
Vehicle Repair Management System

This system helps you organize everything about vehicles, like scheduling bookings for examinations and repairs, keeping track of customer and vehicle info, managing tasks with job cards, and monitoring repairs. You can set up teams, make cost estimates, and create reports. Plus, it's easy to update customer and vehicle details and check the condition of vehicles and their parts.
How it works? click to watch video

Features
- You can help manage various types of bookings related to vehicle examination, repairs, and combined examination with repairs.
- Users can create job cards to generate orders for vehicle Examination.
- You can easily manage and keep track of two types of vehicle examinations and their respective costs.
- You can inspect the vehicles' spare parts, inner/outer body conditions, mechanical conditions, components, tyre conditions, fluids, etc.
- A full examination involves the assessment of various aspects of a vehicle's overall health and performance.
- The specific examination involve only the examination tabs that are relevant to a particular examination type.
- You can add a job charge for creating a sale order.
- You can add vehicle conditions with side location, images and remarks.
- You can create vehicle repair quotations and tasks with assignees.
- You can create vehicle repair PDF reports with relevant vehicle information.
- You can generate PDF reports for vehicle examination job cards and types of examinations being conducted.
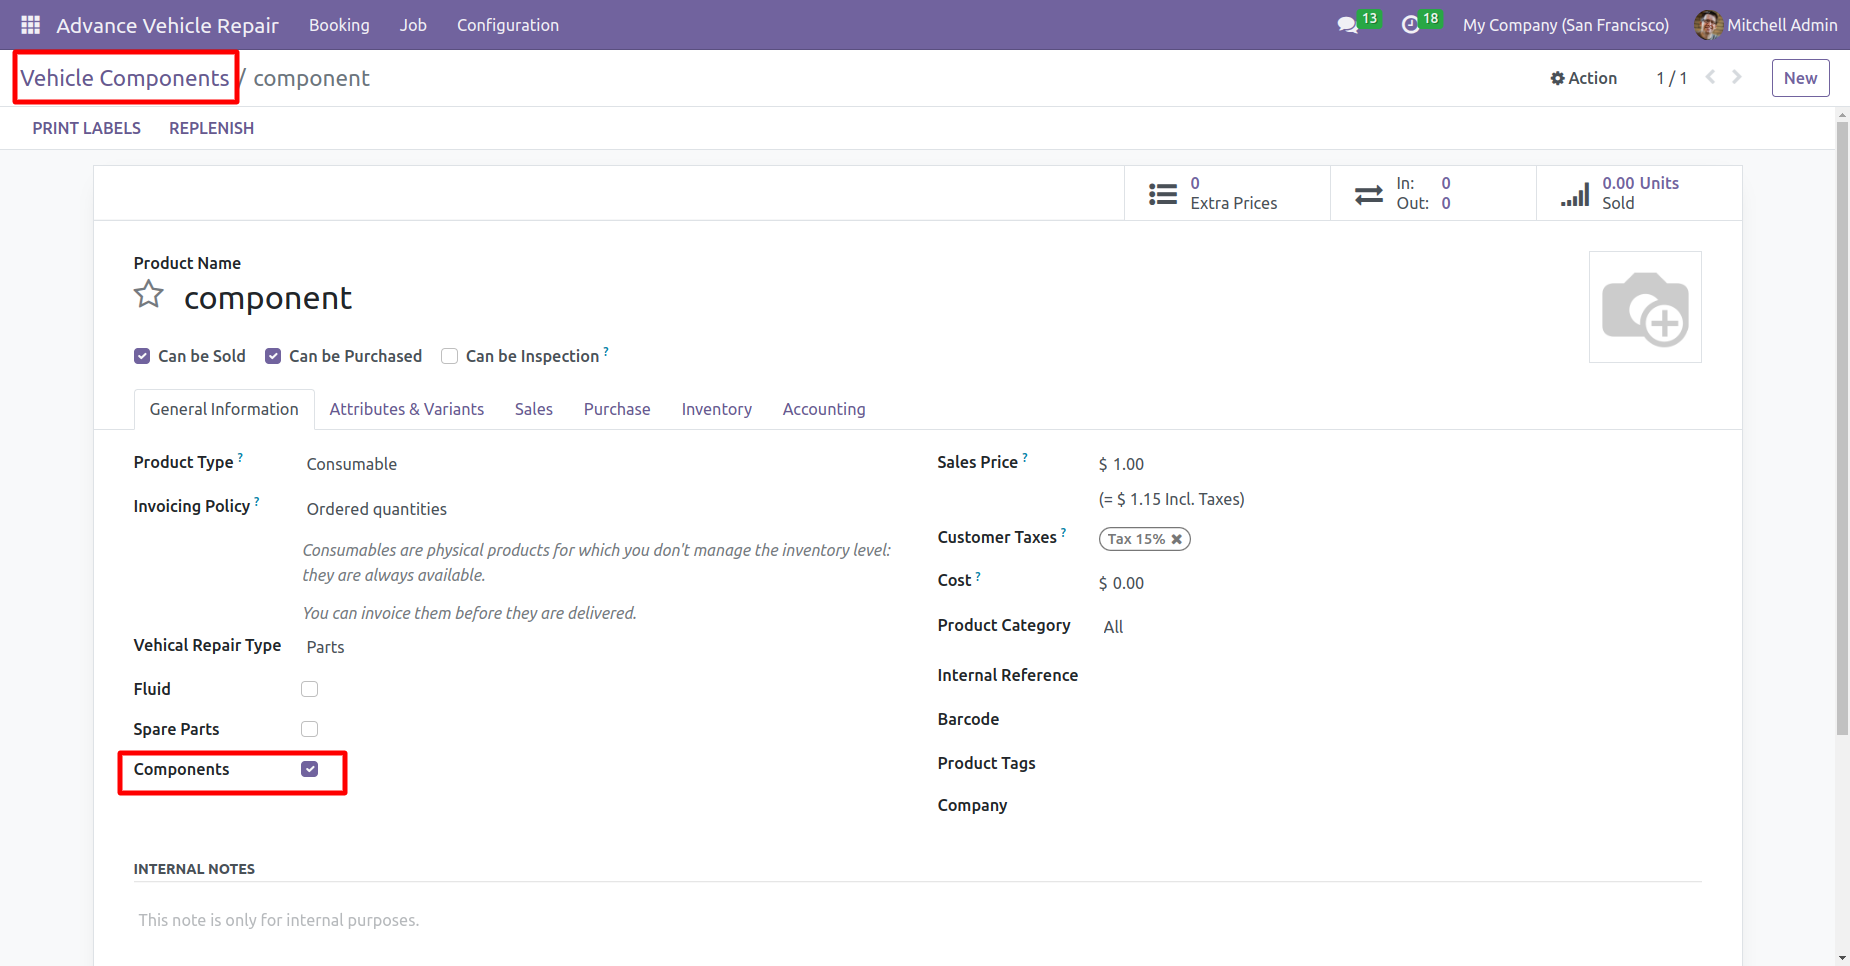
In the vehicle component form view, enable the 'Component' boolean in the 'General Information' tab.
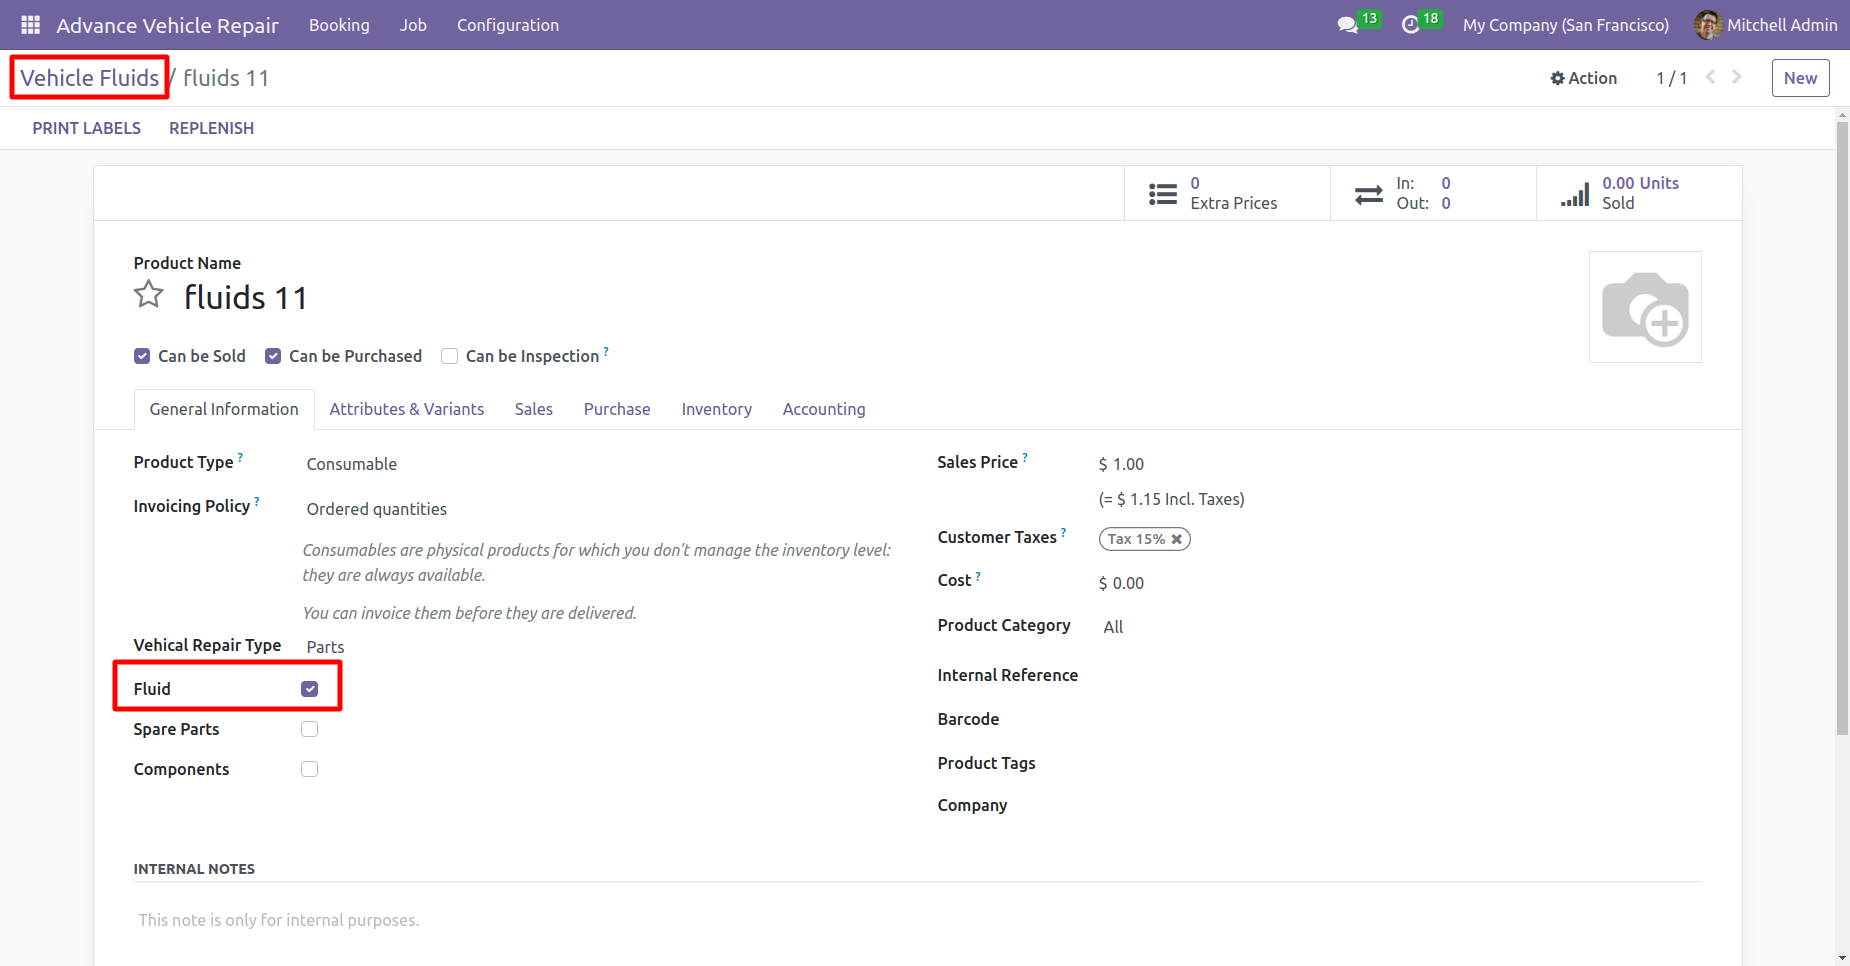
In the vehicle fluids form view, enable the 'Fluid' boolean in the 'General Information' tab.
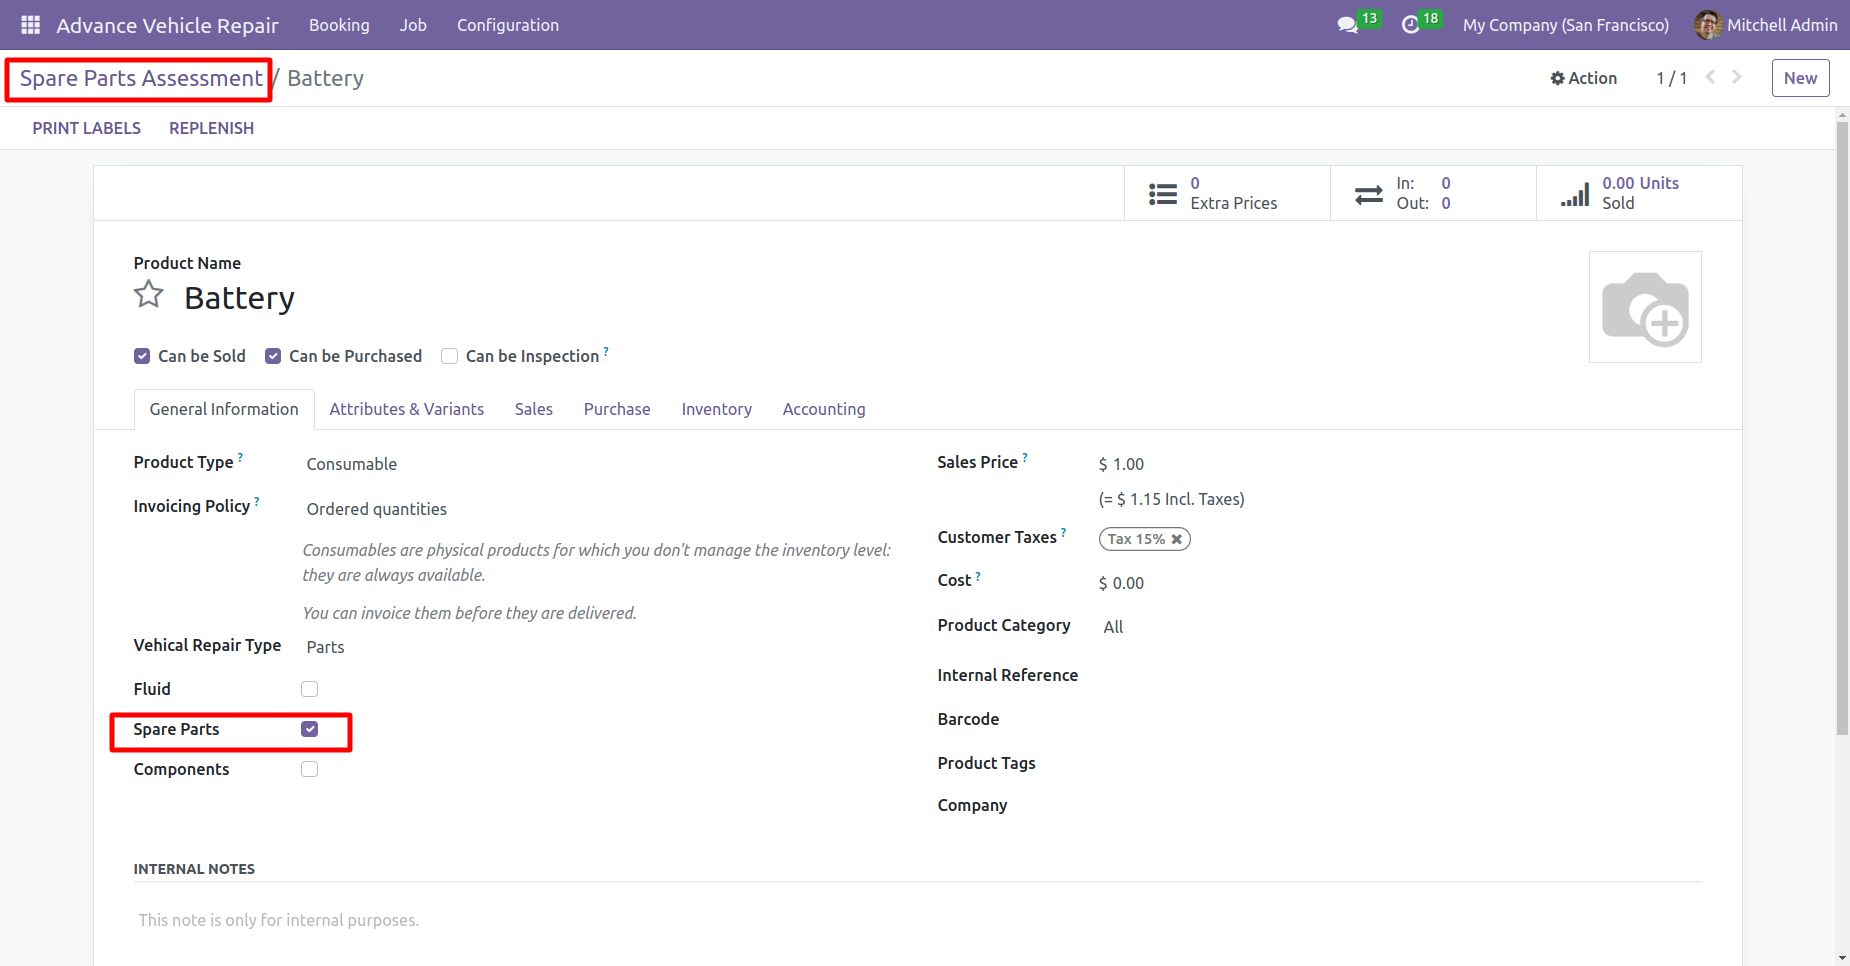
In the spare parts assessment form view, enable the 'Spare Parts' boolean in the 'General Information' tab.
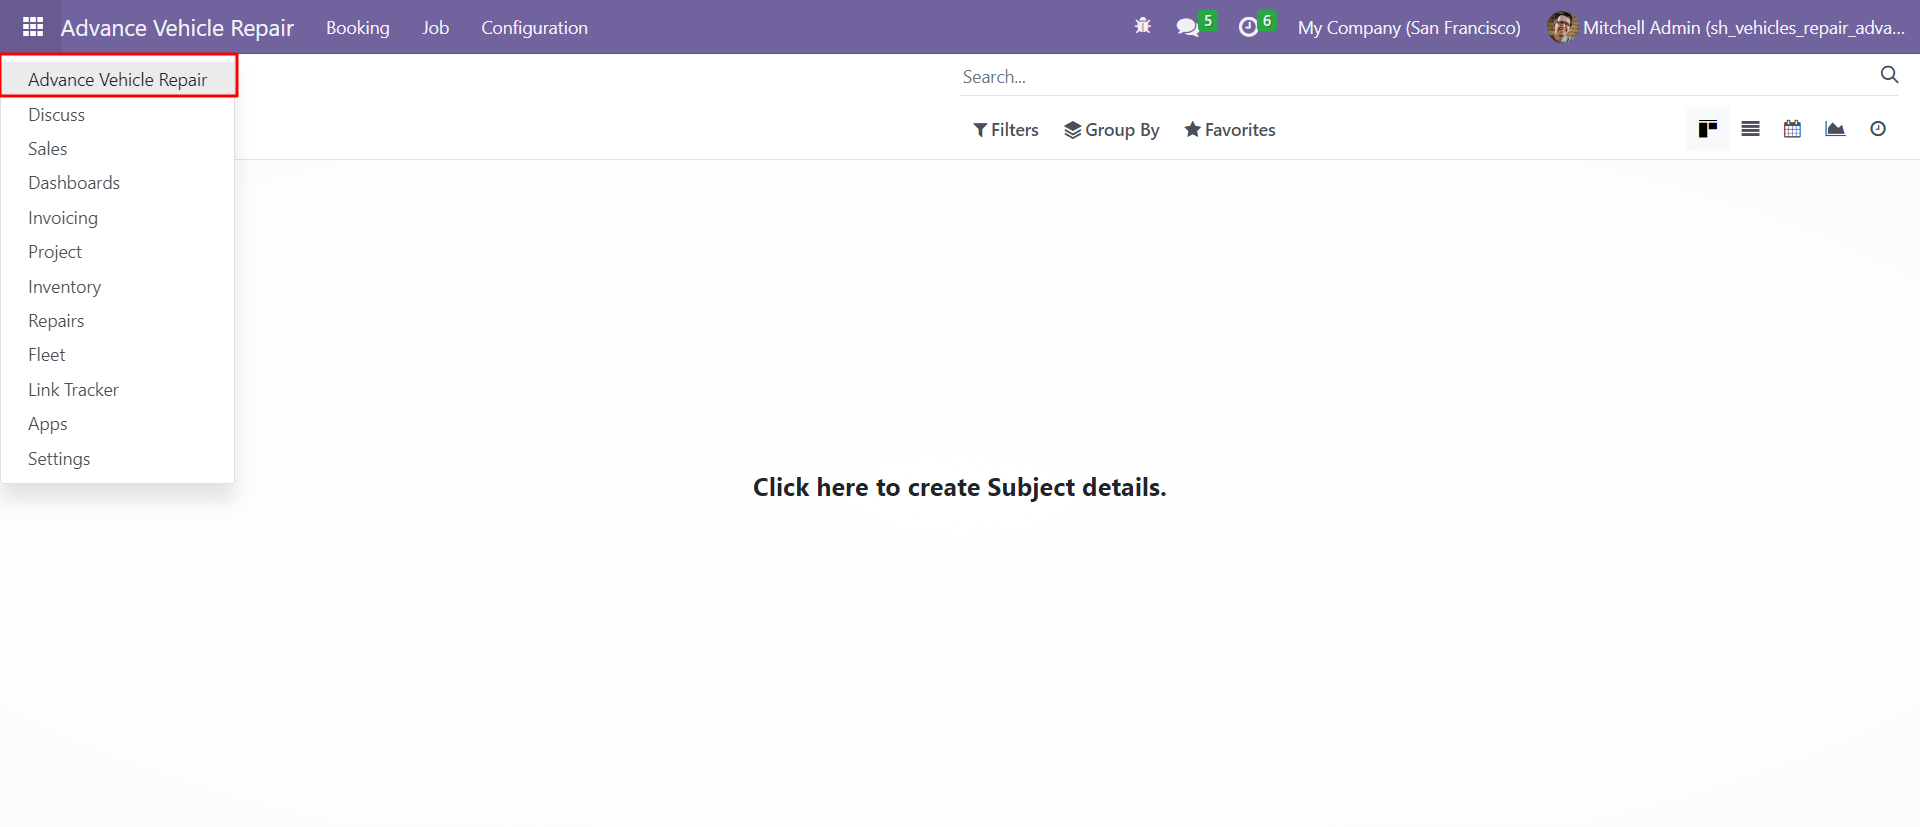
Click on the 'Advance Vehicle Repair' menu.
Go to configurations, select 'Spare Parts Assessments' and add a list of spare parts names that need assessment.
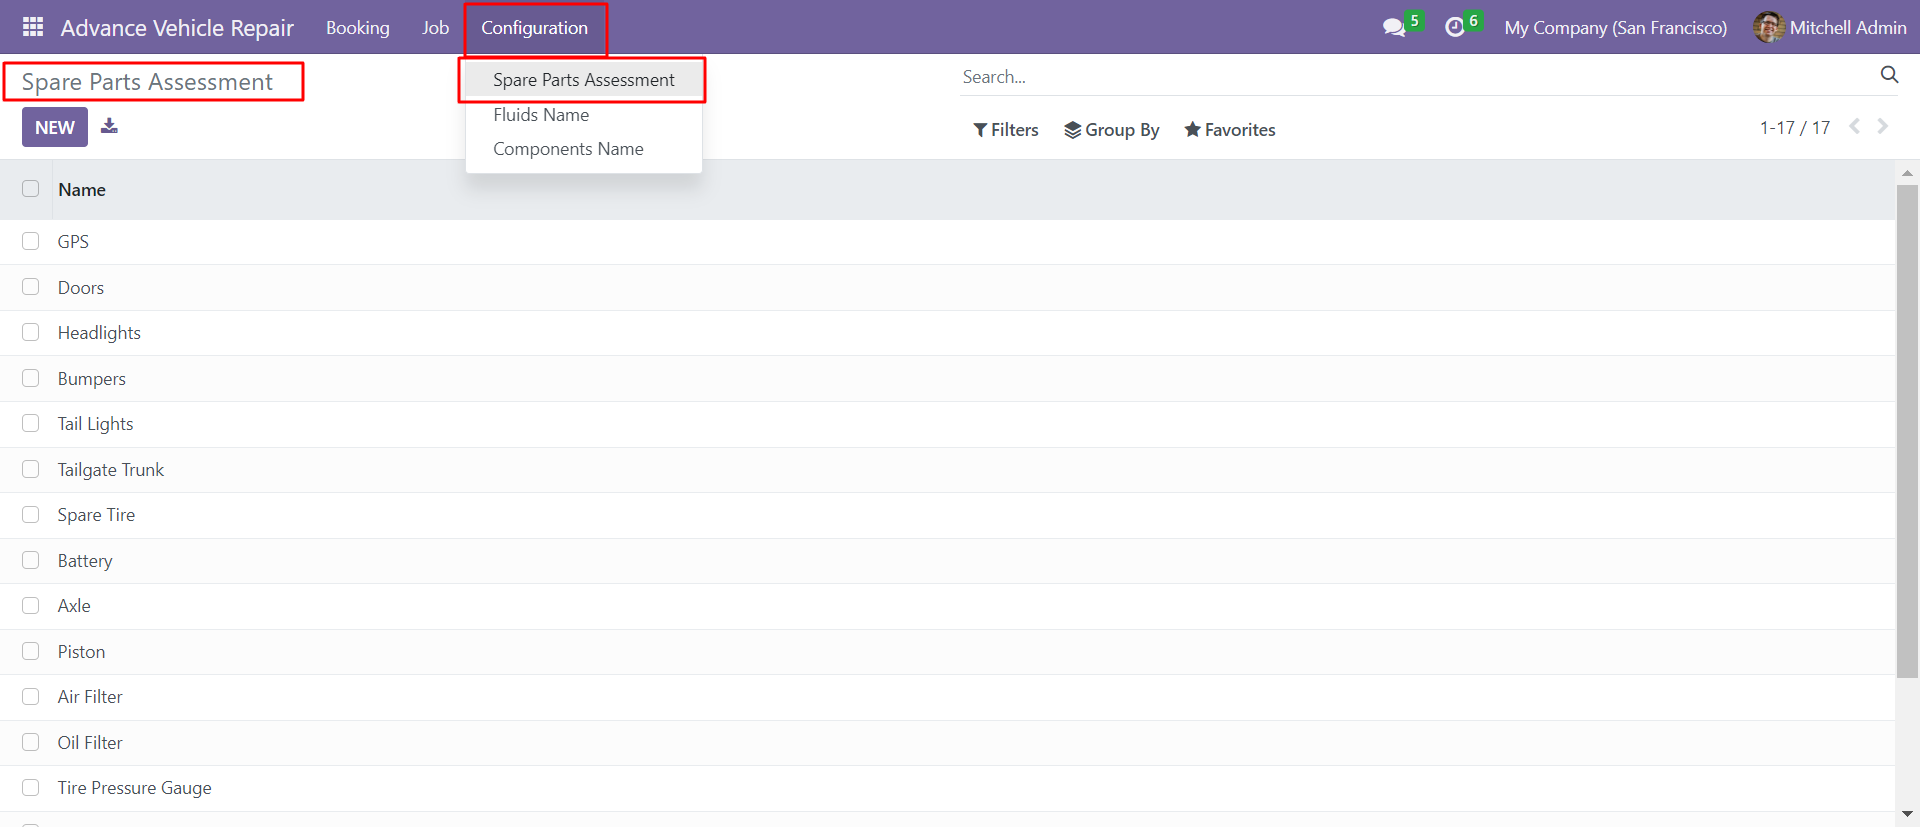
Go to configurations, select 'Fluids Name' and add vehicle component names with its side on the vehicle.
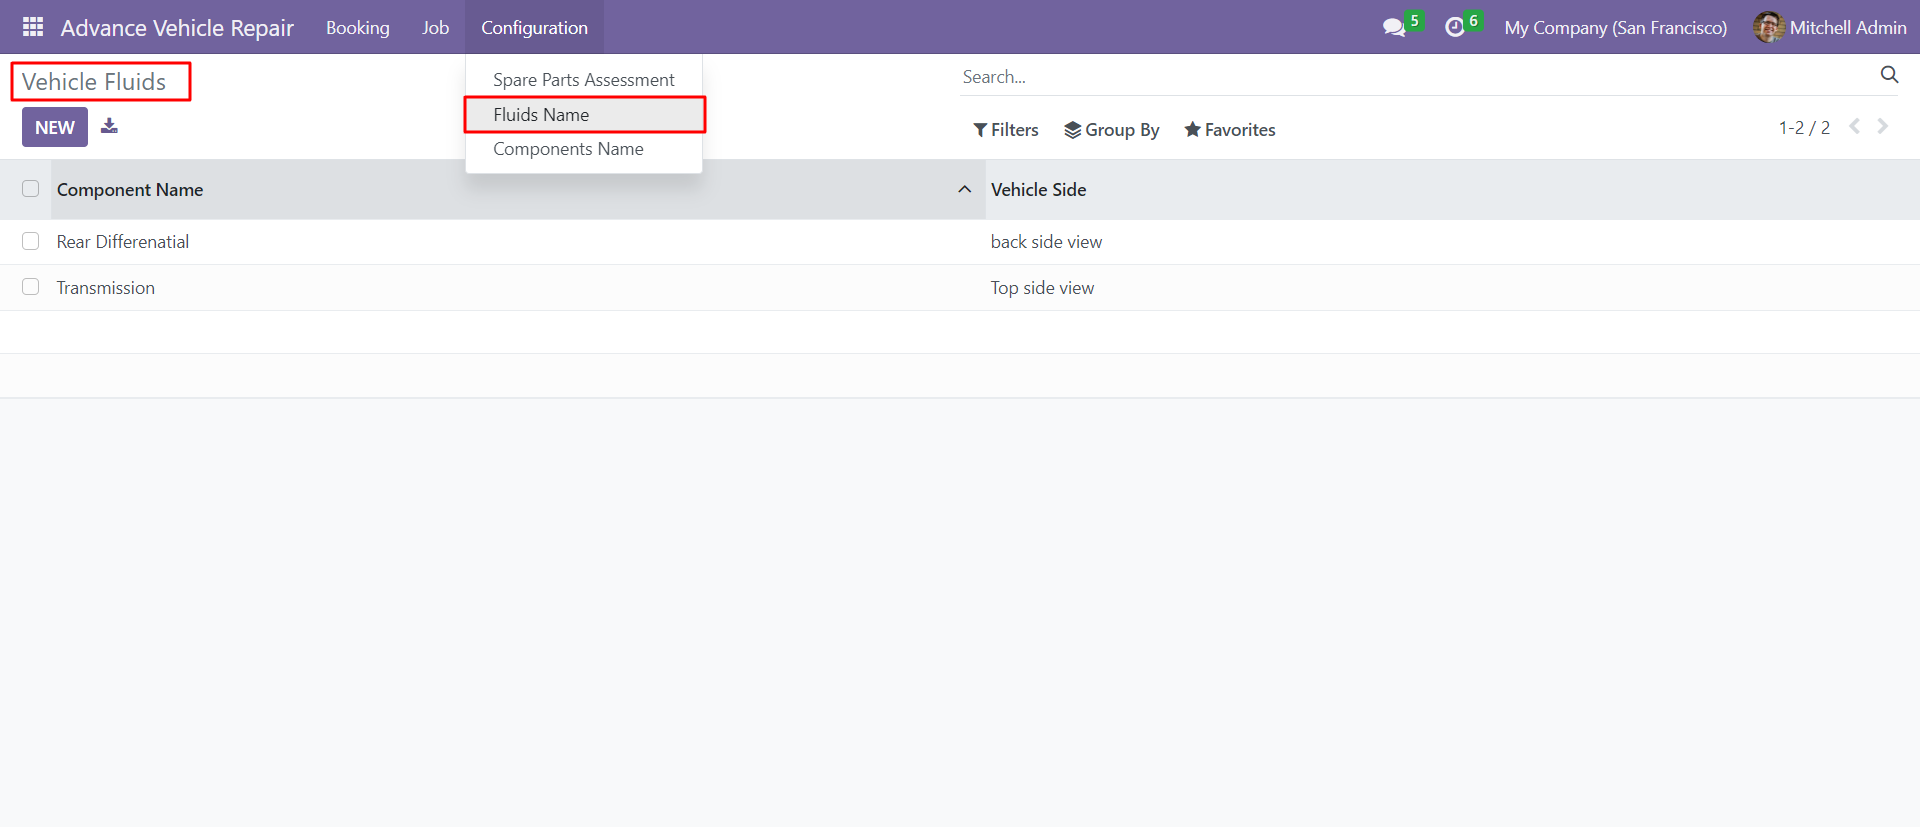
Go to configurations, select 'Components Name' and add vehicle component names with its side on the vehicle.

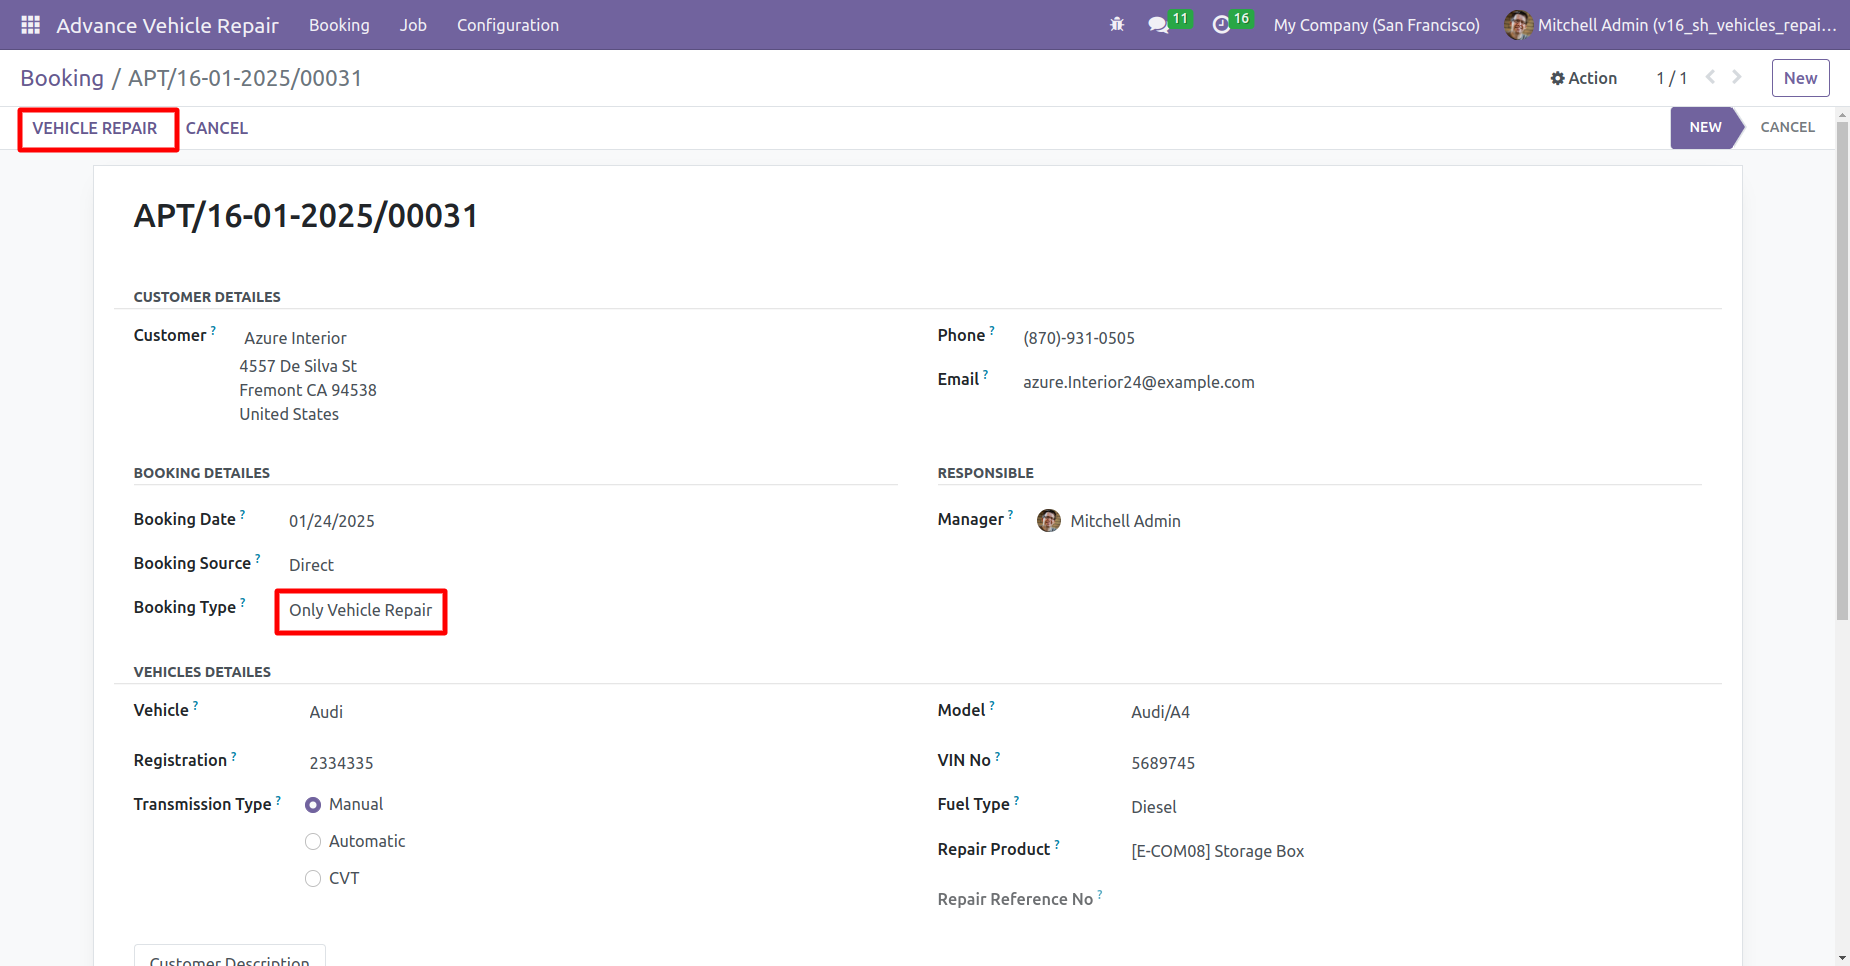
Create a new vehicle booking with the specified booking type - Only vehicle examination.
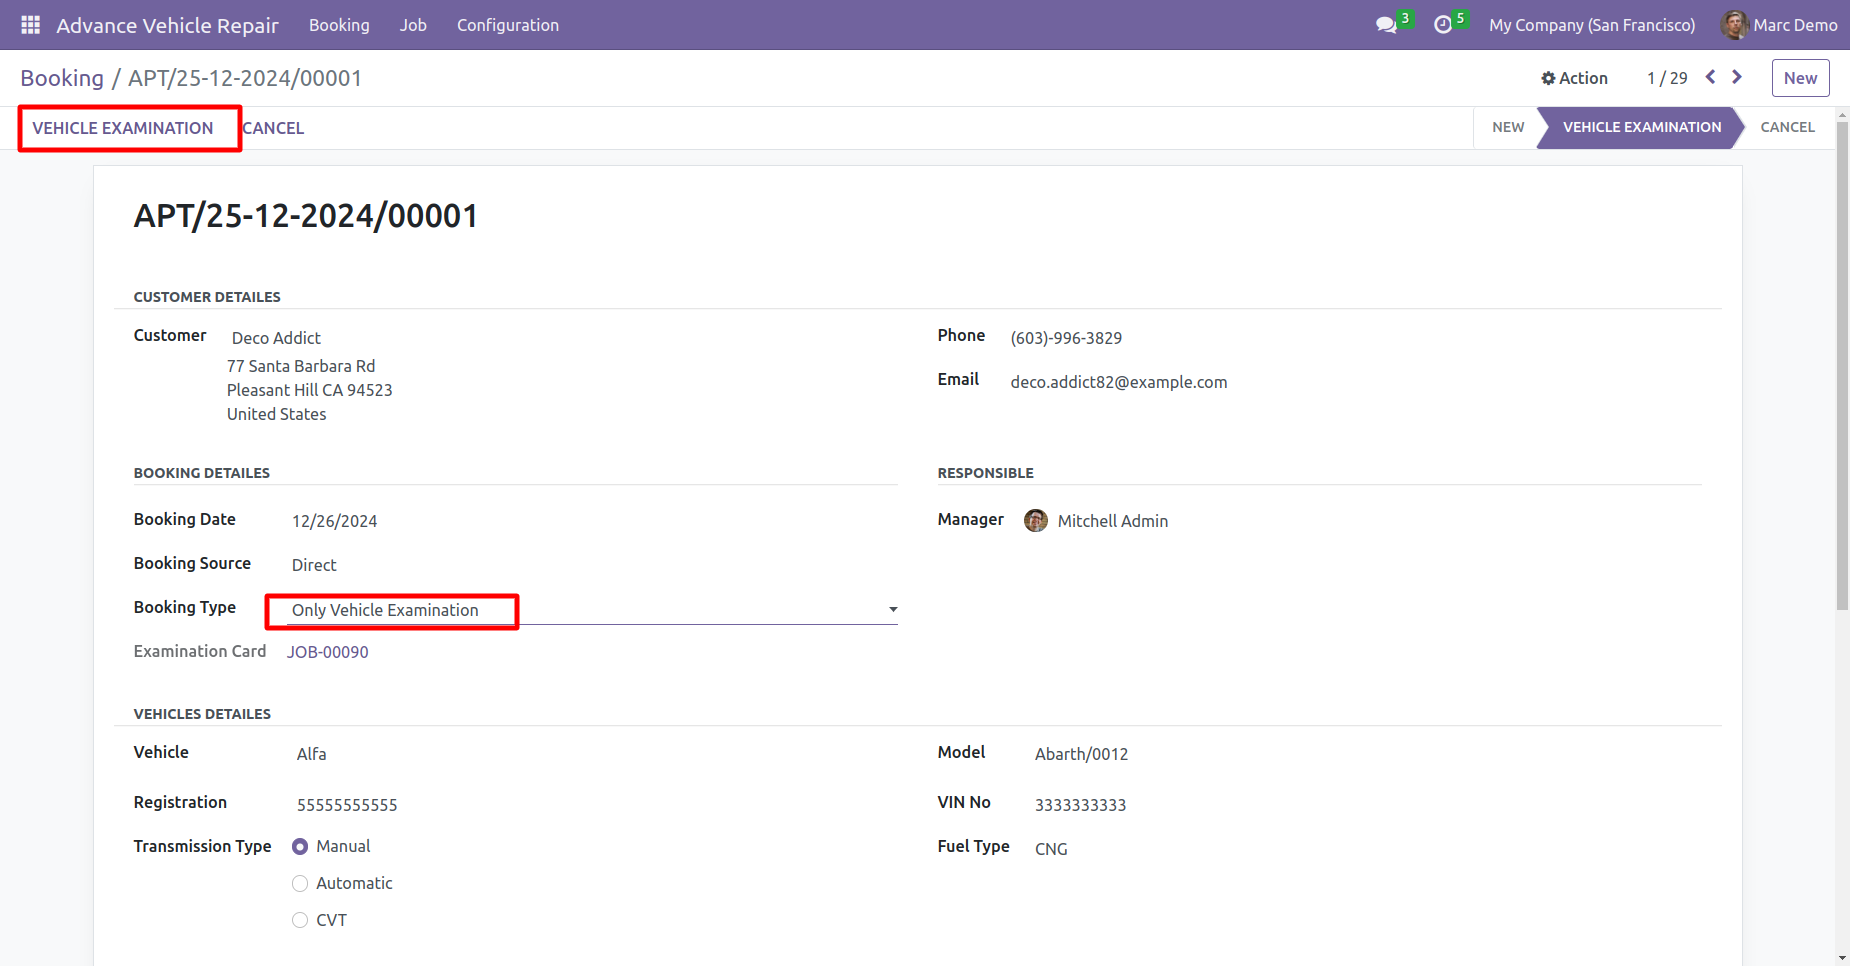
You can fill in all necessary details, select only vehicle examination as the booking type and click on the vehicle examination button within the booking form
Add customer observation description in the 'Customer Observation' tab
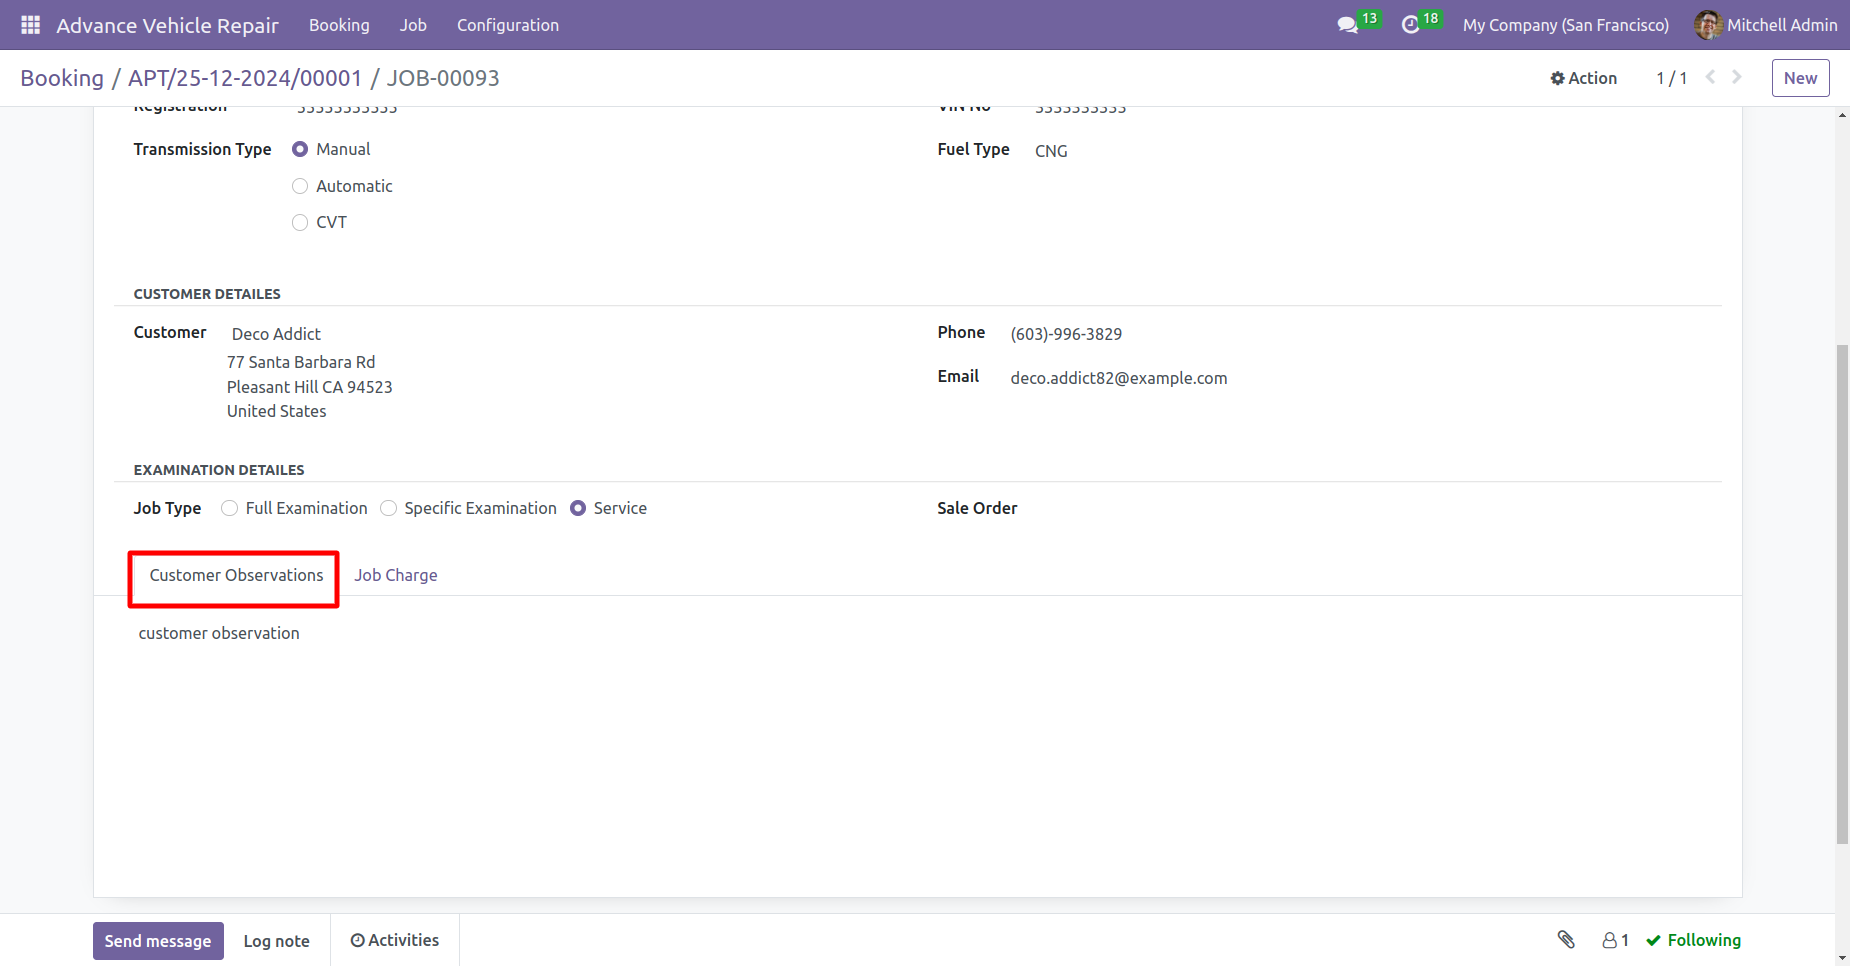
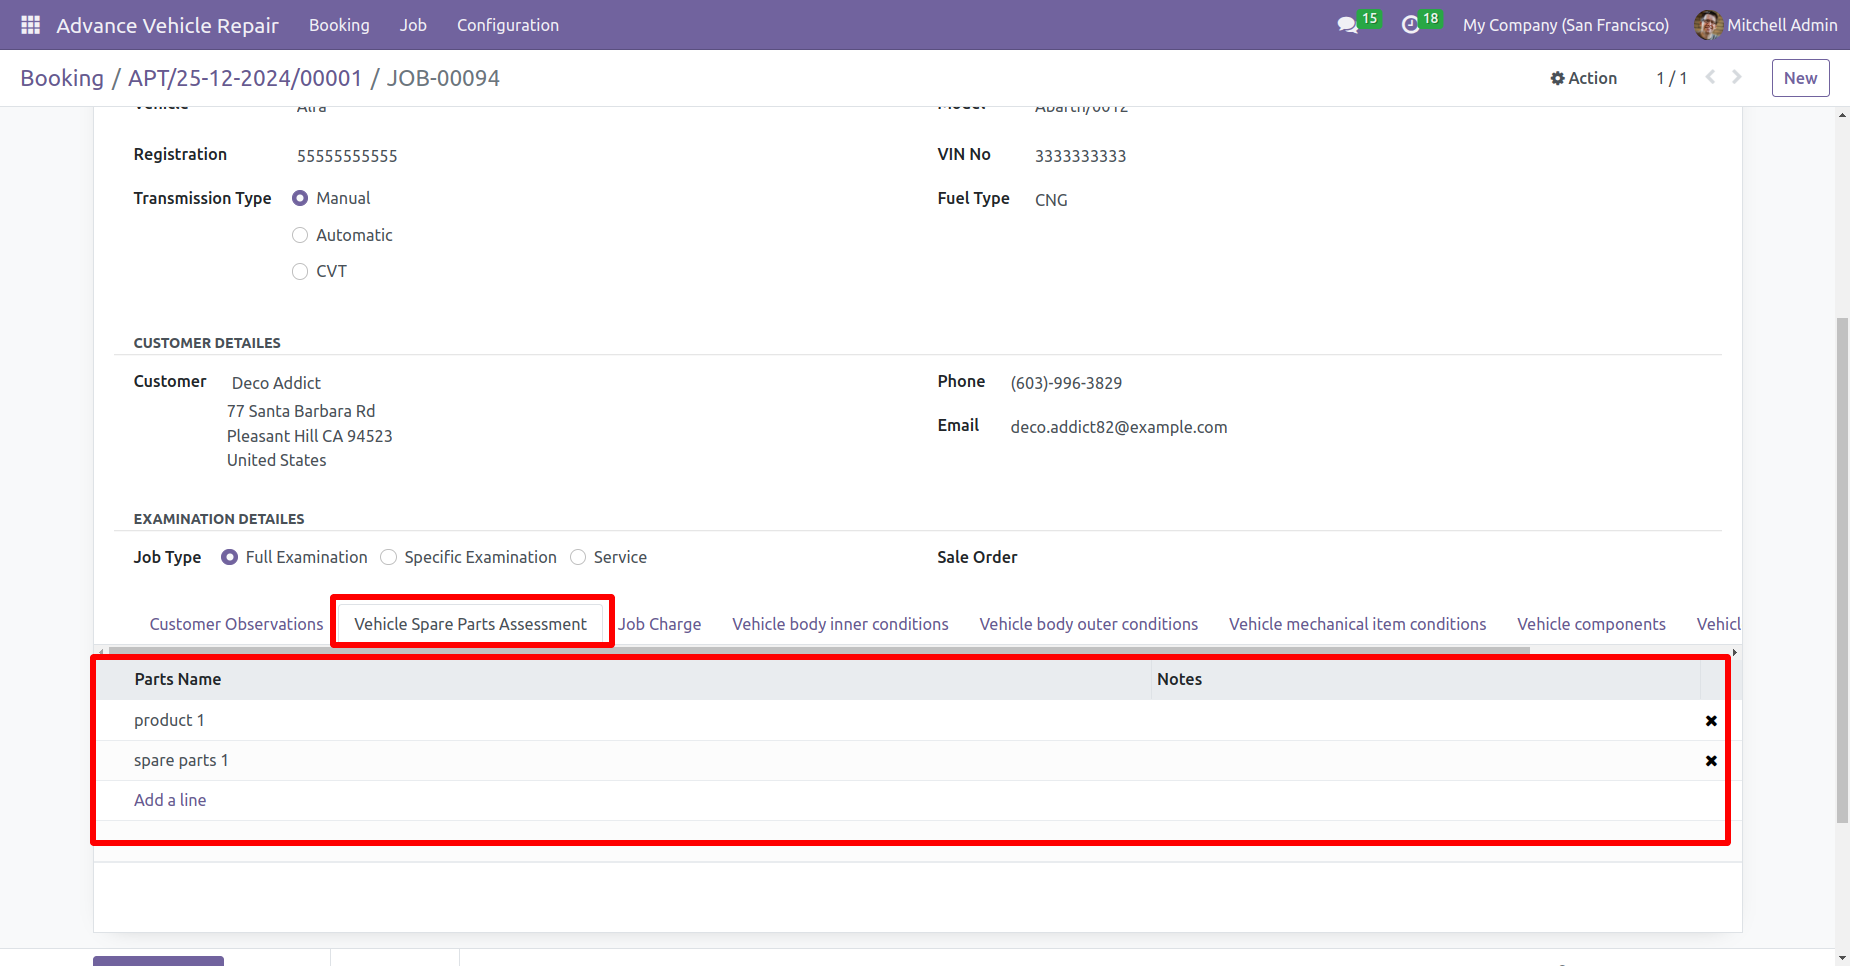
Add parts name and notes in the 'Vehicle Spare Parts Assessment' tab.
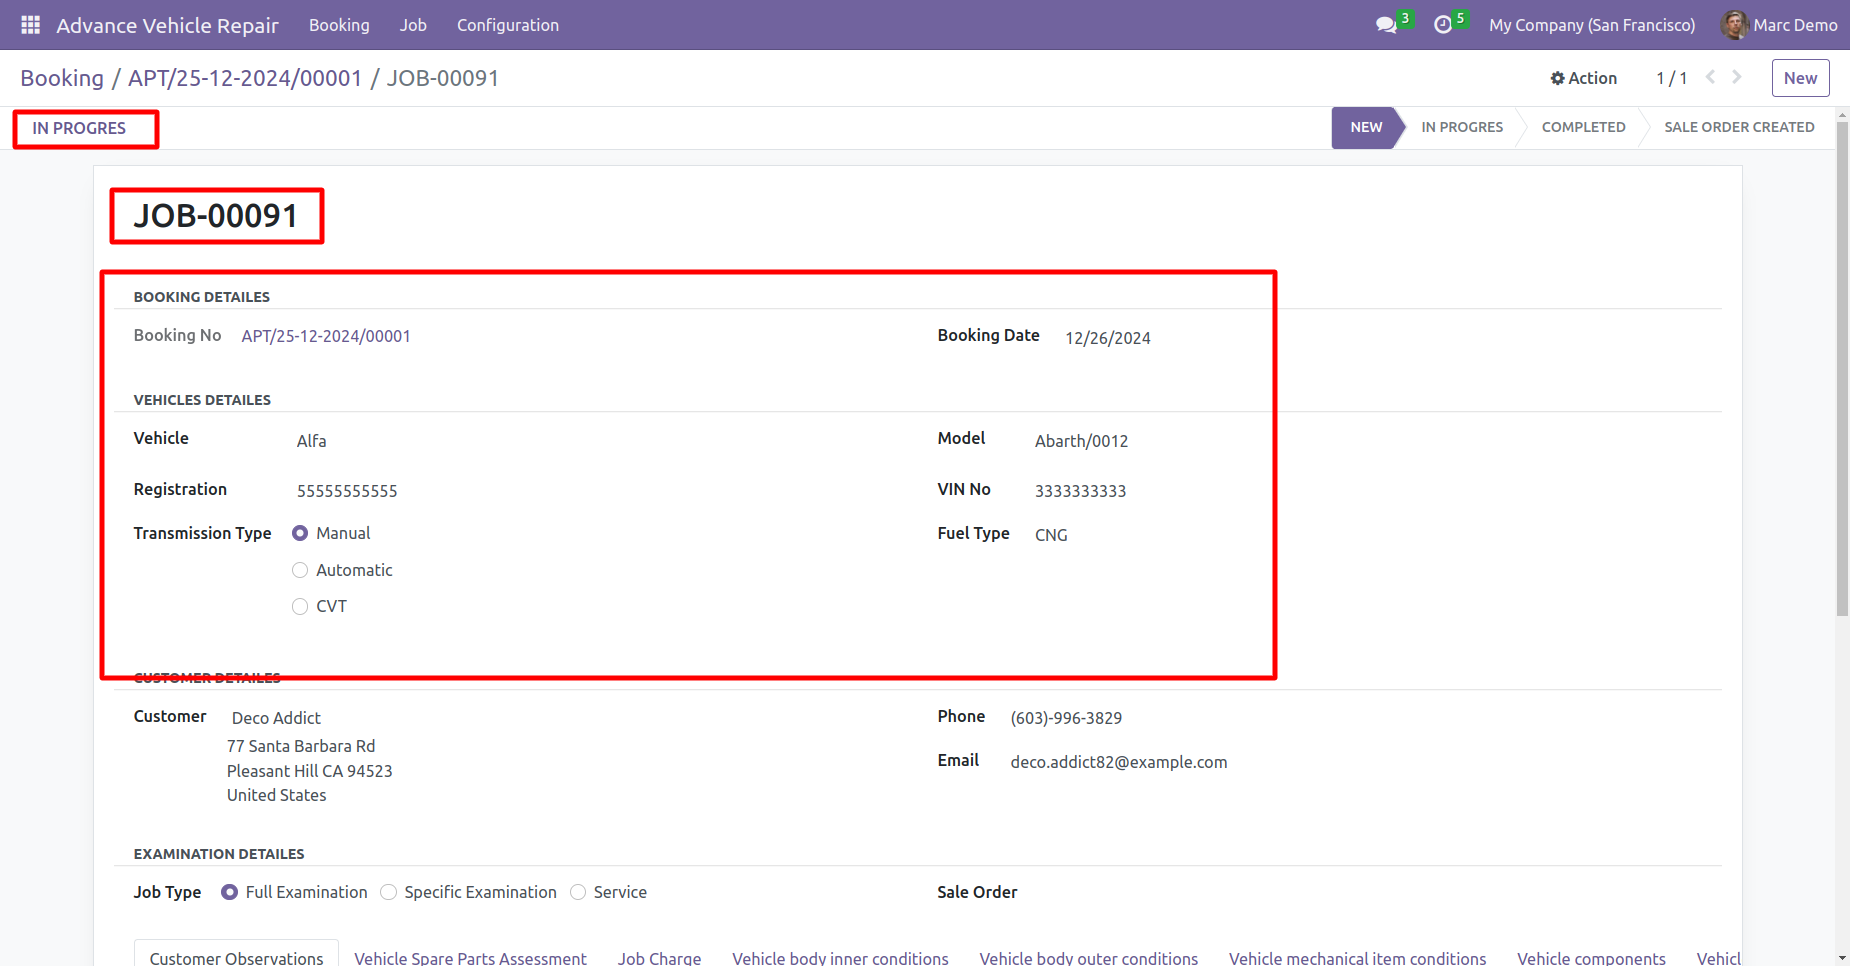
By clicking on the vehicle examination button, it automatically creates a job card with booking, customer and vehicle information and click on the in progress button.
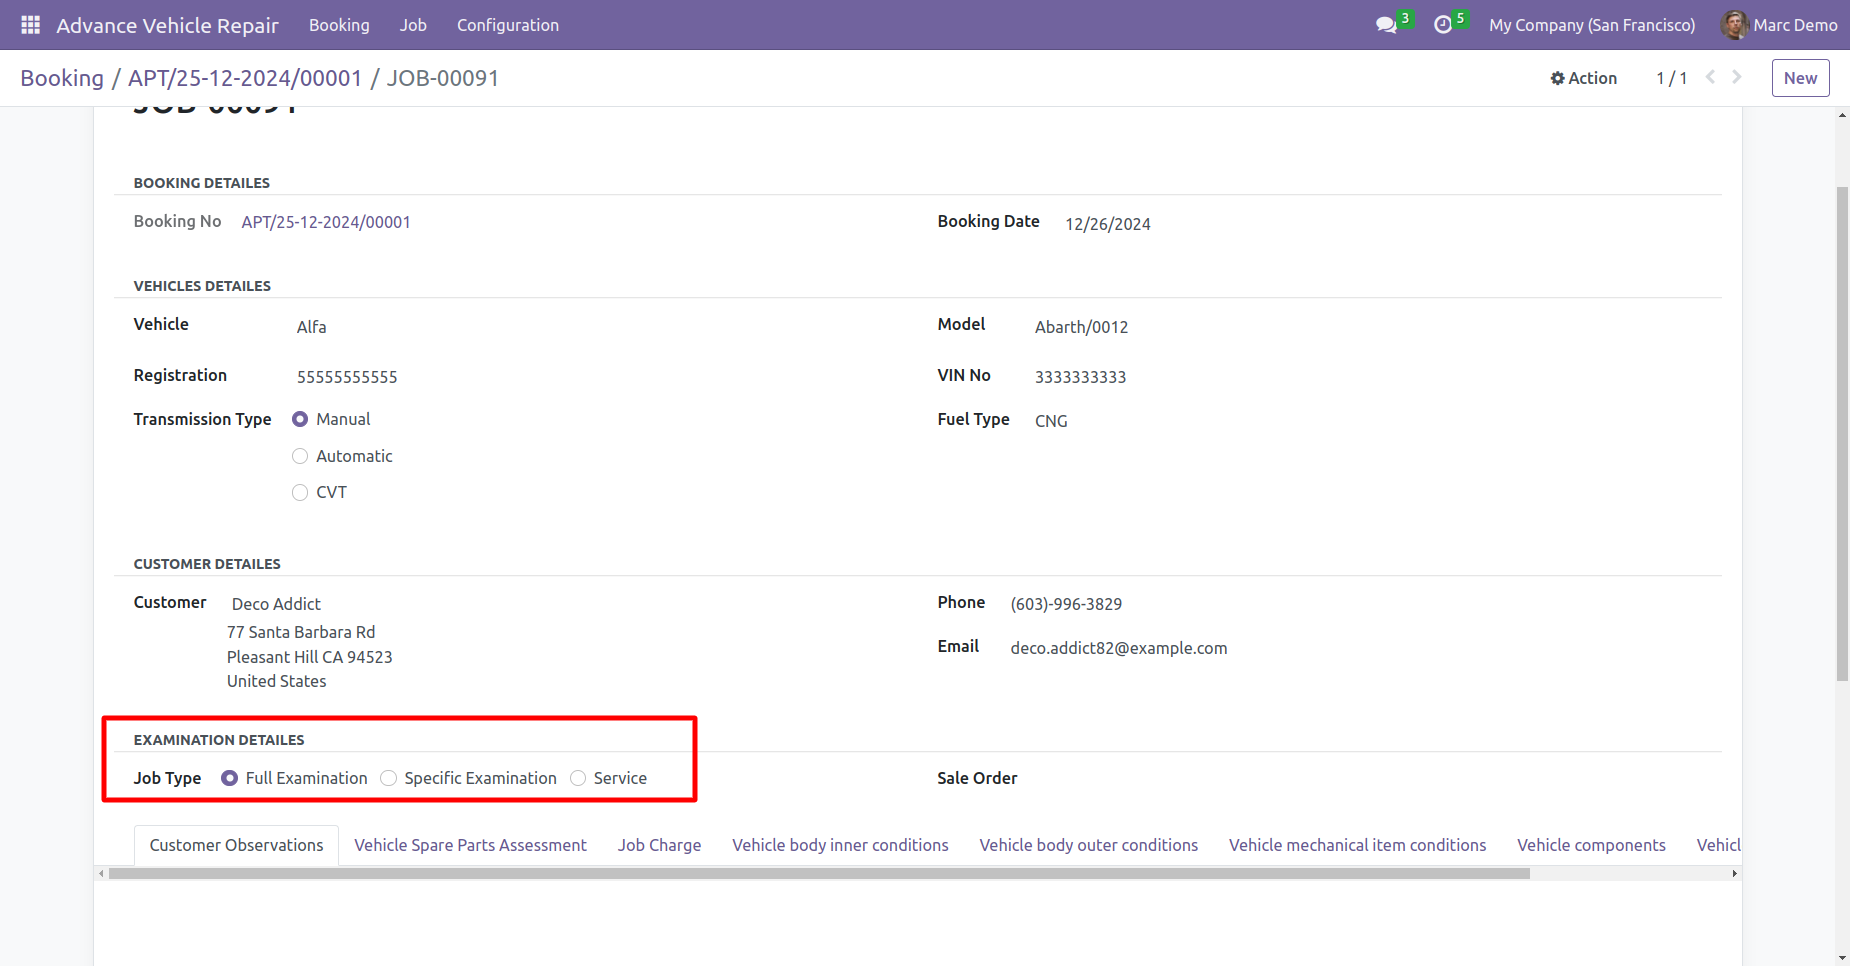
You can add examination details and select the job type (full examination or specific examination type) within the job card for the vehicle examination.
You can view spare parts names in the spare parts assessments tab and tick the boxes according to the examination requirements.
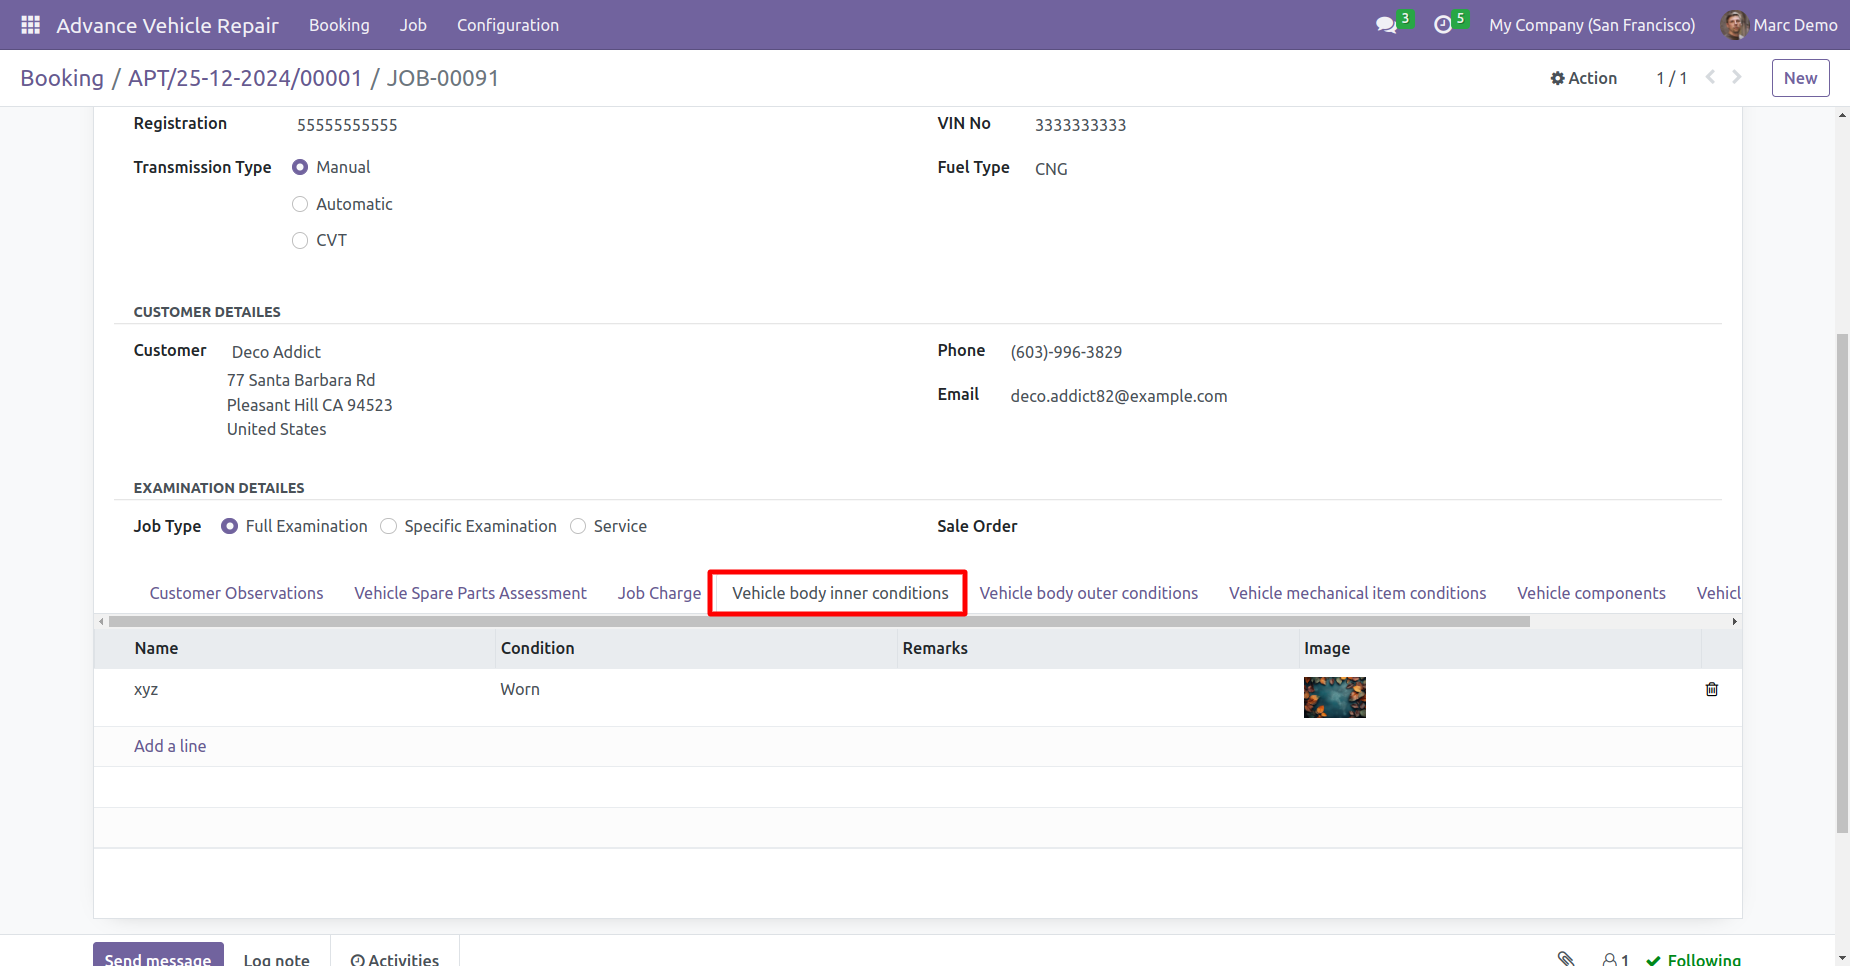
You can add the vehicle's inner body conditions, including the part's name, condition, remark and image, by clicking on the "Add a line" within the job card 'vehicle body inner conditions' tab.
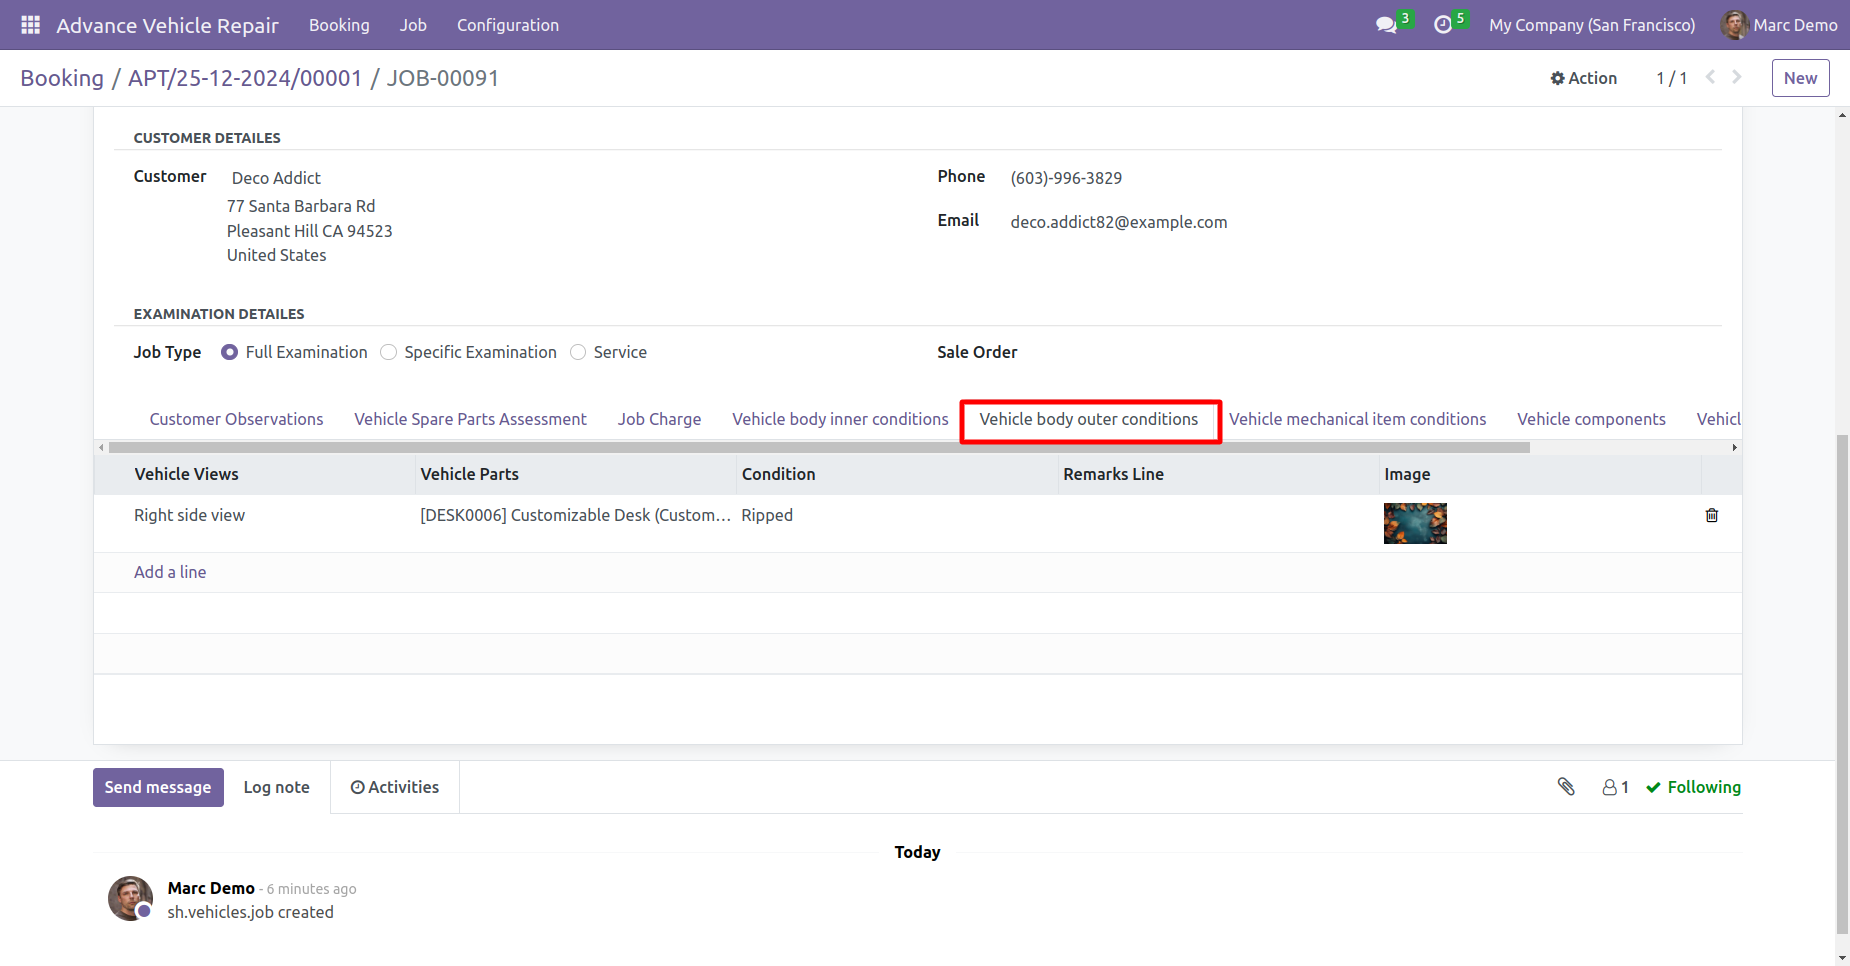
You can add the vehicle's outer body conditions, including the part's name, side view, condition, remark and image, by clicking on the "Add a line" within the job card 'vehicle body outer conditions' tab.
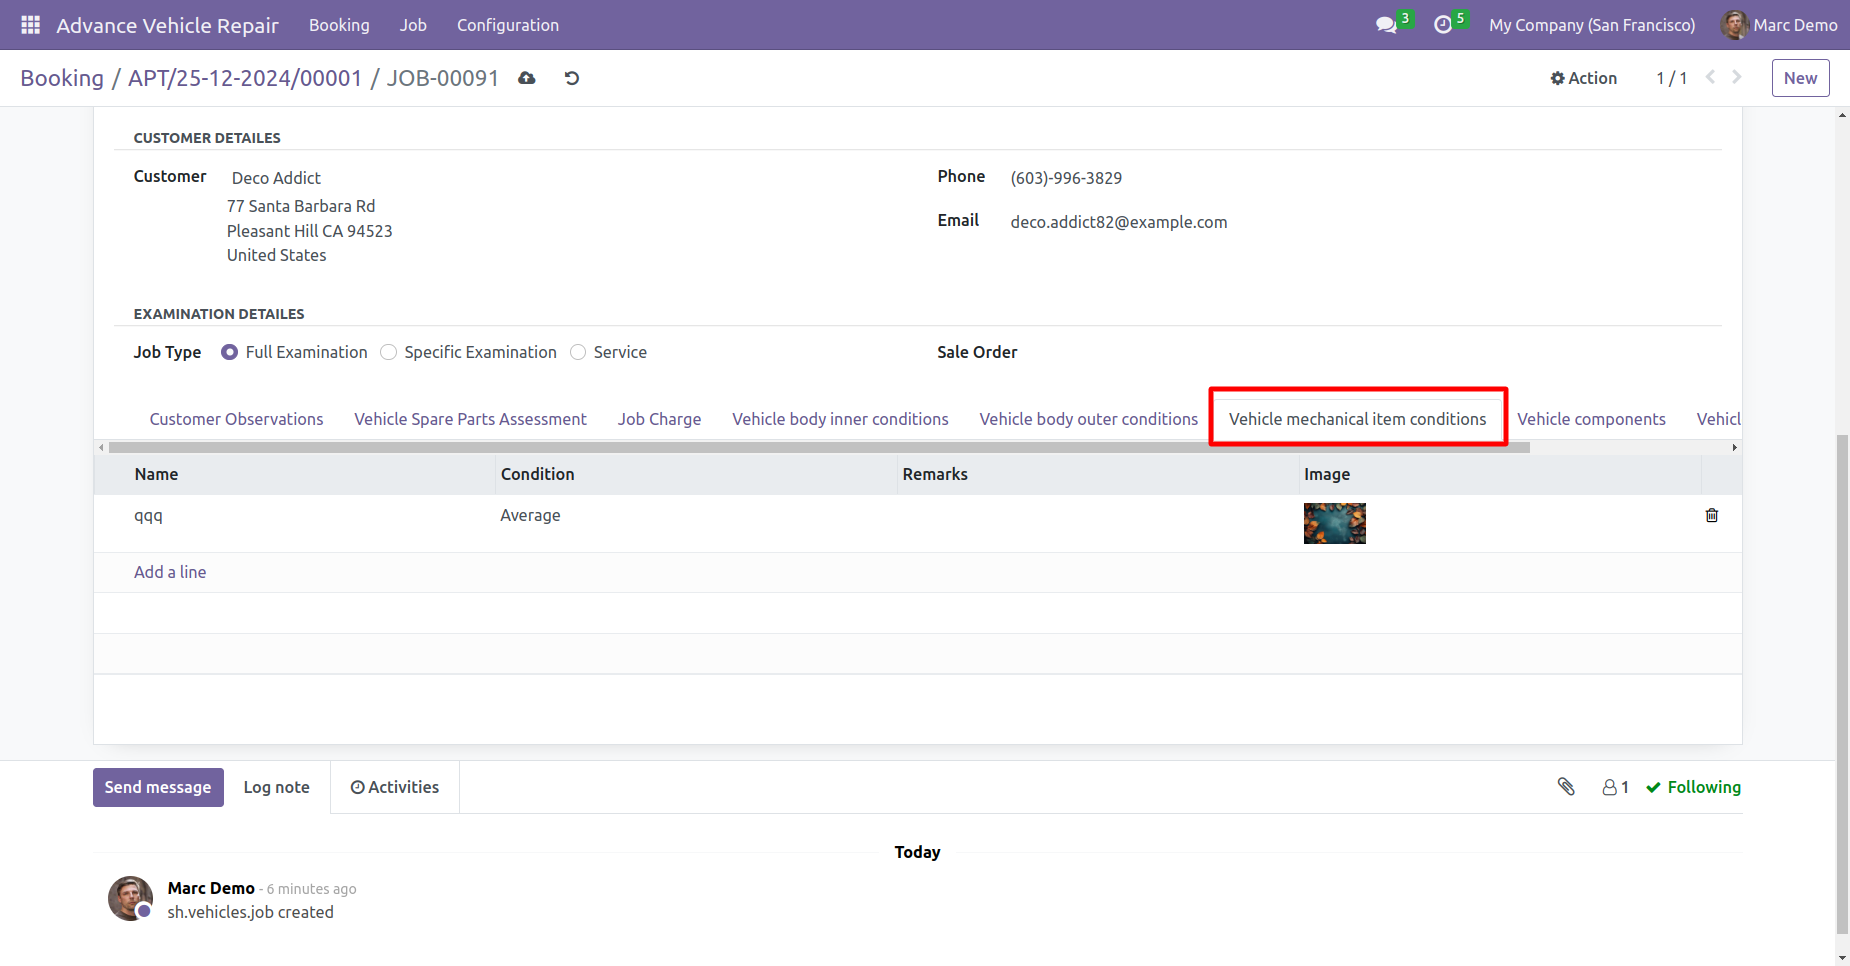
You can add the vehicle's mechanical item conditions, including the component name, condition, remark and image, by clicking on the "Add a line" within the job card 'vehicle mechanic item conditions' tab.
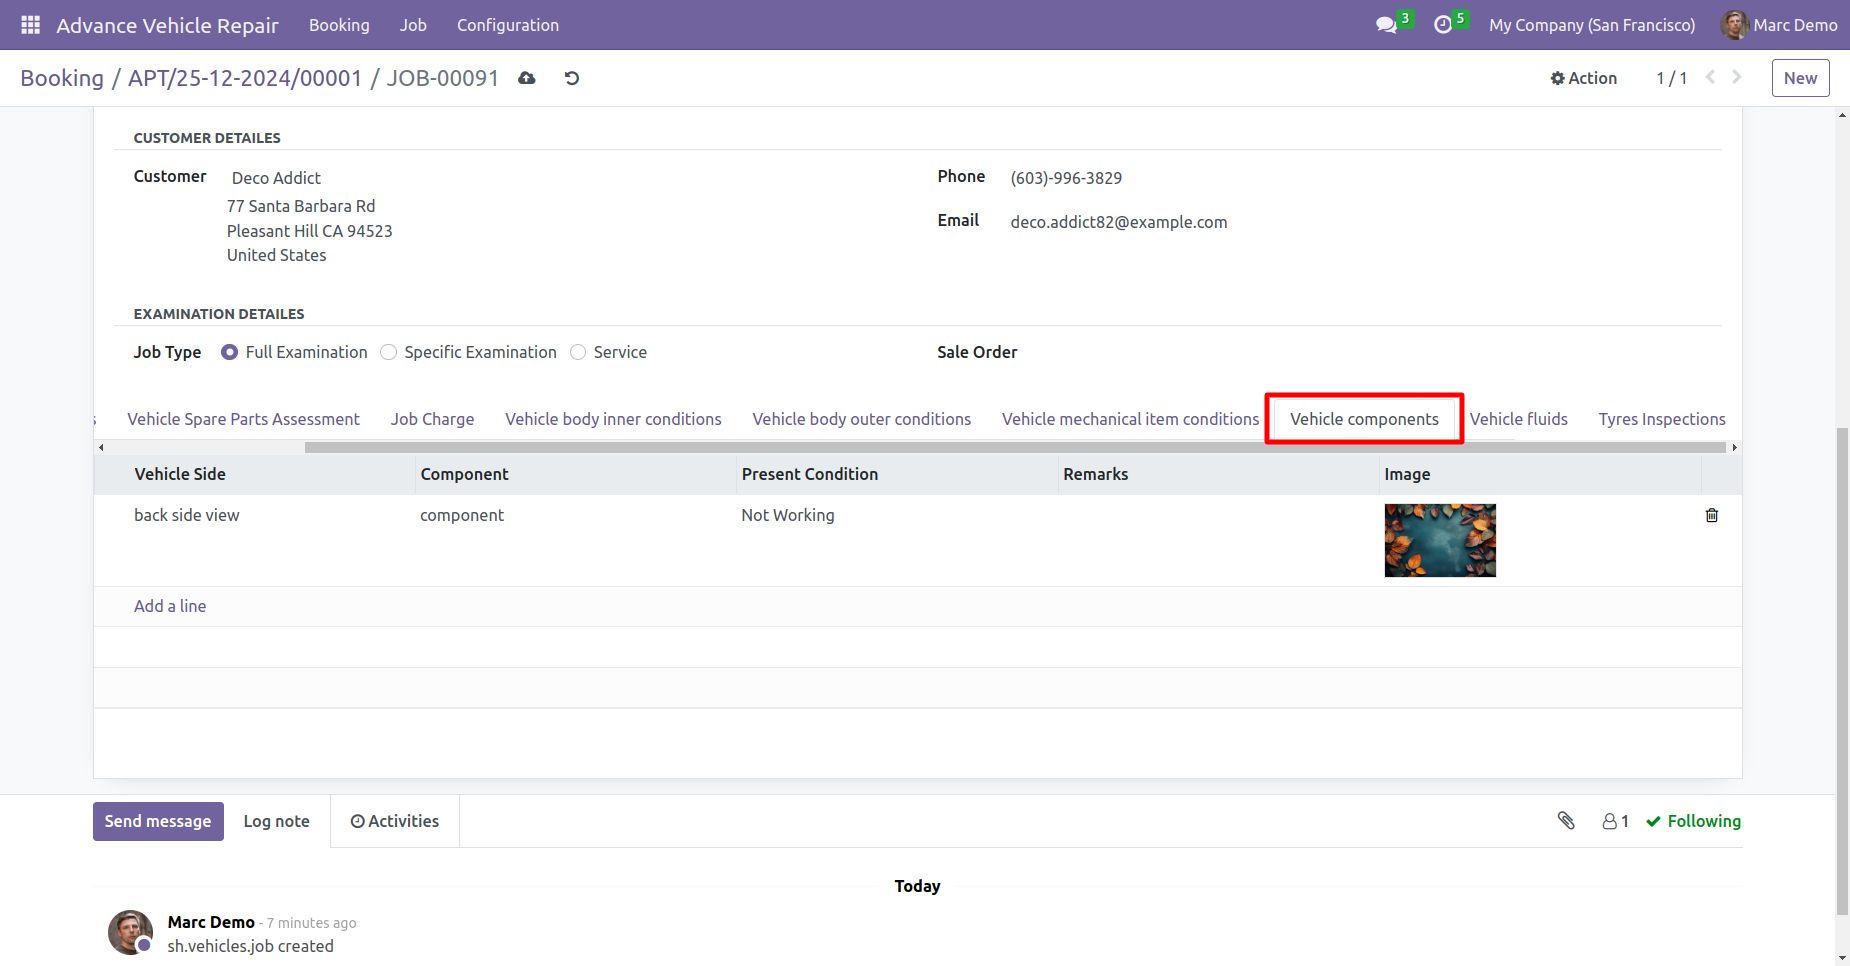
You can add the vehicle's component, including the side view, condition, remark and image, by clicking on the "Add a line" within the 'vehicle components' tab.
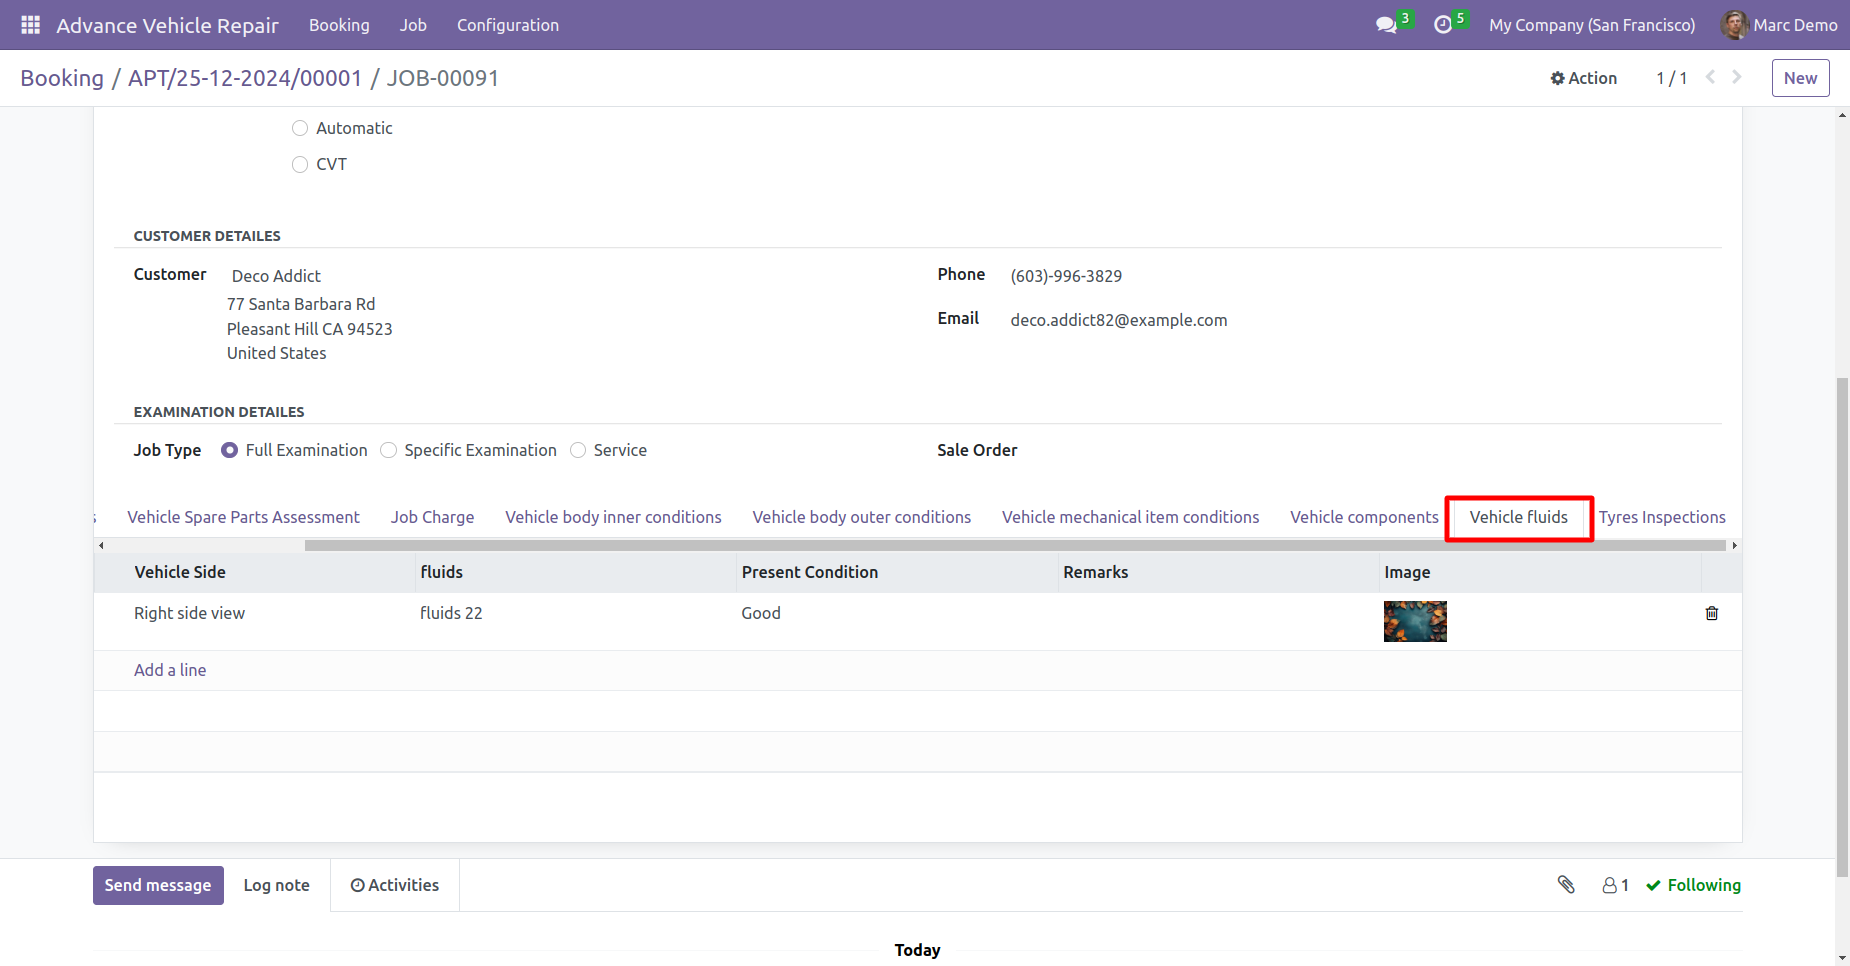
You can add the vehicle's fluids, including the side view, fluid's name, present condition, remark and image, by clicking on the "Add a line" within the job card 'vehicle fluids' tab.
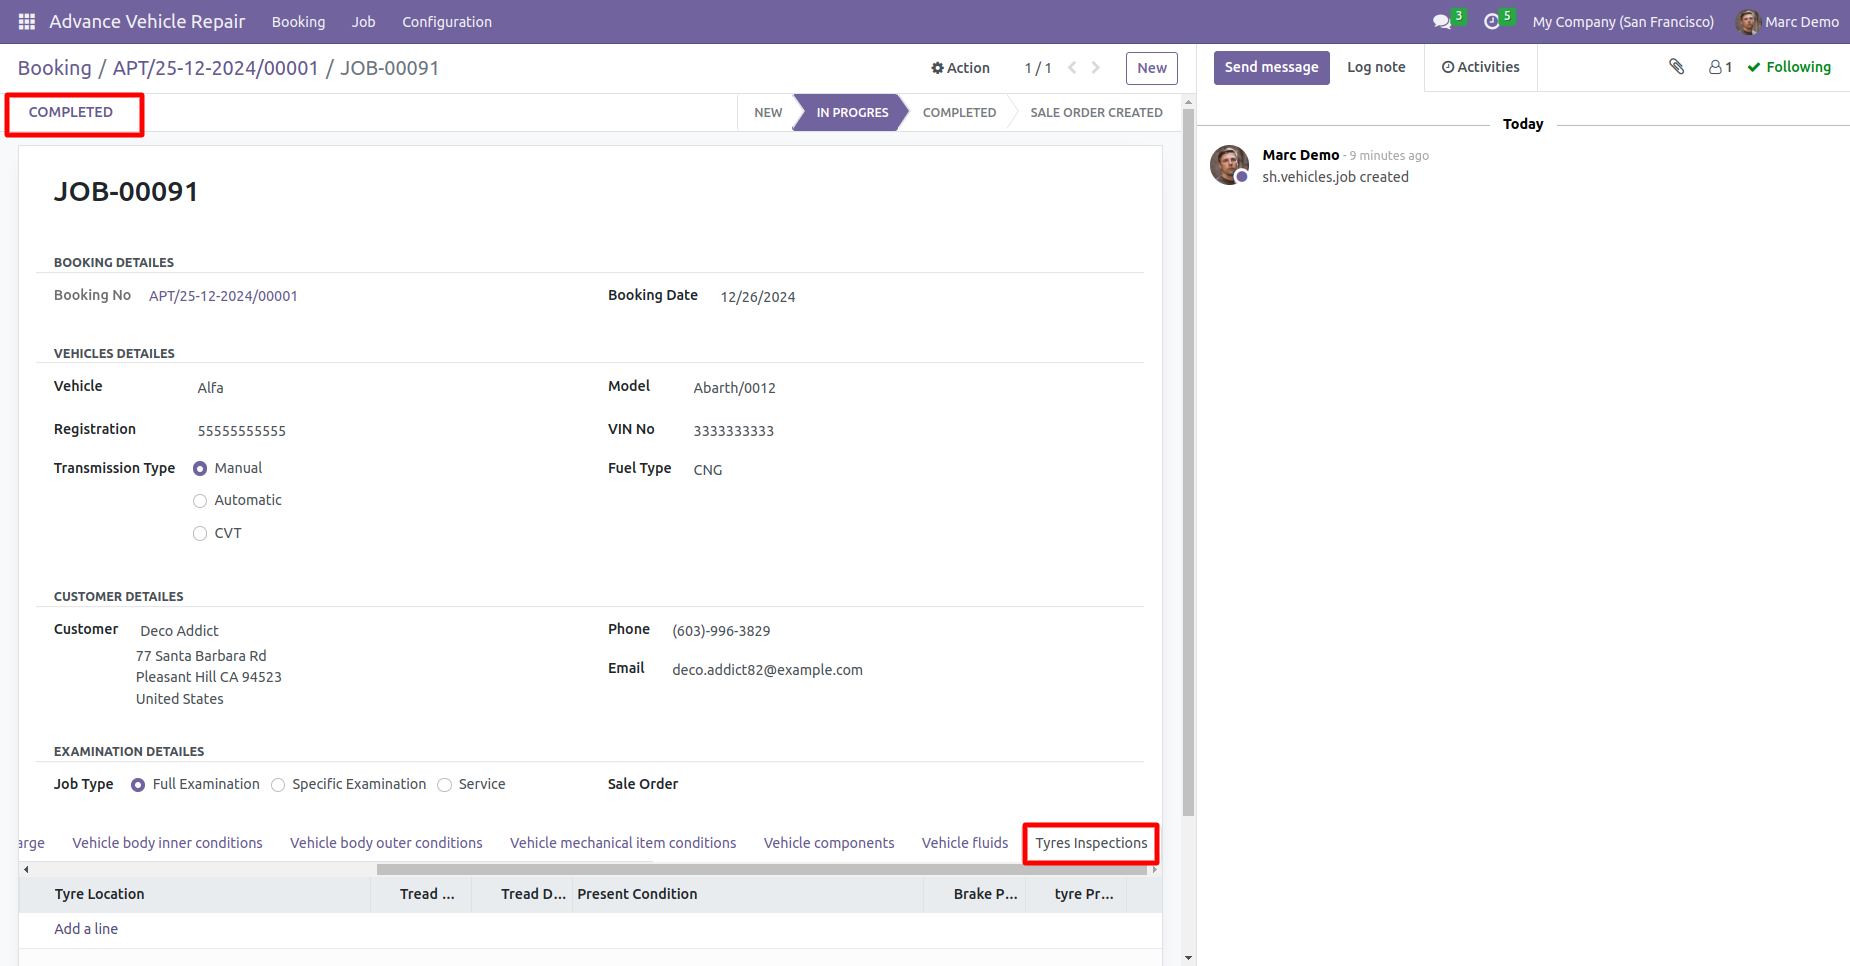
You can add the vehicle's tyre details, by clicking on the "Add a line" button within the job card tyre examinations tab and click on the completed button.
Review all details before marking a job card as completed since additional changes will not be possible after completion, except for the job charge.
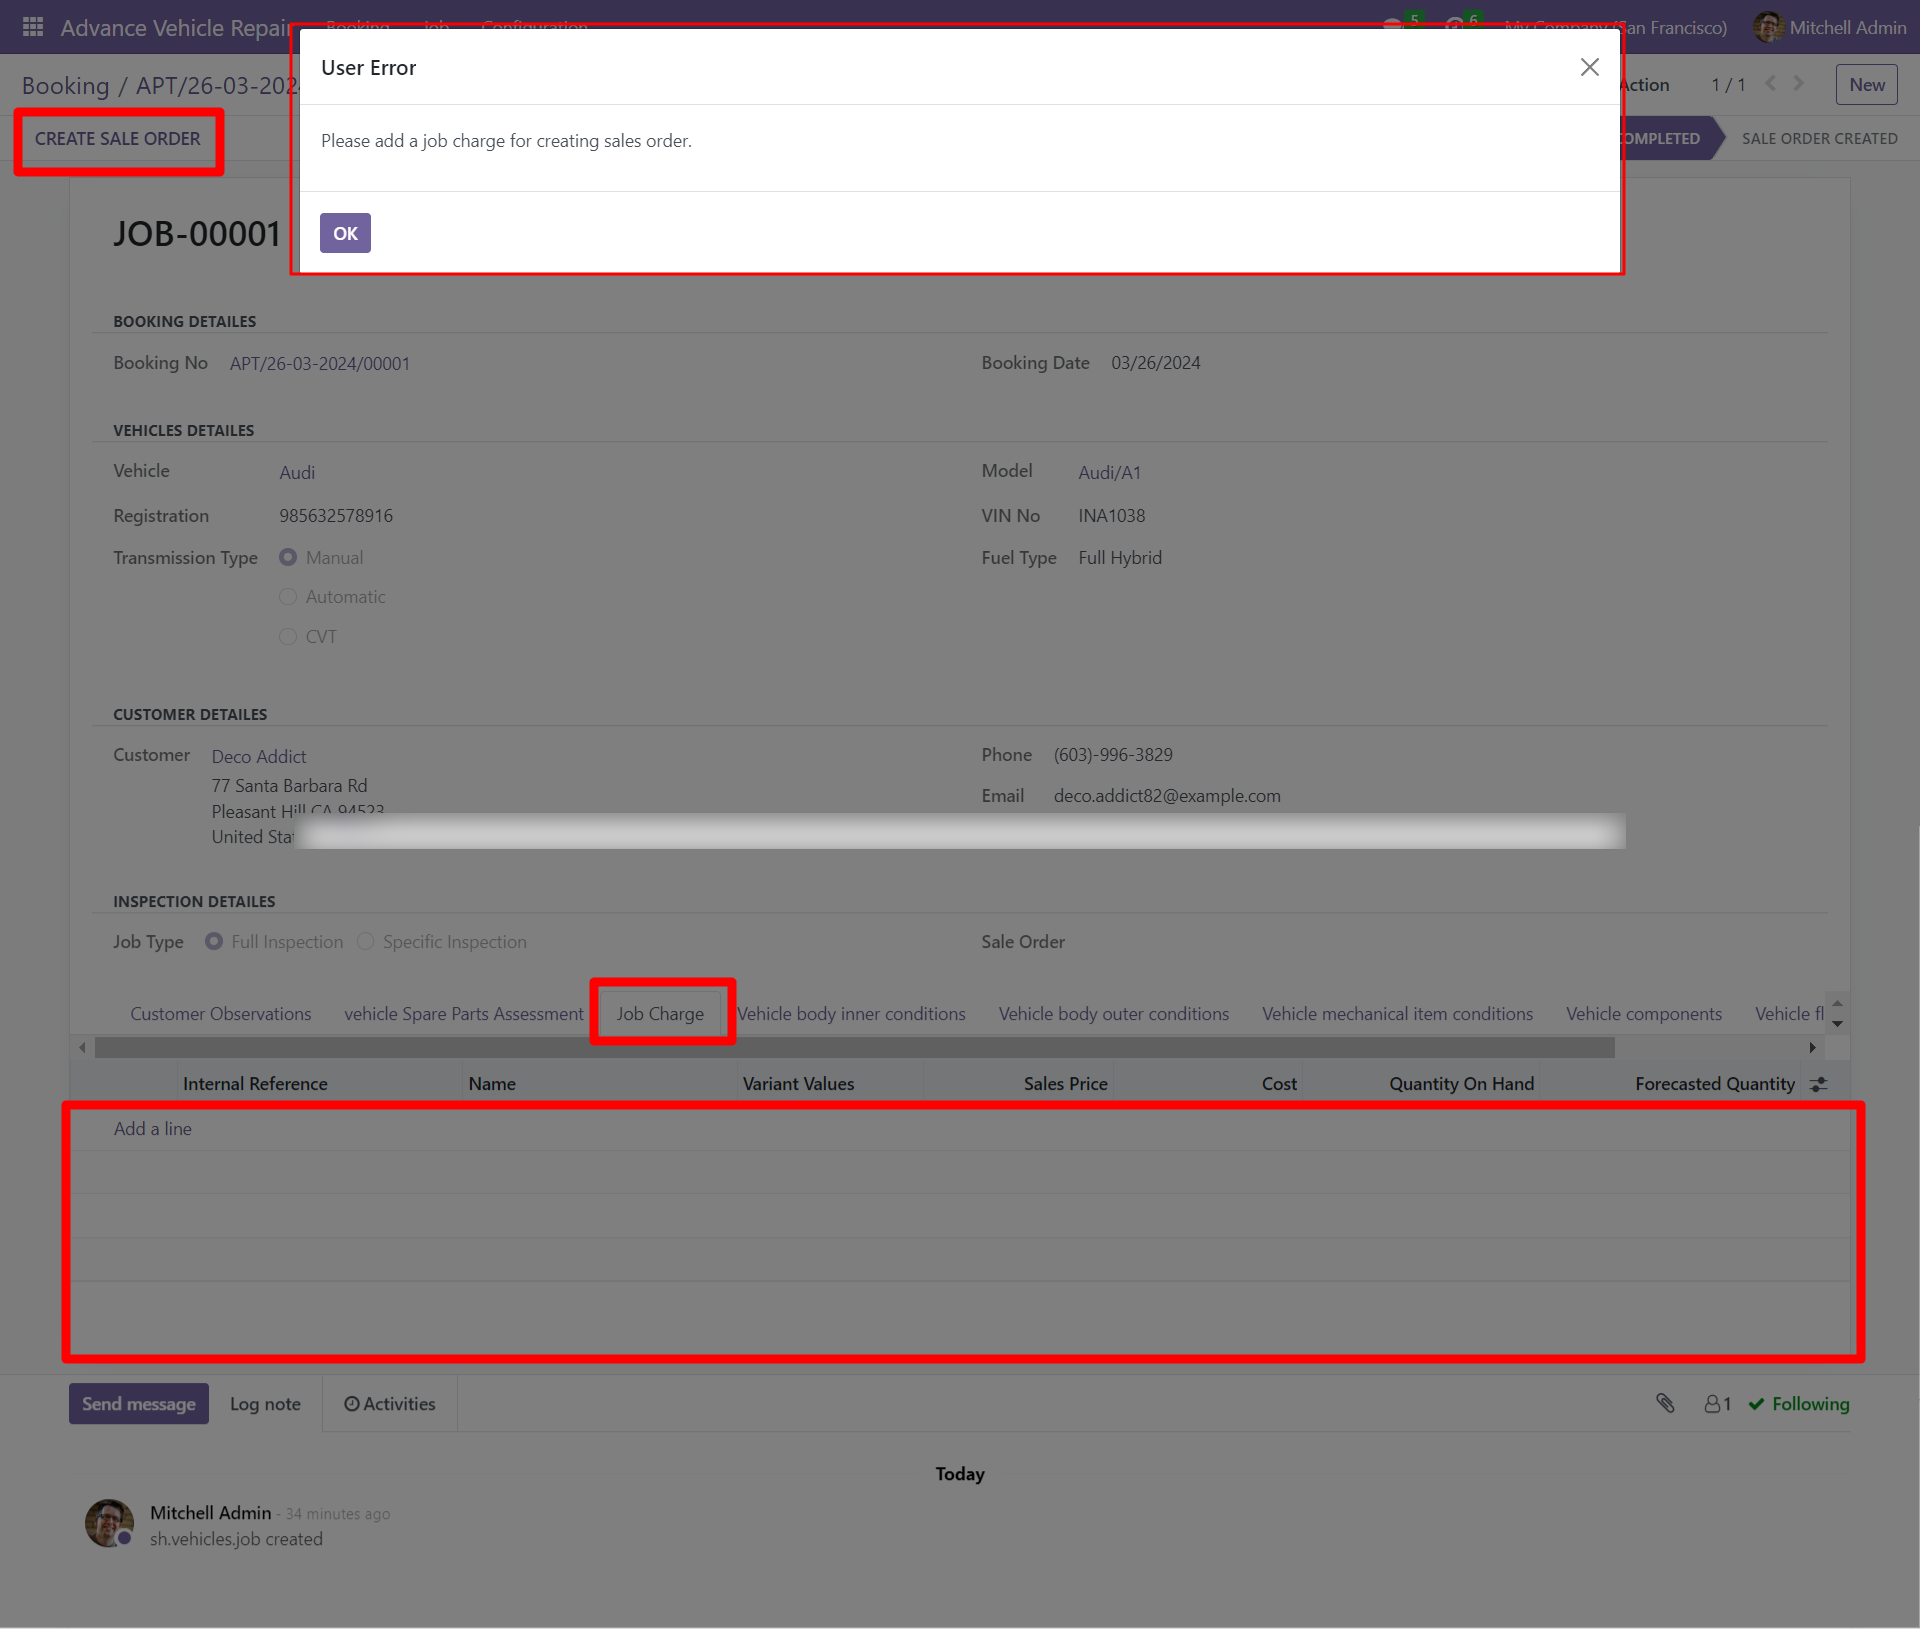
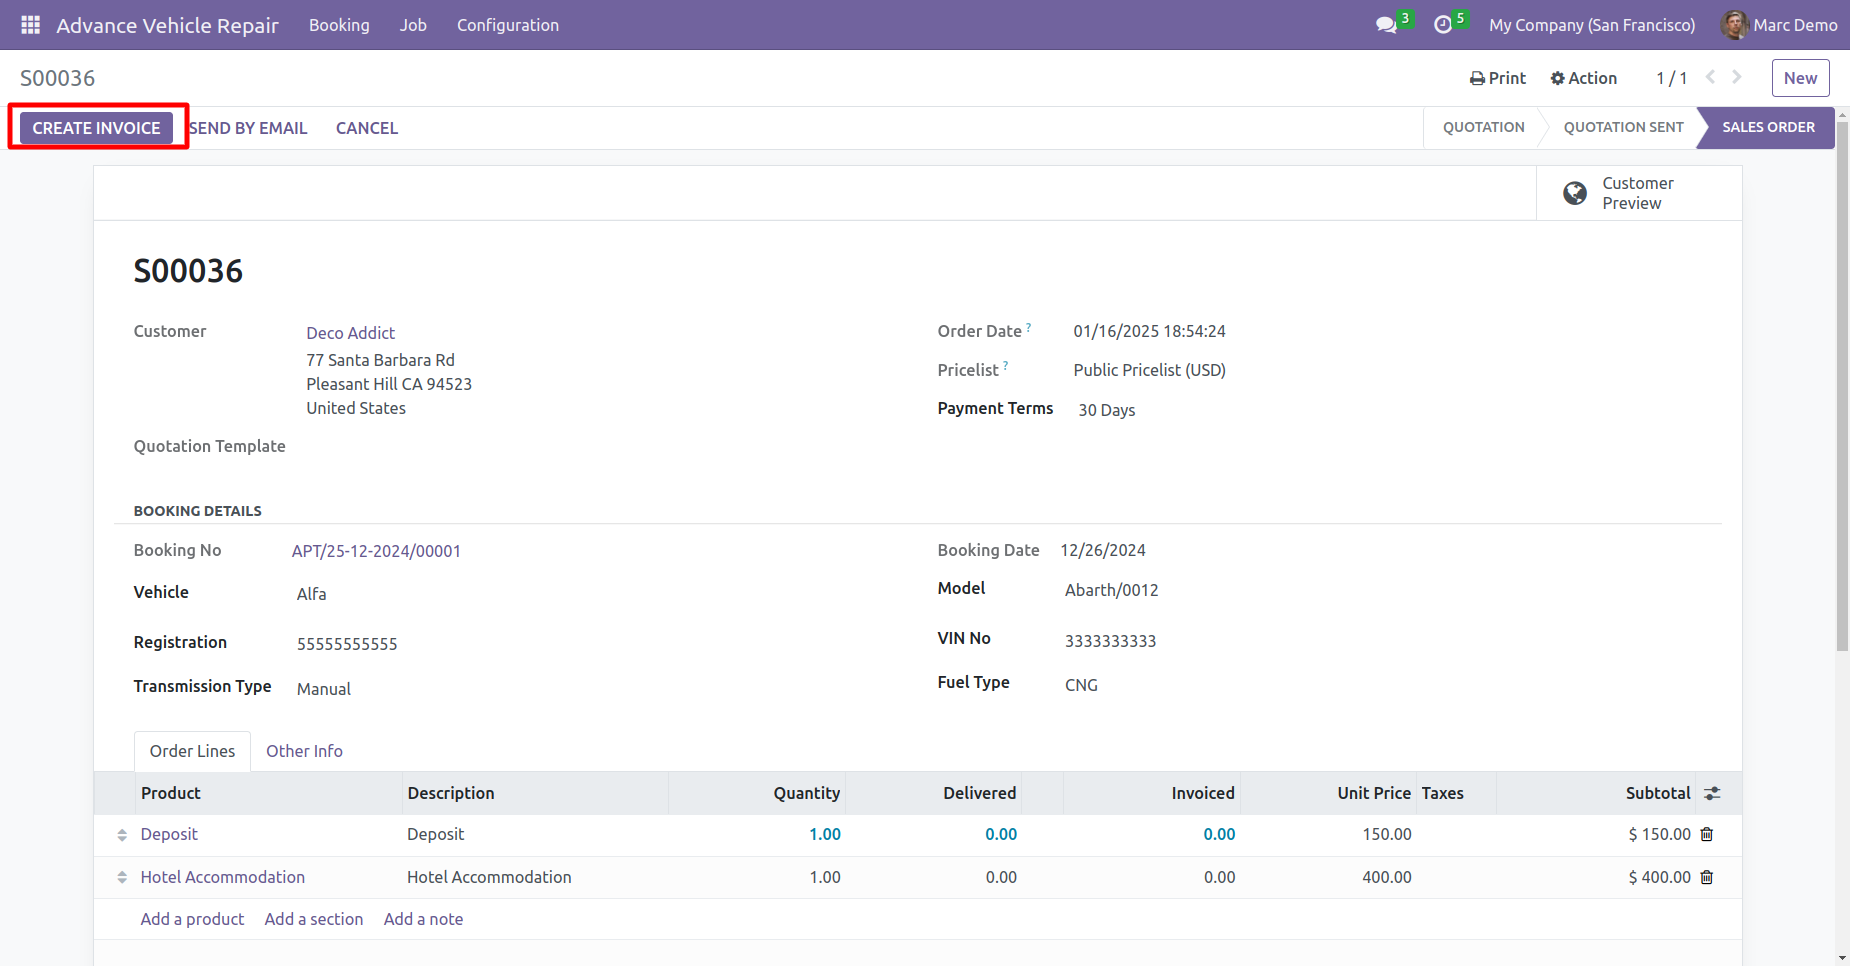
You can create a sale order for the job charge for the completed job by clicking on the create sale order button.
If you have not added a job charge it will give an error message.
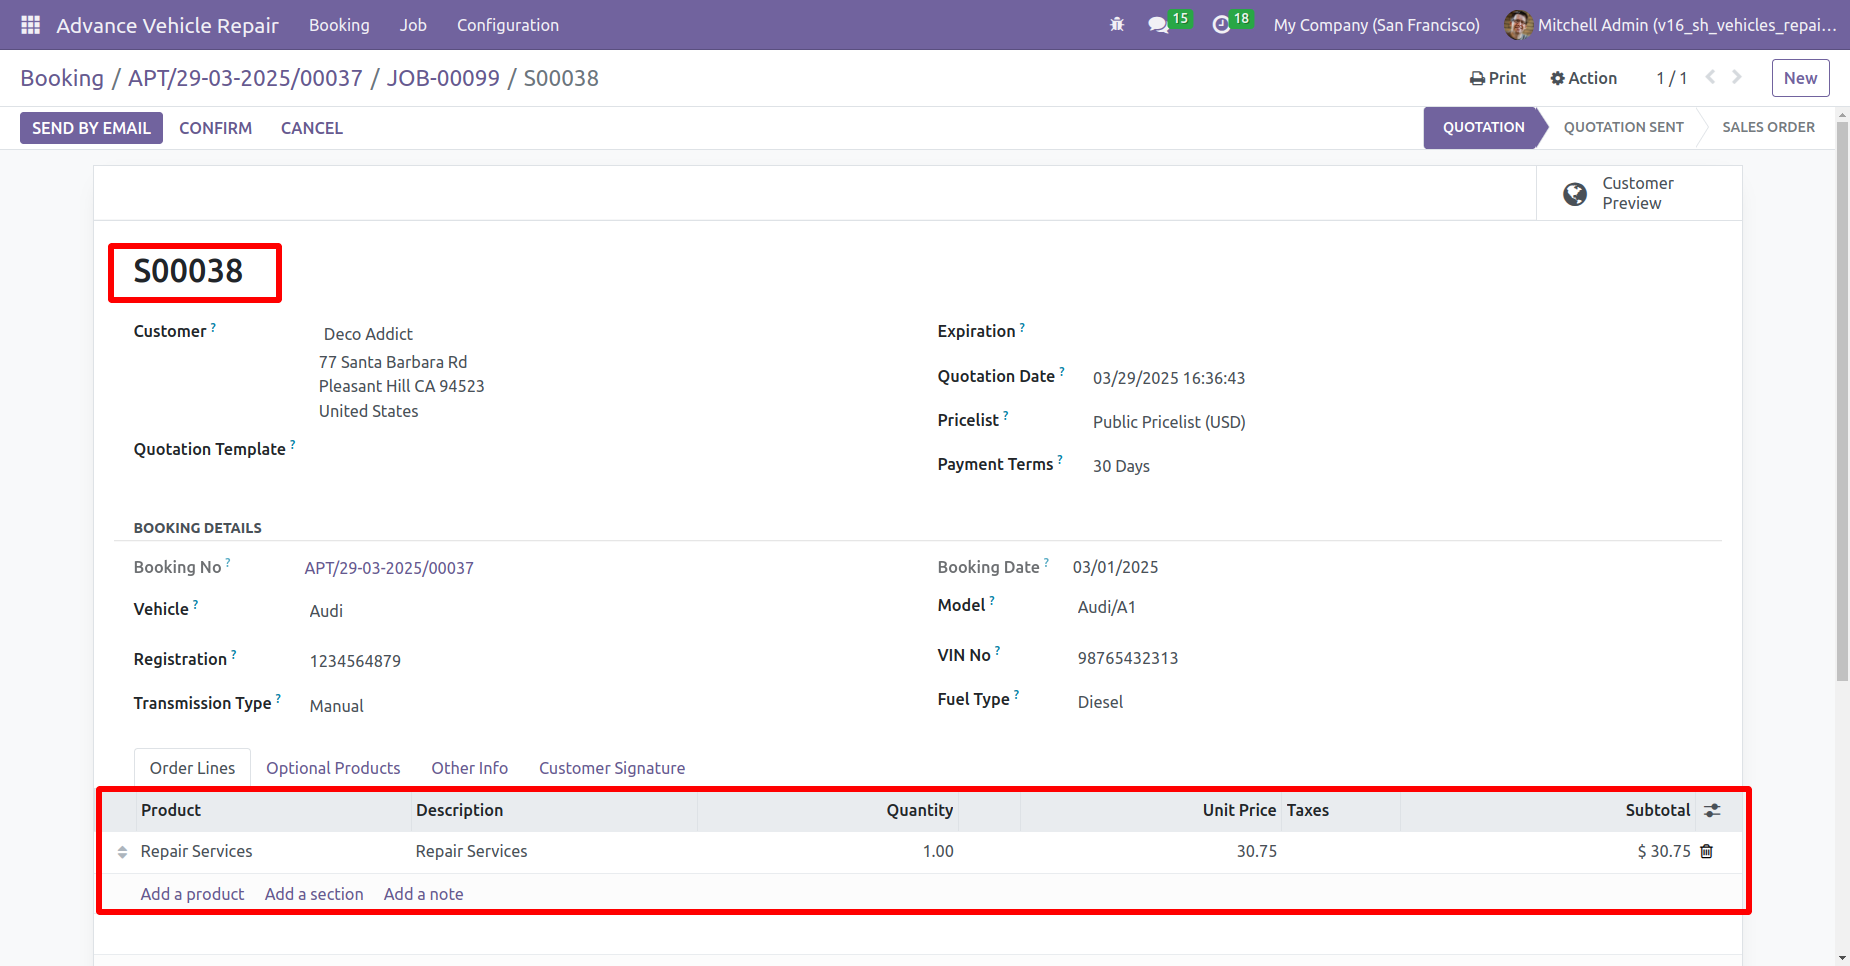
You can see the created sale order reference number in the job card, click on the sale order number.
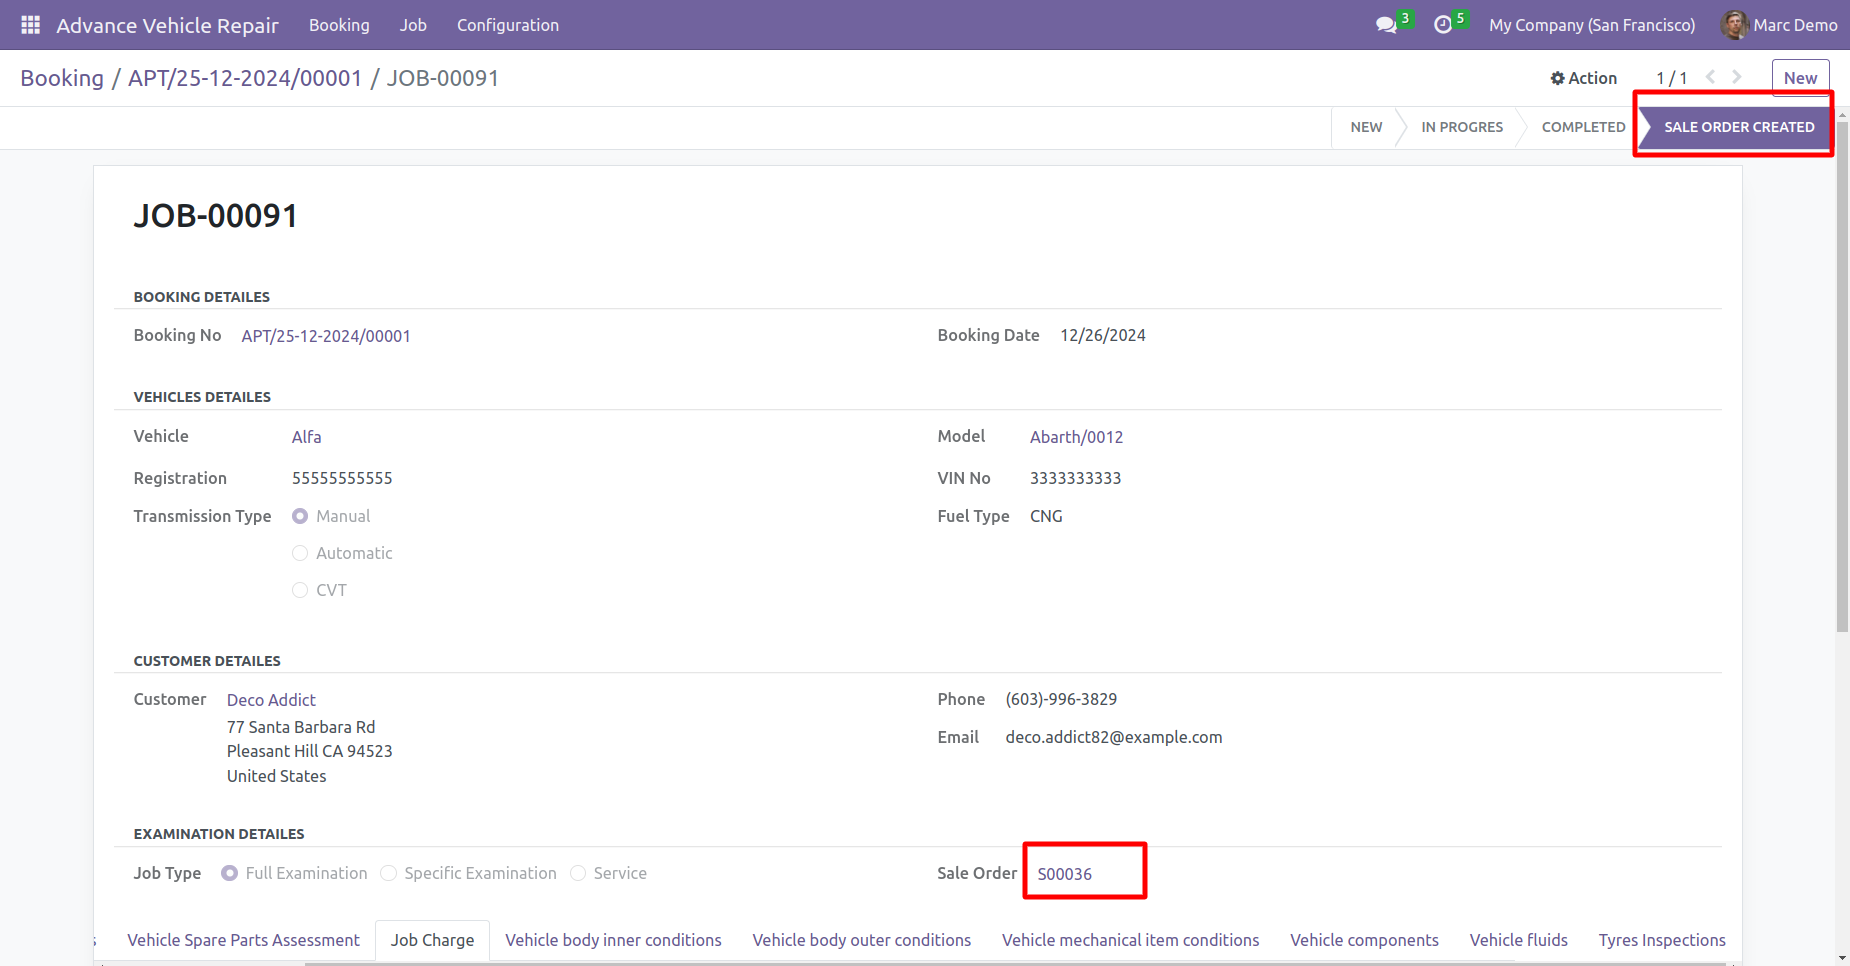
Clicking on the sale order reference number opens up the corresponding sale order, including booking details and job charges in the order lines.
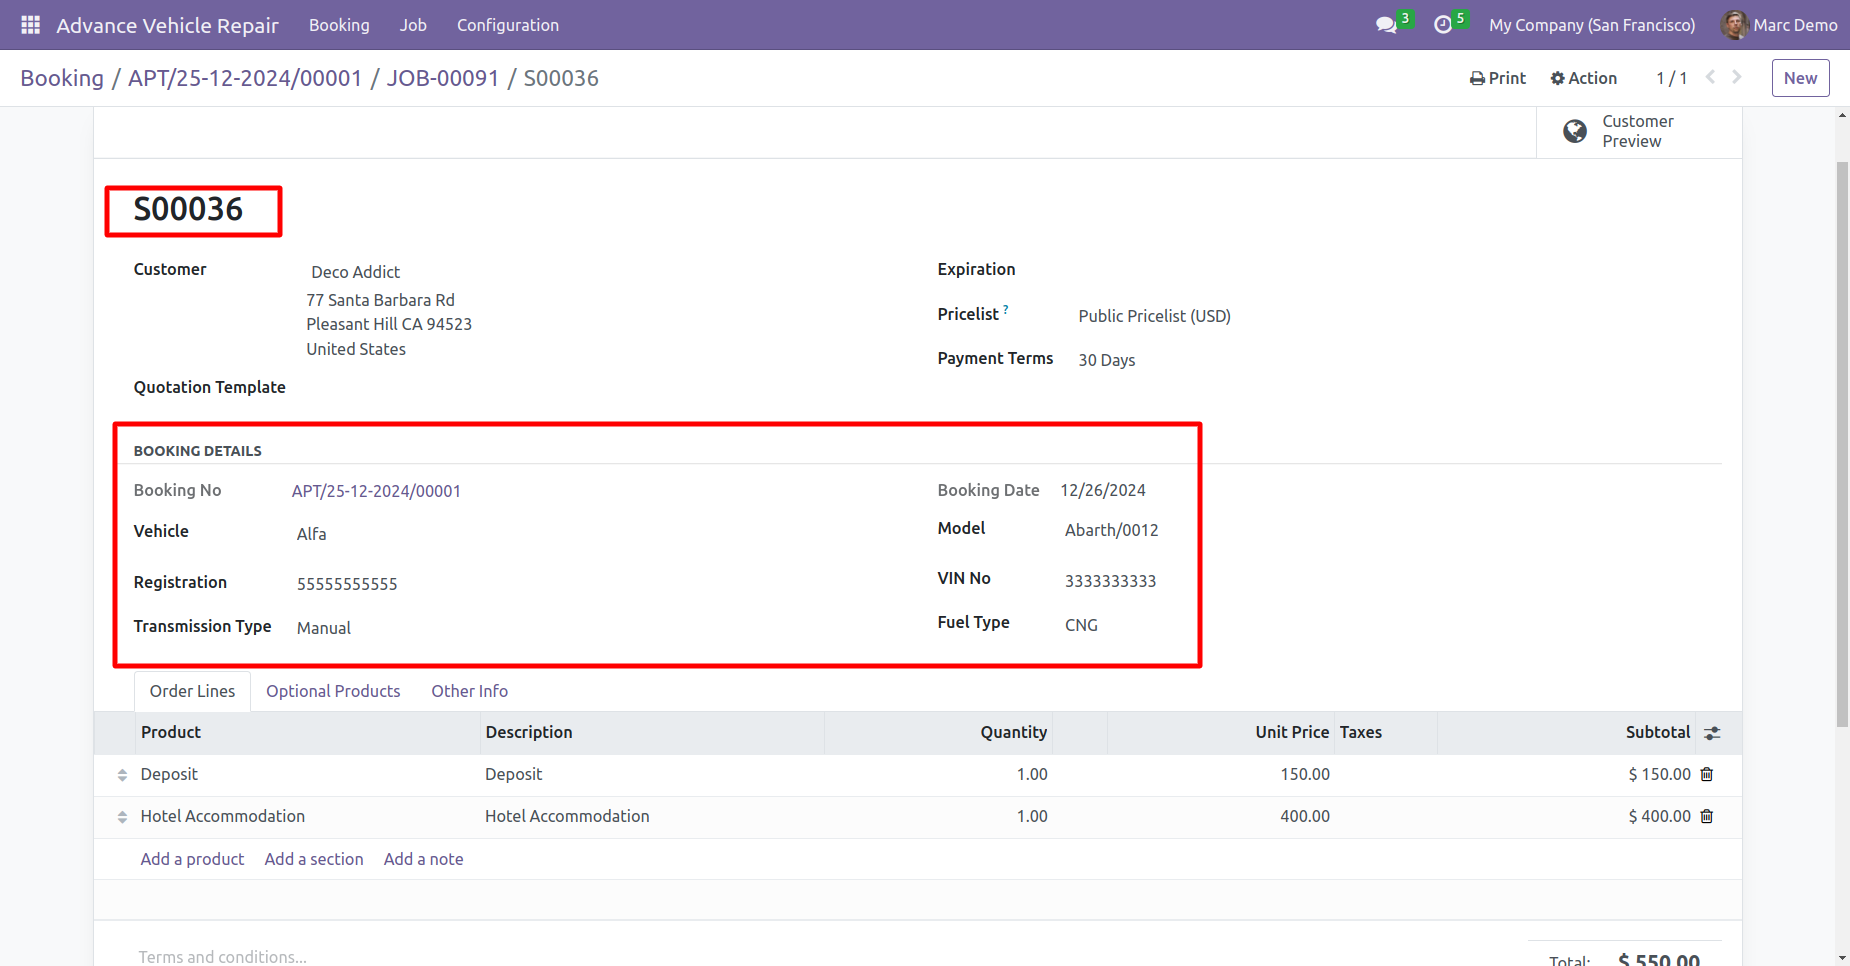
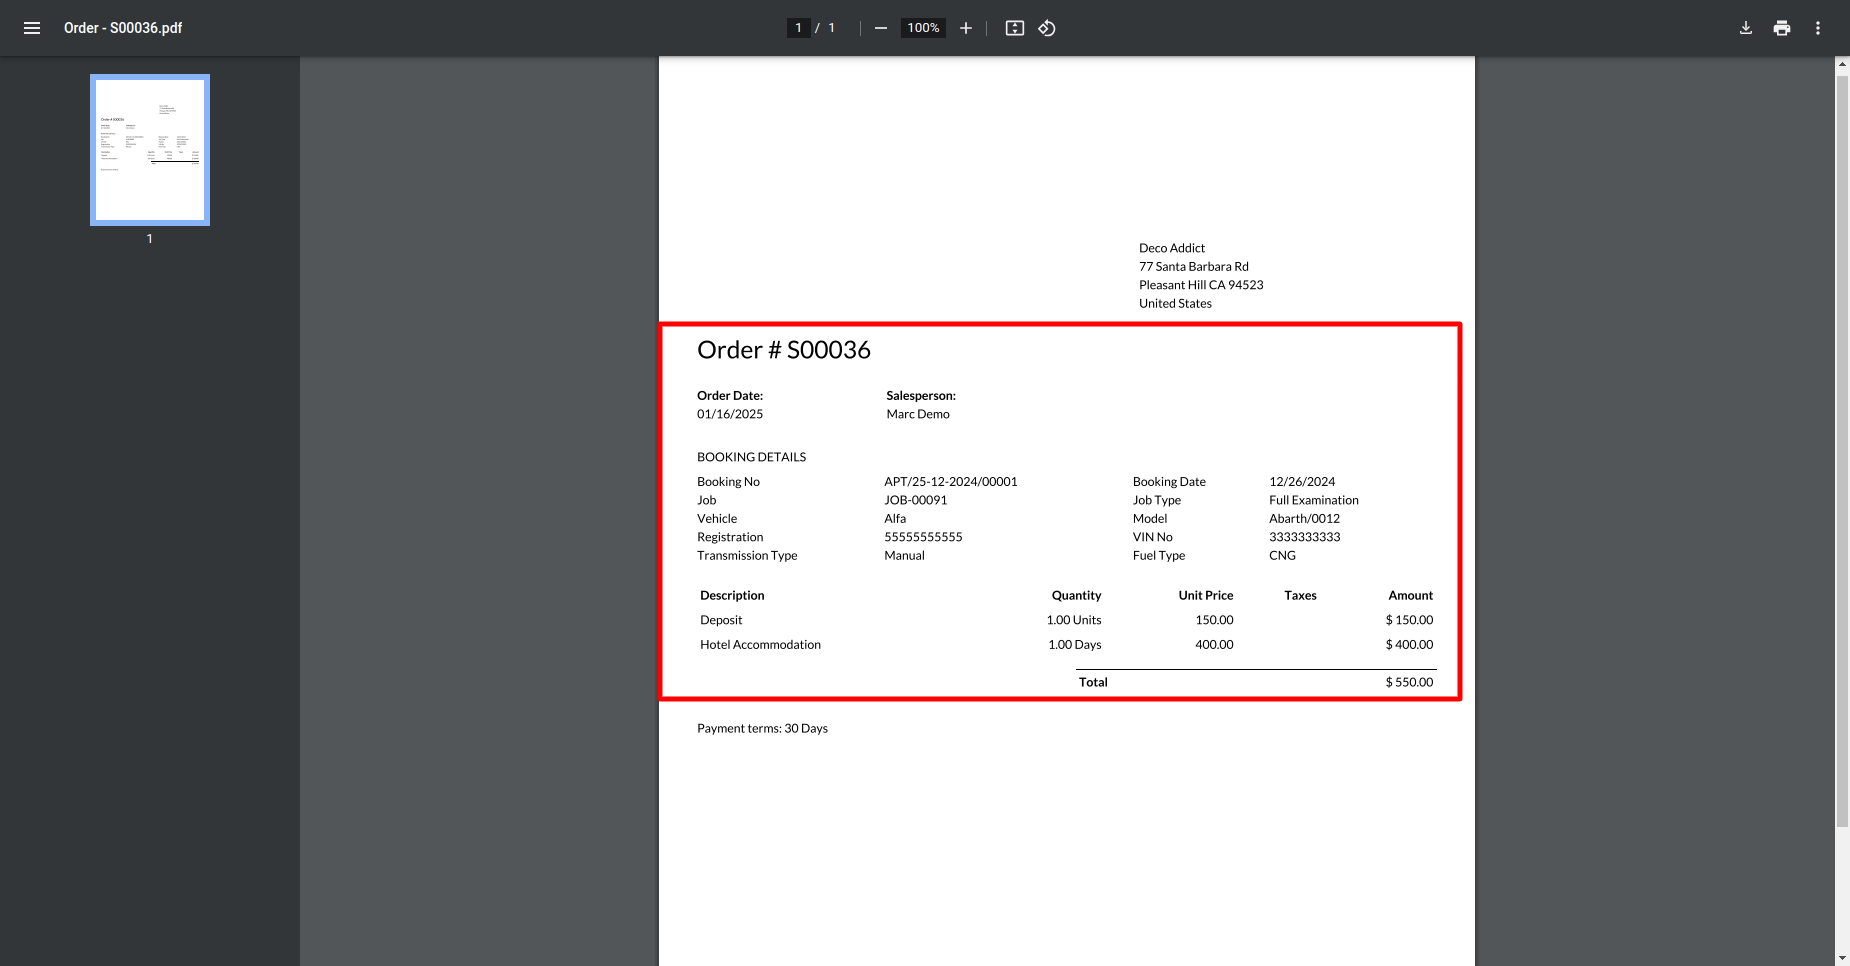
Sale order report with booking details and assessment details in PDF format.
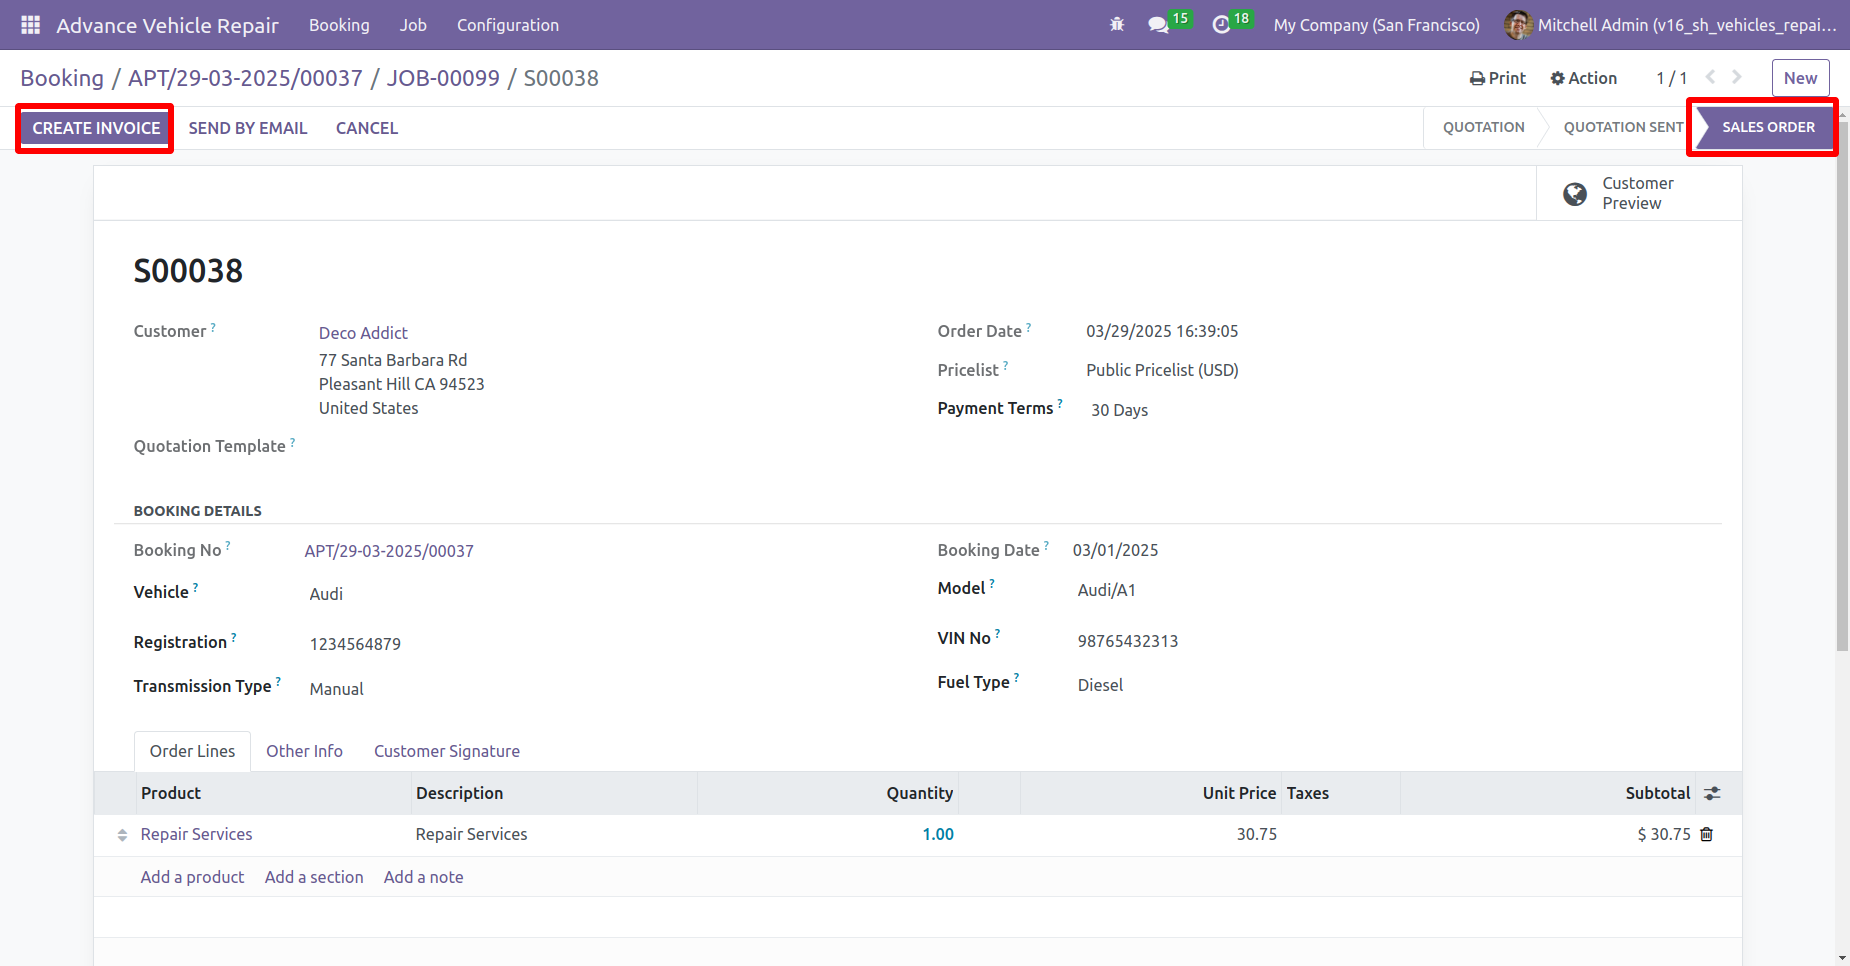
Create an invoice for the job charge by clicking on the create invoice button from the sale order.
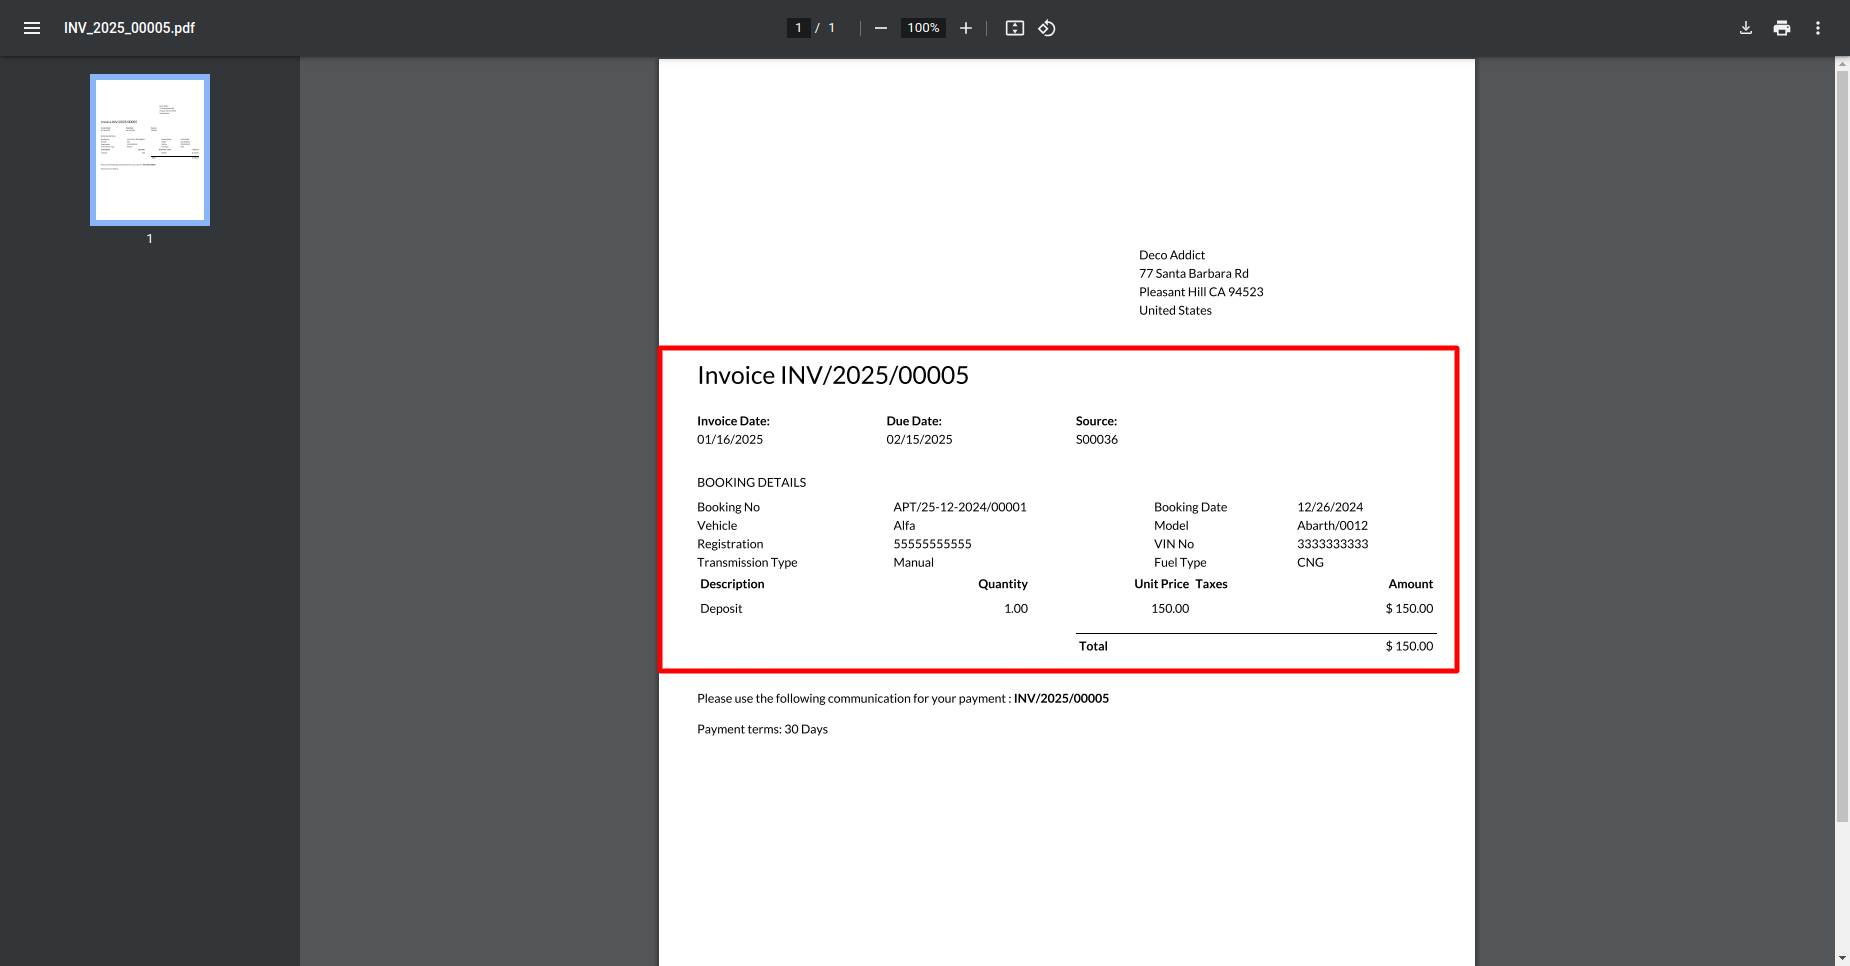
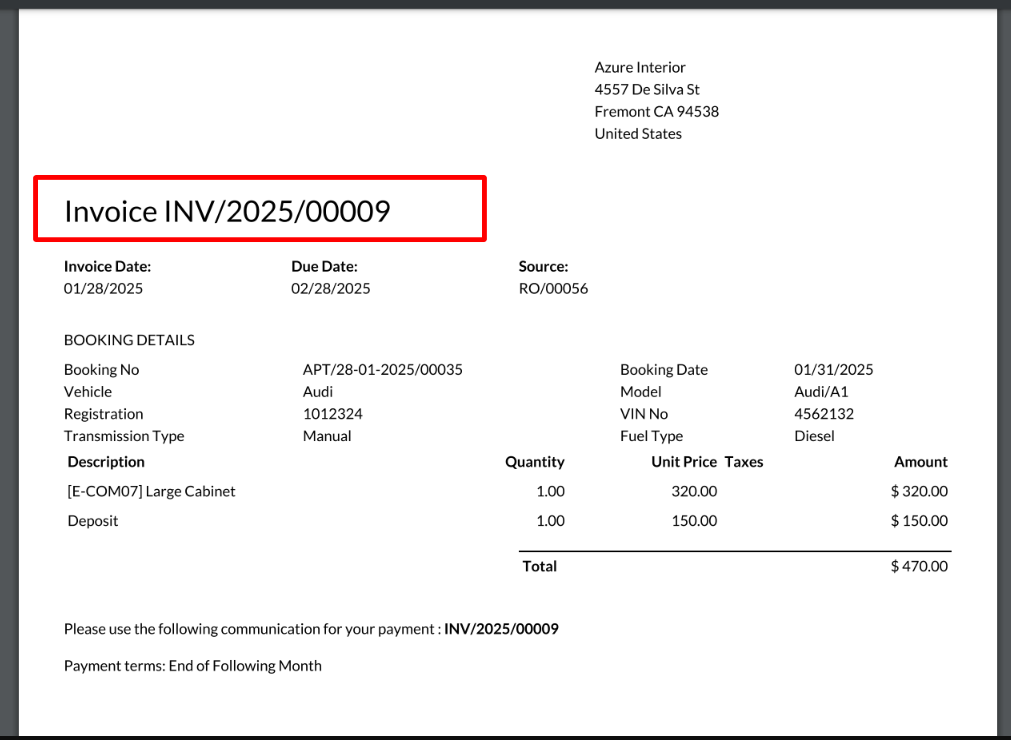
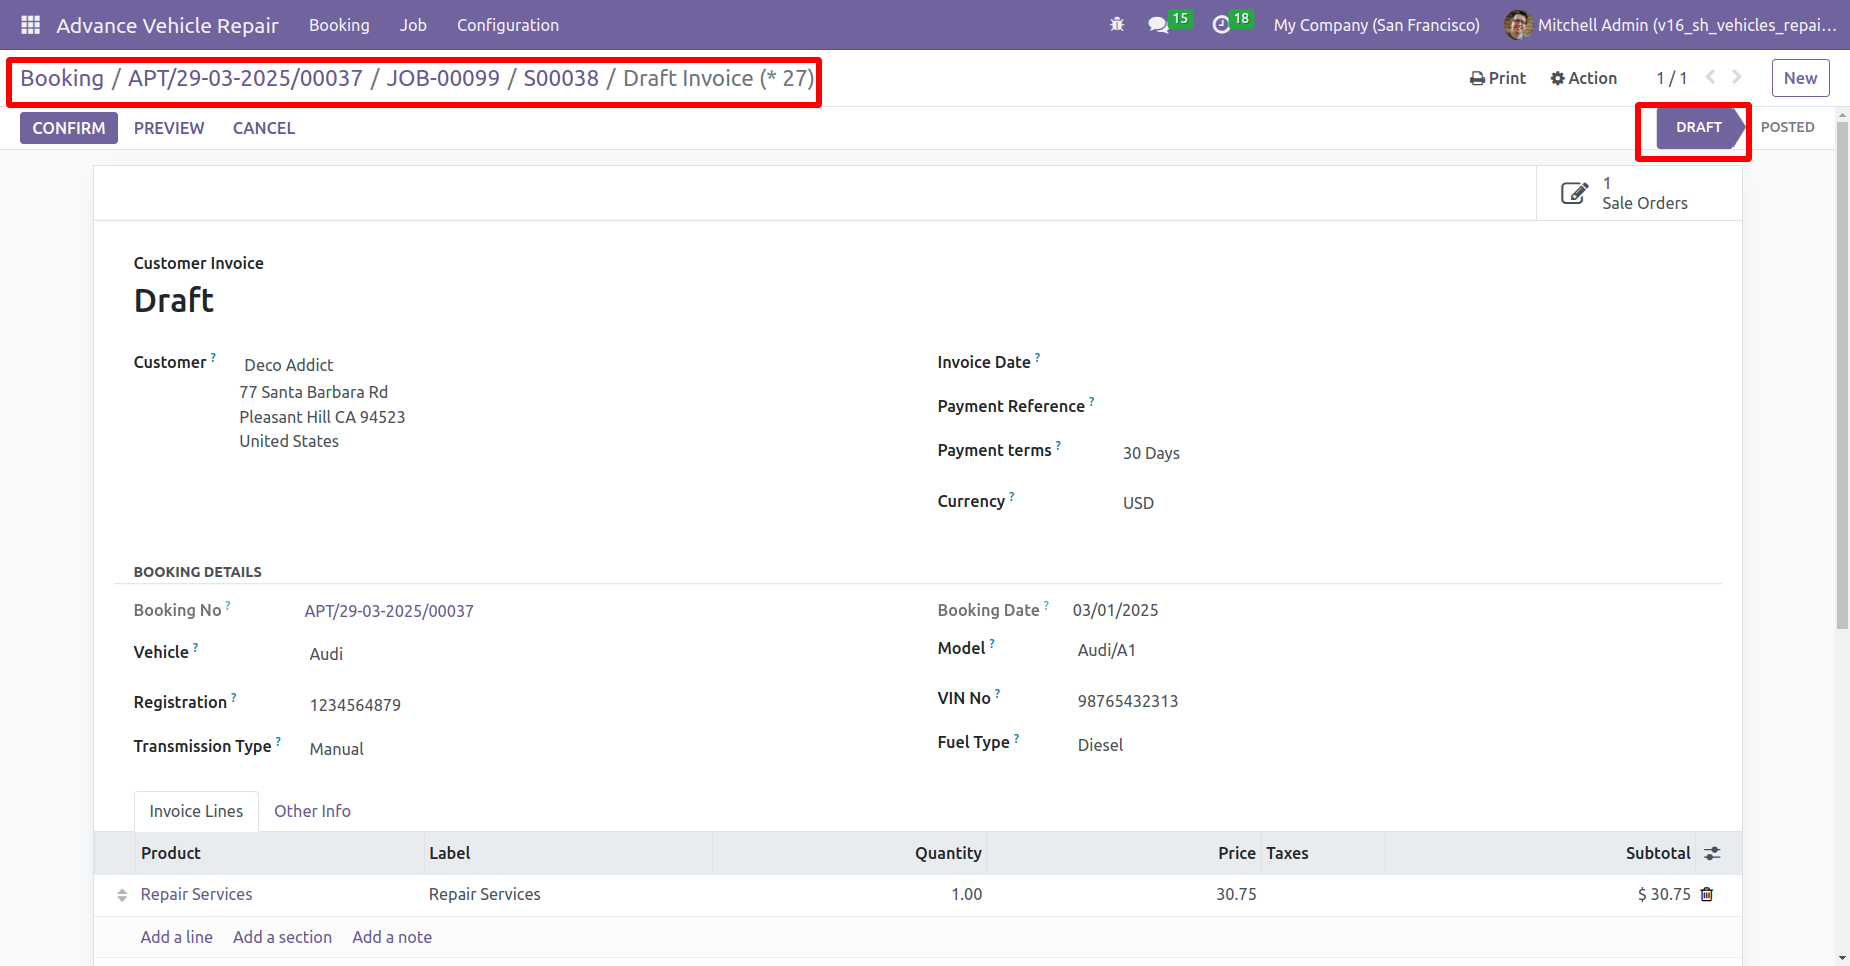
Job charge invoice with vehicle booking details.
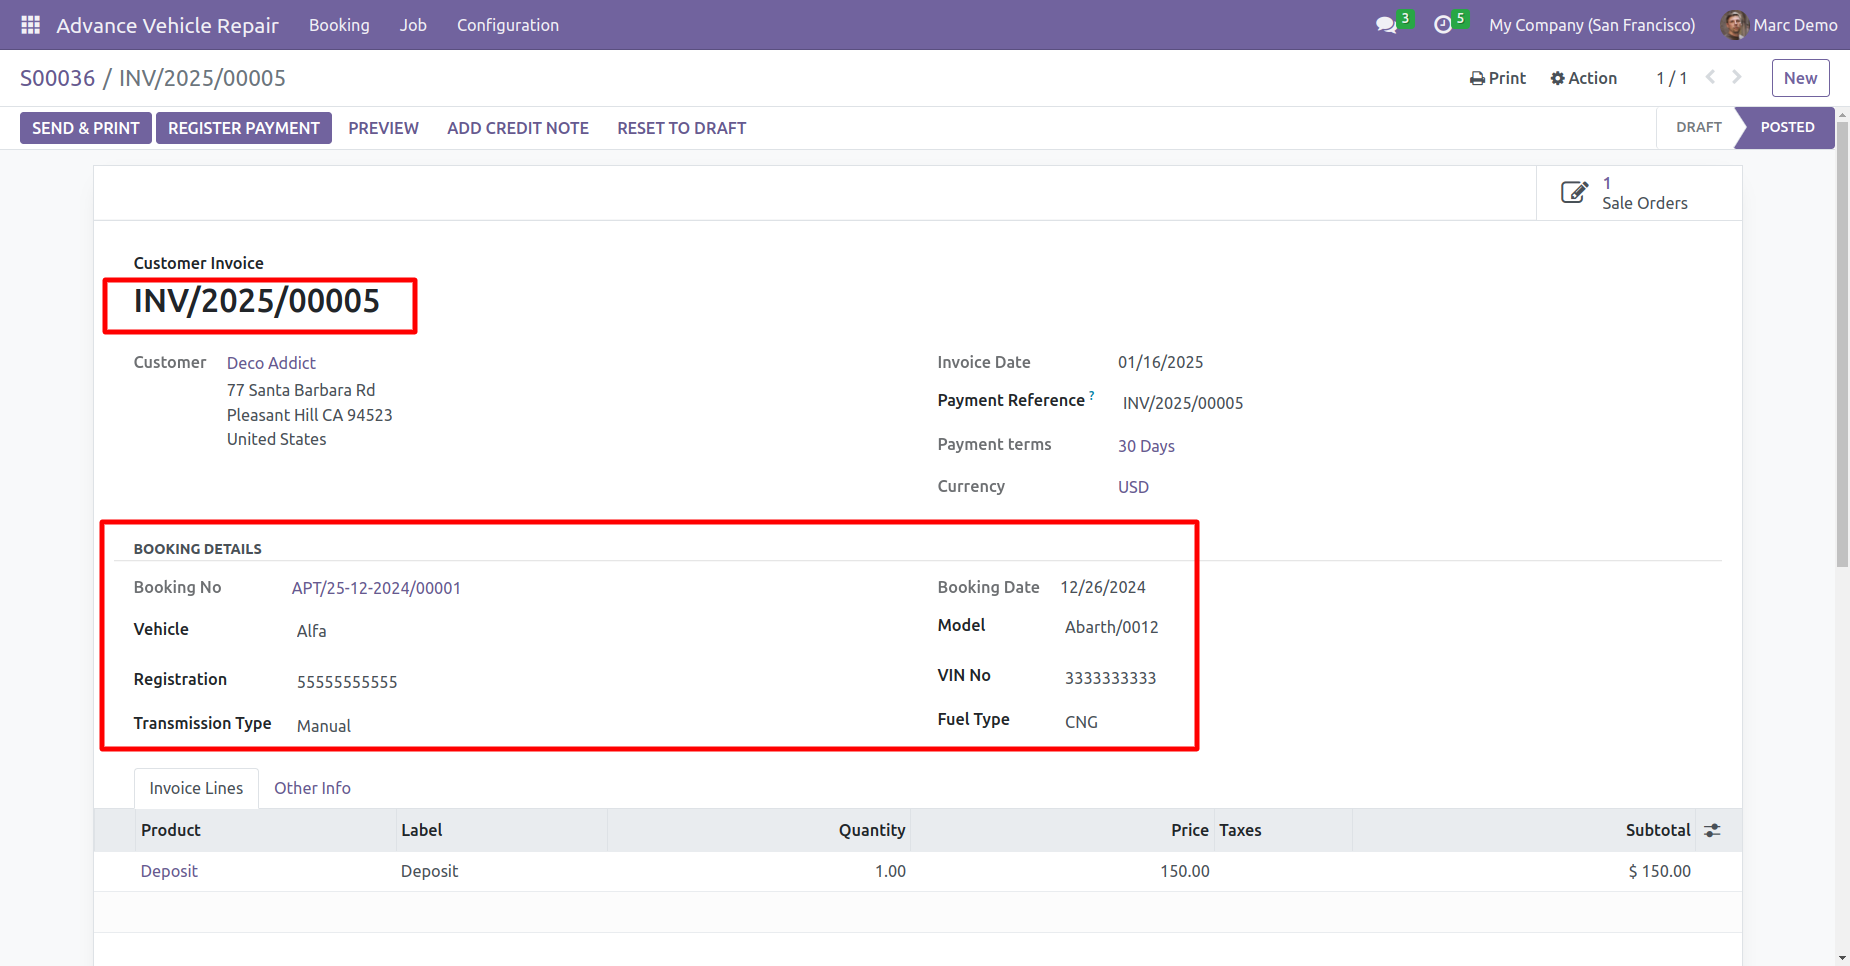
Job charge invoice report with vehicle booking details in PDF format.
Create a new vehicle booking with the specified type only vehicle repairs as the booking type and click on the vehicle repair button within the booking form.
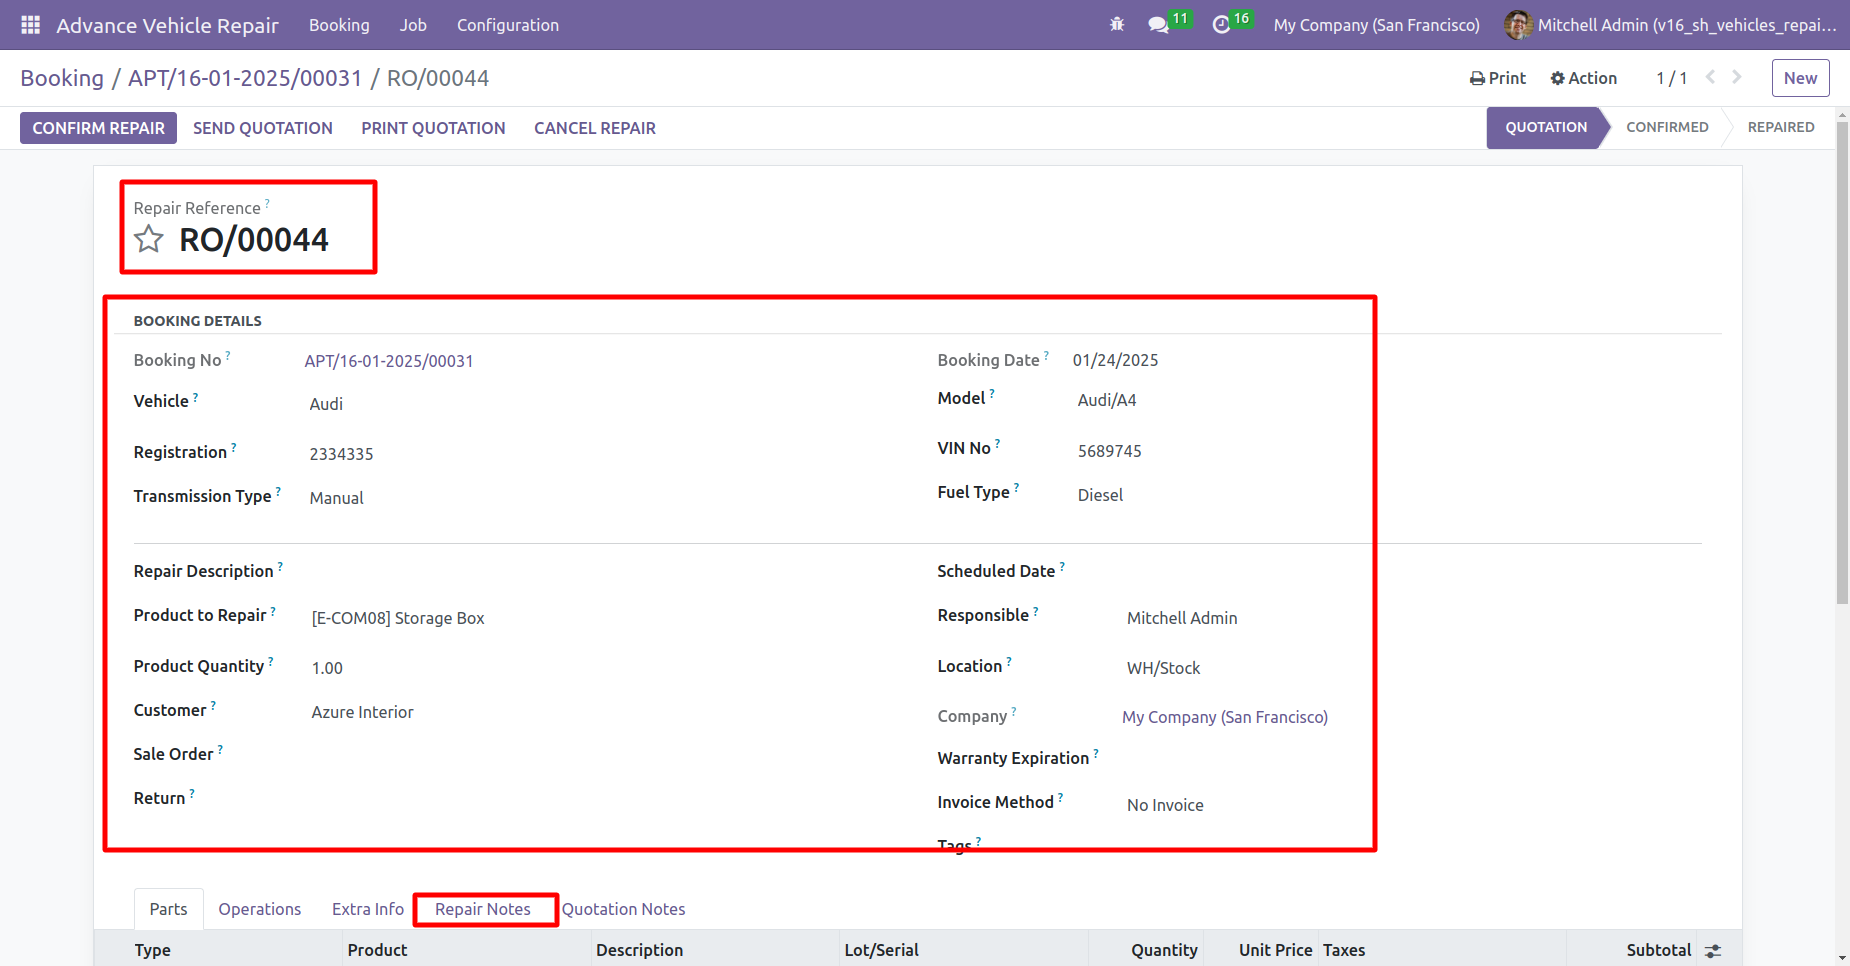
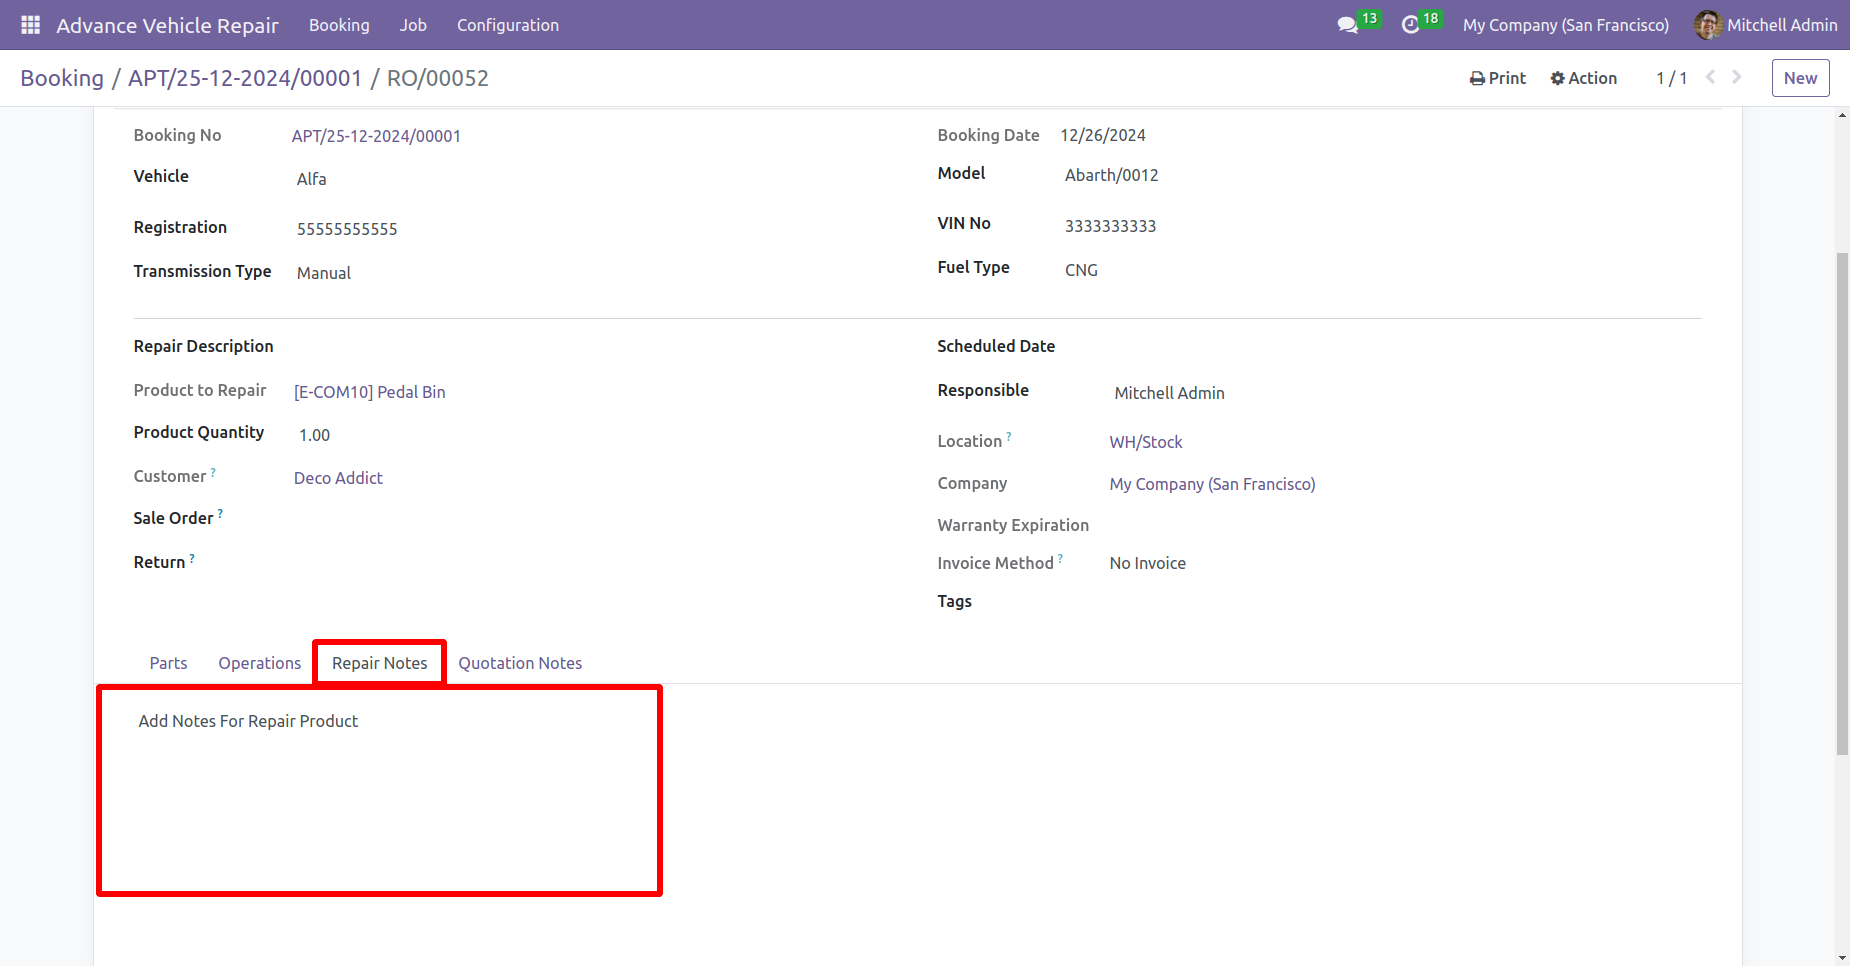
By clicking on the vehicle repairs button, it will create a repair order with booking details and repair descriptions and add a repair note in the repair notes tab.
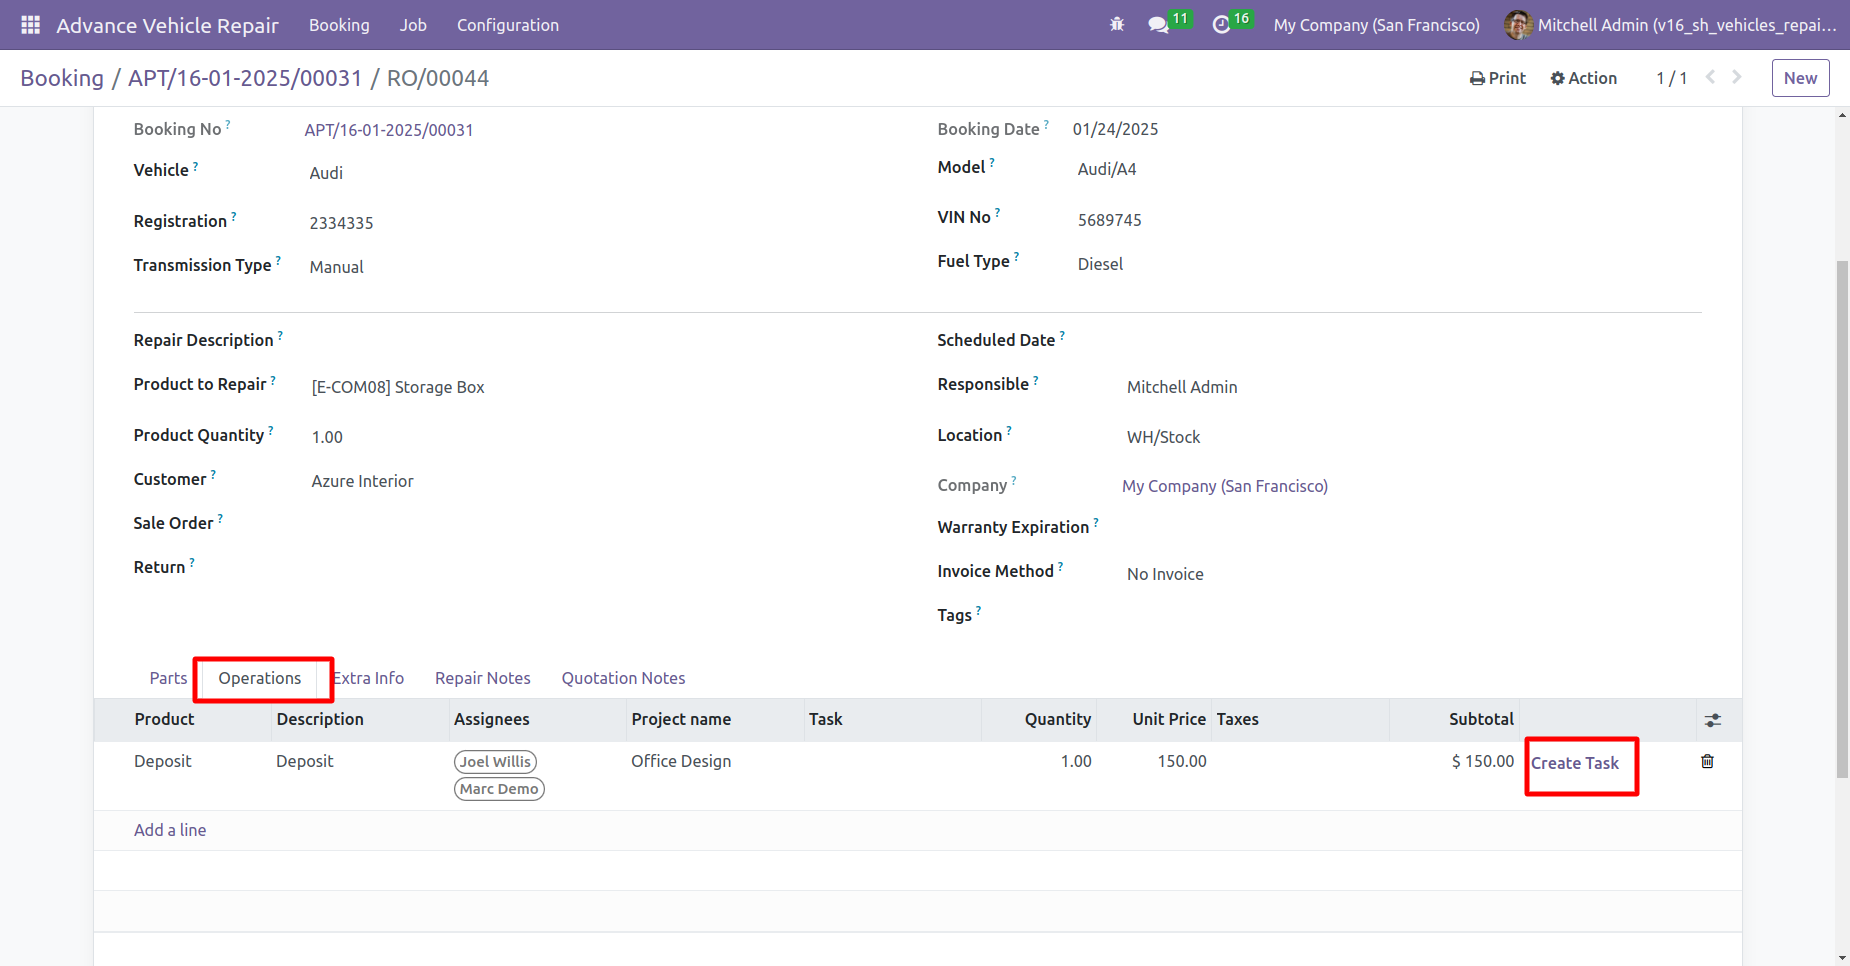
In the operations tab create a task by clicking on the create task button from the operation lines within the repair order.
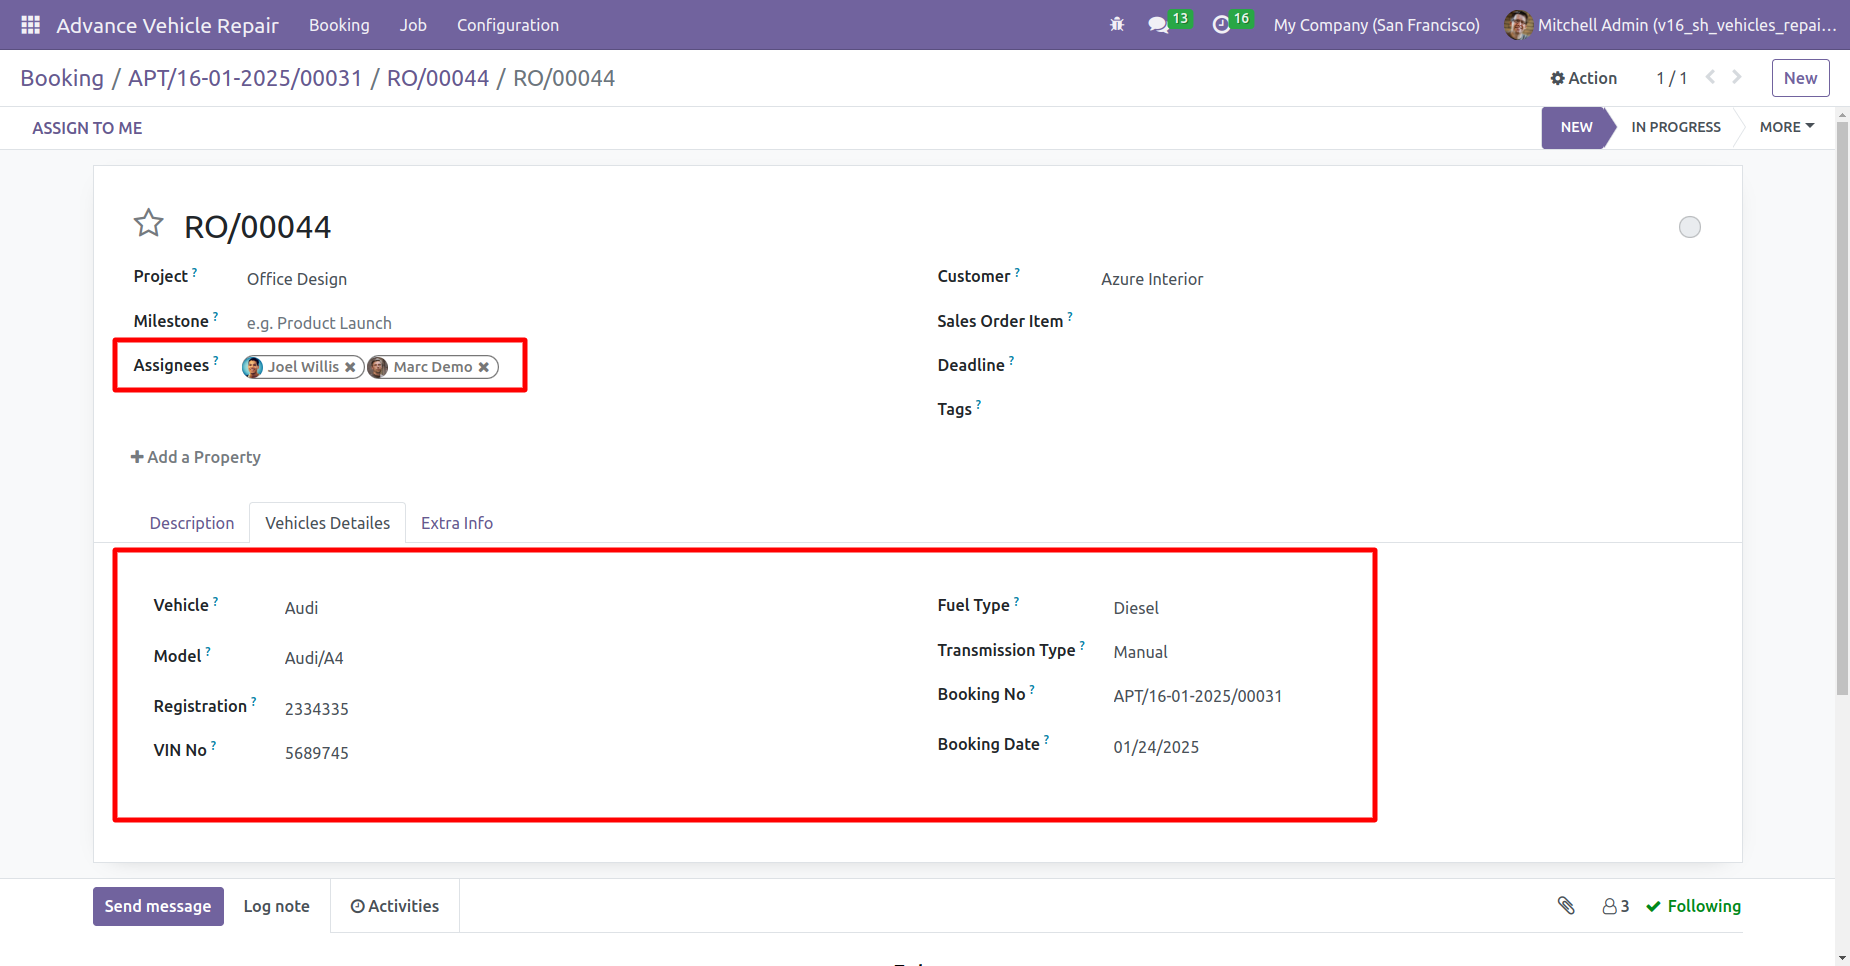
Open a task created from the repairs order, you can see assignees and vehicle details in the vehicle details tab within the project task.
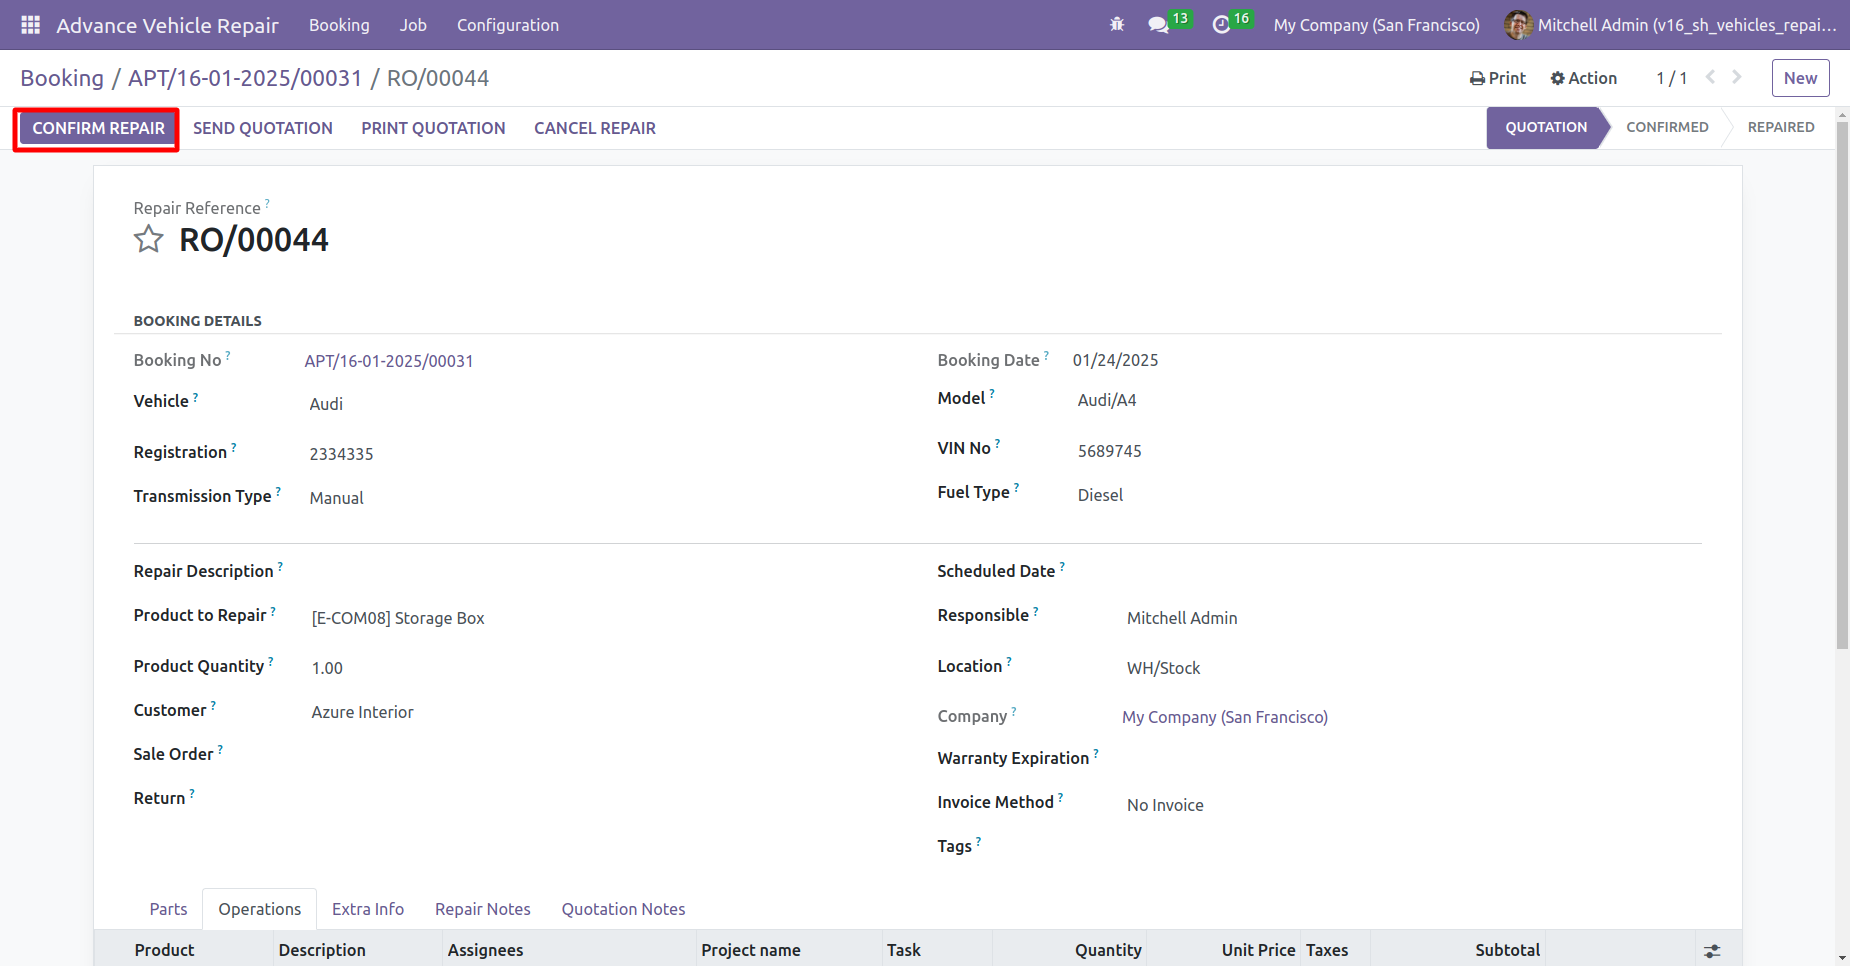
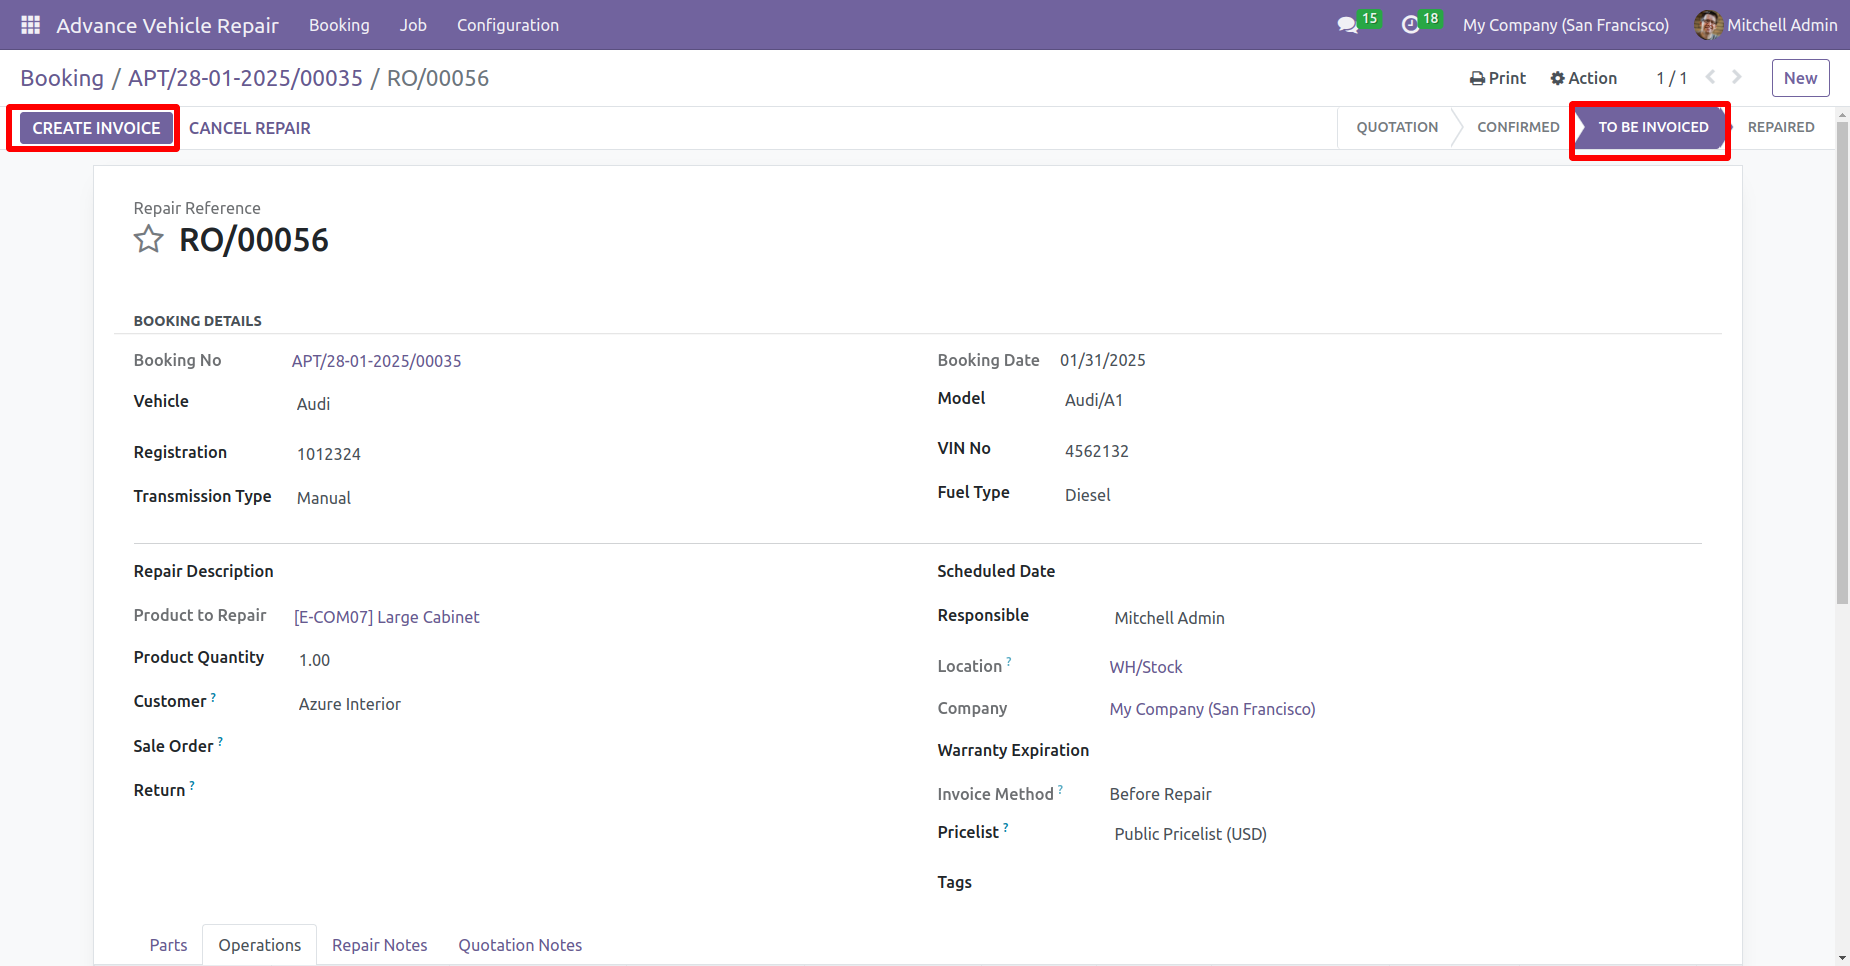
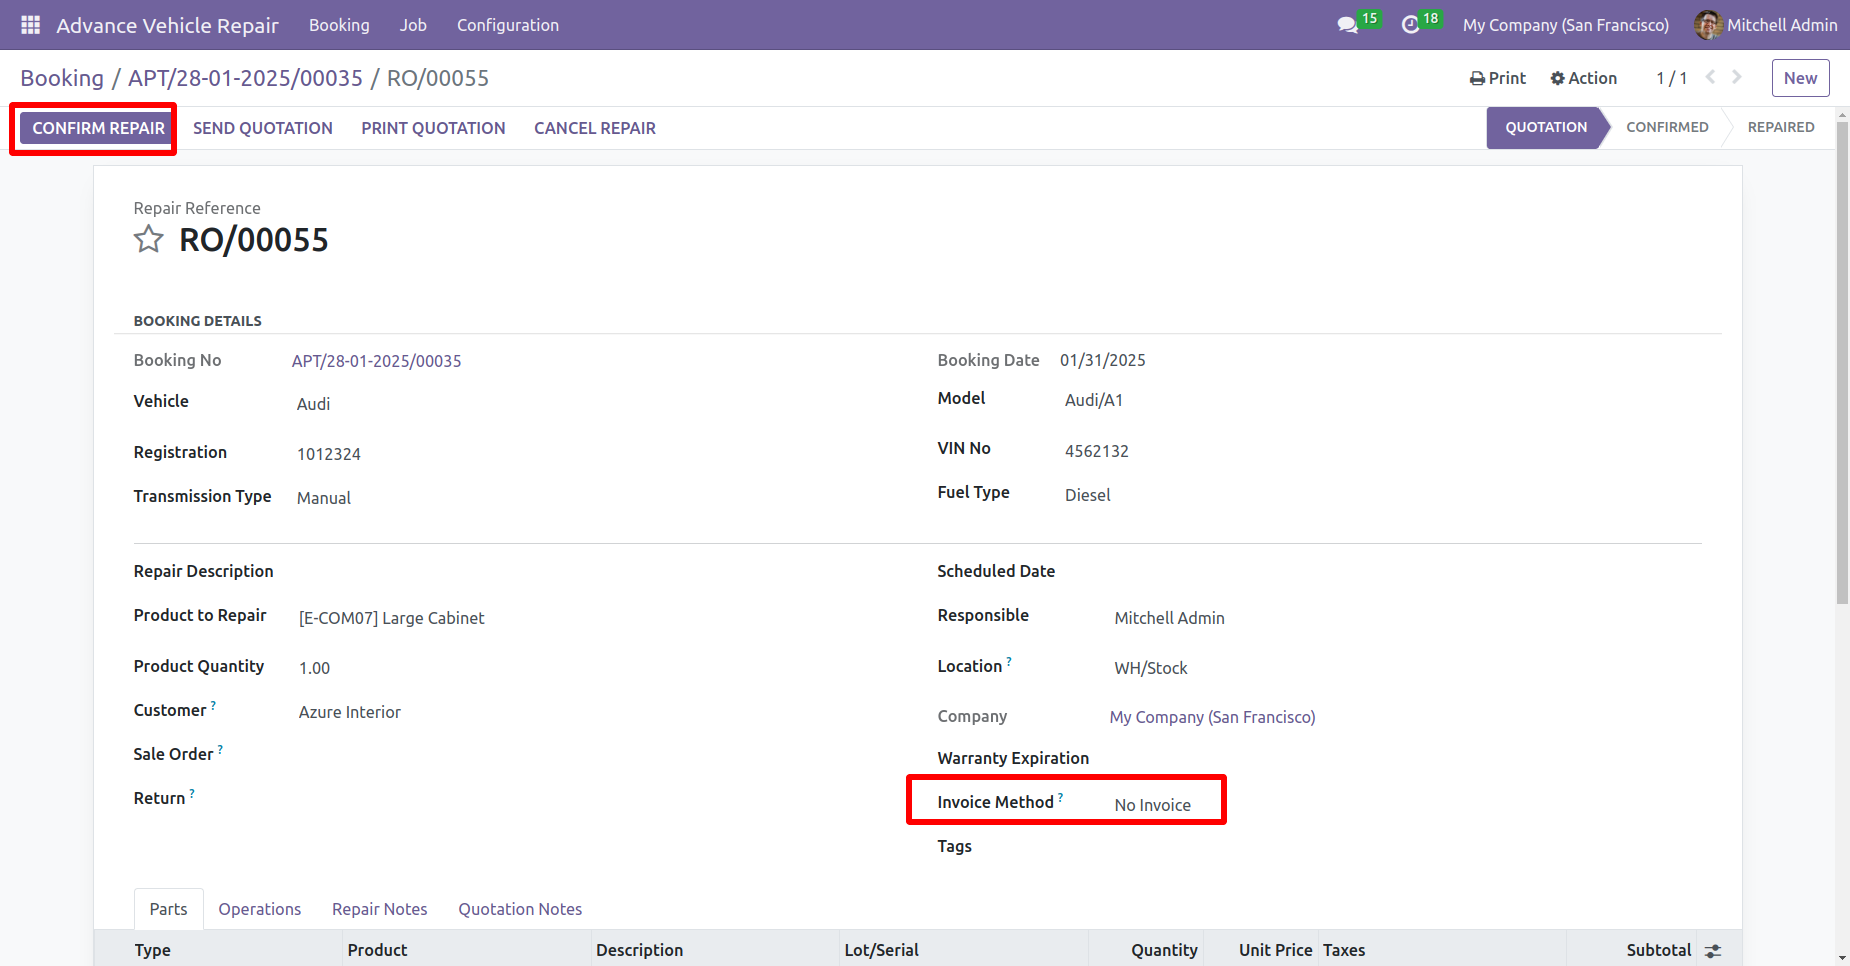
Fill in all the details and verify the quotation, click on the confirm repair button.
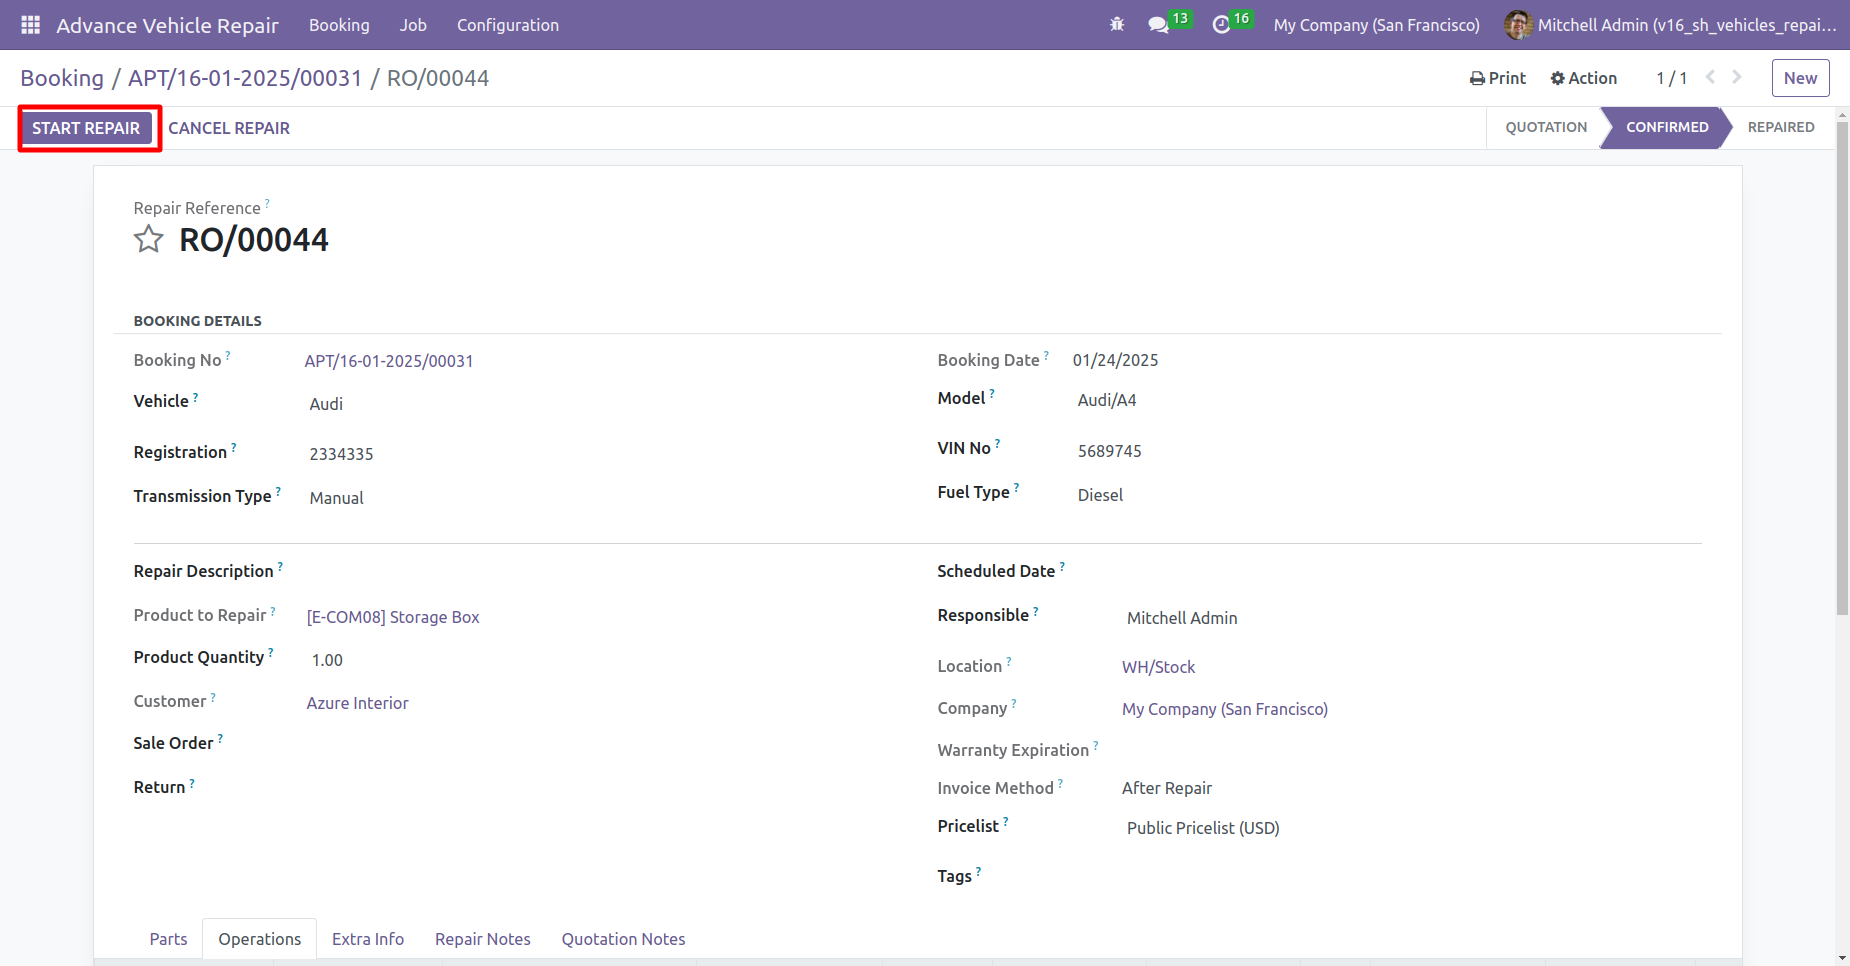
When you start repair click on the start repair button.
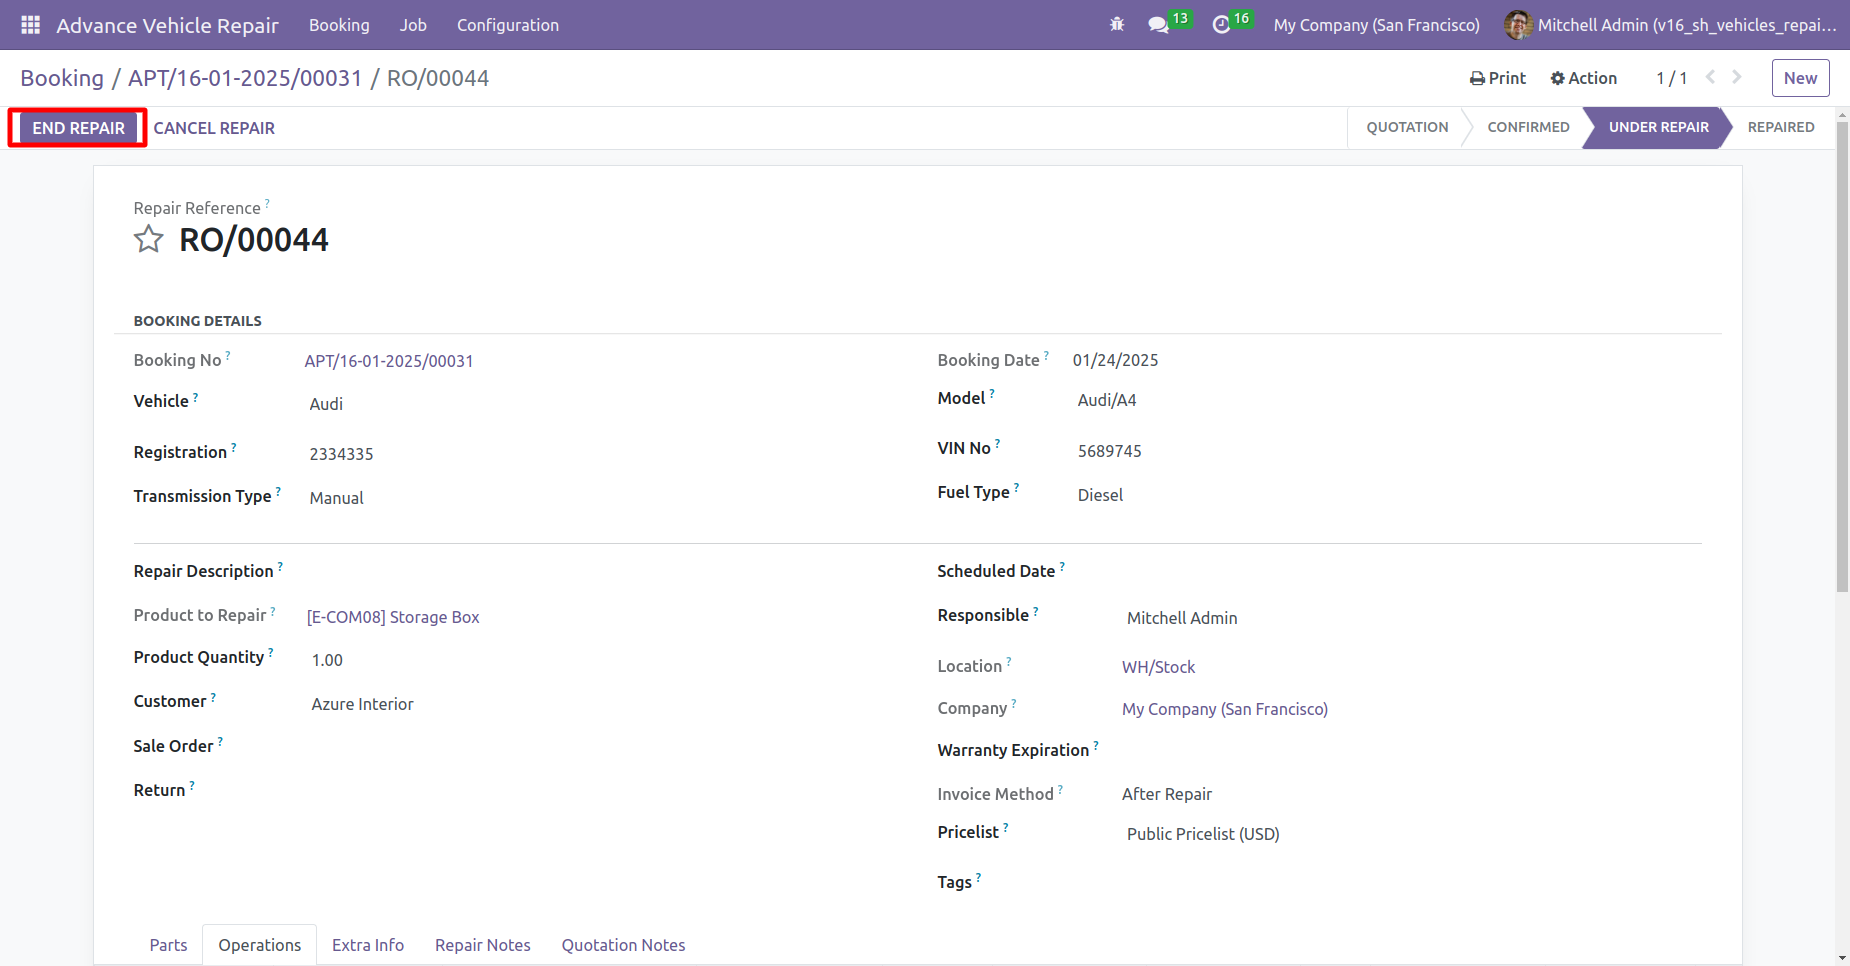
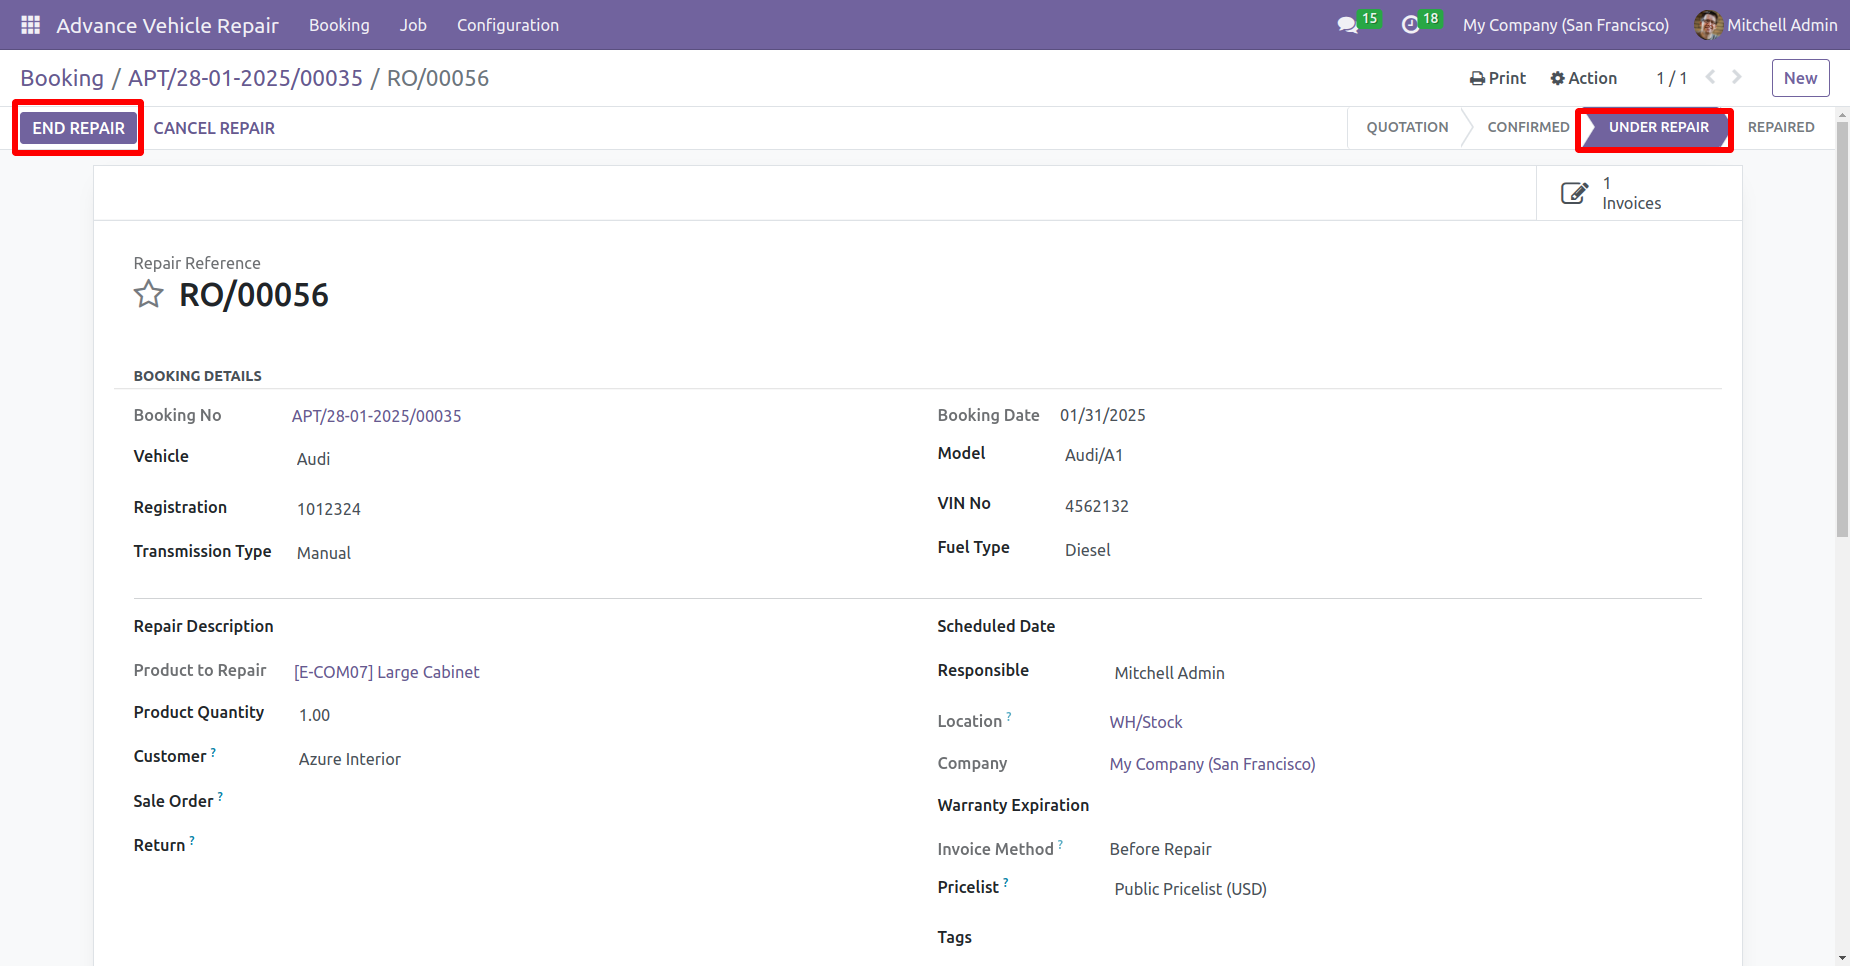
When you complete the repair click on the end repair button.
Click on the create invoice button to create a repair invoice.
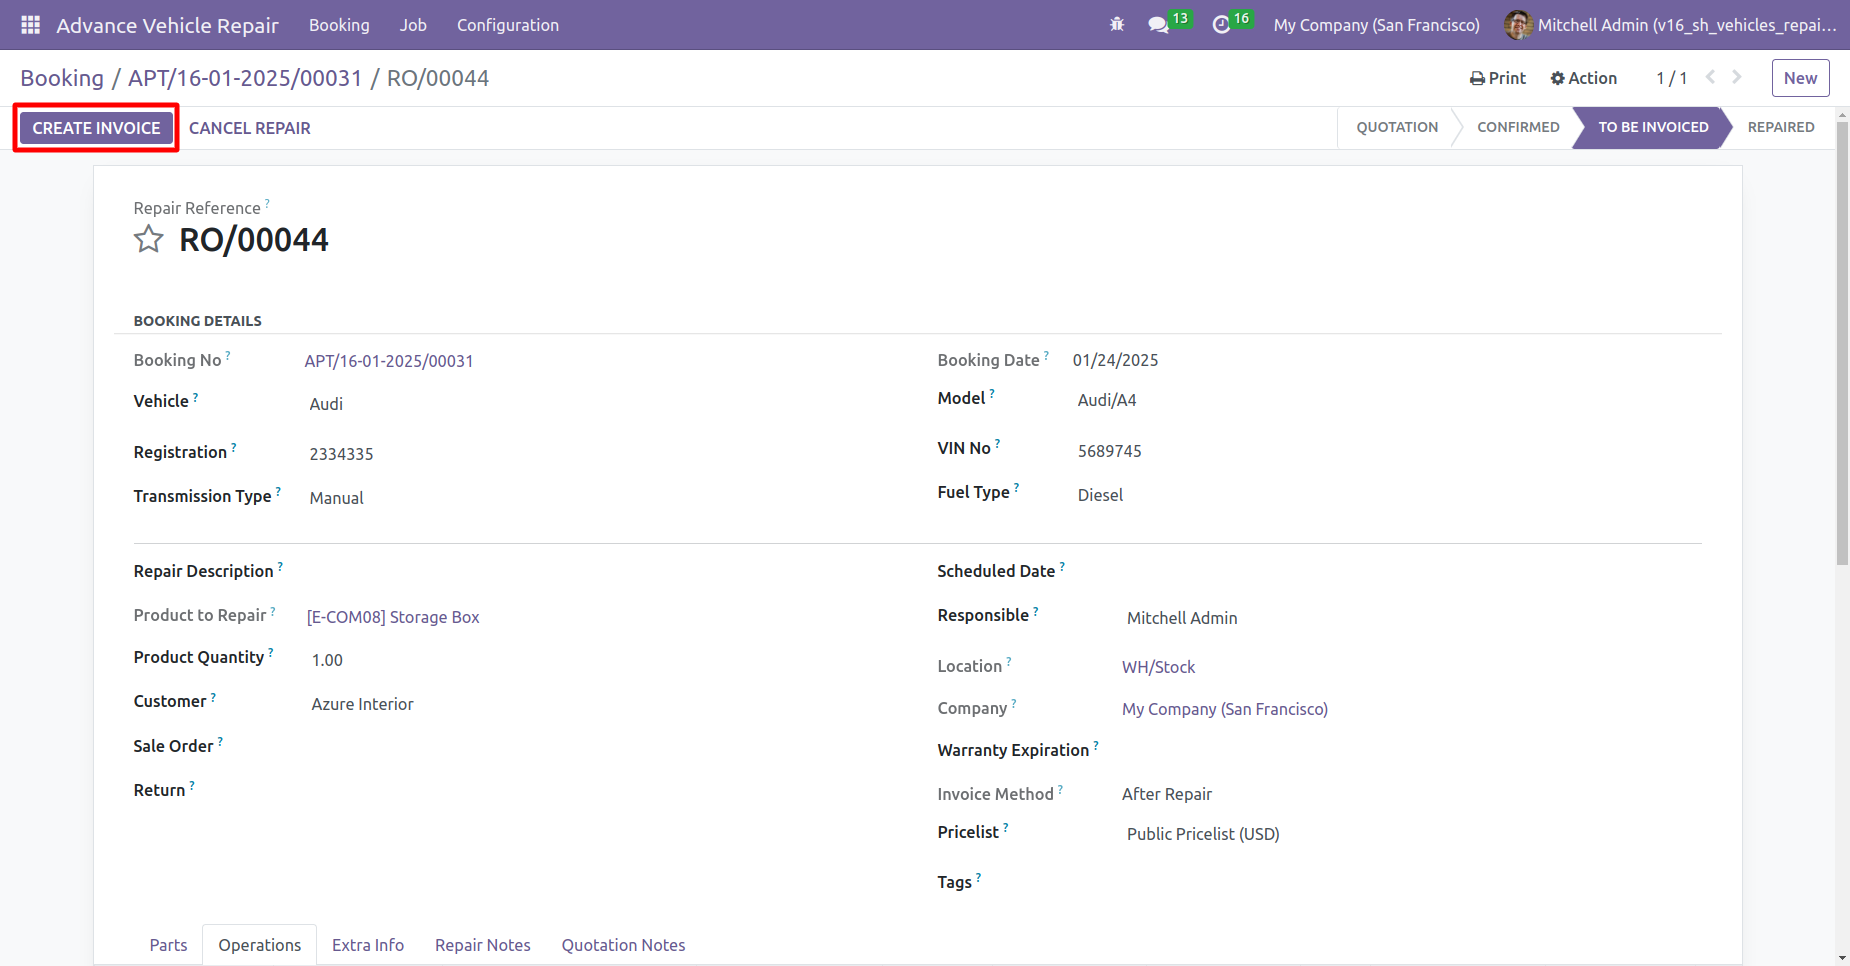
You can print a quotation/repair order by clicking on print.
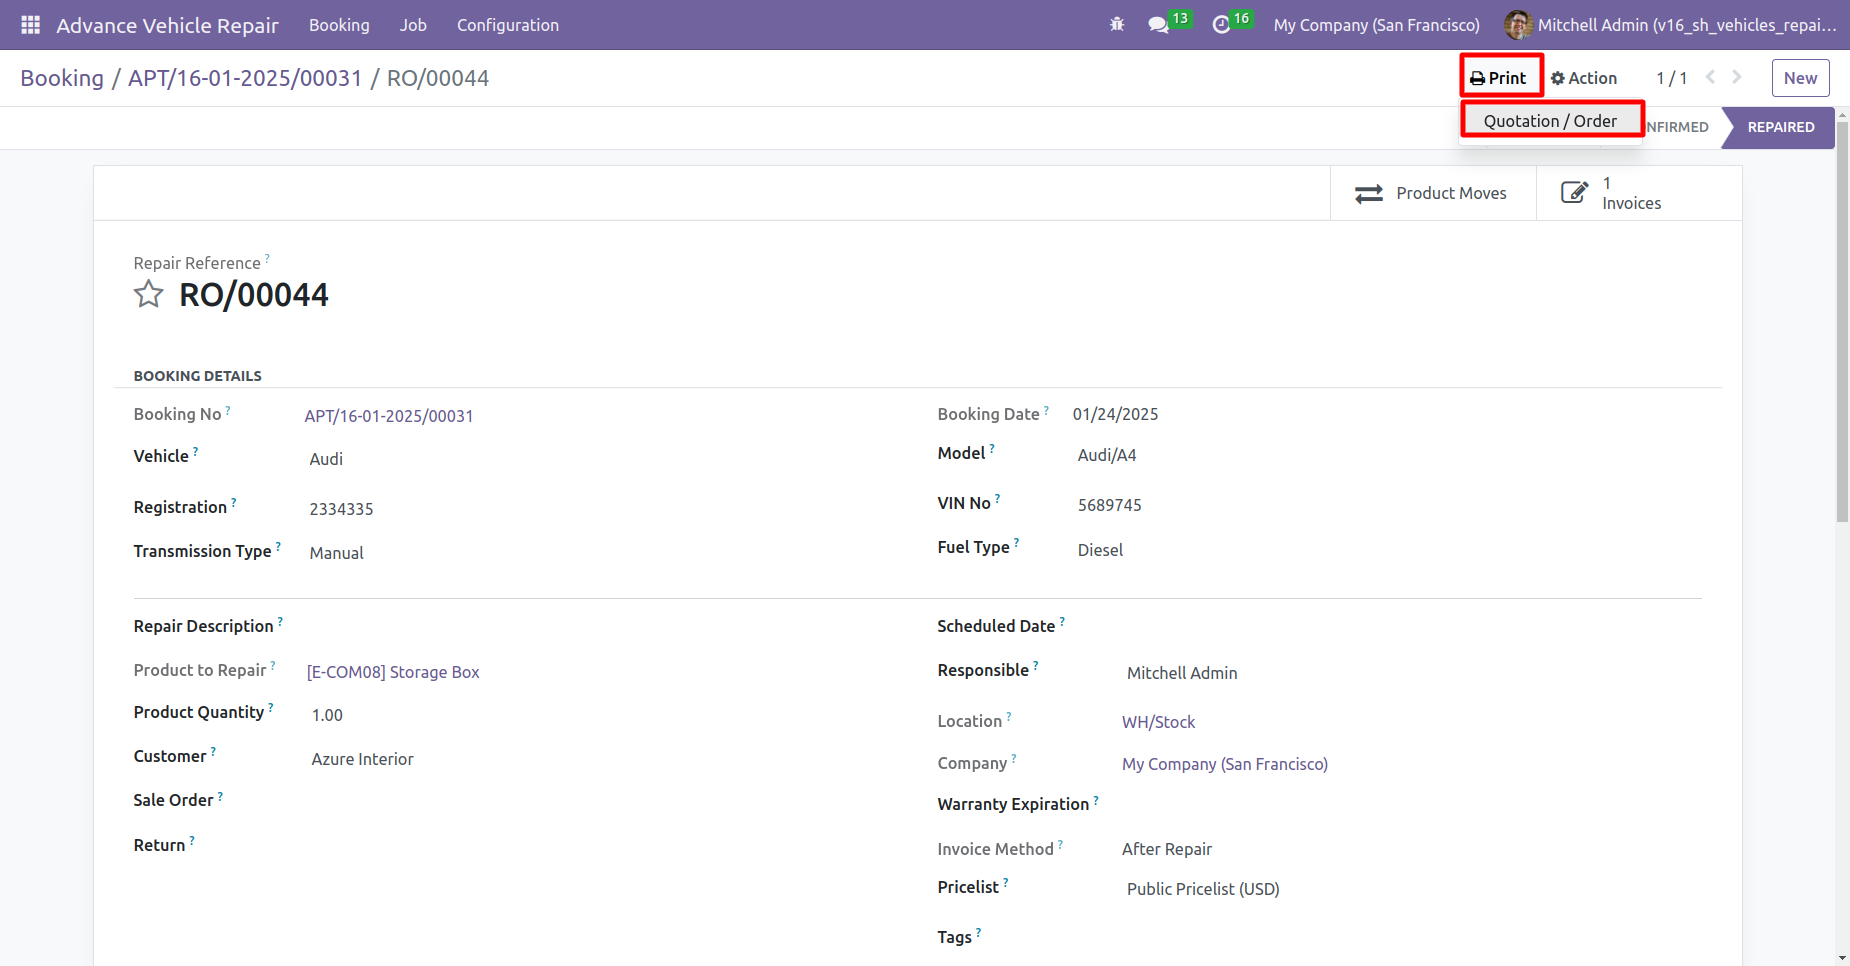
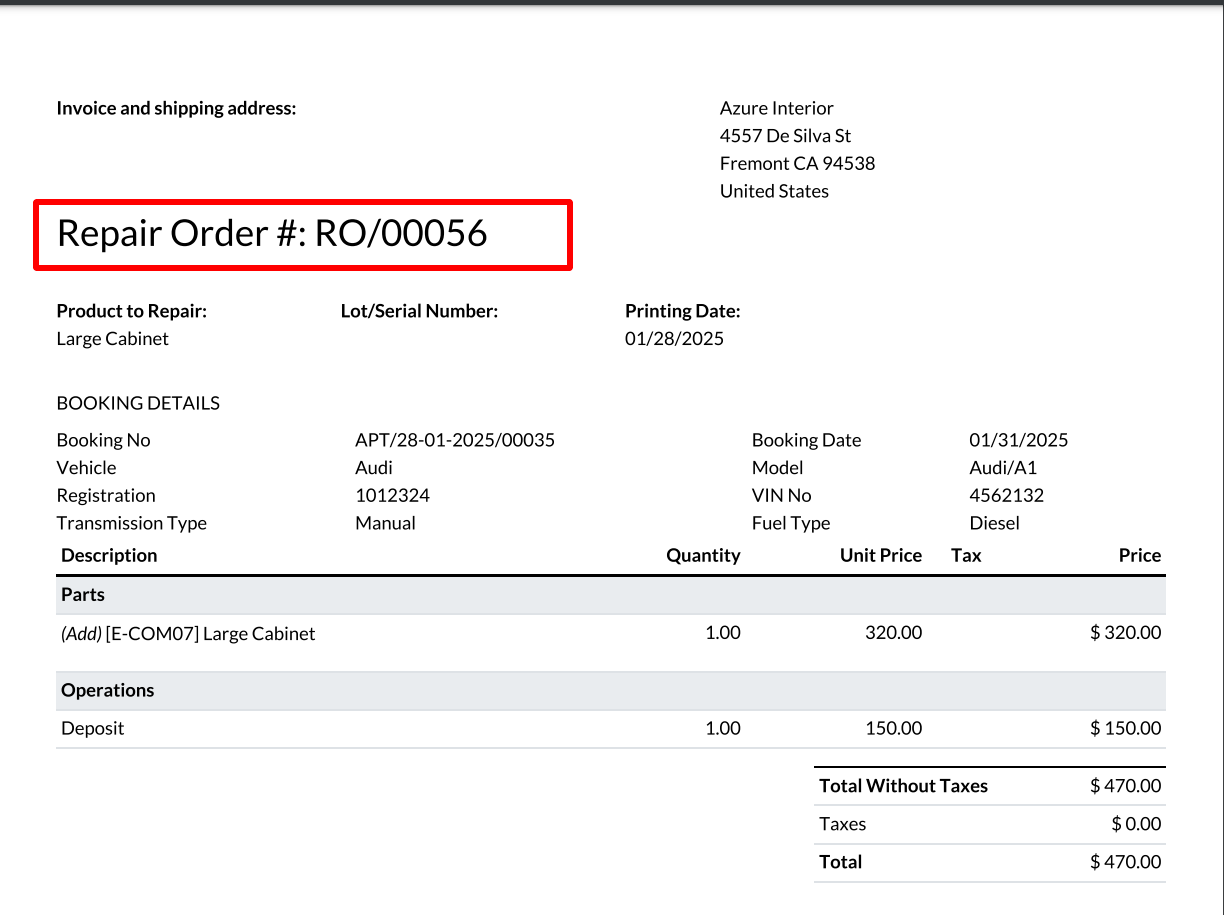
Repairs order with booking details in PDF format.

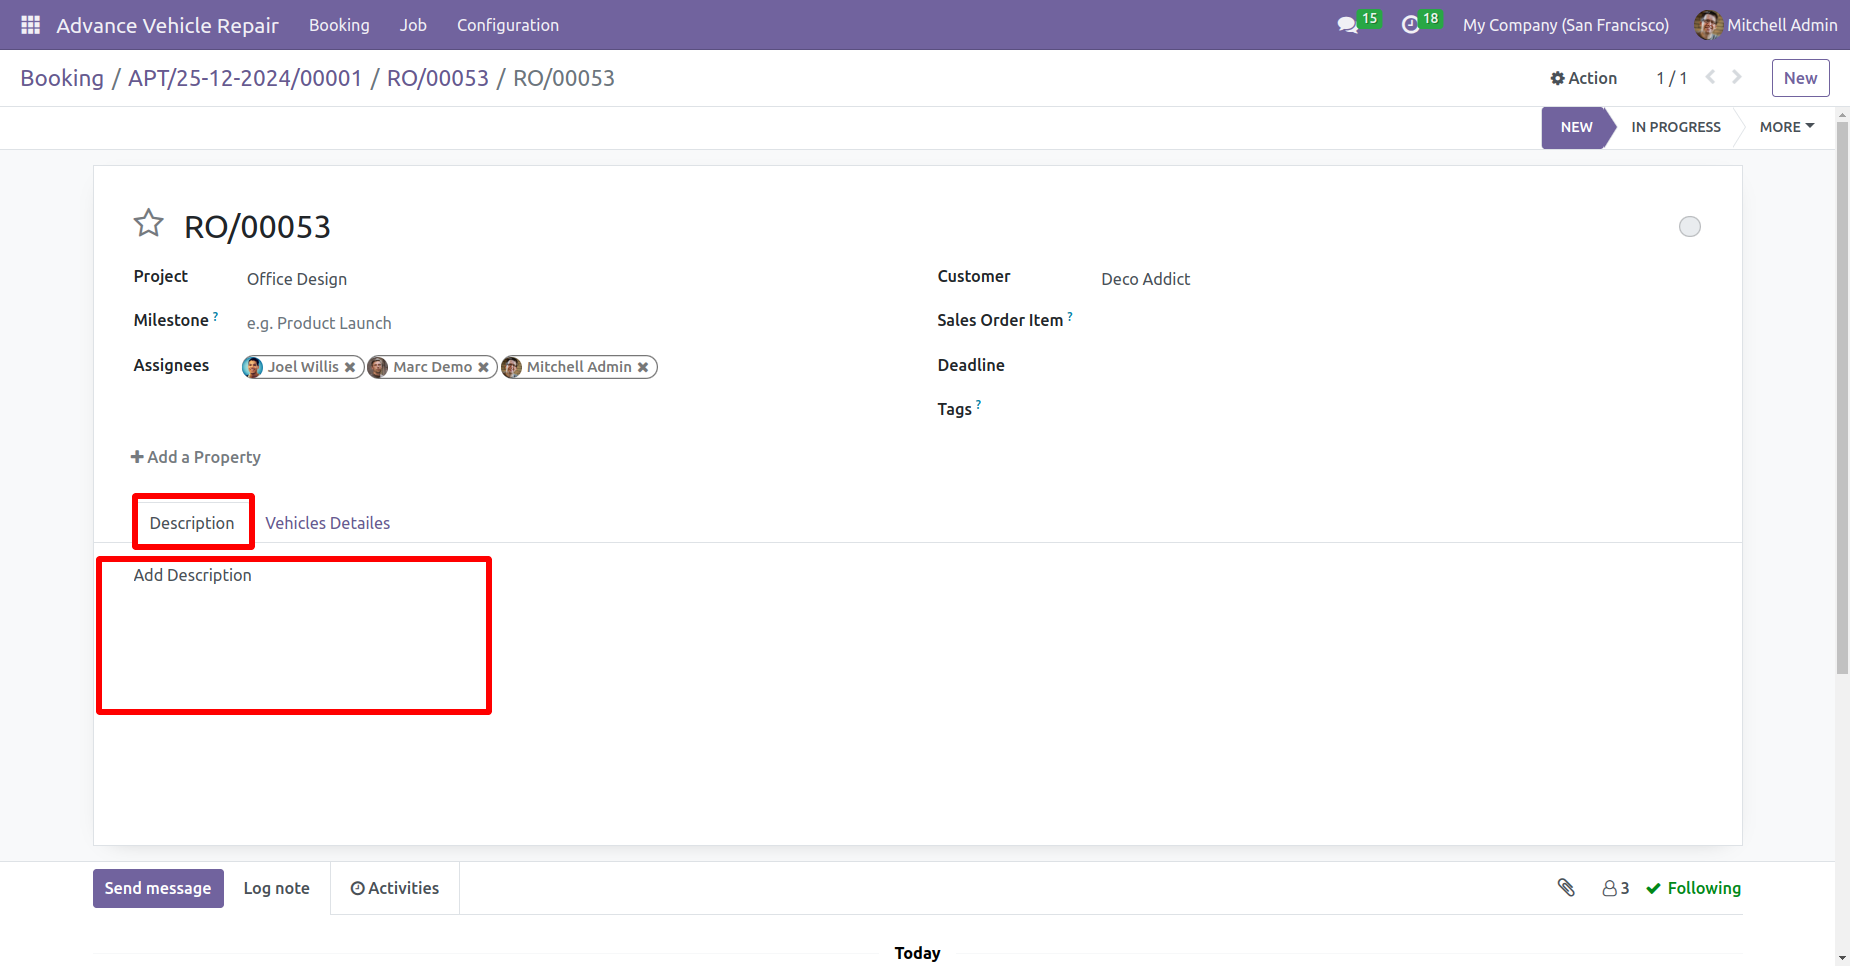
You can add a decription in the repairs order form view.
Repair invoices with booking details and repair products and operations in invoice lines.

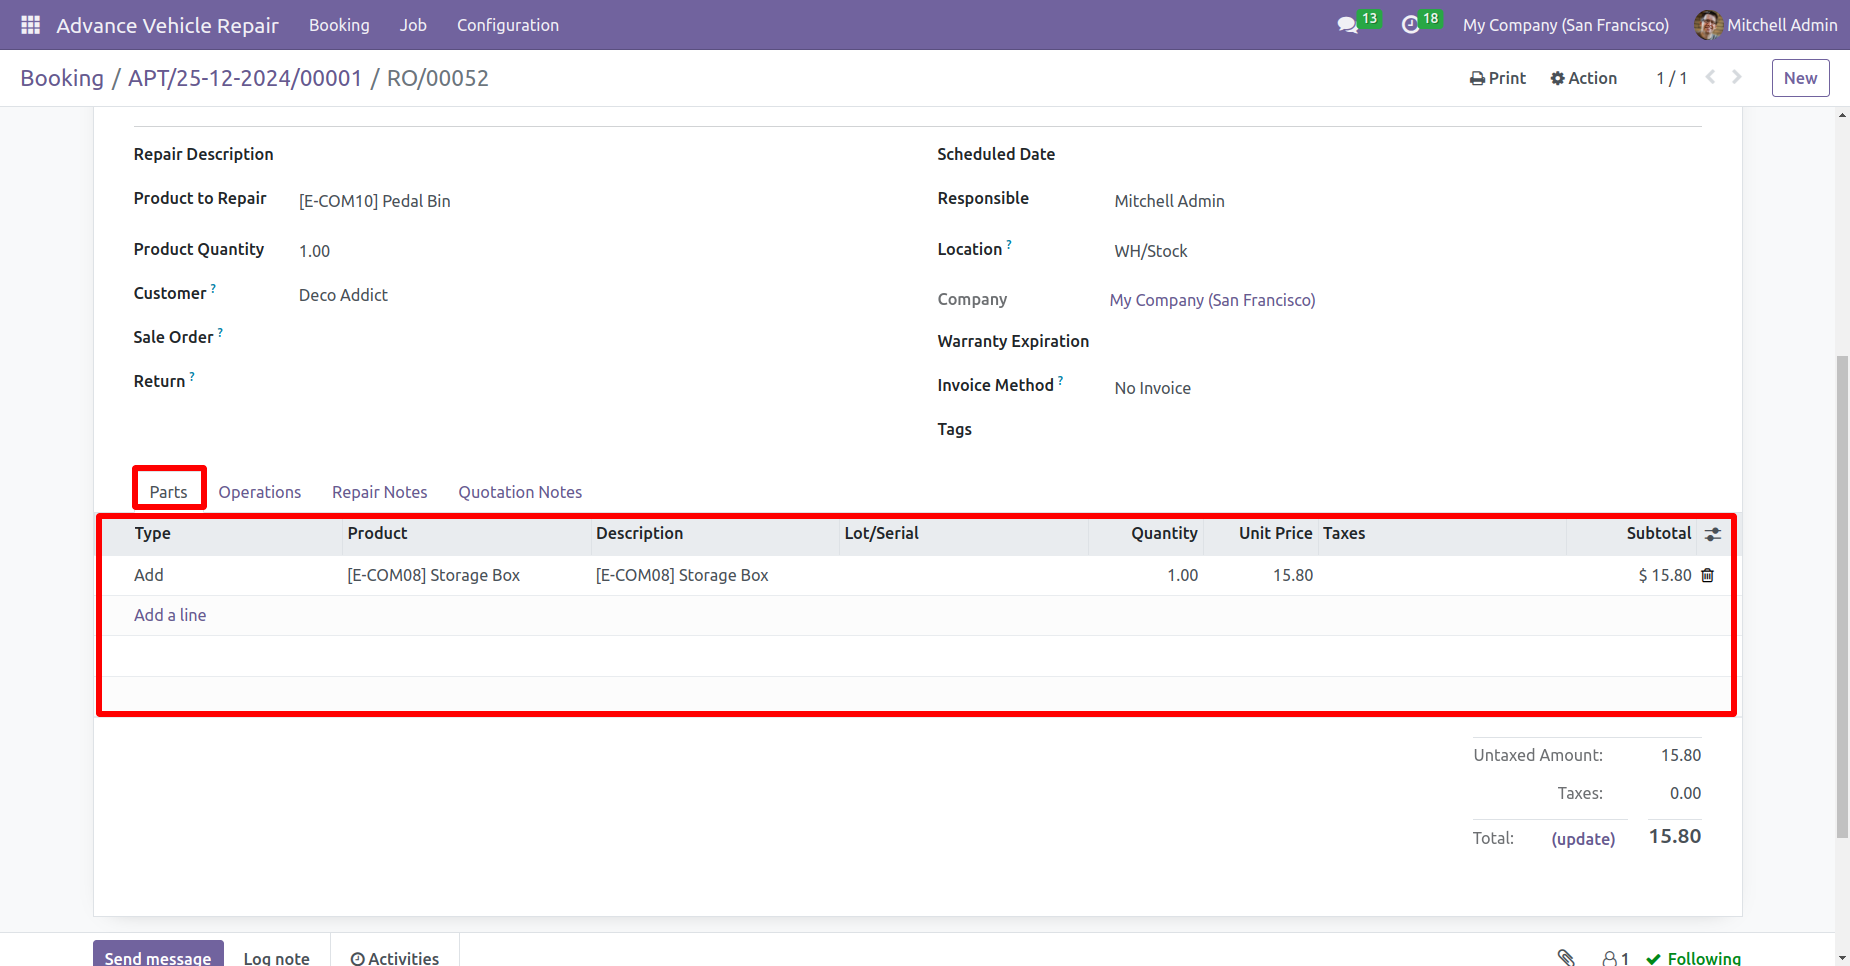
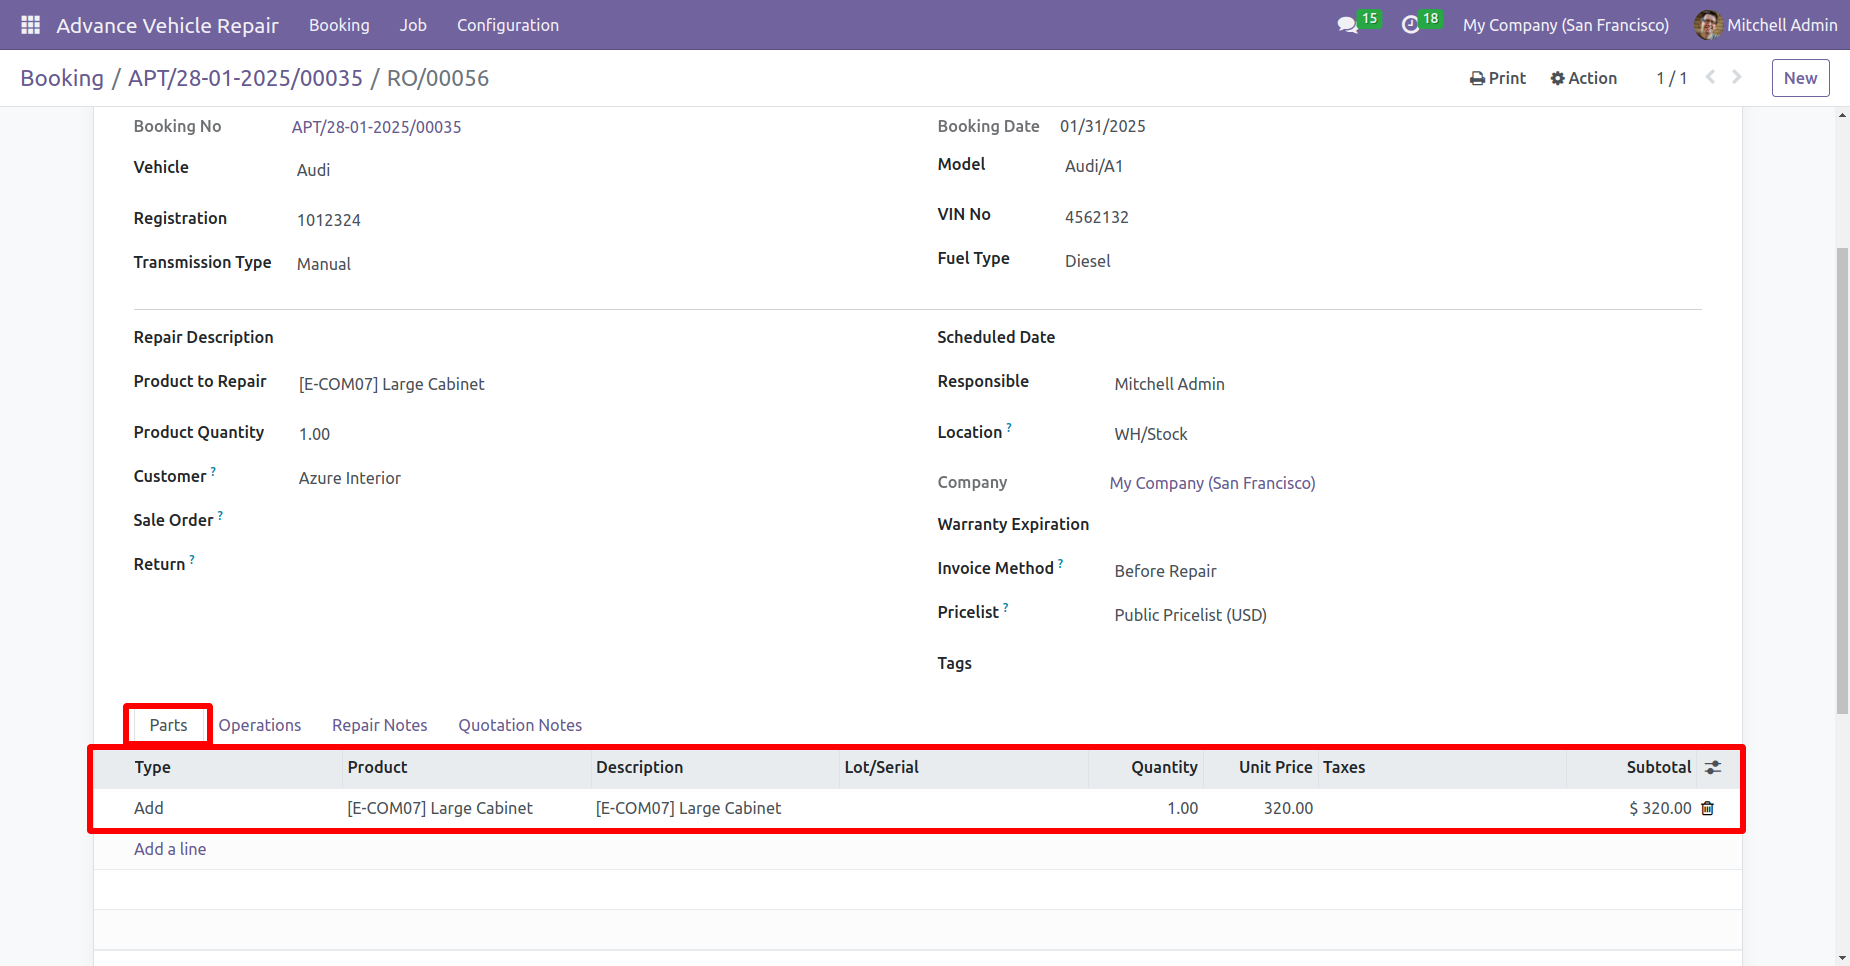
You can add vehicle parts, including the part type, product name, and quantity, by clicking "Add a line" under the 'Parts' tab.
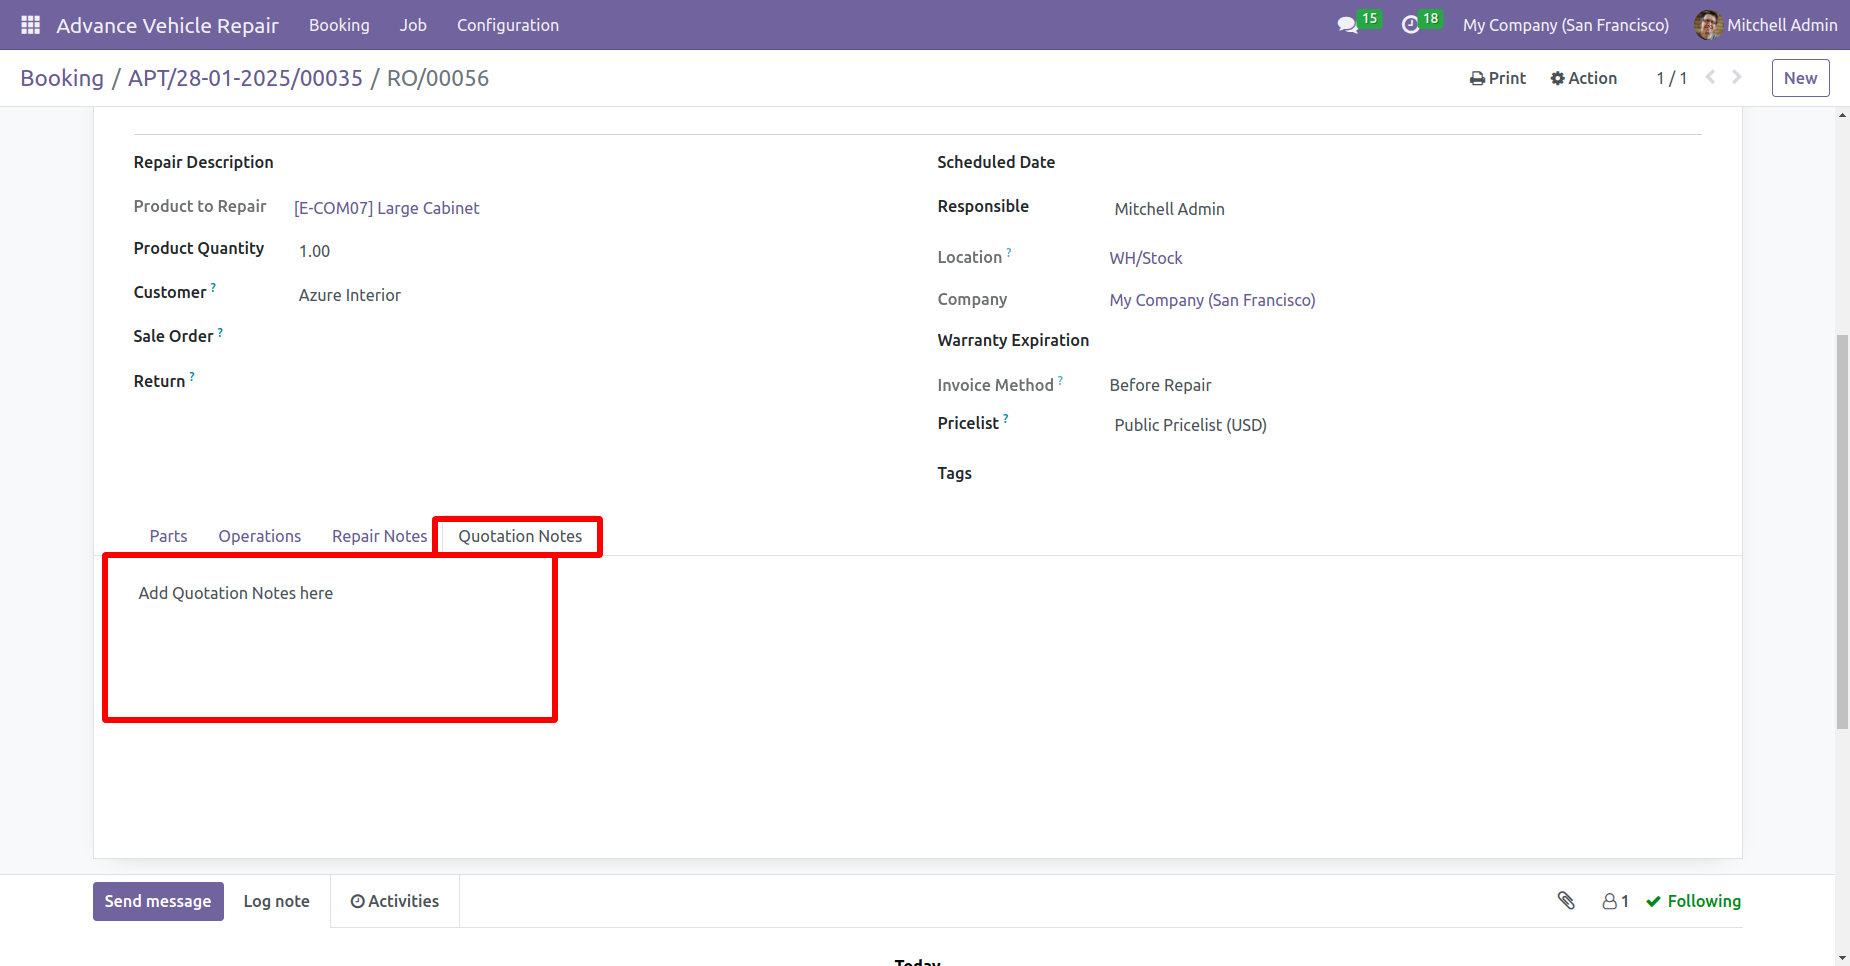
In the repair order form view, you can add a repair note under the 'Repair Notes' tab.
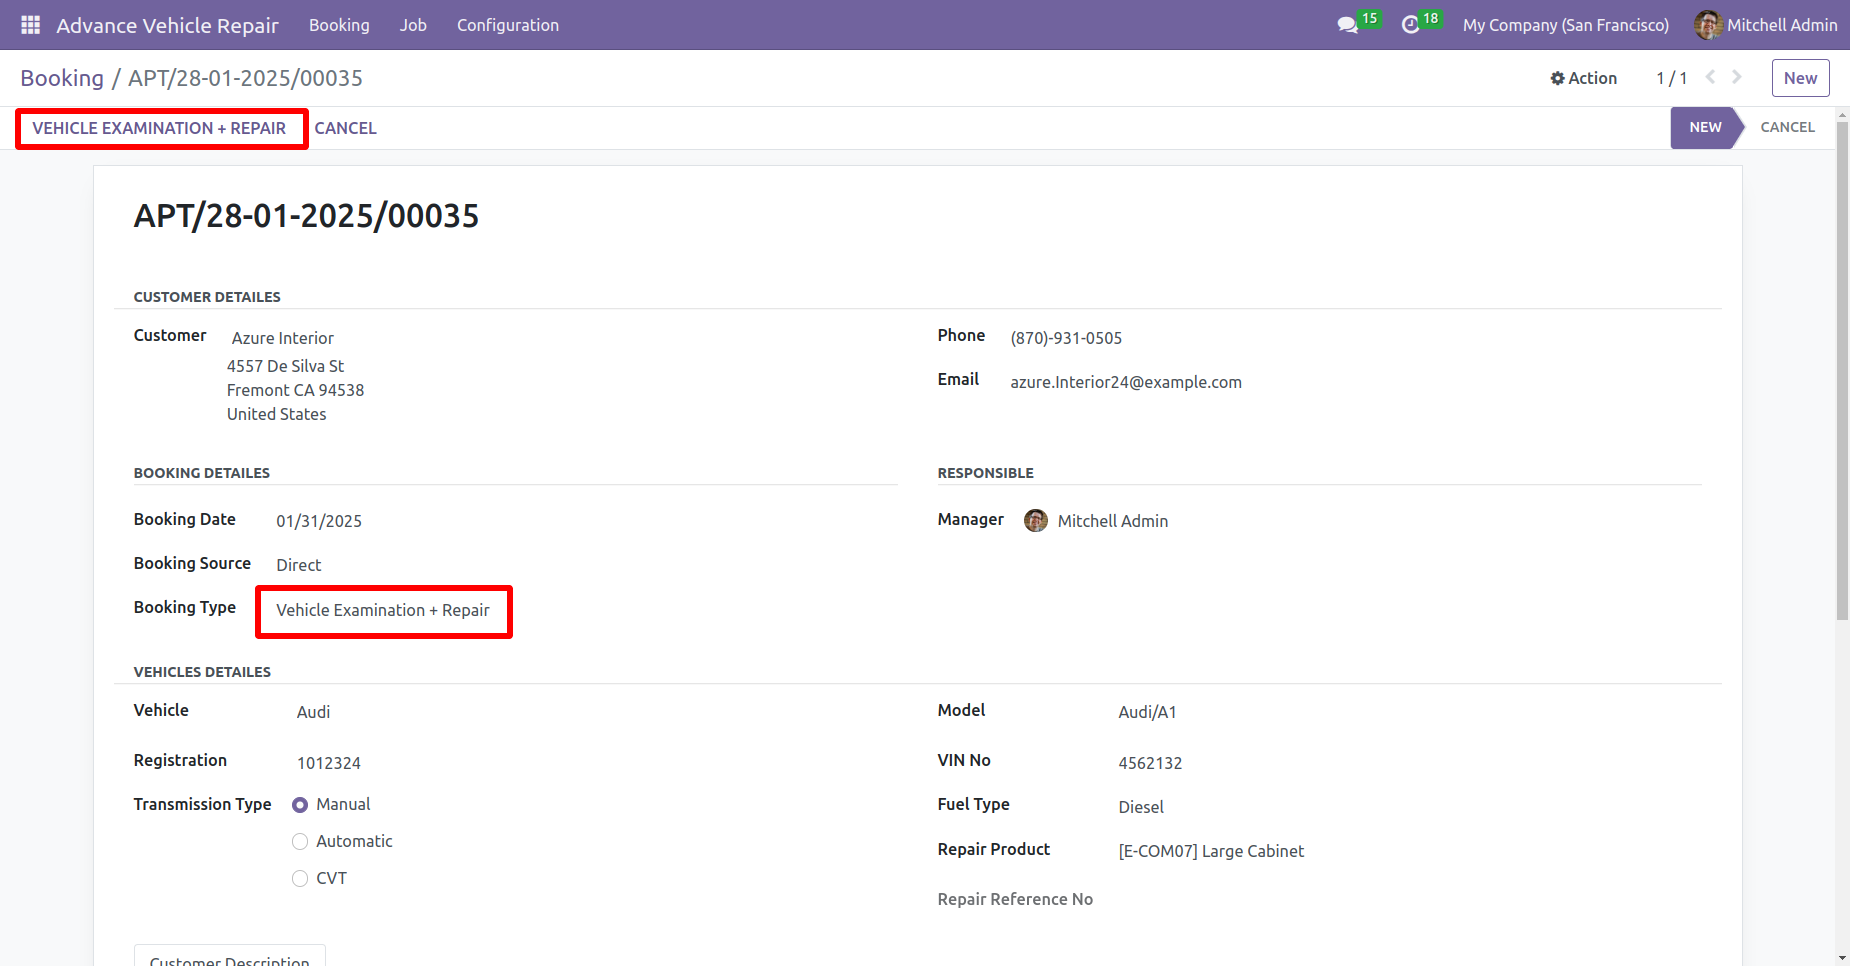
Create a new vehicle booking select vehicle examination + repairs as the booking type and click on the vehicle examination + repair button within the booking form.
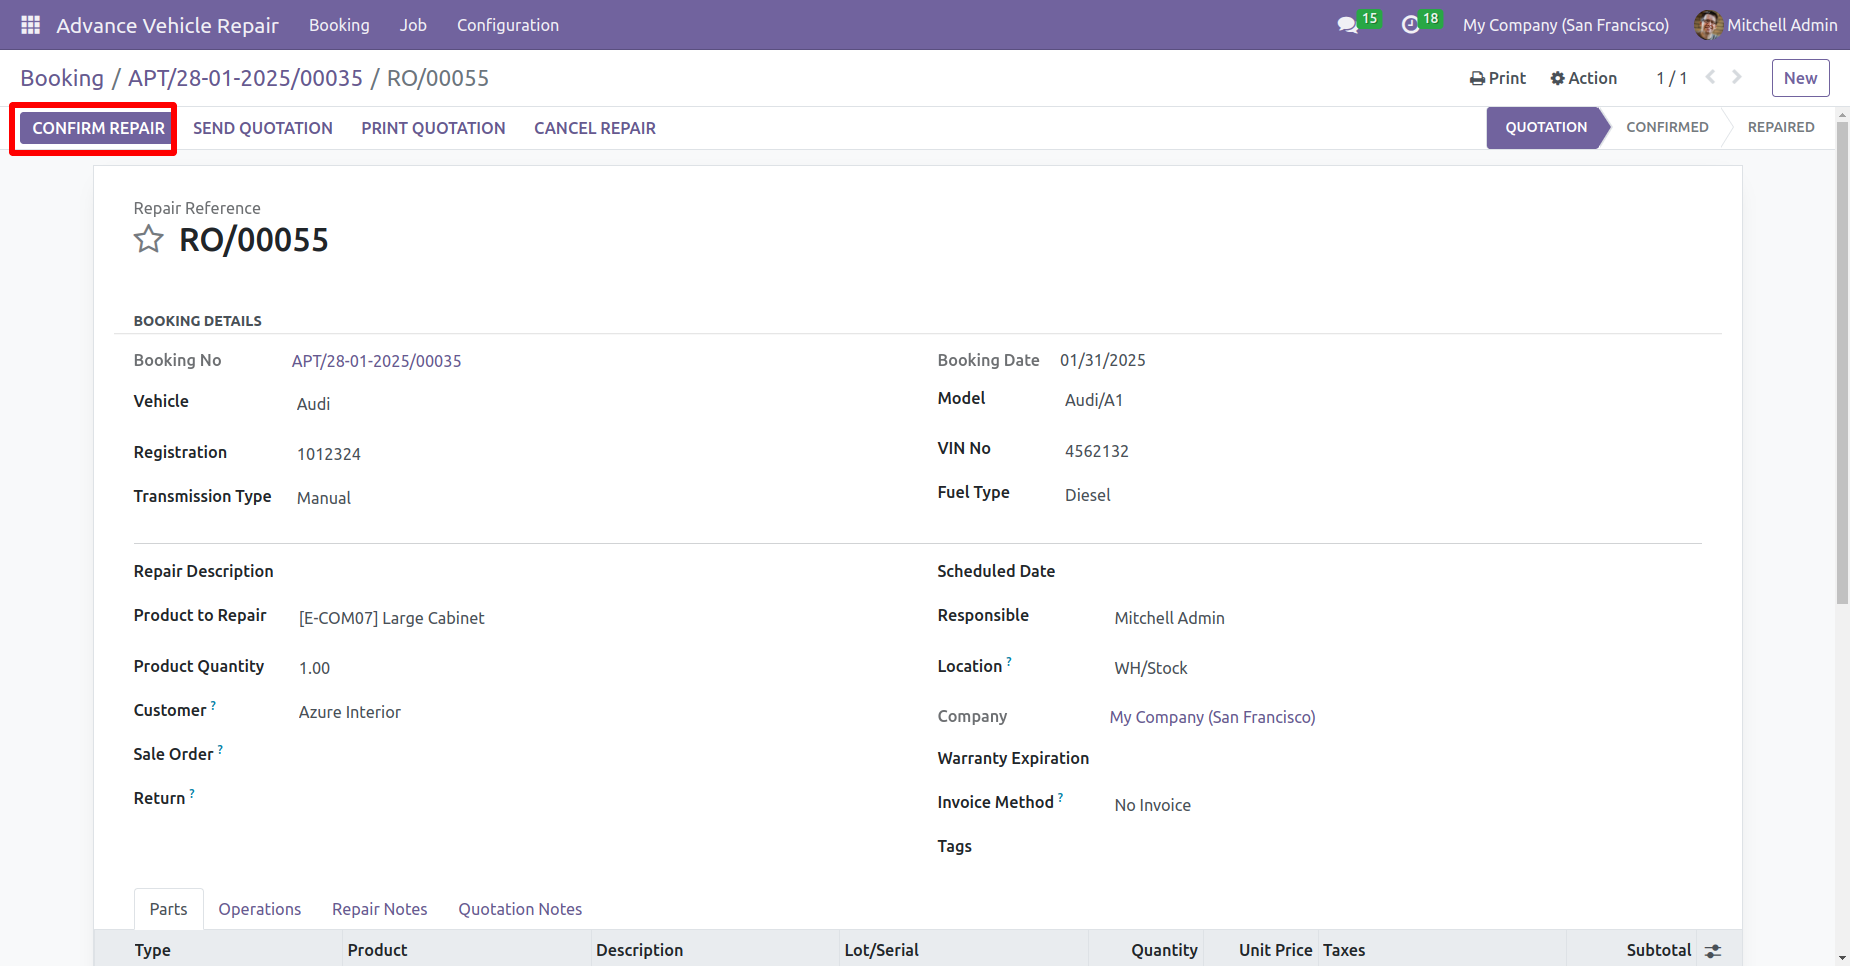
By clicking on the vehicle examinations + repairs button, it will create a repair order with booking details and repair descriptions in the quotation stage and click on the confirm repair button.
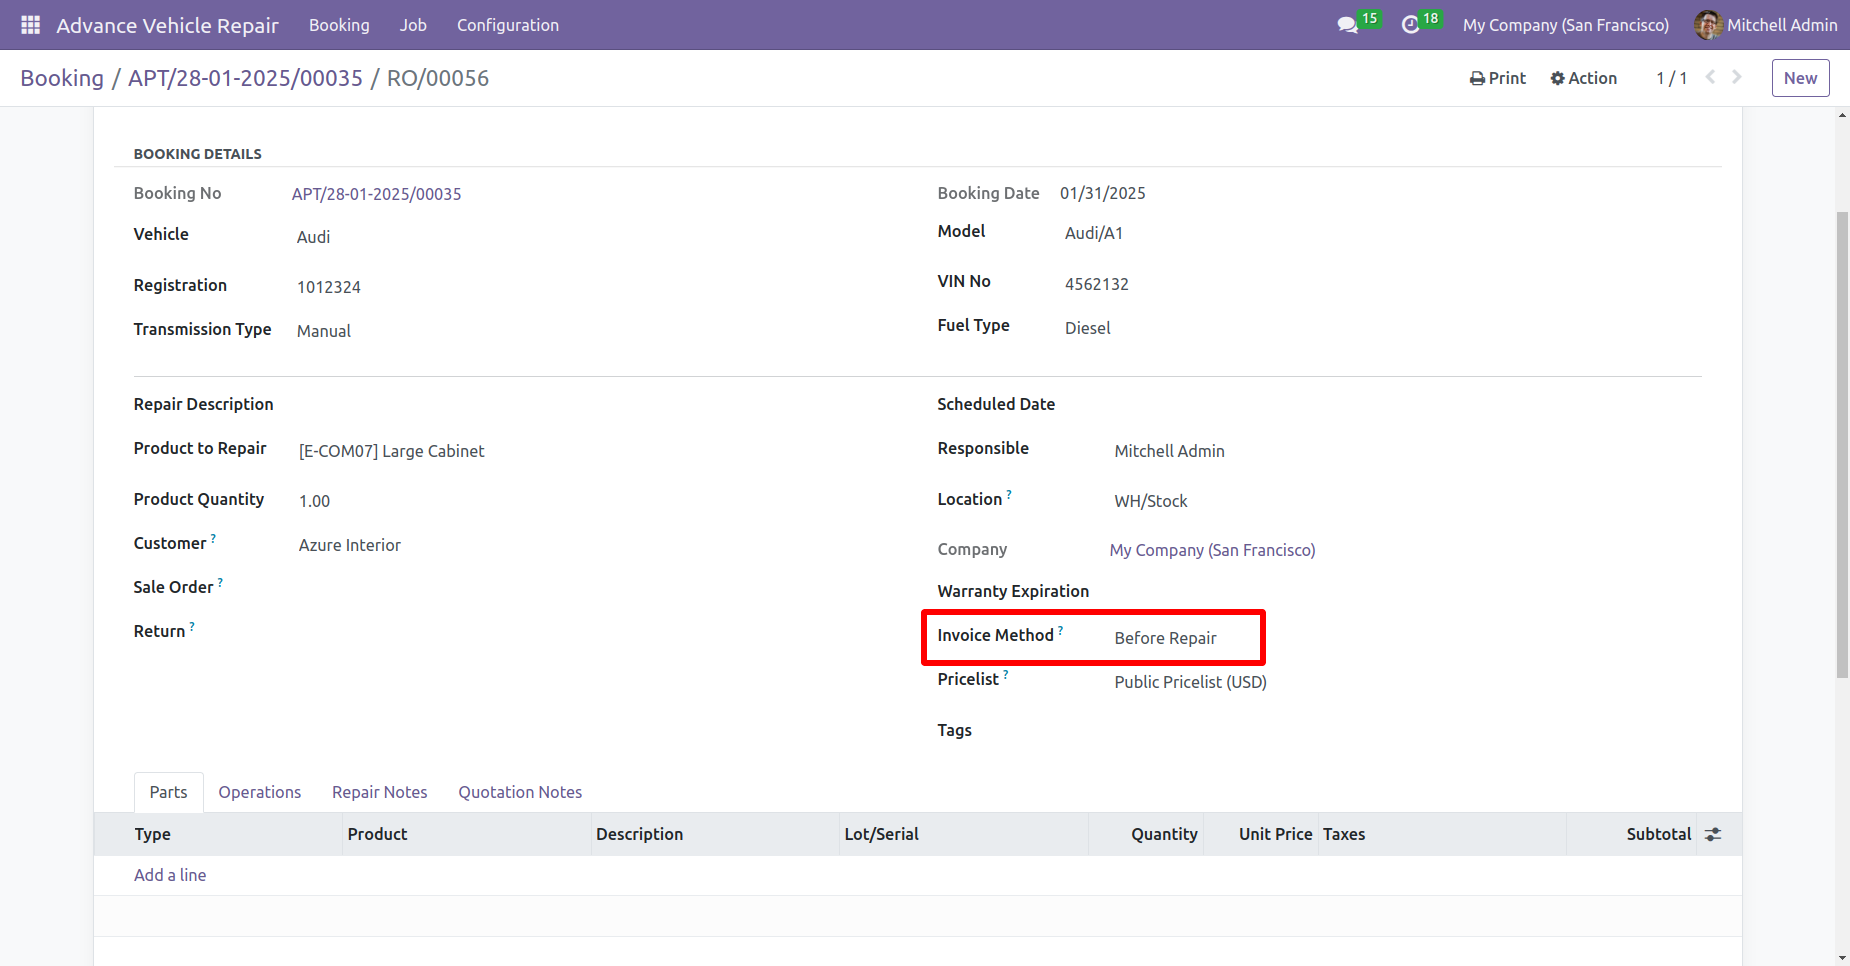
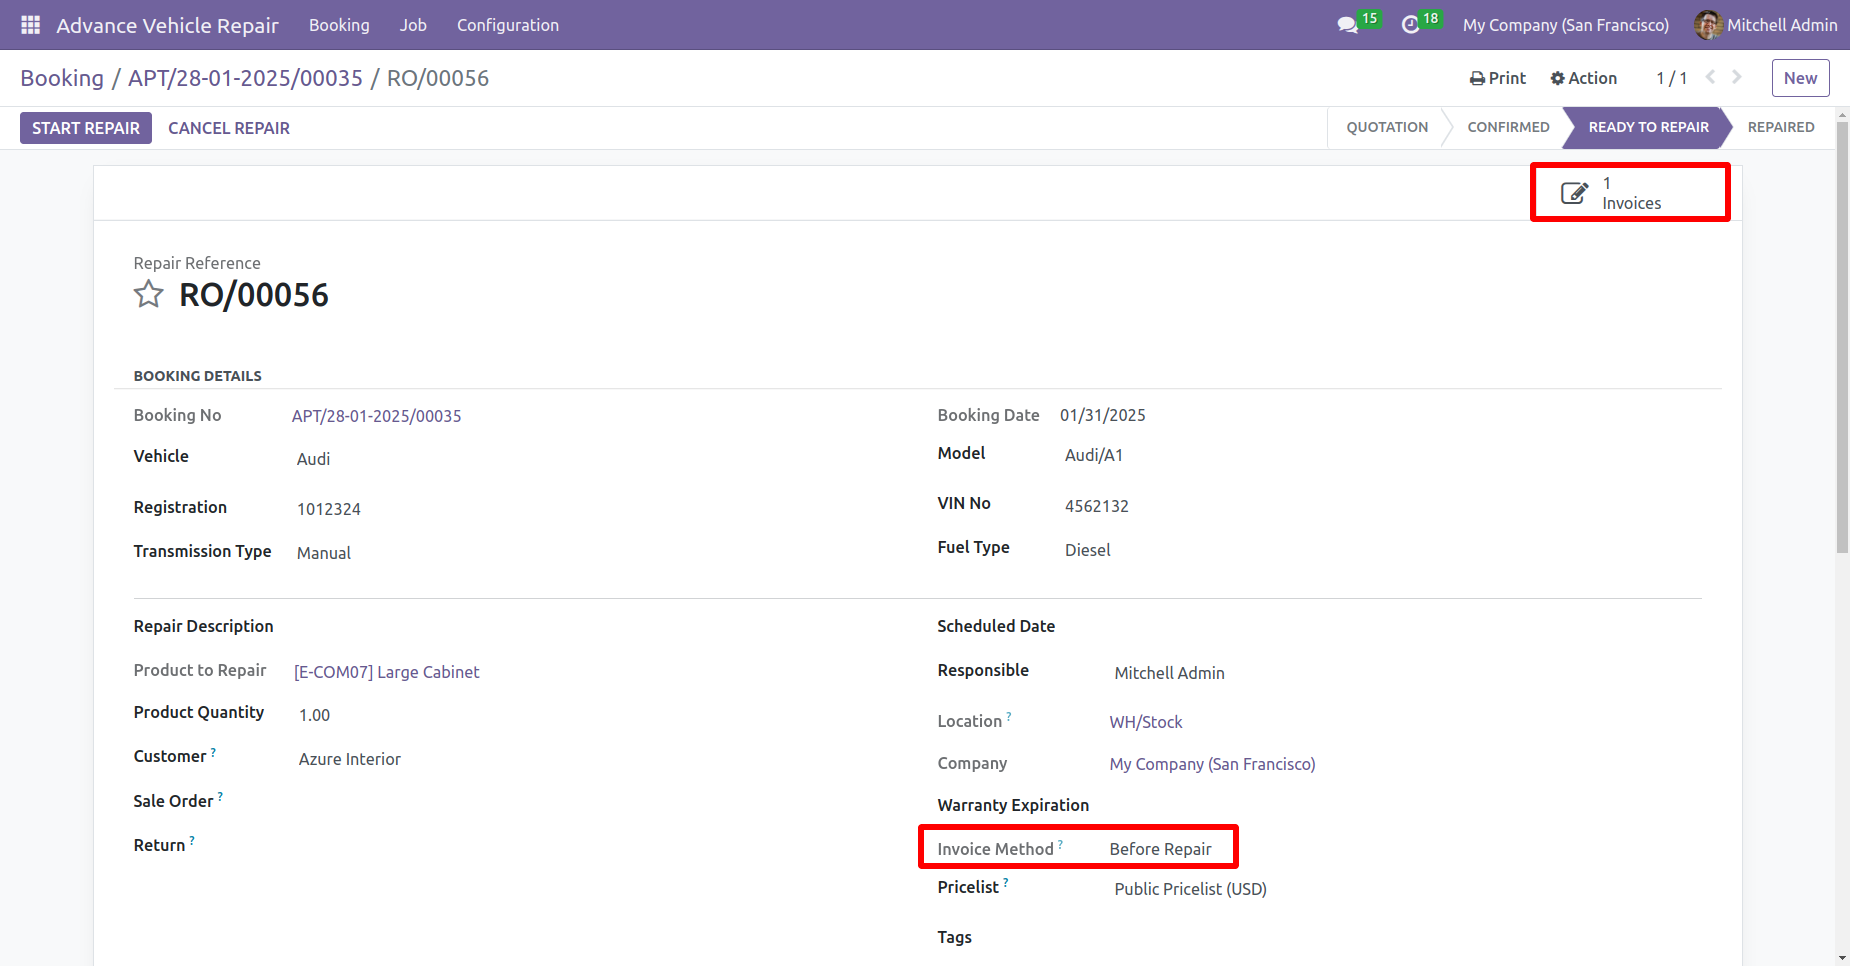
Select the invoice method.
You can add vehicle parts, including the part type, product name, and quantity, by clicking "Add a line" under the 'Parts' tab.
Click on the create invoice button to create a repair invoice.
Click on the 'Invoice' smart button to view the invoice.
Click on the 'End Repair' button.
You can print a quotation/repair order by clicking on print.
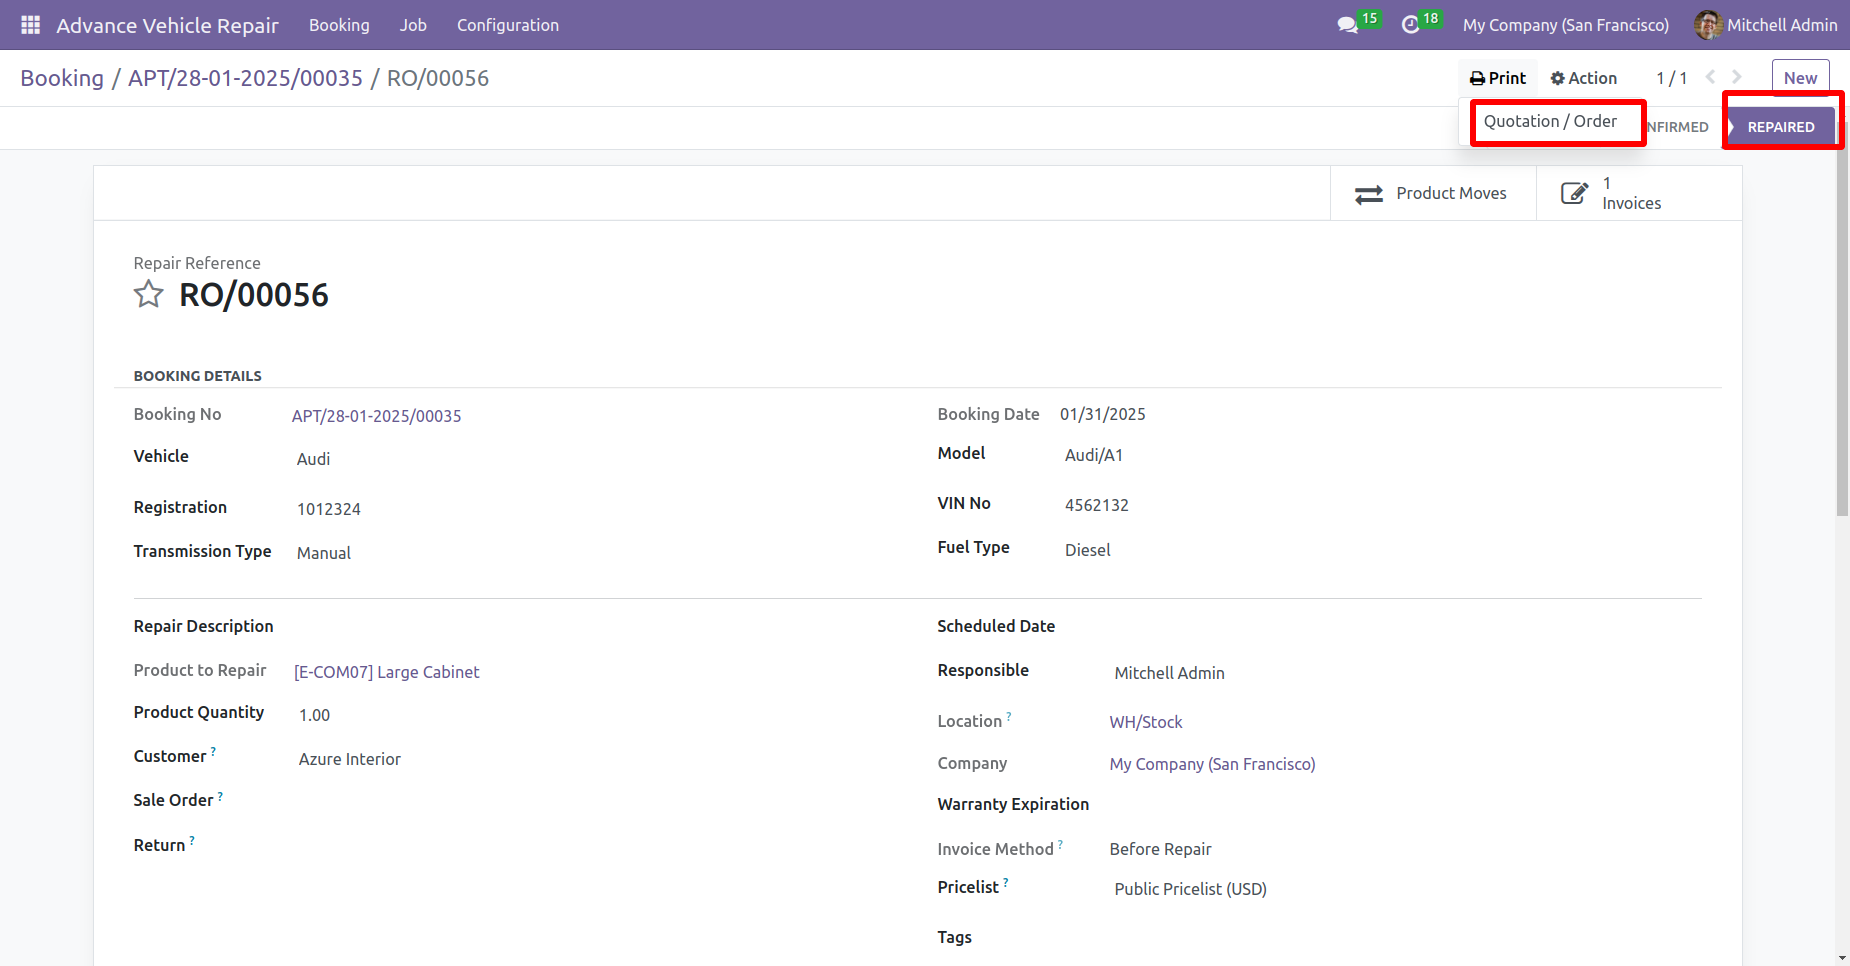
Repairs order with booking details in PDF format.
In the repair order form view, the quotation note can be found under the 'Quotation Notes' tab.
Repair invoices with booking details and repair products and operations in invoice lines.
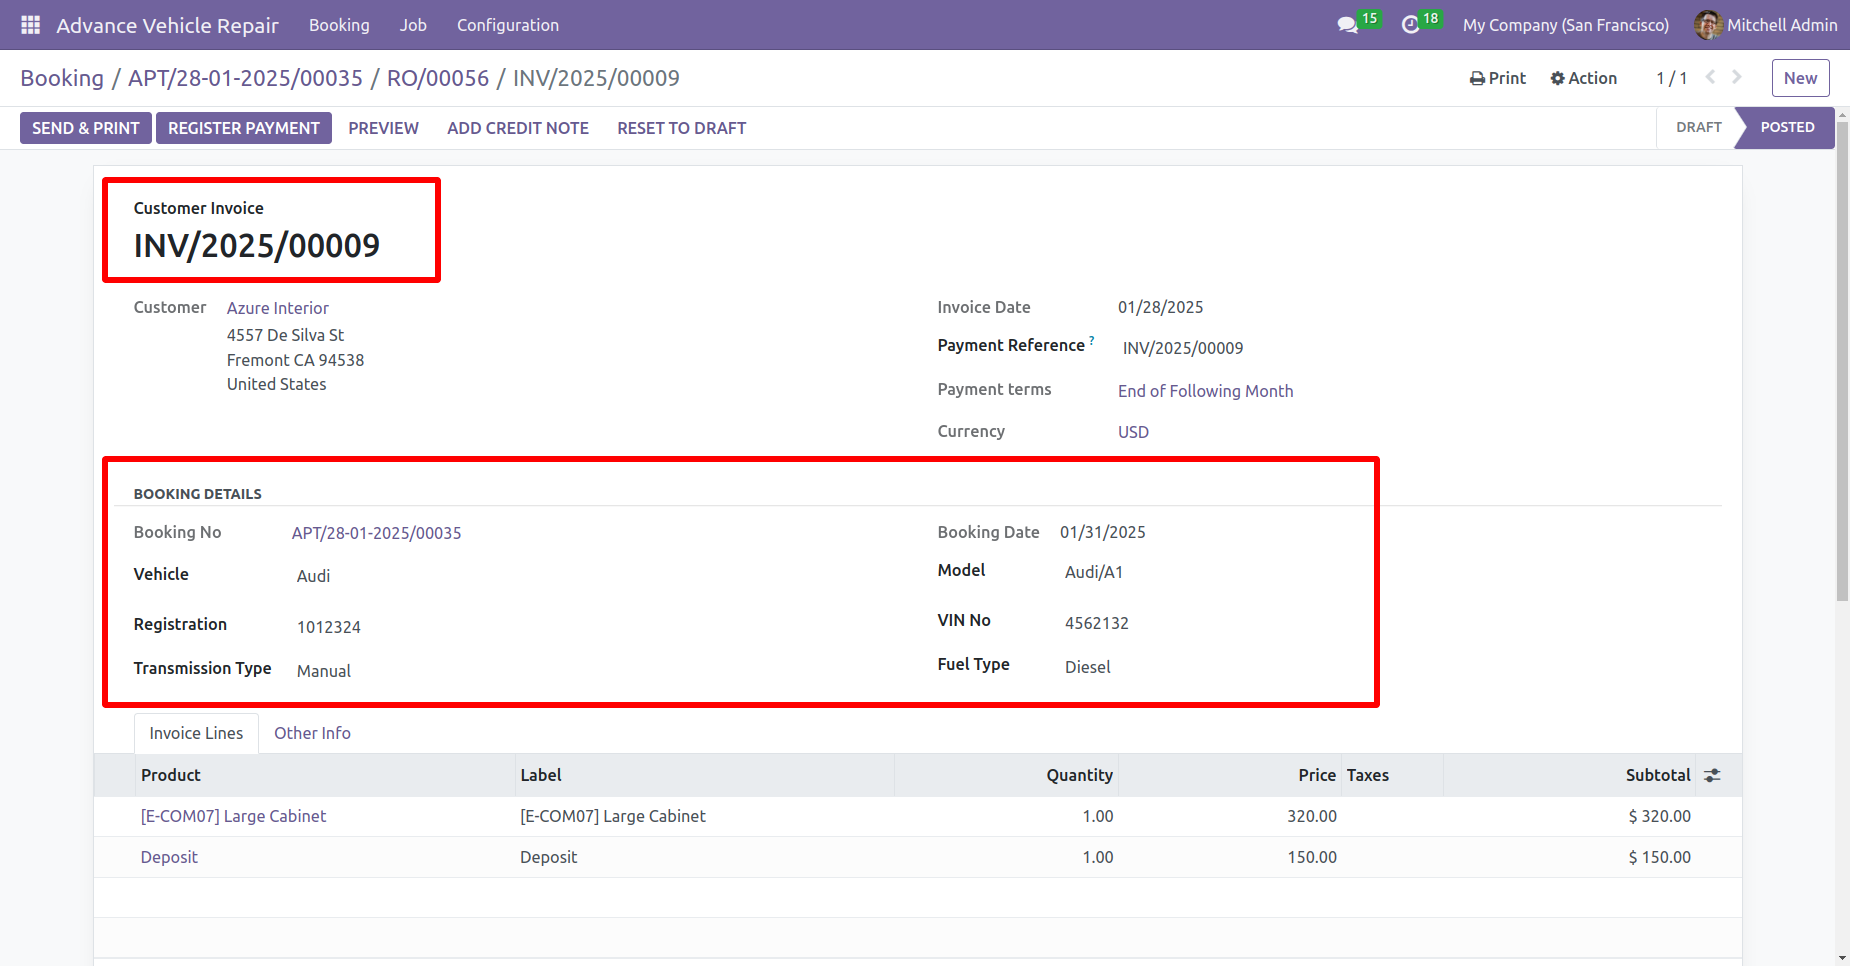
Repairs invoice with booking details in PDF format.
Repairs invoice with booking details in PDF format.
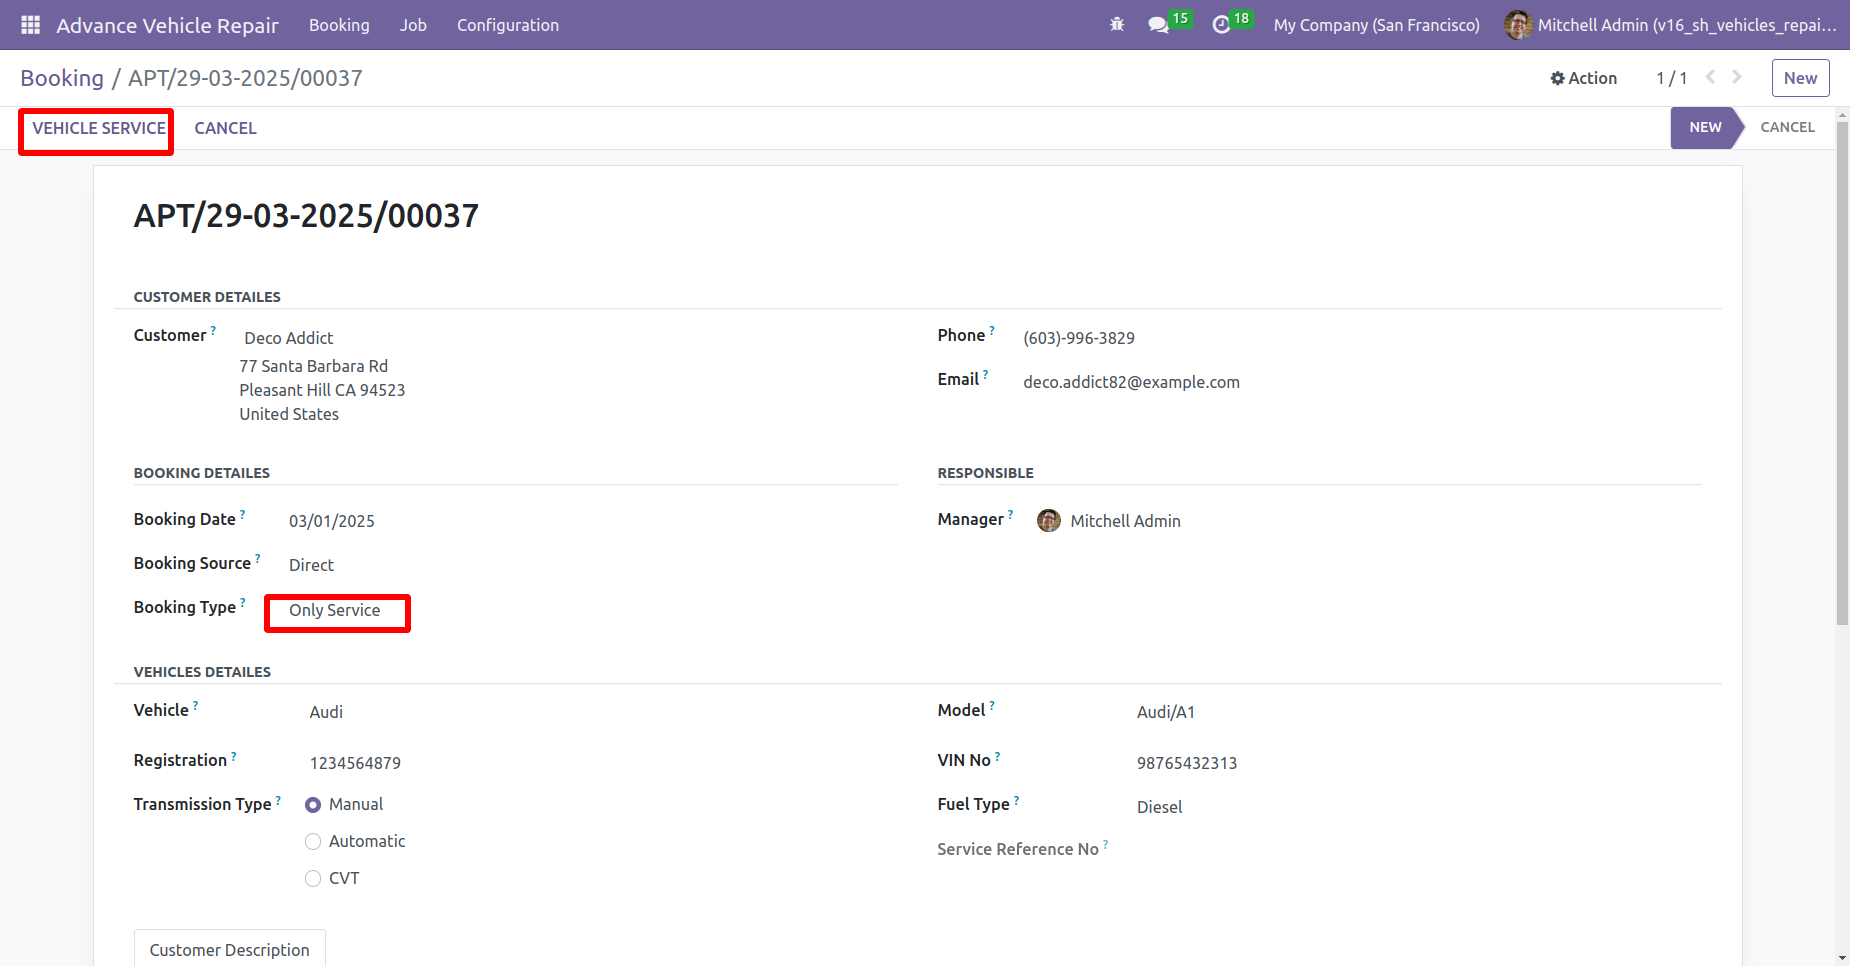
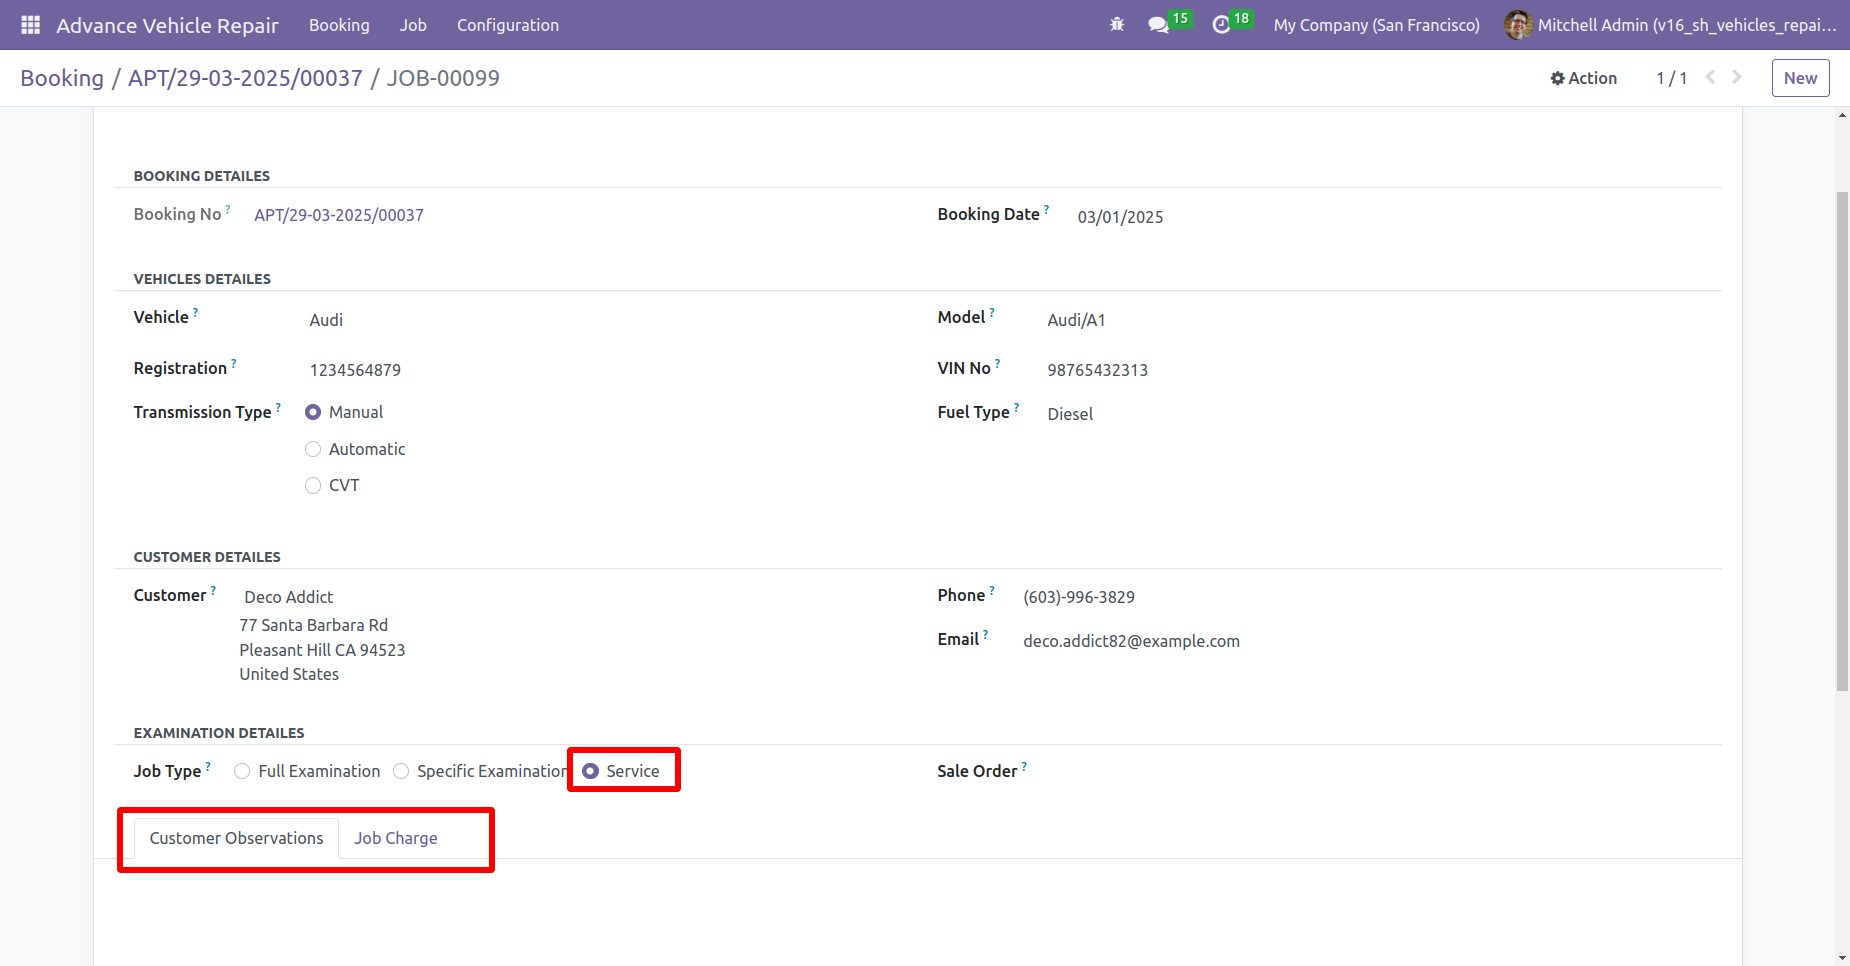
Create a new vehicle booking with the specified booking type service.
You can fill in all necessary details, select only vehicle service as the booking type and click on
the vehicle service button within the booking form.
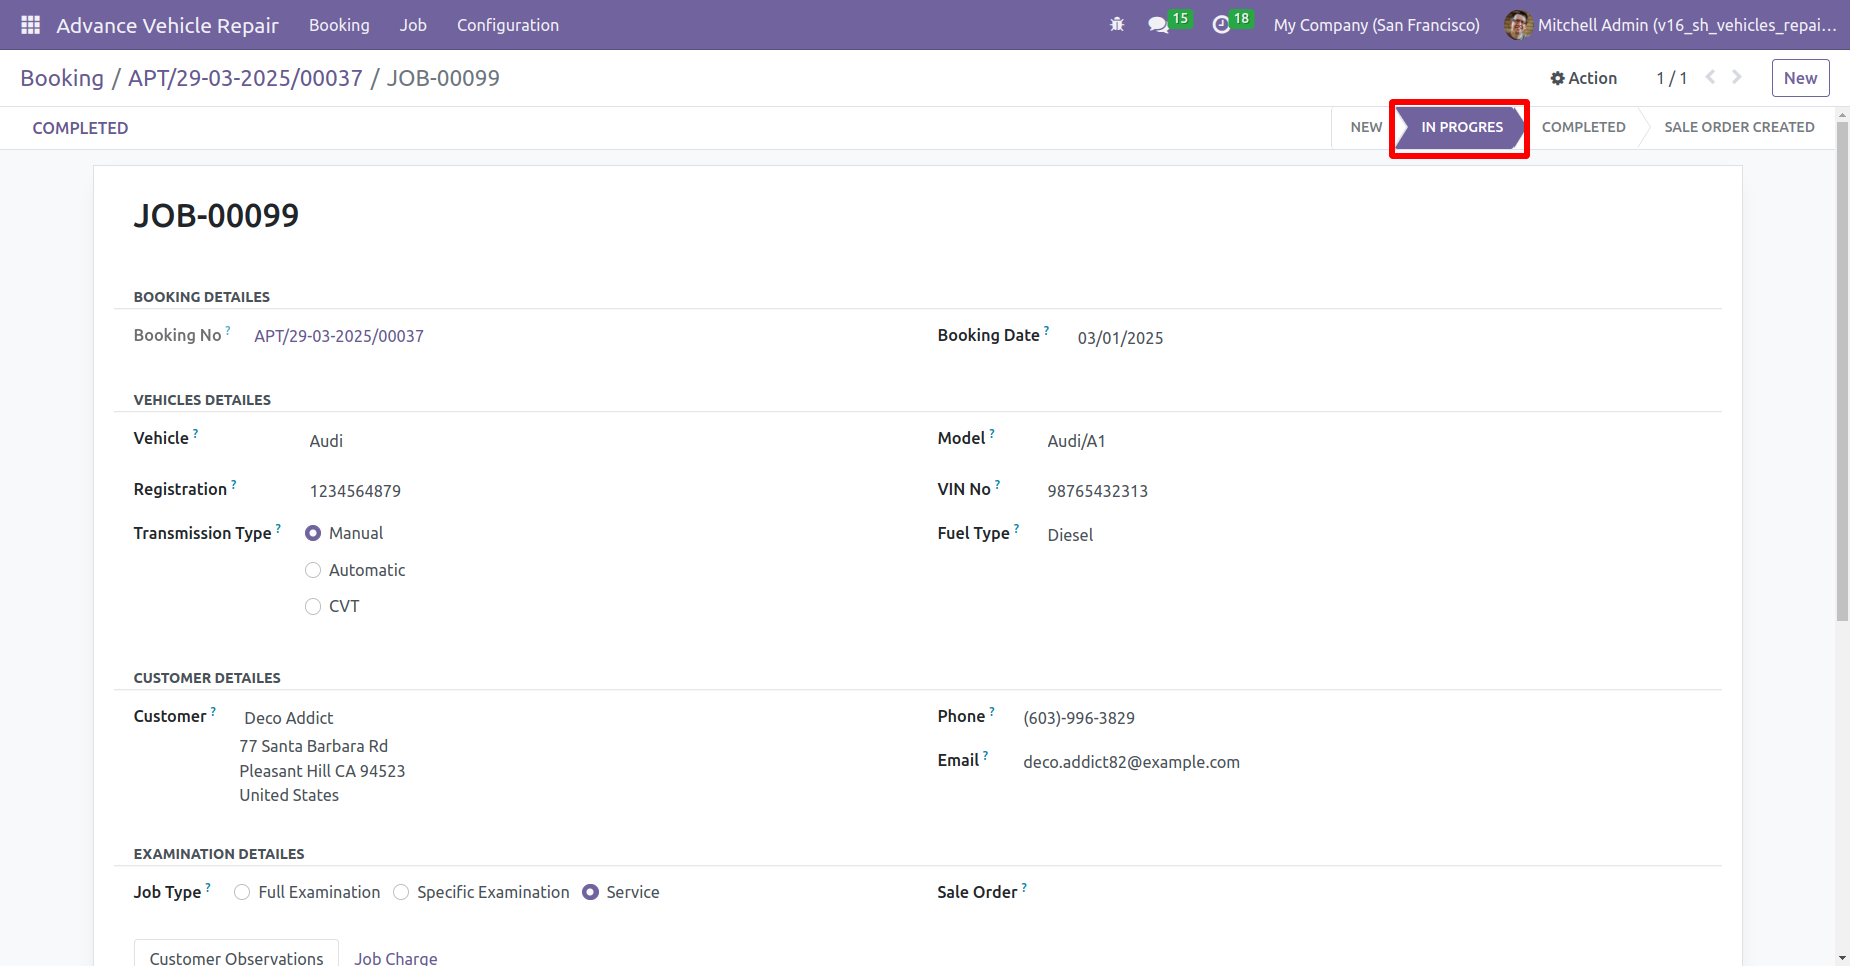
By clicking on the vehicle service button, it automatically creates a job card with booking, customer and vehicle information and click on the in progress button.
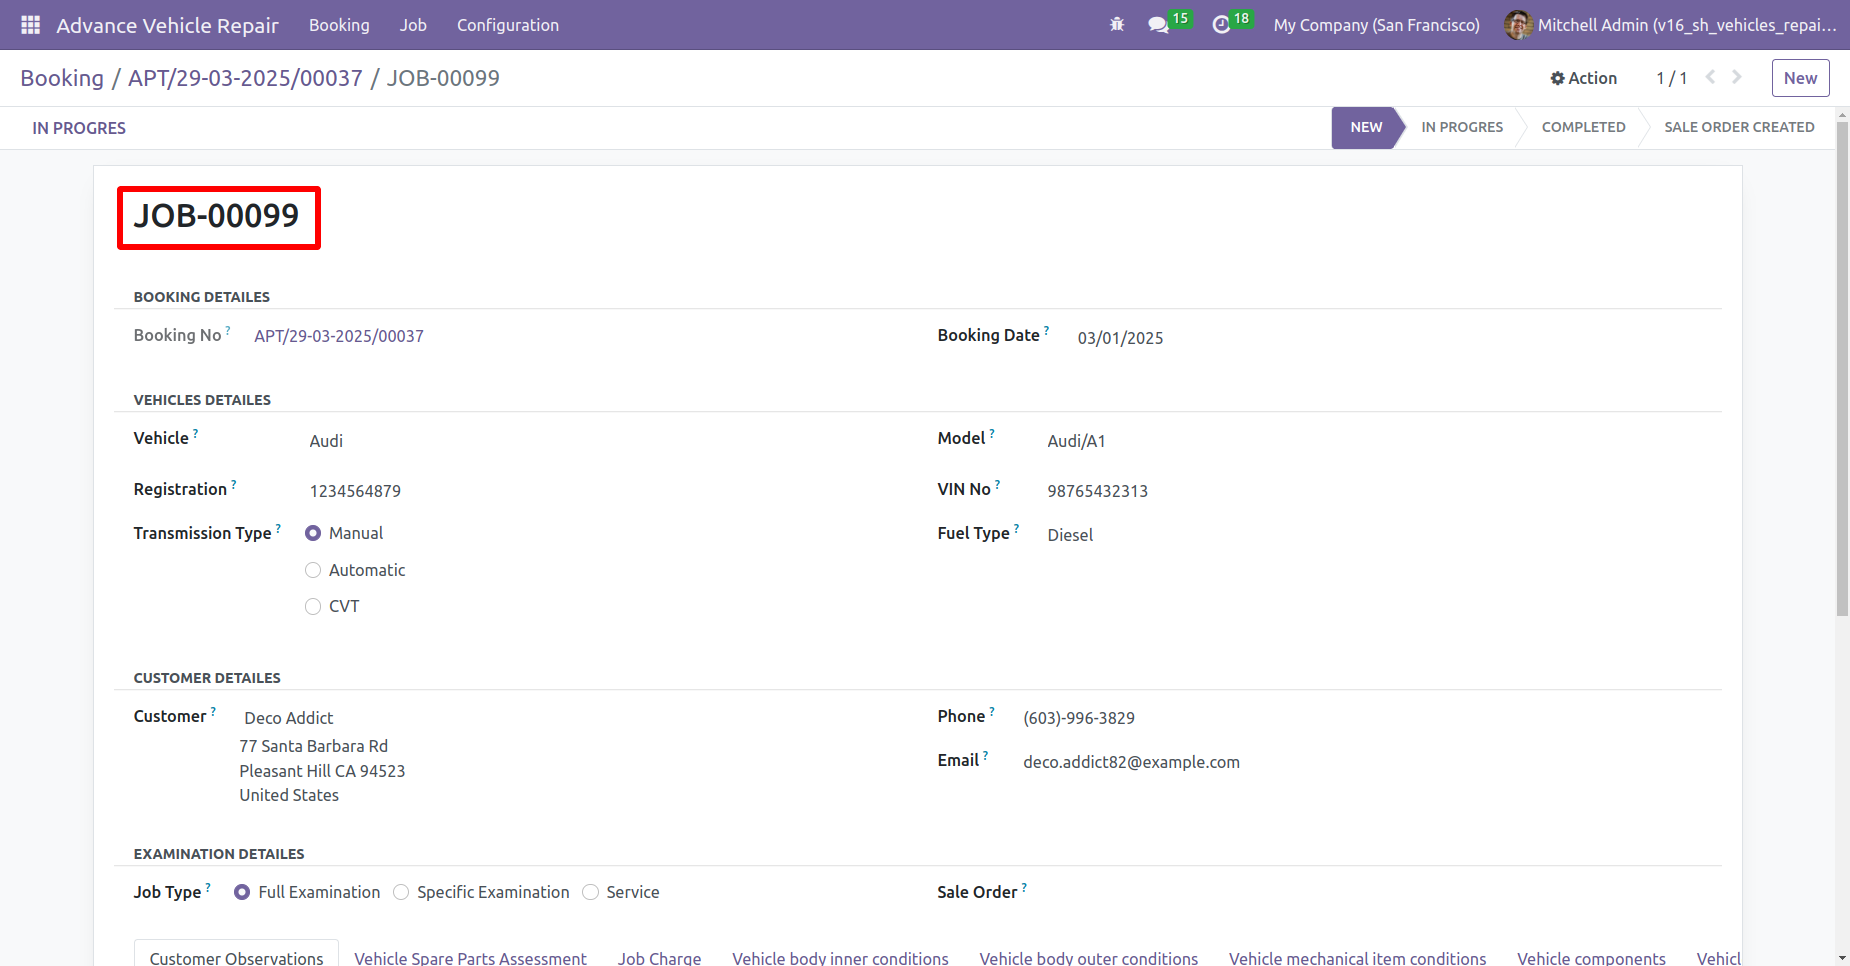
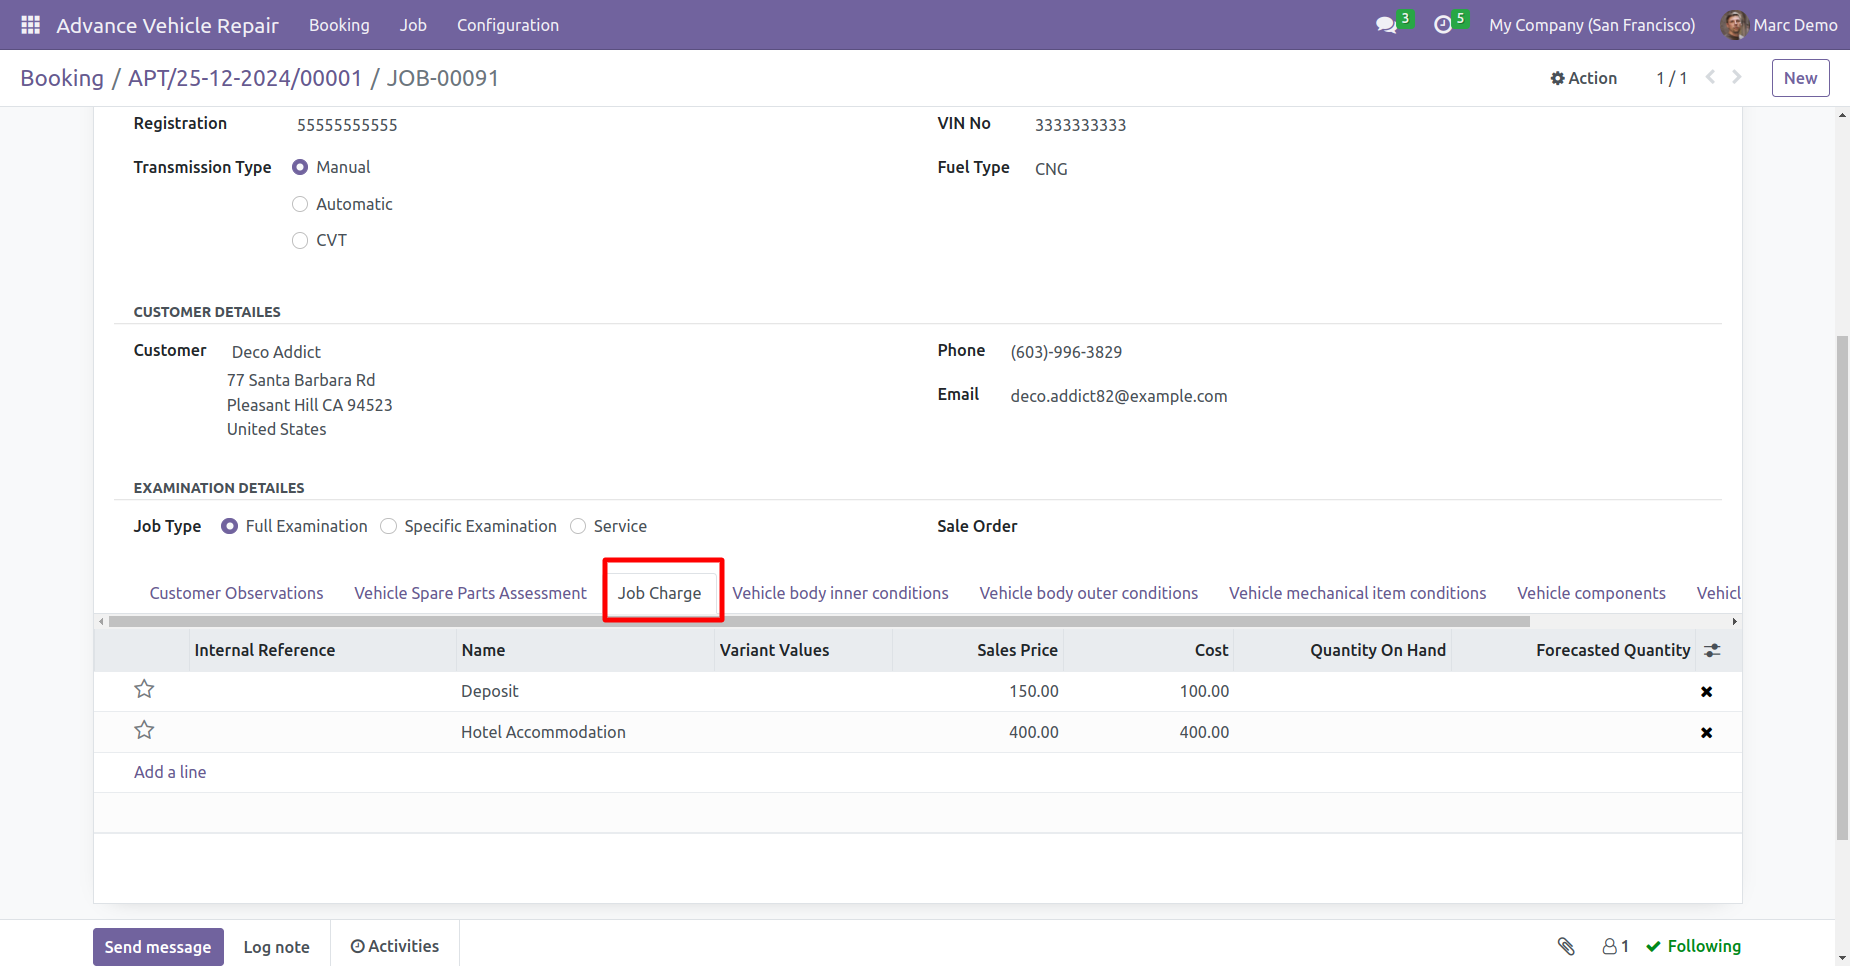
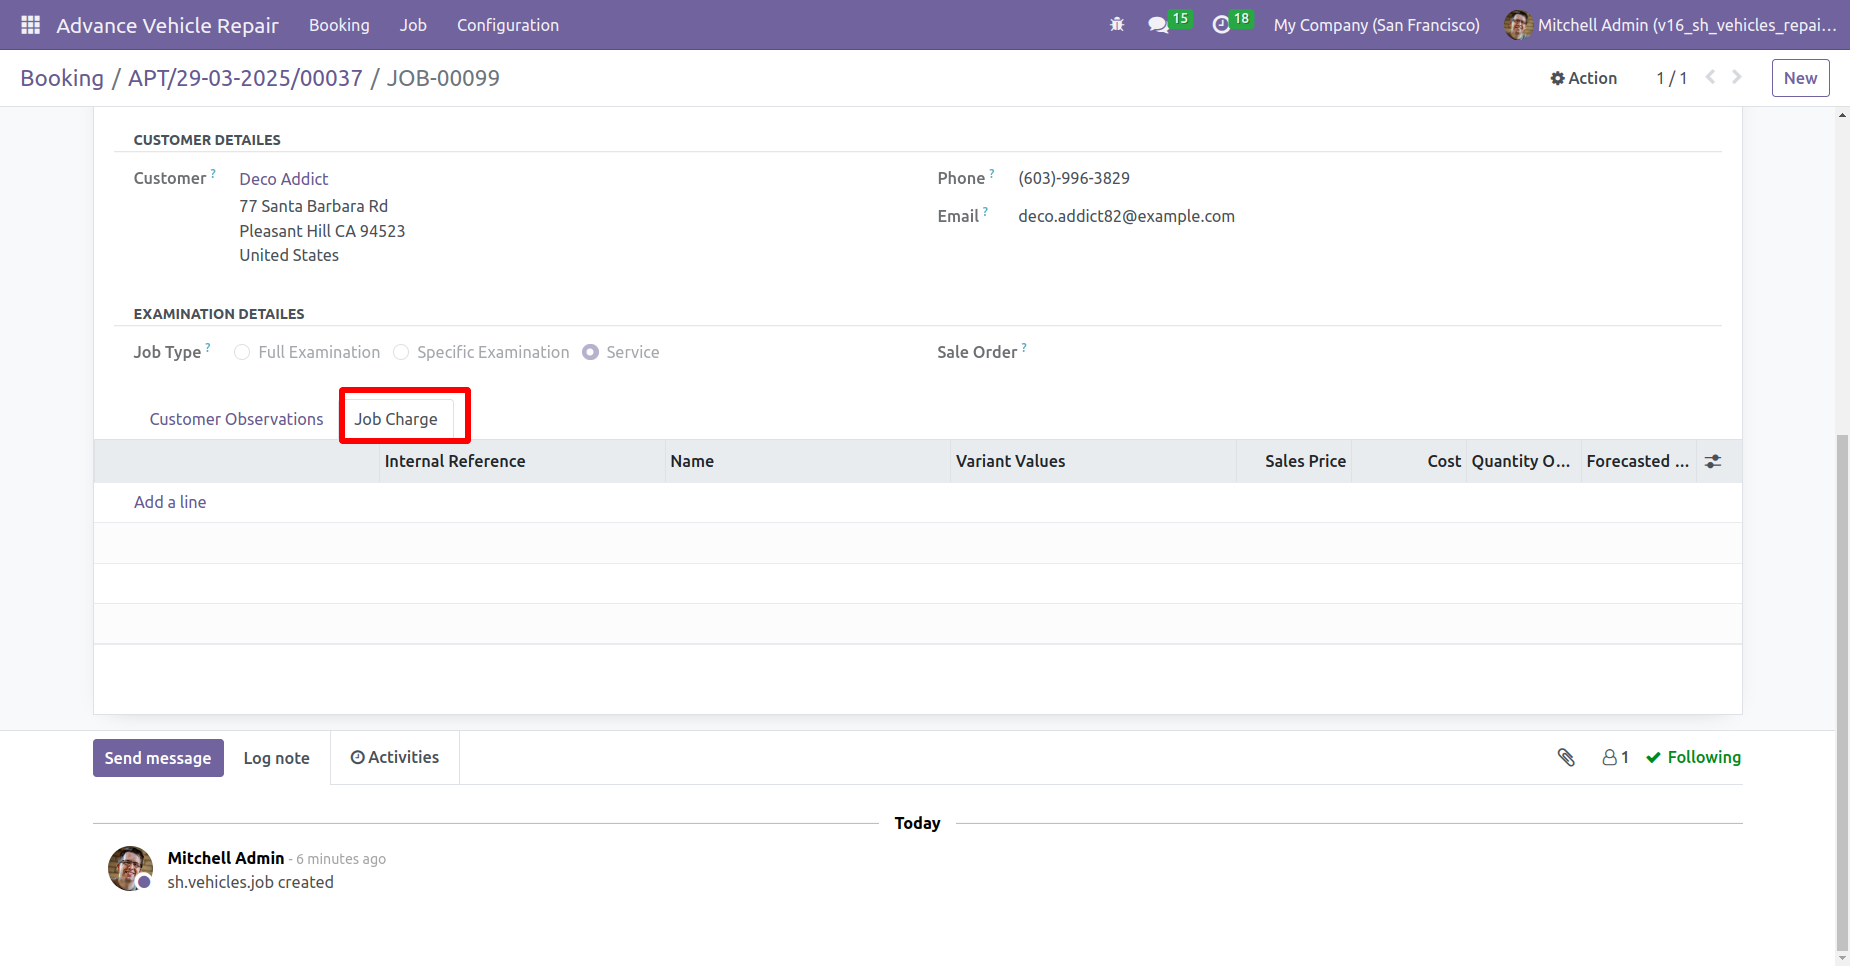
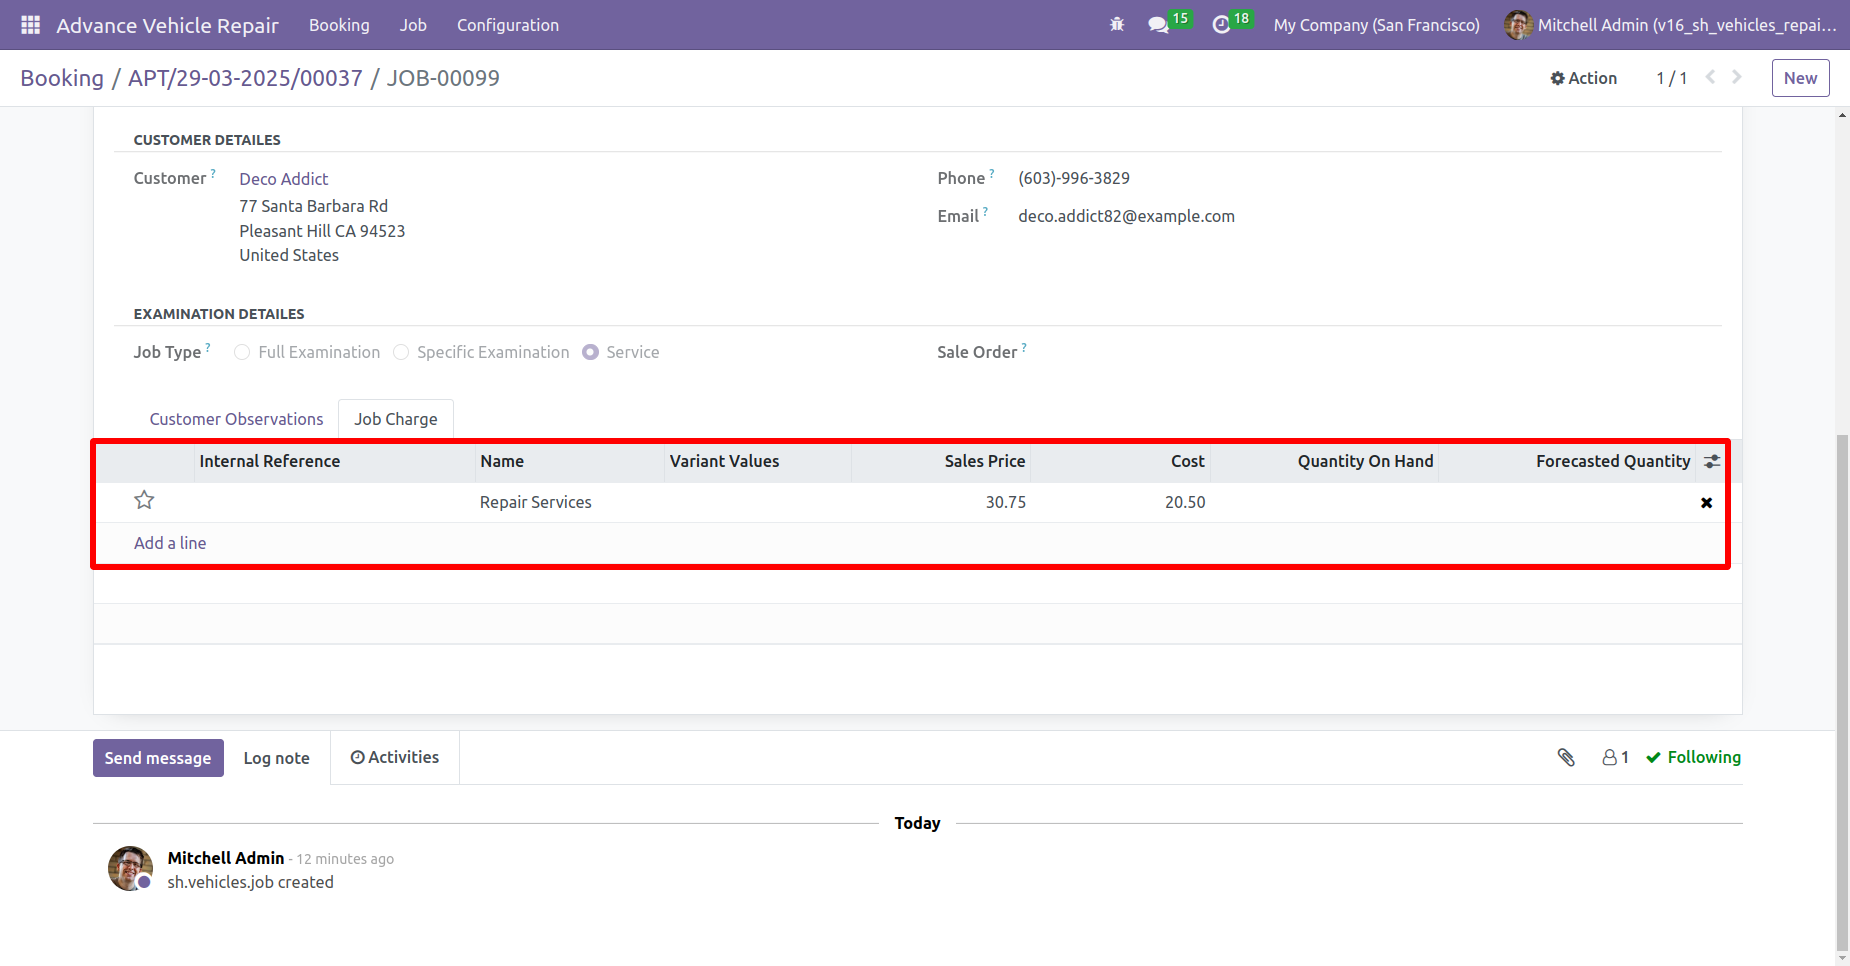
You can see the job charges details in the 'Job charge' tab.
The job card is currently in progress stage. Click on the 'Completed' button to proceed.
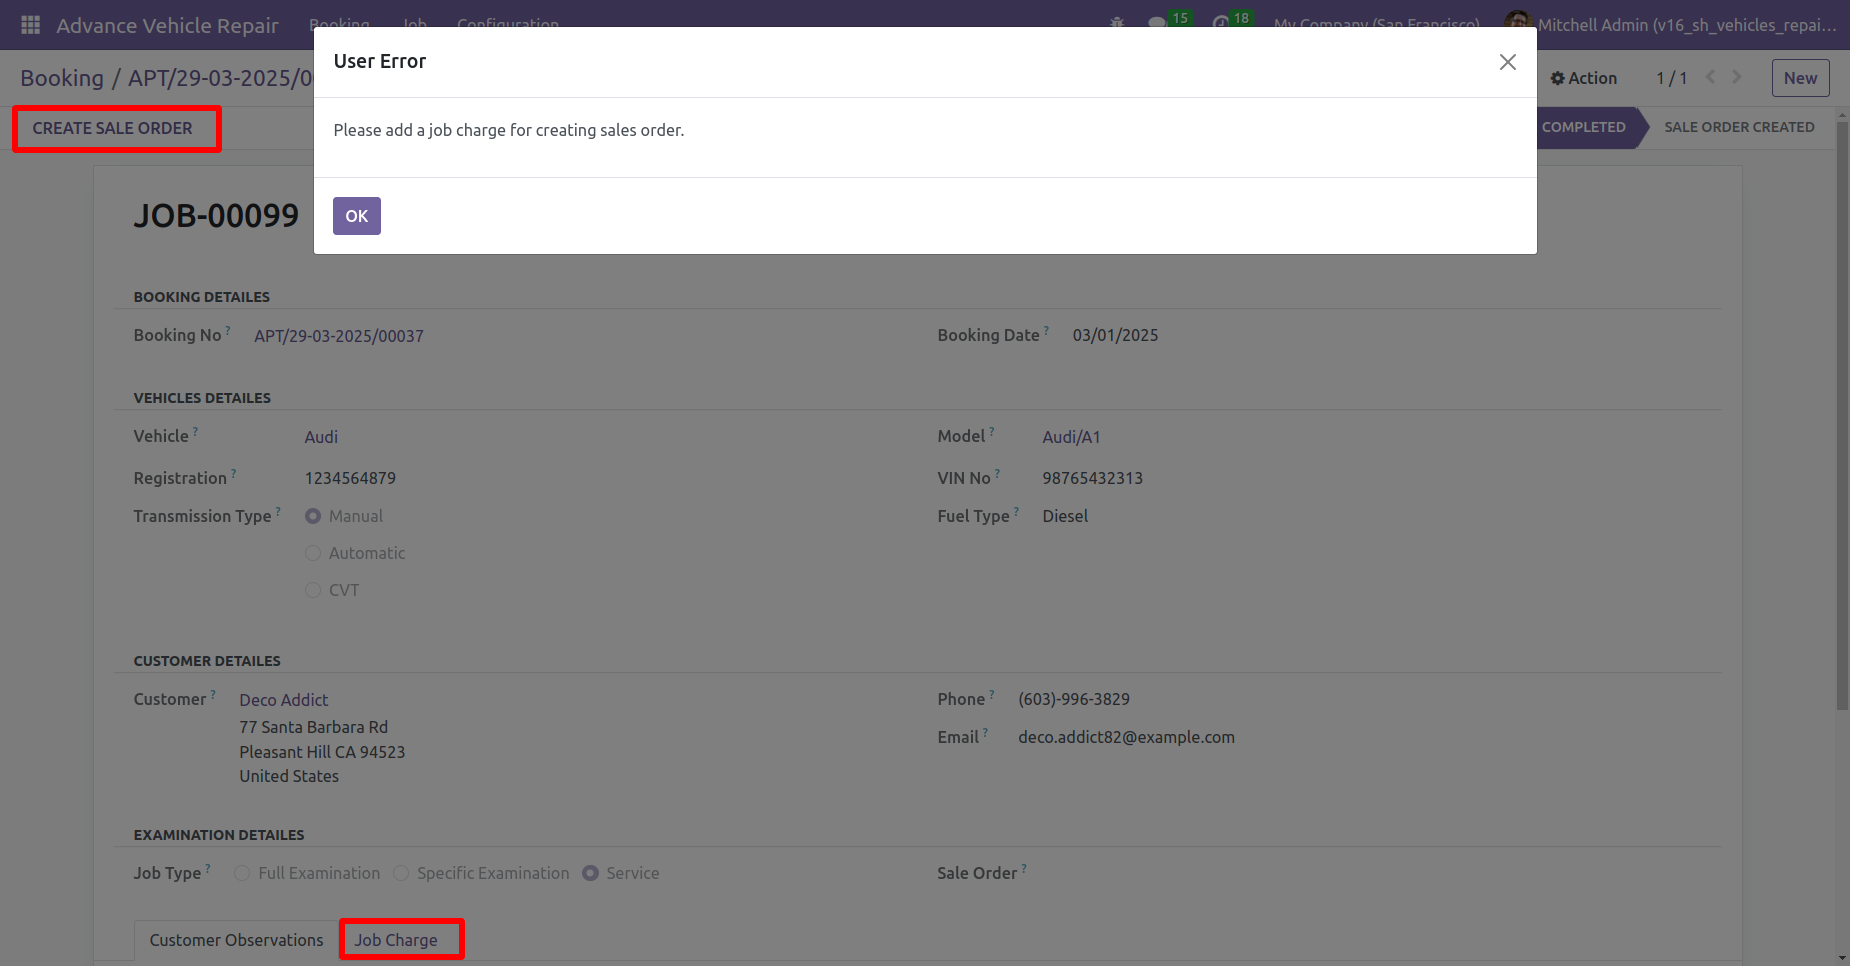
You can create a sale order for the job charge for the completed job by clicking on the create sale order button.
If you have not added a job charge it will give an error message.
You can add the job charge, by clicking on the "Add a line" button within the job charge tab.
Clicking on the sale order reference number opens up the corresponding sale order, including booking details and job charges in the order lines.
Create an invoice for the job charge by clicking on the create invoice button from the sale order.
Job charge invoice with vehicle booking details.
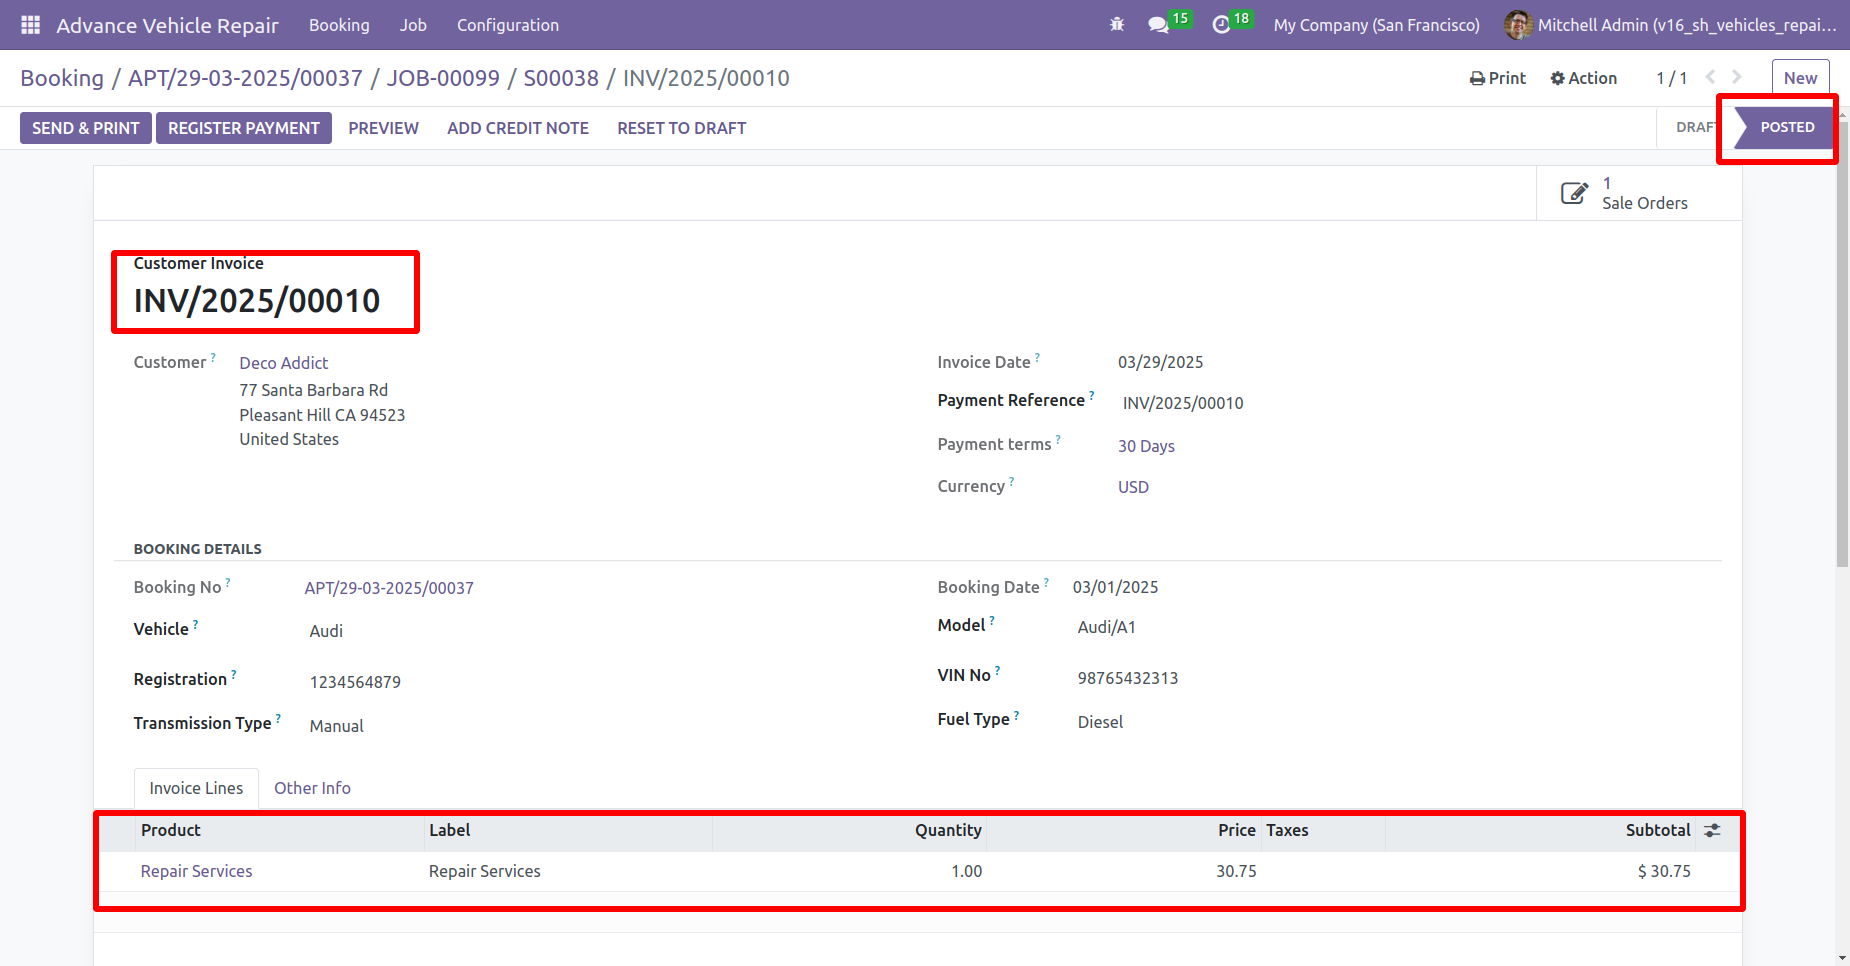
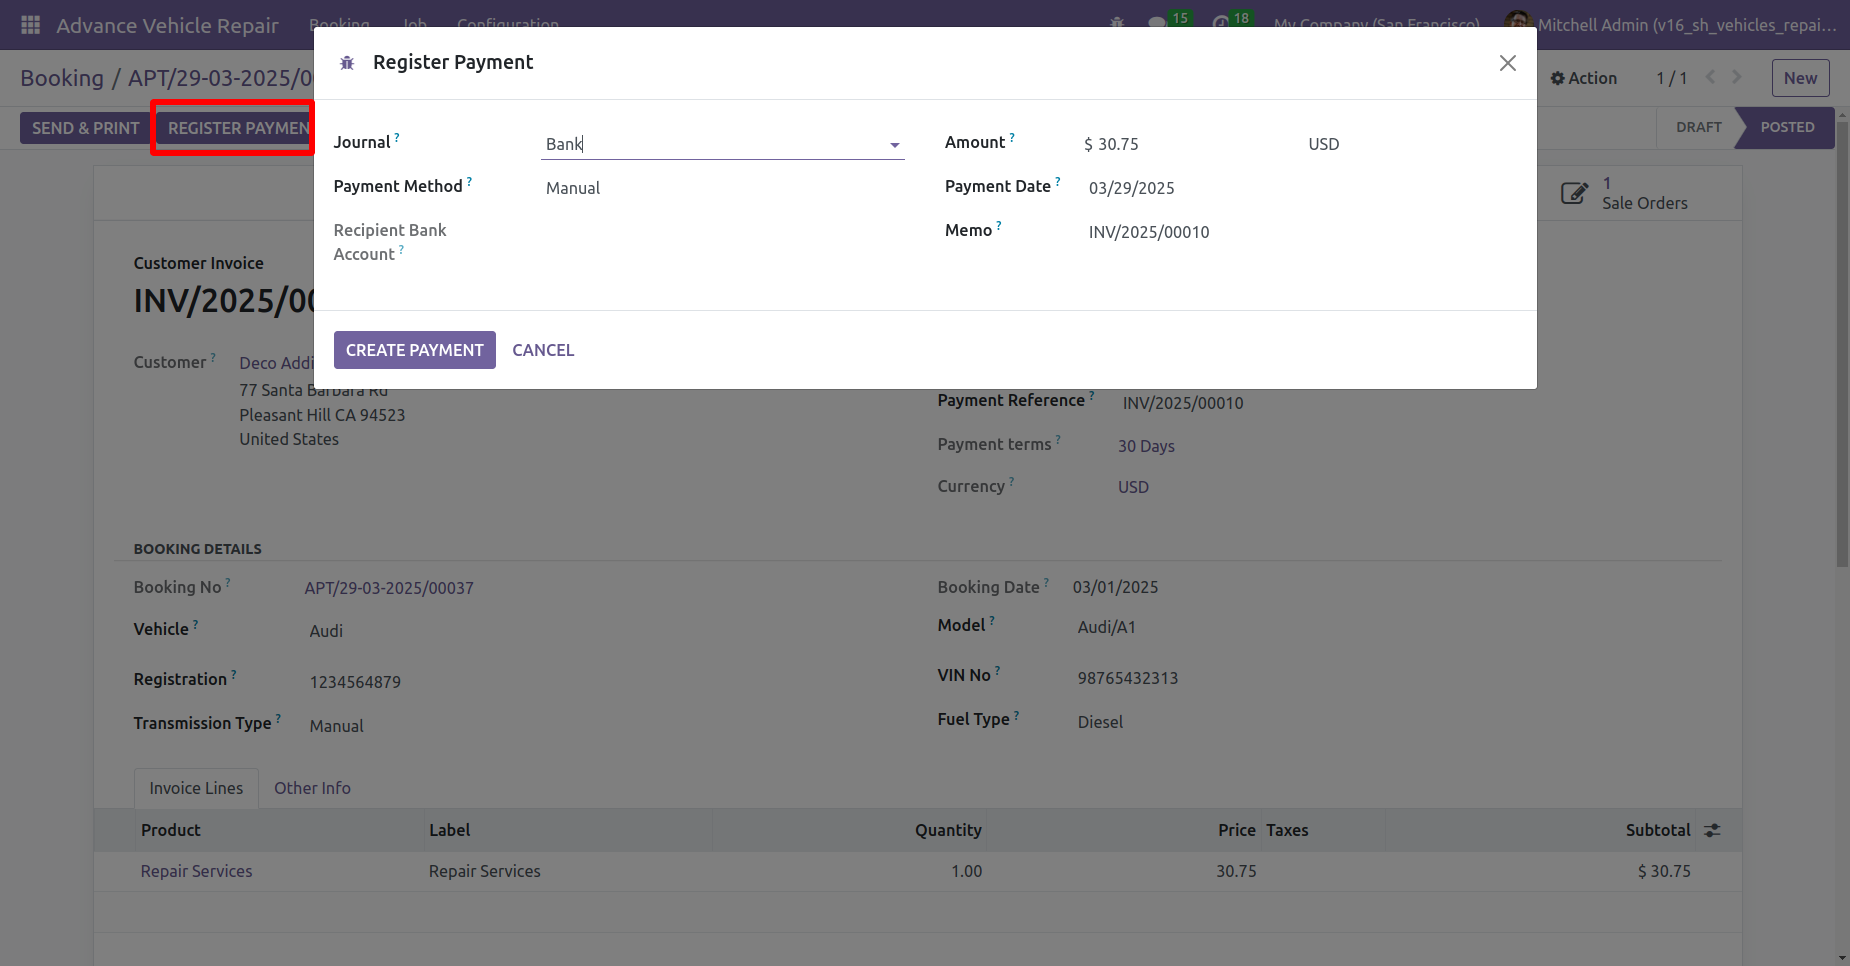
Click on the 'Register Payment' button. After that, register payment wizard will appear. Enter the details and click on the 'Create Payment' button.
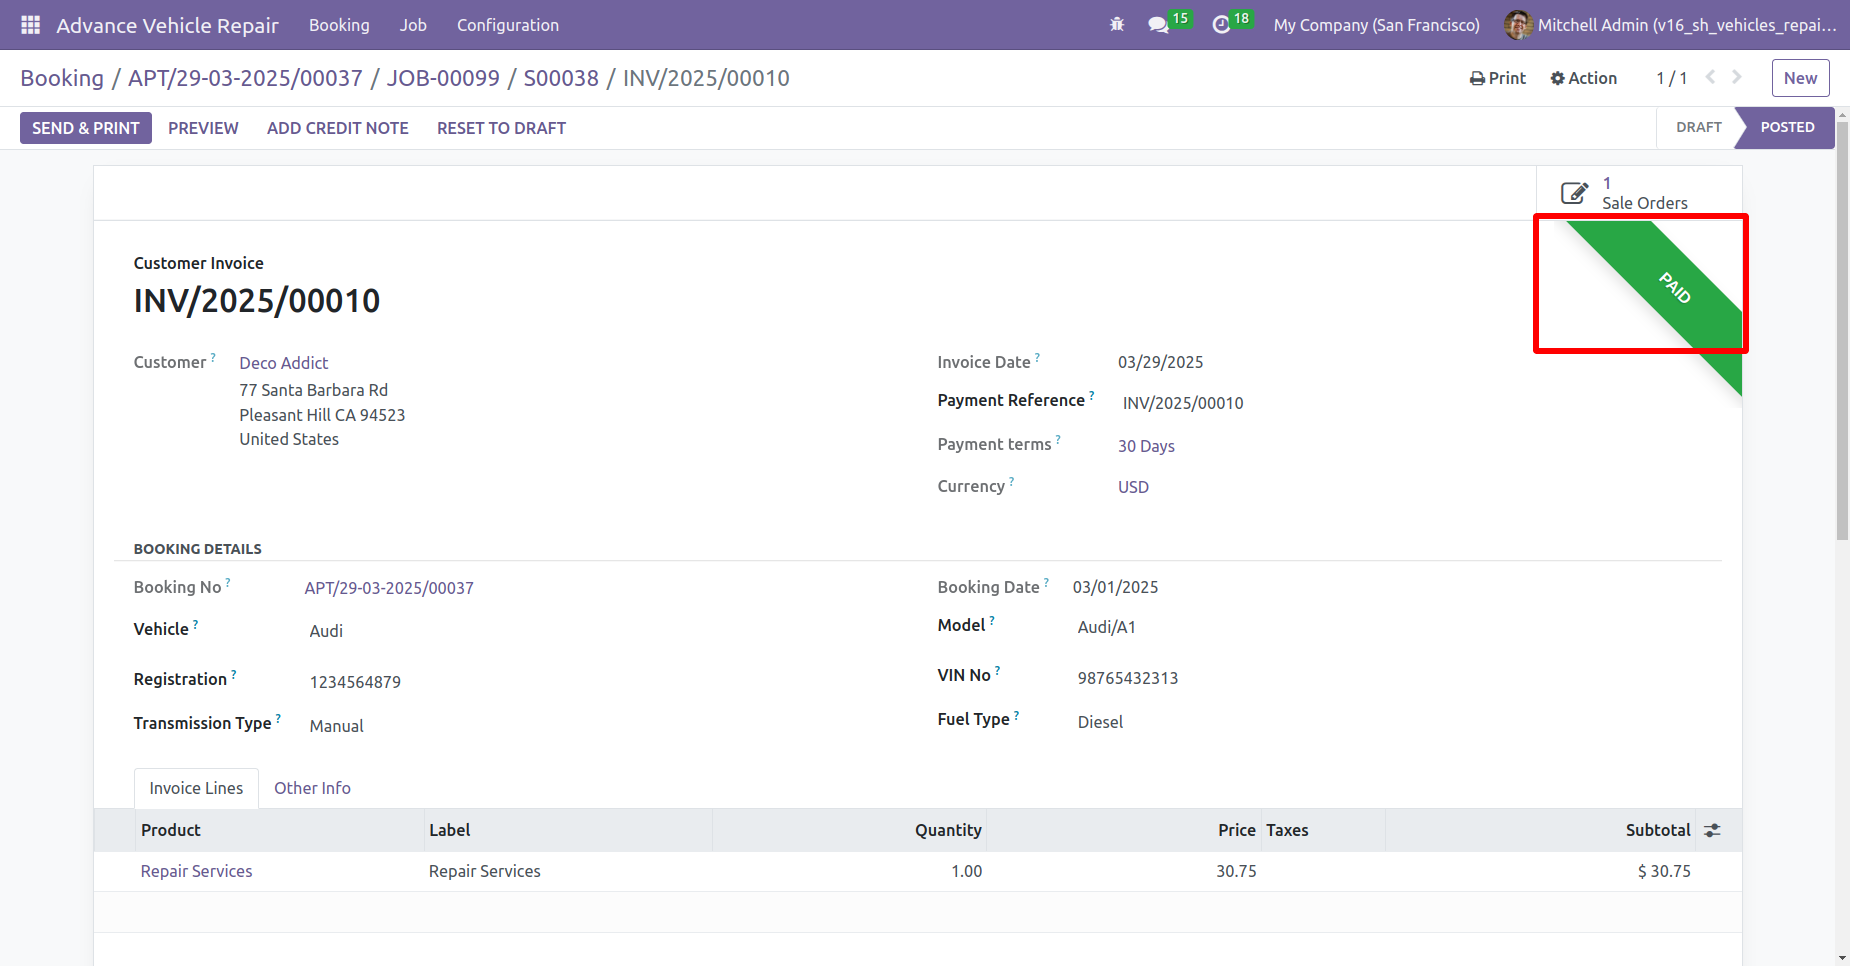
The invoice has been paid.
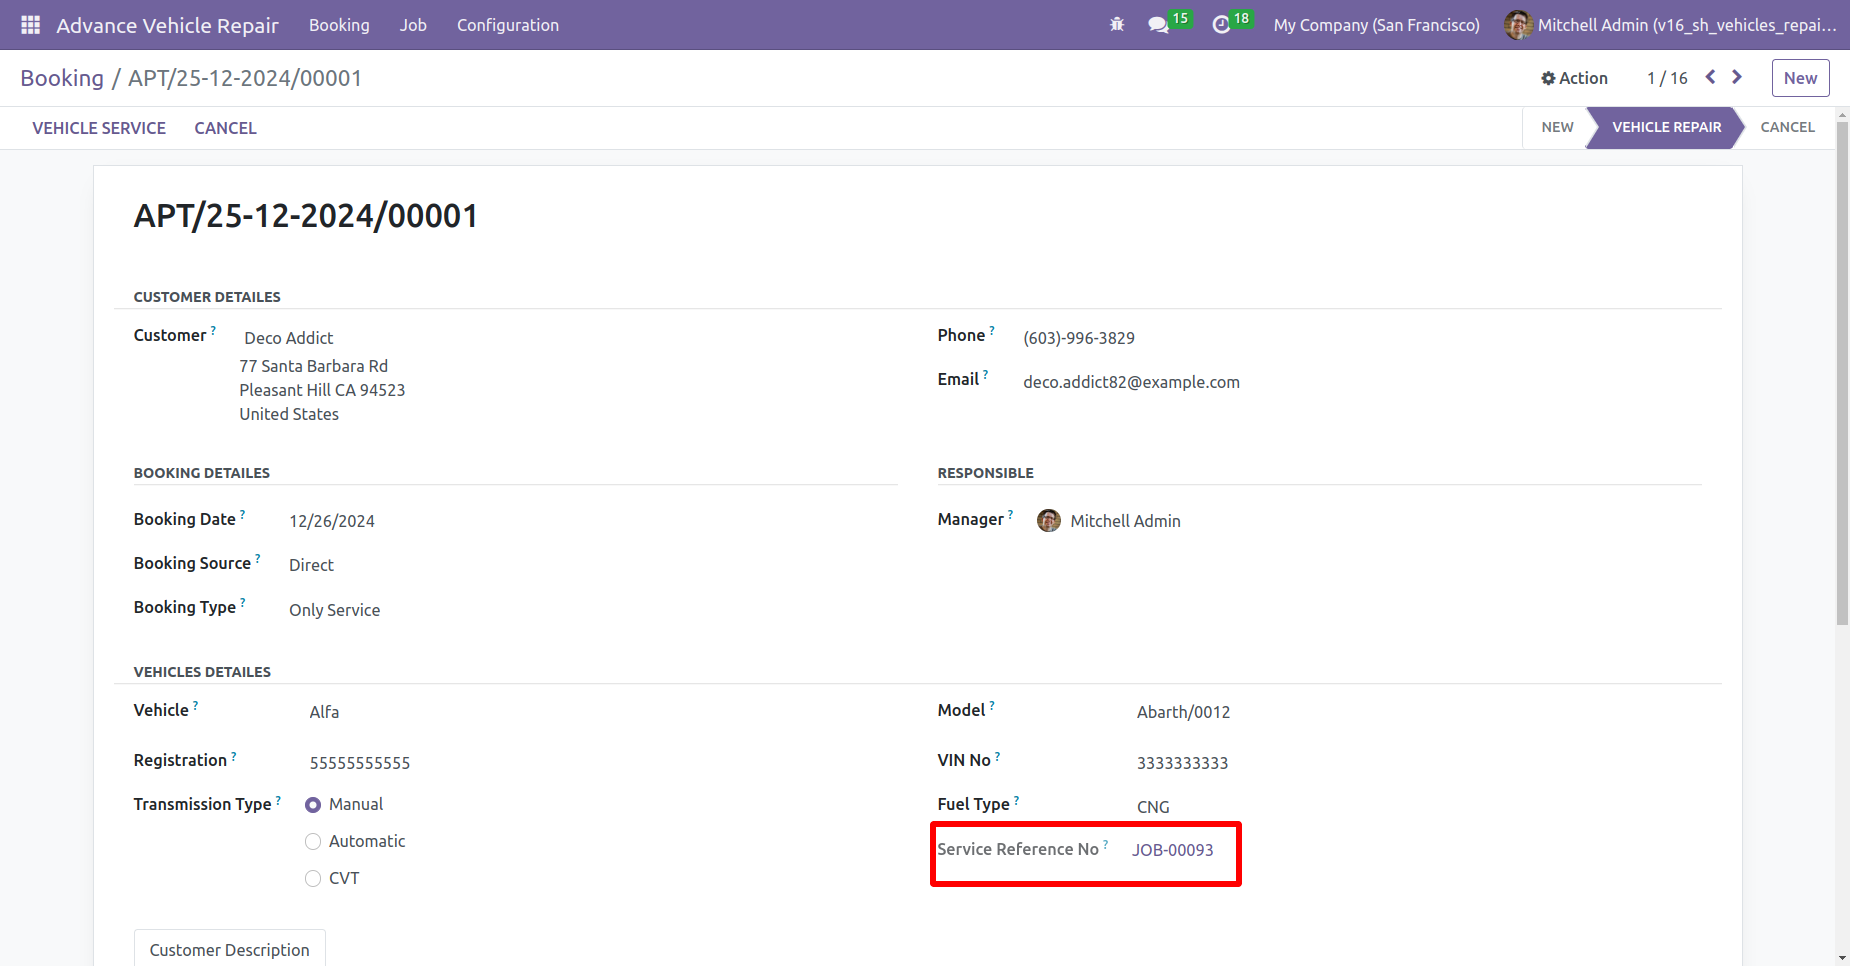
The 'Service Reference No' is visible on the booking page.
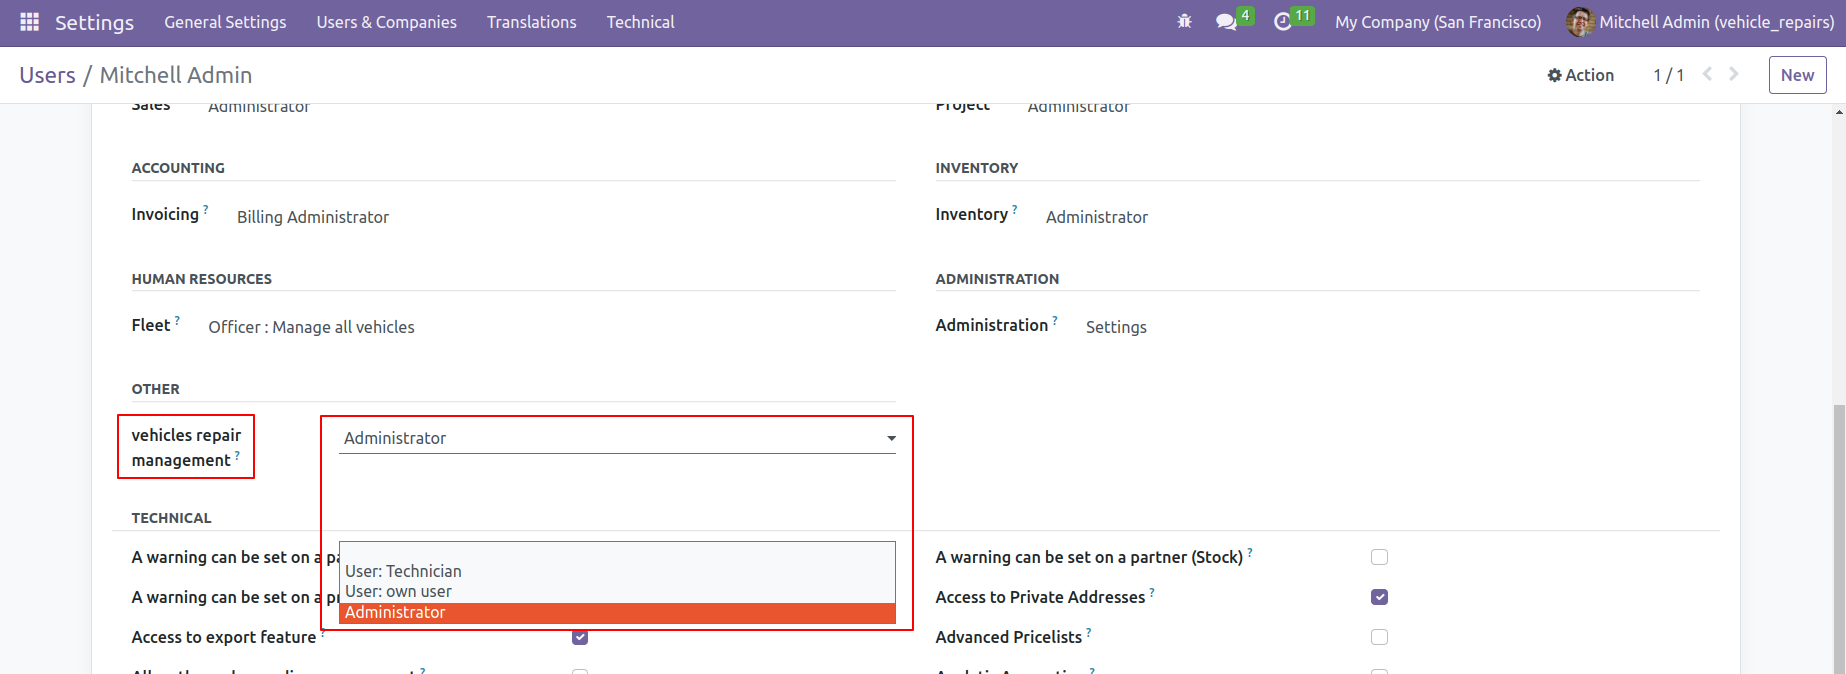
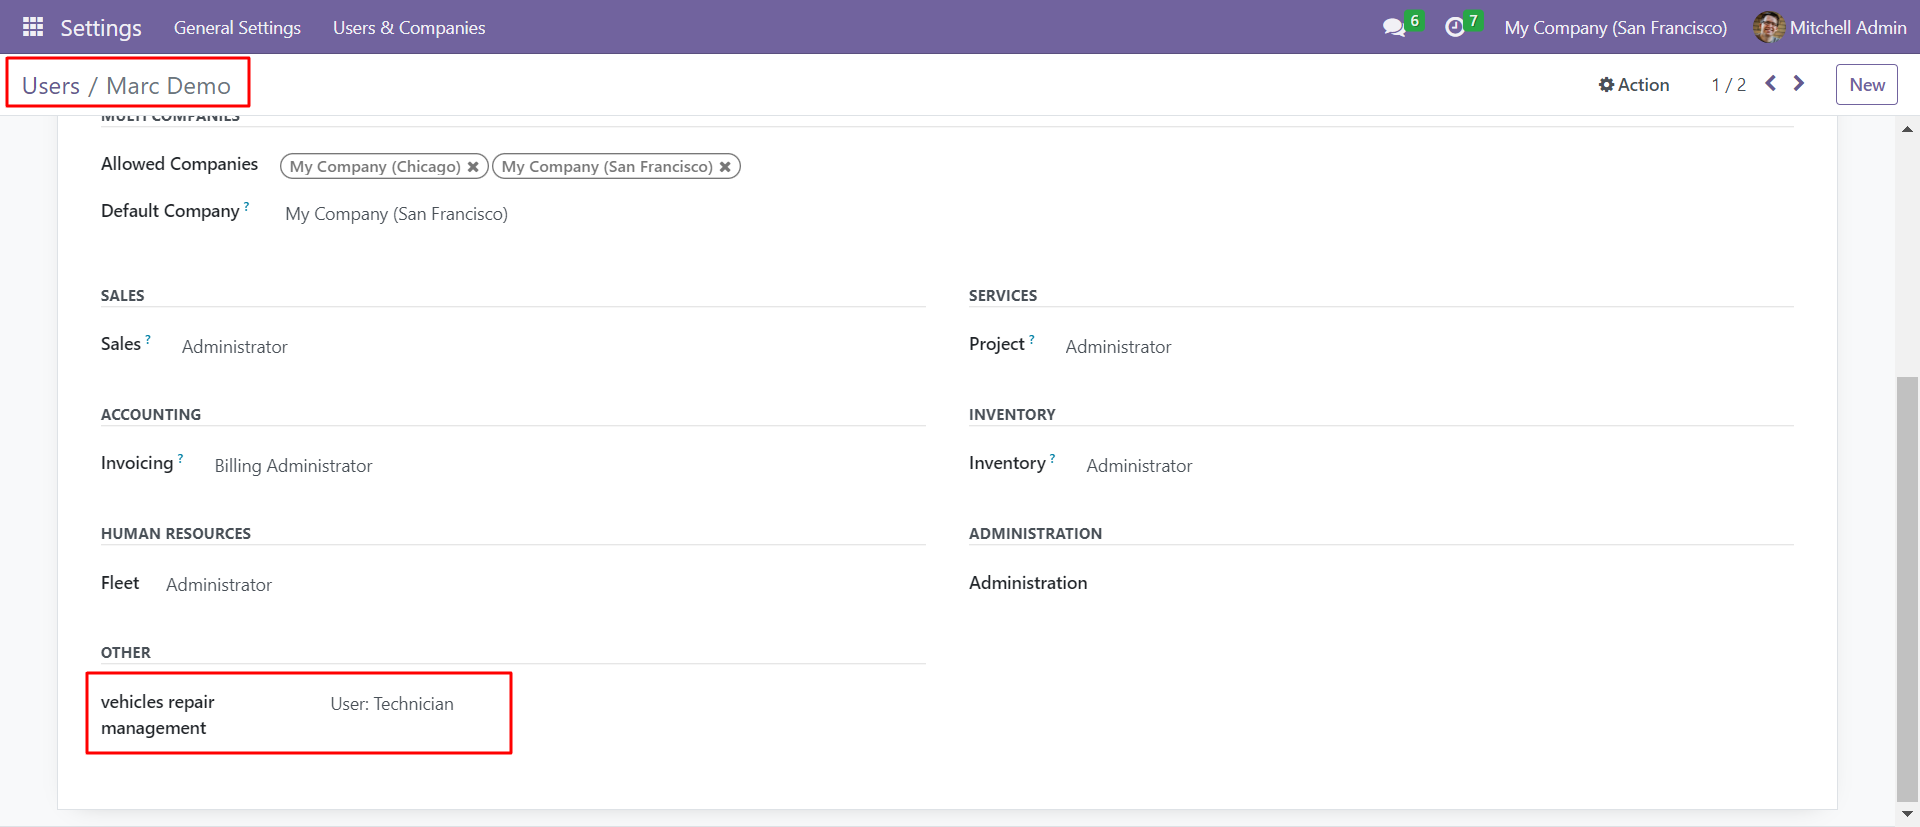
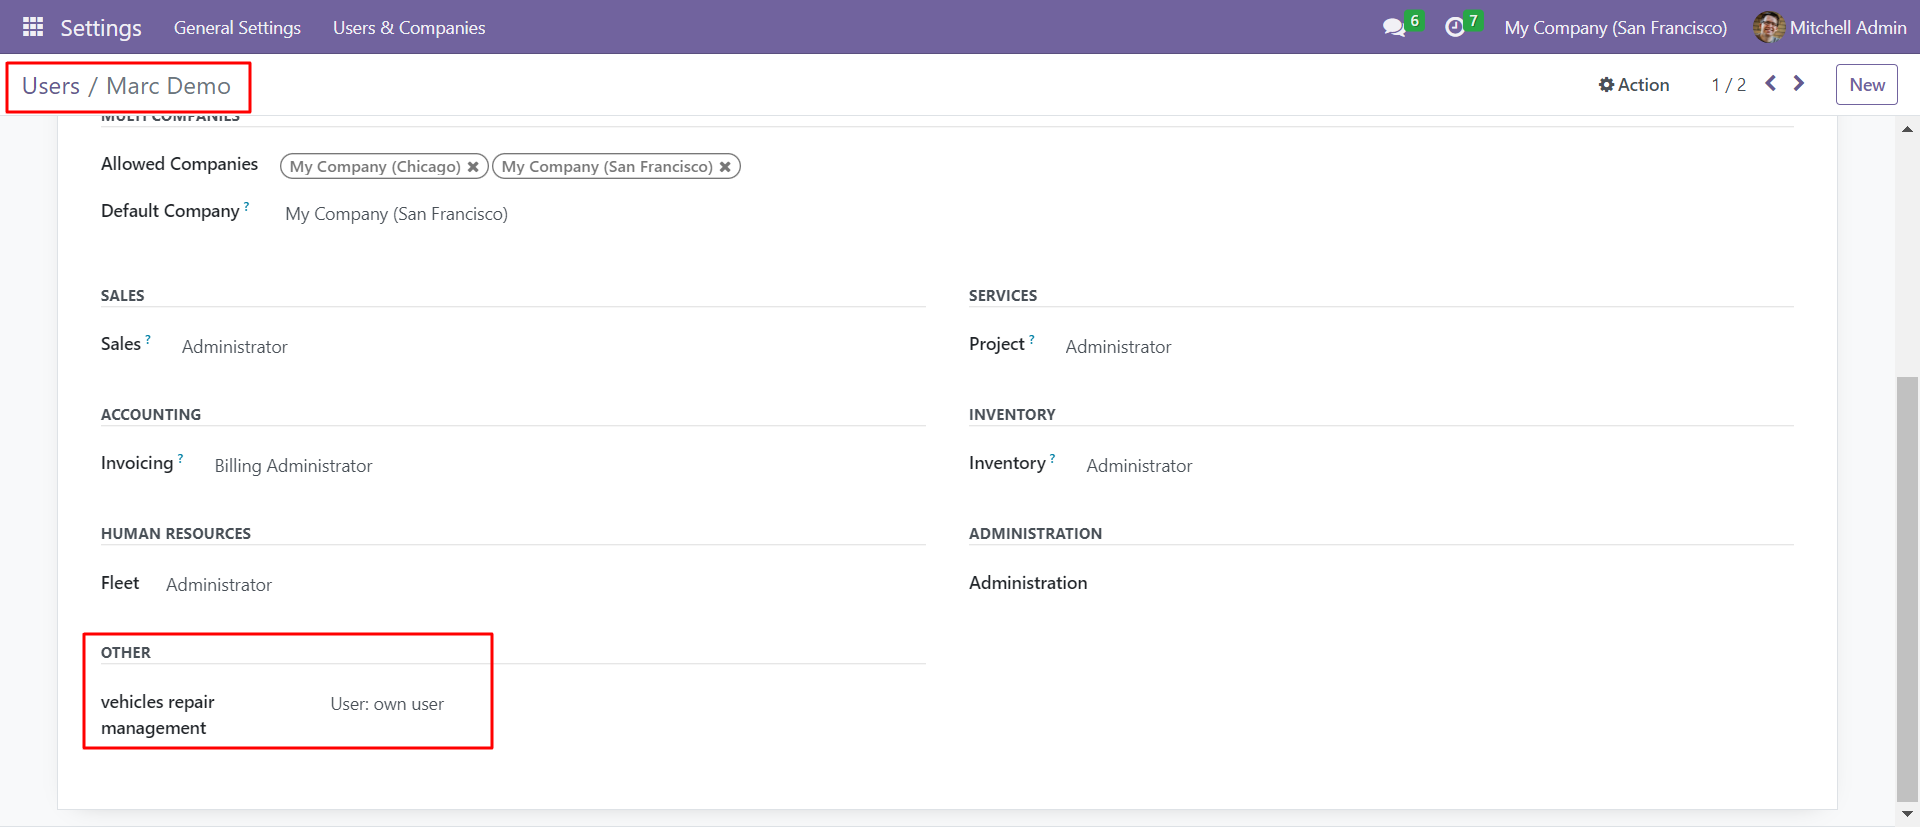
Go to the user's general settings, select the user and set vehicle repair management admin / technician / own user.
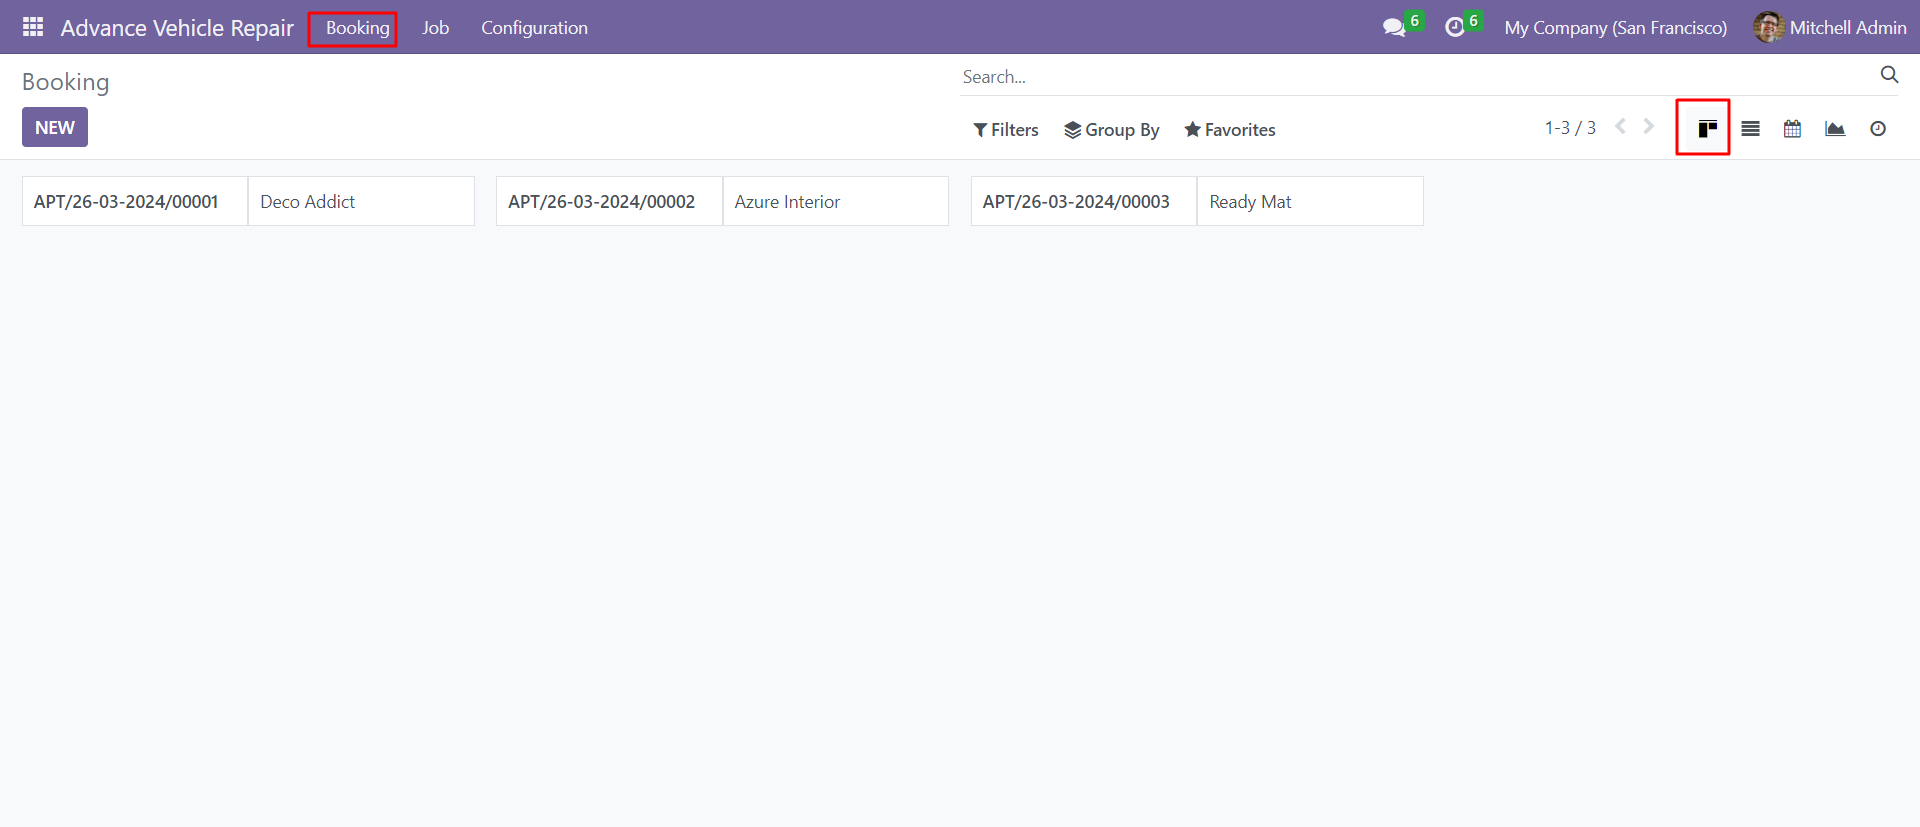
Booking kanban view.
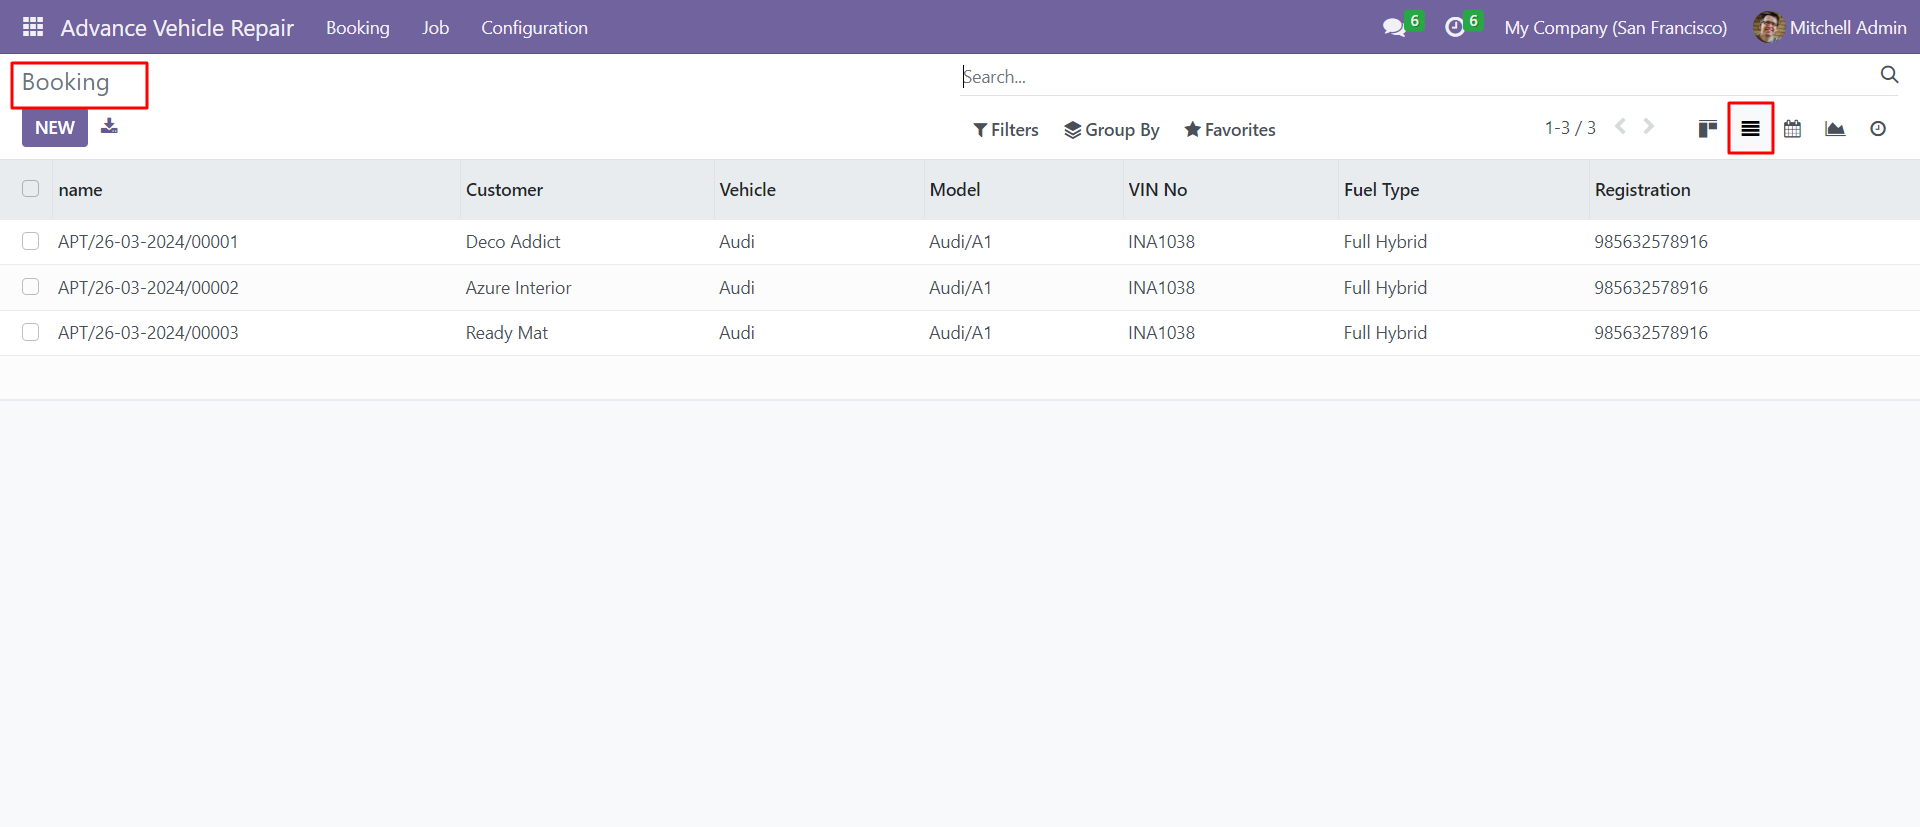
Booking list view.
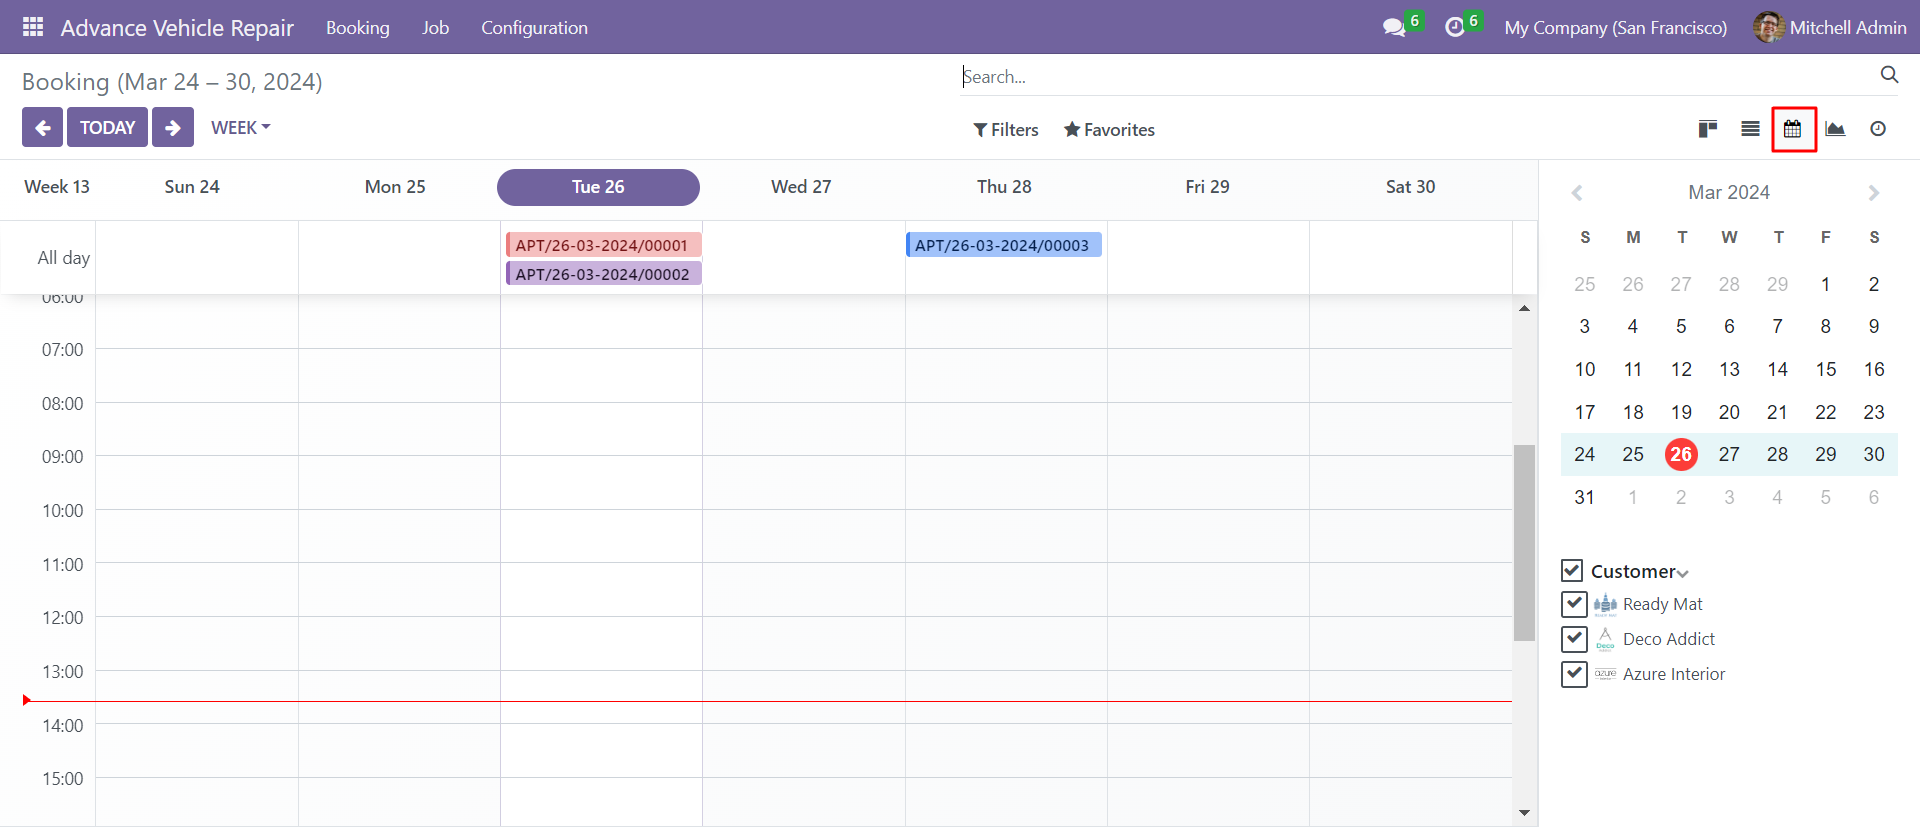
Booking calendar view.
Booking graph view.

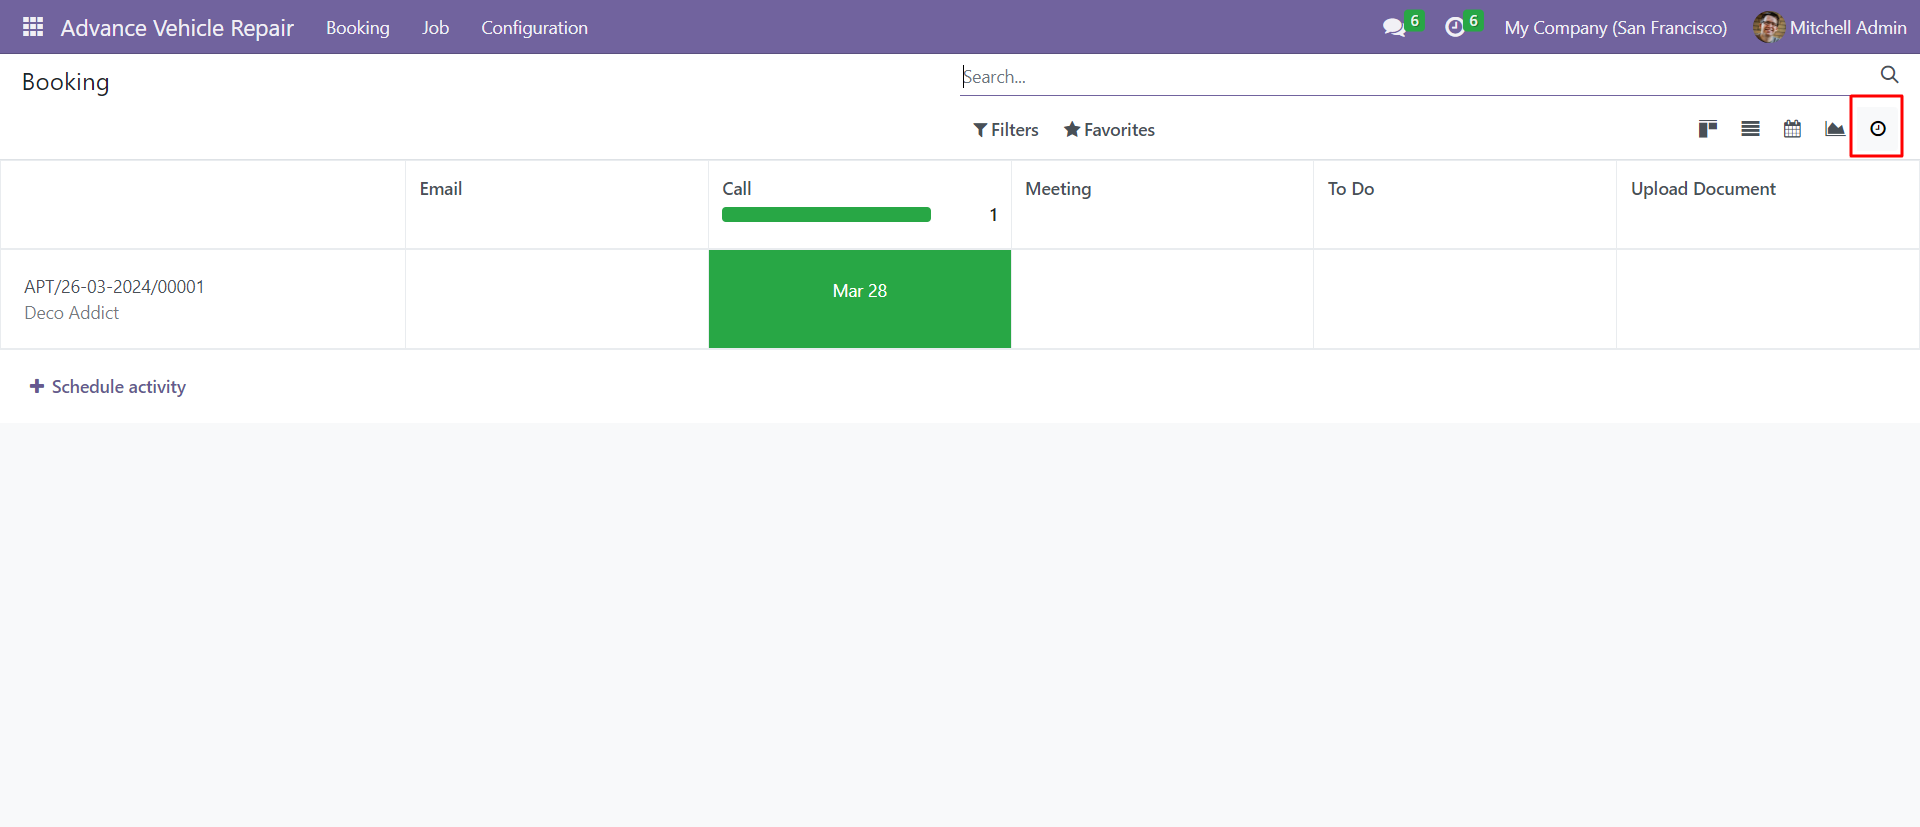
Booking activity view.
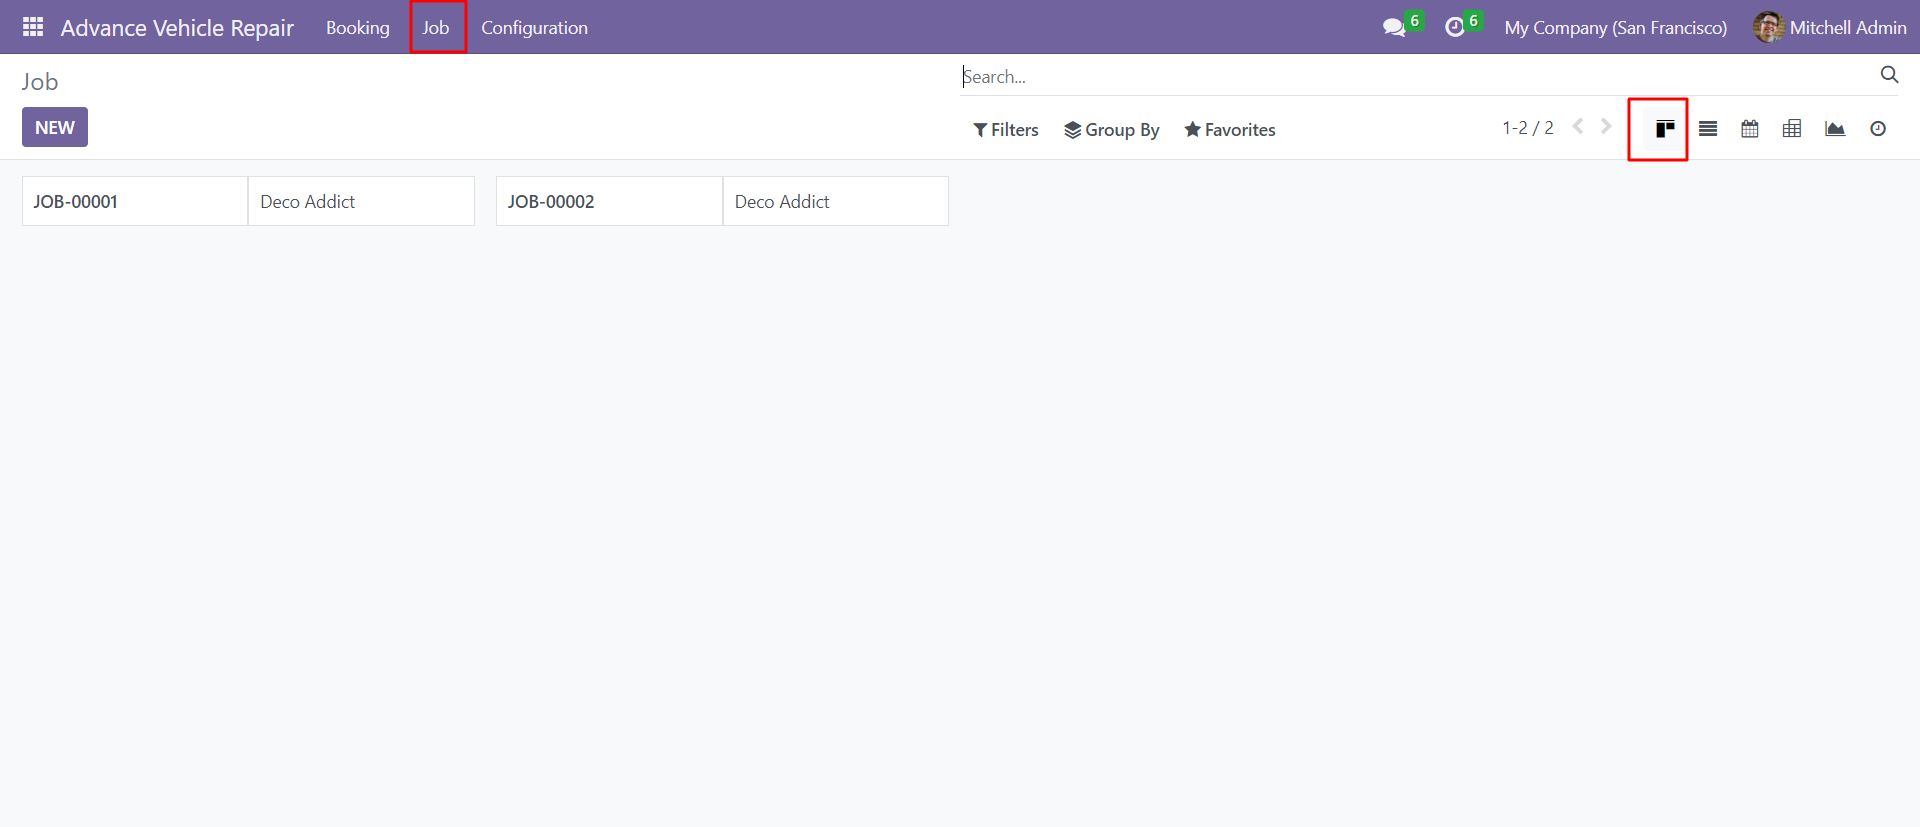
Job kanban view.
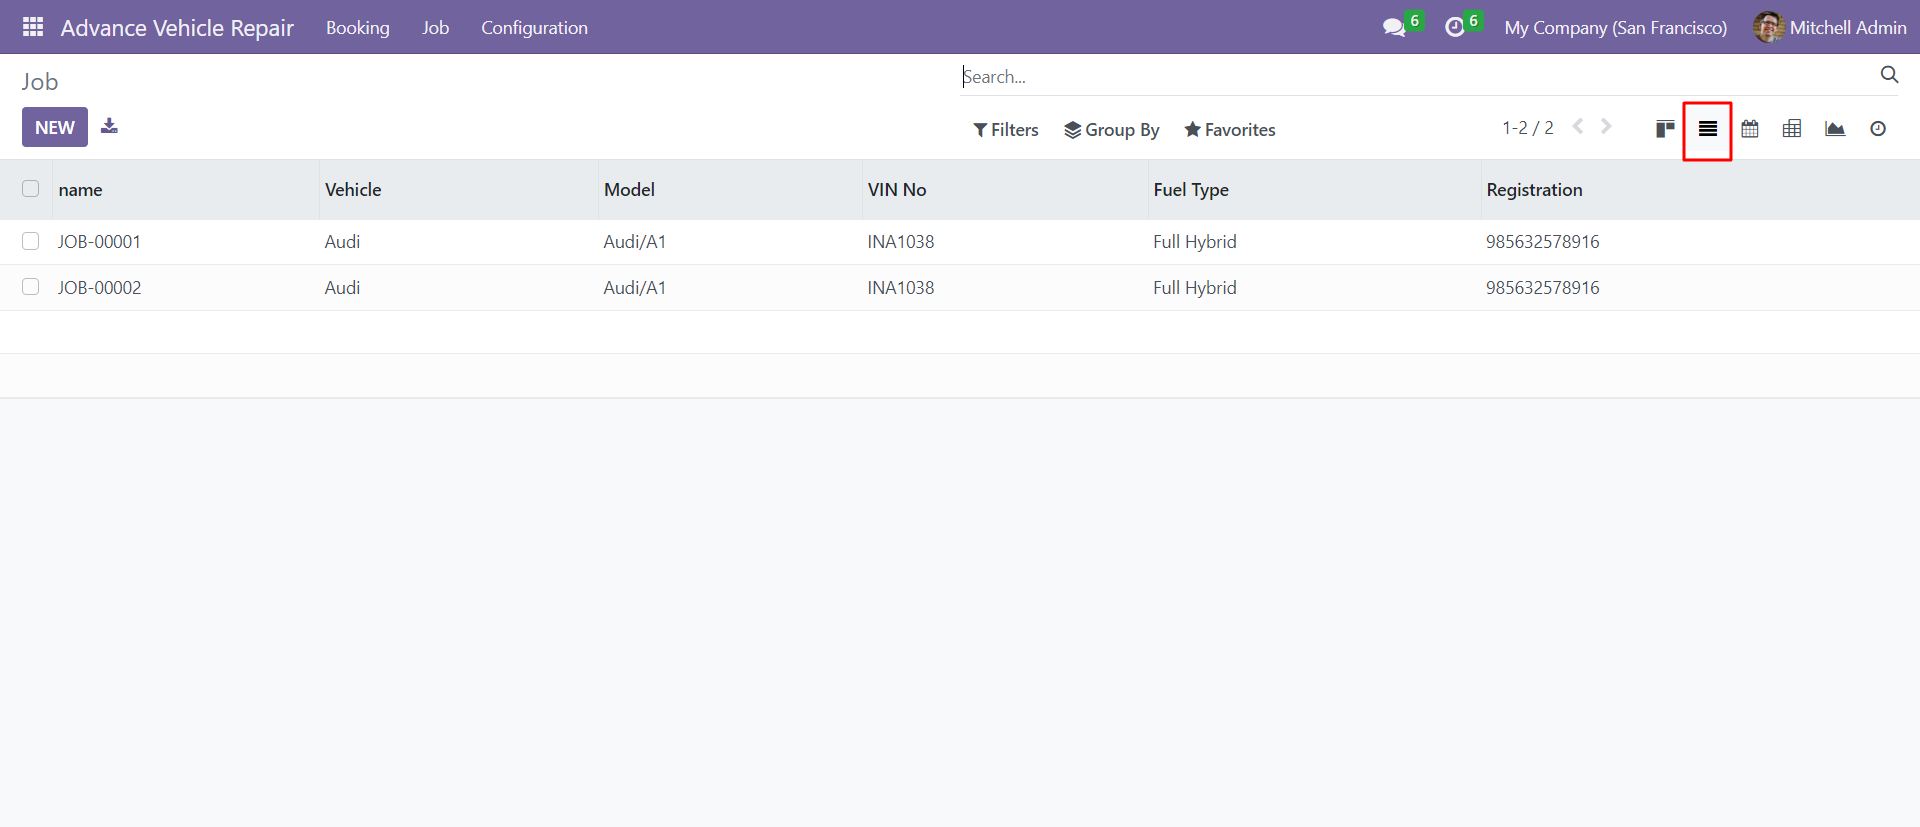
Job list view.
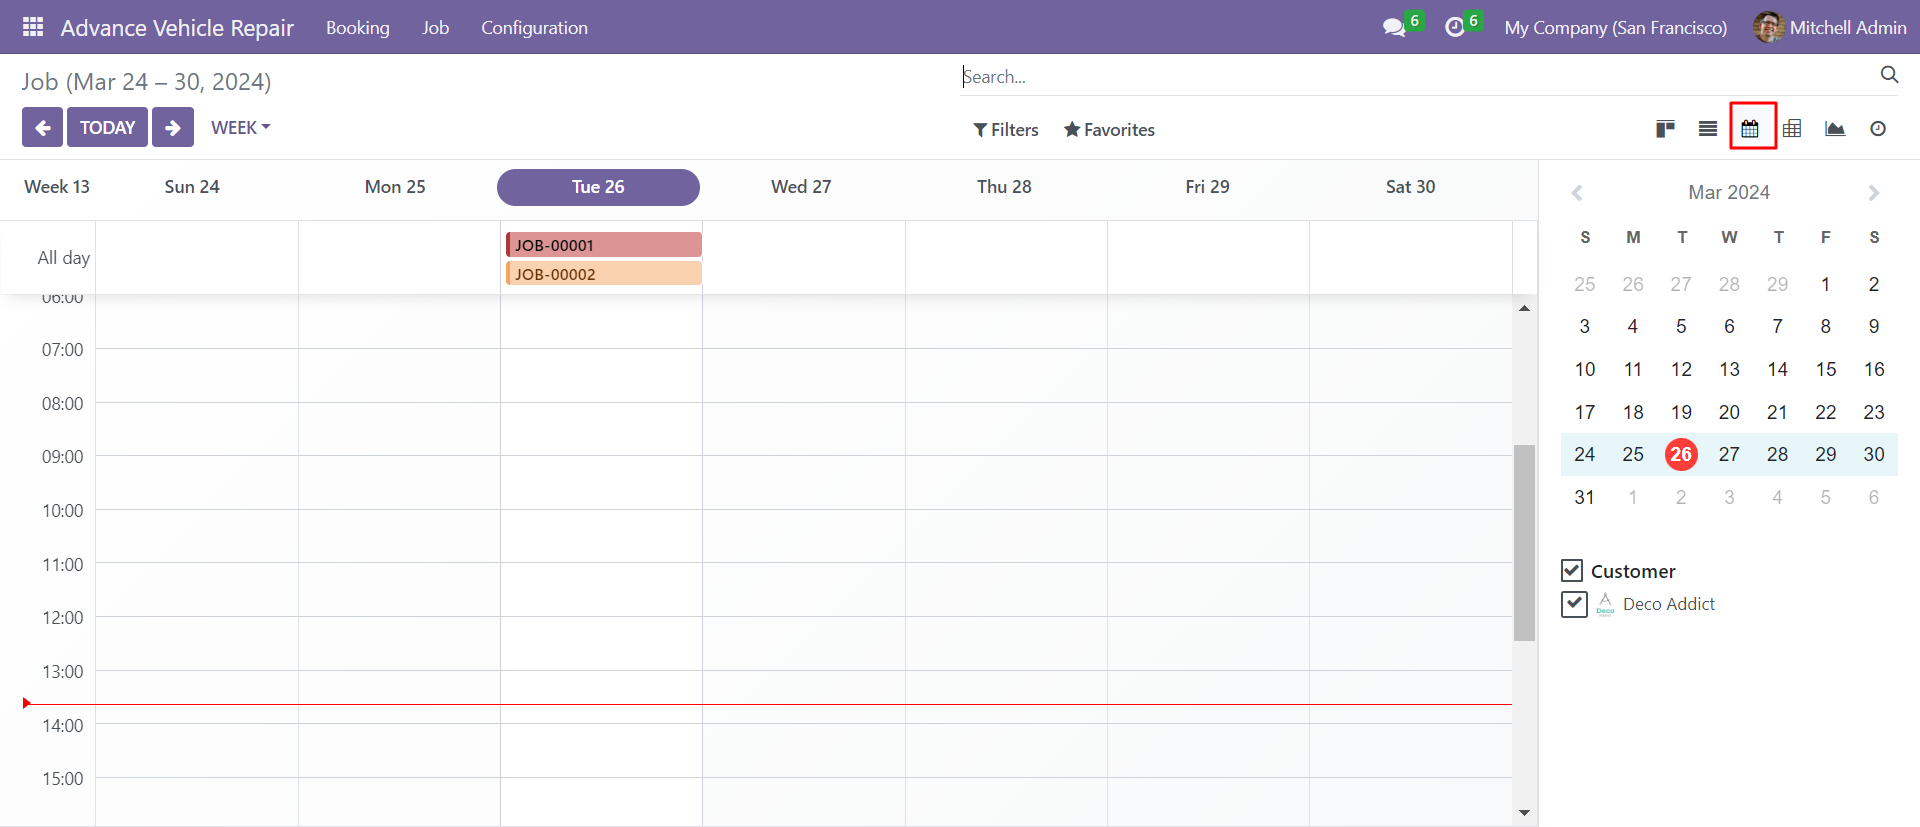
Job calendar view.
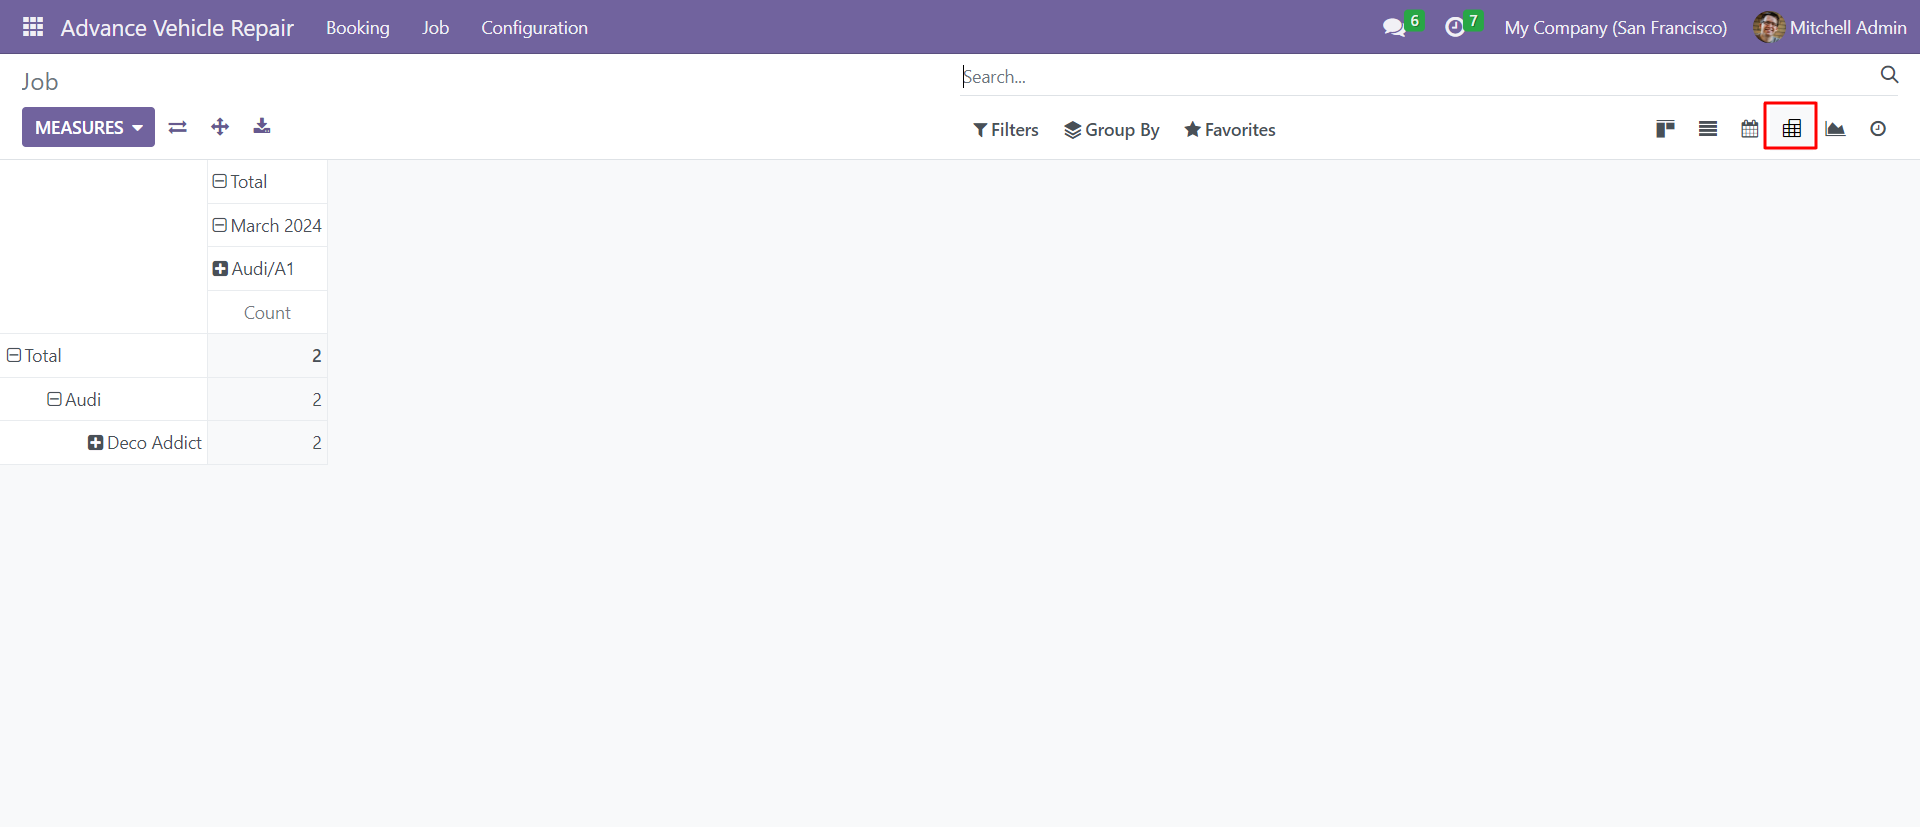
Job pivot view.
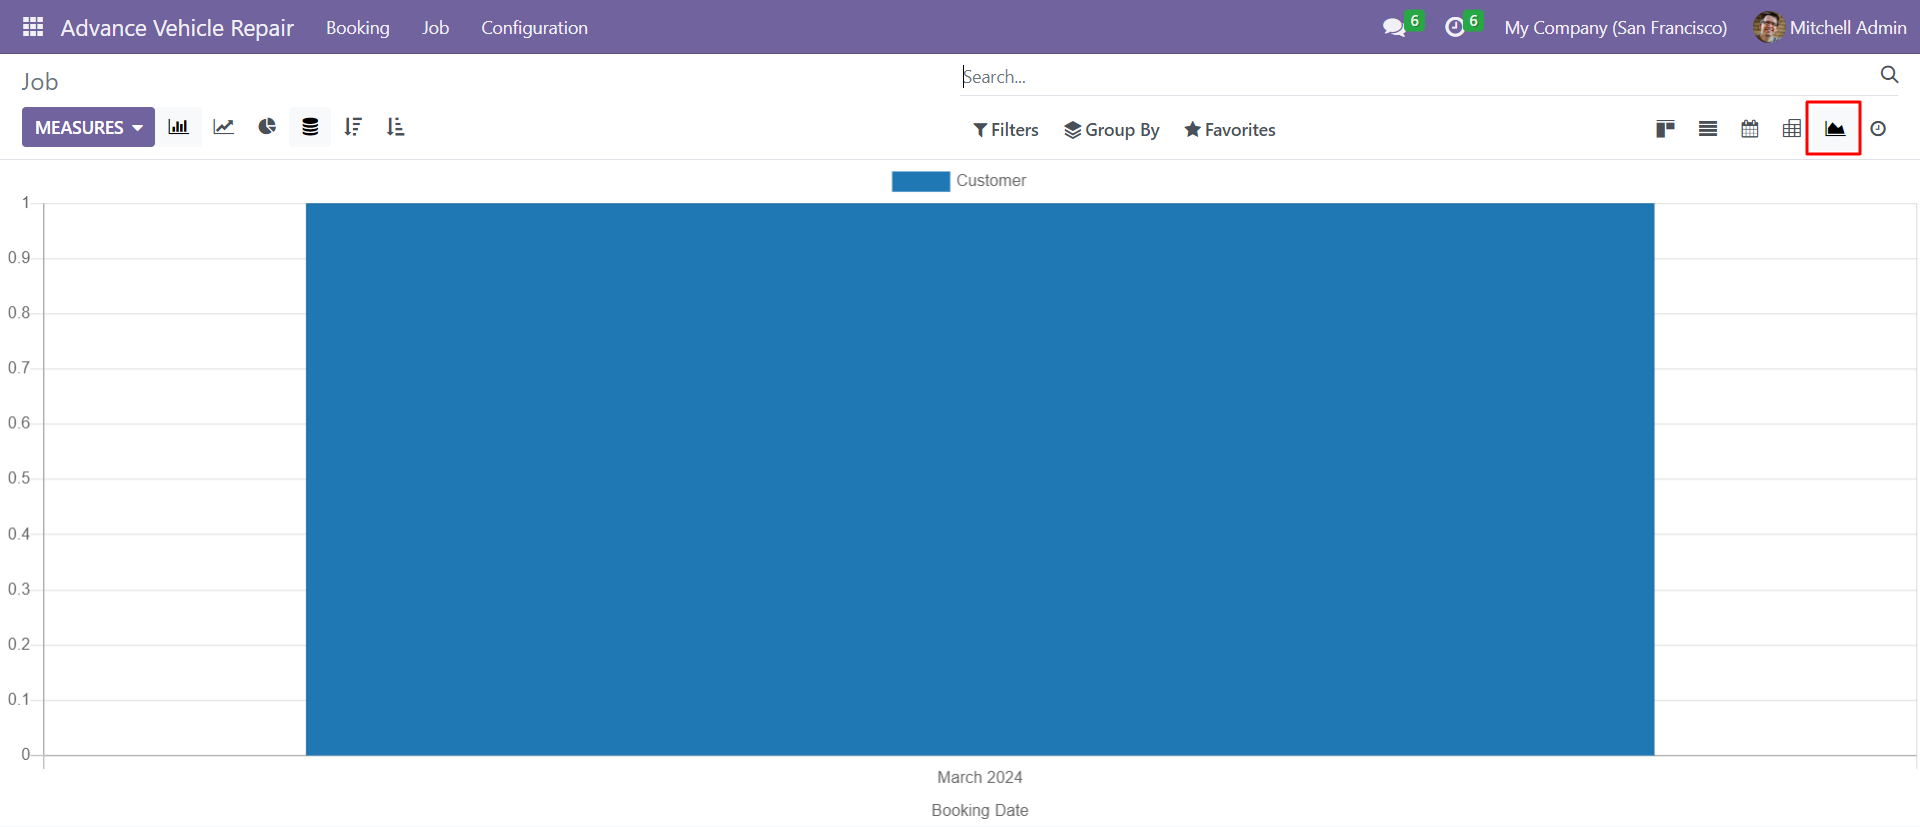
Job graph view.
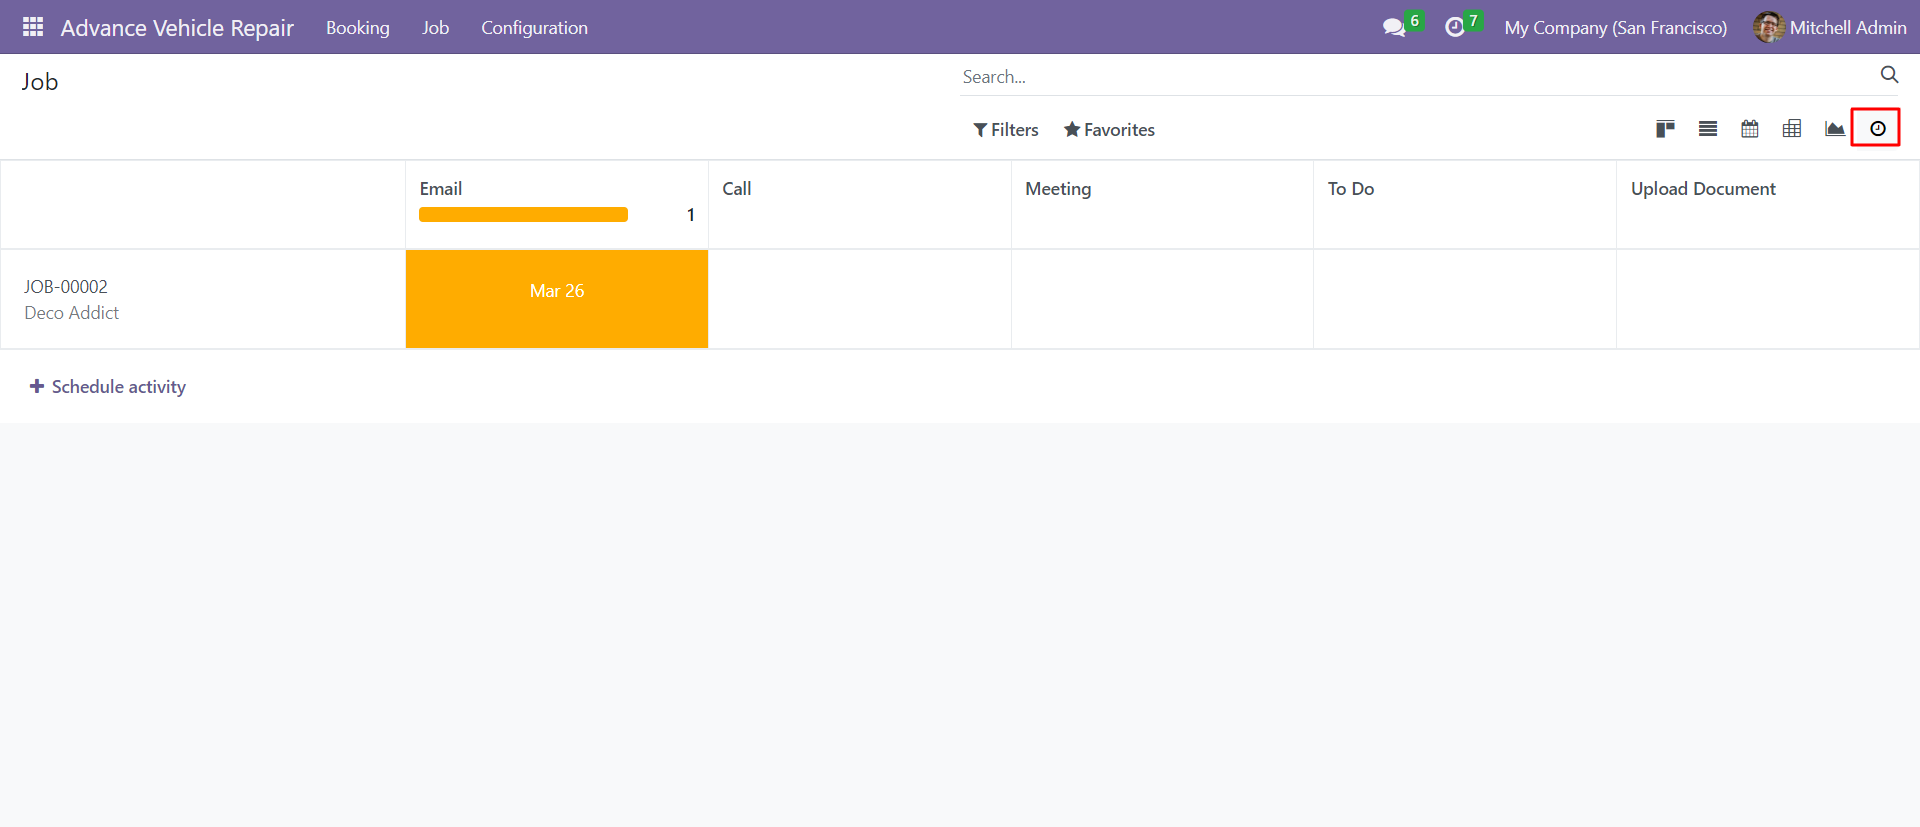
Job activity view.
Version 16.0.1 | Released on : 17th April 2025
- Yes, this app works perfectly with Odoo Enterprise (Odoo.sh & On-Premise) as well as Community.
- No, this application is not compatible with odoo.com(odoo saas/Odoo Online).
- Please Contact Us at sales@softhealer.com to request customization.
- Yes, you will get free update for lifetime.
- No, you don't need to install additional libraries.
- For version 12 or upper, you will need to purchase the module for each version that you want to use.
- Yes, we provide free support for 100 days.
- No, We do not provide any kind of exchange.
