












Subscription Management System

Are you looking for a
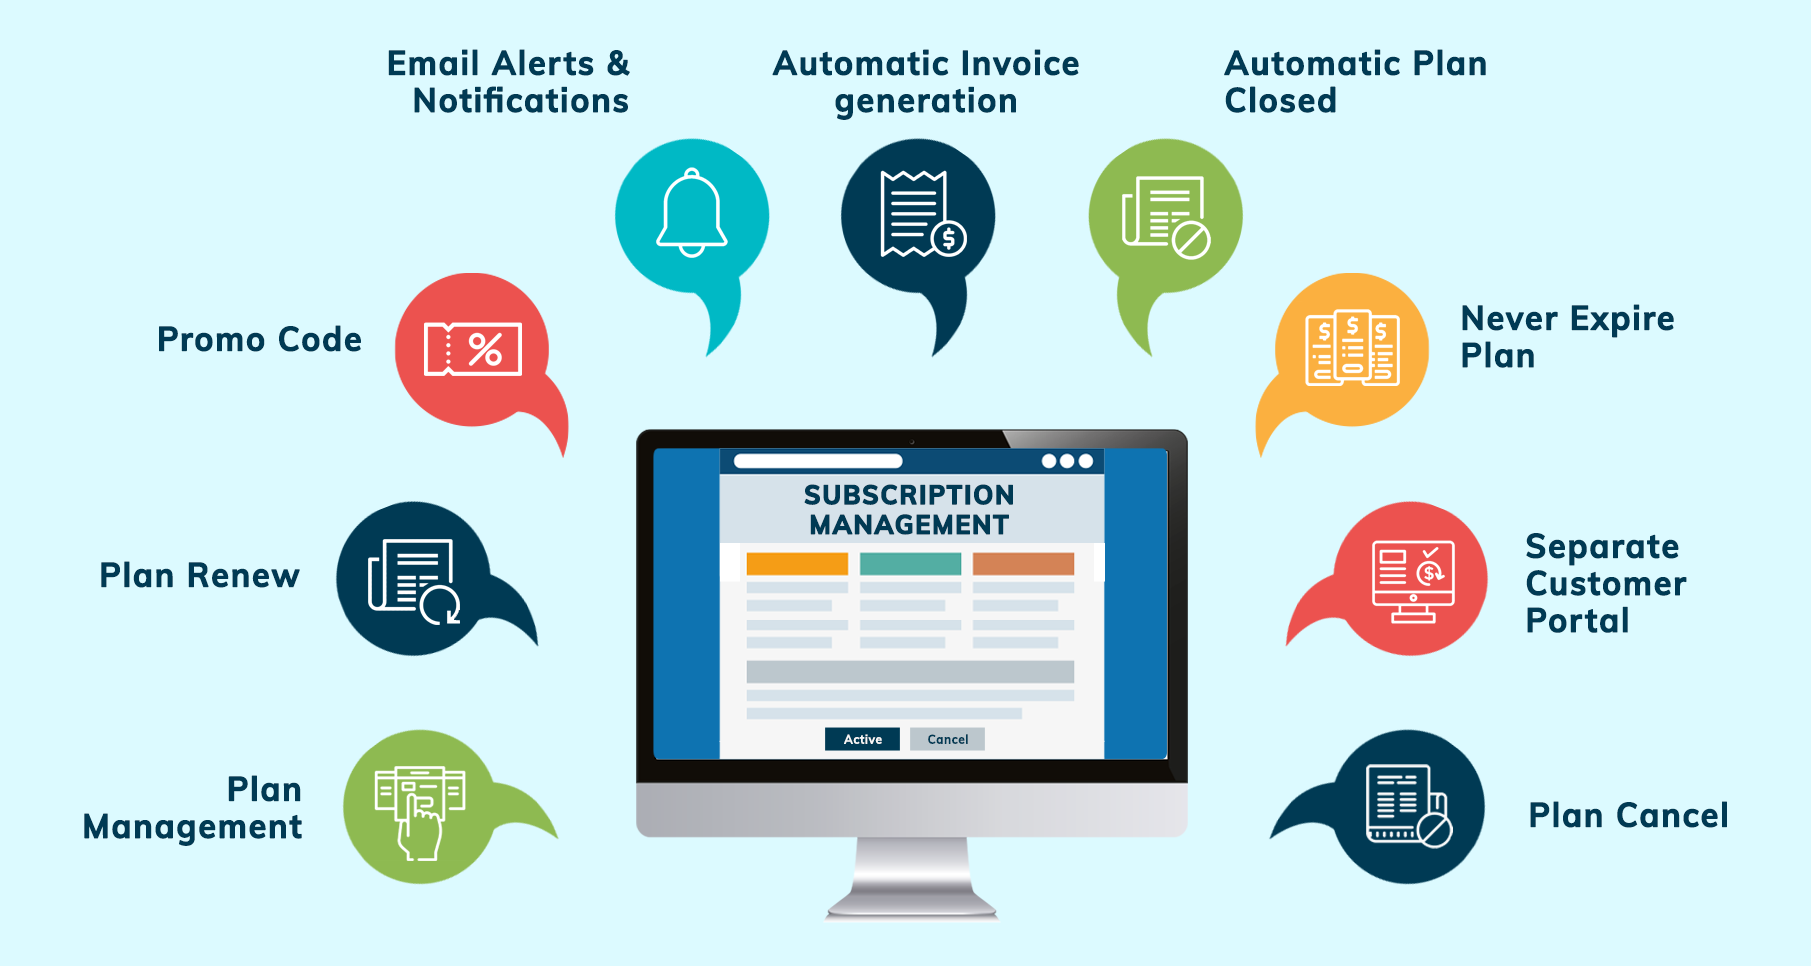
subscription management system? We provides the subscription system with subscription plans. You can
create subscription plans like daily, weekly, monthly & yearly. You can send subscription reminders to
customers using email templates. You can set recurring periods on subscriptions to renew it. Customer can
manage their subscription plans for themselves directly from portal.
This module also allows businesses to create and manage flexible subscription plans, set customizable
billing cycles, and automate email alerts for expirations. Customers can manage their plans via a
self-service portal, while detailed reporting features provide valuable insights for strategic
decision-making.
Related Modules
Key Features
Features
Subscription Product & Plan Management
Create subscription products and flexible plans with daily, weekly, monthly, or yearly billing cycles.
Flexible Billing Cycles
Configure billing frequency, invoice cycles, and subscription duration based on business requirements.
Automatic Invoice Generation
Automatically generate invoices for subscriptions based on configured billing cycles.
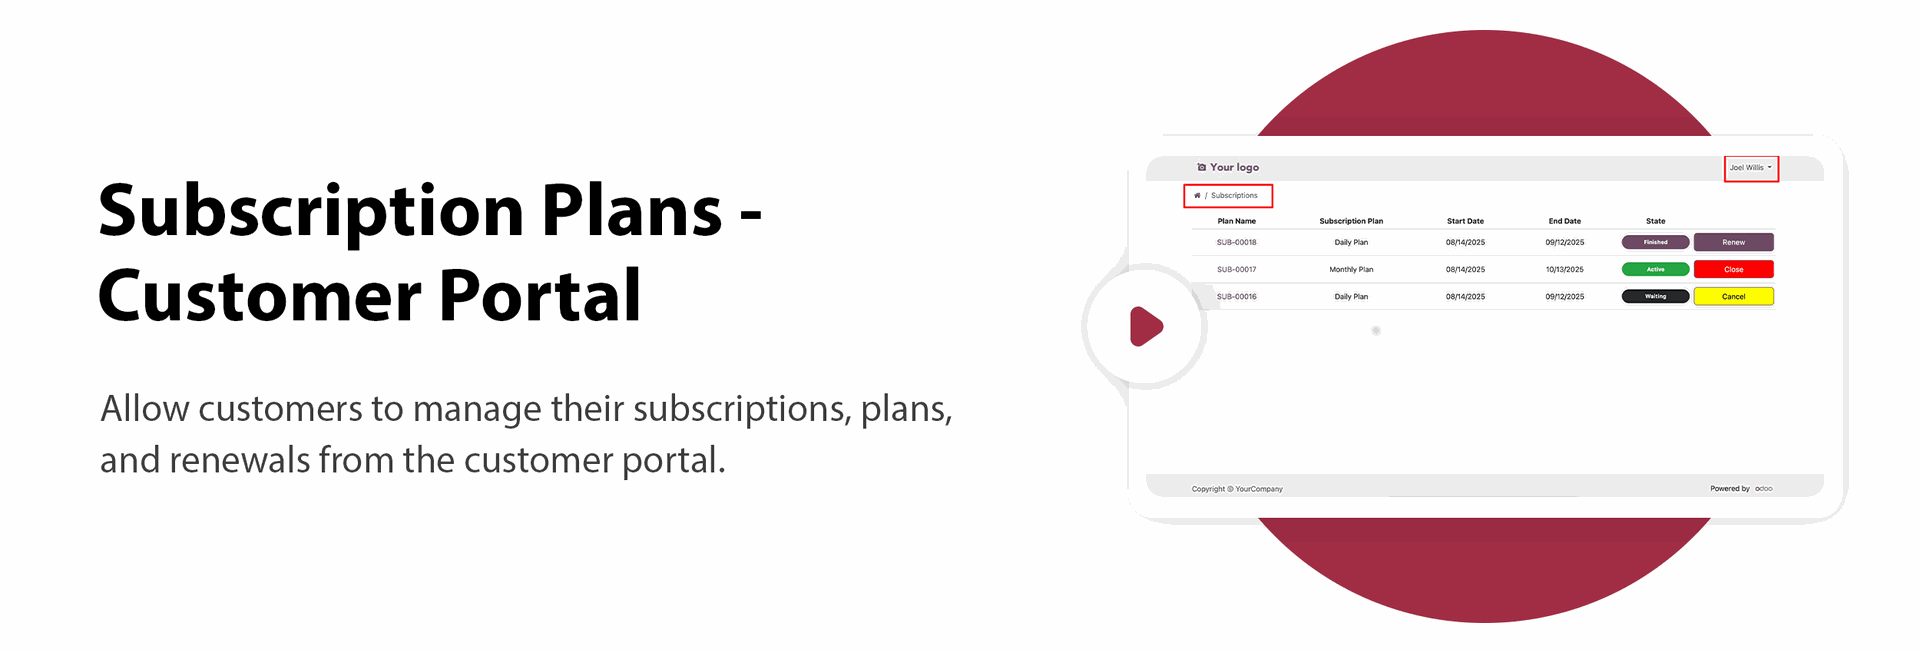
Customer Portal for Subscriptions
Allow customers to manage their subscriptions, plans, and renewals from the customer portal.

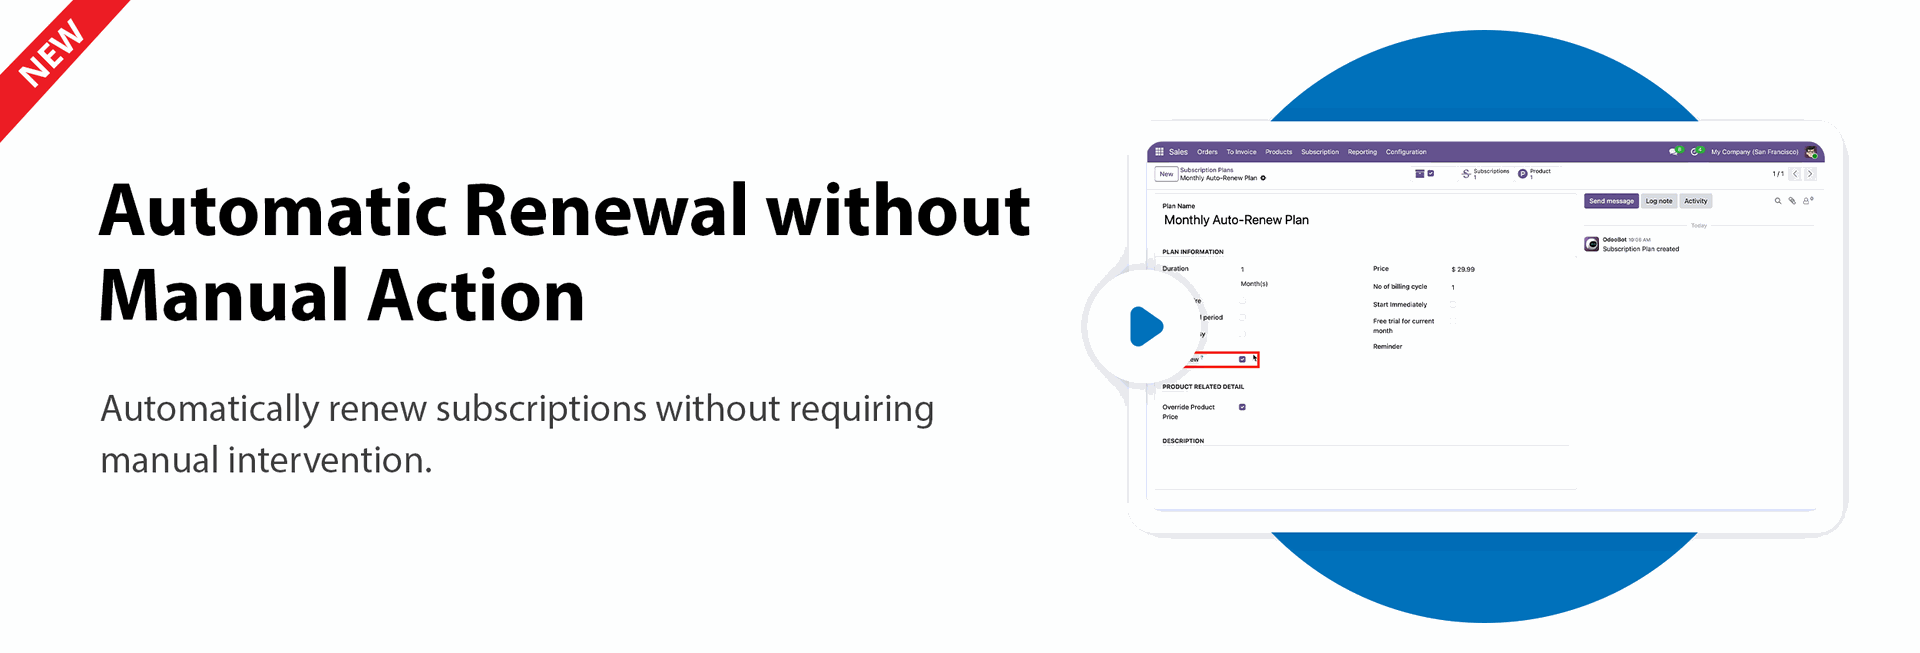
Automatic Renewal
Automatically renew subscriptions without requiring manual intervention.
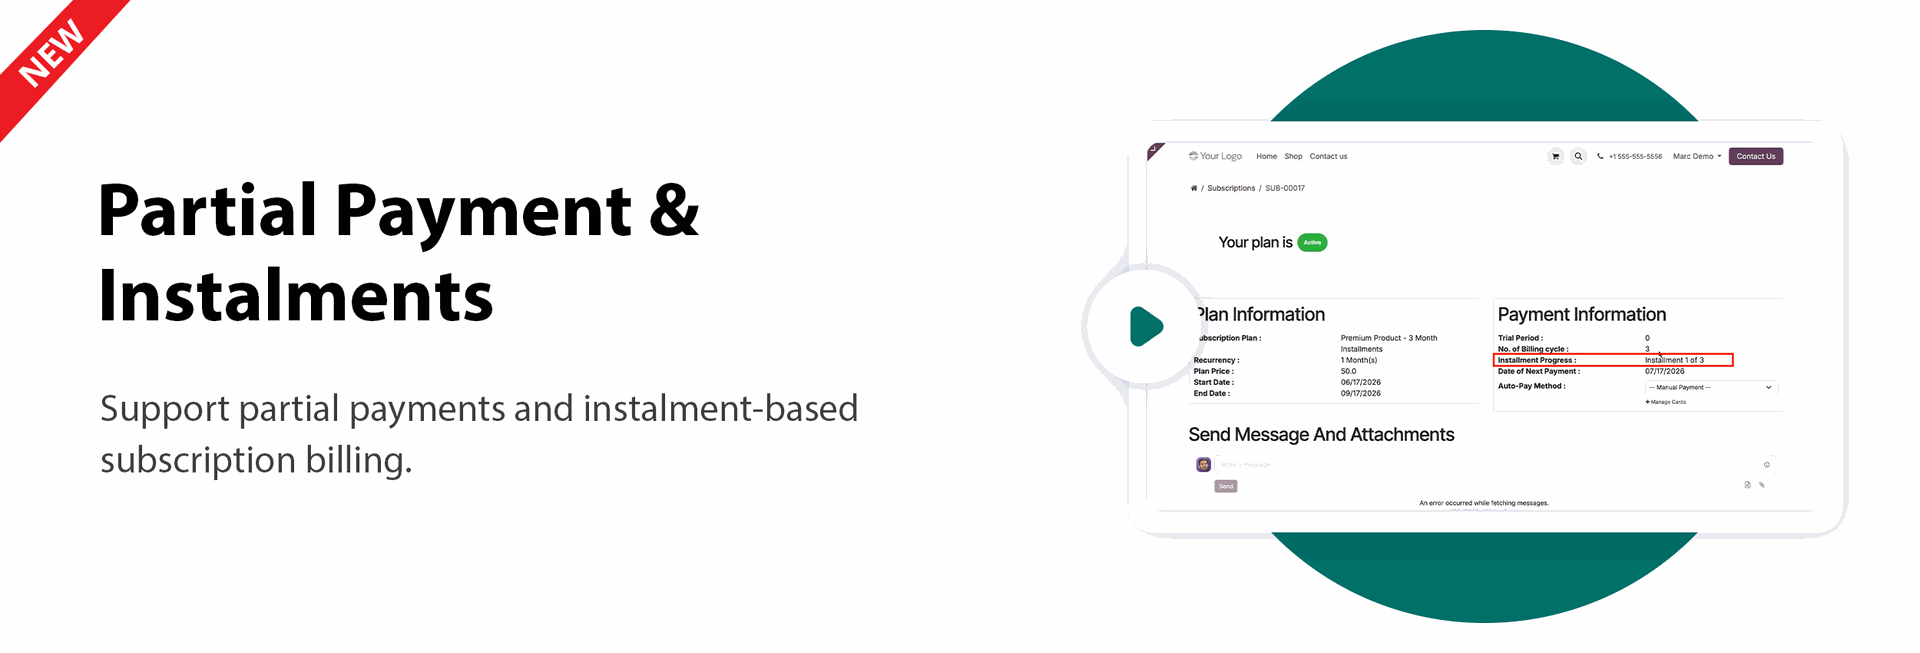
Partial Payment & Installments
Support partial payments and installment-based subscription billing.
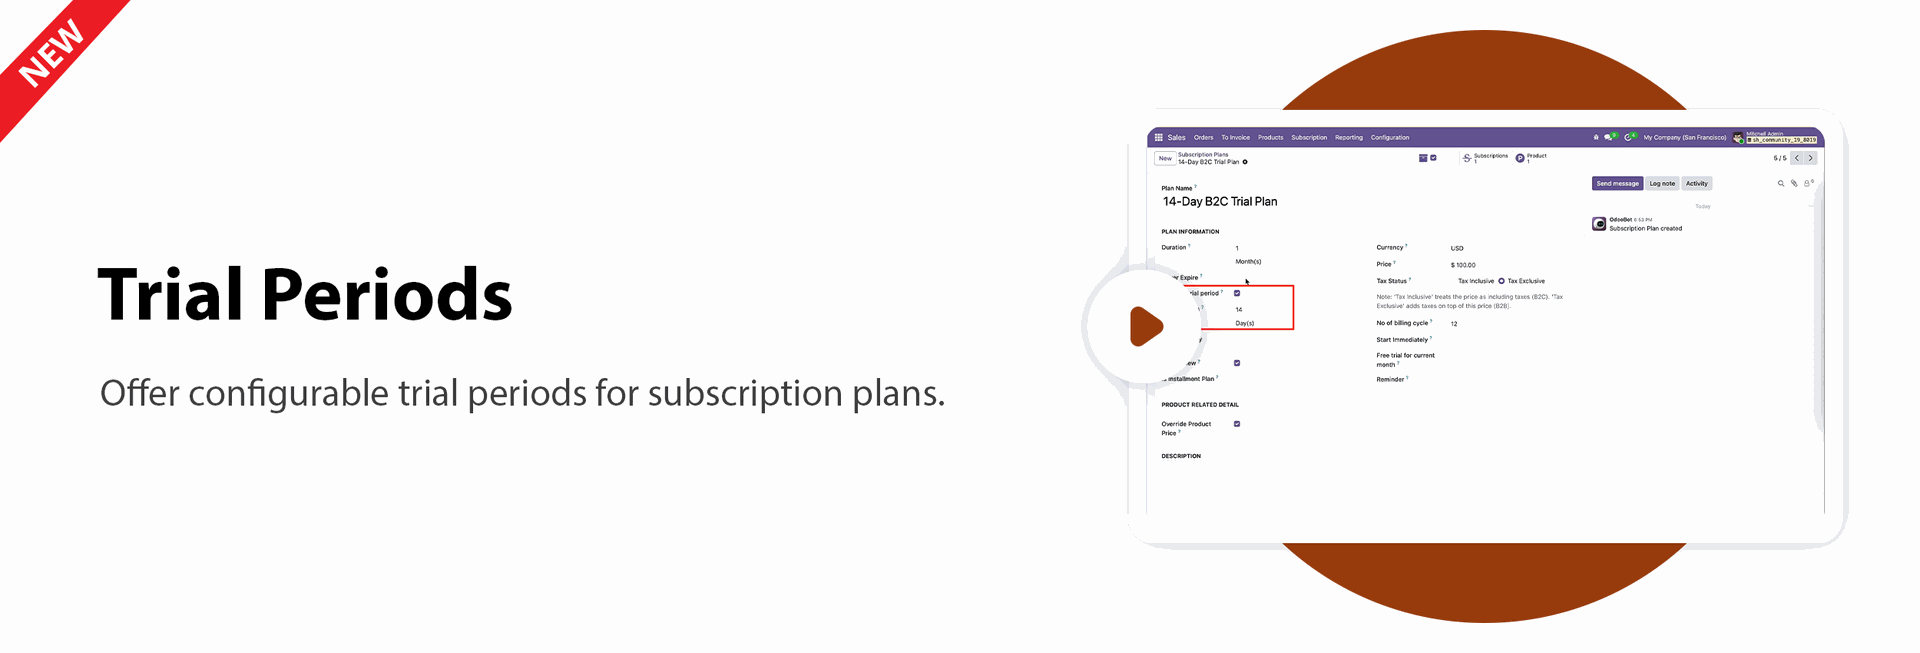
Trial & Grace Periods
Offer configurable trial periods and grace periods for subscription plans.
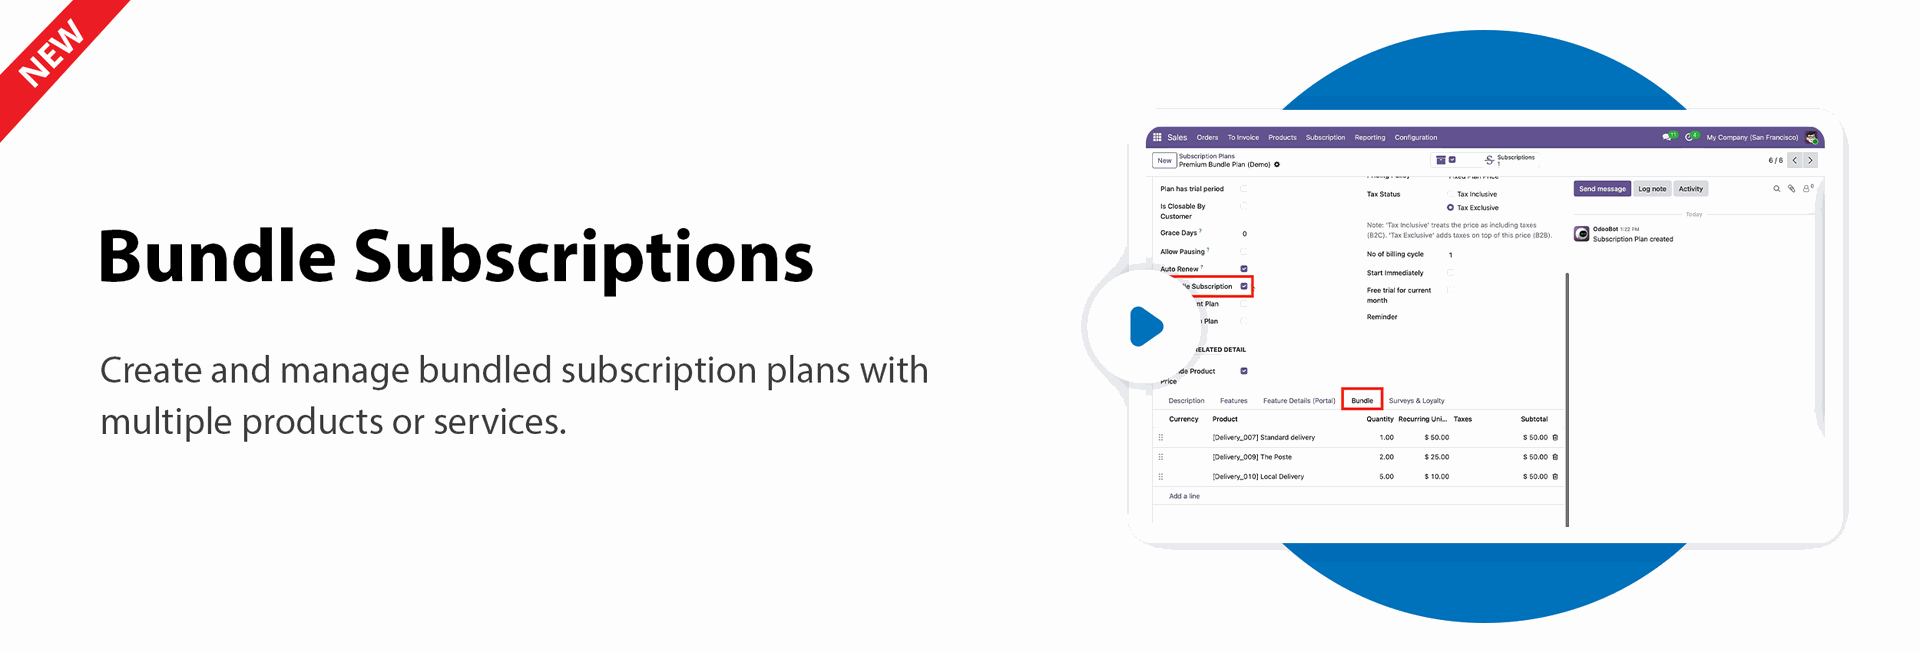
Bundle Subscriptions
Create and manage bundled subscription plans with multiple products or services.

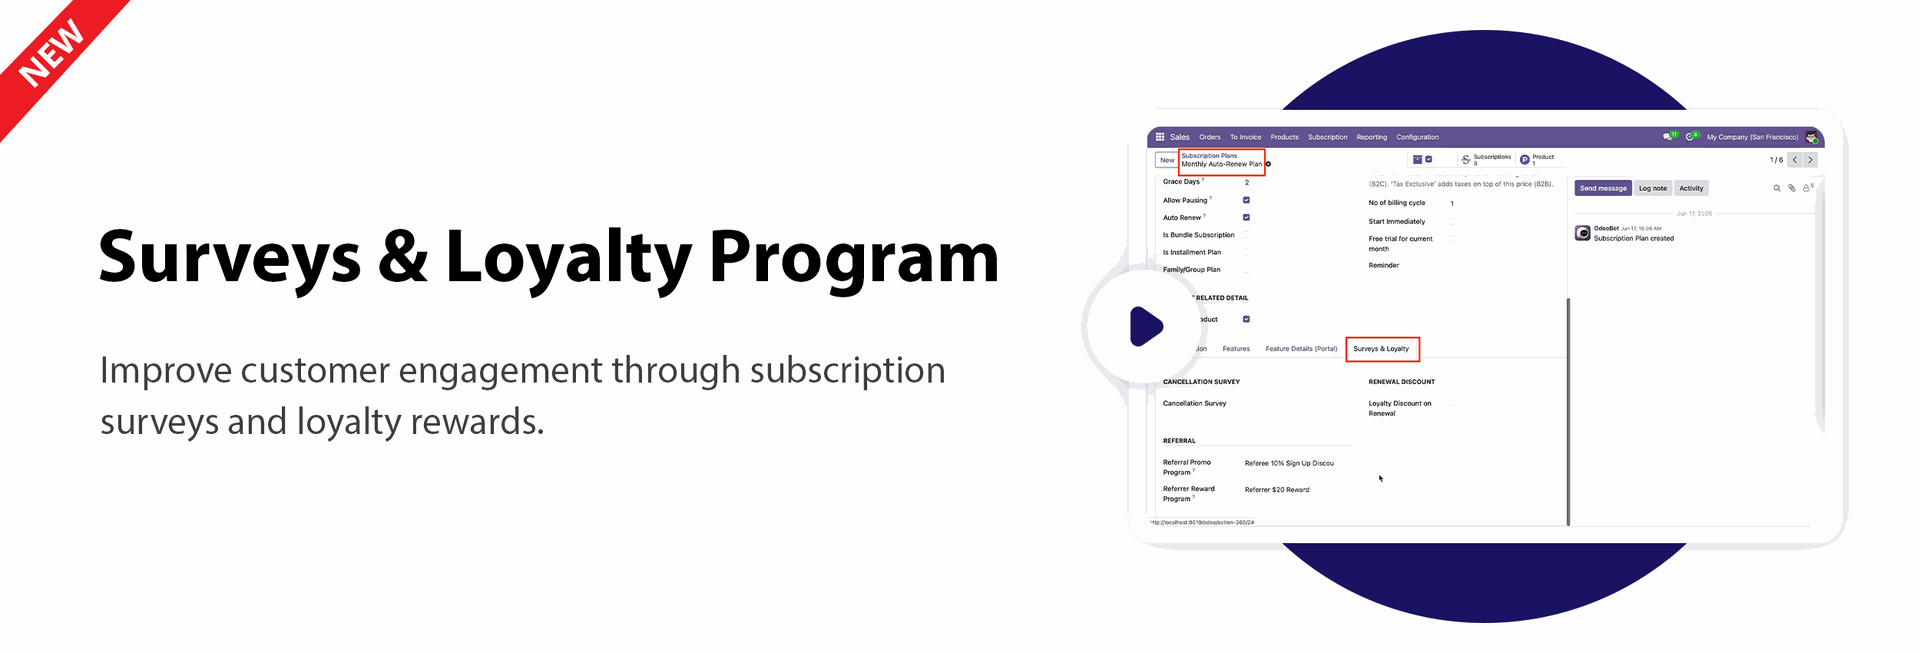
Surveys & Loyalty Program
Improve customer engagement through subscription surveys and loyalty rewards.
Plan Upgrade

Easily upgrade your current subscription plan to a higher tier directly within the system.
Customer Portal Plan Upgrade
Empower customers to seamlessly upgrade their subscription plans directly from the portal.
Customer Portal Payment History Tab
Allow customers to view their complete payment history online via a dedicated tab.
Download Invoice PDF Button In Portal
Customers can easily download their subscription invoice PDFs straight from the portal interface.
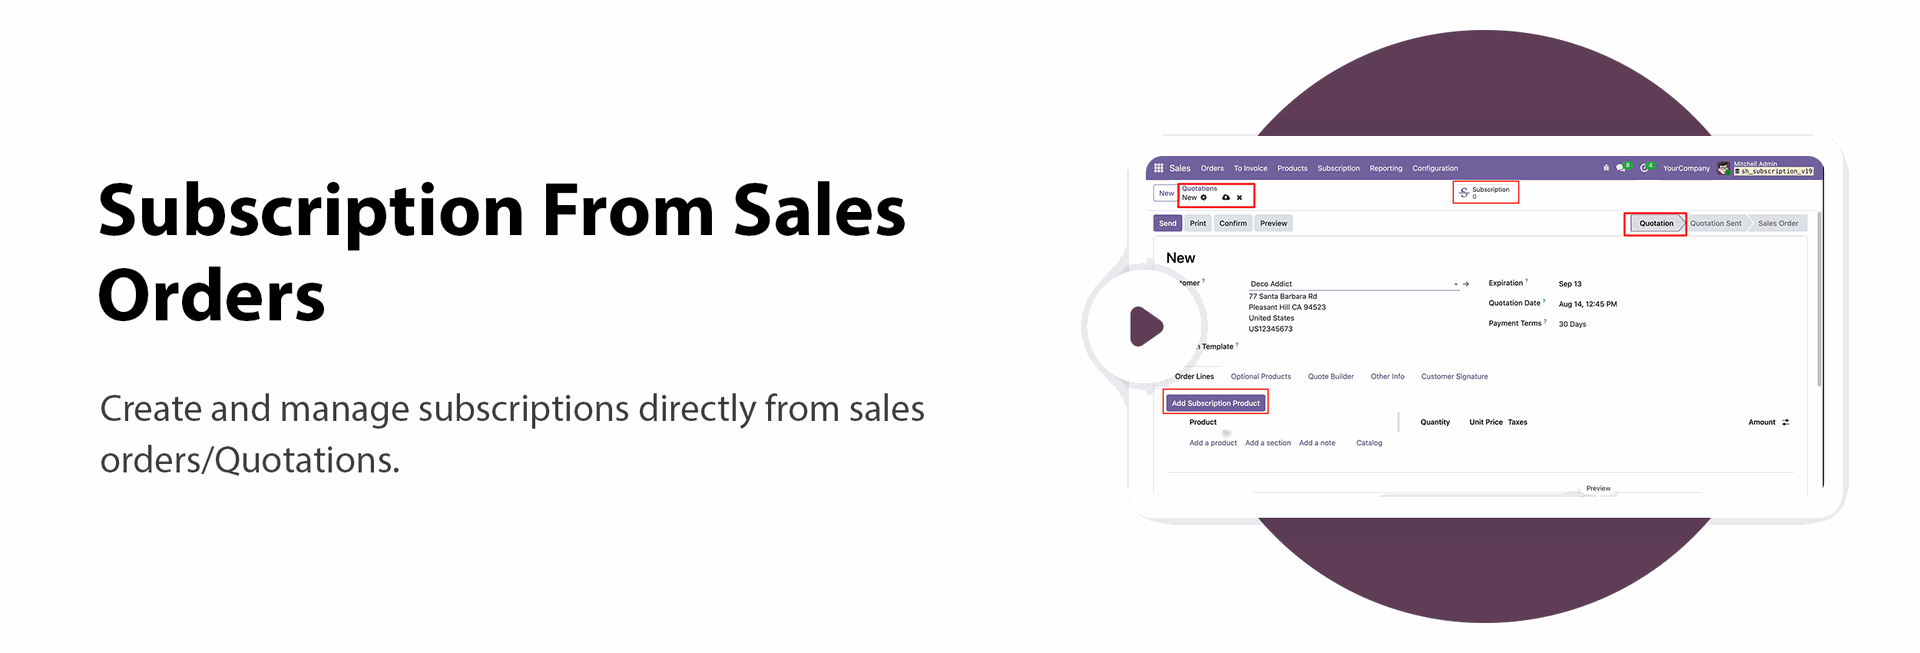
Subscription from Quotations/Sales Orders
Create and manage subscriptions directly from the Quotations/Sales Orders.

Subscription Reports
Analyze subscription performance with dedicated subscription reports.

Promo Code Support
Apply promotional codes and discounts when creating or renewing subscriptions.

Email Notifications
Send automated email notifications to customers about their subscription renewals and expirations.

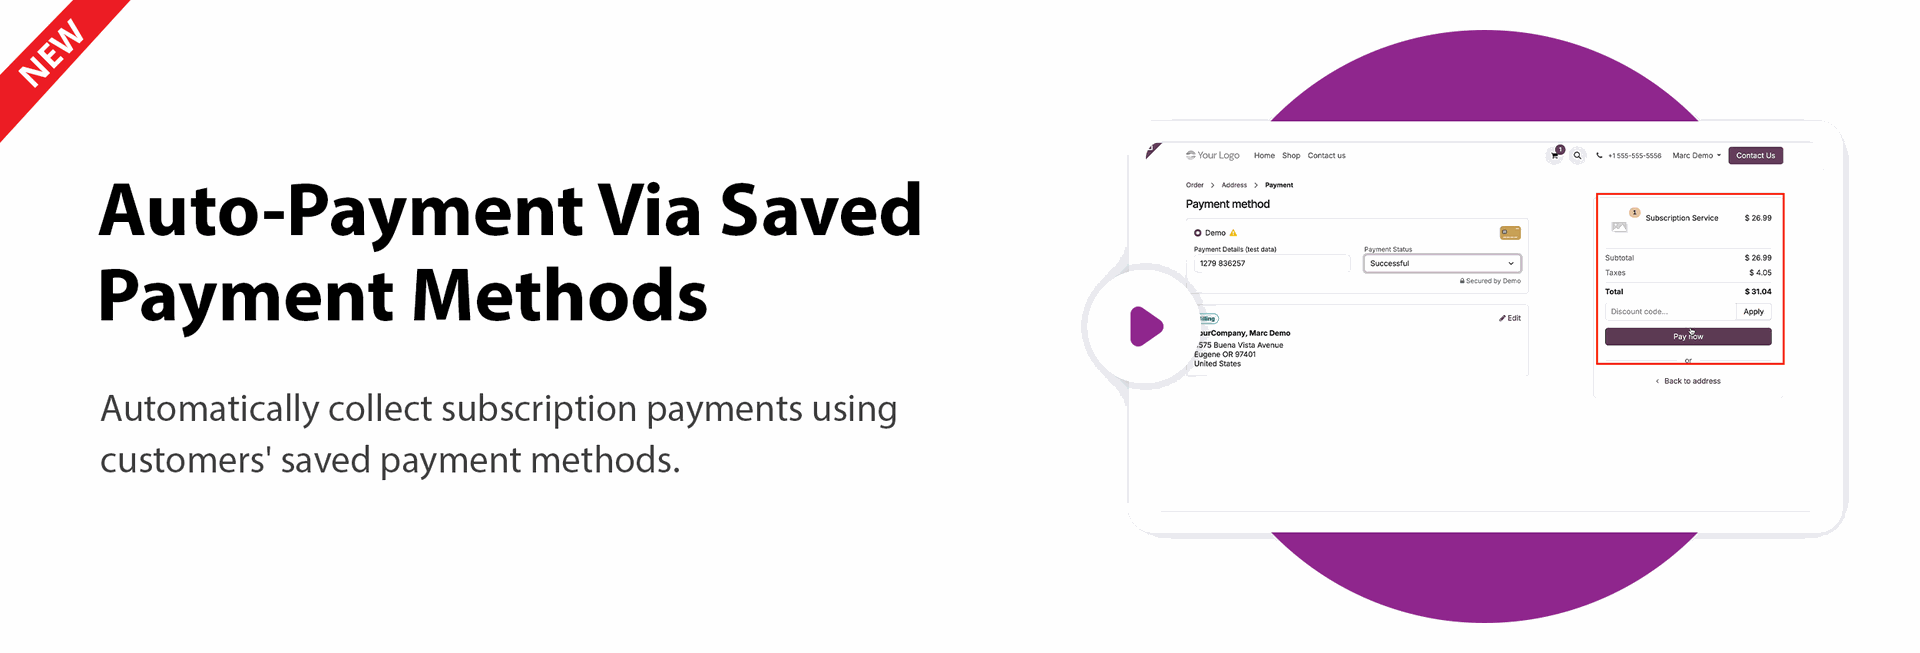
Auto Payment Processing
Automatically collect subscription payments using customers' saved payment methods.
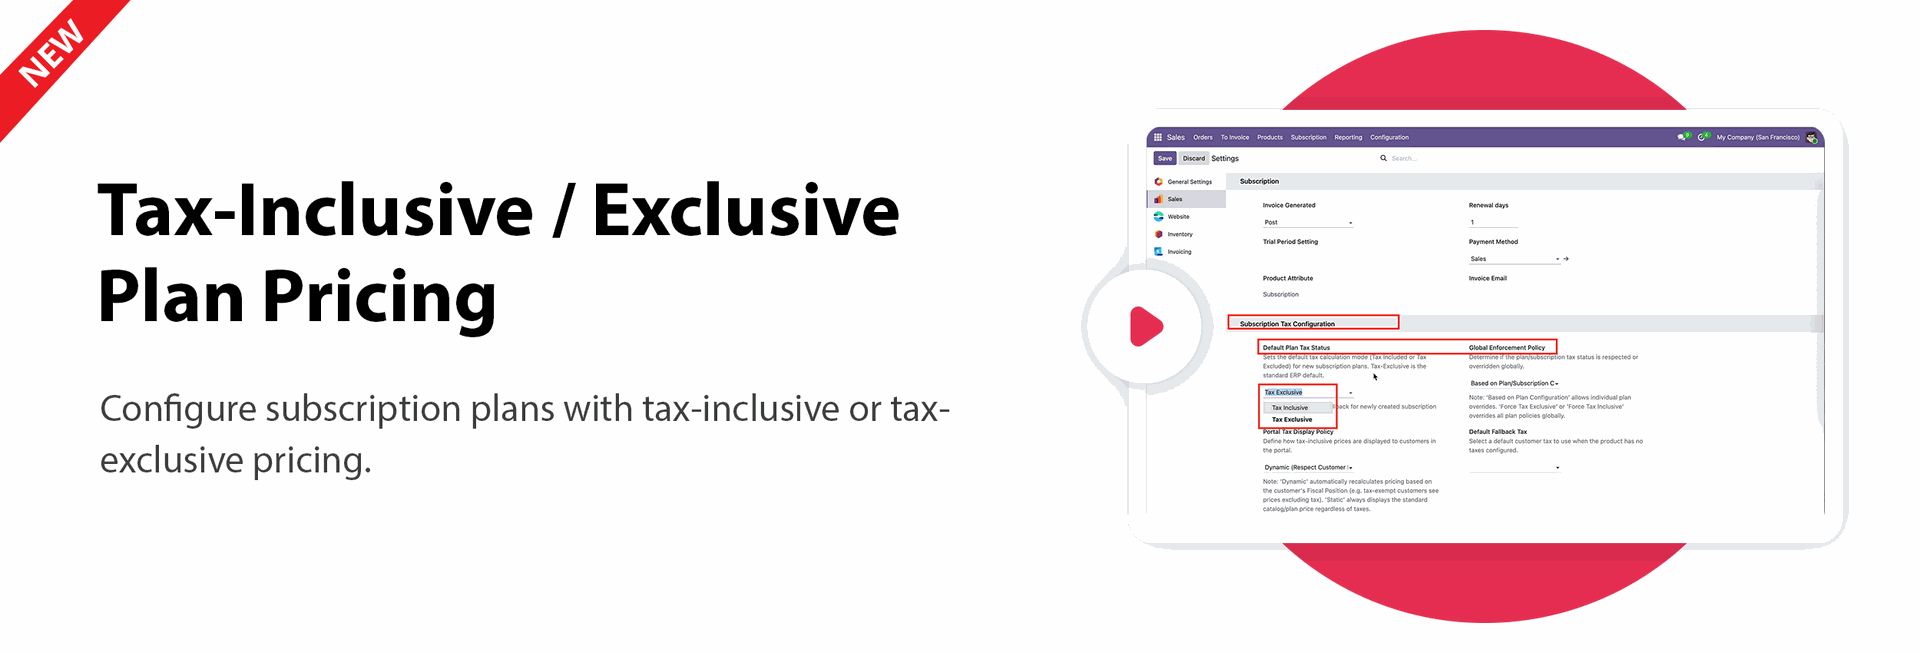
Flexible Tax Pricing
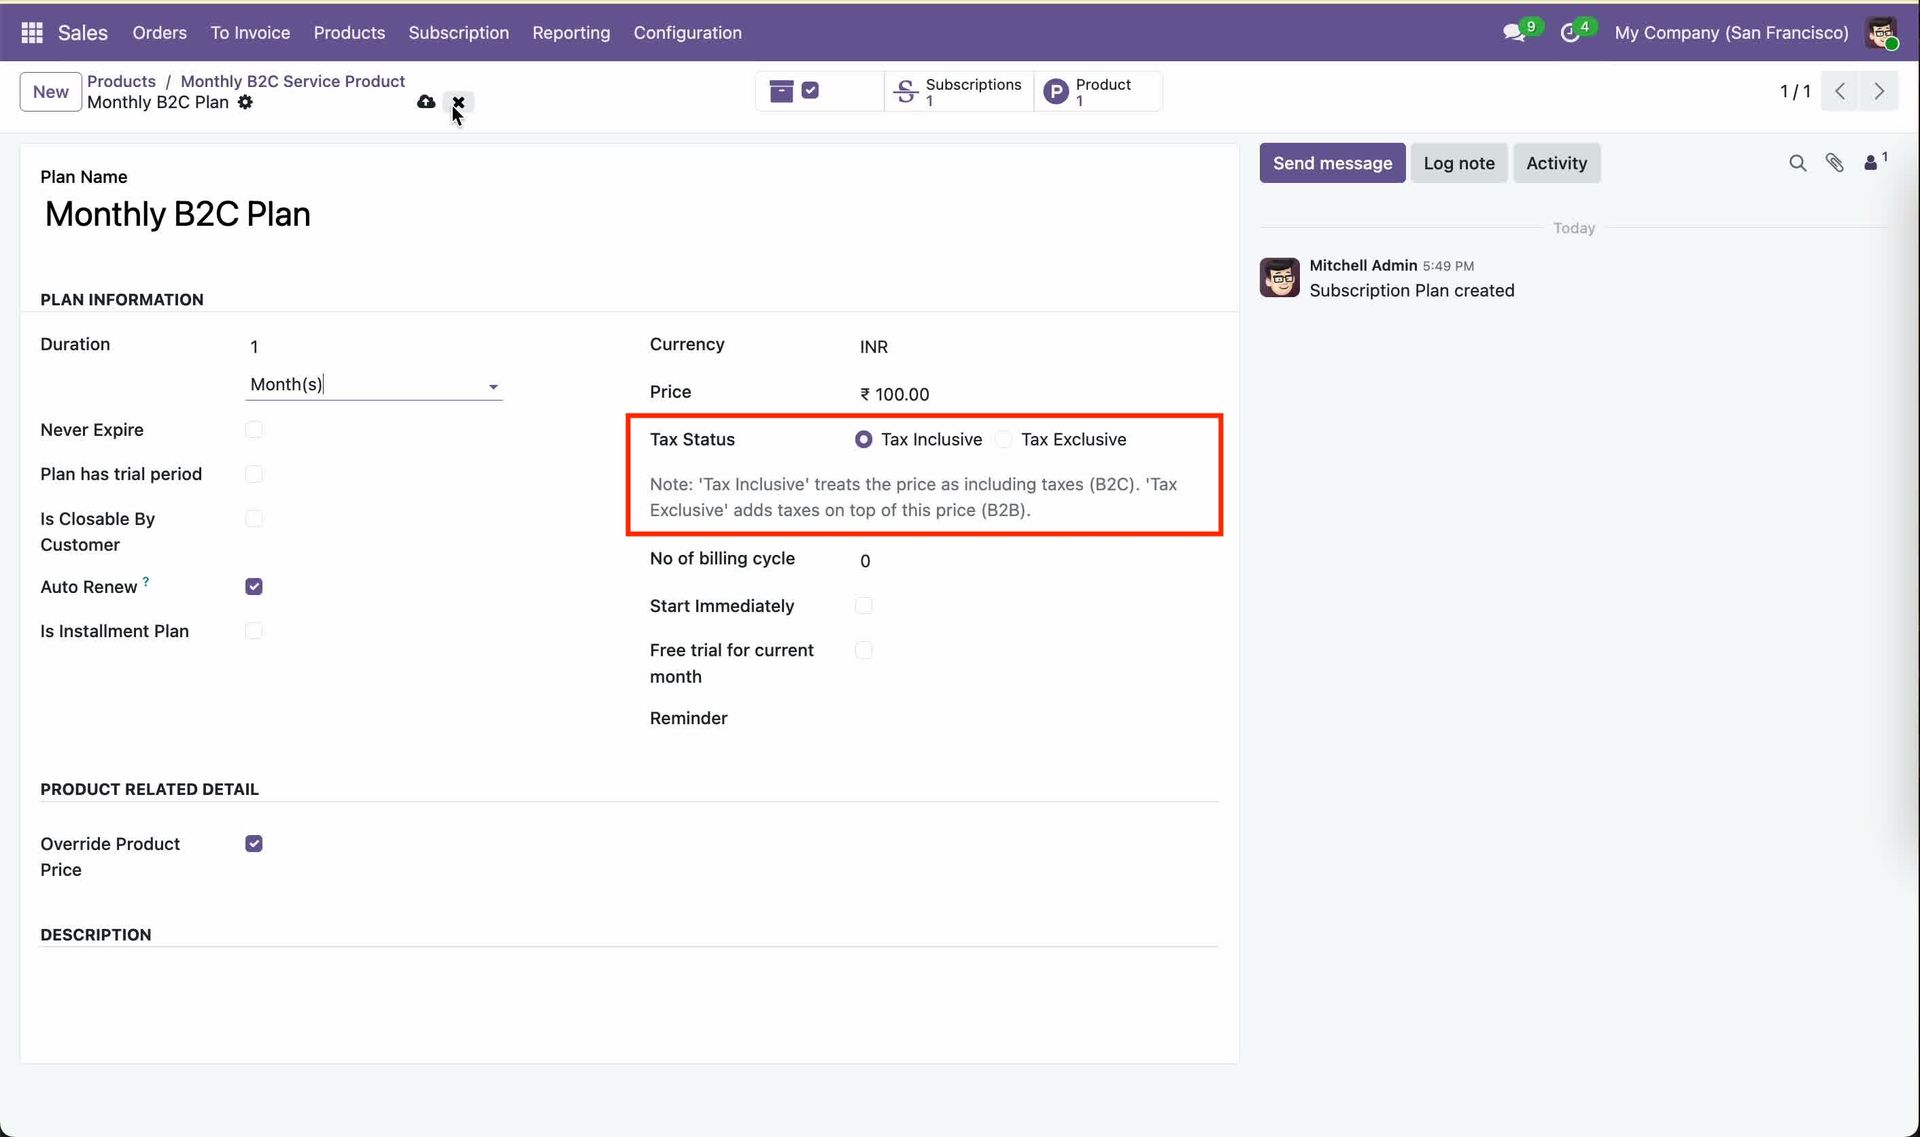
Configure subscription plans with tax-inclusive or tax-exclusive pricing.

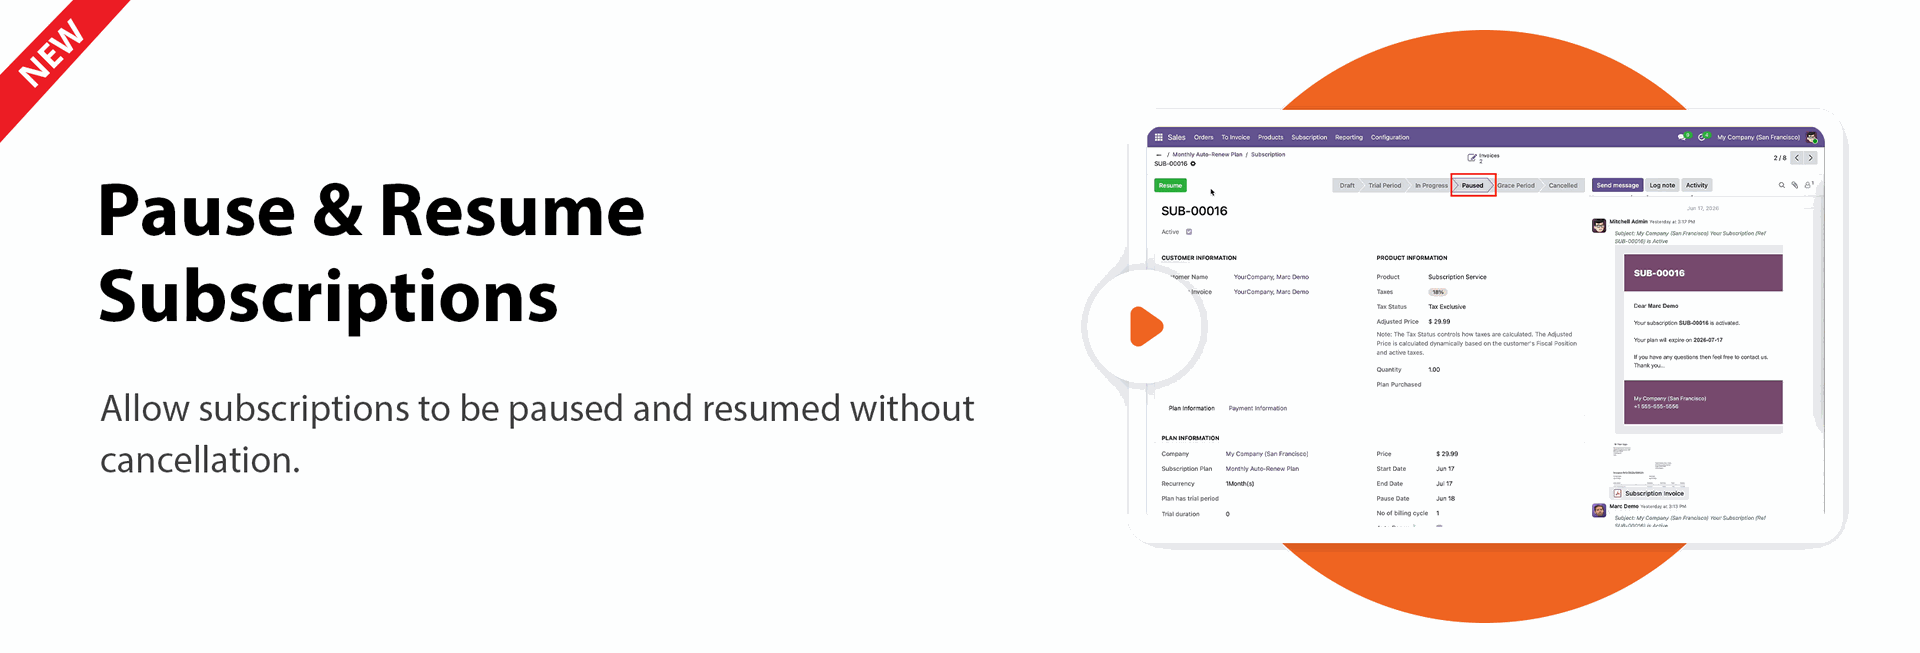
Pause & Resume Subscriptions
Allow subscriptions to be paused and resumed without cancellation.

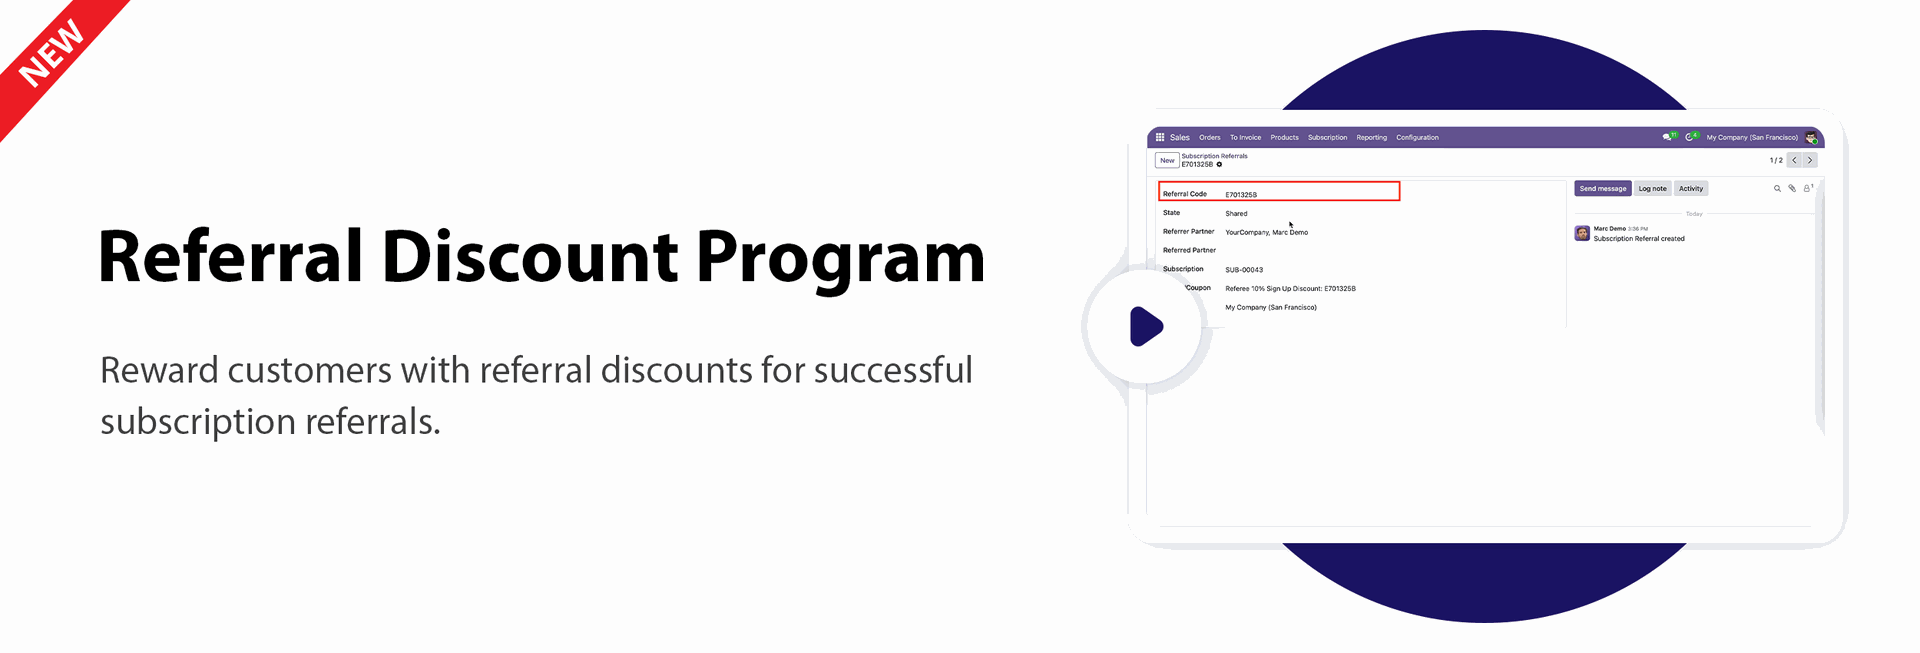
Referral Discount Program
Reward customers with referral discounts for successful subscription referrals.
Portal Plan Comparison Page
Provide a clear comparison page so customers can evaluate and choose the best subscription plans.
Portal Subscription Usage Tracker
Track and display real-time subscription usage metrics for customers in the portal.
Portal Renewal, Expiry, And Overdue Payment Alerts
Automated portal alerts keep customers informed about renewals, expiries, and any overdue payments.

Portal Subscription Pause And Resume
Grant customers the flexibility to pause and resume their active subscriptions seamlessly online.
MRR / ARR Subscription Dashboard
Analyze Monthly and Annual Recurring Revenue with an intuitive, real-time subscription dashboard.

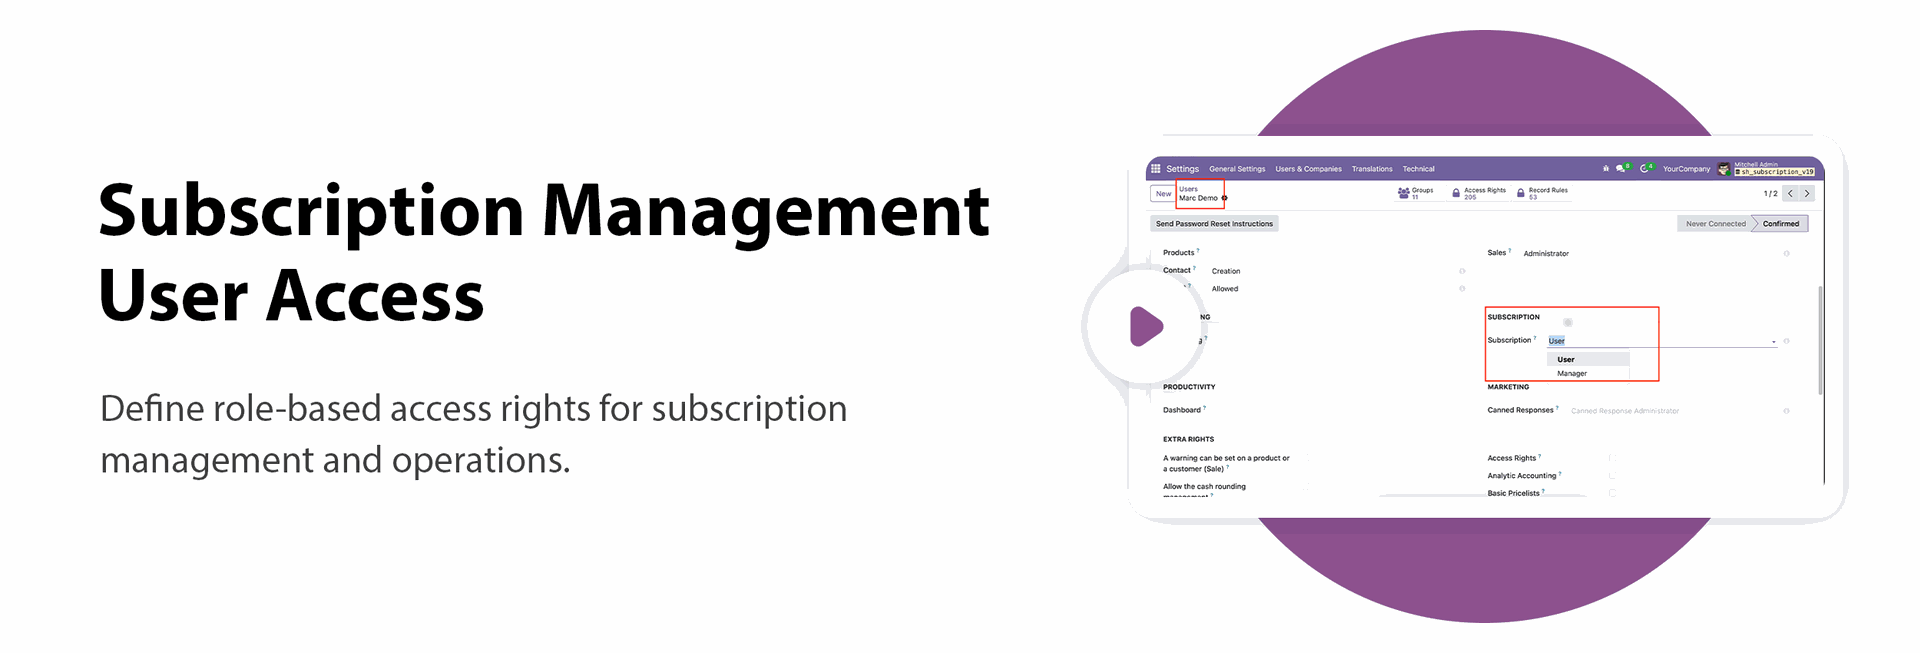
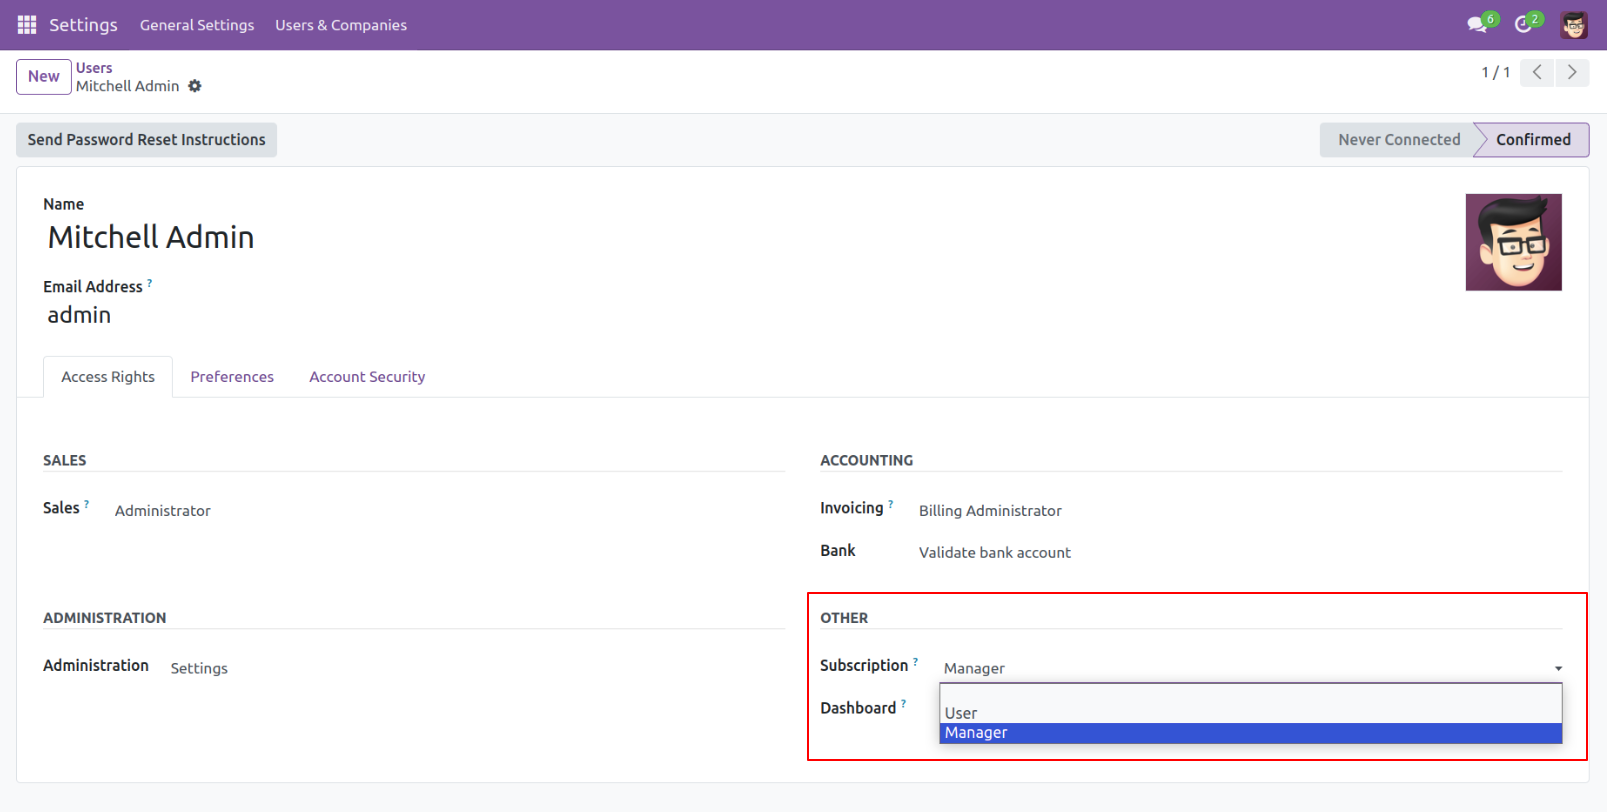
Go to users => select subscription manager/user.
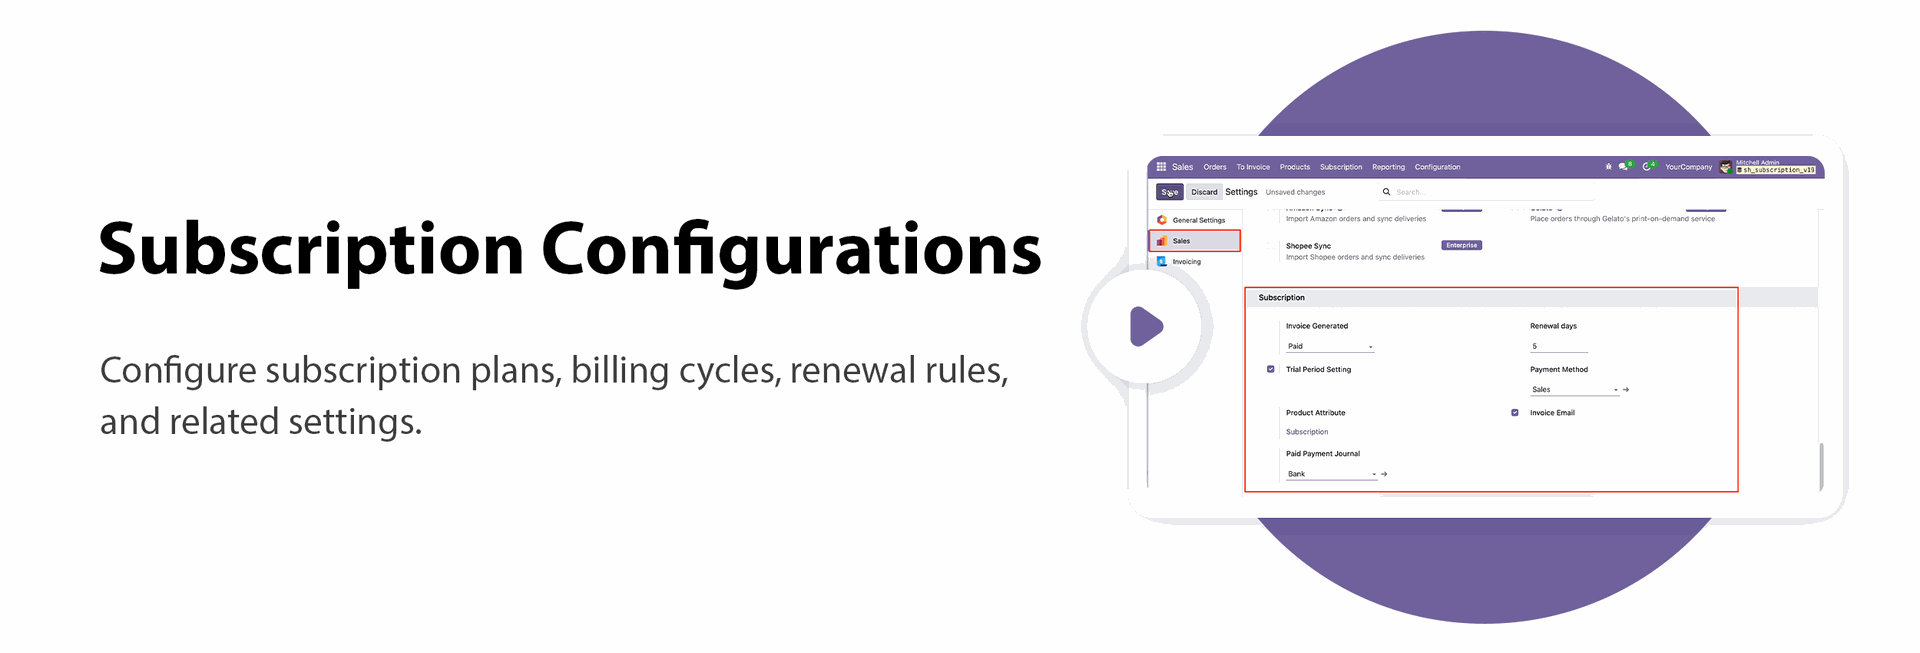
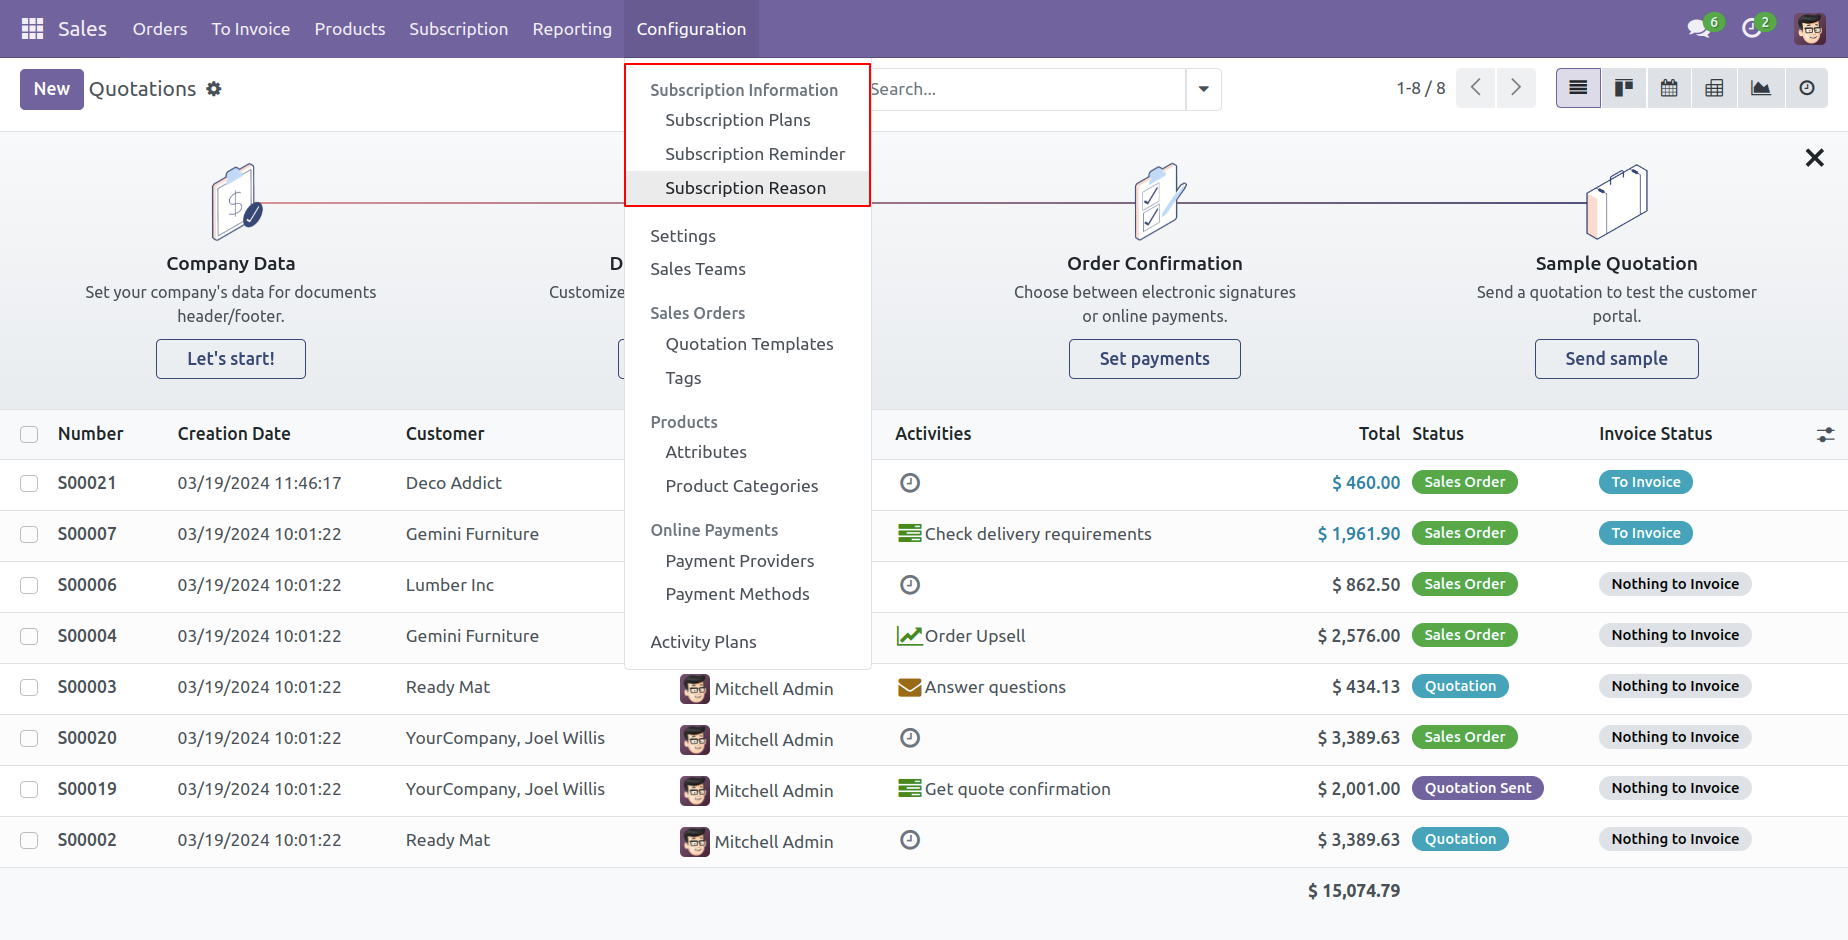
Subscription configurations.
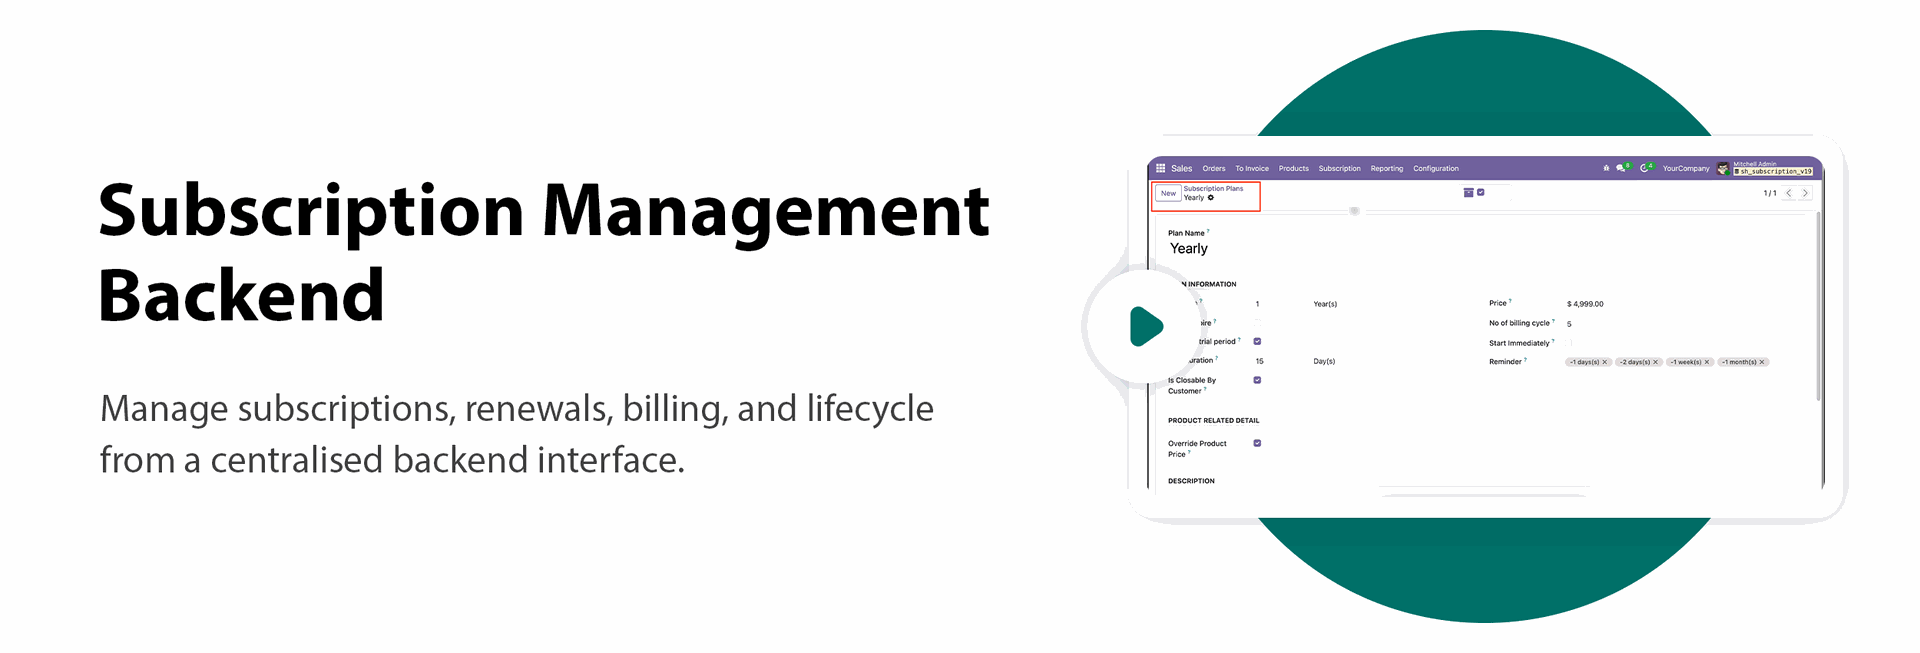
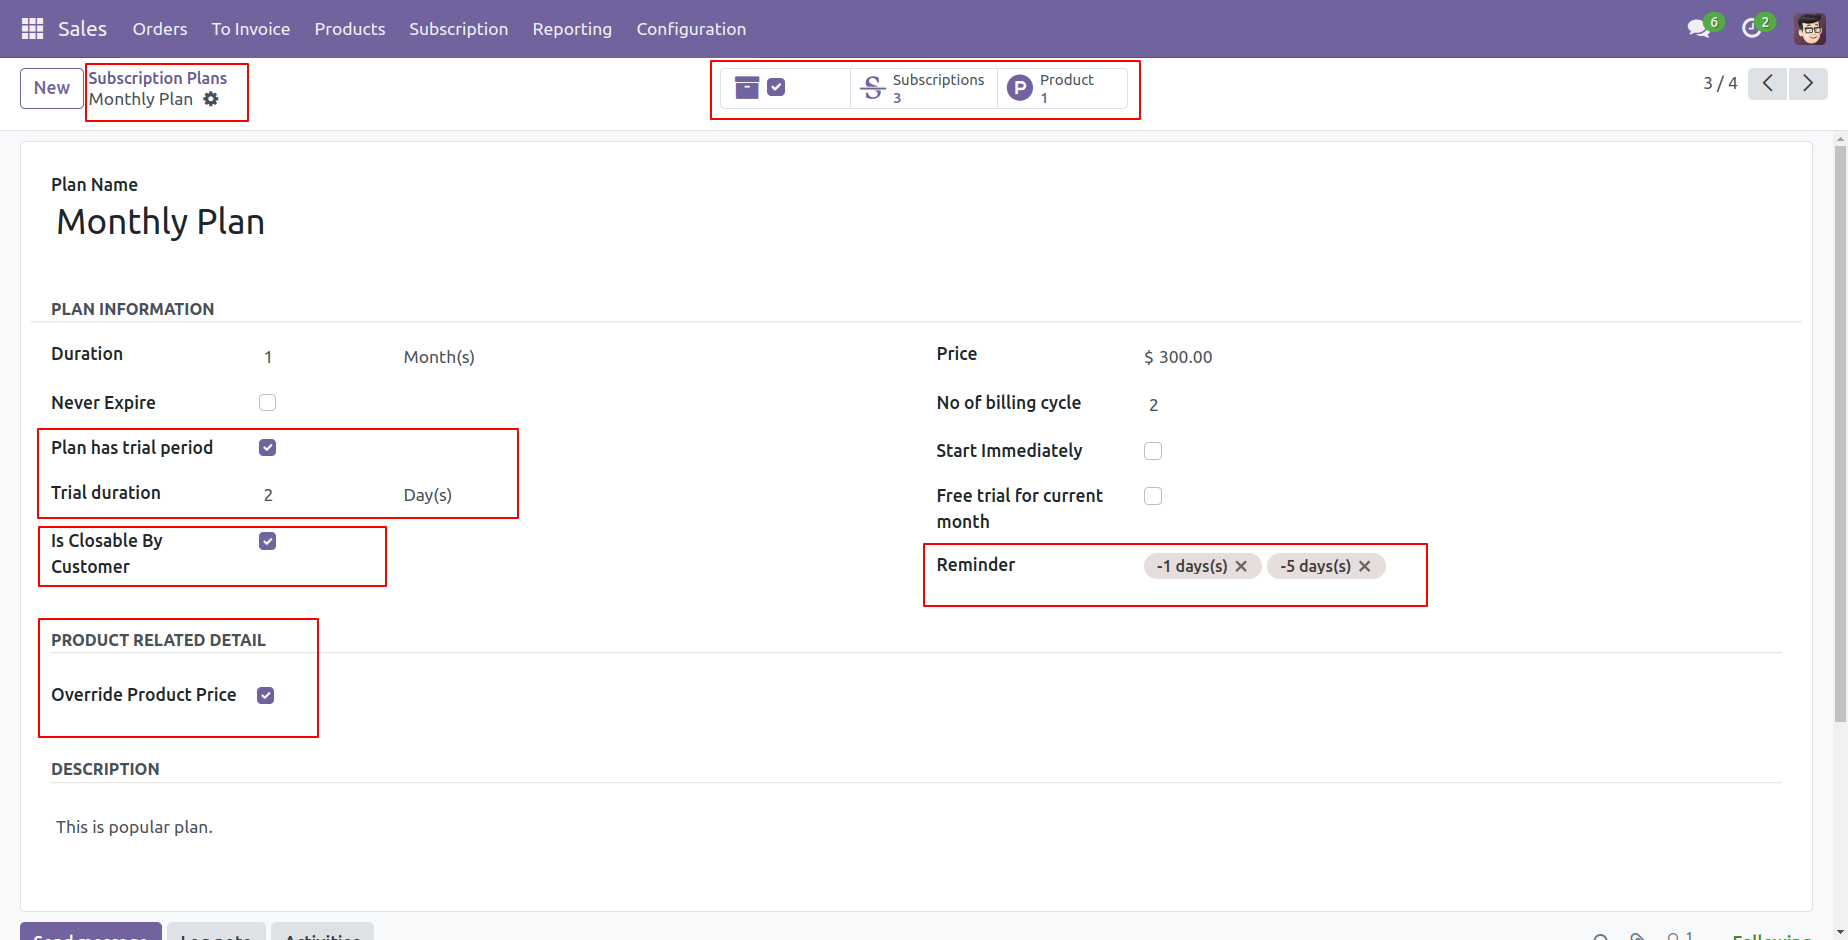
Subscription plan form view.
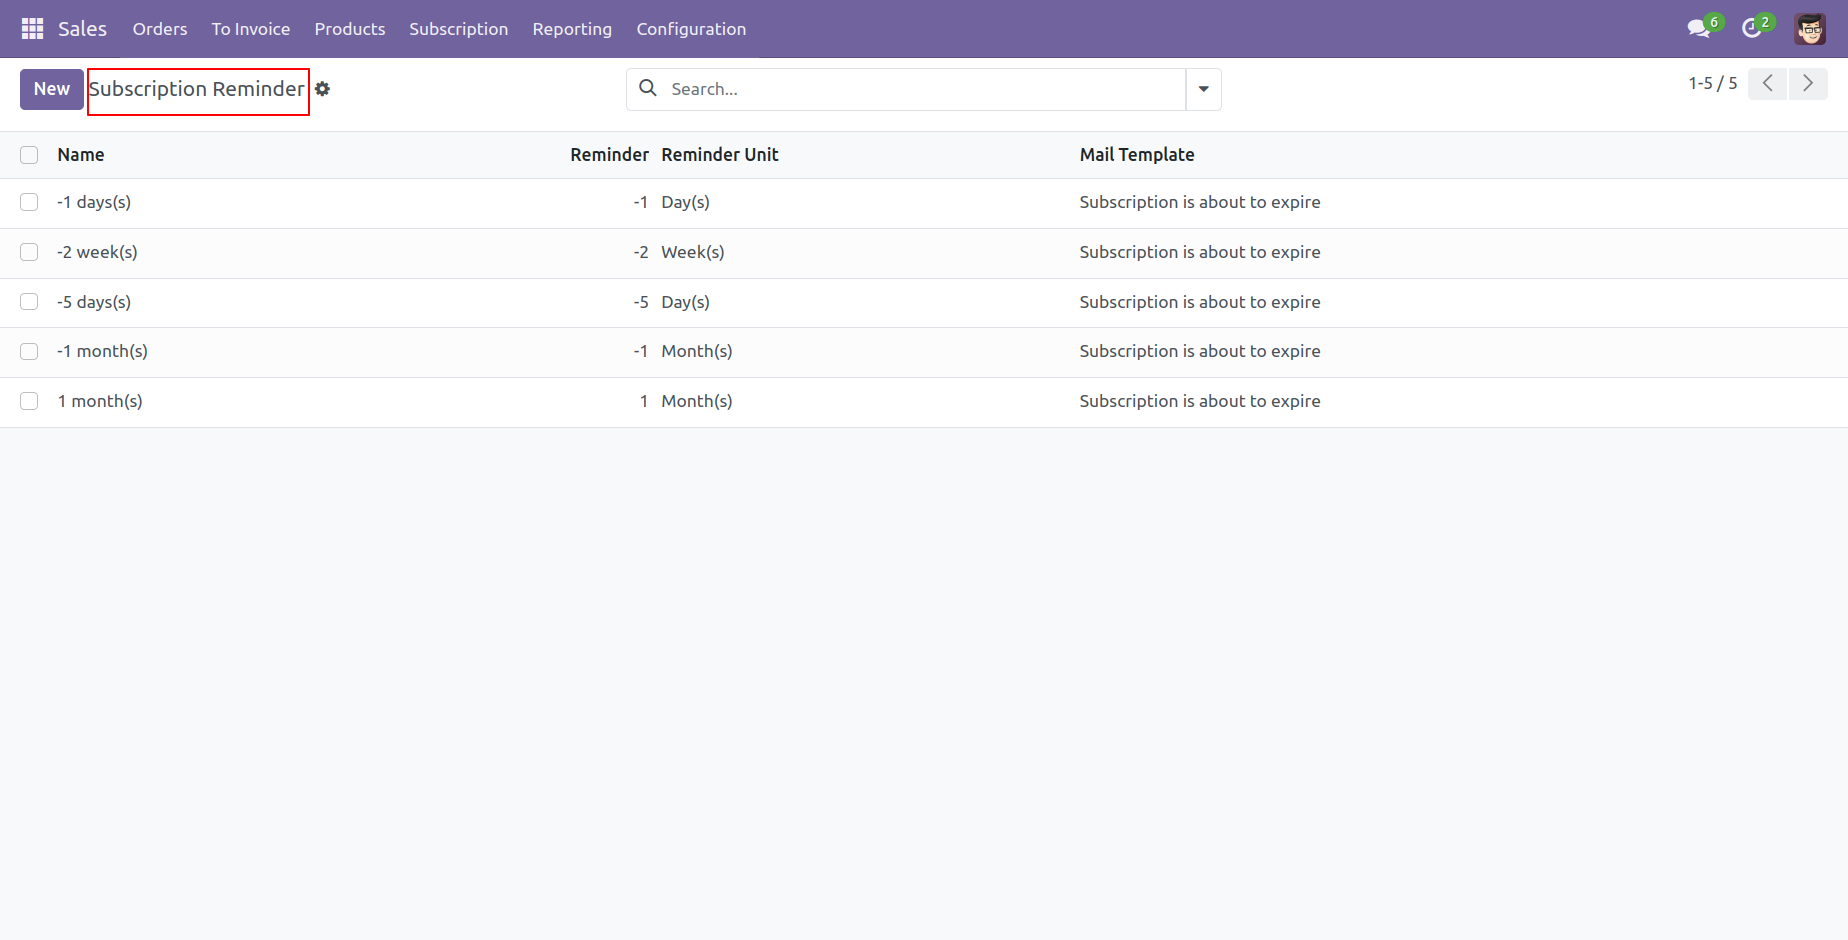
Subscription remider list view.
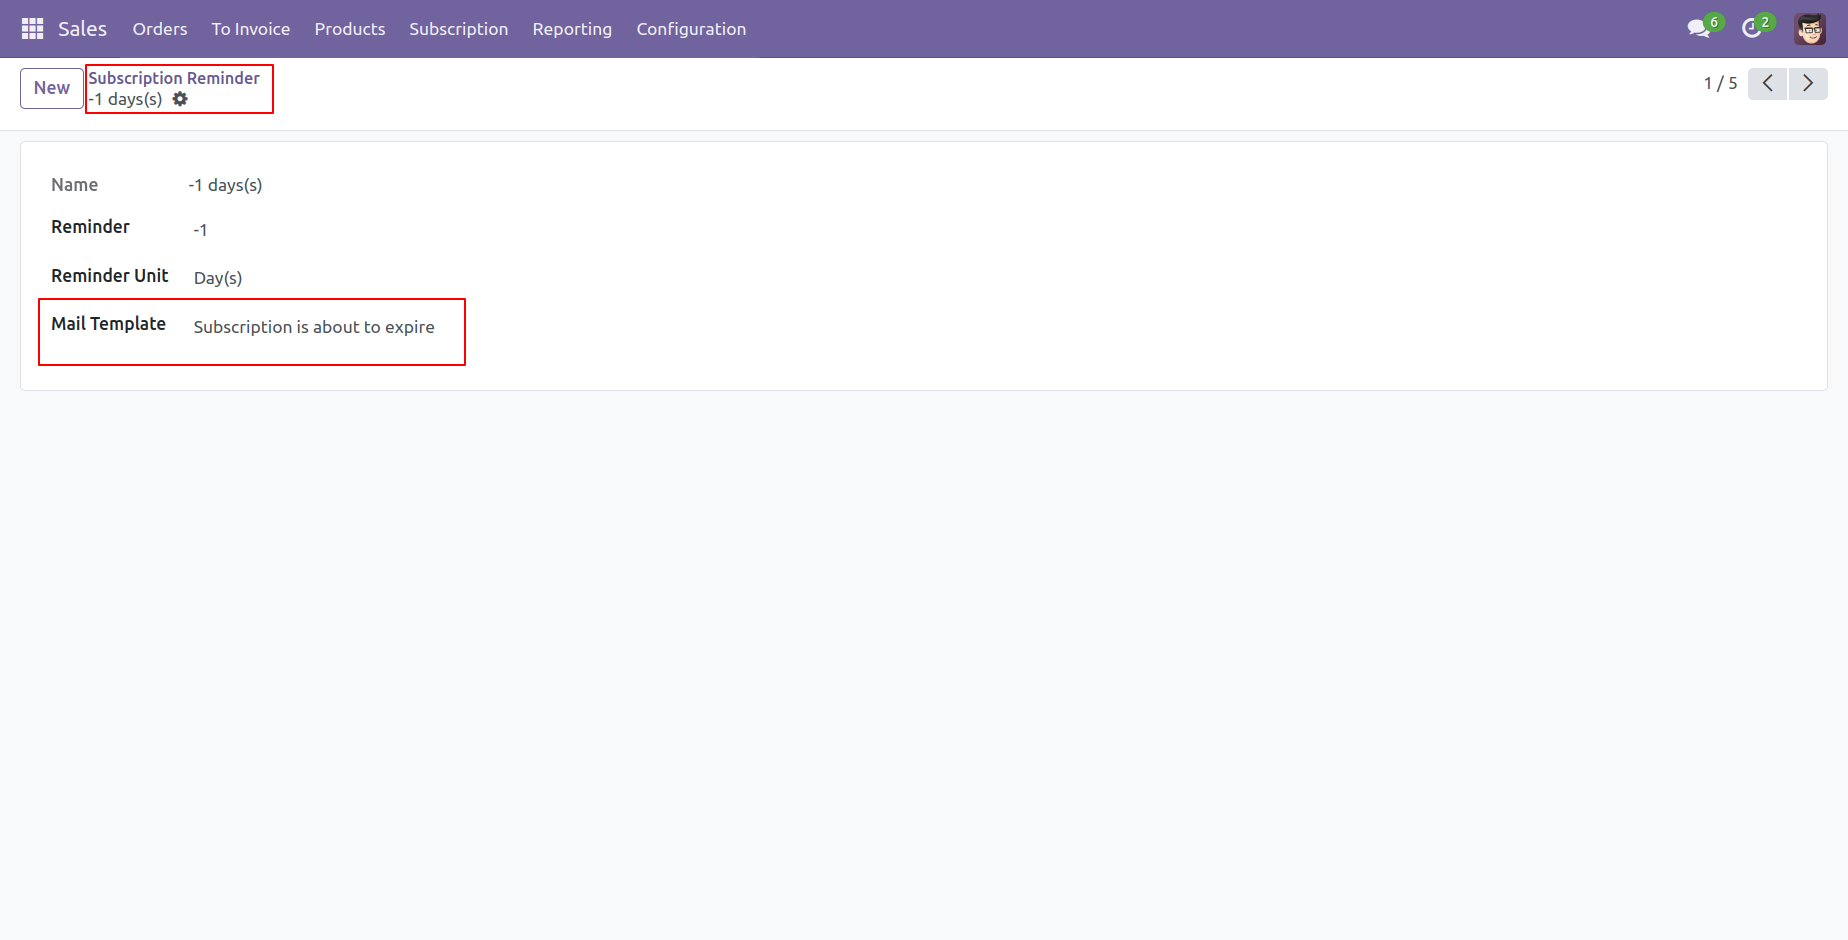
Subscription remider form view, You can add remider email template.
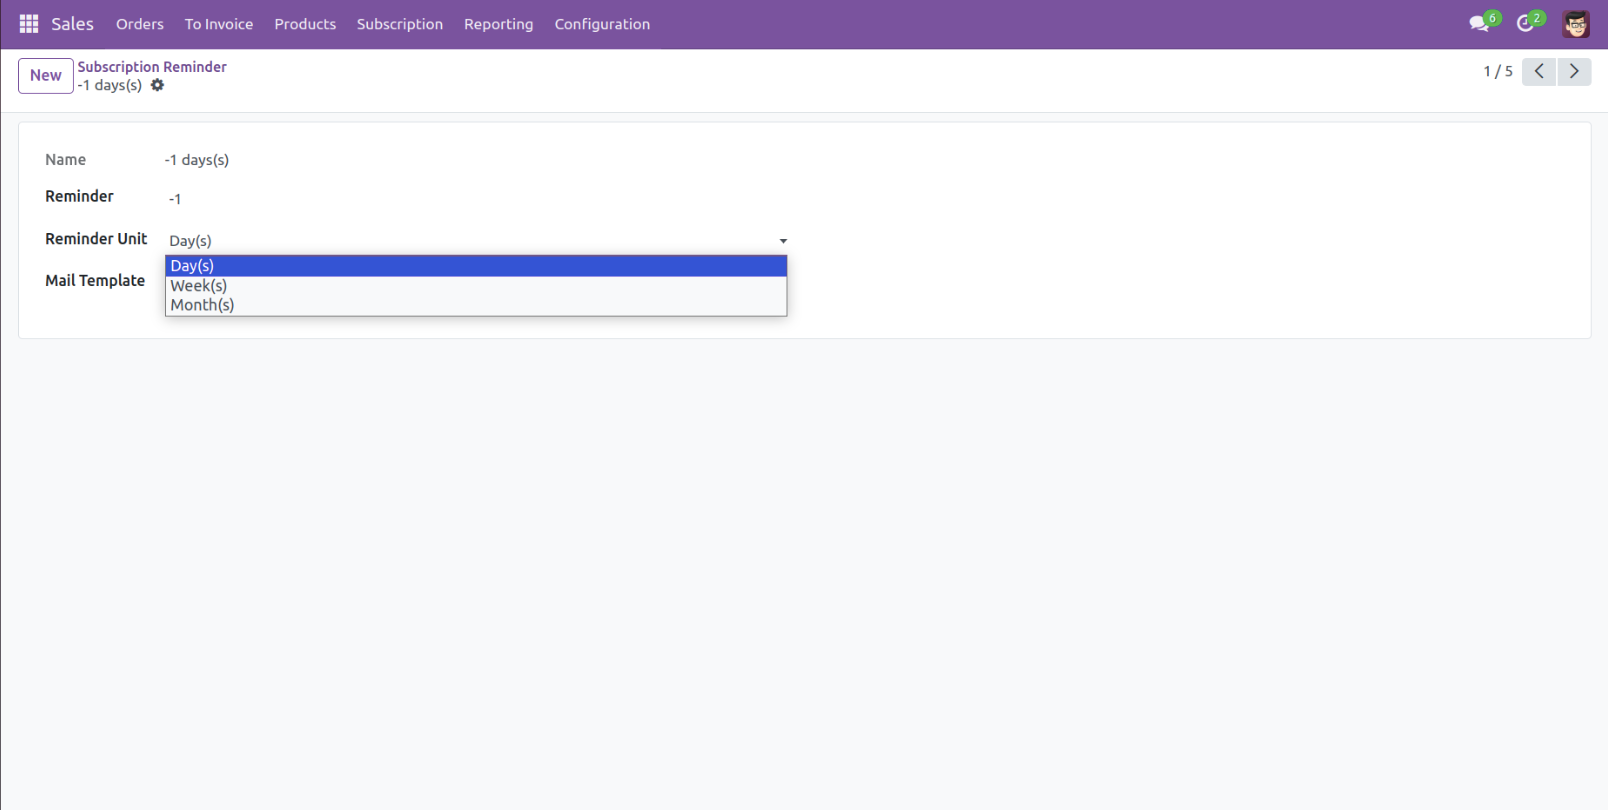
Subscription remider with day, week & month.
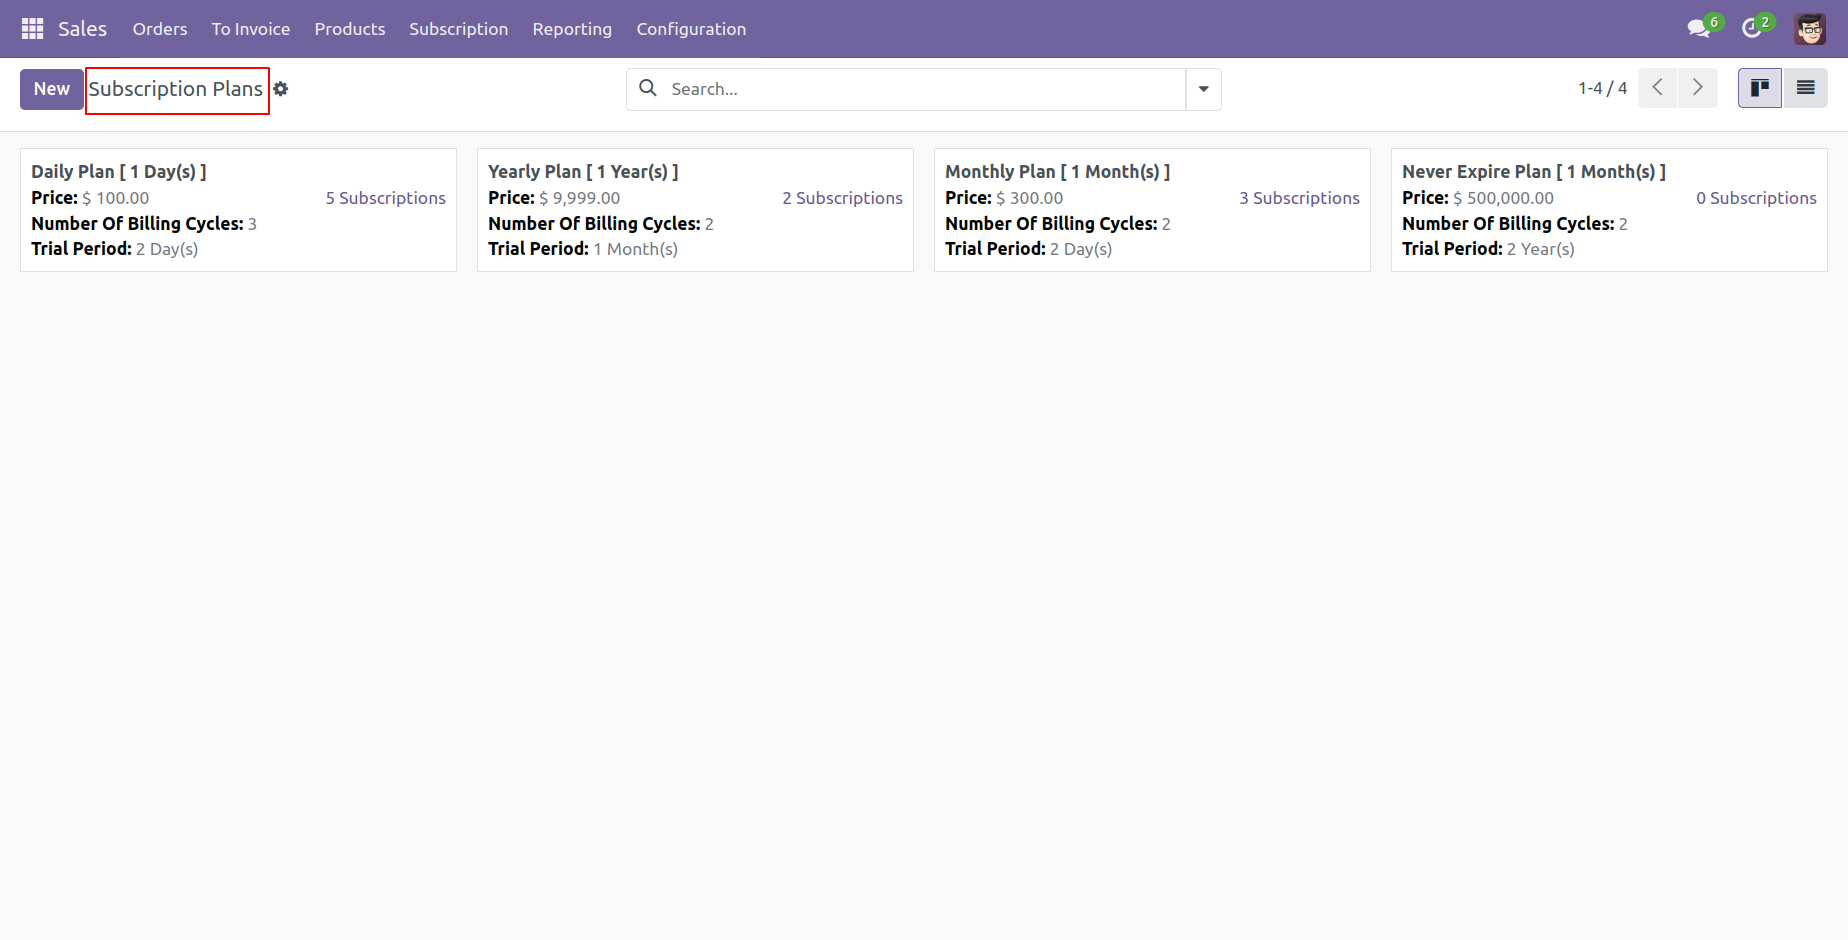
Subscription plans kanban view.
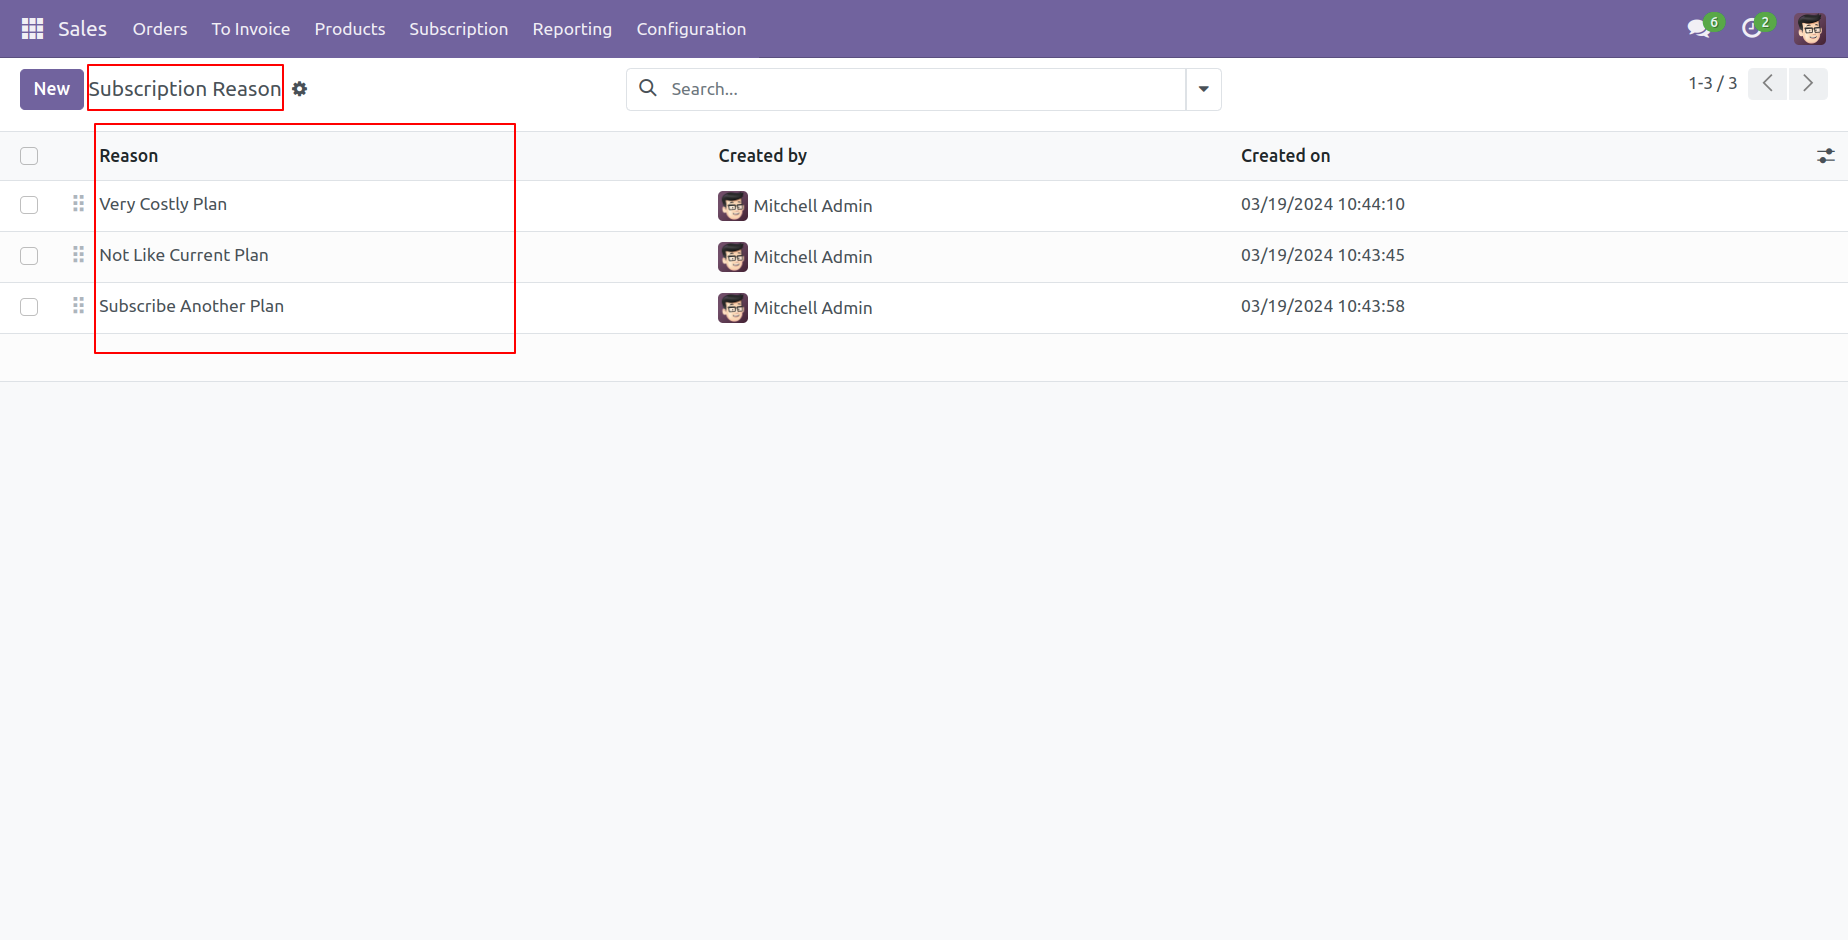
Subscription reasons list view.
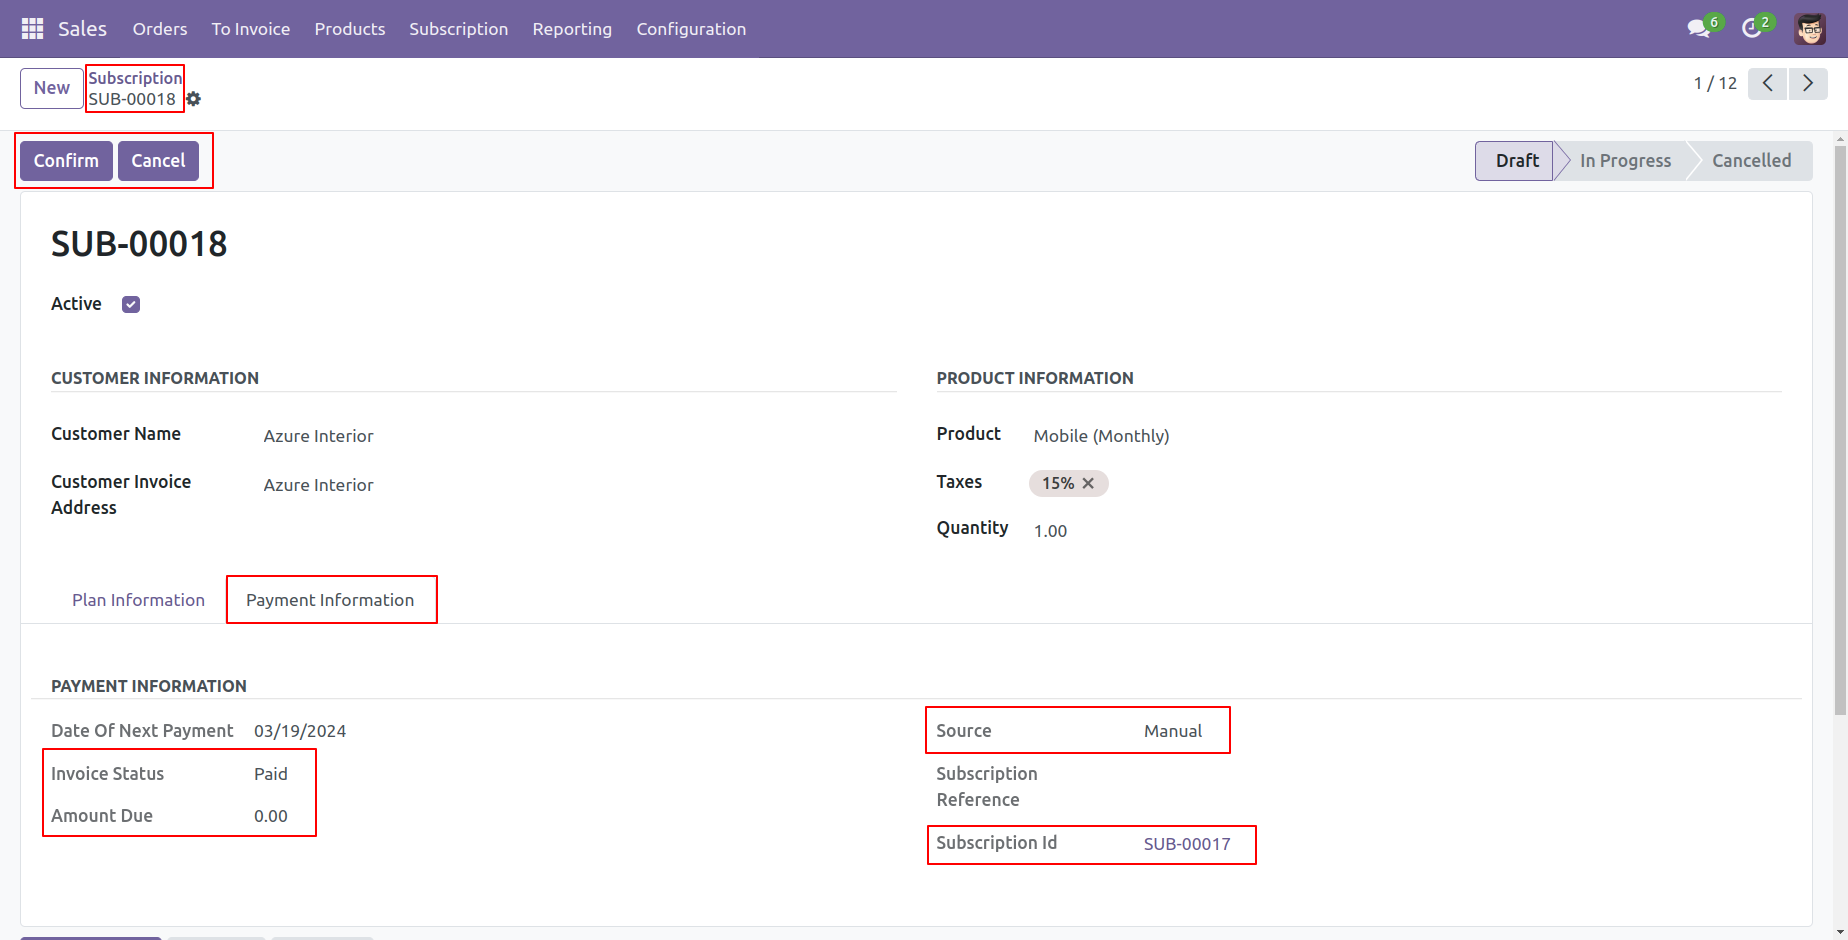
Subscription with payment details.
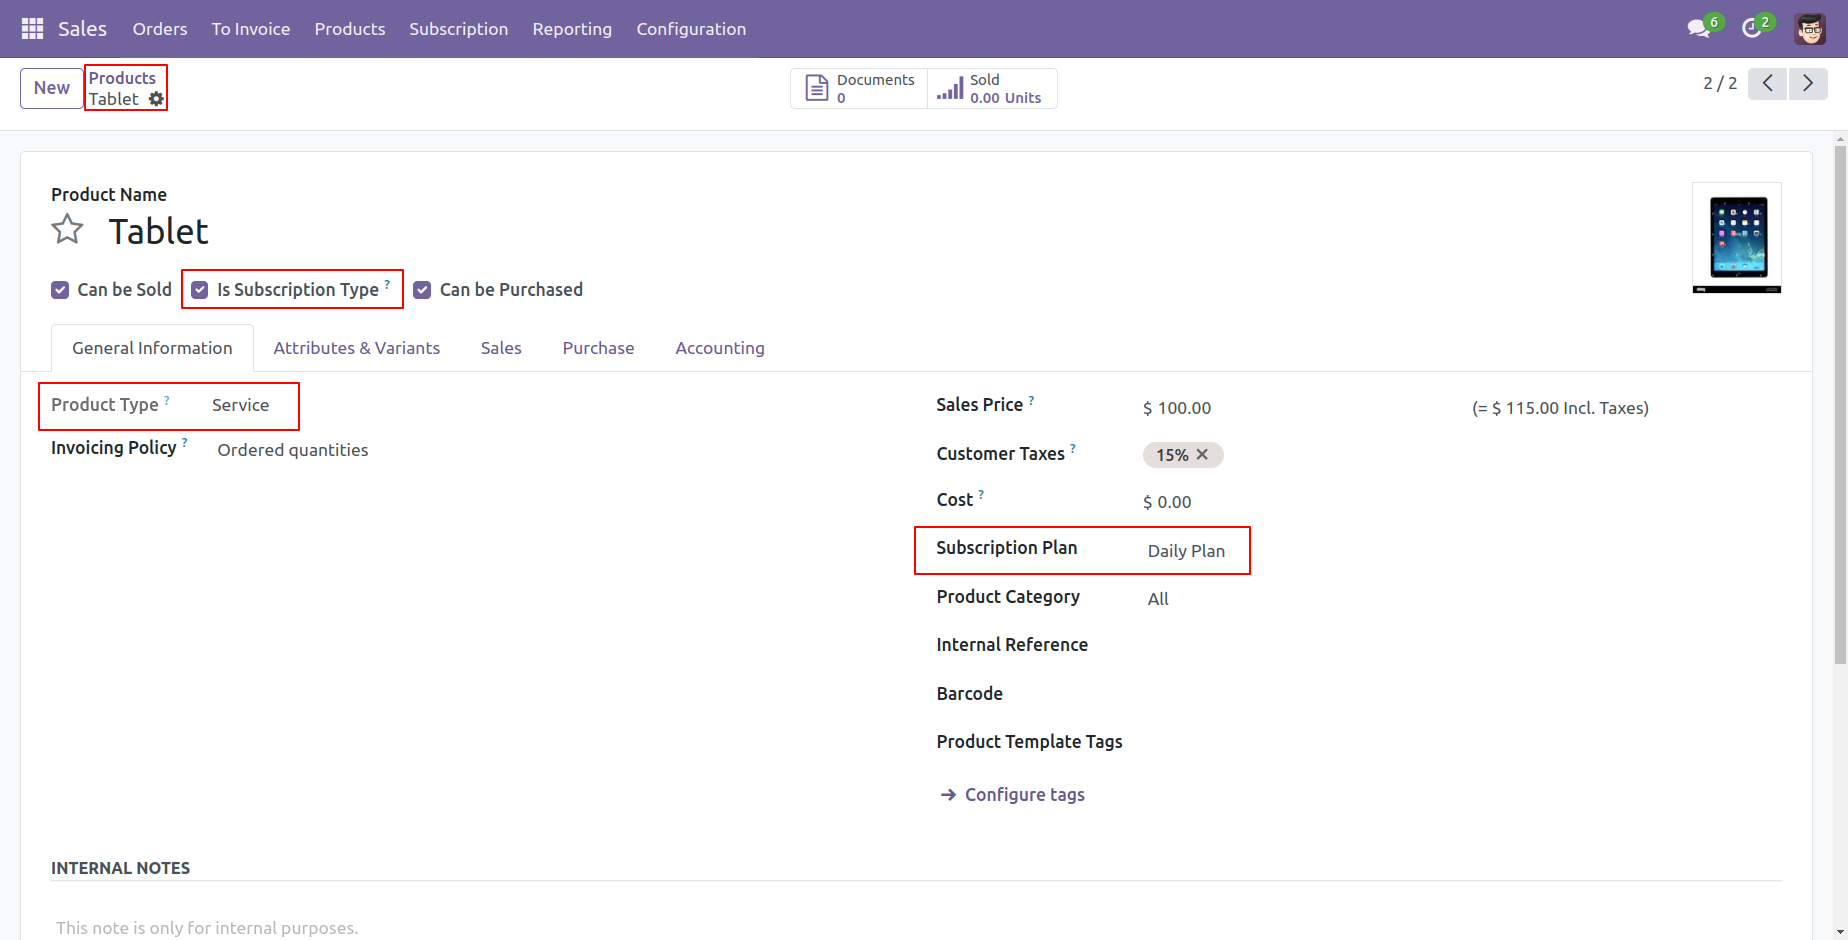
Inside a product, Tick "Is Subscription Type", Select plan and product type.
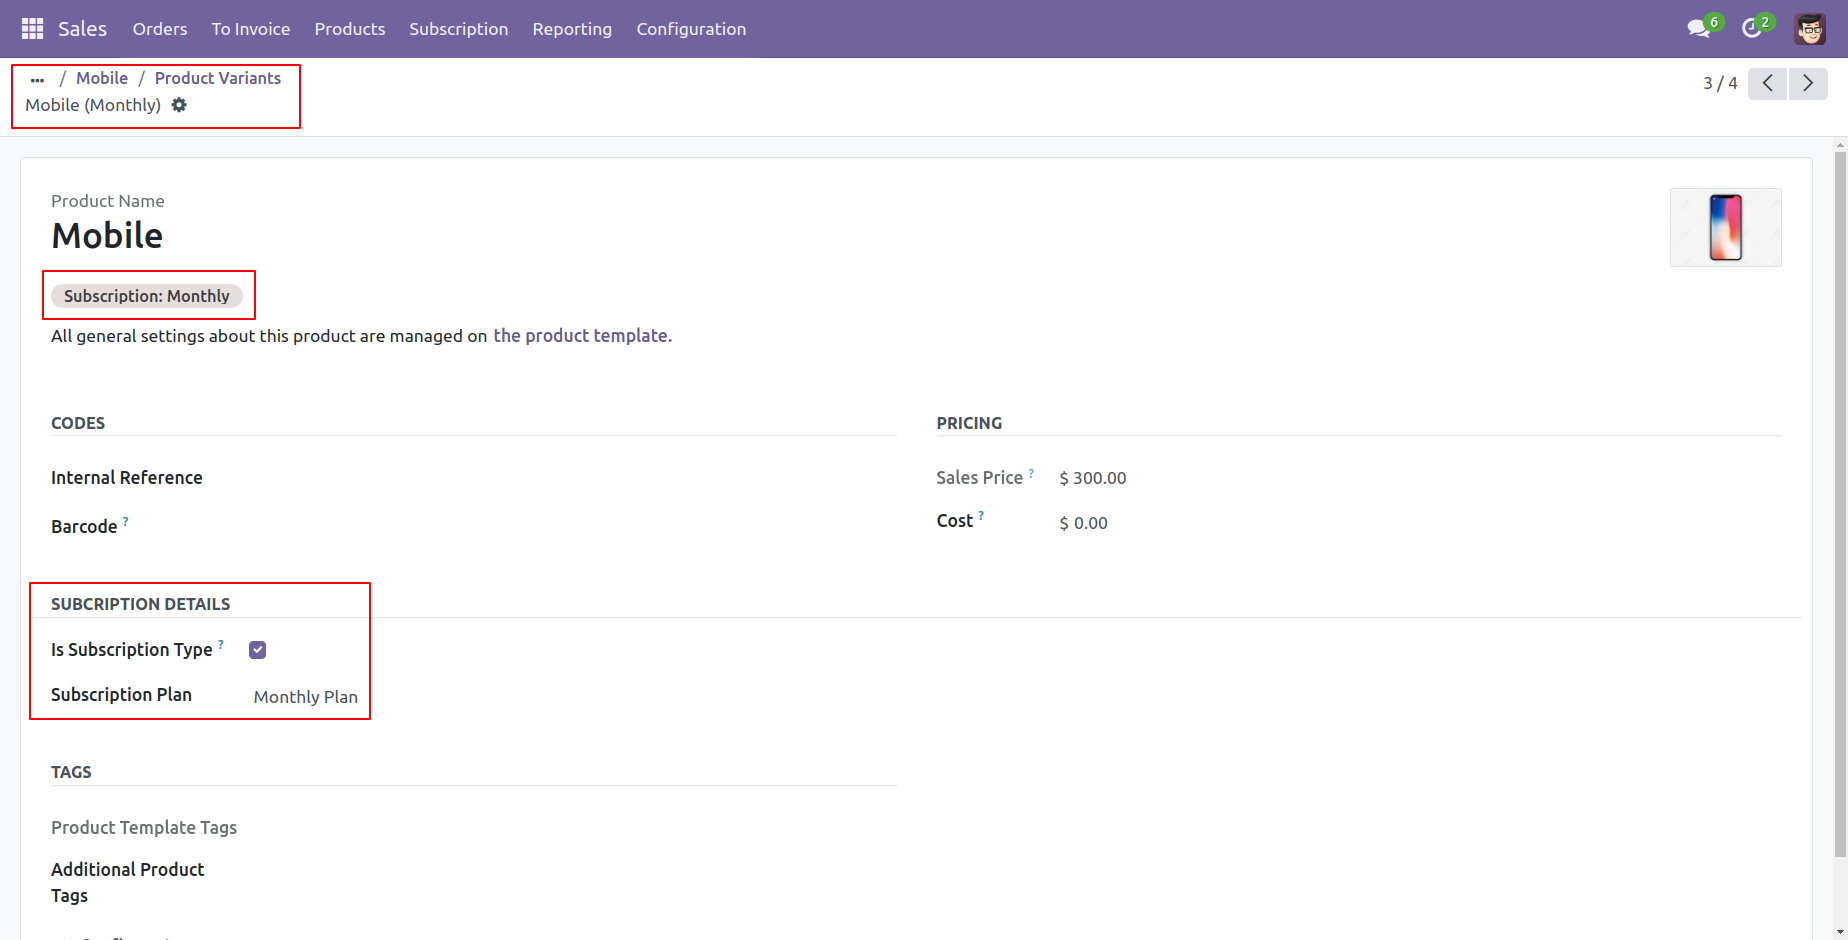
Select "Is Subscription Type" in product variant and choose plan.
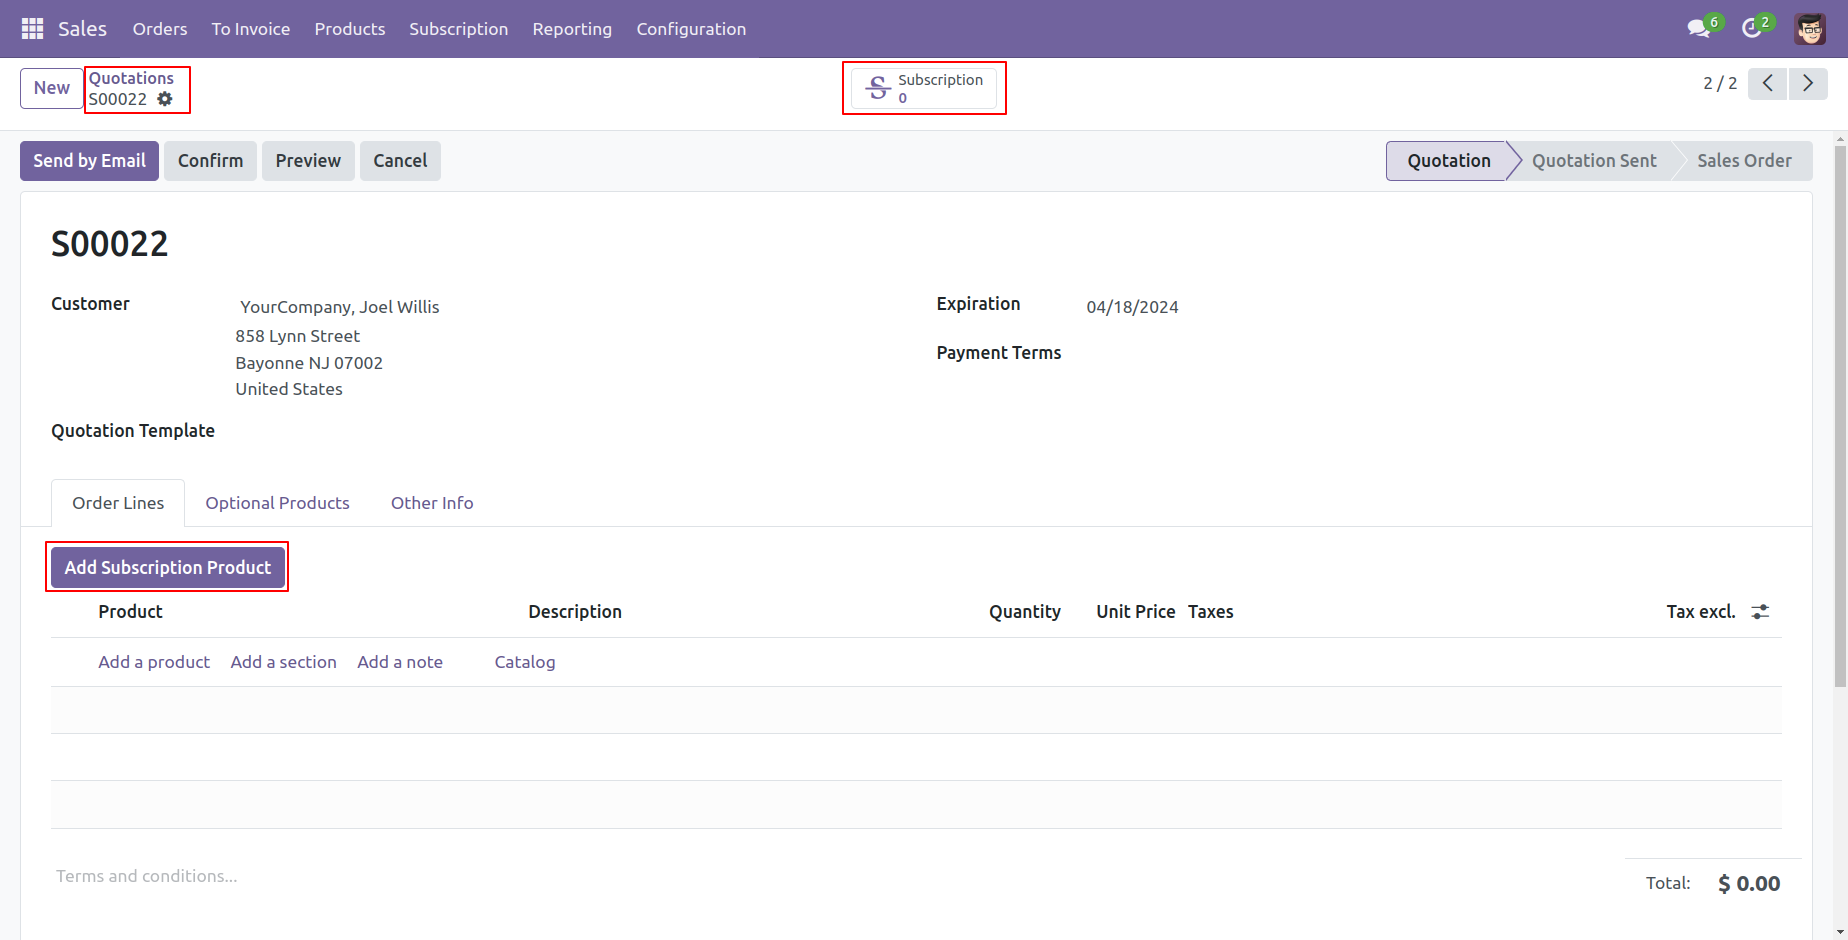
Create a Quotation and add subscription product by pressiing "Add Subscription Product" button.
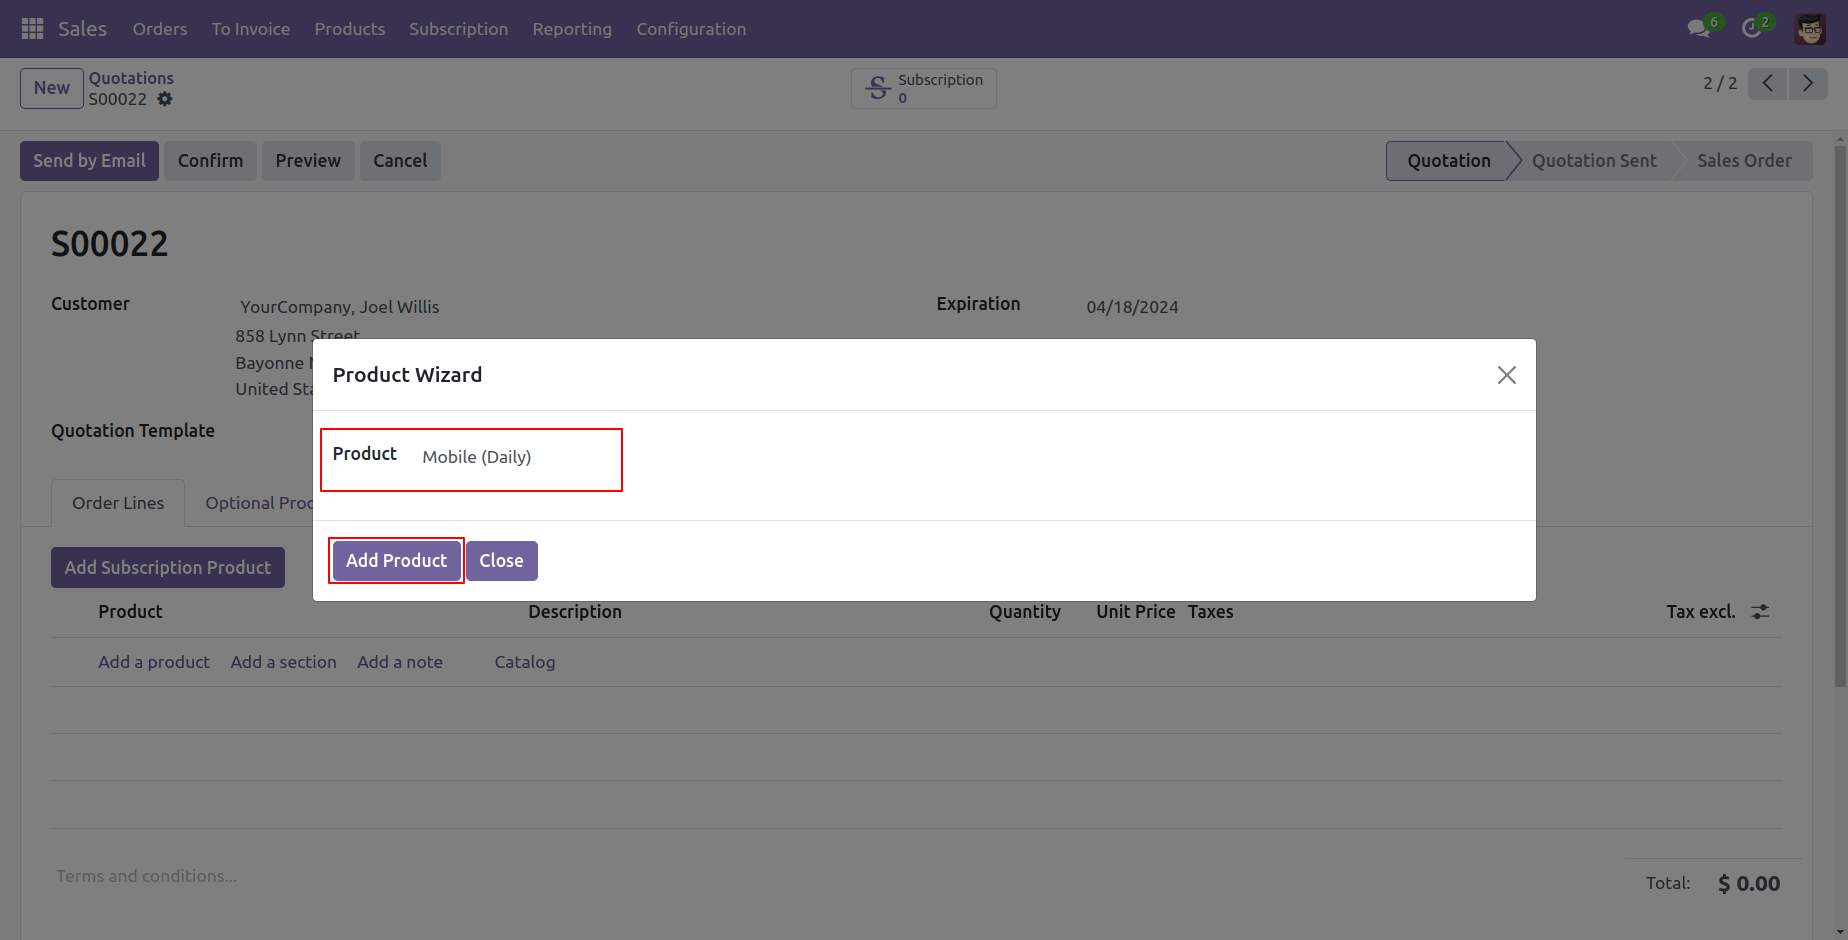
After that wizard will opens, Add subscription product in sale order.
Confirm the quotation, You can see smart button of subscription in sale order.
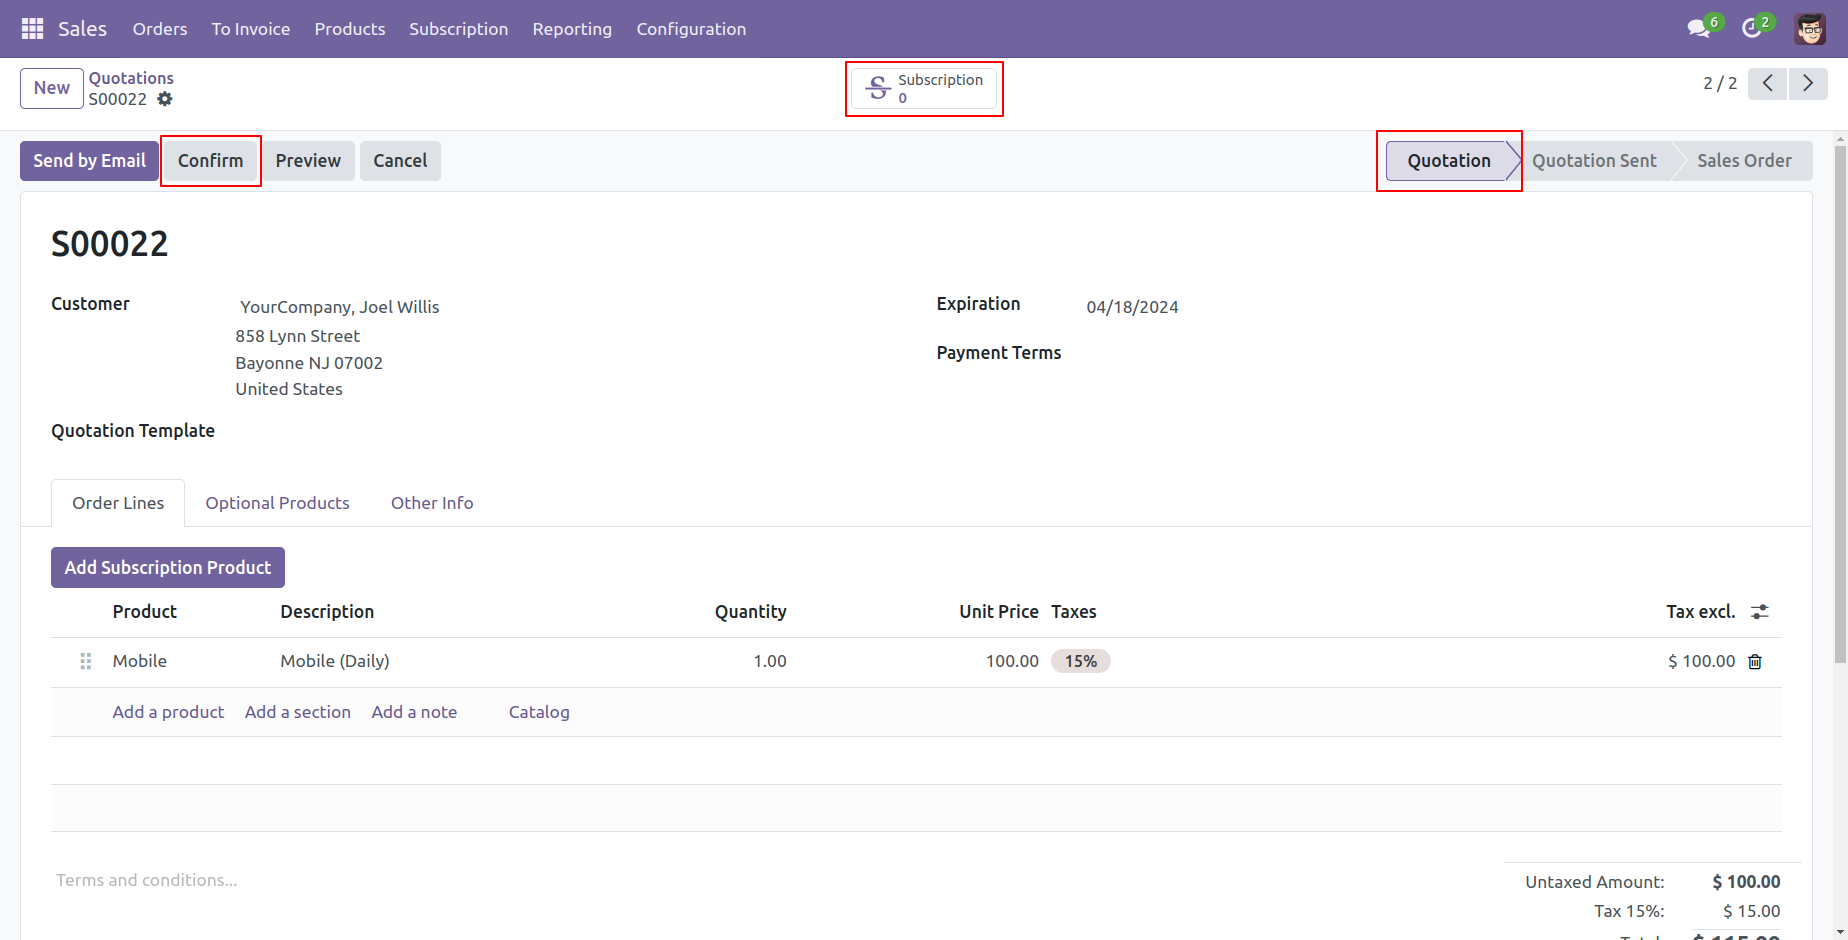
After confirming quotation, subscription smart button will increase by one.
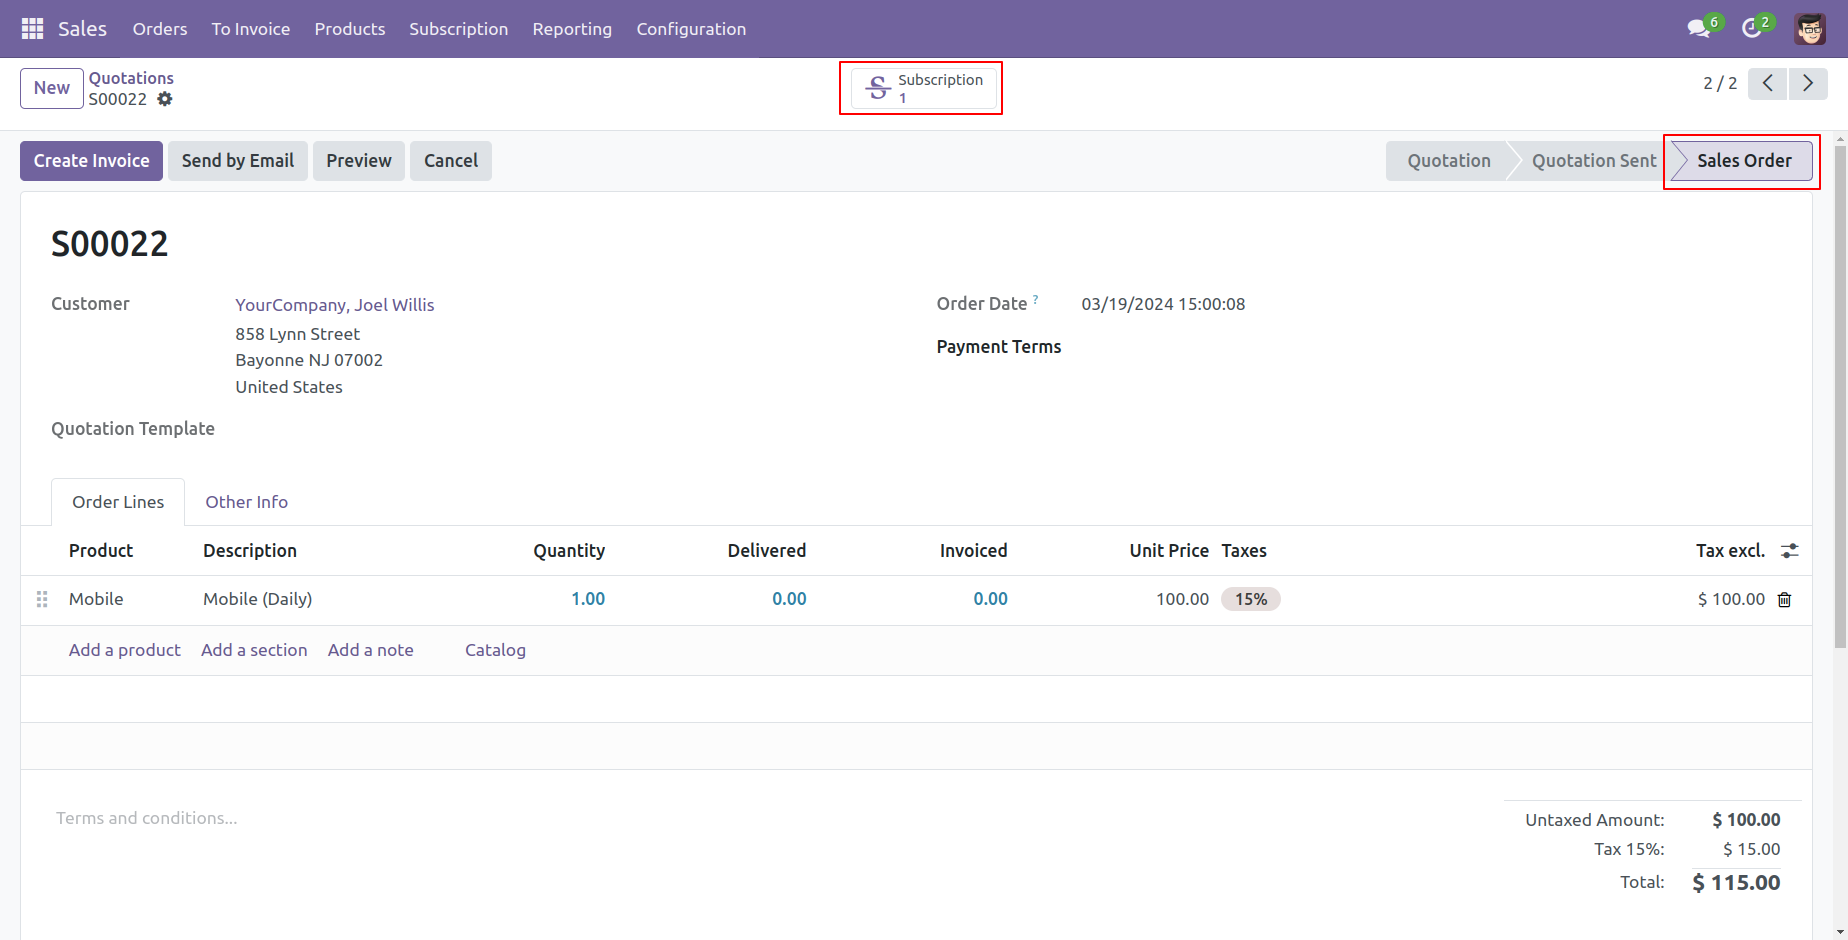
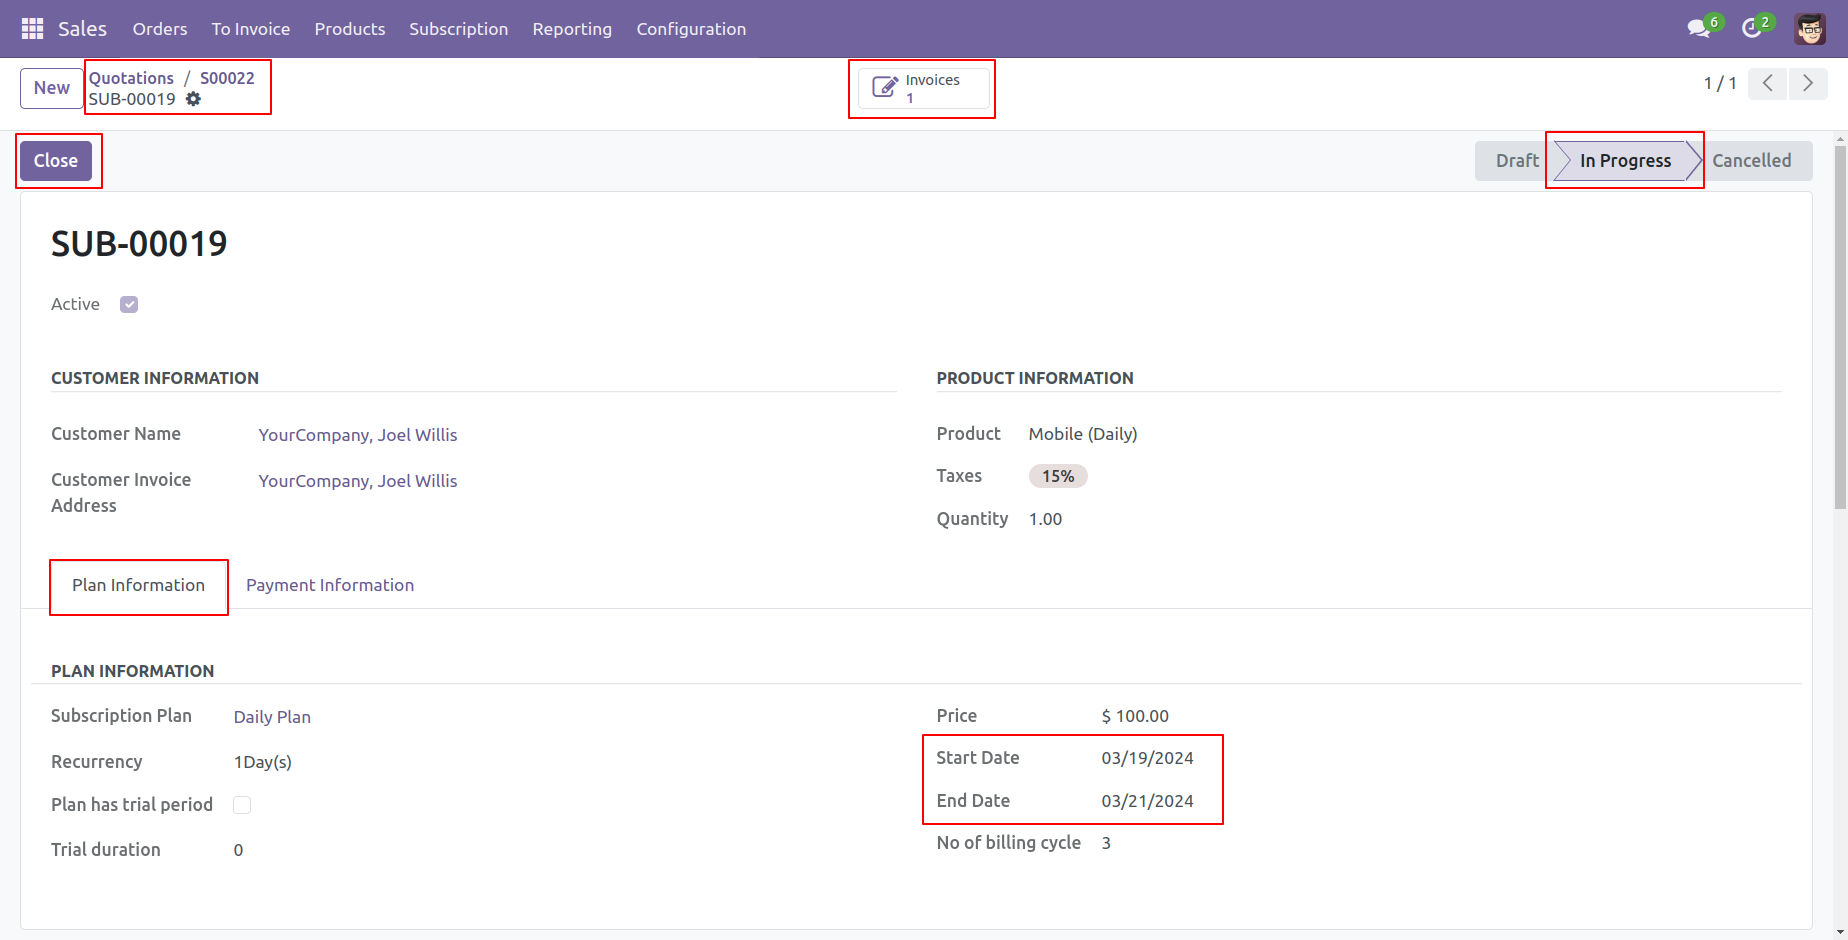
Subscription stage is in progress, Pay the invoice and see subscription details.
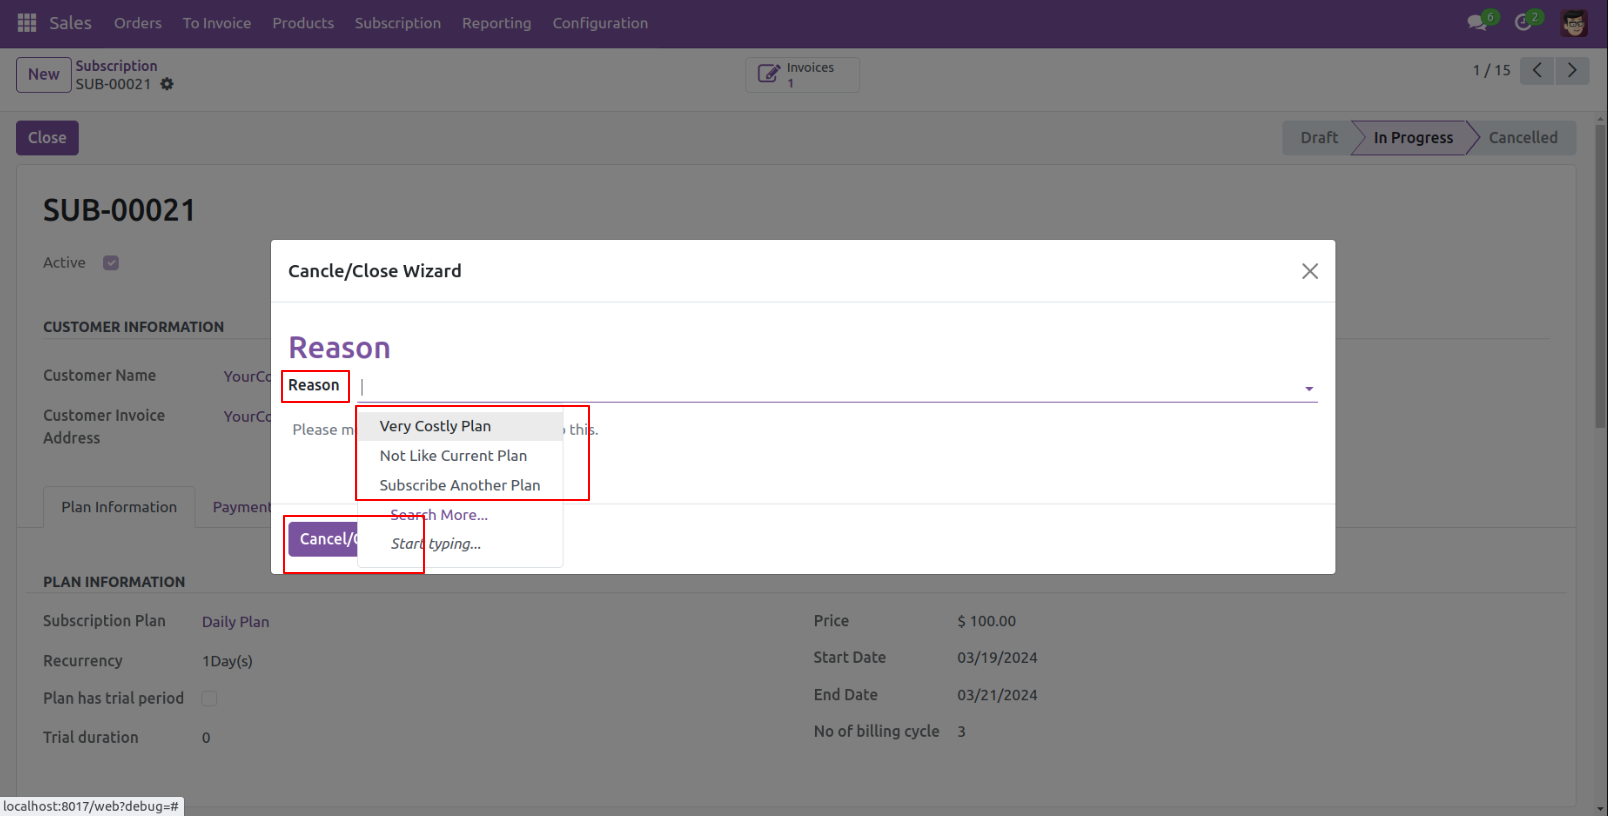
You can close subscription plan using the "Close" button.
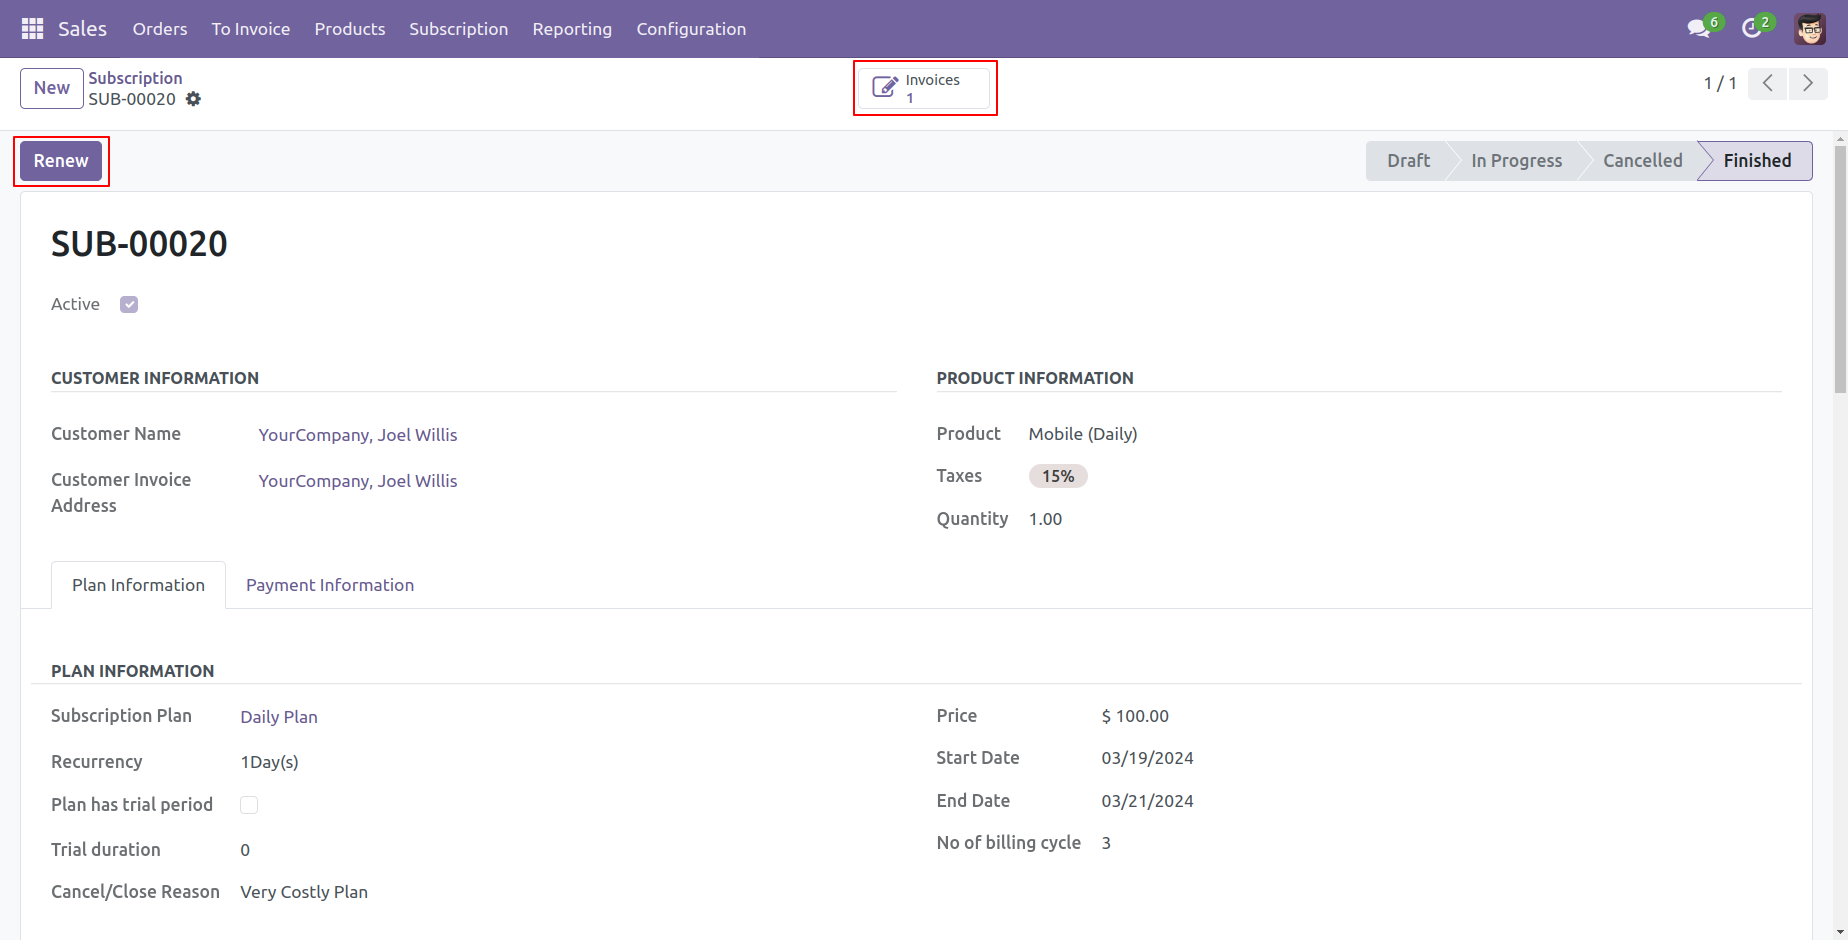
After subscription expires, You can renew plan using the "Renew" button.
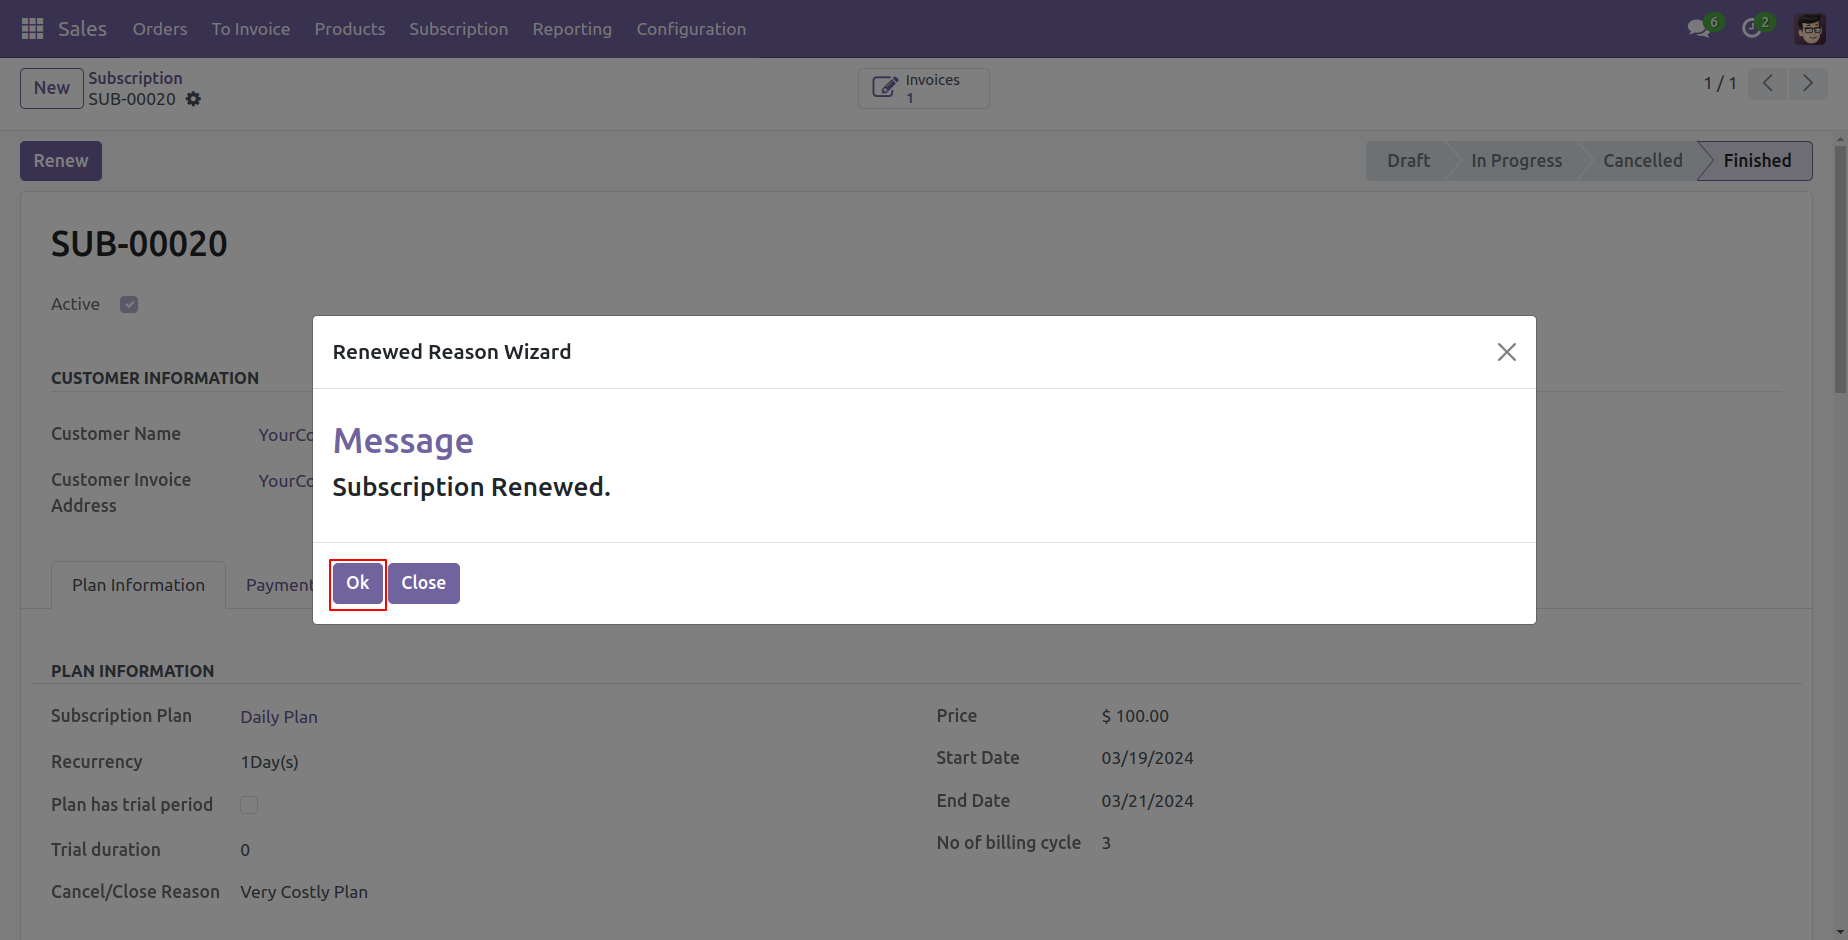
When you press the "Renew" button, this wizared will opens, Click "Ok" to renew the subscription.
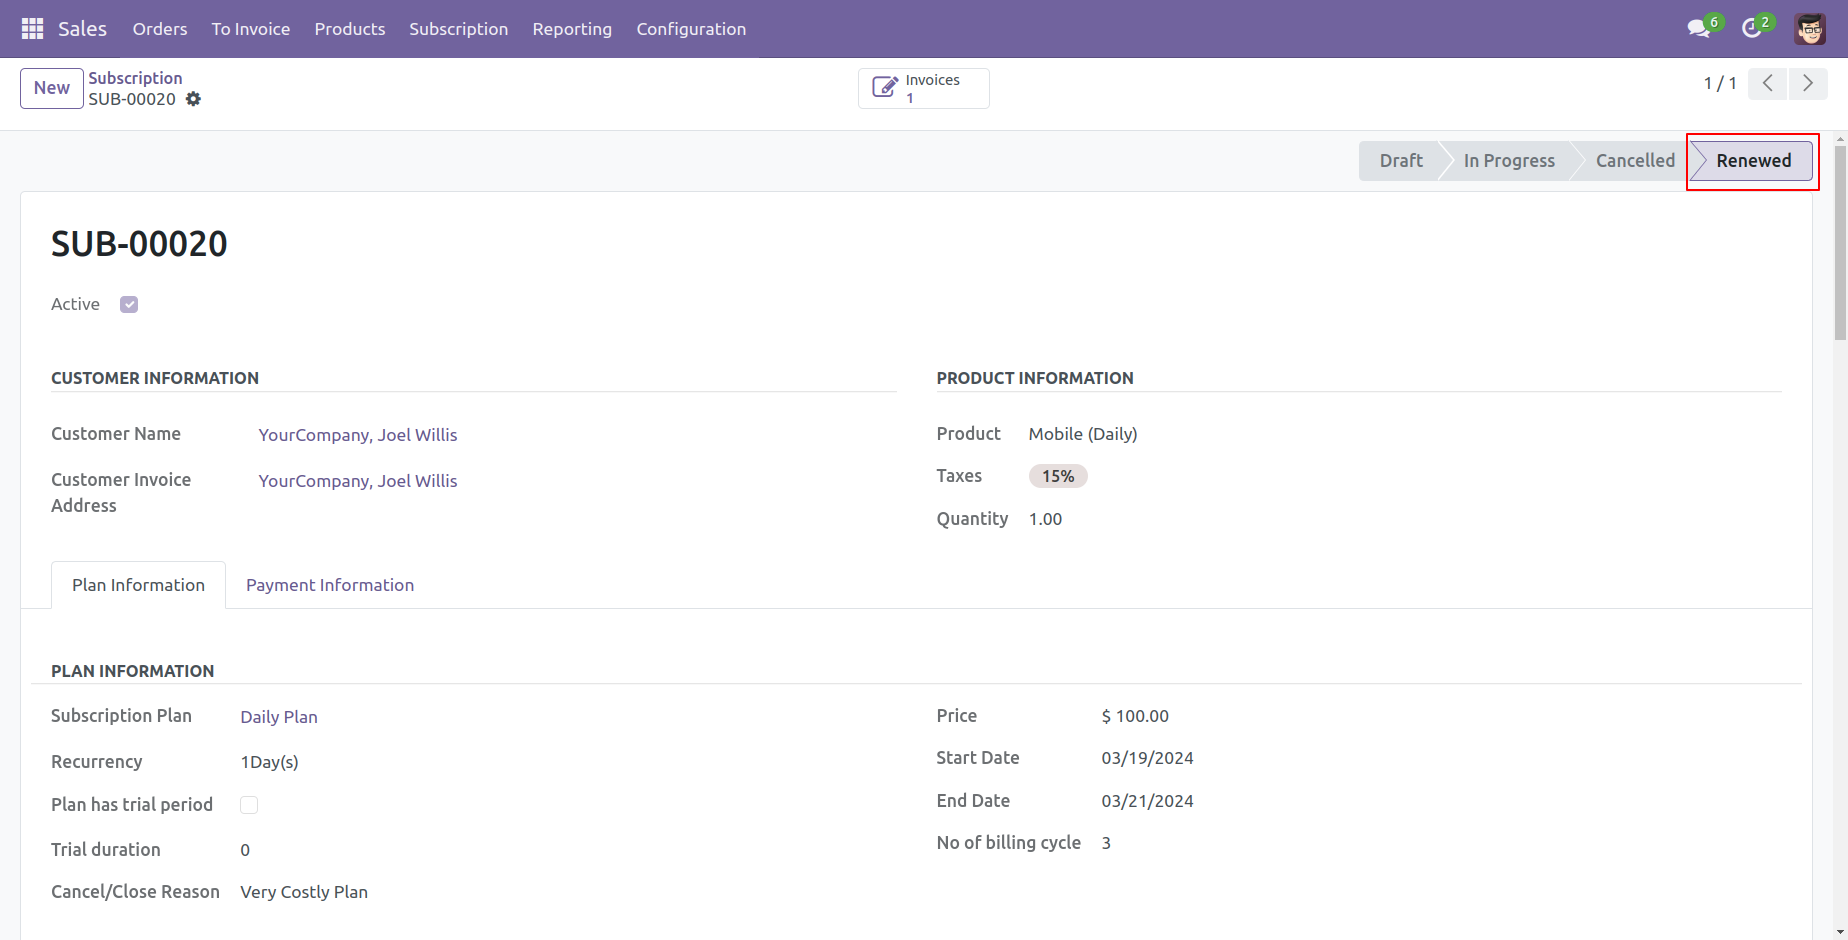
Subscription stage is changed to "Renew".
If you want to close subscription plan, Enter the reason in the wizard and subscription will close.
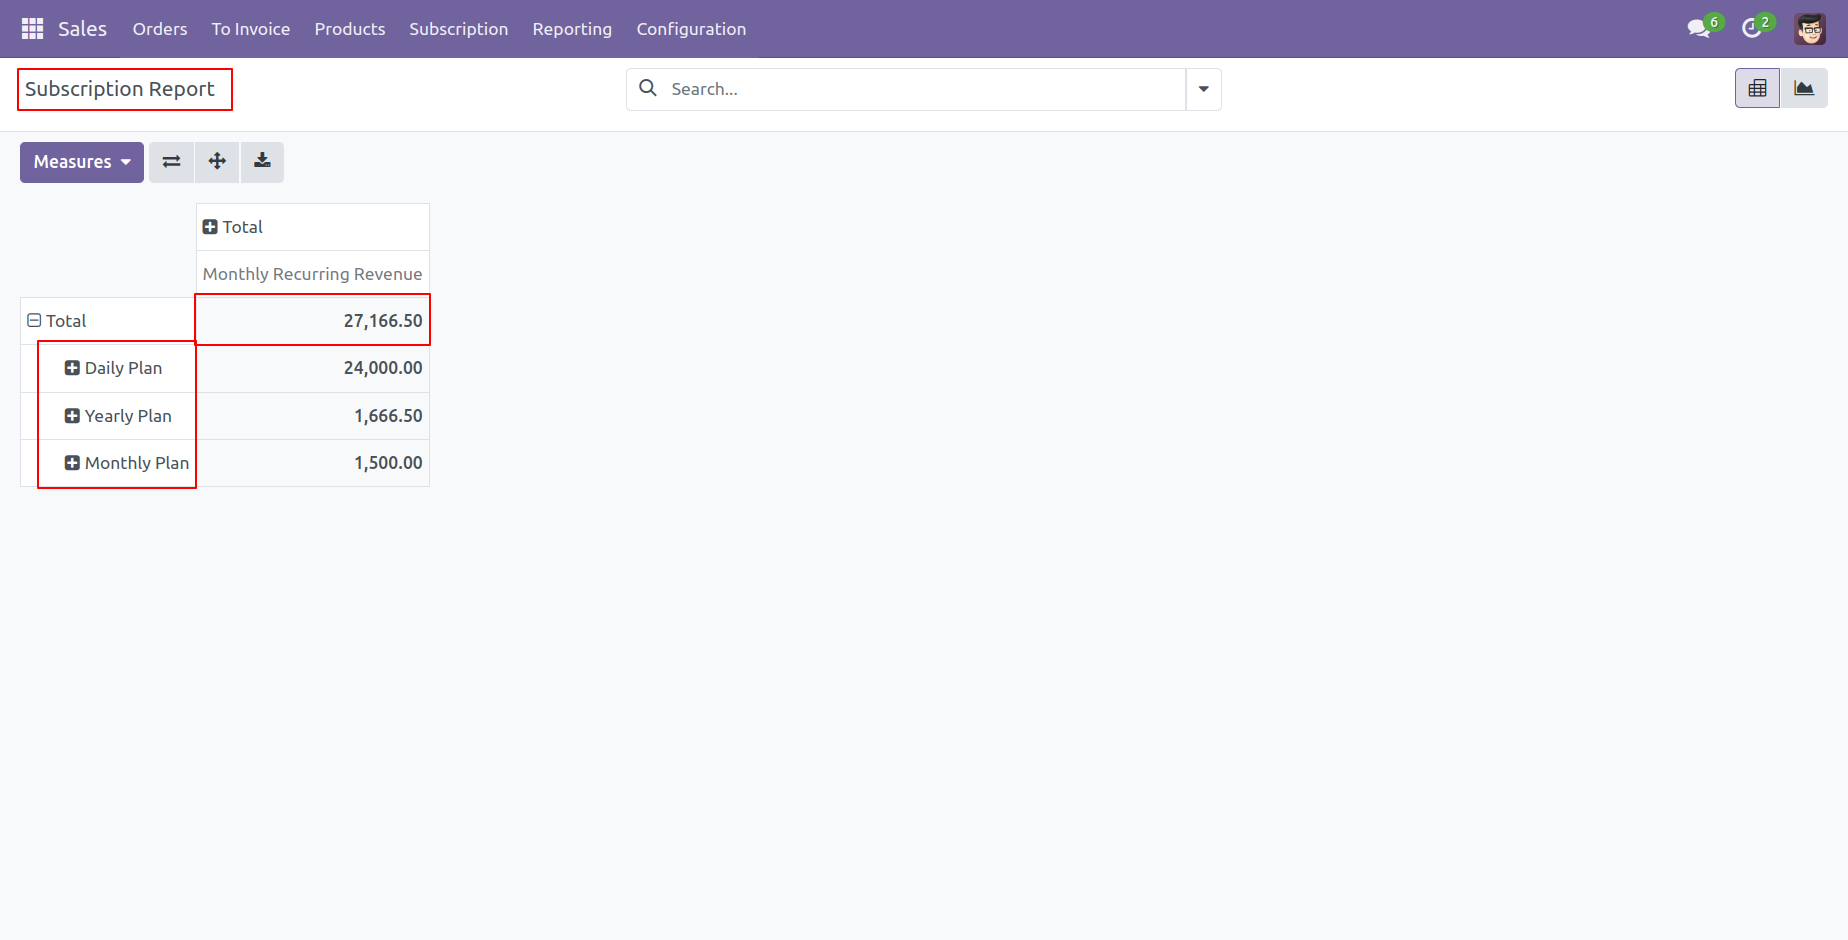
Subscription report looks like below.
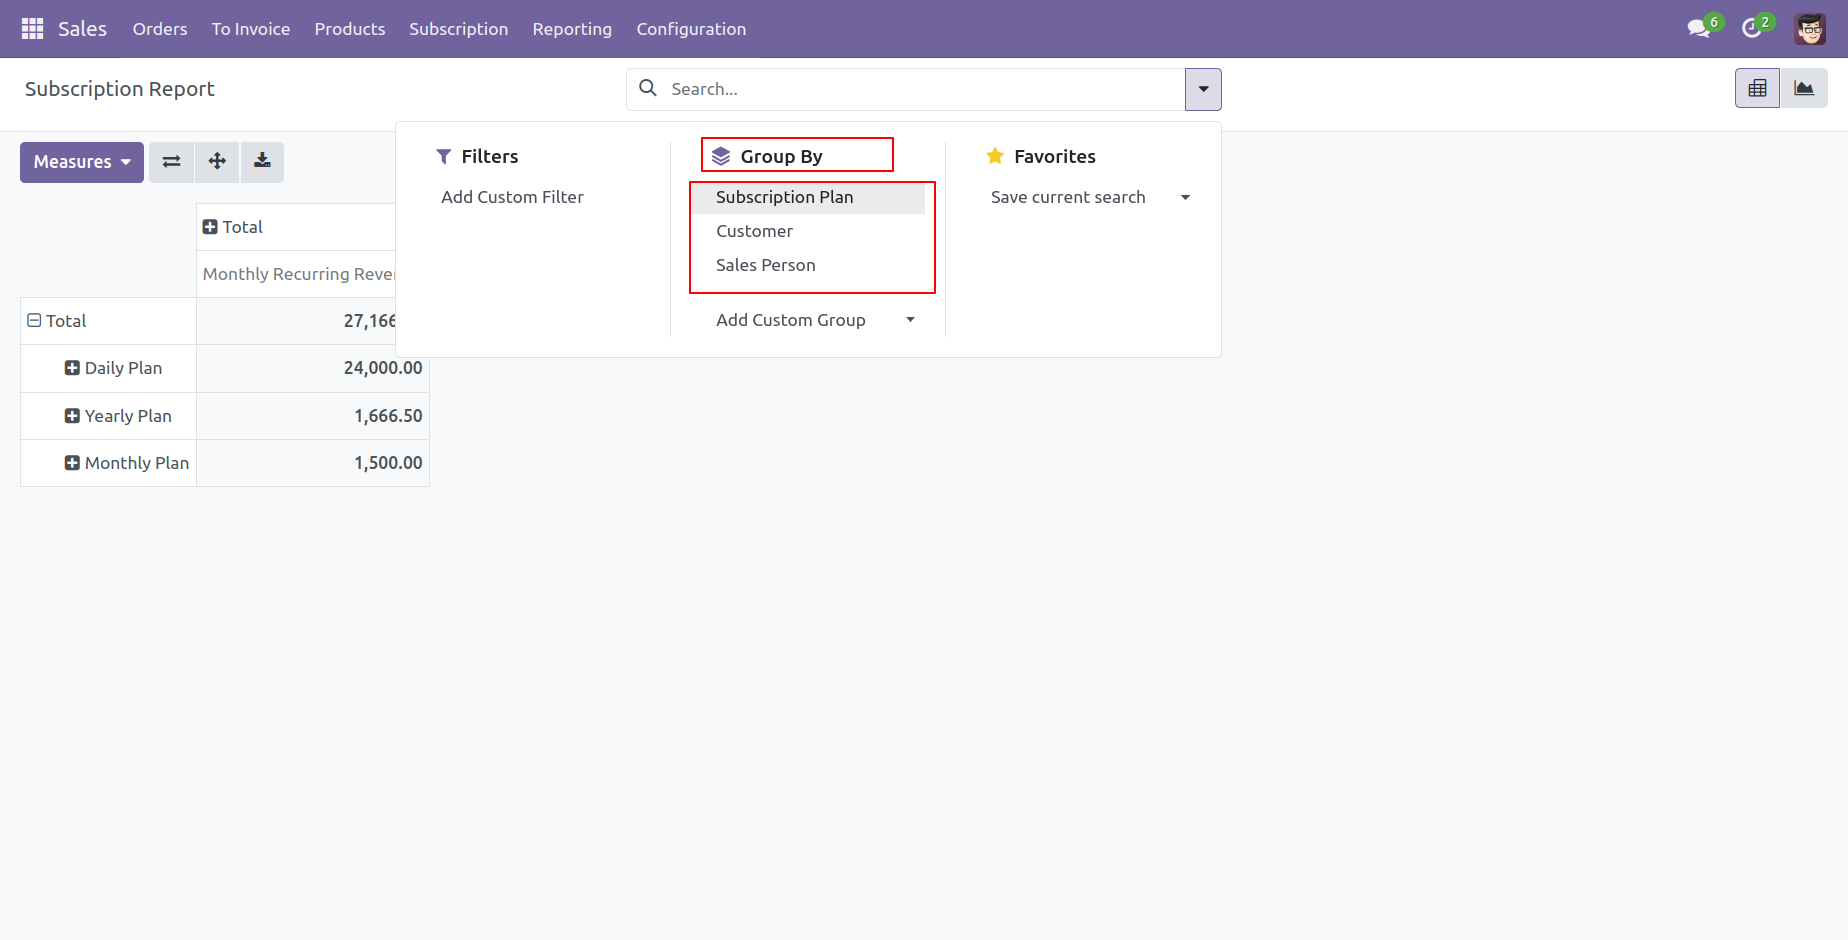
Group By subscription plan.
Subscription at customer portal.
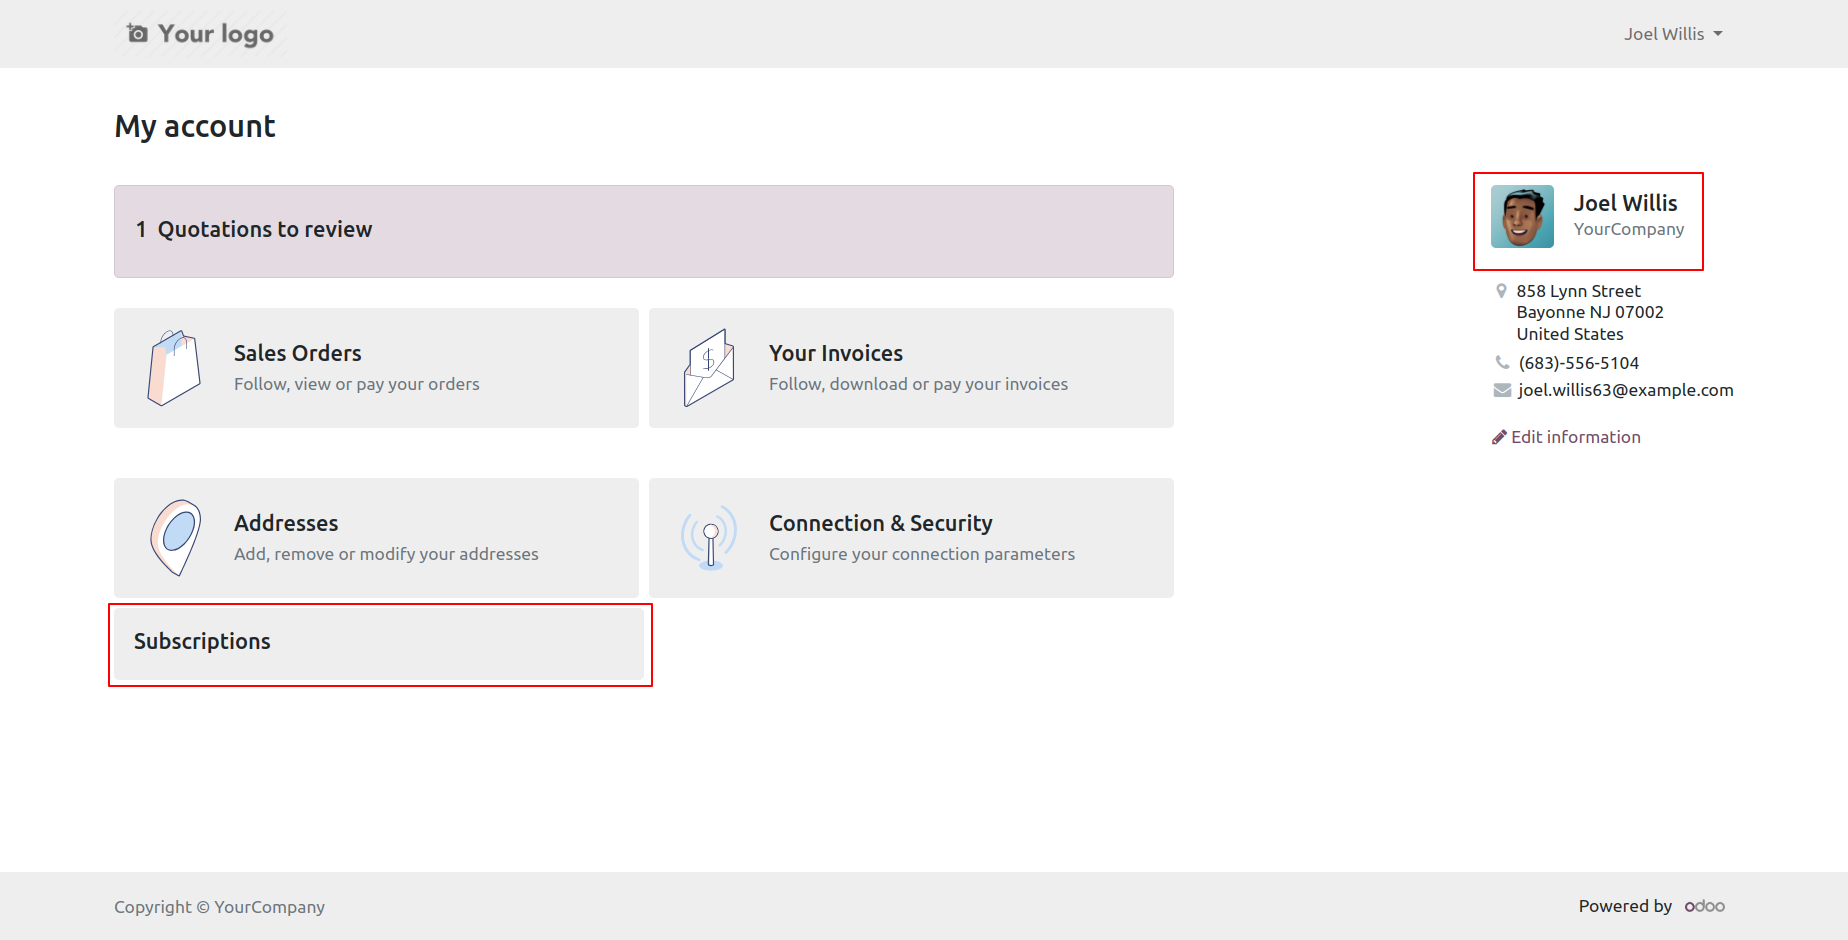
Subscription plans at portal.
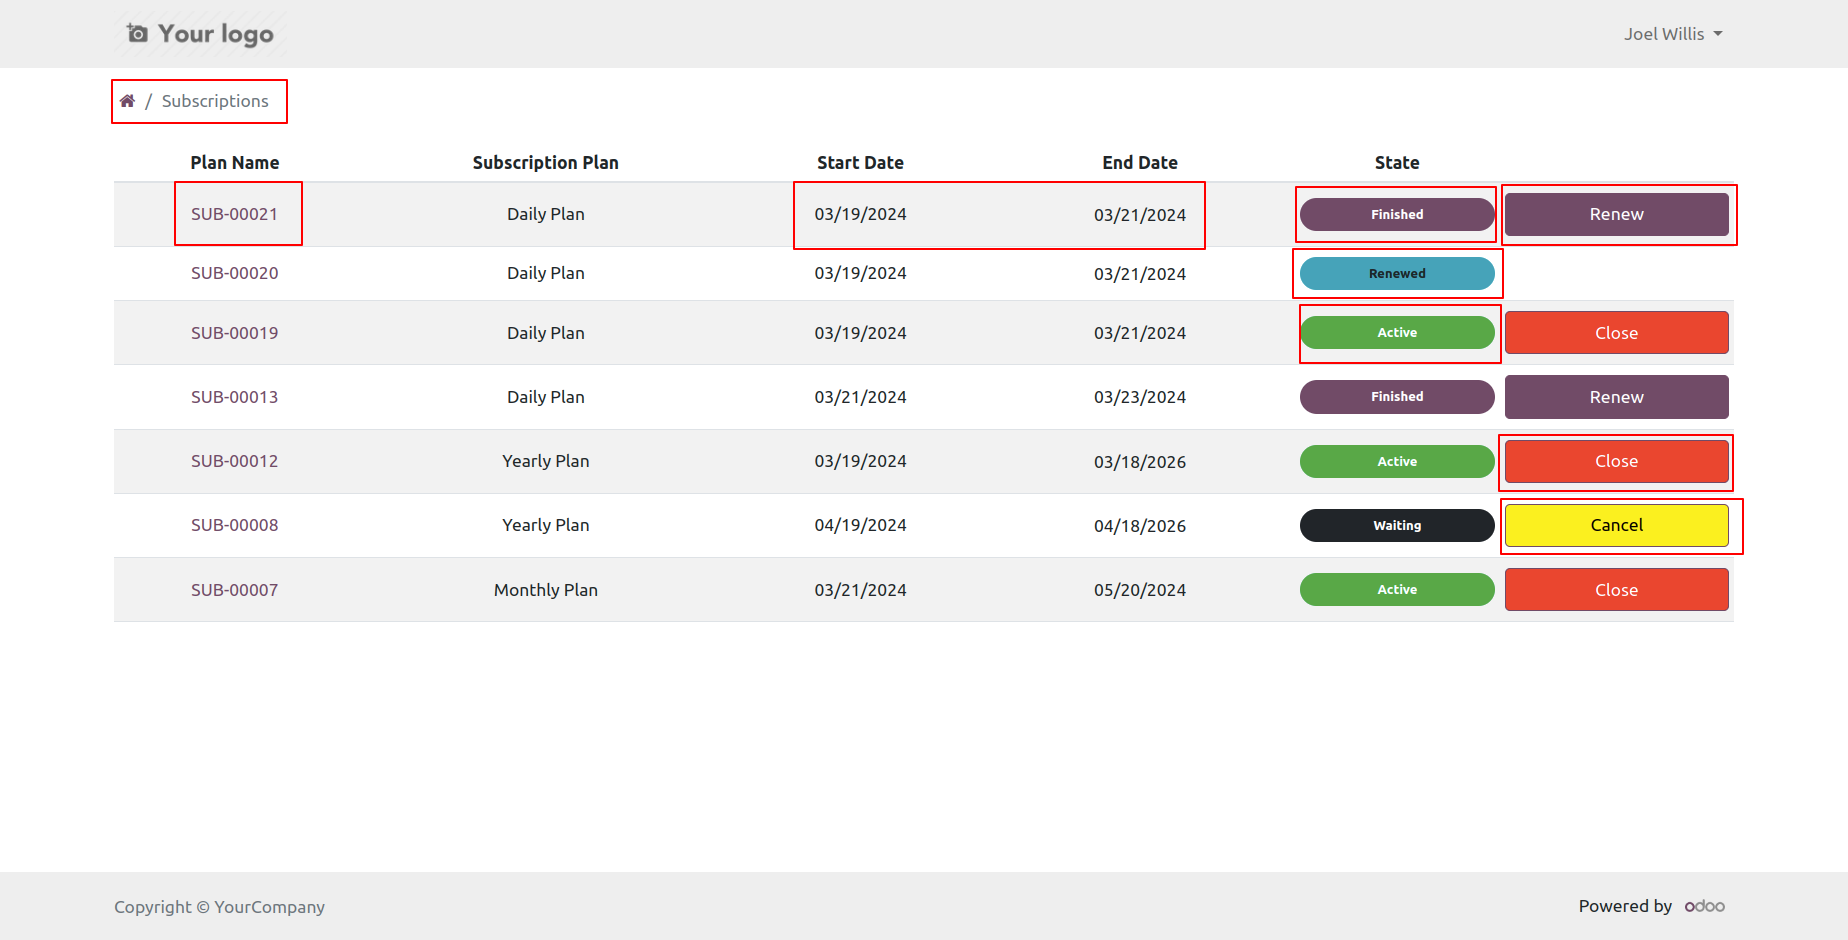
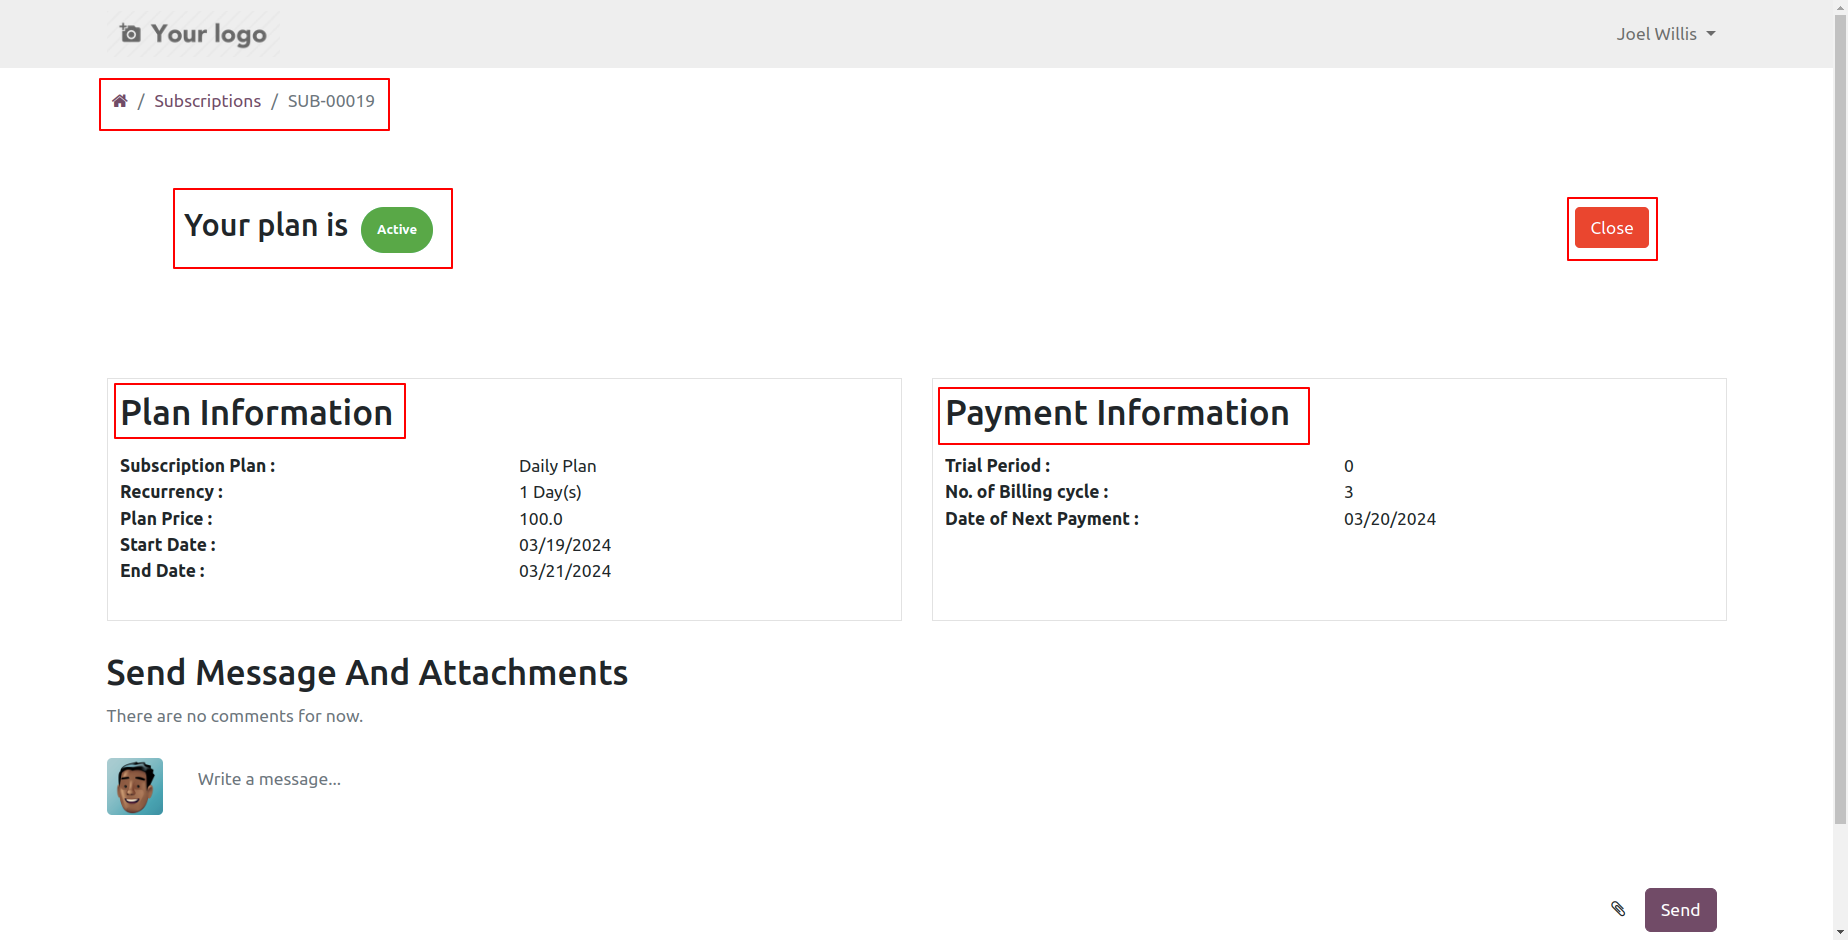
You can active, renew & cancel plans from portal.
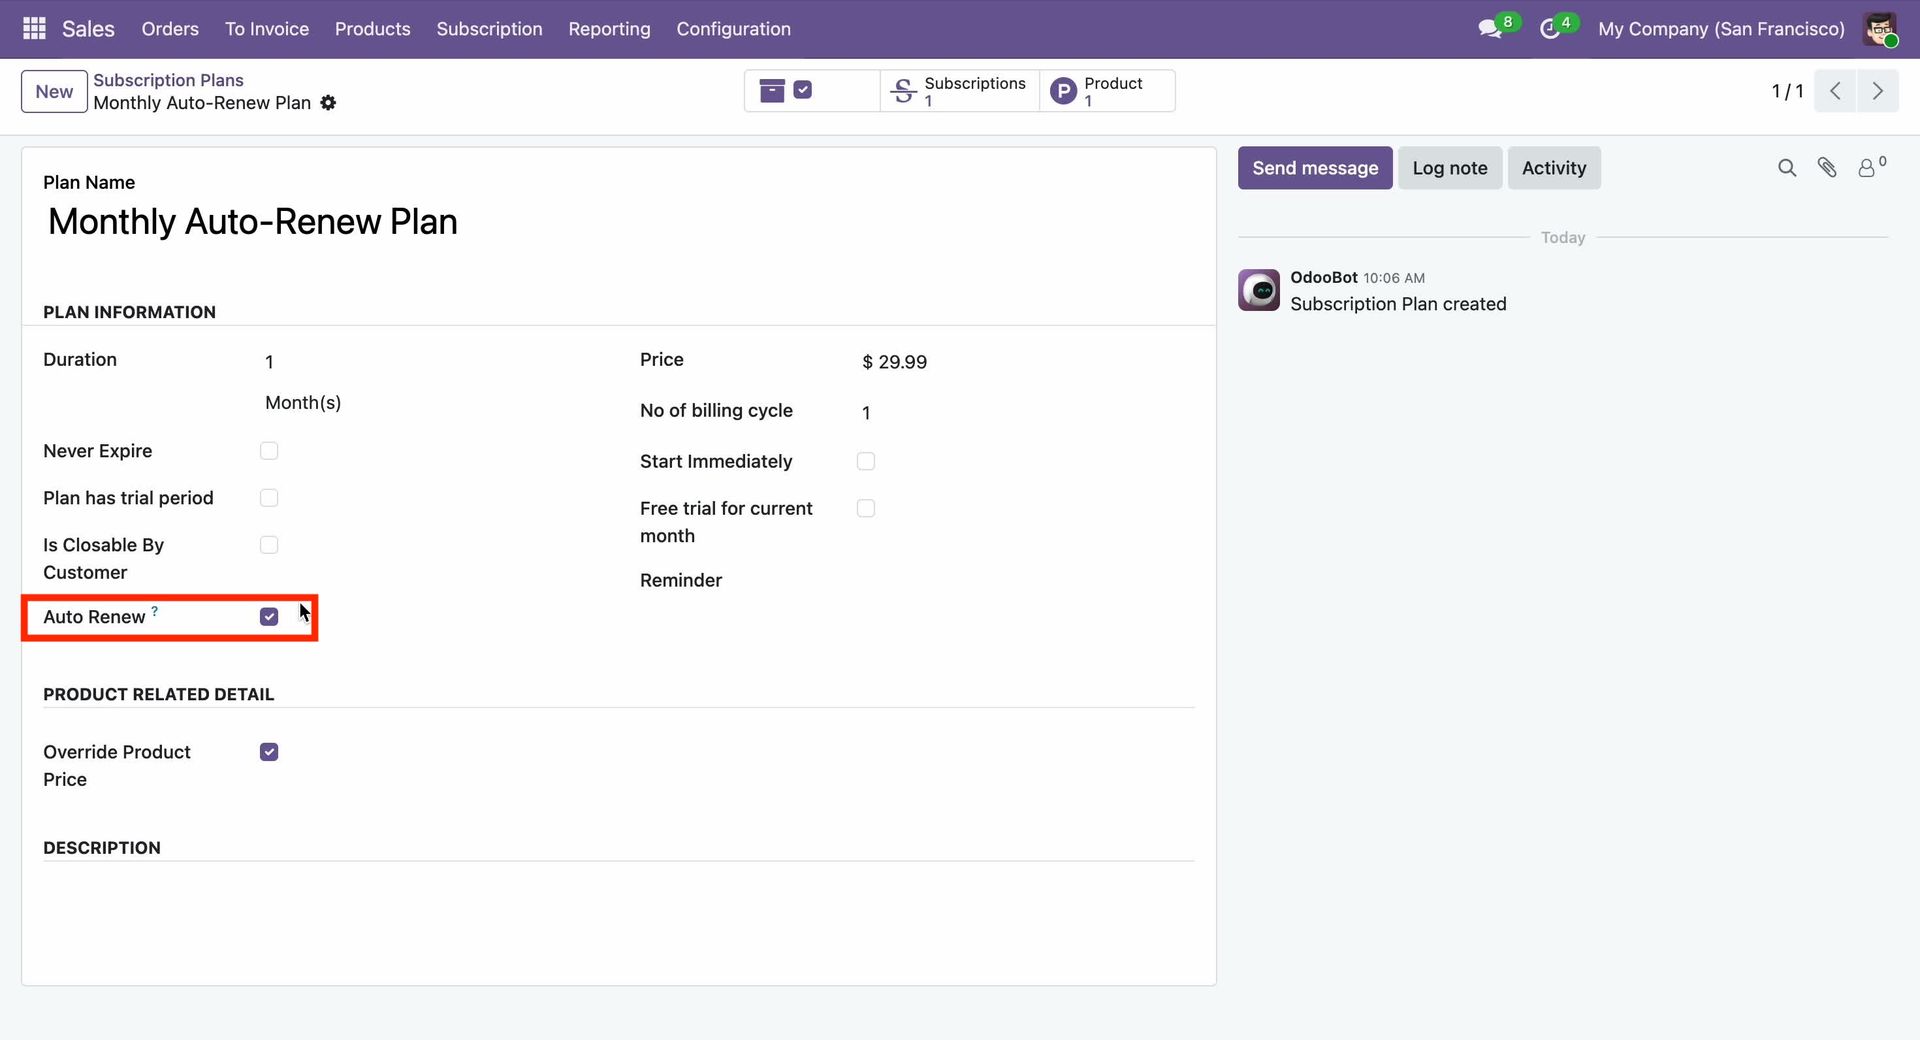
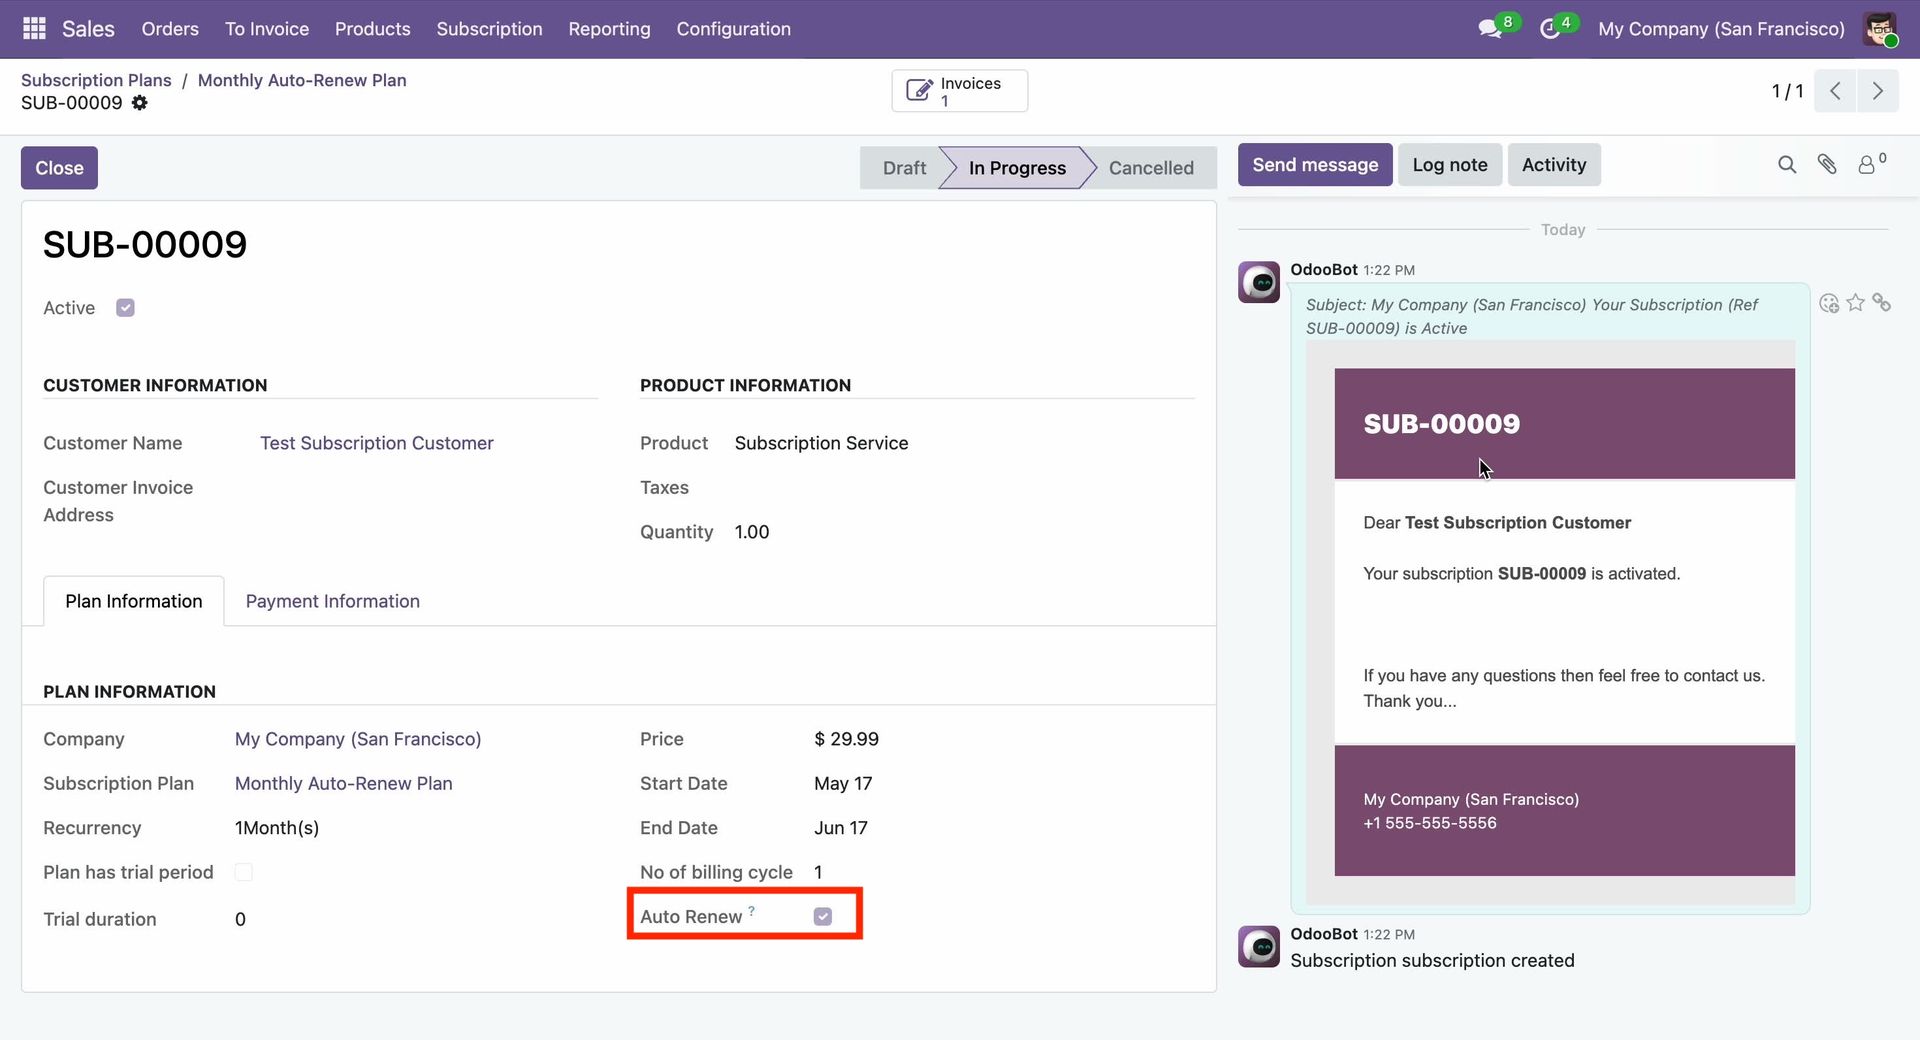
Enable the Auto Renew option in the Subscription Plan to automatically renew subscriptions according to the configured billing cycle.
Users can see that the Auto Renew option is automatically enabled in the Plan Information tab of the Subscription Order based on the selected Subscription Plan.
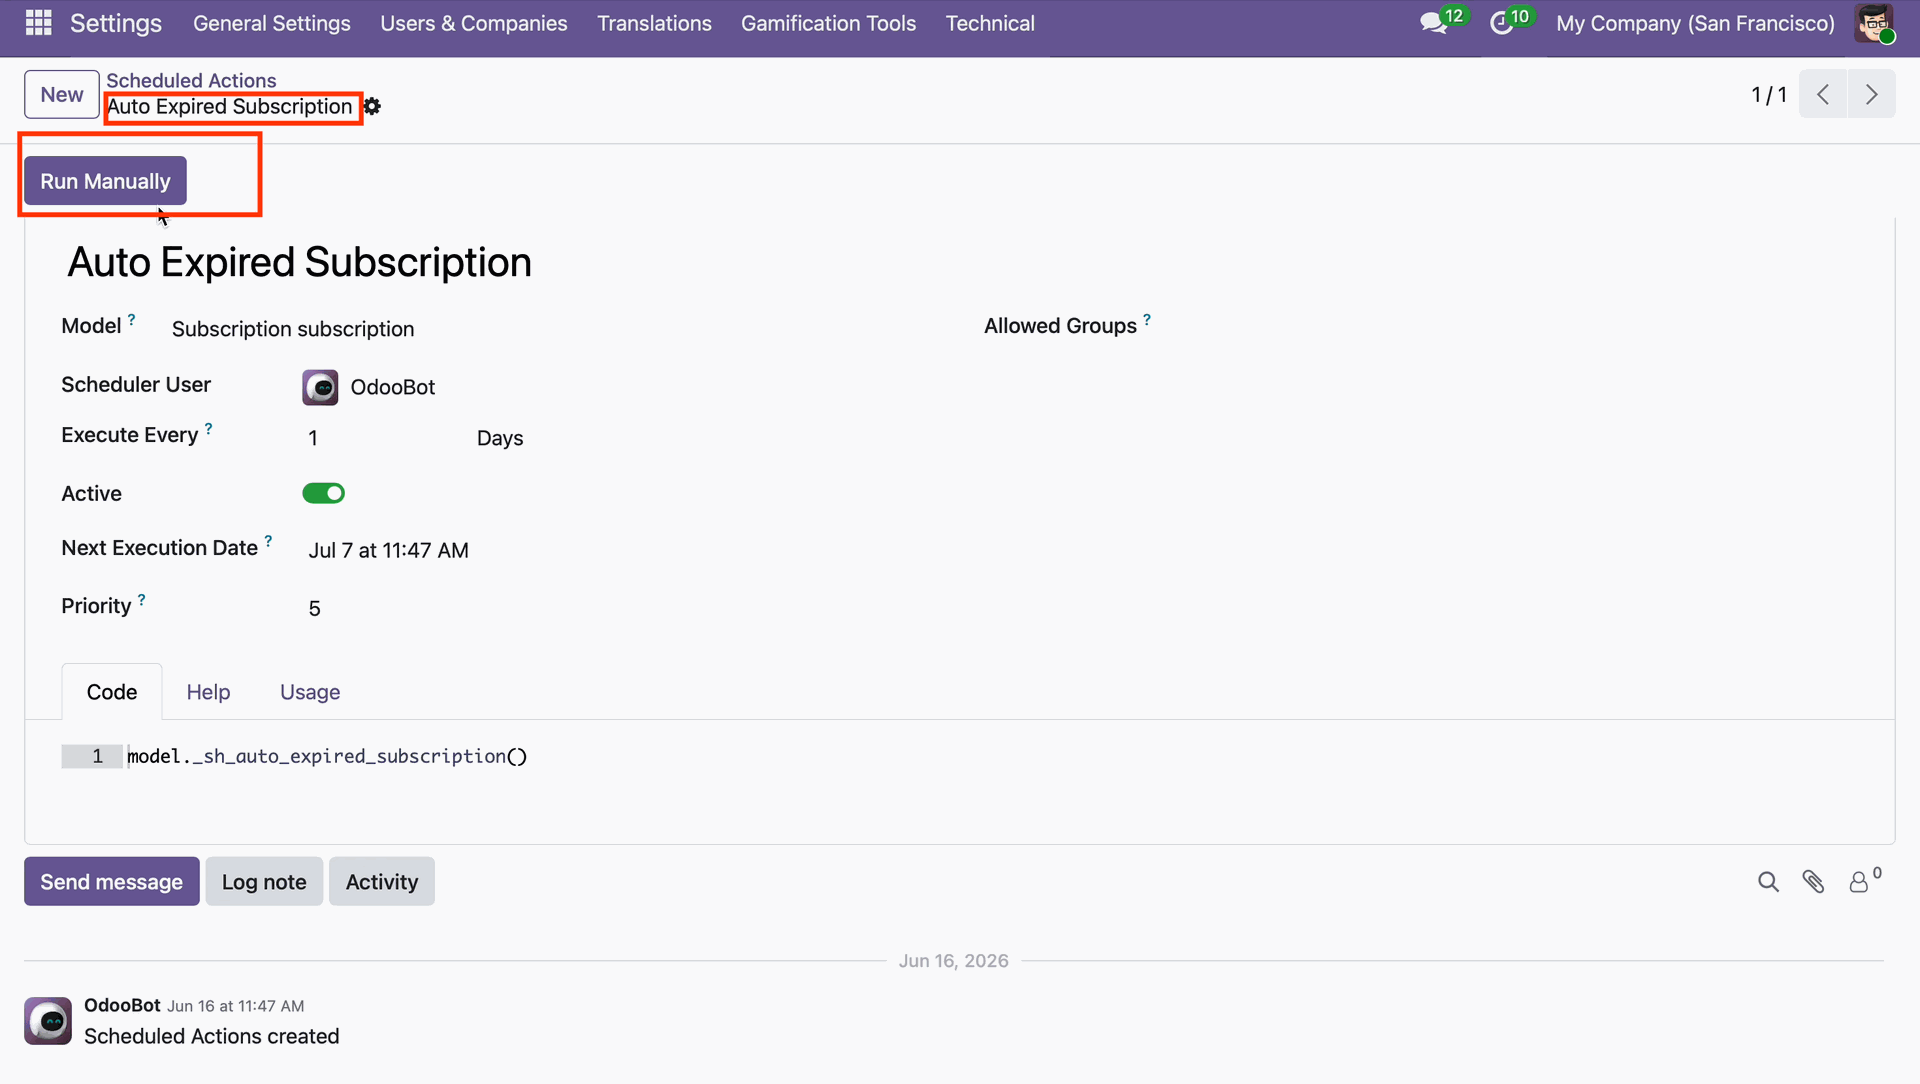
The Auto Expire Subscription scheduled action automatically expires subscriptions that have reached their configured expiration date.
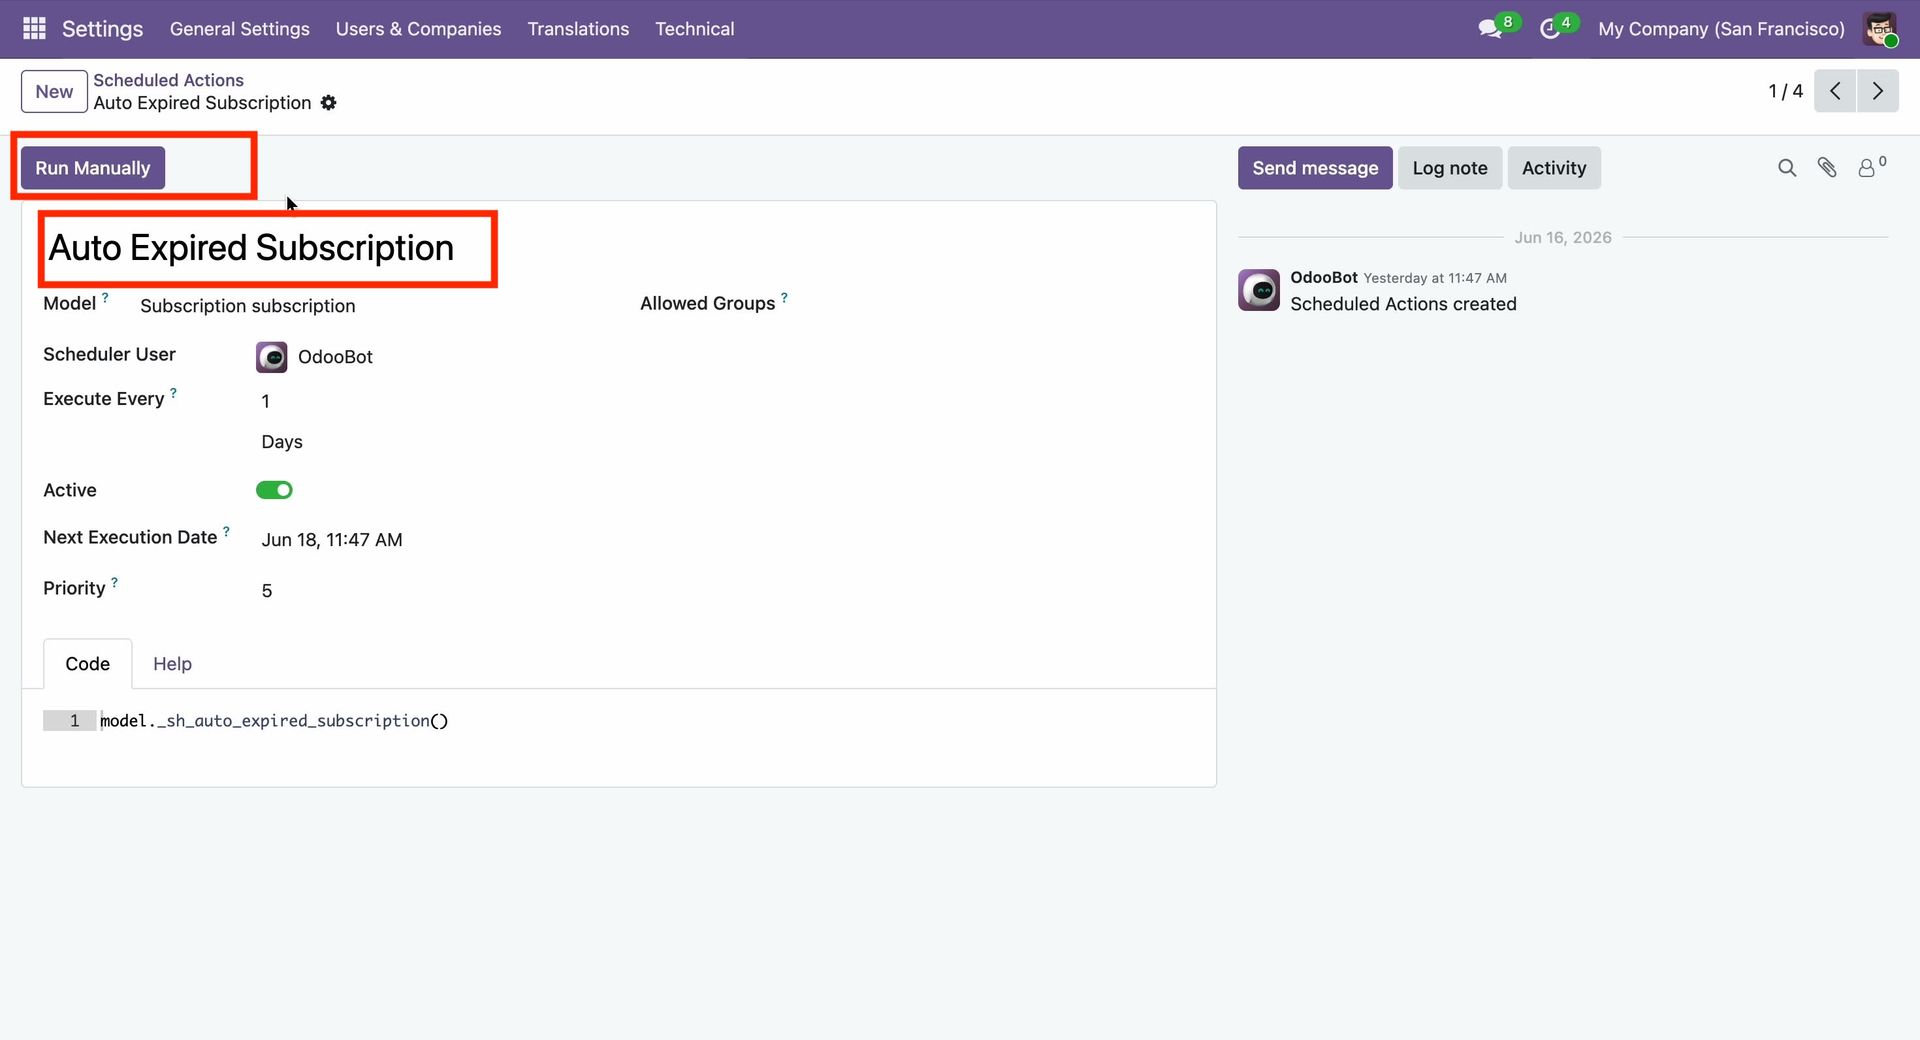
The Auto Expired Subscriptions automatically renews eligible expired subscriptions that have Auto Renew enabled
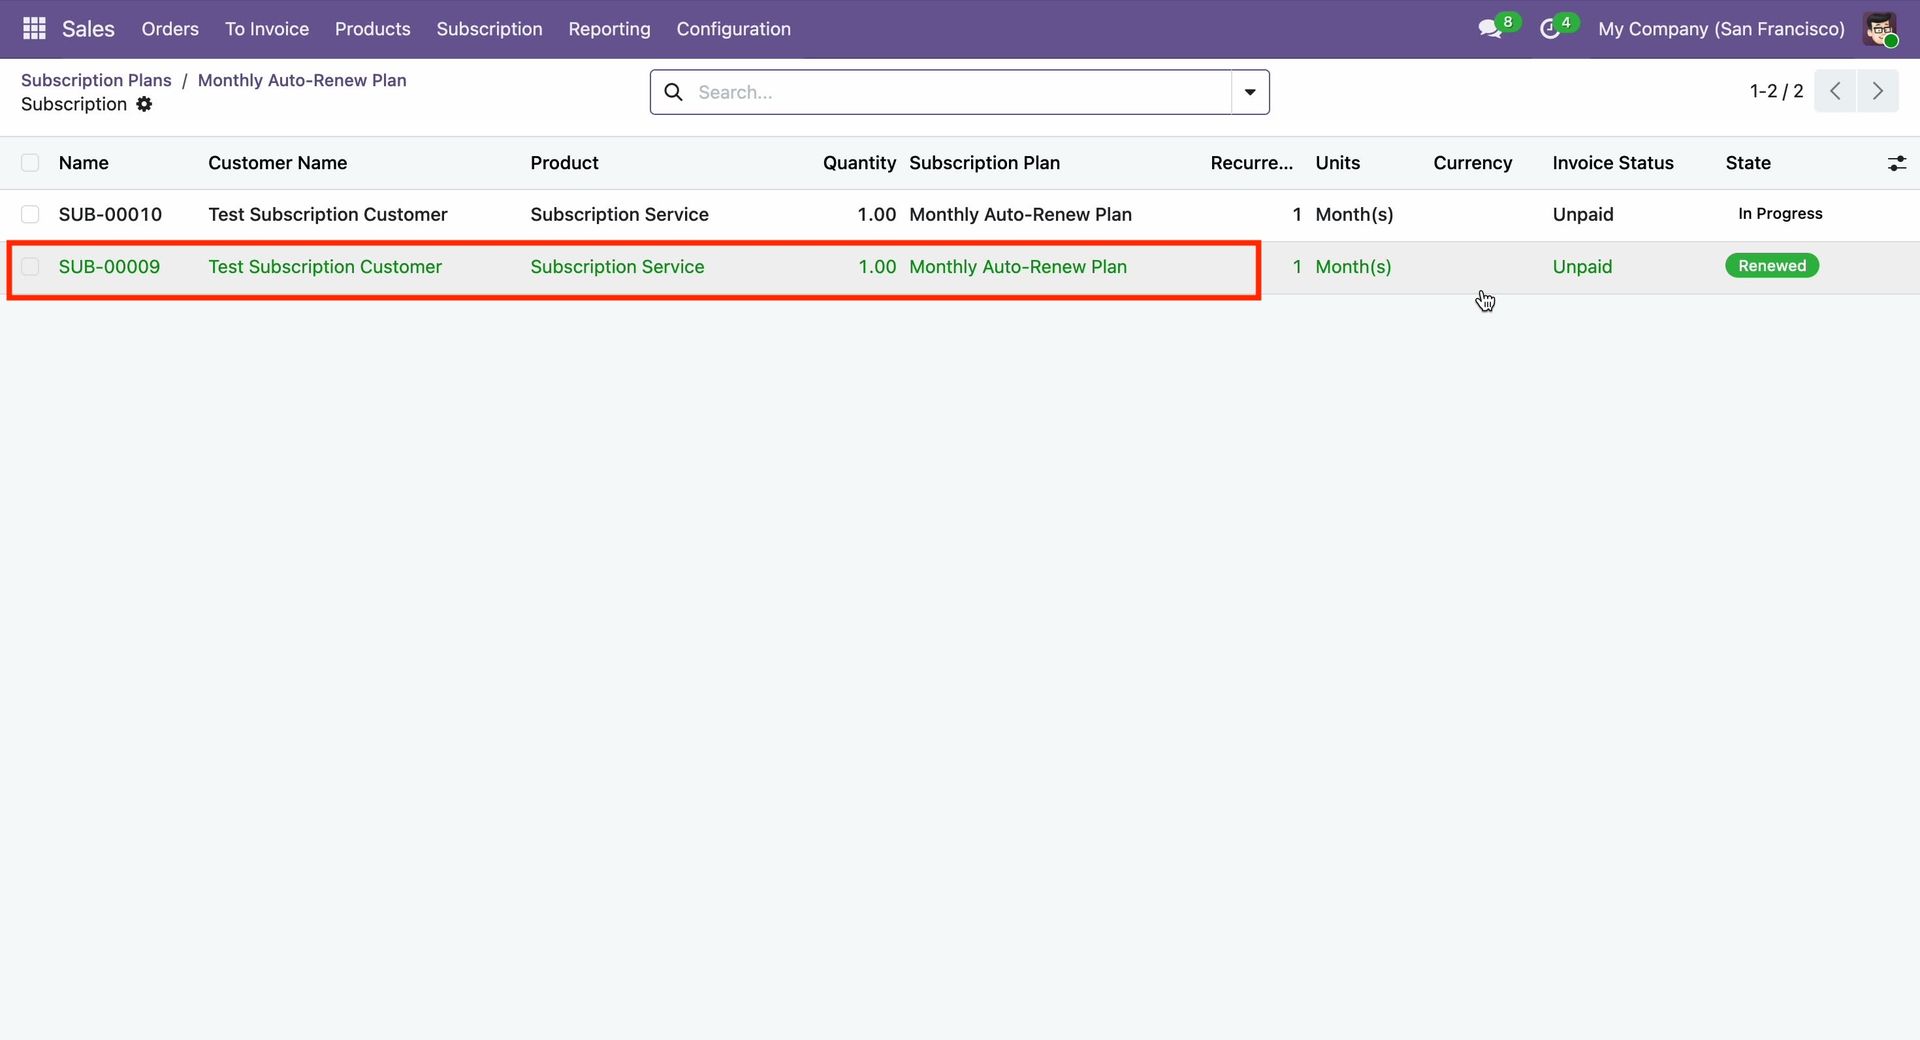
A chatter log is automatically created in the old order, indicating that the old subscription has been renewed, along with the reference number of the newly created subscription.
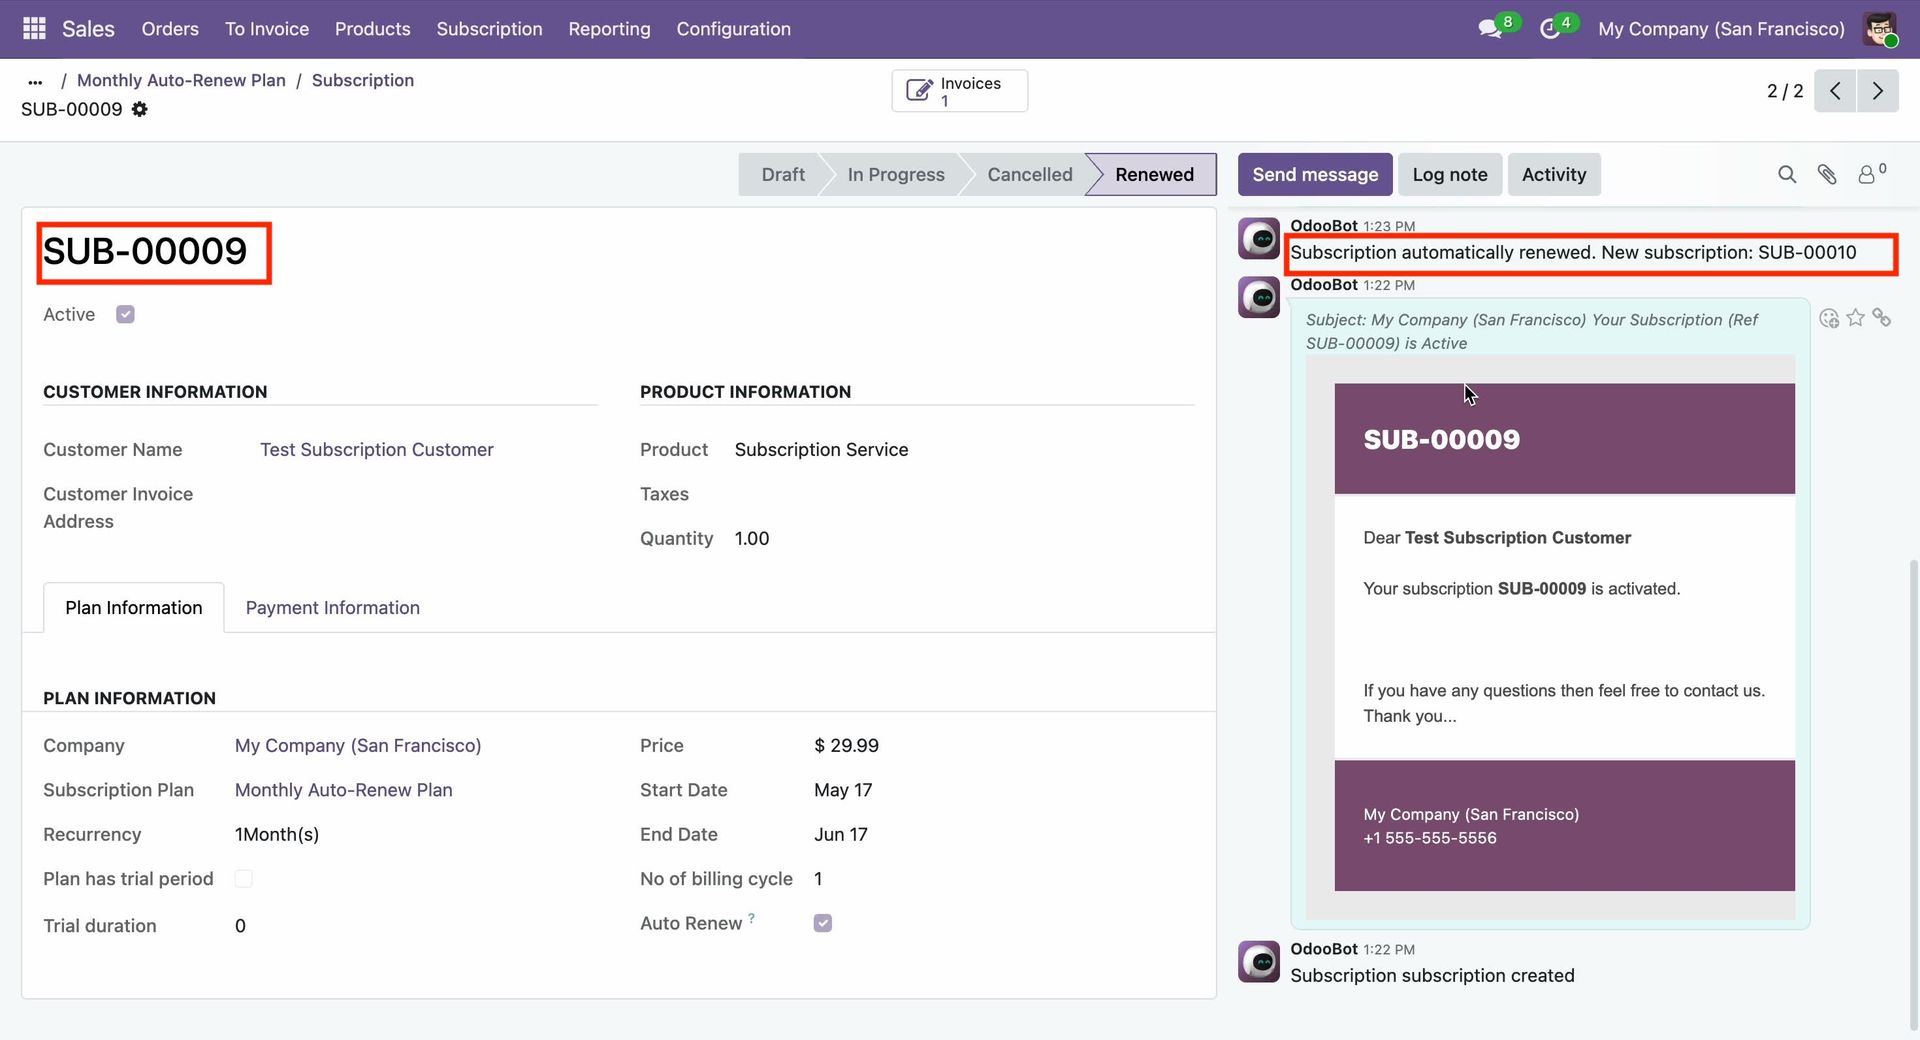
Open the renewed Subscription Order. The chatter displays a log indicating which previous subscription order it was renewed from.
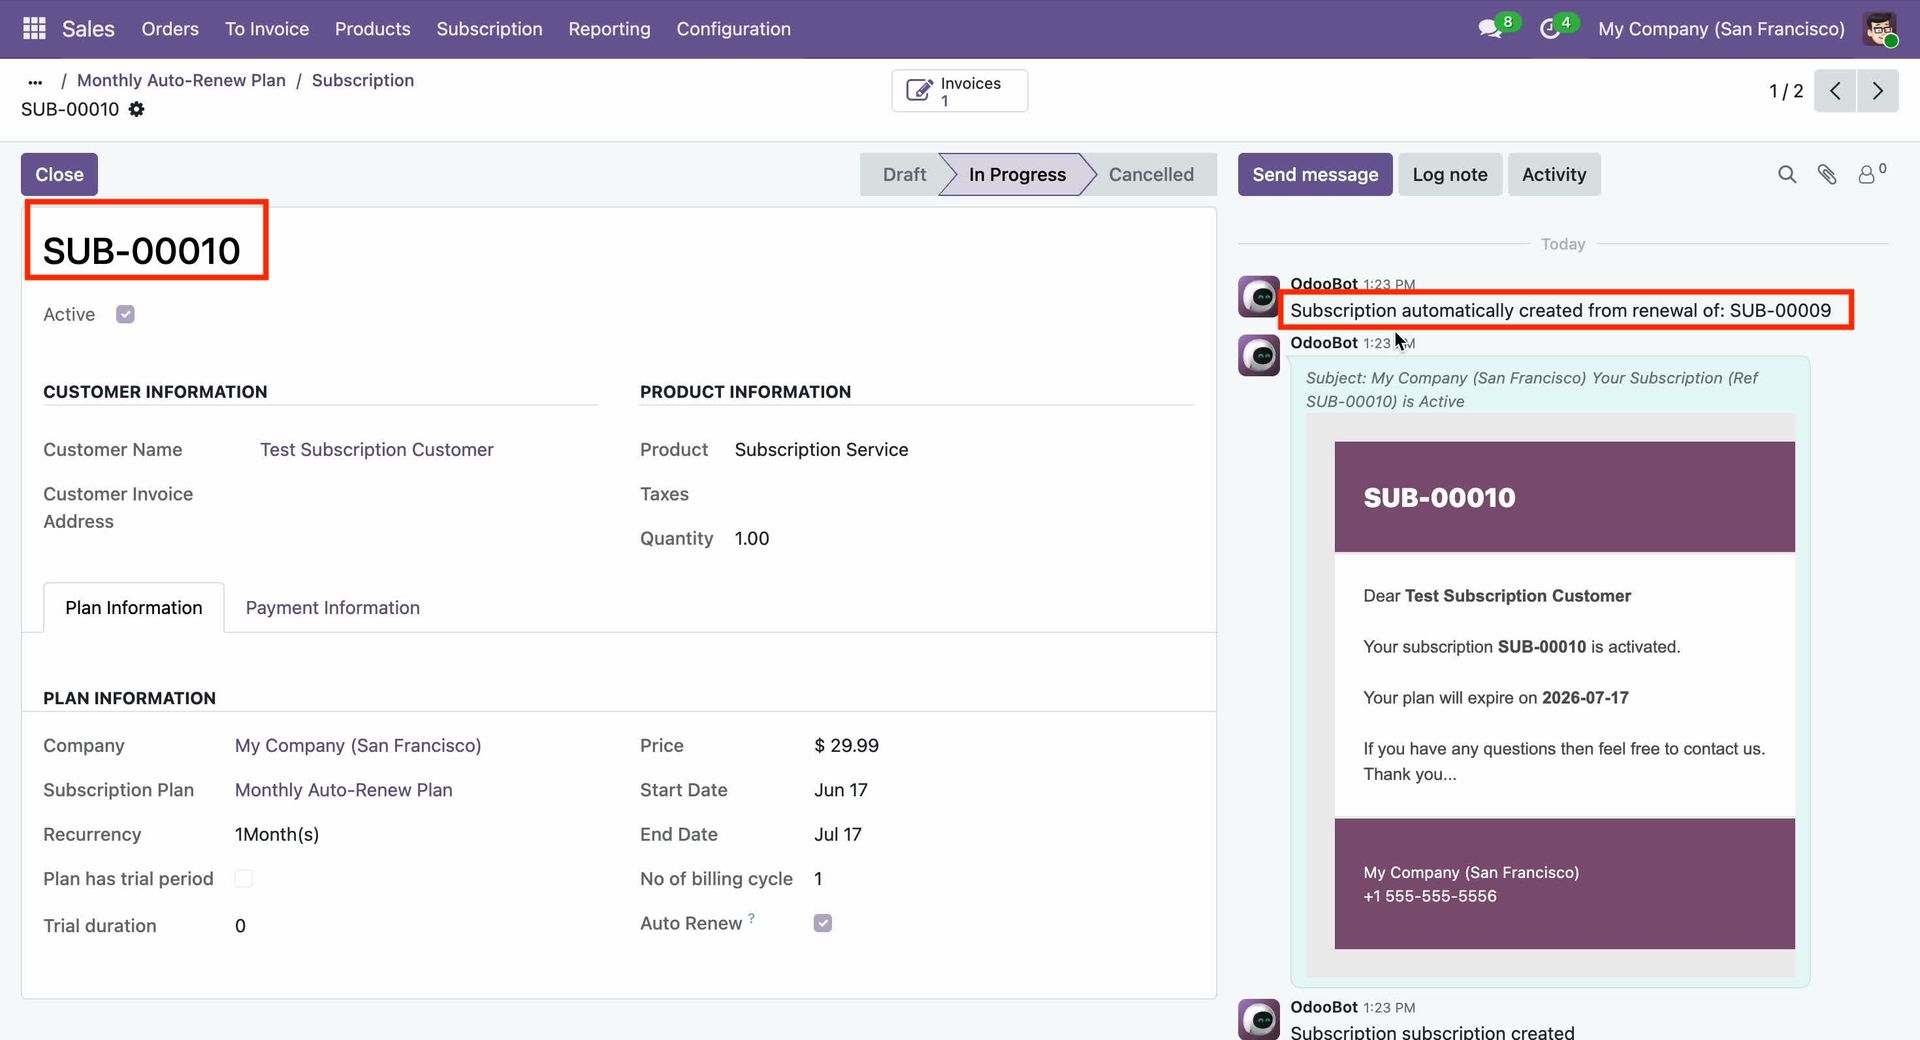
The renewed Subscription Order is automatically created in the In Progress stage, and an unpaid customer invoice is generated automatically.
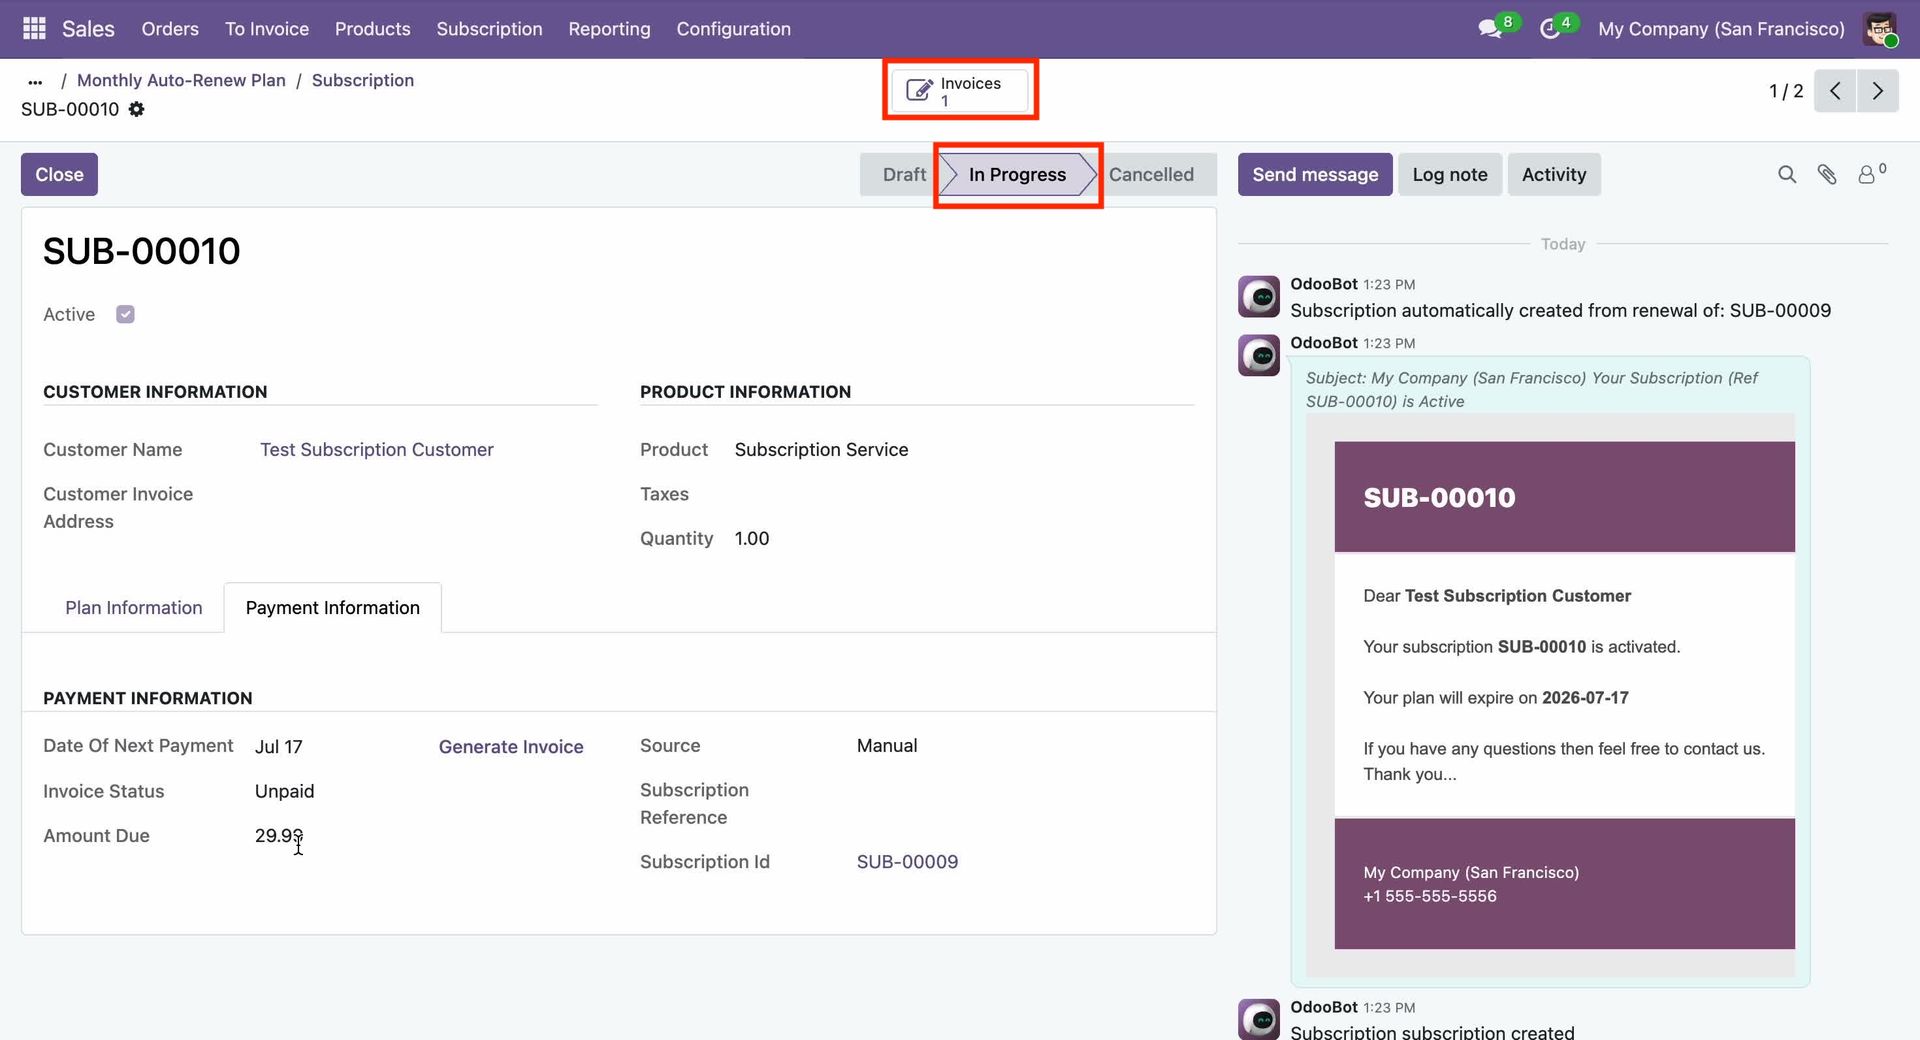
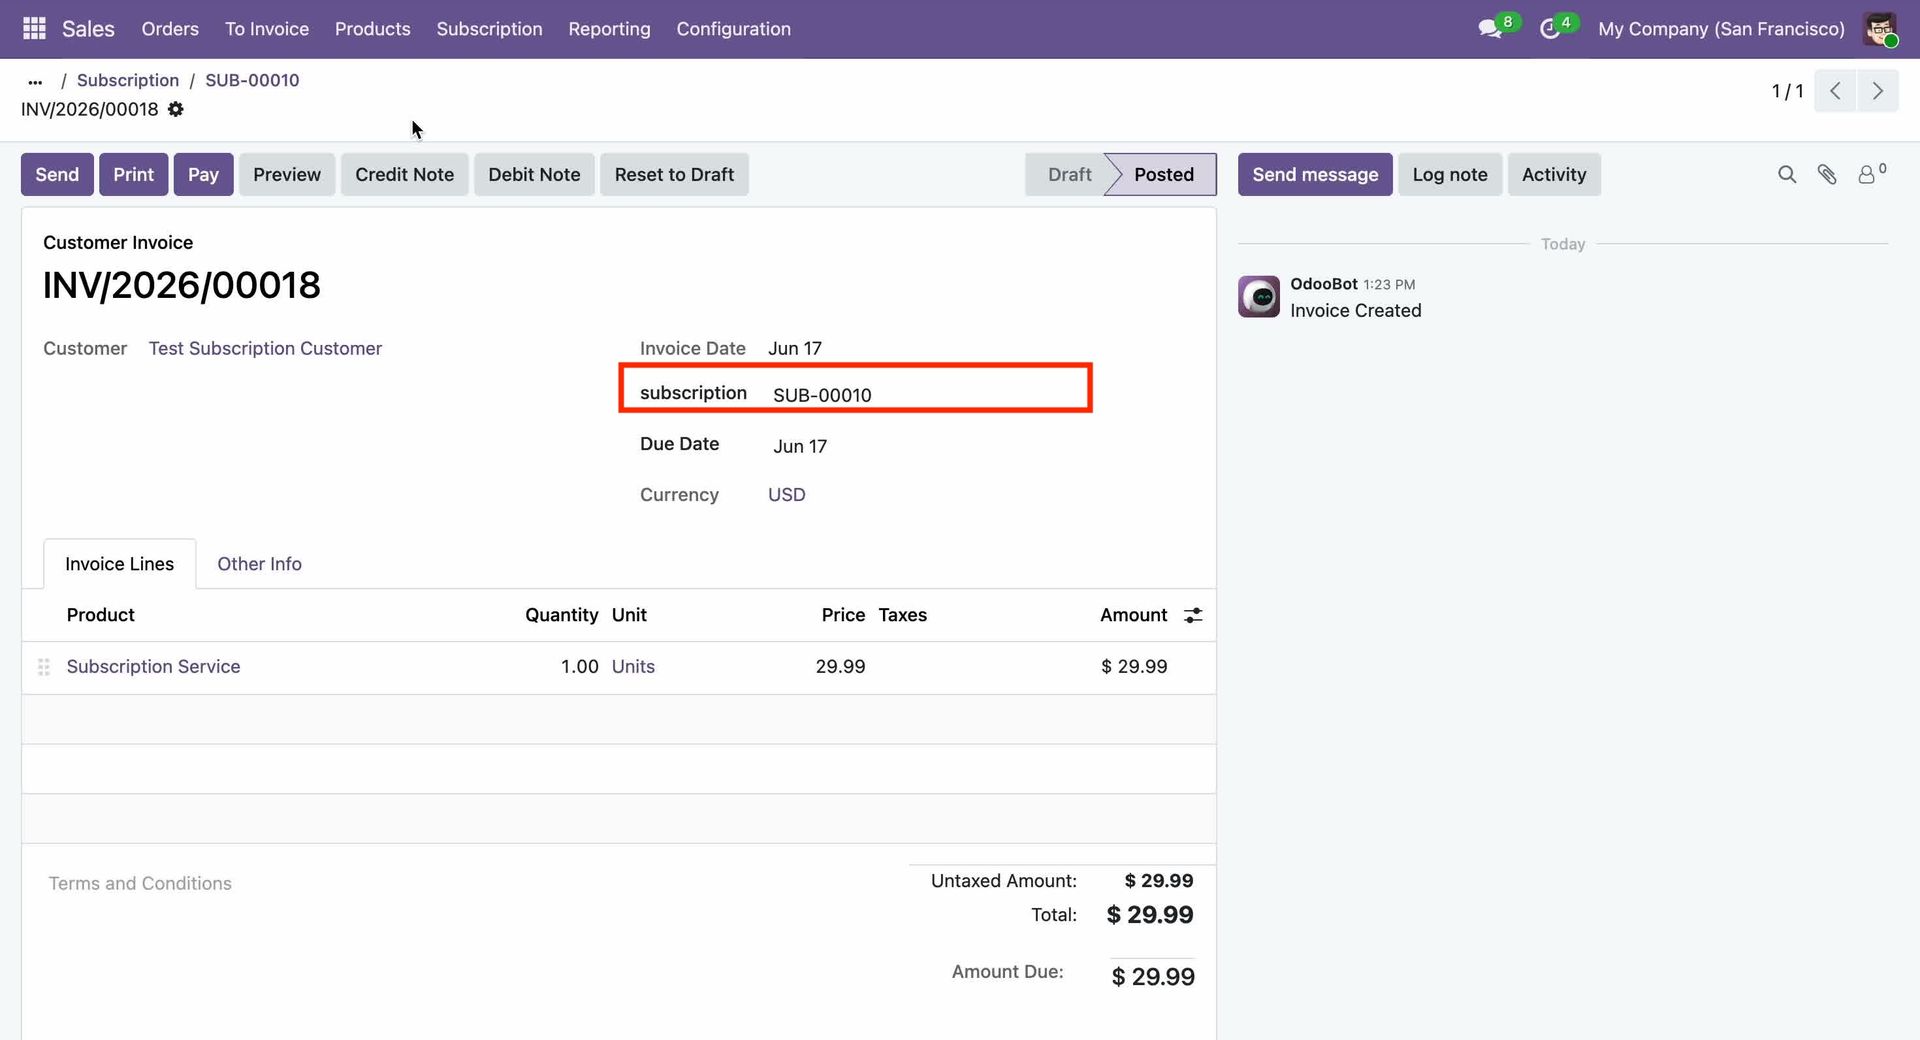
Open the Invoice. Users can view the Subscription Reference Number directly on the invoice for easy tracking and identification.
Go to the Order Summary page on the website.
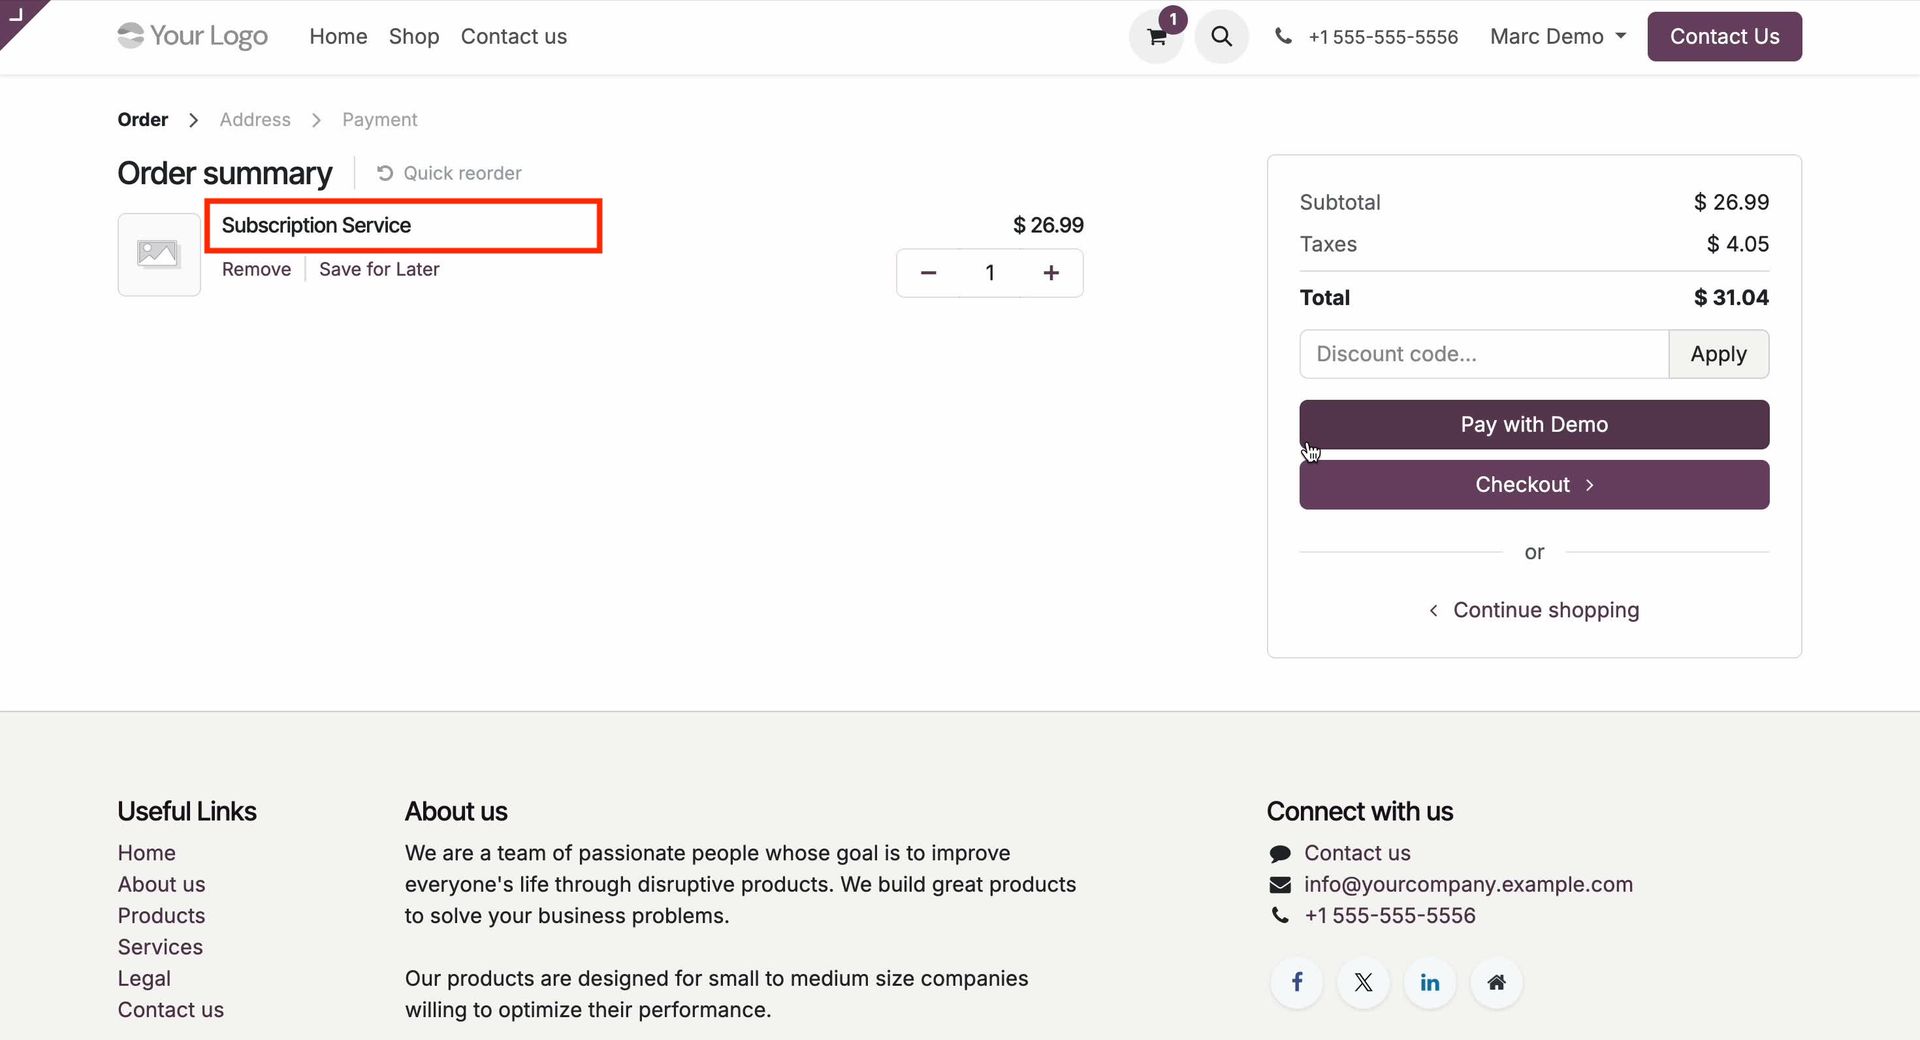
Proceed with the payment using the saved payment details to complete the subscription payment.
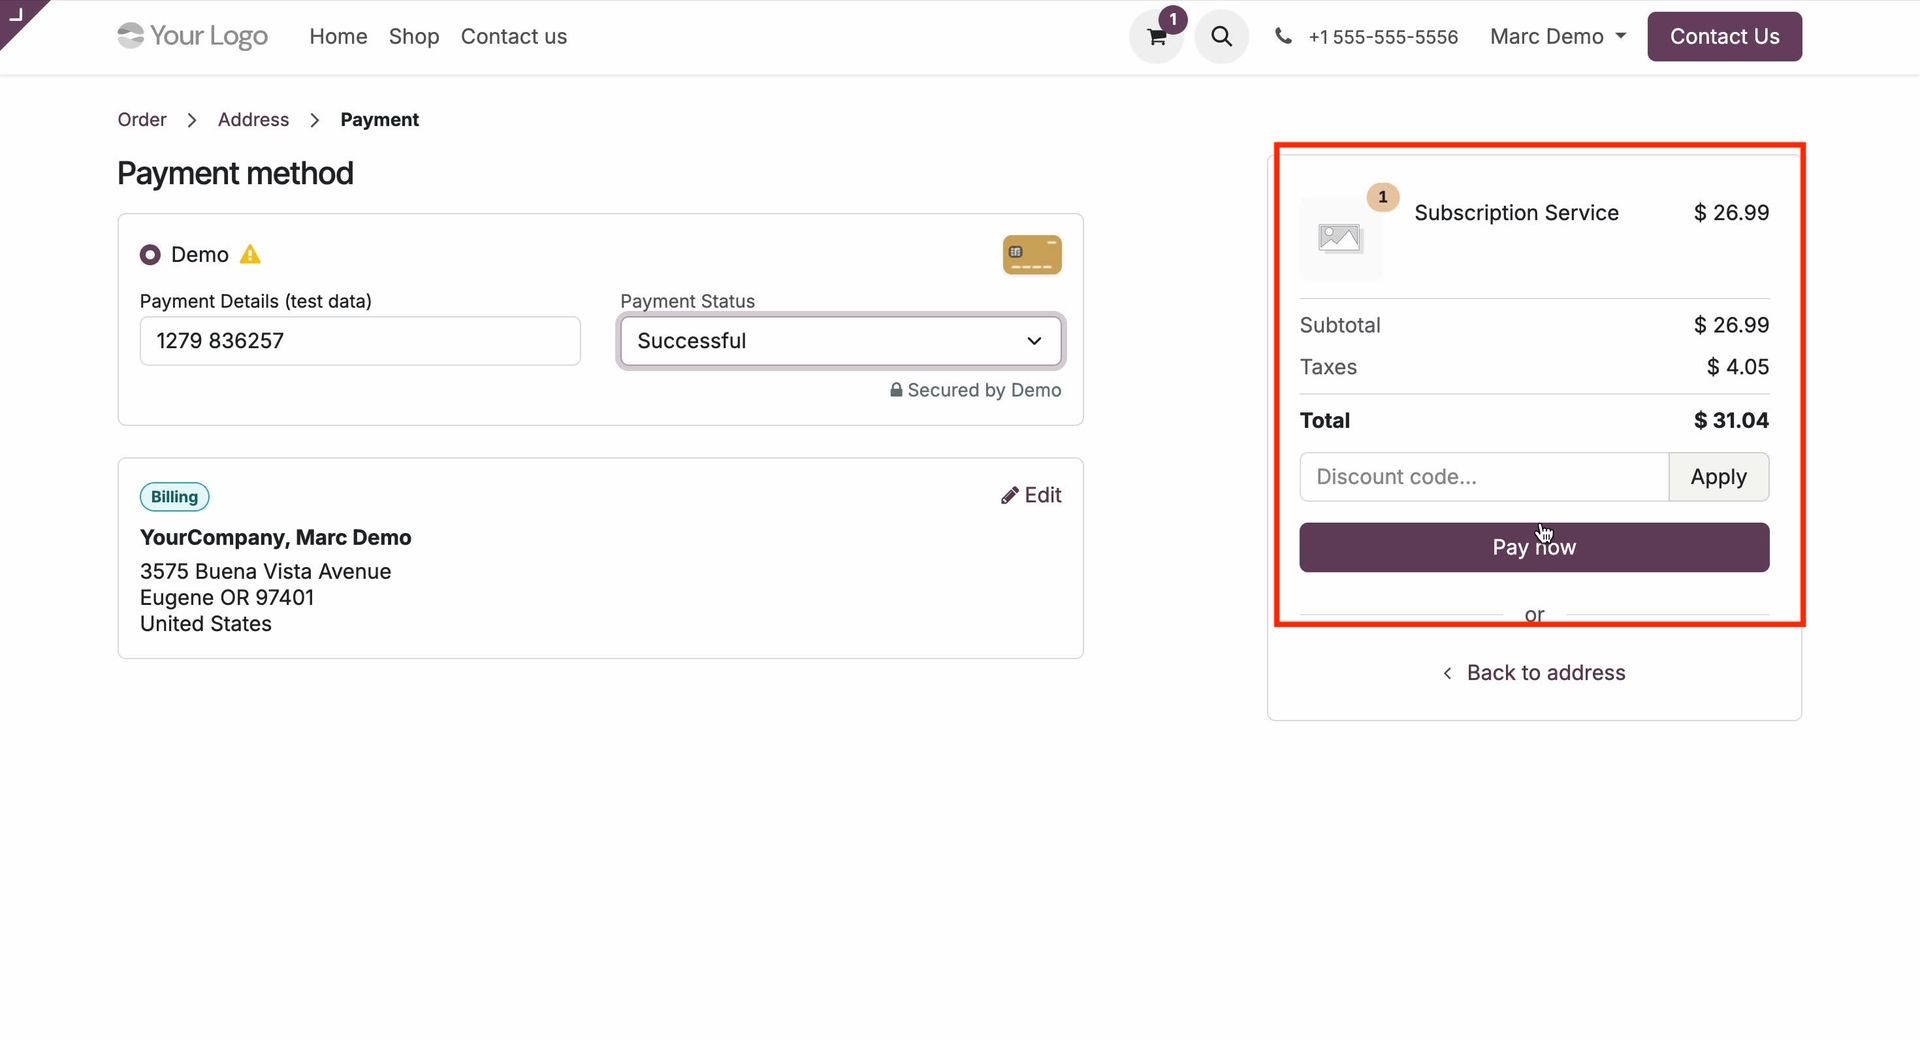
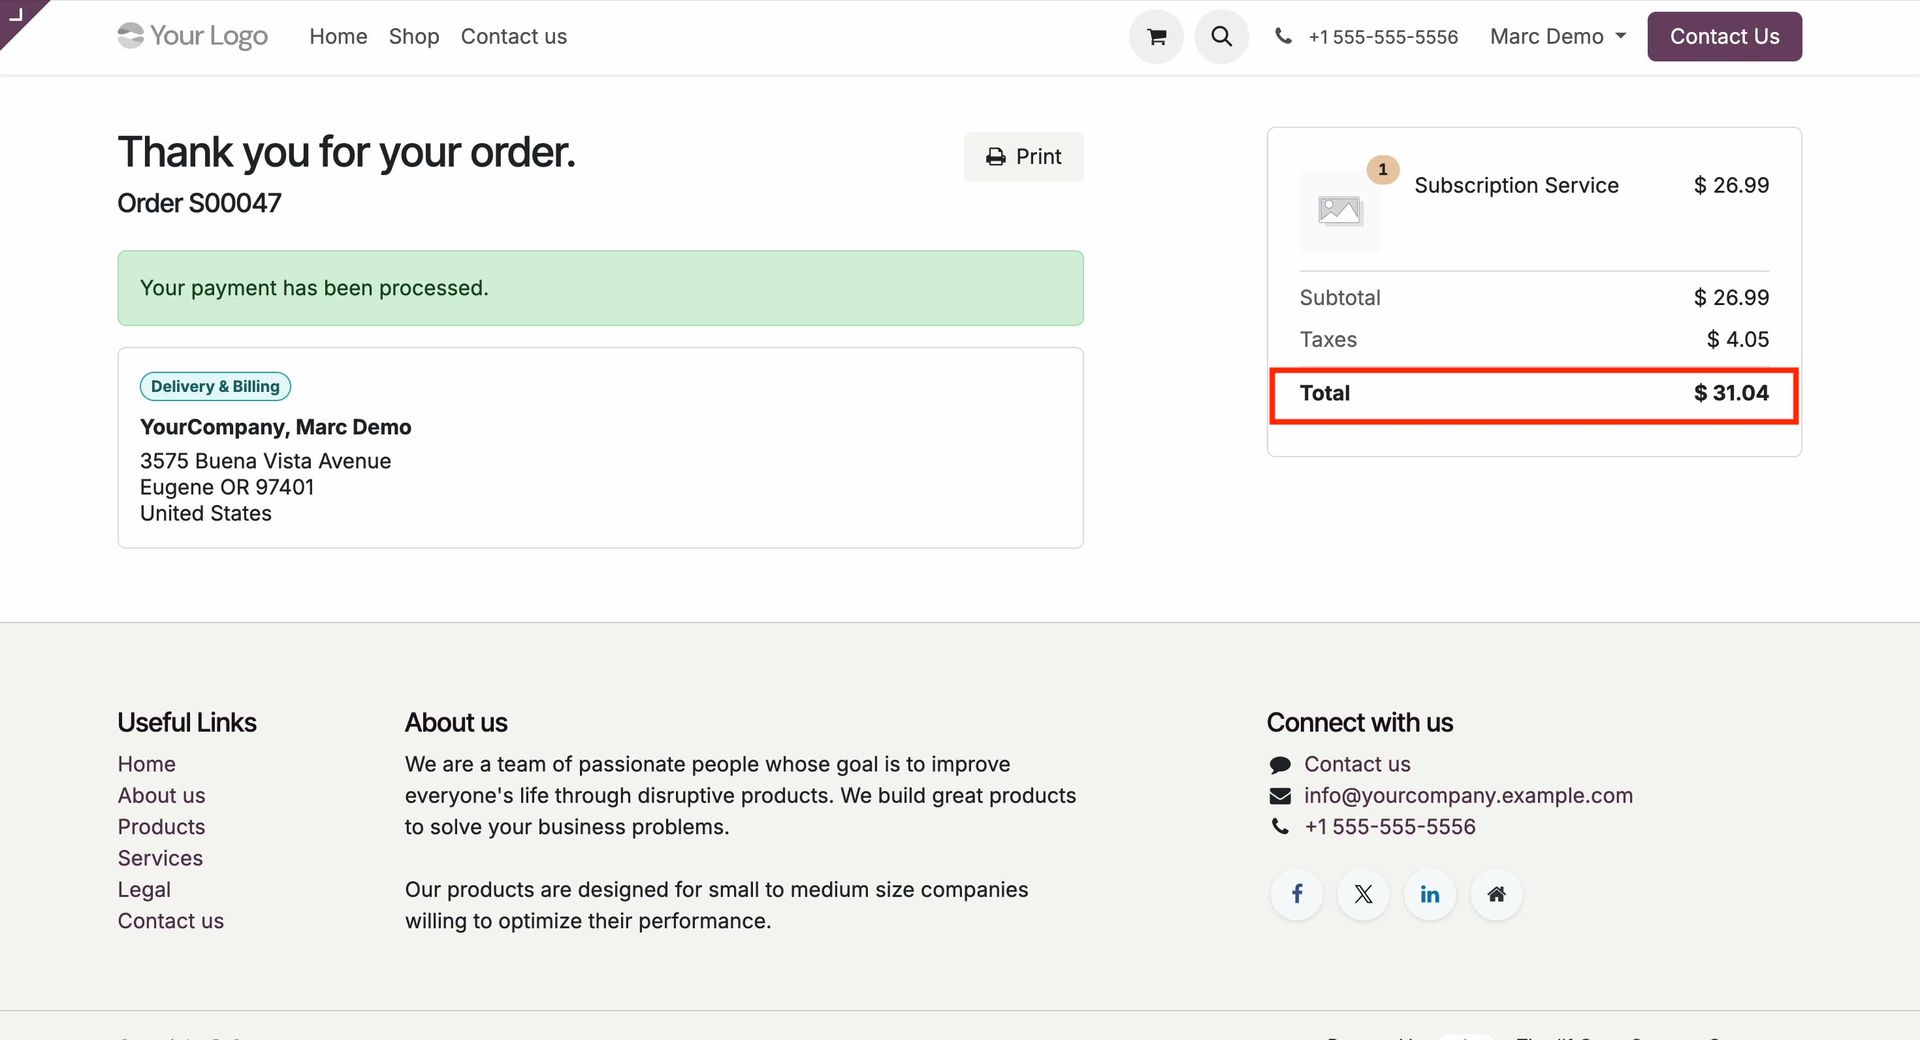
The payment has been completed successfully.
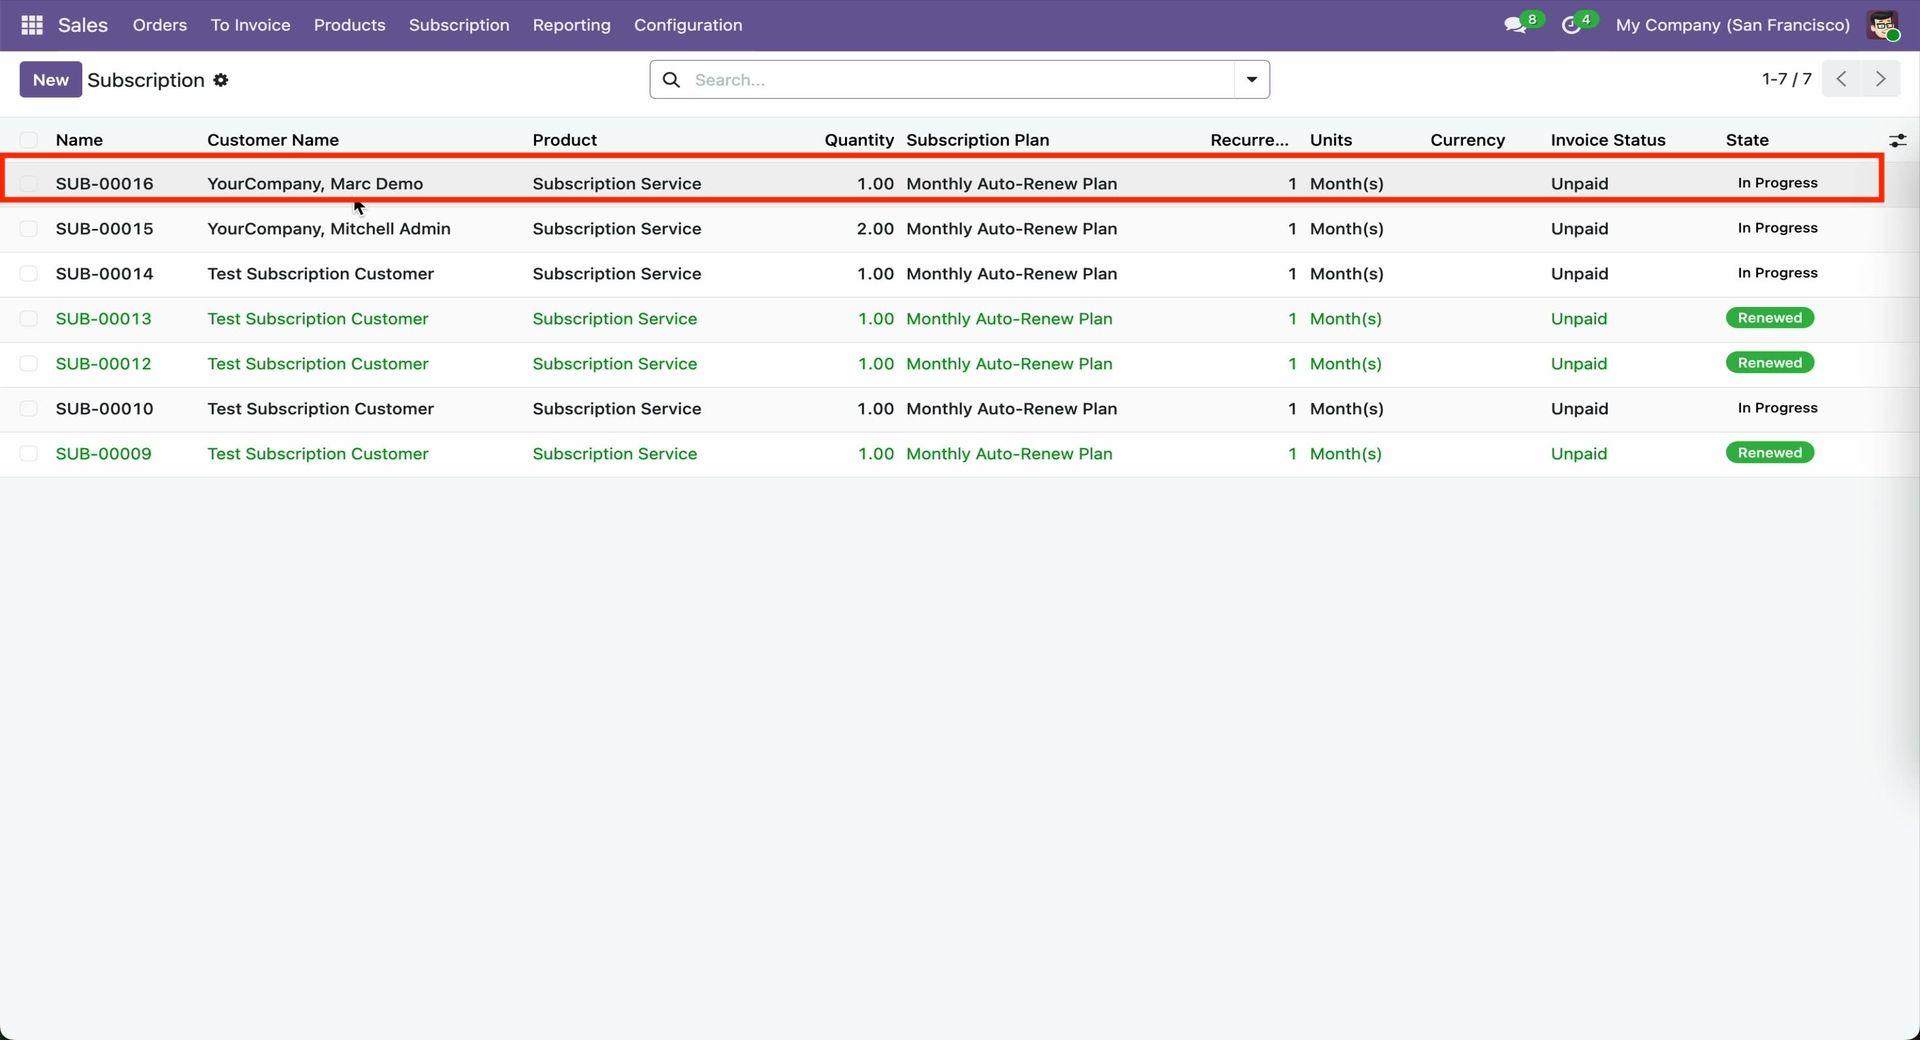
Go to the Subscription Order List View. The new subscription order created from the website will be visible in the list.
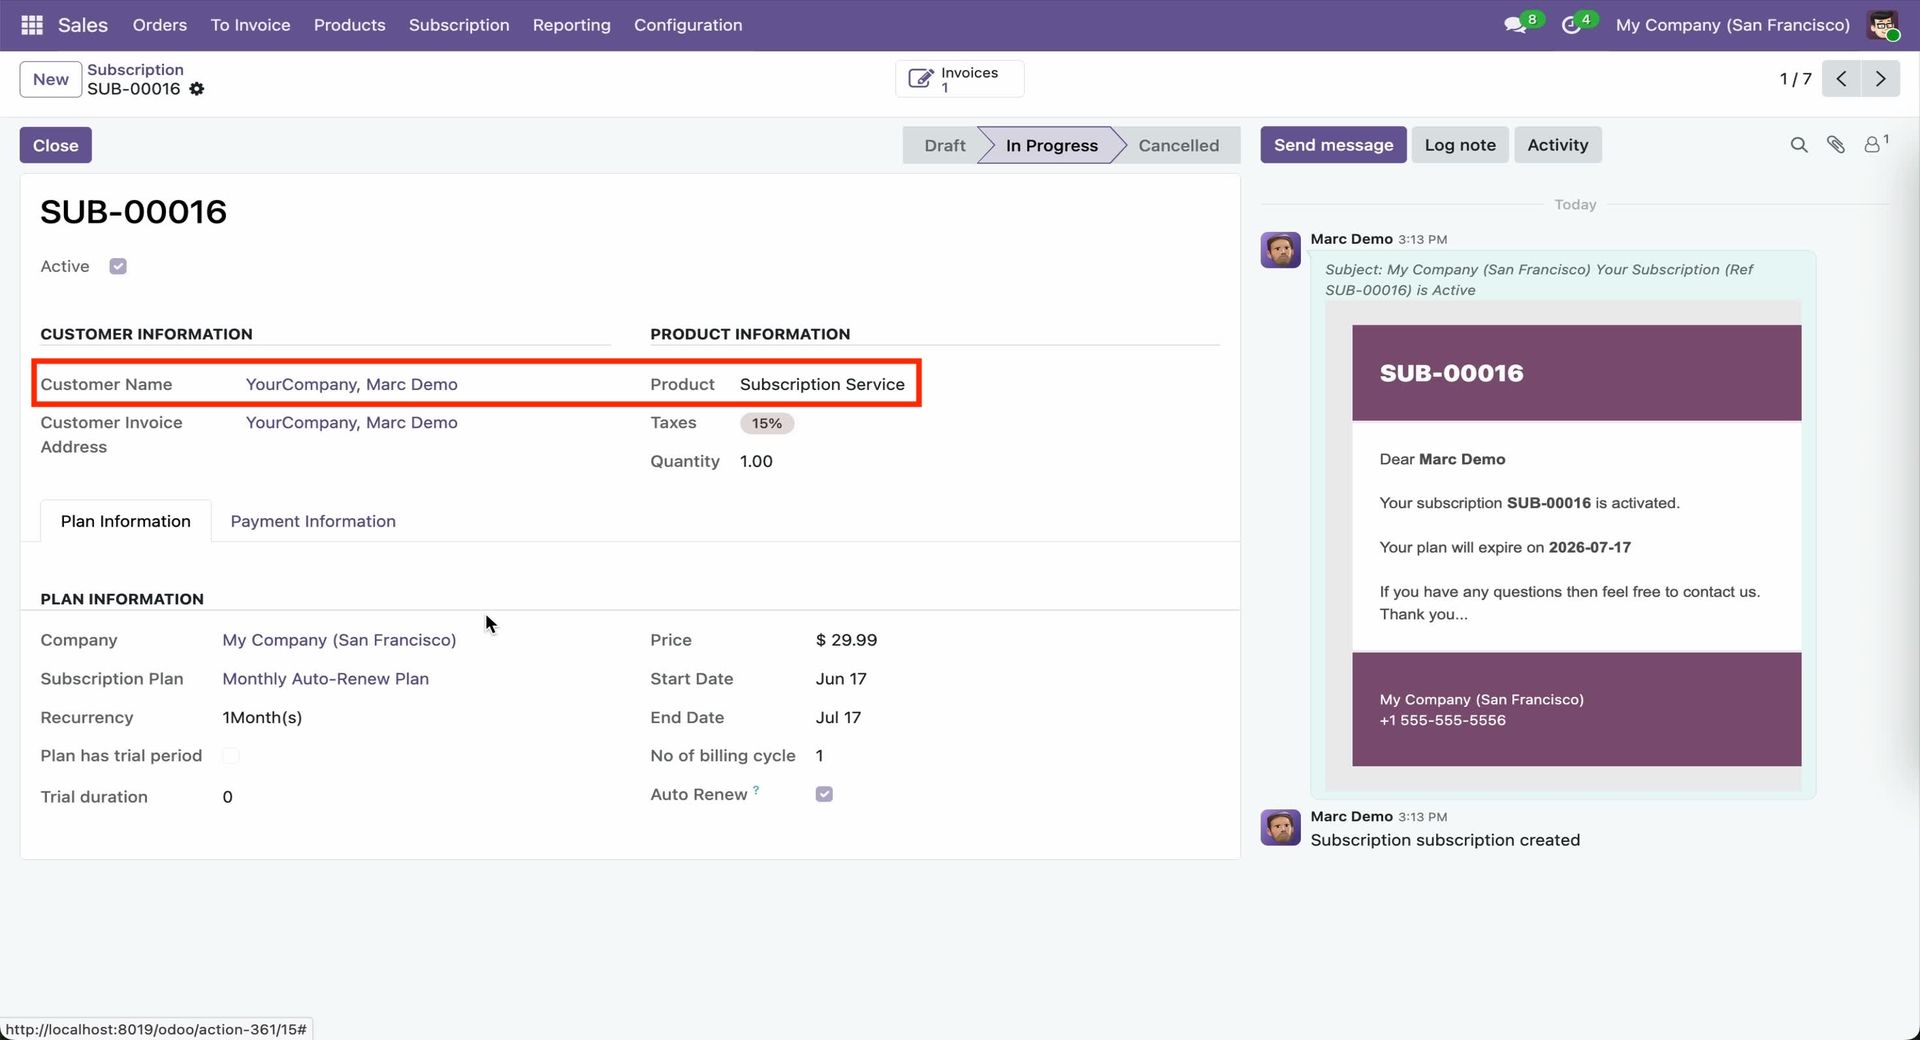
Open the newly created Subscription Order to view its details, plan information, and billing records.
Open the invoice created from the new Subscription Order to view the billing details, payment status, and subscription reference information.
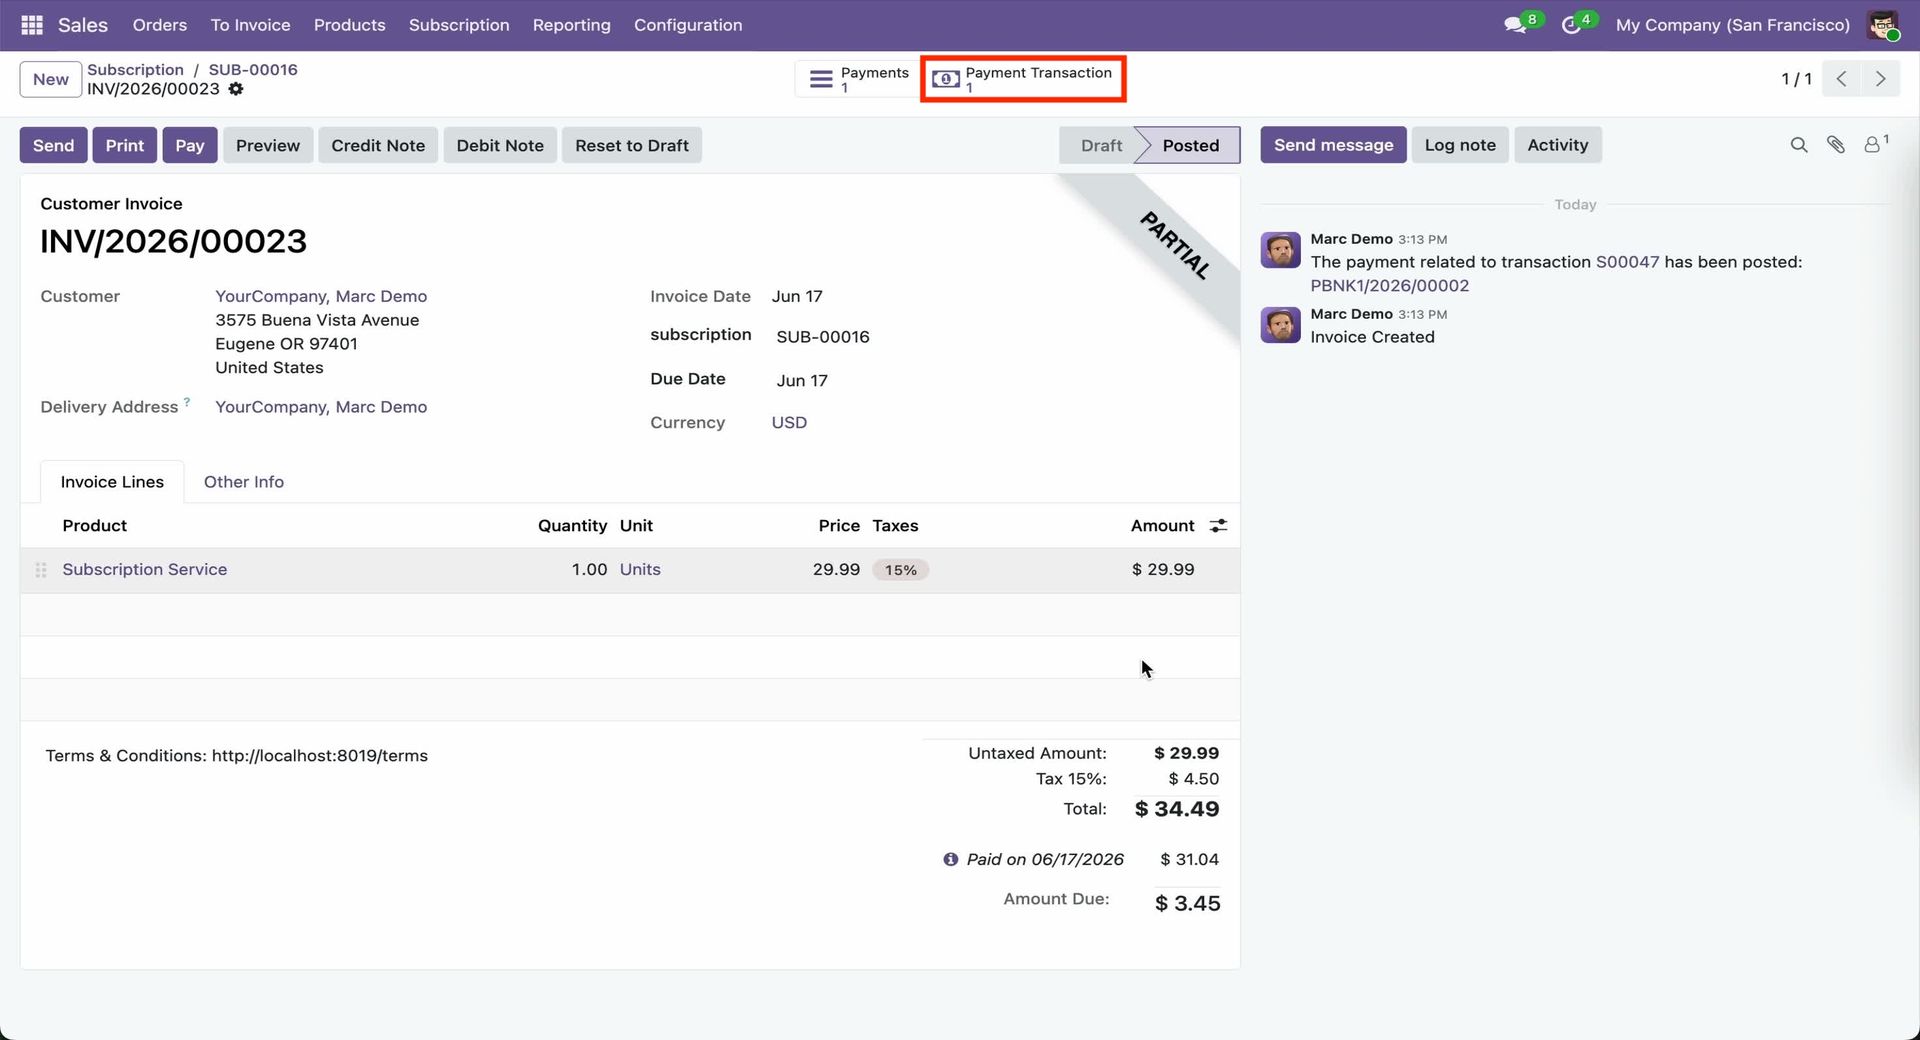
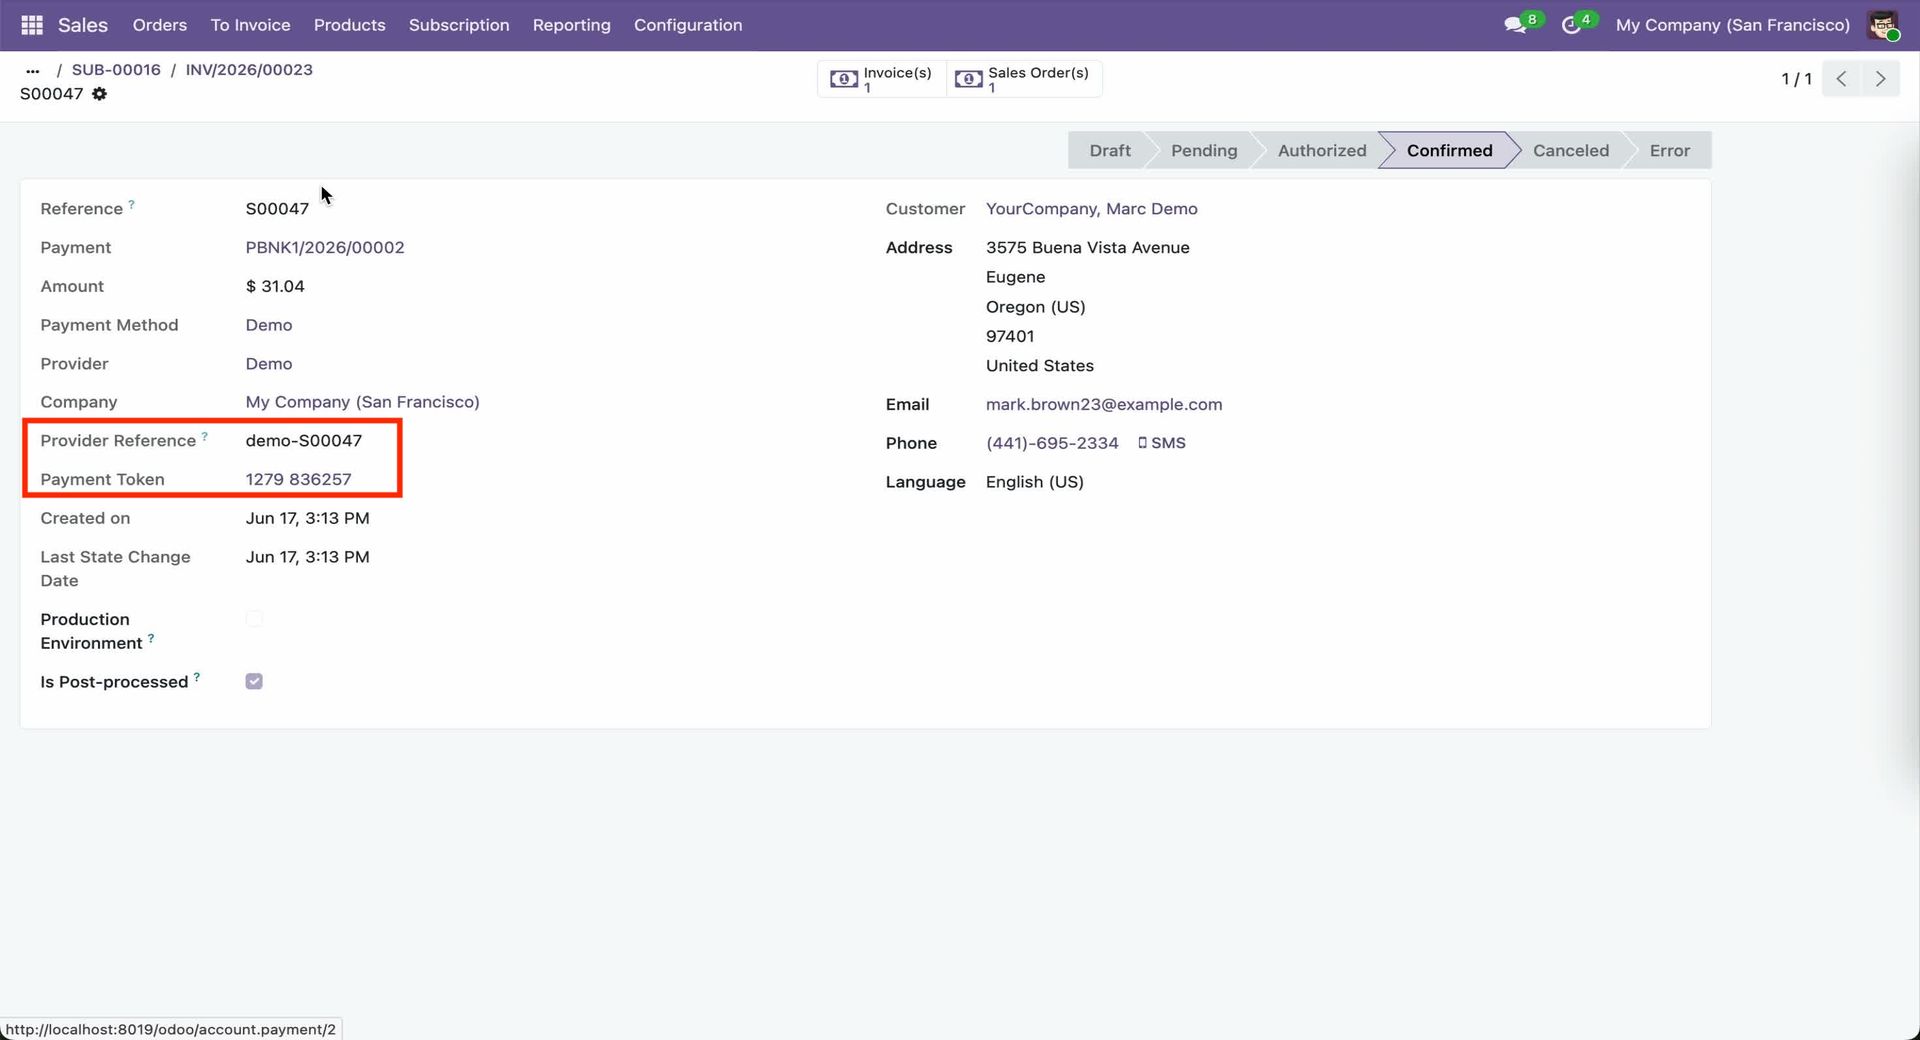
Click the Payment Transactions smart button to view and verify the payment transaction details associated with the subscription order.
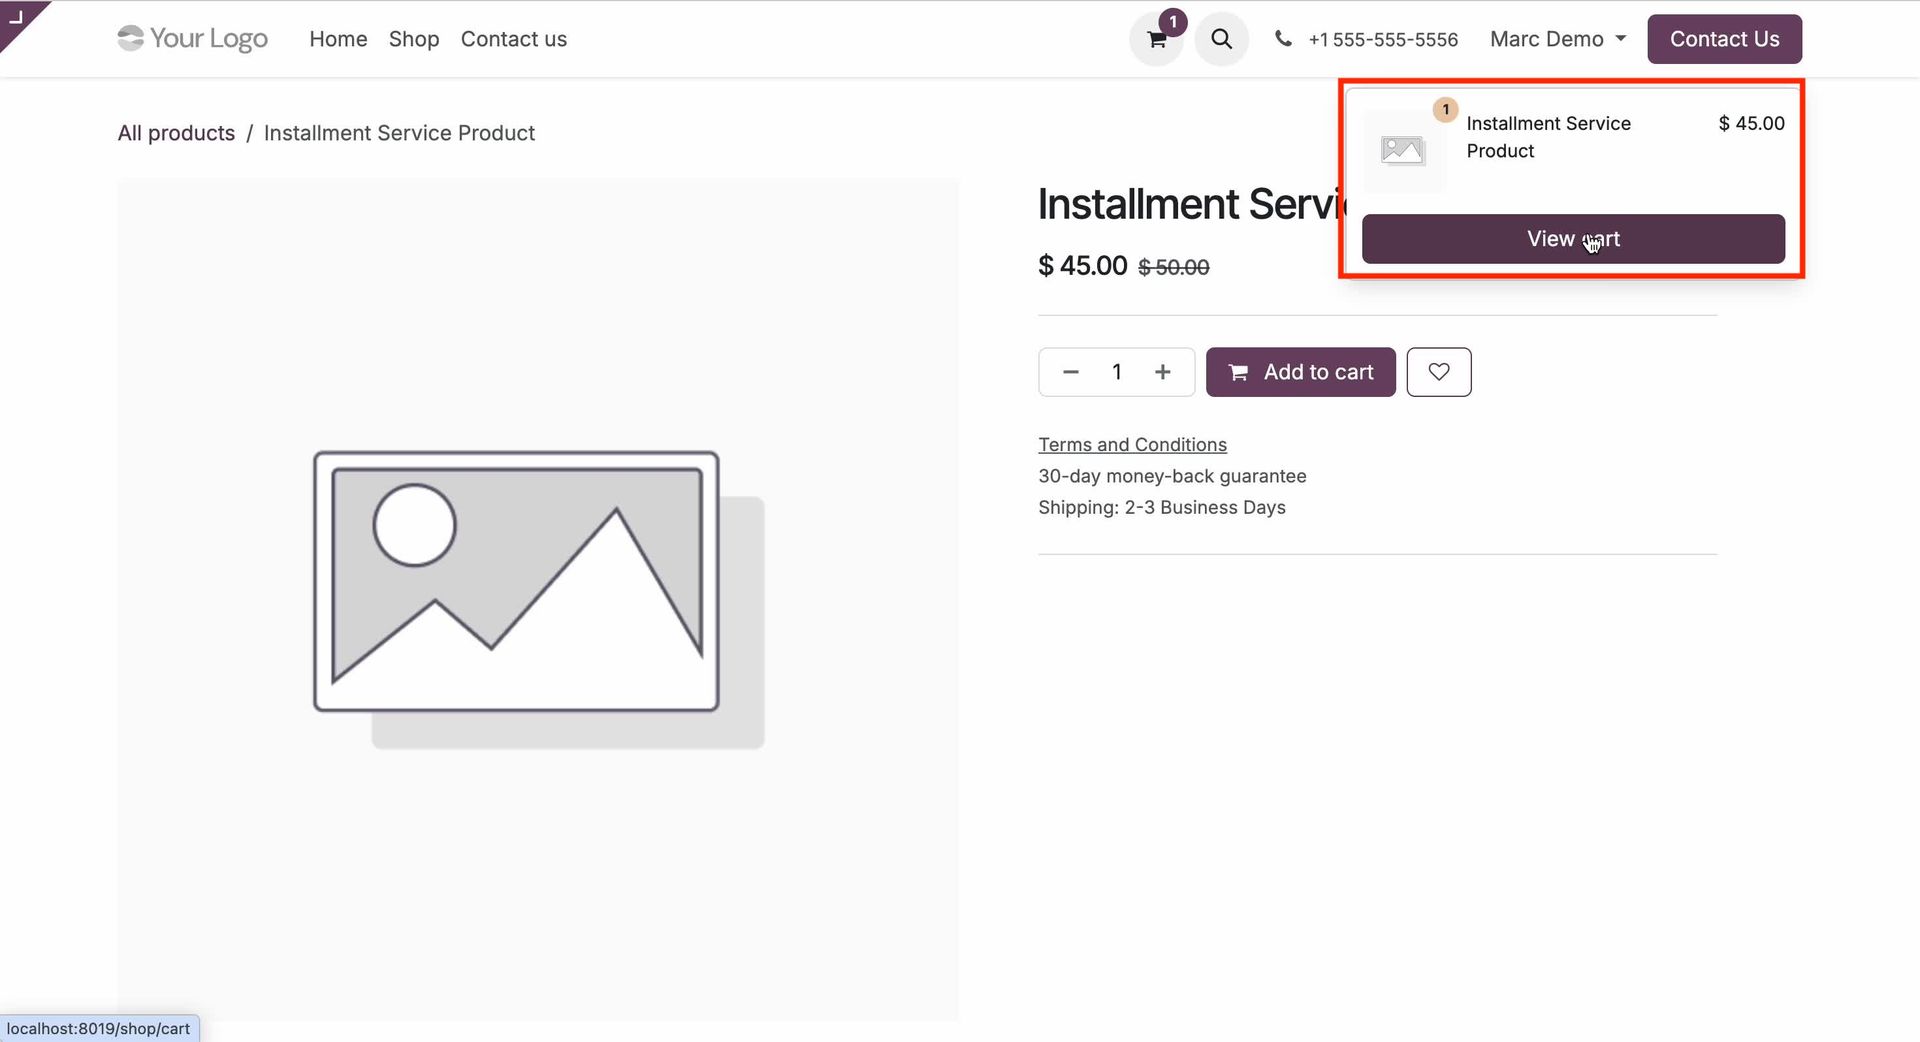
Click the View Cart button on the website to review the selected subscription, pricing, and order details before proceeding to checkout.
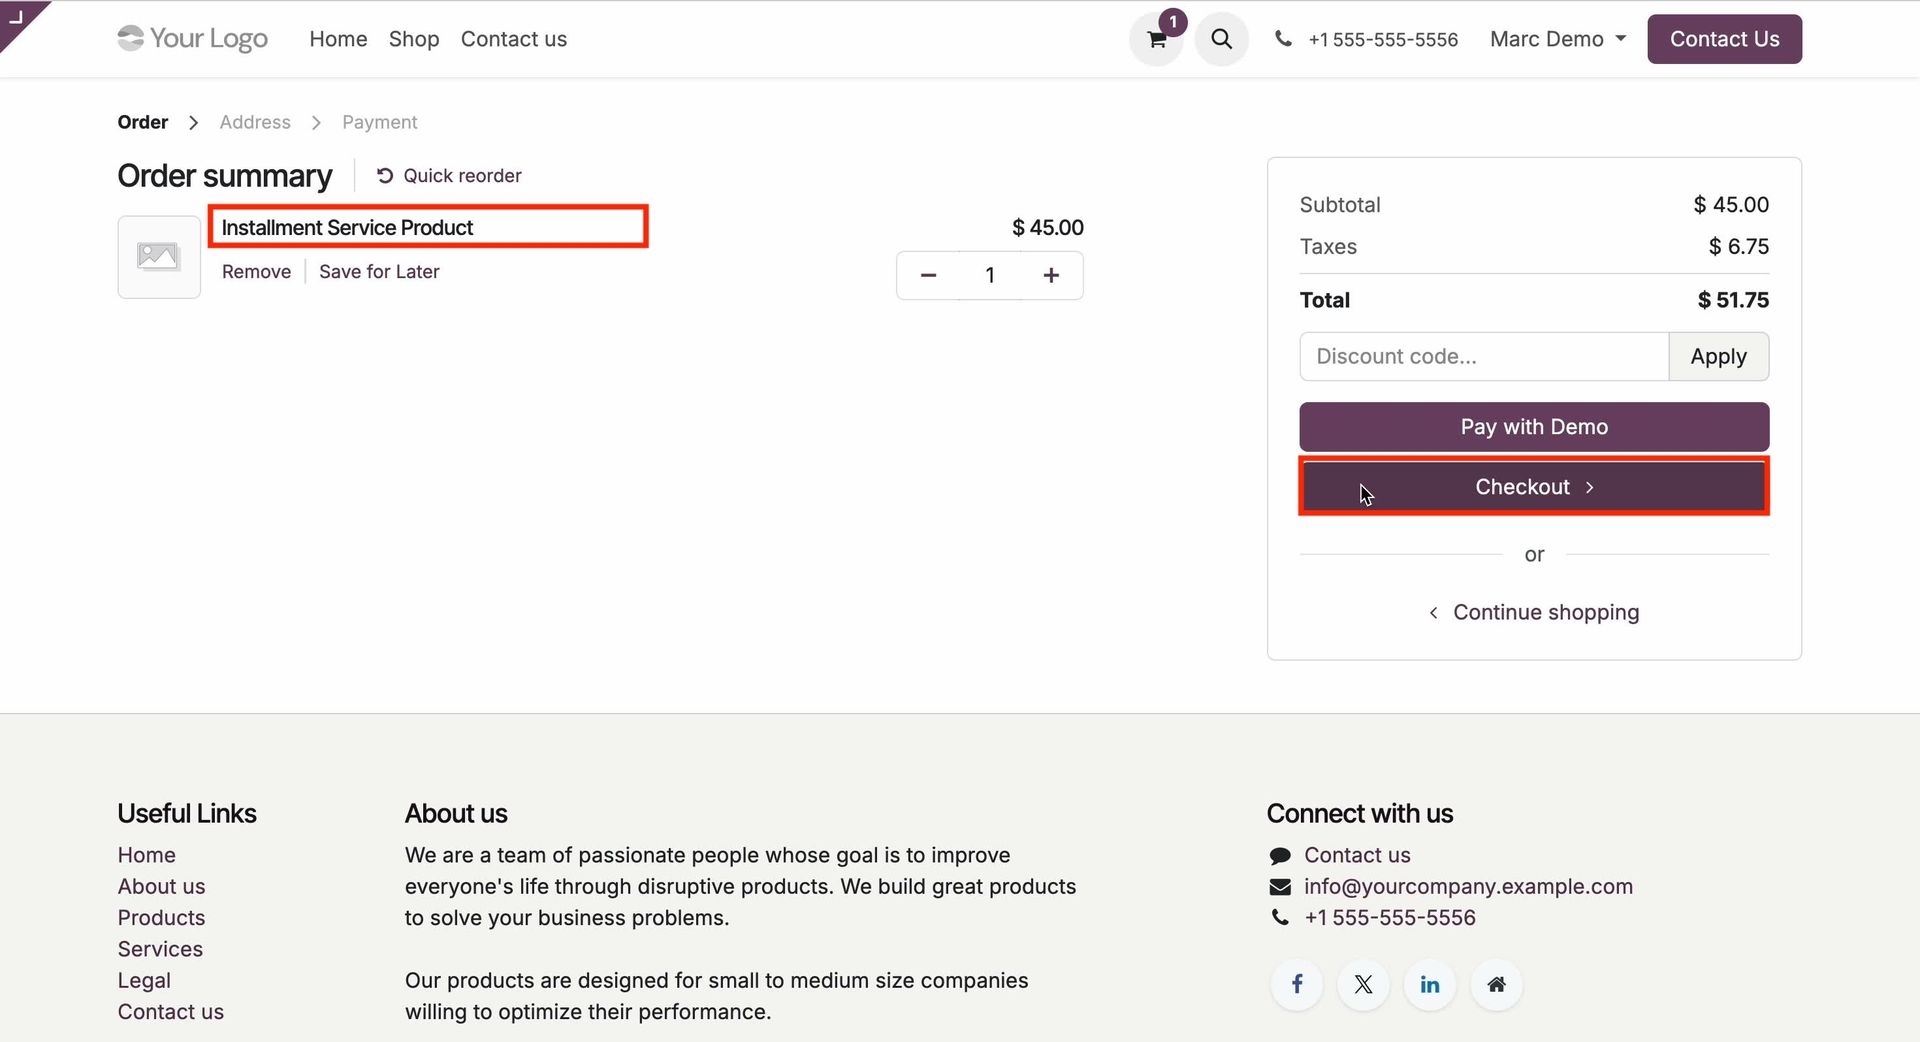
Review the Order Summary to verify the subscription details, then click the Checkout button to proceed with the payment process.
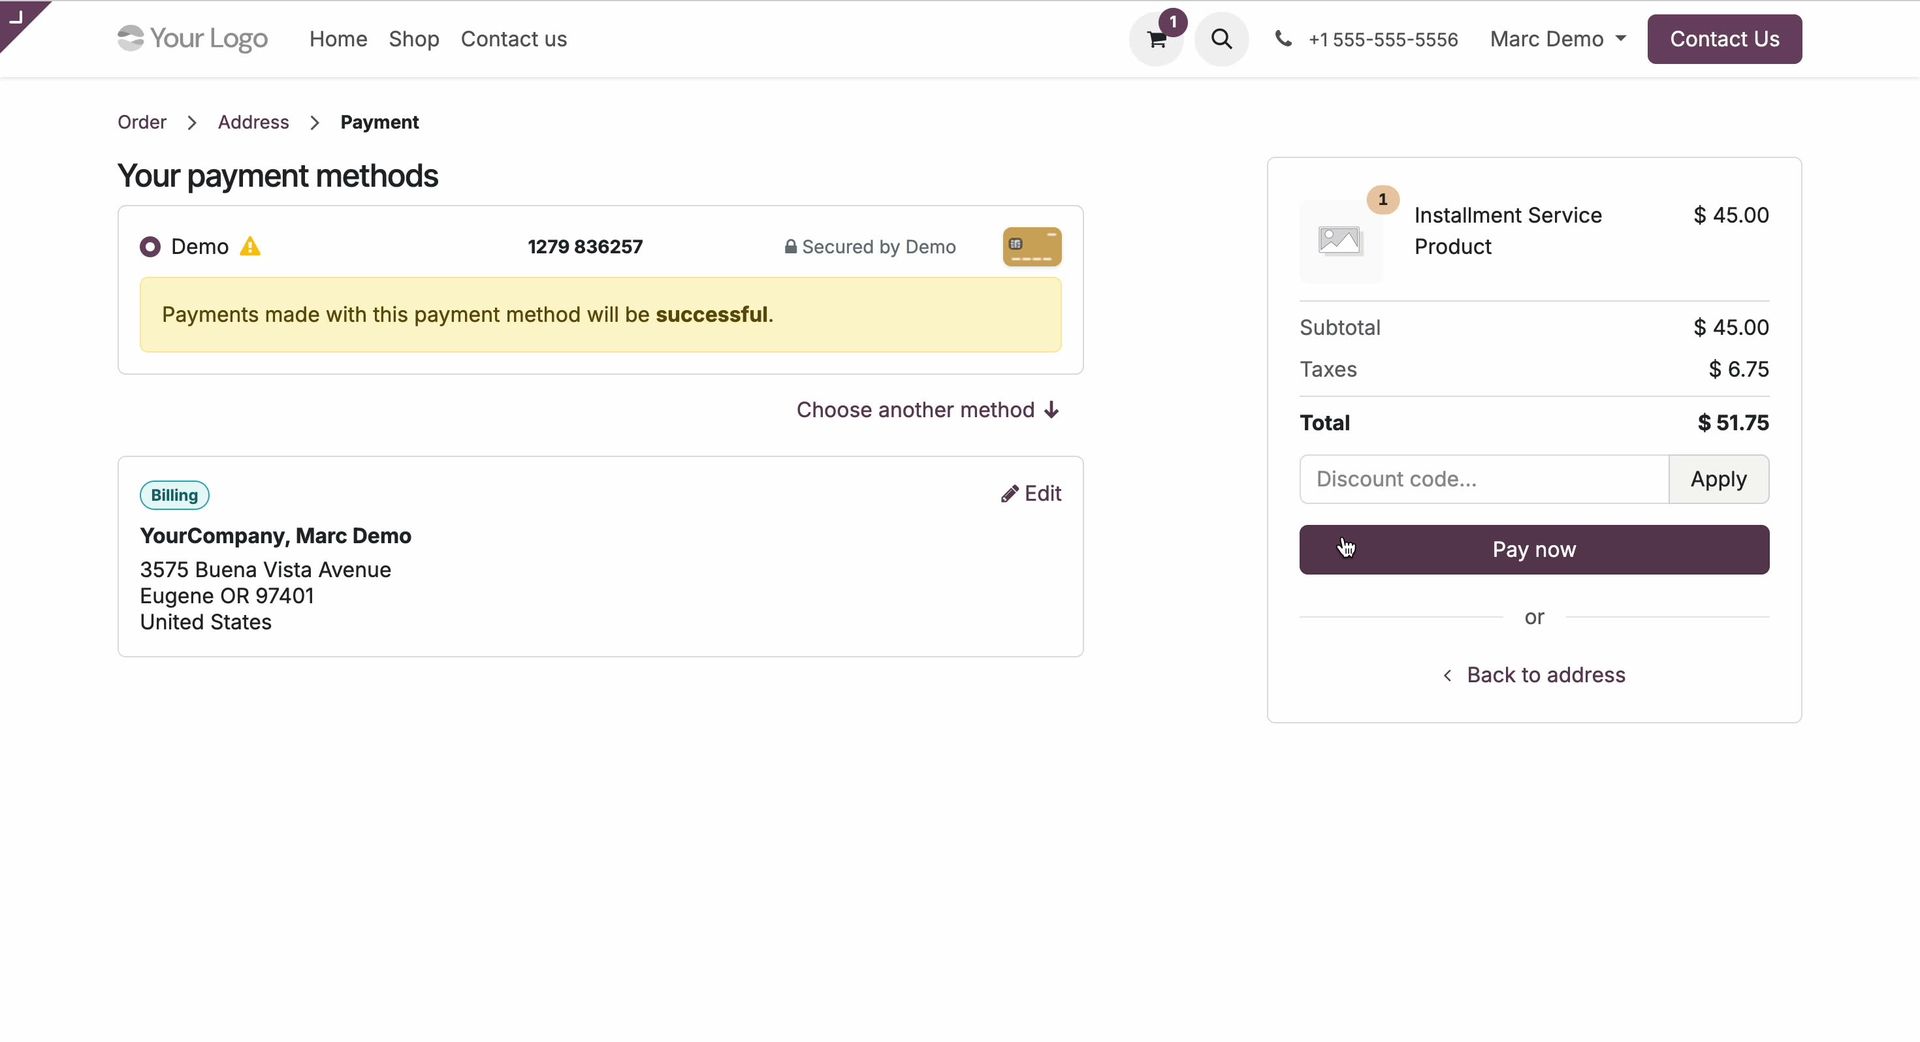
Complete the payment using the saved payment details to finalize the subscription order.
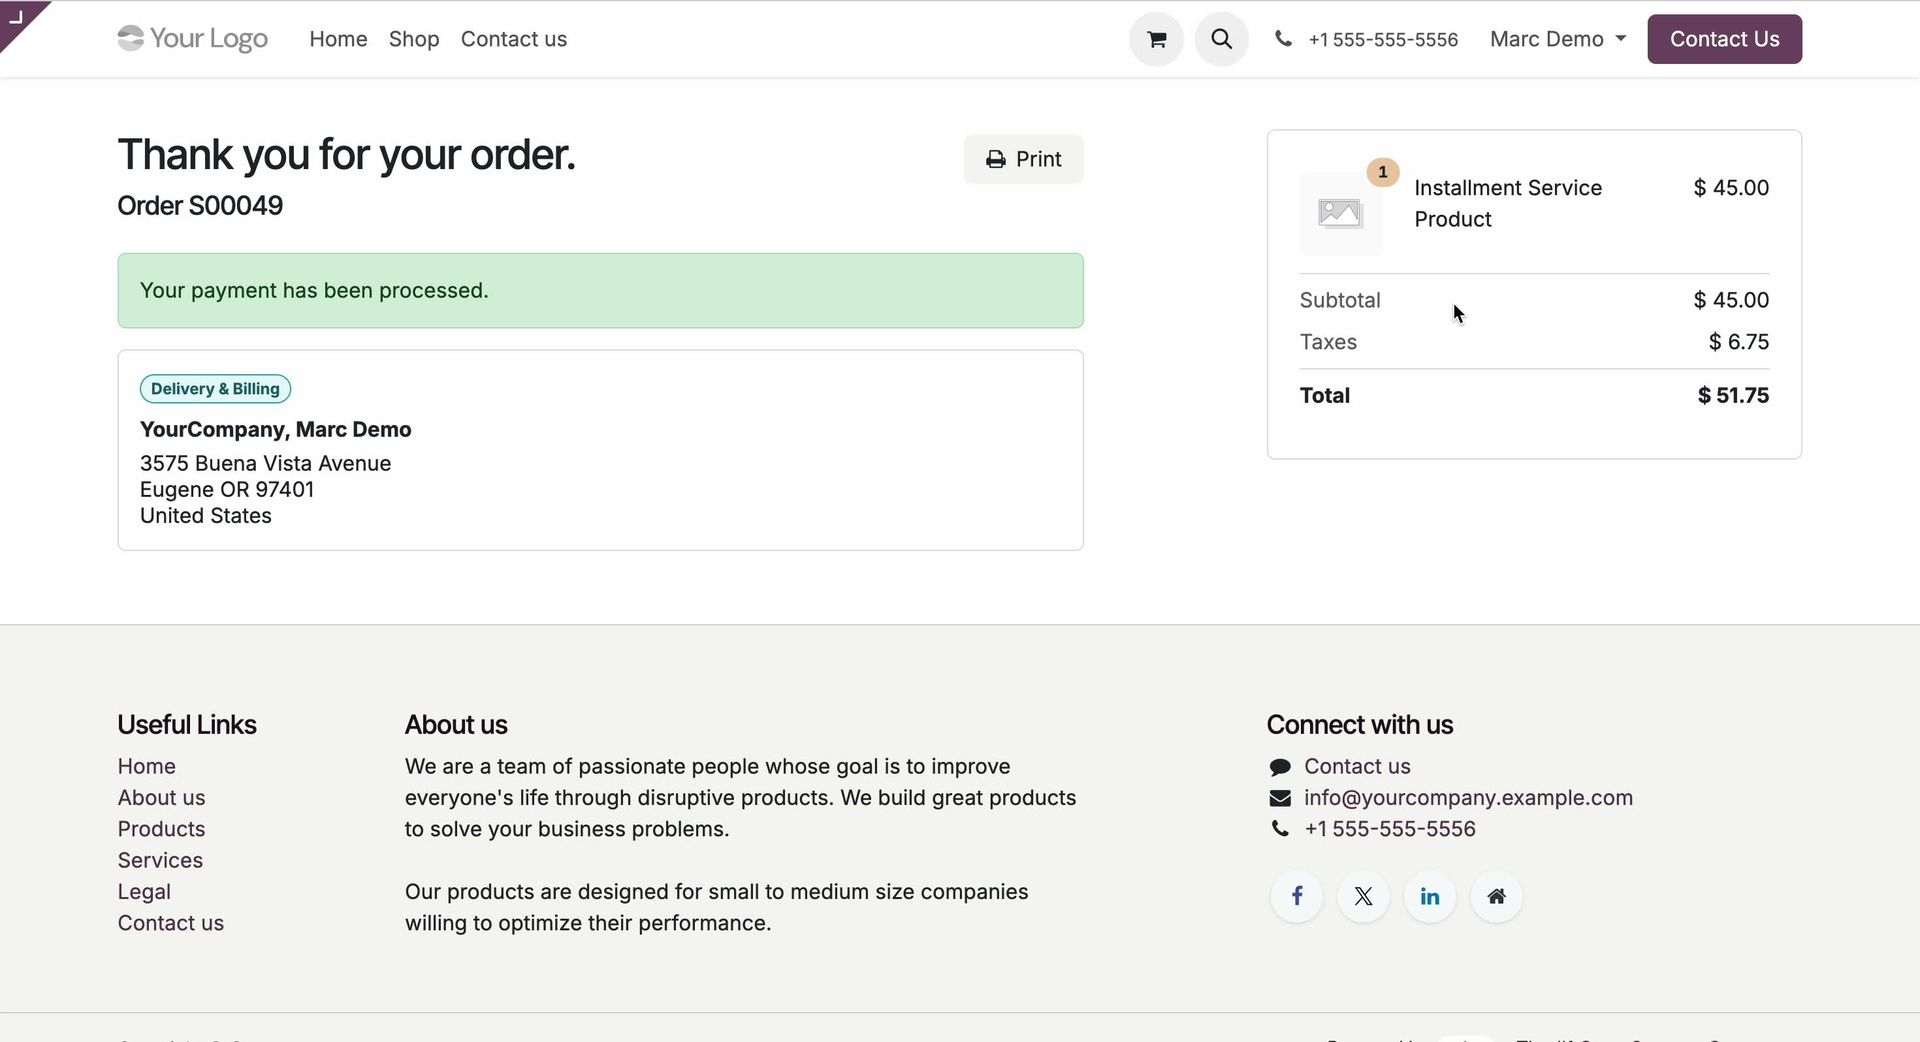
The payment has been completed successfully.
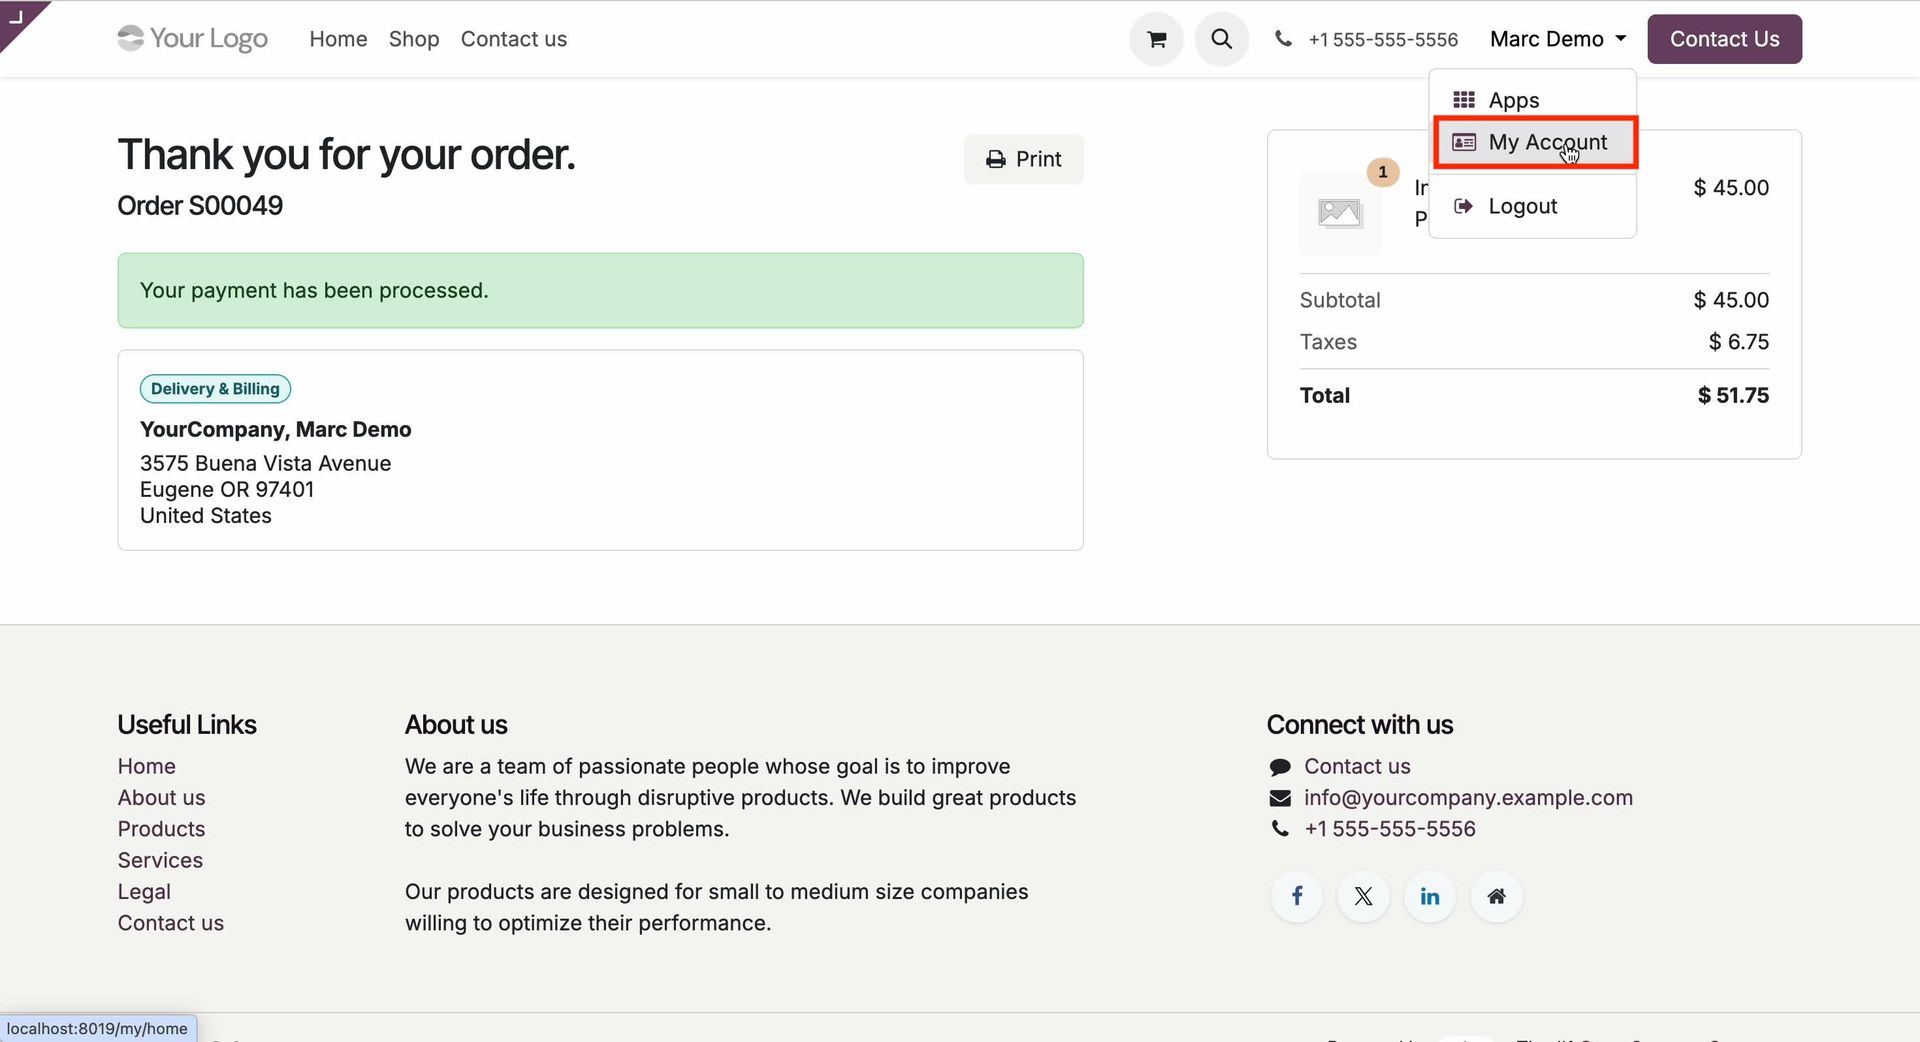
Go to My Account on the website to access and manage your subscriptions, orders, invoices, and account information.
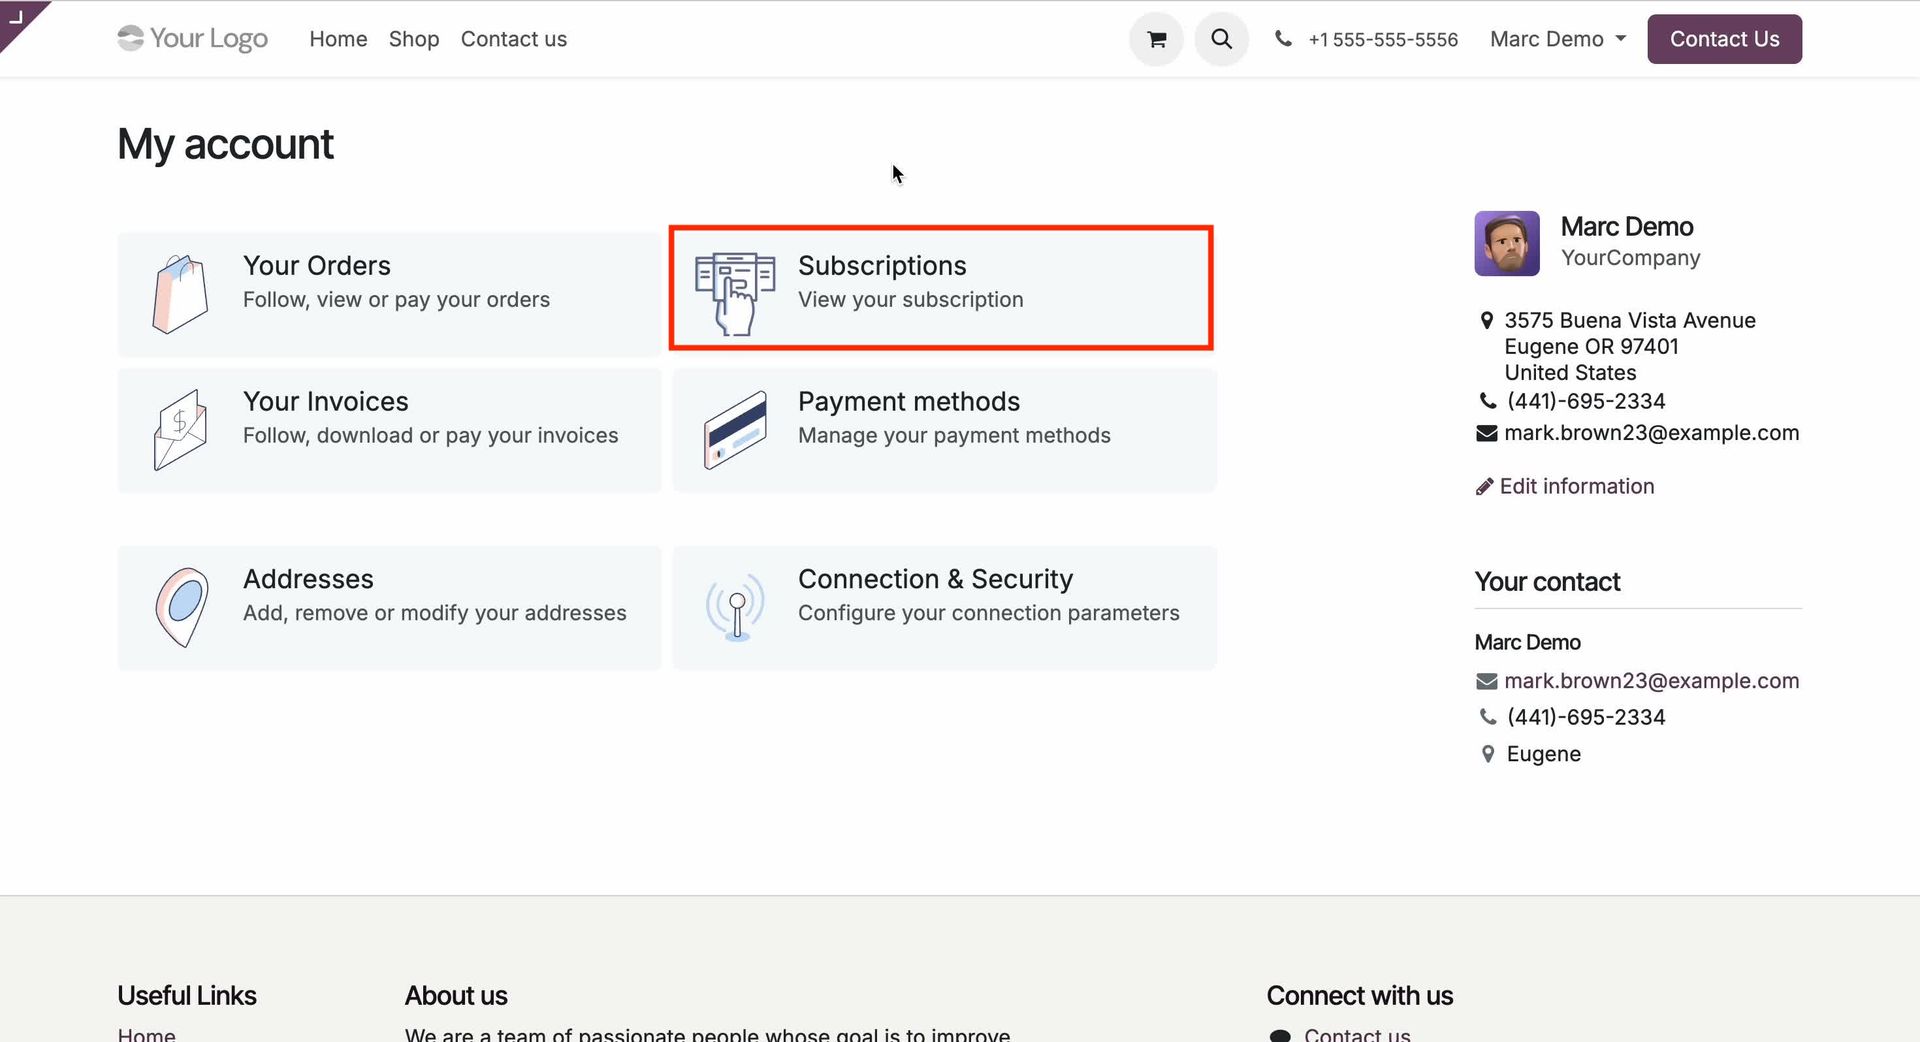
Click Subscriptions from My Account to view and manage all your active, expired, and renewed subscription orders.
Open the Subscription List View, then select the newly created and paid Subscription Order to view its details.
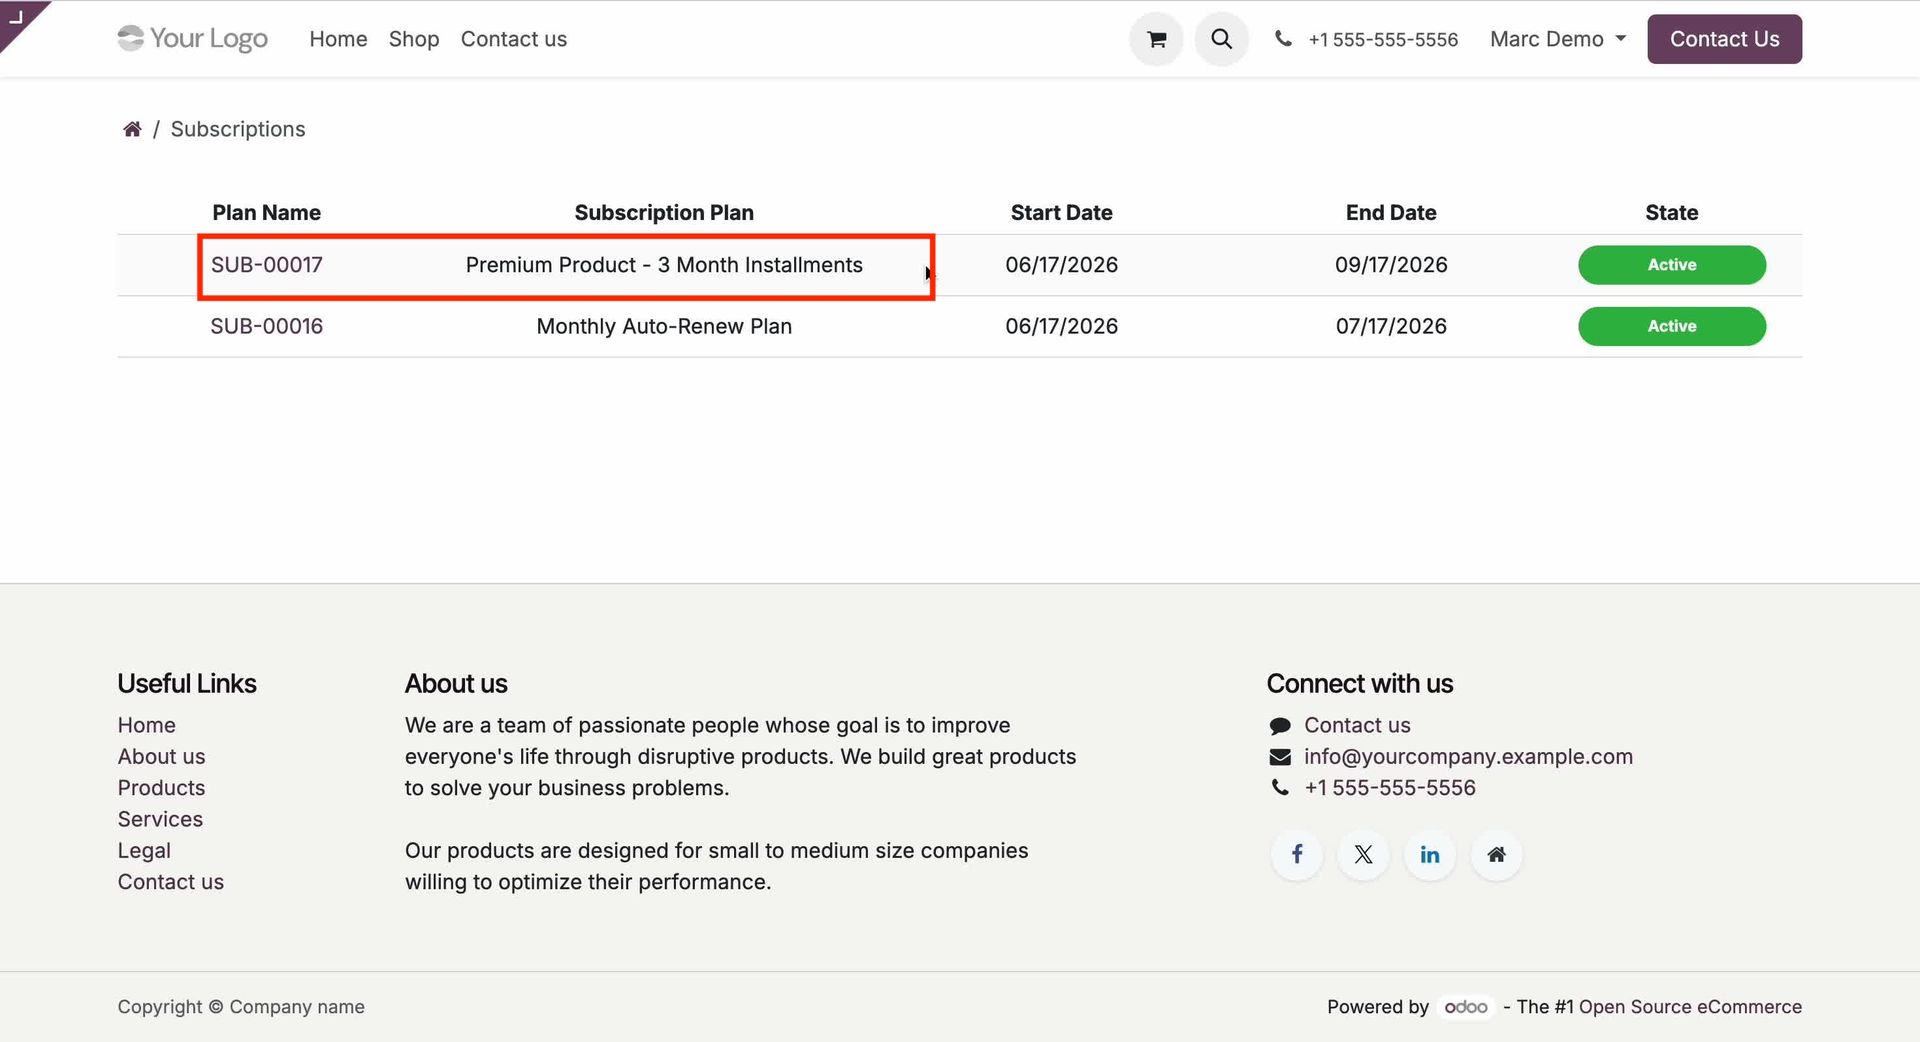
Open the Subscription Order to view the Payment Information, including the installment details.
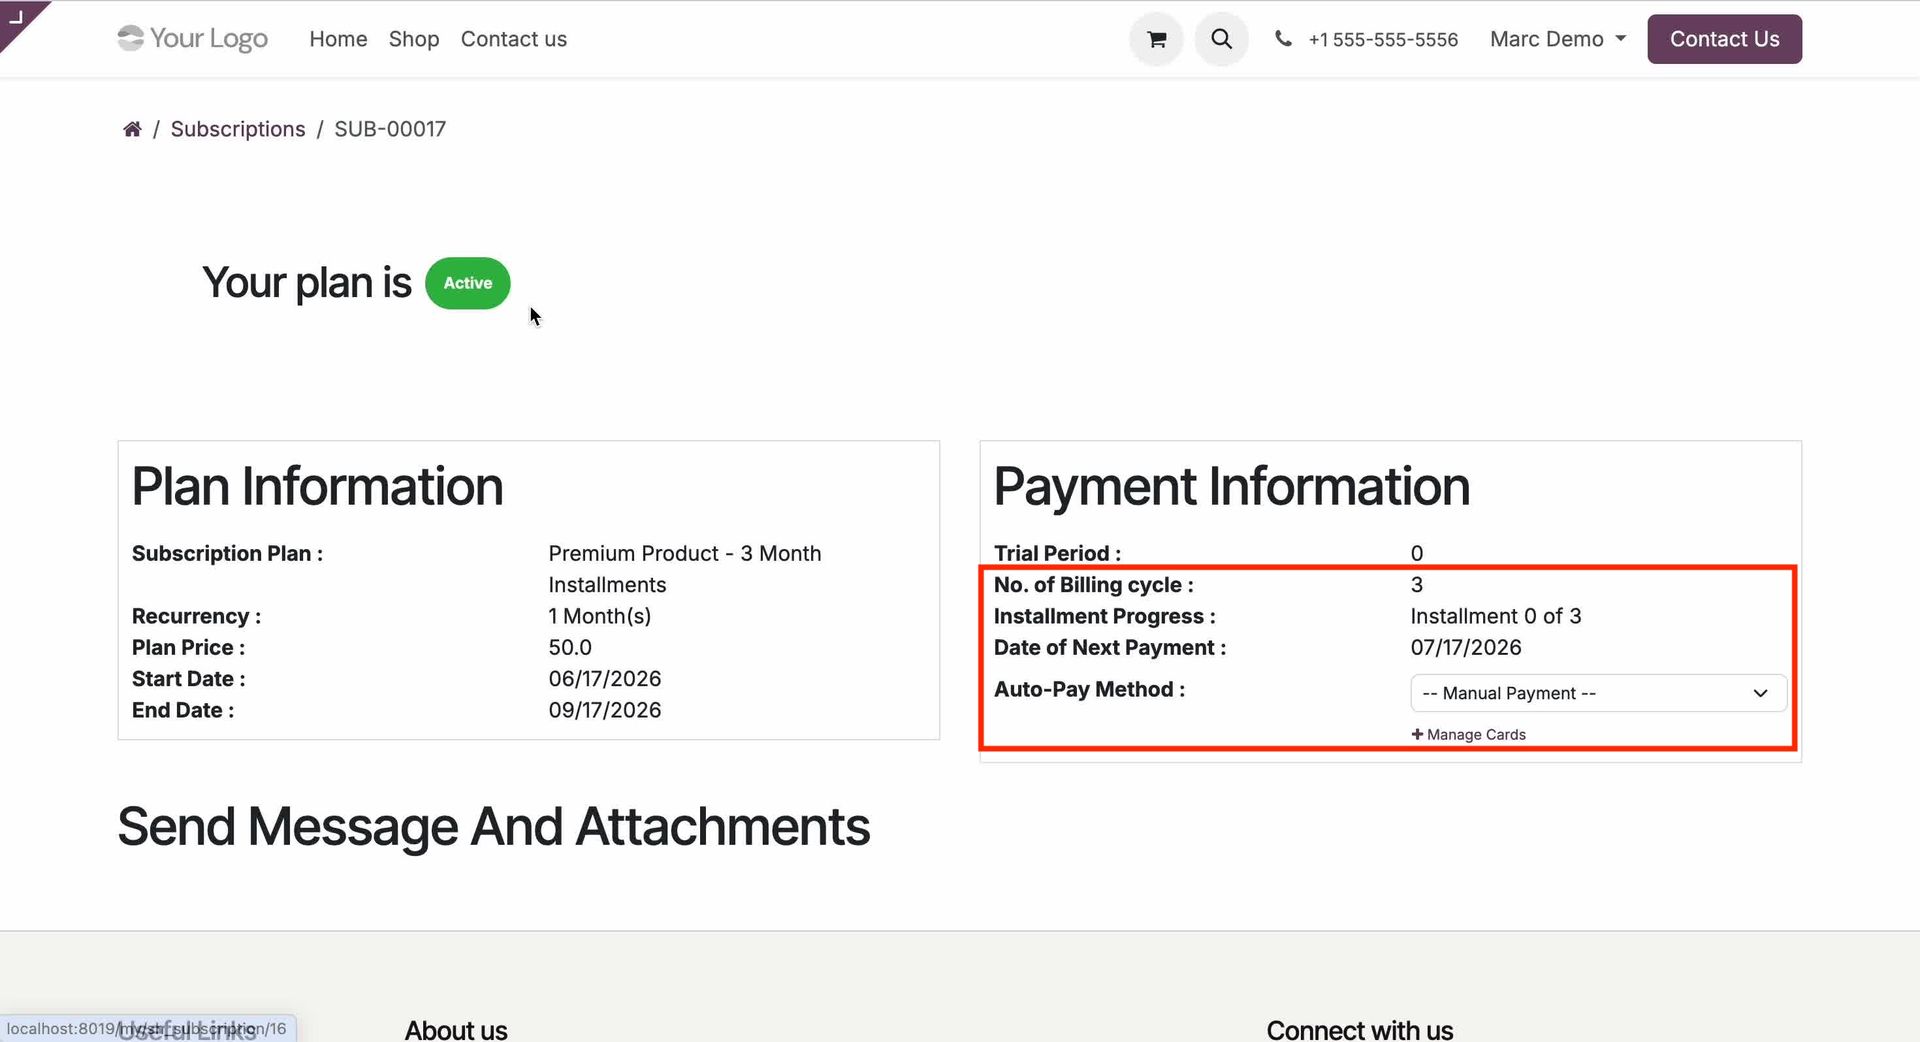
Go to the Subscription Order in the backend and open the linked invoice from the order to view its billing and payment details.
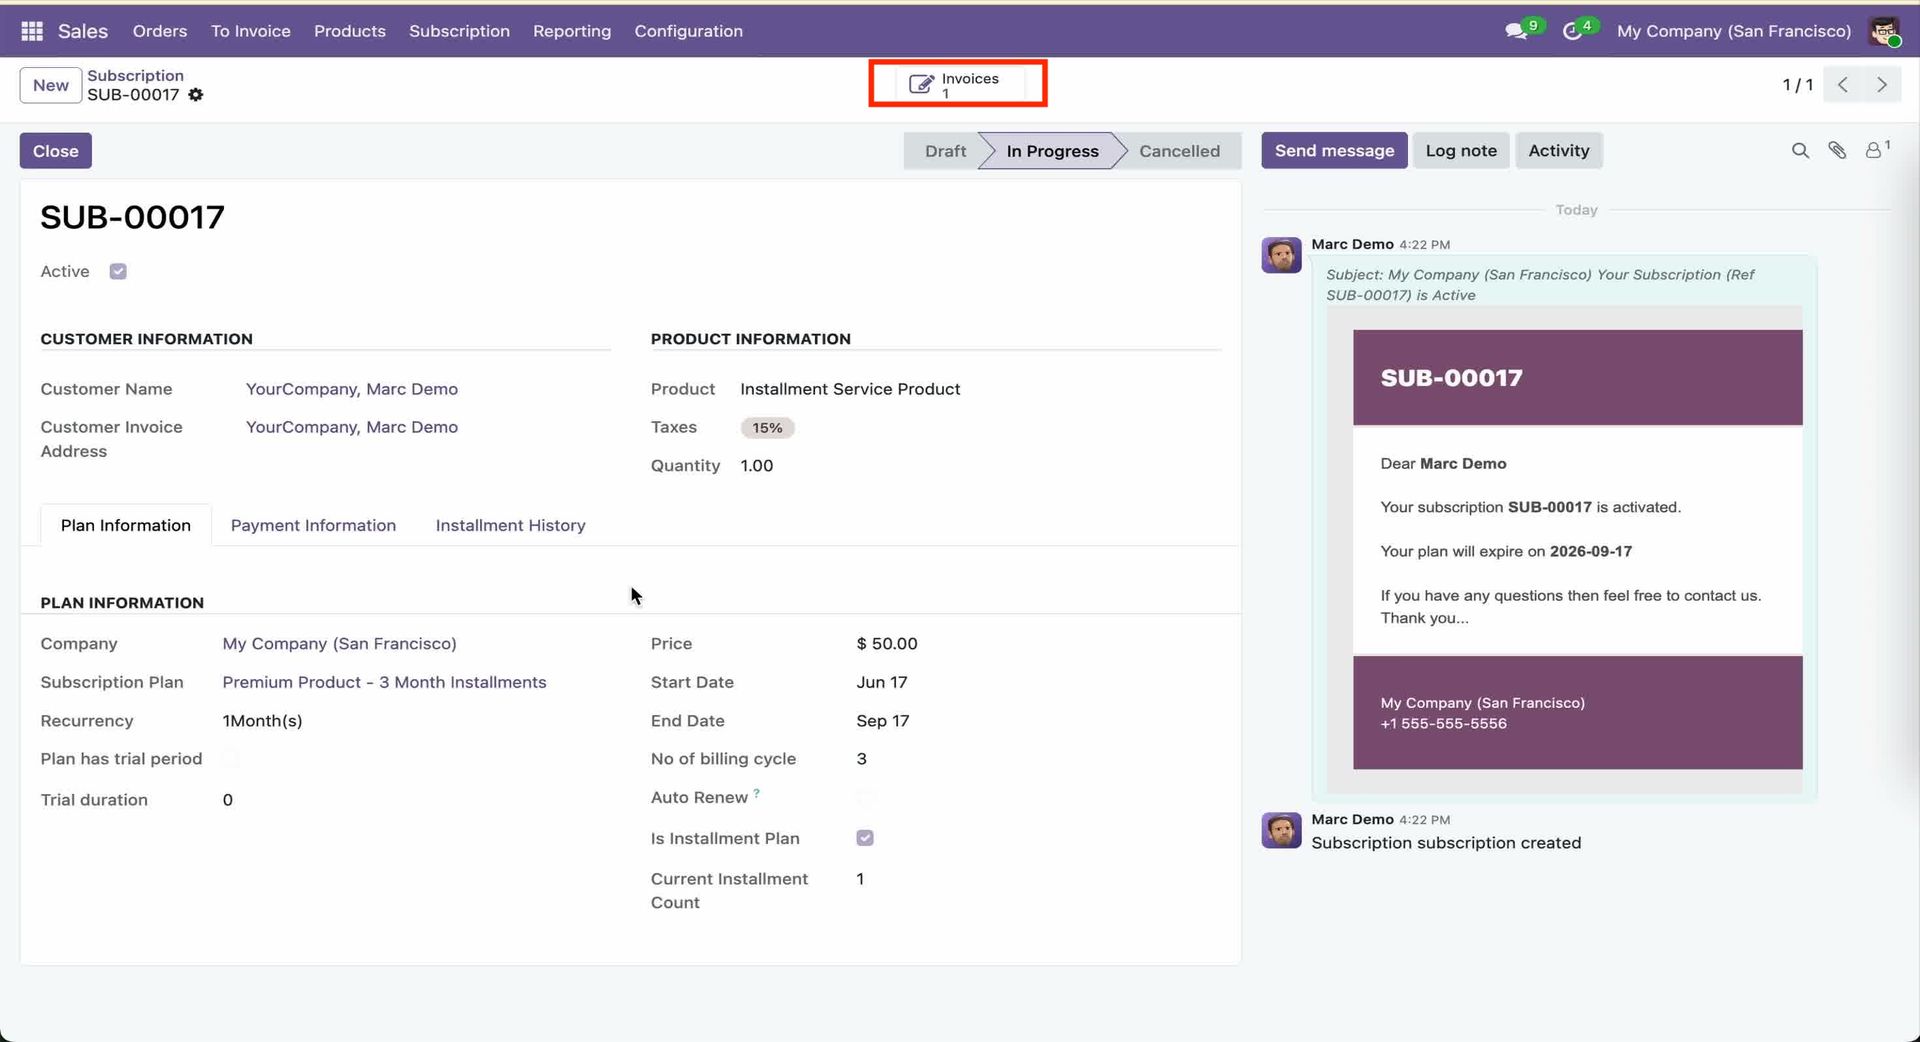
Open the invoice to view the payment details. Users can see that two payment records and one payment transaction have been created according to the configured installment plan.
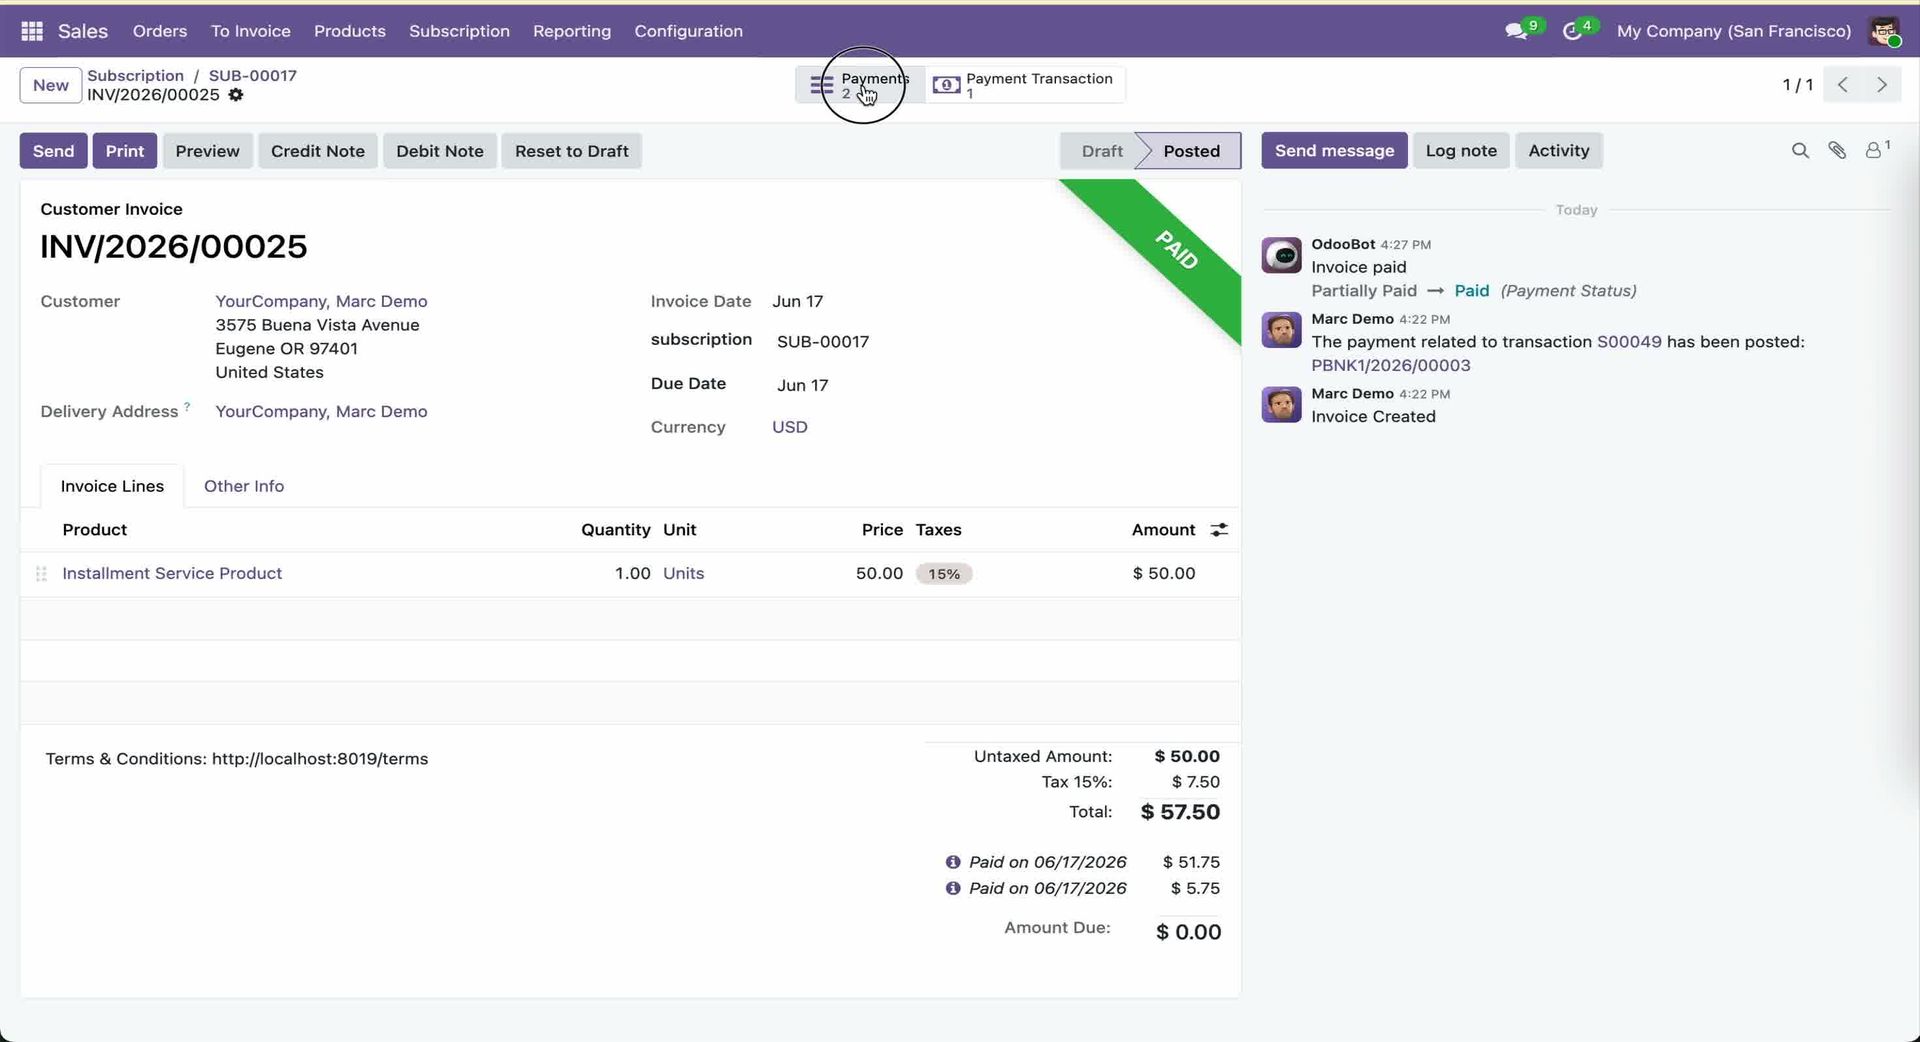
Users can view the complete Installment History from the Installment History tab in the Subscription Order, including payment status.
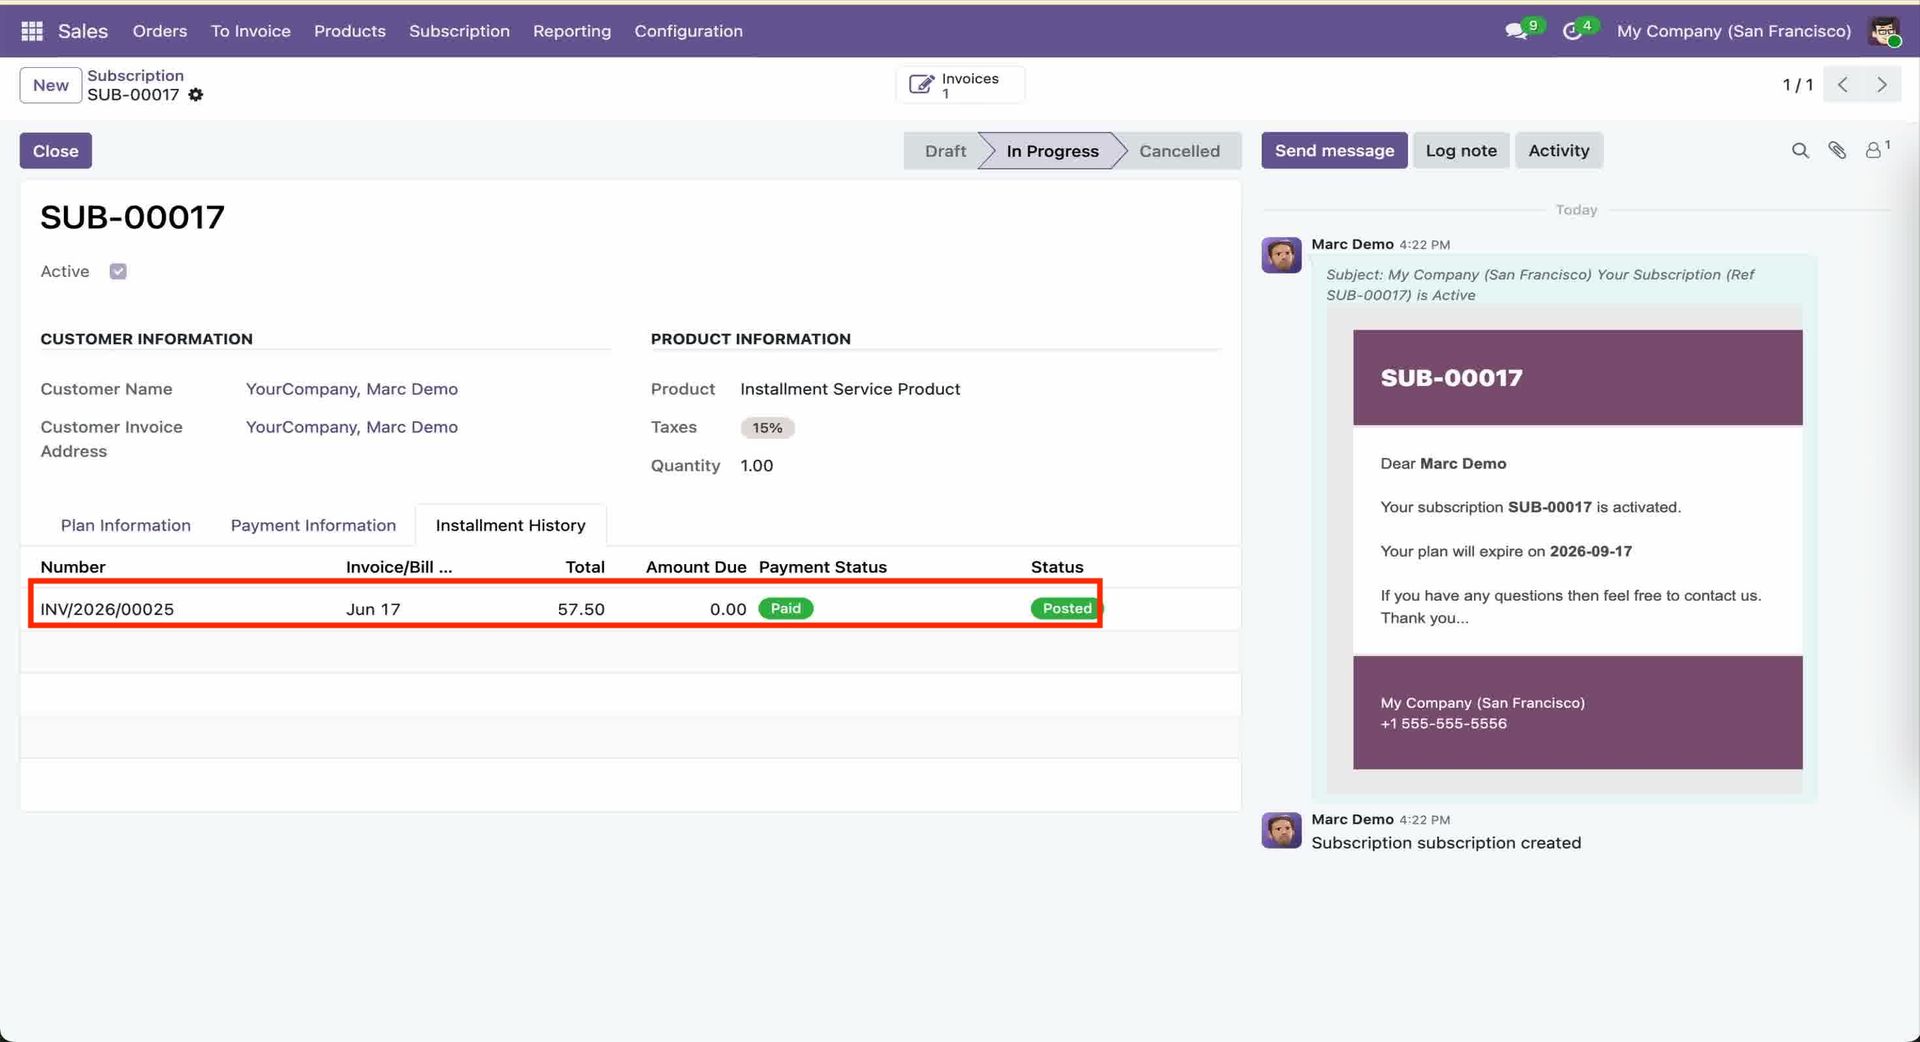
In My Account on the website, users can view their Installment Details, showing that one installment has been paid while the remaining installment is still pending for payment.
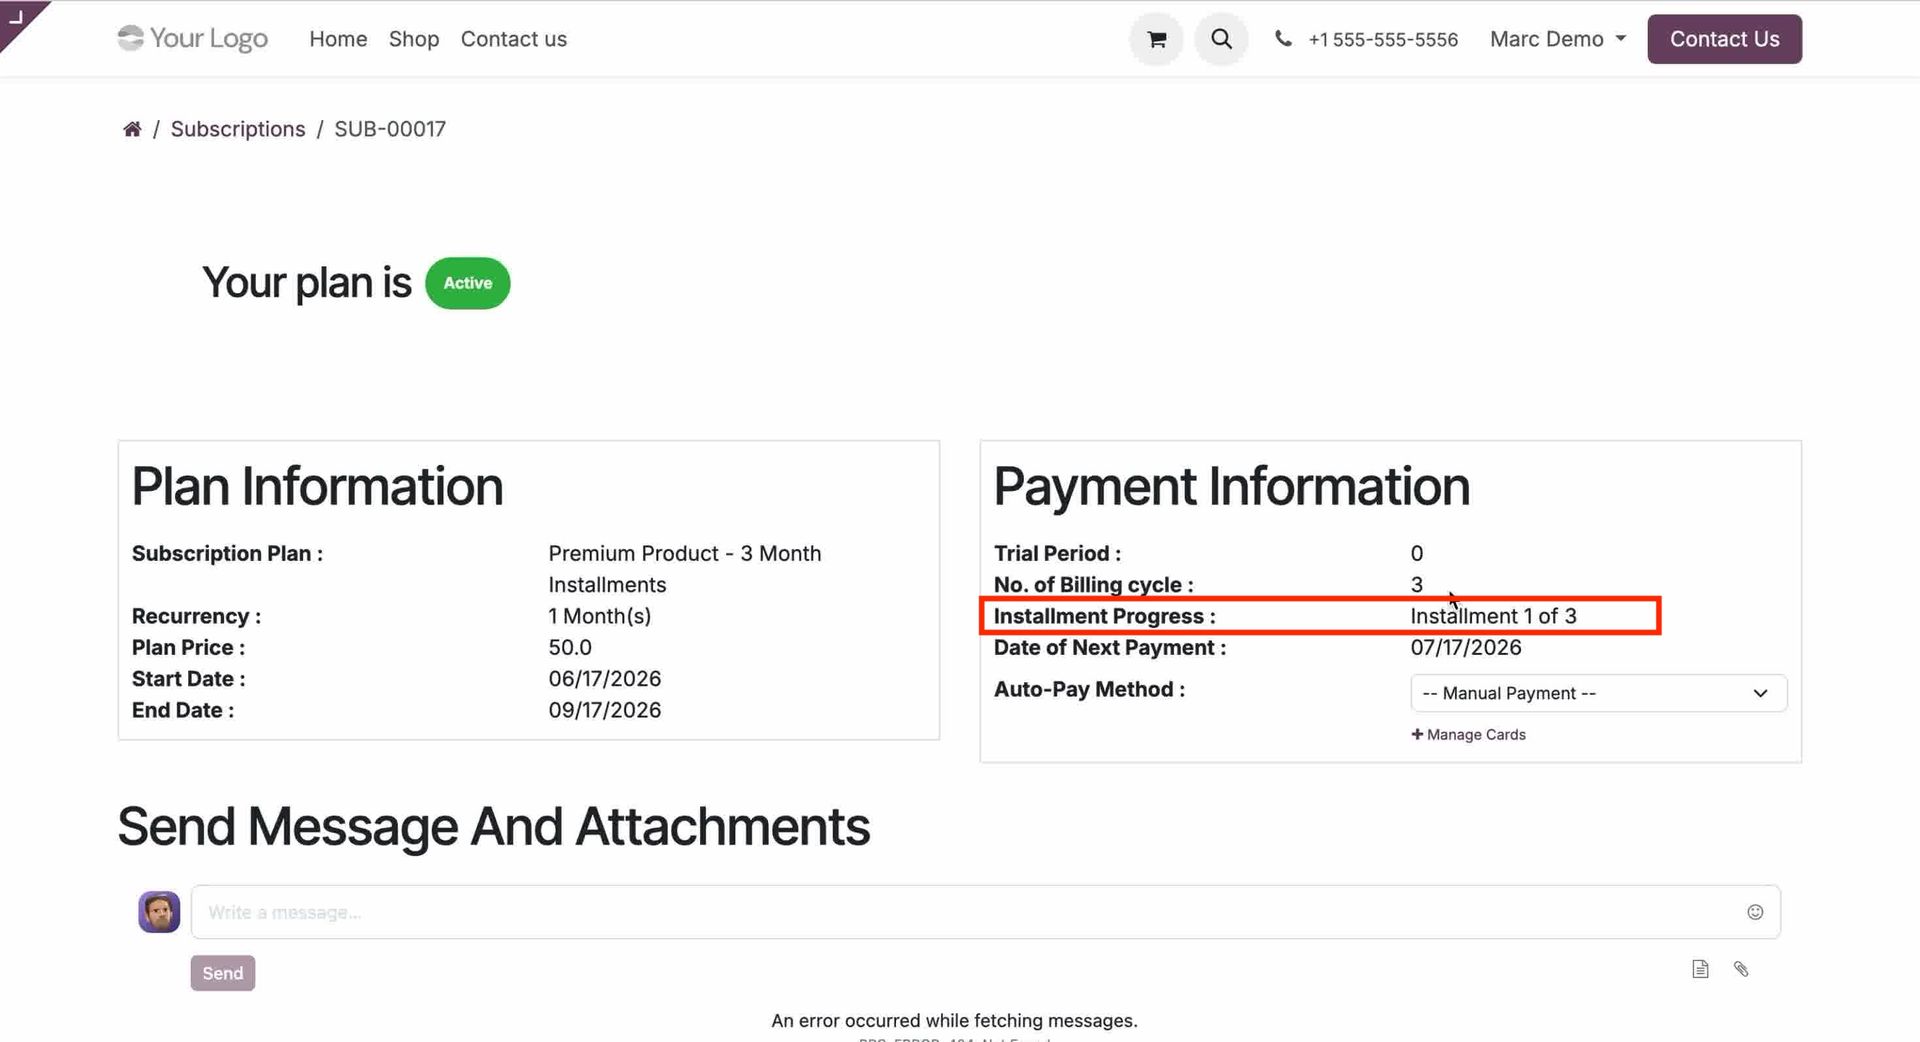
Go to Sales -> Settings and configure the Default Plan Tax Status under the Subscription Tax Configuration settings to define the default tax behavior for subscription plans.
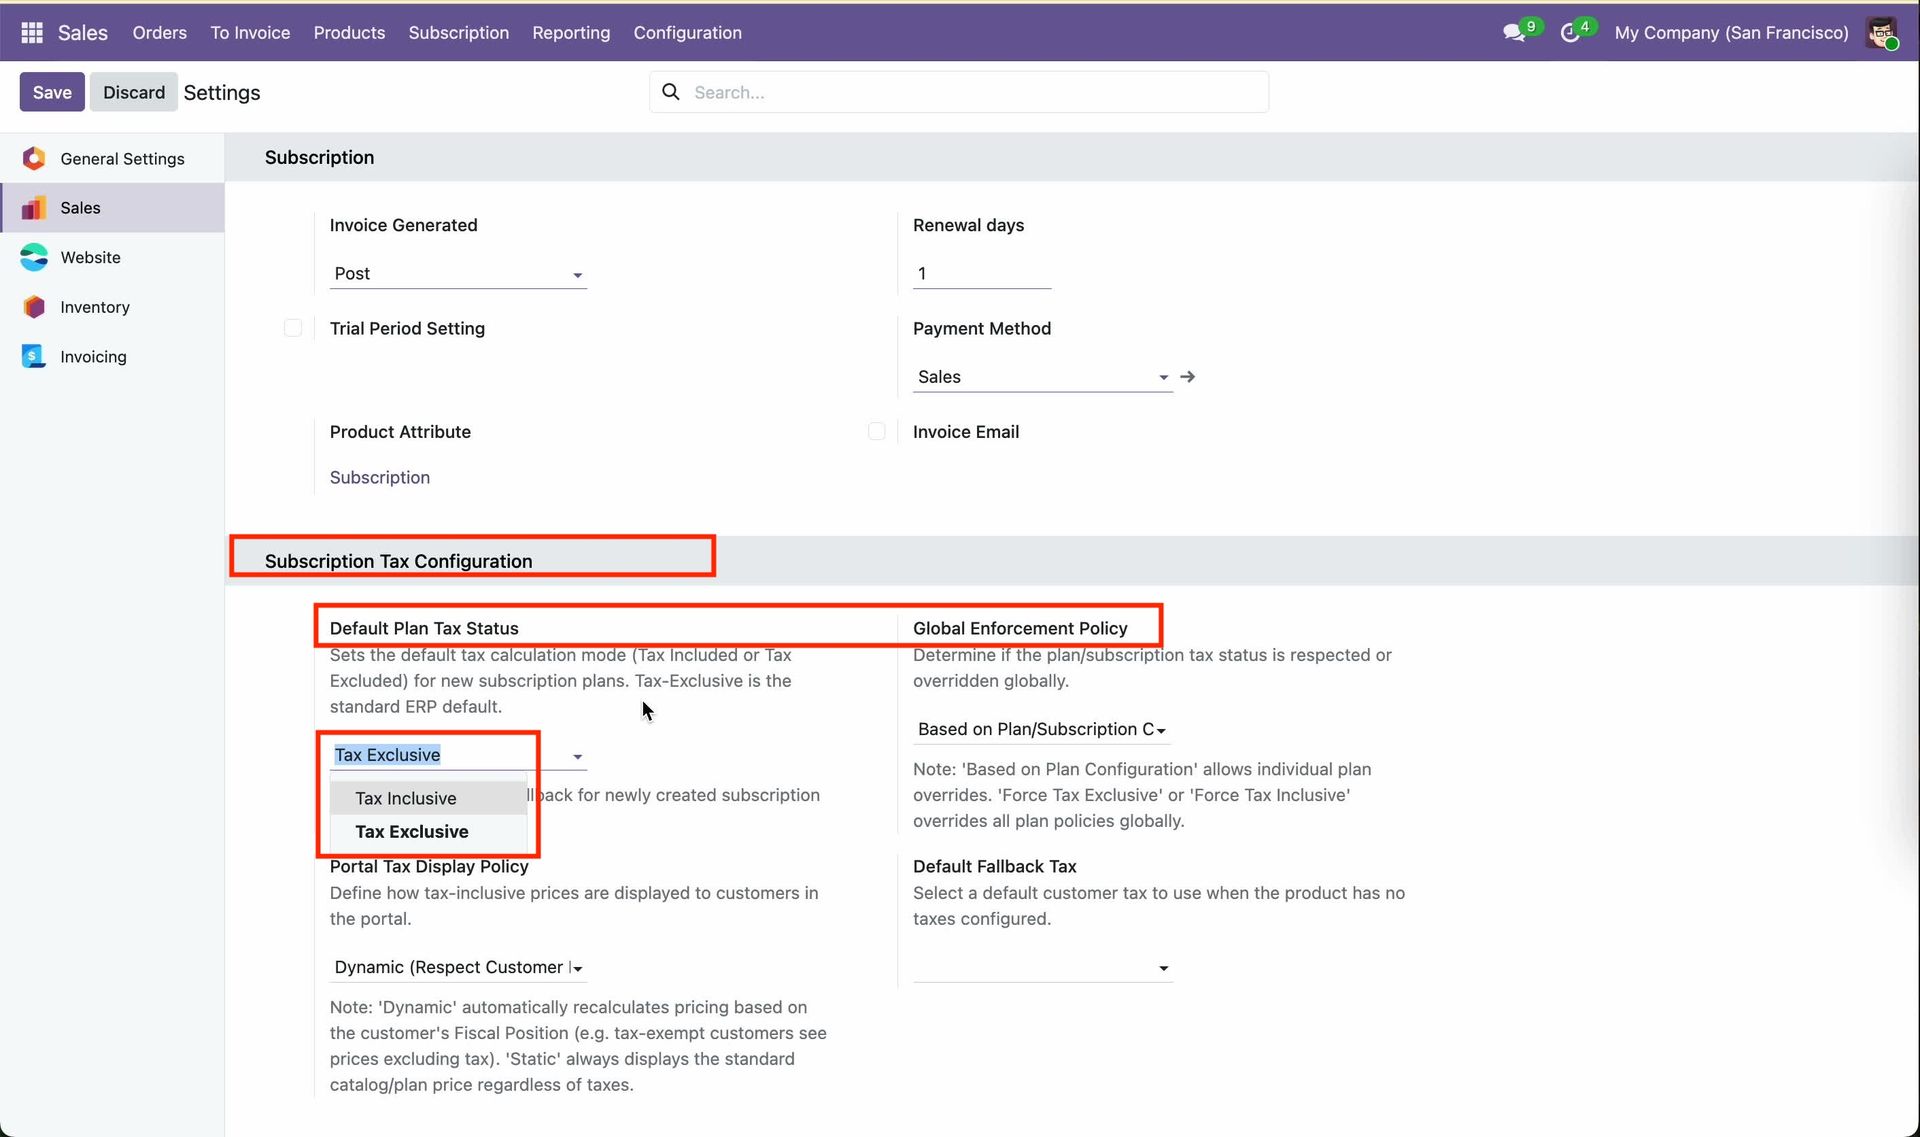
Set the Portal Display Tax Policy to control how subscription prices are displayed on the customer portal. You can choose to display prices dynamically based on the customer's fiscal position or use the static catalog price.
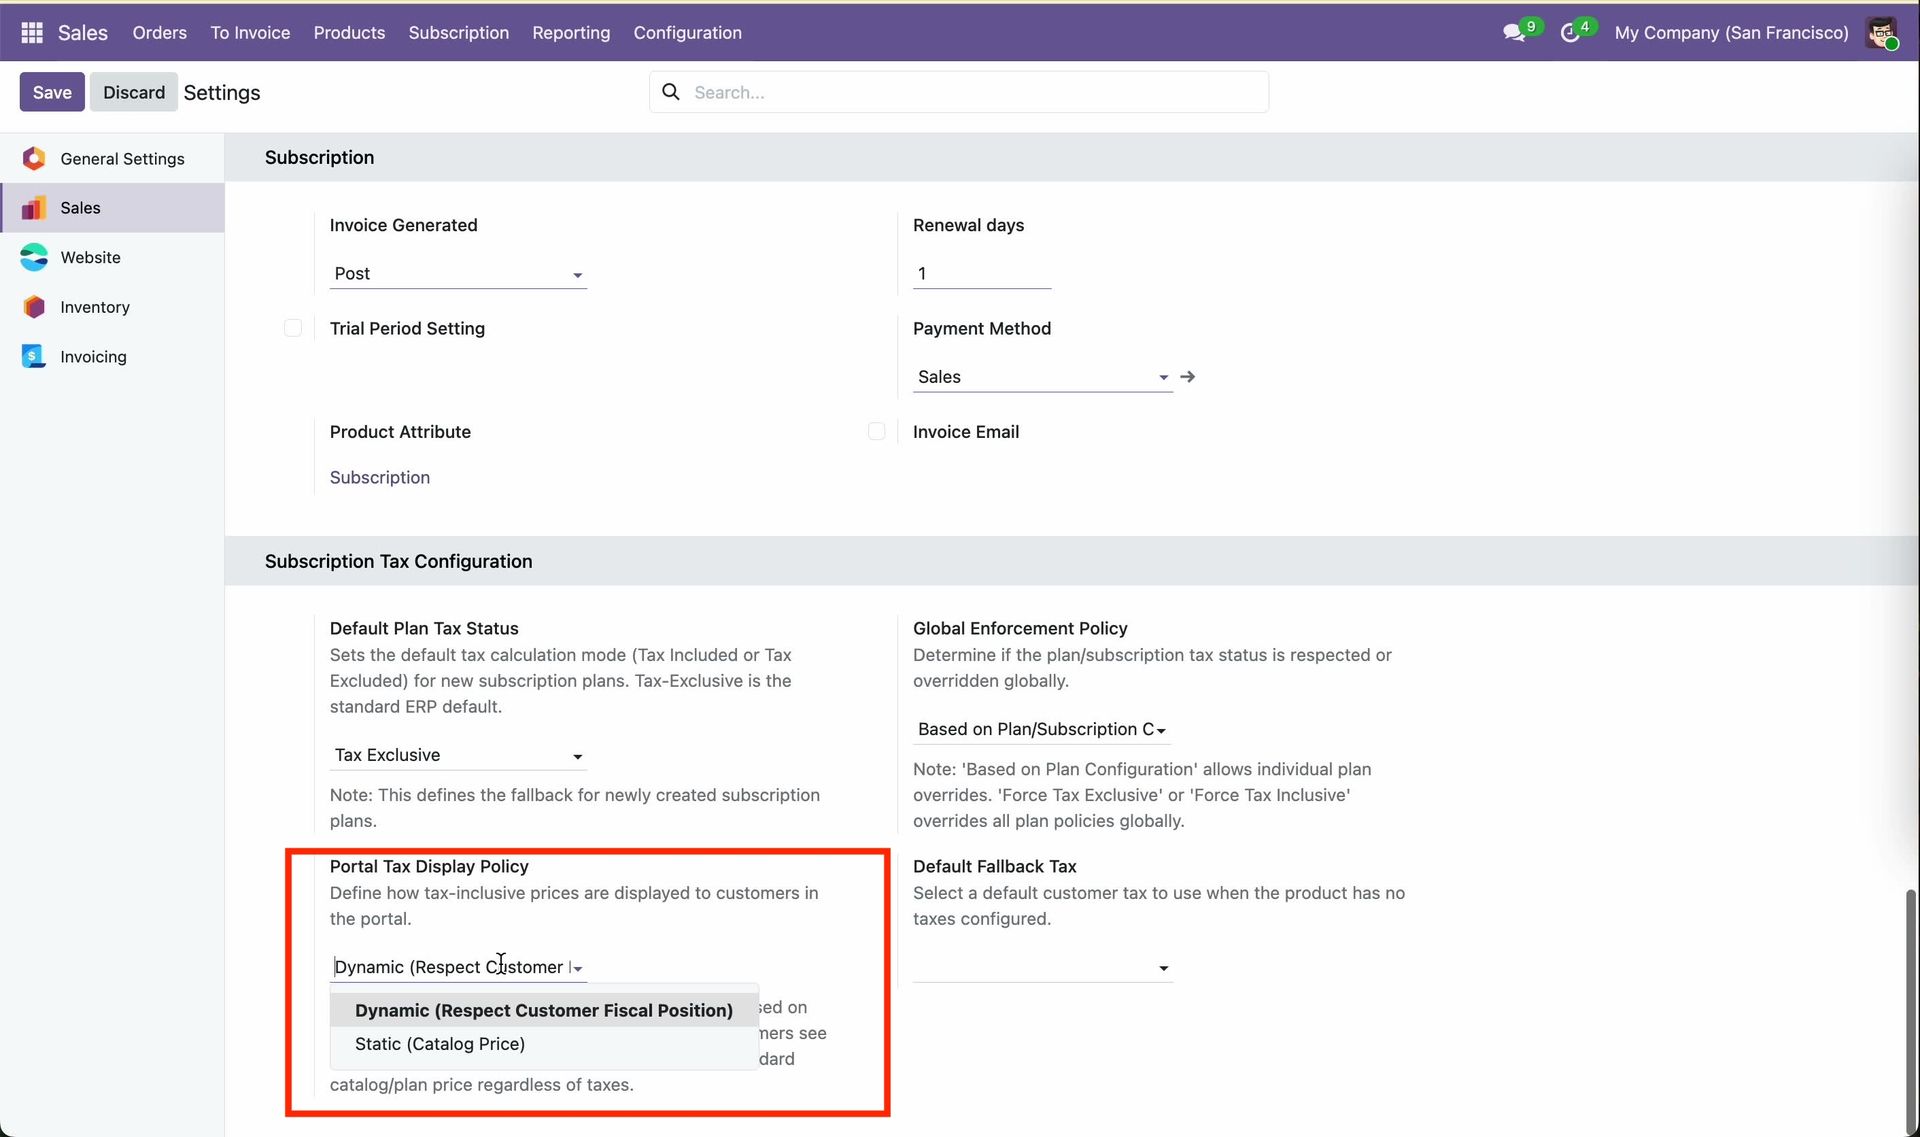
Set the Global Enforcement Policy to control how taxes are displayed across subscriptions. You can choose from the following options:
Based on Plan/Subscription Configuration: Uses the tax display setting configured on the selected subscription plan or subscription.
Force Tax Inclusive Globally: Always displays prices inclusive of taxes, regardless of the plan configuration.
Force Tax Exclusive Globally: Always displays prices exclusive of taxes, regardless of the plan configuration.
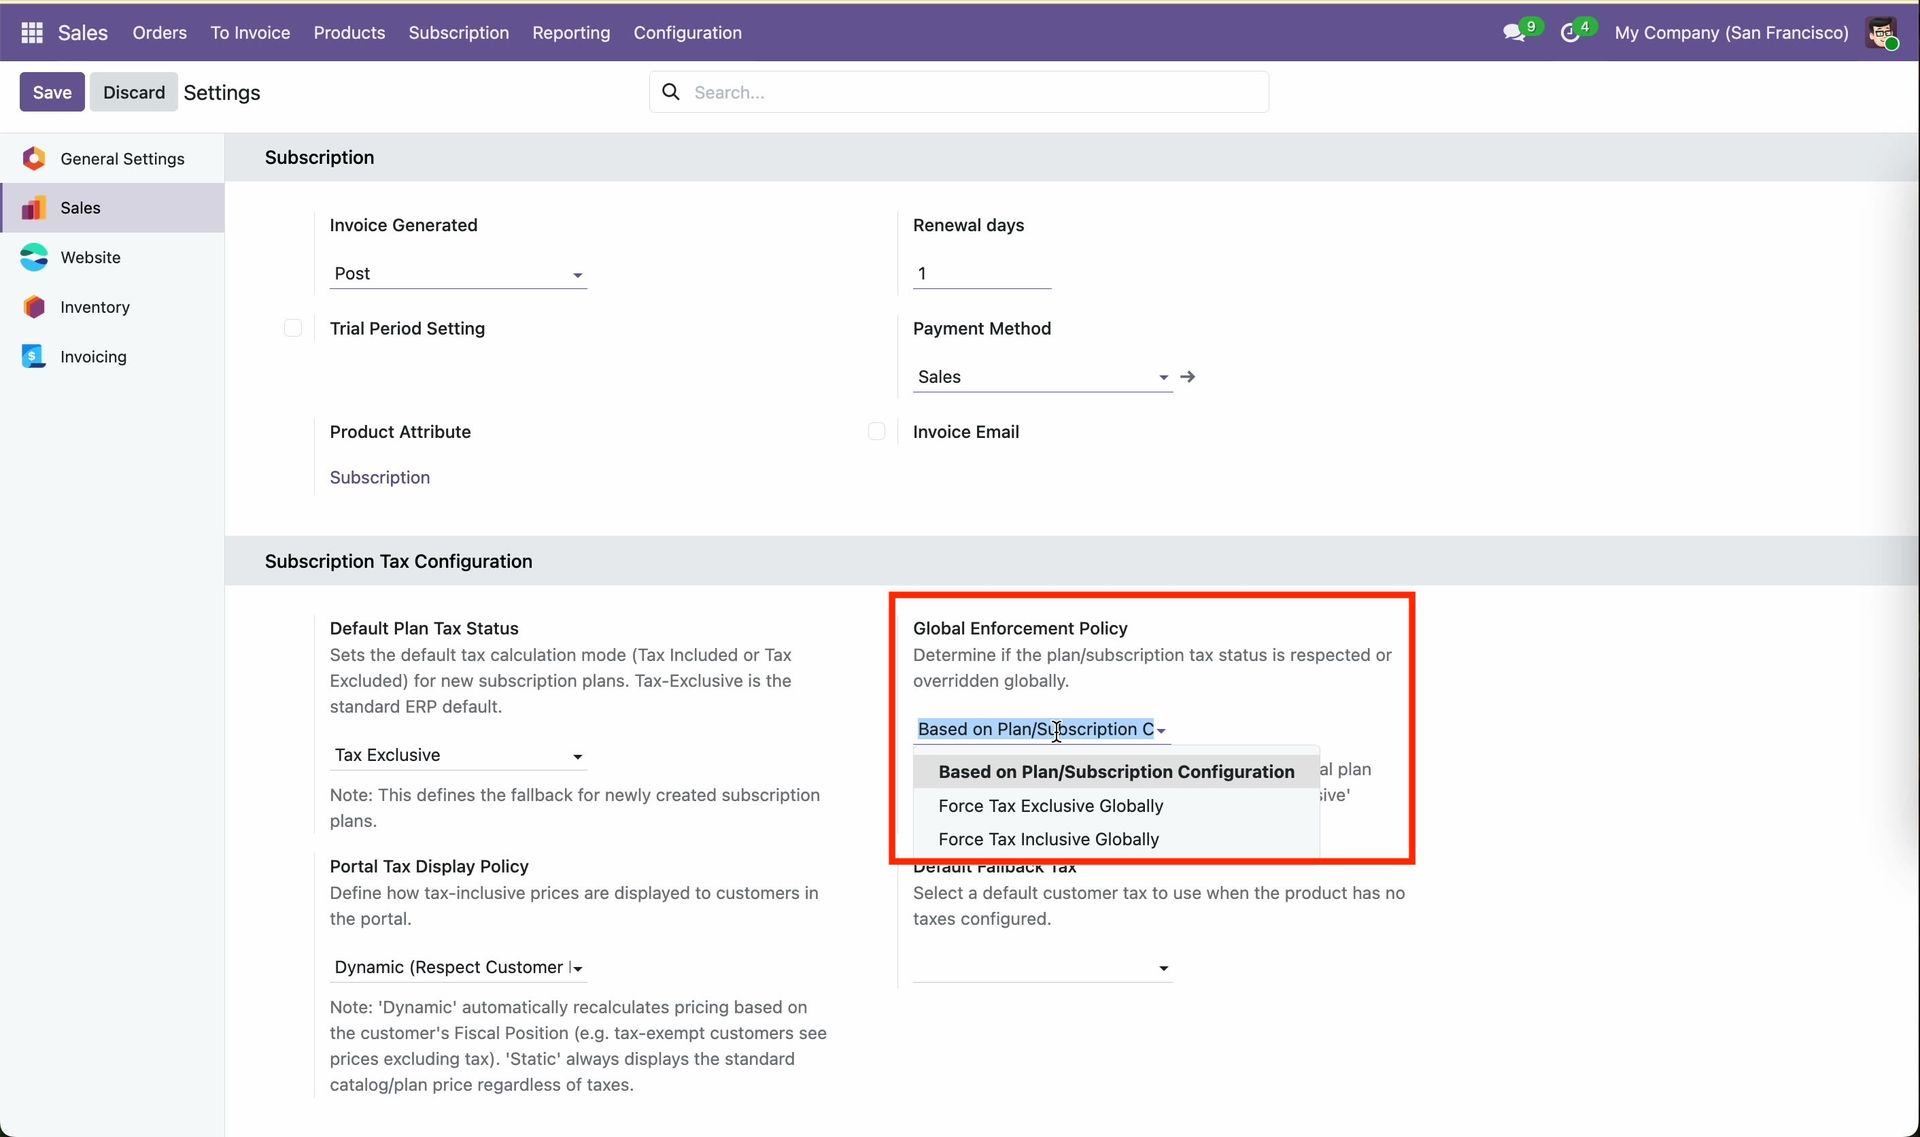
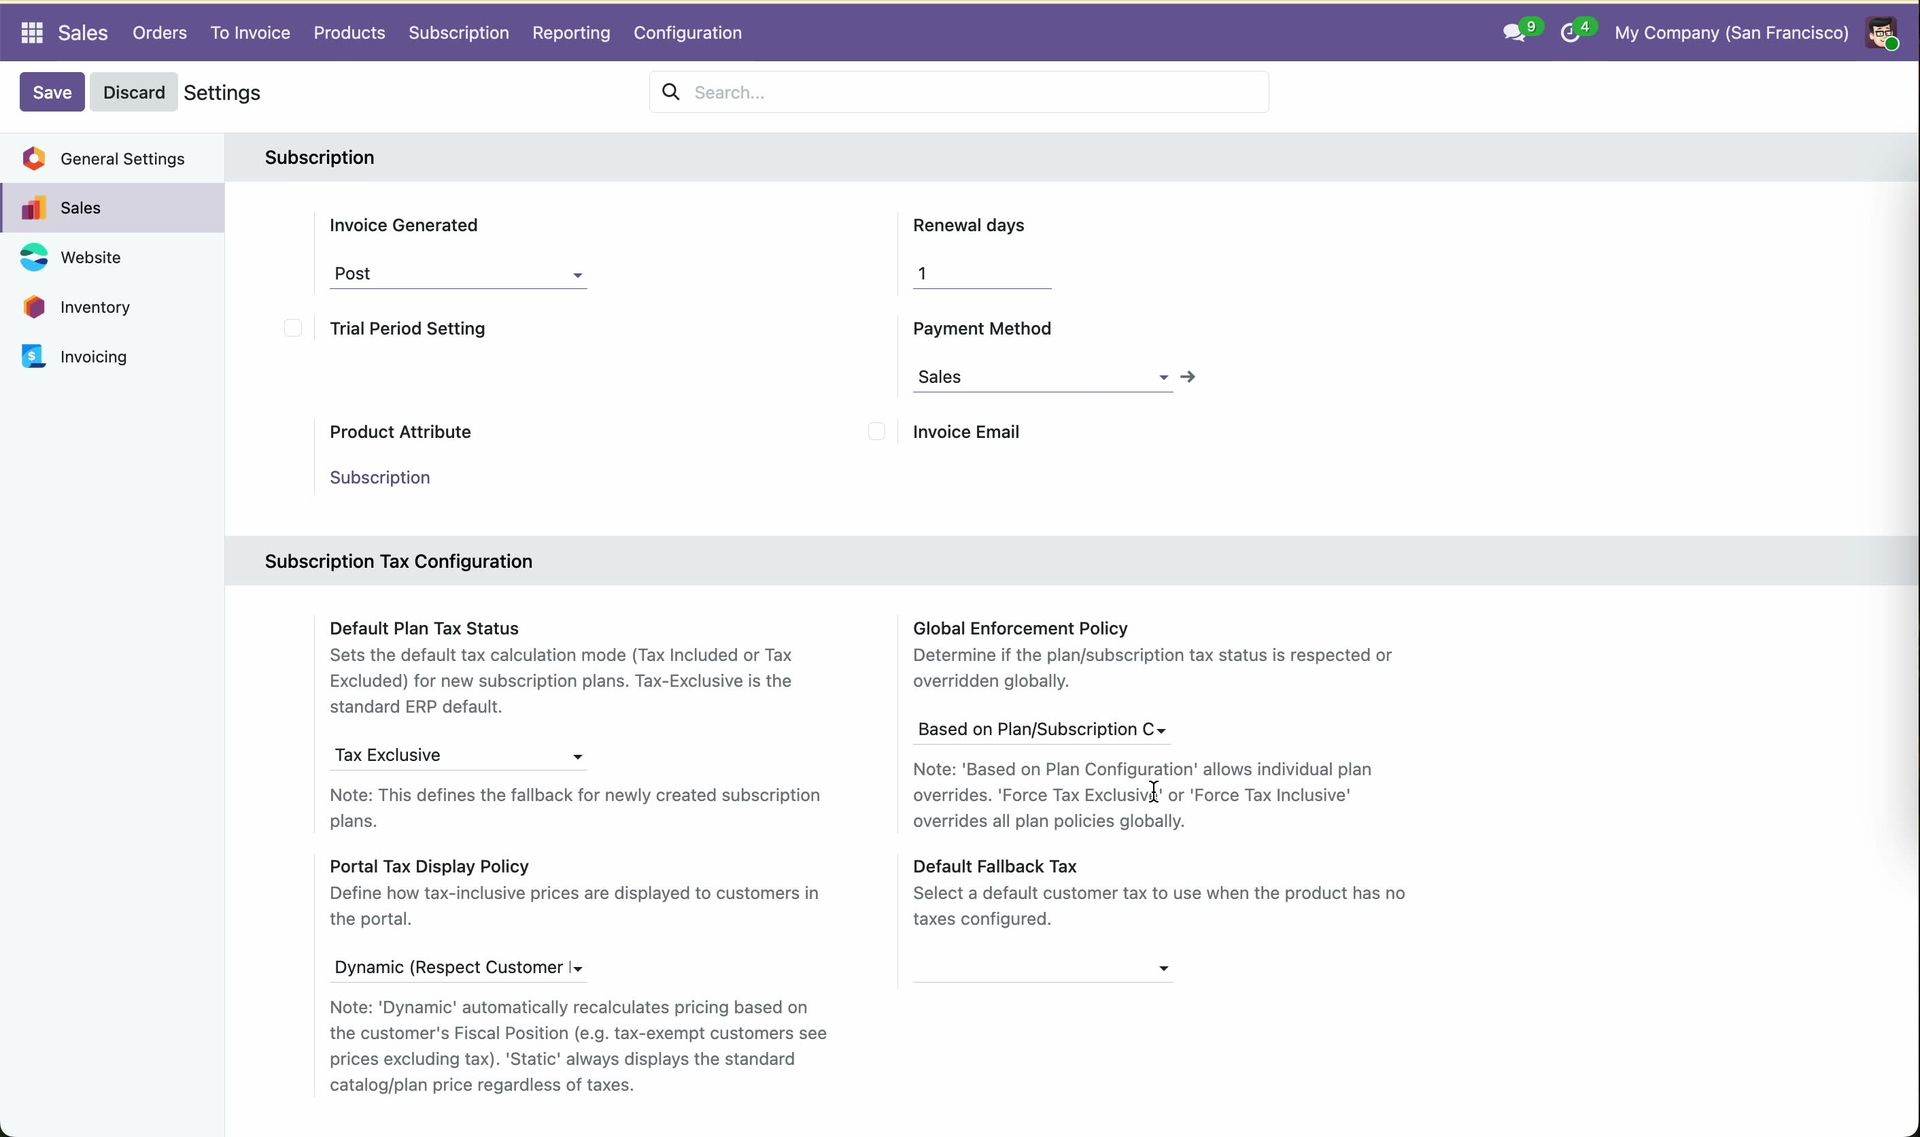
Configure the following Subscription Tax Configuration settings:
Set Default Tax Status to Tax Exclusive.
Set Portal Tax Display Policy to Dynamic (Respect Customer's Fiscal Position).
Set Global Enforcement Policy to Based on Plan/Subscription Configuration.
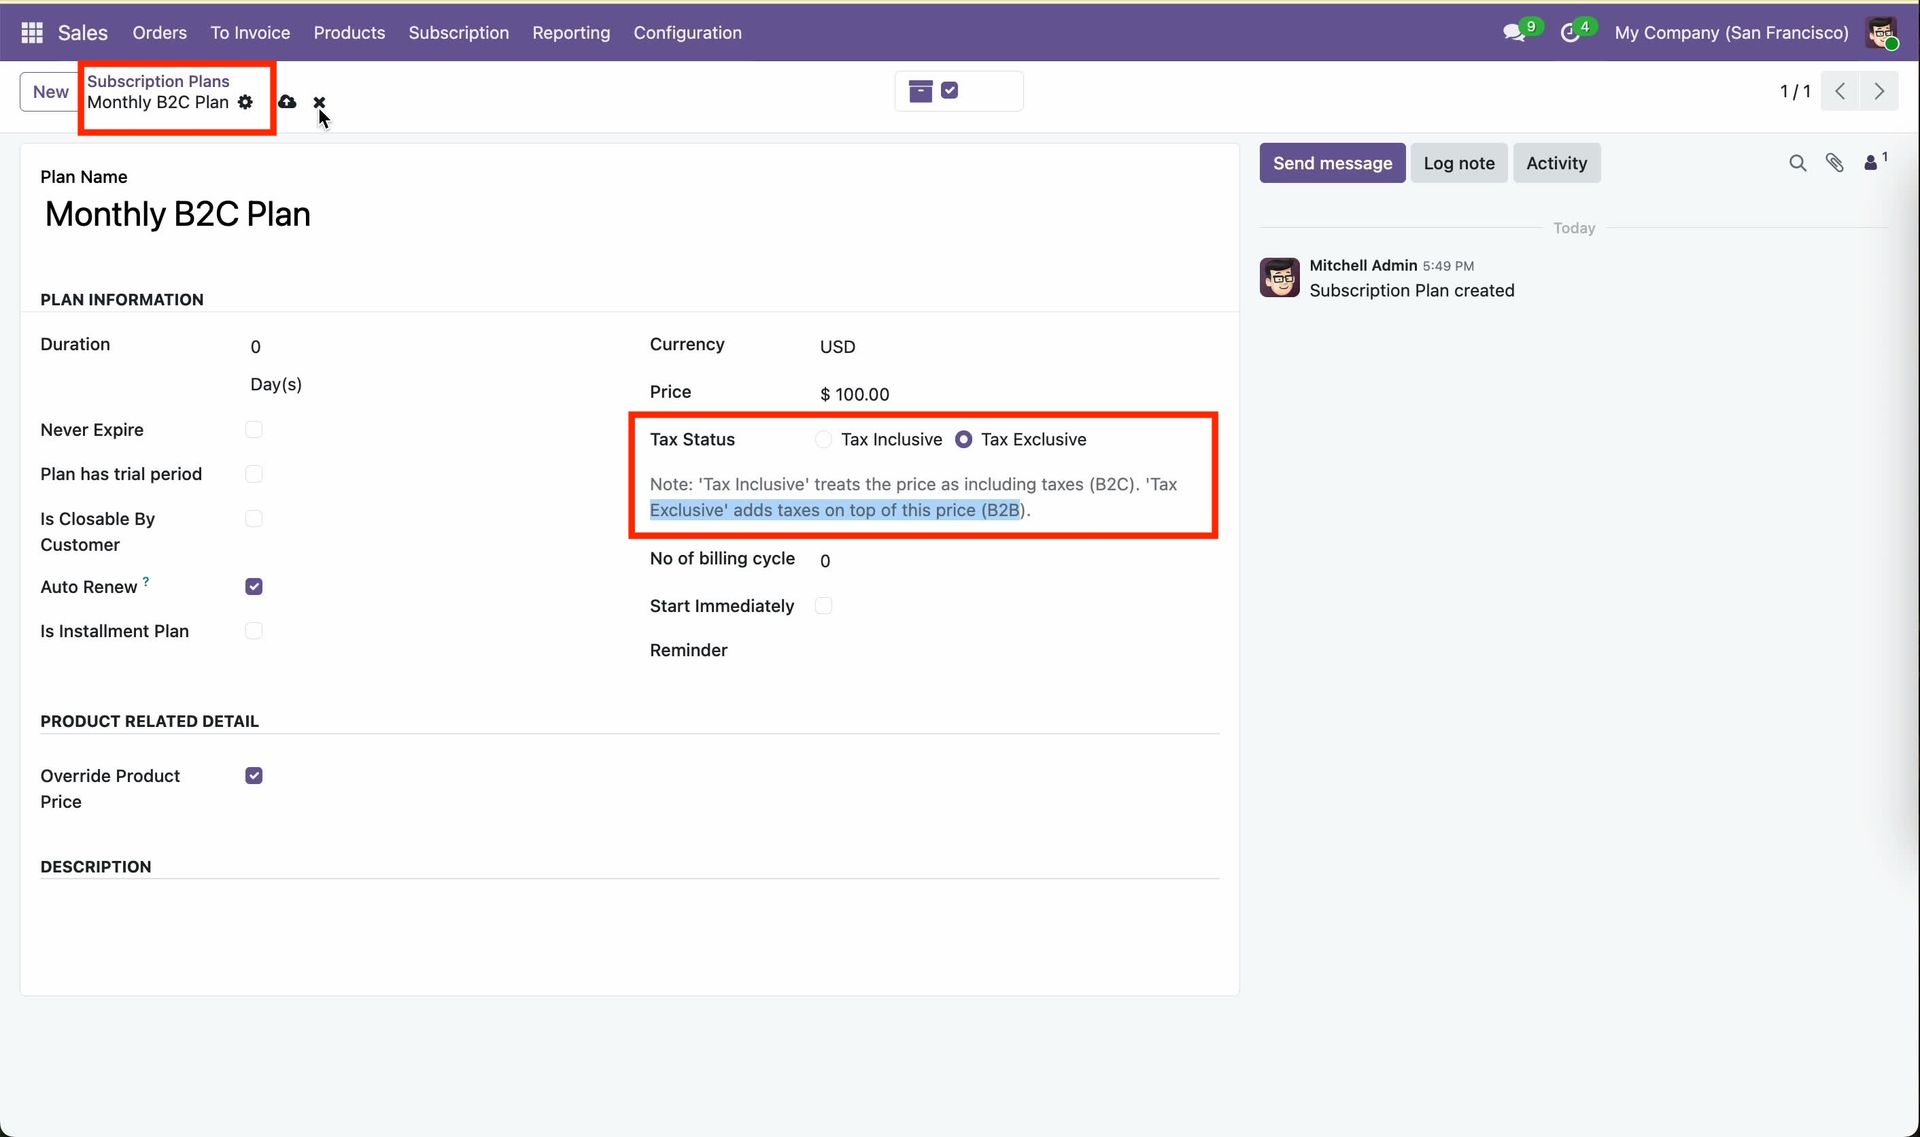
Go to the Subscription Plan and verify that the Default Tax Status is set to Tax Exclusive.
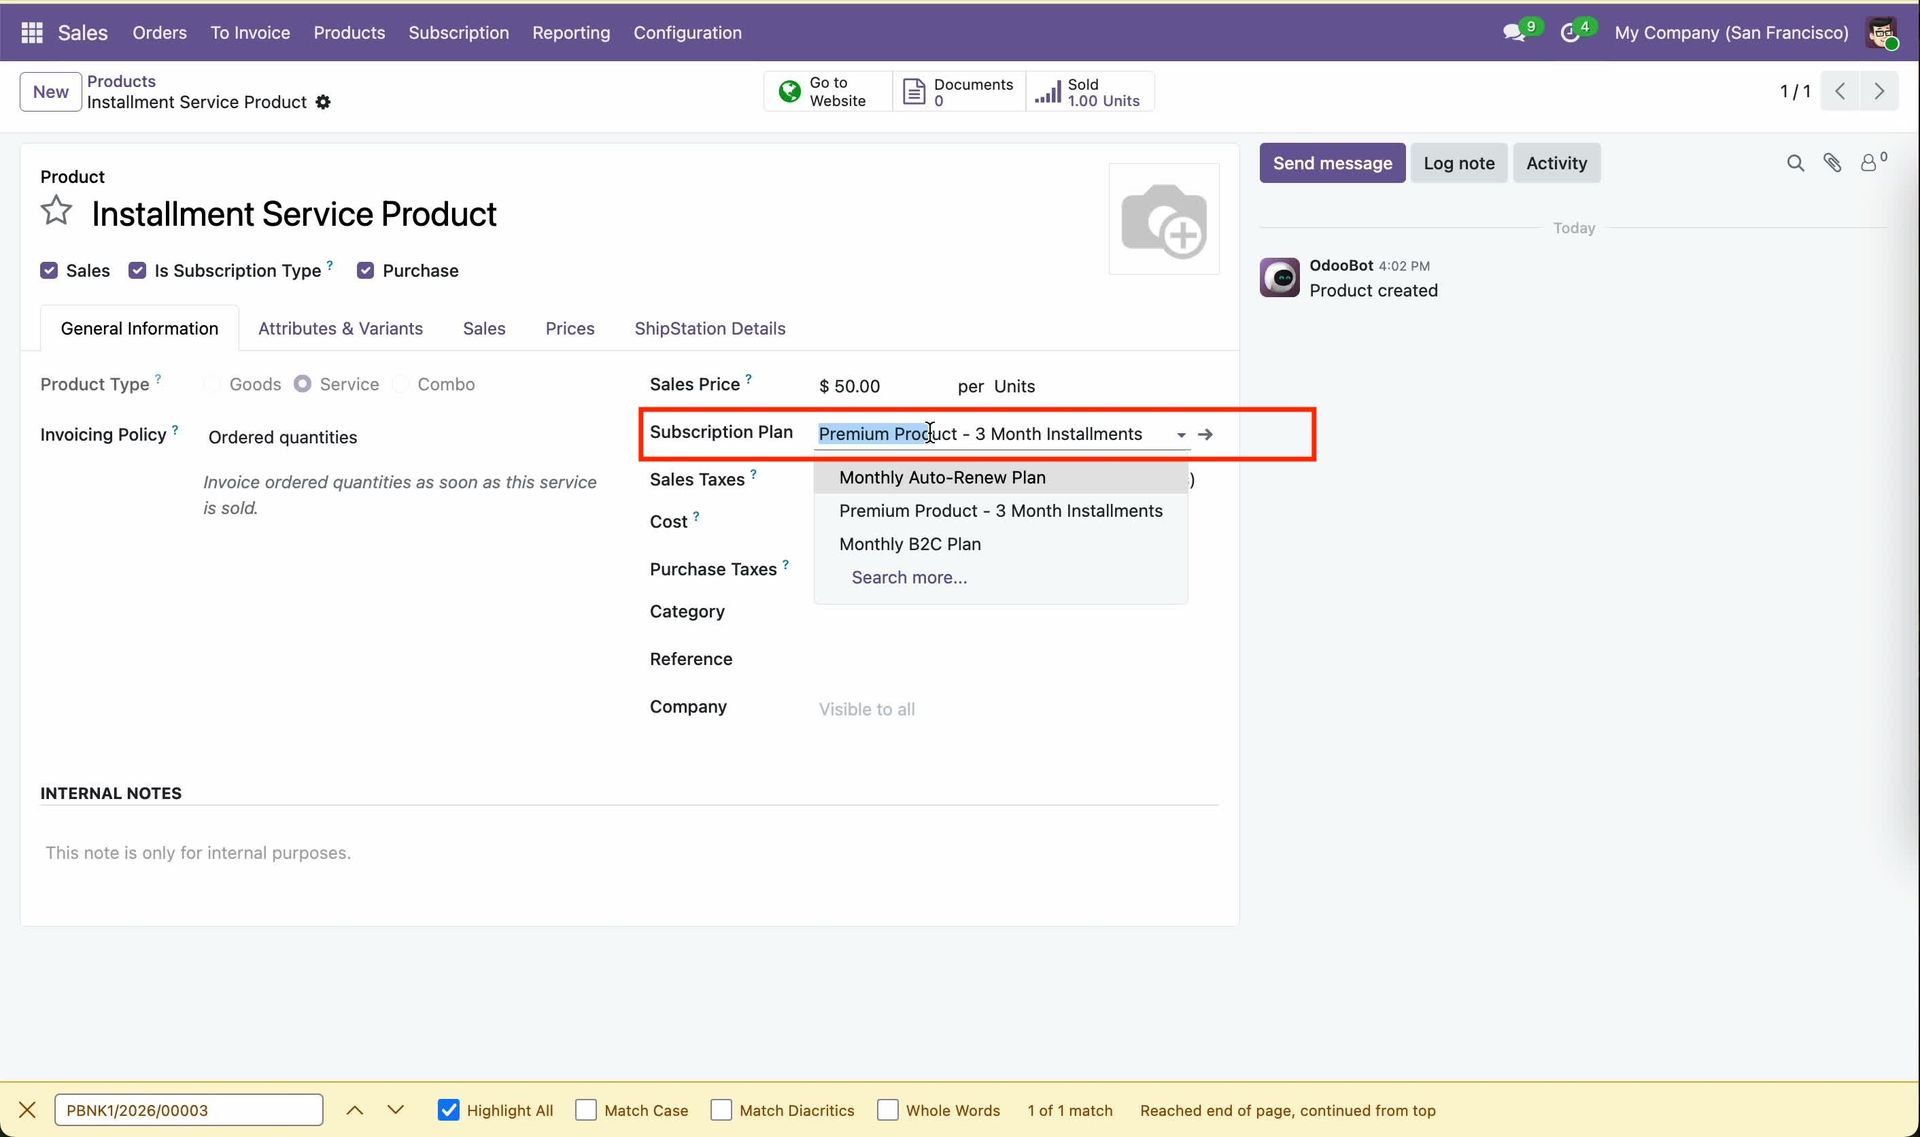
Go to the Product and assign the appropriate Subscription Plan.
Go to the Subscription Order, add or select the subscription product.
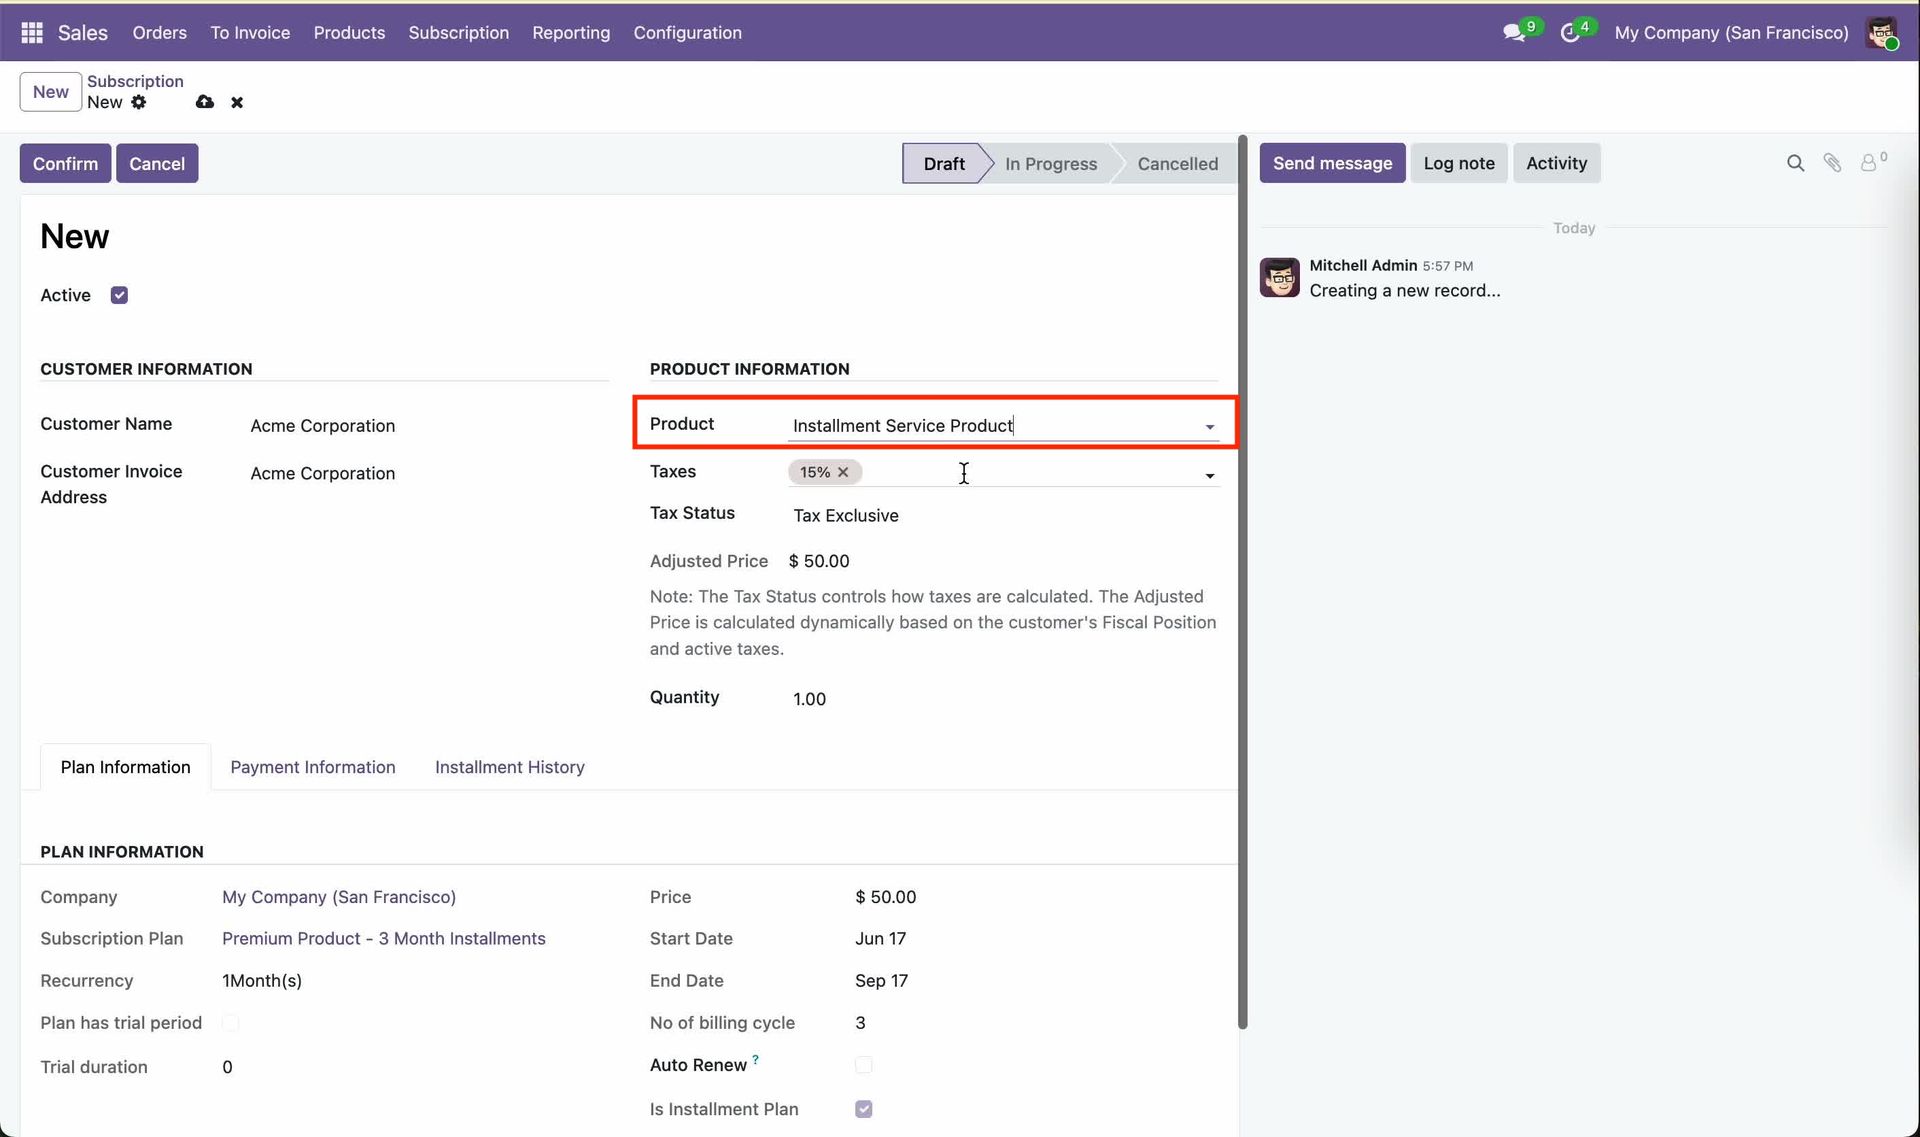
Open the Subscription Product and set the Tax Status to Tax Inclusive. Assign the Subscription Plan to the Product to link it with the appropriate subscription configuration.
Go to the Customer Form View, open the Sales & Purchase tab, and verify the customer's Fiscal Position.
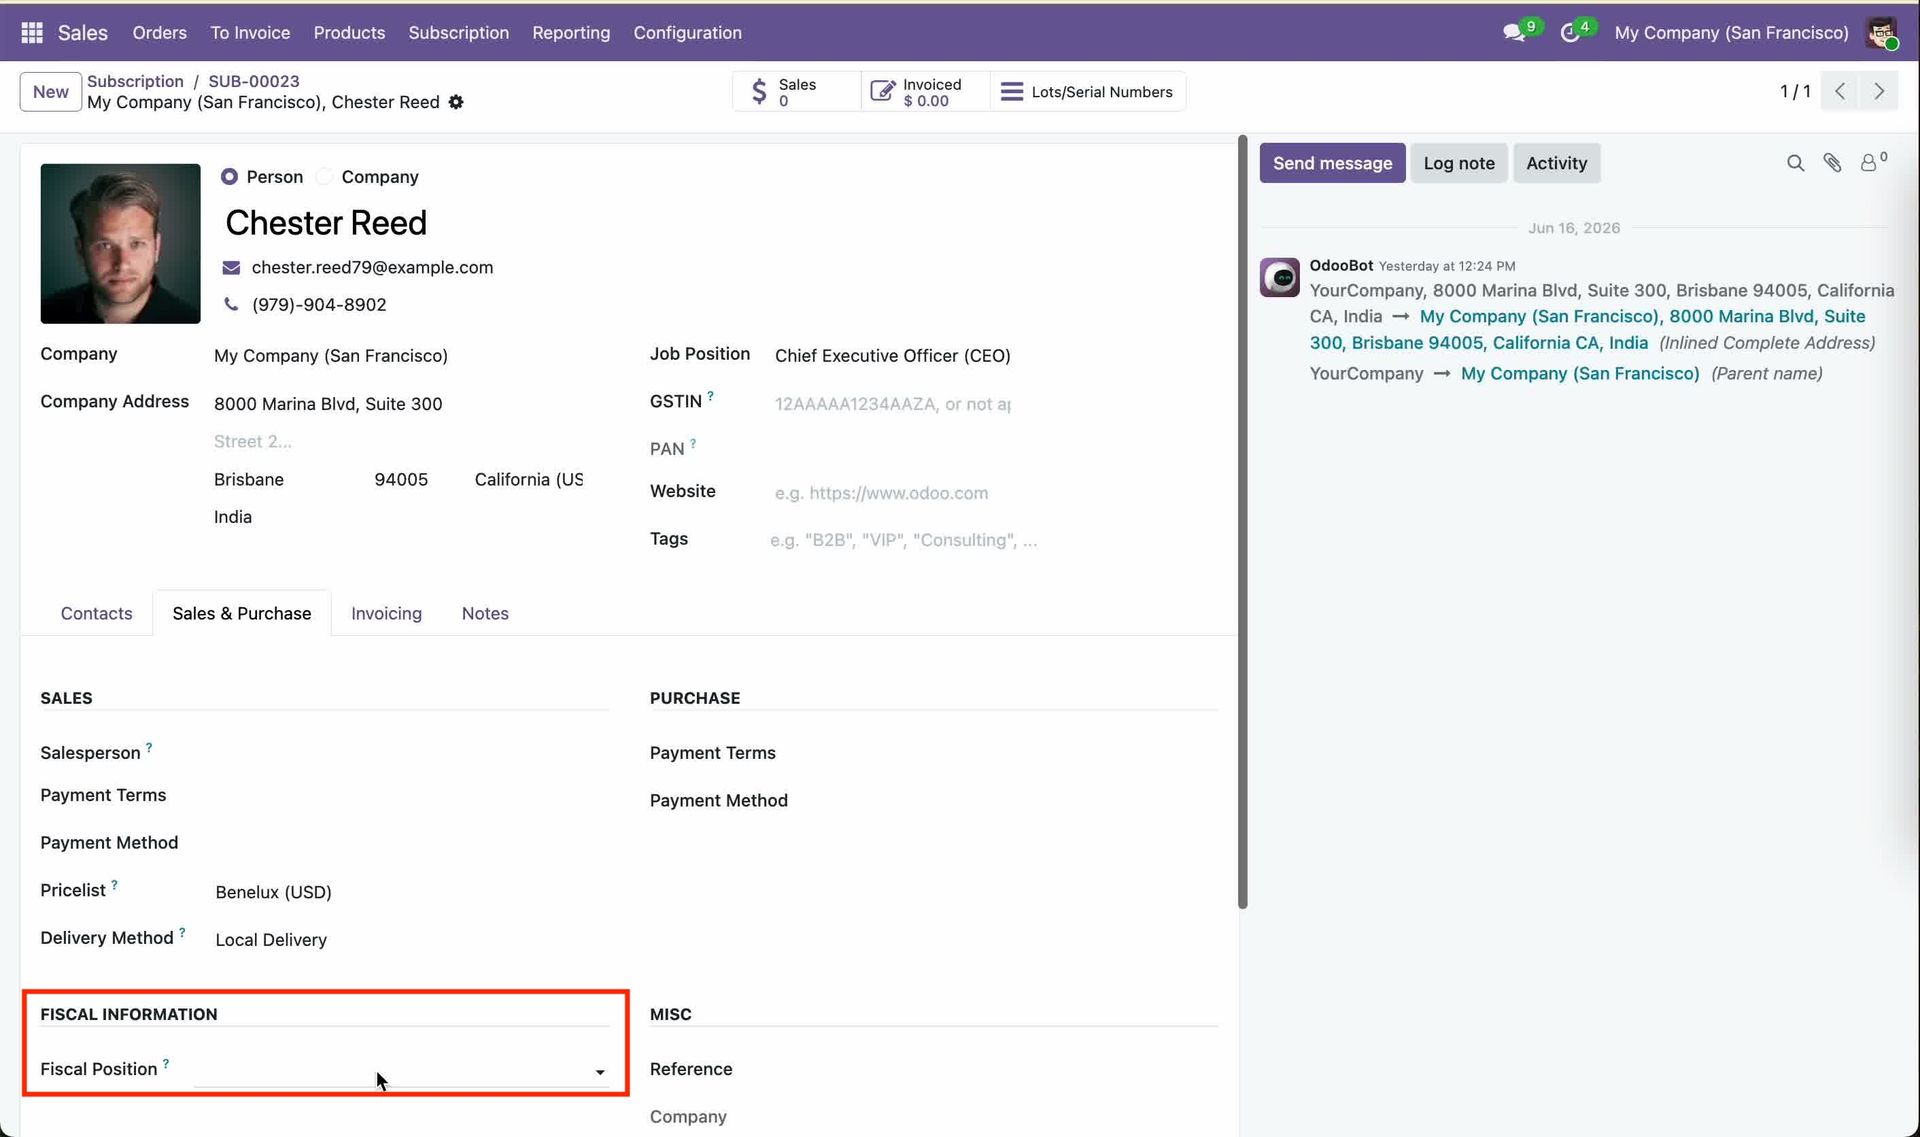
Set the appropriate Fiscal Position for the customer in the Sales & Purchase tab of the Customer Form.
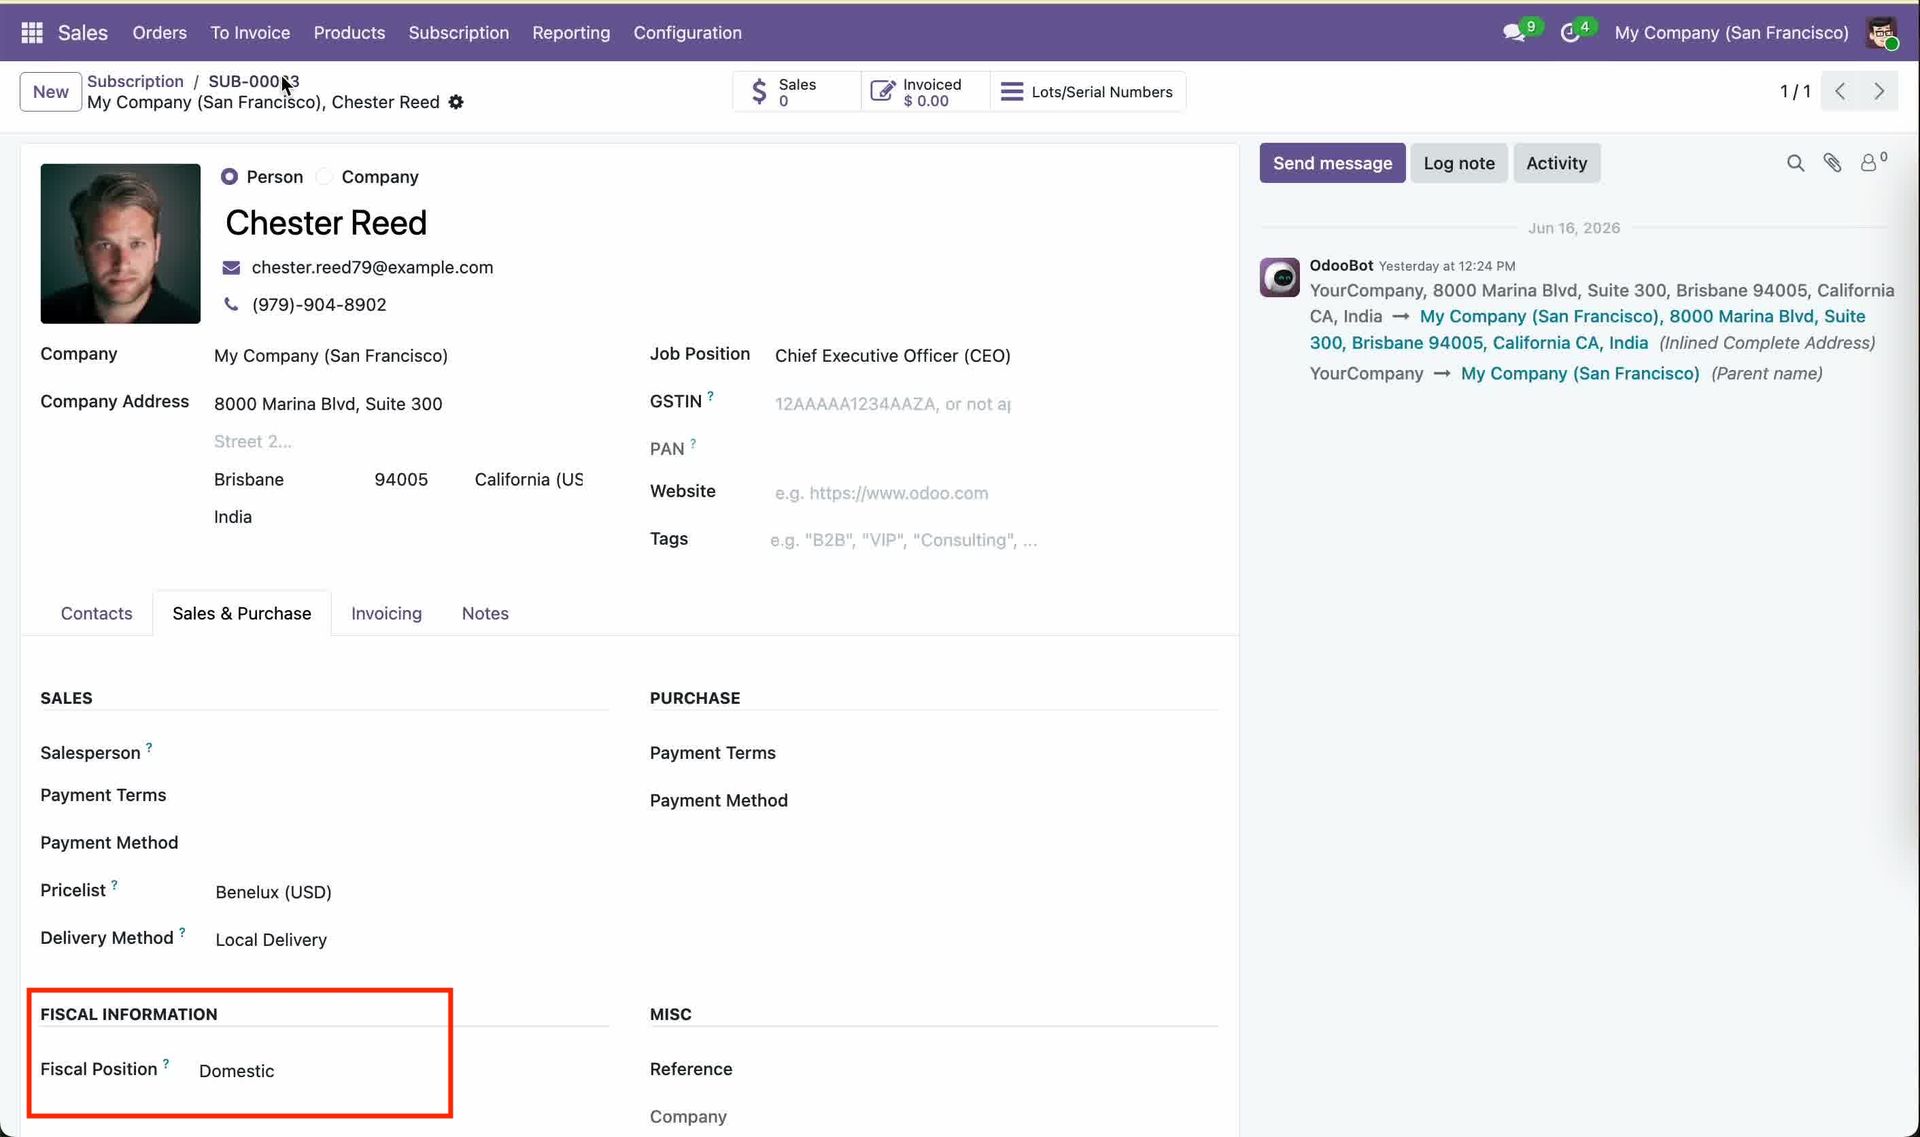
Create a Subscription Order, select the desired subscription product, and choose the appropriate customer for the order.
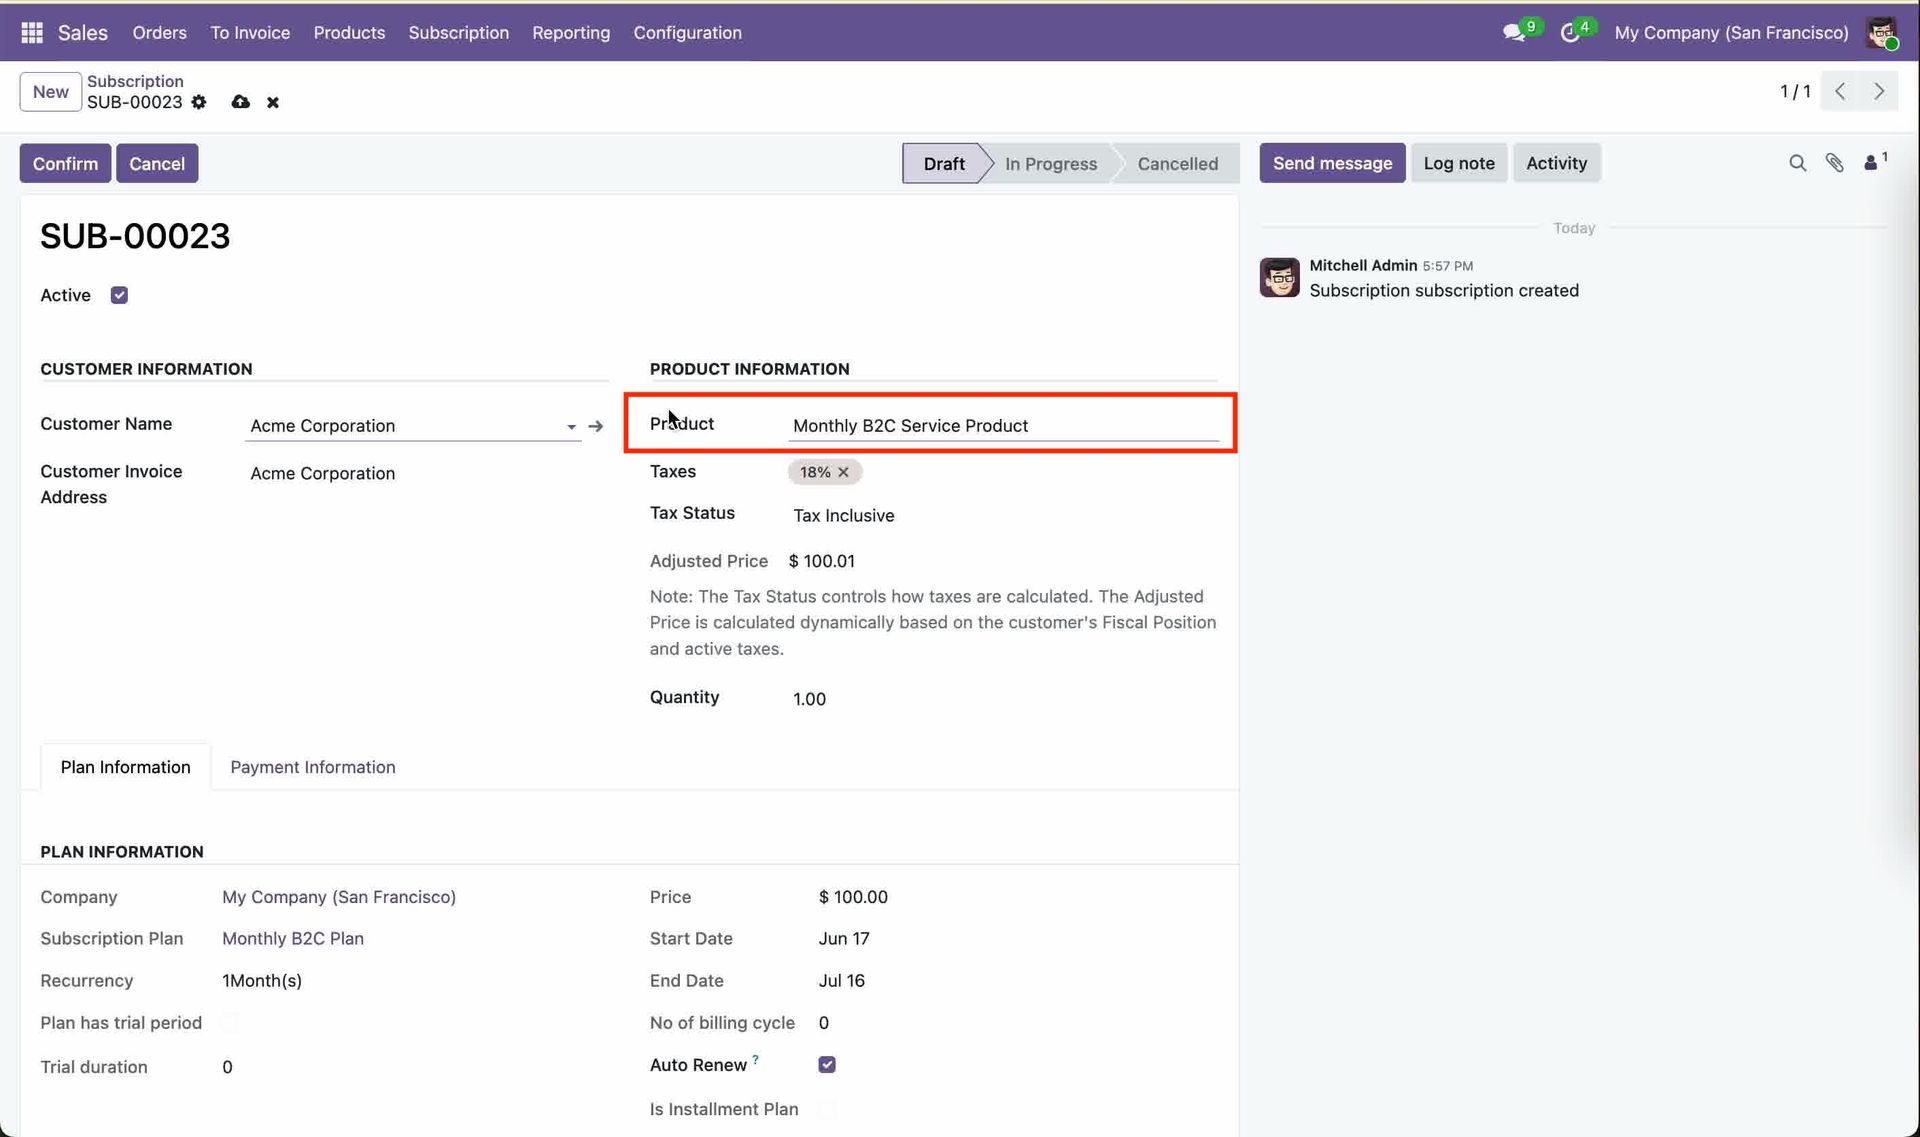
Choose a customer with a configured Fiscal Position to apply the appropriate tax rules.
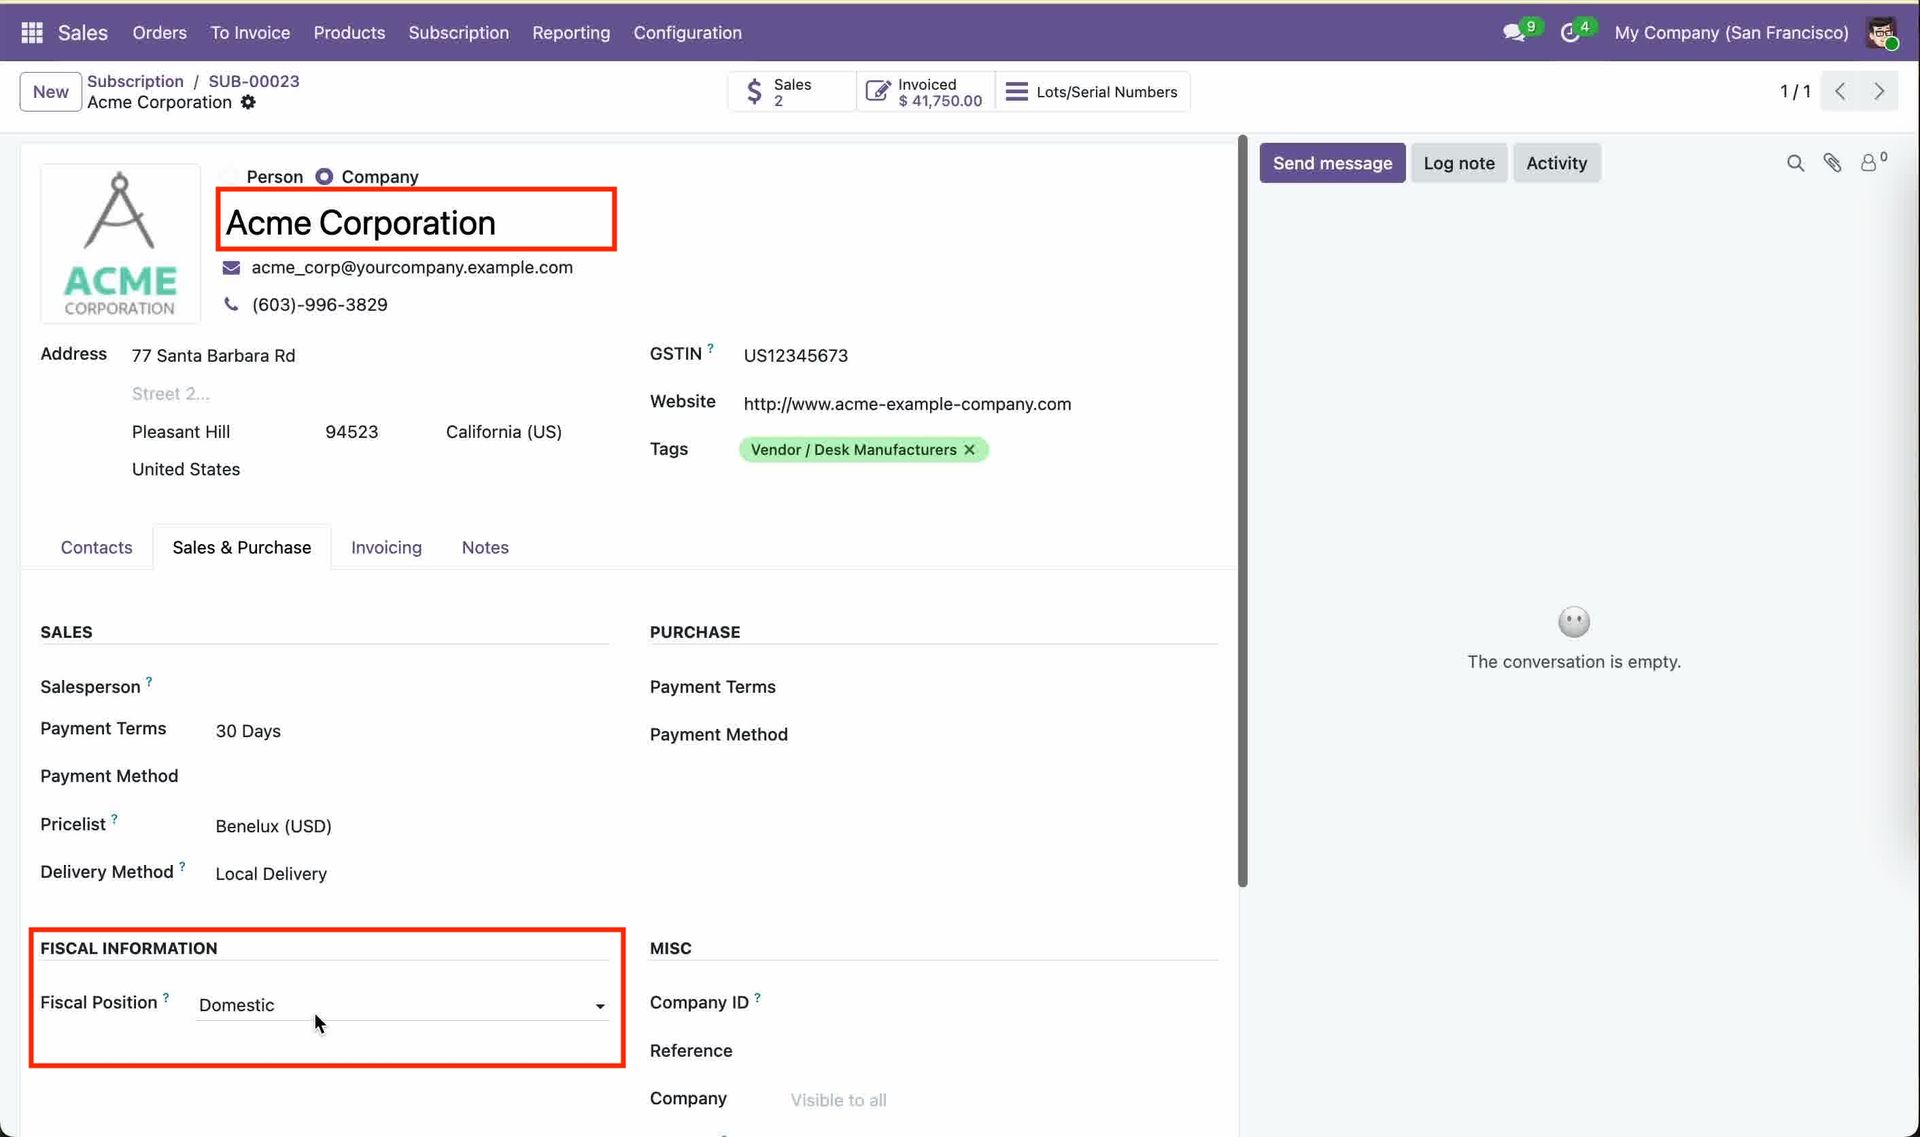
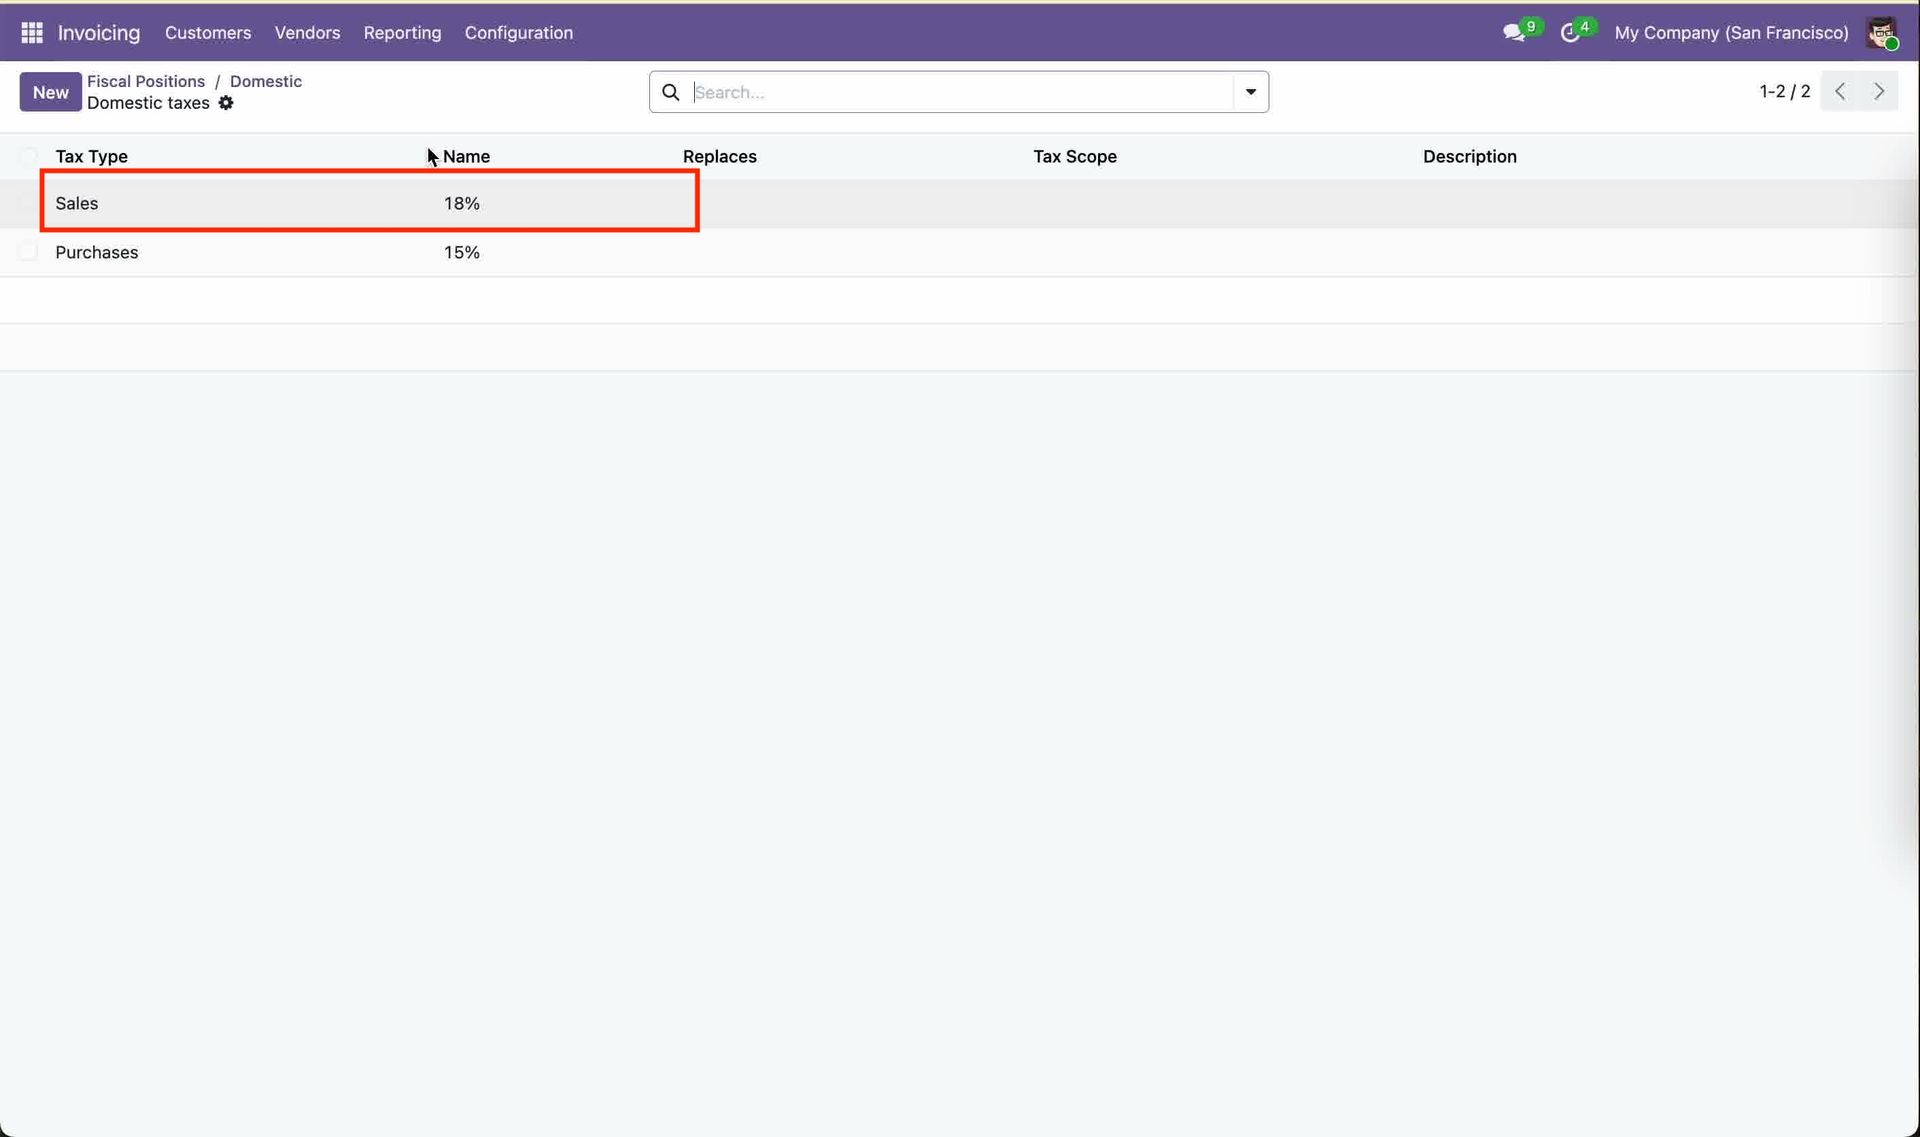
Open the Fiscal Position and verify the configured Tax Type to ensure the correct tax mapping is applied to the subscription order.
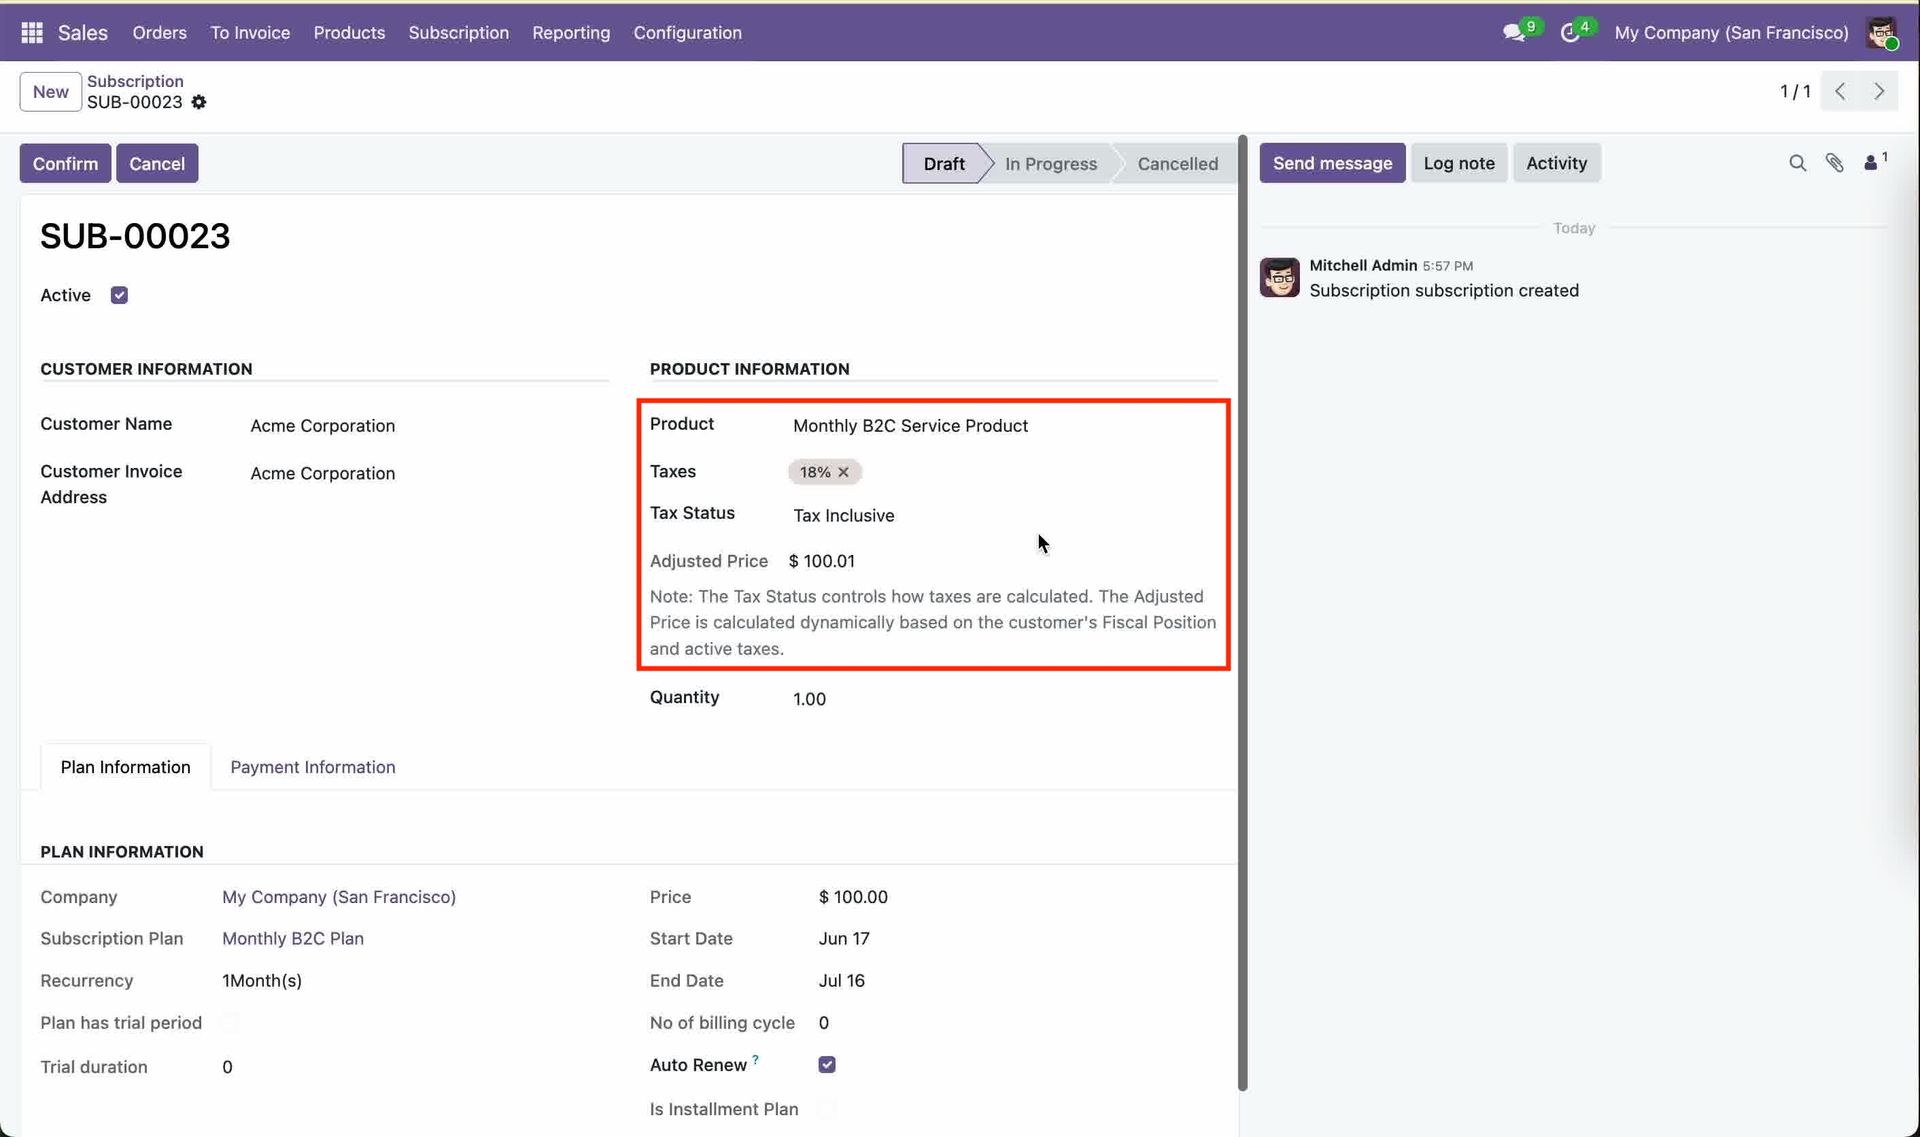
By selecting a customer with a configured Fiscal Position, the appropriate tax is automatically applied according to the Global Enforcement Policy and the customer's fiscal position settings.
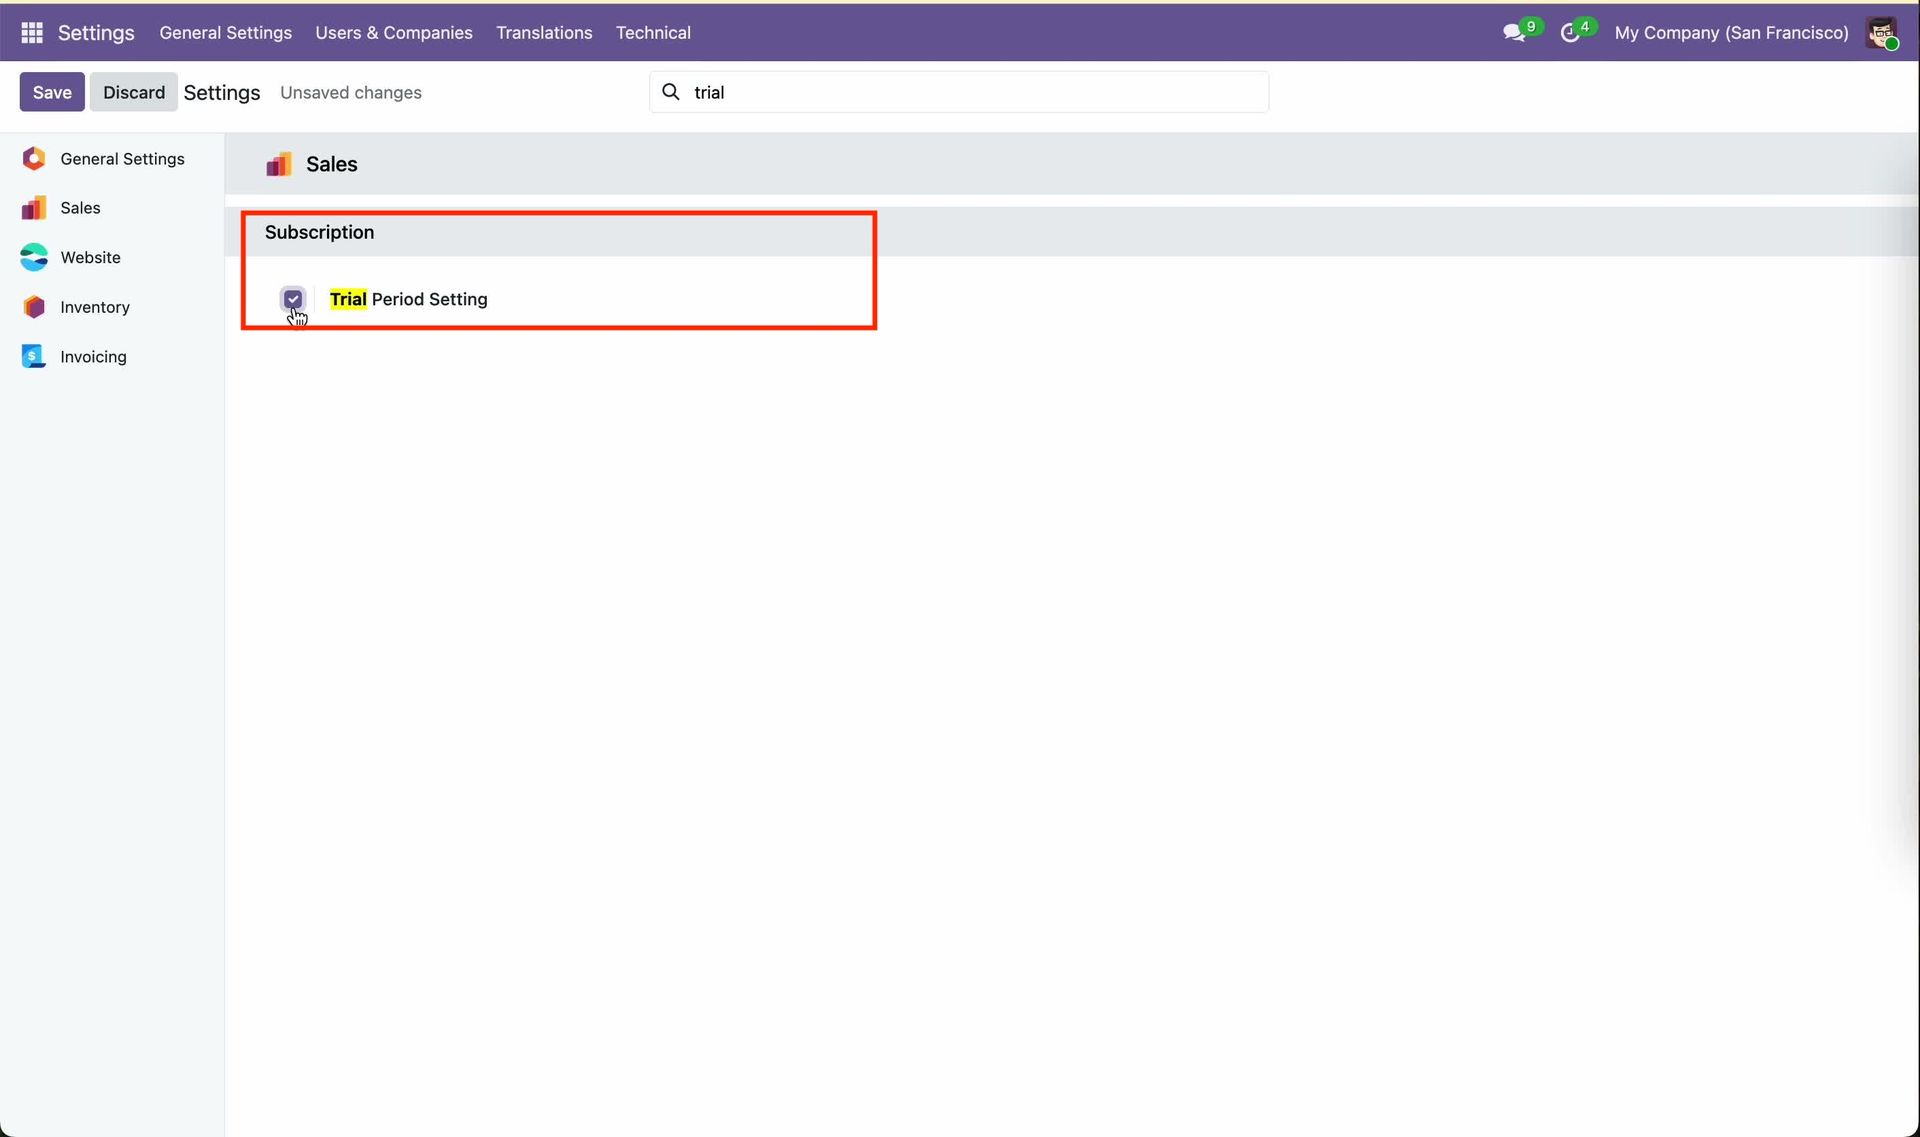
Go to Sales -> Settings and enable the Trial Period option to allow subscription plans to offer a configurable free trial period.
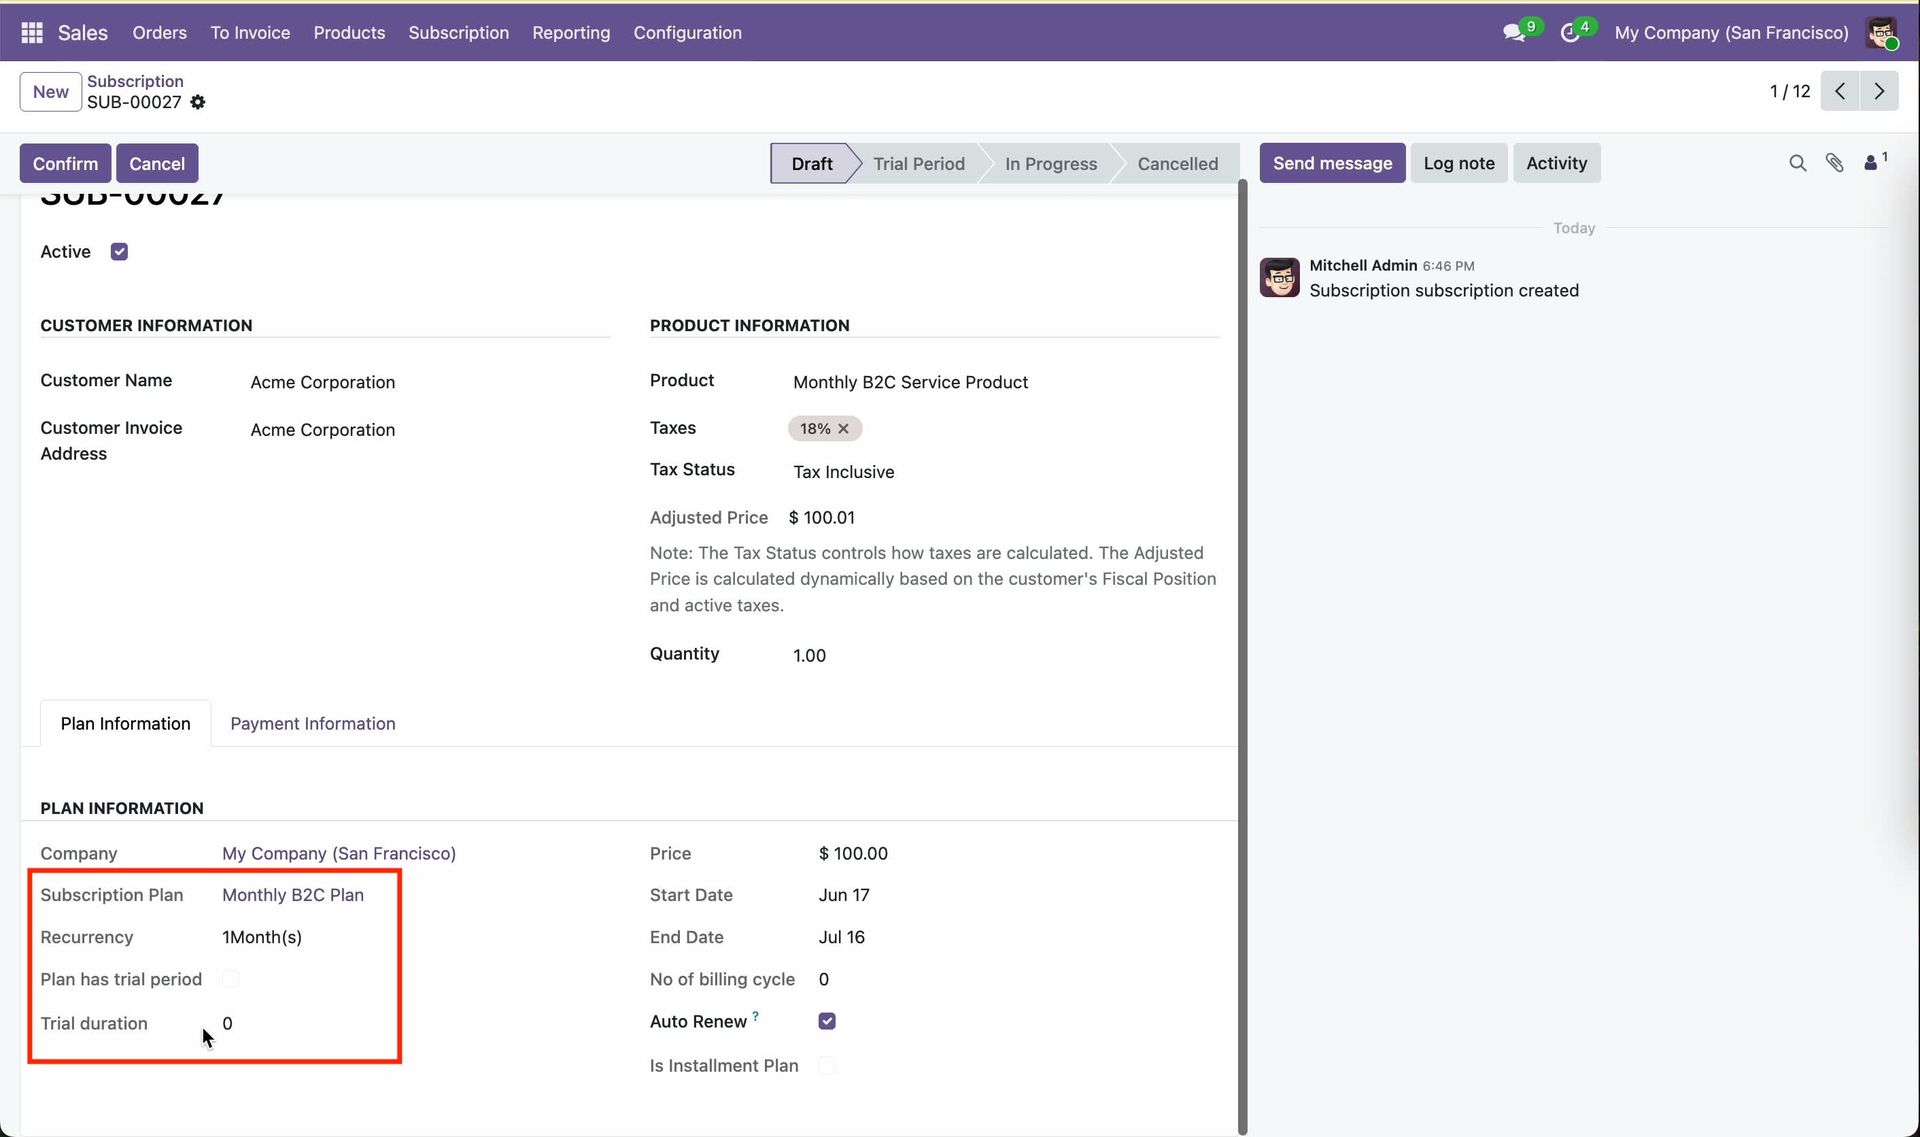
Open the Subscription Order and navigate to the Plan Information tab, where you can view the configured Trial Period details for the selected subscription plan.
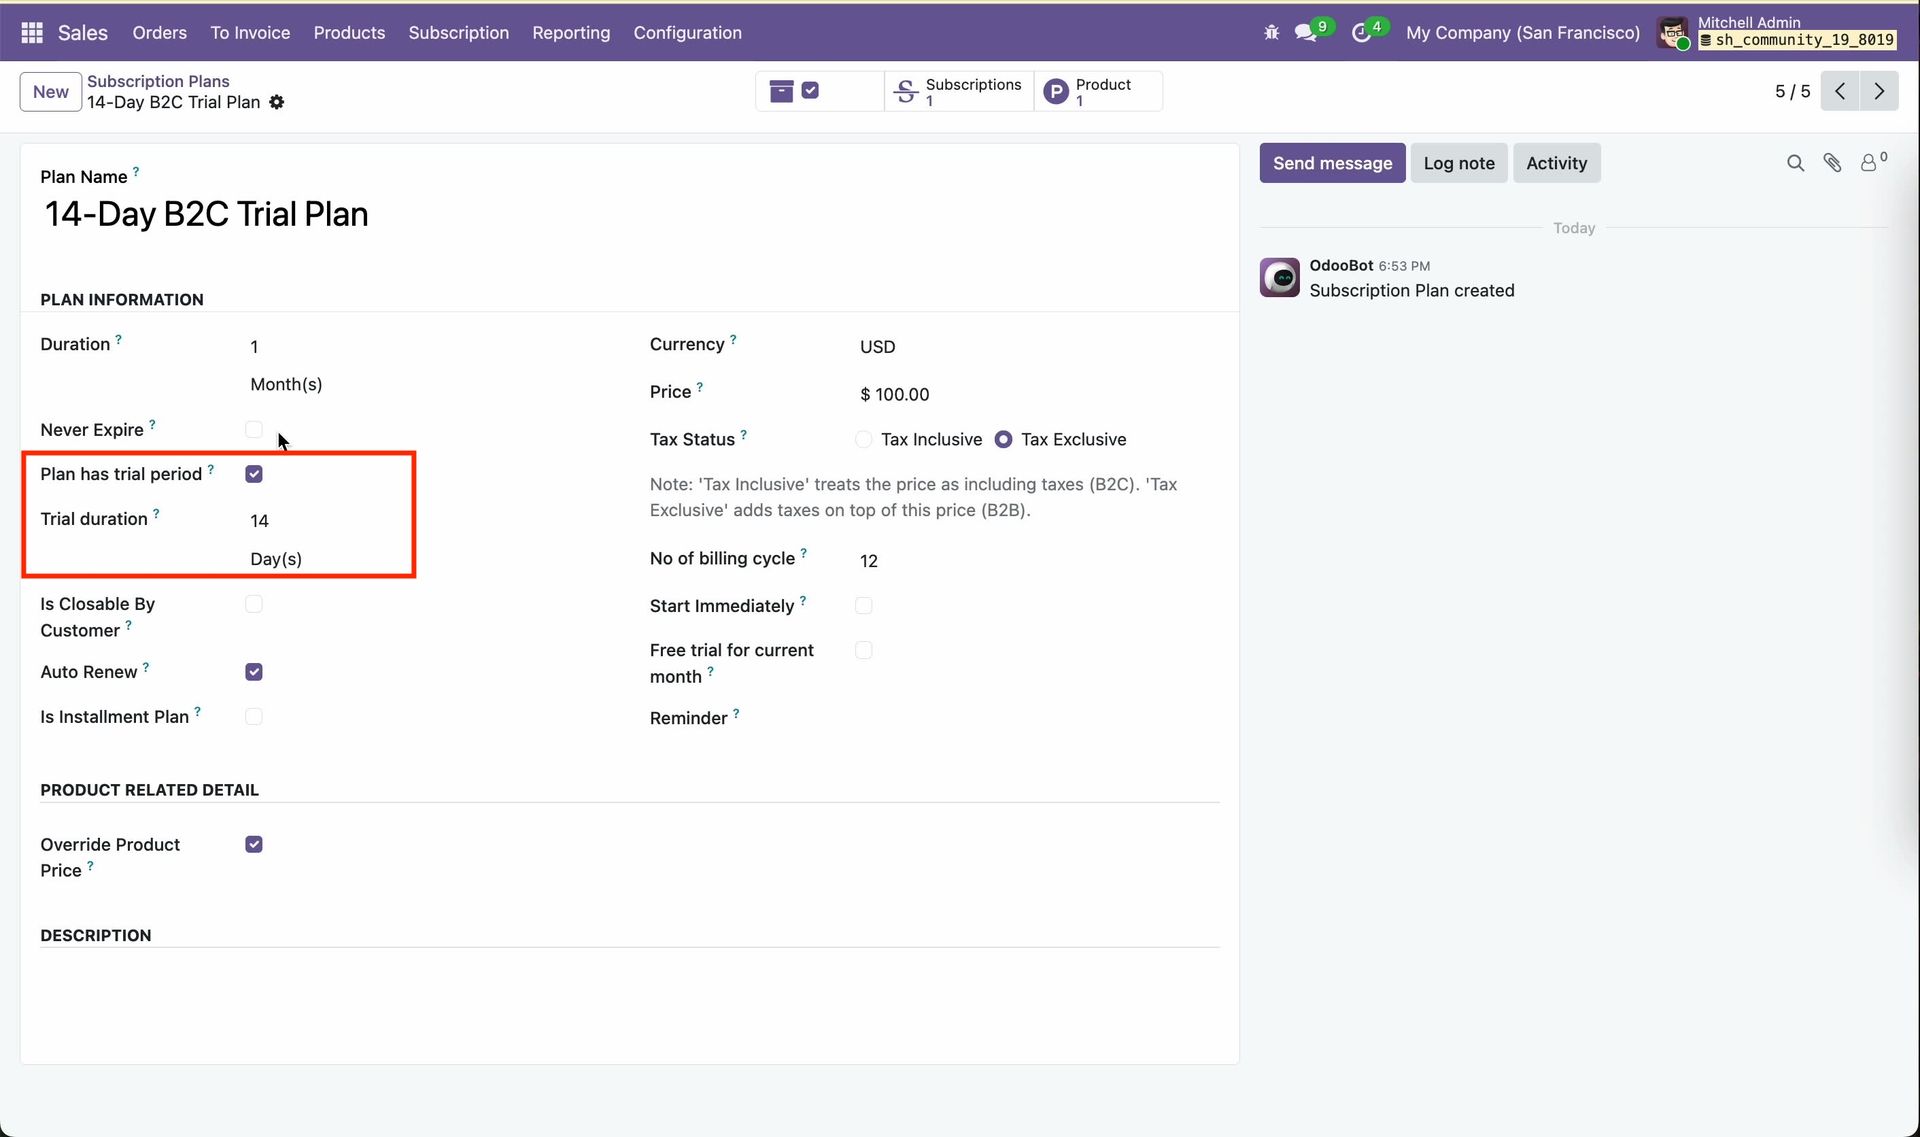
Go to the Subscriptiom Plans and configure the trial period and its duration.
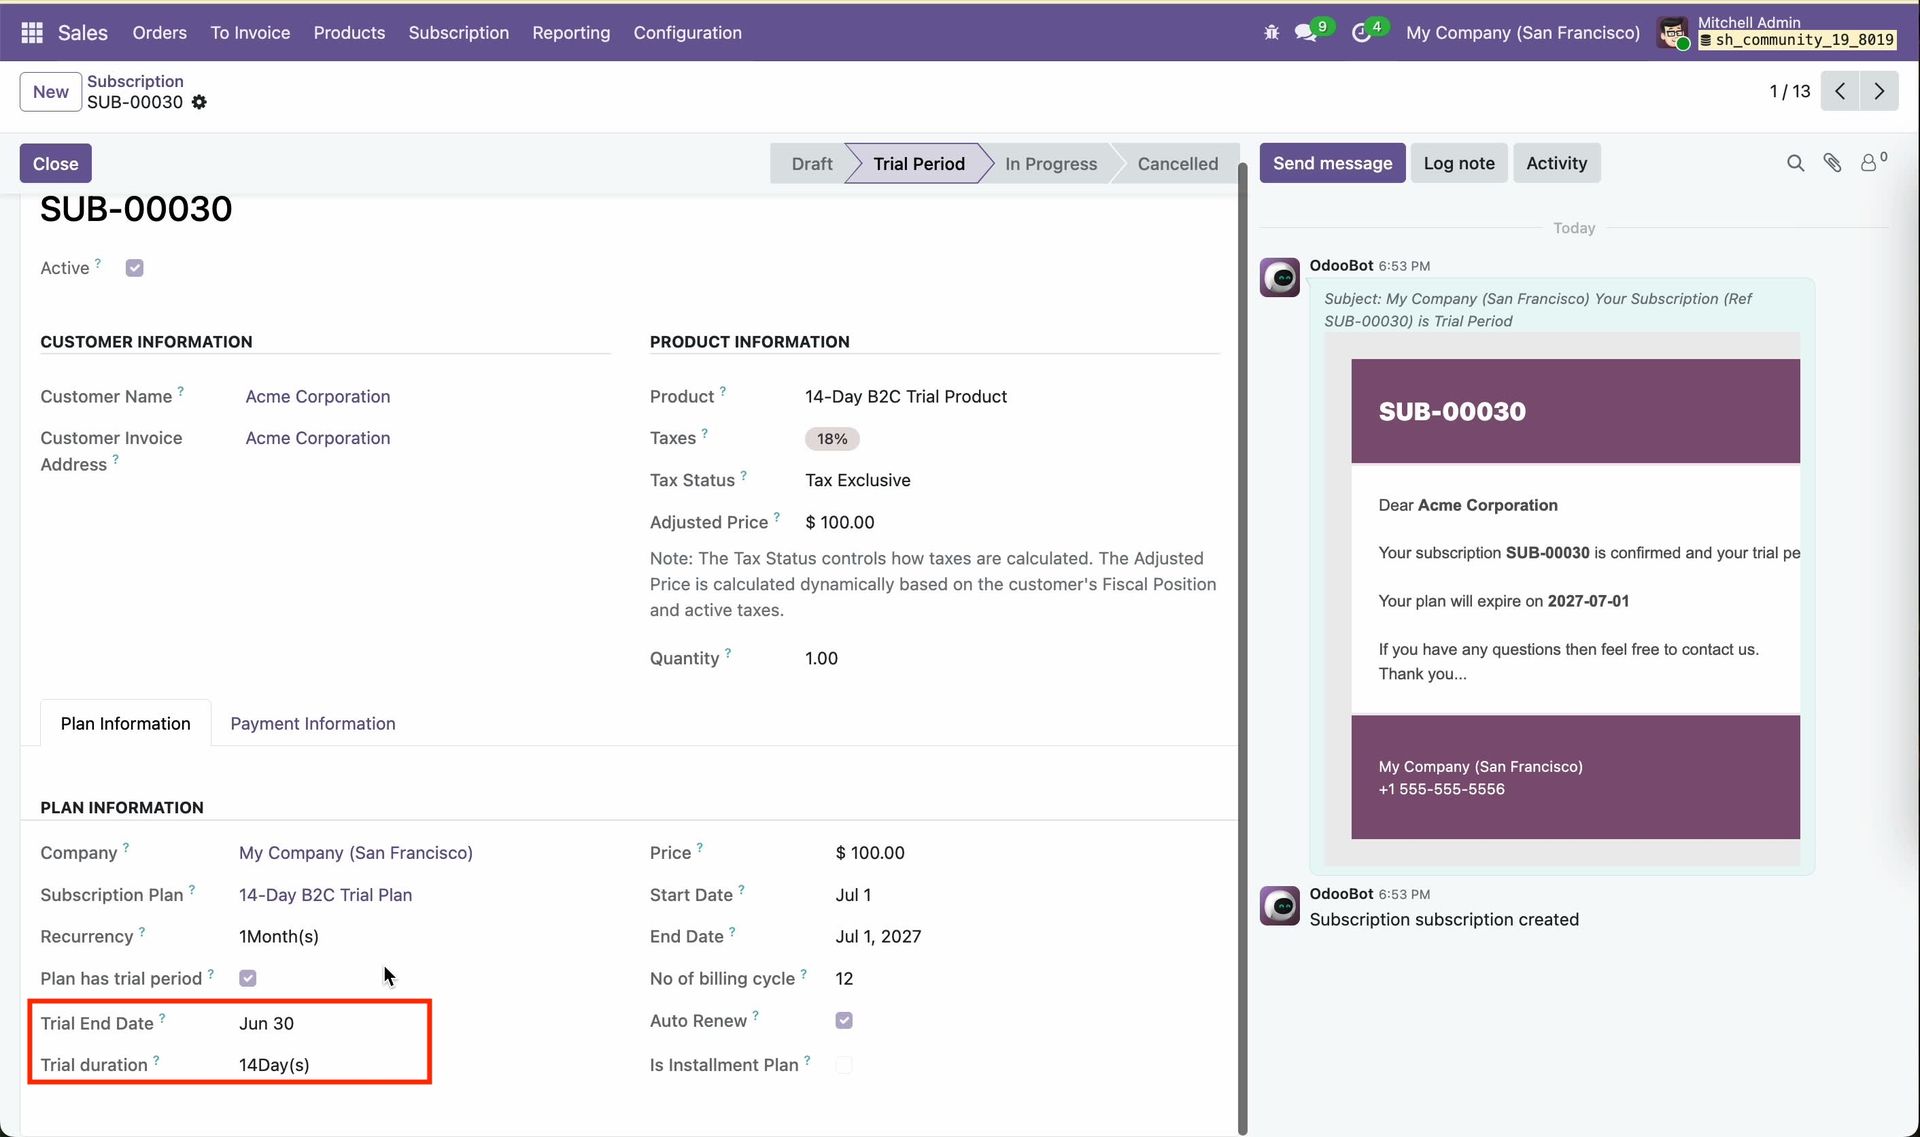
Select the configured trial period plan in the subscription order, and verify the trial duration details under the plan information section.
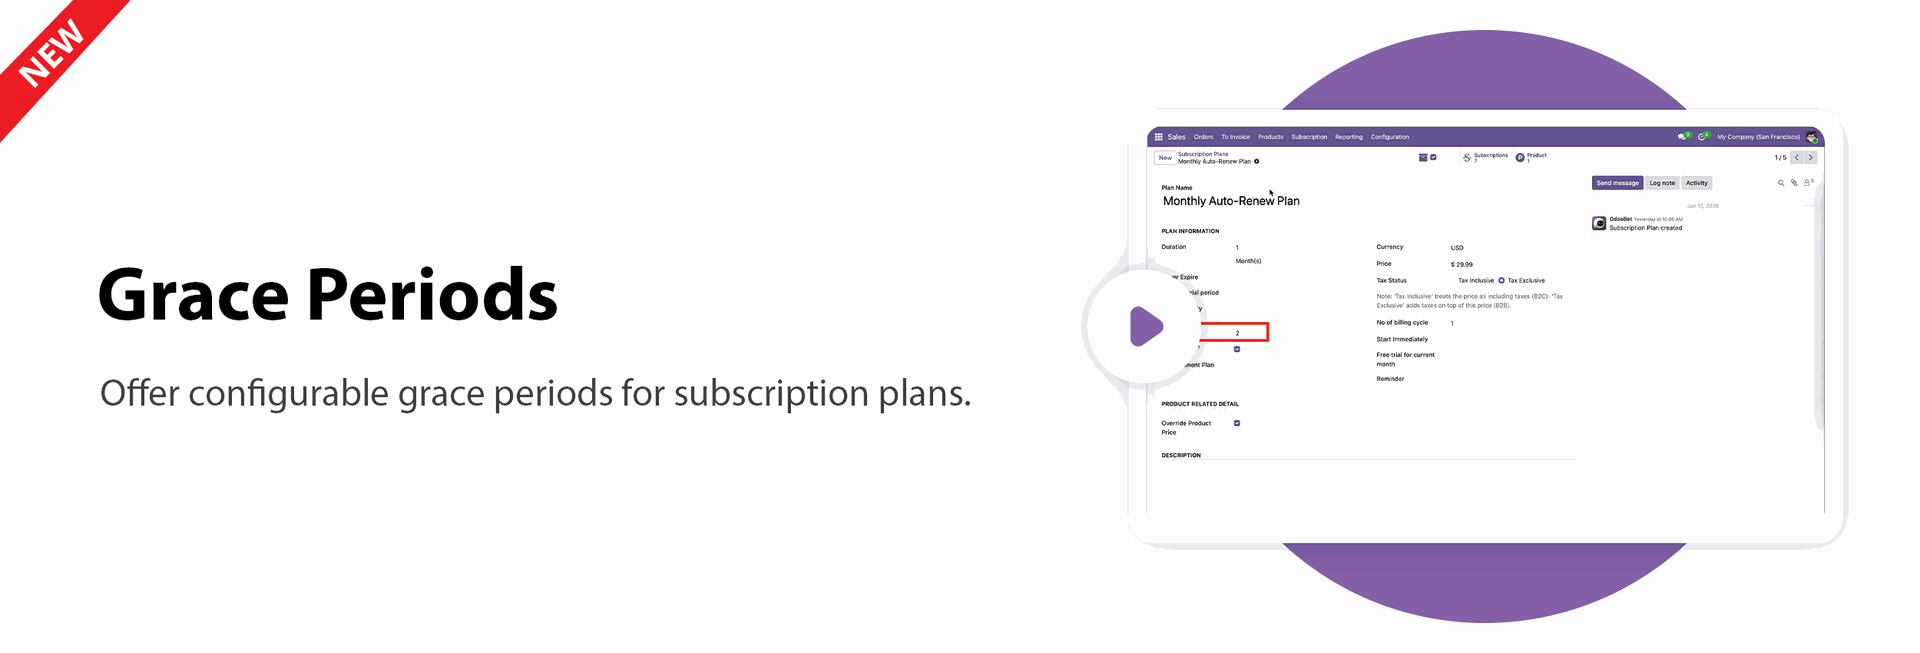
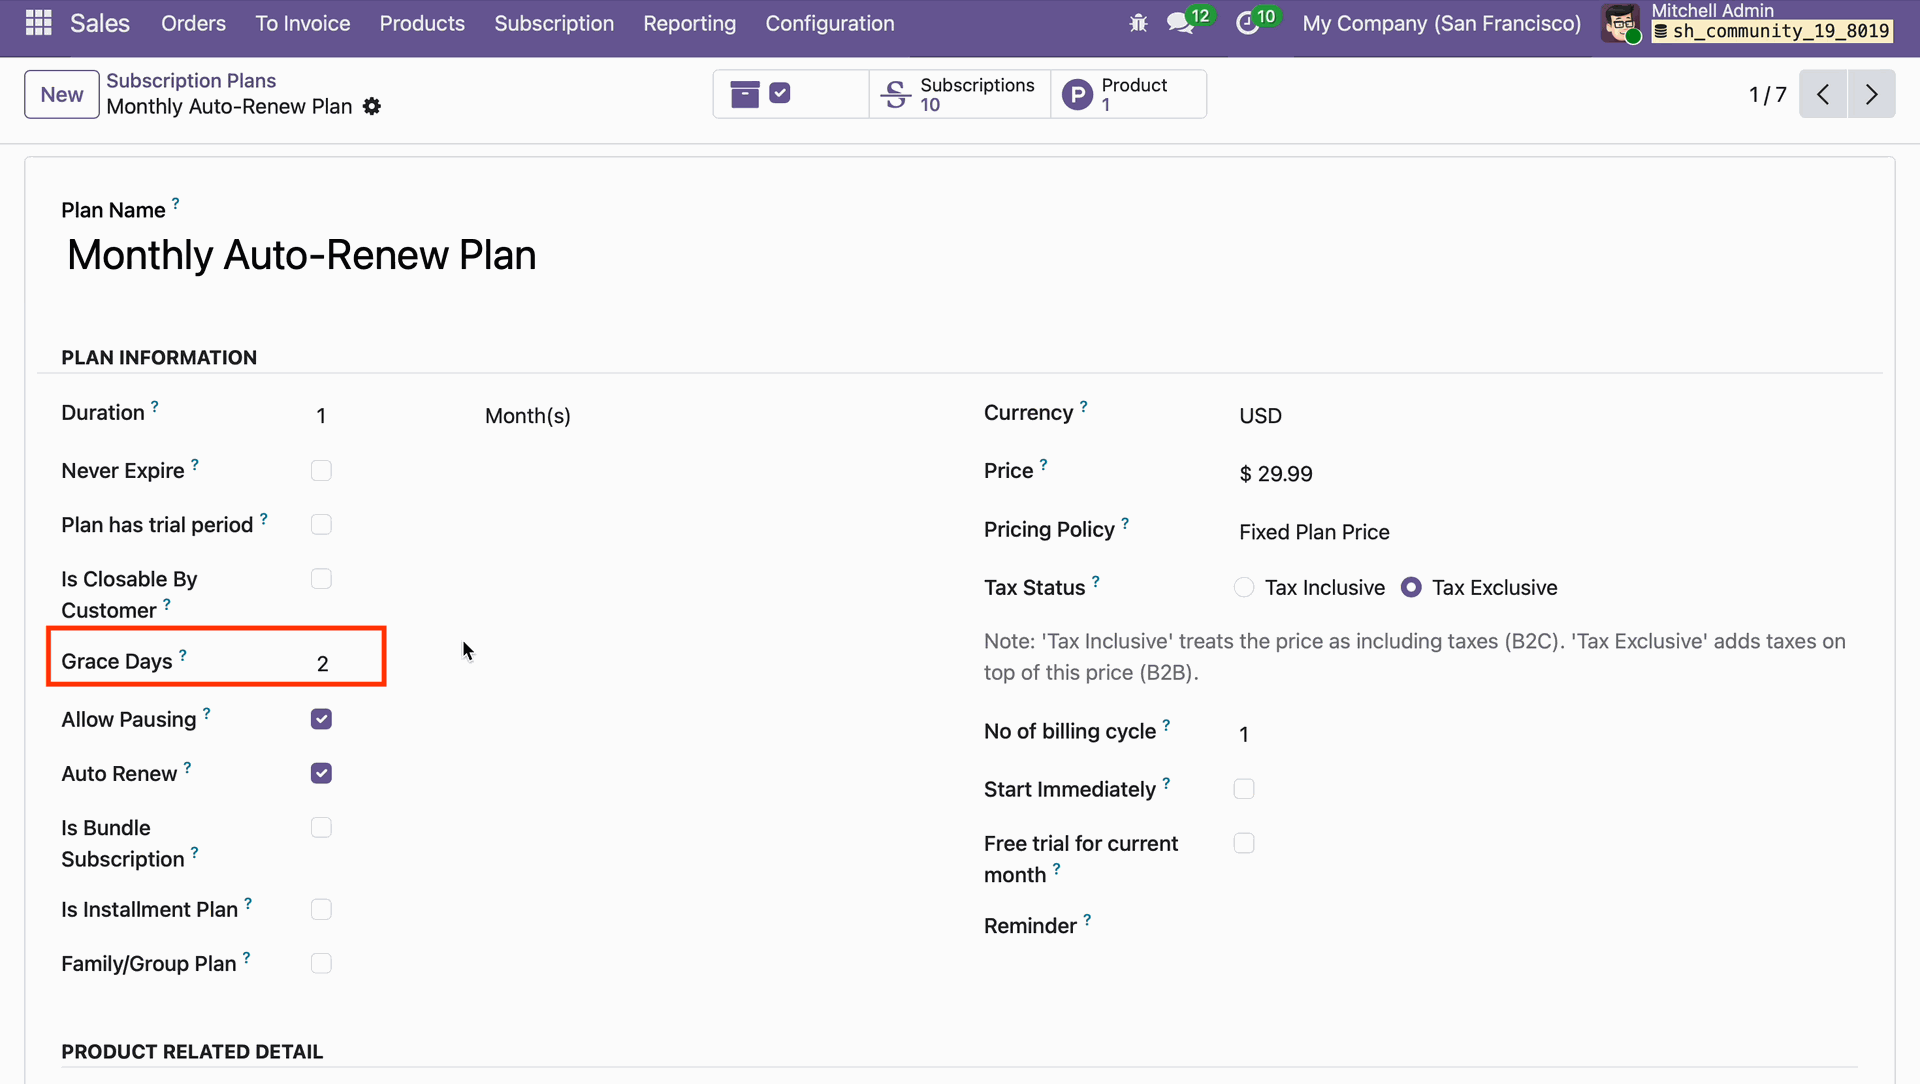
Go to the subscription plan and configure the grace period by setting the grace days.
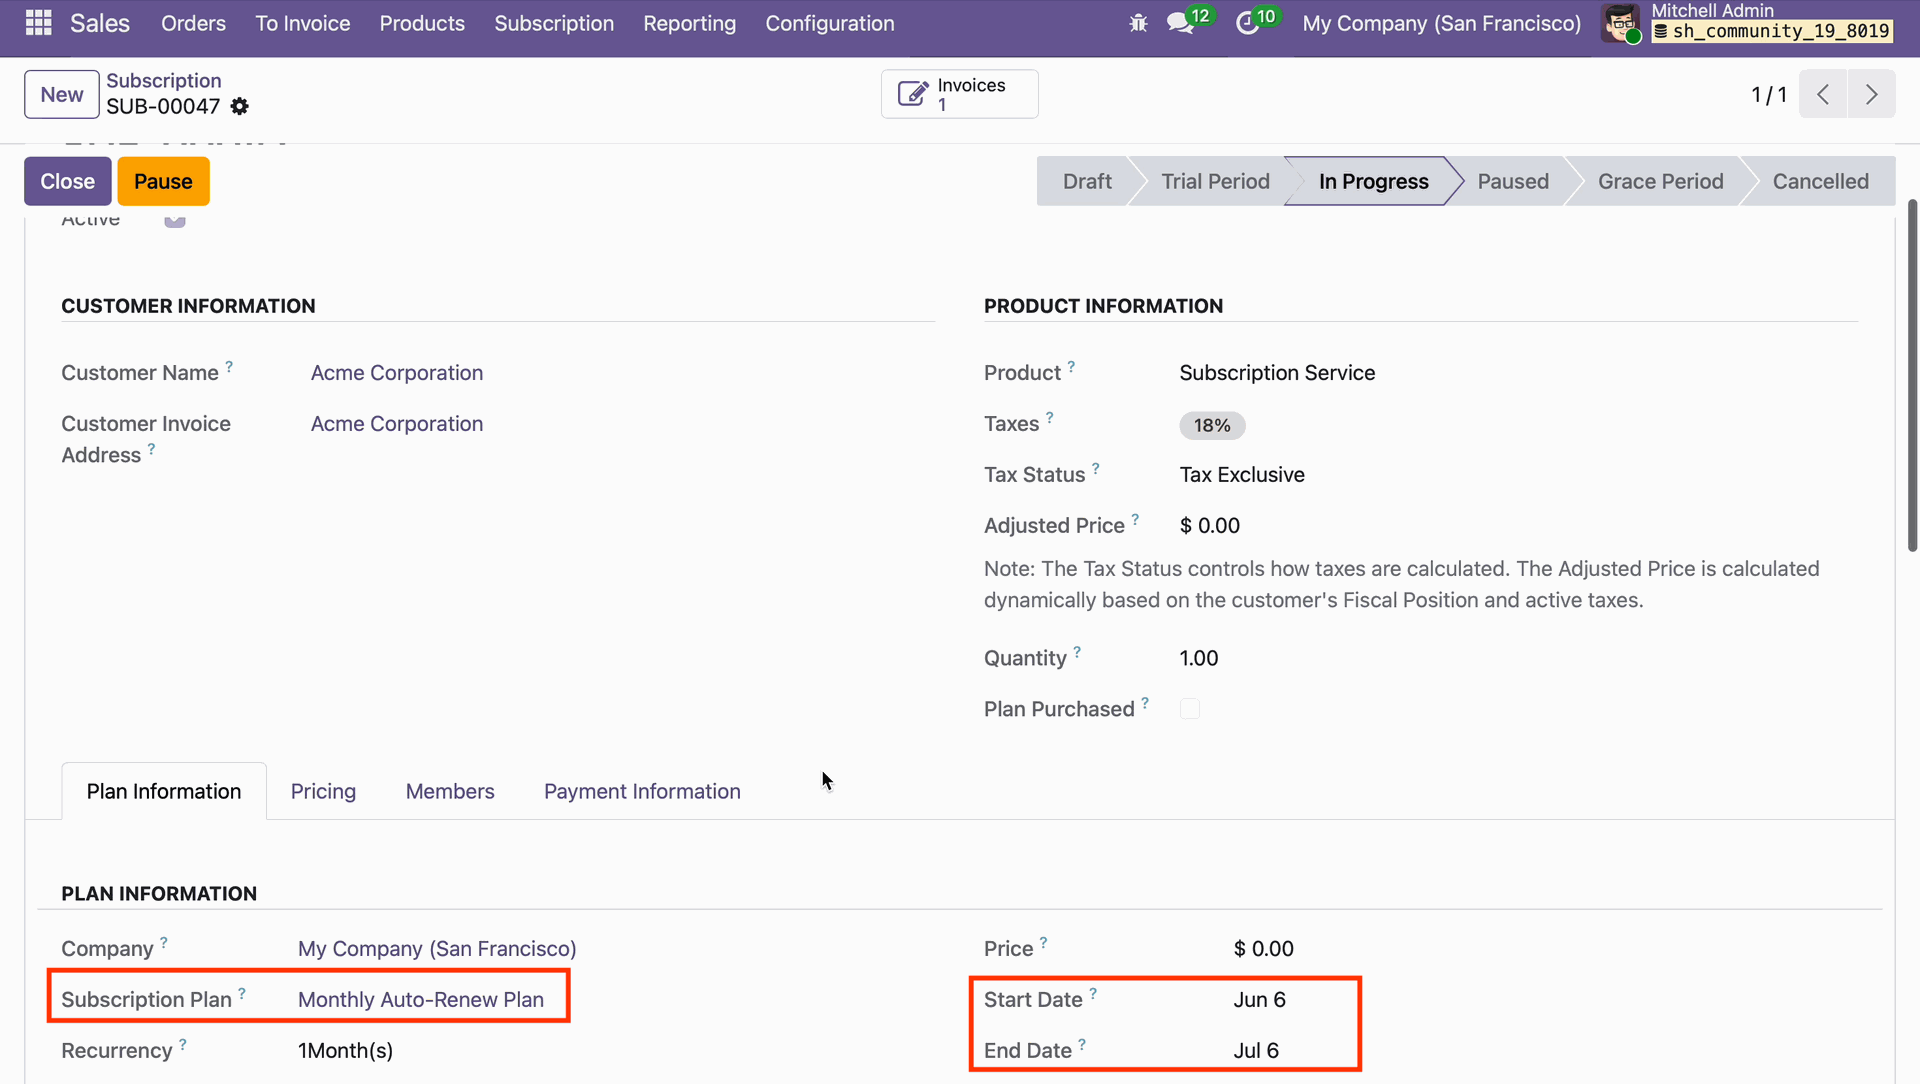
The subscription order is currently in progress and is close to its expiration date.
Execute the scheduled action 'Auto Expired Subscription' to process and update all subscriptions that have reached their expiration date.
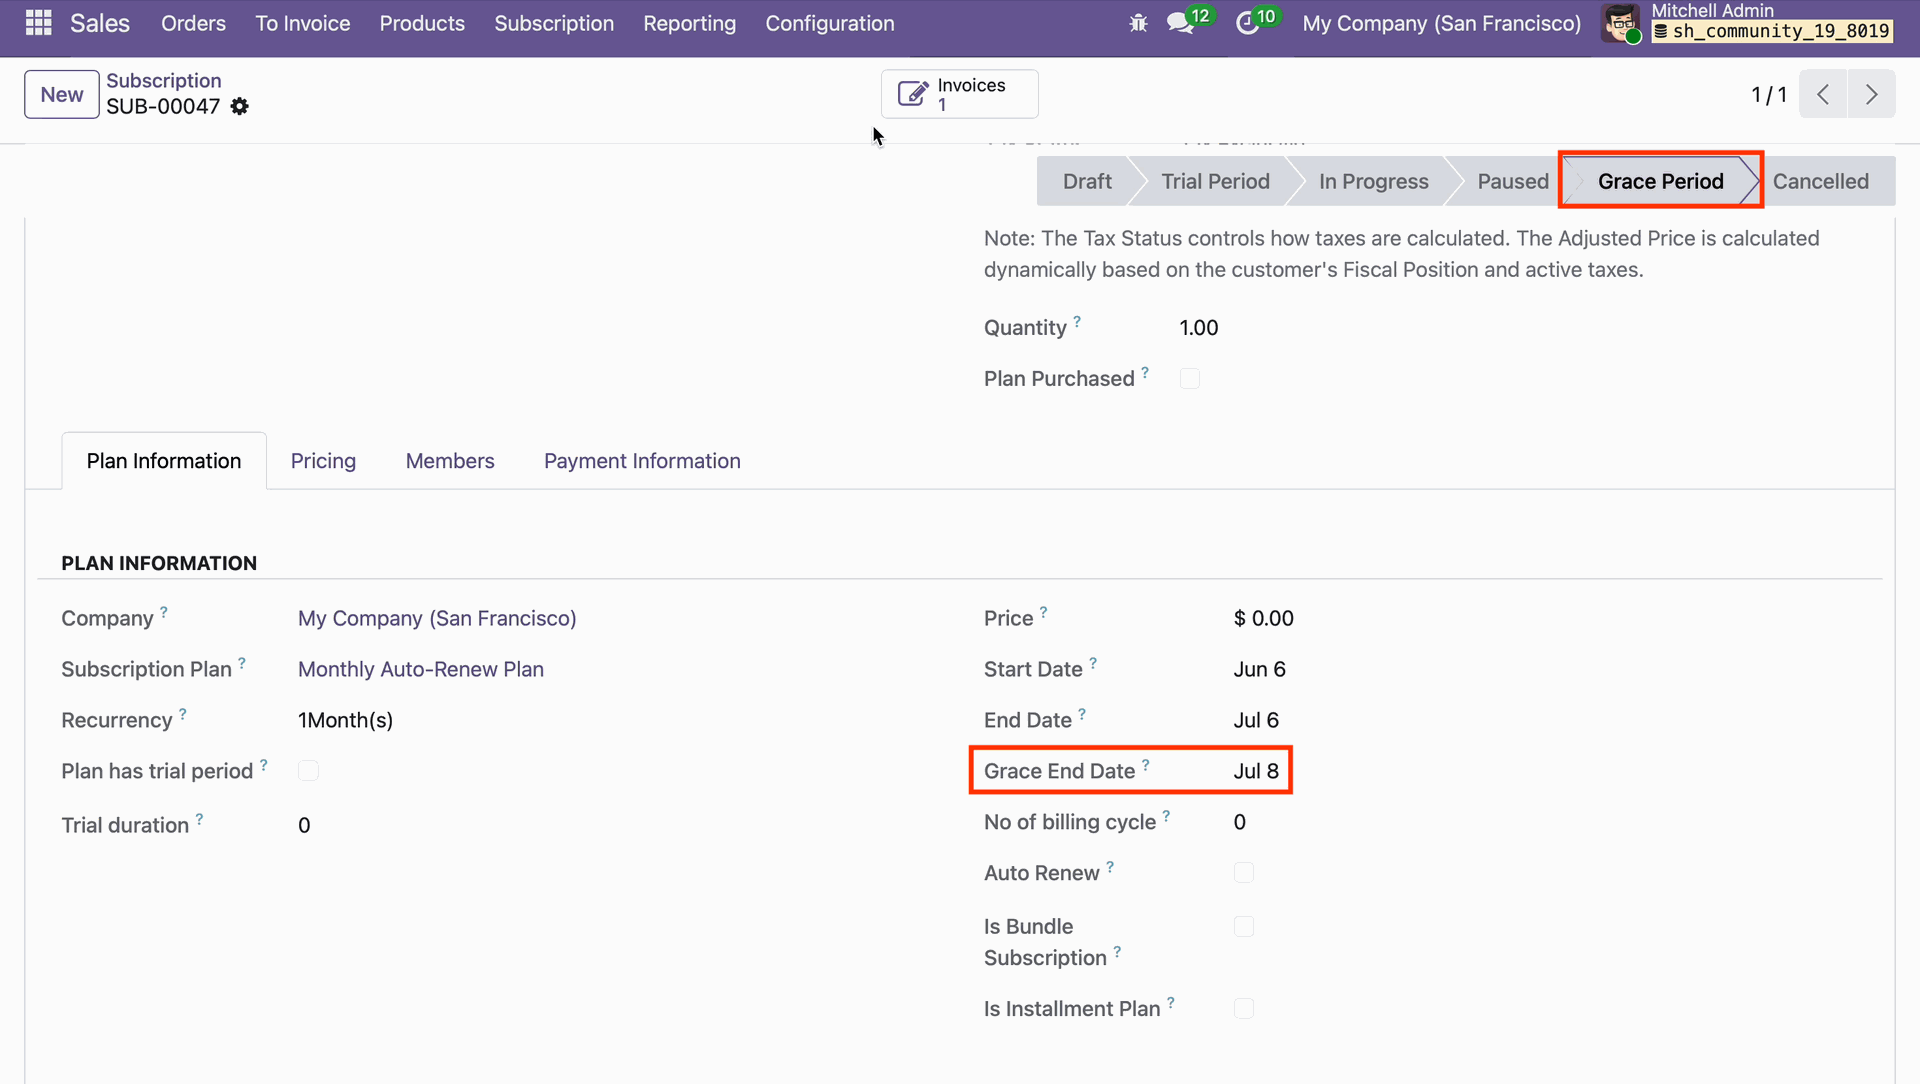
The expired subscription has been successfully transitioned into the grace period stage after applying the configured grace days.
Enable the 'Allow Pausing' option in the subscription plan.

Go to the subscription order and the Pause button is now visible on the subscription form. Click the Pause button on the subscription.

The subscription order will now be moved to the Paused stage/status after clicking the Pause button. After pausing the subscription, the Resume button becomes visible on the subscription order, allowing the user to reactivate it when needed.

Enable the 'Is Bundle Subscription' option in the subscription plan configuration to allow bundled subscription products under this plan.
Configure the bundle details under the Bundle tab by adding the required bundled products and defining their quantities and pricing rules as per the subscription plan.

Create a subscription order and select the configured bundle plan. After the order is created, the bundle lines are correctly populated and visible under the Bundle Lines tab in the subscription order form view.

Create the invoice for the subscription order and verify that all configured bundle lines are included in the generated invoice.

Open the subscription plan and navigate to the Survey & Loyalty tab.

Enable the 'Loyalty Discount on Renewal' option in the Survey & Loyalty tab of the subscription plan.

Disable the 'Loyalty Discount on Renewal' option, then configure the Referral Promo Program and Reward Program in the Survey & Loyalty tab of the subscription plan.

Configure the Referral Program and define the appropriate Reward Rules.

Go to Configuration and select Subscription Referral.

Set the Subscription Referral Code in the Subscription Referral configuration.

Go to the Configuration menu and select Plan Features.

Add a name for the Plan Feature and save the record.

Go to the website, create a subscription order using the product configured with the referral program, and proceed to the payment page. Verify that the configured Subscription Referral Code is automatically applied during checkout.


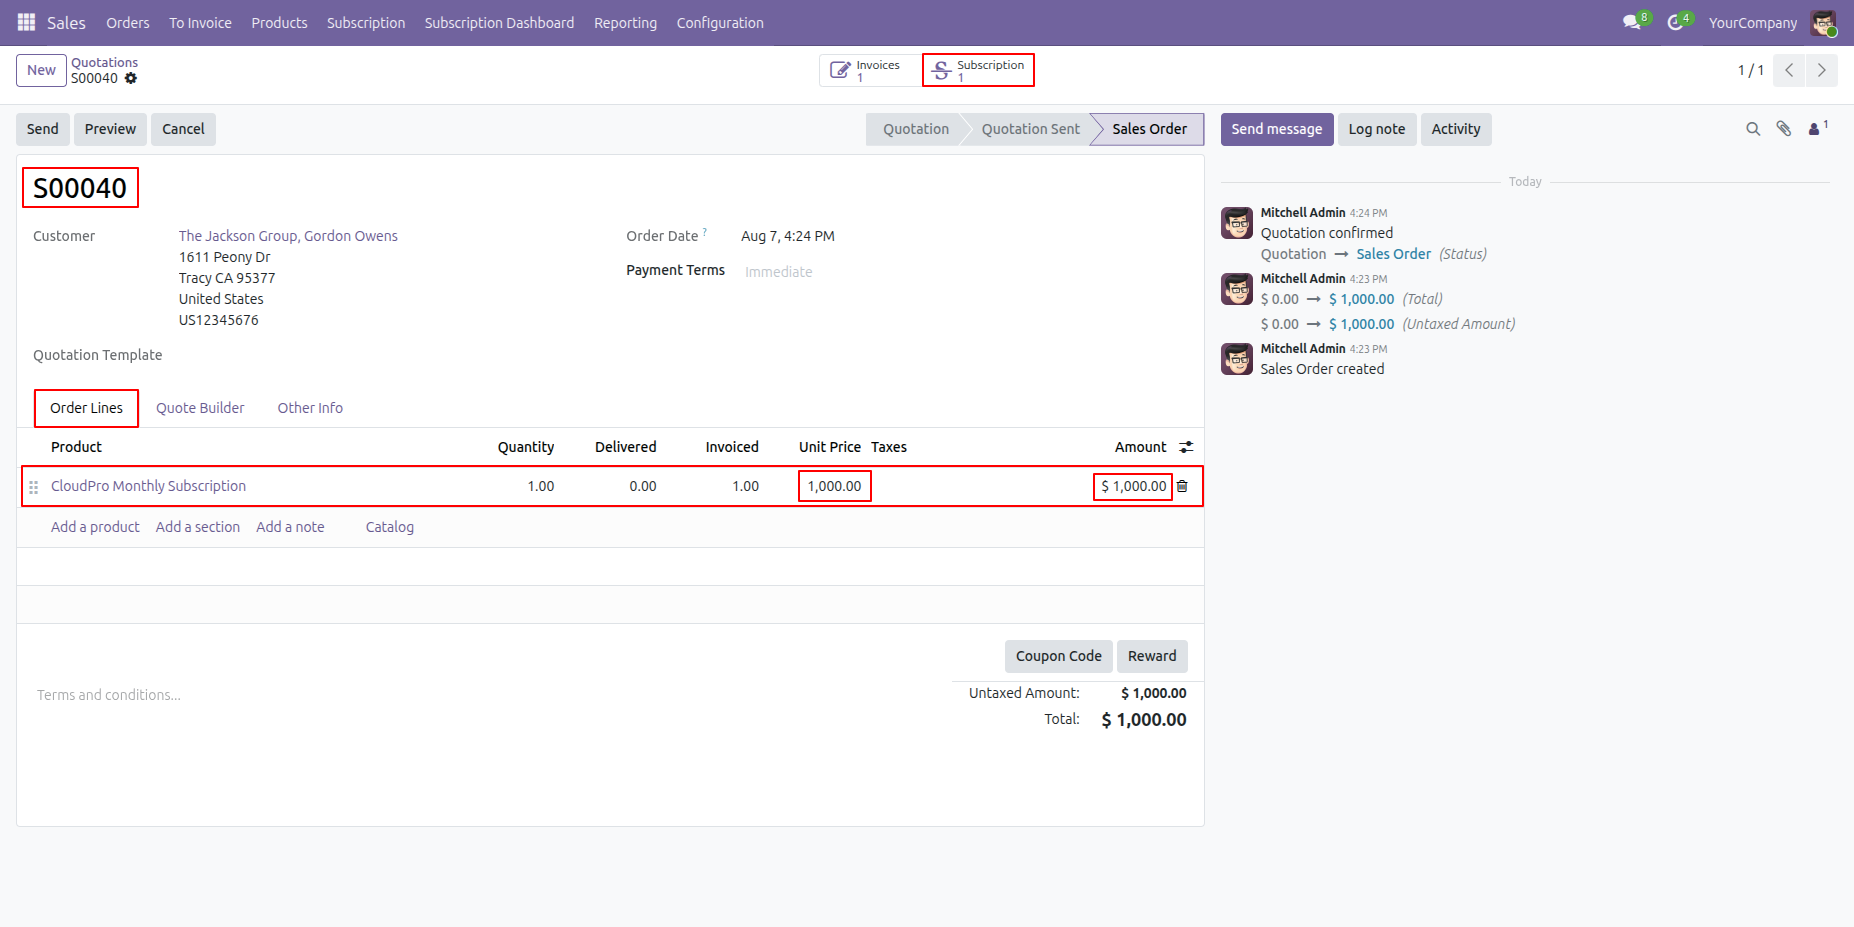
Create a sales order with a subscription product and confirm the order.
Then, create an invoice for the confirmed sales order.
Once the invoice is created, the Subscription smart button will be visible on the sales order.
Click the Subscription smart button to open and view the subscription order details.
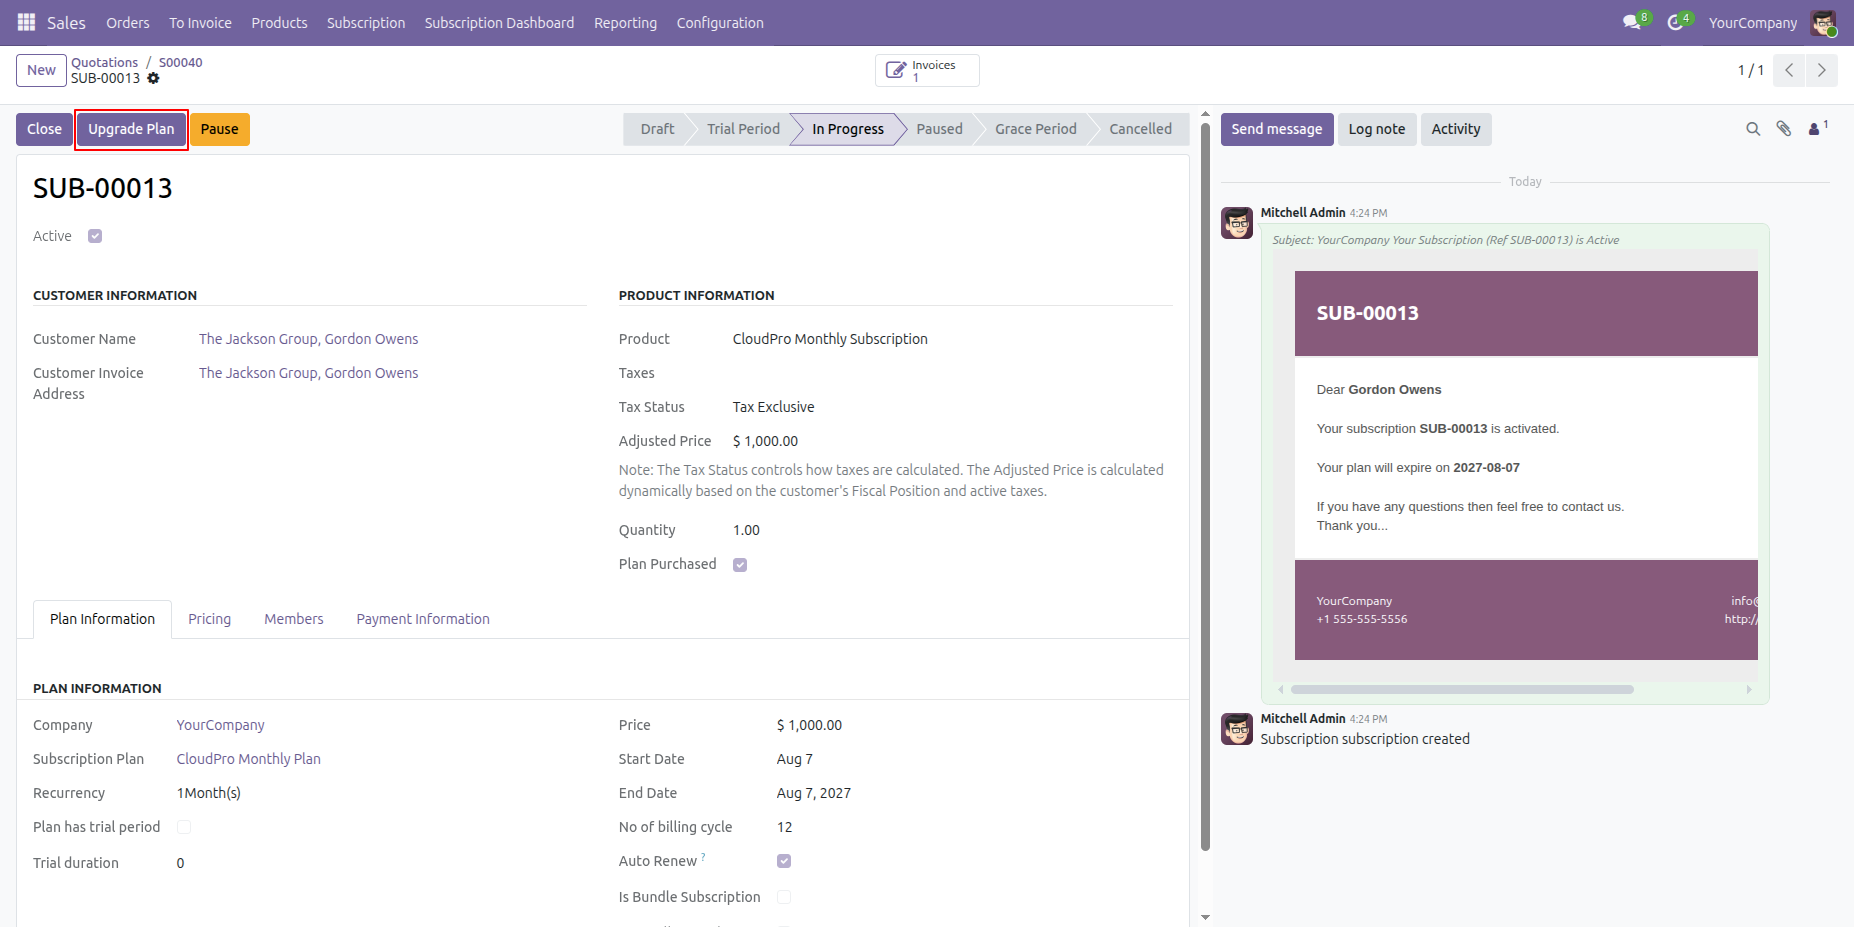
Click the Upgrade Plan button from the subscription order to upgrade the customer's current subscription plan.
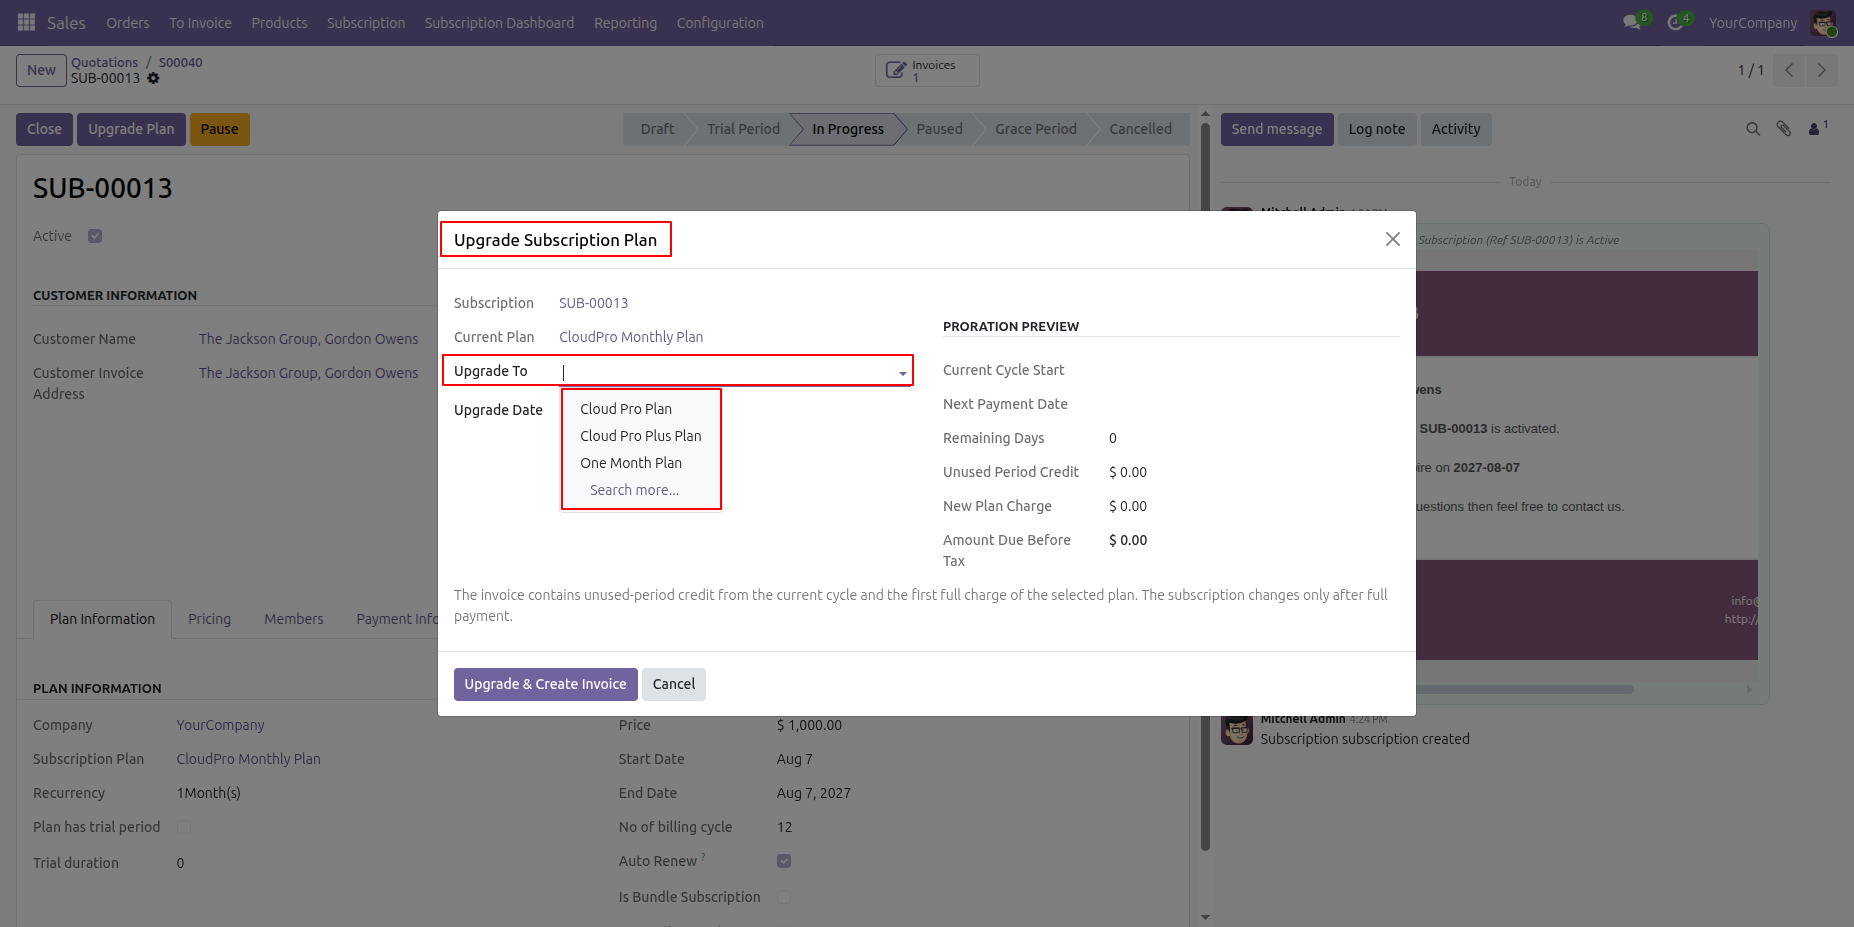
The Upgrade Subscription Plan wizard will open. Select the desired subscription plan to upgrade the current subscription and review its upgrade settings.
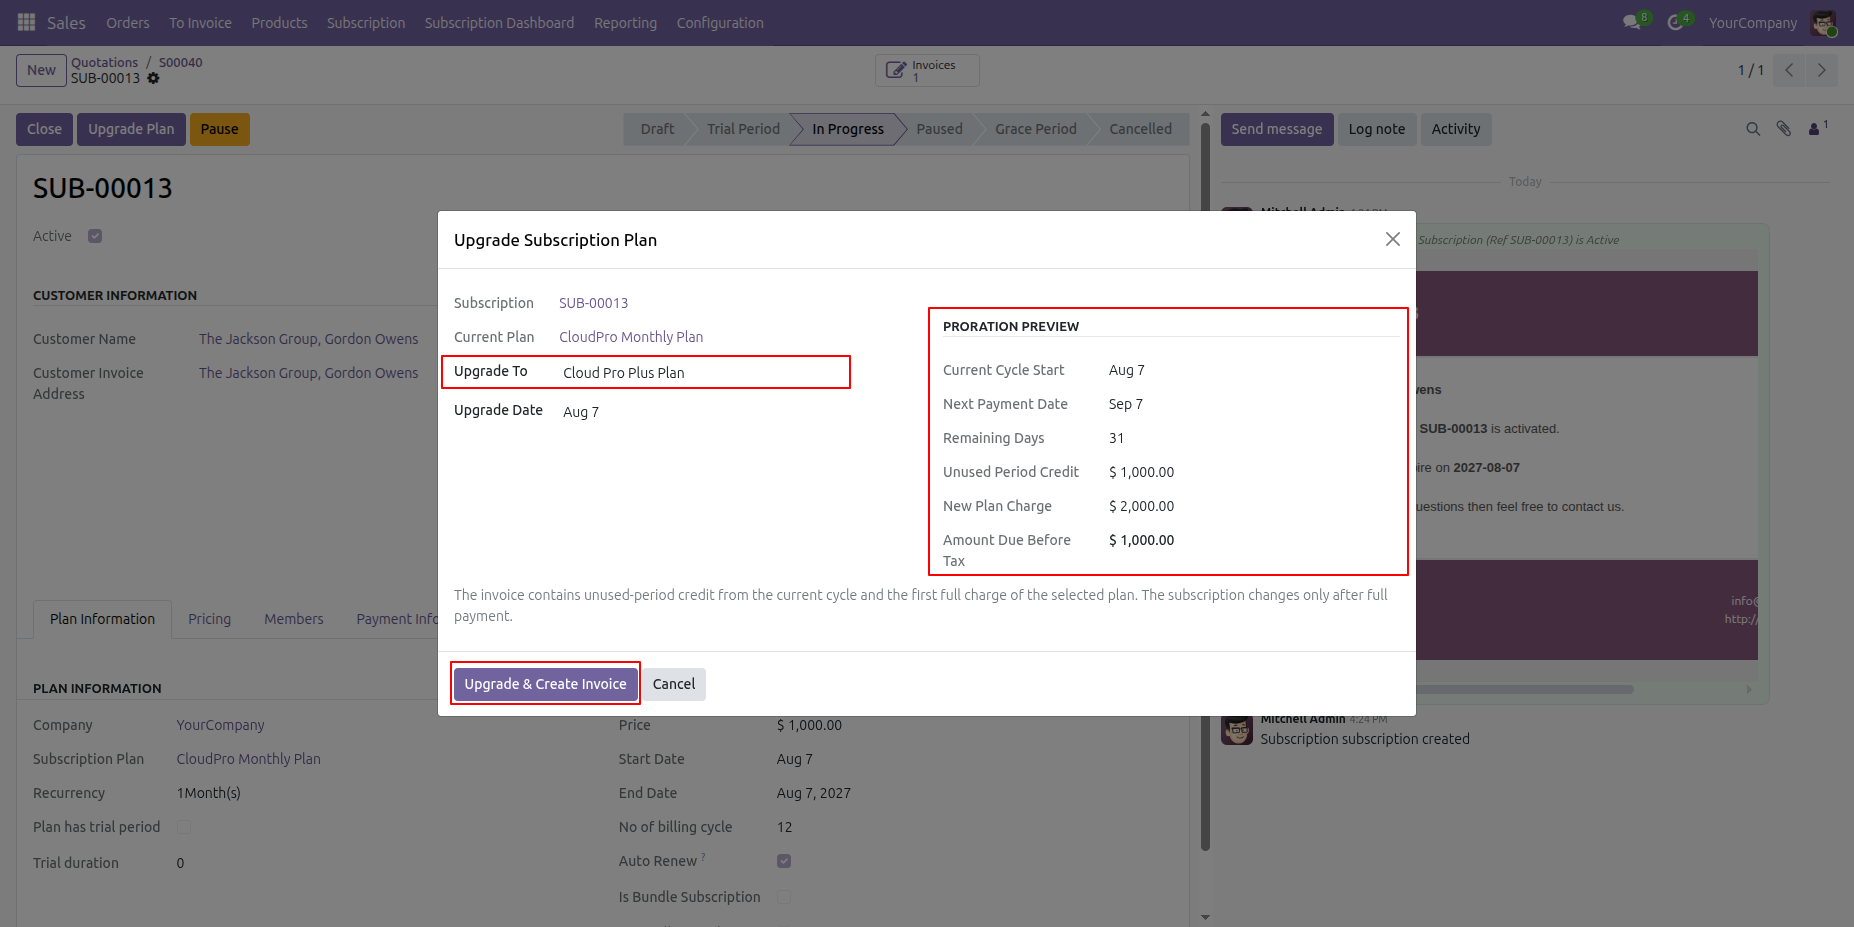
Check the upgrade prorated invoice calculation for accurate customer billing and click on Upgrade and Create Invoice button from the wizard.
Analyze the generated invoice for the subscription upgrade process and click on confirm button.
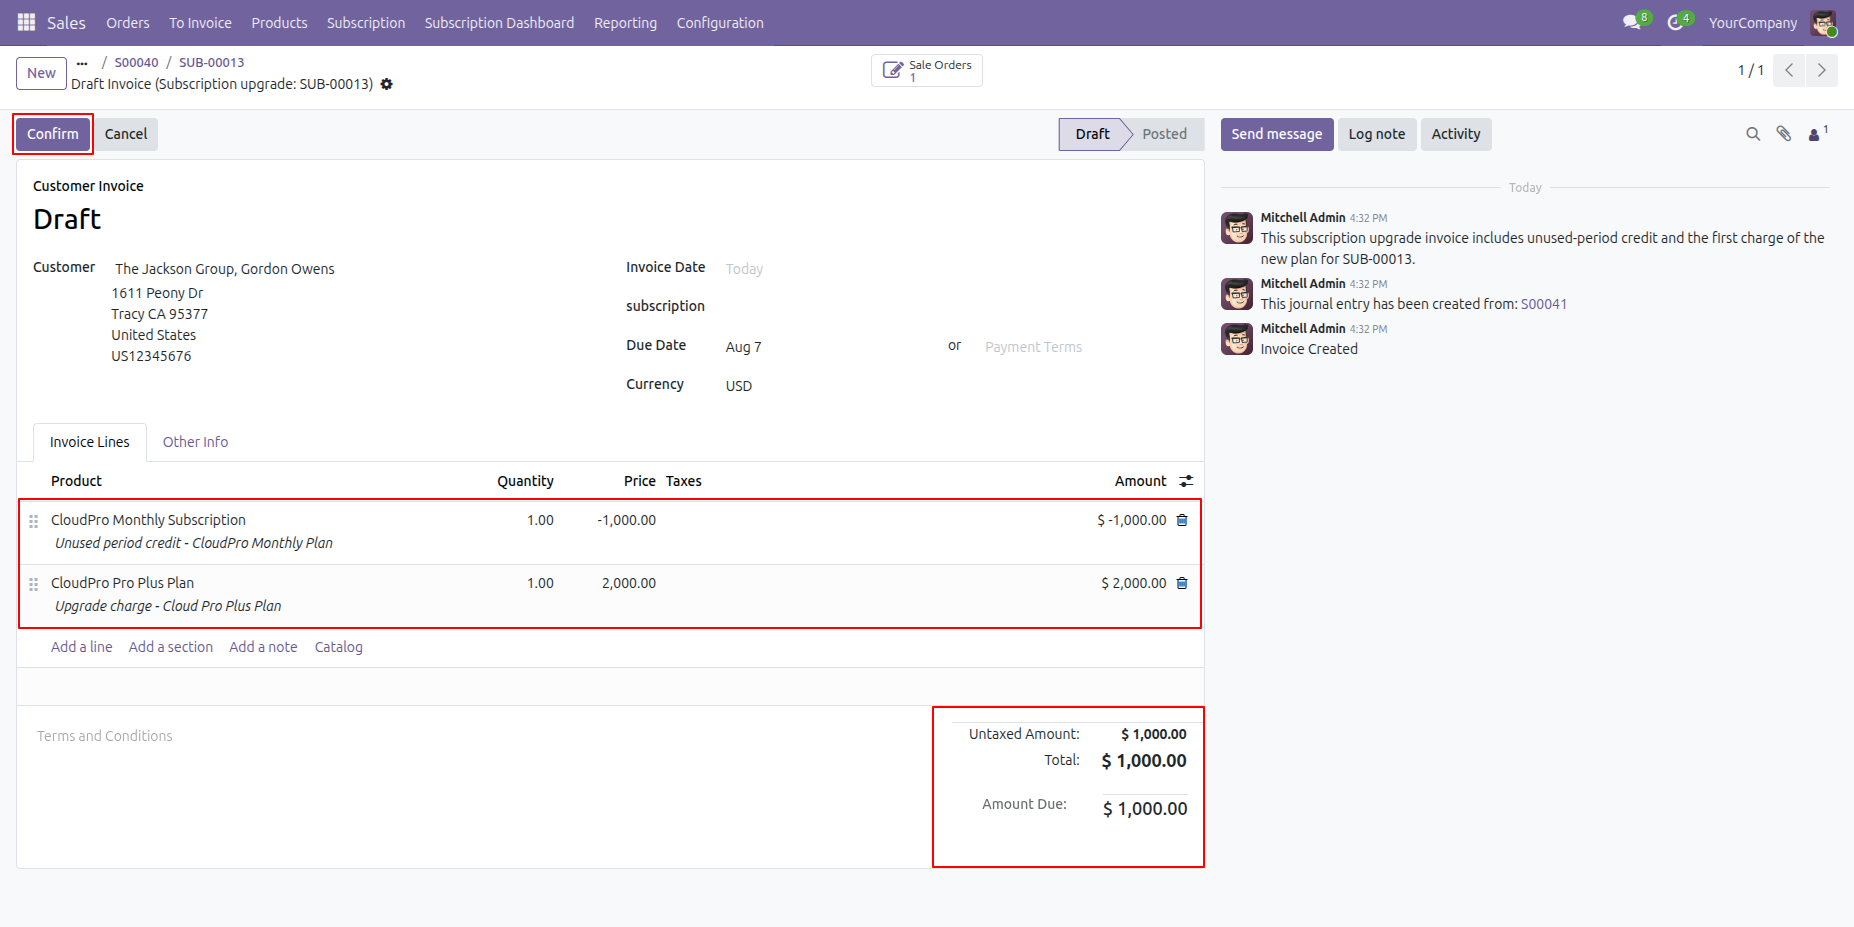
Click the Pay button to complete the payment and apply the selected subscription plan upgrade.
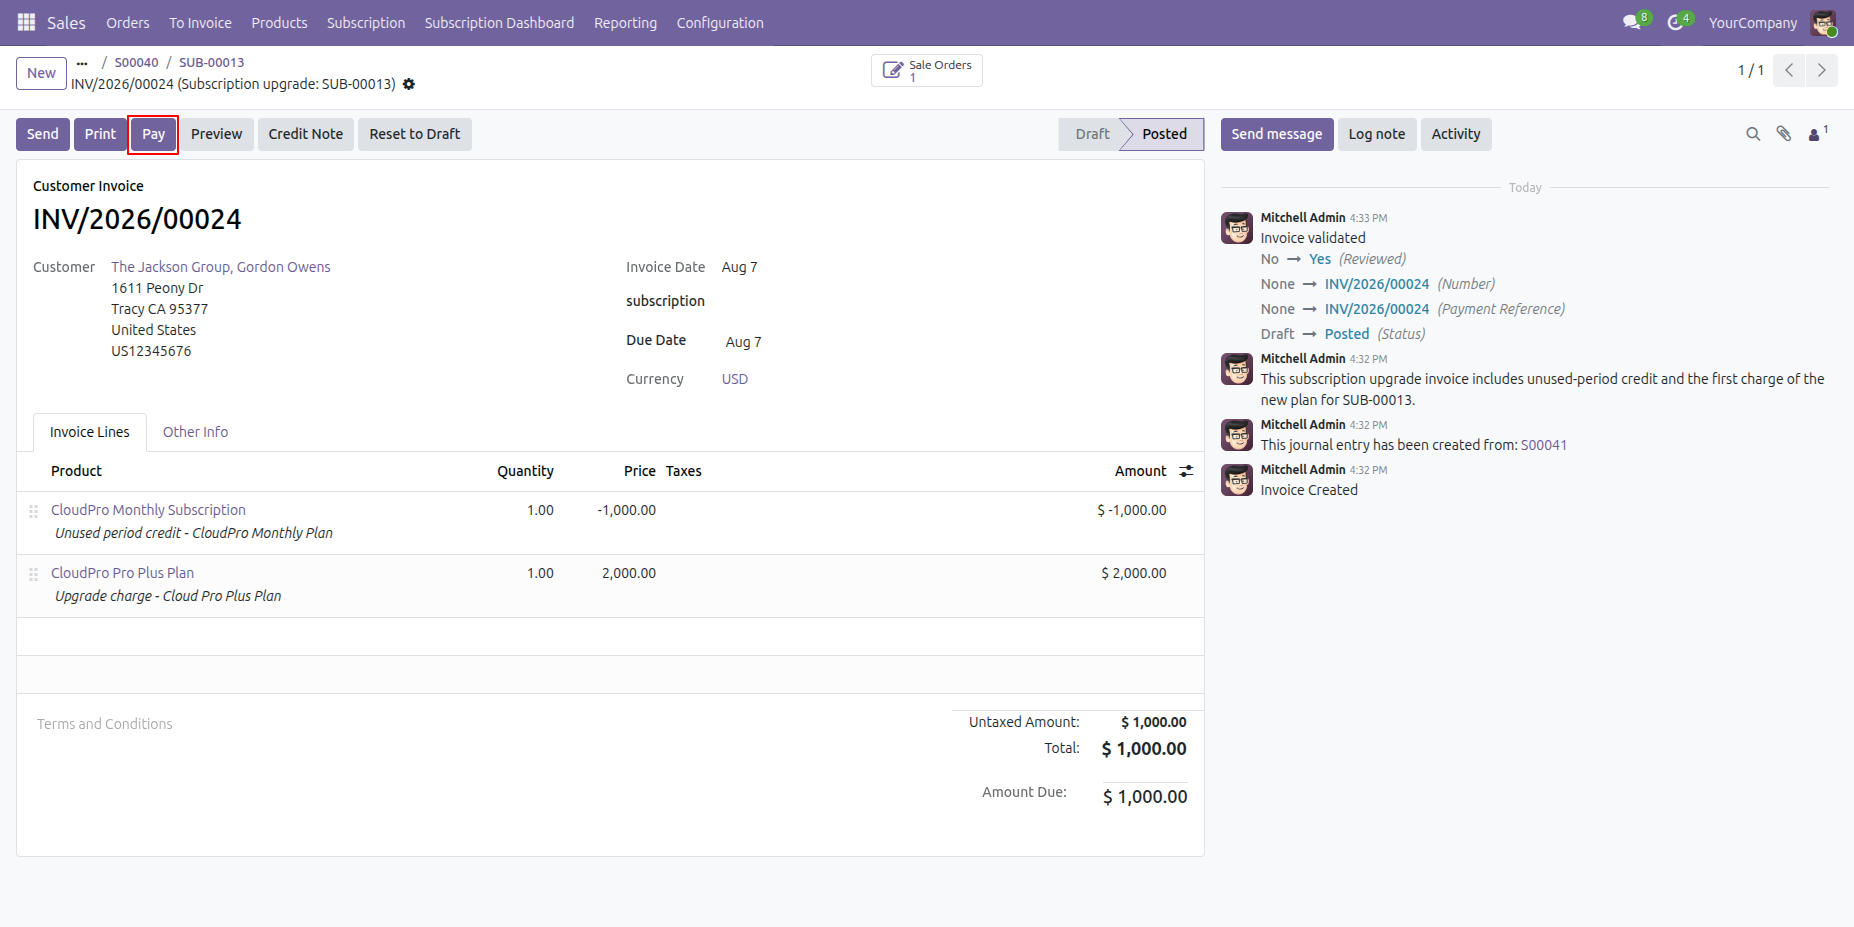
The Payment wizard will open. Review the payment details and click Create Payment to complete the payment process.
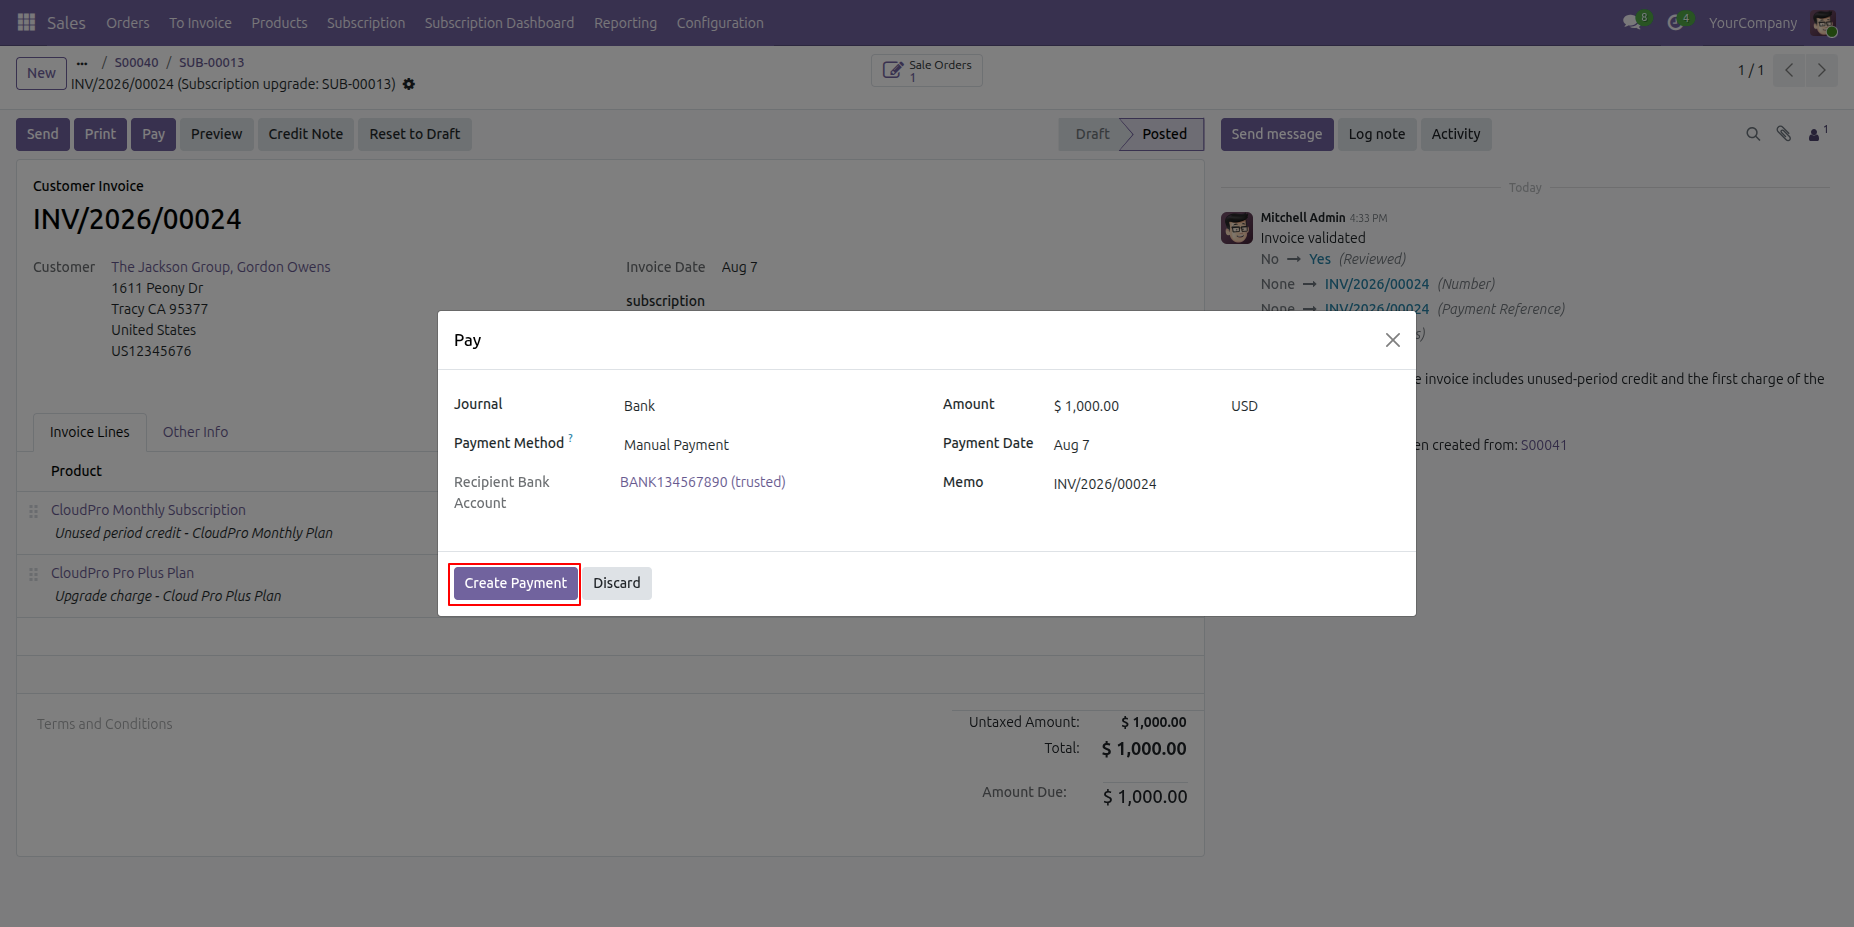
Go to the sales order and click the Subscription smart button to open and view the subscription order details.
The upgraded plan information is updated in the Plan Information tab under Subscription Details.
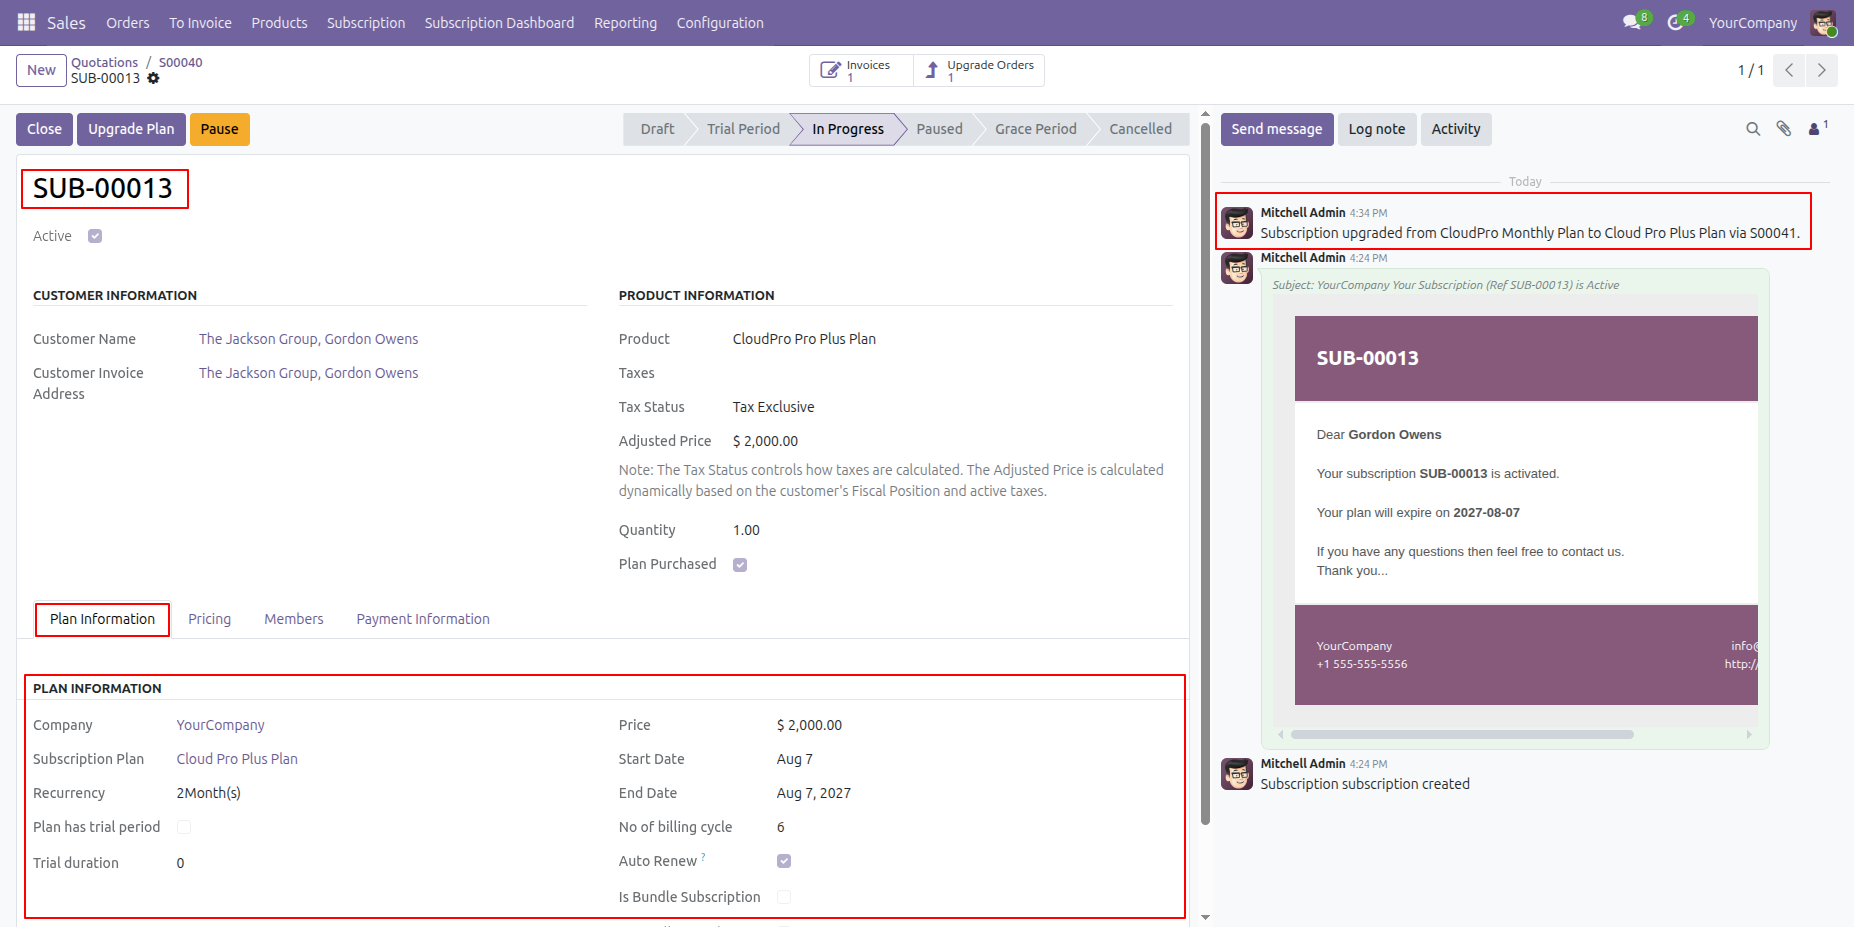
Track the complete subscription history and monitor all plan upgrades applied through the Upgrade Orders smart button on the subscription order.
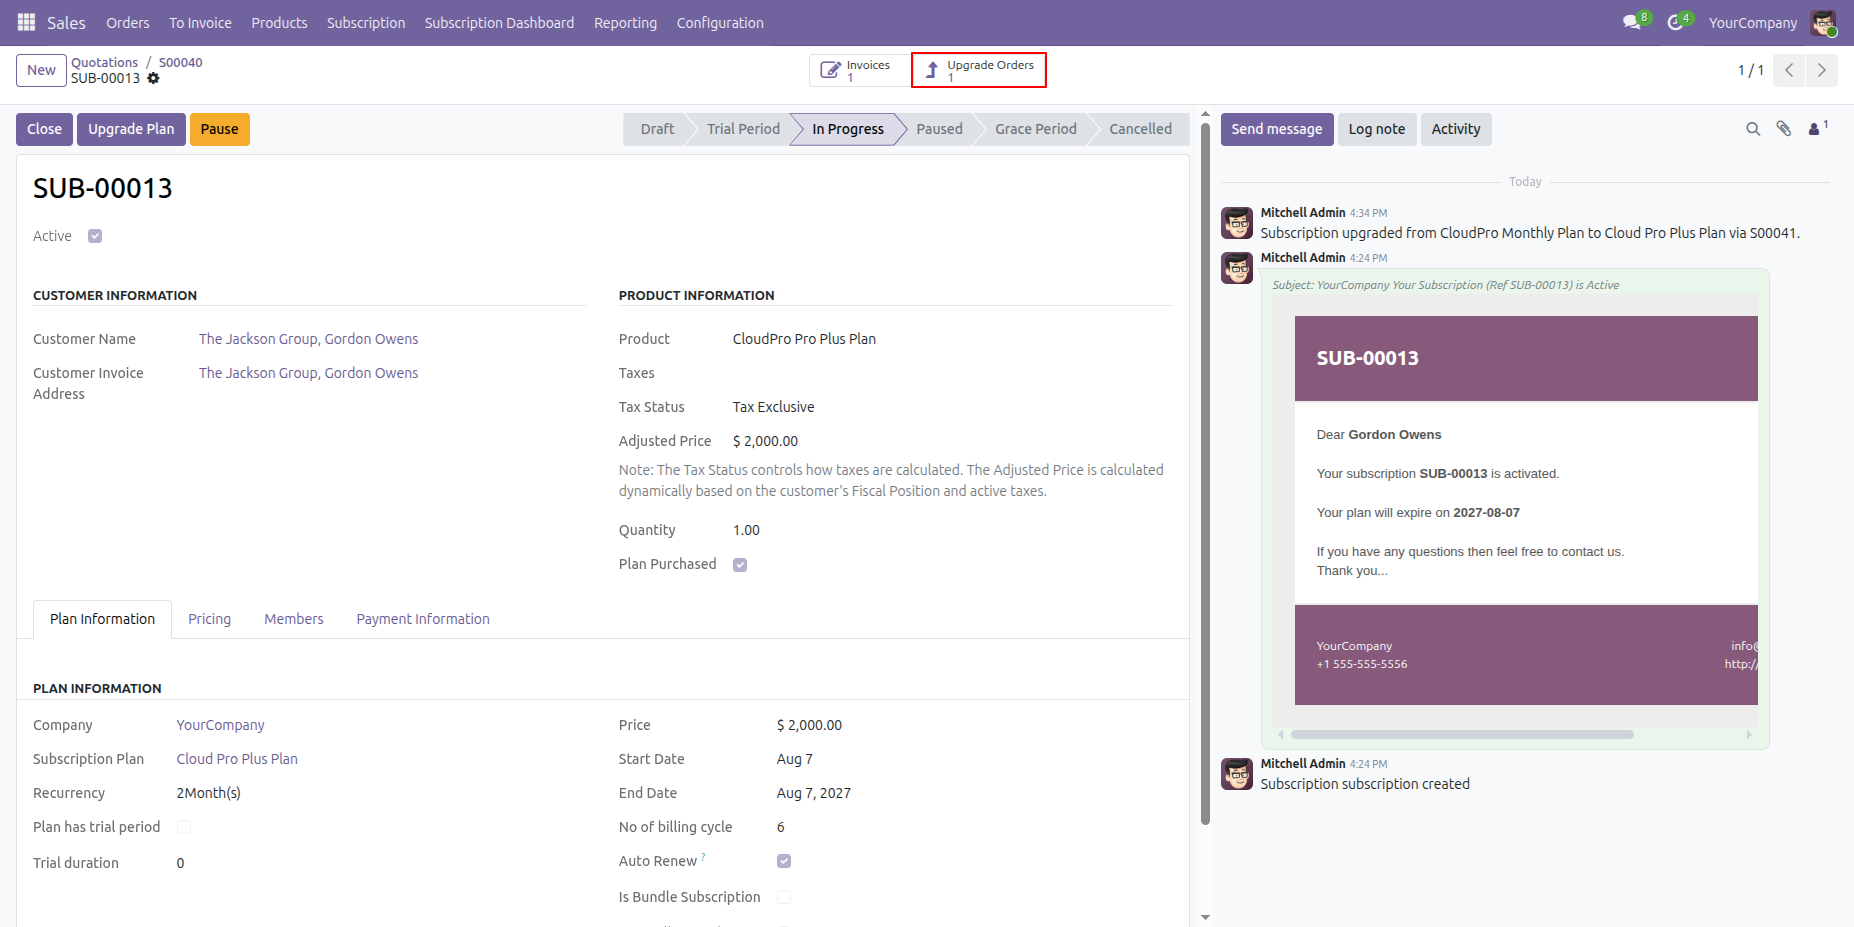
Click the Upgrade Orders smart button to open the newly created sales order, where you can view the upgraded subscription details and the created invoice.
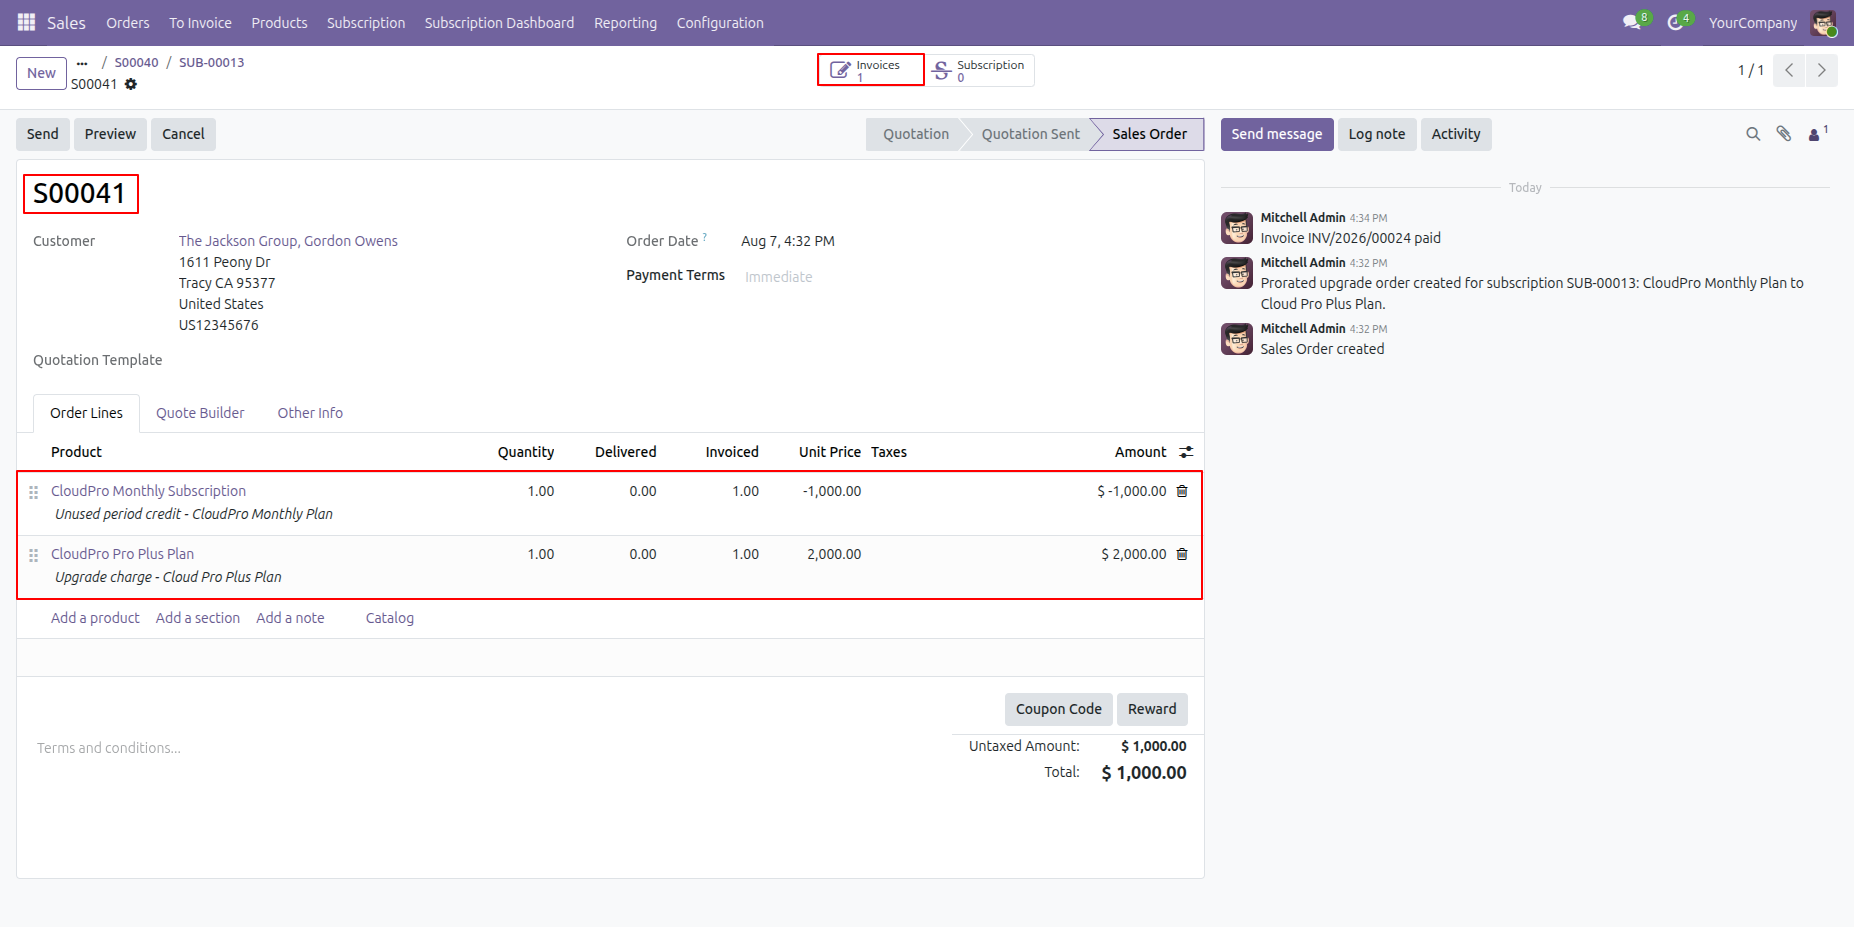
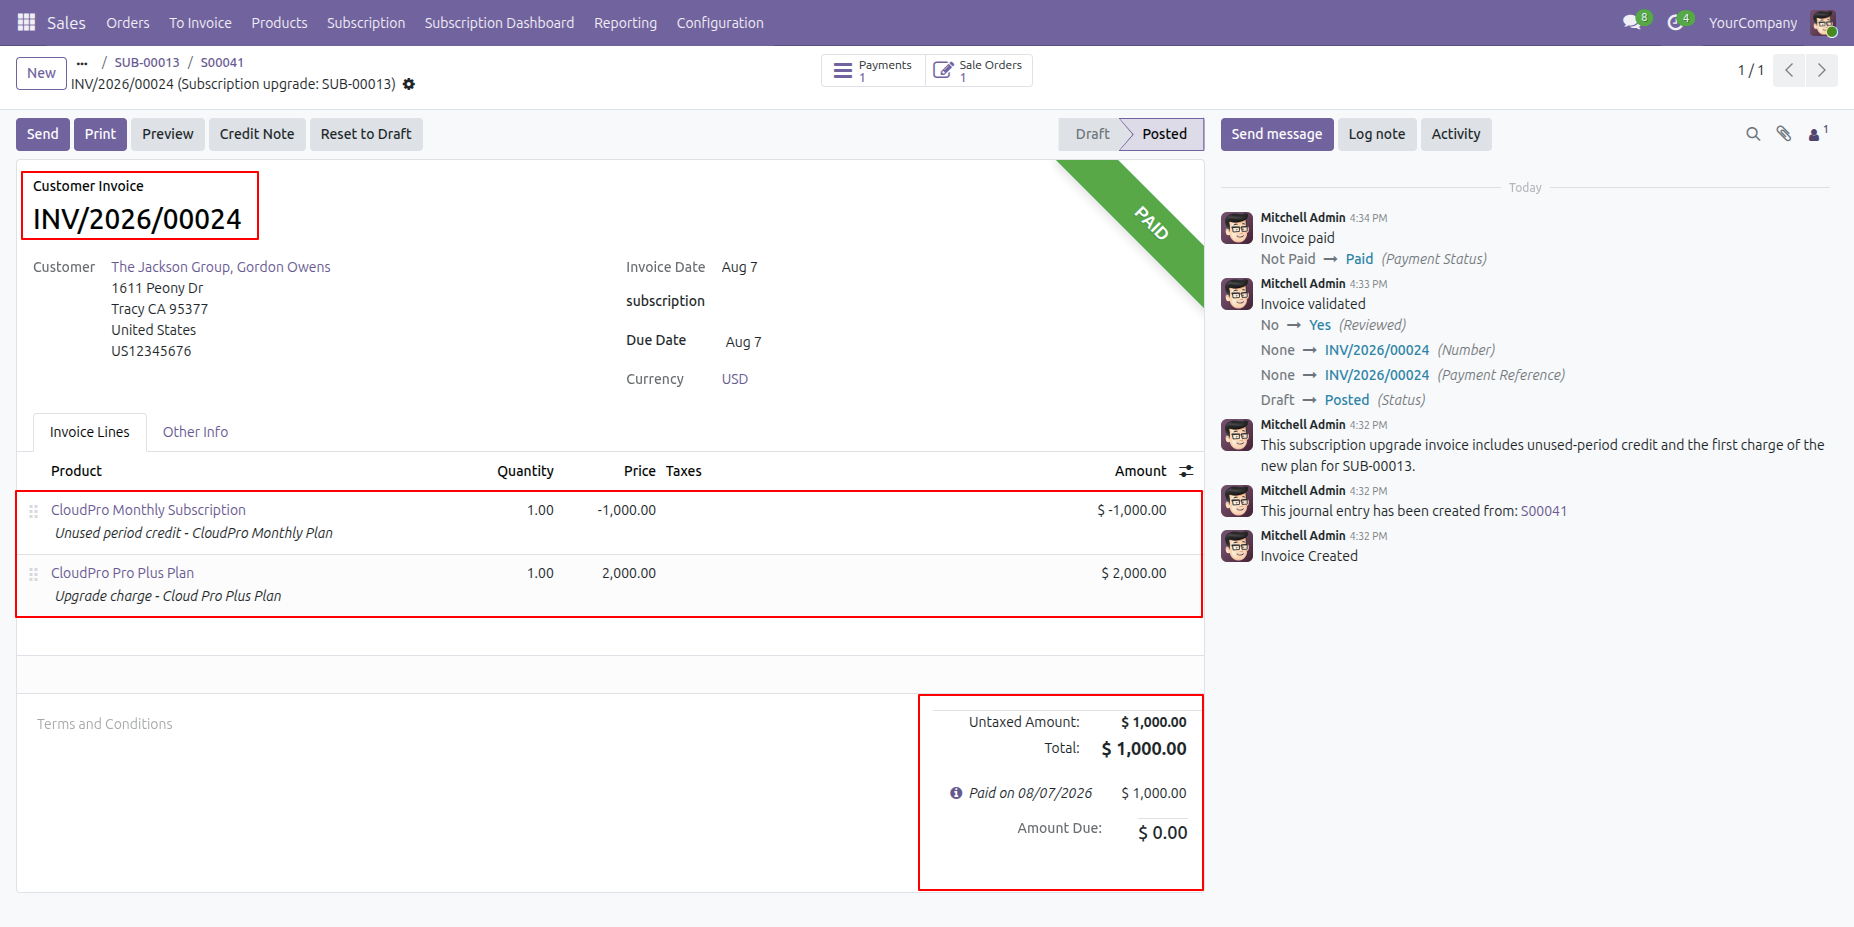
Click the Invoice smart button to open and view the invoice generated for the upgraded subscription order.
Access the customer portal to view current active subscriptions easily.
Click on the specific subscription to see its detailed view.
Press the Upgrade Plan button to initiate the plan upgrade.
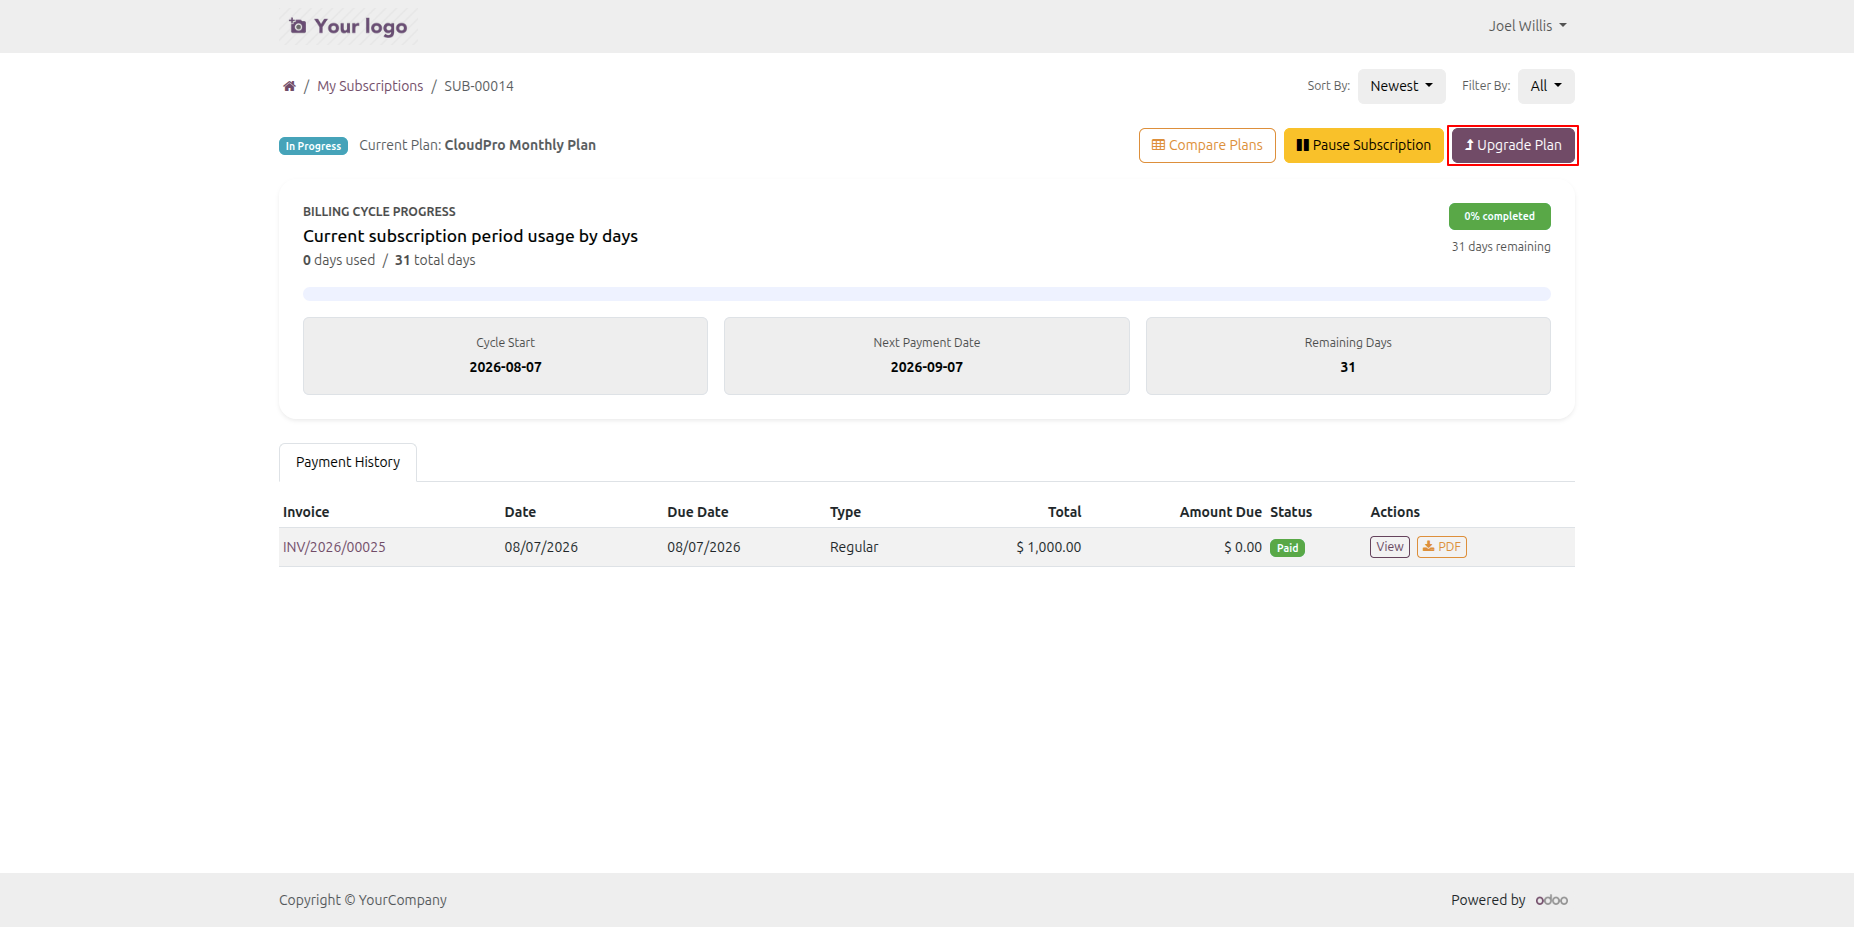
Select the desired new plan from the available upgrade options.
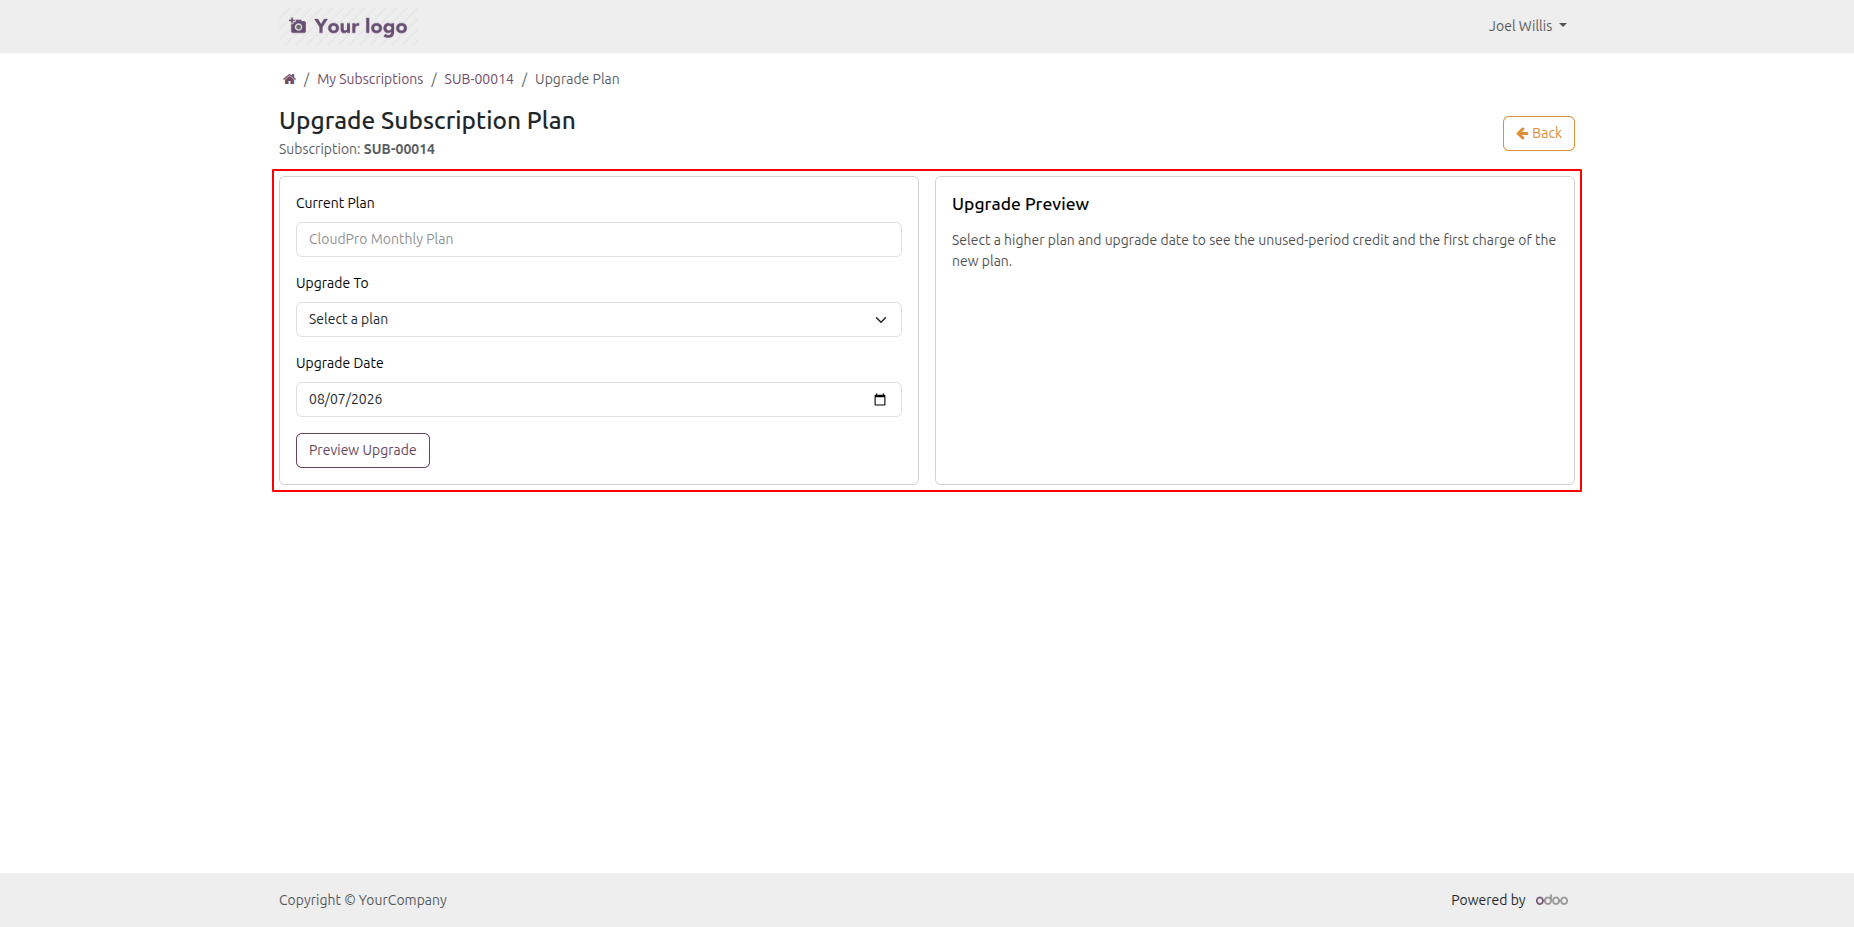
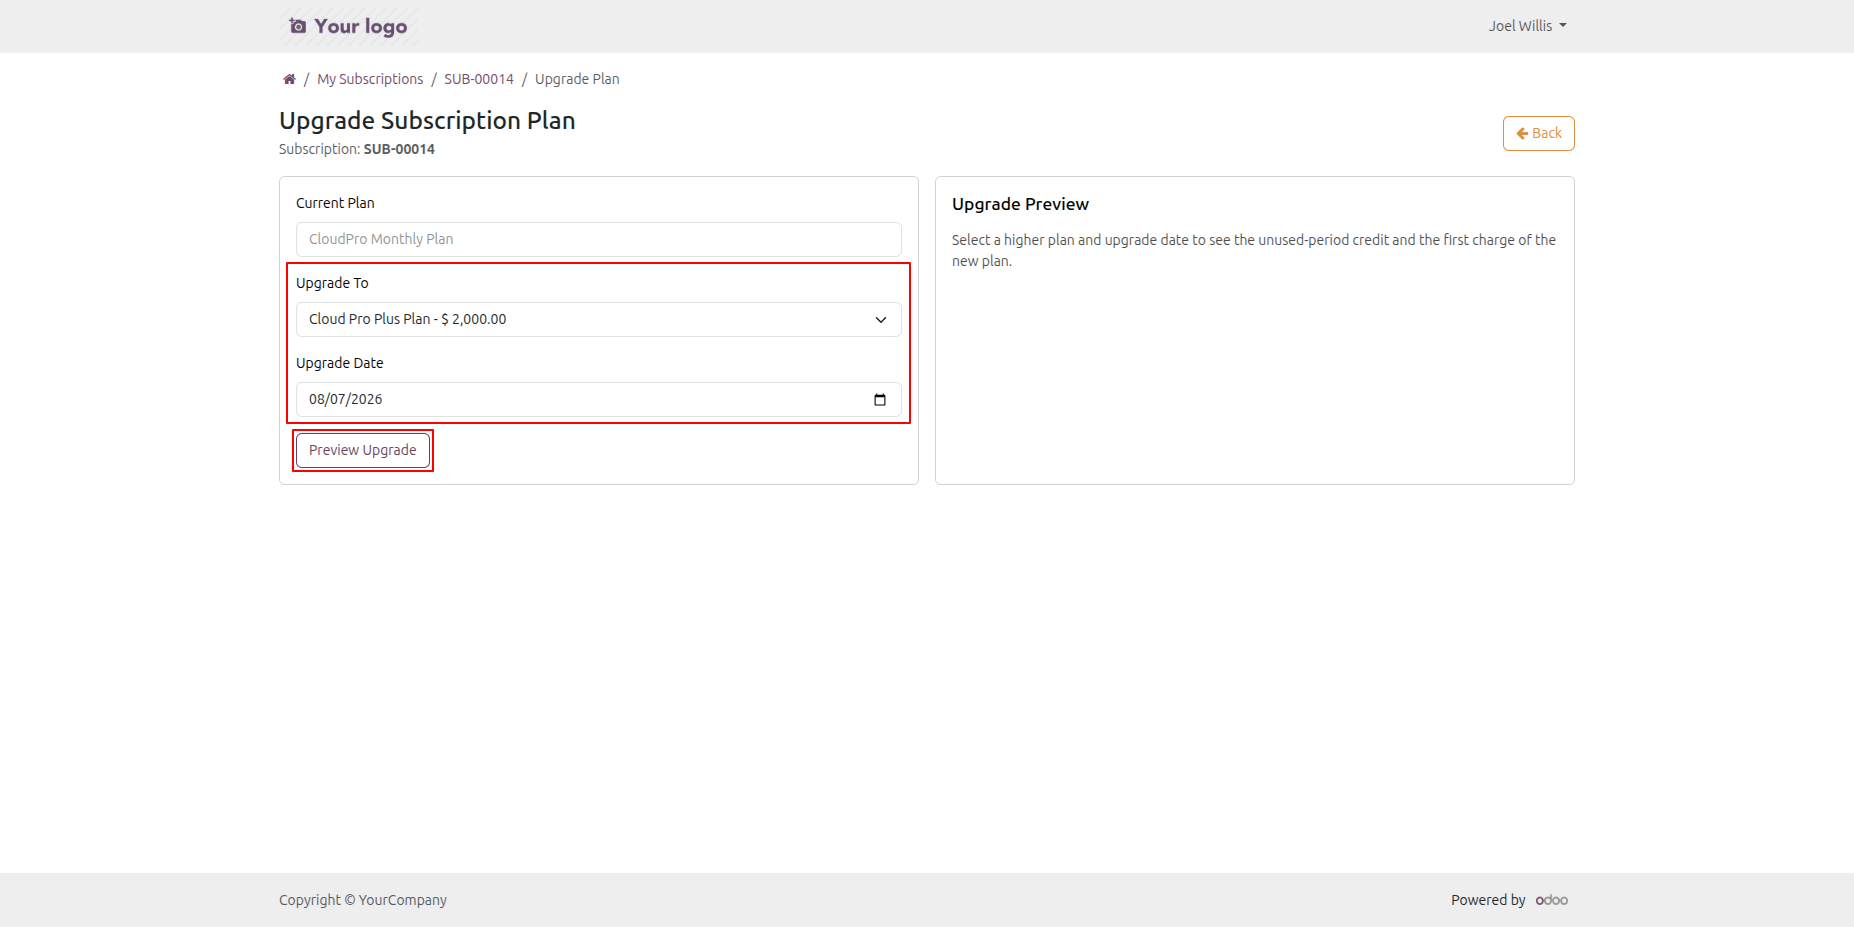
Select the plan and click on the Preview Upgrade button.
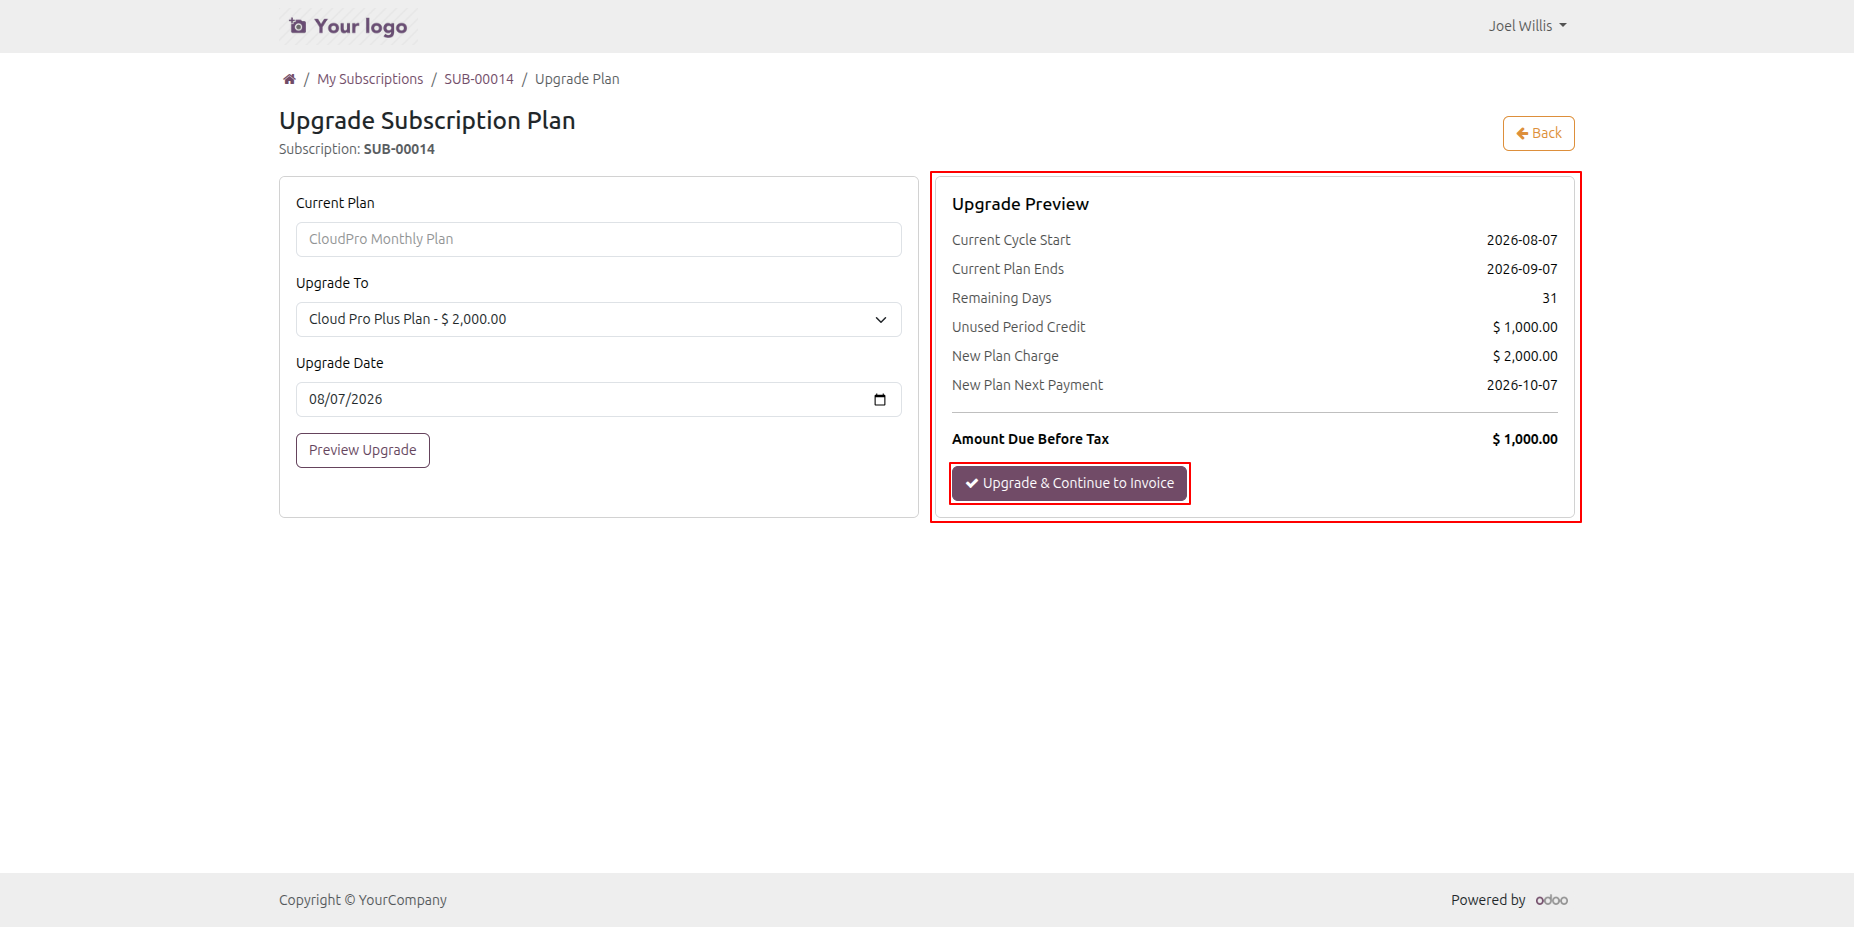
Review the prorated charges before confirming the plan upgrade online and click on Upgrade & Continue to Invoice button.
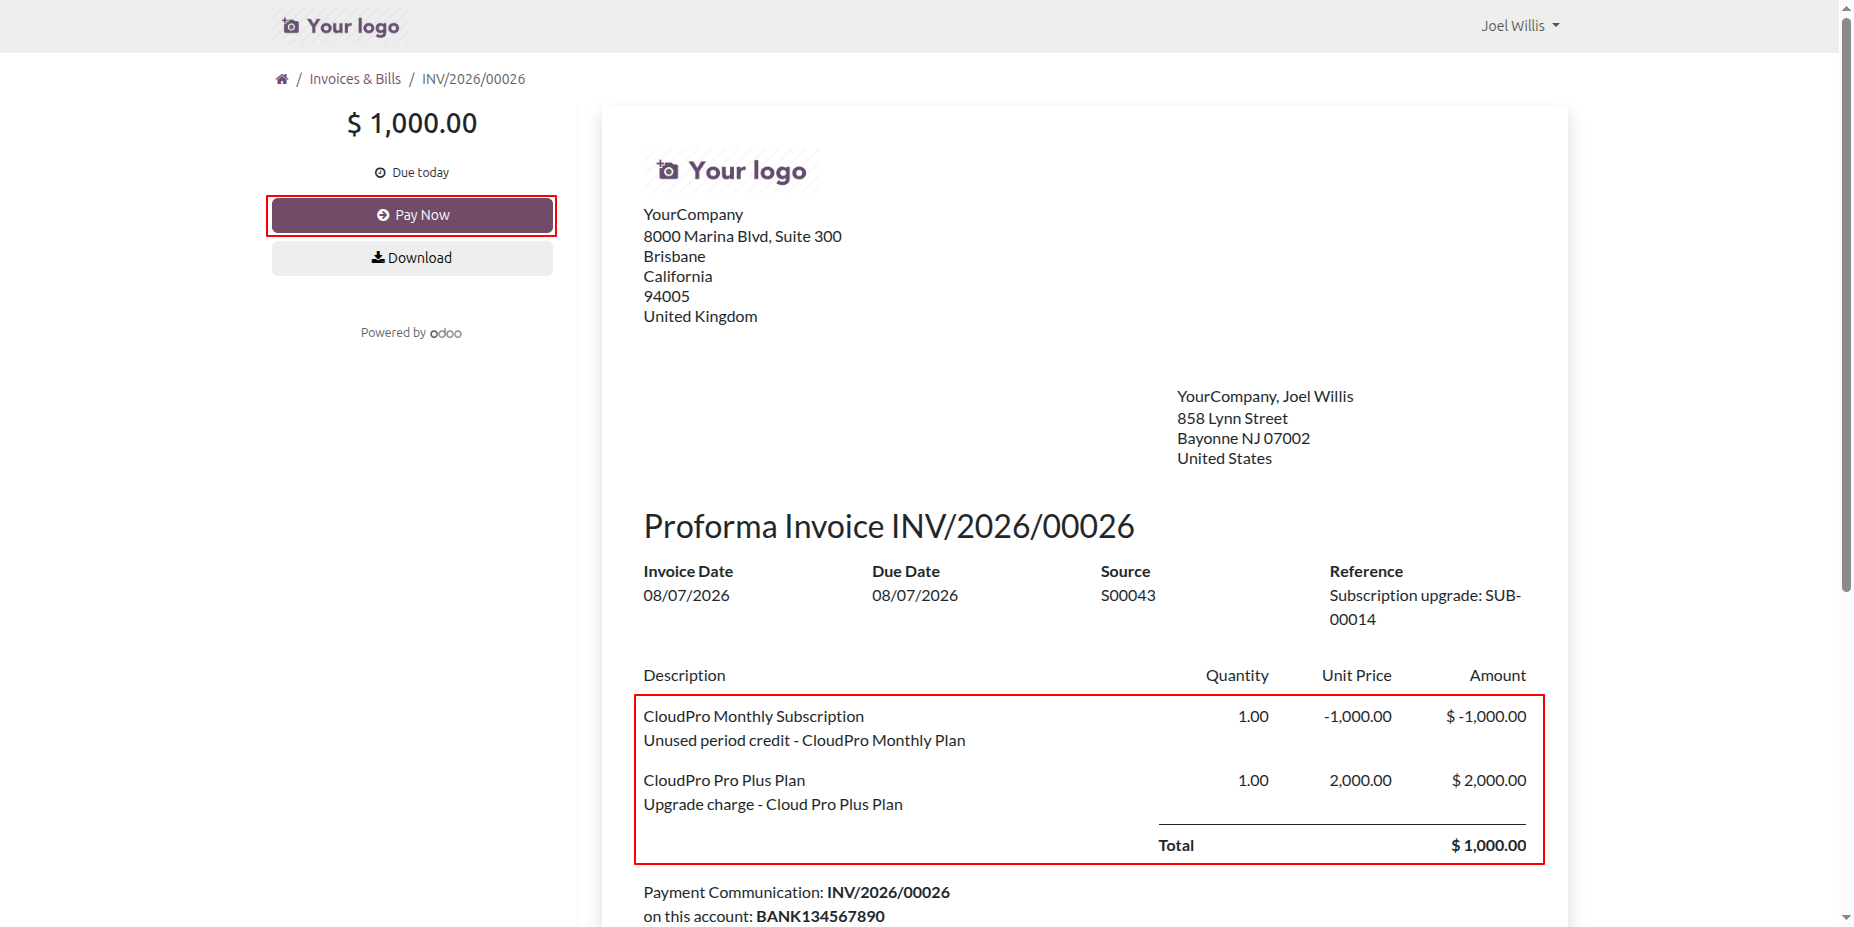
The invoice has been created. Review the plan details and click the Pay Now button to proceed with the payment.
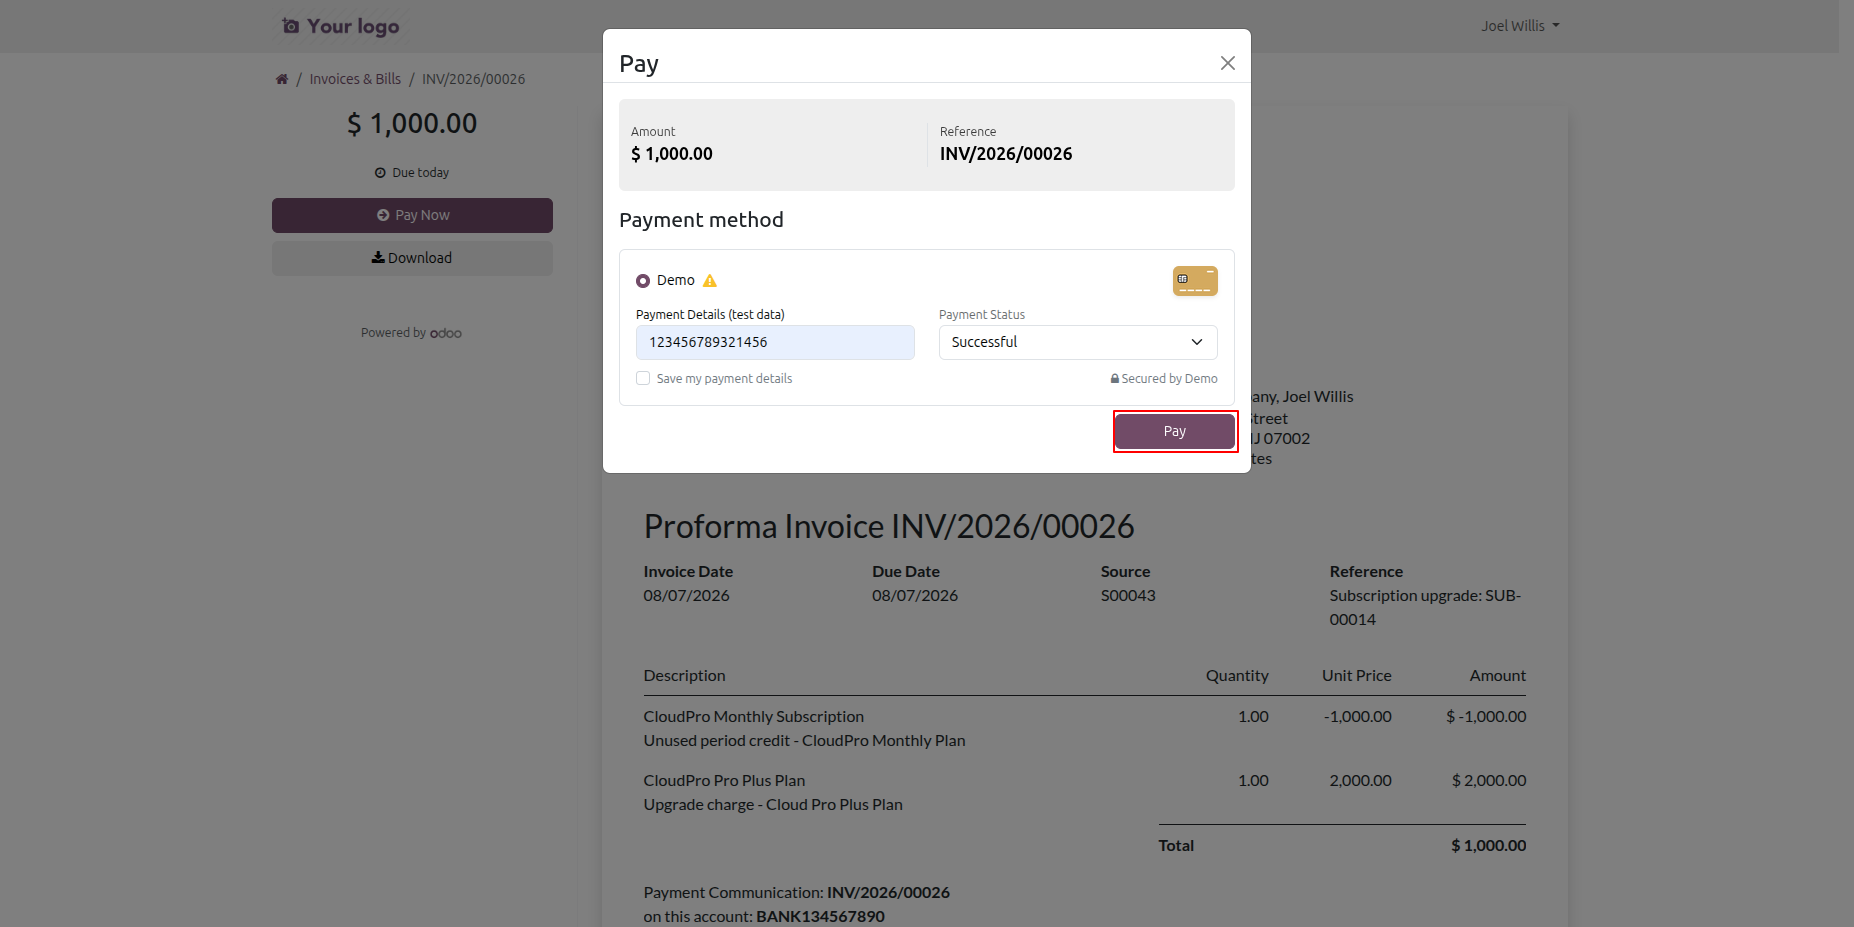
The Payment wizard will open. Review the payment details and click Pay to complete the payment process.
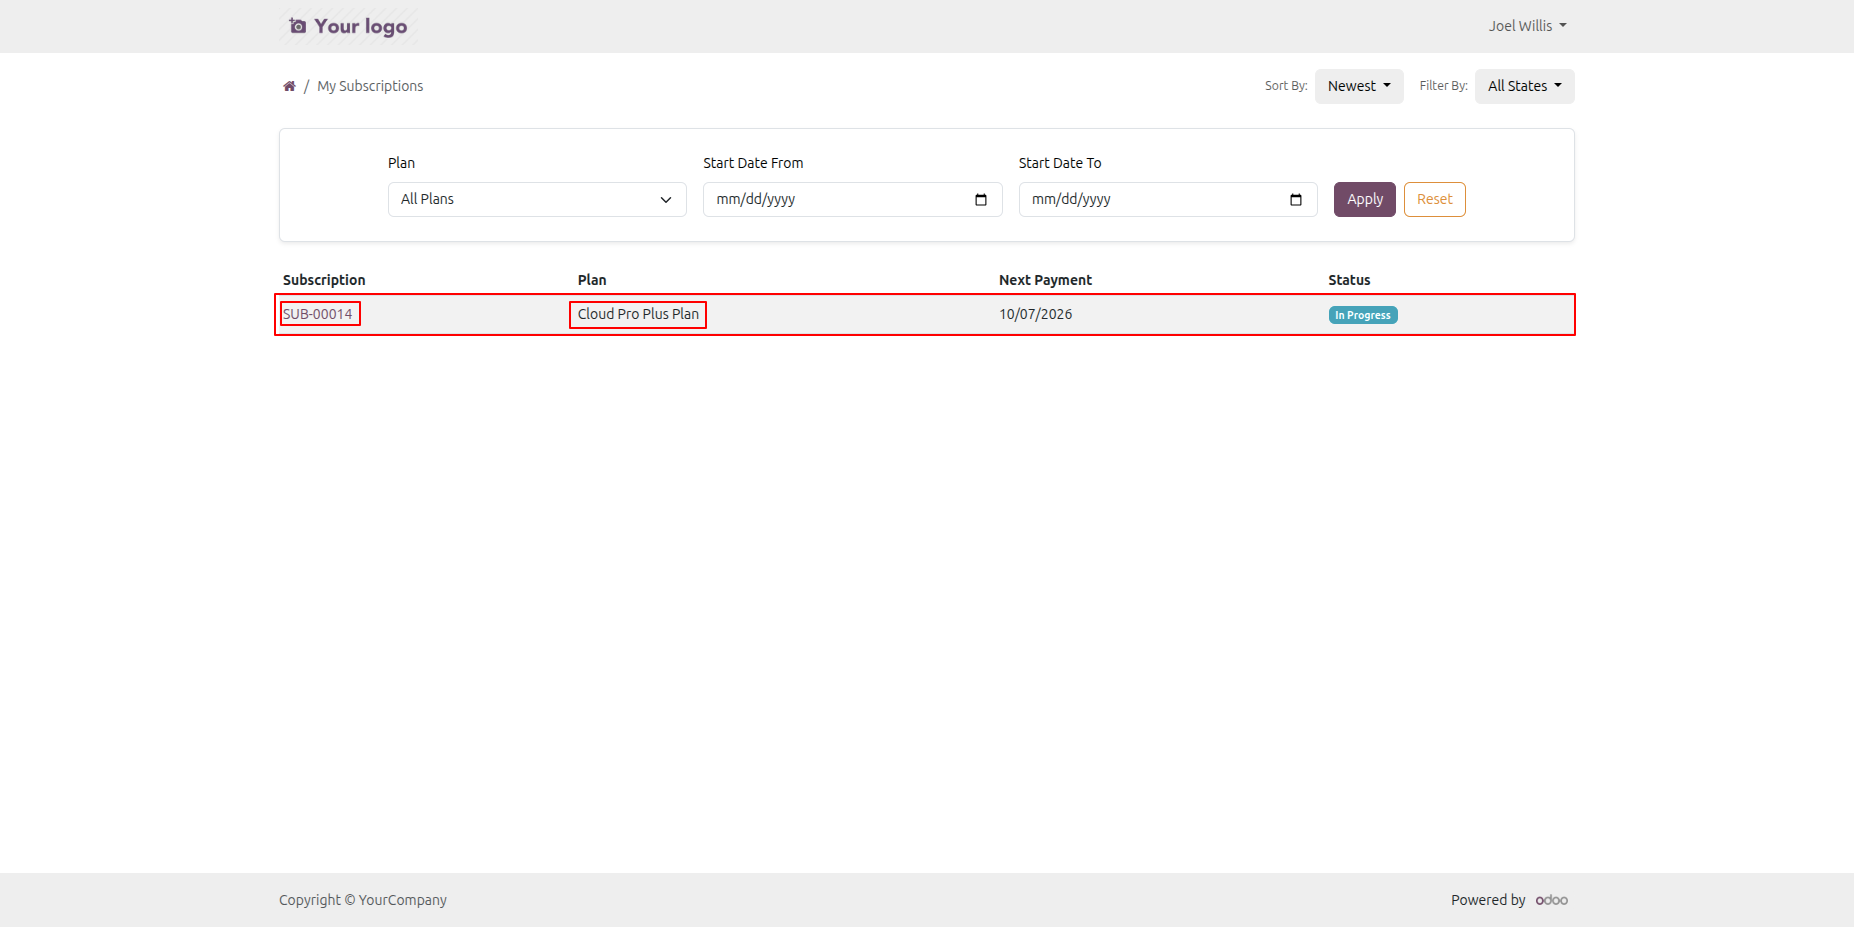
View the updated subscription plan details.
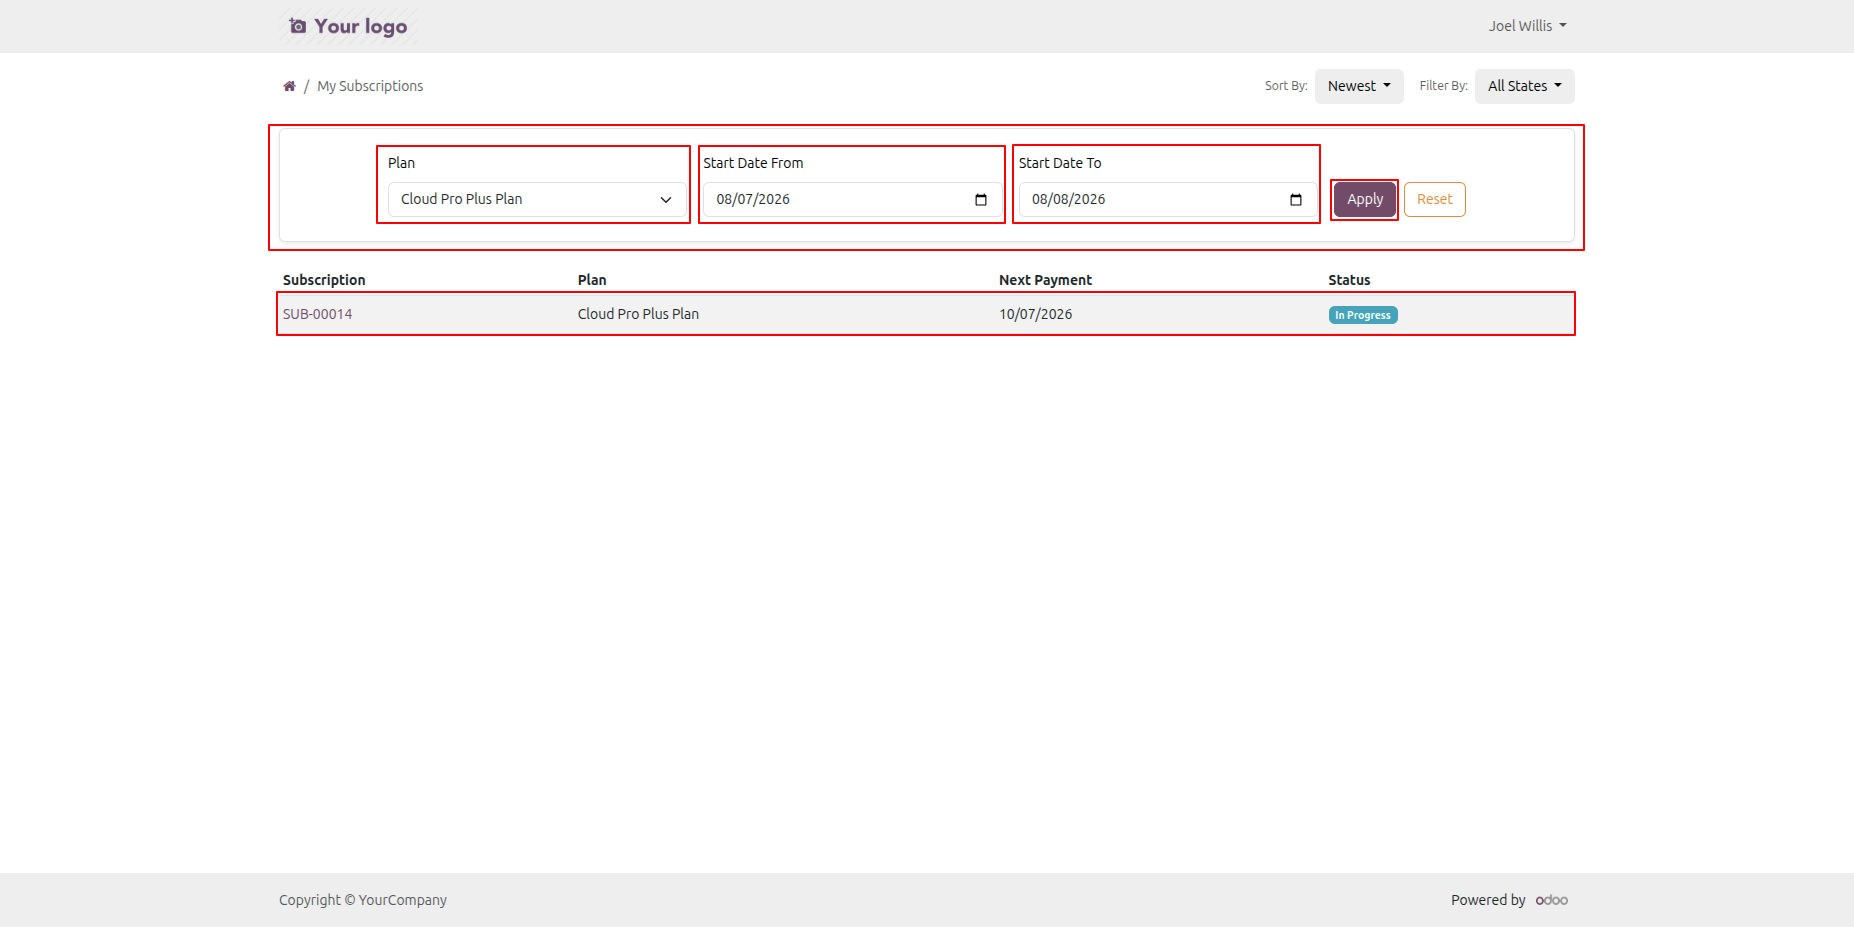
Users can filter subscription plans using the newly added details.
Open the subscription plan from the list view. The Payment History section on the portal displays the payment records associated with the plan.
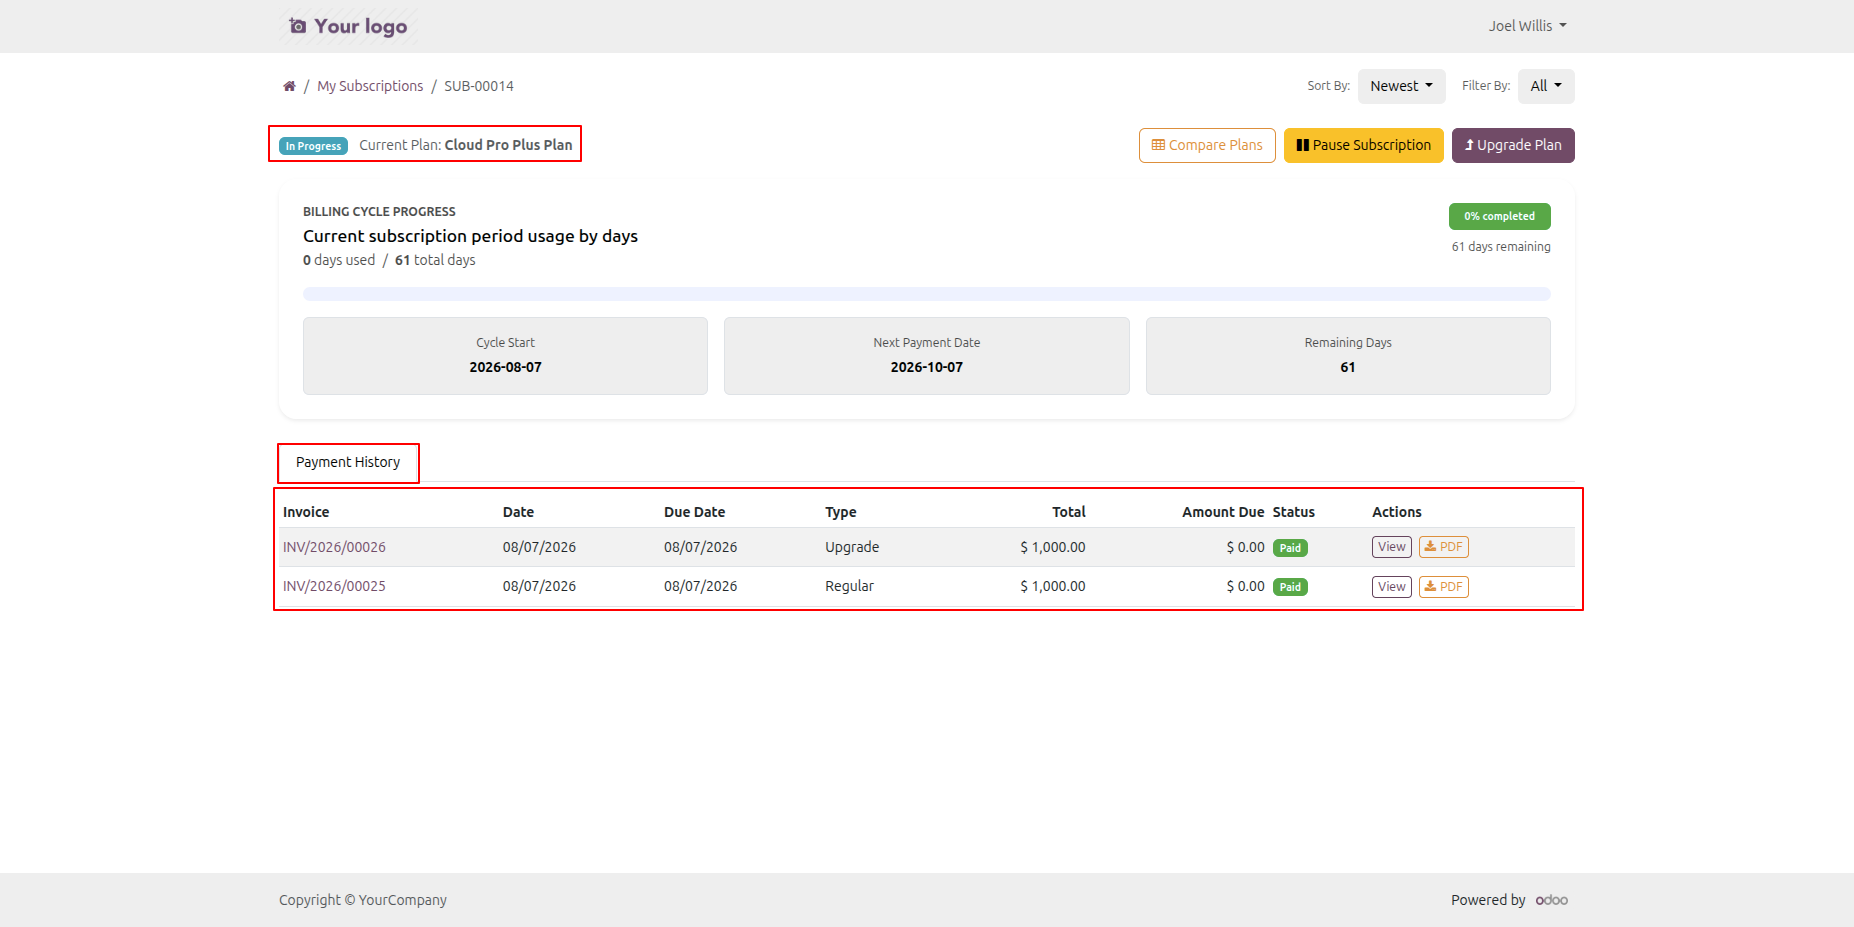
Click My Subscription from the portal to view your active subscription details and plan information.
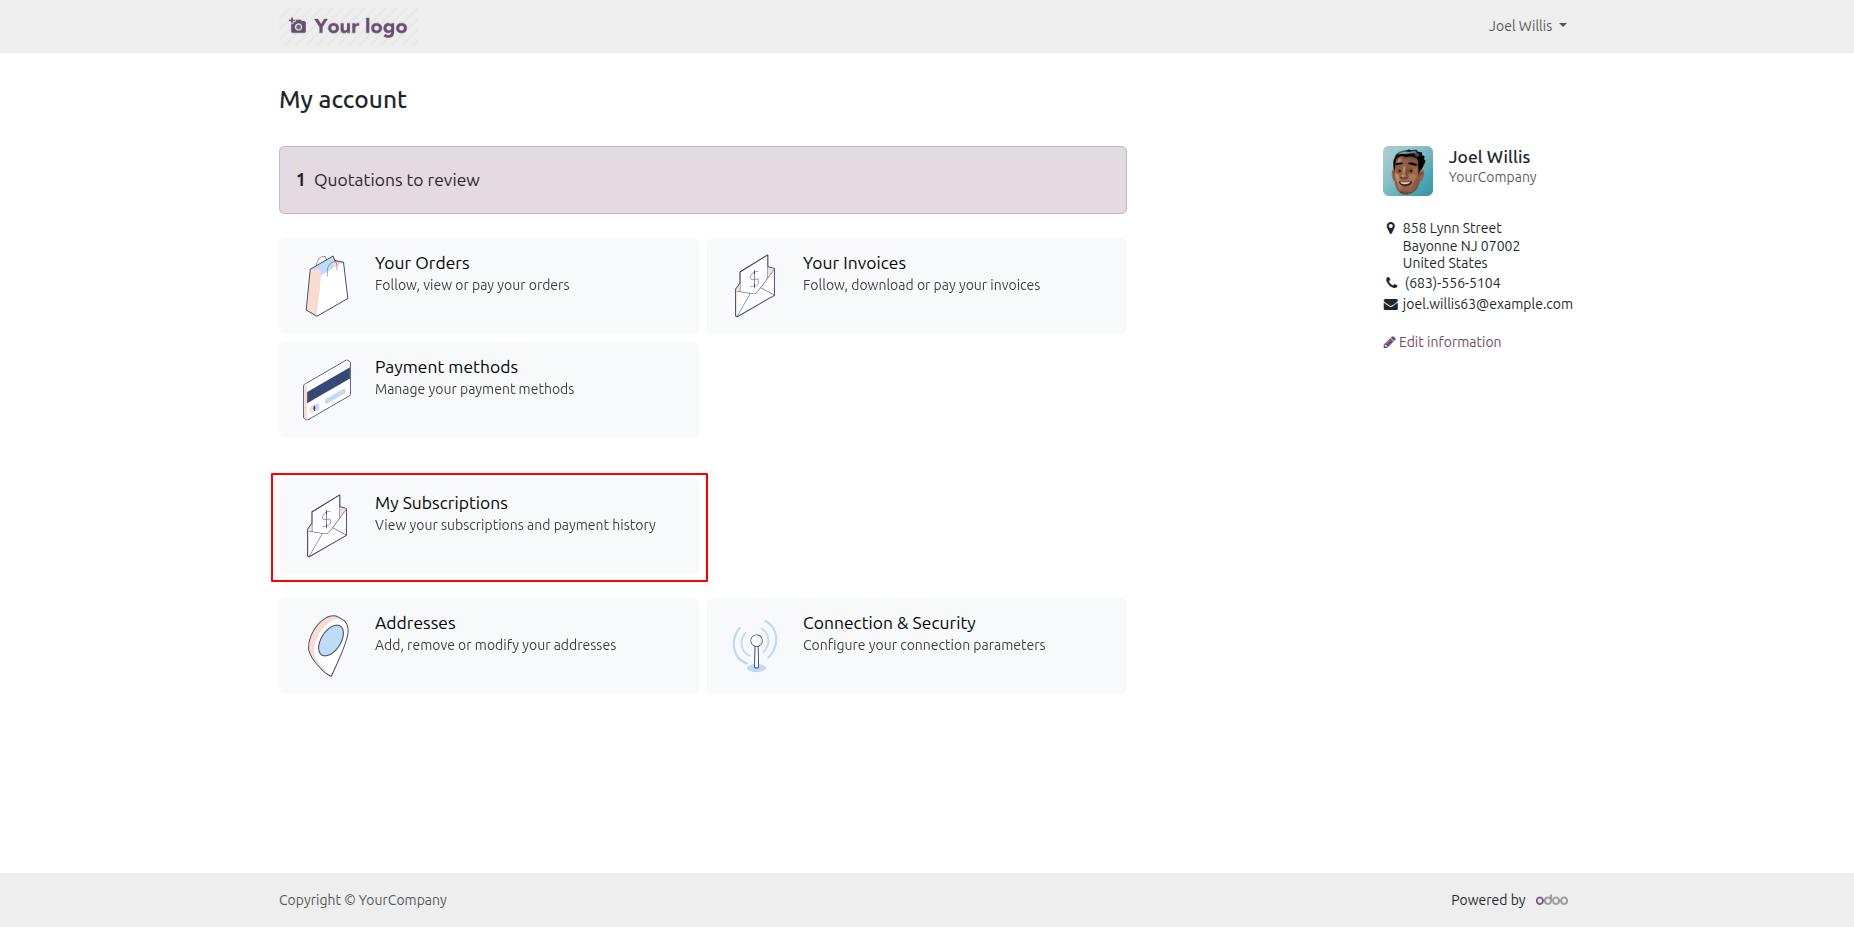
It will open the Subscription list view, displaying all subscription plans associated with the customer.
Select a subscription order from the list view to open its form view and view the complete subscription details.
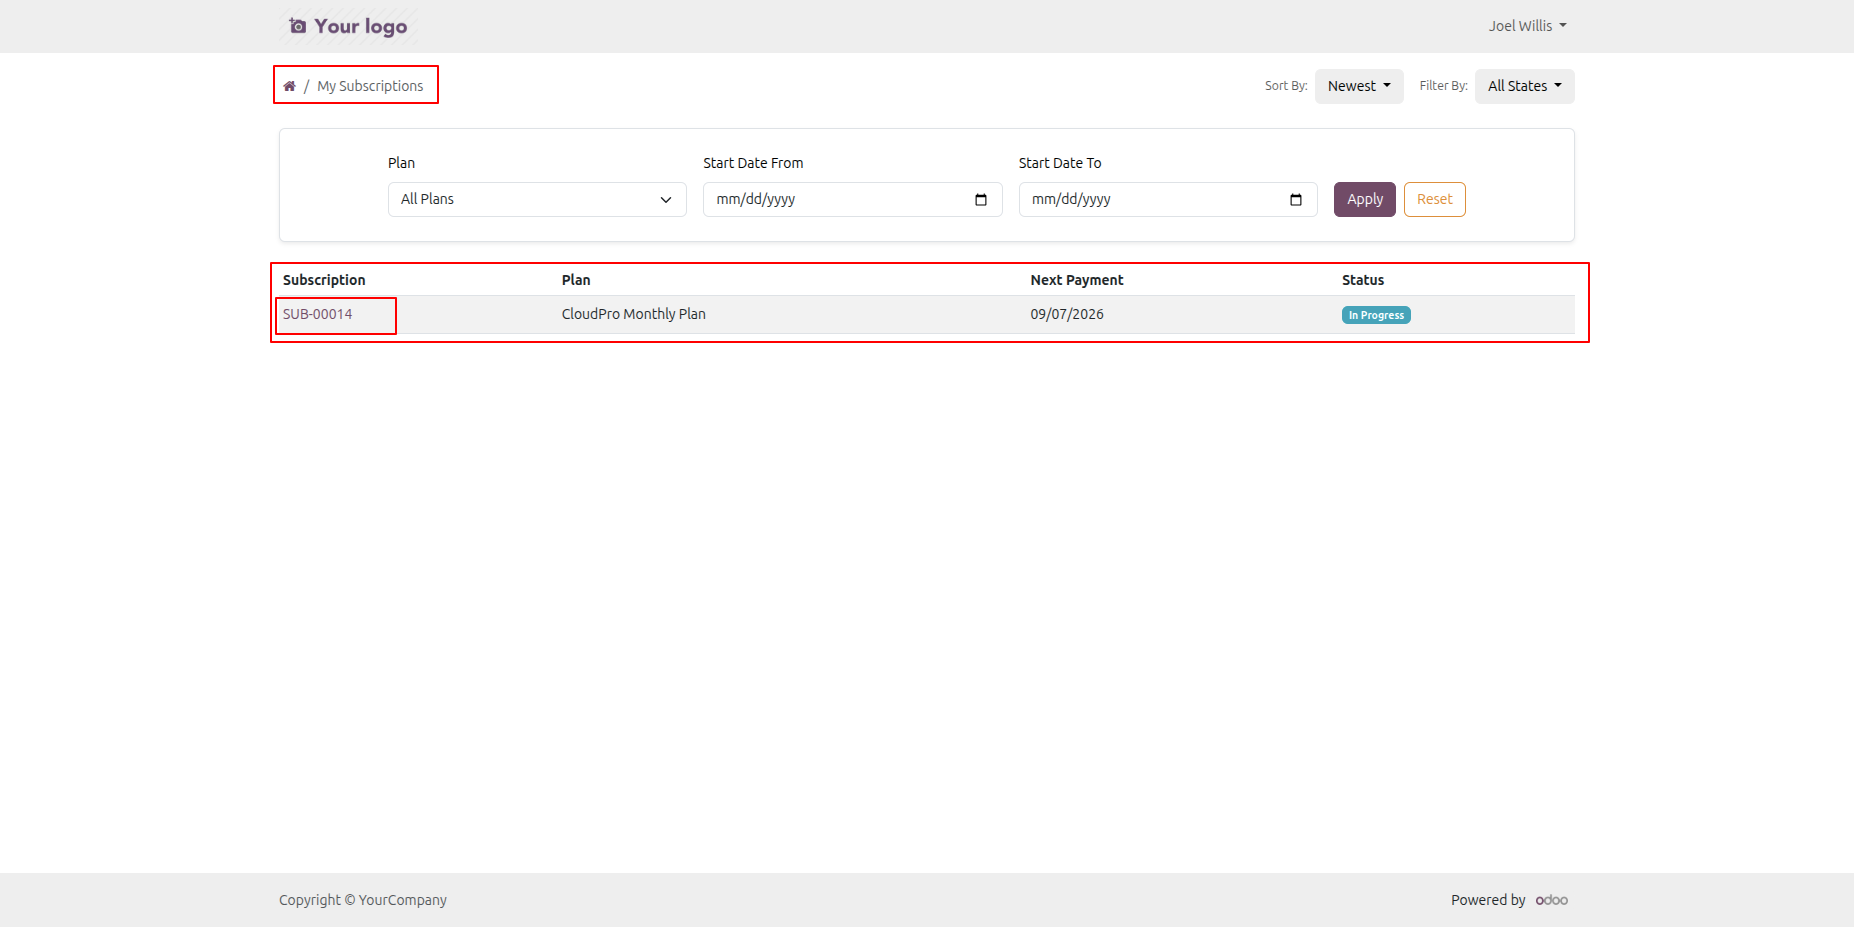
Navigate to the Payment History tab in the customer portal.
Check the status and receipts of past subscription transactions.
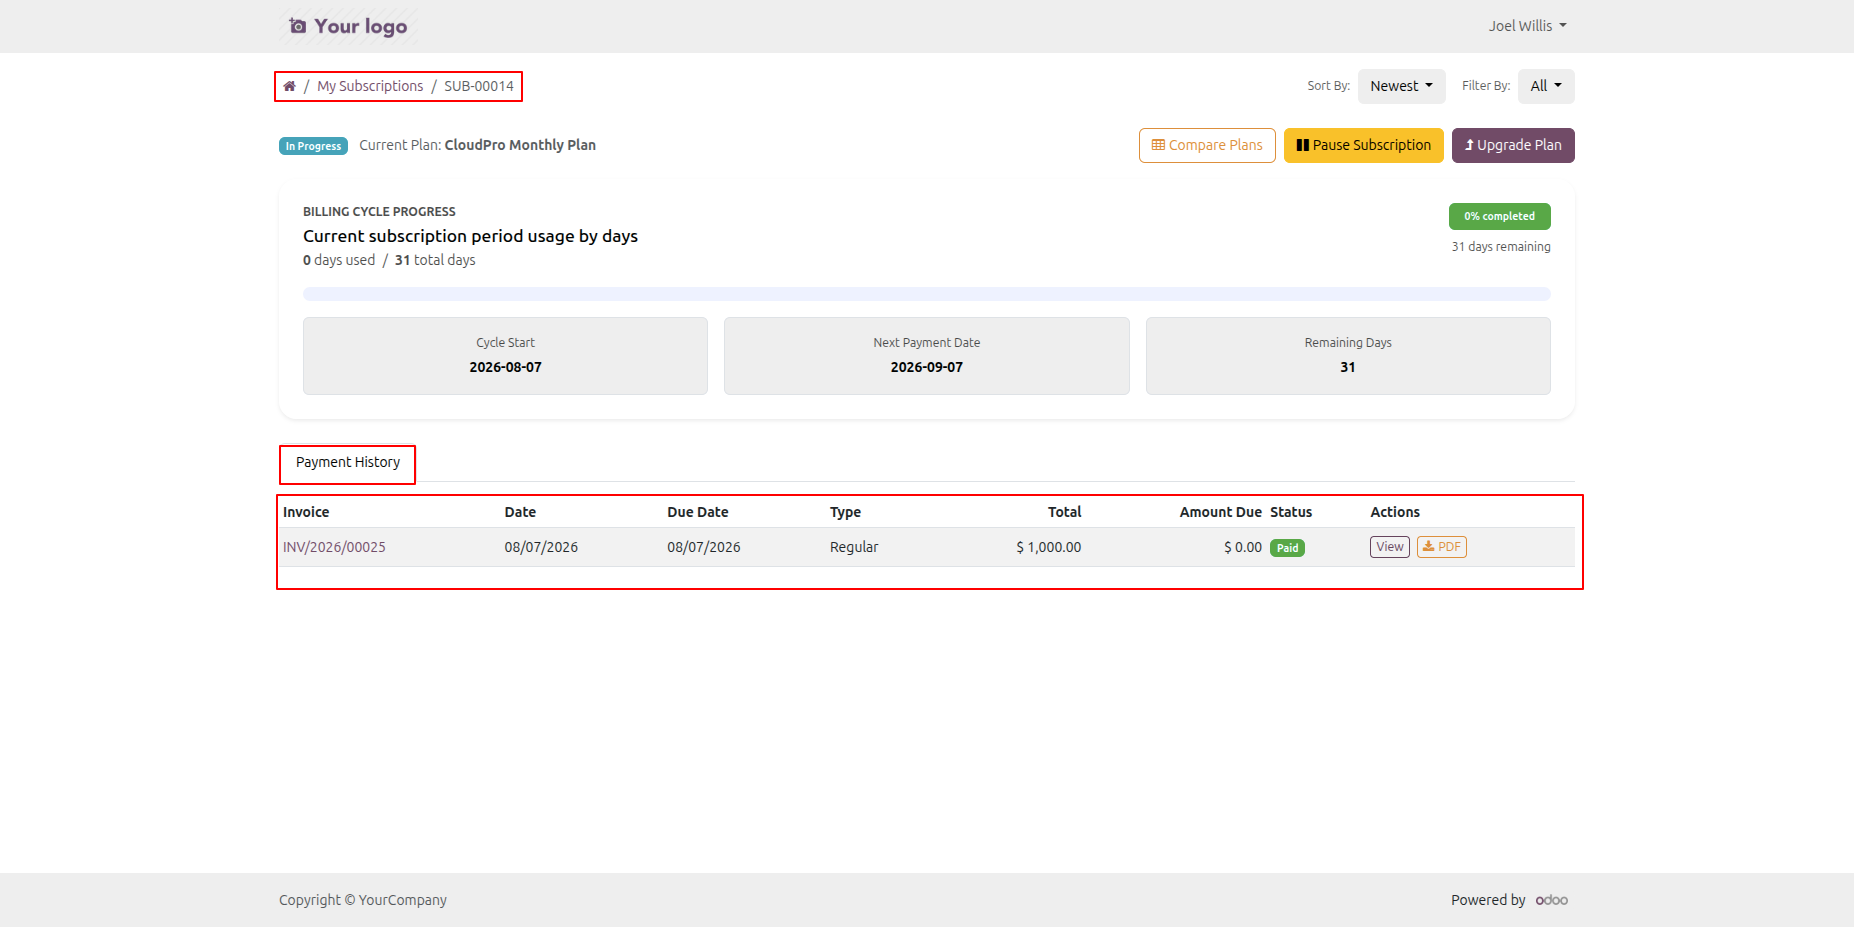
Navigate to the Payment History tab and click the PDF button to download the payment invoice.
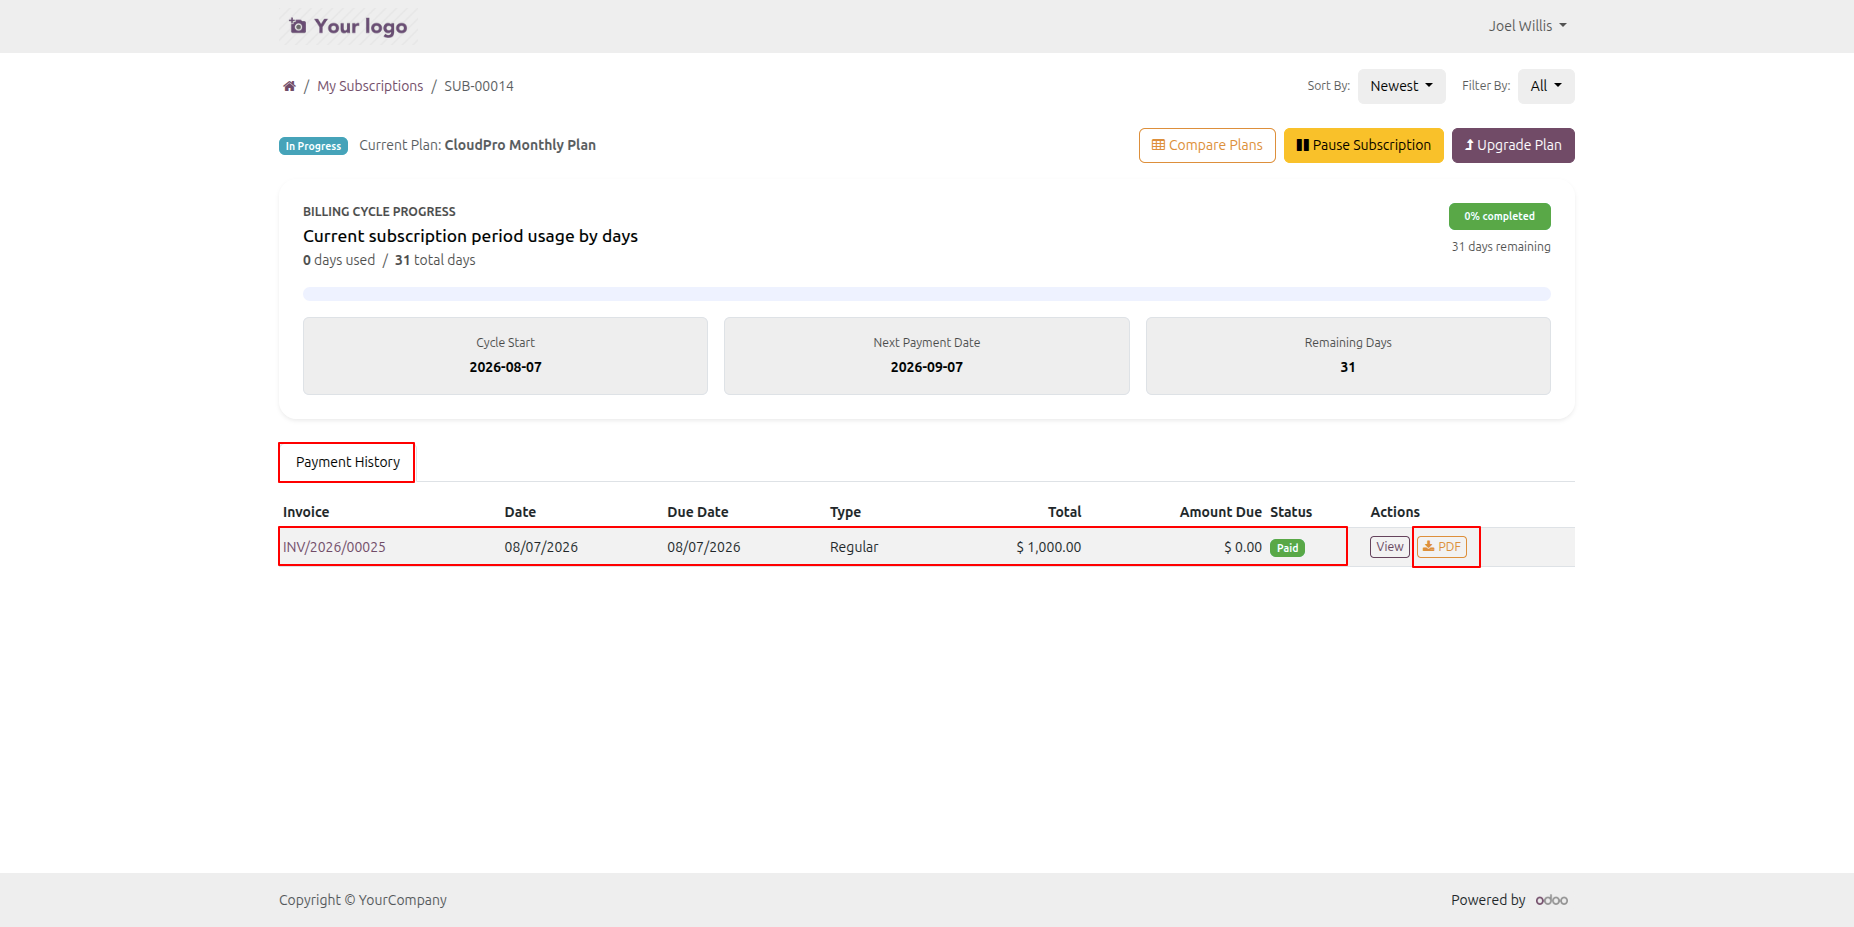
Review the downloaded invoice PDF document with all details.
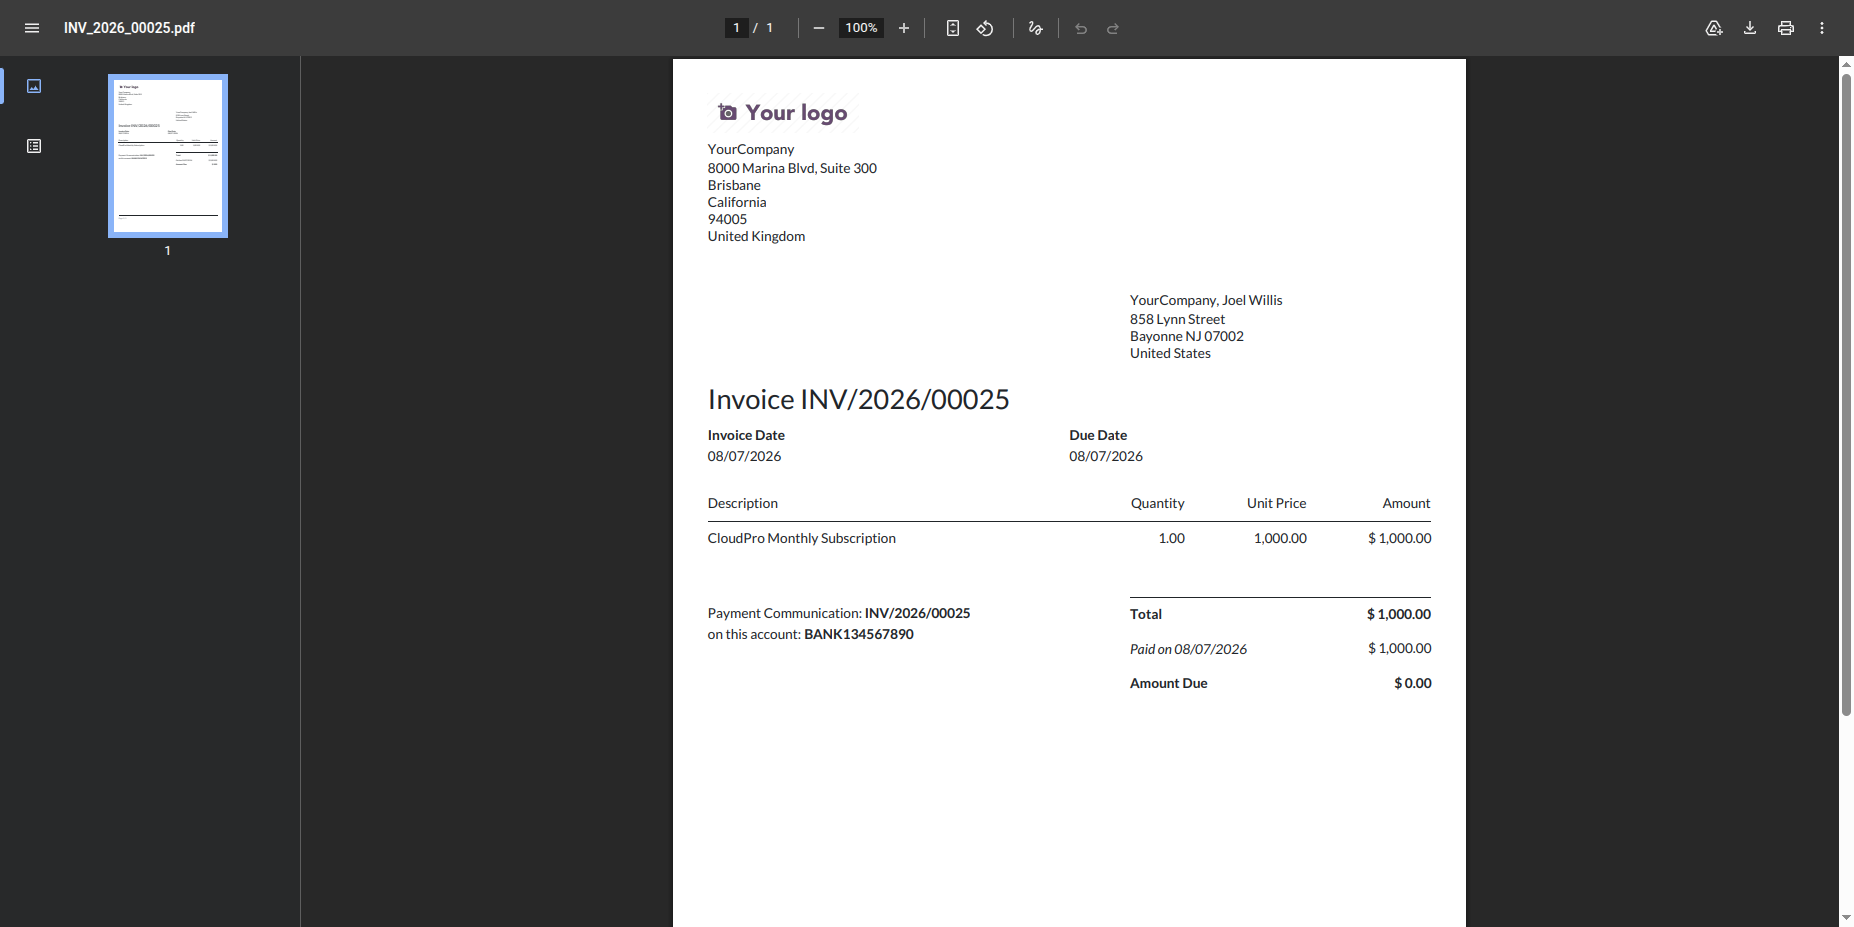
Click the Invoice Number to open the invoice, then click the Download button to download the invoice.
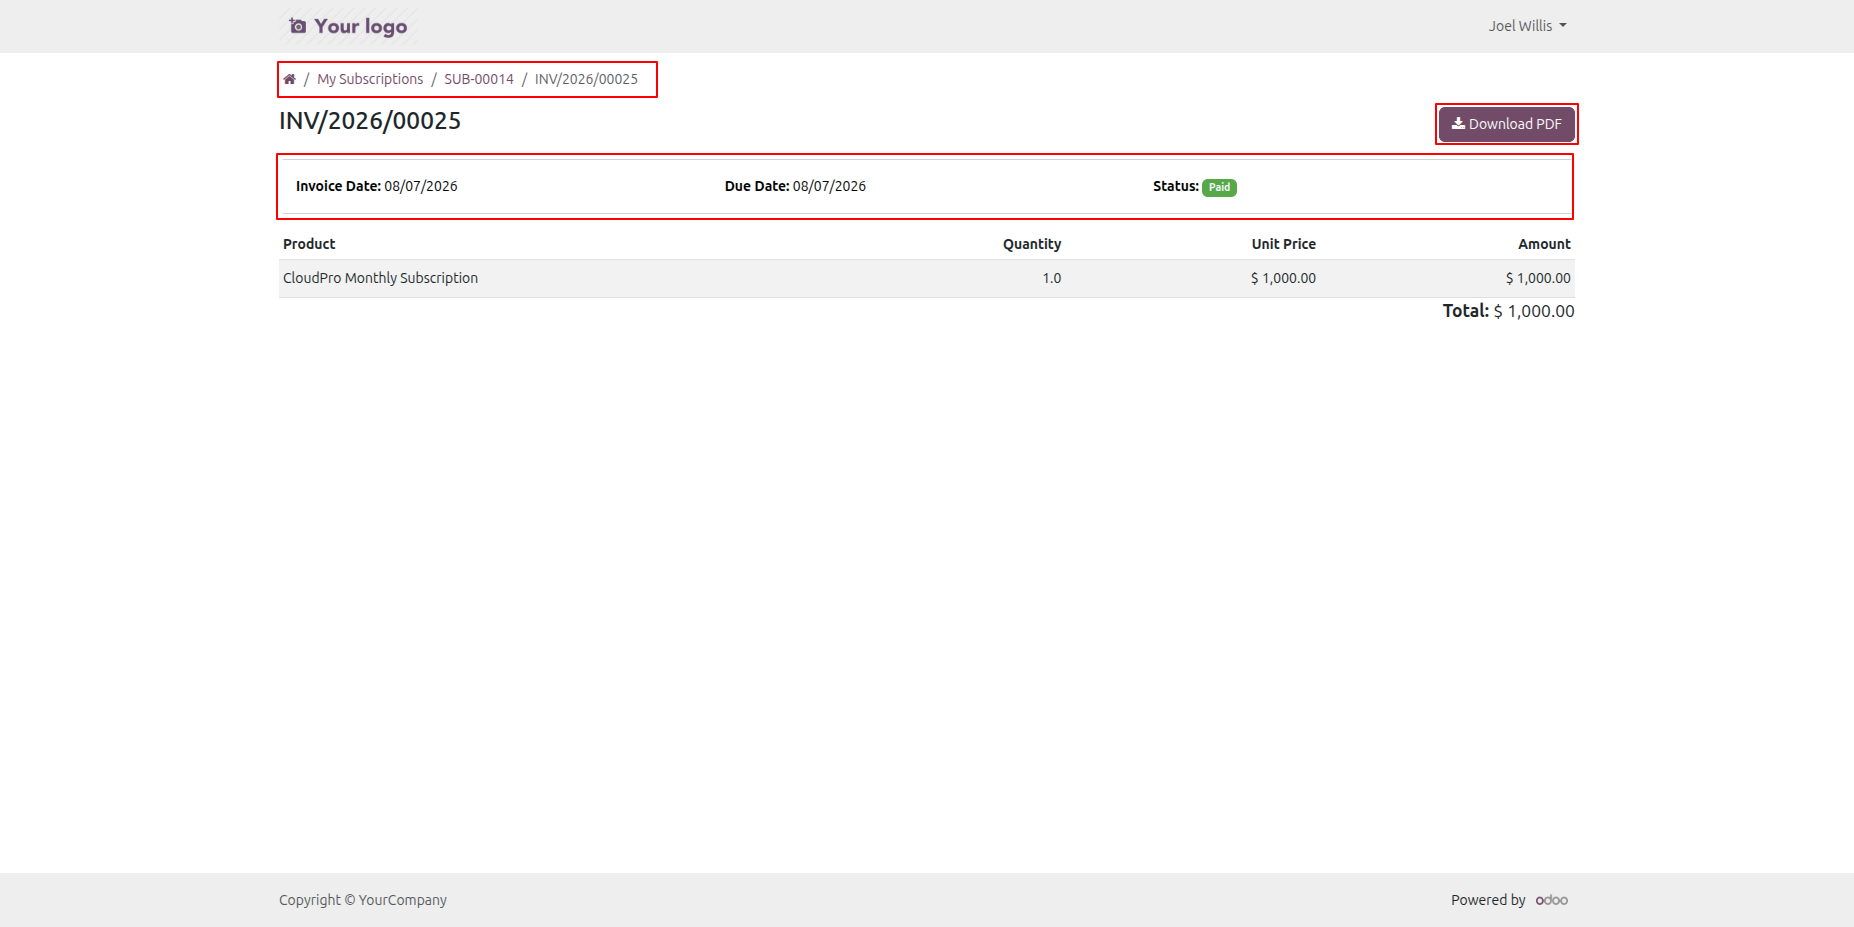
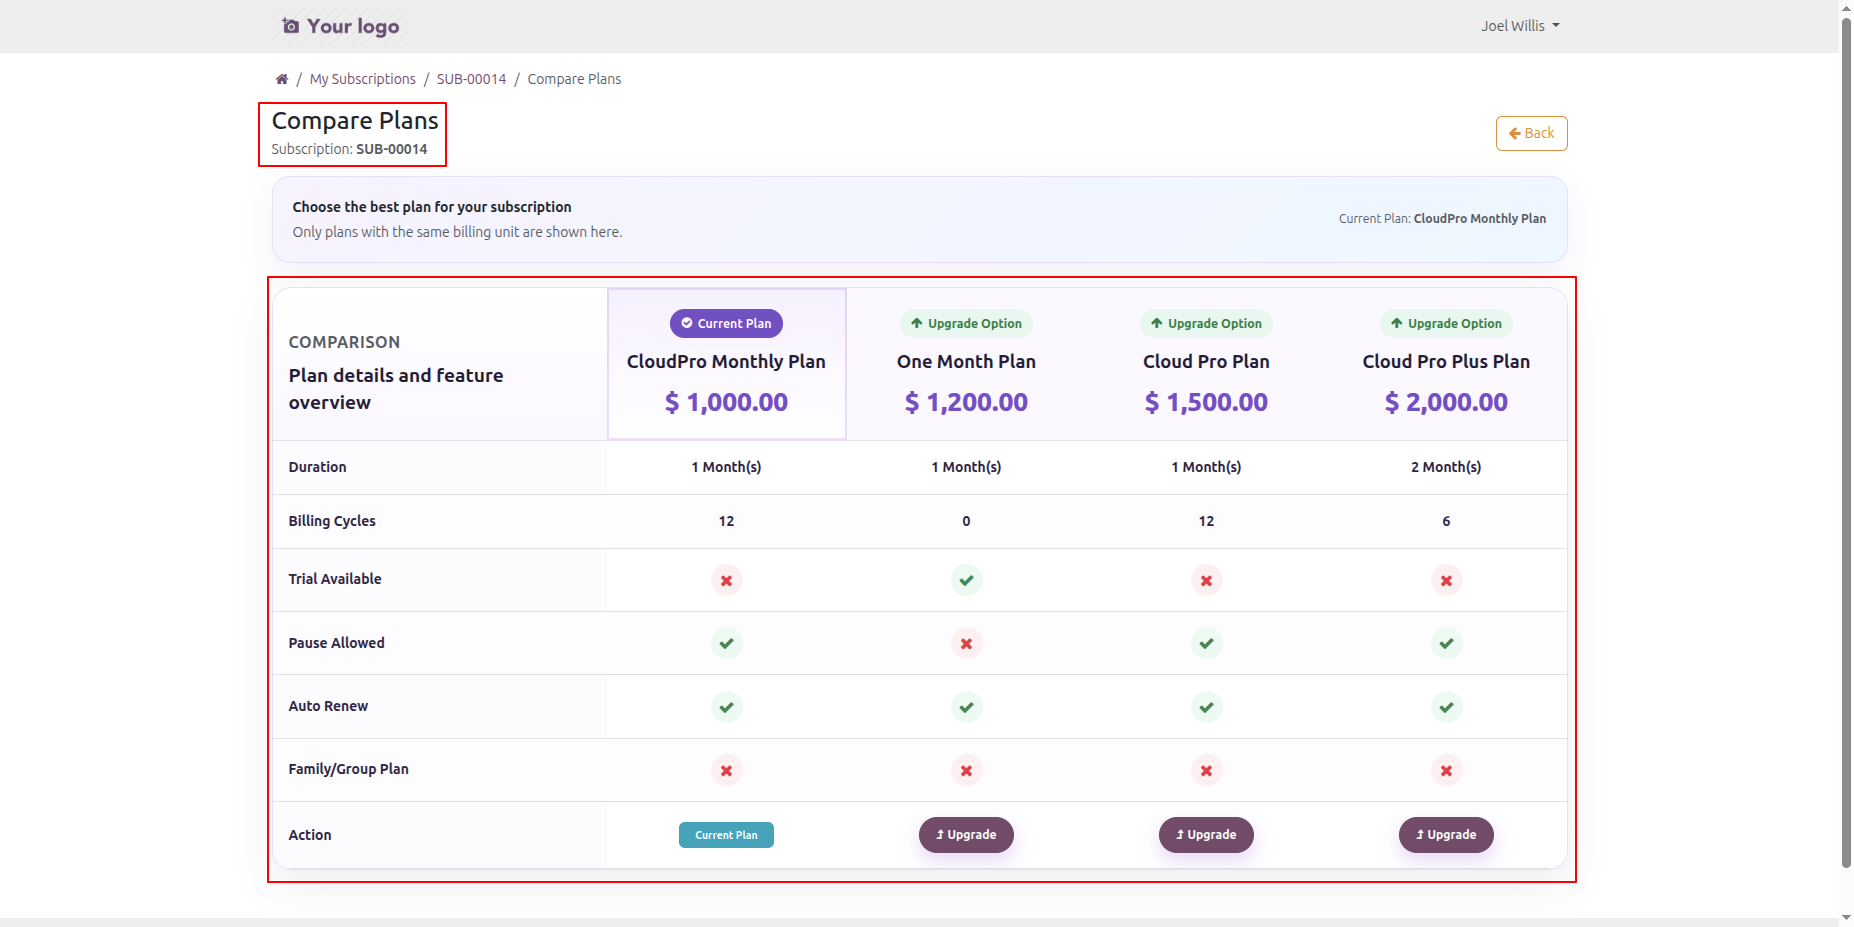
Click the Compare Plans button from the subscription order in the portal to compare the available subscription plans.
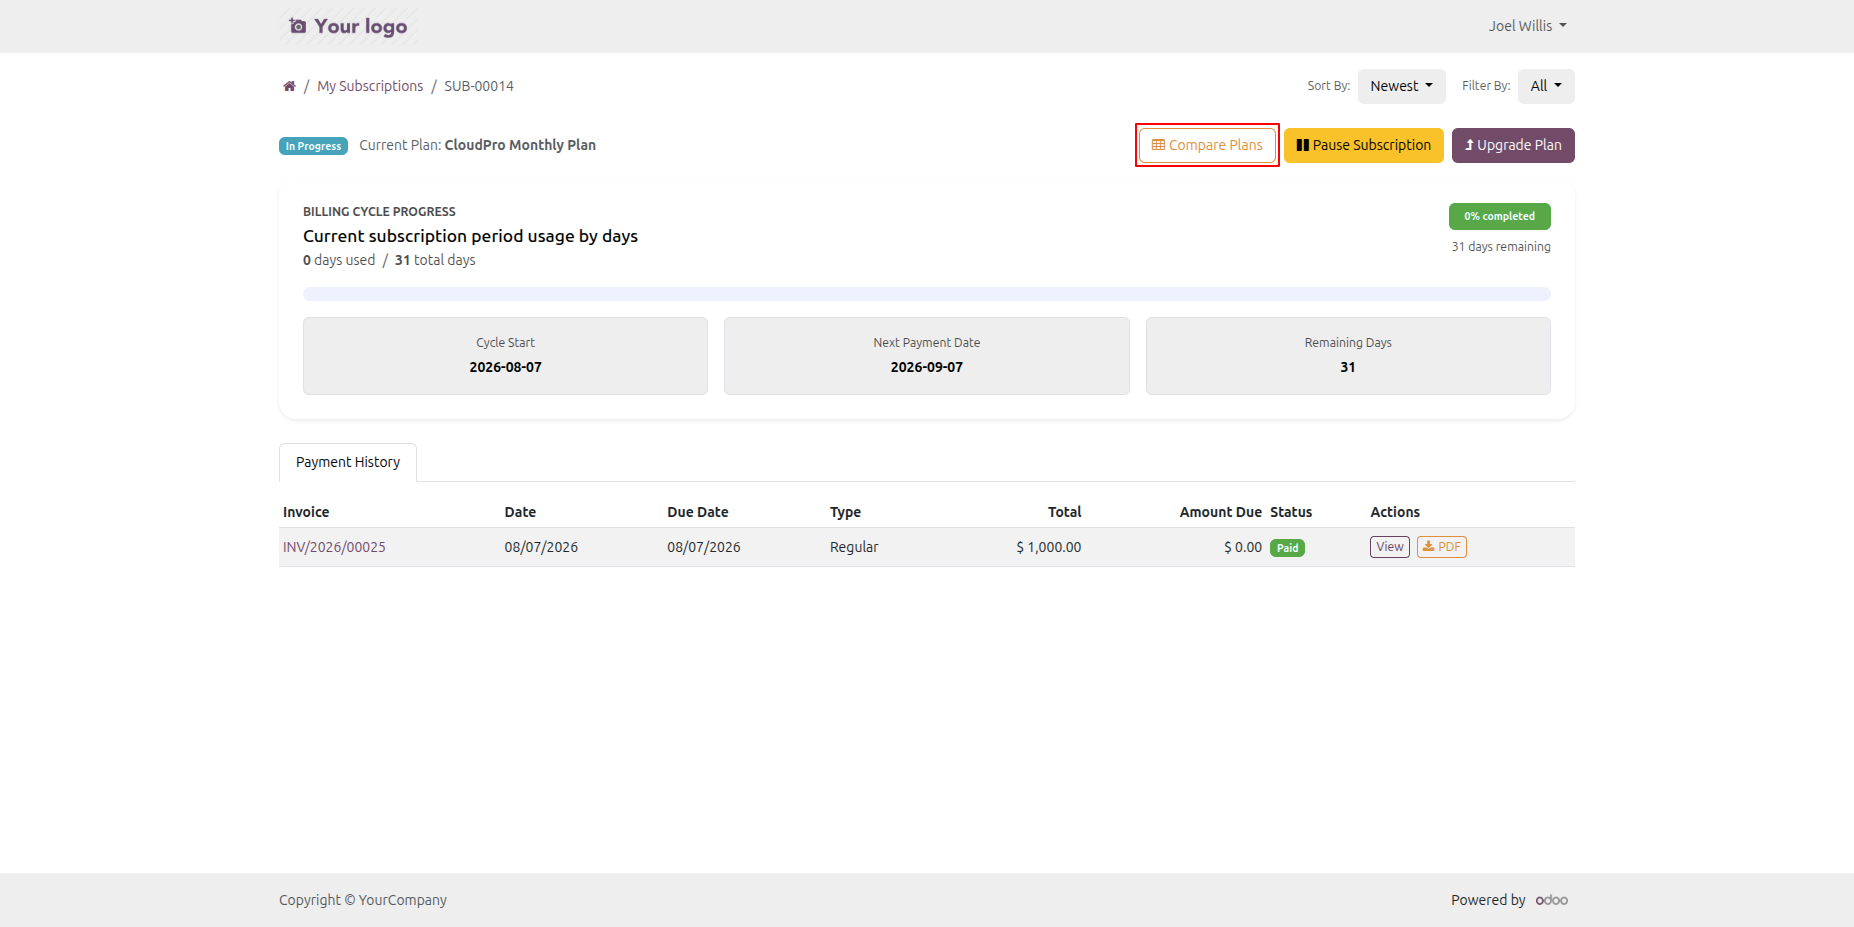
The Compare Plans table will display the available plans along with their plan details and feature overview, making it easy to compare different subscription options.
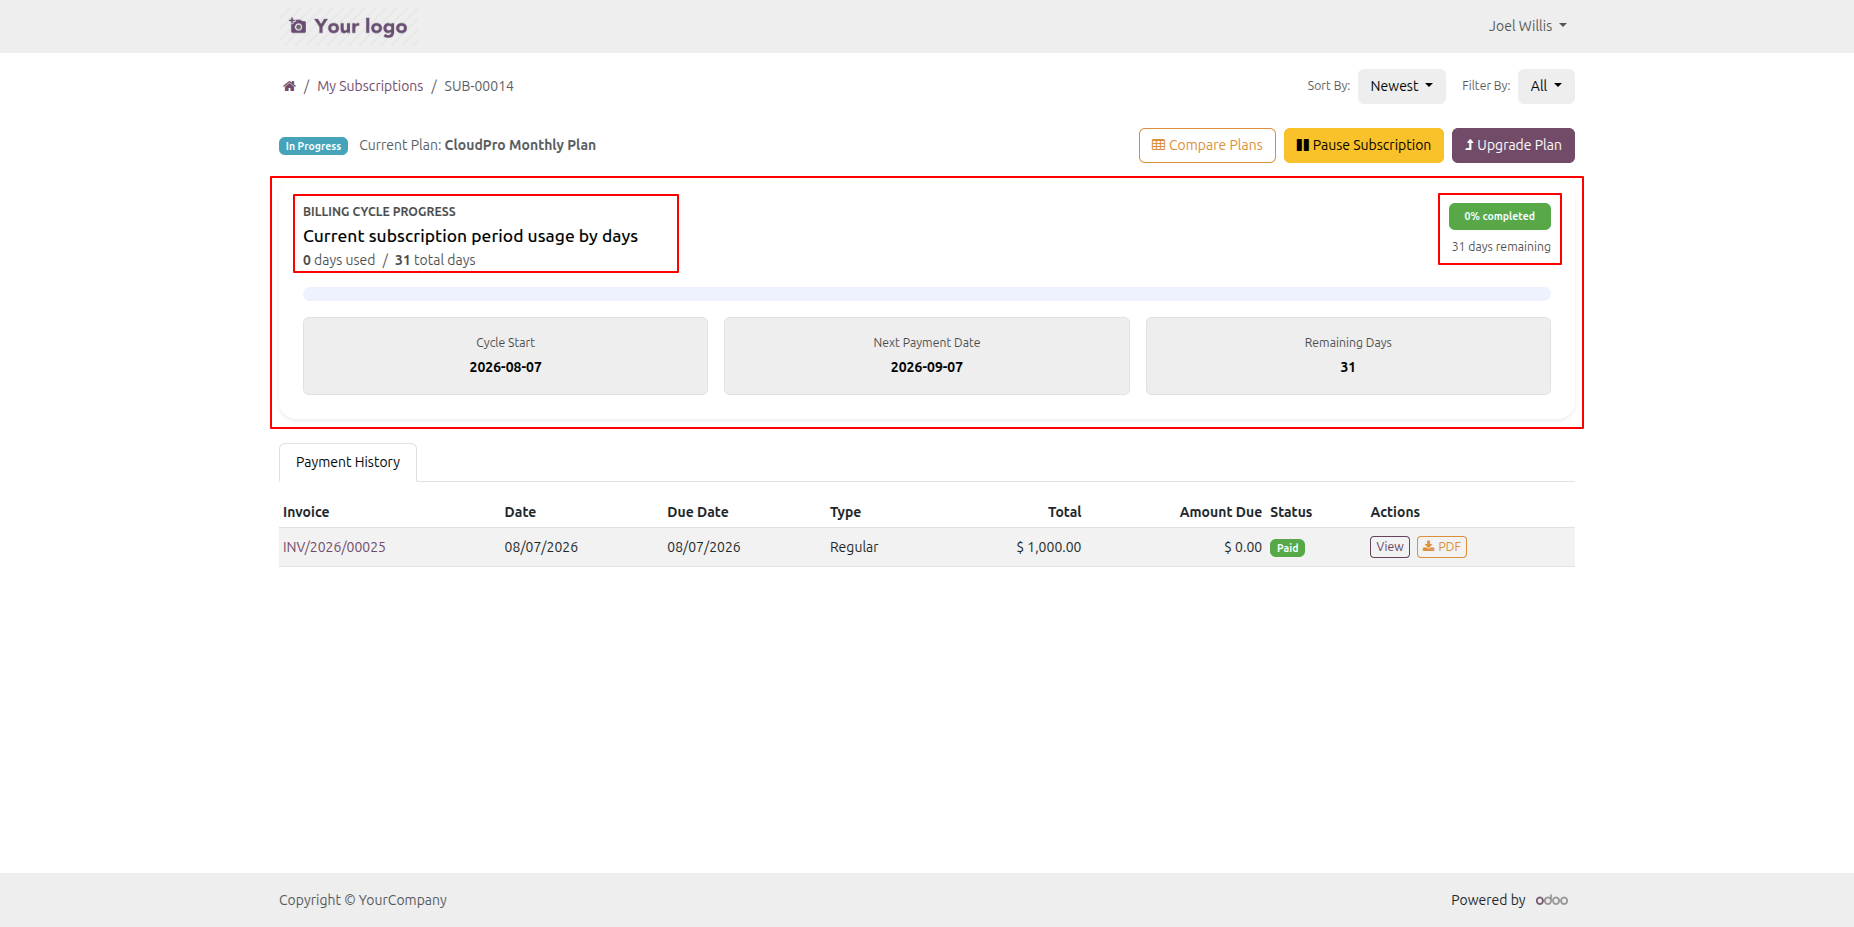
View the Subscription Usage Tracker inside the customer portal interface.
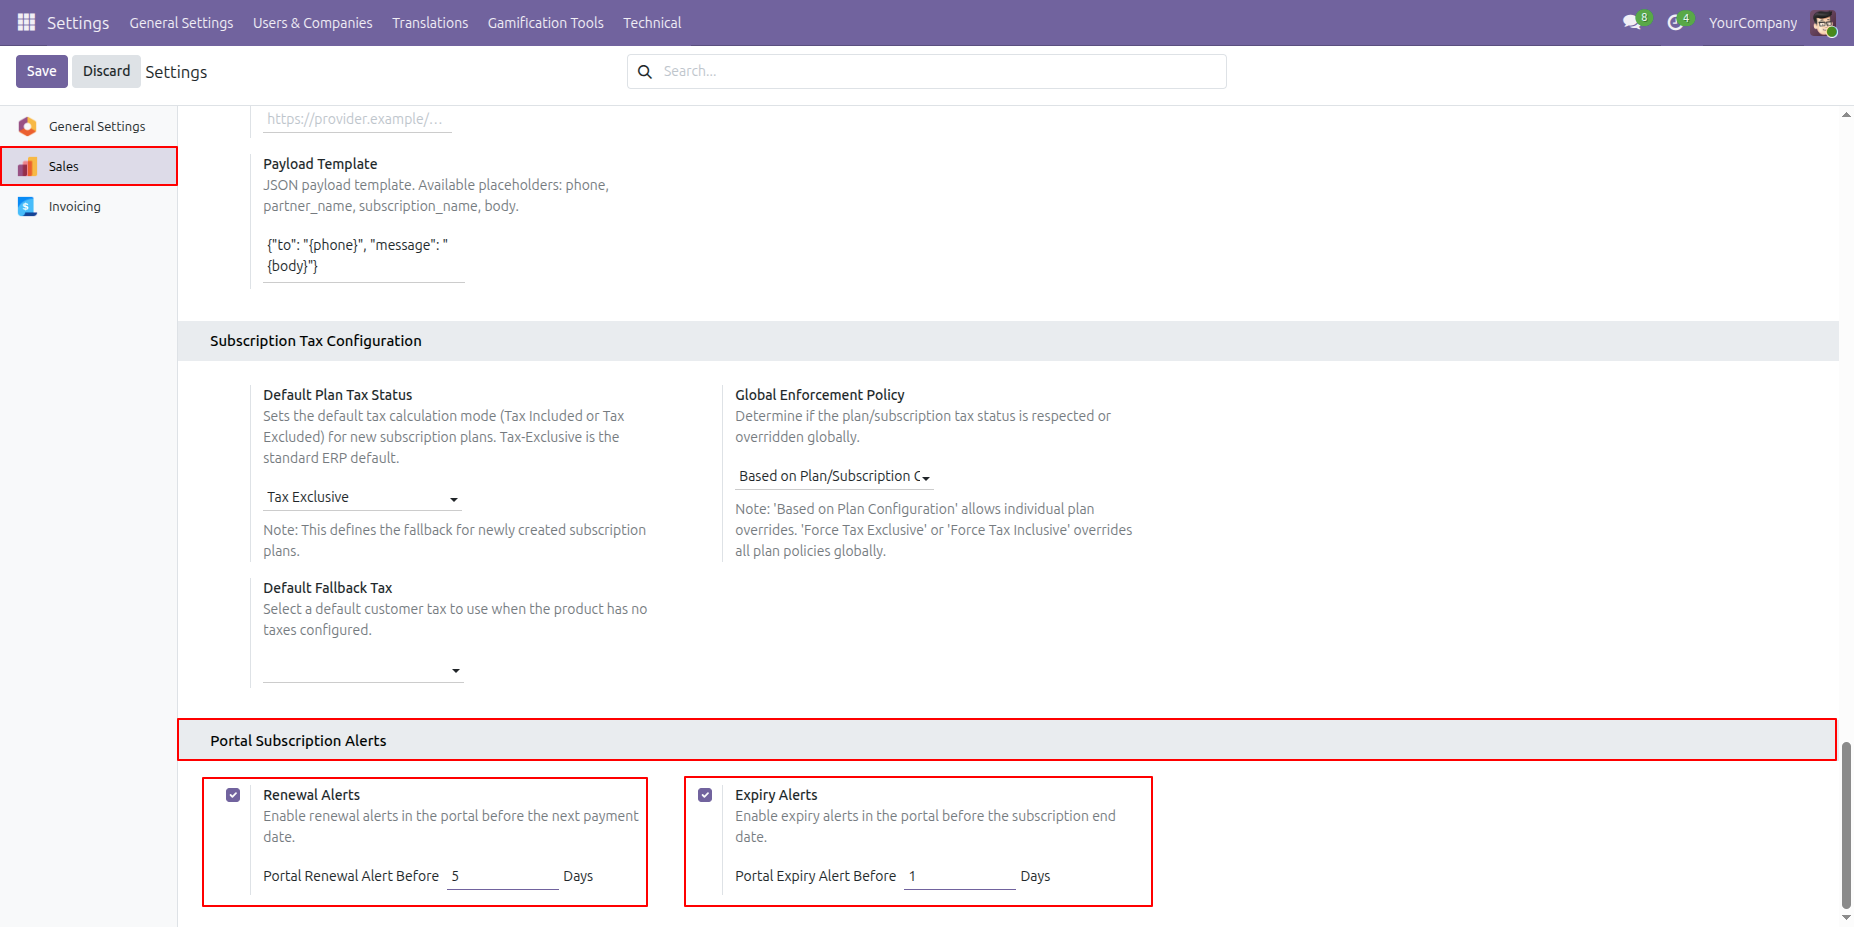
Go to Sales -> General Settings -> Portal Subscription Alerts and enable the Renewal Alert and Expiry Alert options.
Set the required Alert Before Days to specify how many days in advance the renewal and expiry alerts should be sent.
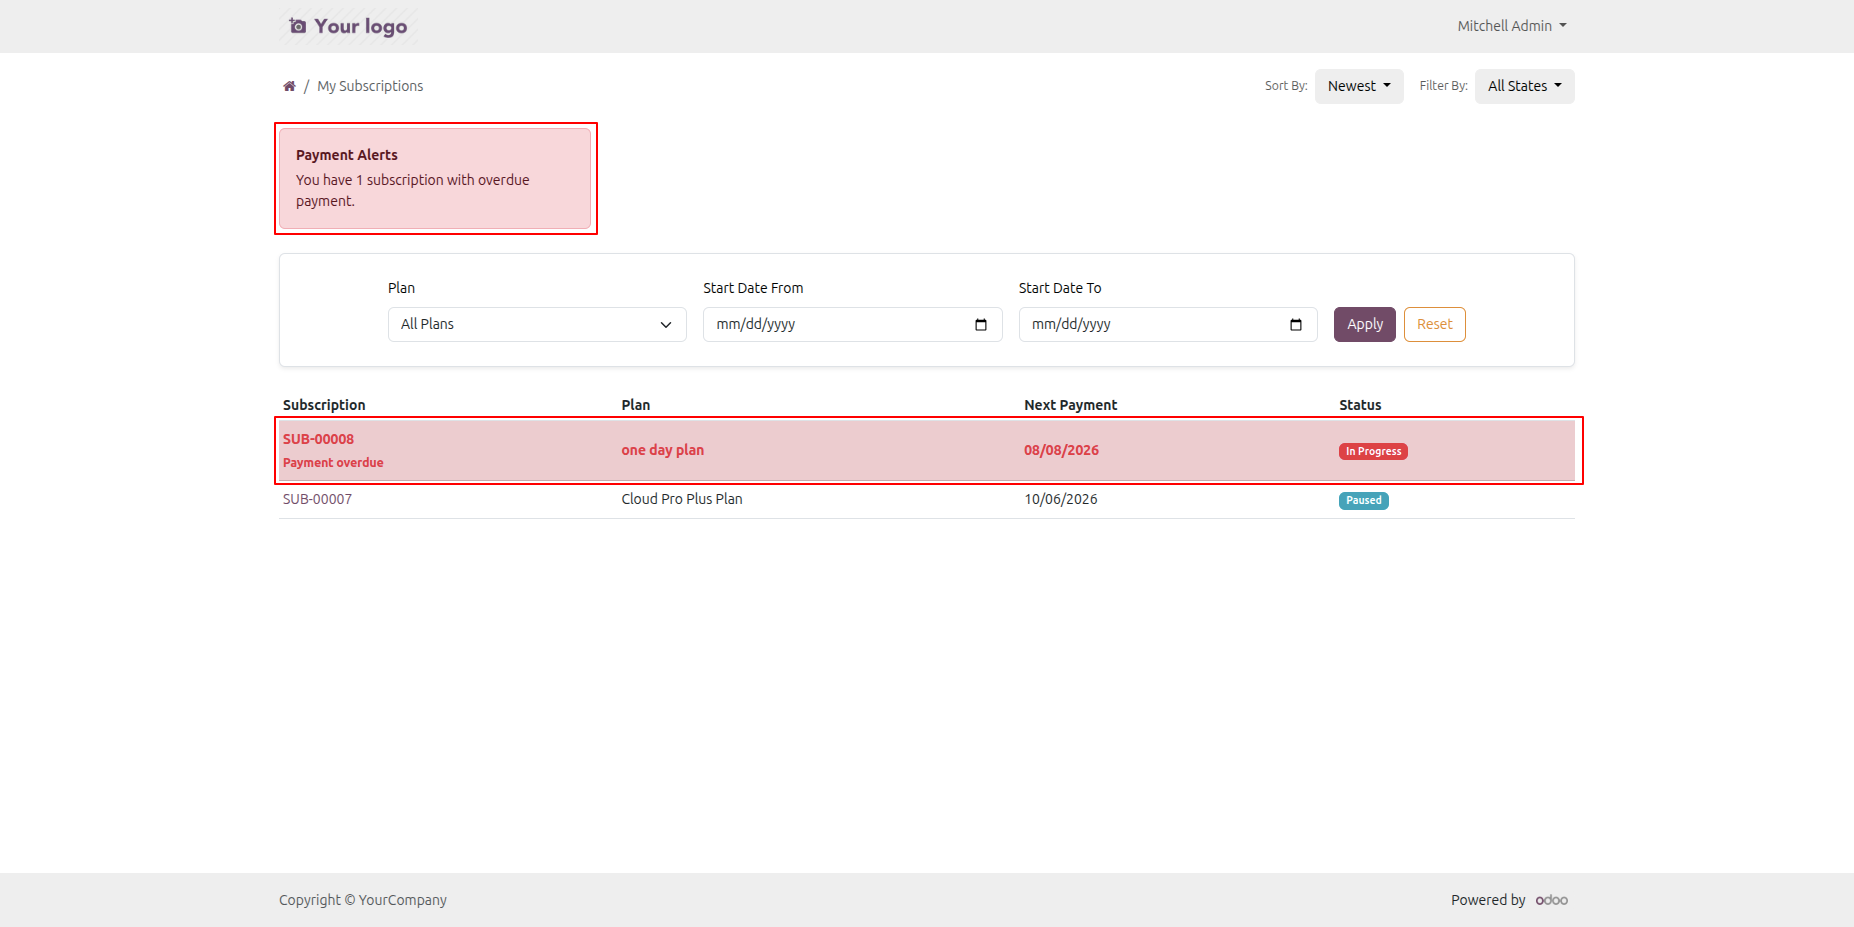
Users can also view payment overdue alerts from the subscription order.
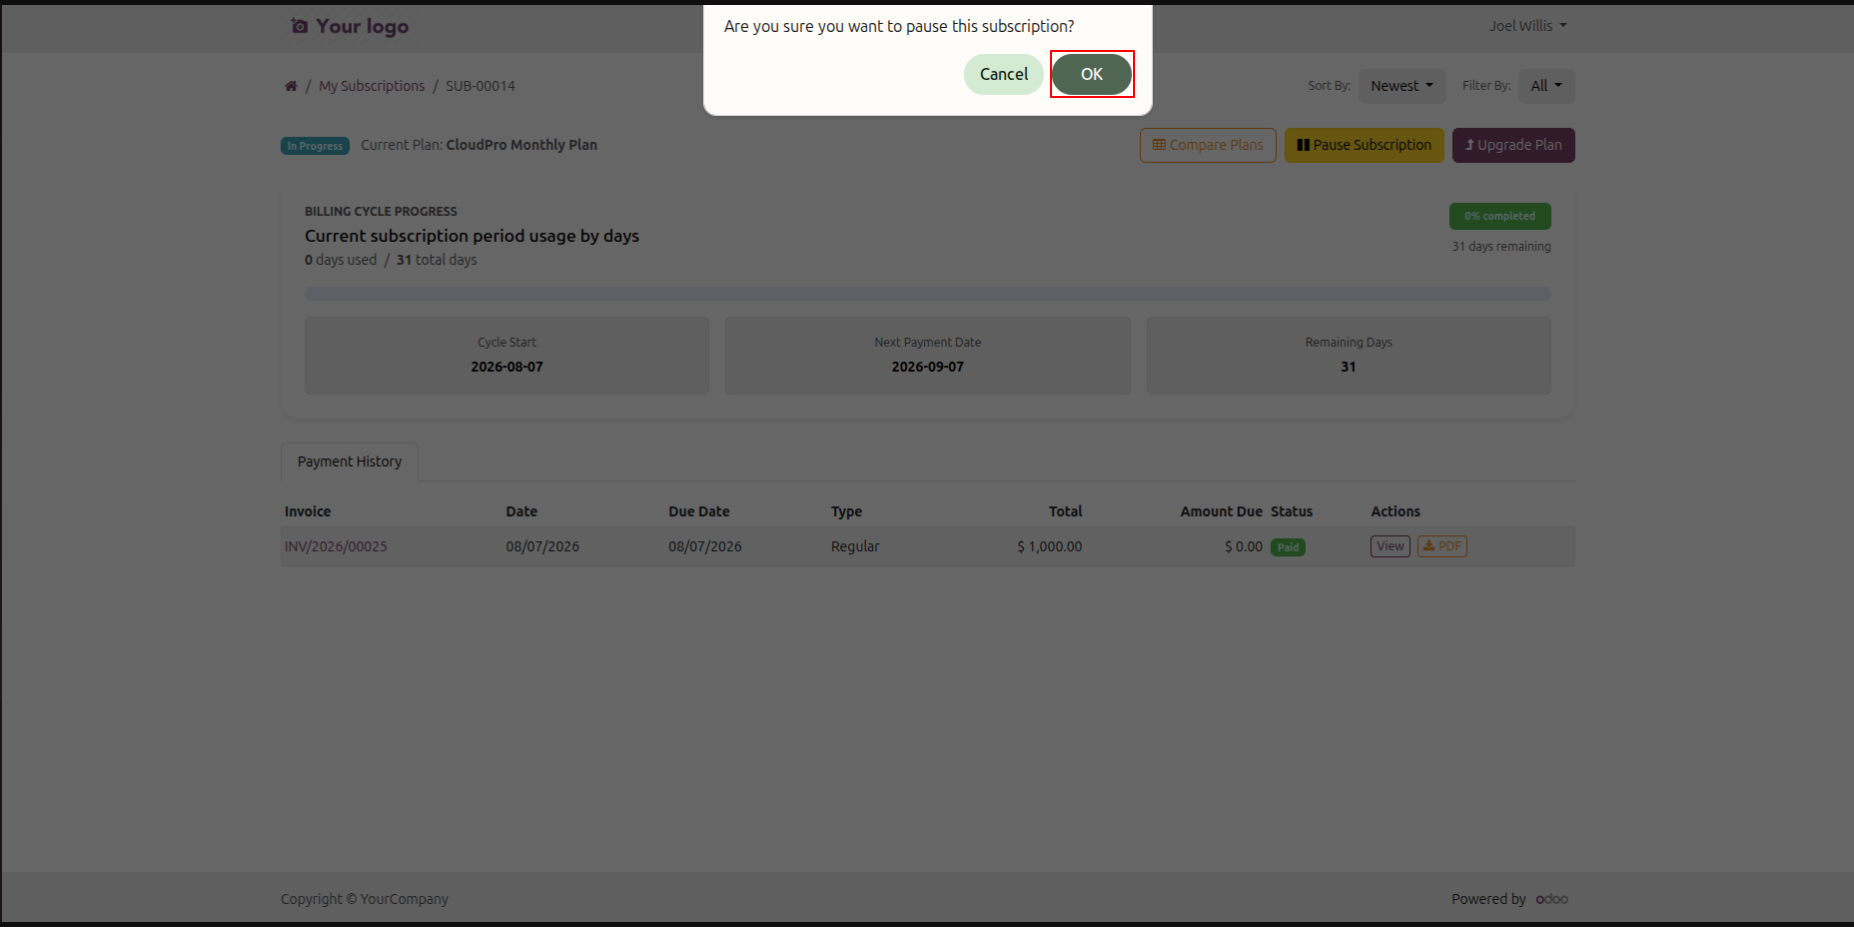
Click the Pause Subscription button to temporarily pause the service.
A confirmation wizard will open; click OK to pause the subscription.
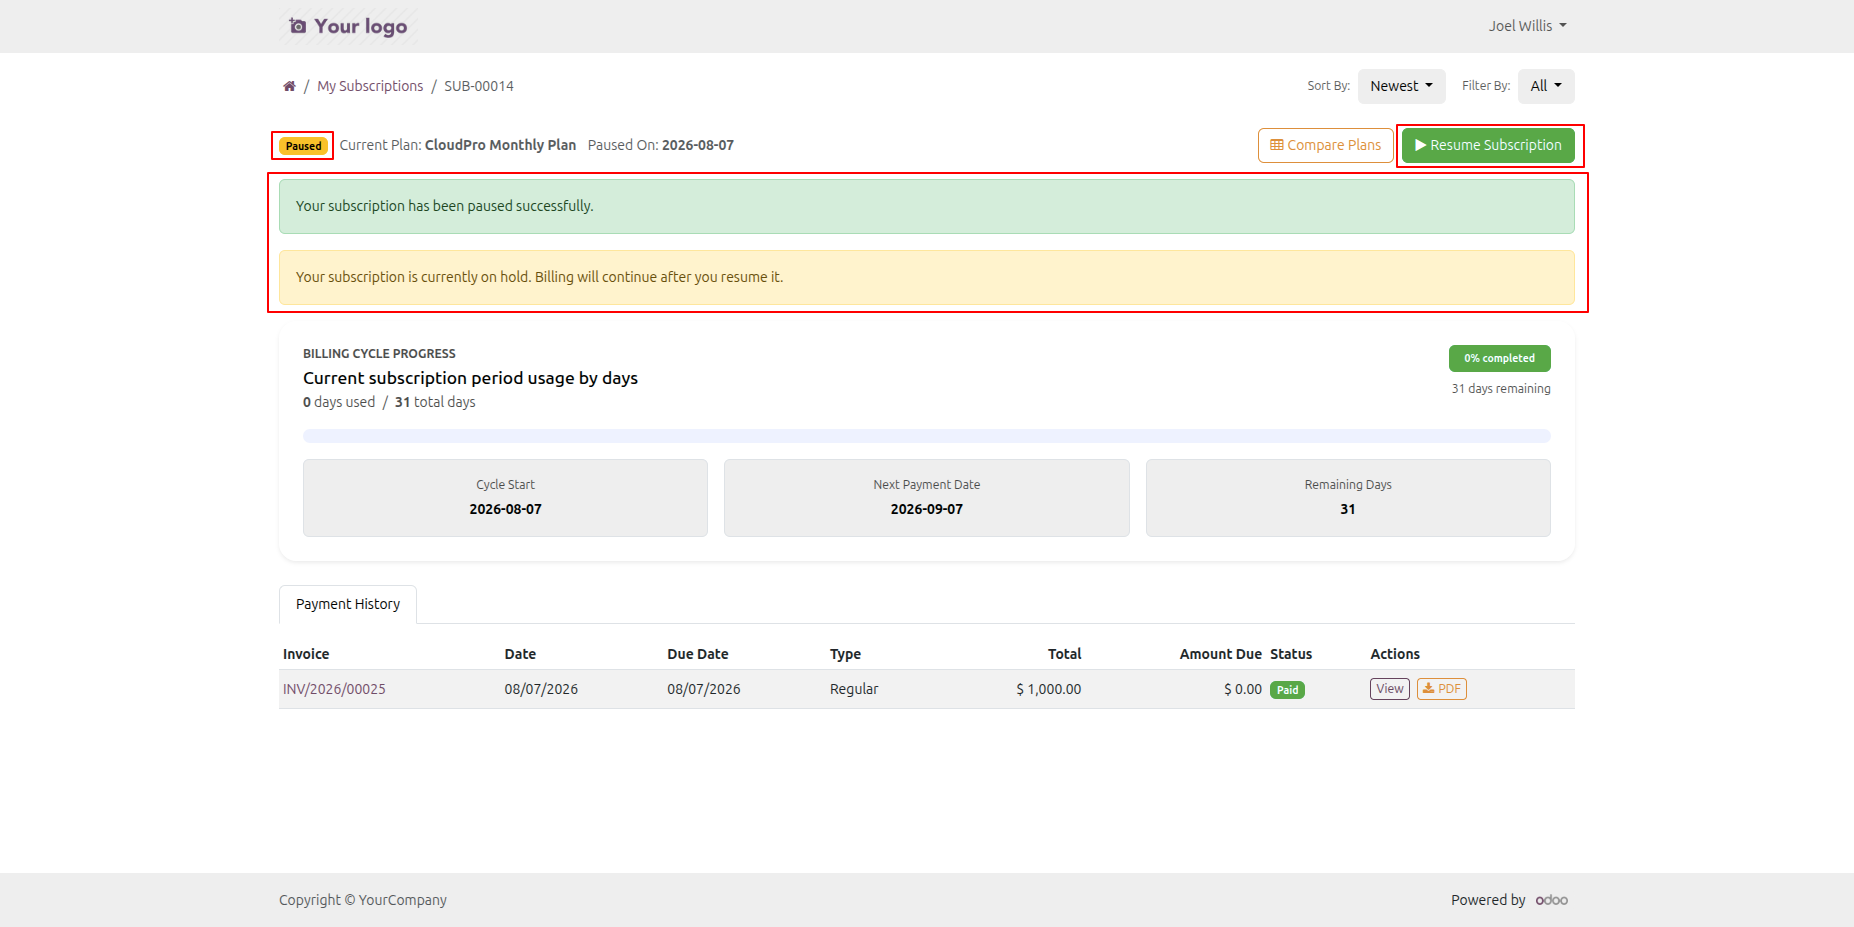
View the updated paused status of the active subscription plan.
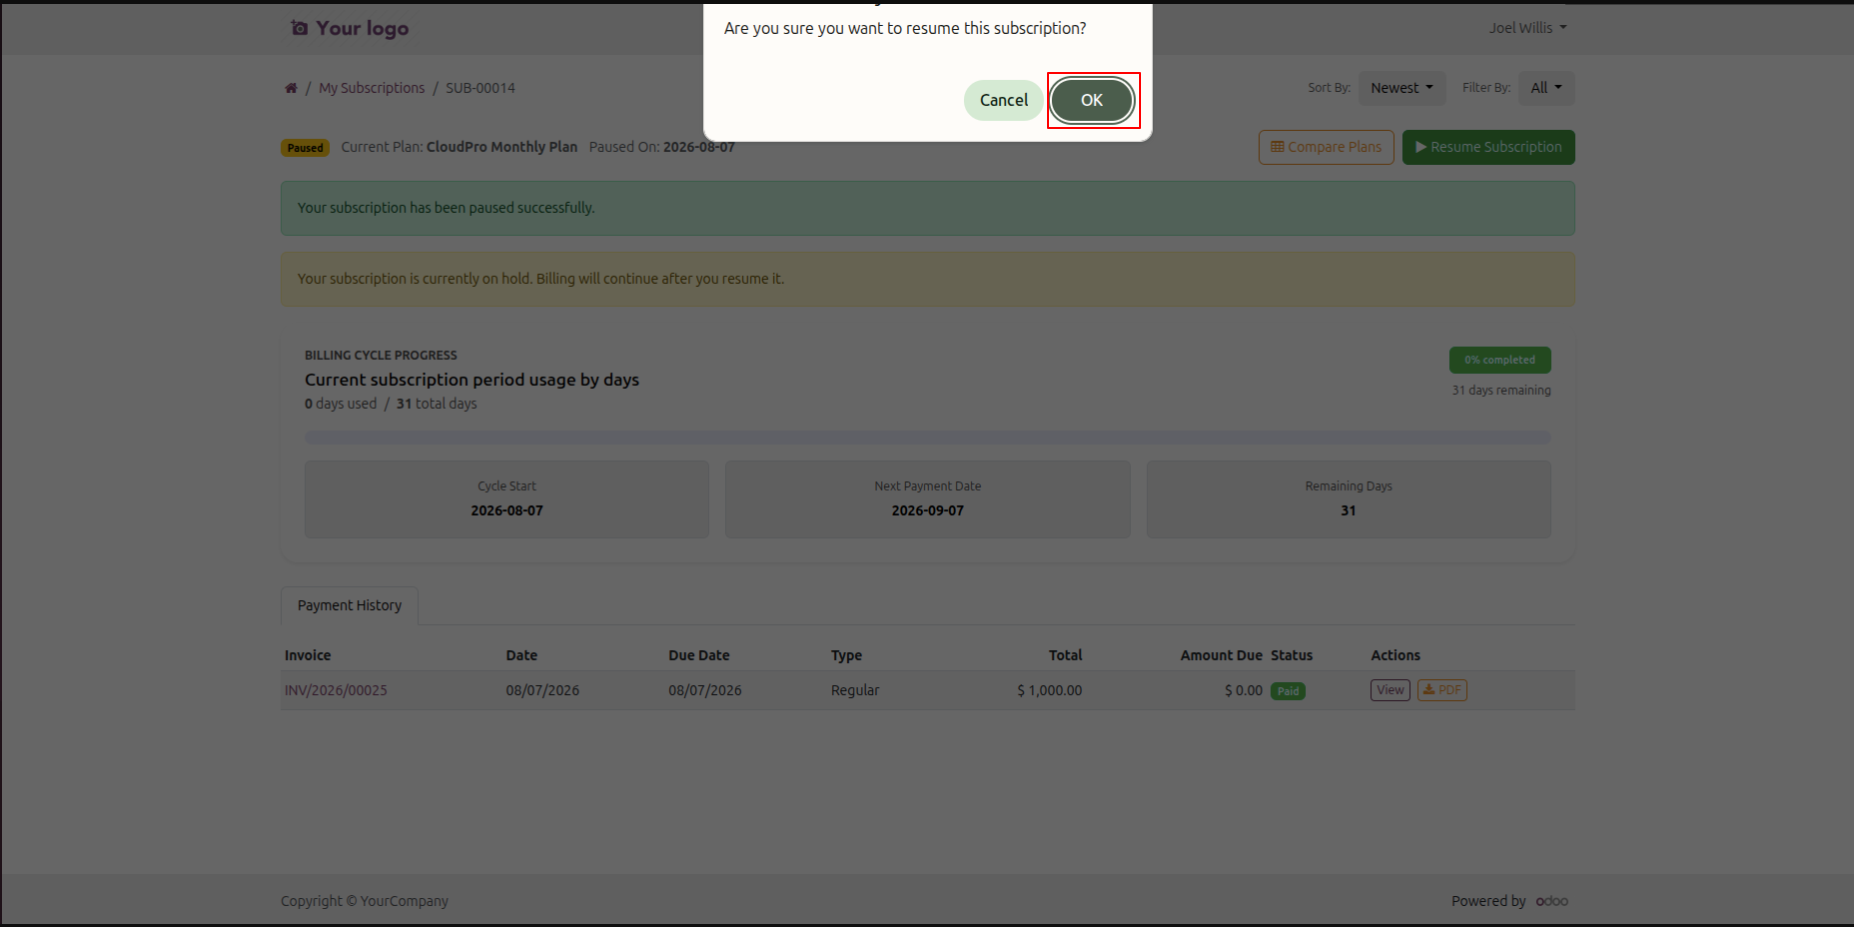
Click the Resume Subscription button to reactivate the paused service.
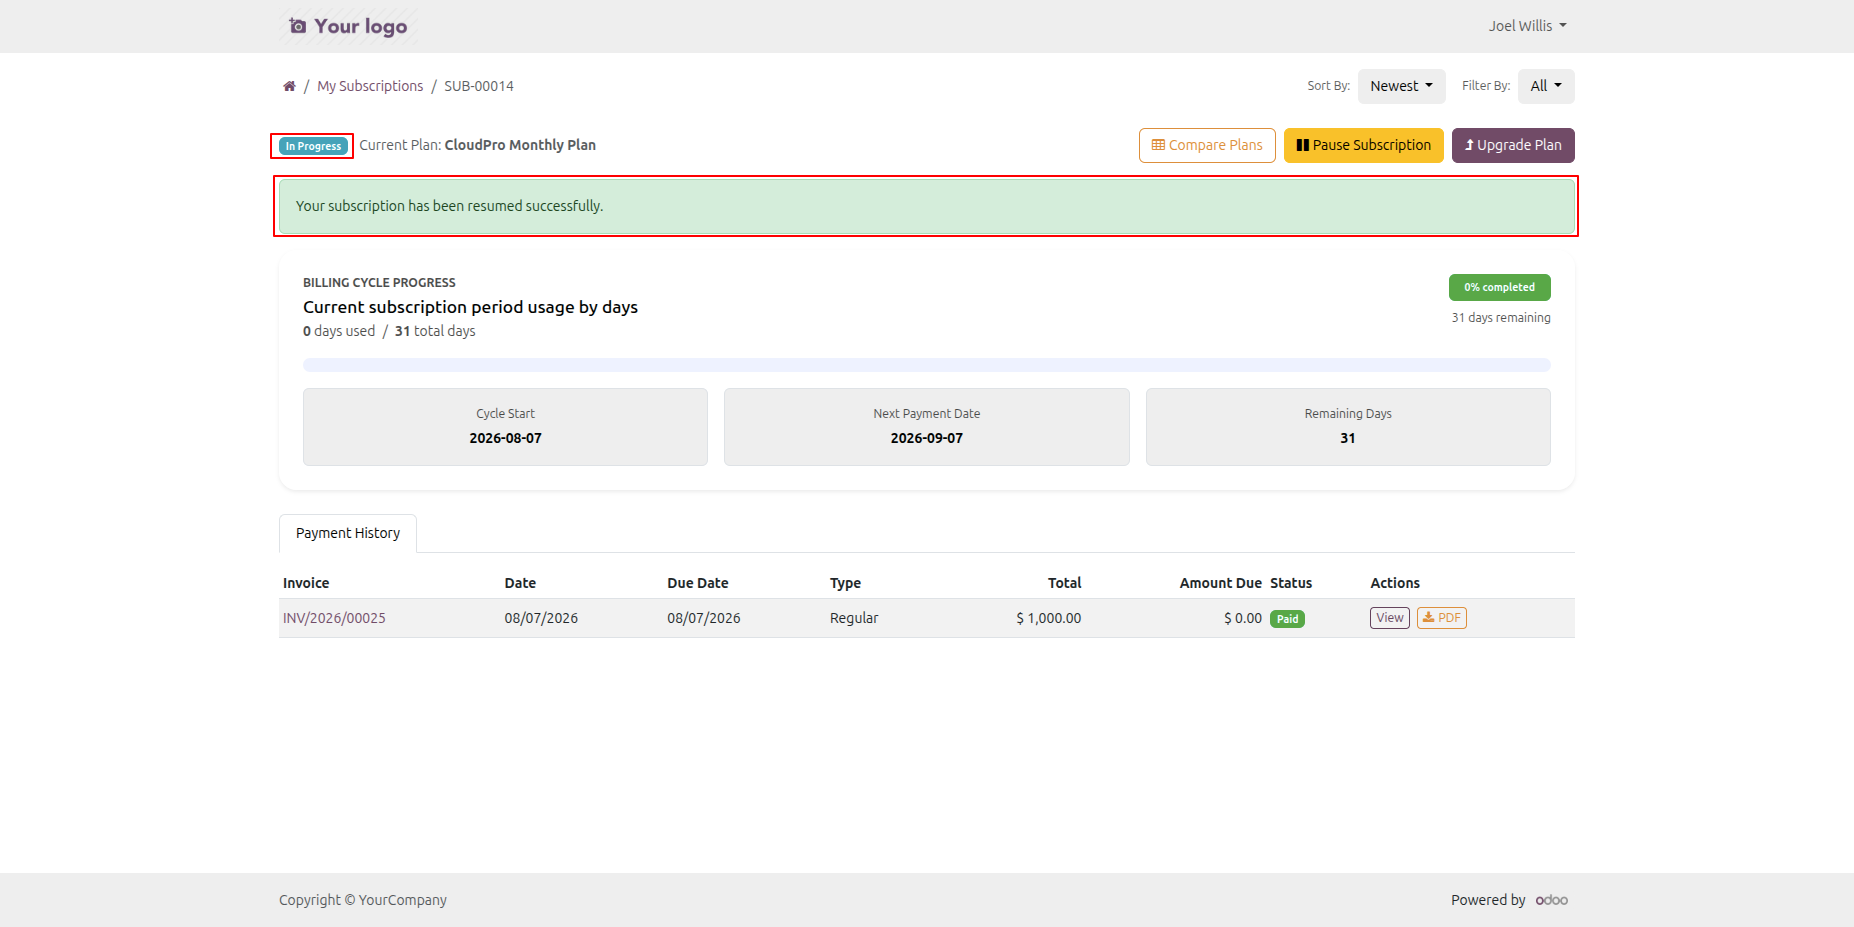
View the updated inprogress status of the paused subscription plan.
Click Subscription Dashboard from the Sales app to view an overview of subscription activities and key metrics.
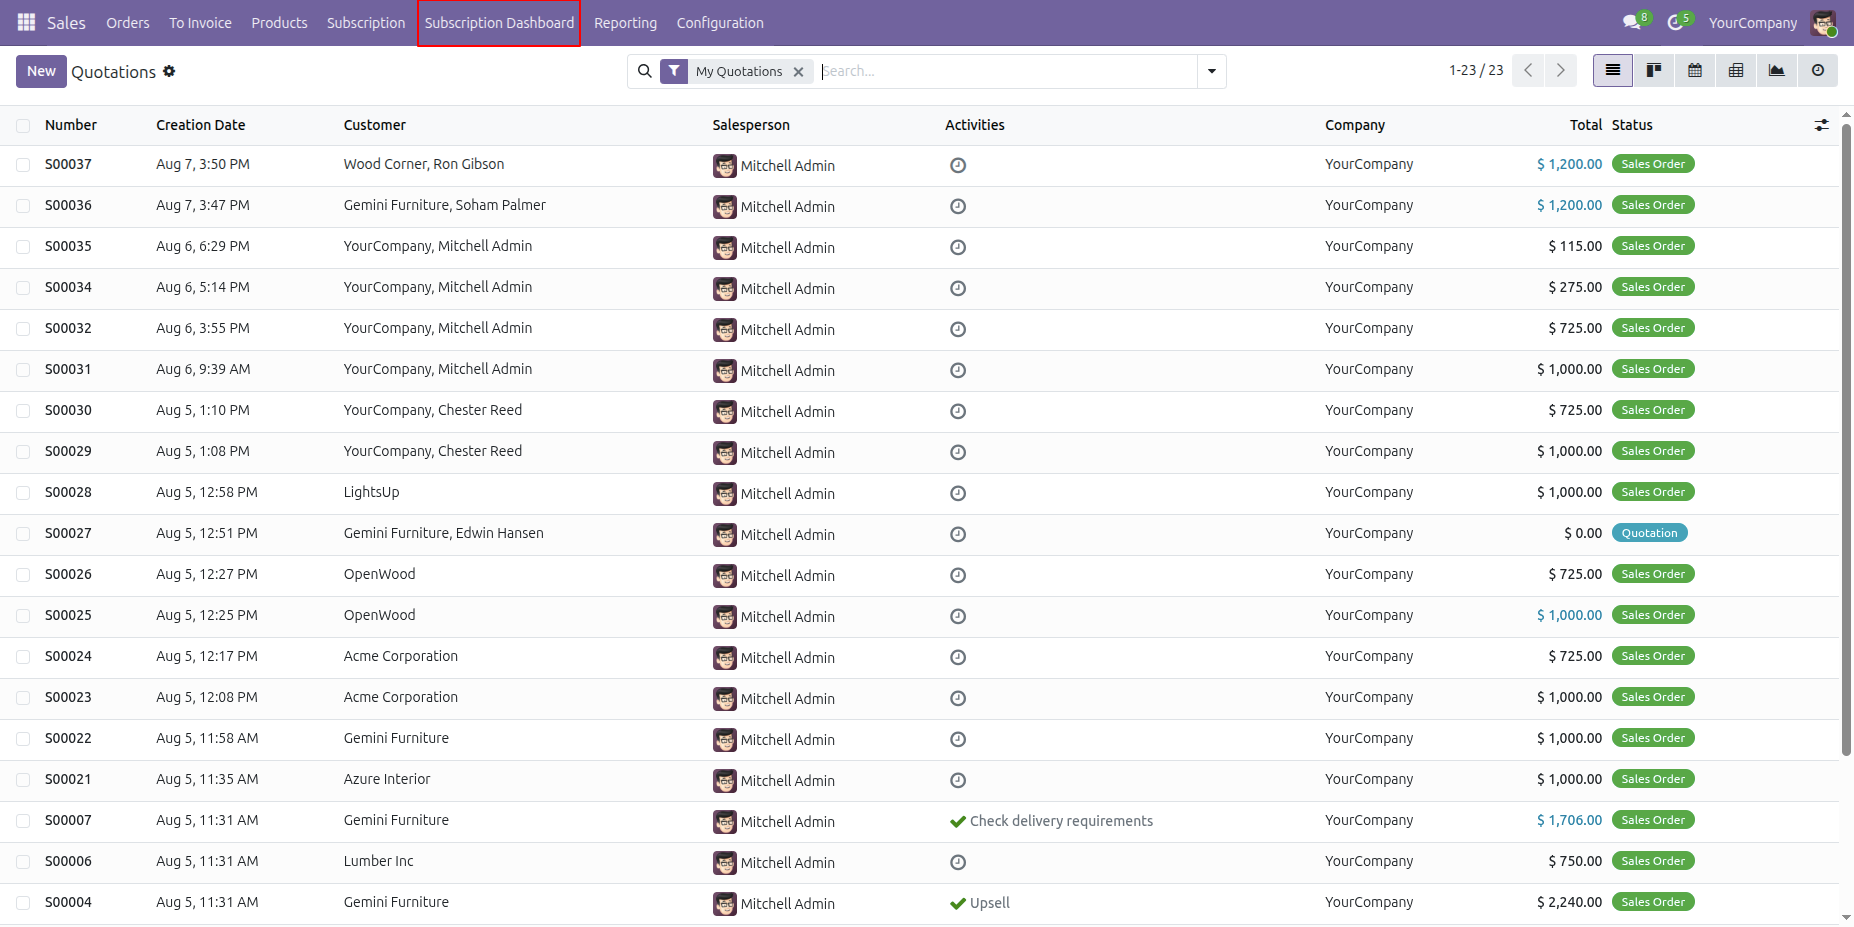
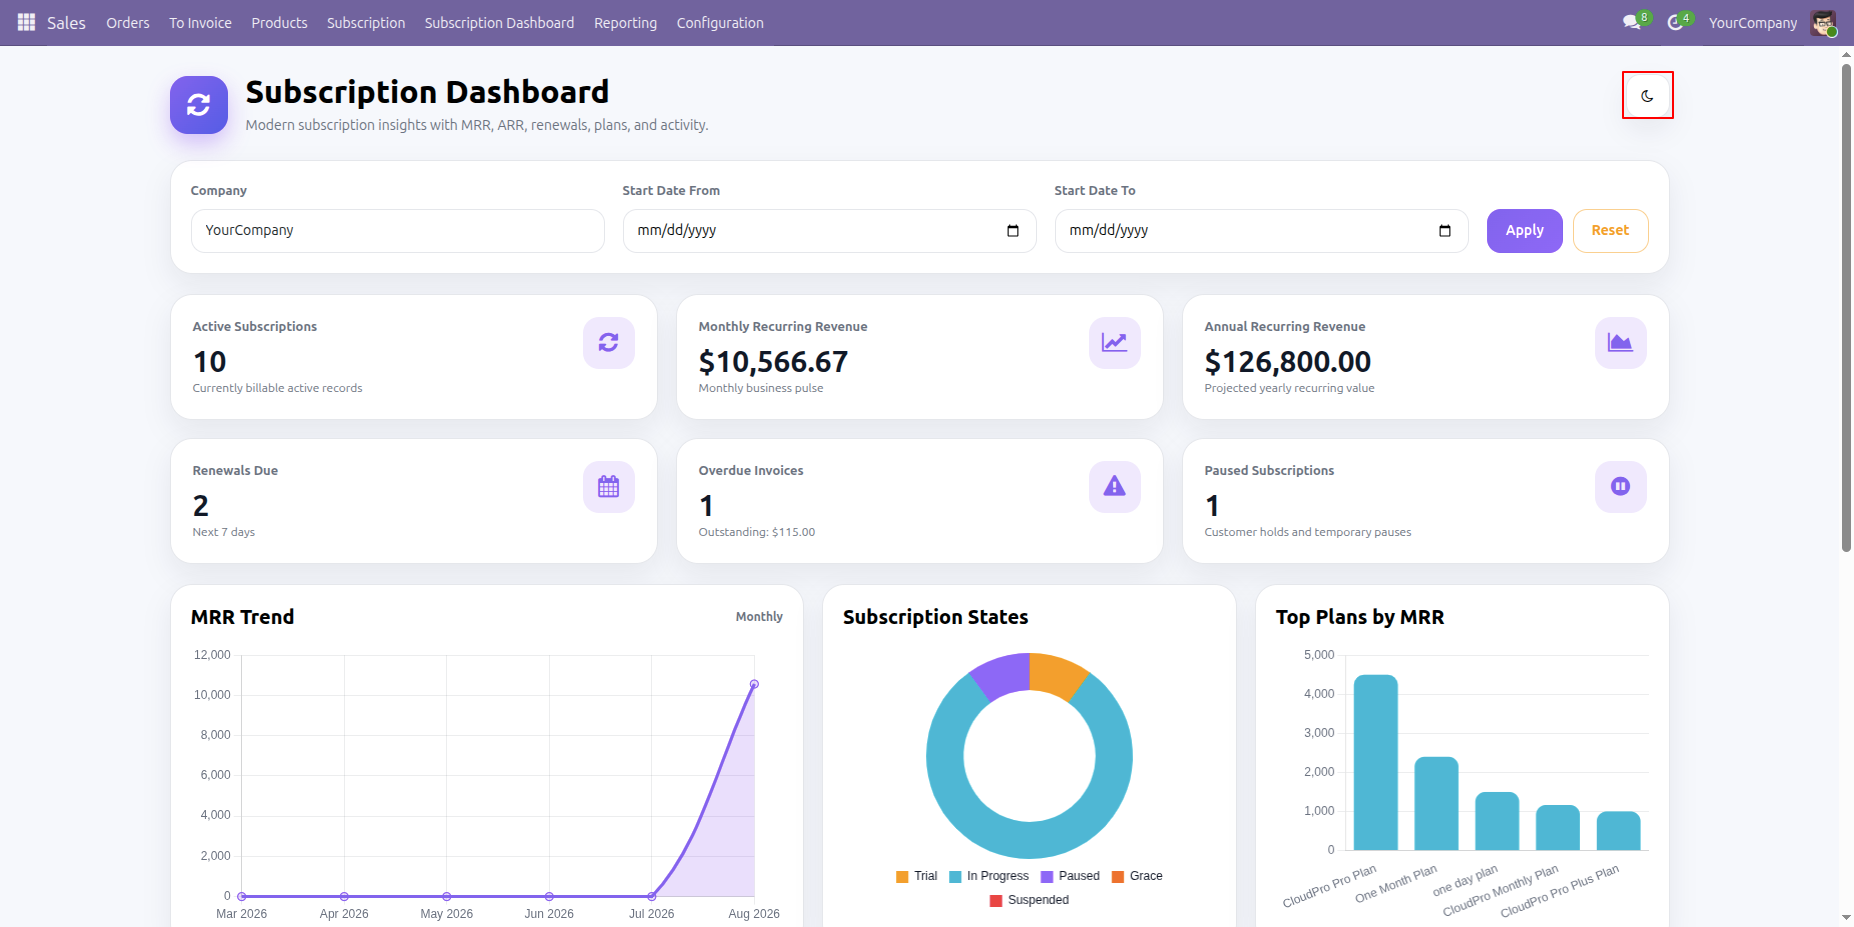
The Subscription Dashboard can be filtered by Company and From/To Date to view relevant subscription data.
The dashboard displays key subscription metrics, including Active Subscriptions, Monthly Recurring Revenue (MRR),
Annual Recurring Revenue (ARR), Renewals Due, Overdue Invoices, and Paused Subscriptions.
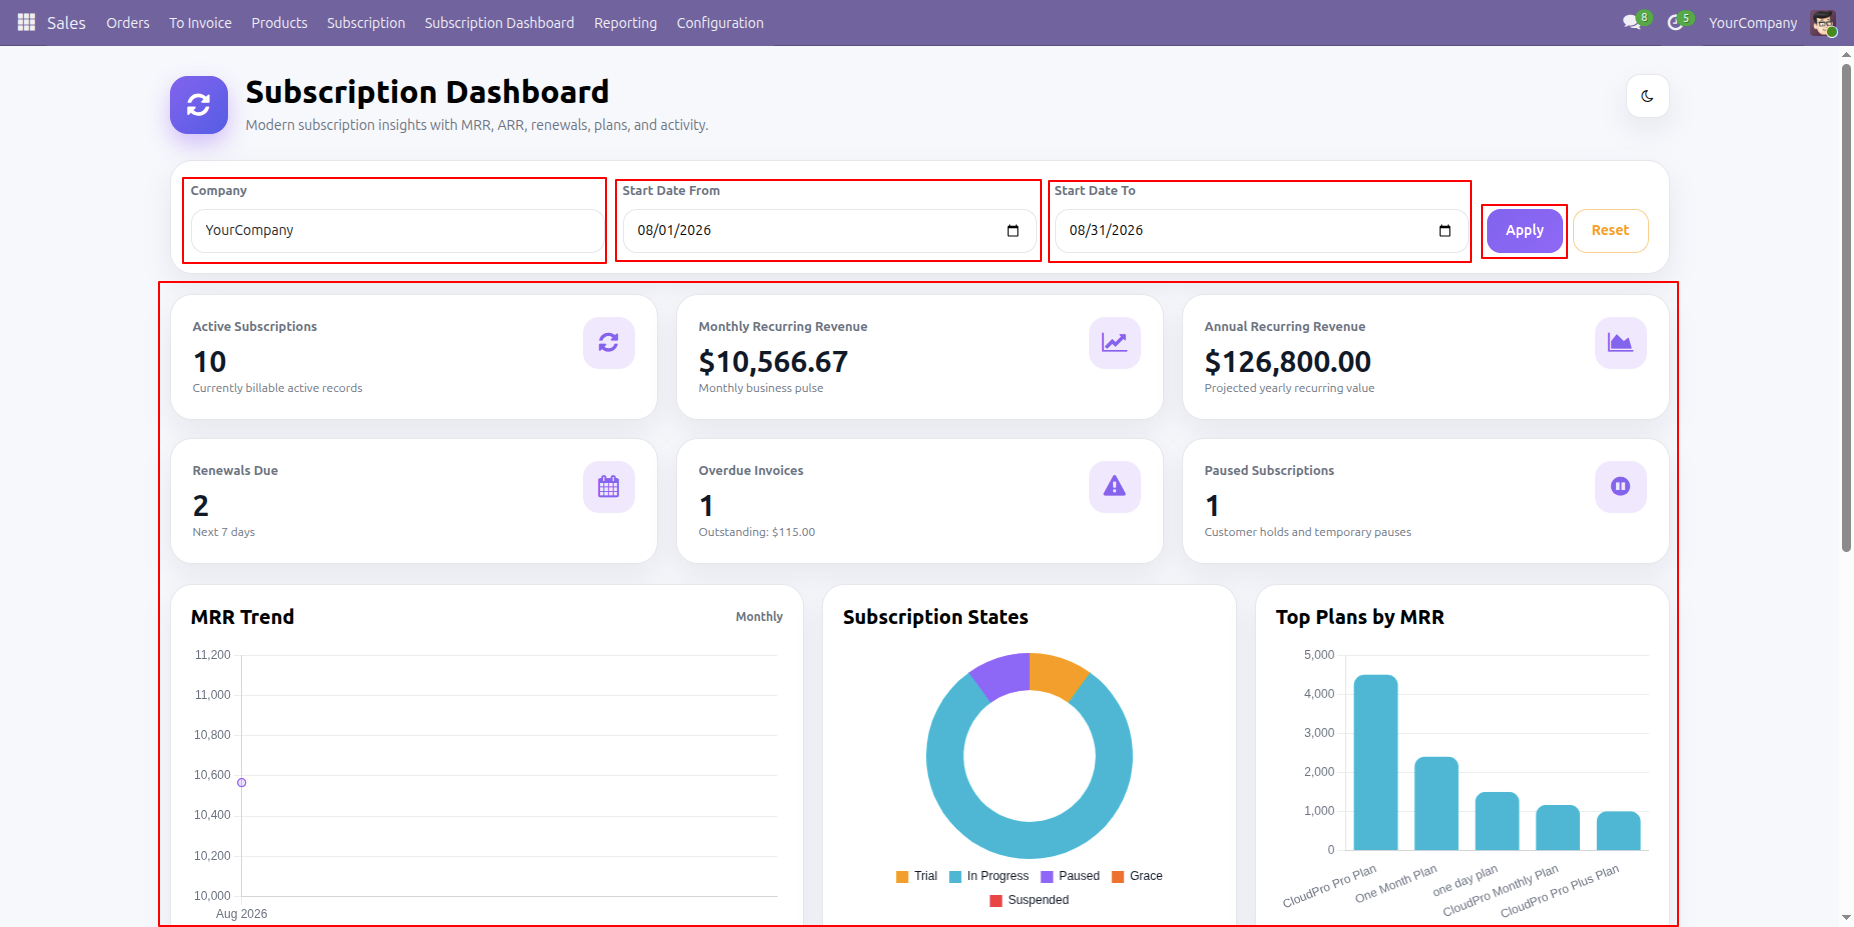
Click on Active Subscriptions tile from the dashboard.
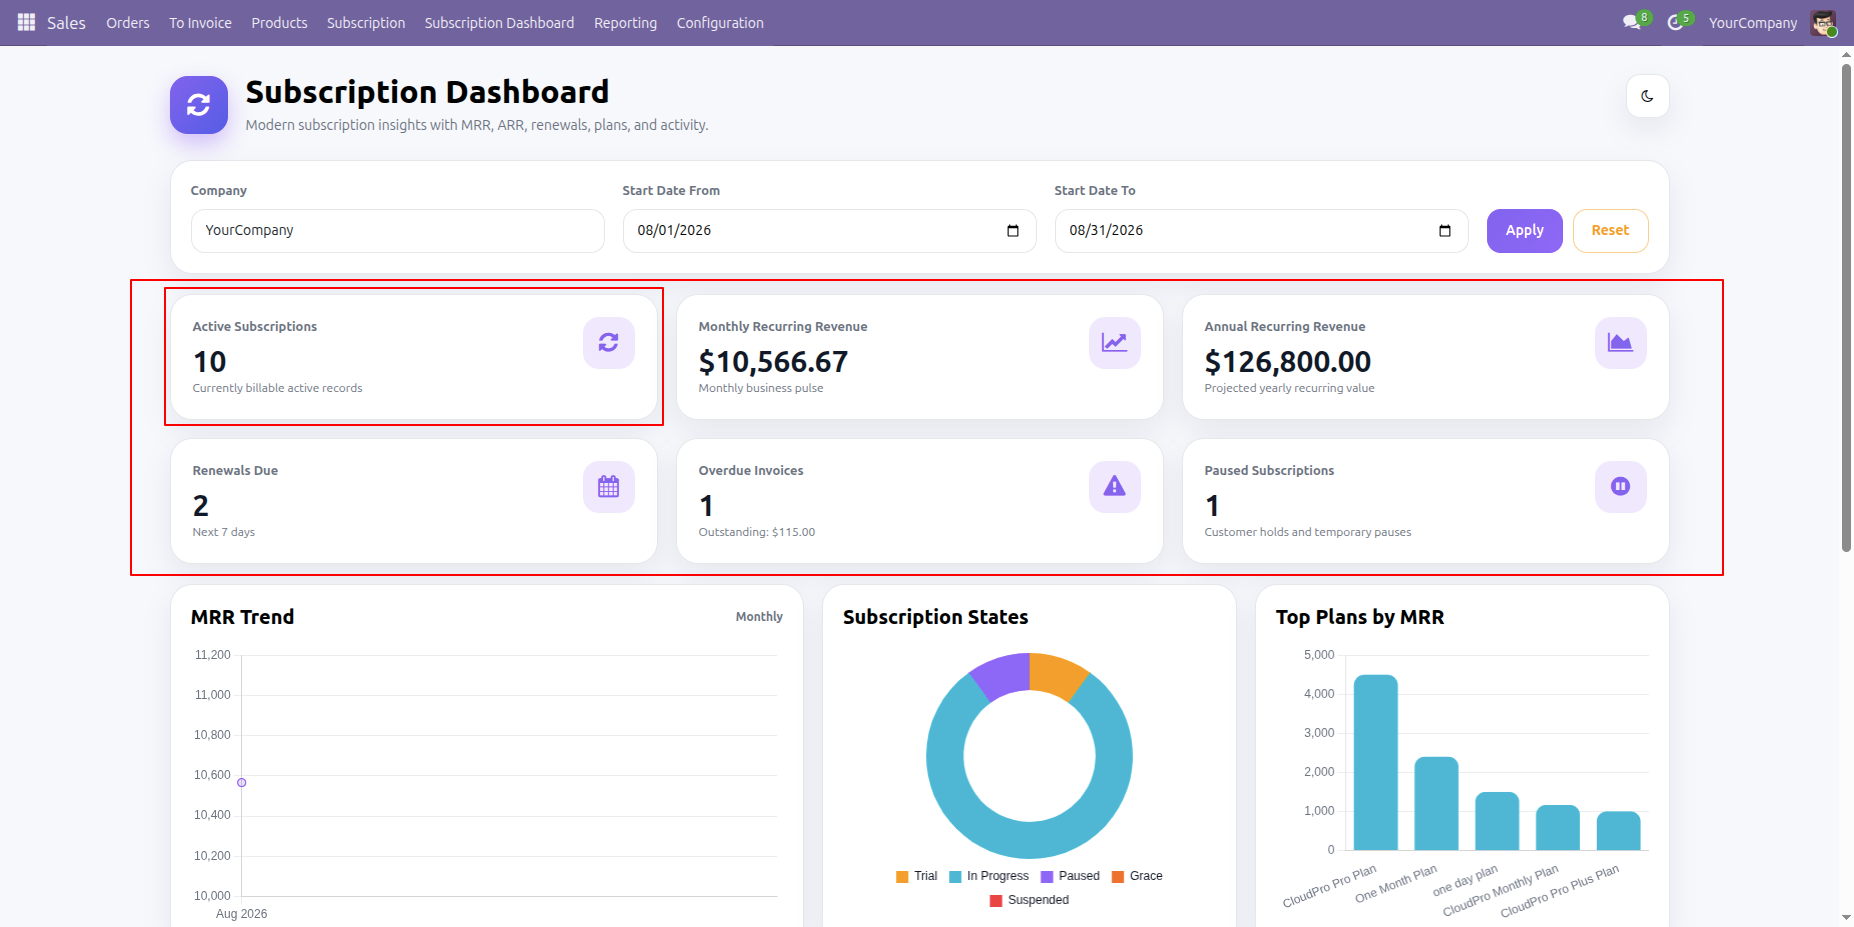
By clicking on Active Subscriptions tile from the dashbaord will open active subscription list view.
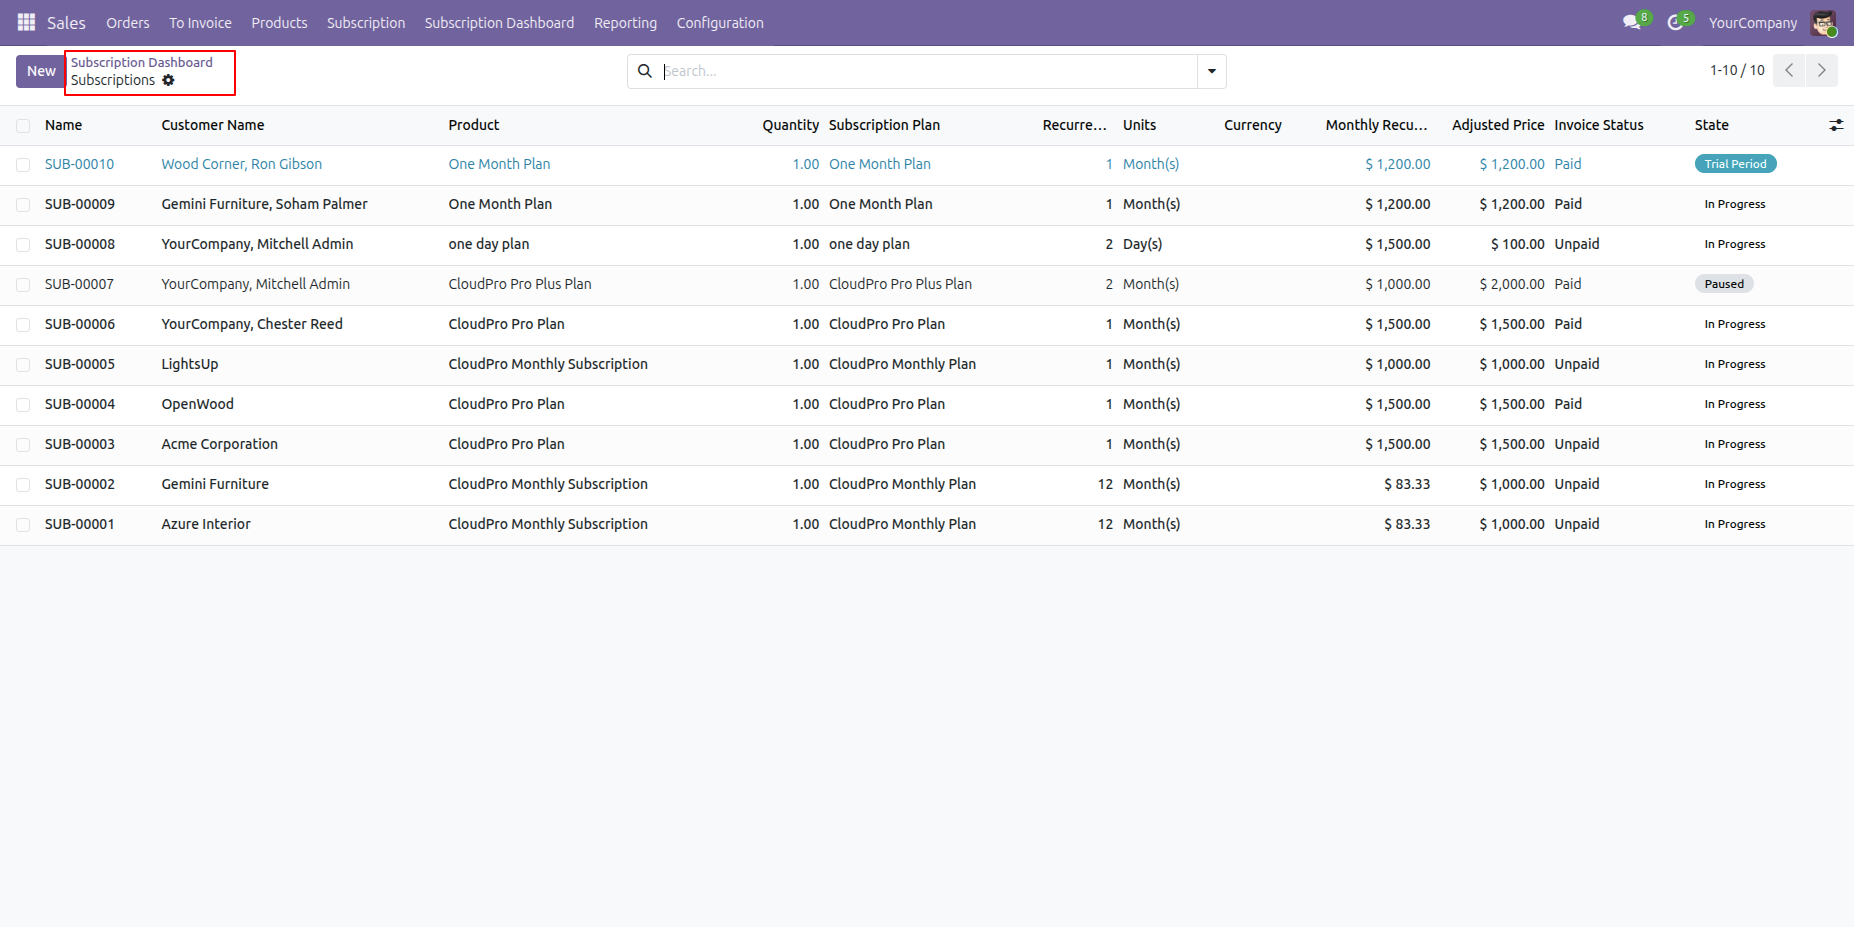
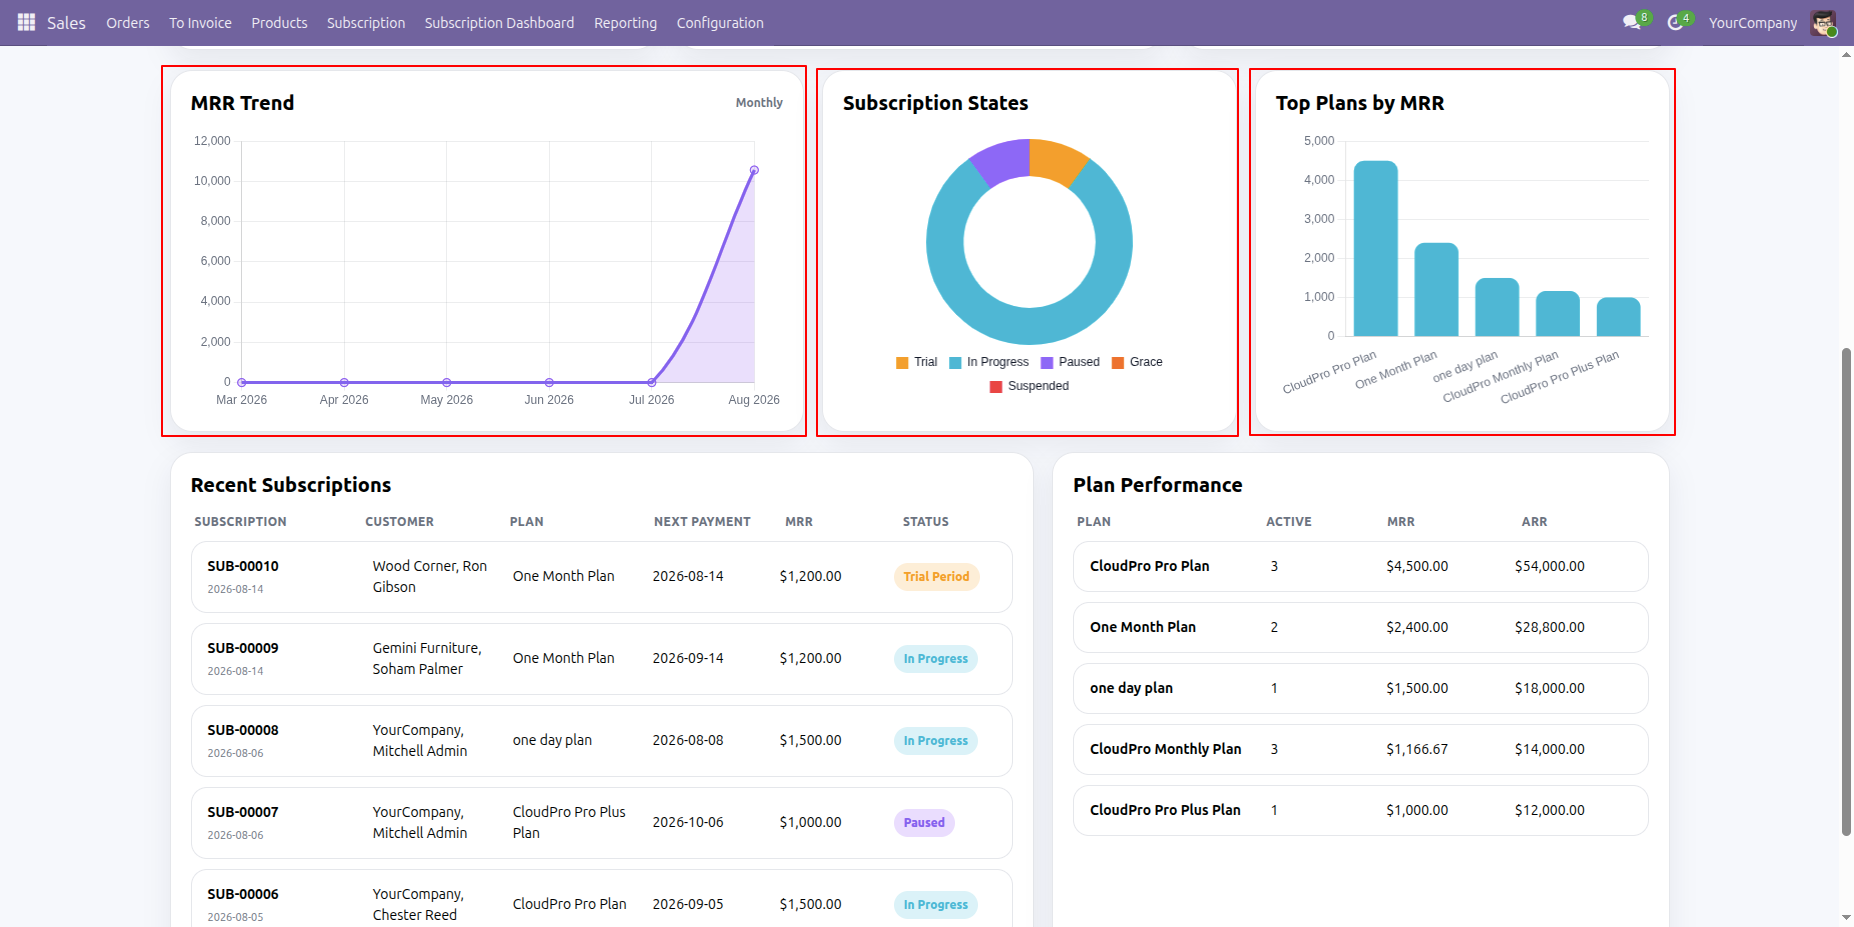
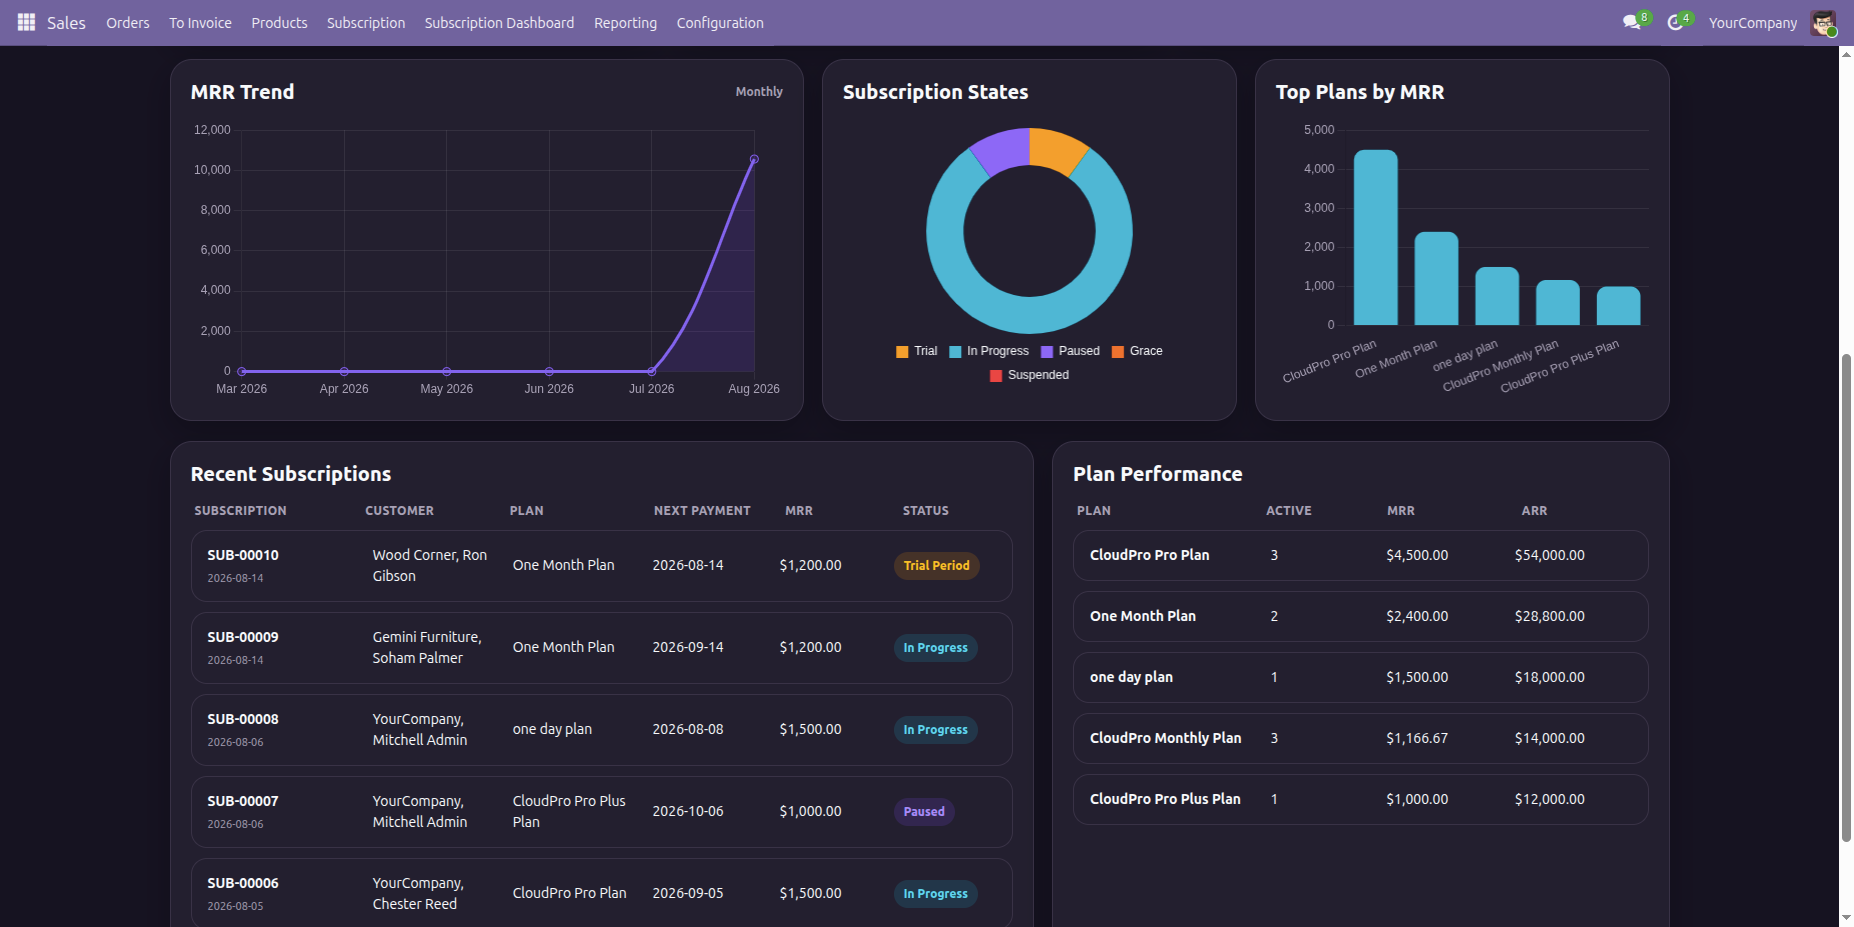
Subscription Dashboard provides visual insights through MRR Trends, Subscription States, and Top Plans by MRR charts.
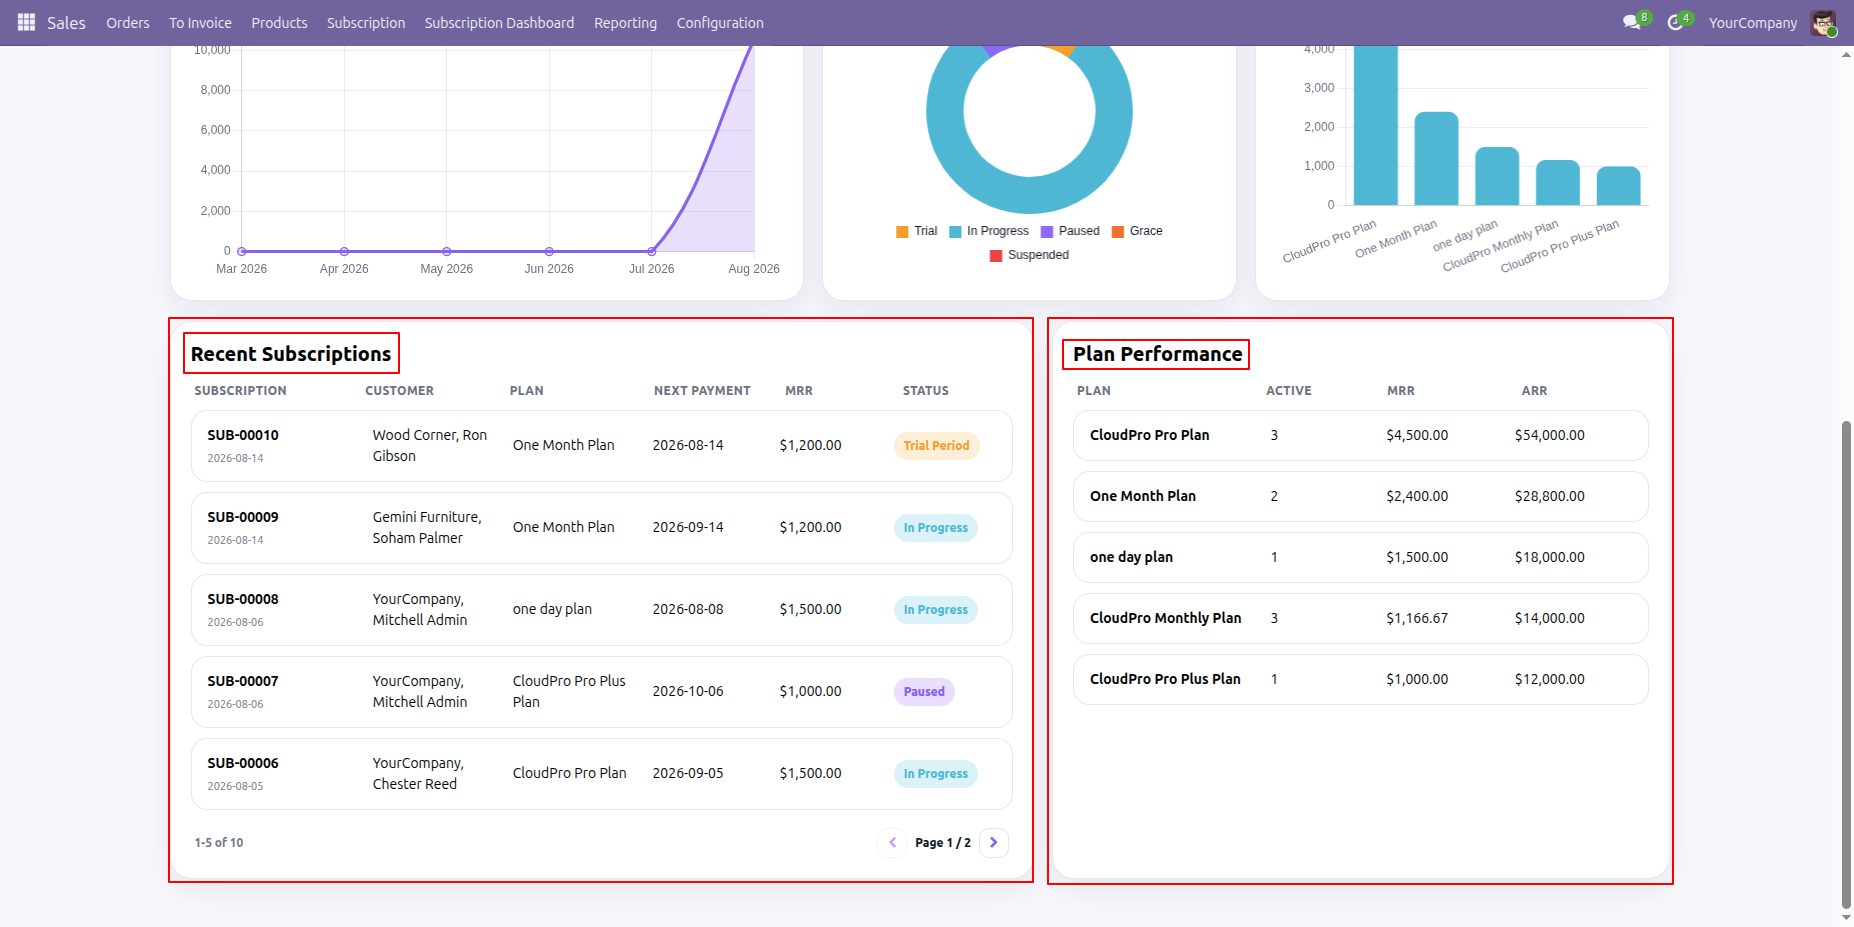
The dashboard displays Recent Subscriptions and a Plan Performance table, providing a quick overview of the latest subscription activity and plan-wise performance.
Click the Moon icon to switch the dashboard to Dark Mode for a different visual appearance.
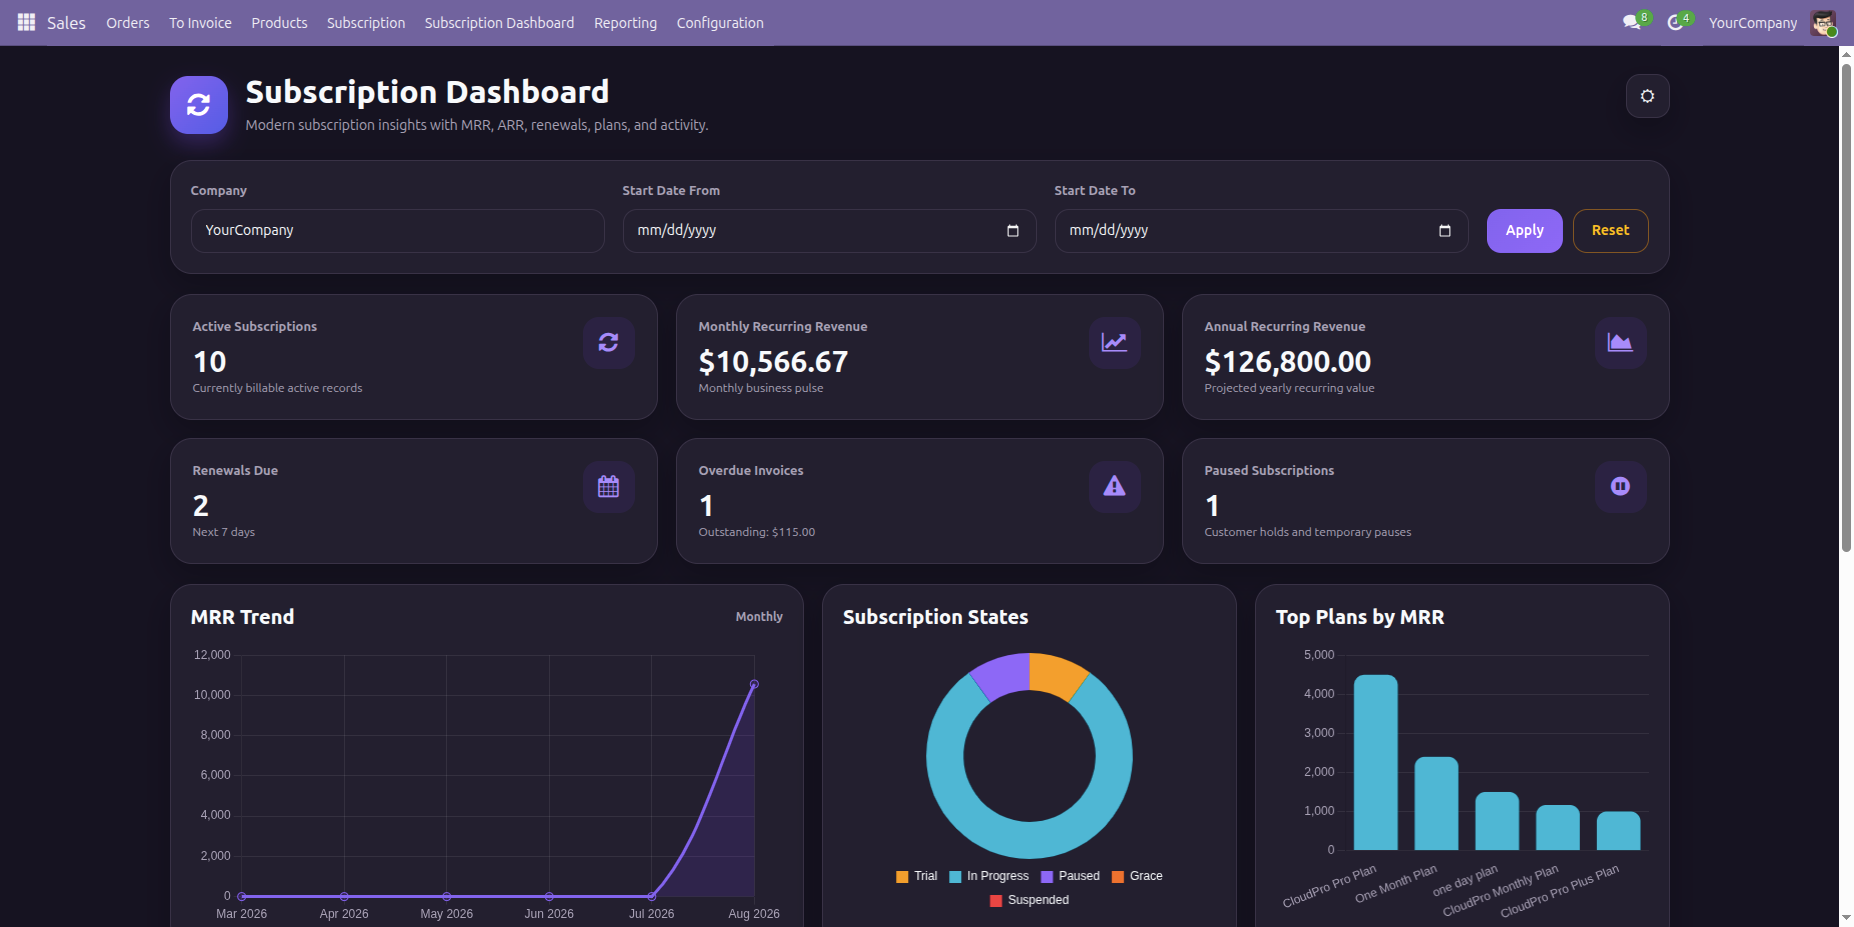
The dashboard will switch to Dark Mode, providing a darker visual interface for improved viewing.
Version 18.0.7.0.0 | Released on : 31st August 2026
Version 18.0.6.0.0 | Released on : 06th July 2026
Version 18.0.5.0.0 | Released on : 12th December 2025
Version 18.0.4.0.0 | Released on : 8th November 2025
Version 18.0.3.0.0 | Released on : 12th September 2025
Version 18.0.2.0.0 | Released on : 10th January 2025
Version 18.0.1.0.0 | Released on : 14th August 2024
- Yes, this app works perfectly with Odoo Enterprise (Odoo.sh & Premise) as well as Community.
- No, this application is not compatible with odoo.com(odoo saas).
- Please Contact Us at sales@softhealer.comto request customization.
- Yes, we provide free lifetime support for the version you purchased.
- Yes, you will get free update for lifetime.
- No, you don't need to install addition libraries.
- Yes, You have to download module for each version (13,14,15) except in version 12 or lower.
- No, We do not provide any kind of exchange.
Discover Our Latest Apps