


Shopify Odoo Connector

Using this app, you can easily import products, contacts, and orders from Shopify into Odoo. It also allows you to export products and customers to Shopify when they are created or updated.
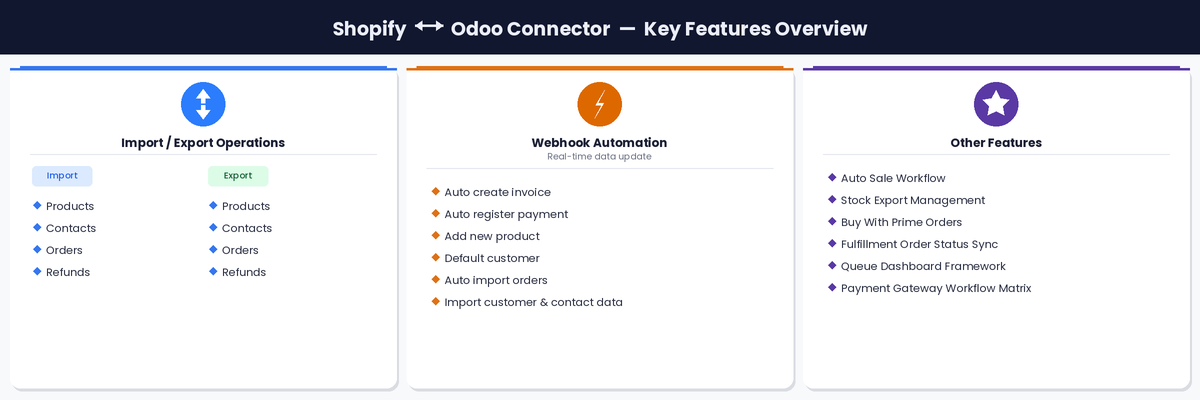
Key Features
Features

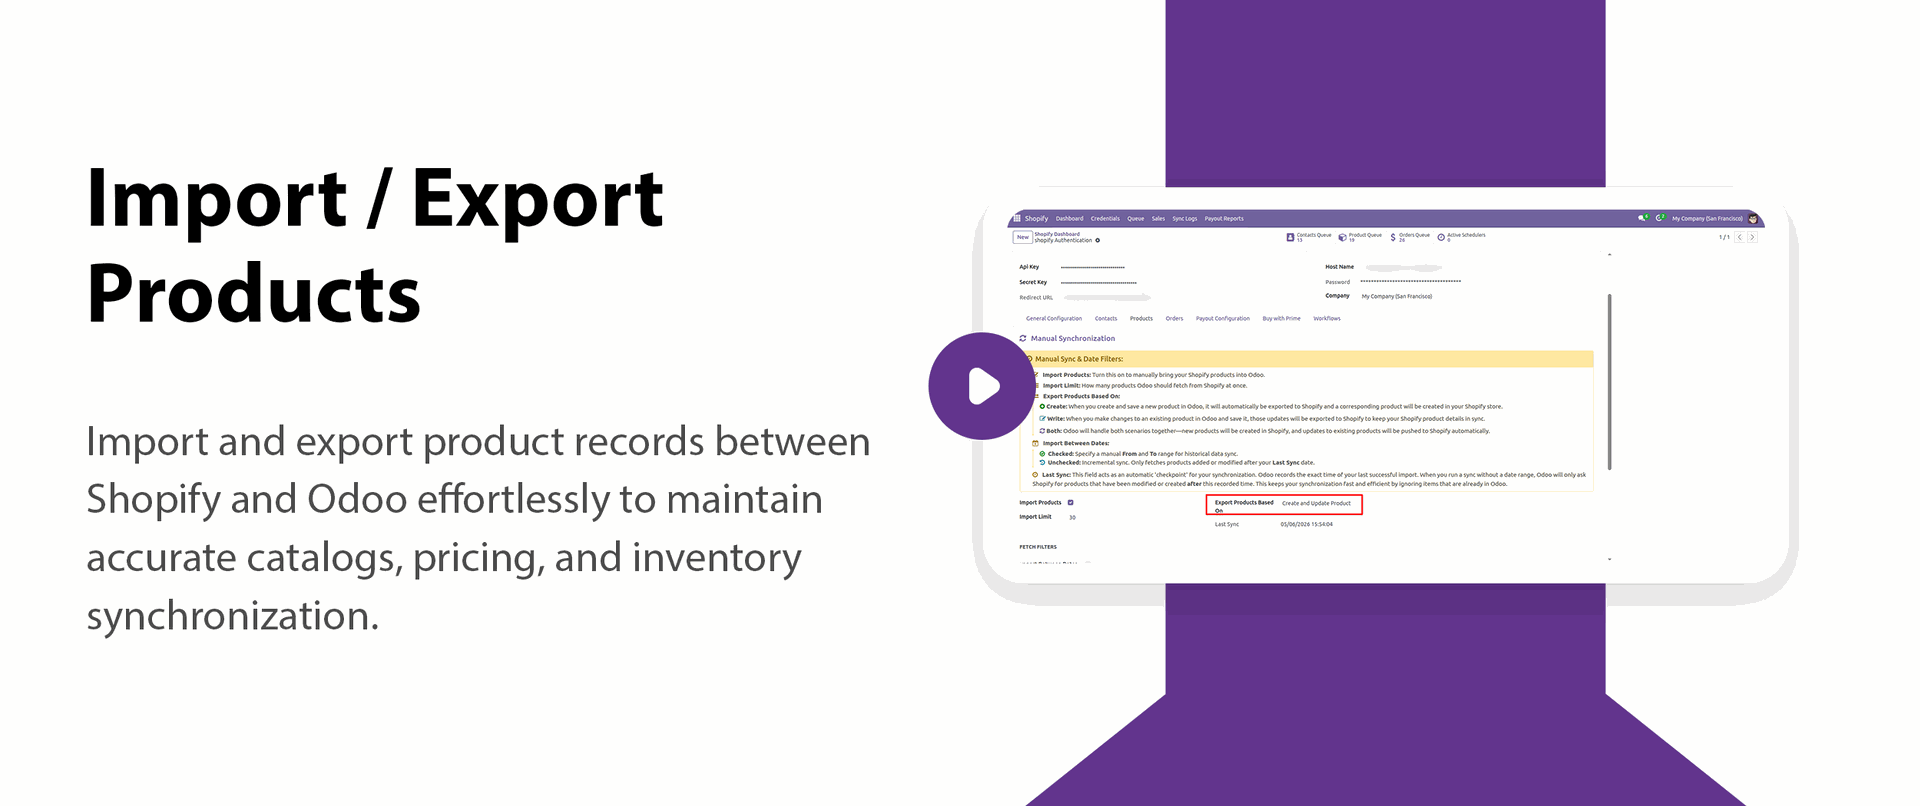
Import/Export Products
- Manual sync option for on-demand import/export
- Import/export products with details
- Import products by specifying a date range
- Export products based on updated
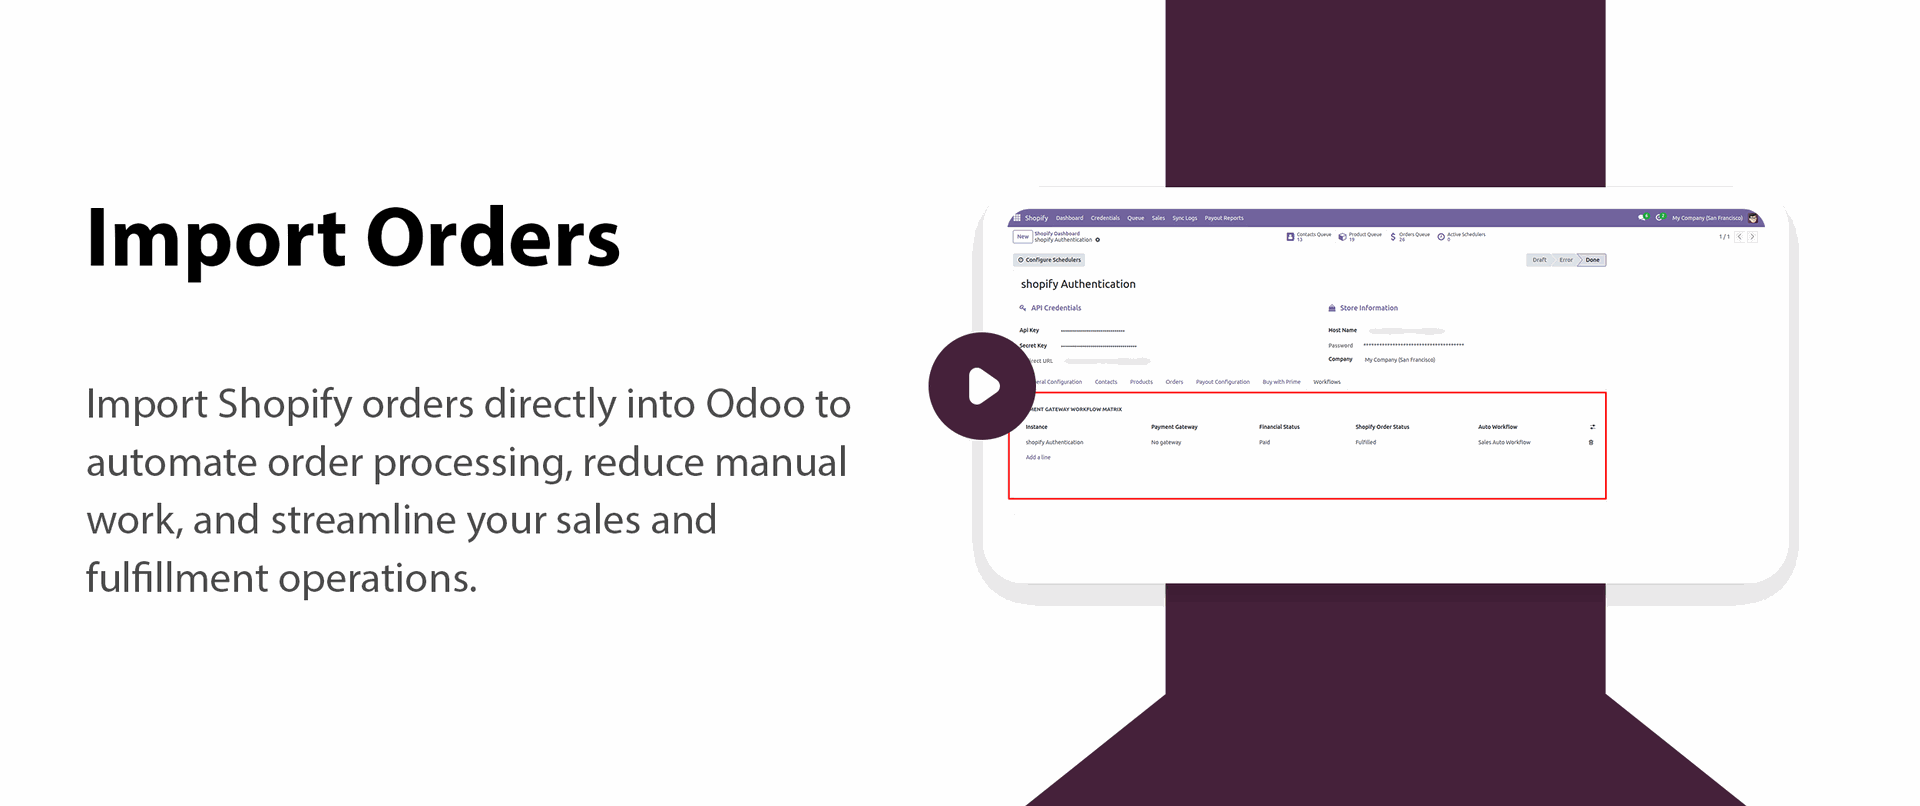
Import Orders
Track shipments in
- Option to enable automatic import (cron-based)
- Manual sync option for on-demand import
- Option to import as 'Confirmed' order in odoo

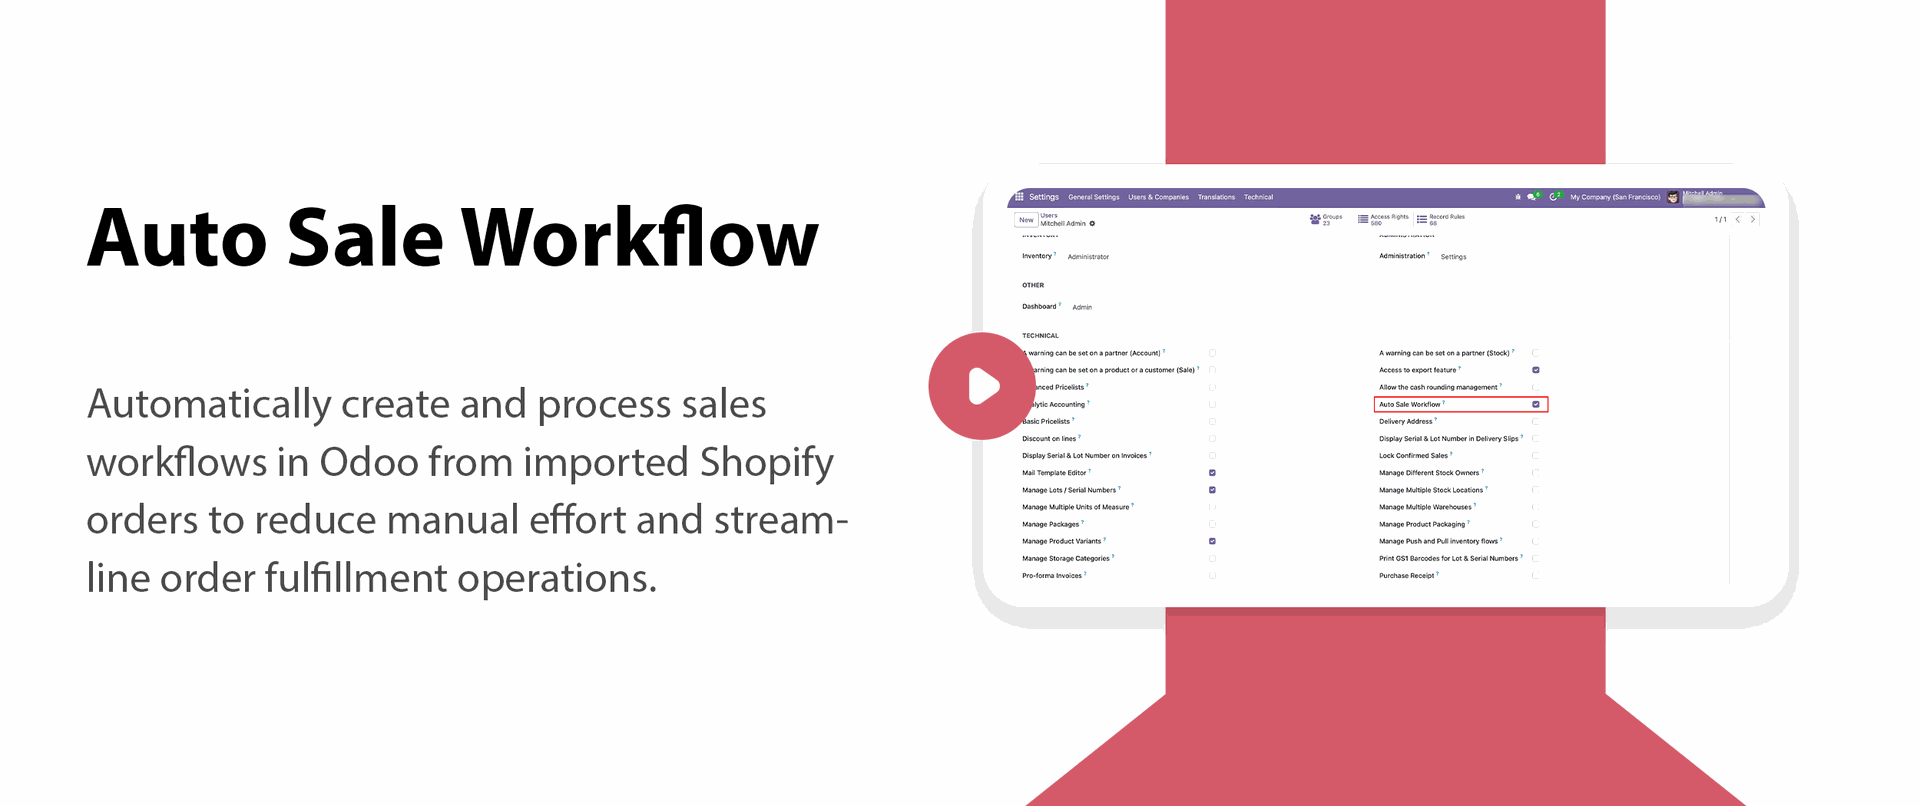
Auto Sale Workflow Calculation
- Automatically create invoices
- Auto-vlidate deliveries for faster order processing
- Auto-register payments & Force Transfer

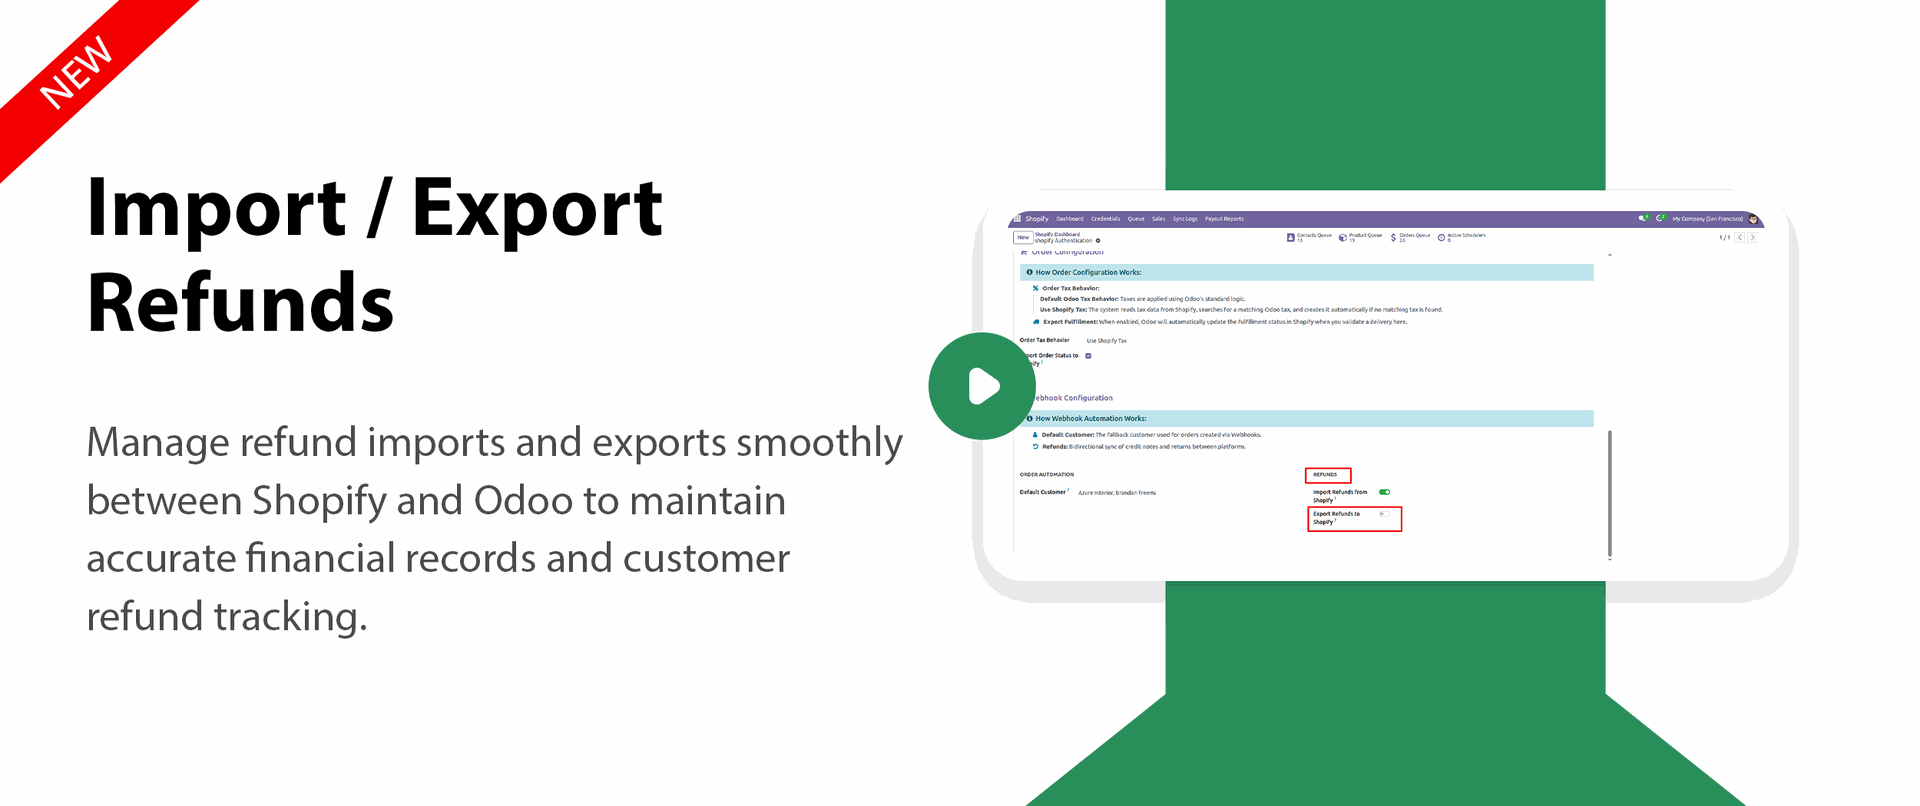
Import / Export Refunds
- Import refund records into Odoo with accurate details
- Export refund updates seamlessly to connected platforms
- Maintain proper financial and order reconciliation
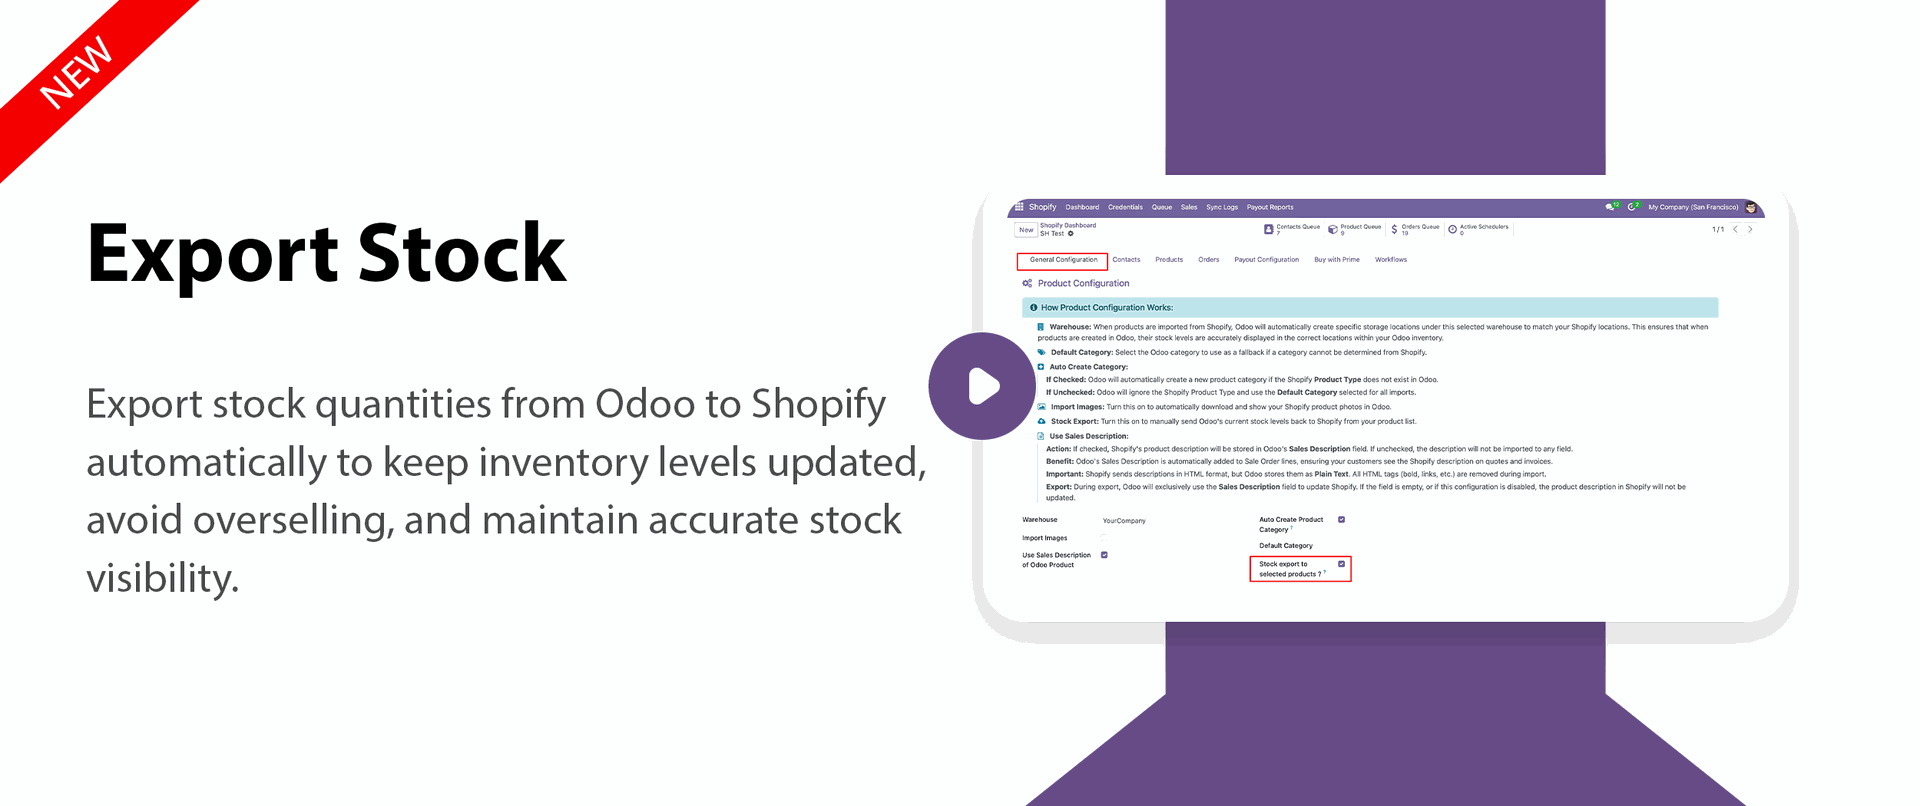
Stock Export Management Website and Backend
- Export stock quantities from Odoo automatically
- Keep inventory synchronized across connected channels
- Improve stock visibility and inventory accuracy

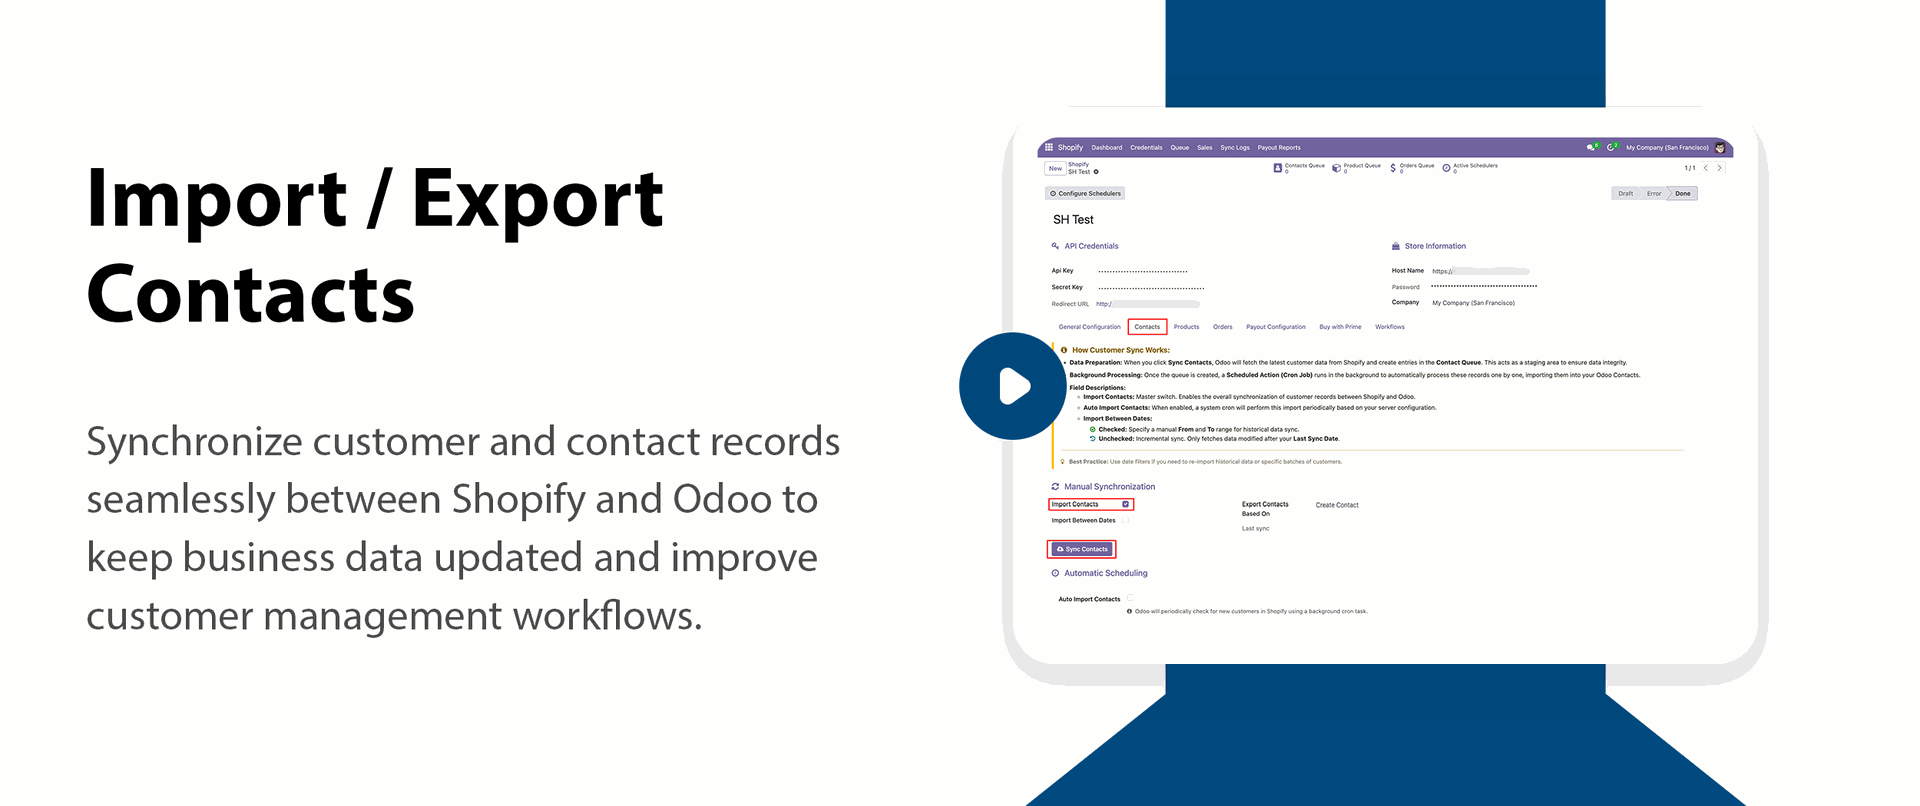
Import/Export Contacts
- Manual sync option for on-demand import/export
- Import contacts by specifying a date range
- Export contacts based on creation
- Export contacts based on updated

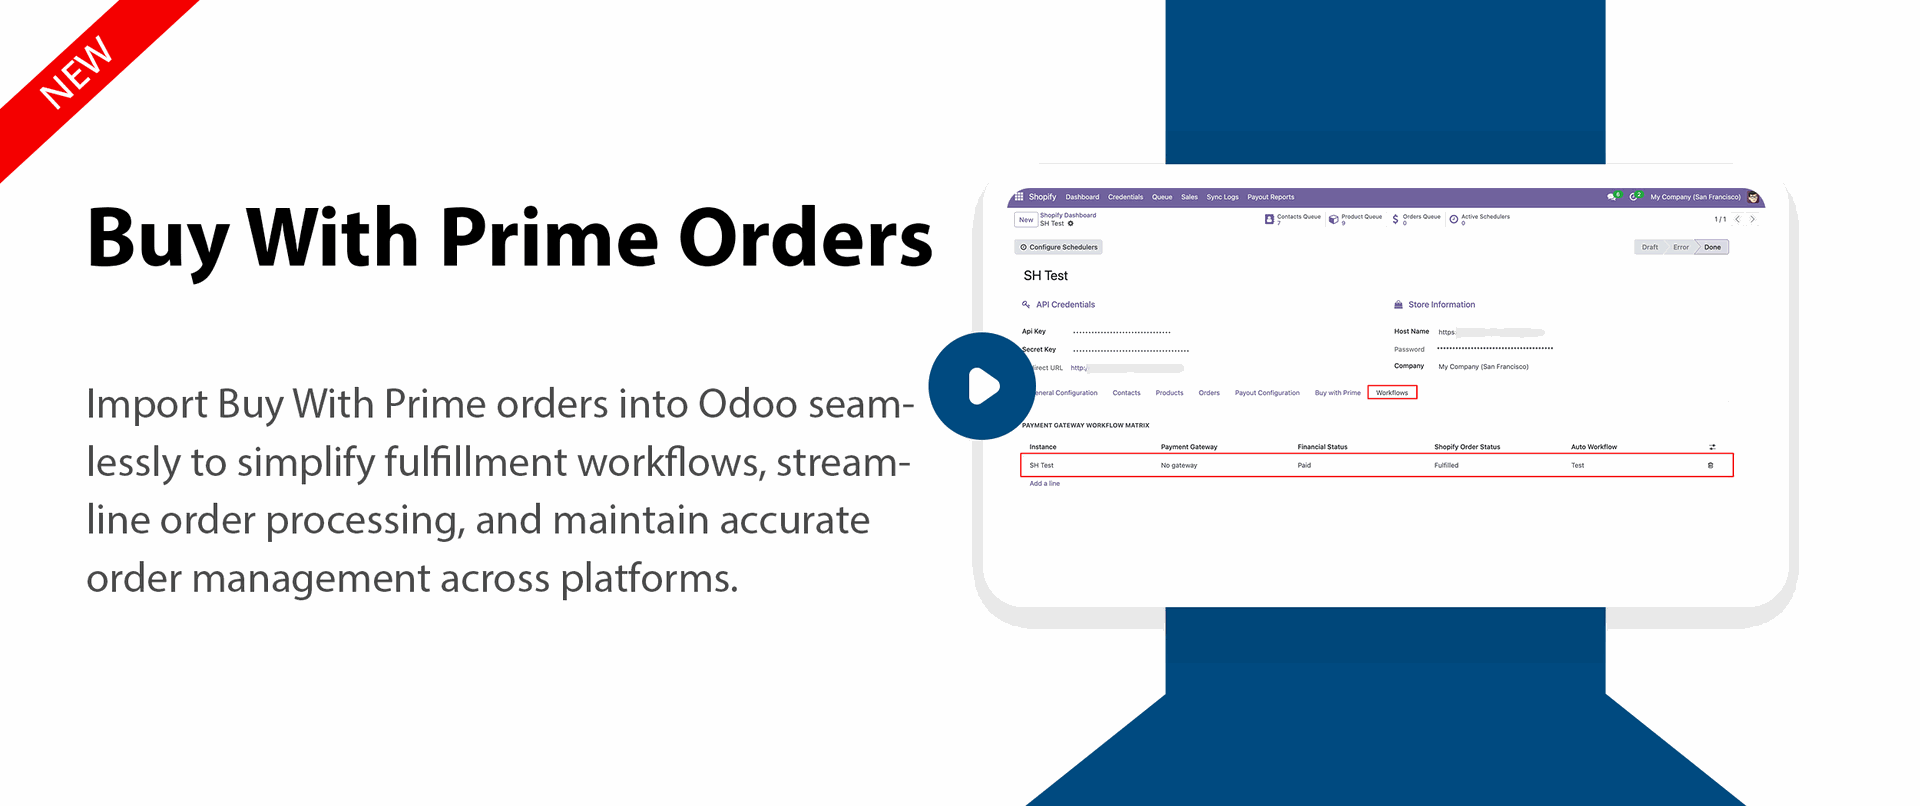
Buy With Prime Orders
- Import Buy With Prime orders directly into Odoo
- Streamline order processing and fulfillment workflows
- Reduce manual order handling with automated sync

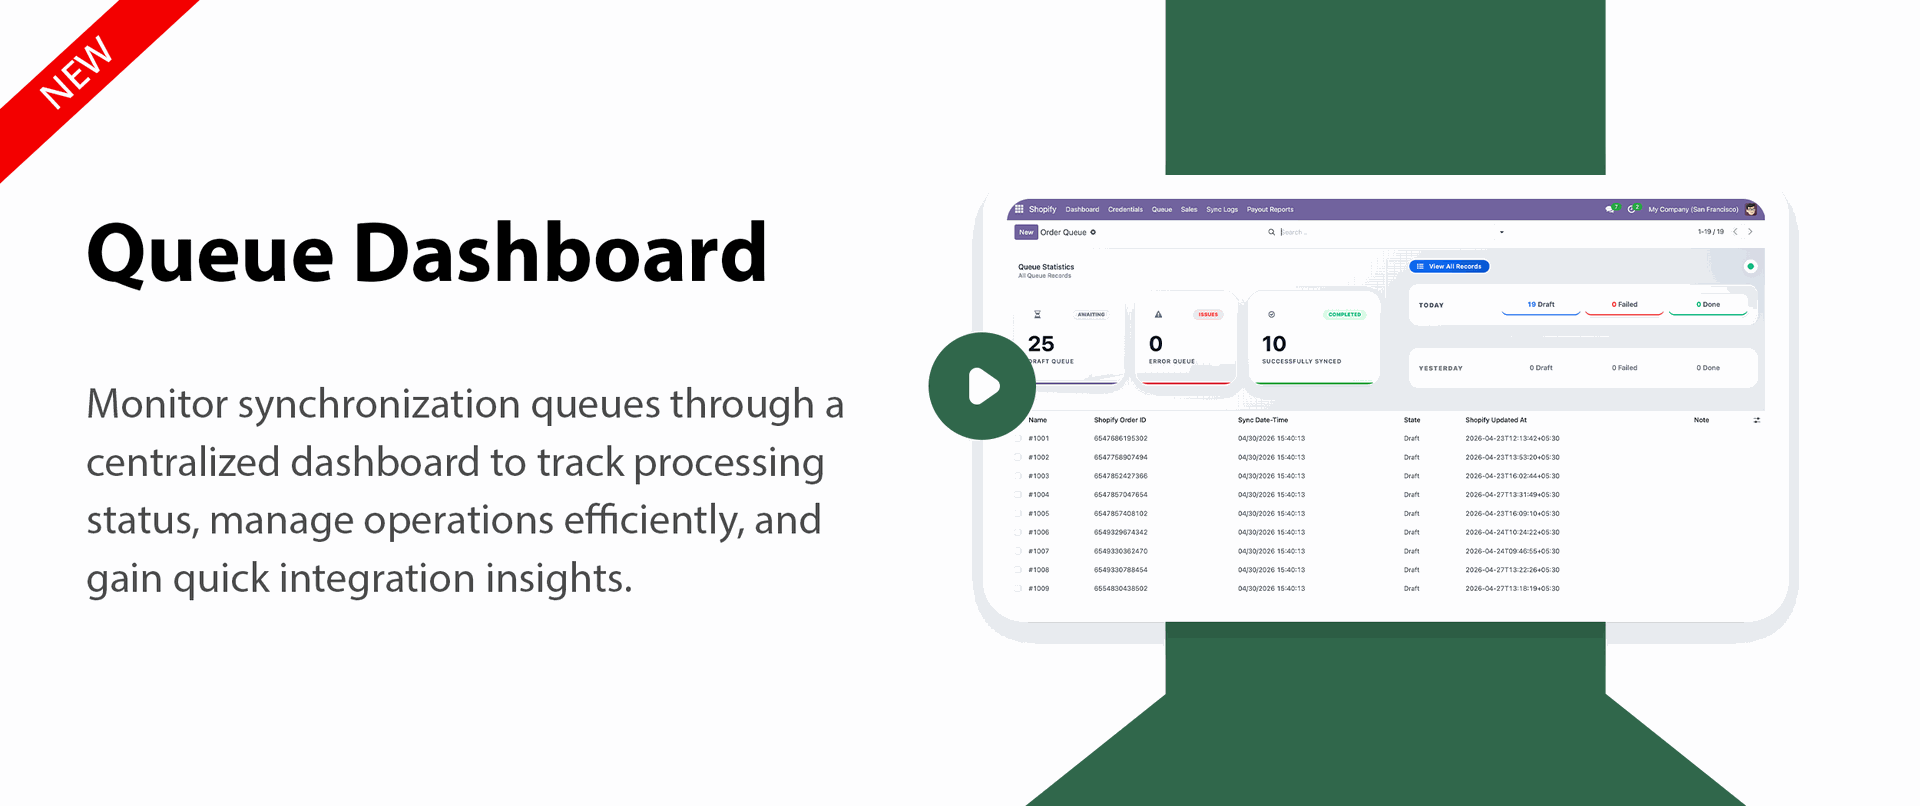
Queue Dashboard Framework
- Monitor queue processing from a centralized dashboard
- Track synchronization activities and operational status
- Get quick visibility into processing workflows

Payment Gateway Workflow Matrix
- Manage multiple payment workflows efficiently
- Support structured payment processing integration
- Improve payment handling across connected systems
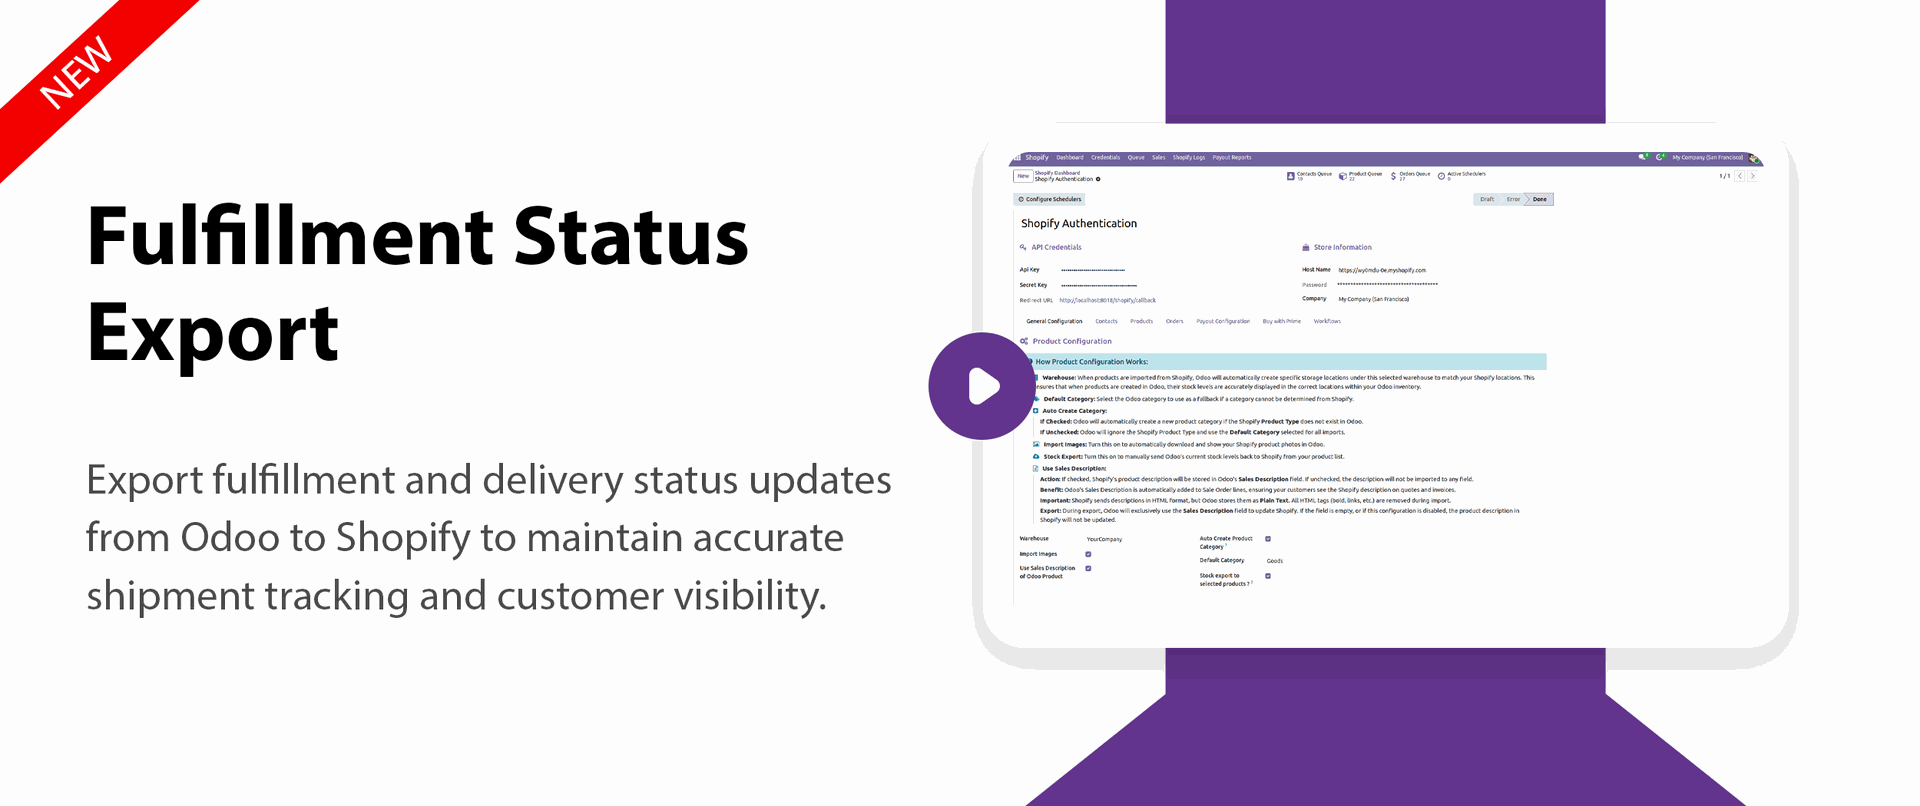
Fulfillment Order Status Sync
- Synchronize fulfillment order statuses in real time
- Track delivery progress with updated status flow
- Improve order visibility across operations
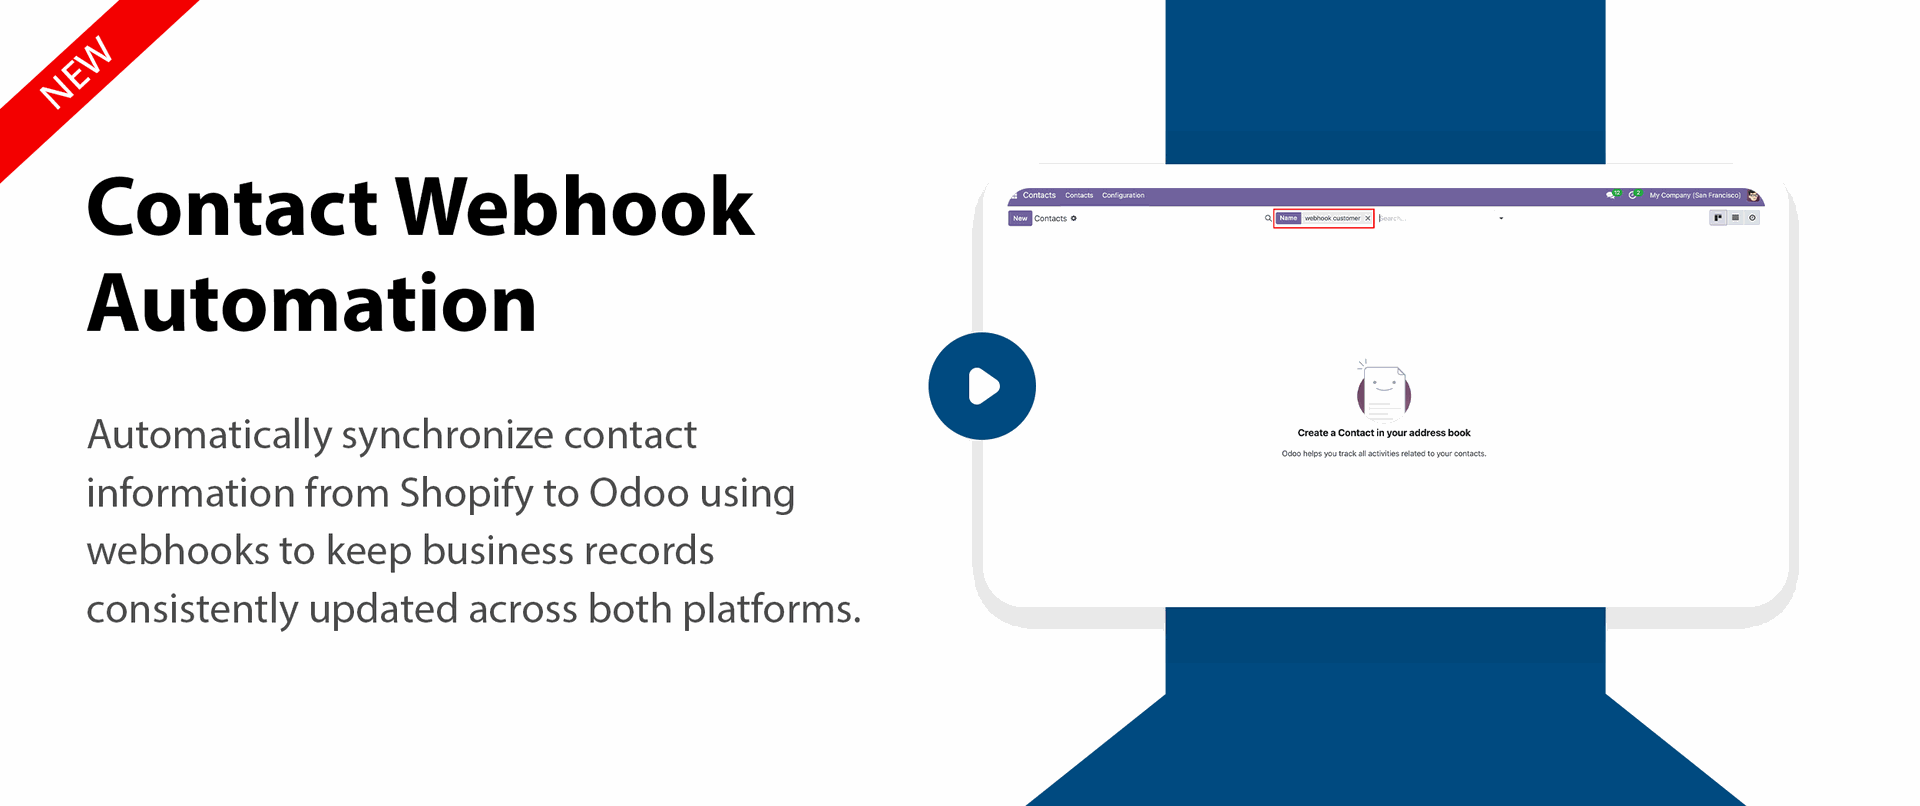
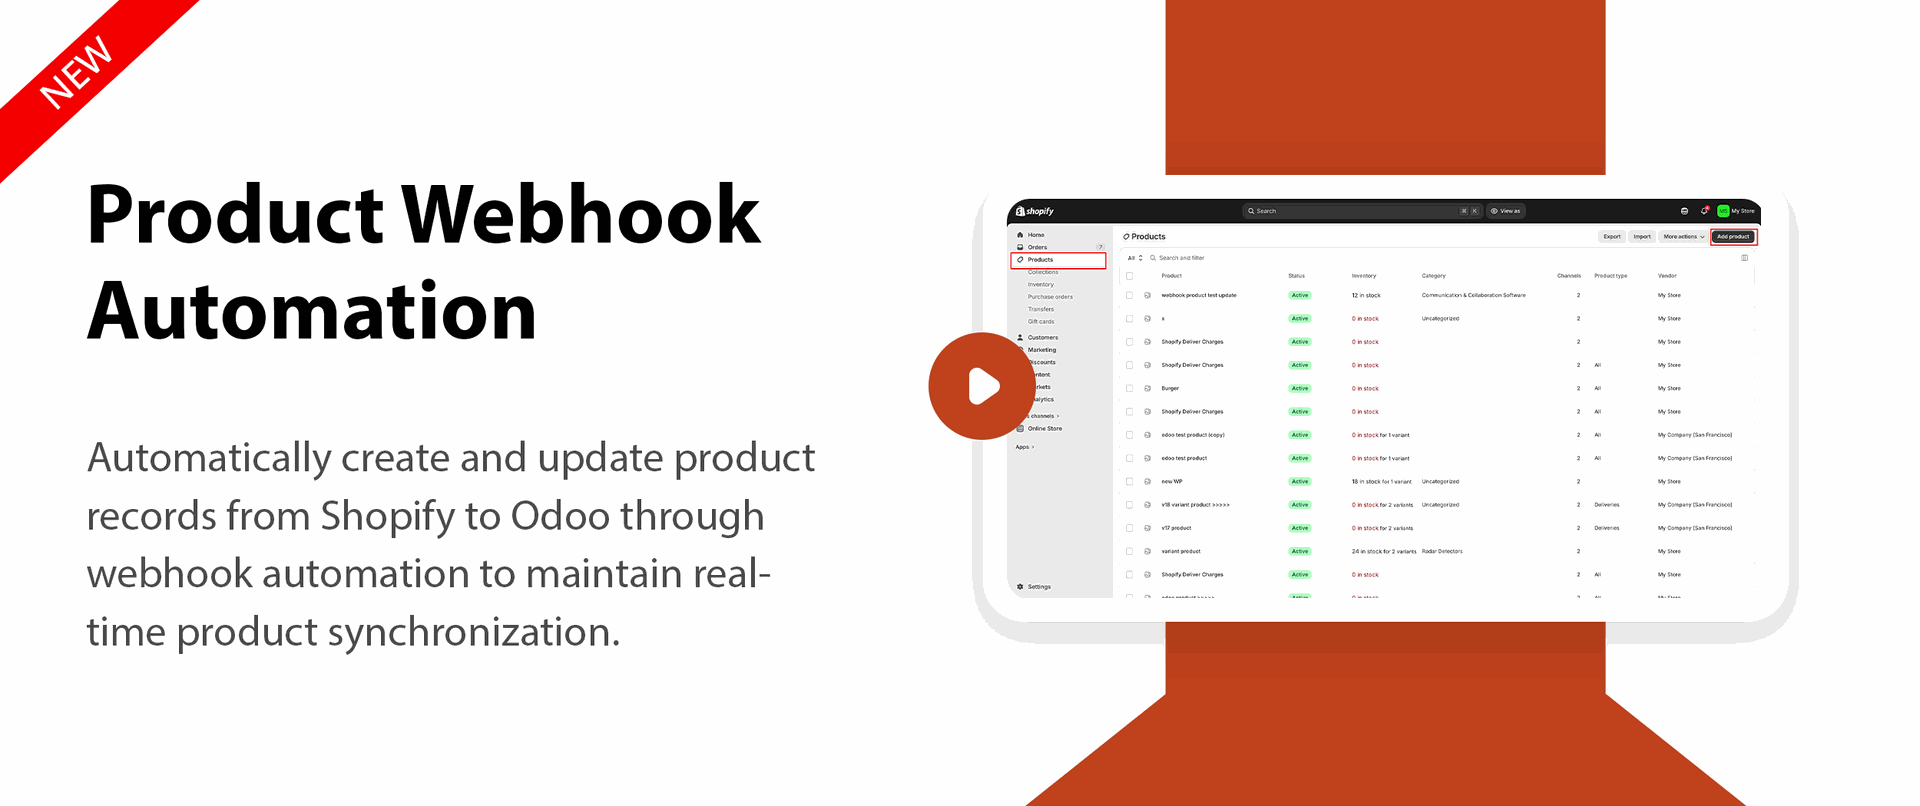
Webhook Automation (Real time data update)
- Auto create invoice
- Auto register Payment
- Automatically import orders
- Automatically import product
- Default customer
- Automatically import customer and contact data

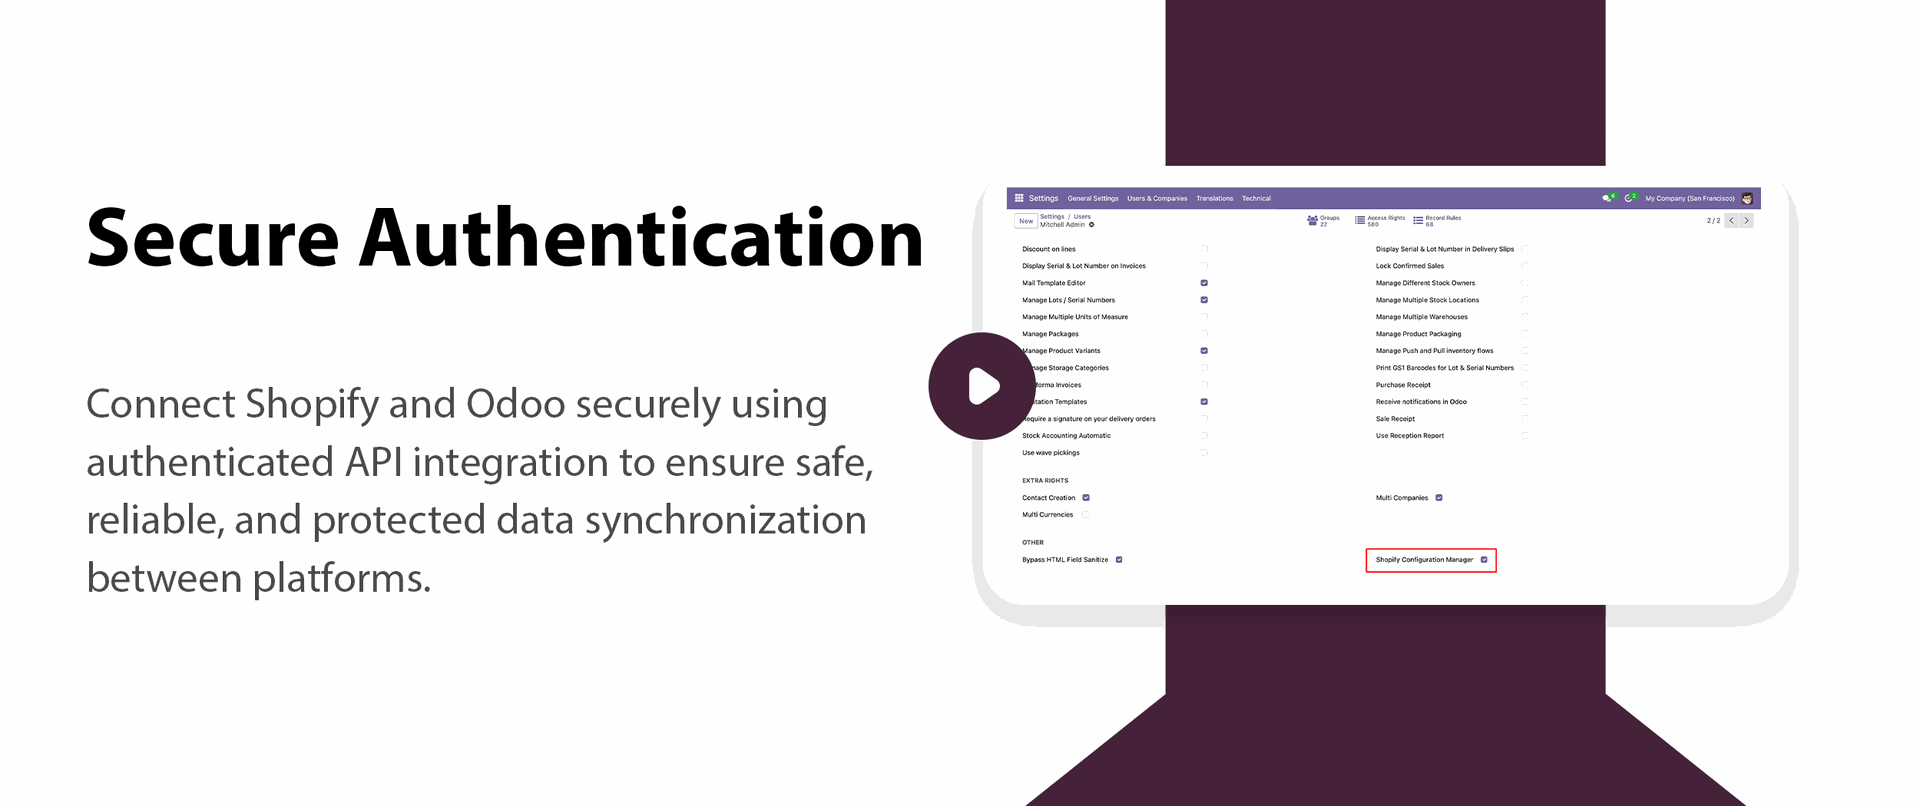
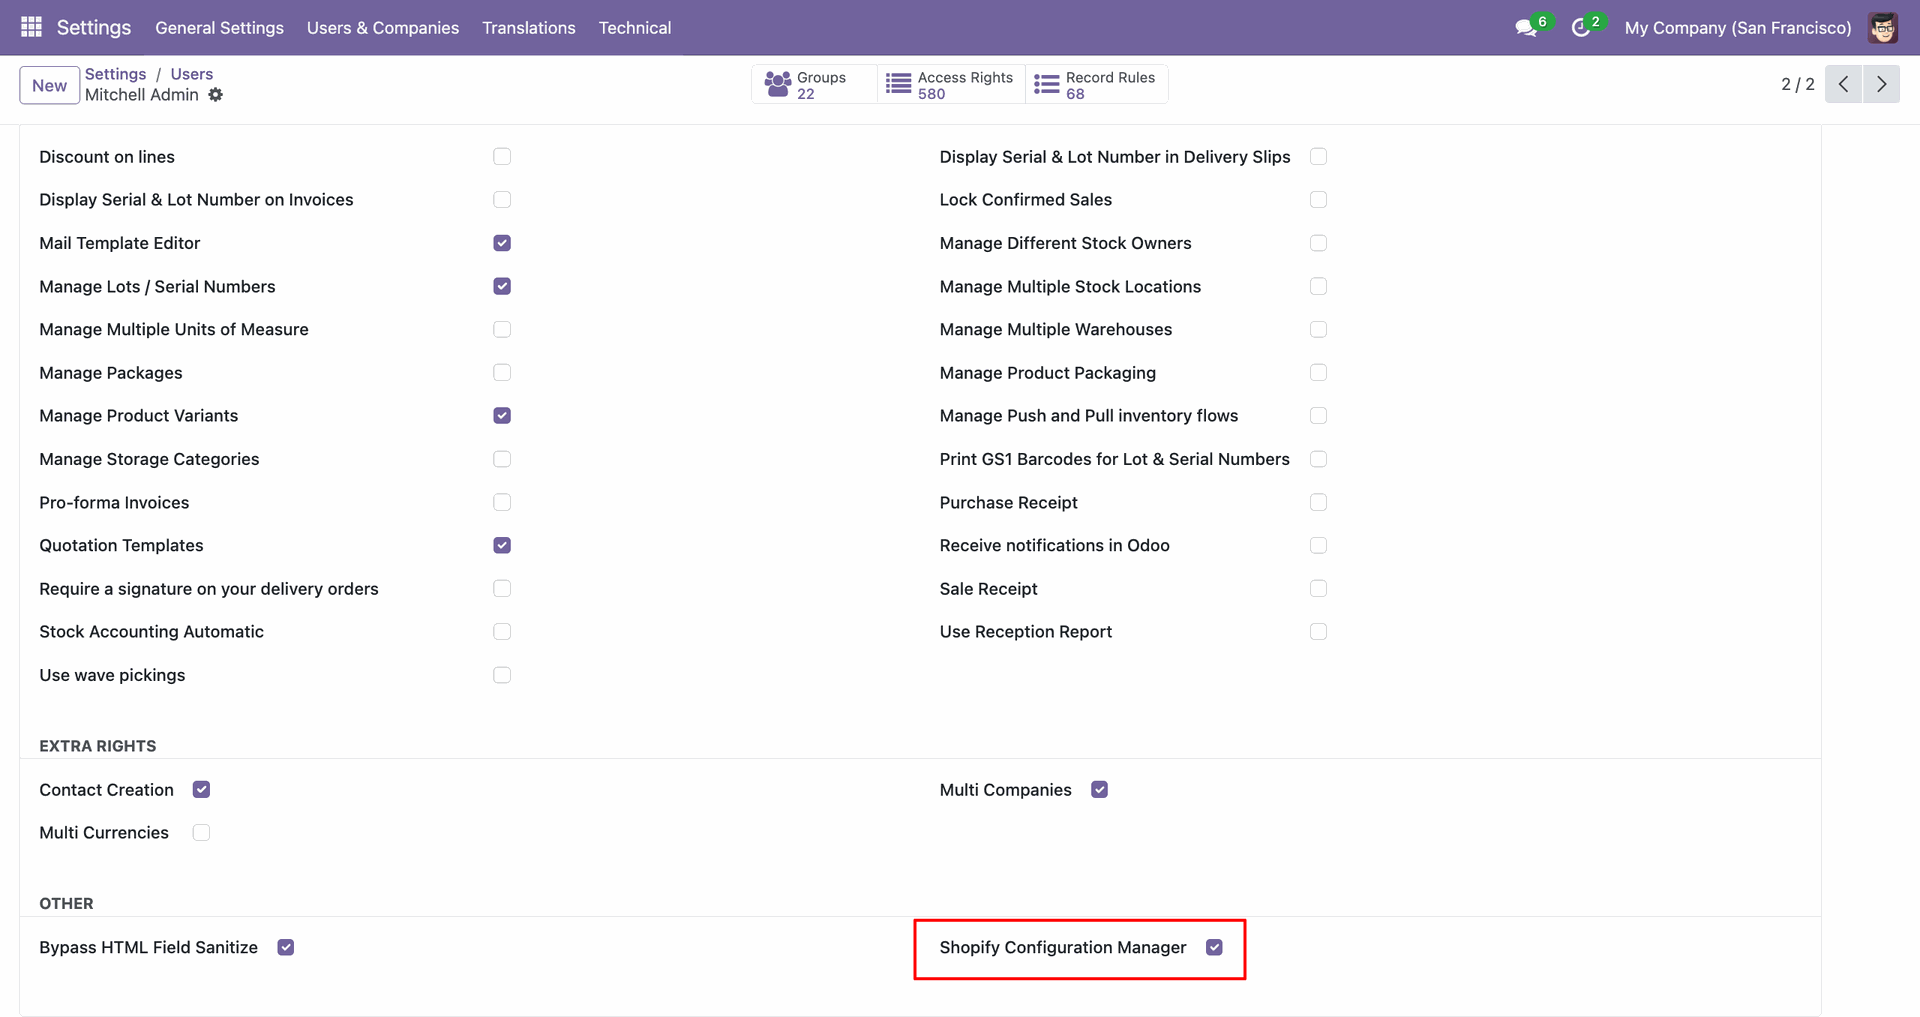
Enable the Shopify Configuration Manager access right to open connector settings and controls.
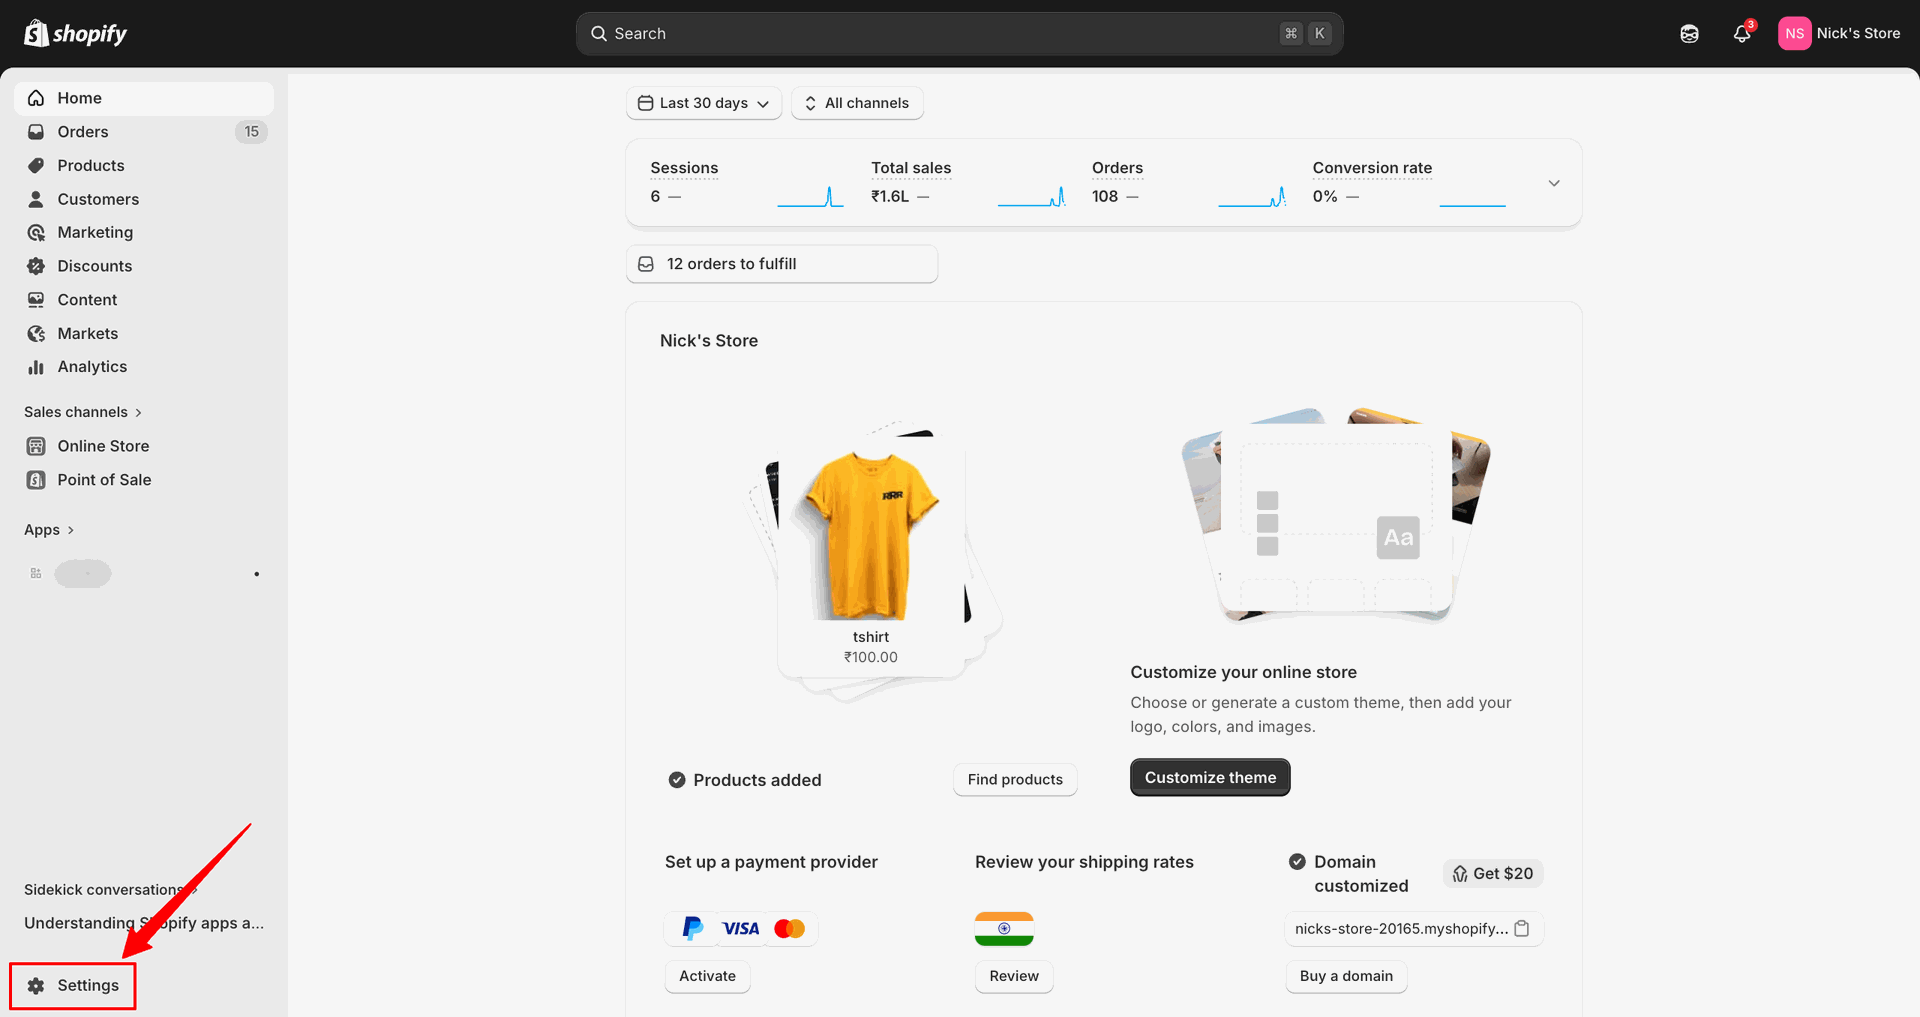
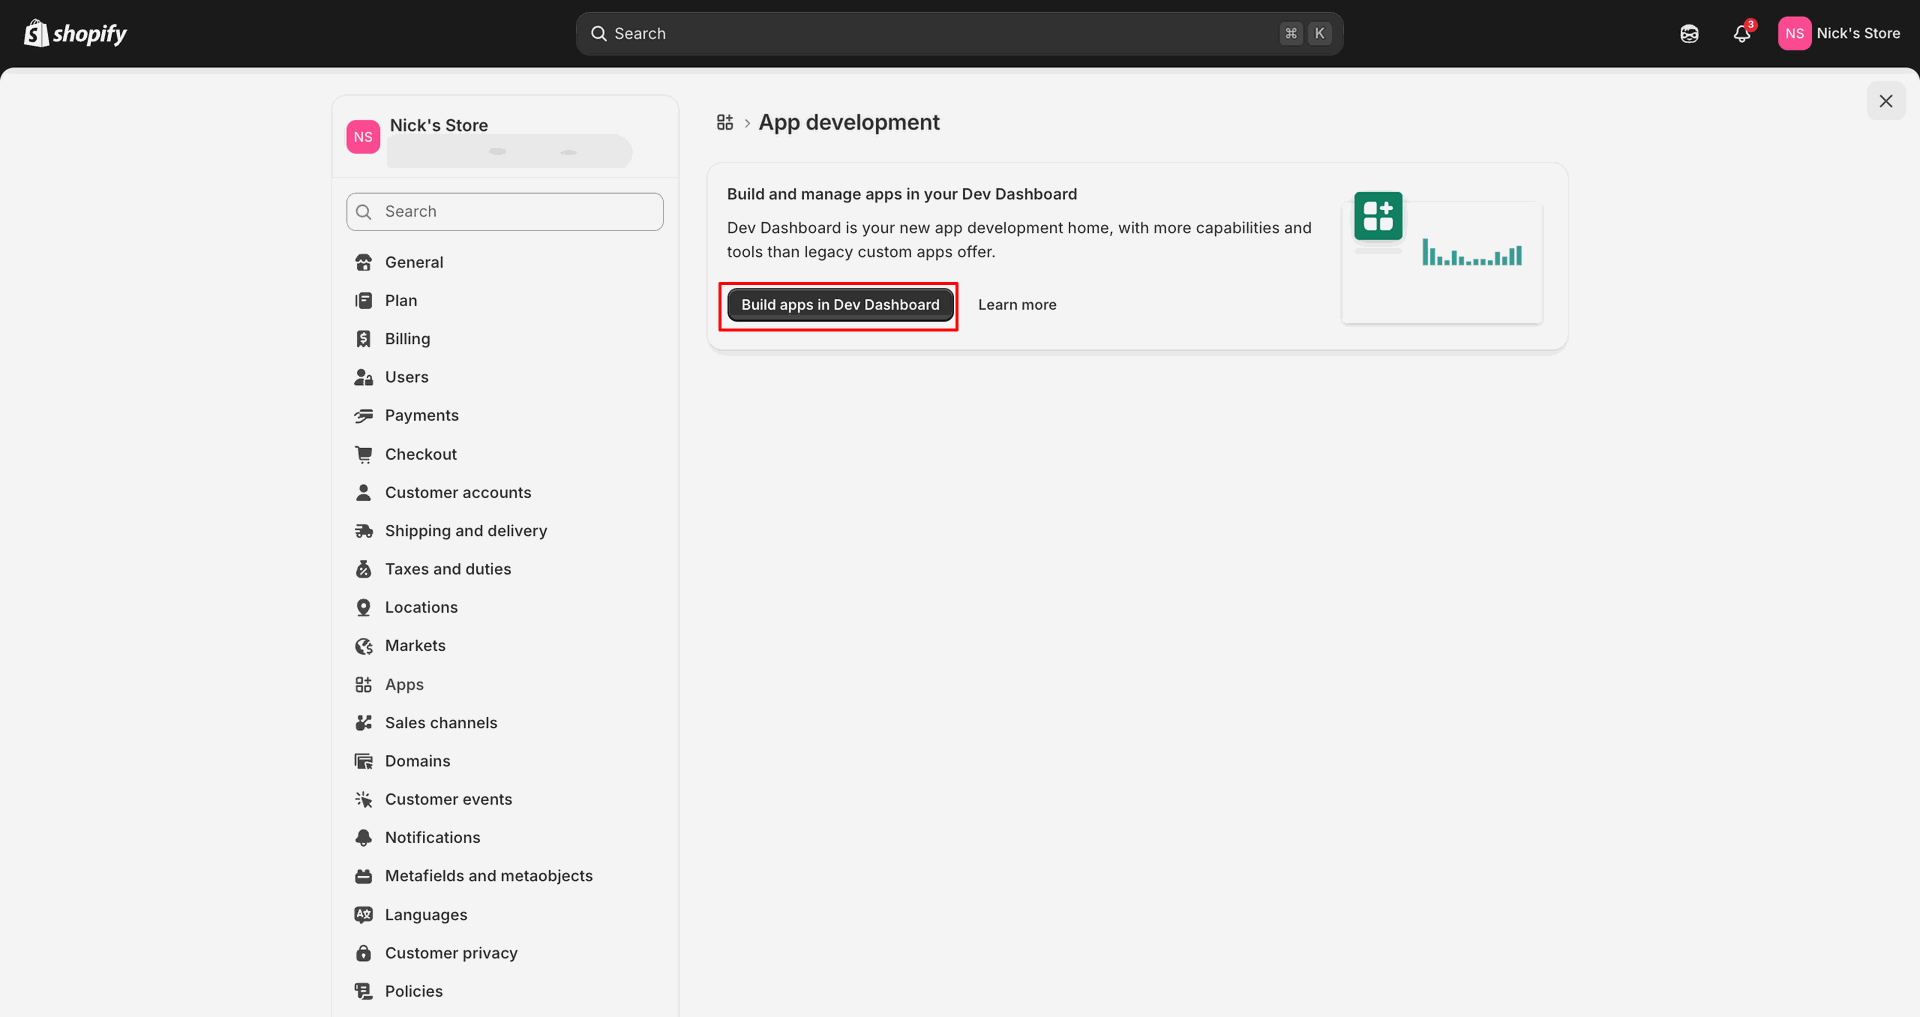
Open Settings in Shopify Admin to begin configuring the store for connector access.
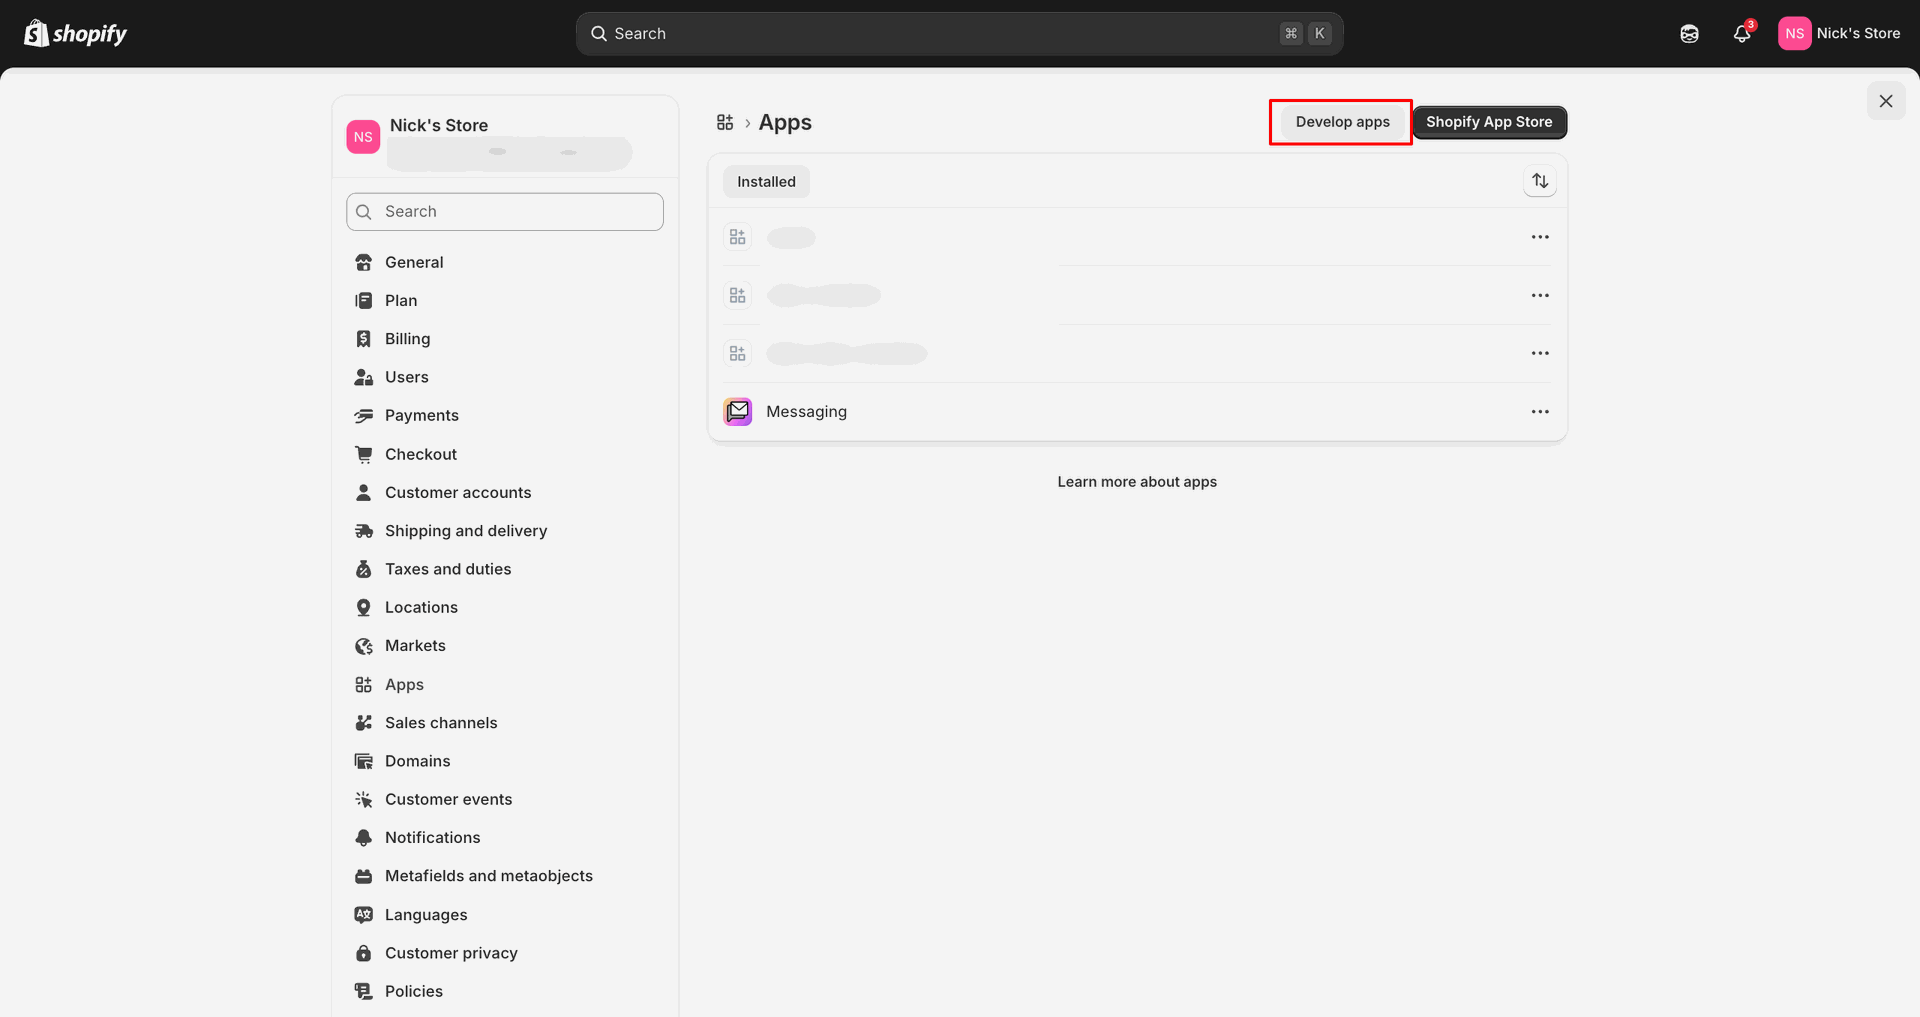
Click Develop apps from the Apps page to manage custom Shopify integrations.
Select Build apps in Dev Dashboard to continue with app development.
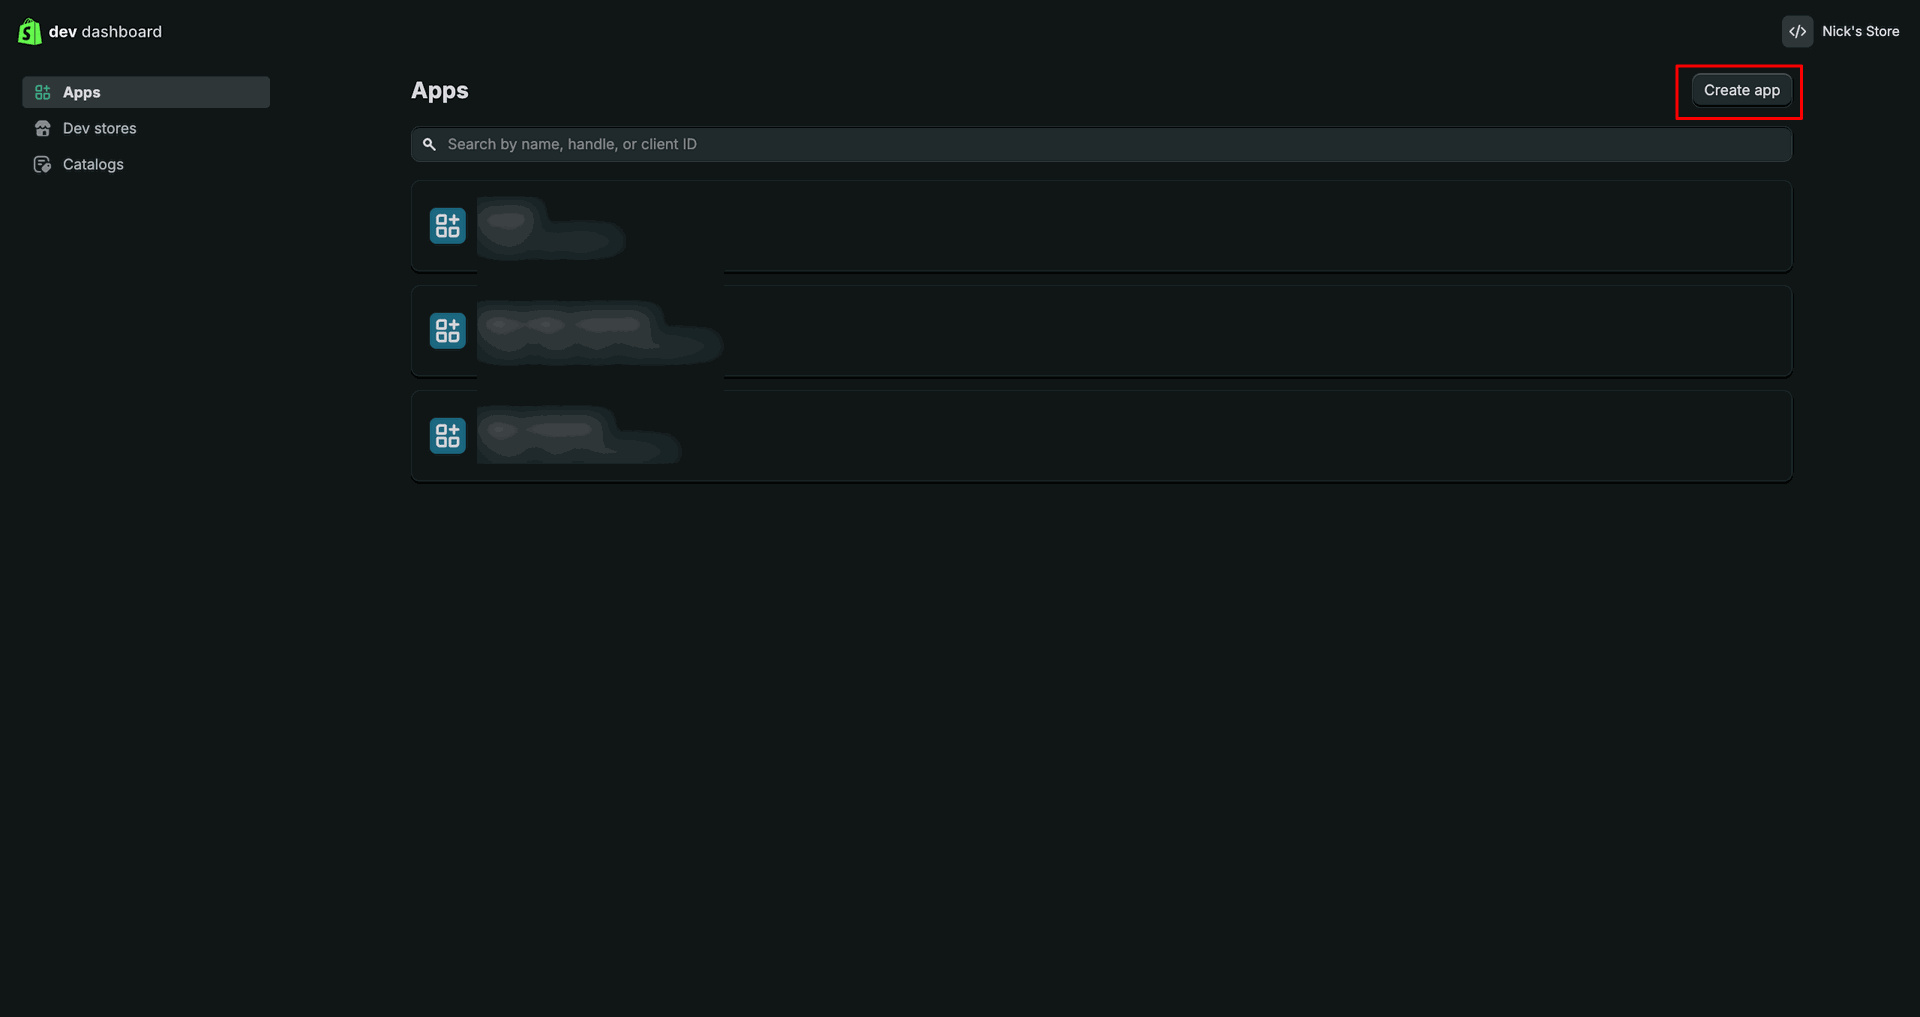
Press Create app in Dev Dashboard to create a new Shopify application.
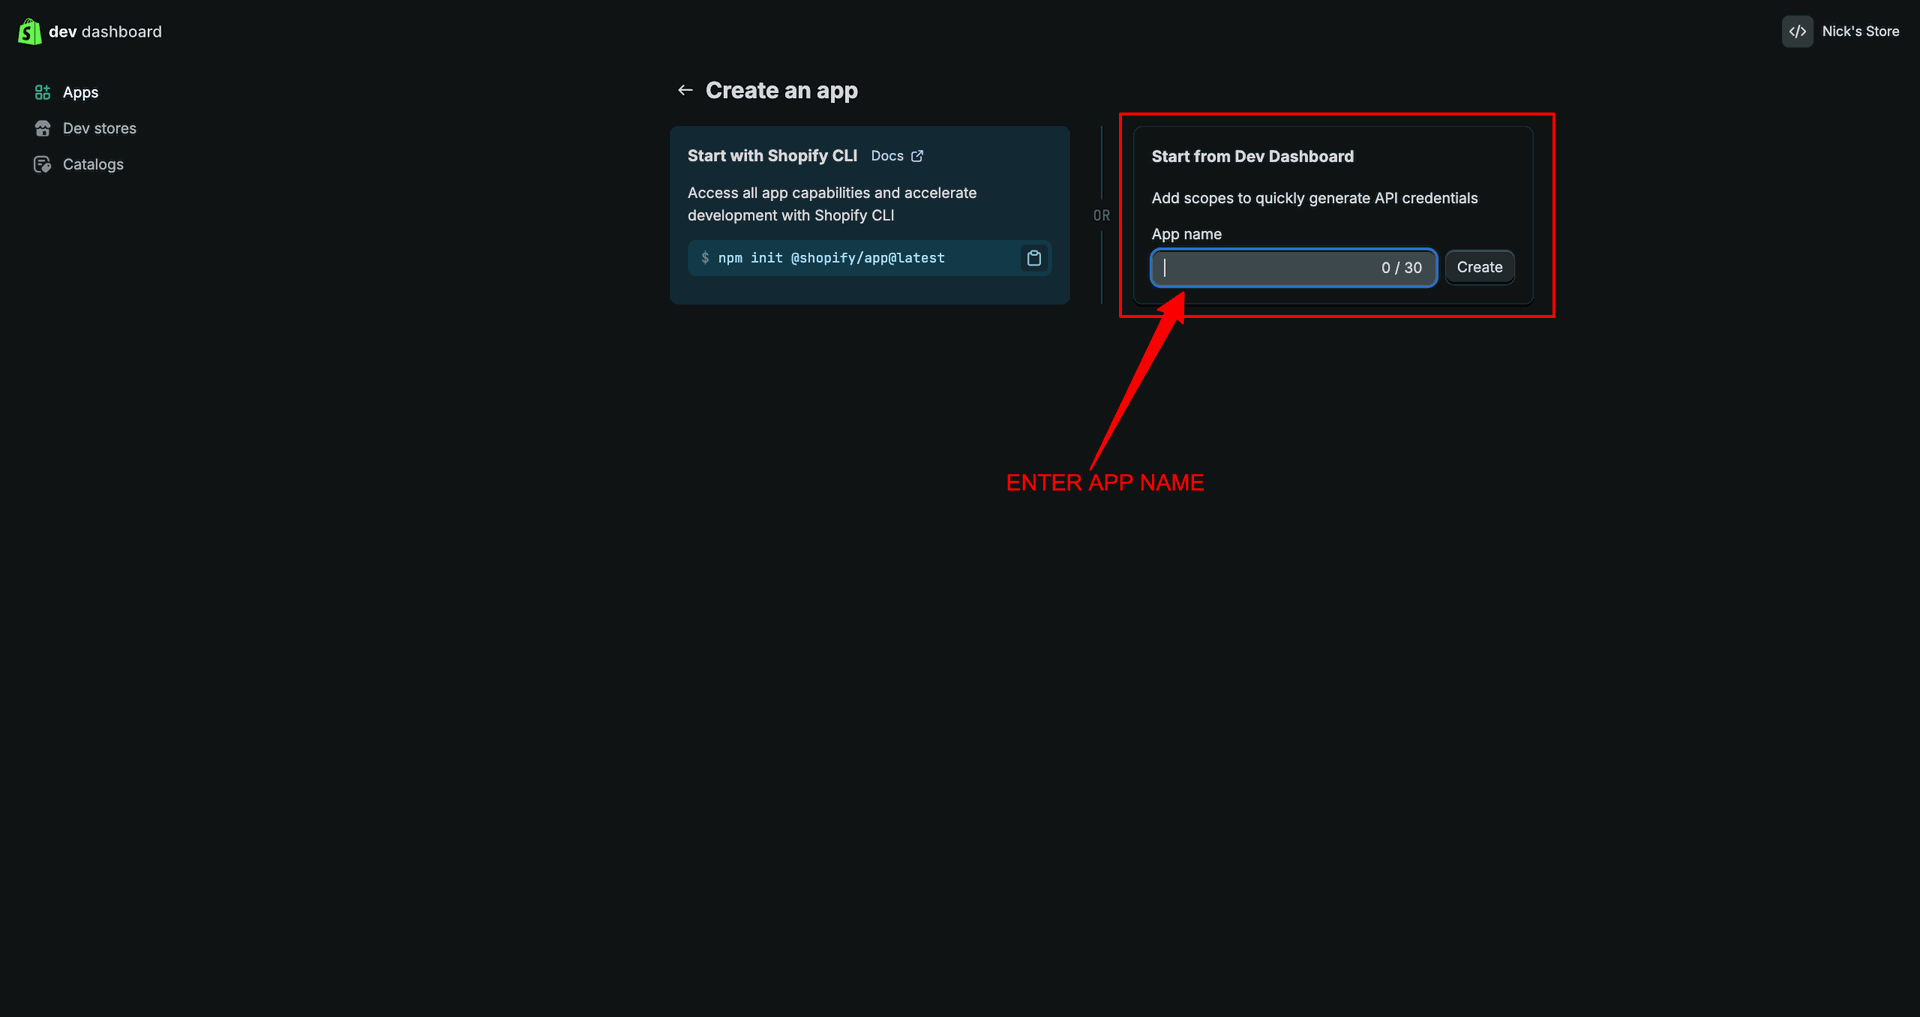
Enter the app name and click Create to generate the custom app.
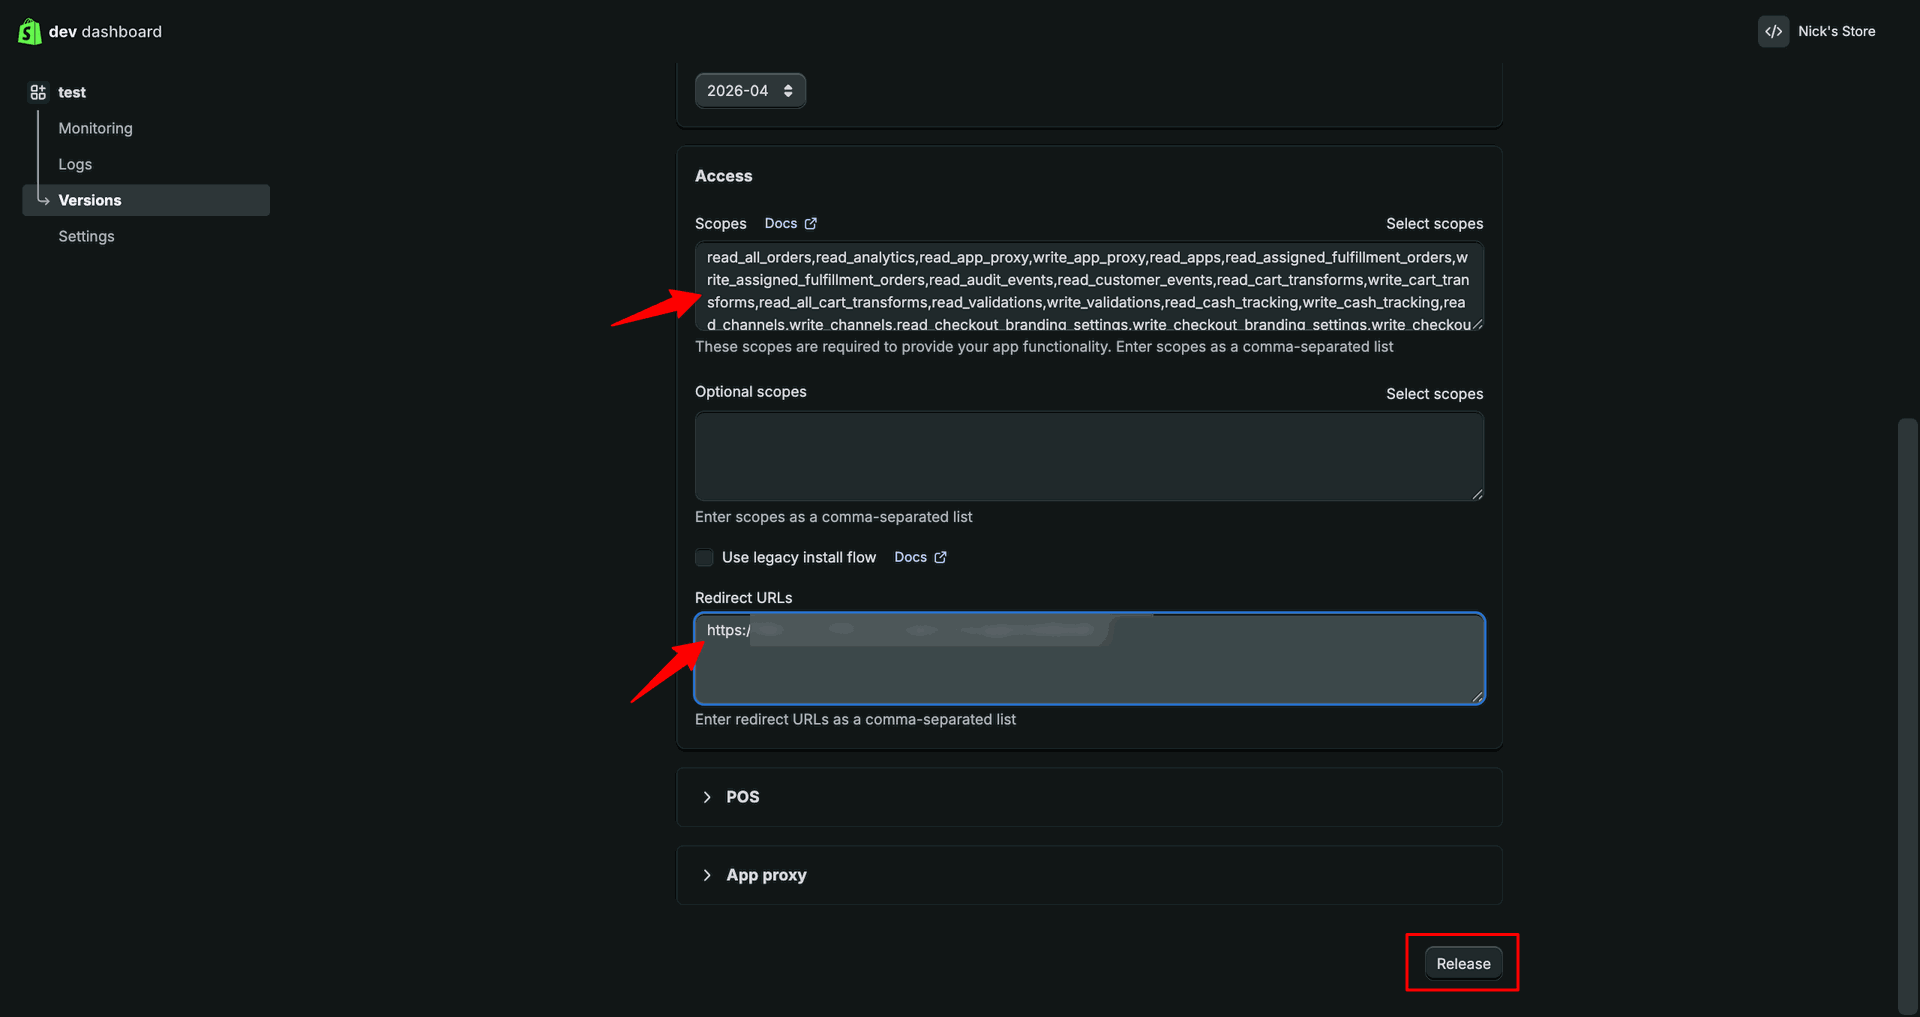
Add the redirect URL, choose required scopes, and click Release to continue.
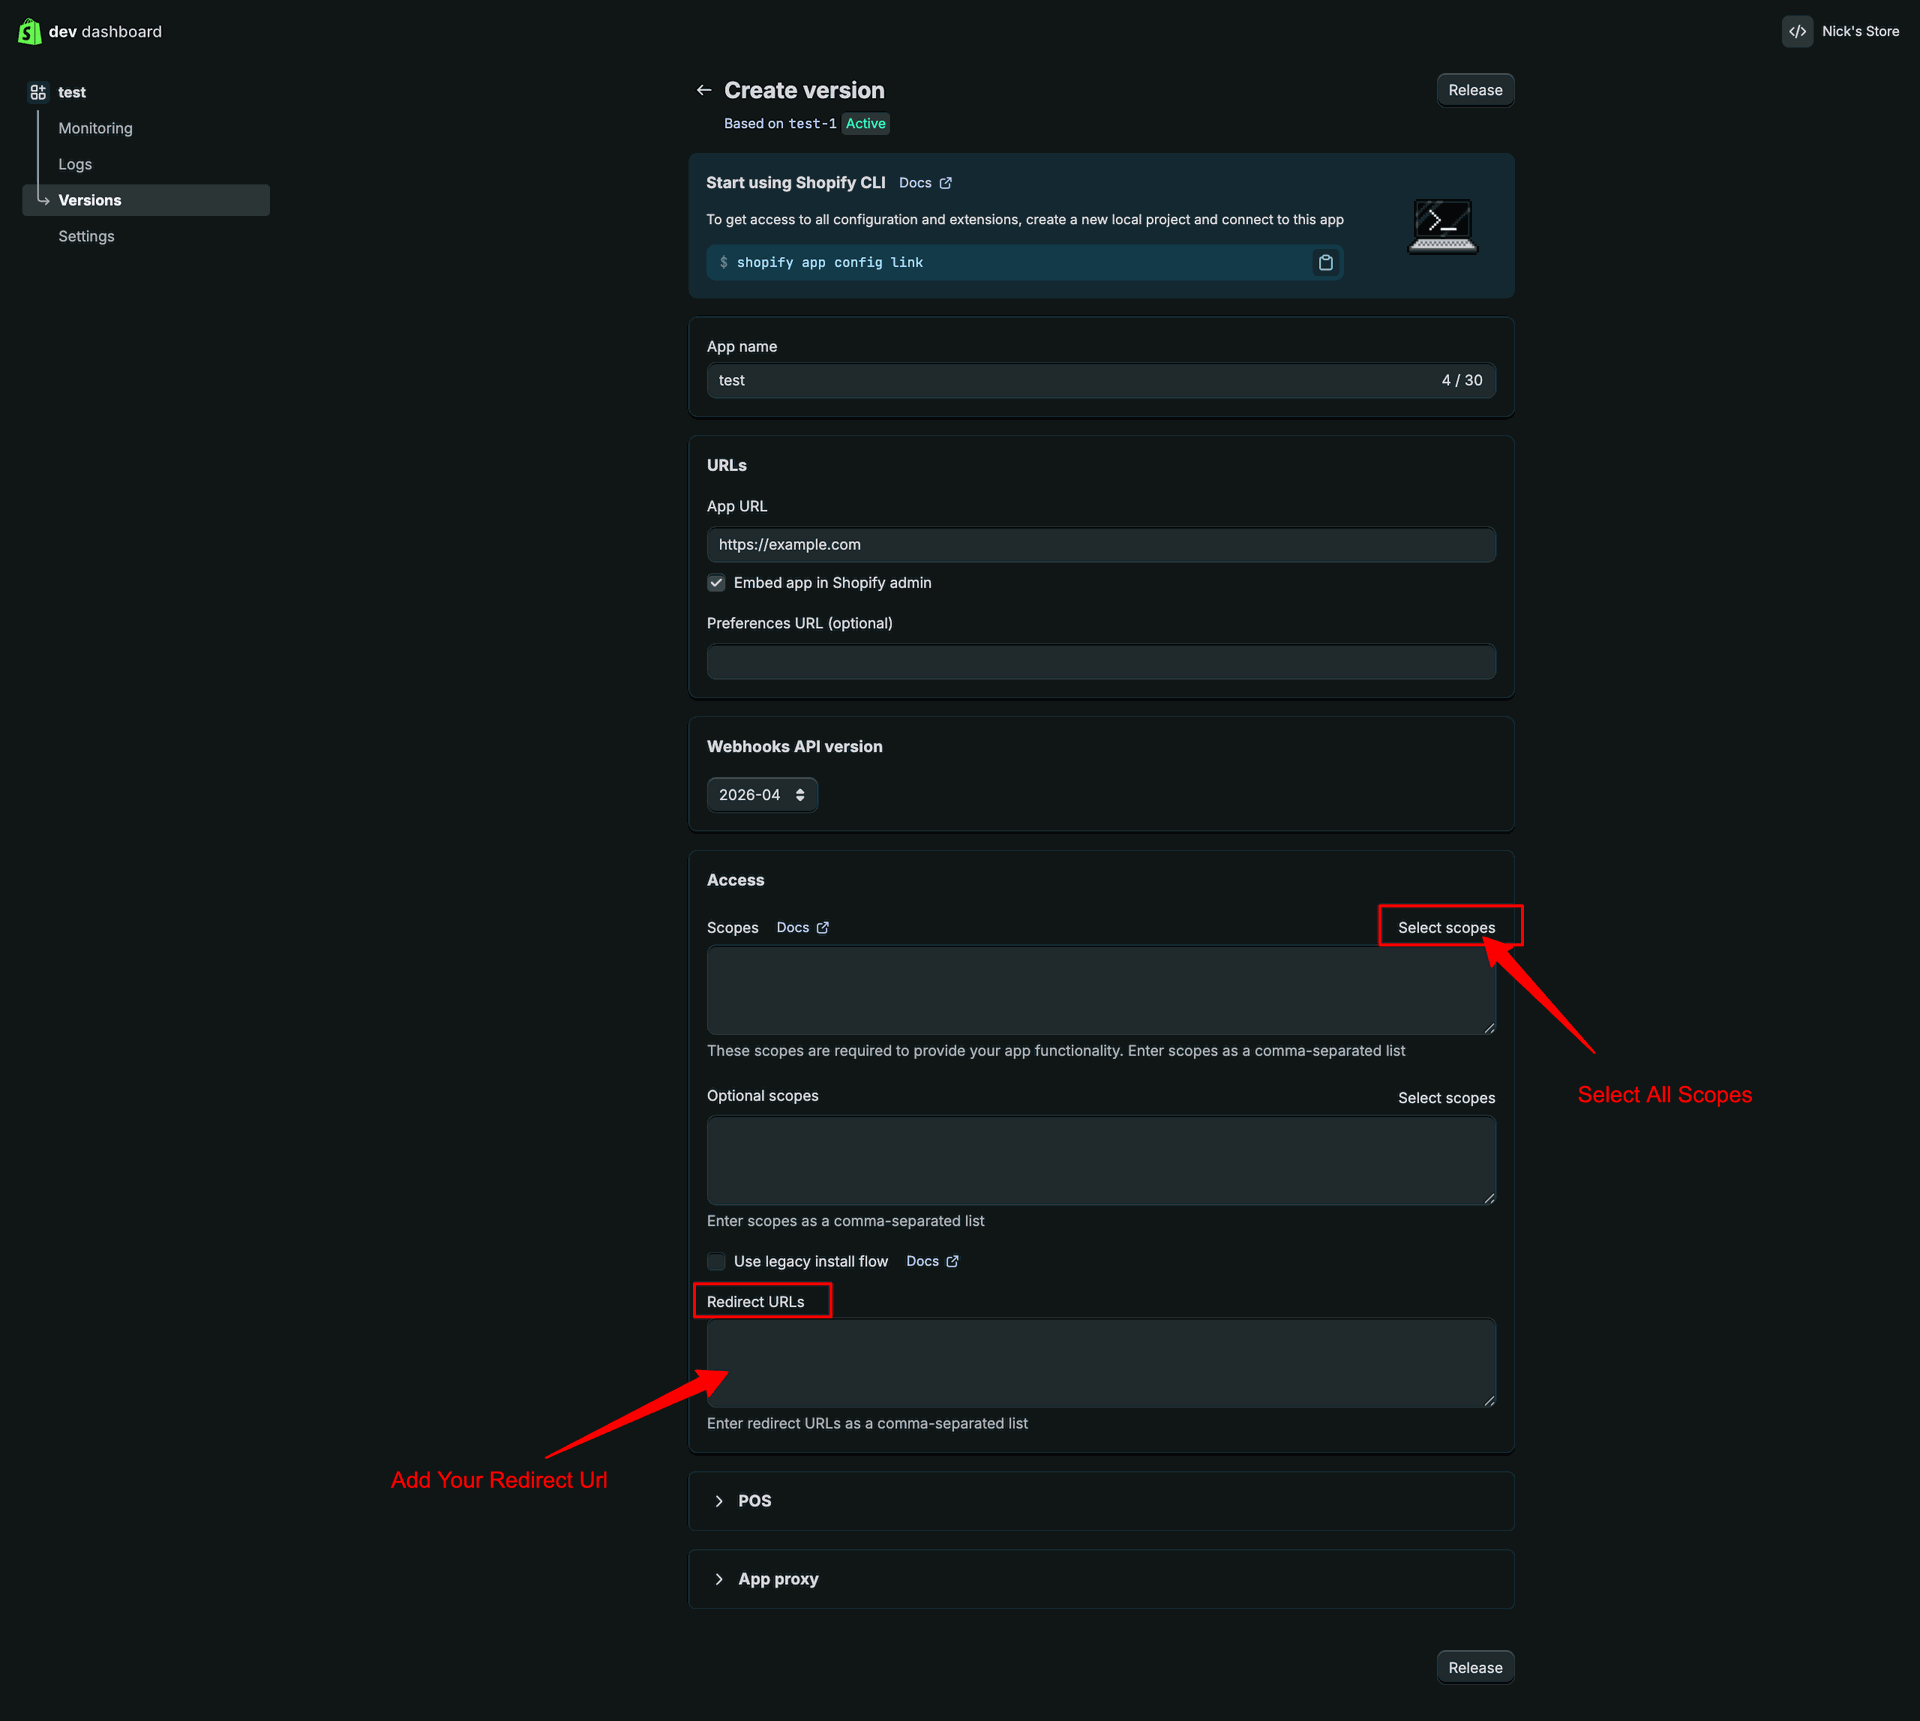
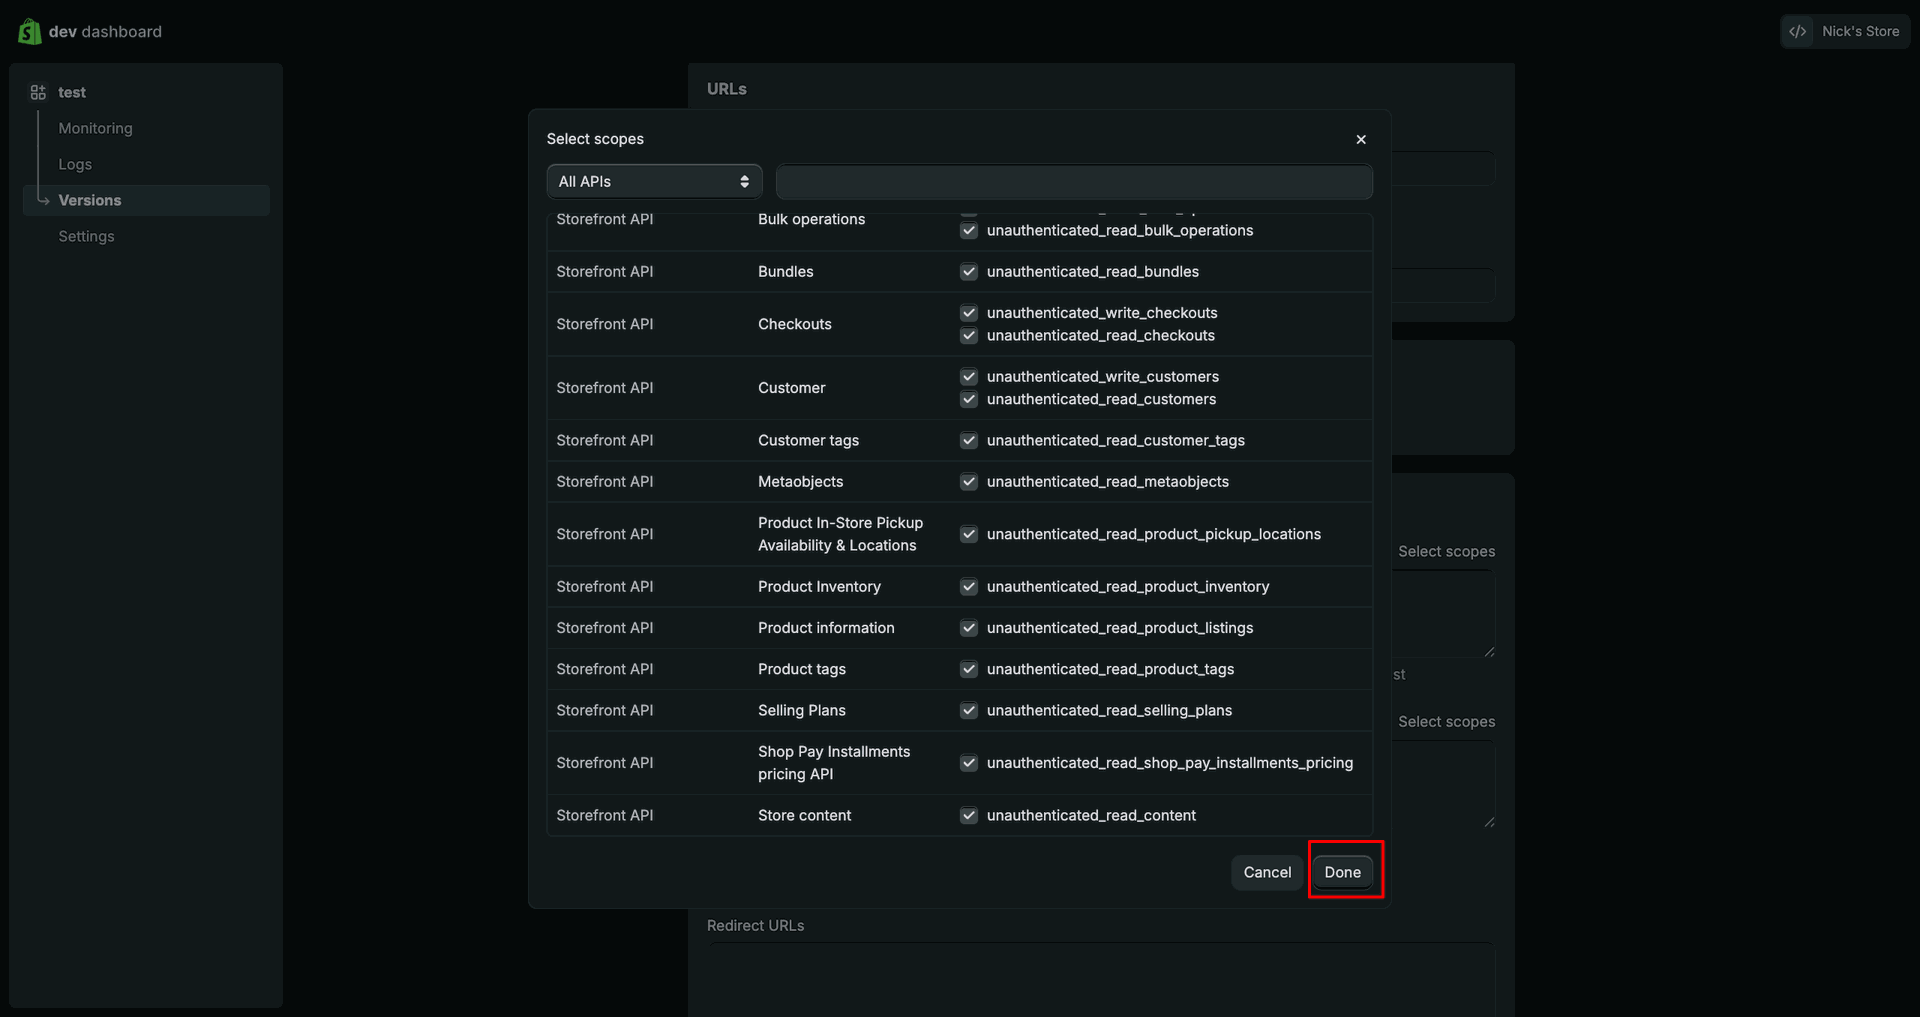
Select the required API scopes, then click Done to confirm the selection.
Review scopes and redirect URL, then click Release to publish the version.
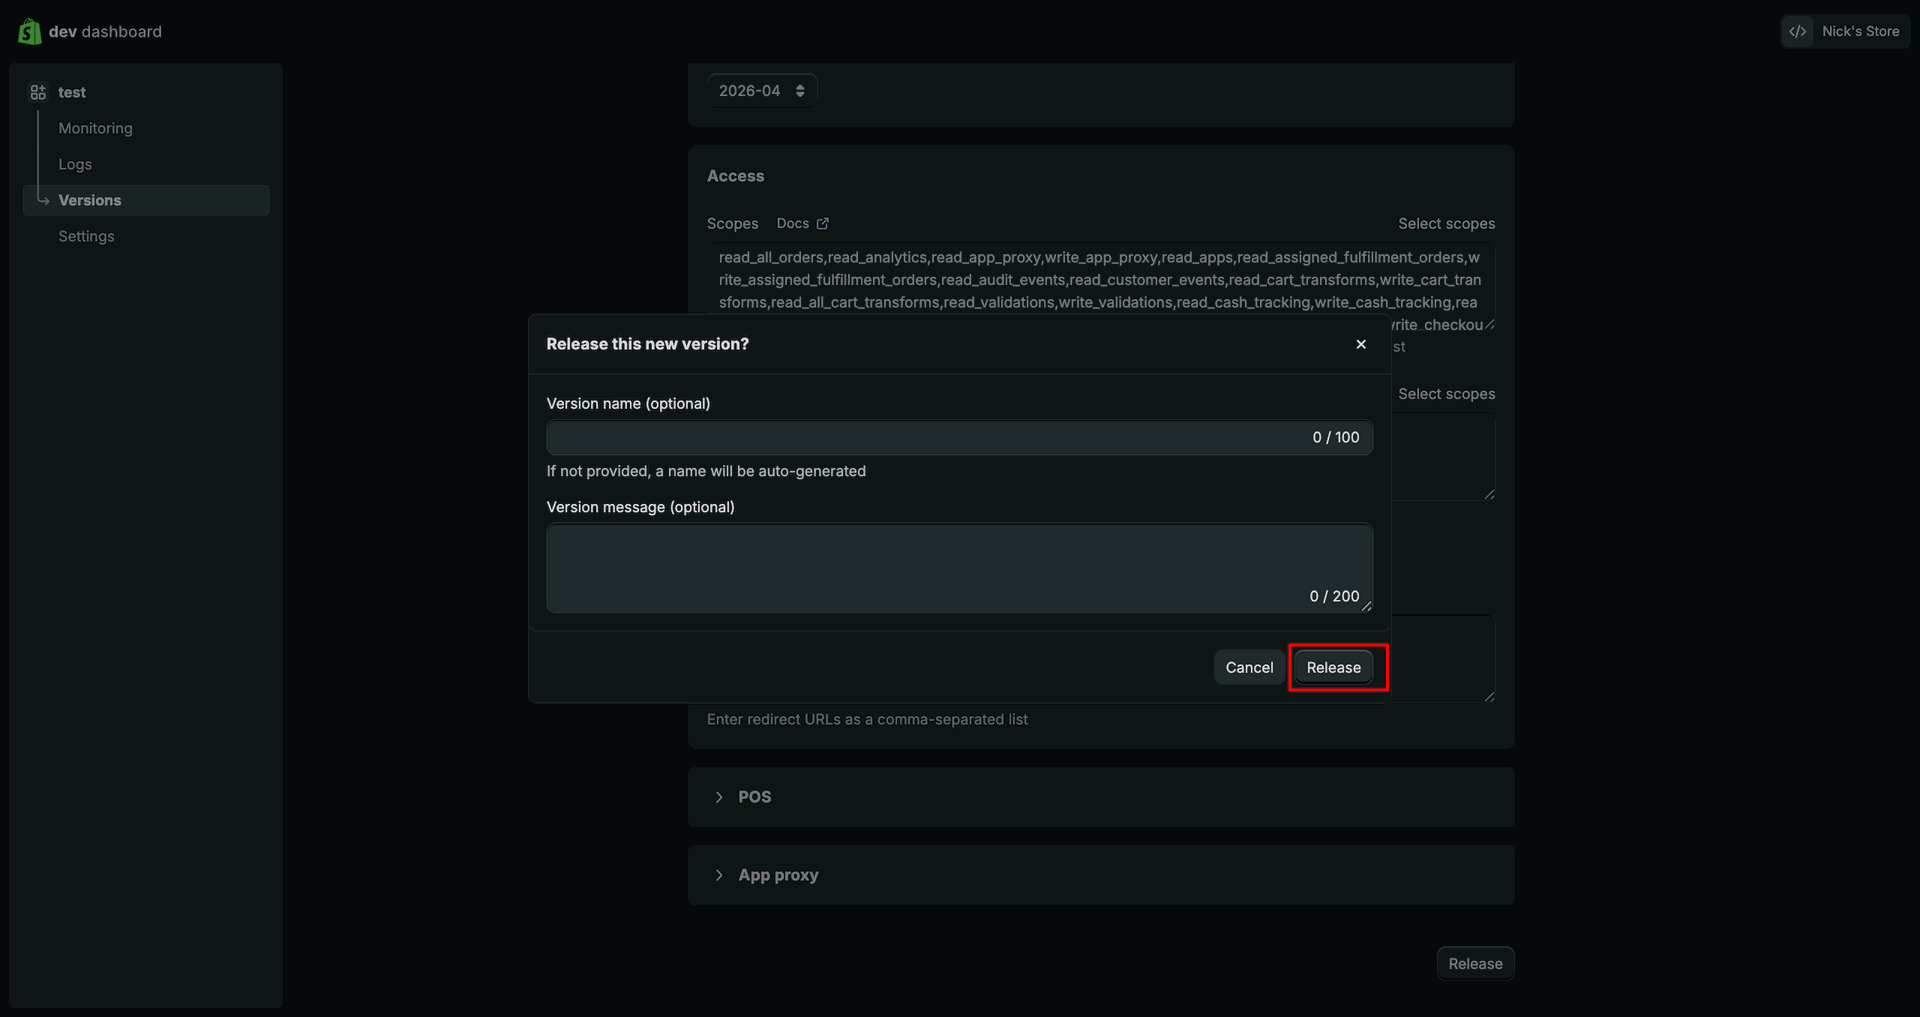
Confirm the version release popup by clicking Release to publish app changes.
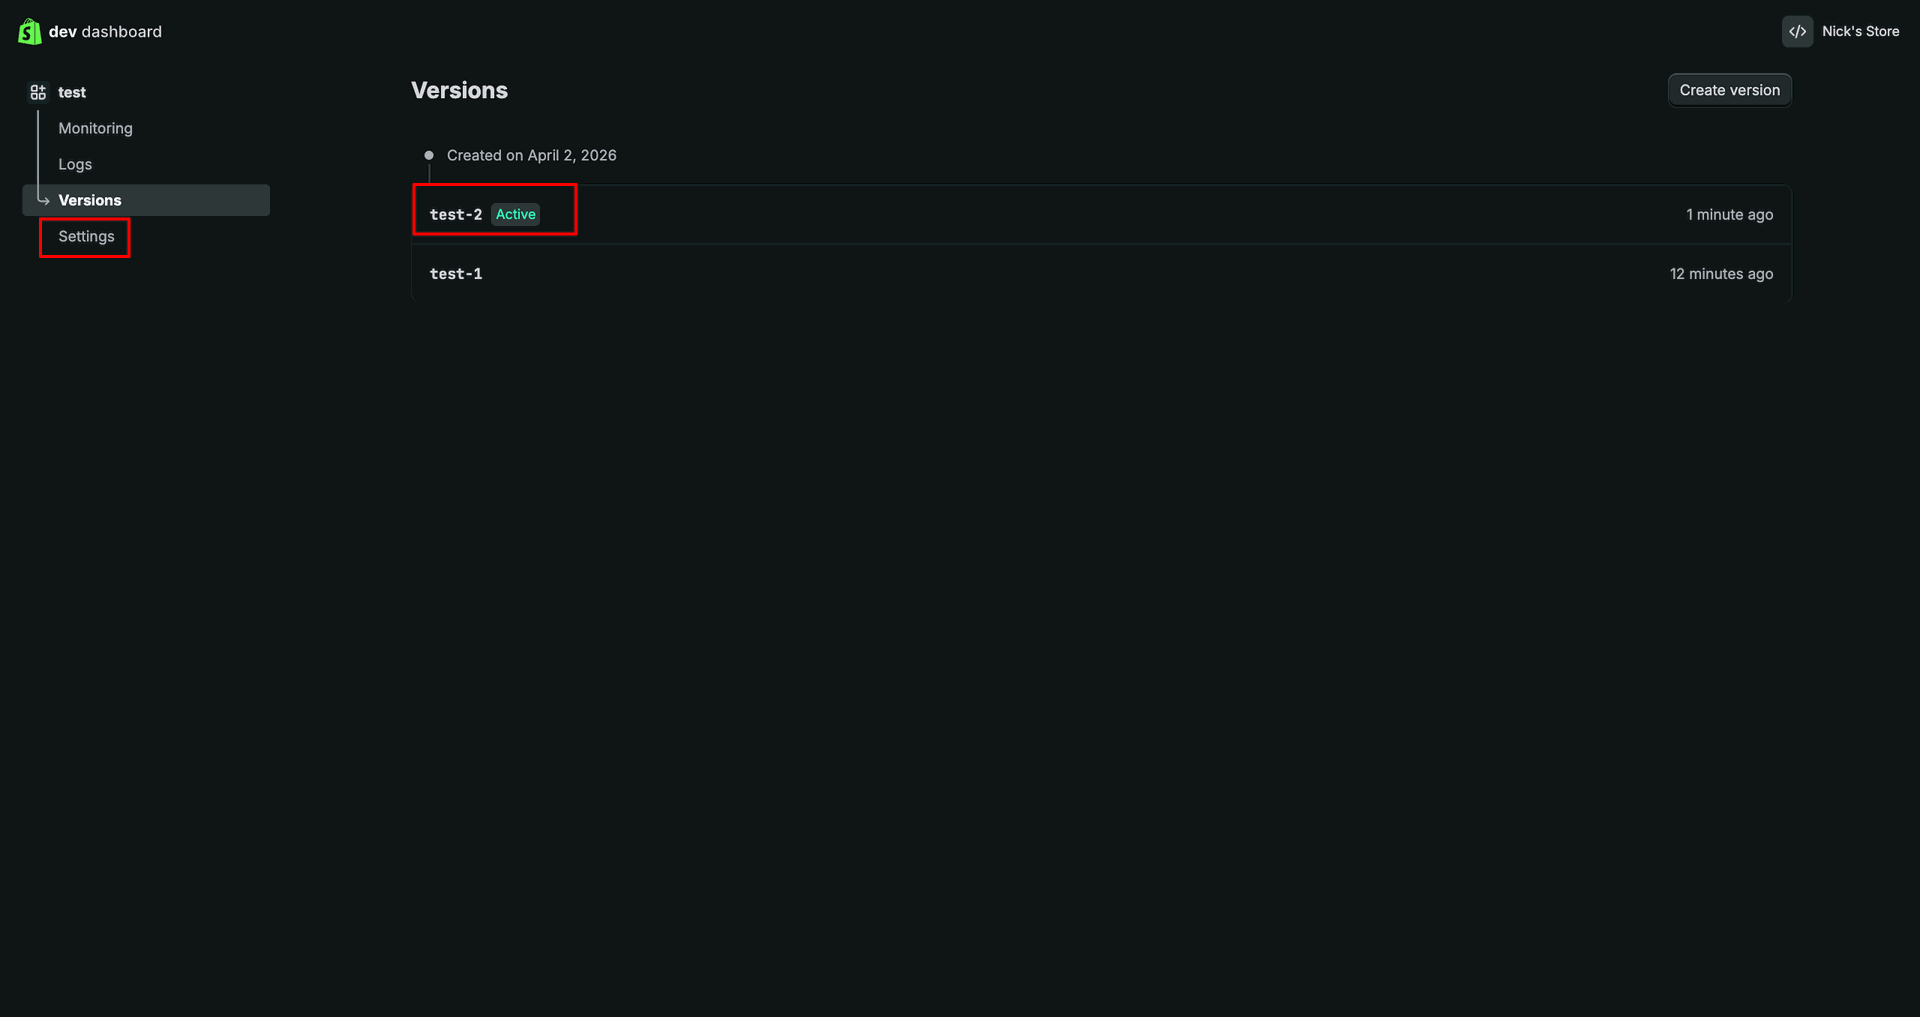
Open the created version from the Versions list to review published app details.
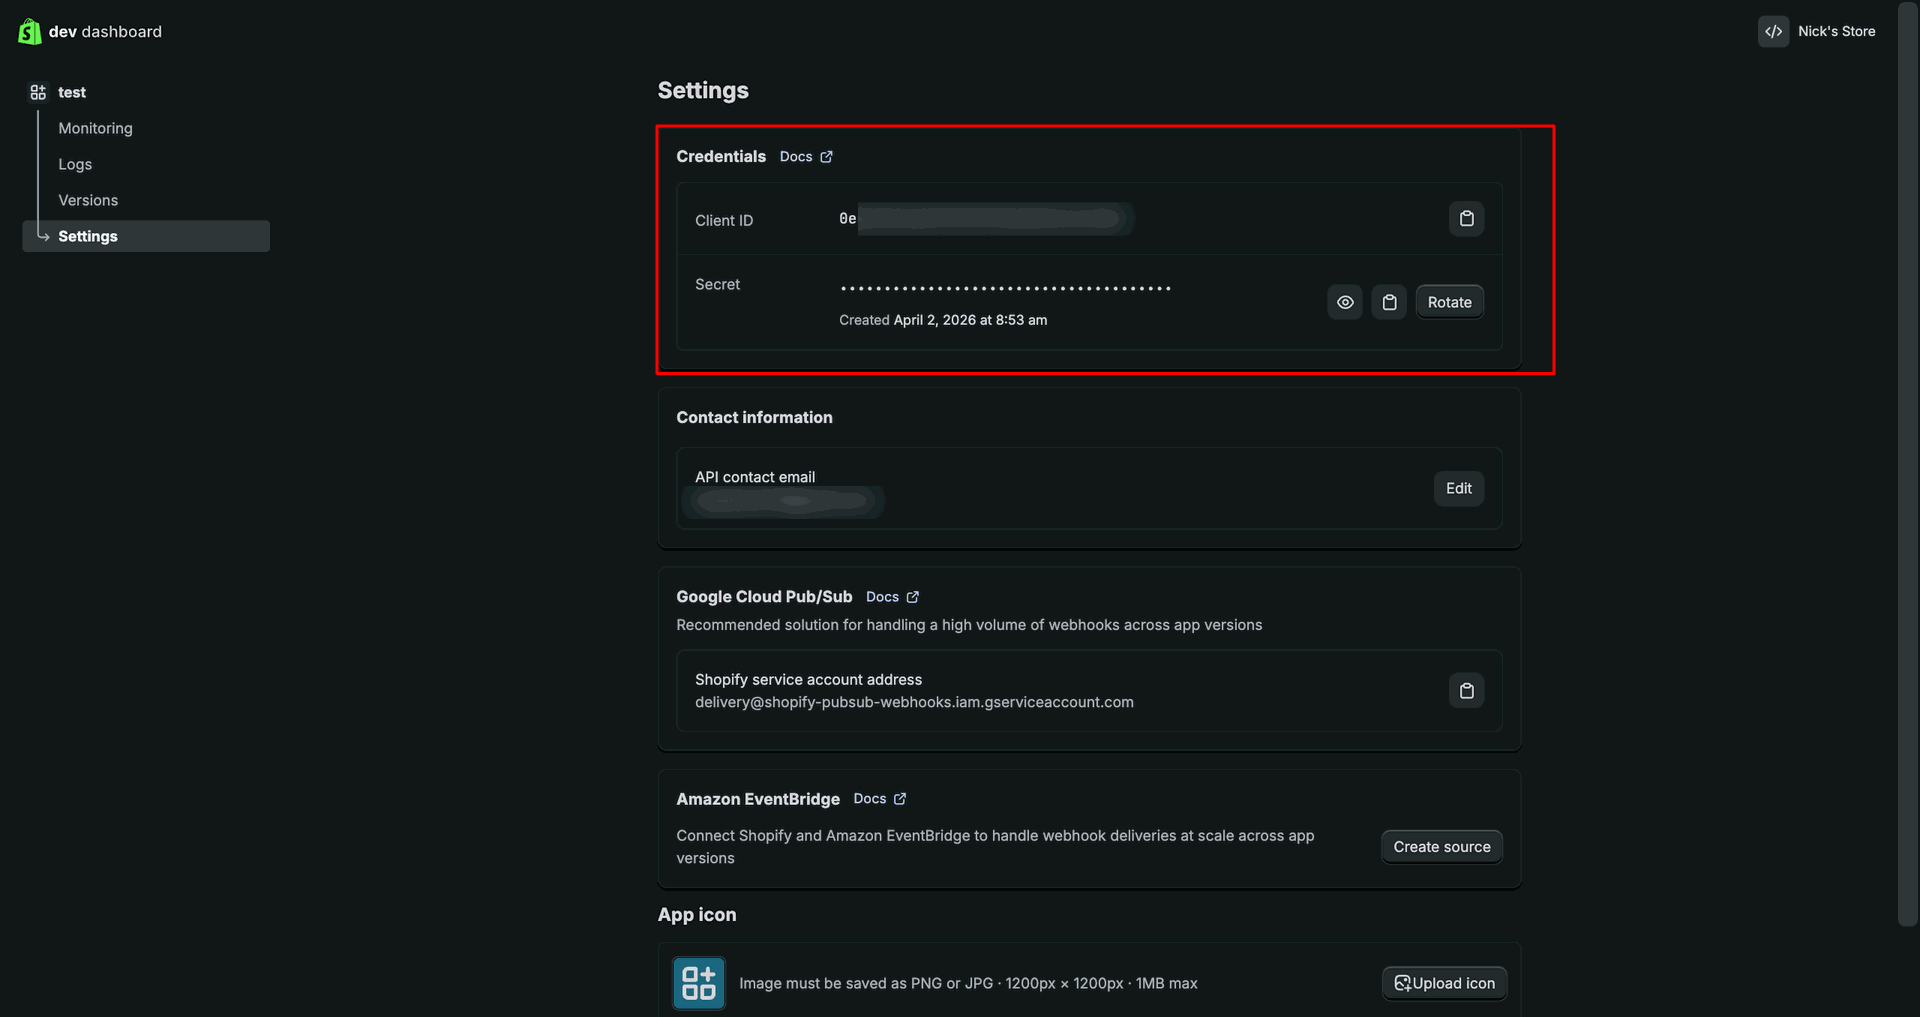
Review the generated client credentials from the Settings page before connecting Odoo.
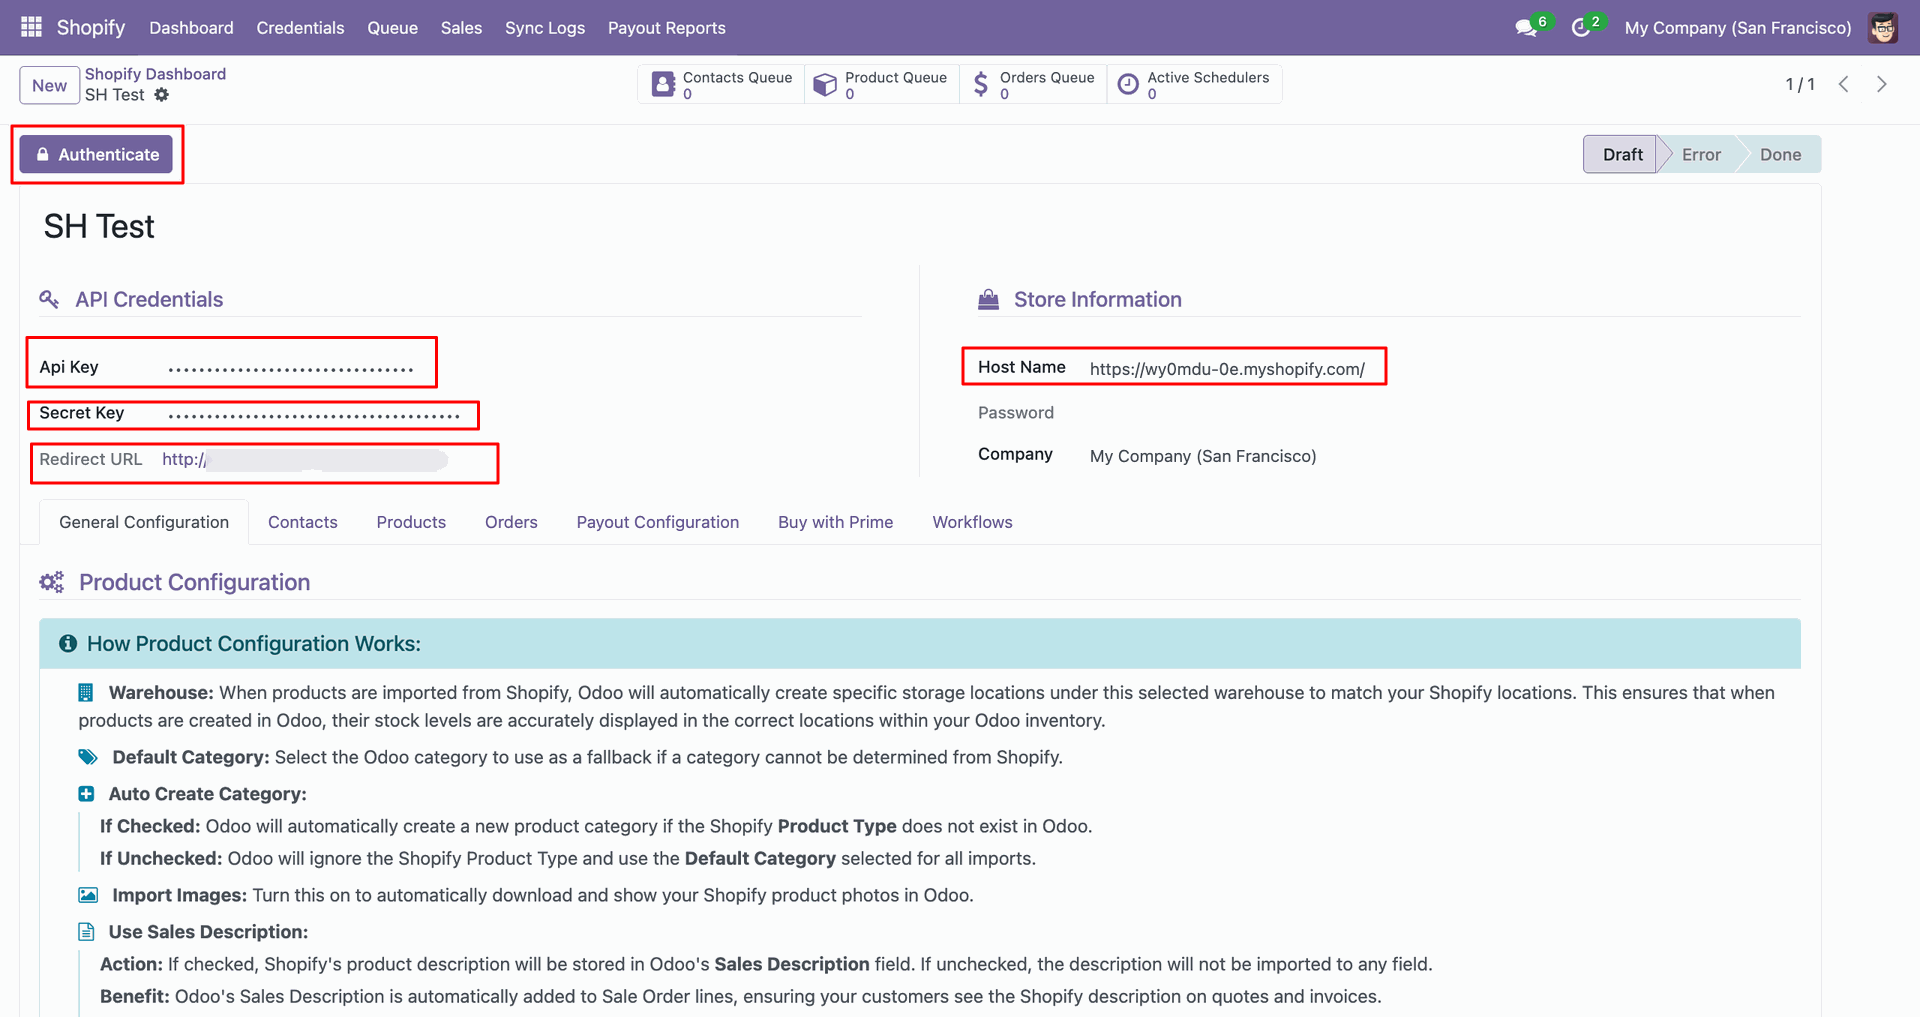
Paste the Shopify credentials into Odoo and click Authenticate to connect the store.
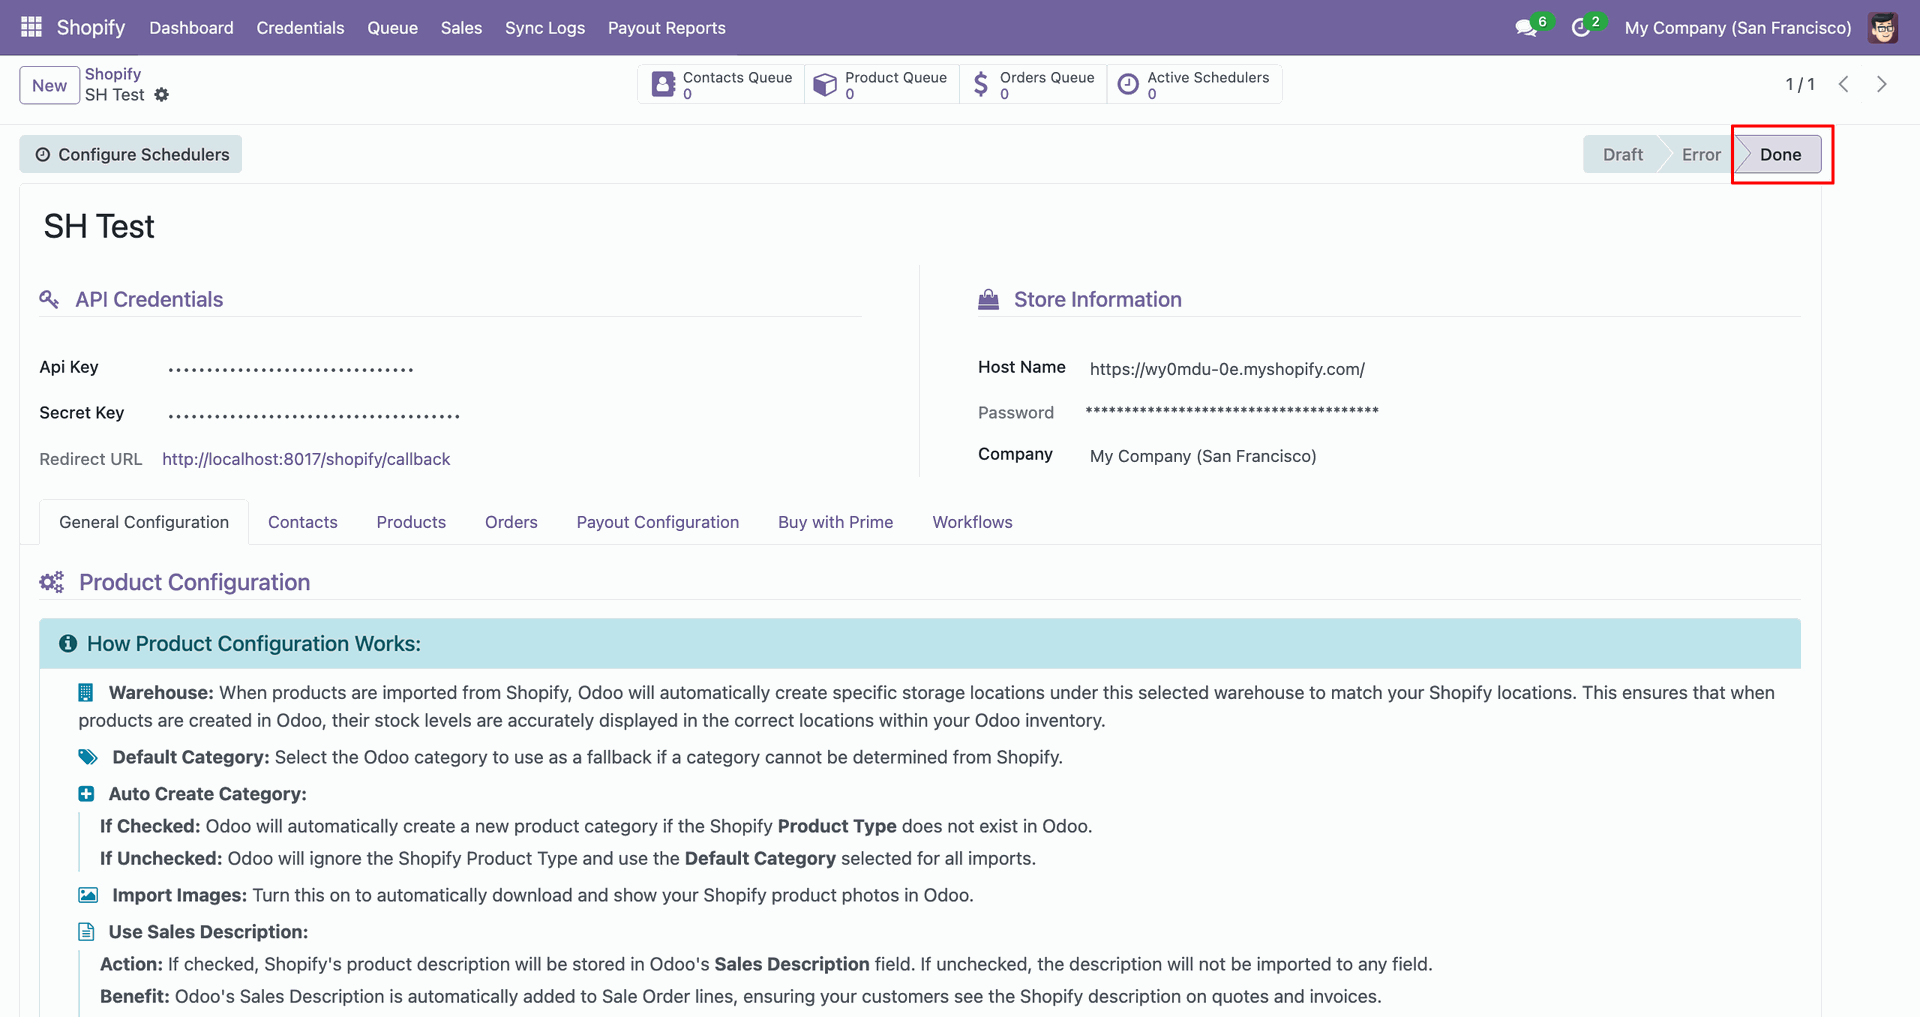
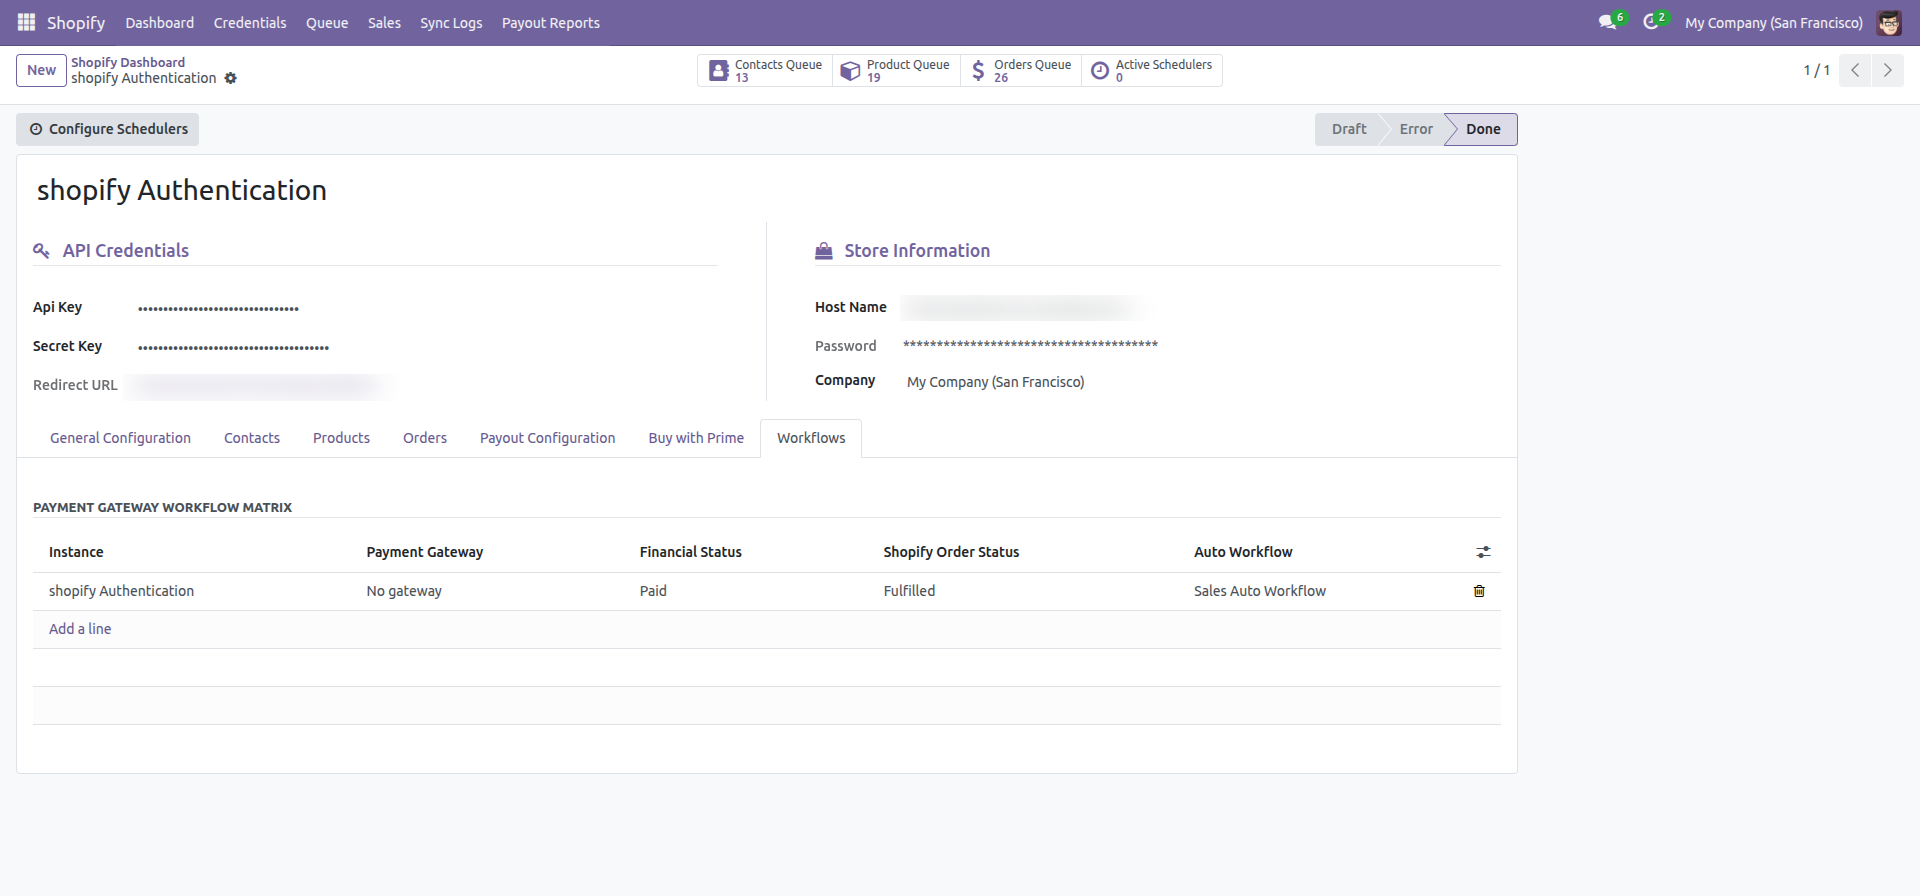
Verify the instance status changes to Done after successful Shopify authentication.
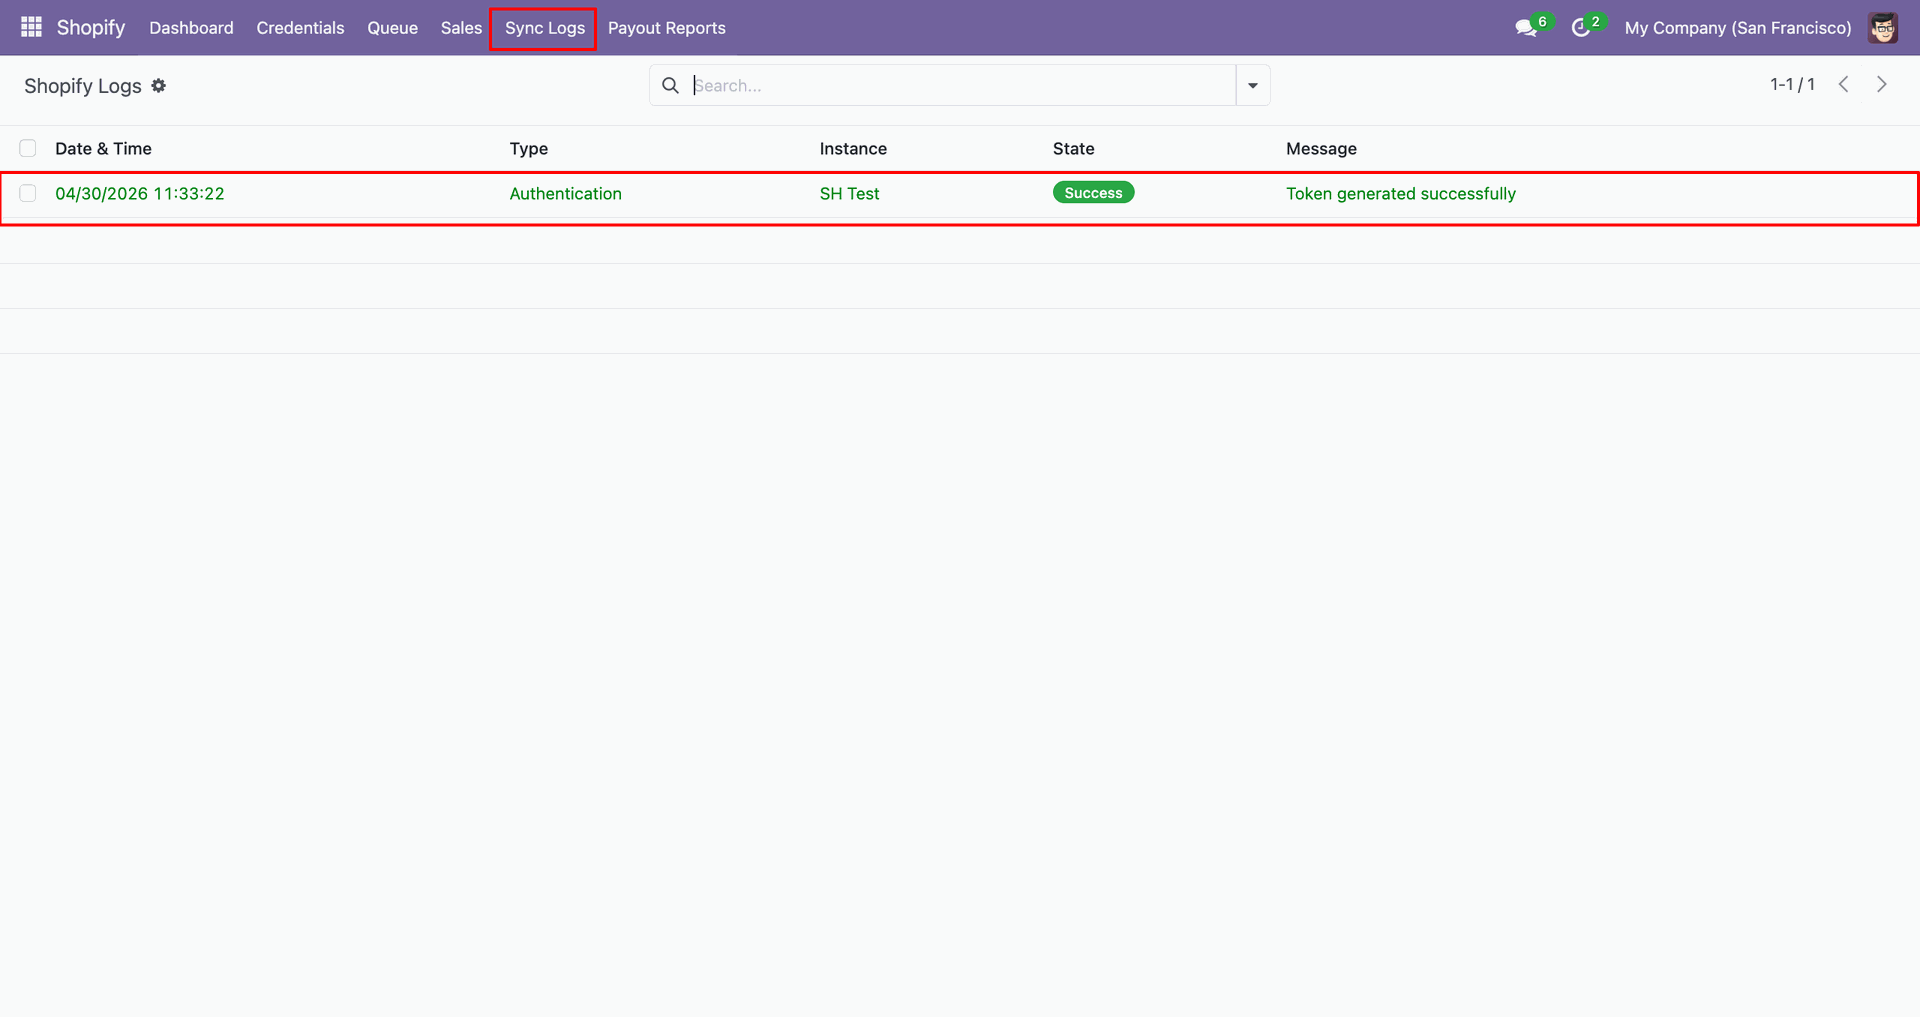
Check Sync Logs to confirm token generation completed successfully for the Shopify instance.
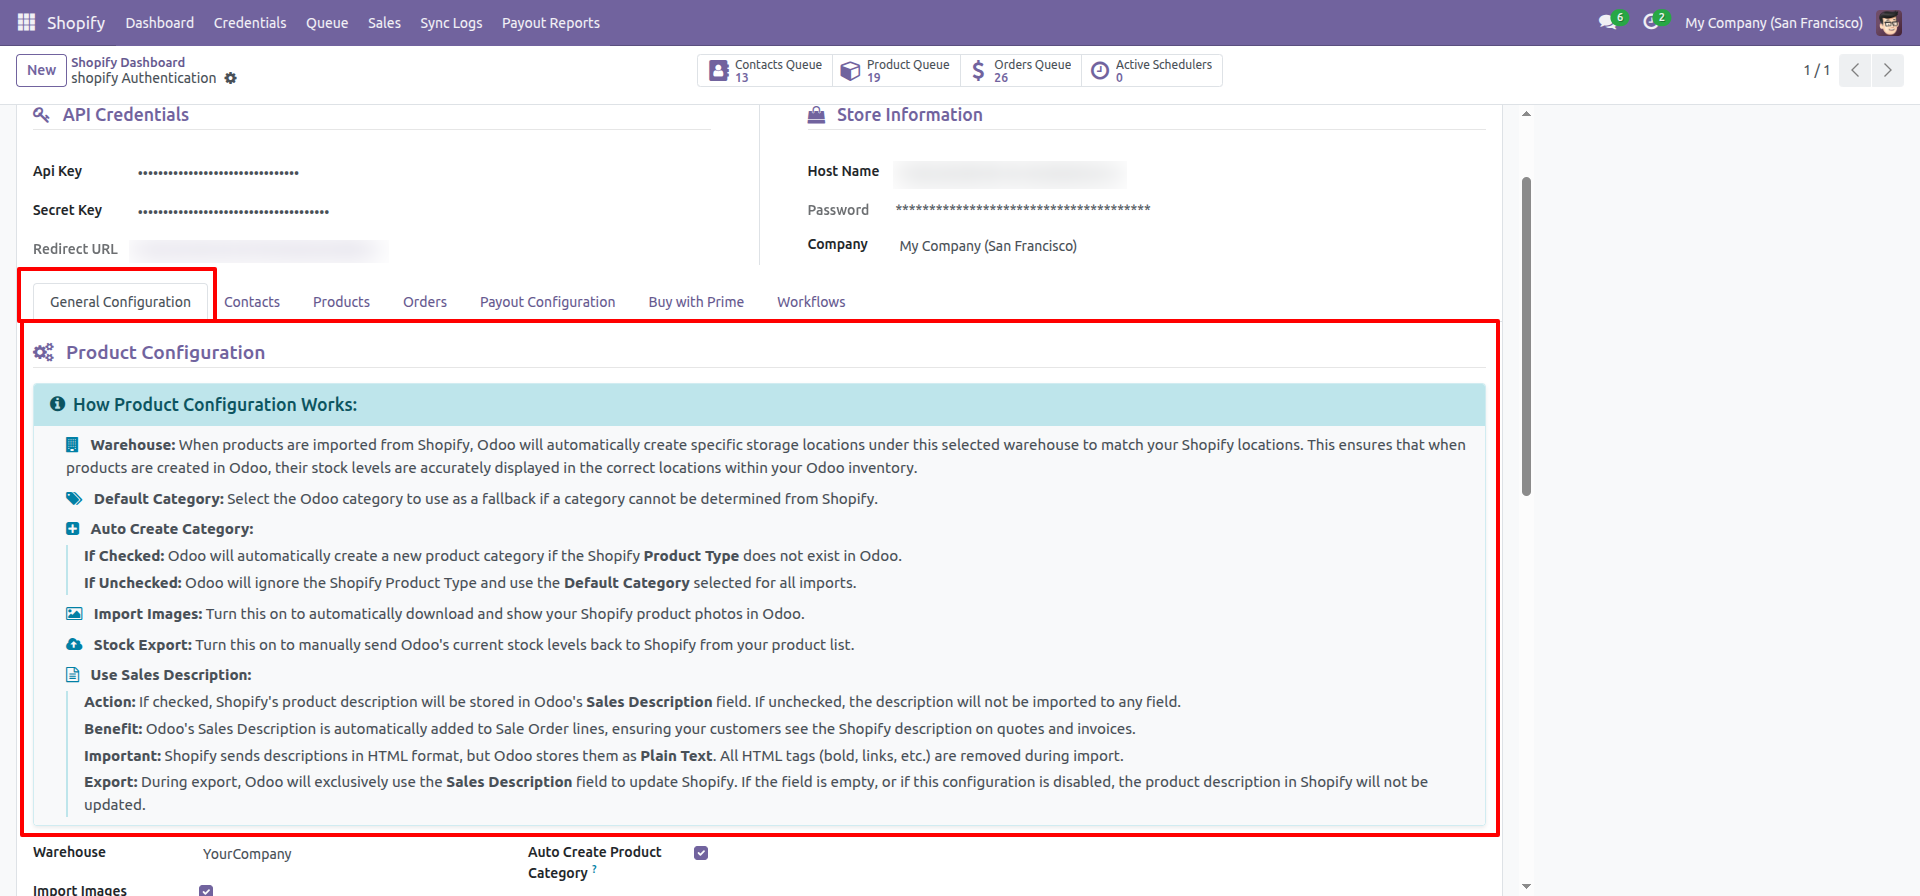
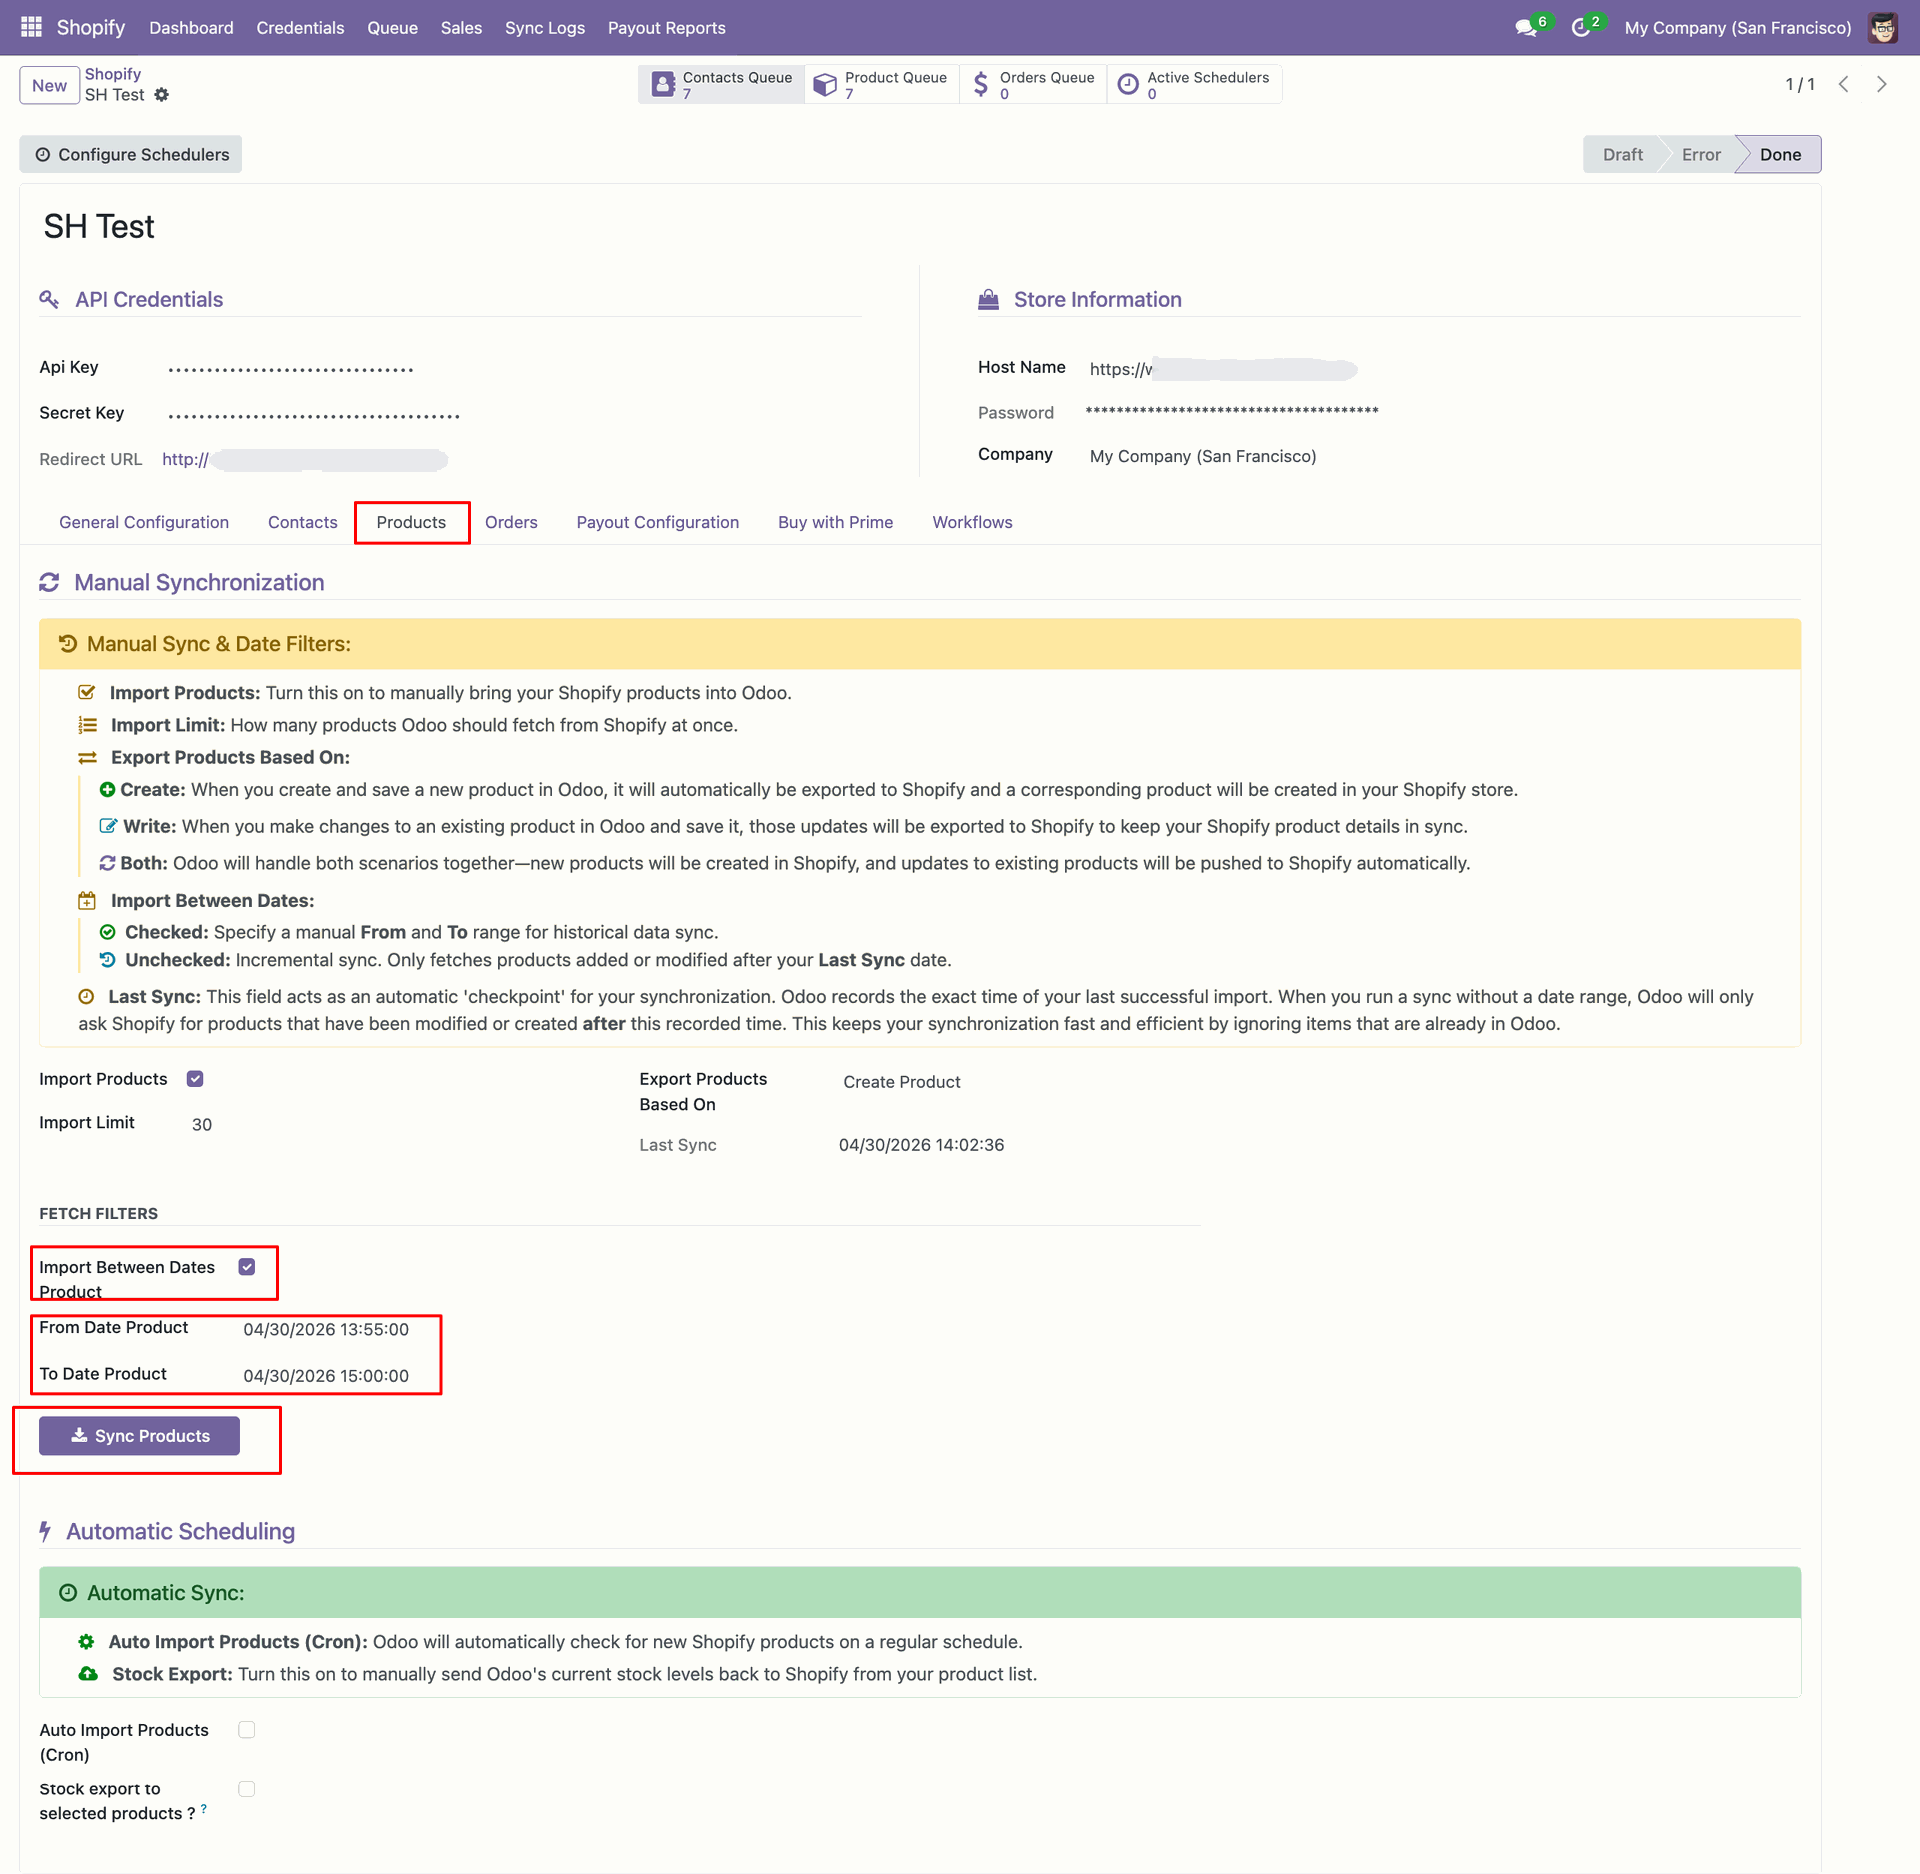
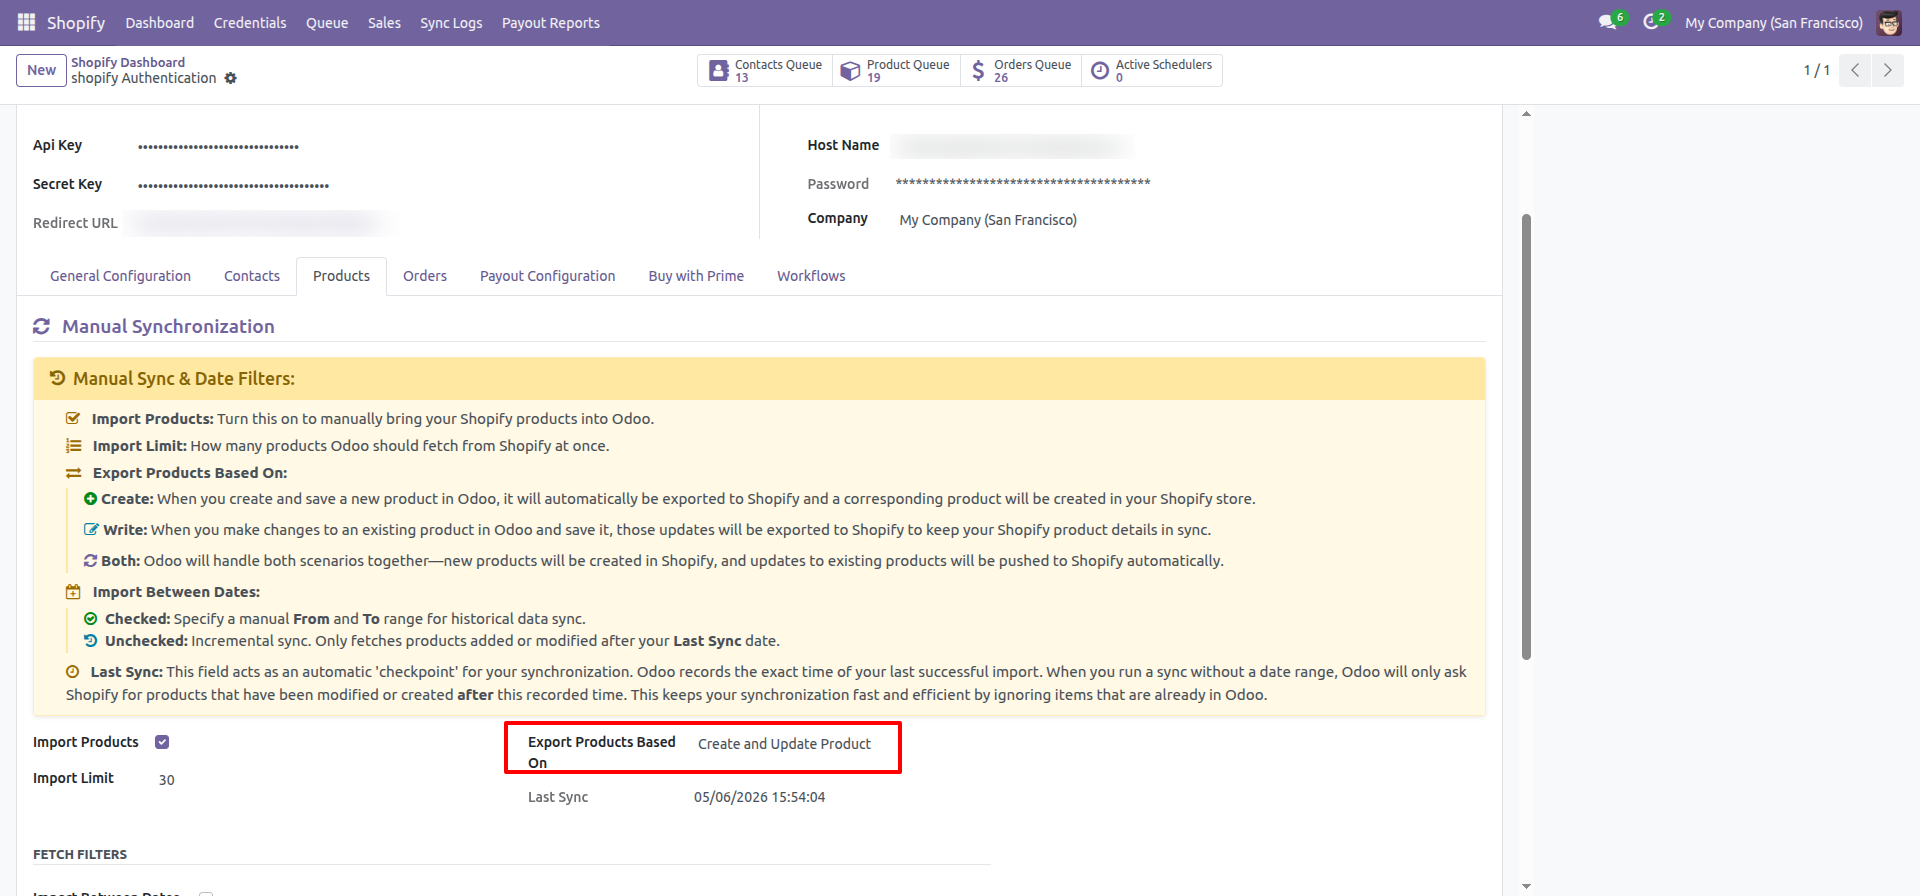
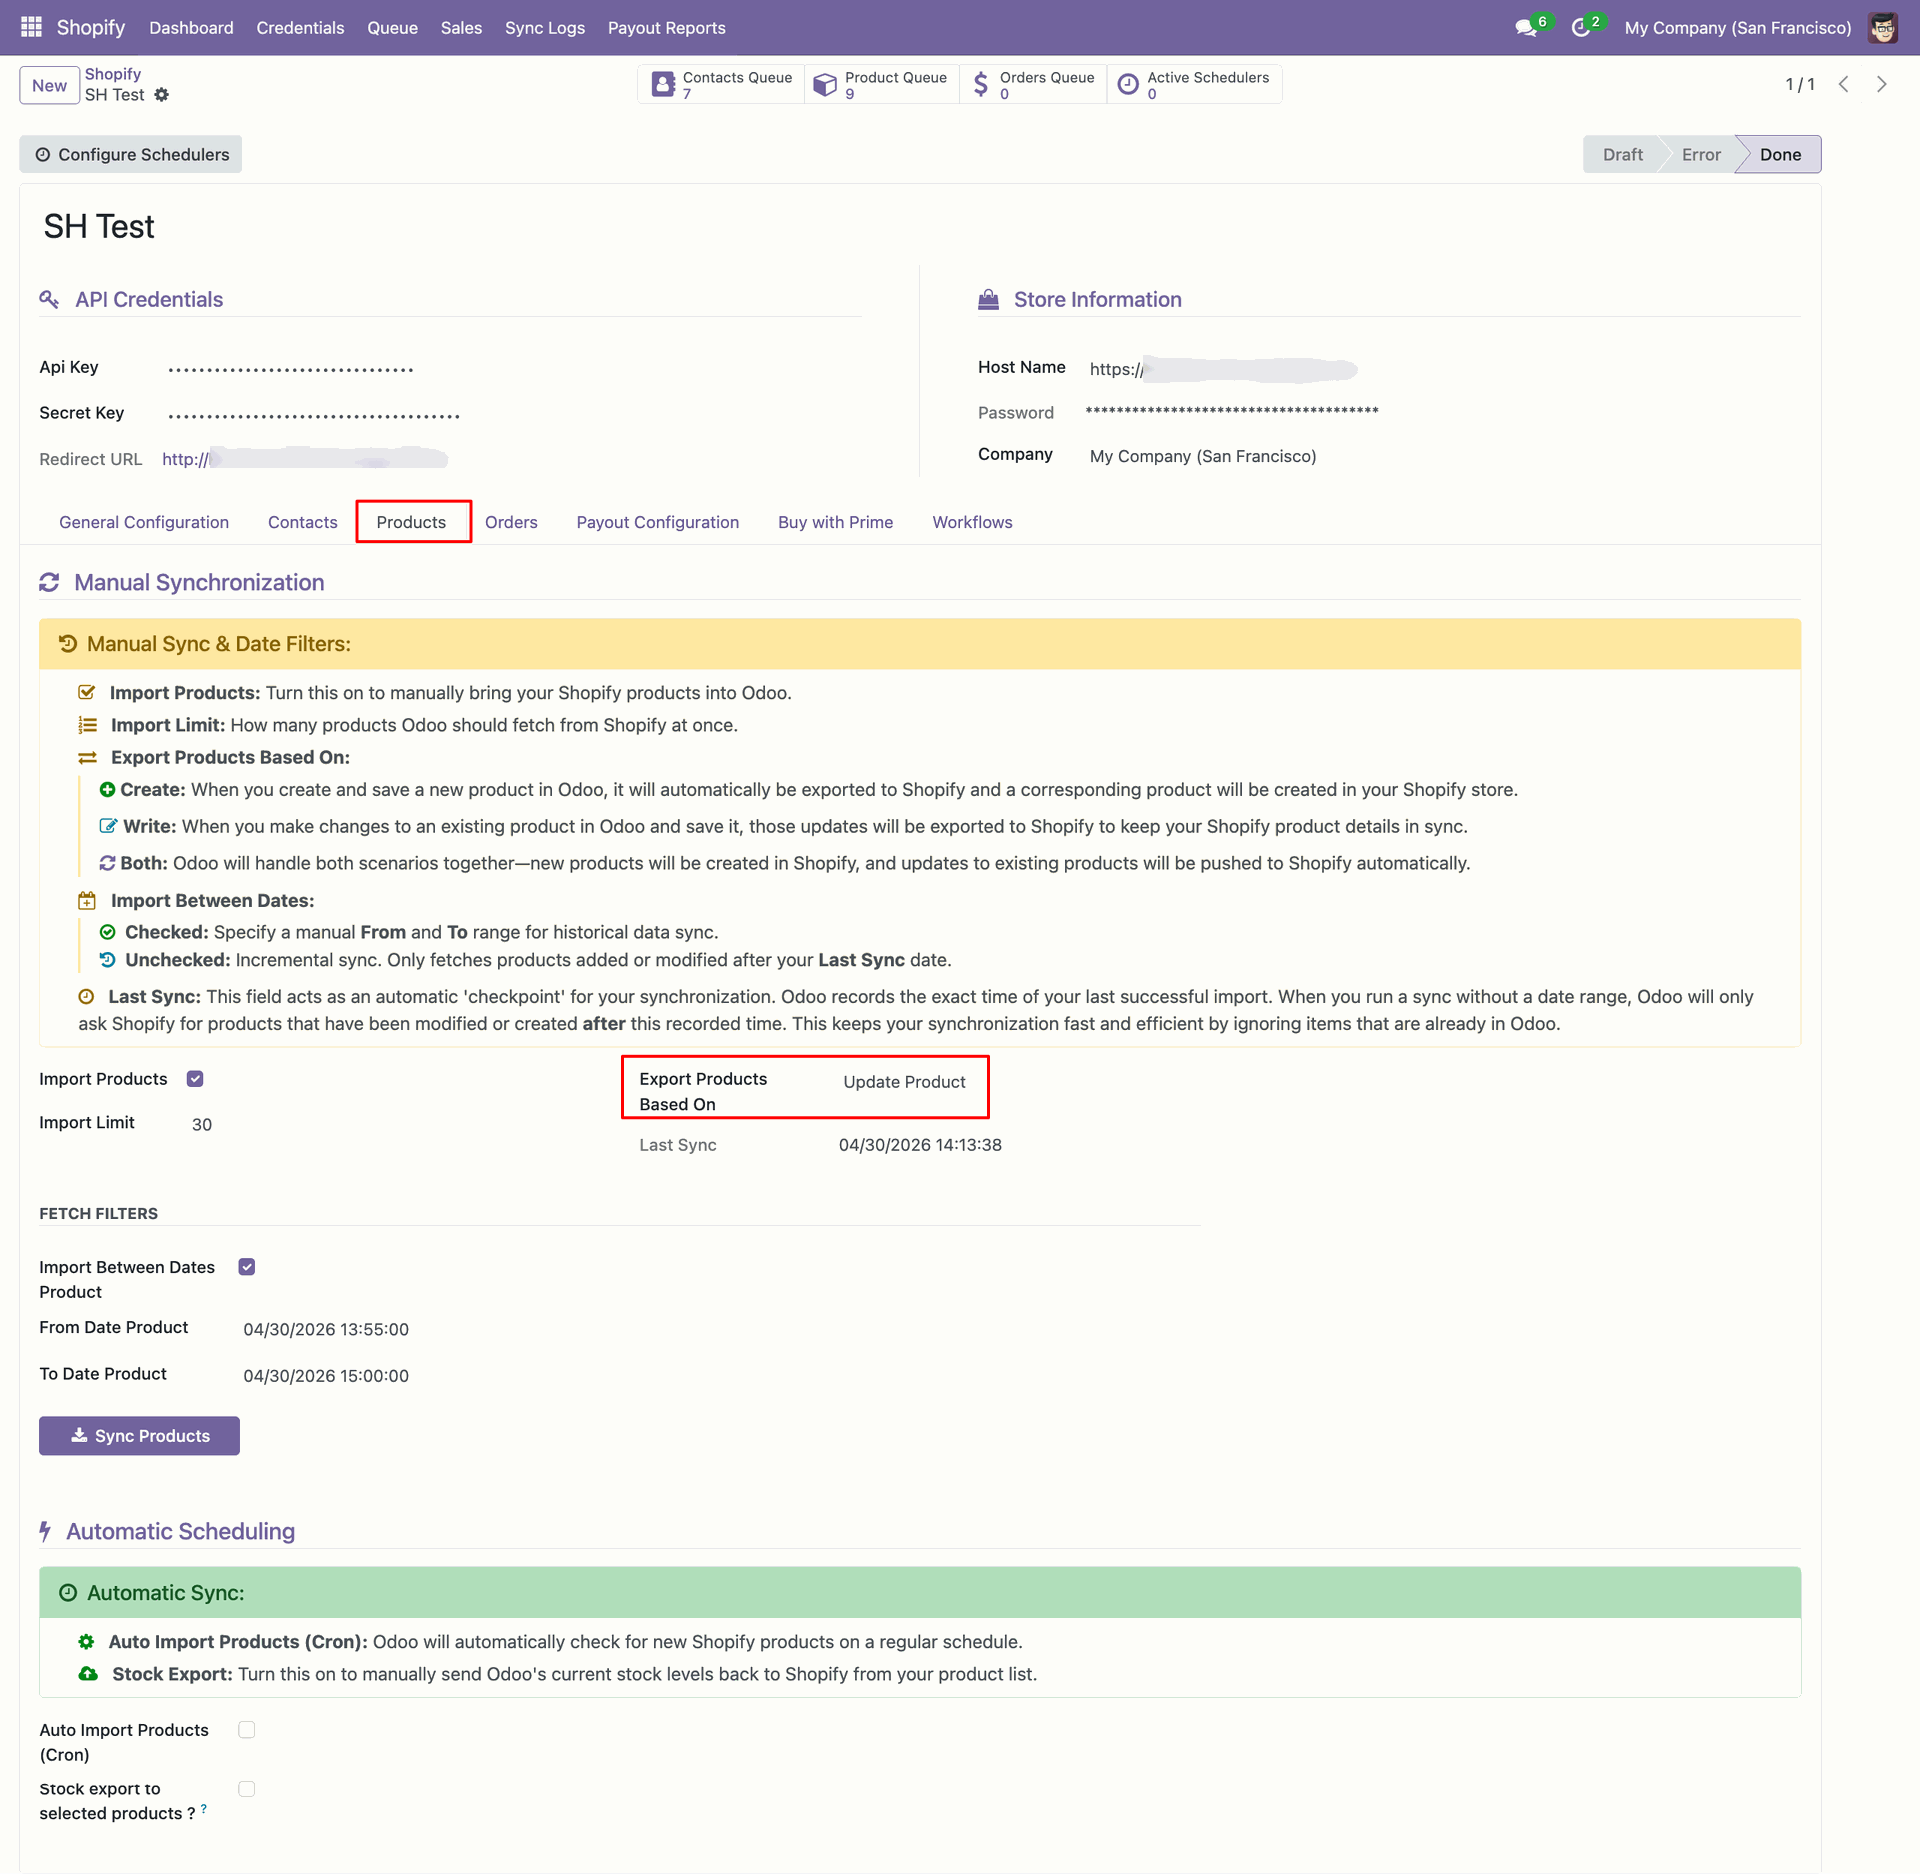
Open the Products tab to review product configuration before importing Shopify items.
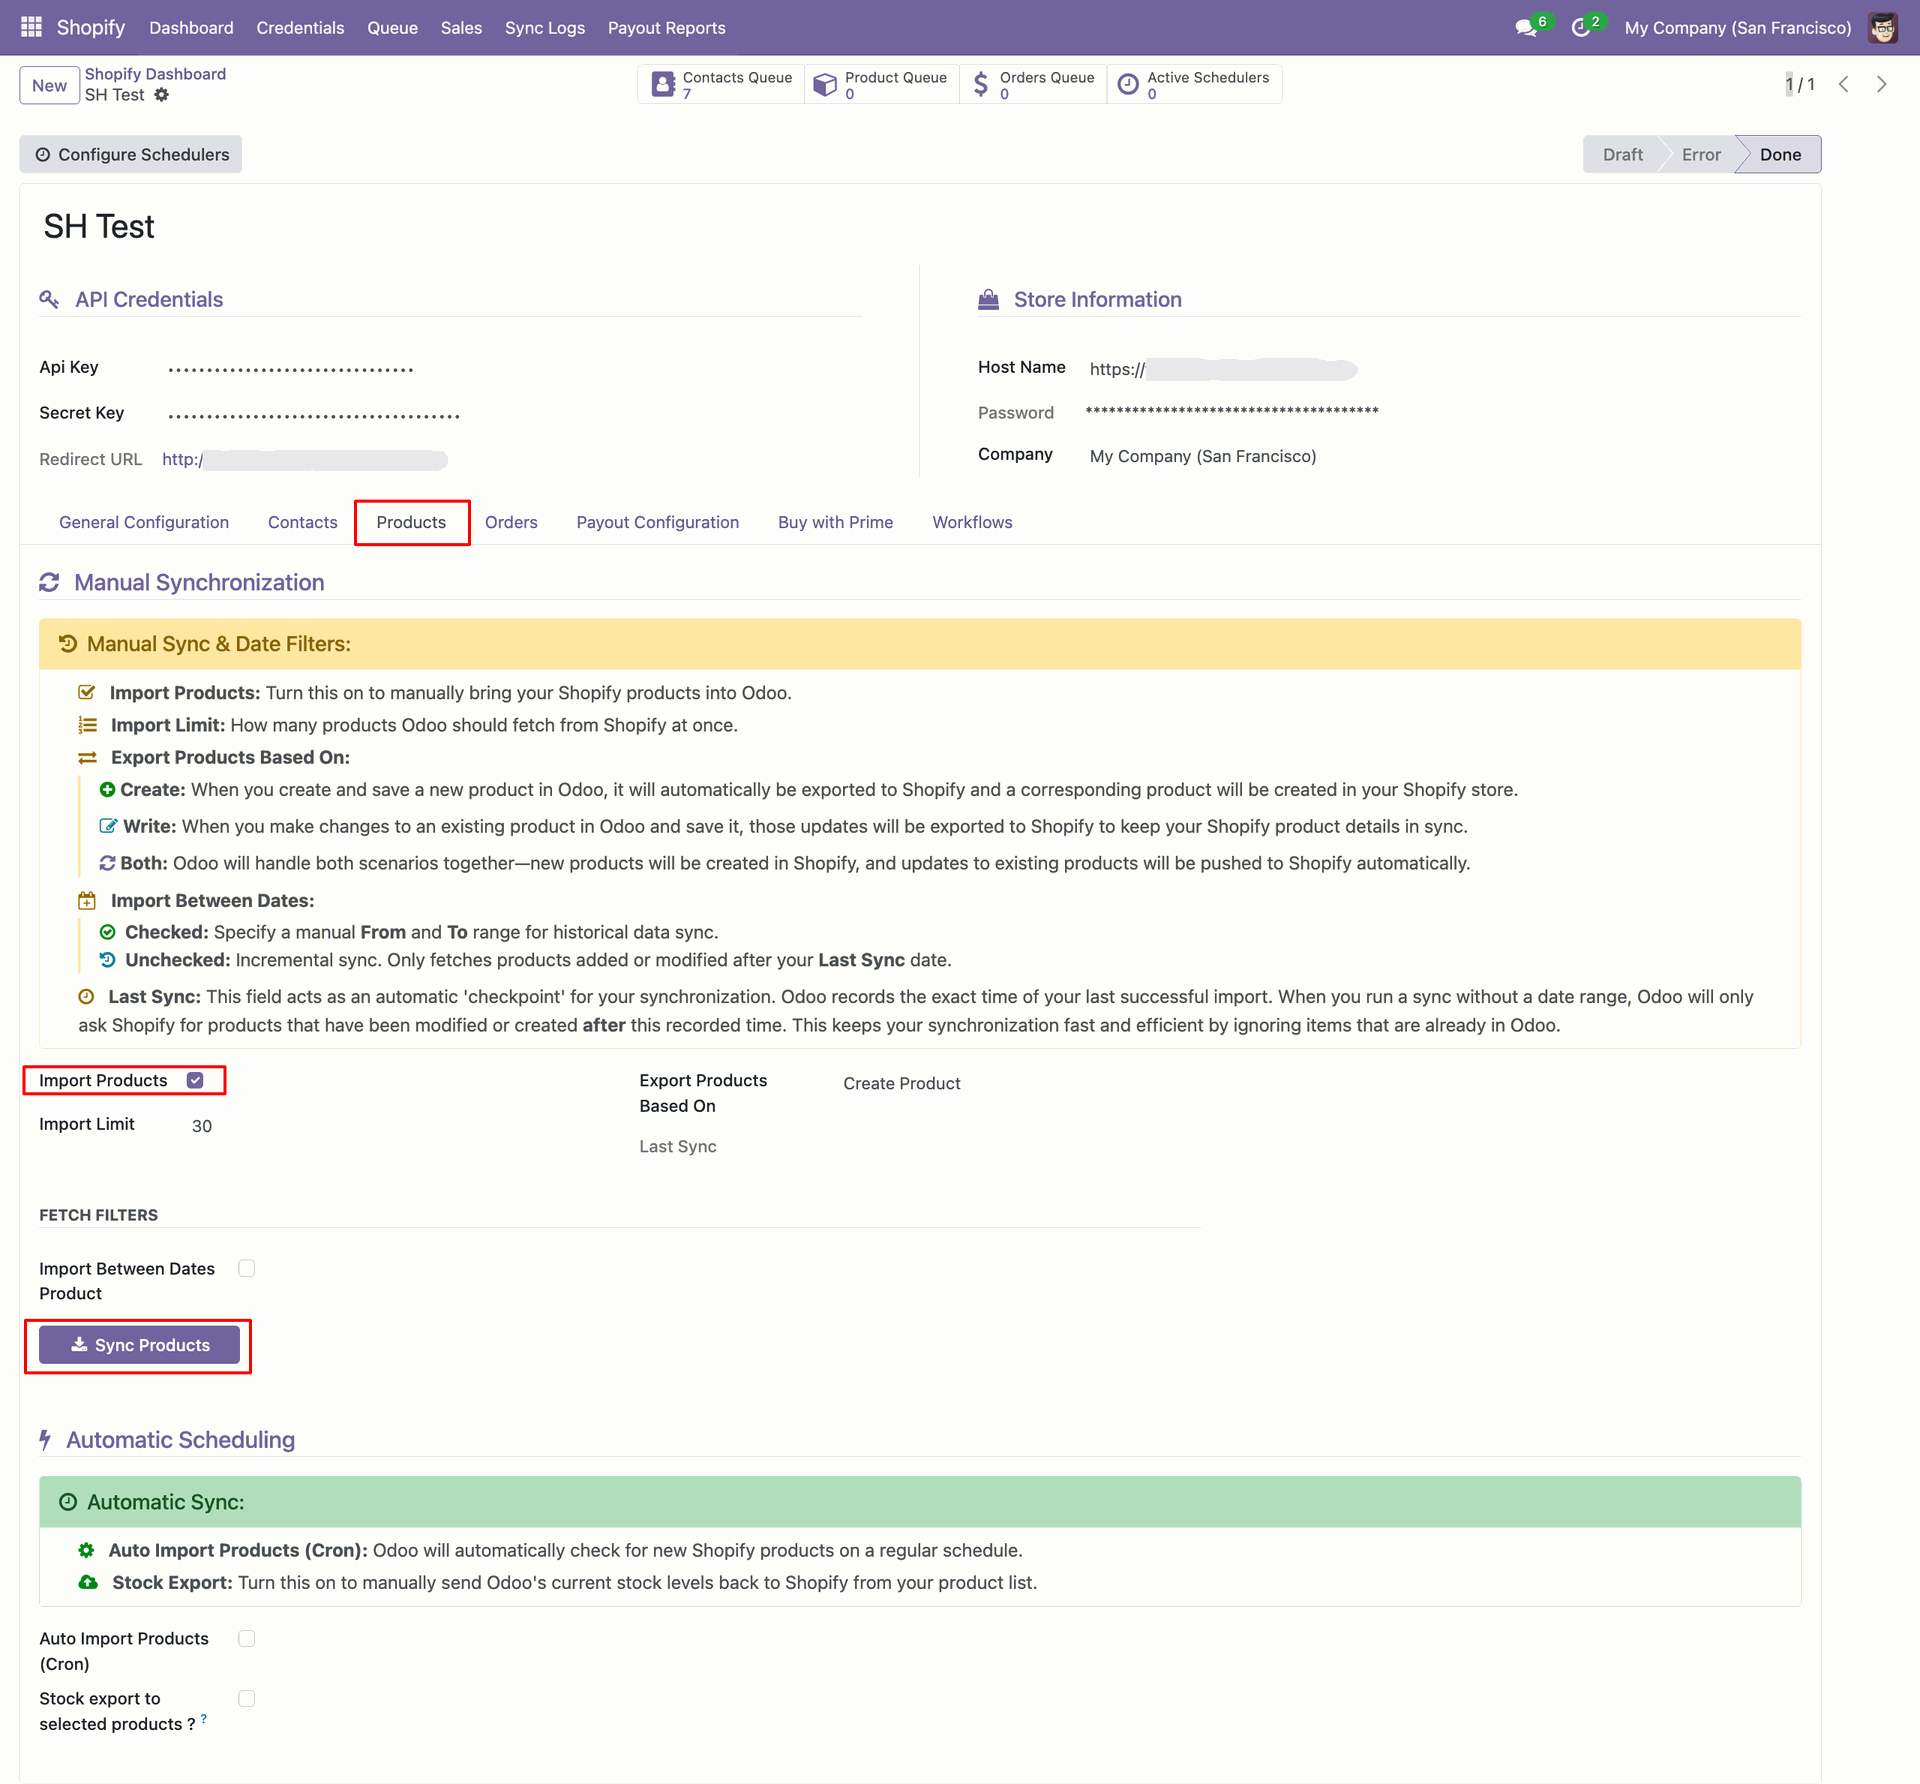
Enable Import Products and click Sync Products to fetch items manually.
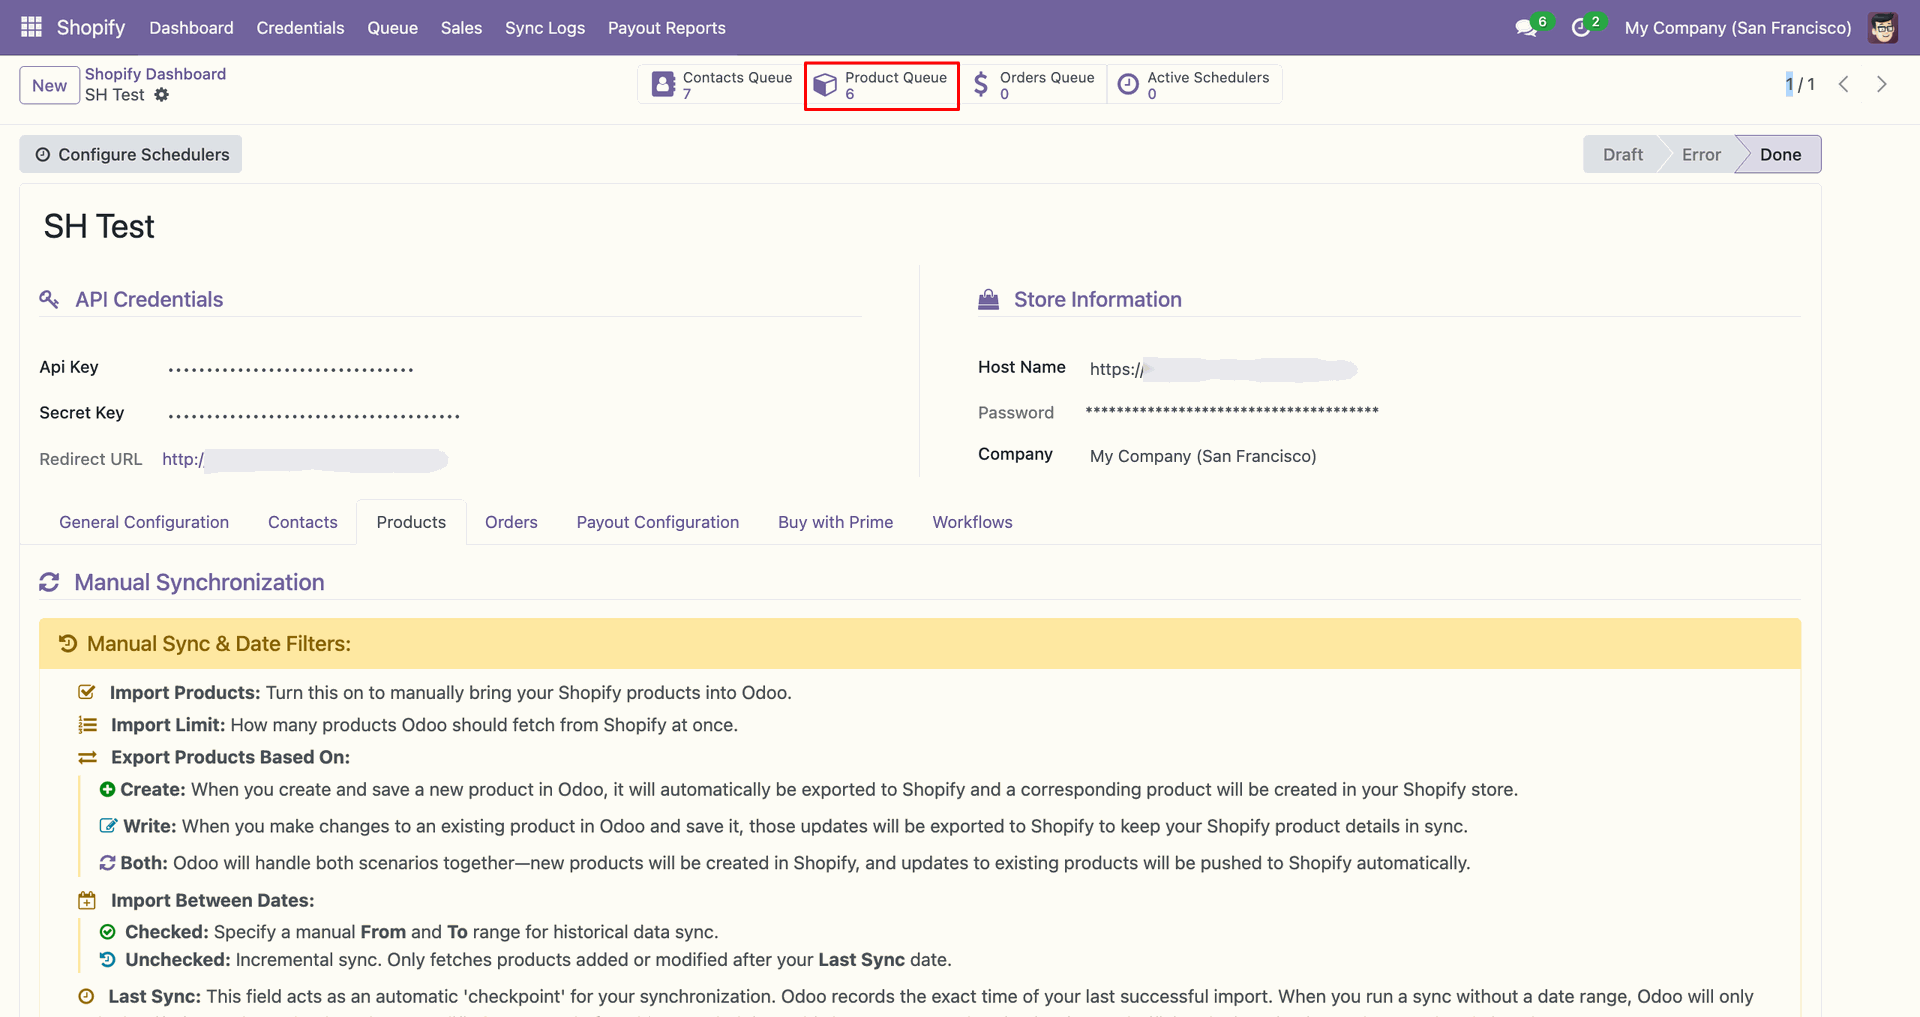
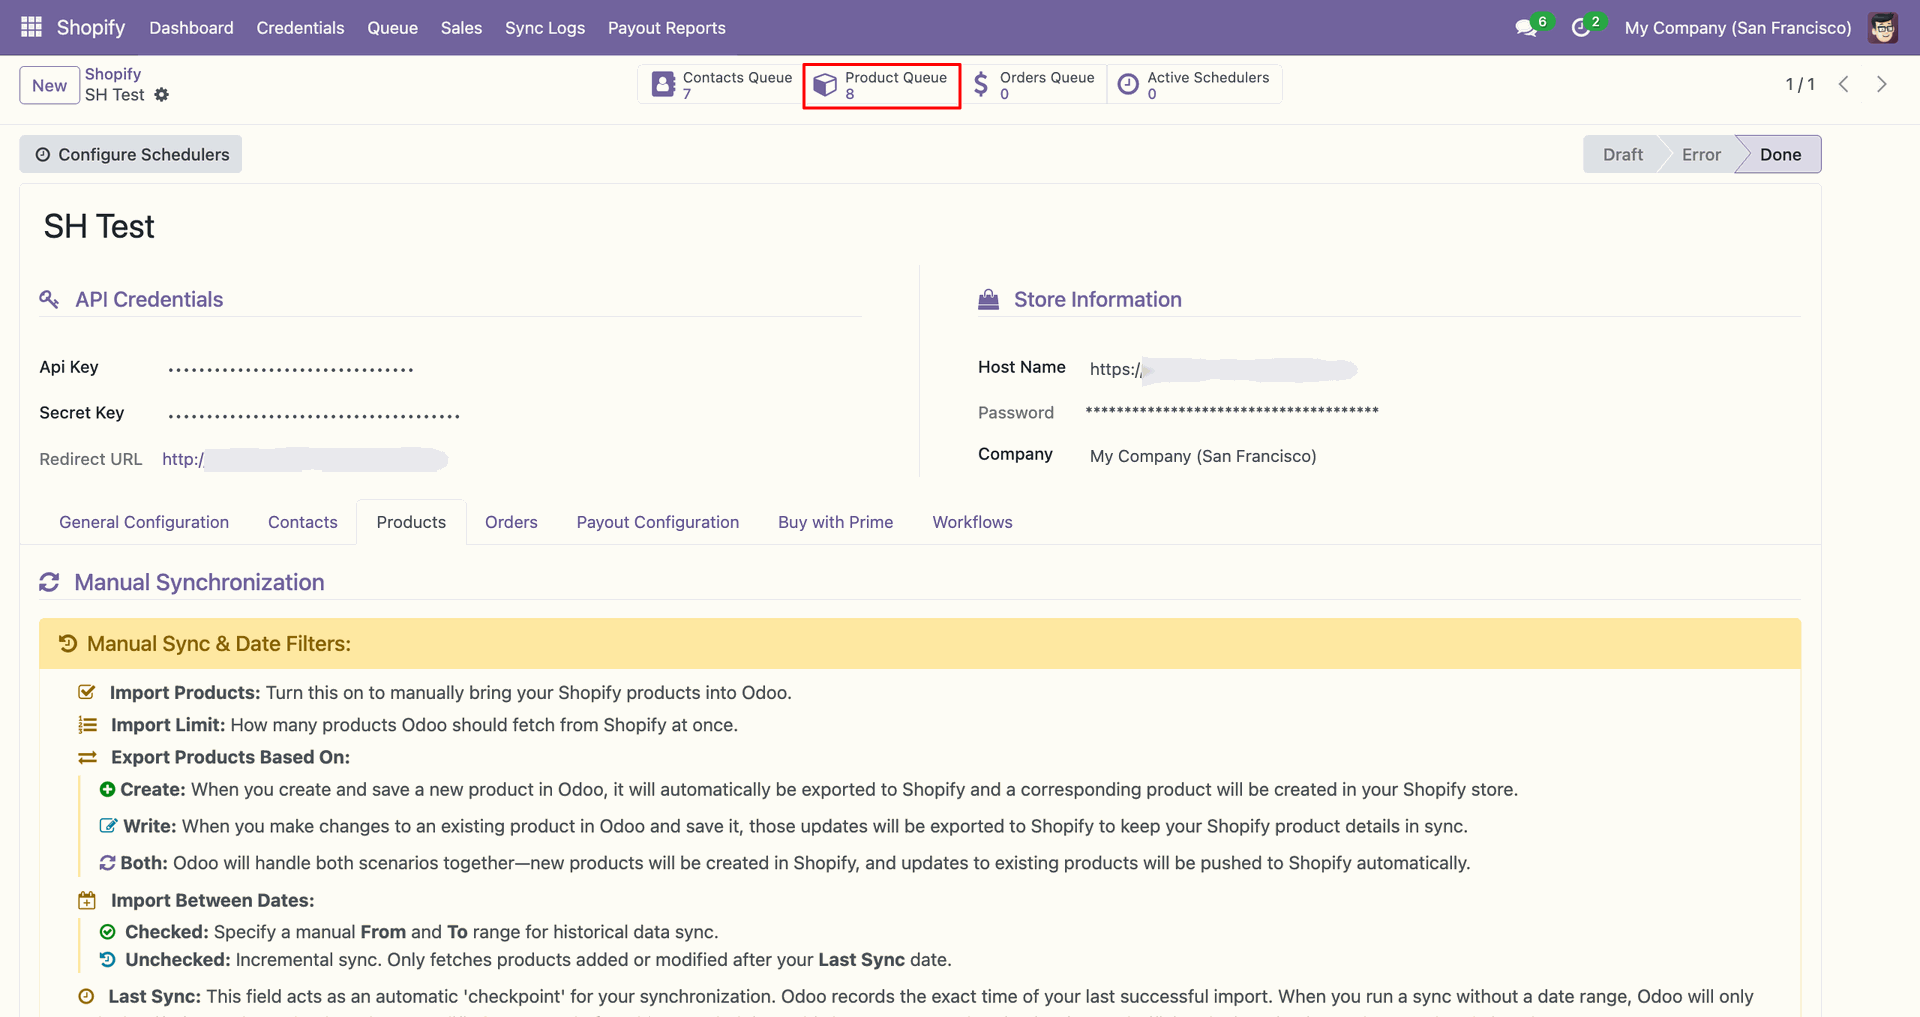
Use the Product Queue shortcut to review staged product records after synchronization.
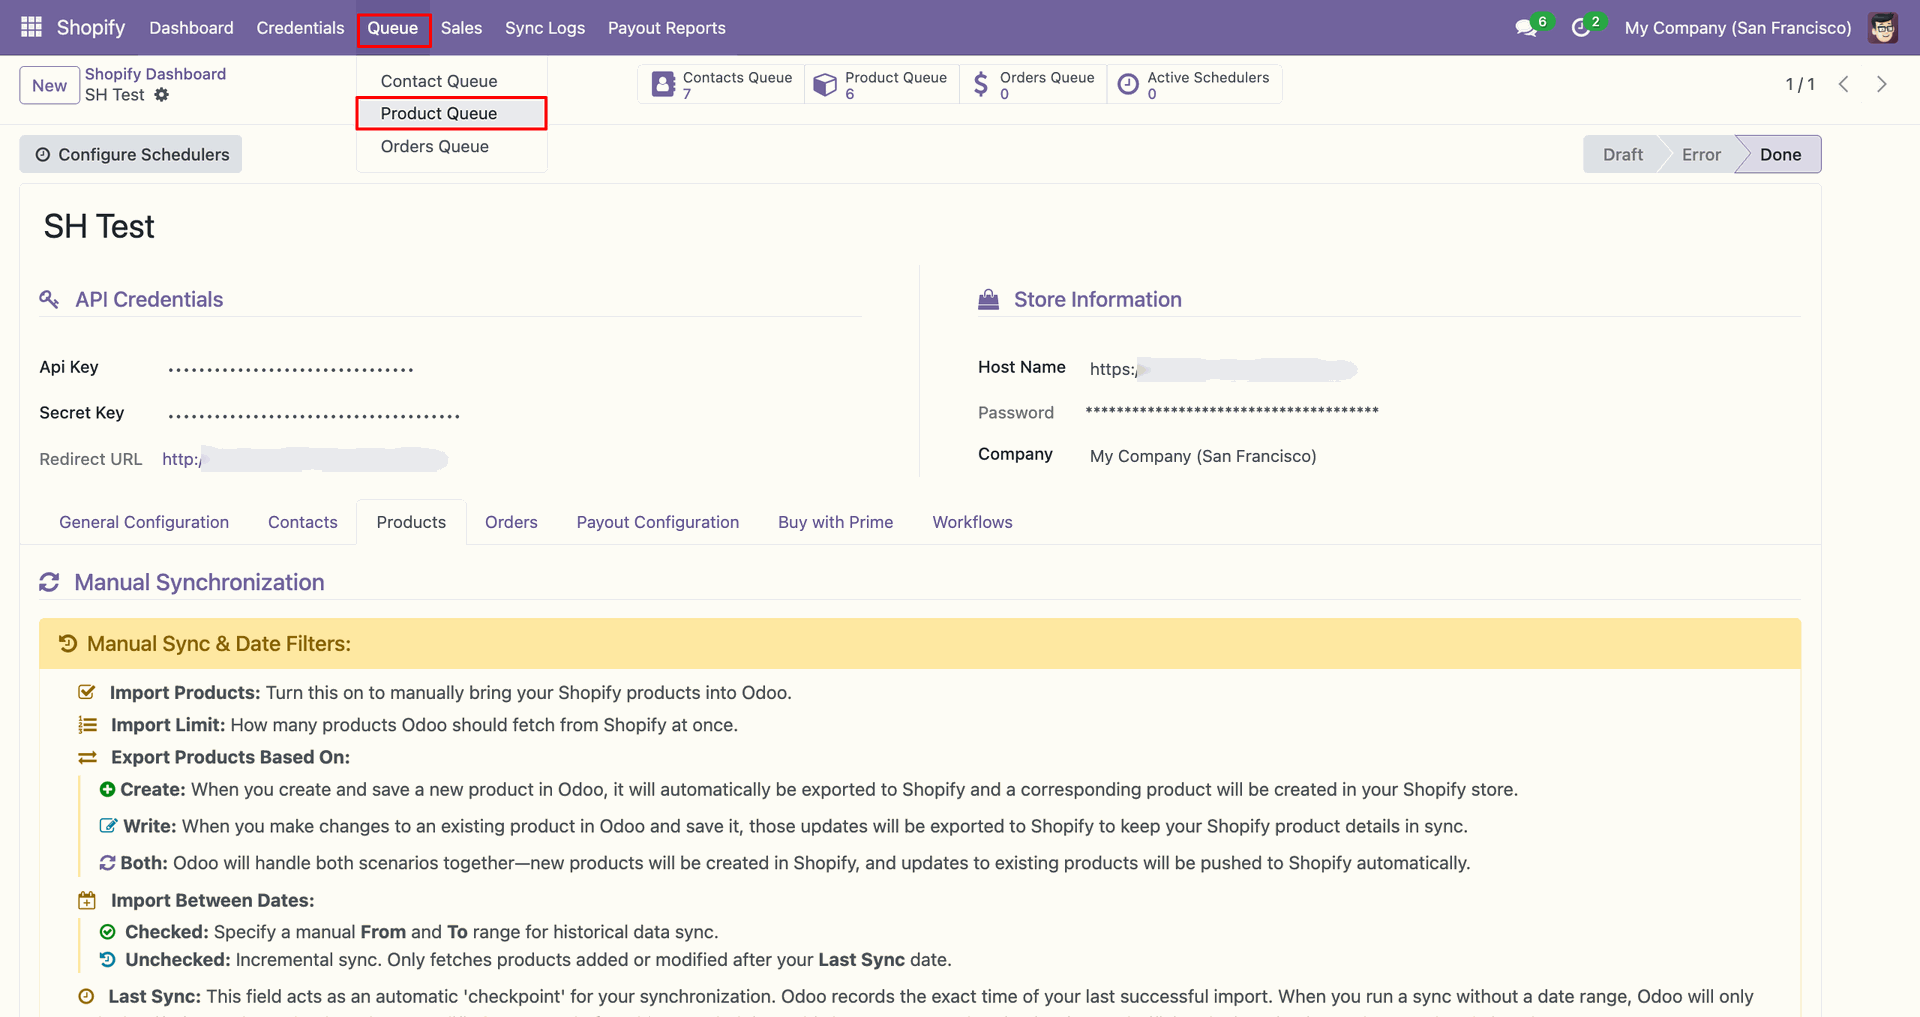
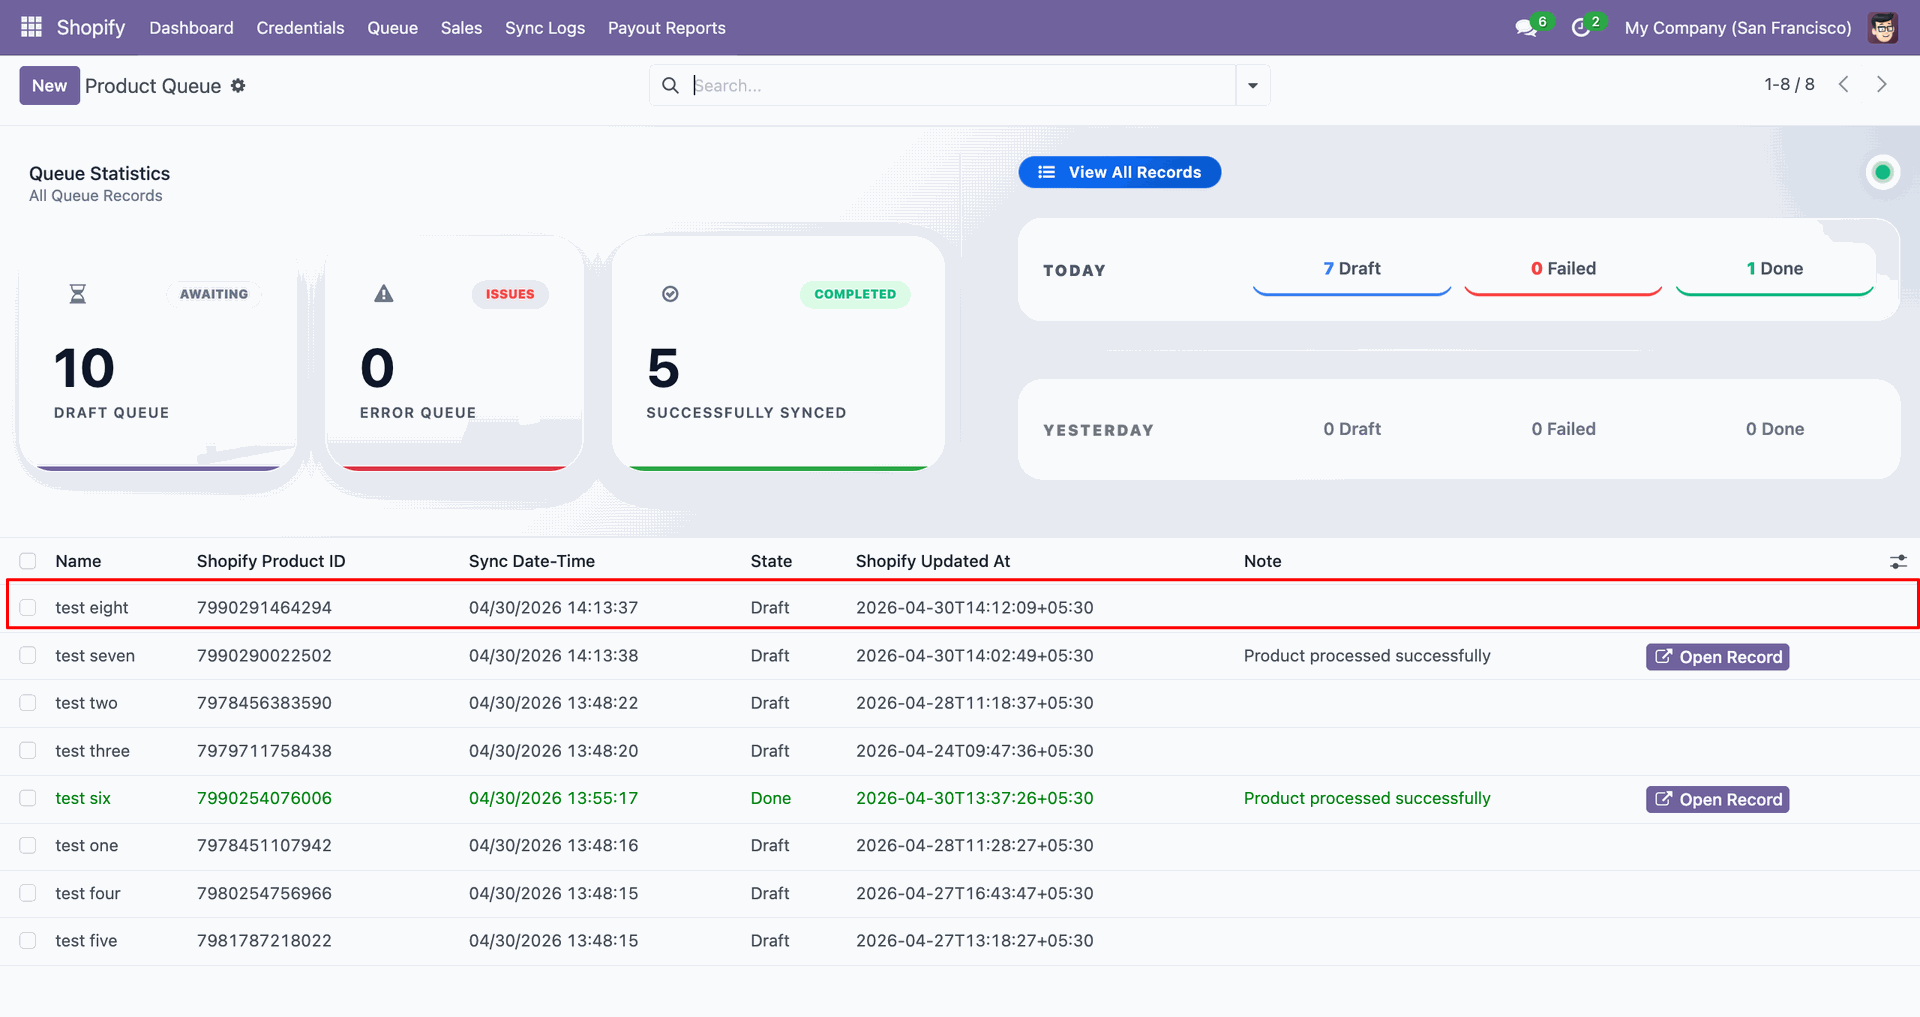
Open Product Queue from the Queue menu to inspect imported product entries.
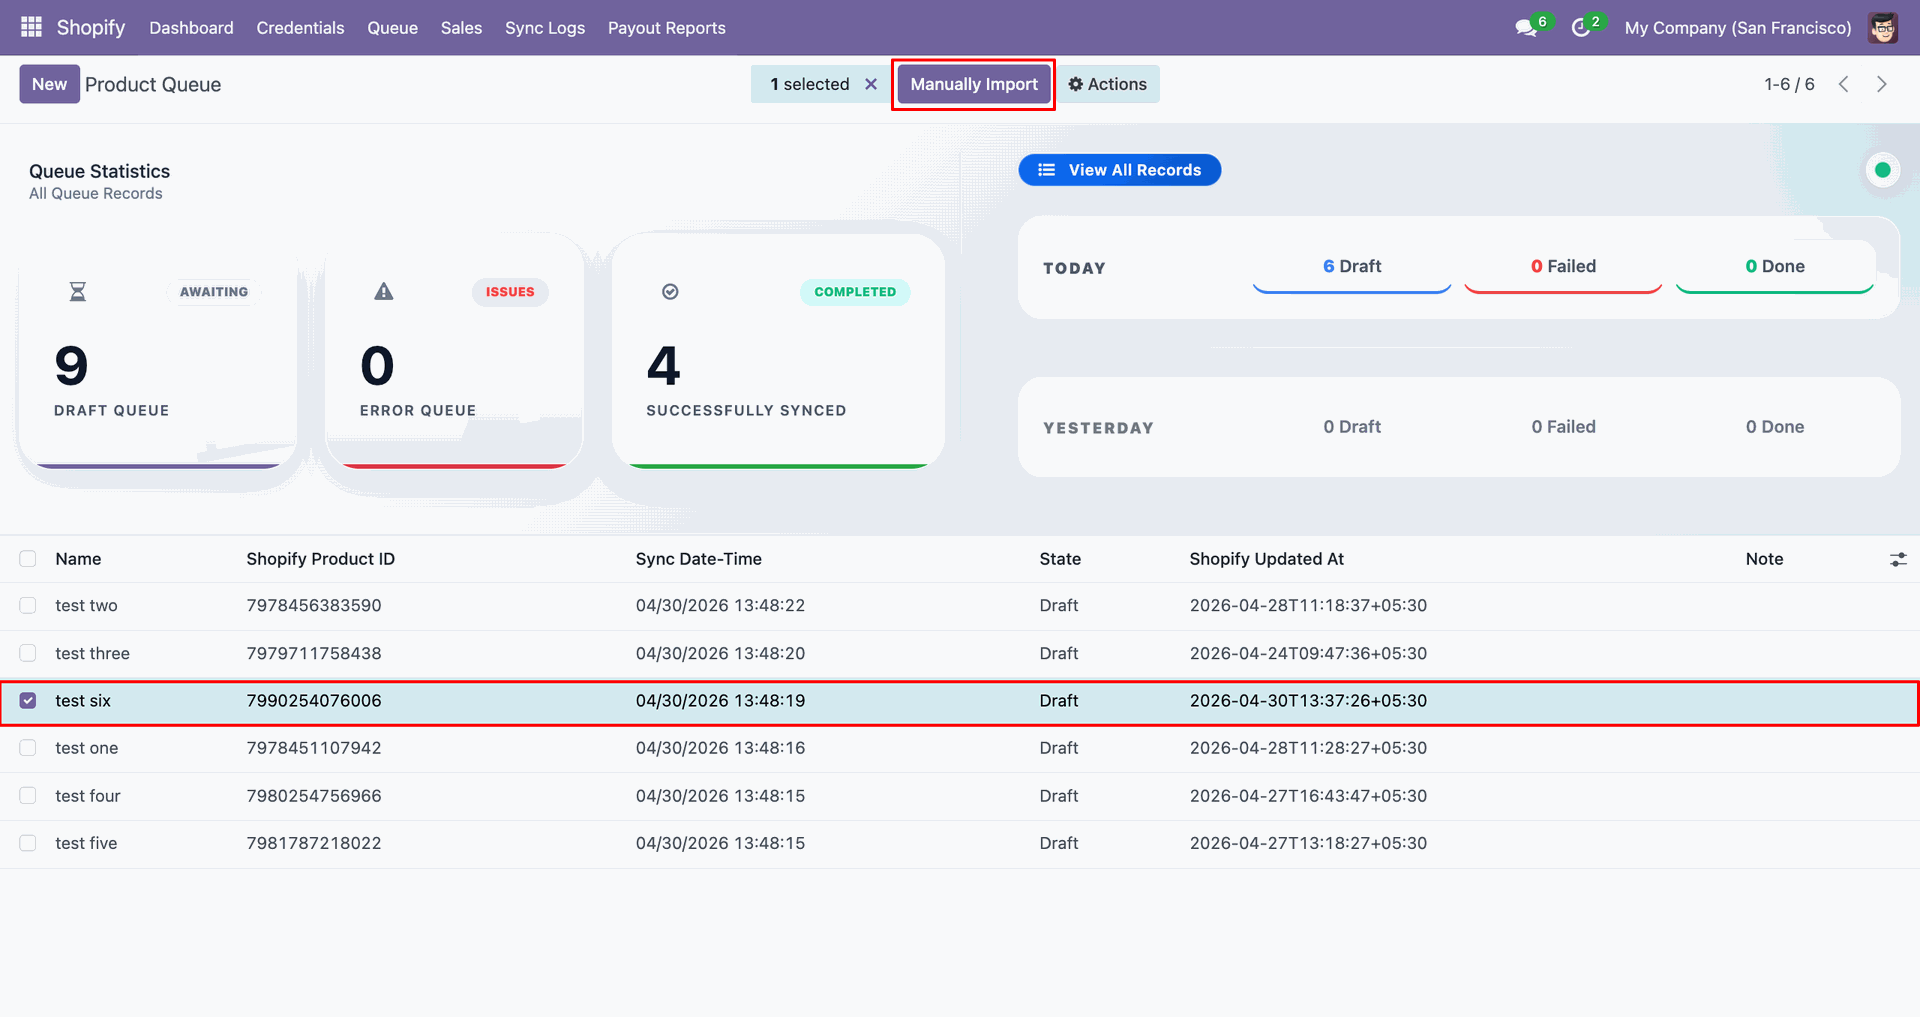
Select the queued product line and click Manually Import to process it.
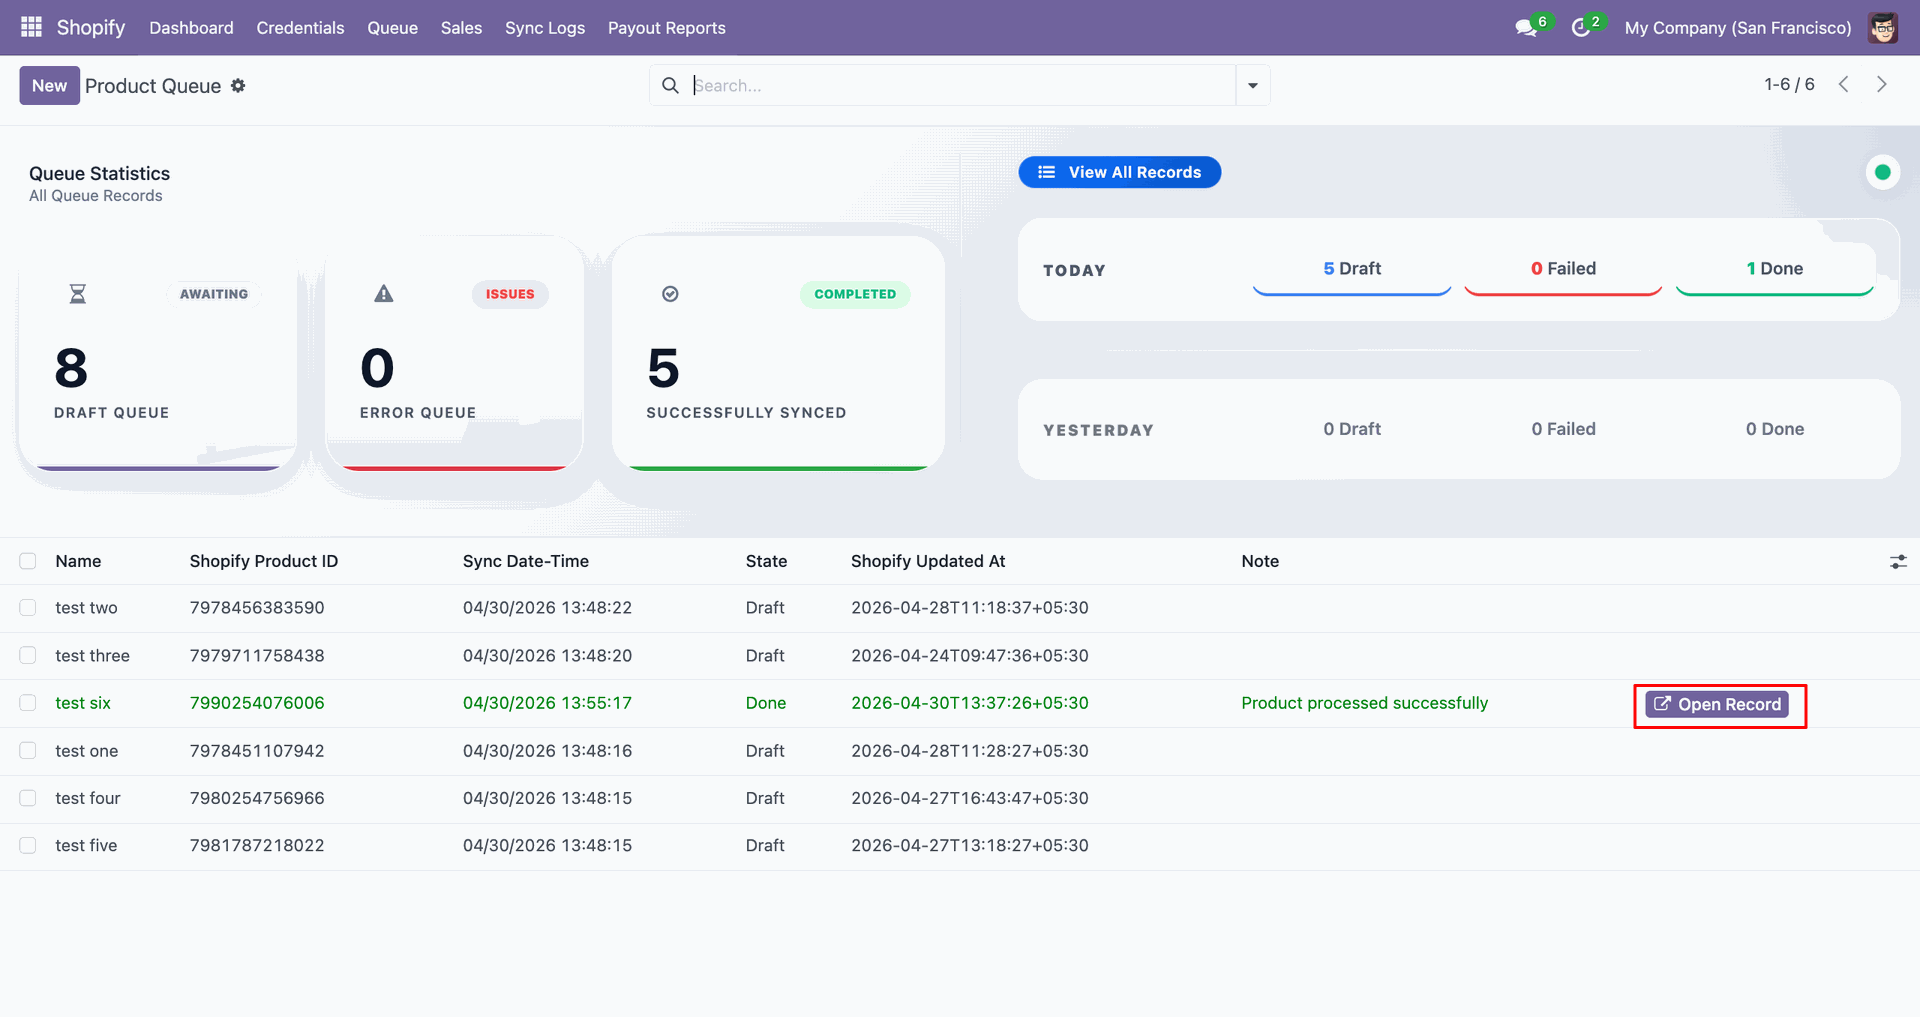
Click Open Record beside the completed queue line to view the Odoo product.
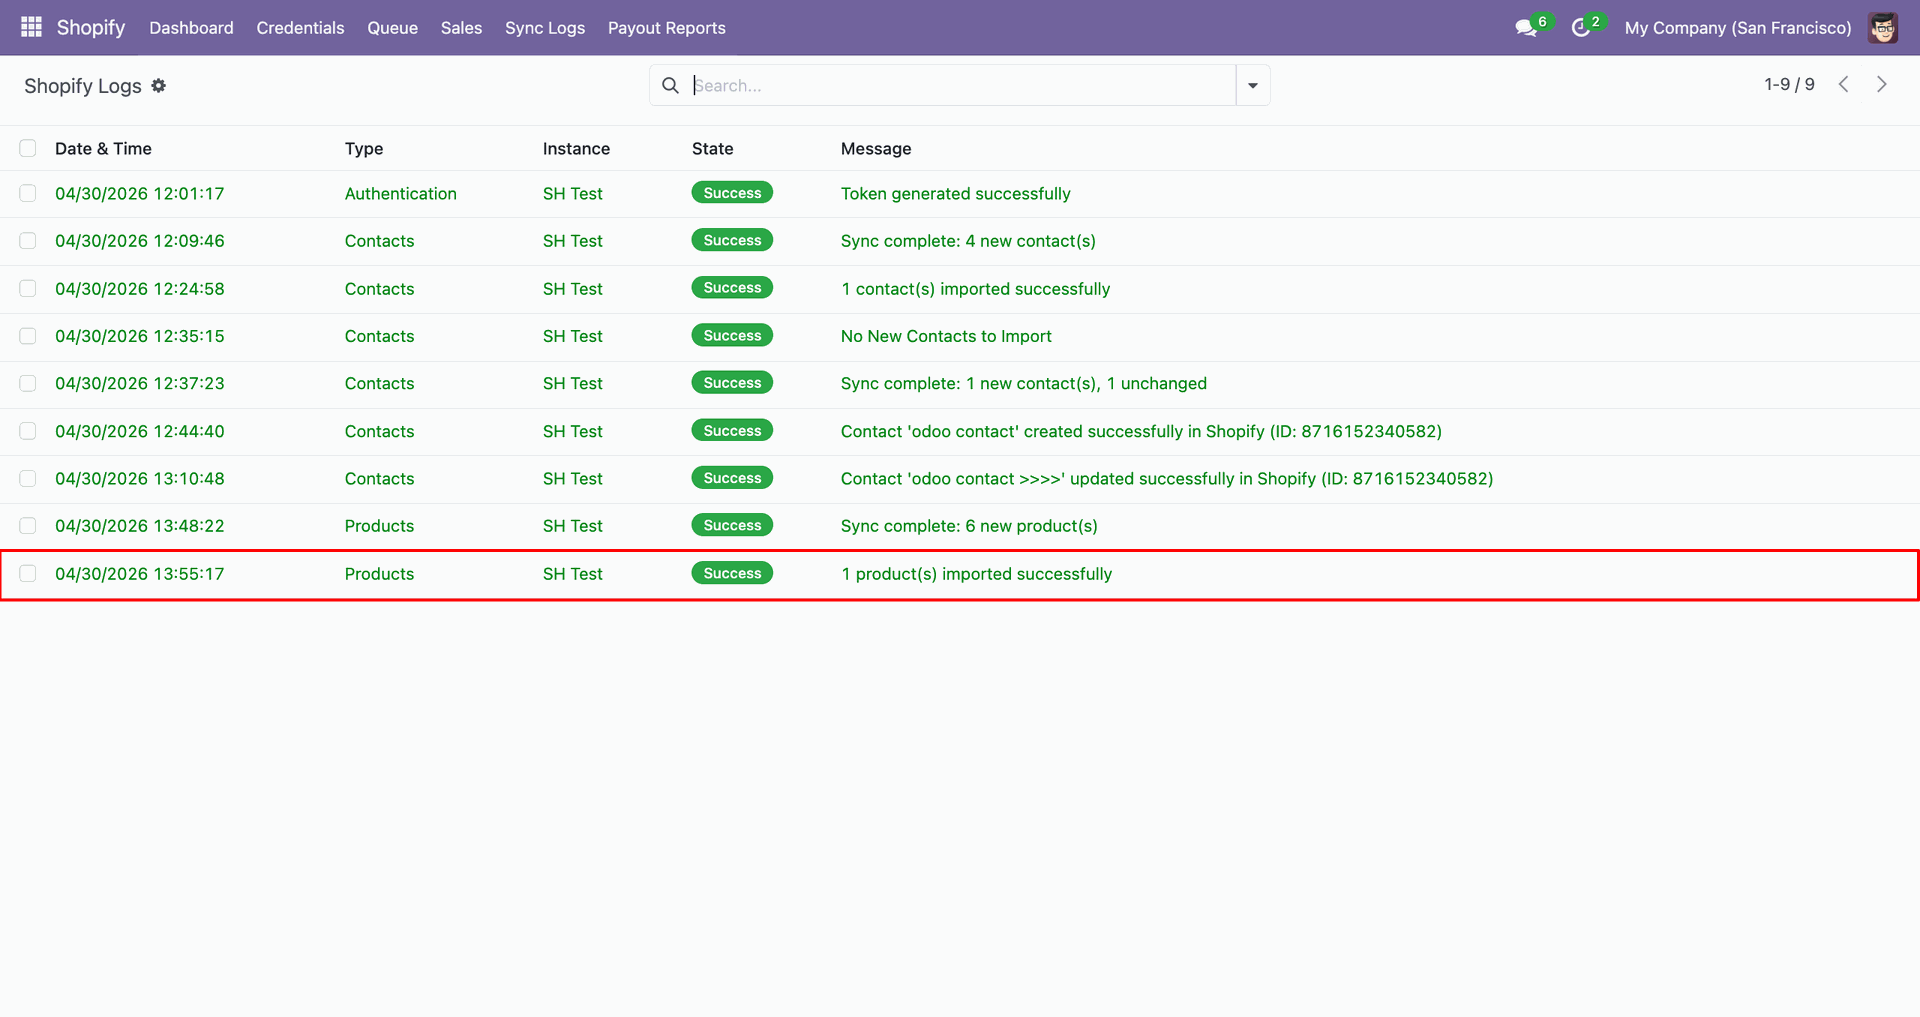
Review the Products log entry to confirm the product import finished successfully.
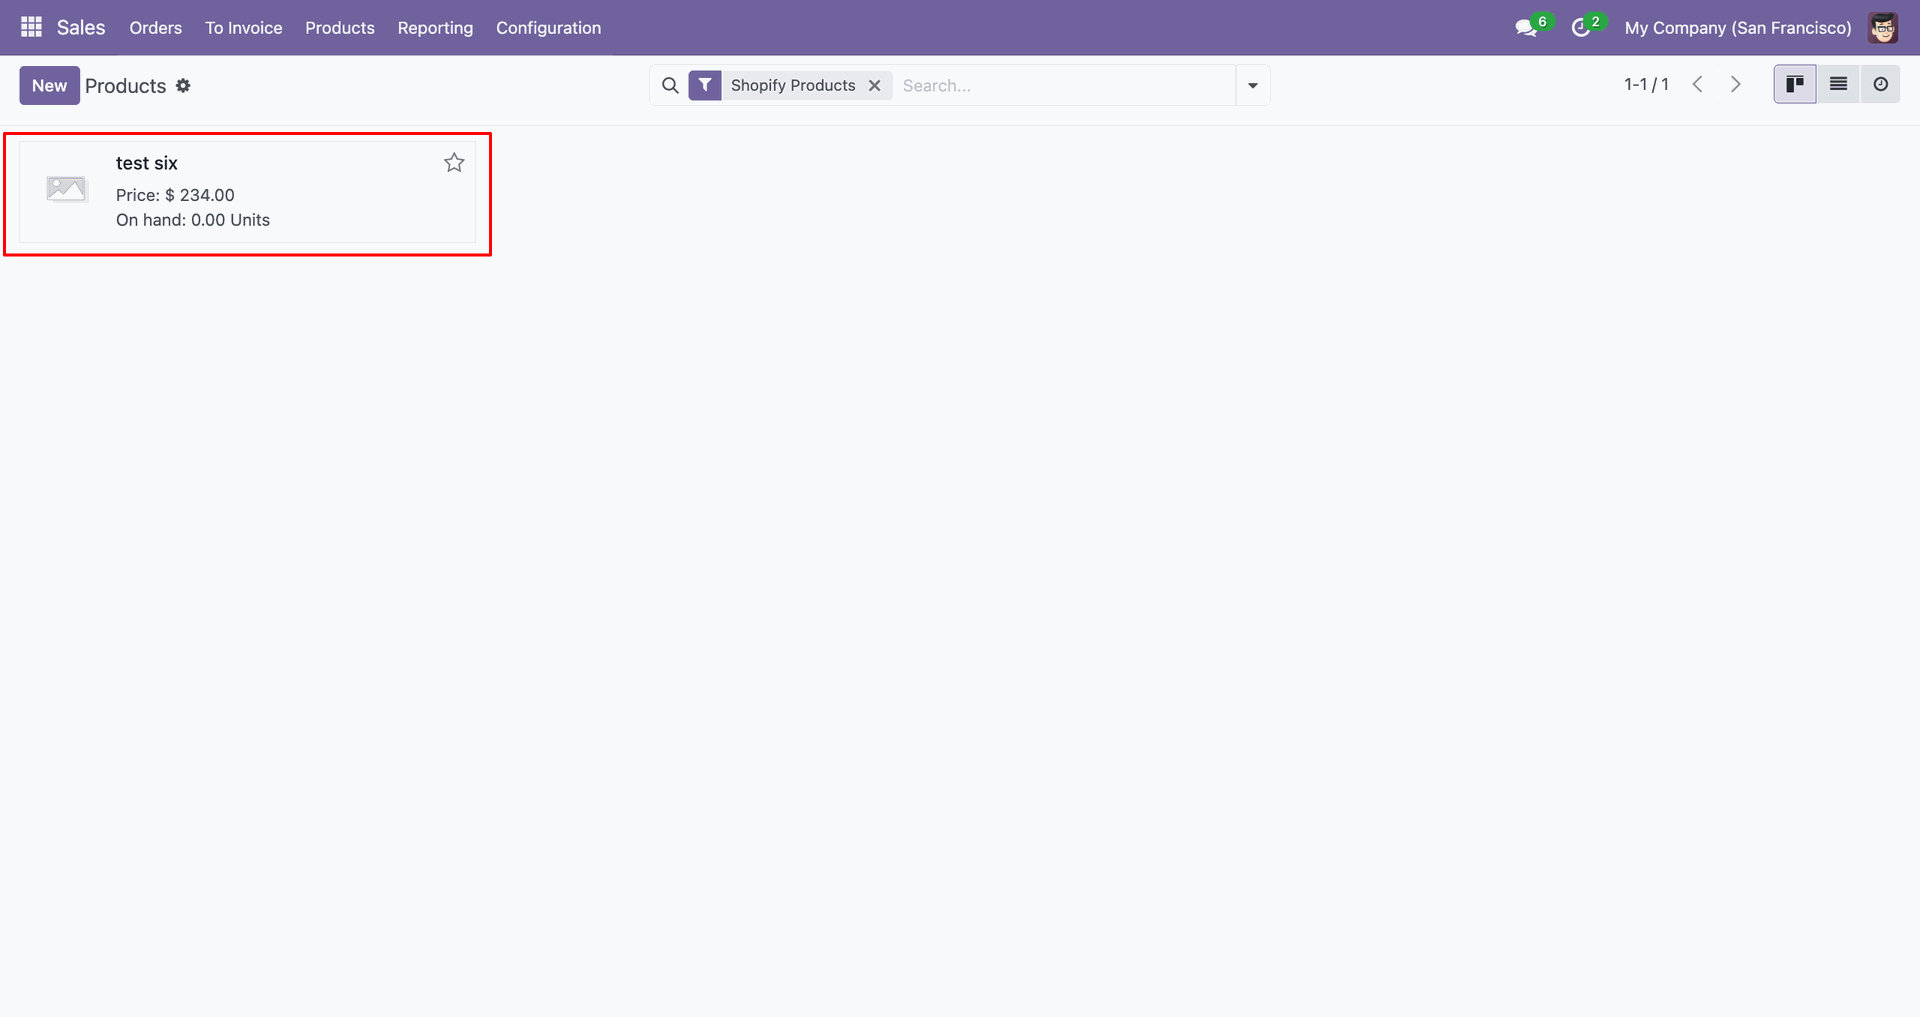
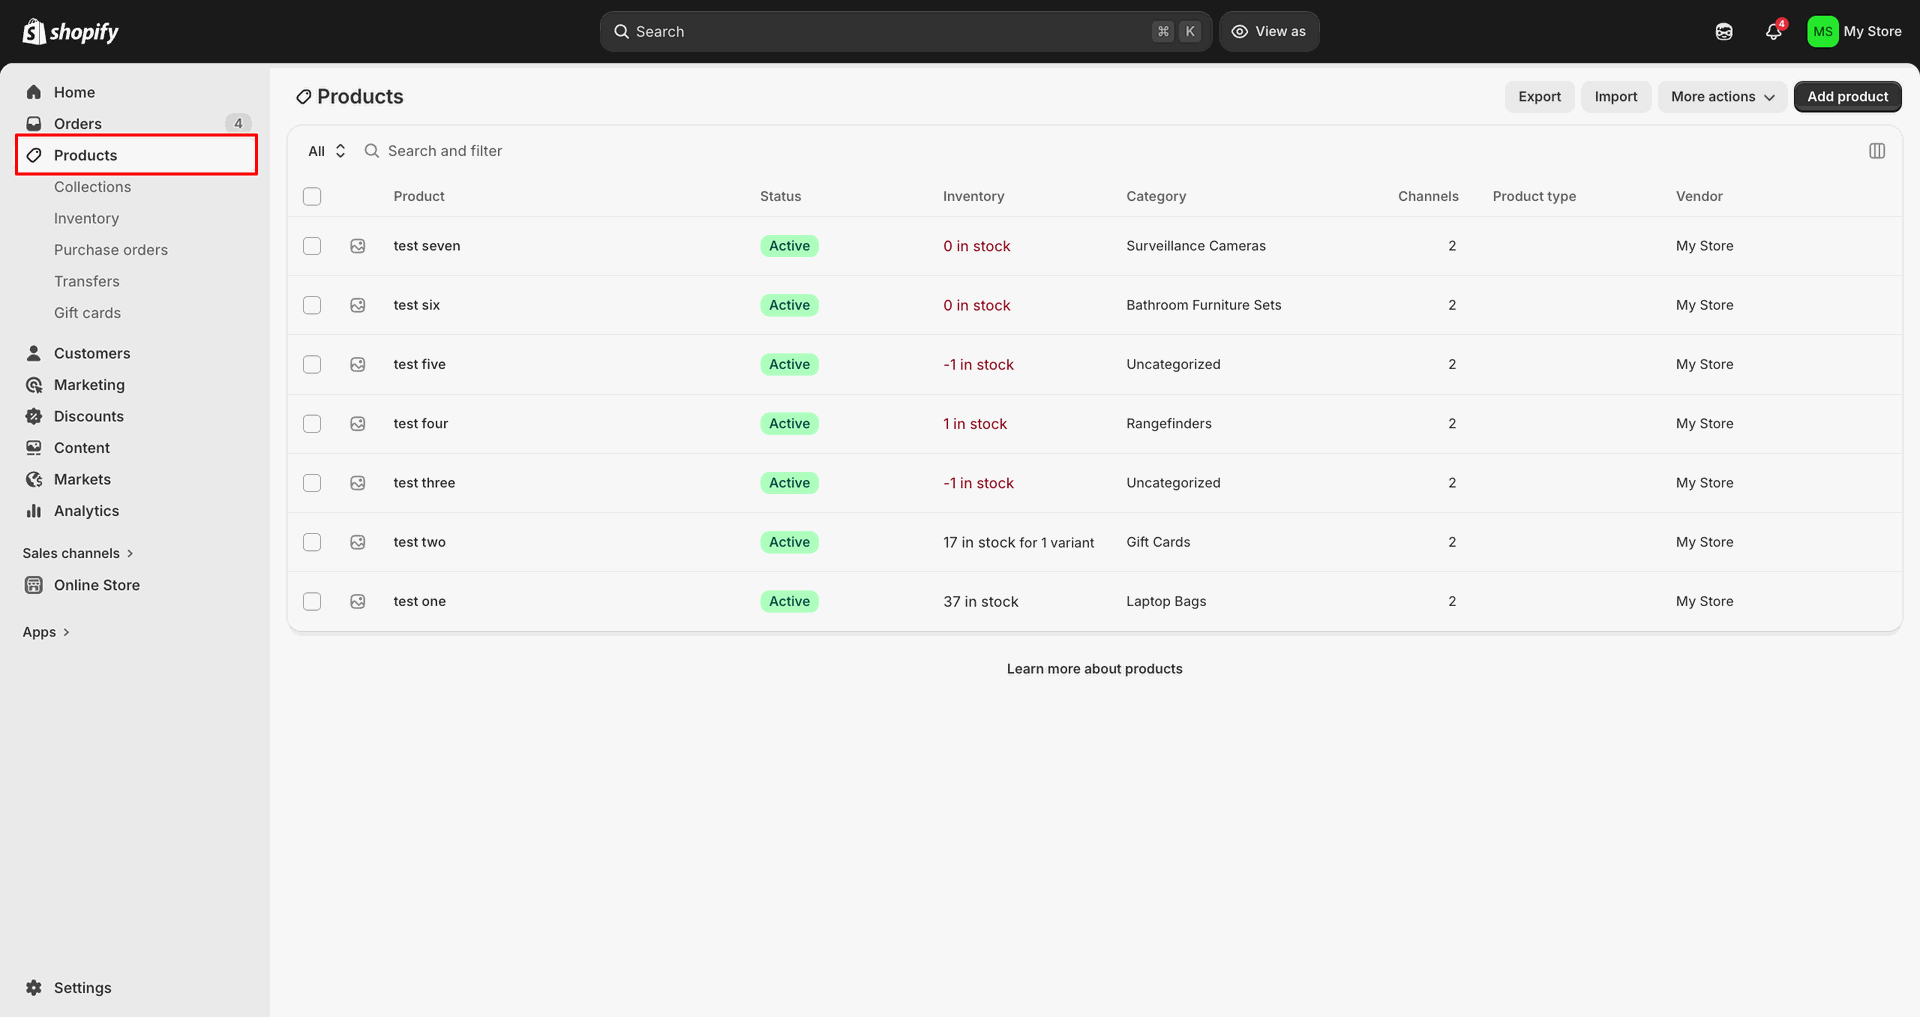
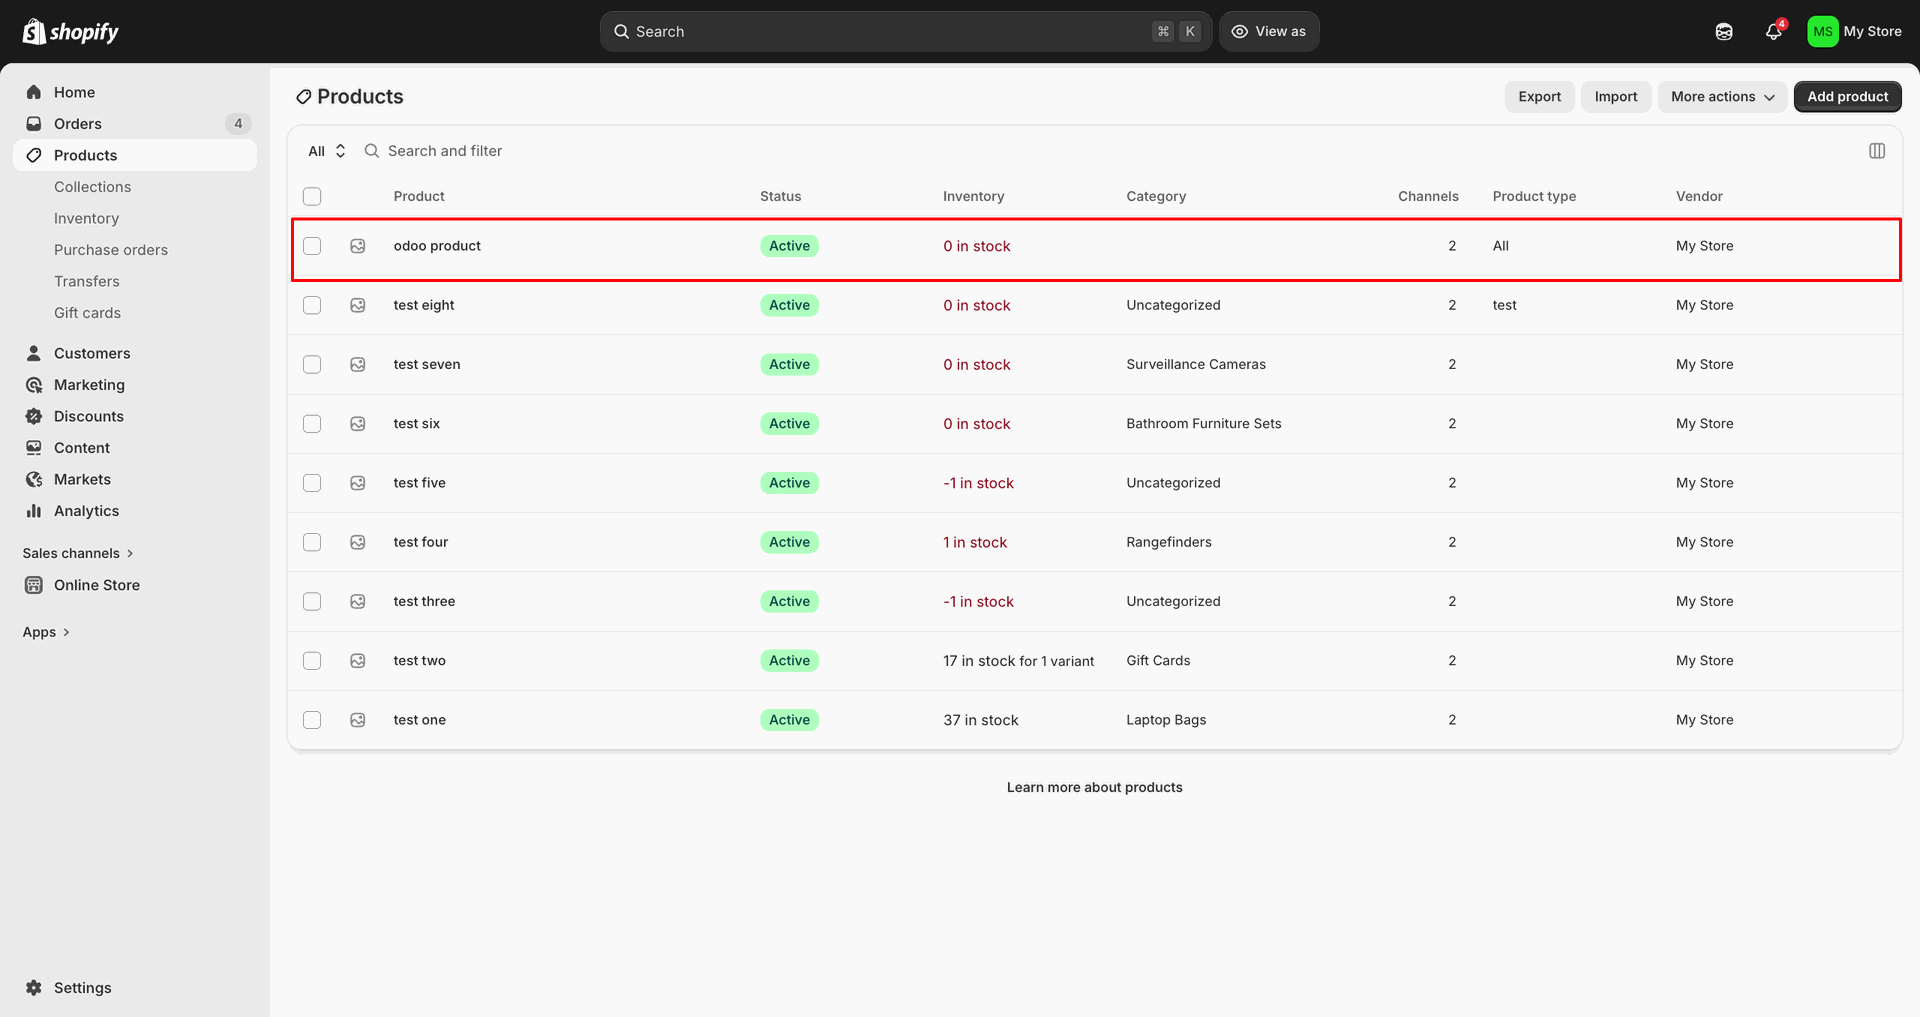
Apply the Shopify Products filter to display only synced products in Odoo.

The imported product card displays the synced item with price and stock.
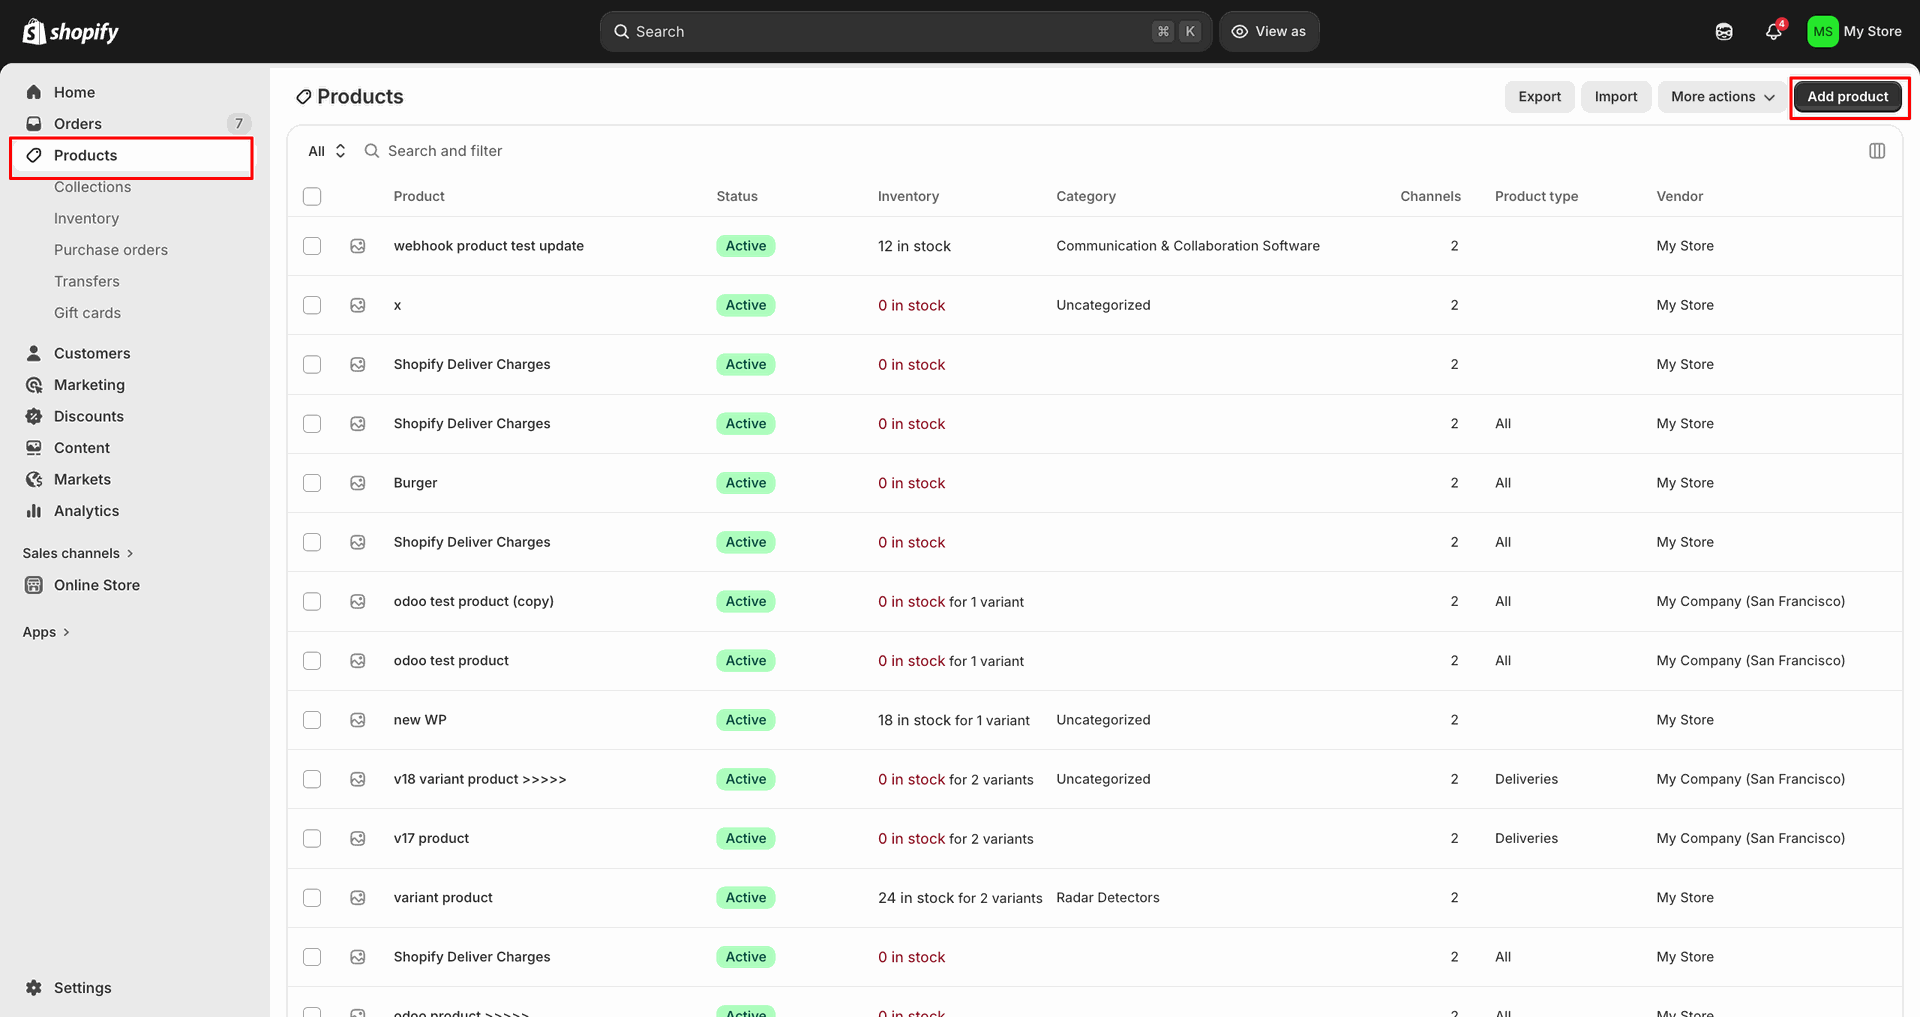
Open Products in Shopify Admin to verify the imported item appears correctly.
Set the product date range, then click Sync Products for dated imports.
Review the updated Product Queue counter after fetching products within the selected dates.
Inspect the new product queue row to verify the fetched record details.
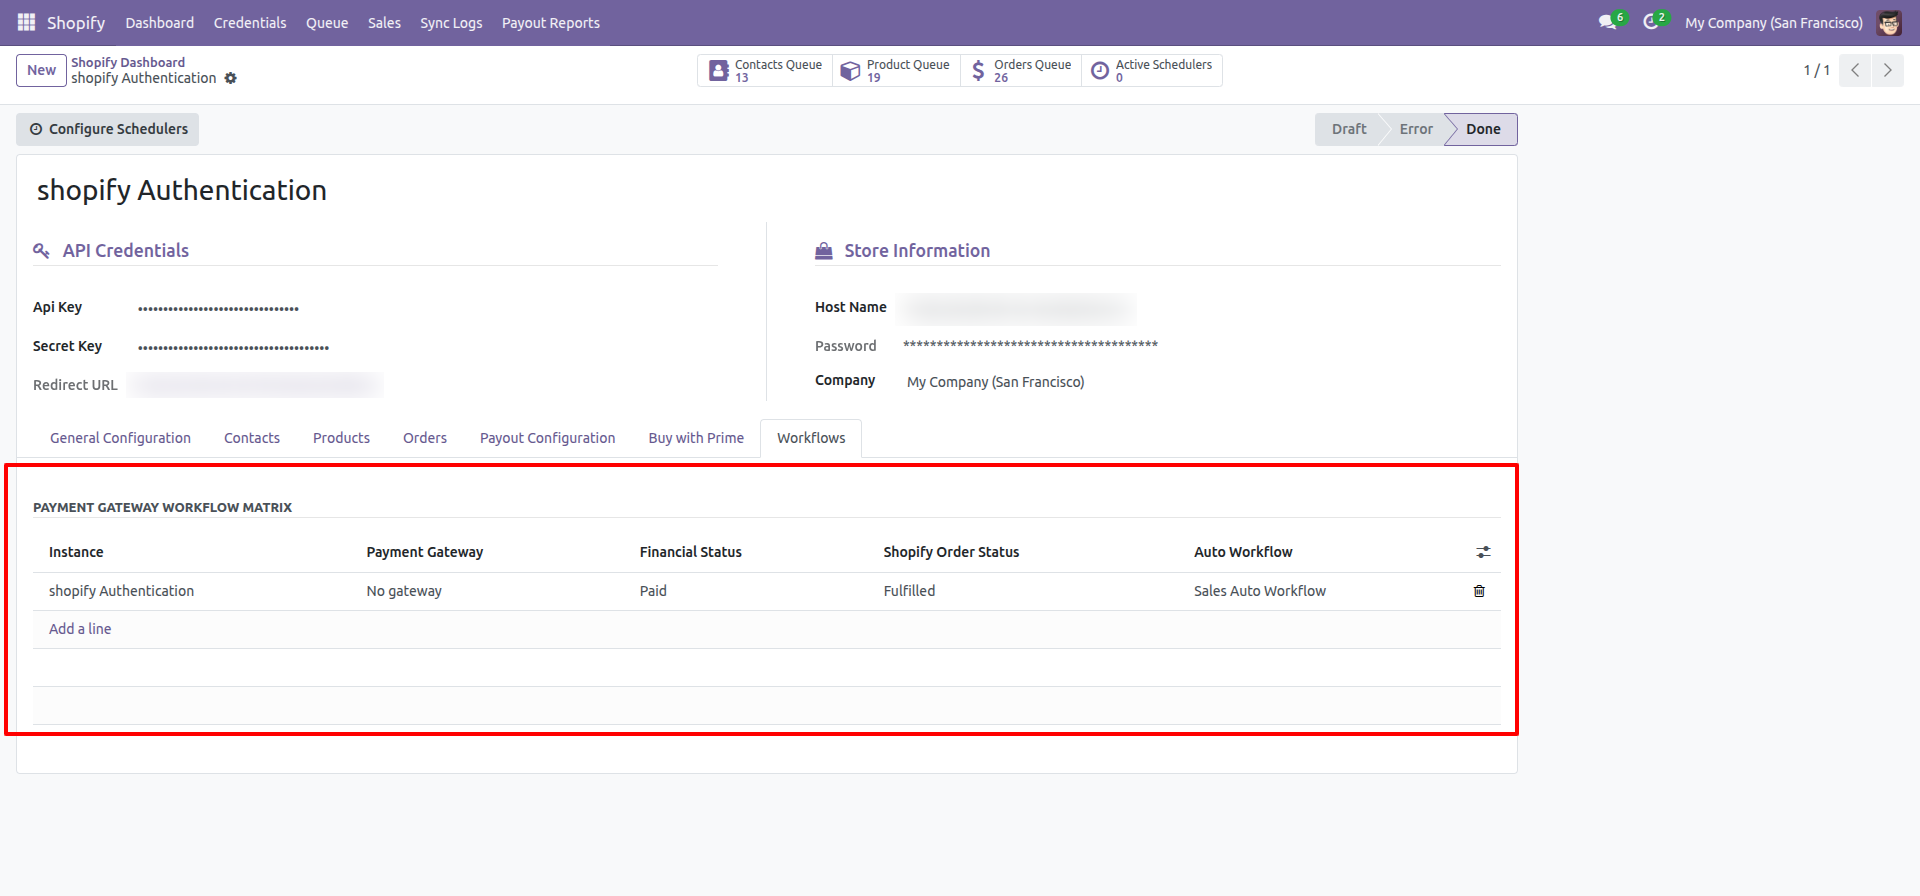
Review the Payment Gateway Workflow Matrix for rules applied during order processing.
Set Export Products Based On to Update Product before running product updates.
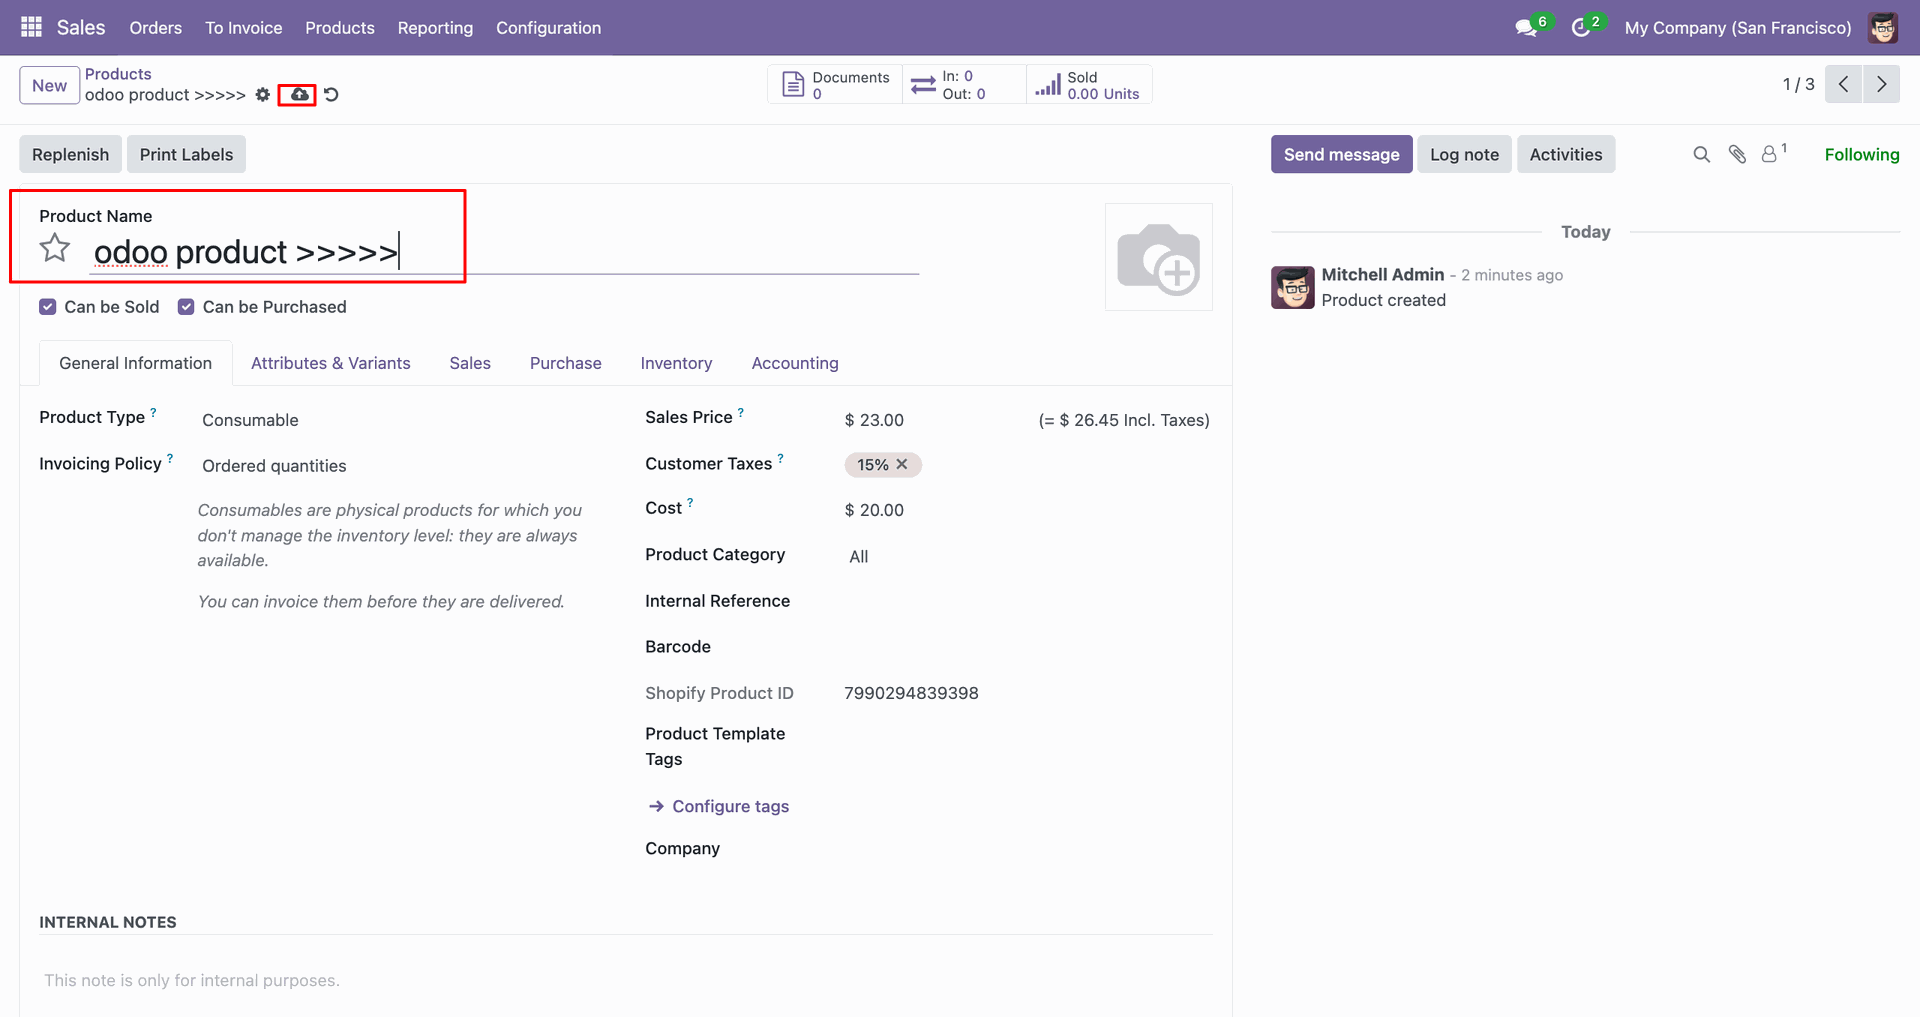
Click the export icon on the product form to send this item.
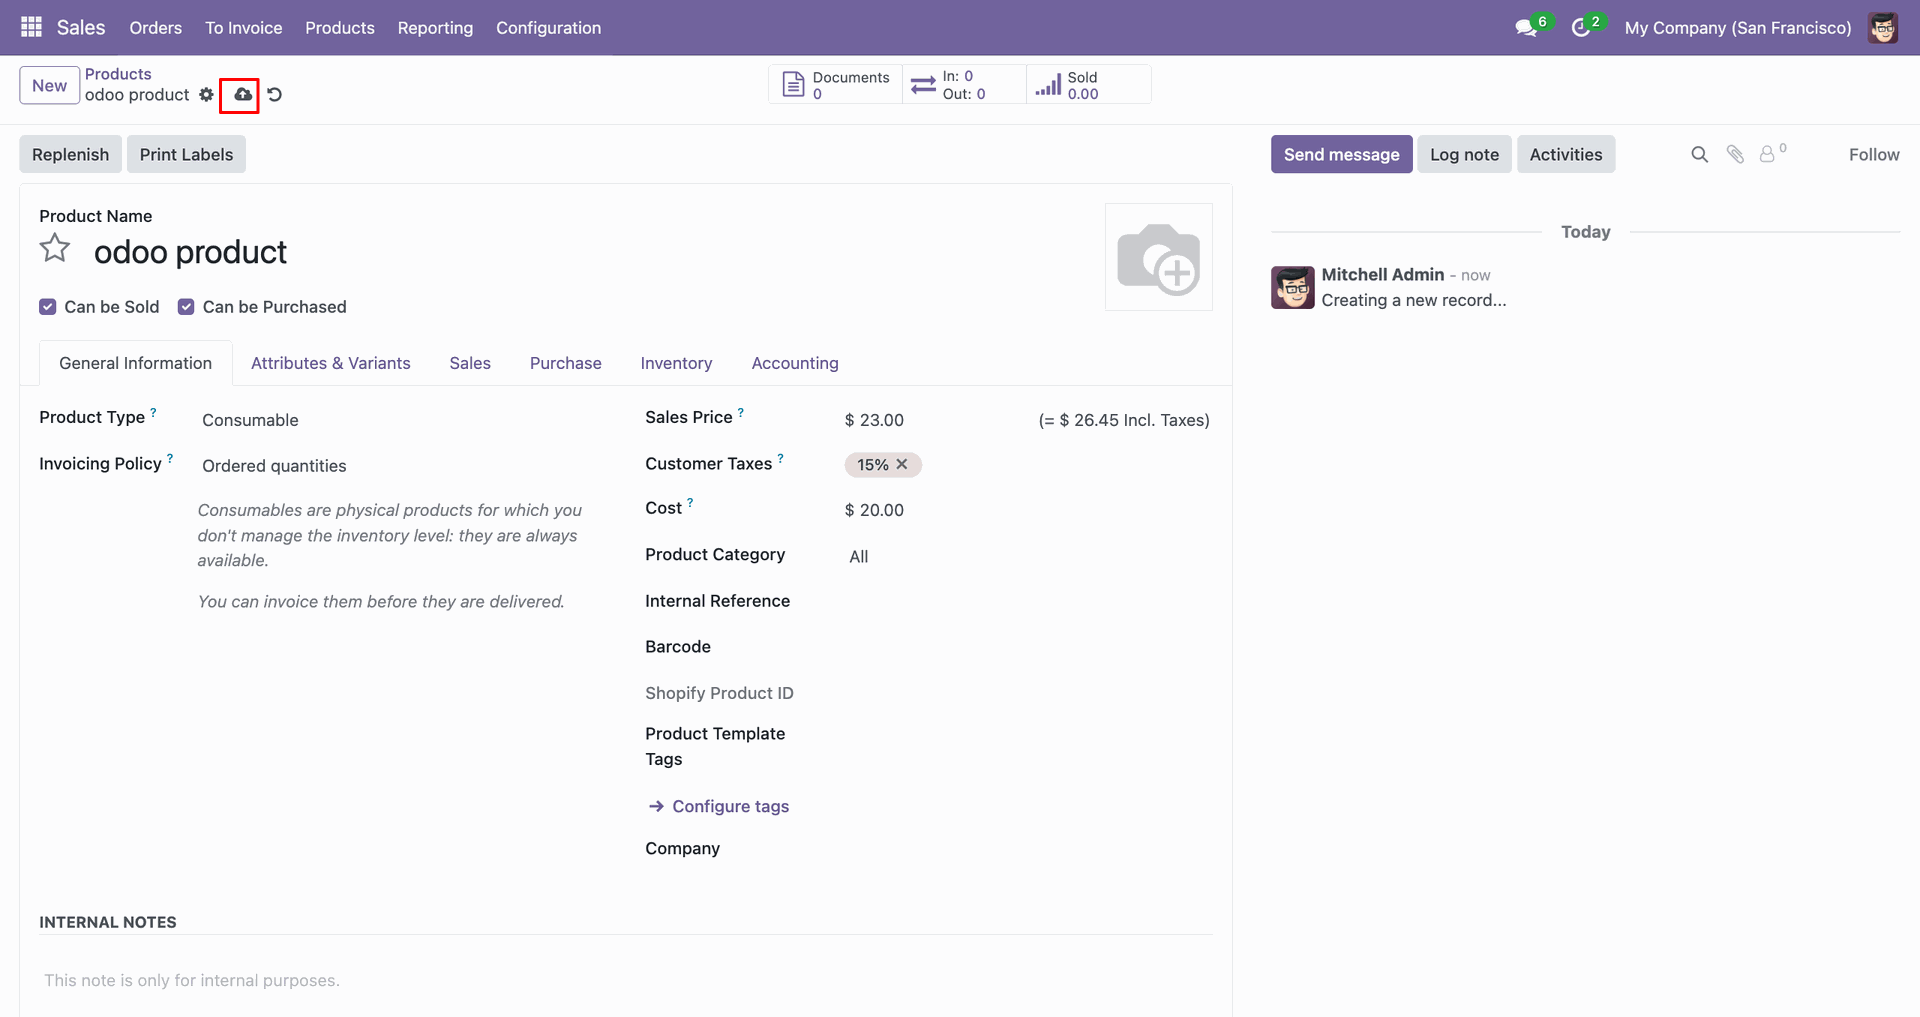
Review the Shopify Product ID field after exporting the product from Odoo.

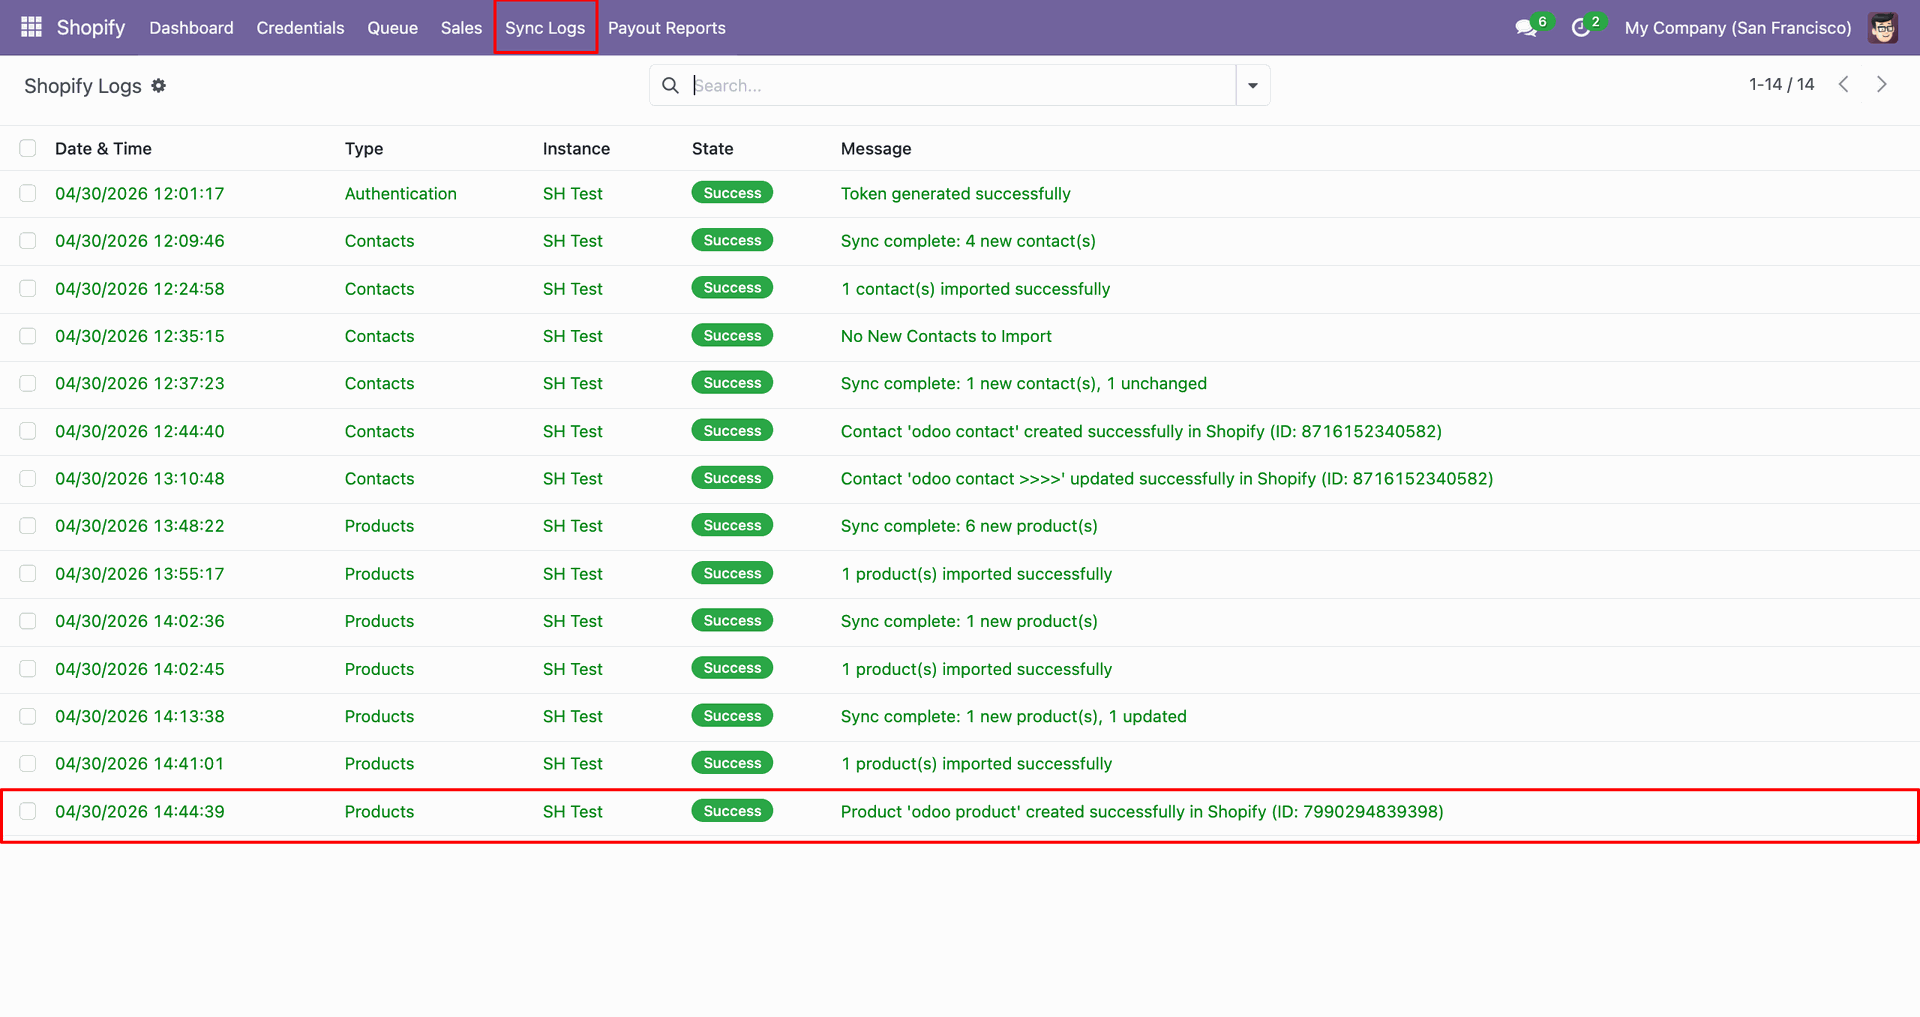
Check Sync Logs to confirm the product was created successfully in Shopify.
Verify the exported product row appears in Shopify with the expected details.
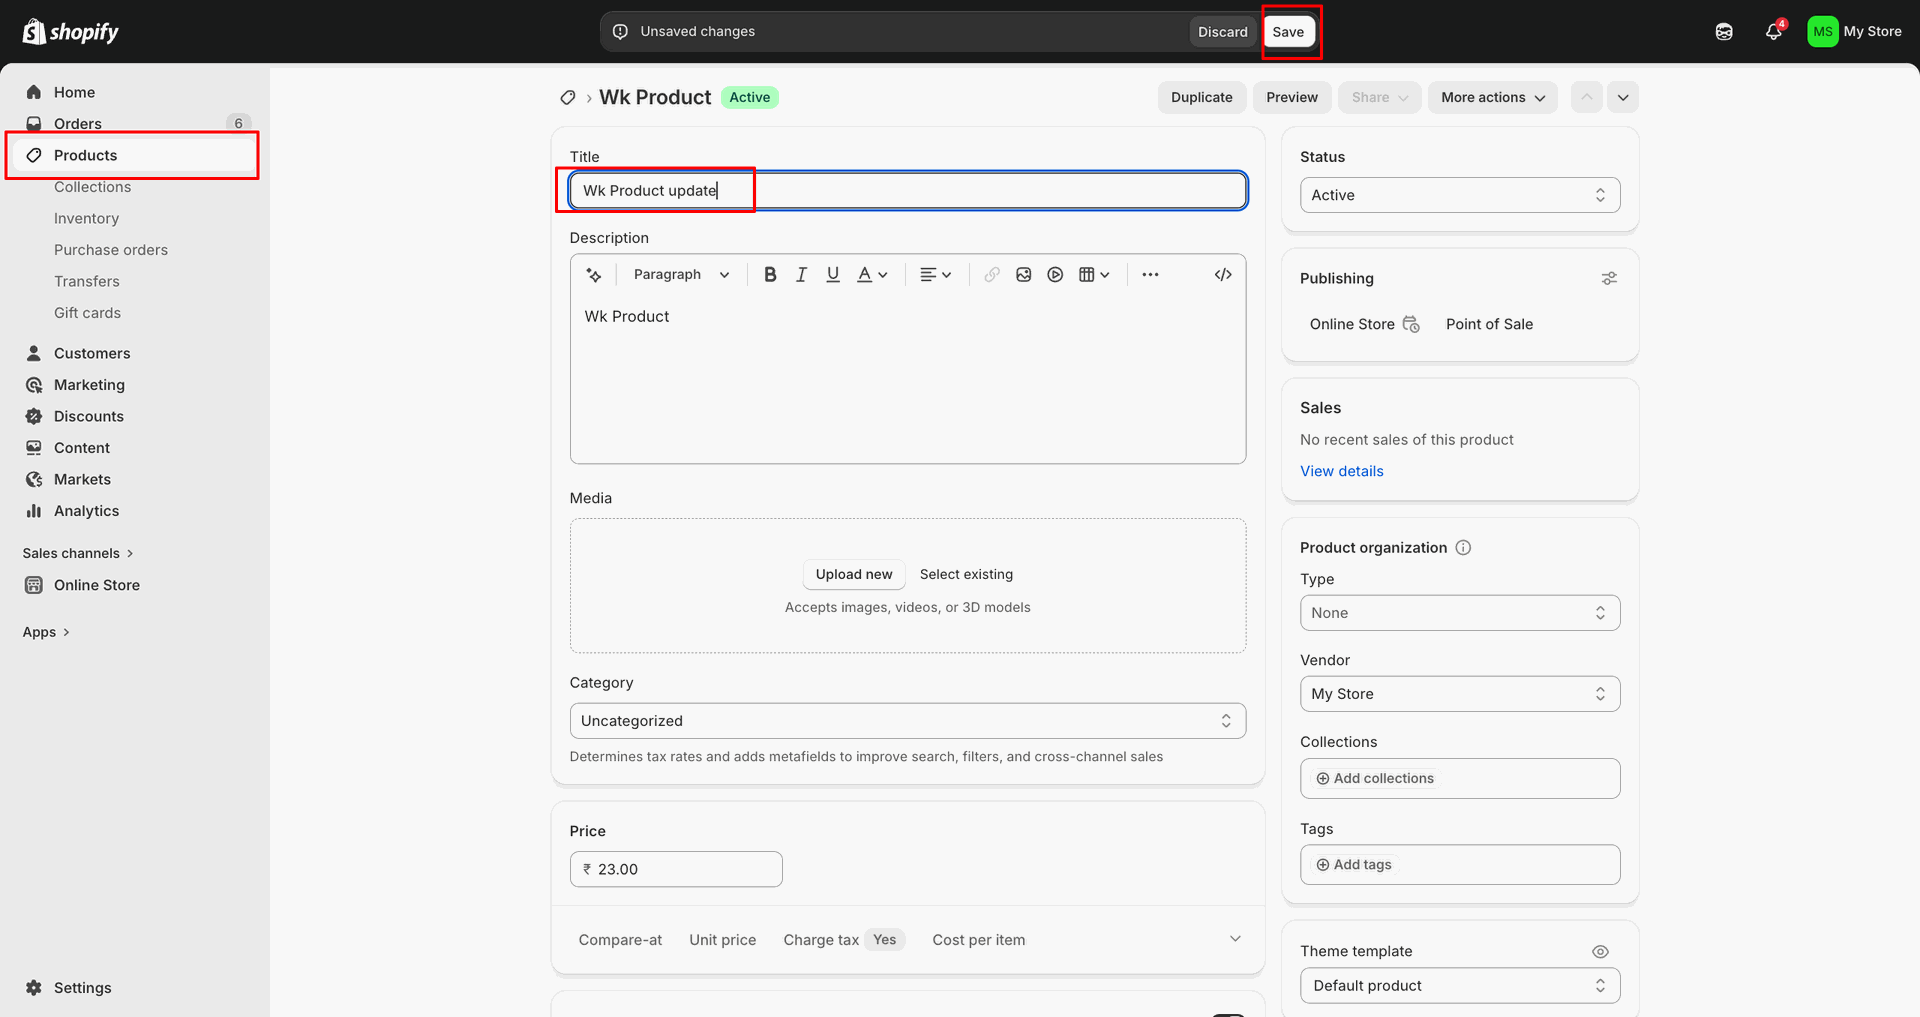
Confirm Export Products Based On is set to Update Product for changes.
Update the Odoo product name before exporting the revised product information.
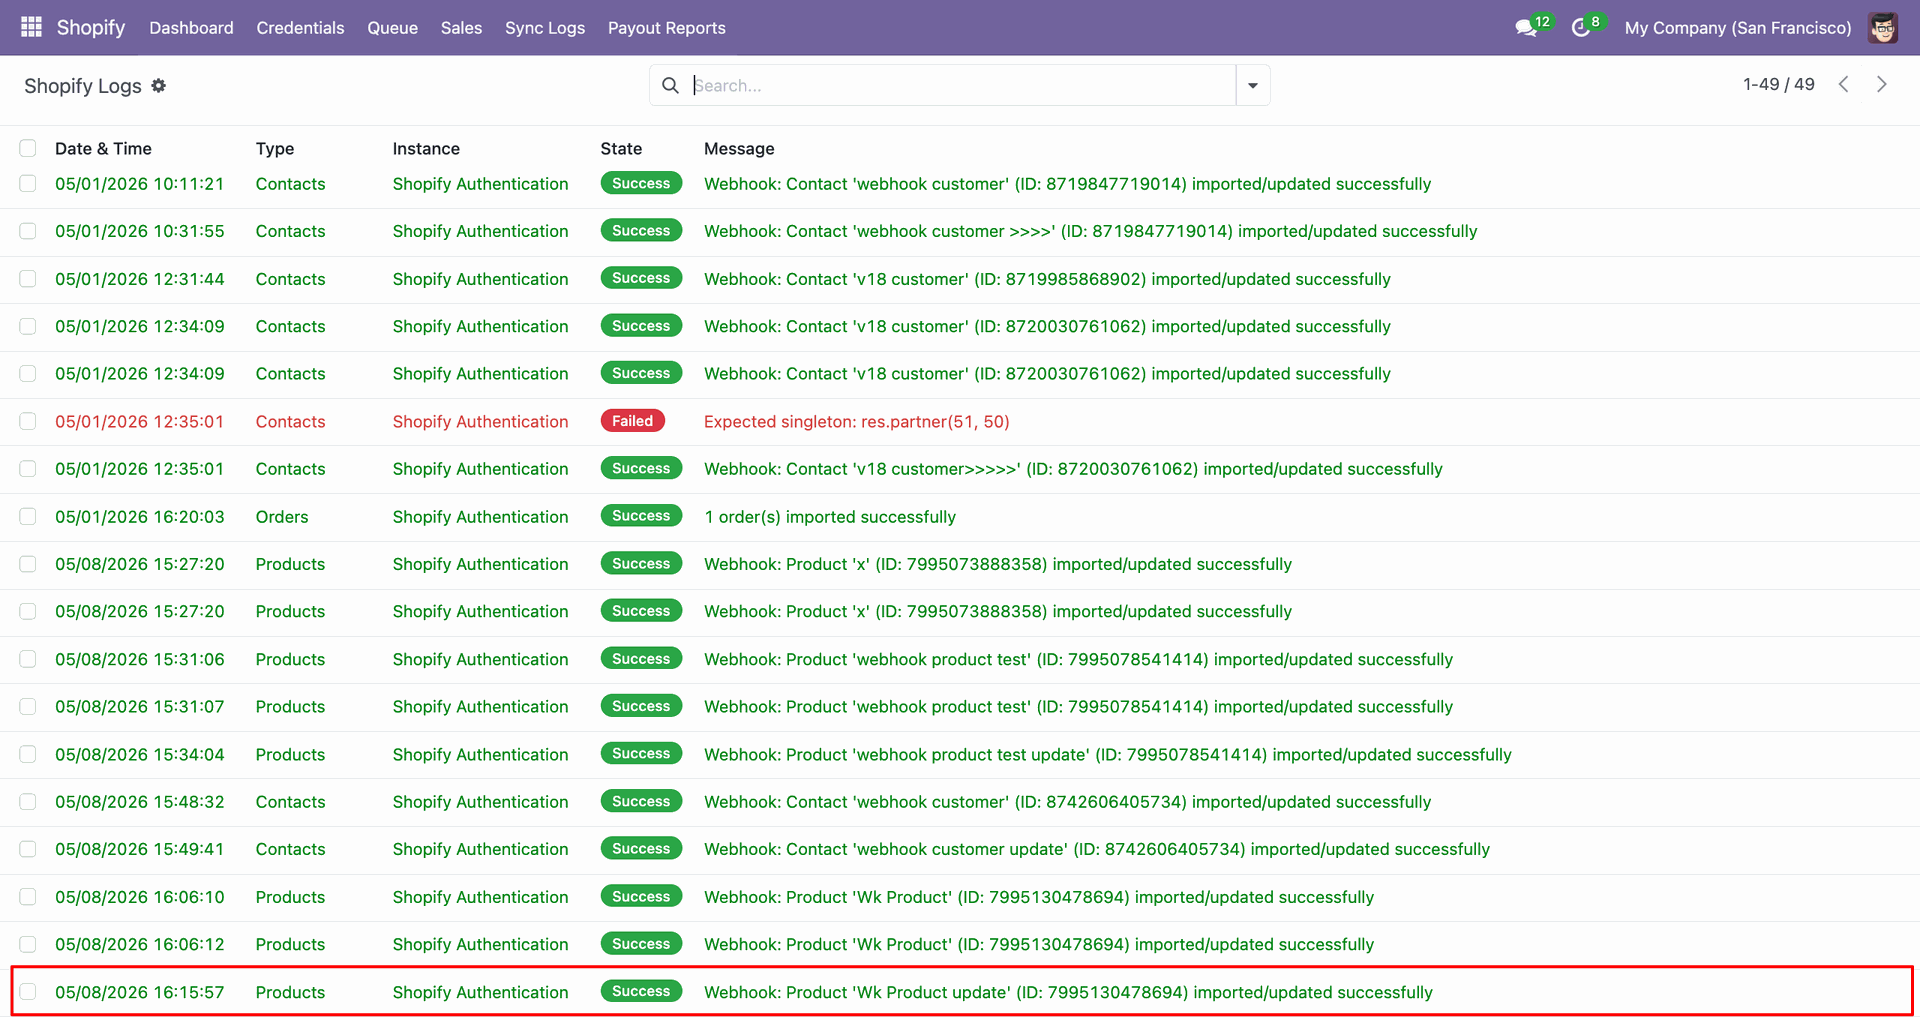
Review Sync Logs to confirm the product update was sent successfully.
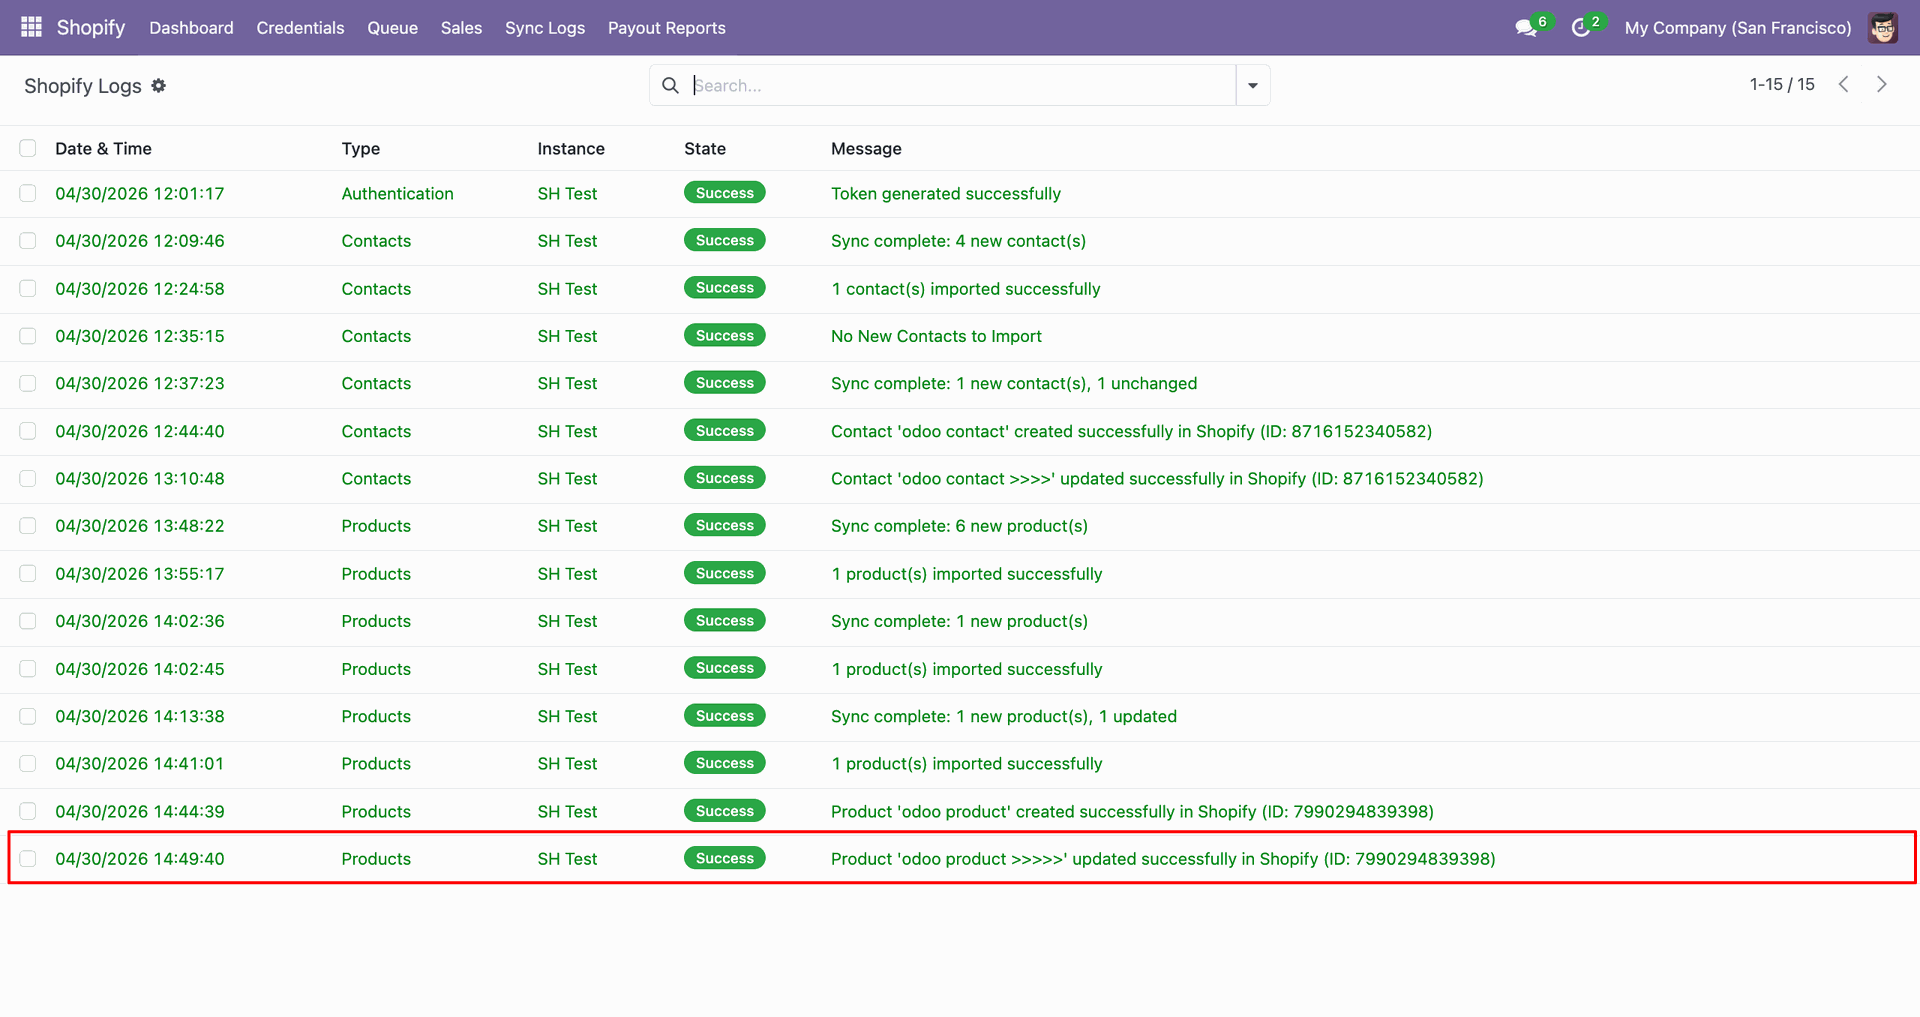
Verify the updated product row is visible in Shopify after export.

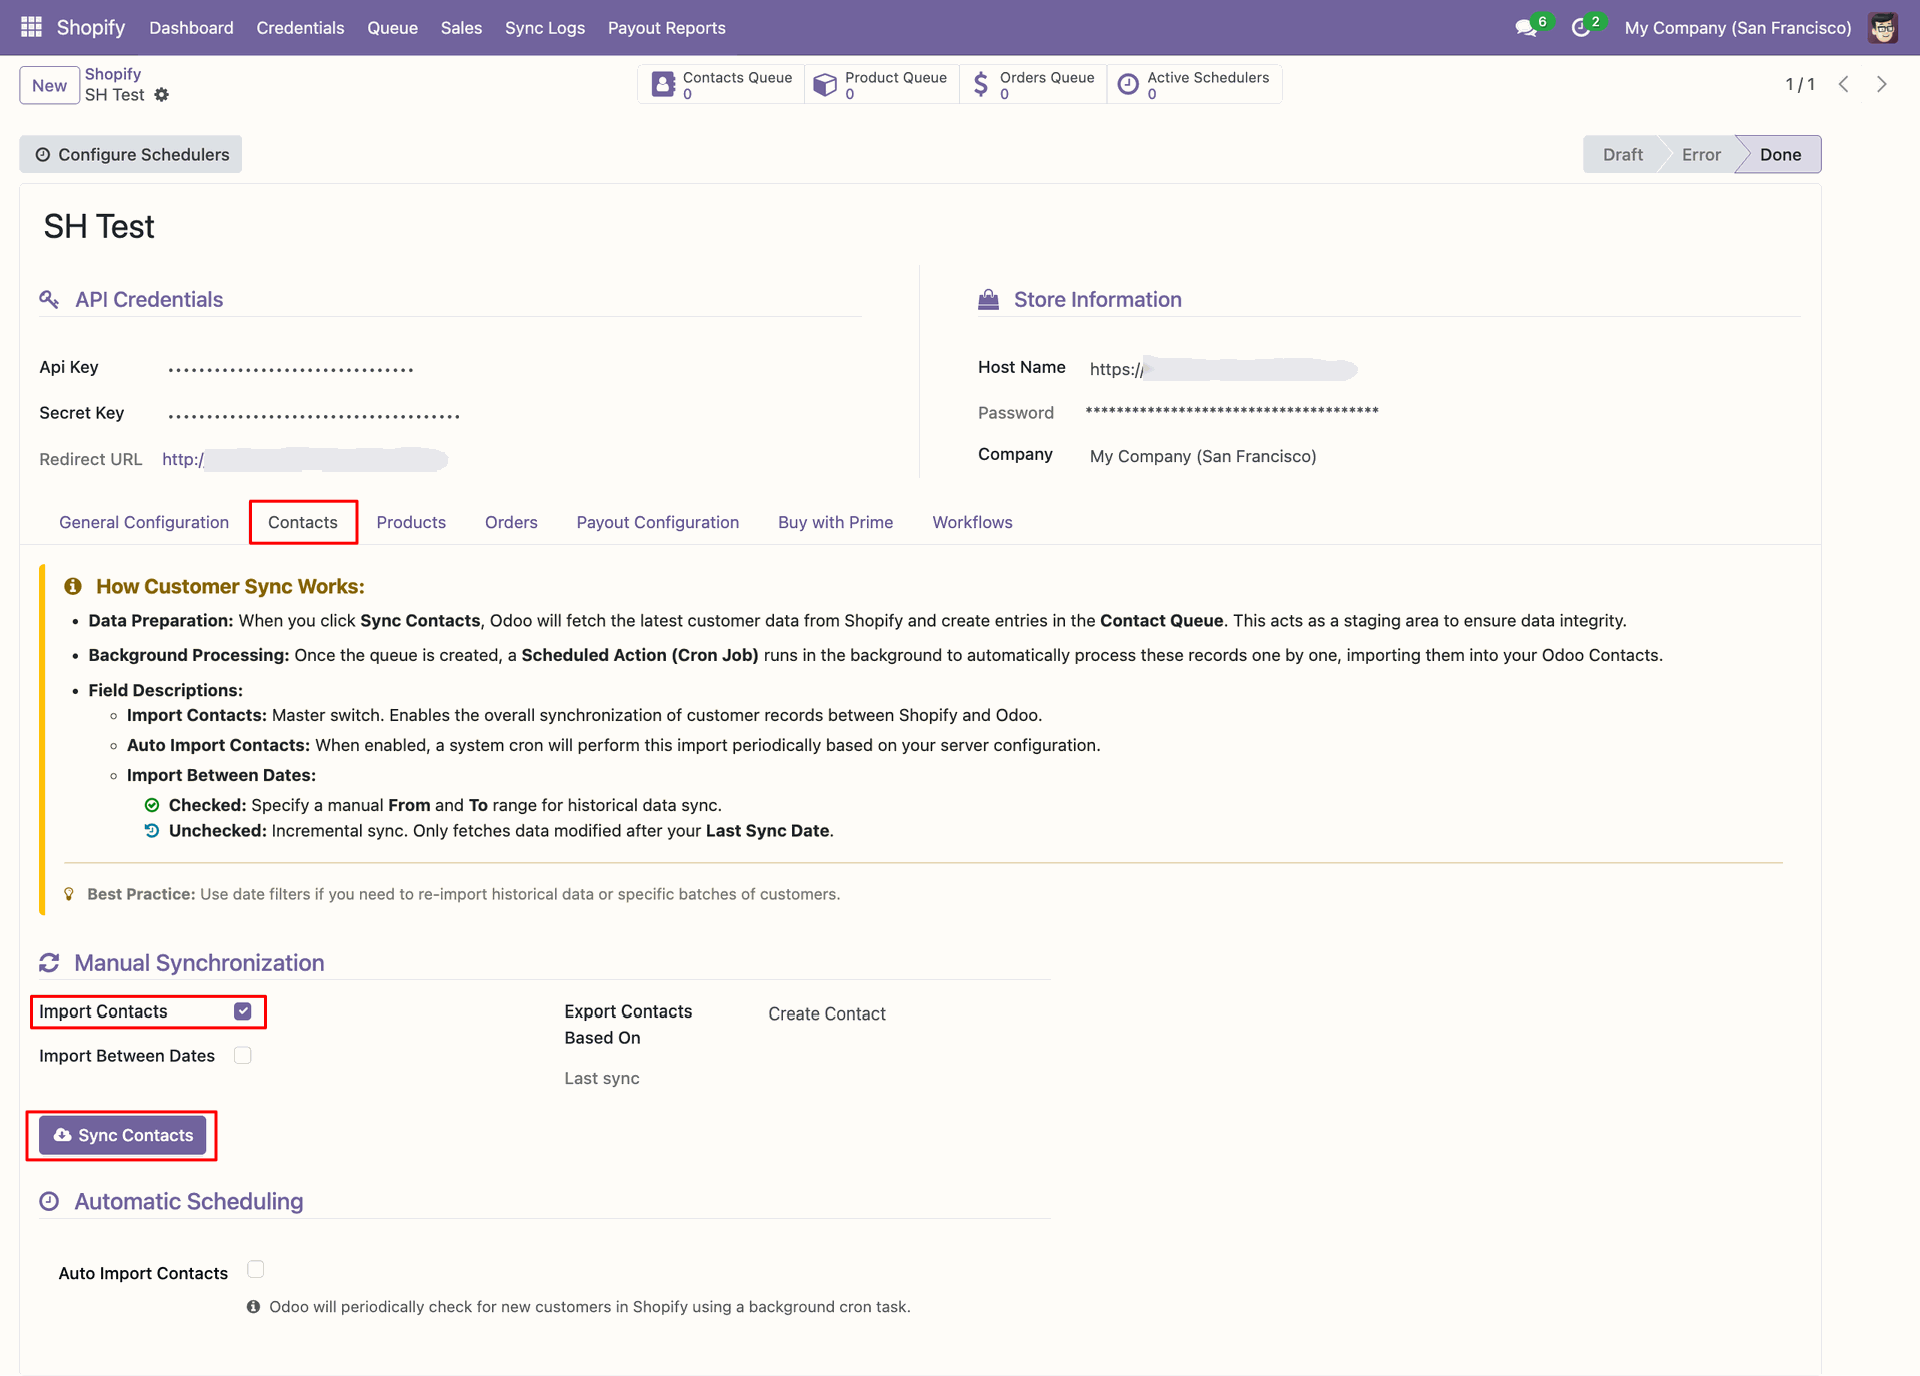
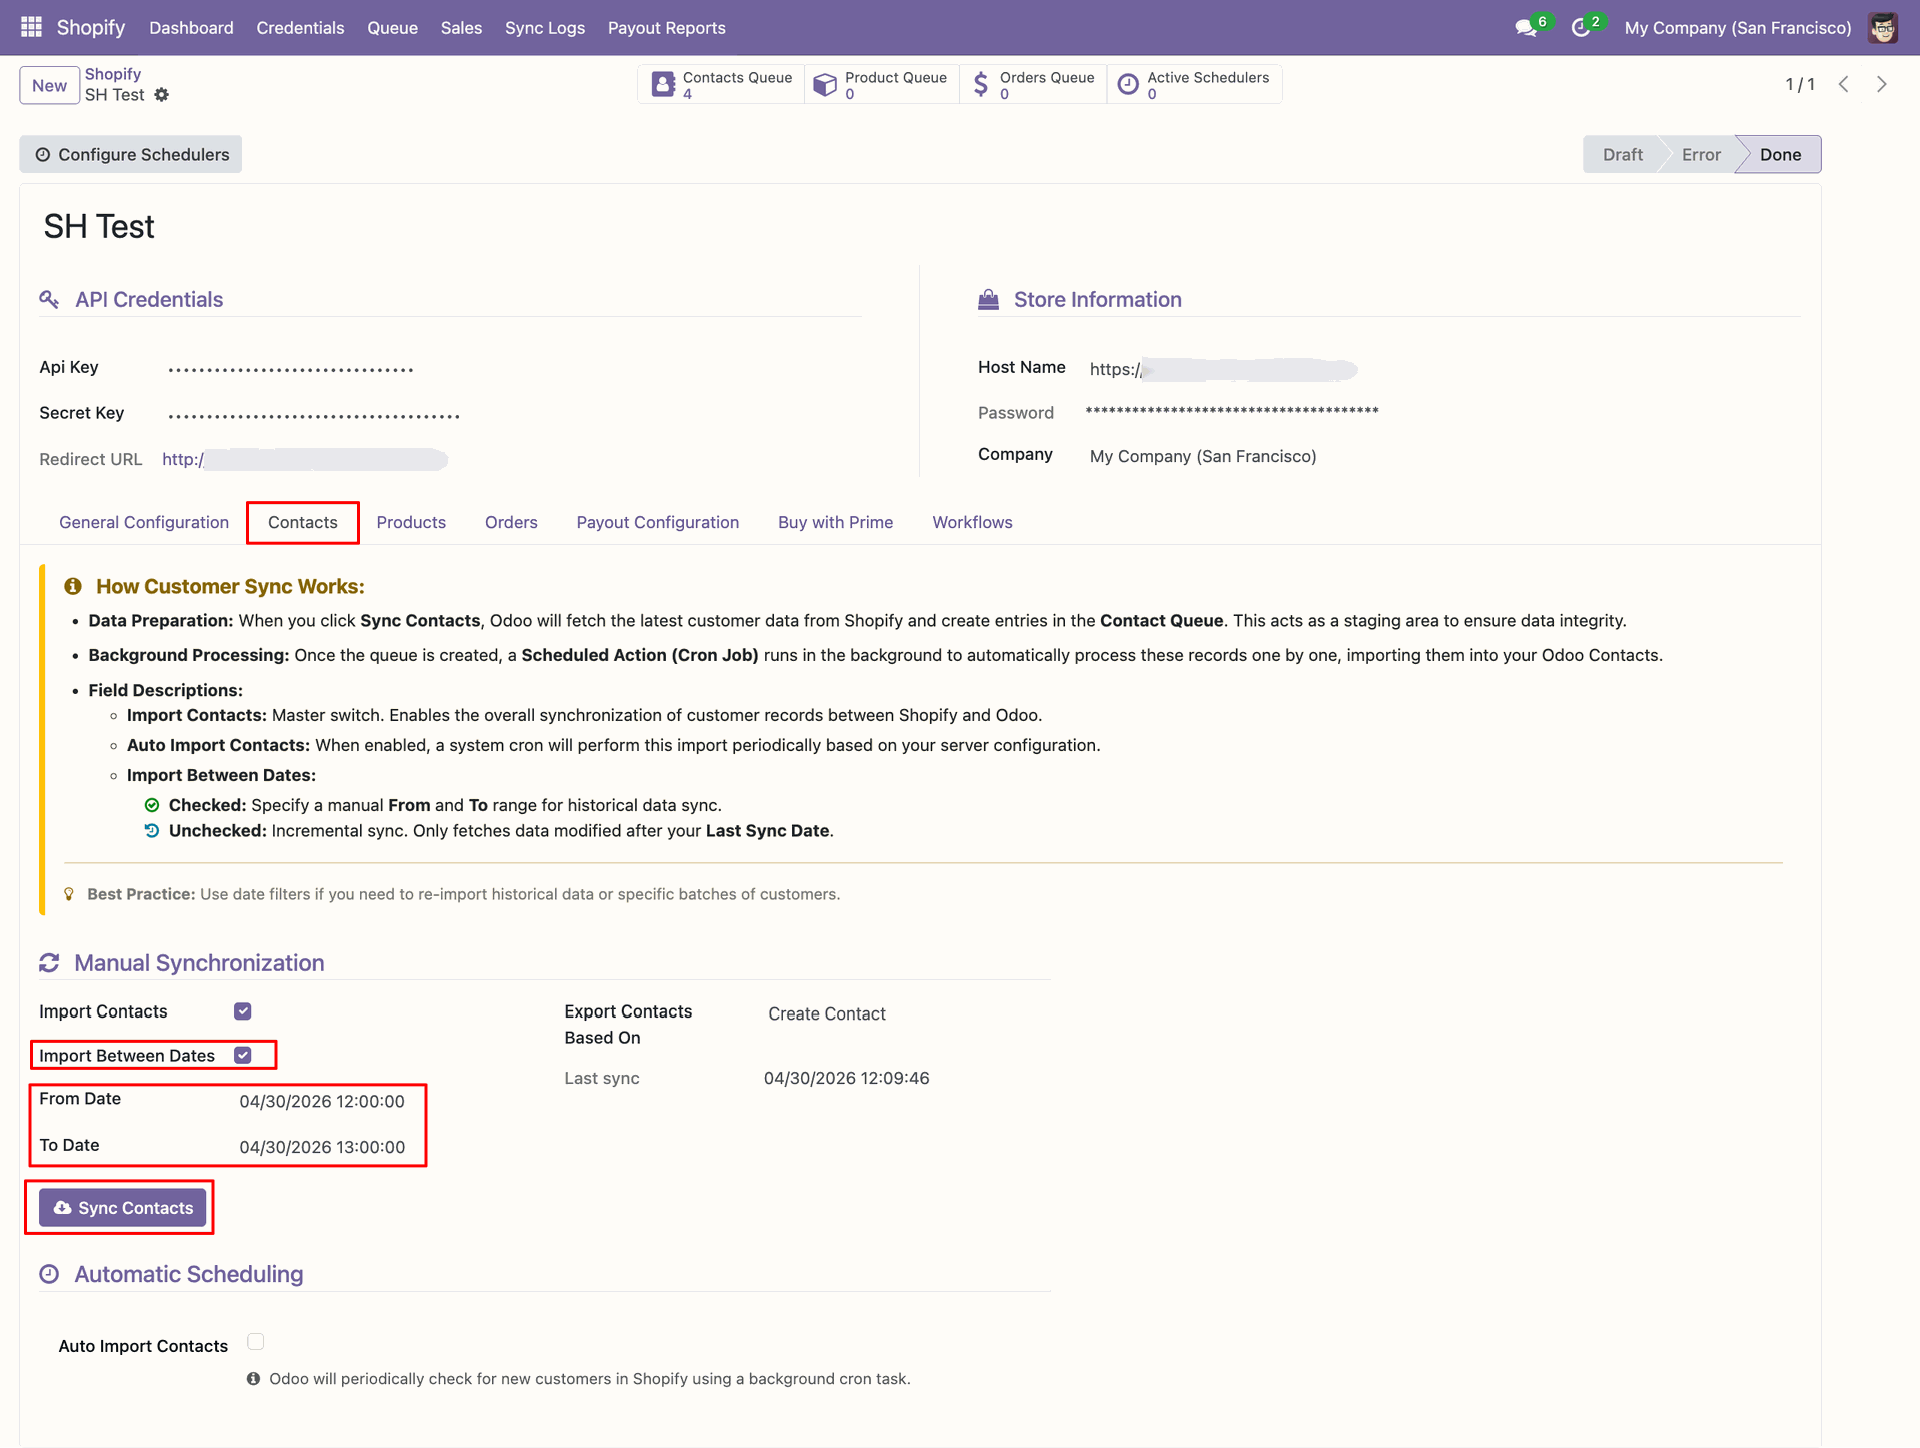
Open the Contacts tab, enable Import Contacts, and click Sync Contacts.
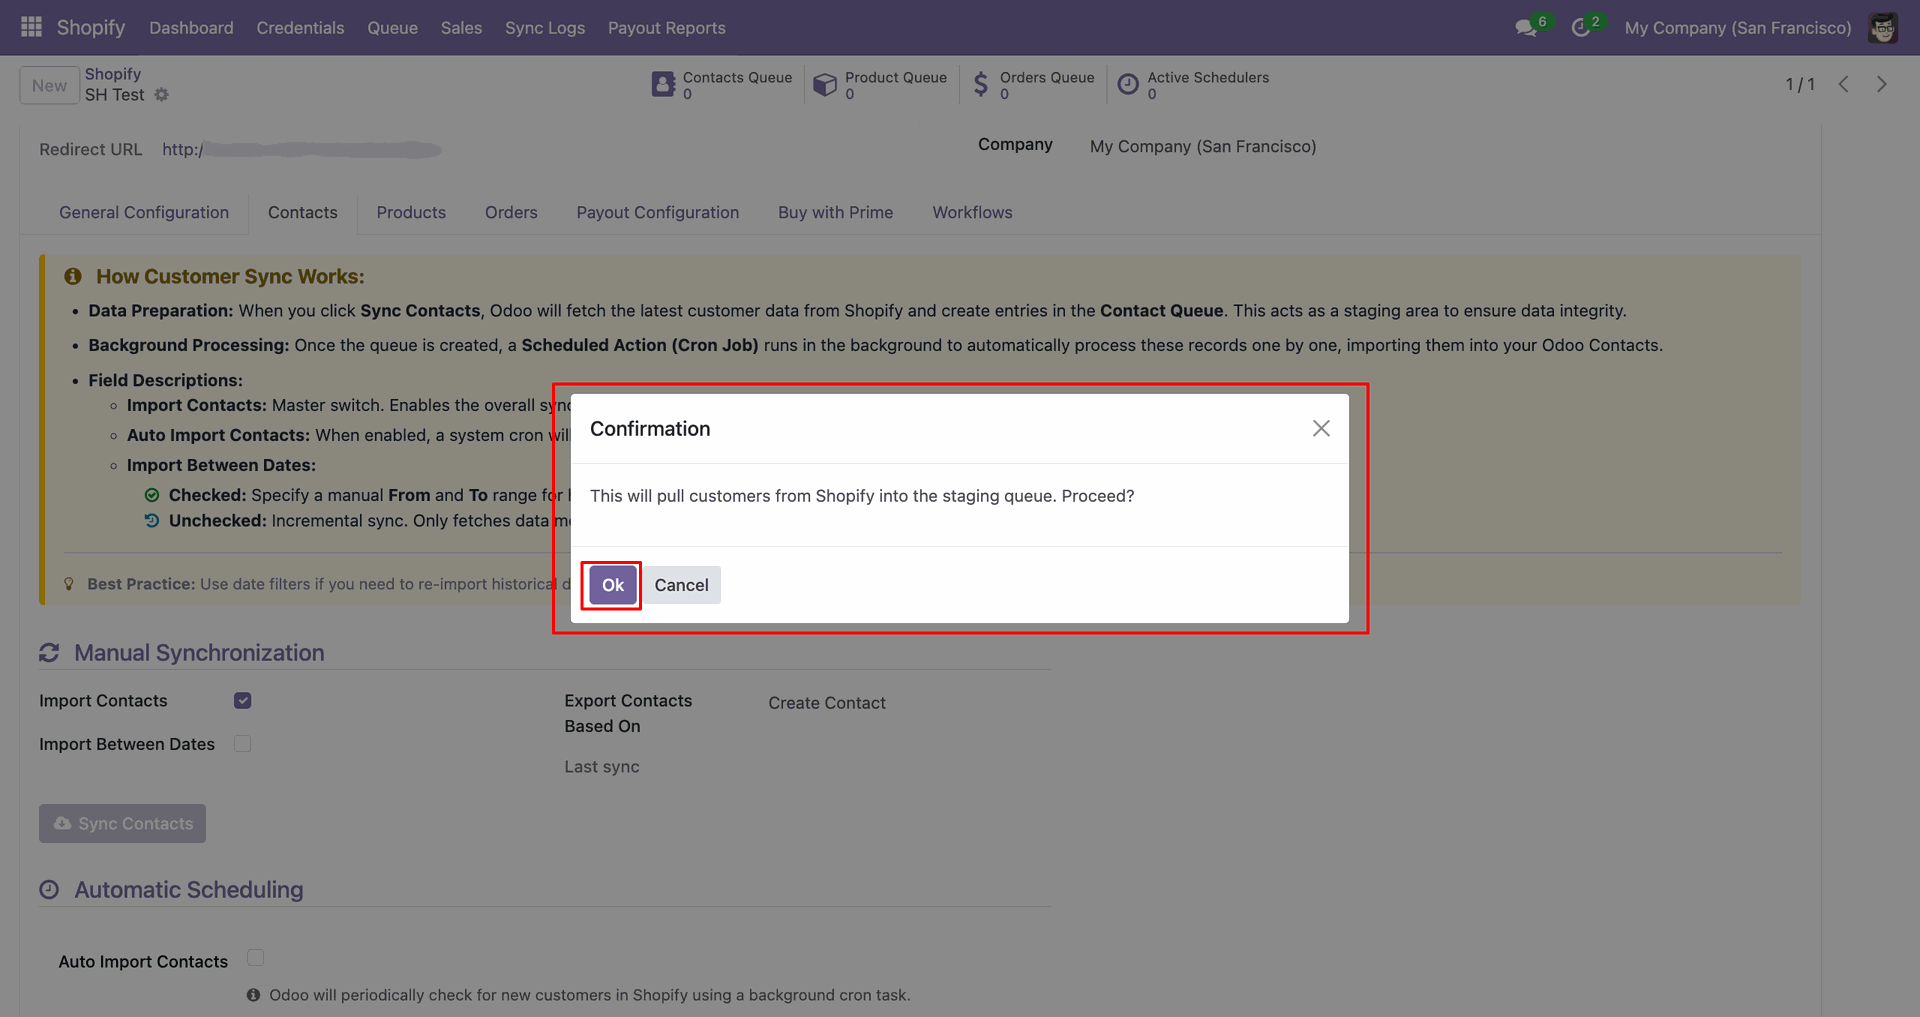
Confirm the staging queue popup by clicking OK to continue contact import.
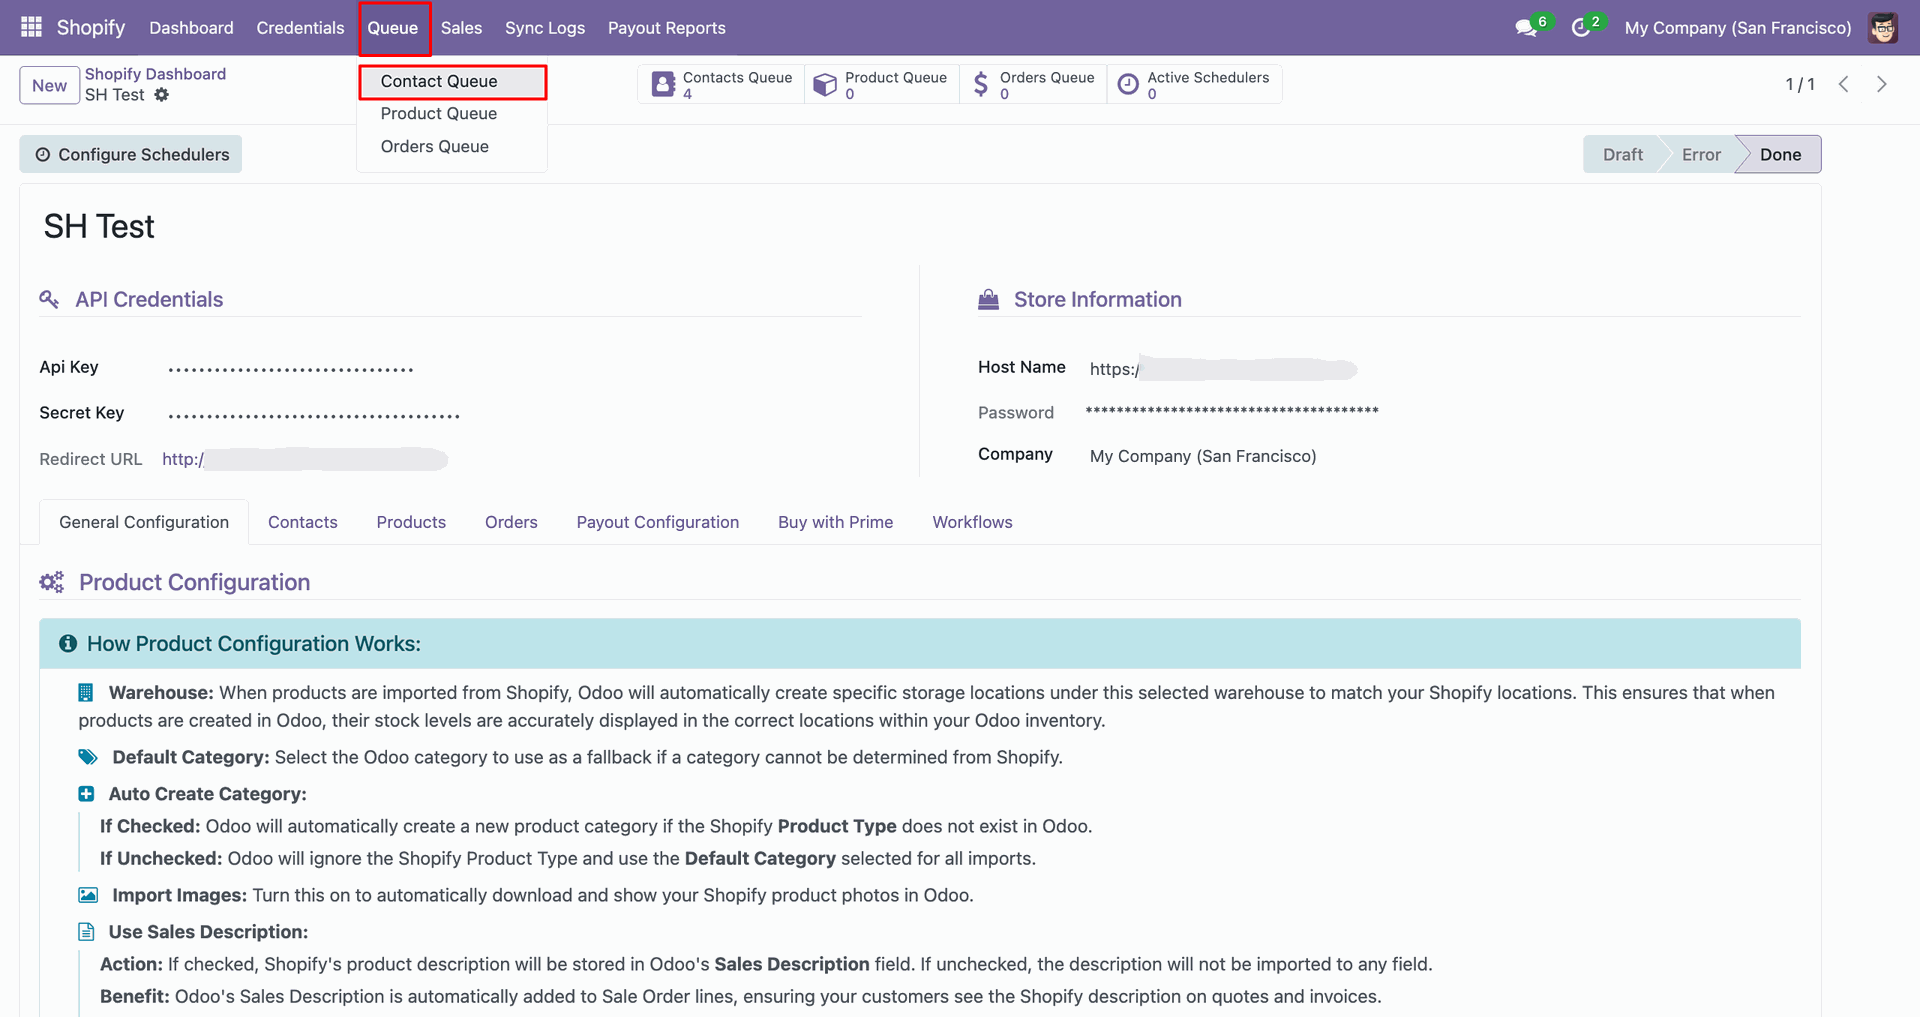
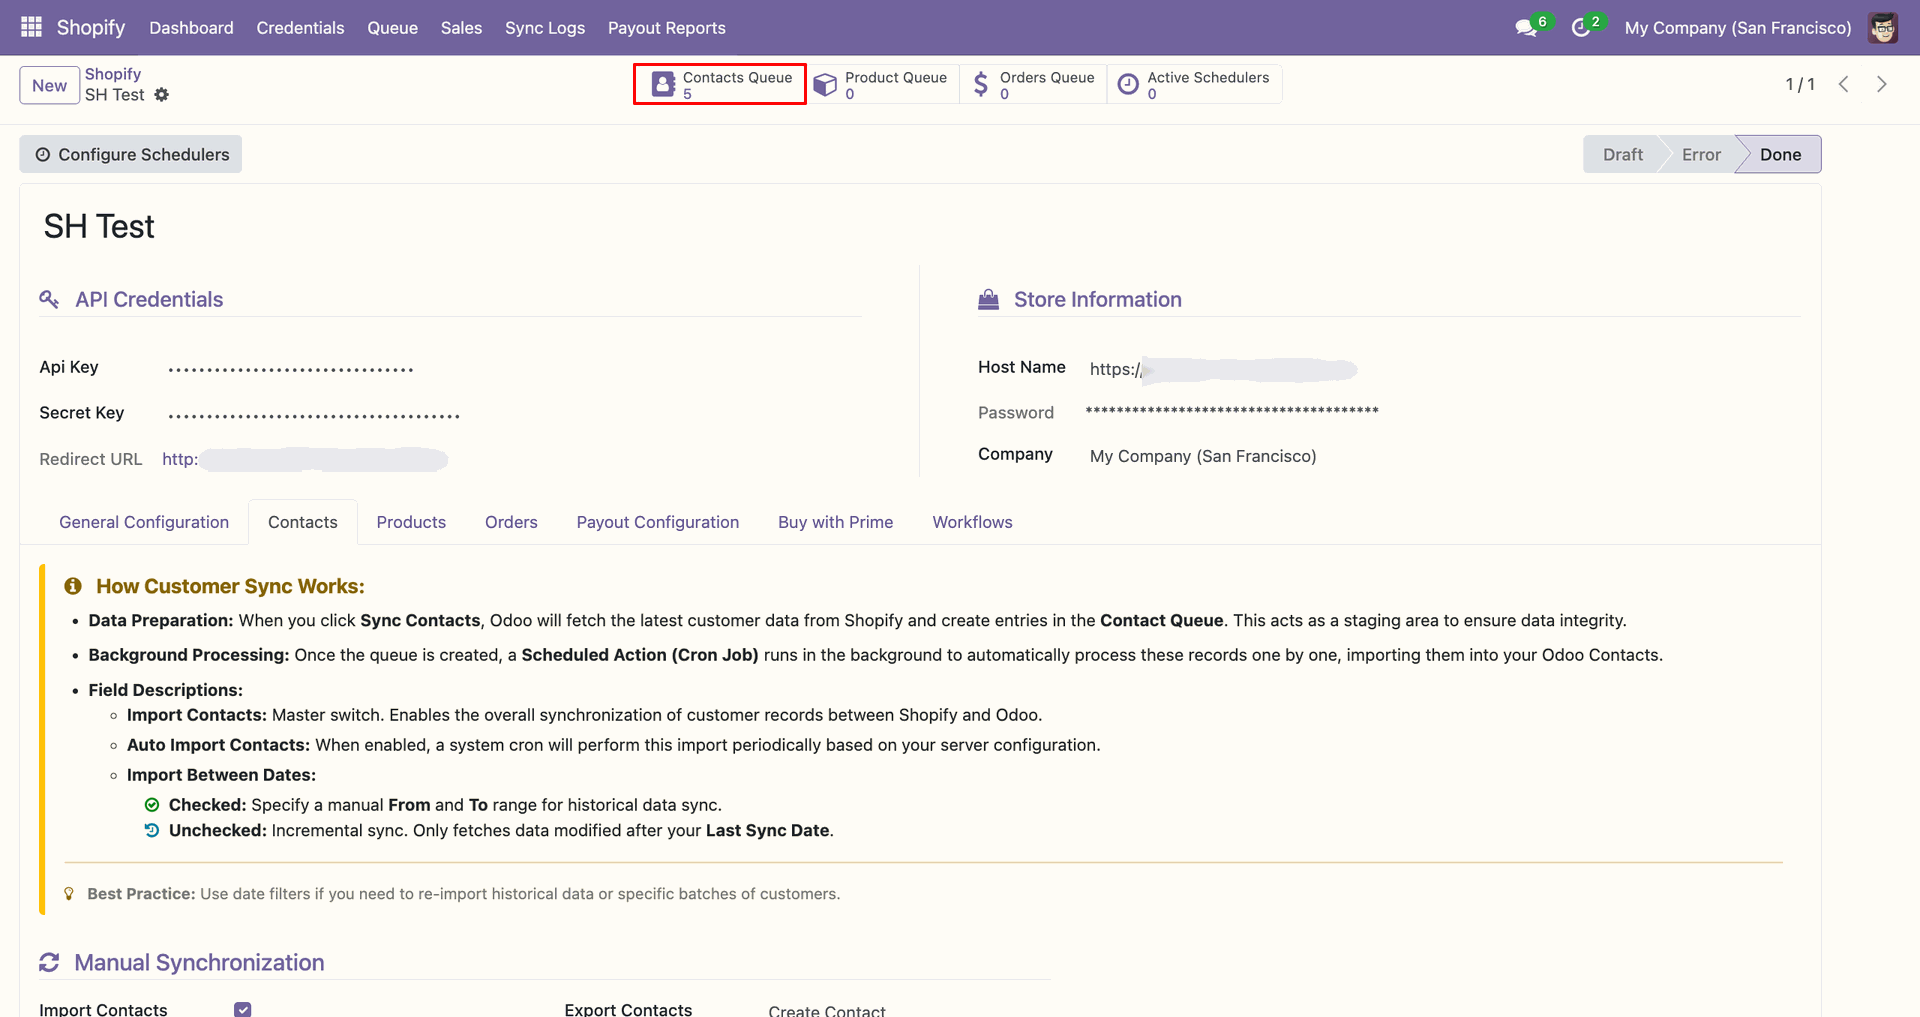
Use the Contacts Queue shortcut to review staged customer records after synchronization.

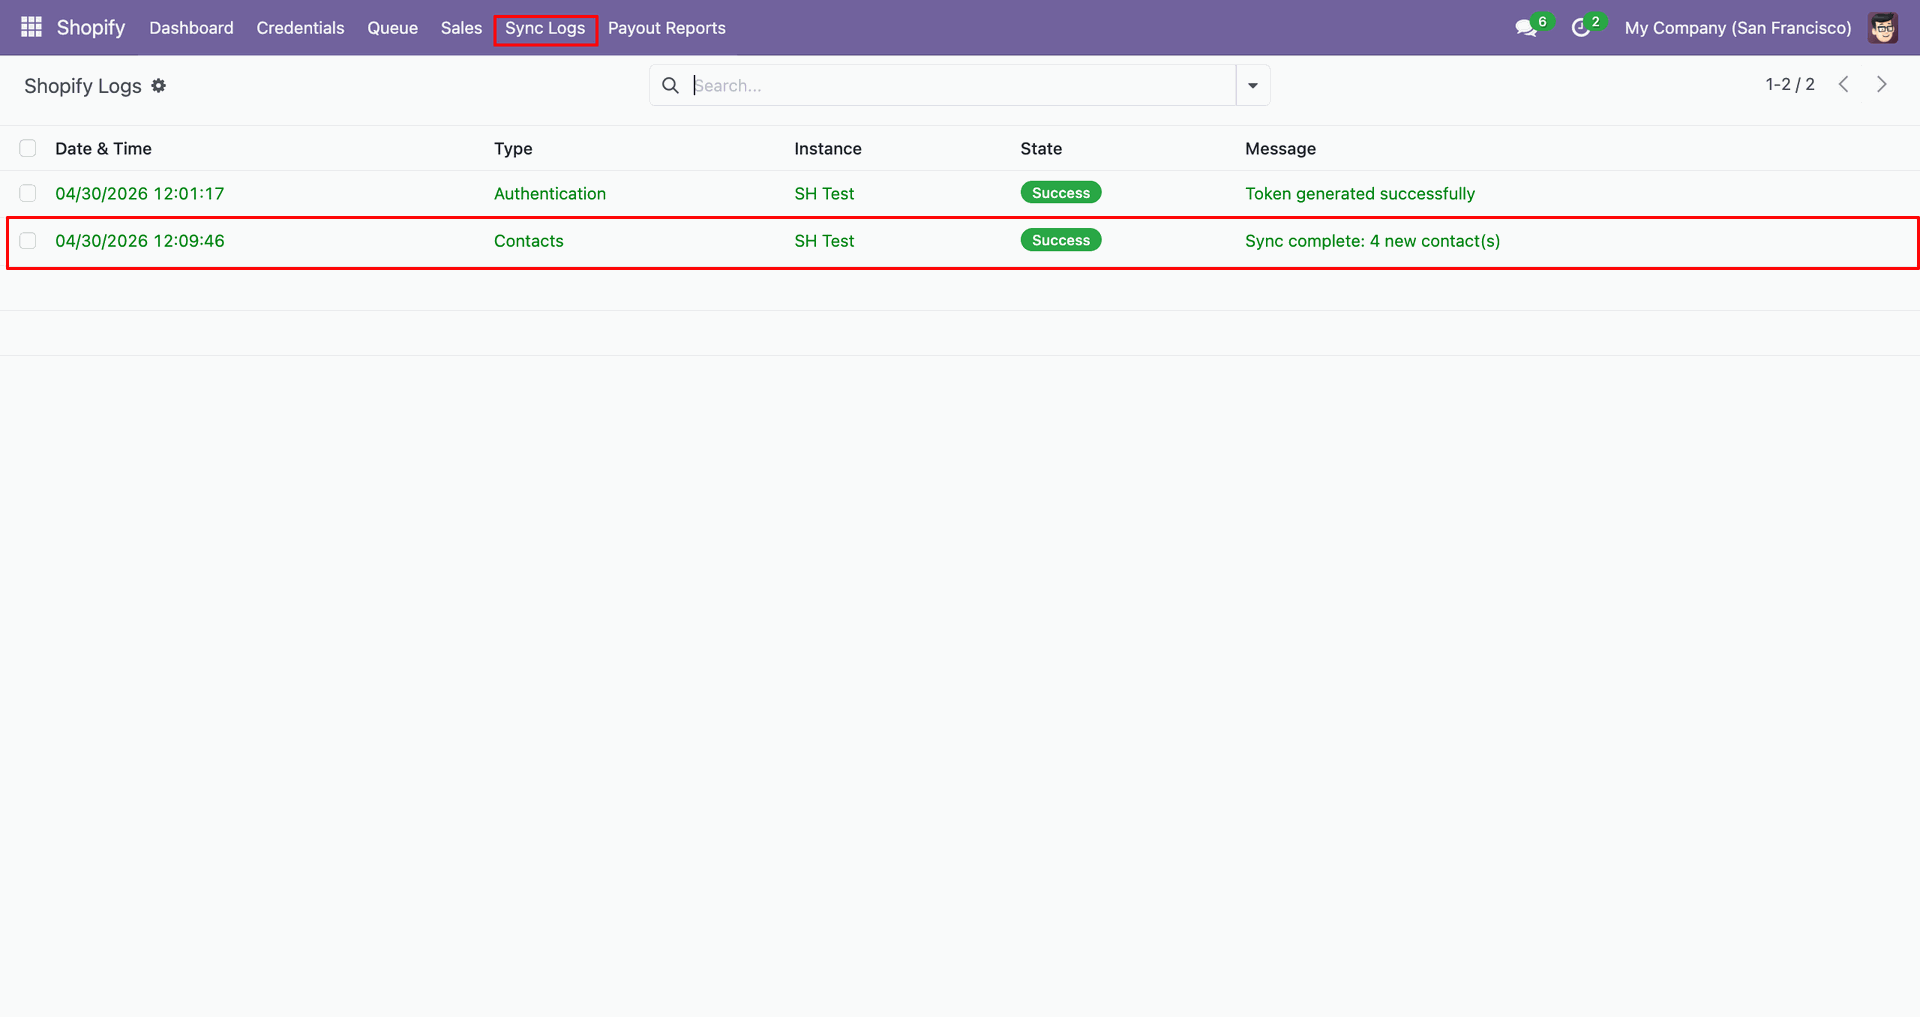
Check Sync Logs to verify the customer fetch completed and staged contacts.
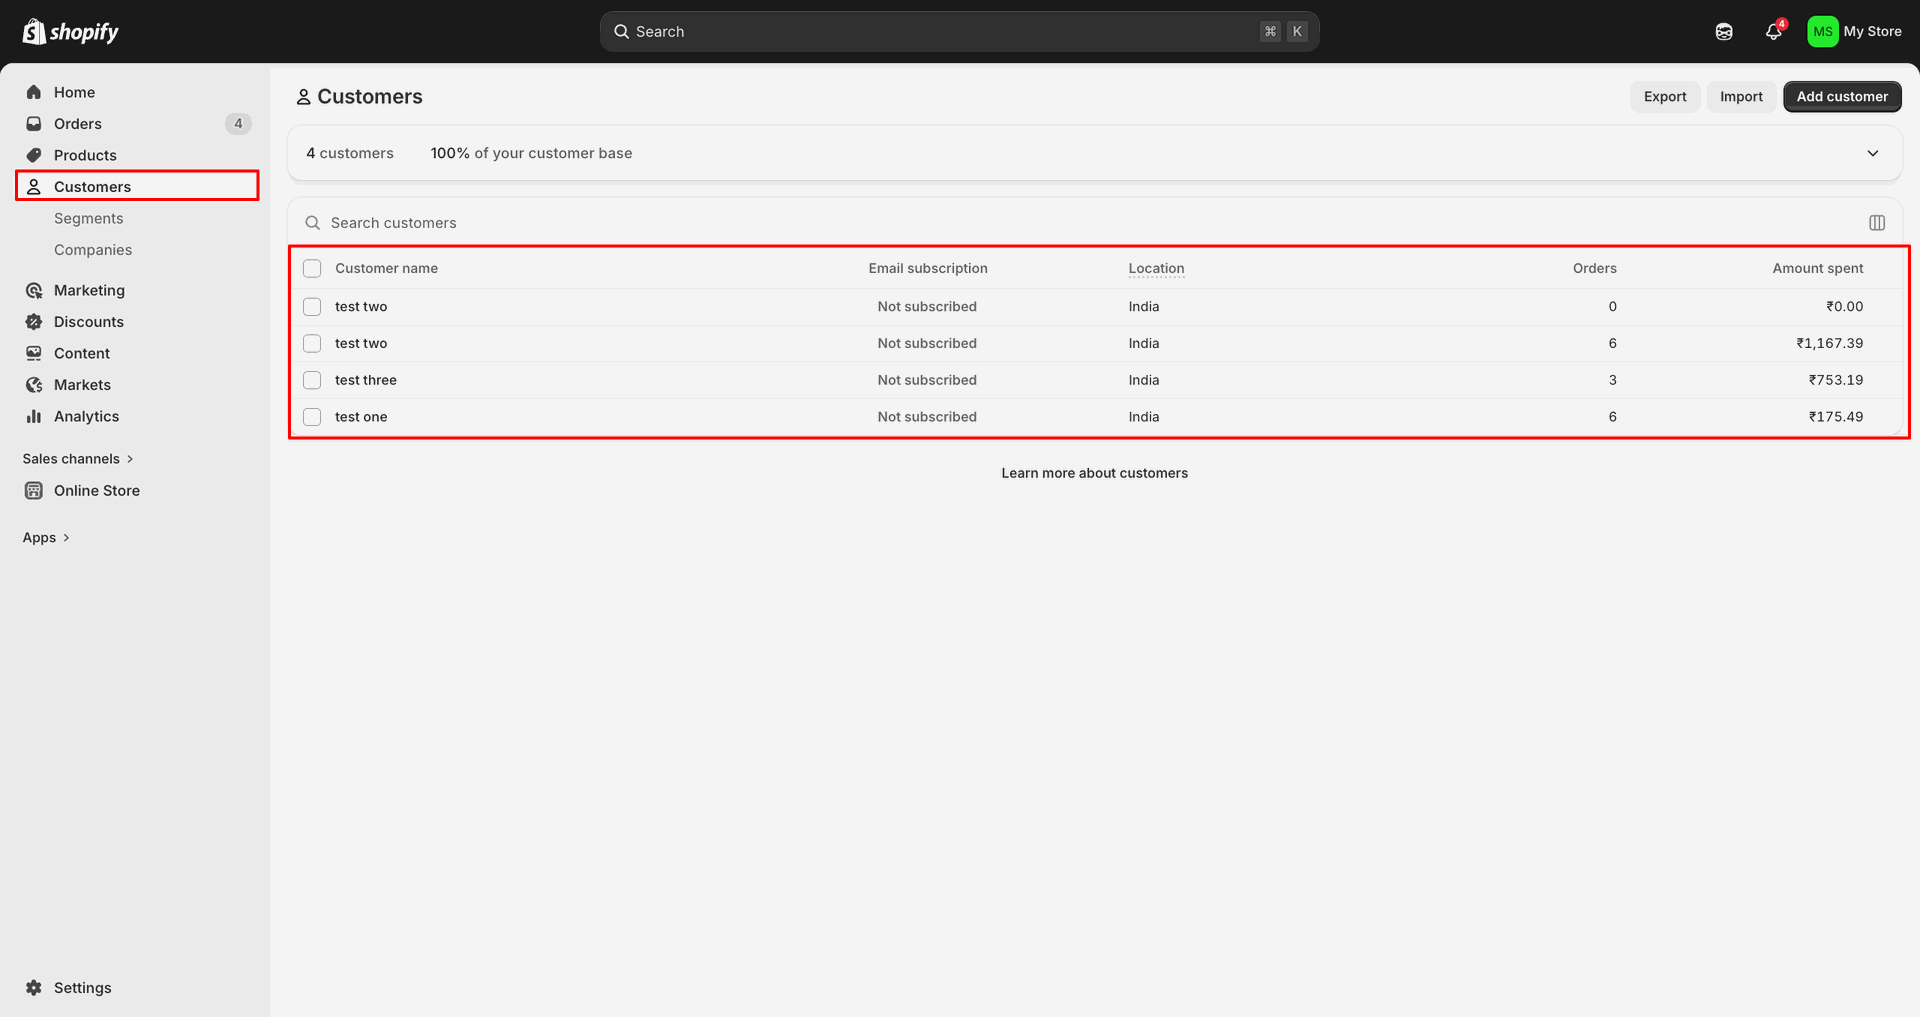
Open Customers in Shopify Admin to review the source customer records.
Open Contact Queue from the Queue menu to inspect imported customer entries.
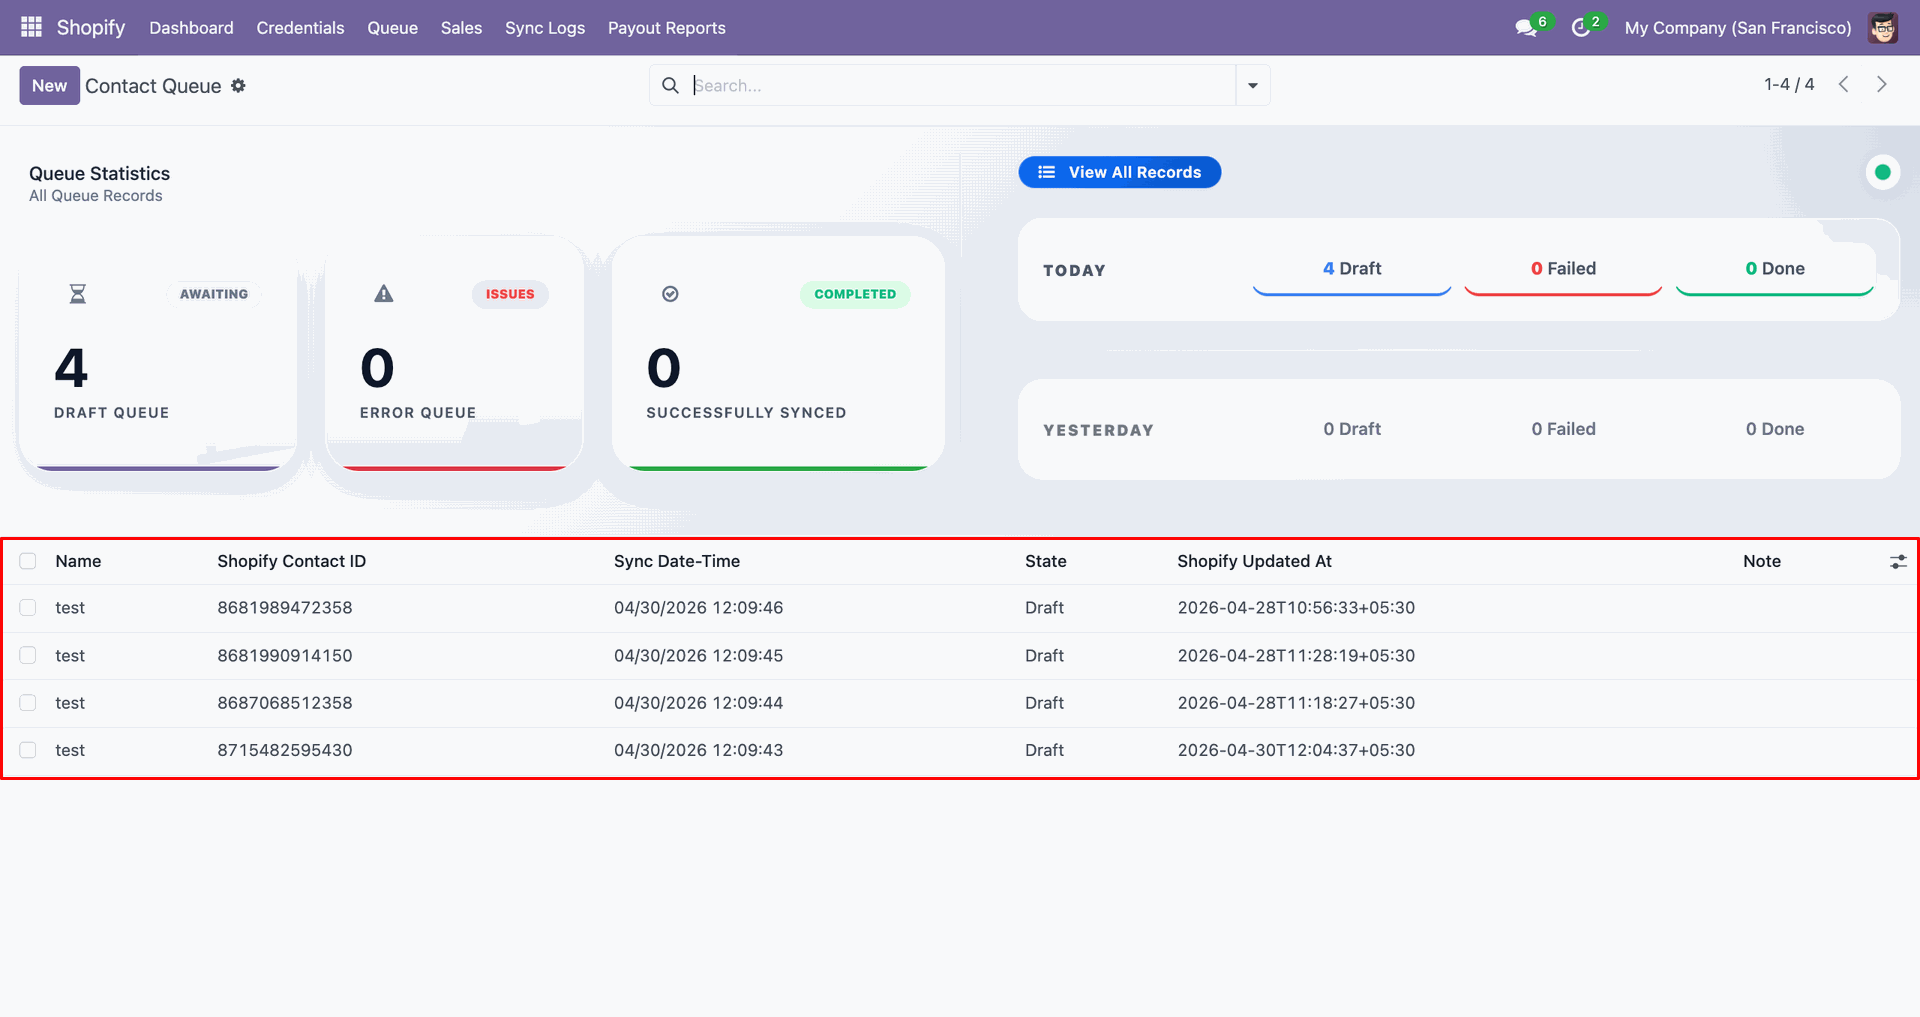
Review the Contact Queue list to compare staged customer IDs and timestamps.
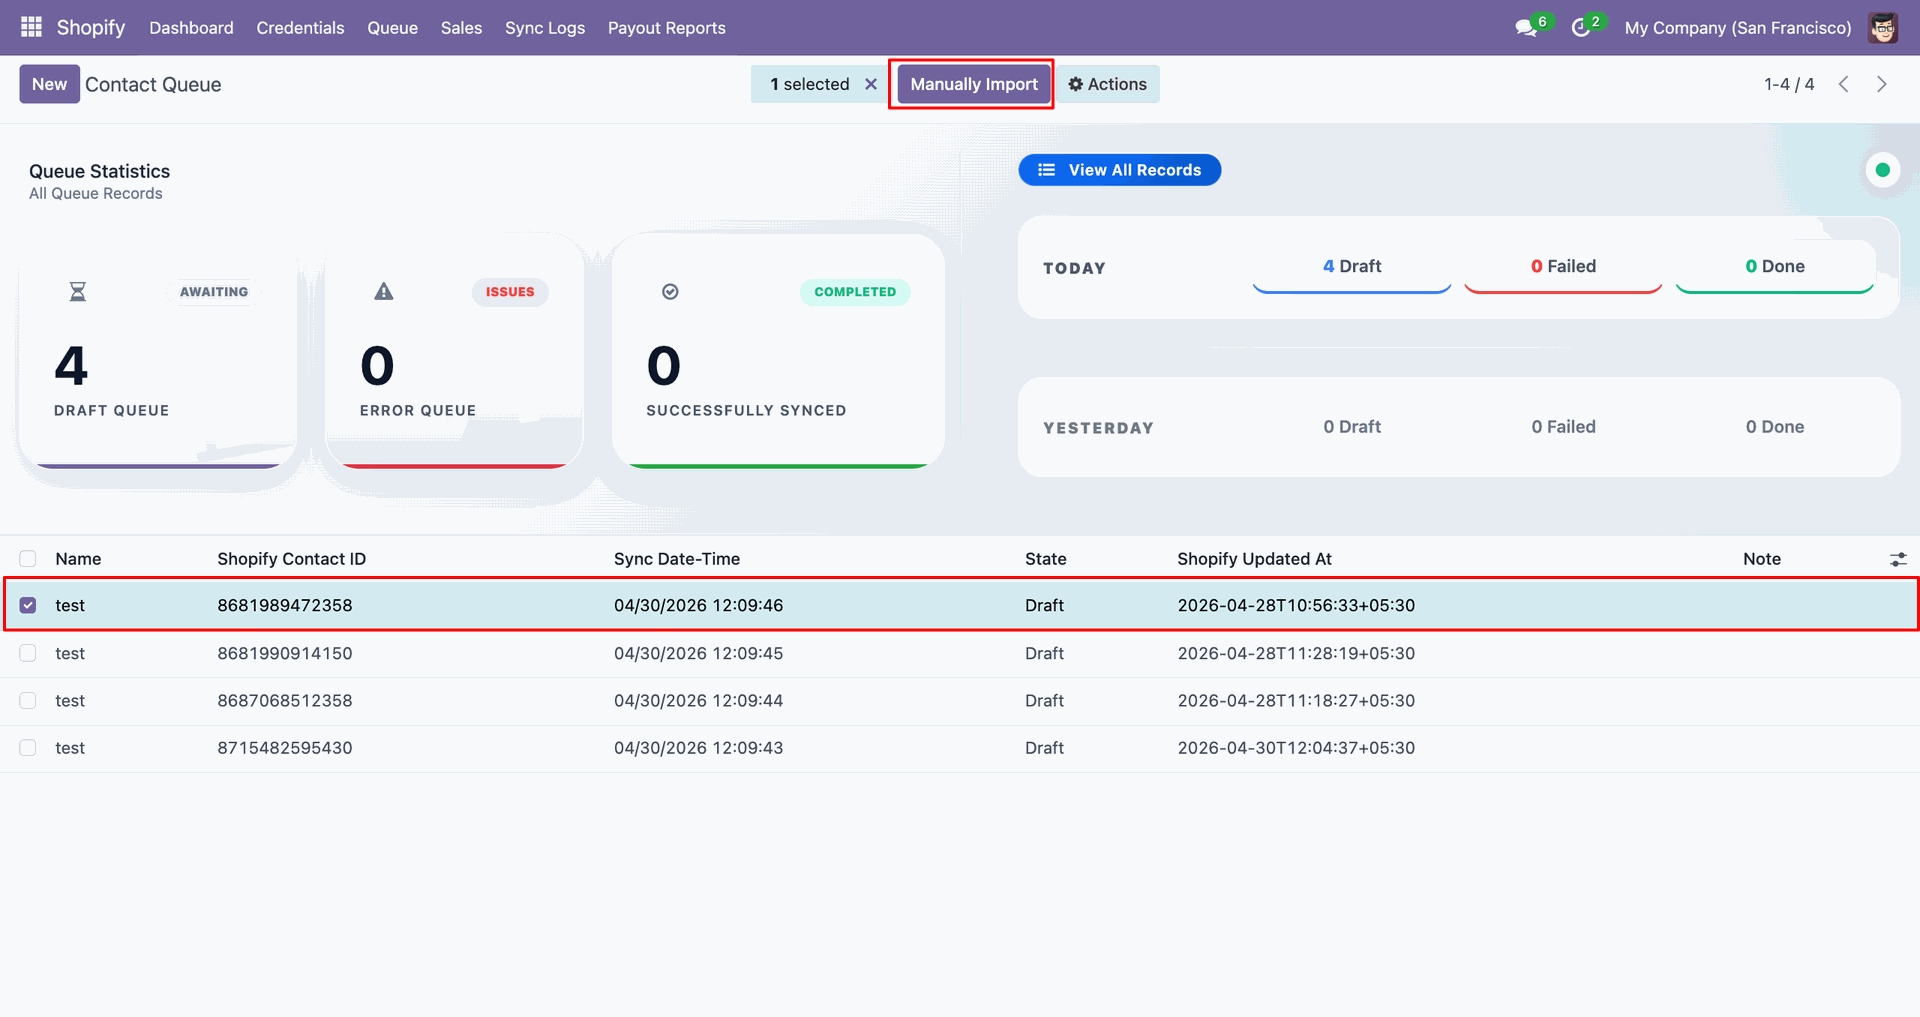
Select the staged contact line and click Manually Import to process it.
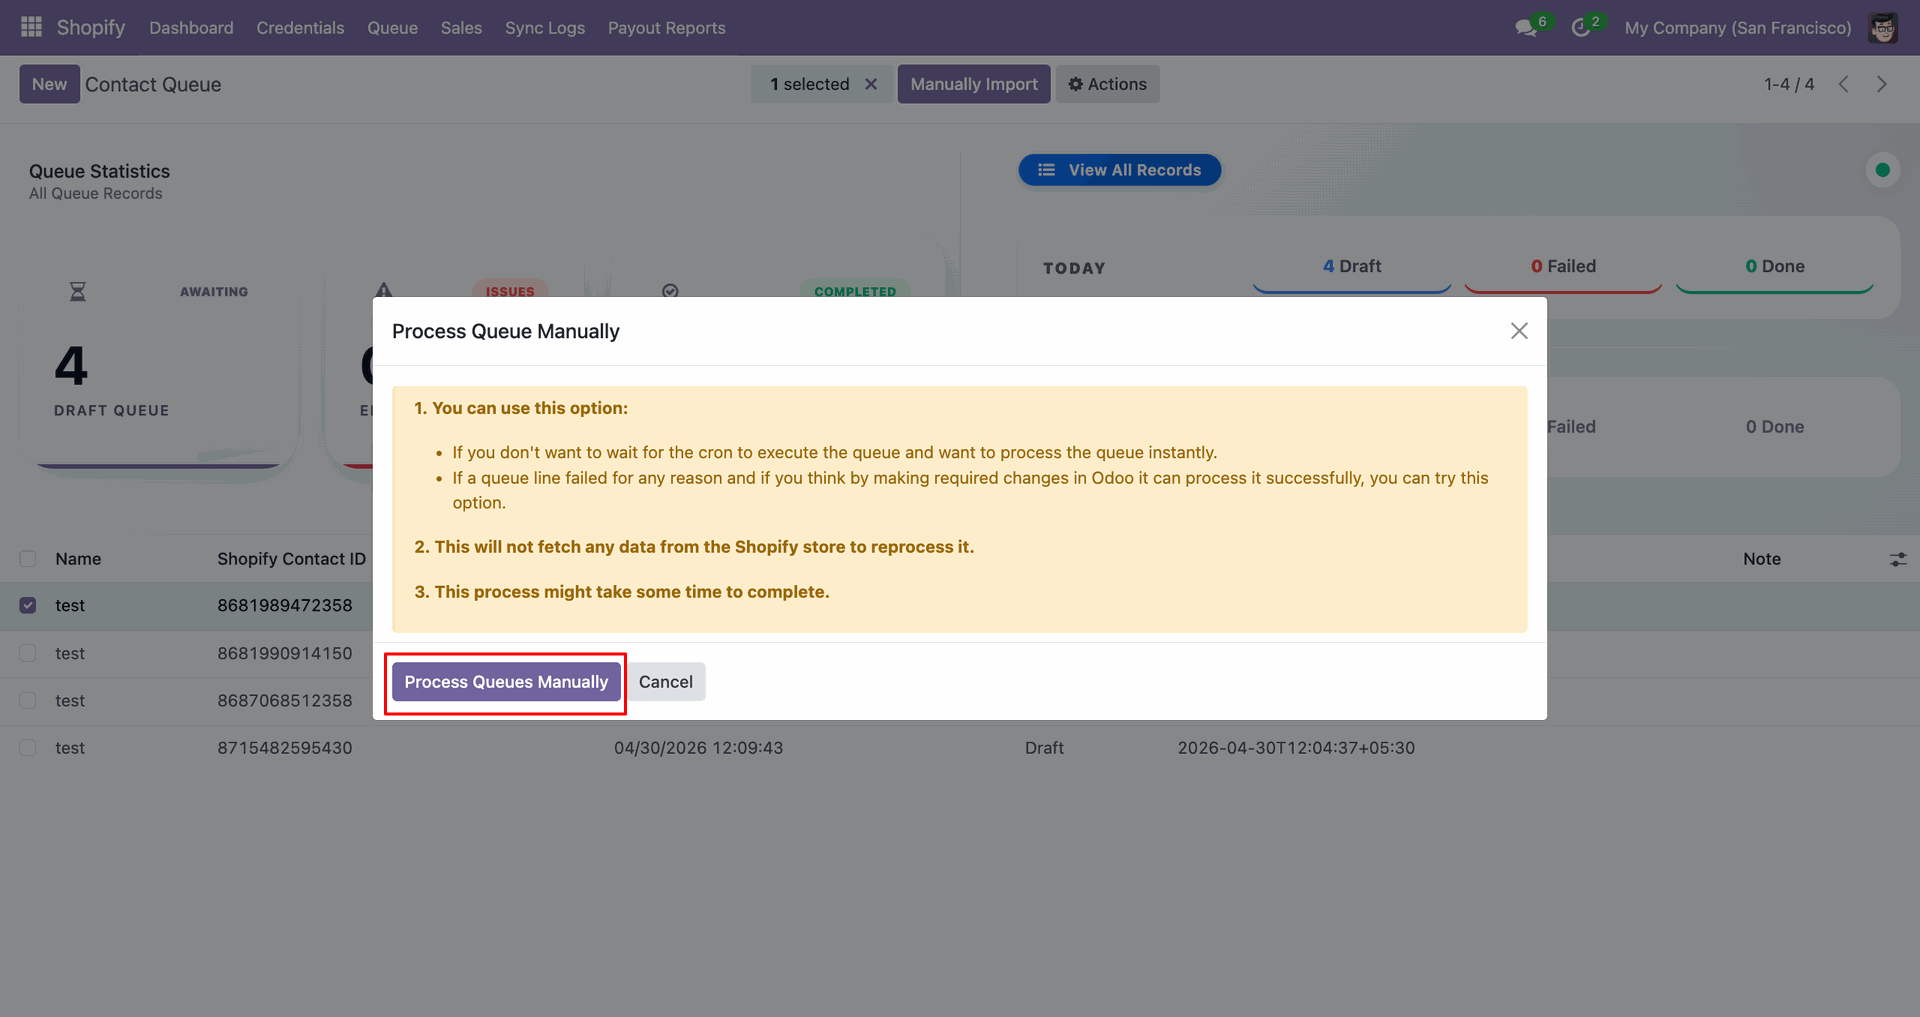
Click Process Queues Manually in the popup to import the selected customer.
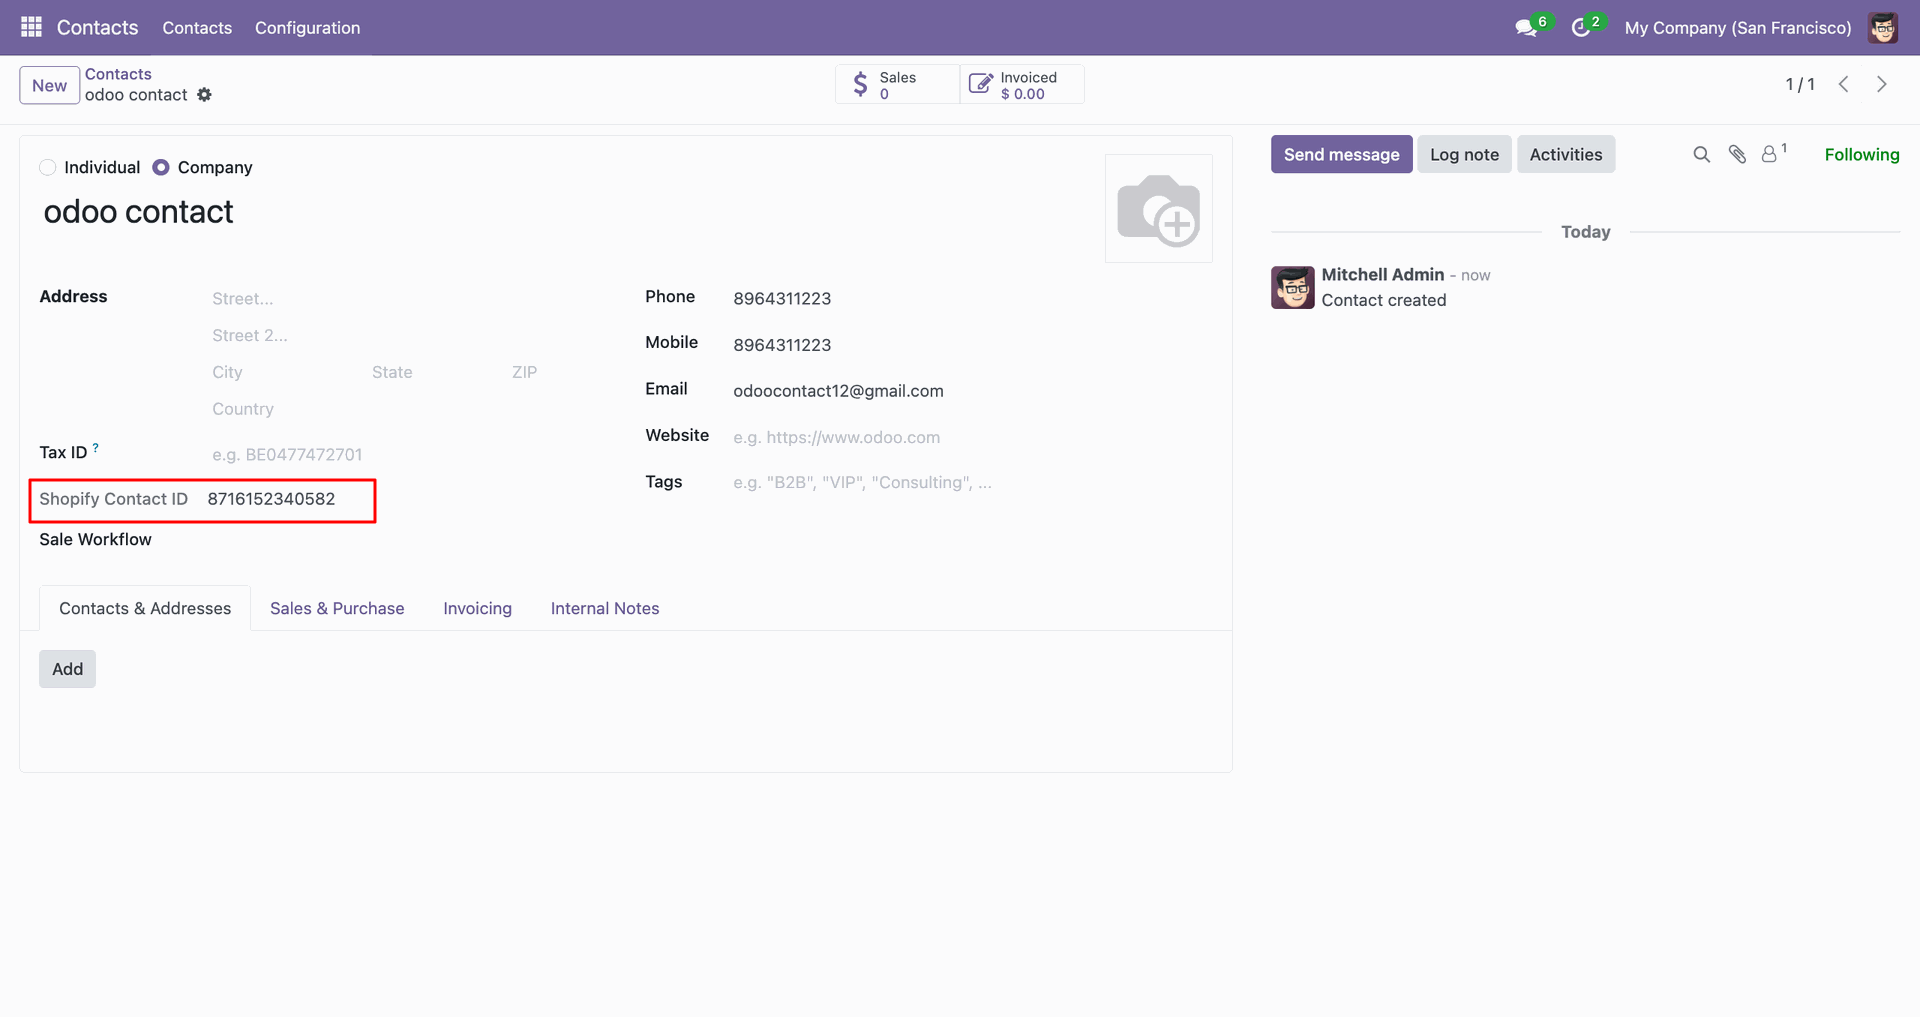
Use Open Record beside the completed queue line to open the Odoo contact.
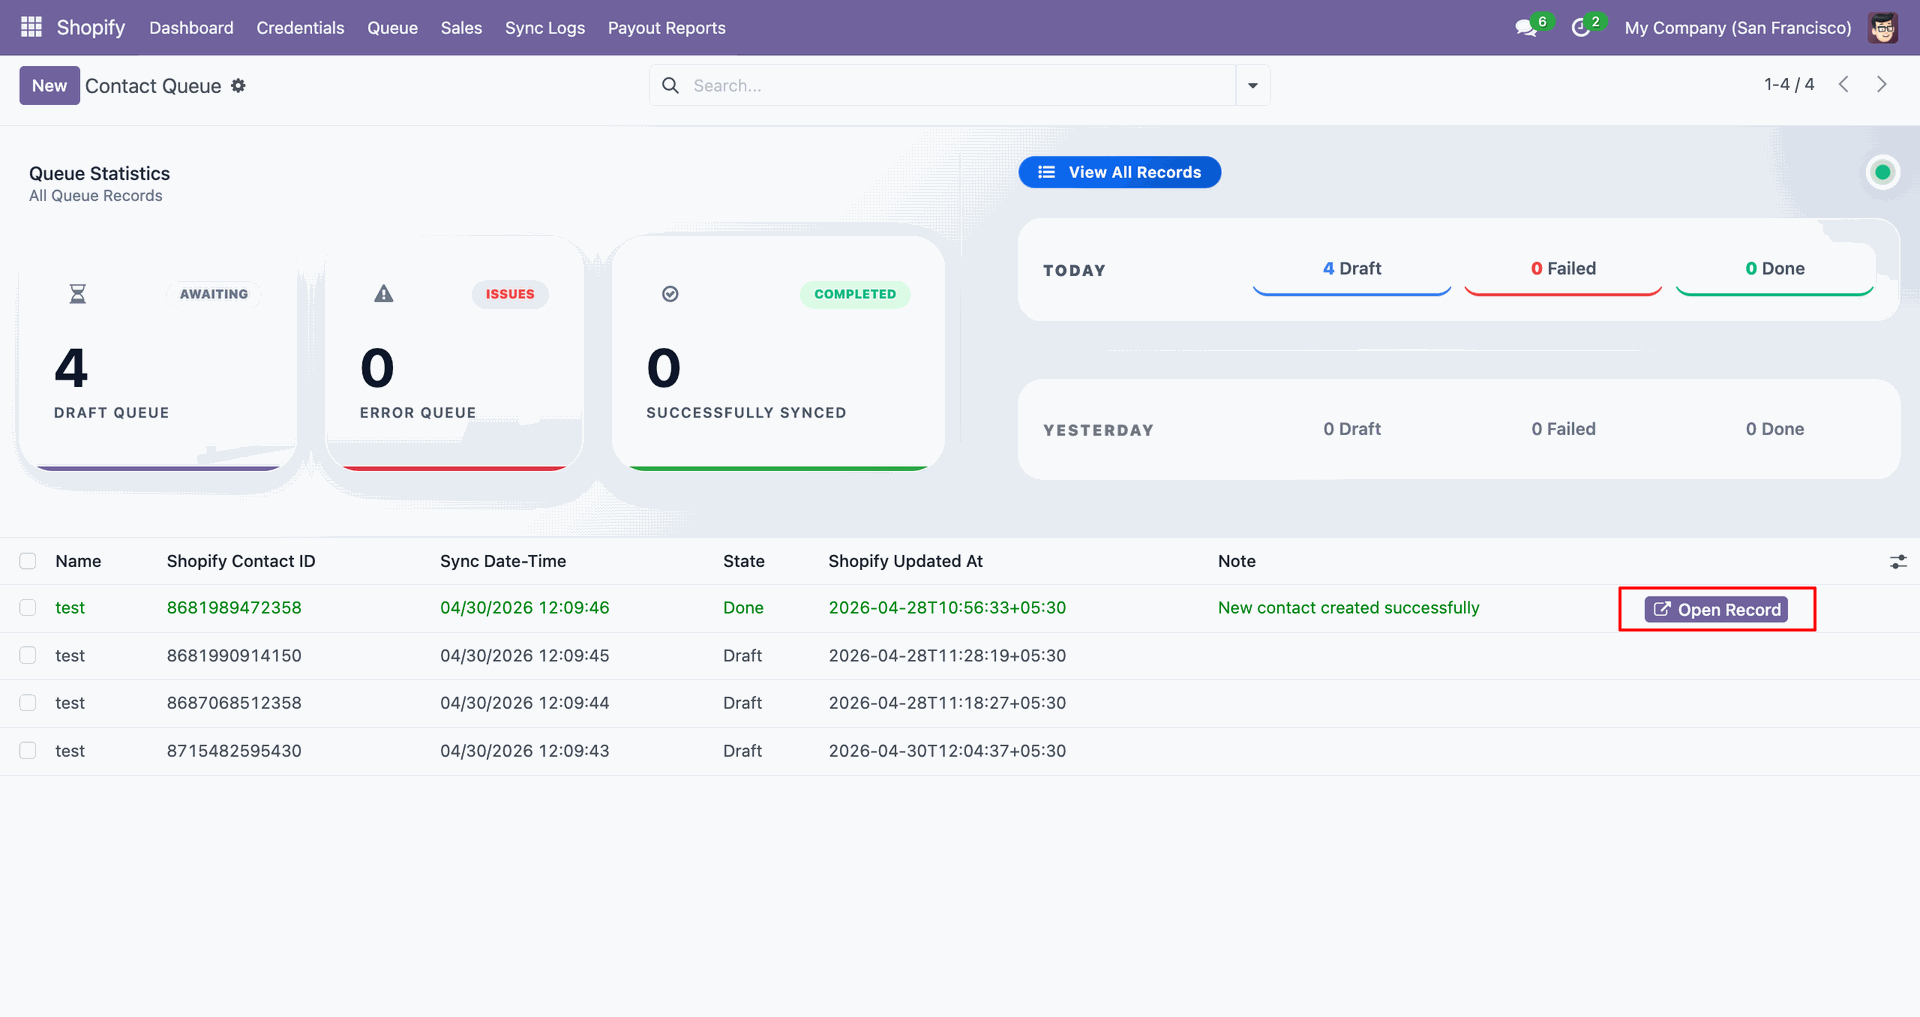
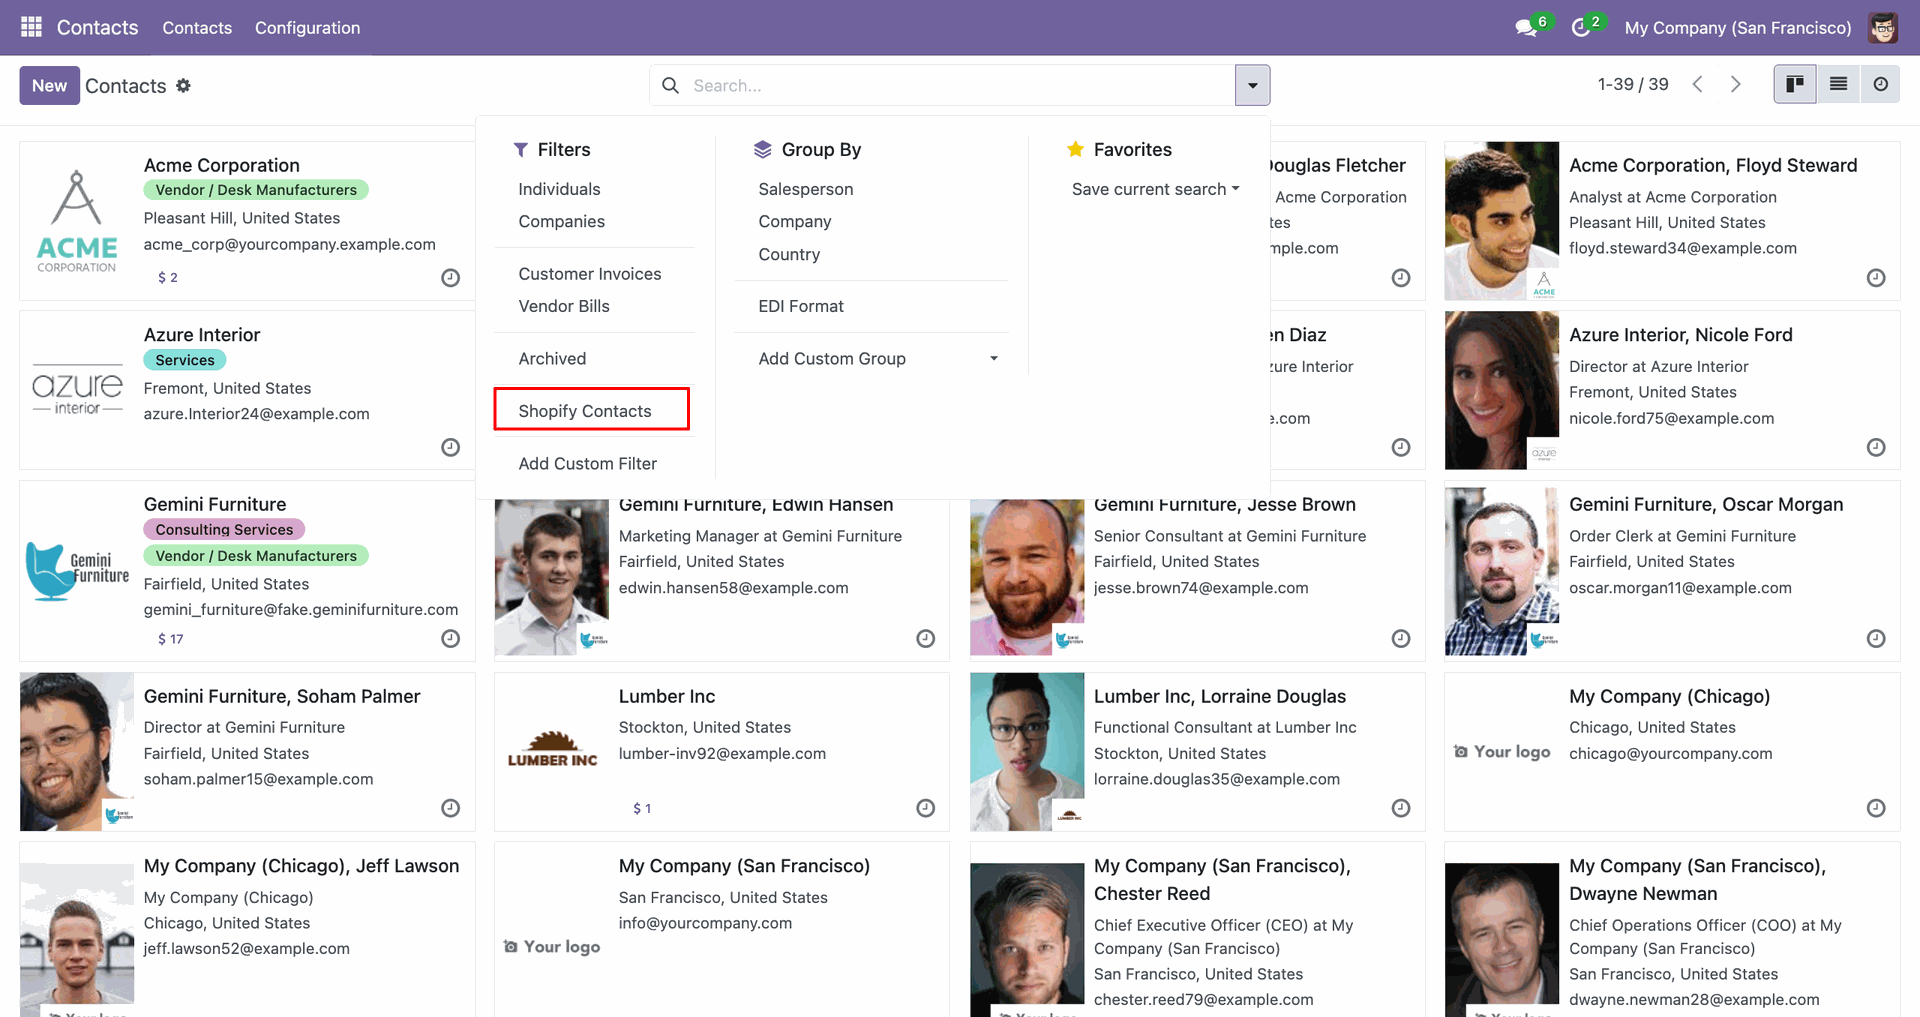
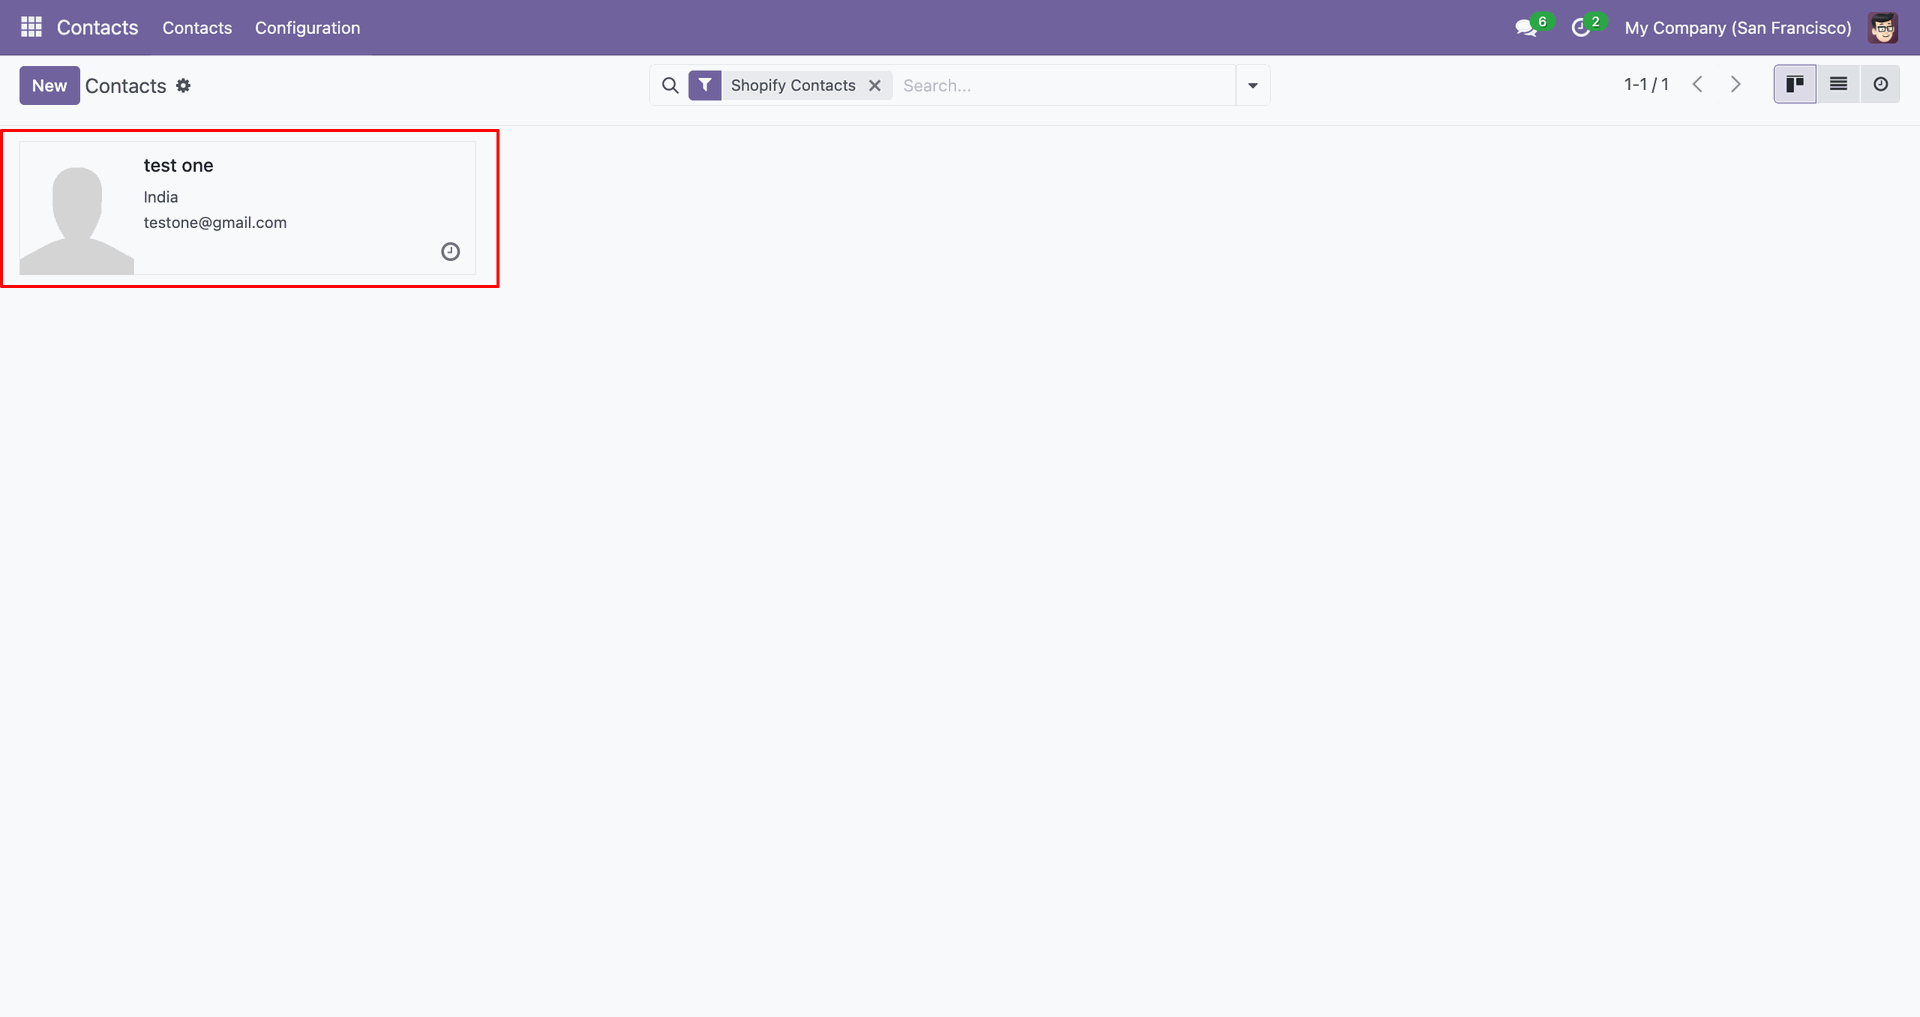
Apply the Shopify Contacts filter to display only imported customer records.
The imported contact card shows the synced customer name and email.
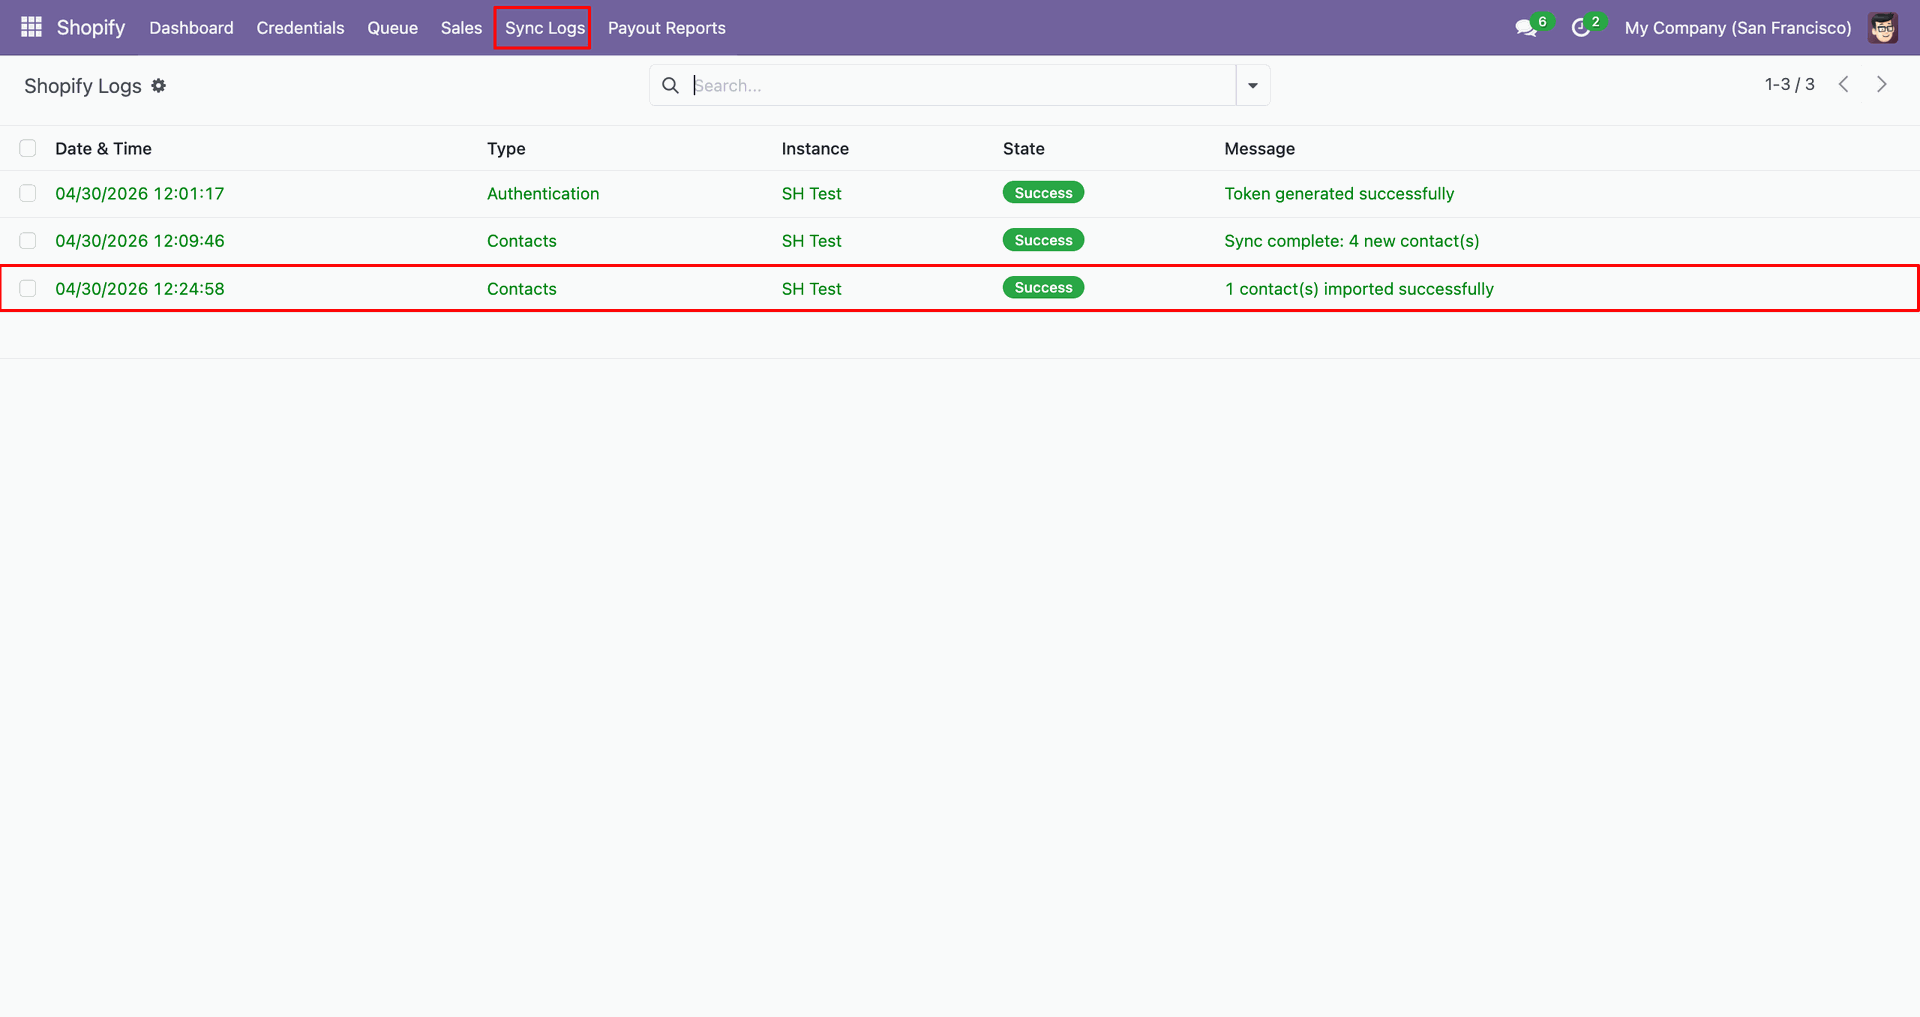
Review Sync Logs to confirm one staged contact imported successfully into Odoo.
Set From and To dates, then click Sync Contacts for dated imports.
Review the Contacts Queue counter after fetching records within the selected dates.
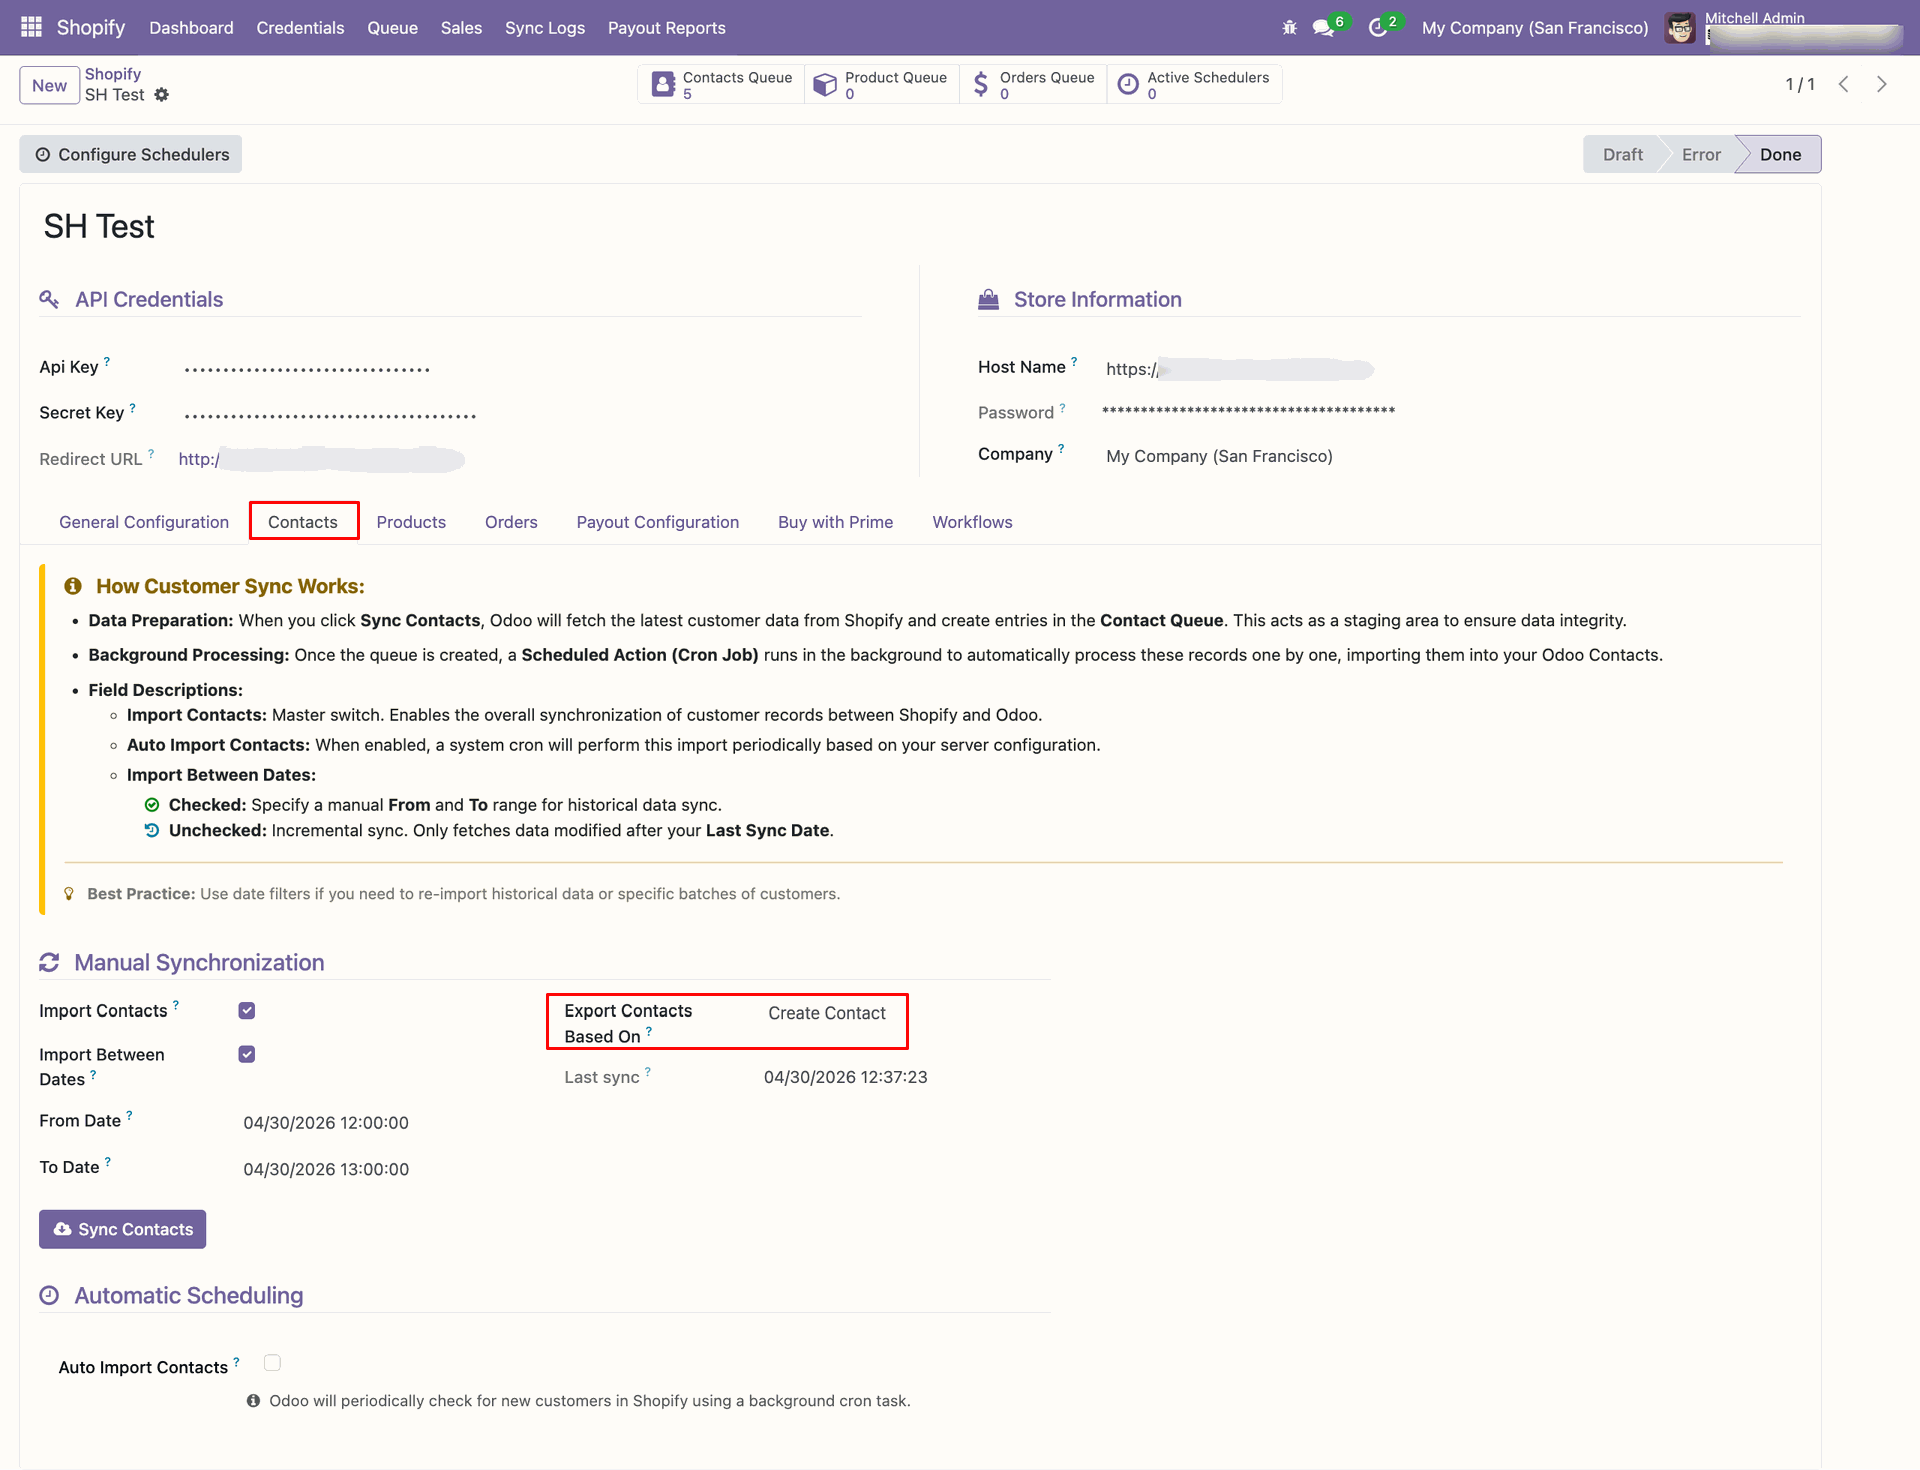
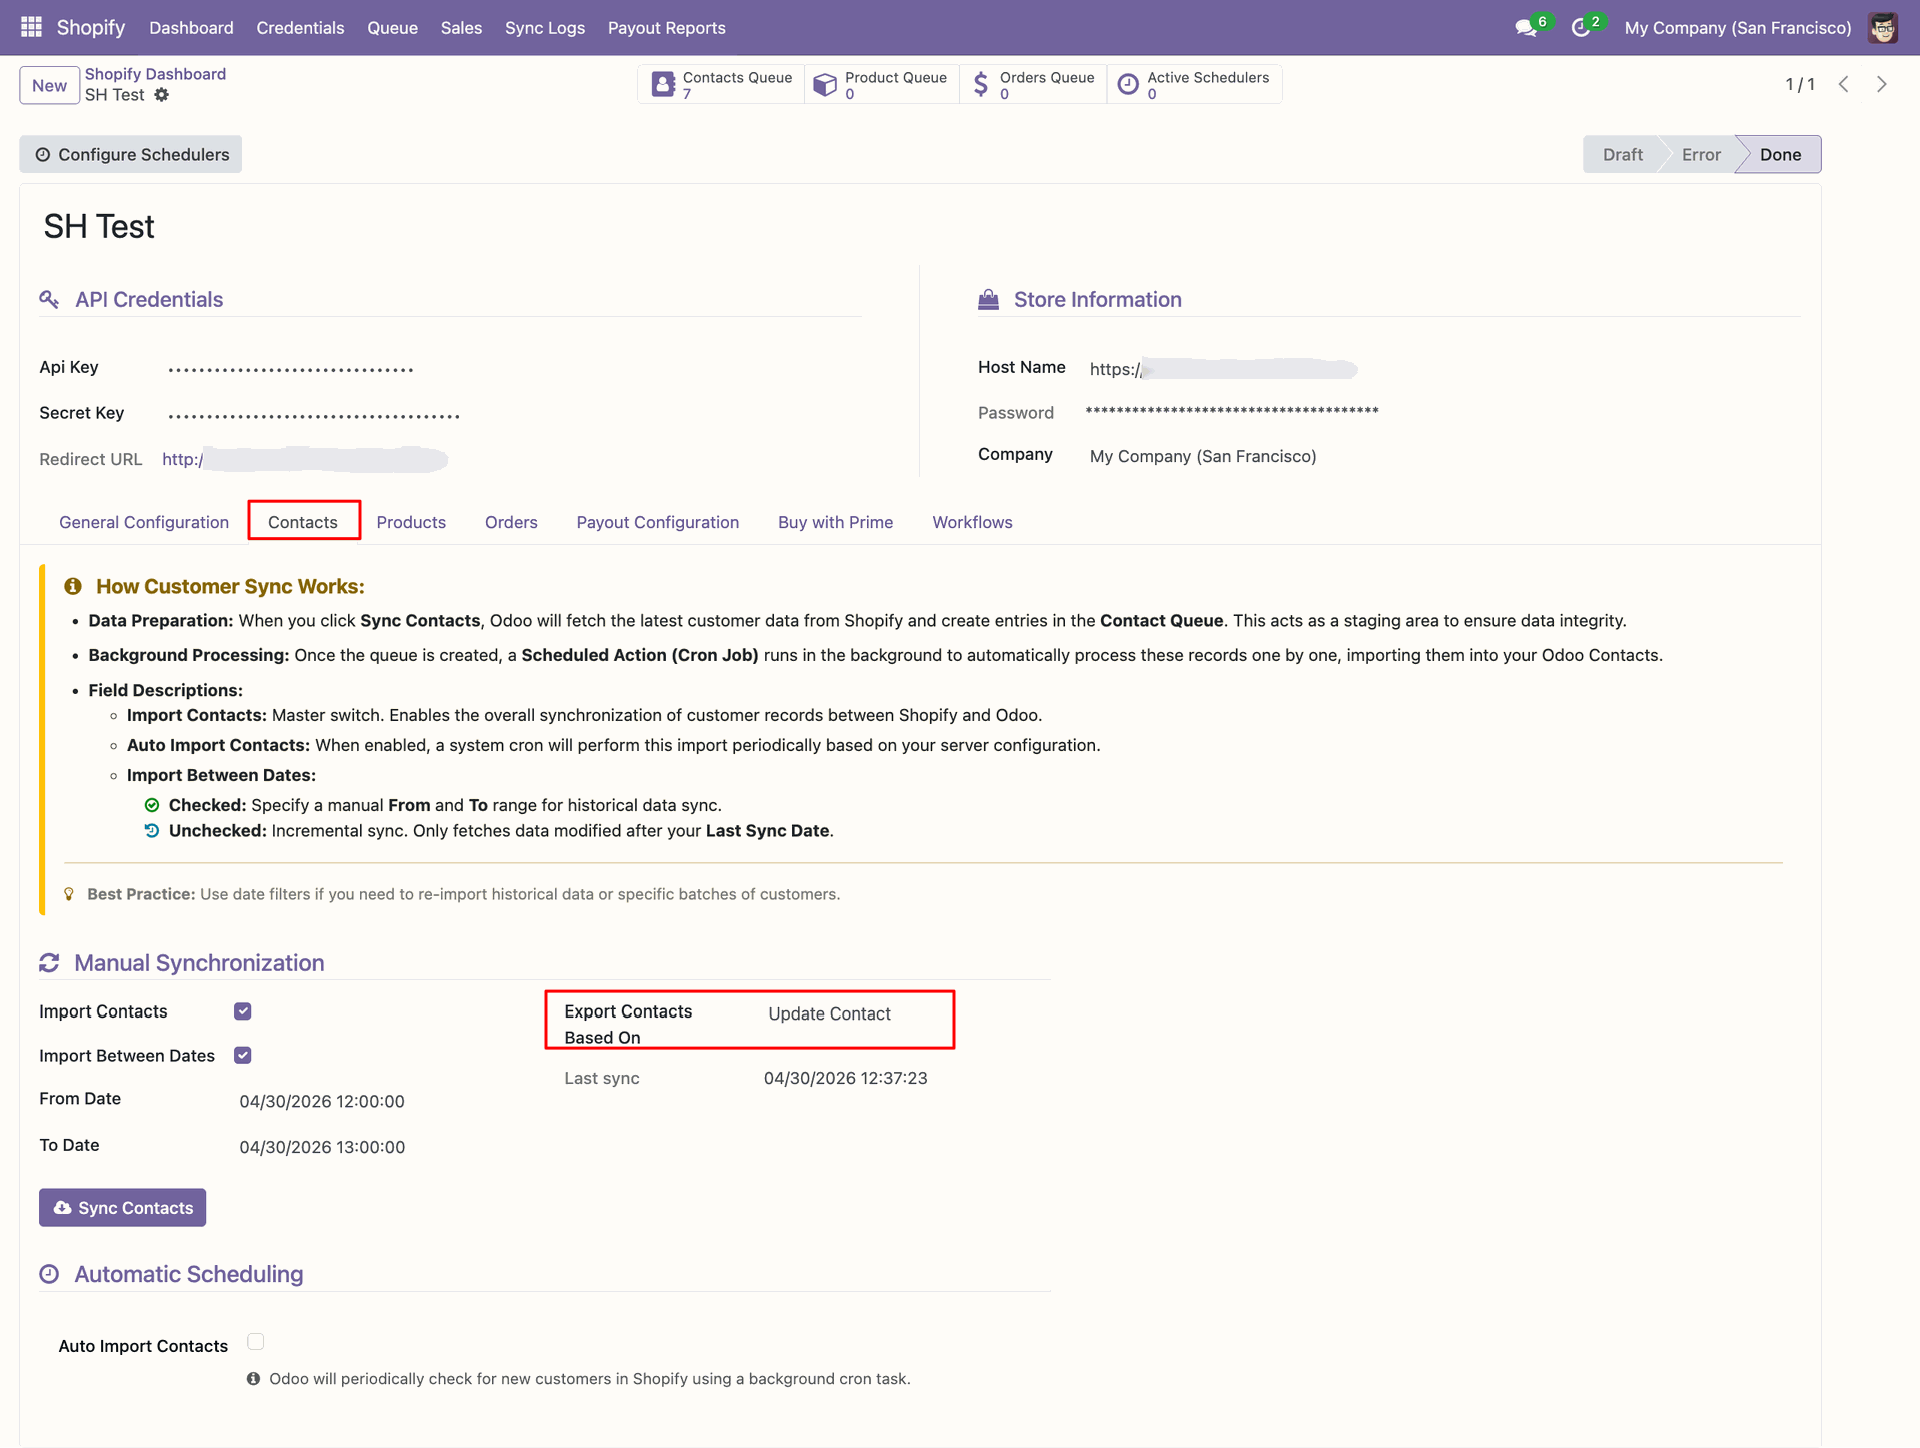
Set Export Contacts Based On to Create Contact before exporting new customers.
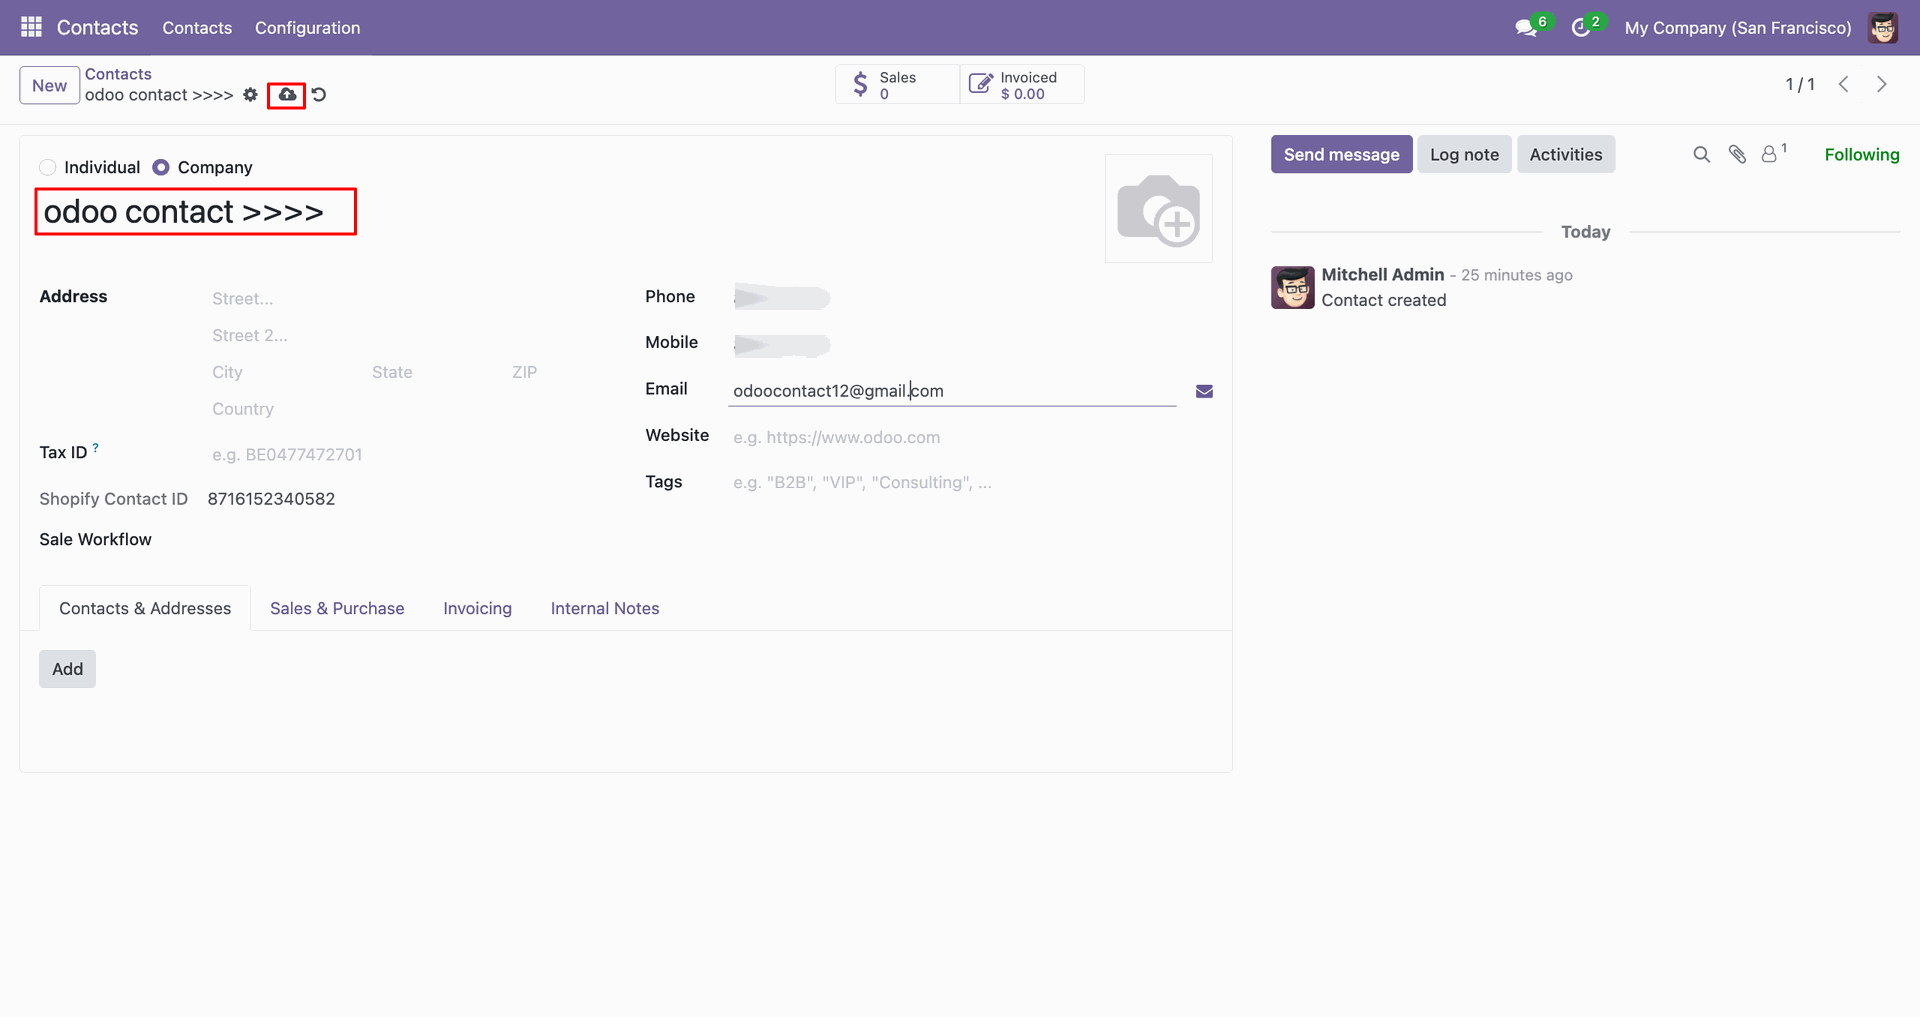
Use the export icon on the contact form to send this customer.

Review the Shopify Contact ID field after exporting the contact from Odoo.
Check Sync Logs to confirm the customer was created successfully in Shopify.
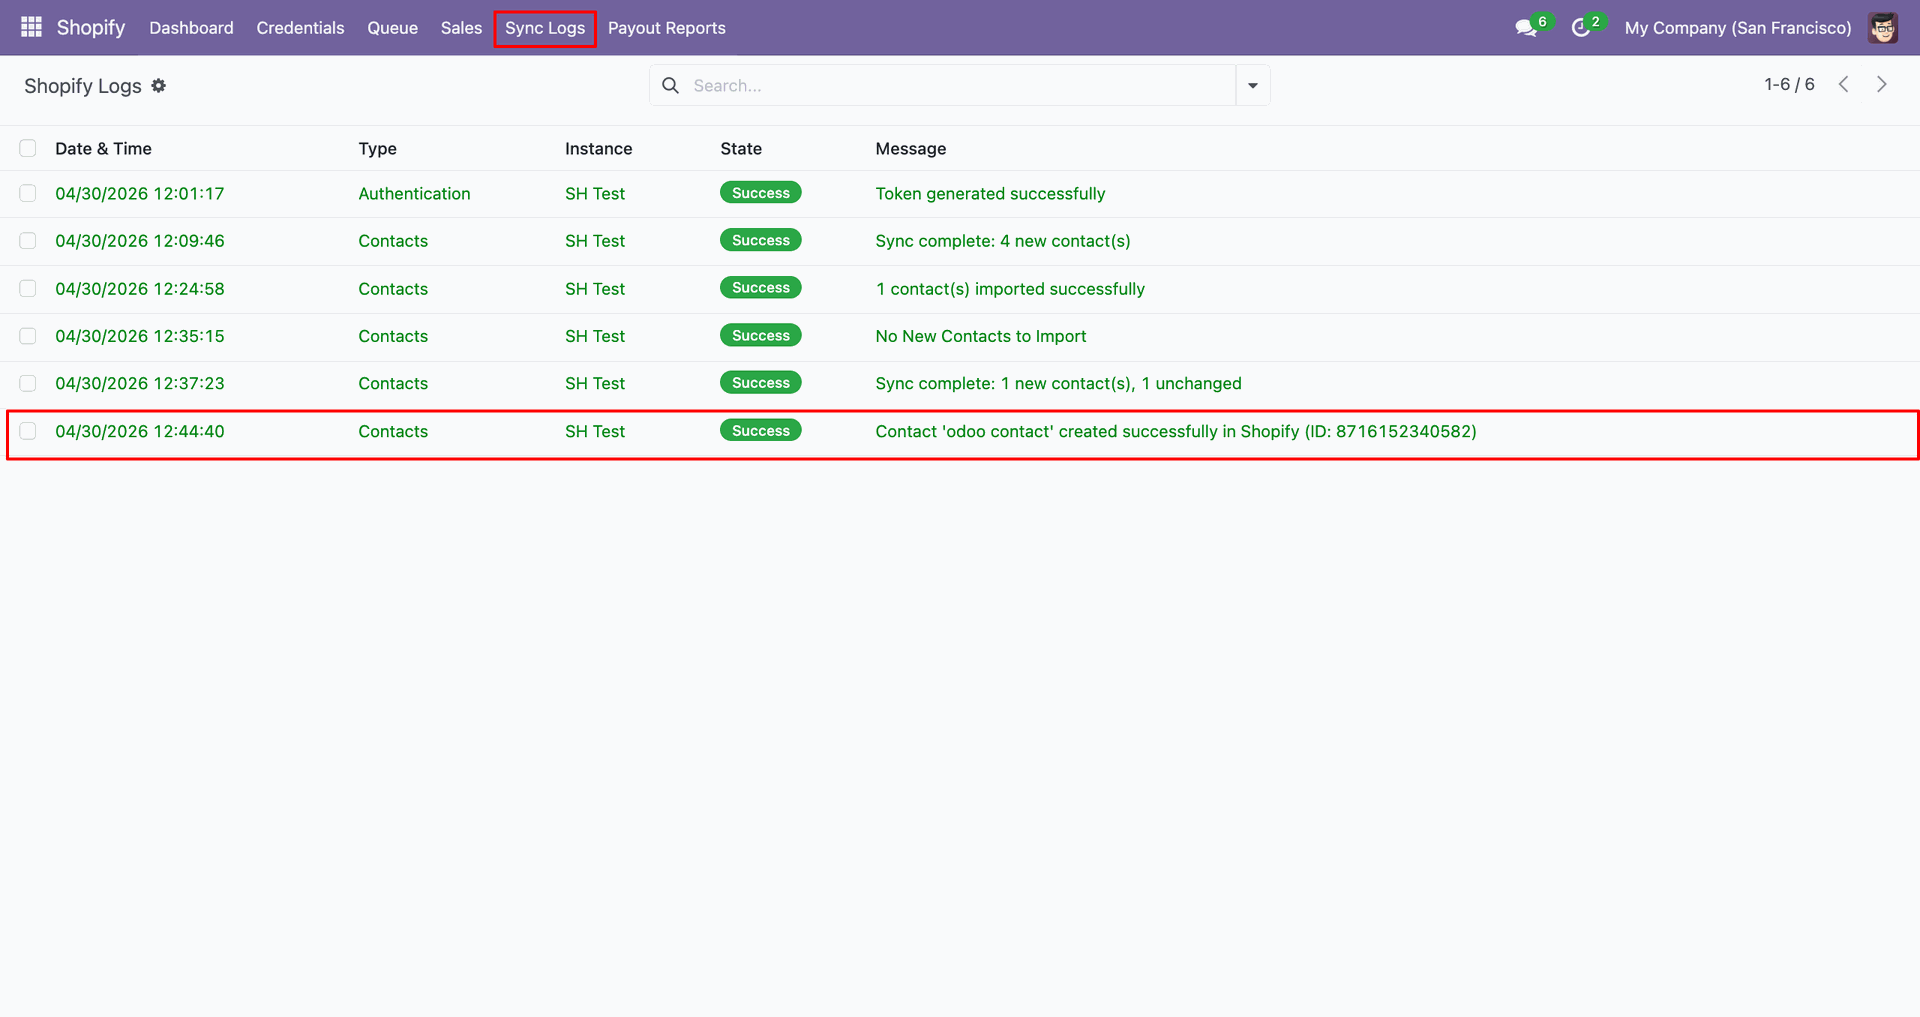
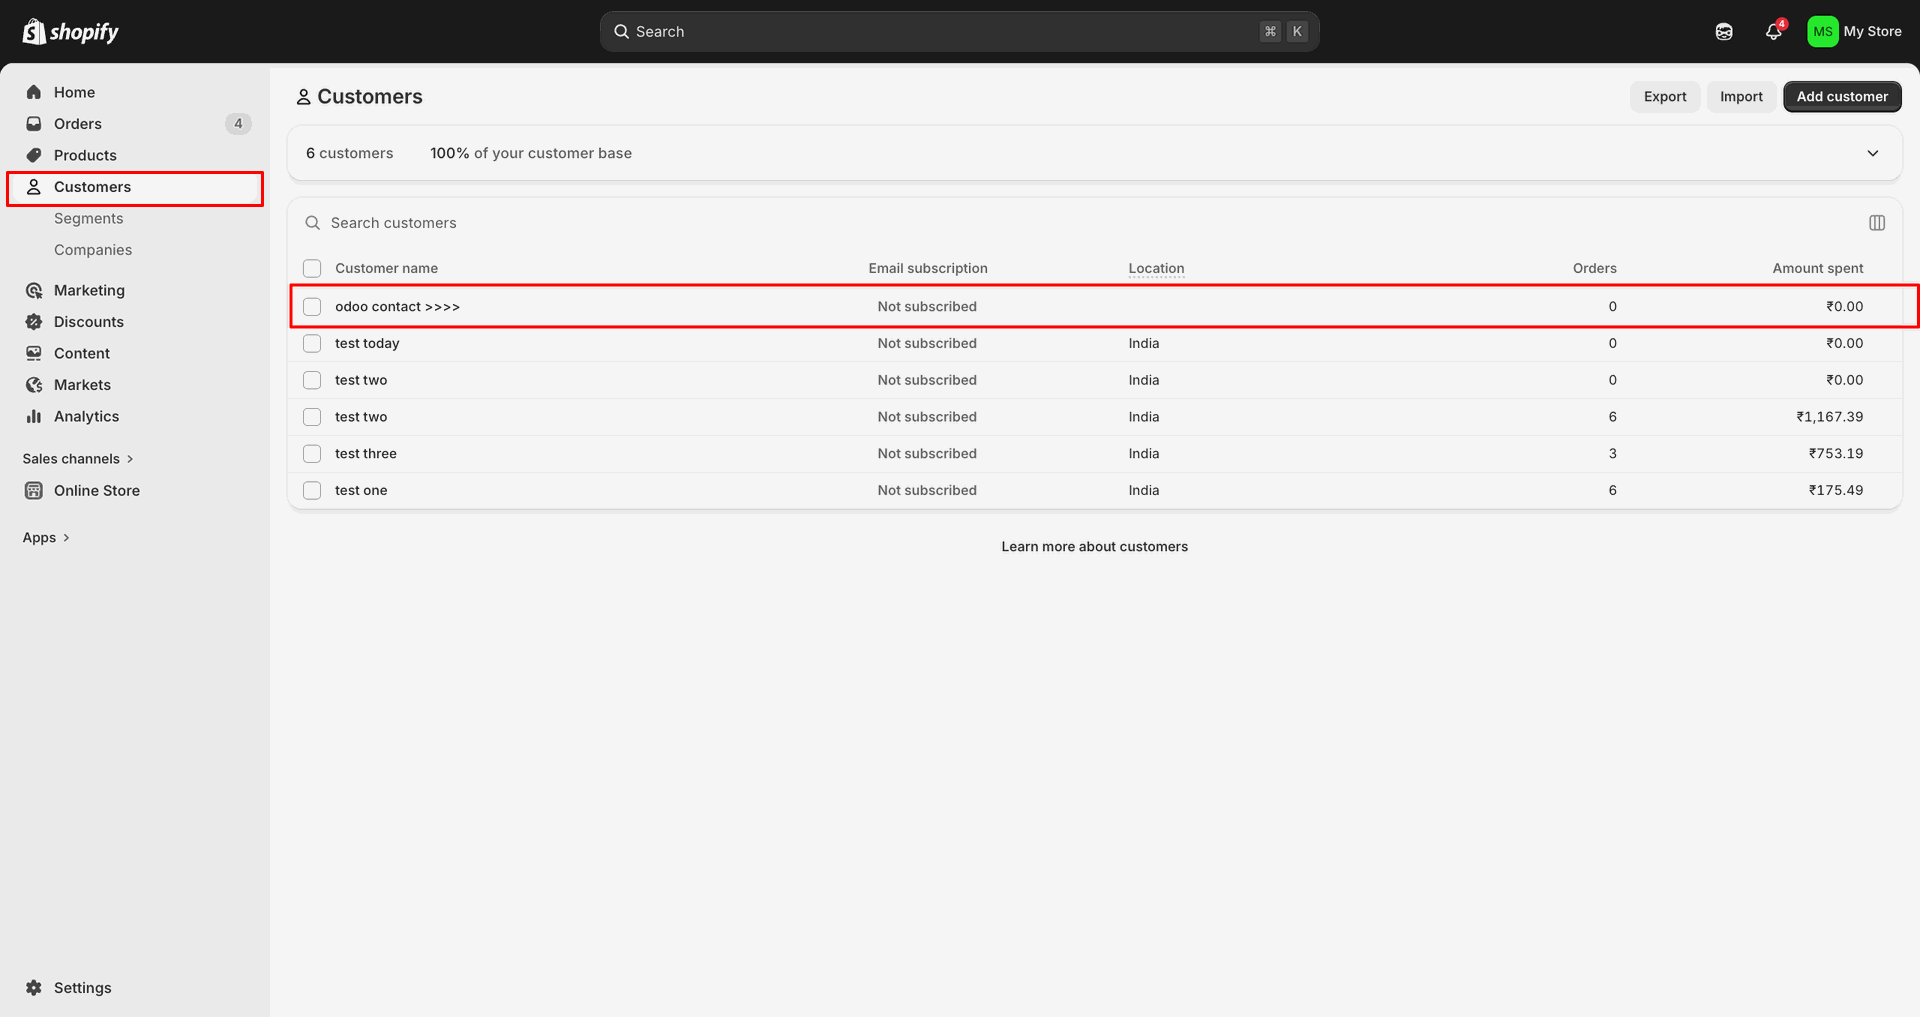
Verify the exported customer row appears in Shopify with the expected details.

Set Export Contacts Based On to Update Contact before exporting customer changes.
Update the Odoo contact name before exporting the revised customer information.
Verify the updated customer row appears in Shopify after the contact export.
Review Sync Logs to confirm the customer update was sent successfully.

Review the Payment Gateway Workflow Matrix used to process imported Shopify orders.
Choose which Shopify orders to fetch from the Sync Shopify Orders Based On list.
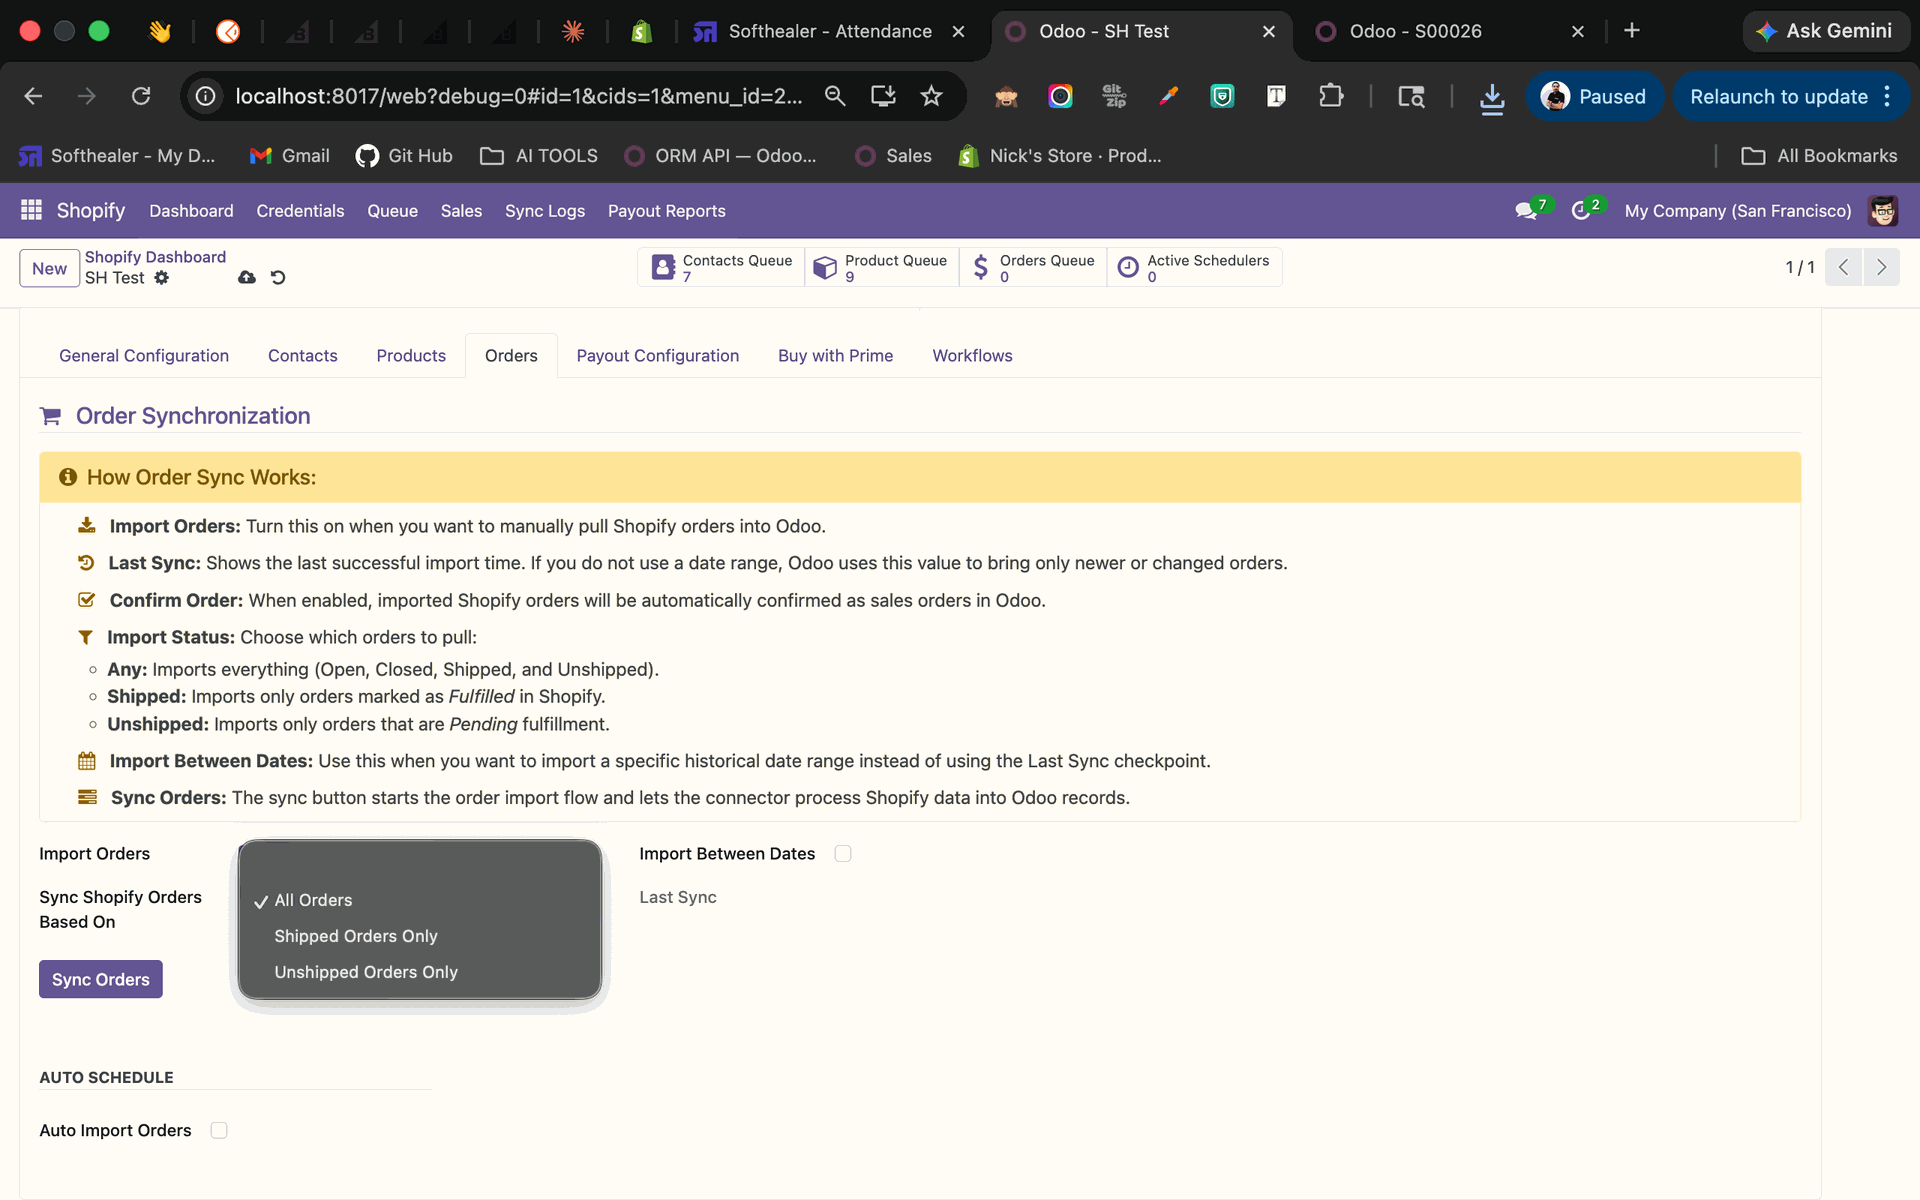
Select All Orders and click Sync Orders to fetch Shopify orders manually.

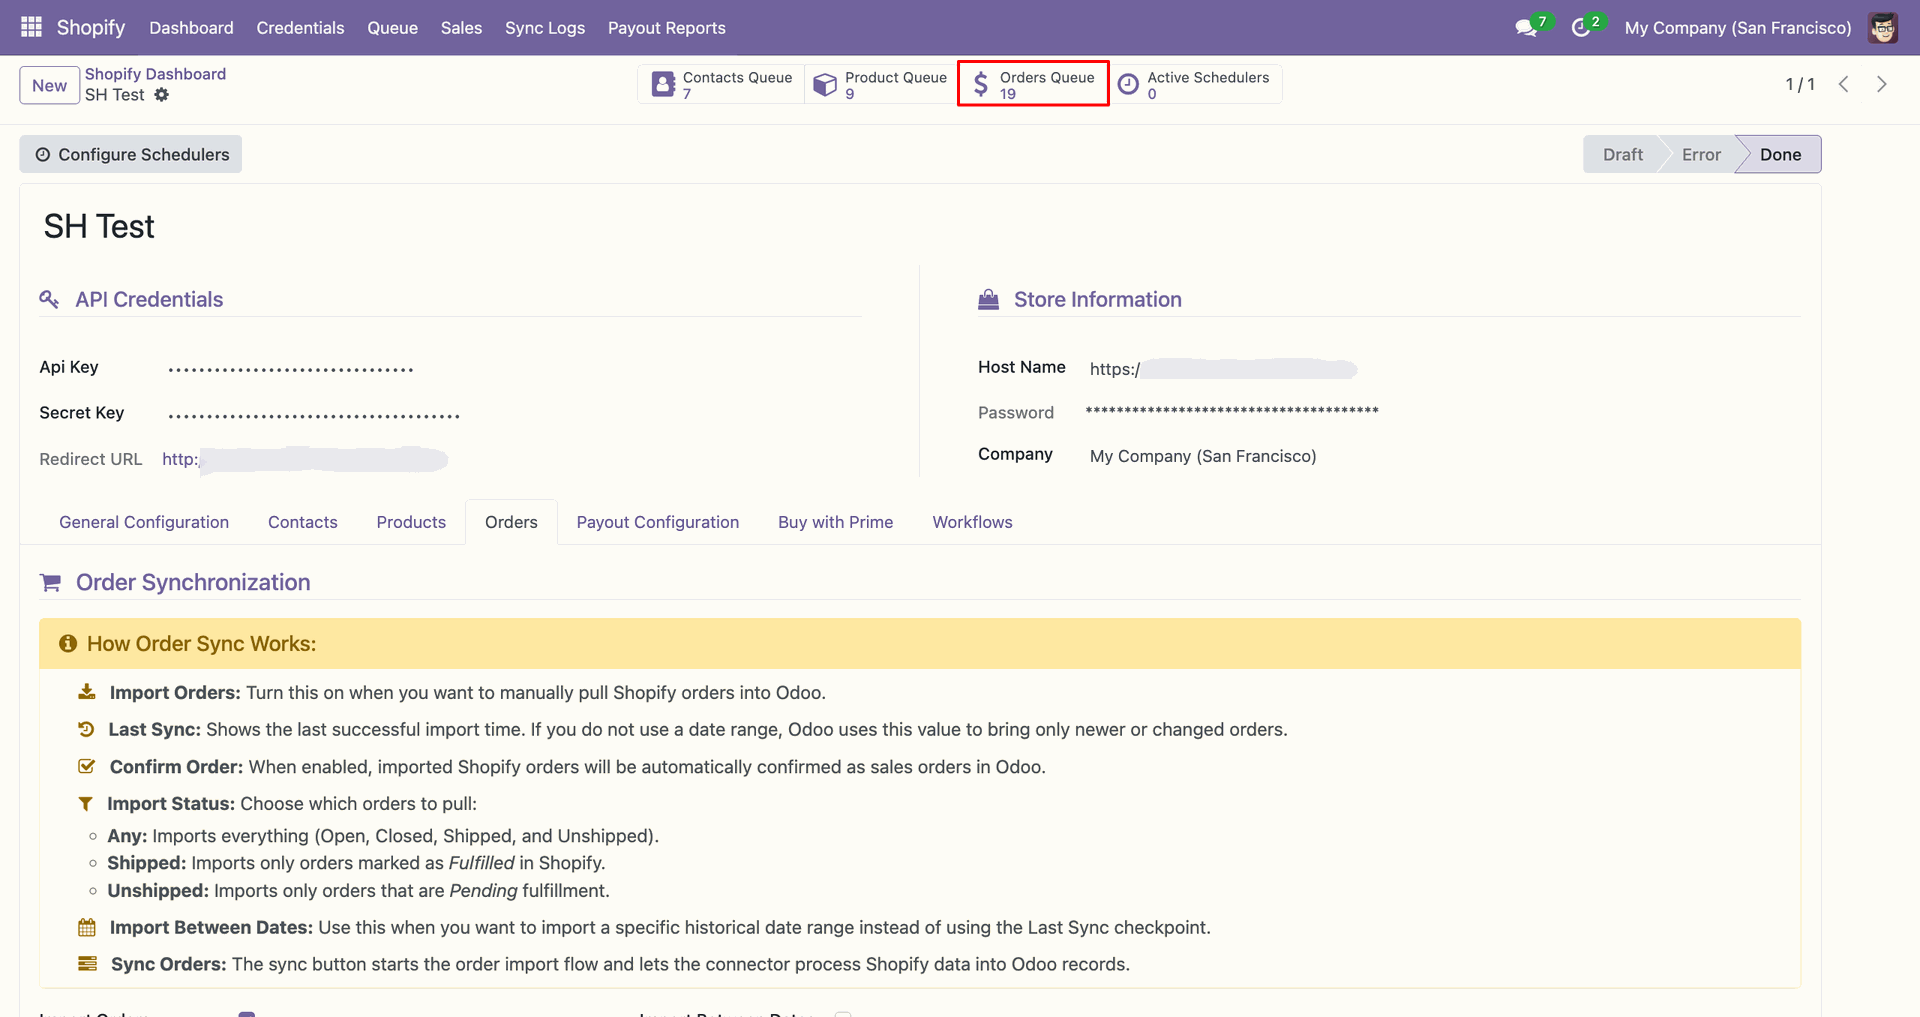
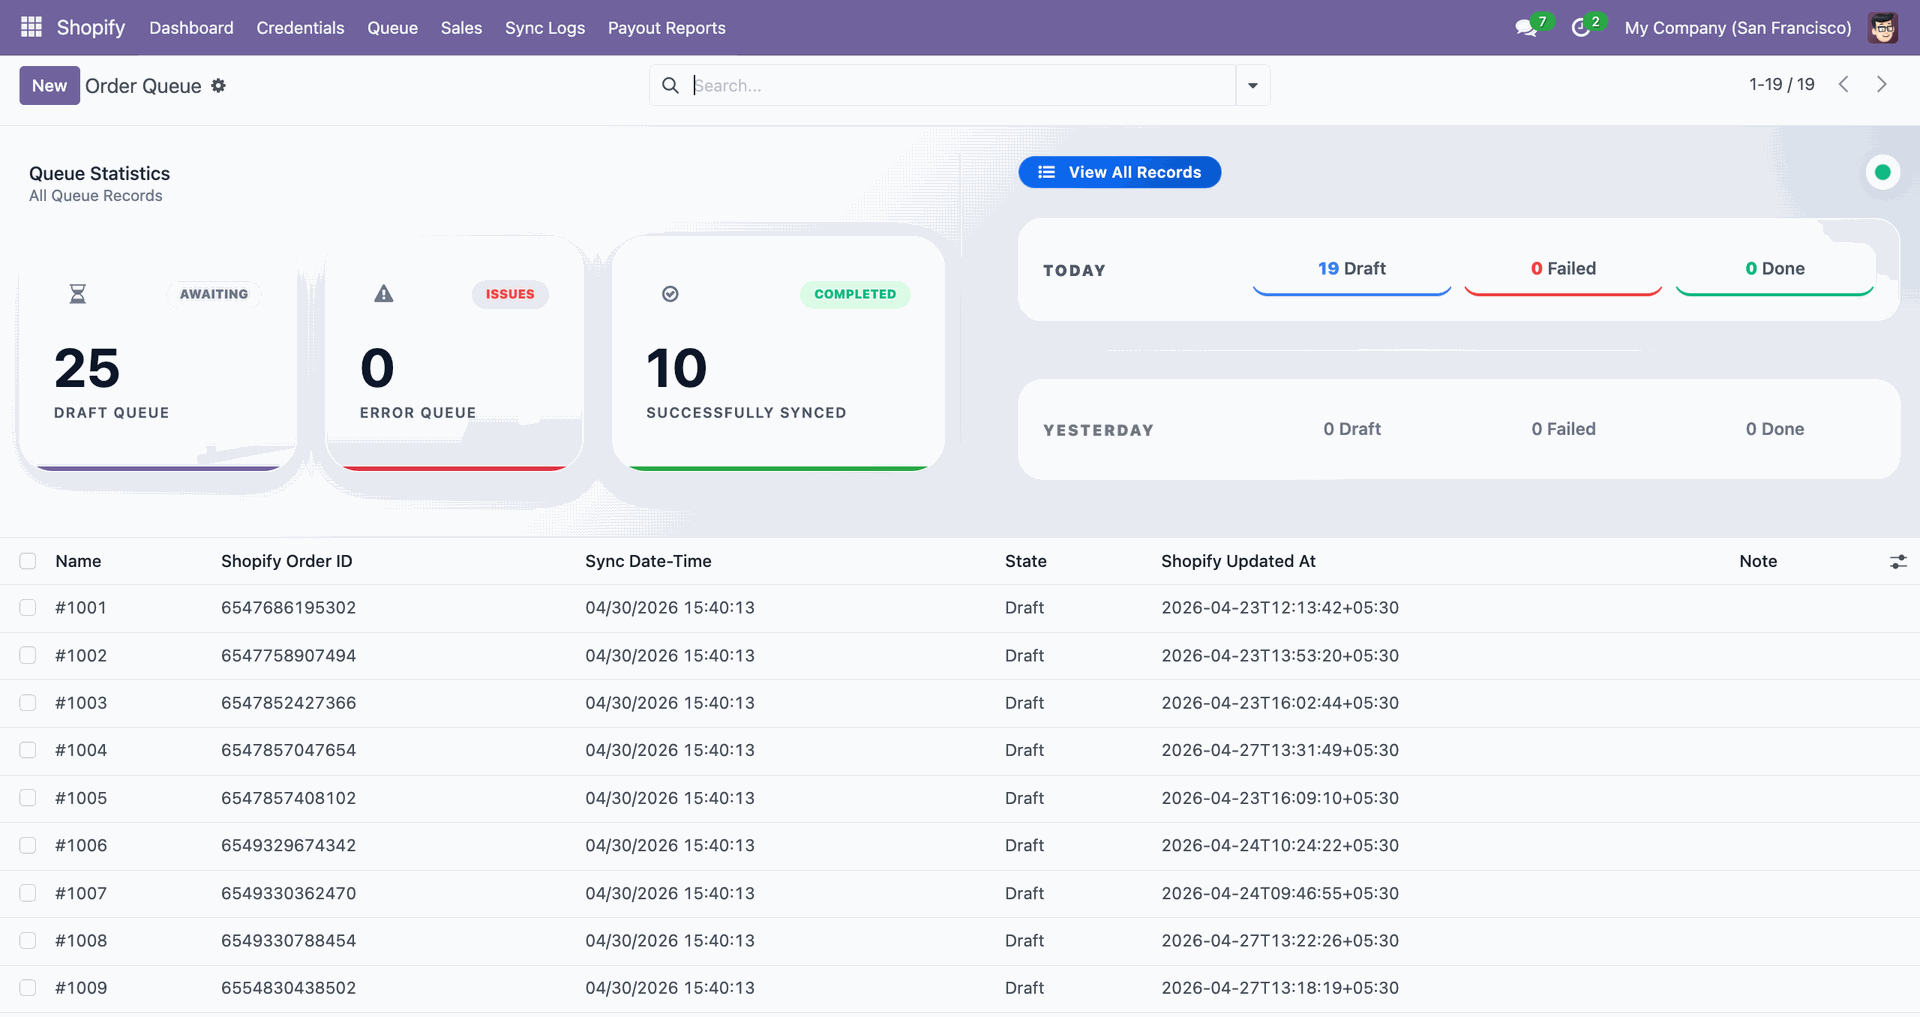
Use the Orders Queue shortcut to review staged order records after synchronization.
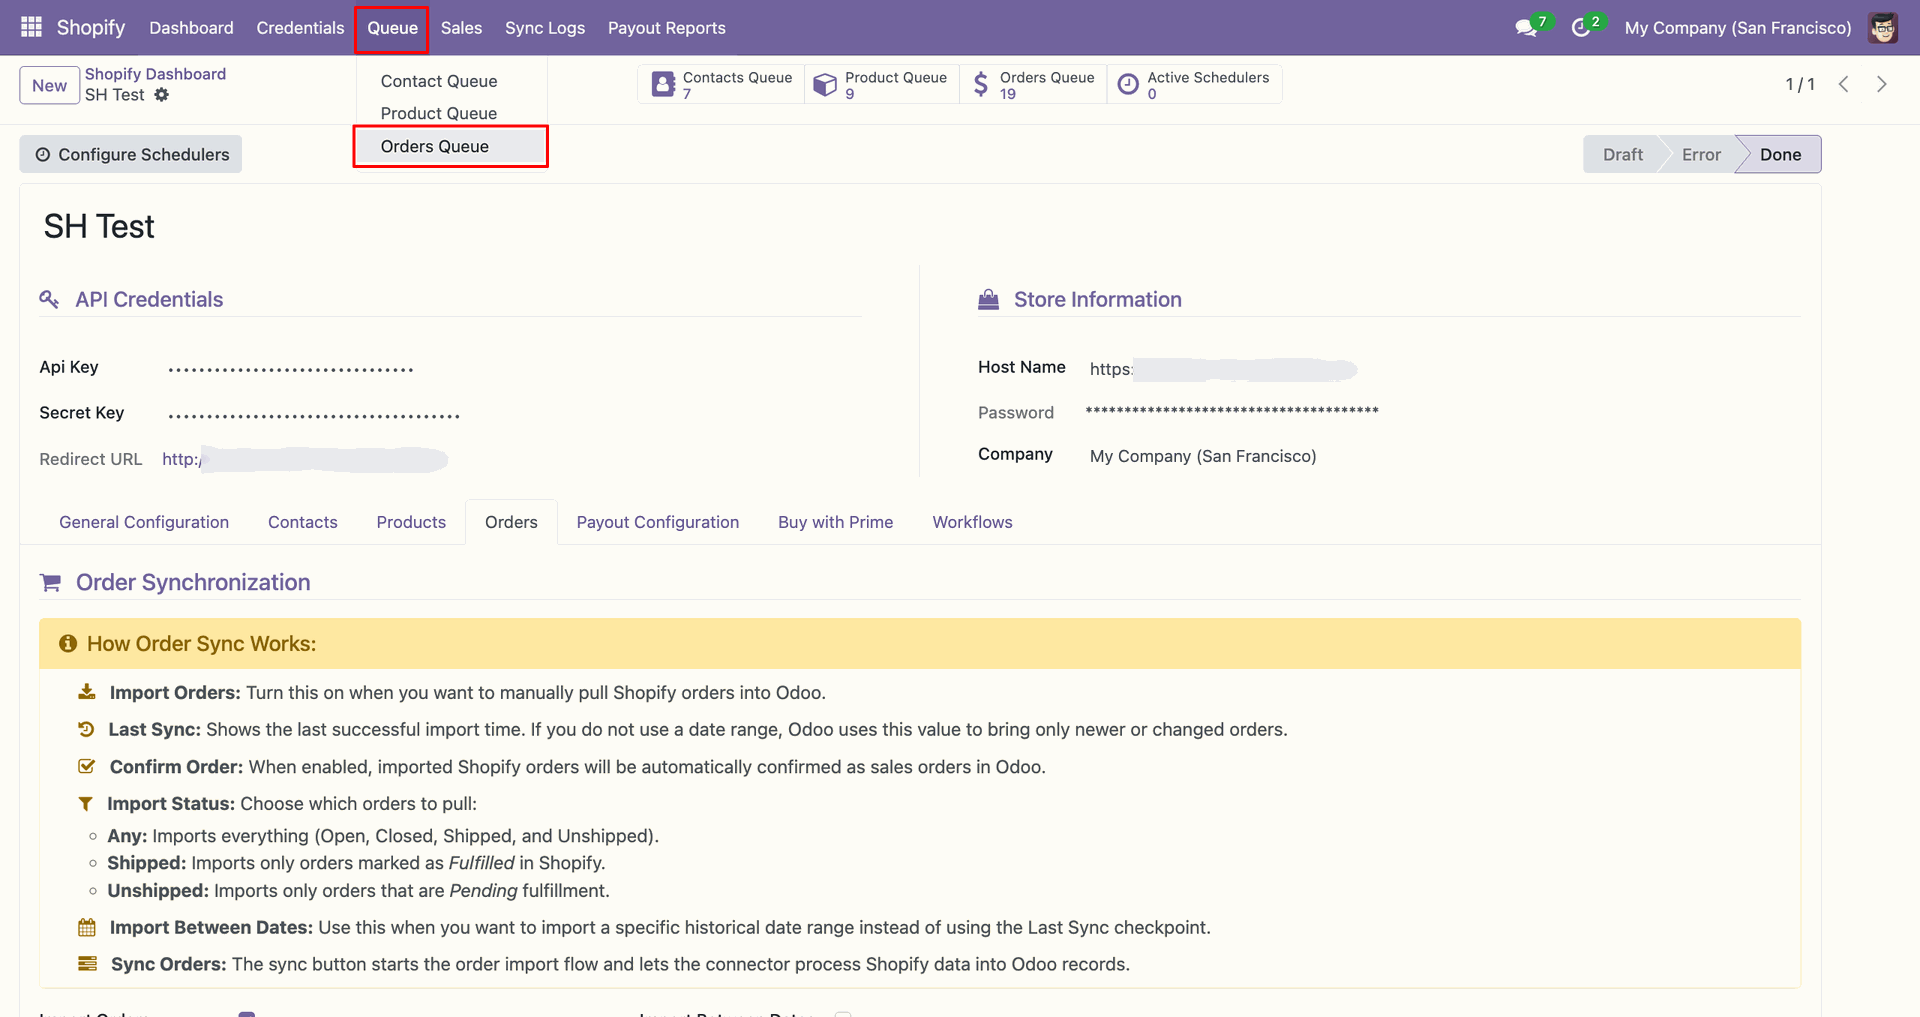
Open Orders Queue from the Queue menu to inspect imported order entries.
The Order Queue dashboard displays draft, completed, and failed order synchronization counts.
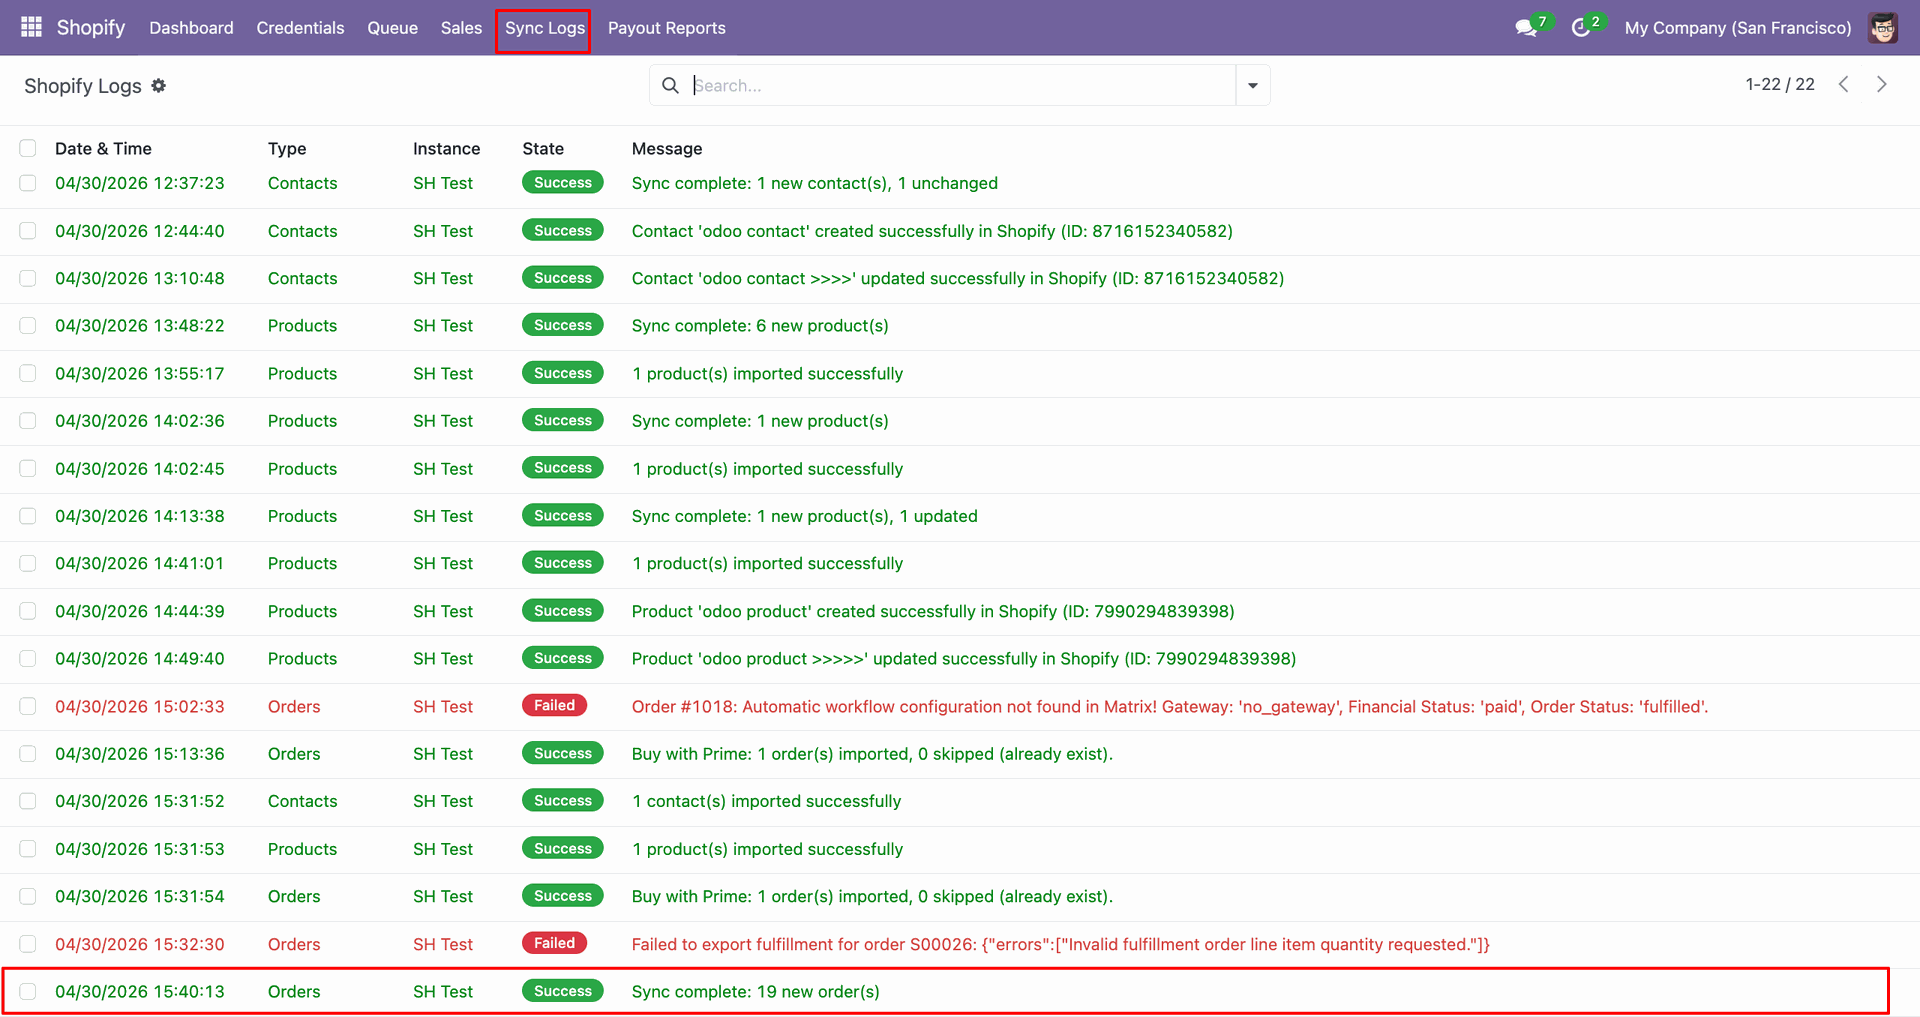
Check Sync Logs to confirm the order fetch completed with new records.
Select the queued order line and click Manually Import to process it.

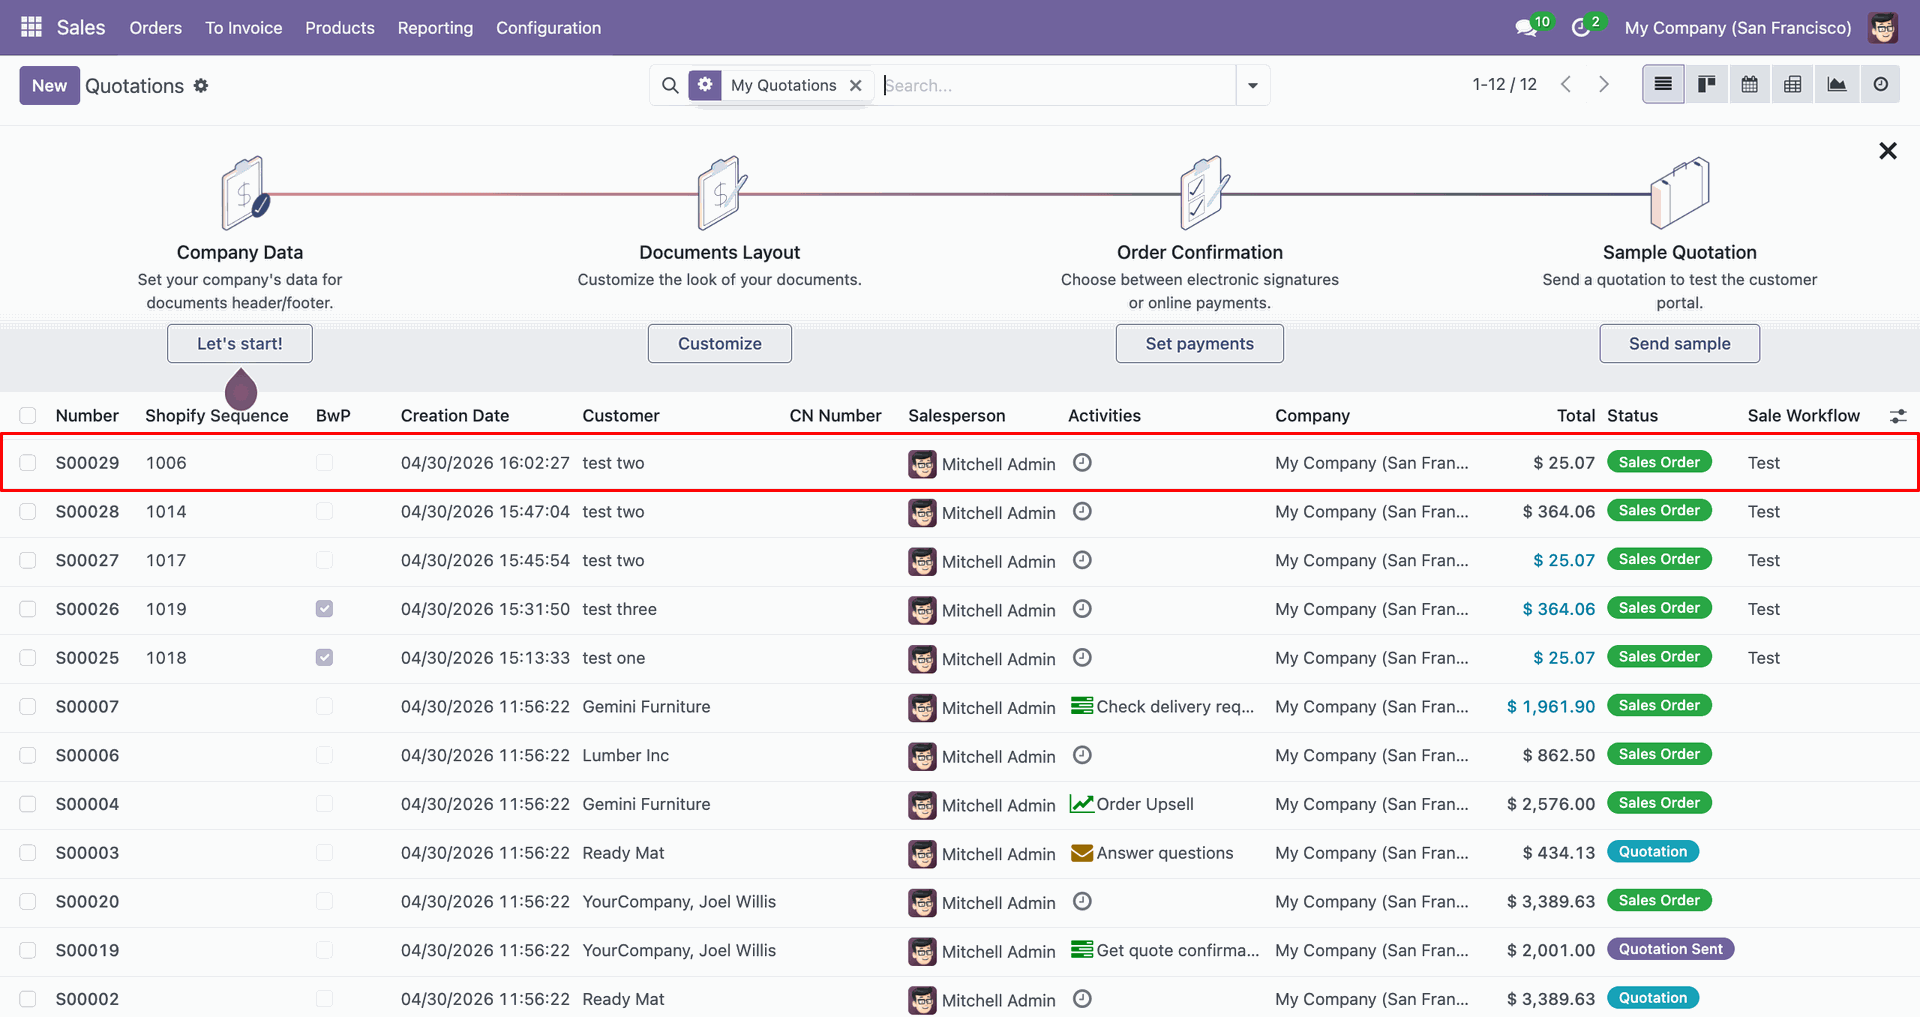
Review the imported sales order row in Odoo after queue processing completes.
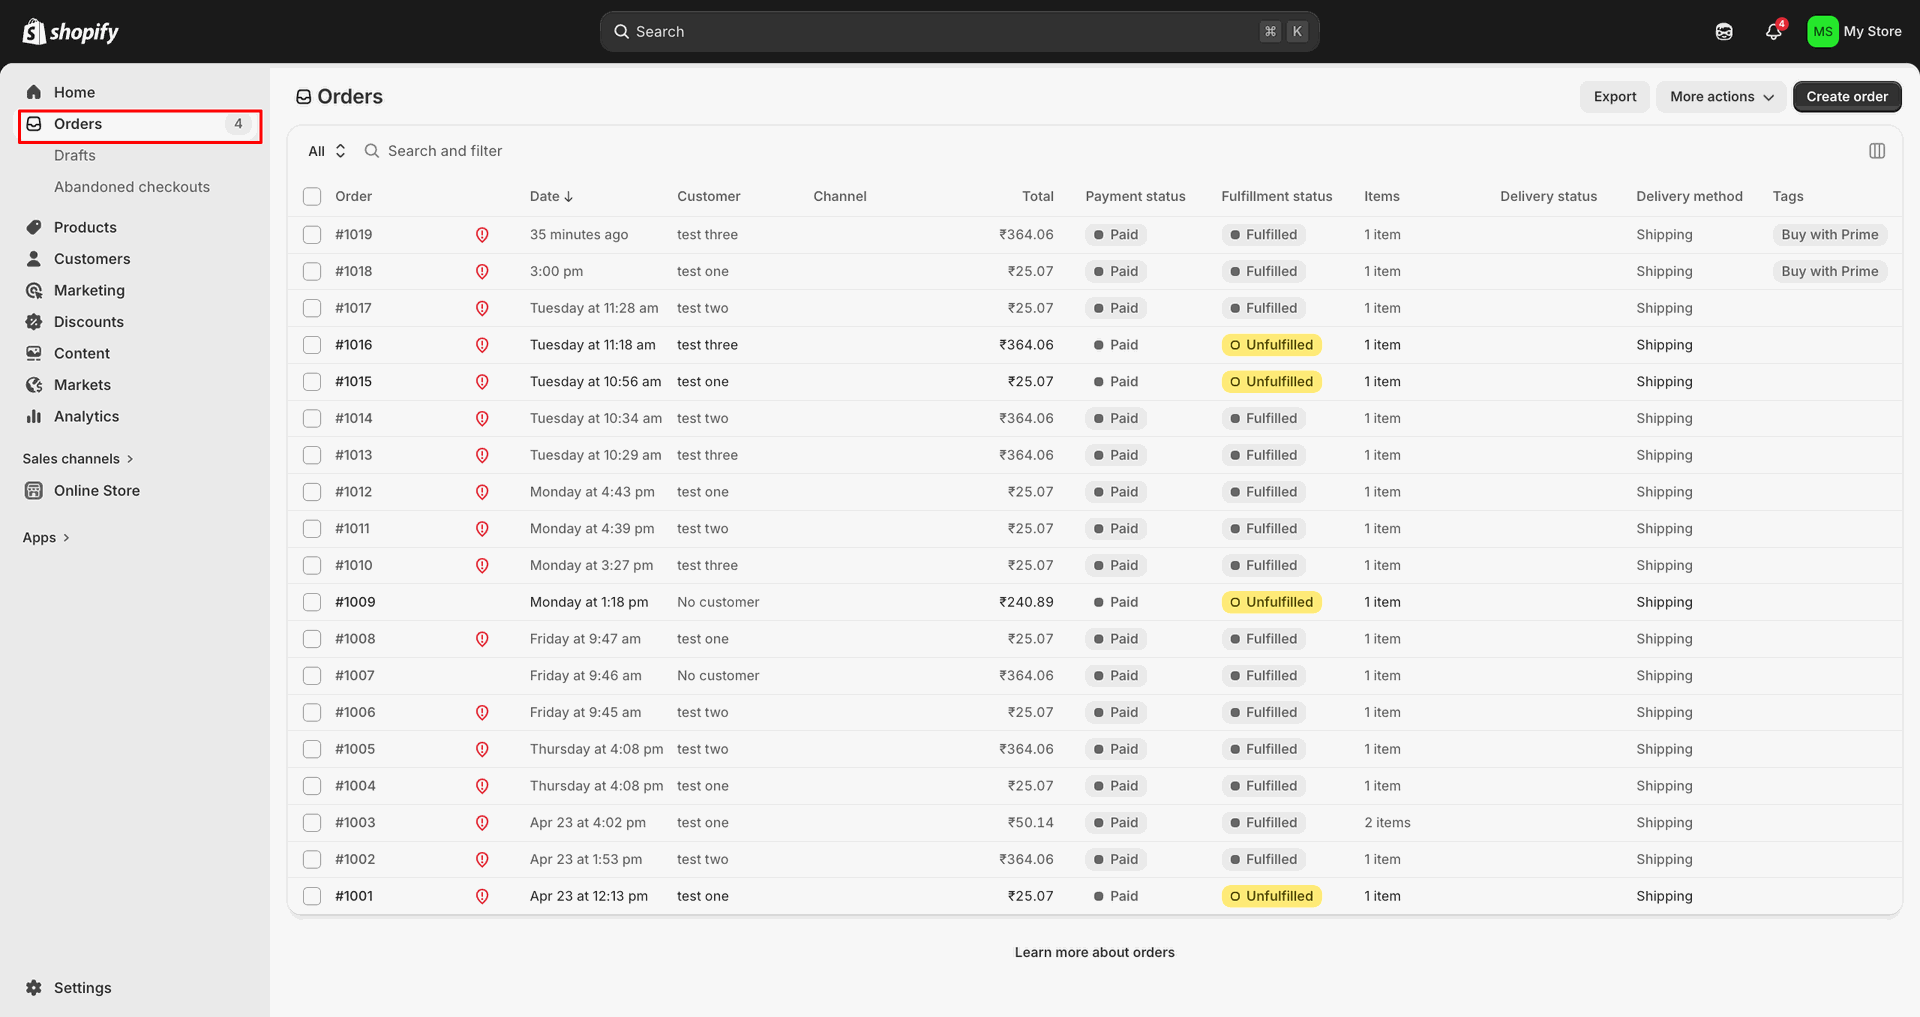
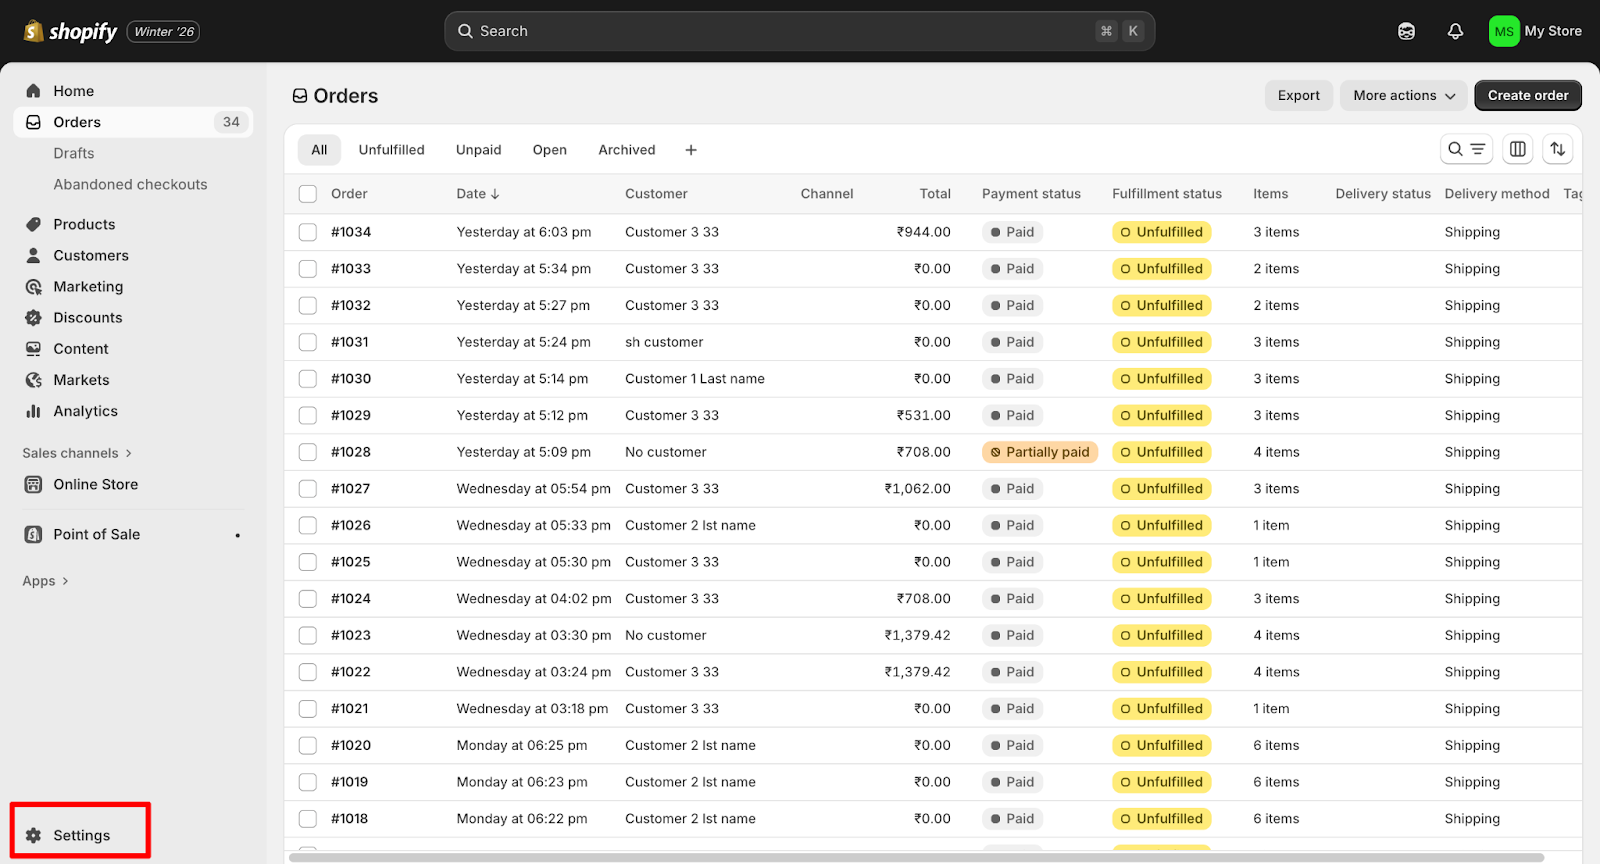
Open Orders in Shopify Admin to compare the source order records.
Open Settings in Shopify Admin to access webhook and notification options.
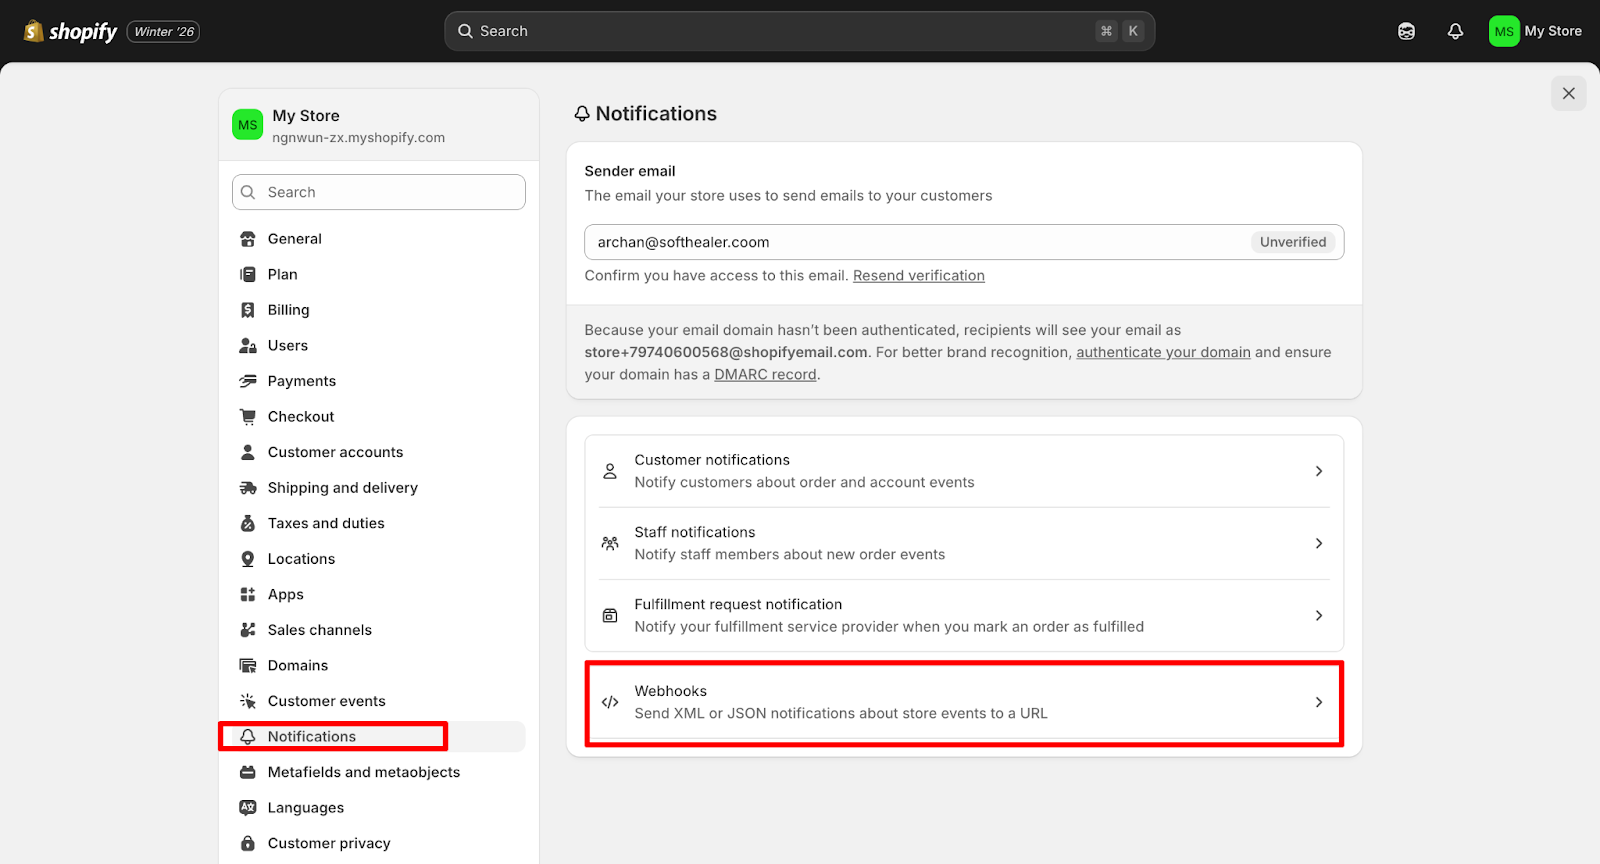
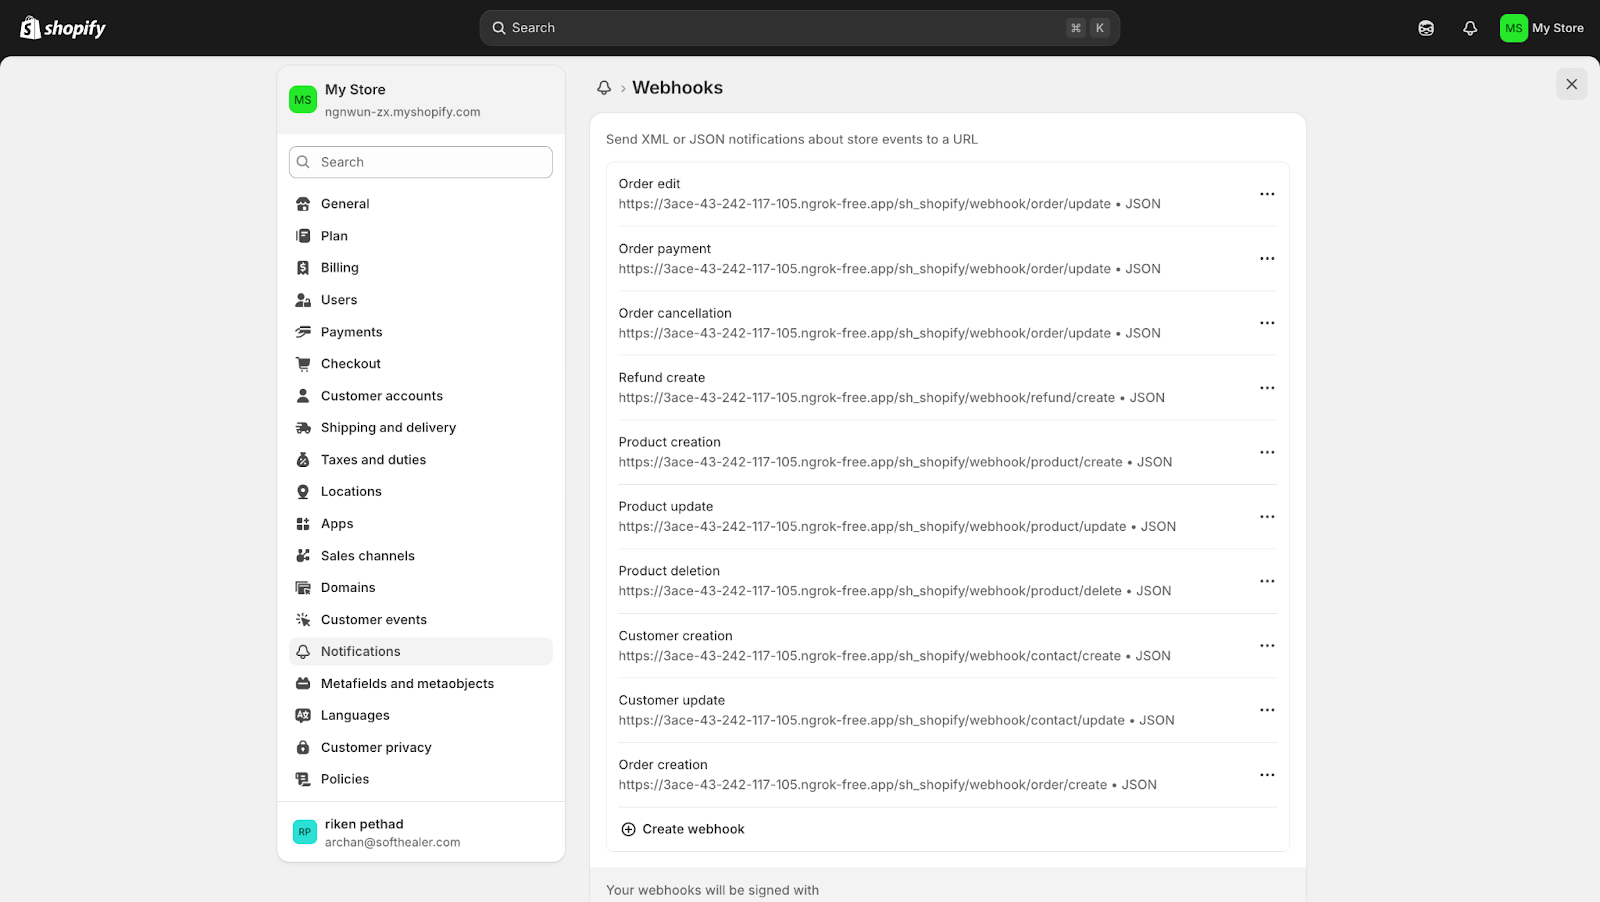
Open Notifications and select Webhooks to manage store event subscriptions.
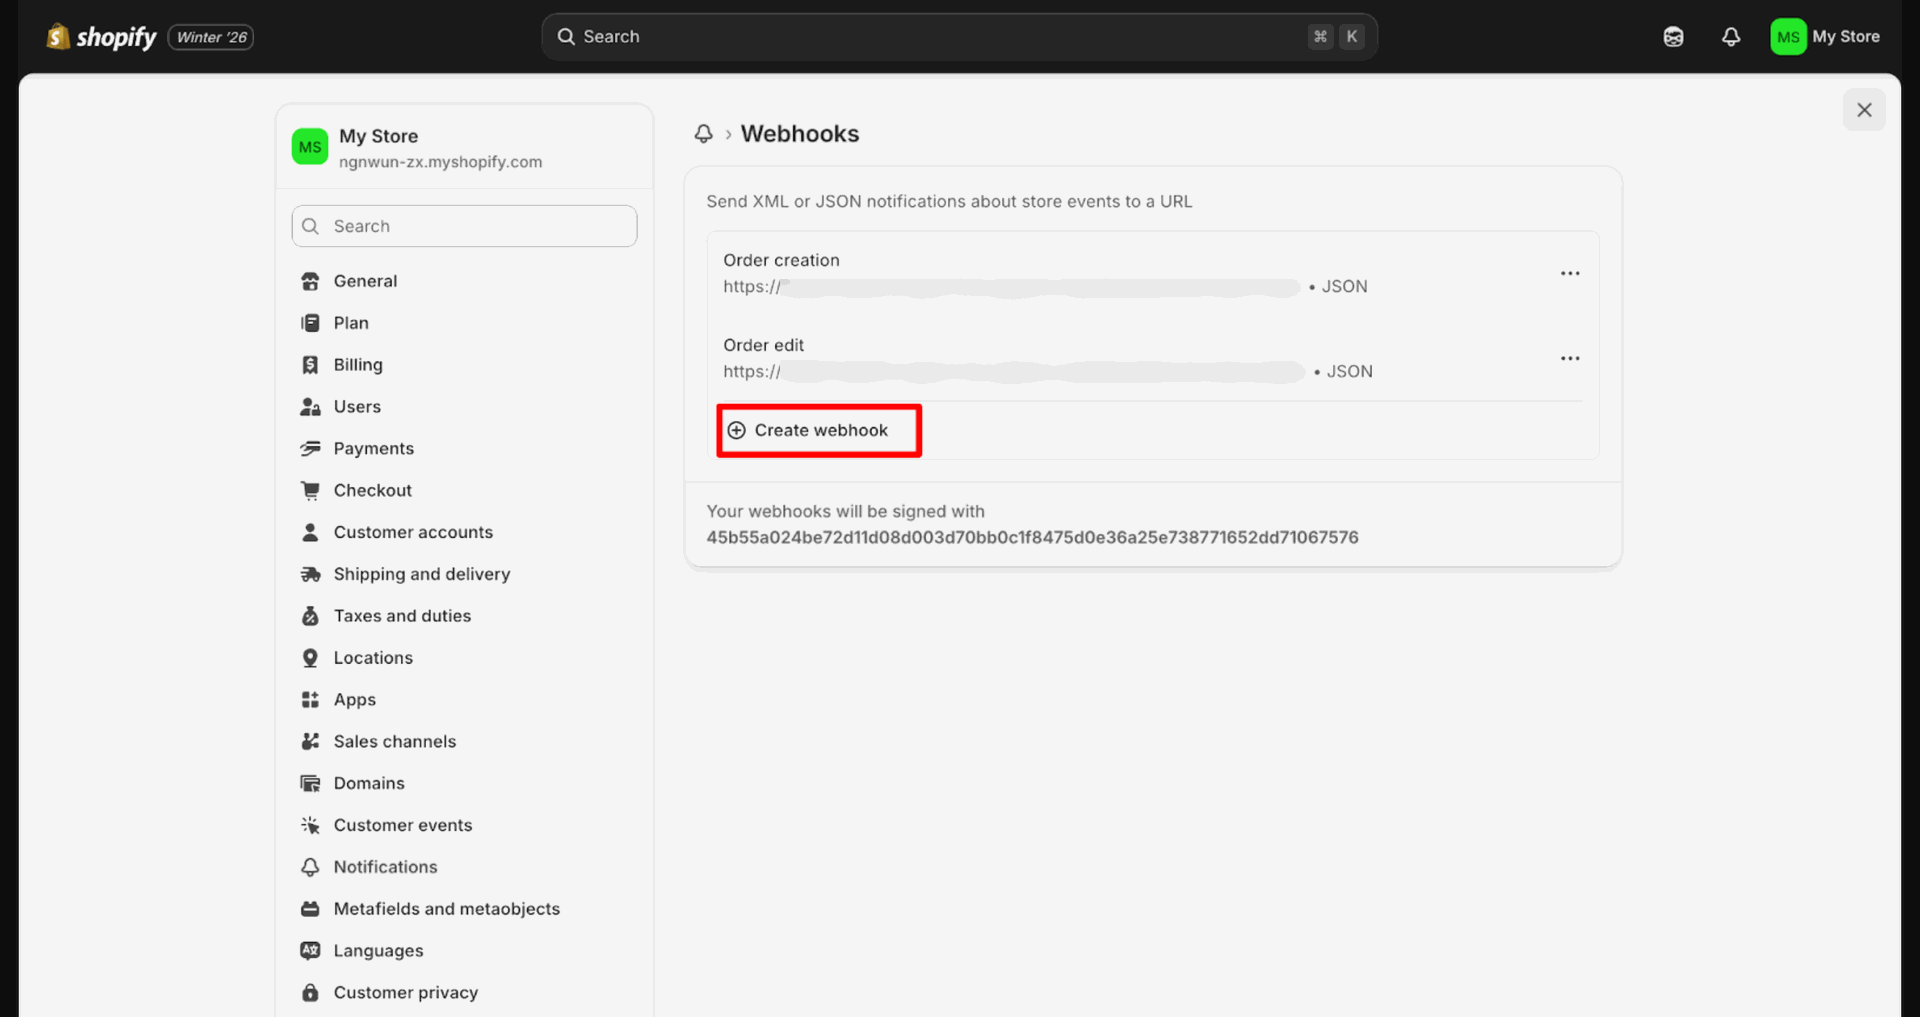
Click Create webhook to add a new event subscription endpoint.
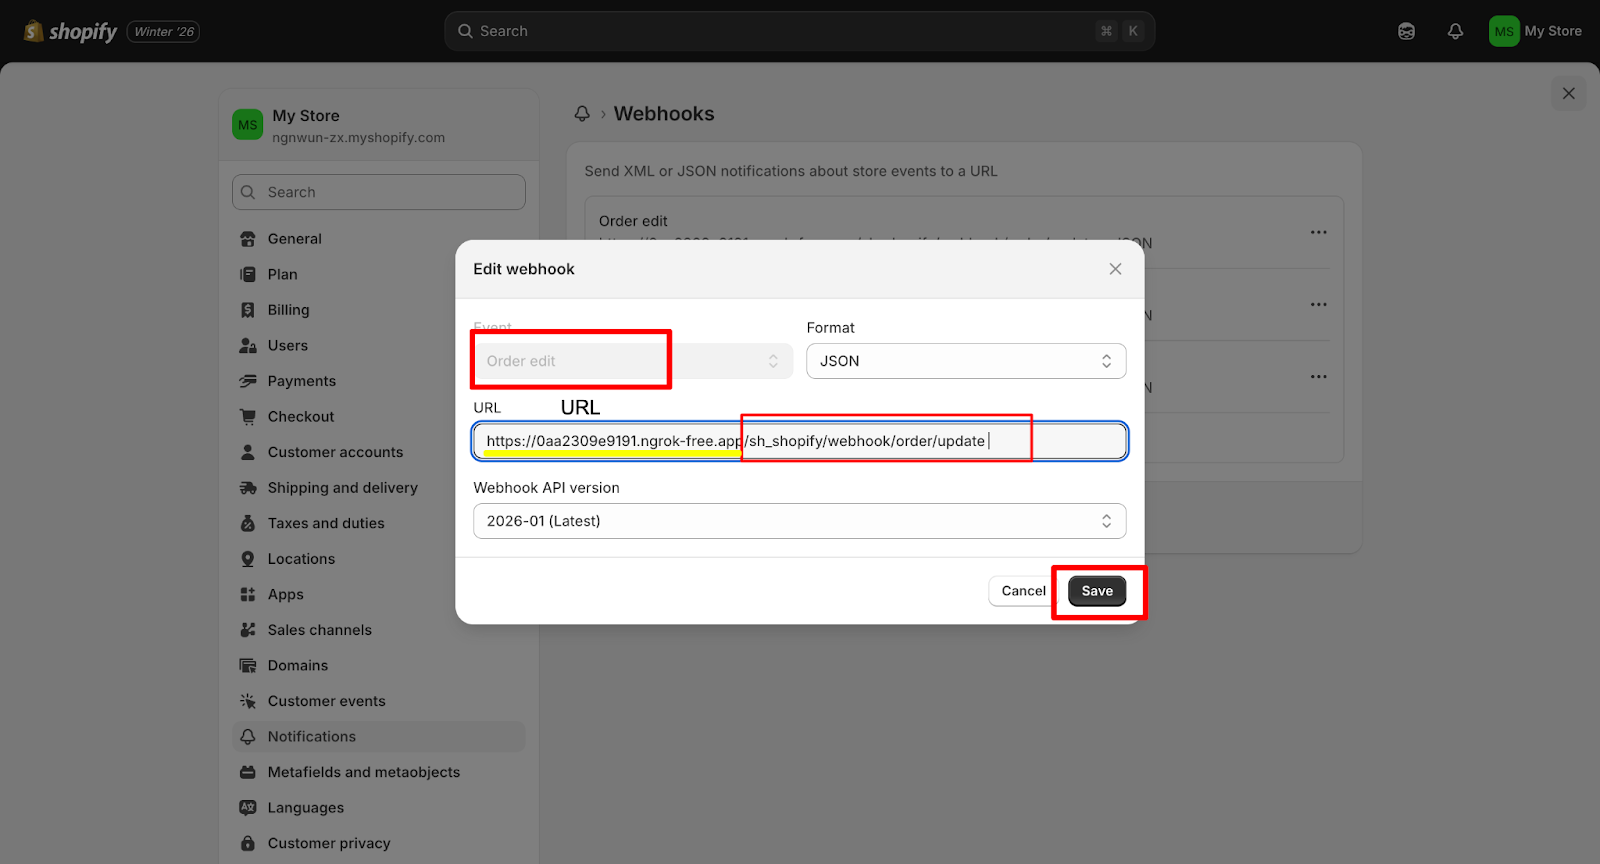
Select the event, enter the webhook URL, and click Save.
Review the Webhooks list to confirm each event URL is configured.
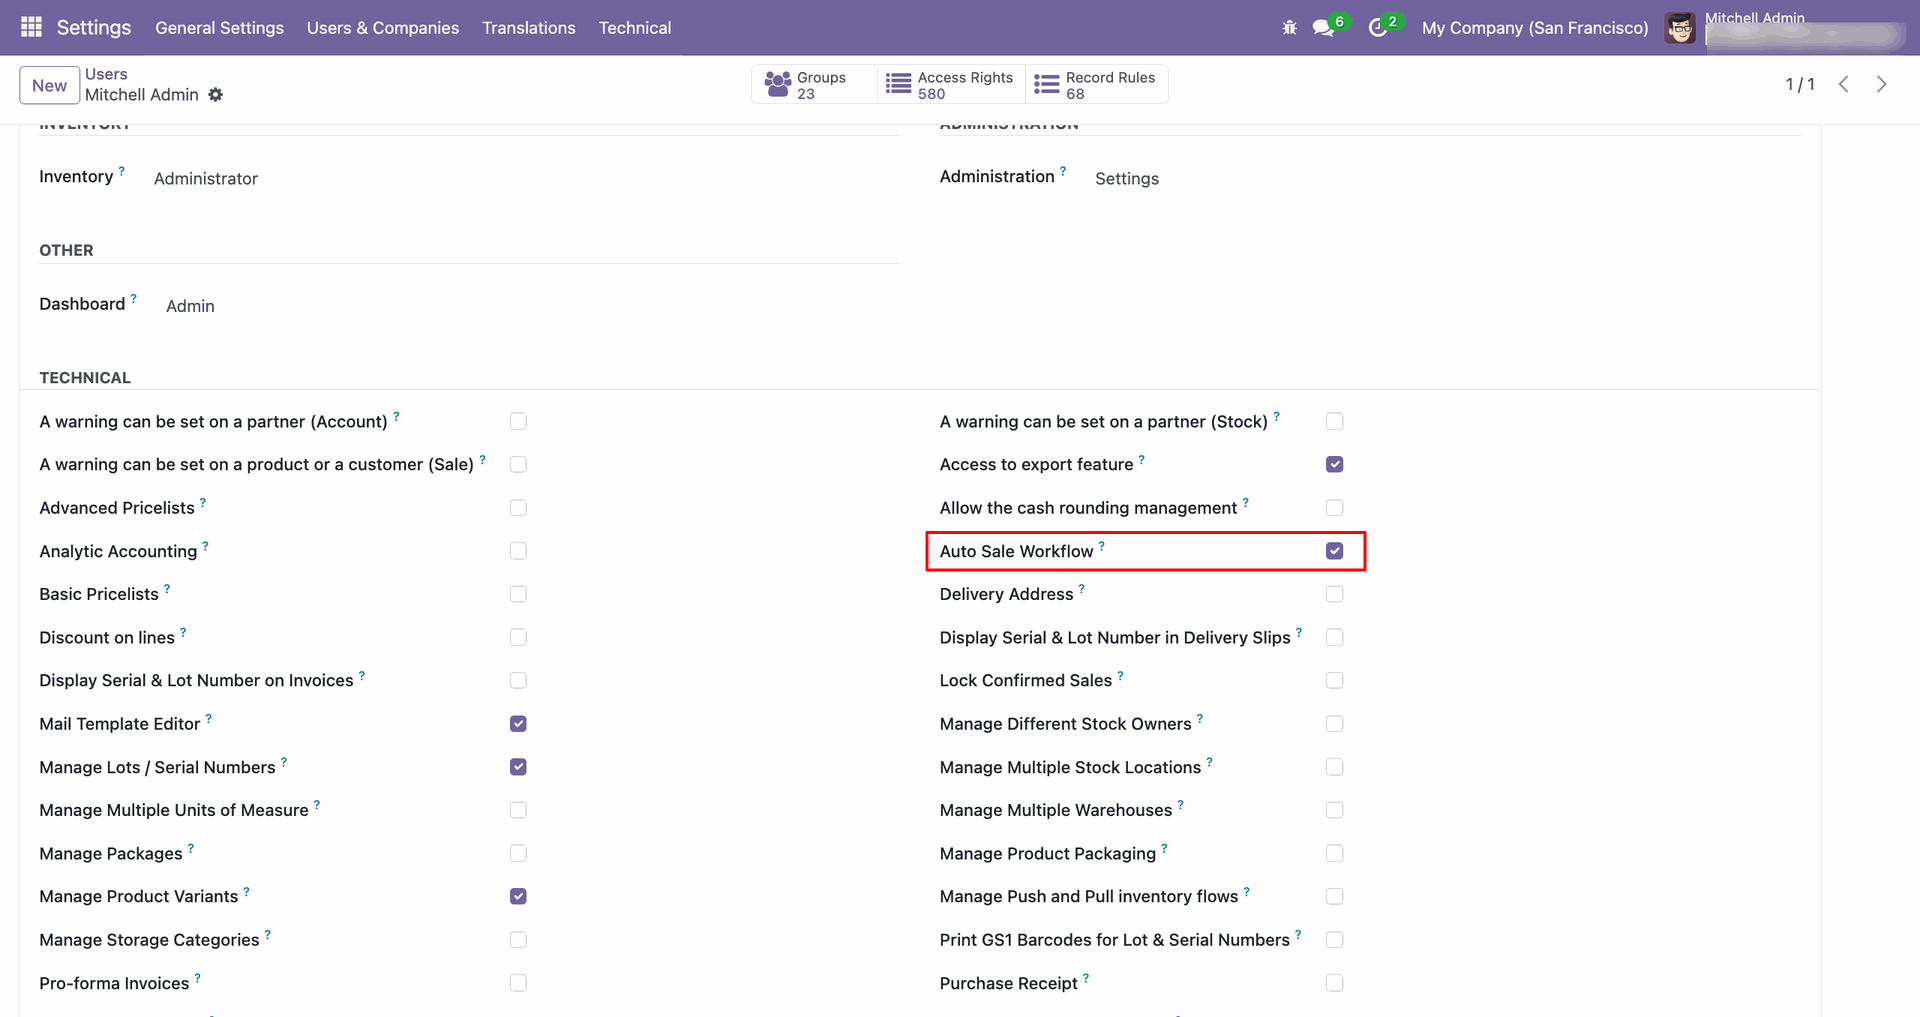
Enable the Auto Sale Workflow access right for the required user.
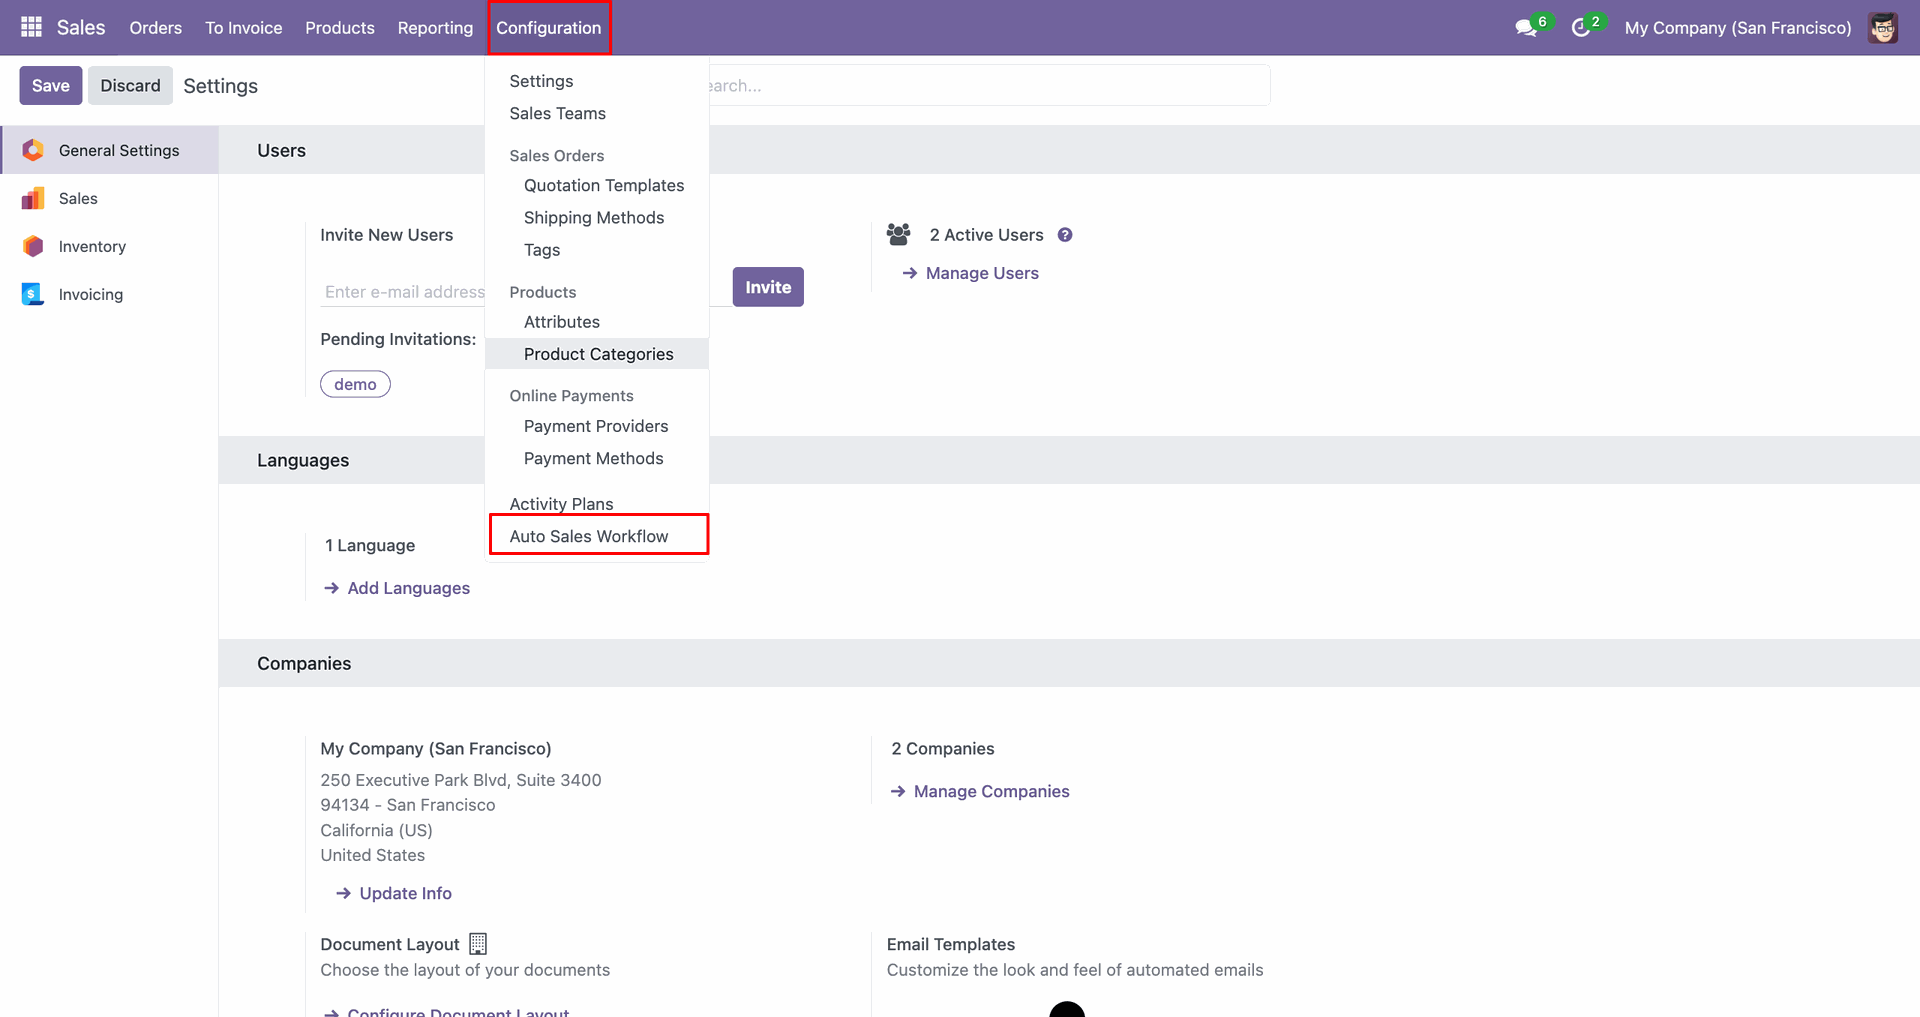
Open Auto Sales Workflow from Configuration to manage sales automation rules.
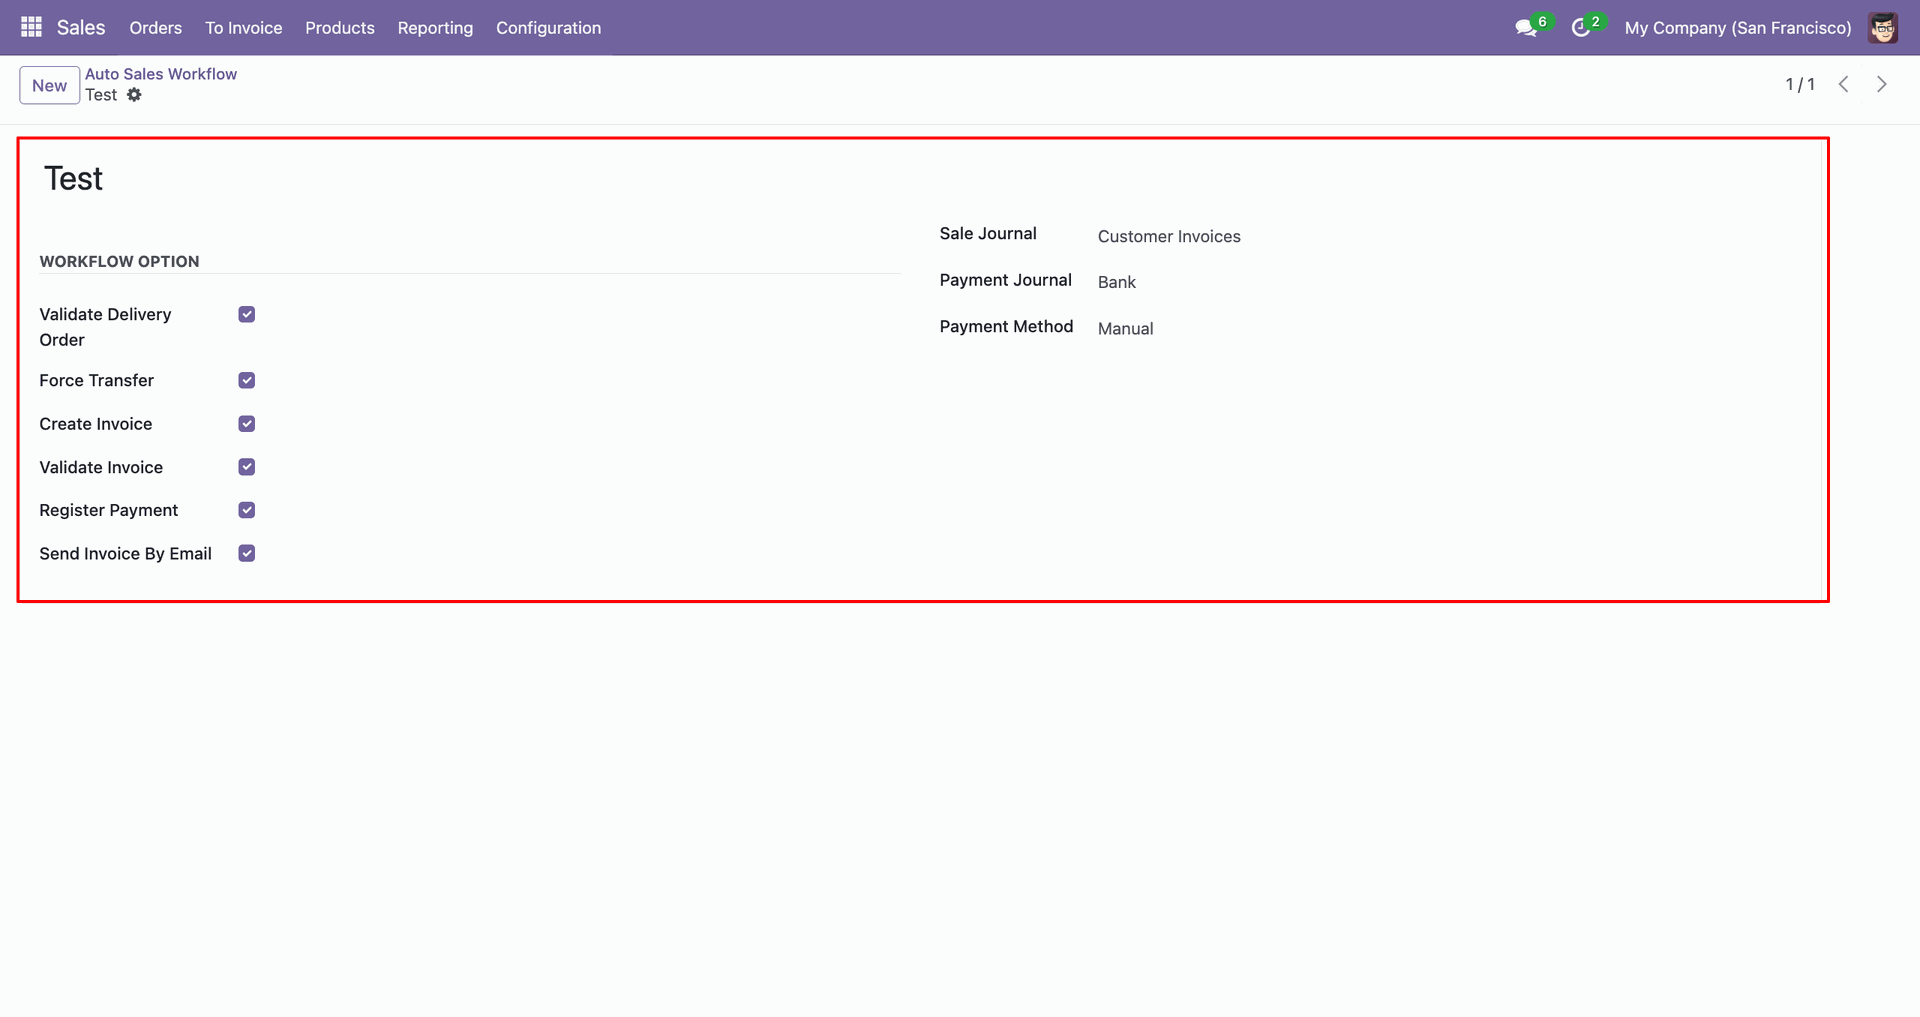
Review the Auto Sales Workflow settings and enabled actions for this rule.
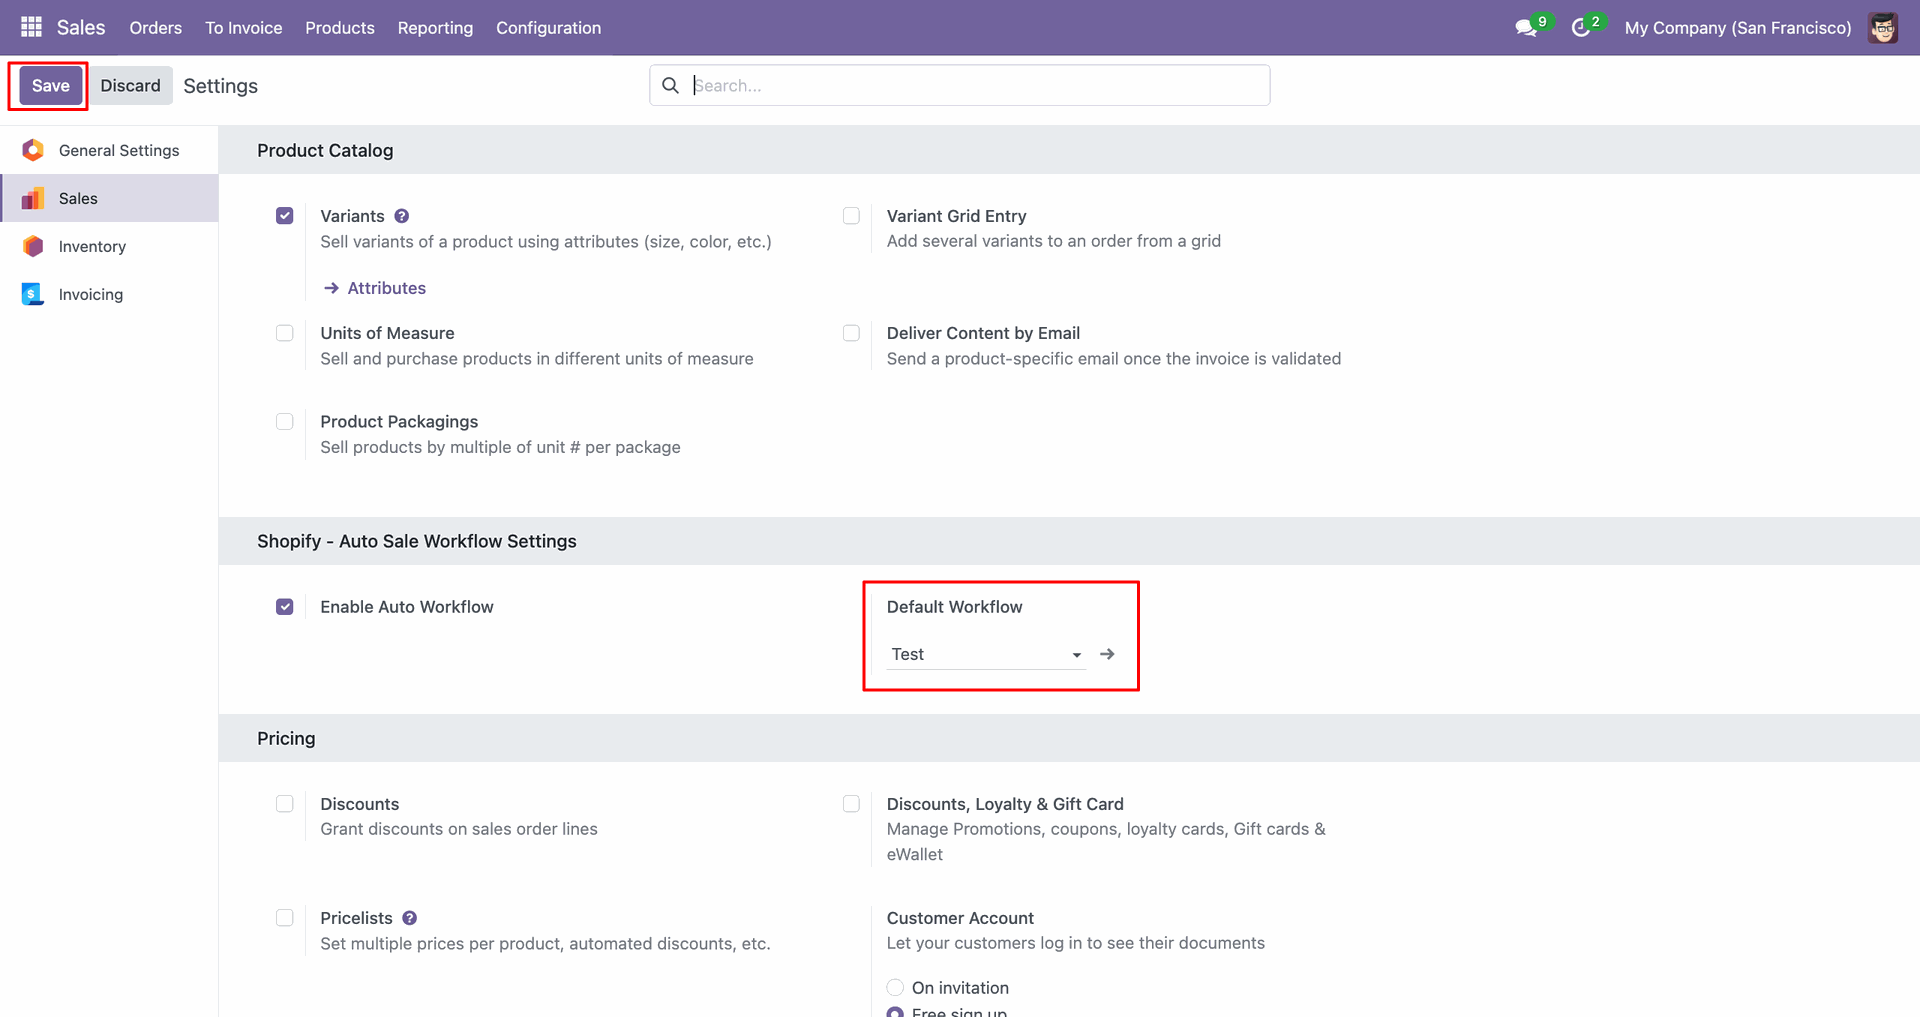
Set the Default Workflow in Settings to apply automatic sales processing.
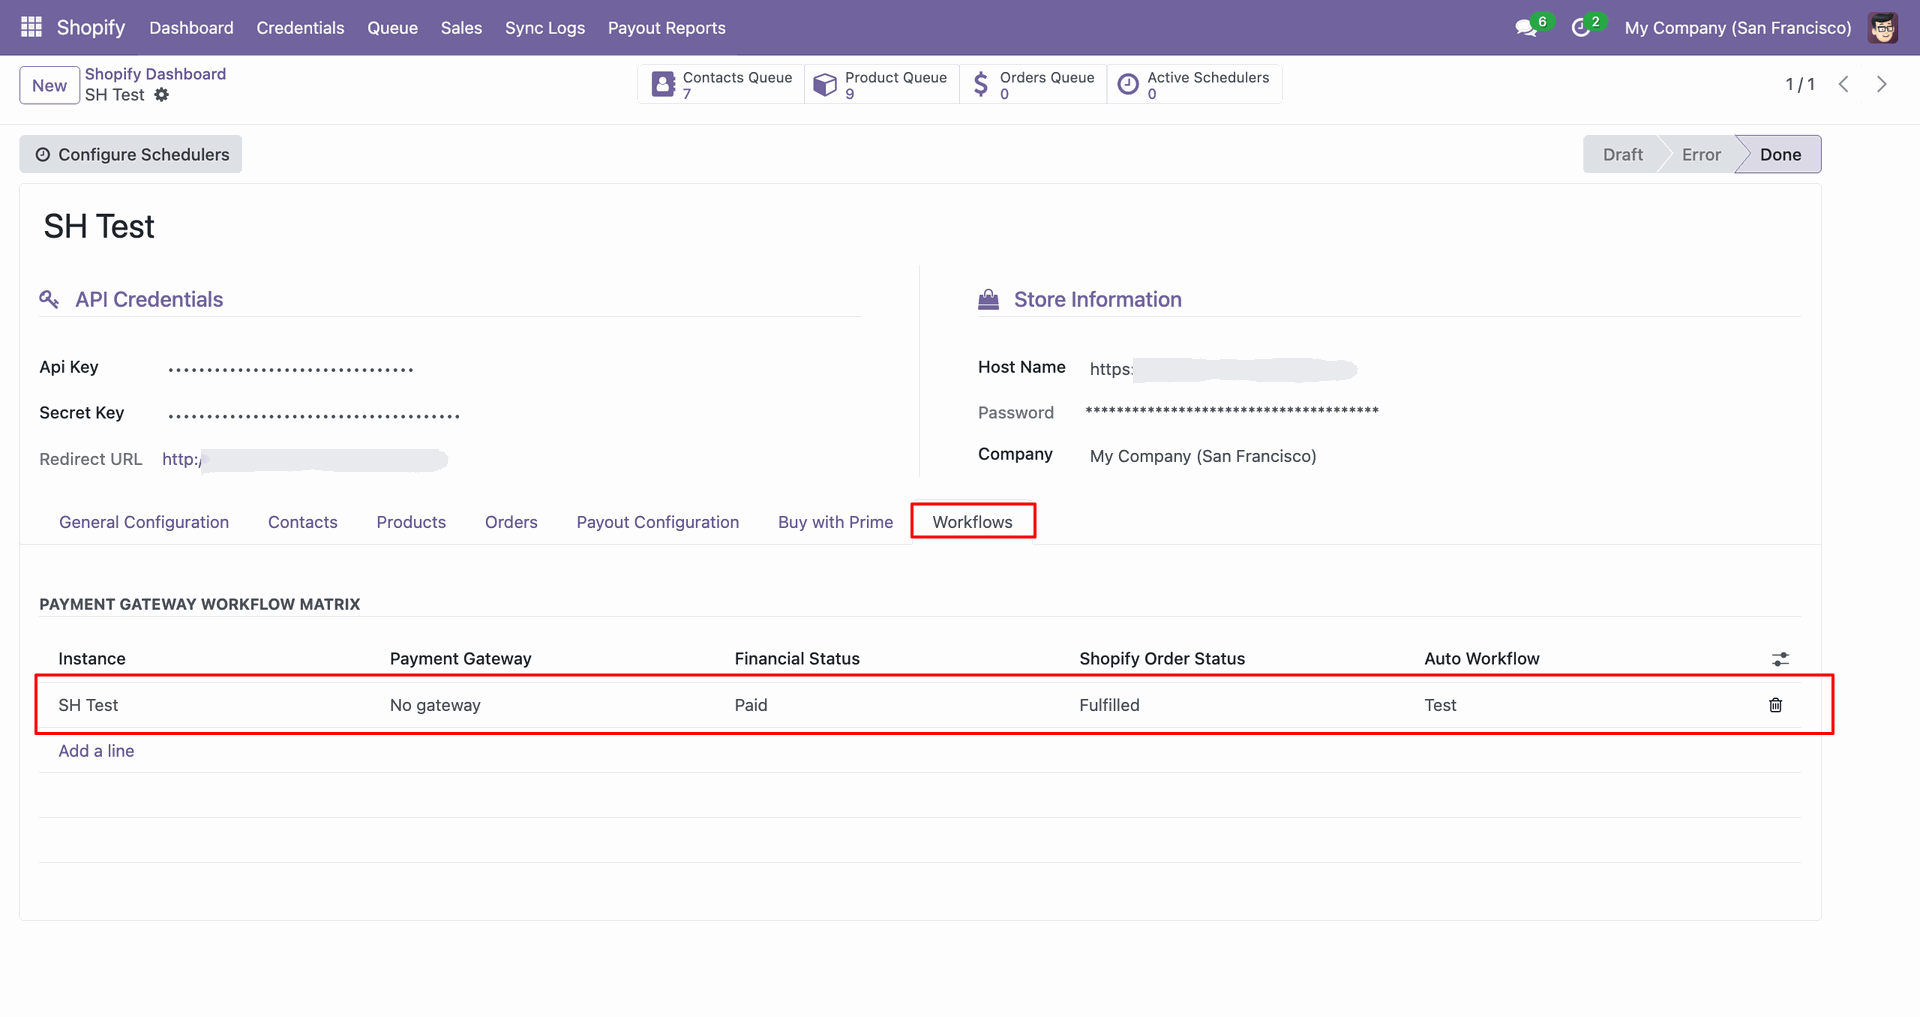
Review the workflow matrix row used for Buy with Prime order processing.
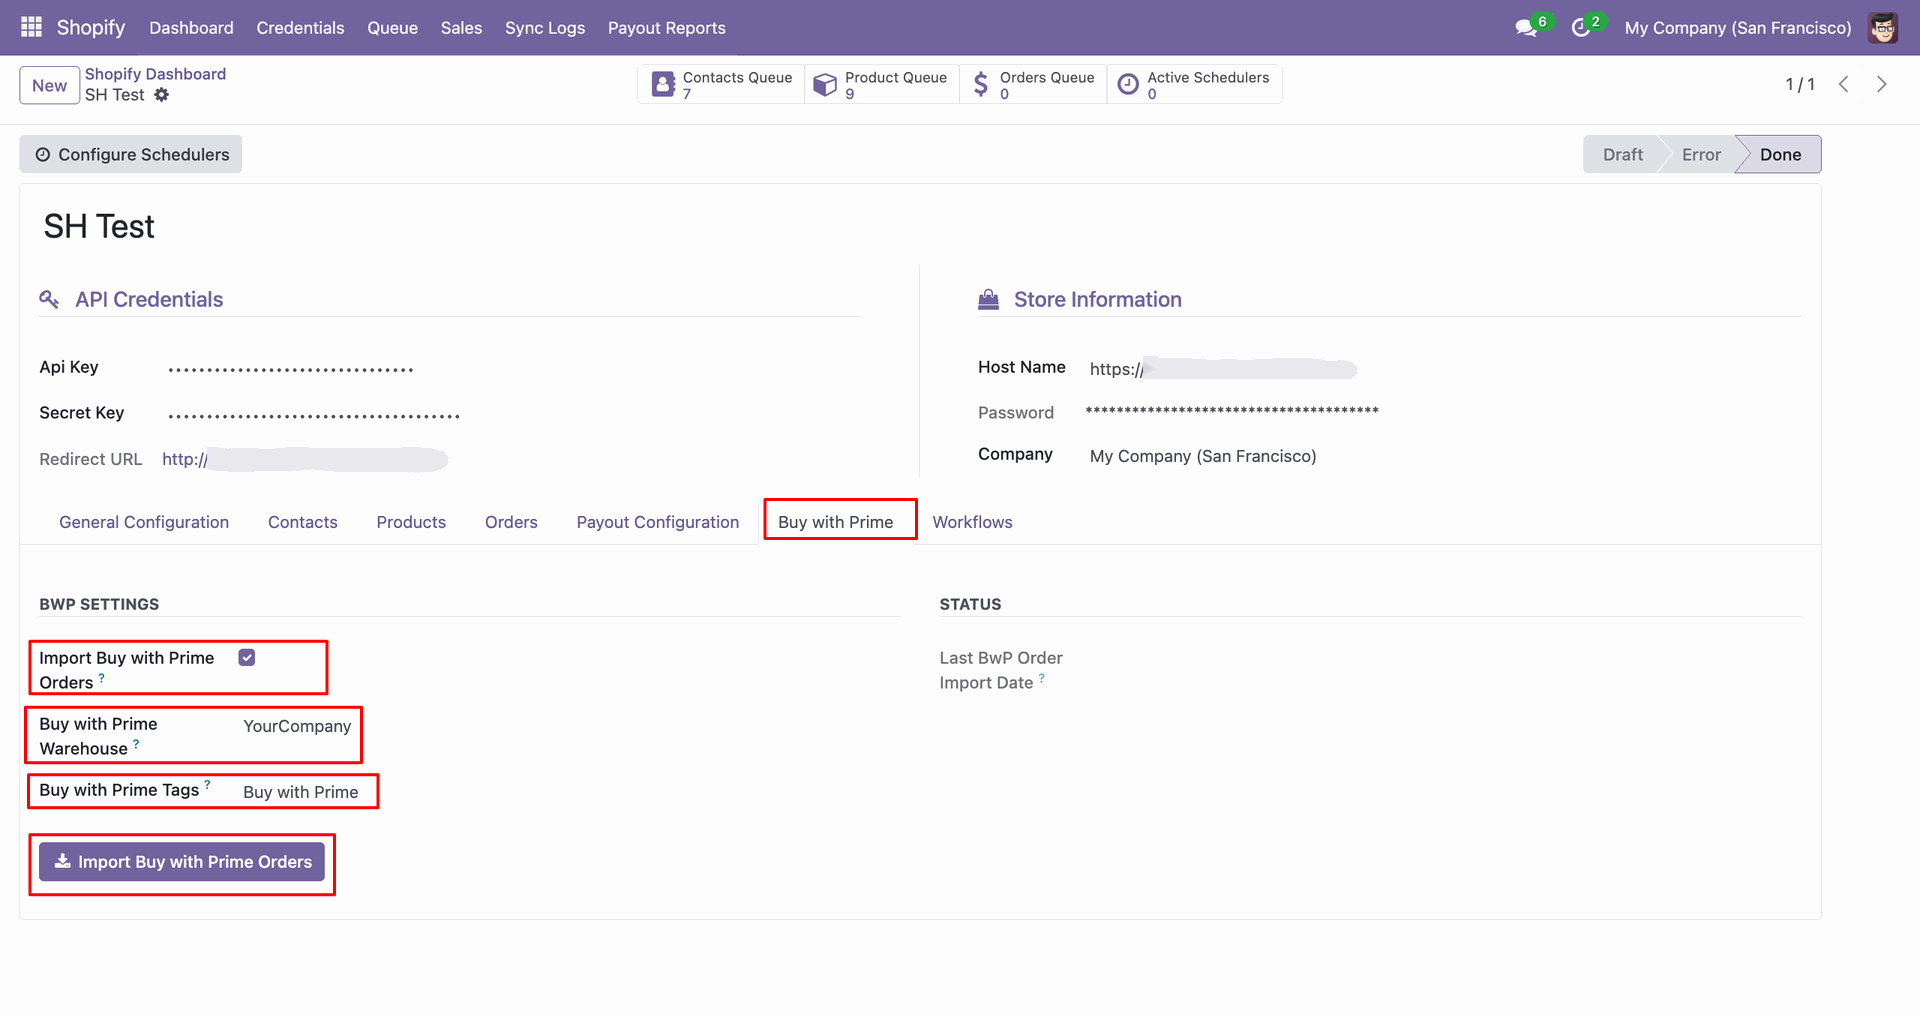
Open the Buy with Prime tab and click Import Buy with Prime Orders.
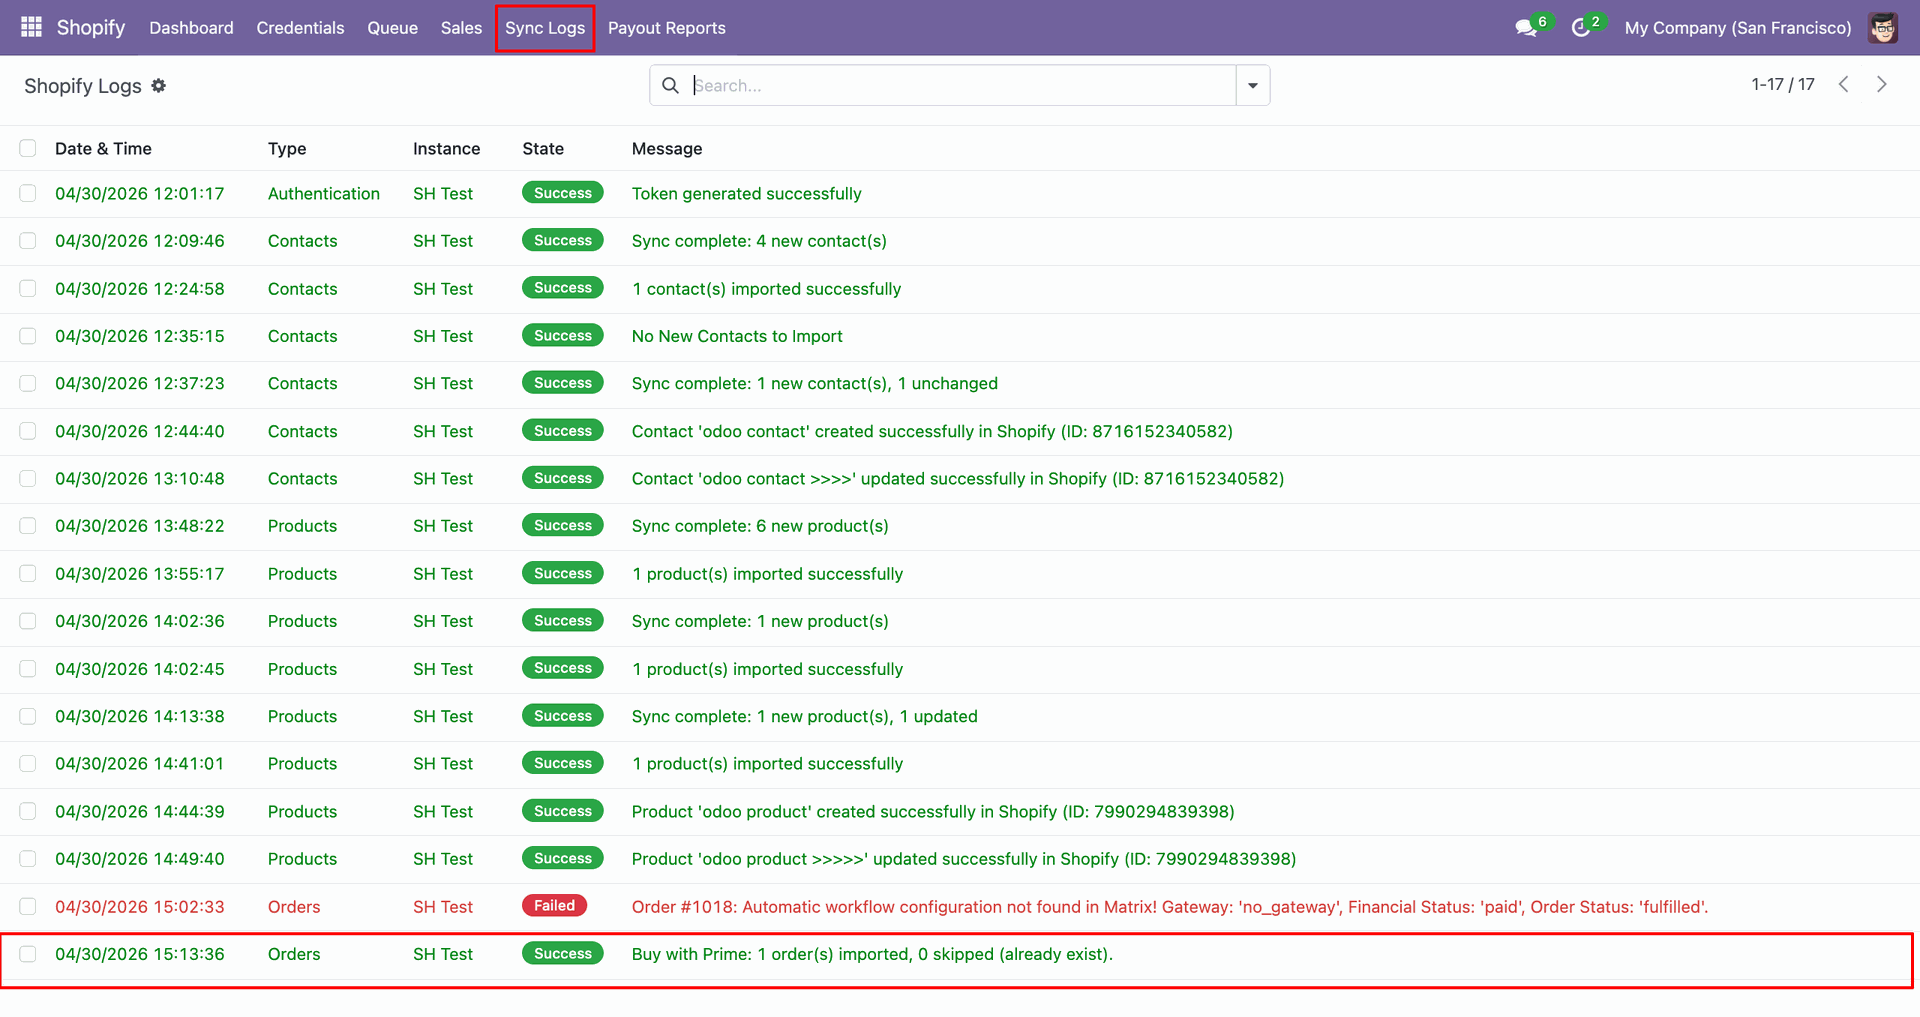
Check Sync Logs to confirm the Buy with Prime order import result.
Review the imported Buy with Prime sales order row in Odoo.
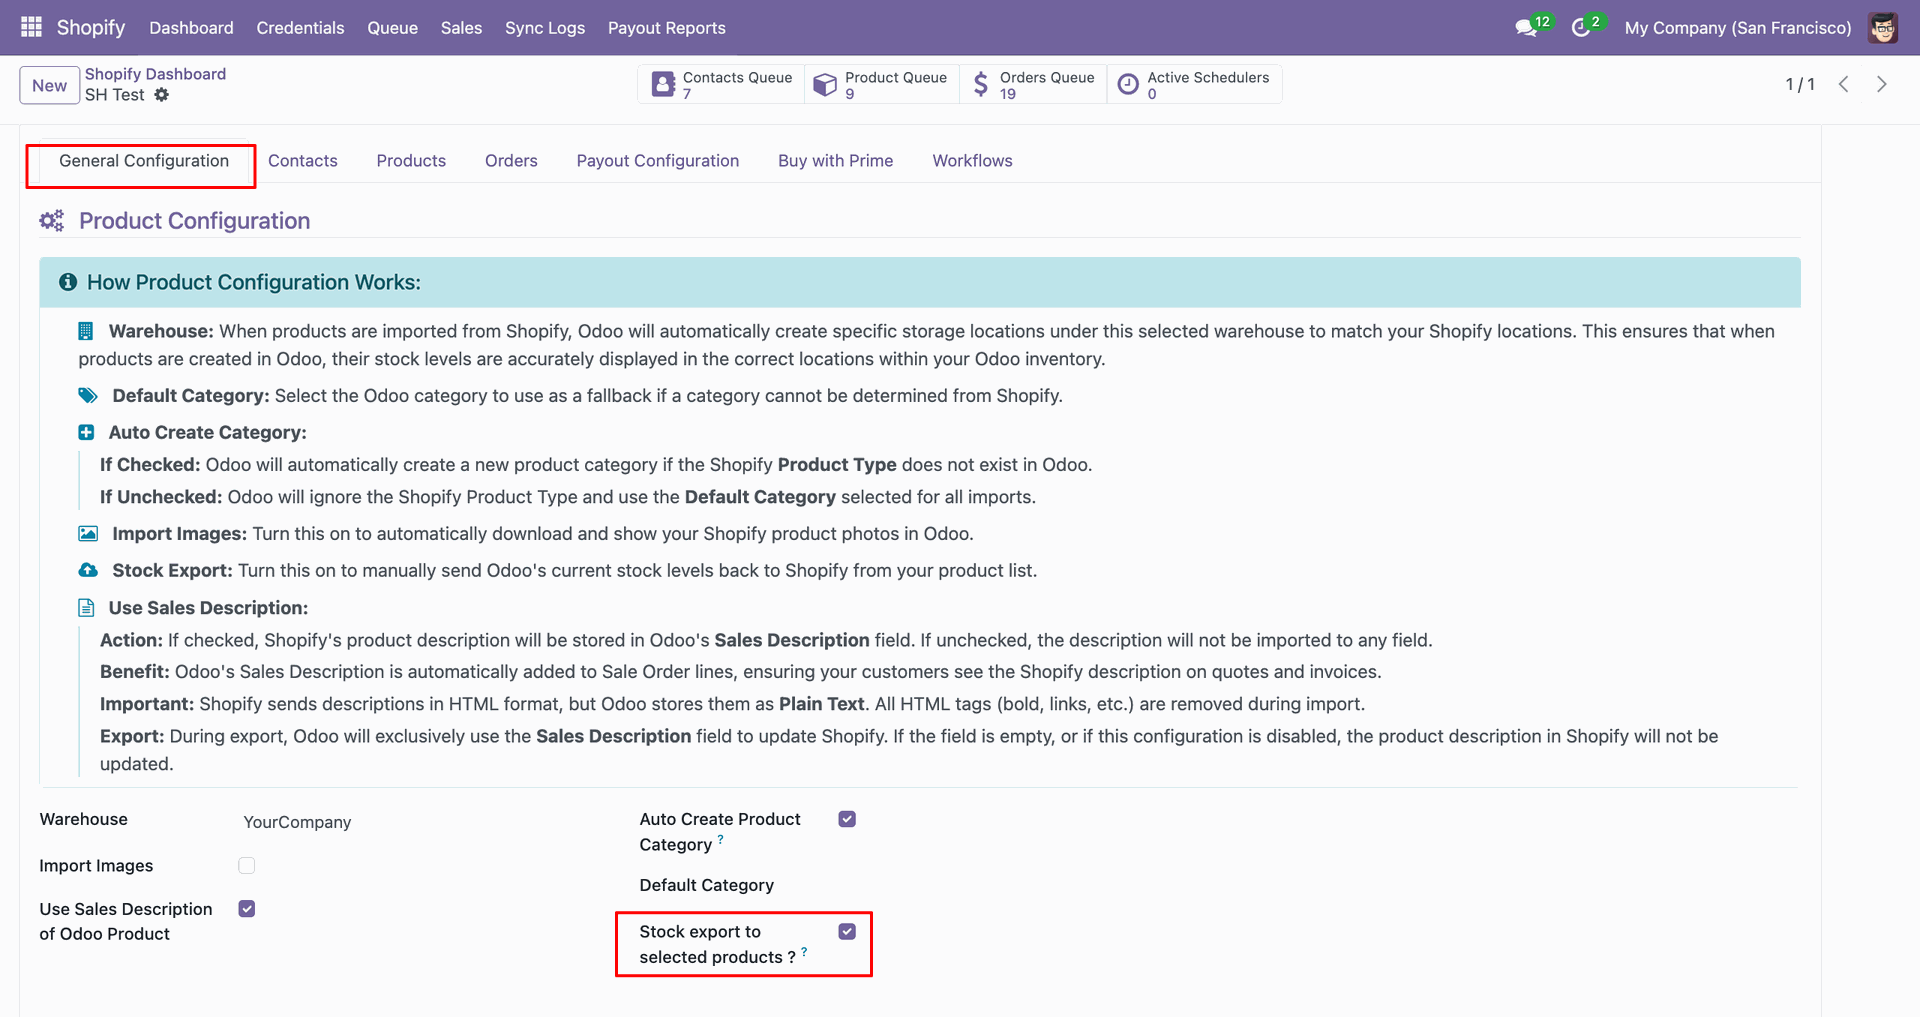
Enable Stock export to selected products from the Products configuration tab.
Open the Shopify product row to review its current inventory before export.
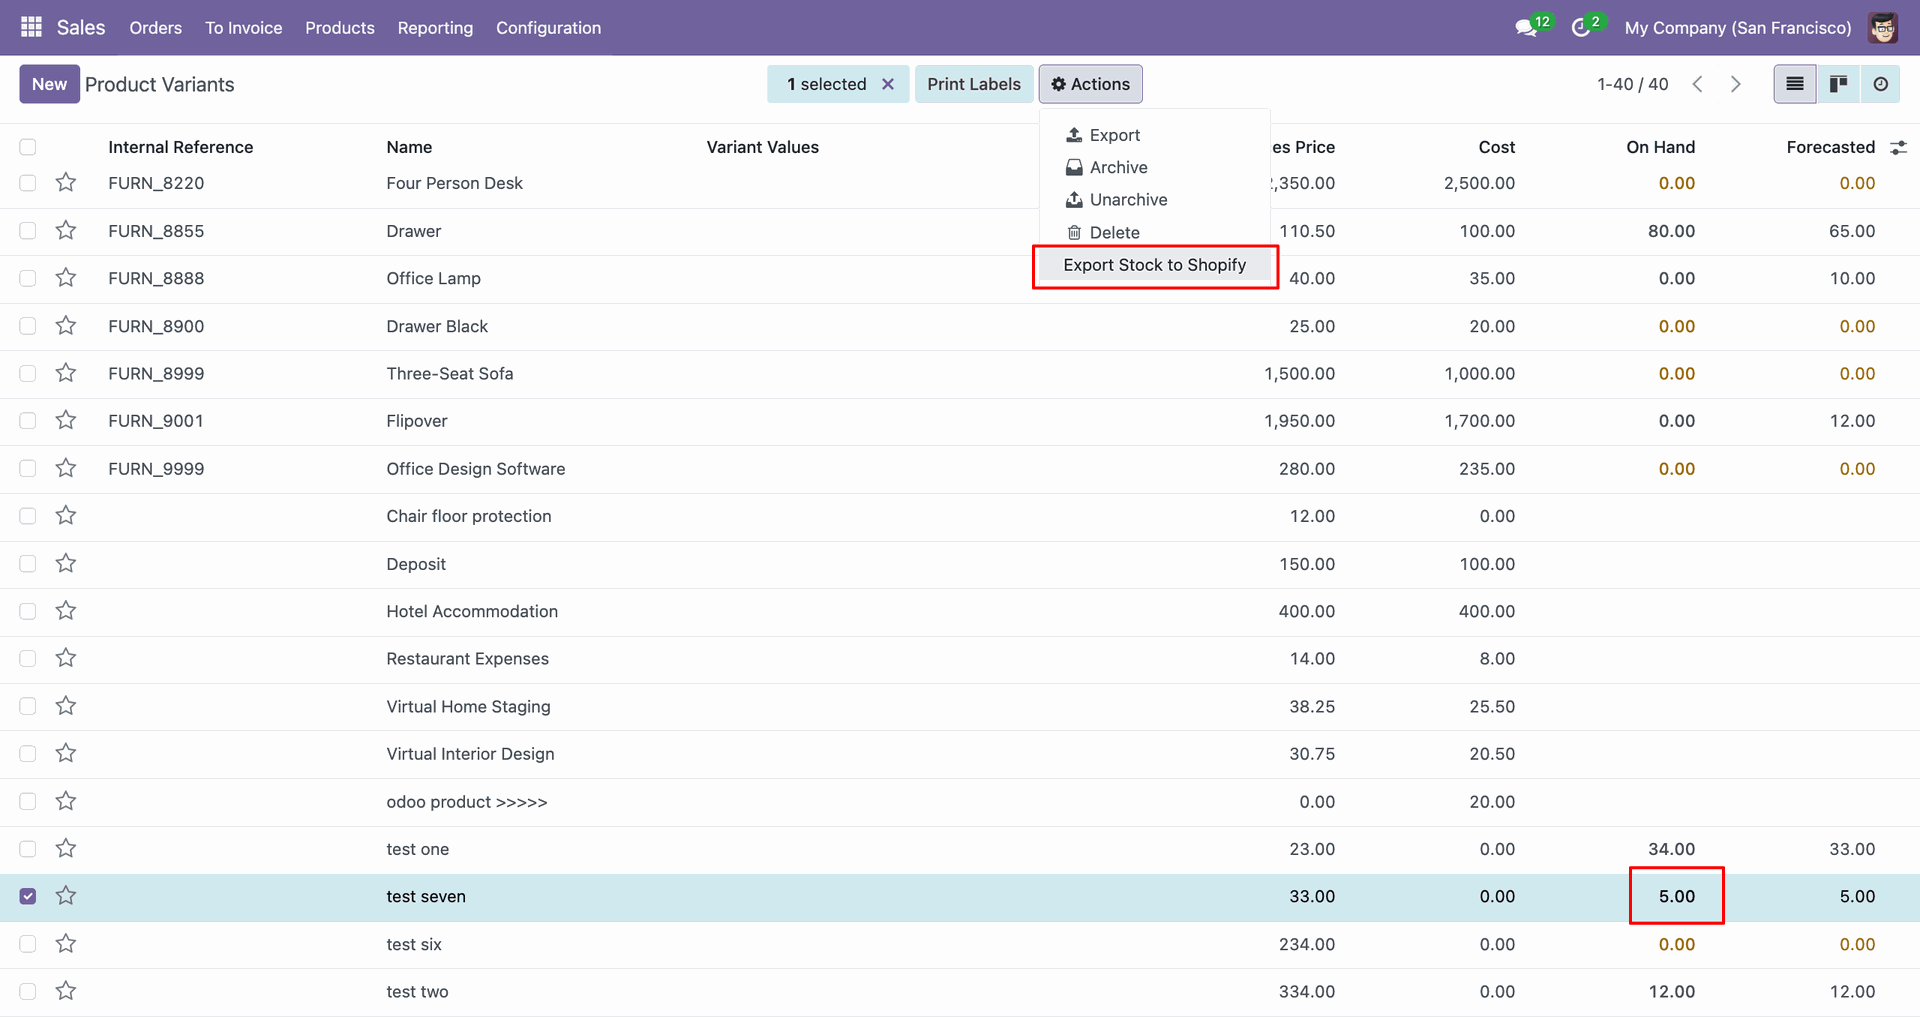
Select the variant line and choose Export Stock to Shopify from Actions.
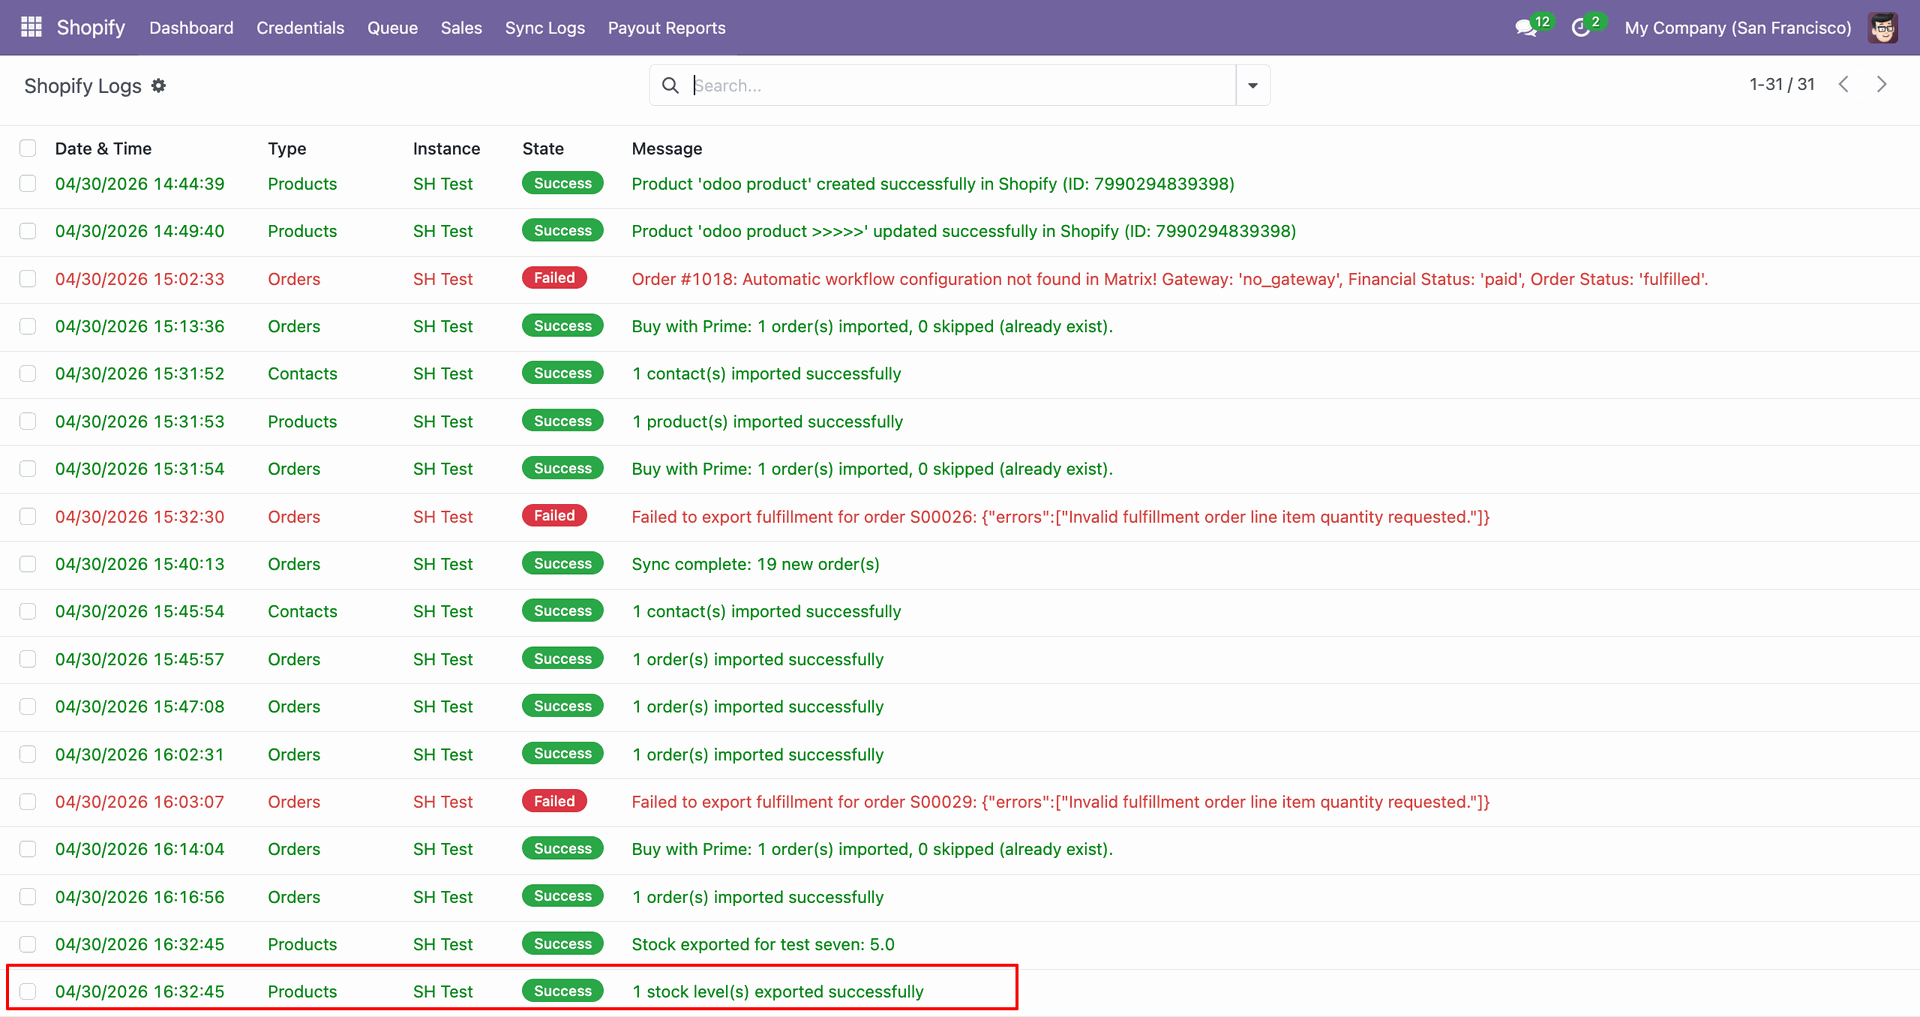
Check Sync Logs to confirm the stock export completed successfully for the product.
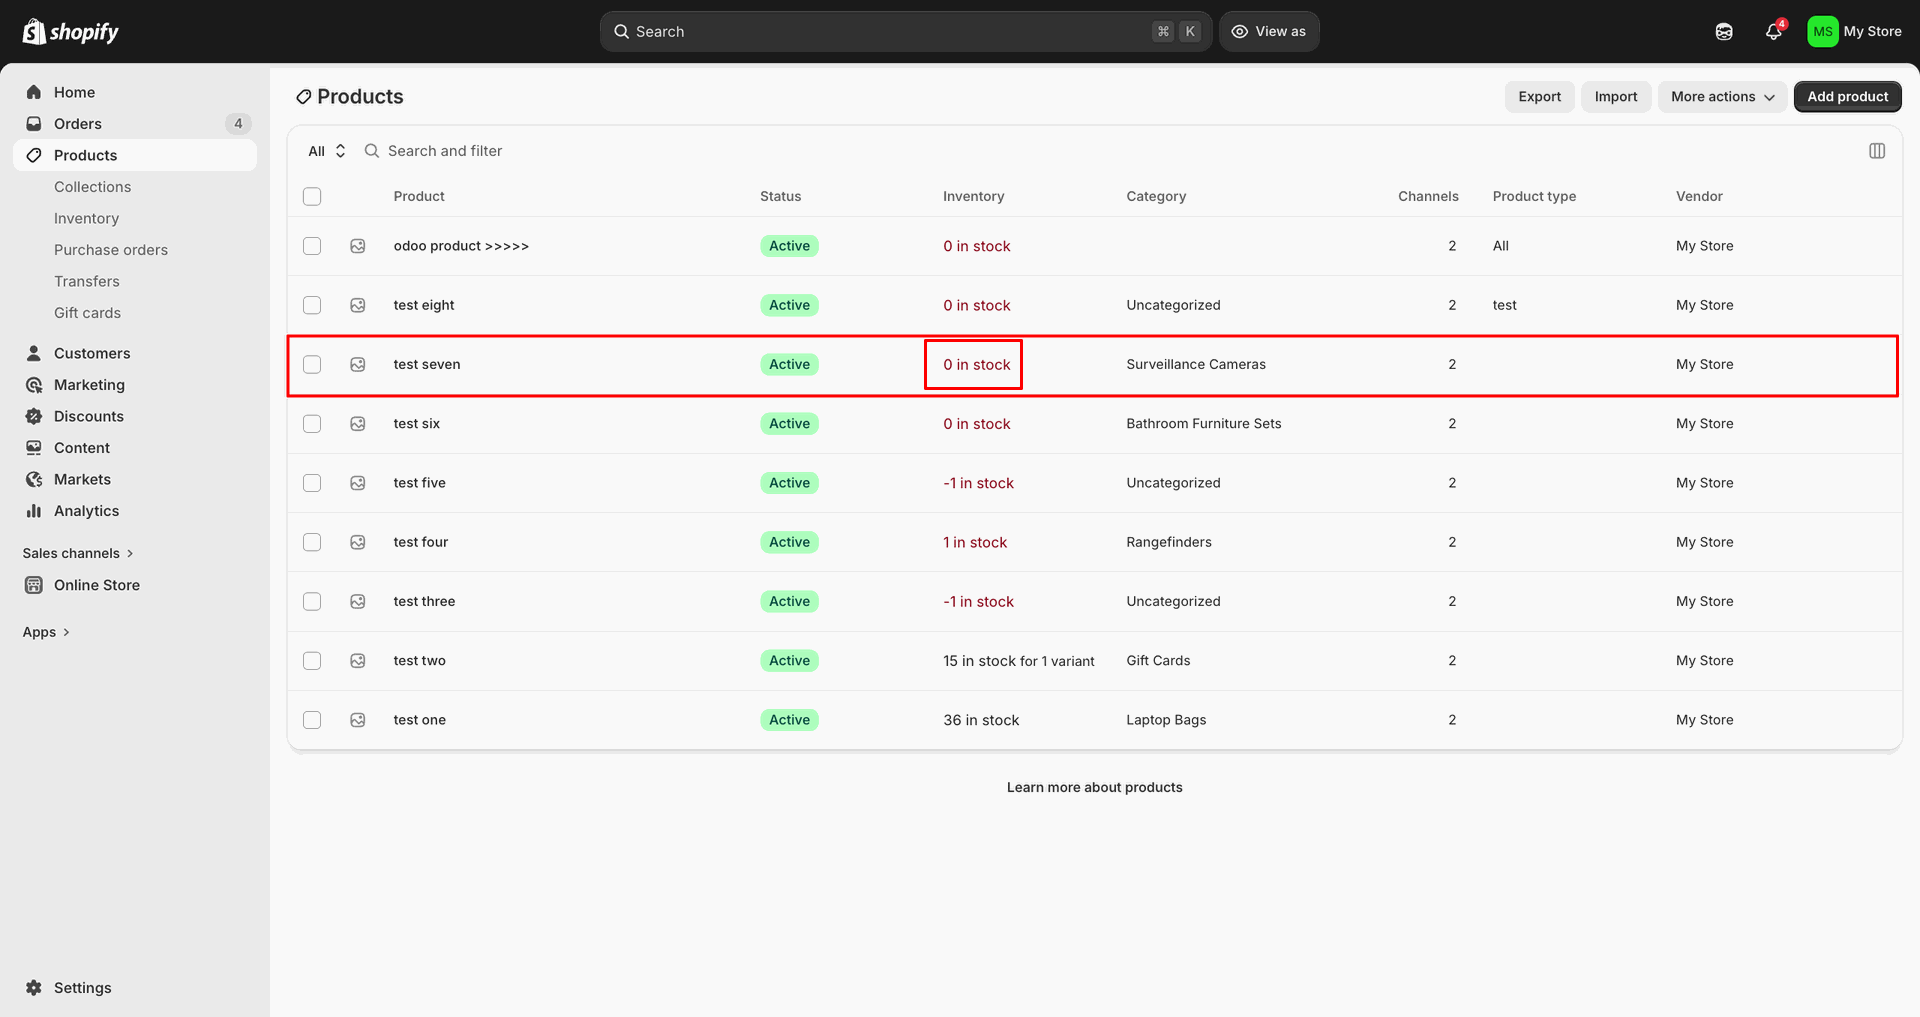
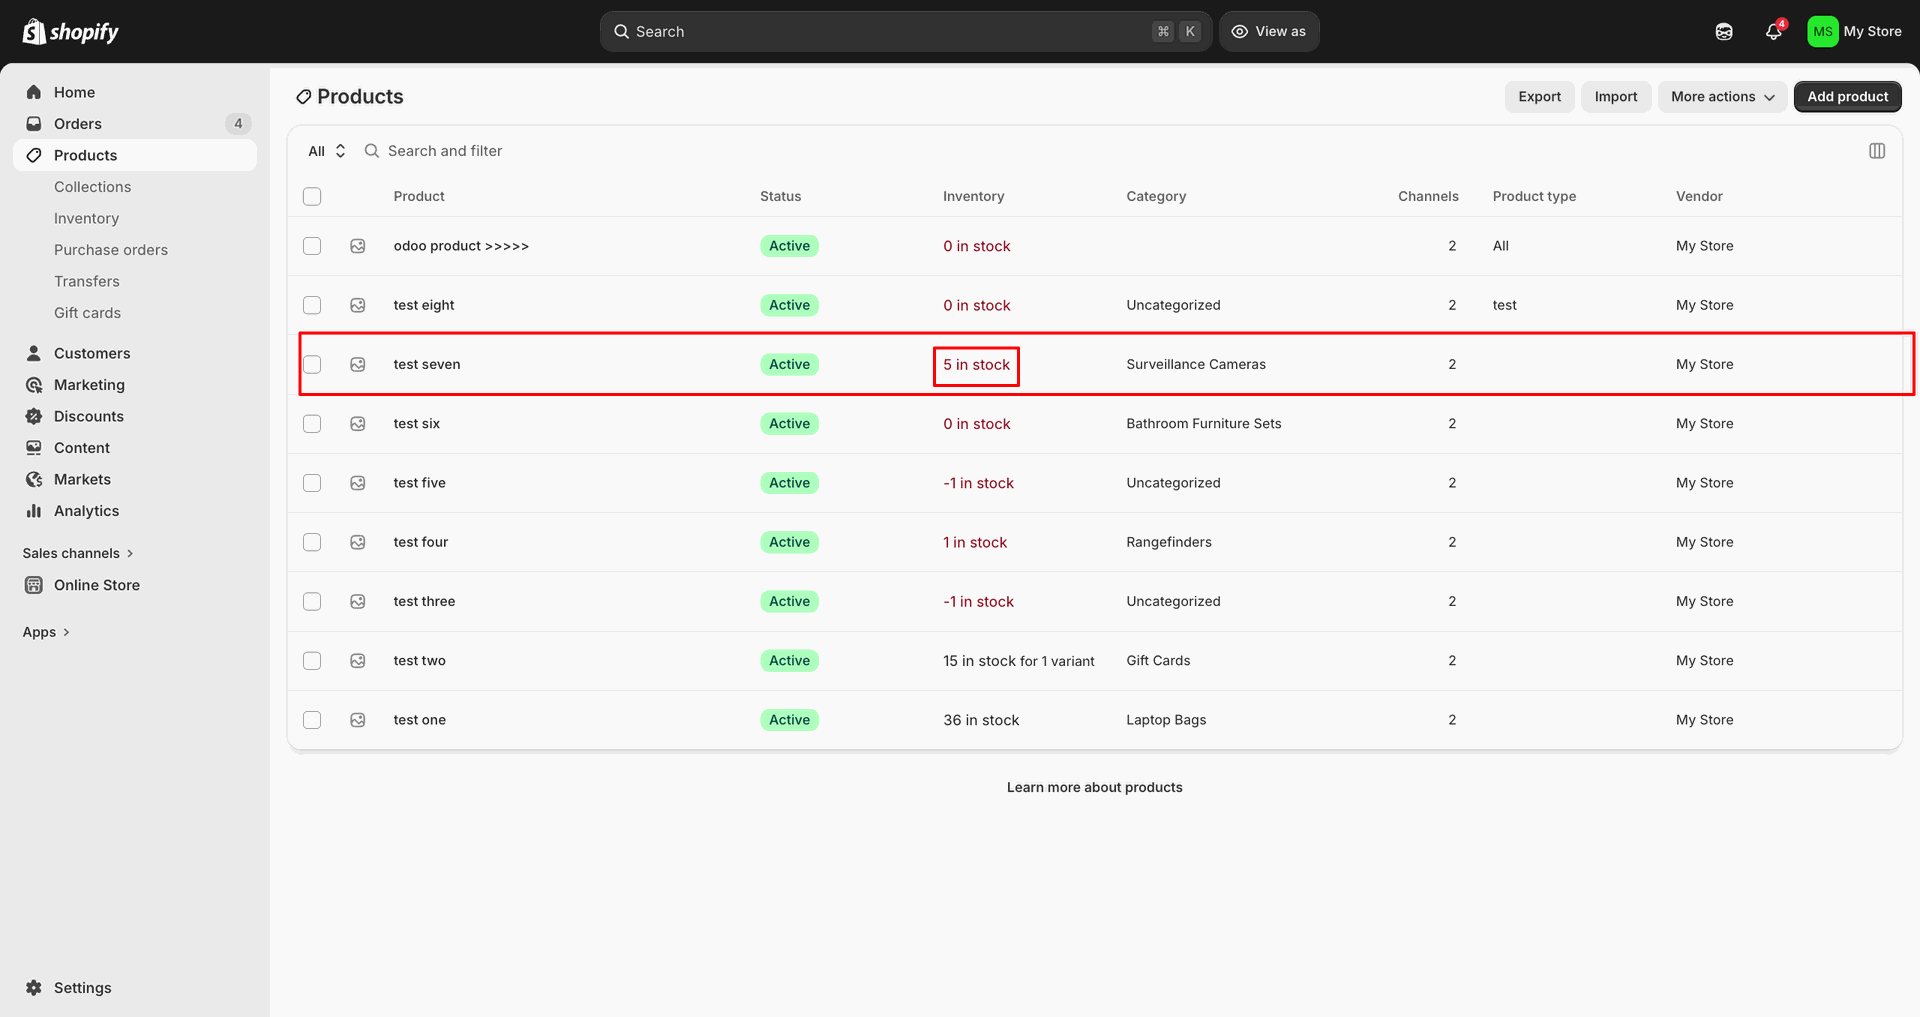
Verify the Shopify product row shows the updated stock after export.
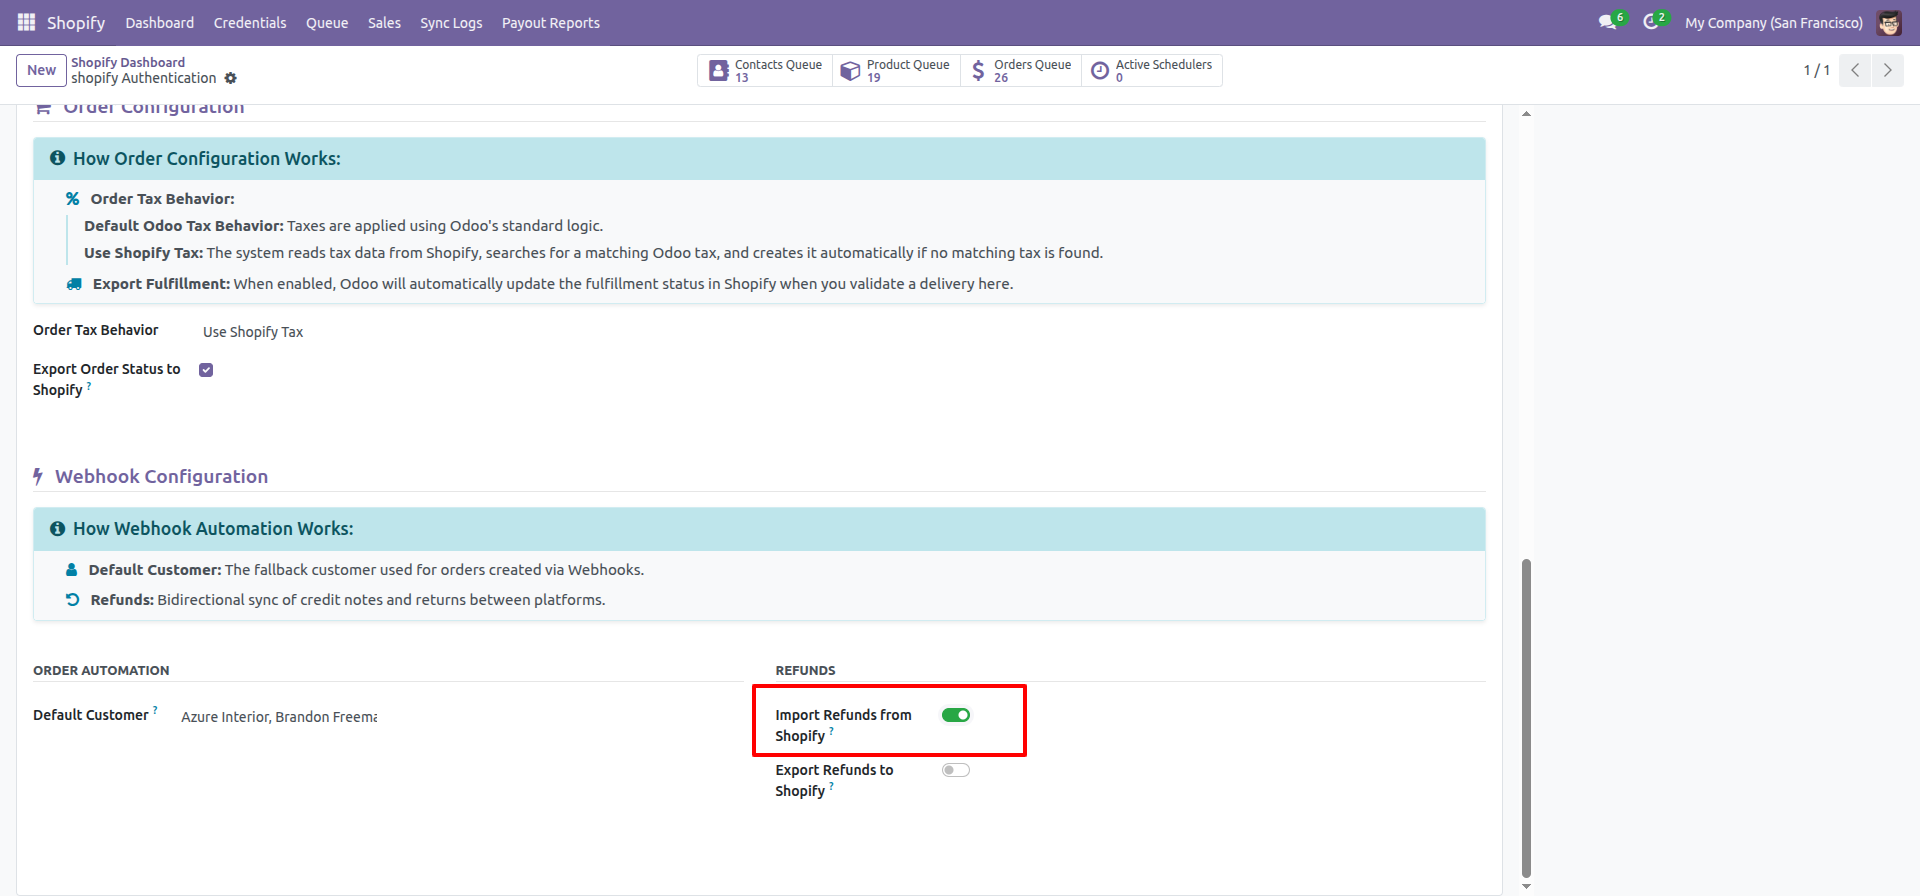
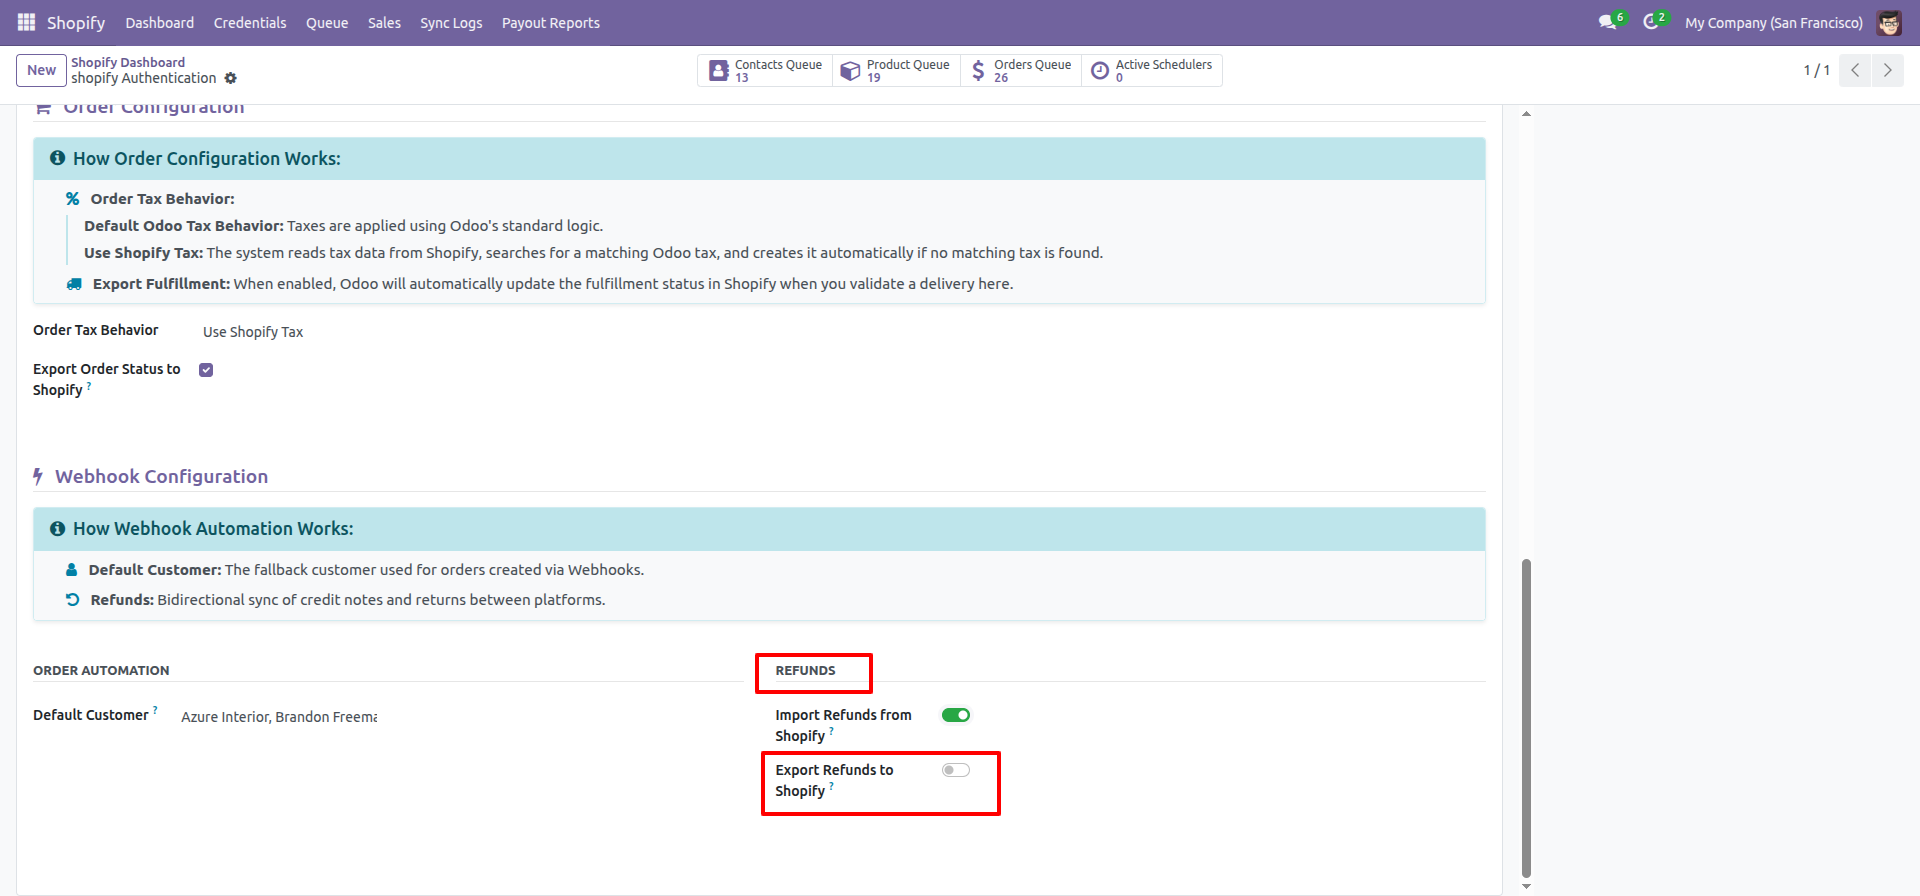
Enable Import Refunds from Shopify in the Refunds section to receive returns.
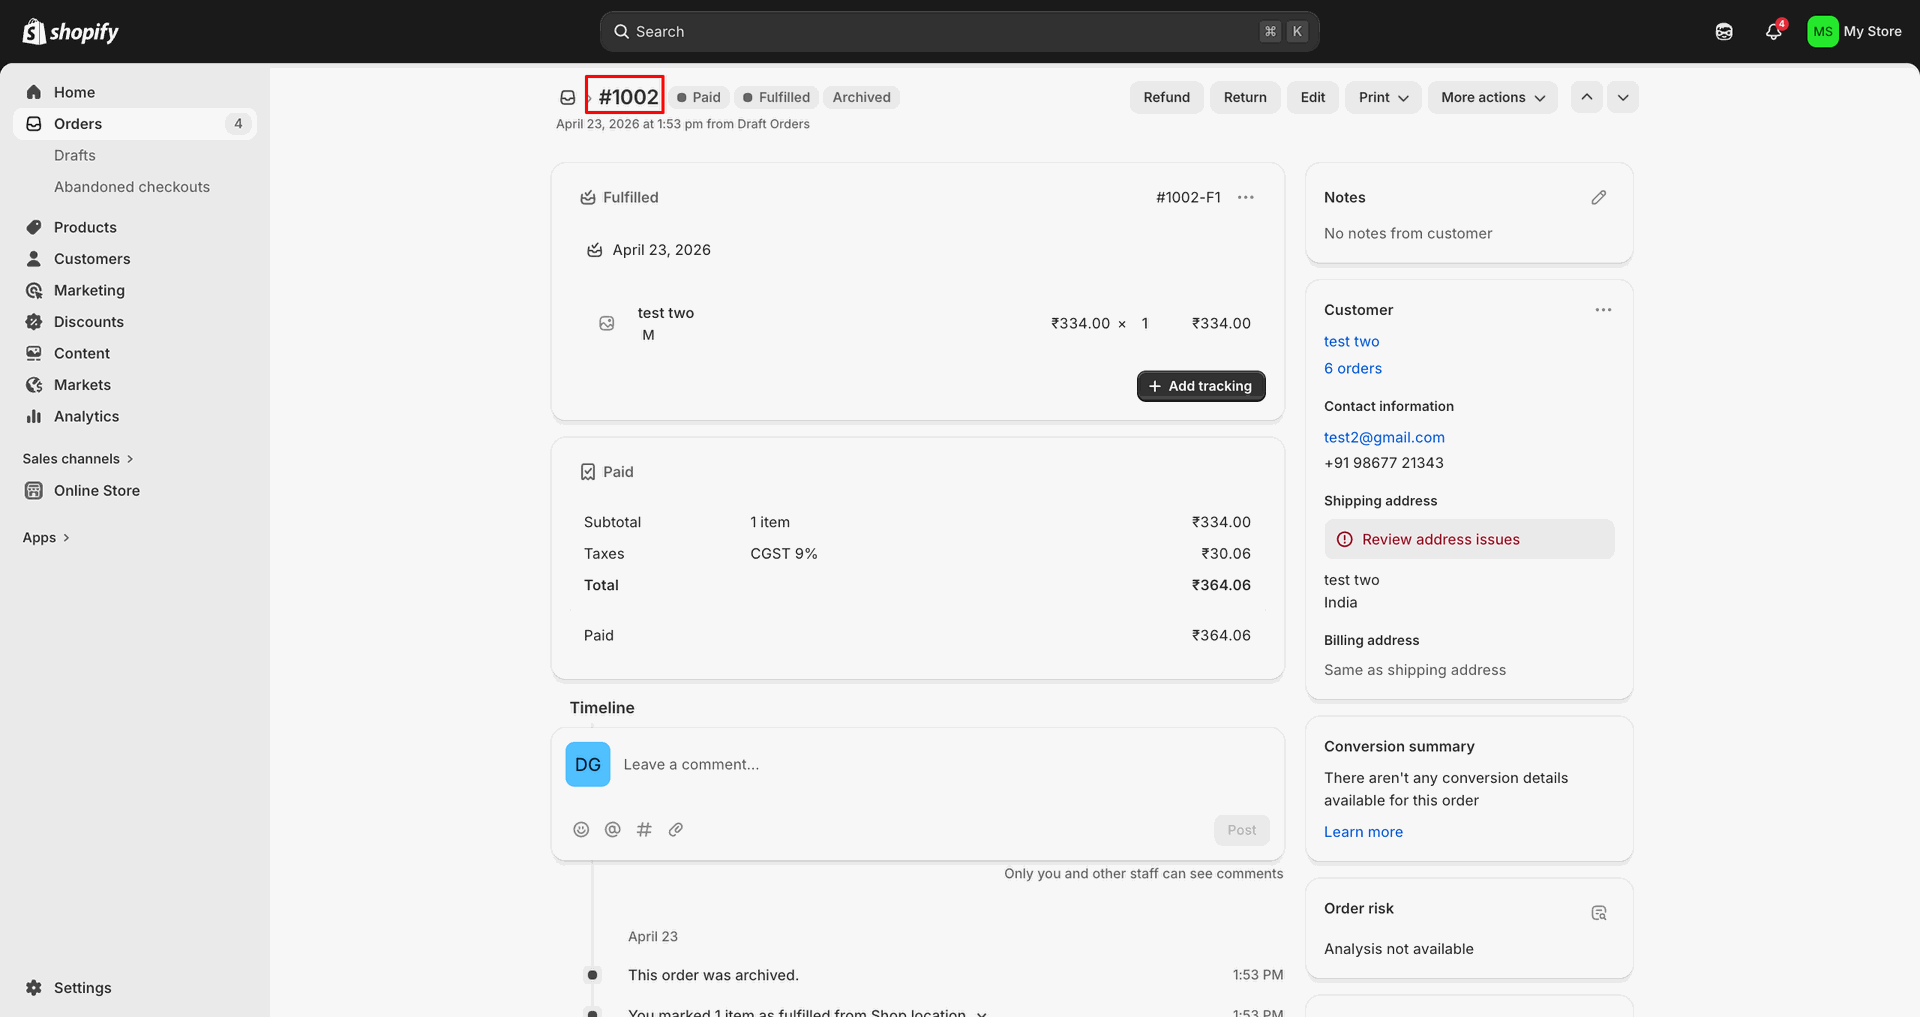
Open the refunded Shopify order to review its order number and status.
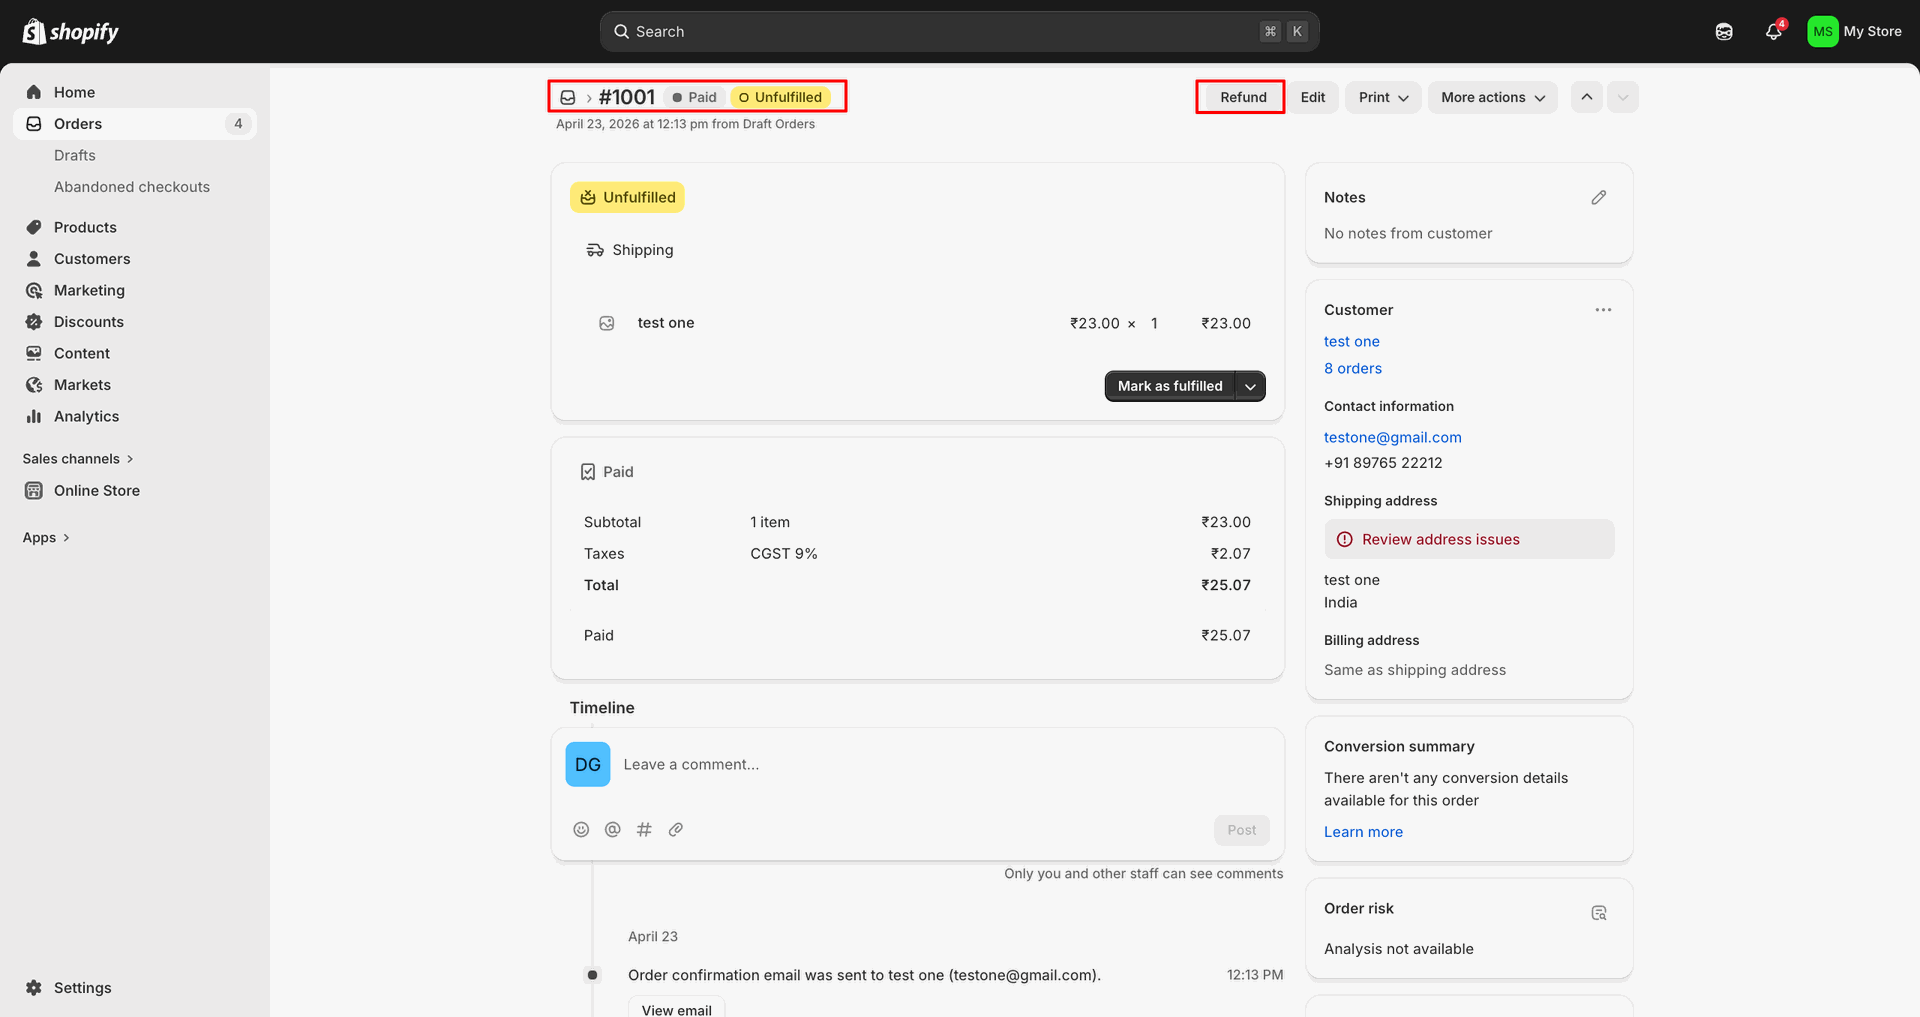
Enter the refund reason and click Refund to submit the Shopify return.

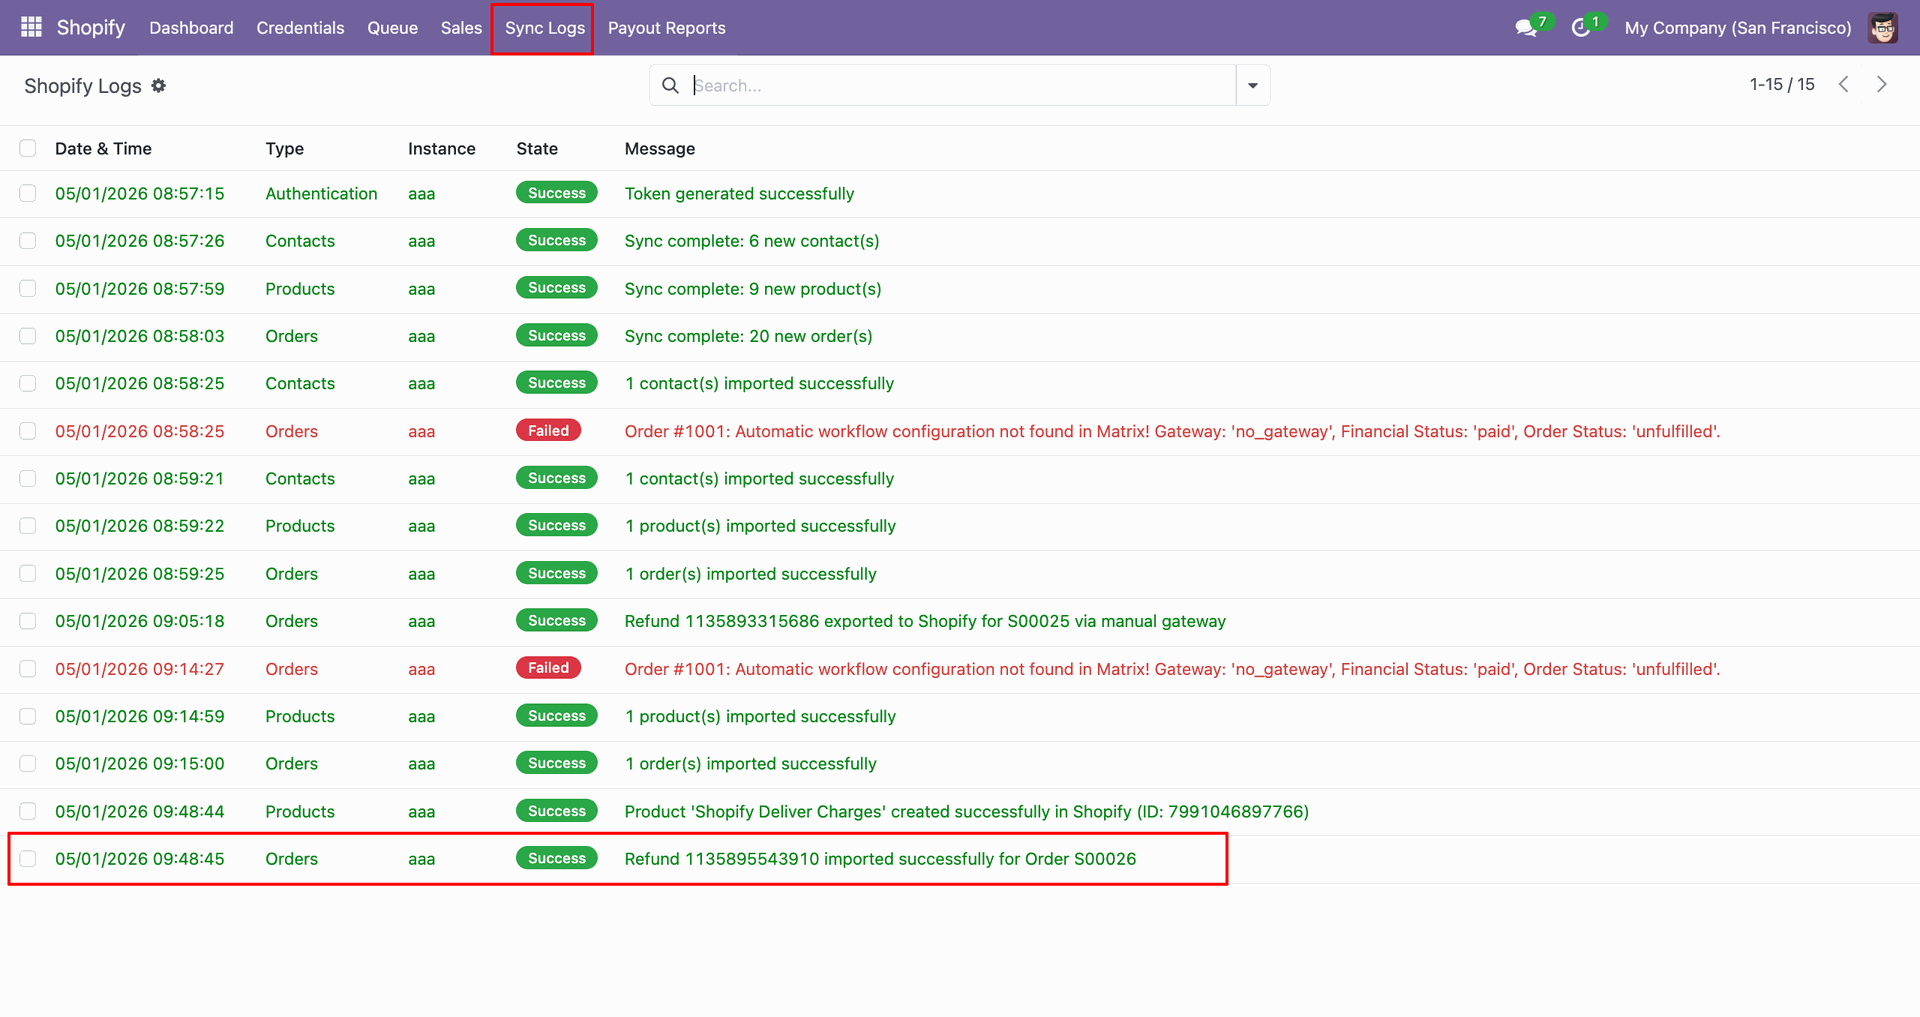
Check Sync Logs to confirm the refund was imported successfully for the order.
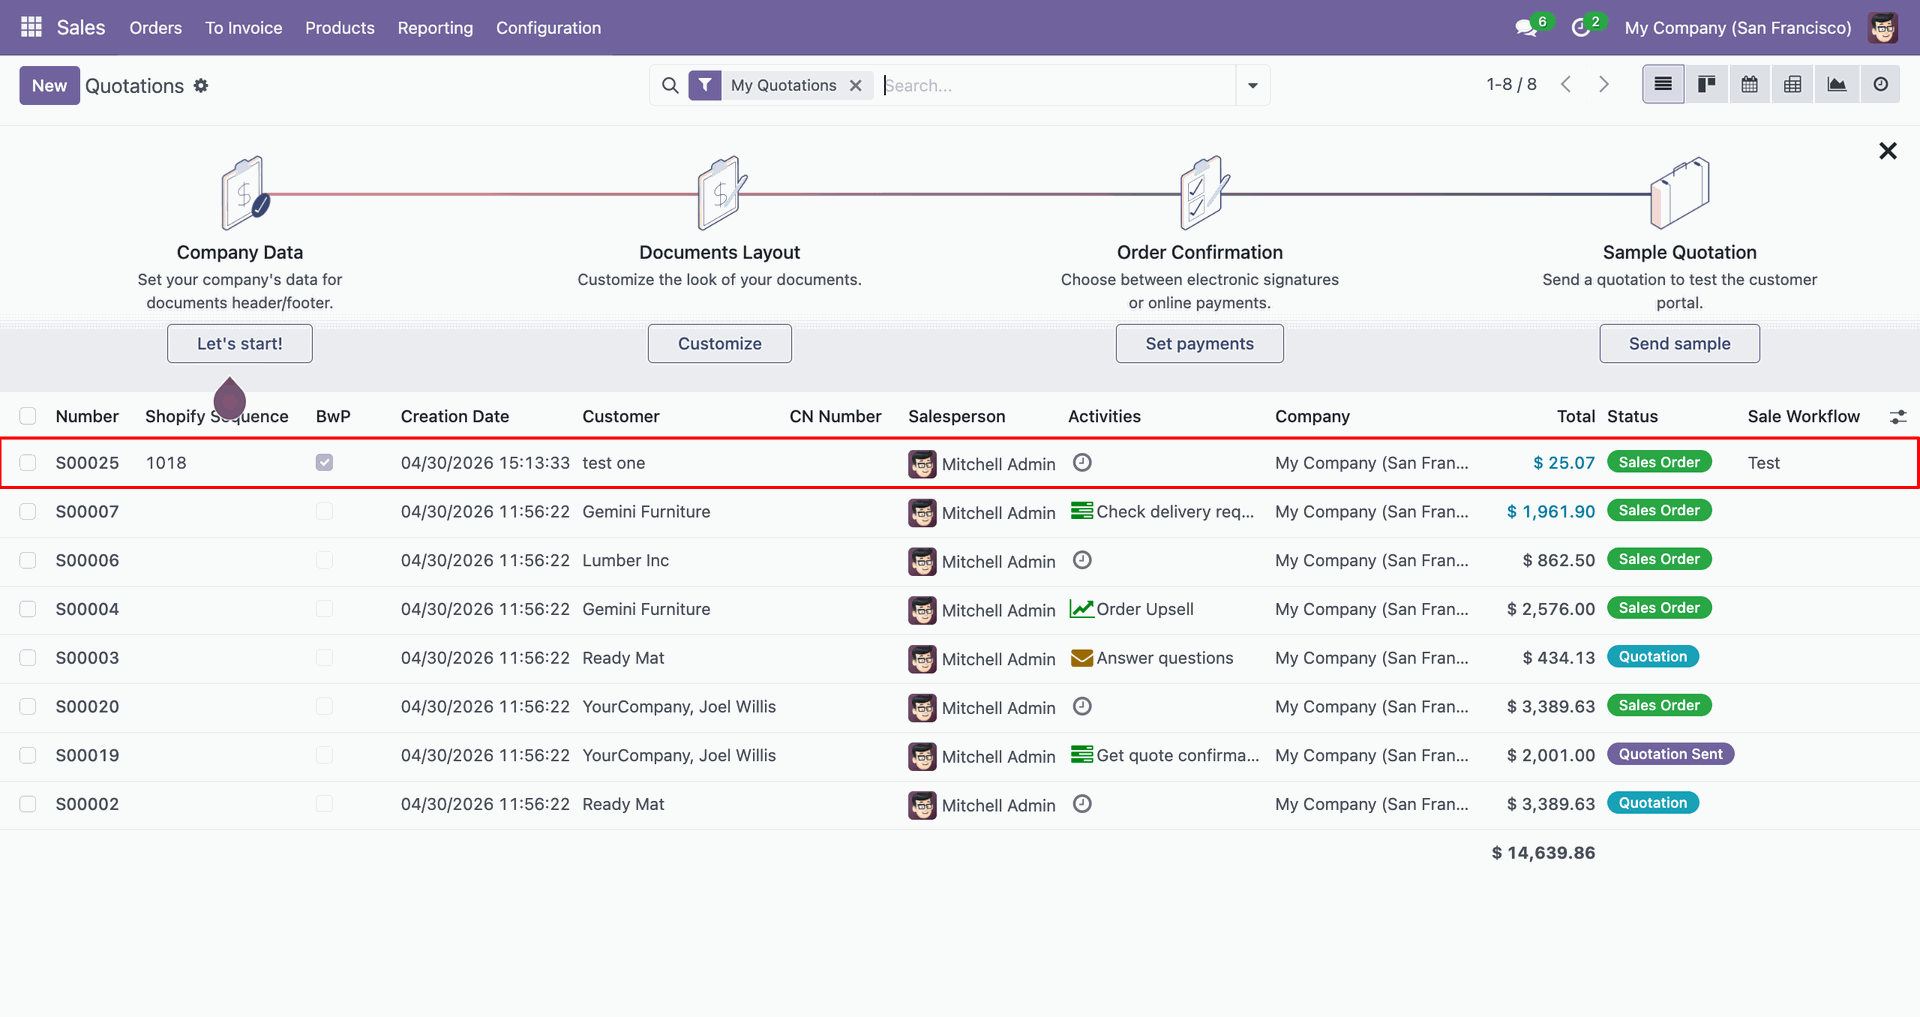
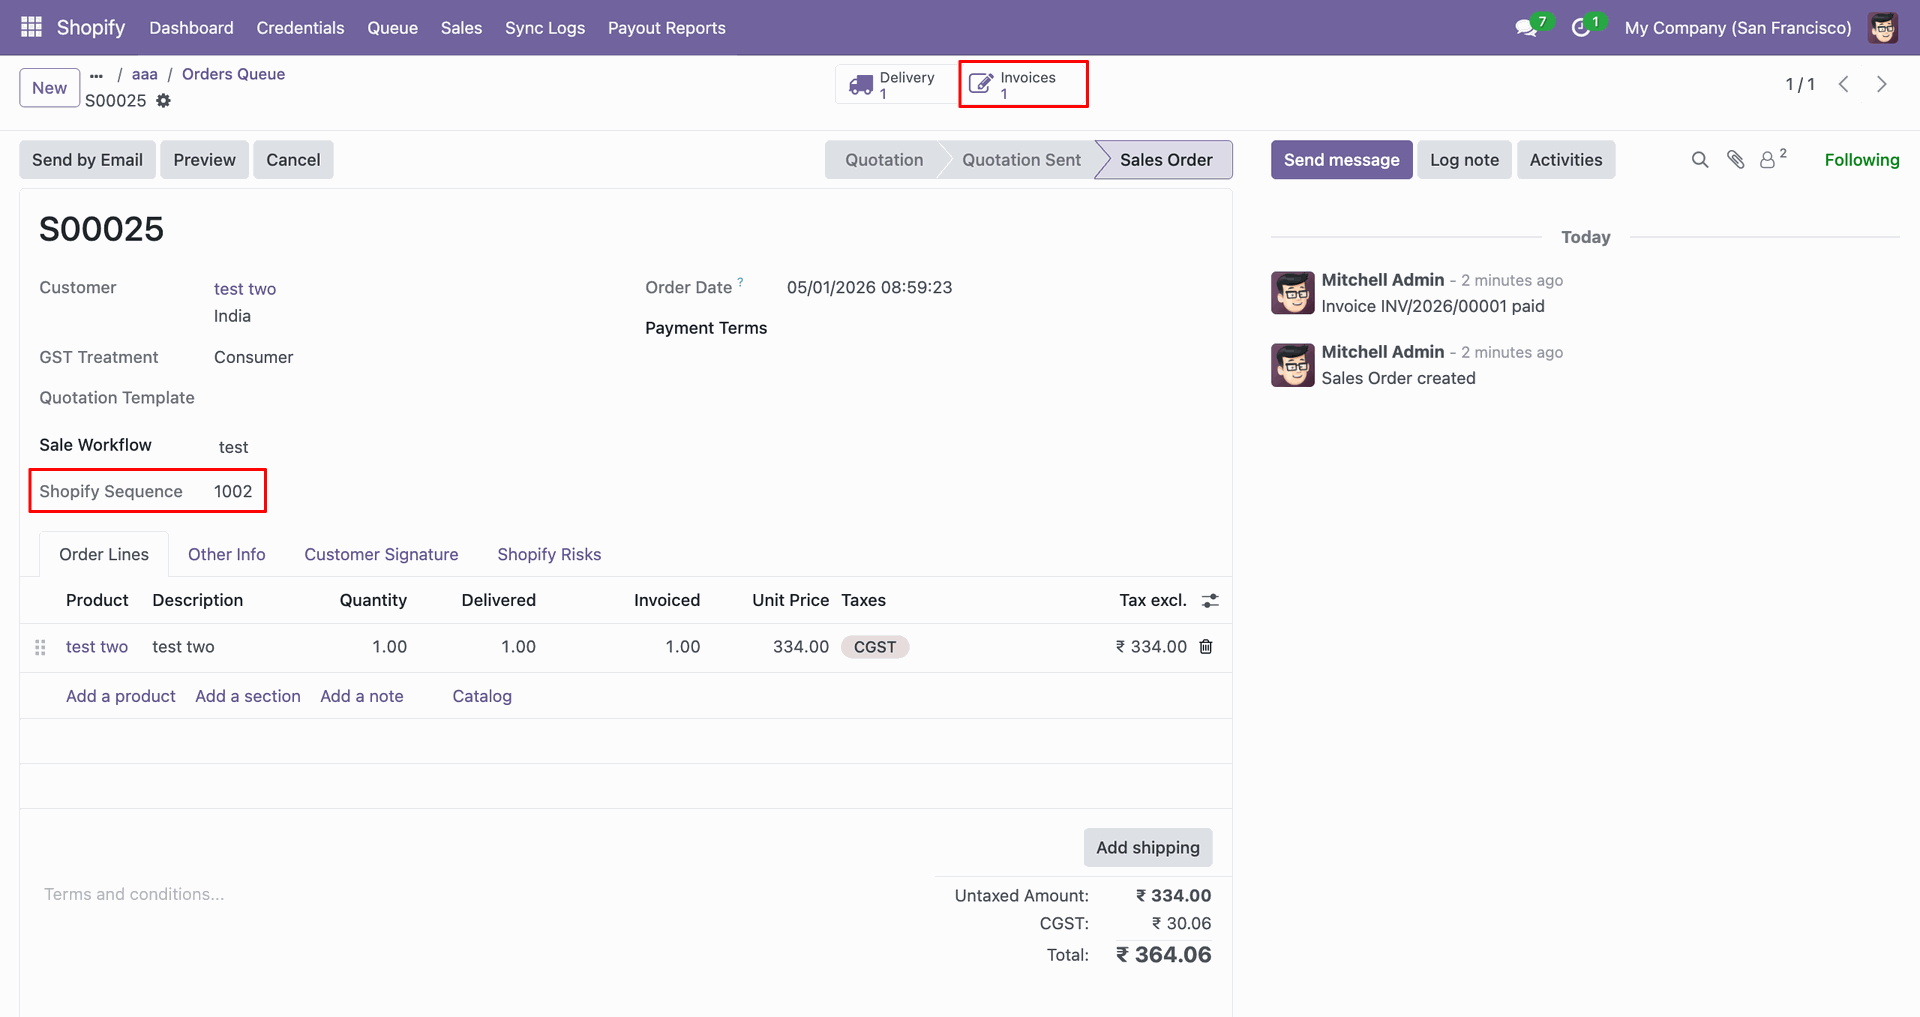
Review the imported sales order and Shopify Sequence created from the refund.

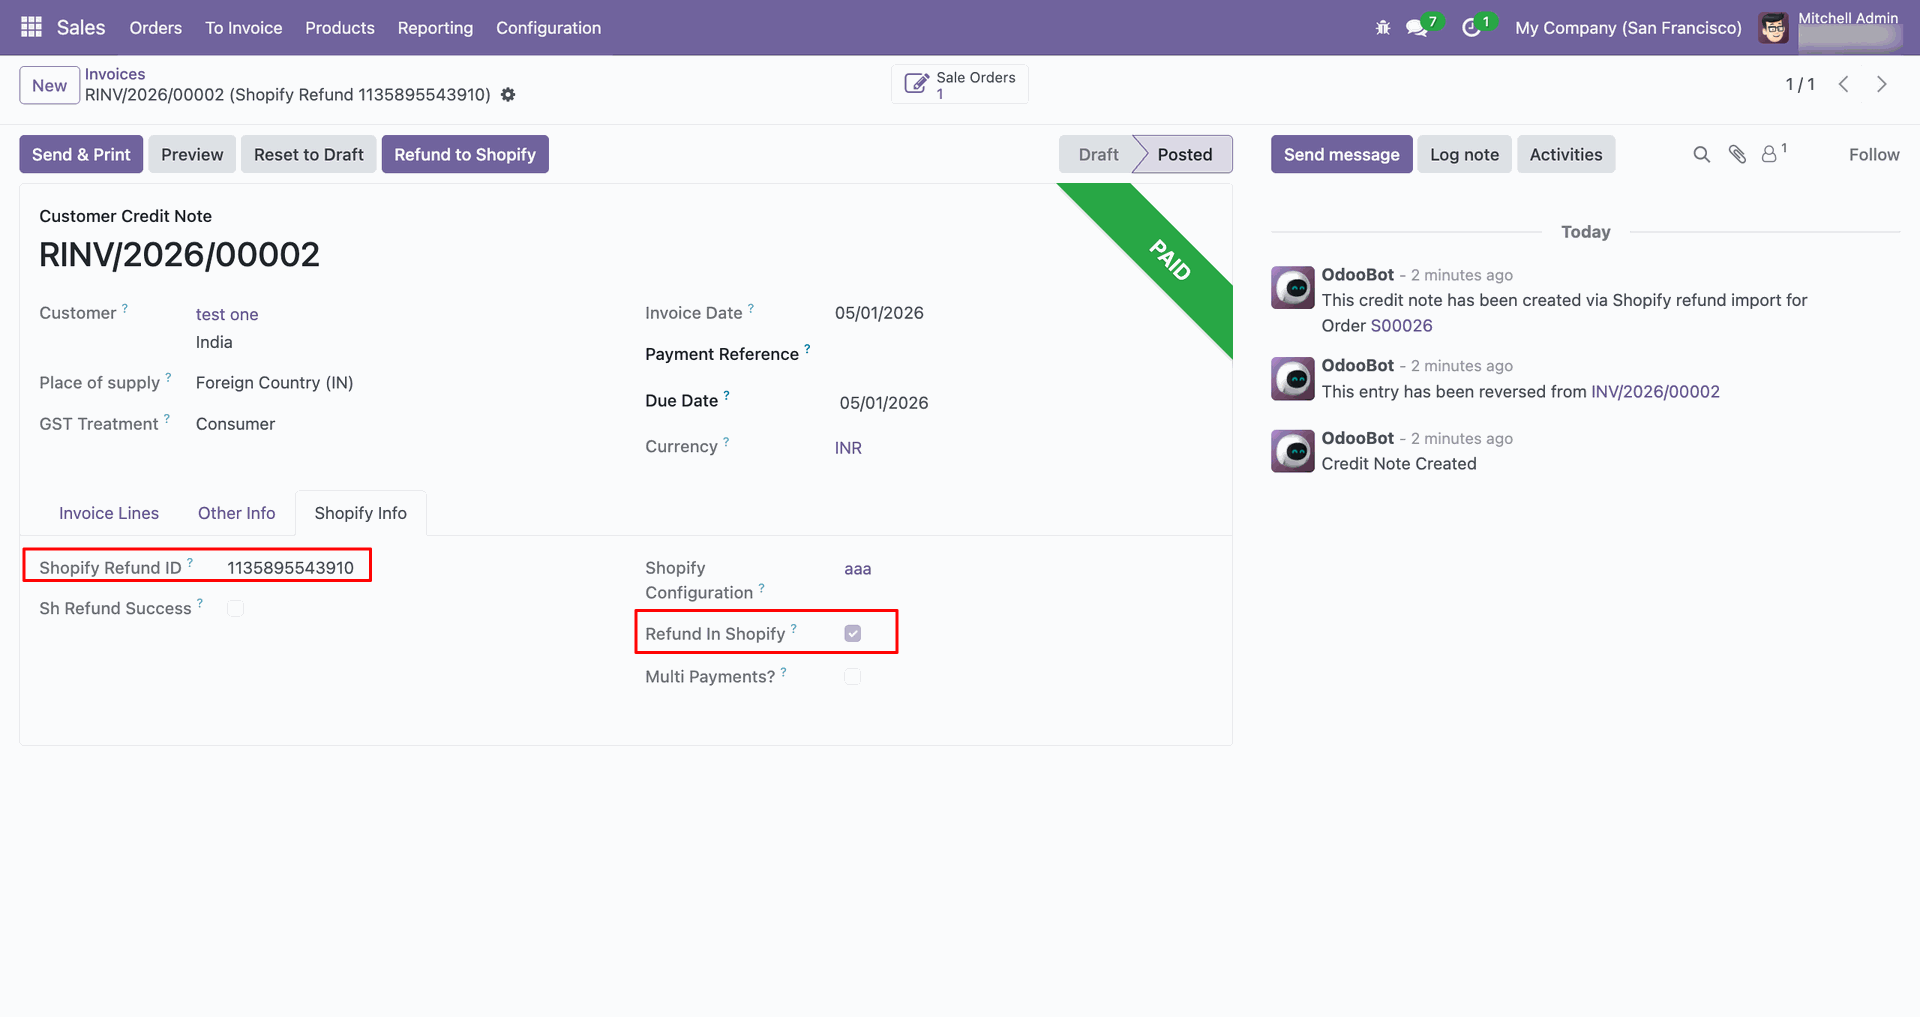
Review the credit note fields showing Shopify Refund ID and Refund in Shopify.
Enable Export Refunds to Shopify in the Refunds section before refund synchronization.
Open the Shopify order that will receive the exported refund details.
Open the Invoices smart button to create the refund from the sales order.
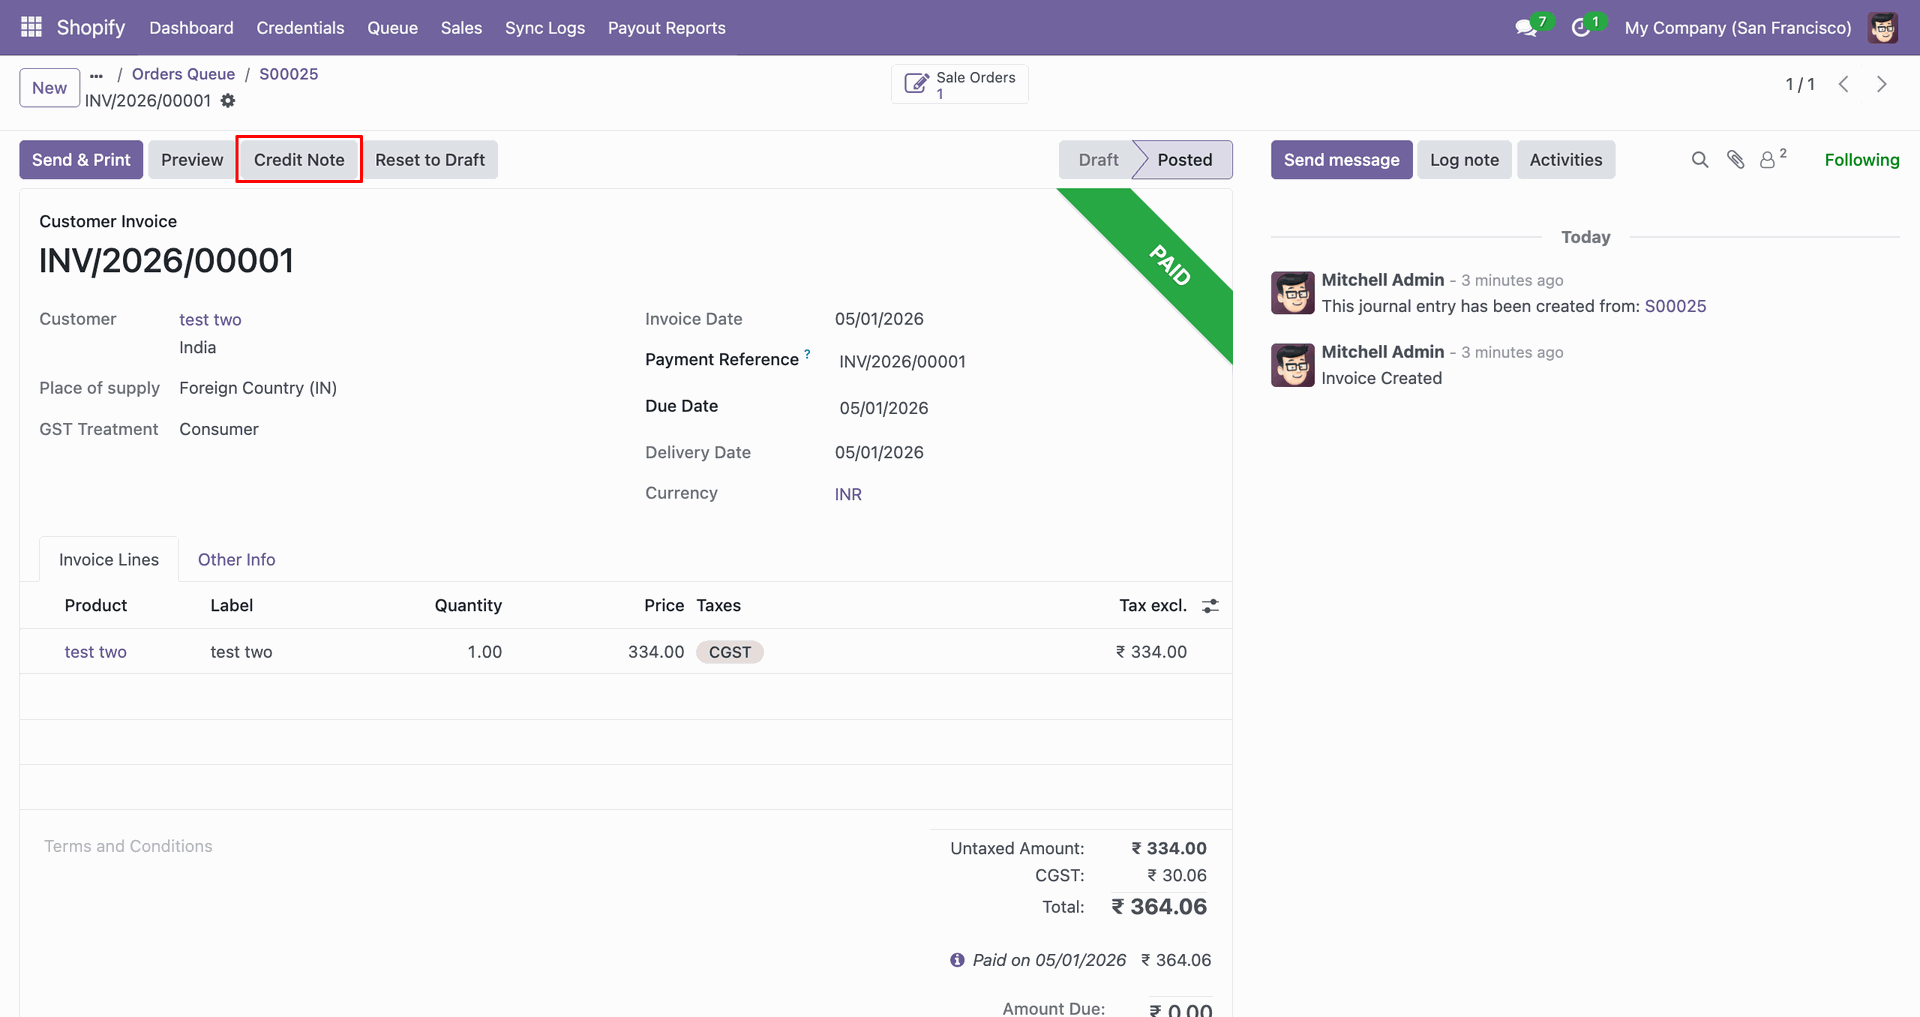
Click Create Note on the invoice to generate the customer credit note.
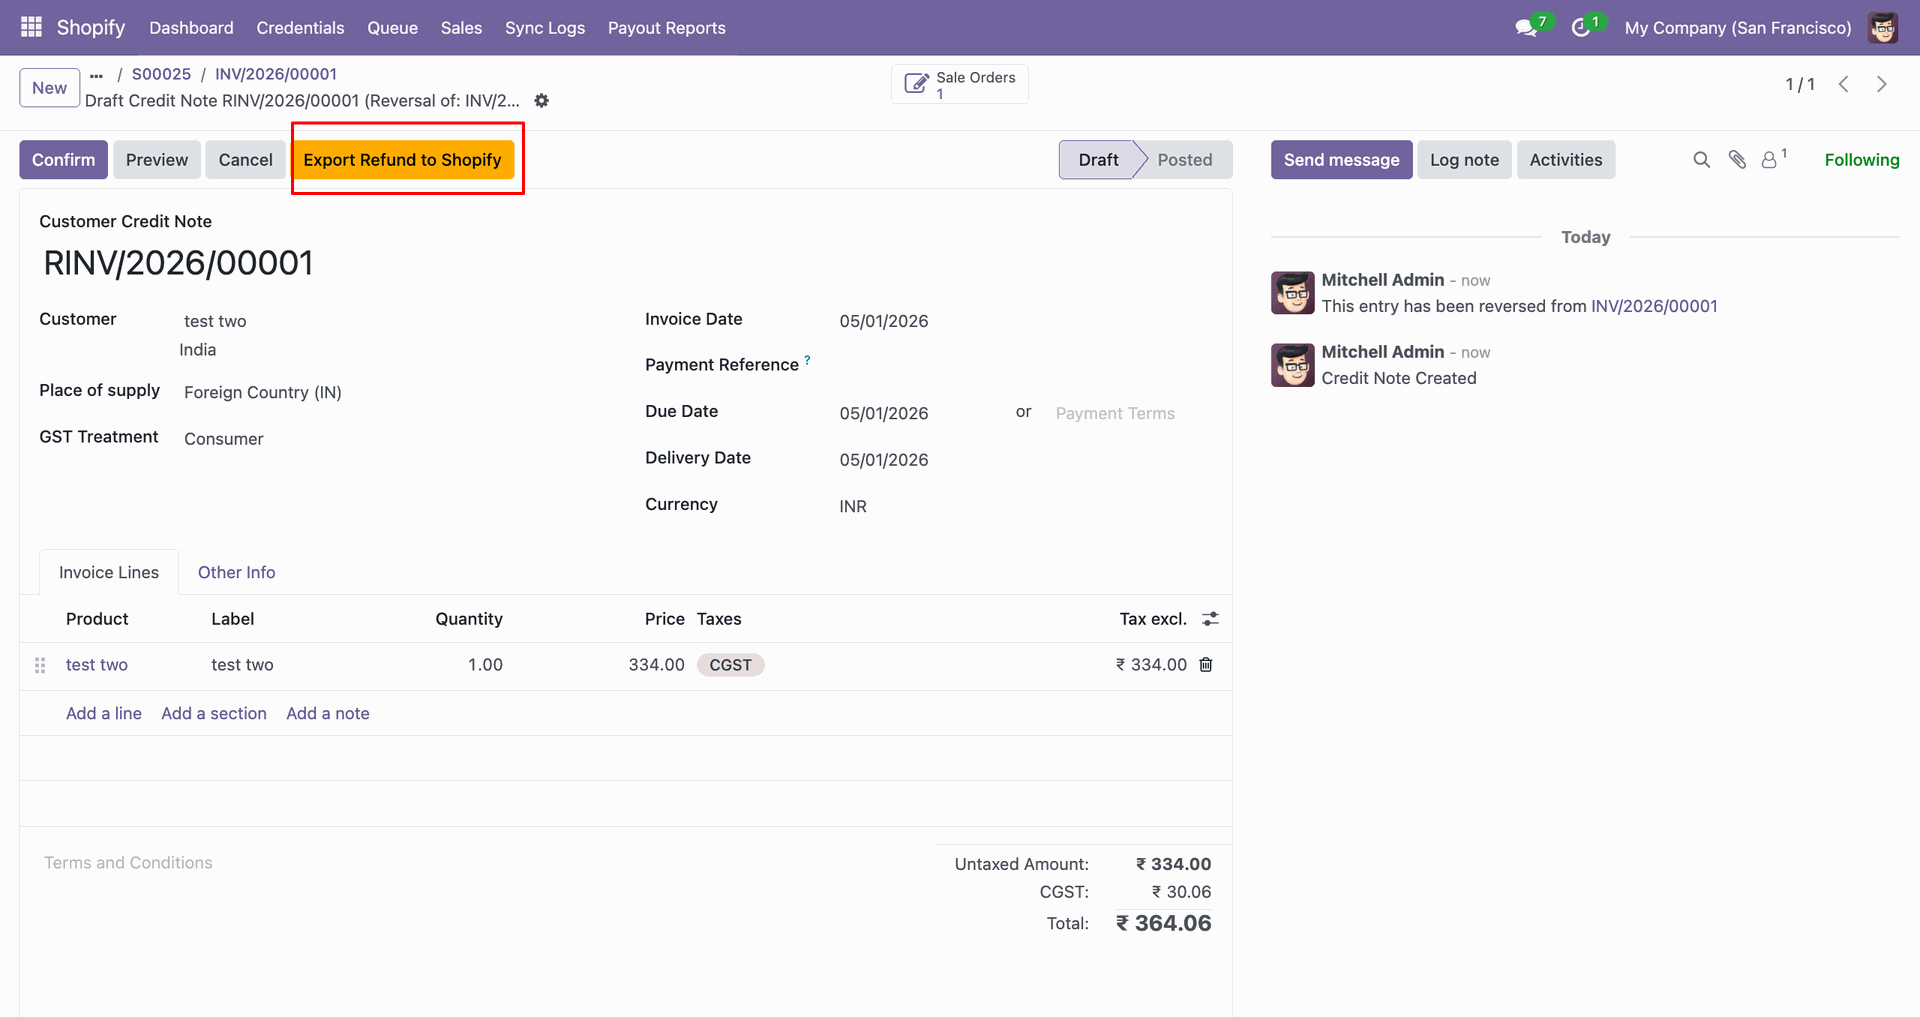
Click Export Refund to Shopify on the credit note to continue.
Review the Shopify Refund popup, then click Send to Shopify.

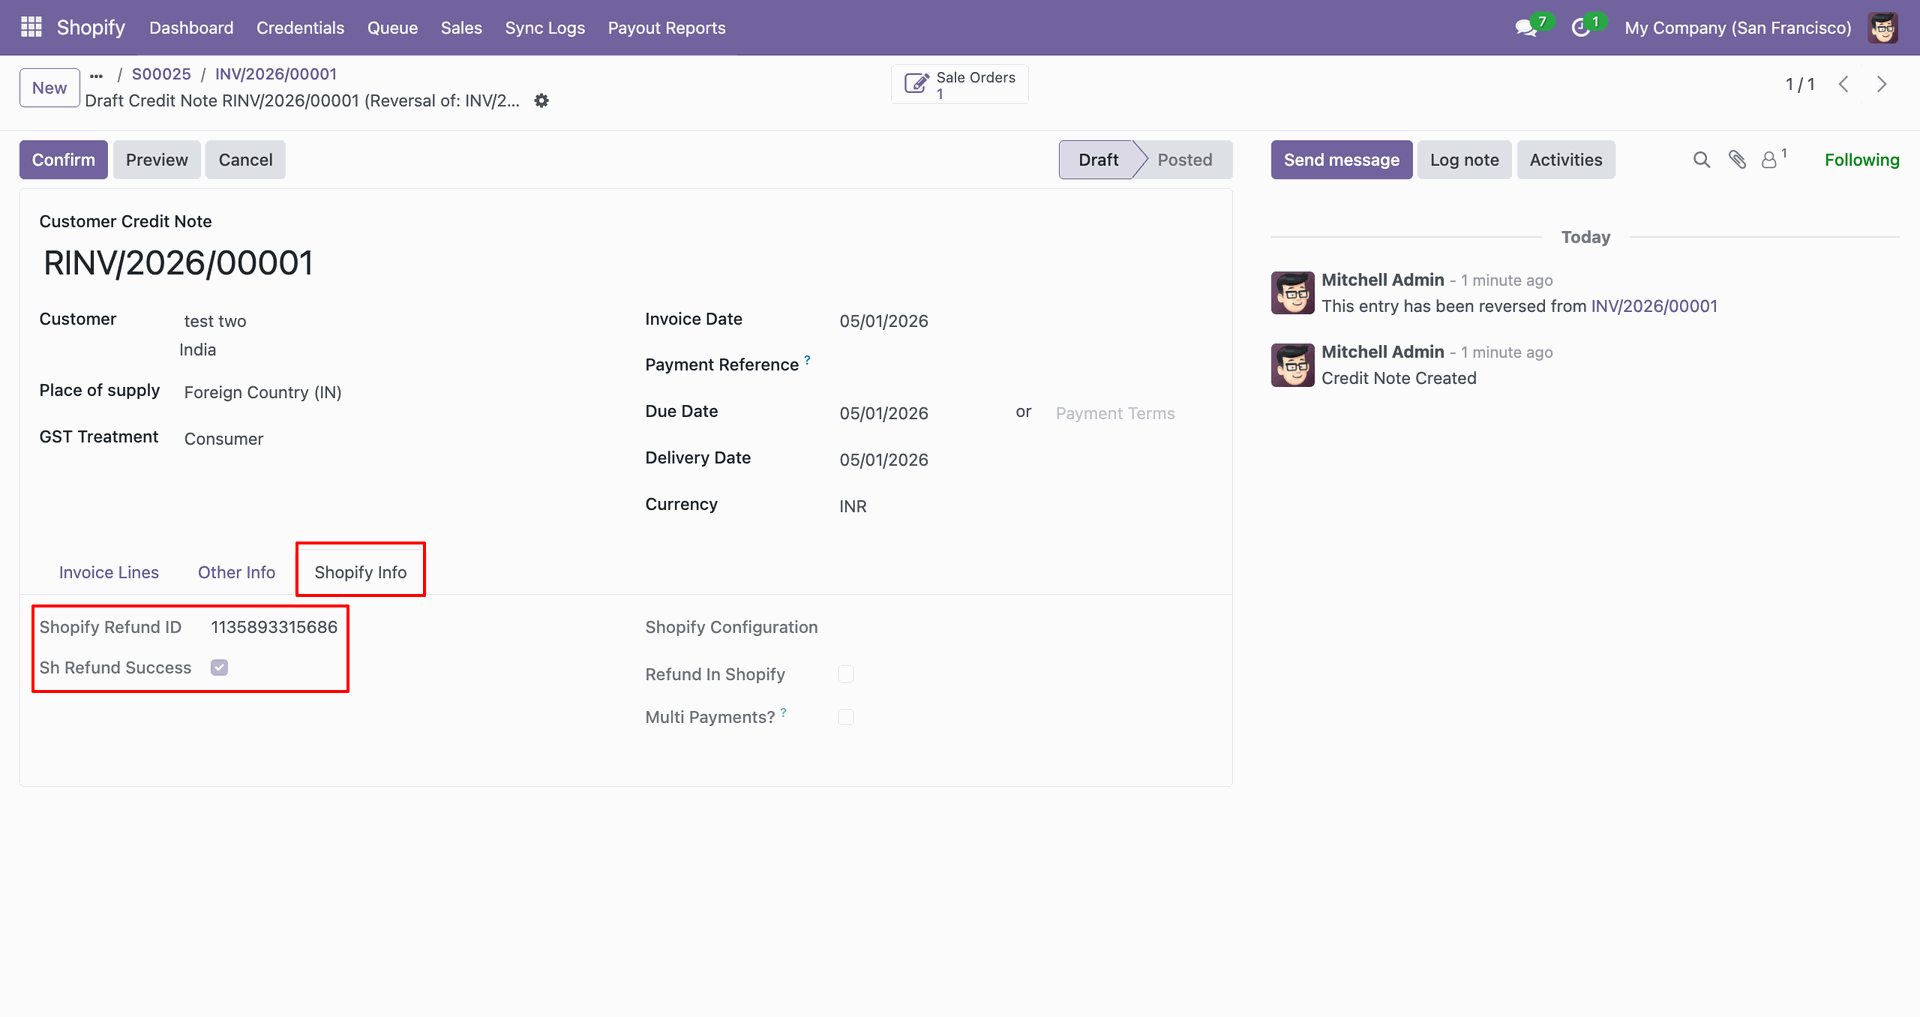
Review the Shopify Info tab to confirm refund IDs and status fields.
Check Sync Logs to confirm the refund was exported successfully to Shopify.
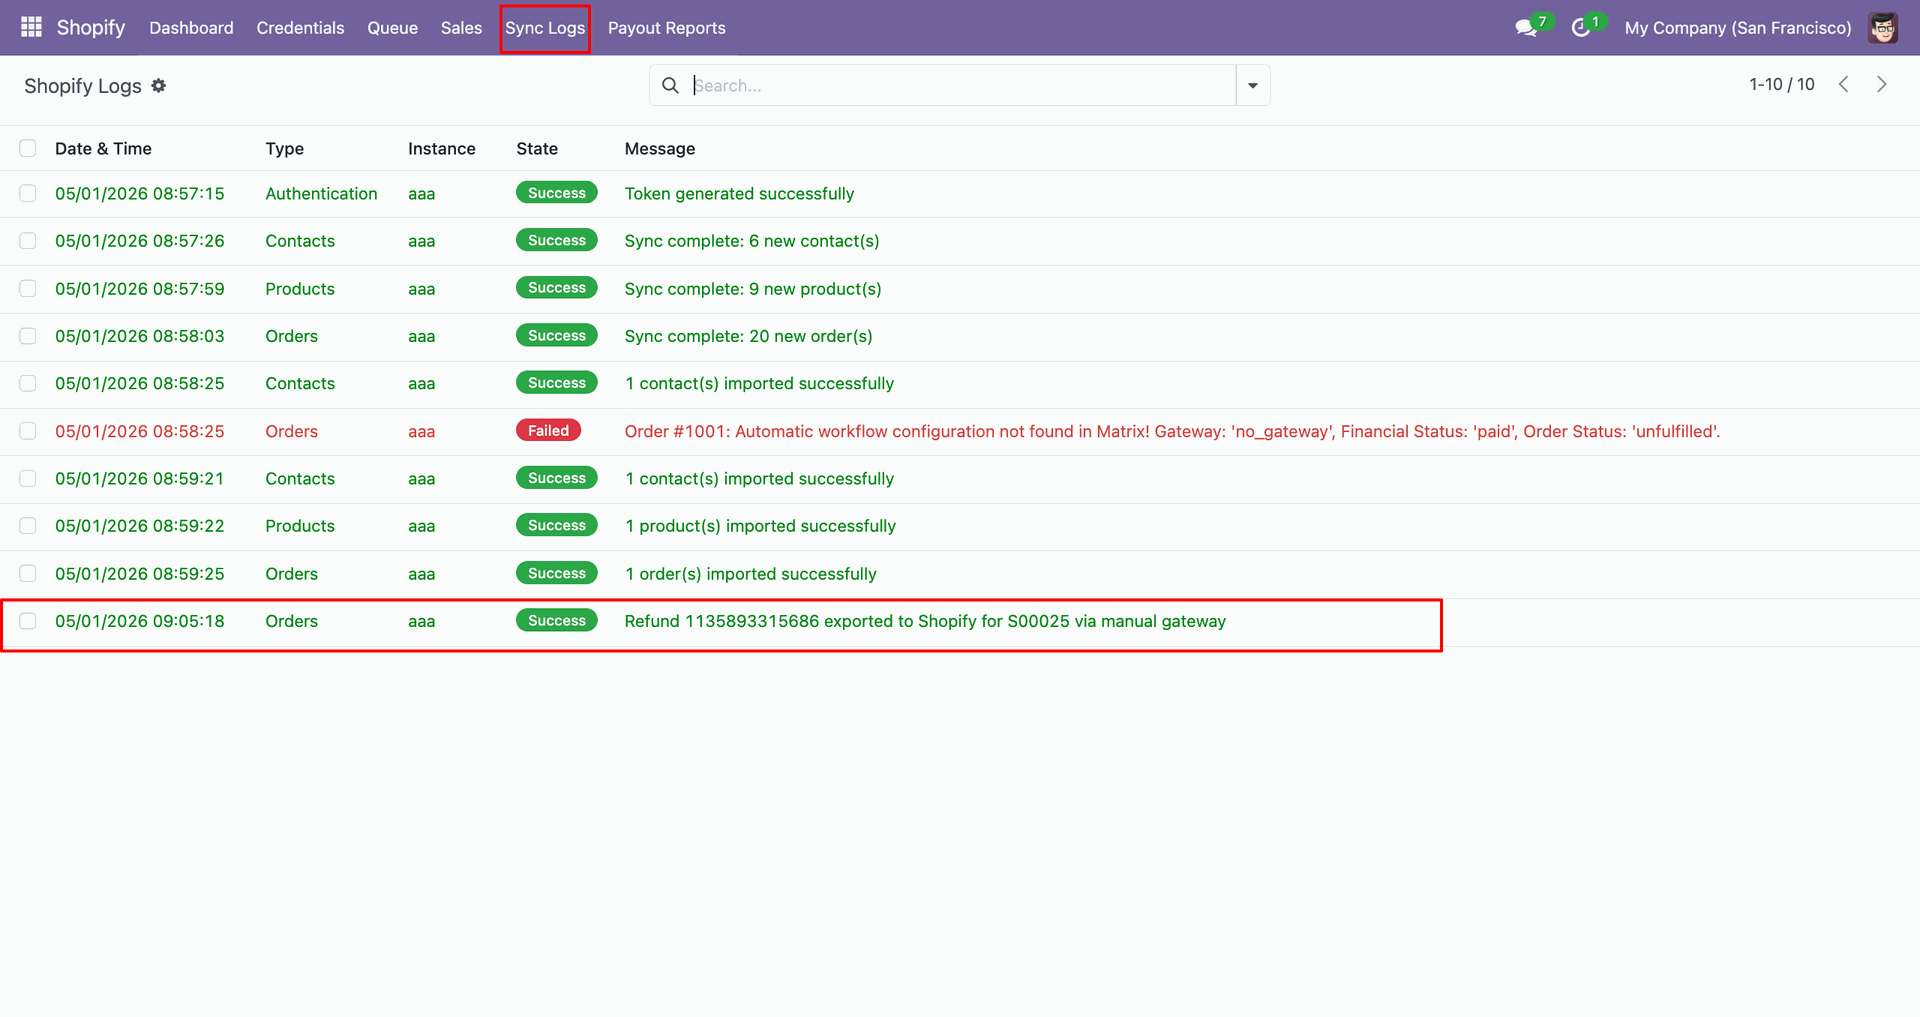
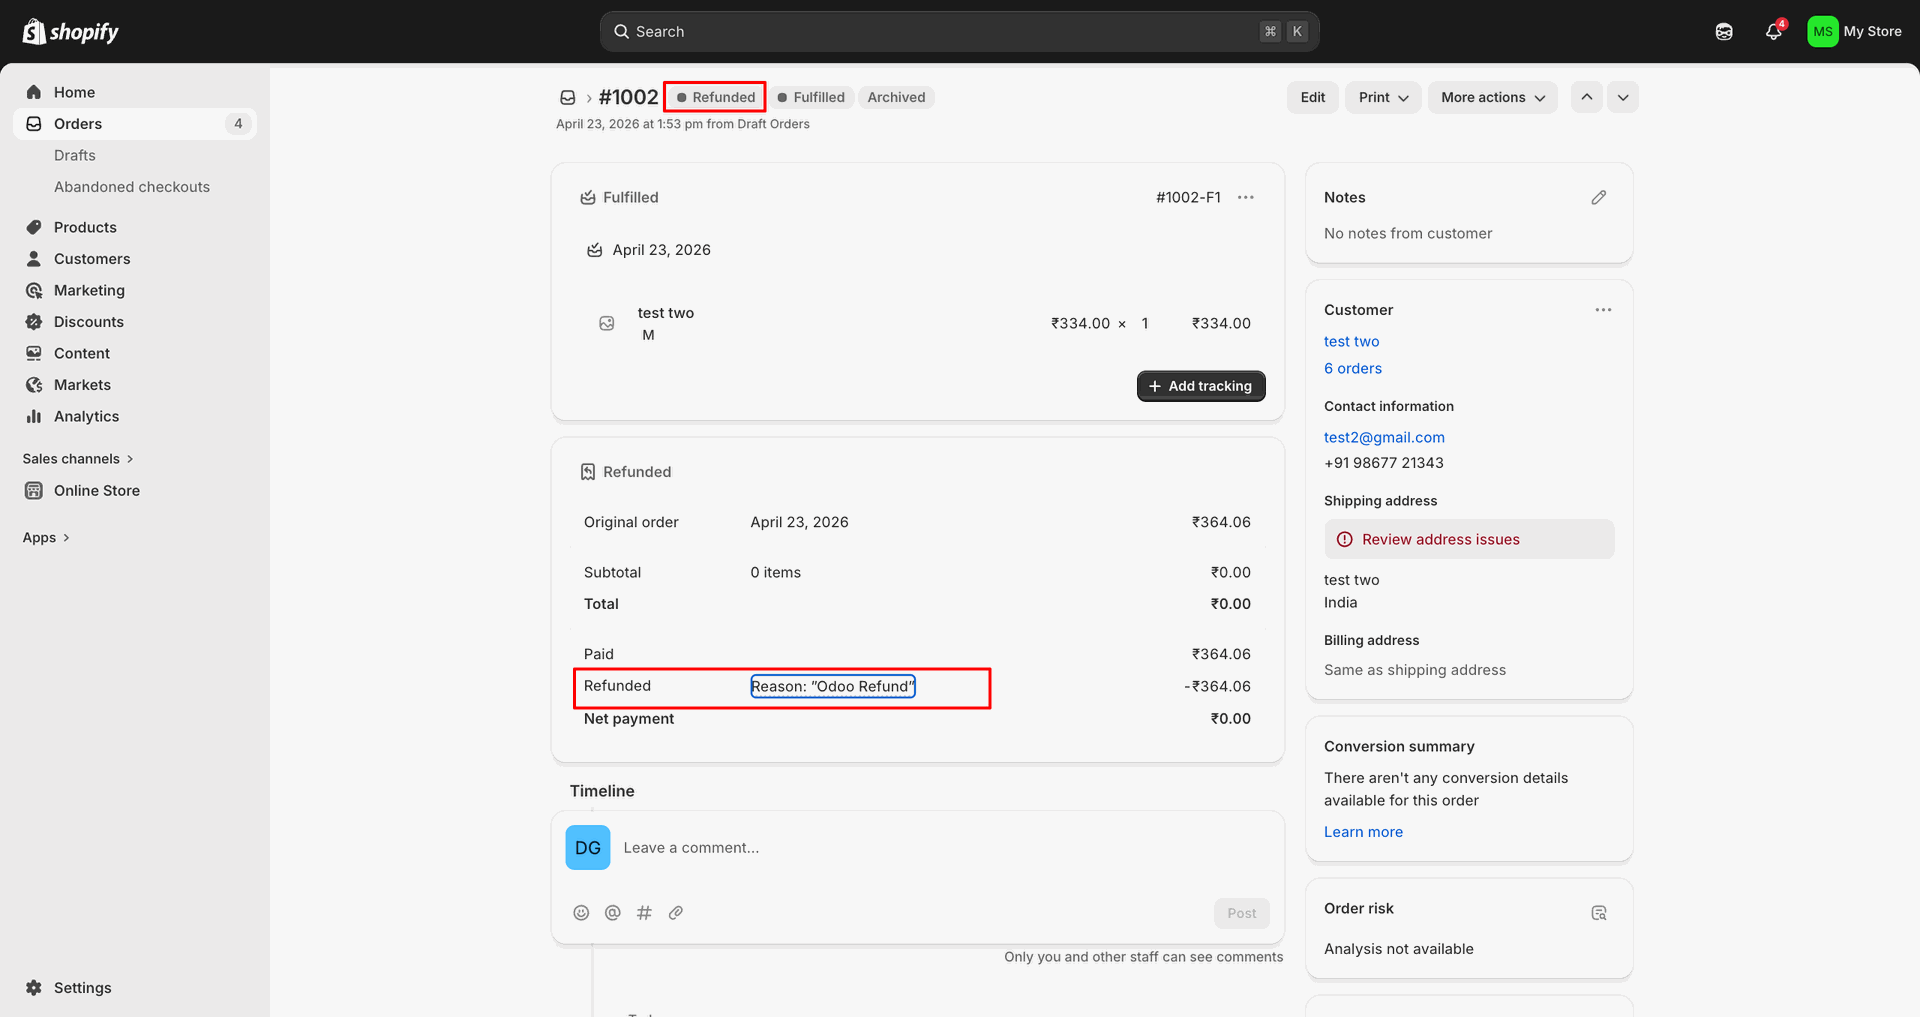
Verify the refunded Shopify order shows the refund reason and amount.
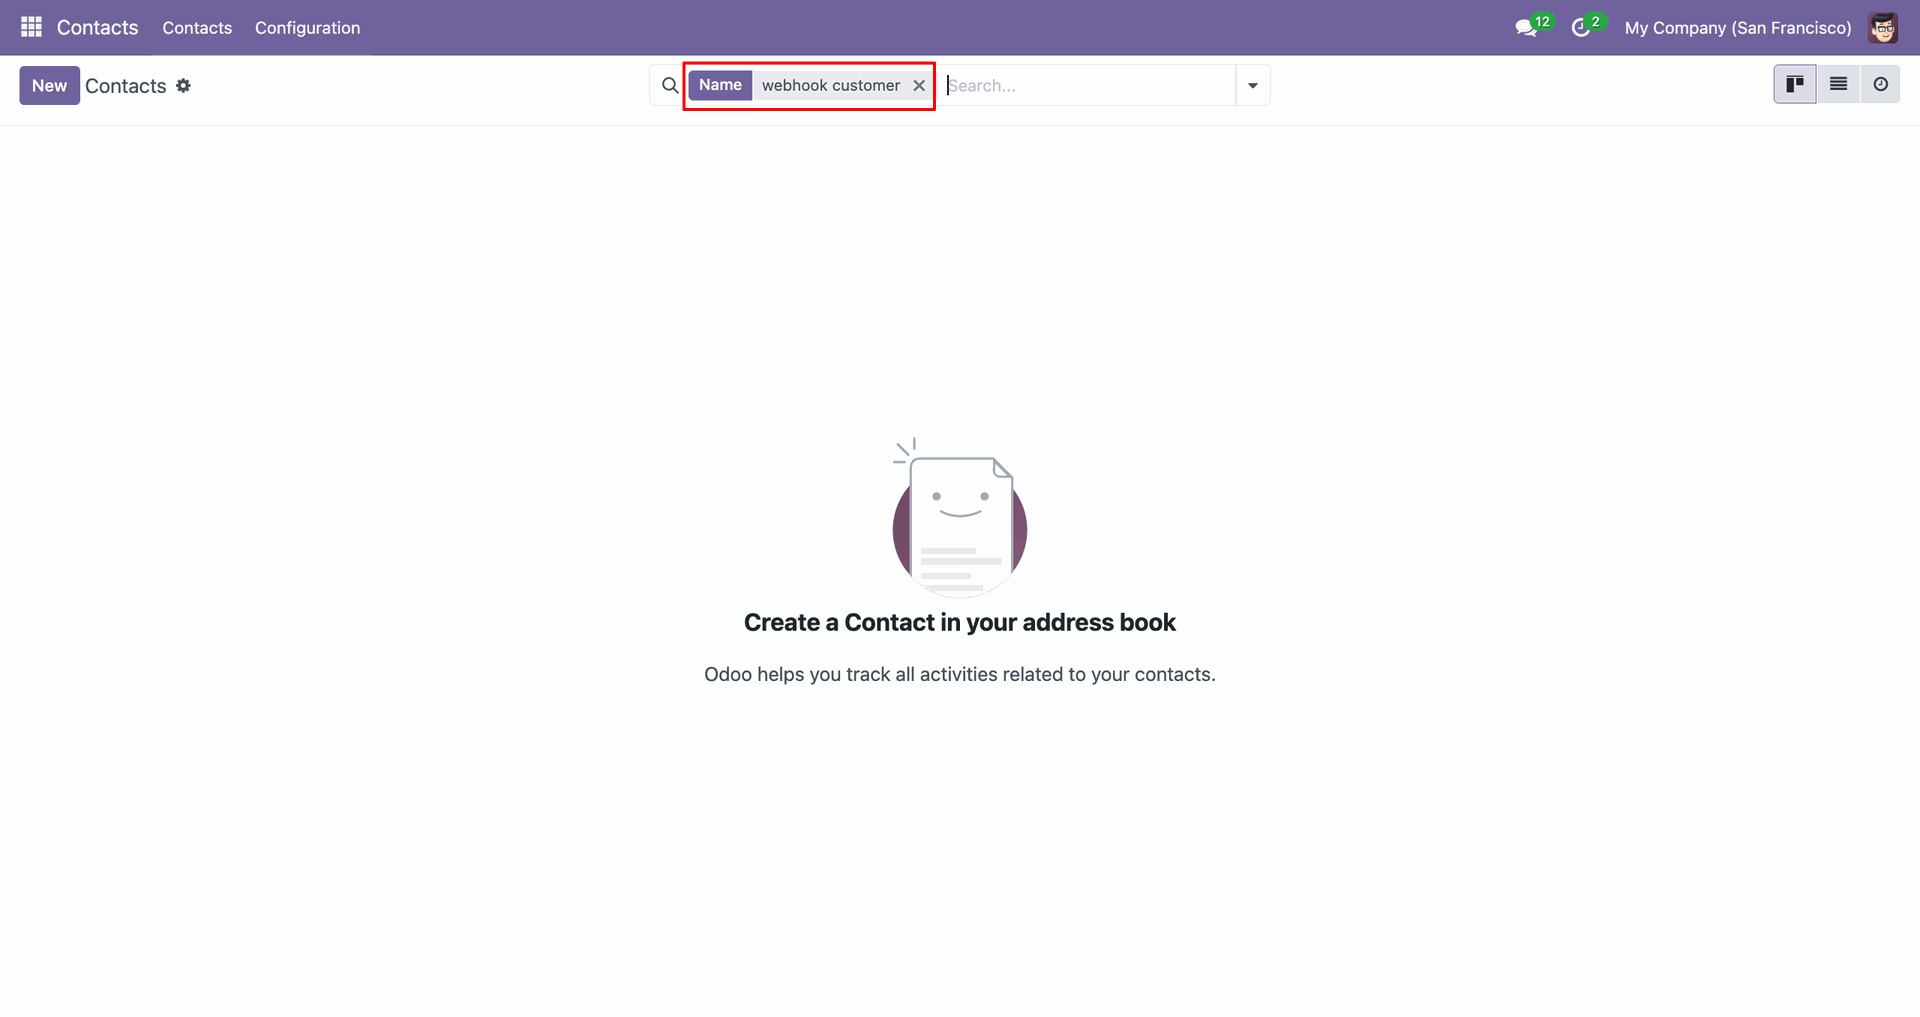
Use the Name search filter to find the webhook customer contact.
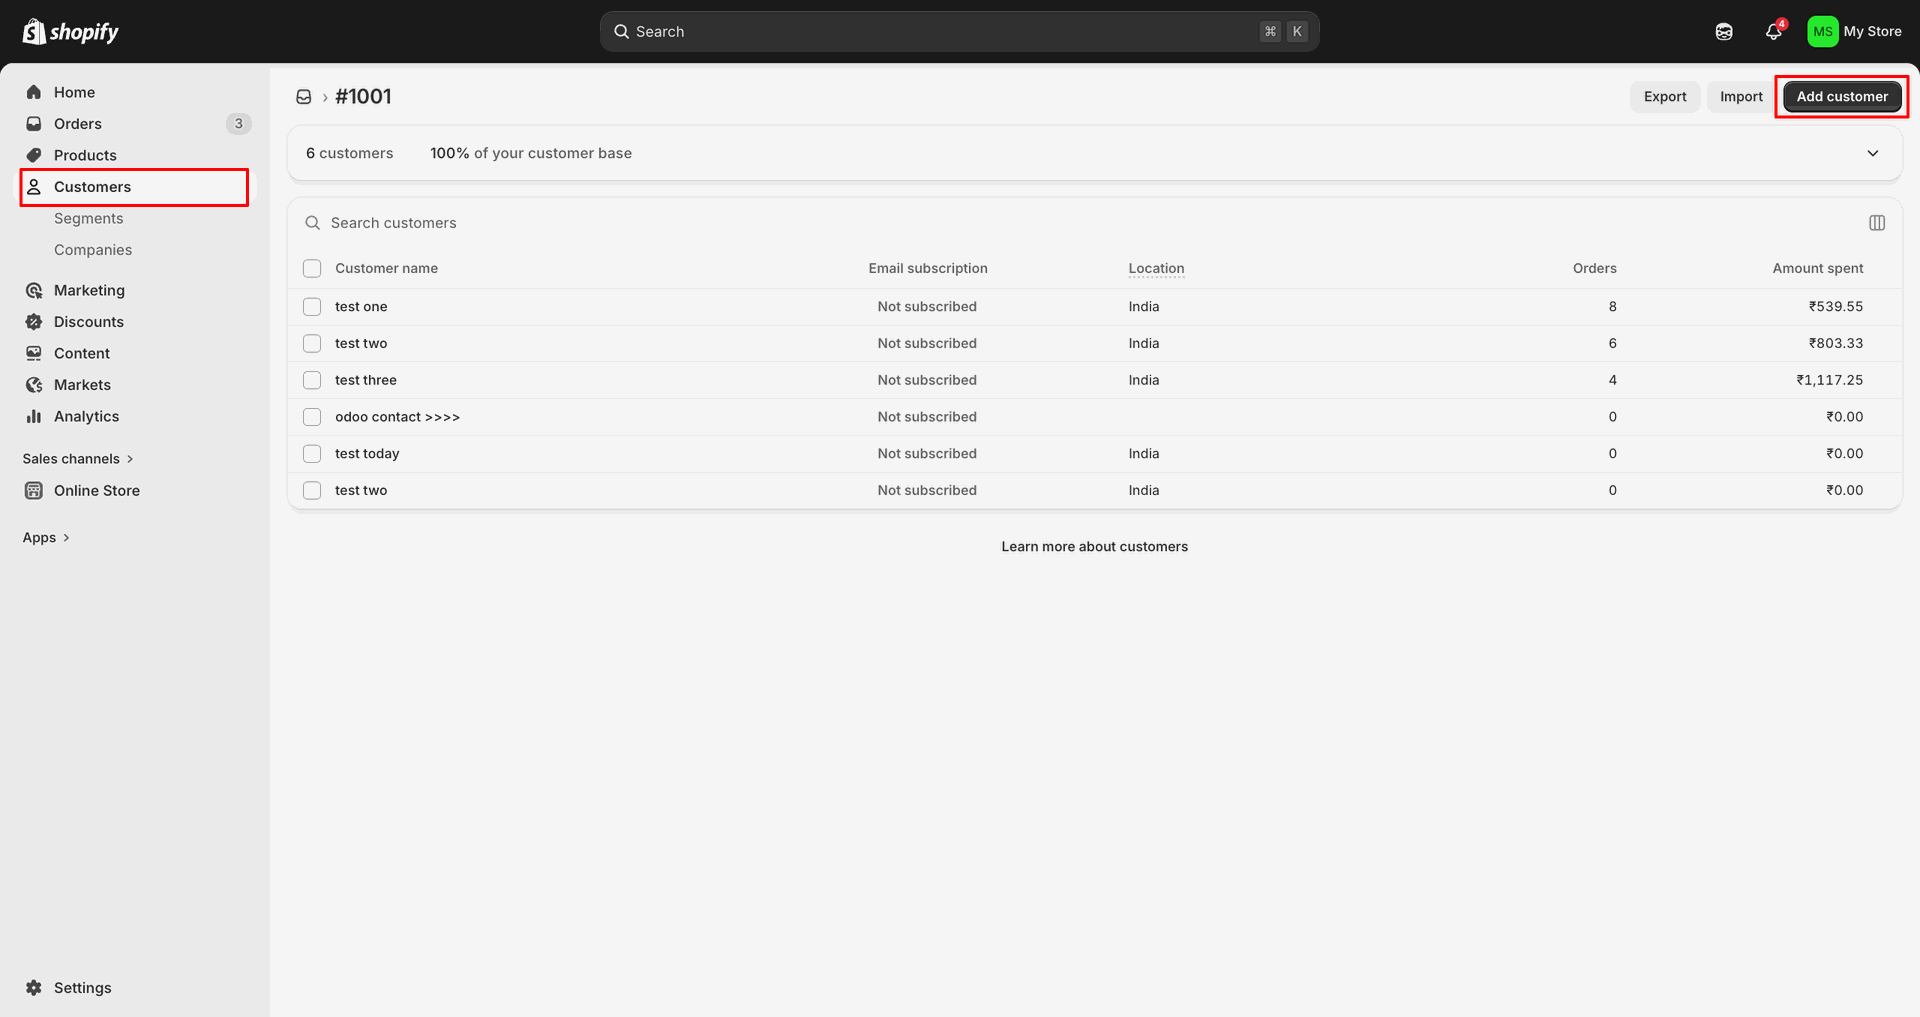
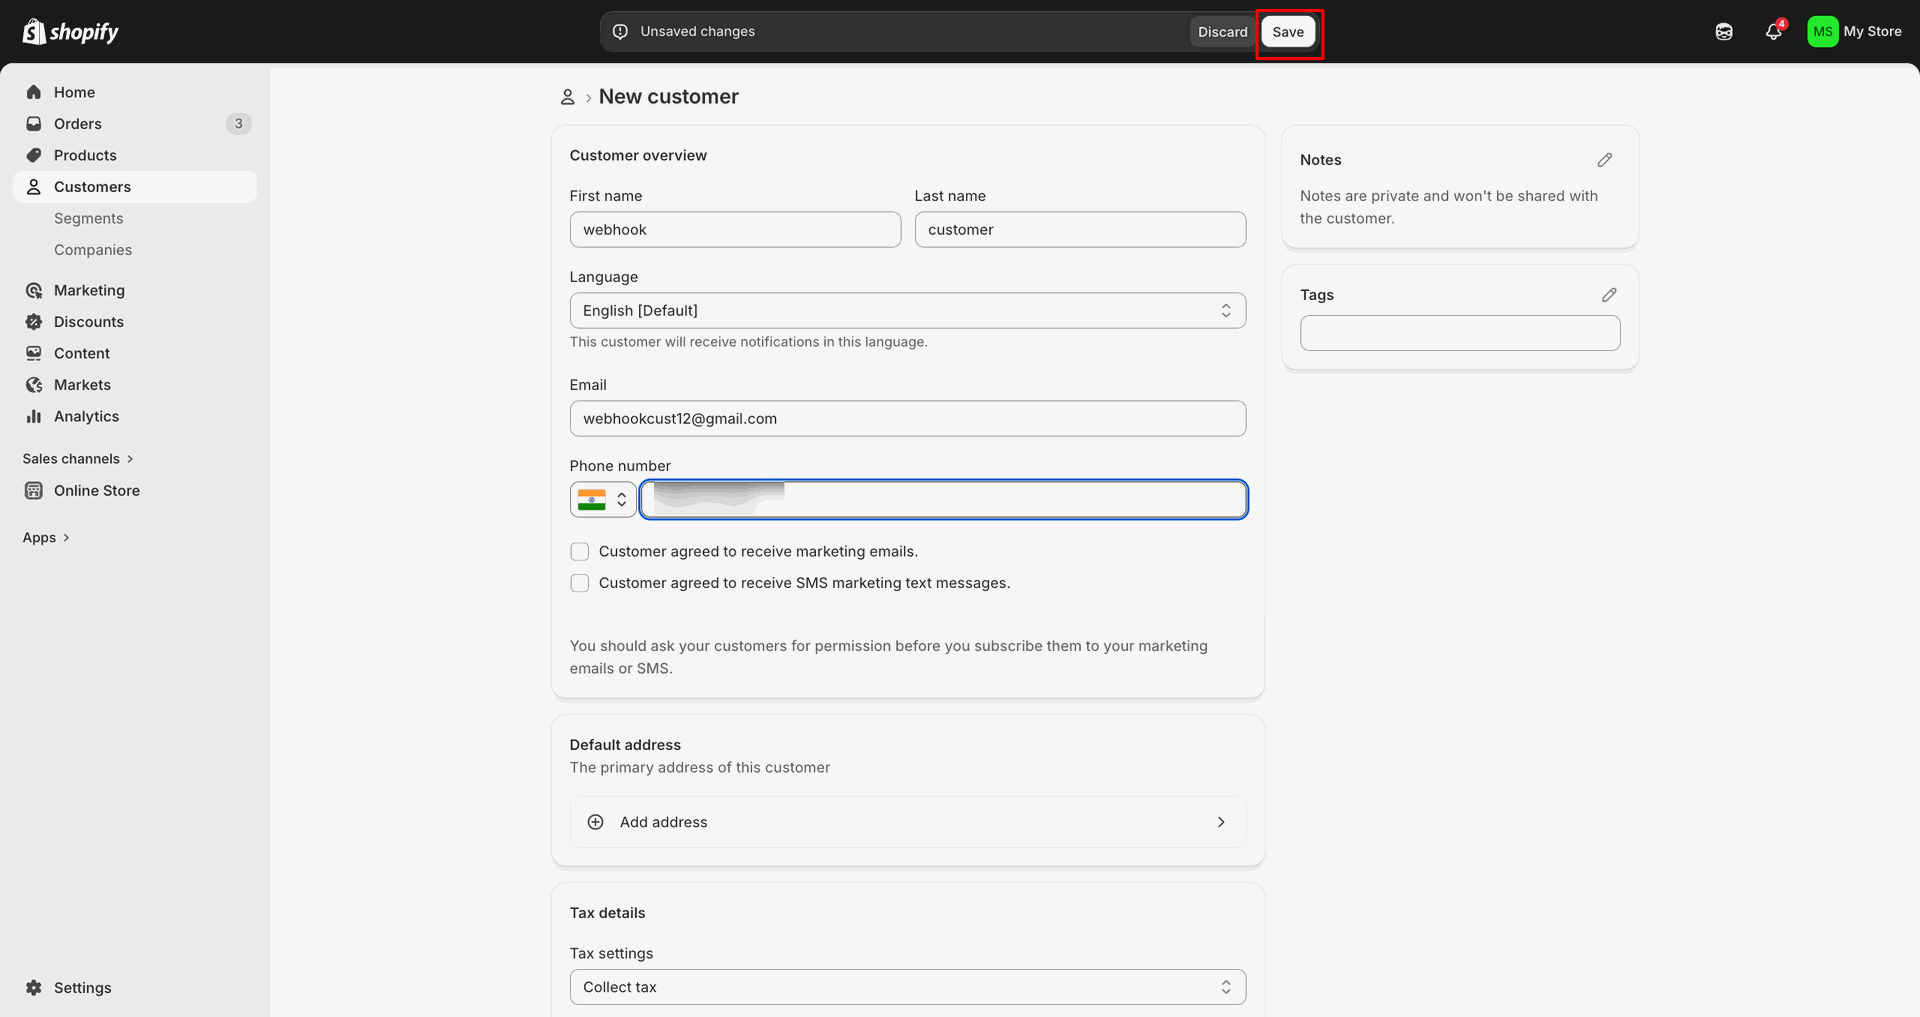
Click Add customer in Shopify to create a new customer record.
Enter customer details, update the phone number, and click Save.
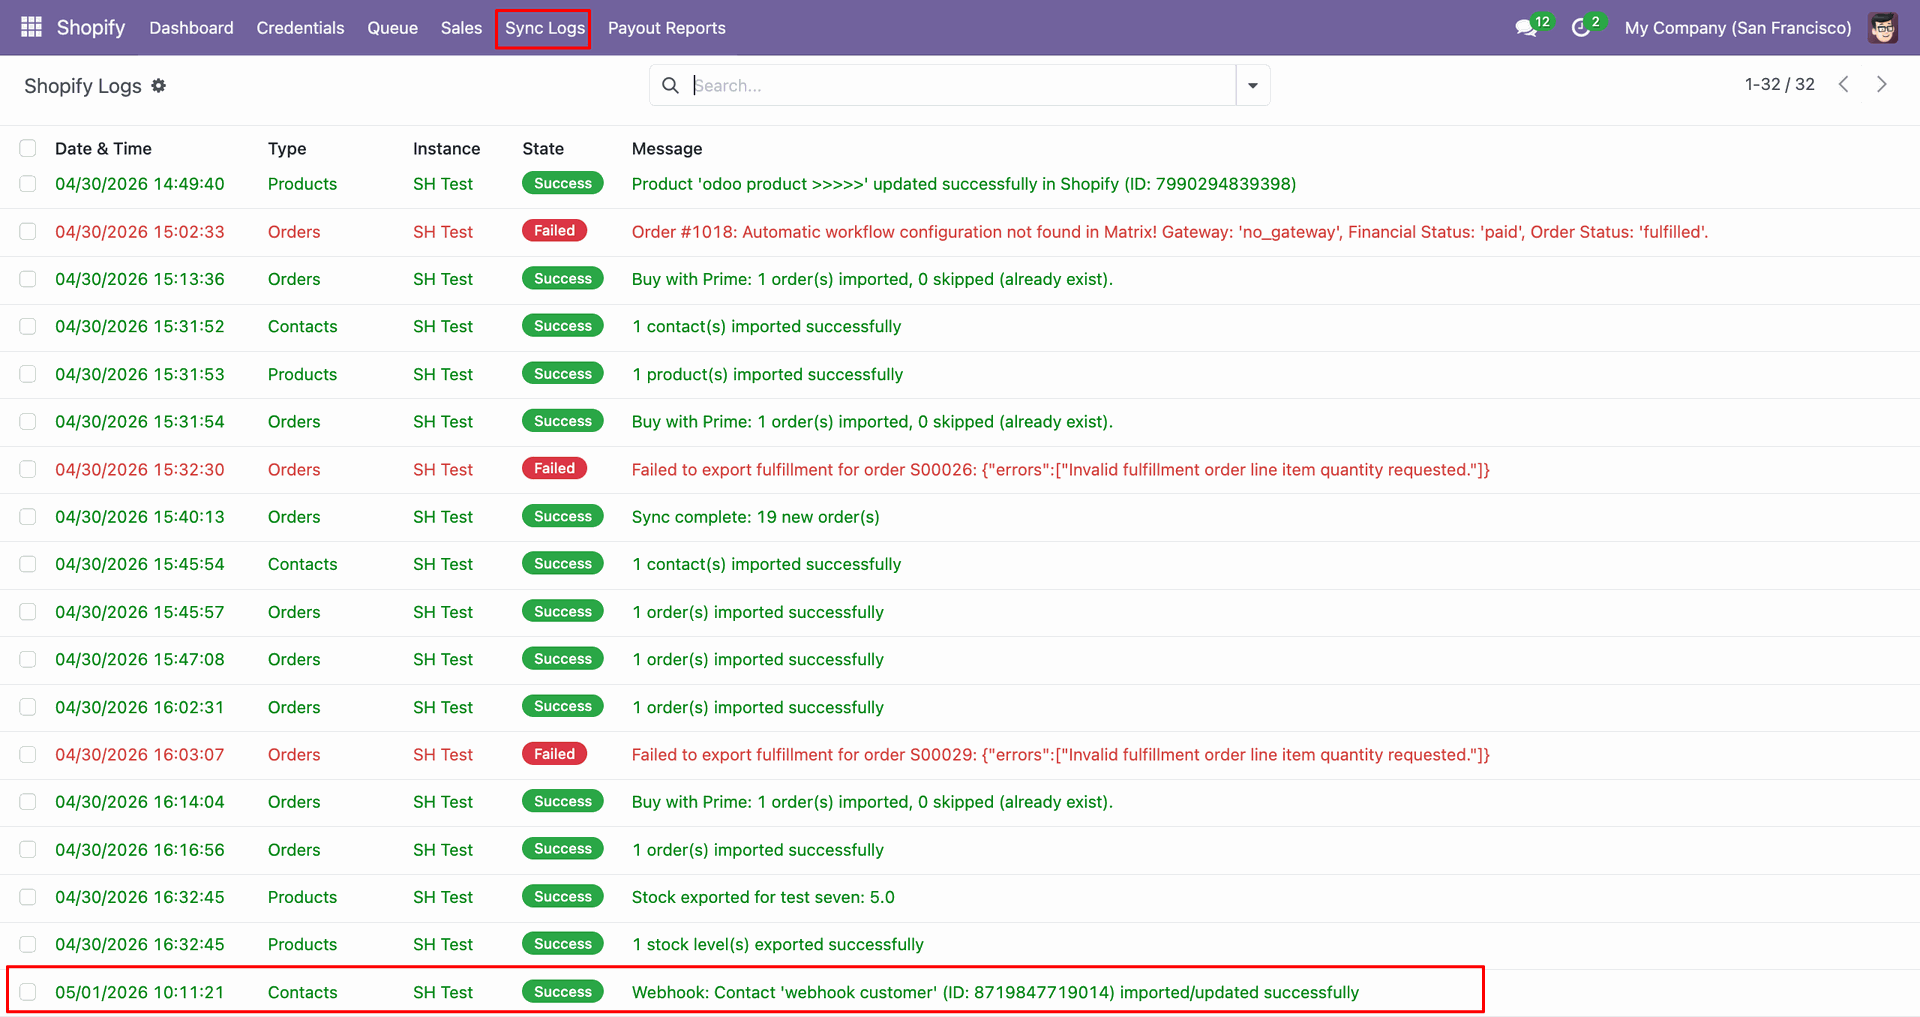
Check Sync Logs to confirm the webhook customer imported or updated successfully.
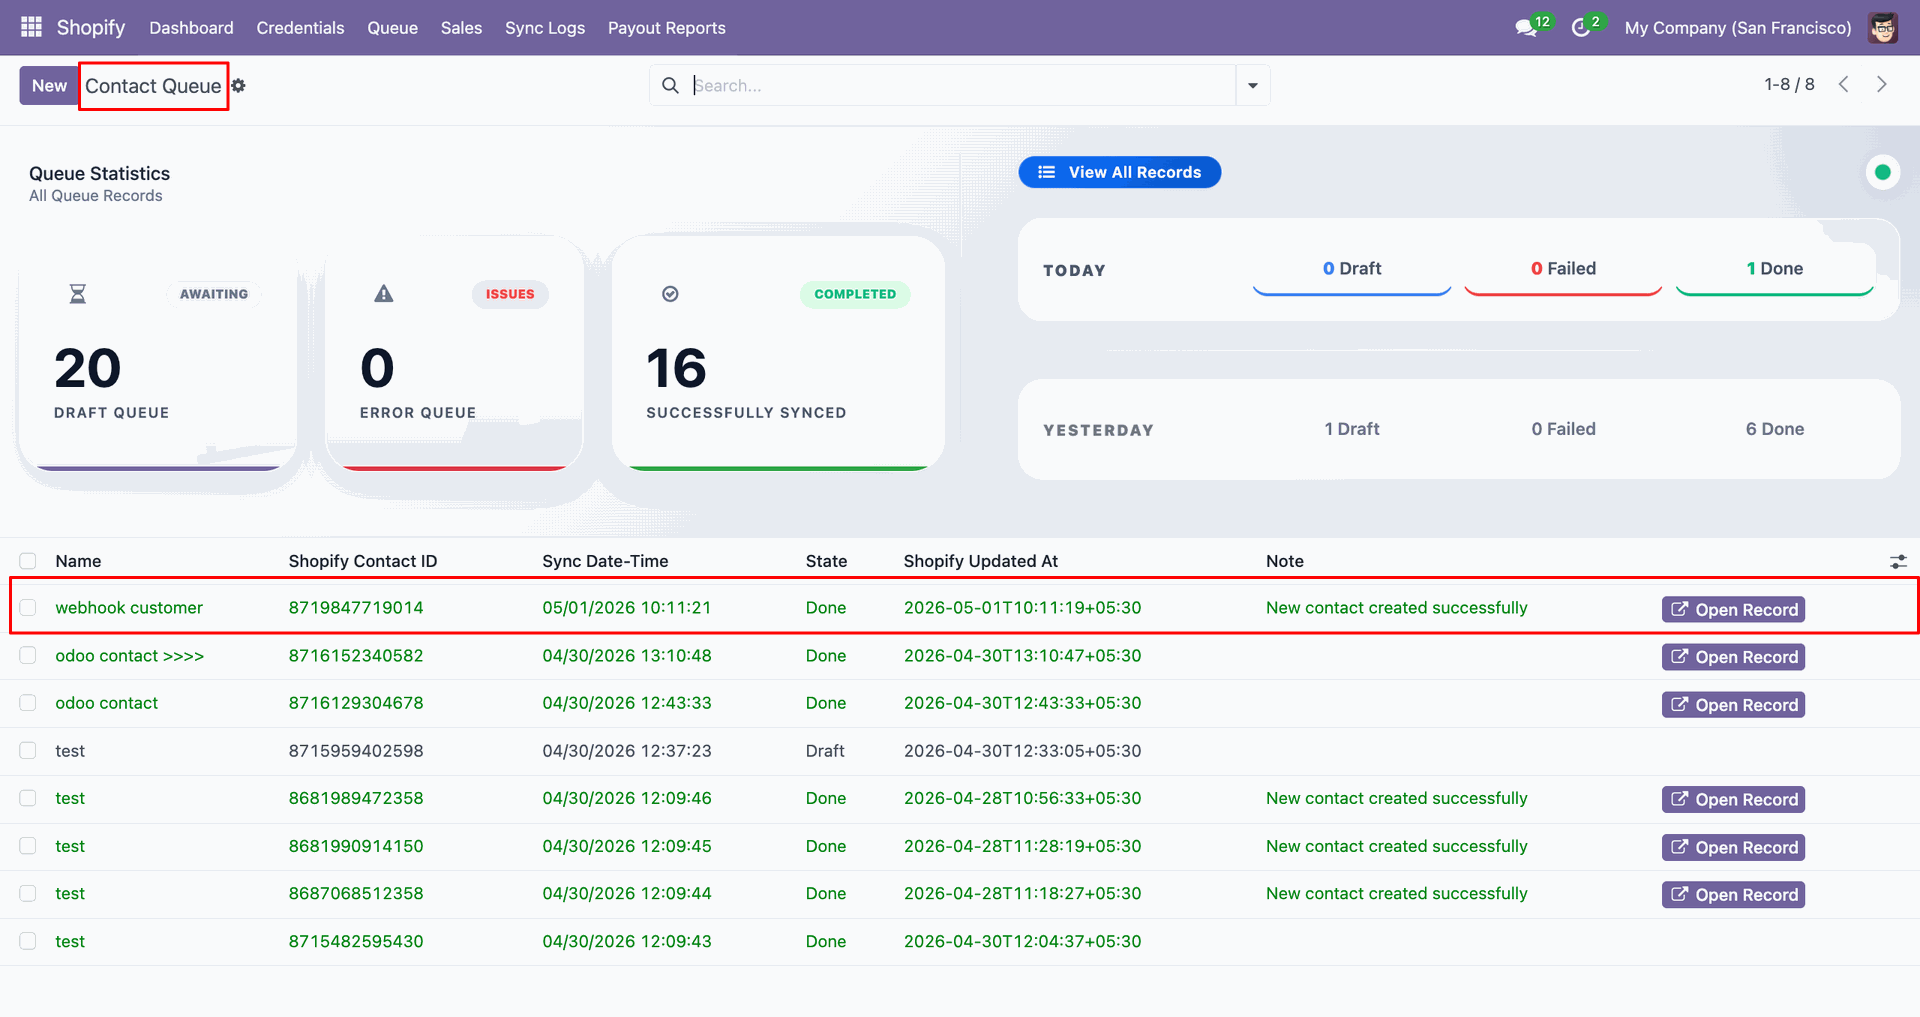
Open Contact Queue to review the webhook customer record and queue status.
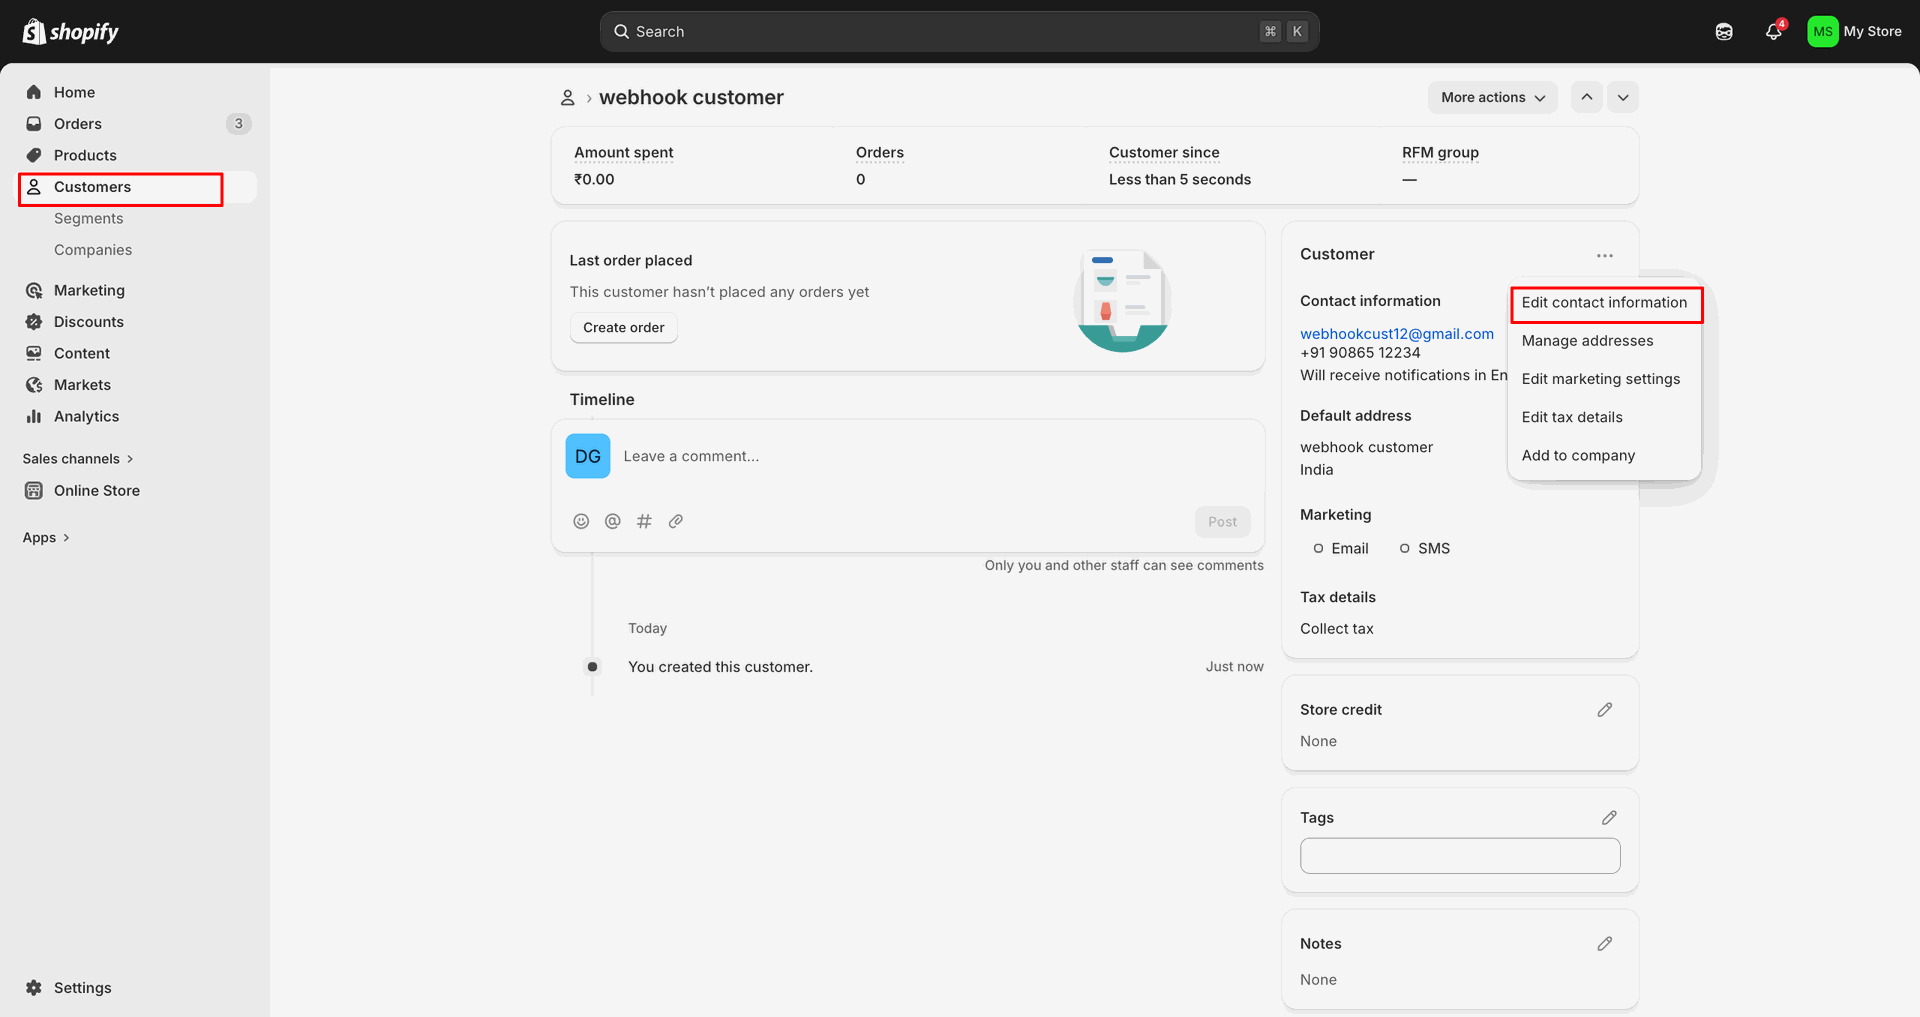
Open the webhook customer contact card to review the created Odoo record.

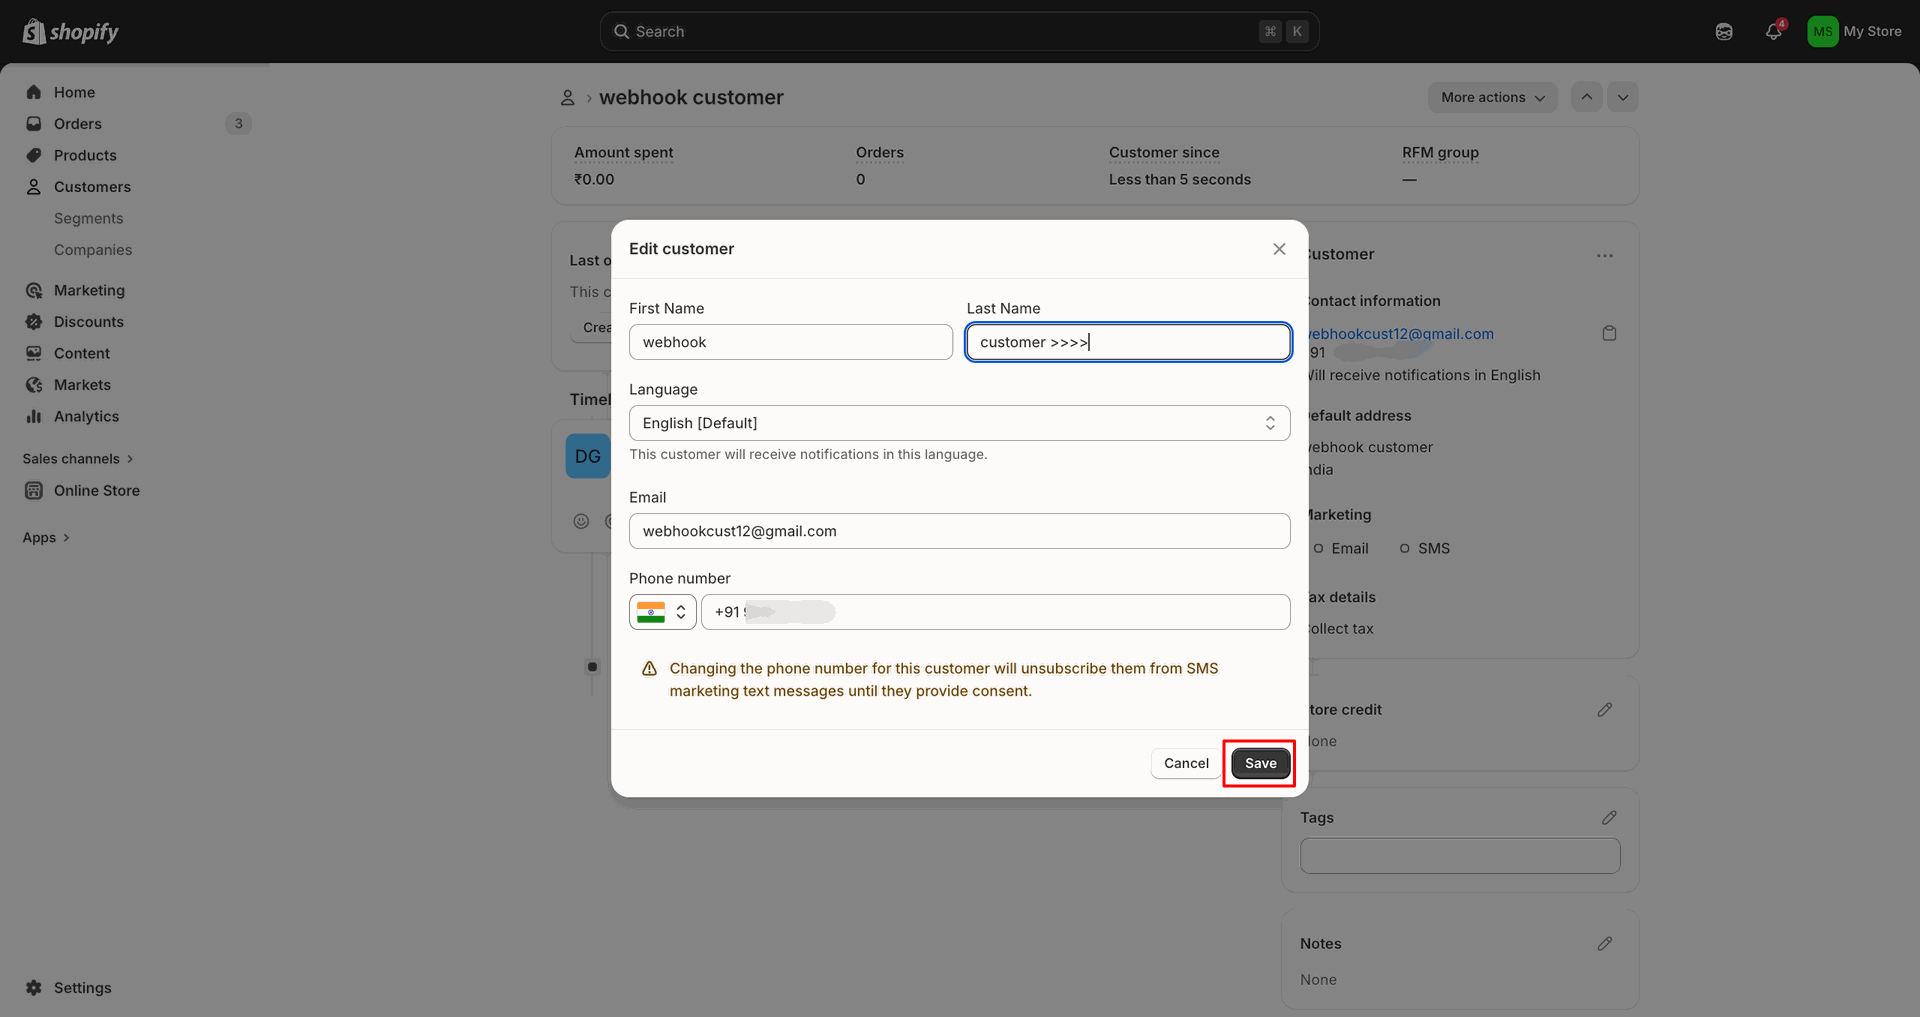
Choose Edit customer from Shopify to update the existing webhook customer.
Change customer fields in the popup, then click Save to apply.
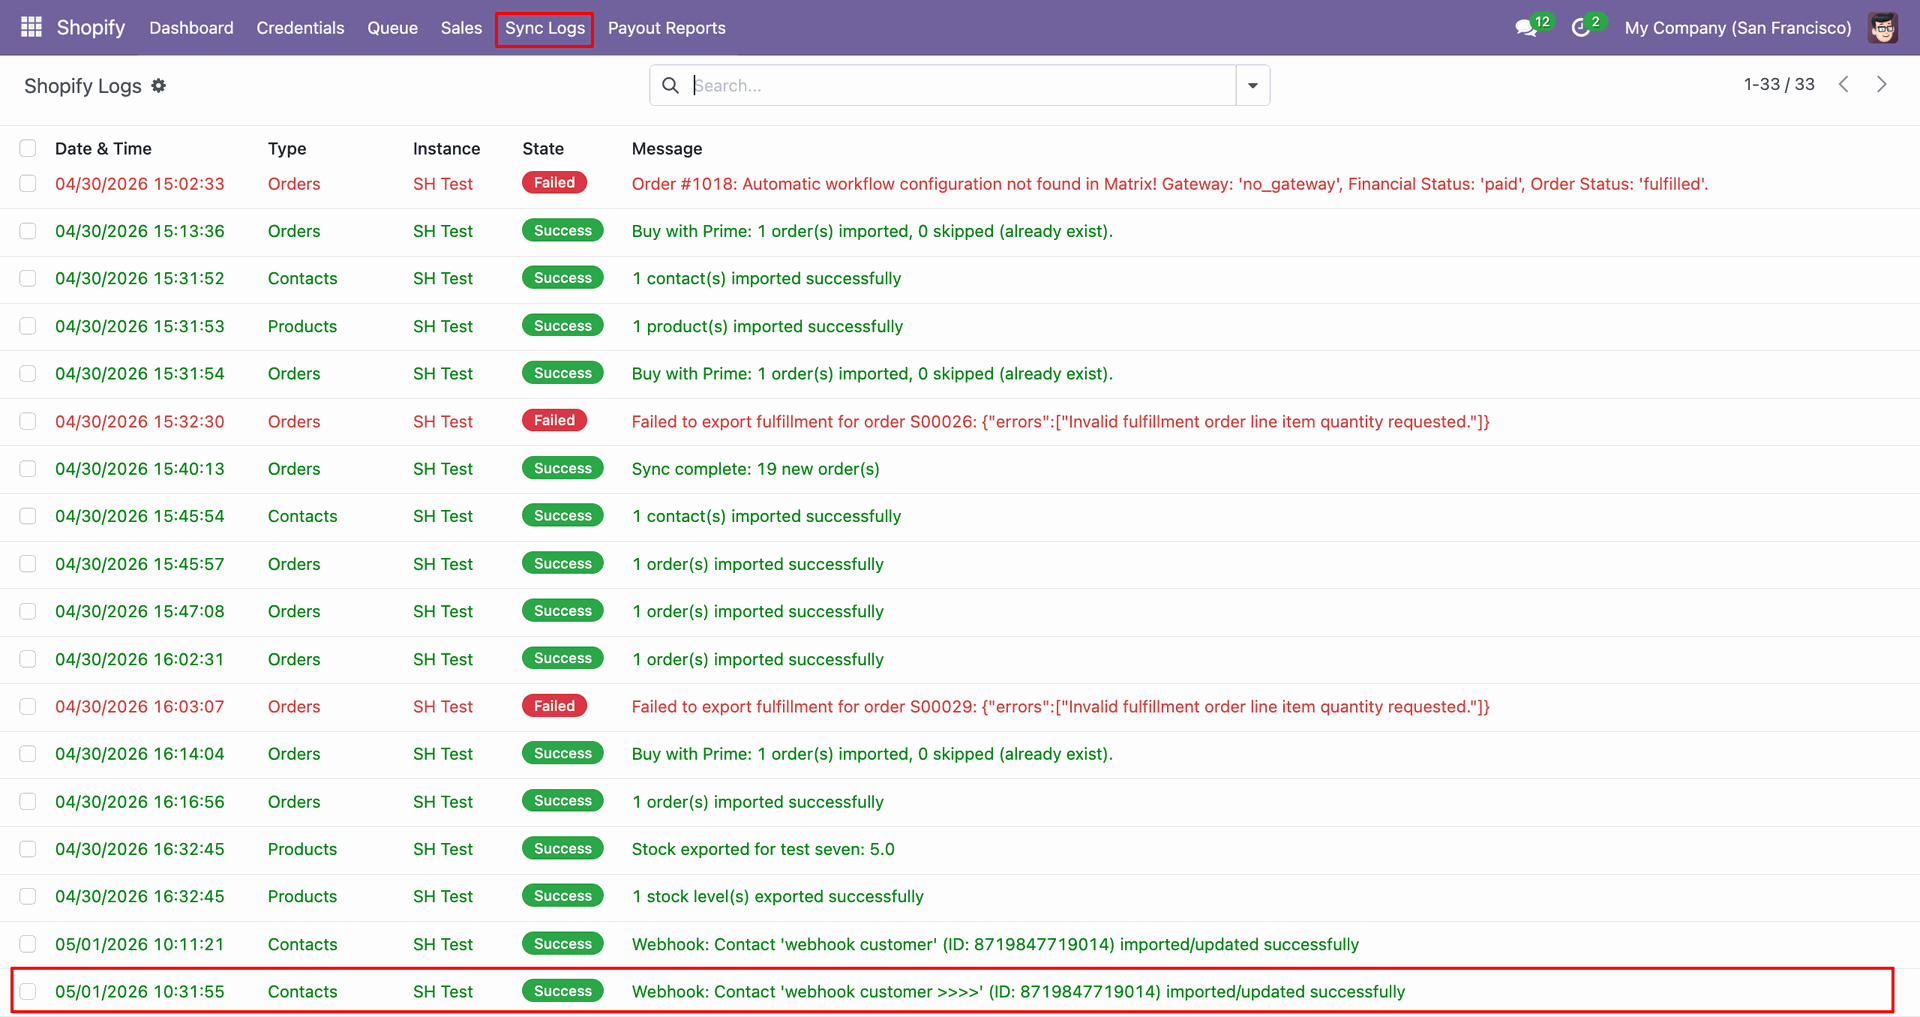
Review Sync Logs to confirm the webhook customer update processed successfully.
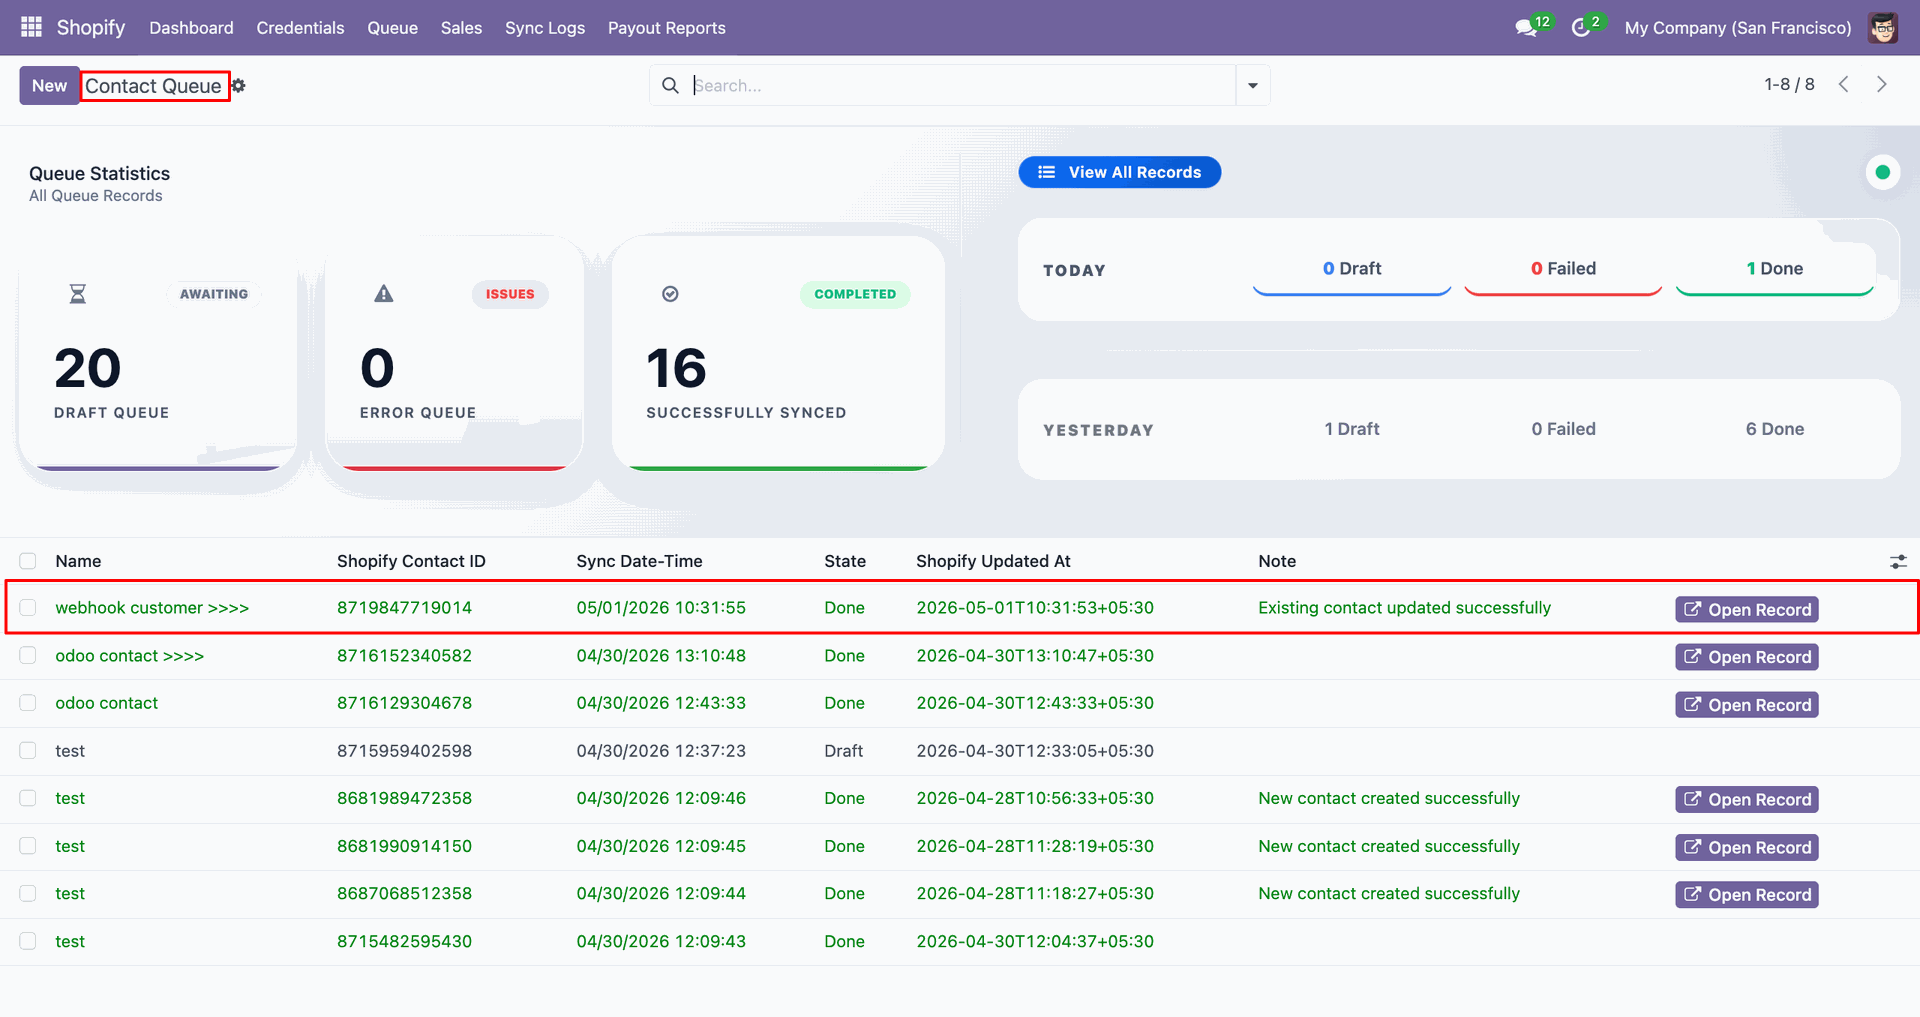
Inspect Contact Queue to verify the existing contact was updated successfully.
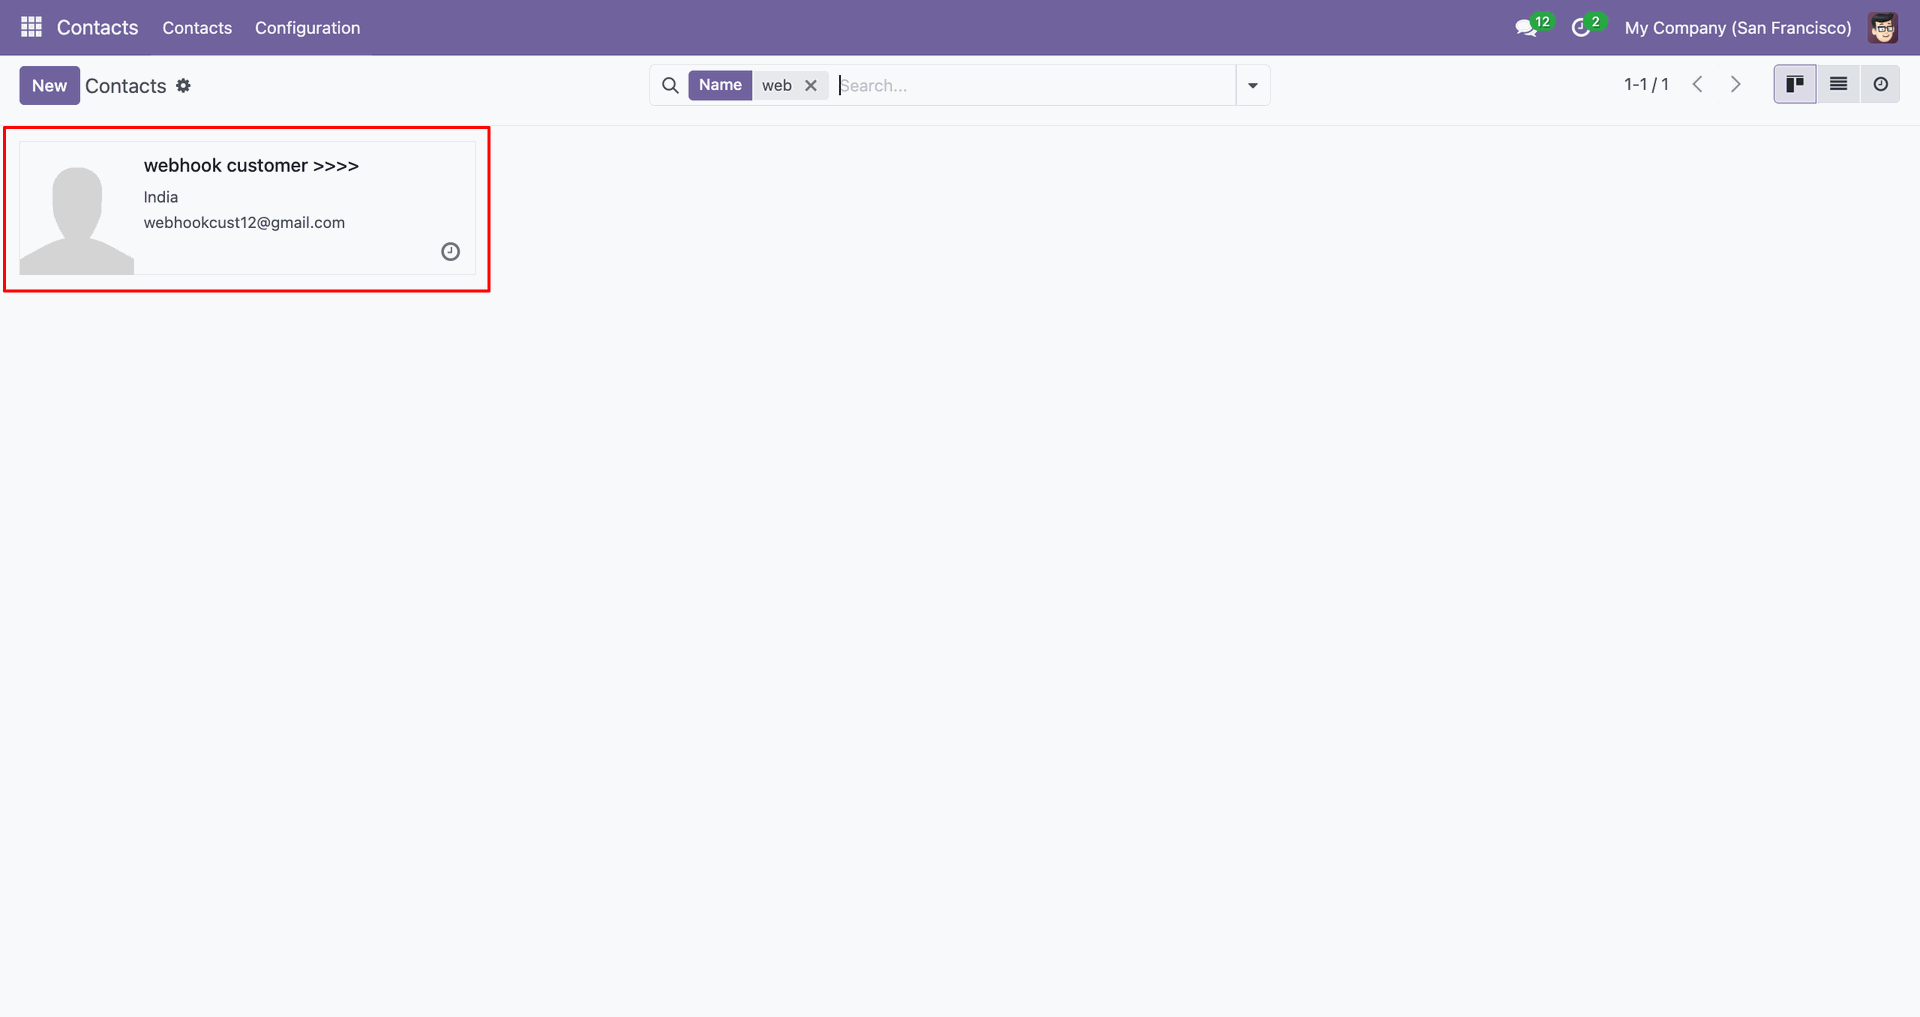
Open the updated webhook customer contact to review the changed name.
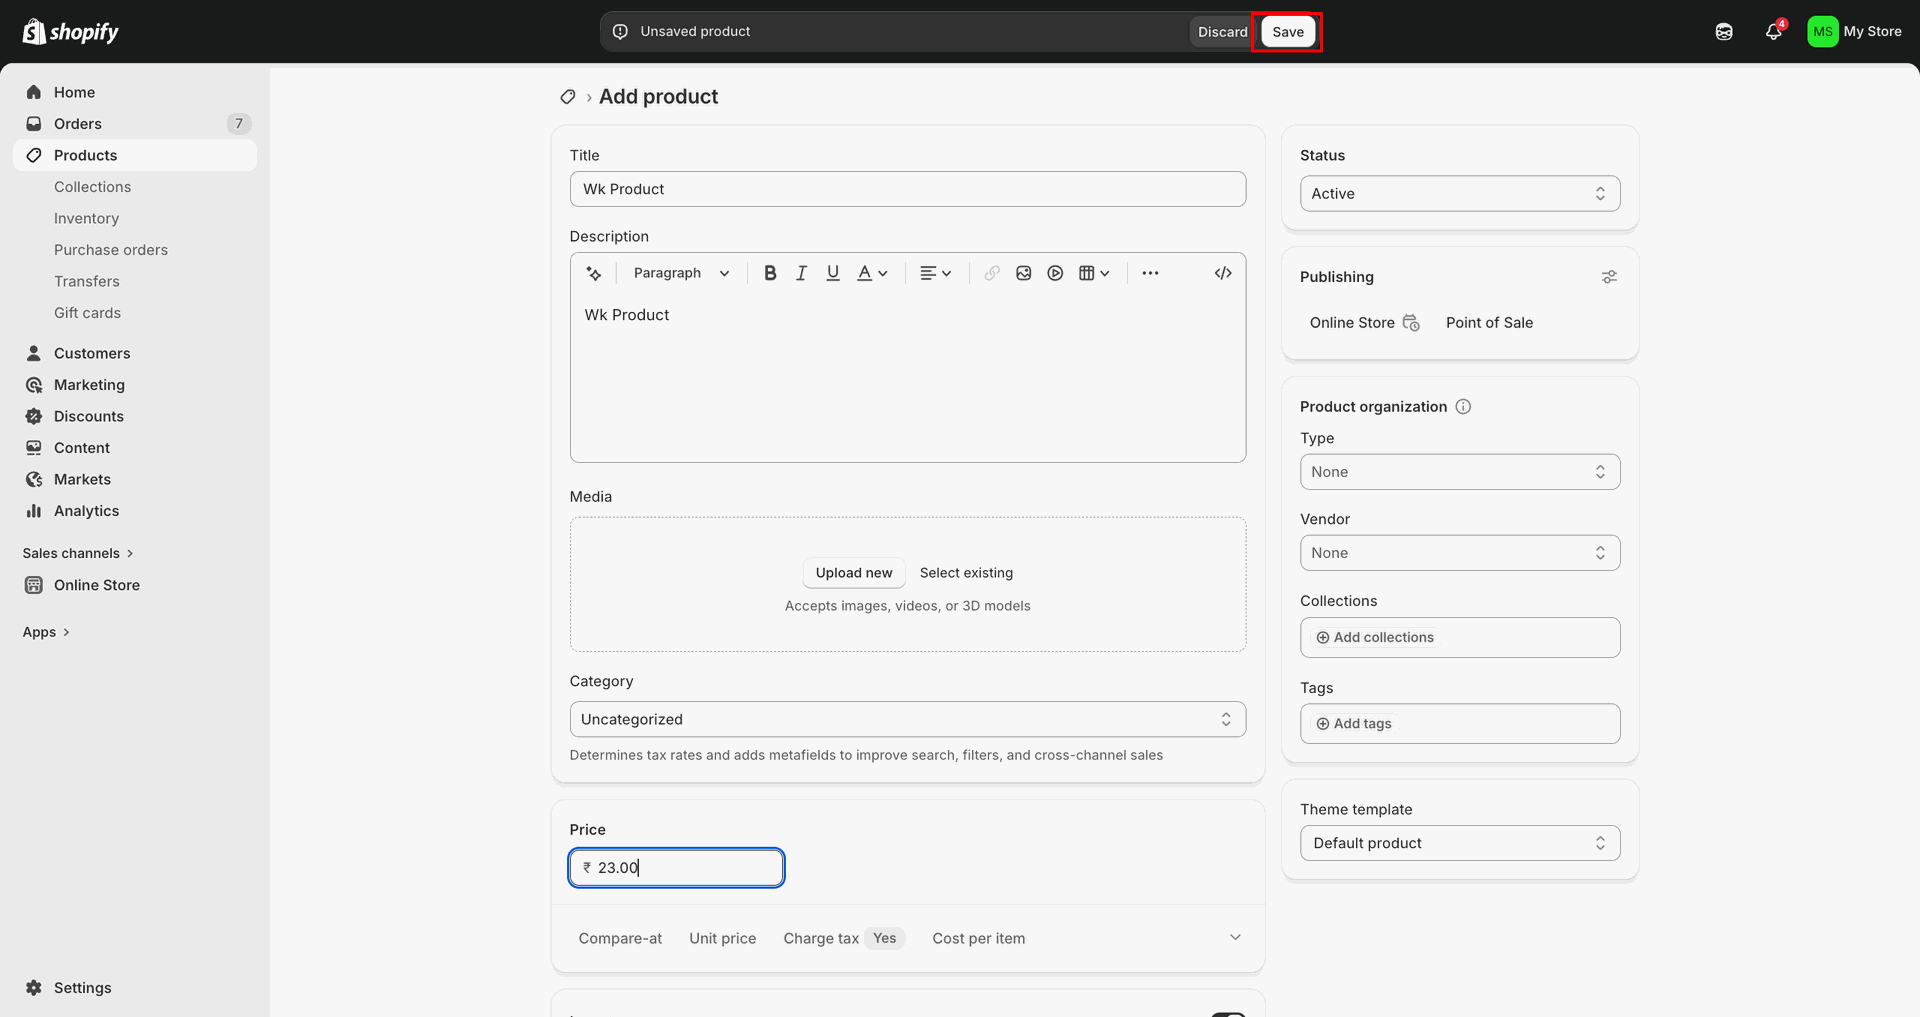
Click Add product in Shopify to create a new product record.
Enter product details and click Save.
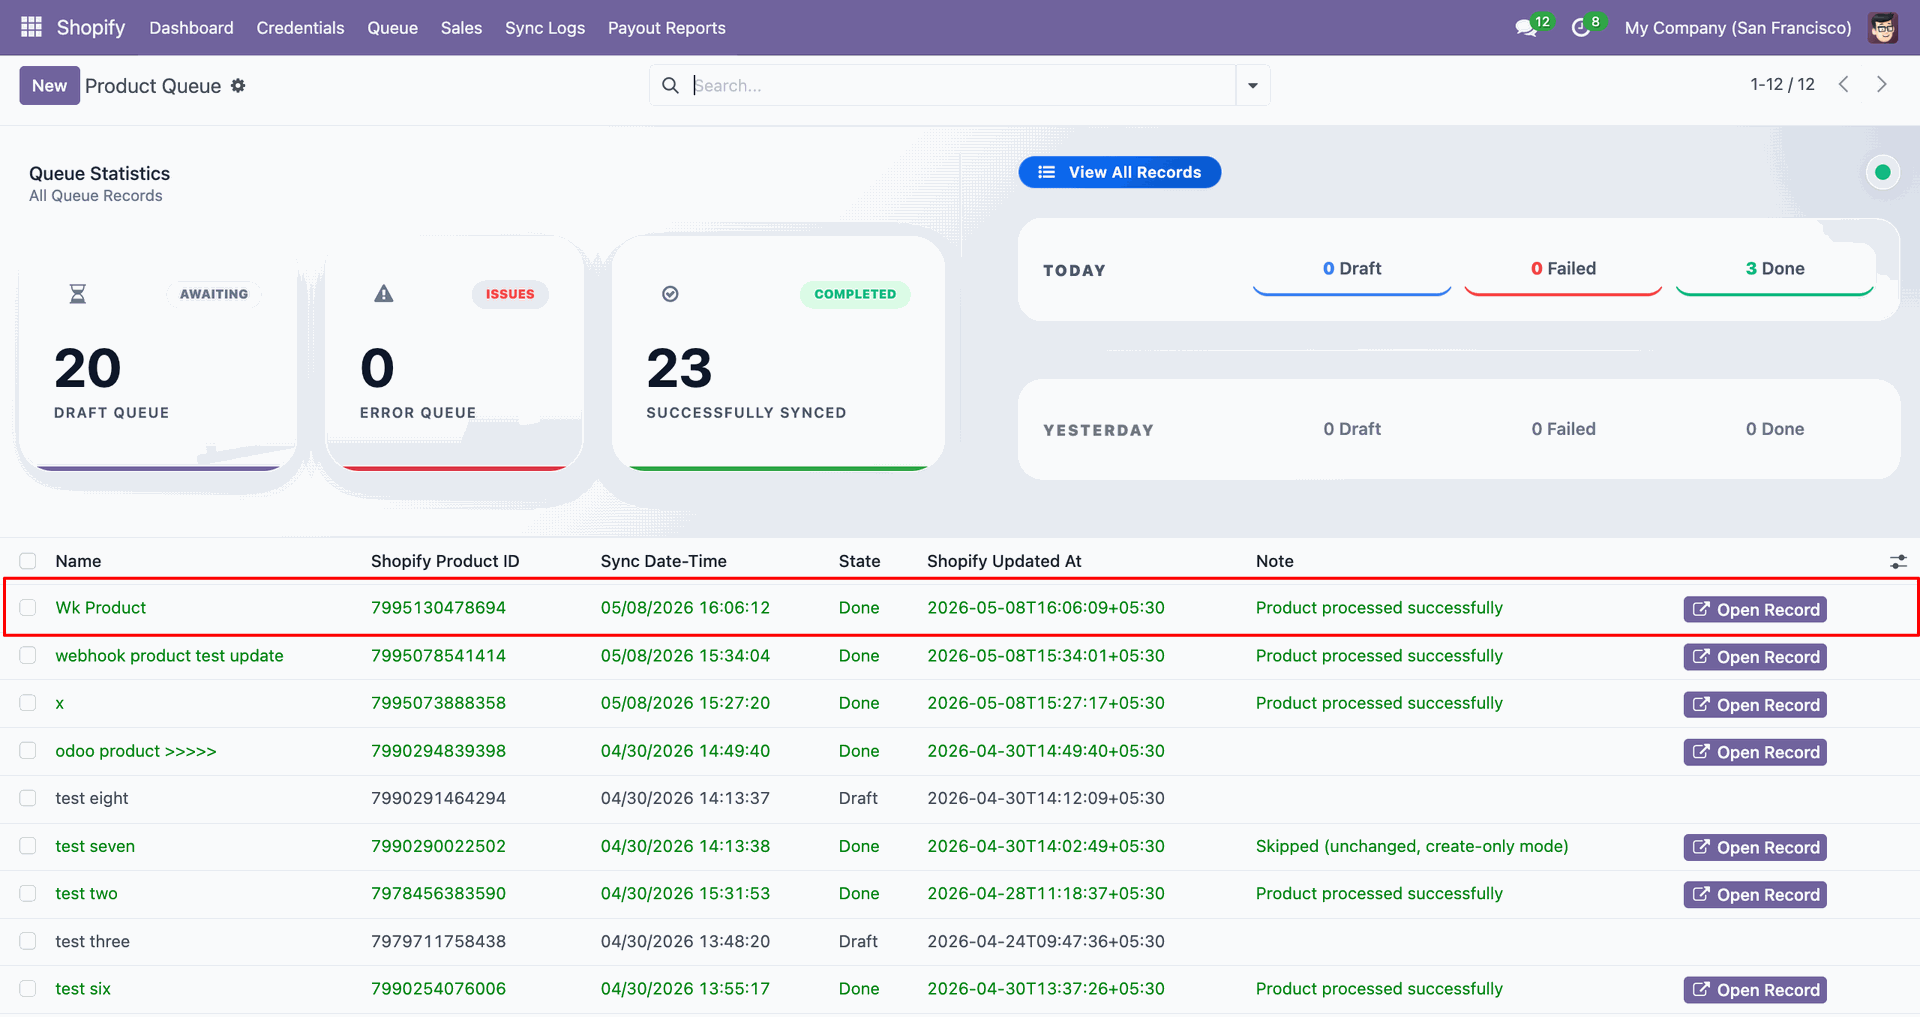
Check Sync Logs to confirm the webhook product imported or updated successfully.
Open the webhook product contact card to review the created Odoo record.
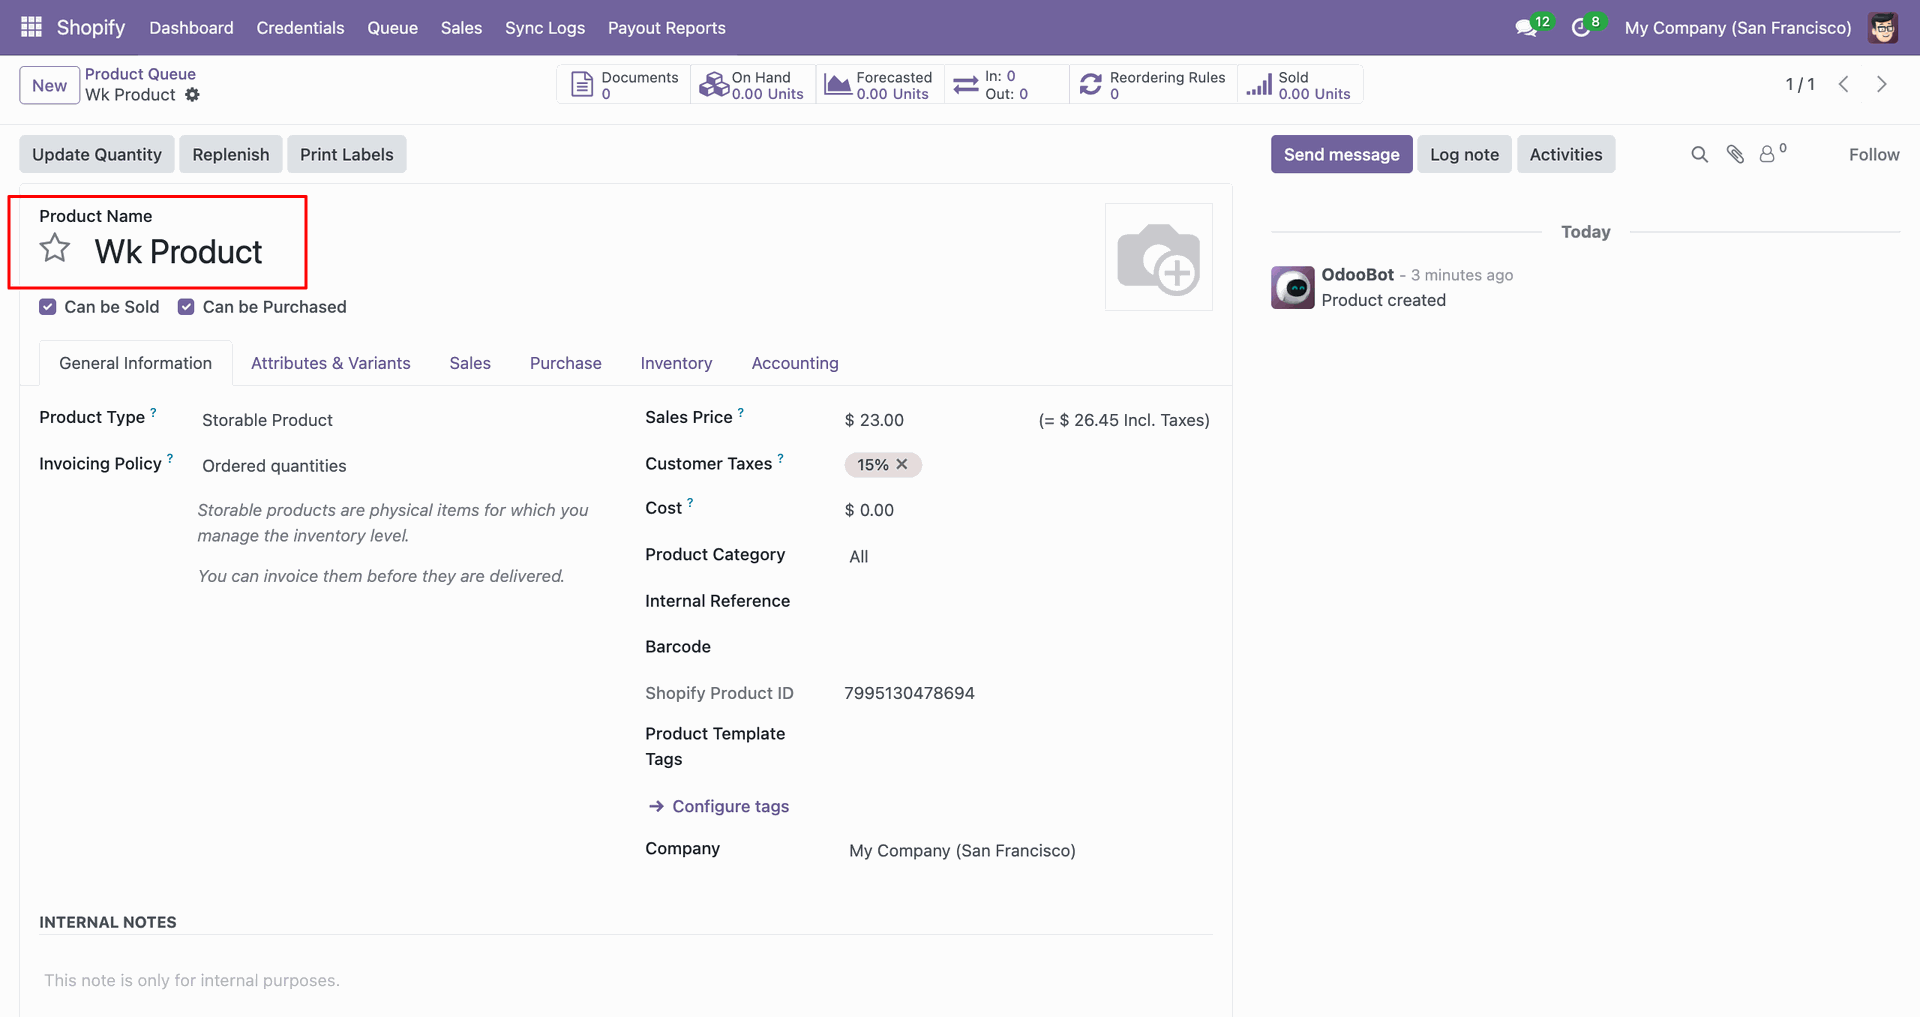
Change product name, then click Save to apply.
Review Sync Logs to confirm the webhook product update processed successfully.
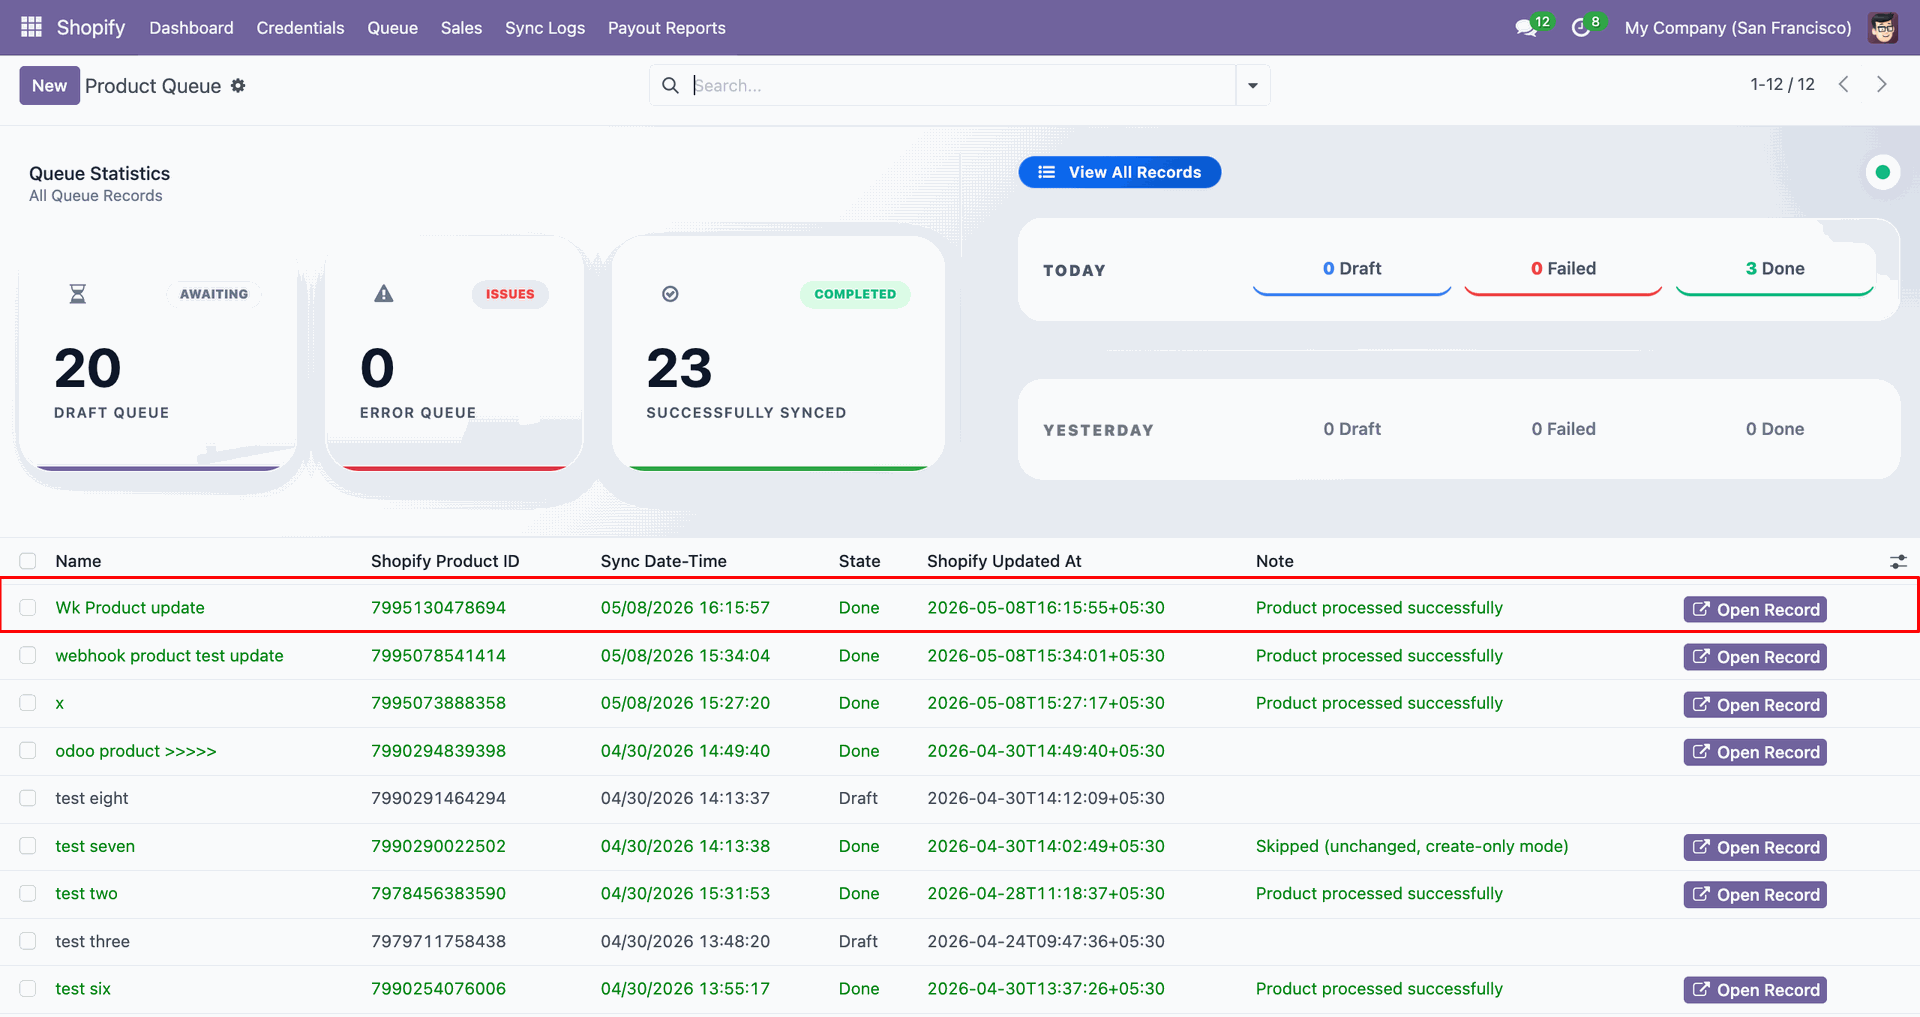
Inspect product Queue to verify the existing product was updated successfully.
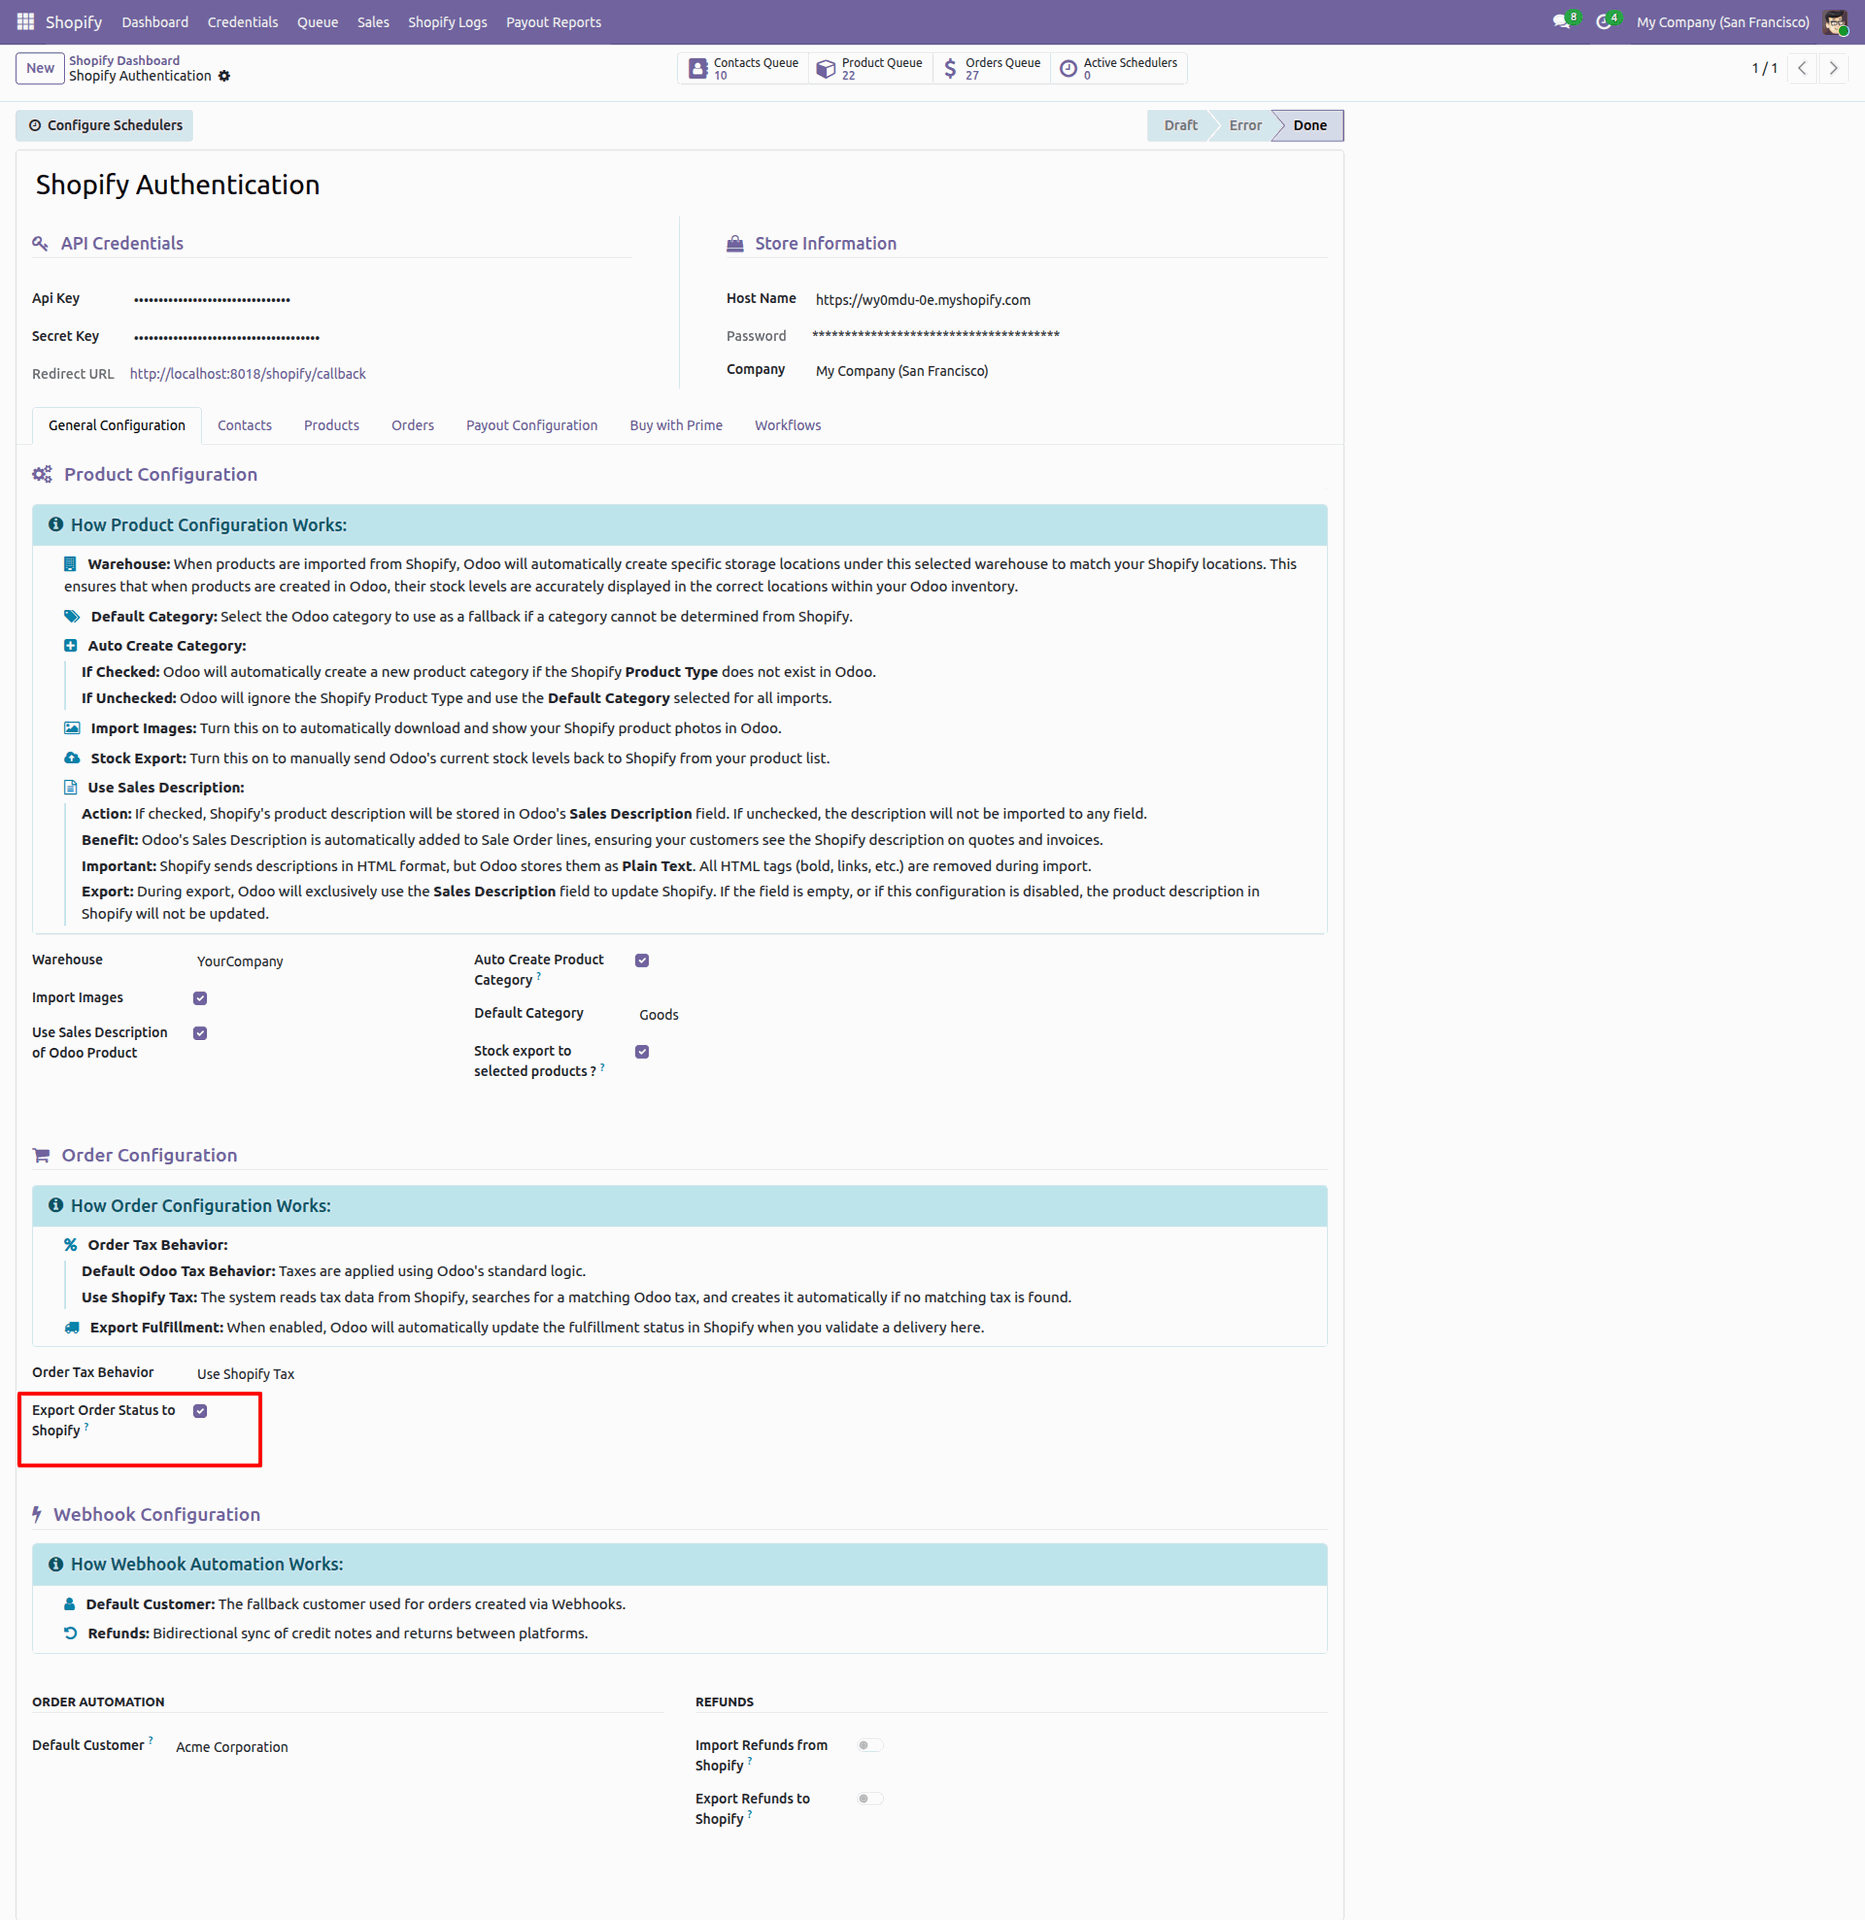
Enable 'Export Order Status to Shopify'.
Current status is 'Unfulfilled'.
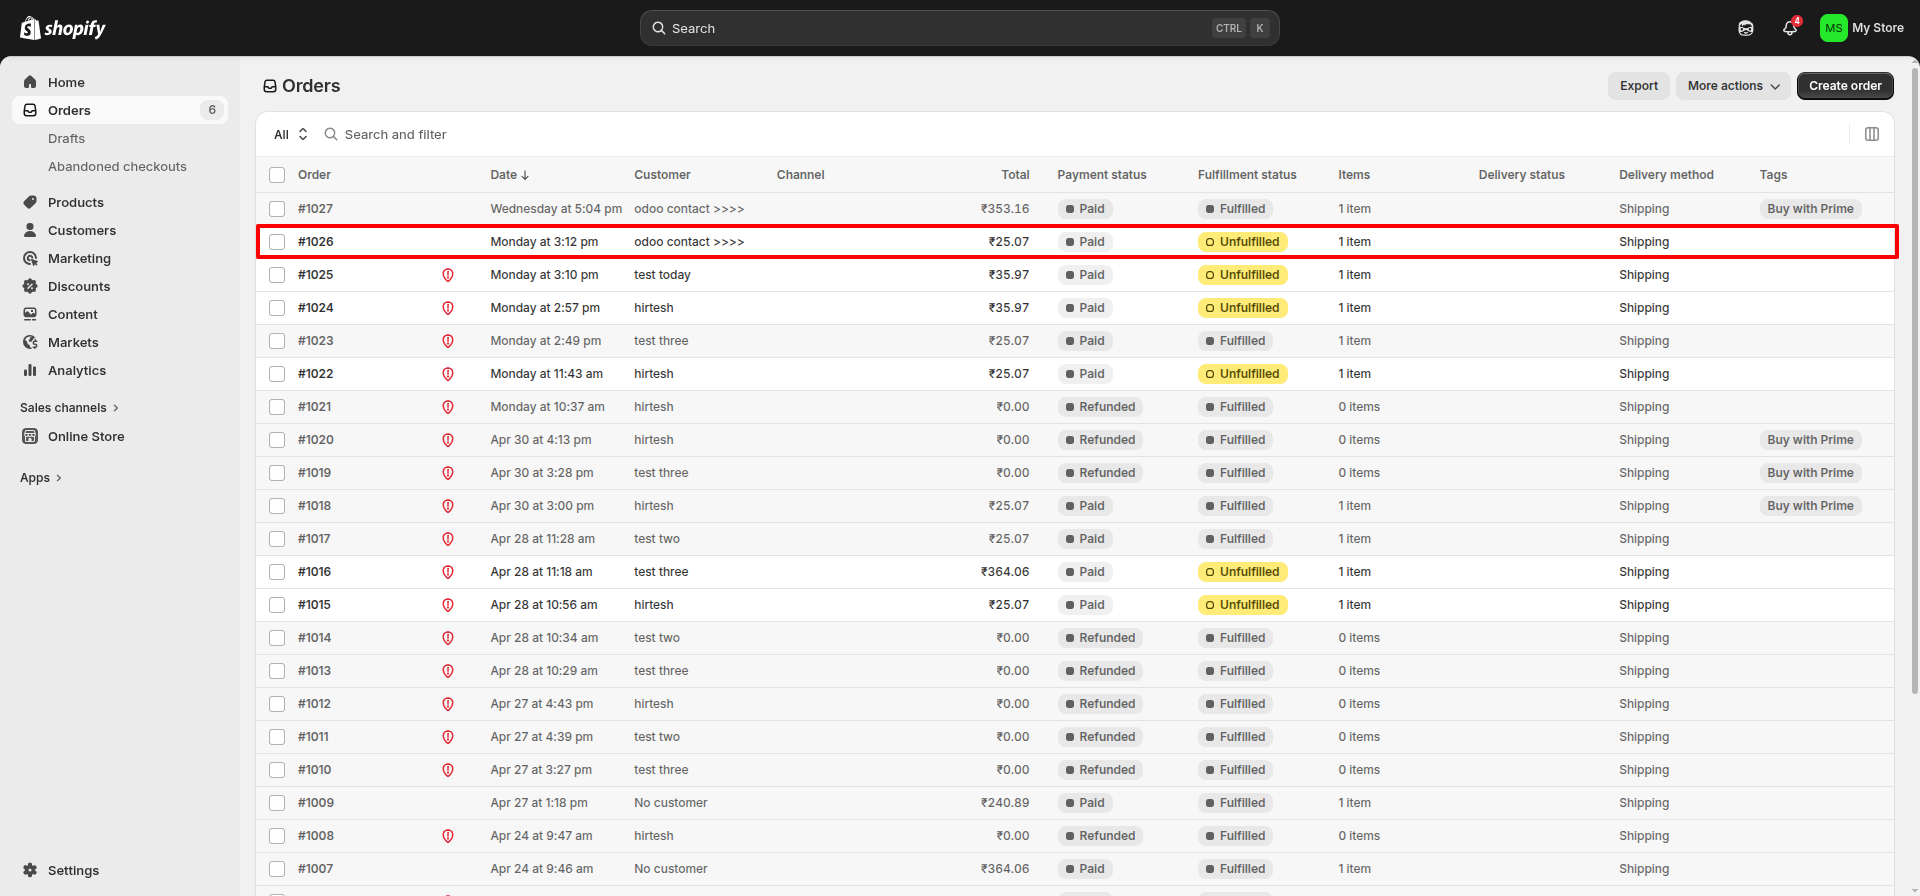
Click 'Open Record'.
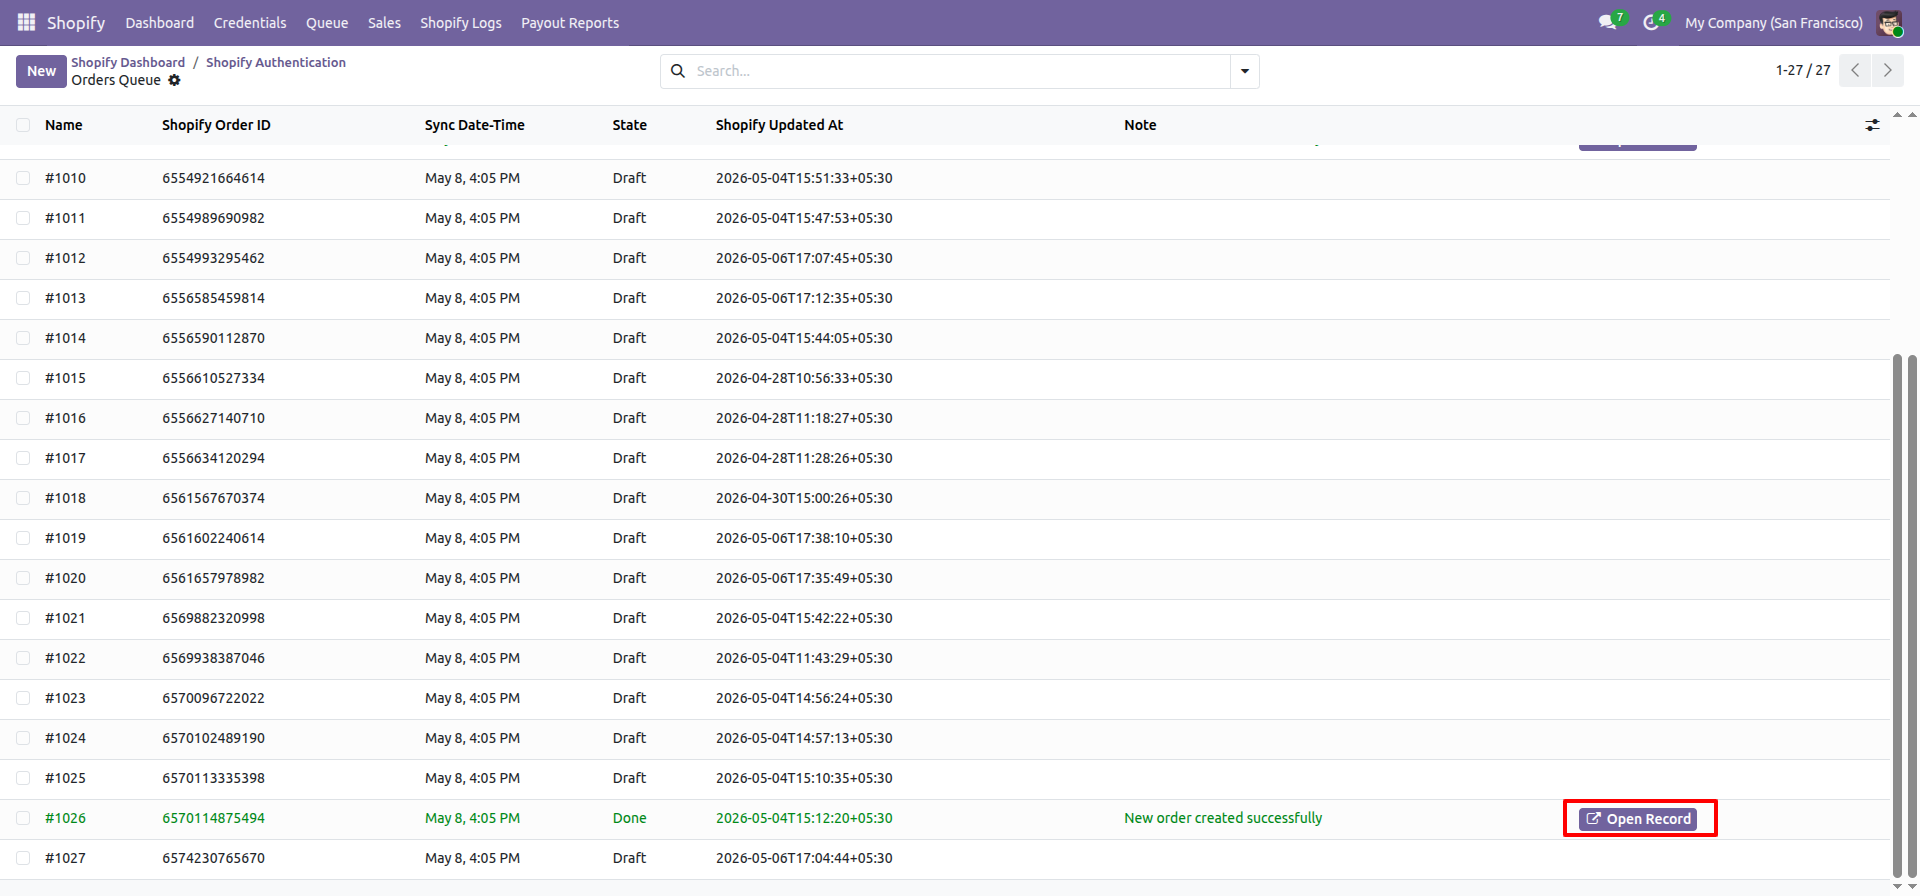
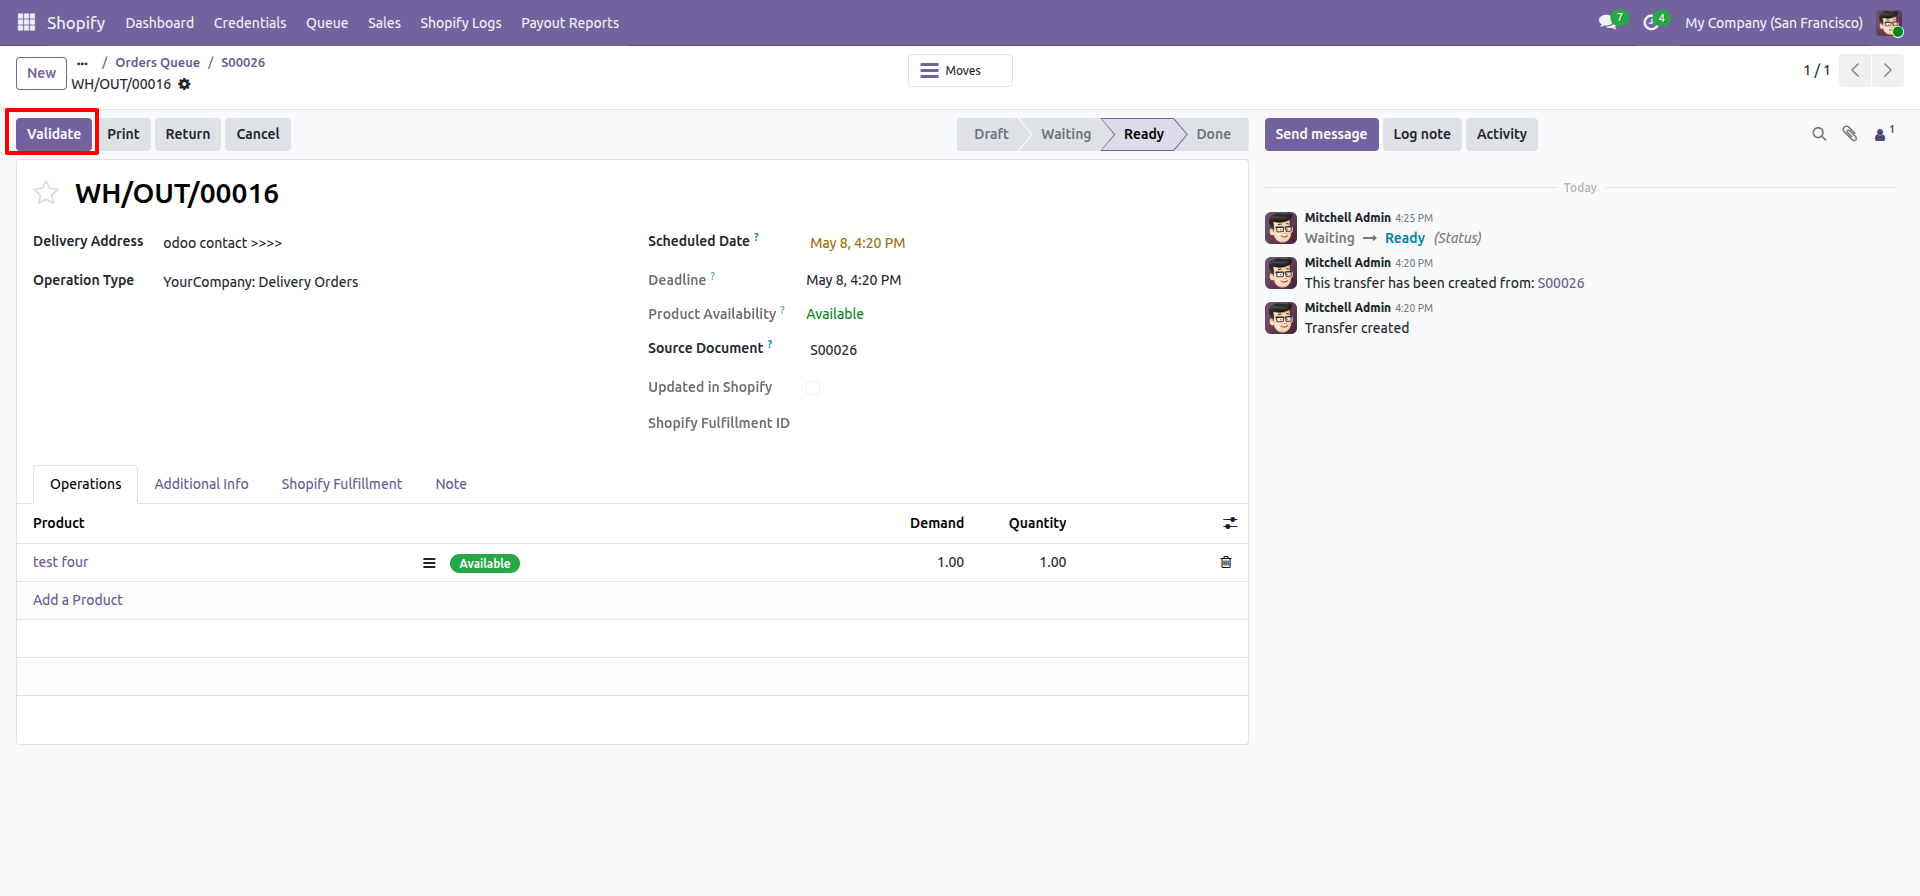
Order queue with Shopify sequence, Click ' Delivery'.

Click 'Validate'.
Stage moved to done with fulfillment ID.
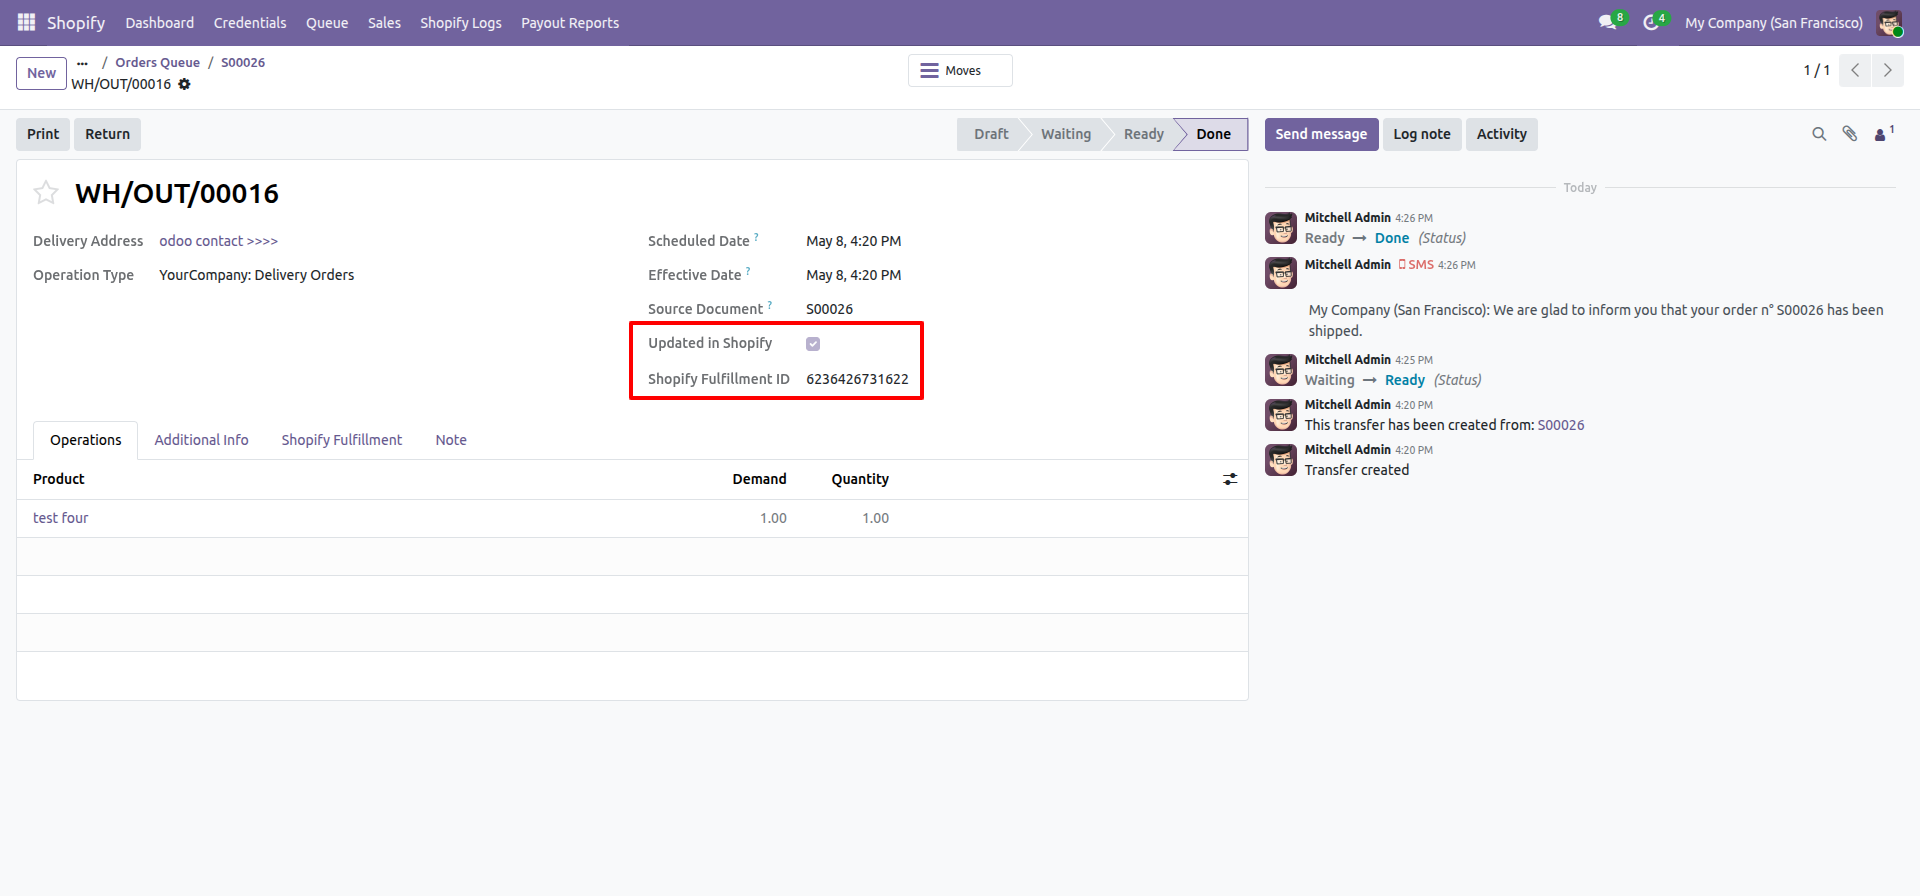
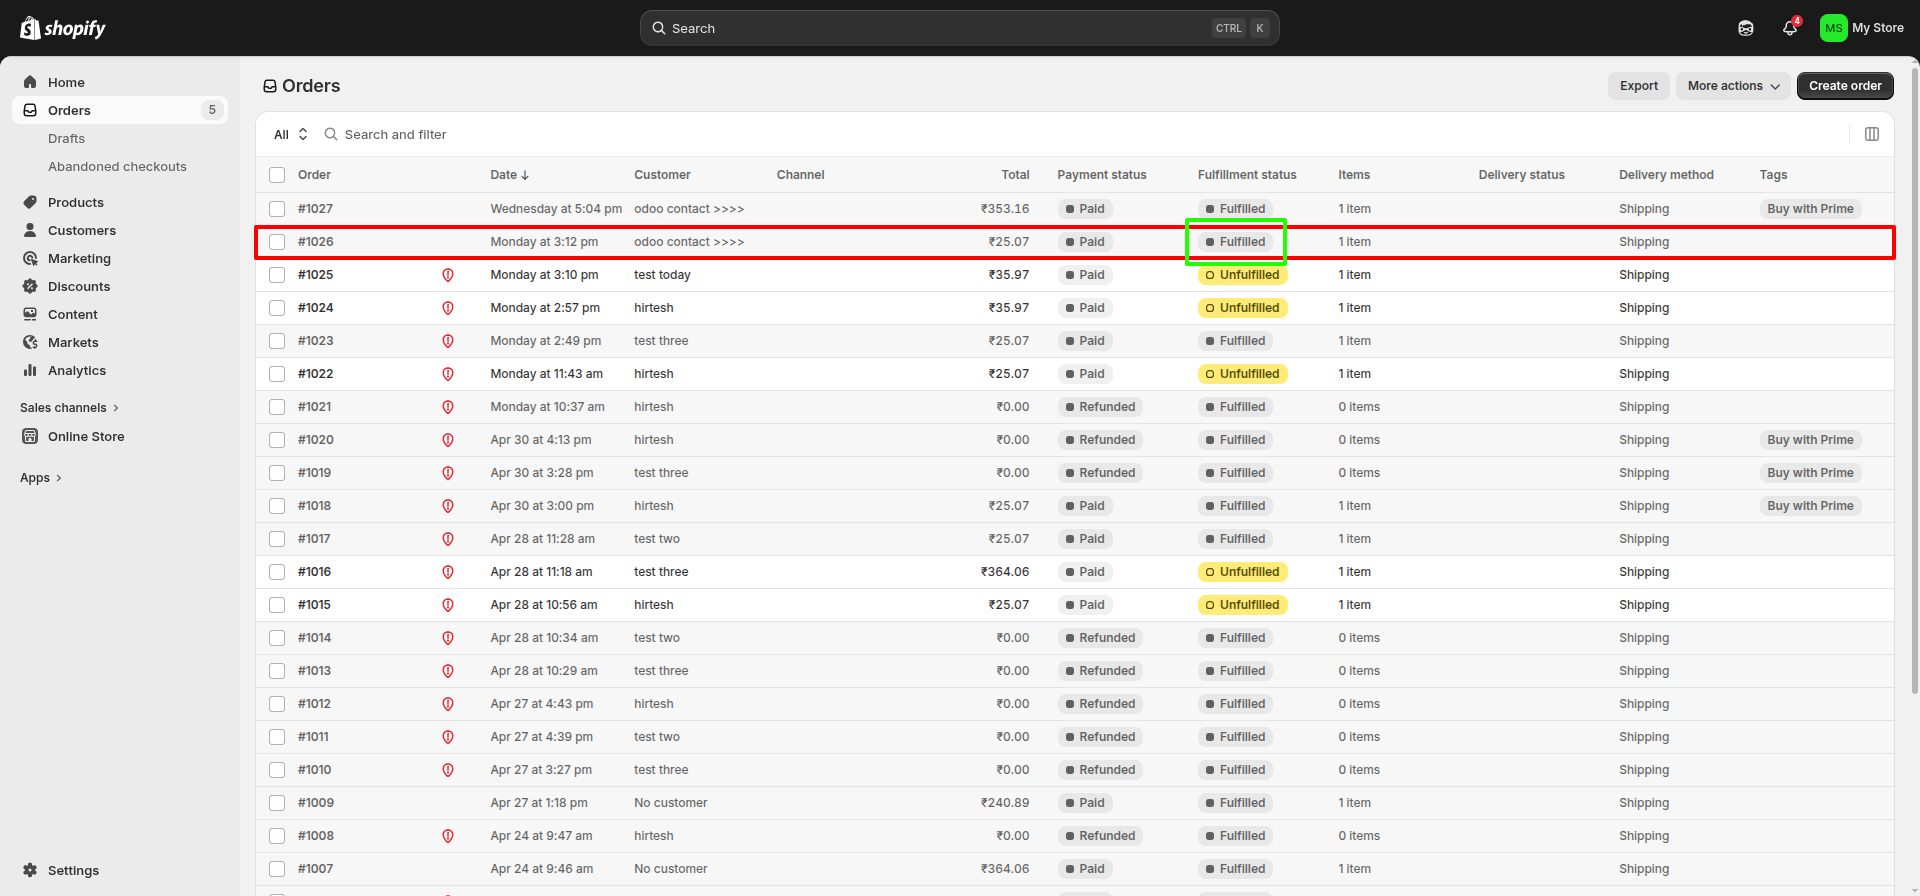
Shopify order with fulfillment status.
Version 17.0.4.0.0 | Released on : 12th May 2026
Version 17.0.3.0.0 | Released on : 10th February 2026
Version 17.0.2.0.0 | Released on : 29th January 2026
Version 17.0.1.0.0 | Released on : 13th April 2024
- Yes, this app works perfectly with Odoo Enterprise (Odoo.sh & Premise) as well as Community.
- No, this application is not compatible with odoo.com(odoo saas/Odoo Online)
- Yes, to test this module, please contact us at sales@softhealer.com.
- Please contact us at sales@softhealer.comto request customization.
- Yes, we provide free support for 365 days from the date of purchase.
- Yes, you will receive lifetime free updates for the version of the module you purchased.
- No, there is no need to install any additional libraries.
- Yes, for version 12 and above, you need to purchase the module separately for each version you intend to use.
- No, exchanges or refunds are not allowed. Please make sure to select the correct version before purchasing.
- You can contact us at support@softhealer.com for language translation support. We use Google Translator tools to provide translations in multiple languages, so the accuracy may vary. We welcome your suggestions to help improve translations.
Discover Our Latest Apps