


Product Warranty Management System

This module helps to track all information related to warranties and renewals, including warranty start and end dates, duration, and customer information. You can easily track and renew warranty statuses with this module, which provides renewal management capabilities for businesses to manage the warranty renewals of their products. It offers a comprehensive solution for managing warranty renewals.

Features
- You can easily create a warranty plan.
- You can easily see the warranty record in kanban view and in list view.
- Also, you can see the history of the expired warranty.
- You can add warranty tags.
- You can search for warranty plans by warranty tags.
- You can renew your expired warranty.
- You can set the duration by adding the start date and end date.
- You can update twice same warranty plan.
- You can print a warranty badge.
-
You can configure the Warranty Renewal Cost within the Warranty Plan.

-
Automatically sends an email to customers when the warranty is activated.
-
You can send notifications to customers prior to their warranty expiration.

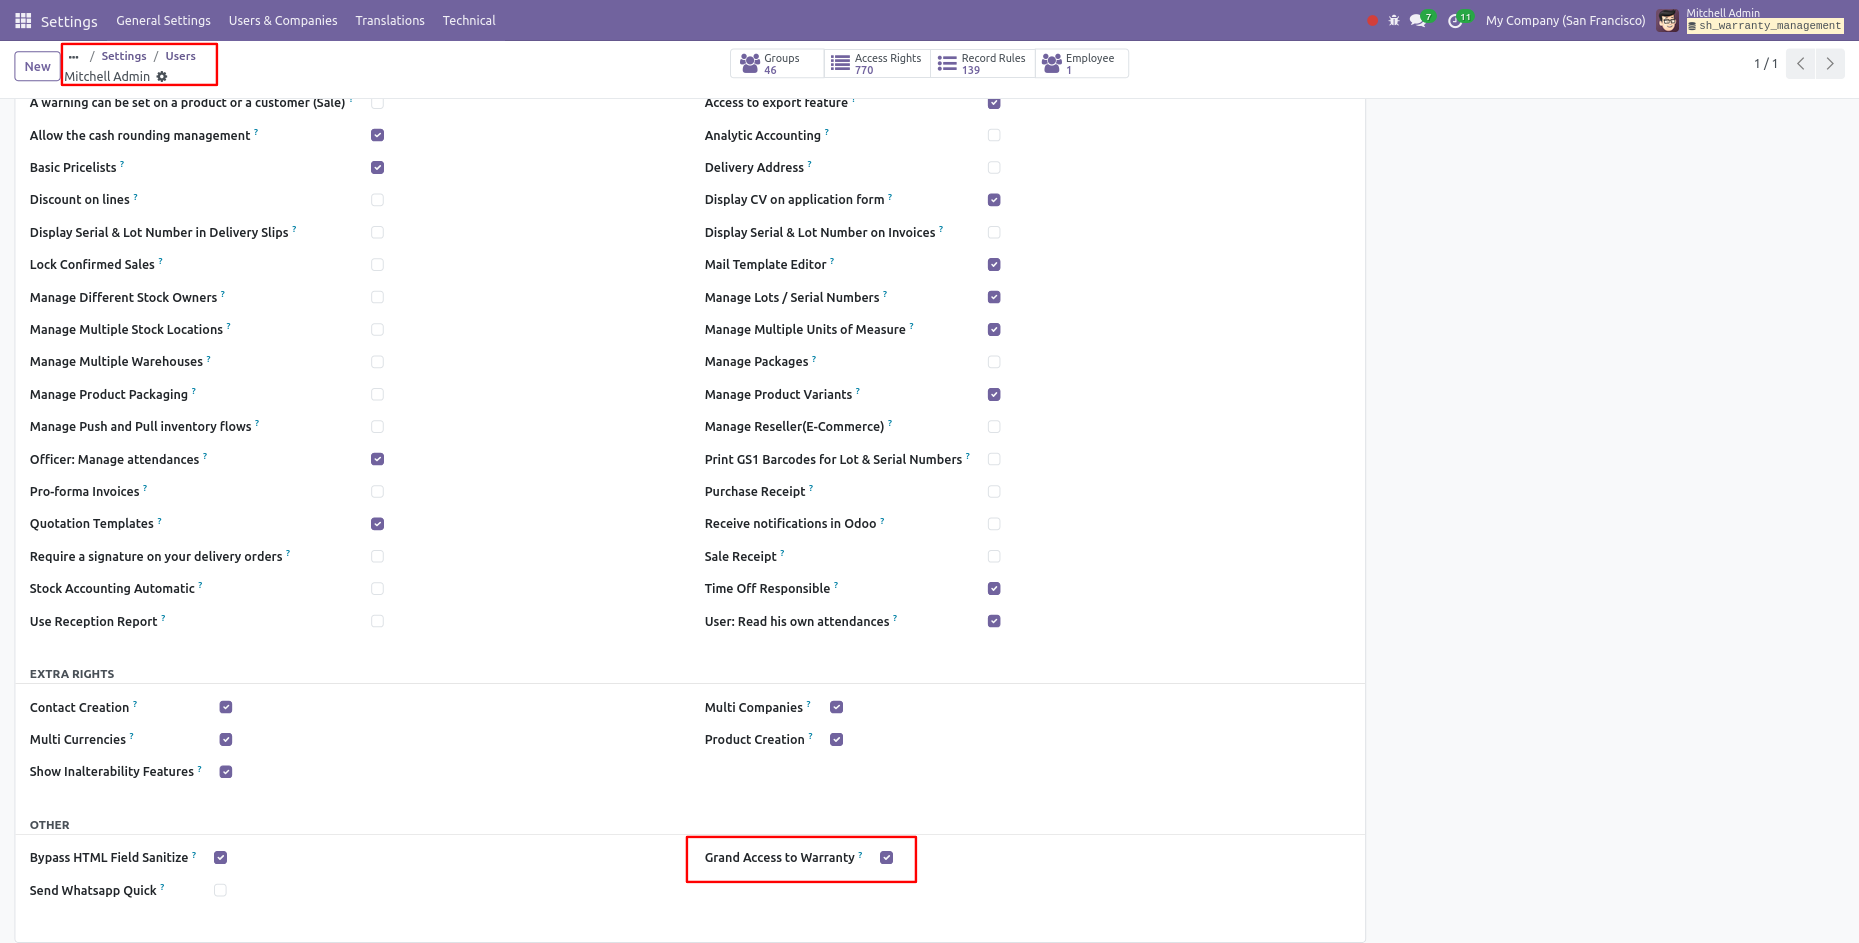
Go to user settings >> Enable the "Grand Access To Warranty".
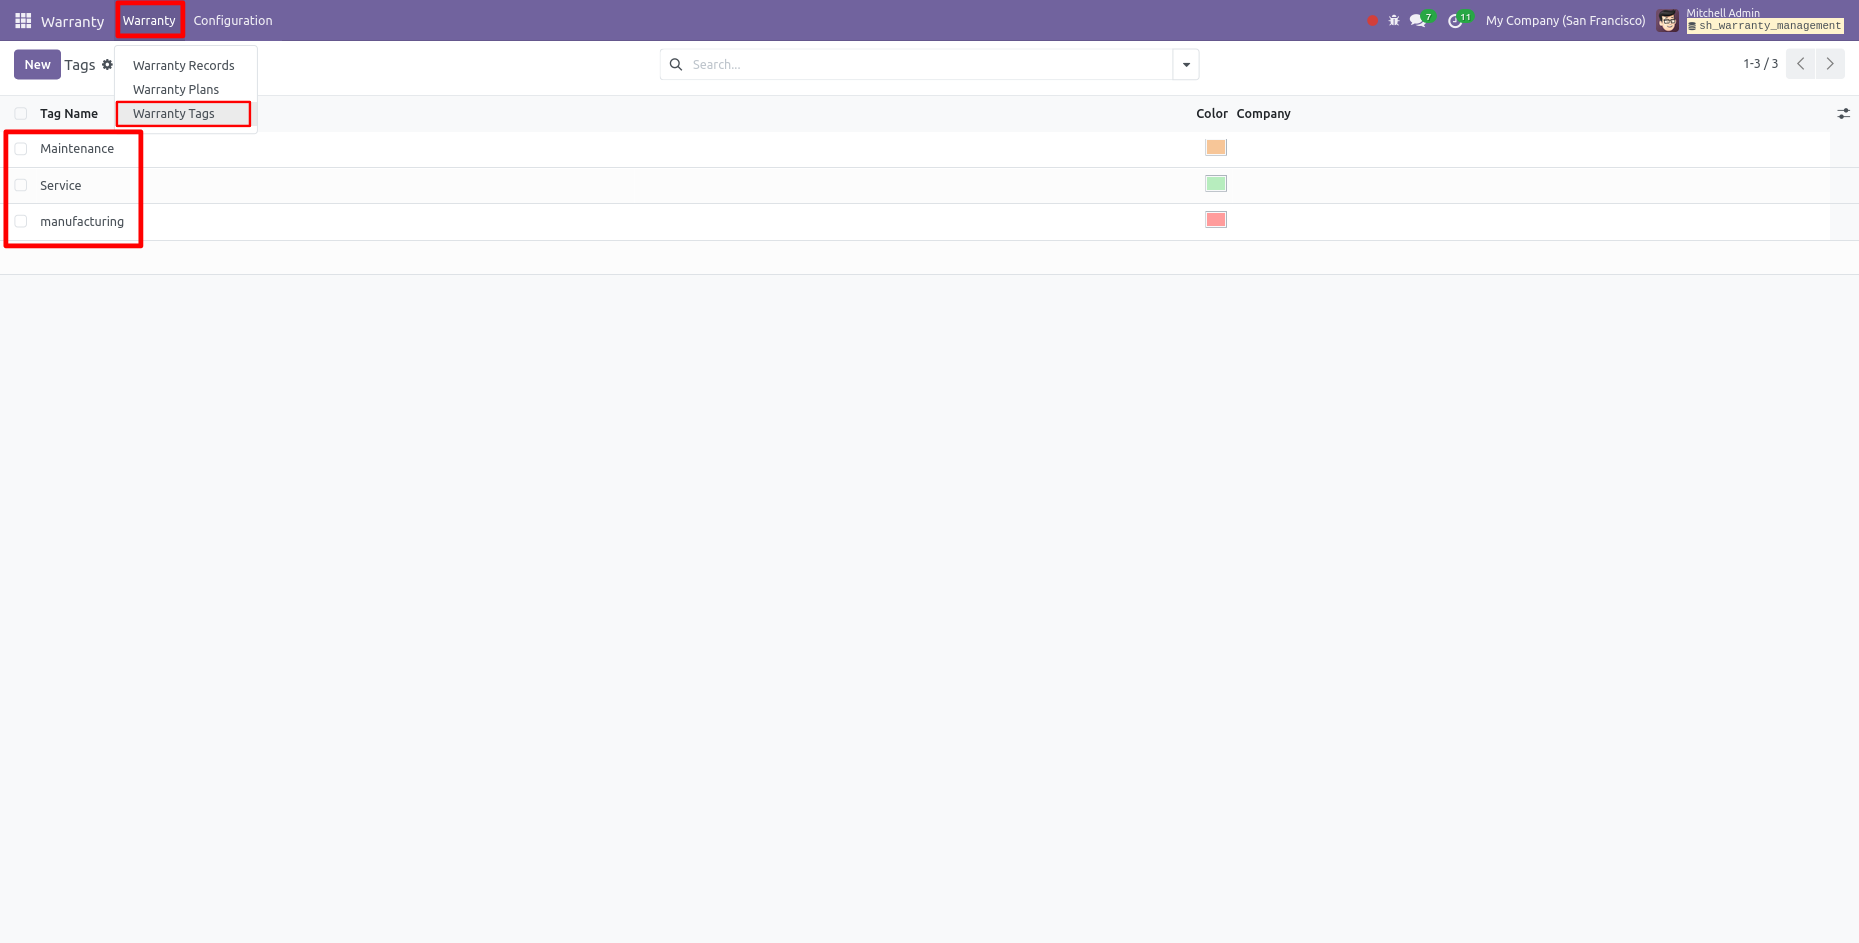
Here, you can see the tree view of the warranty tags. Click on the "Warranty Tag".
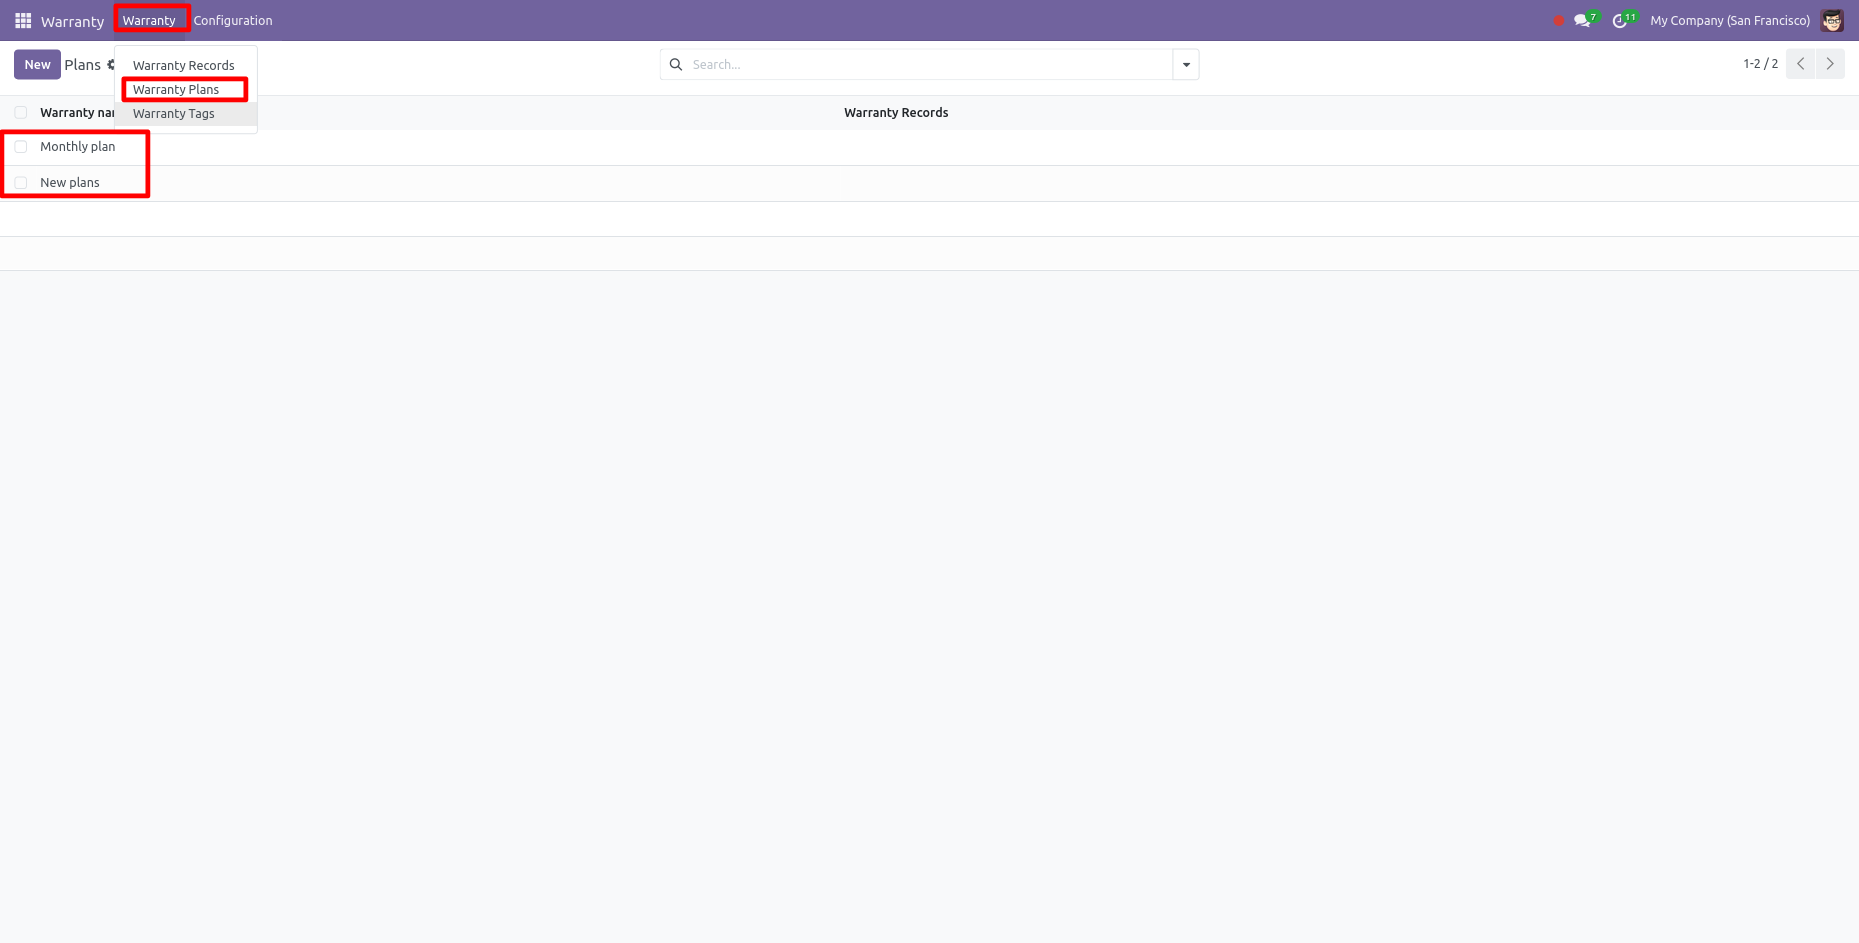
Here, you can see the tree view of the warranty plans. Click on the "Warranty plans".
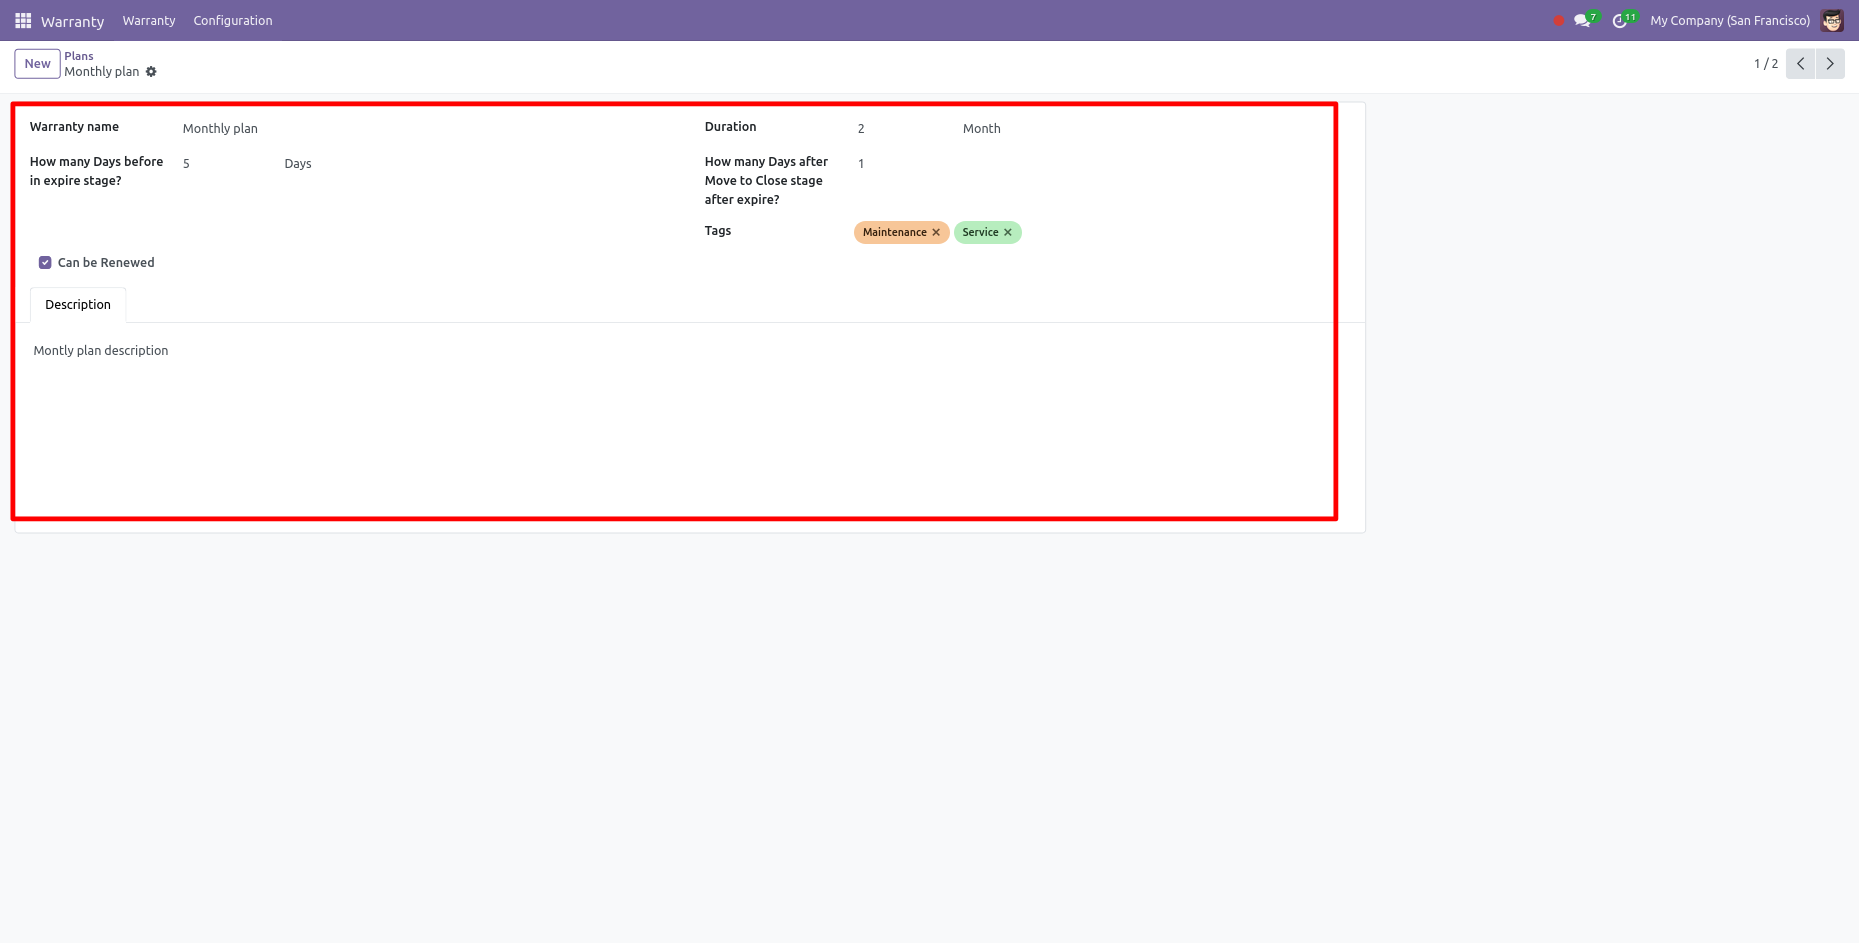
Here, you can see the form view of the warranty plans.
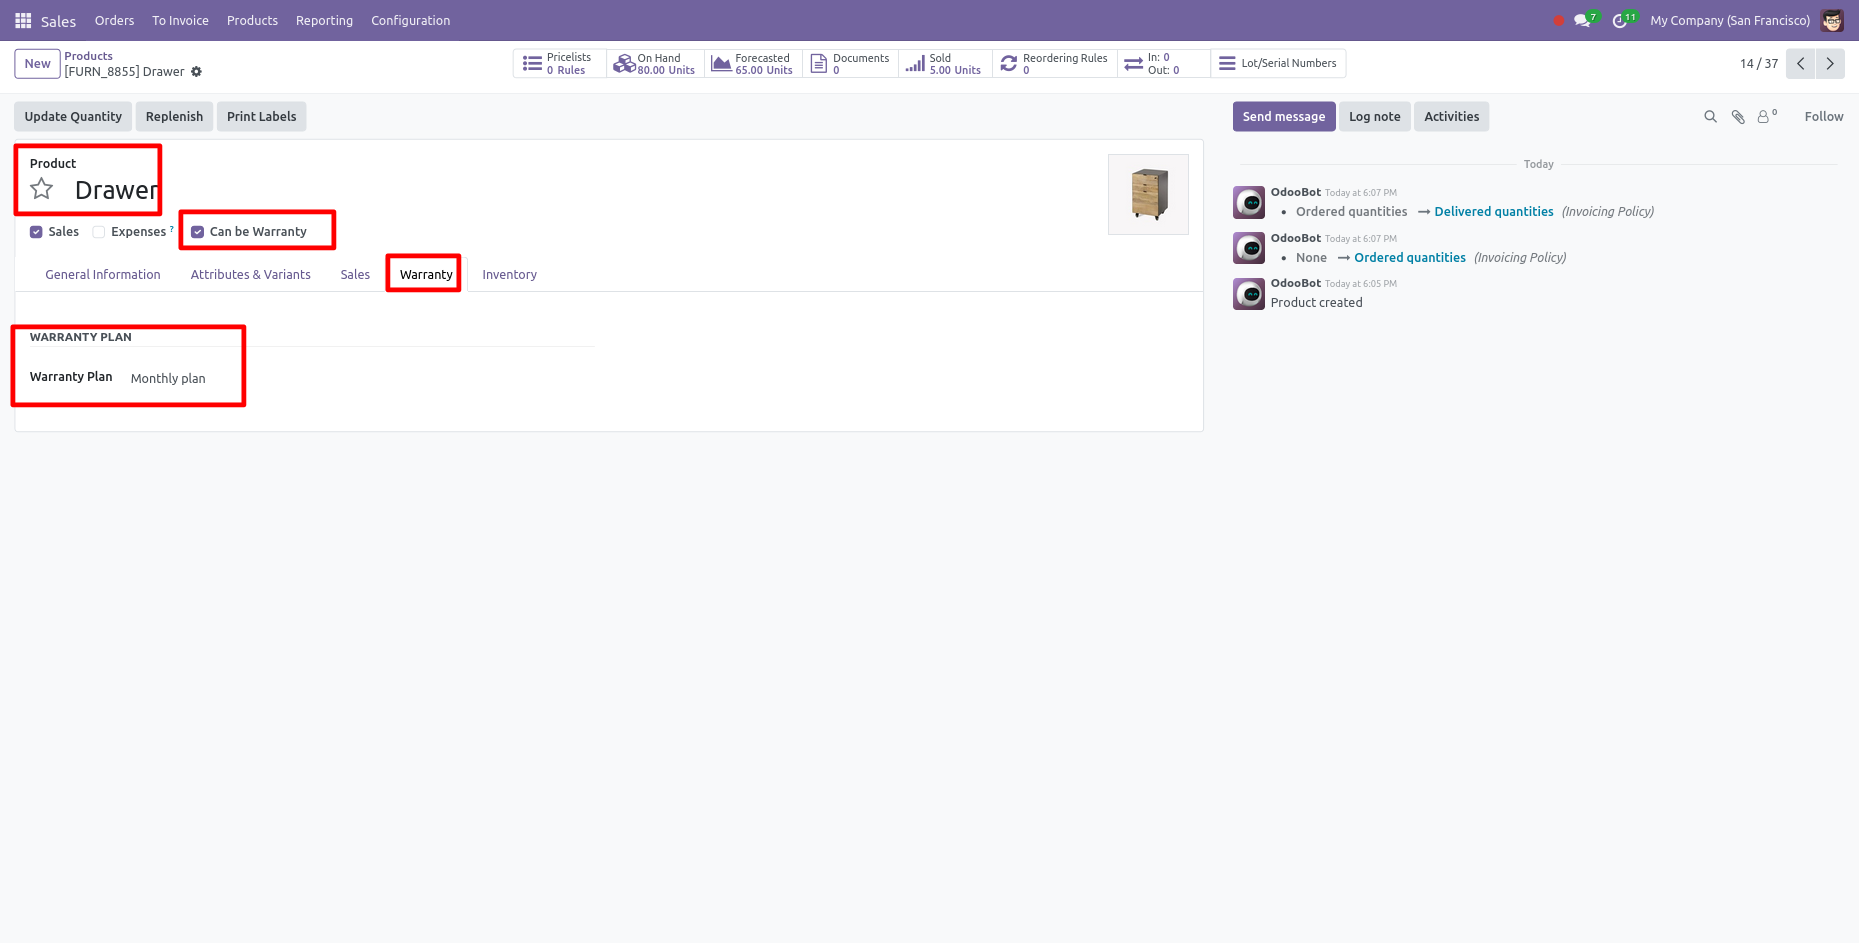
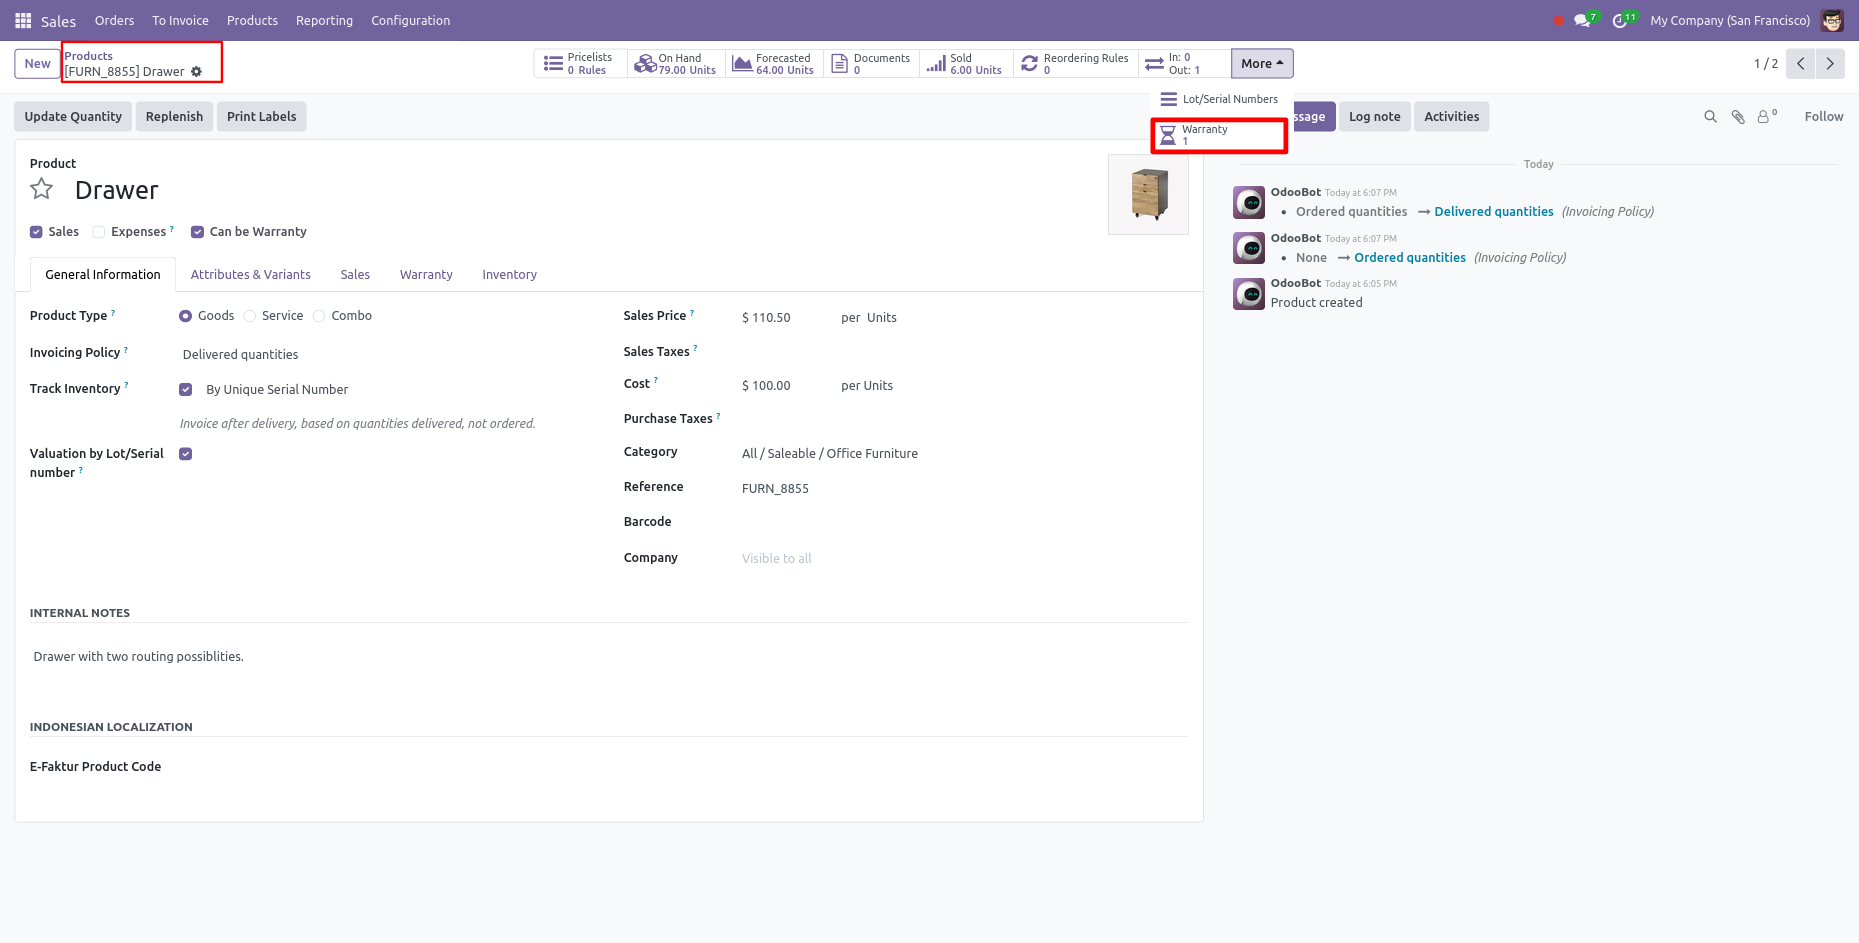
Here, you can see the form view of the product. Enable the "Can Be Warranty" option. After that, the warranty tab is visible. You can select the warranty plan from here.
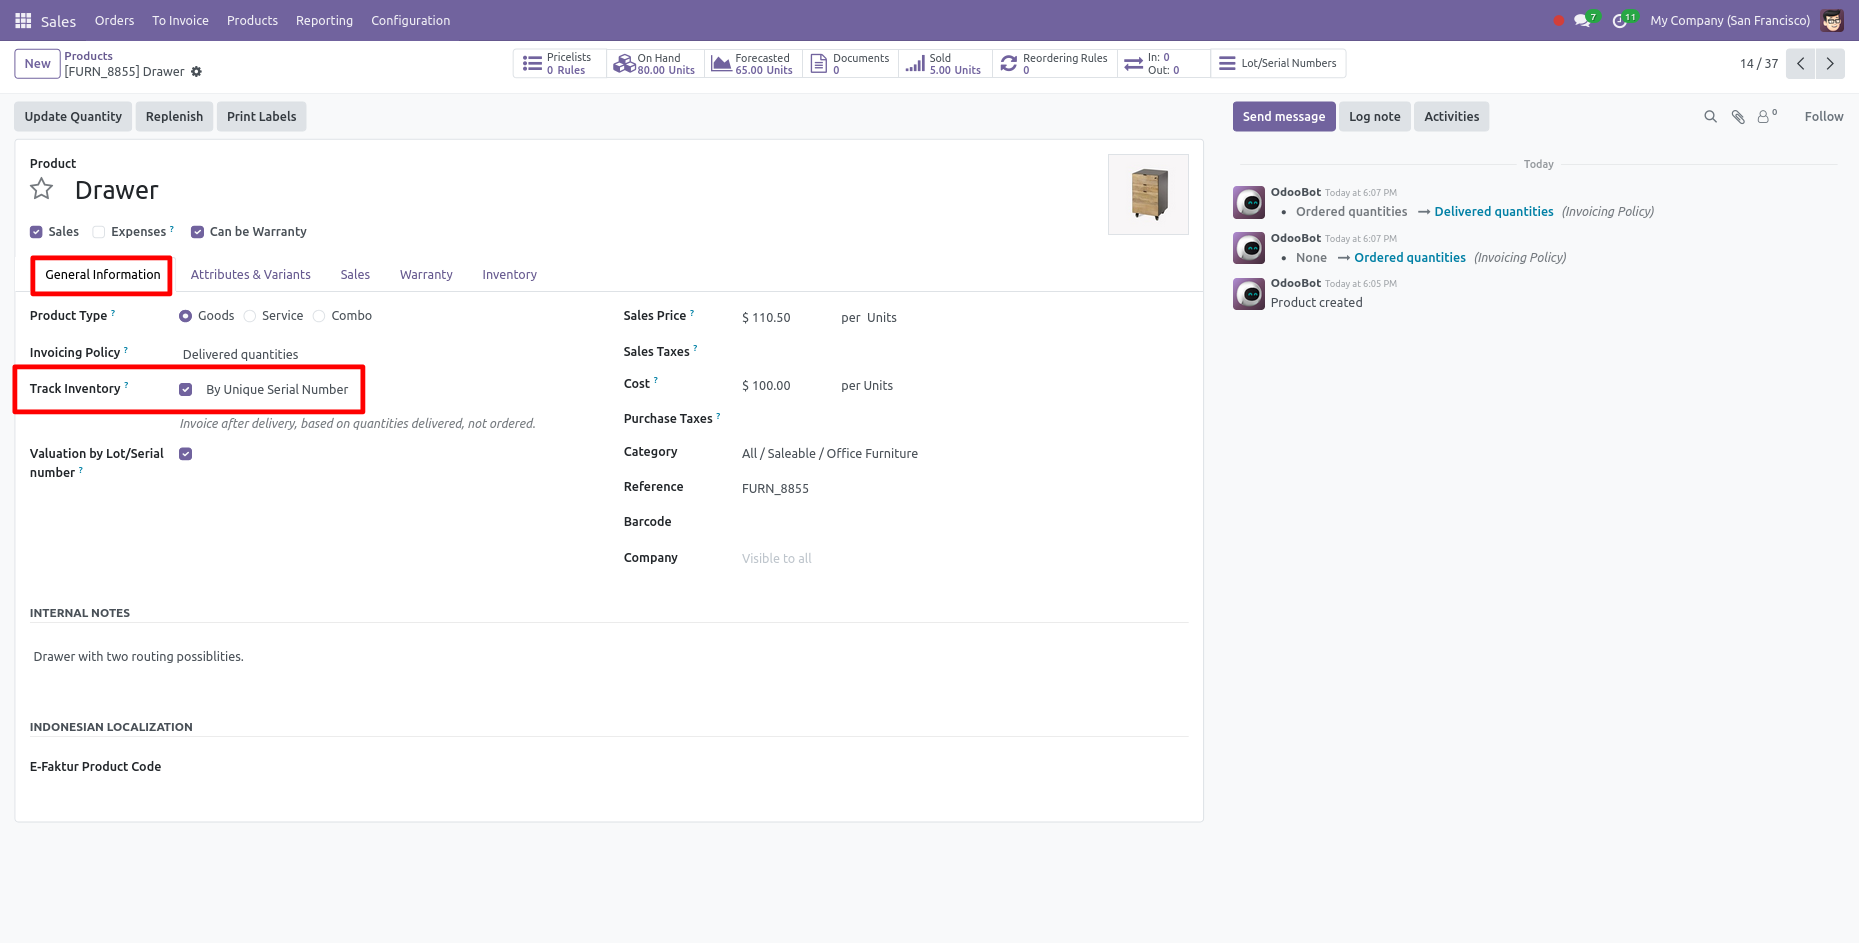
In the General Information tab, you can select the tracking inventory option.
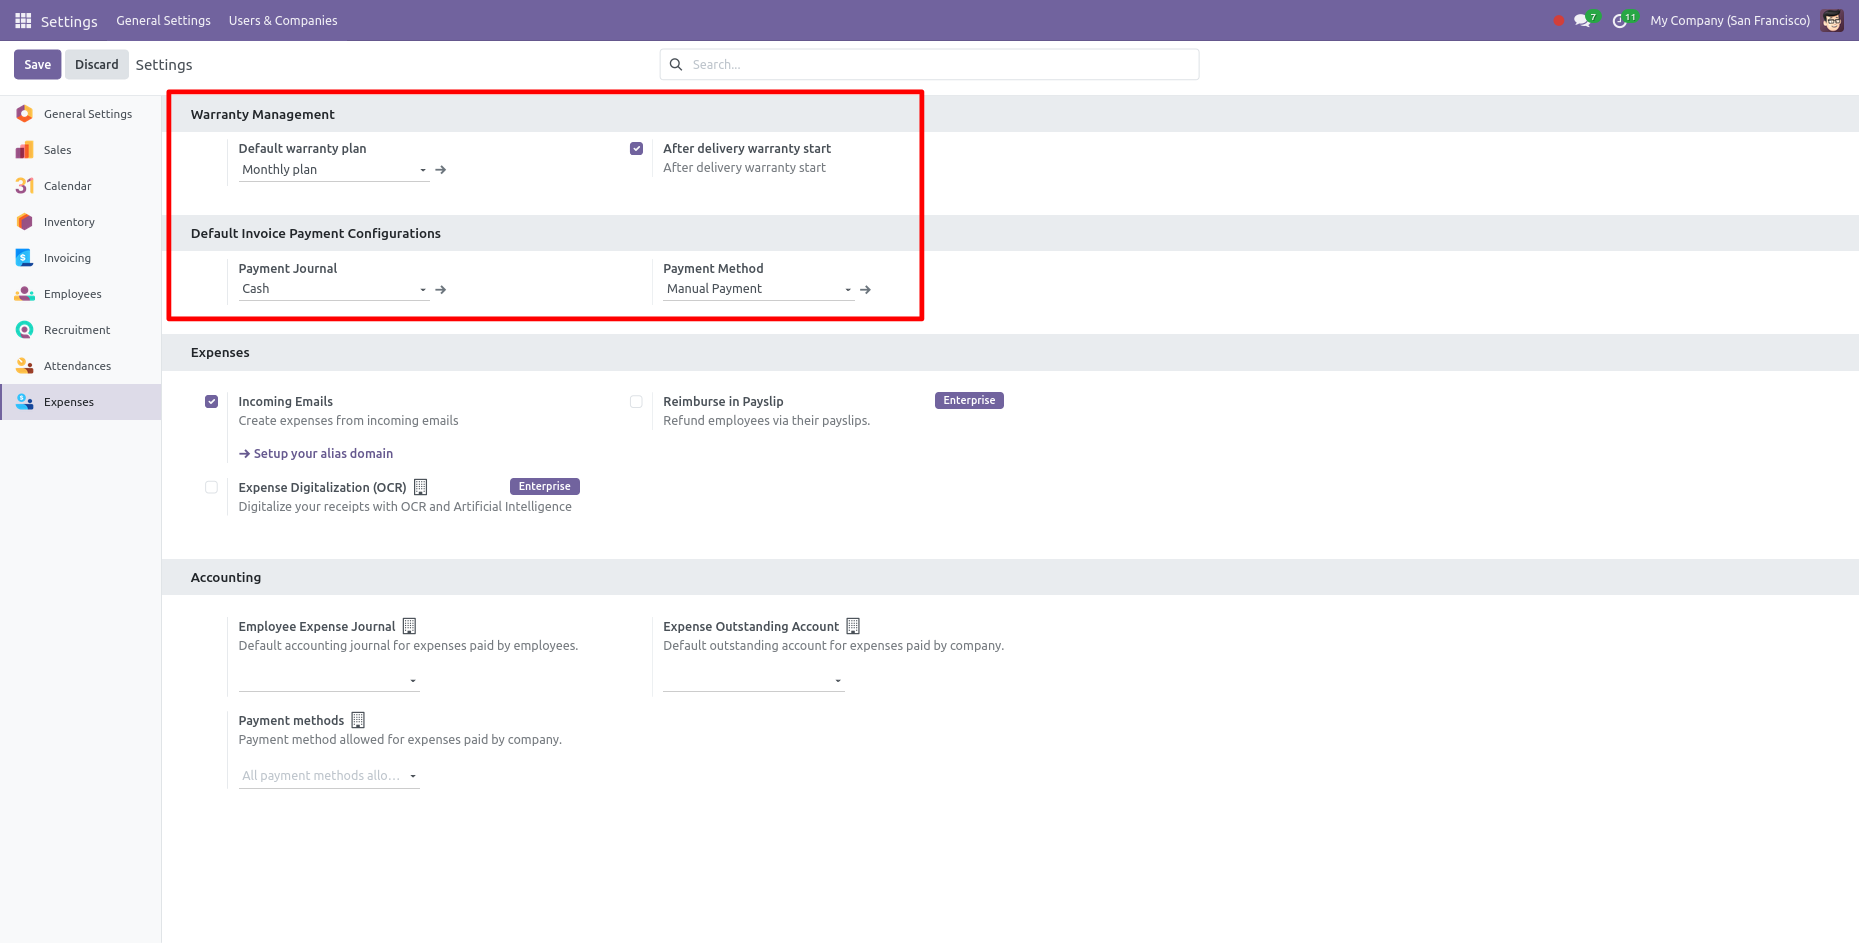
Warranty setting.
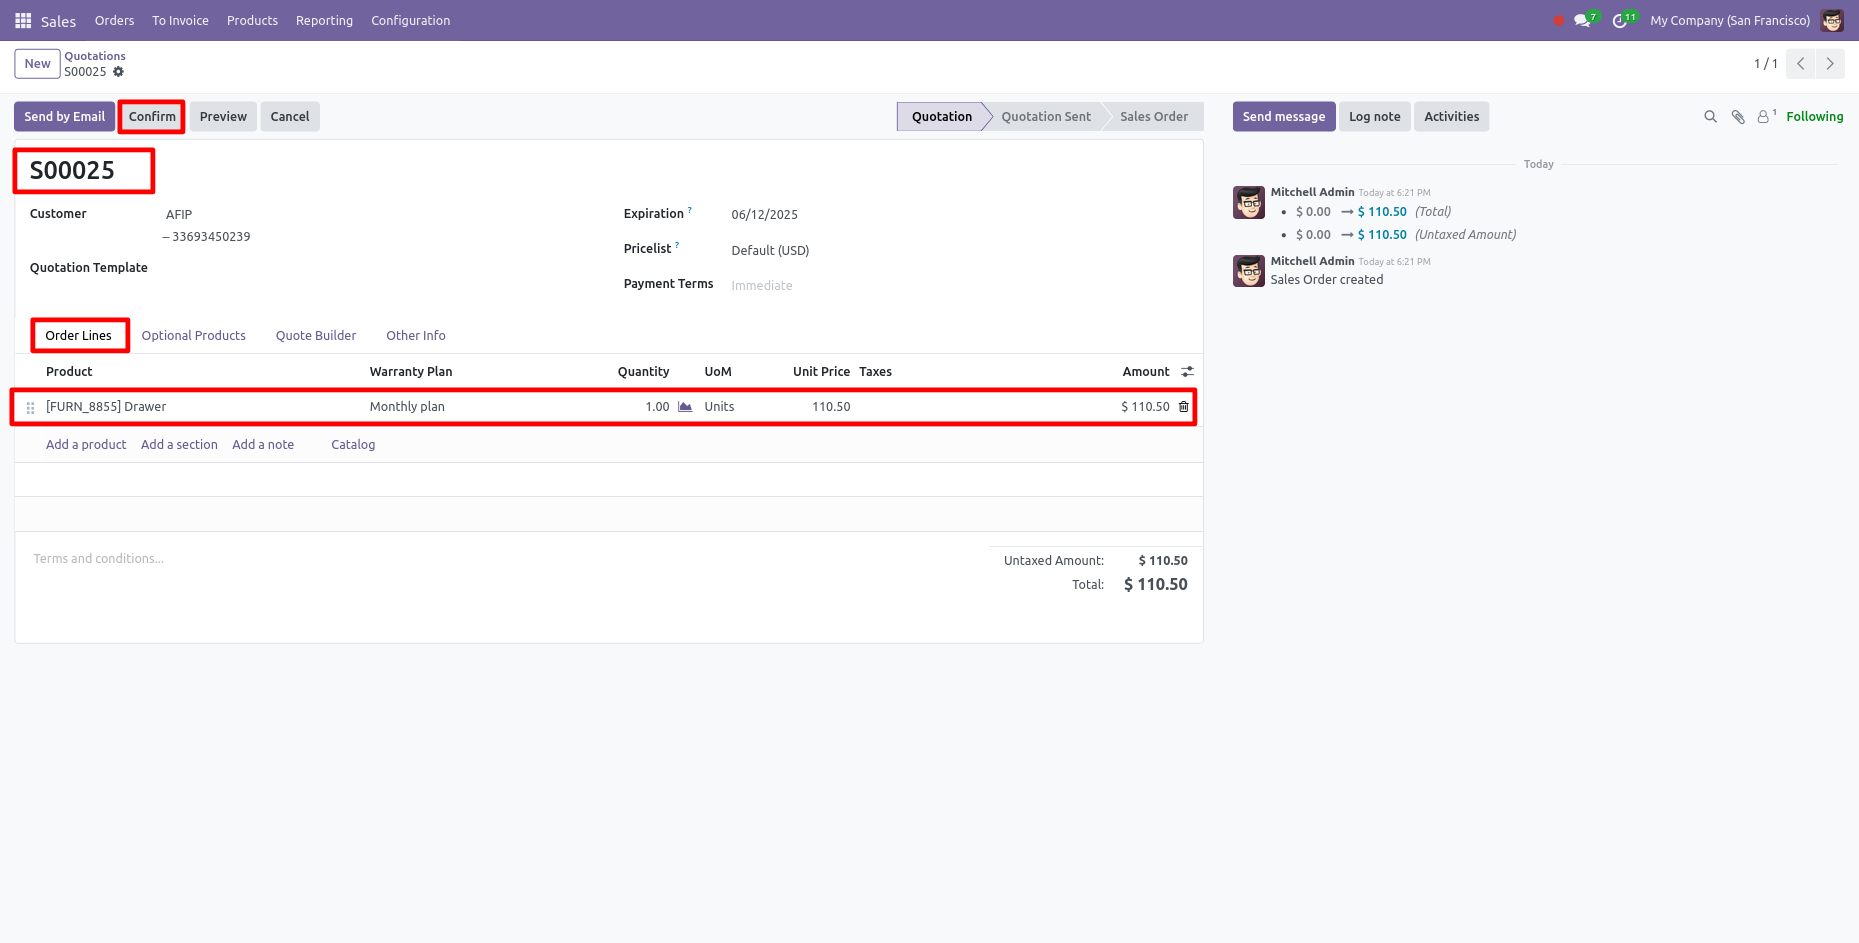
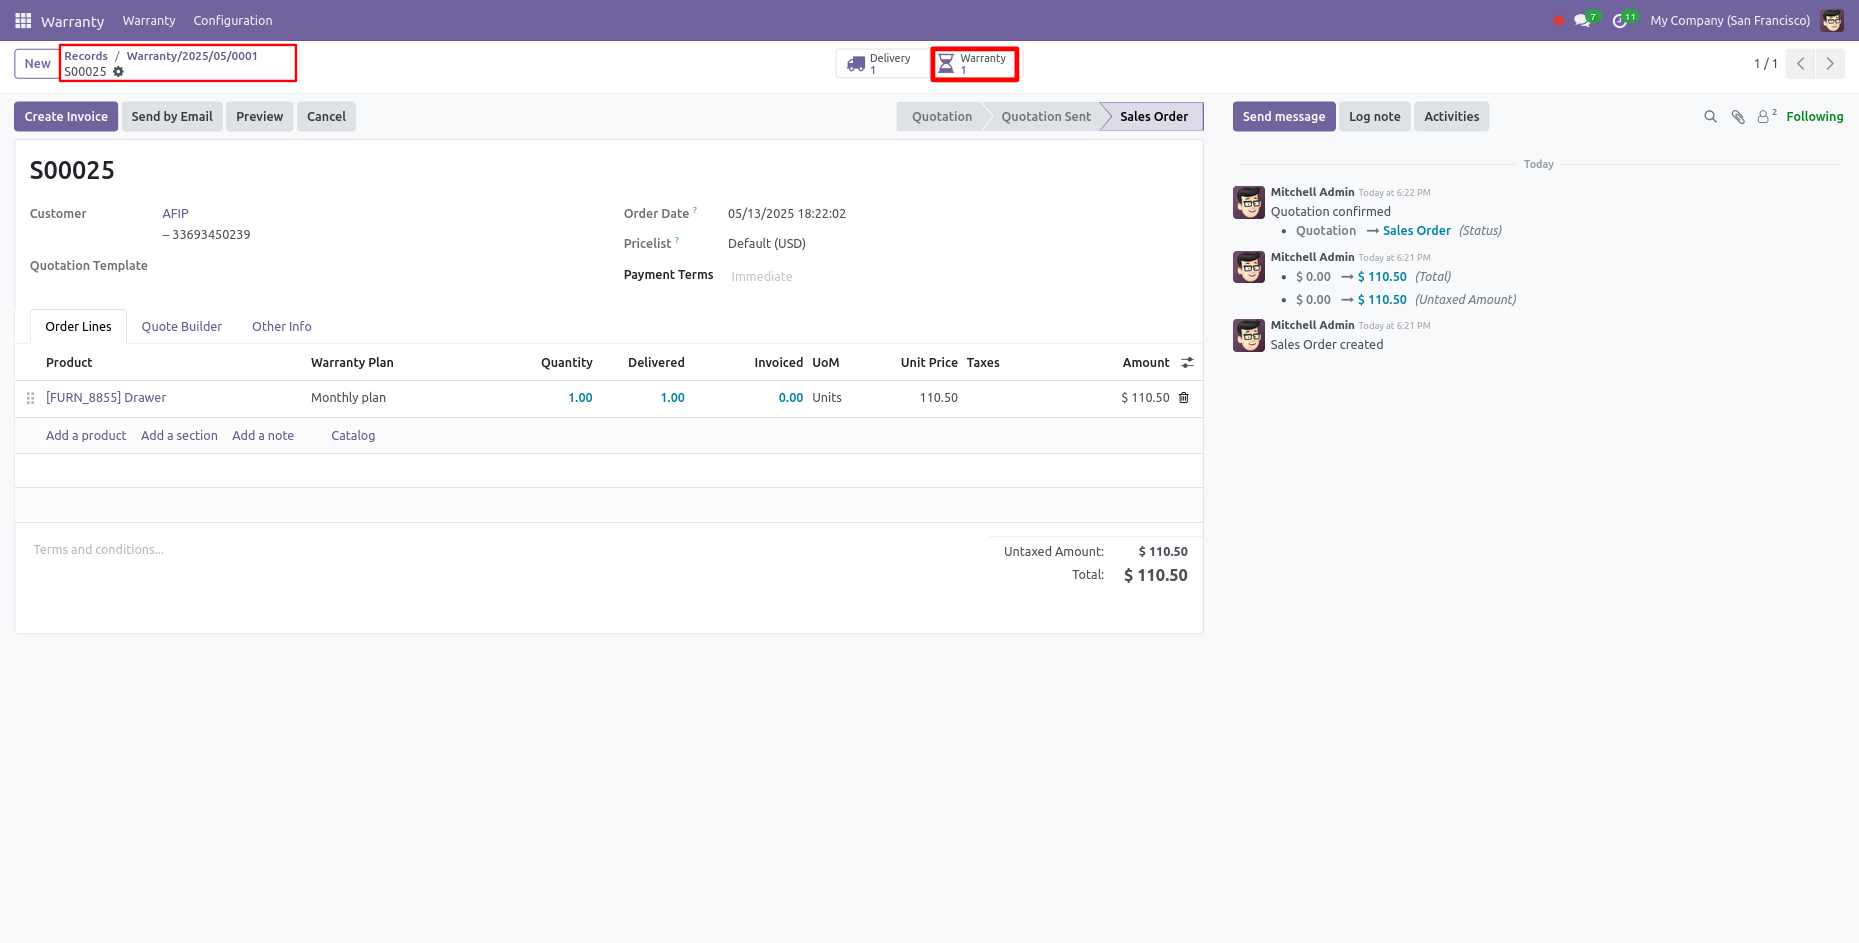
Here, you can see the form view of the quotation. Add the product with the warranty plan and confirm the quotation by clicking on the 'Confirm' button.
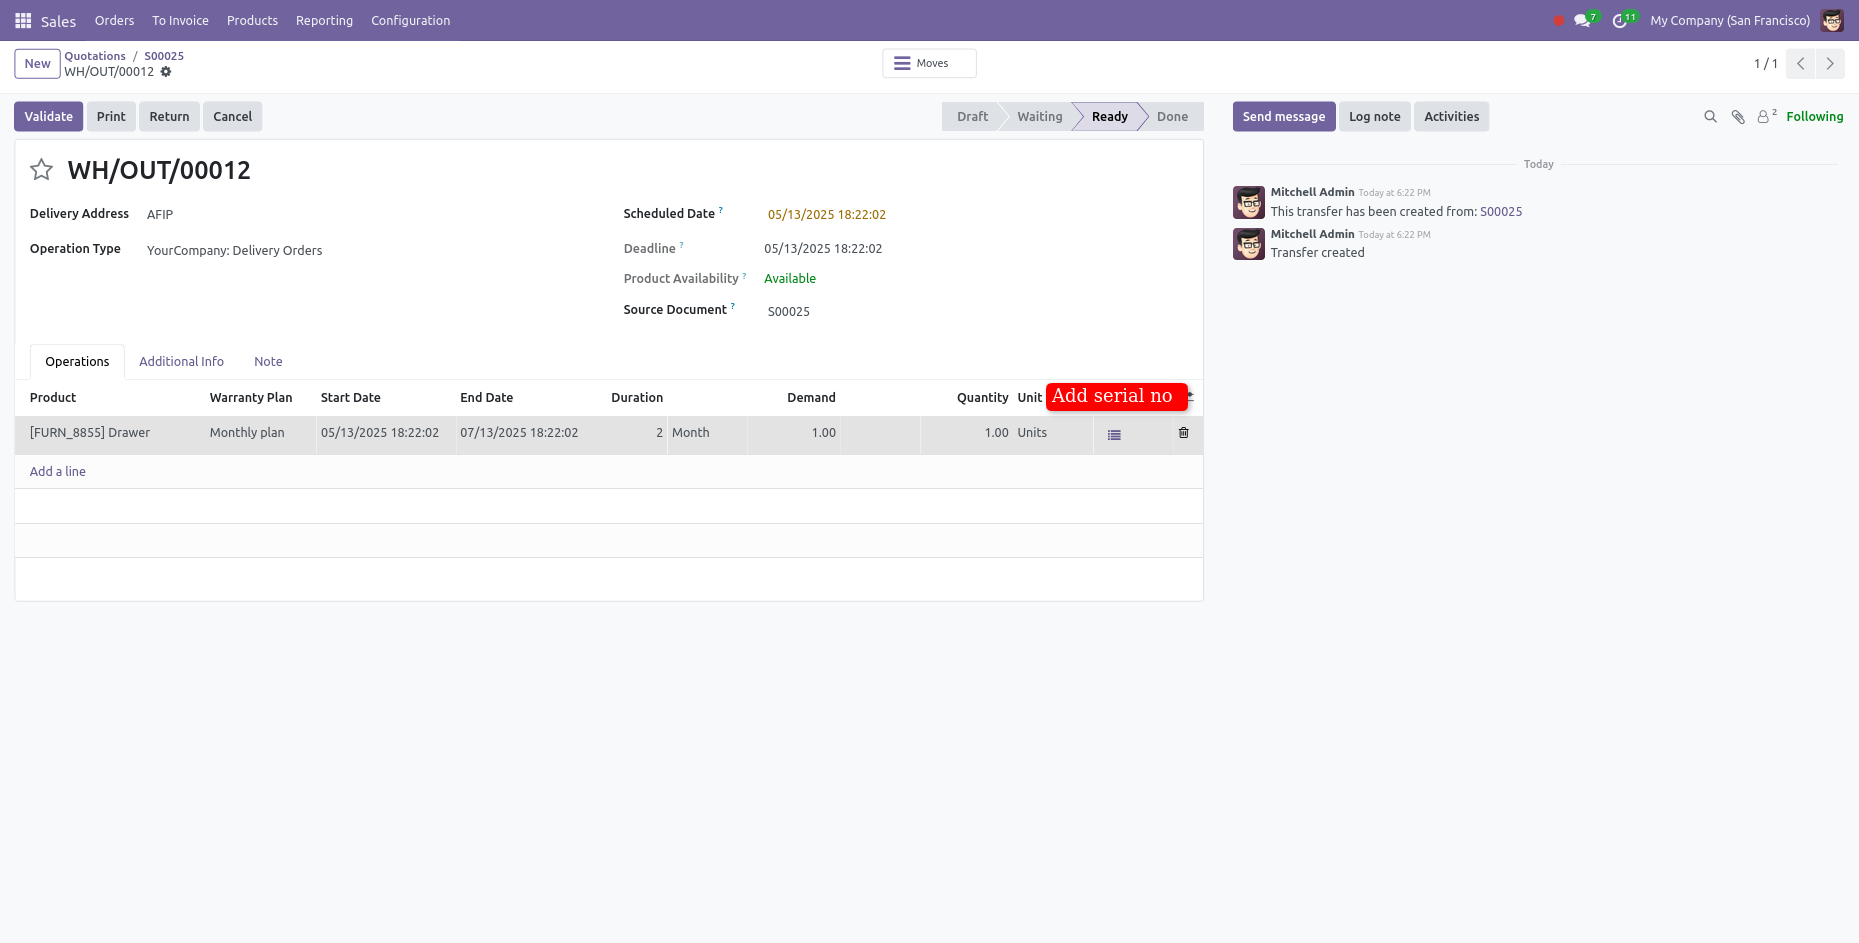
Now your Quotation is in the waiting stage. Click on the "Validate" button.
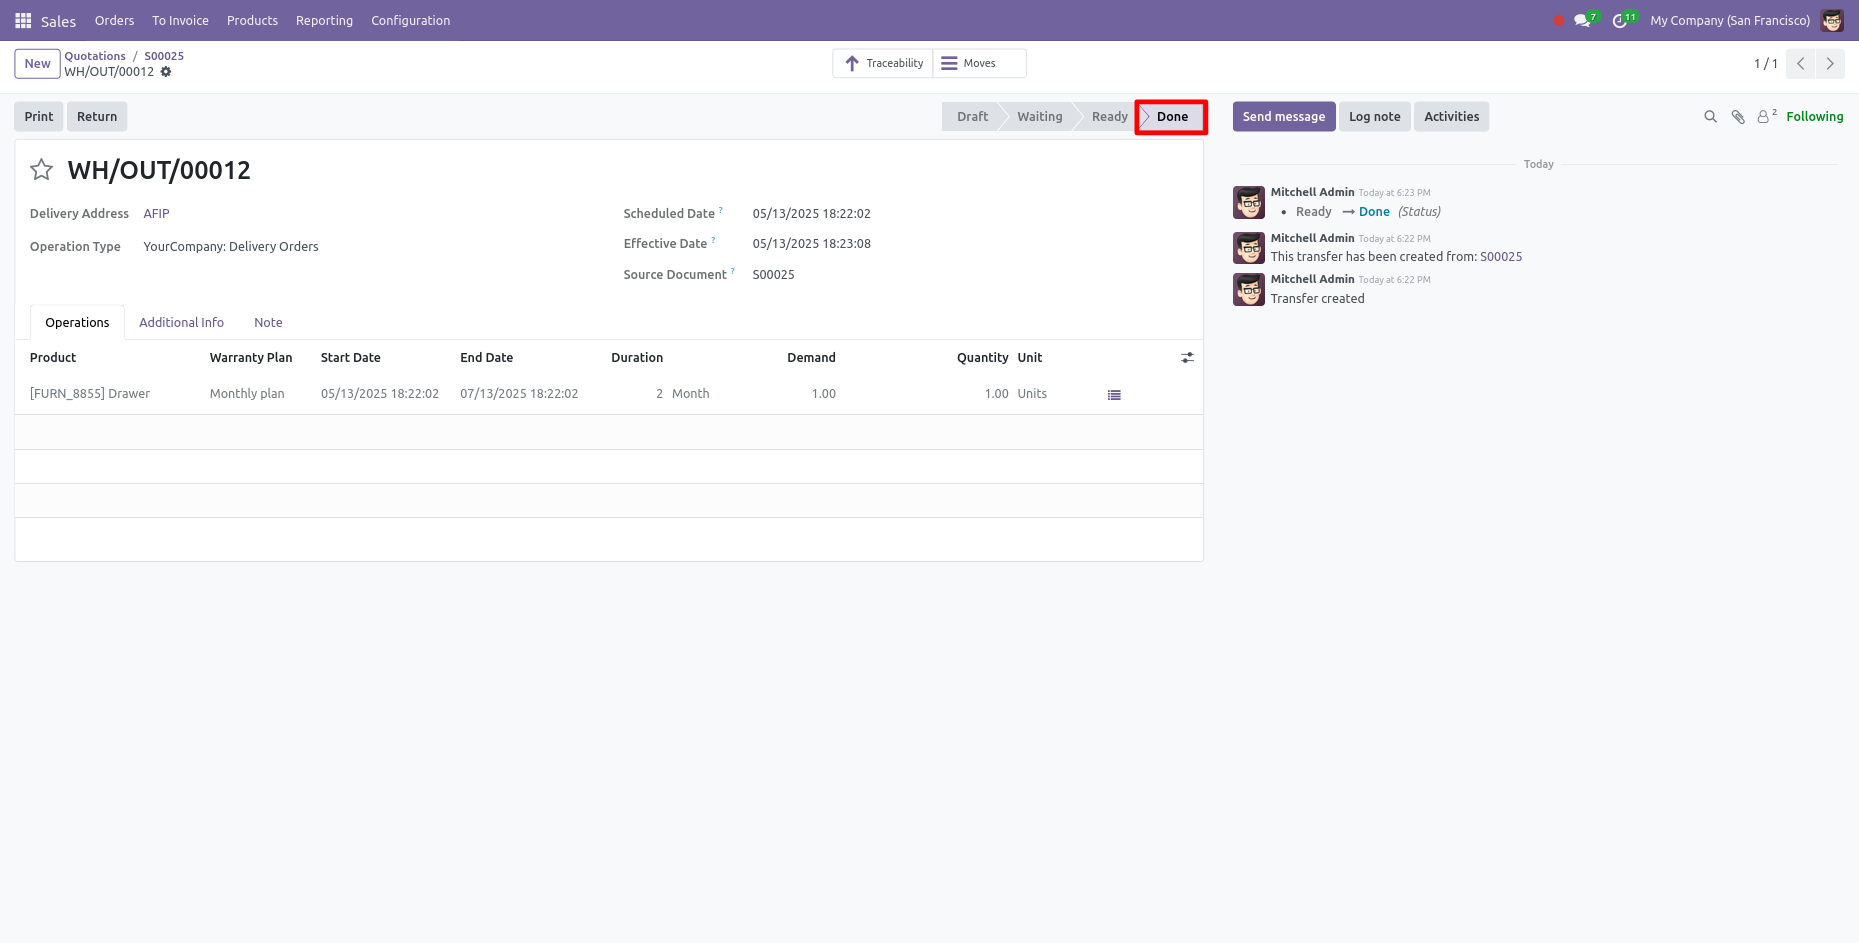
Now your Quotation is in the Done stage.
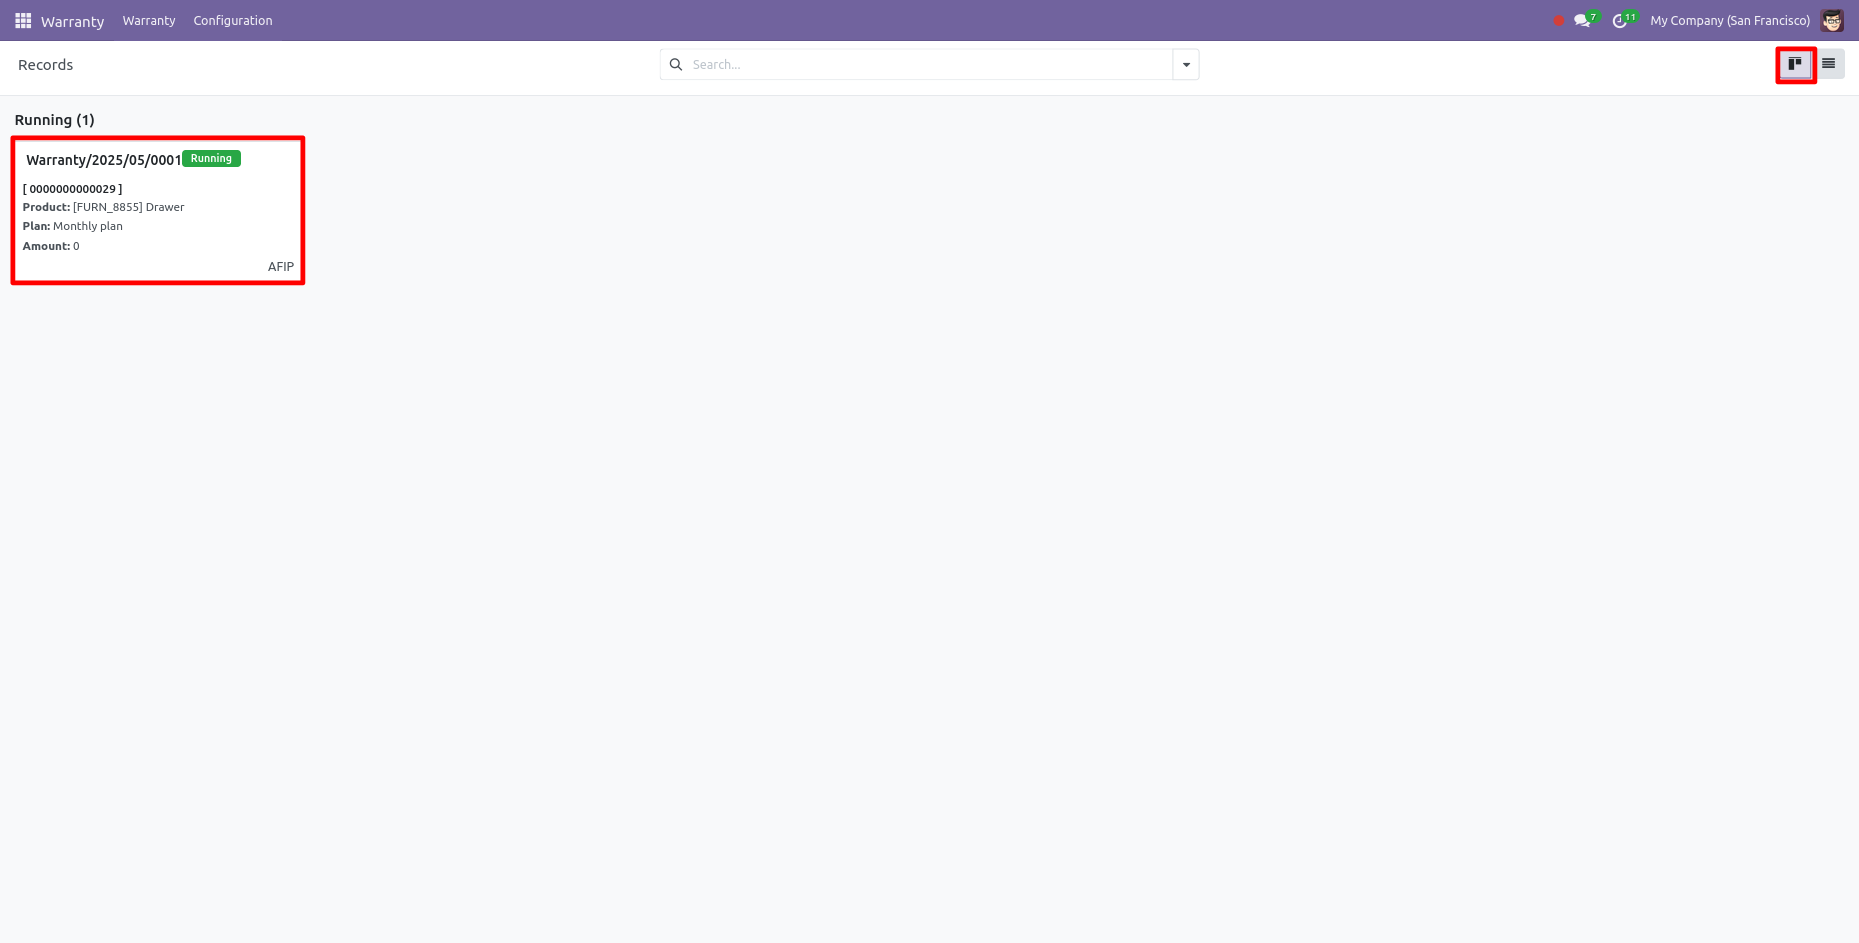
Kanban view of Warranty Records. Open the Warranty Record.
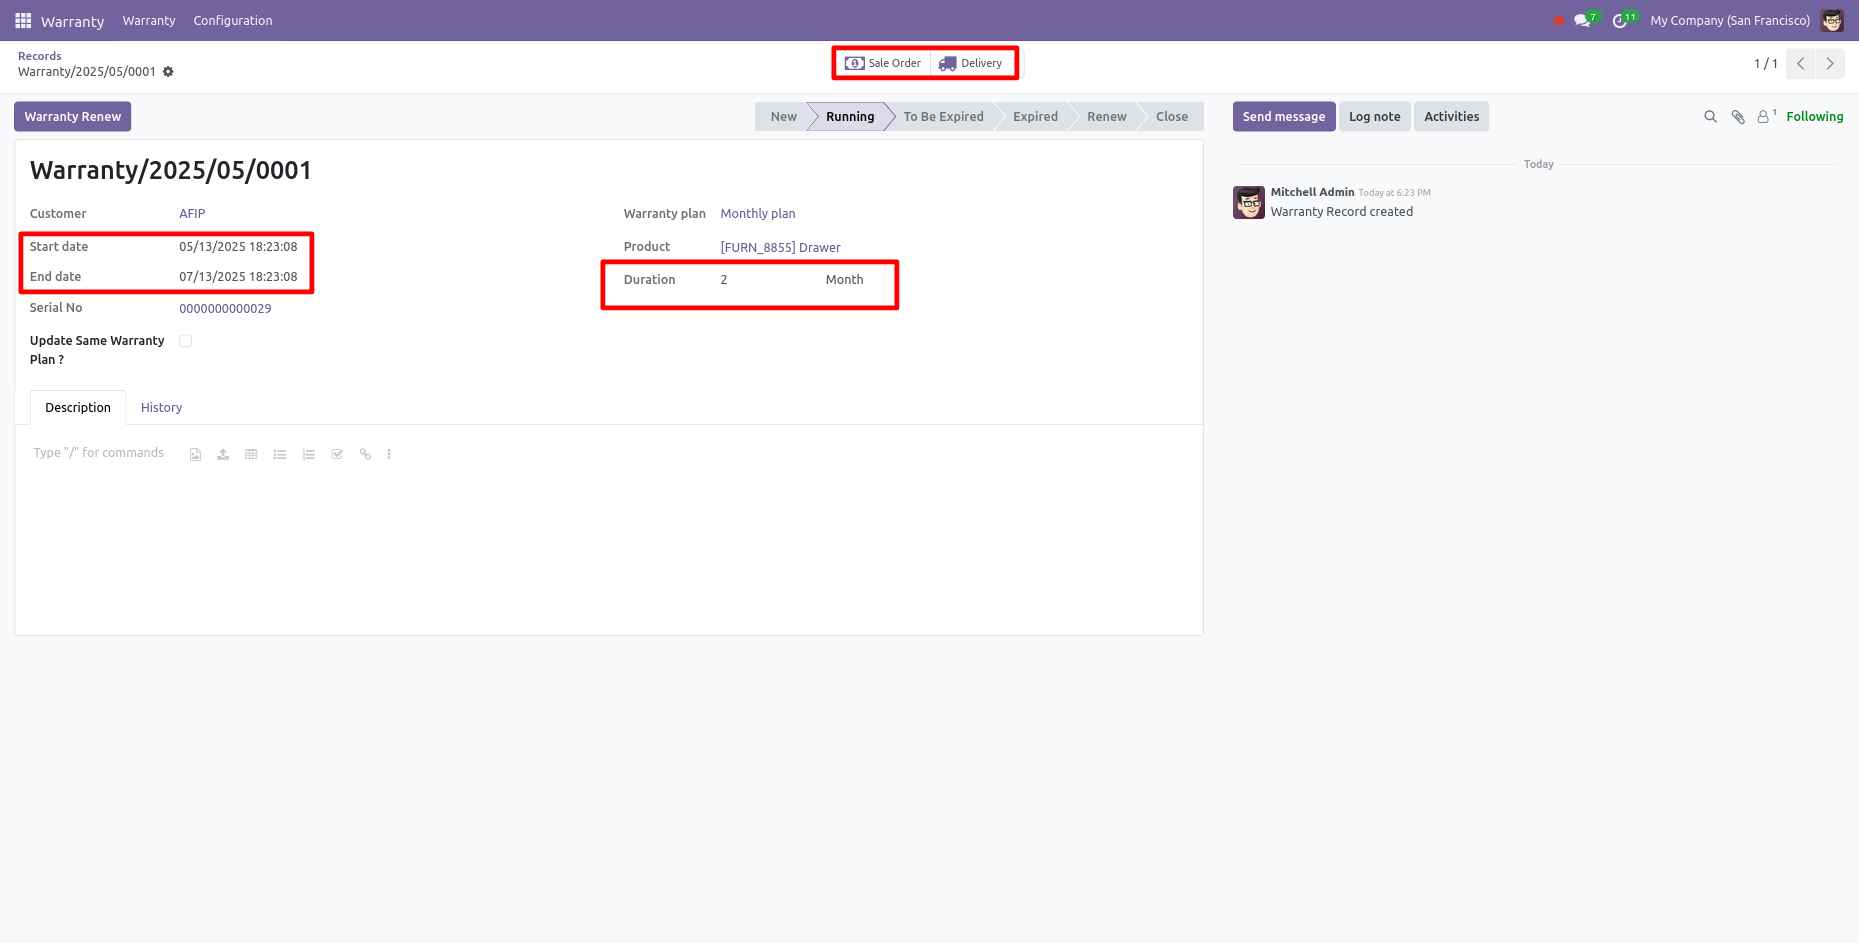
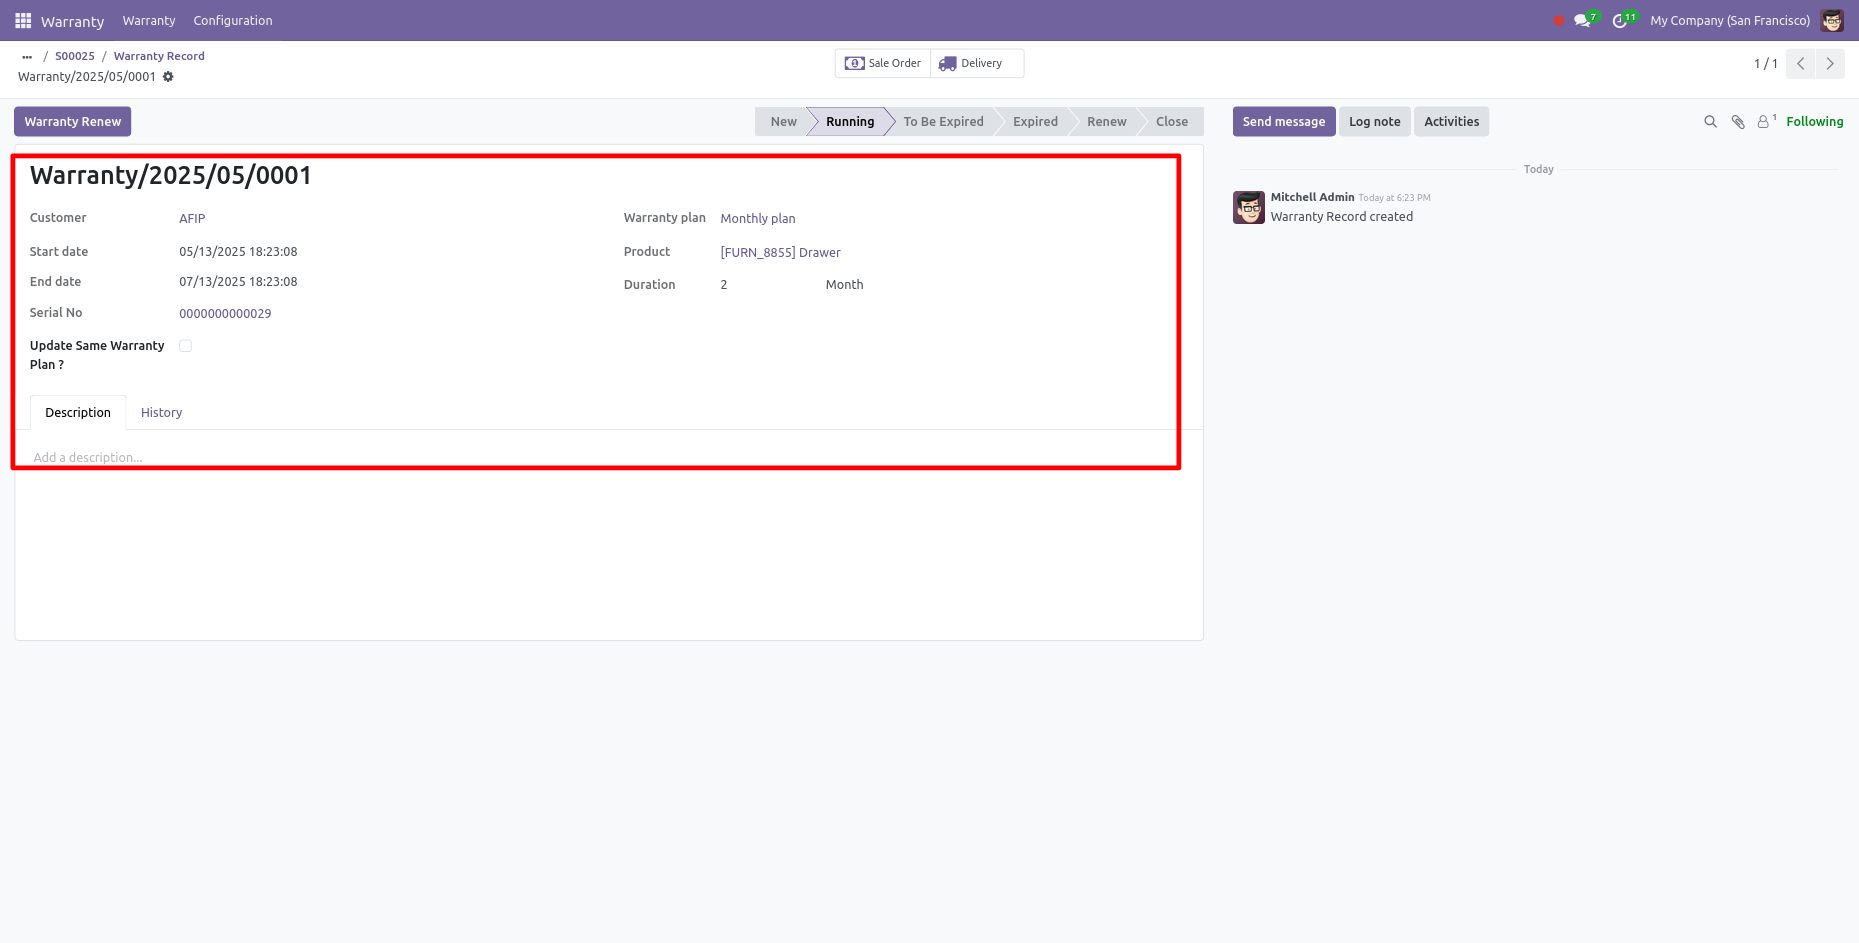
Here, you can see the form view of the Record.
In the form view of the record, the 'Sale Order' and 'Delivery' smart buttons are visible.
Also, you can see the start & end date and duration. Click on the 'Delivery' smart button.
Form view of the Delivery Order.
Click on the "warranty" smart button.
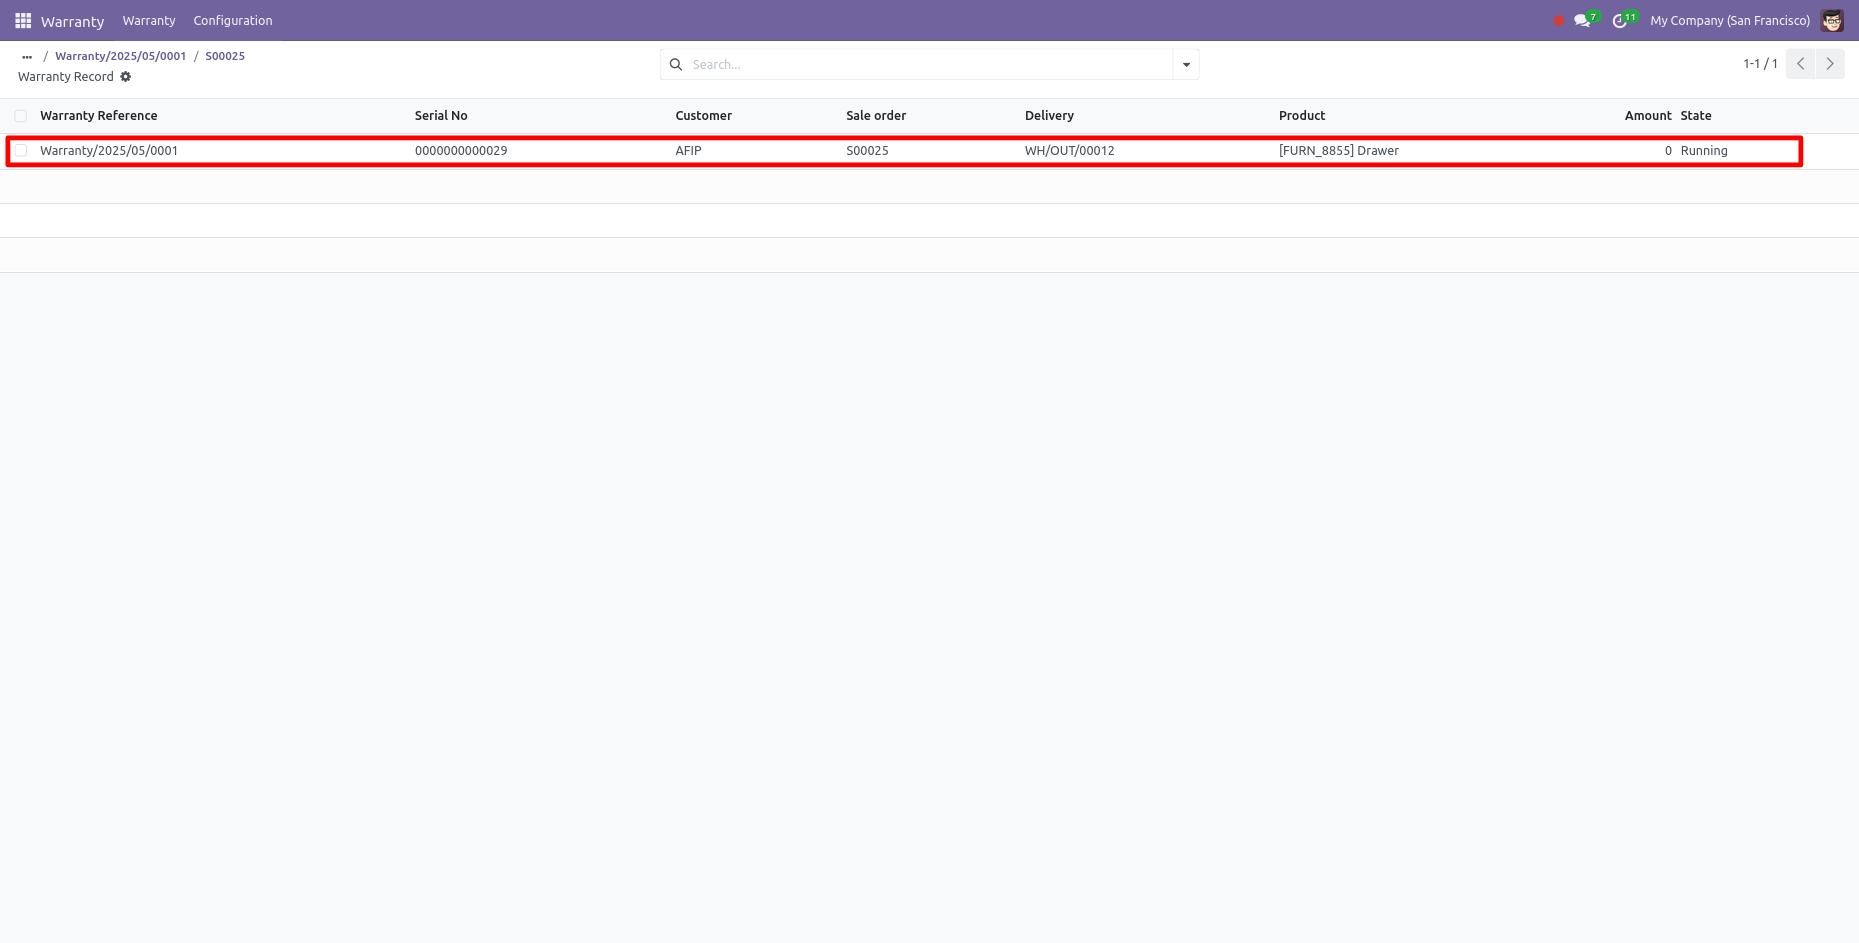
Here, you can see the tree view of the warranty.
Here, you can see the form view of the warranty.
Here, you can see the form view of the product. After adding a warranty to a product, you can
see the warranty smart button in the product form view.
Click on the 'warranty' smart button.
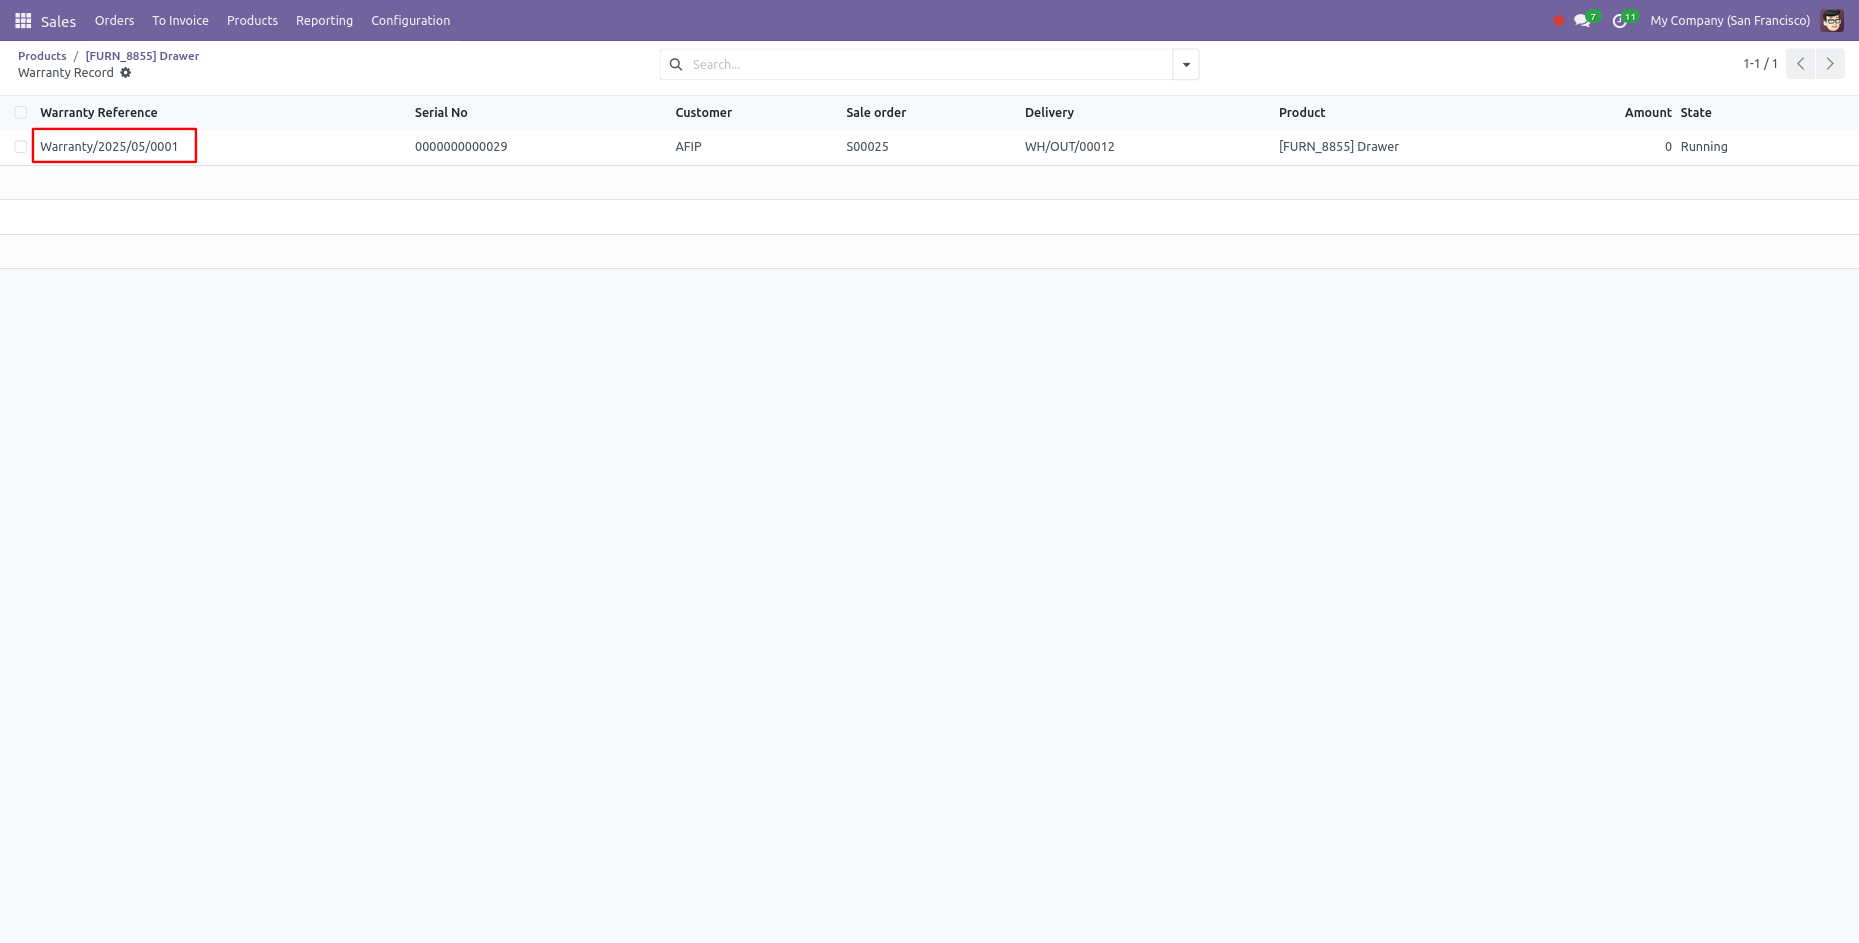
List view of the warranty records.
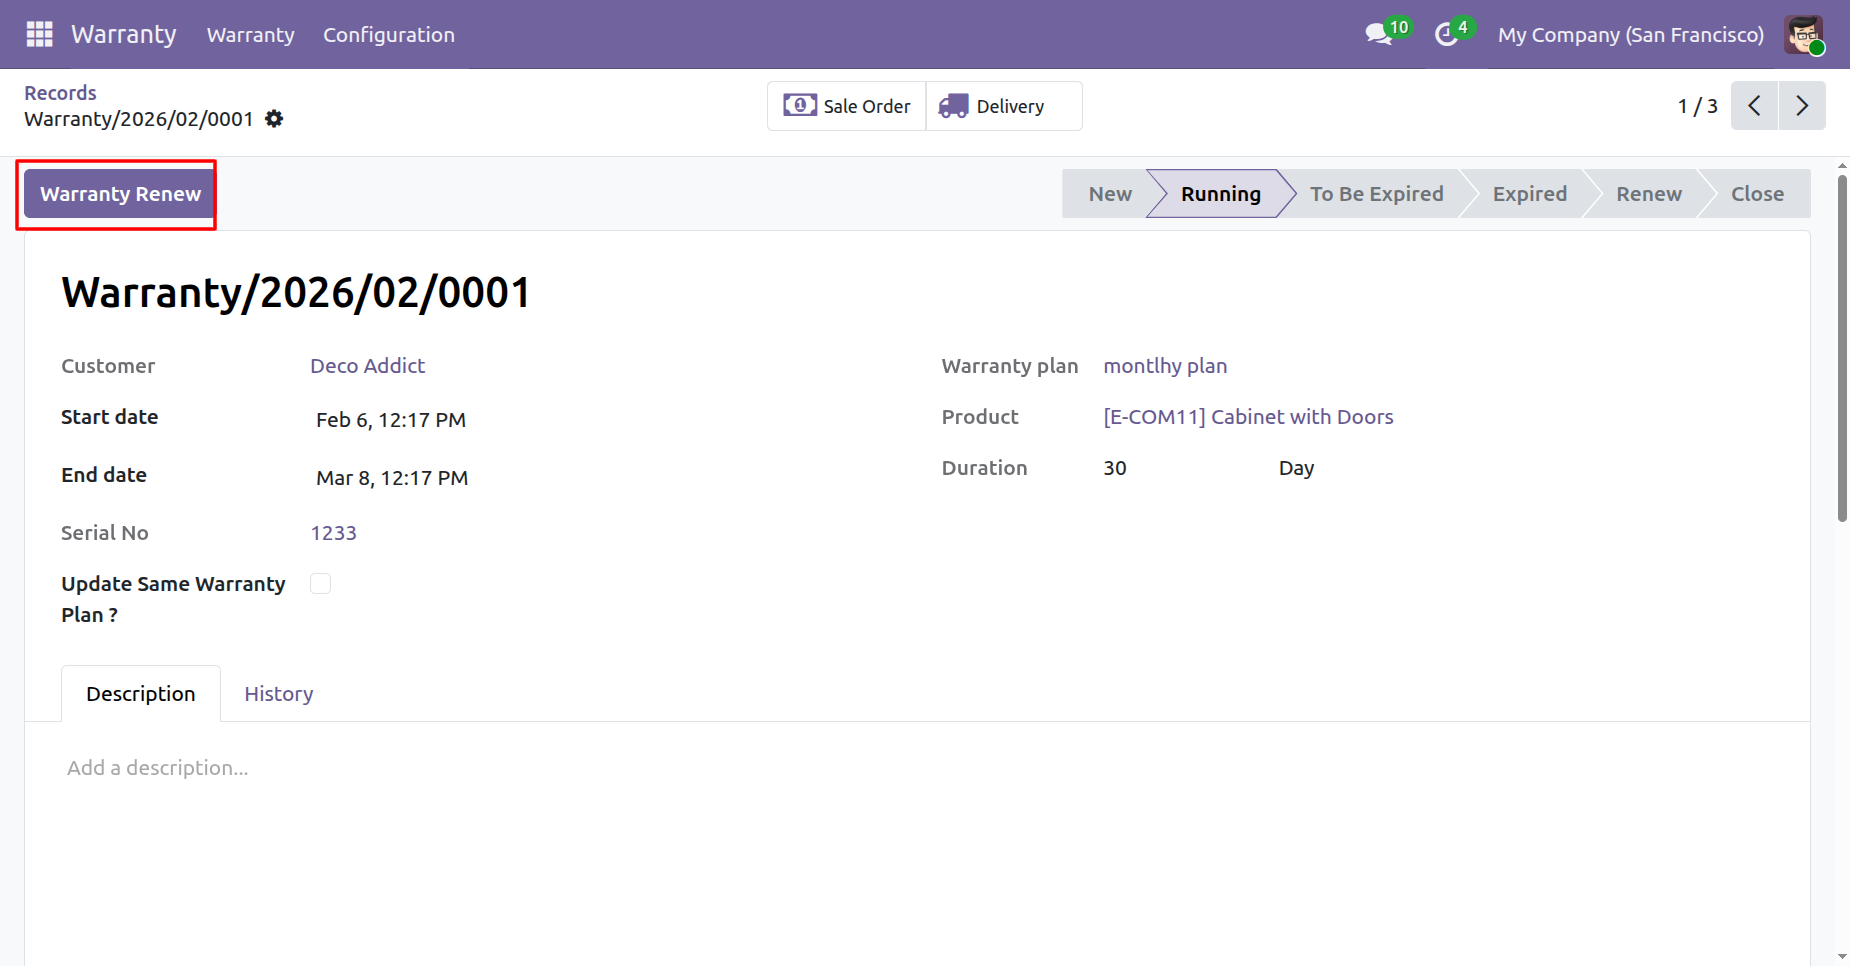
Click on warranty record.
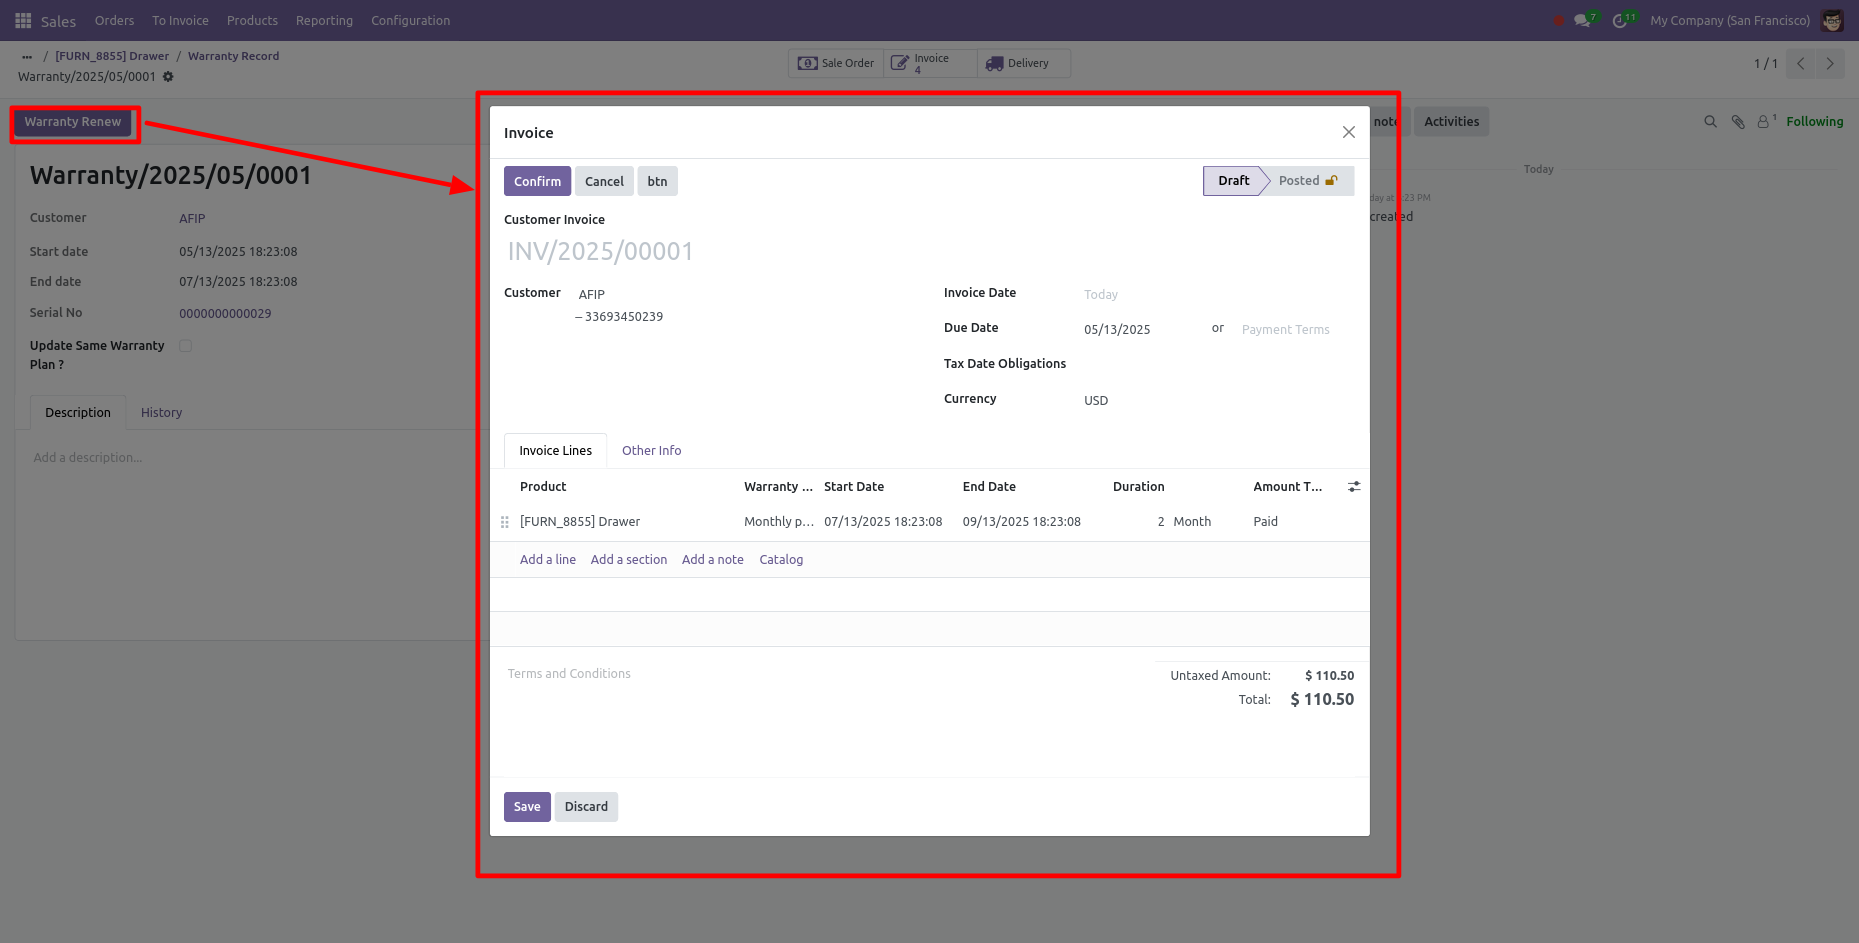
To renew the warranty, Click on the 'Warranty Renew' button. After that 'Invoice' wizard will
appear.
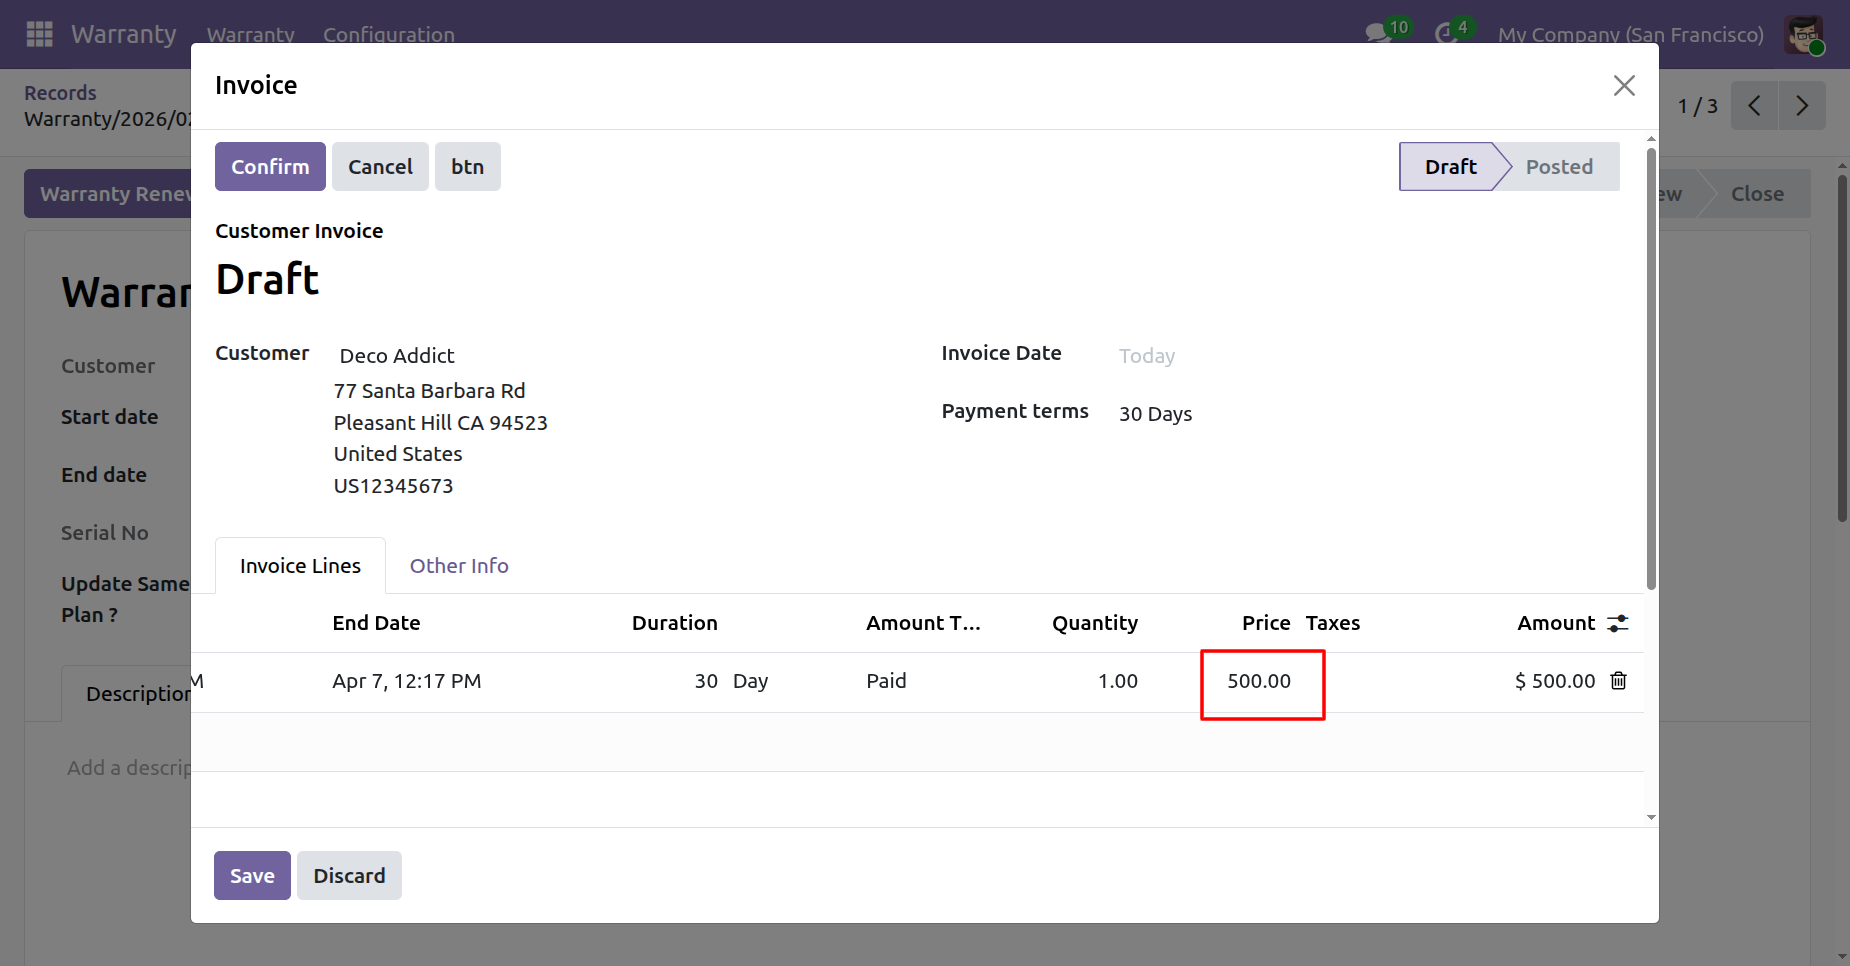
Here, you can set the duration and price. Click on the 'Save' button.
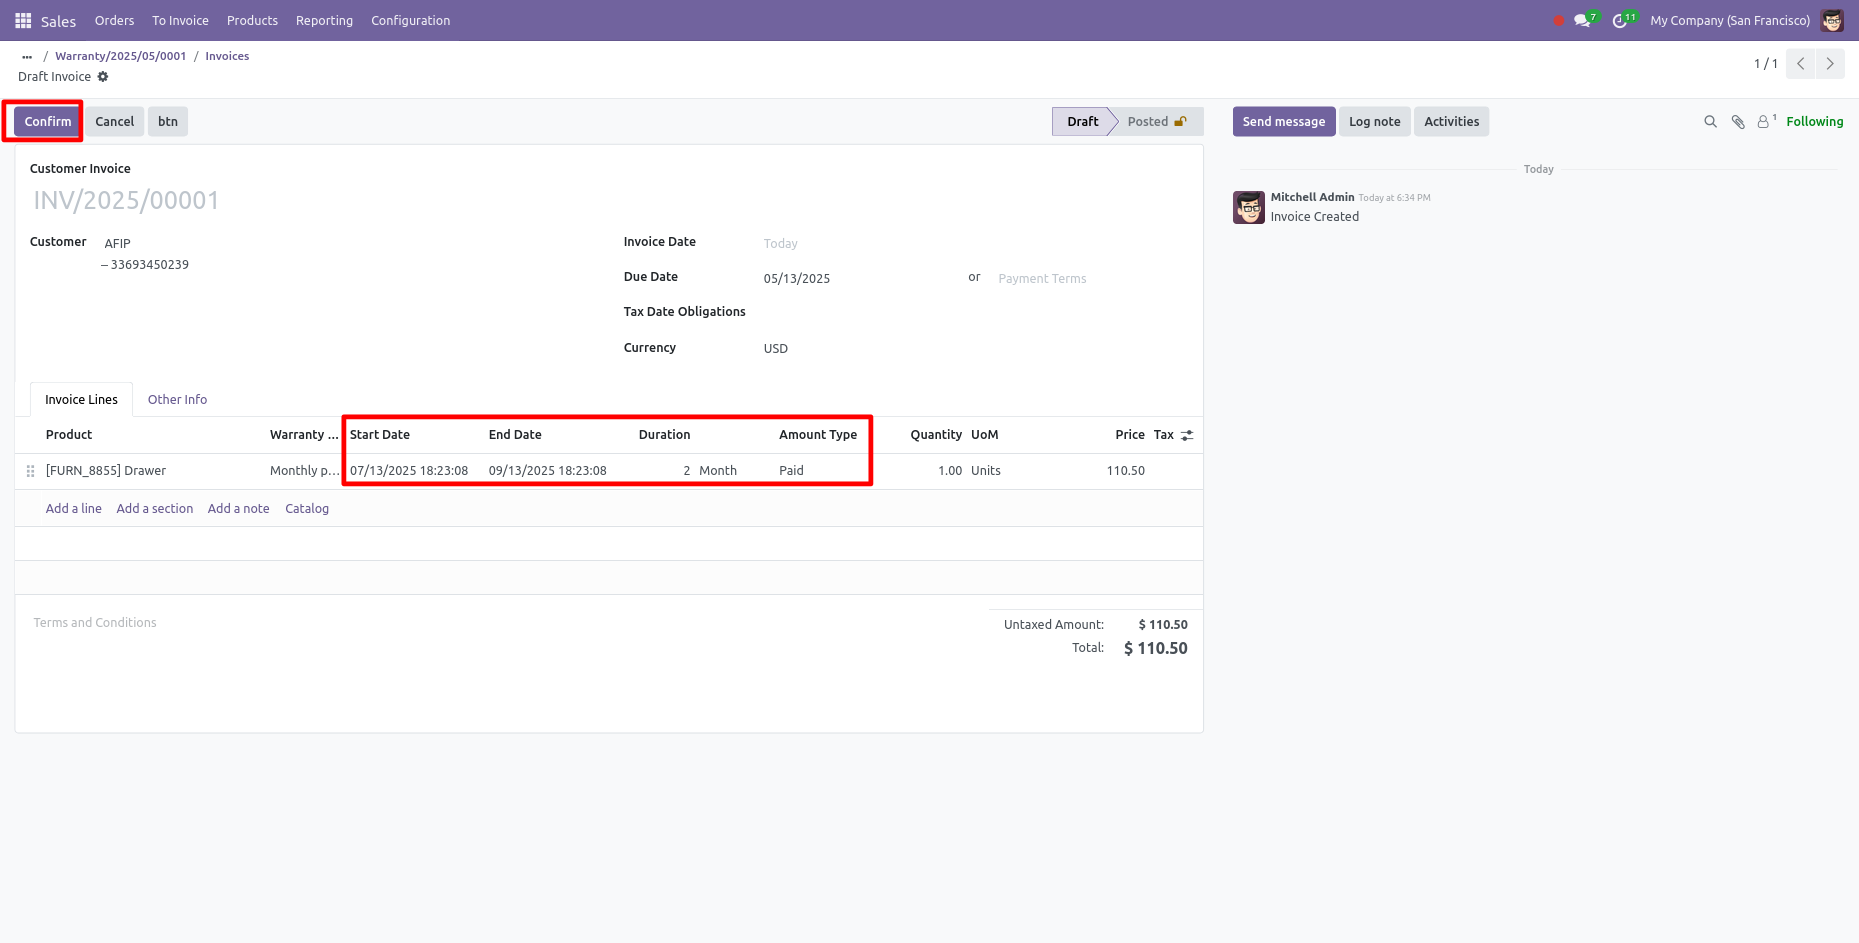
Form view of the Invoice.
In the form view, you can see the Start Date, End Date, Duration and Amount Type.
Click on the 'Confirm' button.
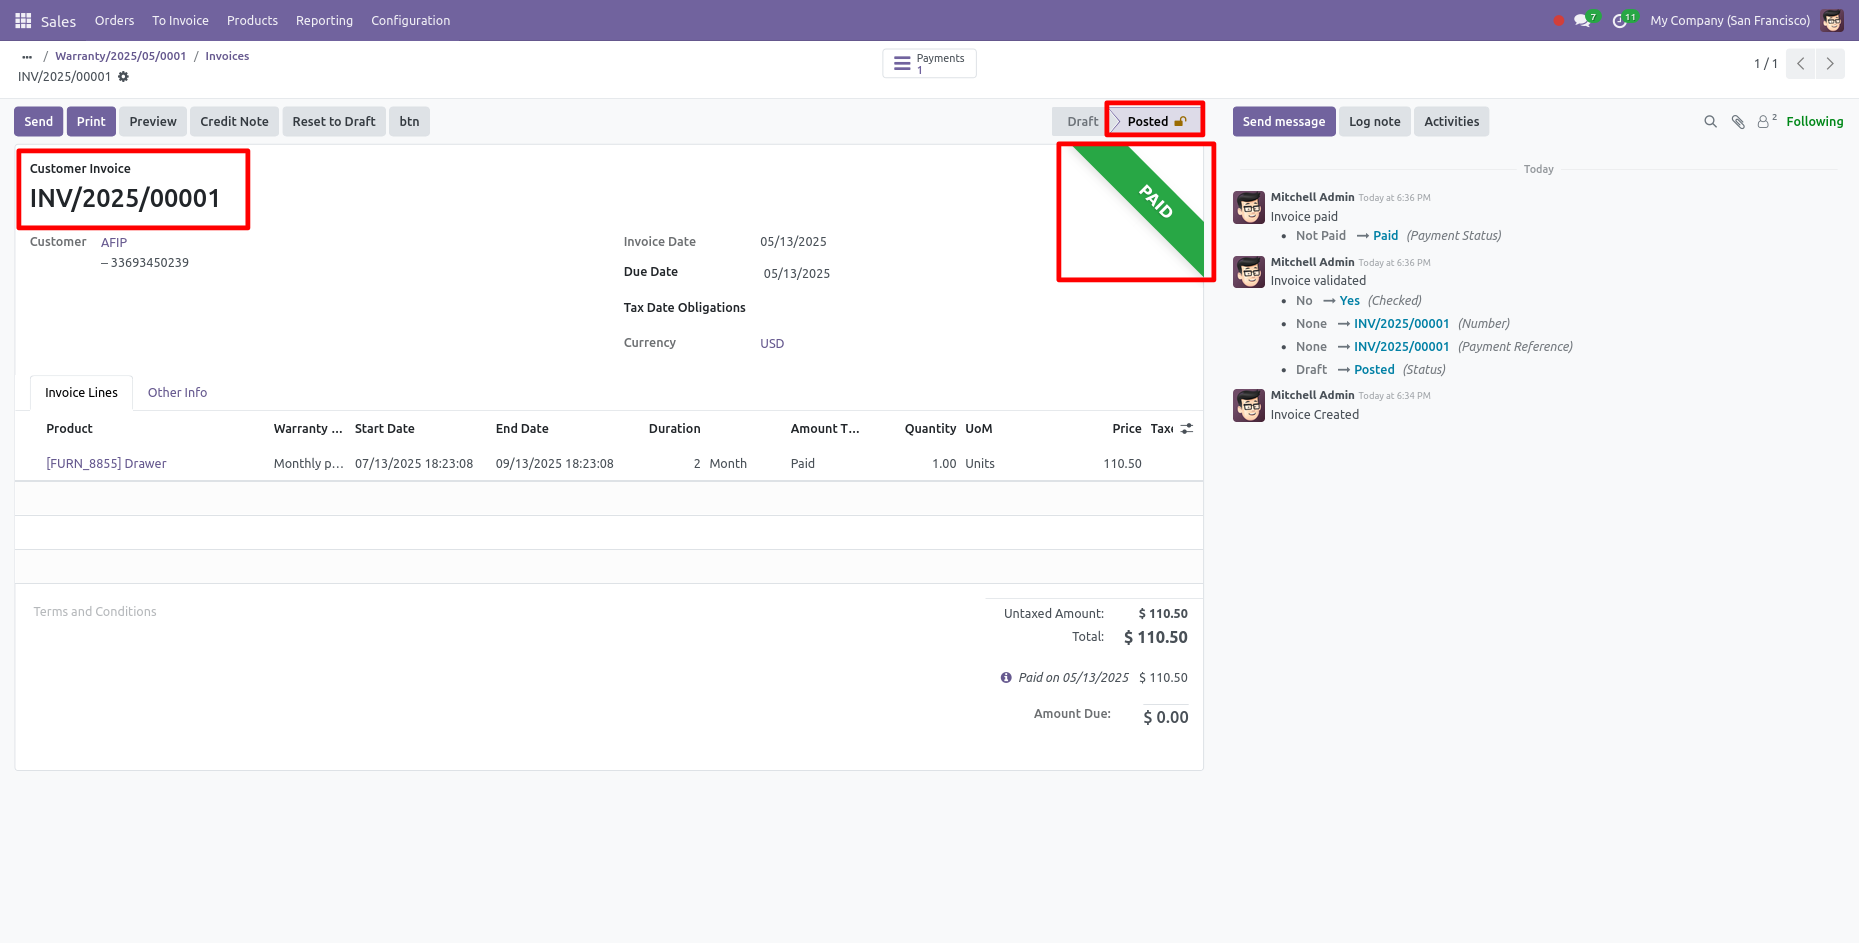
Now your invoice is in 'Posted' stage and PAID ribbon has been added.
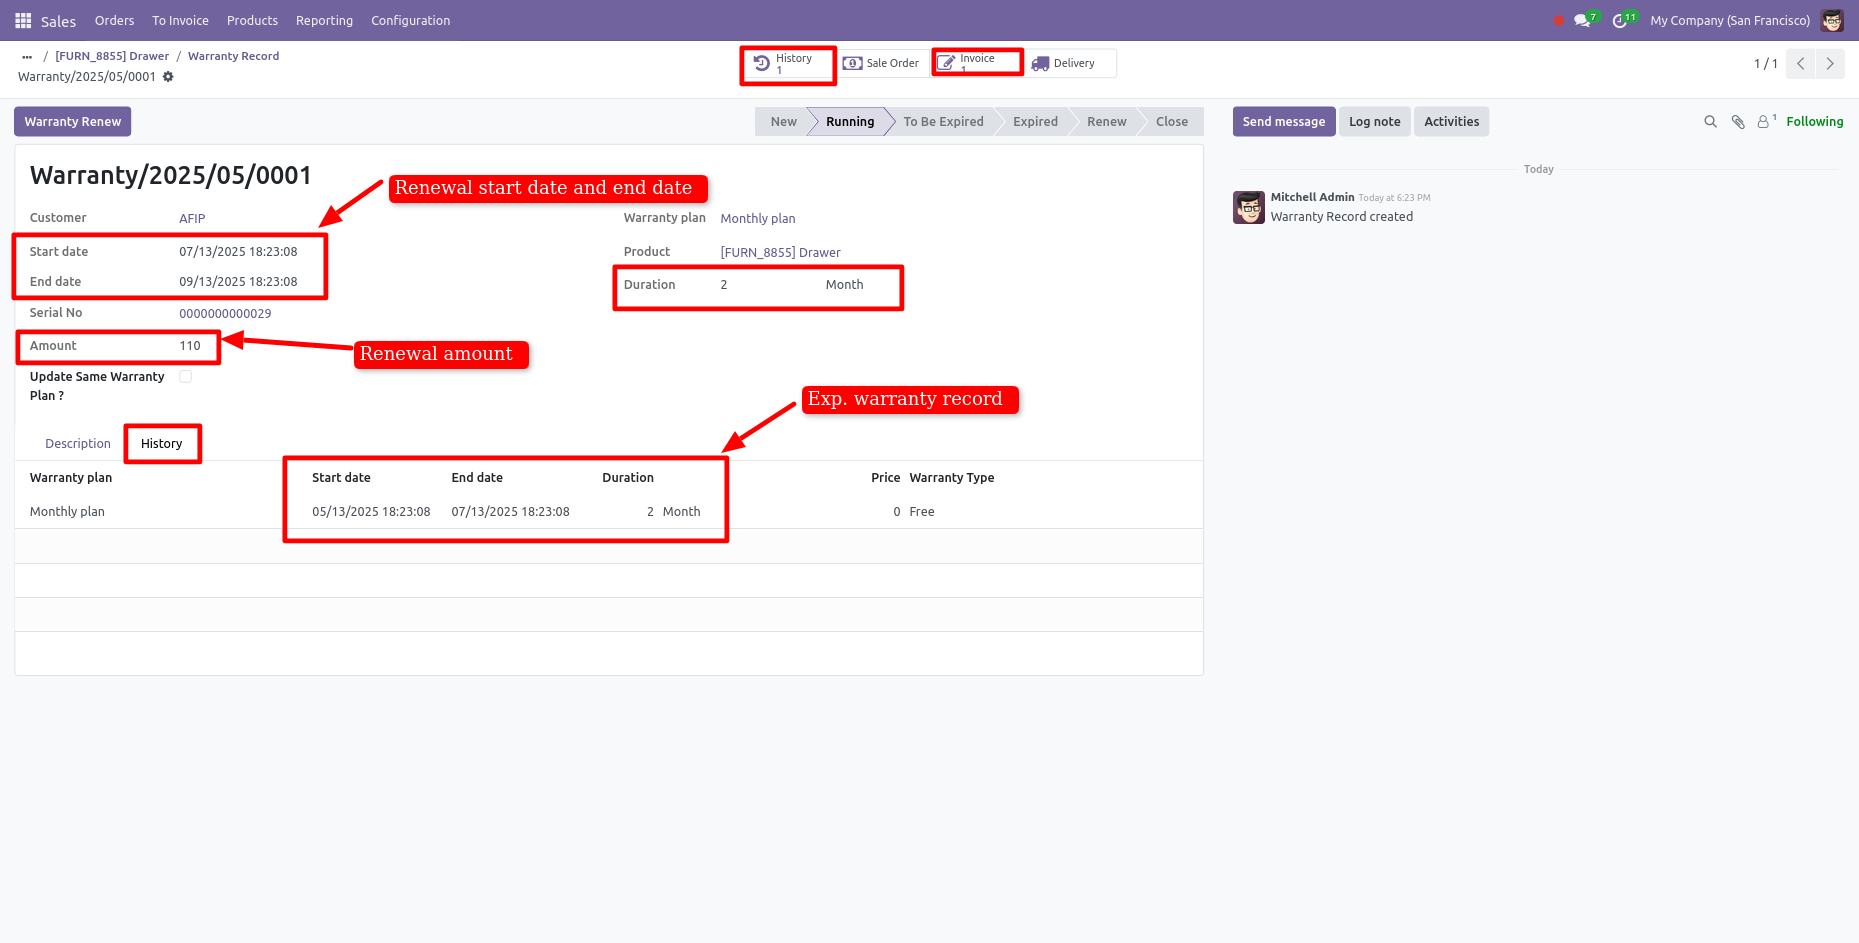
Form view of the warranty.
Here, you can see the renewal warranty record.
If you want to see the history of the warranty record then click on the 'History' smart
button.
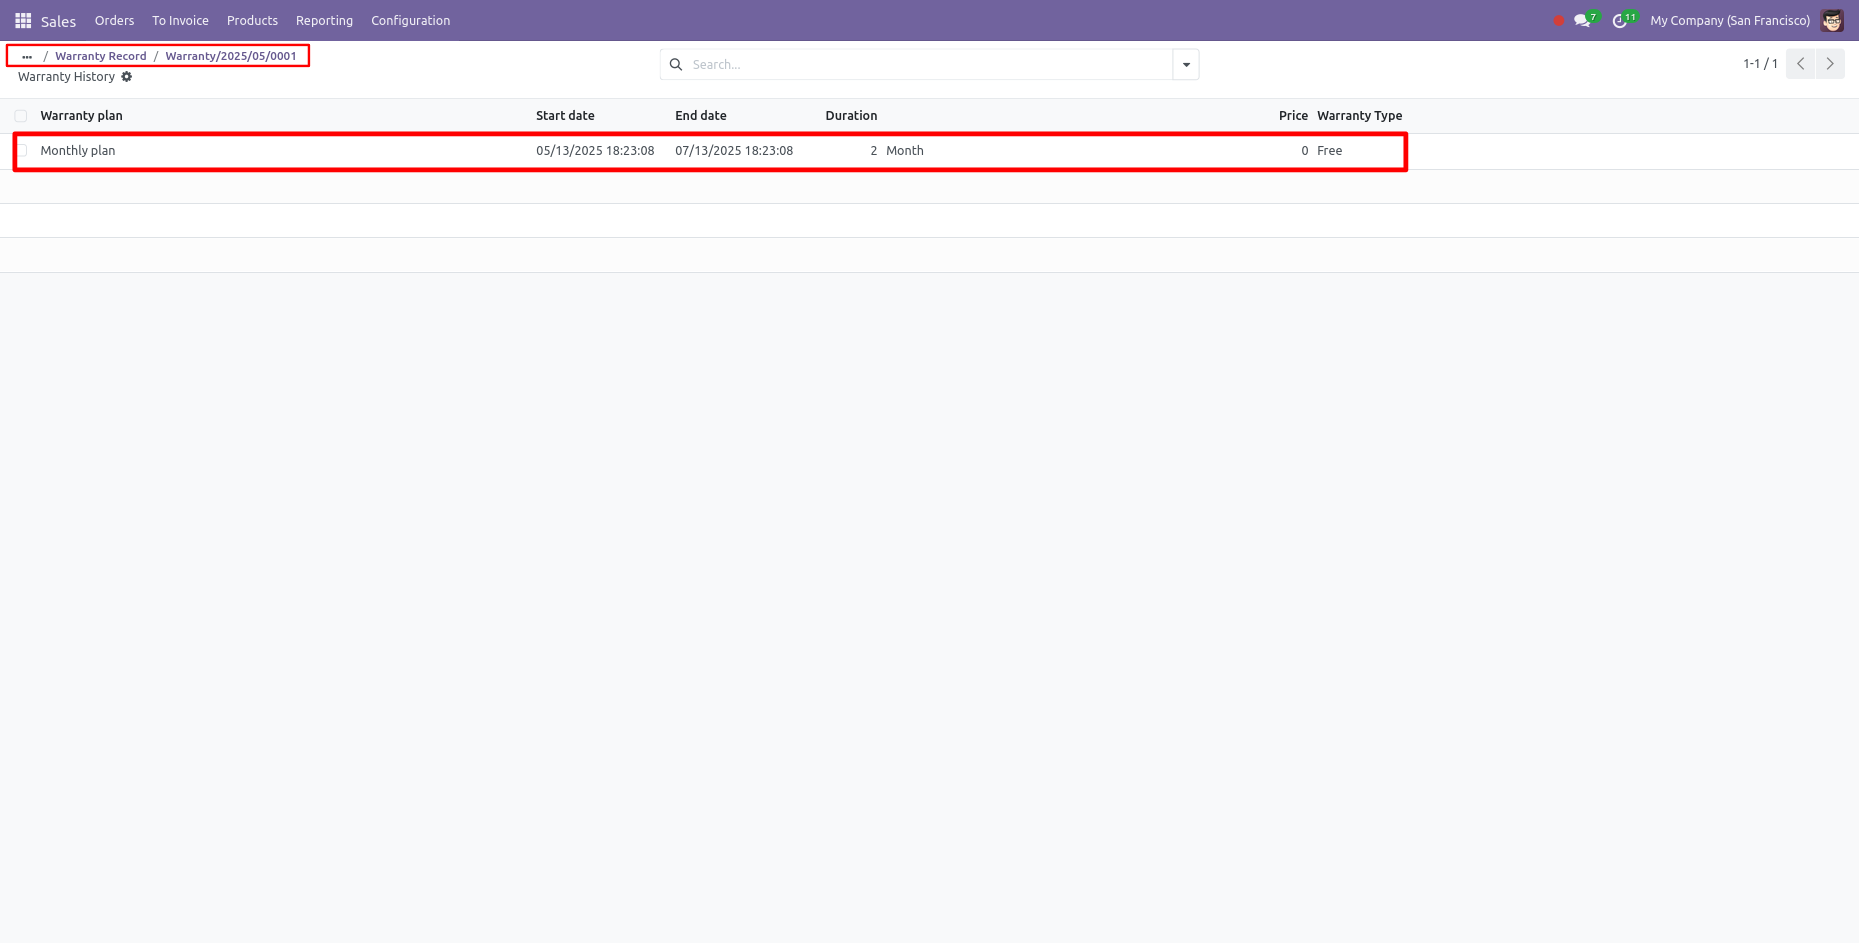
List view of the warranty History.
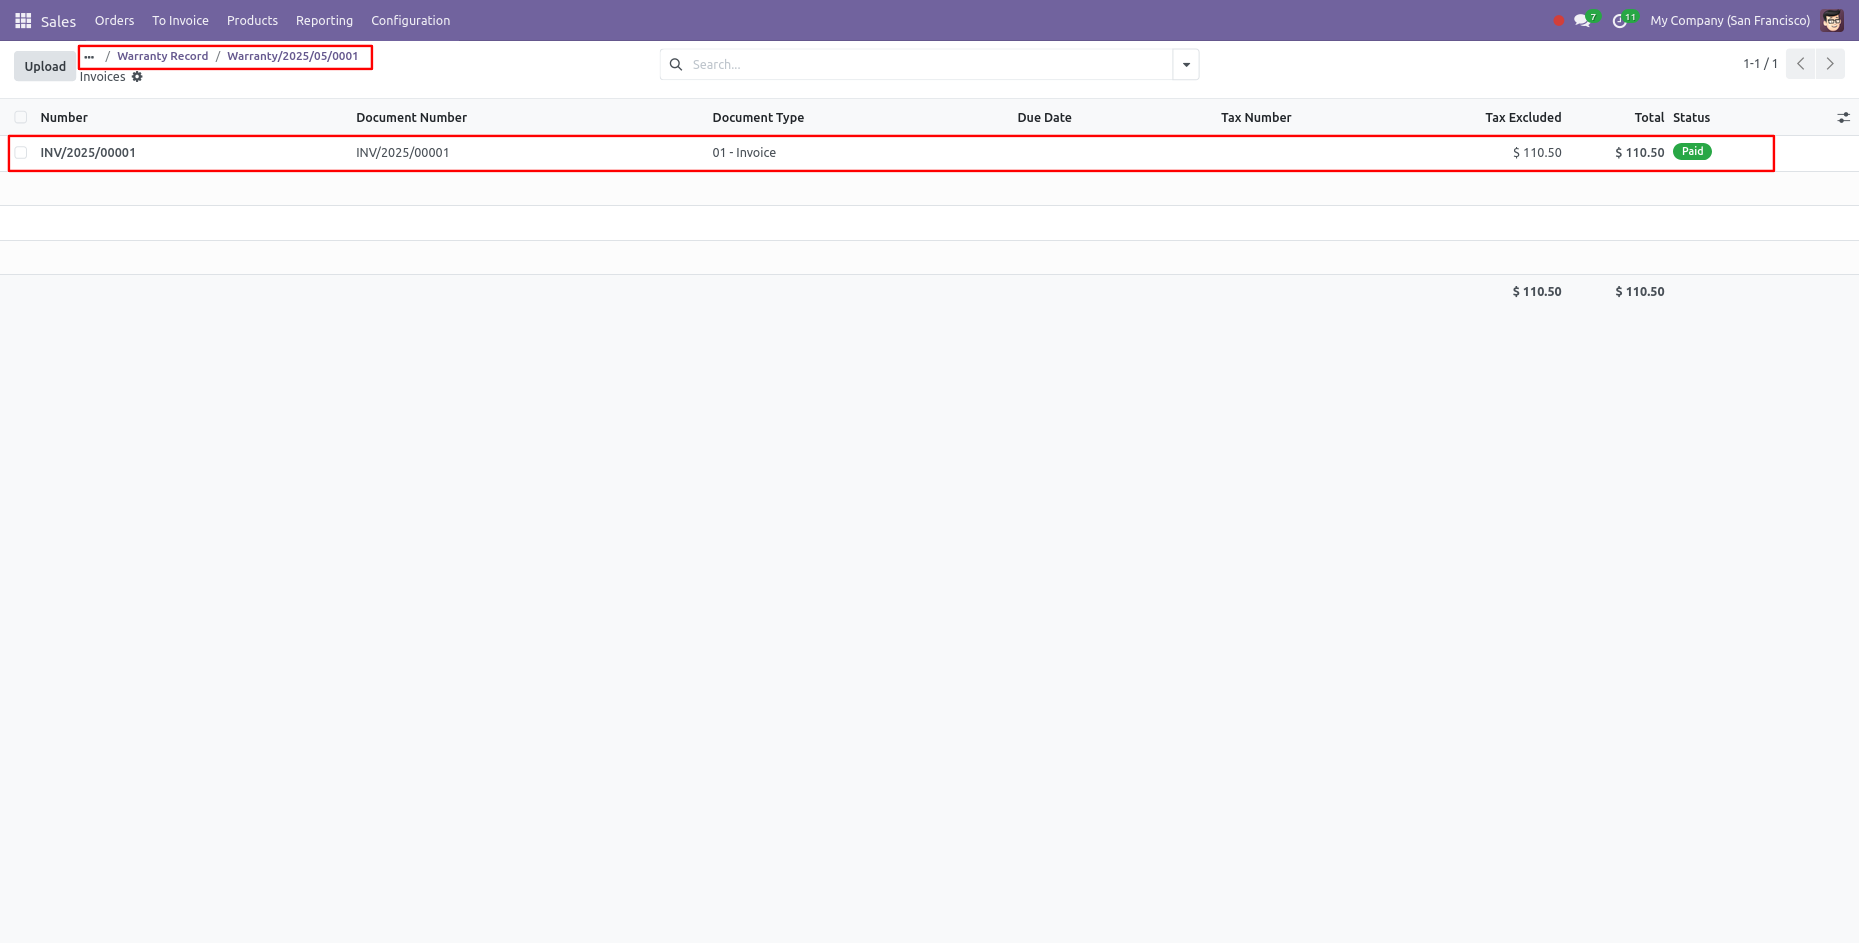
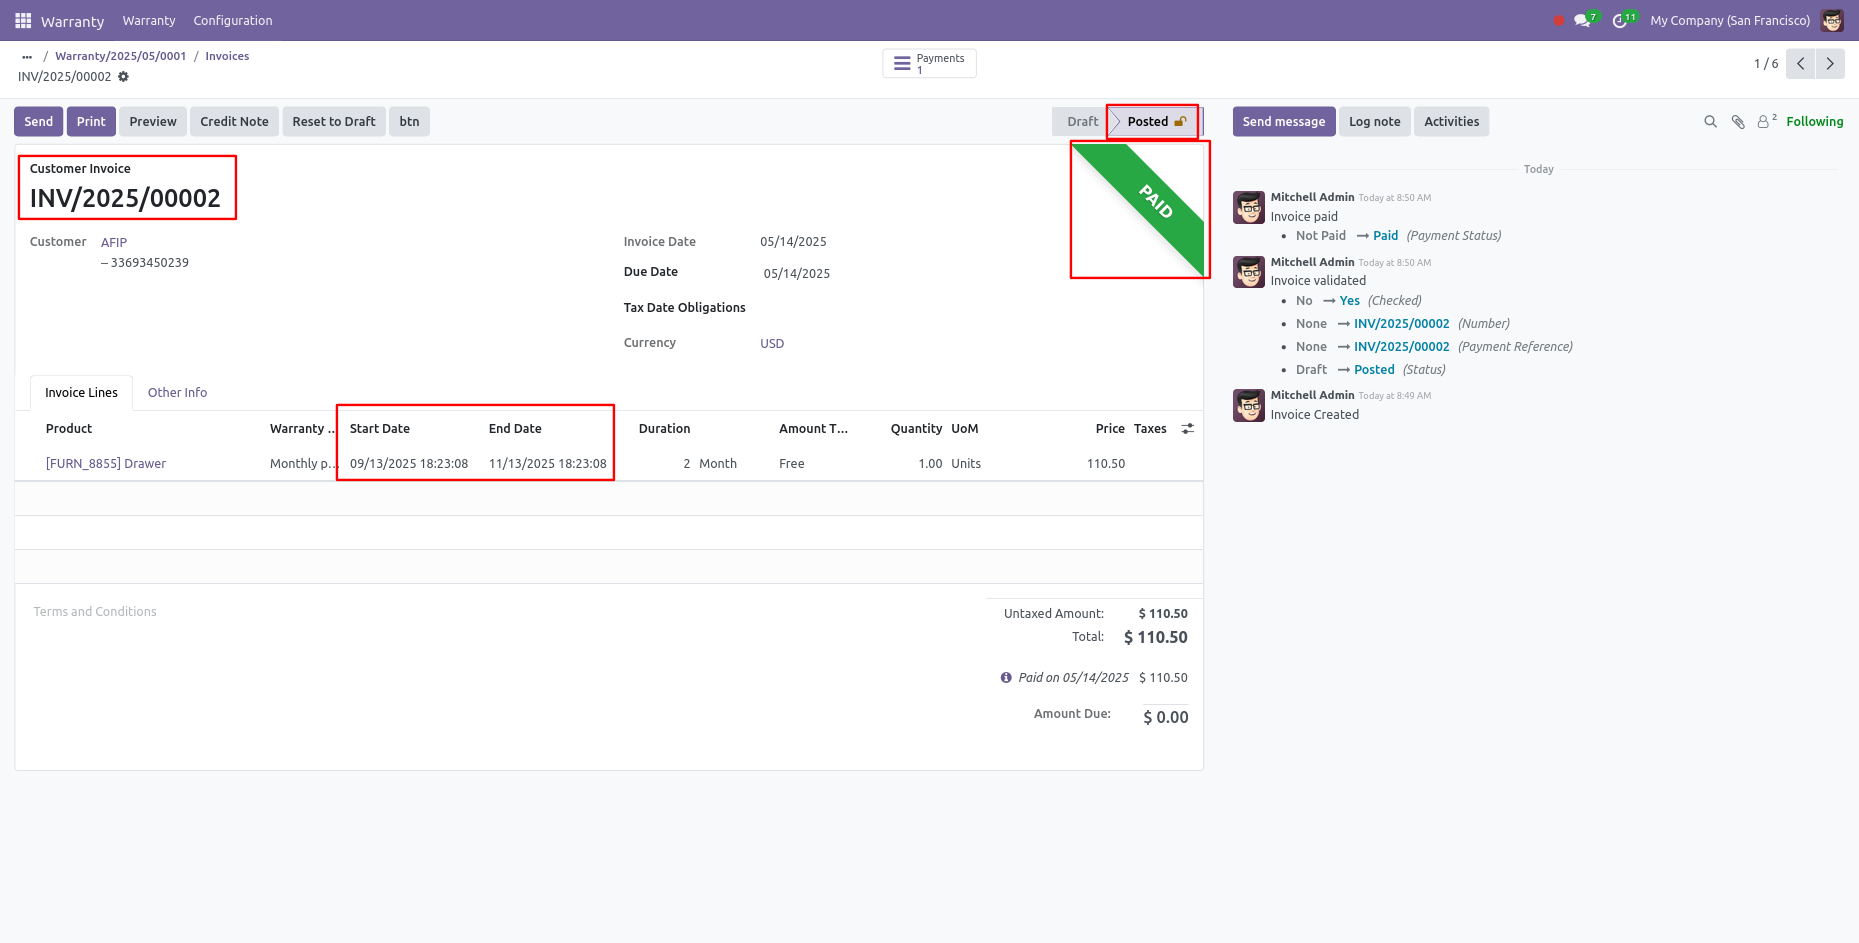
Invoice of the renewal warranty.
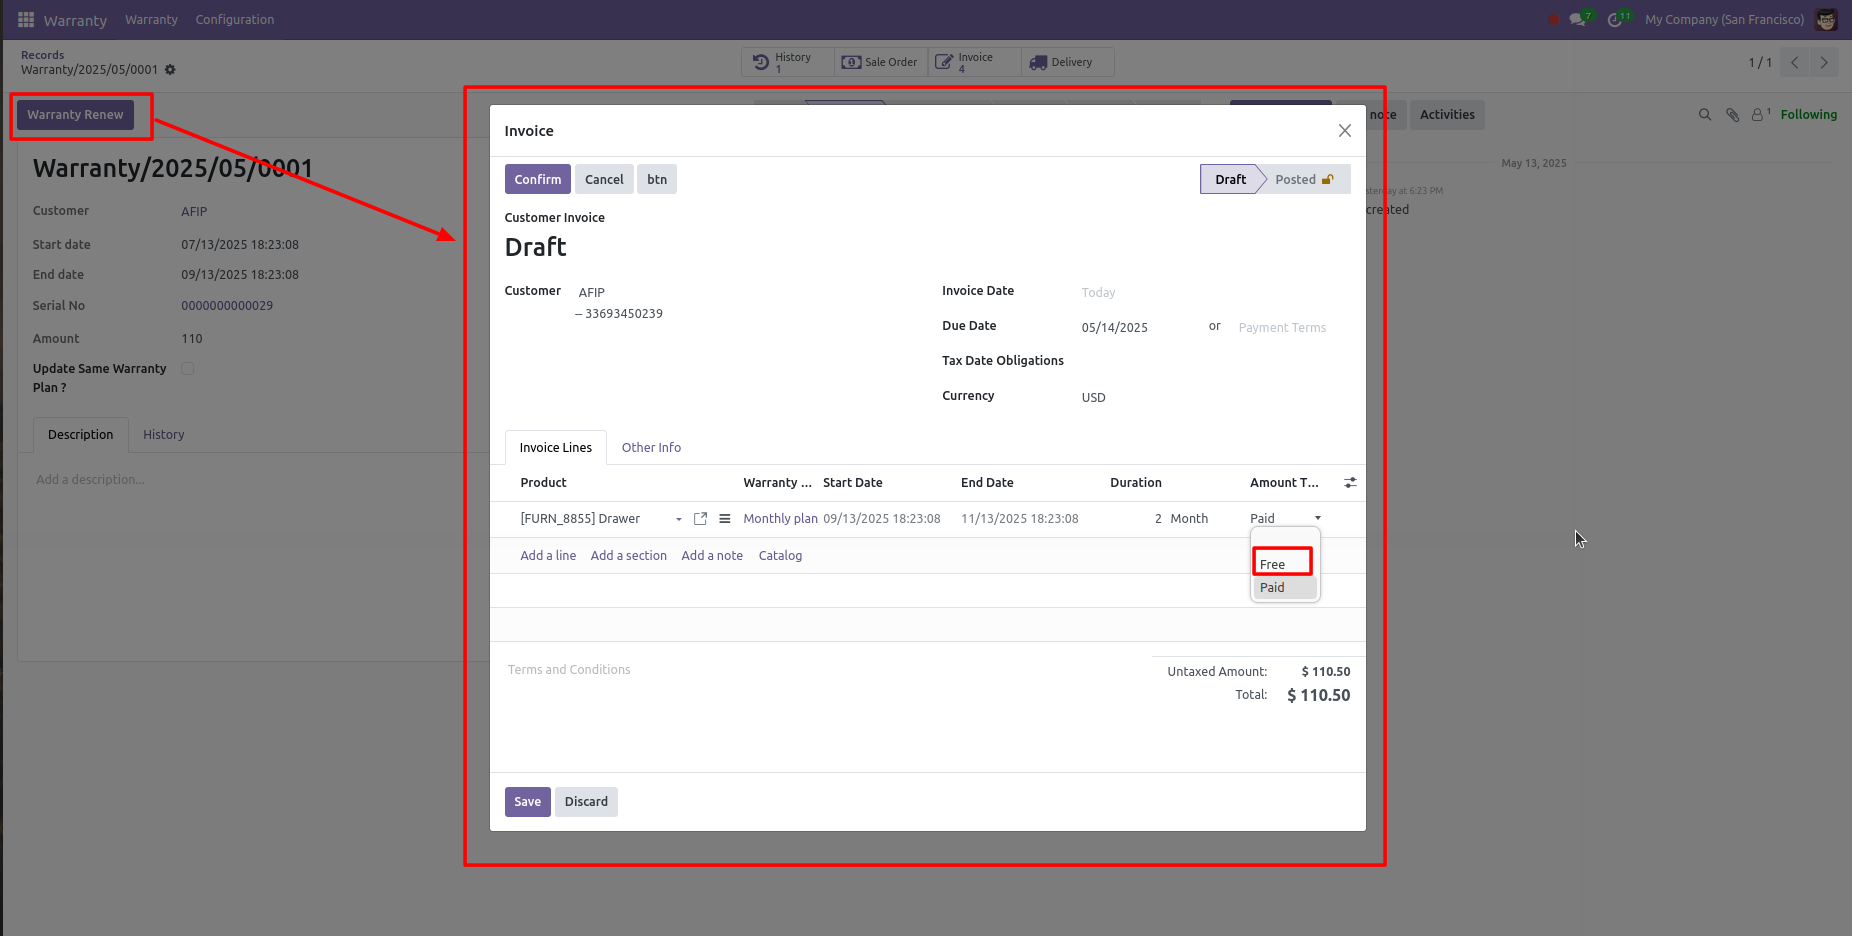
To renew the warranty, Click on the 'Warranty Renew' button.
After that 'Invoice' wizard will appear. Here, you can set the duration and price.
If this is the free warranty then you can select the 'Free' in amount type. Click on the
'Save'
button.
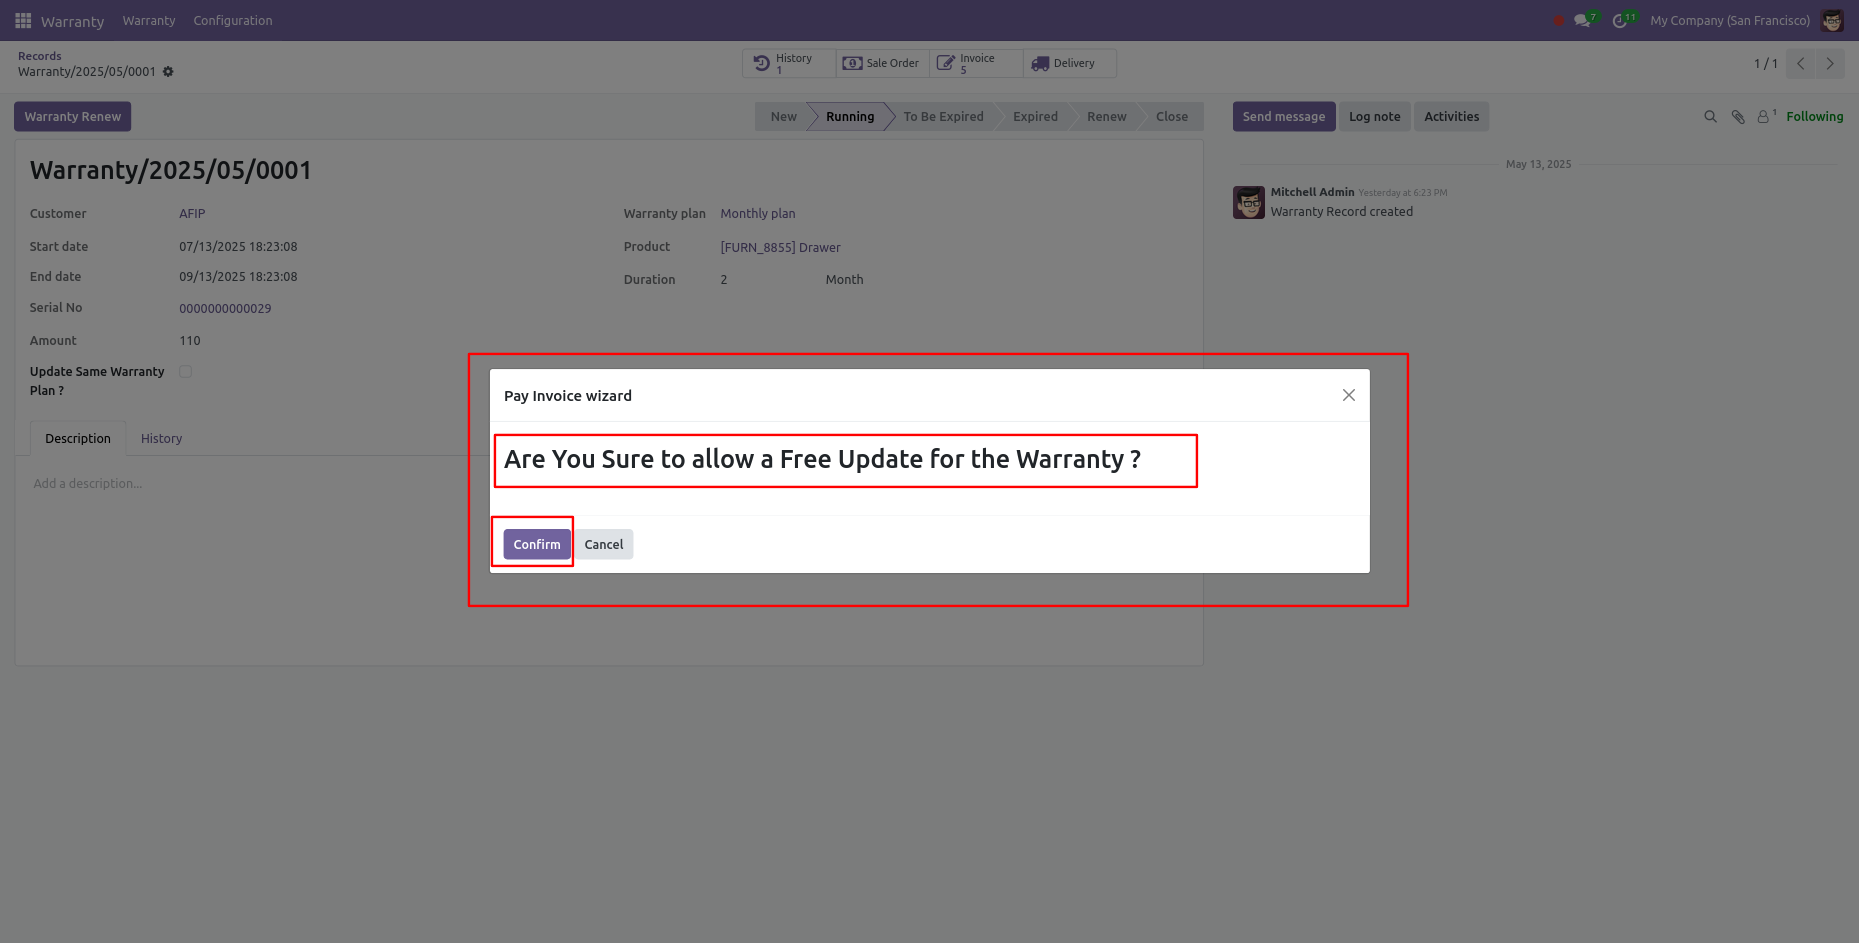
After that Pay Invoice Wizard will open.
Click on the 'confirm' button.
Now your invoice is in 'Posted' stage and 'PAID' ribbon has been added.
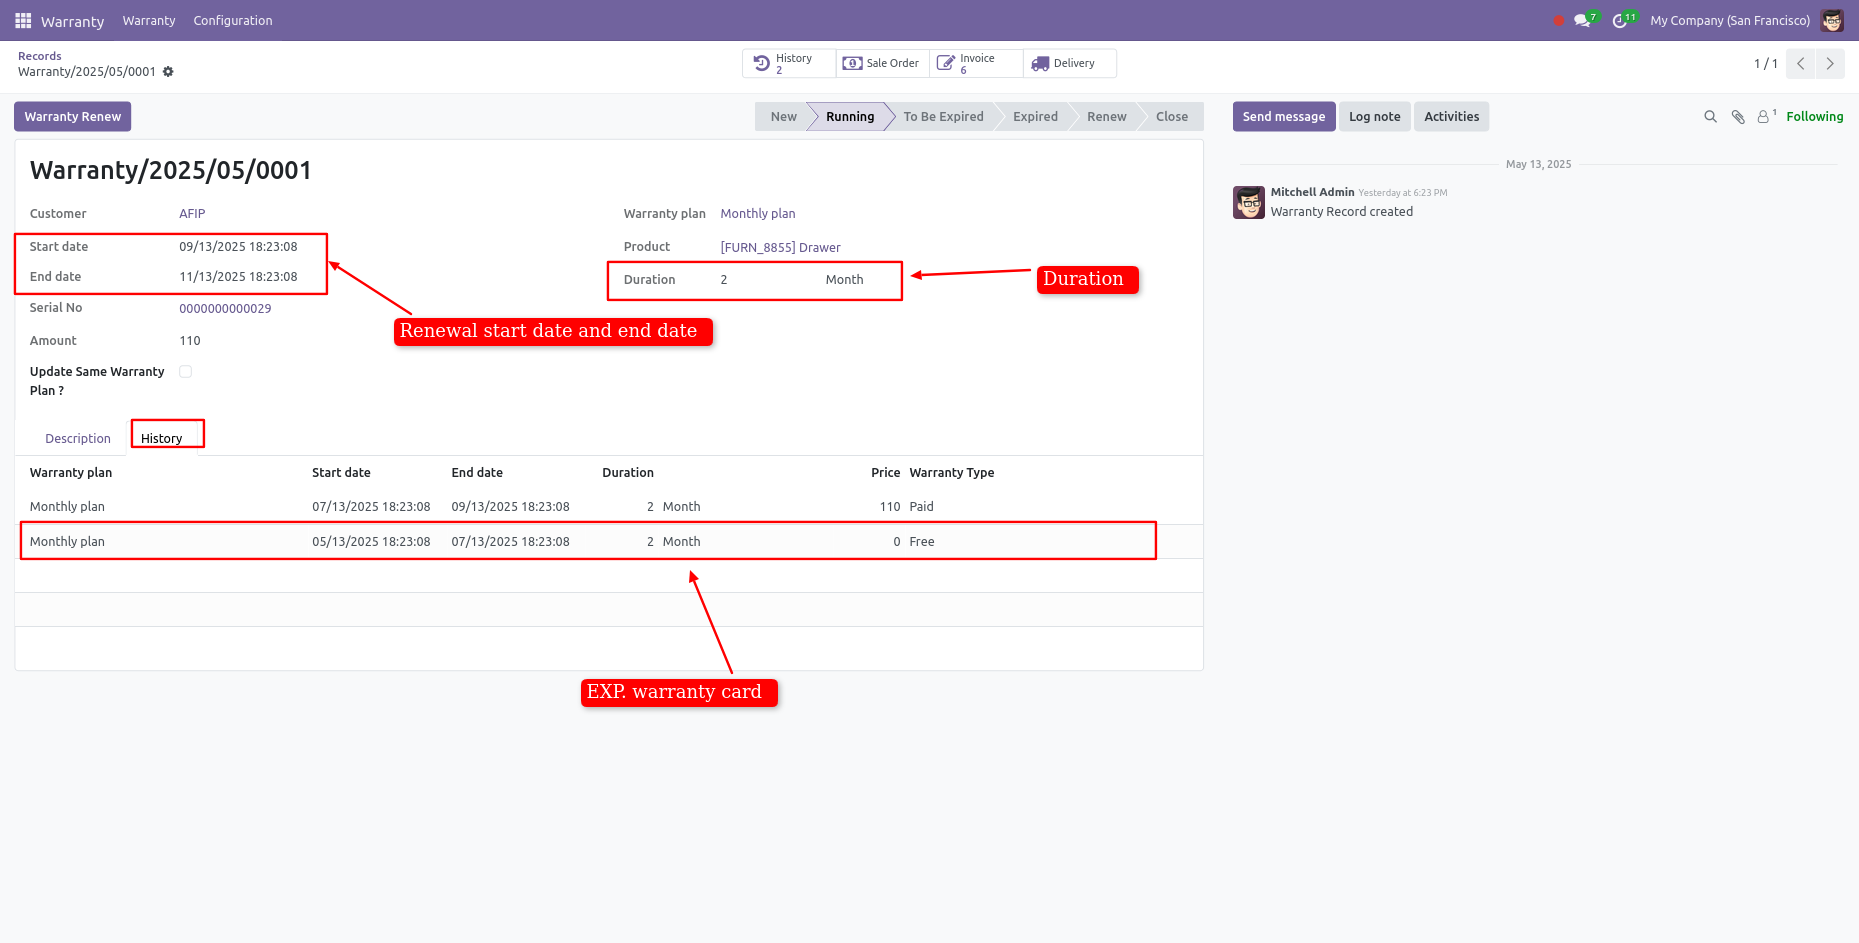
Form view of the warranty.
Here, you can see the renewal warranty record.
You can also see the history of the warranty records.
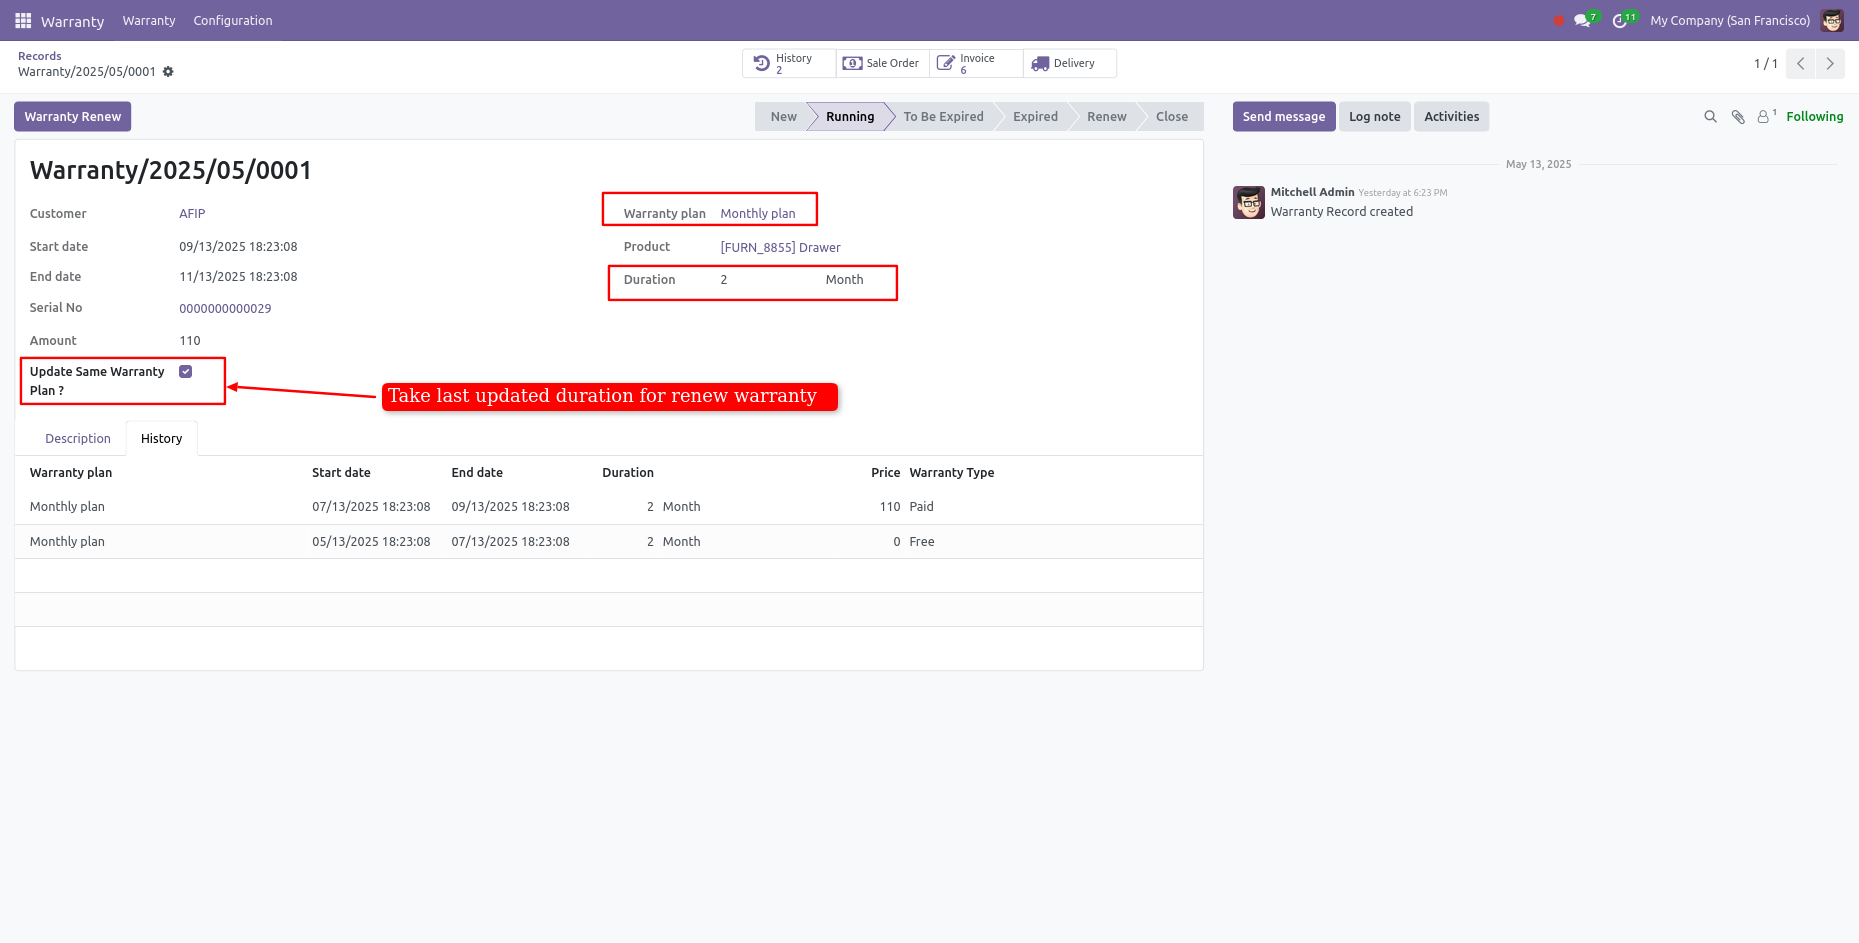
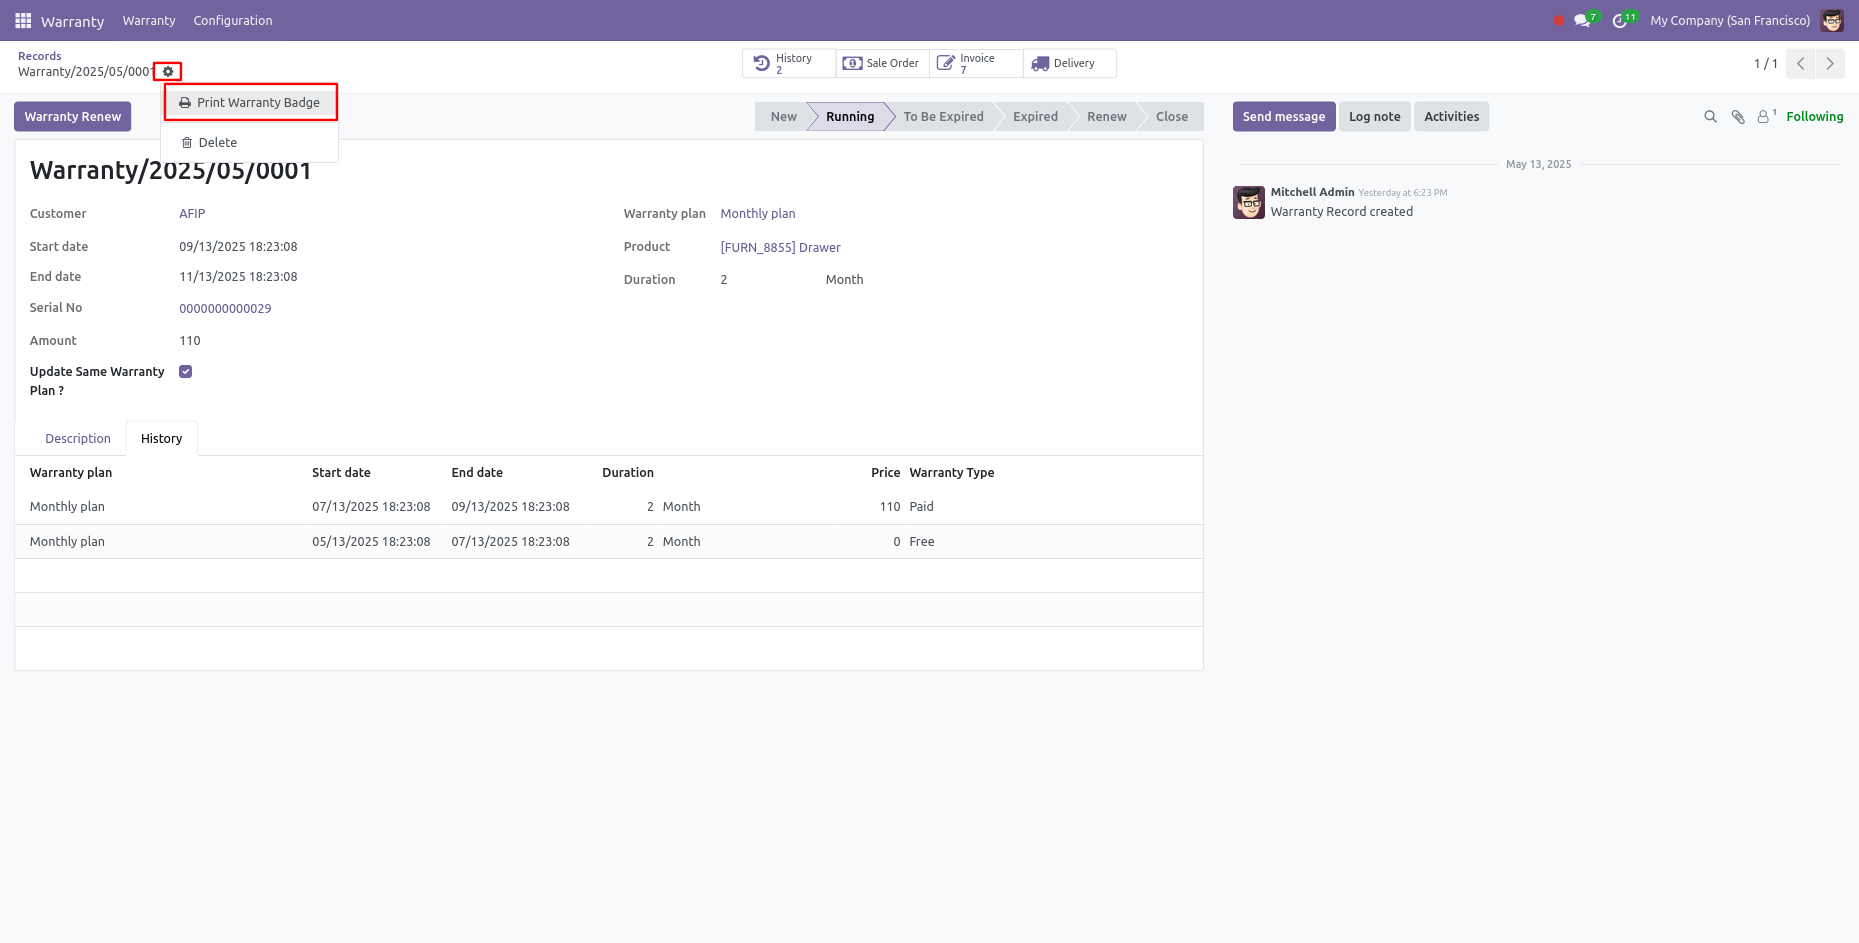
At the renewal time, If you want to renew the same plan then tick the "Update Same Warranty Plan?".
If you want to print the warranty badge, then click on "Print Warranty Badge" from the action.
Here you can see the printed warranty badge.

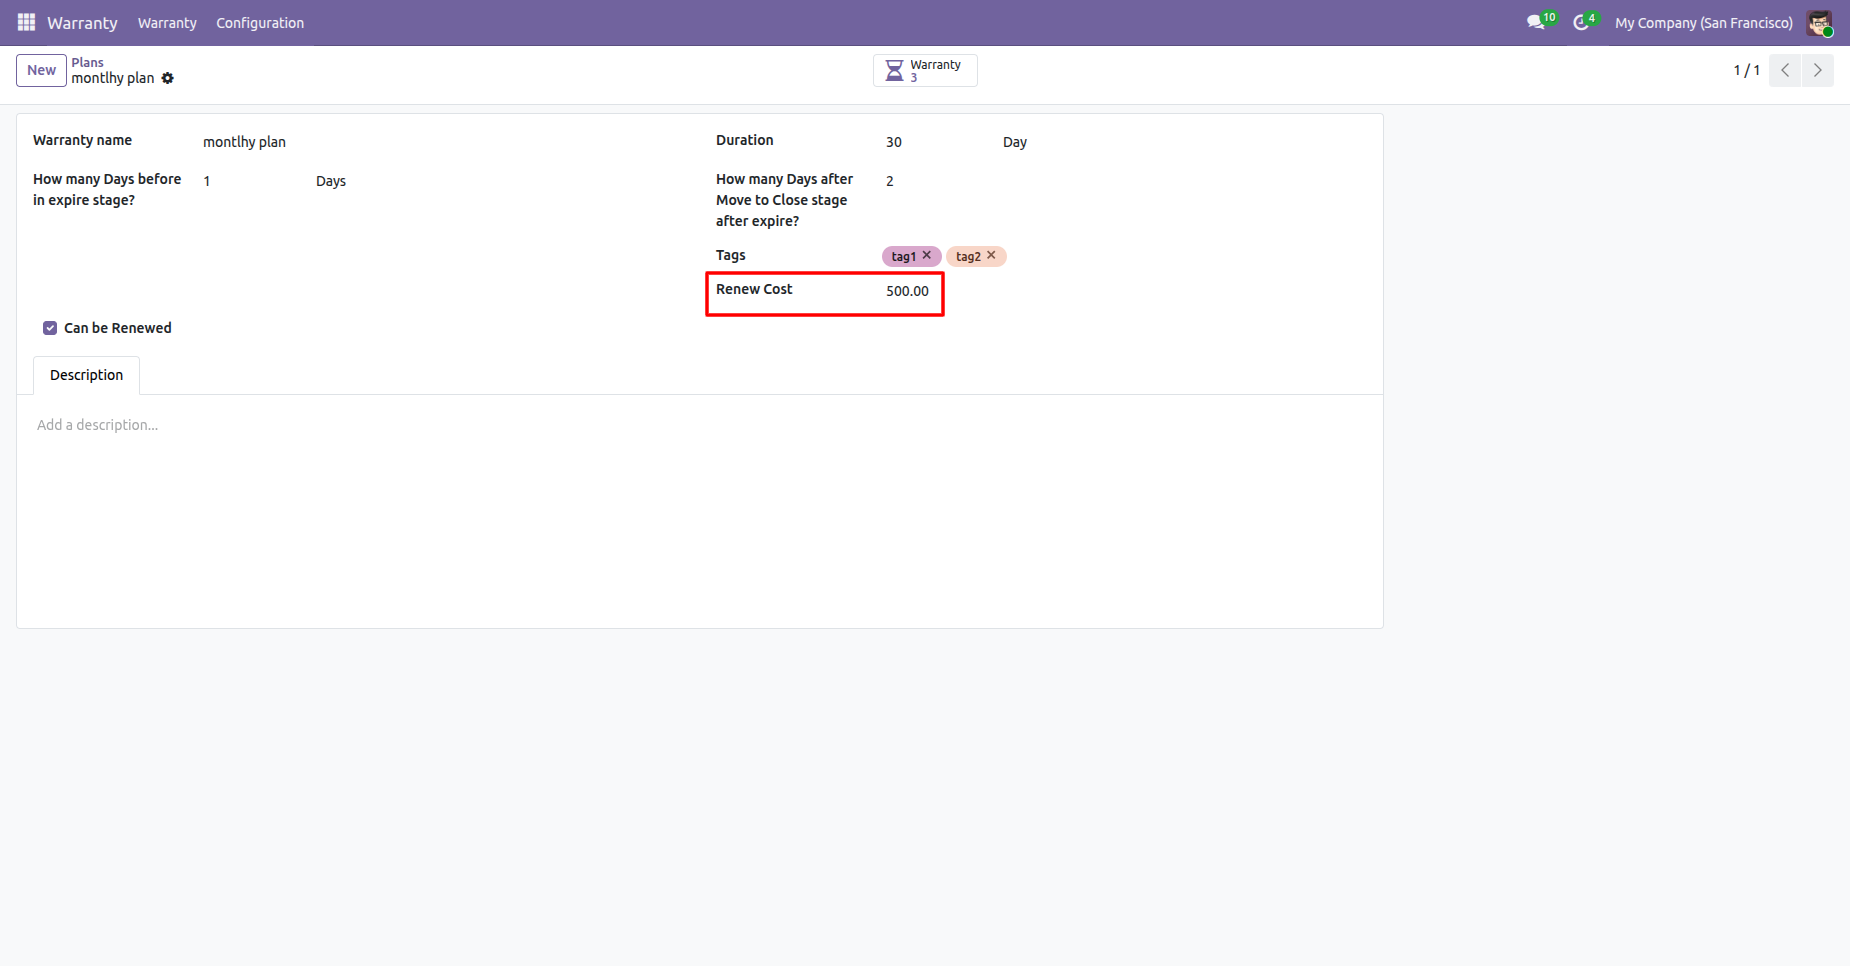
You can view the Renew Cost in the Plan form view.
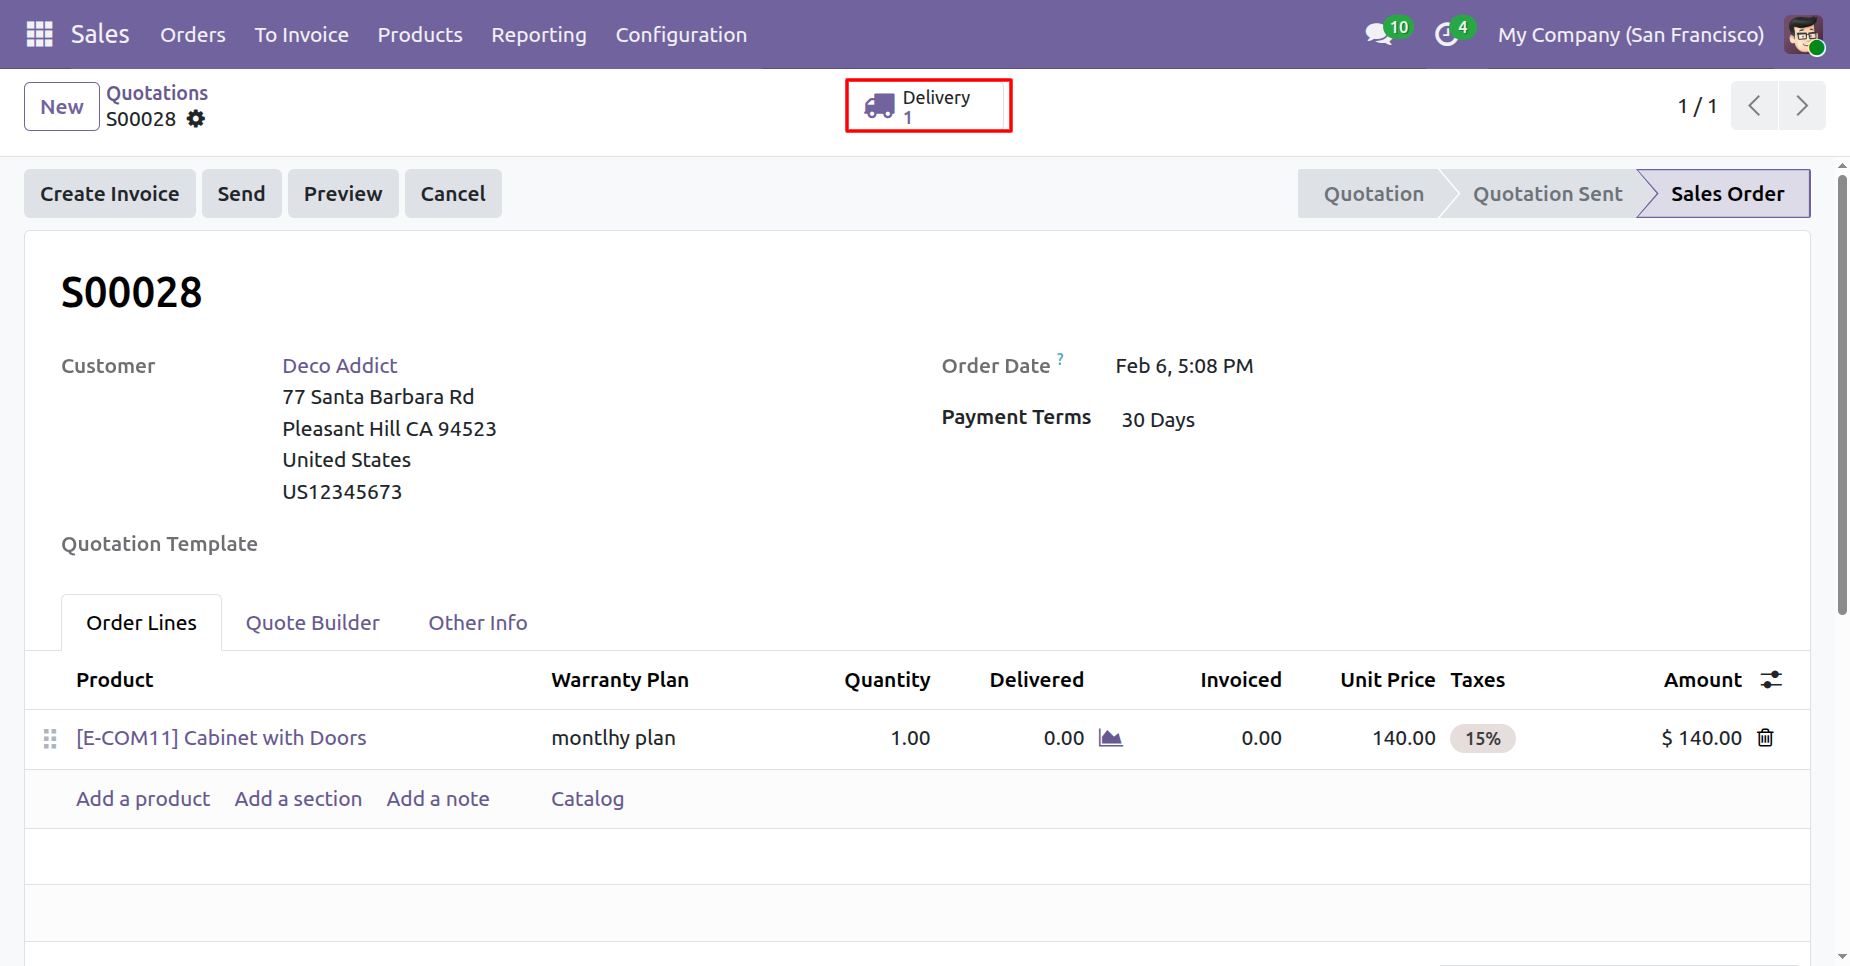
Create a quotation and confirm it.
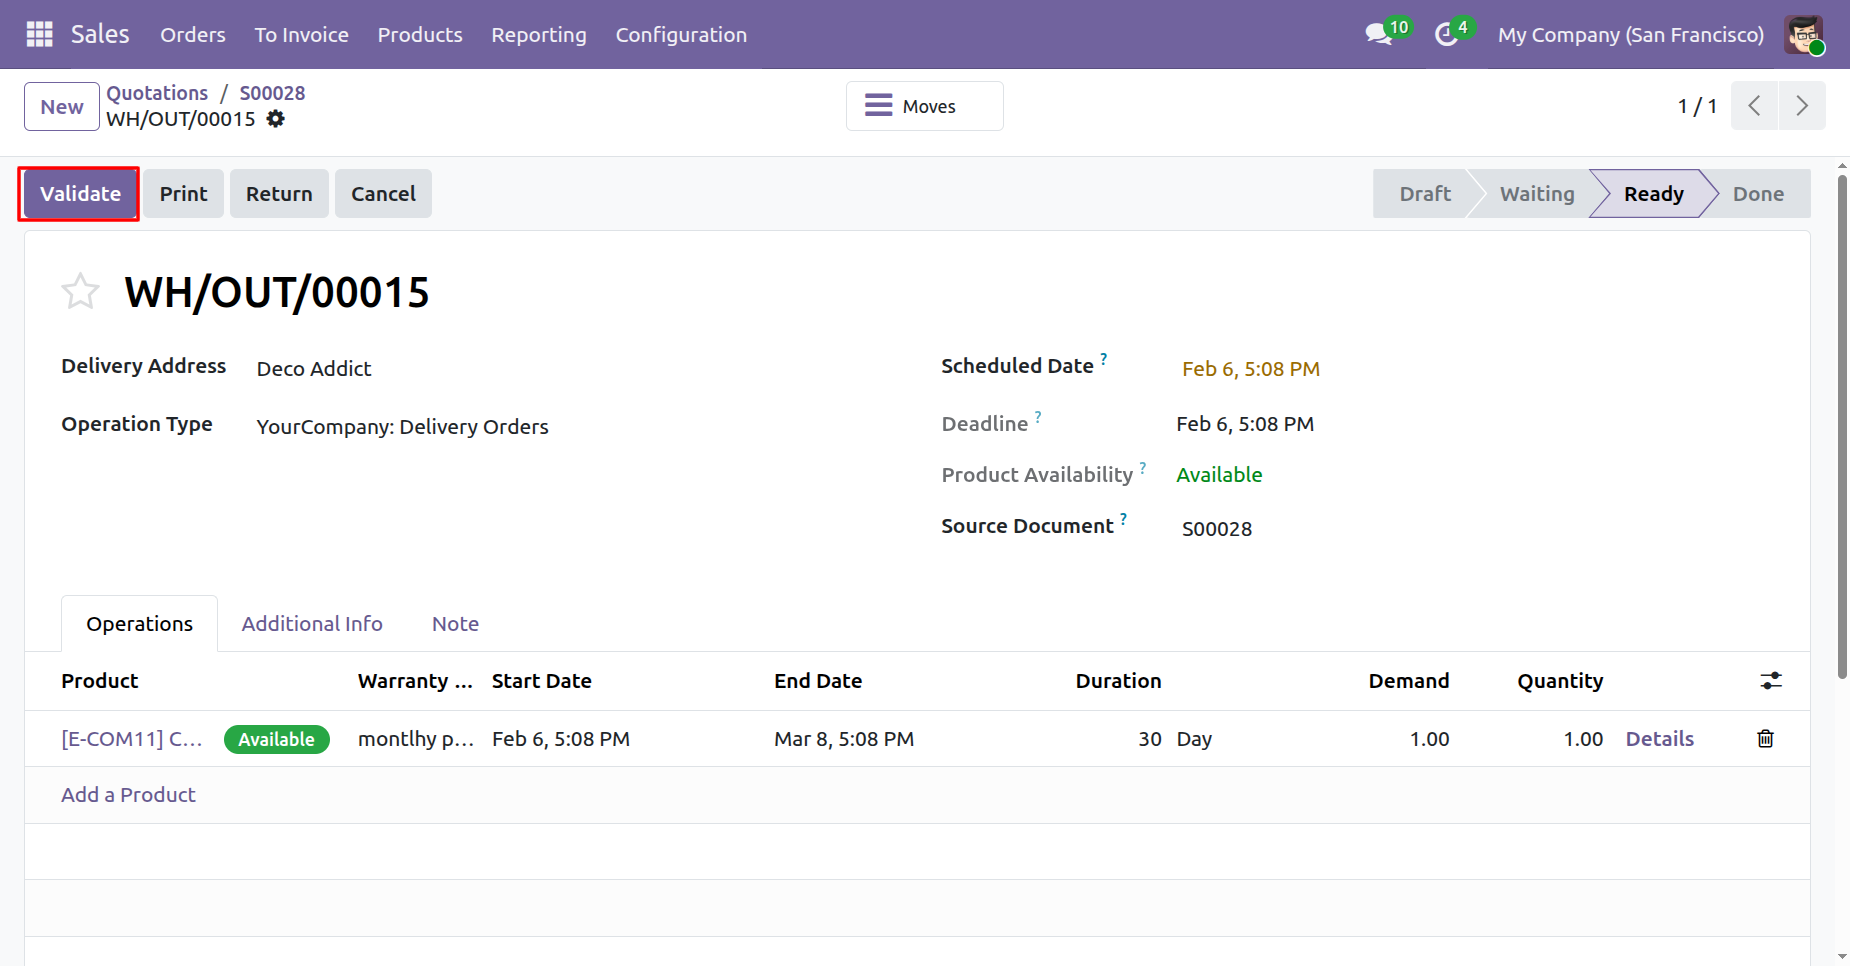
Validate delivery order.
To view the warranty details, click on the 'Warranty' smart button.
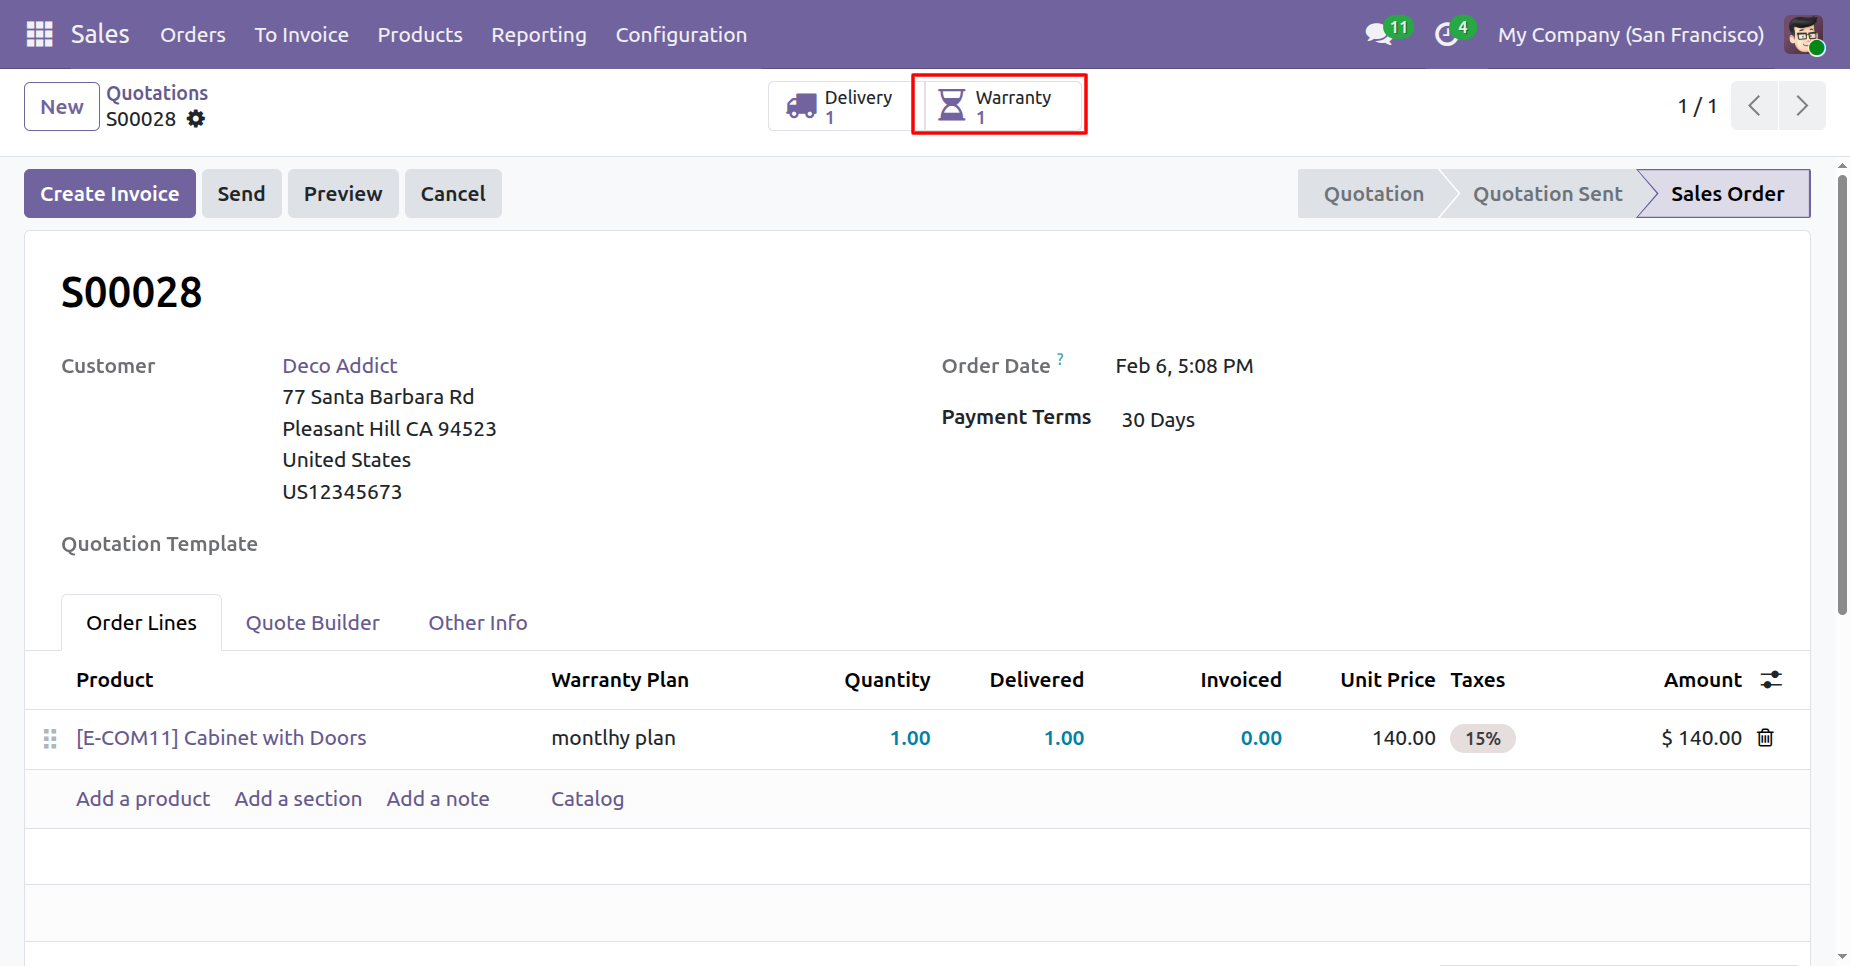
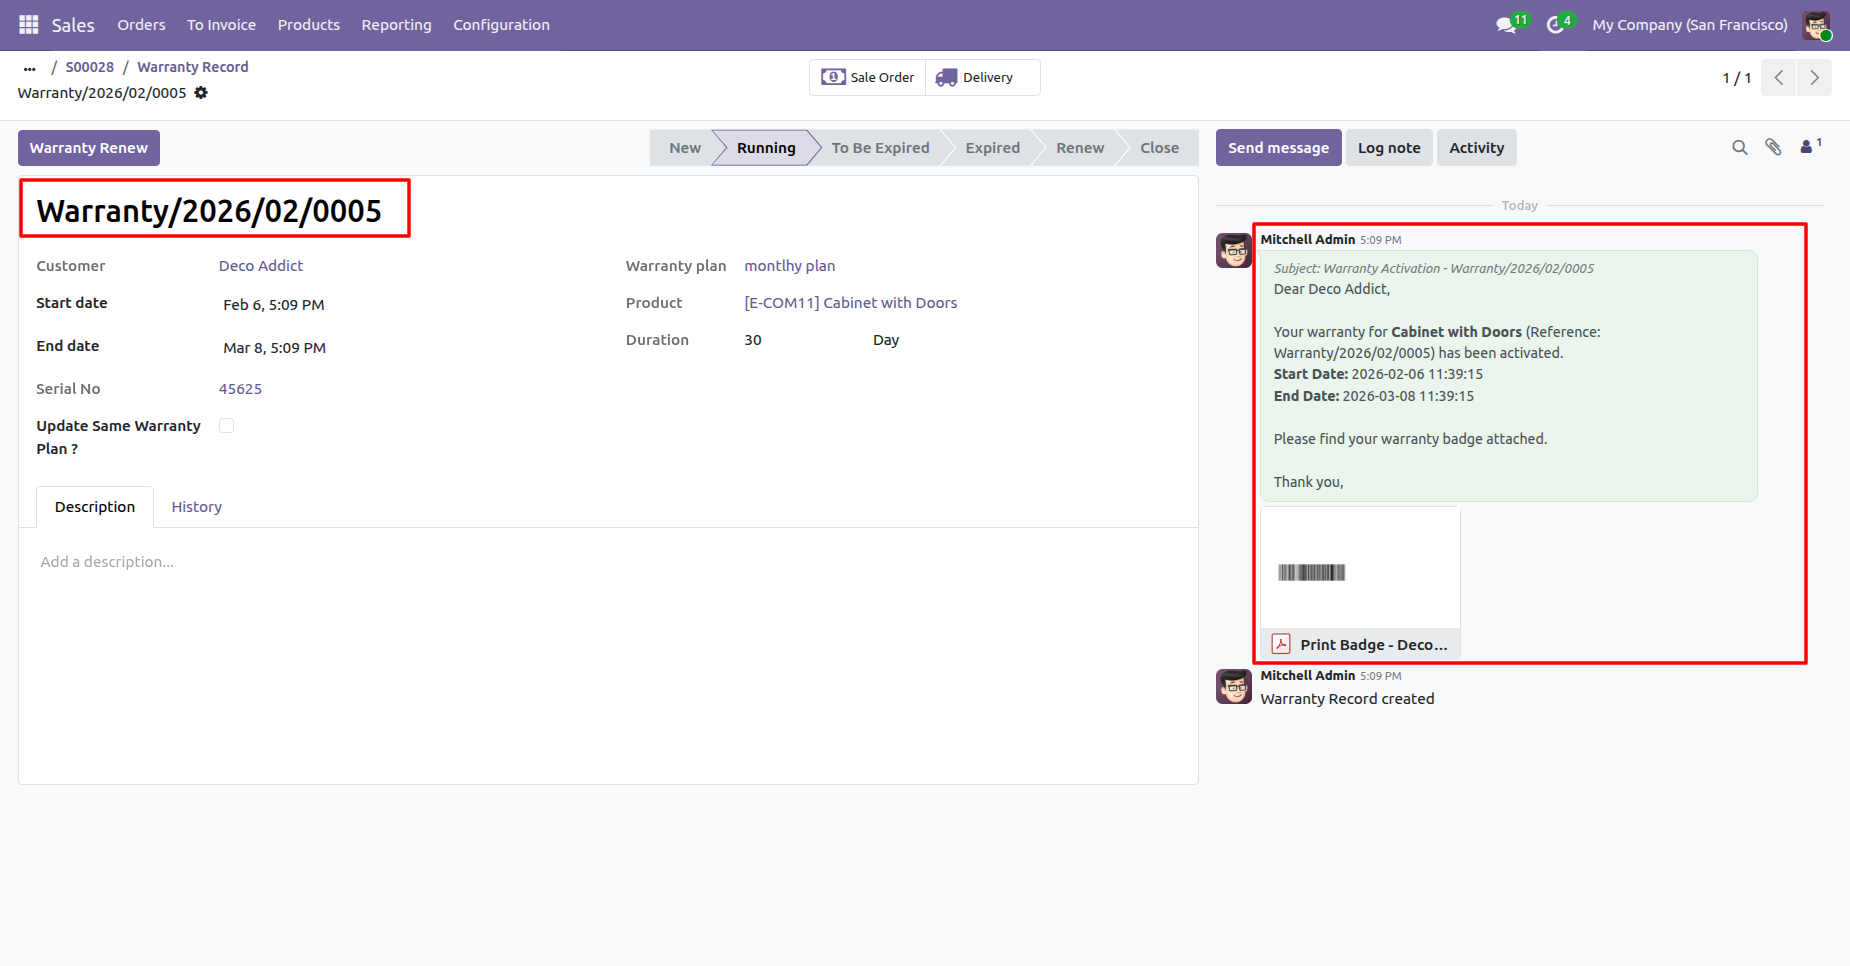
Here, you can see that the warranty activation email has been sent.
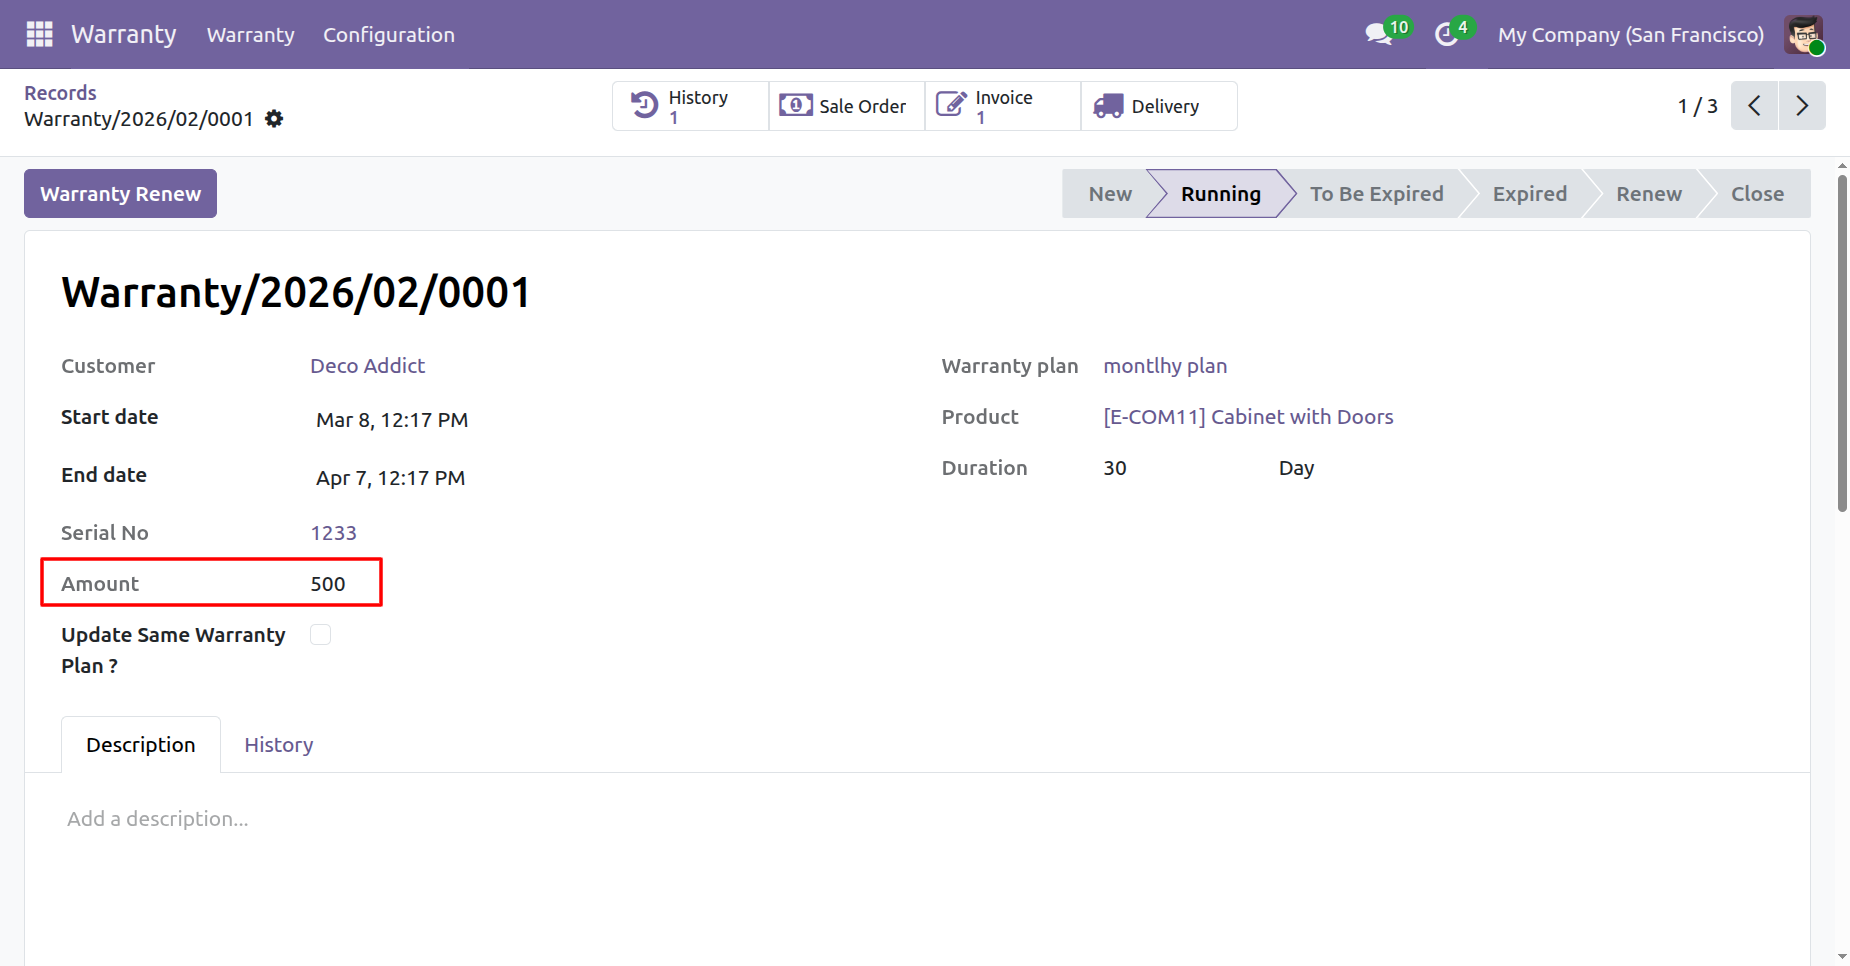
To renew the warranty, click on the 'Warranty Renew' button.
Here, you can see that the warranty renewal price is automatically added.
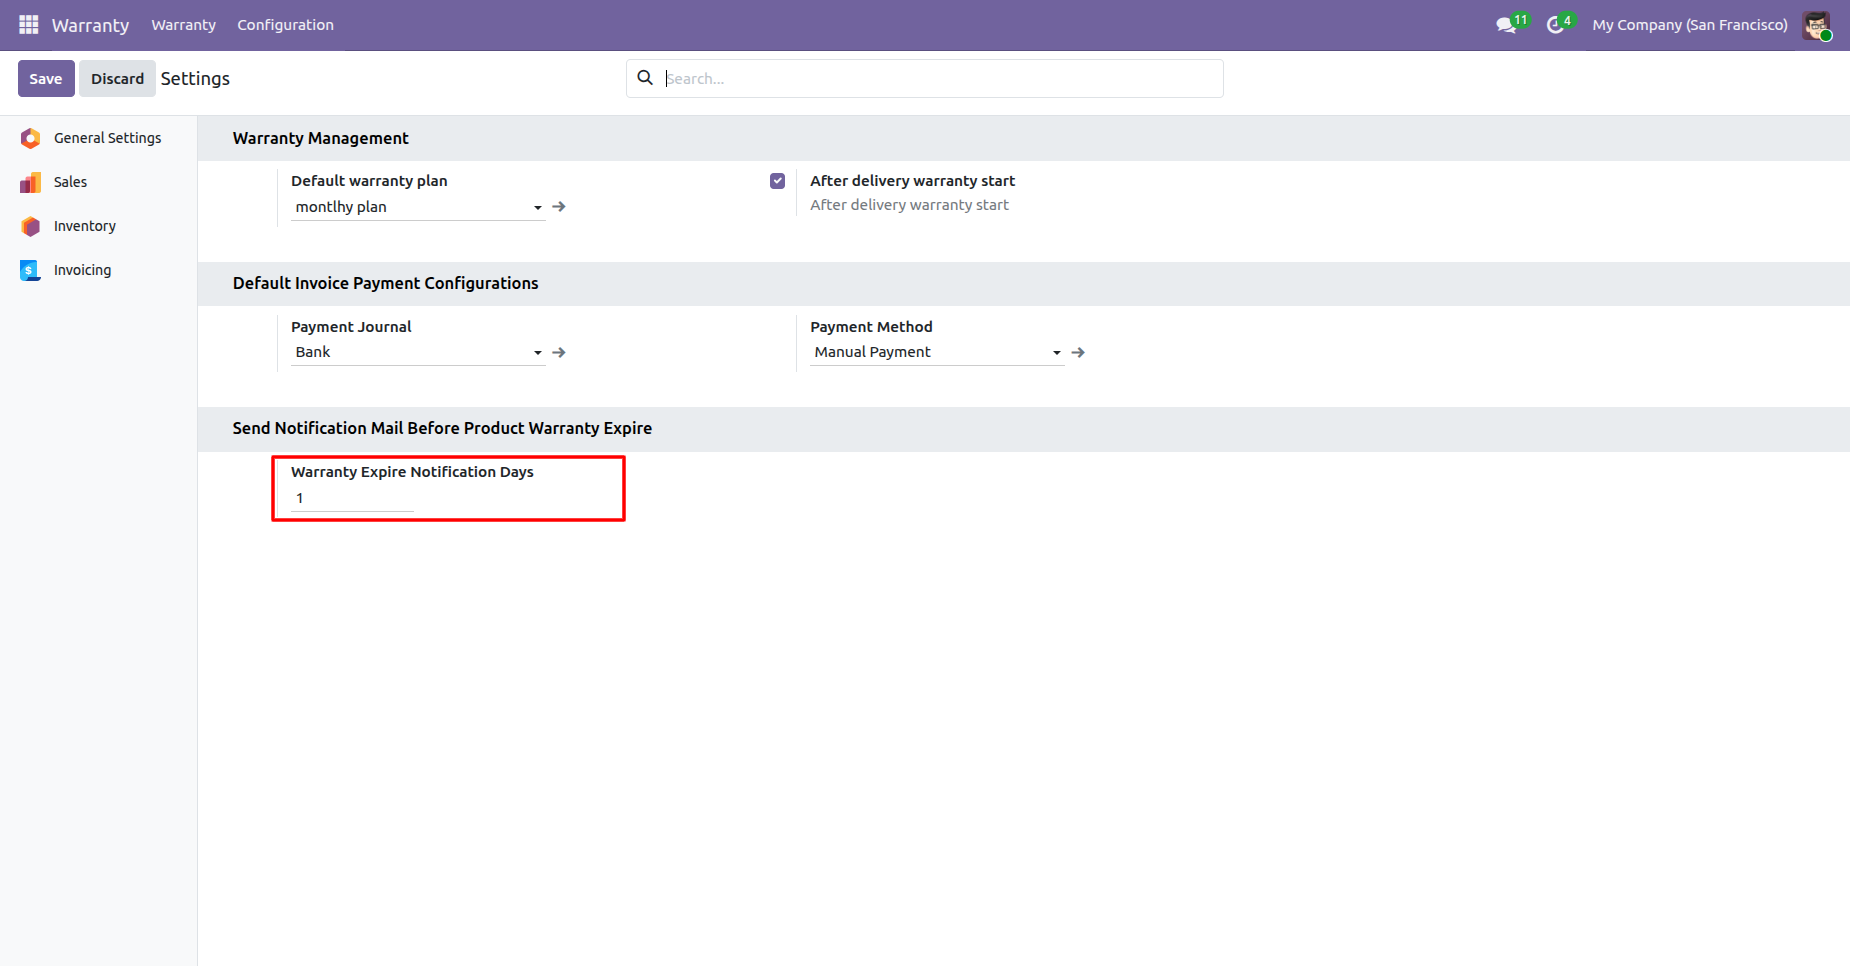
Go to the settings and add the 'Warranty Expire Notification Days: 1'.
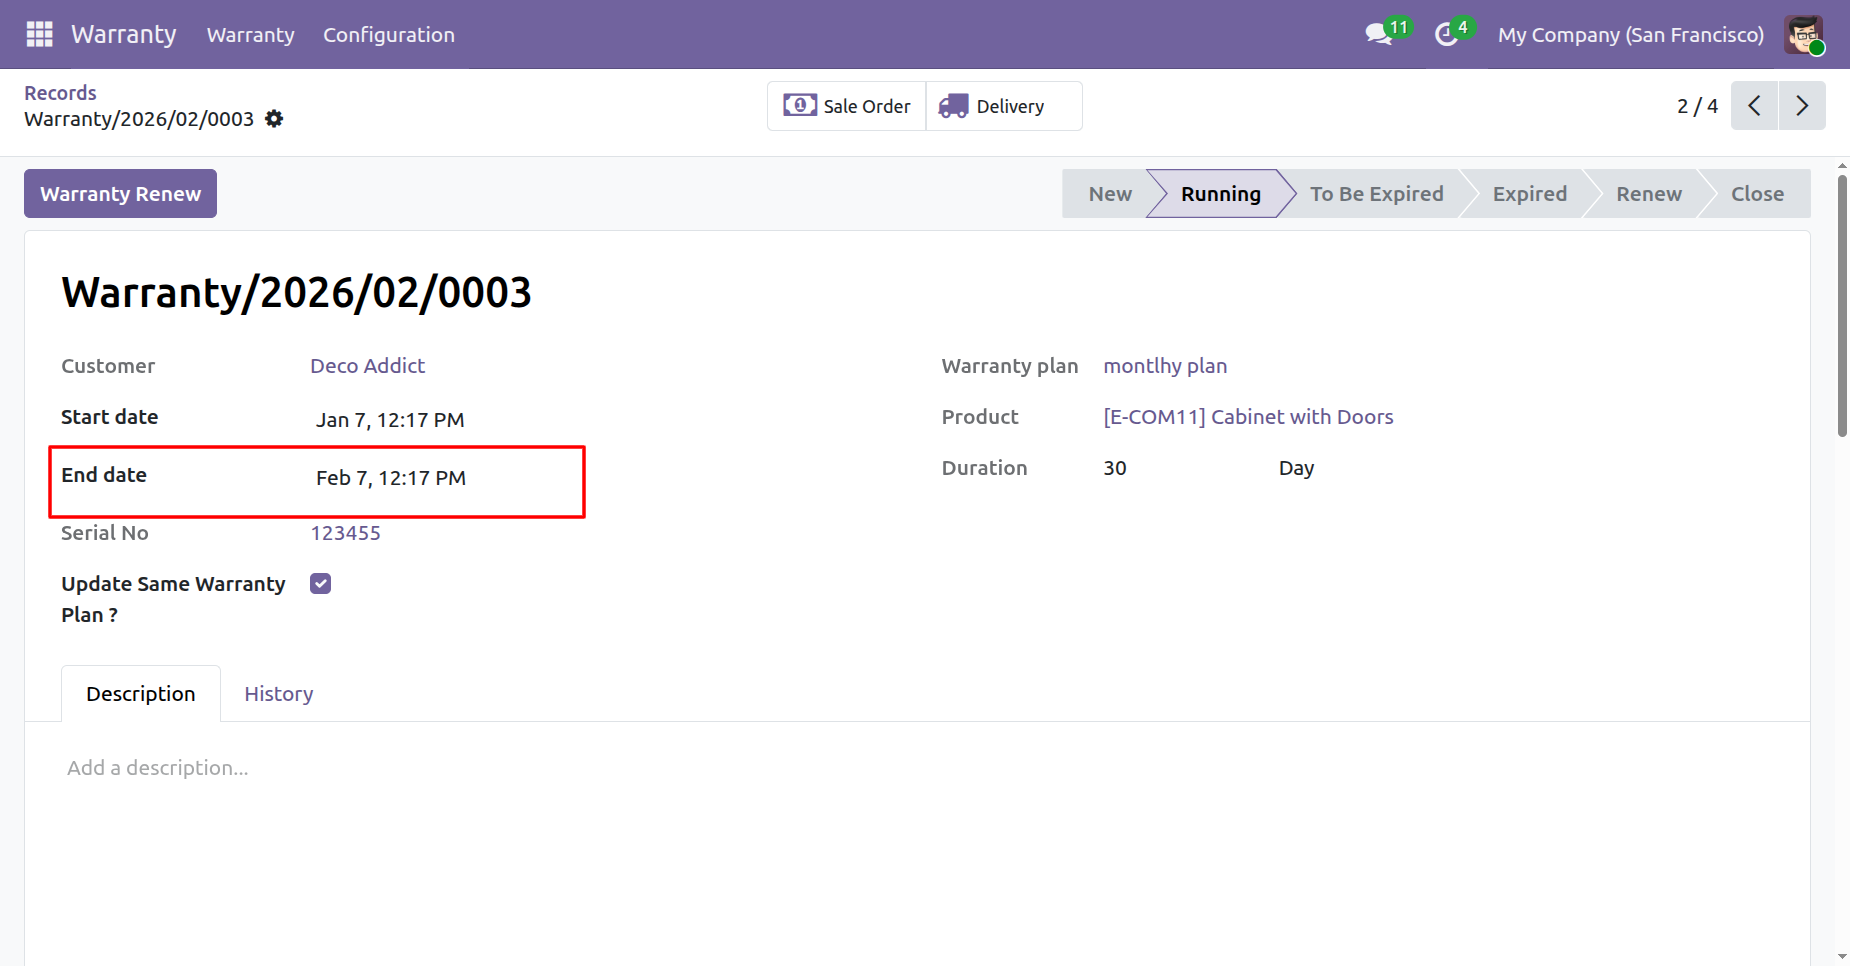
Here, you can see the end date.
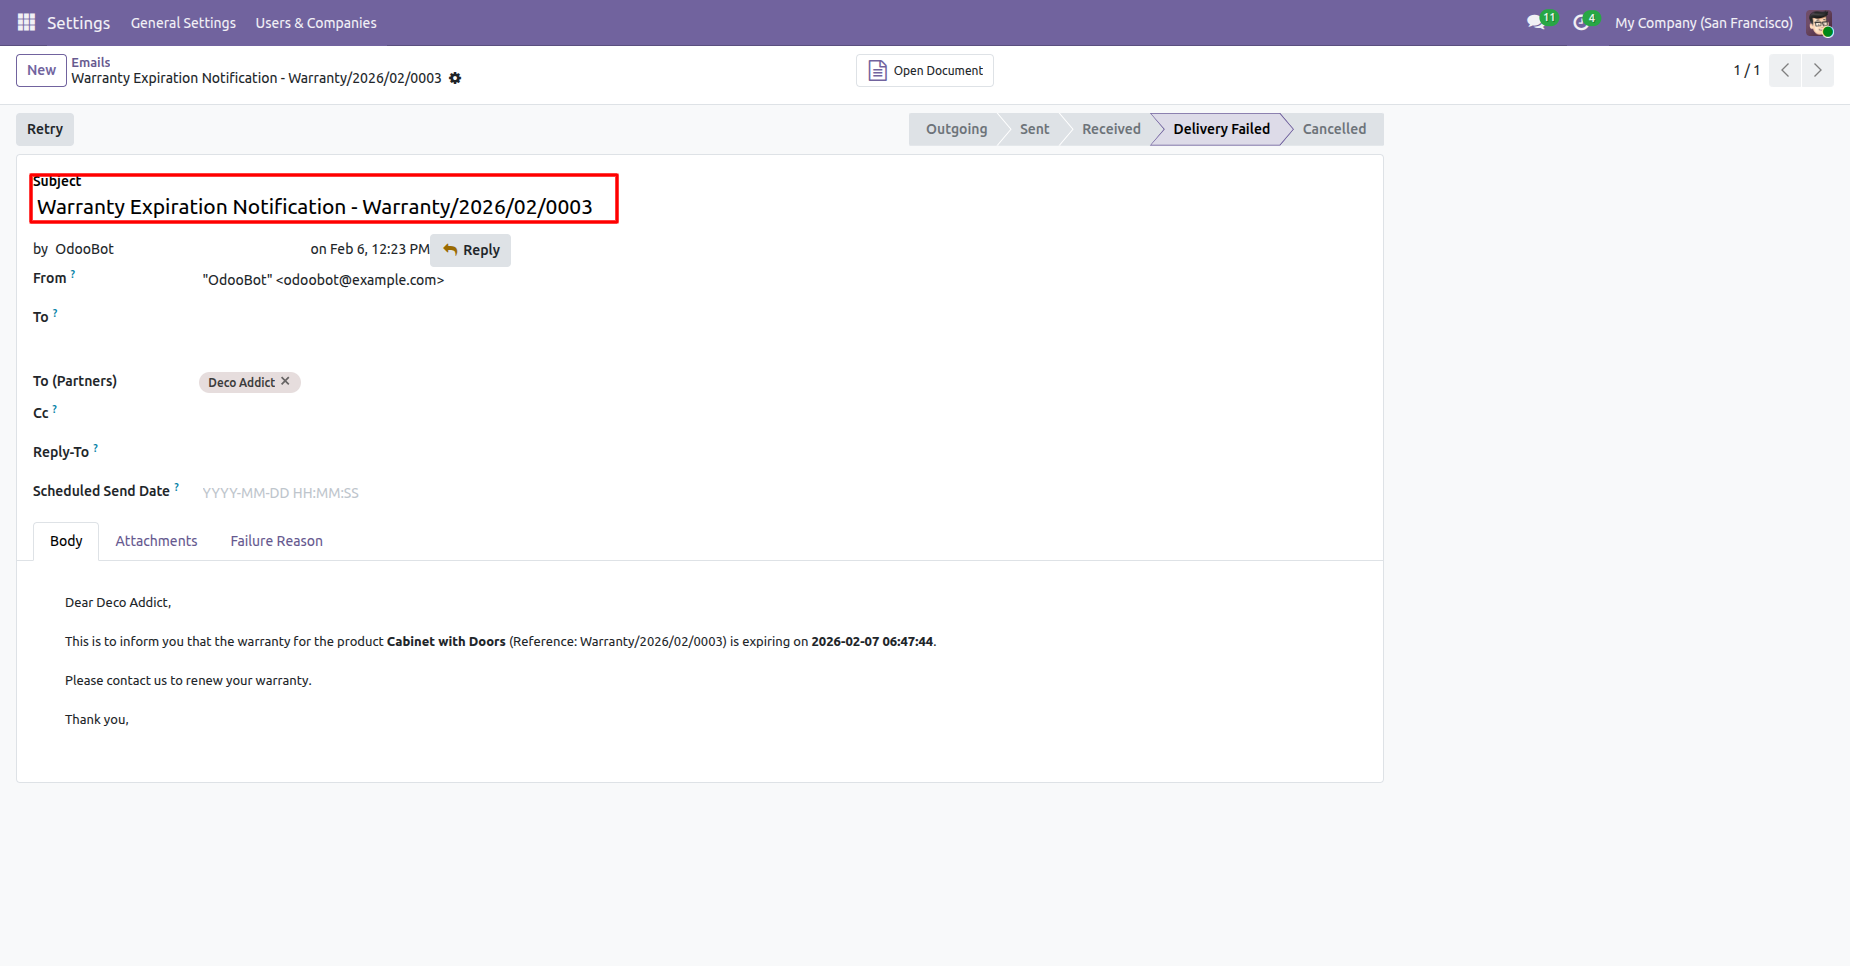
Here, you can see that the expiration email was sent 1 day before, as configured in the settings.

Version 18.0.3.0.0 | Released on : 18th March 2026
Version 18.0.2.0.0 | Released on : 24th February 2026
Version 18.0.1.0.0 | Released on : 22nd April 2025
- Yes, this app works perfectly with Odoo Enterprise (Odoo.sh & Premise) as well as Community.
- No, this application is not compatible with odoo.com(odoo saas).
- Please Contact Us at sales@softhealer.com to request customization.
- Yes, we provide free support for 365 days.
- Yes, you will get free update for lifetime.
- No, you don't need to install additional libraries.
- For version 12 or upper, you will need to purchase the module for each version that you want to use.
- No, We do not provide any kind of exchange.
