


One Click Install

Fast Loading

Easy Configurable

Dynamic Snippets

Multiple Language

Smooth Animation
Google Rich Snippets
Modern Design
Responsive & Retina Ready
Distinctive
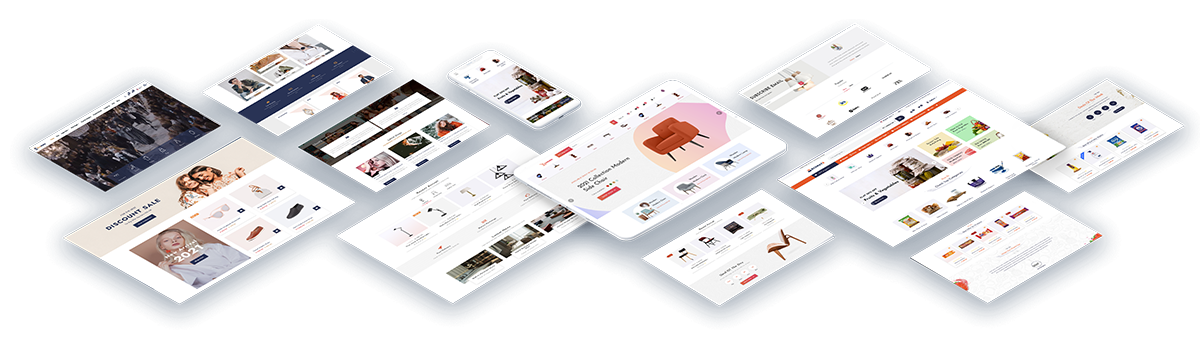
Ready Made Themes
Ultimate
Flexibility
Extra
Pages


Grocery
Store Management
With ecomate theme creating an online store happens way easier and quicker than you think – without needing coding and design skills.This distinctive theme can help you to build your own grocery store, food shop, supermarket, vegetables store, dairy products store.

Furniture
Store Management
This is Ecomate-Furniture, a theme we craft for modern furniture store, interior design, lighting store and much more websites which are providing Carpentry work. This theme provides wide range of furniture, home interior, simple carpentry works and showroom layouts, as well as fully customizable compatibility and one-click setup feature. With this theme craft your furniture store on odoo website.

Lifestyle
Hub Management
Ecomate-Fashion we designed for the tranding world. This theme will help to present your concept that perceive polished by us into visual that manifest your intentions clearly. It provides magnificent style that helps you to present your desinged cloths.

.png)
.png)
.png)


.png)
.png)
.png)


.png)
.png)
.png)
.png)

.png)
.png)
.png)
.png)

.png)
.png)
.png)
.png)

.png)
.png)
.png)
.png)

.png)
.png)
.png)
.png)
— Configurations Part —
Whishlist Product Box
First enable the quick menu from the user preferences. After that you can see the icon of quick menu and list in to the topbar.

Here you can do bookmark record as well. Also you can search bookmarked menu and record. You can do bookmark menu by double click on the bookmark icon. You can see the list of bookmarked recod by one click on bookmark icon.

How it is works

Comparision Product Box
Just goto backend and enable 'Cookie Notice' Add your message, Button text, add your policy page text and url and define your cookie notice button position.

How it will looks on website.

Product Image Zoom
Video Tutorial Global SearchEnable the "Show Menu Global Search Mode" from the user preference.

Enable the "Show Global Search Menu" from the general settting. It allows to search the menus only.

Just enable the show global search configuration in to the user. It will show the configuration for the global search where you can configure your search terms.

We can configure object for global search from here. Global Search Bar

Recent Sell Popup
Just enable the calculator from the user preference after that you can see the icon in the topbar.

How it works

Product Page
Just enable the calculator from the user preference after that you can see the icon in the topbar.
How it works
Product Social Media Sharing
Goto website setting, Just enable 'Share Product on Social Media'. Here you have lots of style to display social media icons and list of popular social media options, just enable and ready to go.

How it will look on website product details page,

Whatsapp E-Commerce Order
Just enable the full screen from the user preference. After that you can see the icon of full screen in topbar.

How it works

Website Product Sticker
Goto website config and click on 'Ribbon' menu. This is the ribbon tree view.

Create a new ribbon, just add ribbon name, style, text color and background color. here you can upload custom ribbon png just select style custom and upload ribbon png.

Now goto the product and select ribbon.

How it will looks on website.

Ecommerce Product Tags
In Website product menu you can see 'Product Tags' sub menu. Product Tags tree view.

Create a tag, just enter tag name, select appropriate tag color, select website. And select products list.

Also you can set tag into product master view.

You can filter by using tags in website.

Tags in product detail view.

Dynamic Blog Snippets
Goto website config menu and select daynamic blog filter. This is the tree view of dynamic blog filter.

Create a new filter. Just add filter name define filter type 1. Domain 2. Manually. Select appearance how to show blog in slider or in tab formate. If you select filter type Manuall just select products in the line.

Goto website and edit mode. Here just drag and drop dynamic blog snippet.

After drag and drop you have to select filter in to the style section.

How it will looks on website.

Blog Products & Products Blog List
First define related blogs in to the products.

Define related products into the blogs.

As you can see the related blogs will display into the product detail page.

Enable how to display related products in to the blogs slider or list view.

Related products into the blog view.

Product Price Filter
In product detail view just click on 'customize'. Here you can see 'Product Attributes Filter' section, here you have various option for that just enable and that's it.

After enable filters you can see the list of all fiters which you enabled.

Product Quick View
Just enalble quick view option in website setting.

After enable that you can see the quick view button in product view page.

Quick view.

Custom Tabs
In Website configuration menu, you can see the 'Custom Tab' sub menu. This is the tree view of custom tab.

Create a custom tab, just add tab name, sequence number, make sure it will active. And add your description in html field.

Select custom tabs in products.

Just select the tab style from backend website config.

How it will looks.

Product FAQ
FAQ Menu and Tree view.

Create custom FAQ.

Create your question answers.

Now goto products and select FAQs

How it will looks
Product Extra Details
Just enable which extra fields you want to enable for the website

As you can see these 3 fields are visible on product detail page.

Megamenu
Goto website configuration menu and click on 'Megamenu Configuration', this is the tree view of mega menu confing.

Create a mega menu and select appropriate styles and select ecommerce categories which you want to display on the website.

Goto ecommerce categories, just congif megamenu tab, here you can add tag, add images or icons as well.

Now goto the website and click on 'New' option and make one blank page 'Mega Two'

Now goto backend menu config view. Open recent created menu 'Mega Two'. Here you have to check 'Is Megamenu' and click on 'Design Megamenu'.

After click on 'Desing Megamenu', Here just drag and drop 'Megamenu Snippet', and select filter as per requirement.

That's it Megamenu is ready, How it will look Dynamic Megamenu. You can also set static megamenu. Just select static megamenu snippet and design using website tool.

Category Snippet
Goto website editor. search category snippet, here you have more than 20 different well crafted snippets.

Just drag and drop any one. After that you have to select which categories you want to display and which details you want to display (Number Of Products, Description, etc...)

How it will look.

Ecommerce Snippet
Ecommerce Product Brand
Product brands menu and tree view.

Create your products brands and assign products. Also you can define brand images.

Also you can set the brand into the product master view.

Now goto configuration and click on product brand filter.

Here create filter for your brand snippet.

Now goto website, and just drag and drop brand snippet.

After drop the snippet, you have to select appropriate filter for the website.

How it will looks.

Bundle Product
Goto the product, Create new product just check the 'Is bundled' and select bundled's products in tab 'Pack/Bundle Products'

After that in 'General Information' tab you can see one button 'Compute Bundle Sales Price'. It will calculate based on the bundled products prices.

How it will looks on website.

Product Attachment
Goto product 'Attachment' tab, here just attach your products documents.

Here you have two type for attach attachment 1. URL 2. Files

Attached documents.

Attached documents on website product detail page.

Website Product Question Email
Goto the website configuration, here just select the responsible persons.

Now goto the website and open any products, here just click on 'chat' icon button beside cart button, after that this wizard will popout. Just fill all require details and click to send.

Success message.

Sended Email Template.

Category Page
Goto the websiter configuration, and select appropriate category style for category page.

Category page.

Subcategory page style

Coming Soon
Goto website config setting and enable 'Website Comming soon' here just add titl, release date and background image and style.

How it looks

Website GDPR
First enable the quick menu from the user preferences. After that you can see the icon of quick menu and list in to the topbar.
Here you can do bookmark record as well. Also you can search bookmarked menu and record. You can do bookmark menu by double click on the bookmark icon. You can see the list of bookmarked recod by one click on bookmark icon.
How it is works
Cookie Notice
Just goto backend and enable 'Cookie Notice' Add your message, Button text, add your policy page text and url and define your cookie notice button position.
How it will looks on website.
Website FAQ
Video Tutorial Global SearchEnable the "Show Menu Global Search Mode" from the user preference.
Enable the "Show Global Search Menu" from the general settting. It allows to search the menus only.
Just enable the show global search configuration in to the user. It will show the configuration for the global search where you can configure your search terms.
We can configure object for global search from here. Global Search Bar
Website T & C
Just enable the calculator from the user preference after that you can see the icon in the topbar.
How it works
A) Individual: If you have one person who manages all orders then select individual.
B) Multiple: If you have a team that manages different orders then select multiple. (You can manage time and holidays for all team members).
A) Color: You can change the font and button color.
B) We provide different 9 styles for the WhatsApp button.
A) Modal-Popup: When you click the WhatsApp button it opens a wizard for general details for Whatsapp message.
B) Direct message: When you click the WhatsApp button it sends cart order details to WhatsApp message.
a) On Request Email Notification Sent to responsible person.
b) On Request Email Notification also sent to the client.
c) On Respond from employee email notification sent to the client again.

First enable the quick menu from the user preferences. After that you can see the icon of quick menu and list in to the topbar.
Here you can do bookmark record as well. Also you can search bookmarked menu and record. You can do bookmark menu by double click on the bookmark icon. You can see the list of bookmarked recod by one click on bookmark icon.
How it is works
Just enable the full screen from the user preference. After that you can see the icon of full screen in topbar.
How it works
Enable the "Show Menu Global Search Mode" from the user preference.
Enable the "Show Global Search Menu" from the general settting. It allows to search the menus only.
Just enable the show global search configuration in to the user. It will show the configuration for the global search where you can configure your search terms.
We can configure object for global search from here. Global Search Bar
Just enable the calculator from the user preference after that you can see the icon in the topbar.
How it works
Goto preference and enable 'Enable Multiple Tab View'.

How it Looks. (*Multi Tab Feature Only Work For the Desktop)


Goto theme setting --> Progress Bar --> set height and color.

How it Looks

Goto theme setting --> Loading Style --> select 'Style Number'.

How It Looks.

Goto theme setting --> Chatter Position --> select 'Sided'.

Chatter Position Sided.


Here You have amazing feature is one click to edit form. That means you can edit form with click anywherer in form view. No more need to click on 'Edit' buttons. Also enable or disable this feature is user-wise.
Goto preferences

Enable 'One Click Form Edit' feature. and save it


Here in this theme, you have another amazing feature is 'Web Push Notification'. Using this feature you can send a notification to your all users like internal, portal, public etc...
Video Tutorial Push Notification ConfigPush Notification looks like

Goto user setting and select 'Firebase Push Notification' user.

Now goto general setting and add firebase credential.

Now goto Web Push Notification menu and create a notification and select appropriate option to 'Send Notification'

Make sure your all related user has to allow a 'Show Notification' in the browser otherwise it will not appear.

Push Notification output

Here in this theme you can change your custom menu icons. Just follow the below screenshots or watch video tutorial.
Video Tutorial Theme SetupFirst start debug mode.

Now goto Technical --> User Interface --> Menu Items. Here find your custom menu.

Here you can change your menu icon. Just upload your custom icon in 'Web Icon Image'.

You have to enable 'Theme Config Setting' for perticular users.
Video Tutorial Theme Setup
For setup company logo and icon. Go to Company menu and set logo and icons.
Here in this theme, you have another amazing utility is 'Web Notification'. Using this feature you can create announcement for your selected users. Here you have tow types notification one popup and another like notice board .
Video Tutorial Notification ConfigEnable these groups for those users who create notifications.

'Notification' Menu and tree view.

If you want to send message like warning or quick information, so just enable 'Popup Notification', configure it and click on "Notify User".

Popup notification like Info.

Popup notification like Alert.

Here in this feature you have two different styles, One is message still display on users screen just like news banner.

How it look like notice board.

Here in this theme, you have 2 tab styles Horizontal and Vertical for desktop, and each one has 7 amazing styles. Also you can define different tab style for desktop and mobile. So that will helps to improve your ERP Looks.
Video Tutorial Desktop Tab
Now you can change the form view style with 8 impressive form elements styles. That means you can easily craft your themes style. Watch video tutorial for more info.
Video Tutorial Form Style
Here in this theme we provide 7 different well designed breadcrumb styles. That will helps to improve your ERP Looks. That is small changes but it create huge impact.

Here Here in this theme, you have amazing utility is calculator. Easy to enable or disable this utility as per user's requirement.
Video Tutorial Calculator
Go
to "Settings" => "PWA Backend Configuration".
You can configure
PWA as per your choice. You have an option of app name, icon,
display orientation etc.
*If you have external module
"sh_pwa_backend" install So, please uninstall that and than update
new version.

User can bookmarks mostly used menus.(*First thing first you have to enable ' Activate Quick Menu Mode' from theme setting.)

Enable the "Show Menu Global Search".

We can configure object for global search from here. Global Search Bar
We have made 10 different beautiful popup style, You can select and use as per your requirement. These changes will be applied to everywhere in odoo.

We have made 7 different beautiful color palette, You can select and use as per your requirement. Also you have 3 well designed and pre-define theme styles just select and use it. You can easily customize that particular theme style, Normally user has its own logo or brand colors so the user can customize his theme as per logo or brand colors. These changes will be applied to everywhere in odoo.

Normally the user has a logo or brand color, so the user can change primary colors, hover color, active menu color using primary color as per his brand color.
Users can also change Secondary color, Secondary hover, Secondary active colors.
Here you have another color option is gradients color. You can also set gradient color for predefine theme 3 only.

You can easily change the color of Topbar(header) background color, hover color and active menu color.
You can customize your body with different options. There are two
options
for body background Image/Color. Also, you can change body font color
and
body font type with 8 different beautiful and clean font families
(Roboto,
Raleway, Poppins, Oxygen, Open Sans, Koho, Ubuntu).
Also, provide
google font family in this Backmate theme. So the user has a large range
of
body font type and set as your choice.

To Set google fonts on Just copy name of any google fonts. In theme setting goto 'Header Body Color' and select font family 'Googel Fonts'. After that on field is visible 'Google Font Family' here paste your font family name and click save. (* Refresh browser 2 3 times if not affect).

You can set font color as per heading size(H1 to H6),paragraph(p).
You can easily change the font size as per heading size(H1 to H6), paragraph(P).

You can set a button style with 5 different styles of the button like a leaf, square corner, rounded corner, with or without background, also you can enable icon with the button.
Easily customize your separator line with 6 different styles like a ridge, dotted, double, etc and set the color of the separator.

There are 3 types of sidebar background.Background Image / Background Color.To set a sidebar background image select 'sidebar background style - Image'.To set a sidebar background color select 'sidebar background style - Color'.Also, you can change the font color, font hovers color, font hovers background color, etc.

Here
we
provide a feature to customize the list view.
There are mainly two
types Bordered and Without border.
Easily set odd-even line
background
colors.
Easily enable or disable rows hover and set hover color
also.

Backmate
theme provides tools to customize the login screen.
Using this tool
you
can make an attractive login screen.
In this theme, there are three
styles of the login screen.
You can also set the default odoo login
screen.
In style 2 provide a feature to set a banner image in the
login
screen.
Easily set background color or image.
Easy to set a
login
box background color.
*Please note that login styles does not work
with website modules.
Here you can set a loading gif image as per your choice.

You can easily enable or disable sticky from setting.

Sticky Heading of List view

Sticky Heading of Form View

Sticky Heading of Inside Form View

Sticky Heading of Chatter View

Here we provide 2 types of search styles.

Version 15.0.2 |Released on : 13th December 2021
- Fixed Fixed sidebar visibility issue for safari browser.
- Fixed Fixed logo issue in sidebar.
Version 15.0.1 |Released on : 26th November 2021
- Initial Initial Release
- No, This theme is not include features of the backmate basics and enterprisemate theme.
- No, This theme works perfectly with Odoo Community only.
- Currently, The firebase notification is tested with android os.
- Yes, It's only compatible with 'https'.
- No, It's only compatible with odoo backend.
- Yes, This theme setup with One-click, with 3 beautiful well crafted theme styles.
- Please Contact Us at sales@softhealer.com to request customization.
— All Features —
A) Individual: If you have one person who manages all orders then select individual.
B) Multiple: If you have a team that manages different orders then select multiple. (You can manage time and holidays for all team members).
A) Color: You can change the font and button color.
B) We provide different 9 styles for the WhatsApp button.
A) Modal-Popup: When you click the WhatsApp button it opens a wizard for general details for Whatsapp message.
B) Direct message: When you click the WhatsApp button it sends cart order details to WhatsApp message.
a) On Request Email Notification Sent to responsible person.
b) On Request Email Notification also sent to the client.
c) On Respond from employee email notification sent to the client again.
You May Also Like
We offer extremely unique and awesome features for you.


First heading
...
Second heading
...
Third heading
...
Fourth heading
...
Fifth heading
...