











One Drive Connector | One Drive Odoo Integration | Connect One Drive with Odoo | Odoo One Drive Connector

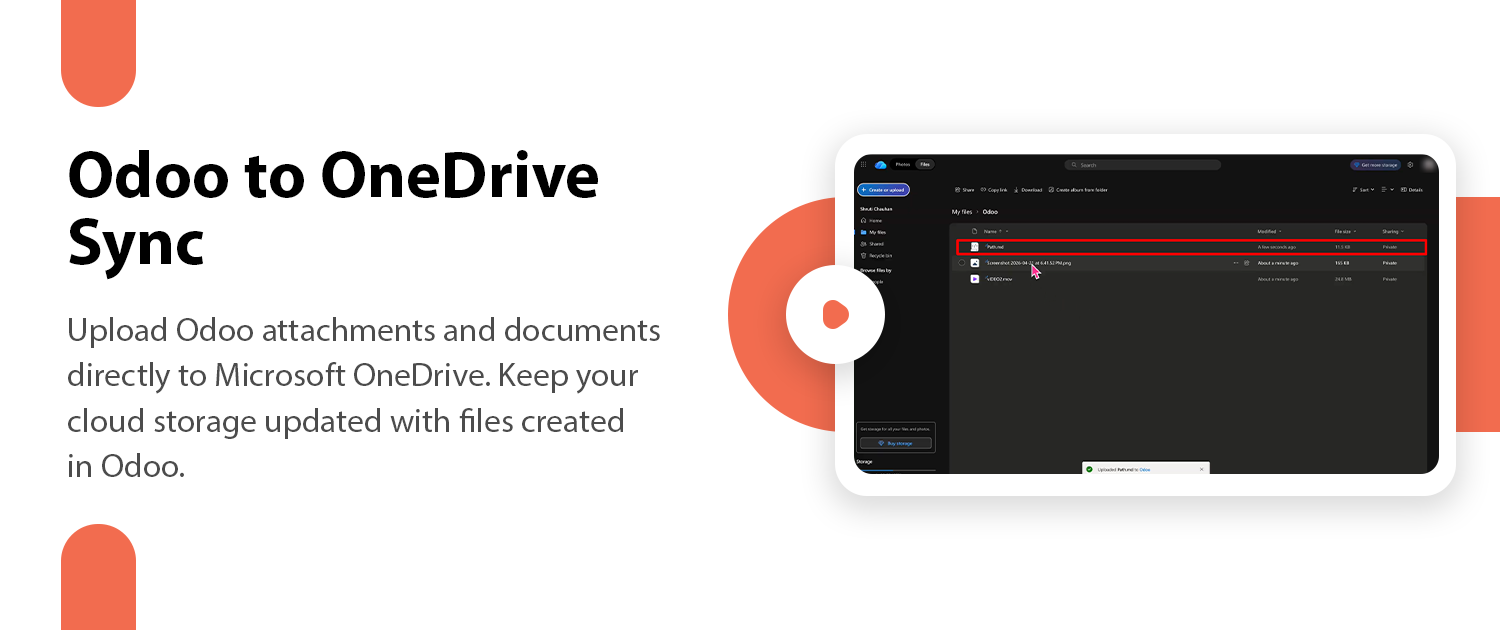
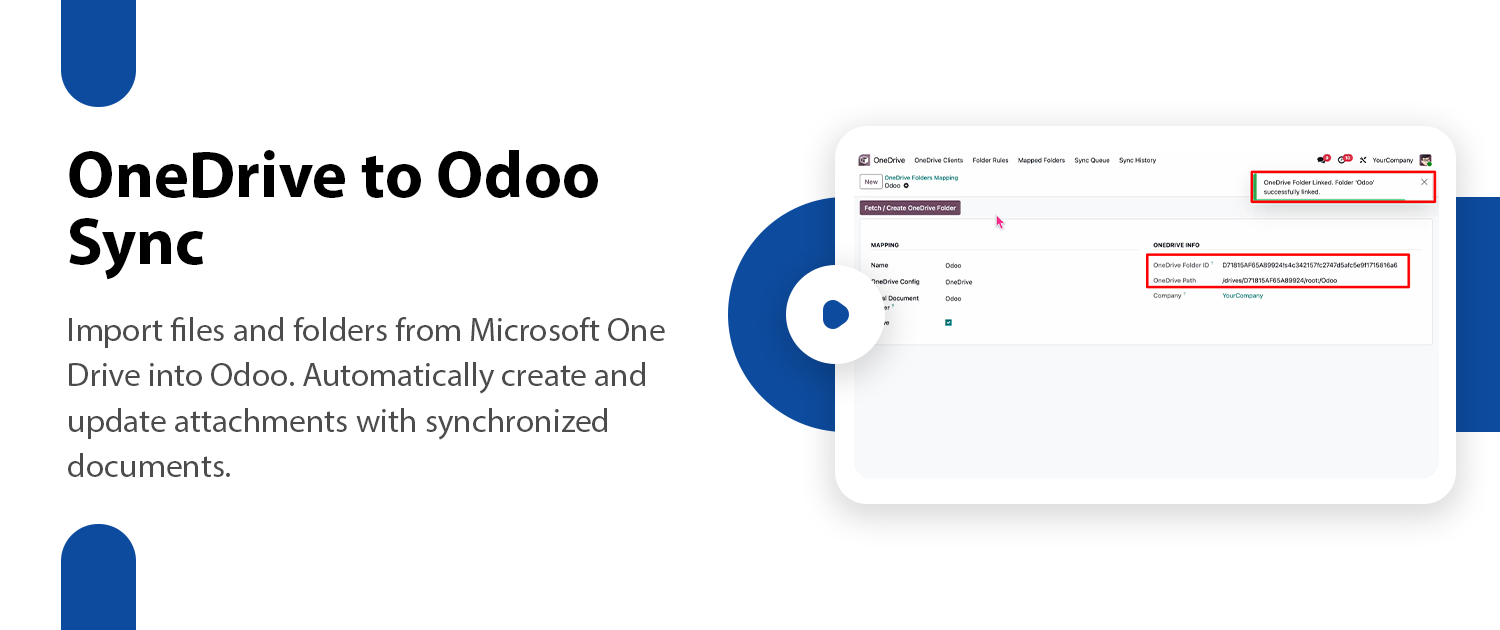
Integrate Odoo with Microsoft OneDrive to automatically synchronize files and folders between both platforms. Securely connect using OAuth authentication, transfer documents in both directions, organize files with dynamic folder rules, and track synchronization status in real time.
Key Features
Features
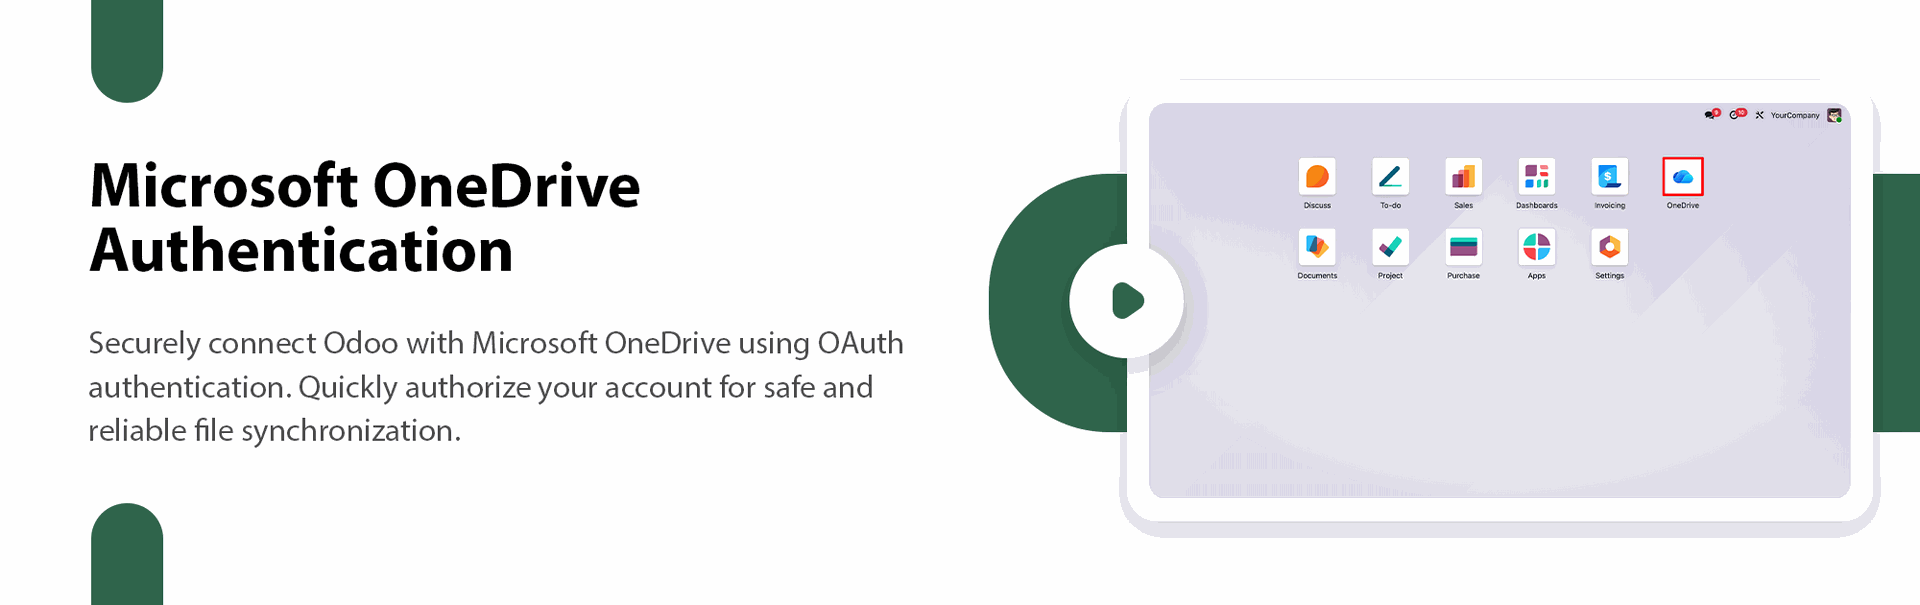
Microsoft OneDrive Authentication
Connect Odoo with Microsoft OneDrive using secure OAuth authentication.
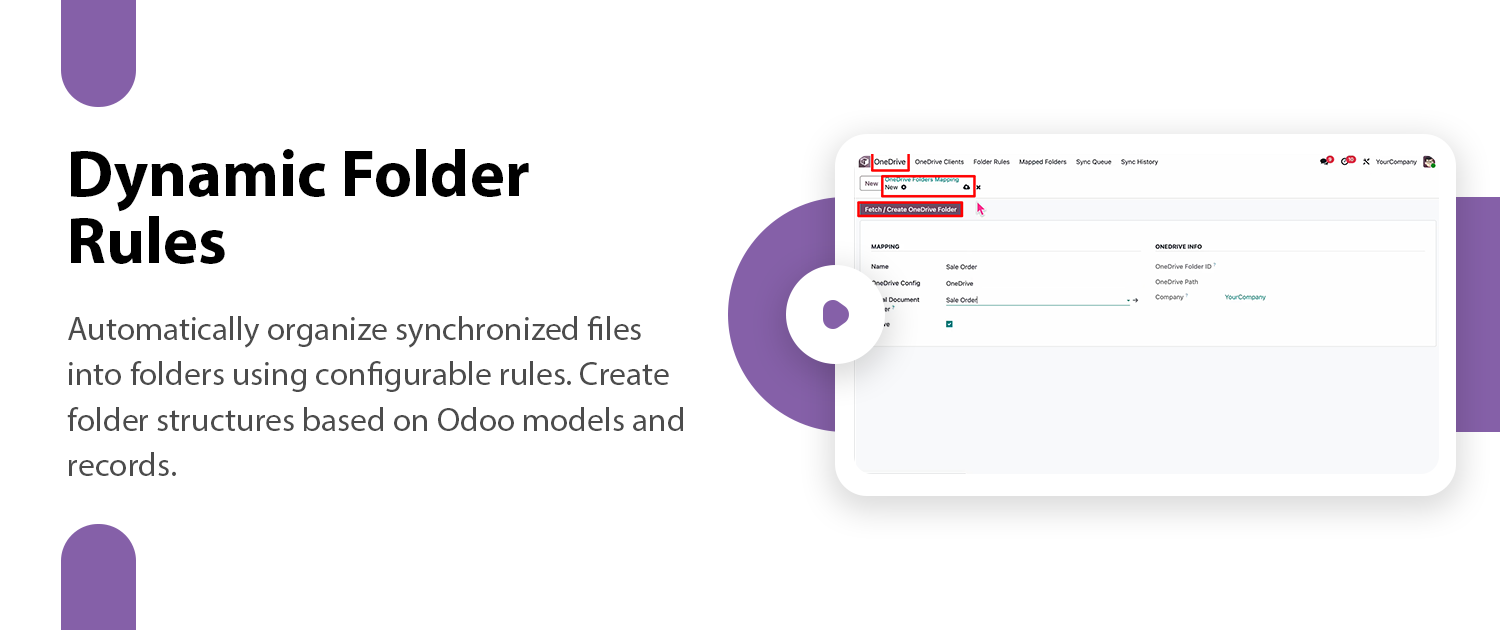
Dynamic Folder Rules
Create dynamic folder rules based on Odoo records to keep your files organized intuitively.
Automated Background Syncing
Automatically synchronize attachments and files between your Odoo system and Microsoft OneDrive in the background.
Bi-directional Document Sync
Synchronize files and folders between Odoo and Microsoft OneDrive in both directions.
Bi-Directional Deletion
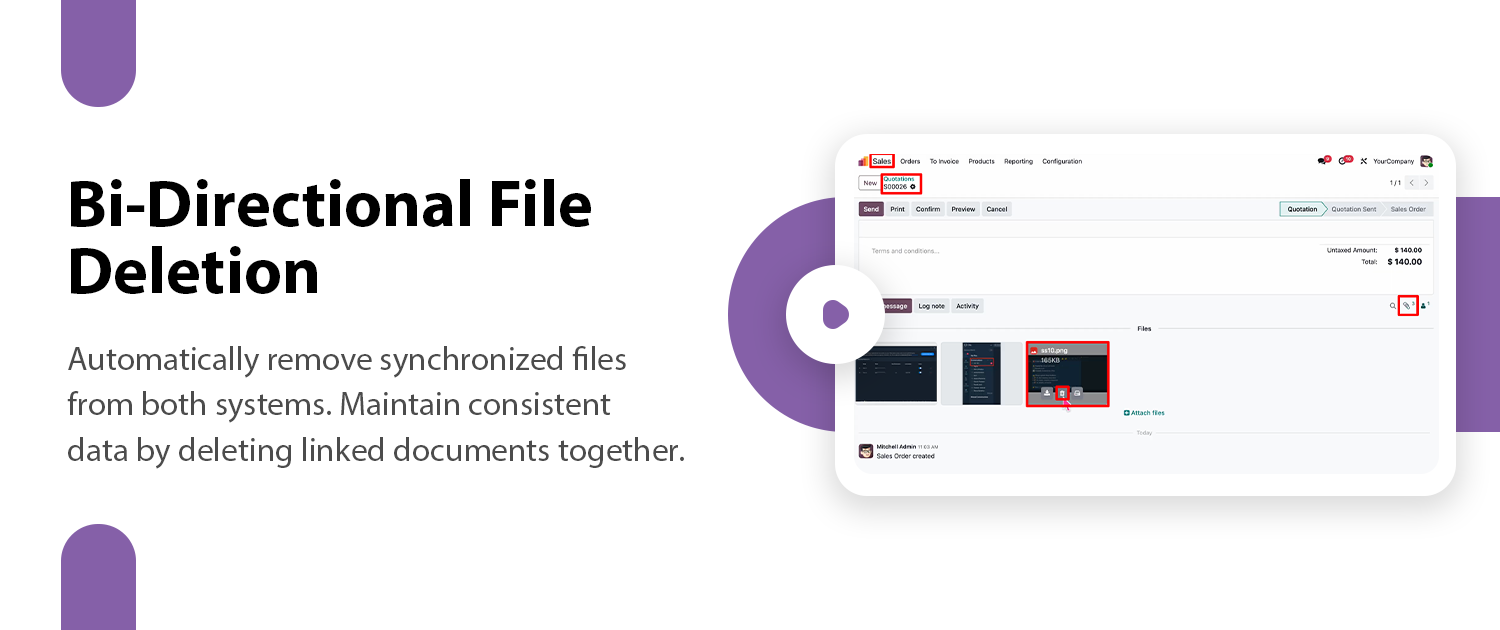
Automatically delete files in both systems when removed from one to maintain perfect consistency.

Real-time Status Tracking
Track the synchronization status of your files in real-time to ensure data consistency.
Directory Creation & Organized Folder Structure
Create directories and sub-directories to maintain a clean, structured, and easily navigable document hierarchy.
Secure Document Storage
Store and manage documents safely with controlled access and organized directory-wise storage.
Upload, Preview & Download Documents
Upload files into directories, preview documents instantly, and download them as needed.
Smart Reminders & Notifications
Set reminders on documents, and the system sends automatic email notifications at the scheduled date and time.
Customizable Email Templates
Use flexible and editable email templates to send document-related notifications.
Quick Access to Tags & Directories
Access directory tags, document tags, main directories, and sub-directories instantly from the menu bar.
Advanced Search, Filters & Grouping
Search documents using the global search bar, apply custom filters, and group documents by directory, created date, or created by.
Visible Directory & My Directory Filters
Quickly filter documents based on visibility — view your personal directories or only shared/public directories.
Document Tags & Directory Tags Management
Add, edit, and manage tags for both documents and directories to classify and find files faster.
Share Documents & Directories Easily
Share documents or entire directories with multiple users at once and send share emails automatically.

Activity Tracking & History
Track all activities related to a document — uploads, edits, comments, and updates.
View Related Files (Sub-Directory Files)
Easily view related documents from sub-directories or linked directories for quick navigation between related folders.

Bulk Actions & Multi-Select Management
Perform bulk operations such as mass-select, bulk download, and multiple document actions in one click.
Create Directory from Scheduled Activities
Generate a new directory directly from scheduled activity actions without navigating away.

Seamless Portal Document Access & Preview
Shared documents are automatically available to selected recipients in their portal, with the ability to preview files instantly without downloading.
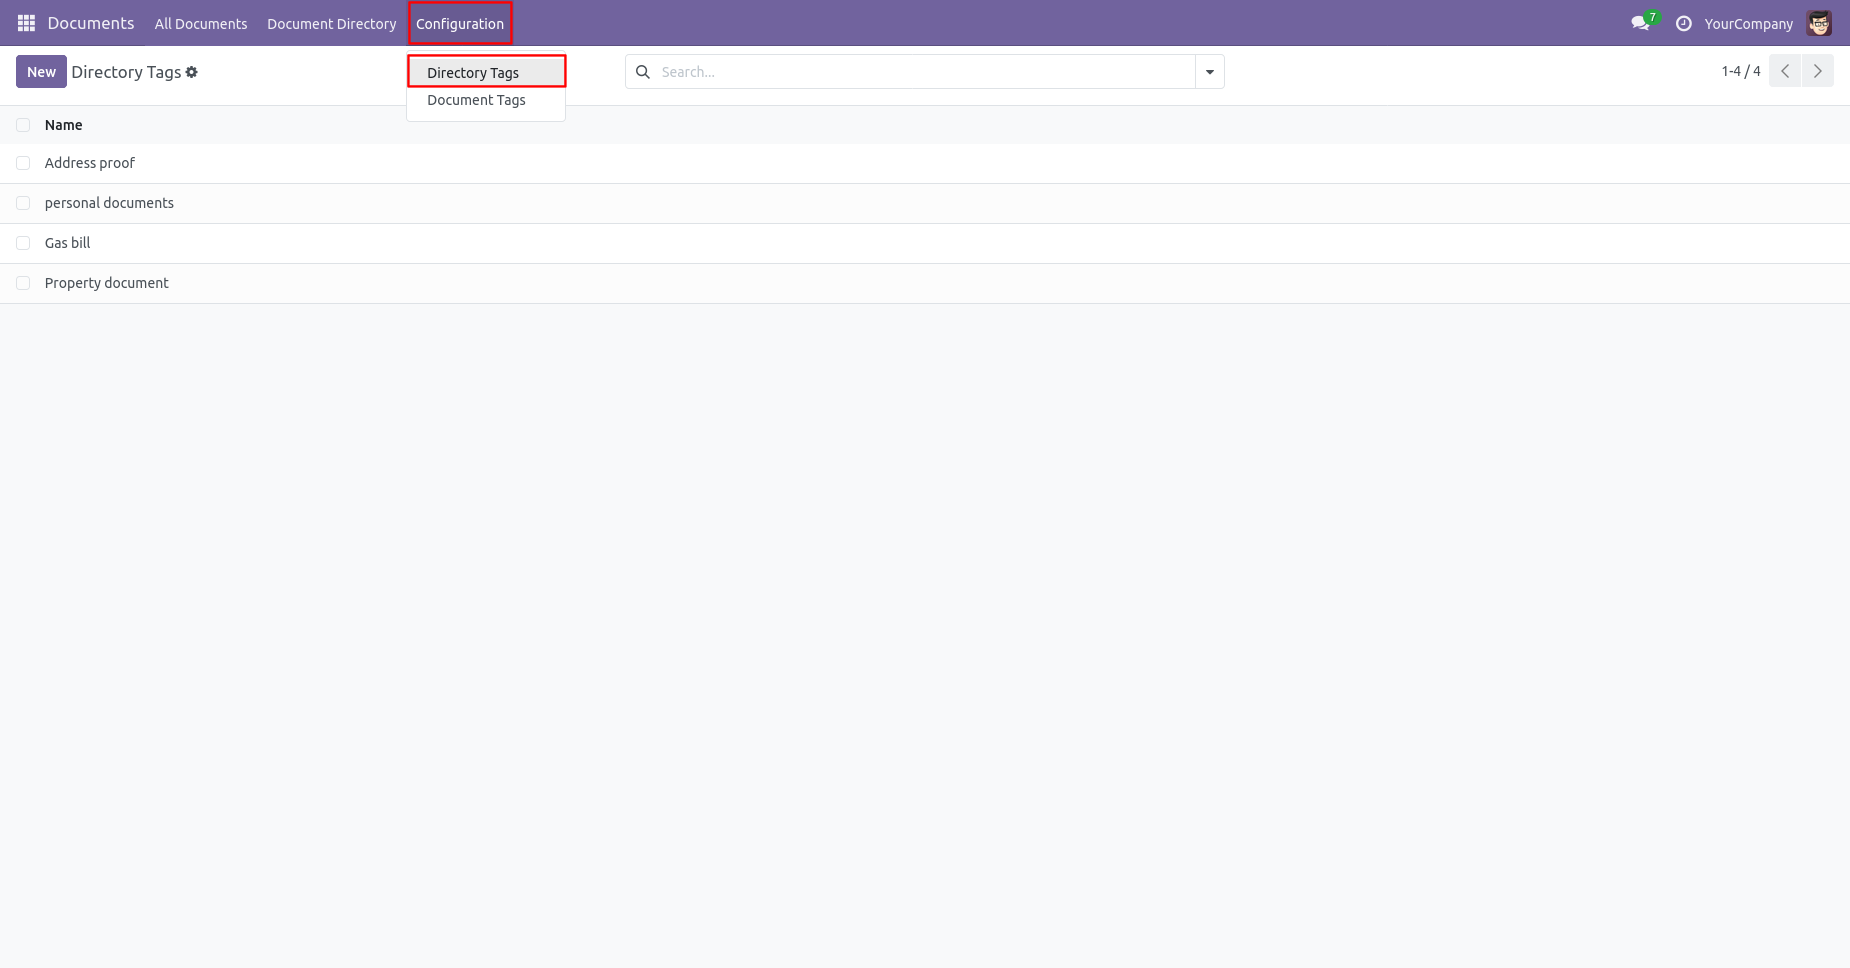
In 'Configuration' go to directory tags, list view of the directory tags looks like below.
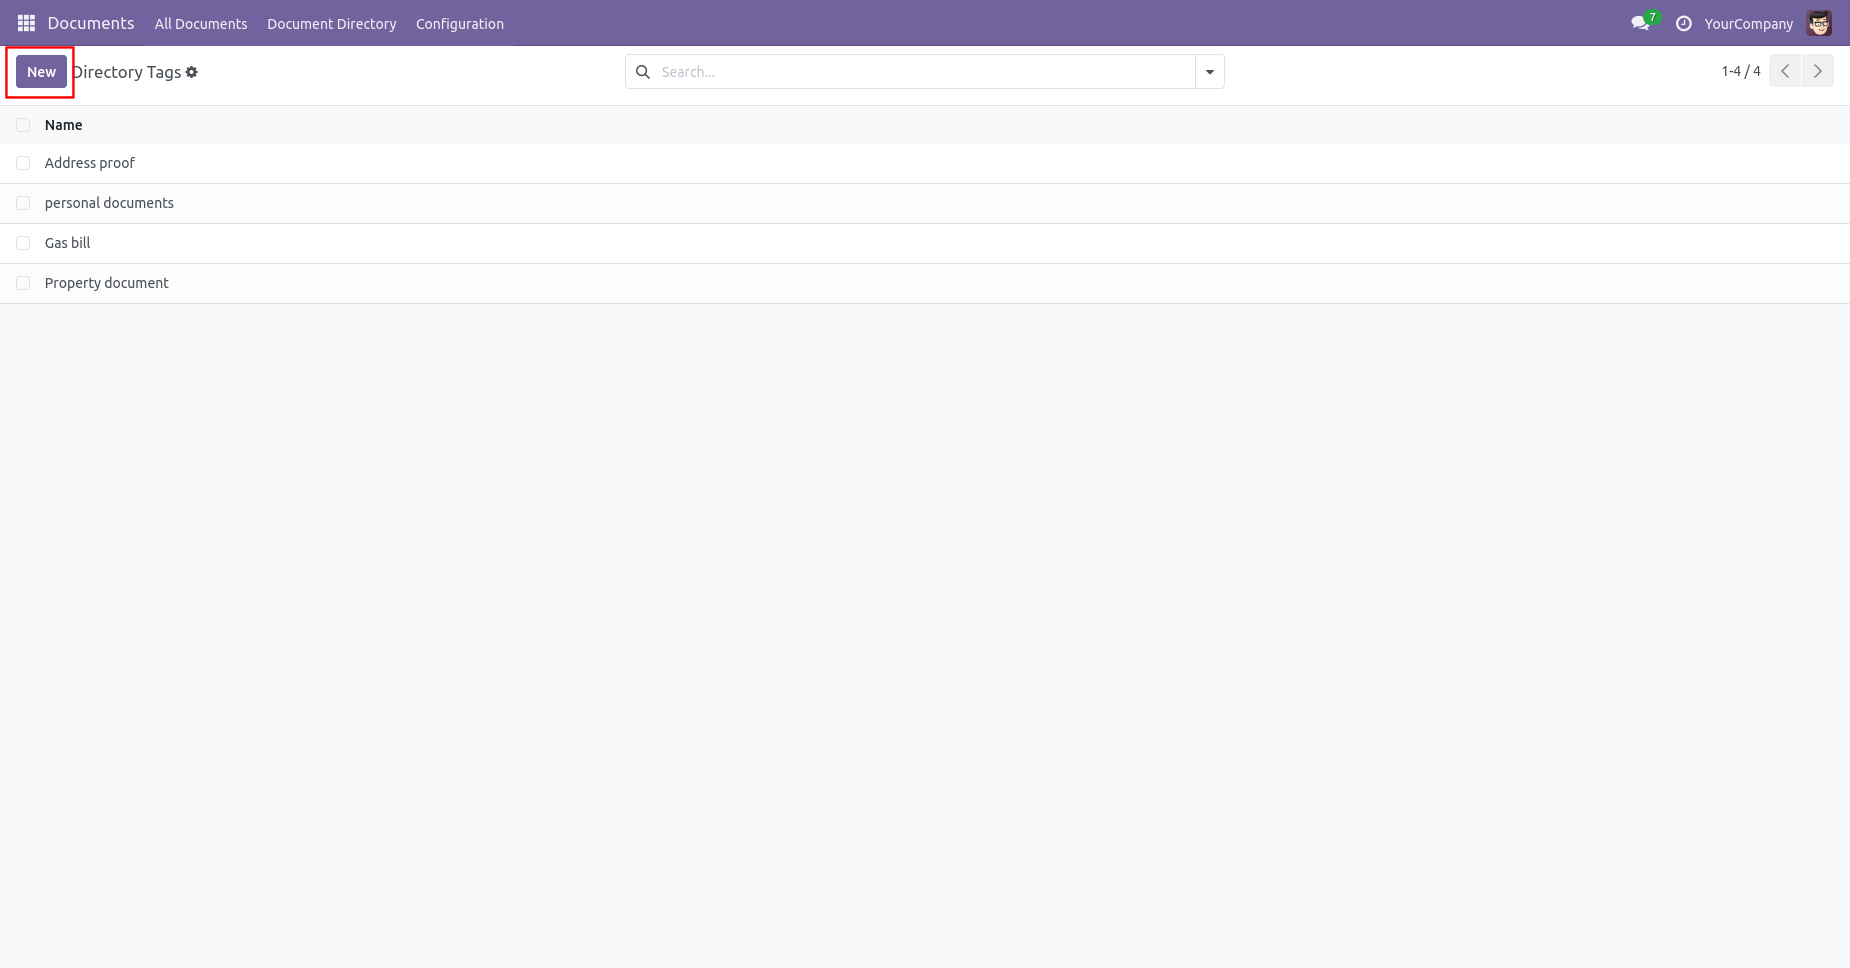
Click on the 'New' button to create a new directory tag.
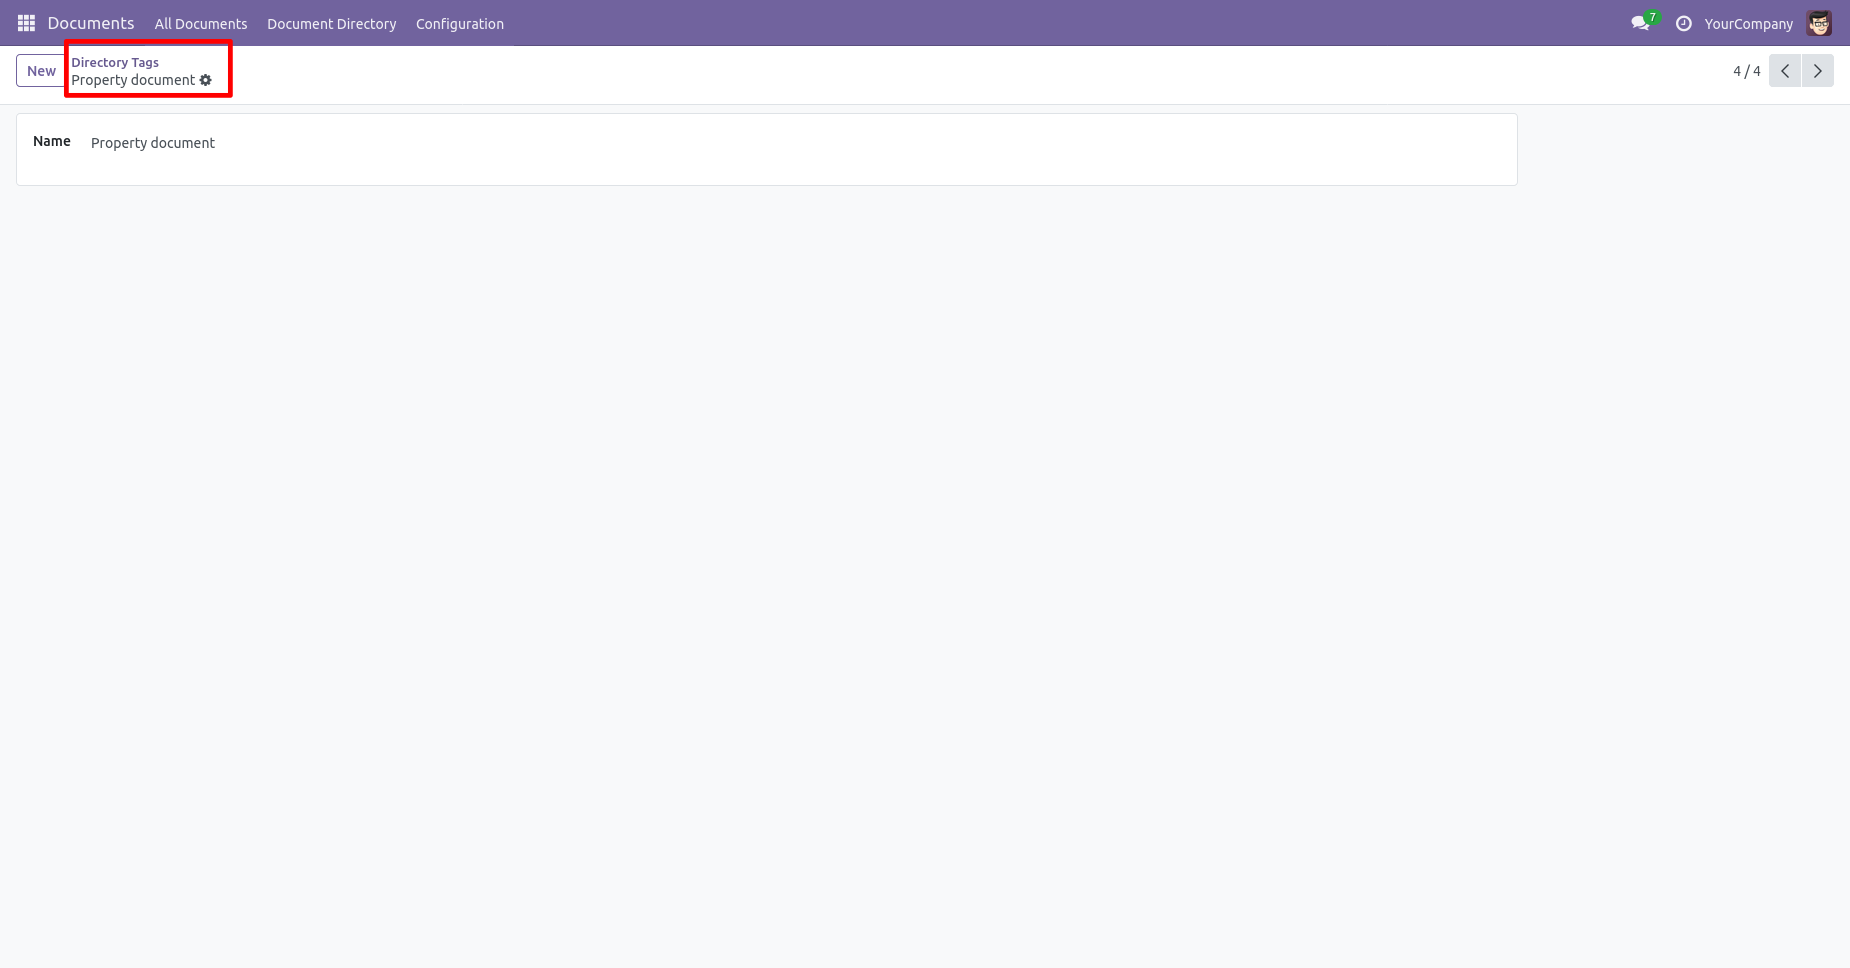
Directory tags form view looks like below.
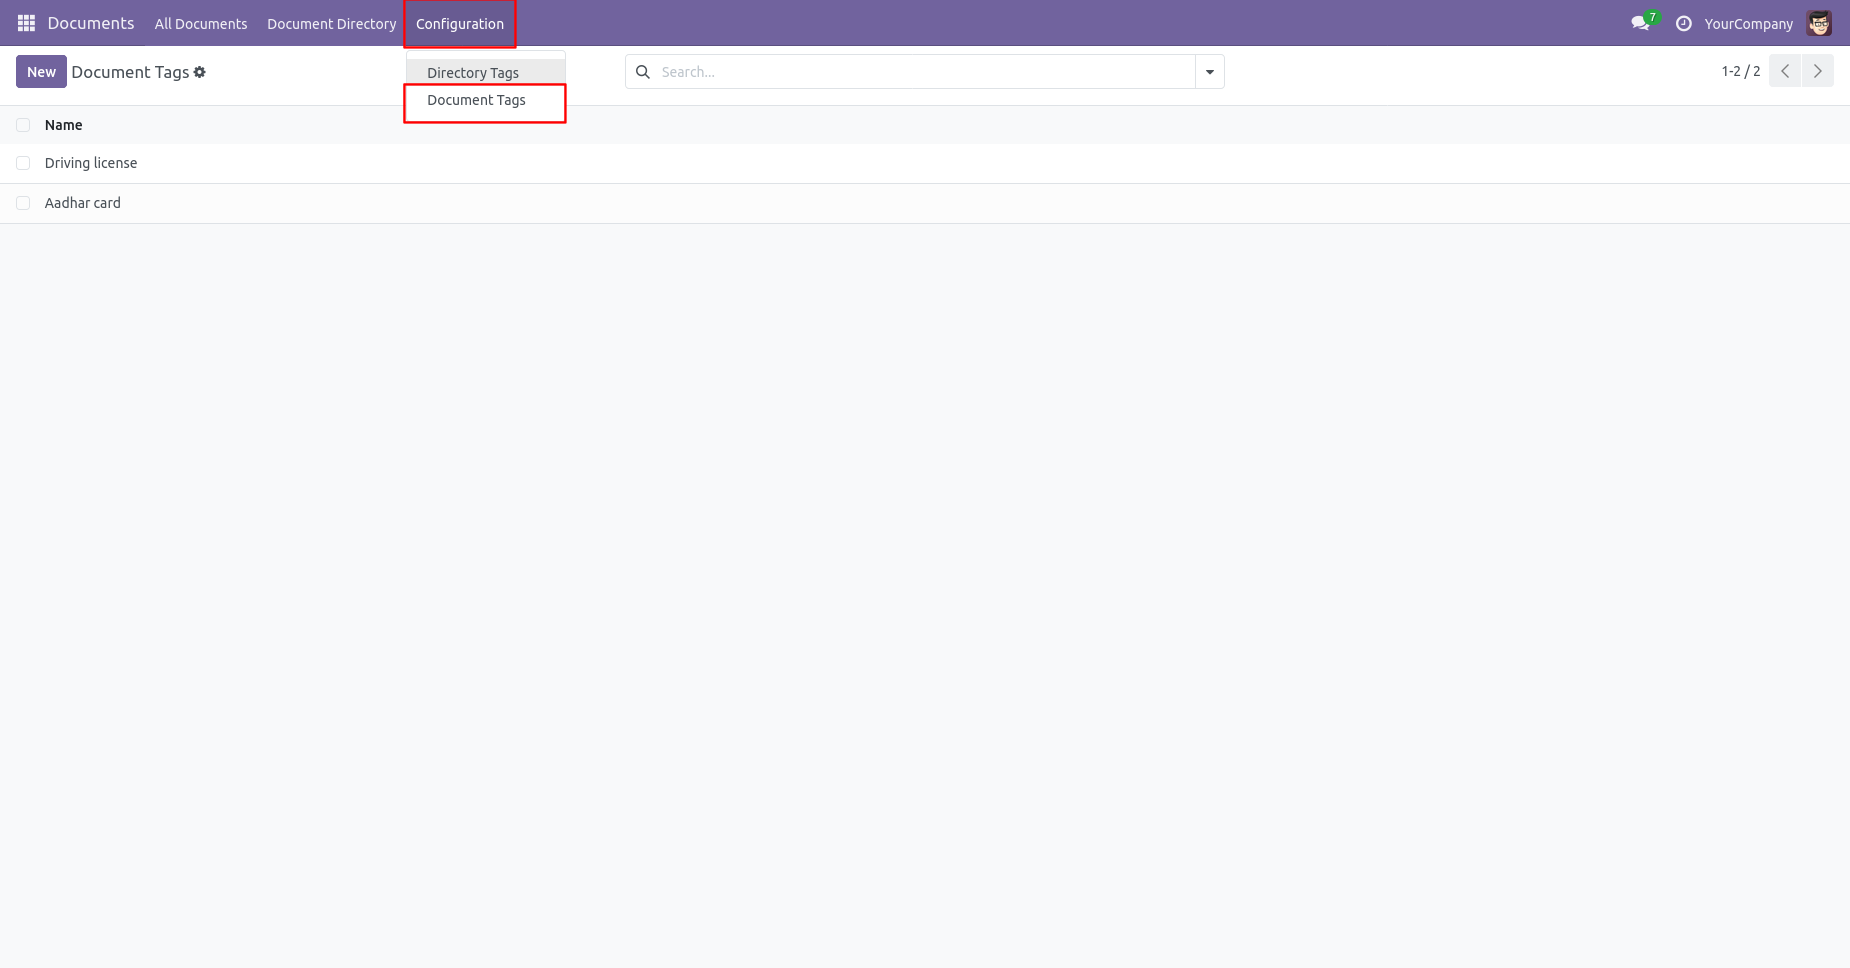
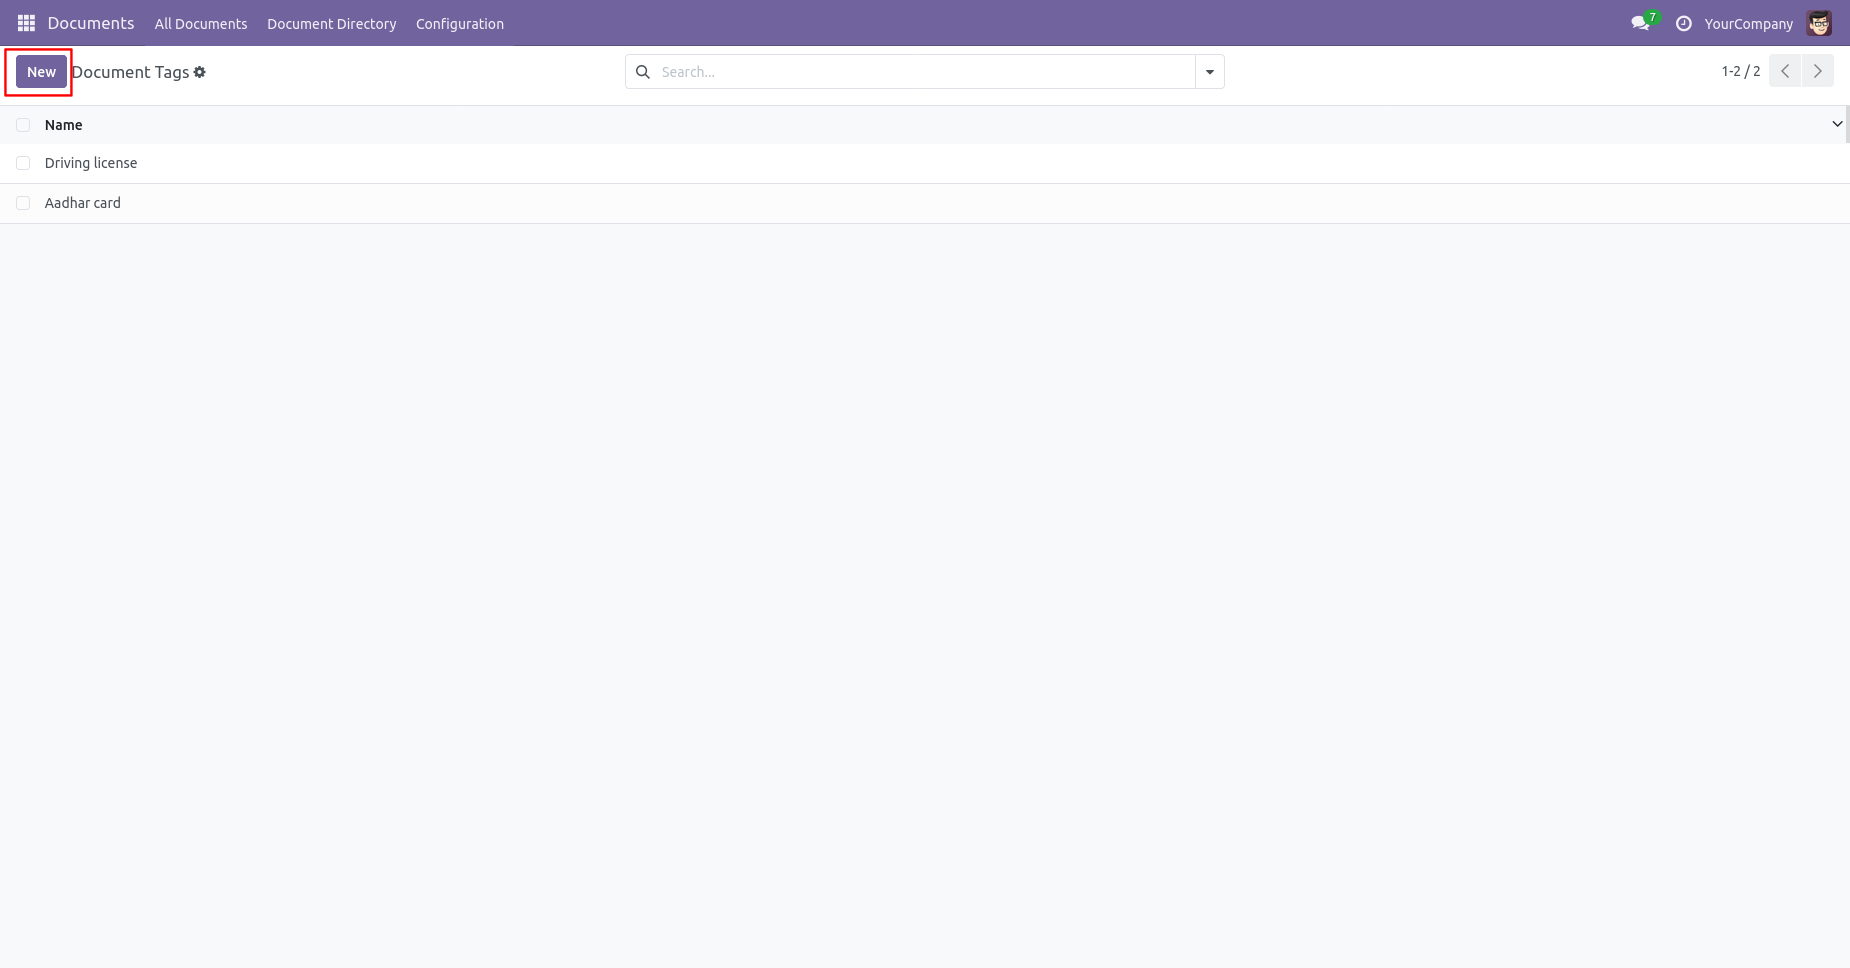
In 'Configuration' go to directory tags, list view of the document tags look like below.
Click on the 'New' button to create a new document tag.
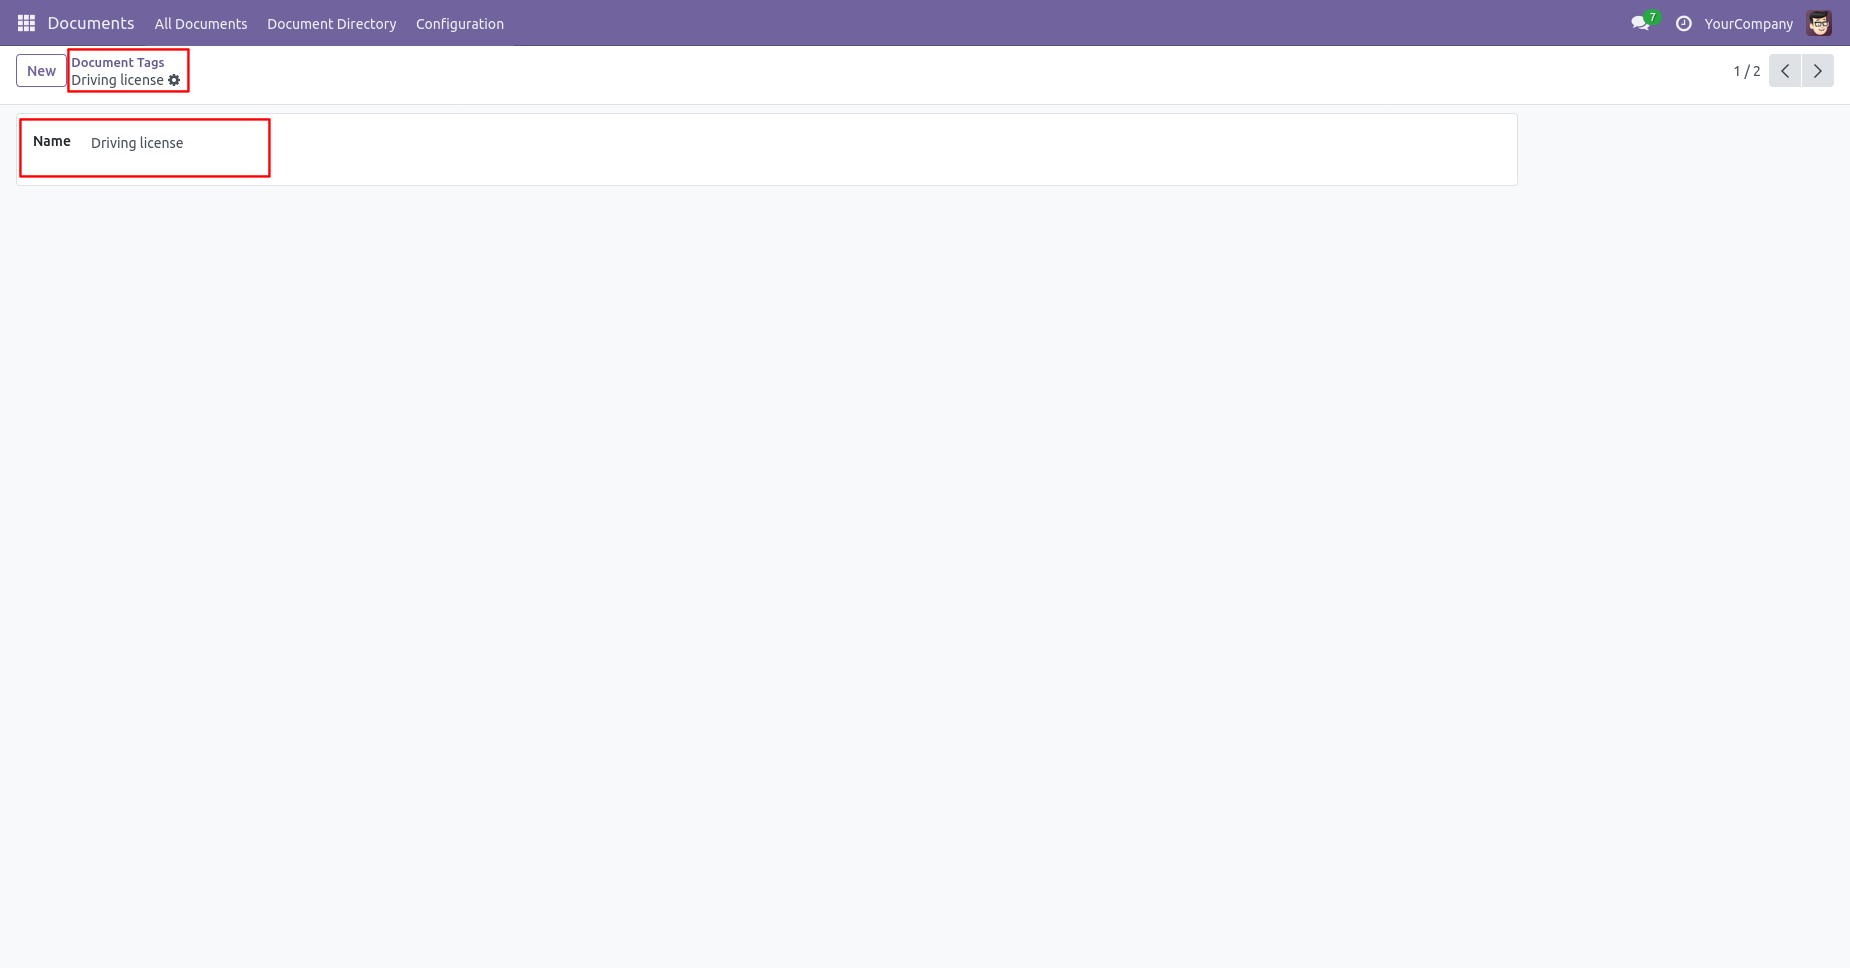
Document tags form view looks like below.
When a ticket is created that time customer will notify via email.

When a ticket is created that time assigned users will notify via email.

In 'Documents' go to all documents.
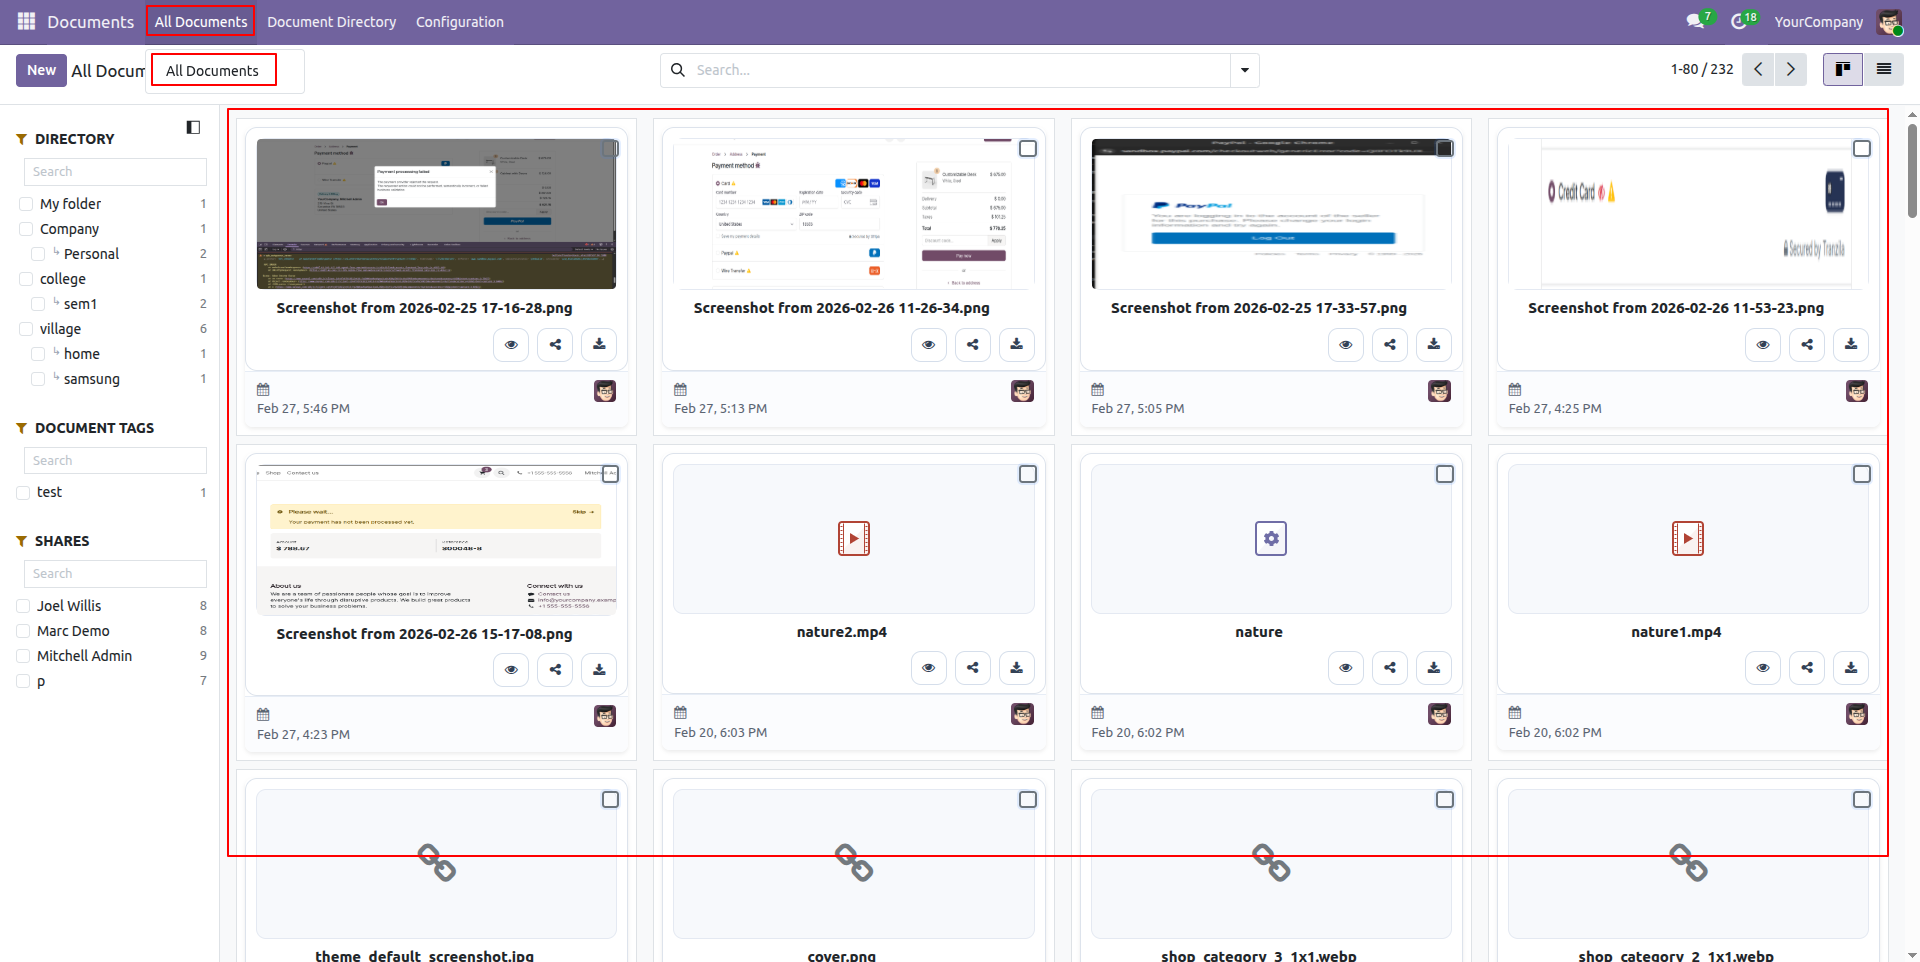
Kanban view of the "All Documents'.
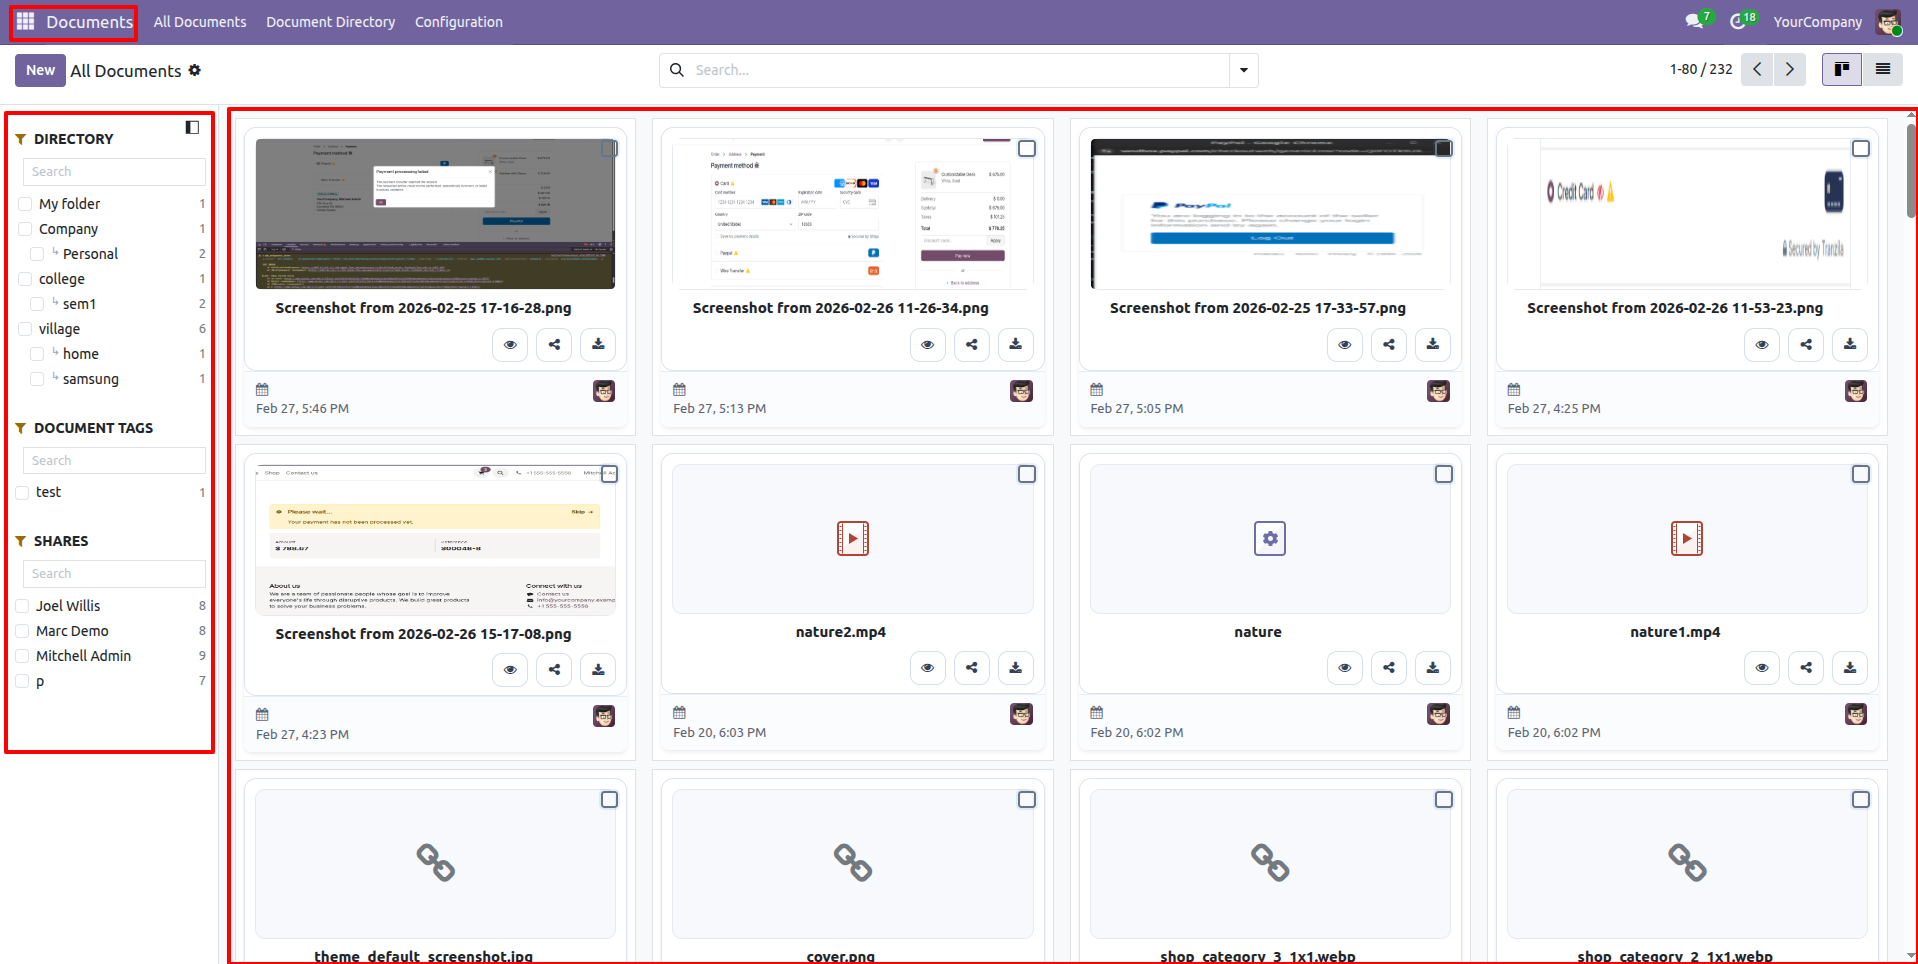
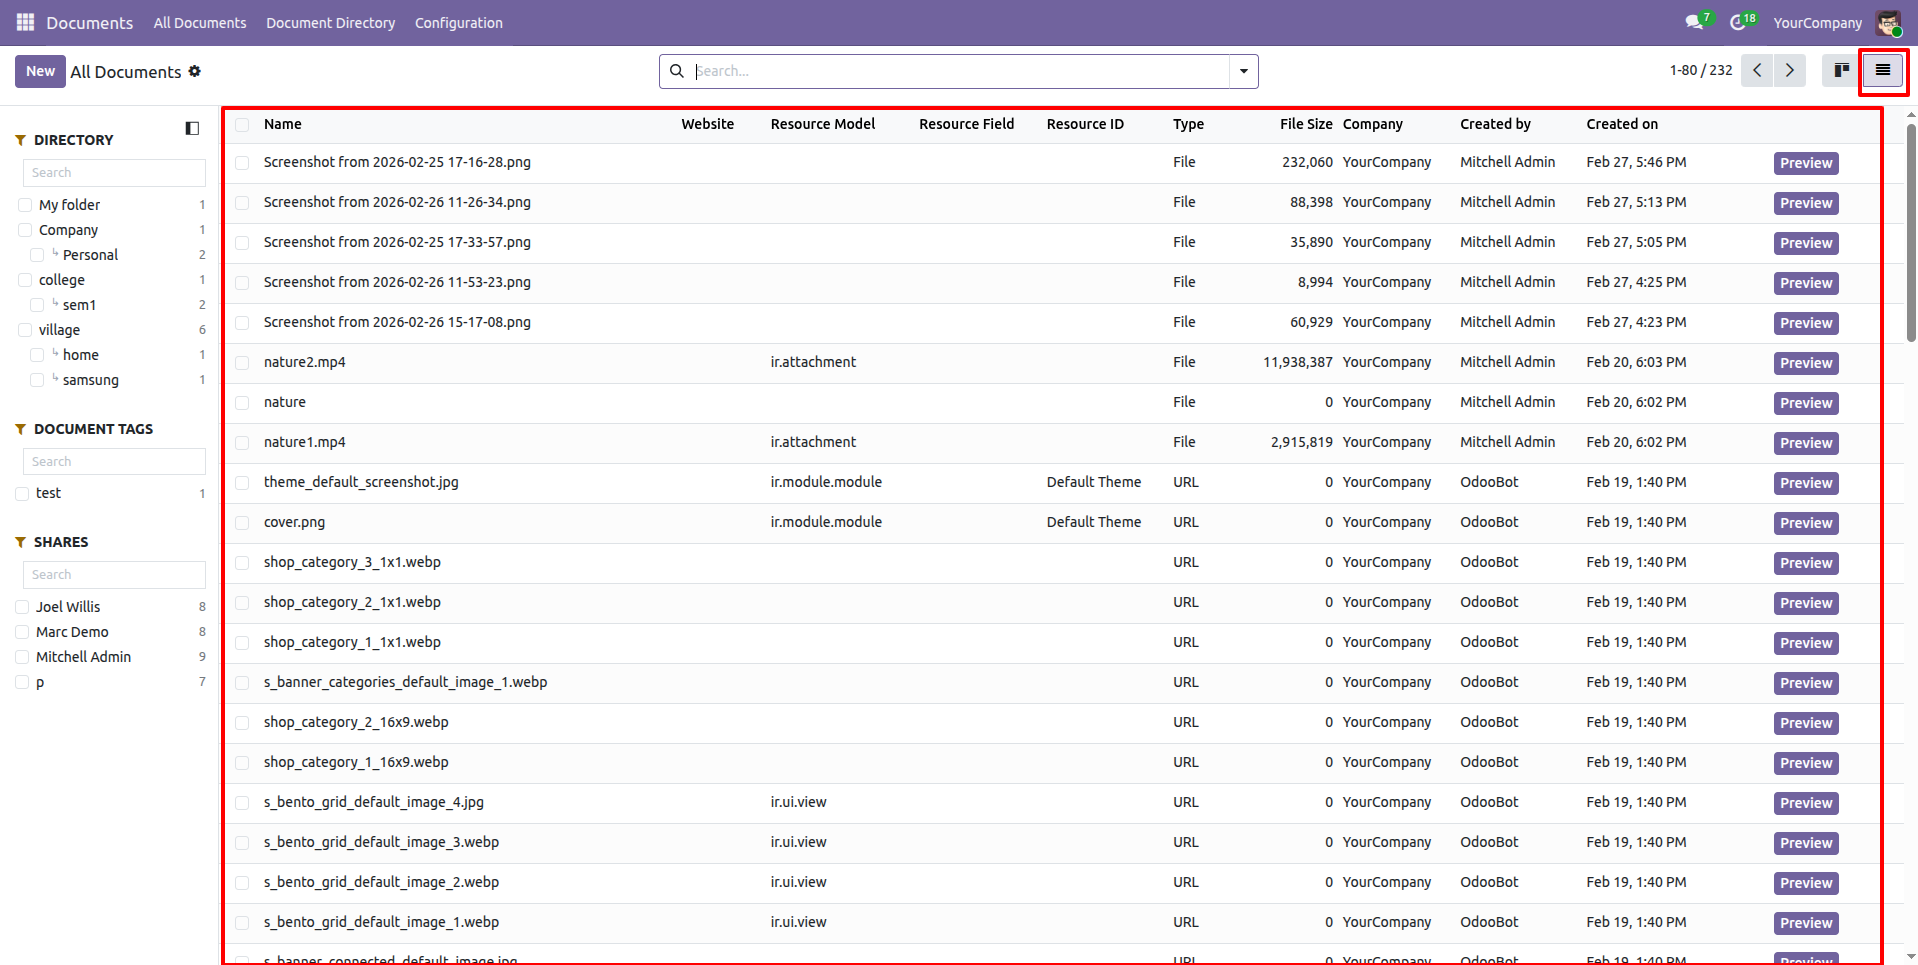
Tree view of the "All Documents'.
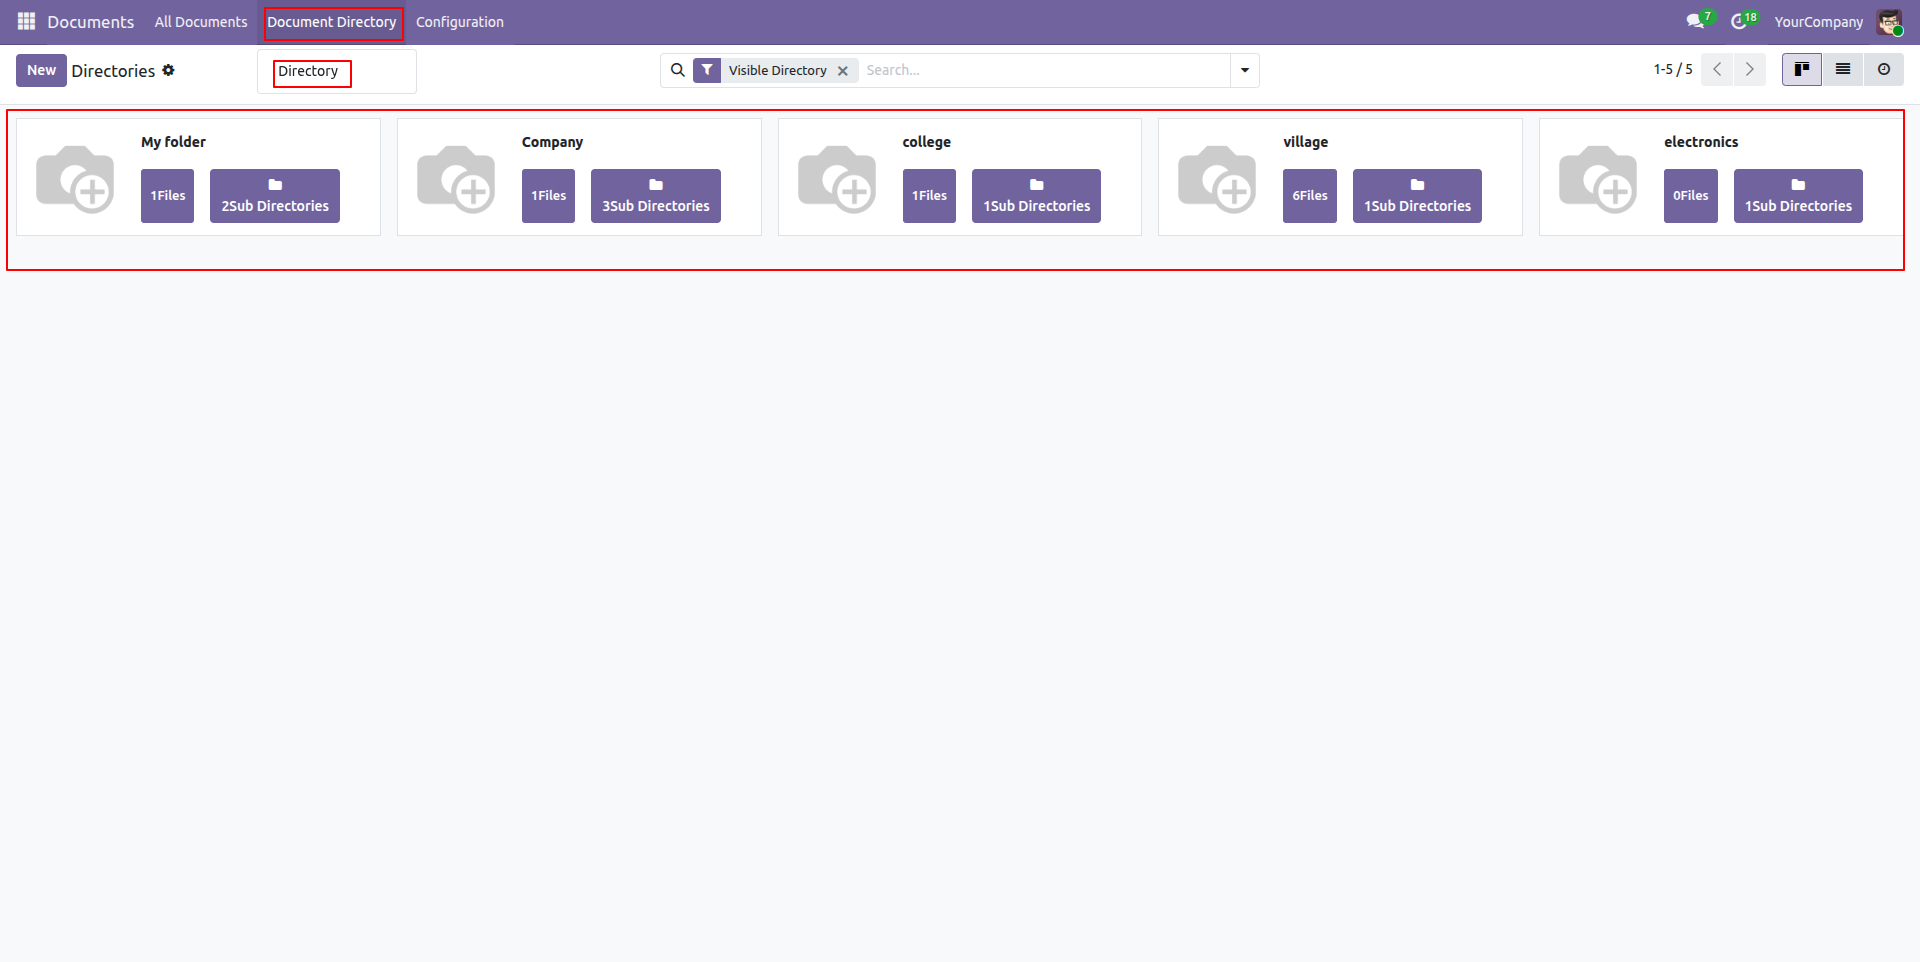
Menu and Kanban view of the directories.
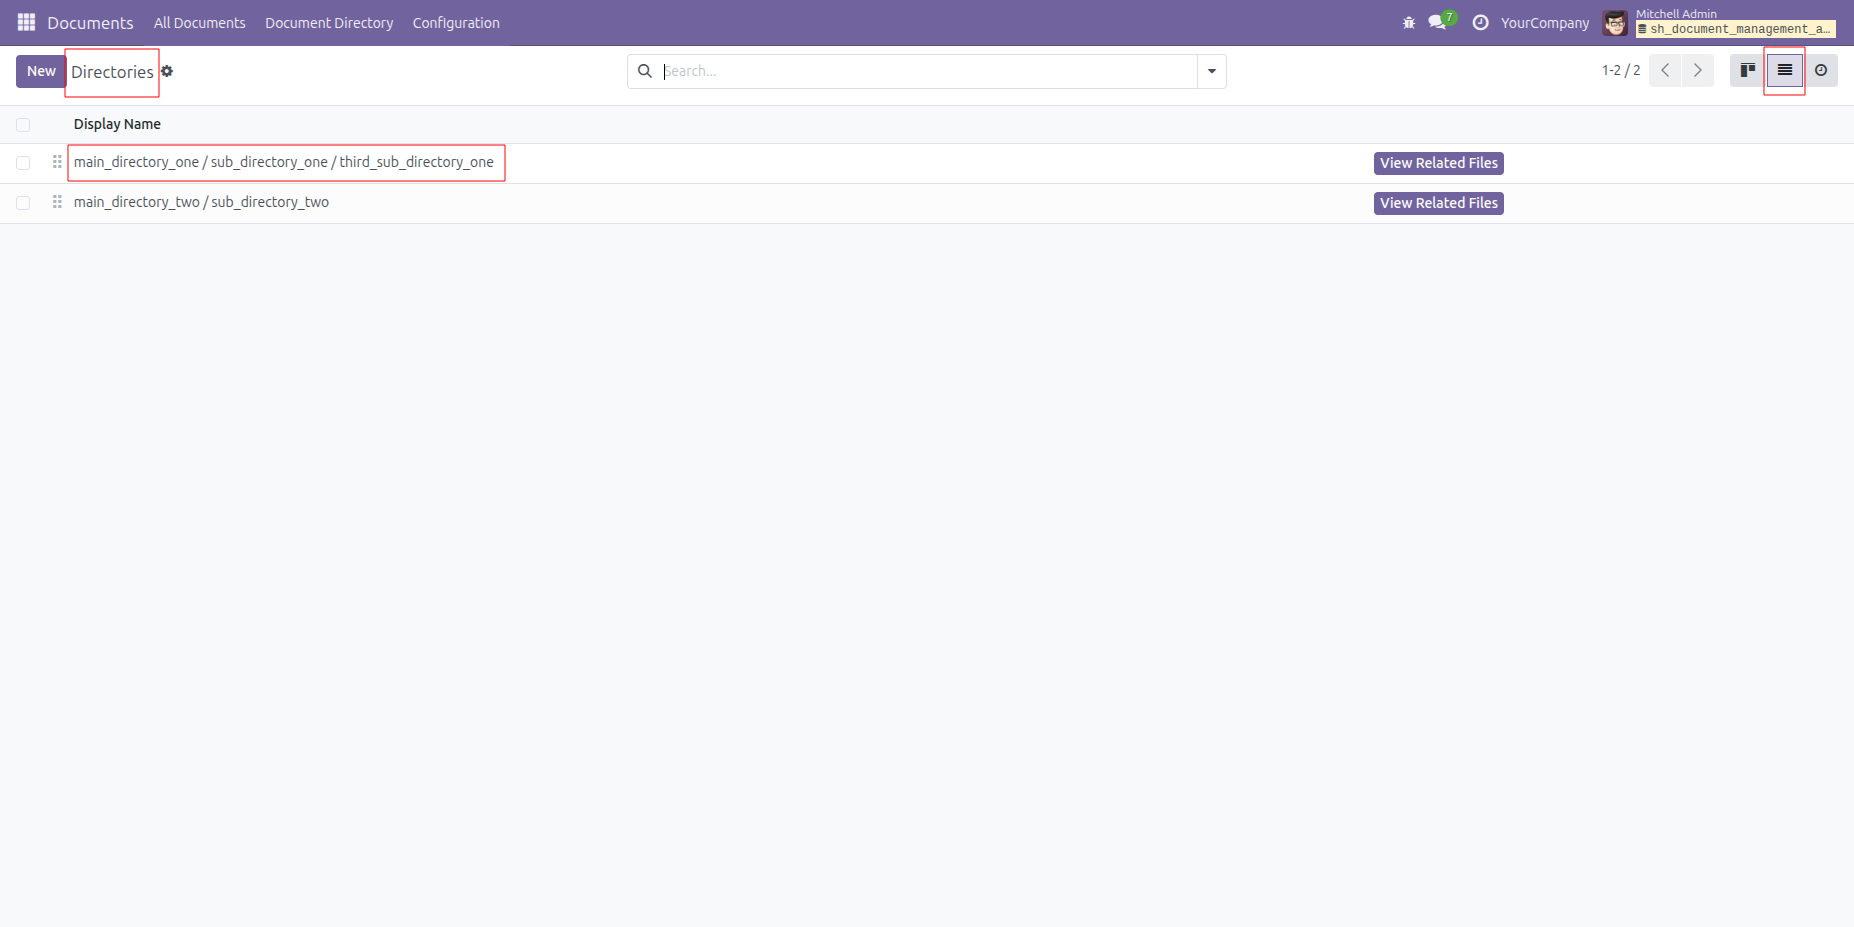
Tree view of the directories.
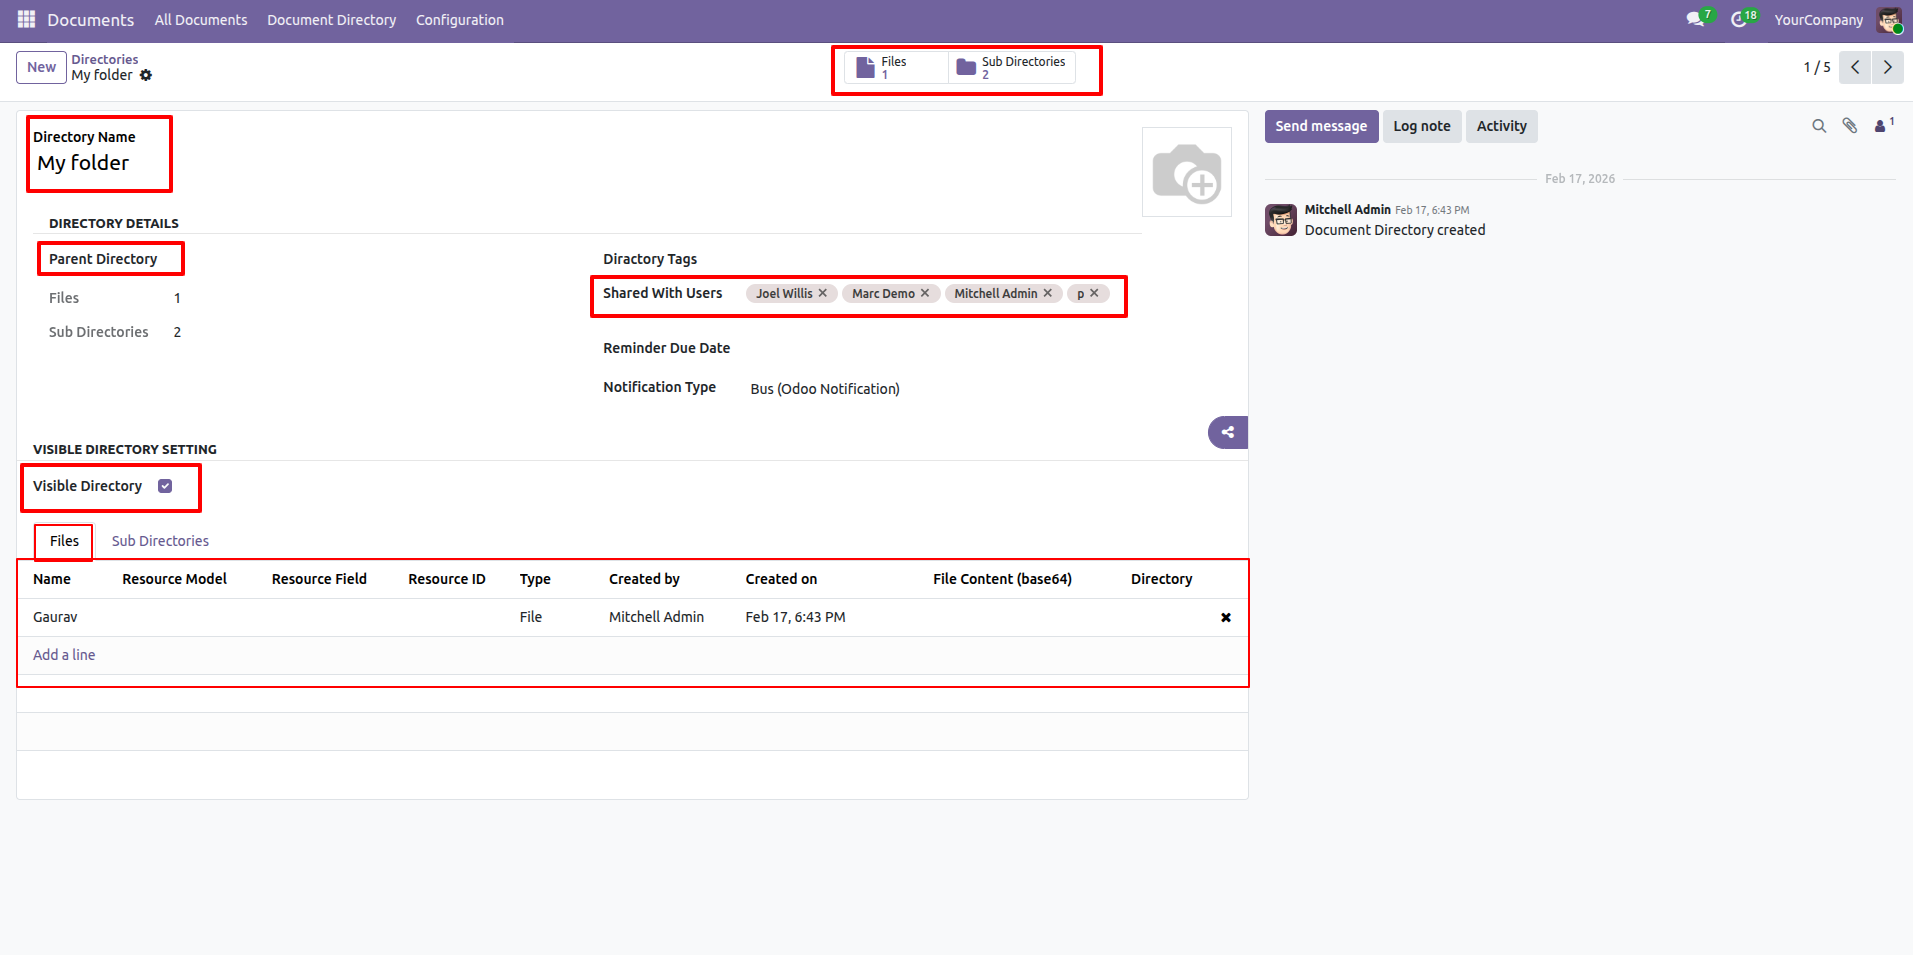
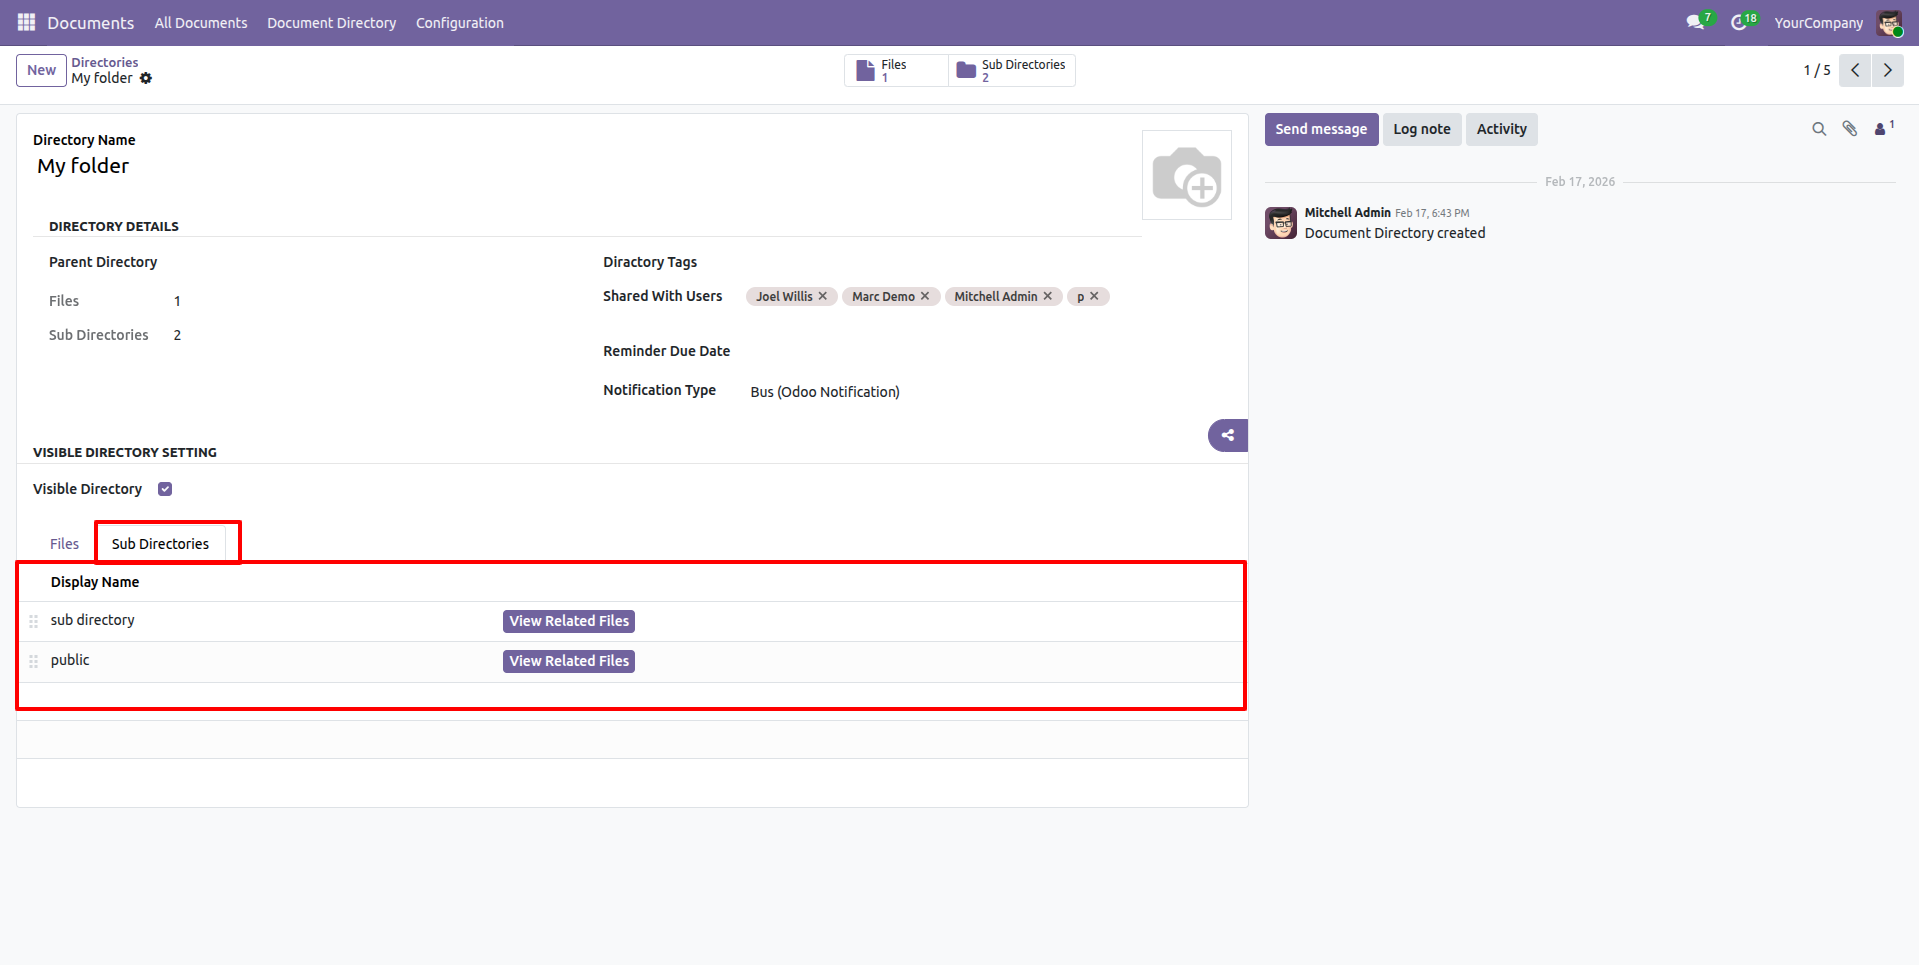
Form view of the directories.
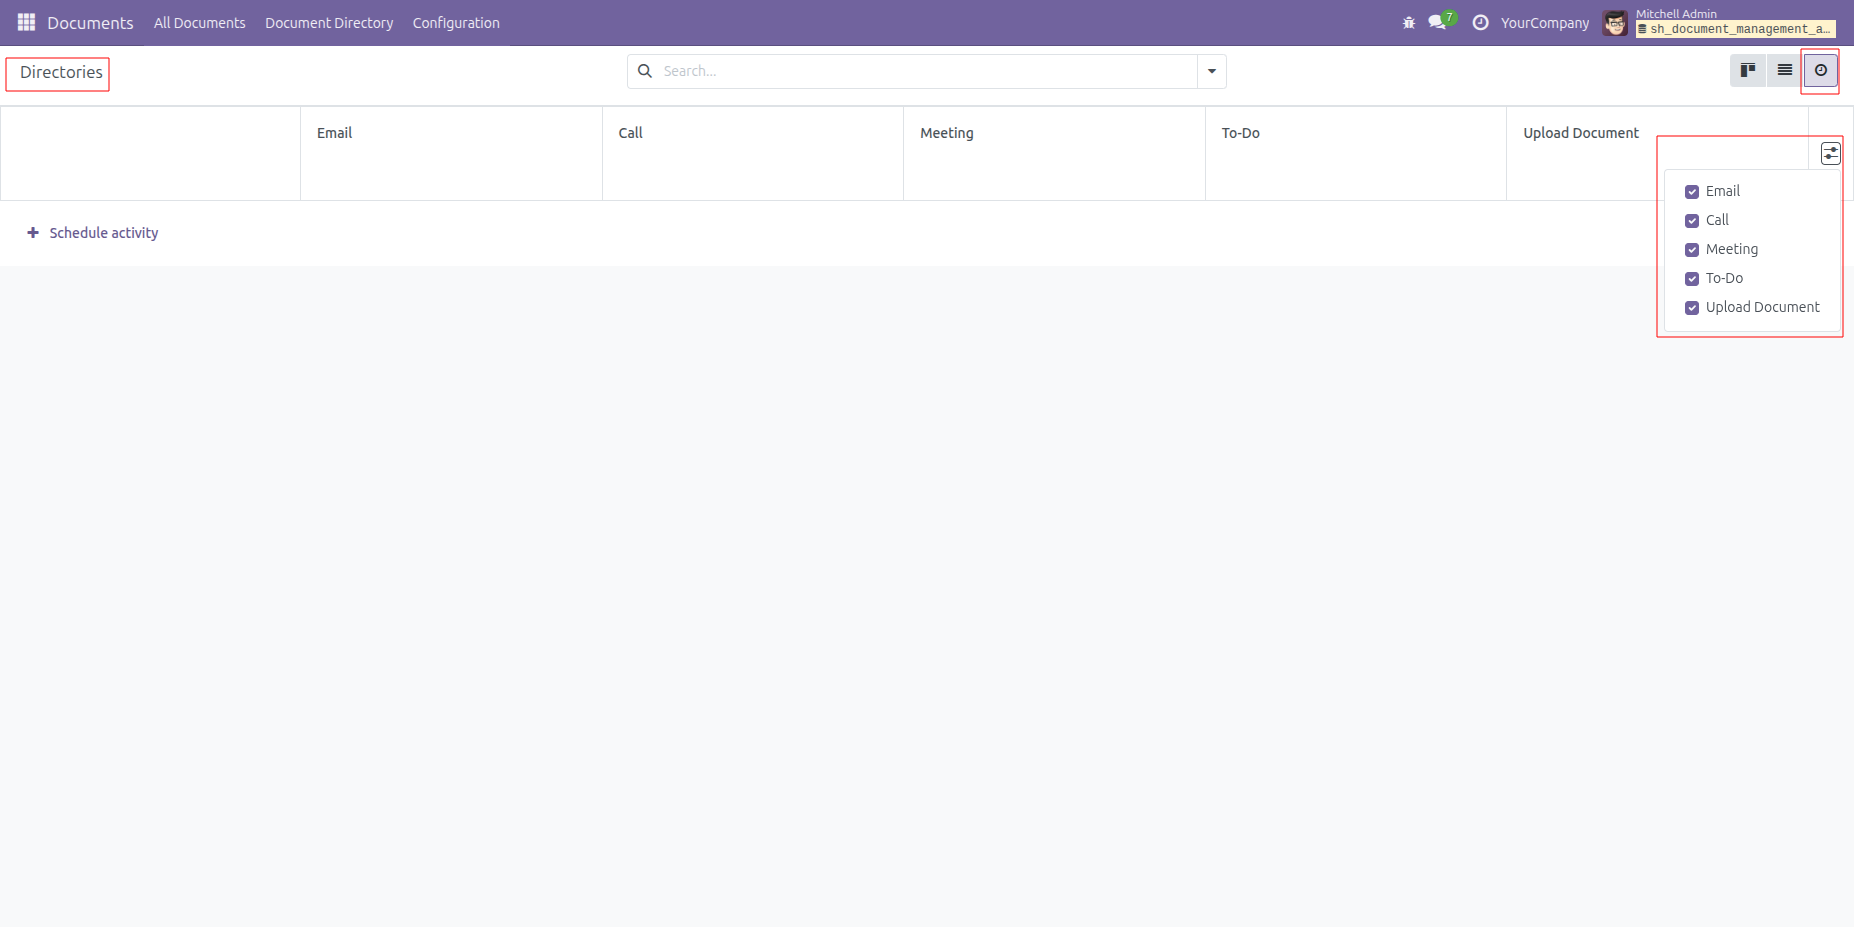
Activity view of the directories.
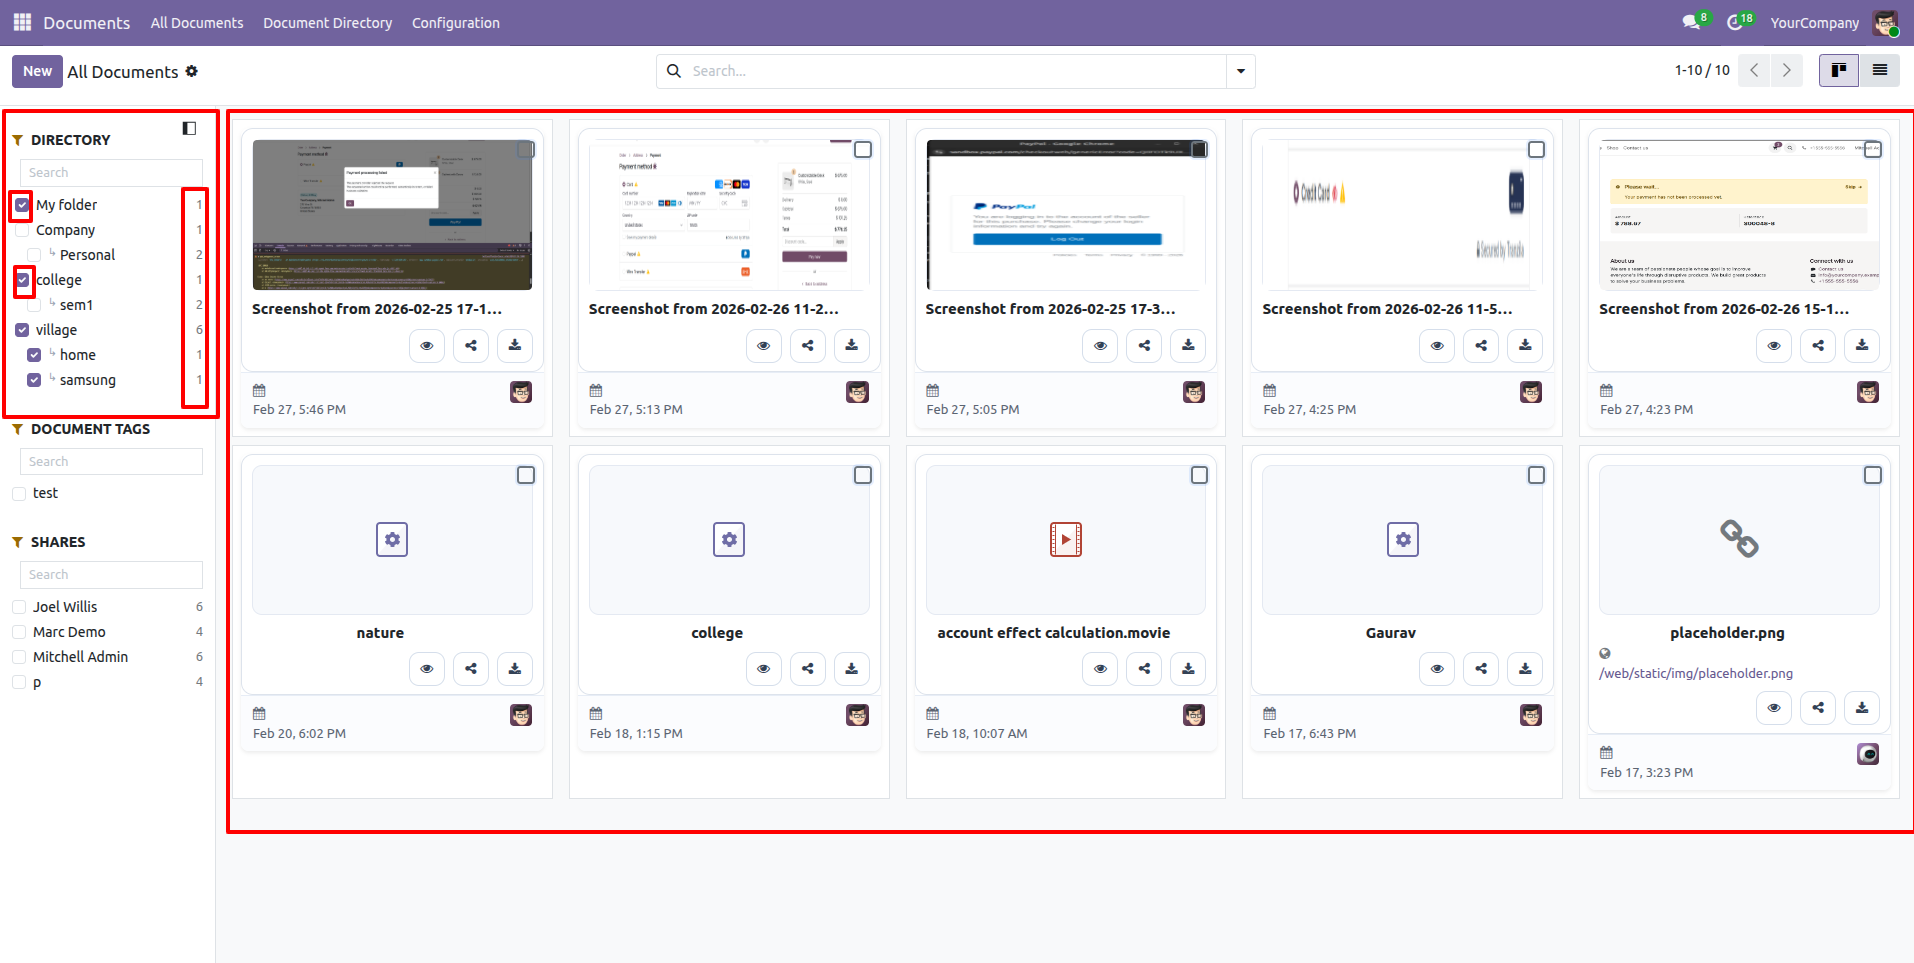
You can filter the directories using the boolean options, and also view the count of directories.
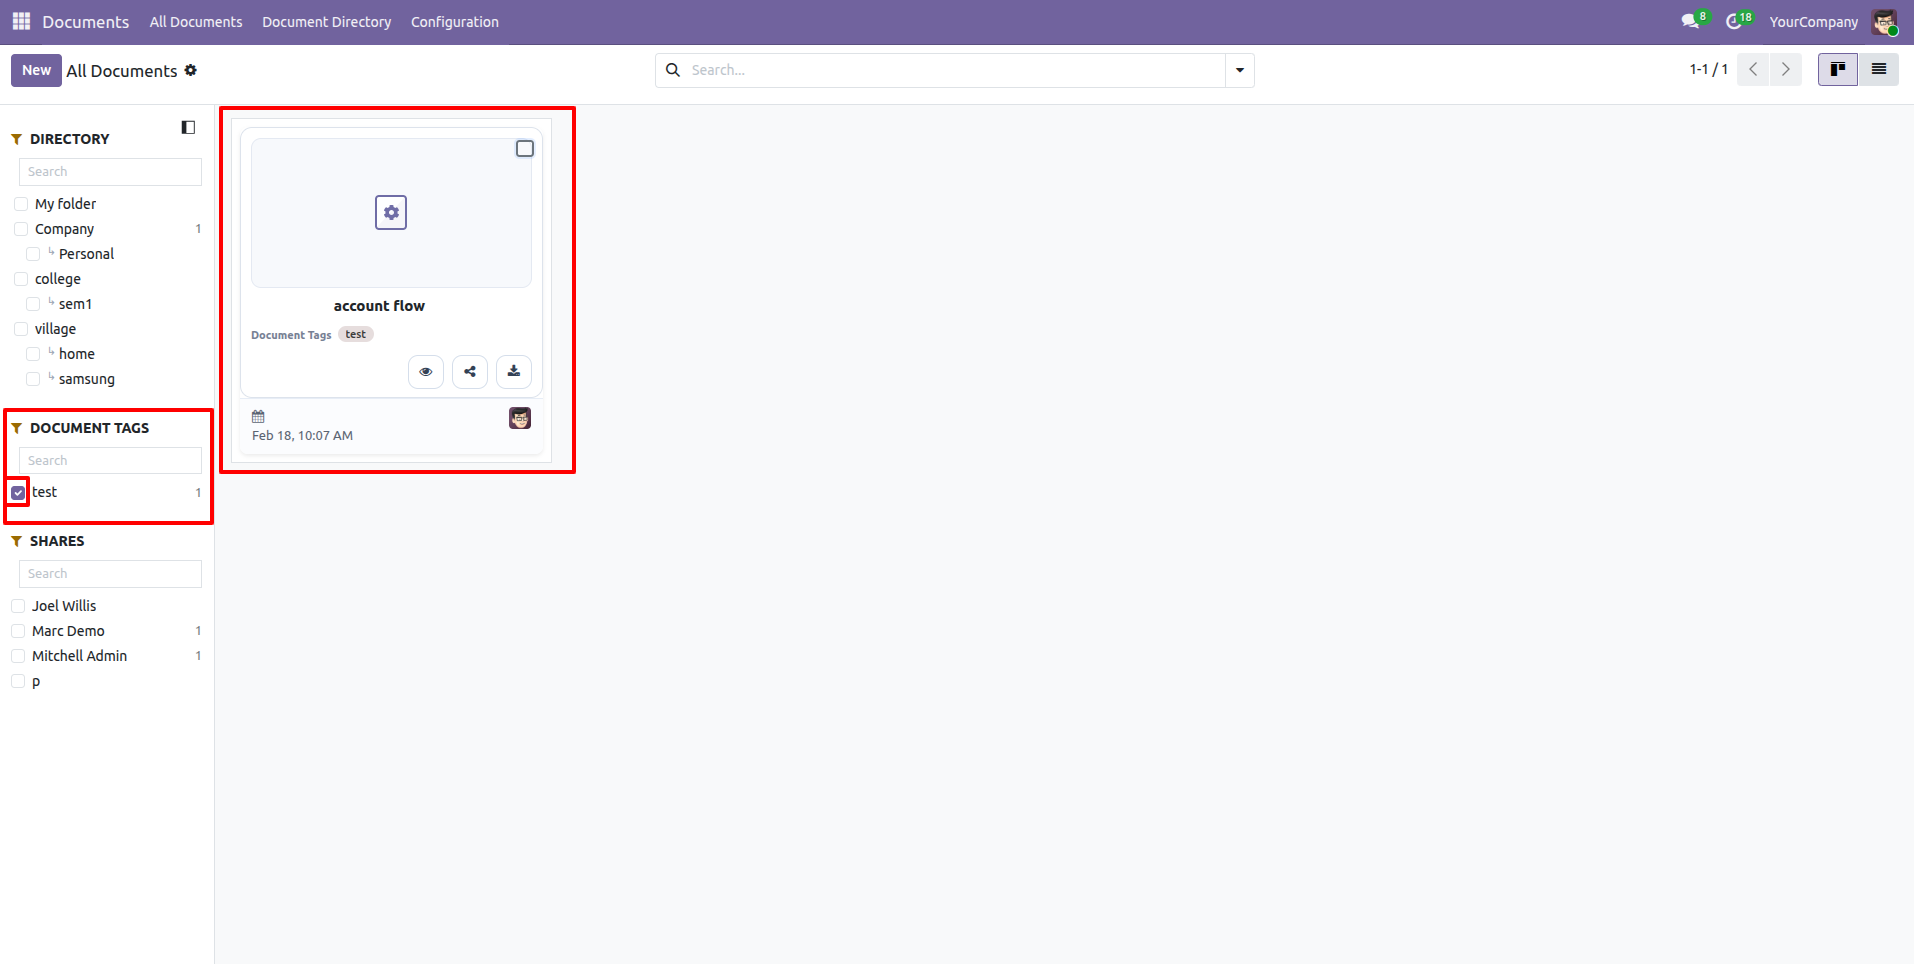
You can filter document tags using the Boolean options and also view the count of document tags.
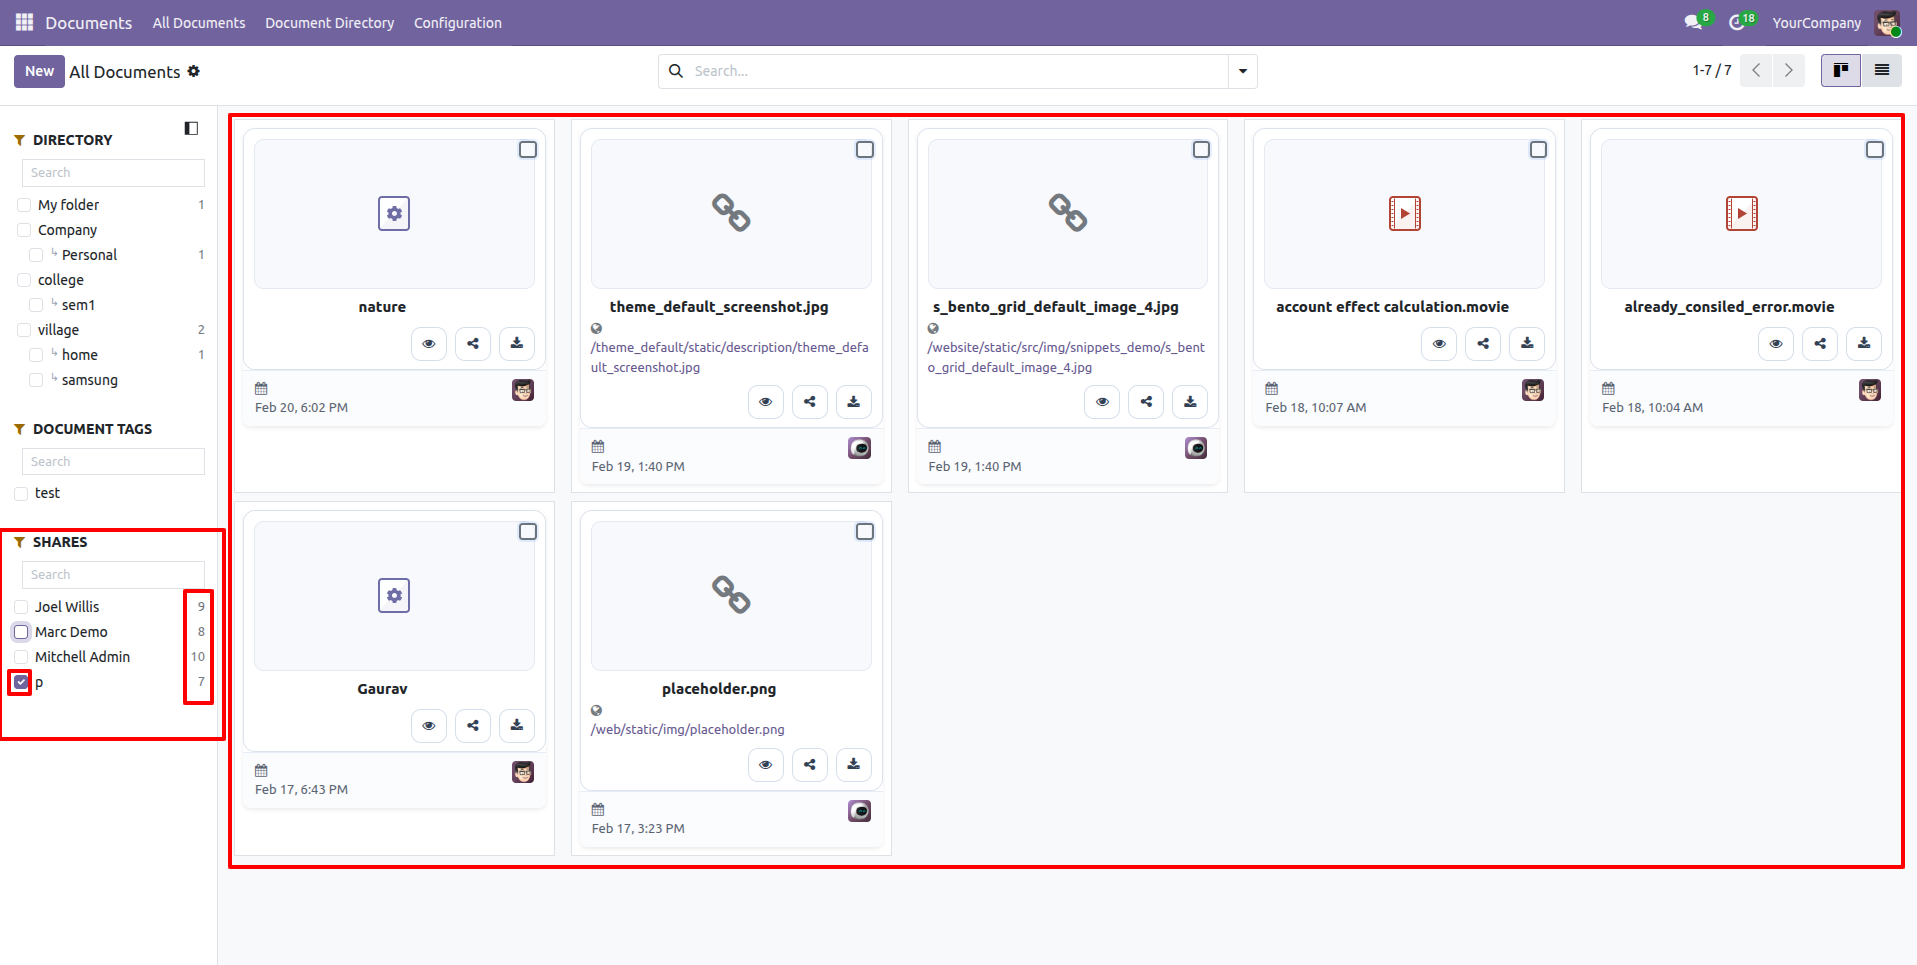
You can filter shares using the Boolean options and view the total count of shares.
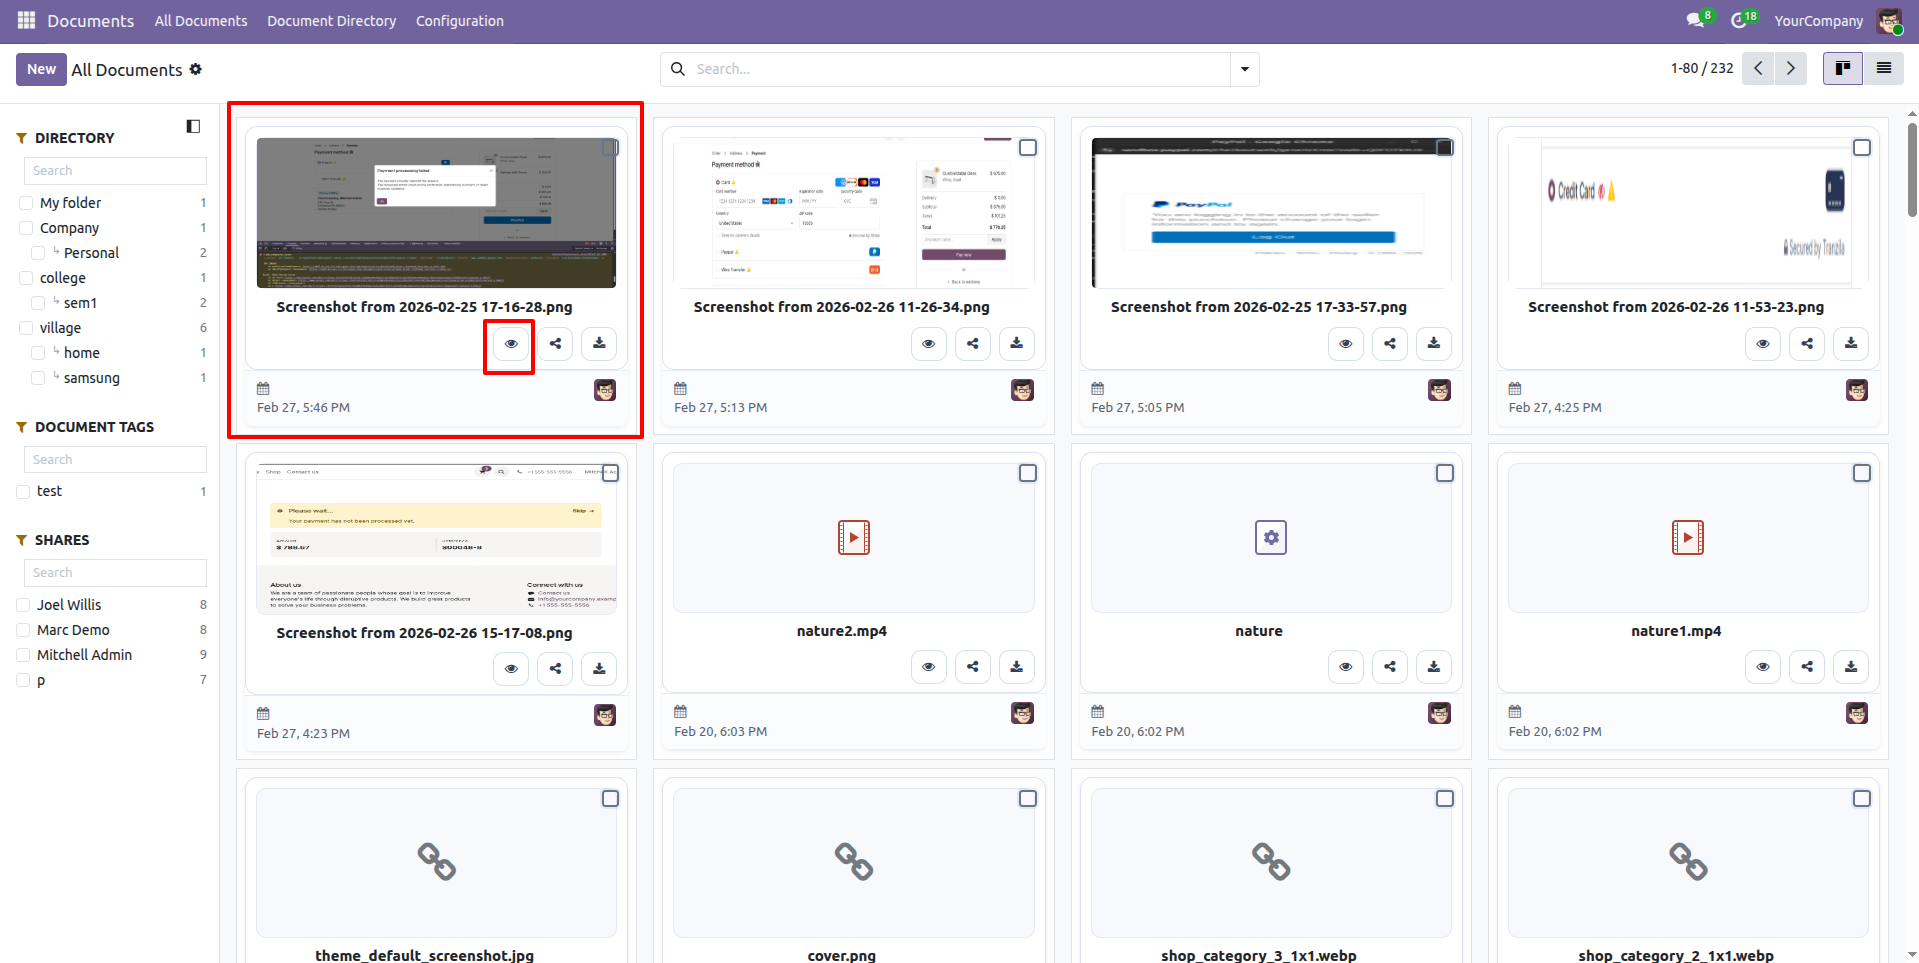
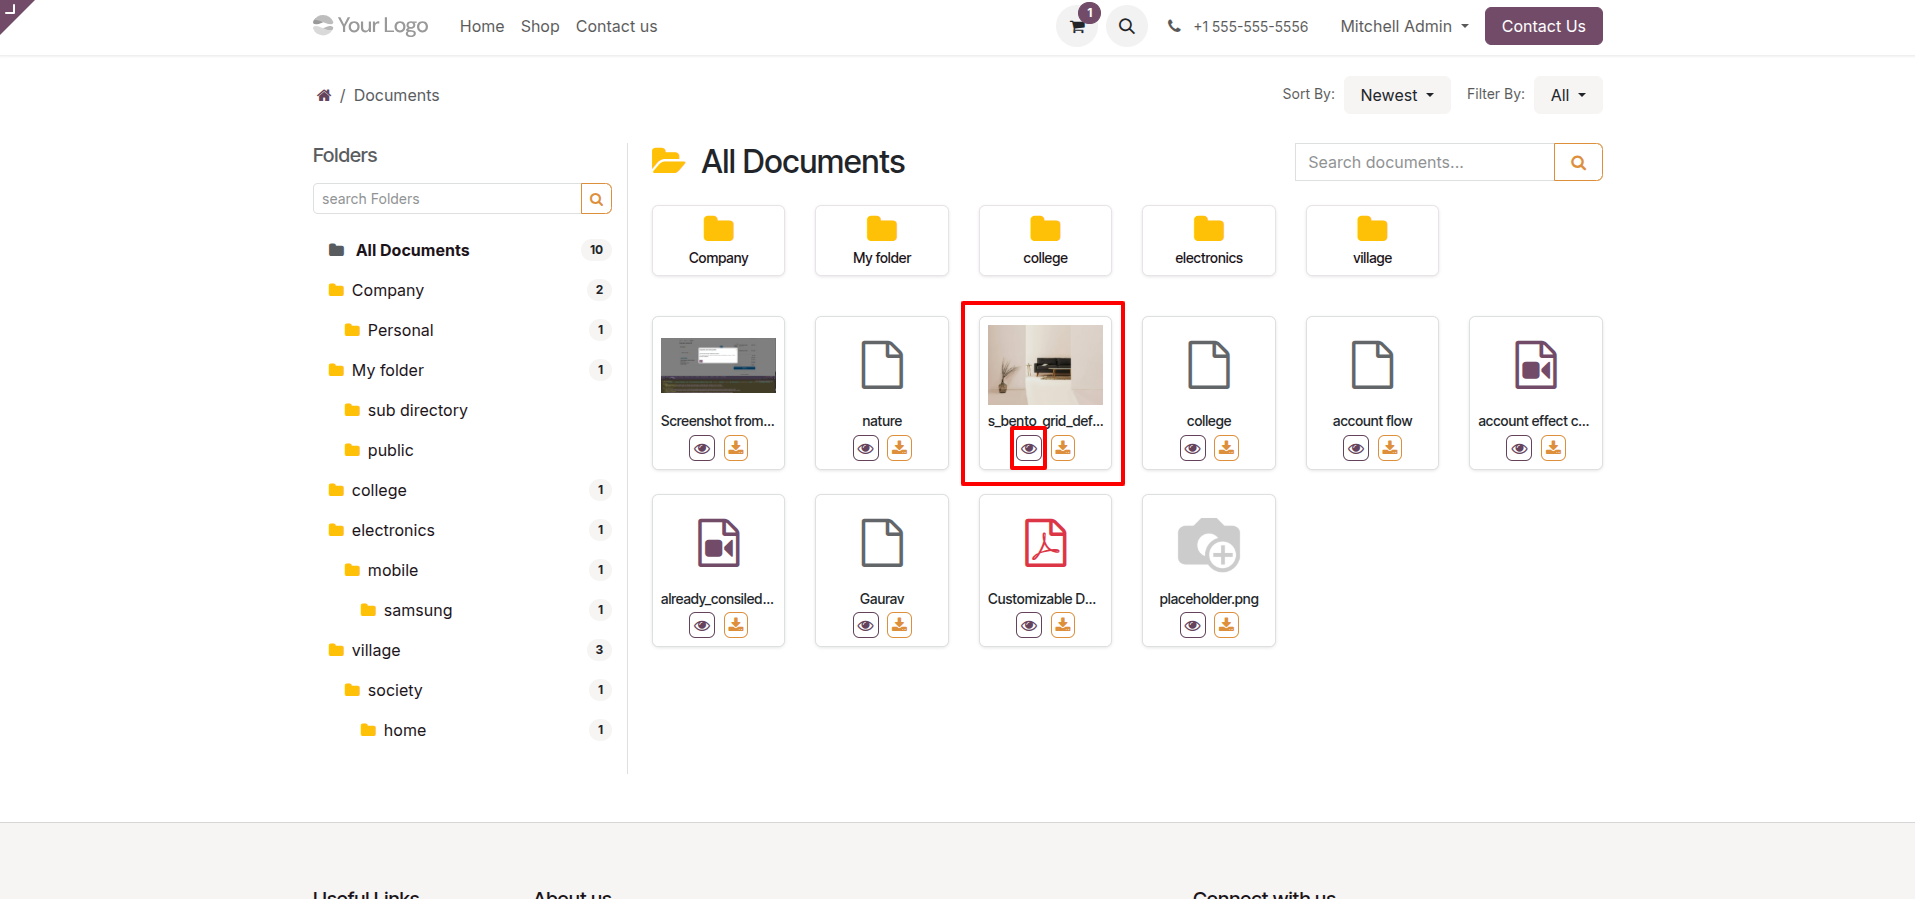
Click on the 'Eye' icon to view the document.
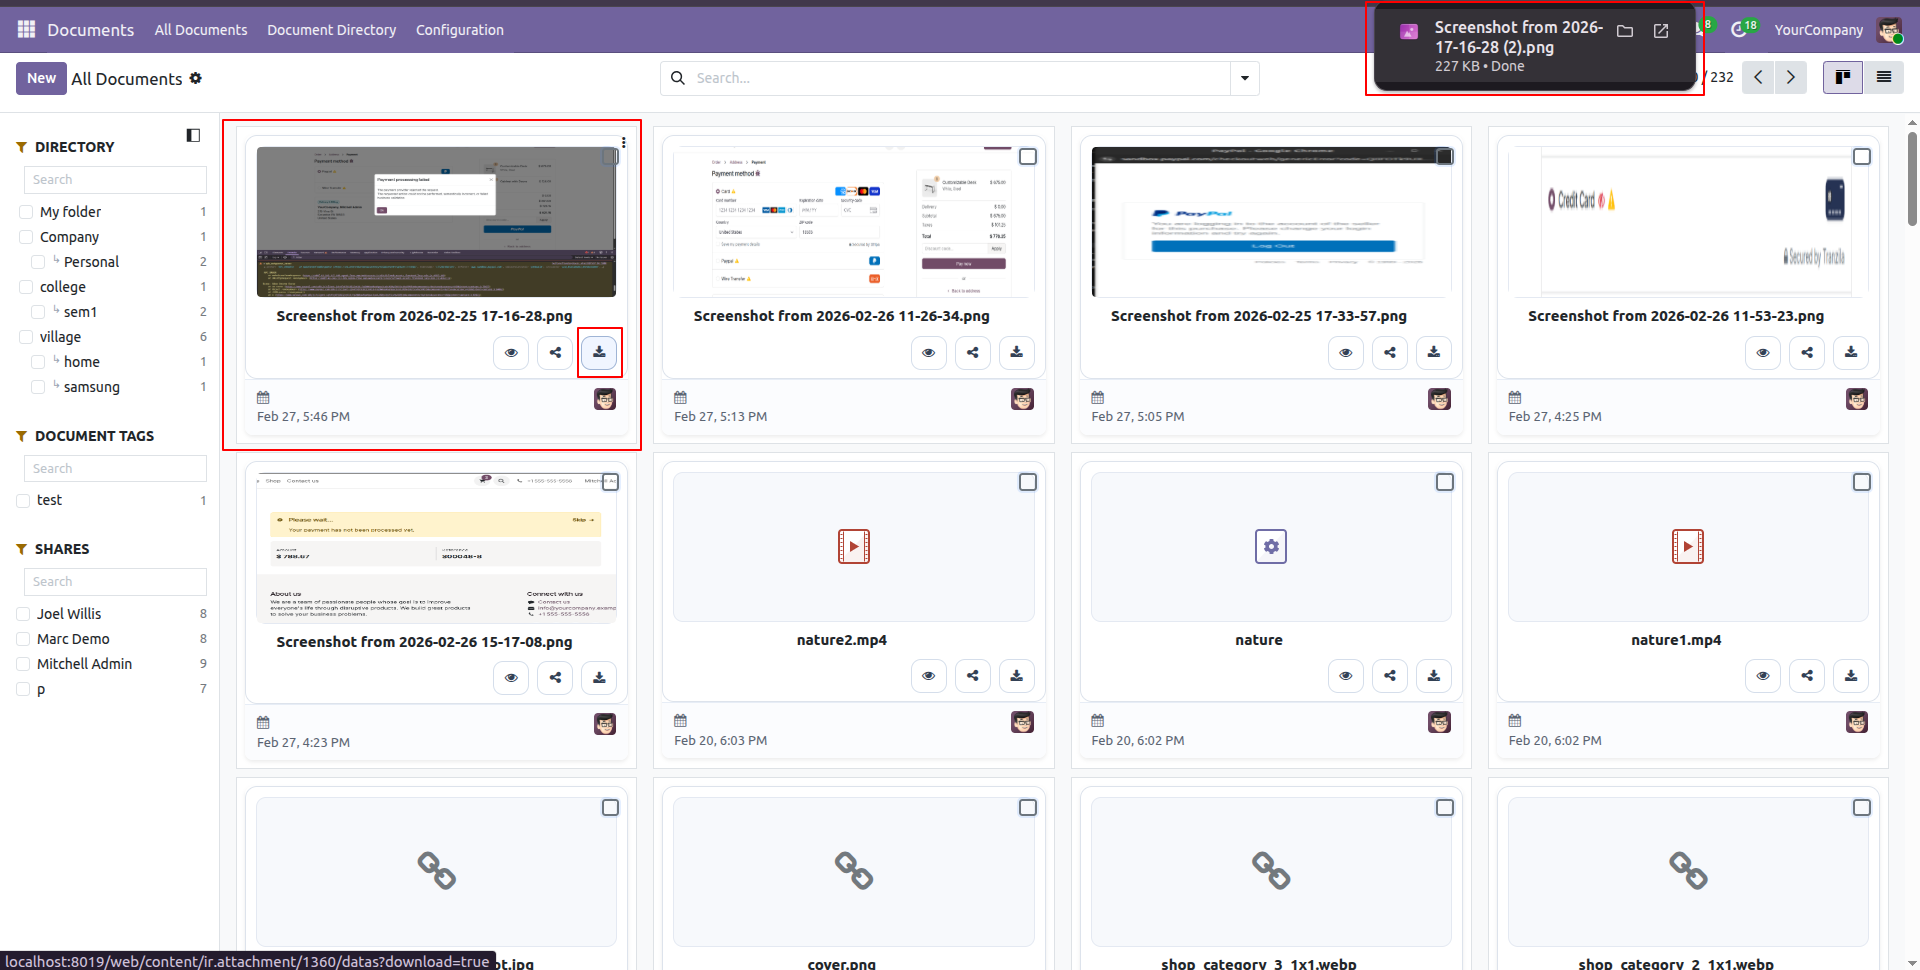
Click on the 'Download' icon to download the document.
Here, you can see that the document ZIP file has been
downloaded.
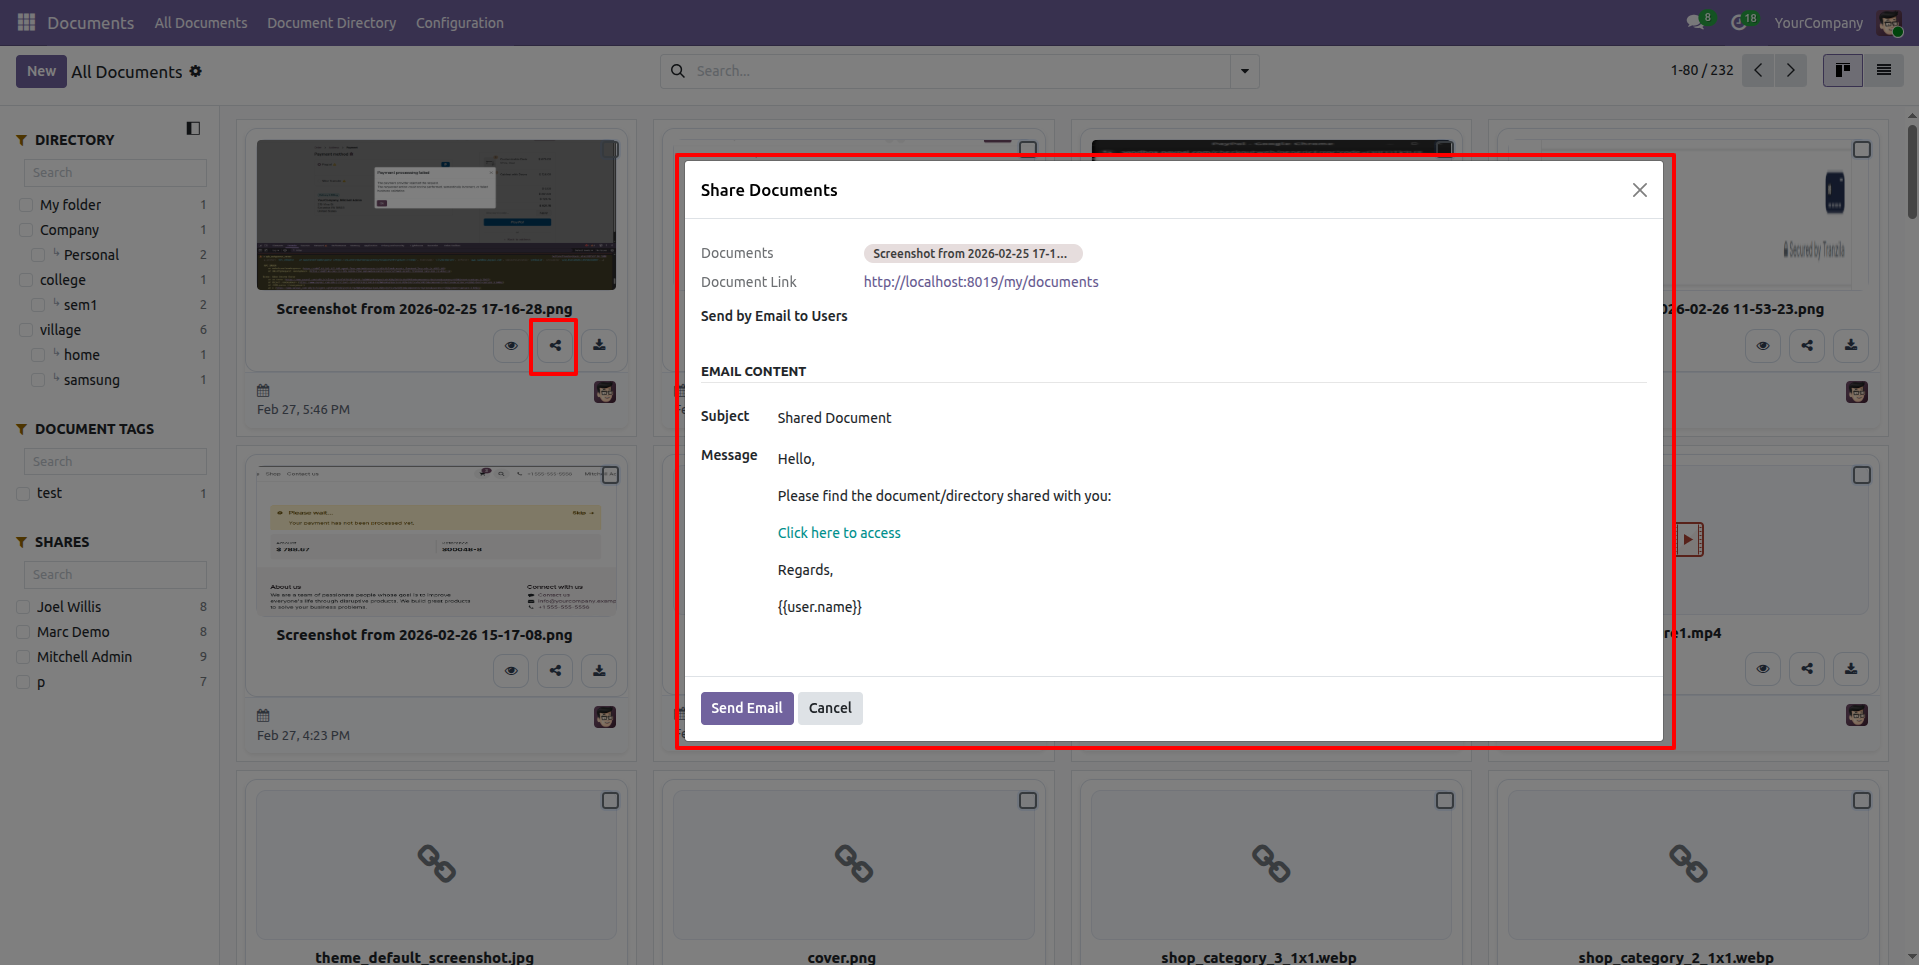
Click on the 'Share' icon to share the document.
This will open the 'Share Document' popup. Enter the
required
details and click on the 'Send Email' button.
Select user or manager.
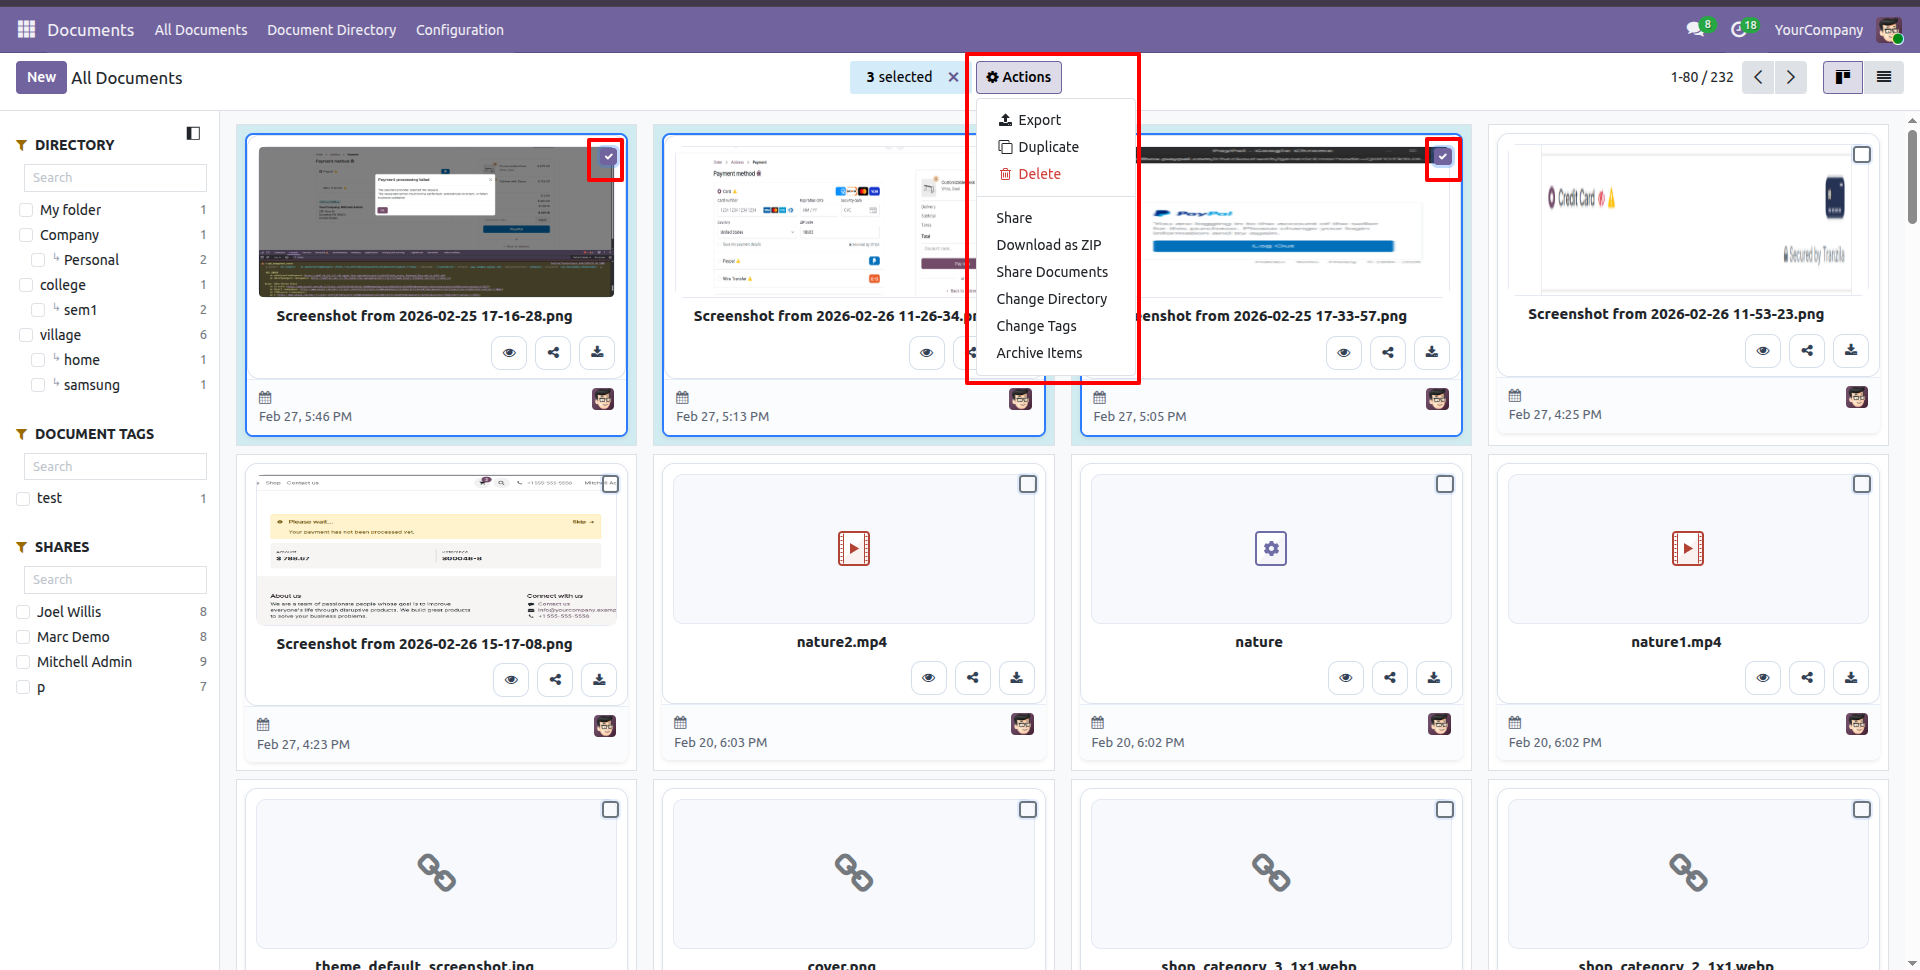
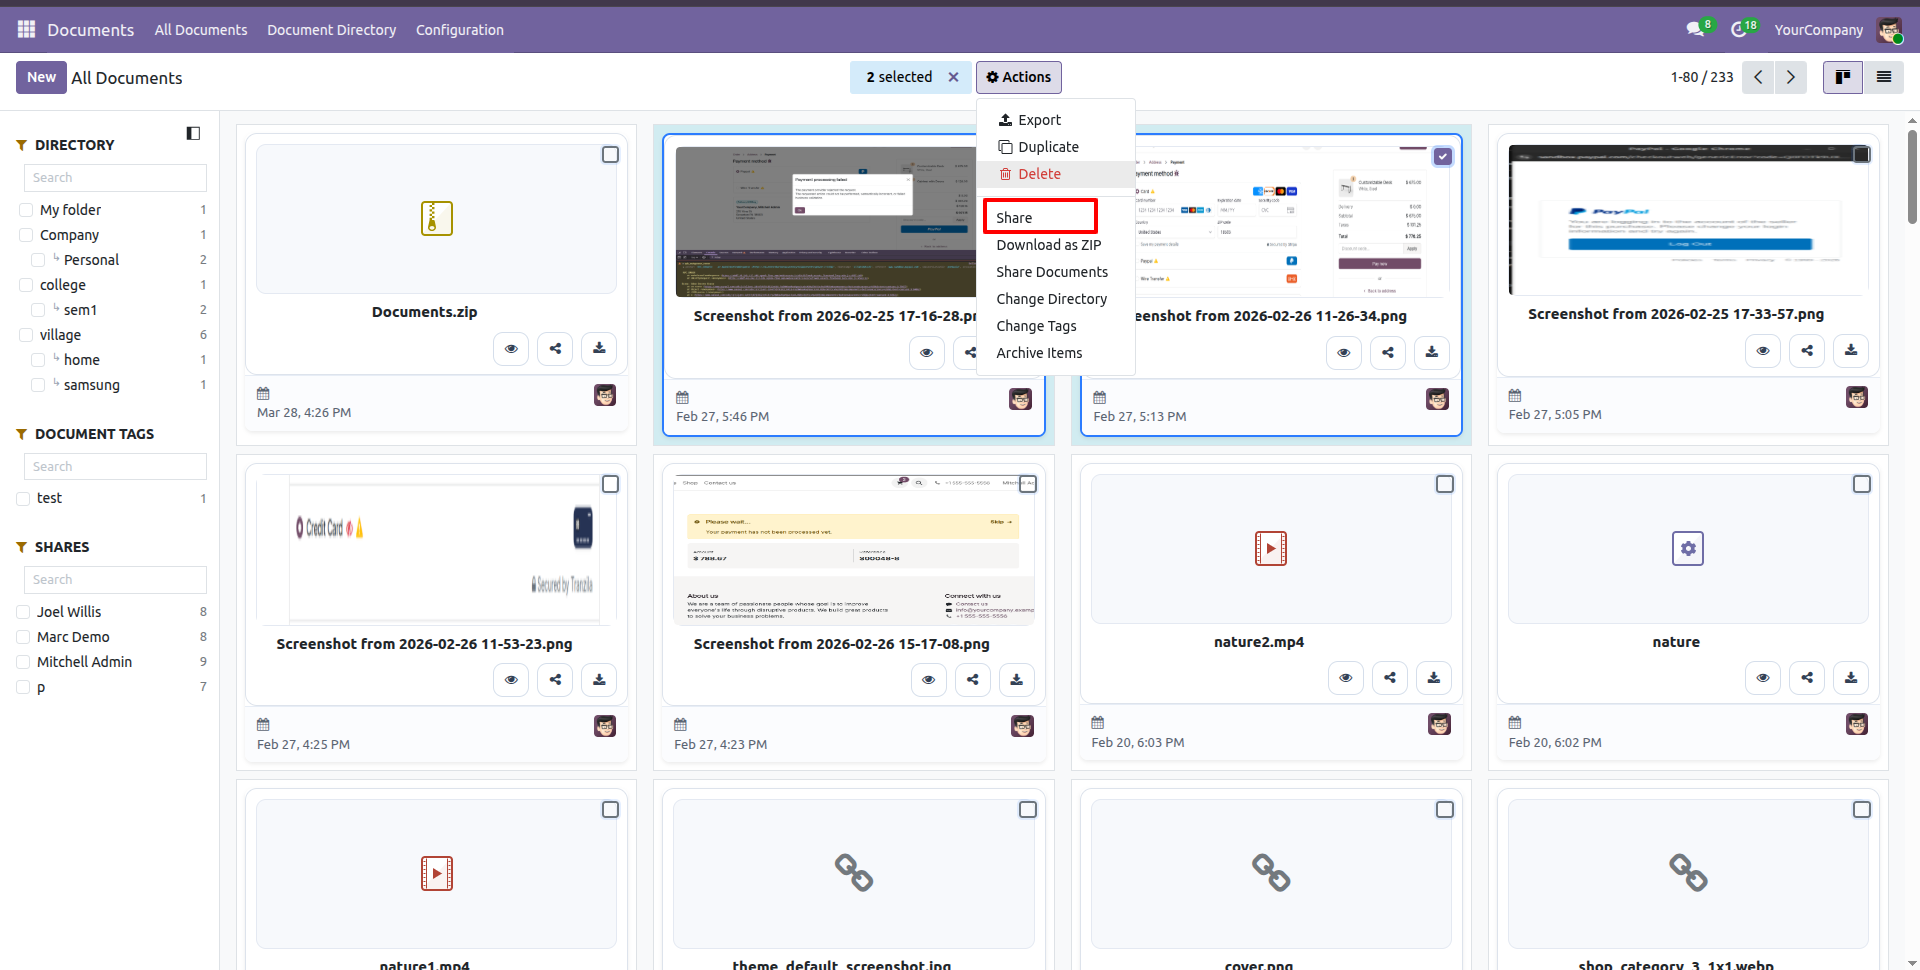
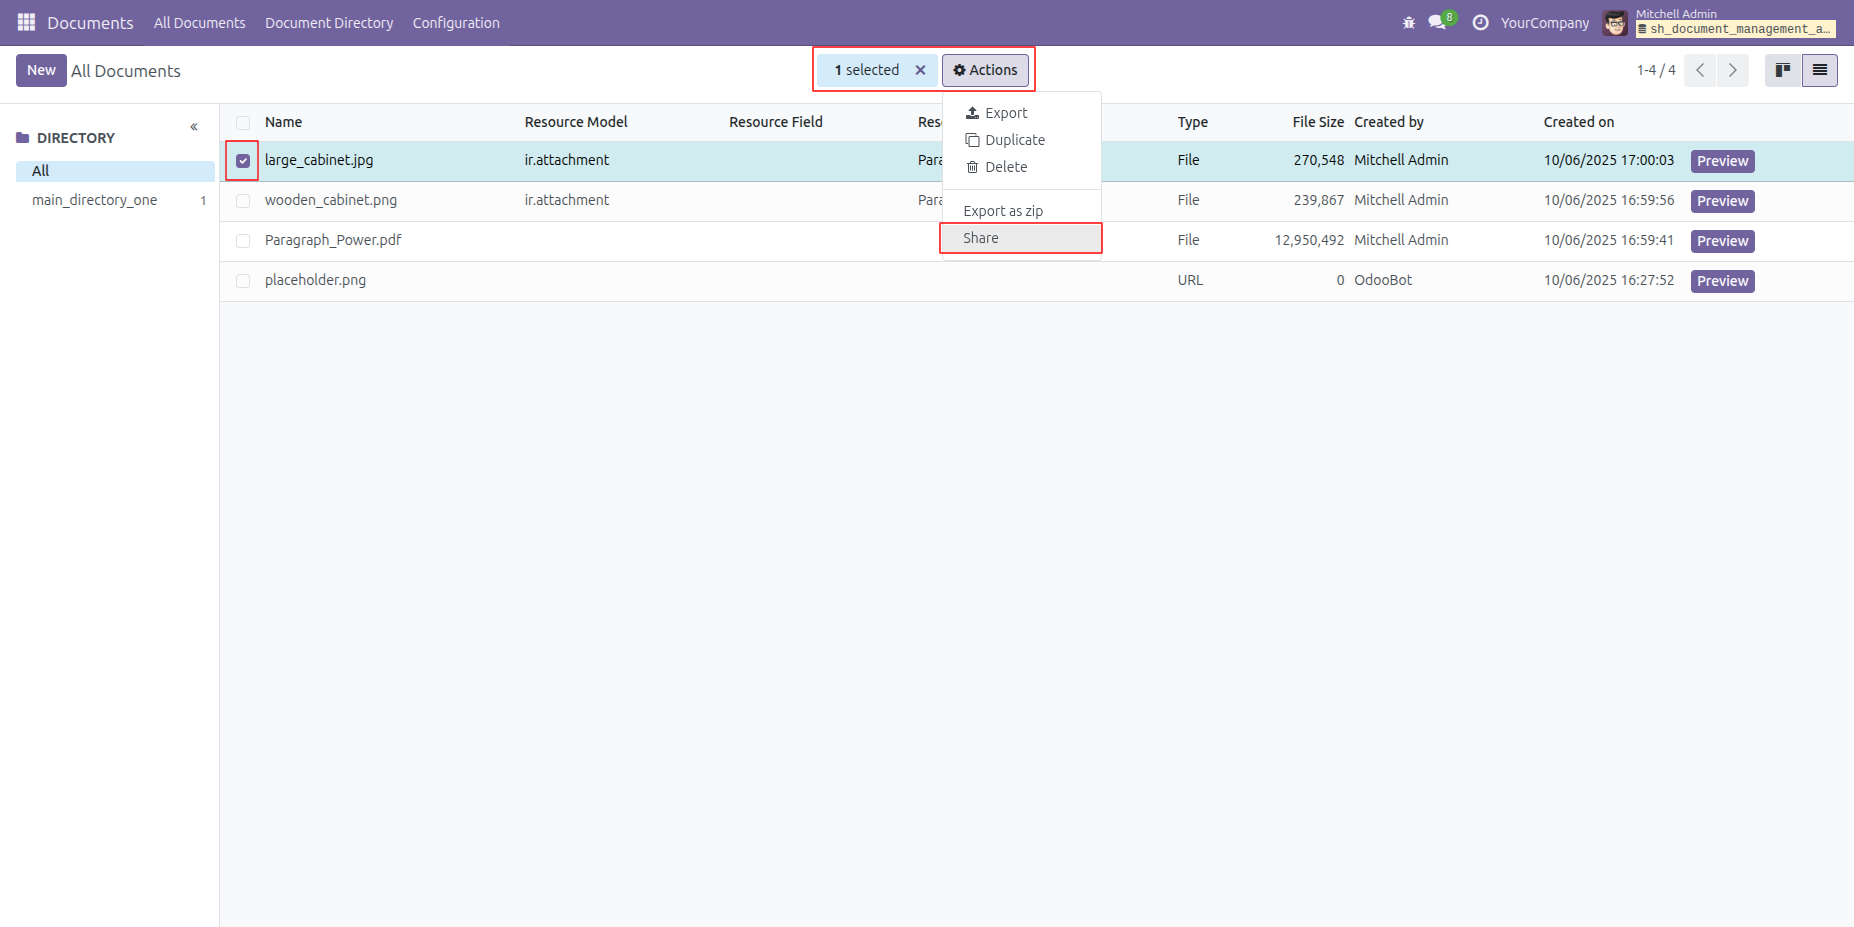
Select the document you want to share, then click on the 'Share' option from the 'Action' menu.
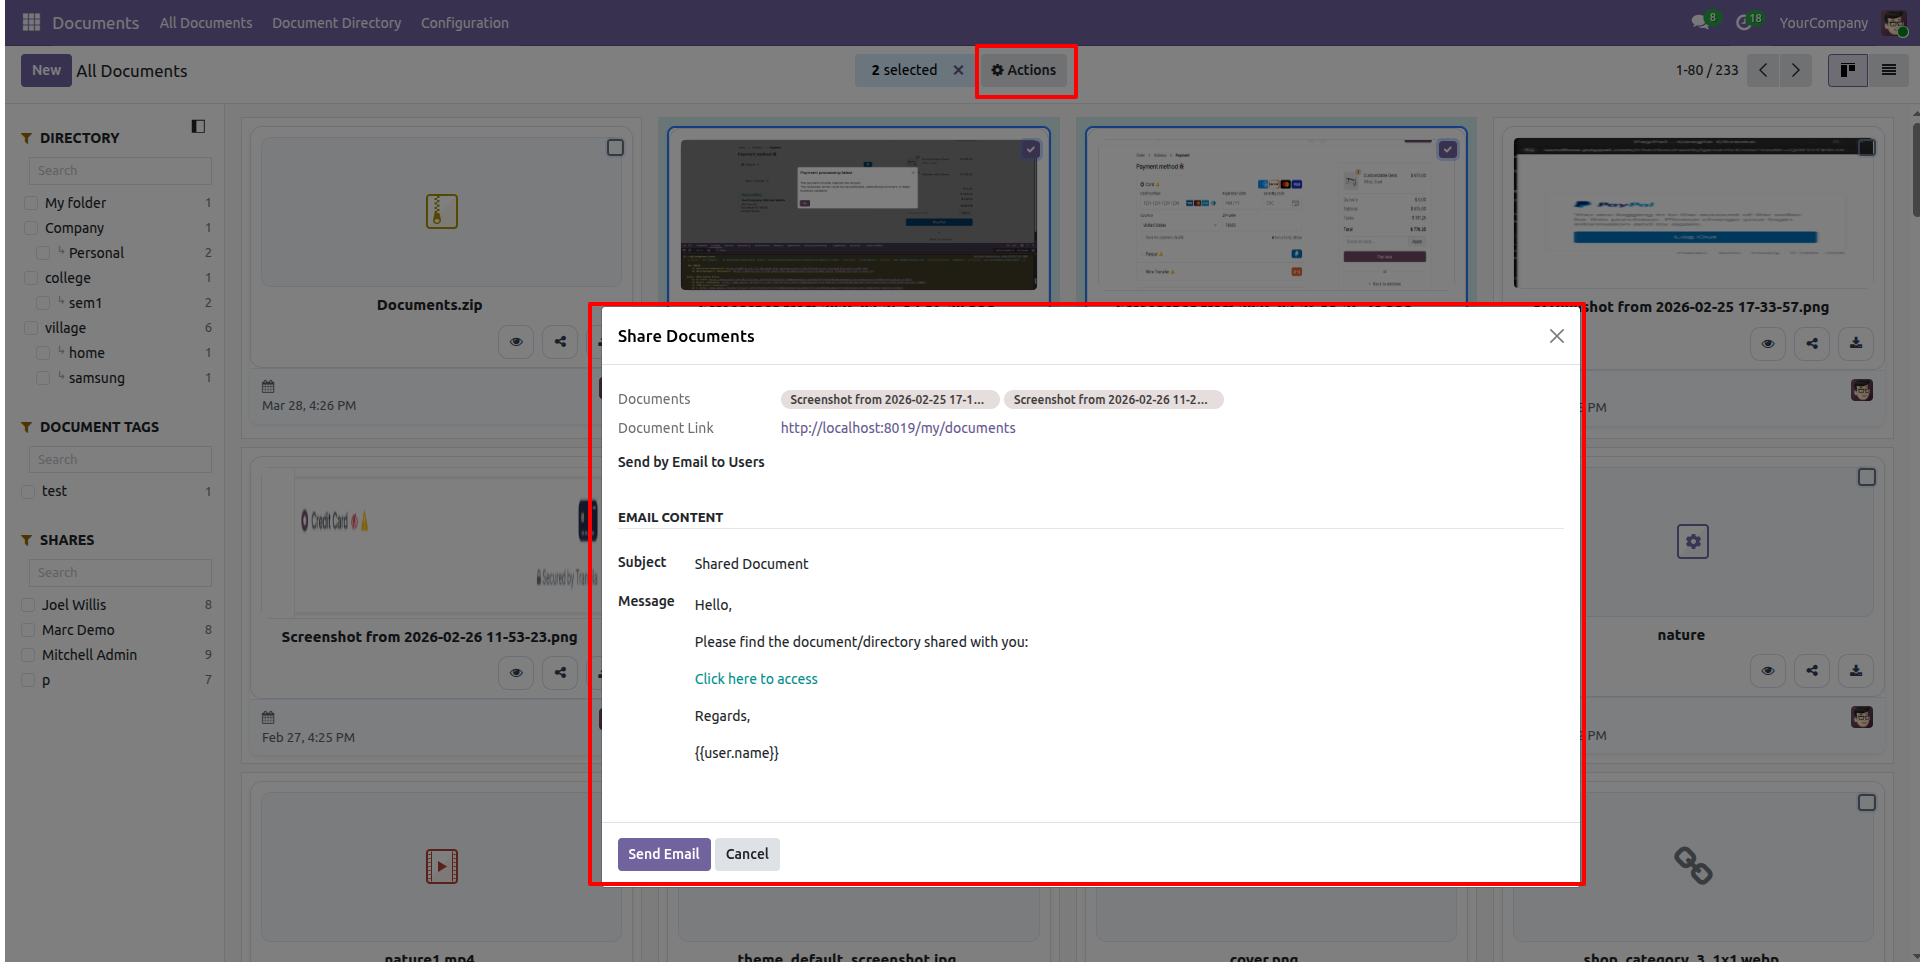
This will open the 'Share Document' popup. Enter the required details and click on the 'Send Email' button.
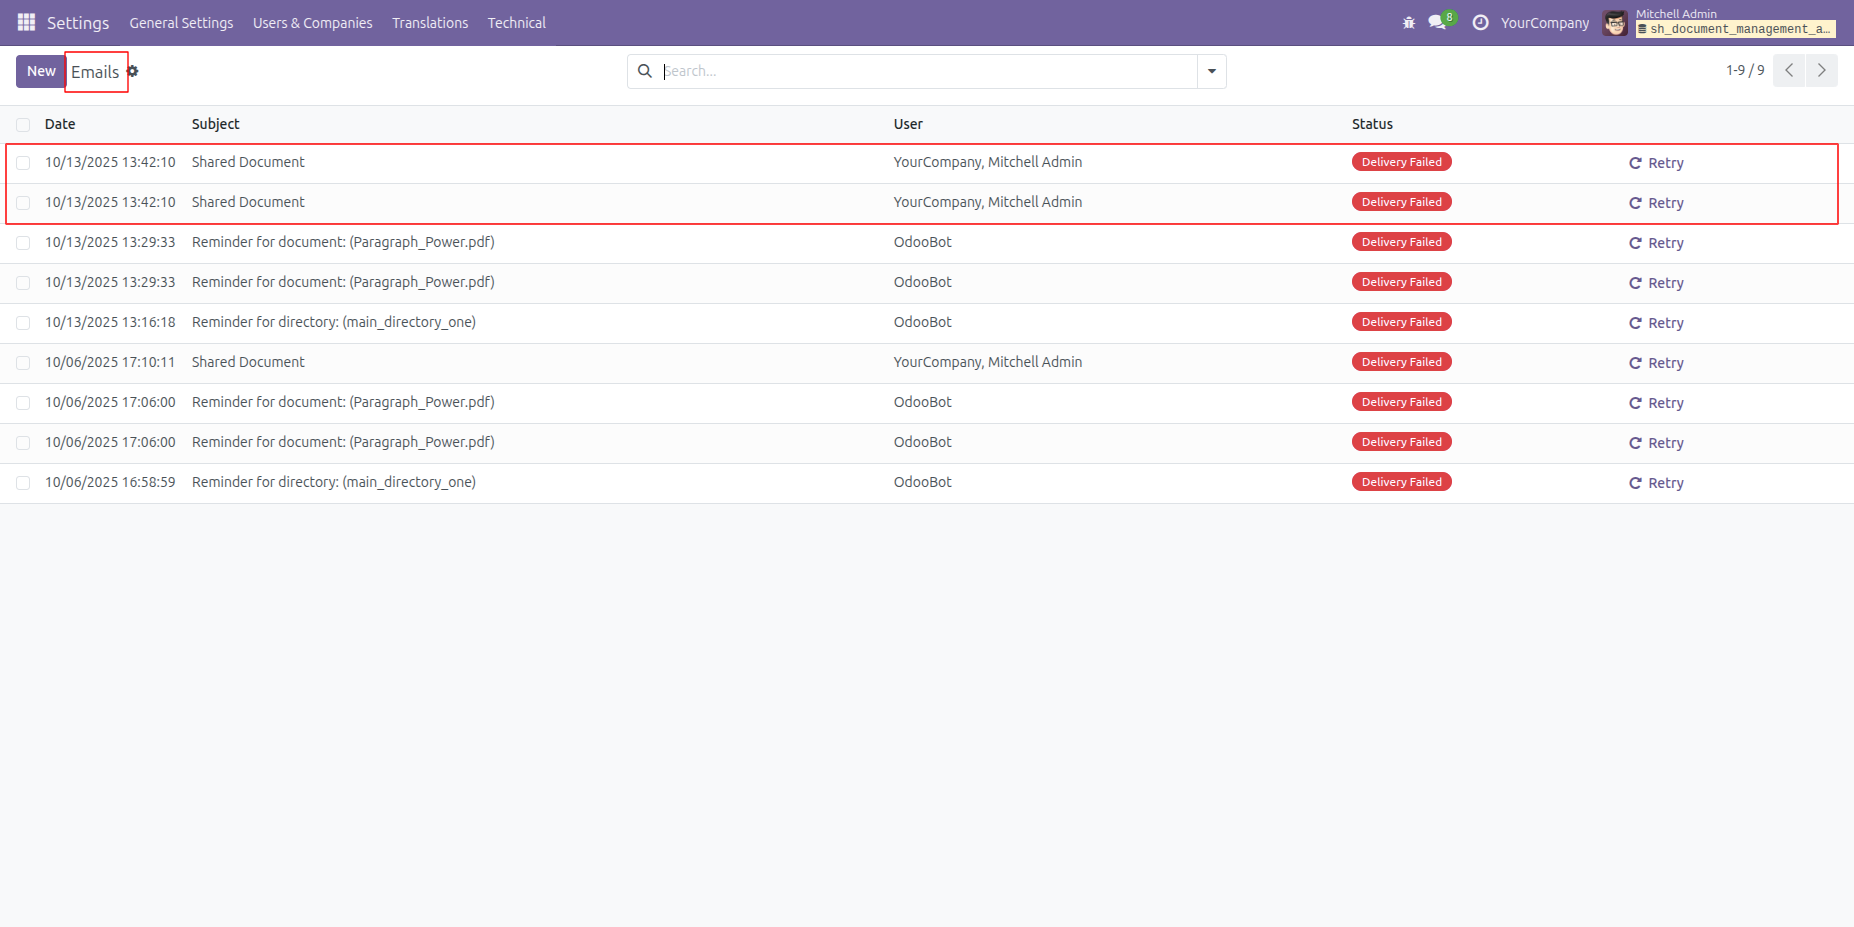
The email is sent to all the users you selected.
Select the document you want to download, then click on the 'Download as ZIP' option from the 'Action' menu.
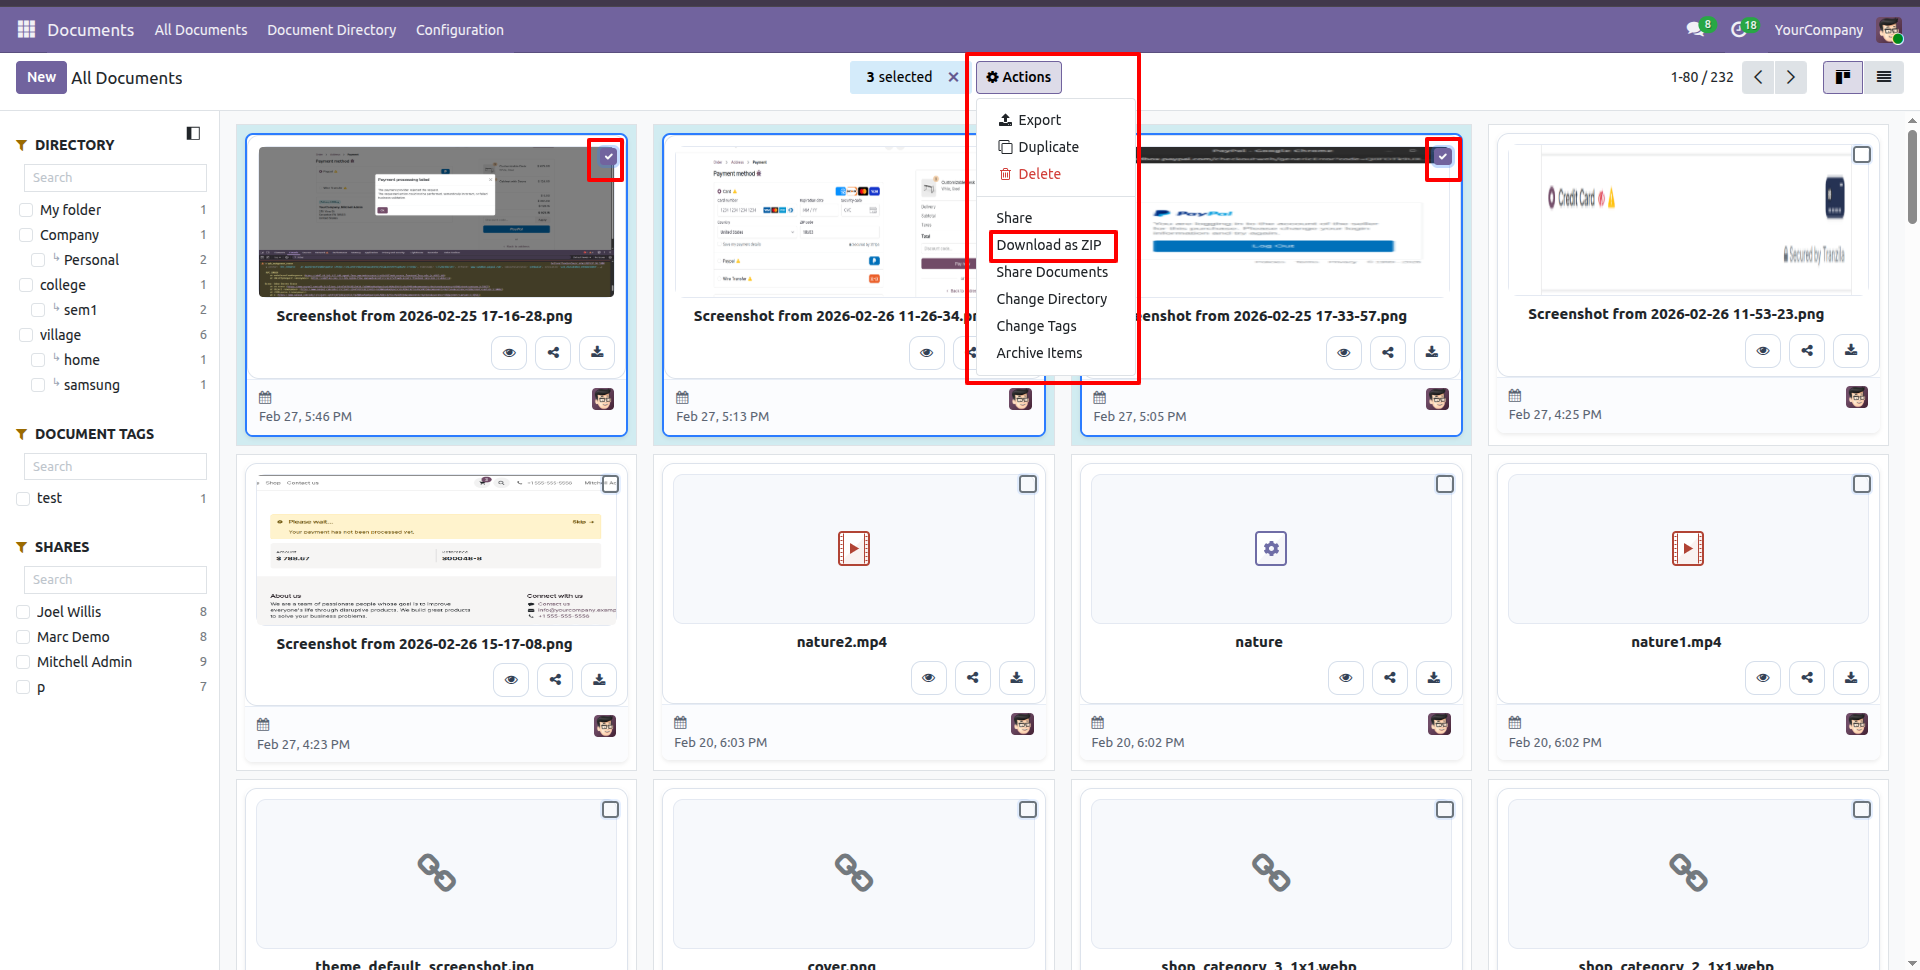
Here, you can see that the document ZIP file has been downloaded and is displayed in the Kanban view.
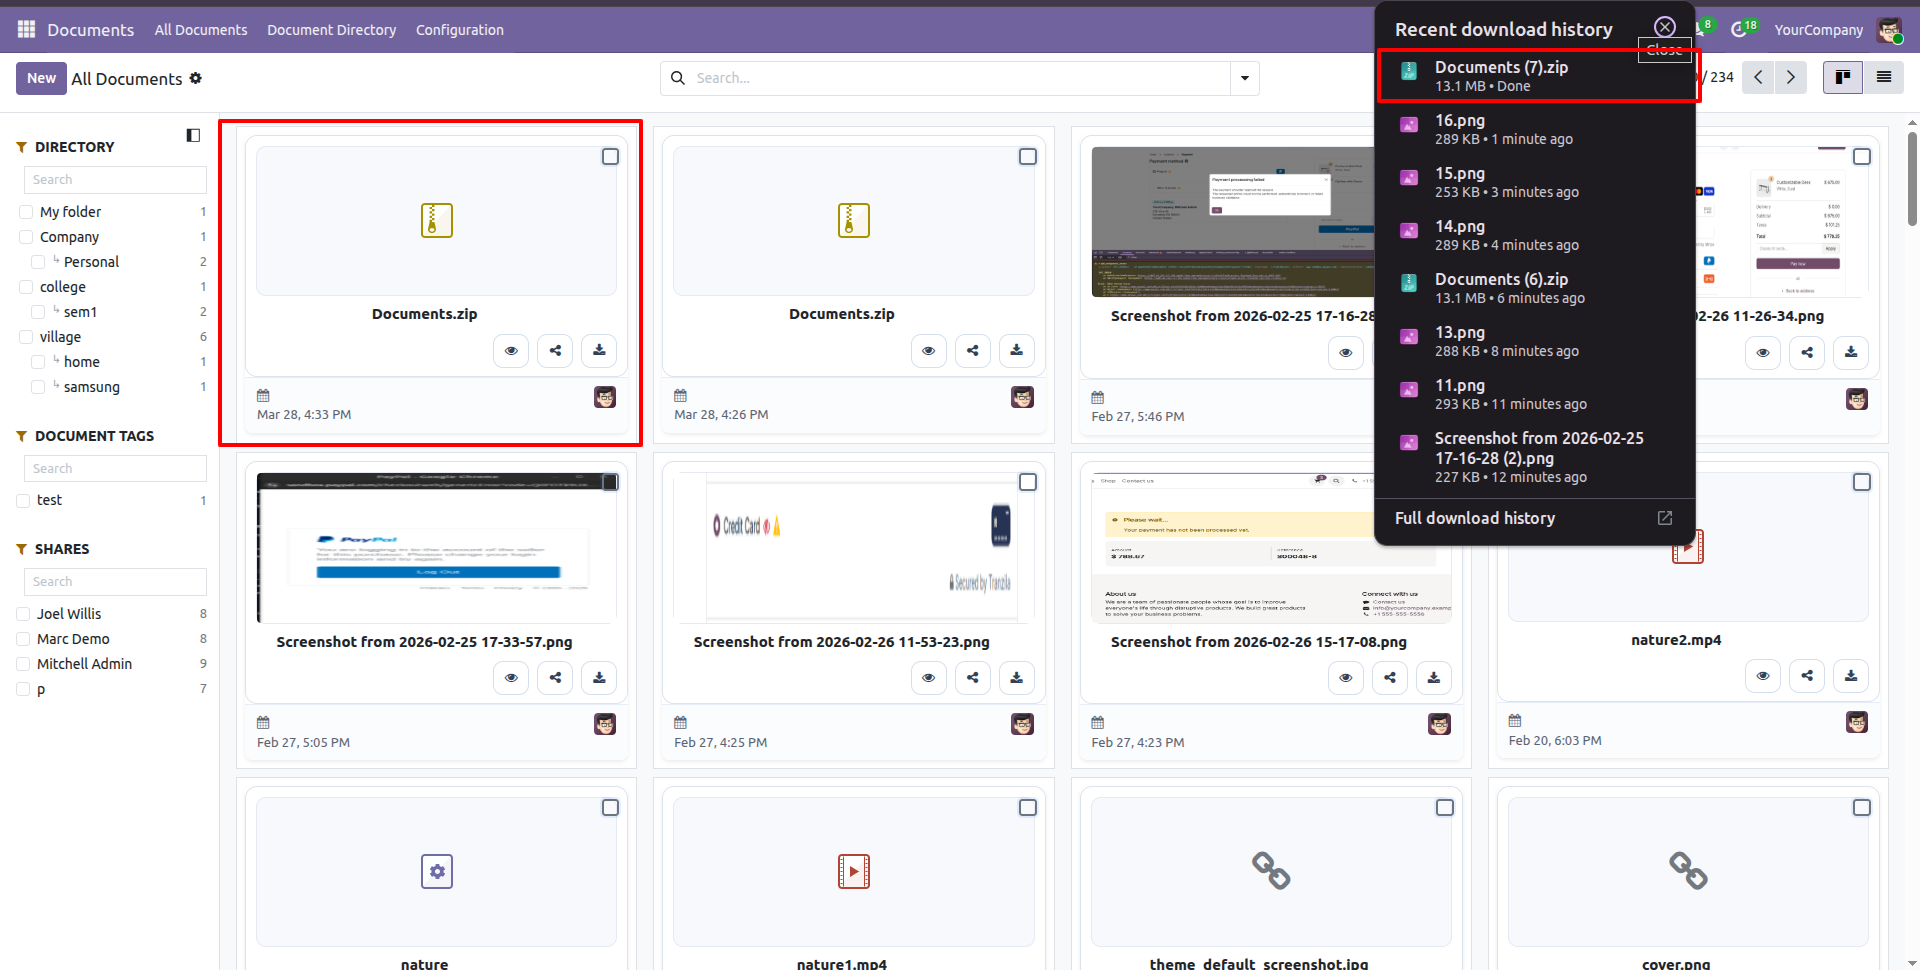
Select the document for which you want to change the directory, then click on the 'Change Directory' option from the 'Action' menu.
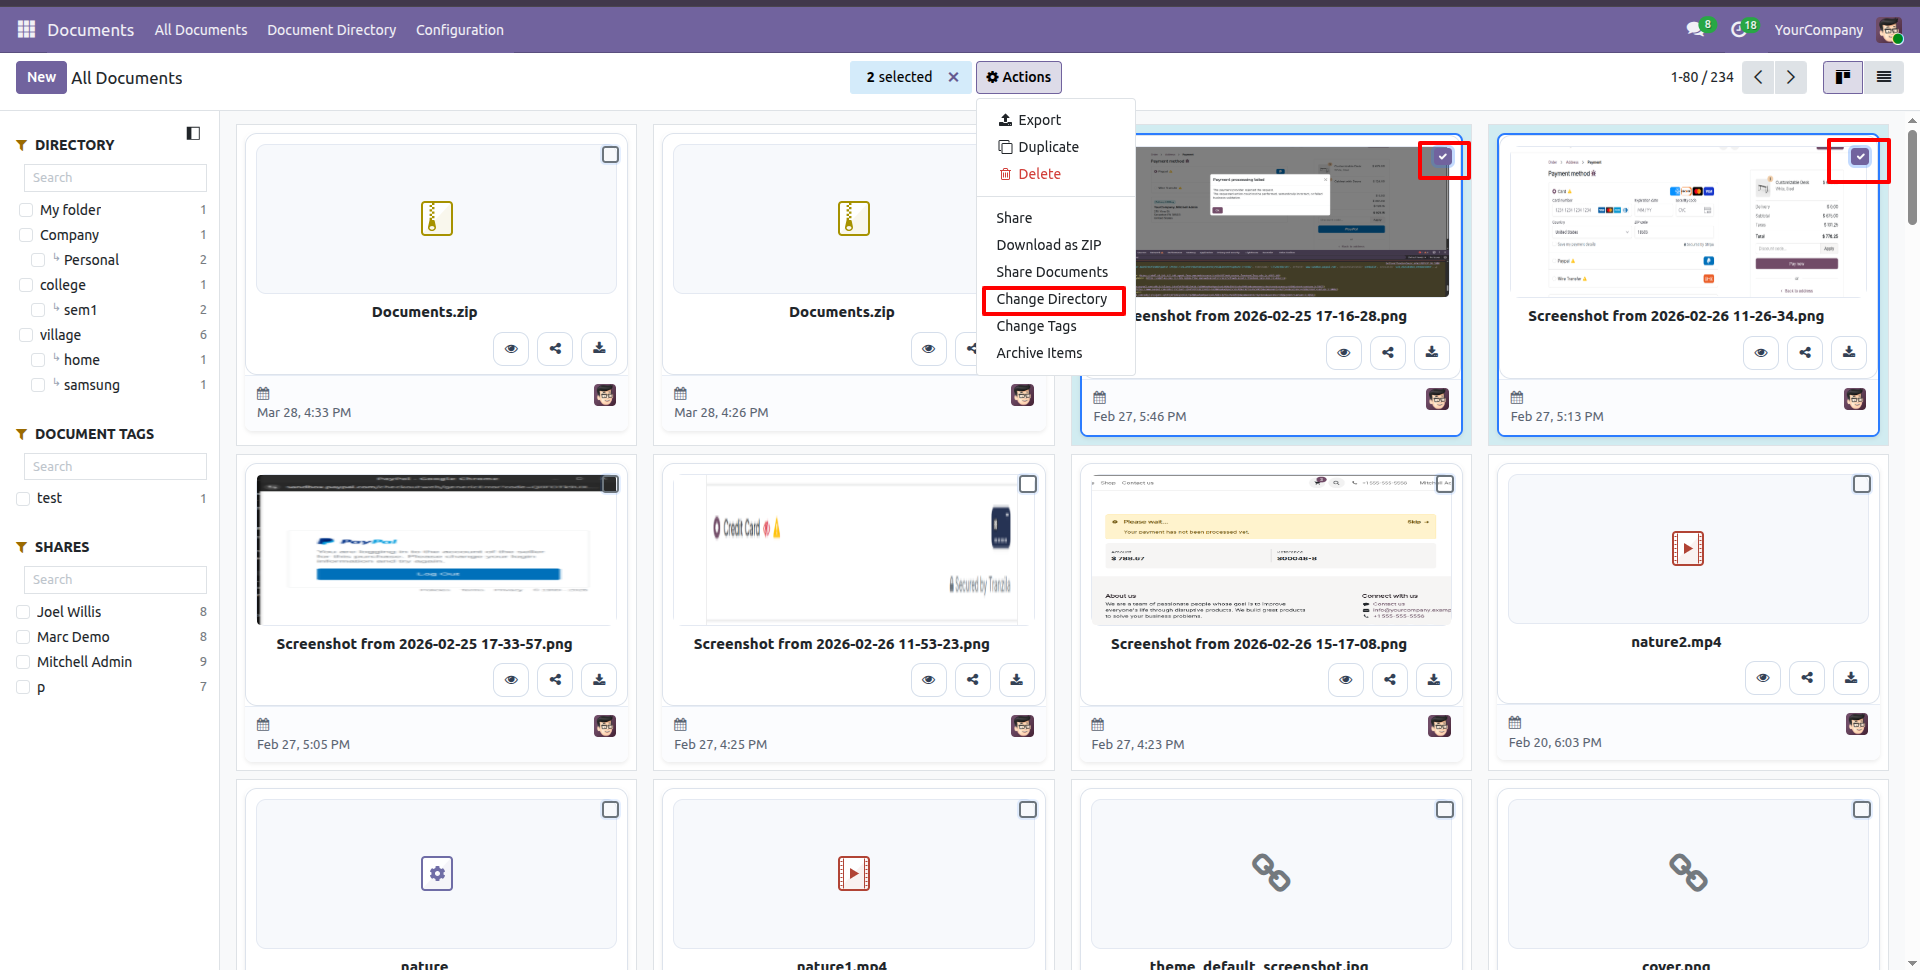
After that, the Change Directory wizard will appear. Enter all the required details and click on the 'Apply' button.
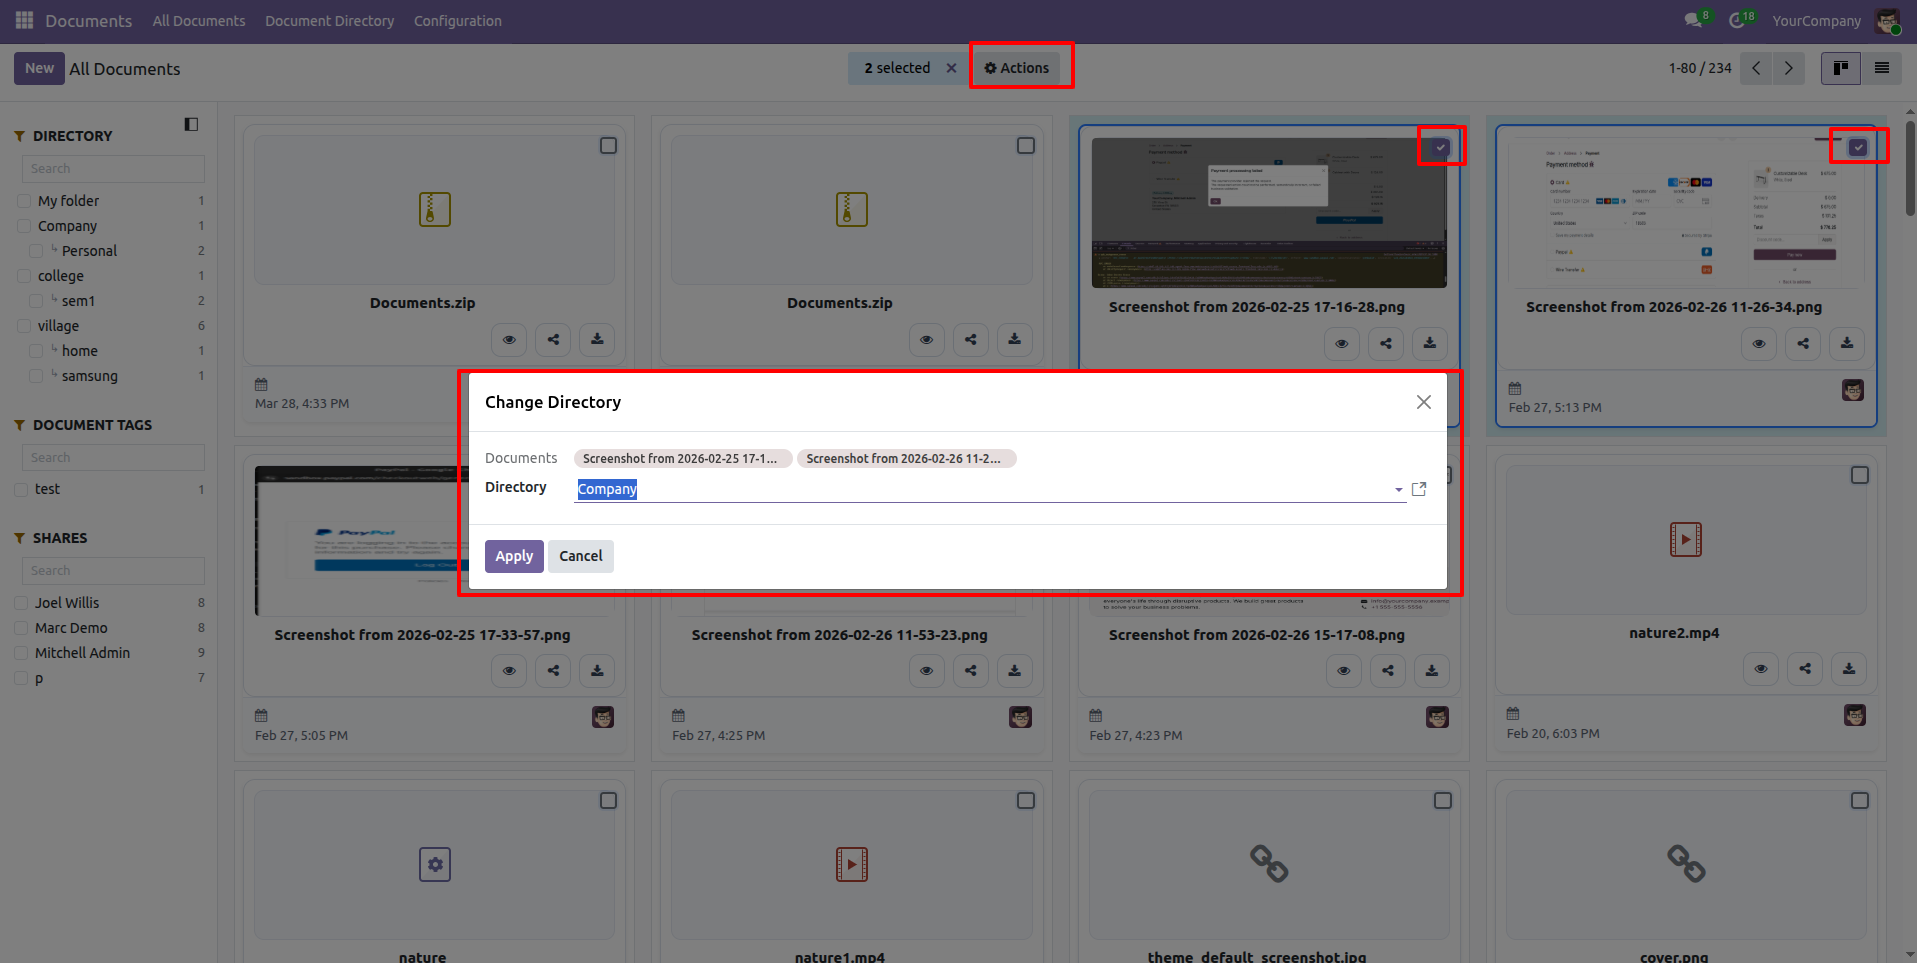
Select the document for which you want to change the tags, then click on the 'Change Tags' option from the 'Action' menu.
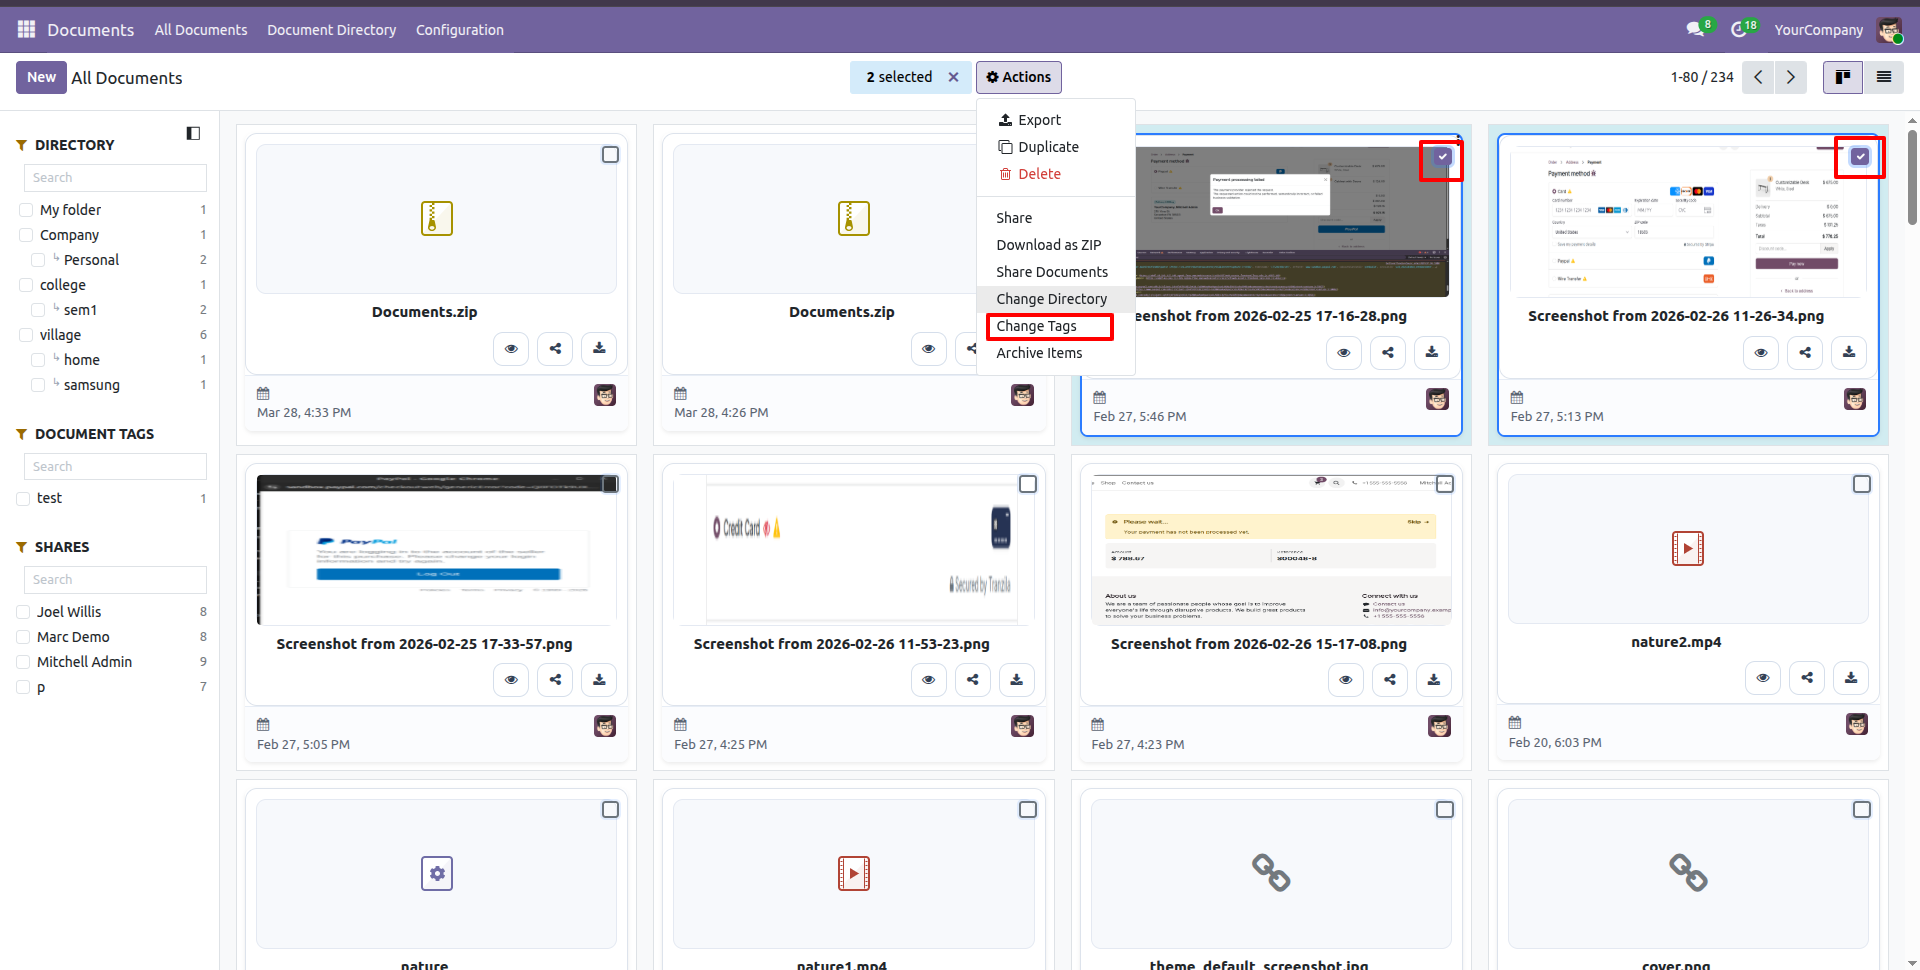
After that, the Change Tags wizard will appear. Enter all the required details and click on the 'Apply' button.
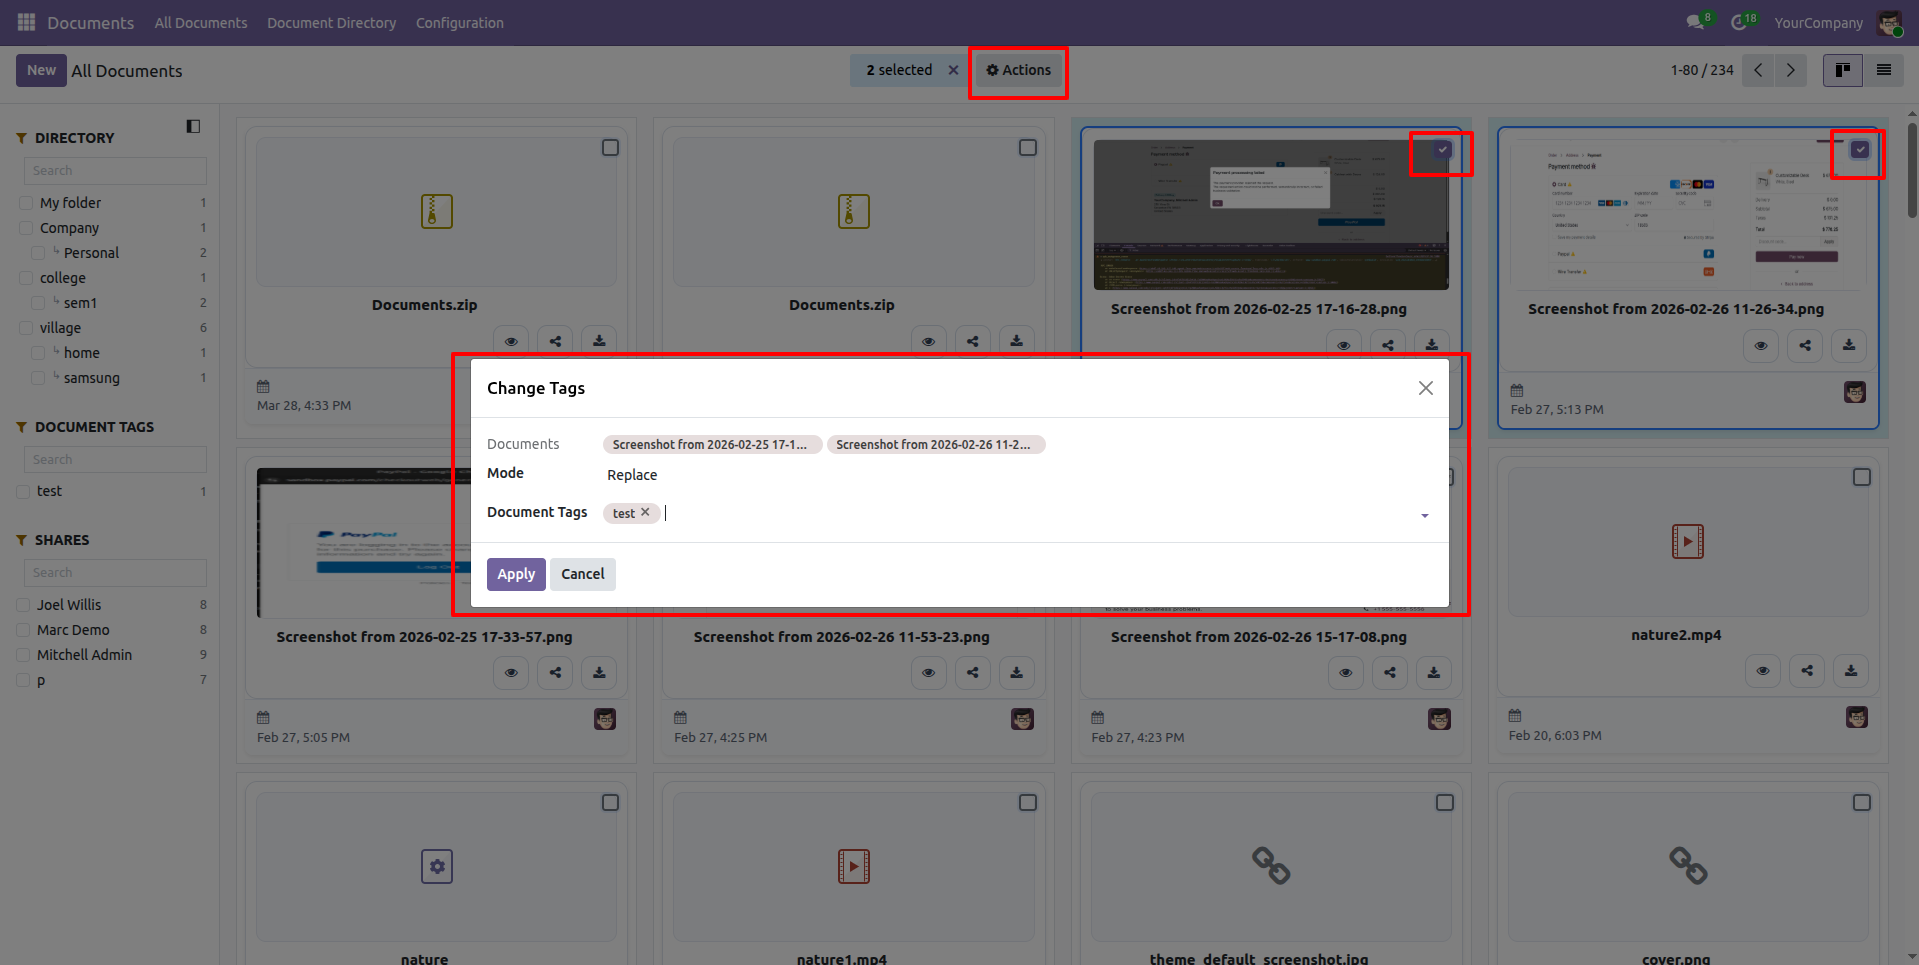
You can download or share the document from the Kanban view by clicking on the three dots.
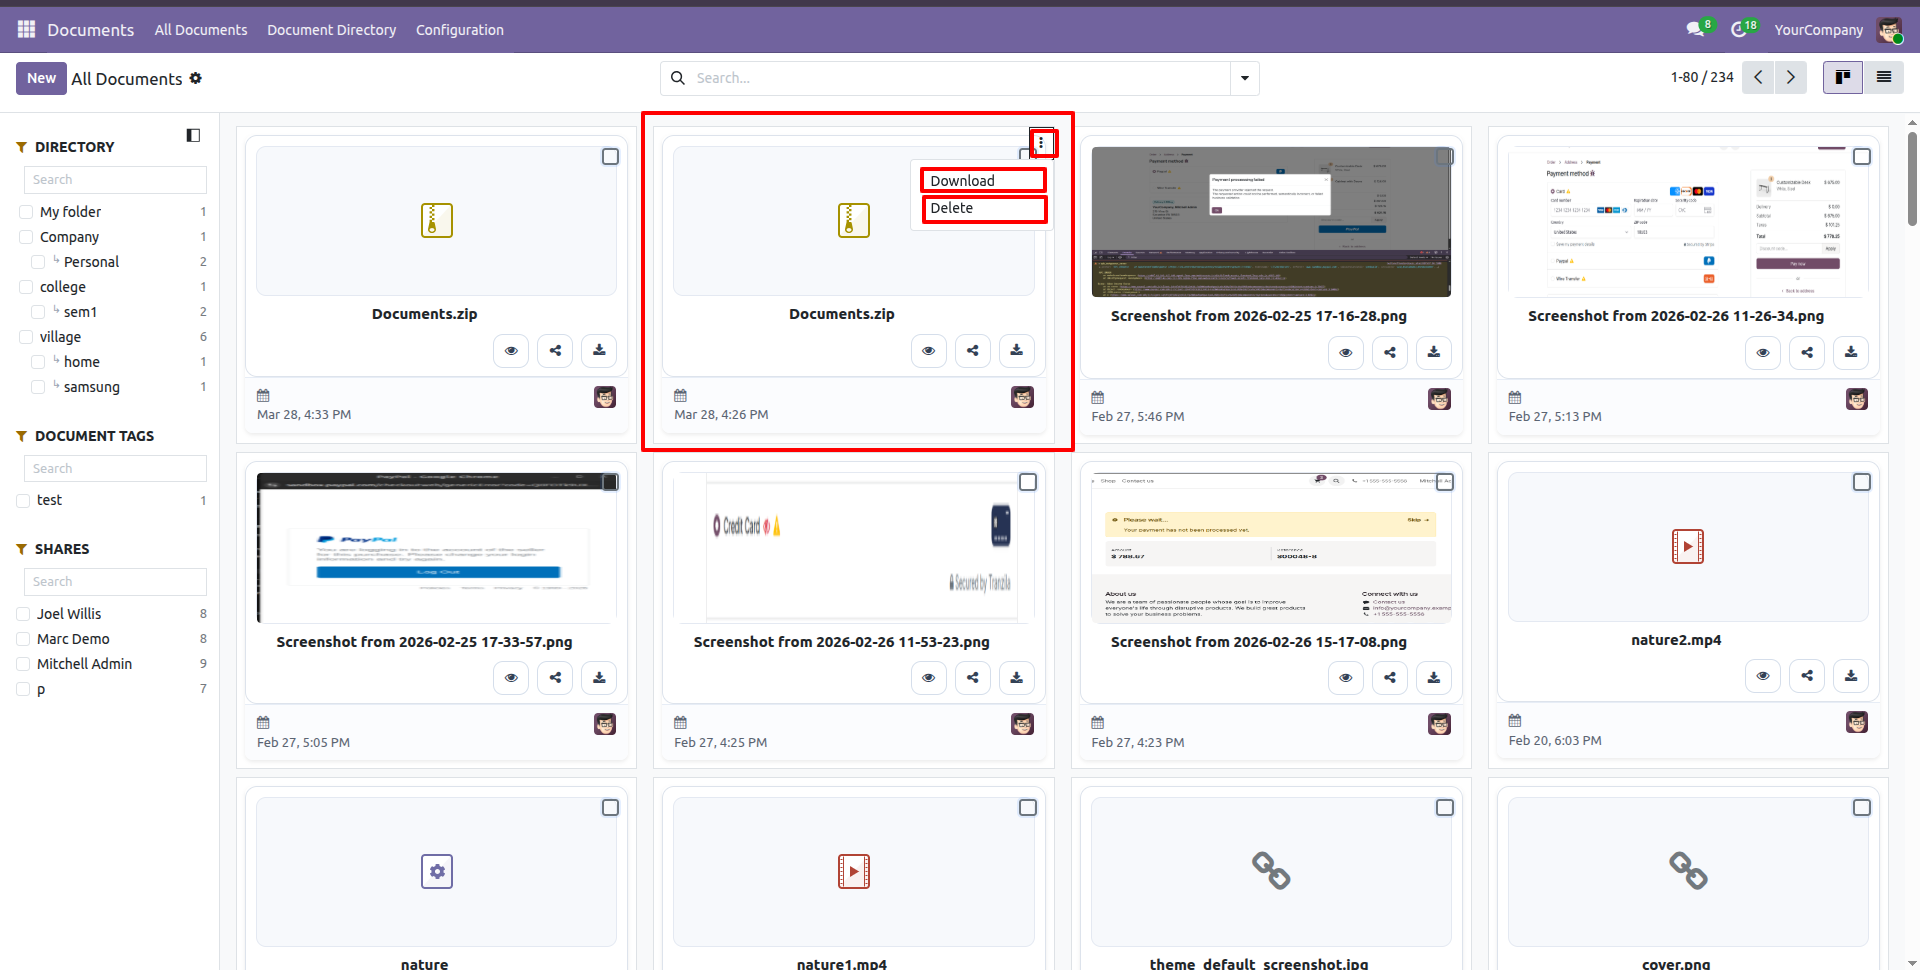
You can group by directory using parent directory.
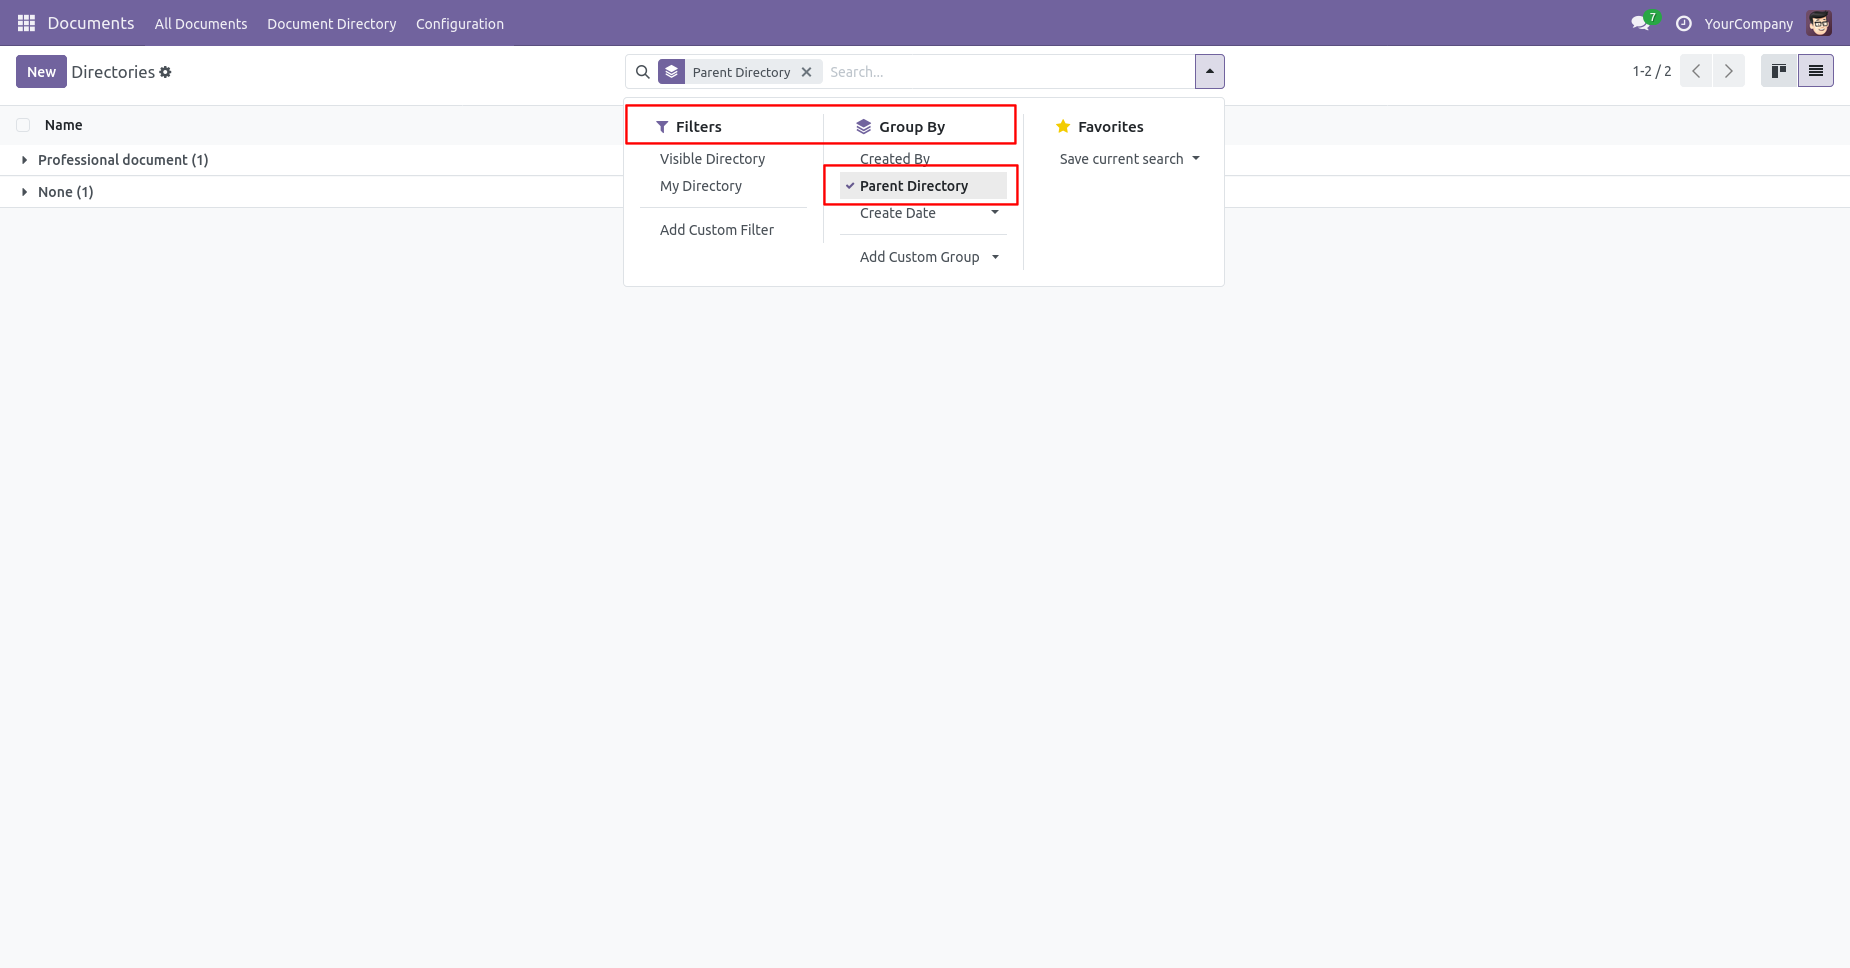
Directory & Sub-Directory
In 'Documents' go to Document Directory ==> Directory.
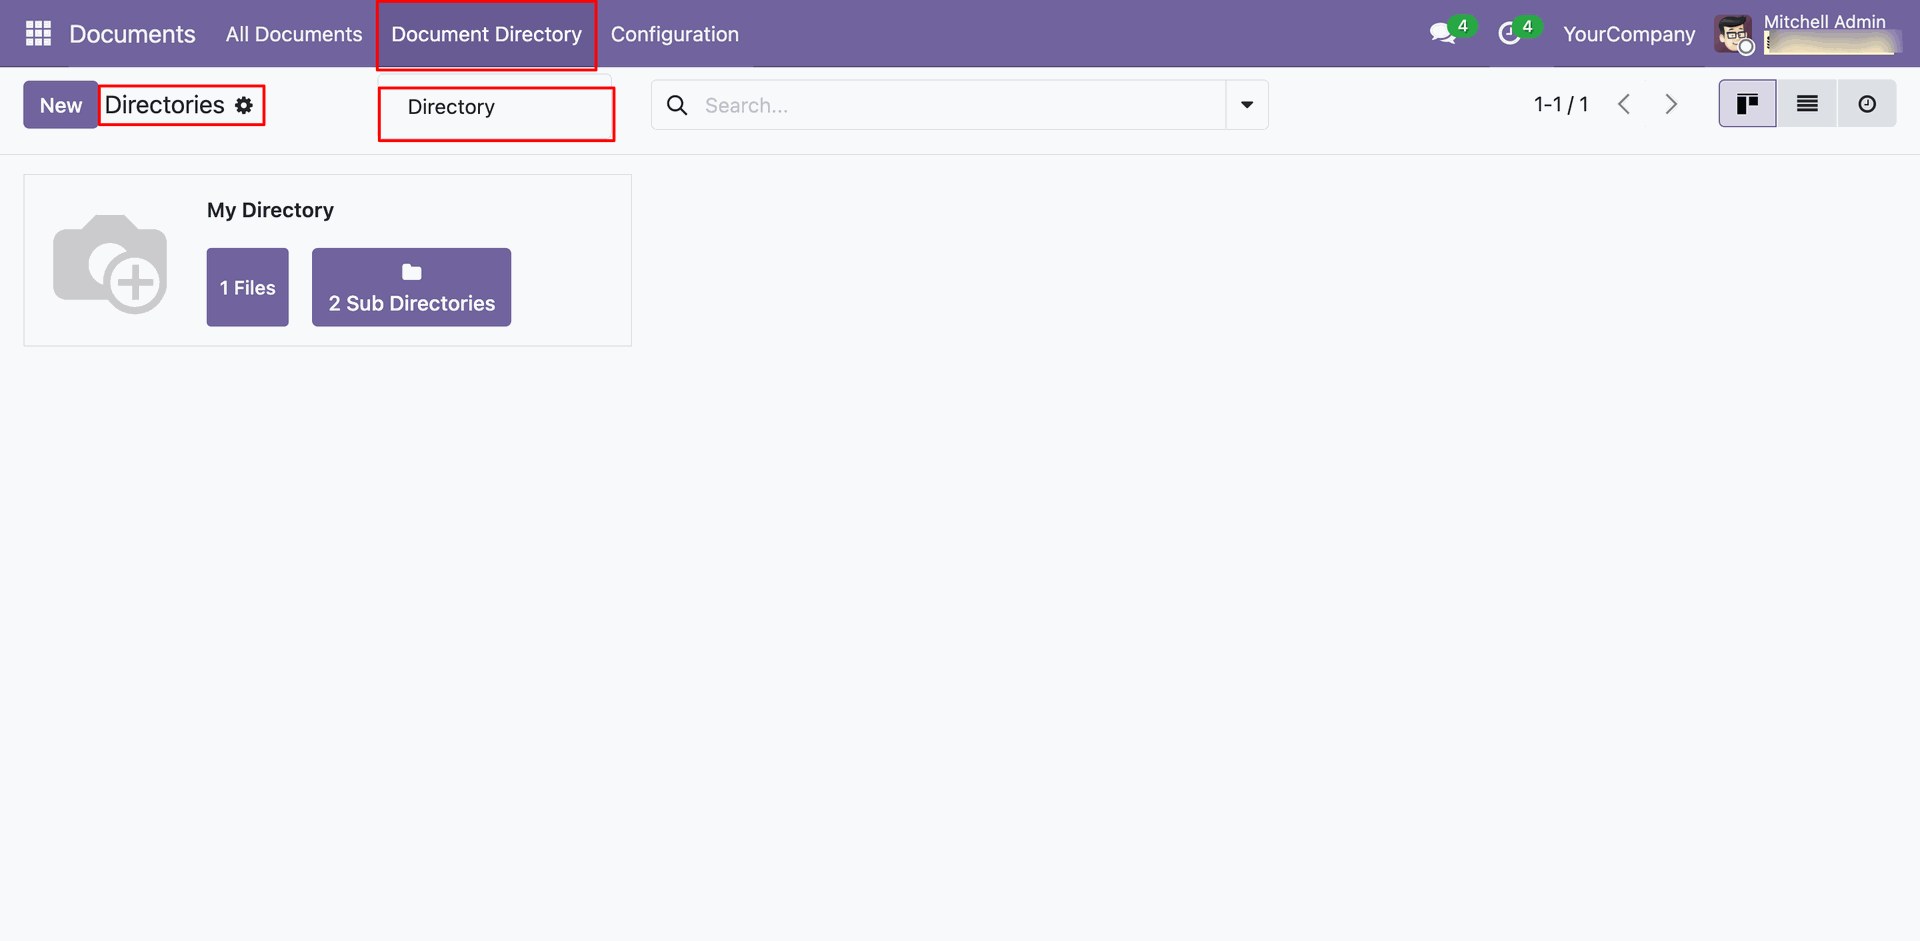
Kanban view of the directories.
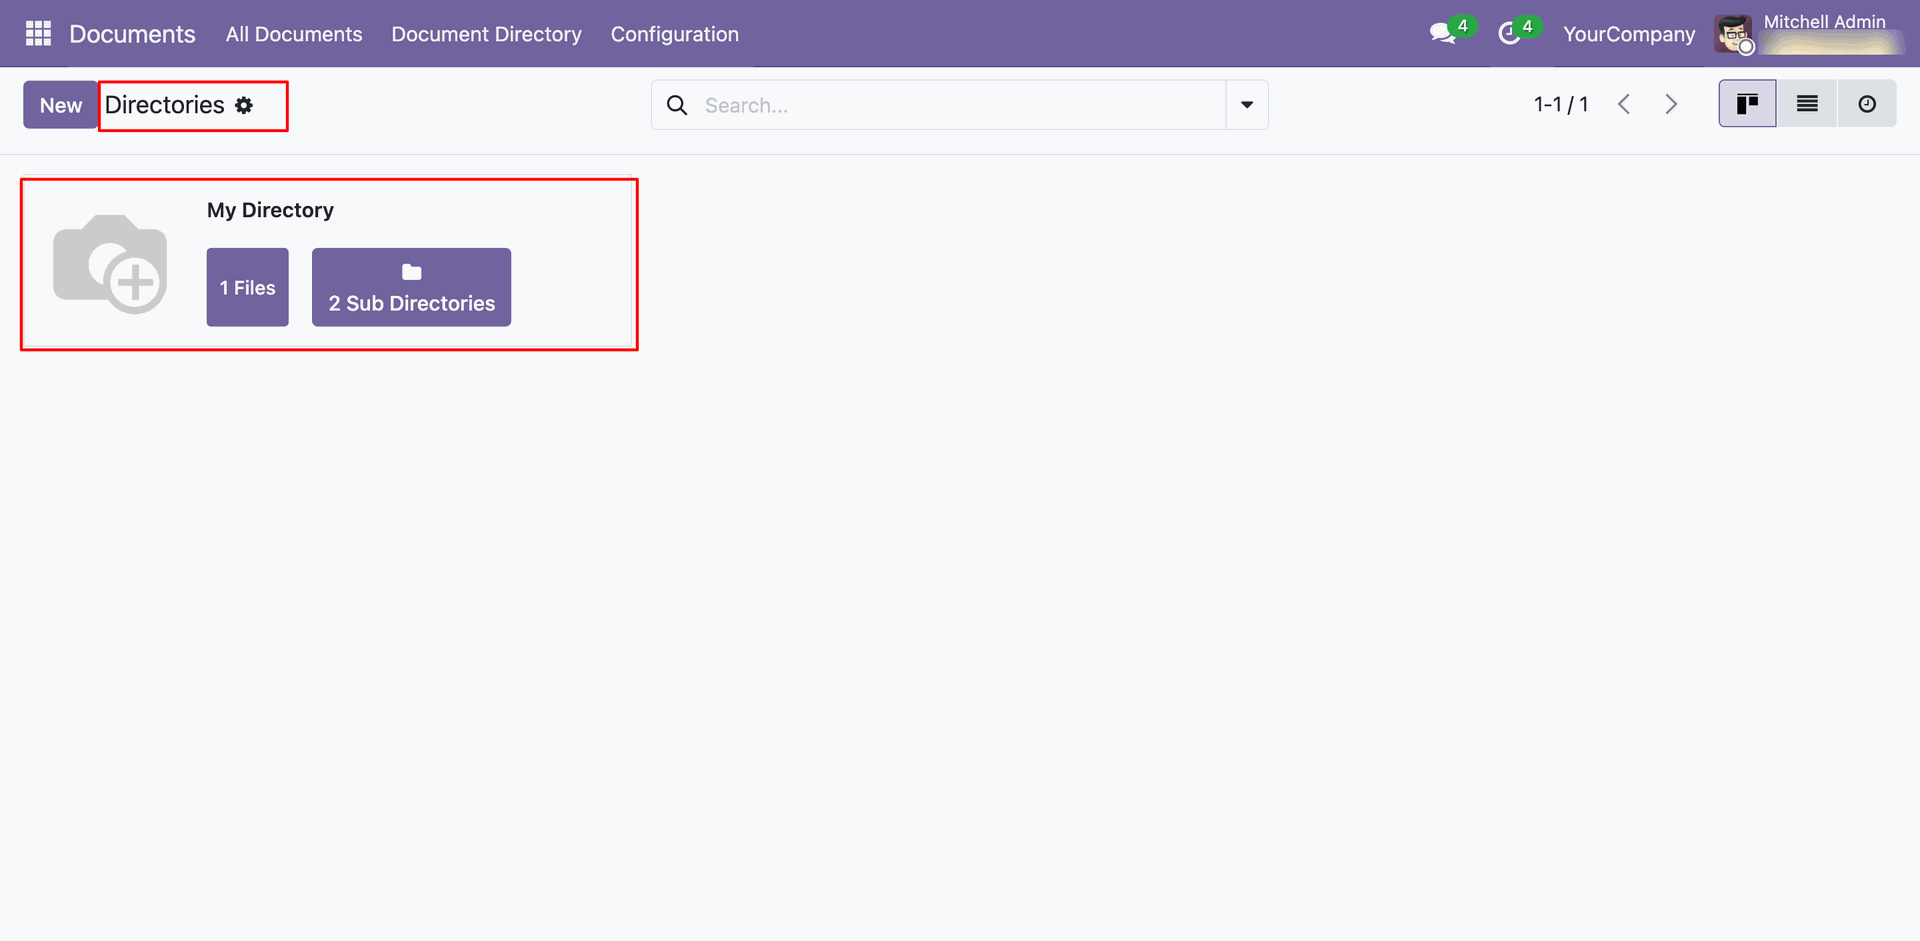
In 'Document Directories' go to the directory, you can create a directory here. Using files & sub-directory users can see details of particular documents. Search bar used for search directory.
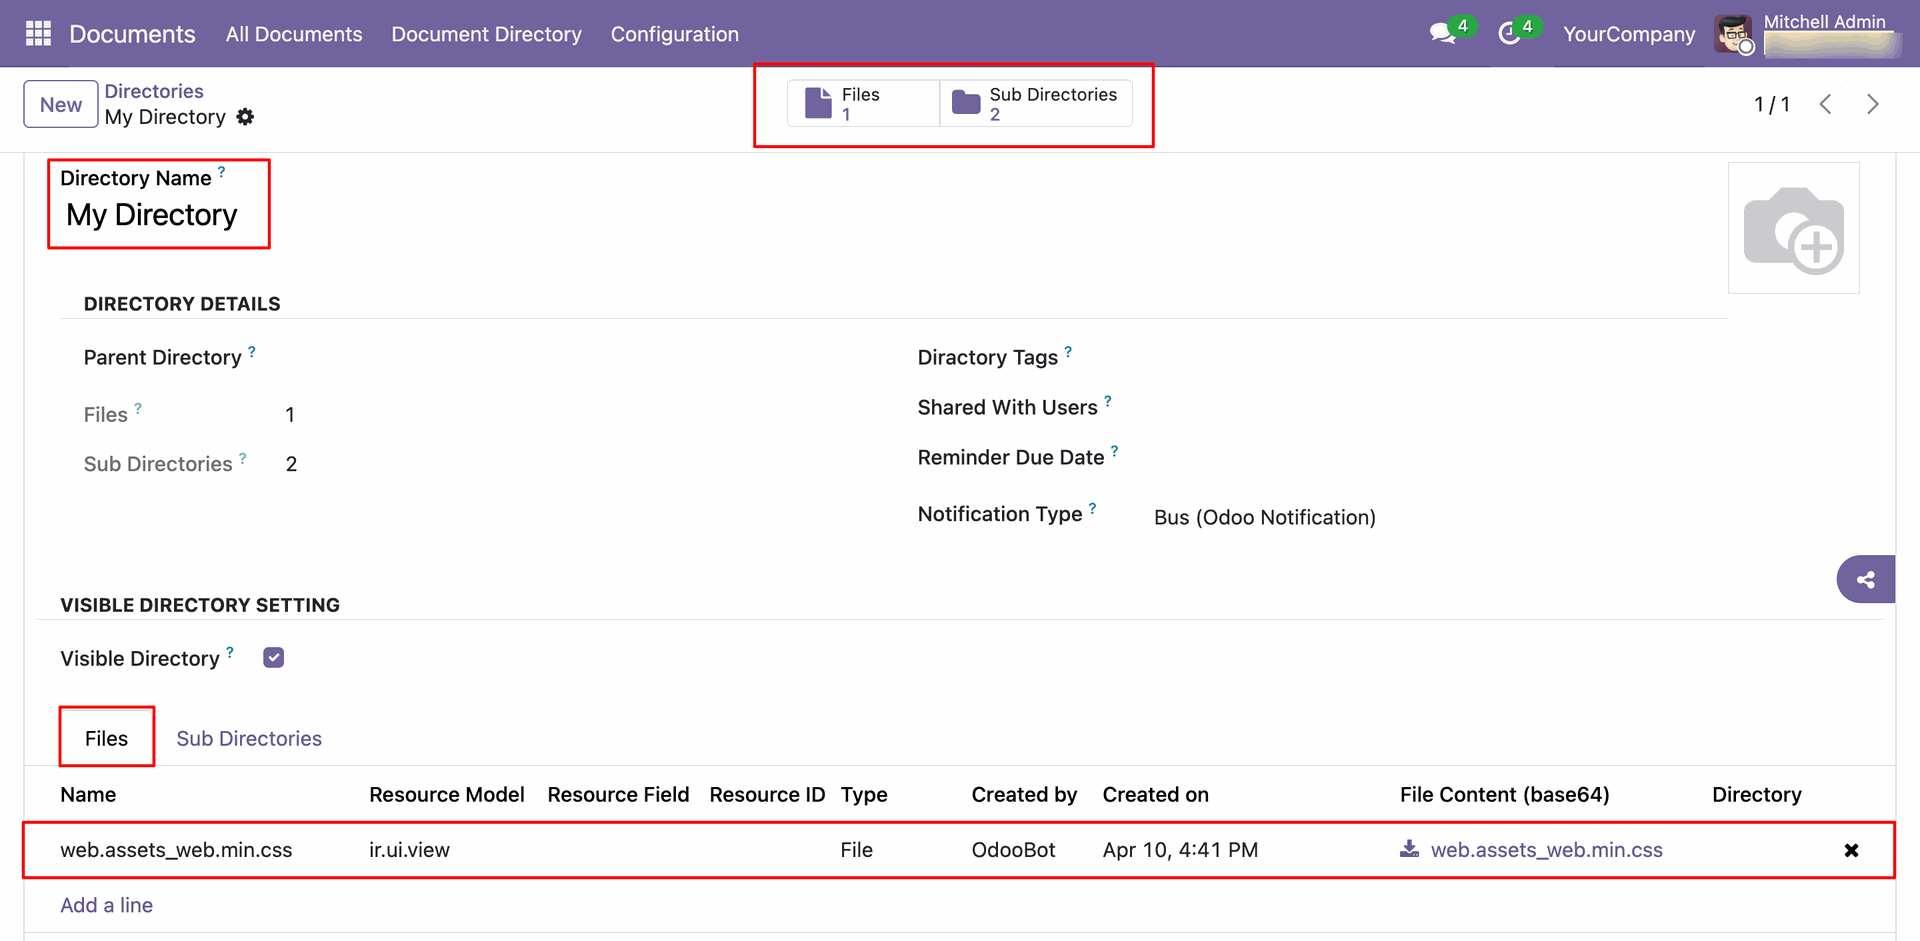
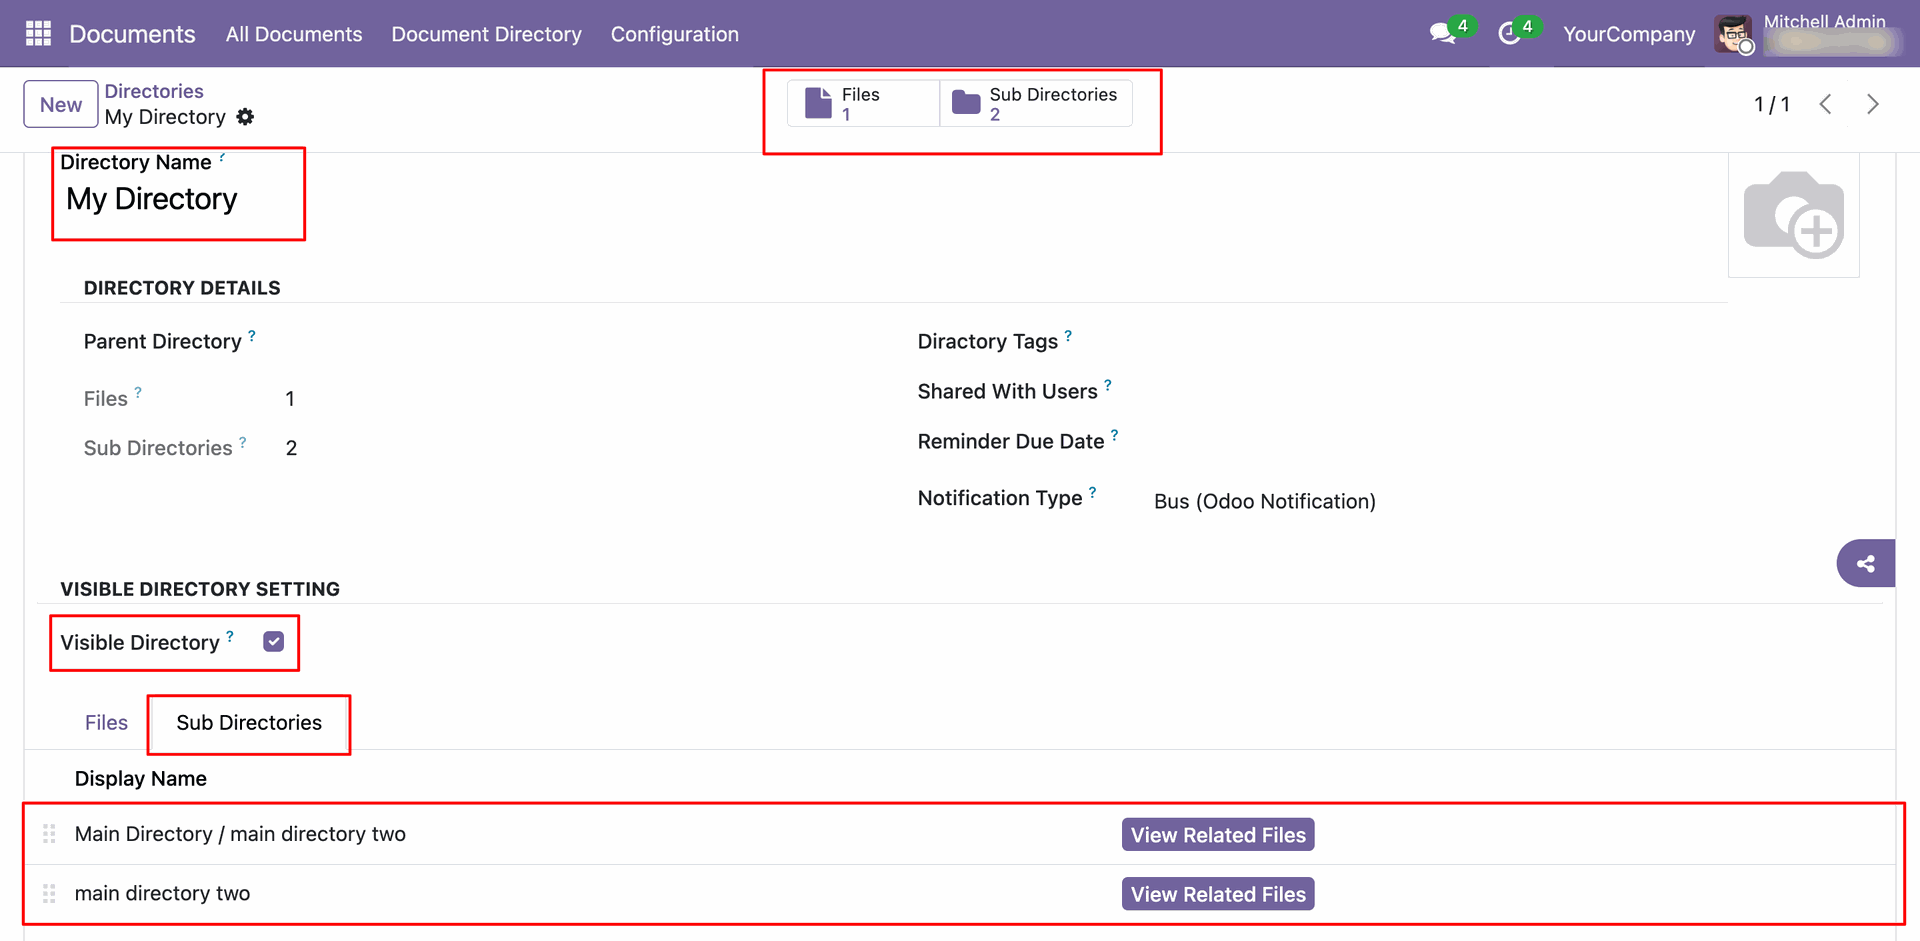
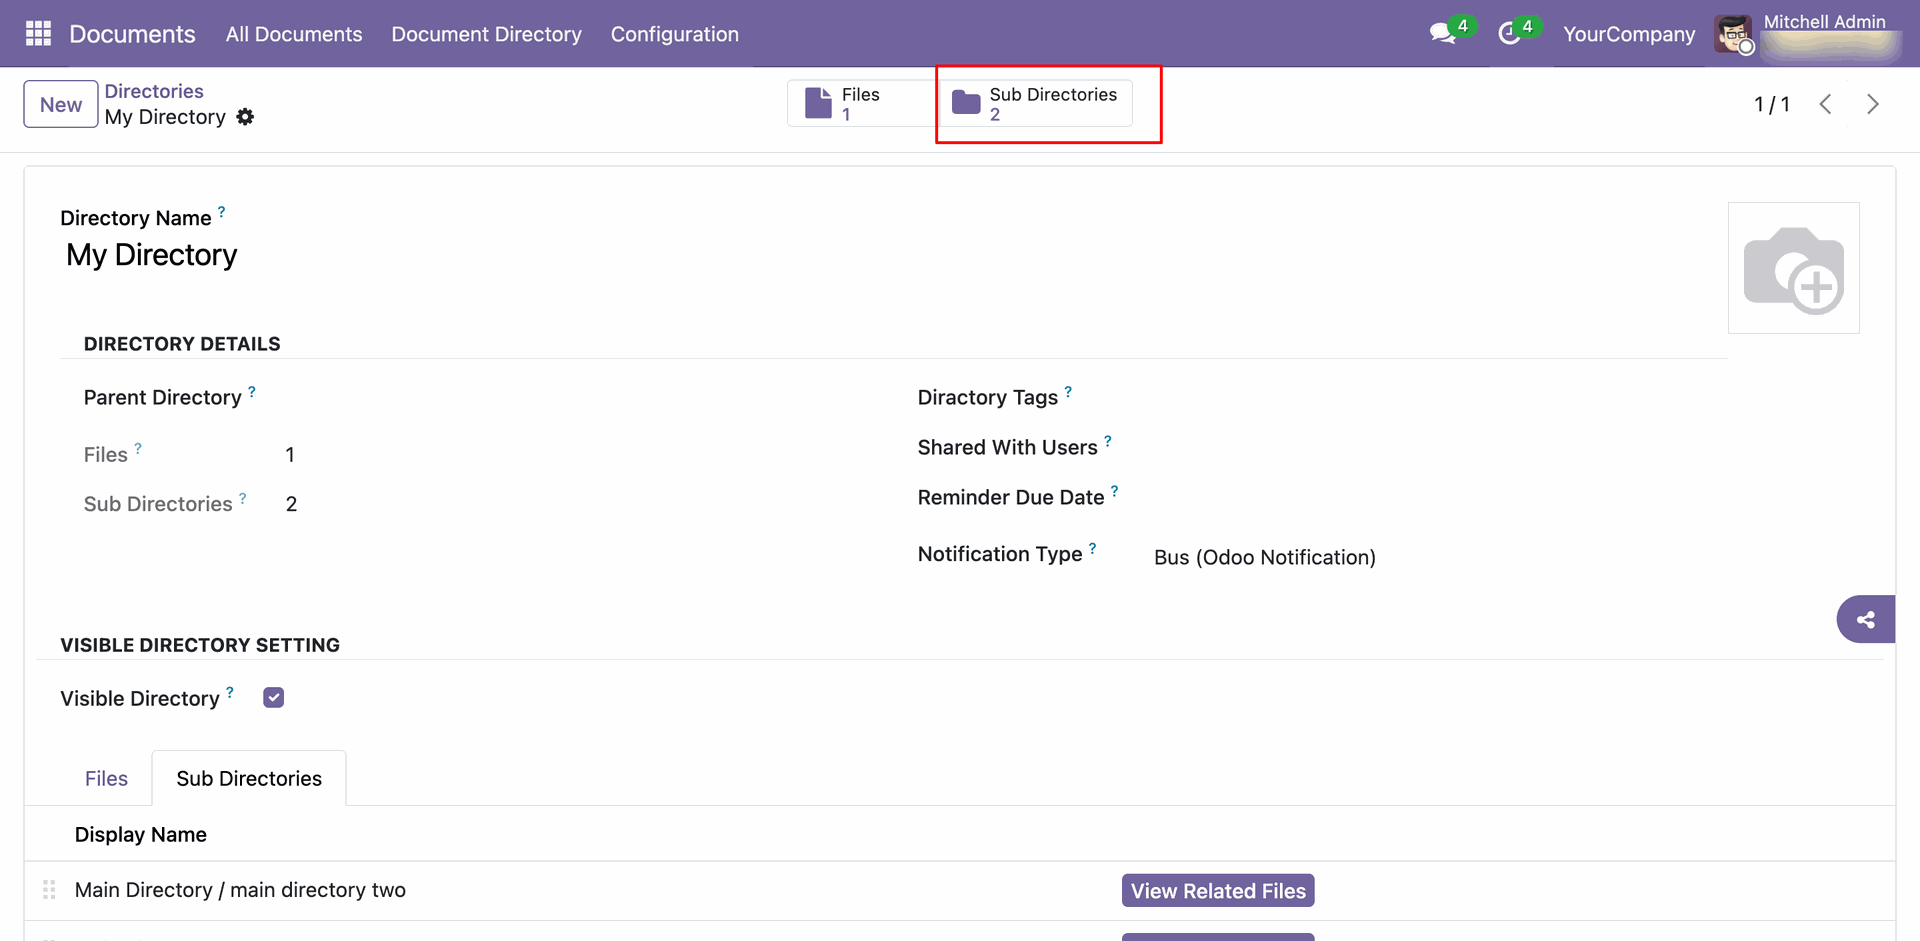
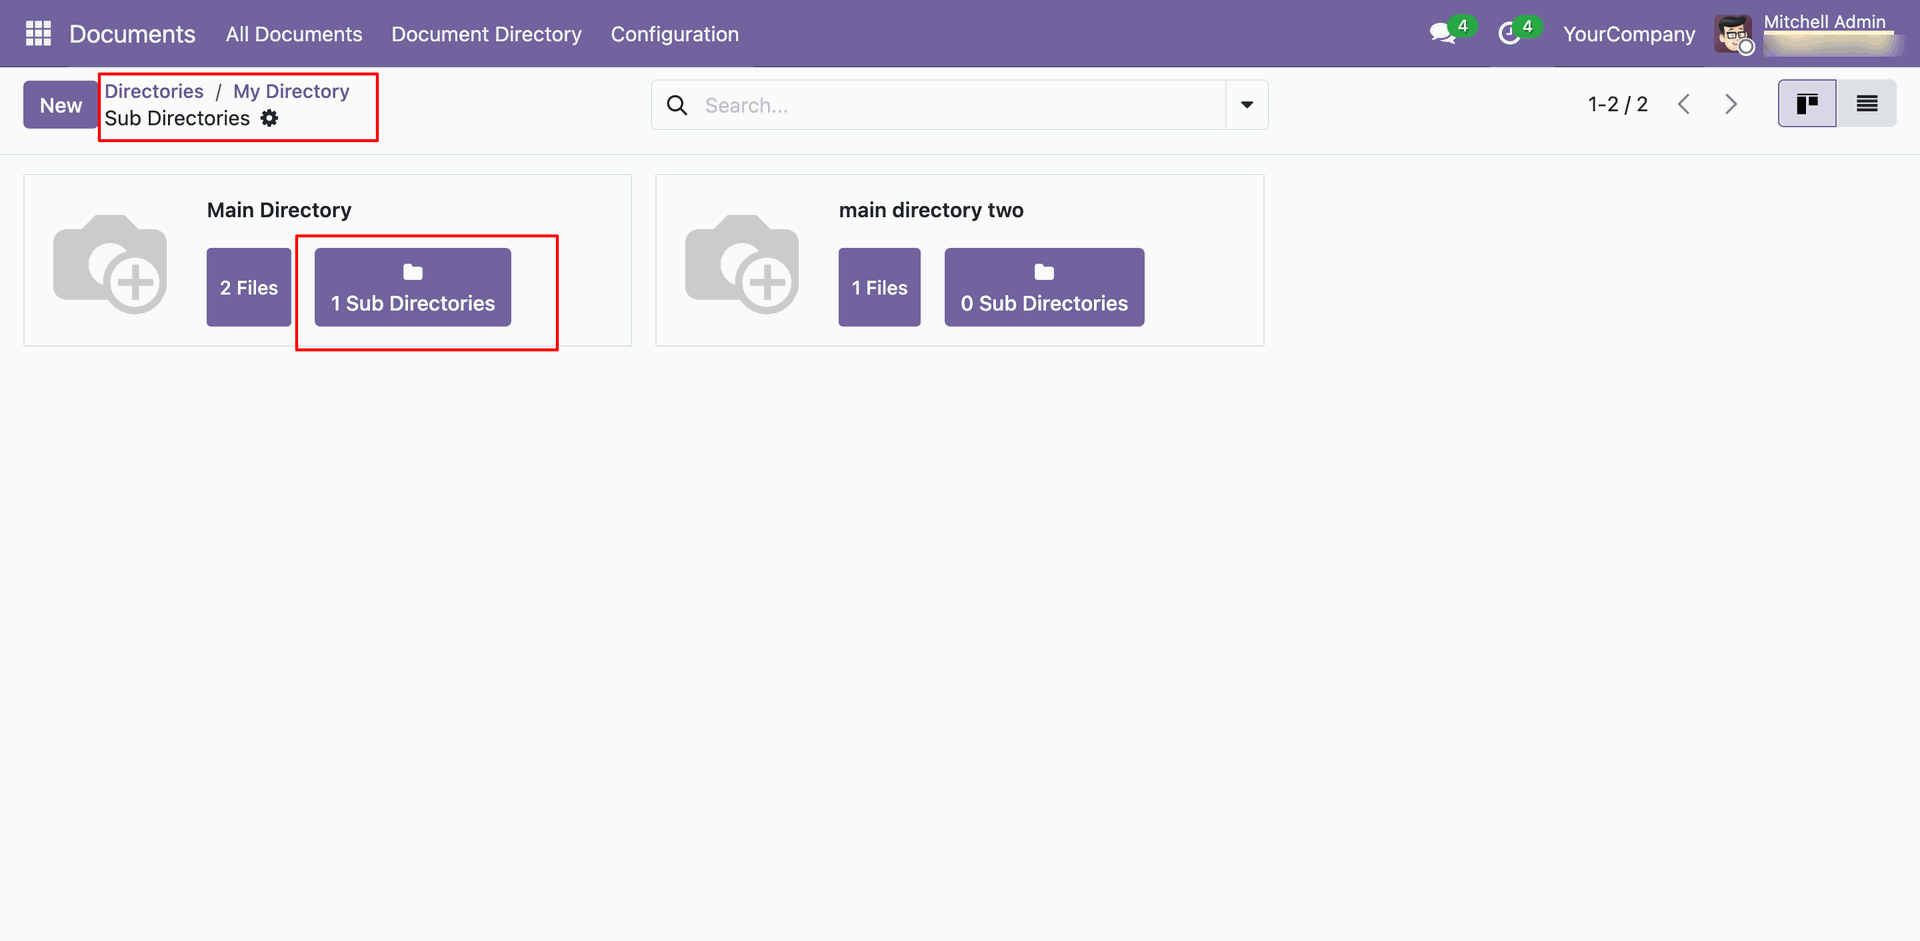
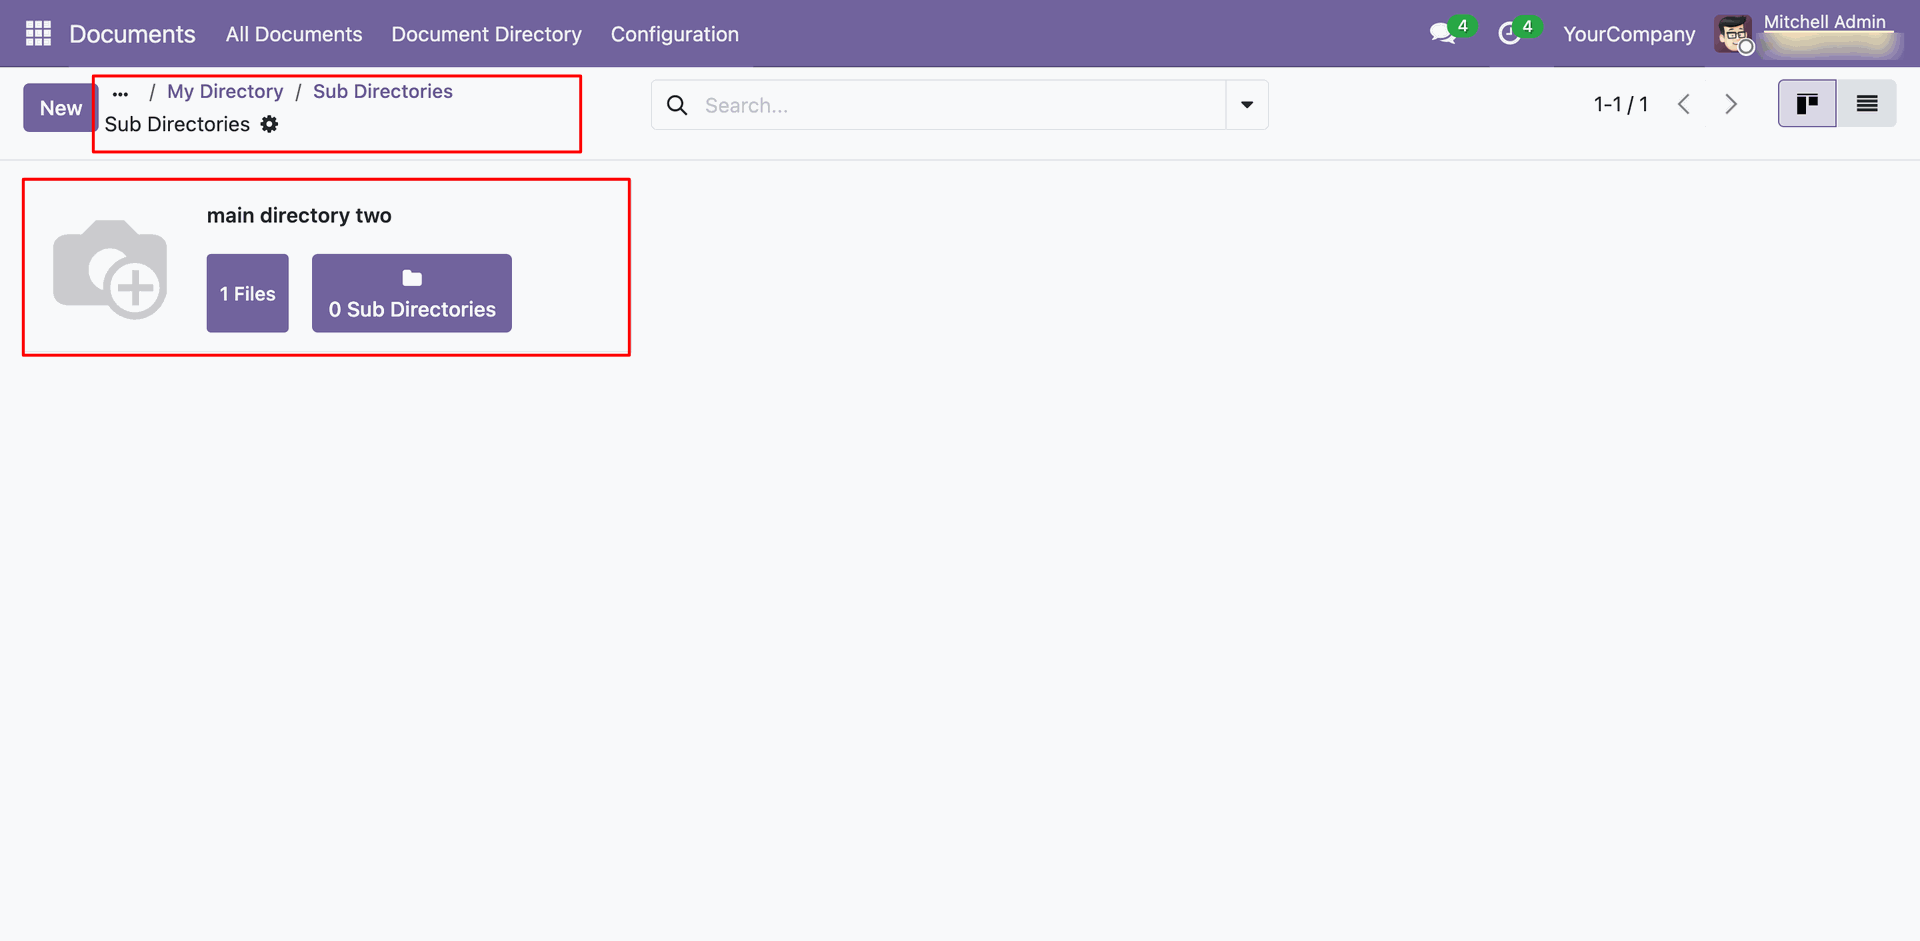
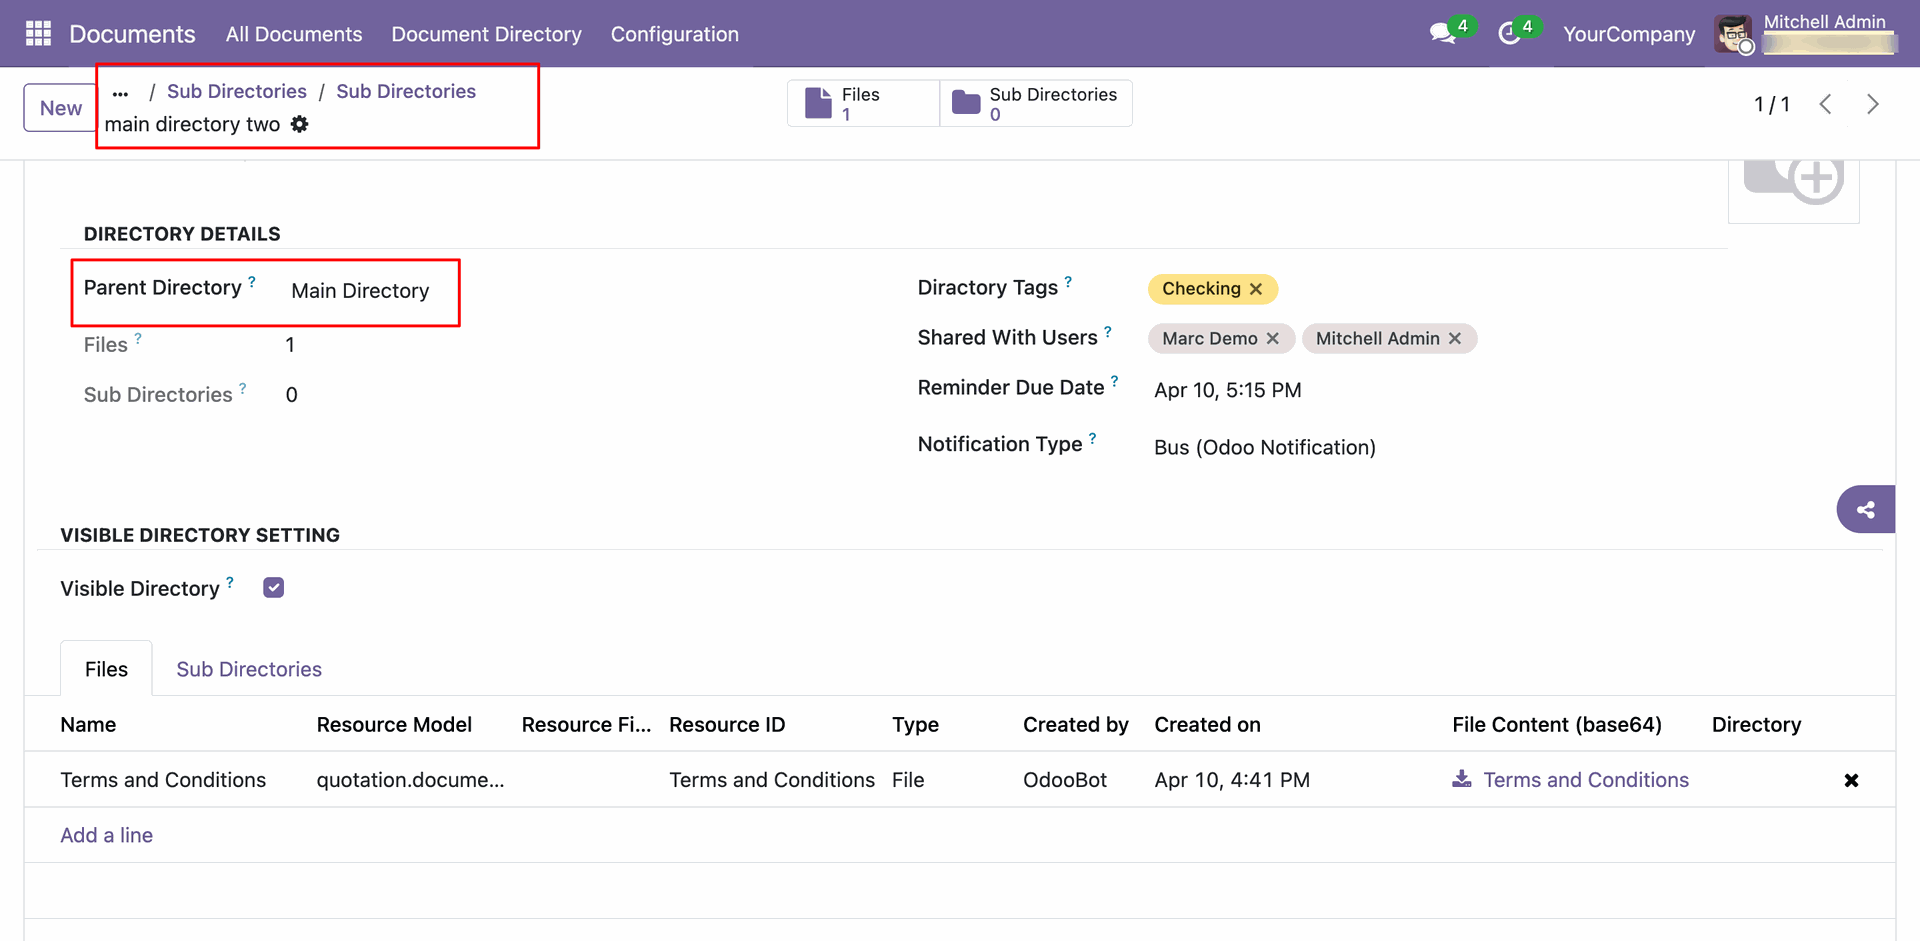
Tree view of the directories.
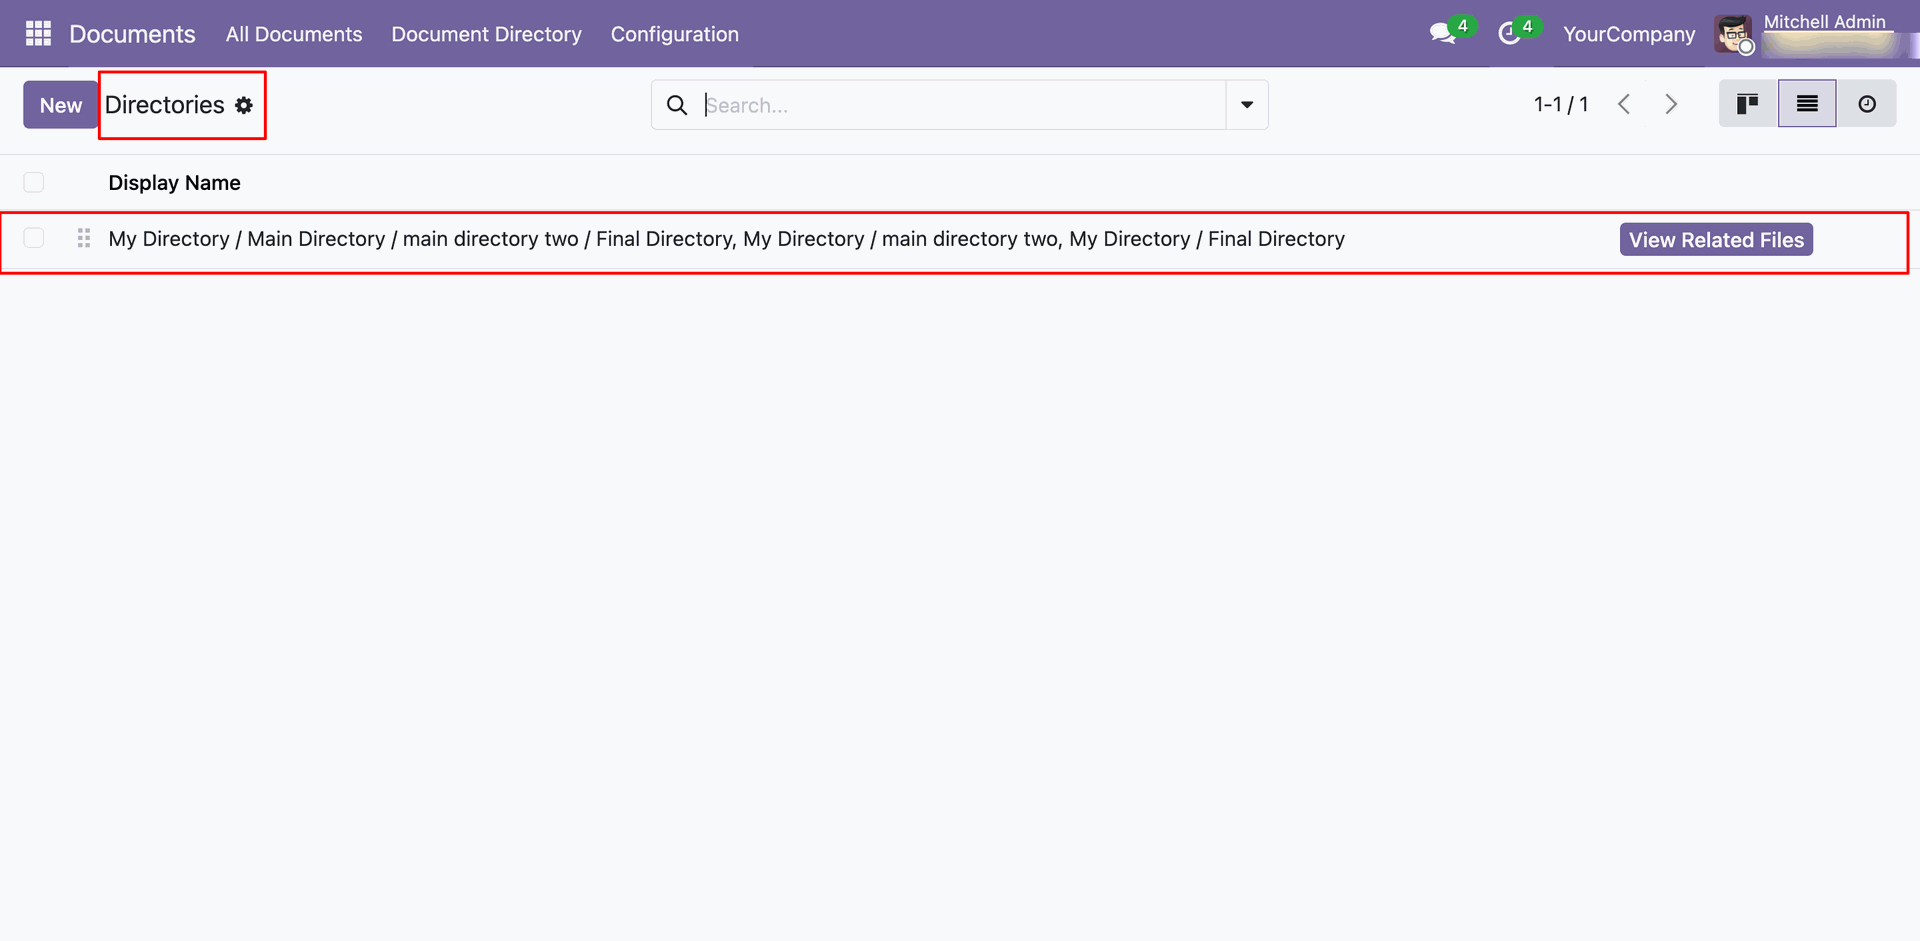
Click on the 'Schedule Activity'.
The 'Search: Document Directory' wizard will appear.
Then, click
on the 'View Related Files' button.
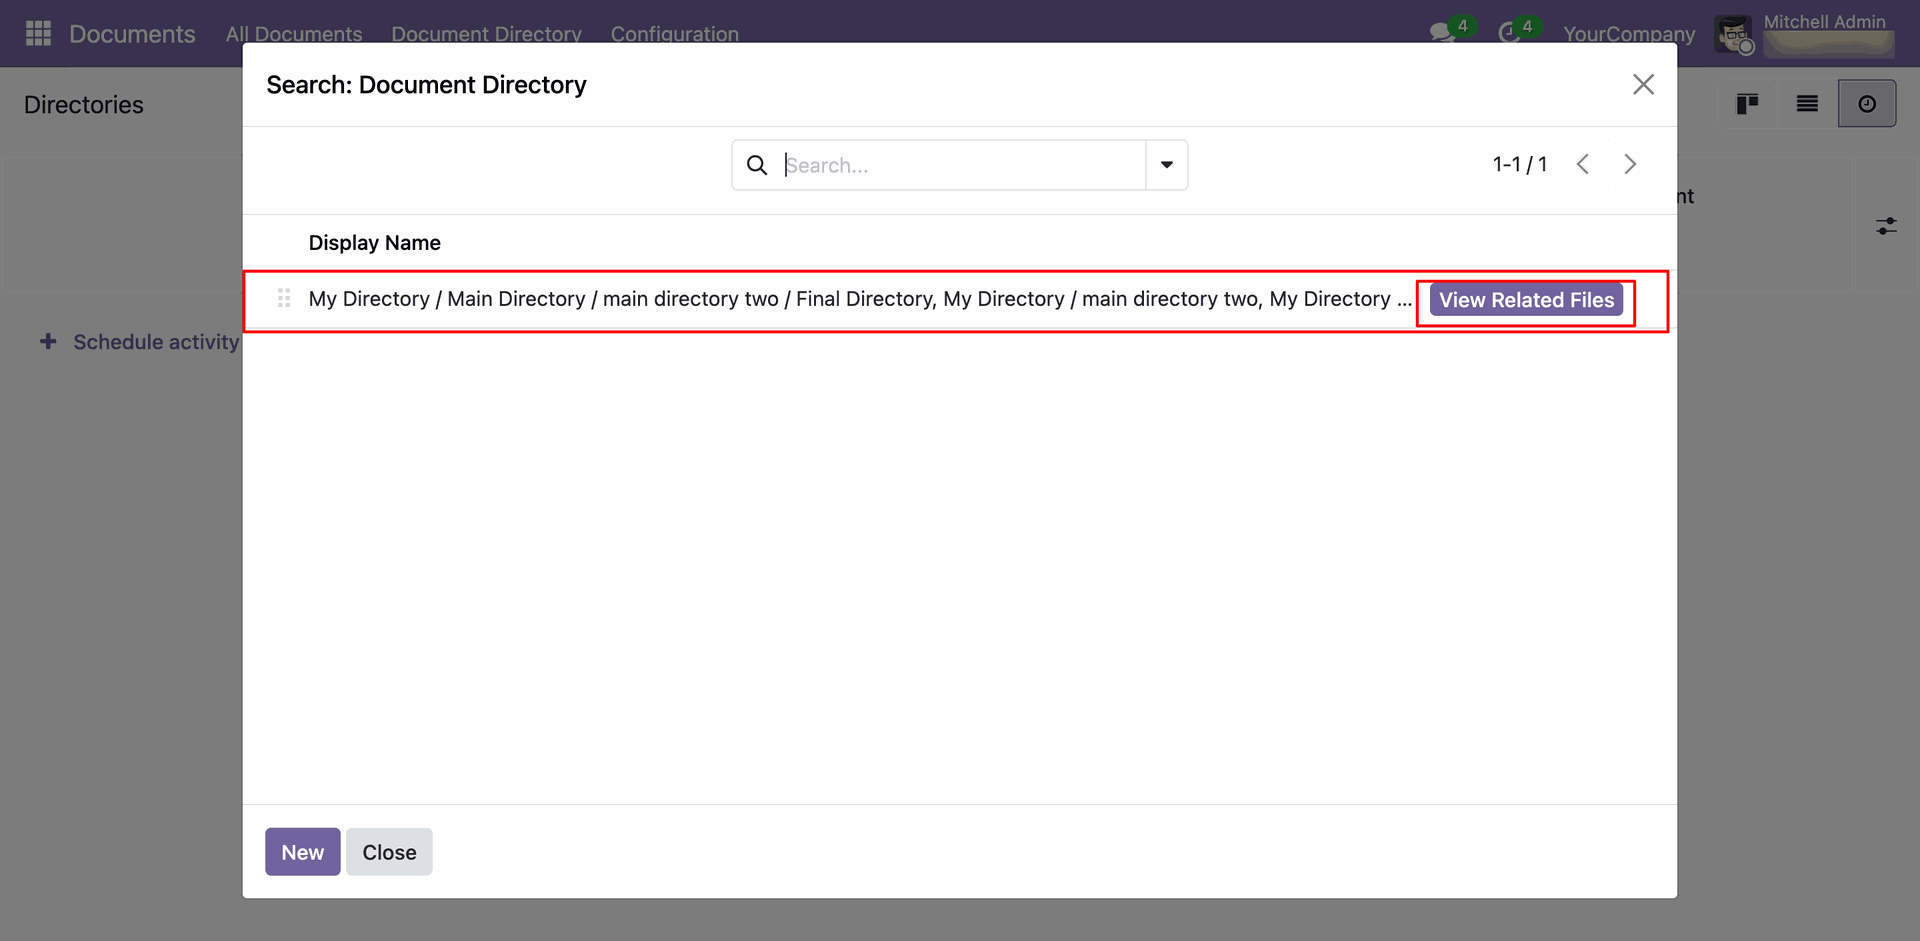
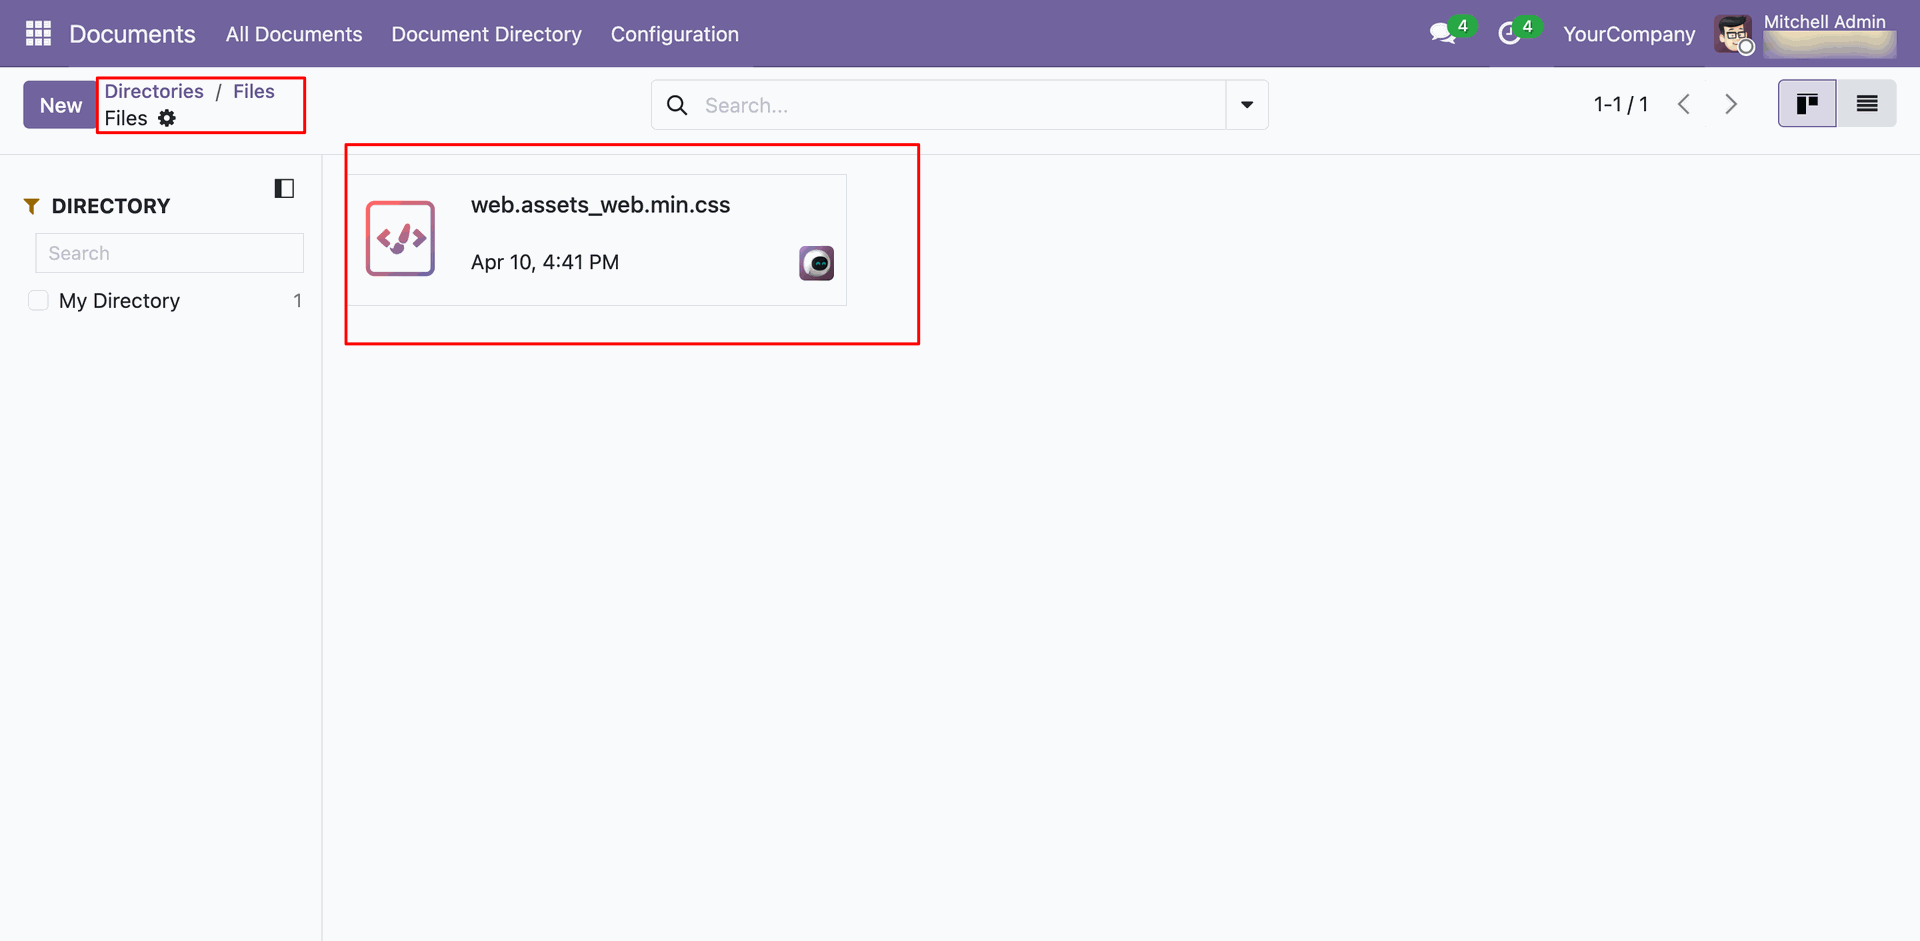
After that, you will be redirected to the directories file view.
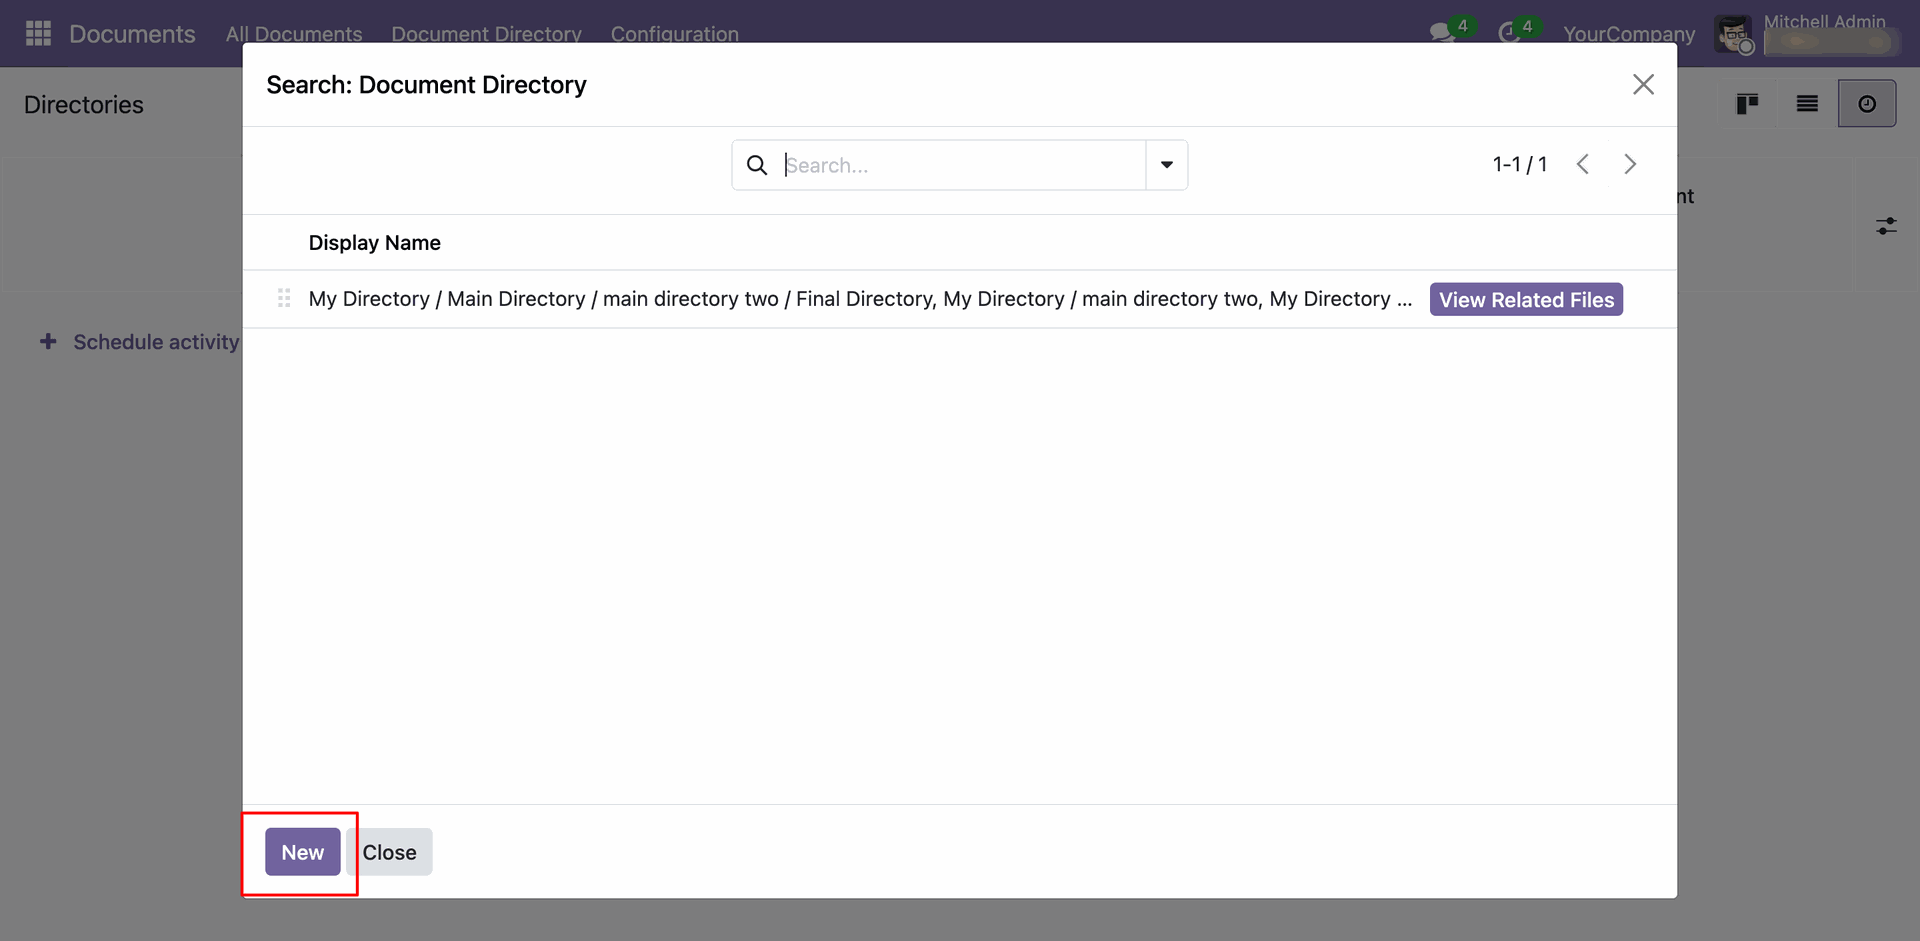
To create a new directory, click the 'New' button in the "Search: Document Directory" wizard.
Add details and click on the 'Save' button.
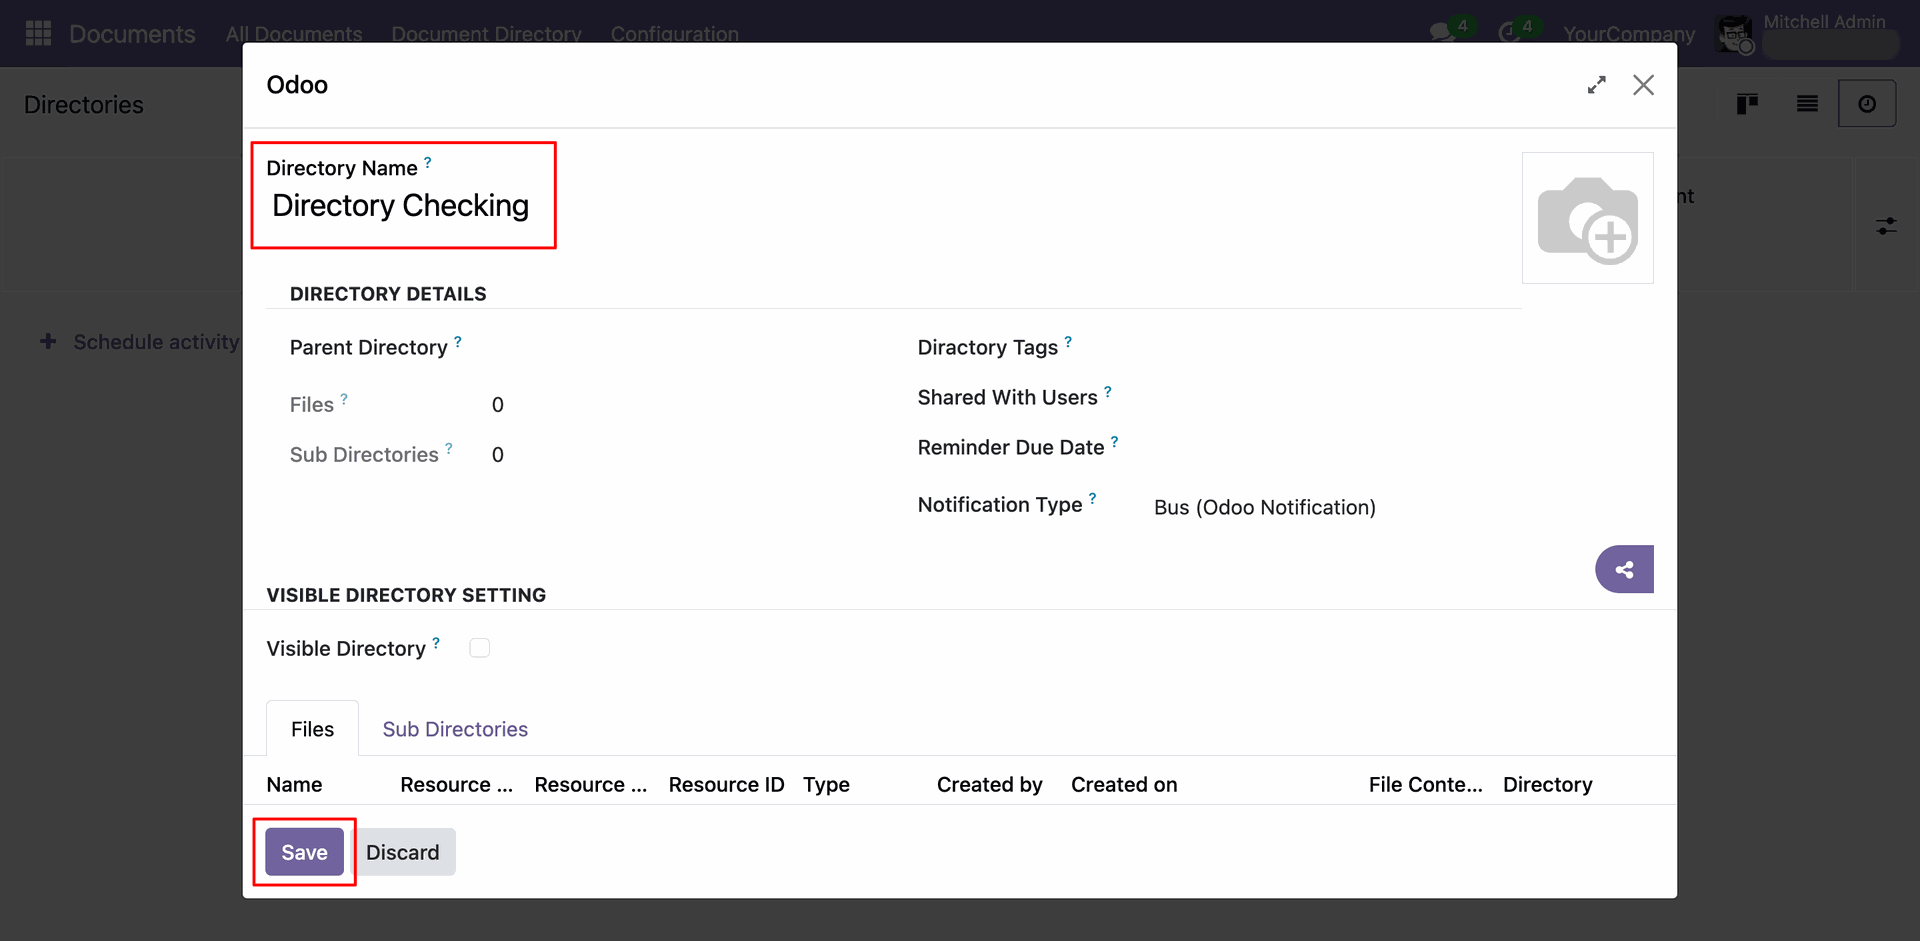
Add details and click on the 'Save' button.
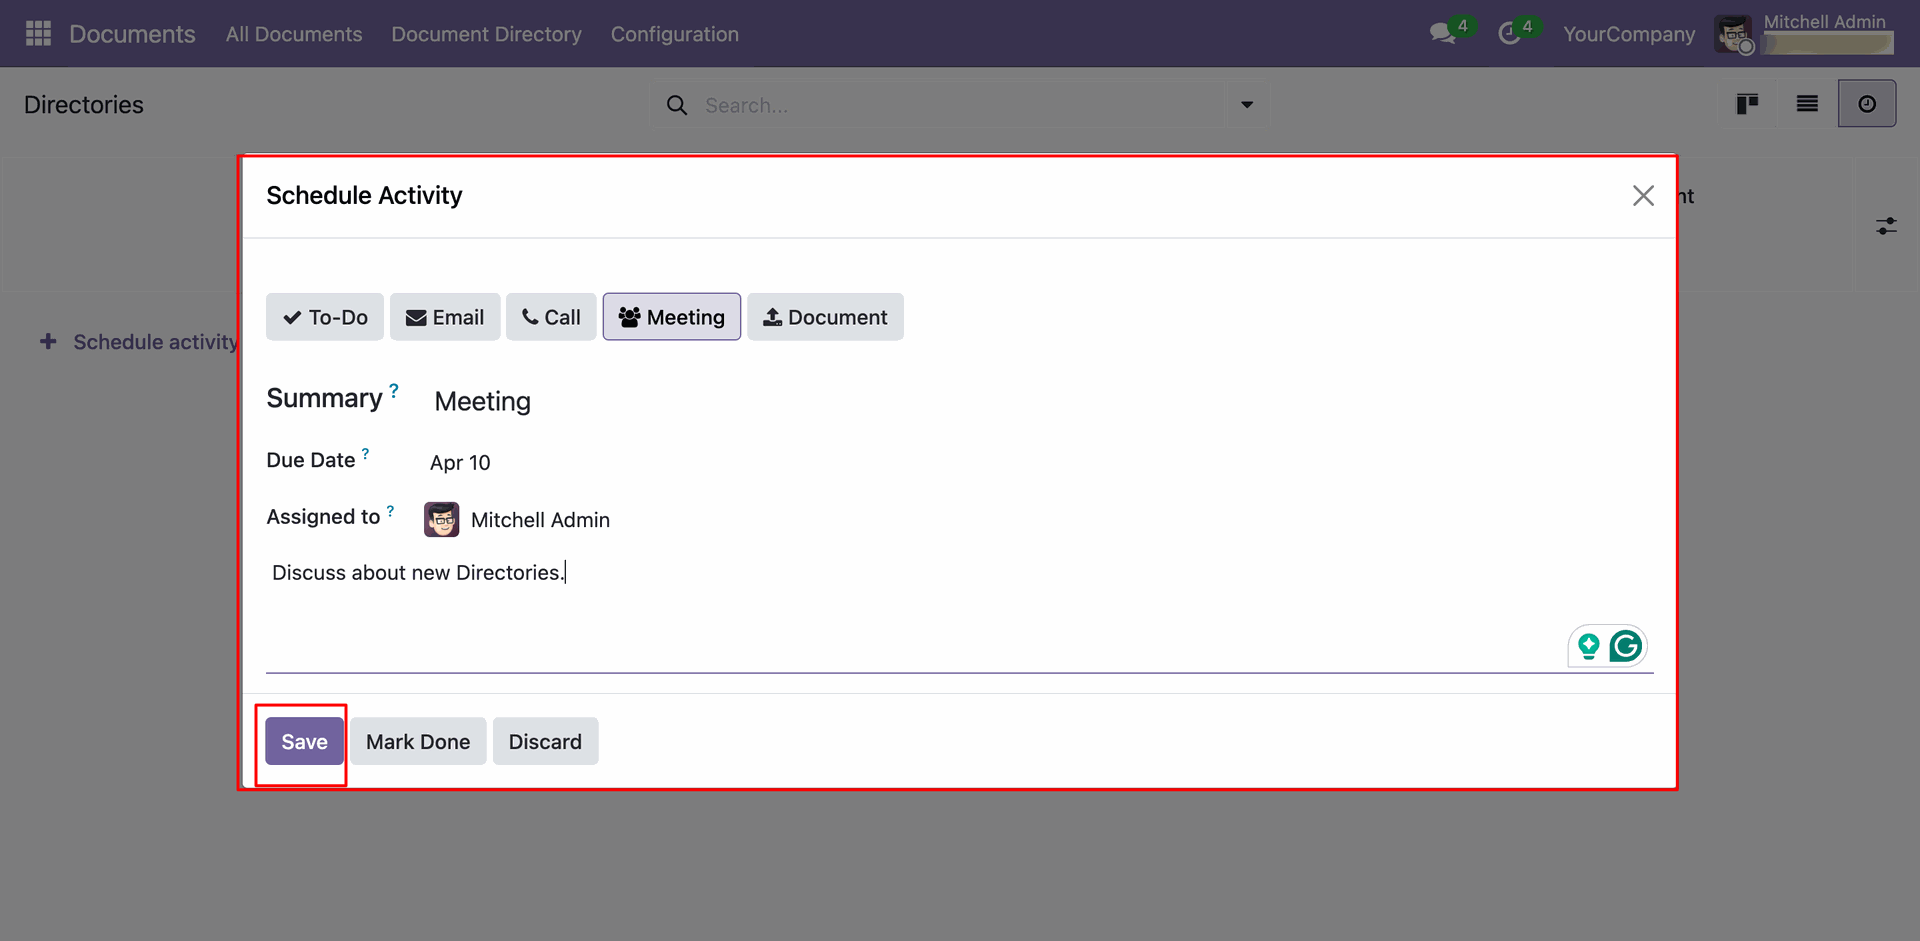
Here you can see the created directory.
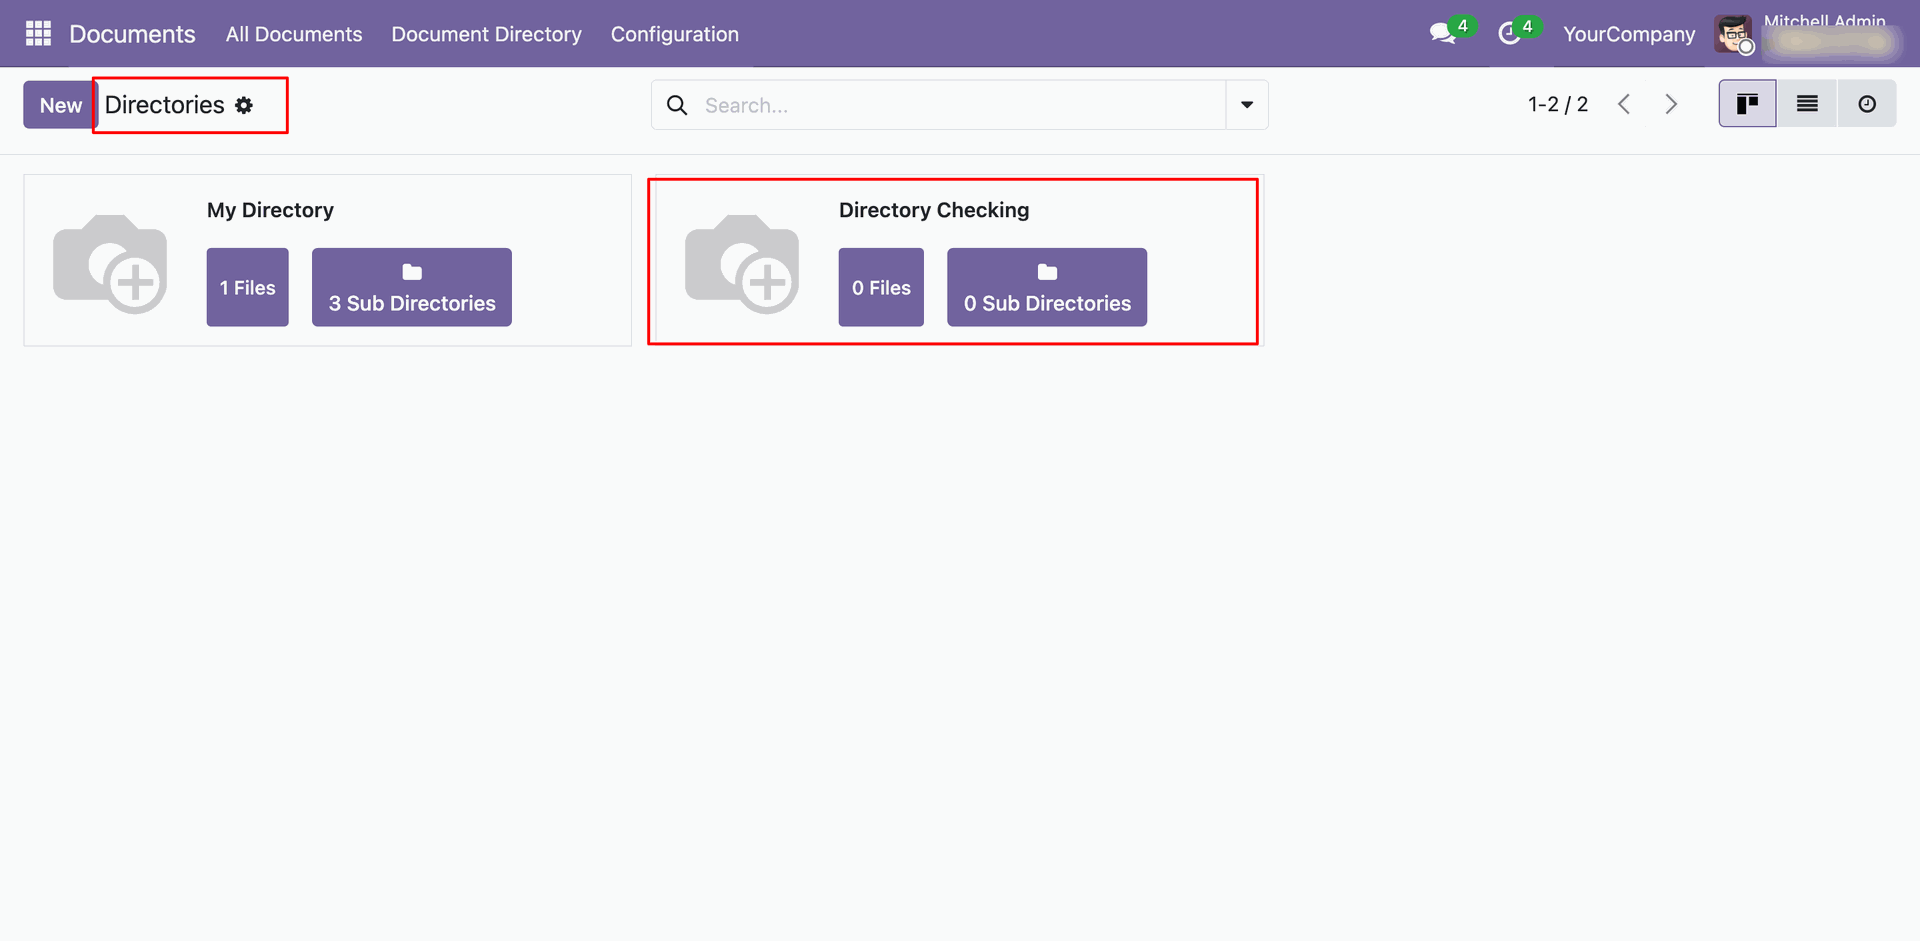
Form view of the directories.
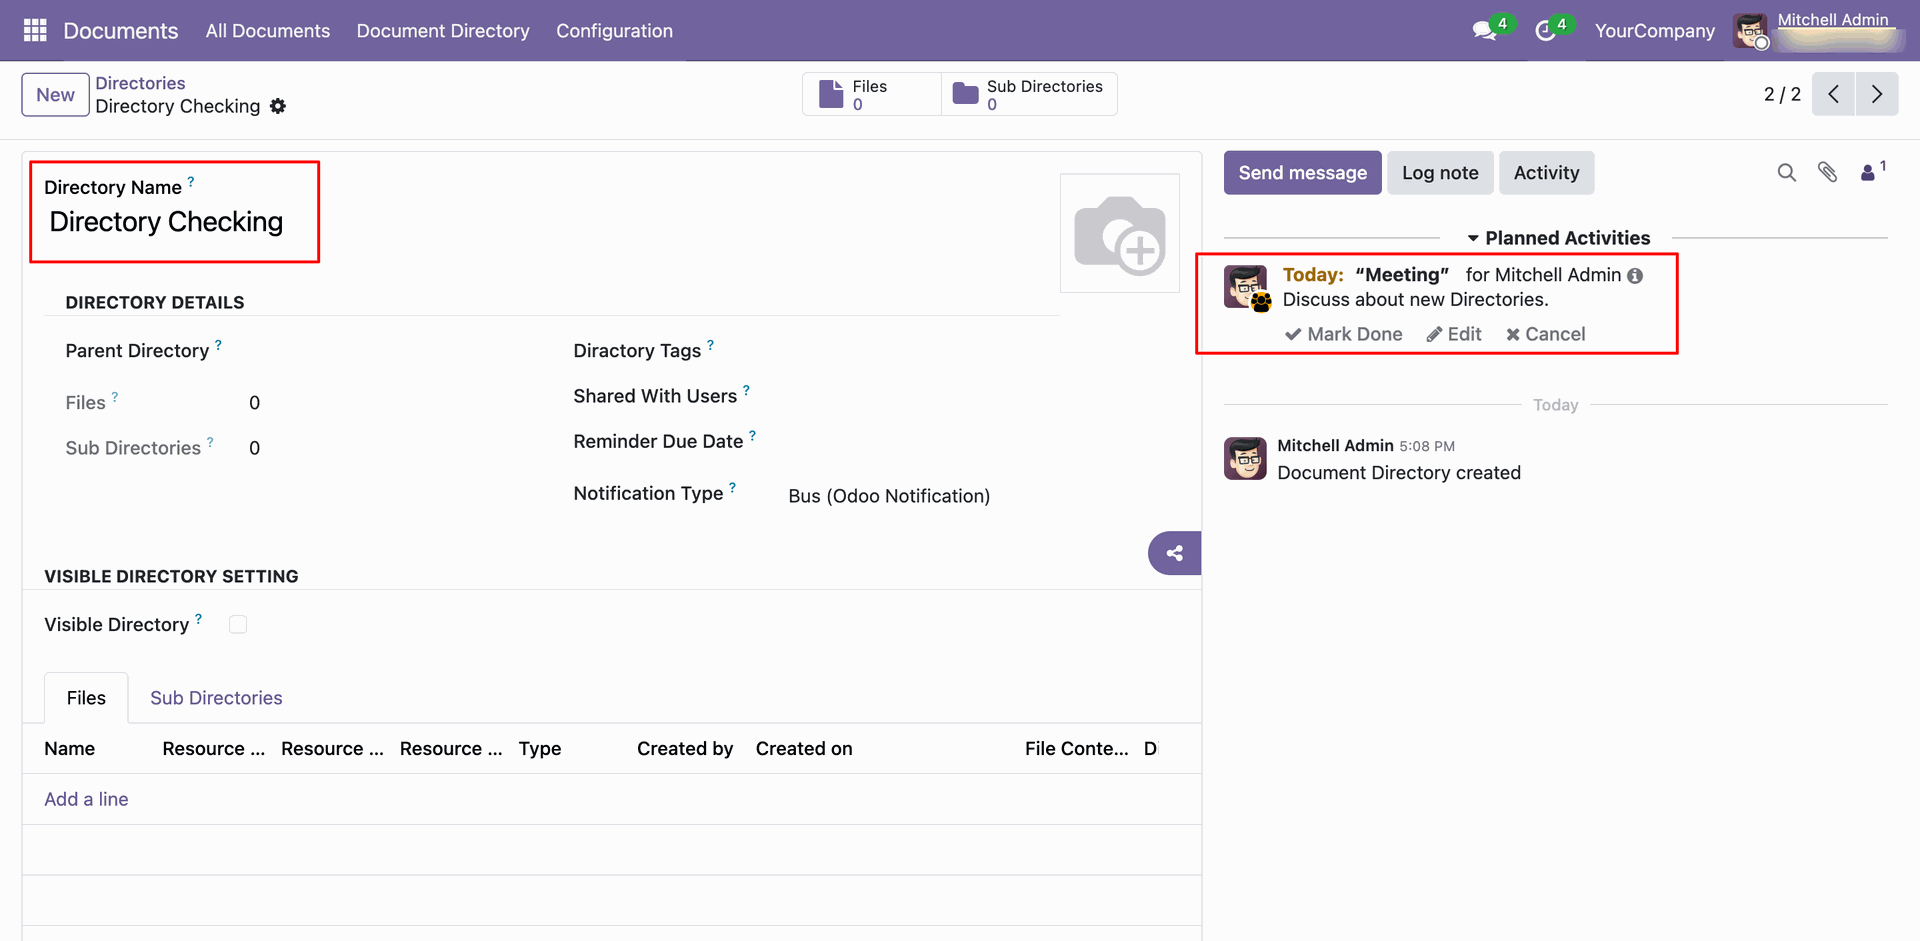
Click on the directory that you want to view.
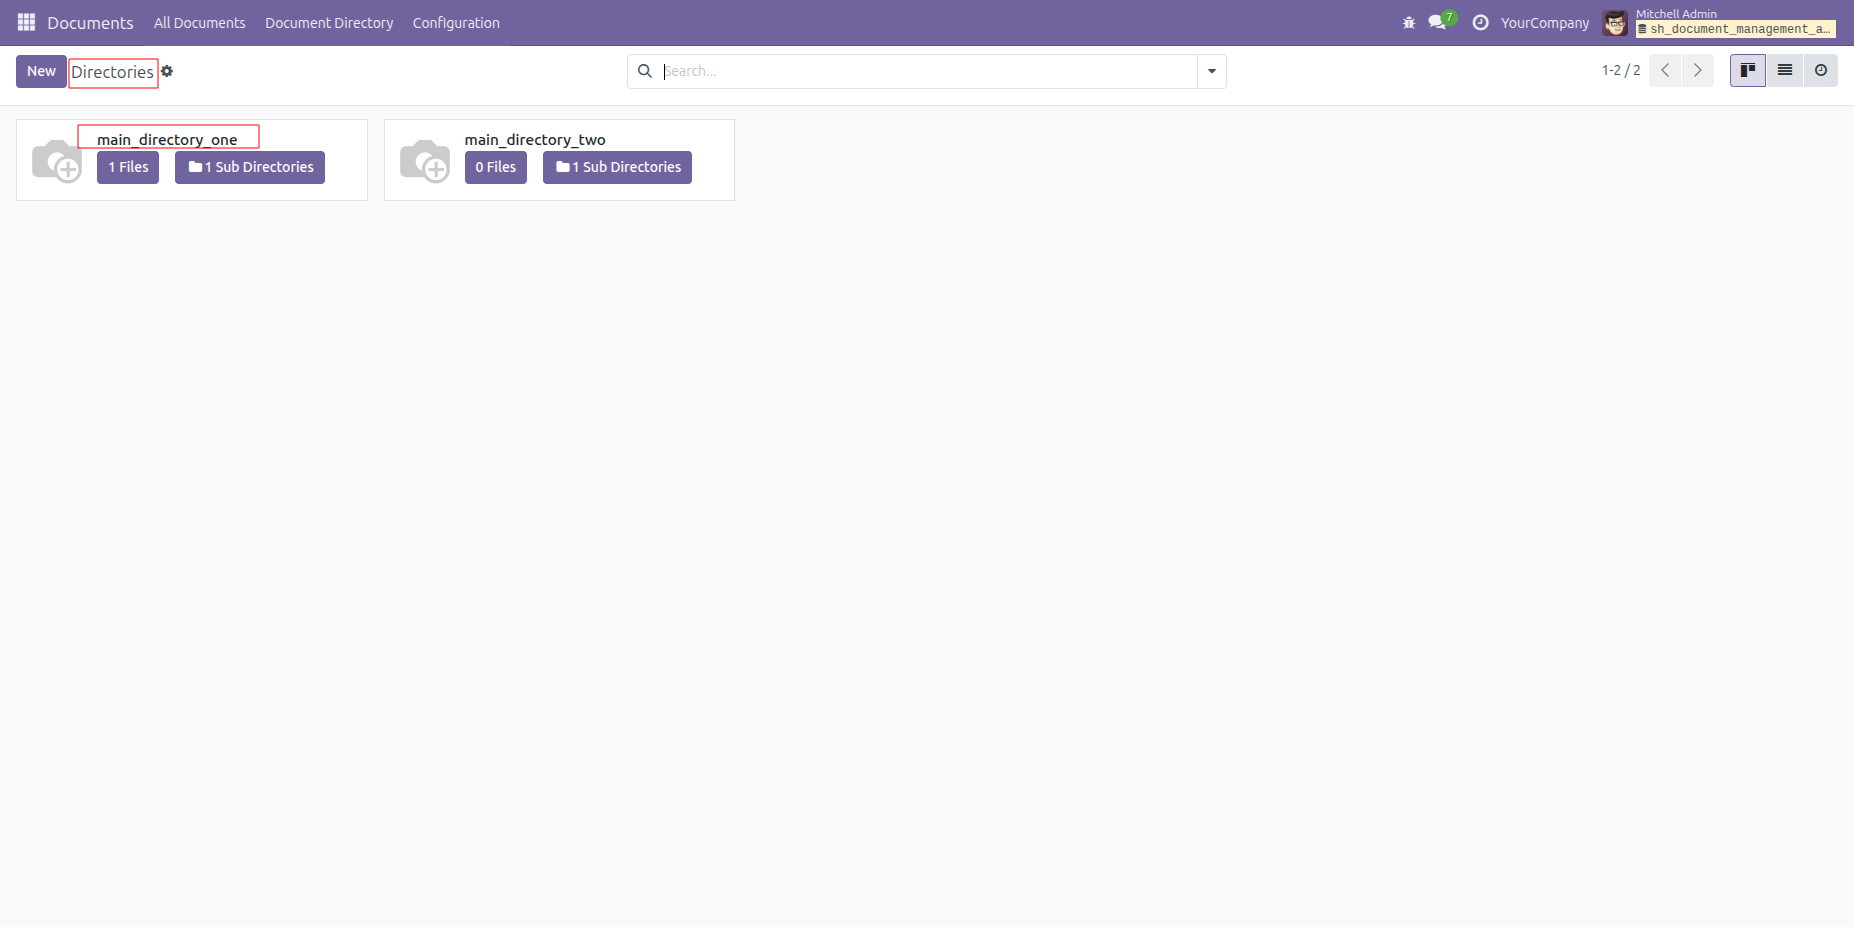
Add the details such as User, Reminder Due Date, and Notification Type: Bus (Odoo Notification).
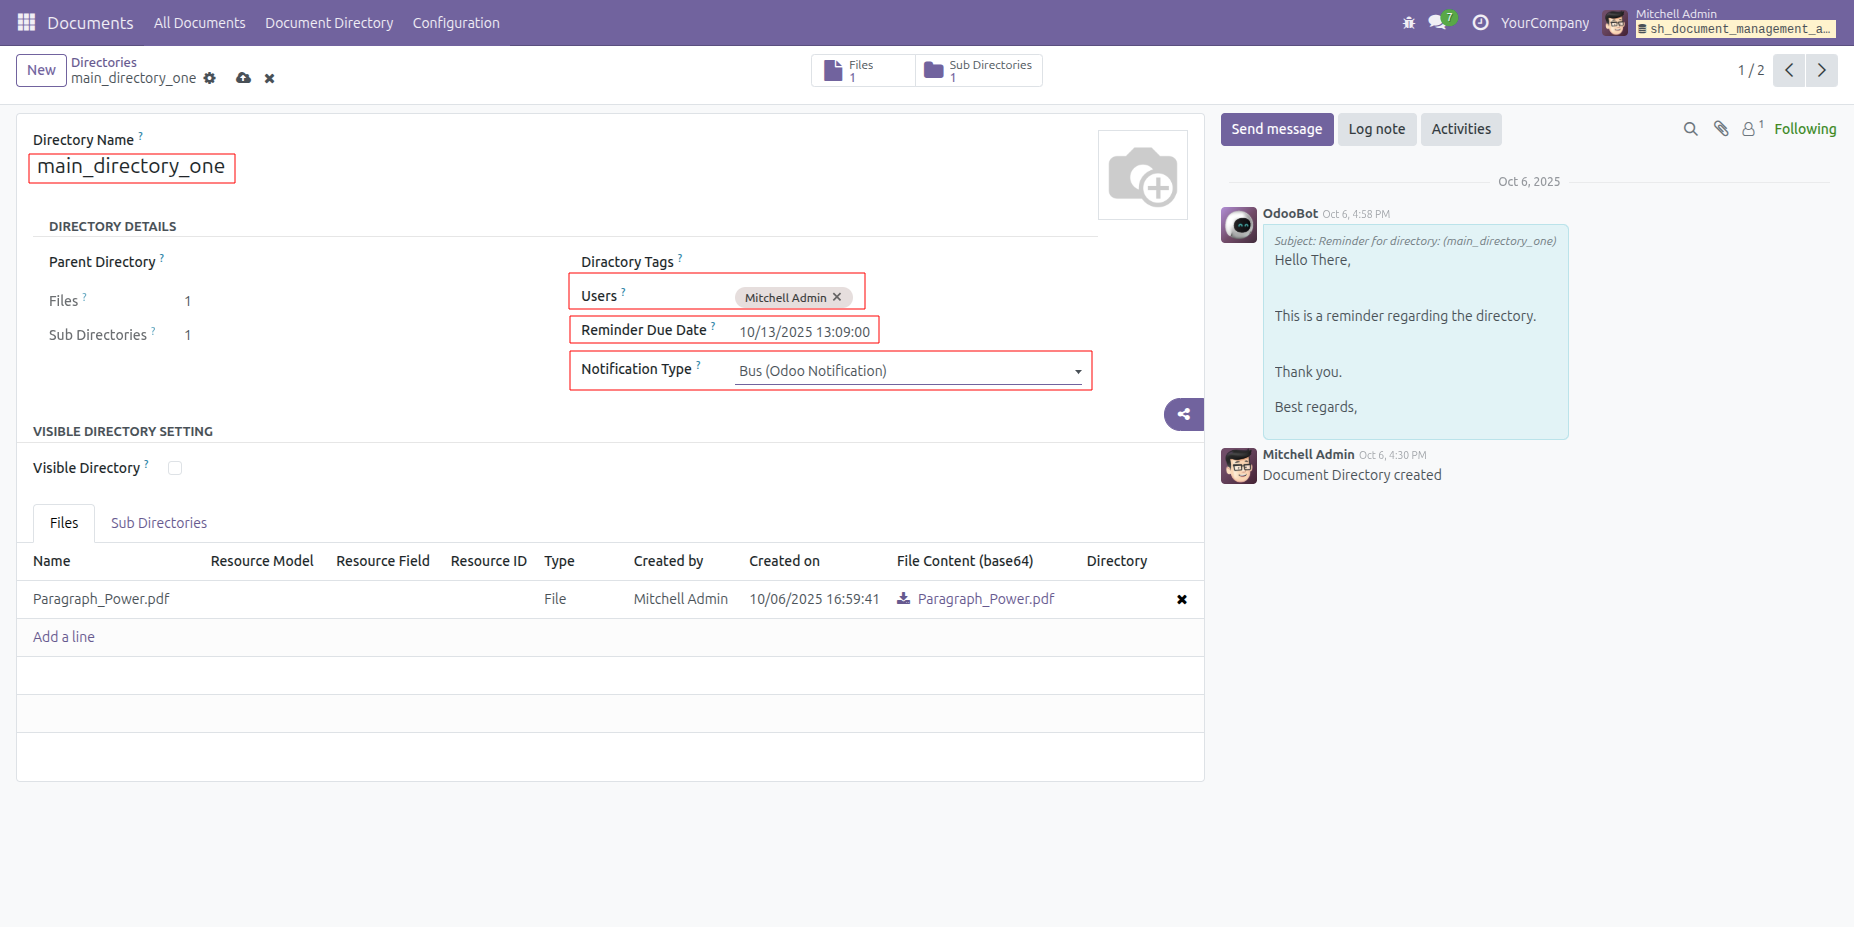
The user receives a reminder notification on the scheduled date and time.
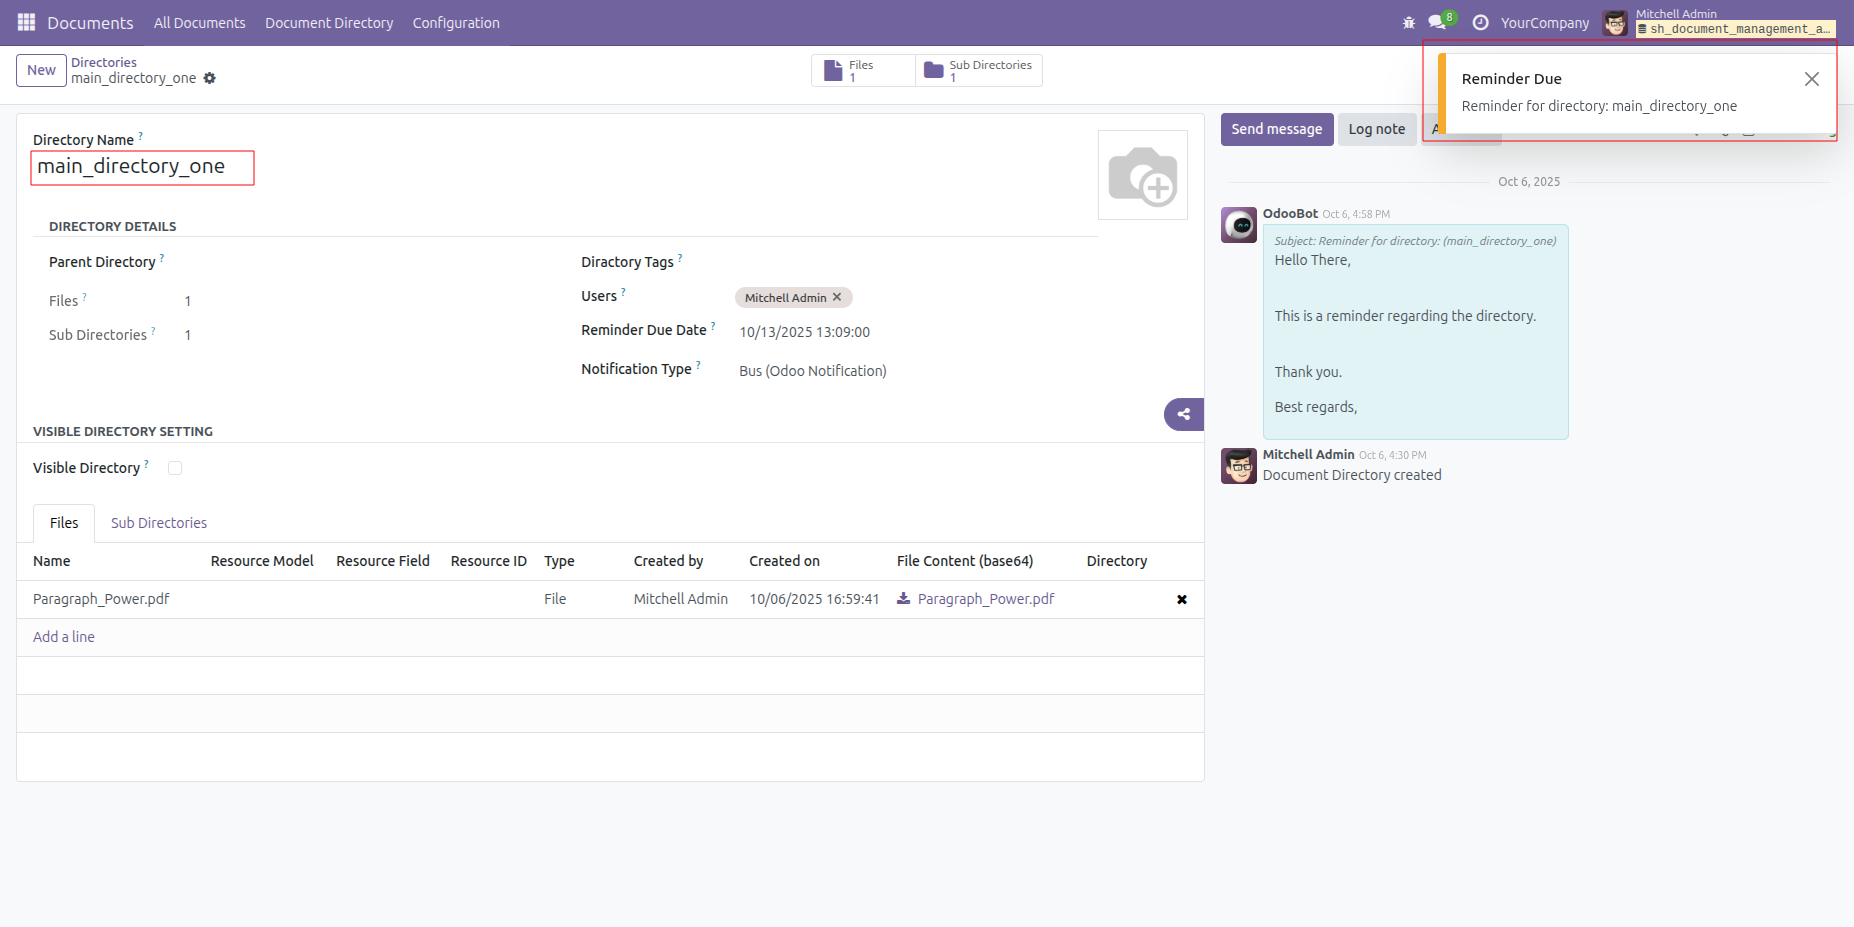
In the directories form view, select the Notification Type: Email, and choose the corresponding Email Template
The user receives the reminder email notification on the scheduled date and time.
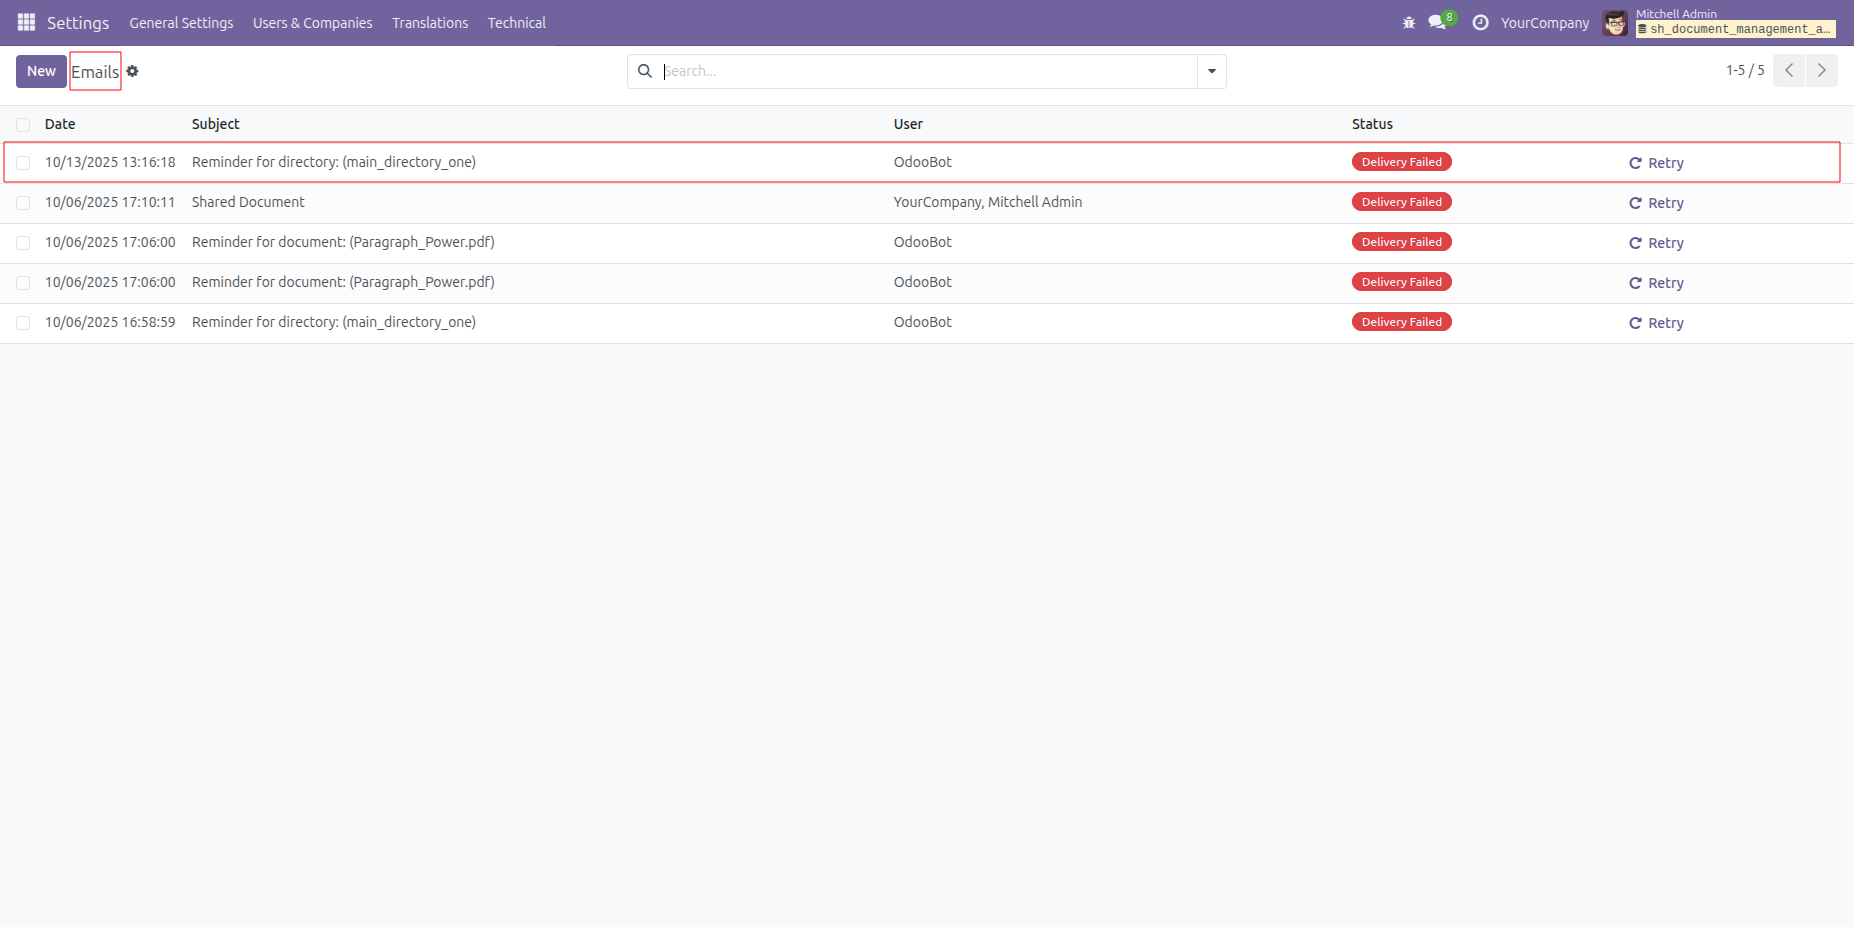
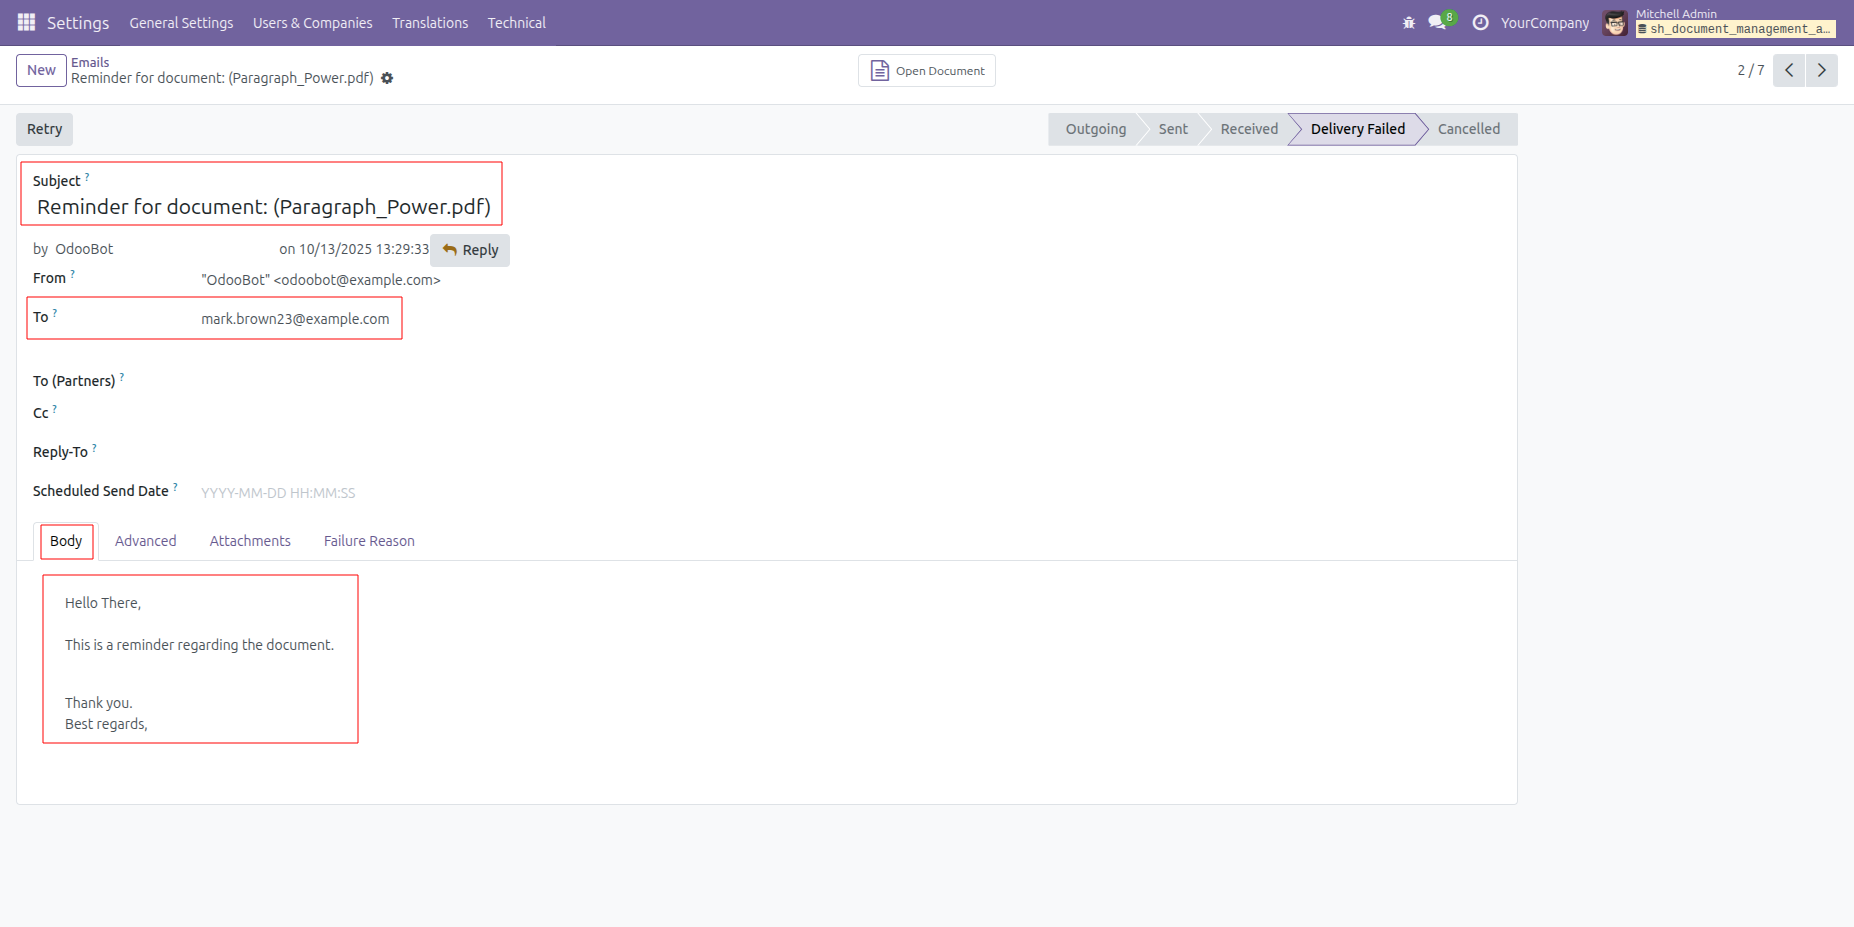
Form view of the email.
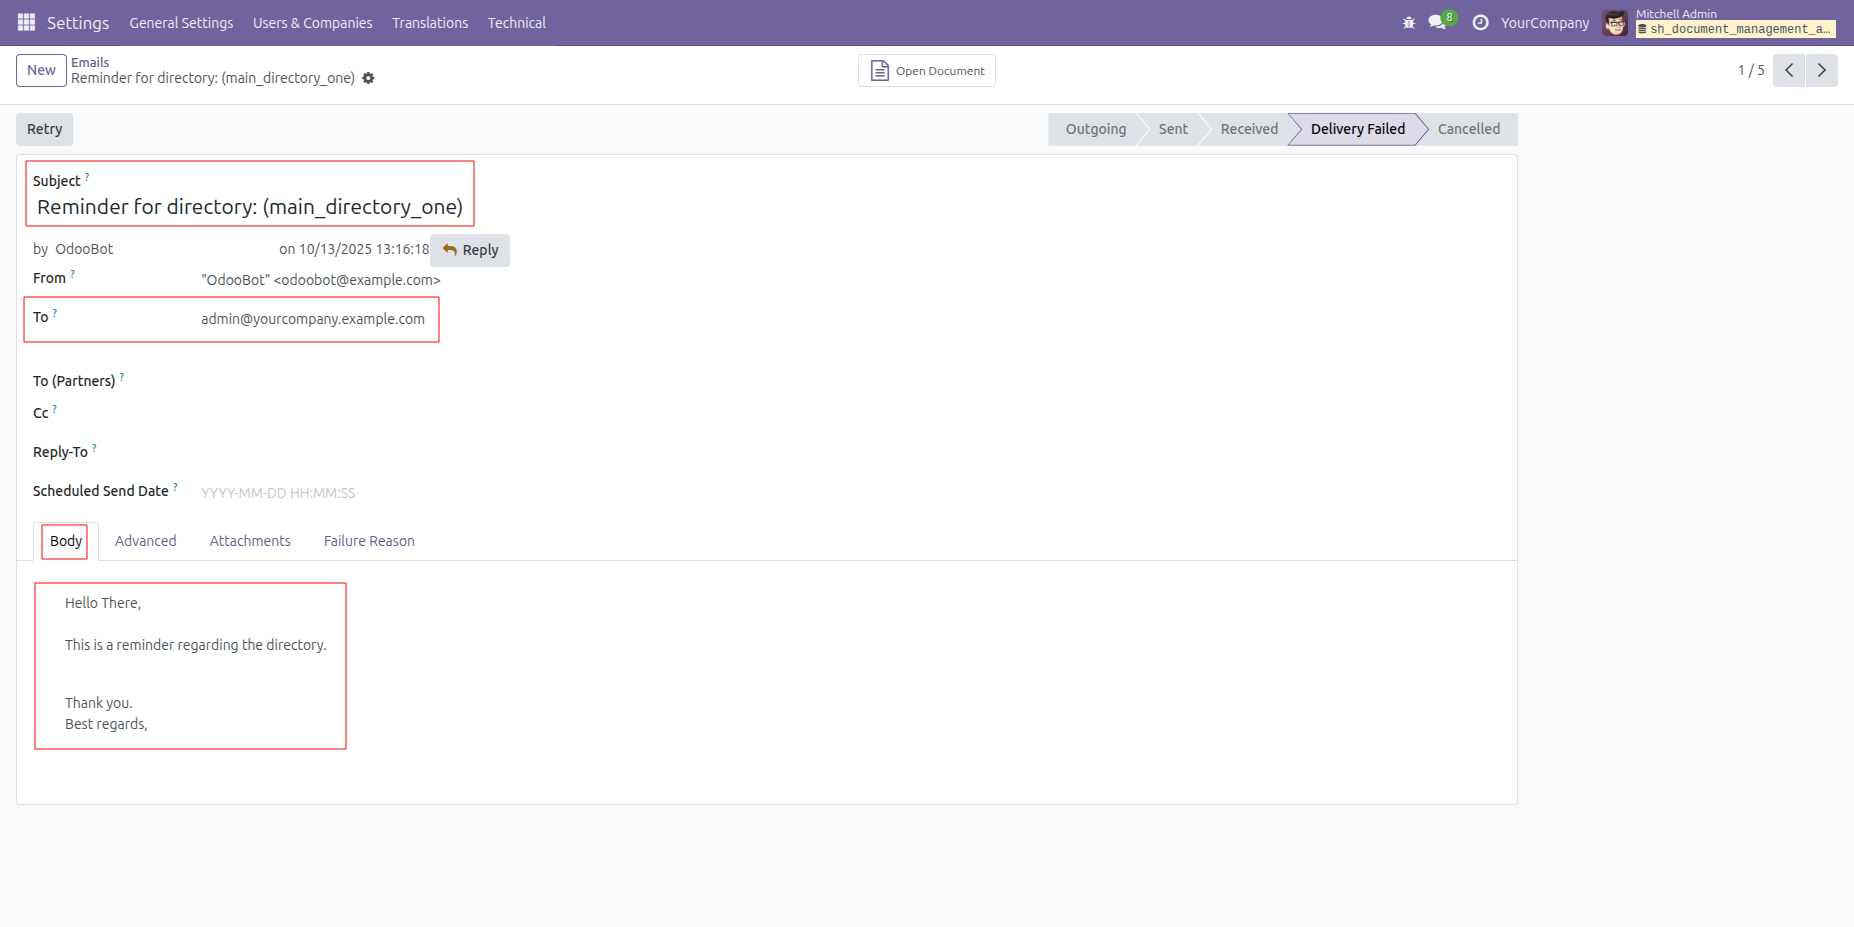
Upload & Manage Files
In the directories form view, click on the "Files" smart button.
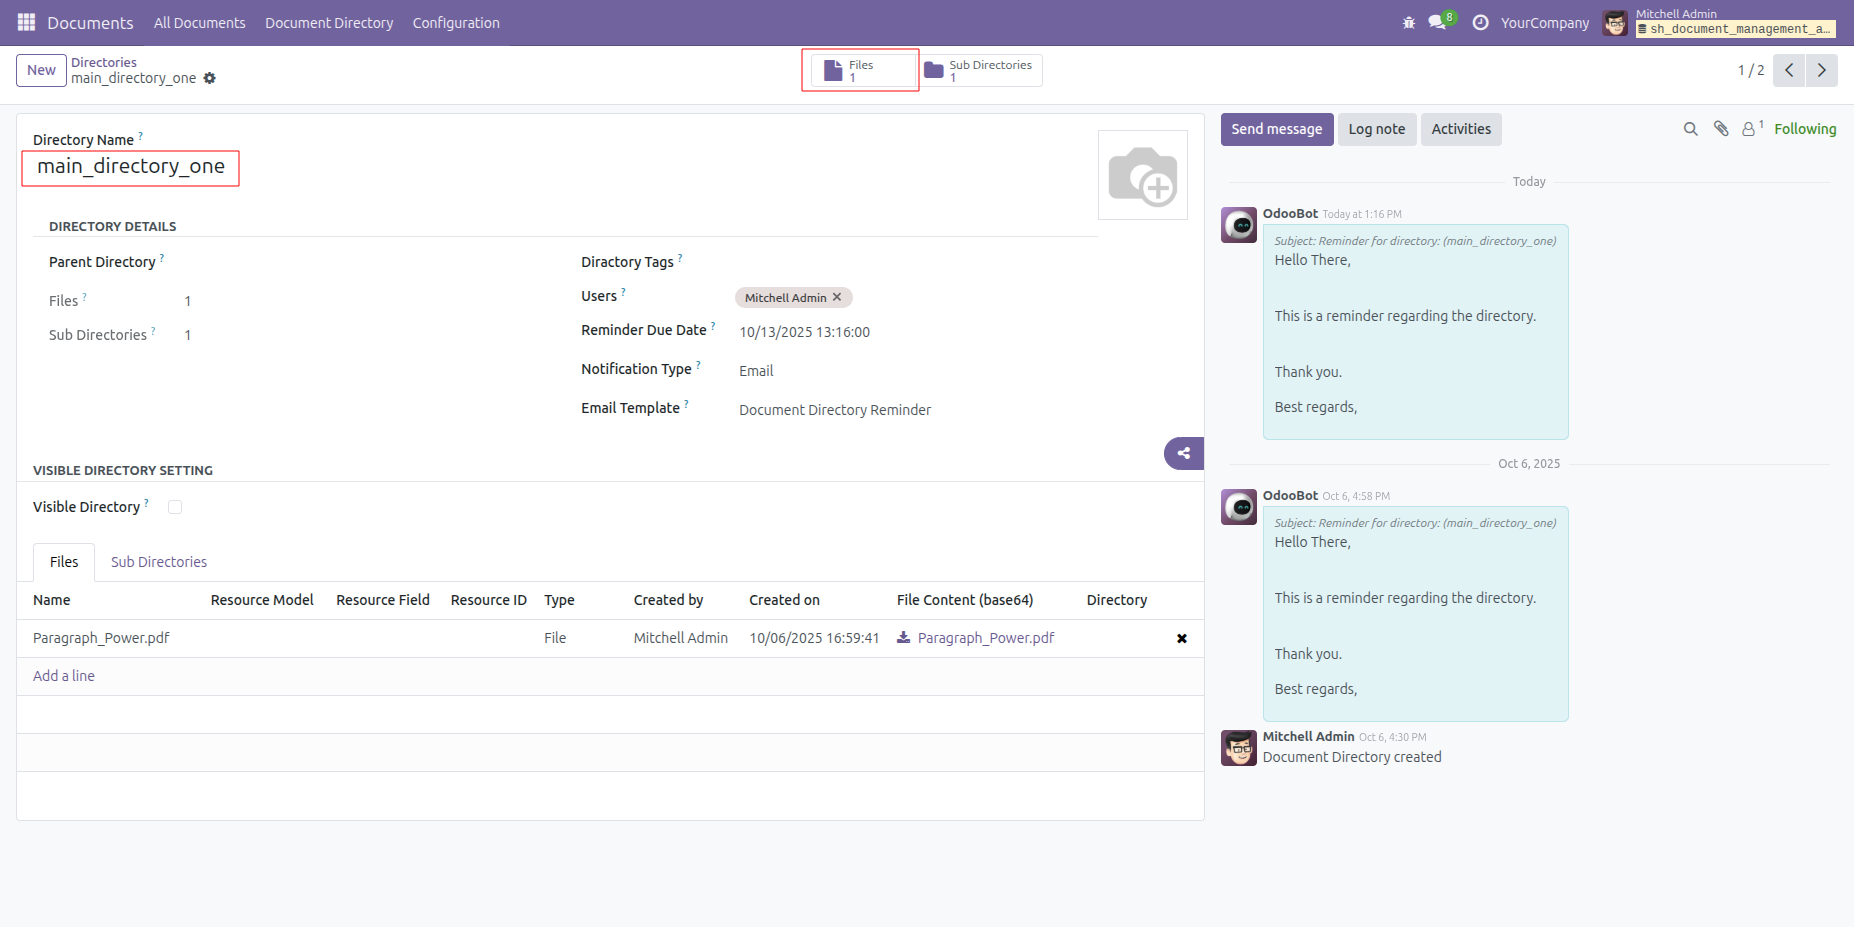
Kanban view of the "Files".
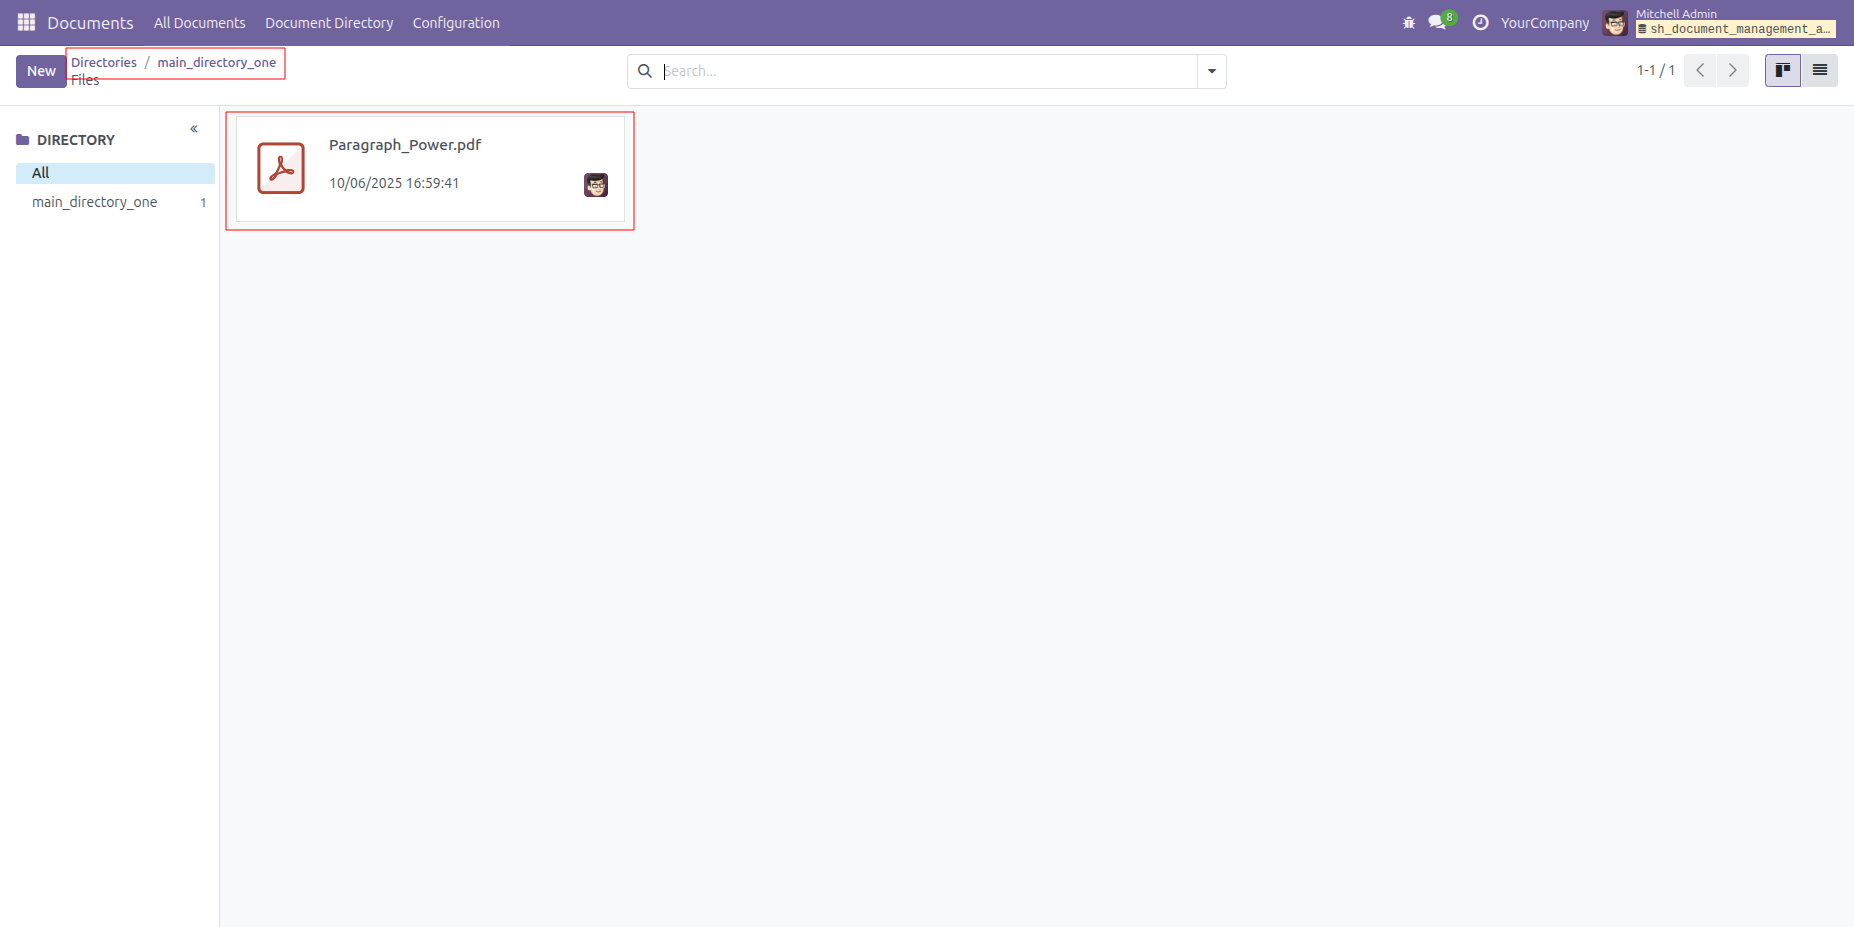
In the files form view, attach the document.
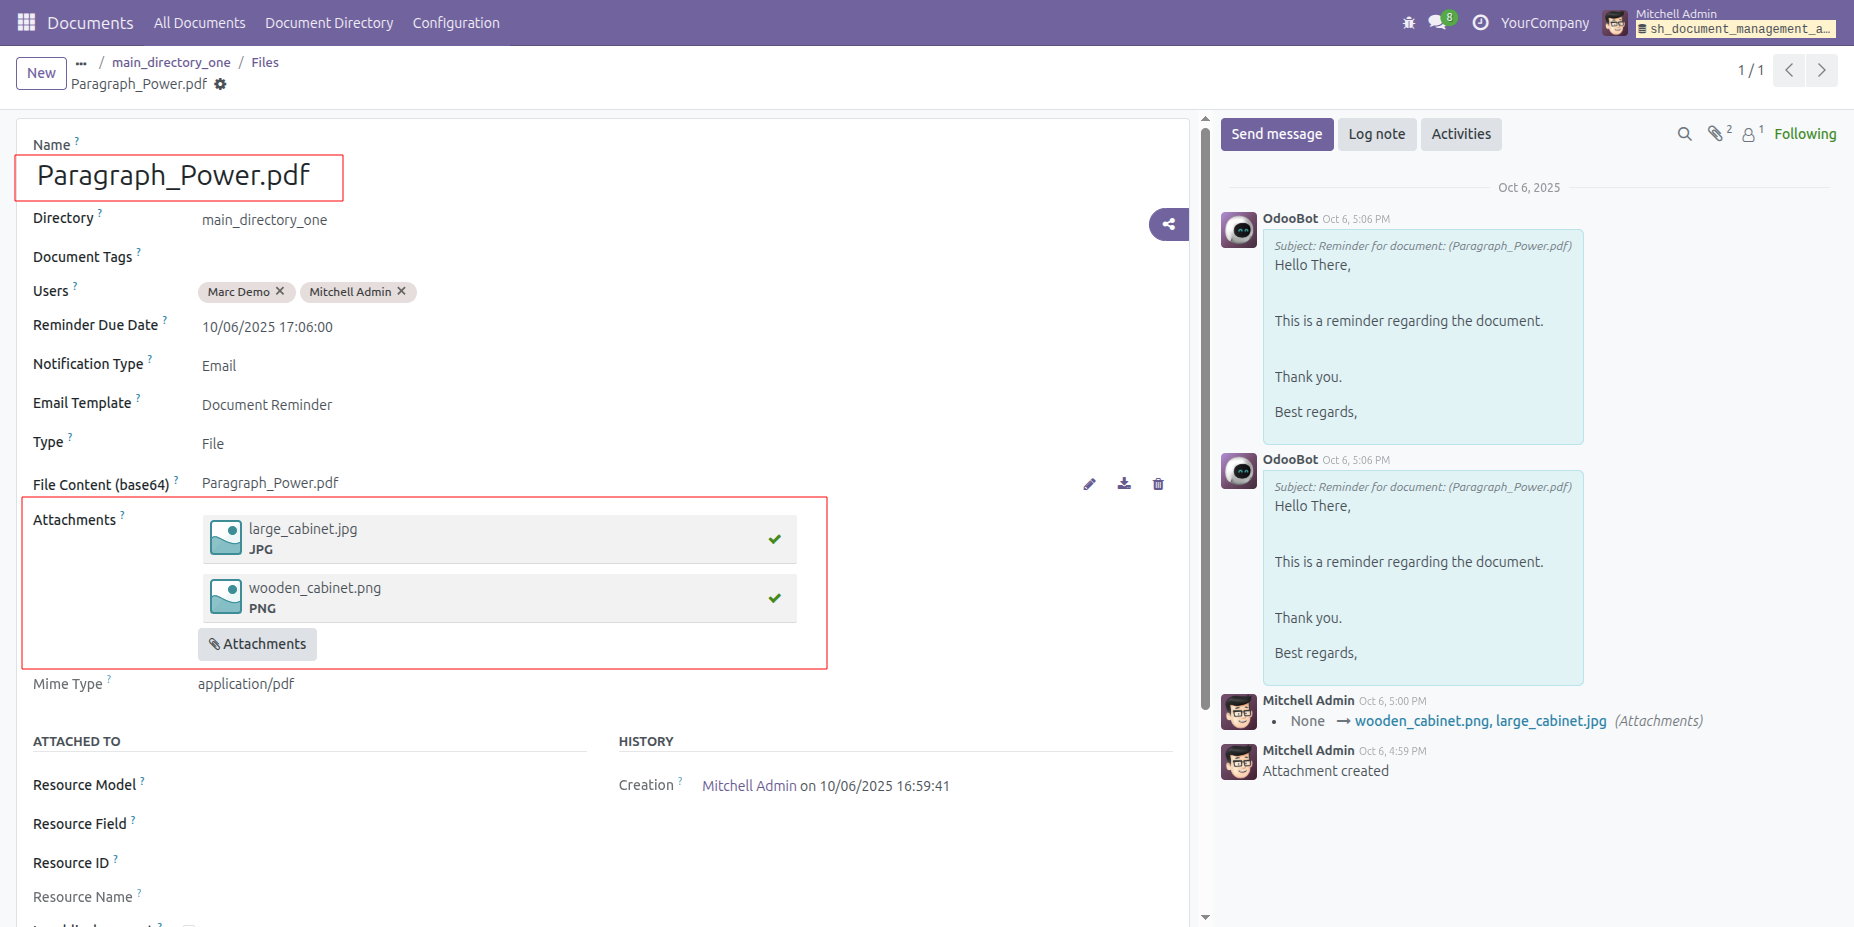
In the files form view, add the details such as User, Reminder Due Date, and Notification Type: Bus (Odoo Notification).
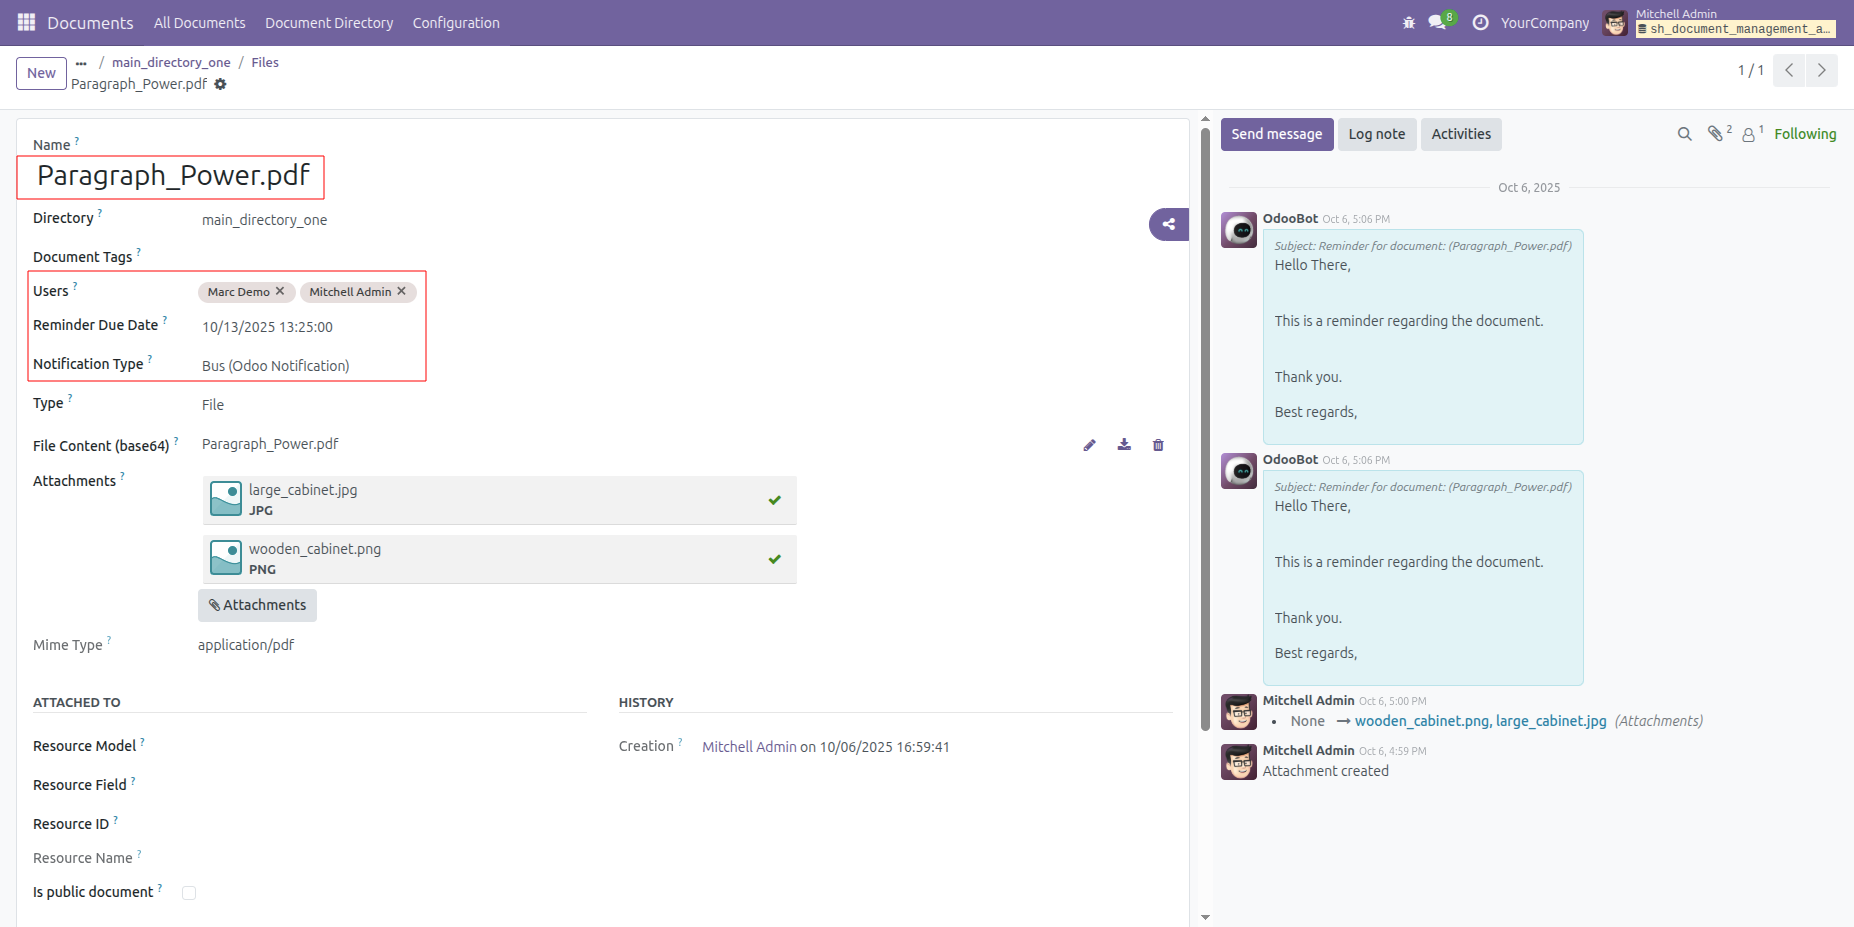
The user receives a reminder notification on the scheduled date and time.
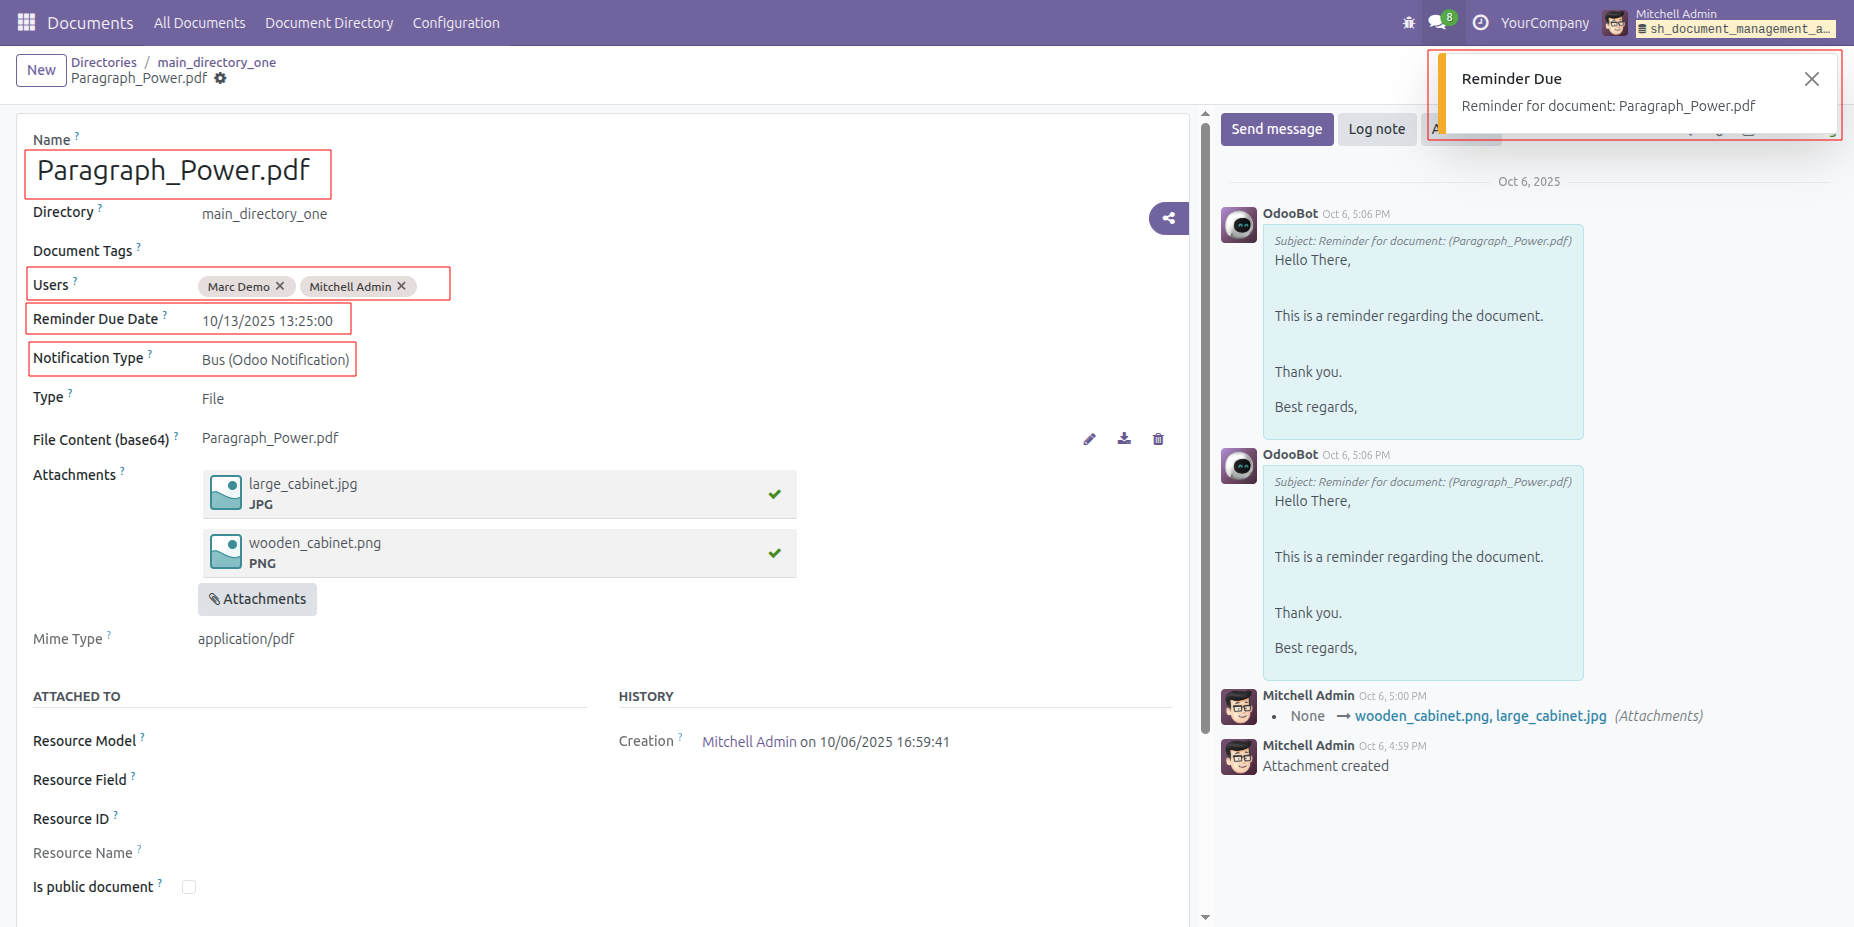
In the files form view, select the Notification Type: Email and choose the corresponding Email Template.
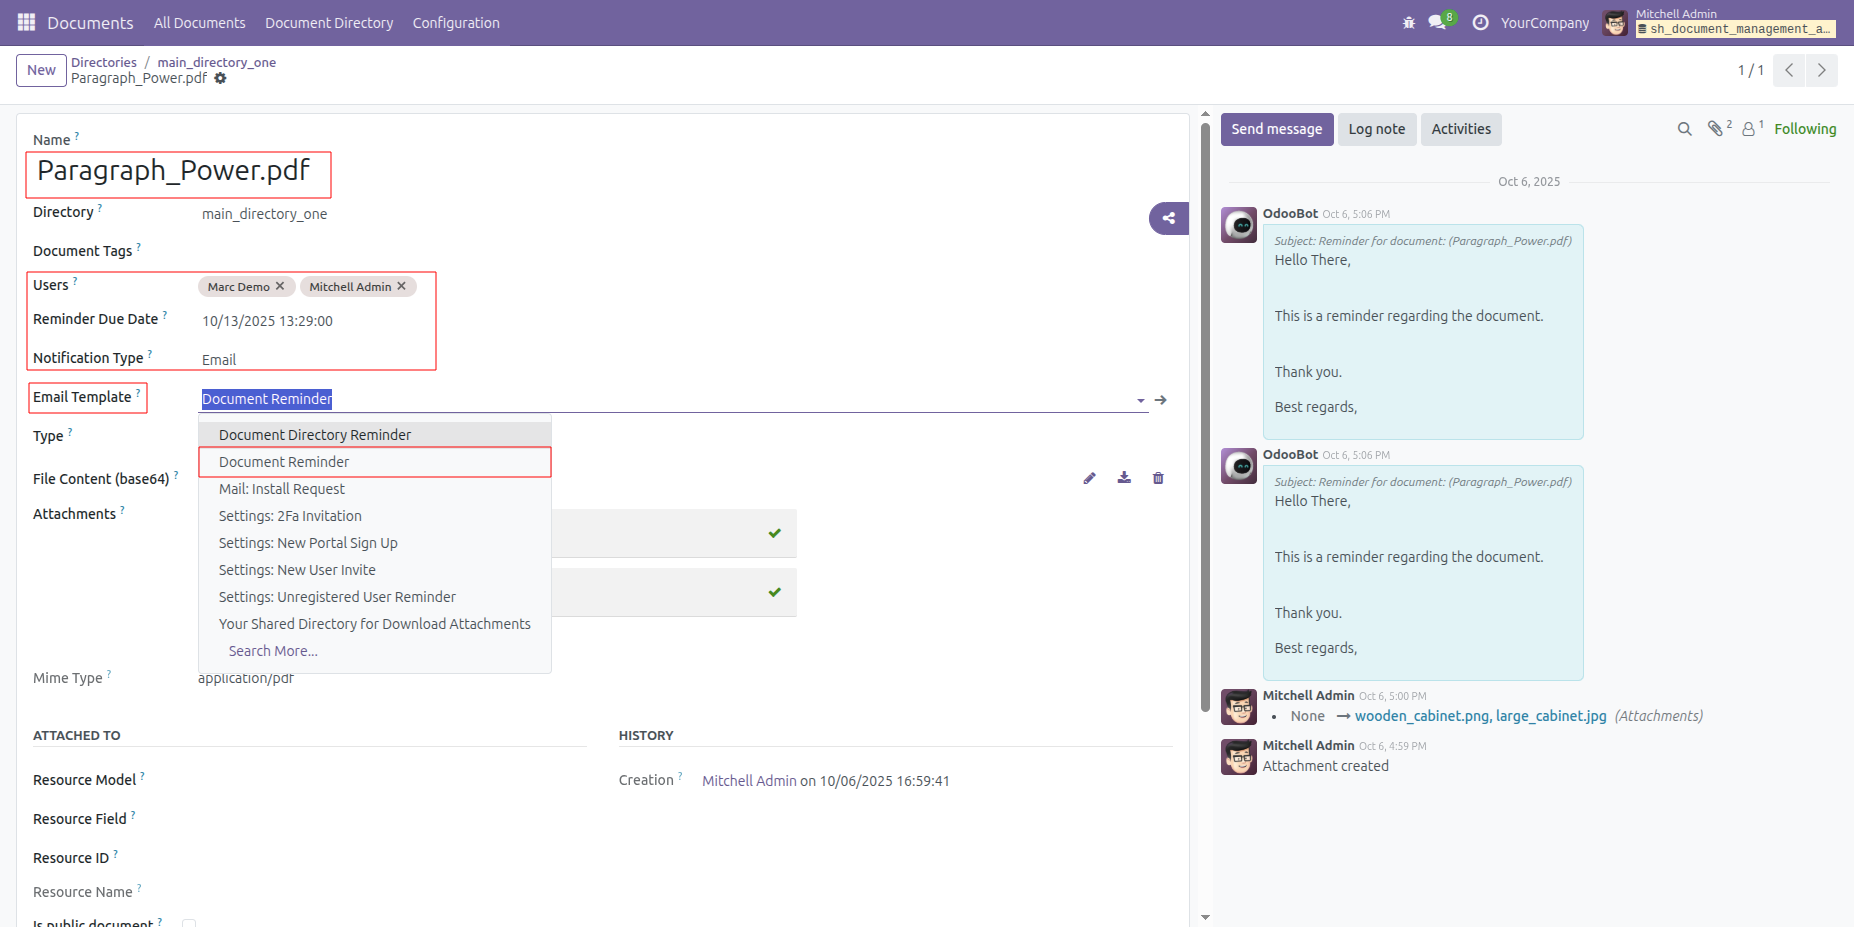
The user receives the reminder email notification on the scheduled date and time.
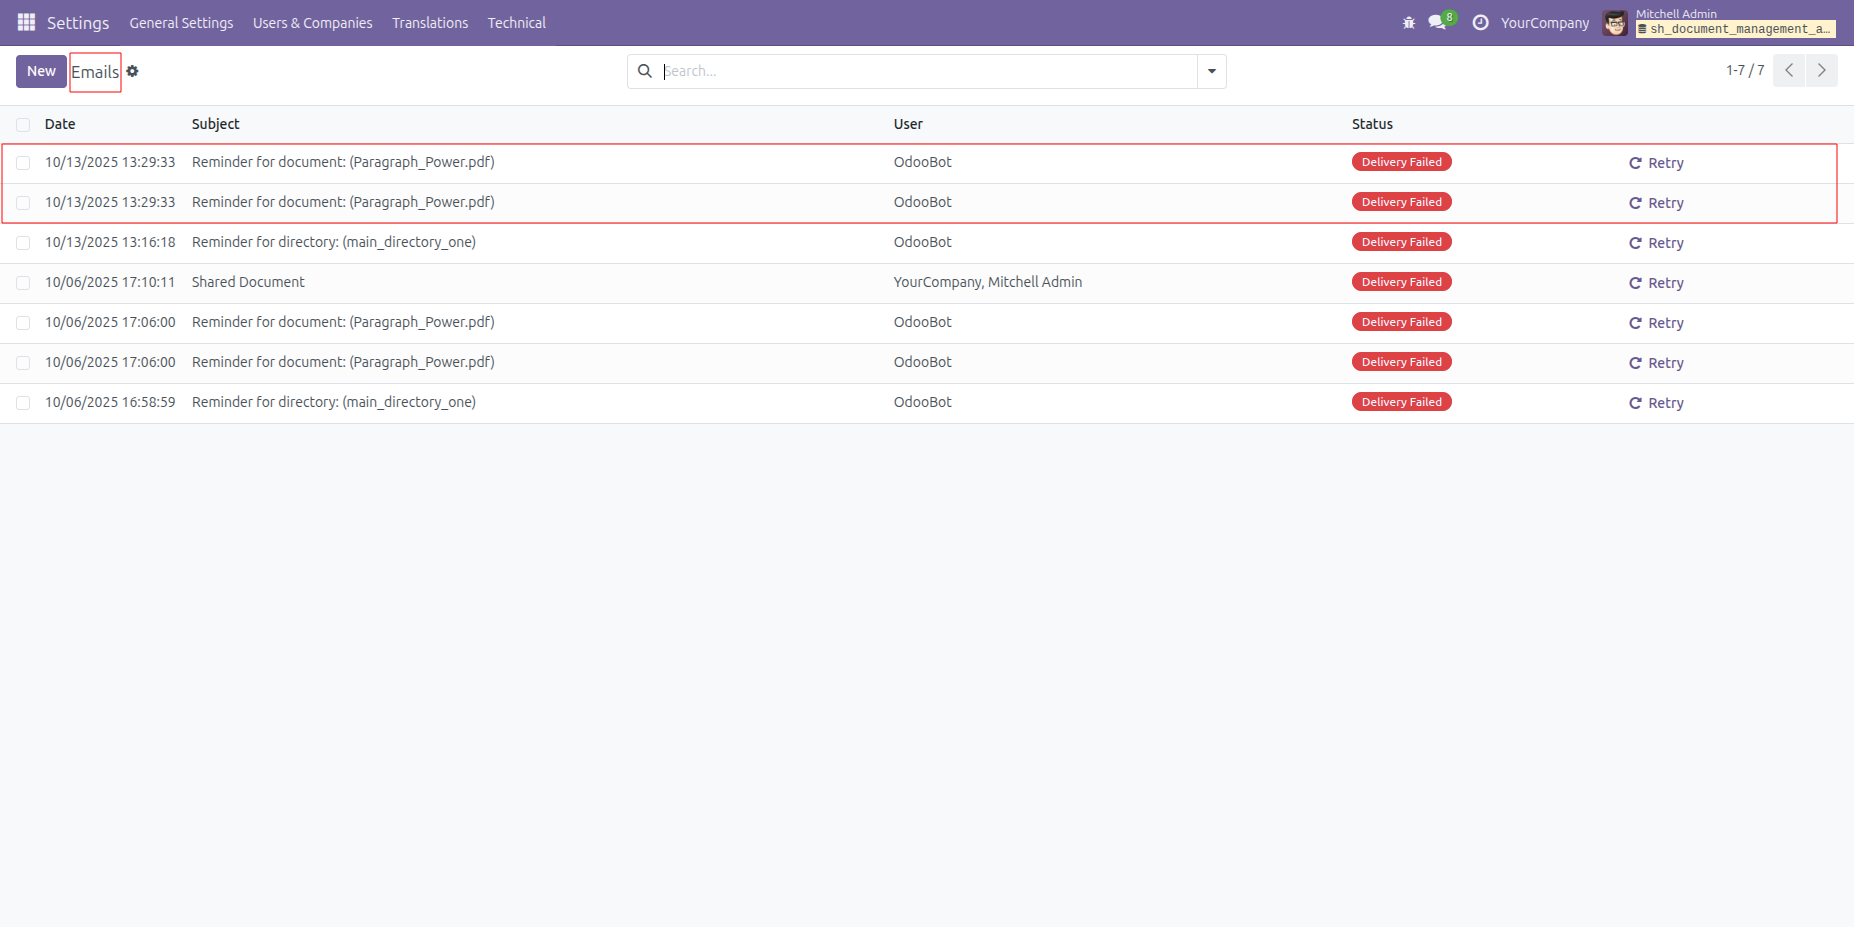
Form view of the email.
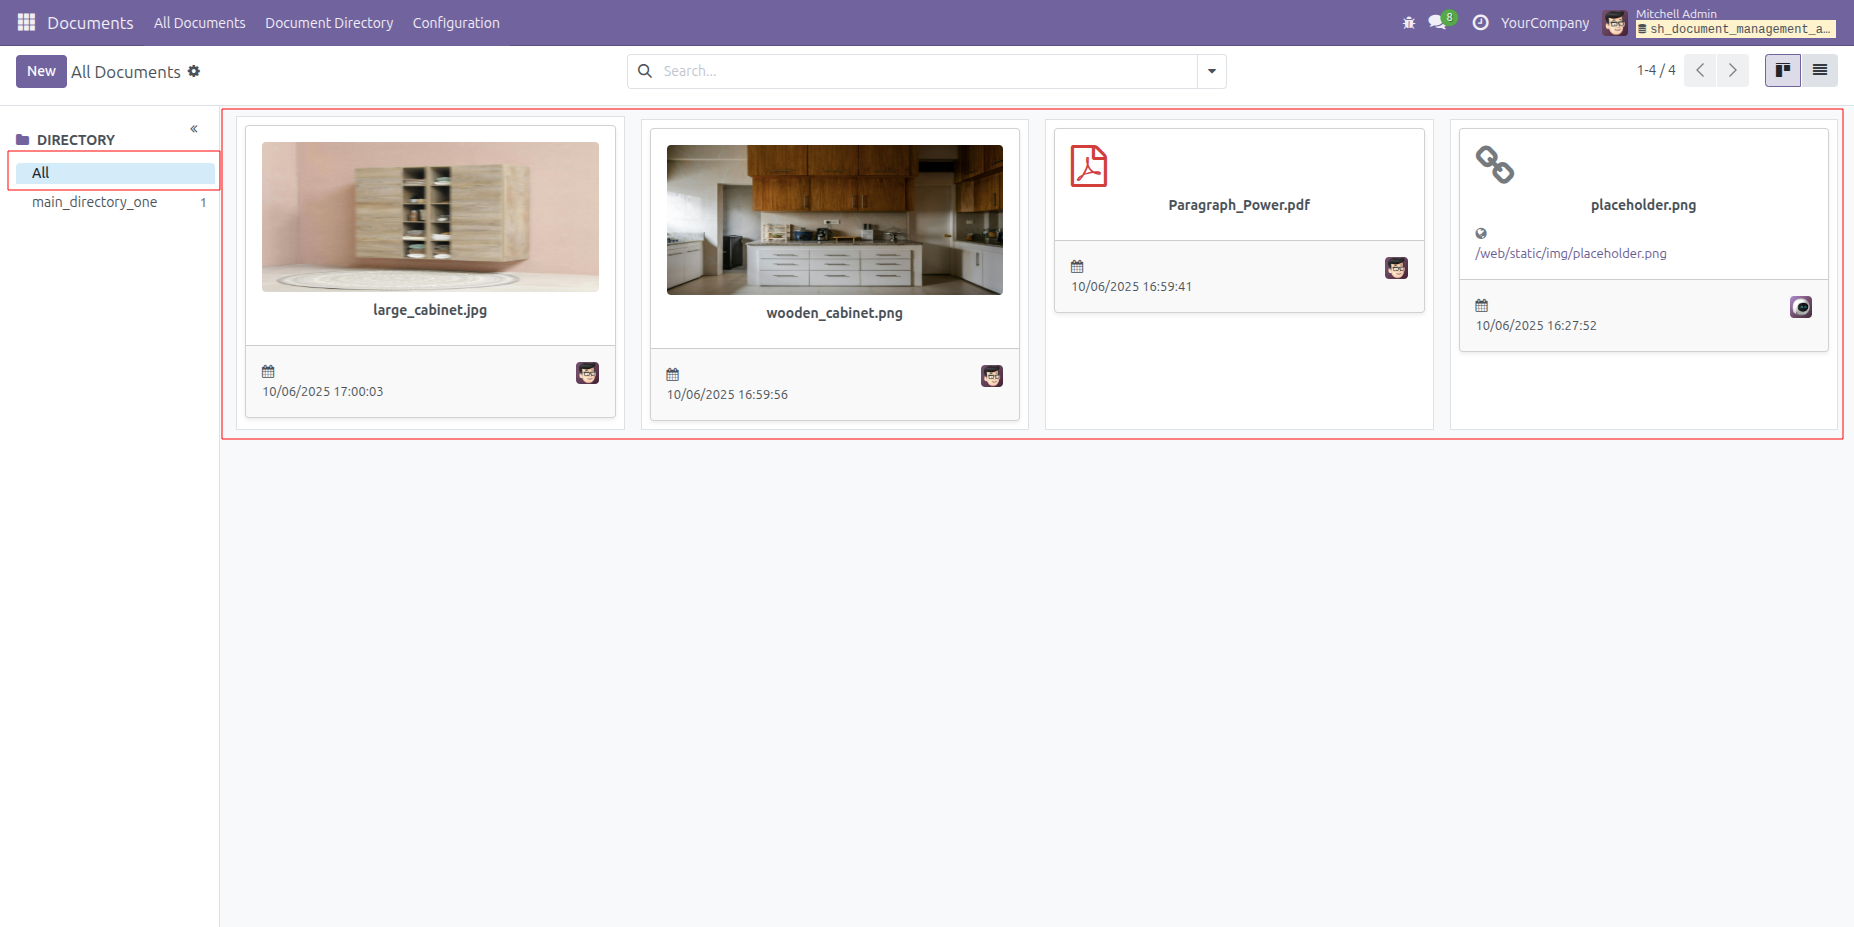
In the Kanban view of "All Documents", you can see the attached documents.
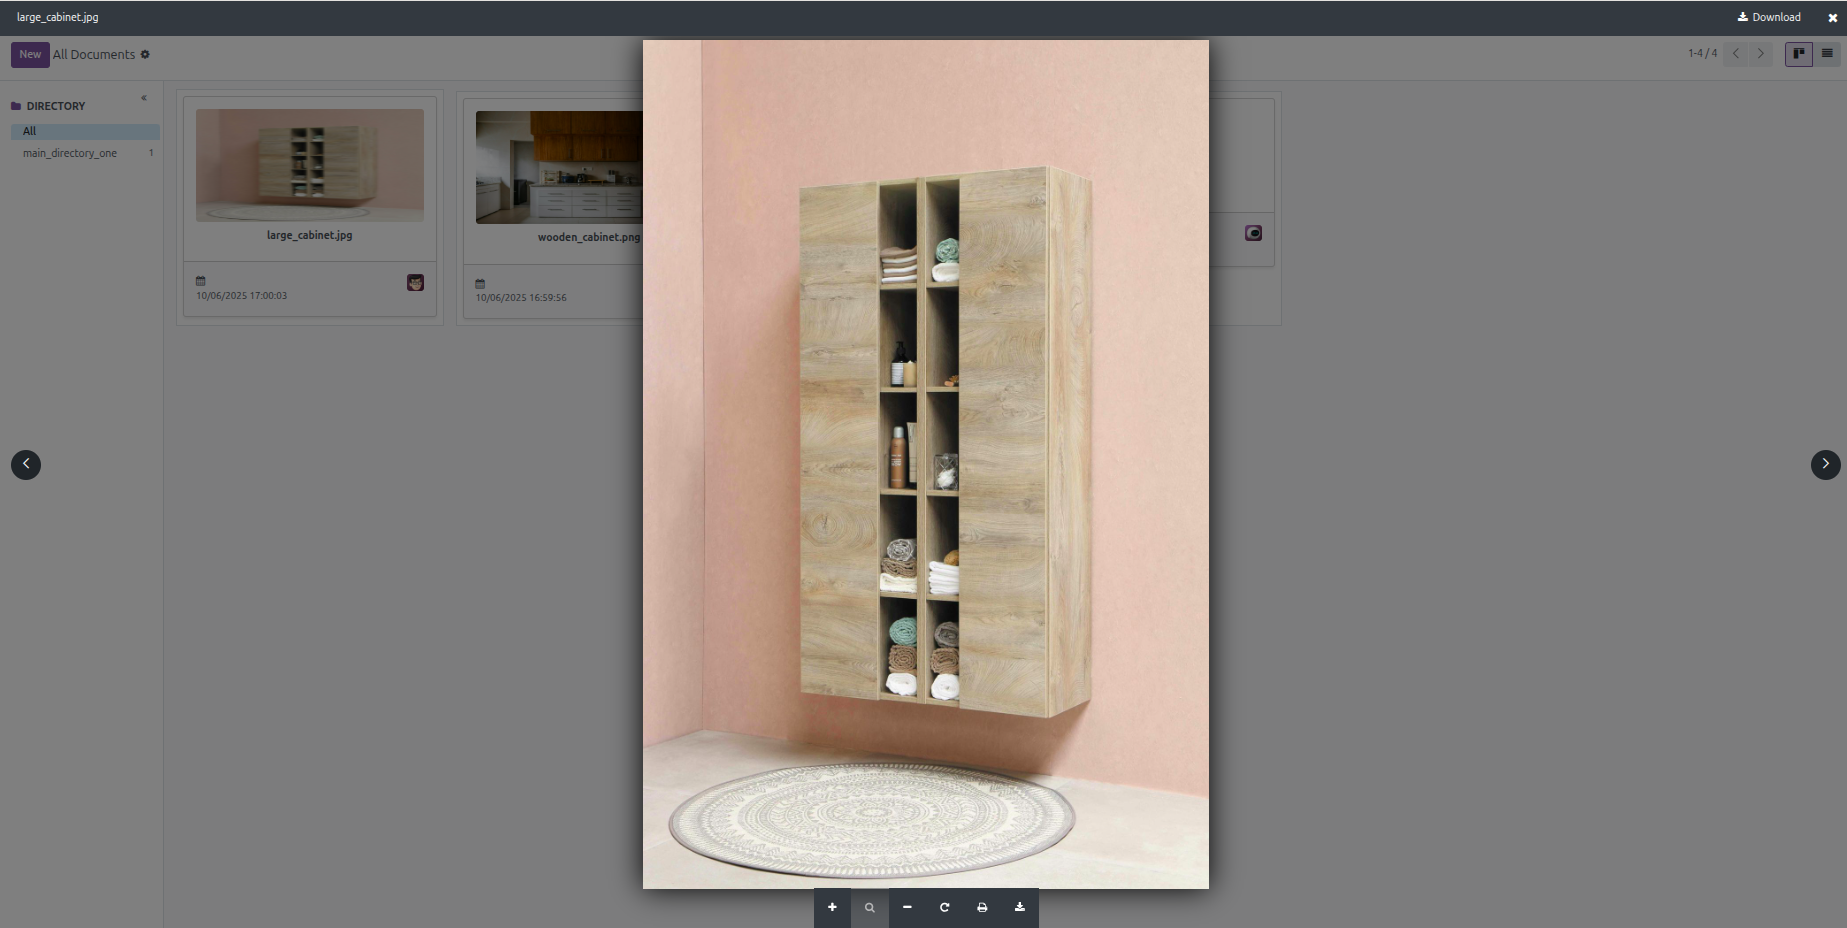
The image popup looks like below.
Tree view of the "All Documents'.
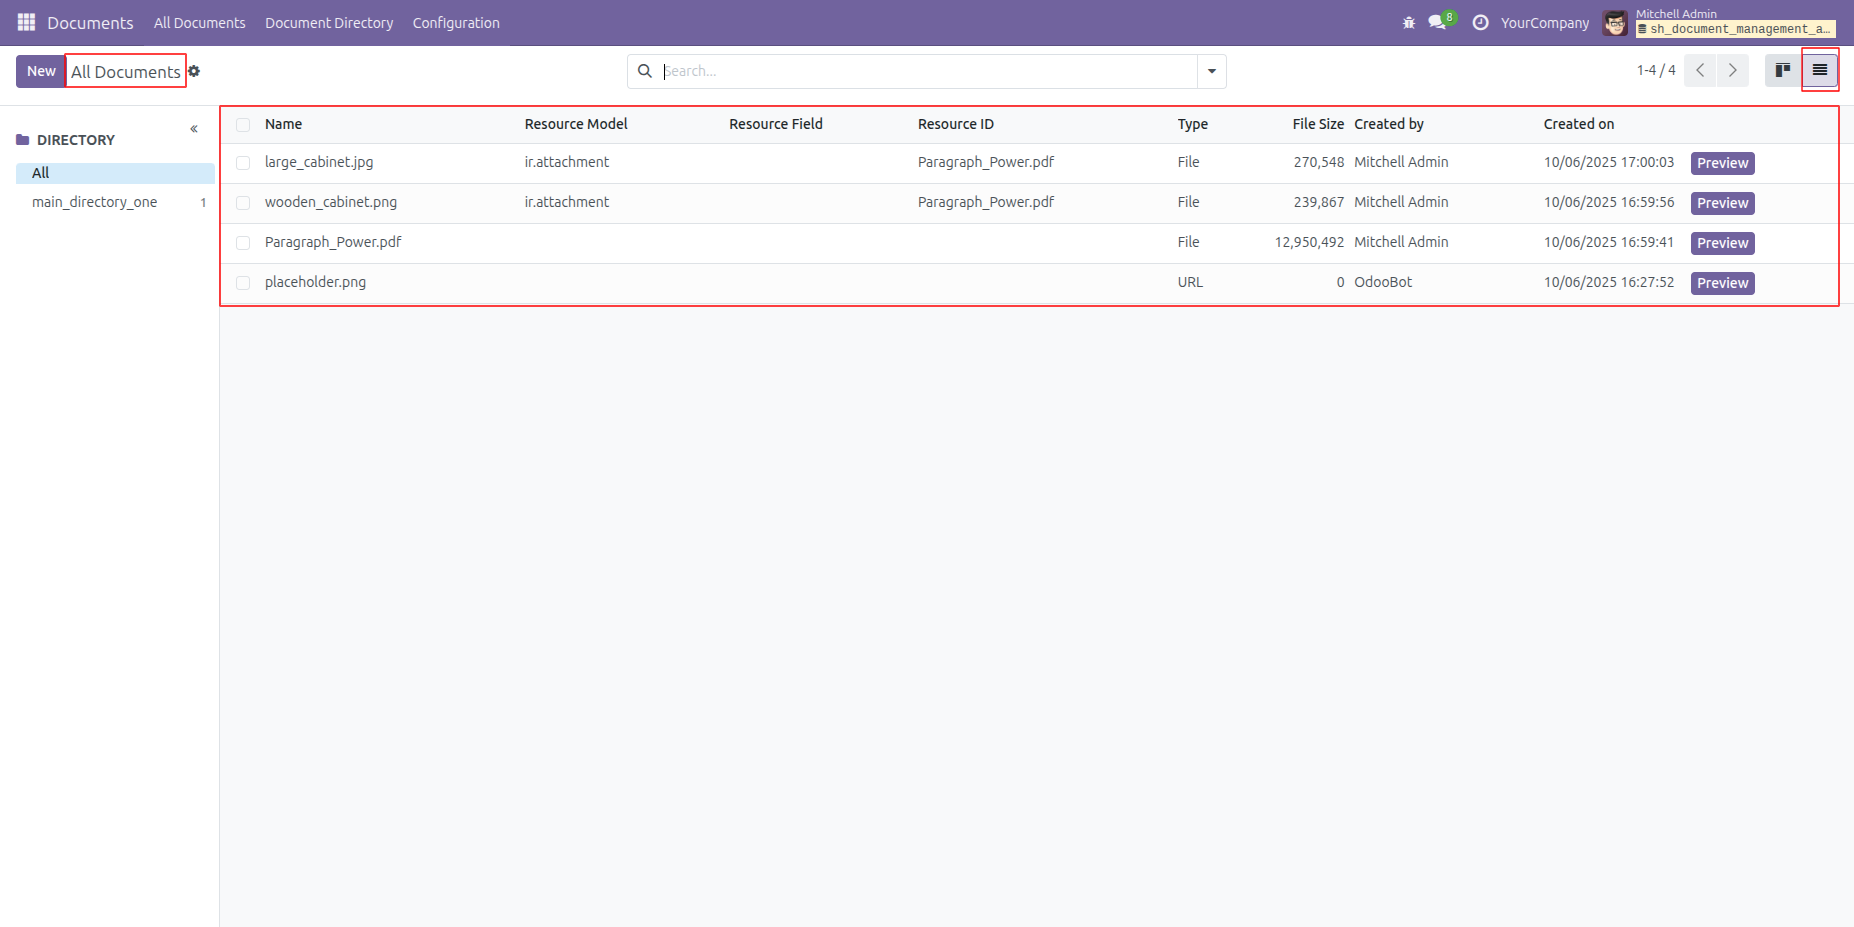
Select the document you want to share, then click on the "Share" option under "Action."
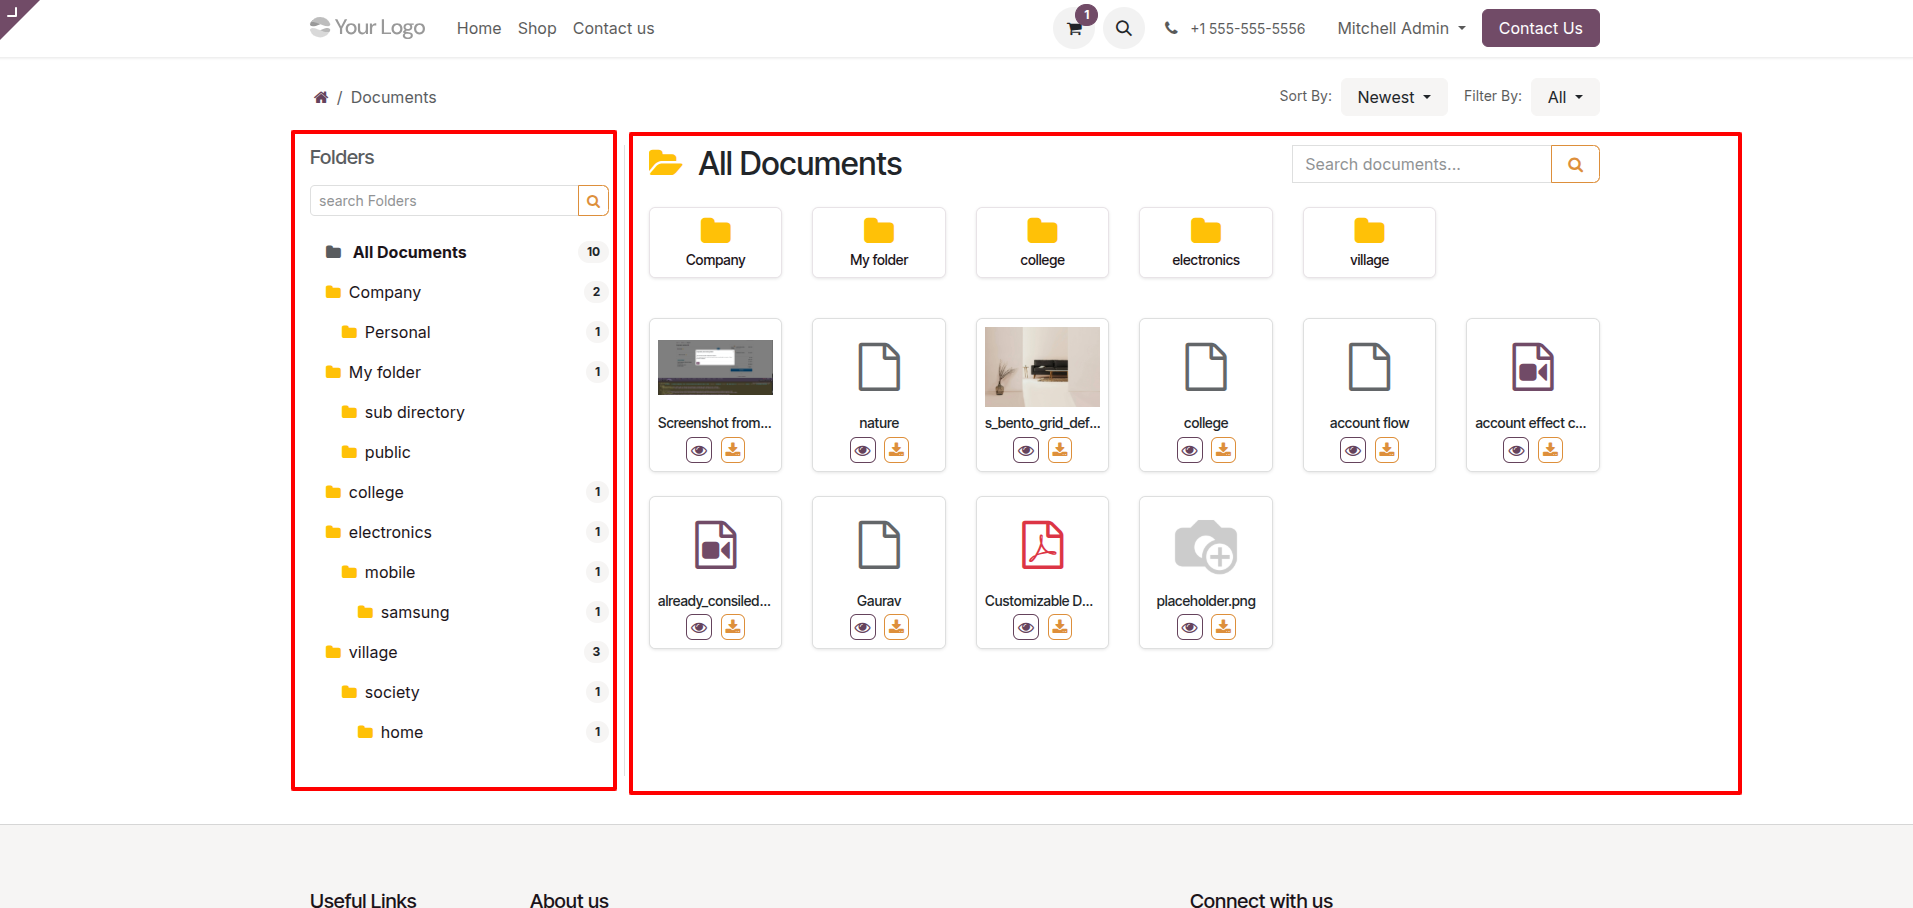
Kanban view for the portal user.
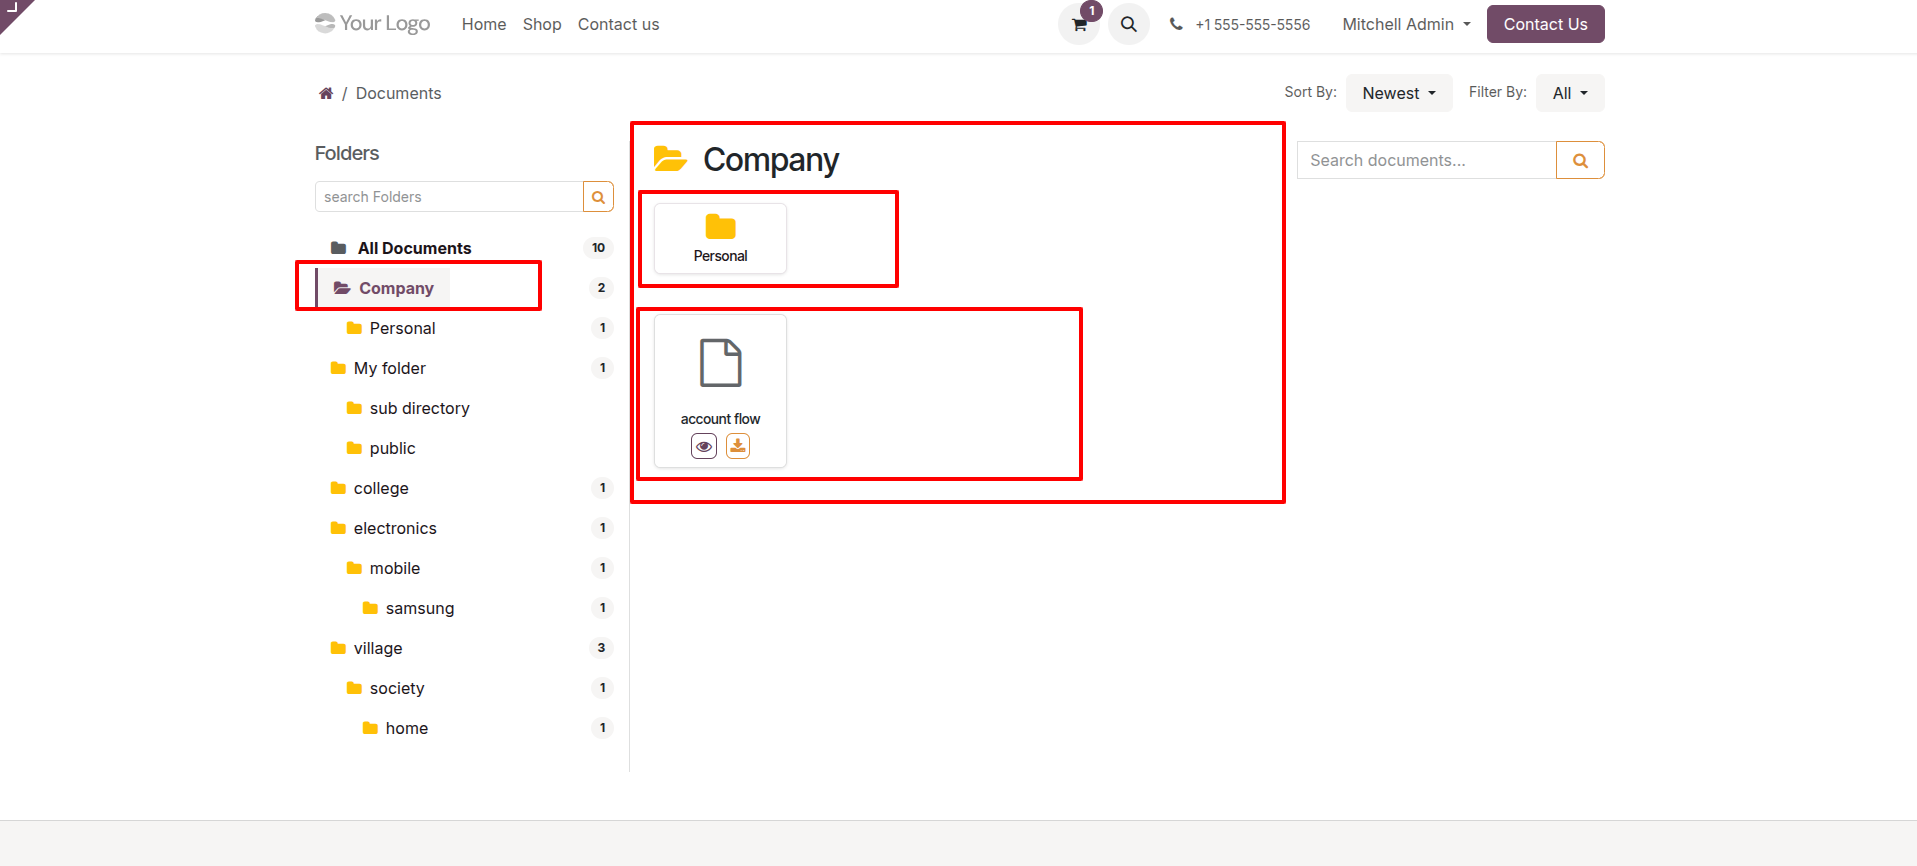
Company-wise document list.
Personal document list.
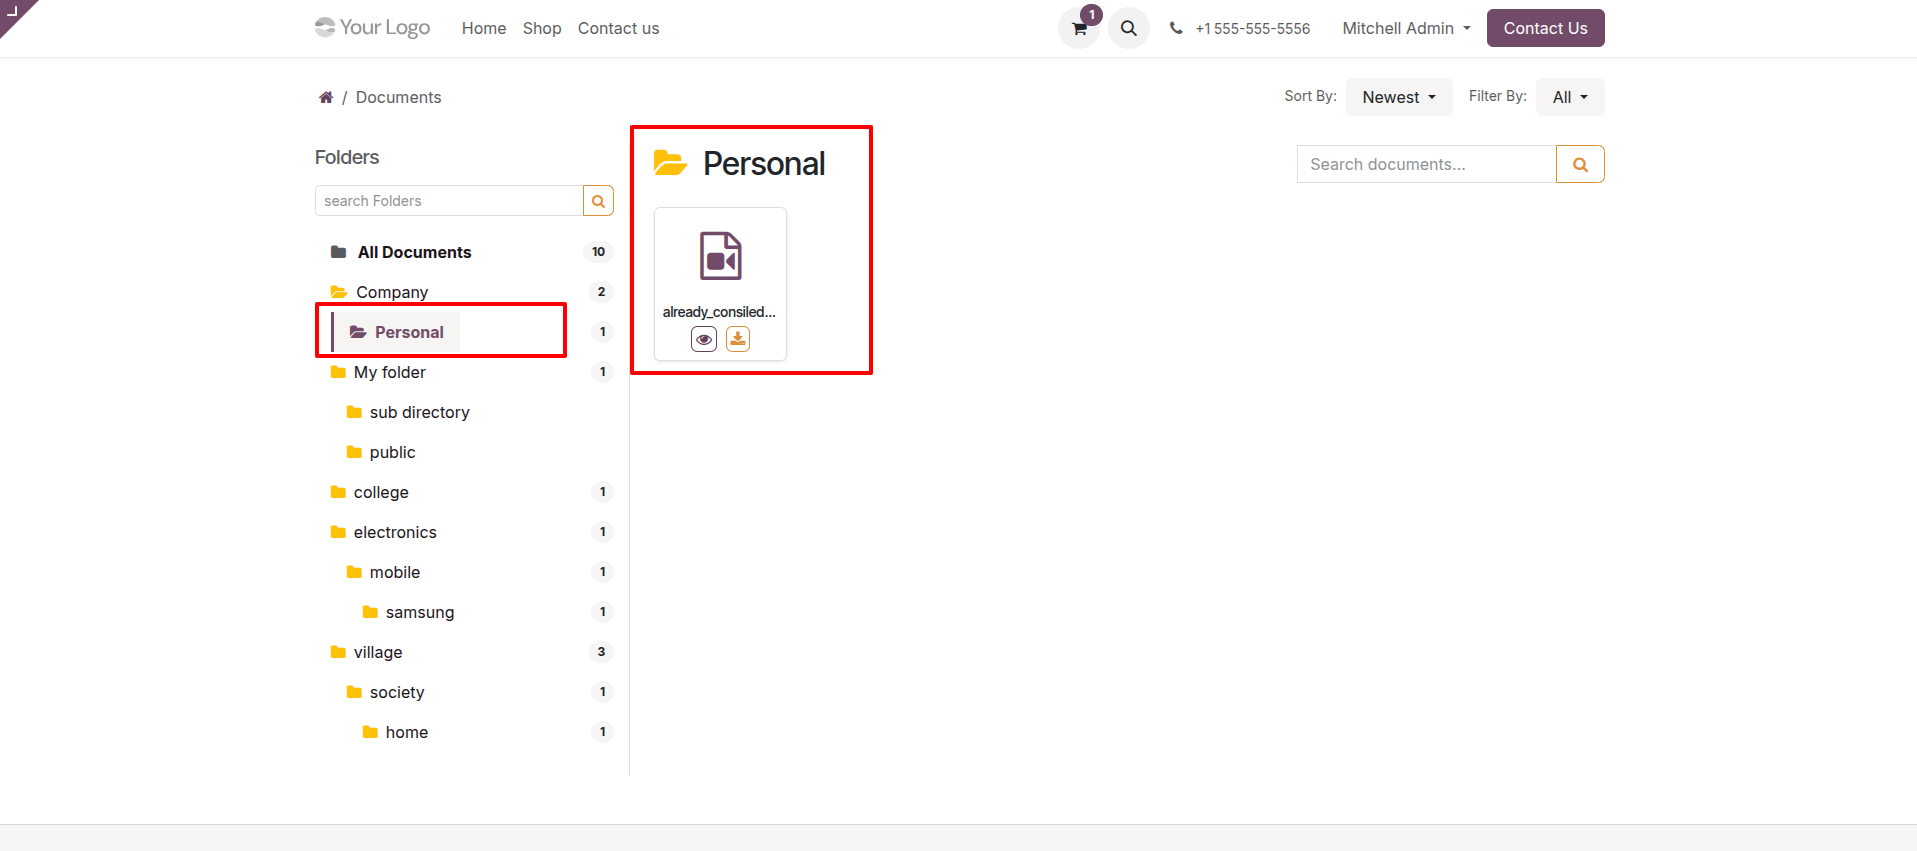
Click on the 'Eye' icon to view the document.
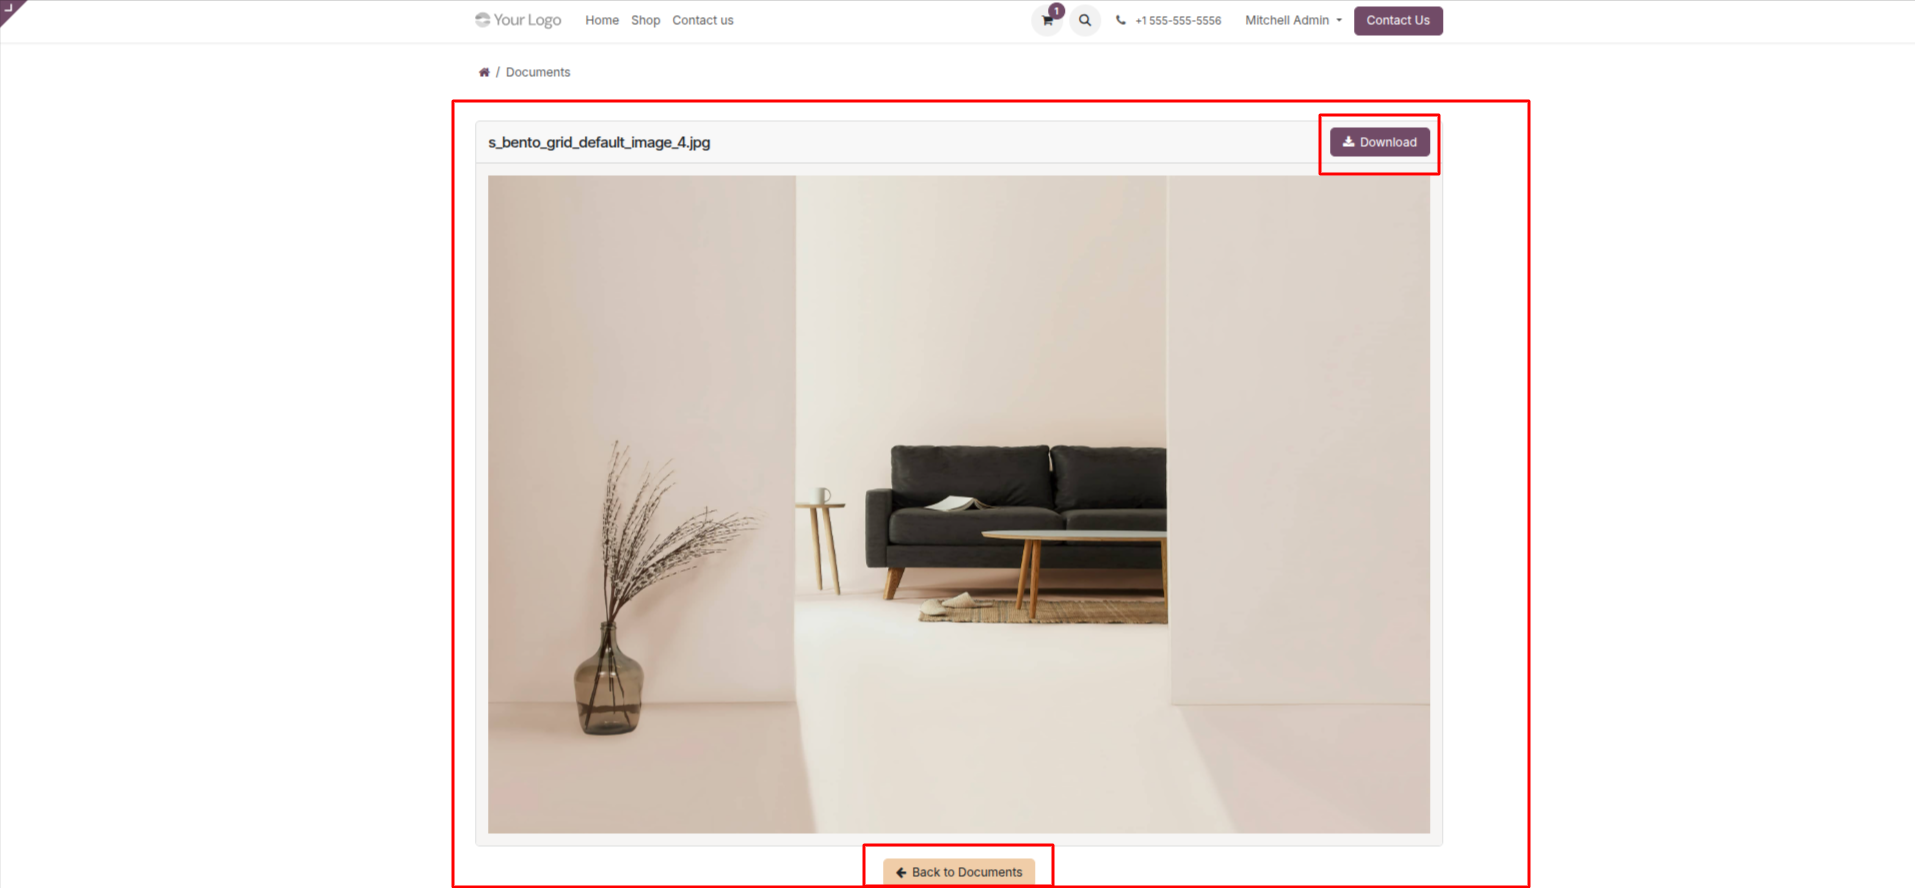
After that, the document popup will appear. Click on the 'Back to Document' button.
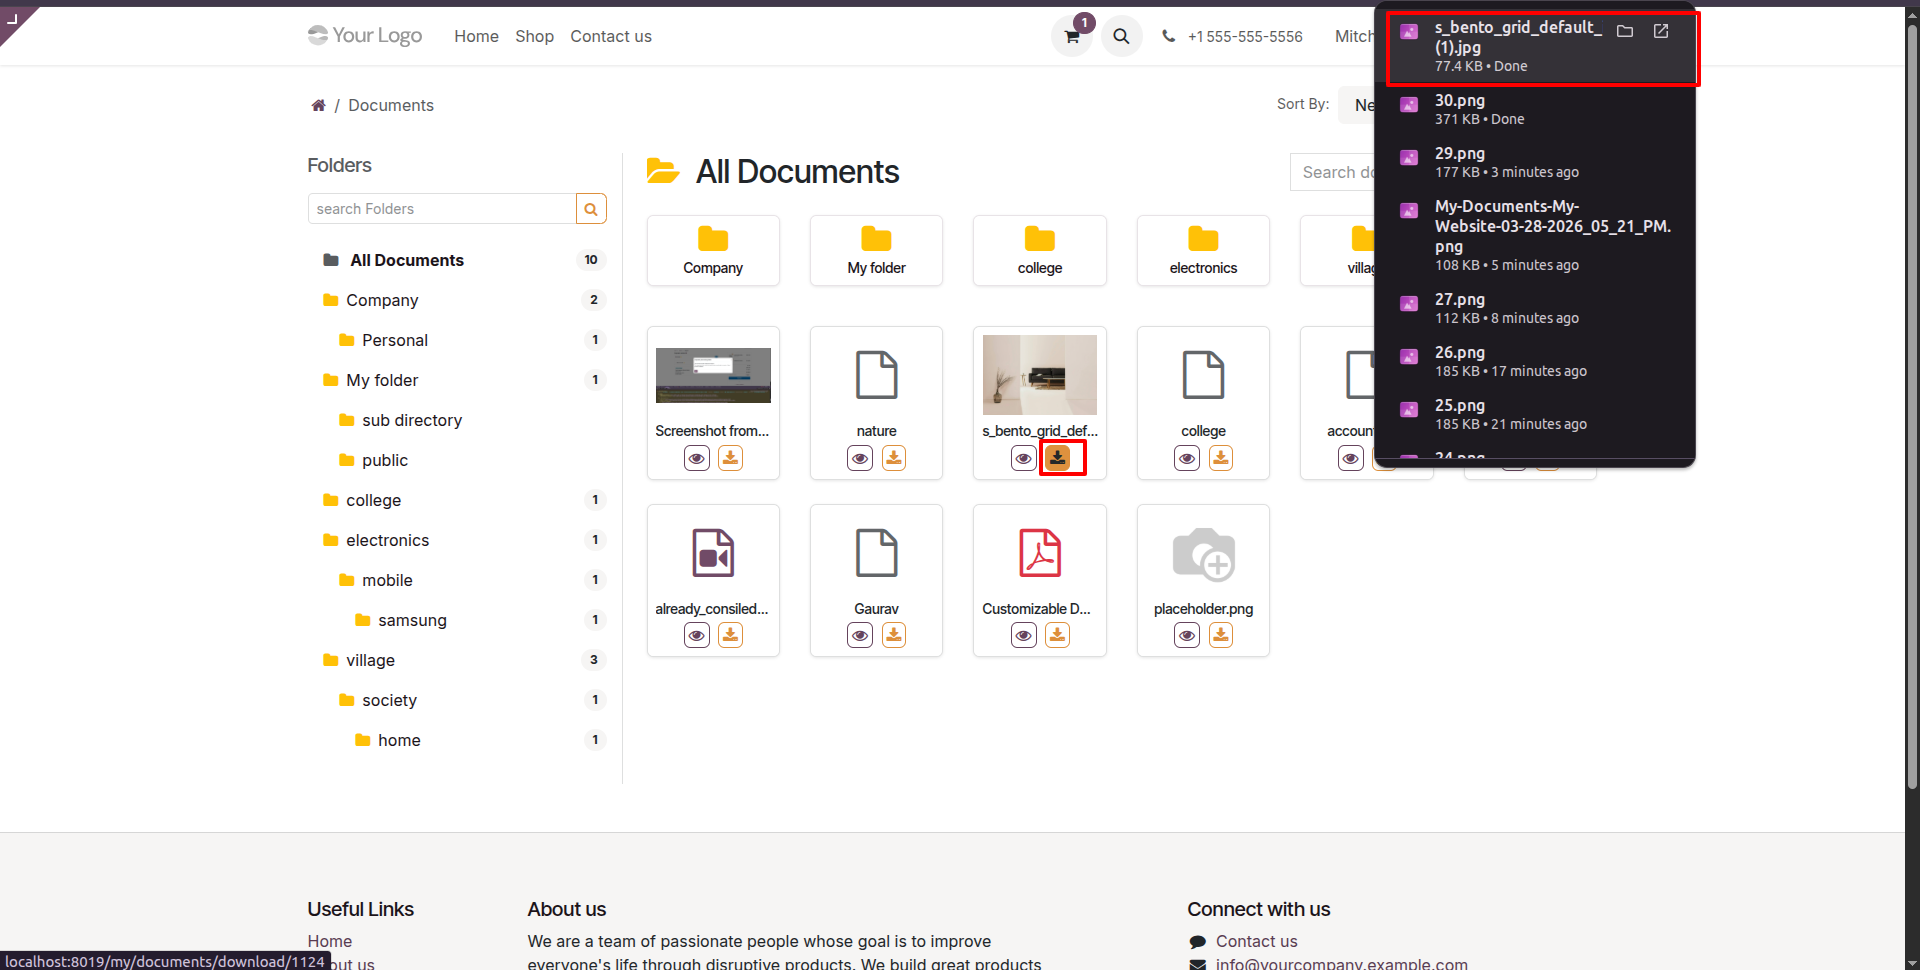
Click on the 'Download' icon to download the document.
Here, you can see that the document ZIP file has been
downloaded.
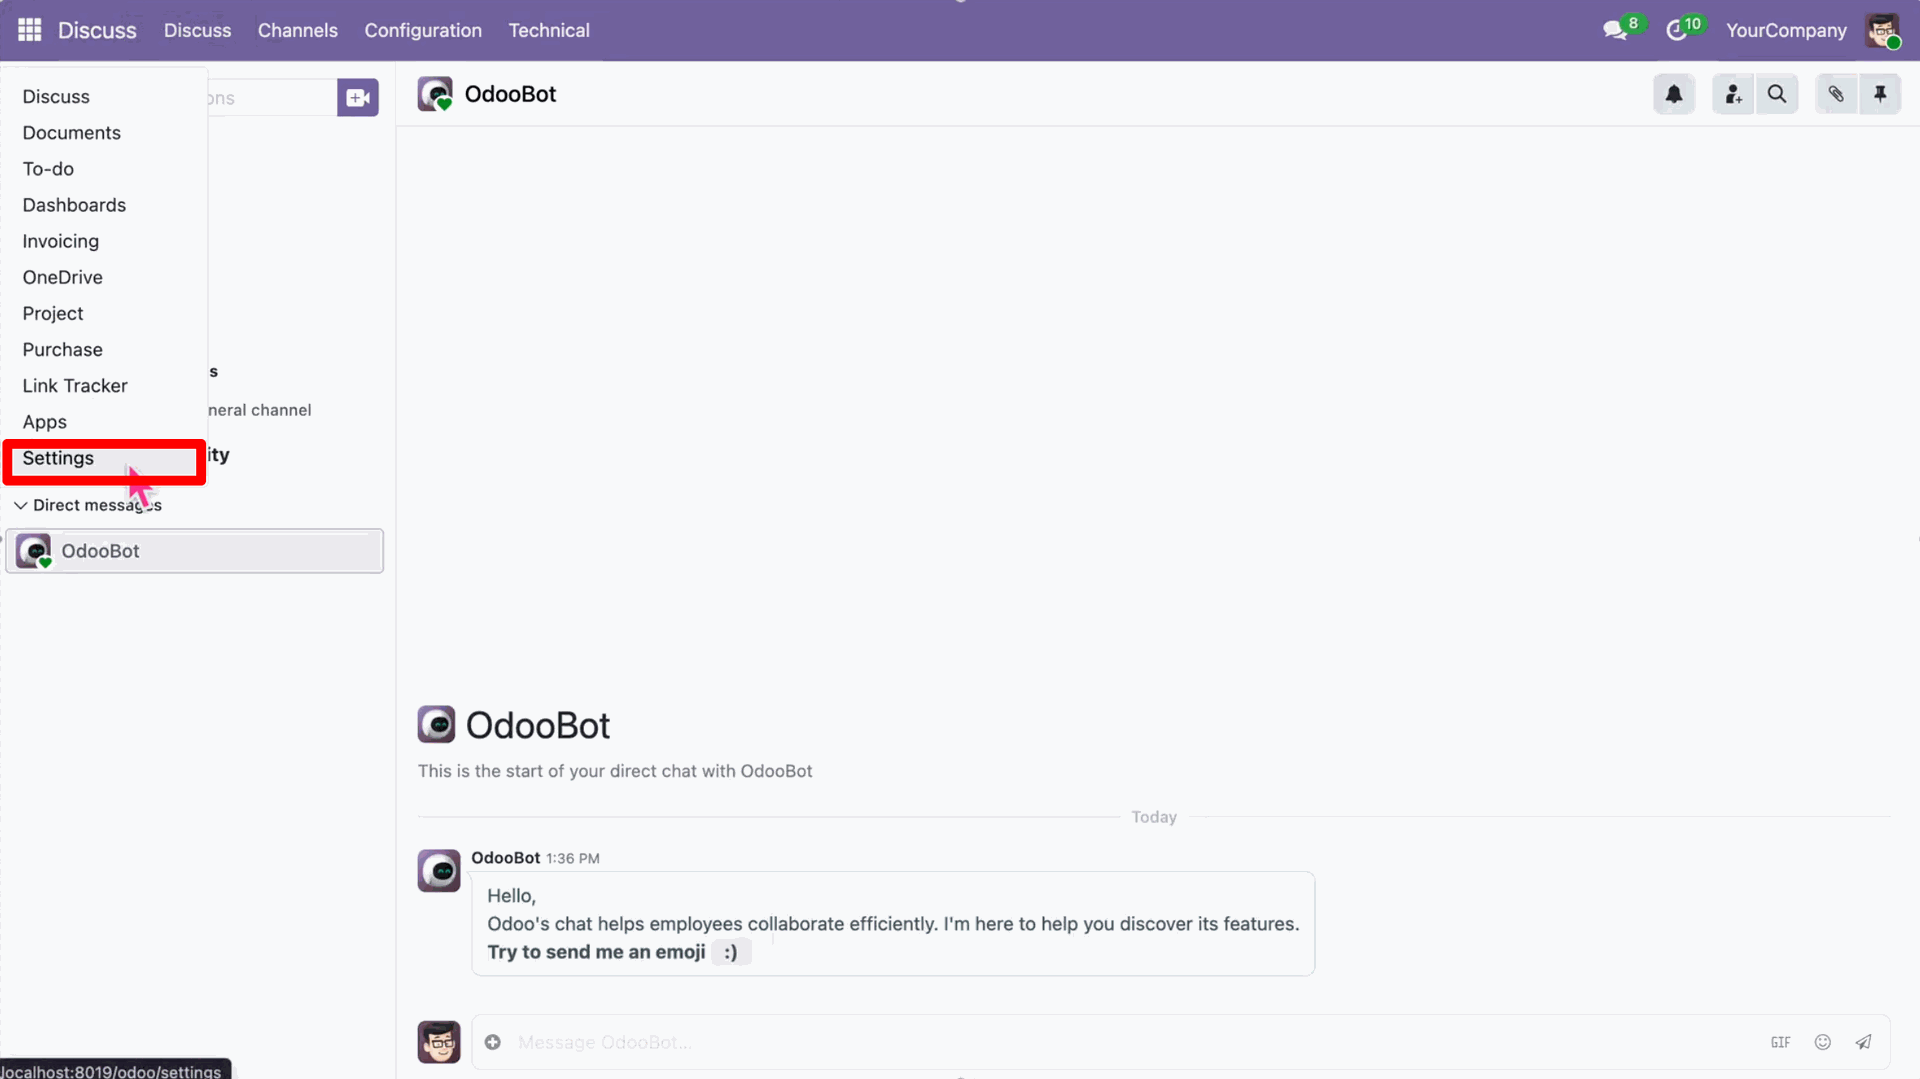
Navigate to Settings in your Odoo apps.
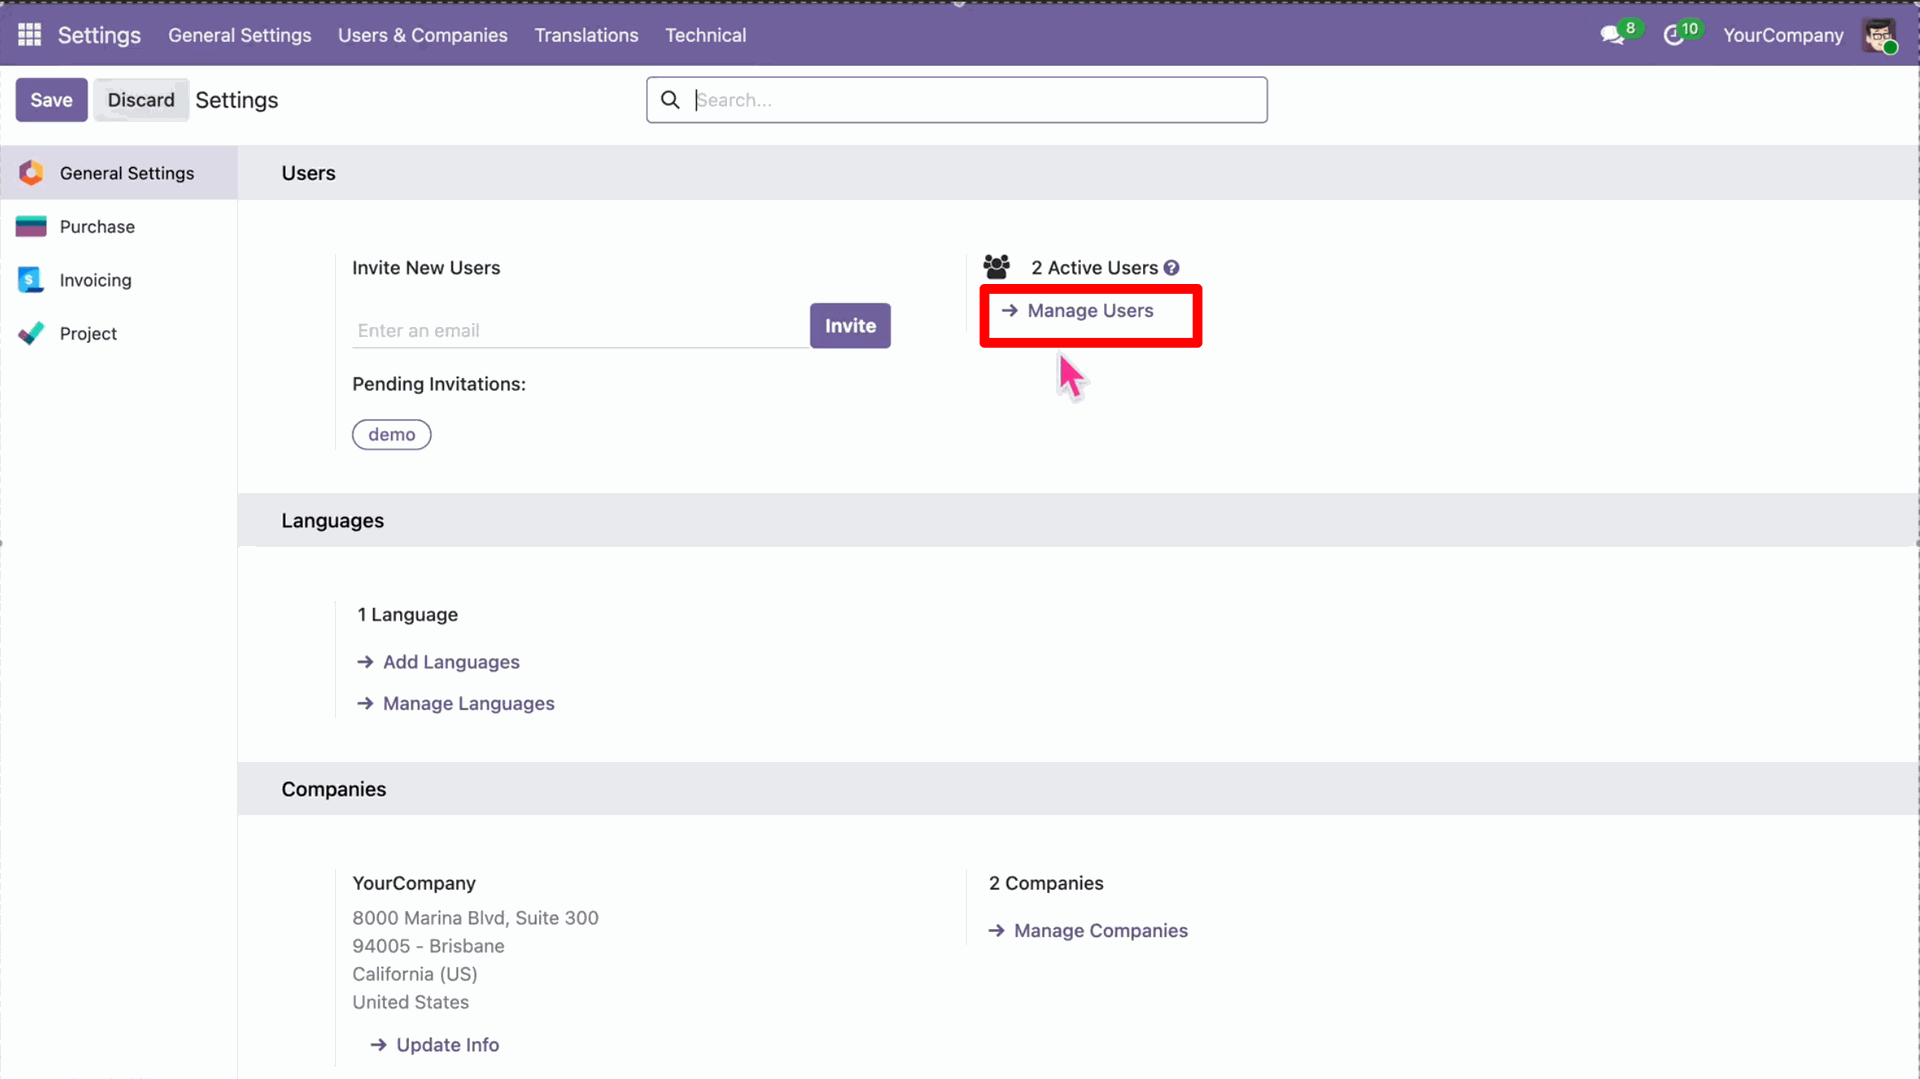
Go to Manage Users under Users & Companies.
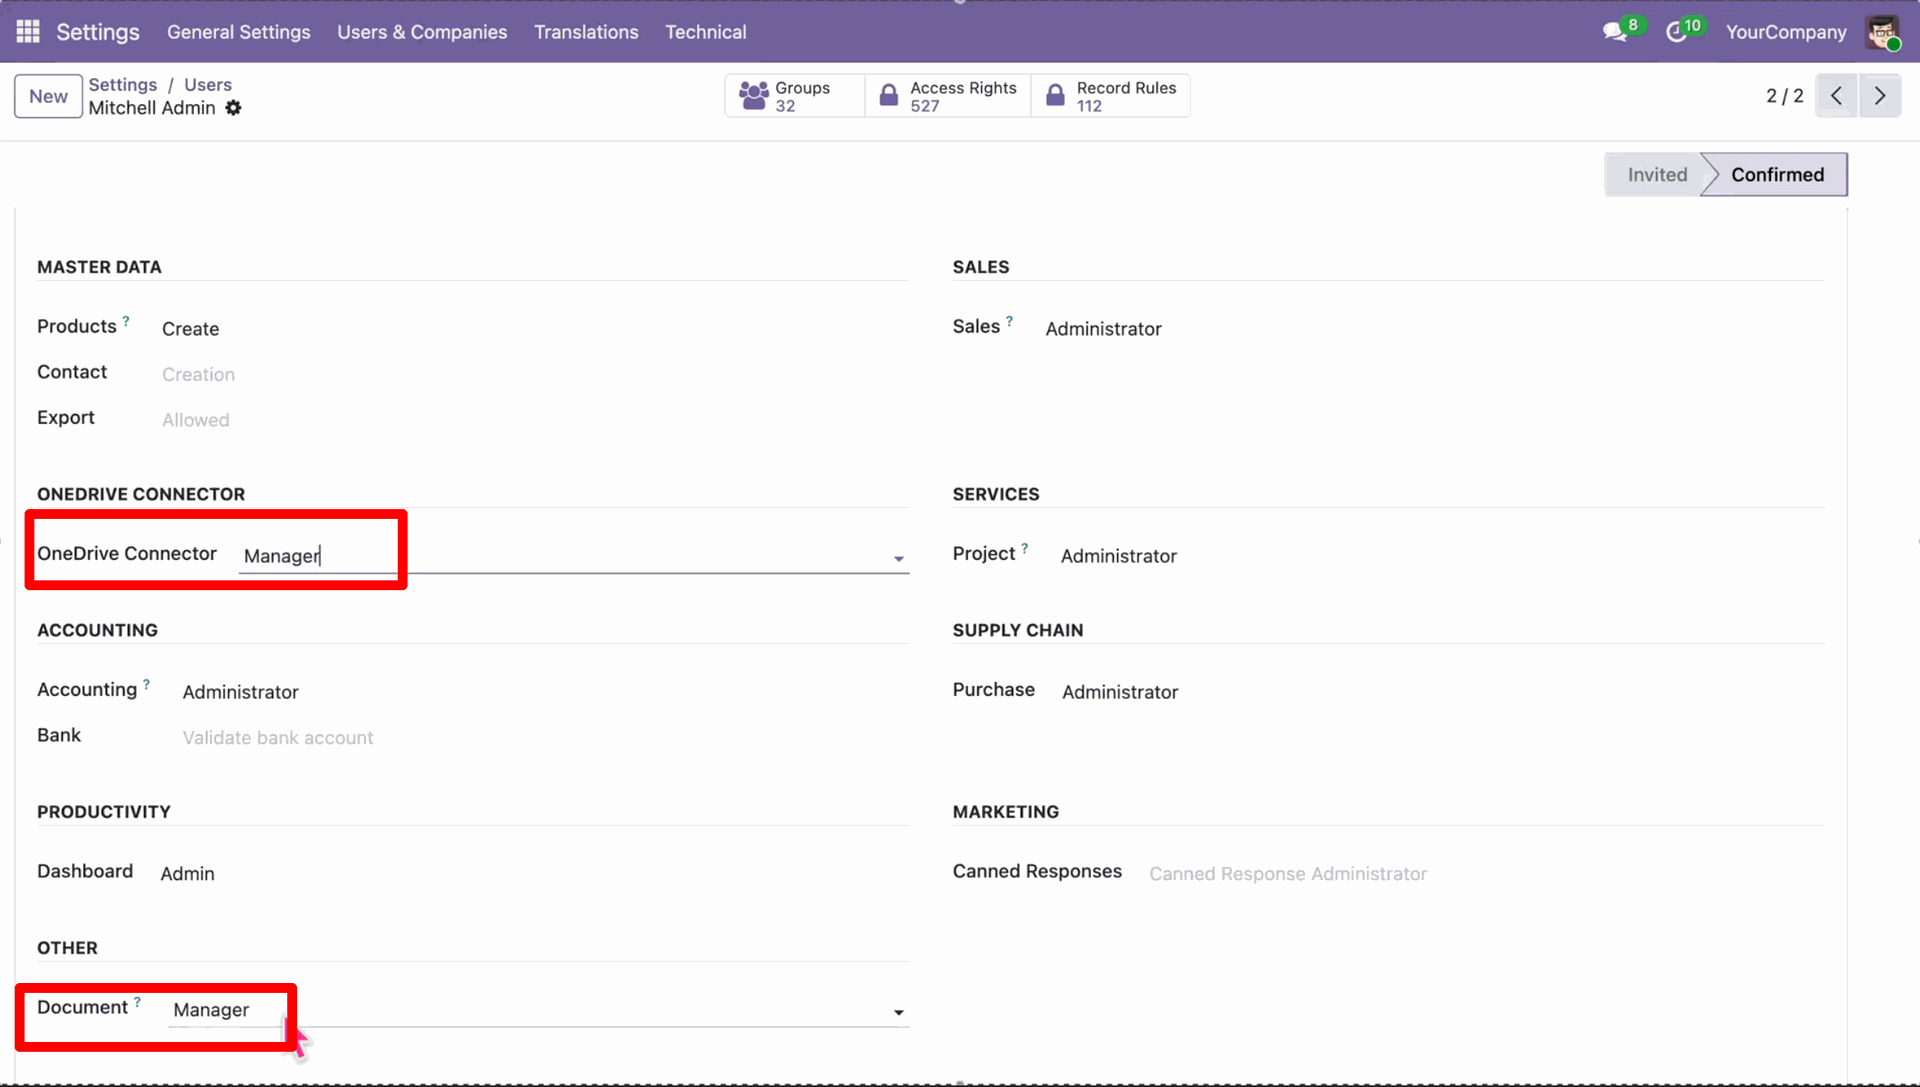
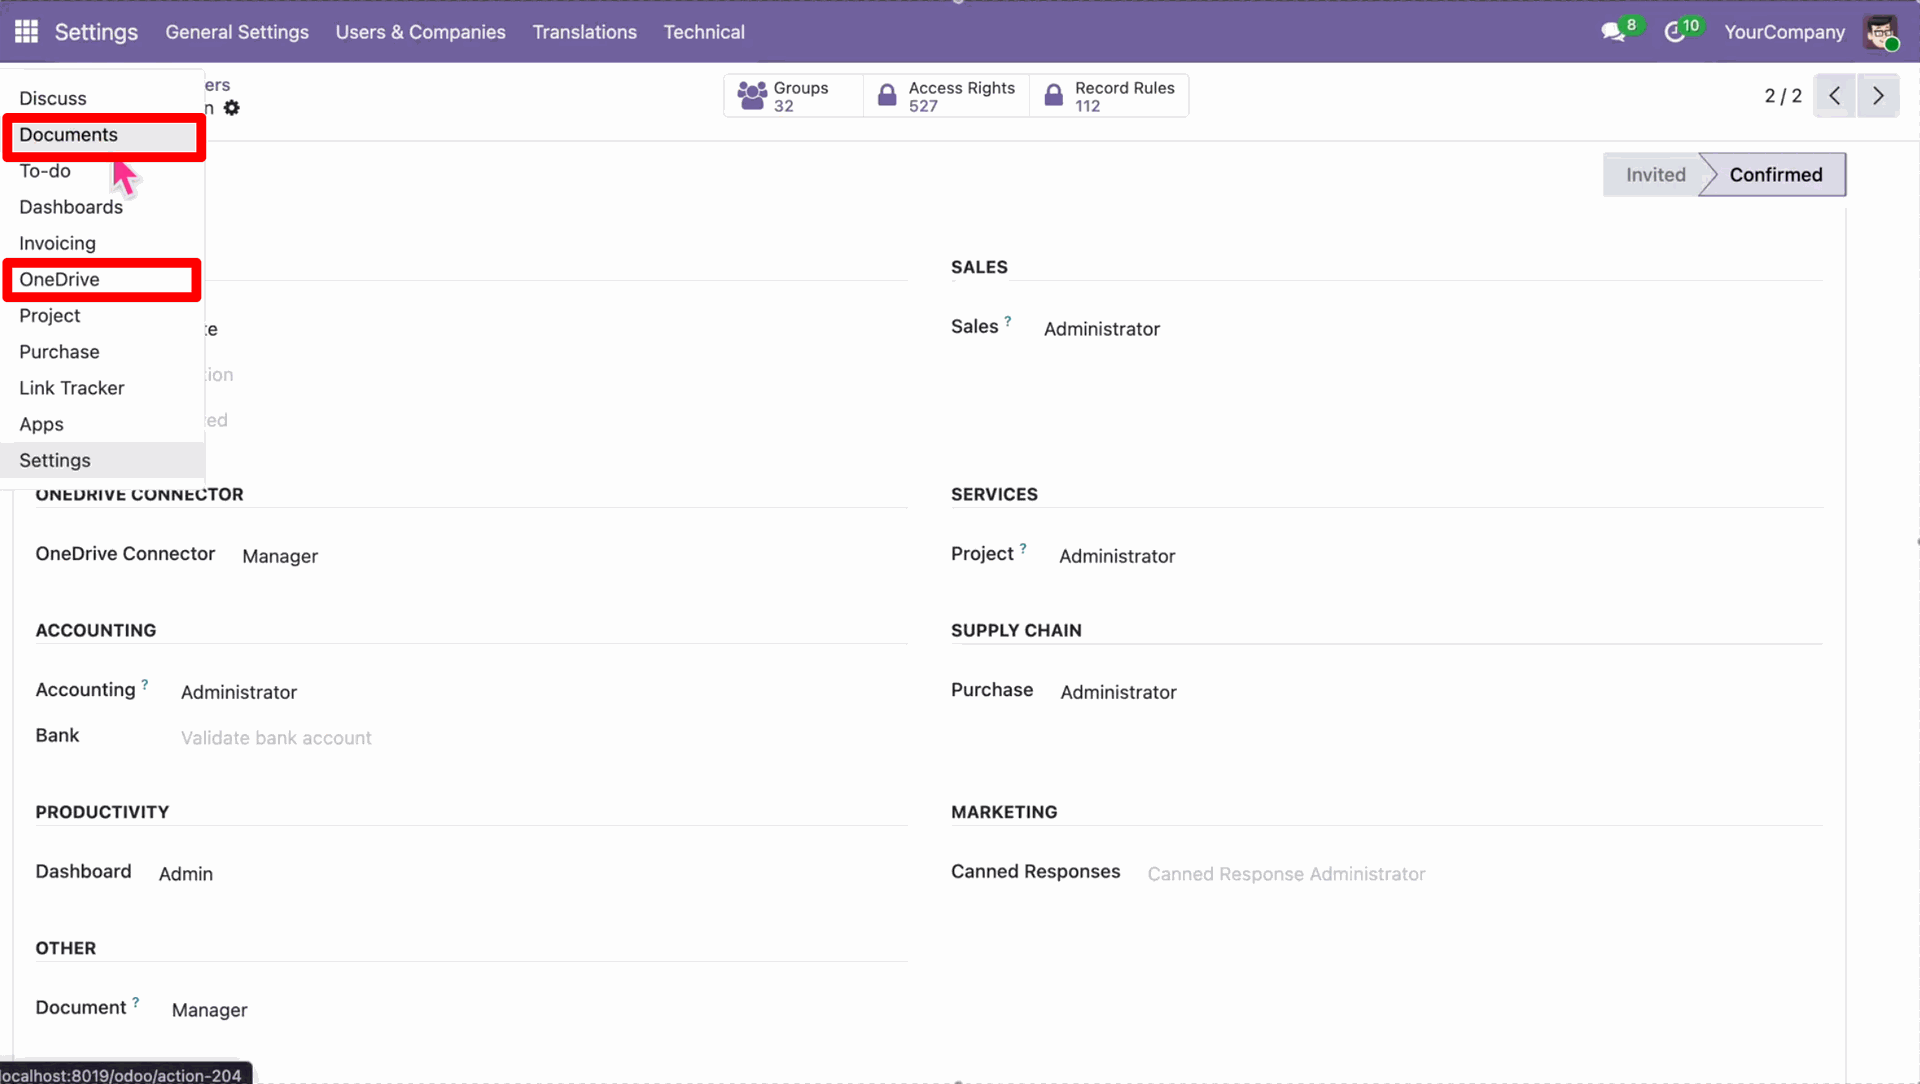
Assign the 'Manager' role for OneDrive Connector to the user.
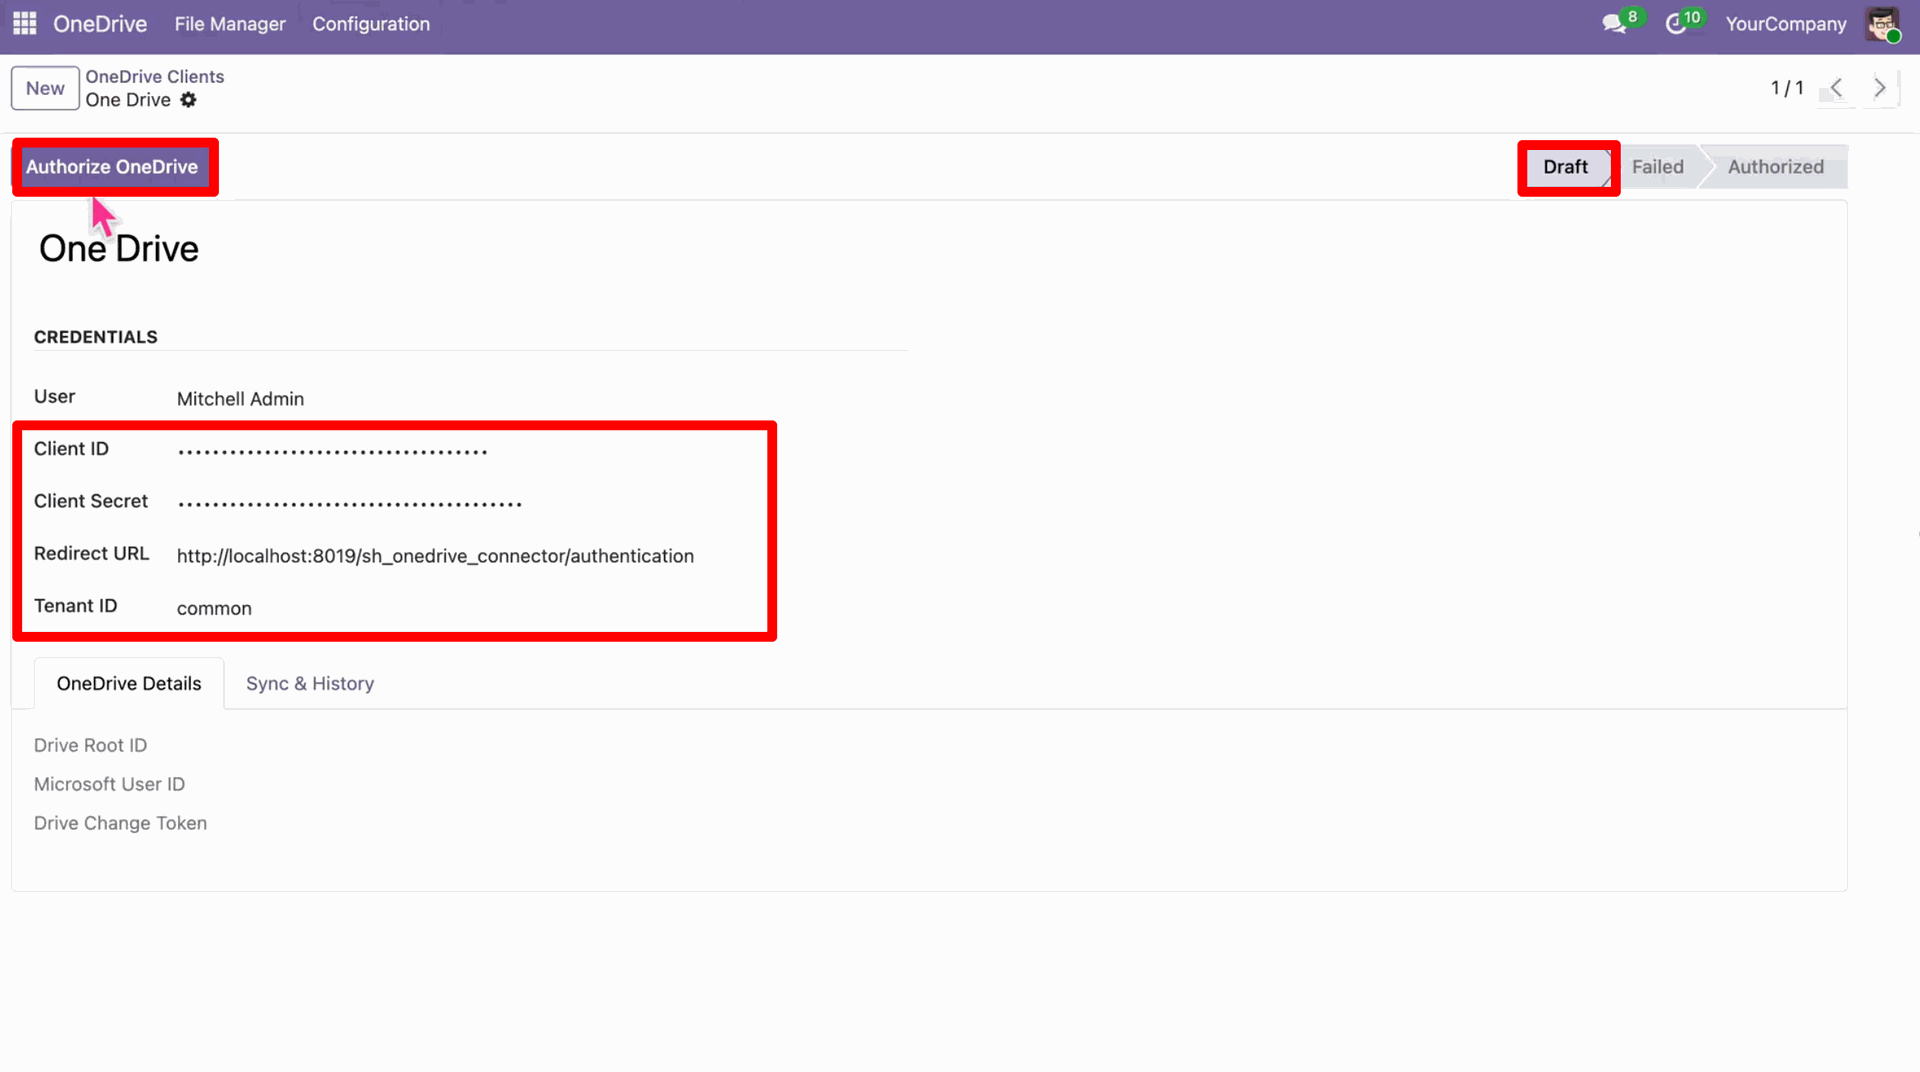
Click on the 'Authorize OneDrive' button to initiate the connection.
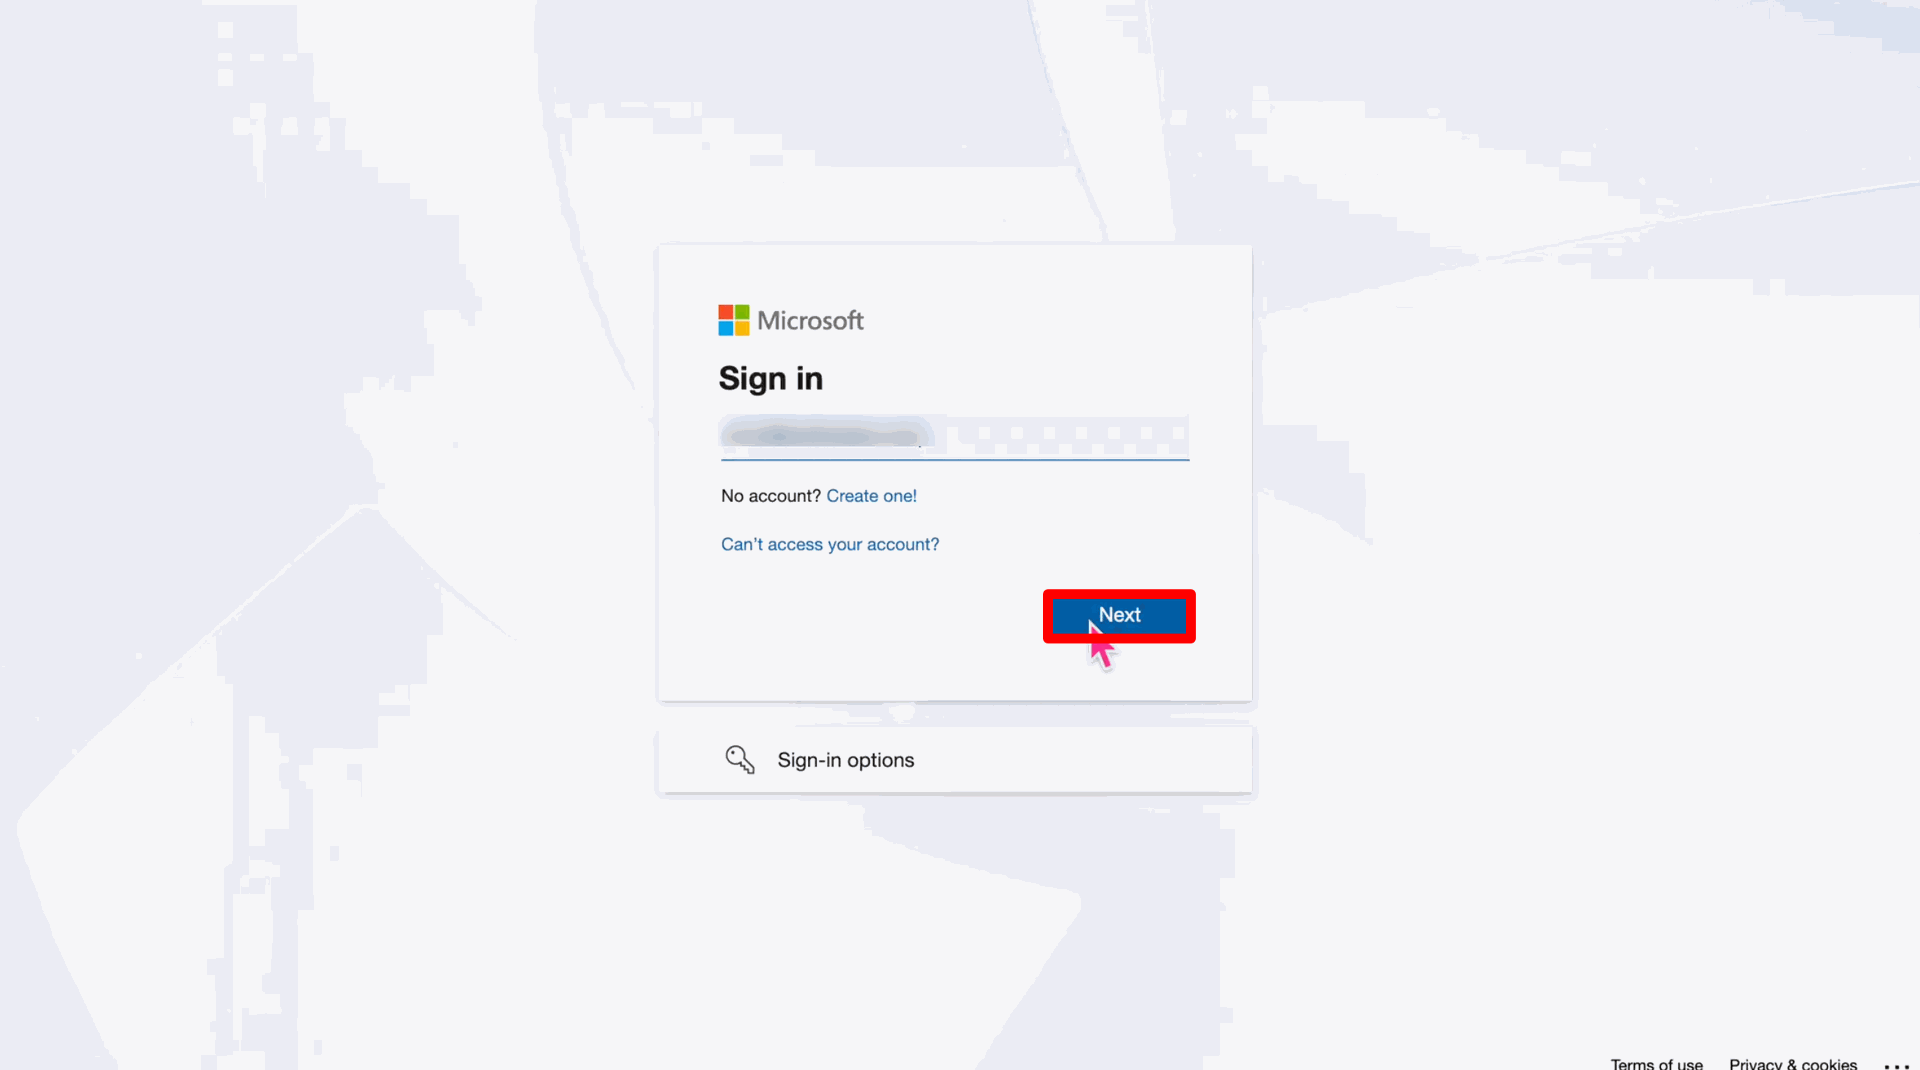
Sign in with your Microsoft account credentials.
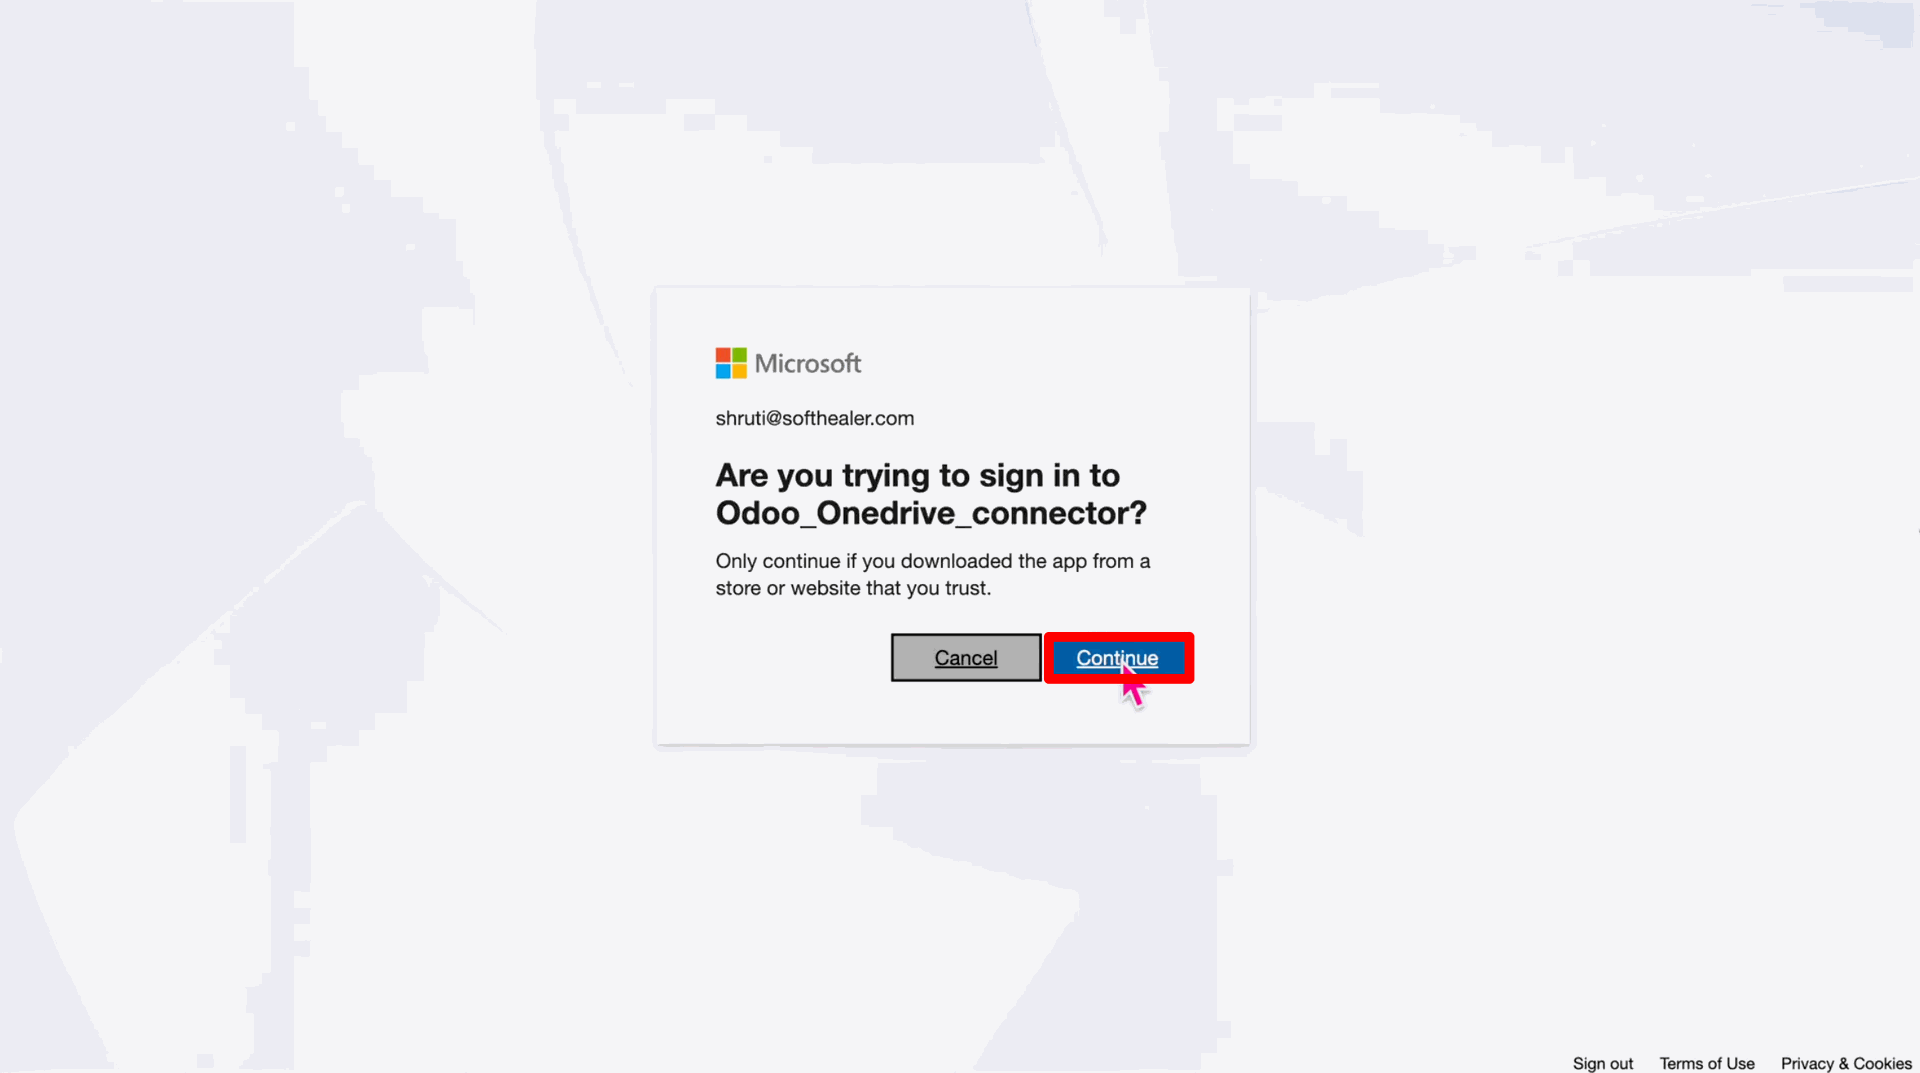
Grant the necessary permissions to the Odoo application.
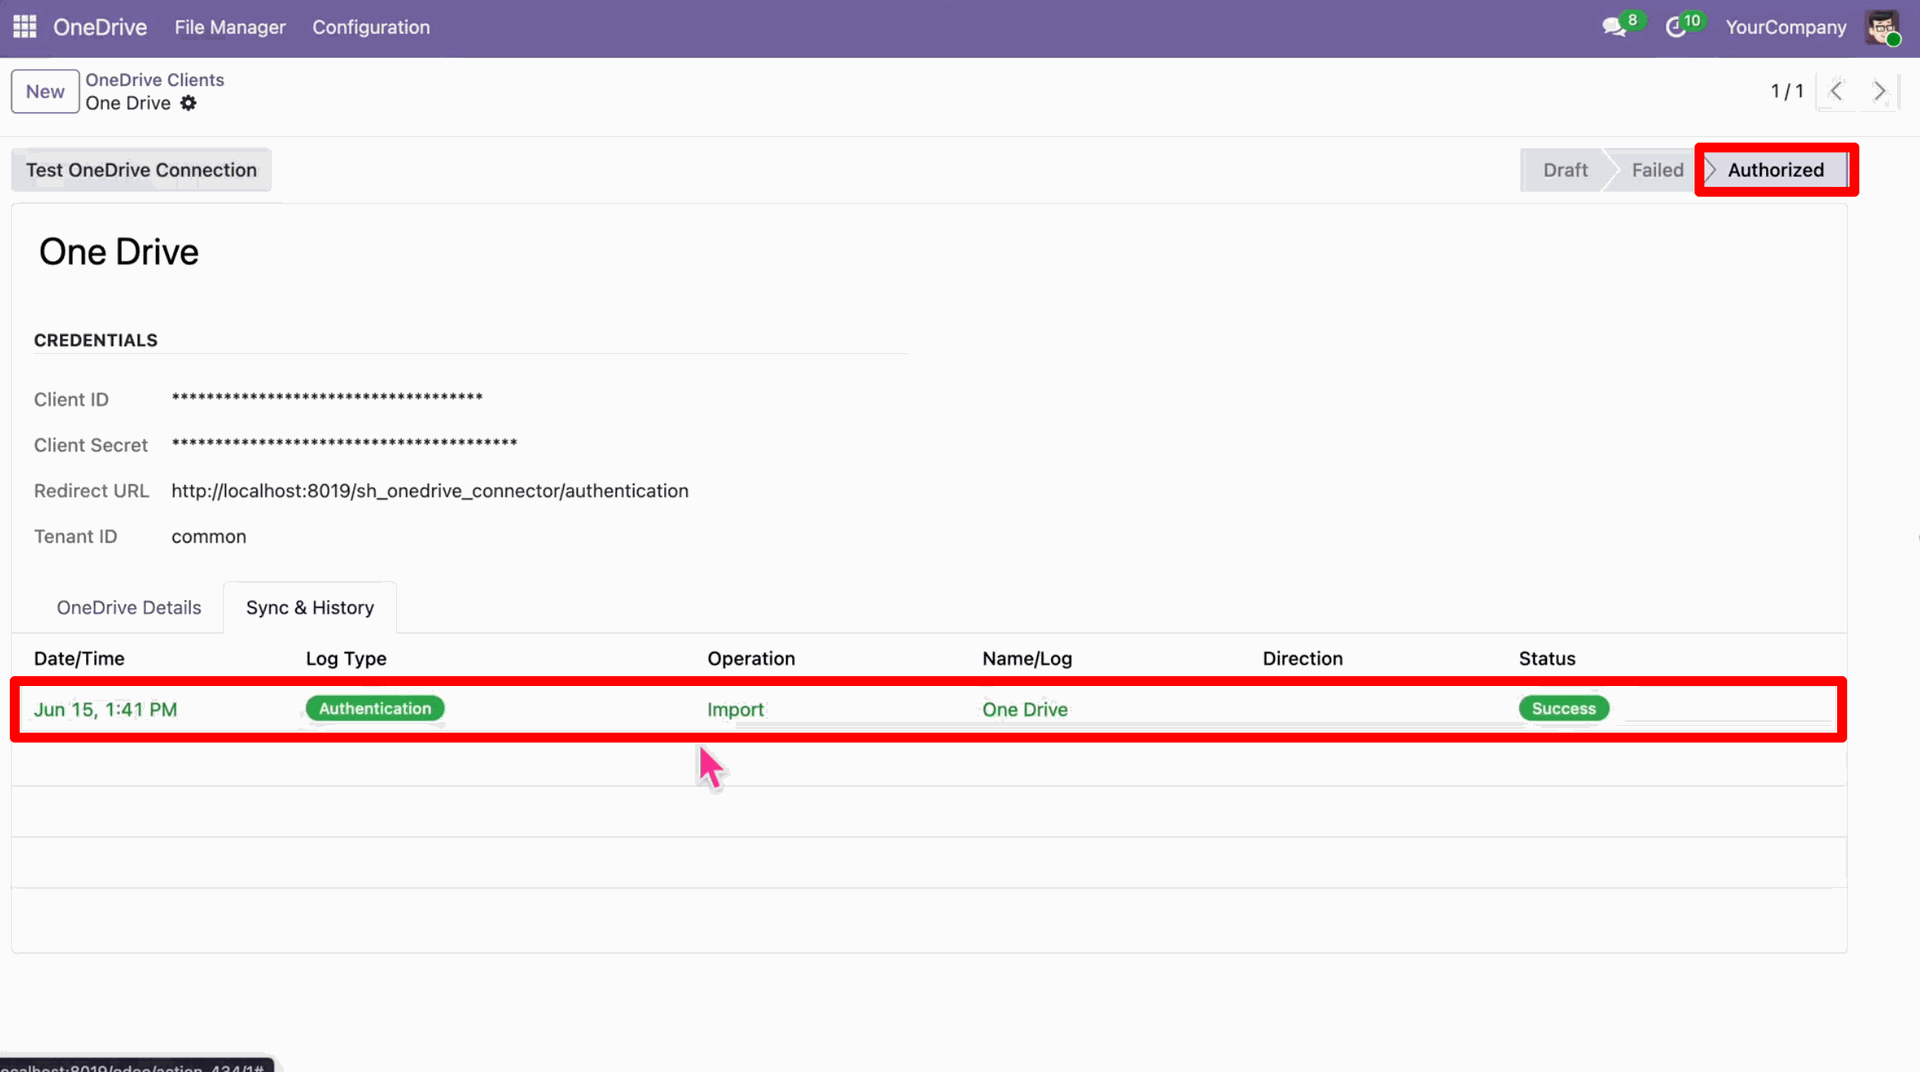
The connection is successfully established and authorized.
Accessing the Dedicated OneDrive App.
OneDrive Clients List View.
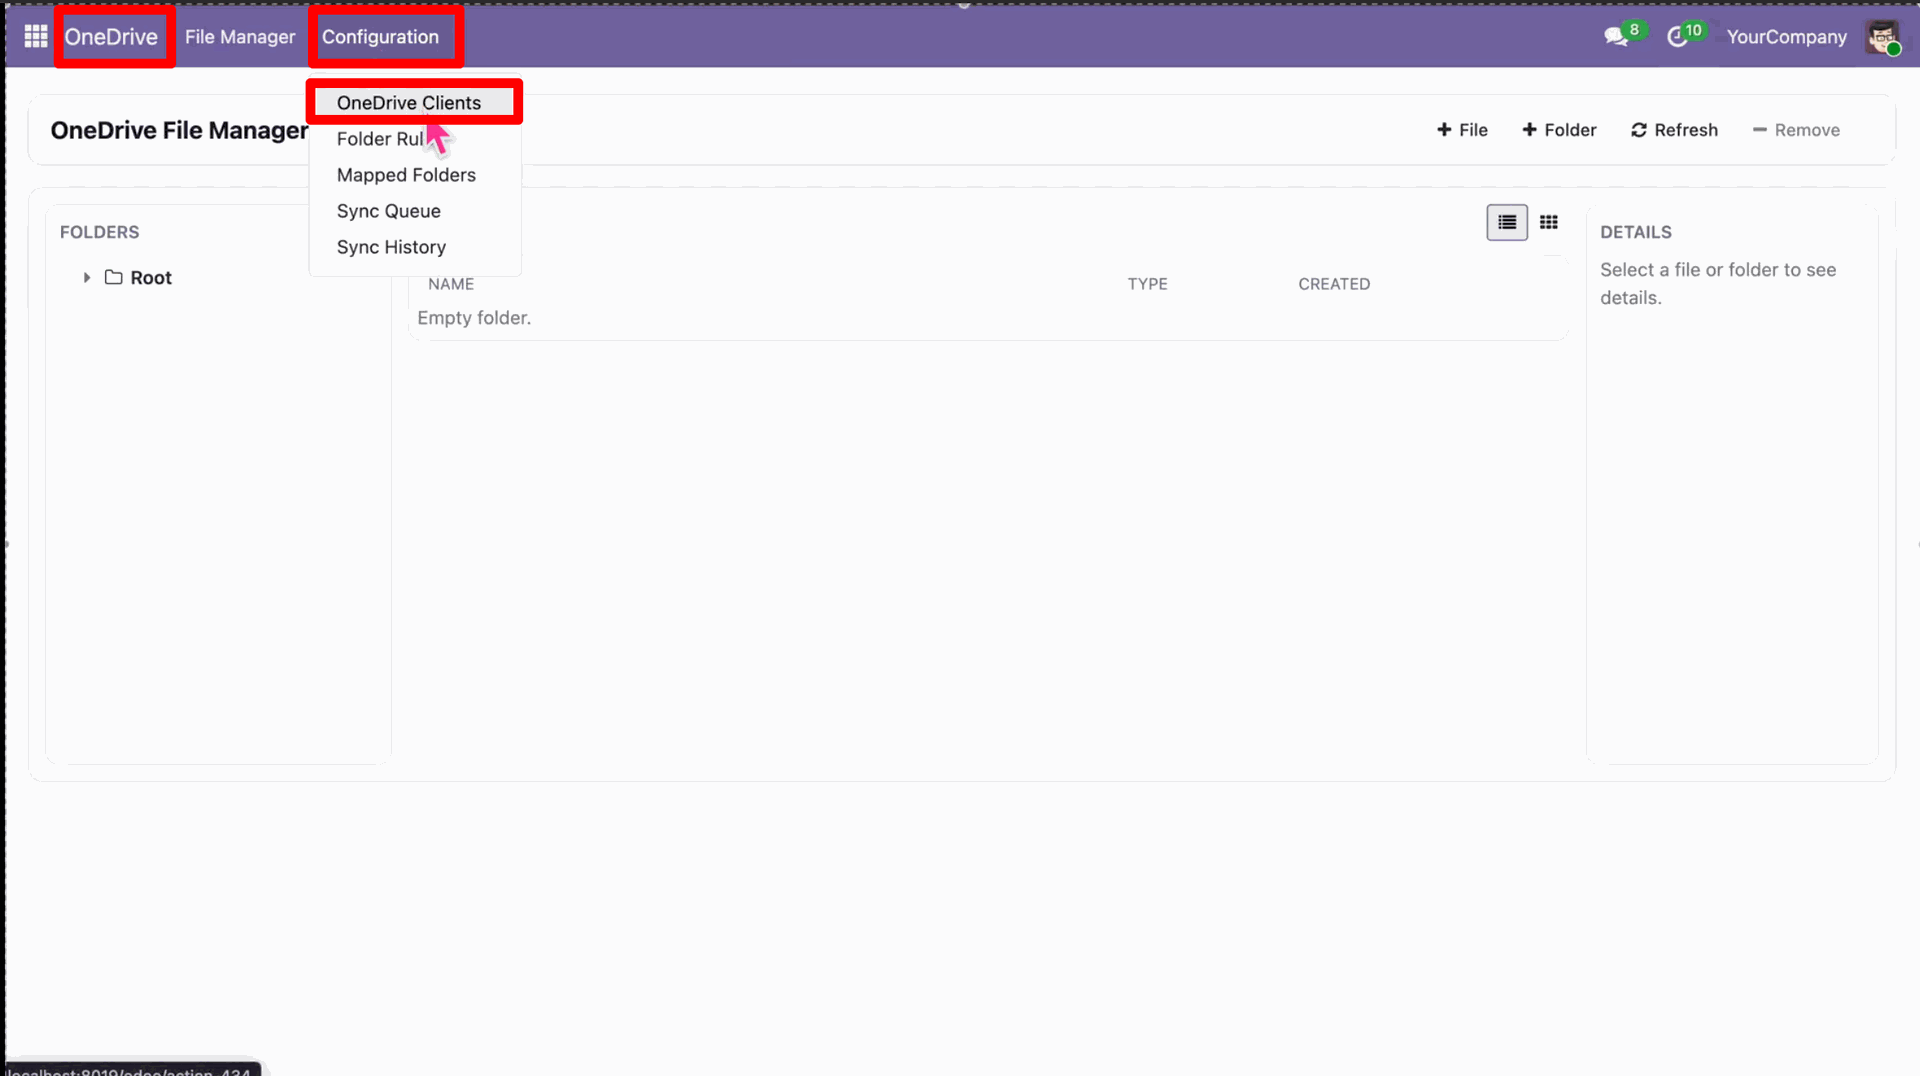
Centralized One Drive Documents Kanban View.
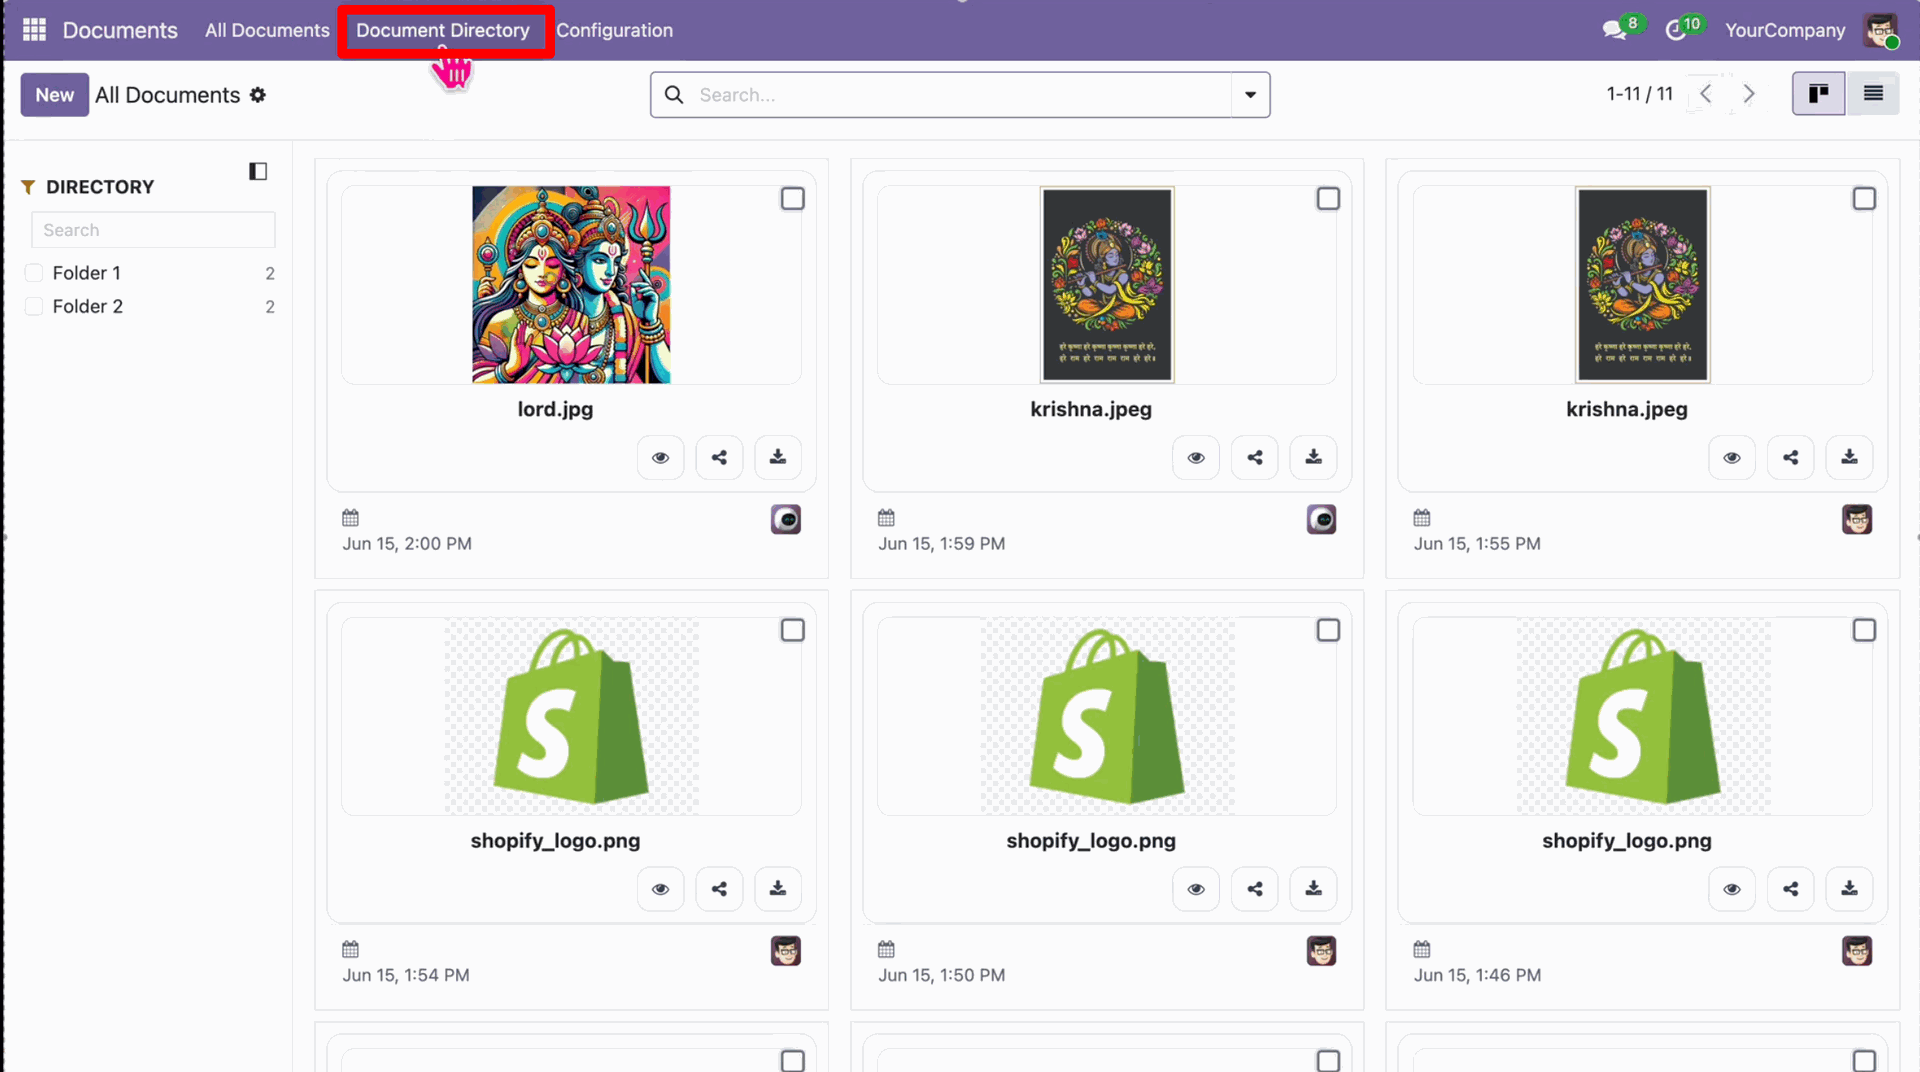
Creating and Organizing New Directories within Odoo.
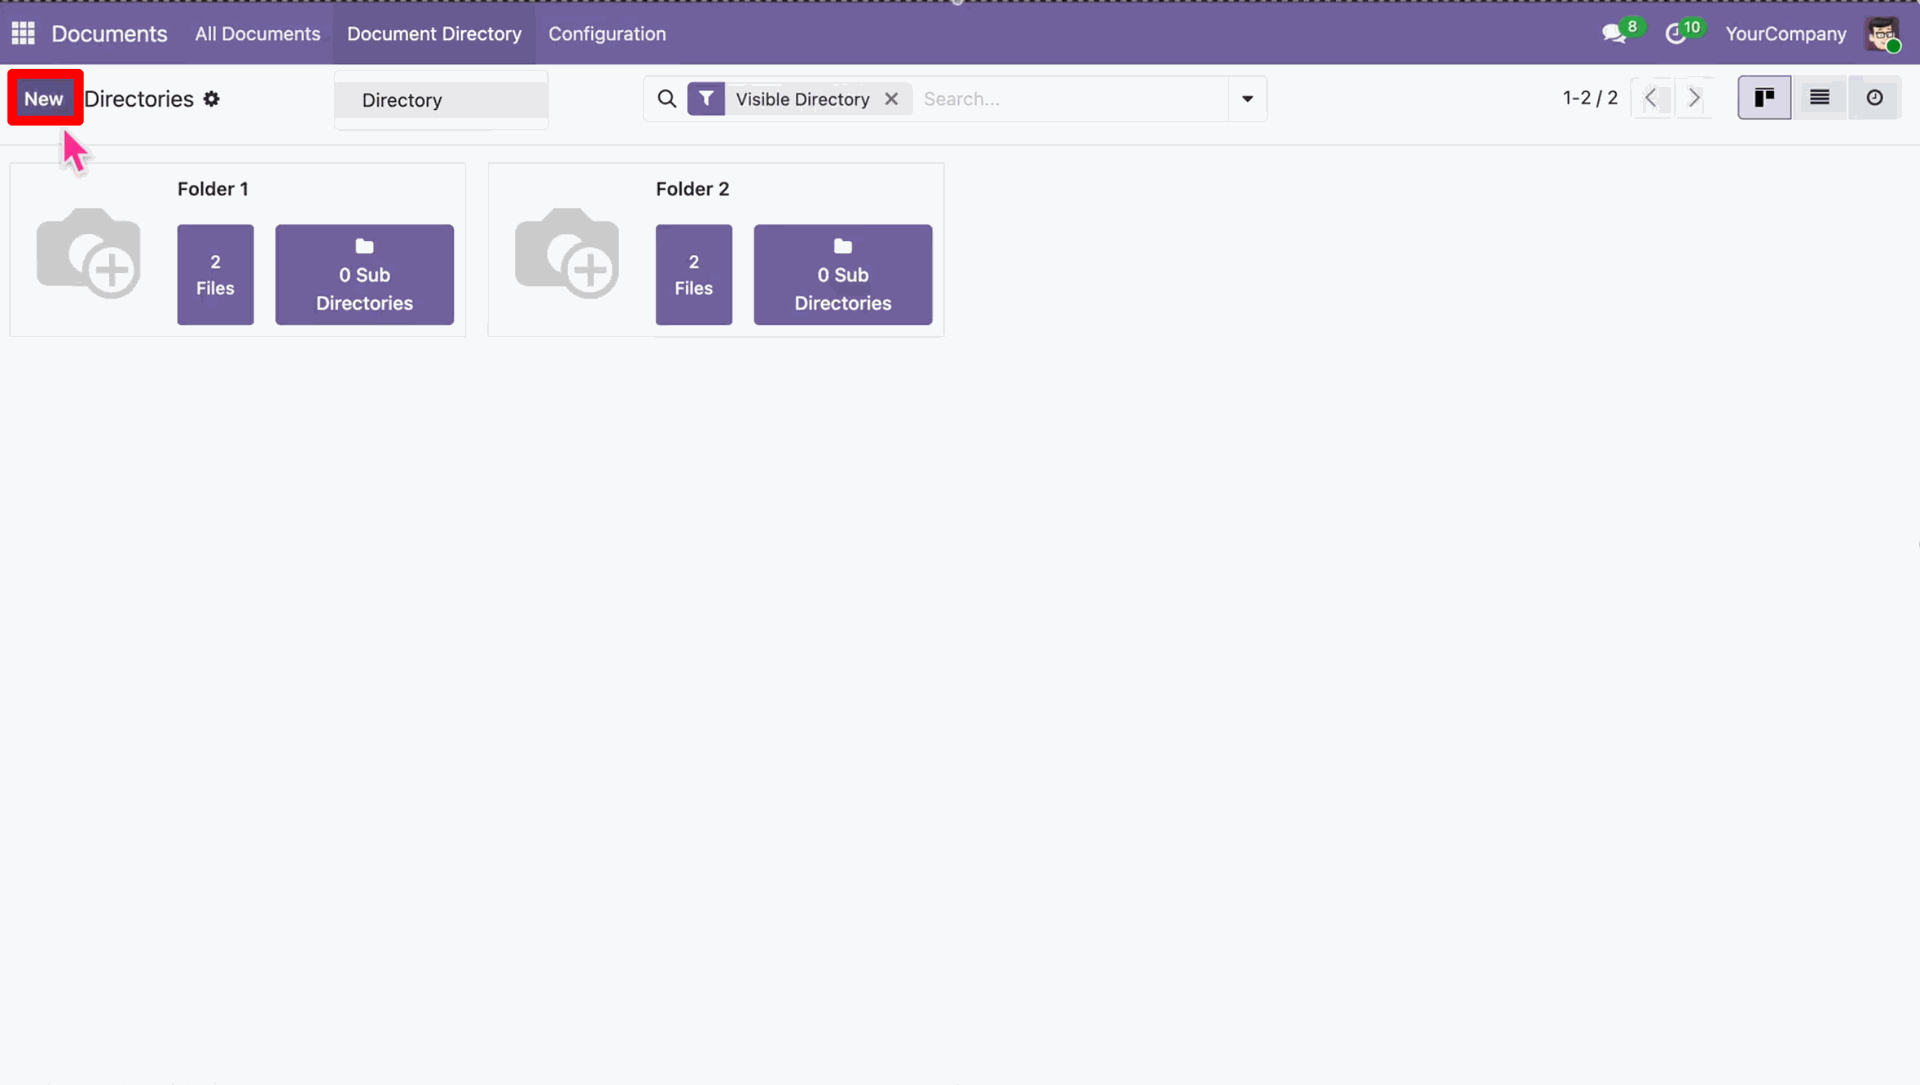
Detailed Document Management and Directory Information.
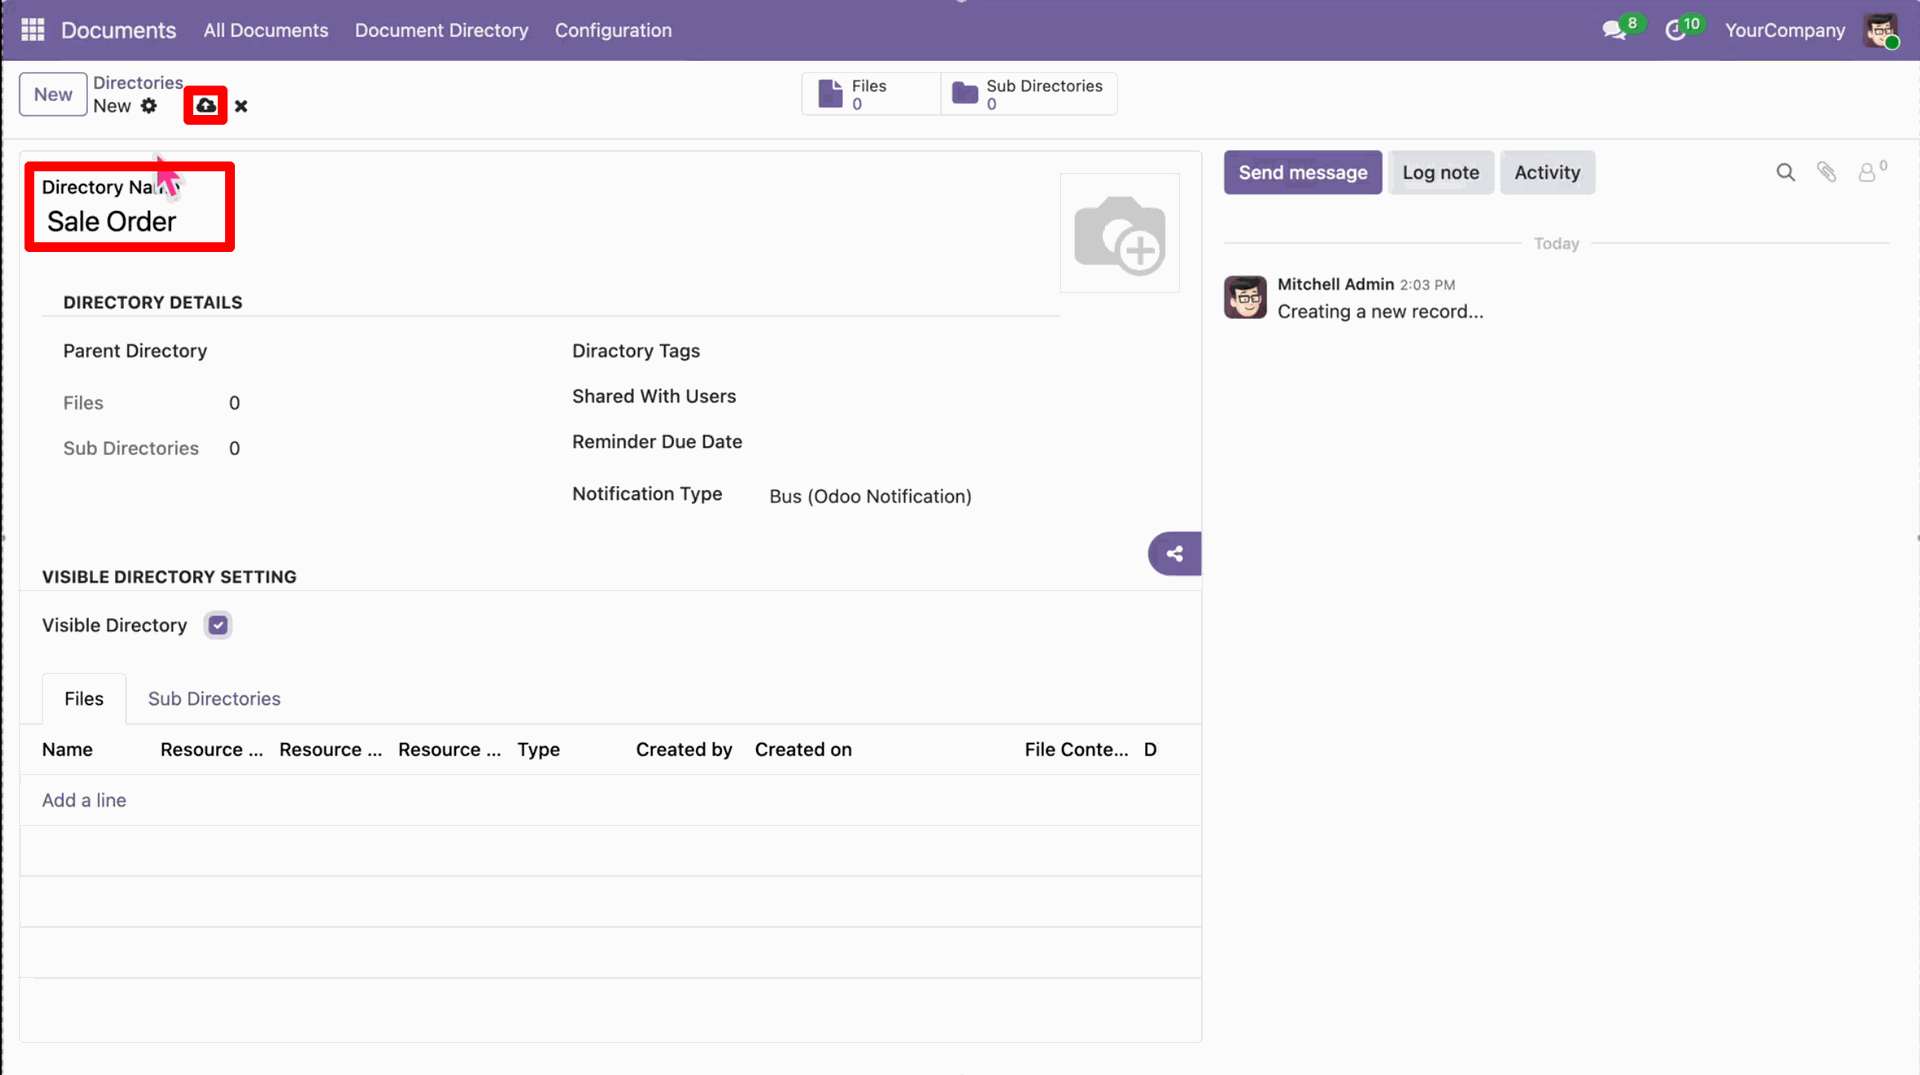
Navigate to the Documents App to create a Root Folder.
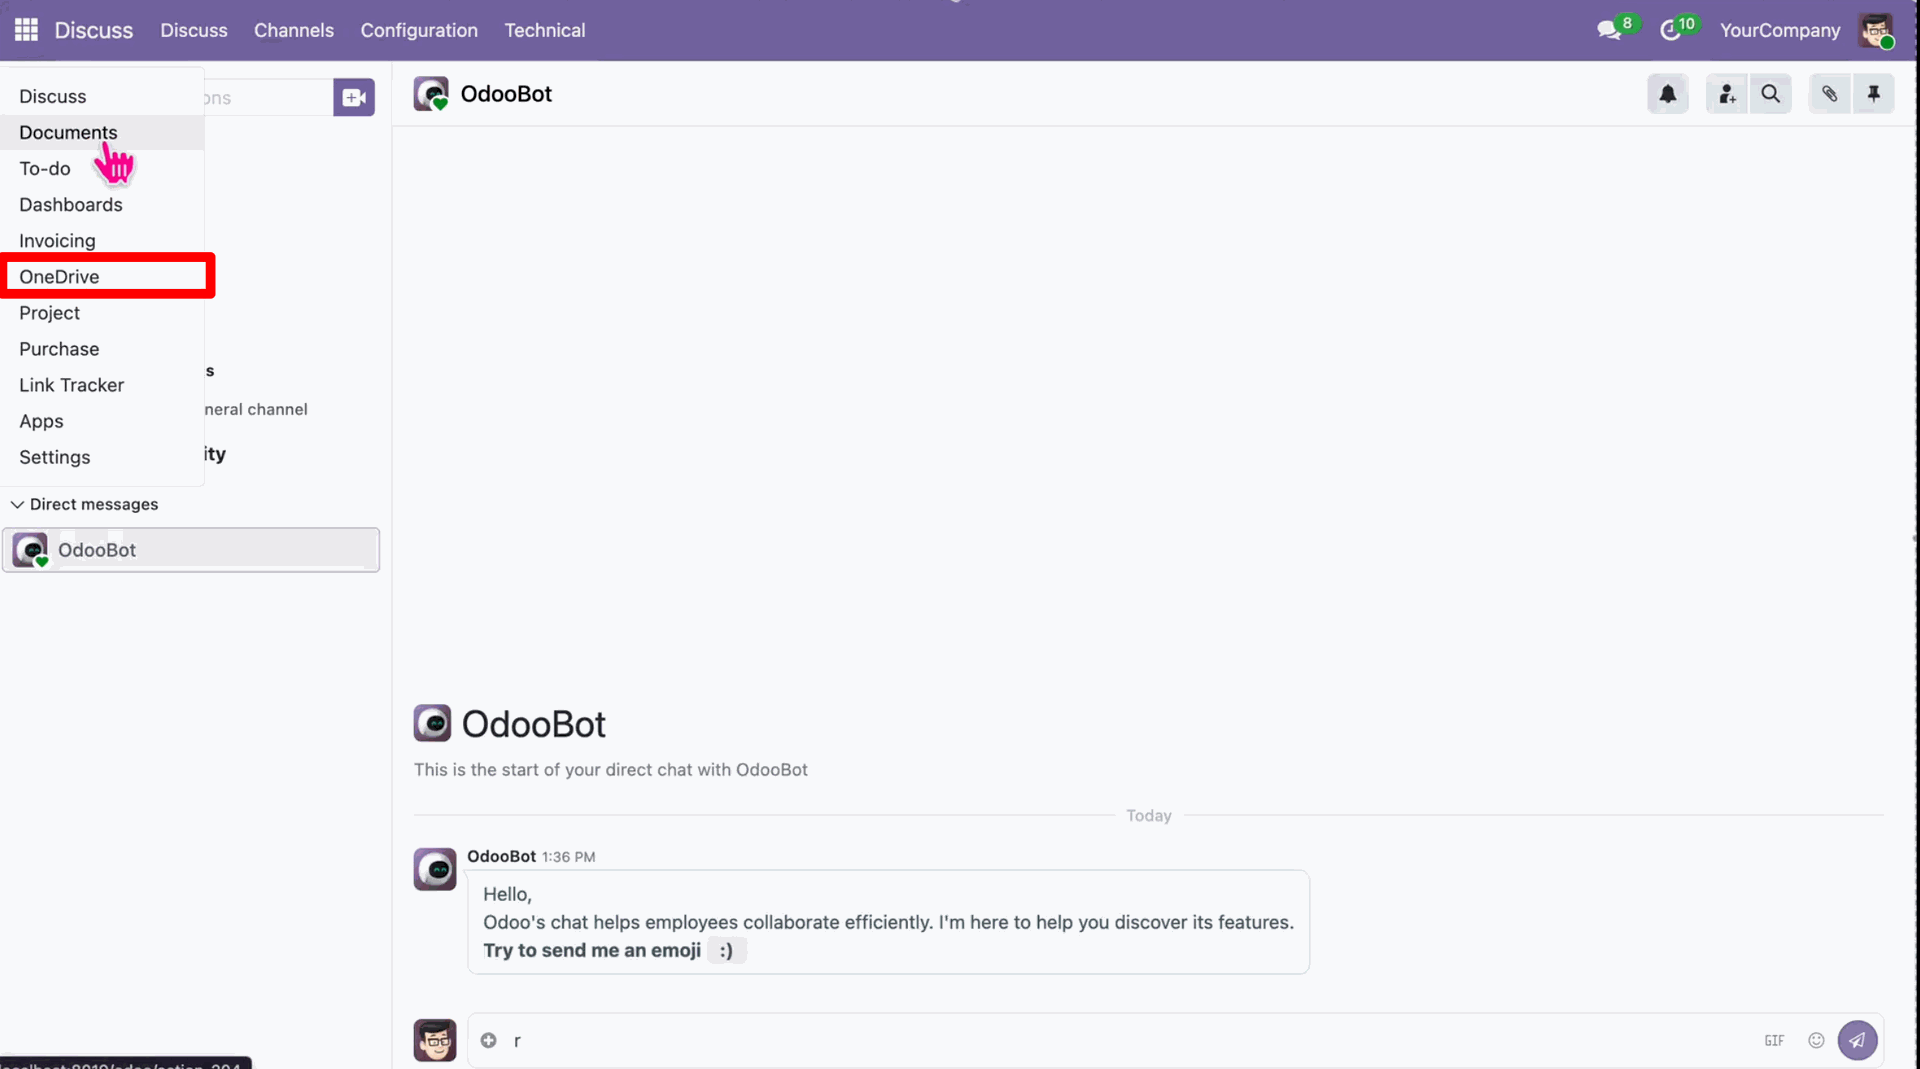
Open the OneDrive Connector and go to 'Mapped Folders'.
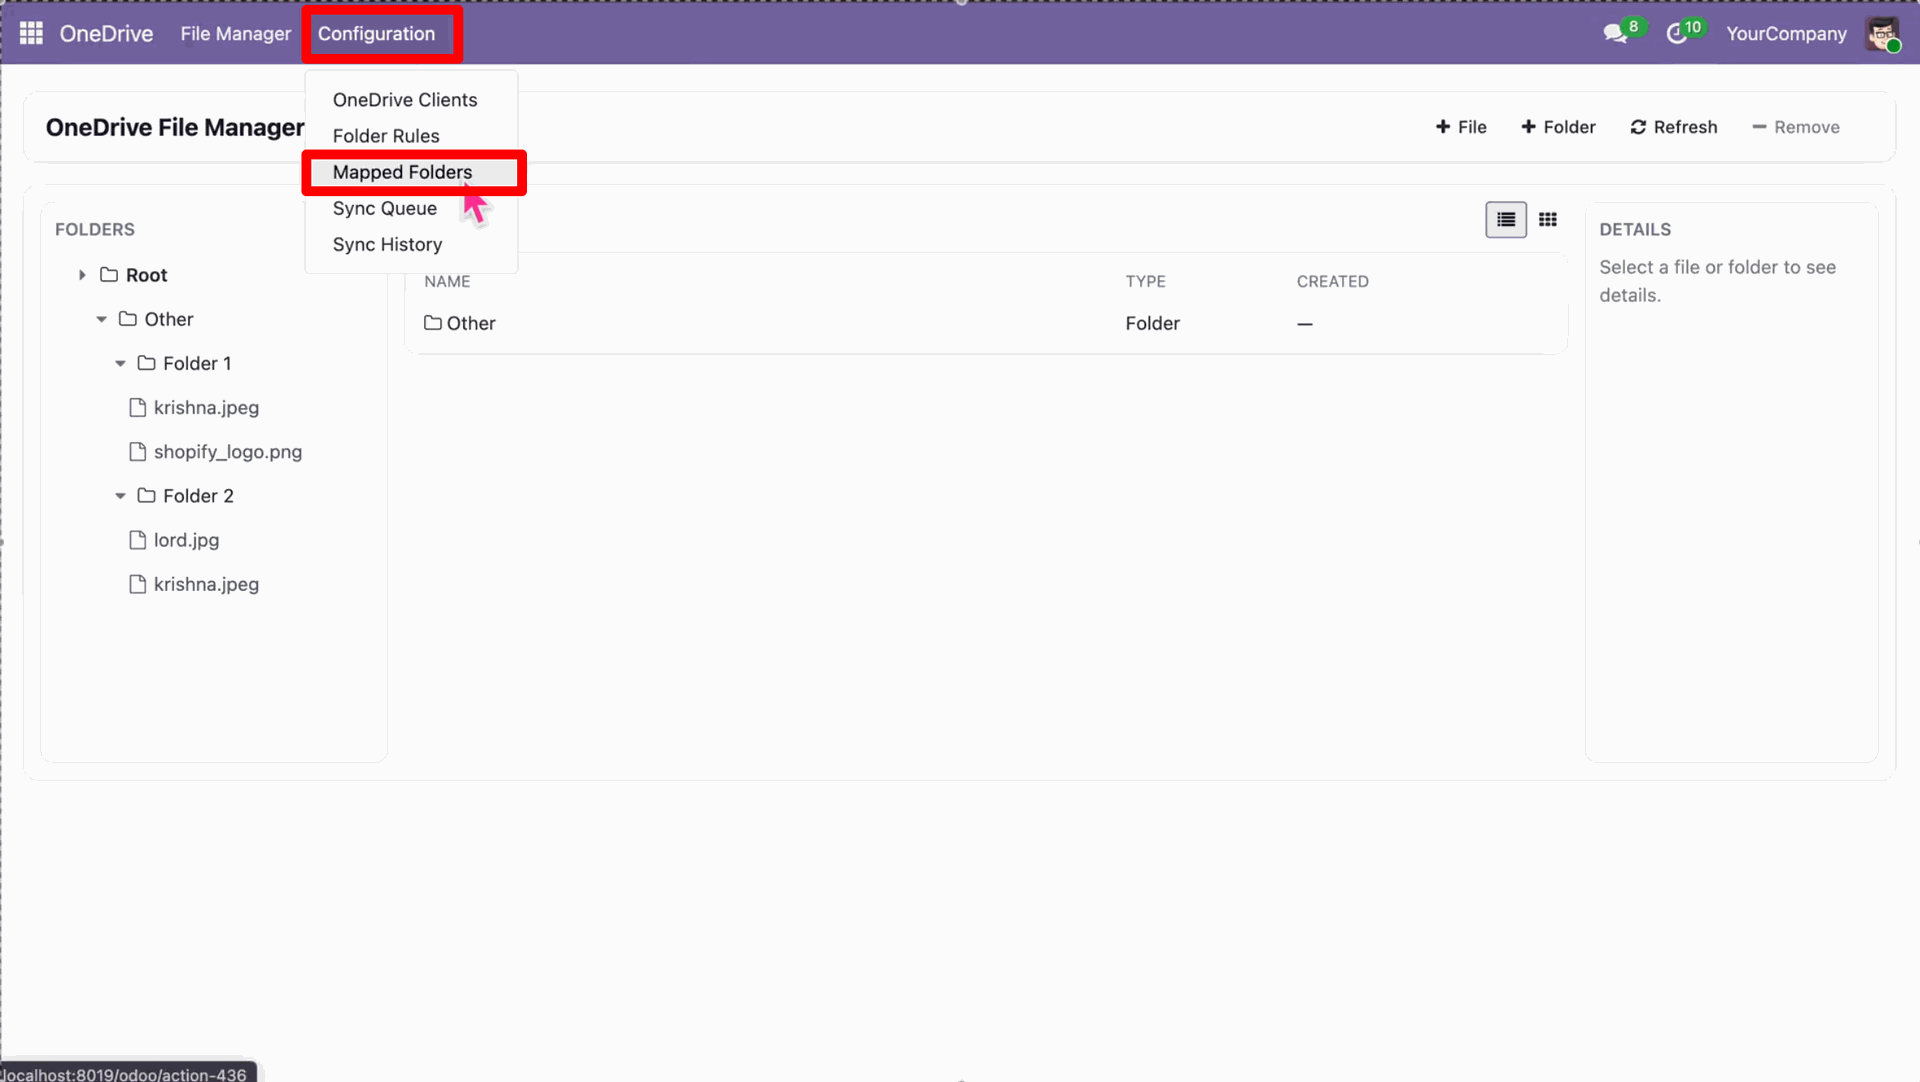
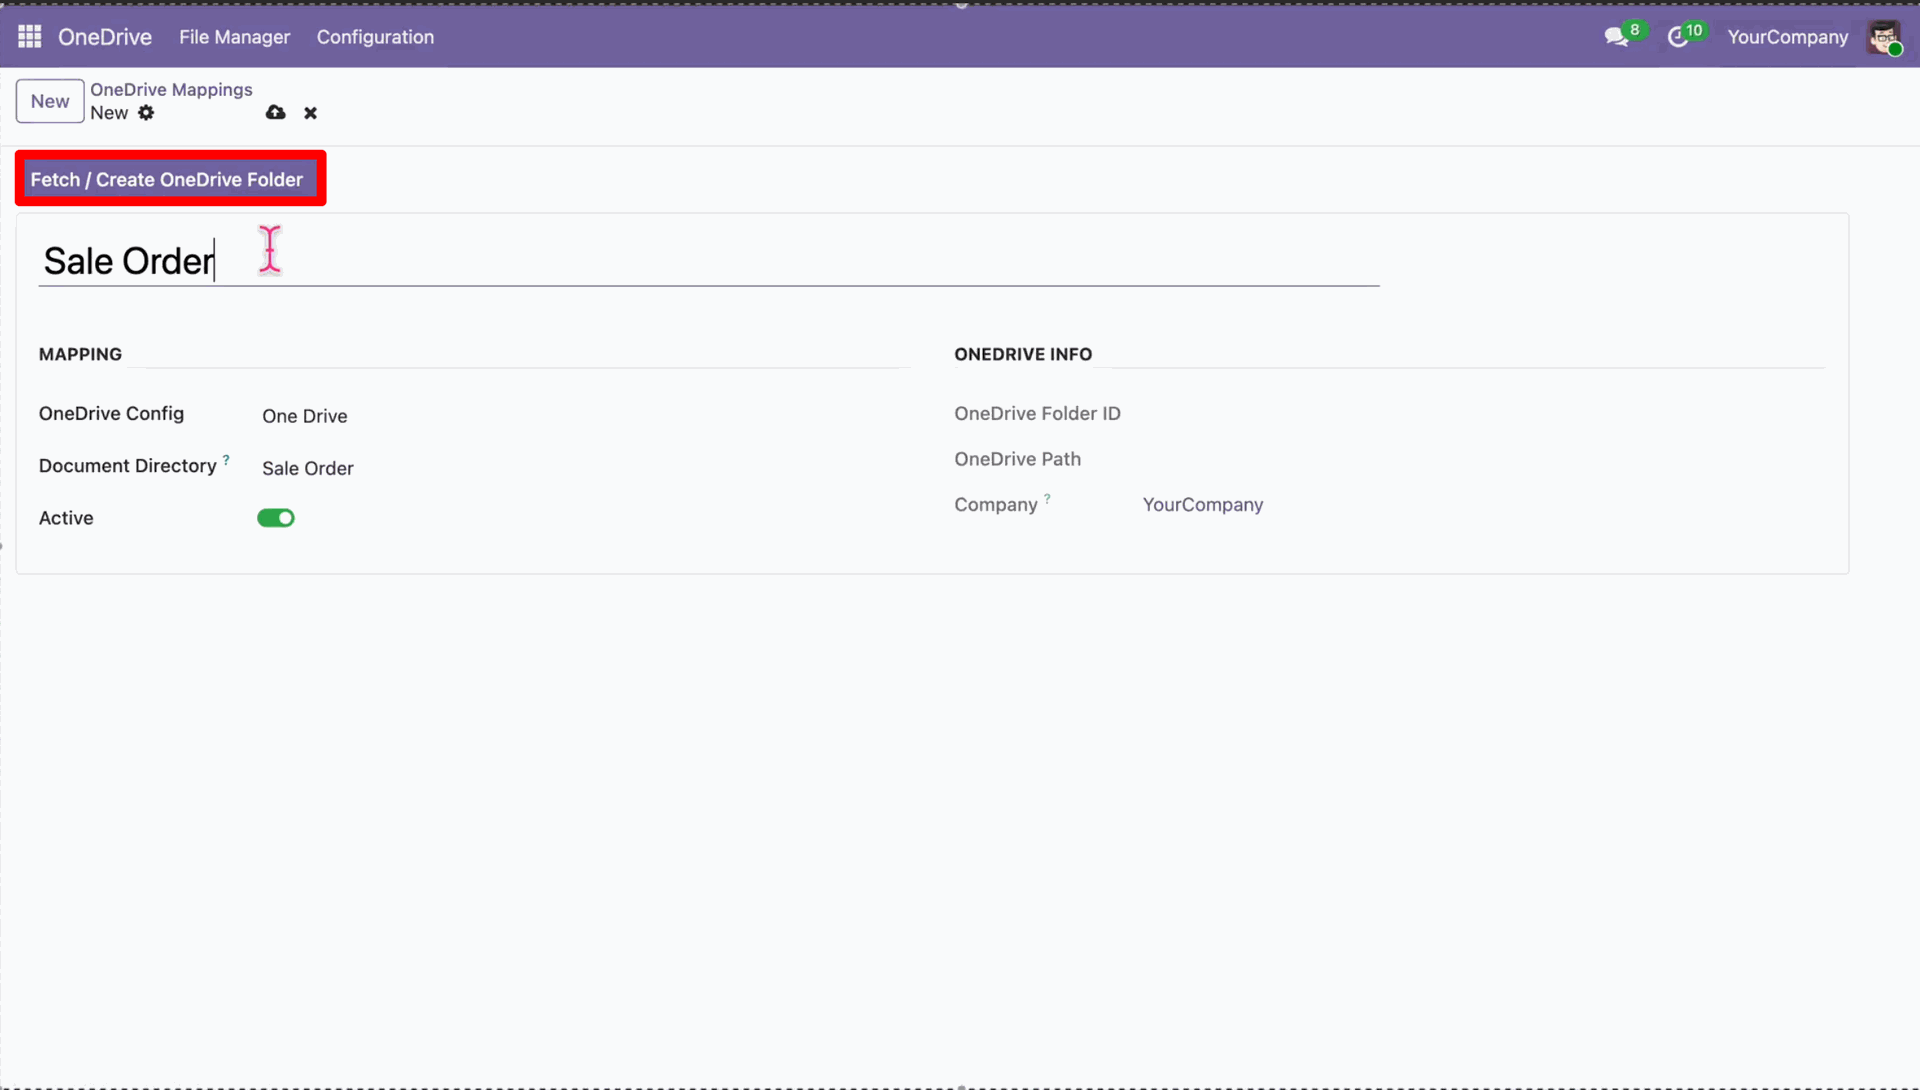
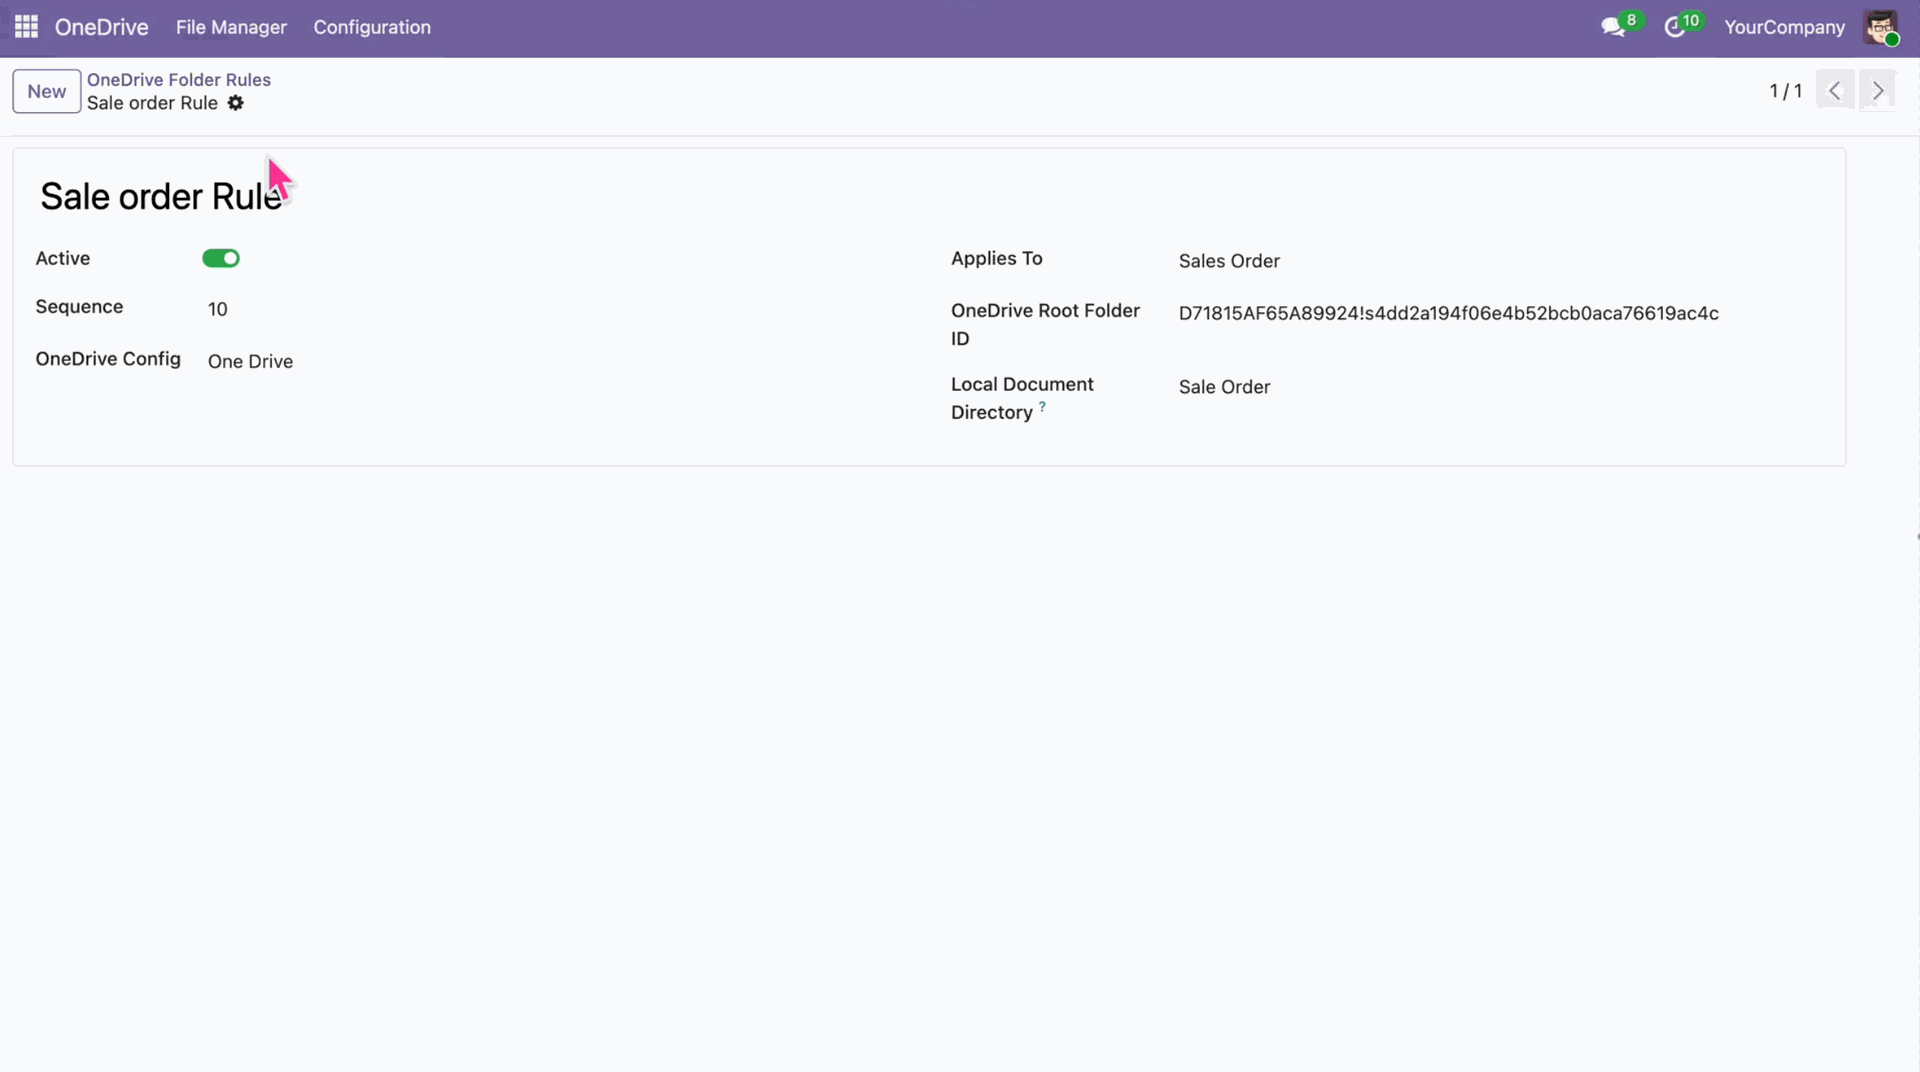
Map your local 'Sale Order' folder to dynamically create its counterpart in OneDrive.
Set the naming convention for the synced folder.
Select the fields as per need.
Open a Sales Order record.
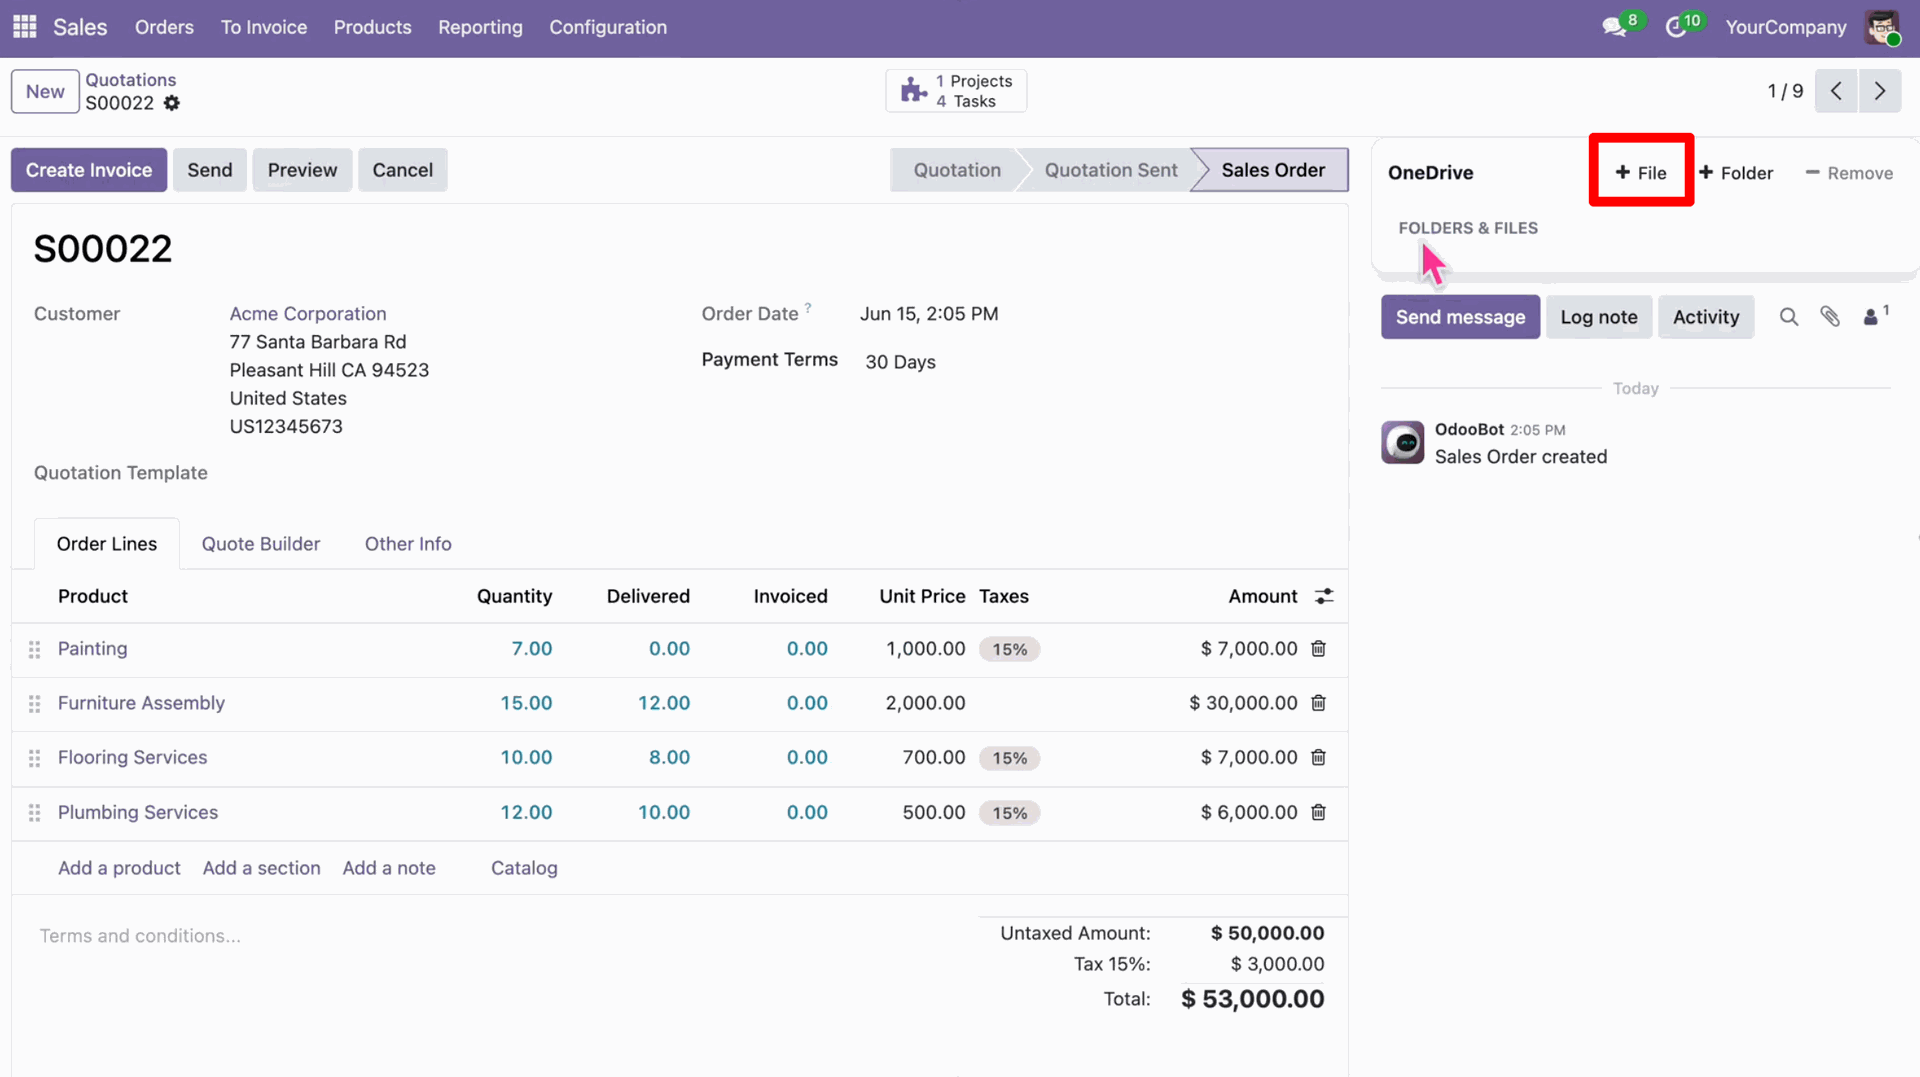
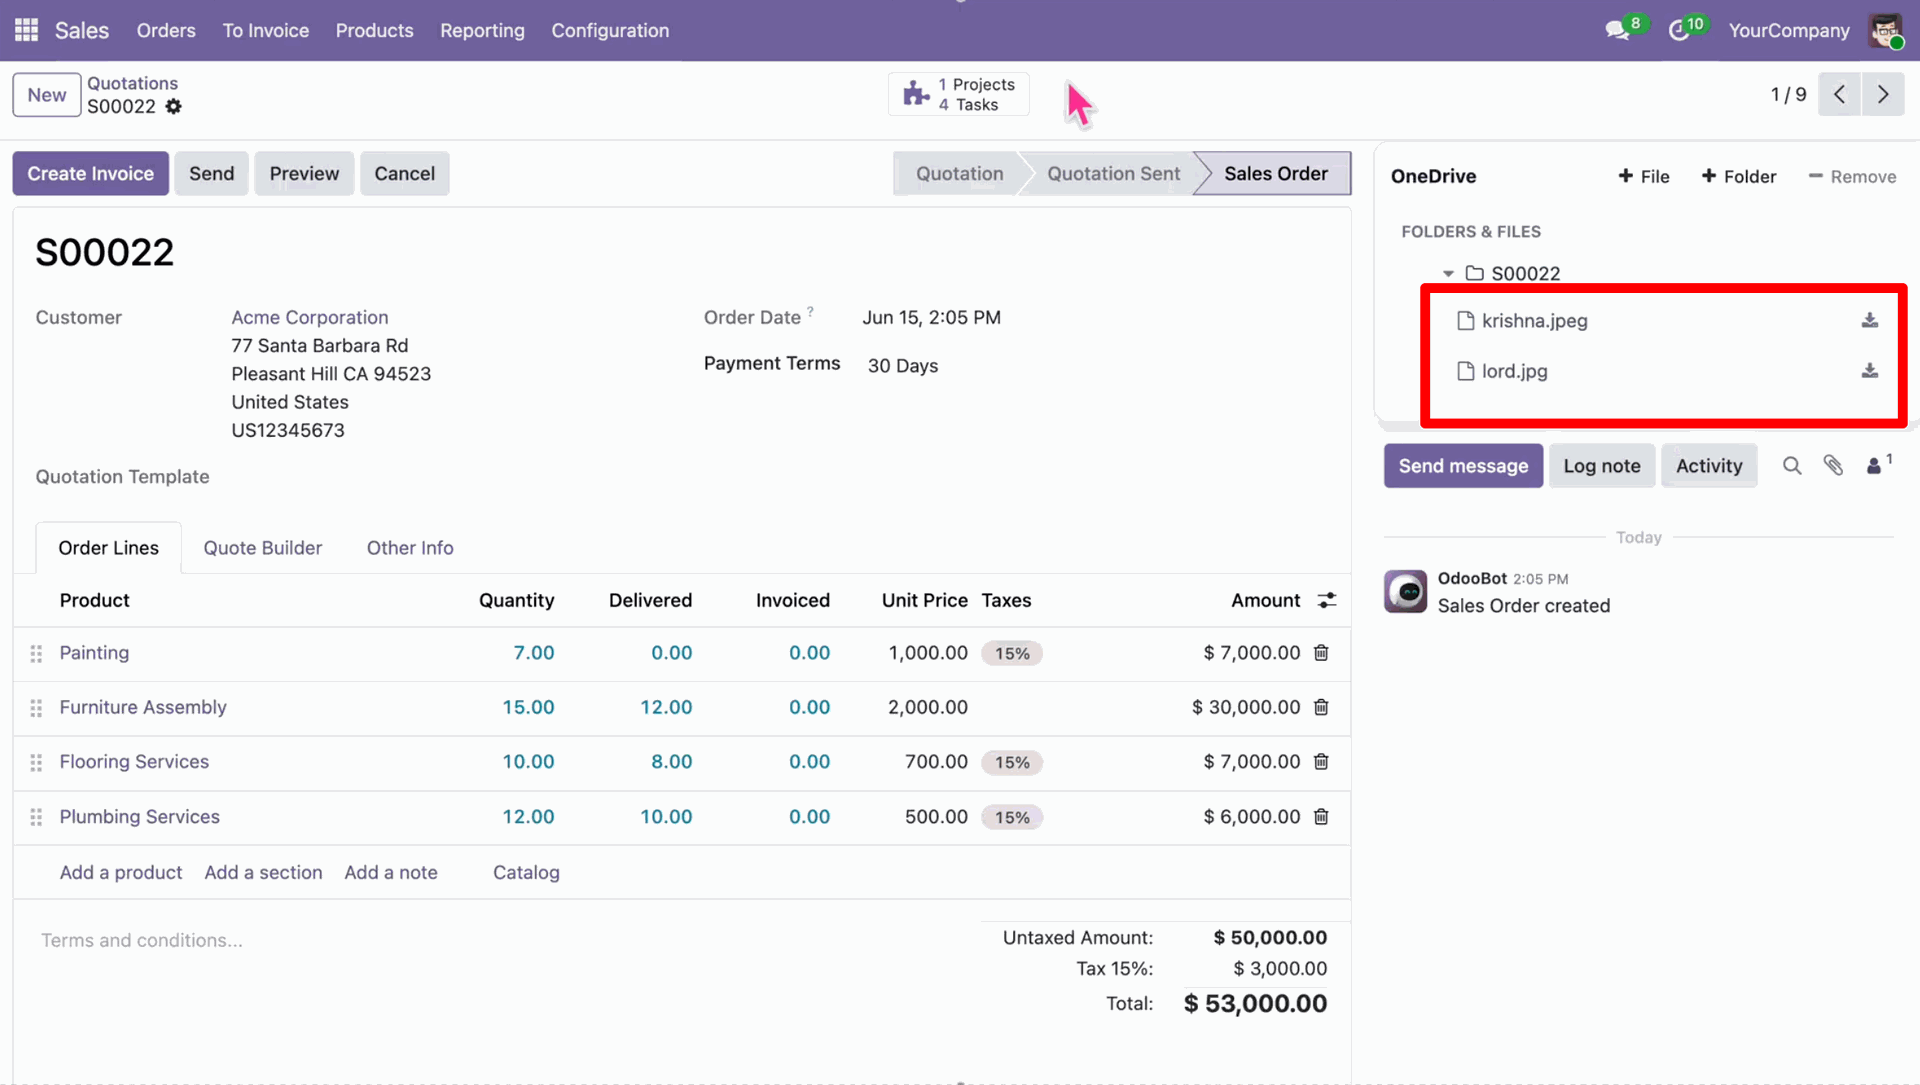
Upload a document or attachment to the Sales Order.
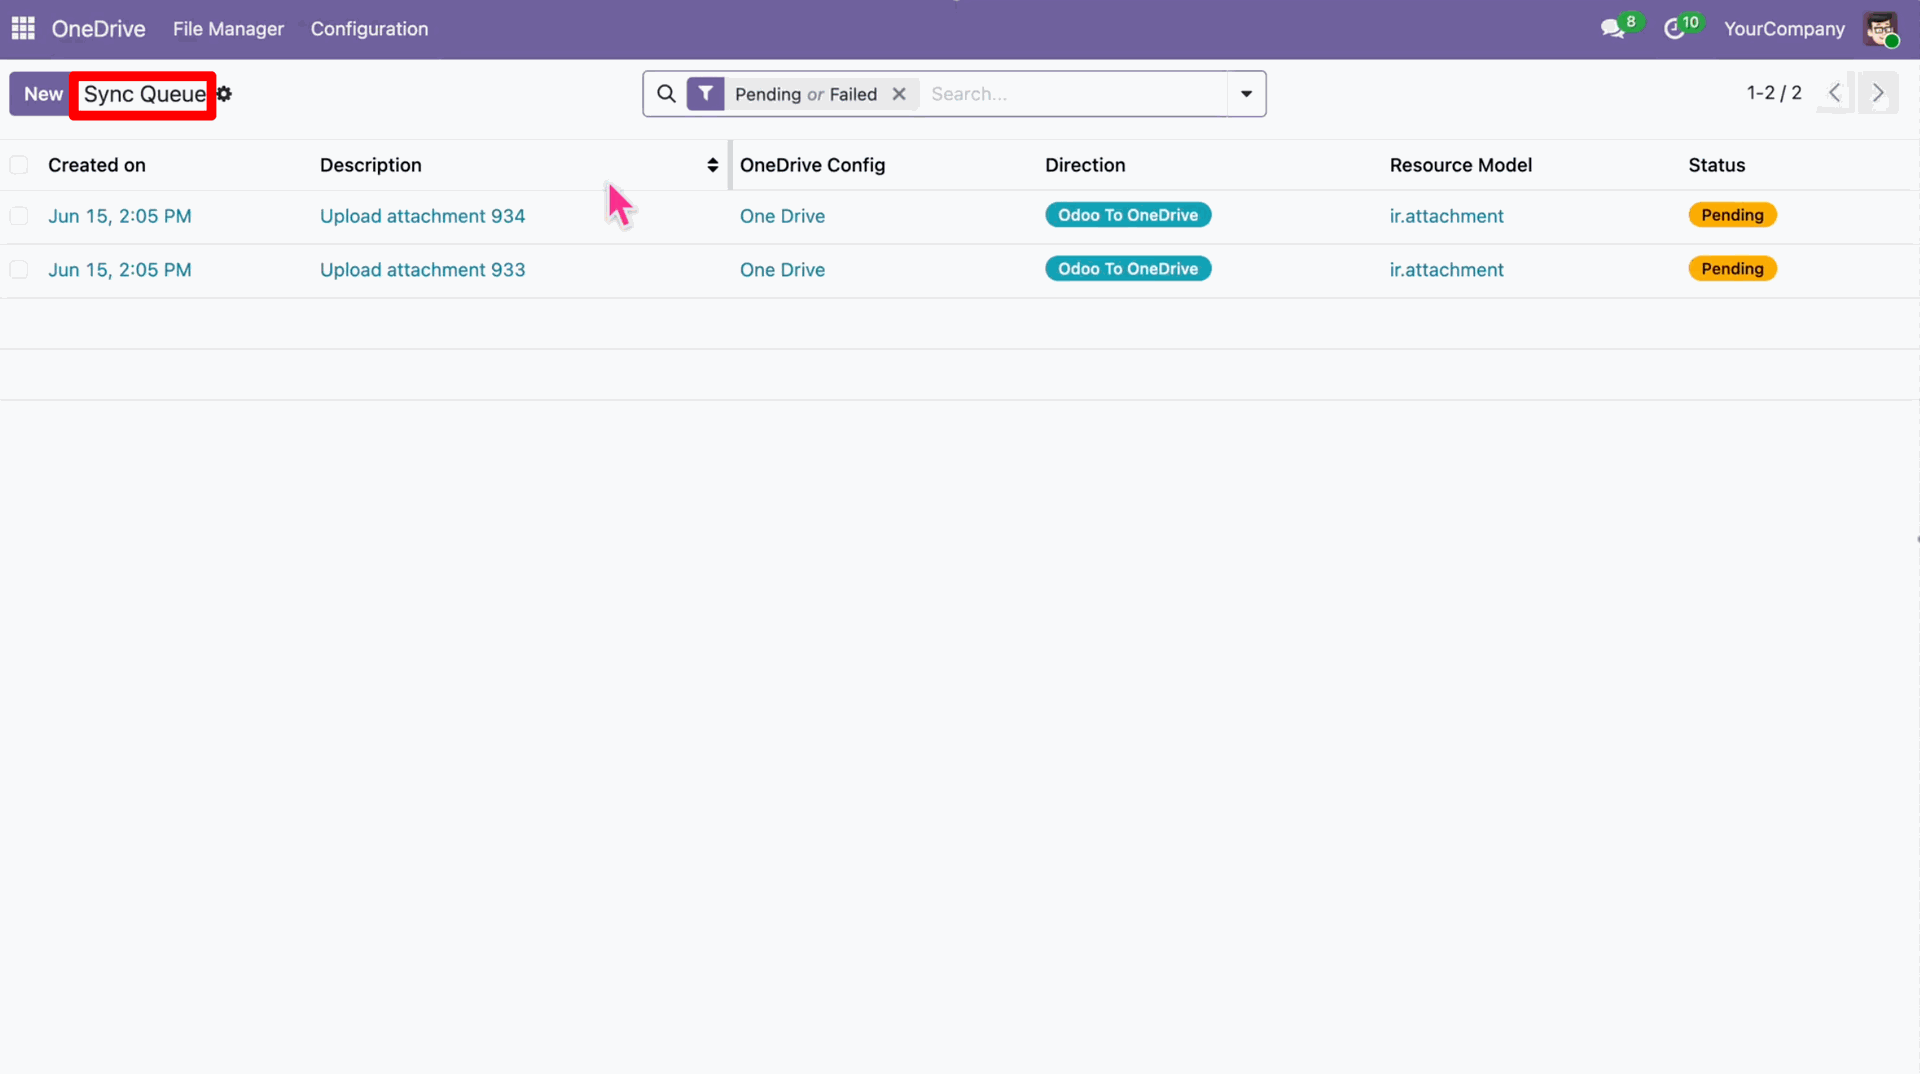
View the pending synchronization task.
Click the 'Run Manually' button to trigger the synchronization immediately.
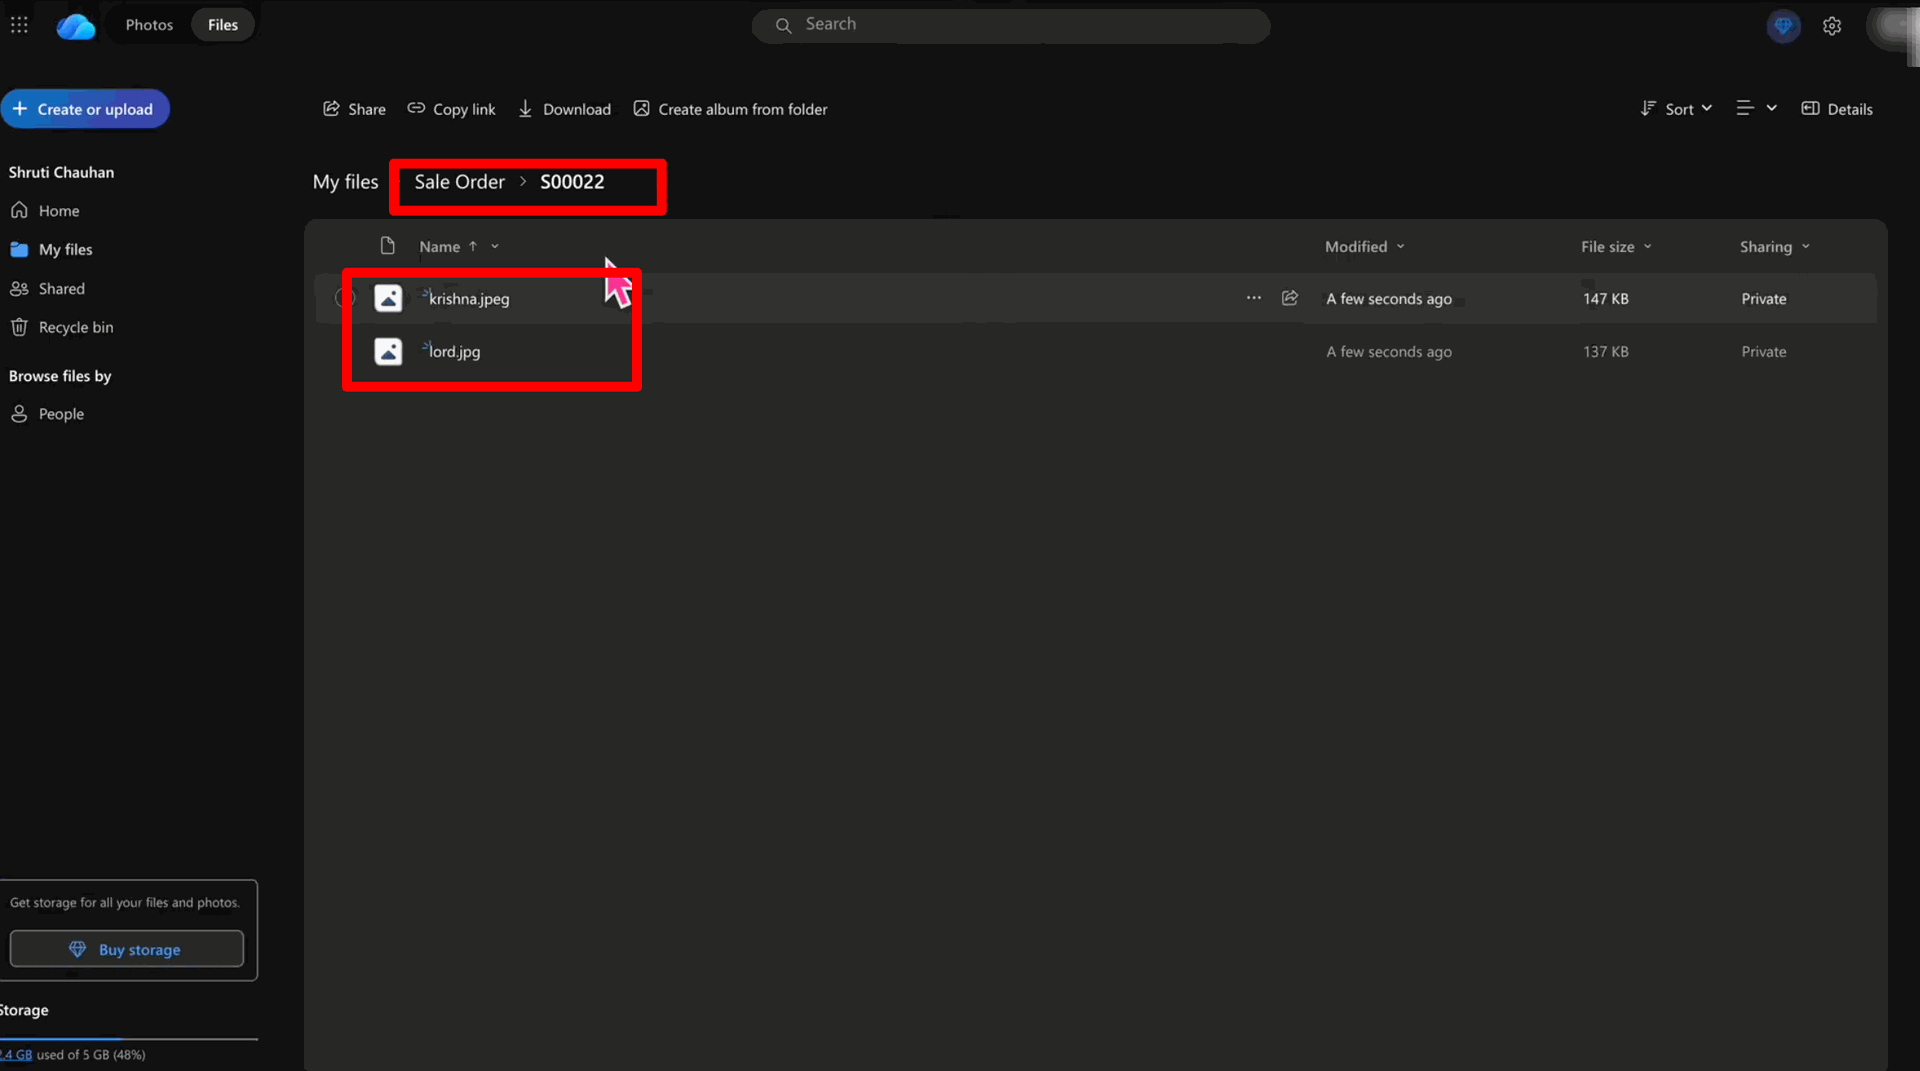
View the successful upload.
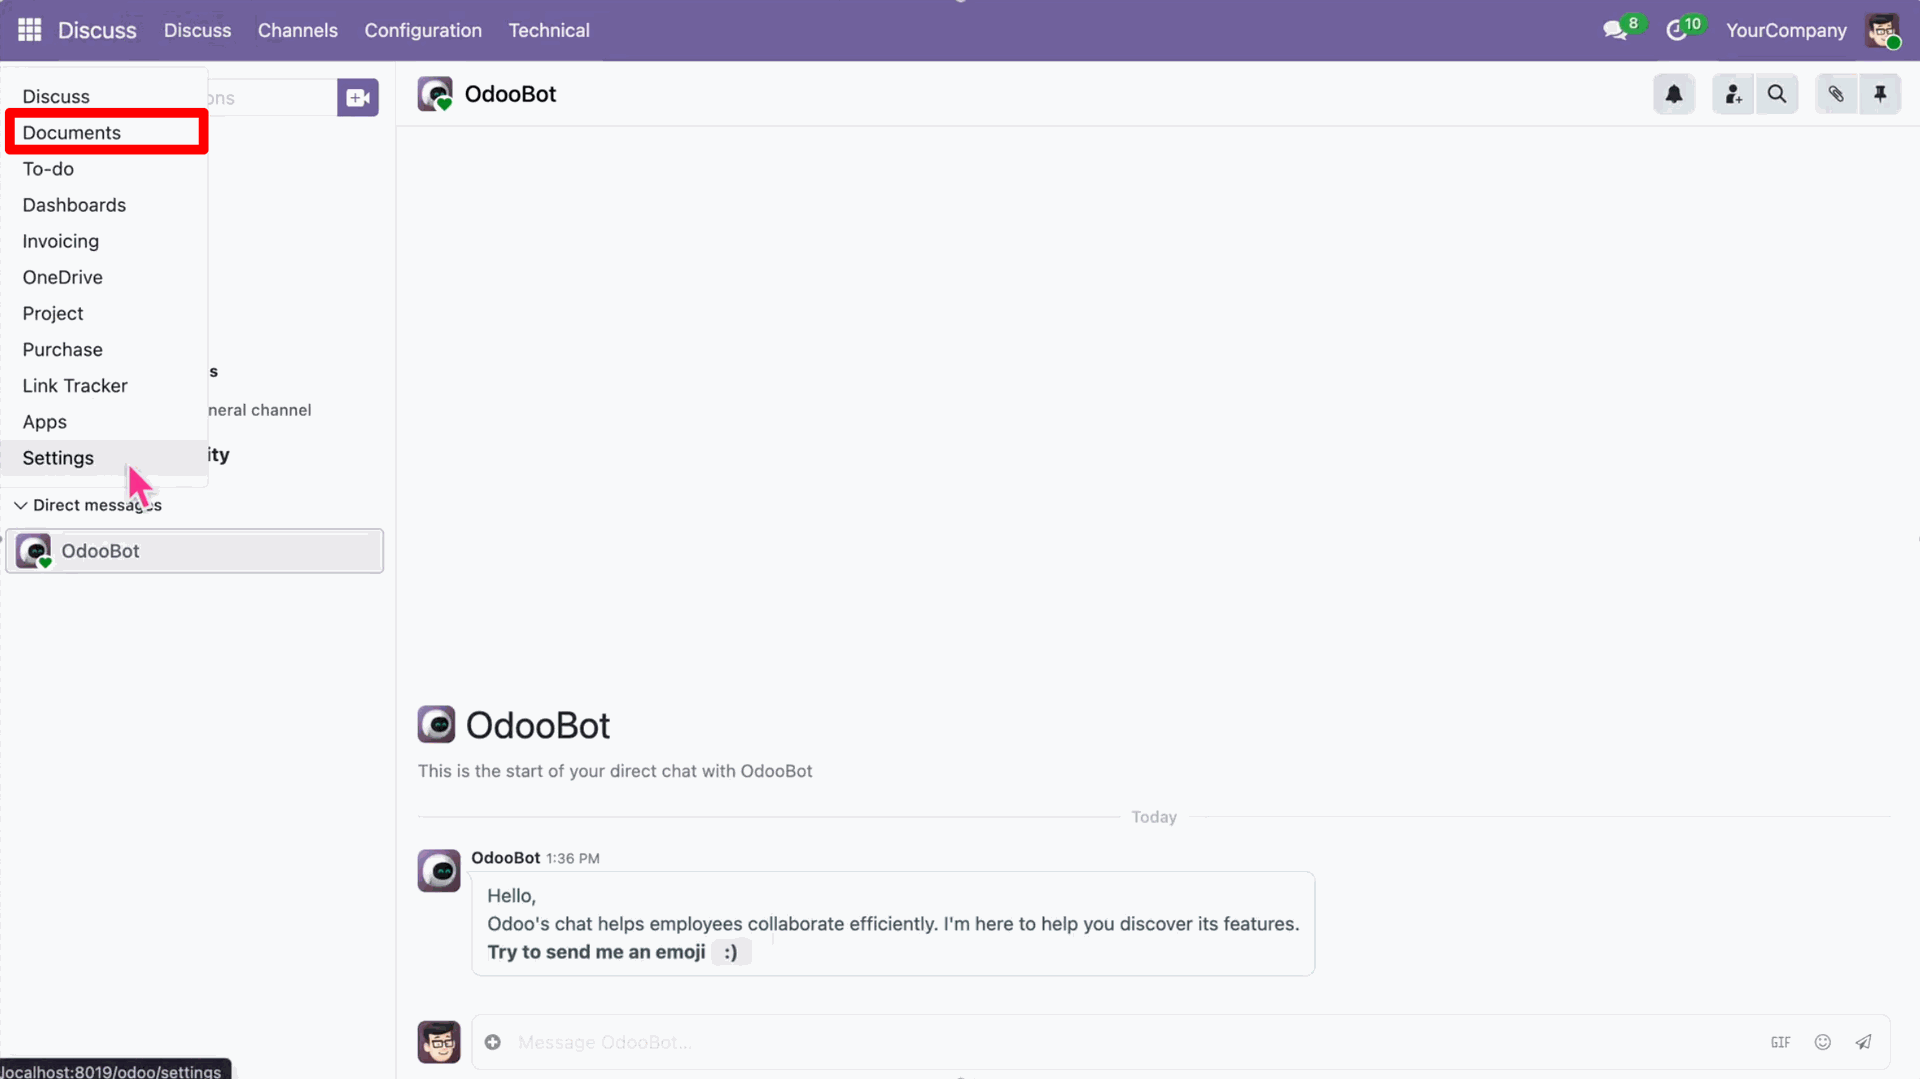
Navigate to the Documents app from the Odoo apps.
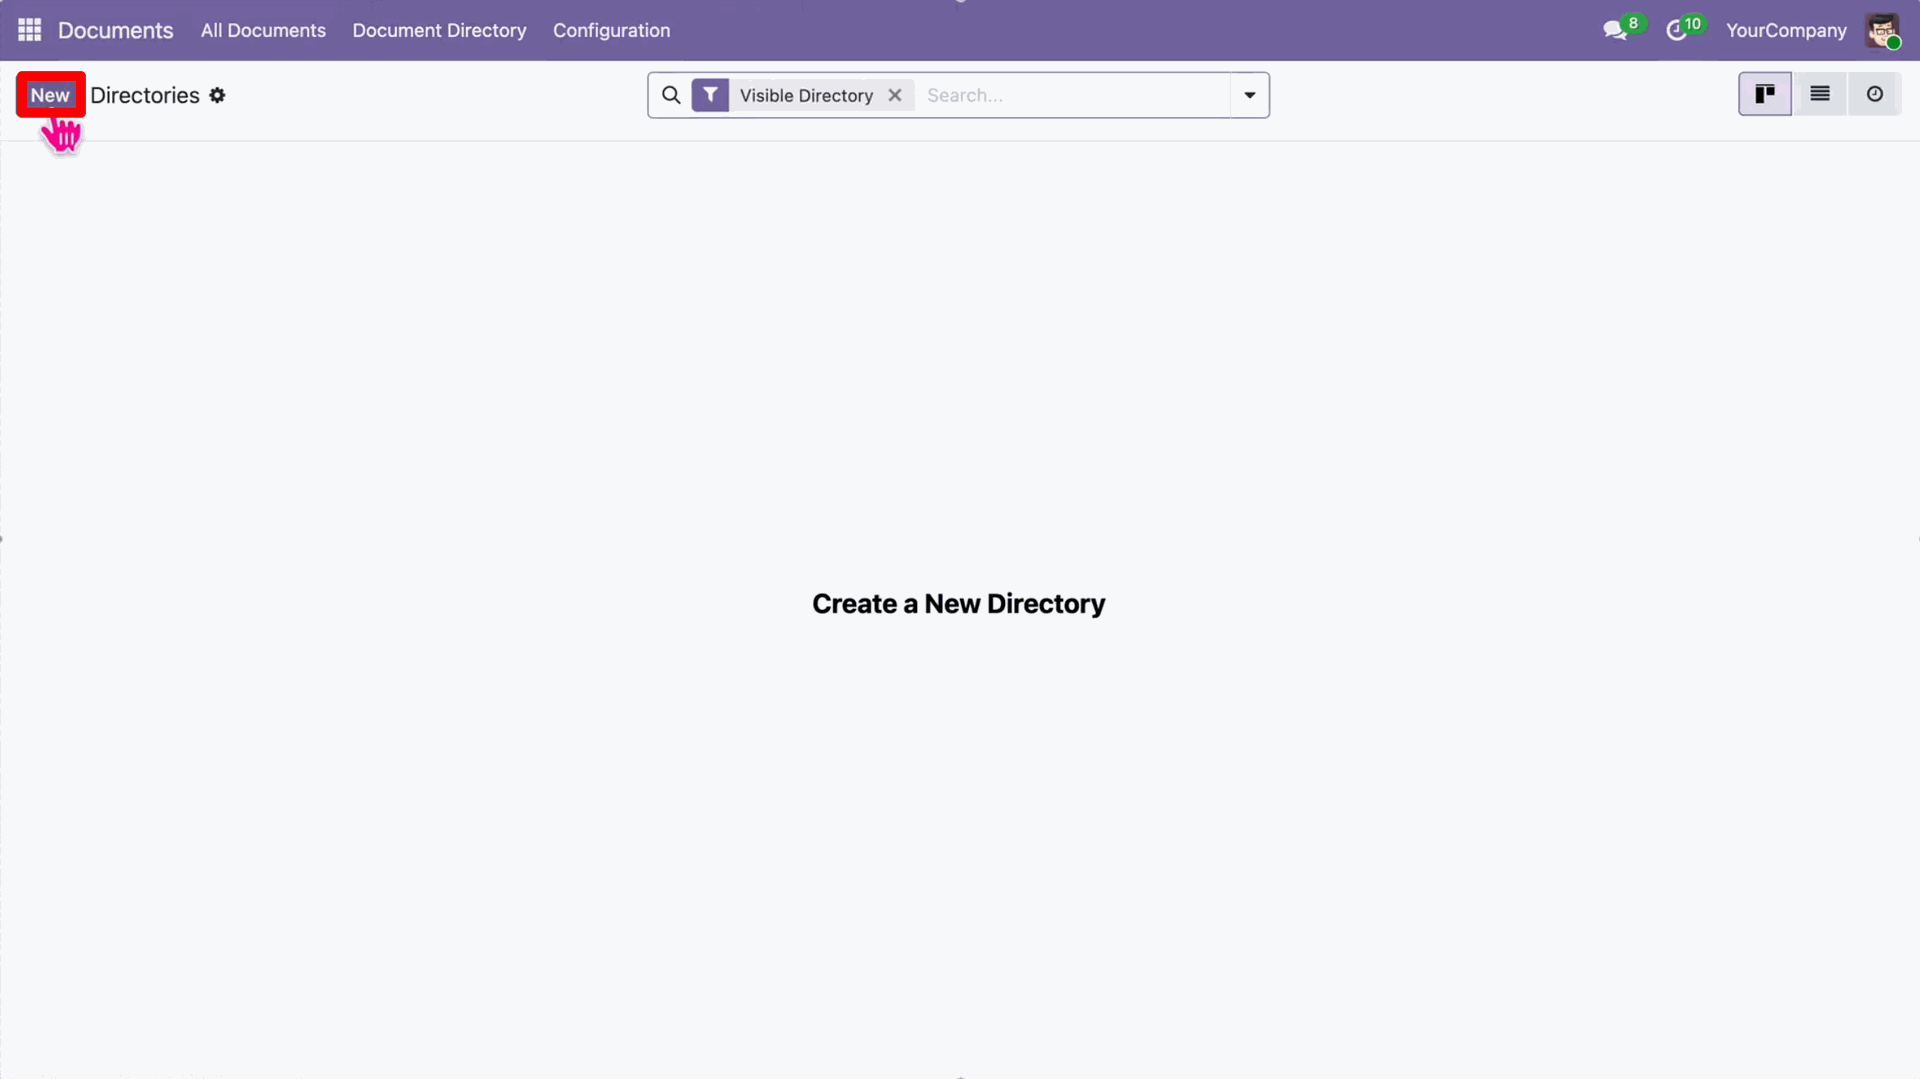
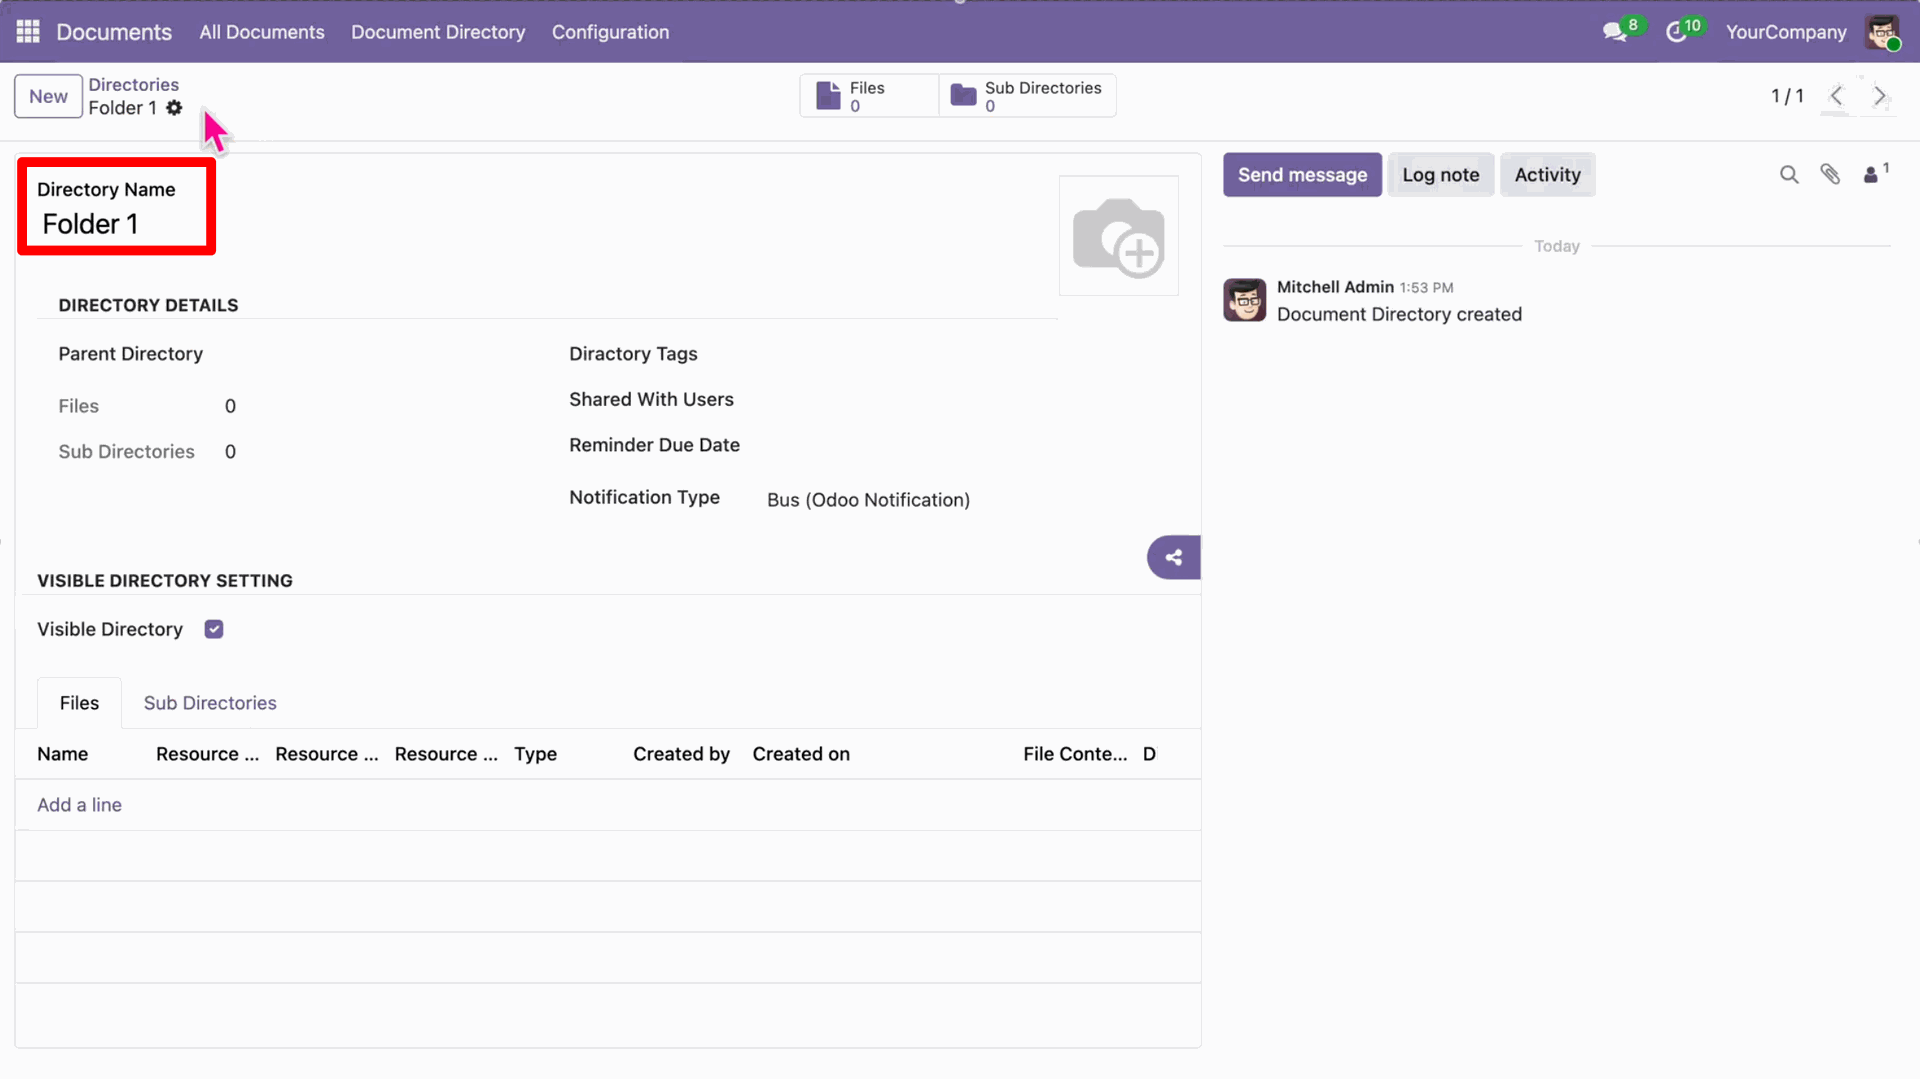
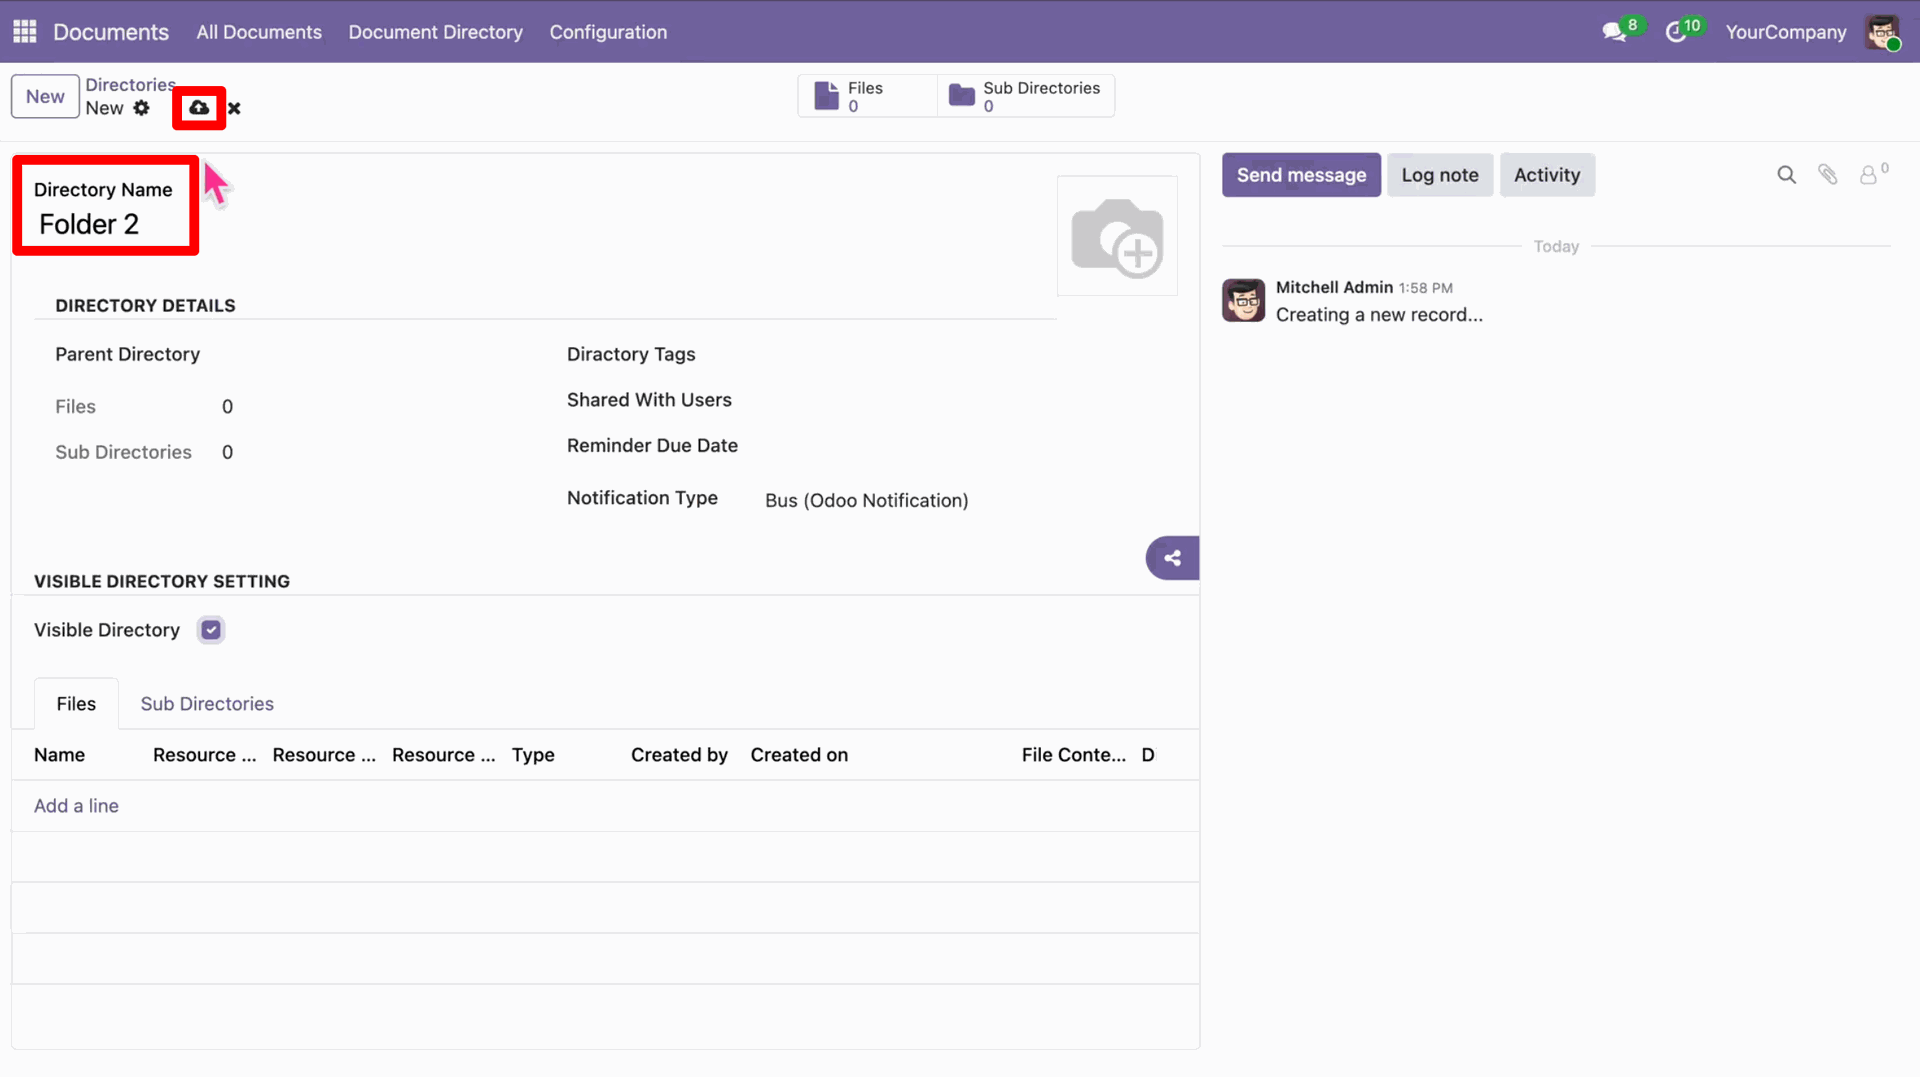
In the Documents app, click on the "New" button and select "Folder" to create a new folder.
Enter the folder name and click "Save".
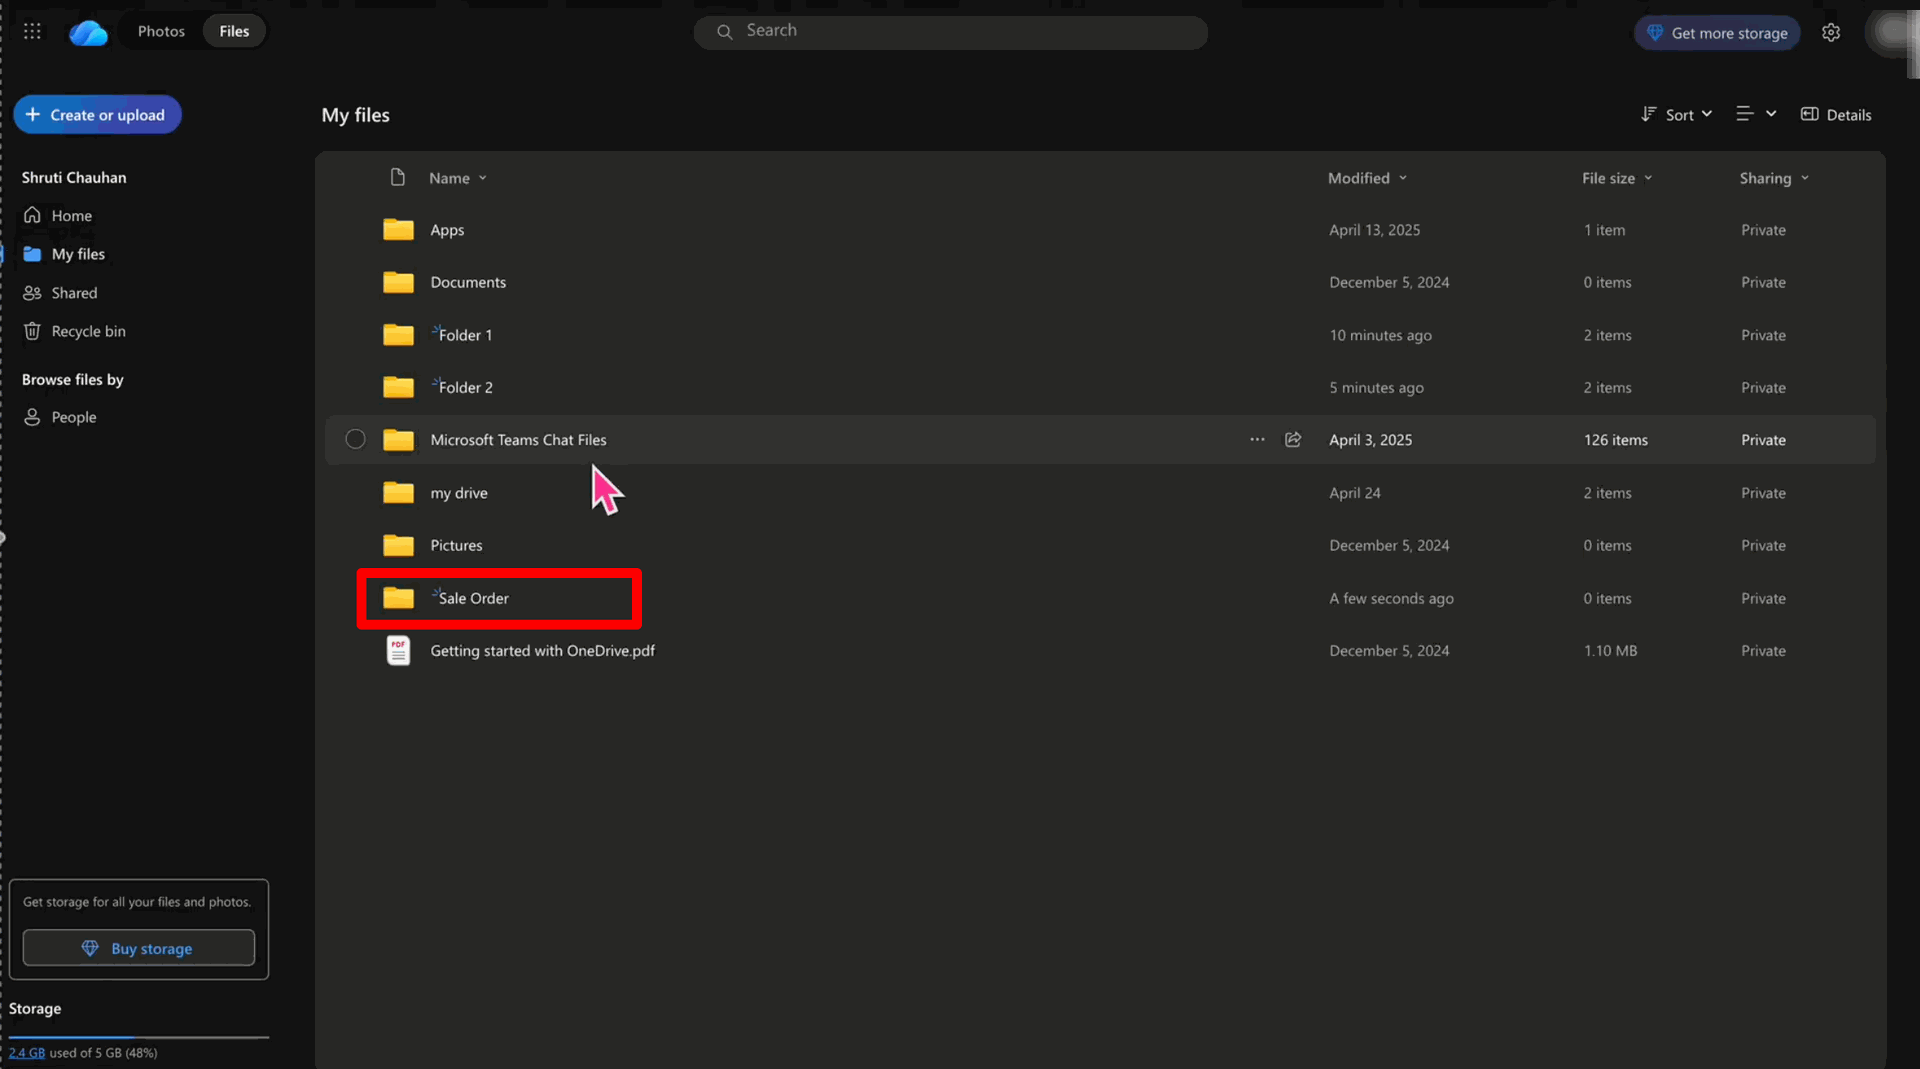
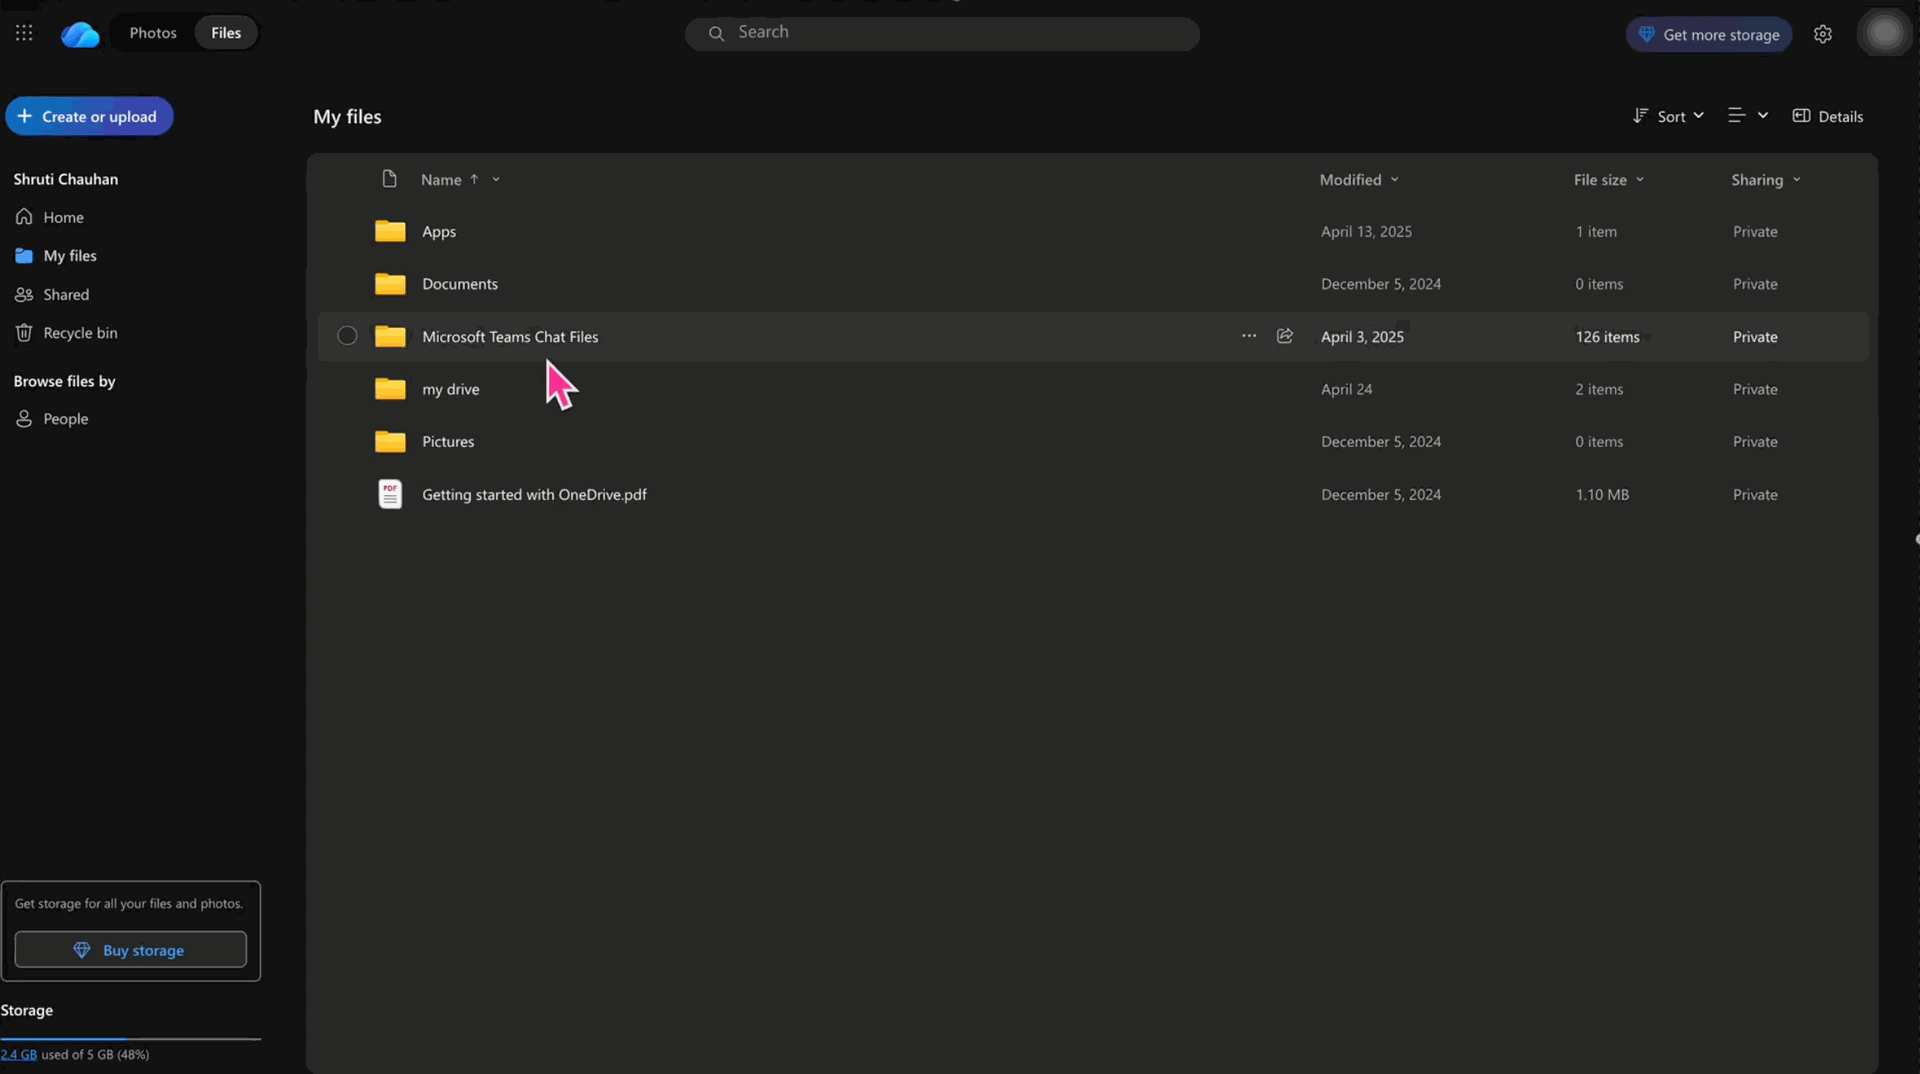
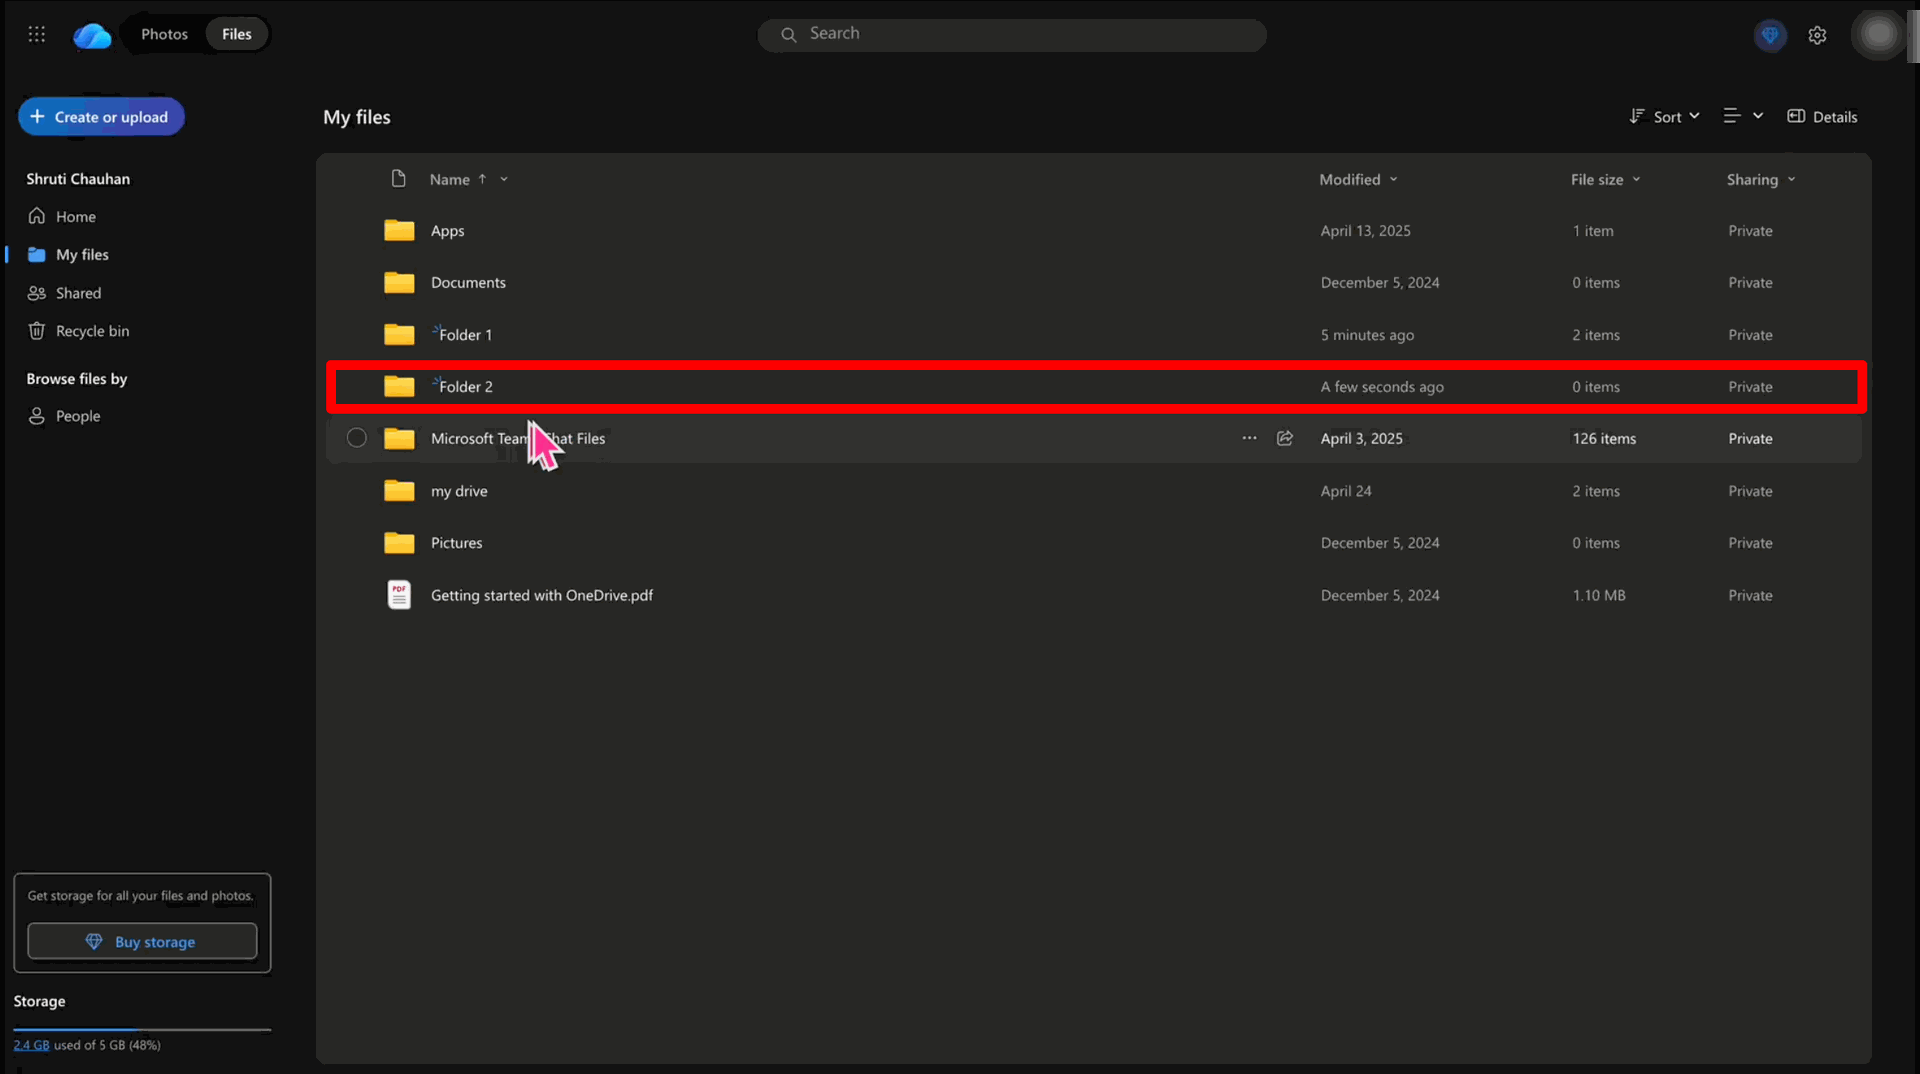
The newly created folder will be visible in your OneDrive account under "My files".
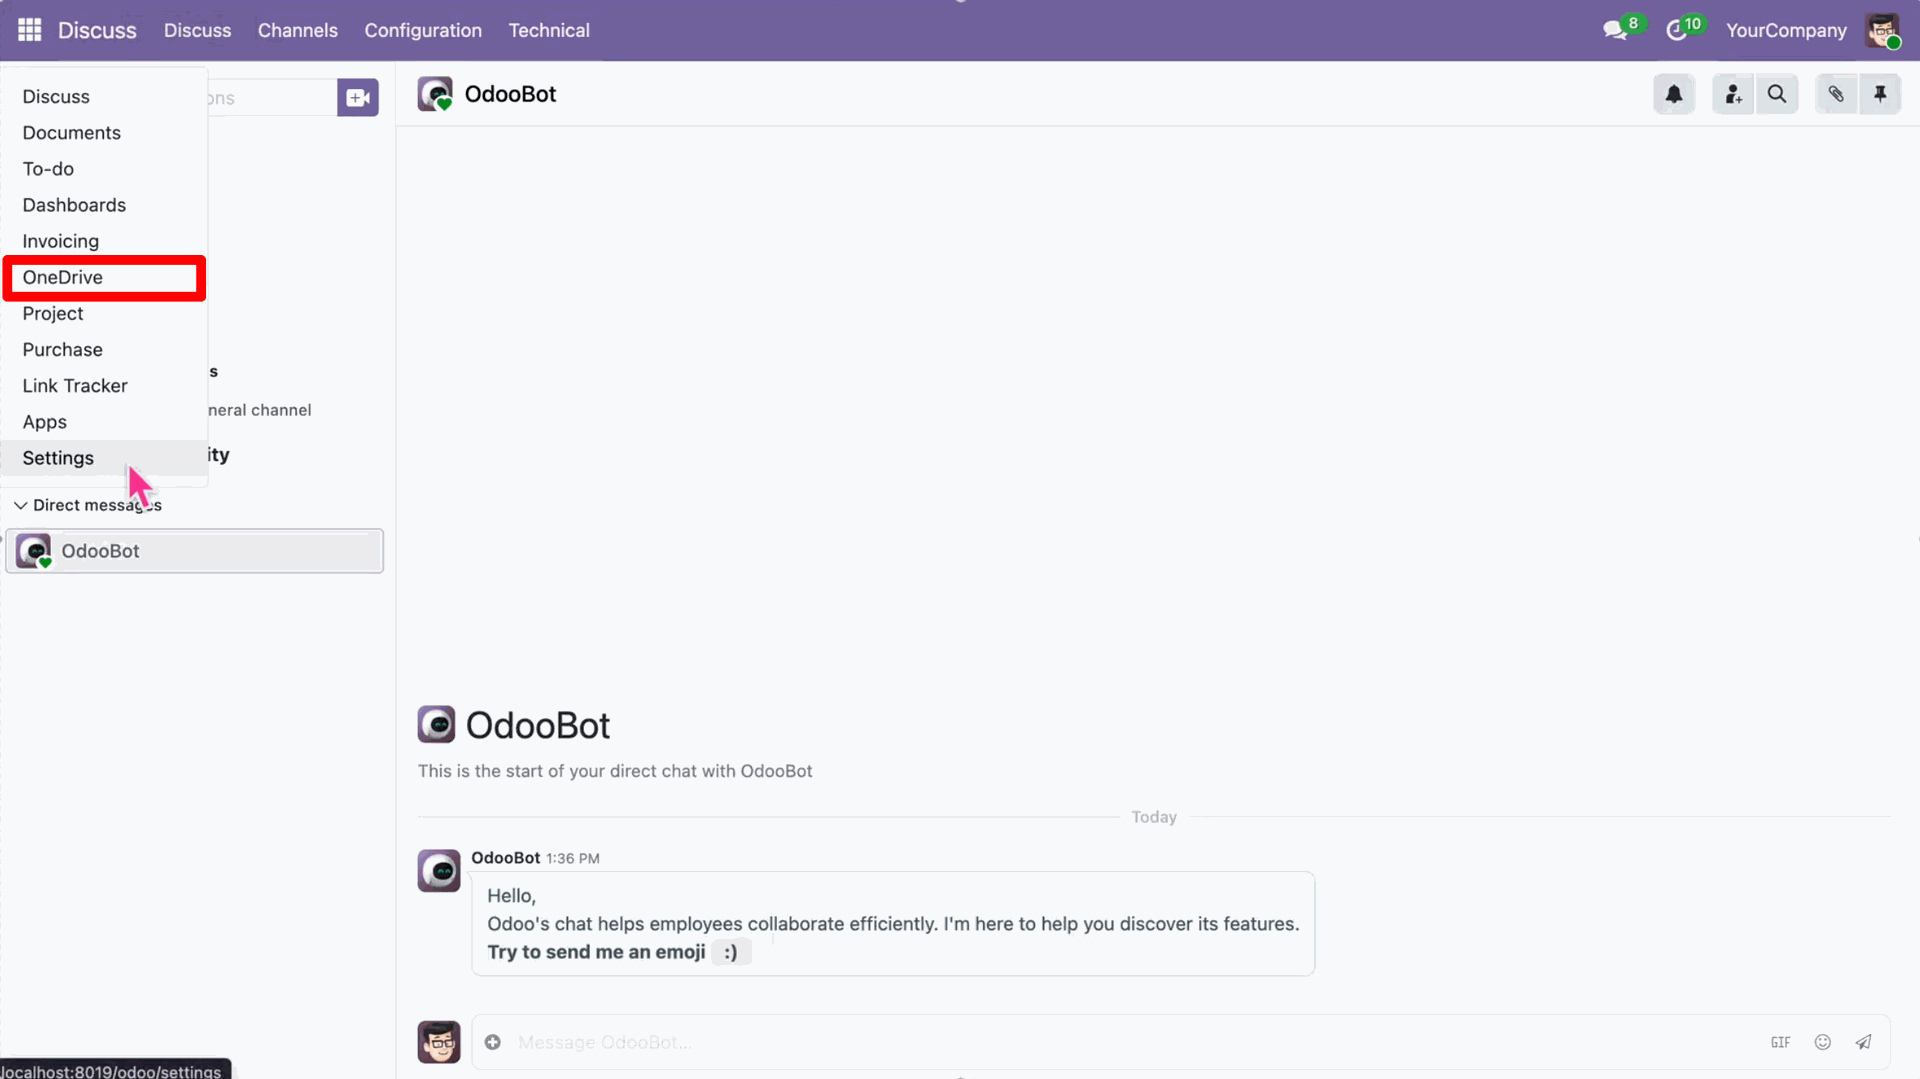
Navigate back to the Odoo apps and open the "OneDrive" app.
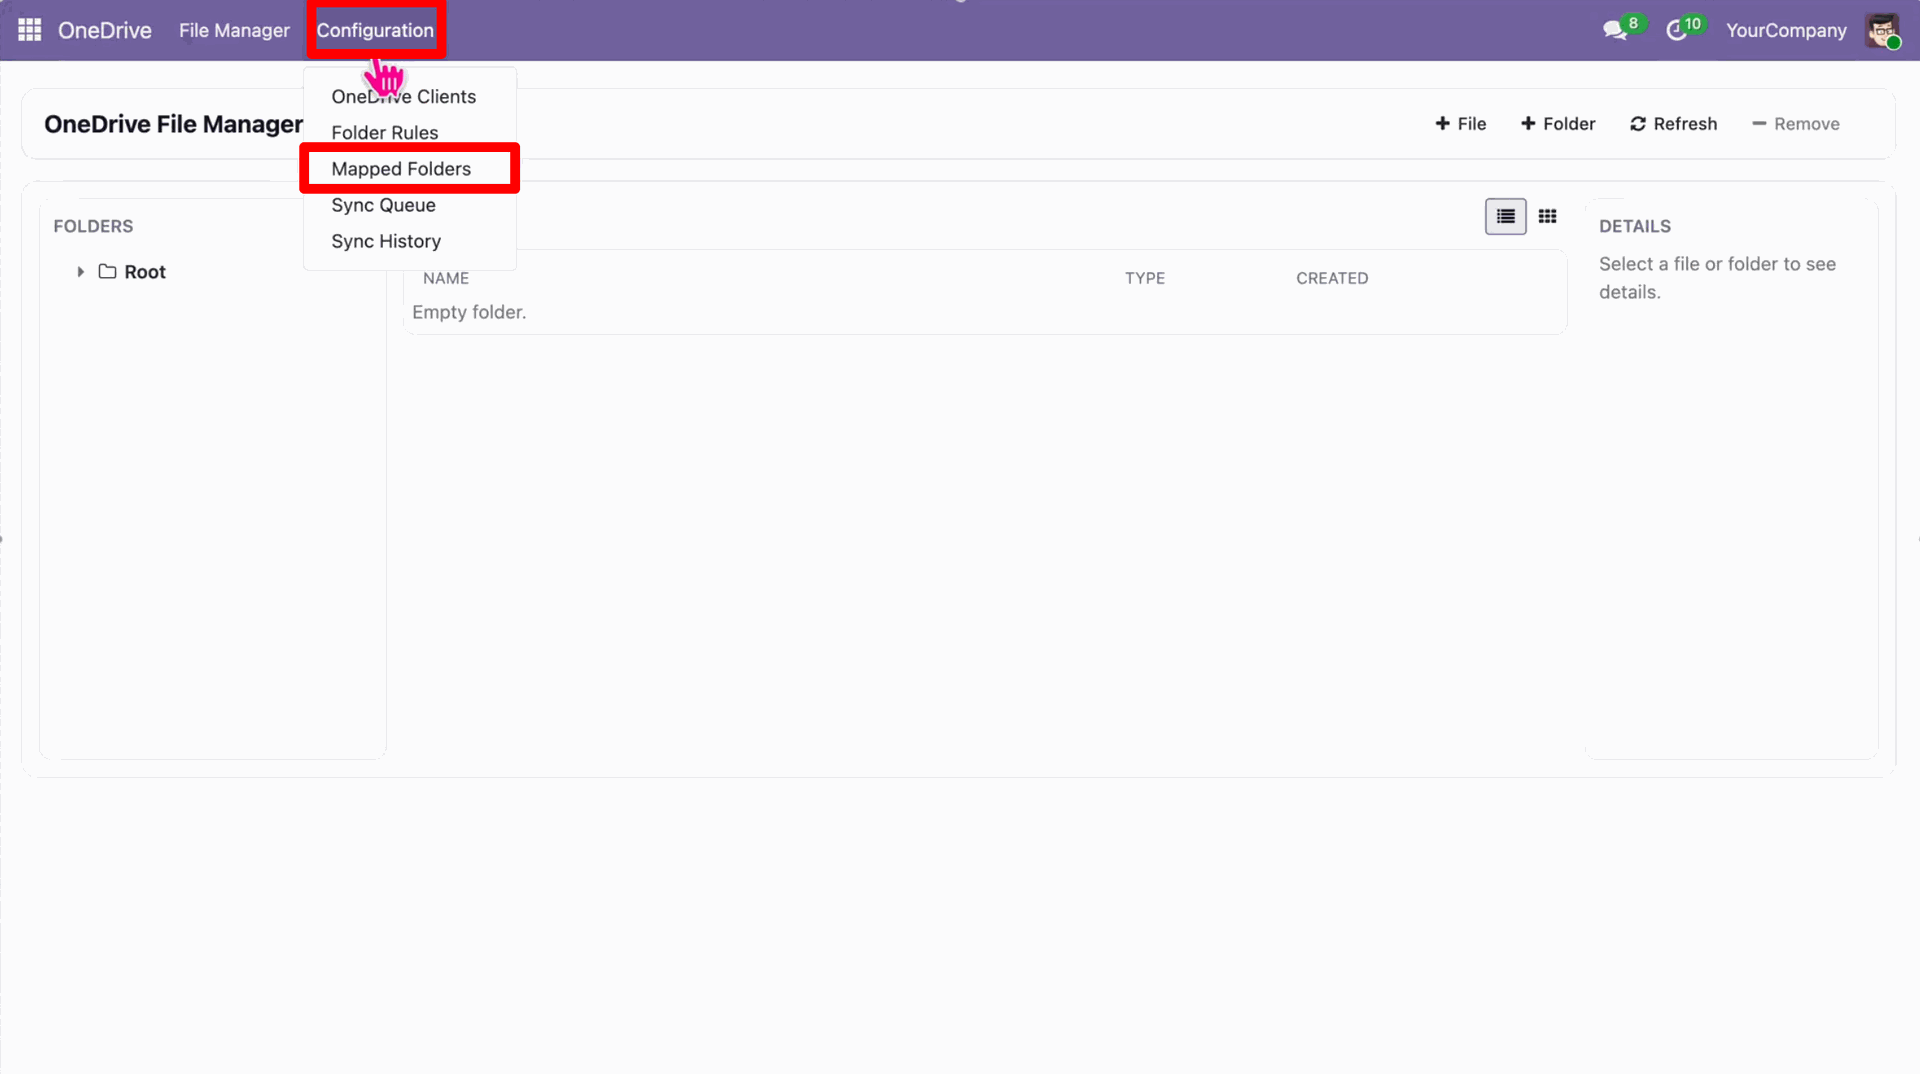
Go to the "Mapped Folders" menu under the OneDrive app.
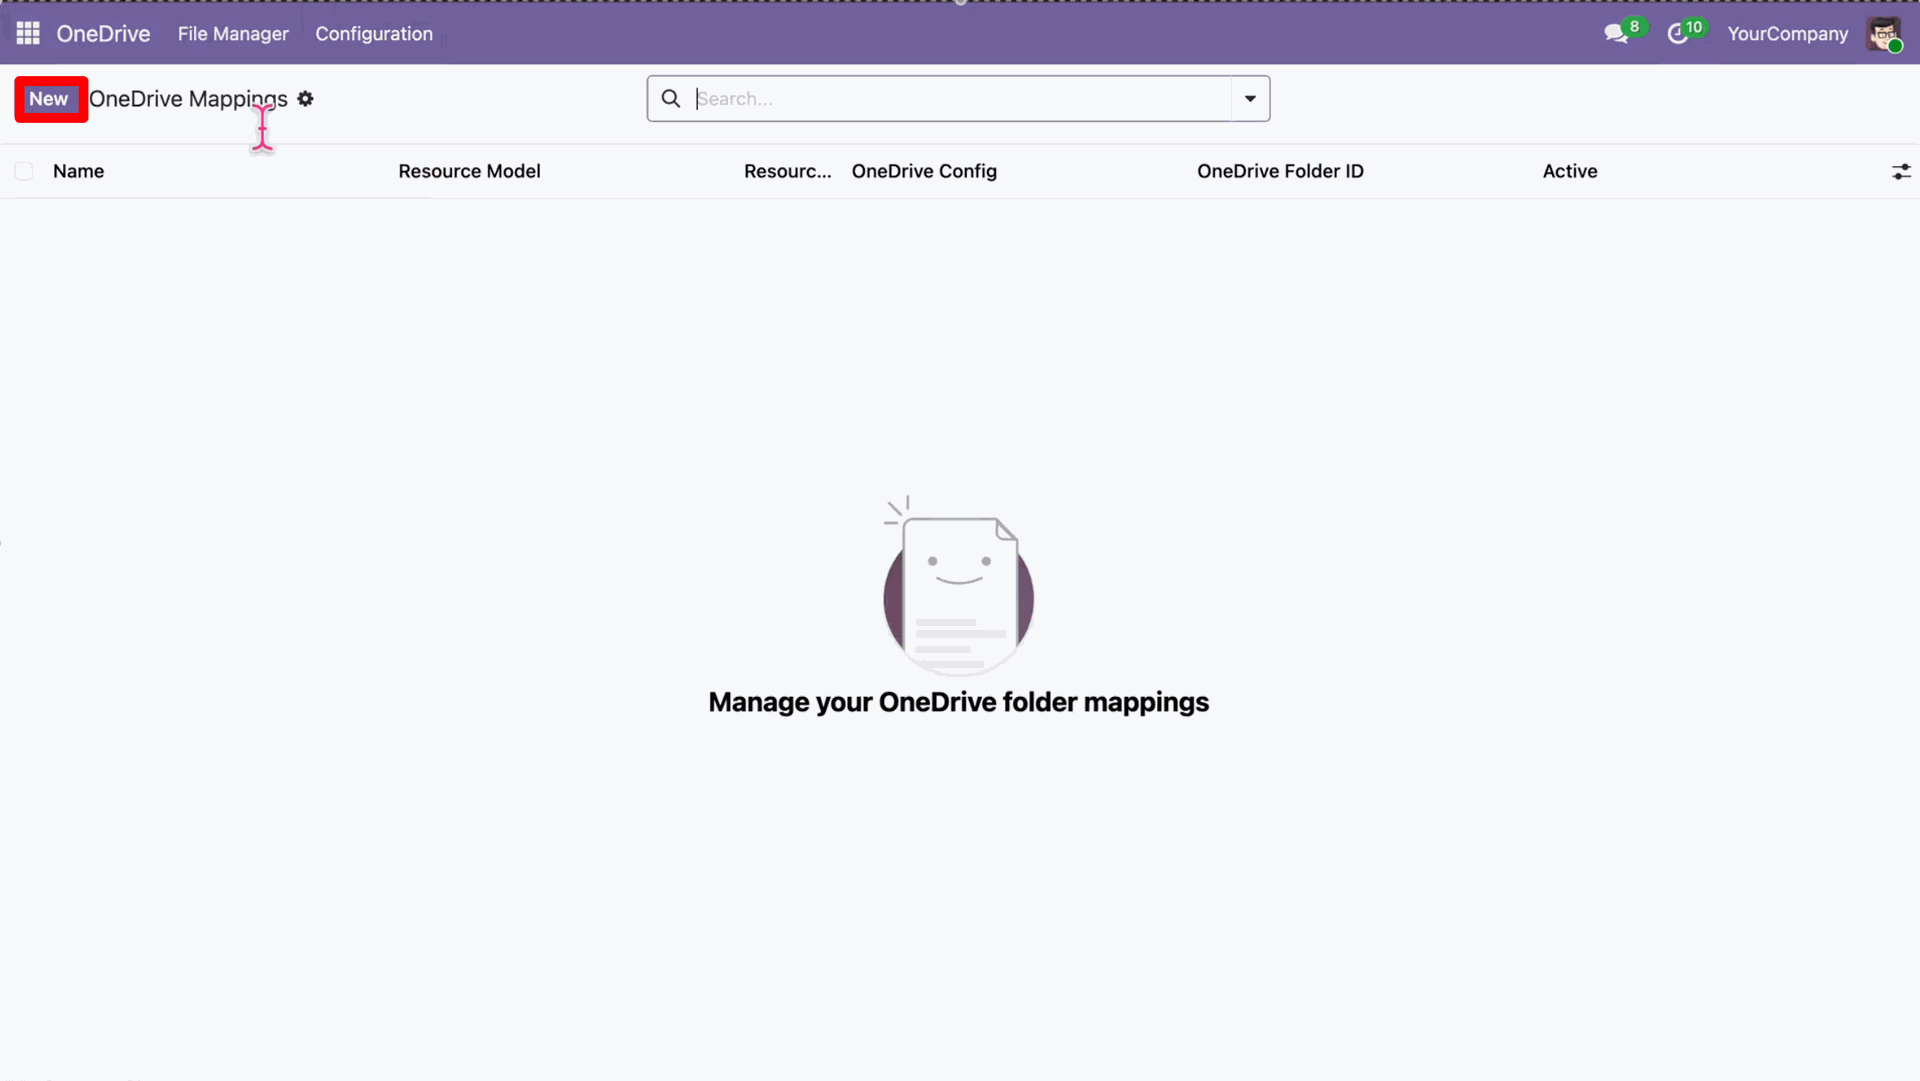
Click on the "New" button to create a new OneDrive Folders Mapping.
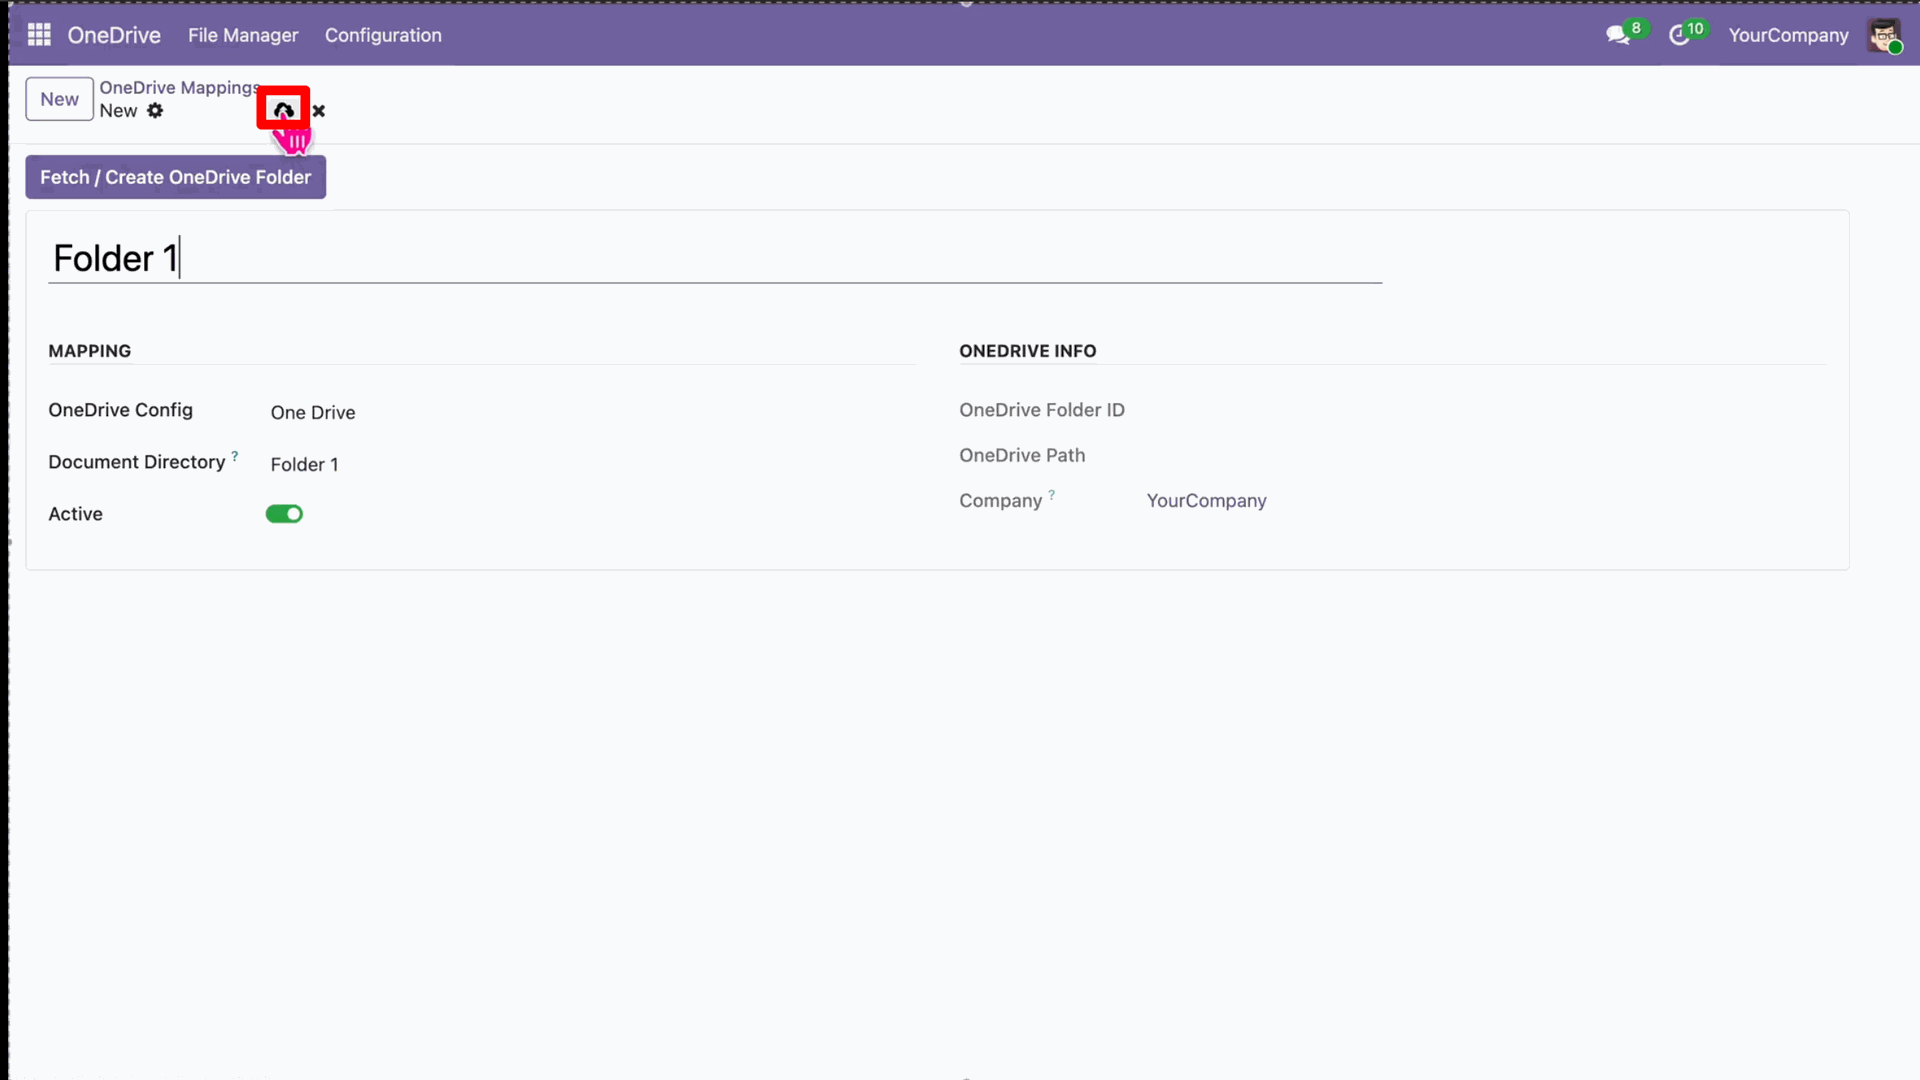
Enter the mapping details and click on the "Fetch / Create OneDrive Folder" button.
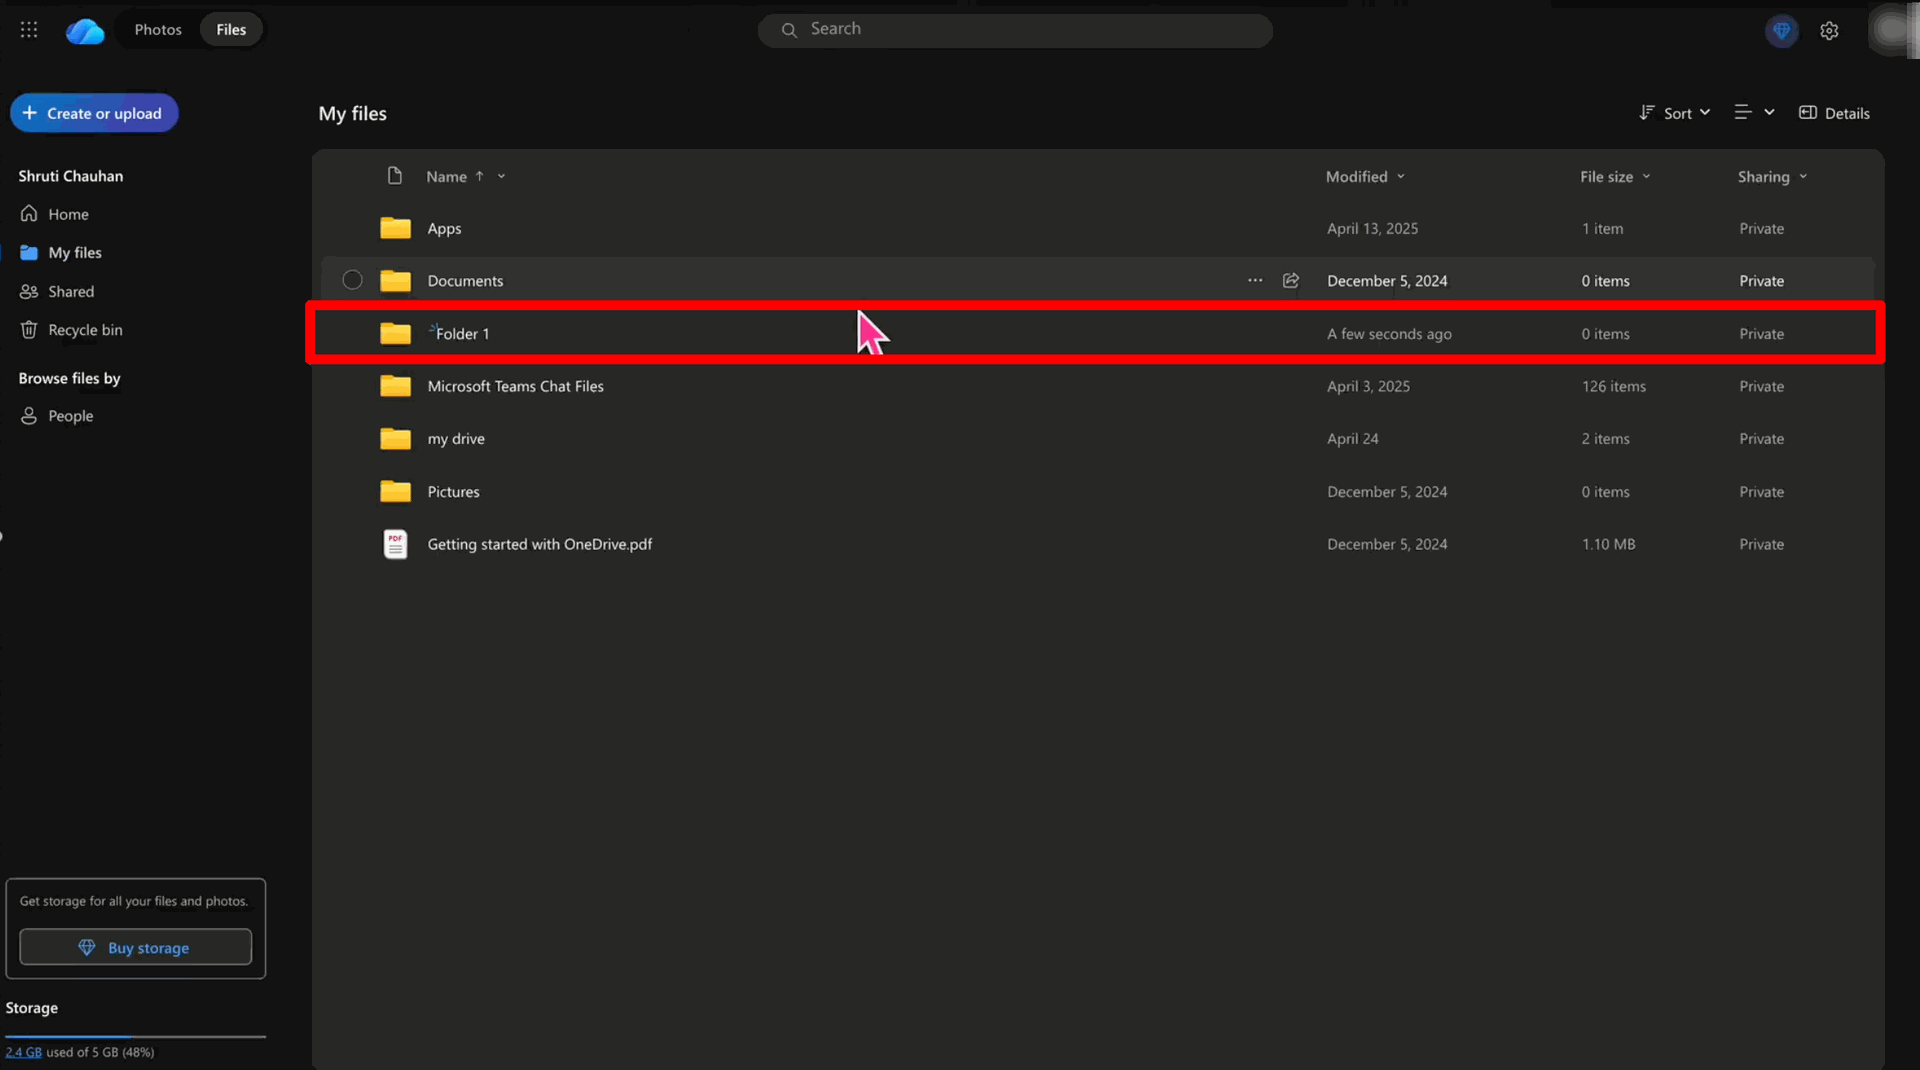
The linked folder is now ready and visible in your OneDrive account.
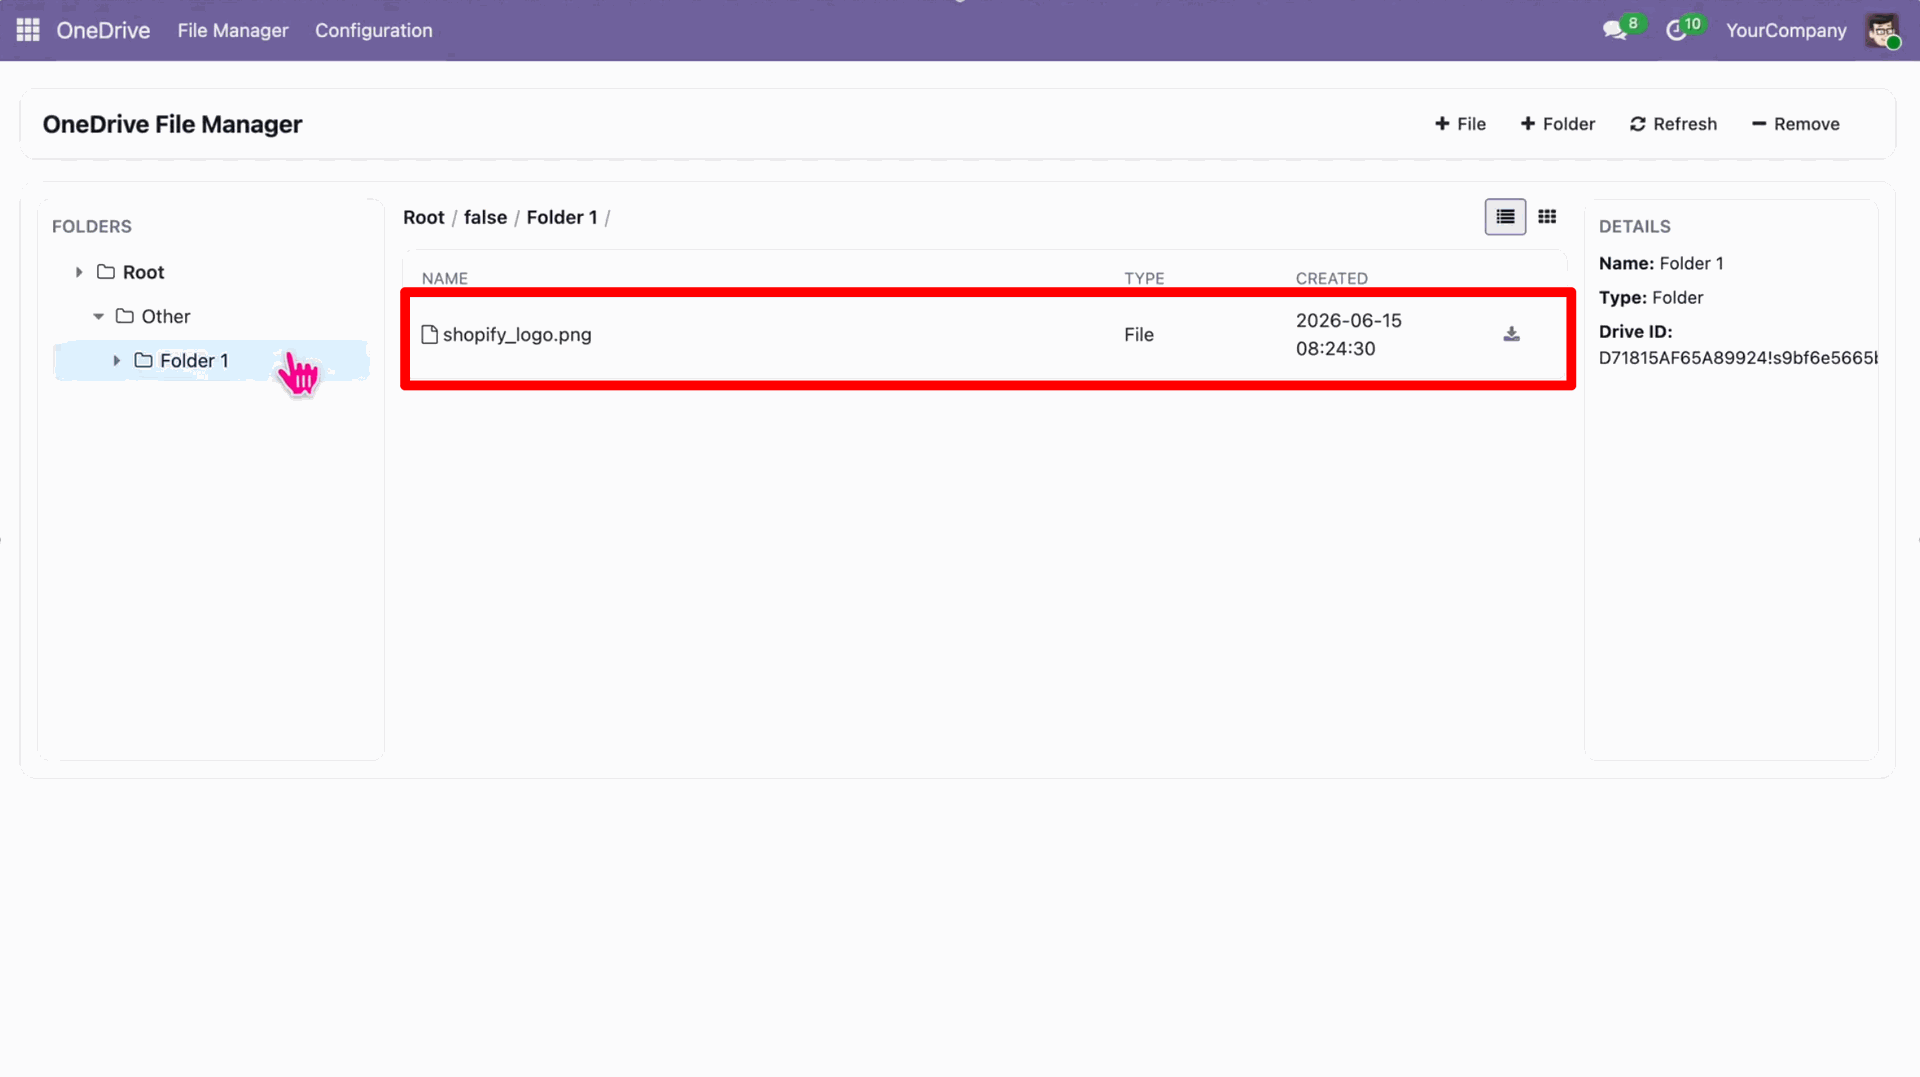
In the Documents app sidebar, select the folder under "My Drive".
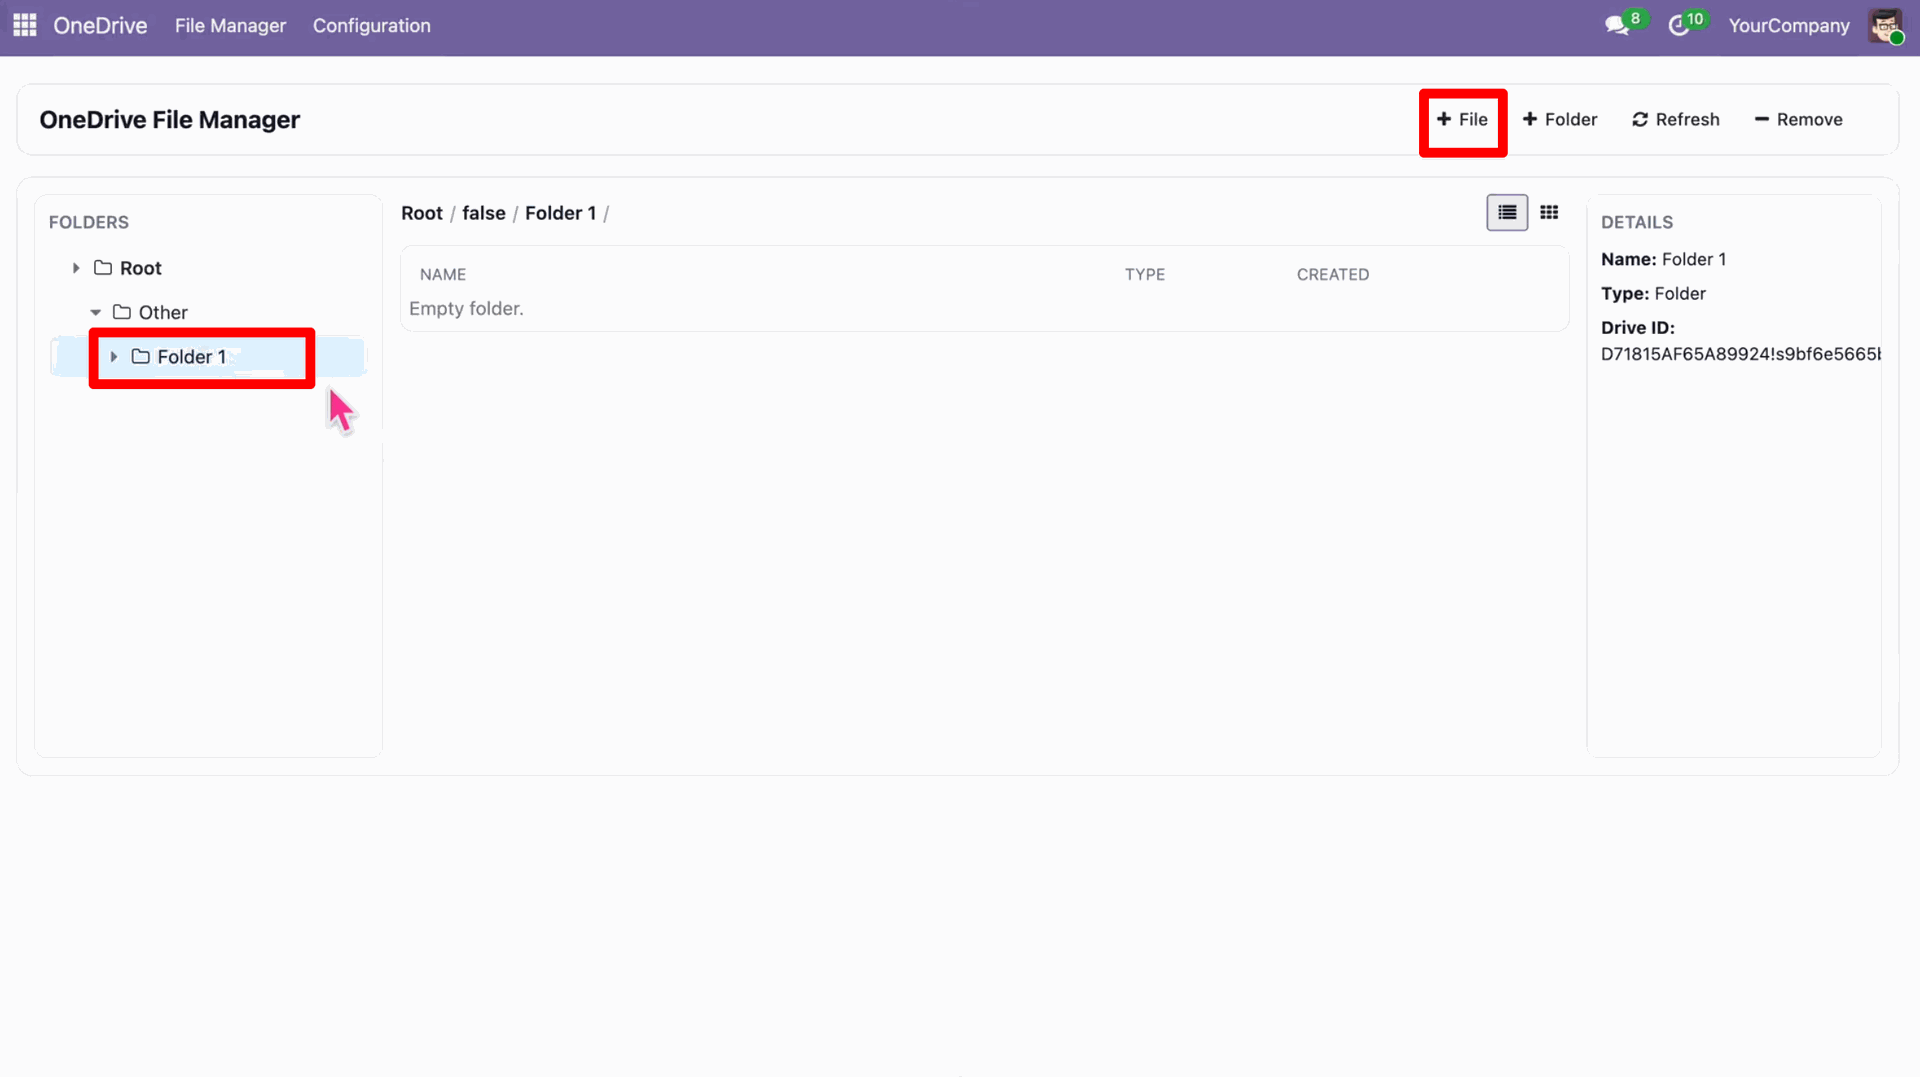
Upload a document or select an existing file within the folder.
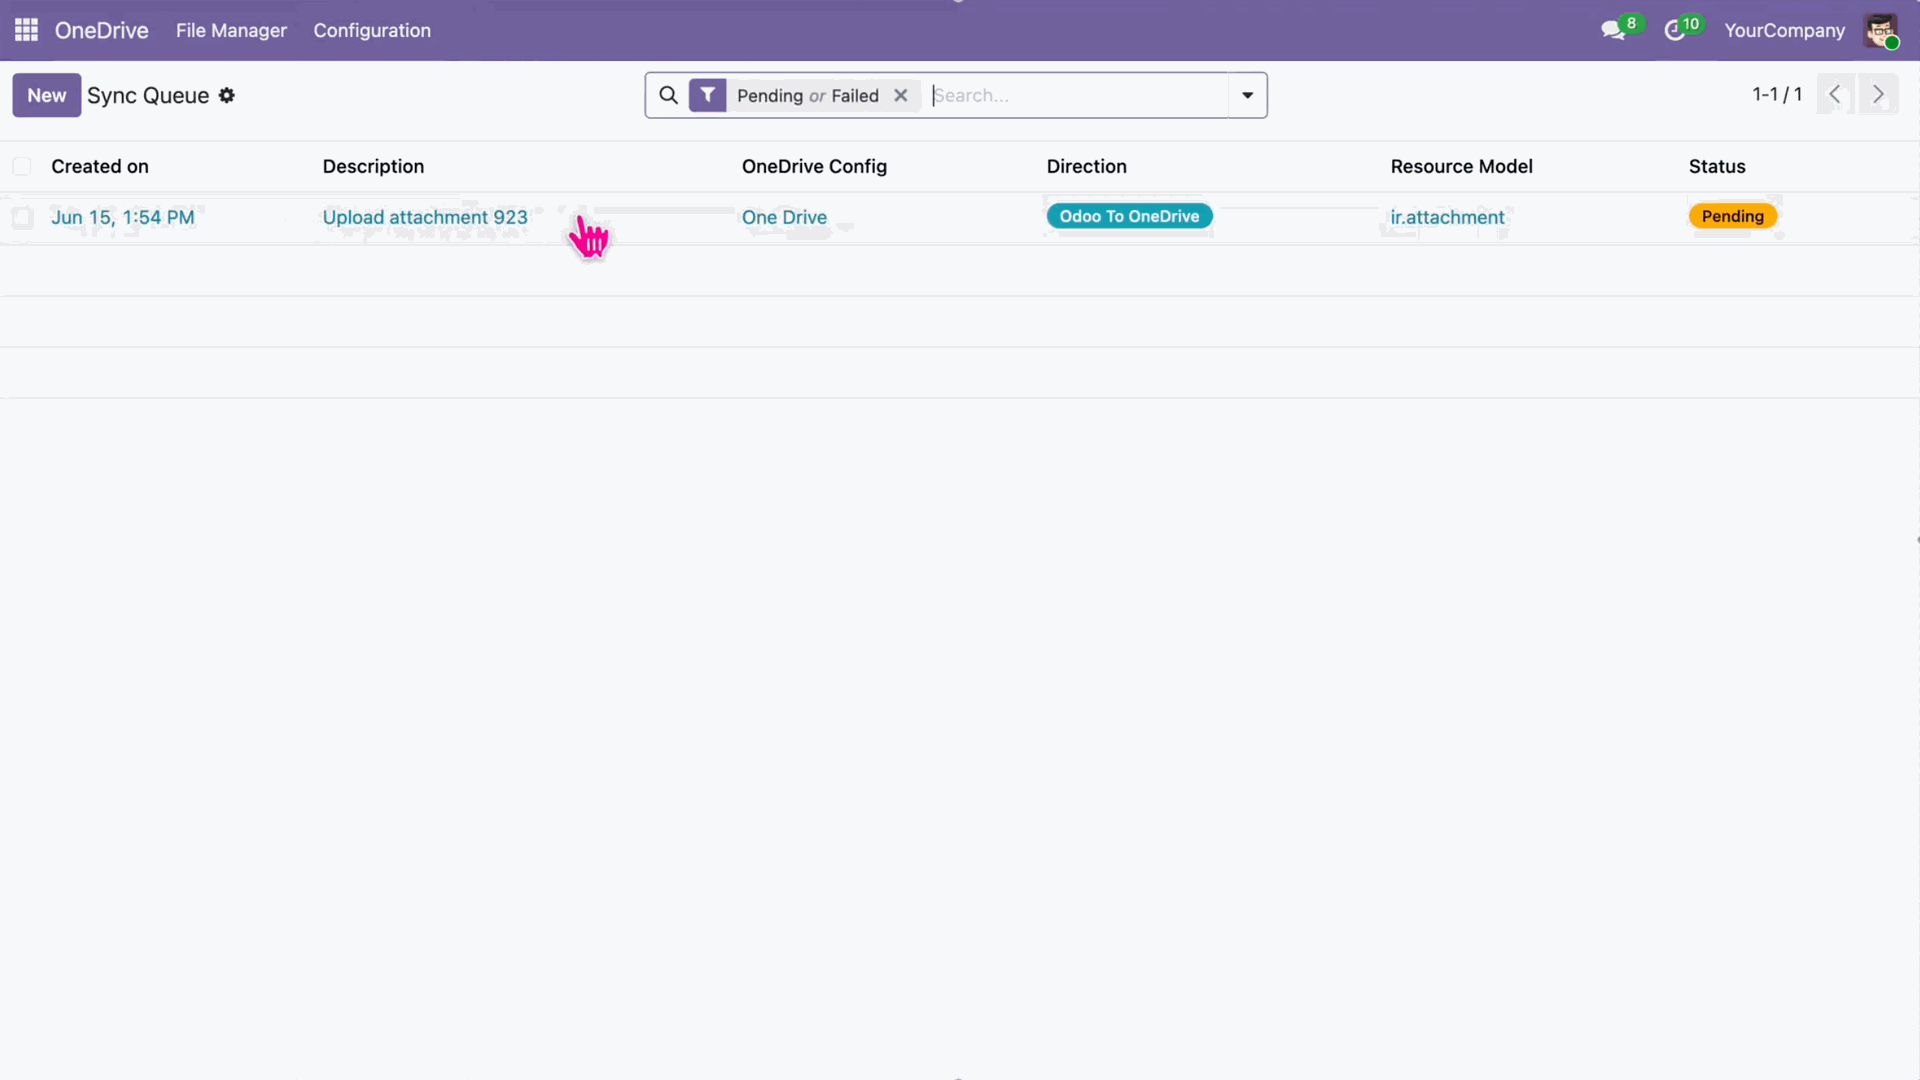
Go to the "Sync Queue" in the OneDrive app to see the uploaded document in "Pending" status for Direct Sync.
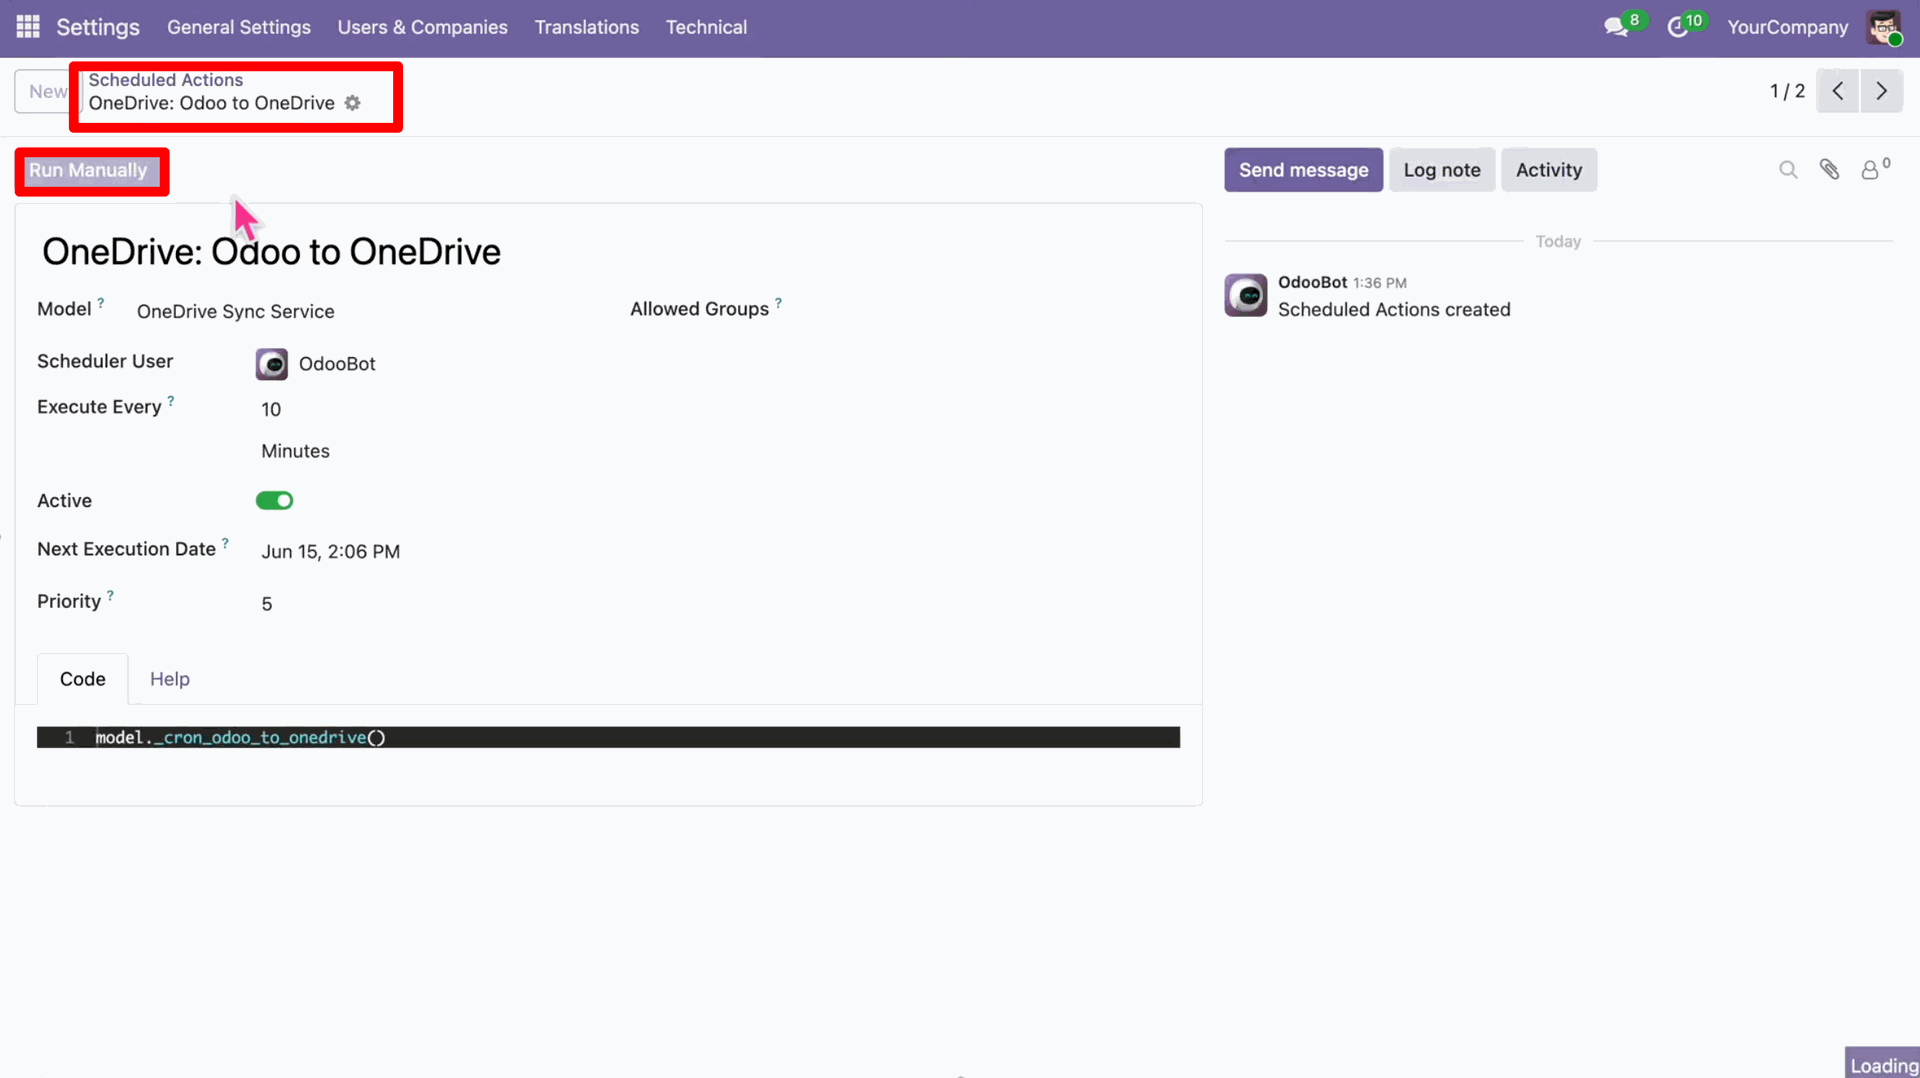
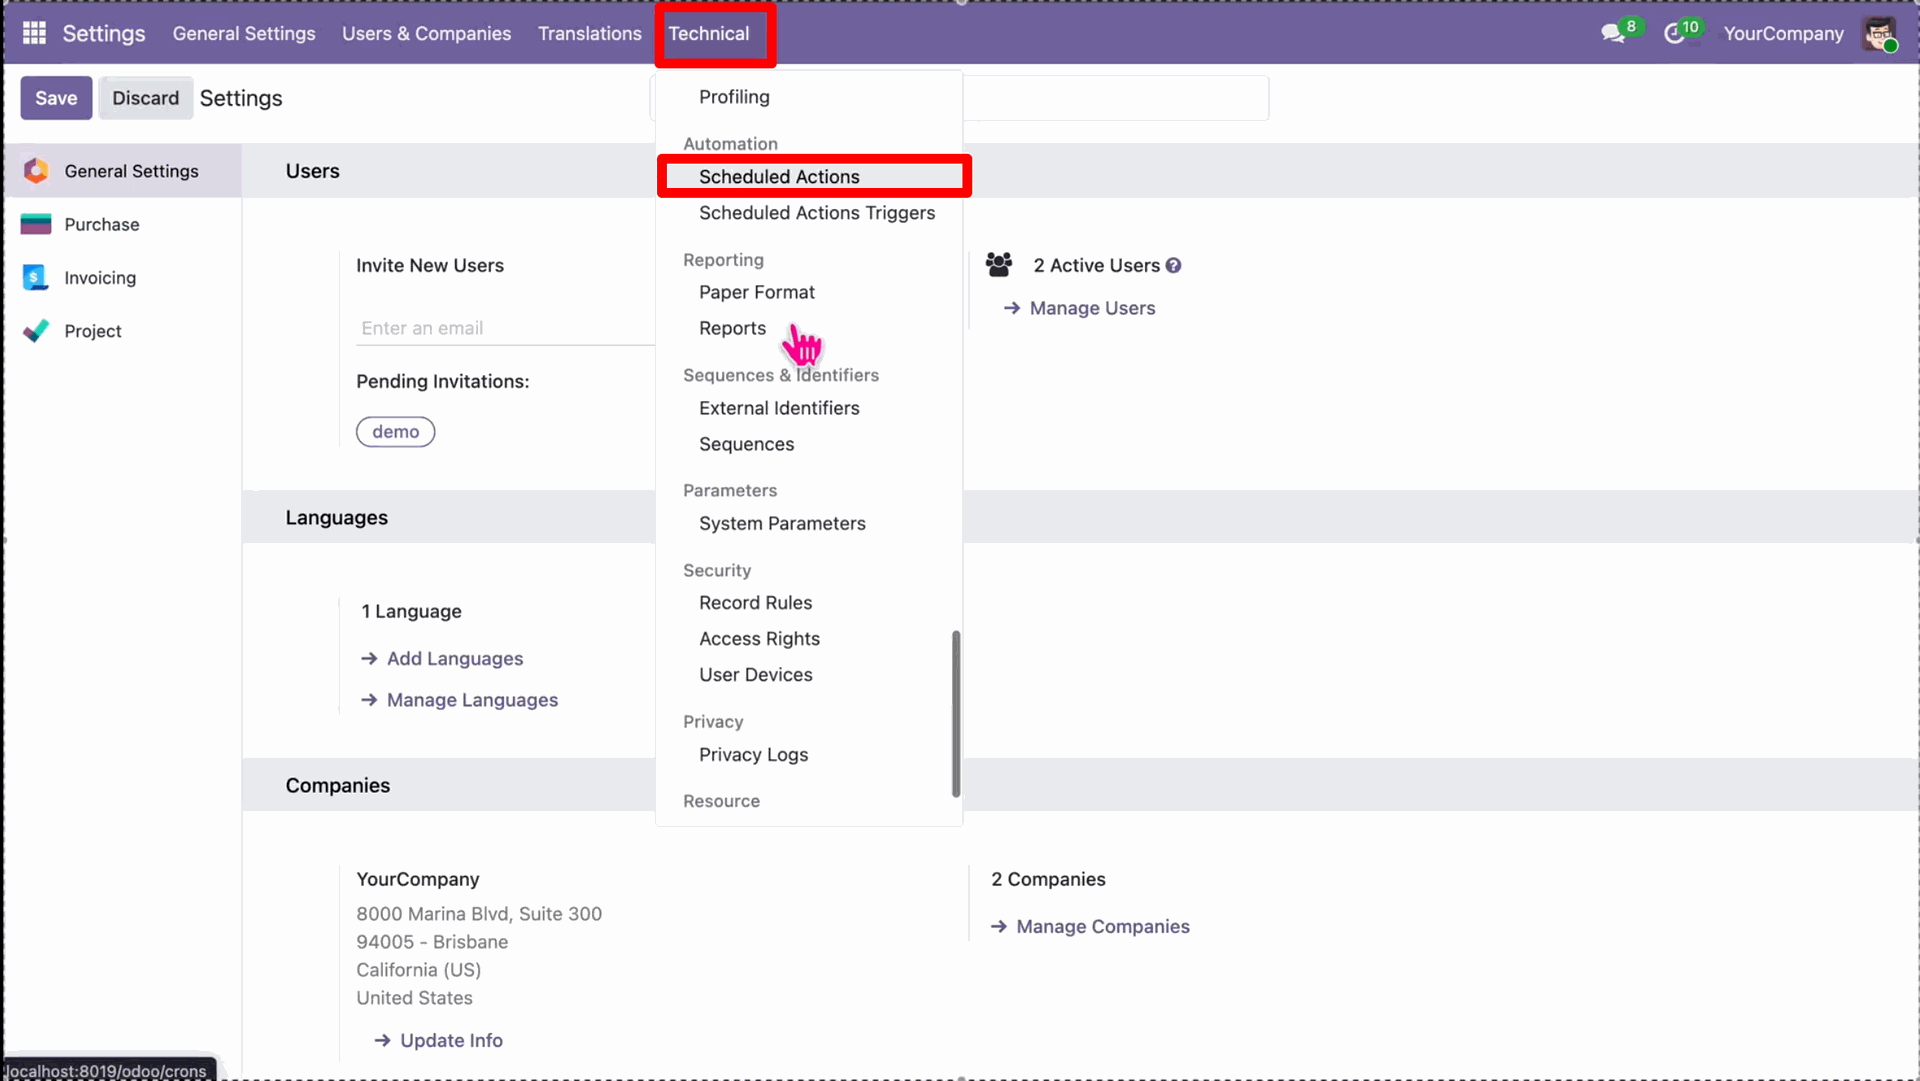
Navigate to Settings > Technical > Scheduled Actions.
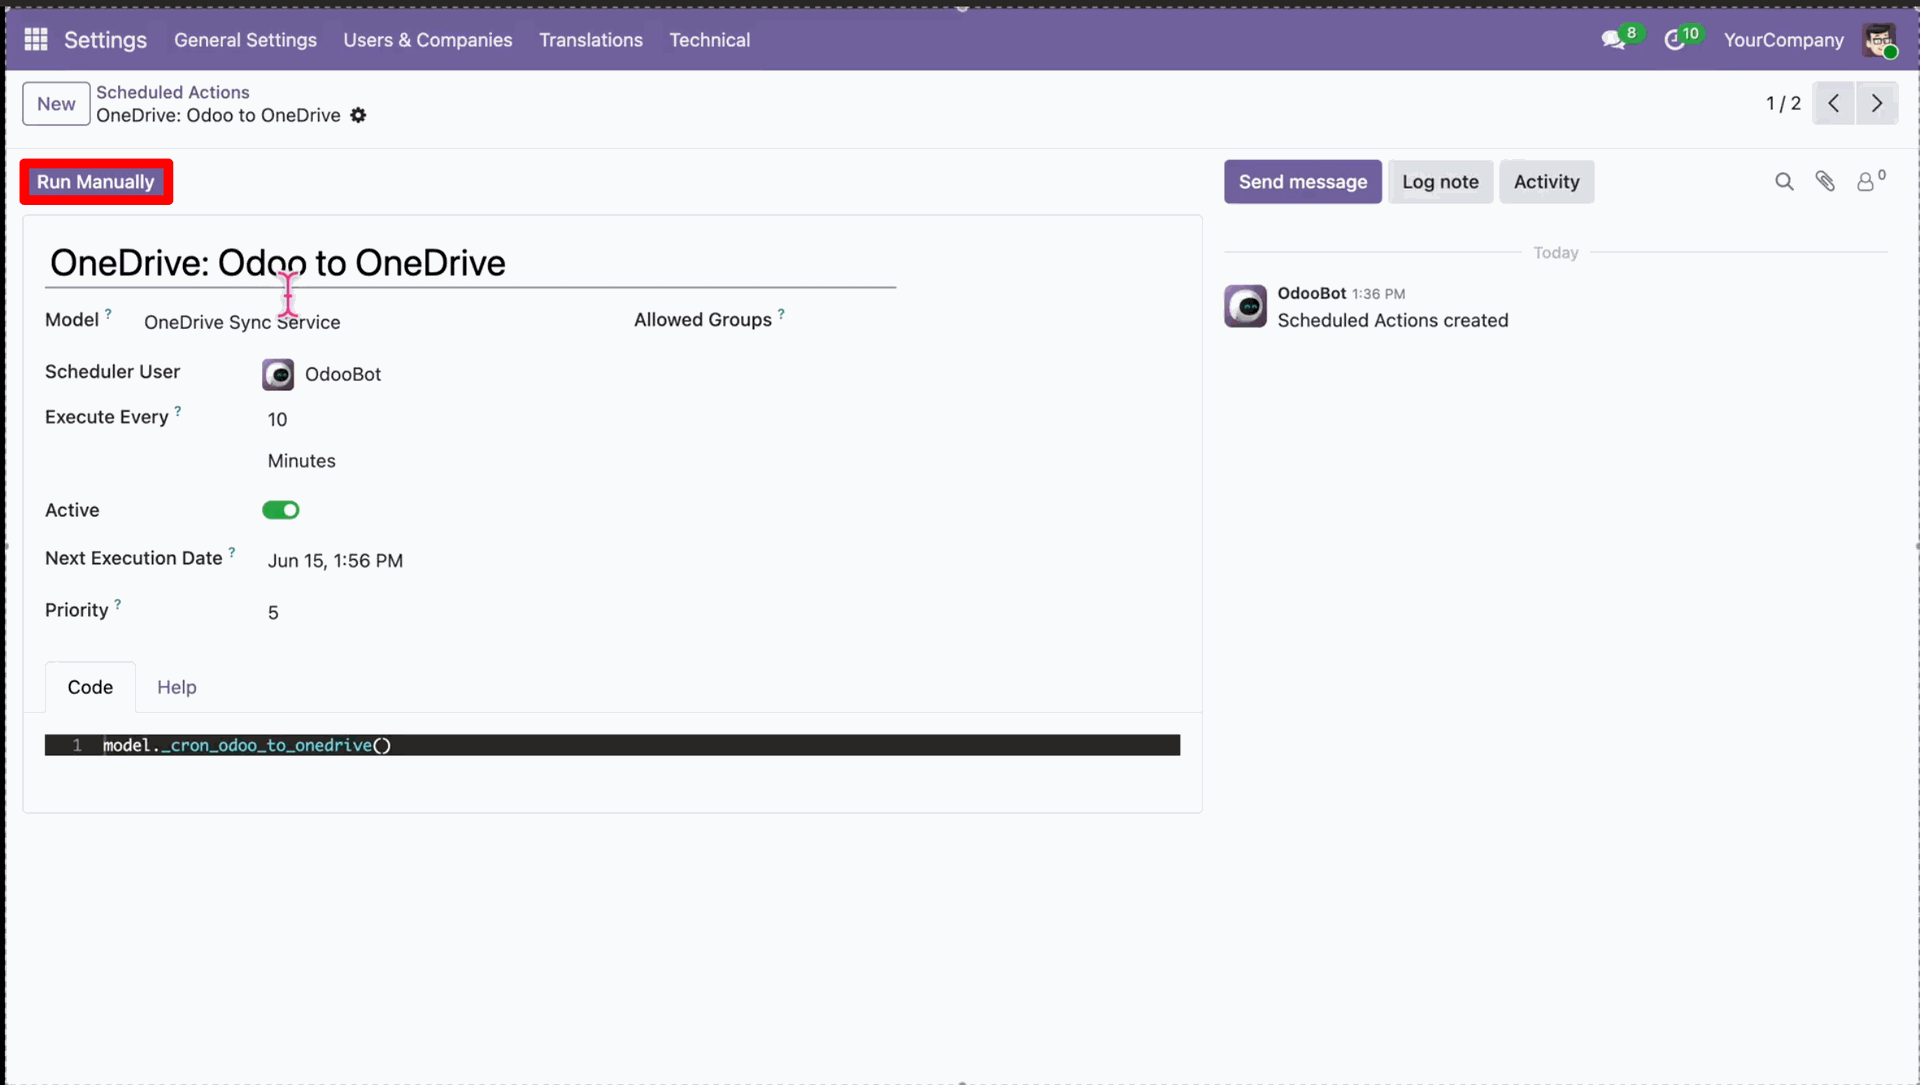
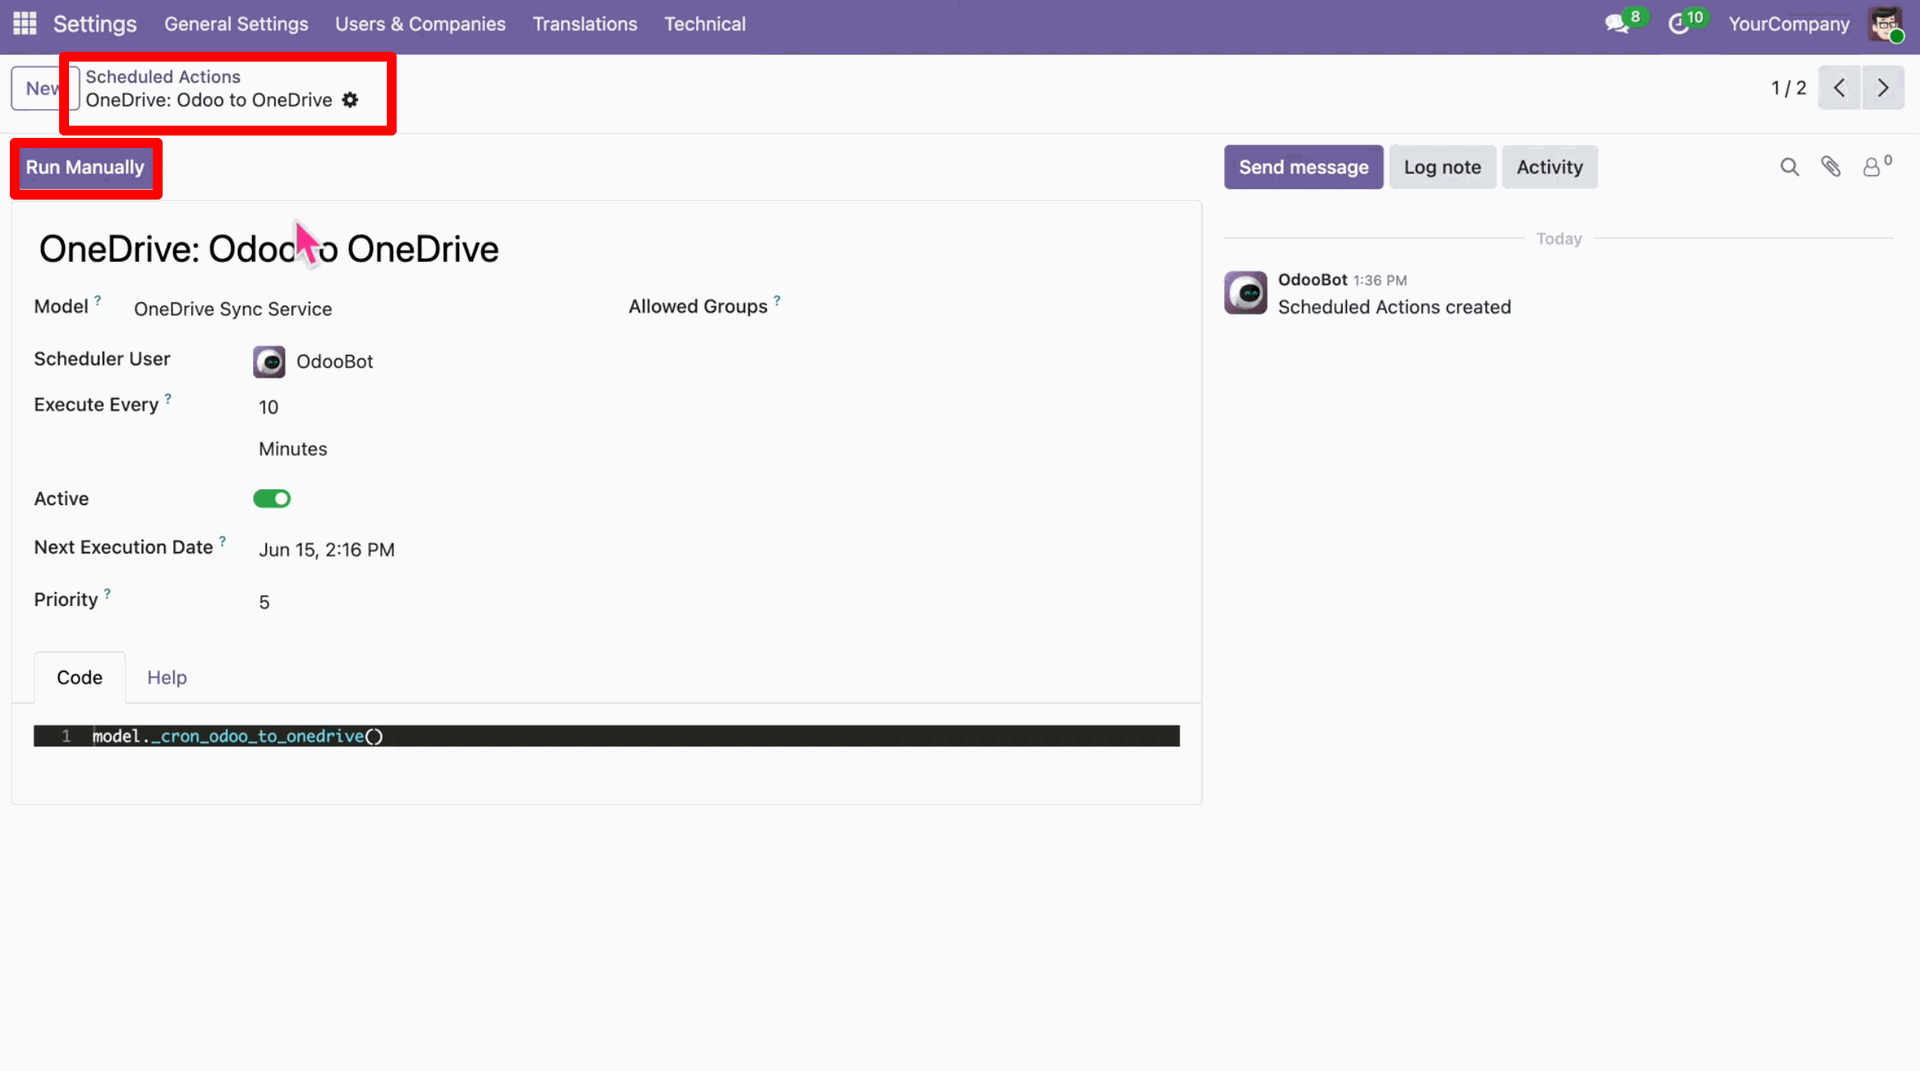
Find and select the scheduled action named "OneDrive: Odoo to OneDrive".
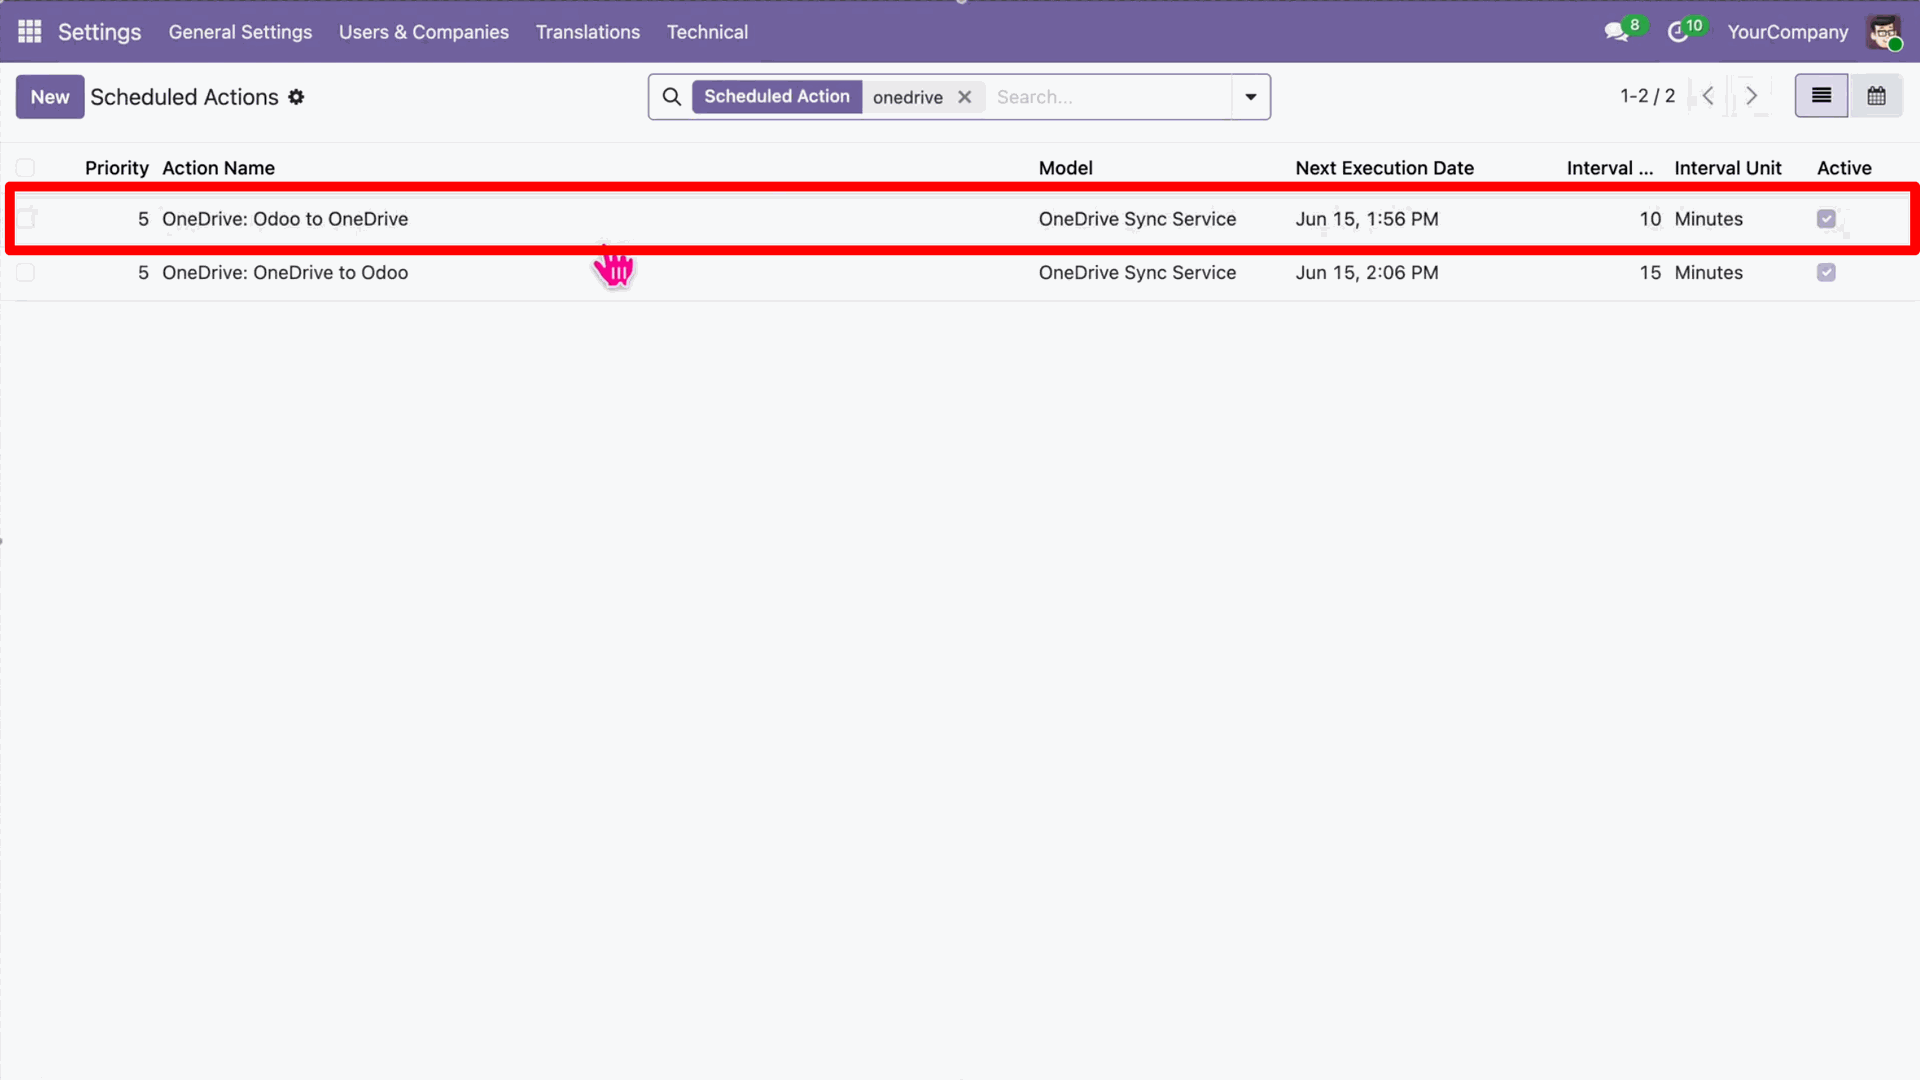
Click on the "Run Manually" button to trigger the synchronization process immediately.
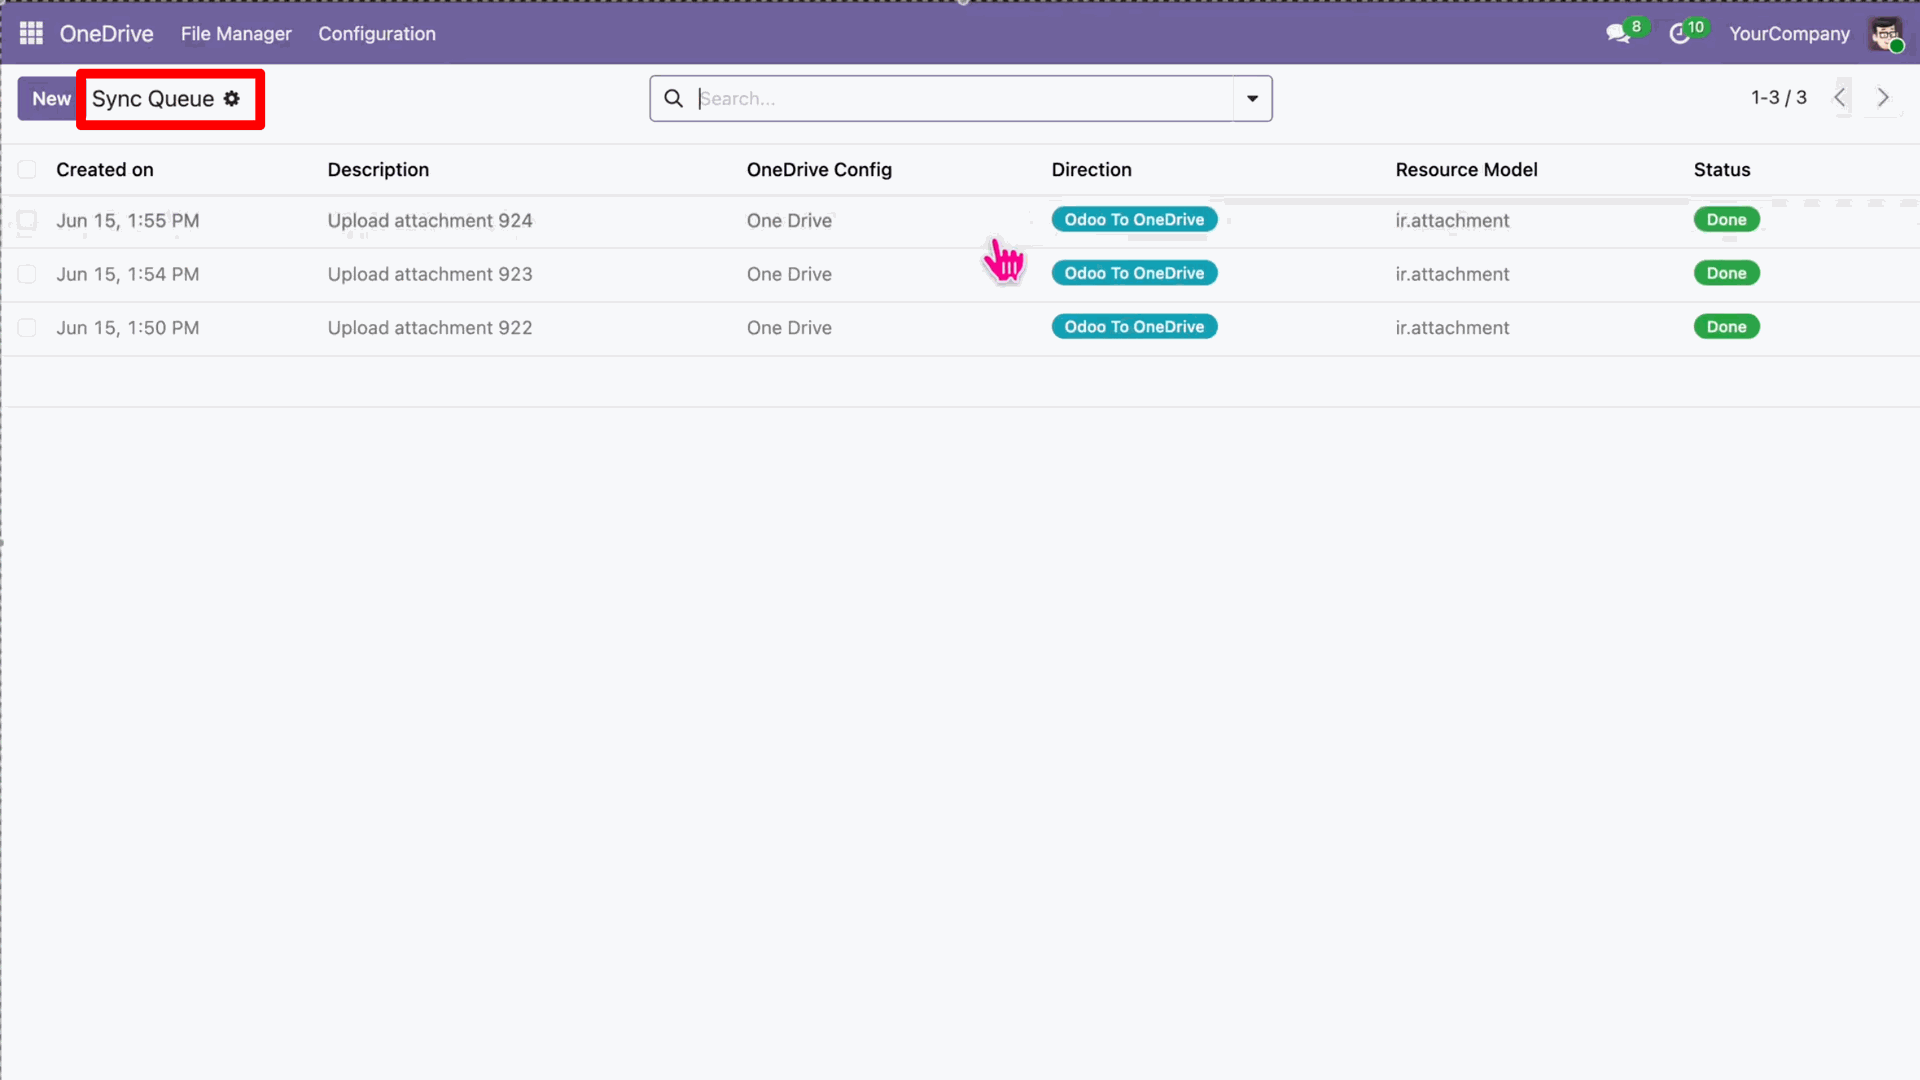
Check the "Sync Queue" again; the status of the document will now be changed to "Done".
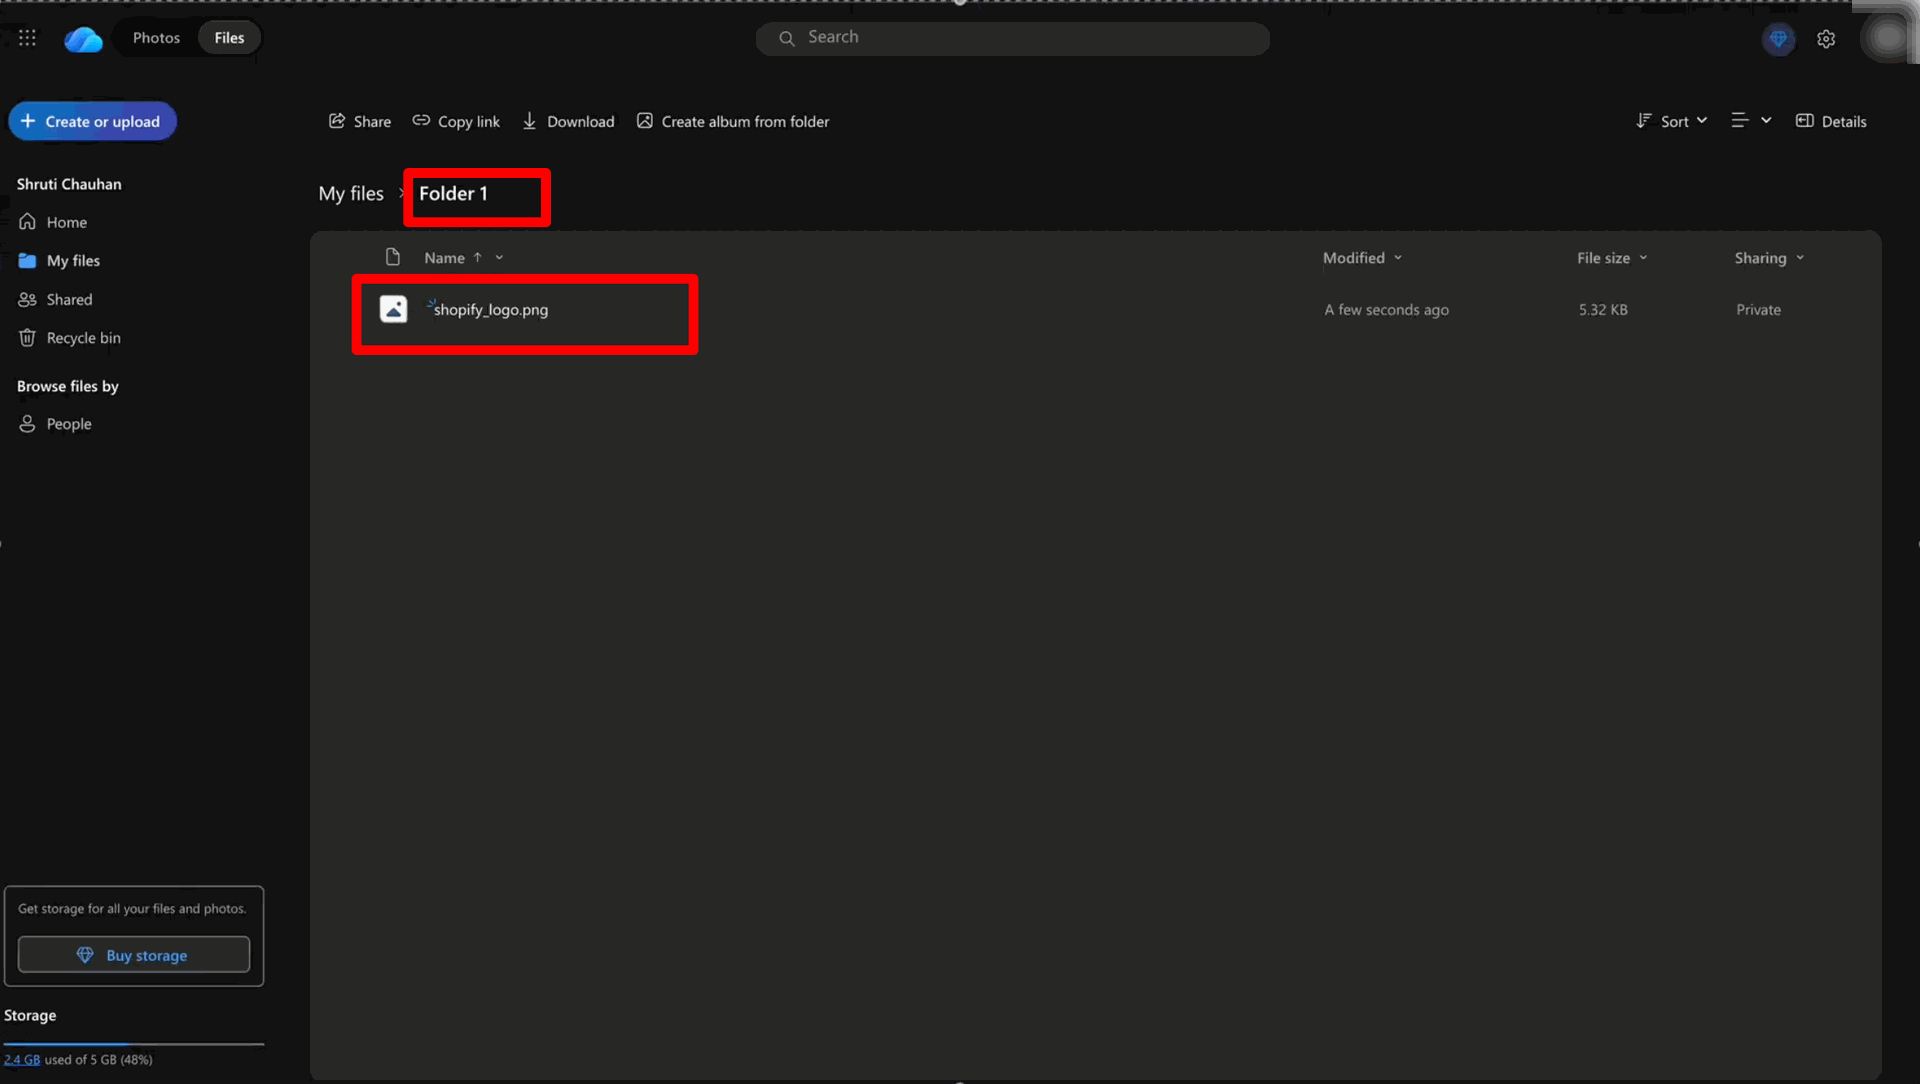
Finally, verify the synced document in your OneDrive account inside the folder.
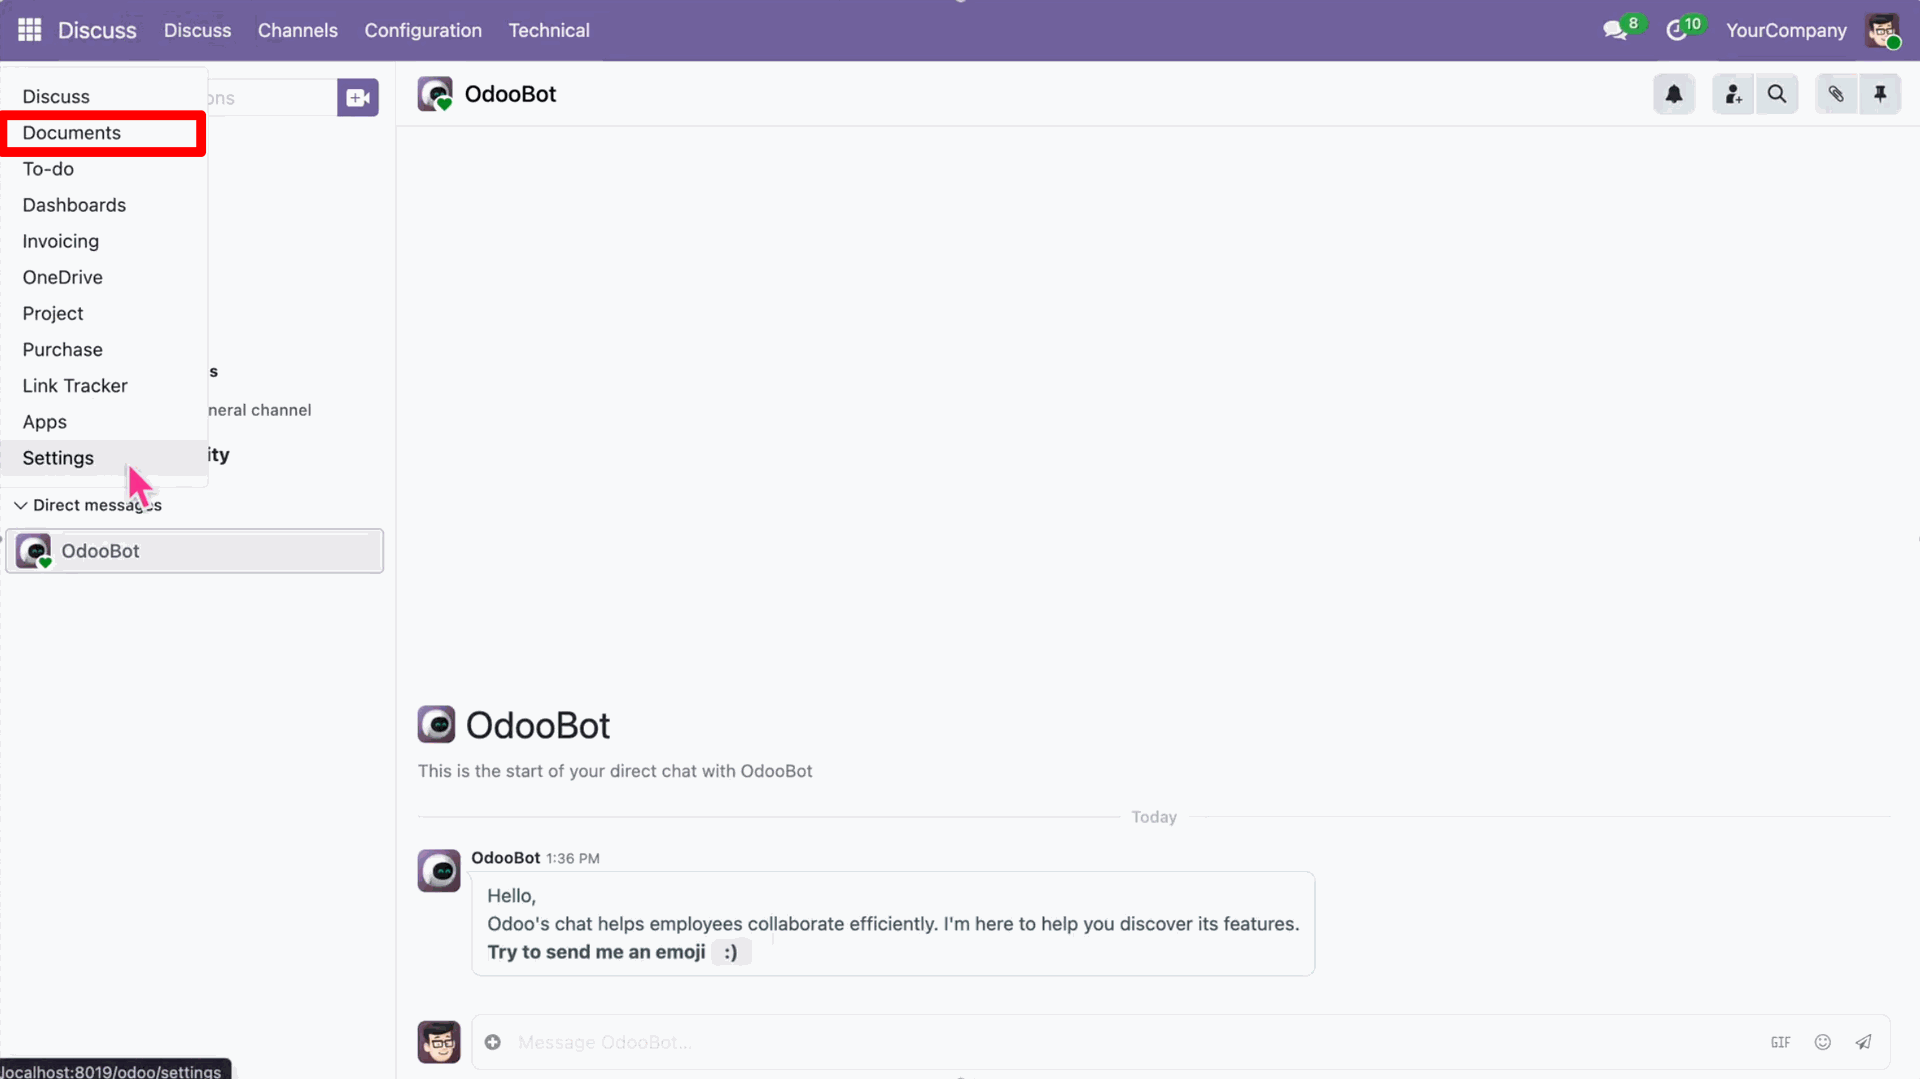
Navigate to the Documents App from the Odoo apps.
Open the mapped folder in the Documents app to view existing files.
Navigate to your OneDrive account and open the mapped folder.
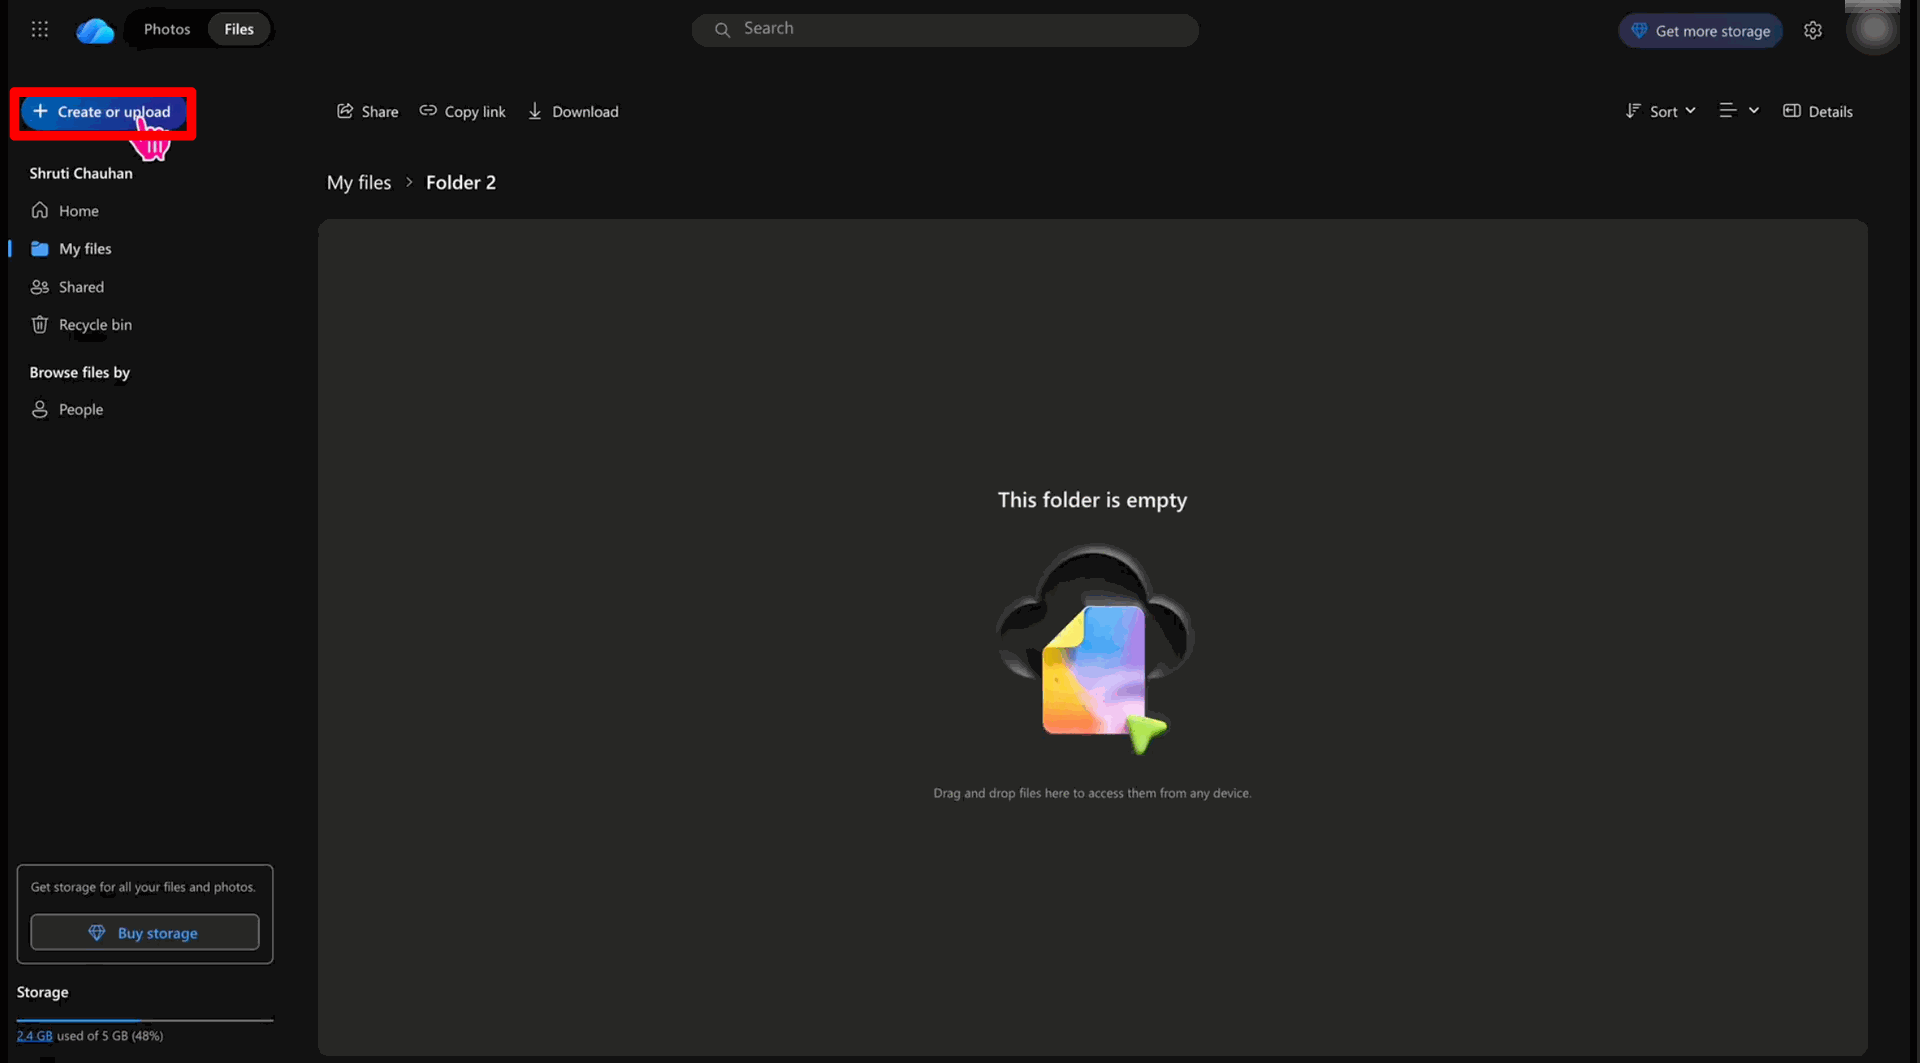
Click on the 'Create or upload' button and select 'Files upload' to upload a new file.
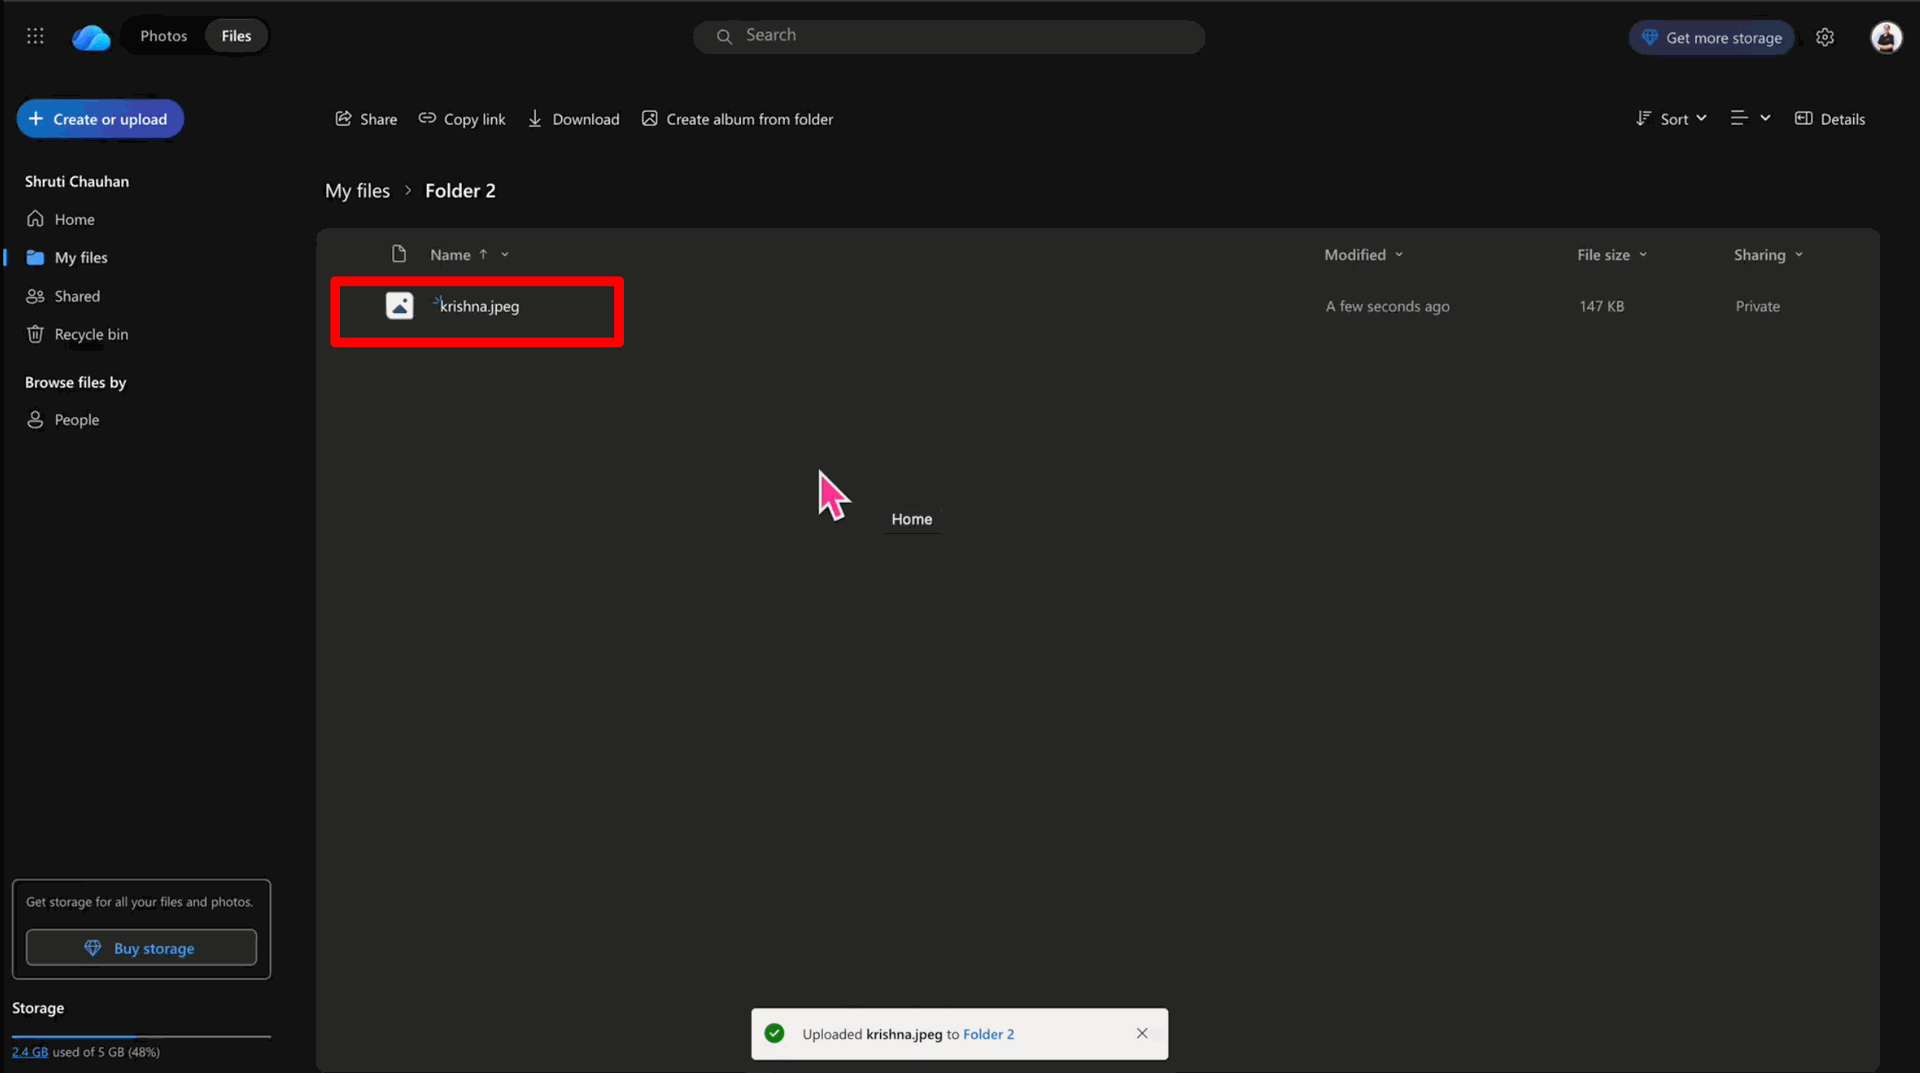
Ensure the new file is completely uploaded in the OneDrive folder.
Click the 'Run Manually' button to trigger the import synchronization immediately.
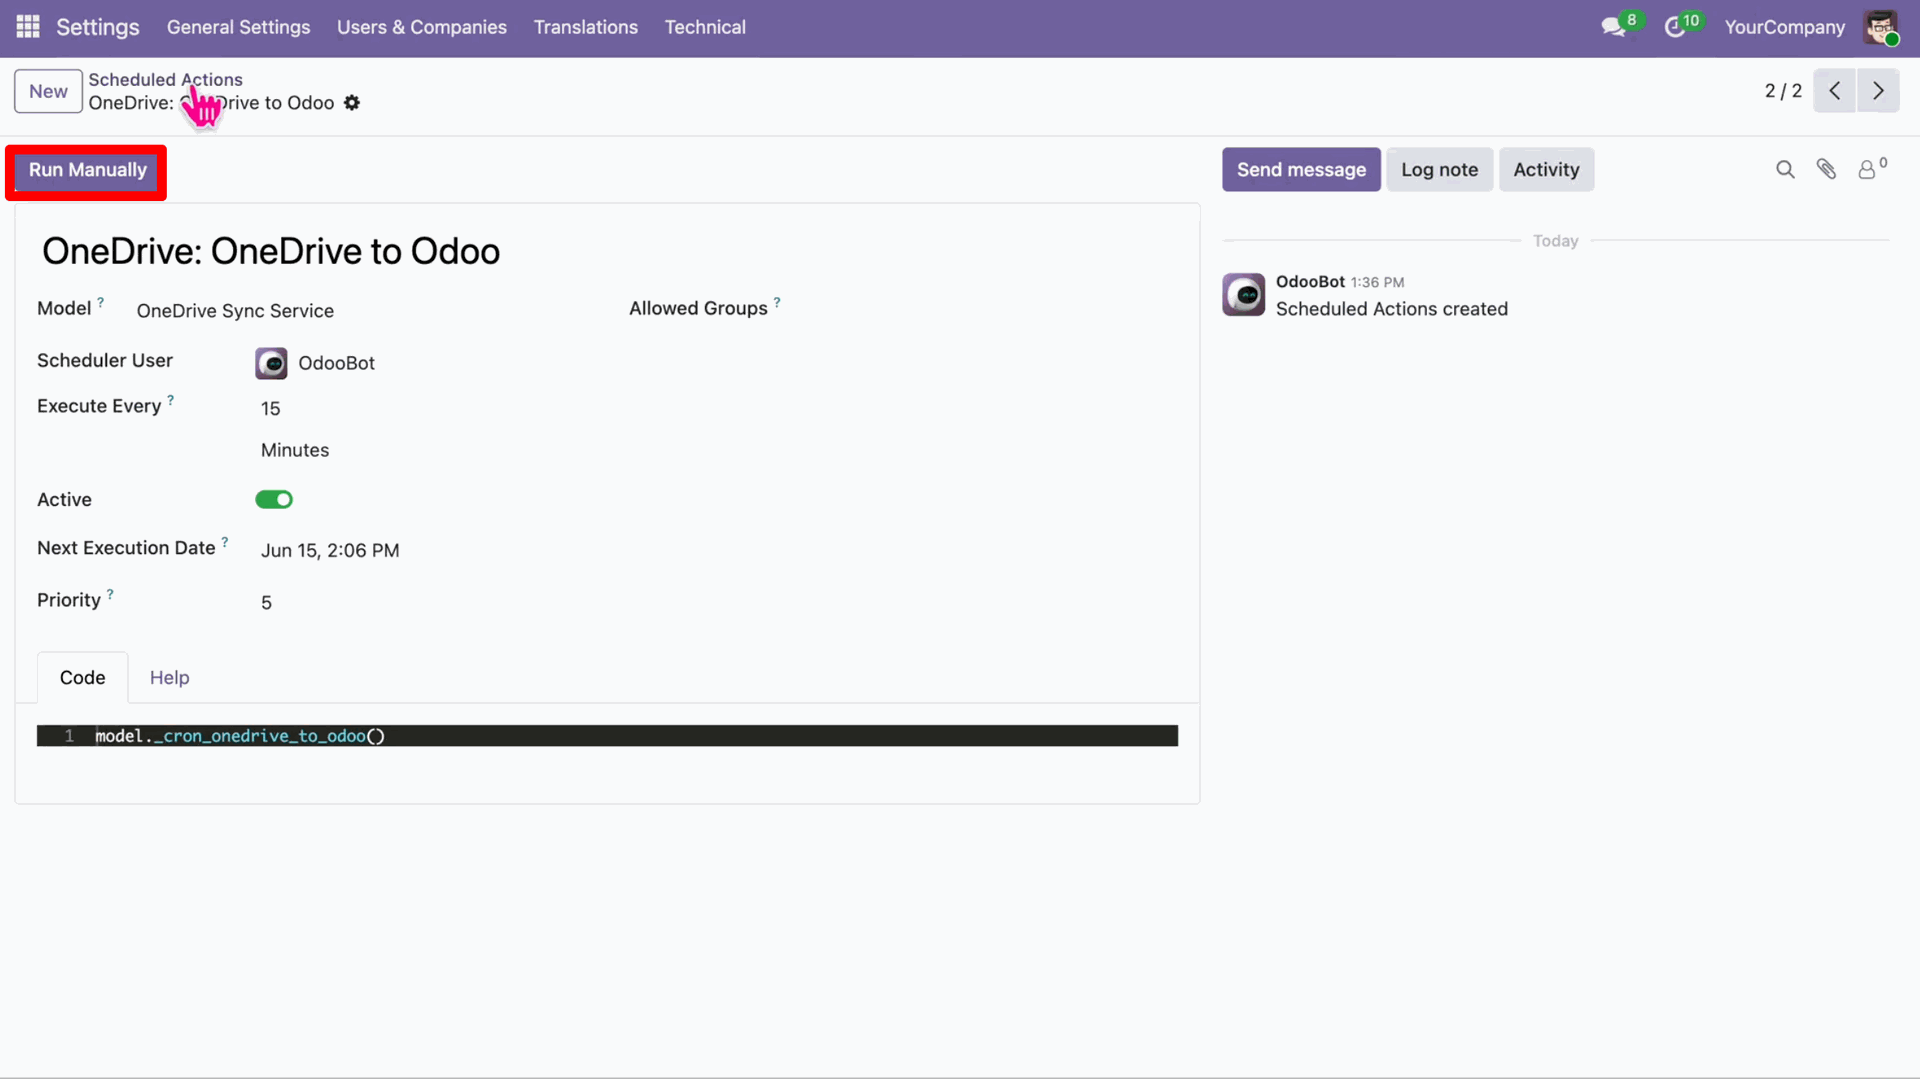
Finally, verify the newly imported file is now present in the Odoo Documents app.
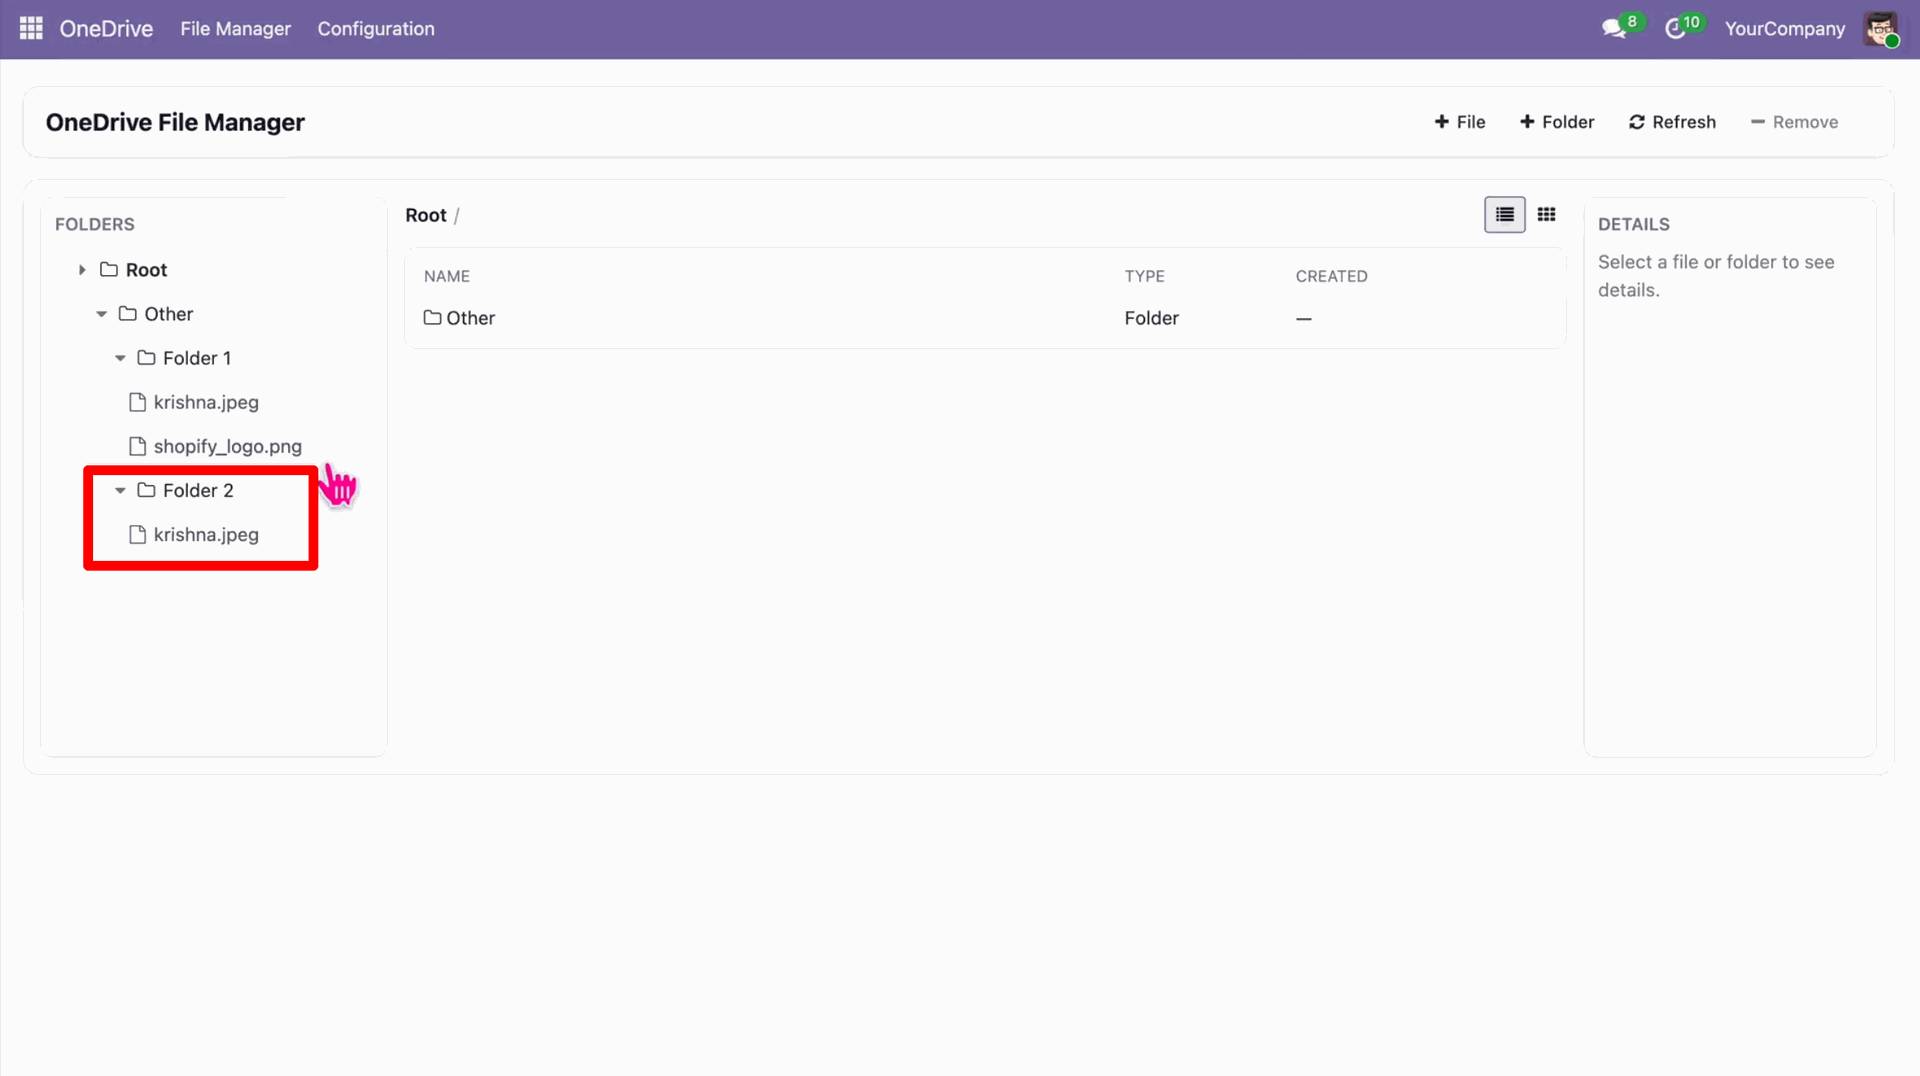
Verify that the synchronized files exist in the Odoo Documents app under the mapped folder.
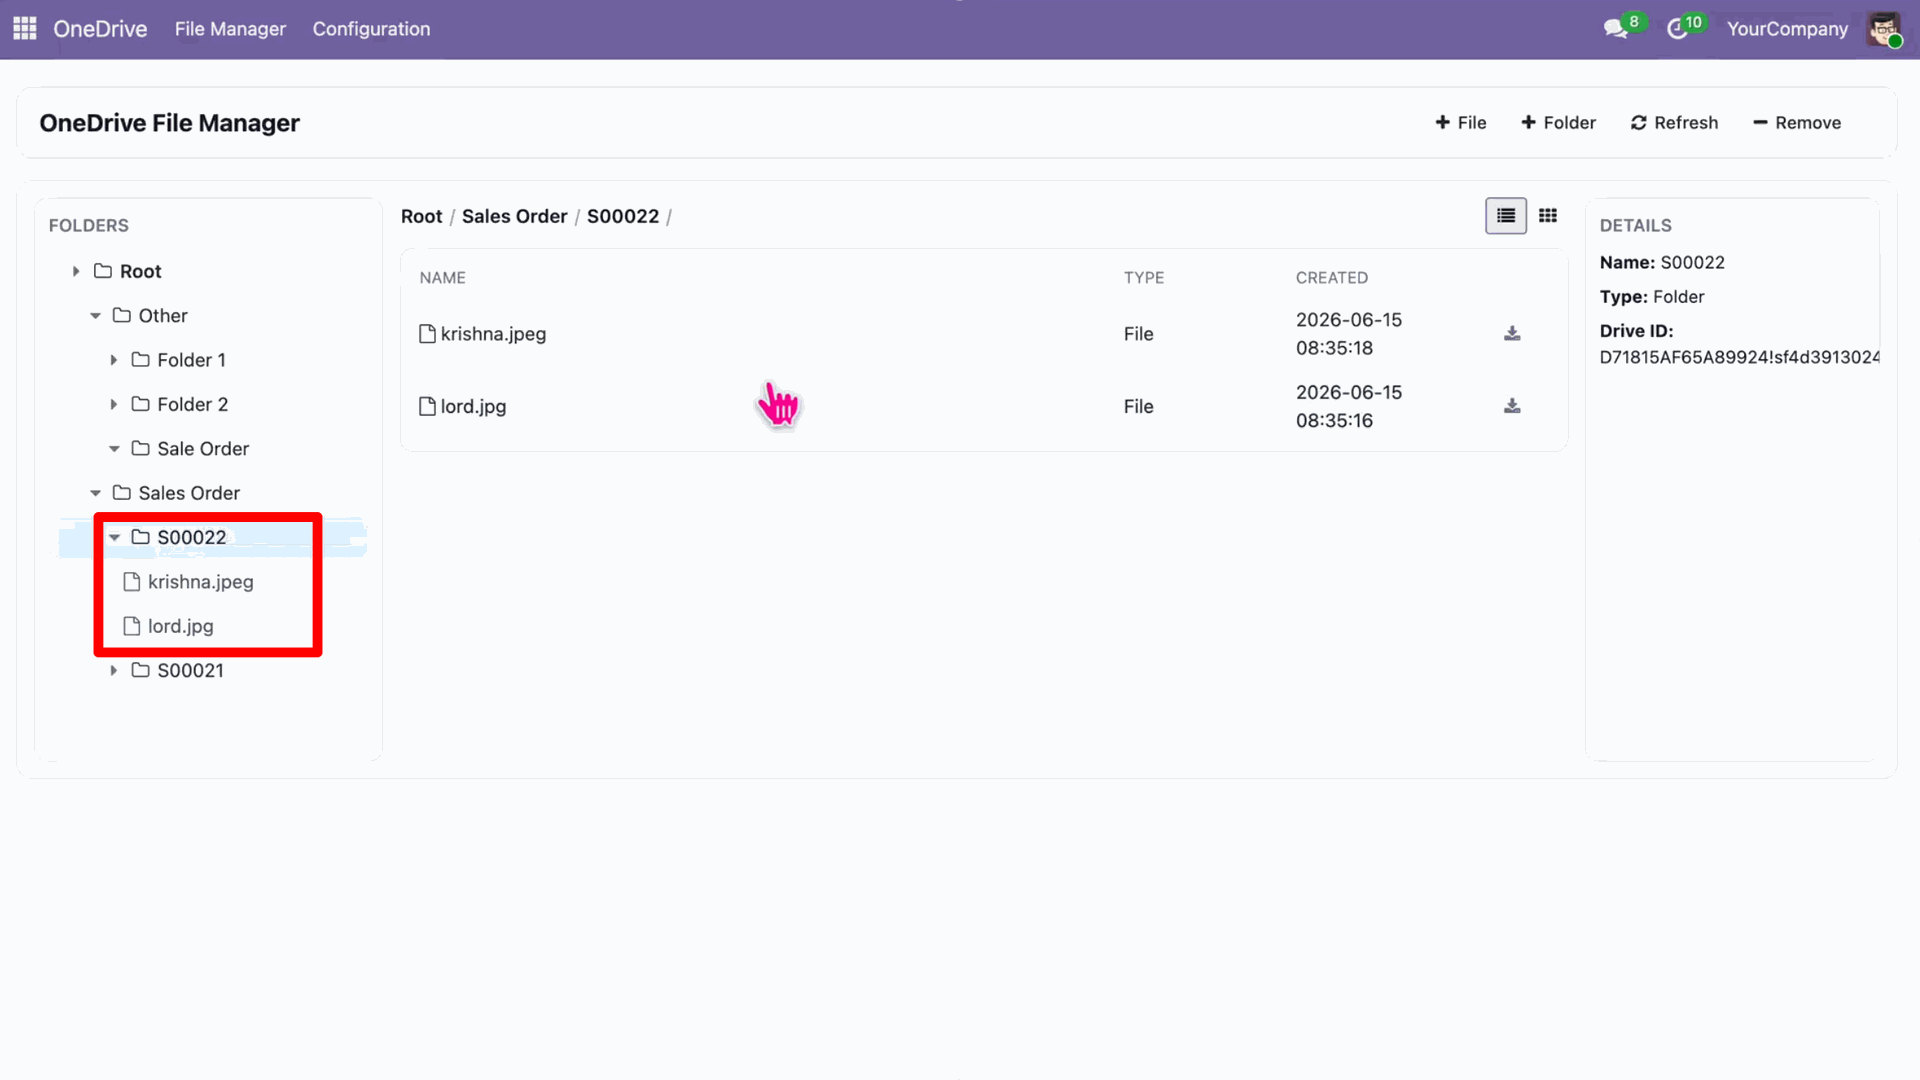
Verify that the same files exist as attachments in the corresponding Odoo record.
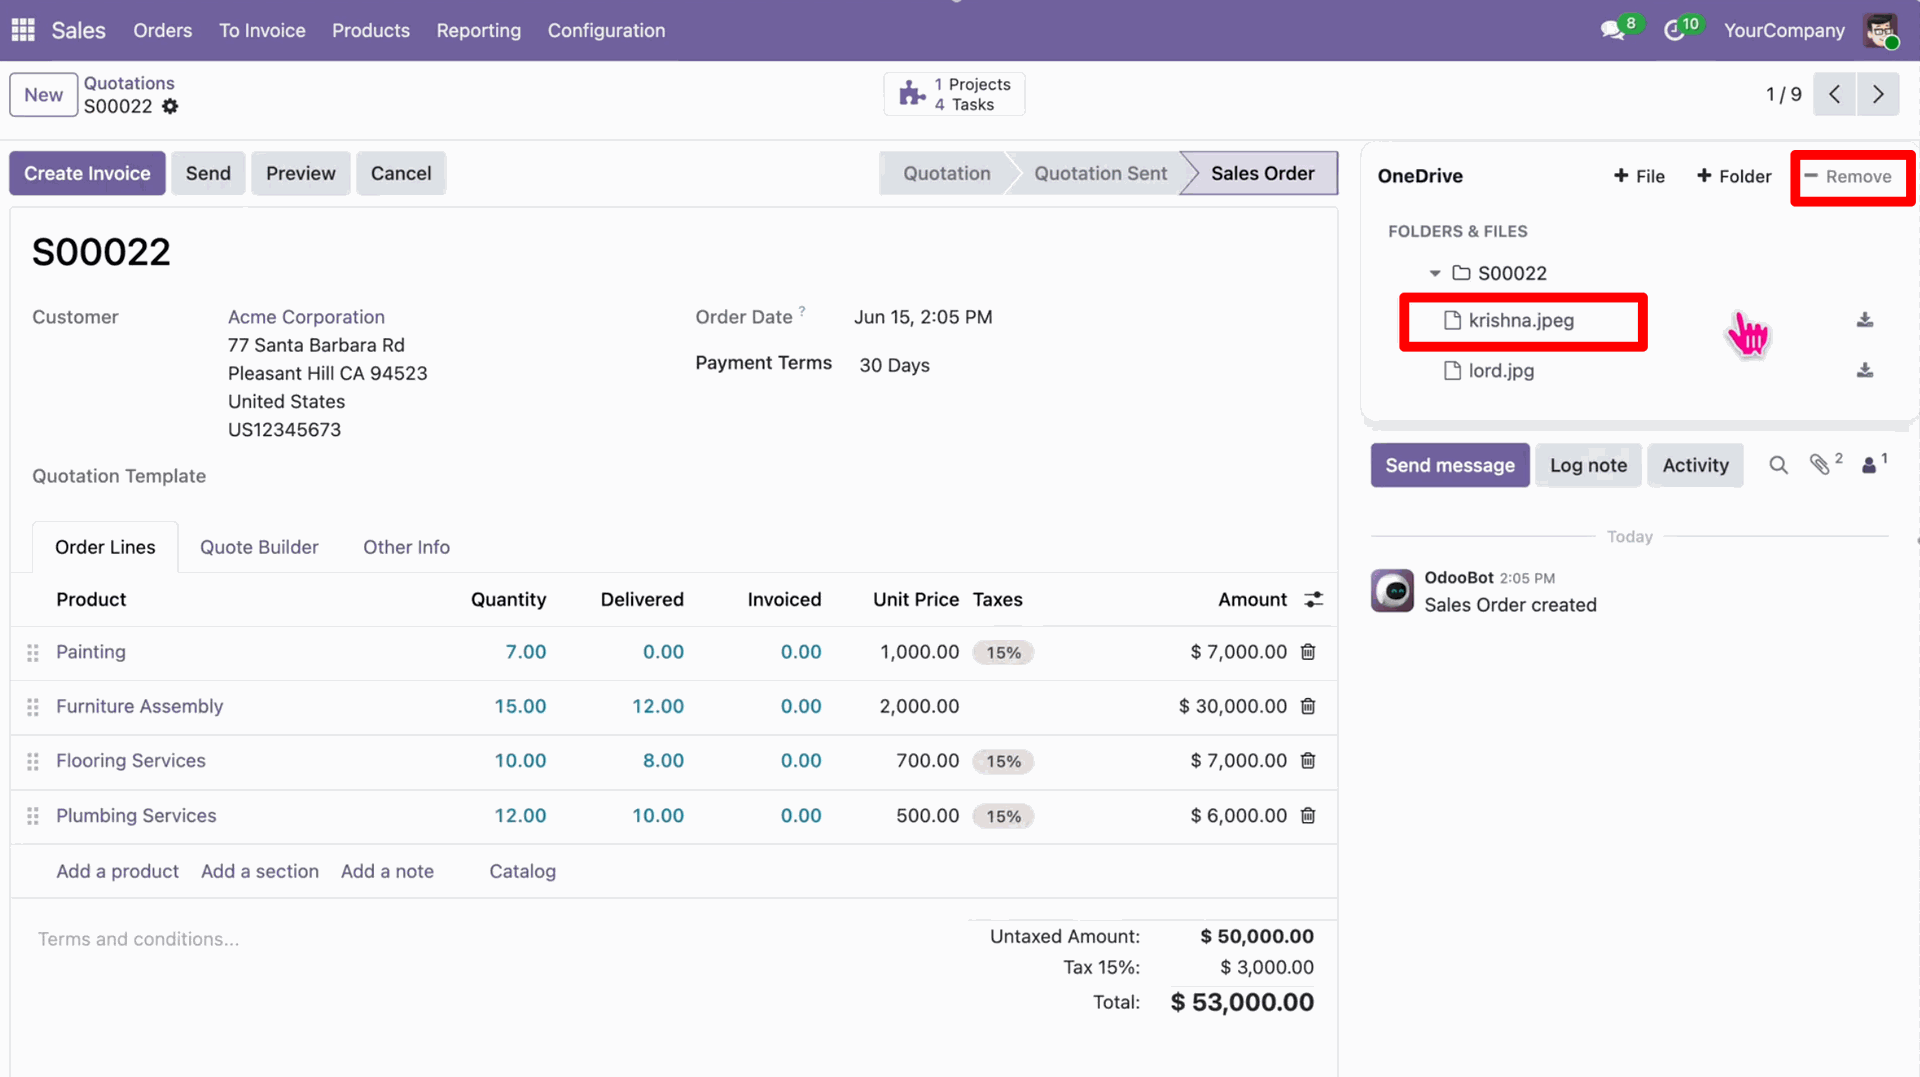
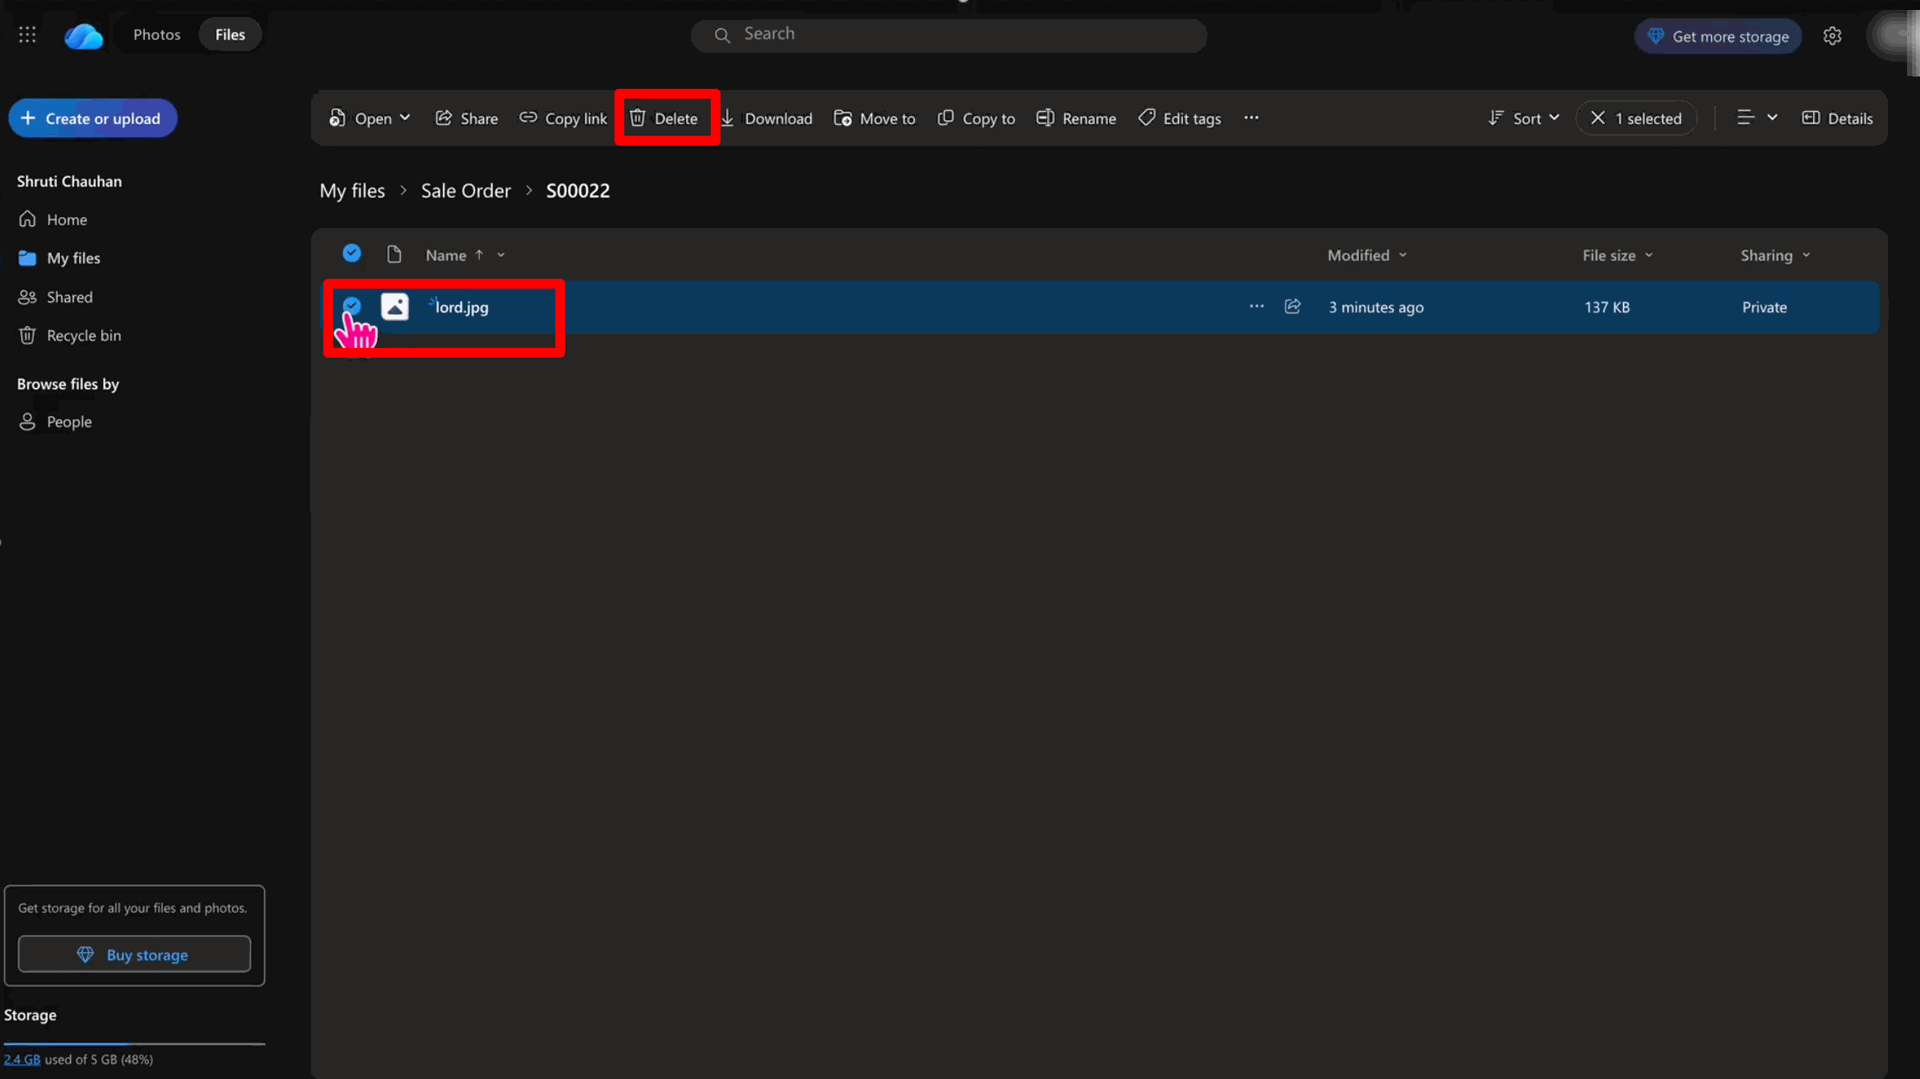
In OneDrive, select the files you want to delete and click the 'Delete' button.
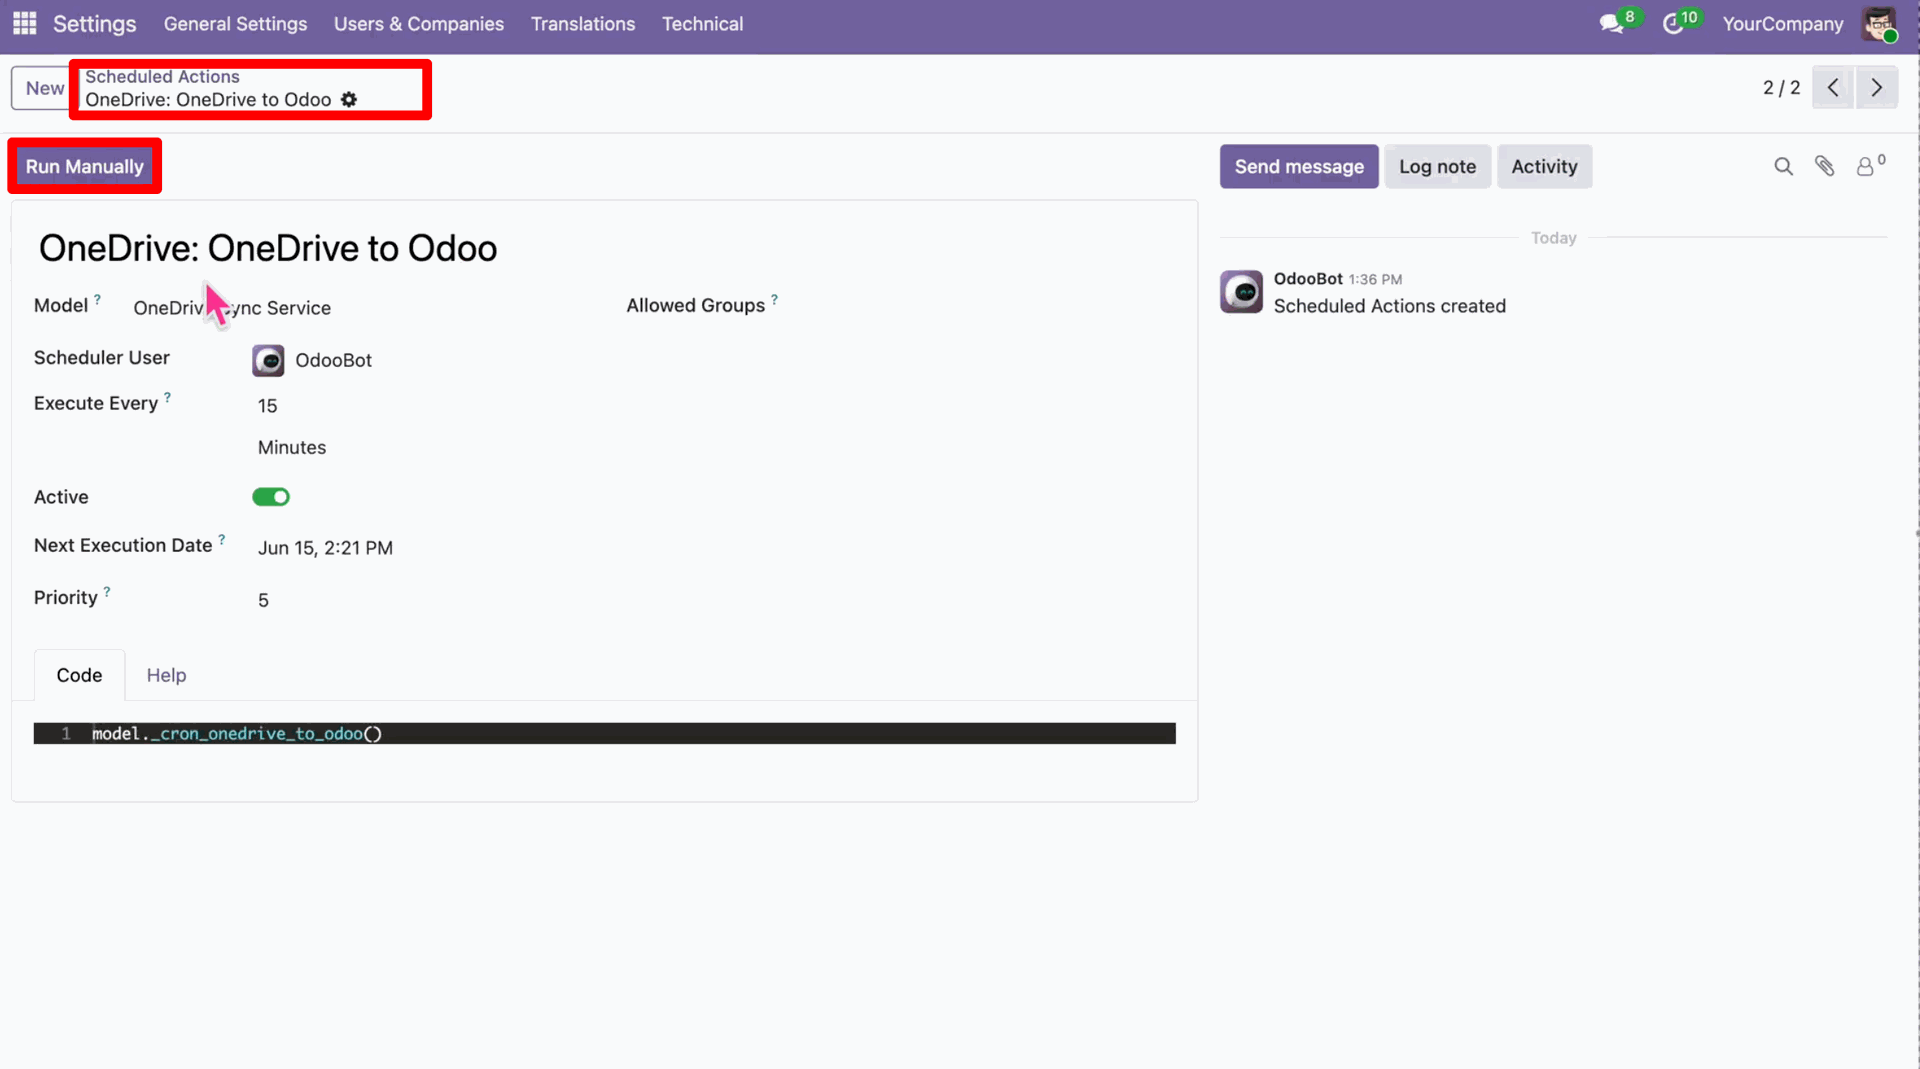
In Odoo, run the 'OneDrive: OneDrive to Odoo' scheduled action manually to synchronize the deletion.
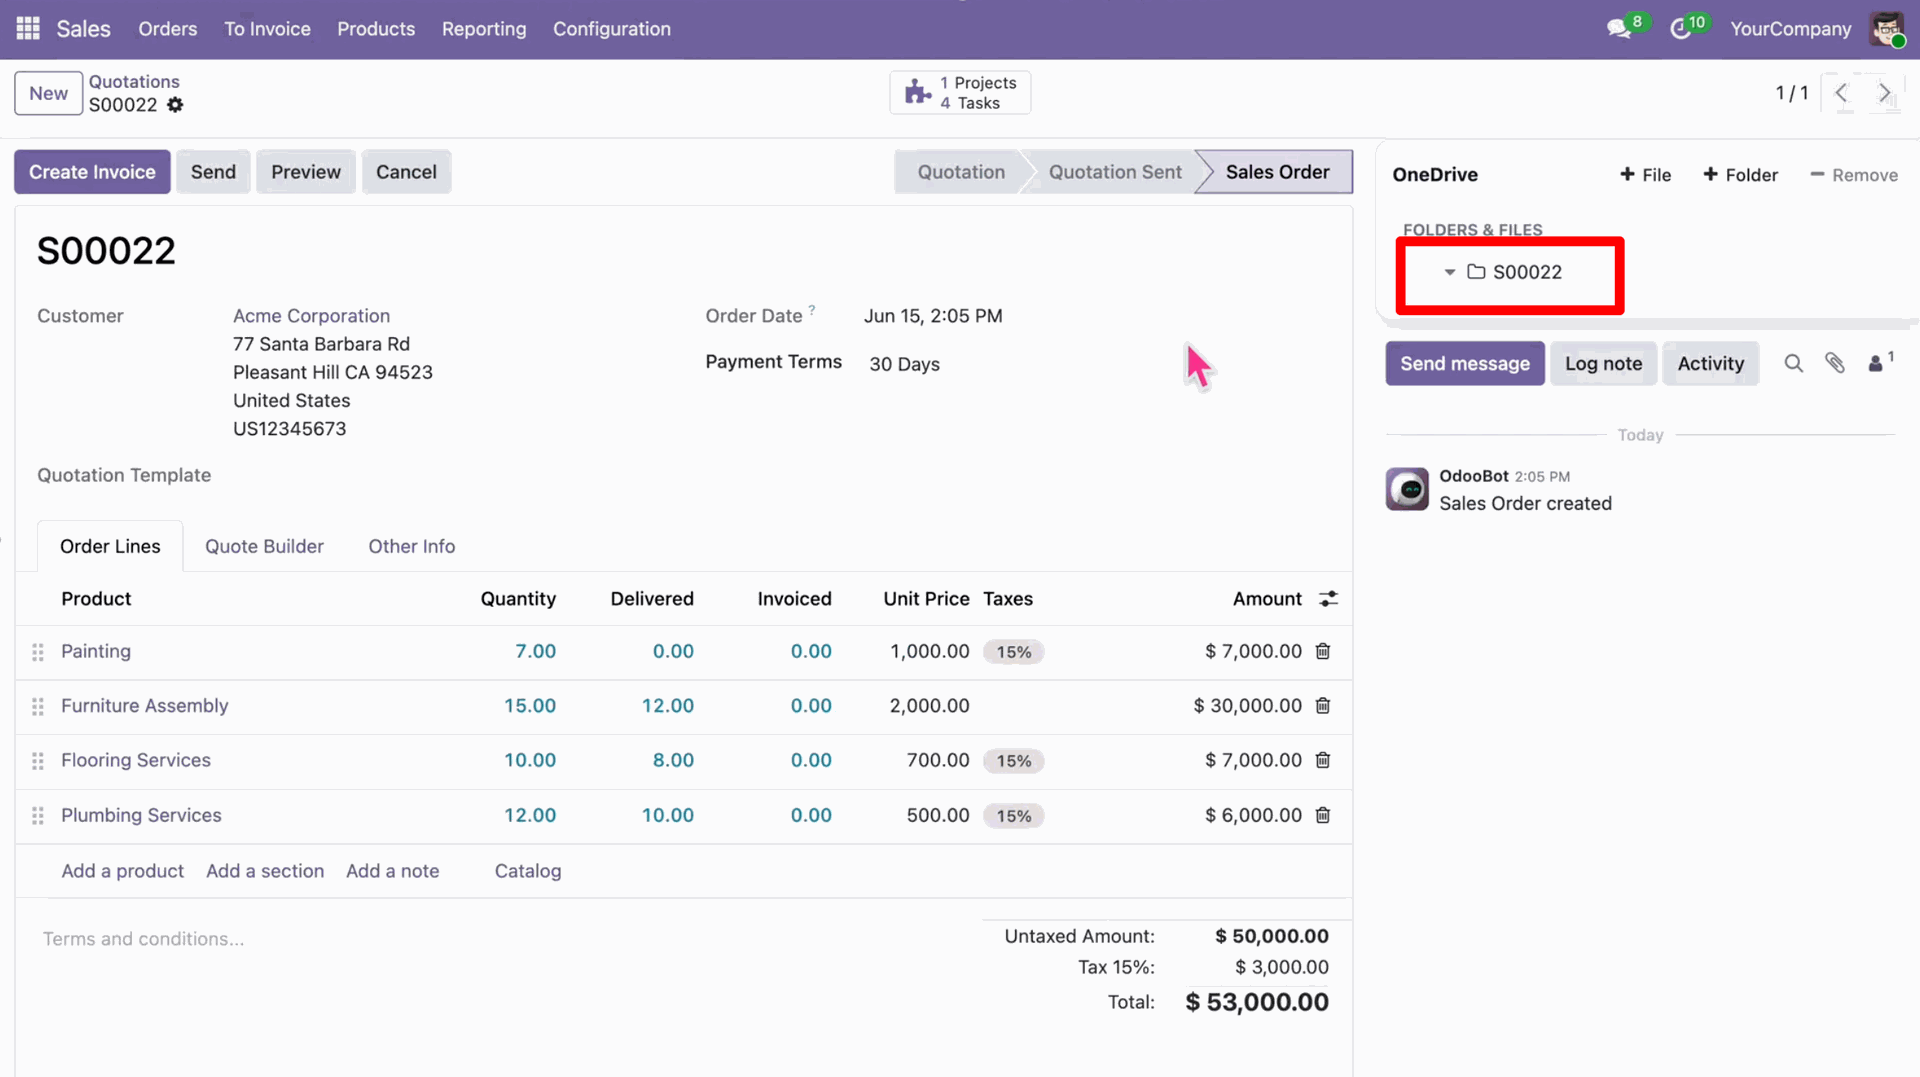
The files are automatically deleted from the Odoo record attachments.
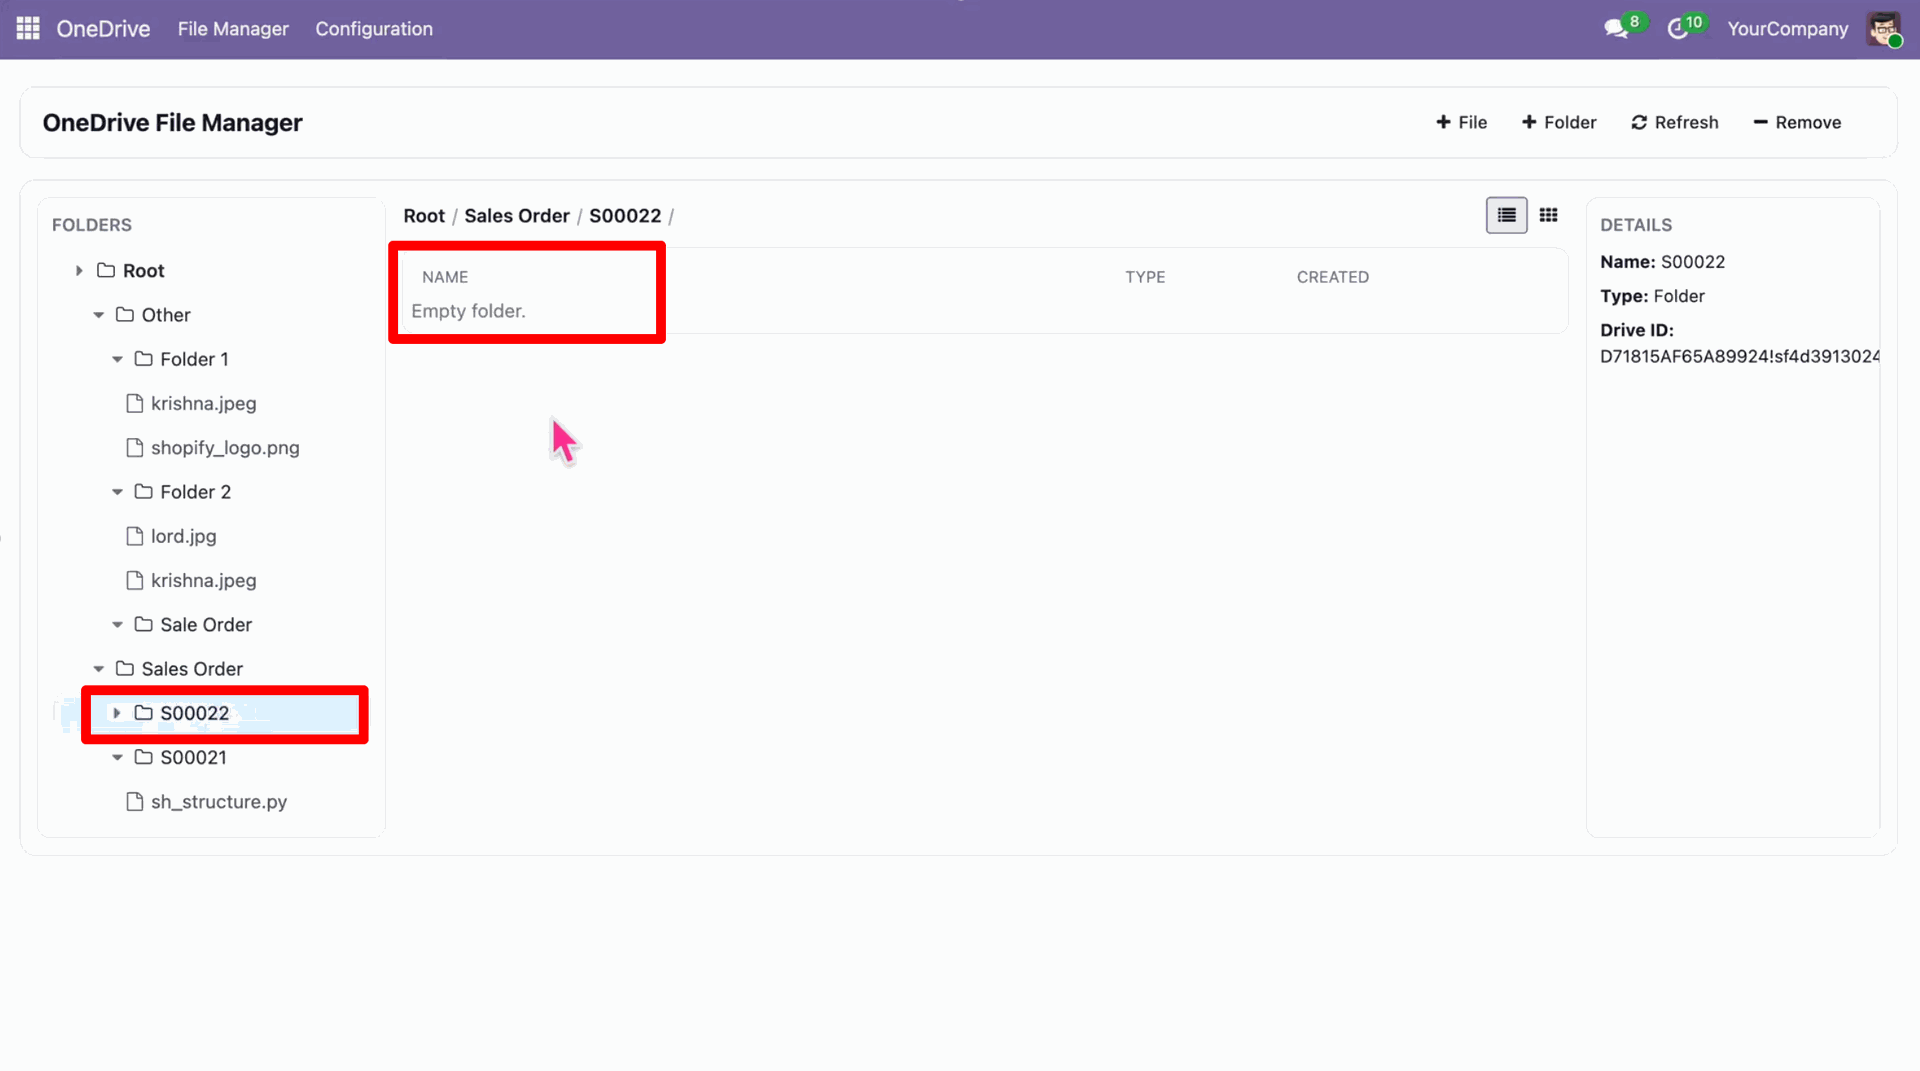
Verify the files are also removed from the Odoo Documents app.
Now, delete a different file directly from the Odoo record attachments.
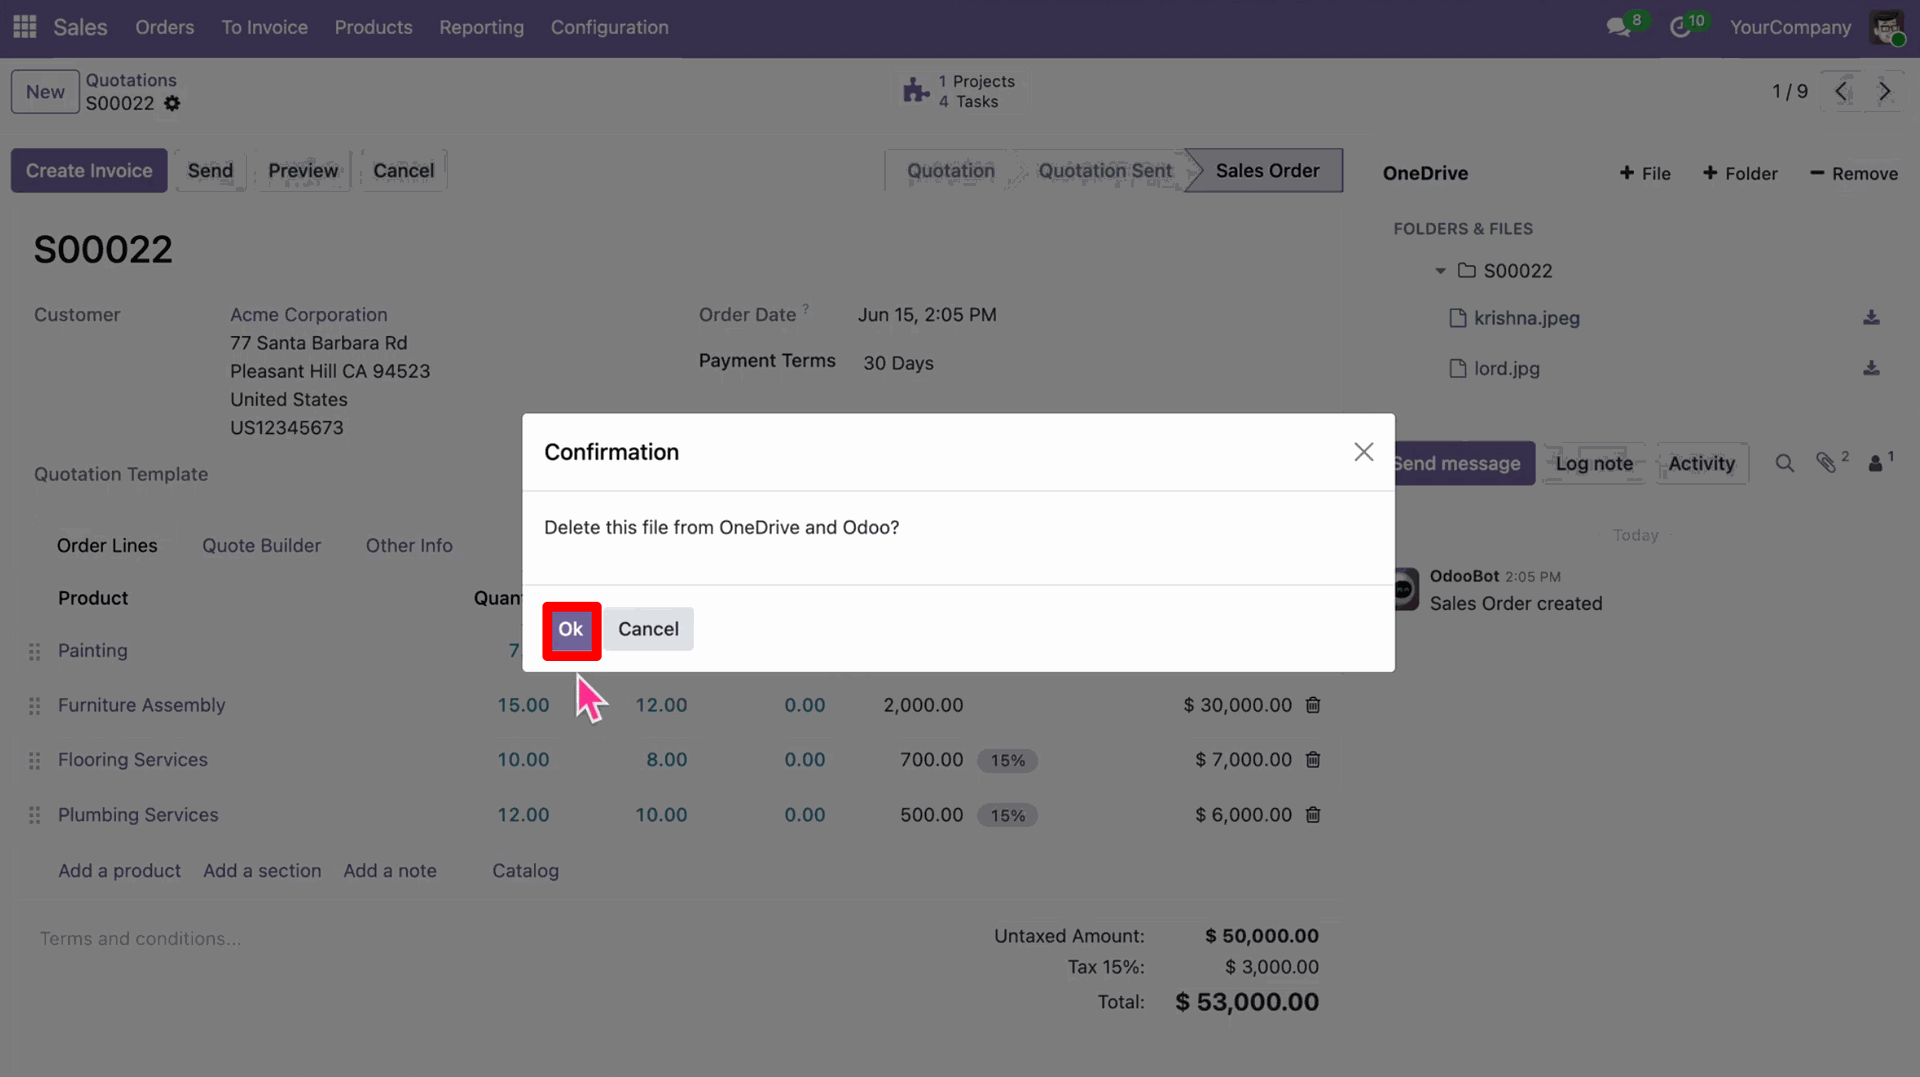
Run the 'OneDrive: Odoo to OneDrive' scheduled action manually to synchronize this deletion.
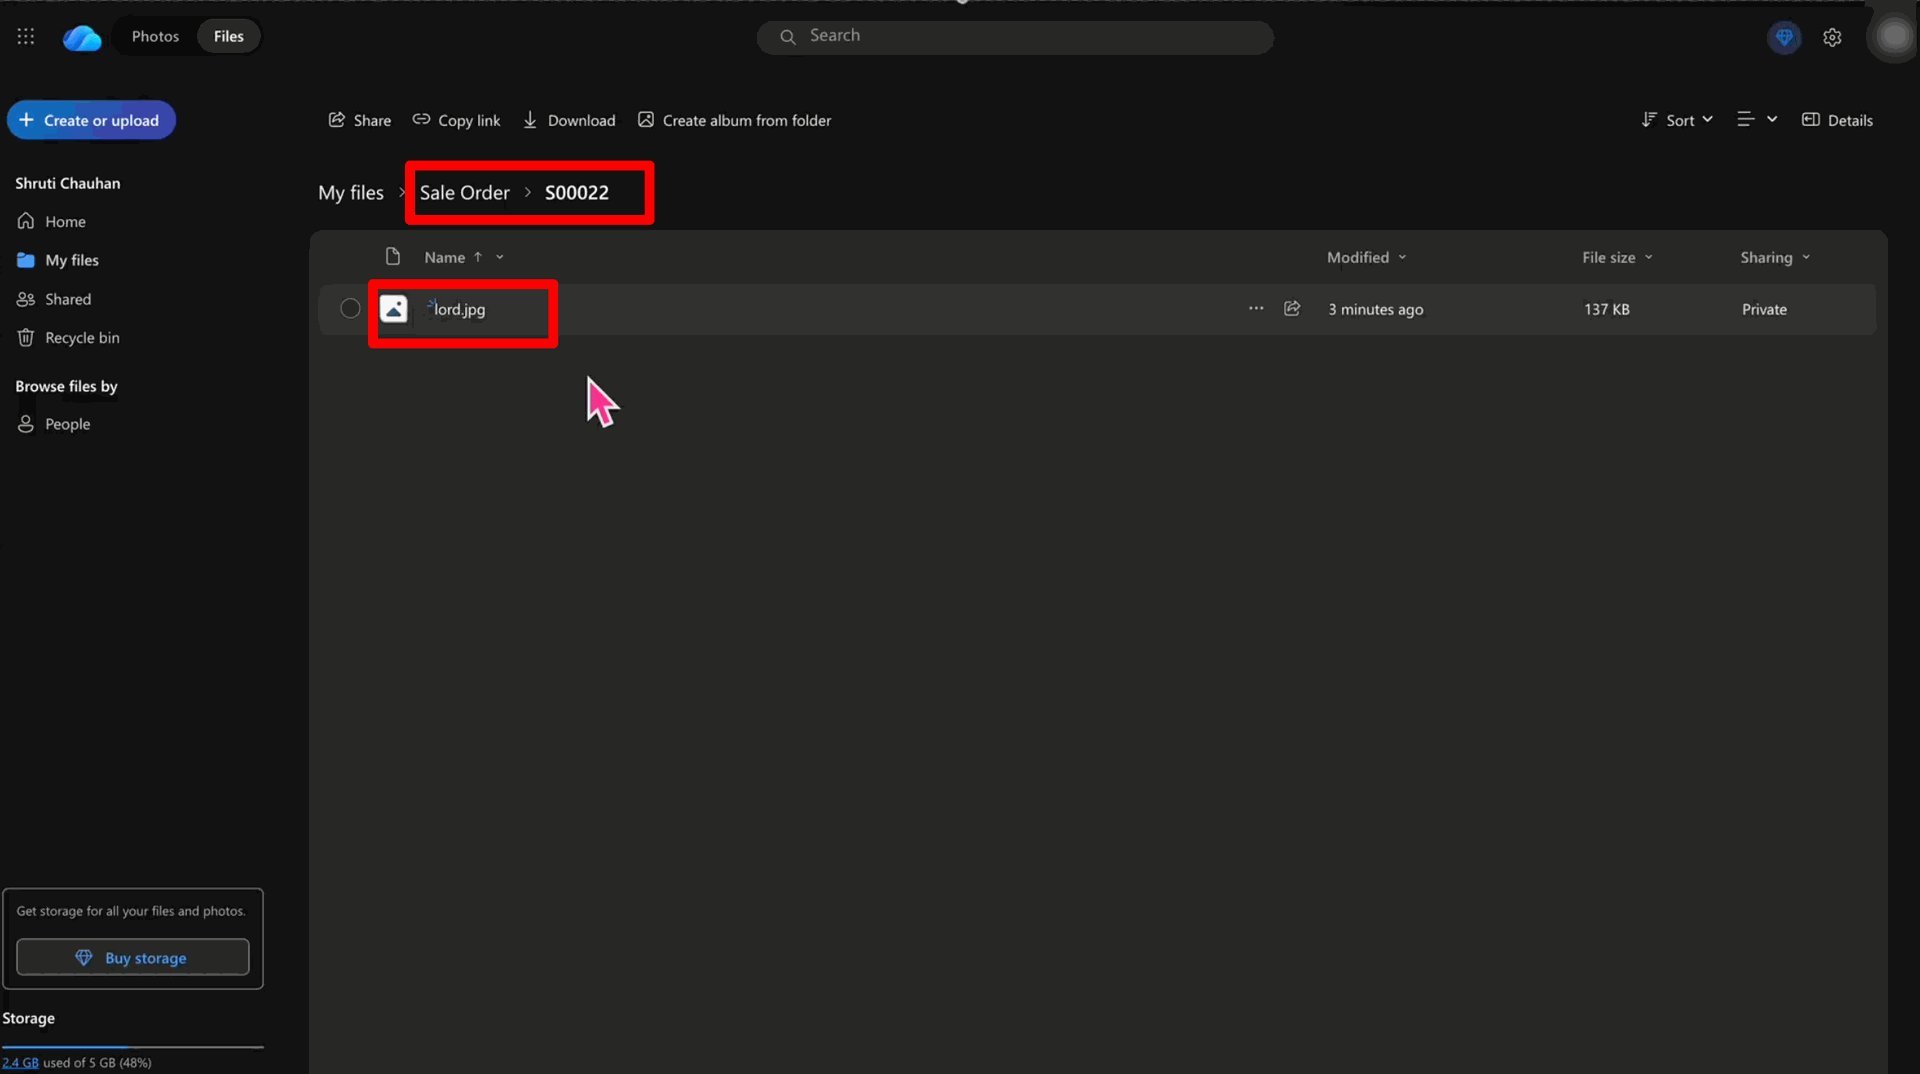
Finally, verify the file is automatically removed from the OneDrive folder.
Version 18.0.1.0.0 | Released on : 30th August 2026
- Yes, this app works perfectly with Odoo Enterprise (Odoo.sh & Premise) as well as Community.
- No, this application is not compatible with odoo.com(odoo saas/Odoo Online)
- Yes, to test this module, please contact us at sales@softhealer.com.
- Please contact us at sales@softhealer.com to request customization.
- Yes, we provide free support for 365 days from the date of purchase.
- Yes, you will receive lifetime free updates for the version of the module you purchased.
- No, there is no need to install any additional libraries.
- Yes, for version 12 and above, you need to purchase the module separately for each version you intend to use.
- No, exchanges or refunds are not allowed. Please make sure to select the correct version before purchasing.
- You can contact us at support@softhealer.com for language translation support. We use Google Translator tools to provide translations in multiple languages, so the accuracy may vary. We welcome your suggestions to help improve translations.
Discover Our Latest Apps