












Odoo QuickBooks Connector

Streamline accounting operations with our Odoo QuickBooks Integration solution, designed to synchronize business and accounting data between Odoo and QuickBooks. The Odoo QuickBooks connector helps businesses automate data exchange and reduce manual data entry while keeping important records synchronized across both systems.
With Odoo QuickBooks automatic data sync, you can import and export customers, vendors, products, invoices, bills, payments, payment terms, taxes, accounts, and other accounting records between Odoo and QuickBooks. The integration provides a centralized synchronization workflow with logs, queues, filters, and synchronization status tracking.
This Odoo QuickBooks integration software supports accounting-focused workflows such as Odoo QuickBooks invoice sync, Odoo QuickBooks bill sync, Odoo QuickBooks payment sync, Odoo QuickBooks vendor sync, and Odoo QuickBooks product sync. It also supports Odoo QuickBooks chart of accounts sync to help maintain consistent accounting information between the two platforms.
Features

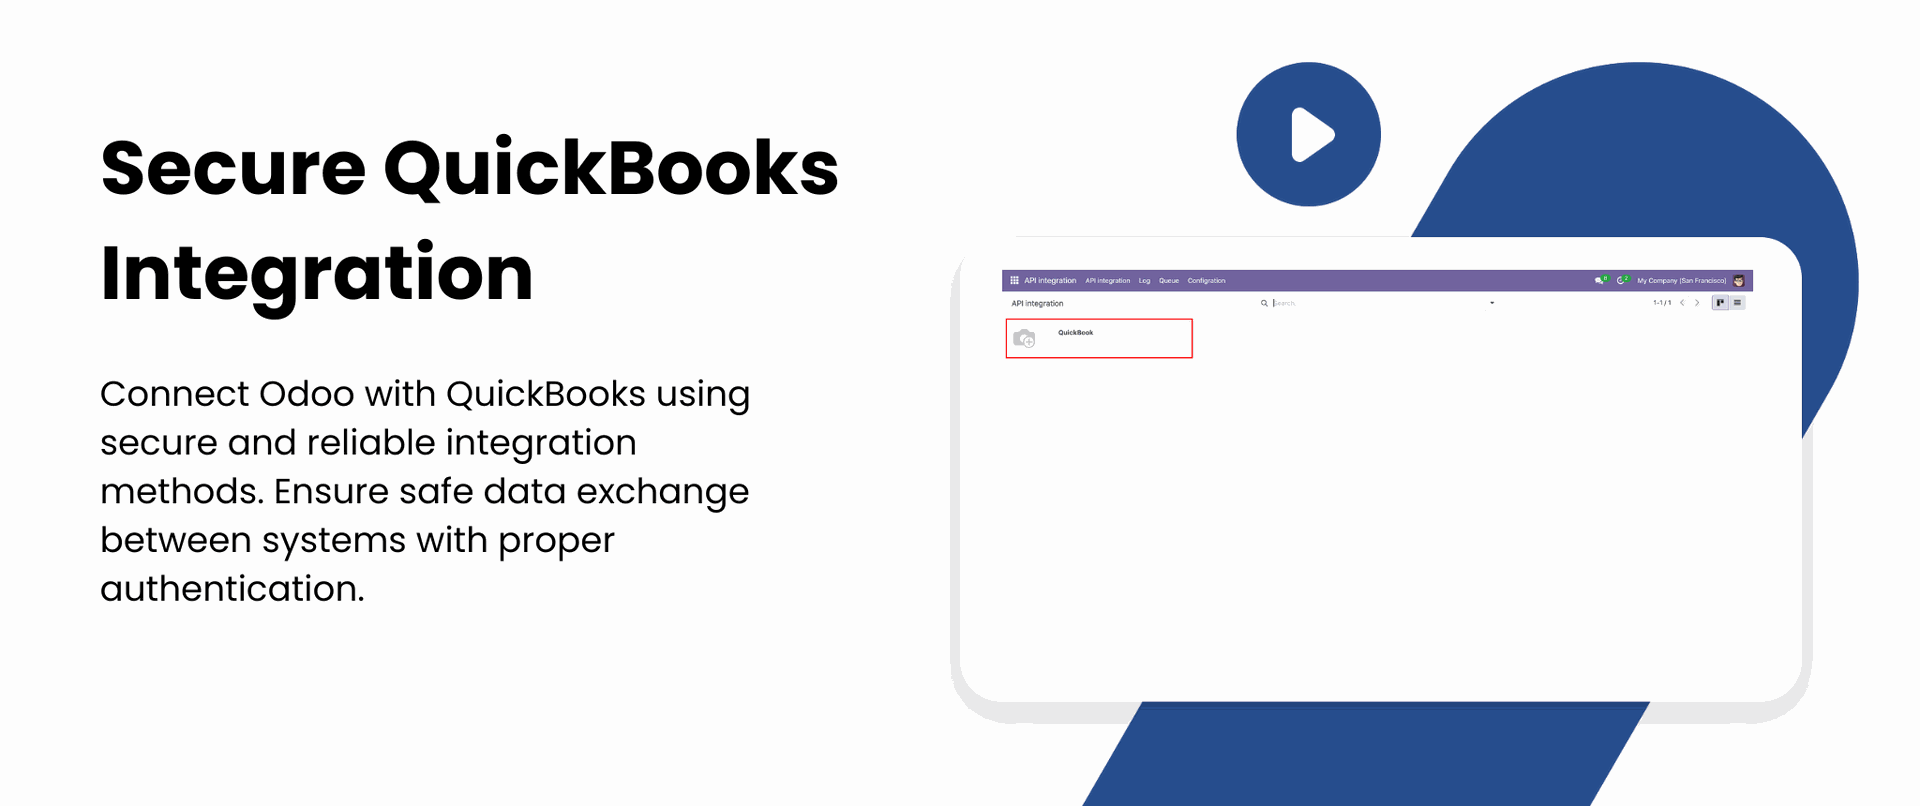
Secure QuickBooks Integration
Connect Odoo with QuickBooks using secure authentication to enable smooth and reliable data synchronization.

Centralized Configuration Panel
Manage all QuickBooks connection settings and synchronization options from a single configuration screen.
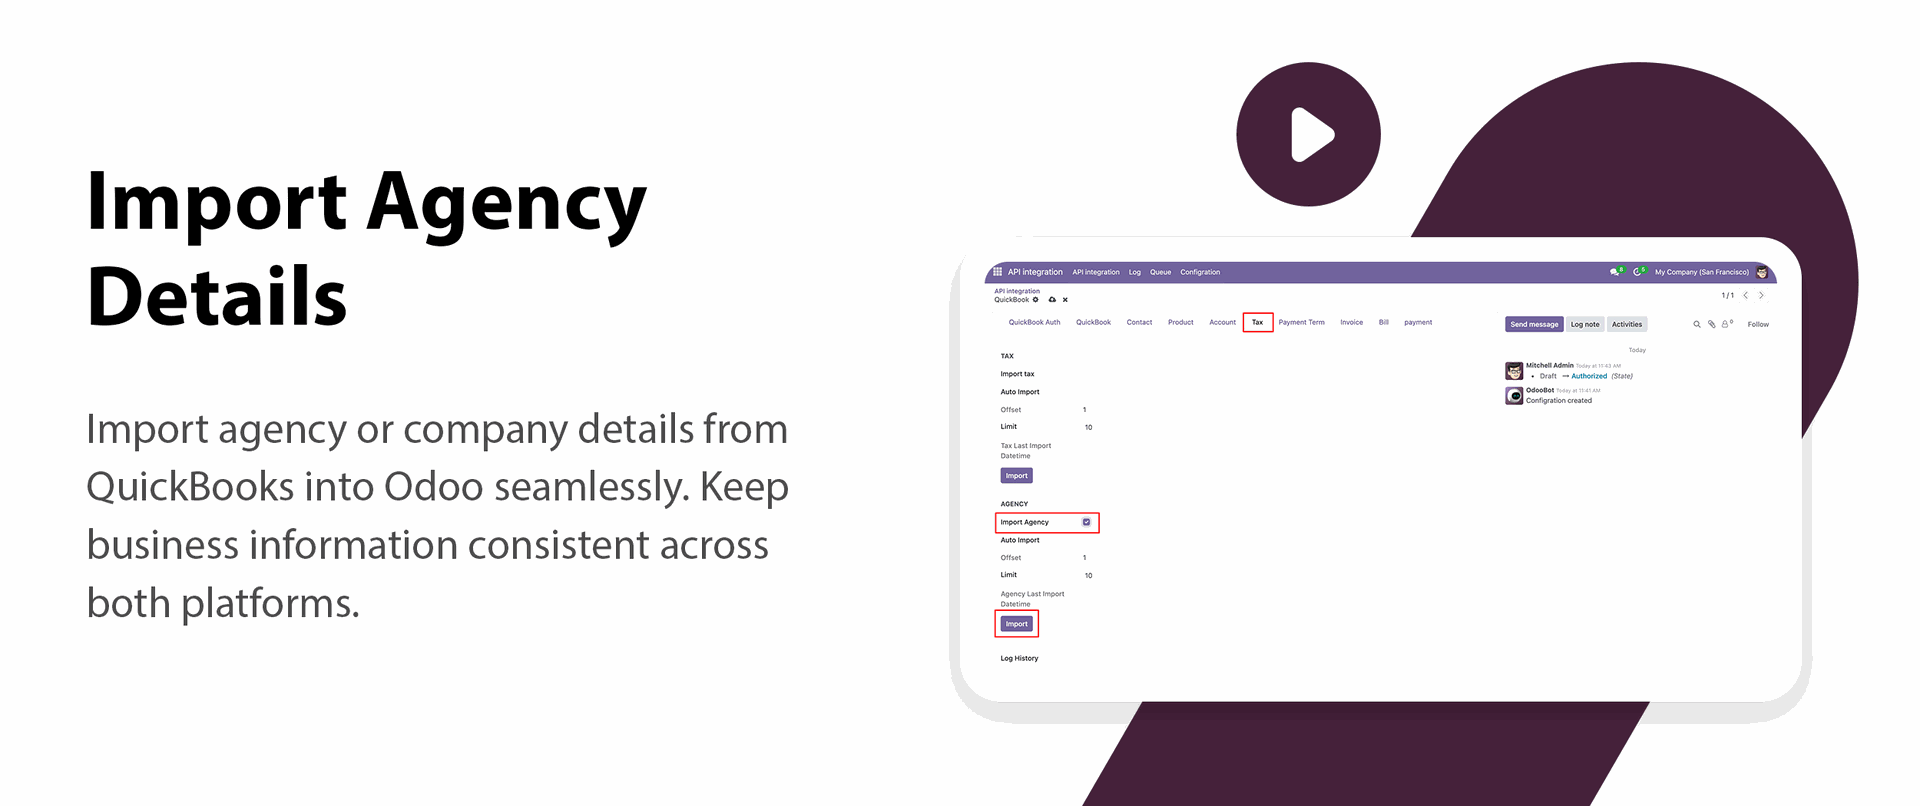
Import Agency Details
Easily import tax agency from QuickBooks into Odoo to maintain accurate business records.

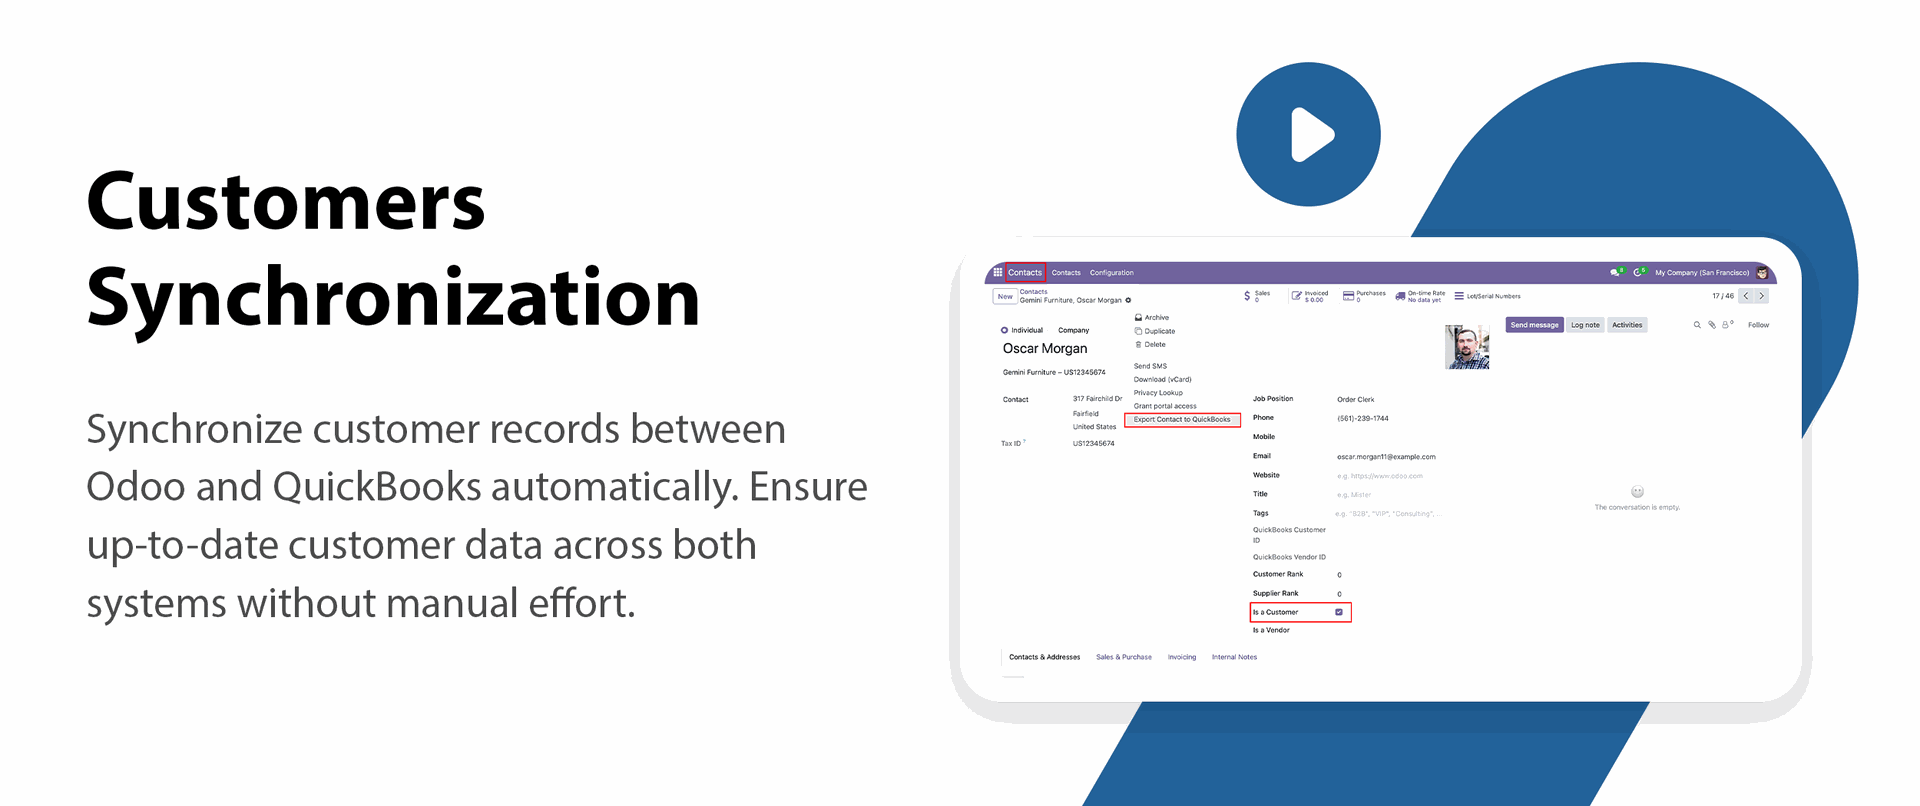
Import/Export Customers
Import and export customers to keep records consistent across both systems.

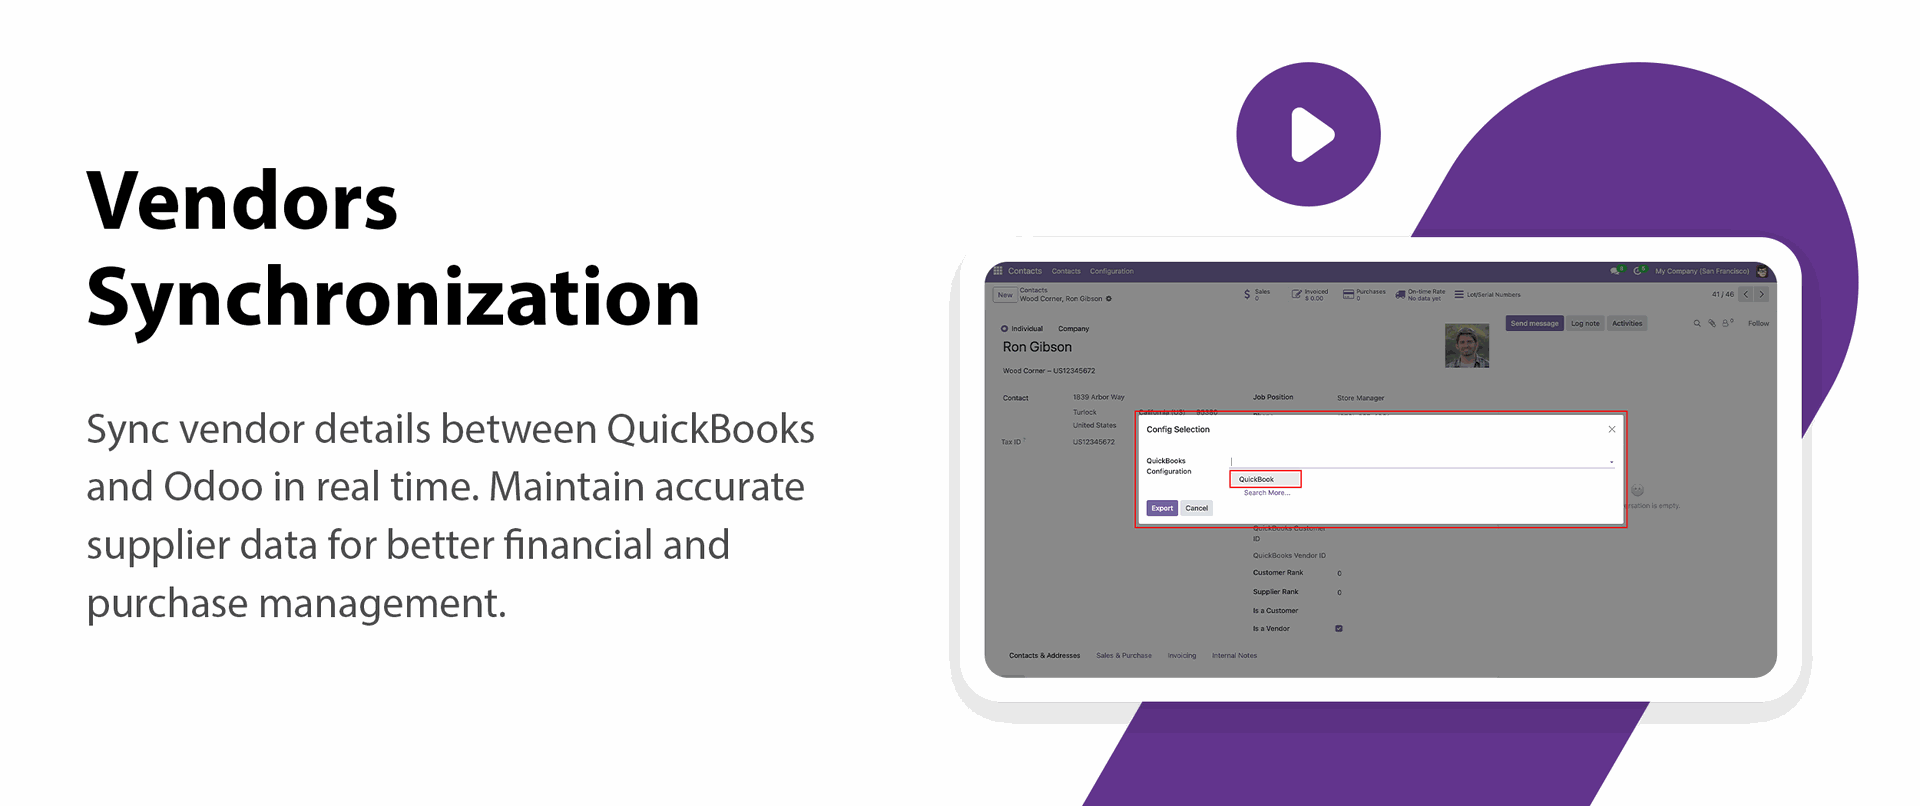
Import/Export Vendors
Sync vendor information seamlessly to maintain up-to-date supplier data.
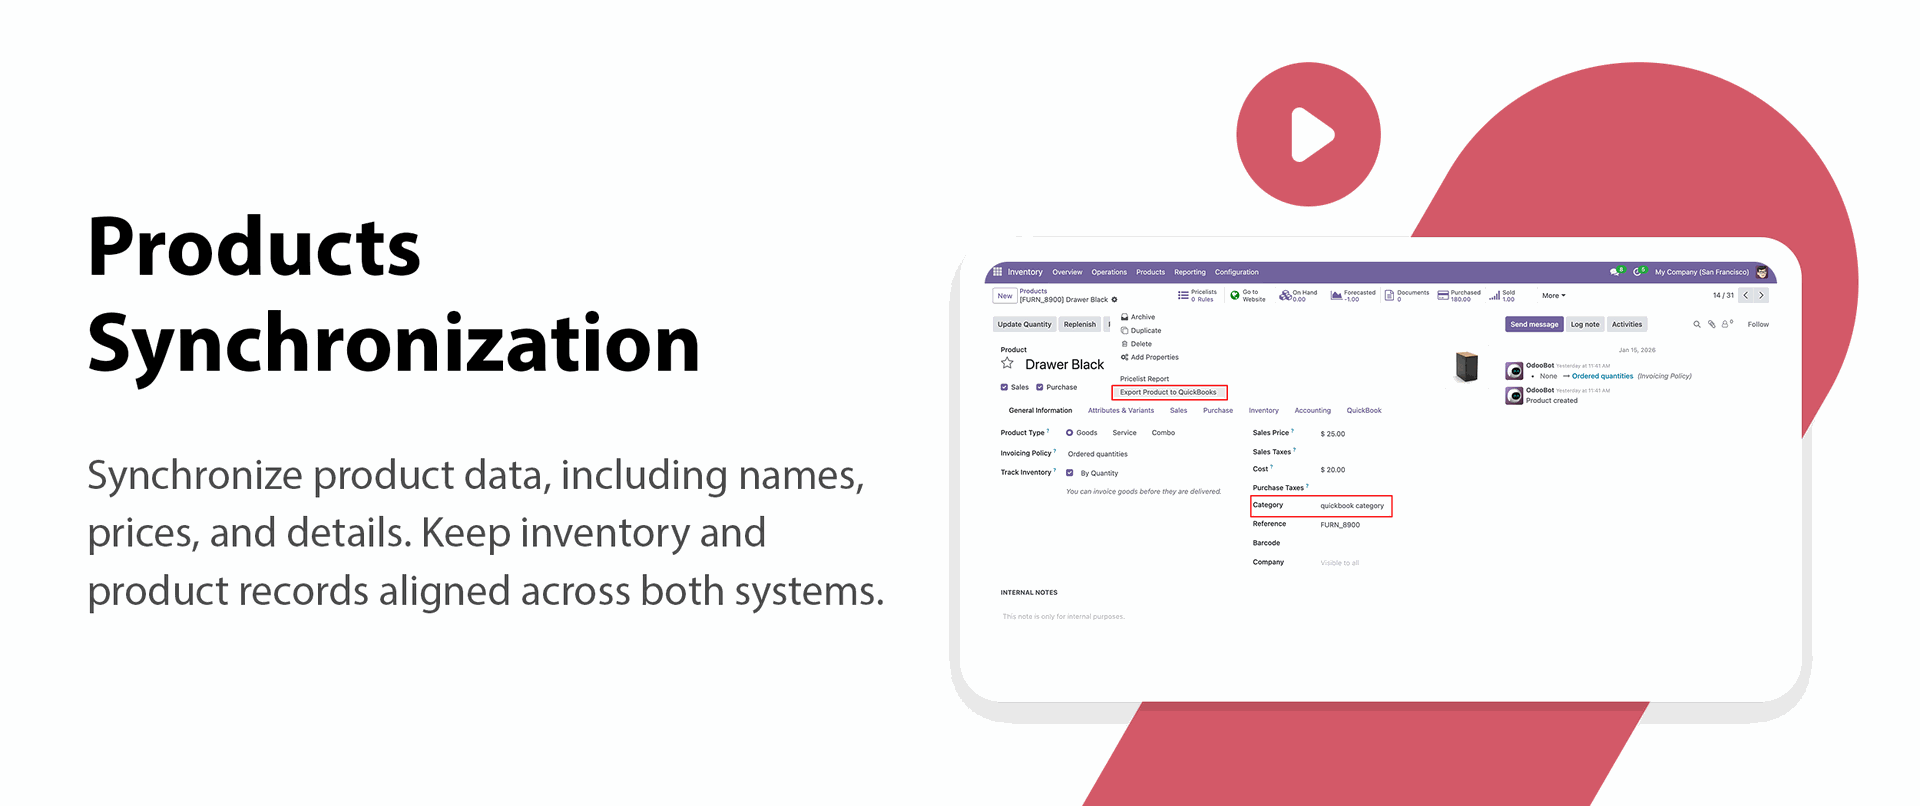
Product Data Synchronization
Import and export products quickly, Avoid duplicate entries and maintain accurate product data.
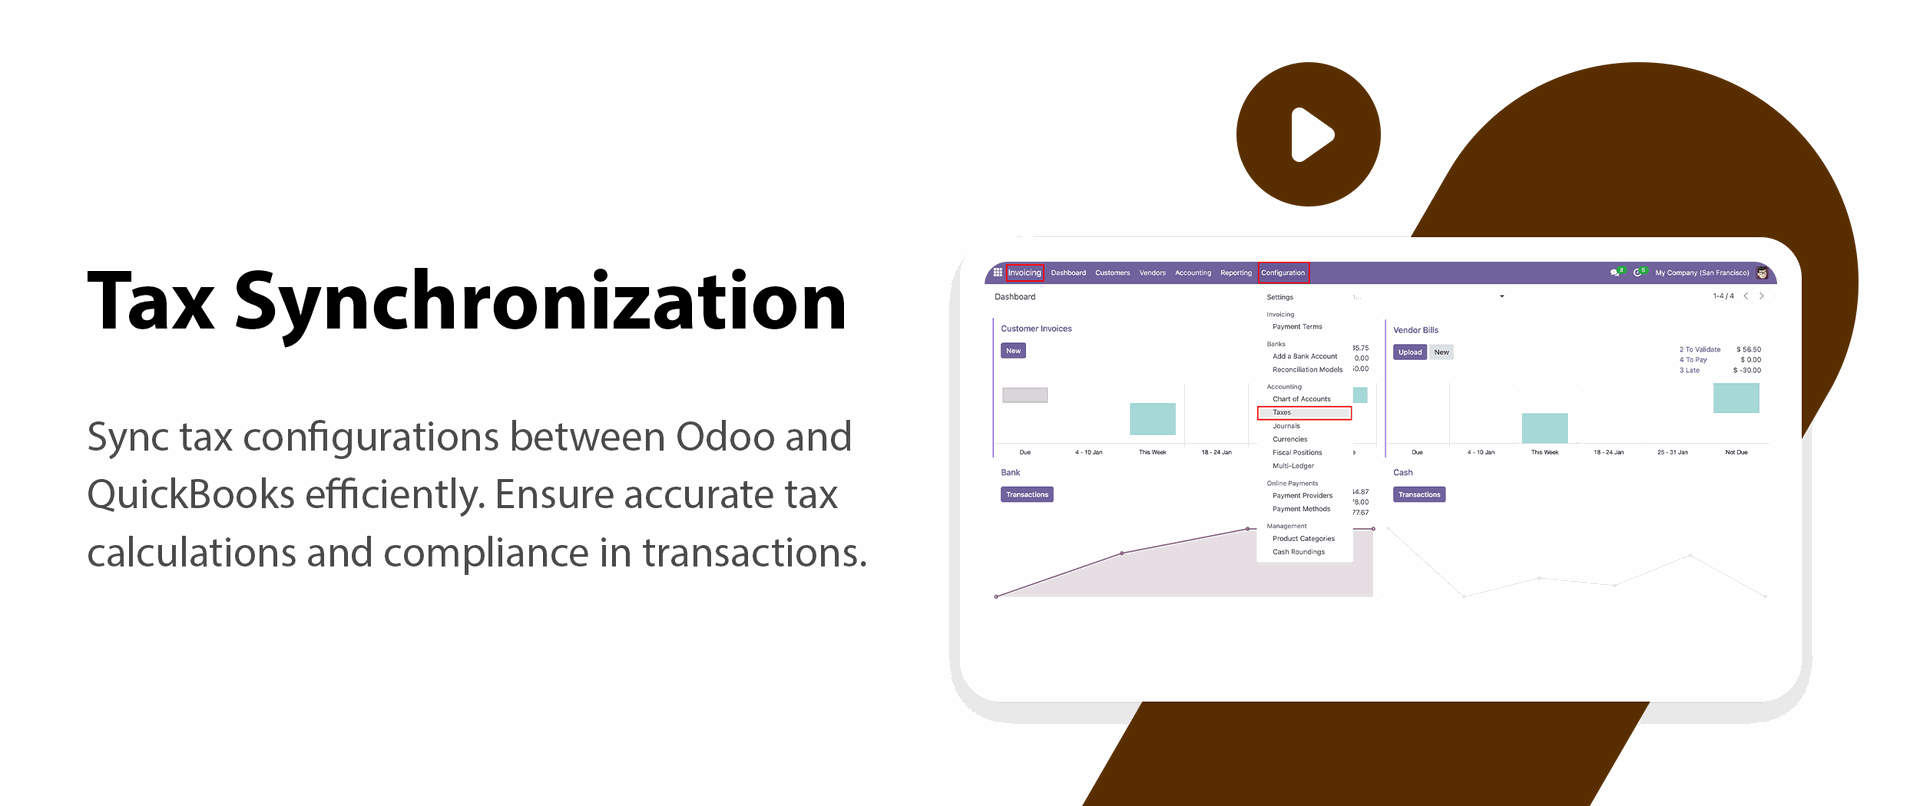
Tax Synchronization
Import and export taxes to ensure accurate tax calculations in transactions.
Real-Time Data Consistency
Keep records synchronized and always up to date, Minimize human errors in accounting operations.

Vendor Credit Synchronization
Synchronize vendor credits between Odoo and the connected platform.

Credit Note Synchronization
Sync credit notes to keep accounting records updated between both systems.
API Call Logs
Track detailed logs for each API call based on the configured integration settings.

Journal Entry Synchronization
Synchronize journal entries between Odoo and the connected platform.

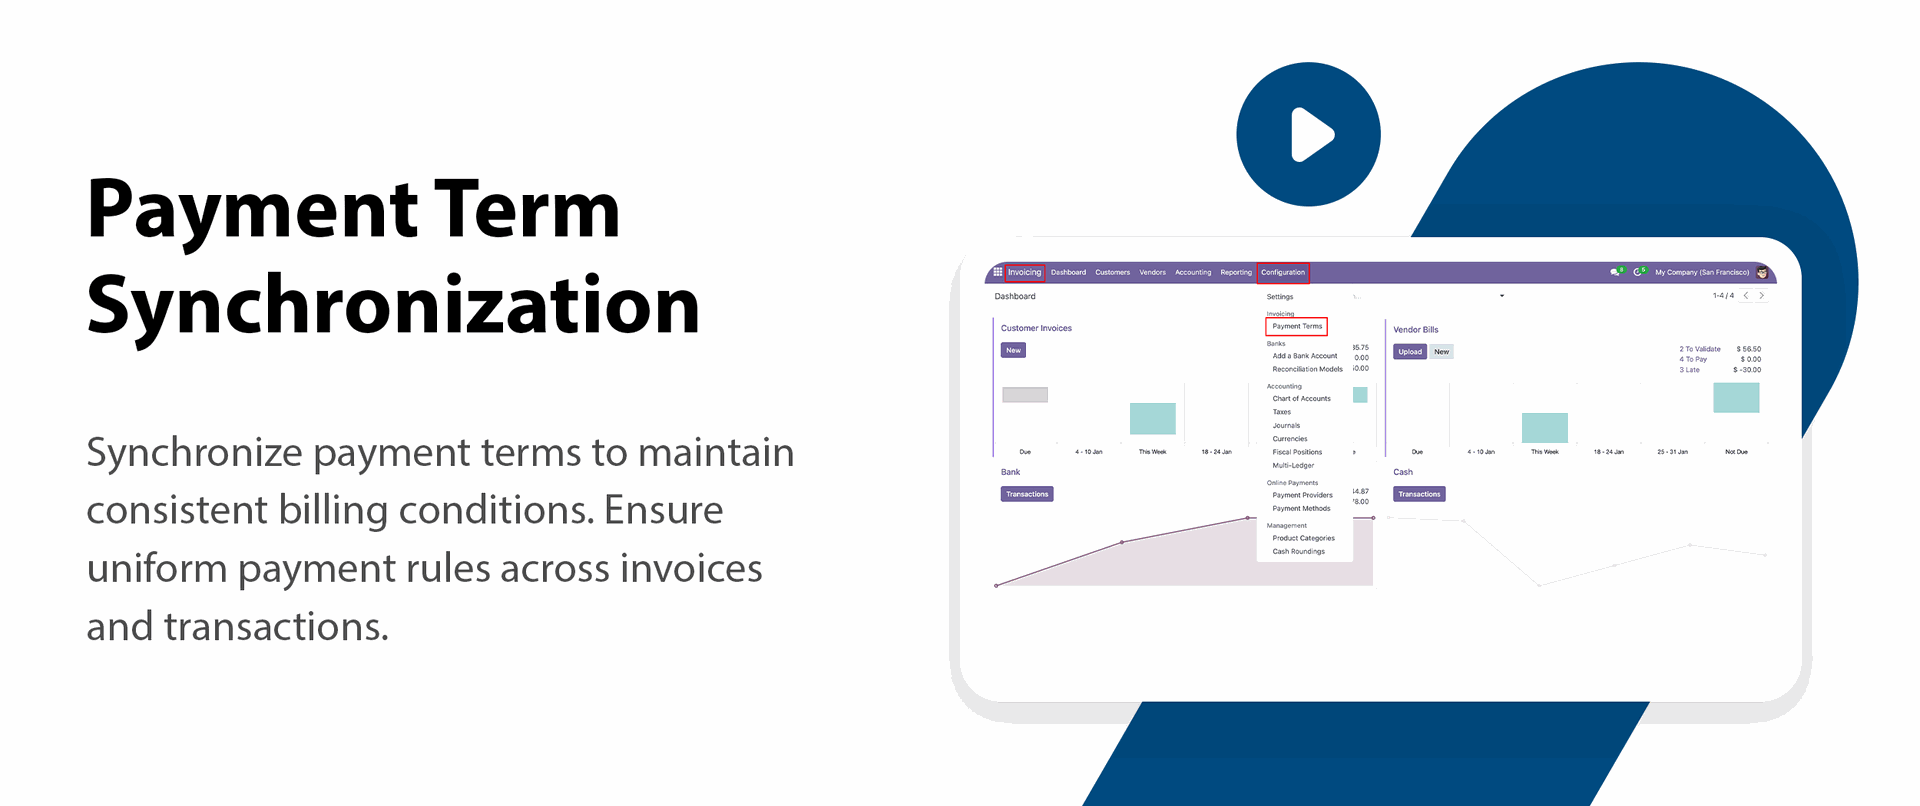
Payment Term Synchronization
Transfer payment terms between systems to maintain consistent billing conditions.
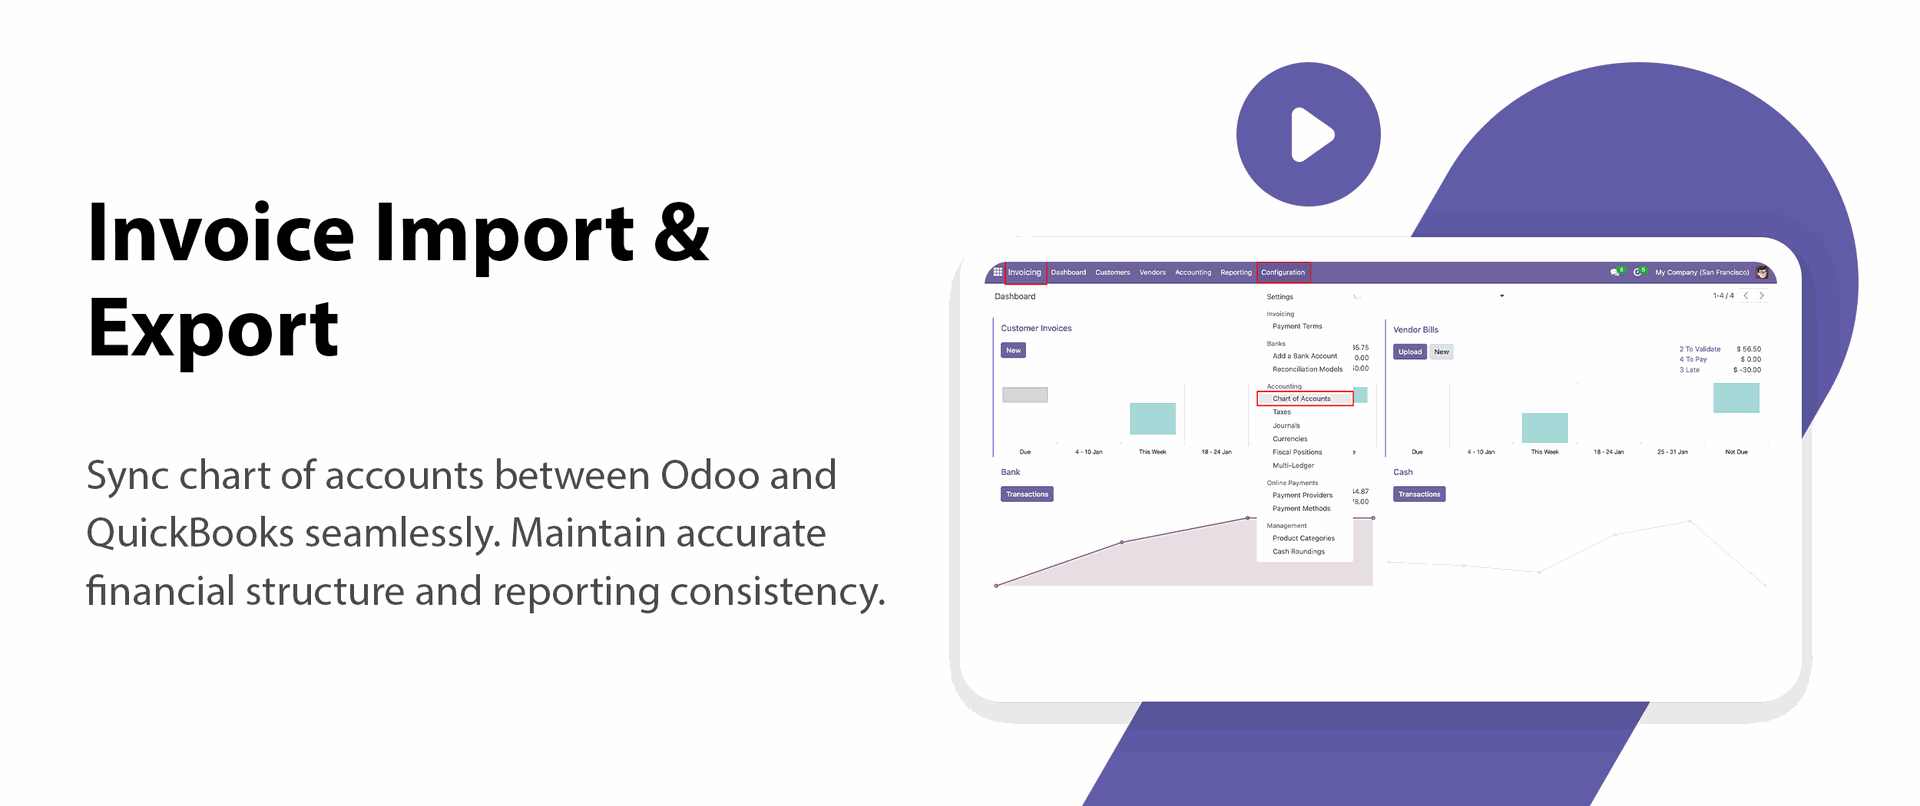
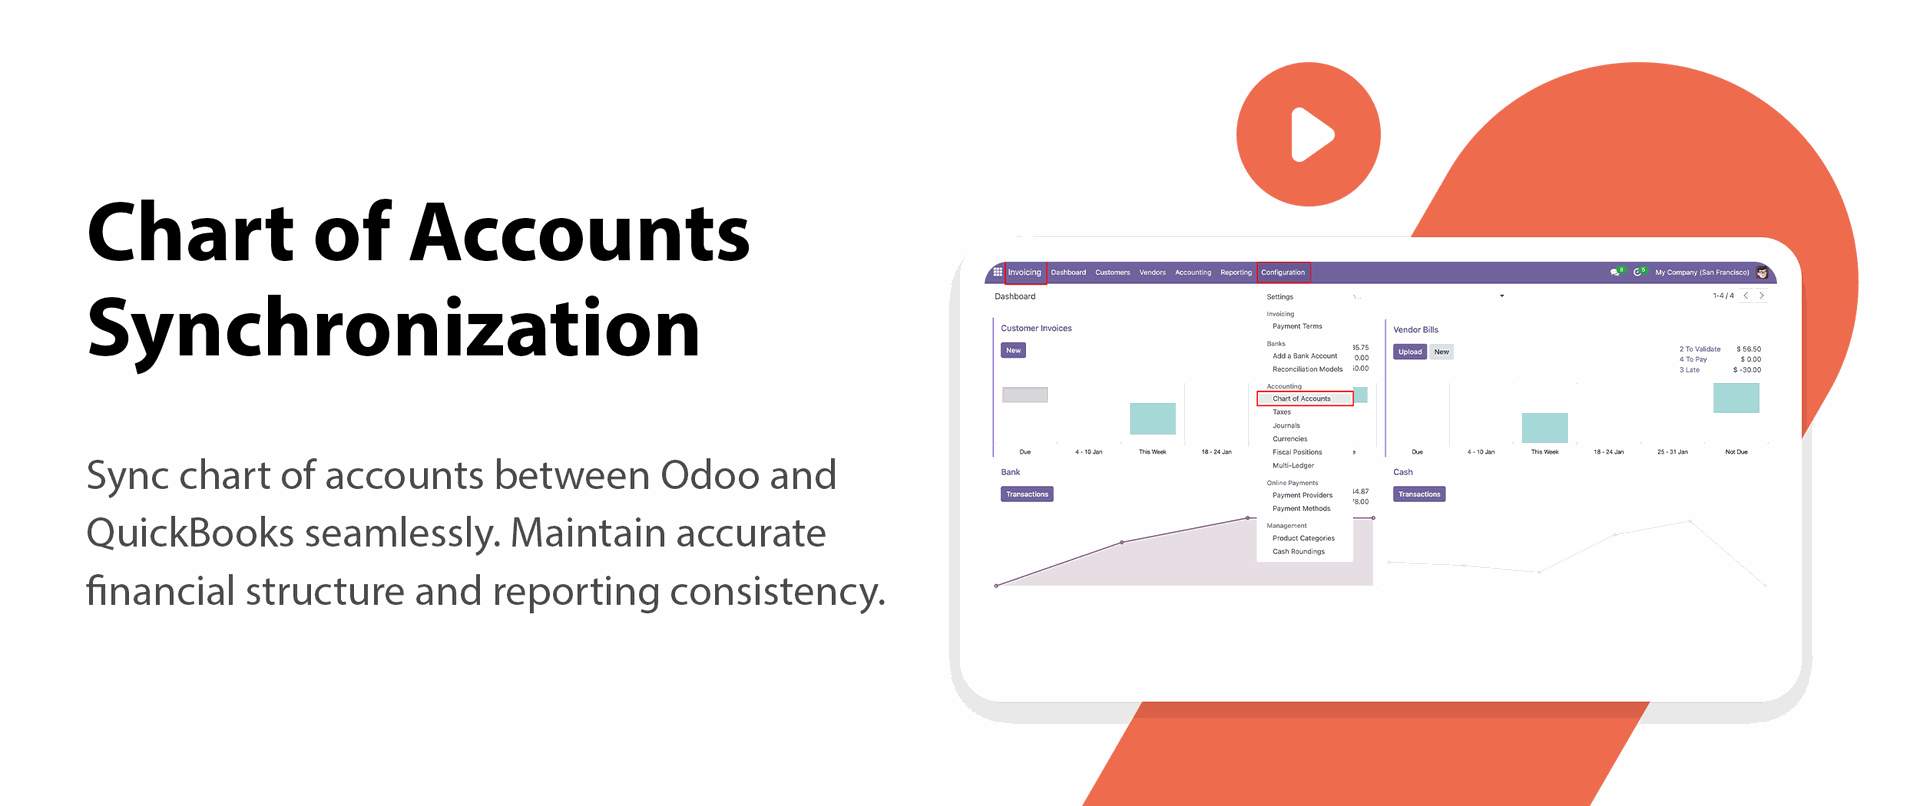
Chart of Accounts Synchronization
Sync accounts between Odoo and QuickBooks to maintain proper financial mapping.
Invoice Import & Export
Easily sync customer invoices, Keep sales and receivable records updated.
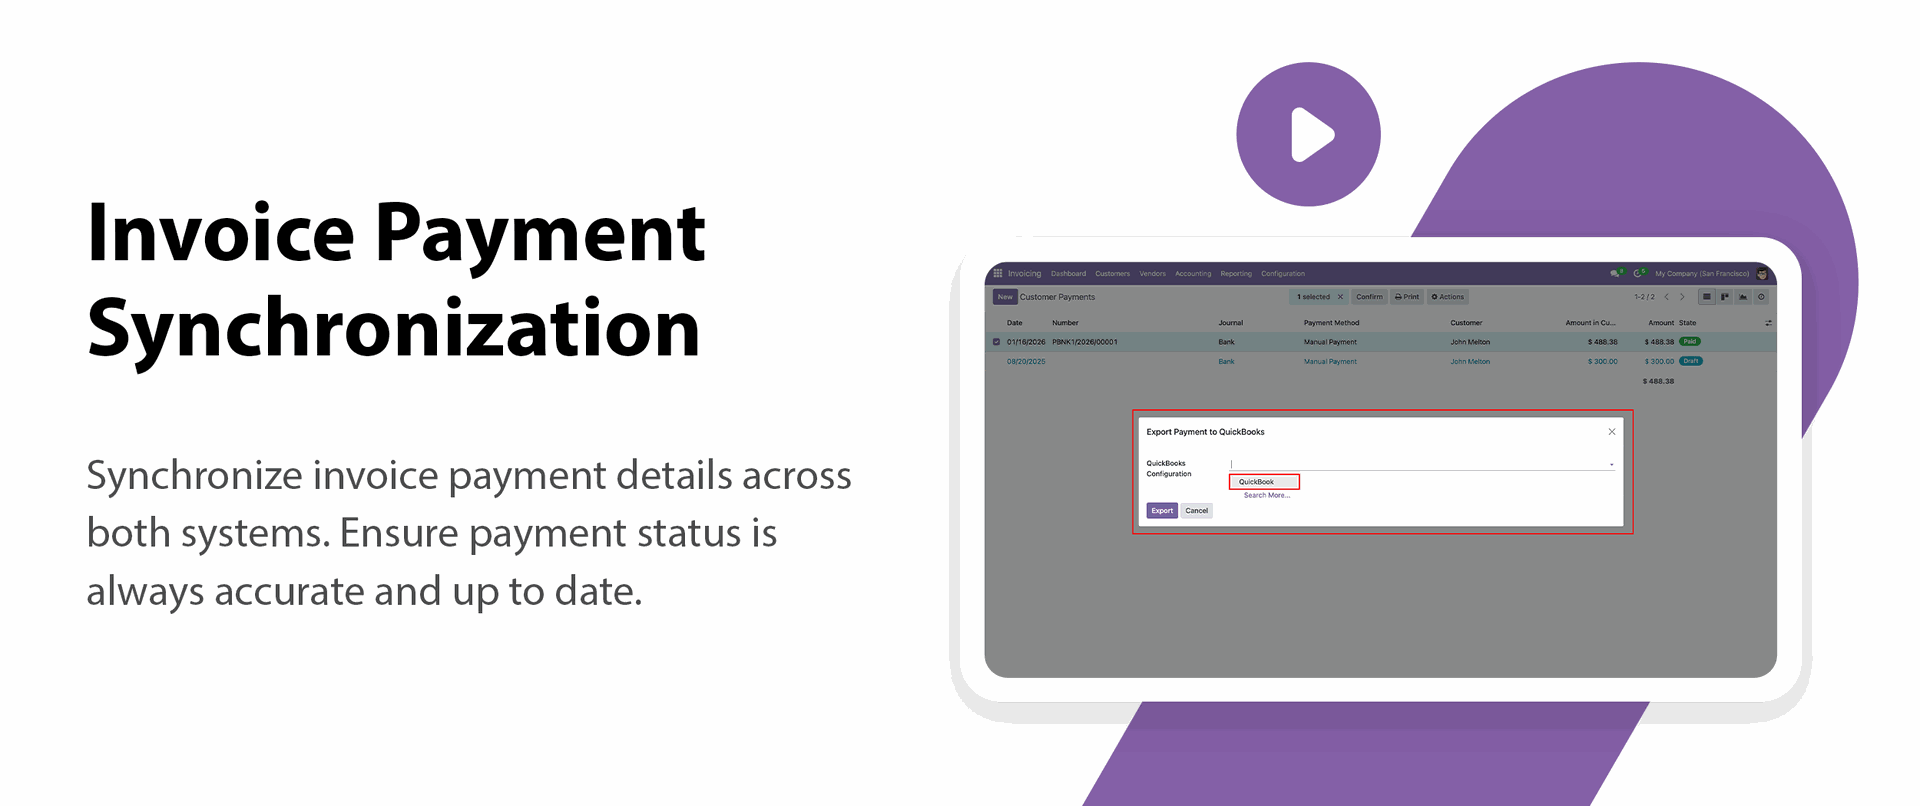
Invoice Payment Synchronization
Import and export invoice payment records to keep accurate tracking of customer payments.
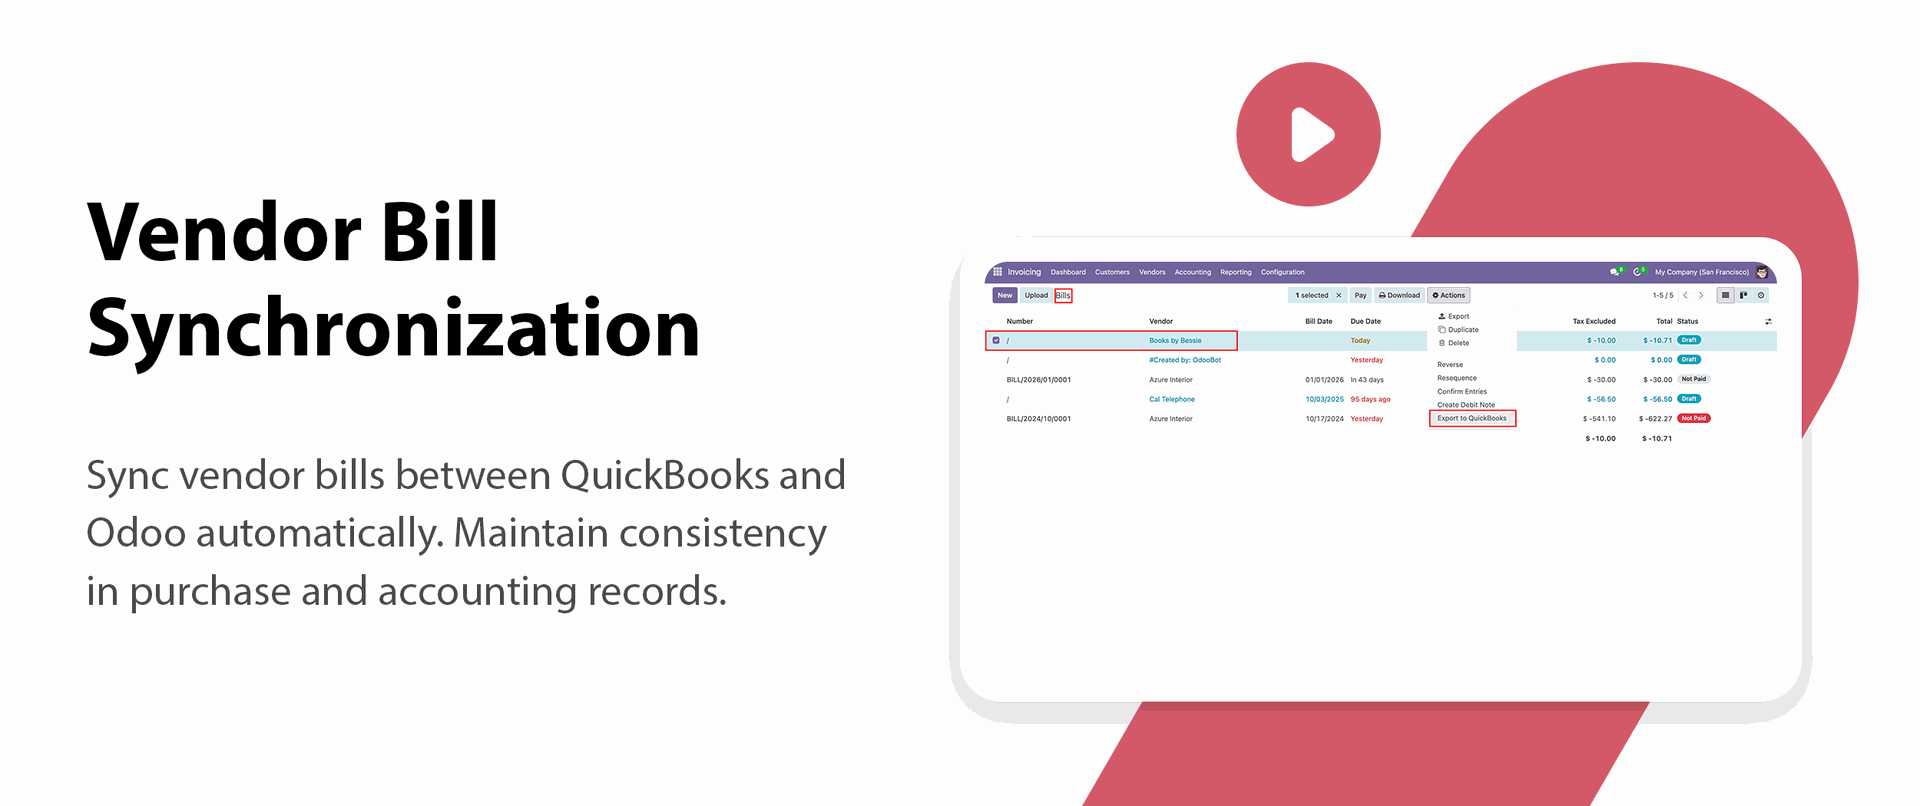
Vendor Bill Synchronization
Sync vendor bills between Odoo and QuickBooks for efficient payable management.

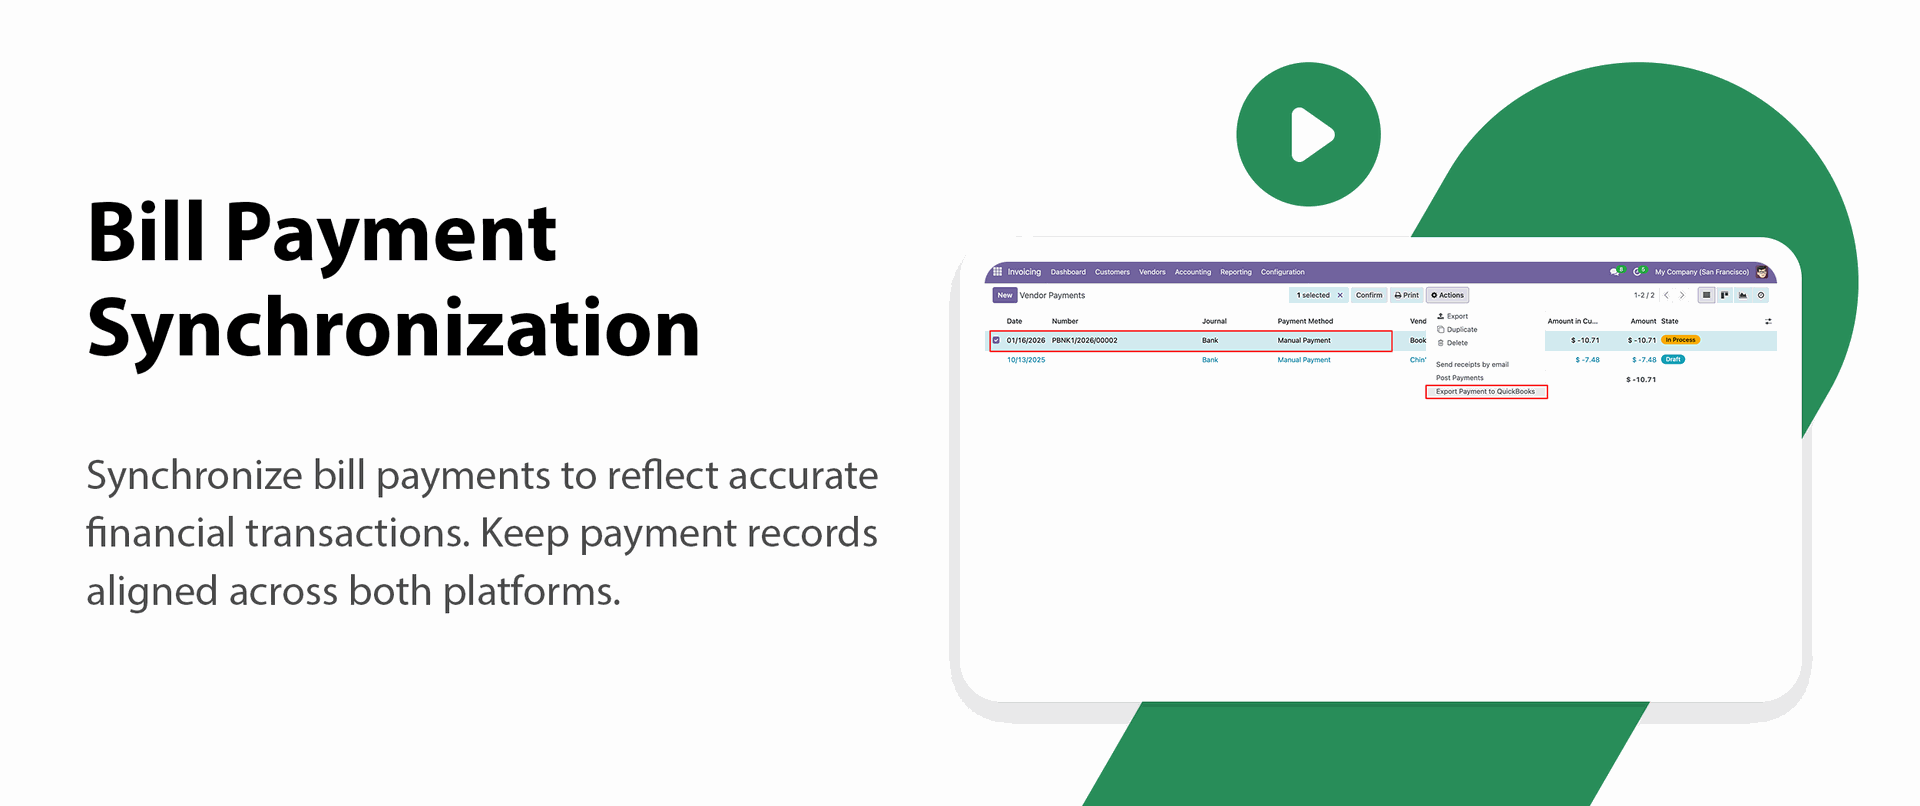
Bill Payment Synchronization
Transfer bill payment transactions smoothly, Keep financial data consistent across both systems.

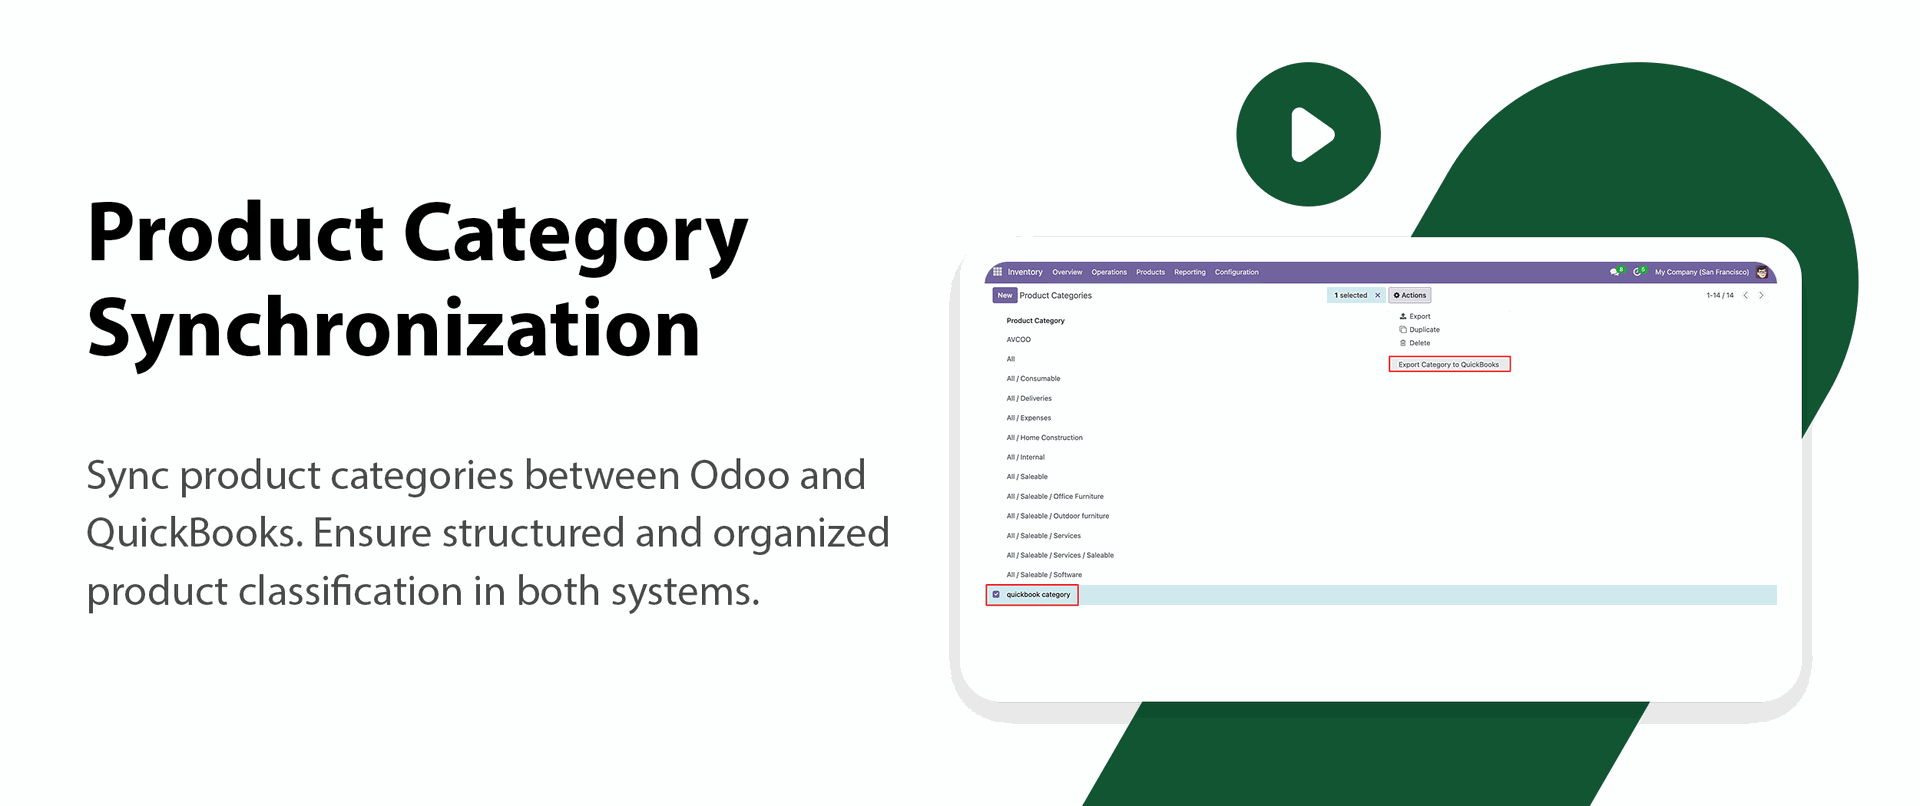
Product Category Synchronization
Import and export product categories between Odoo and QuickBooks to keep classification consistent.

QuickBook Dashboard
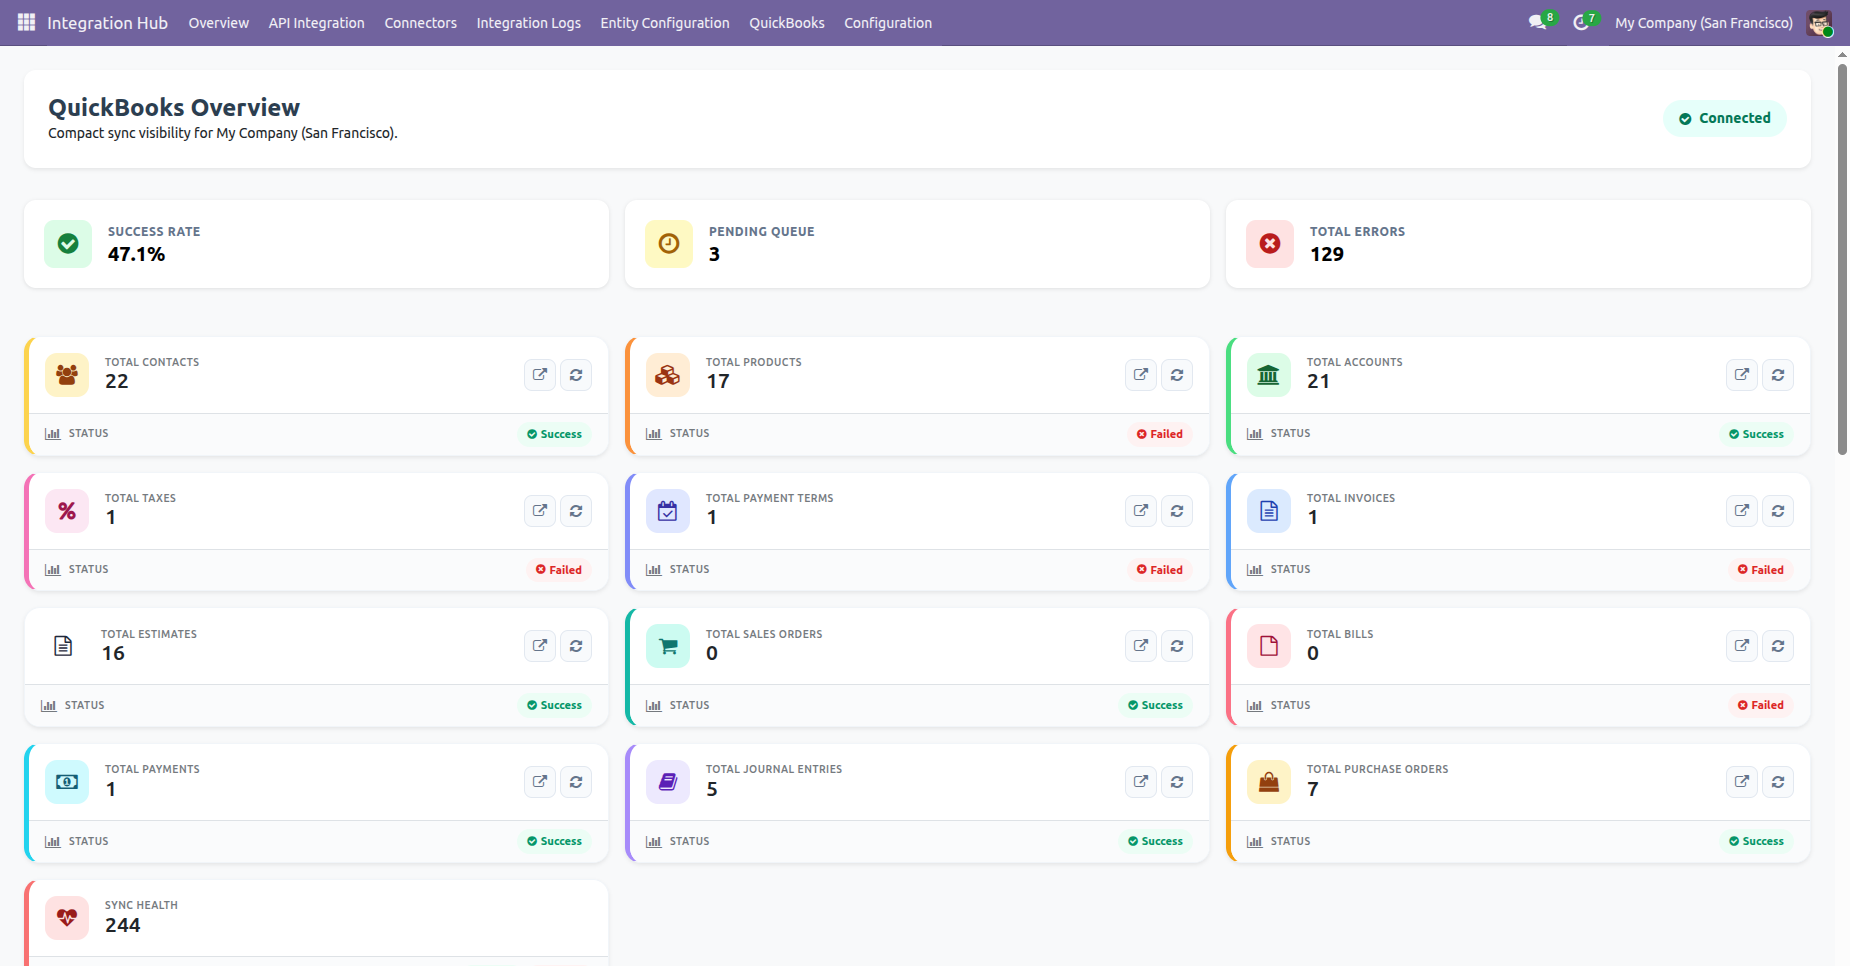
View all the information about Contacts, Products, Accounts, Taxes, Payment Terms, Invoices, Bills, Payments on the dashboard.
Purchase Order Integration
Sync purchase orders between Odoo and the connected platform.

Quotation Integration
Sync estimates and quotations between Odoo and the connected platform.

Webhook Integration
Receive real-time updates through webhooks for automatic synchronization.
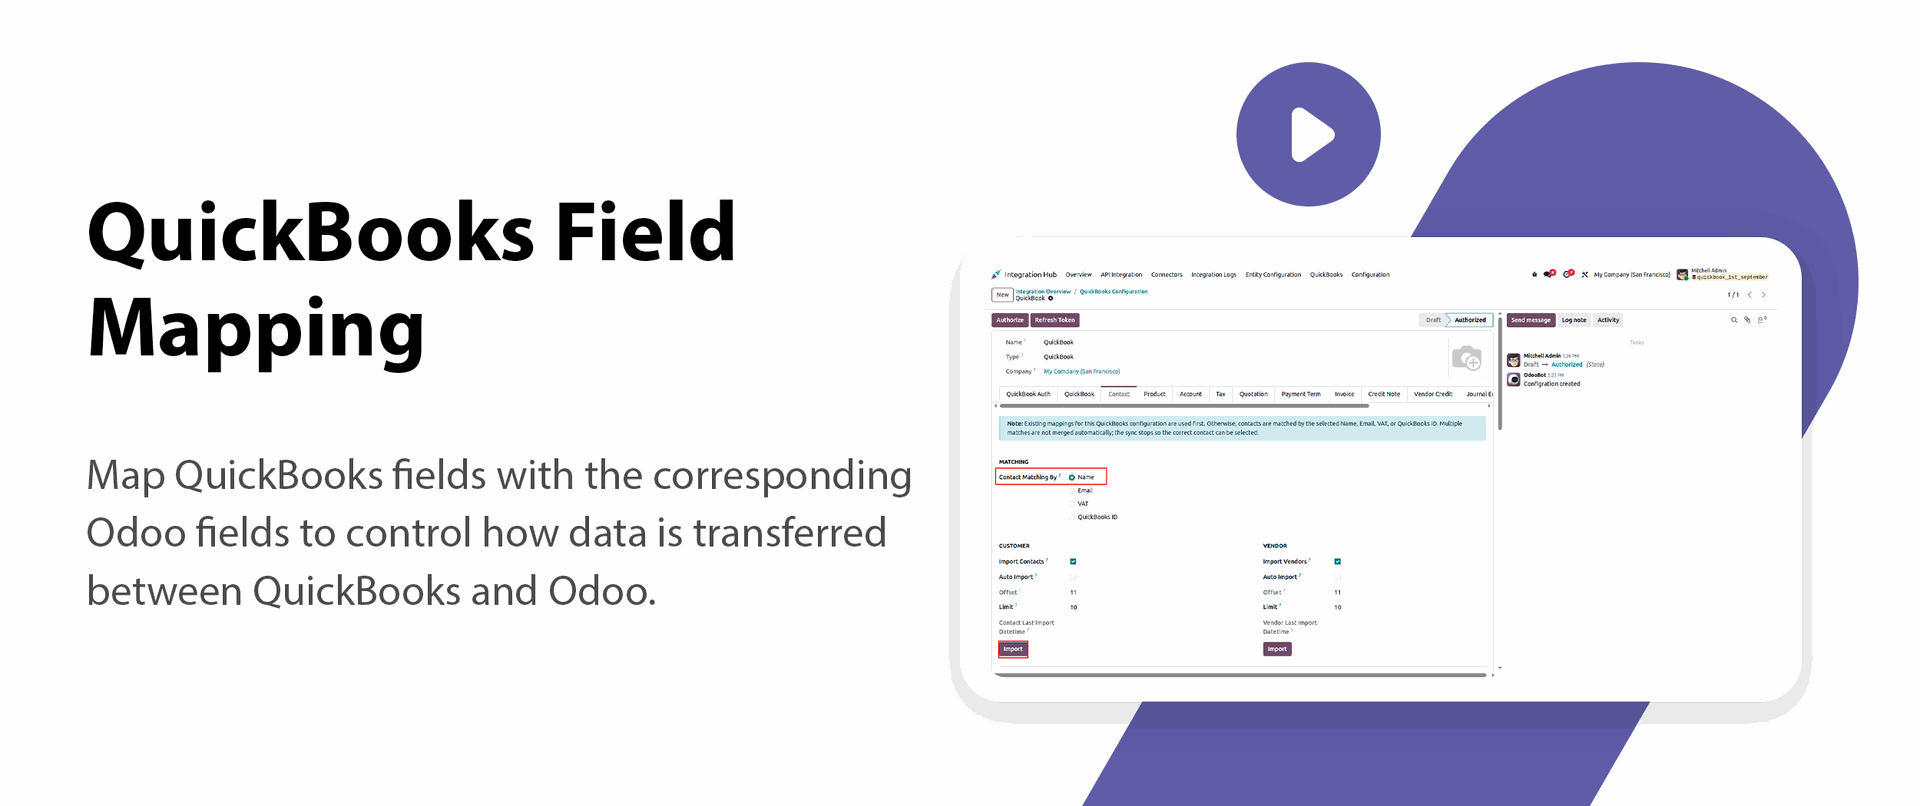
QuickBooks Field Mapping
Map QuickBooks fields with the corresponding Odoo fields to control how data is transferred between QuickBooks and Odoo.
Key Features
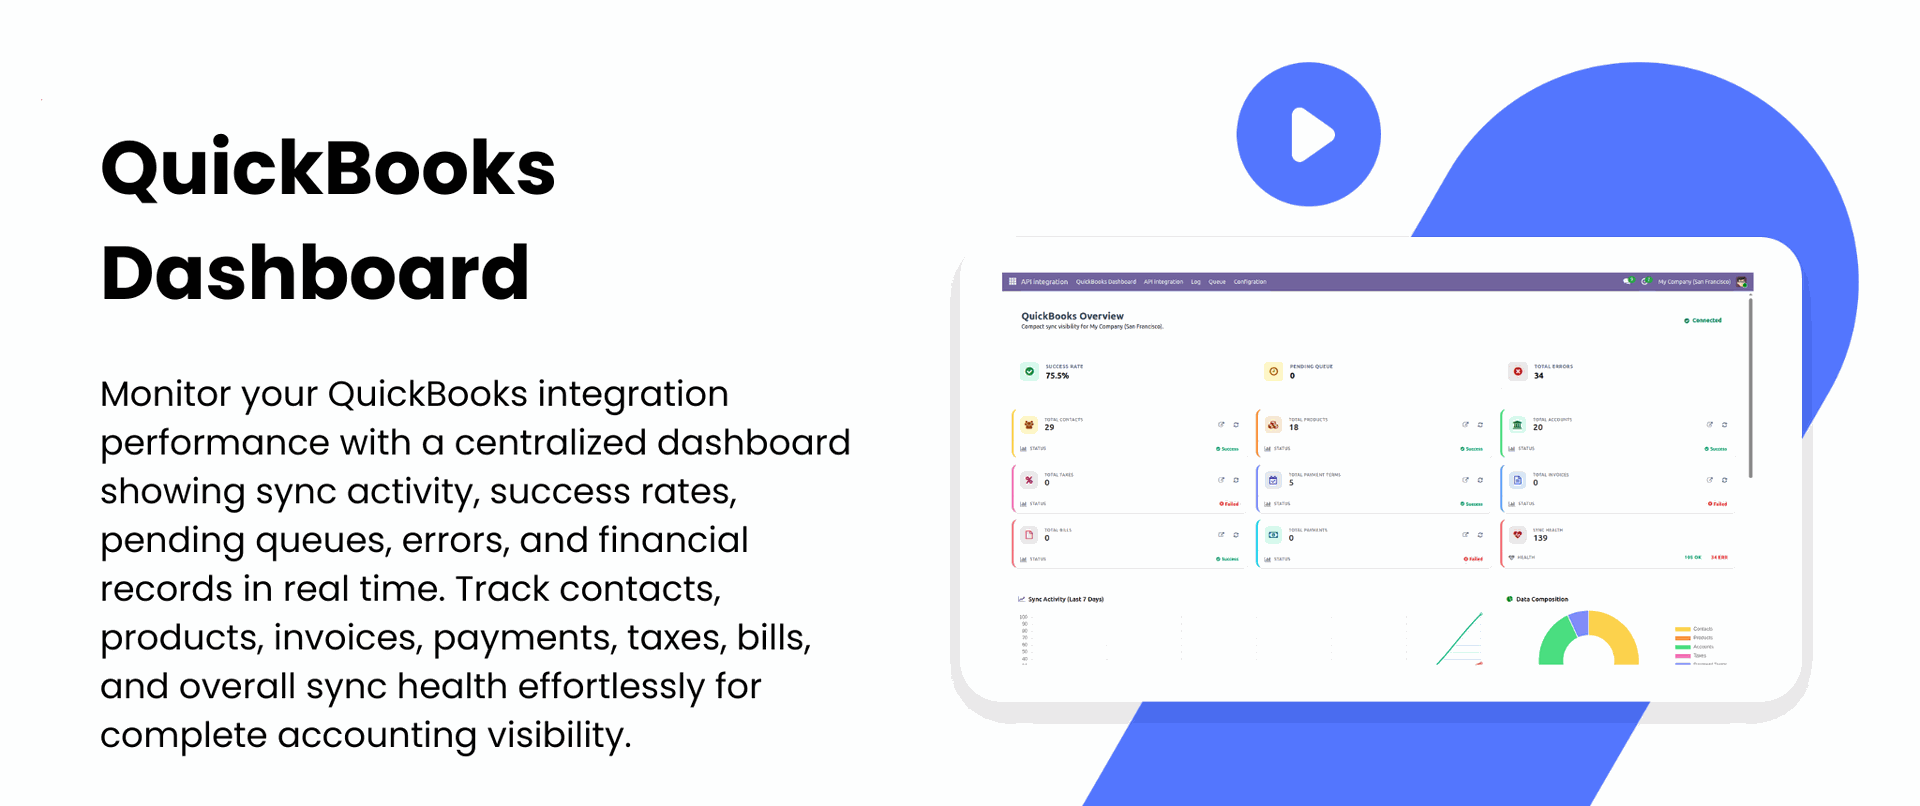
Quickbook Dashboard Overview.
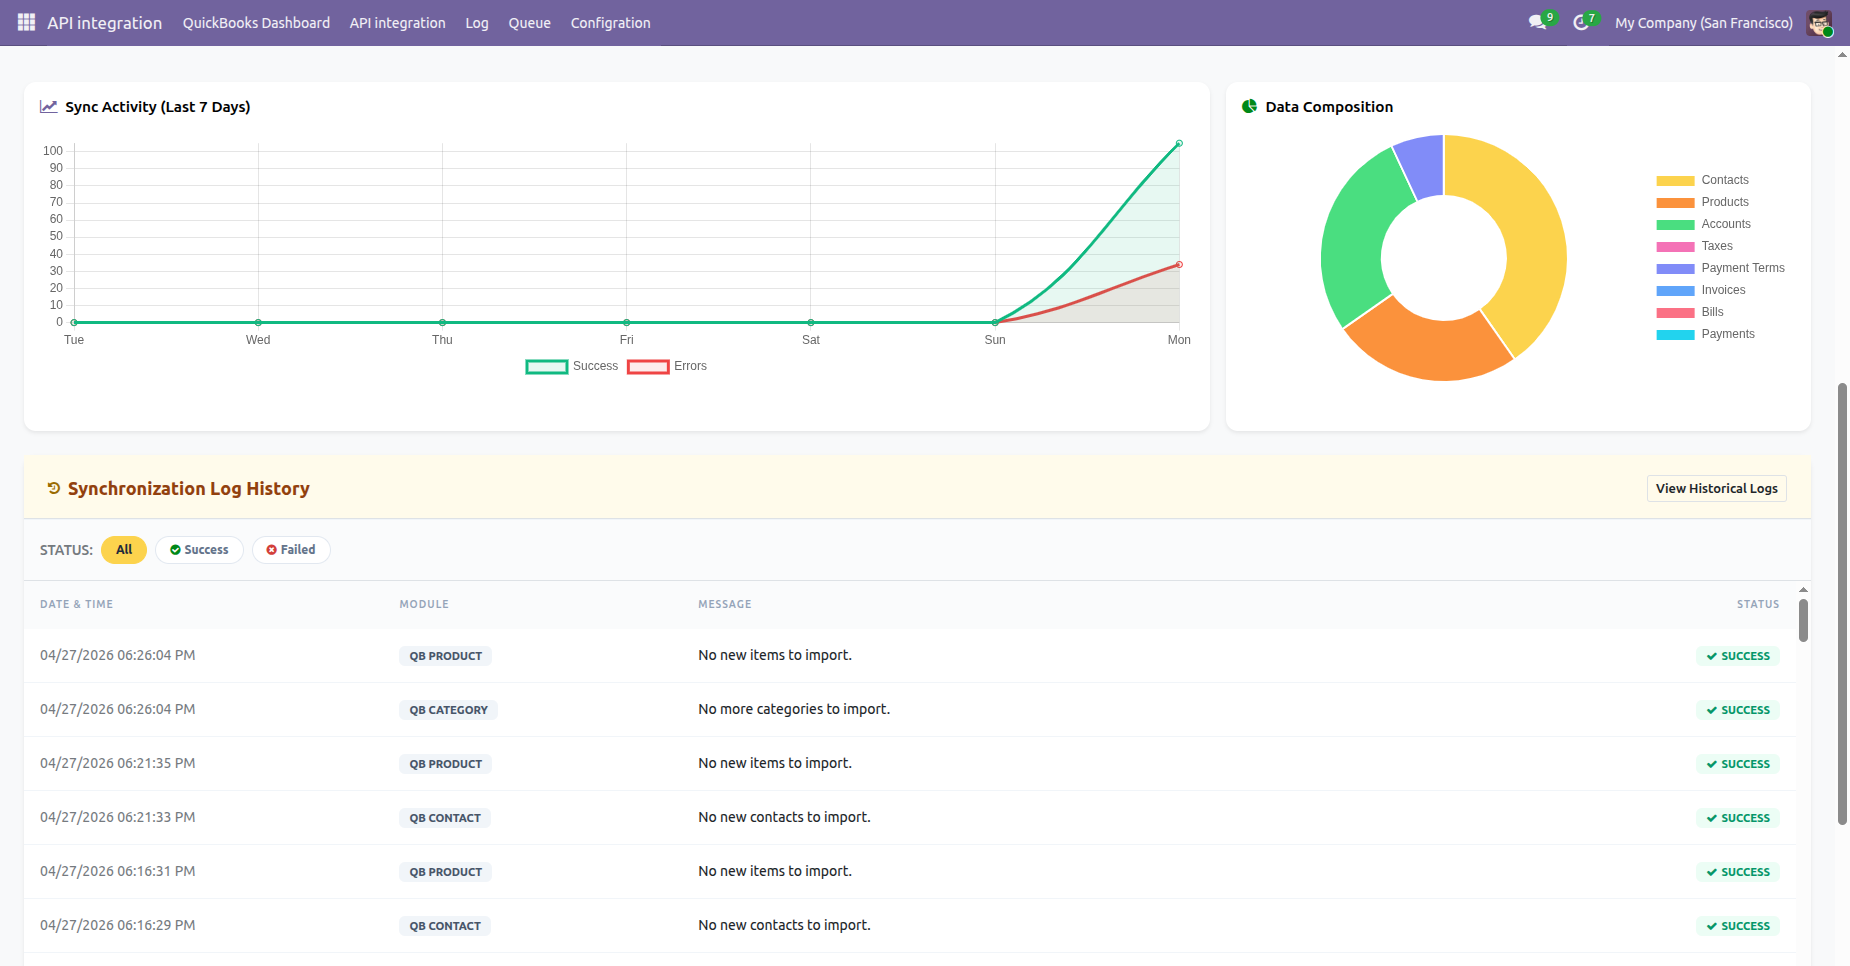
Synchronization Log History along with Sync Activity chart and Data composition pie chart.
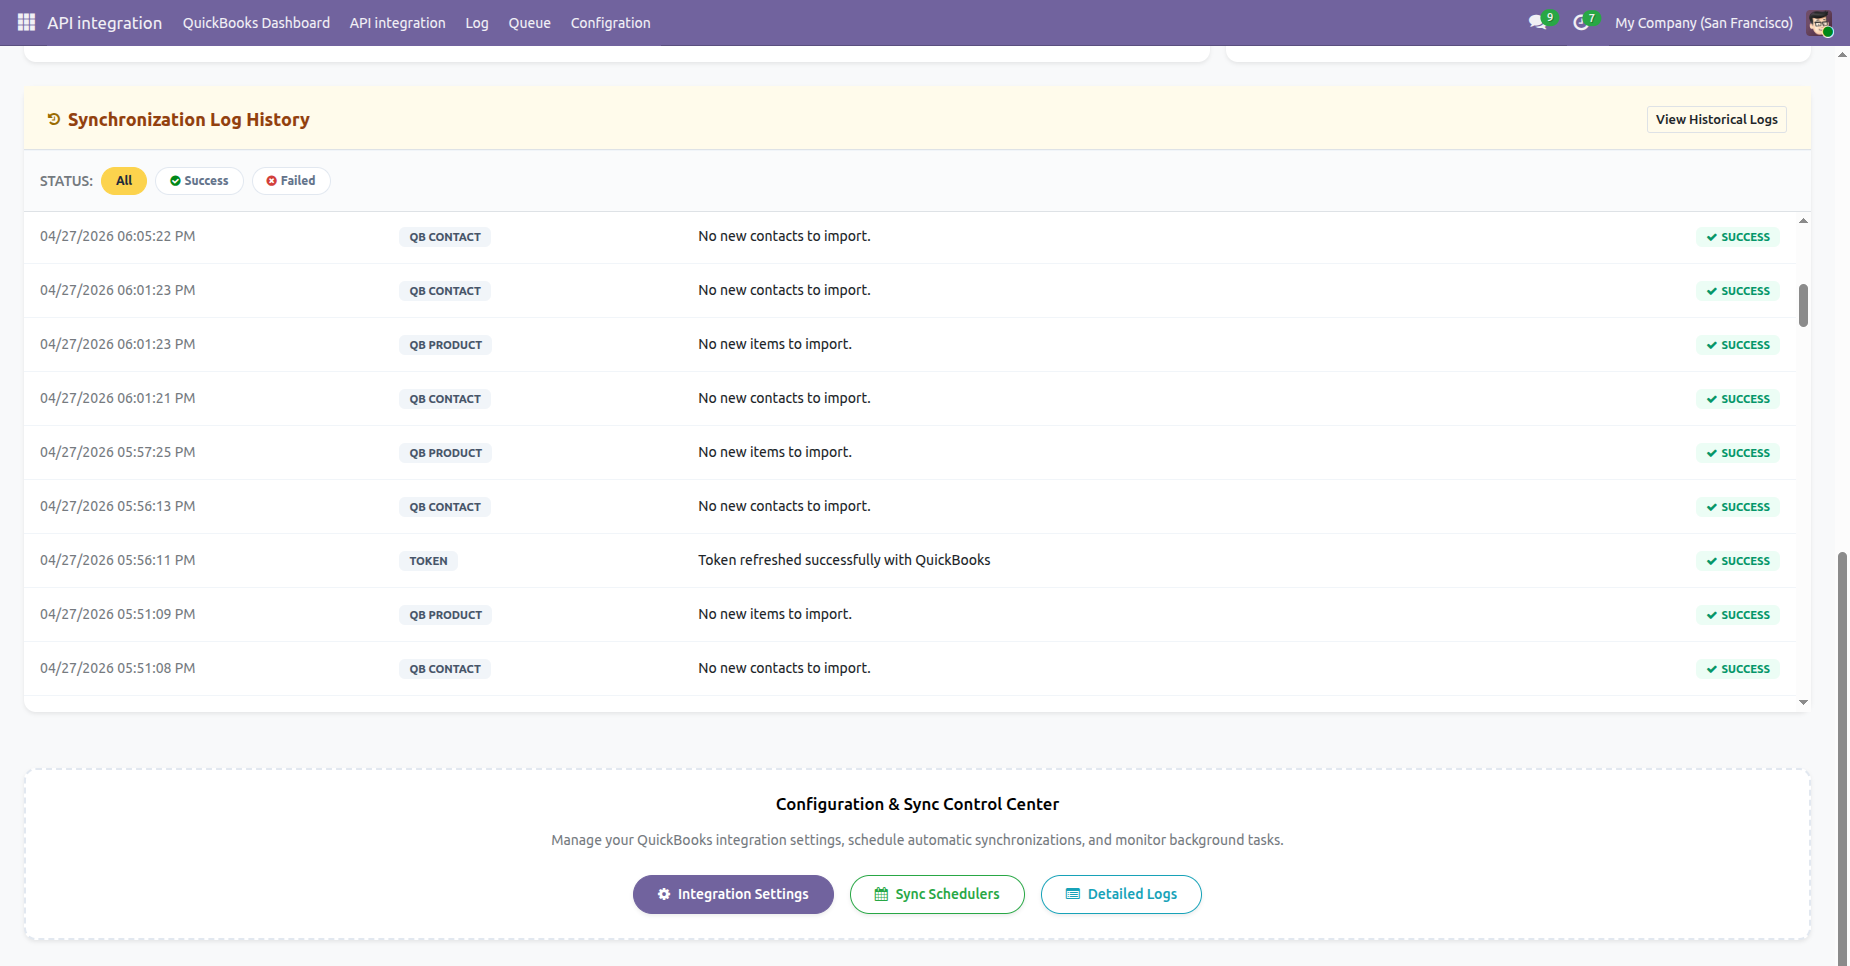
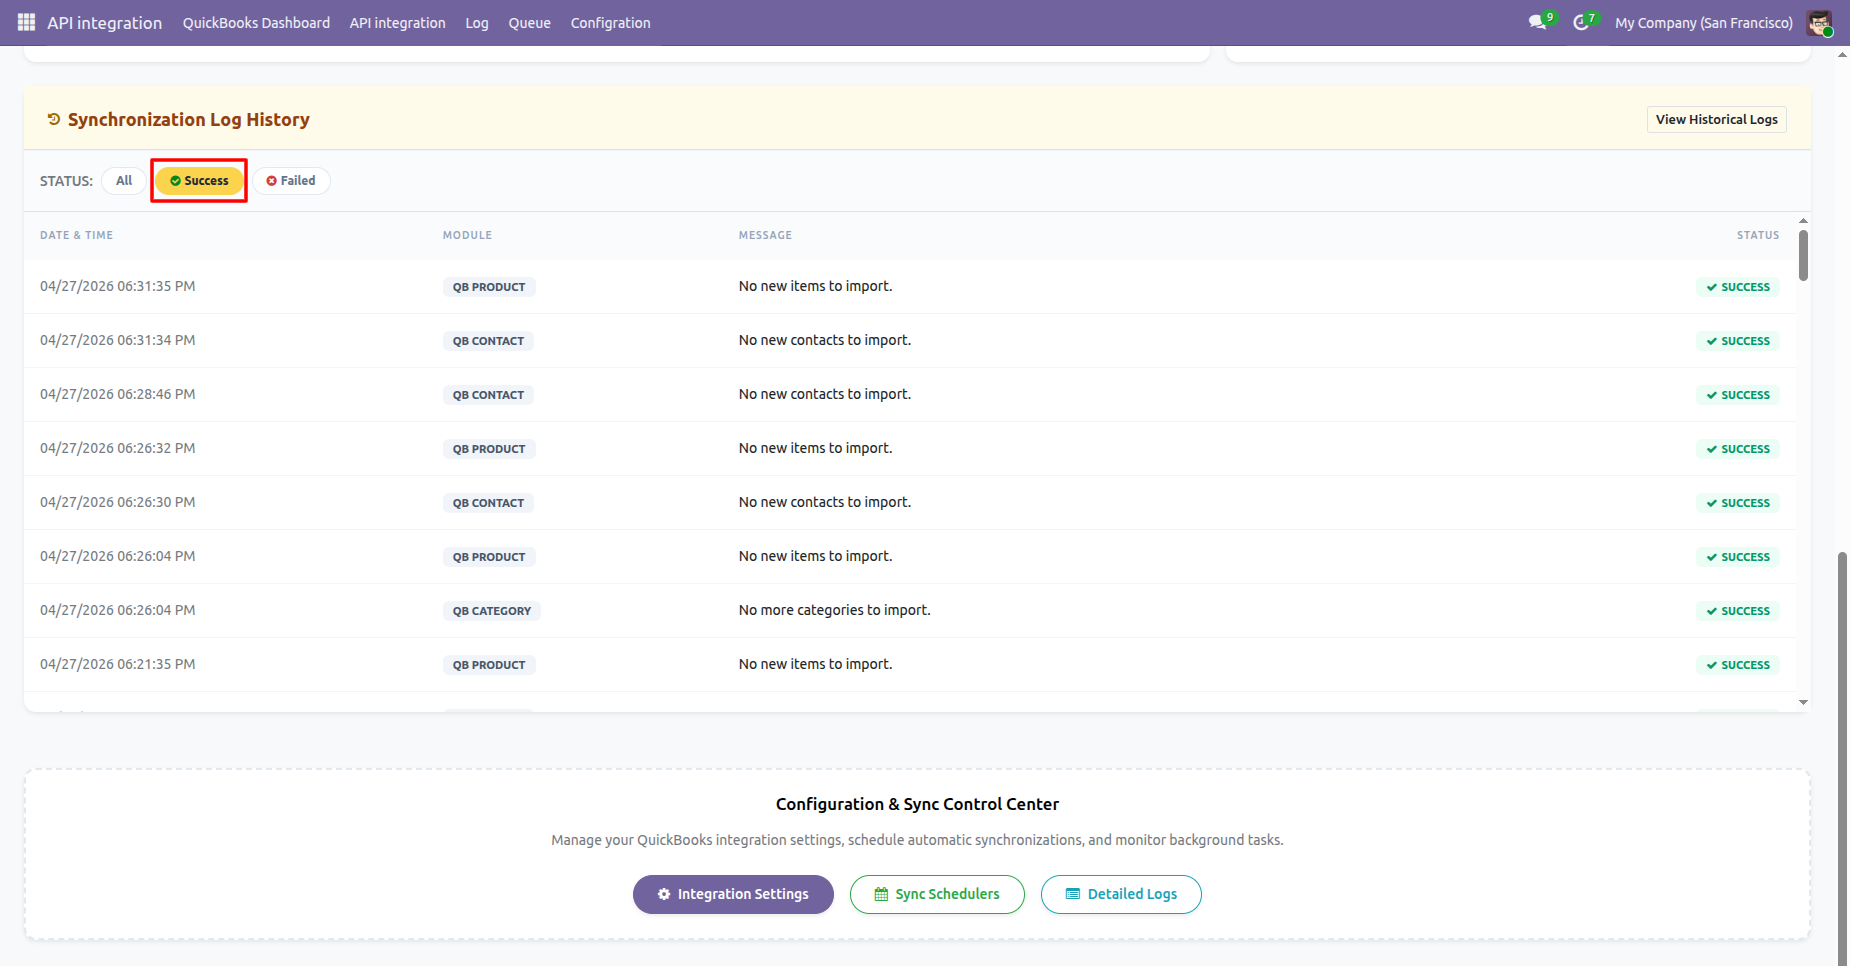
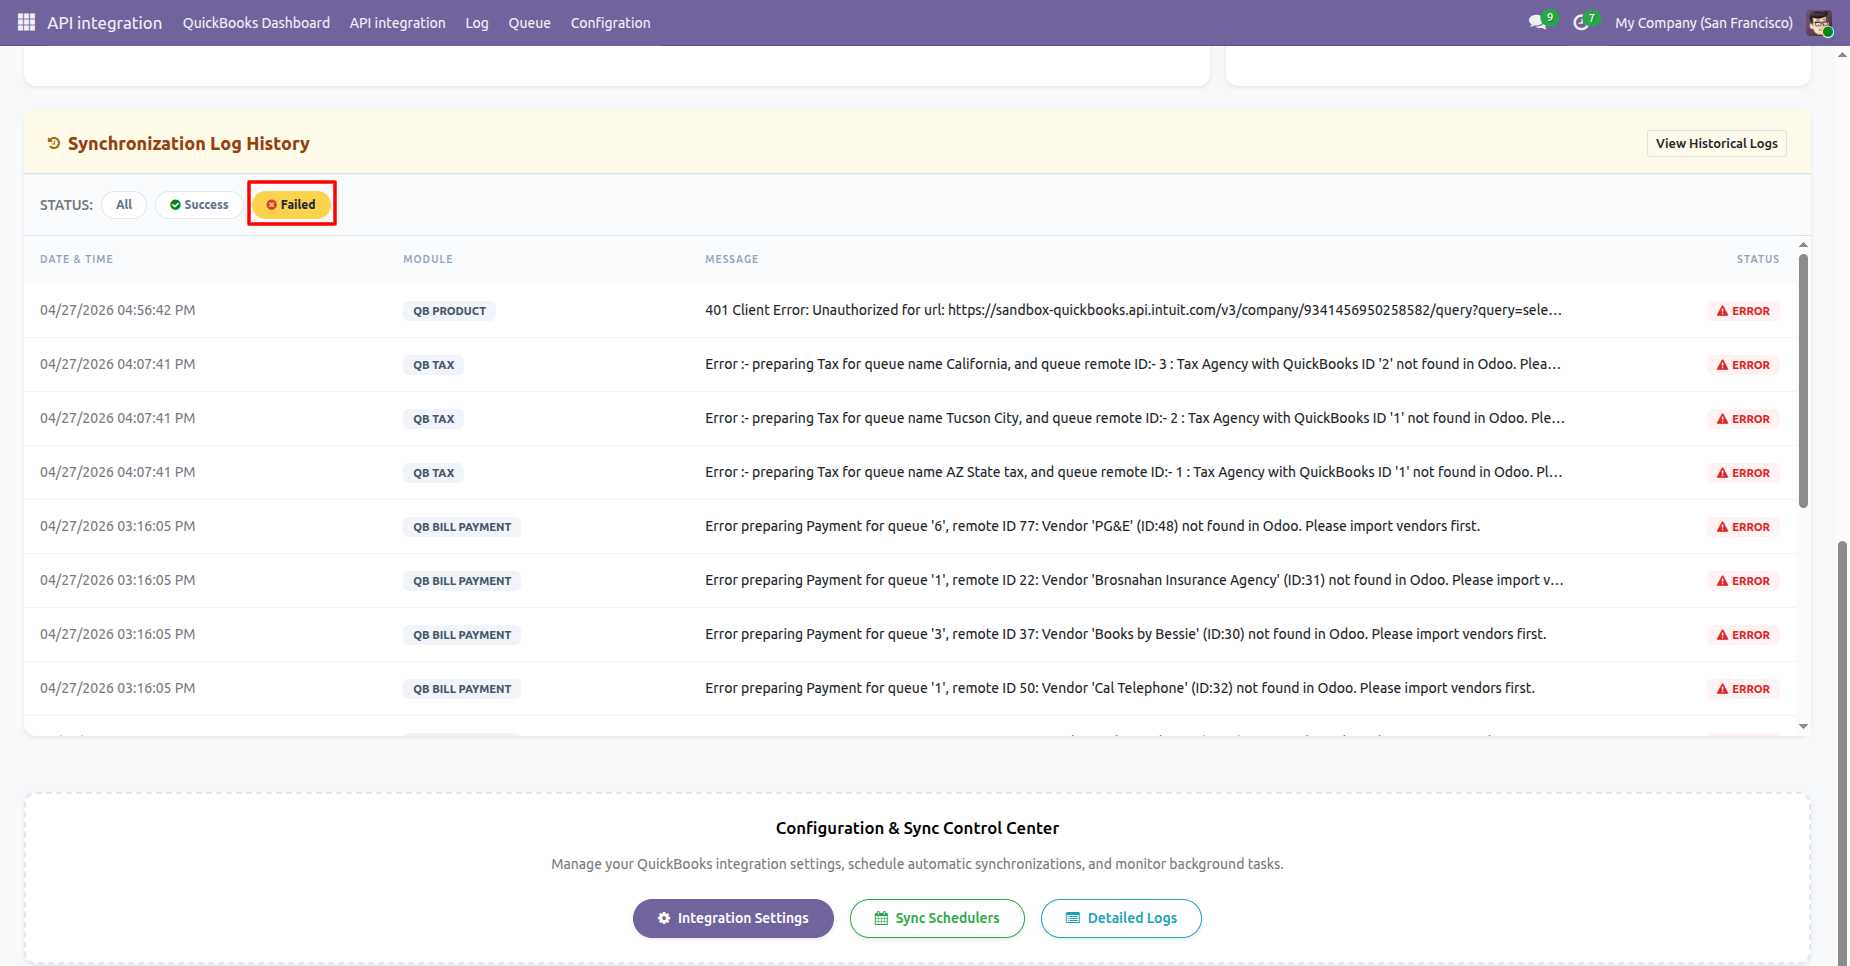
Synchronization Log History with status filters of success and failed.
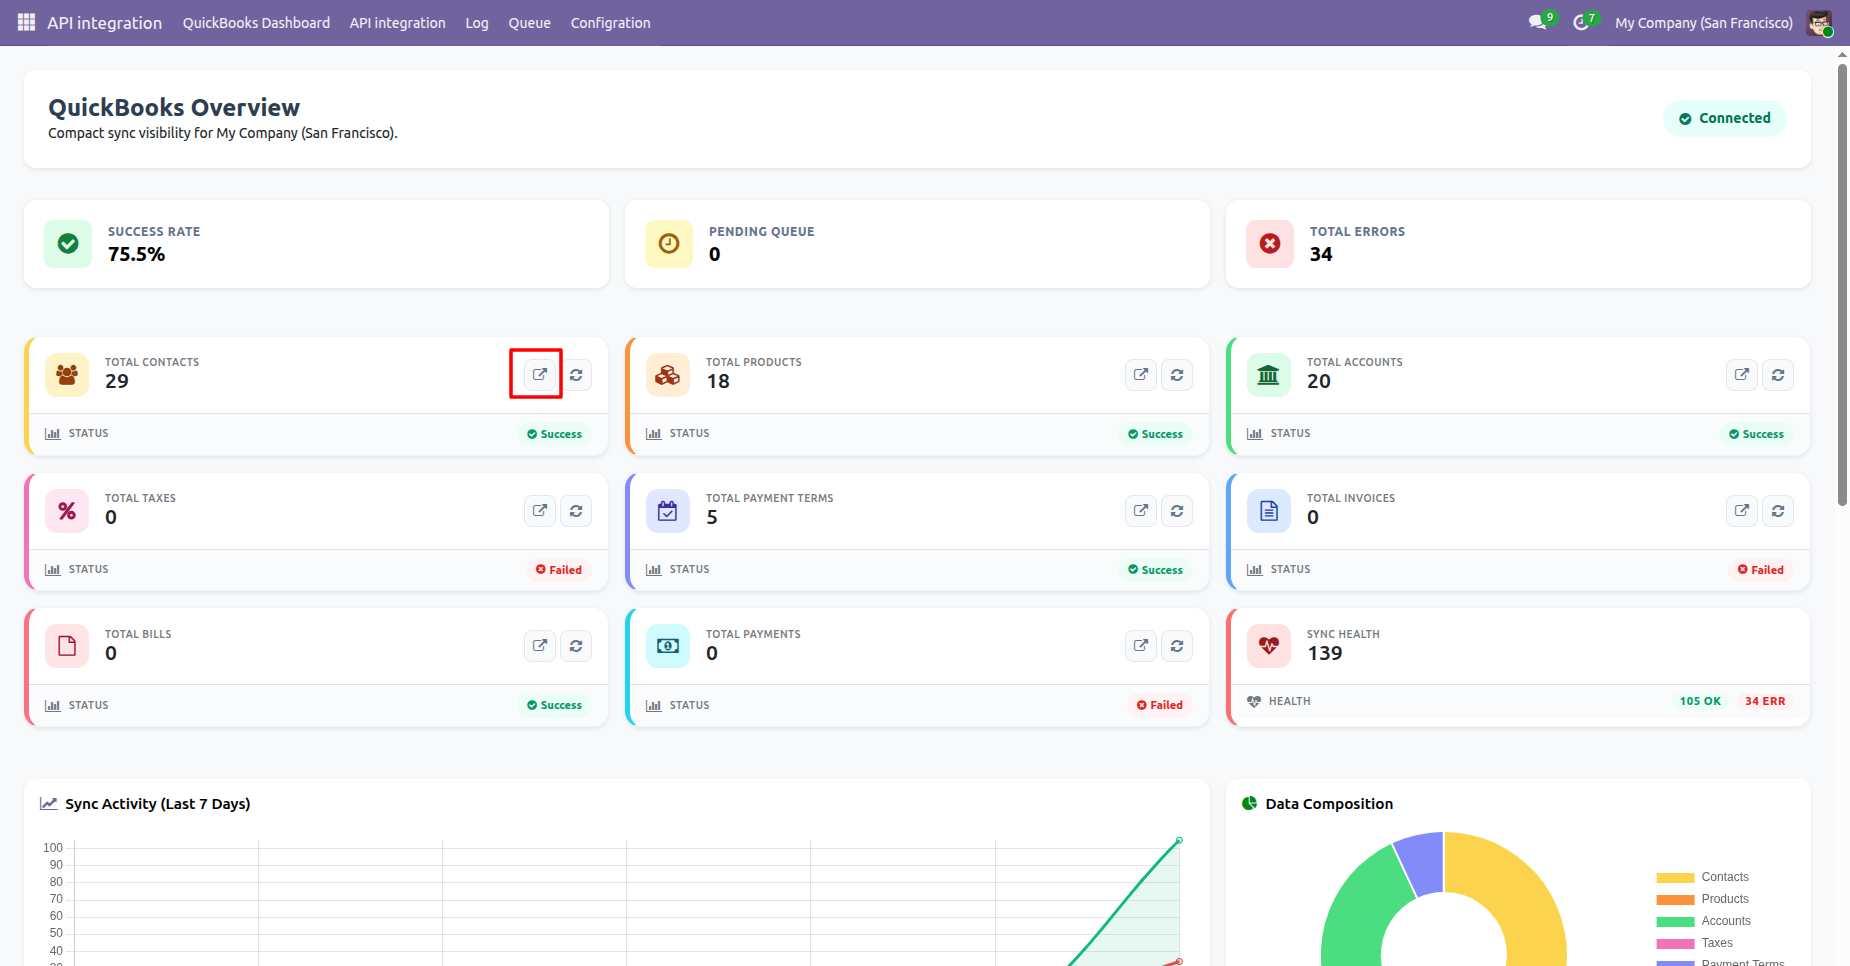
Highlighted Total Contacts in the dashboard.
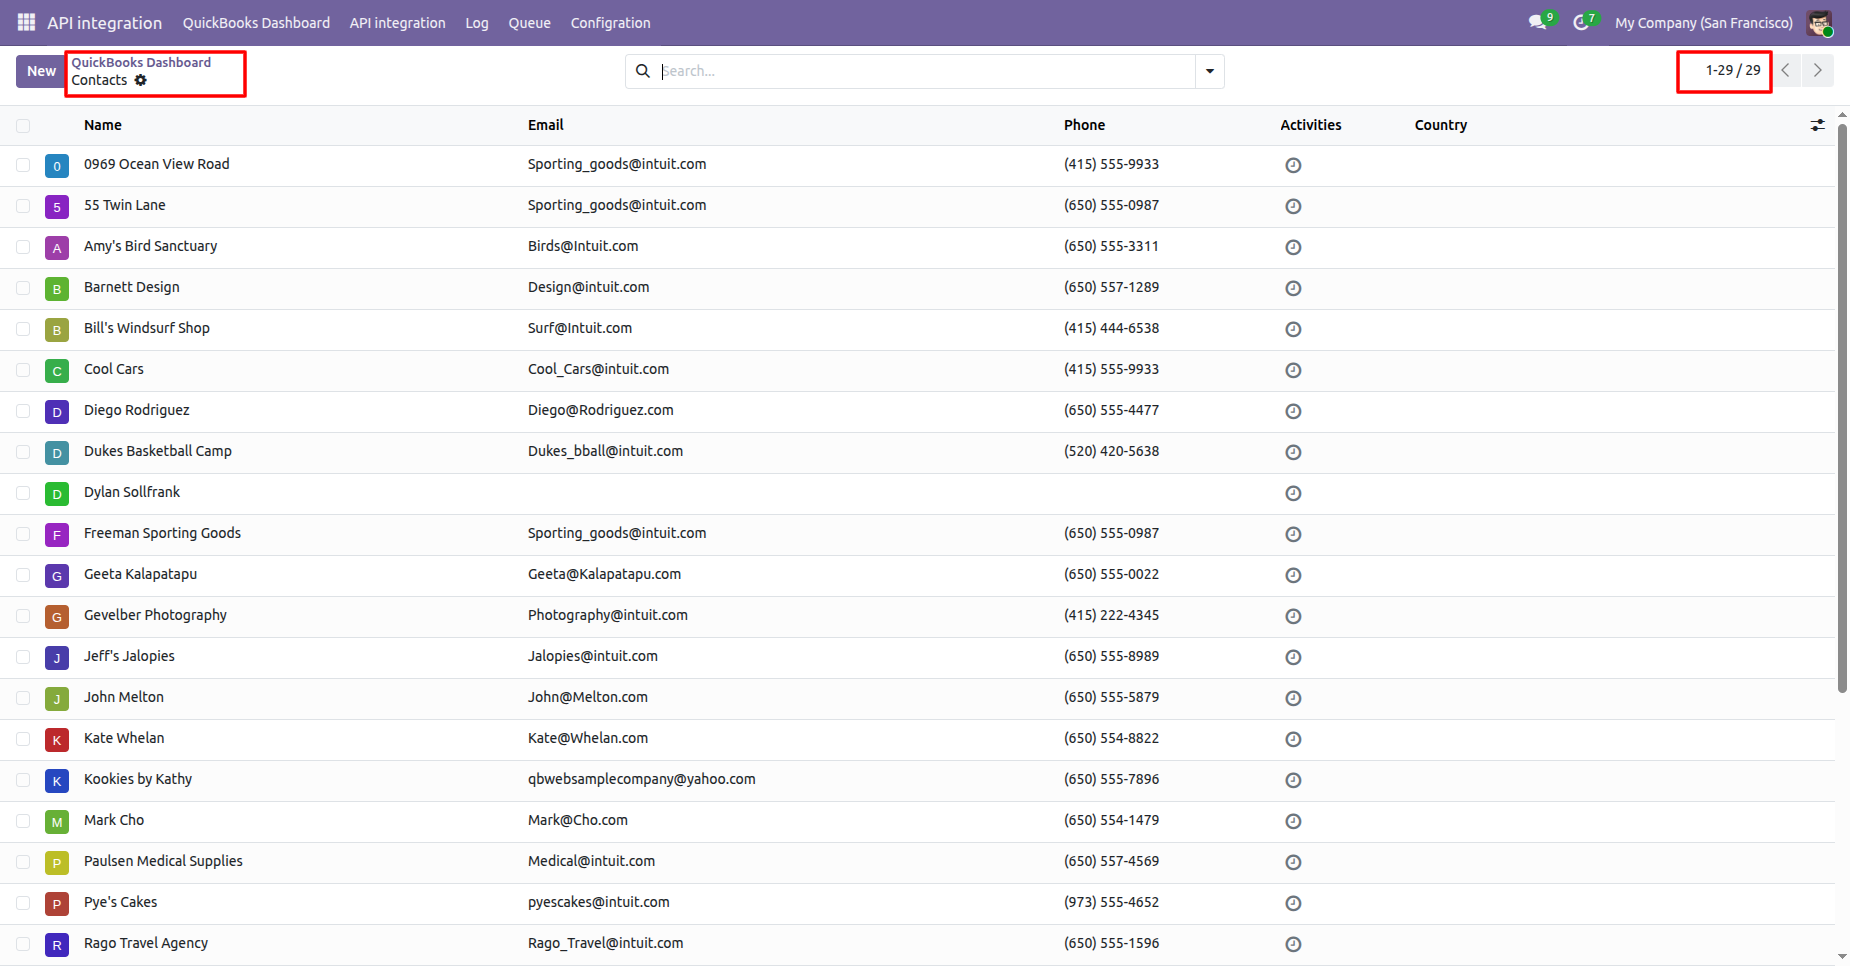
Contacts list view opened from the Quickbook Qashboard.
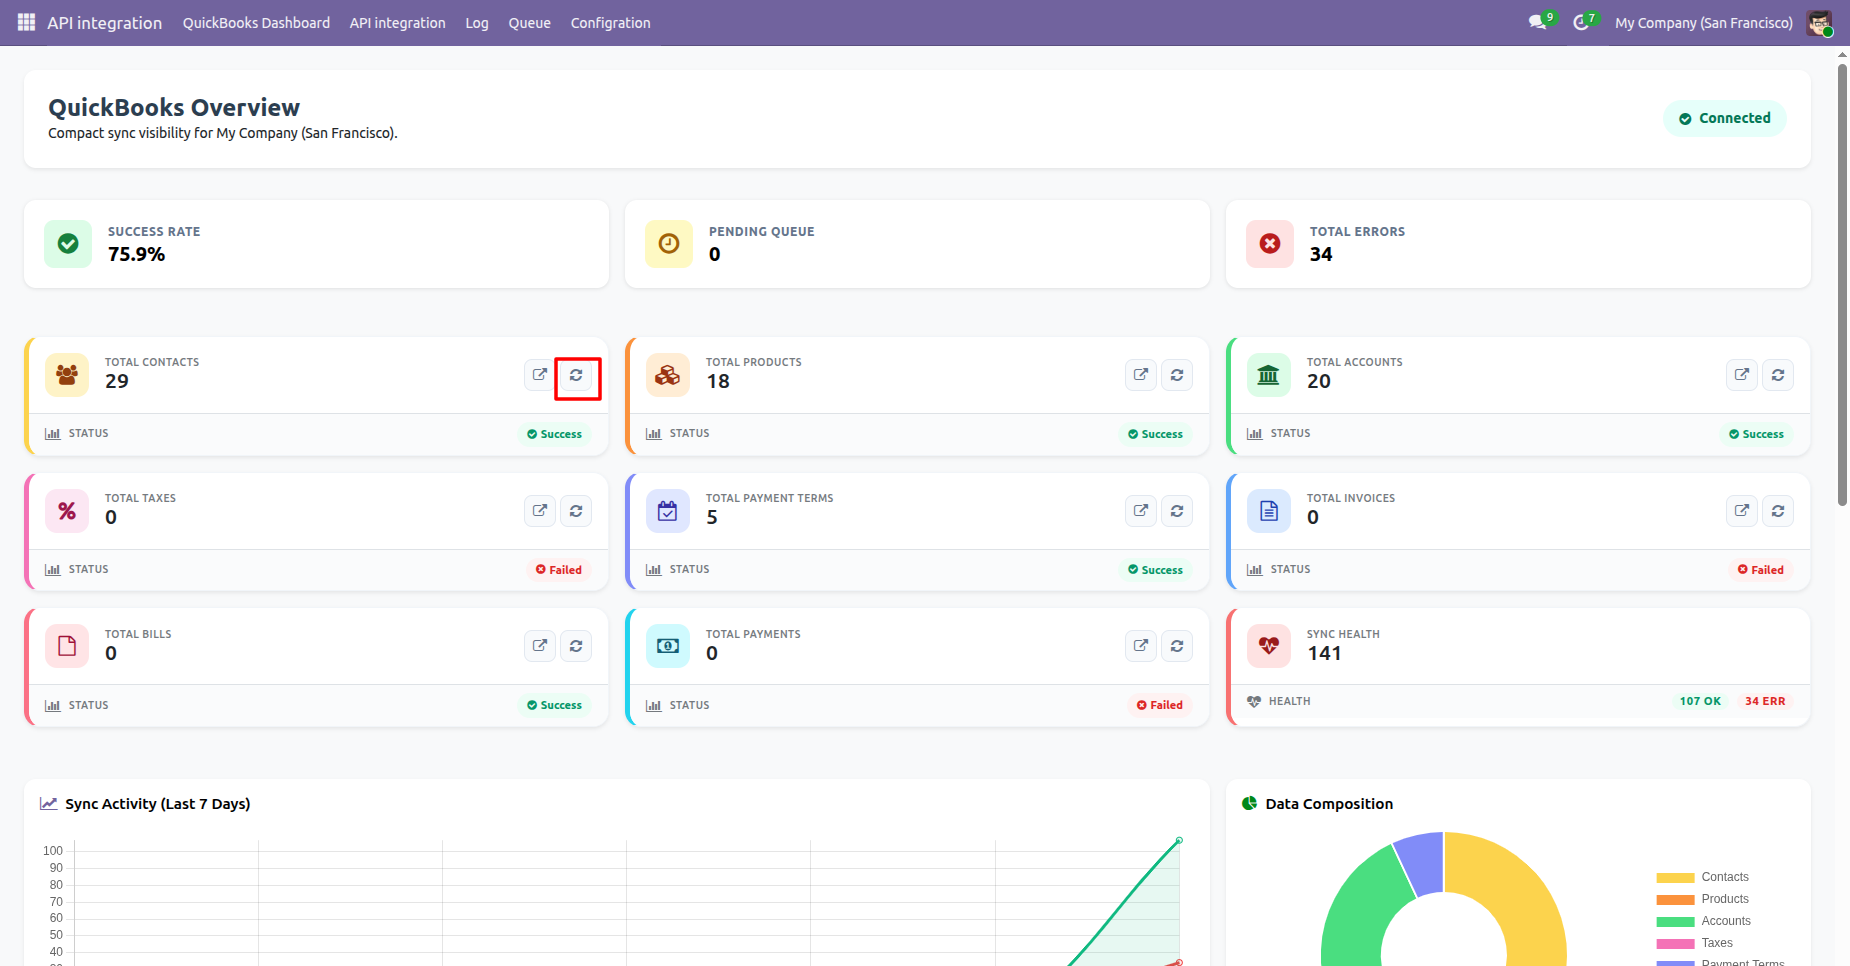
Click the Sync icon to sync all the contacts.
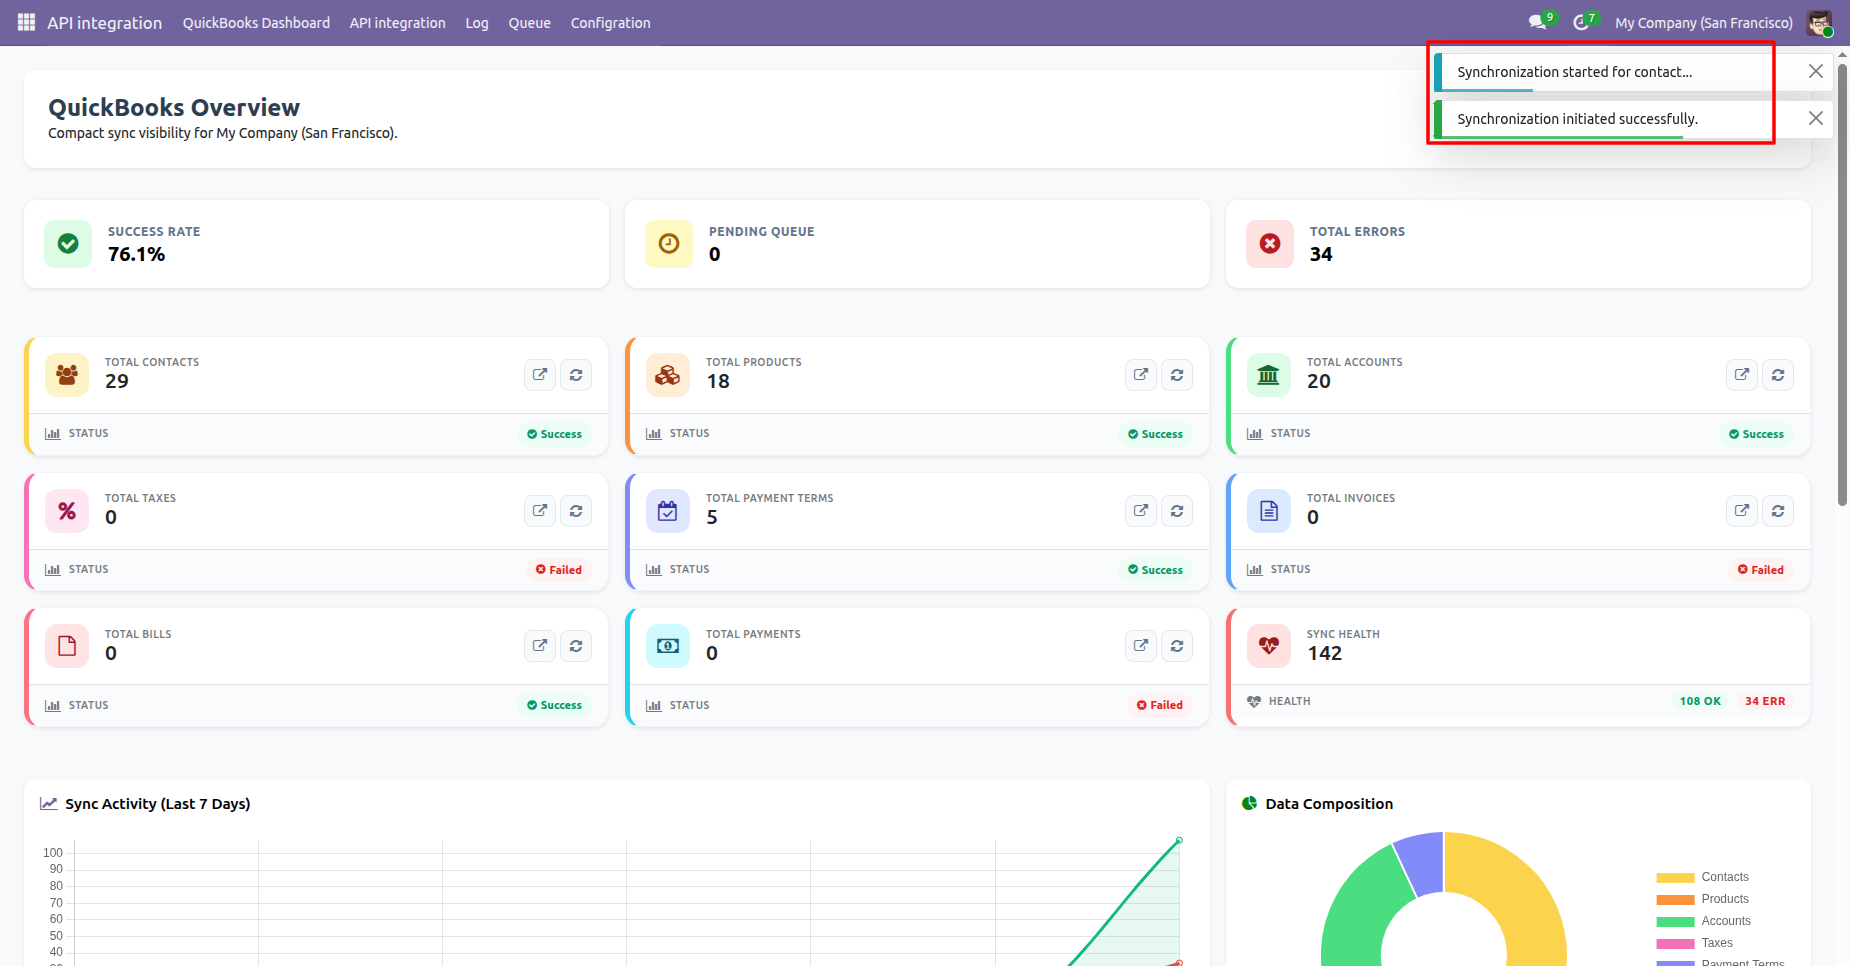
Notifications showing that the synchronization has been started for contacts and initiated succesfully.
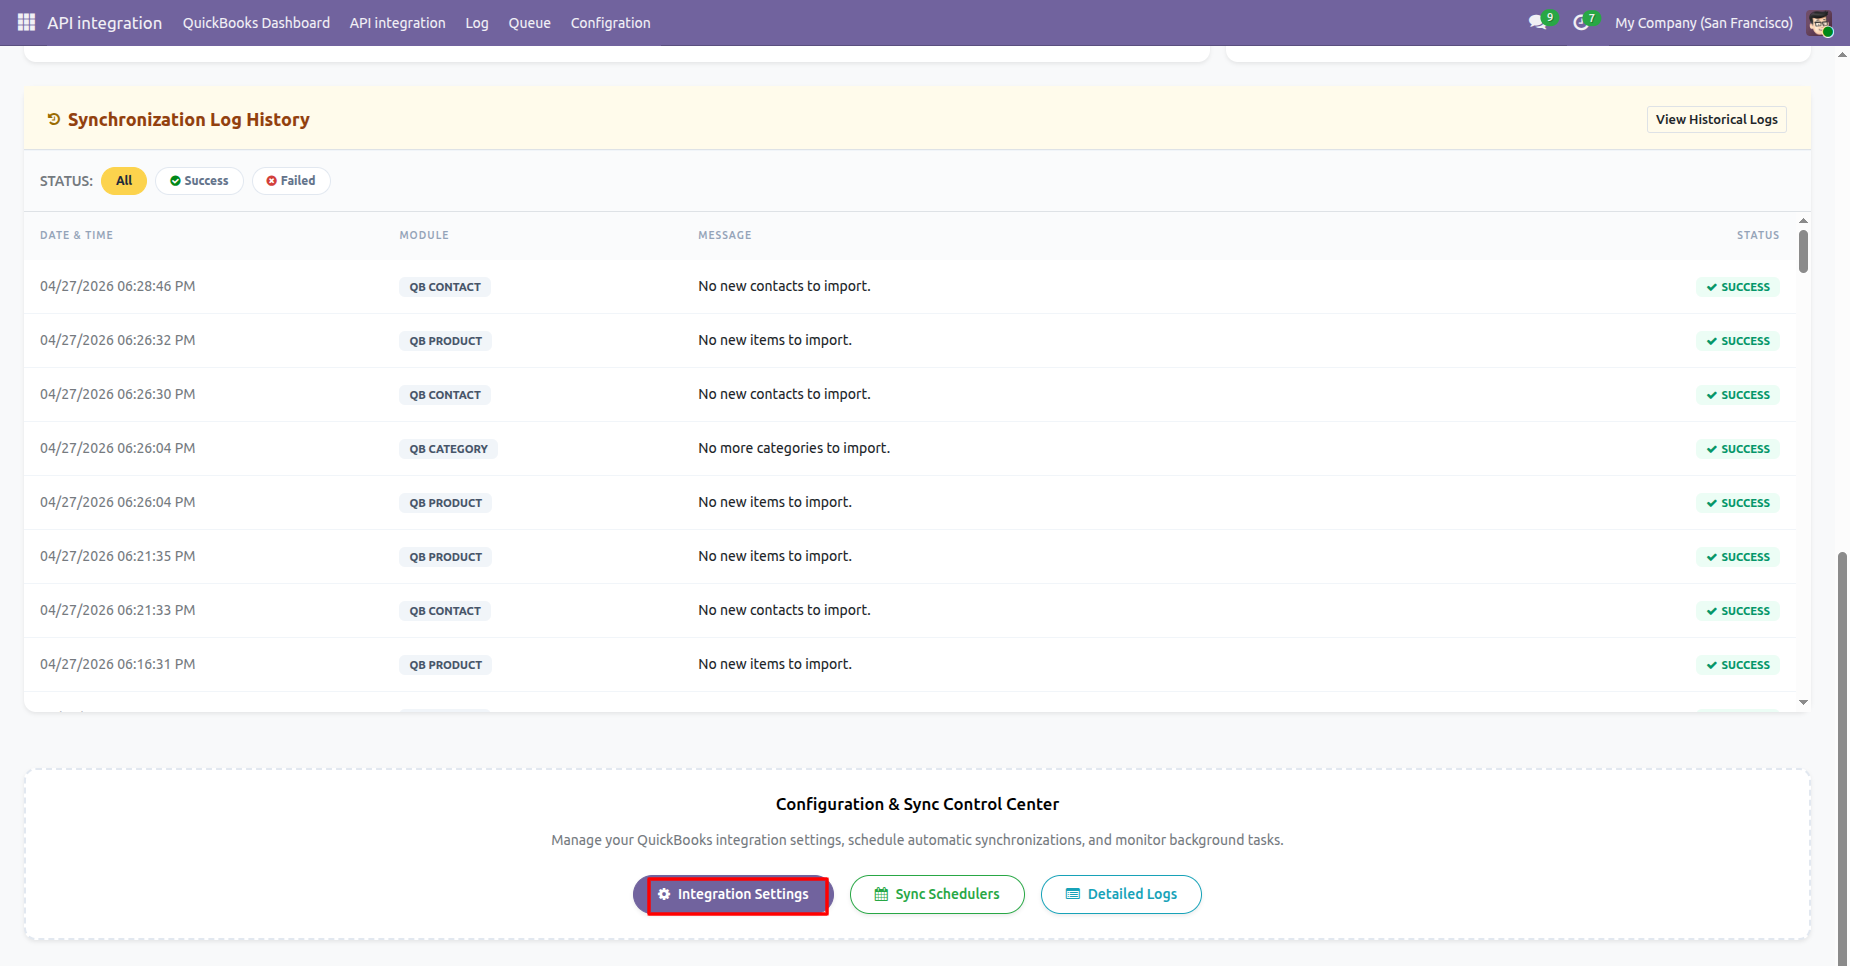
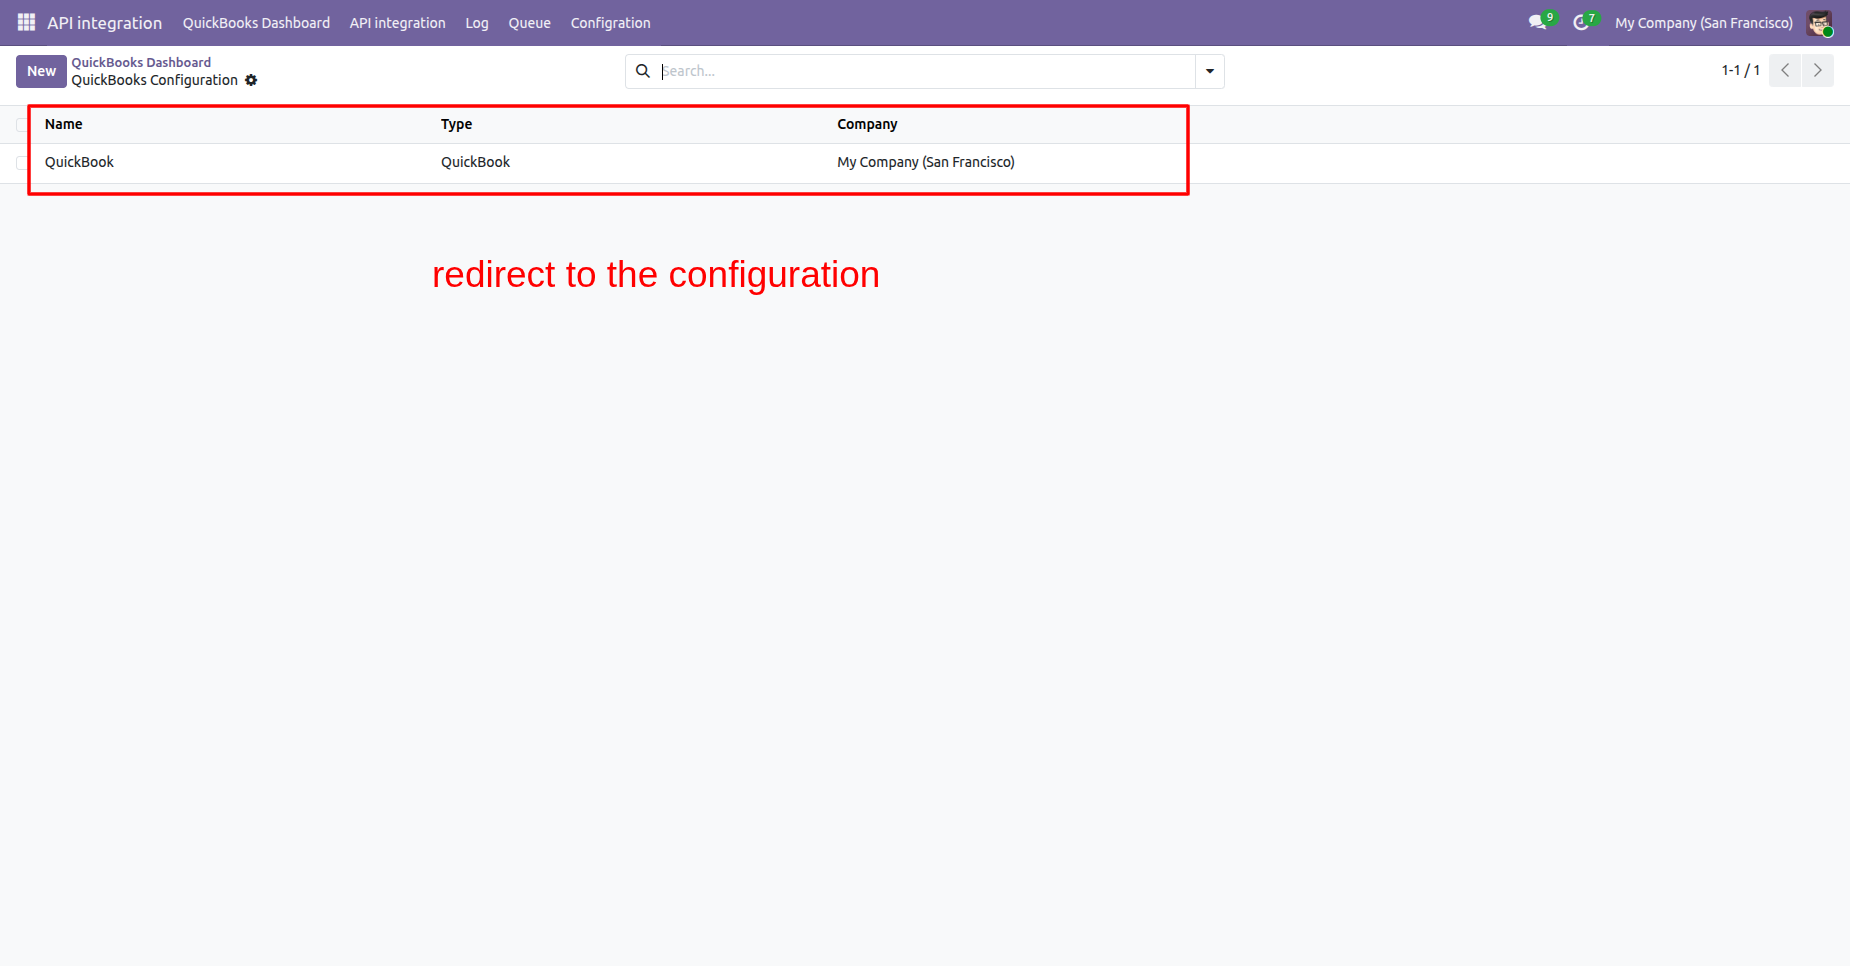
Click the Integeration Settings in the dashboard footer to redirect to configurations.
Quickbook configurations list view.
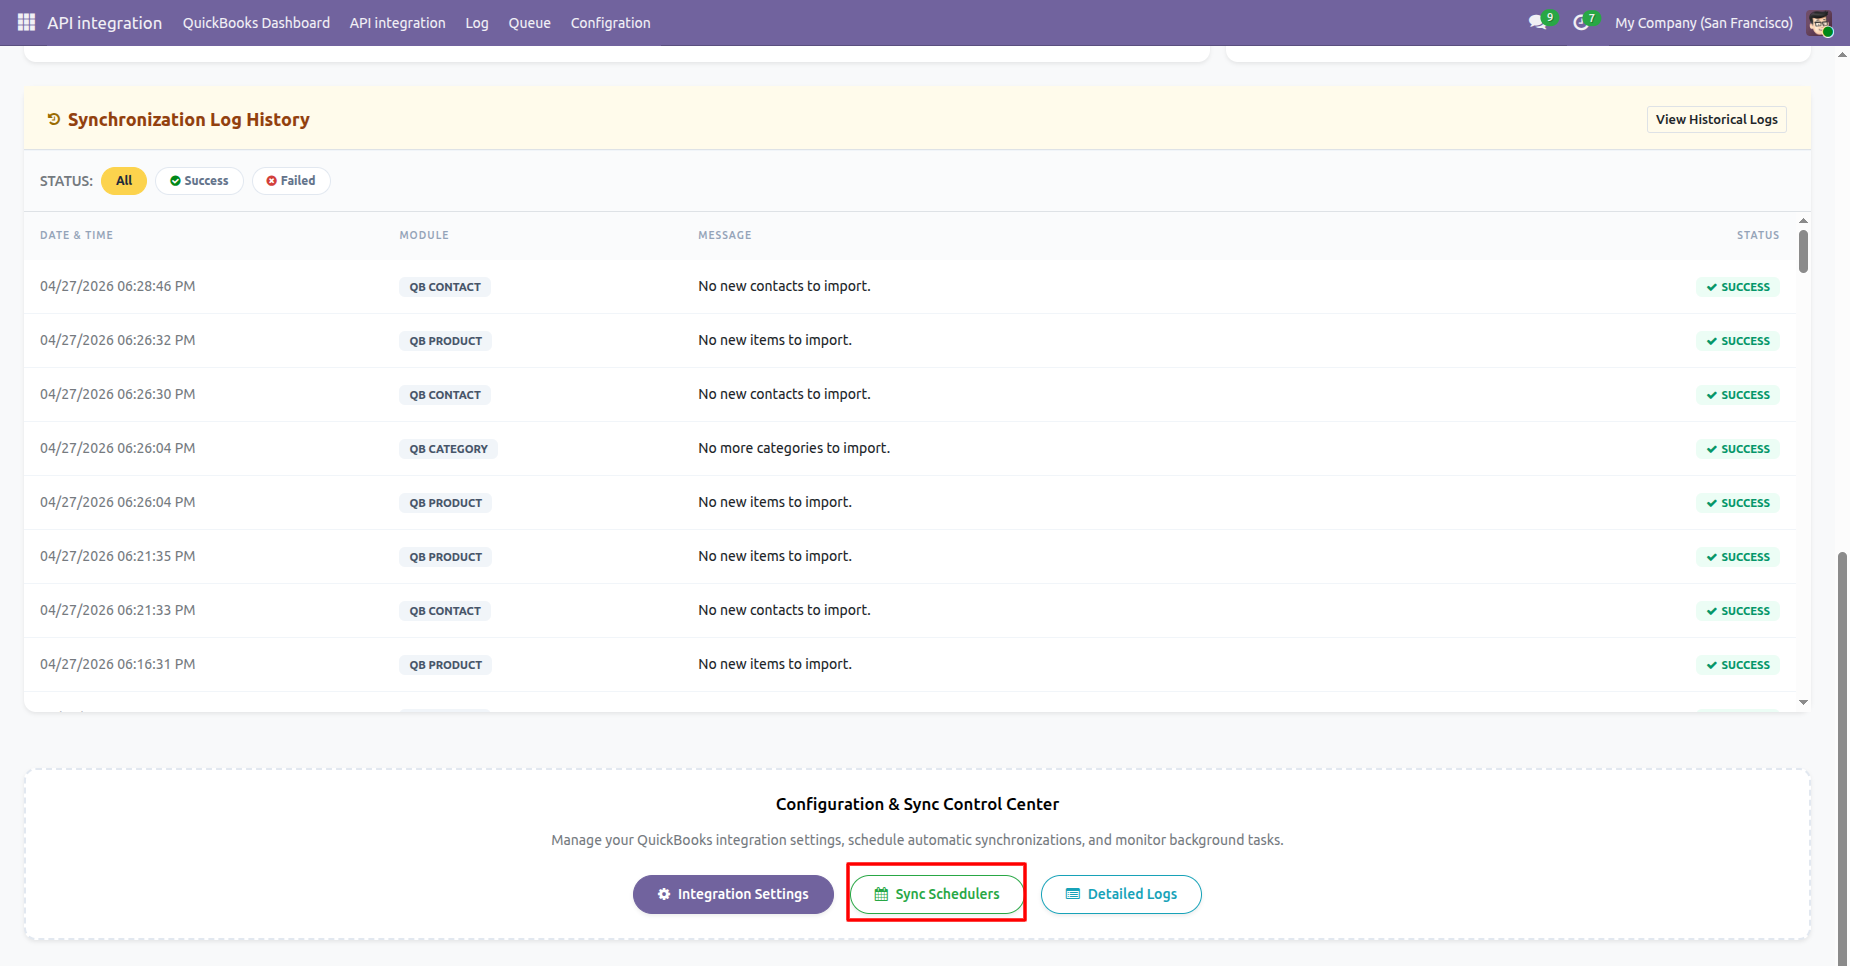
Click the Sync Schedulers in the dashboard footer to view the QuickBook Schedulers.
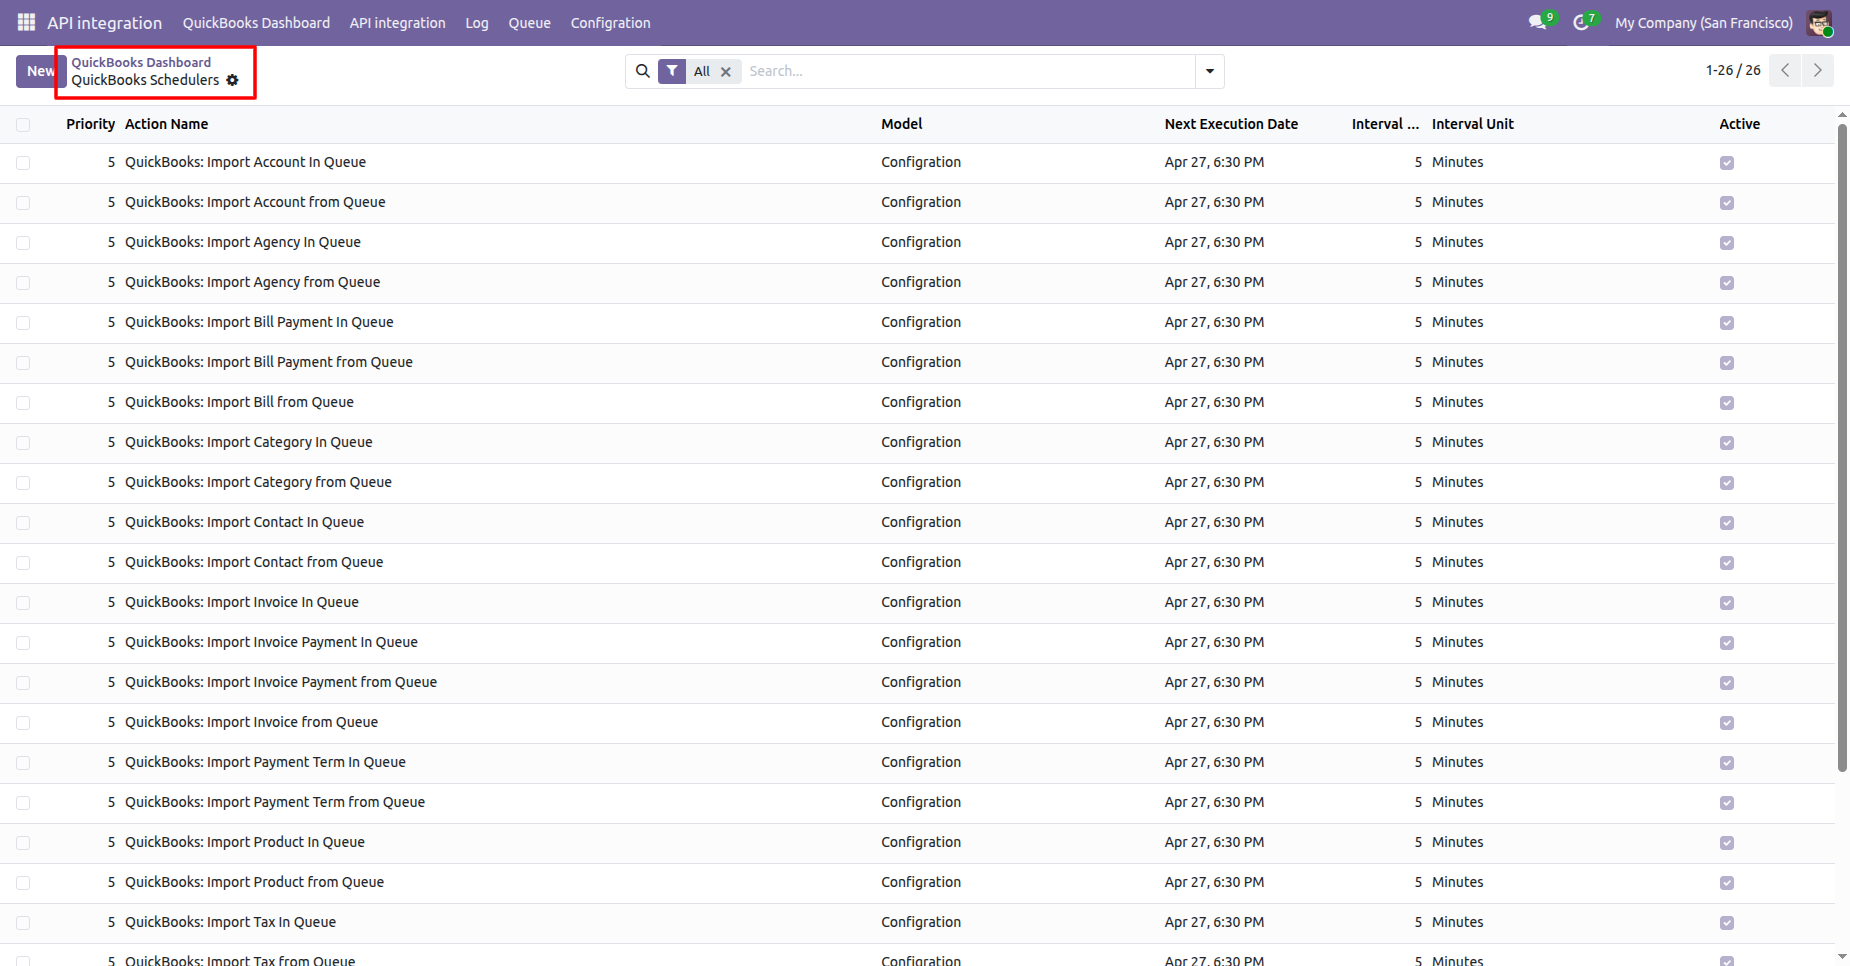
Quickbook Schedulers list view.
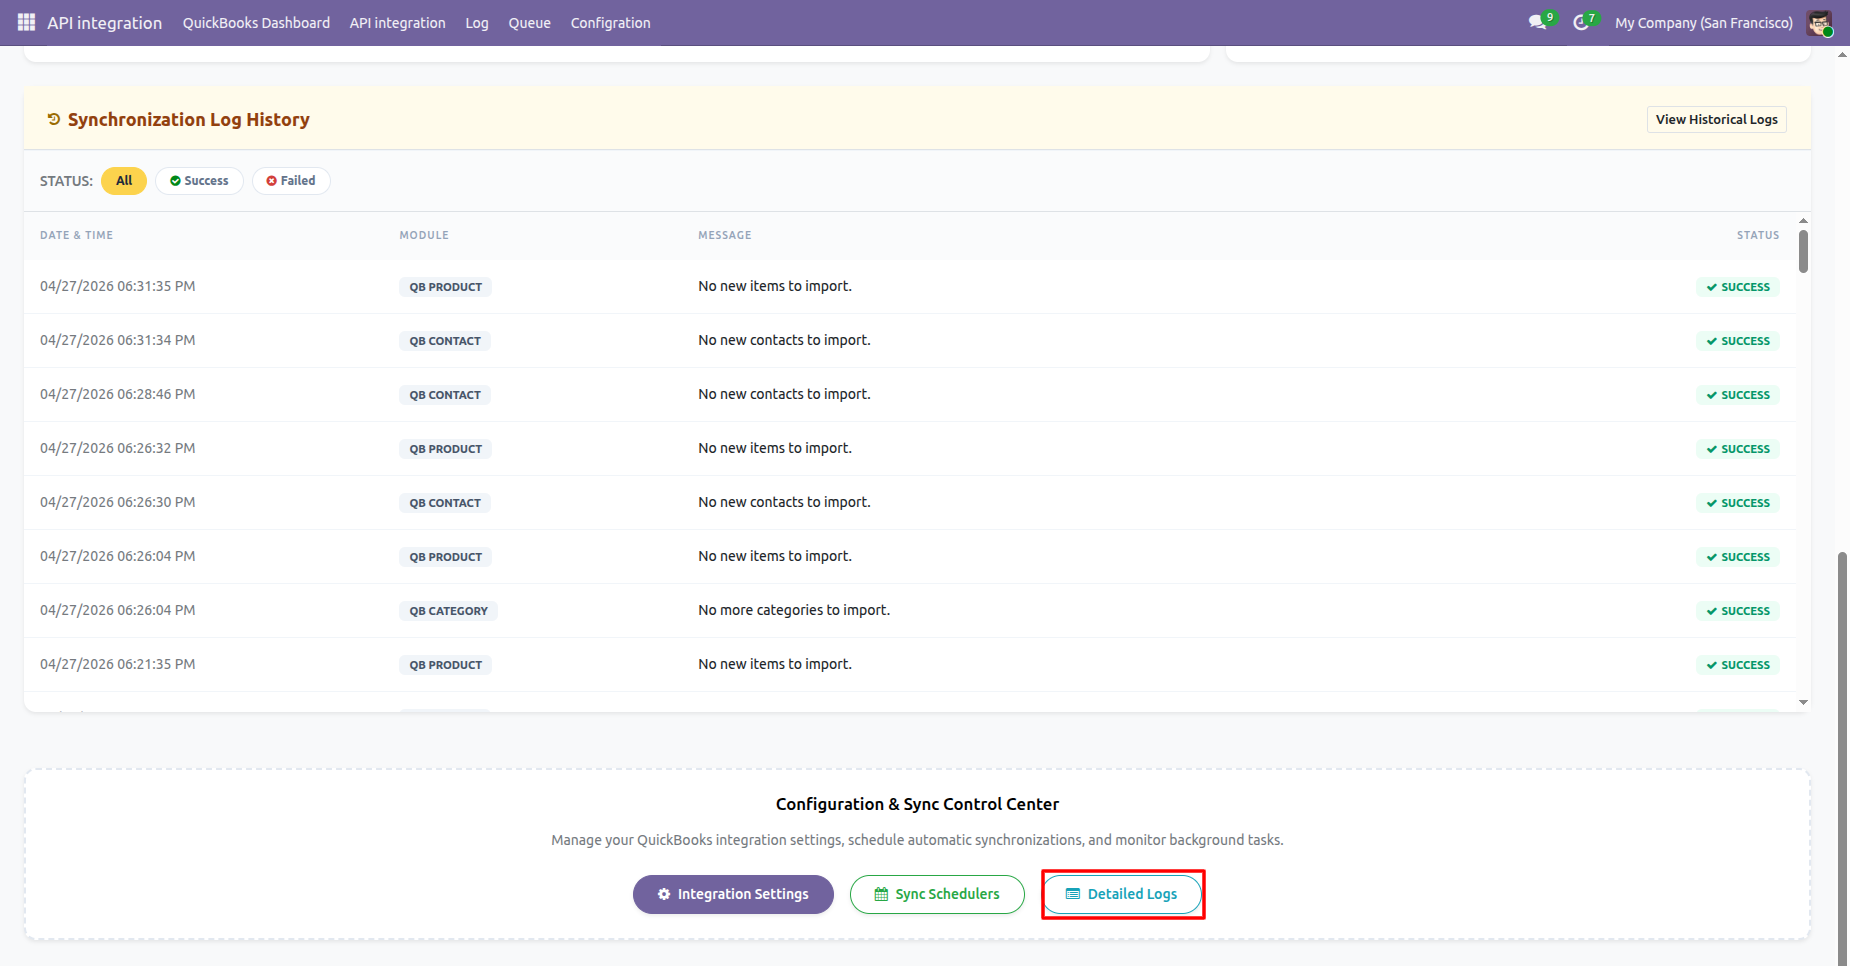
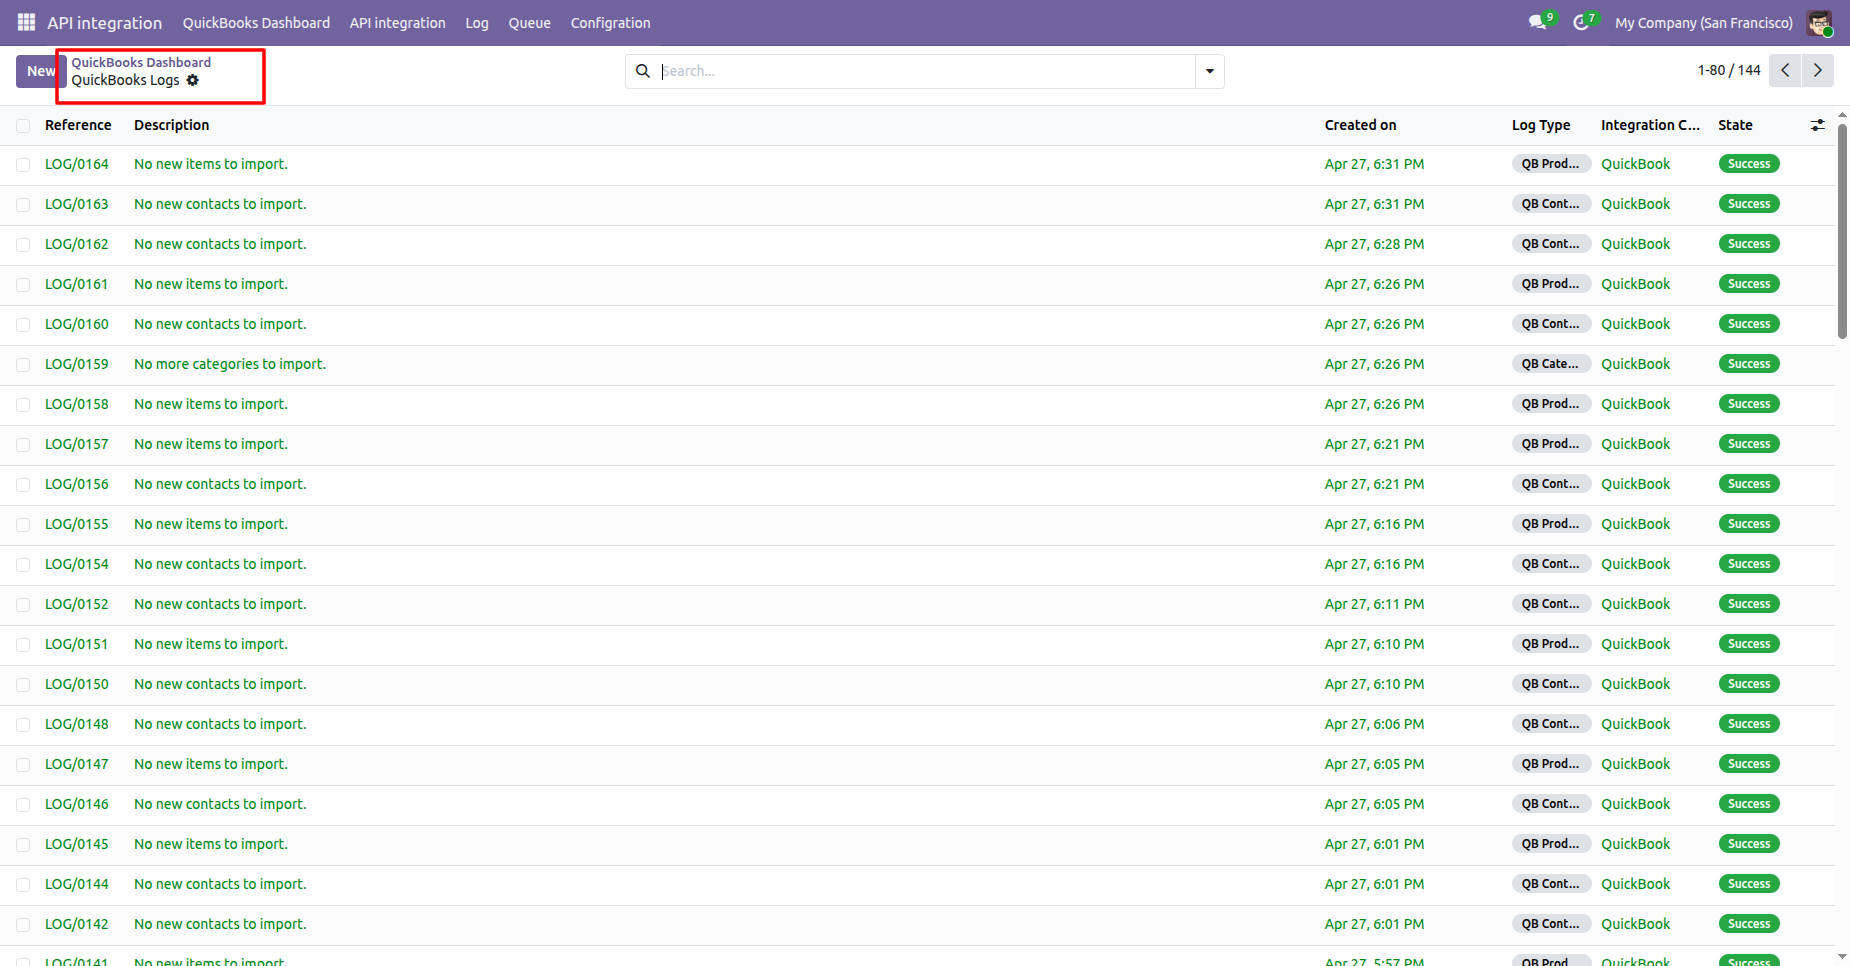
Click the Detailed Logs in the dashboard footer to view the QuickBook Logs.
Quickbook Logs list view.
In the Syncronization Log History using the Success filters to view the successful sync records.
In the Syncronization Log History using the Failed filters to view the failed sync records.
Centralized dashboard to manage and monitor all connectors from one place. Quickly access sync summary, activity logs, and configuration controls with improved visibility.
Sample workspace in QuickBooks.
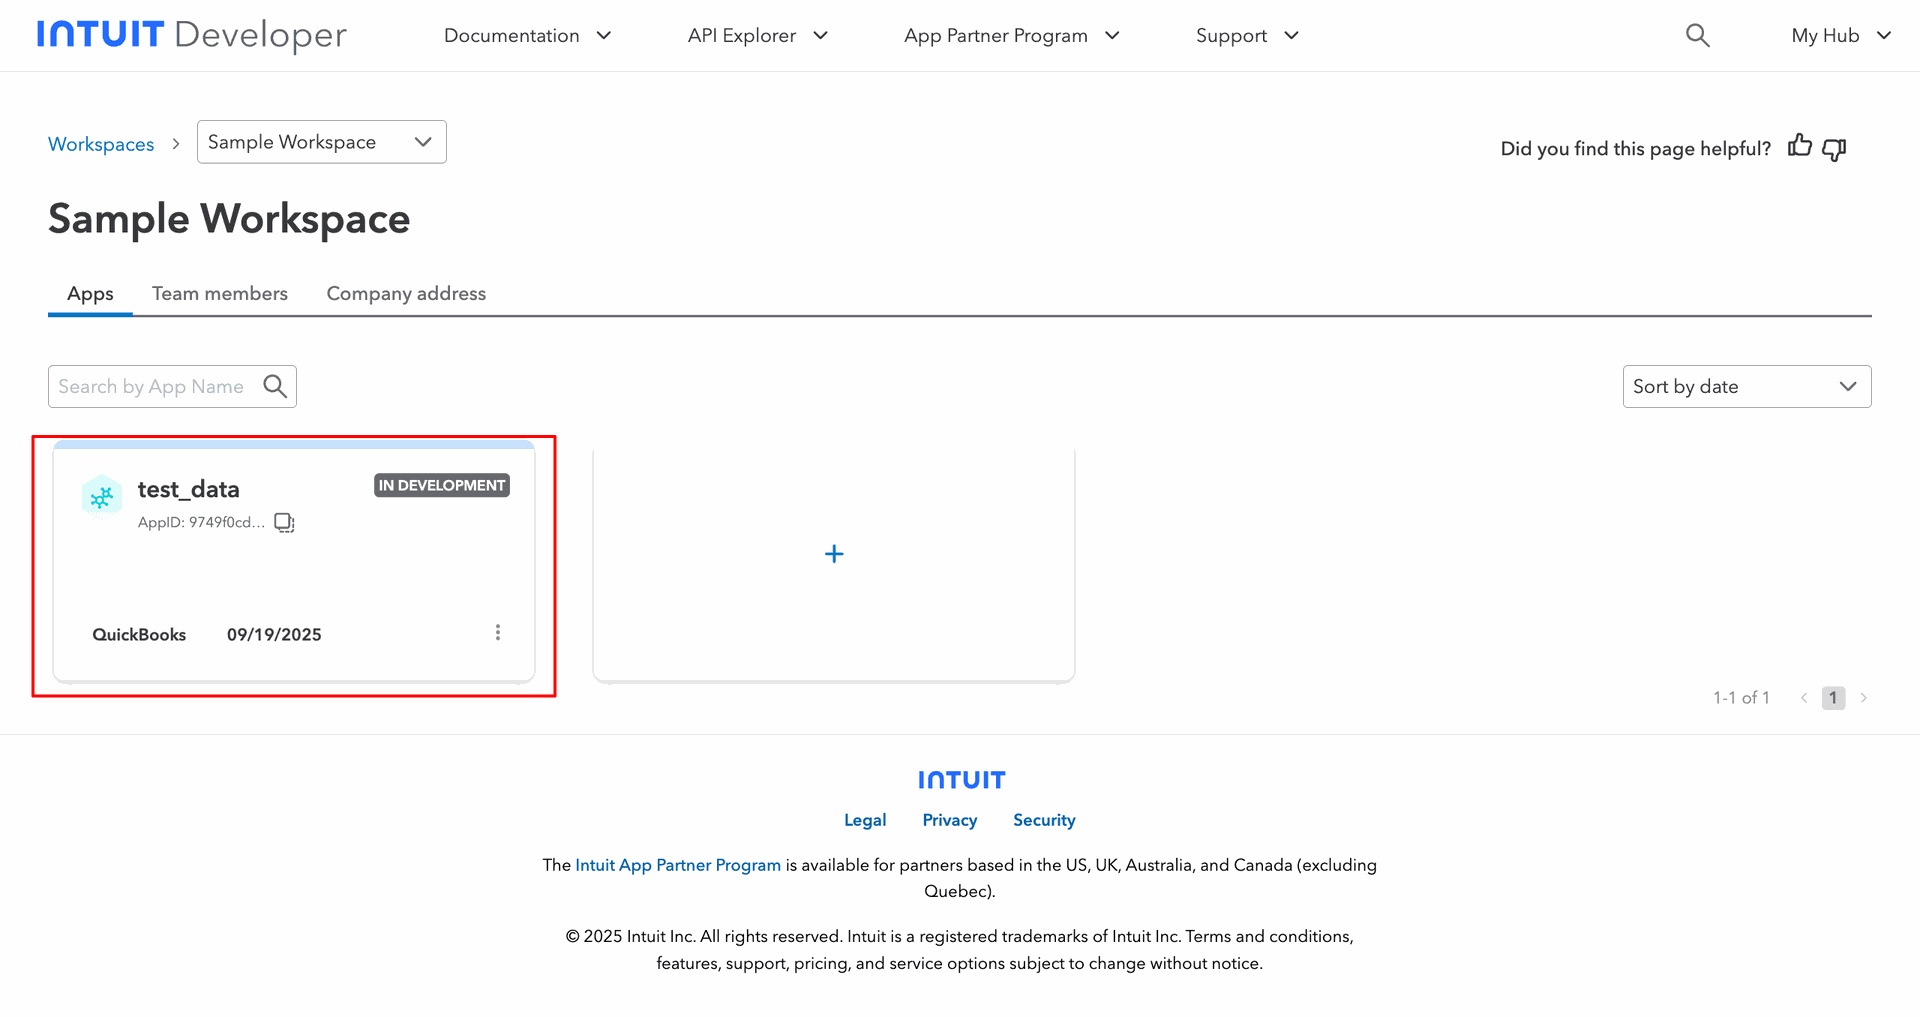
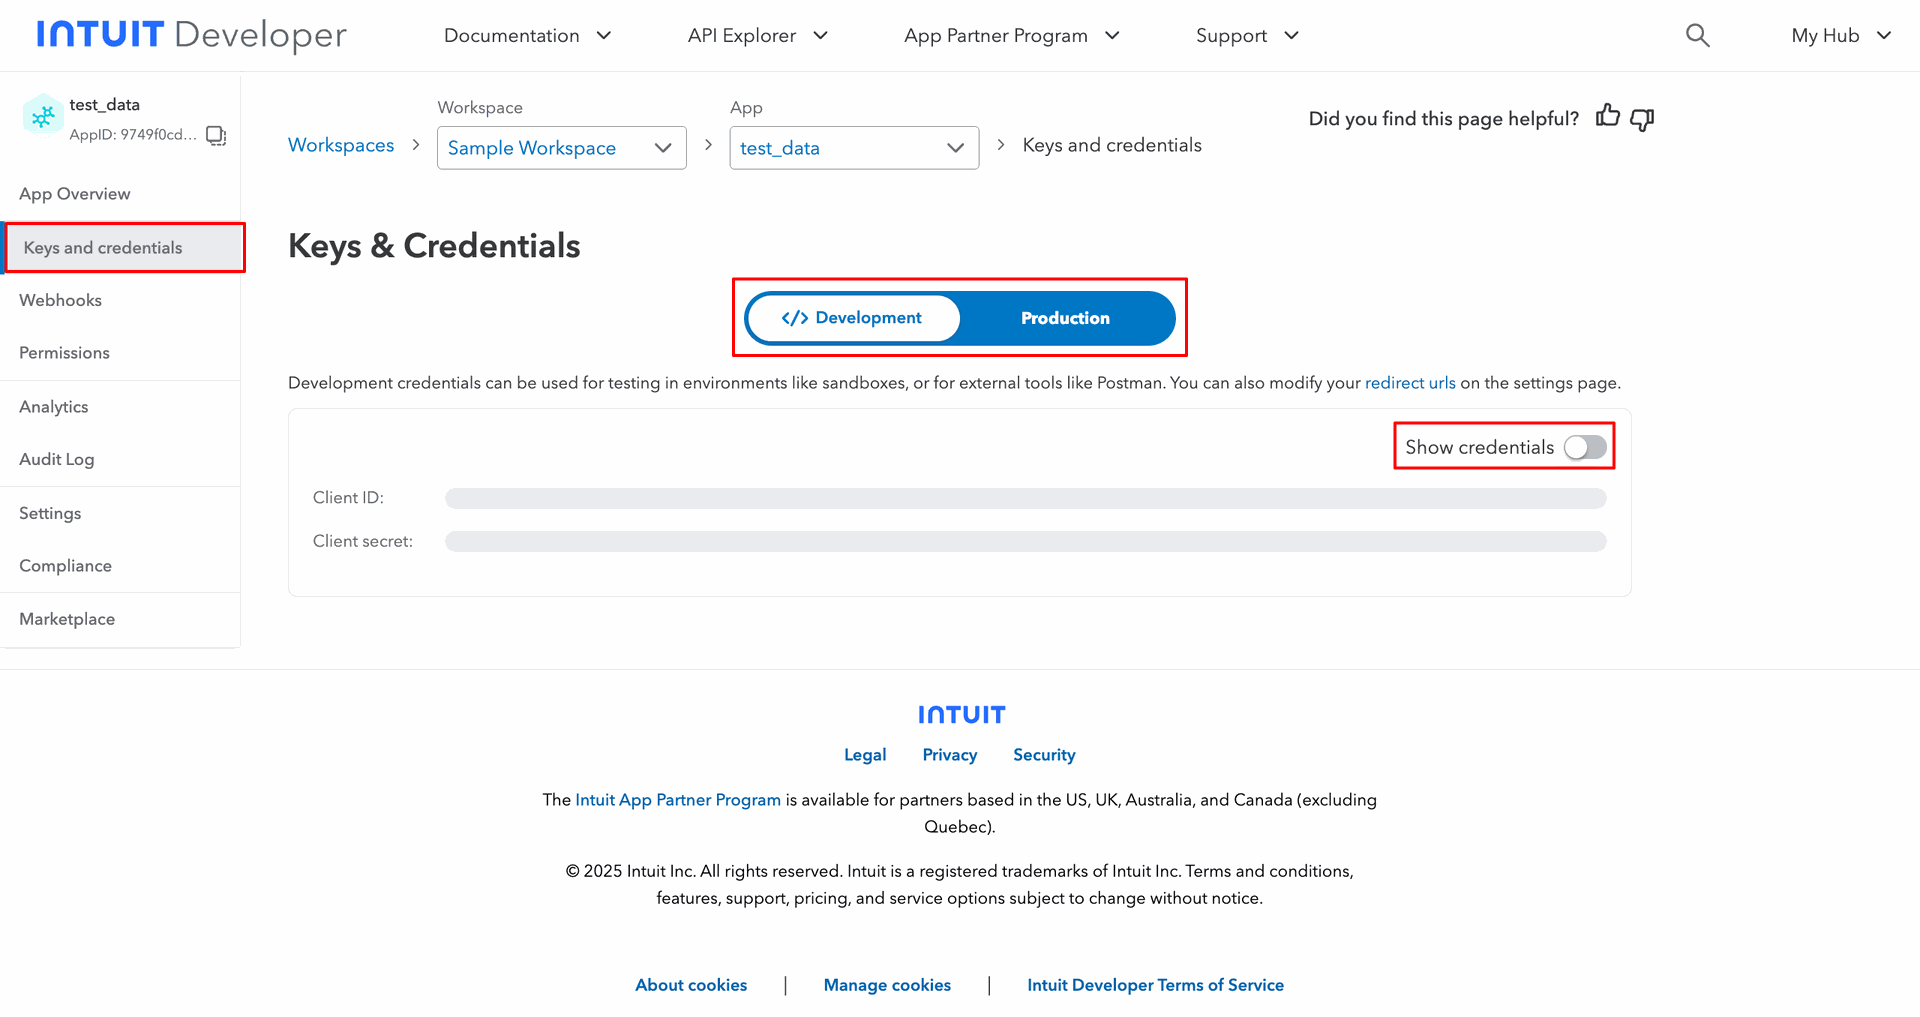
Go to the 'Keys & Credentials' tab, Enable show credential toggle to show the credentials.
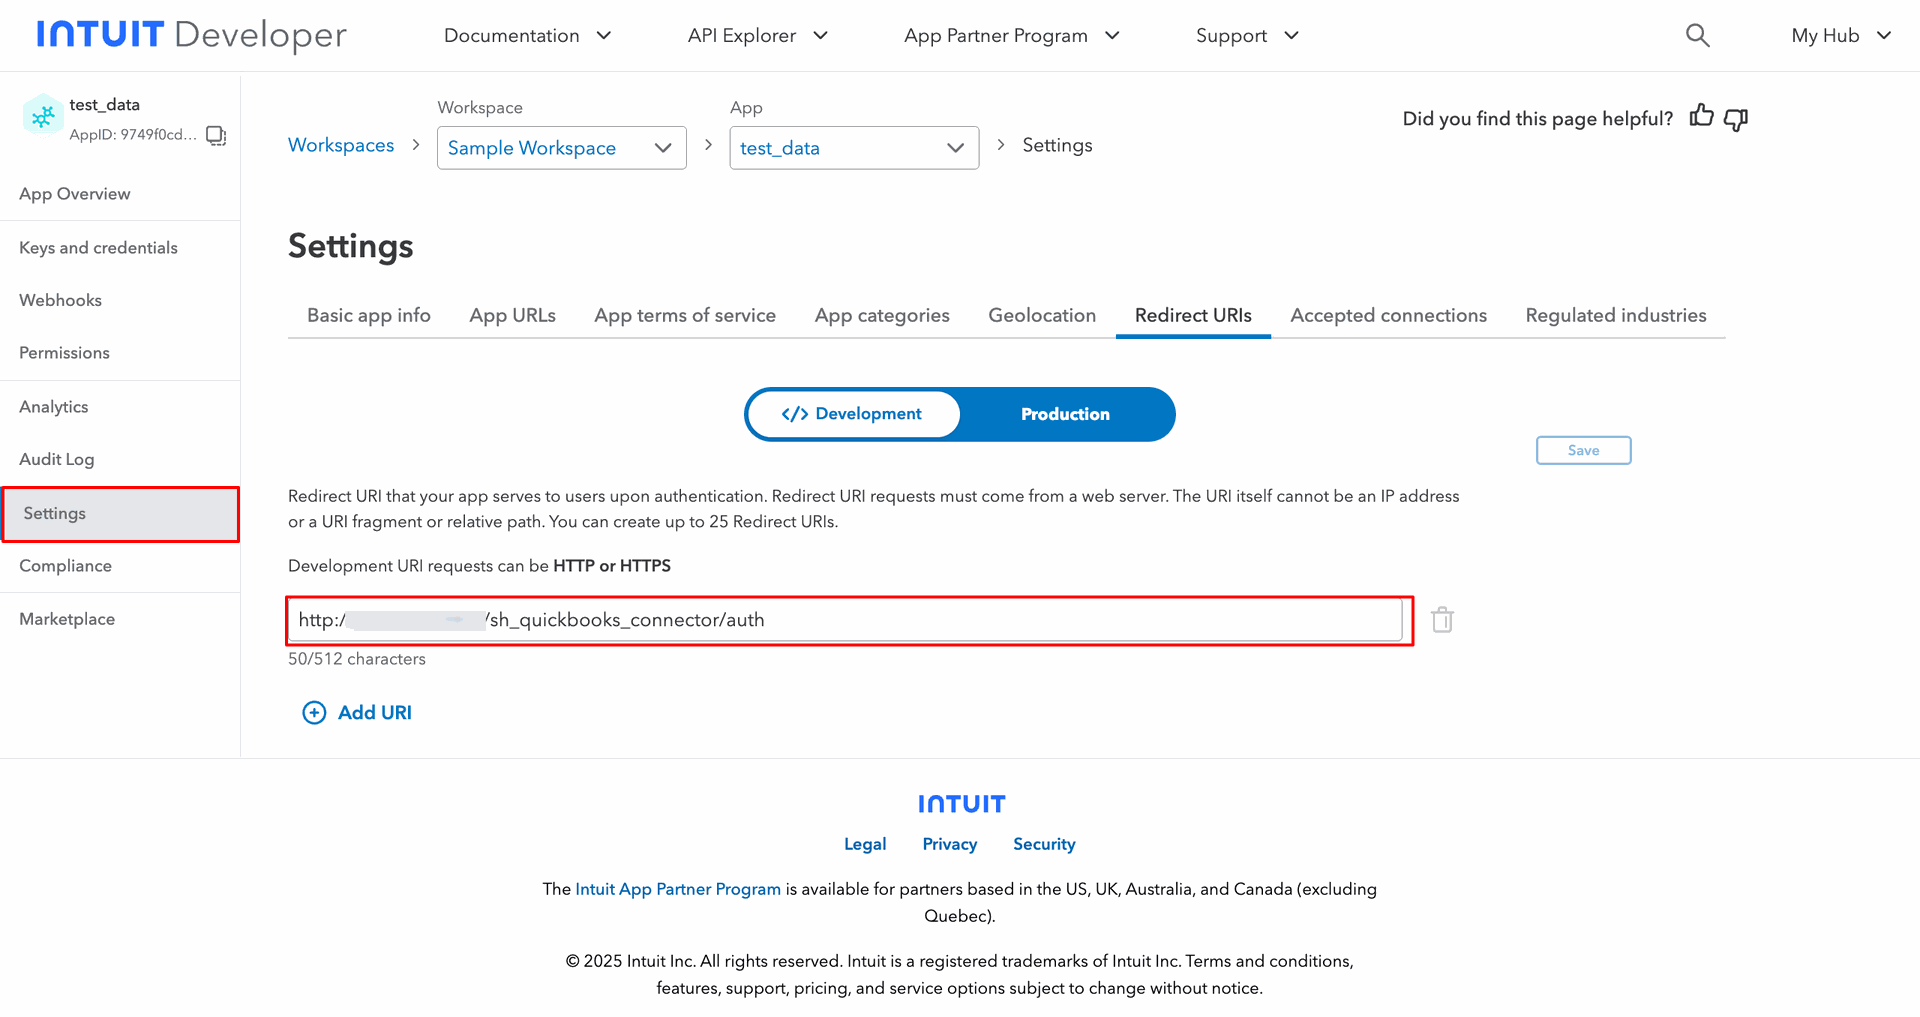
In the settings tab, you will get the development URL.
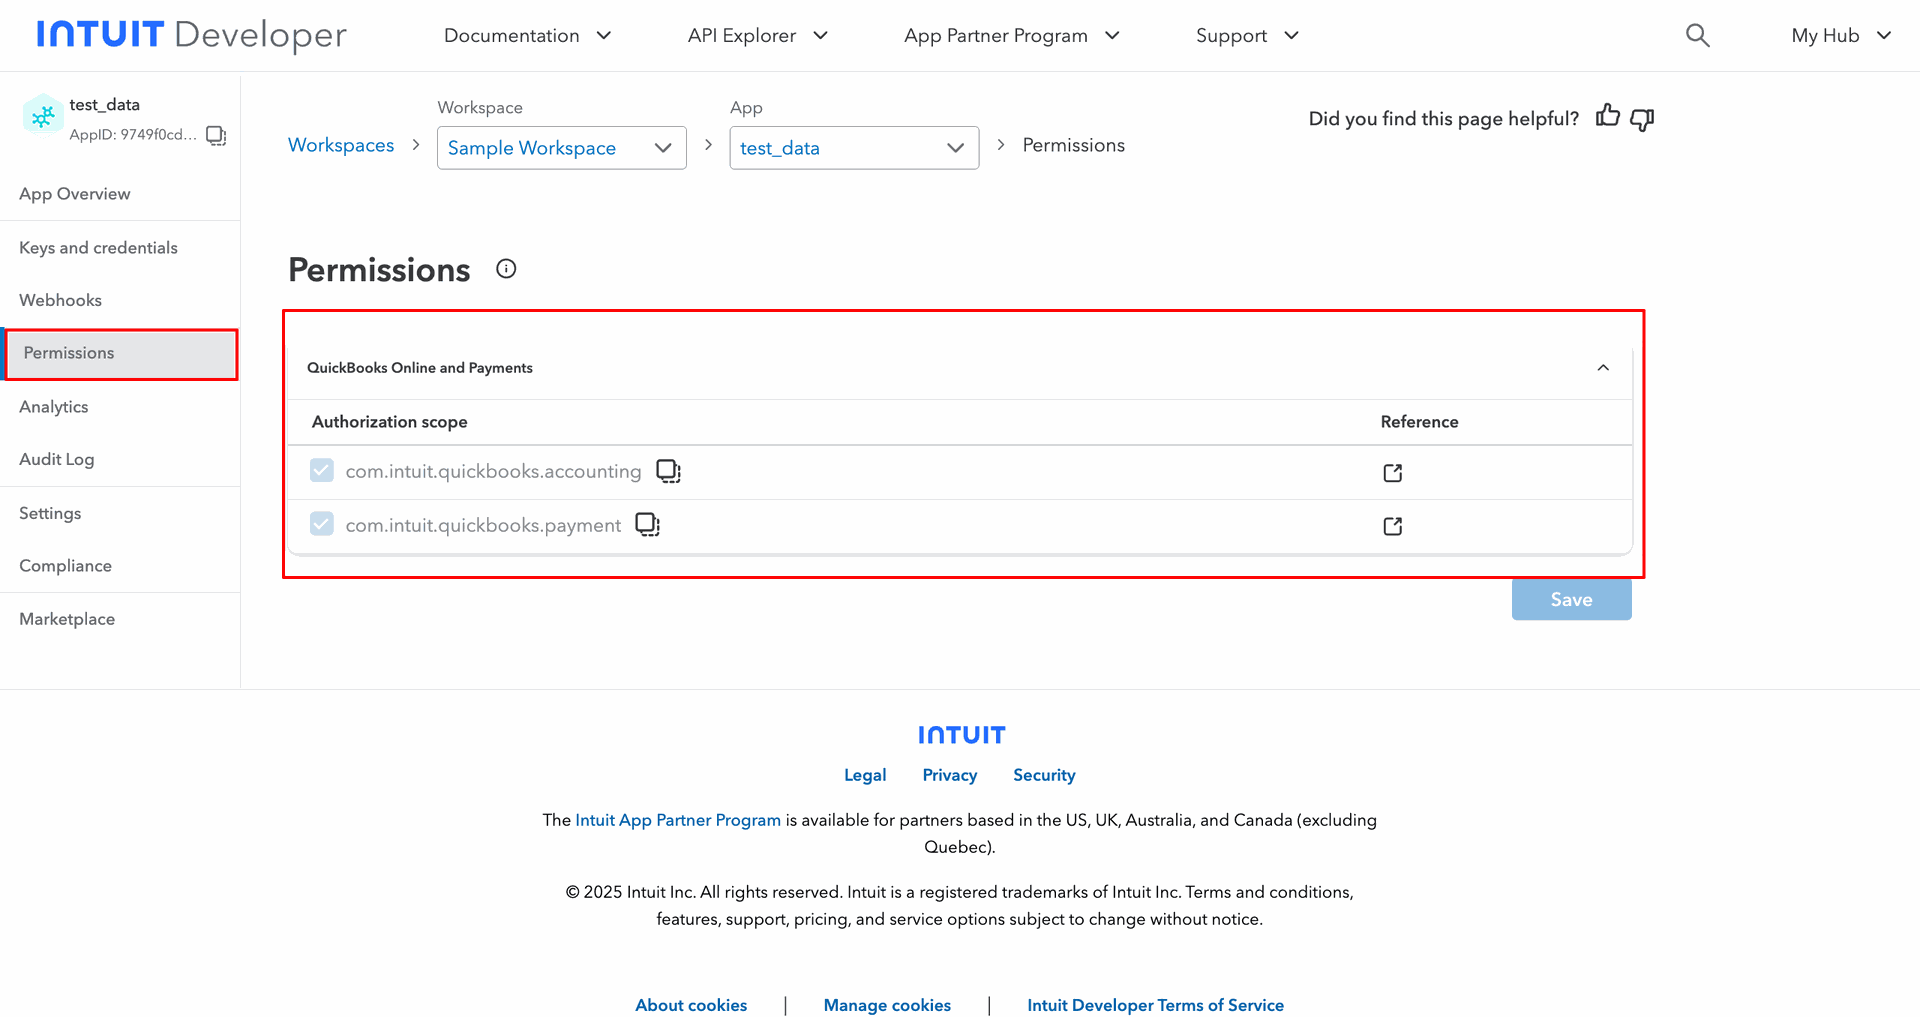
Permission tab with details.
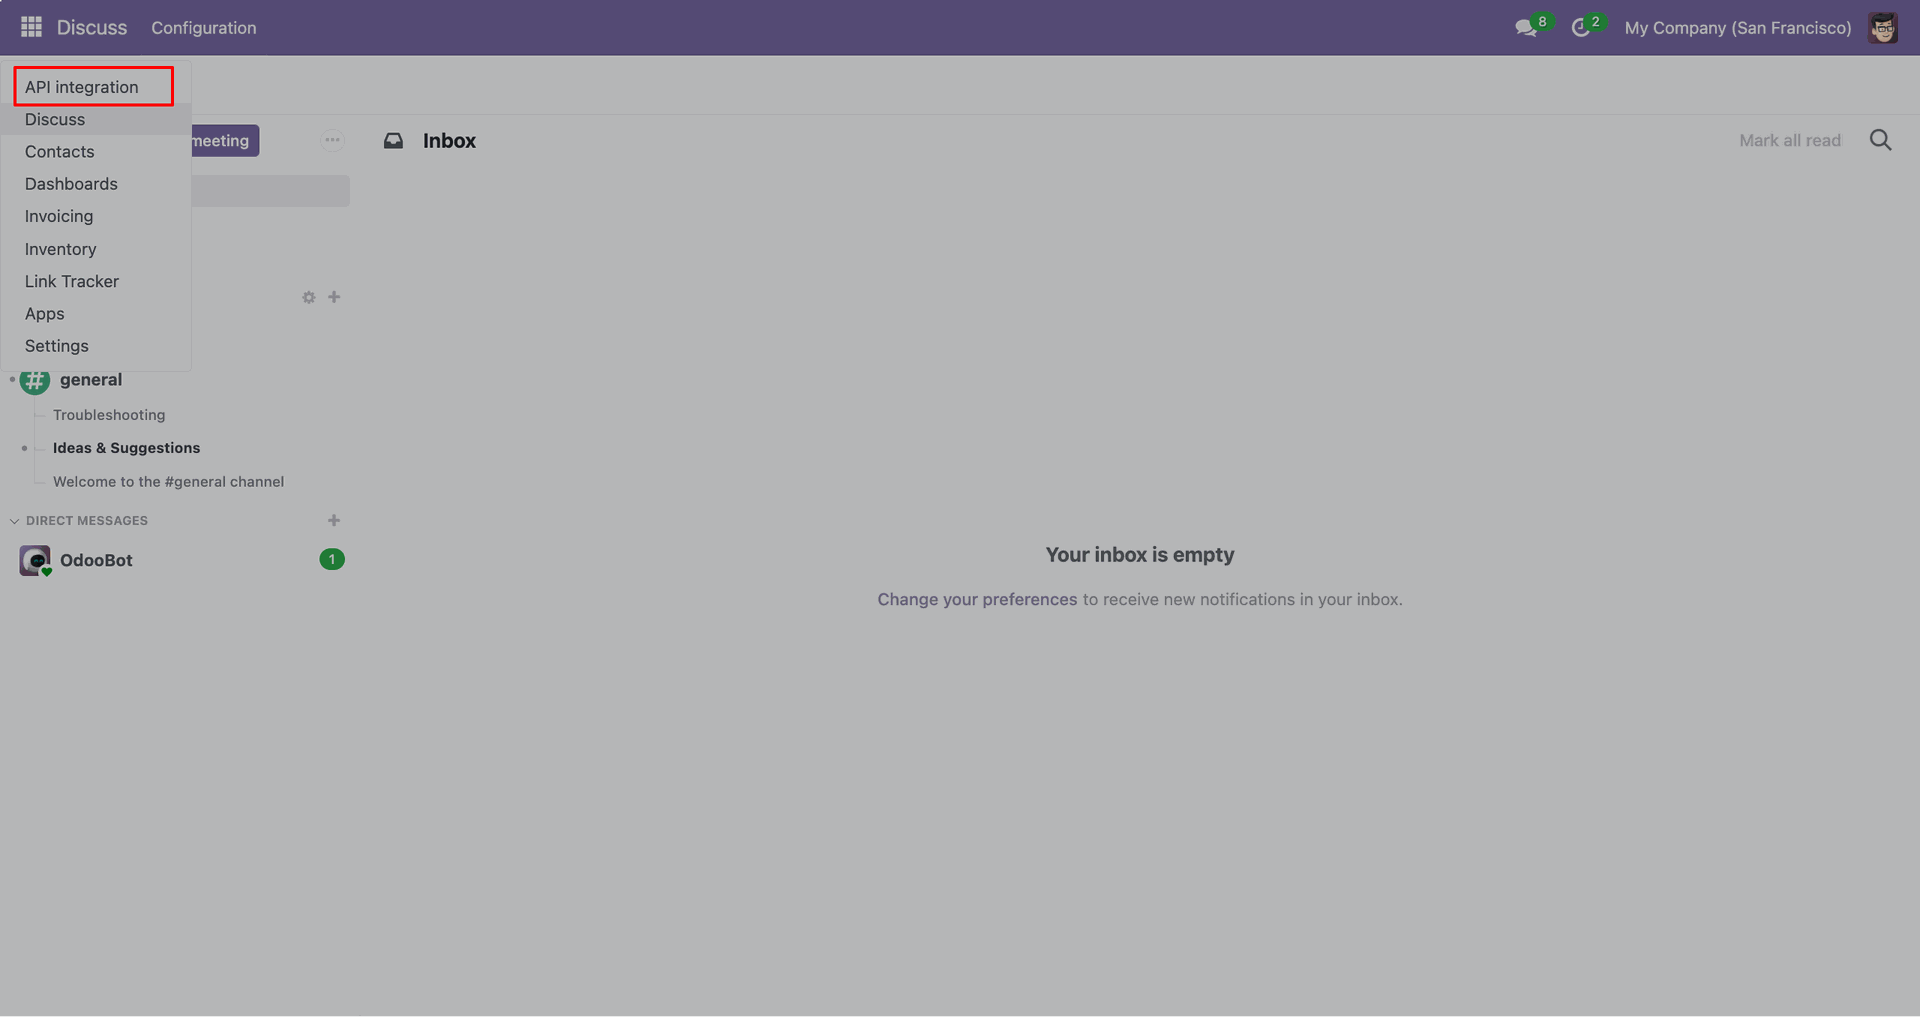
Go to the 'API Integration'.
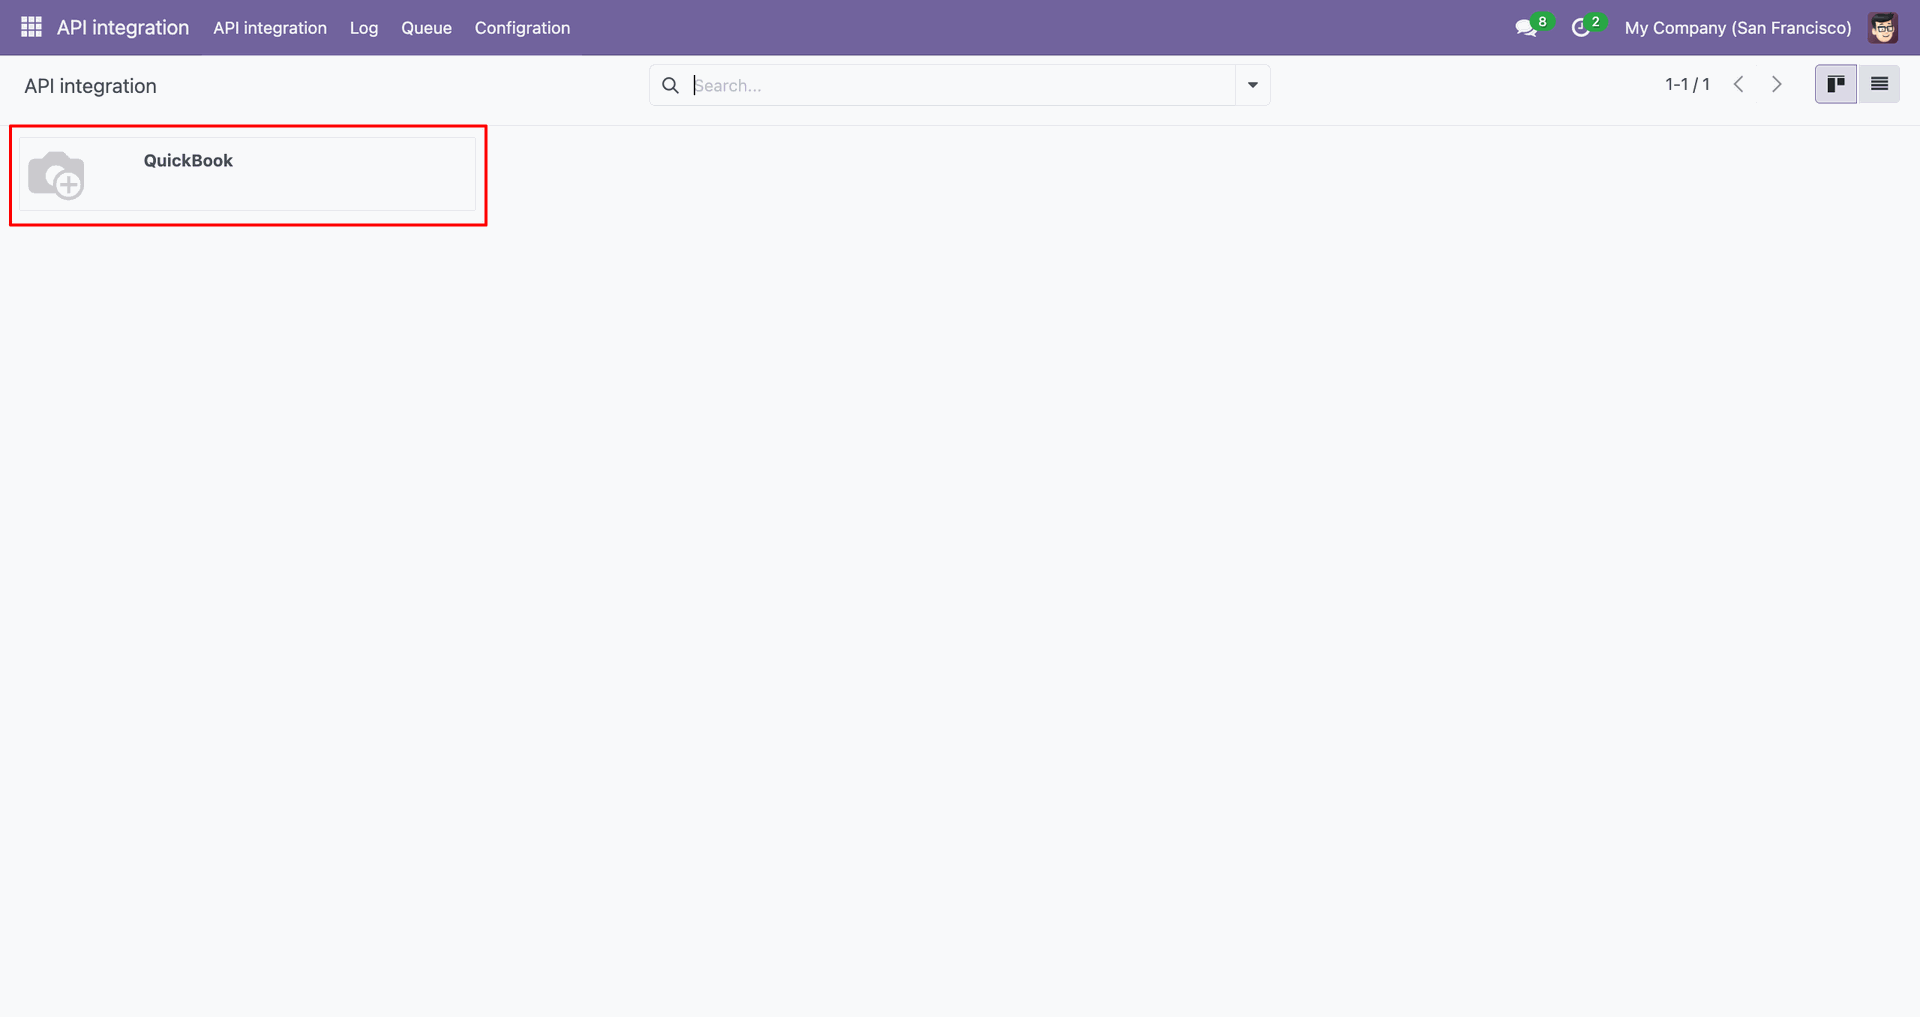
Click 'QuickBook'.
Enter details from QuickBooks and click 'Authorize'.

Successfully authorized with the log.

Quickbook tab shows token details.

For the import agency Just go to the tax tab, enable the import agency, and click 'Import'.
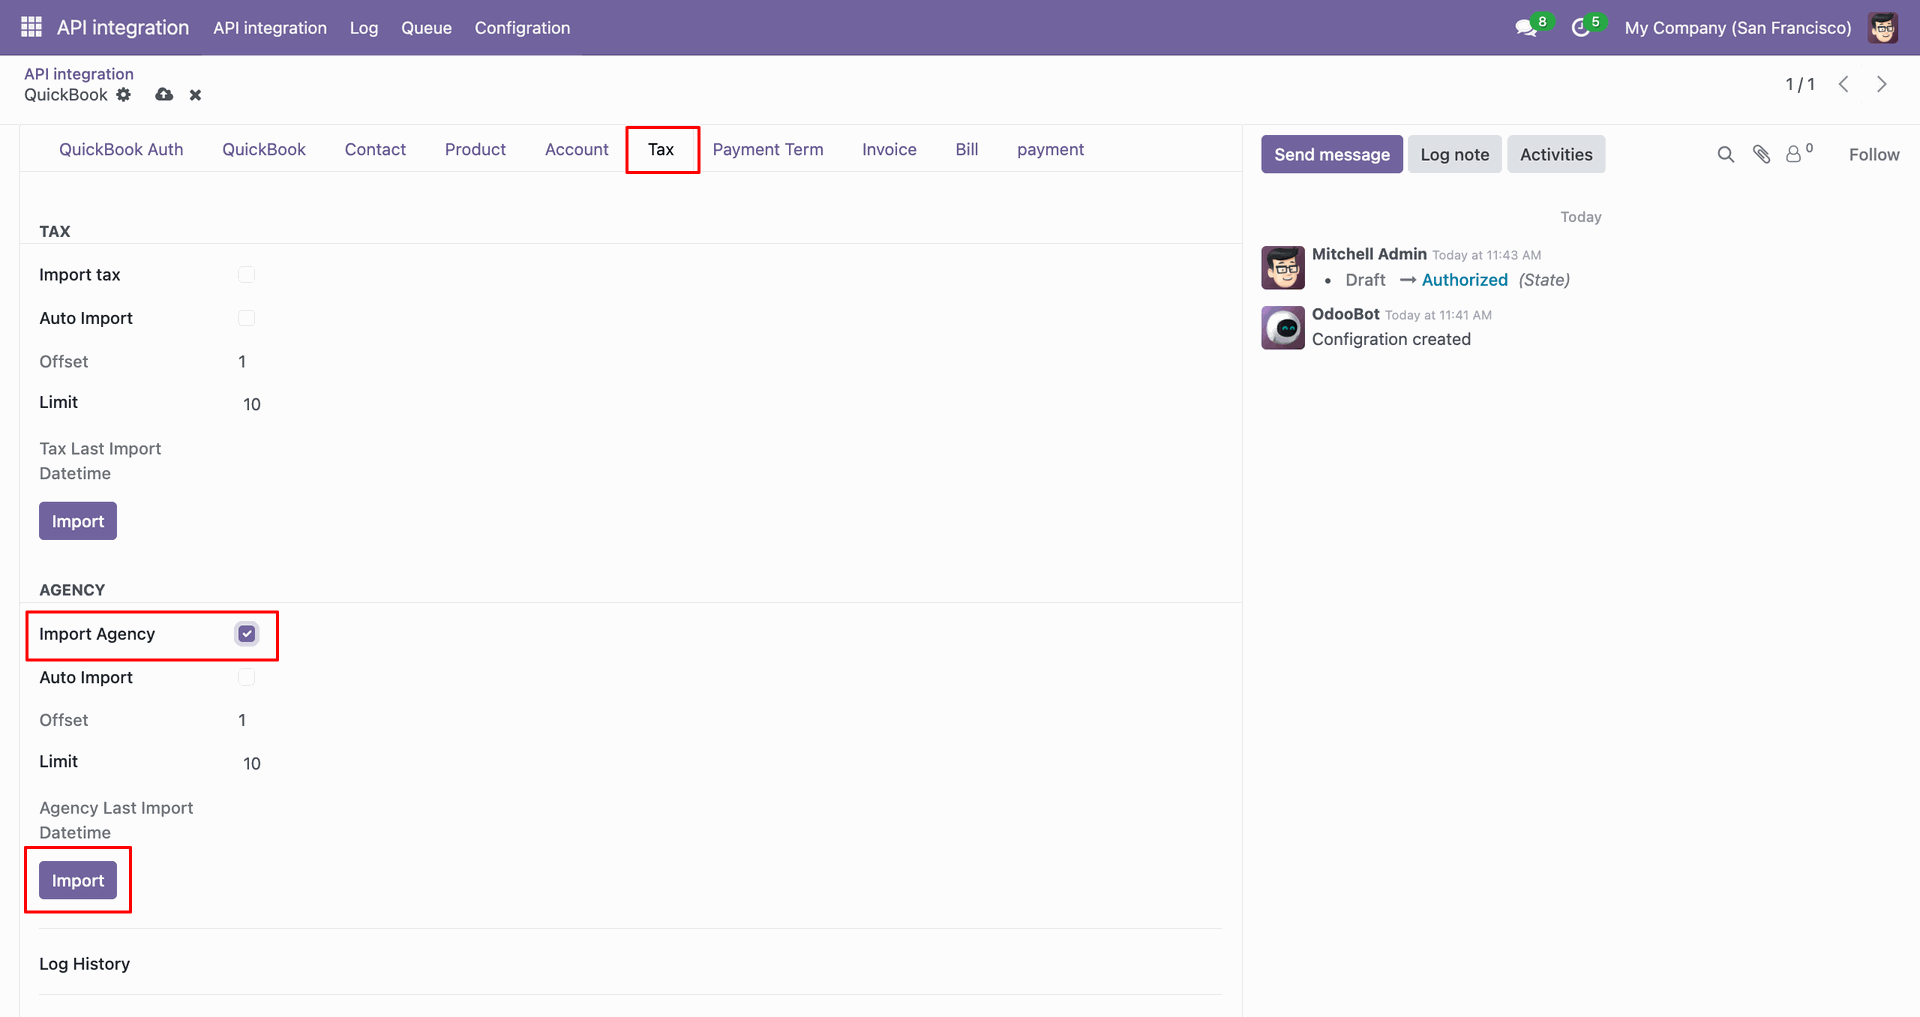
Imported data with log.
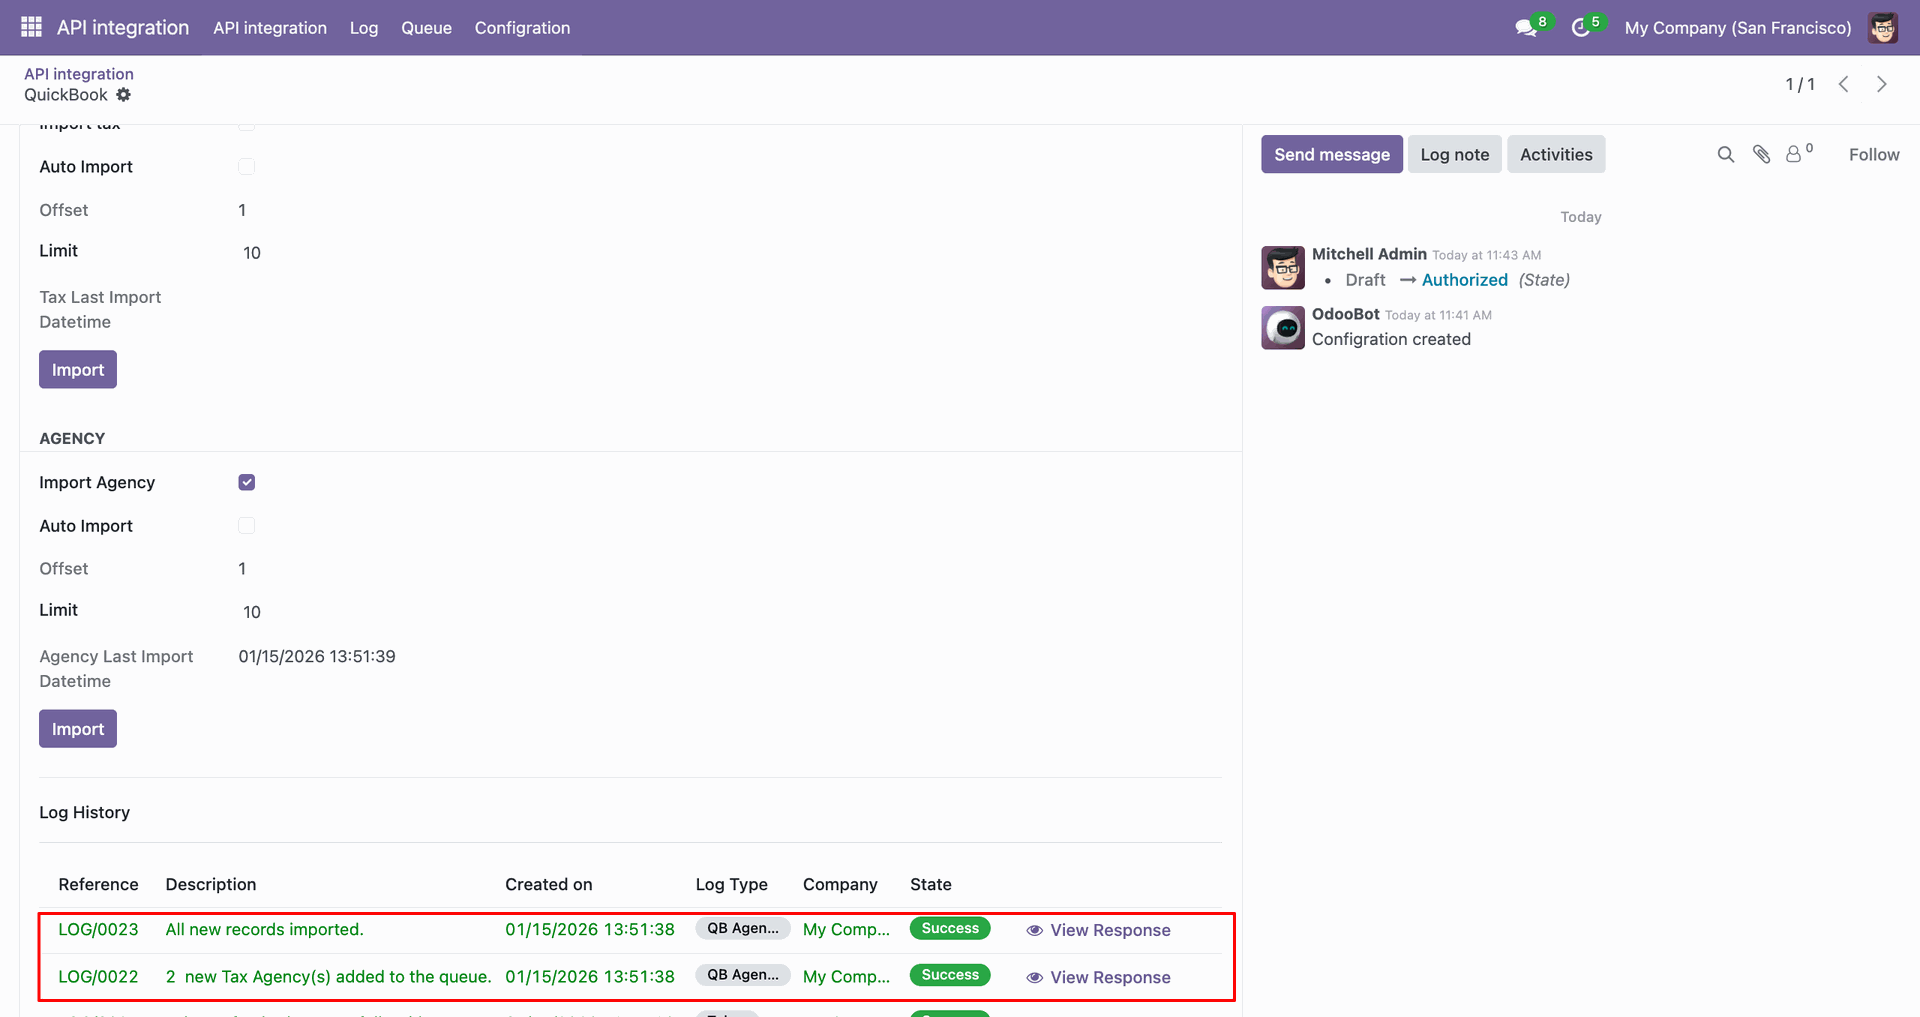
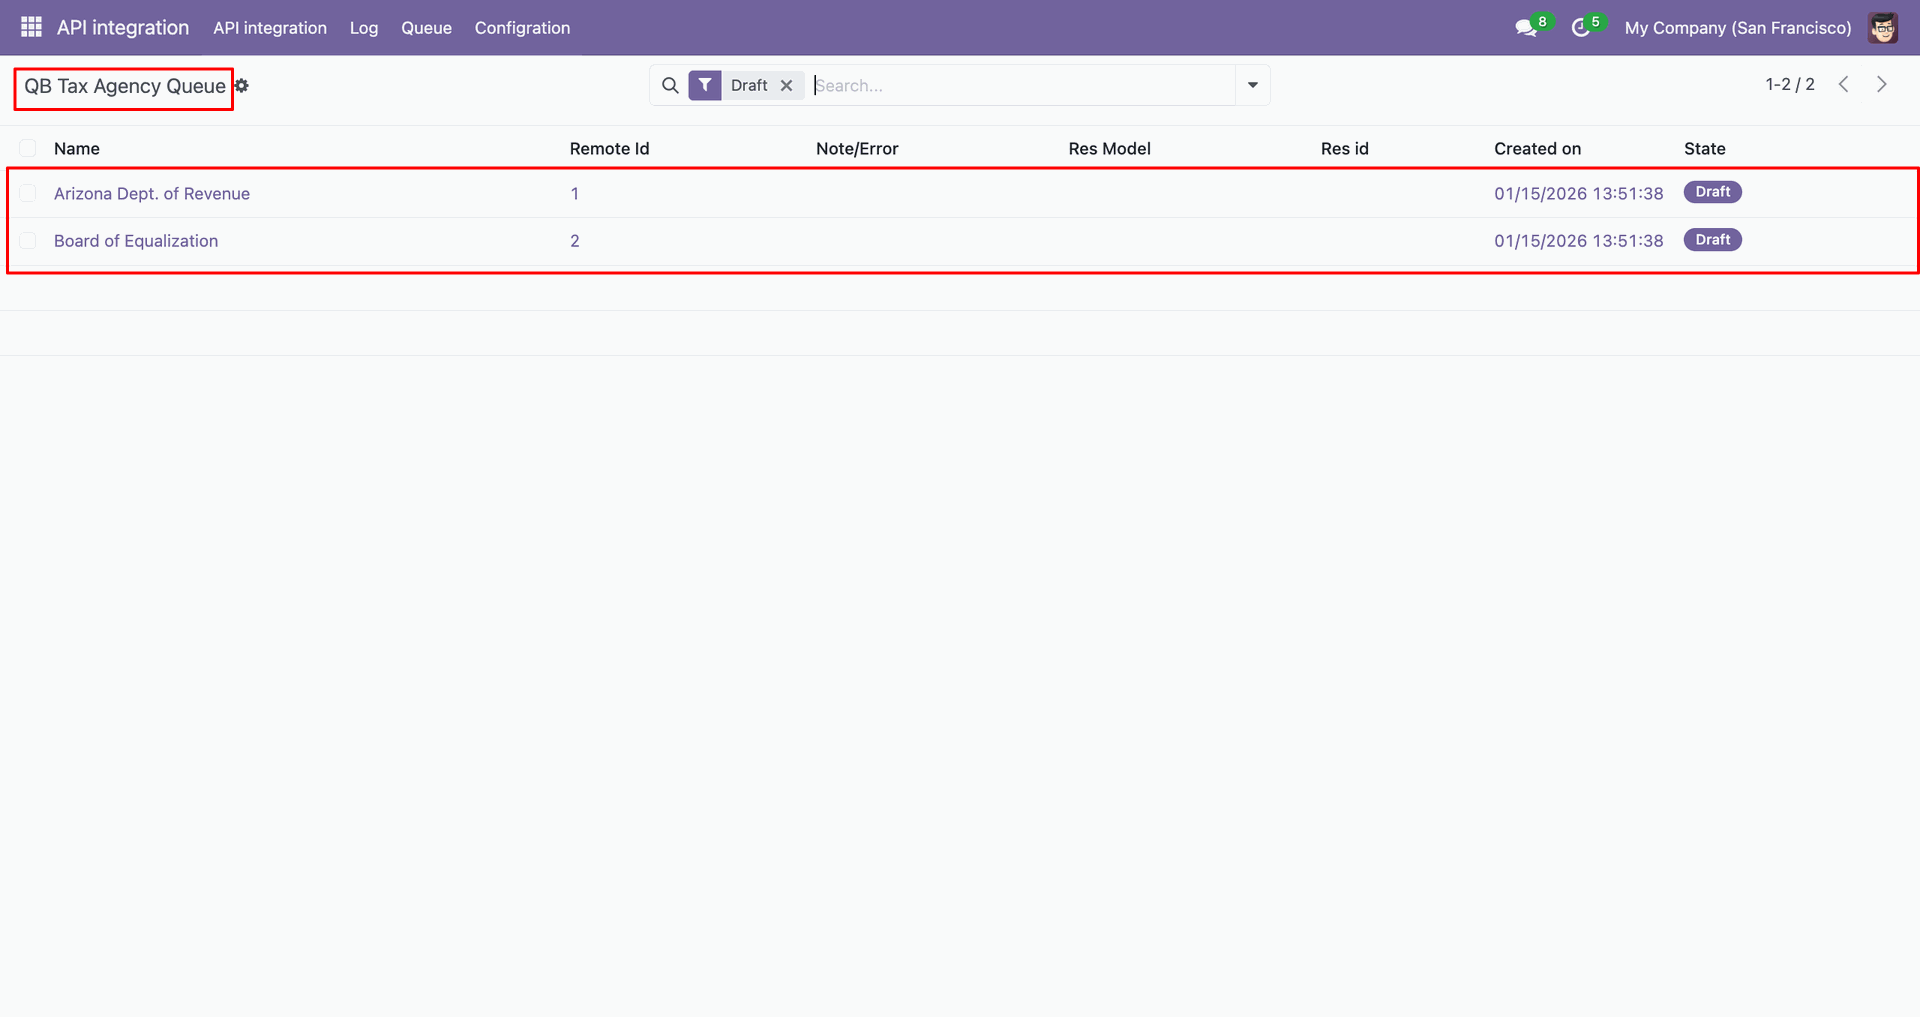
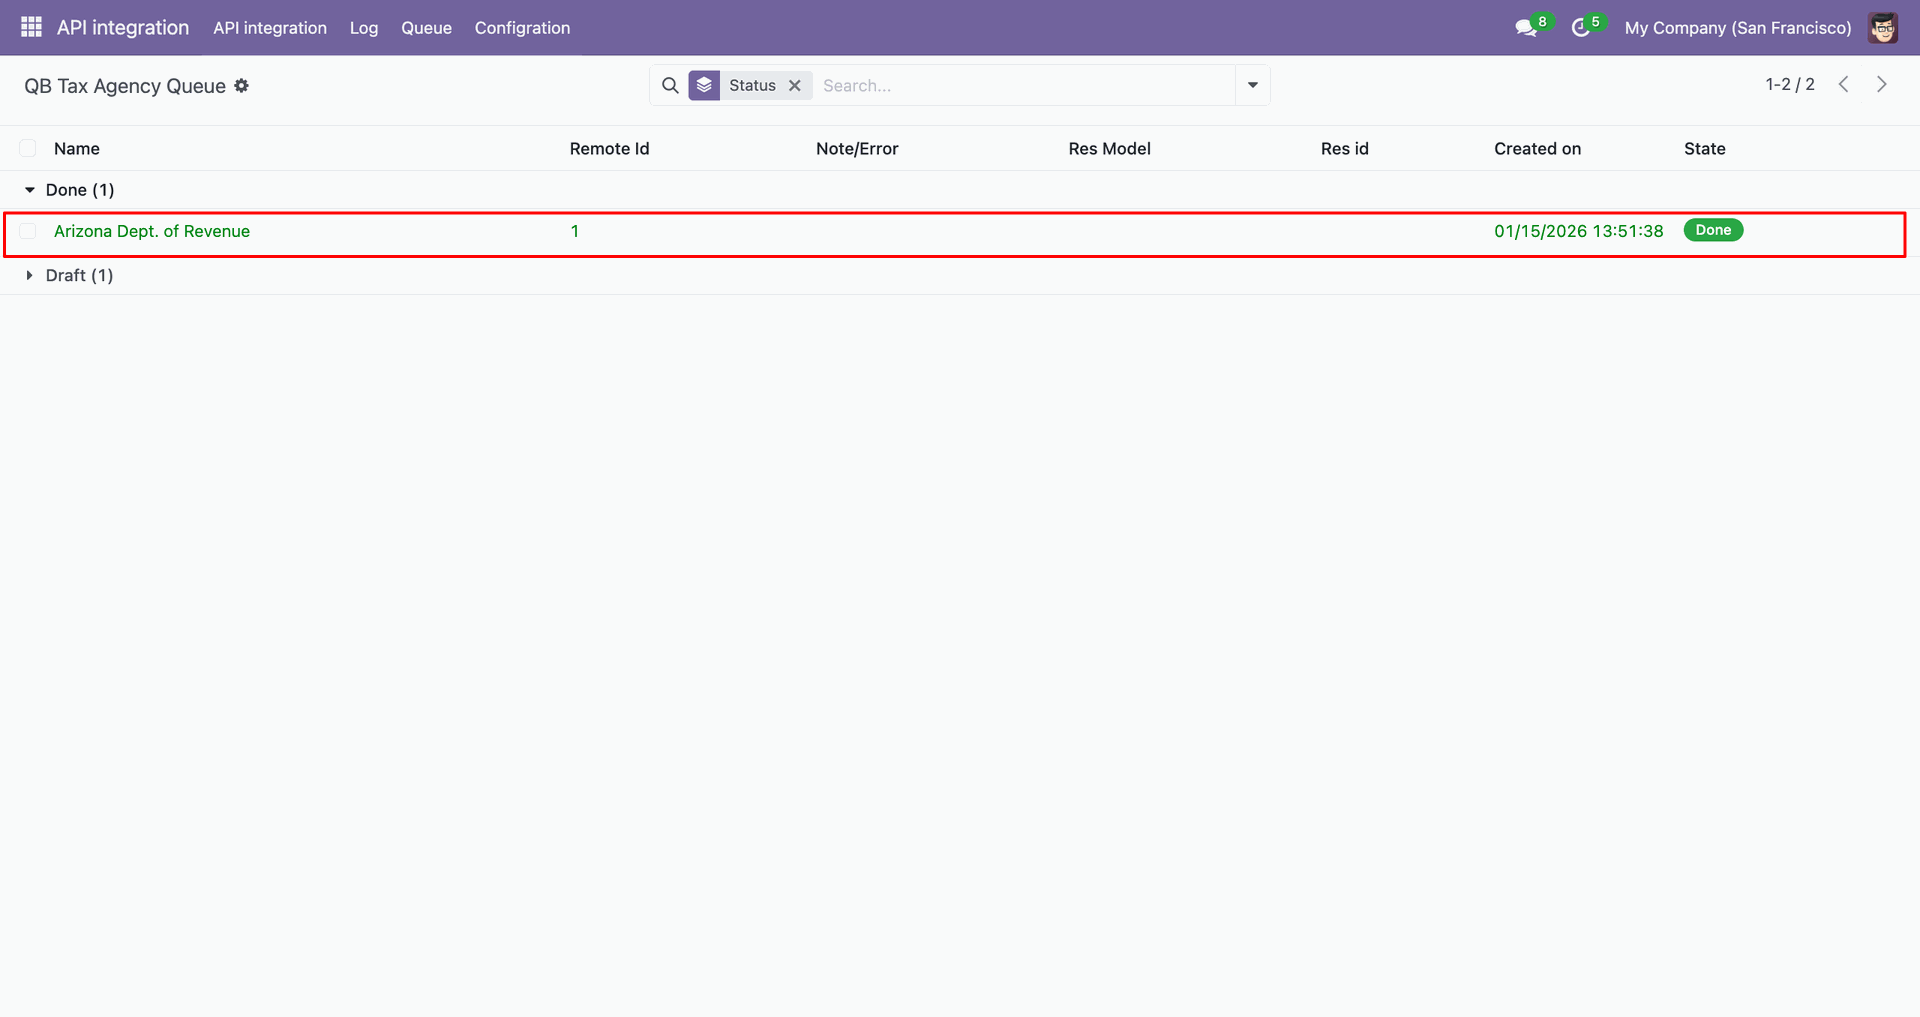
Go to the 'Queue' menu, click 'QB Tax Agency'.
QB Tax Agency Queue list view.
You can import from the 'Action' button.
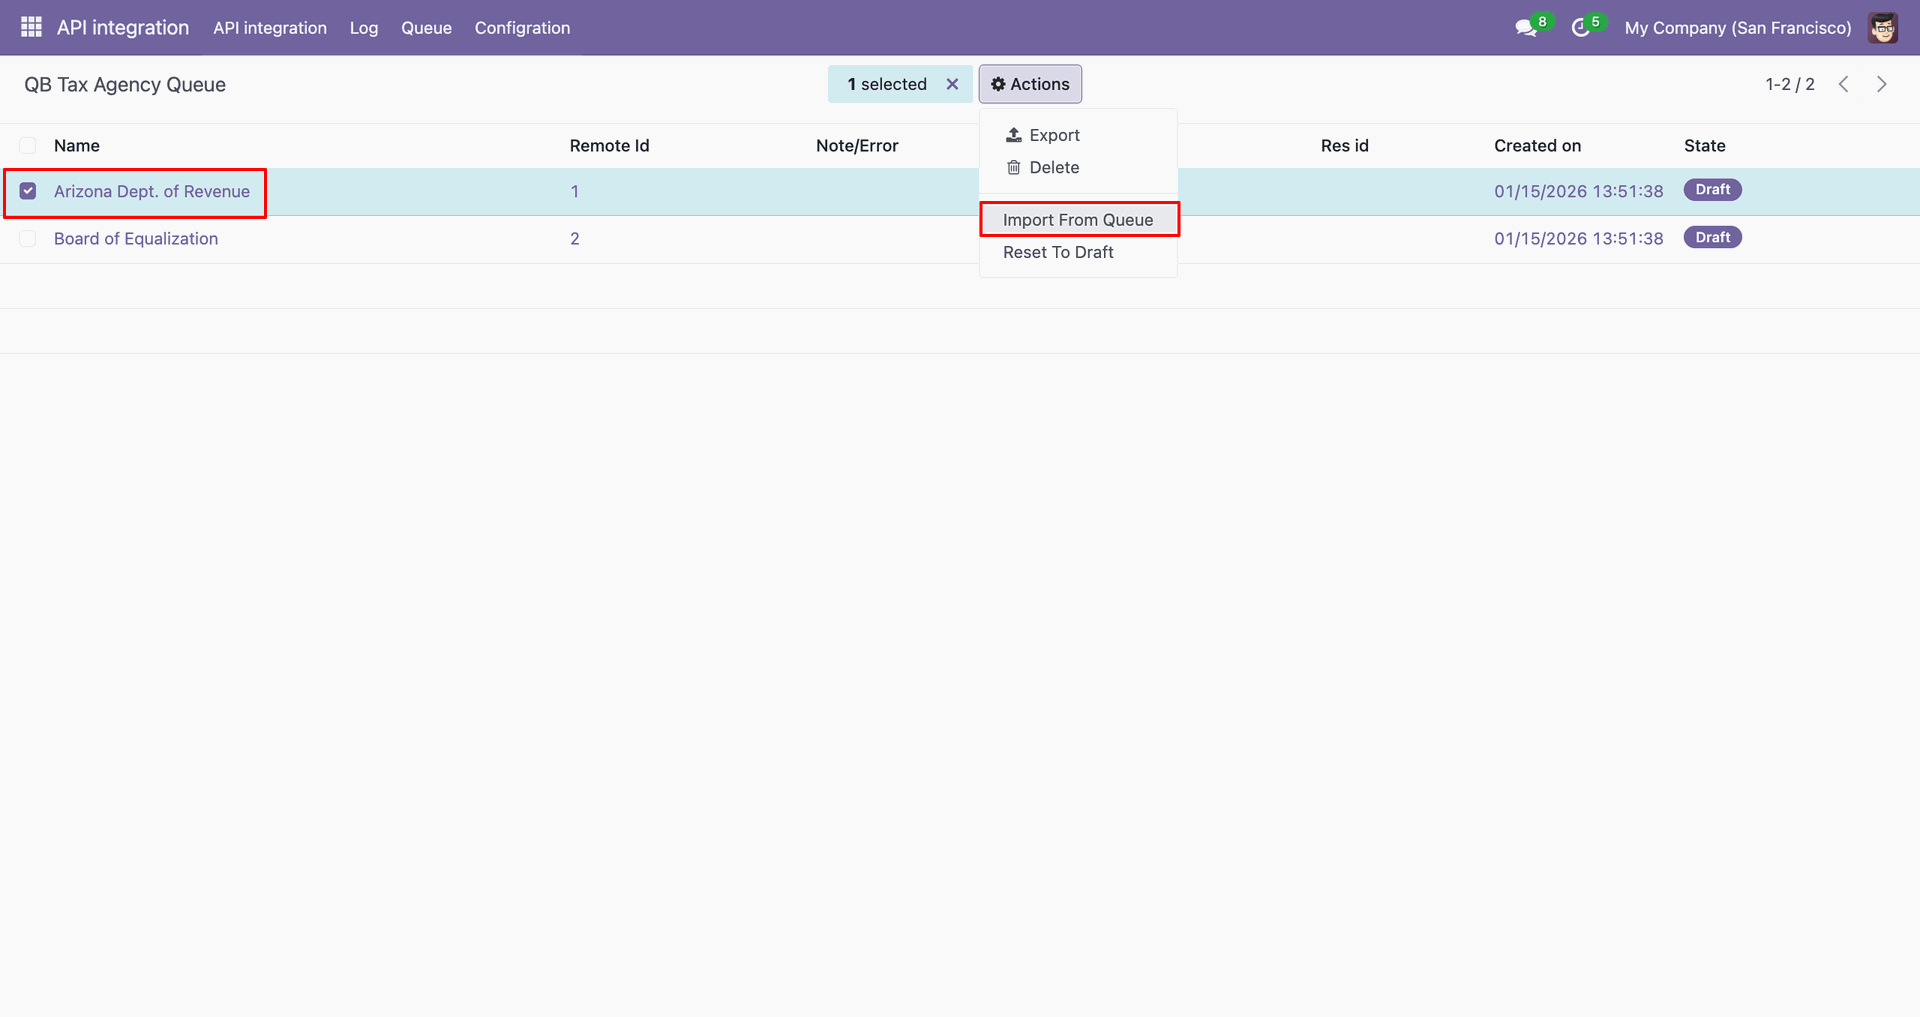
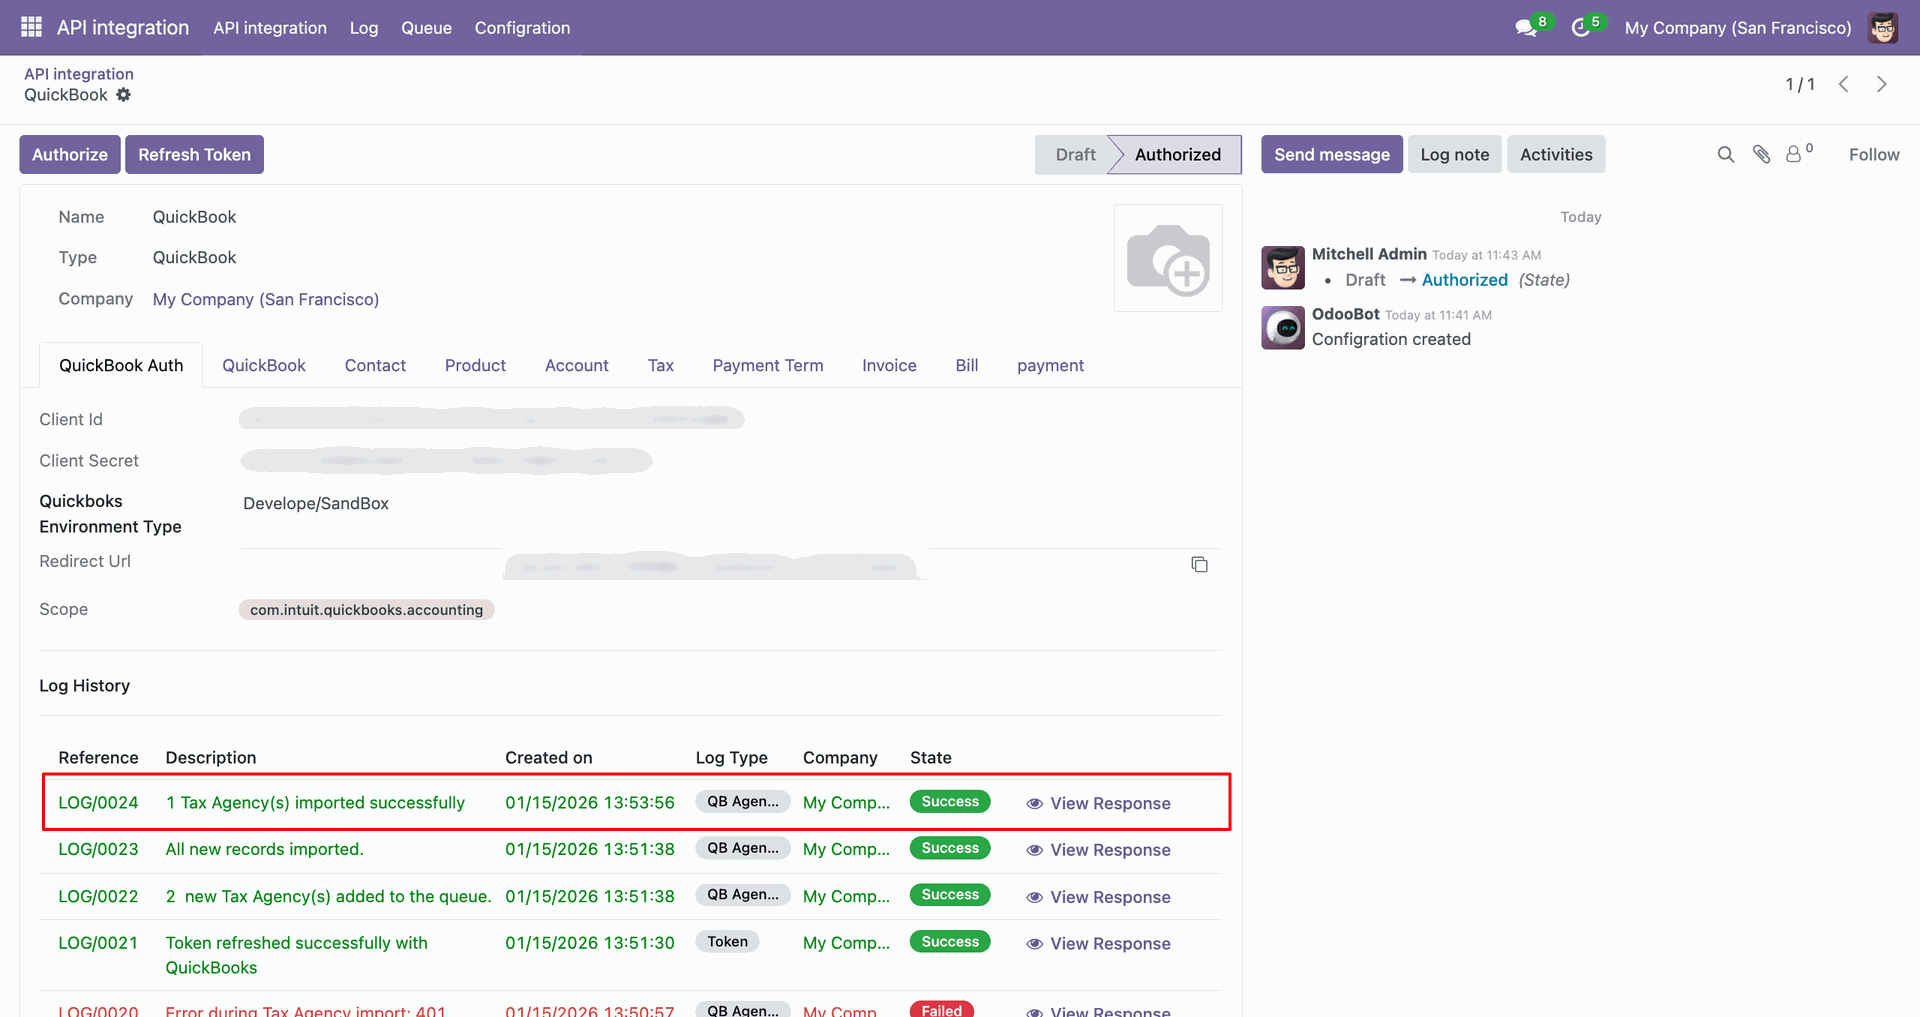
Imported data with log.
Group by agency with 'Status'.
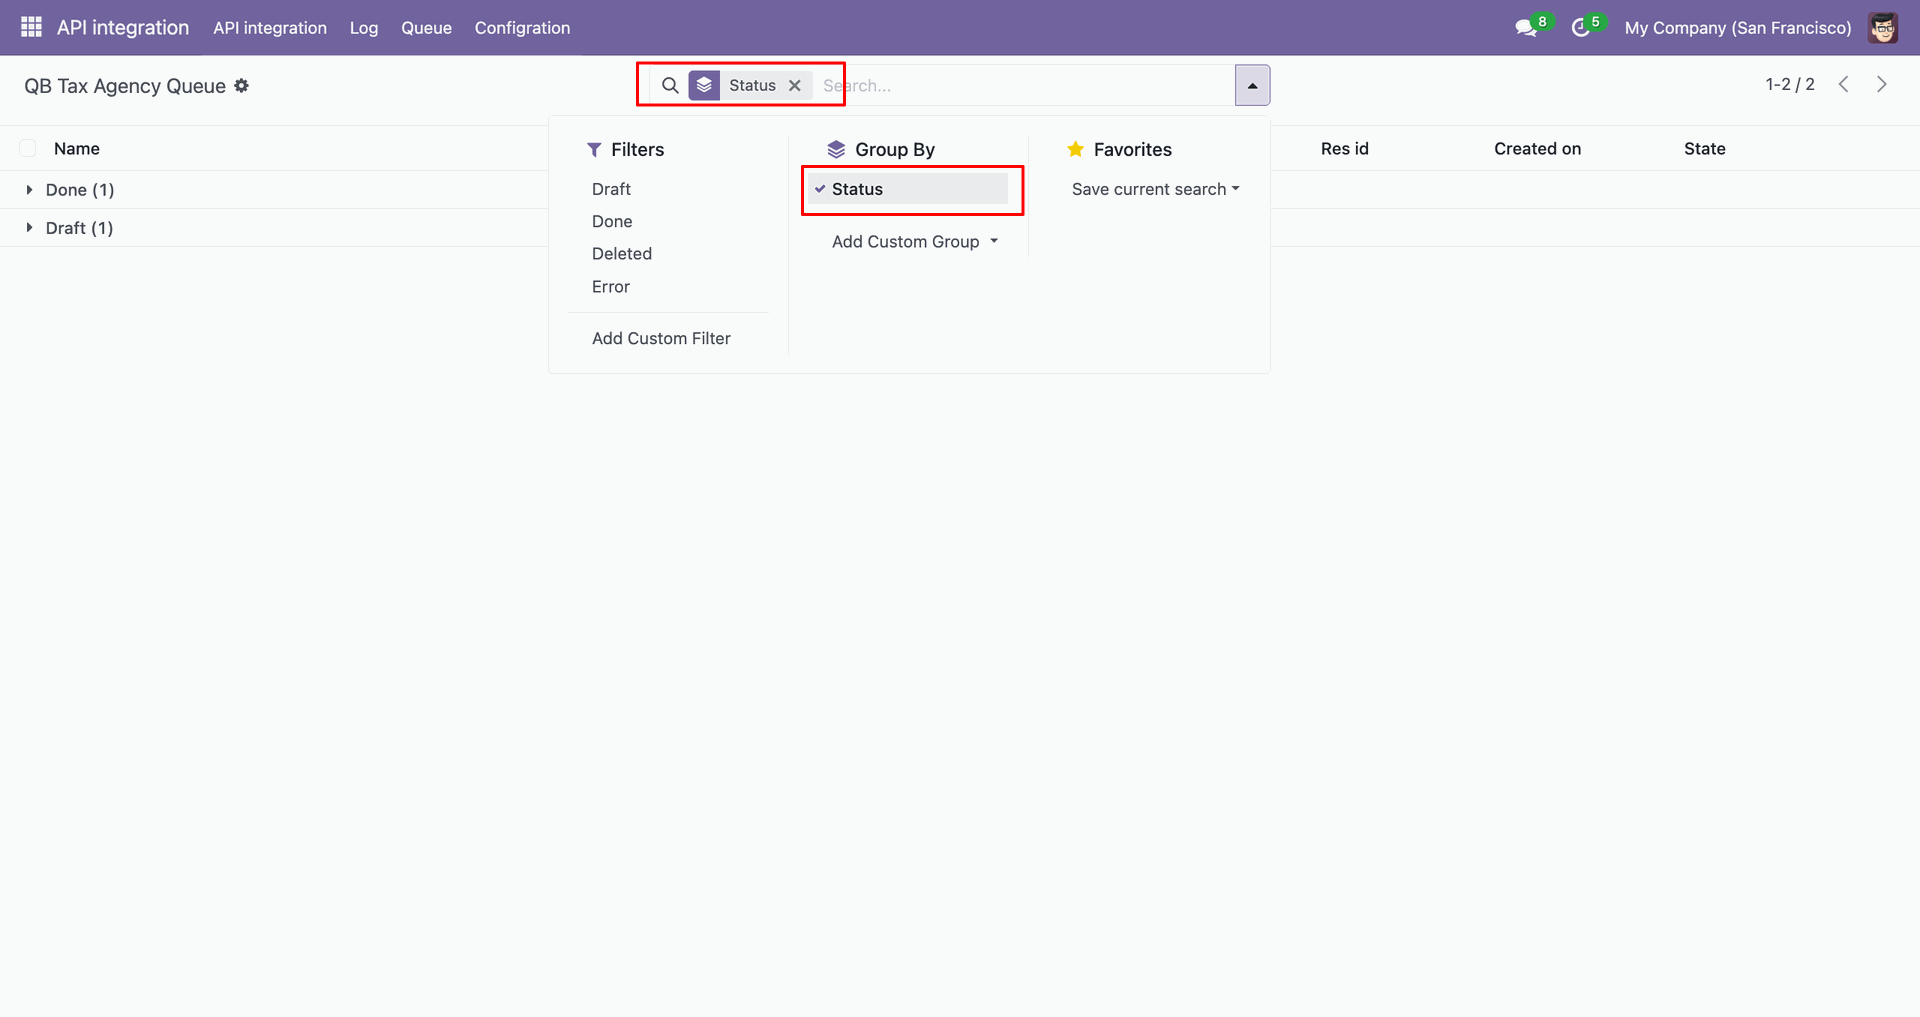
Group by result.
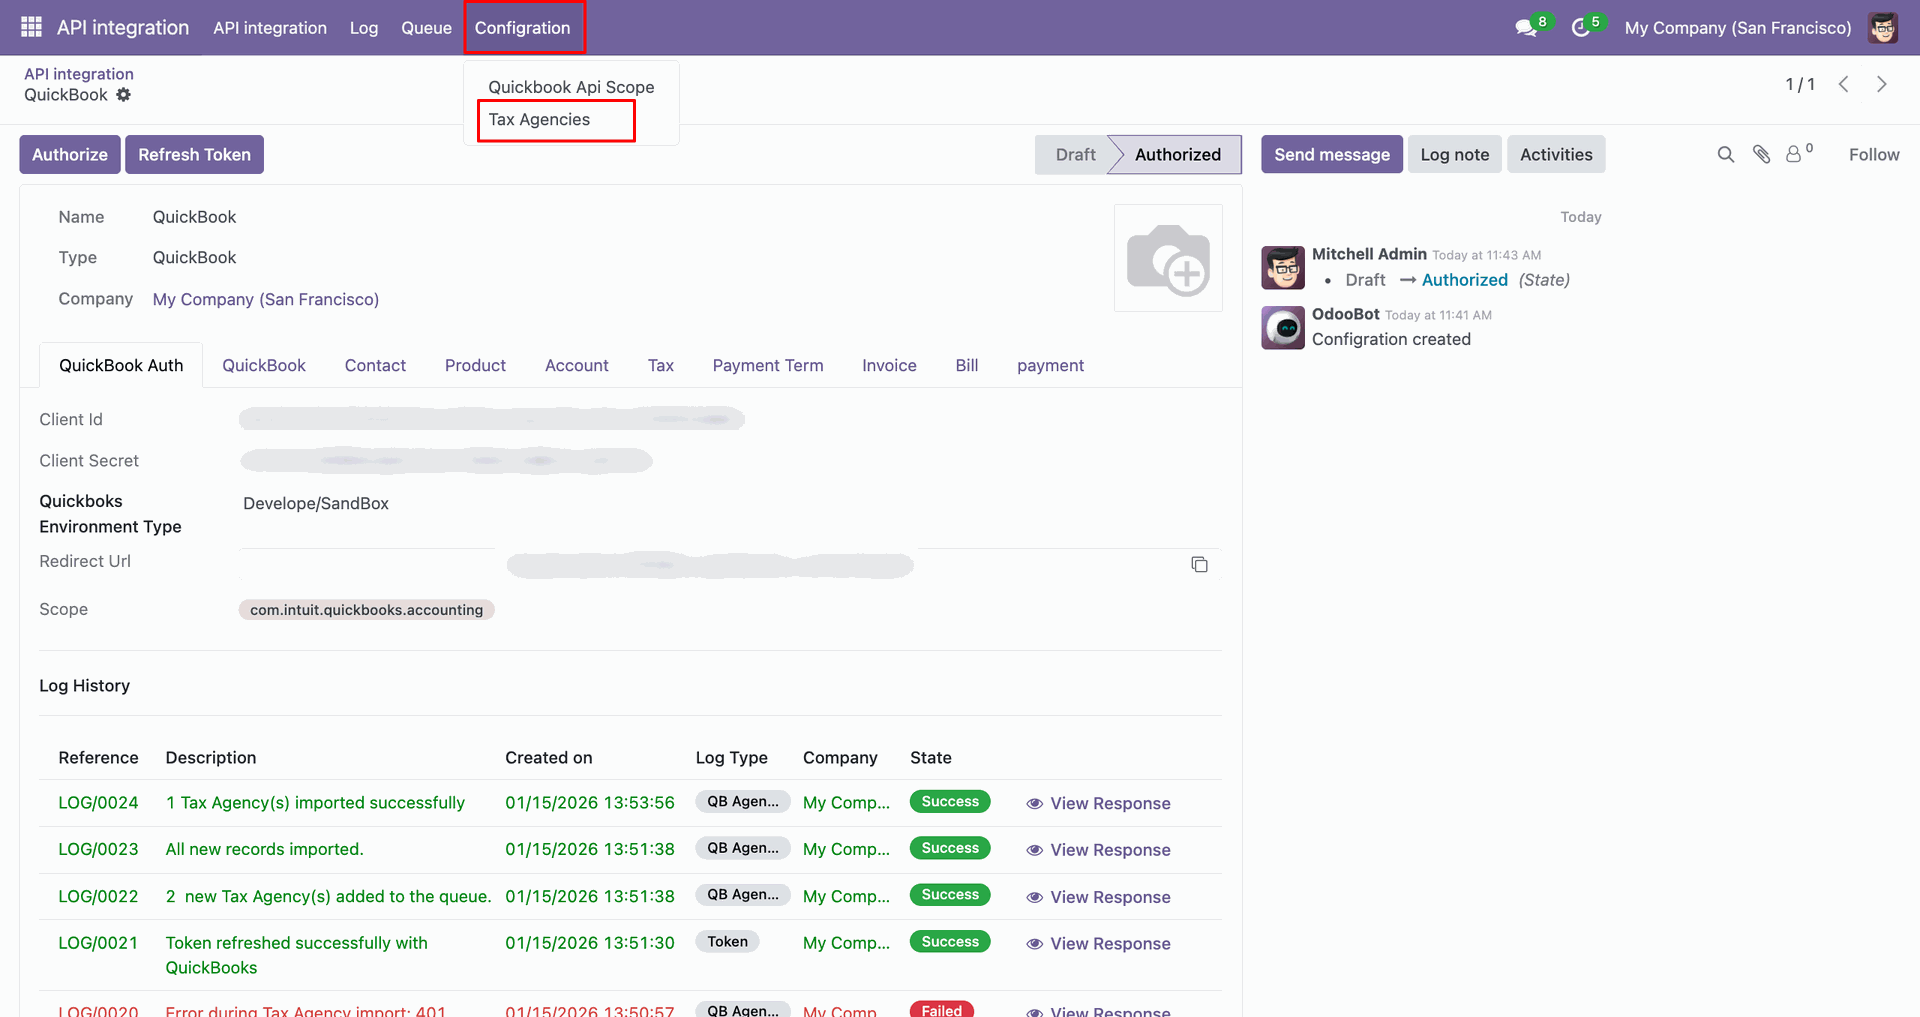
Go to the 'Configuration' menu, click 'Tax Agencies'.
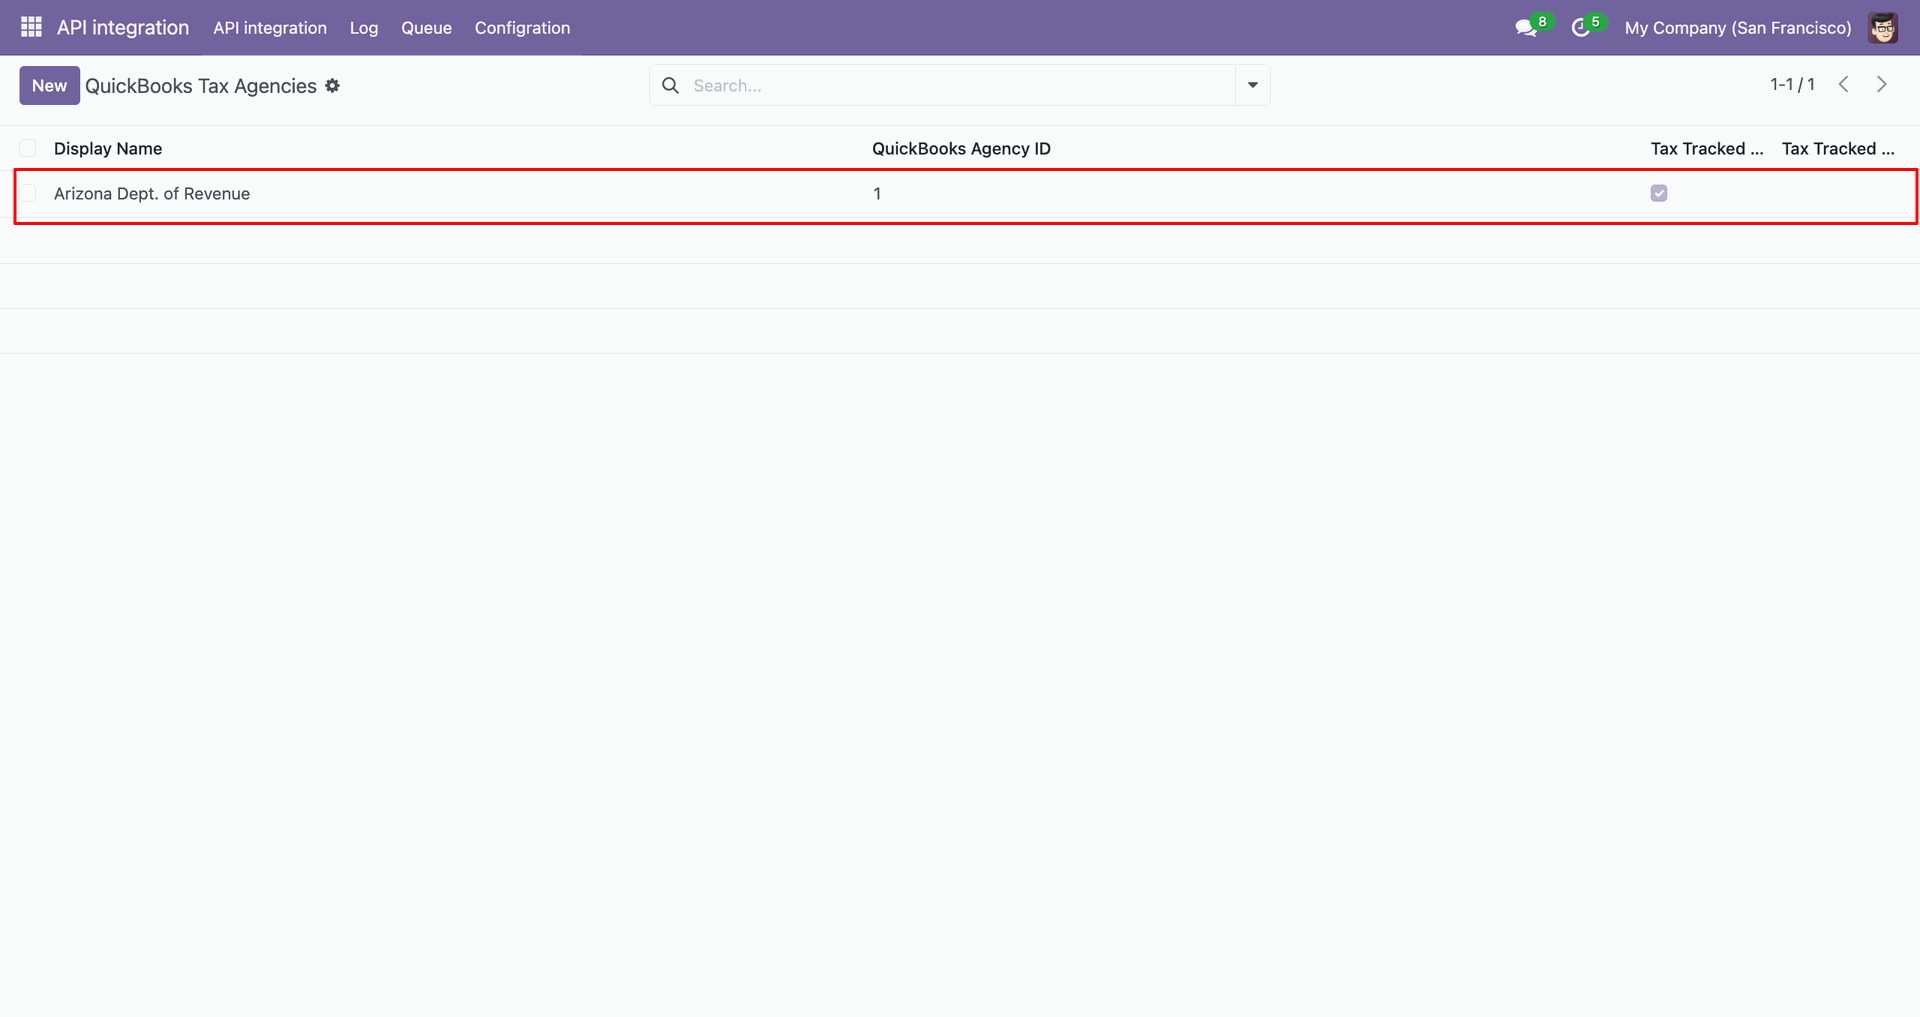
It will shows Tax Agency list view.
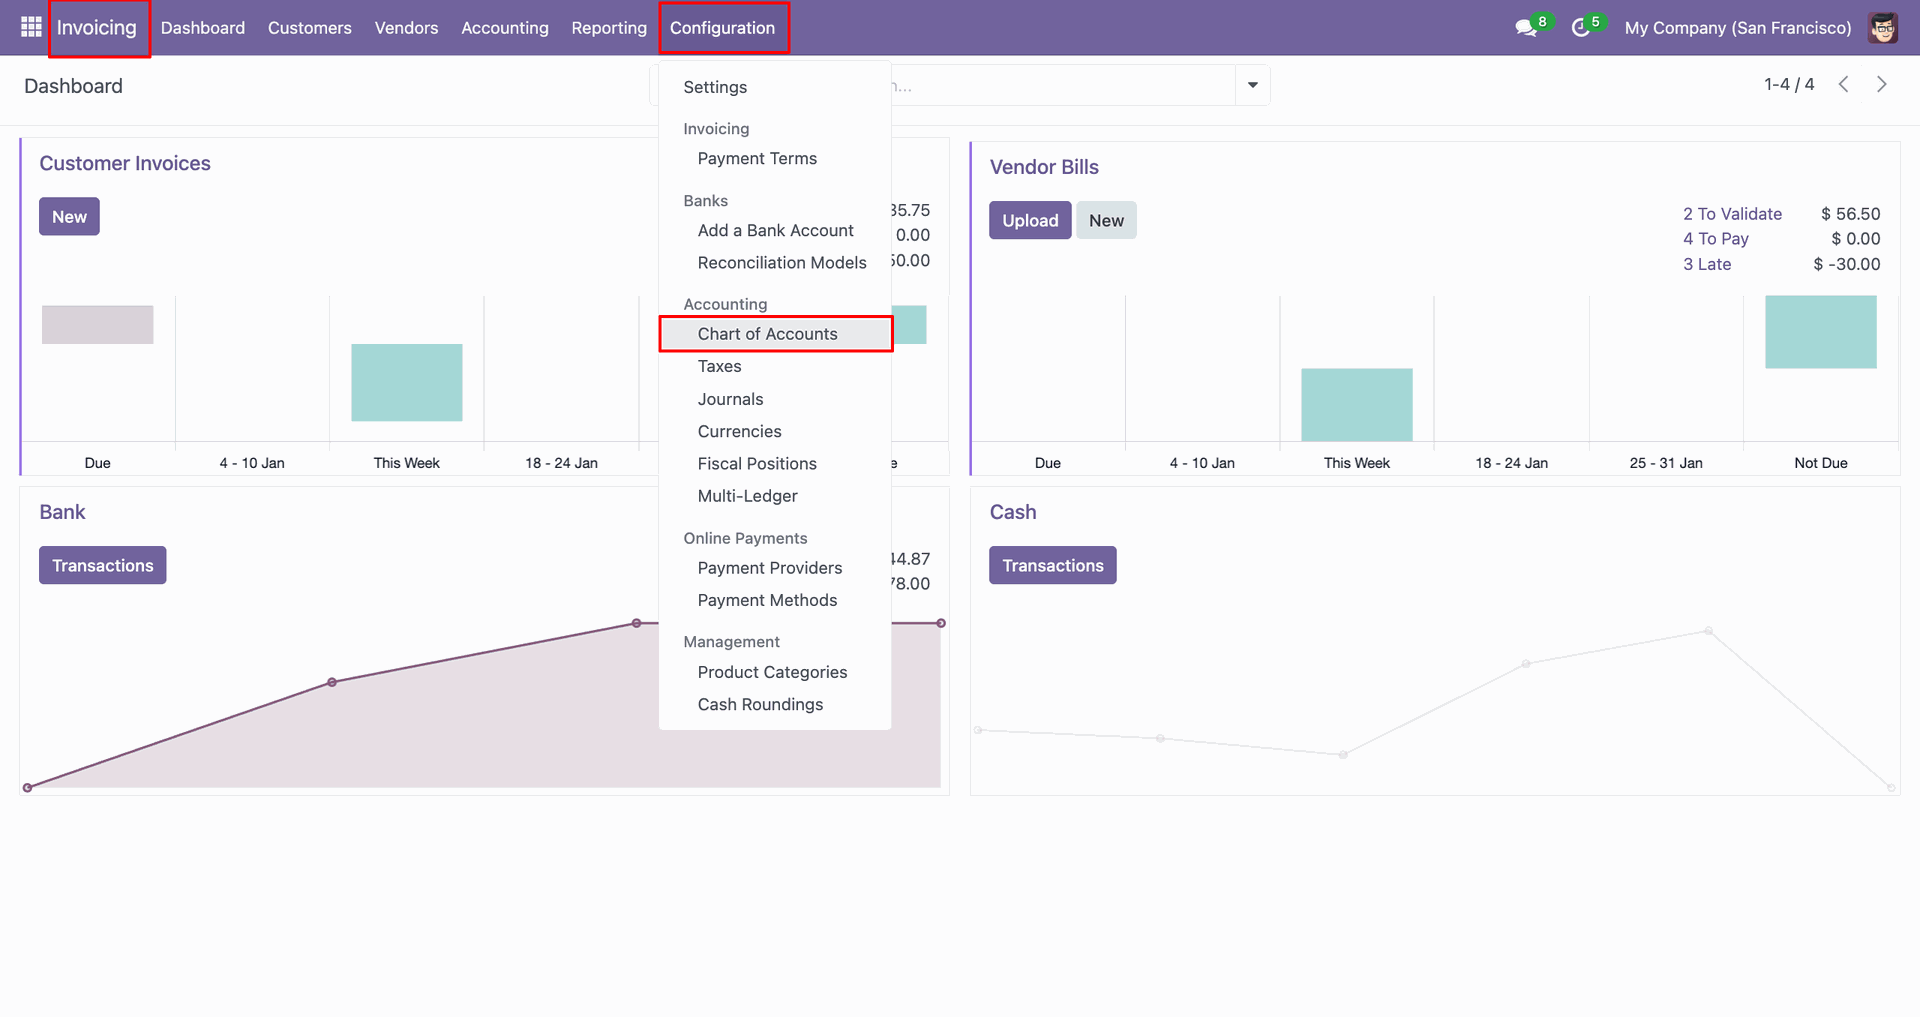
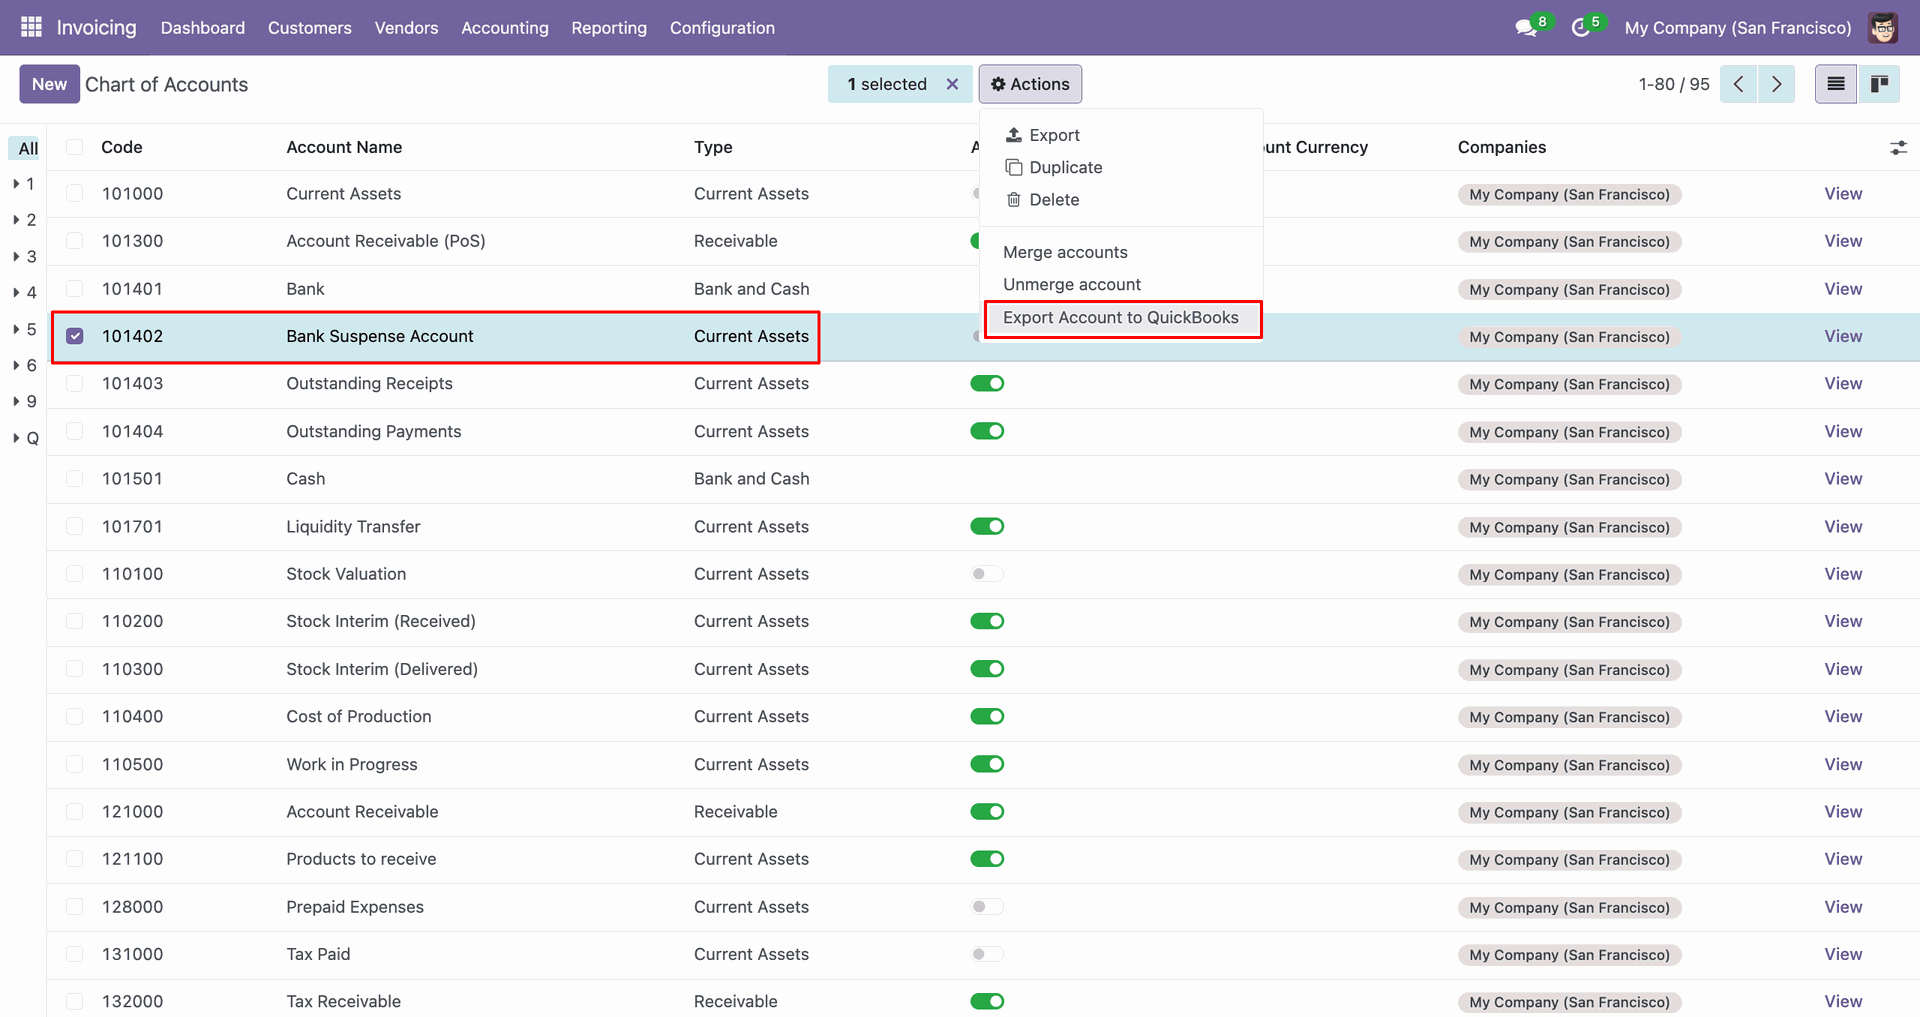
Go to the 'Configuration', click 'Chart Of Accounts'.
You can export from the 'Action'.
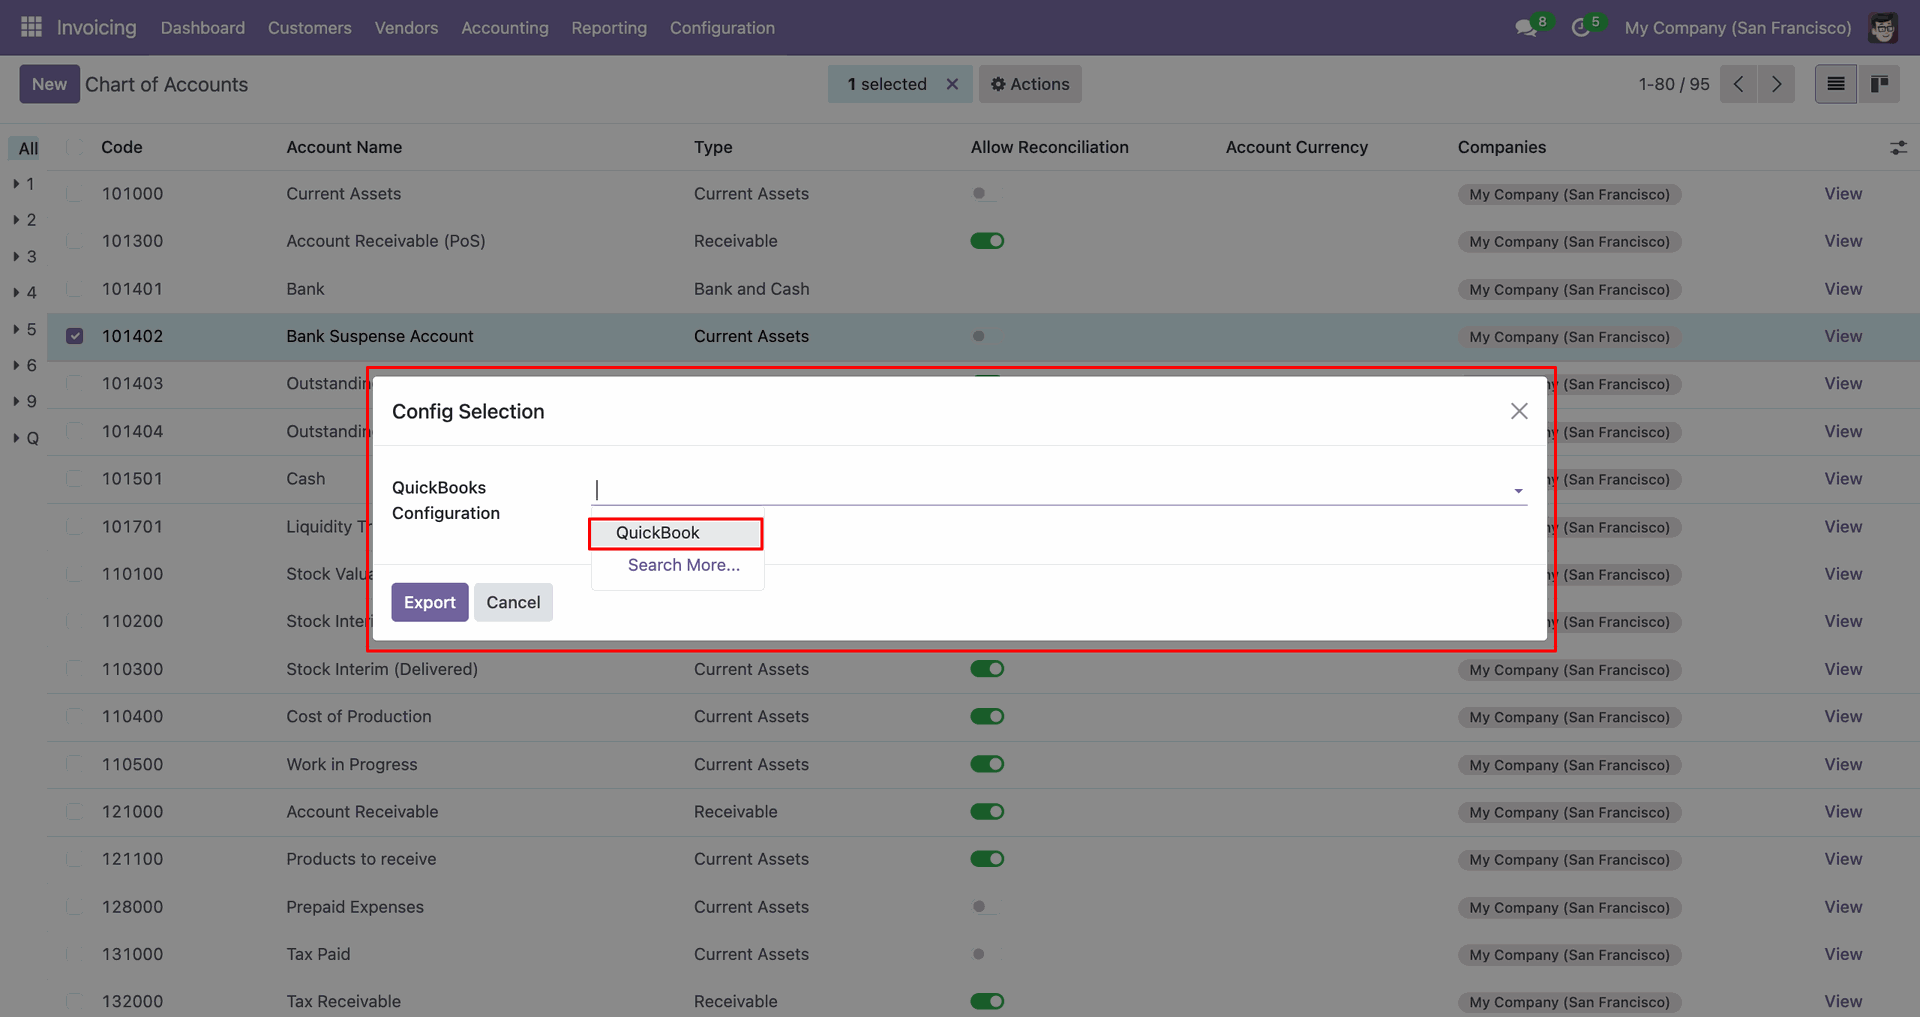
Config selection popup.
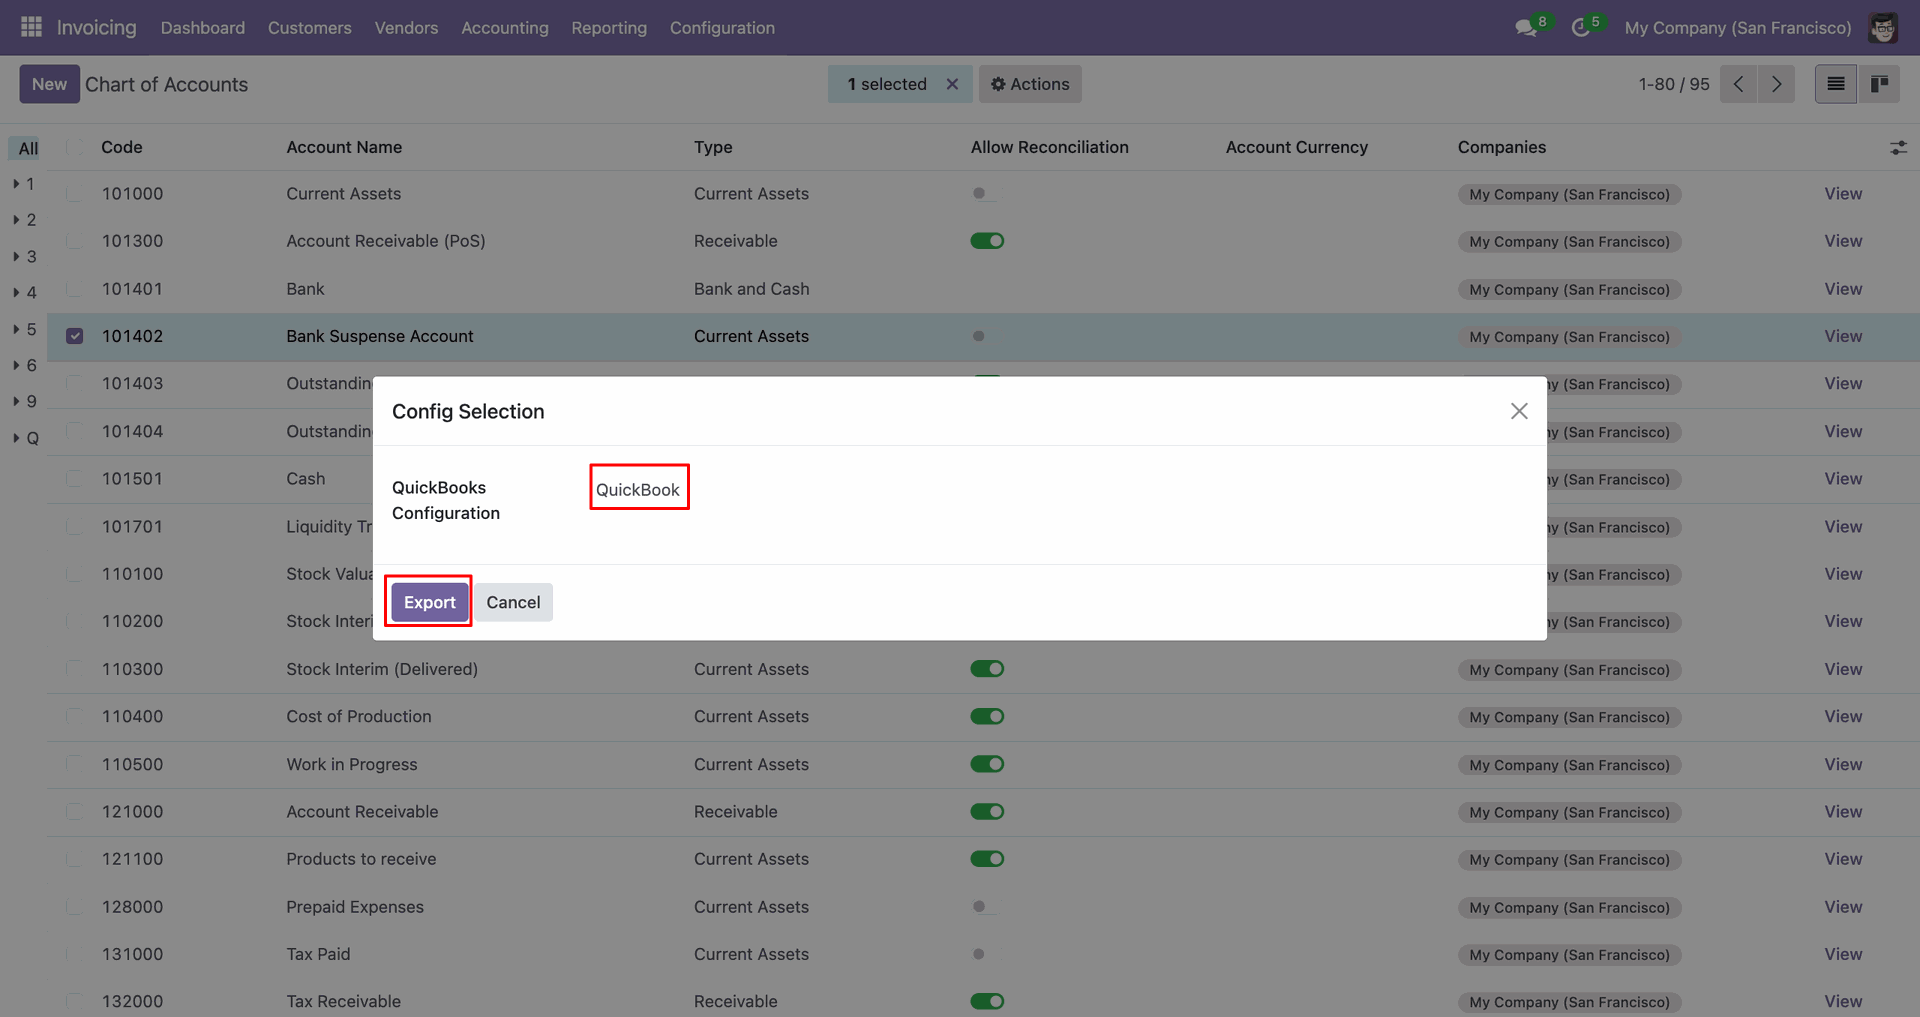
Select 'QuickBooks' and click 'Export'.
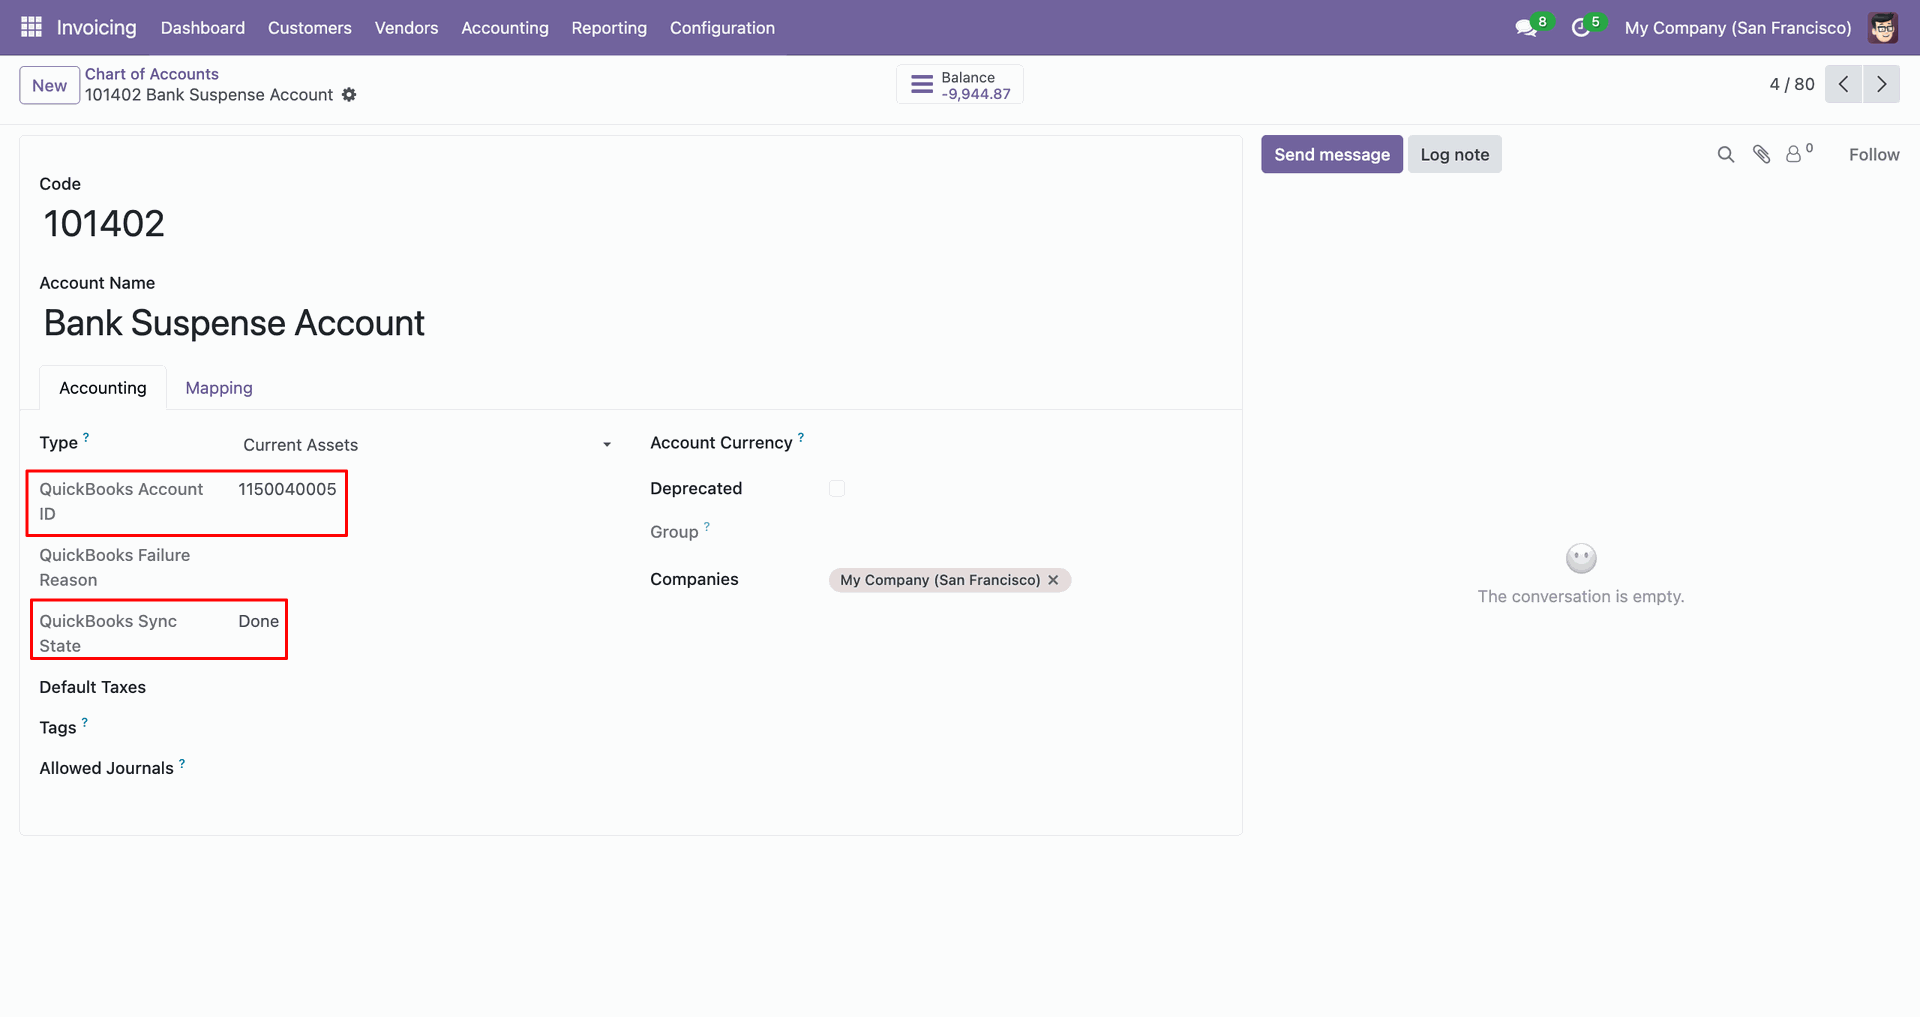
The Chart Of Accounts form view contains Quickbook ID and sync state.
Log with details.
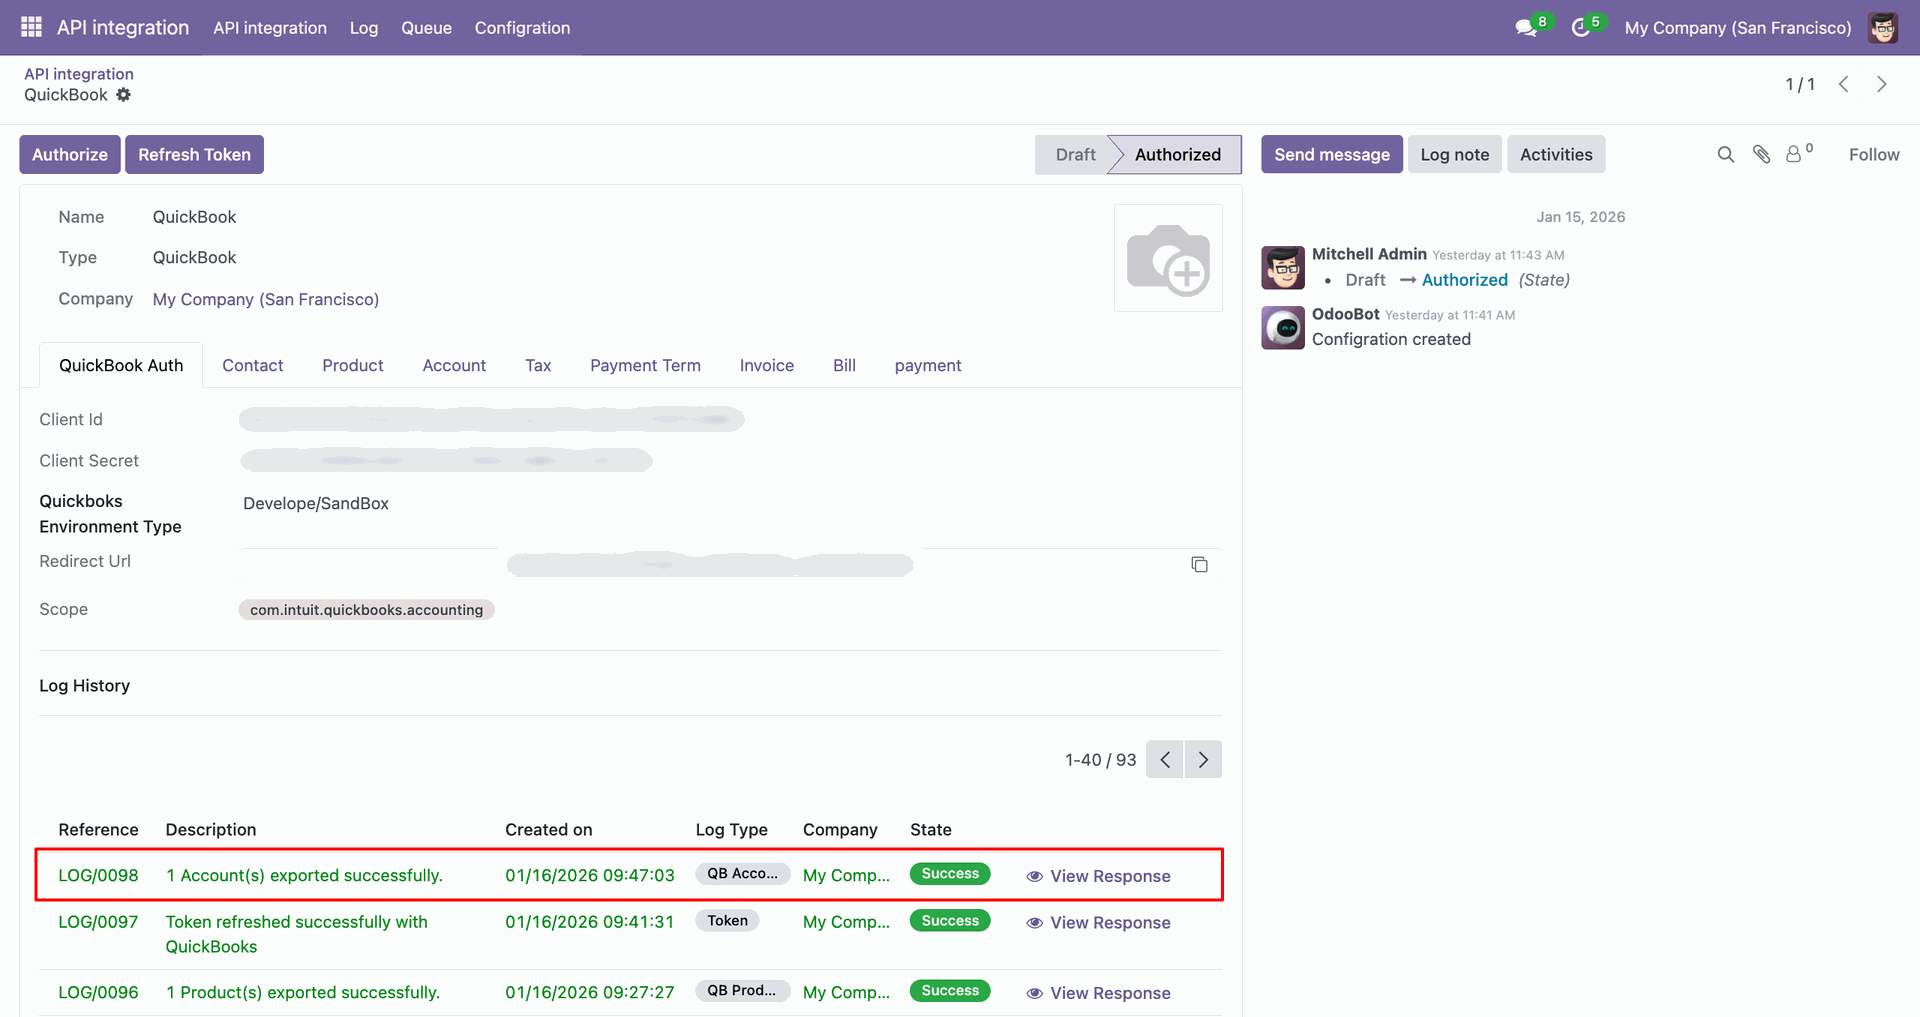
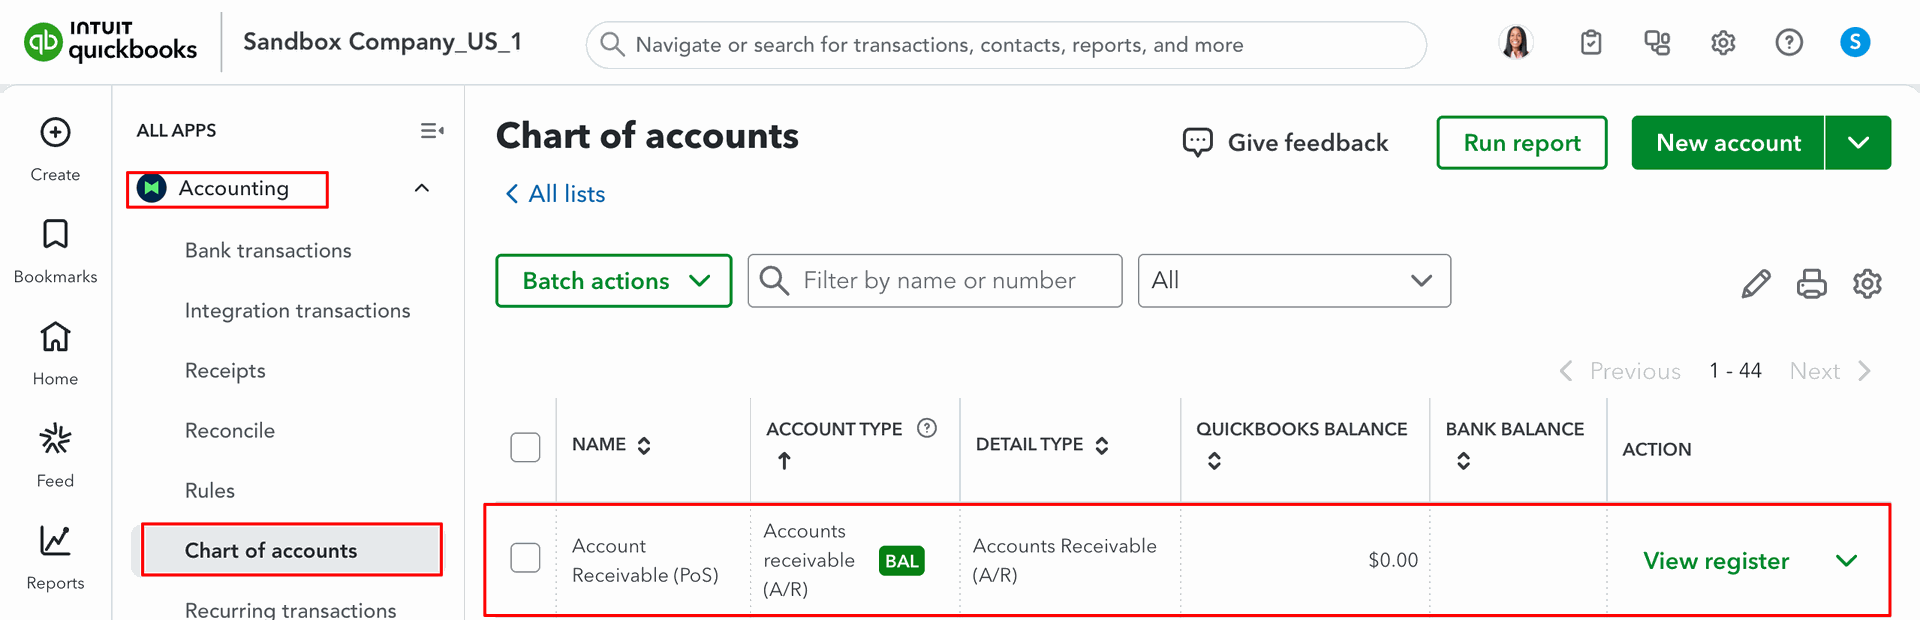
Chart of Accounts in QuickBooks.
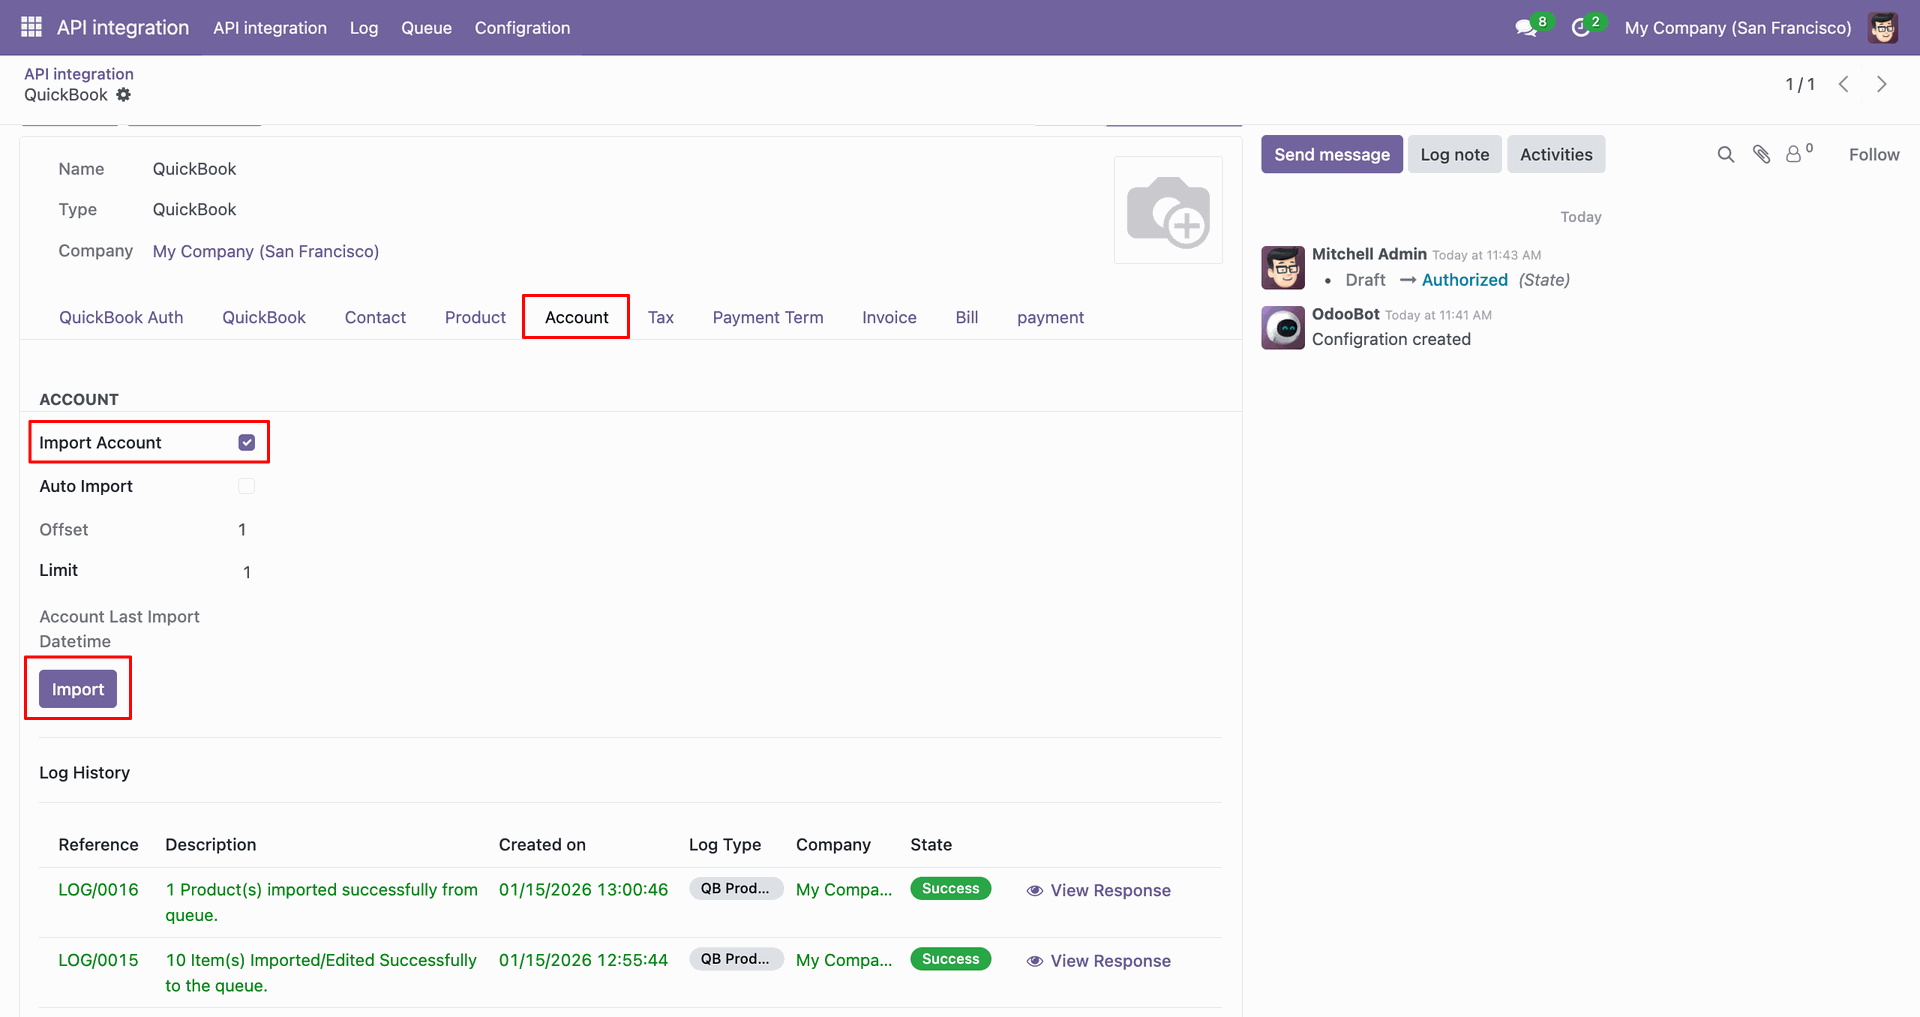
For the import, go to the 'Account' Tab, enable 'Import Account', and click 'Import'.
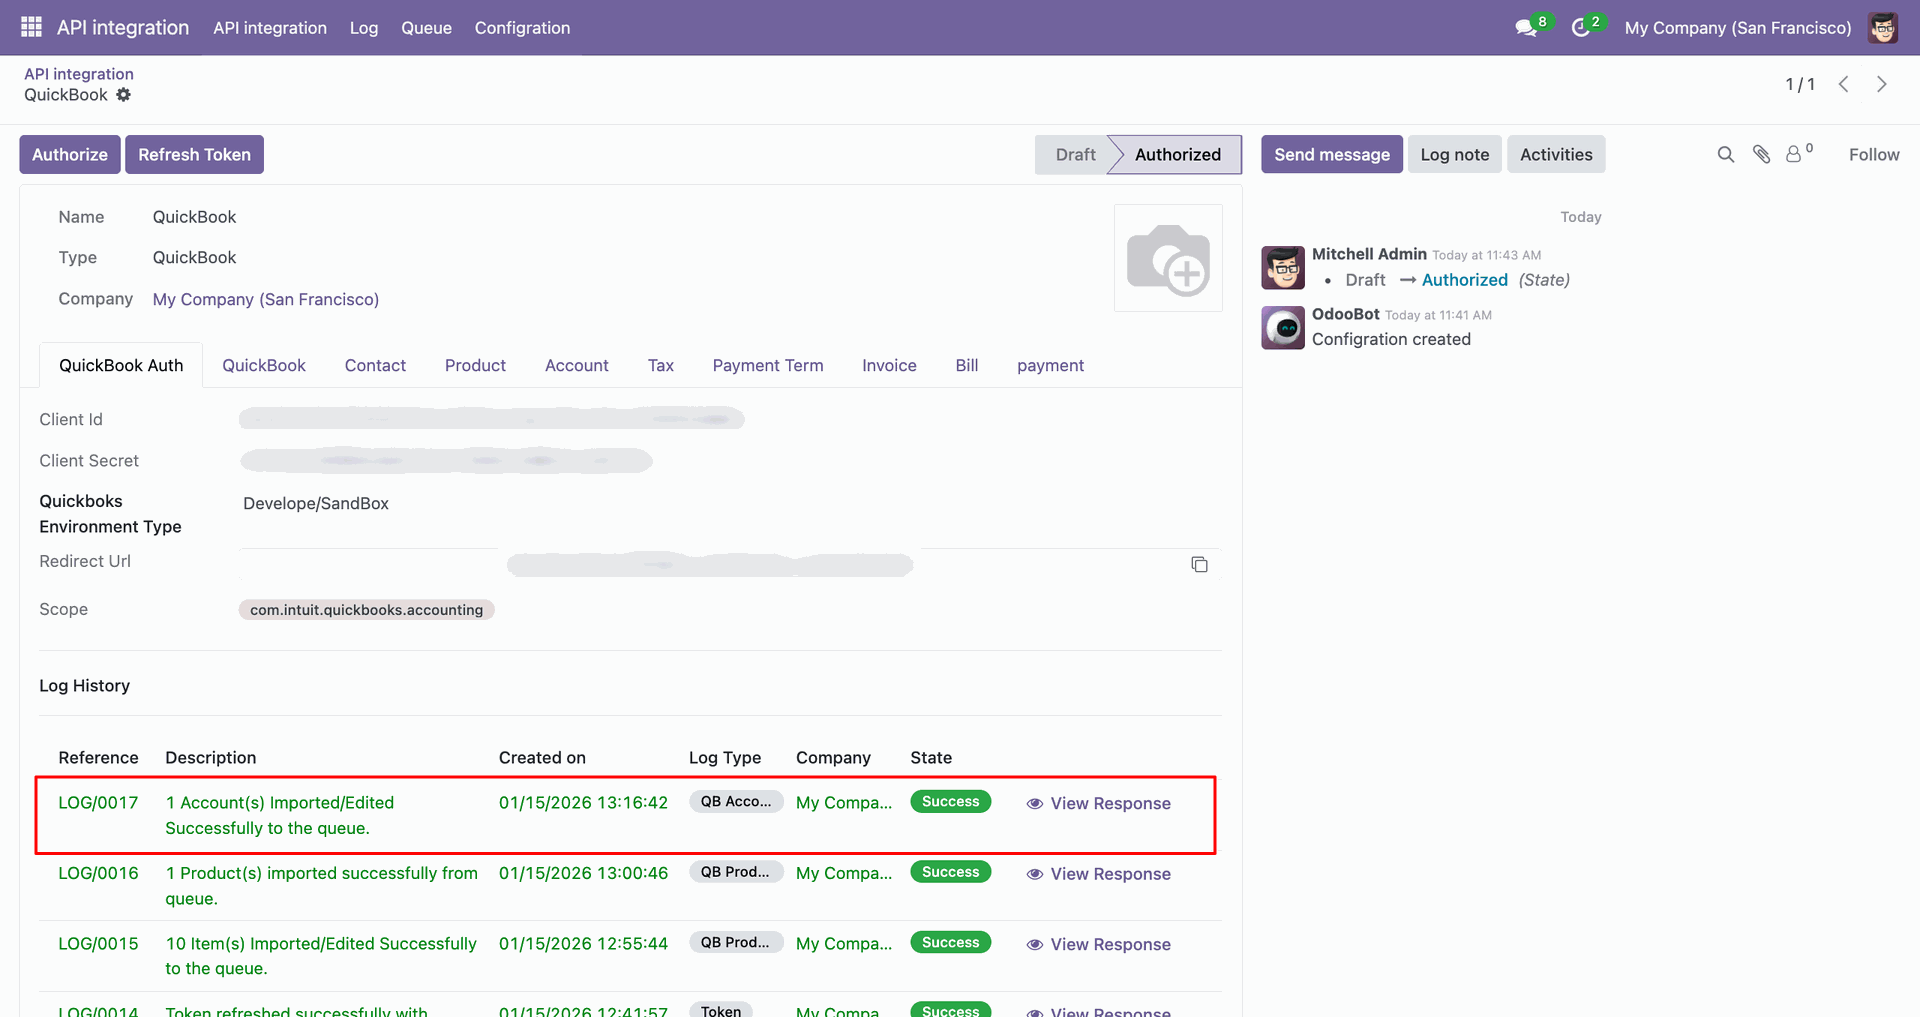
Log with imported data.
Go to the Queue, 'QB Account'.
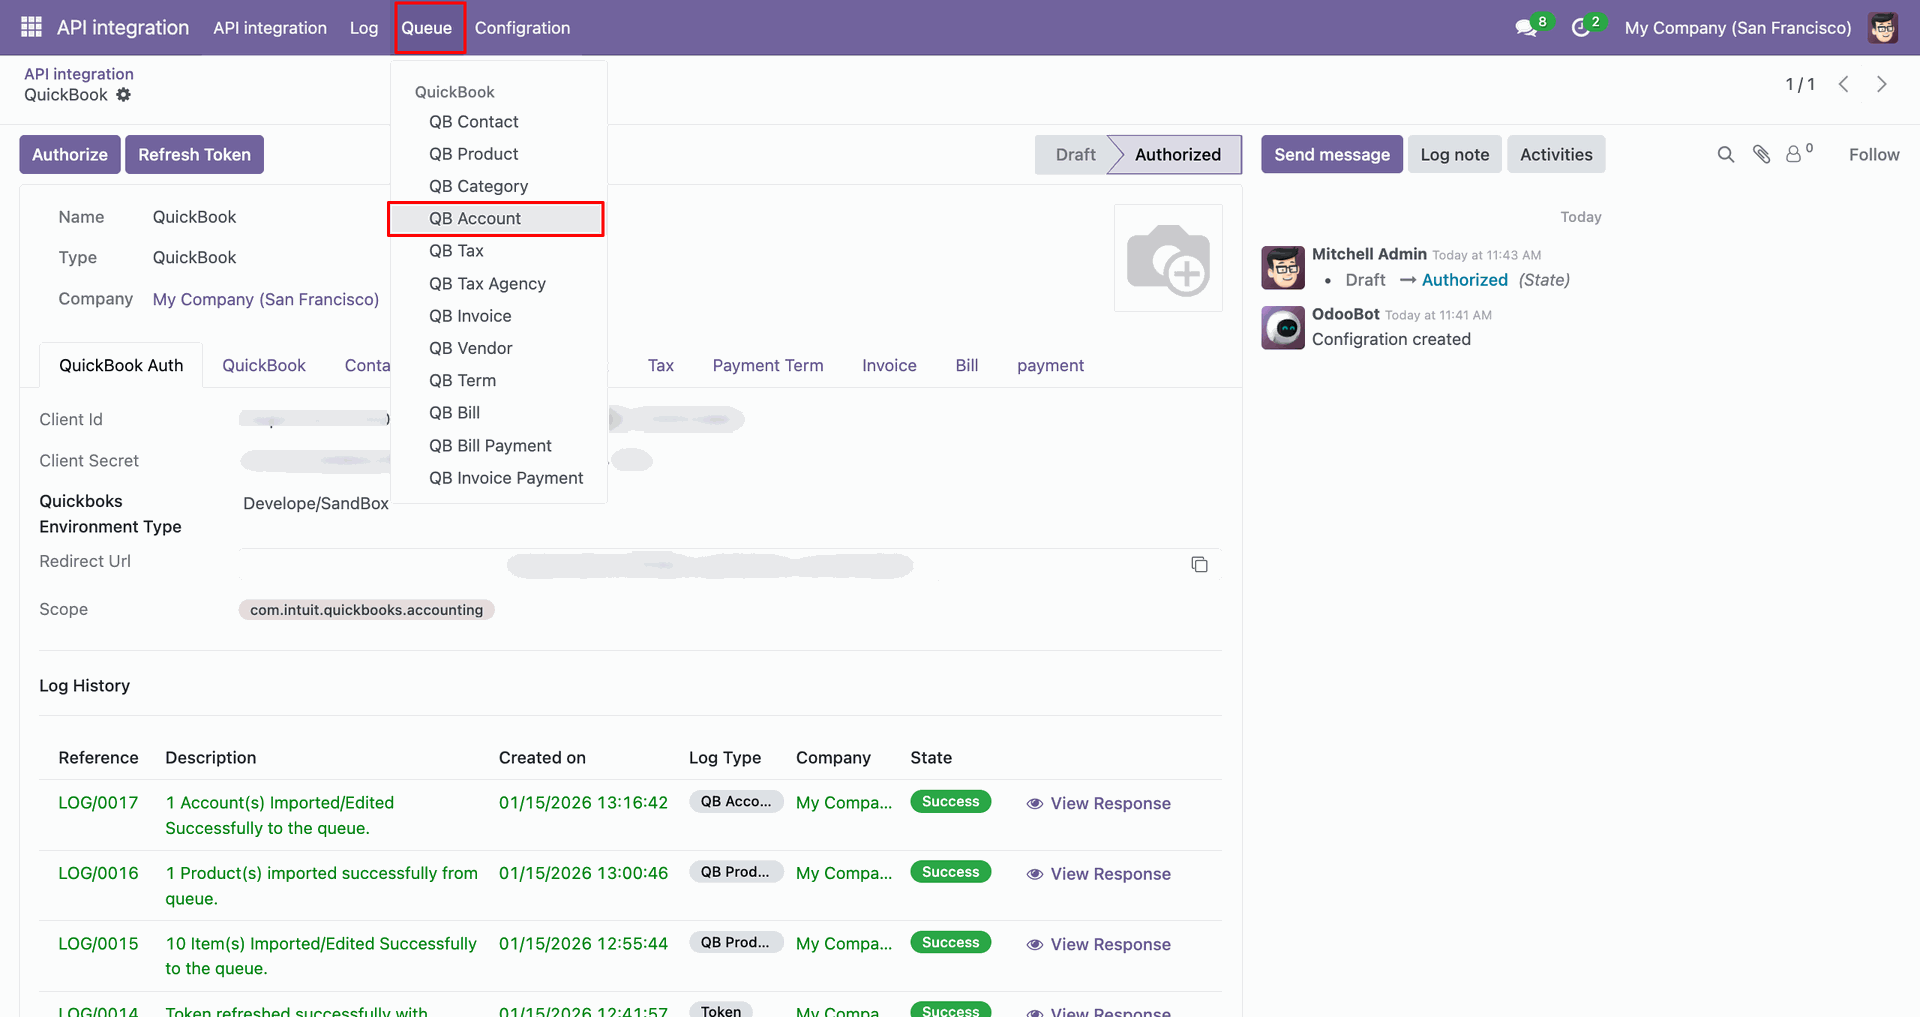
It will open the queue.
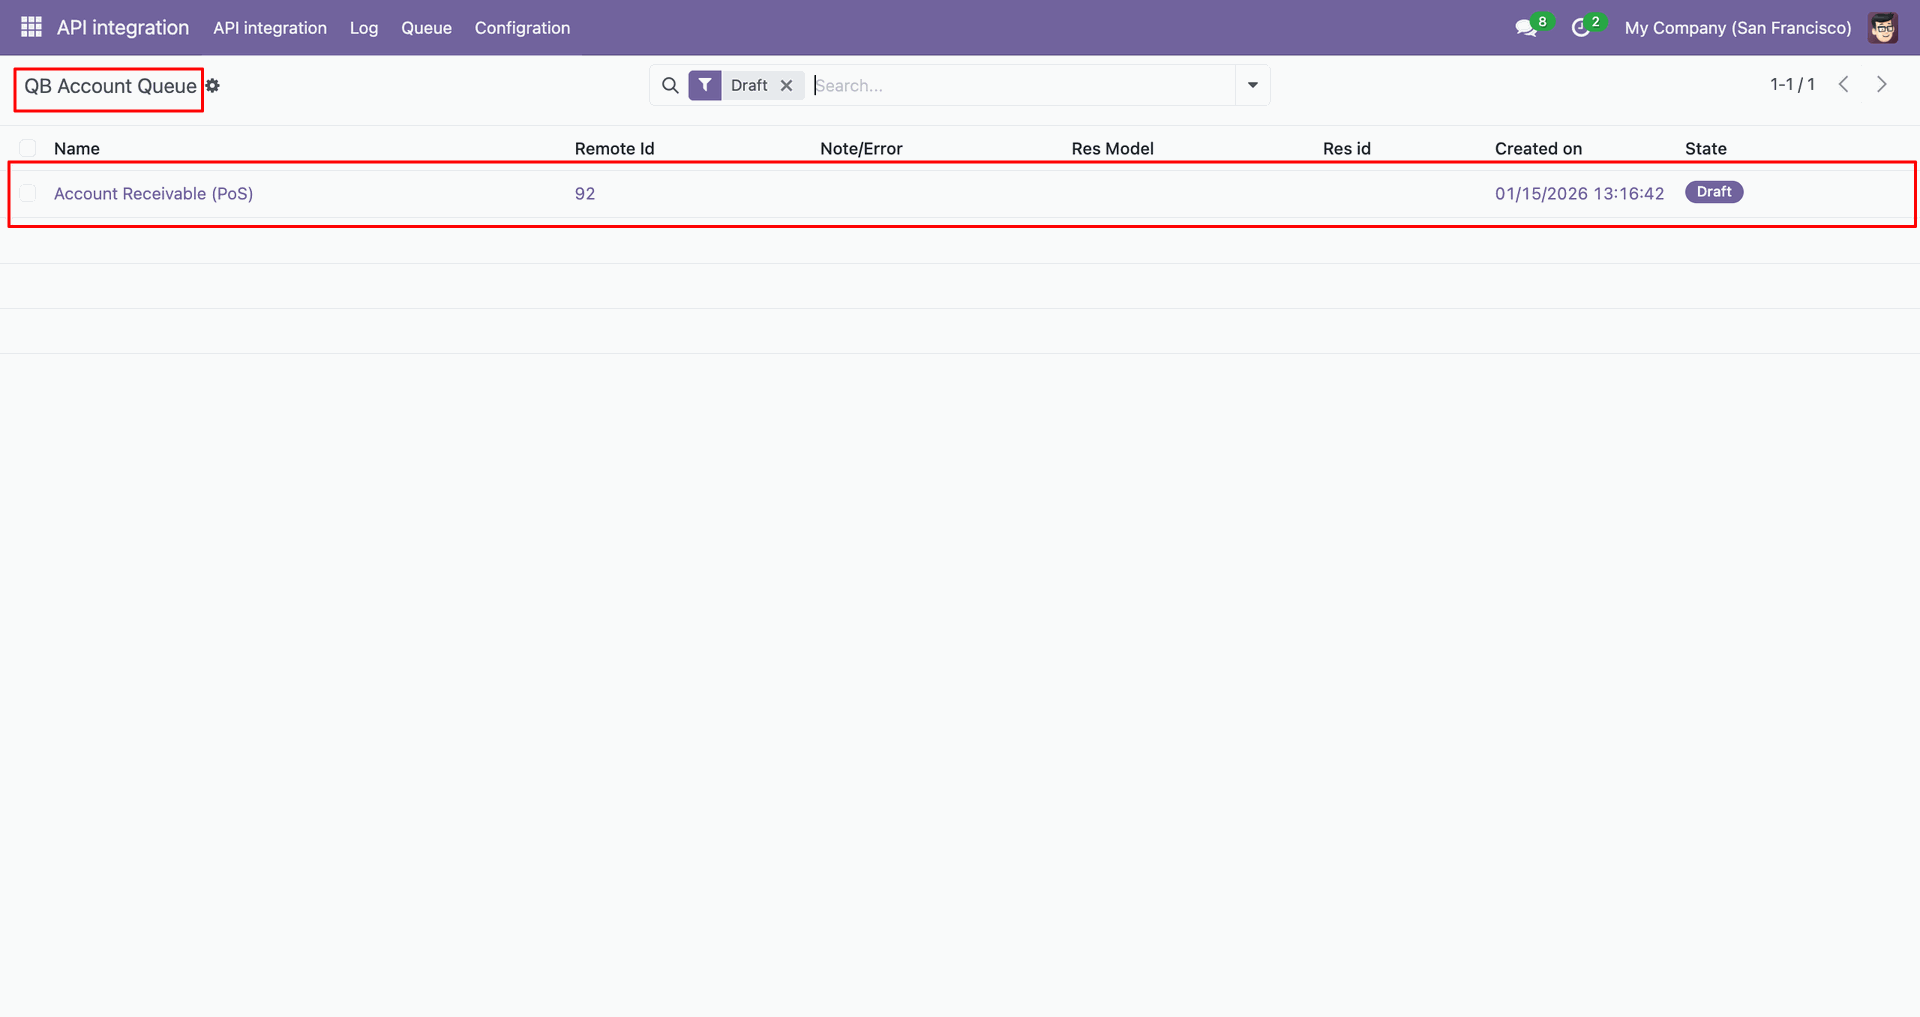
You can import from 'Action'.
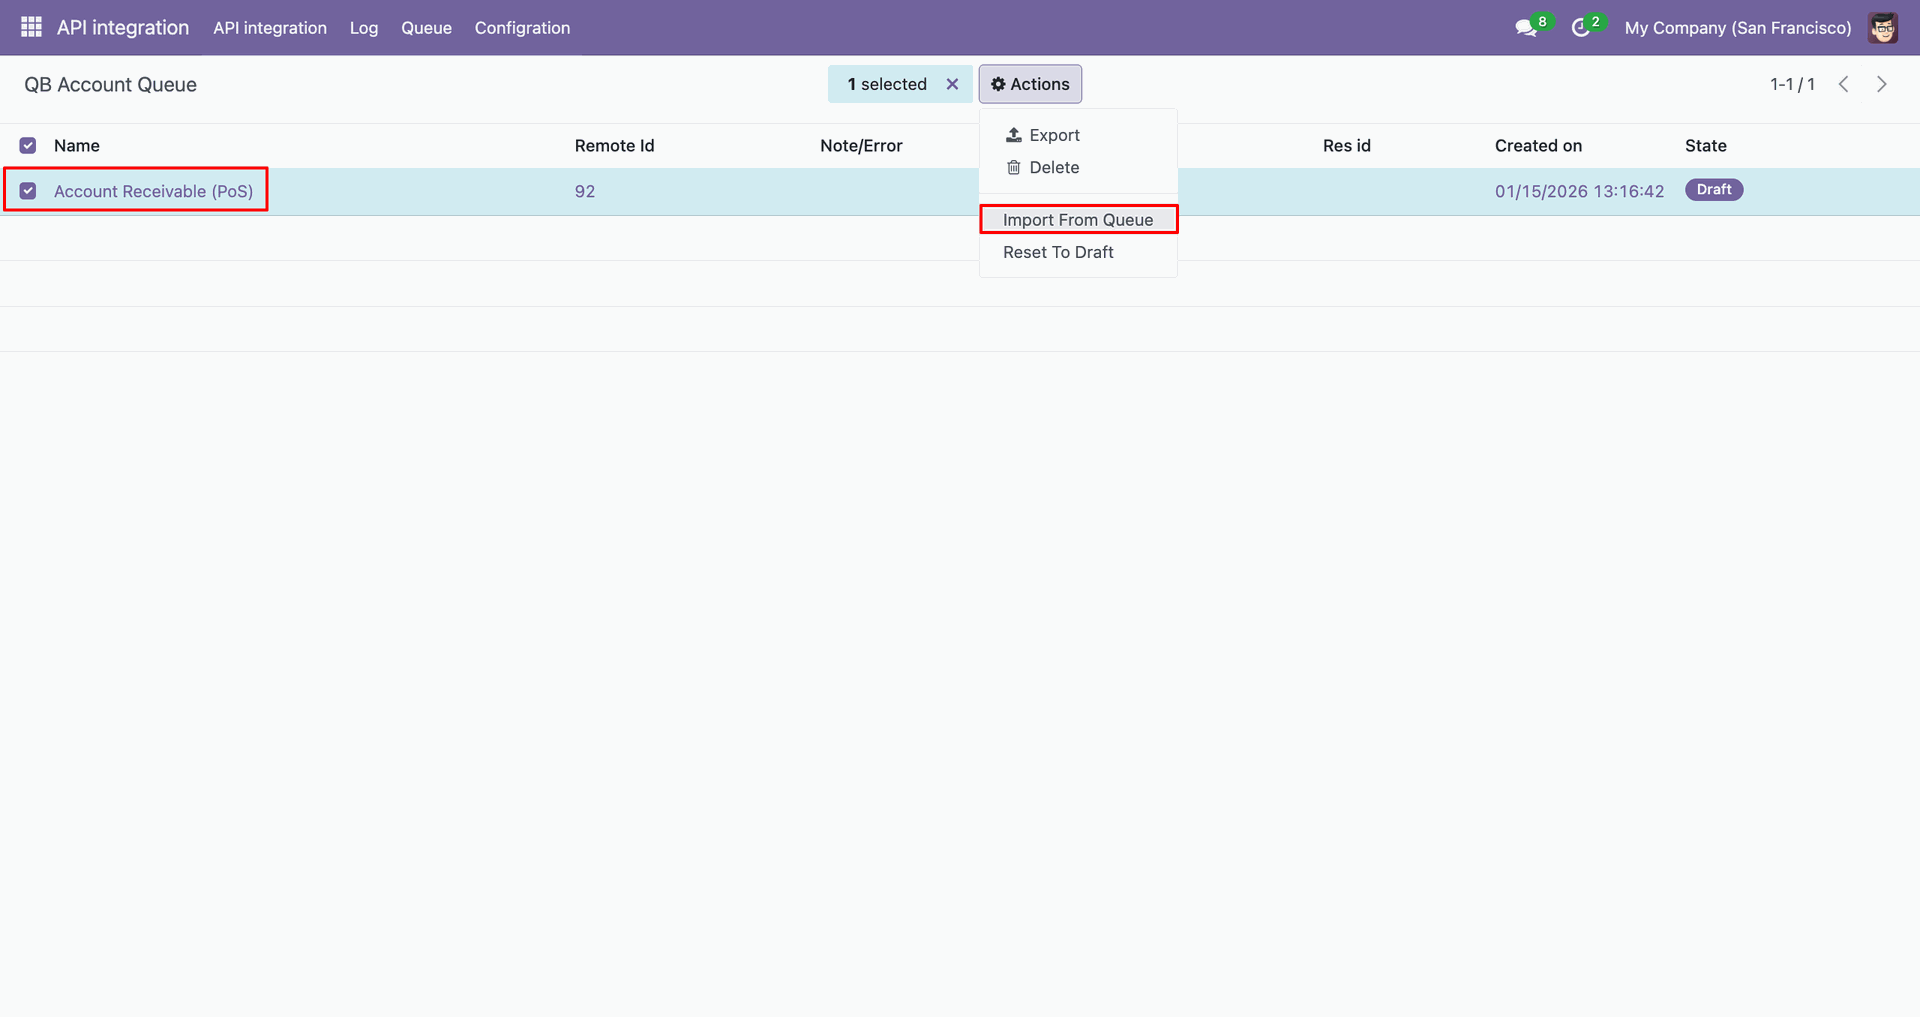
Log with details.
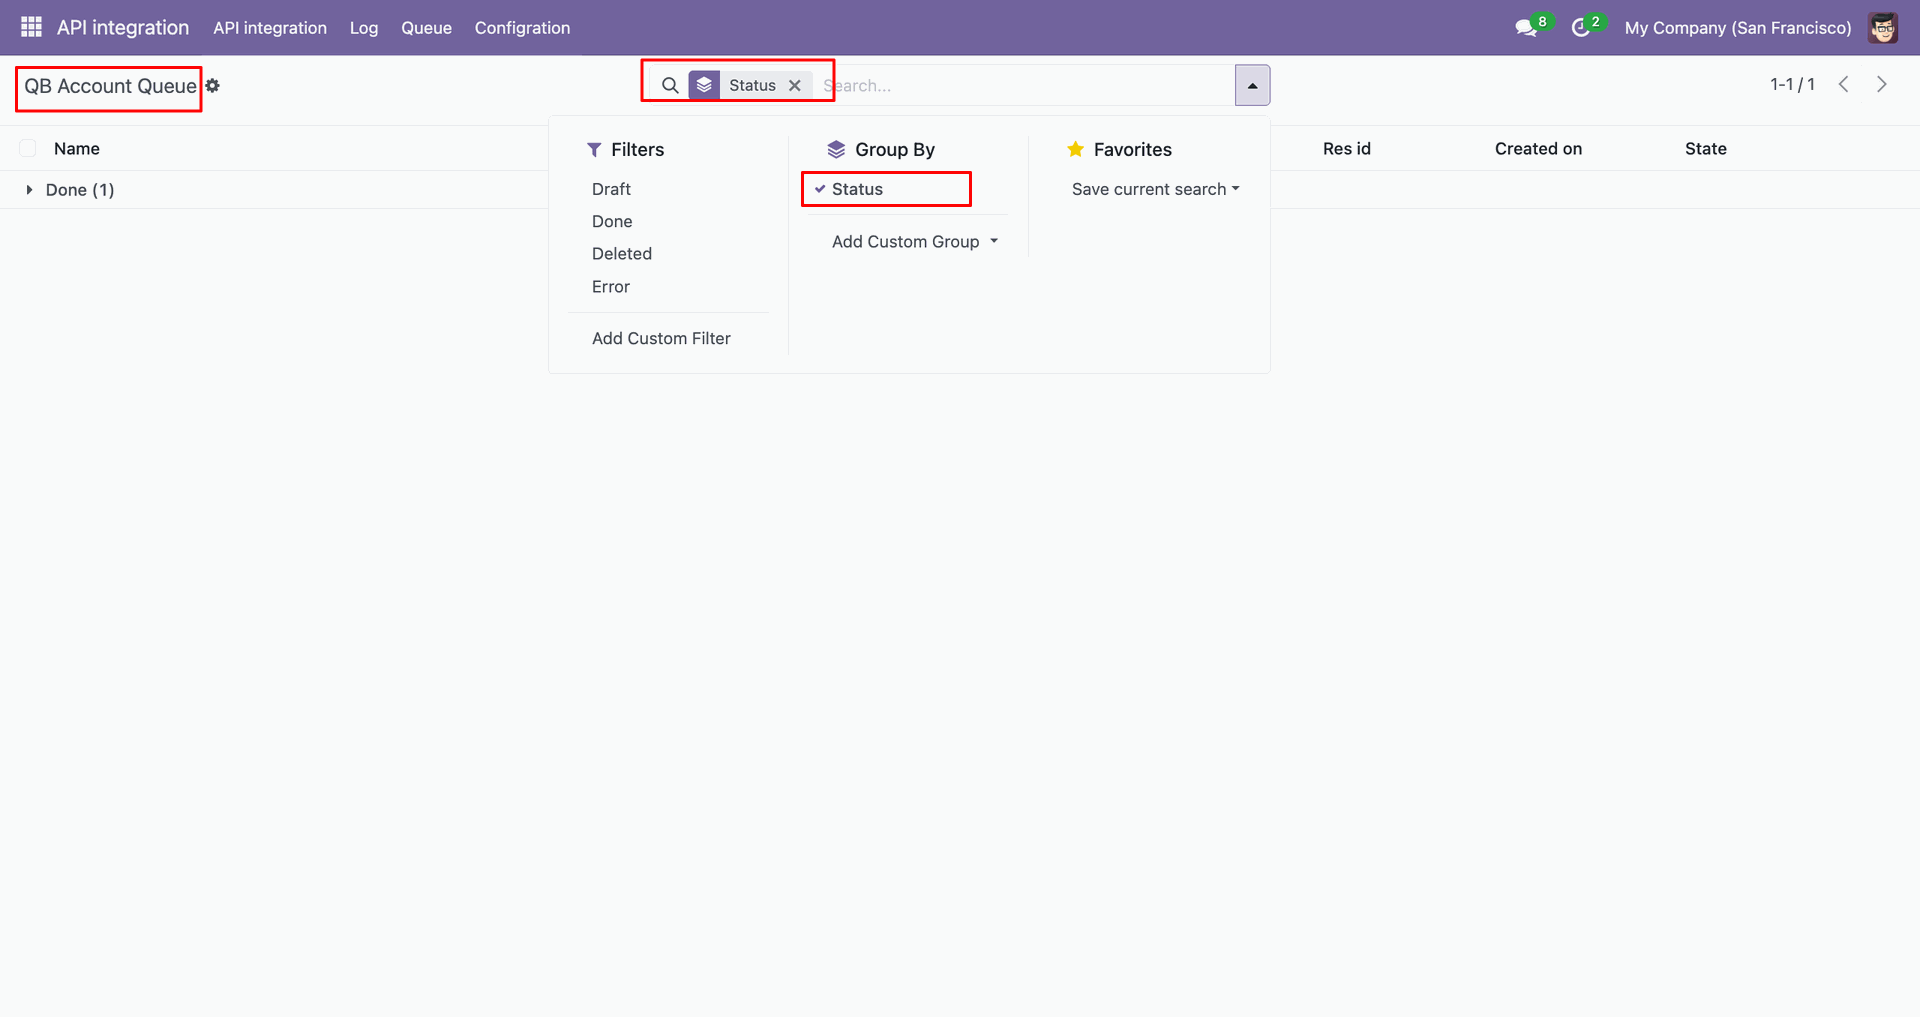
Group by with 'Status'.
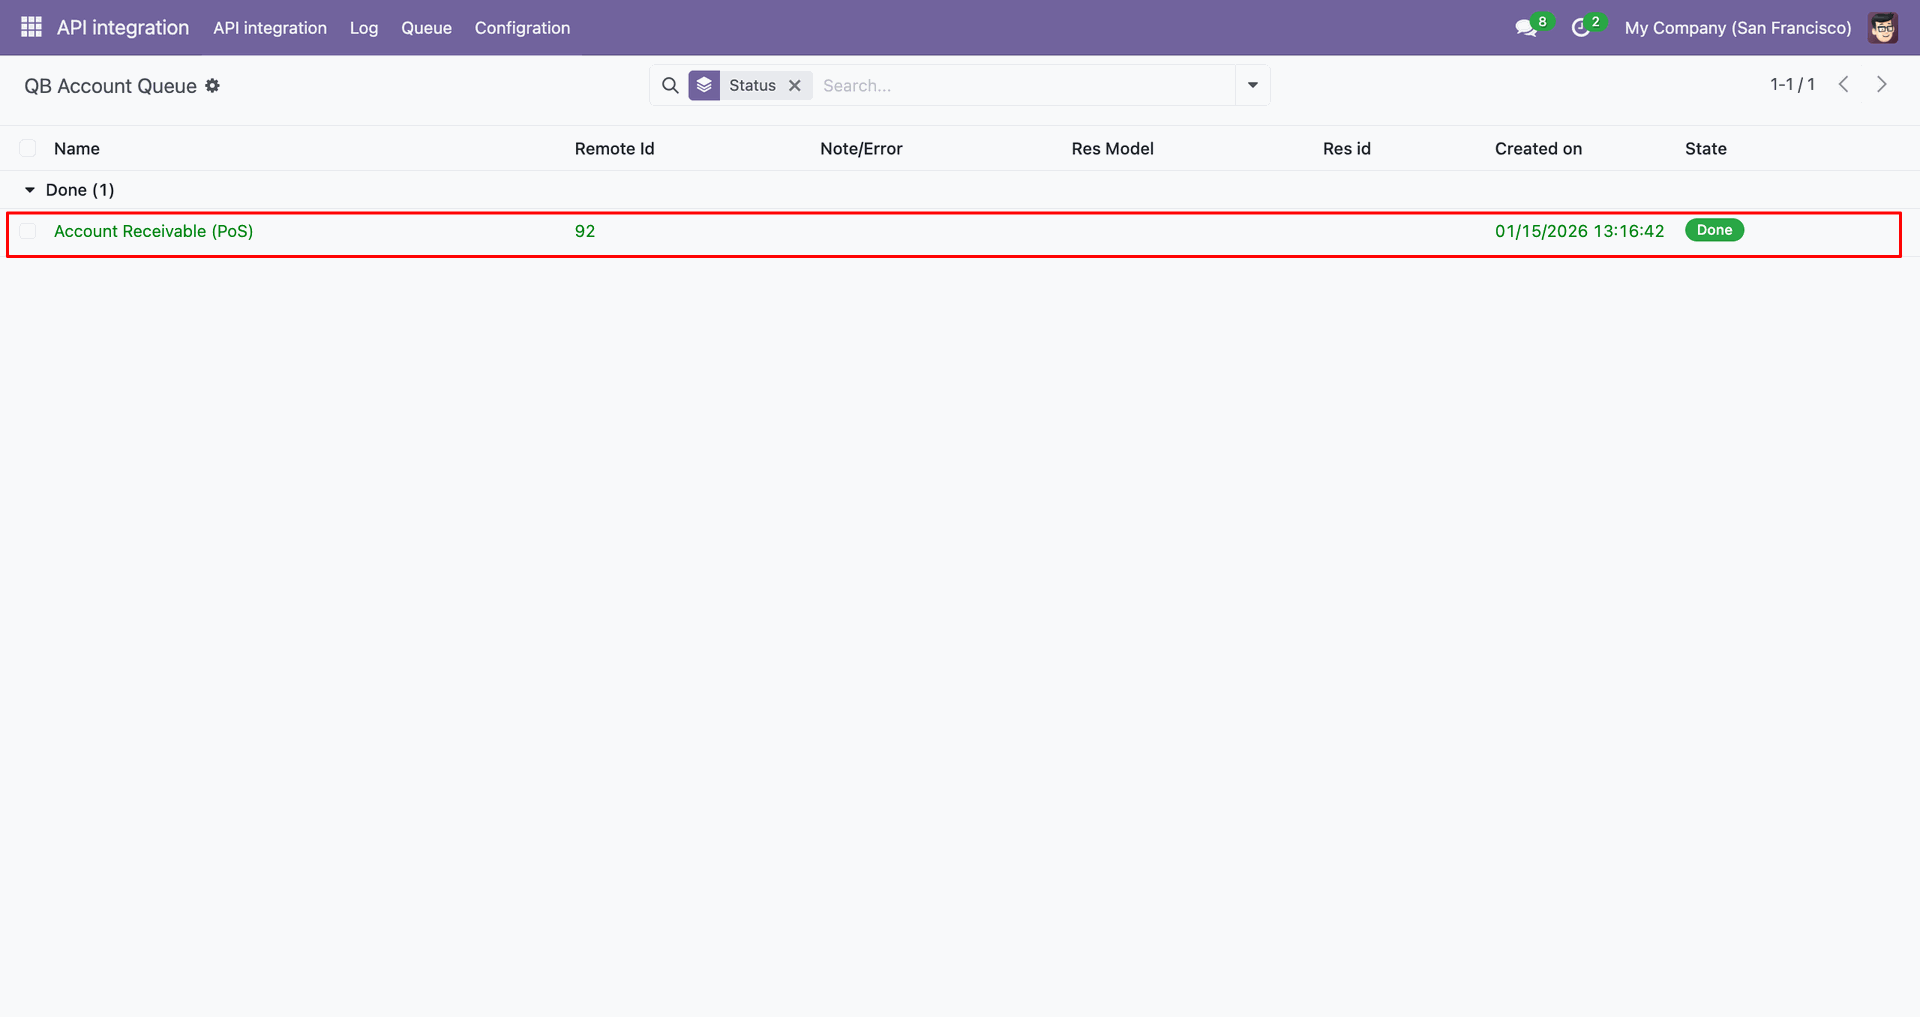
Group by result.
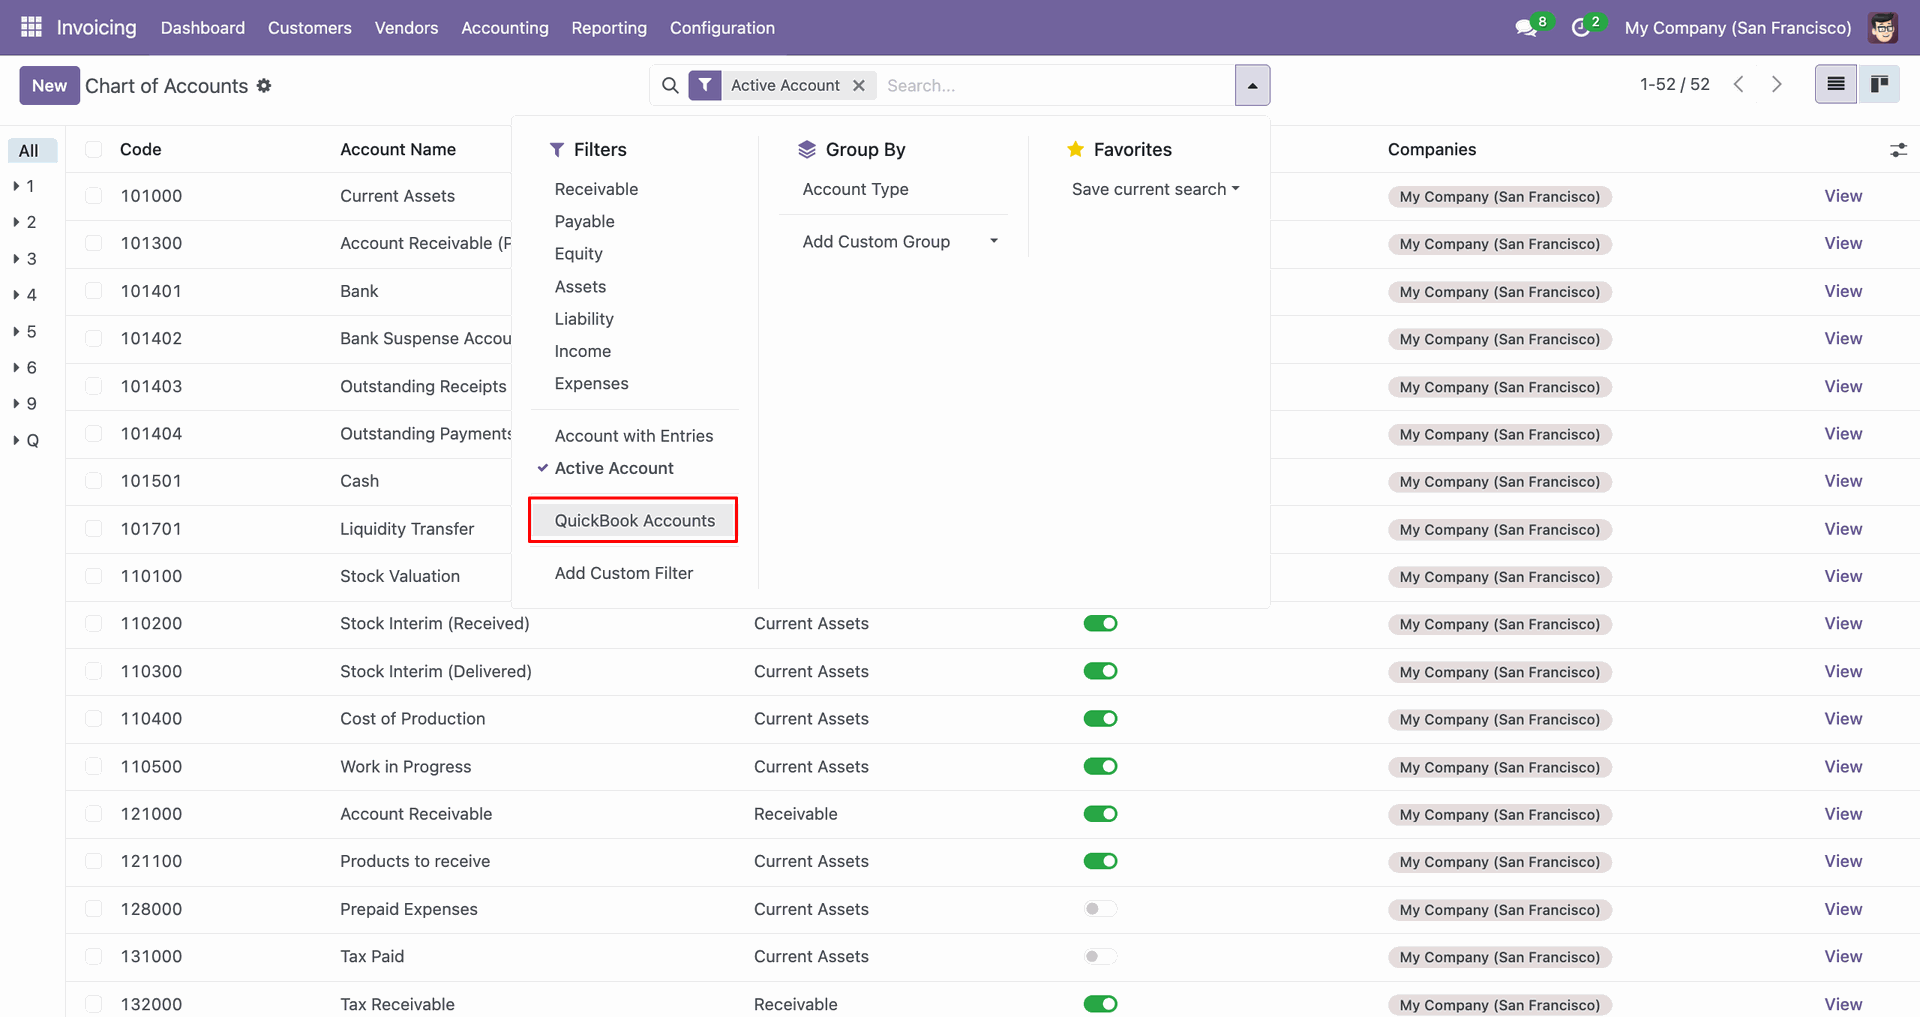
Filter Quickbooks account.
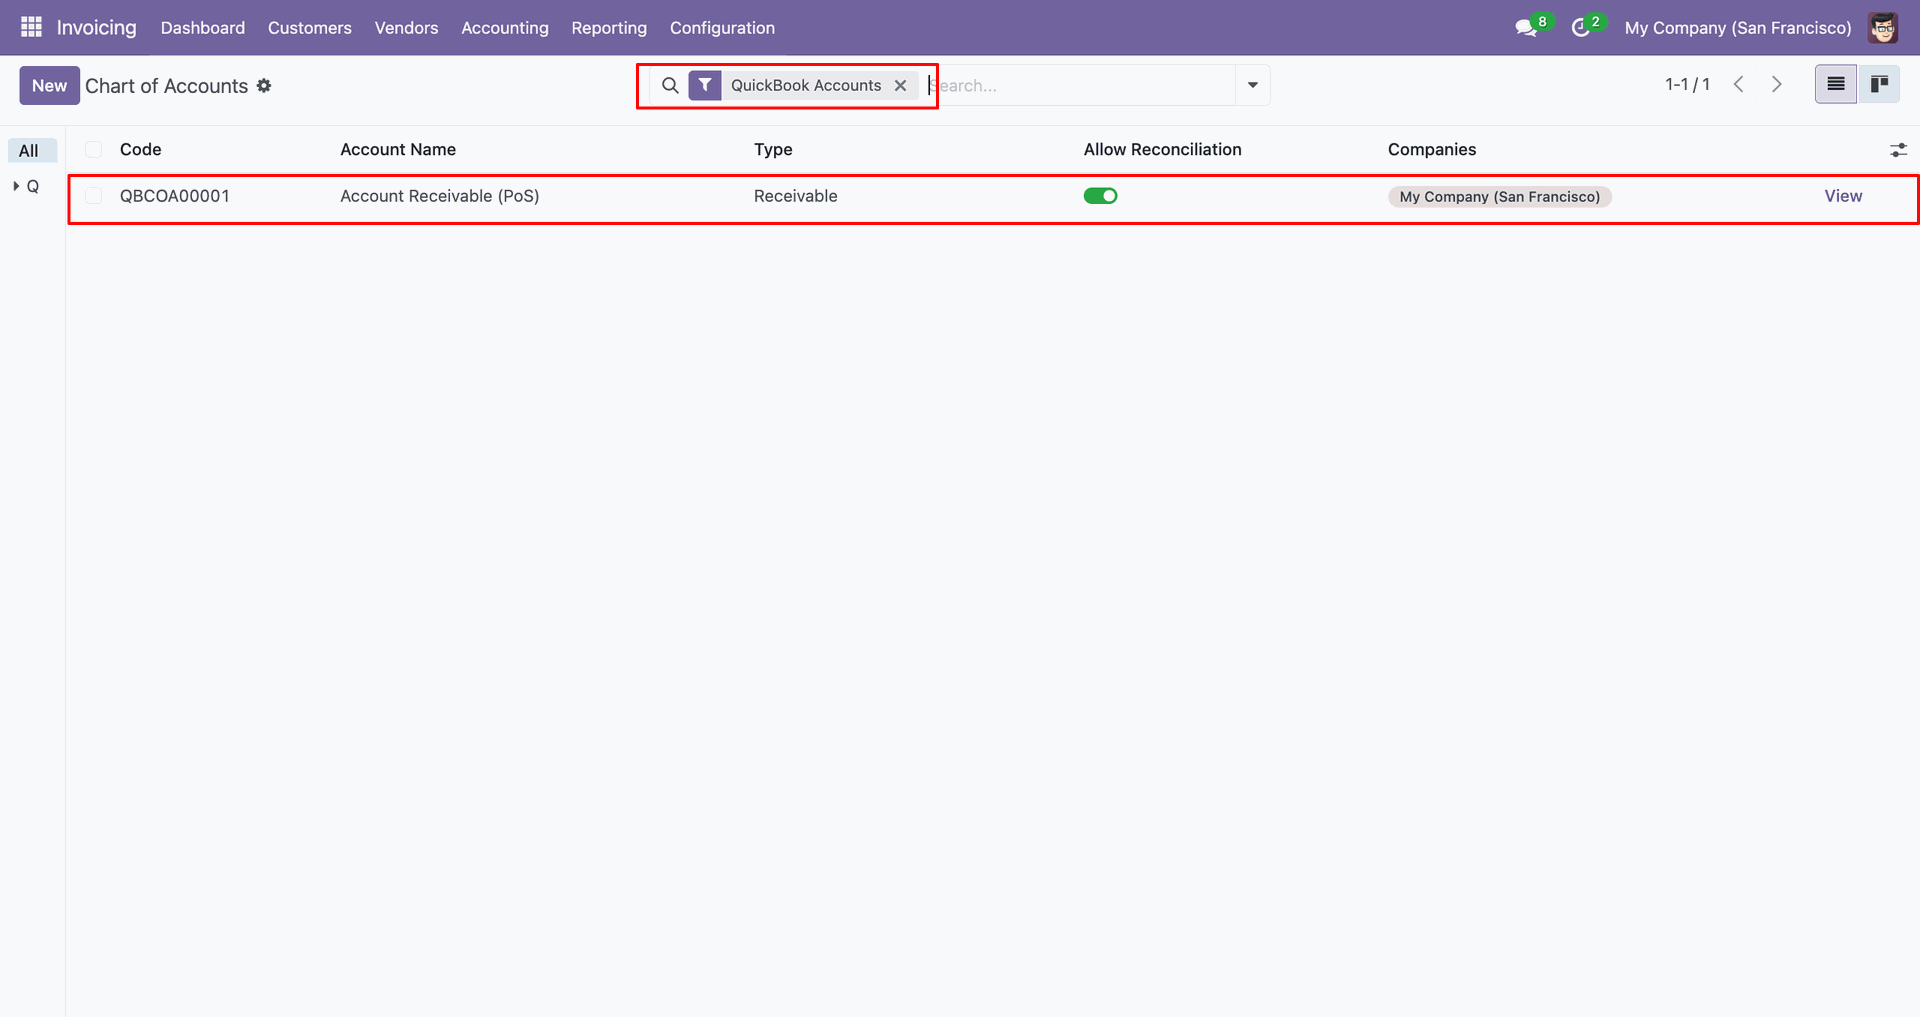
Filter result.
Go to the 'Customers', click 'Invoices'.
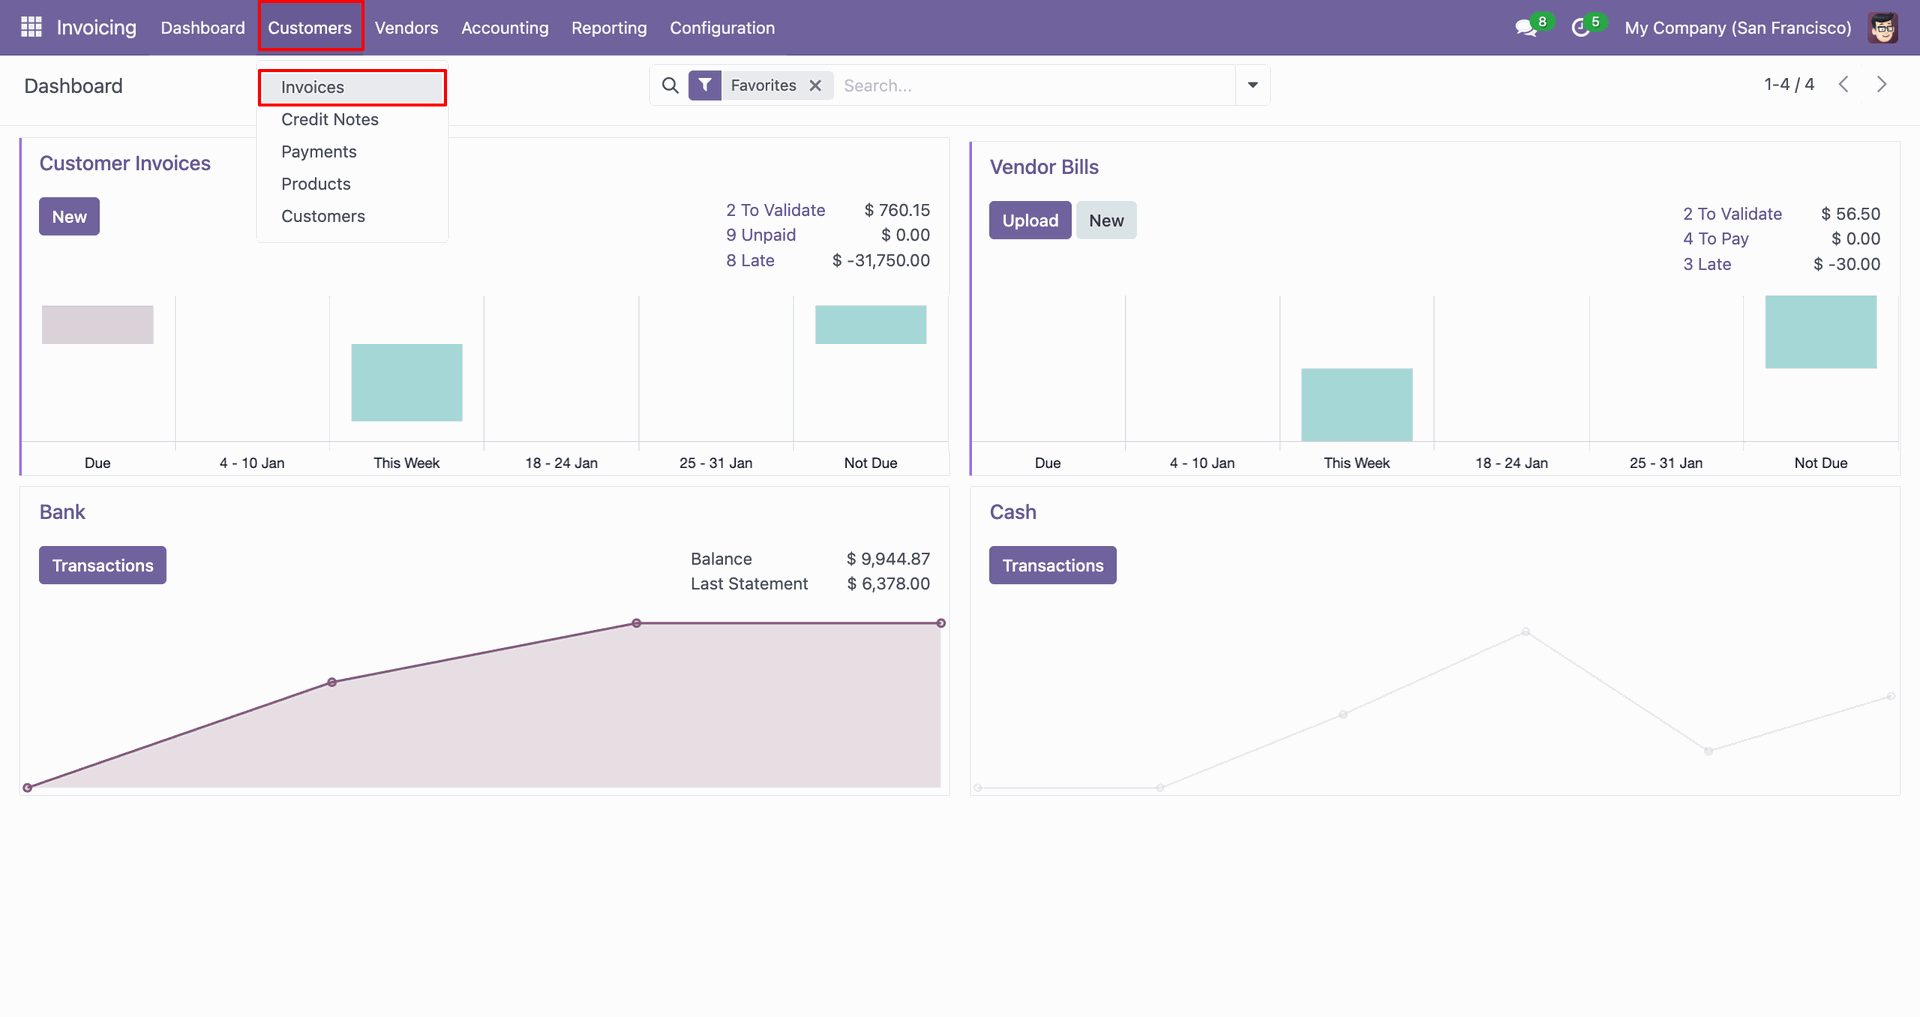
You can export from the 'Action'.
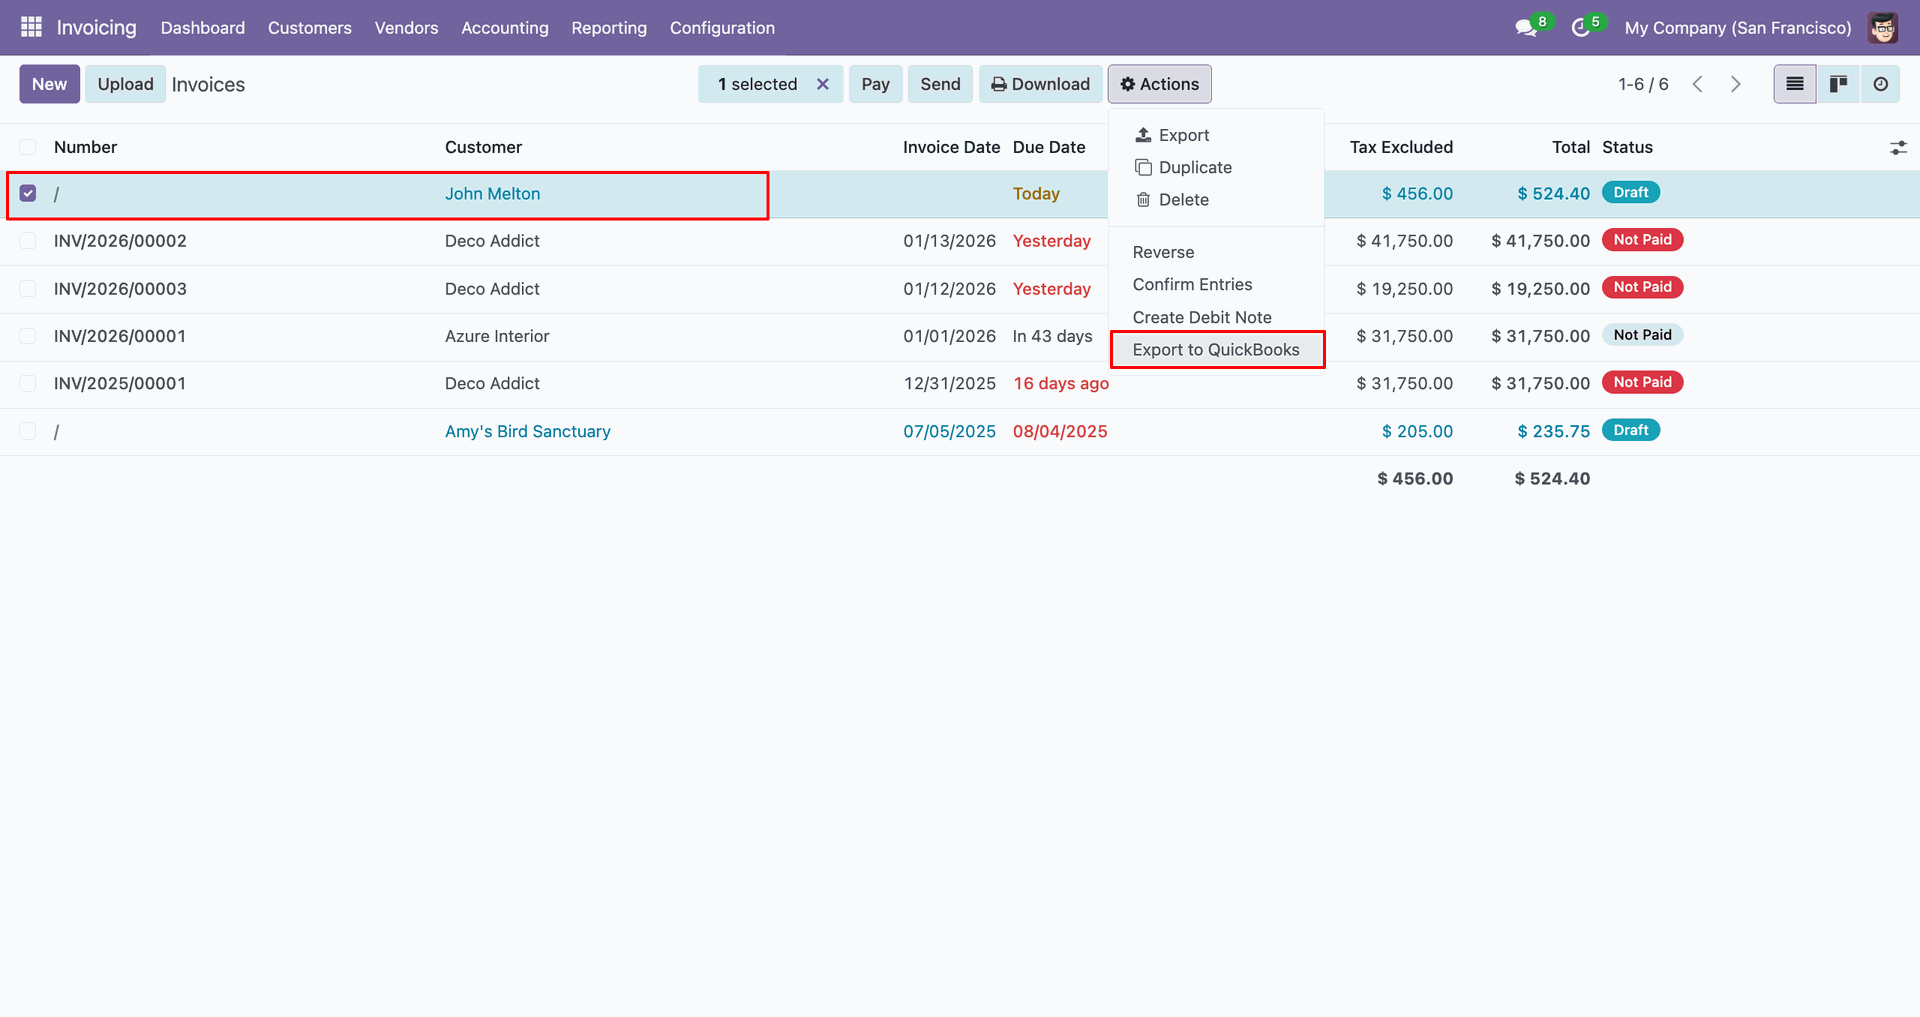
Config selection popup.
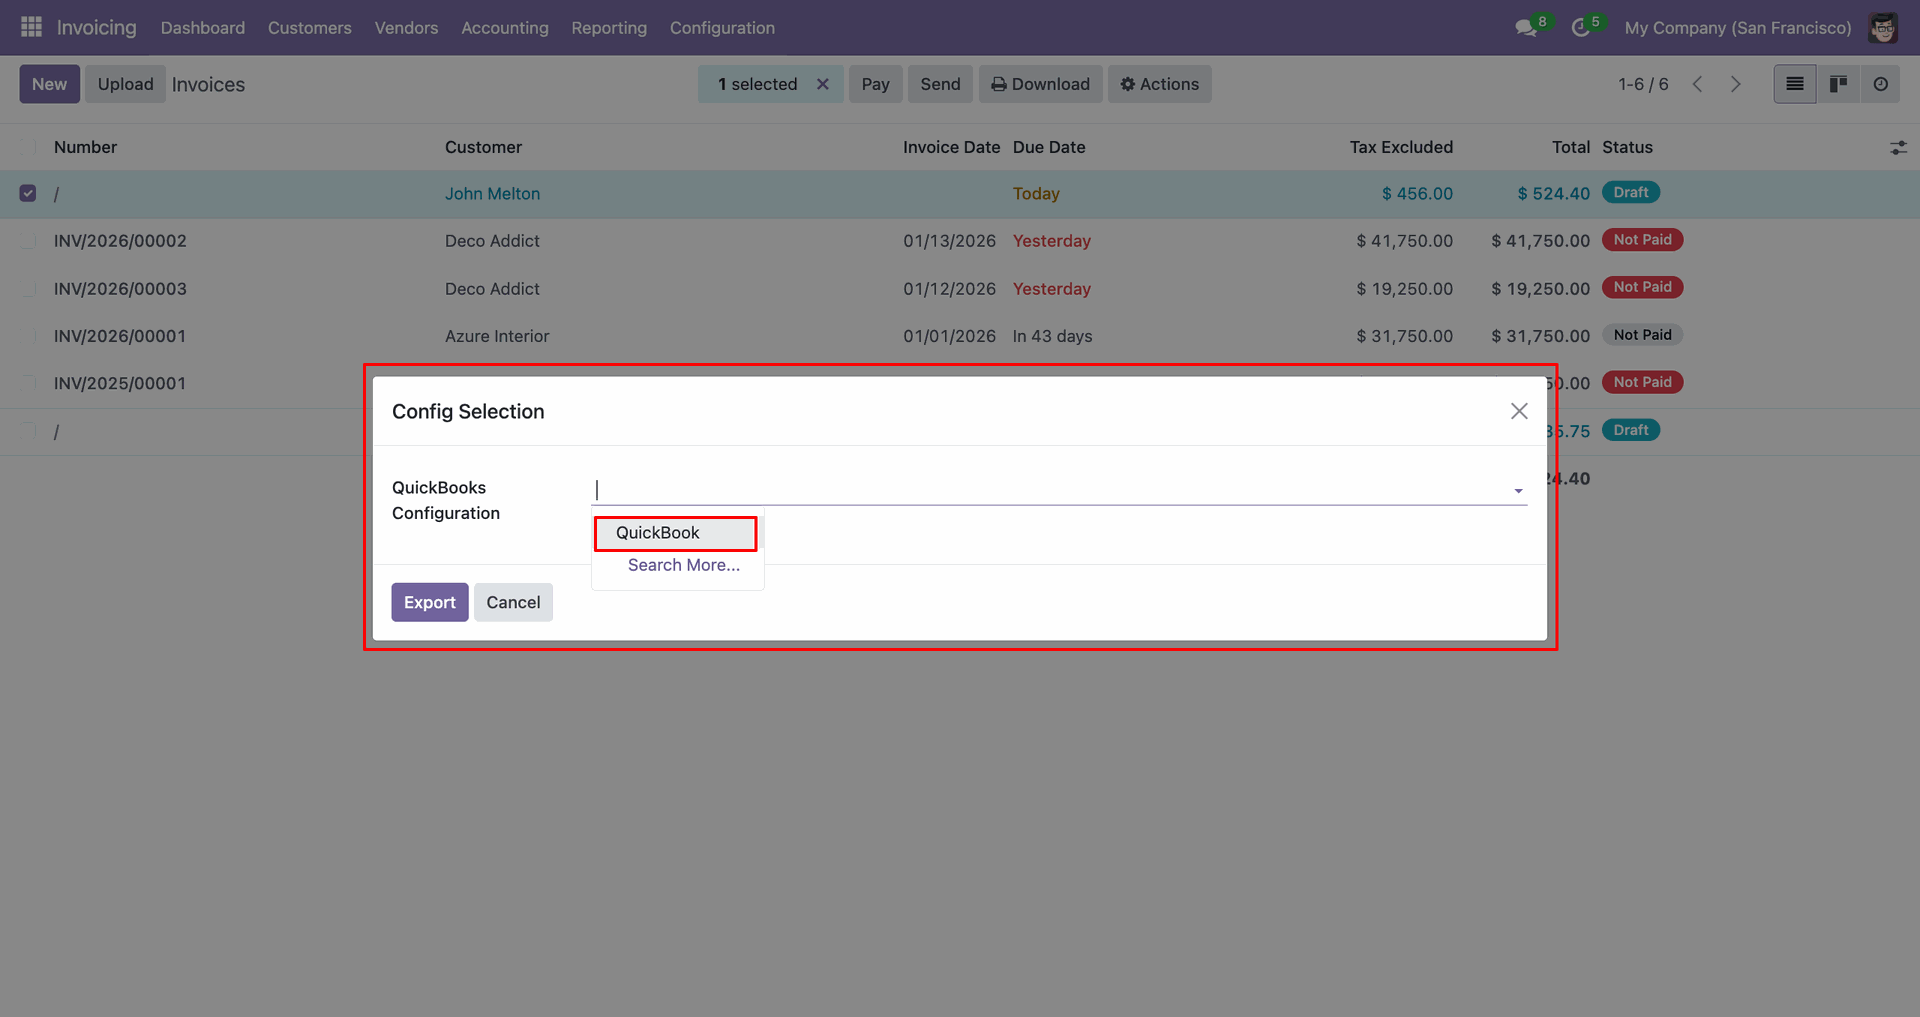
Select 'QuickBooks' and click 'Export'.
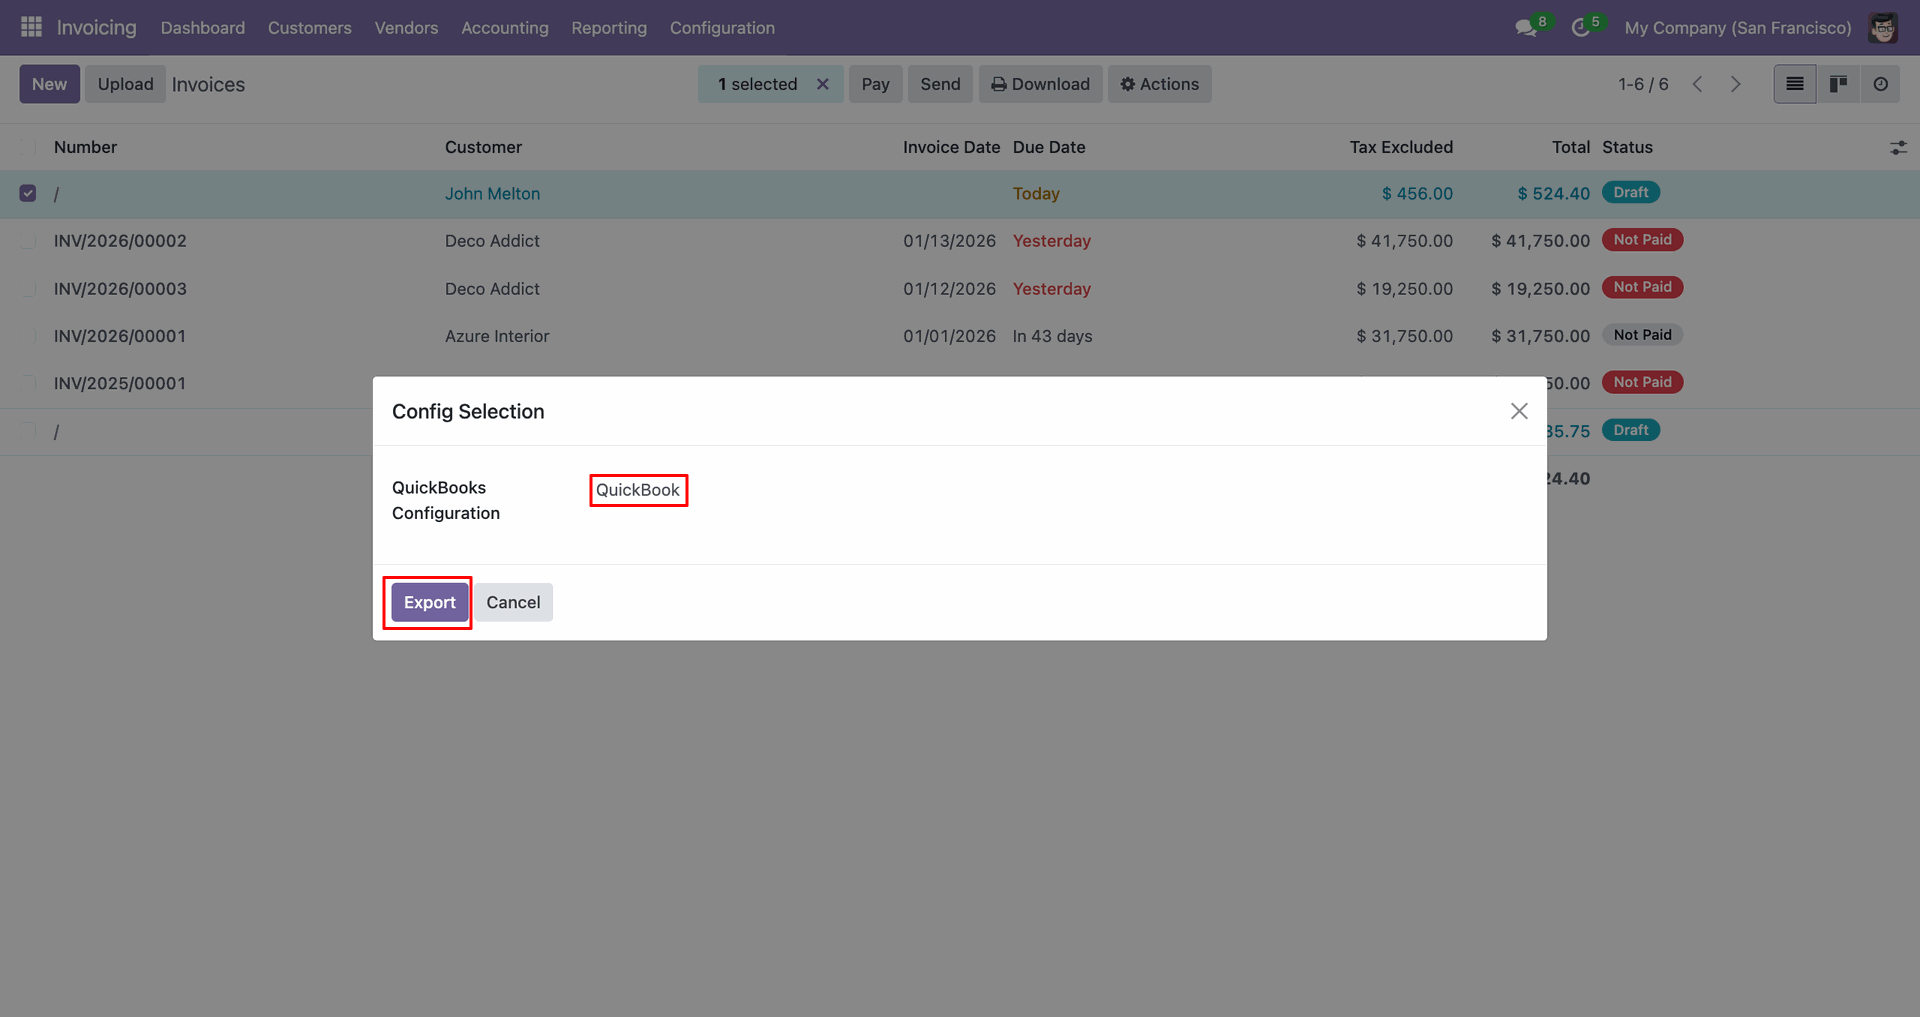
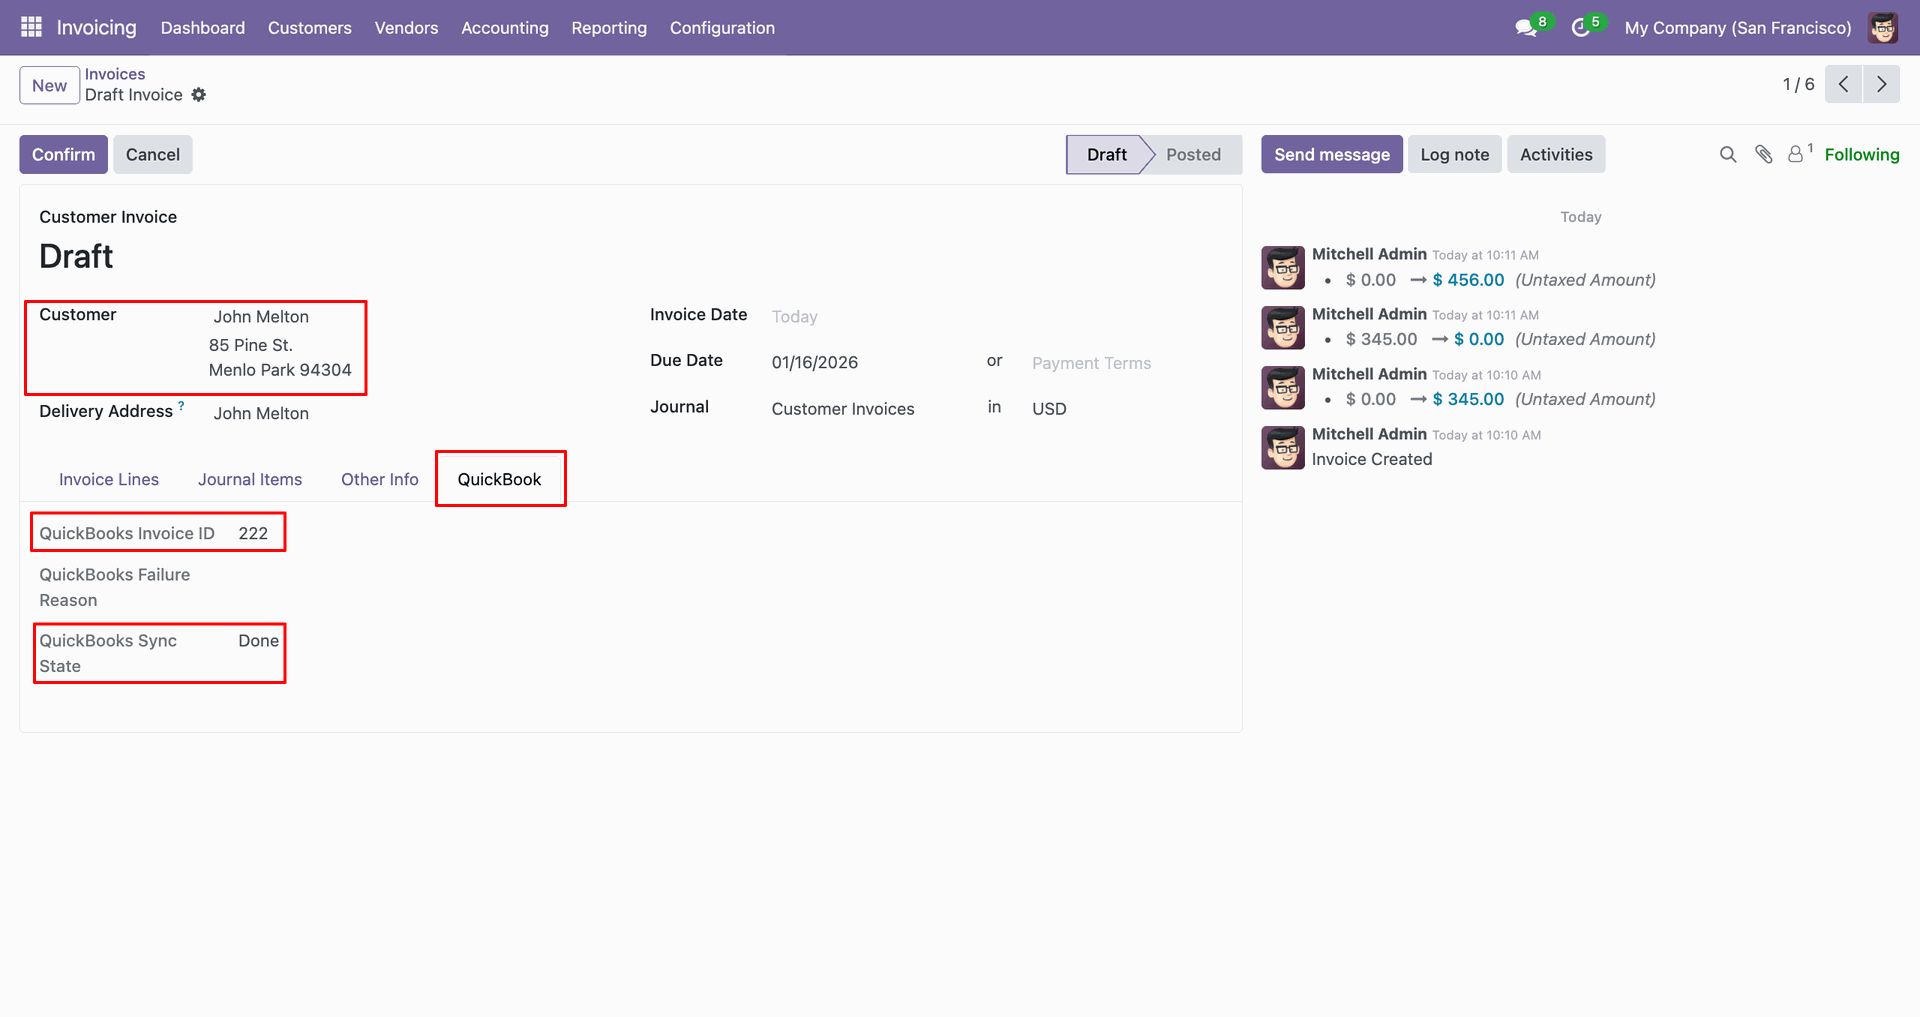
The form view contains Quickbook ID and sync state.
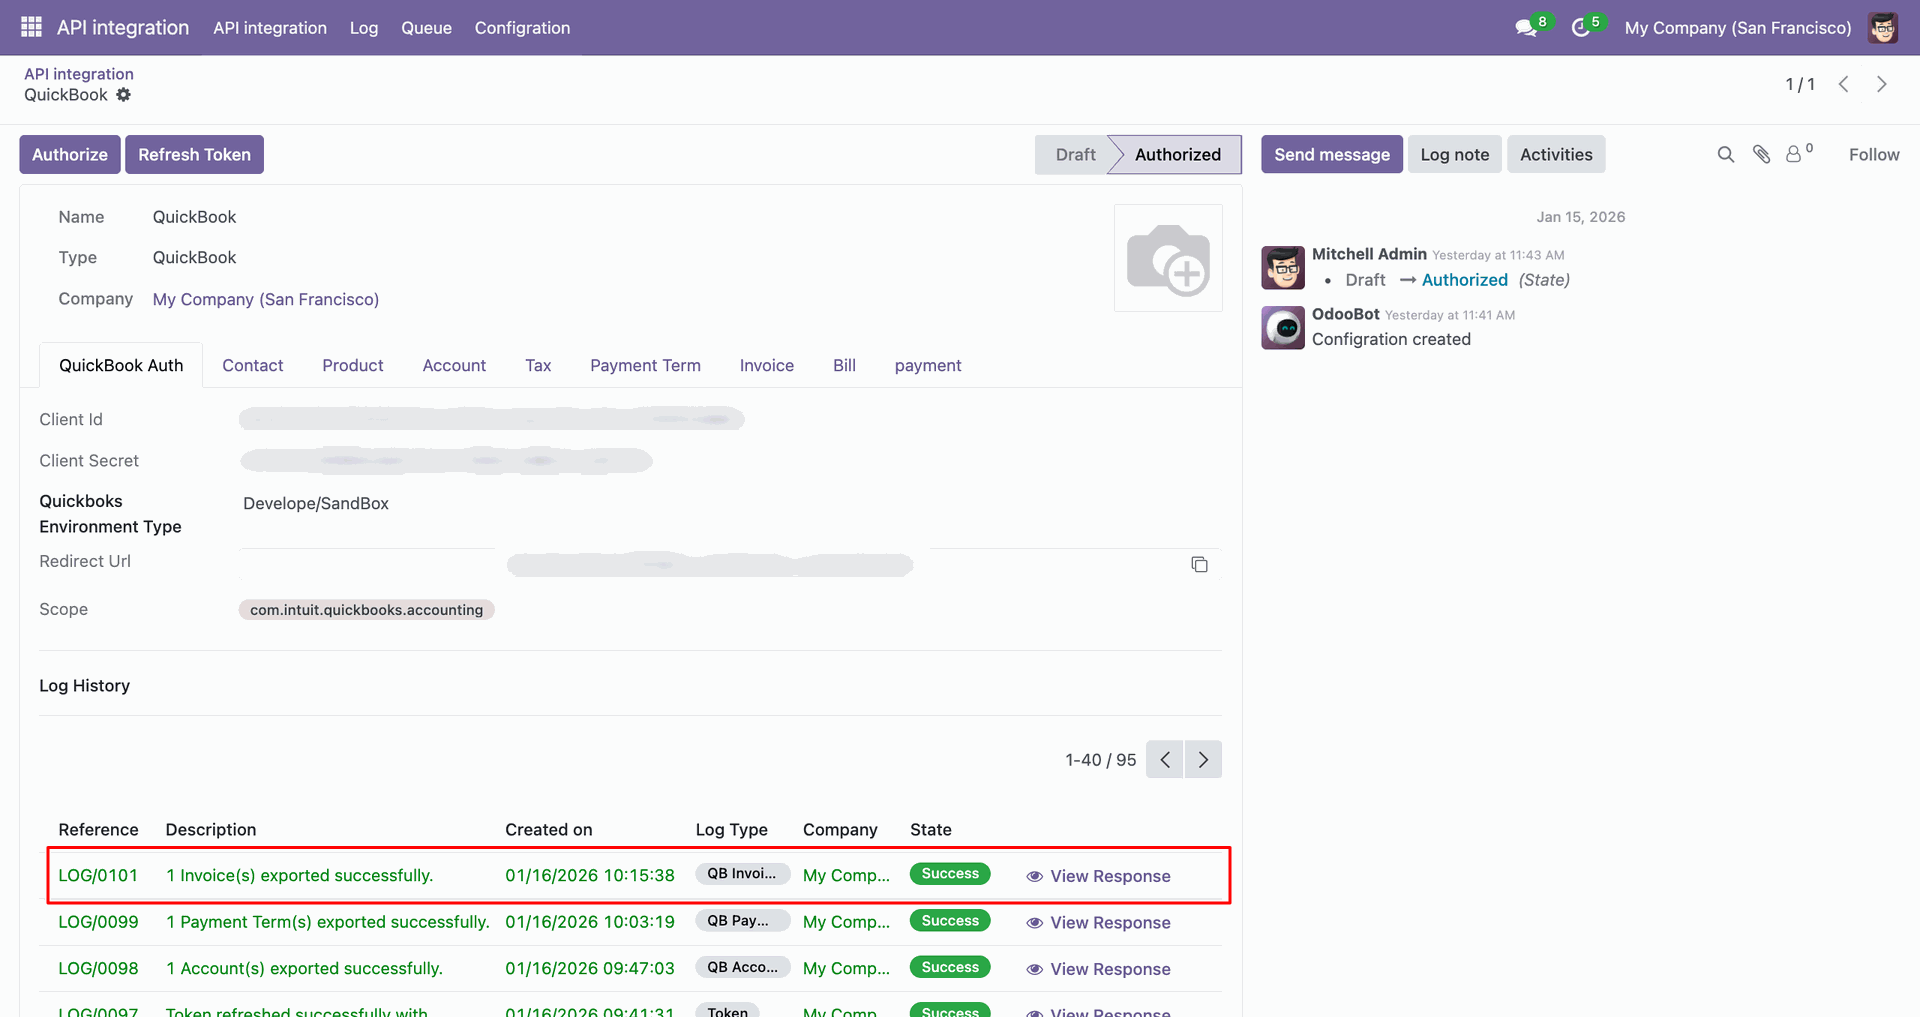
Log with details.
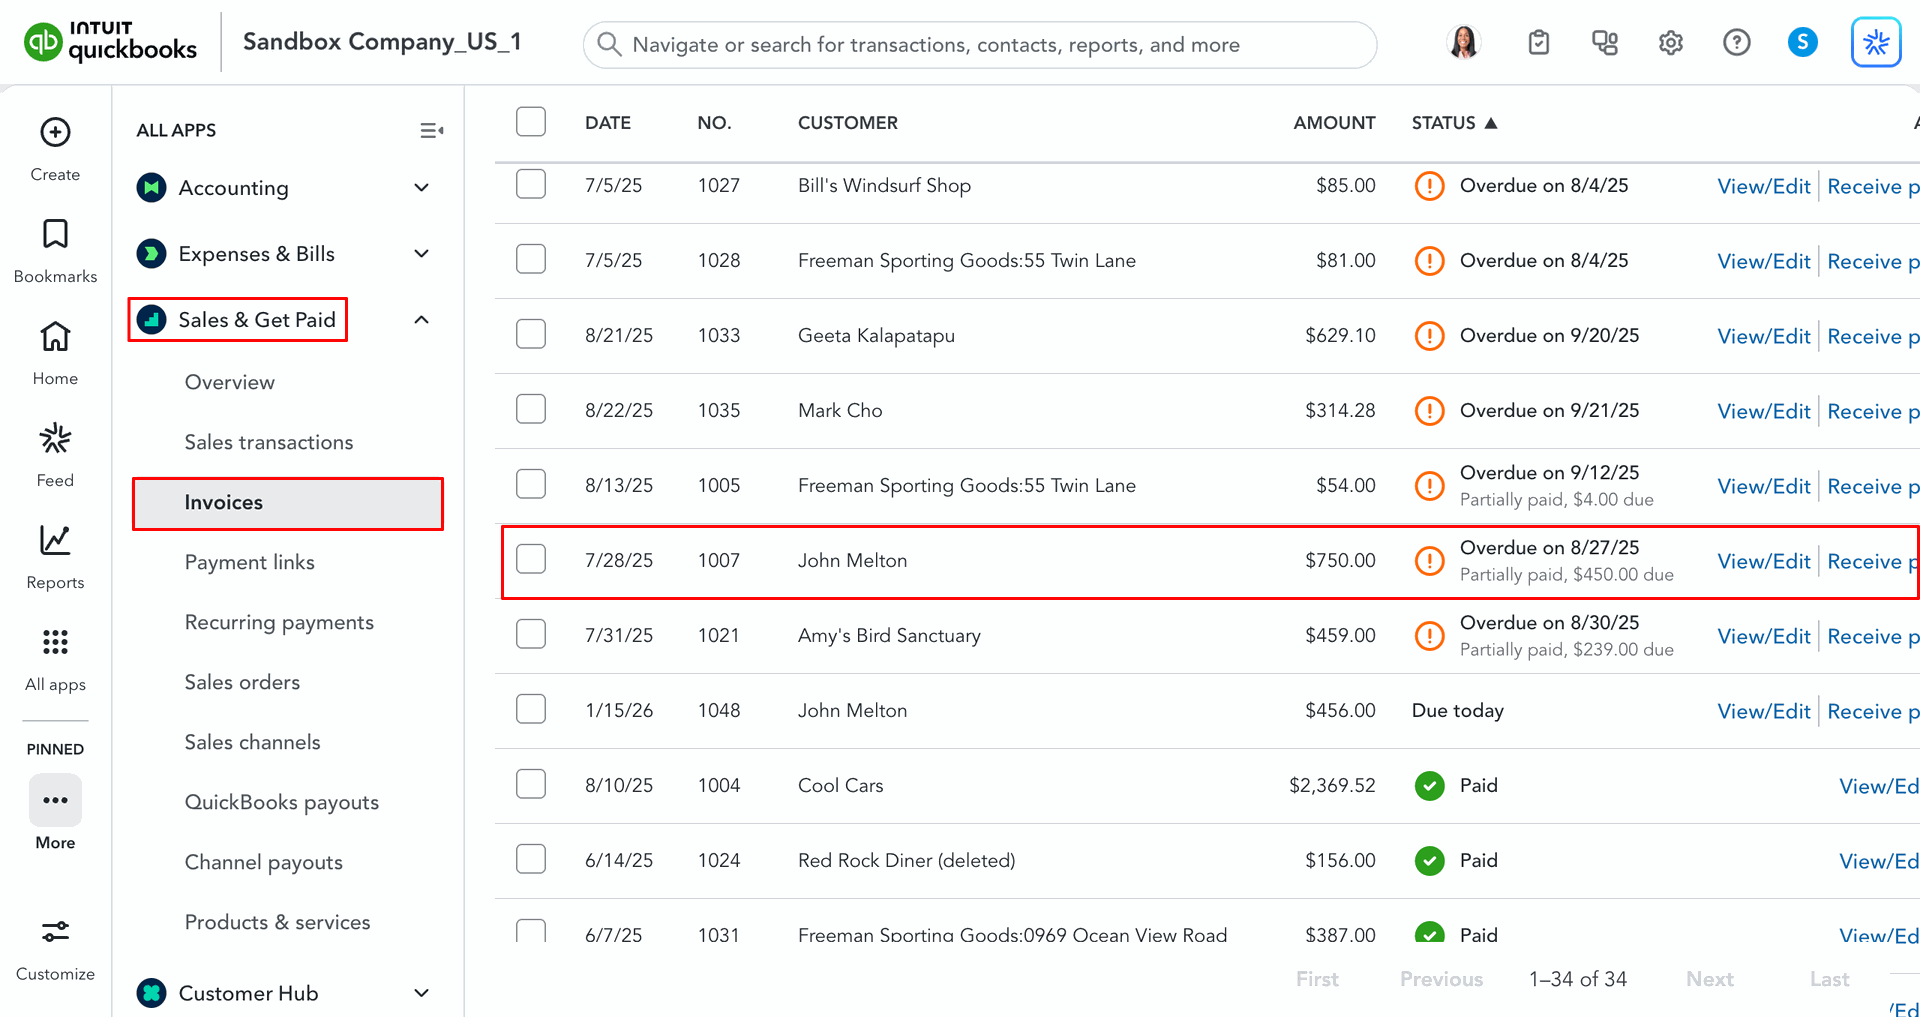
Invoices in QuickBooks.
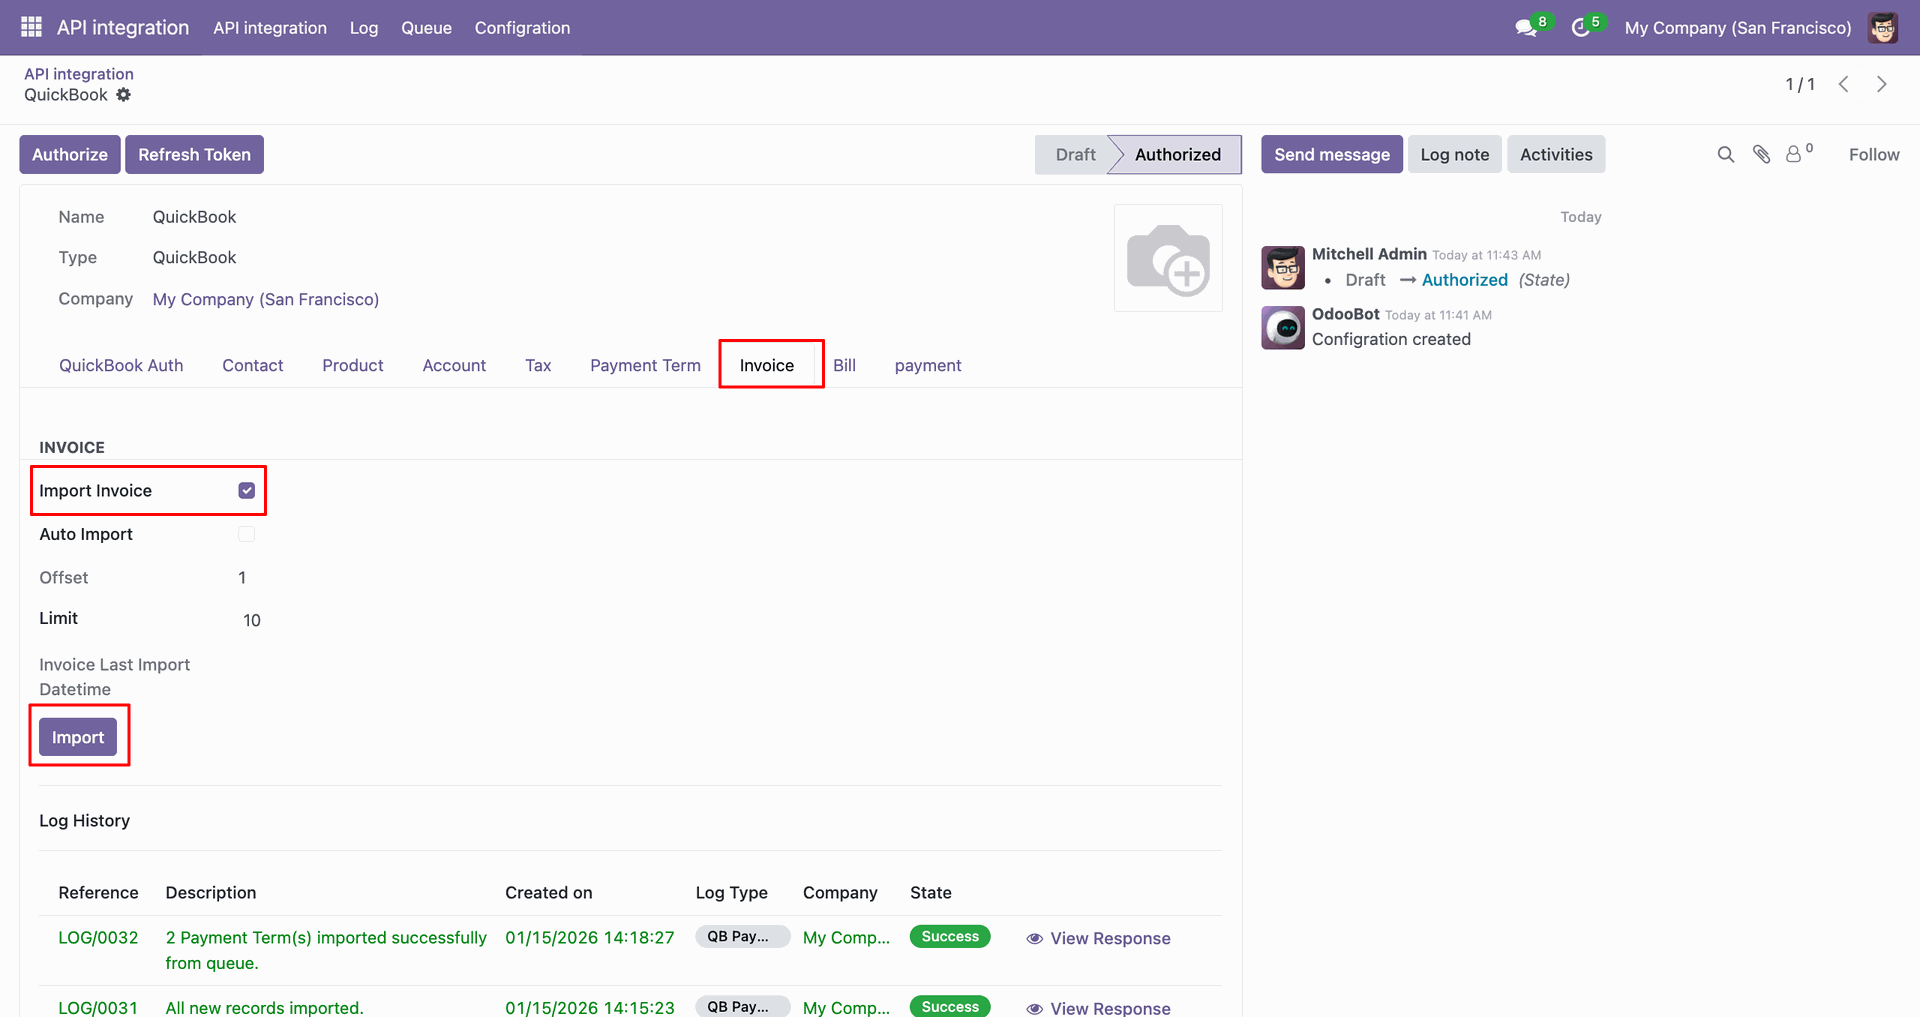
For the import, go to the 'Invoice' Tab, enable 'Import Invoice', and click 'Import'.
Log with imported data.
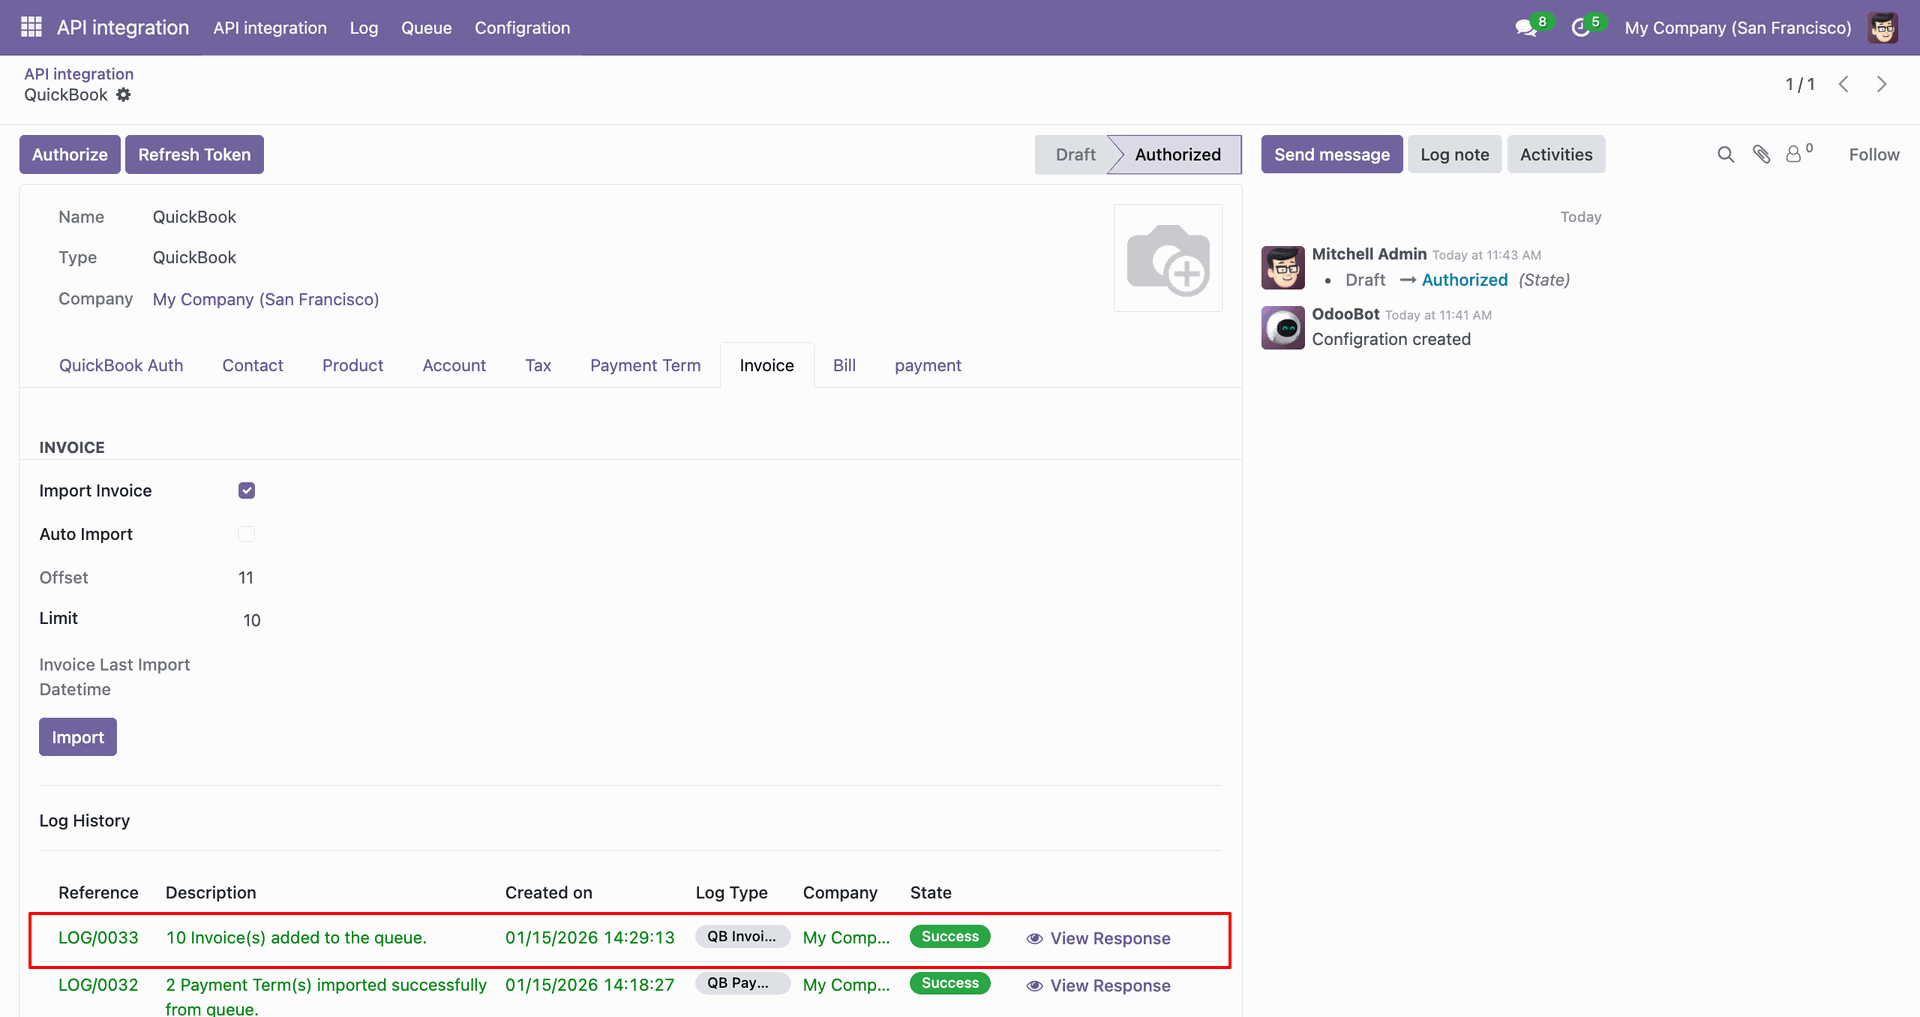
Go to the Queue, 'QB Invoice'.
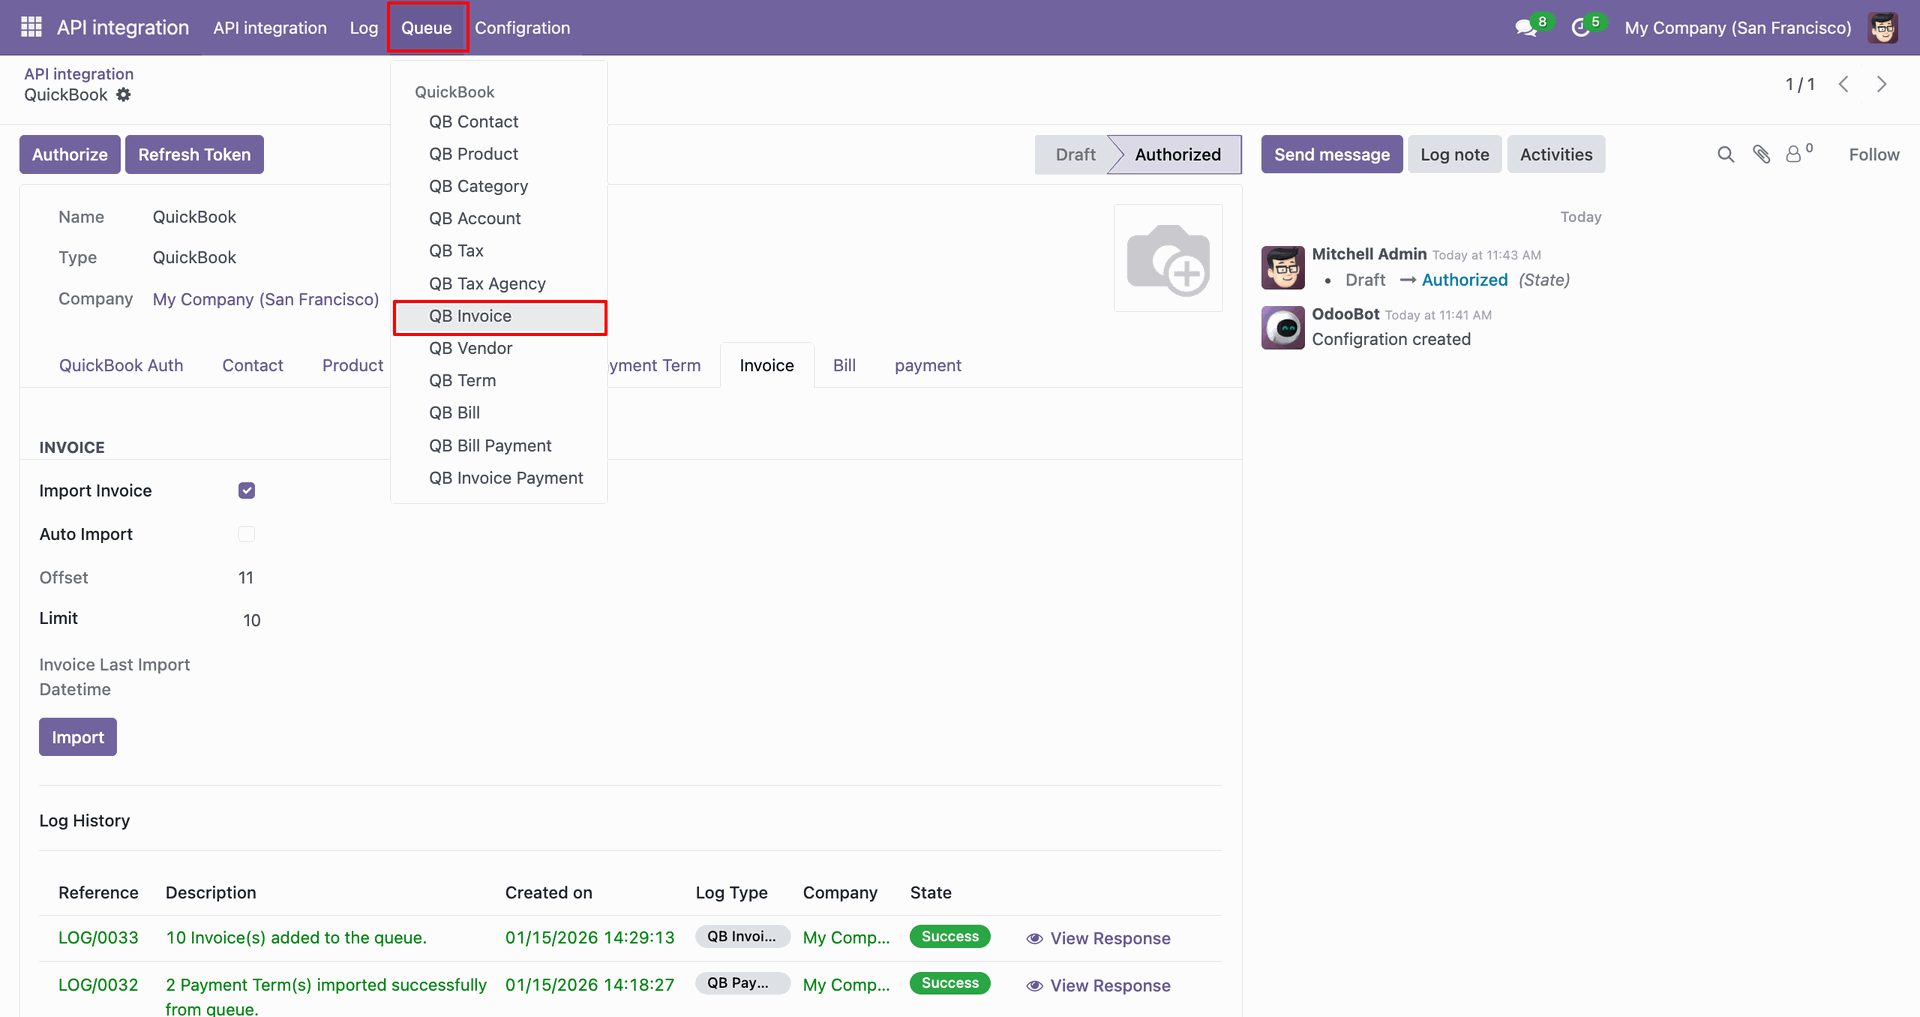
It will open the queue.
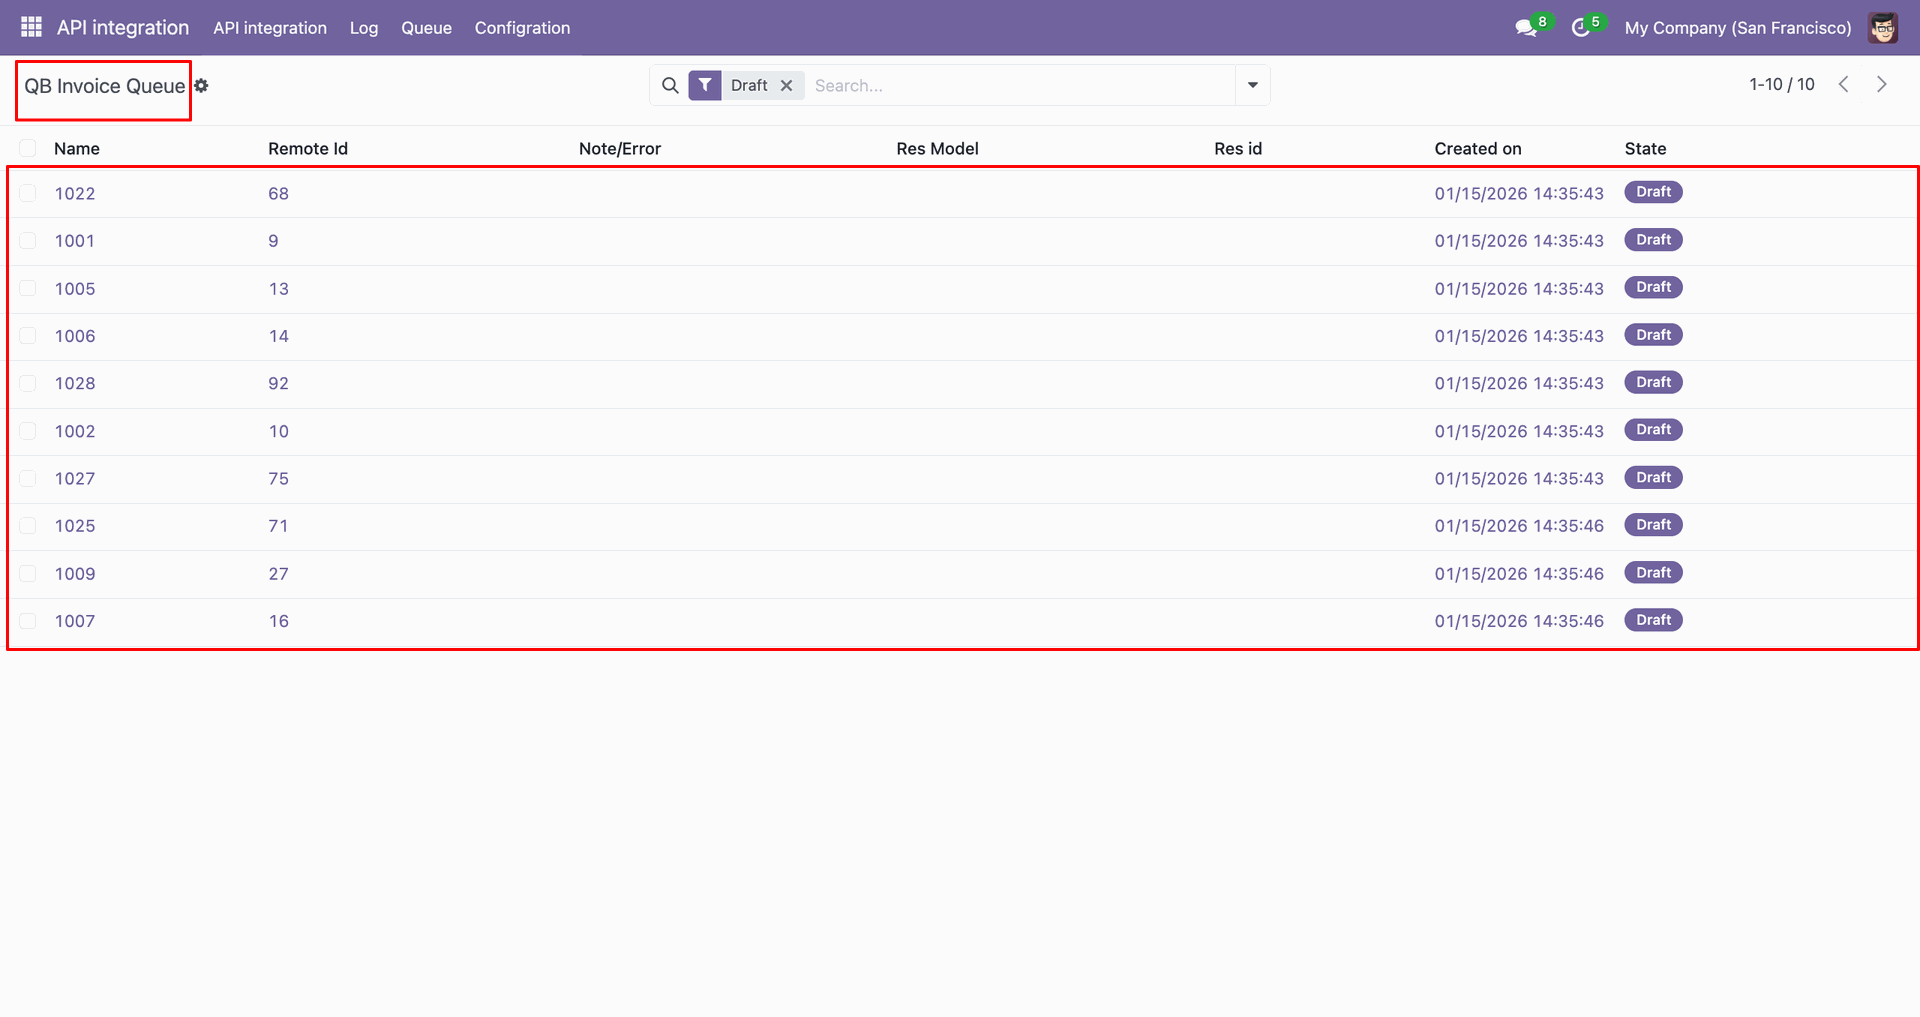
You can import from 'Action'.
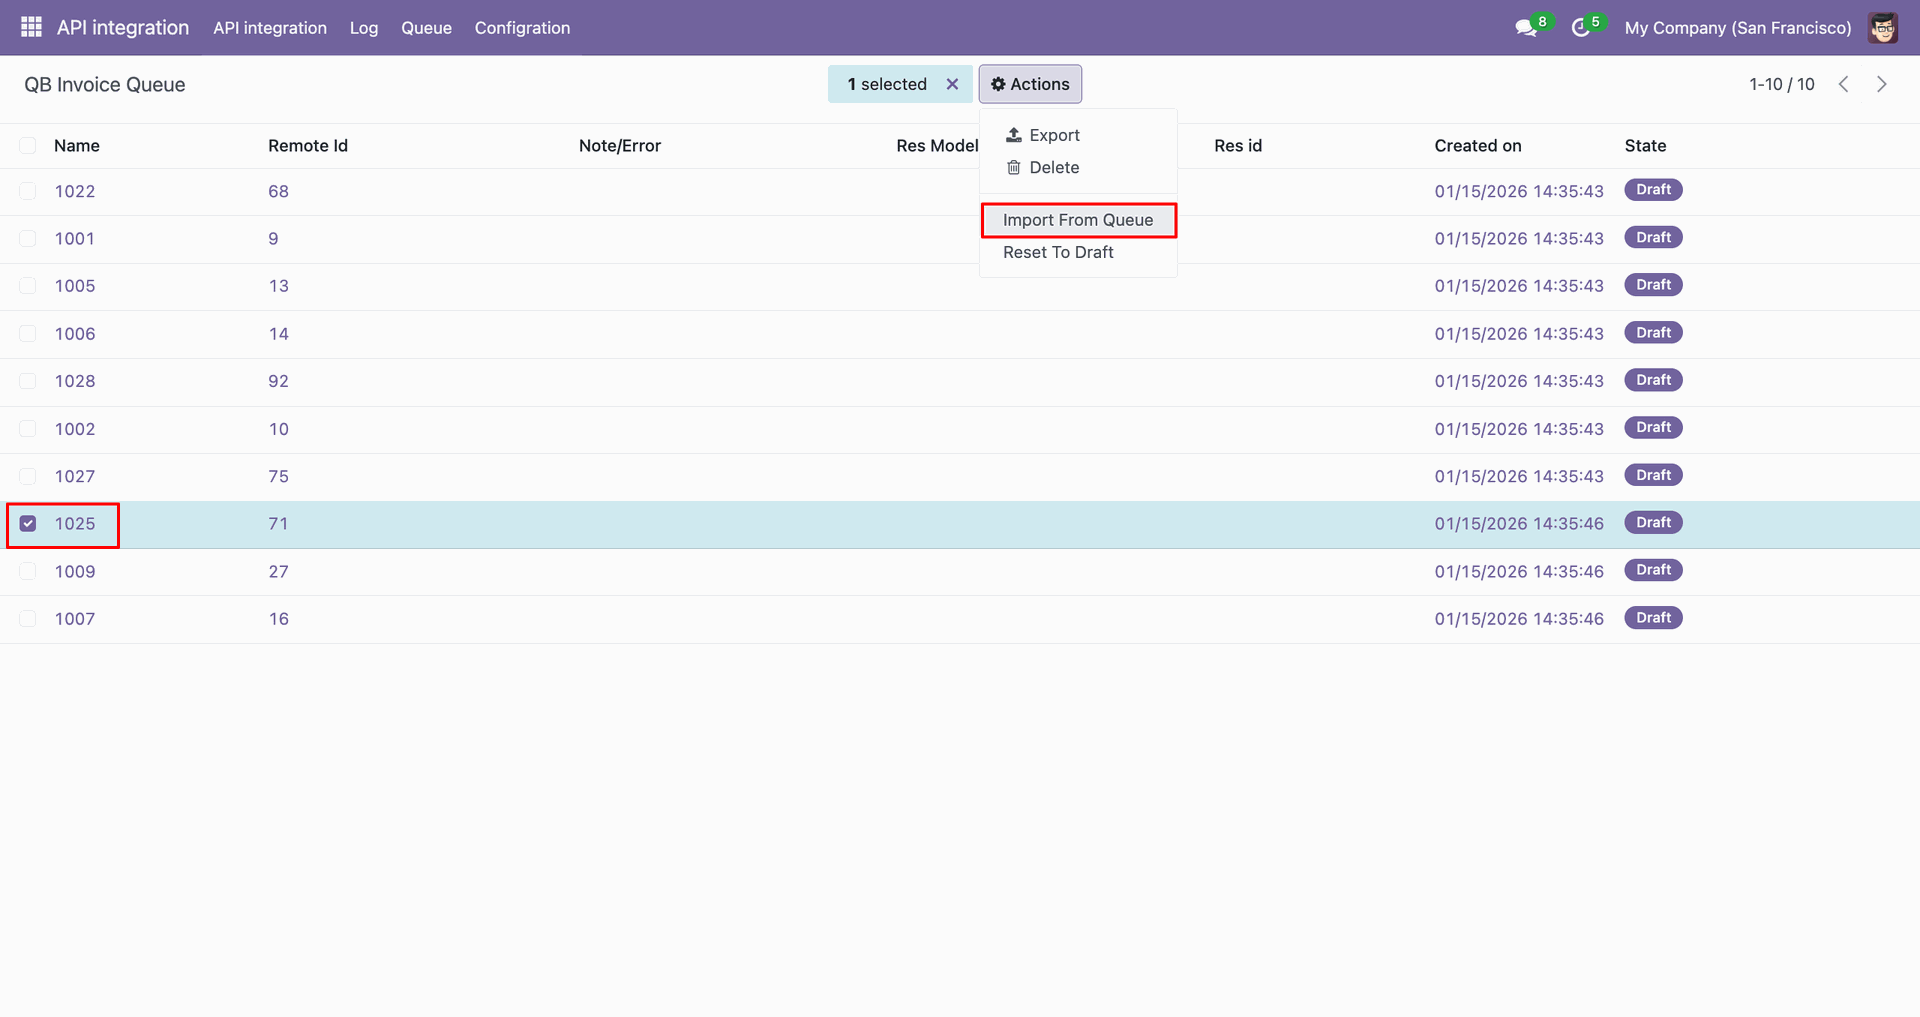
Log with details.
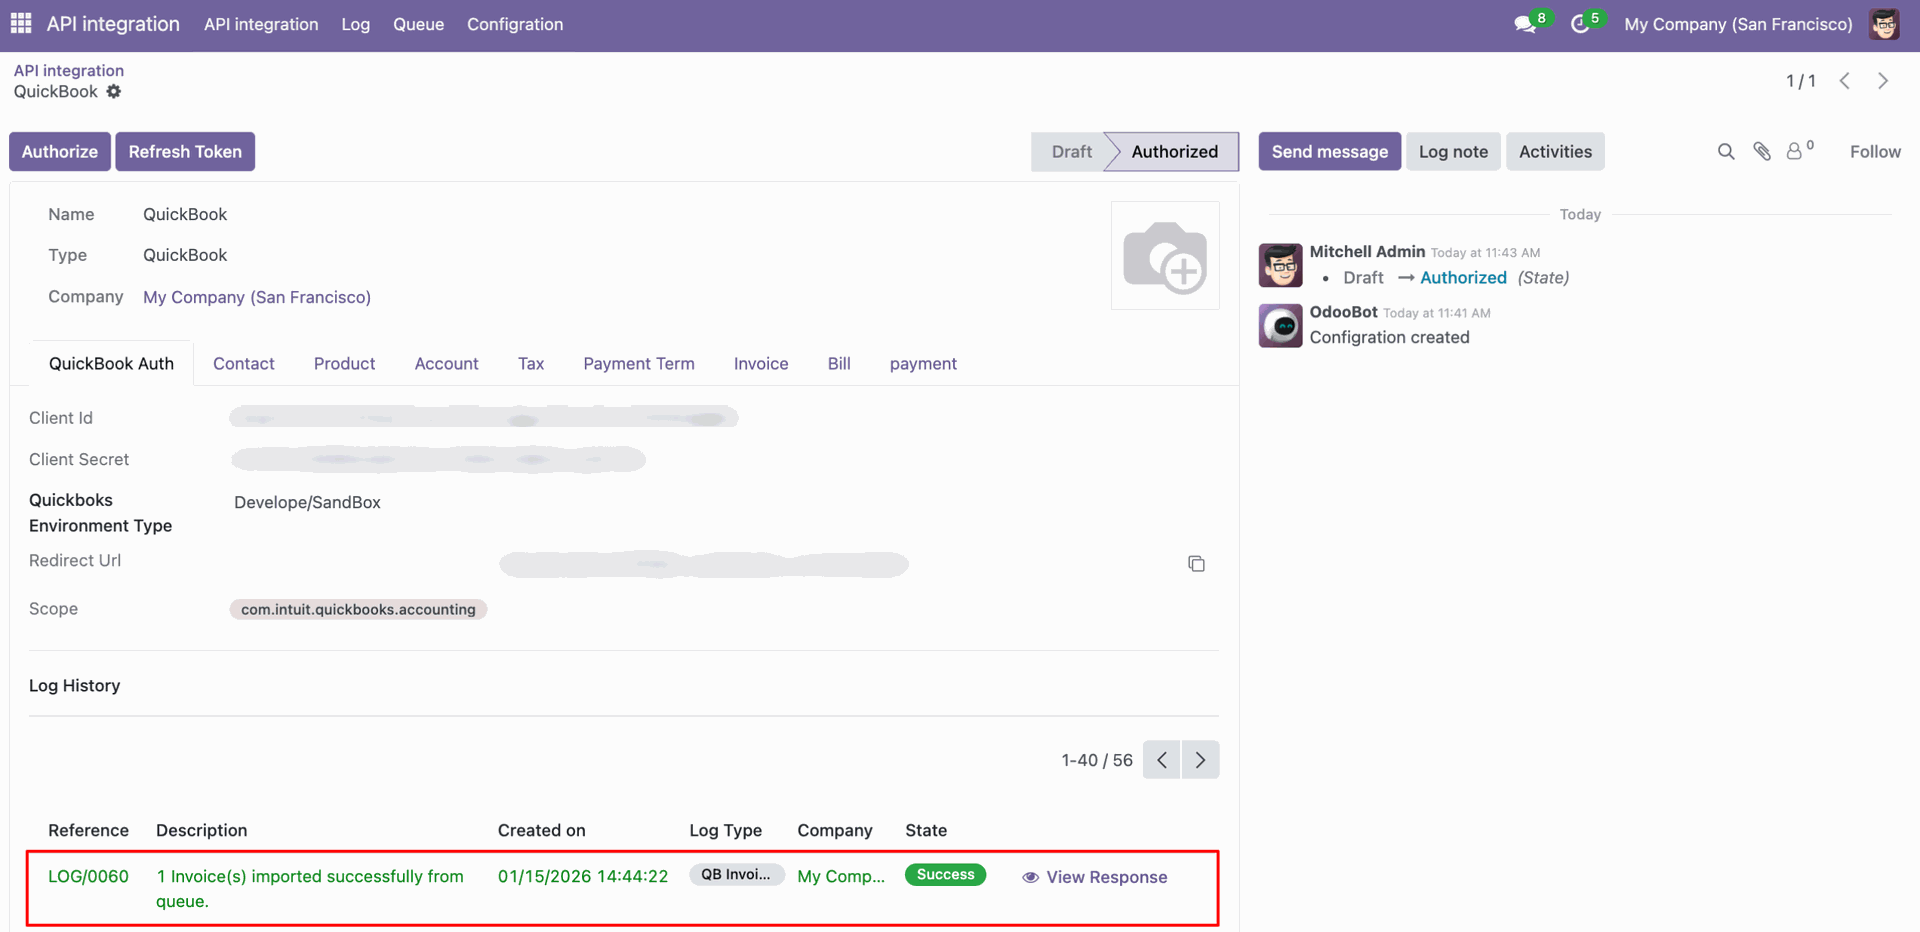
Group by with 'Status'.
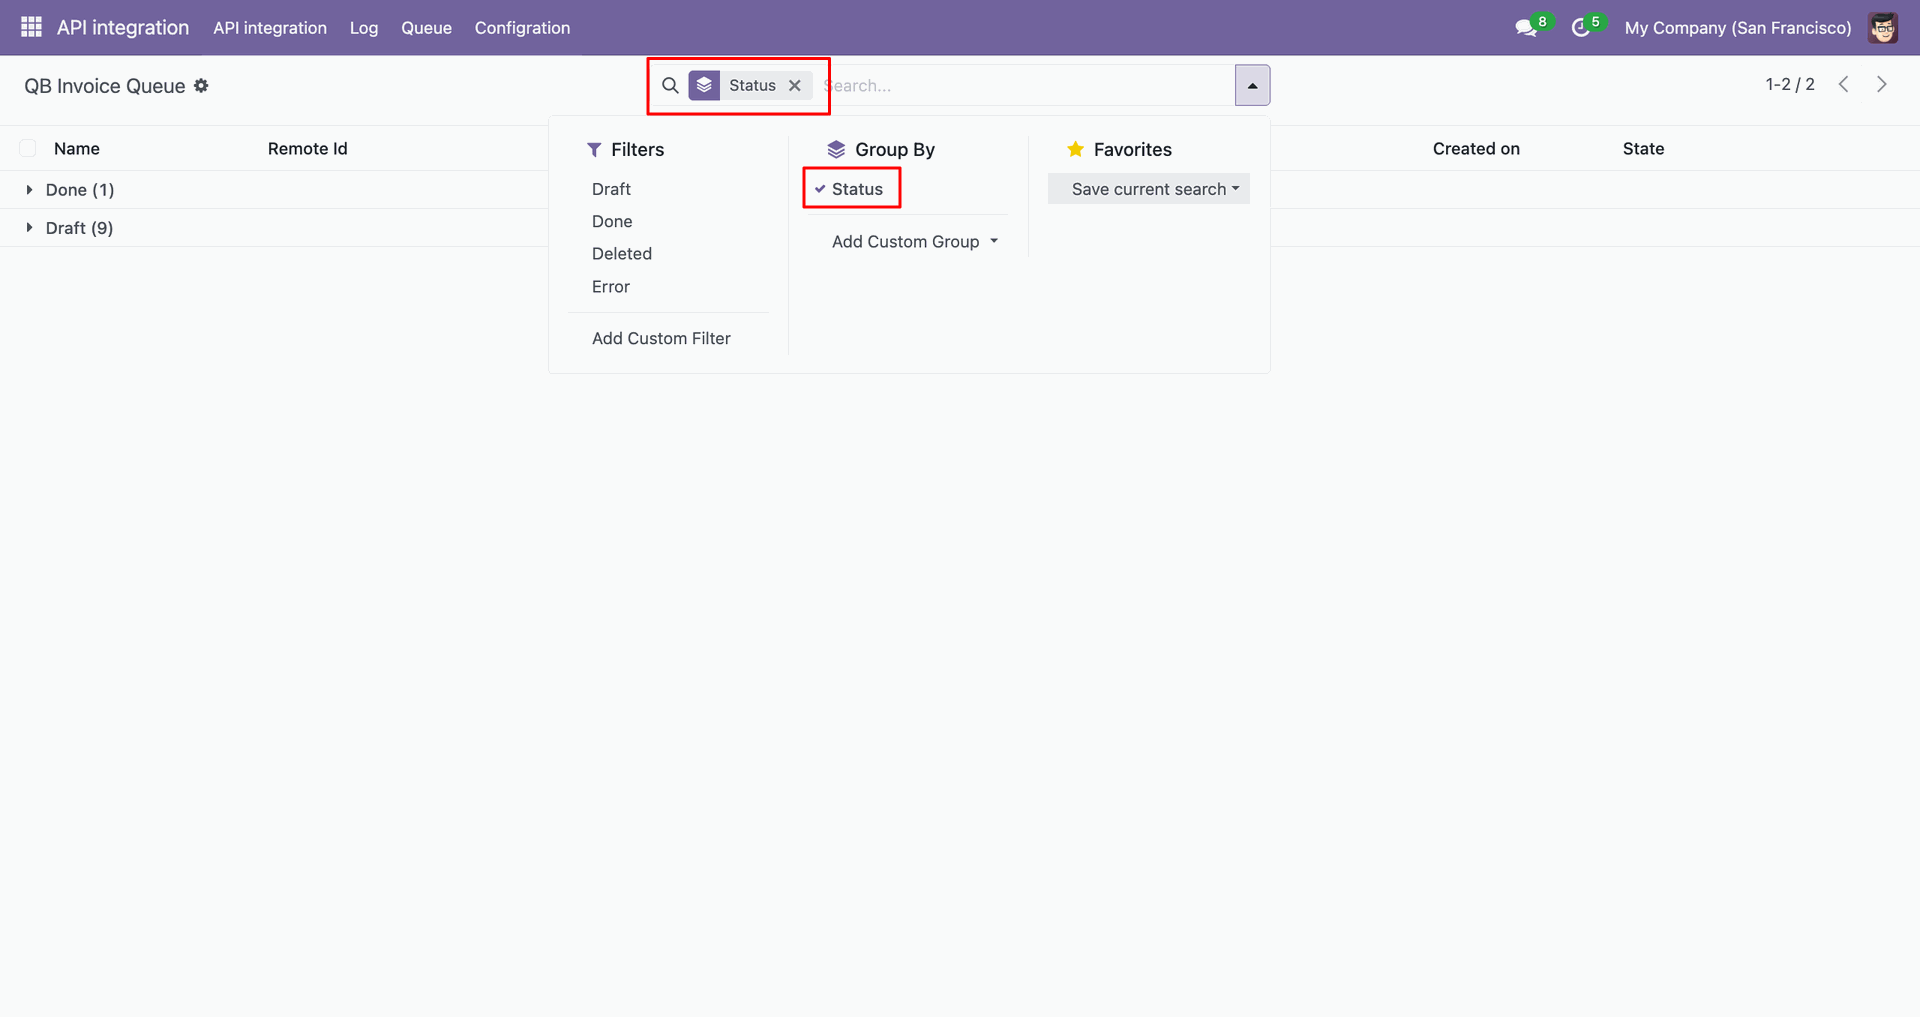
Group by result.
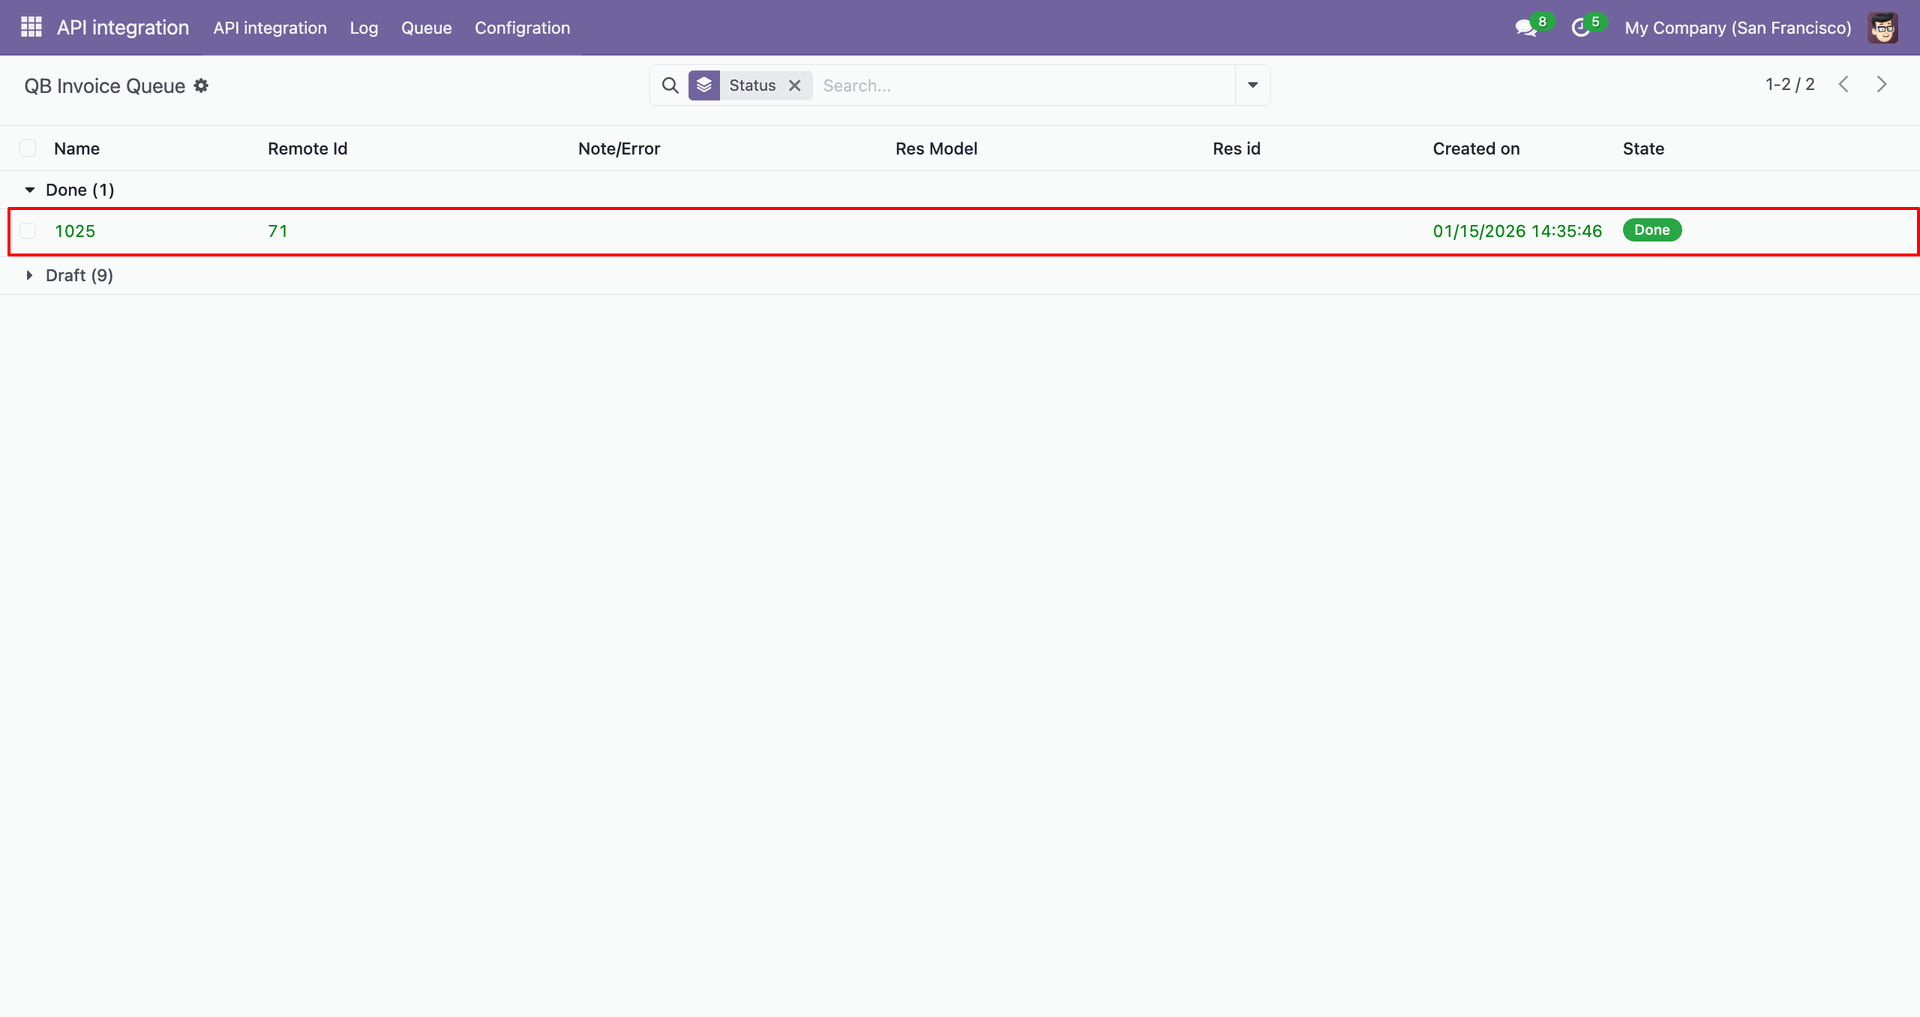
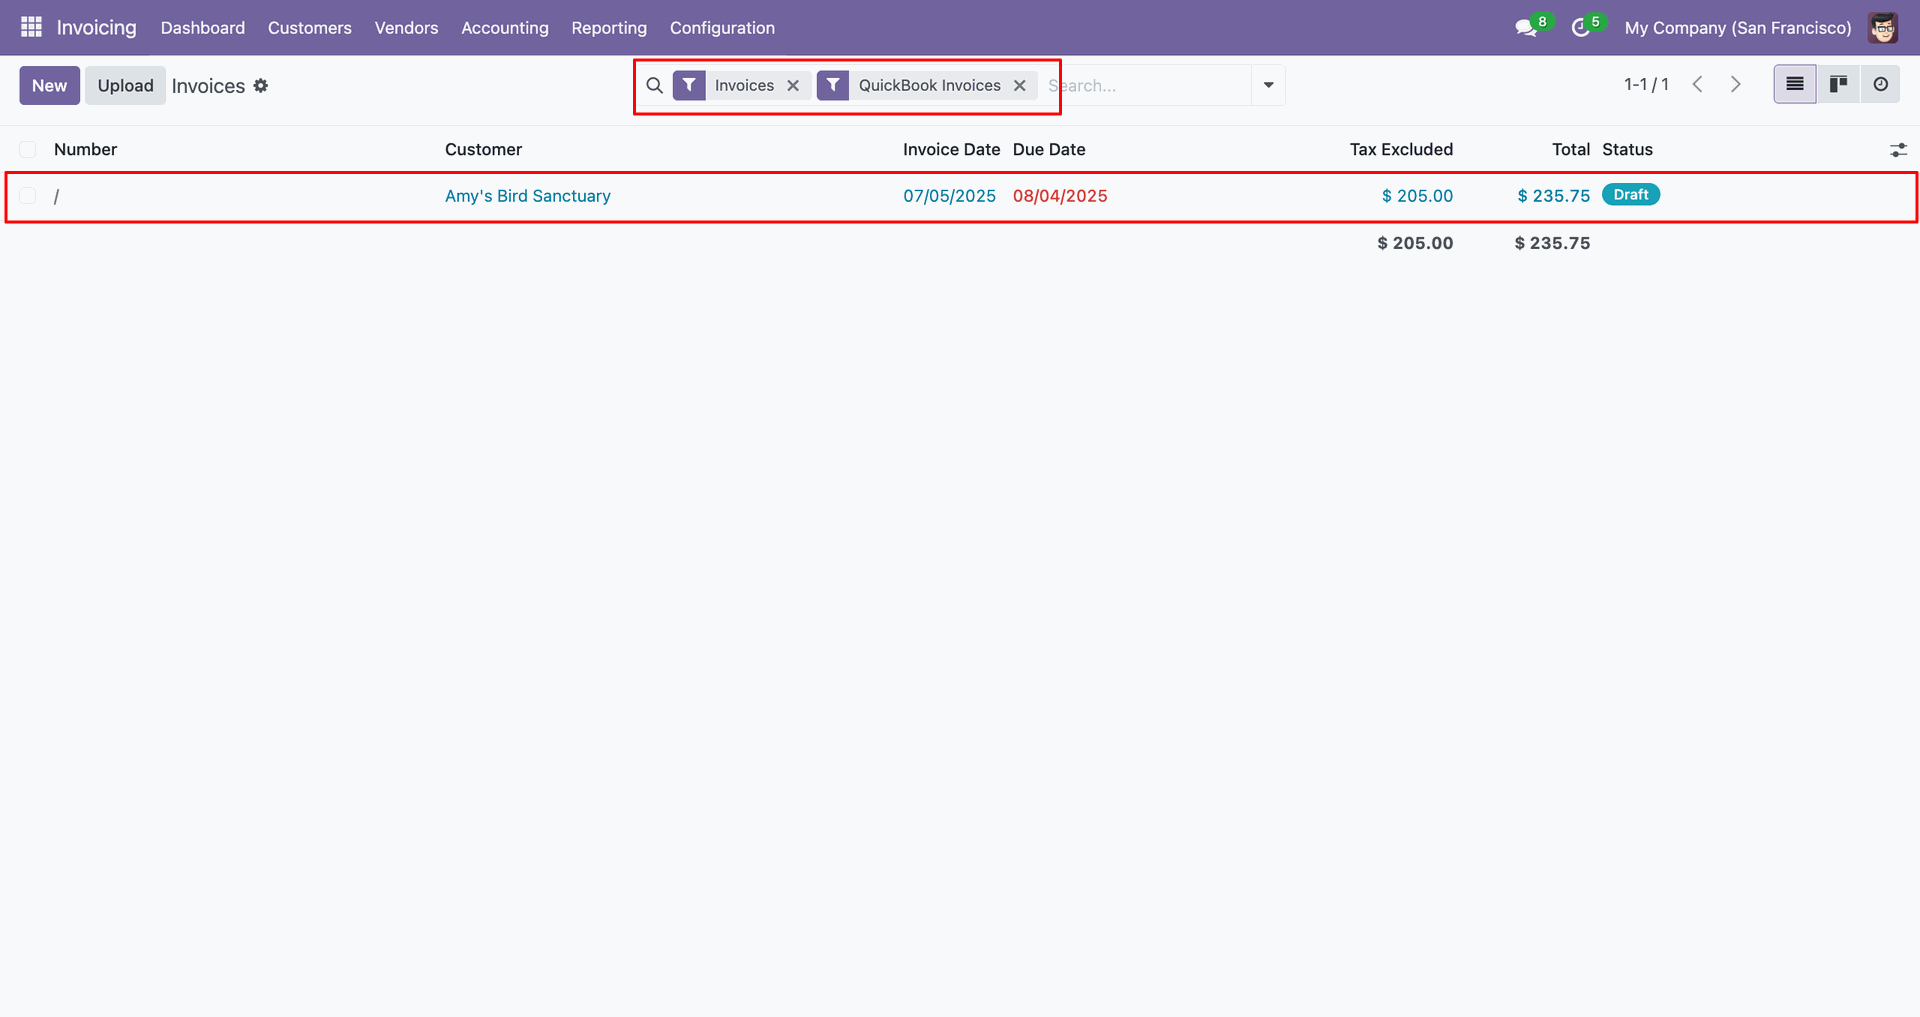
Filter Quickbooks invoices.
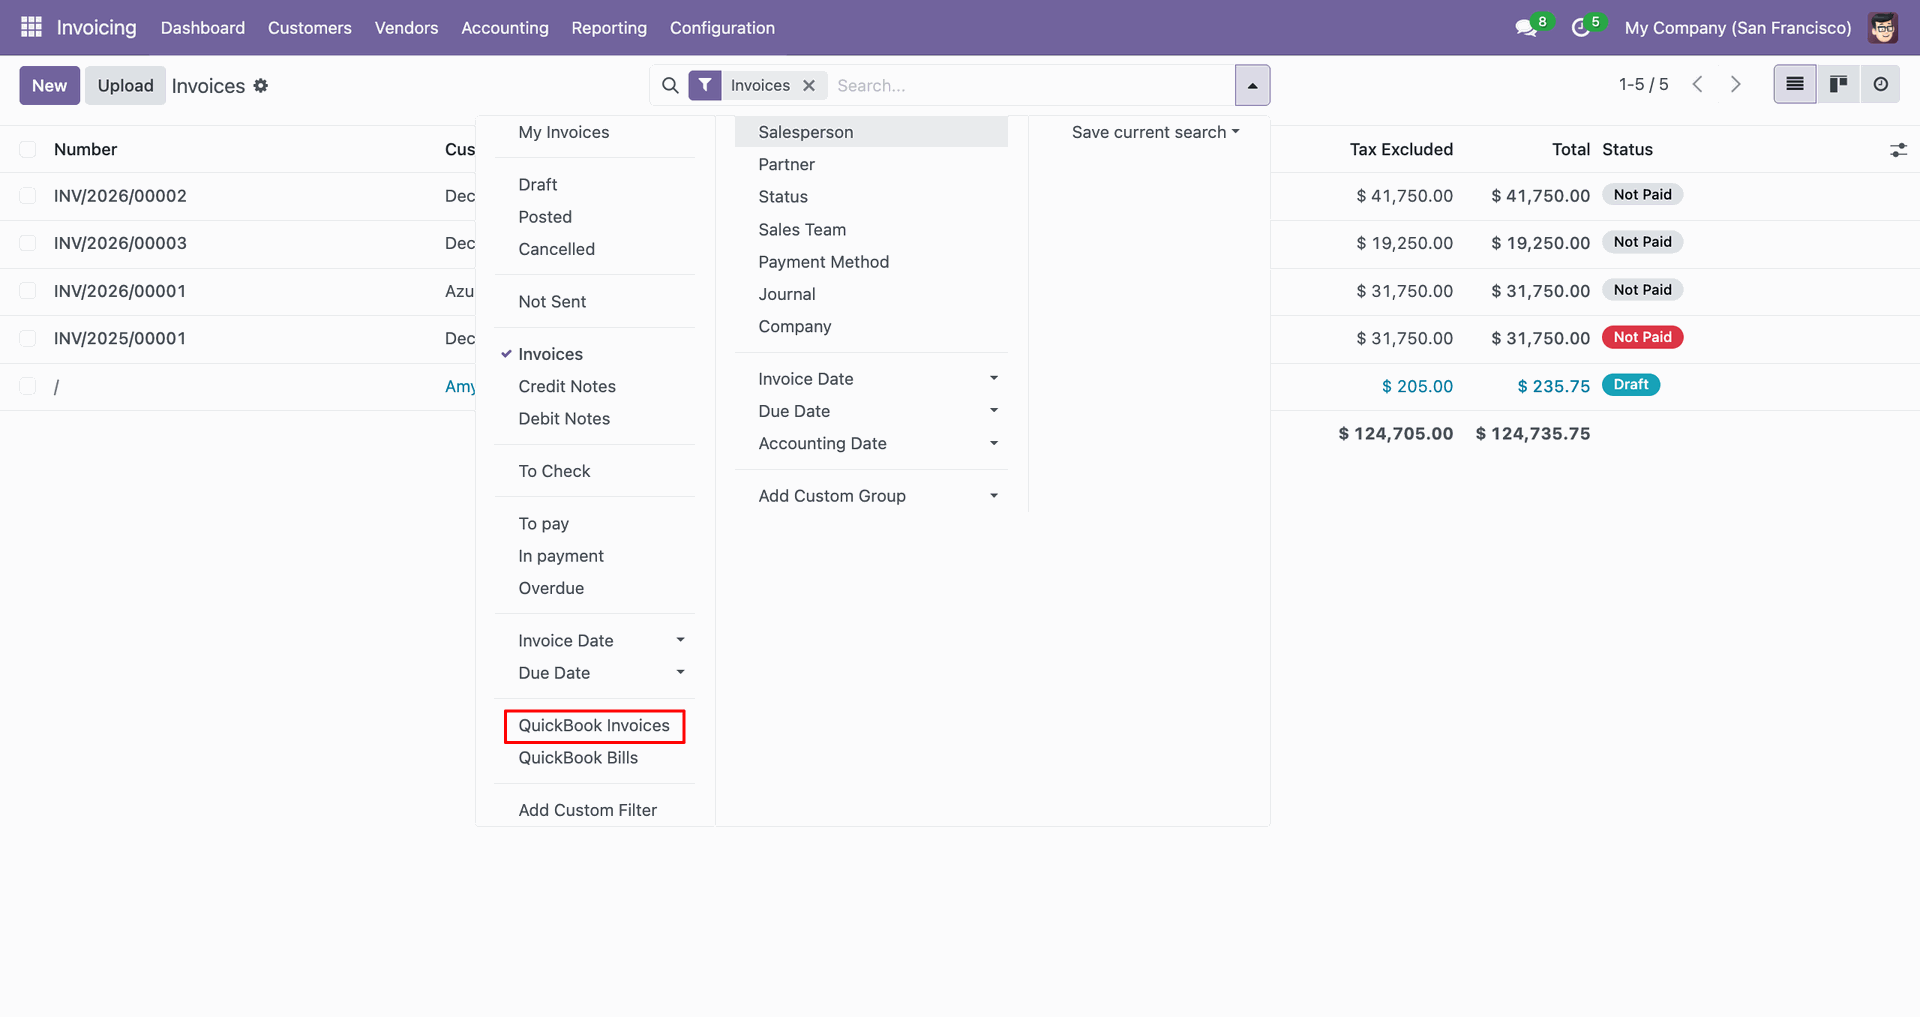
Filter result.
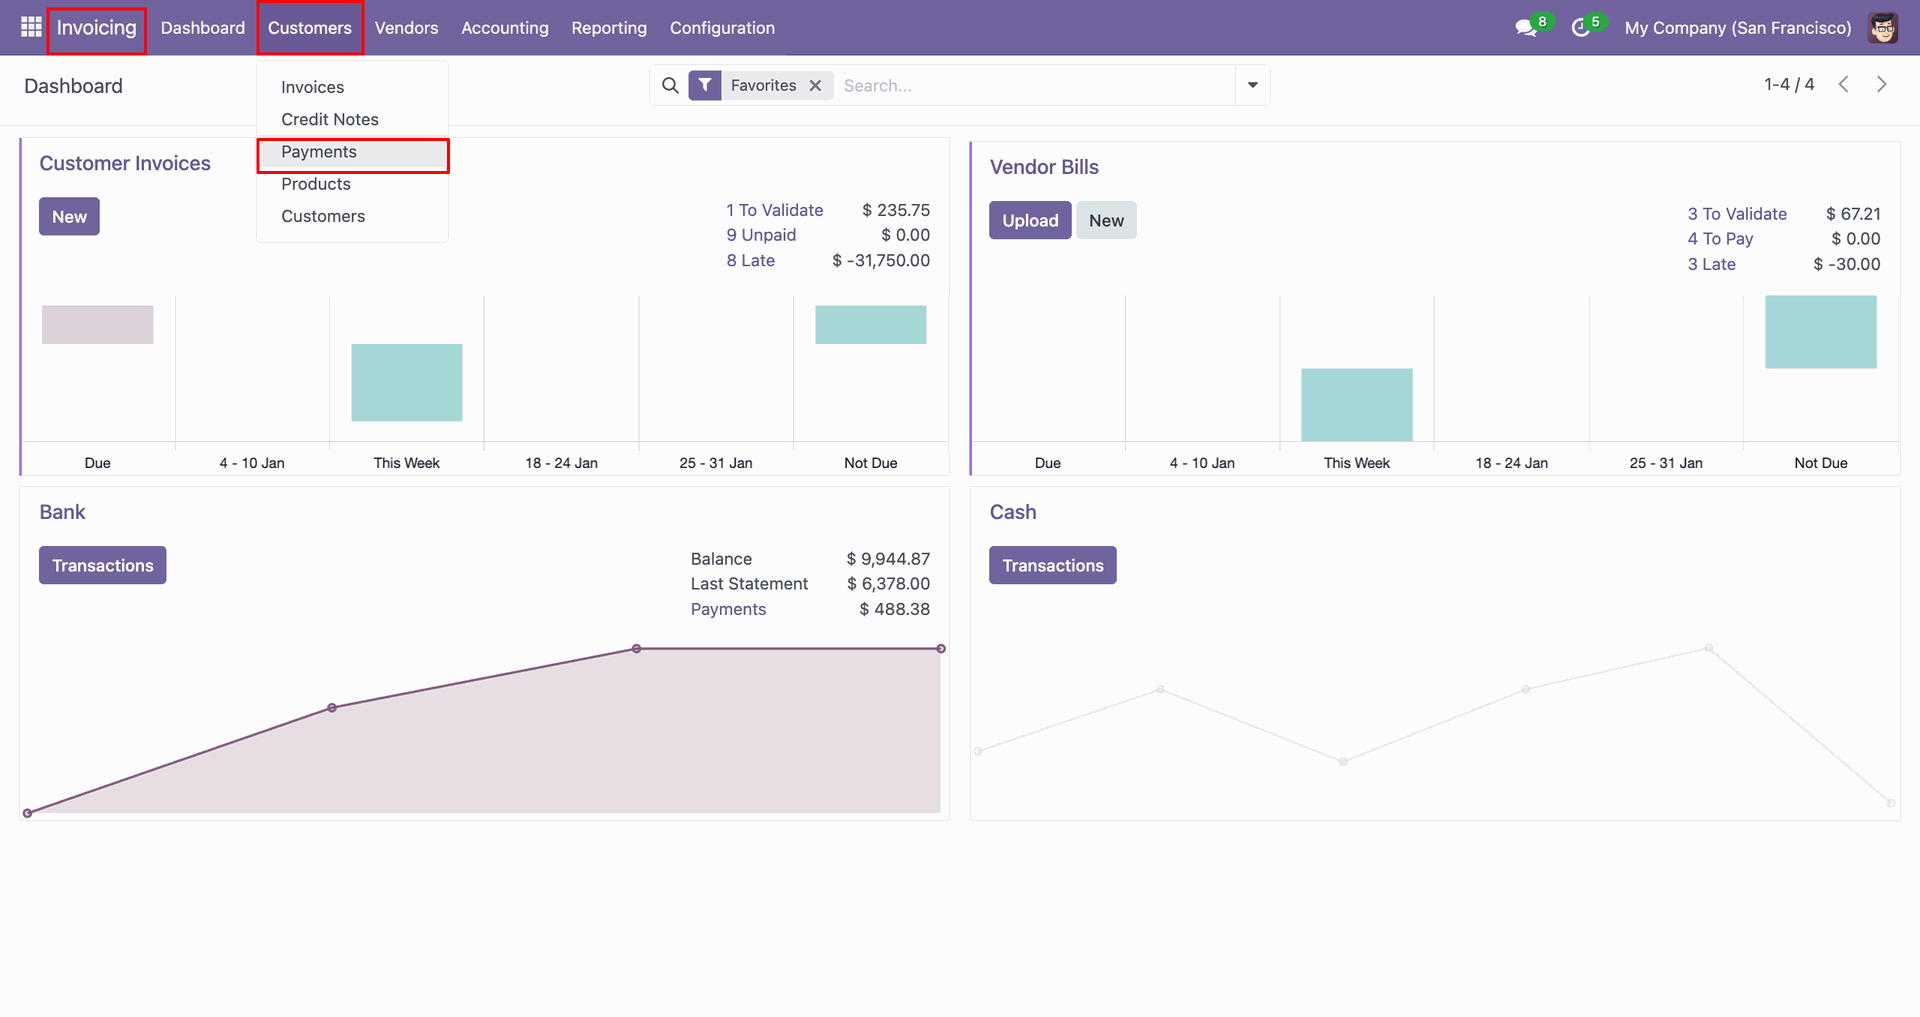
Go to the 'Customers', click 'Payments'.
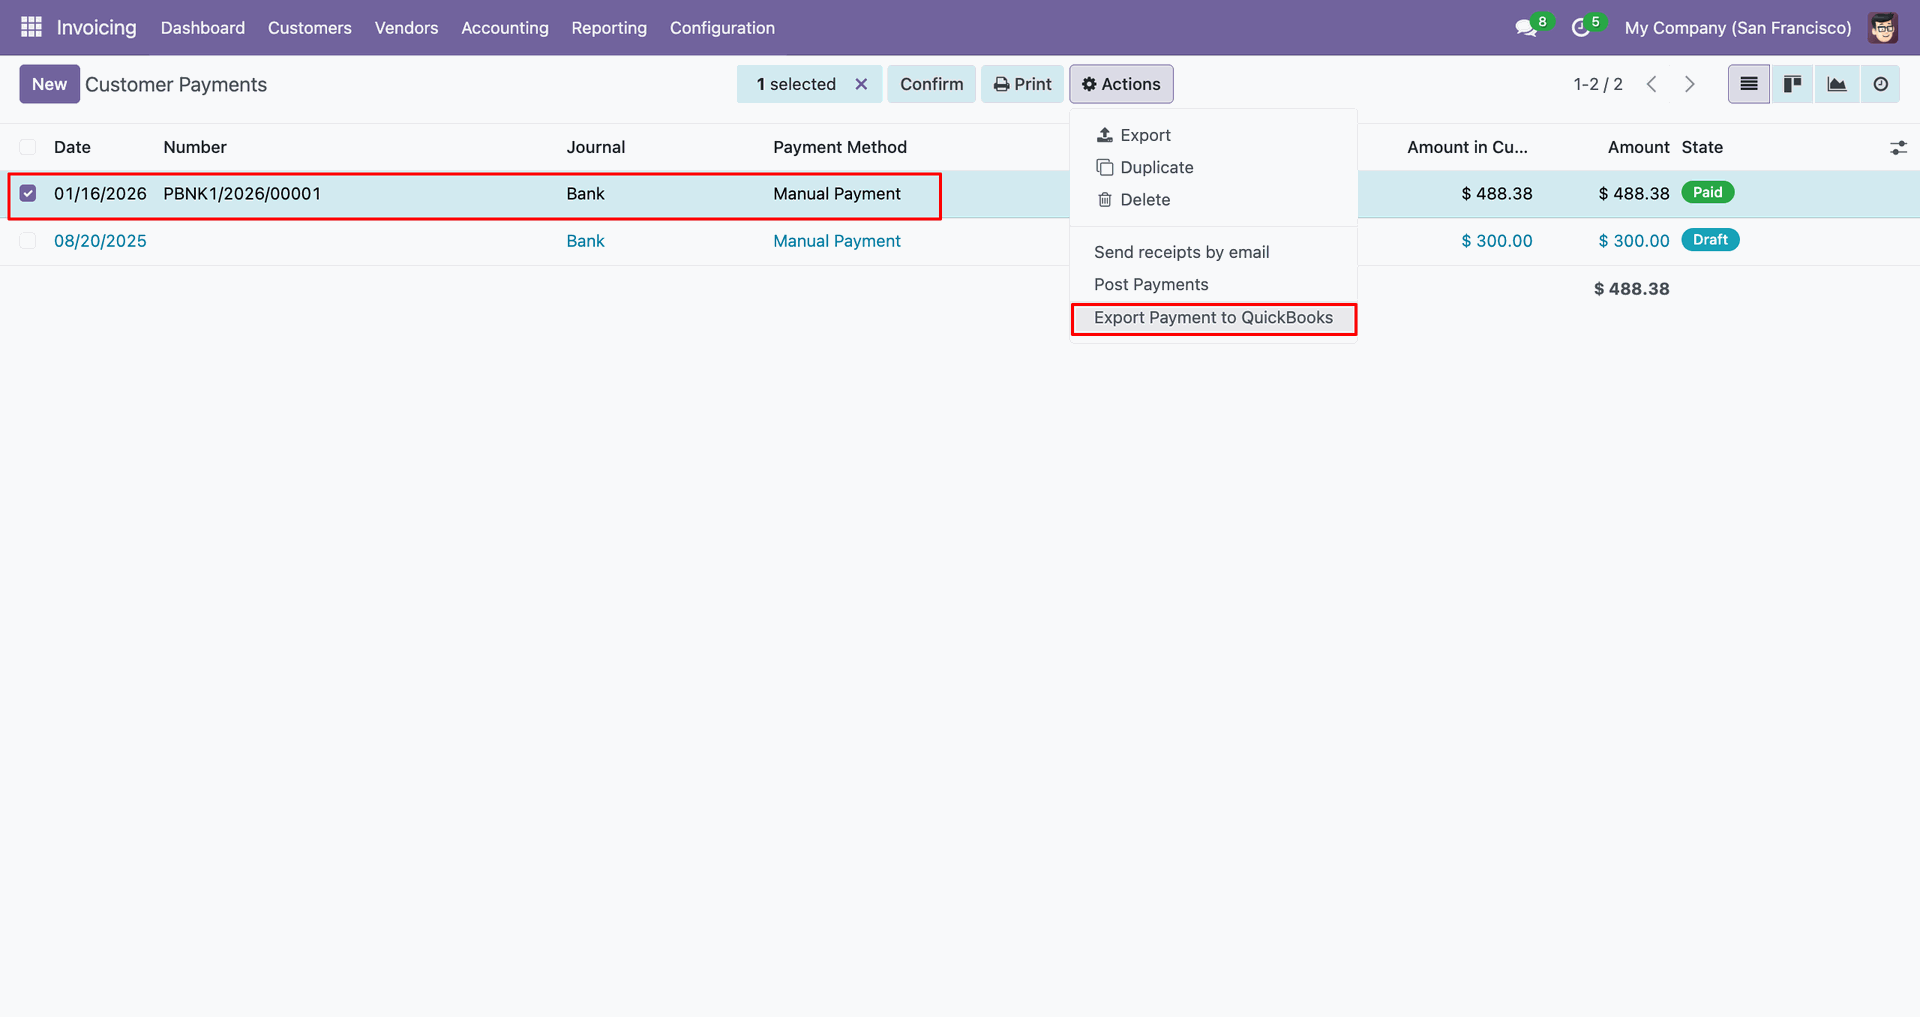
You can export from the 'Action'.
Config selection popup.
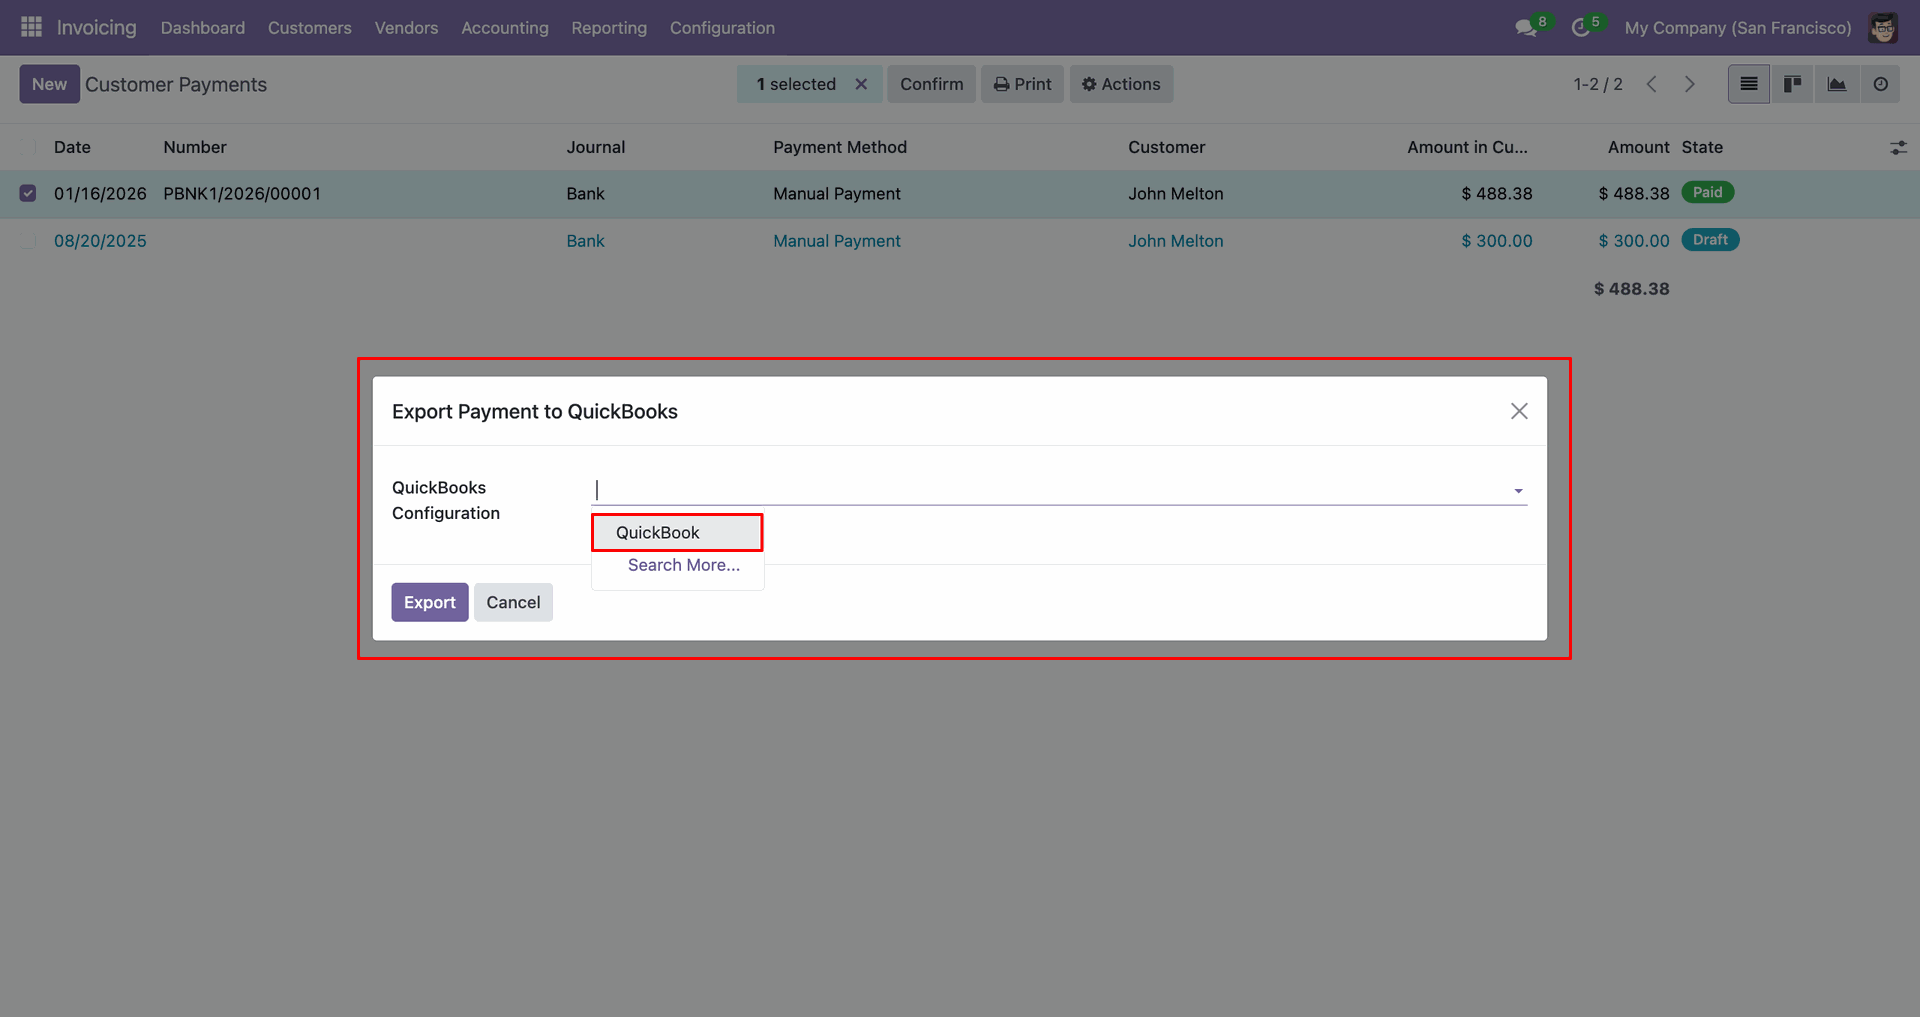
Select 'QuickBooks' and click 'Export'.
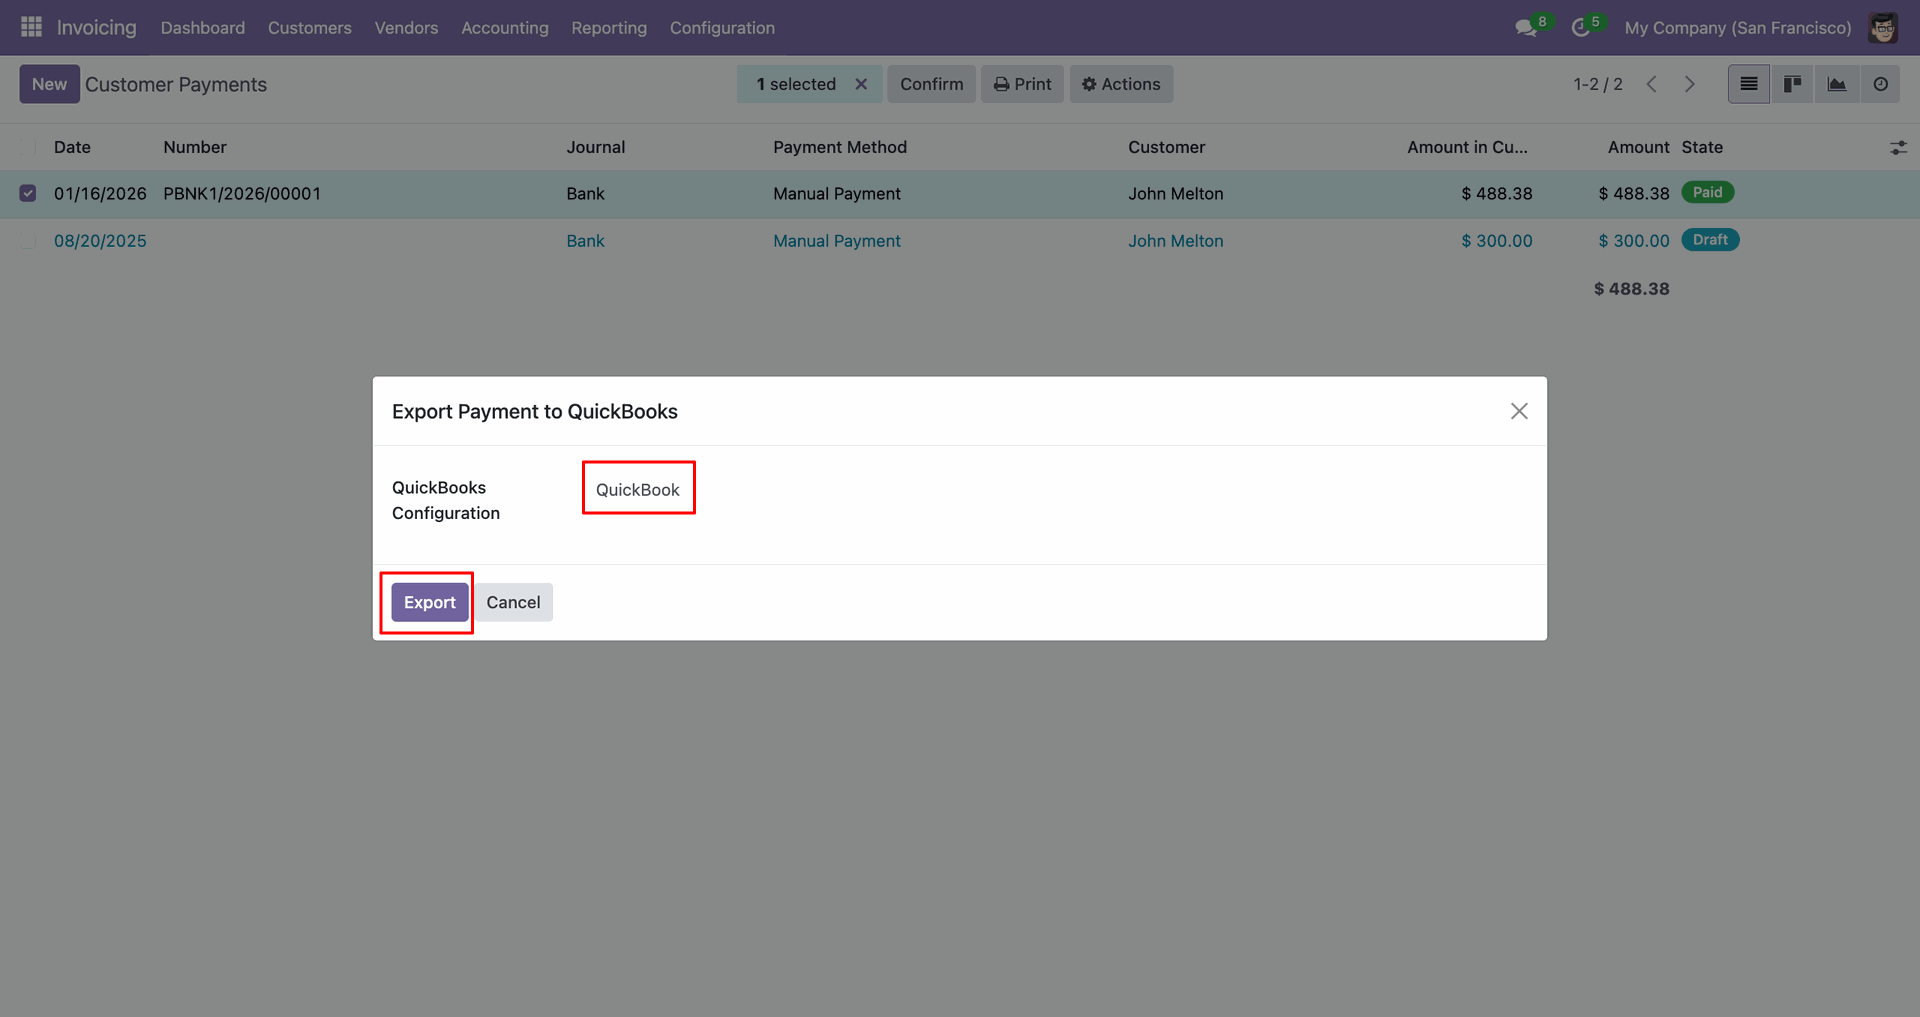
The form view contains Quickbook ID and sync state.
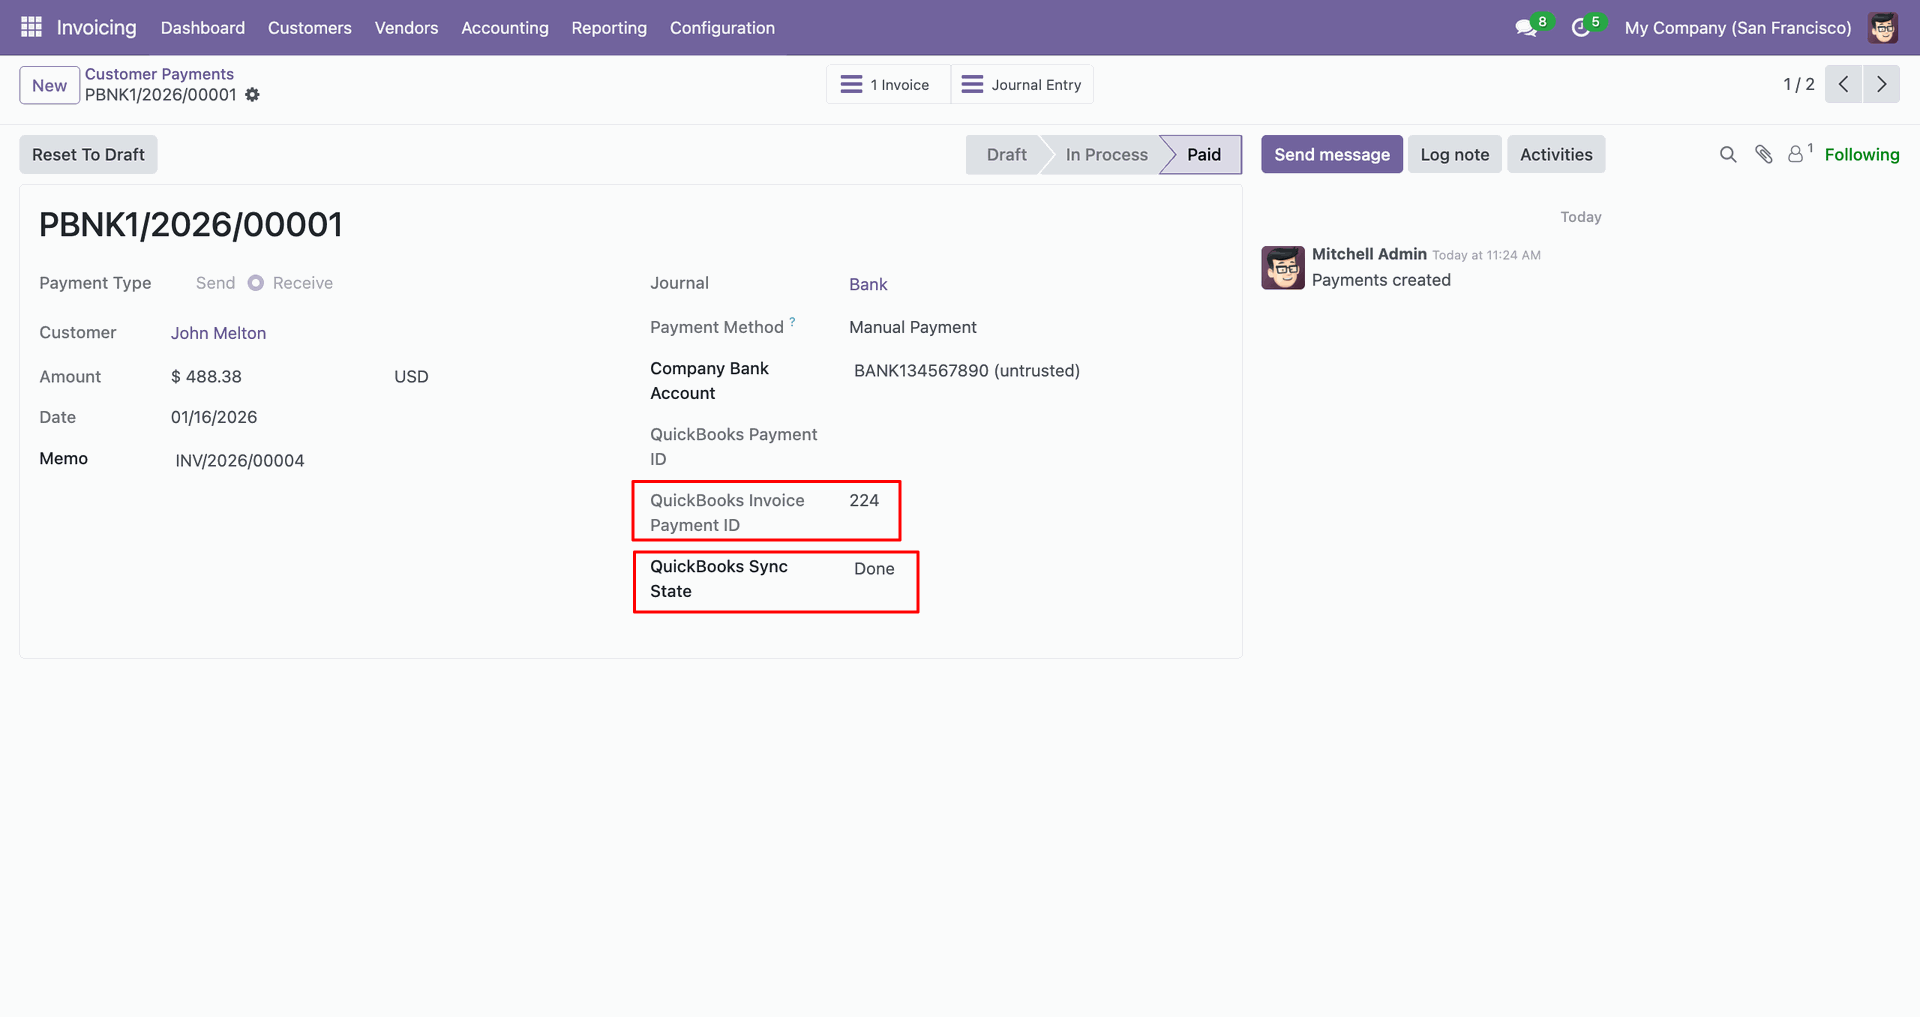
Log with details.
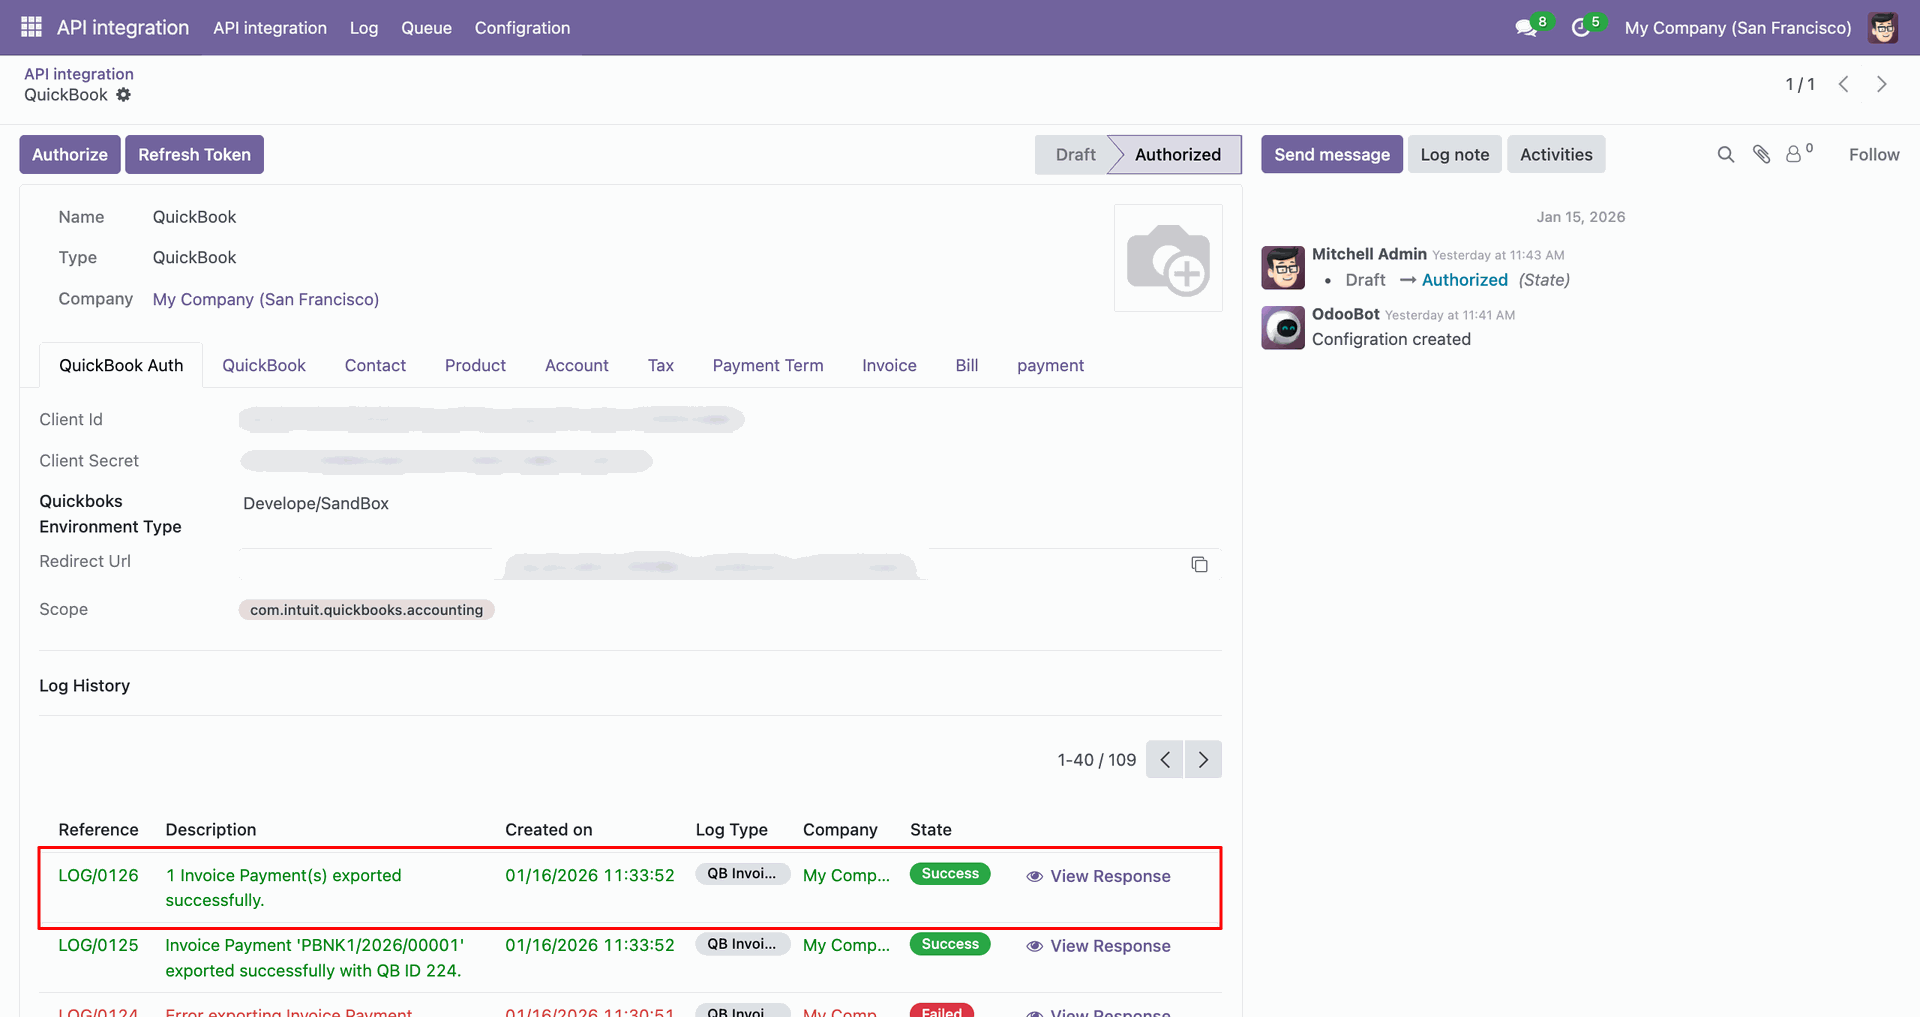
Payments in QuickBooks.
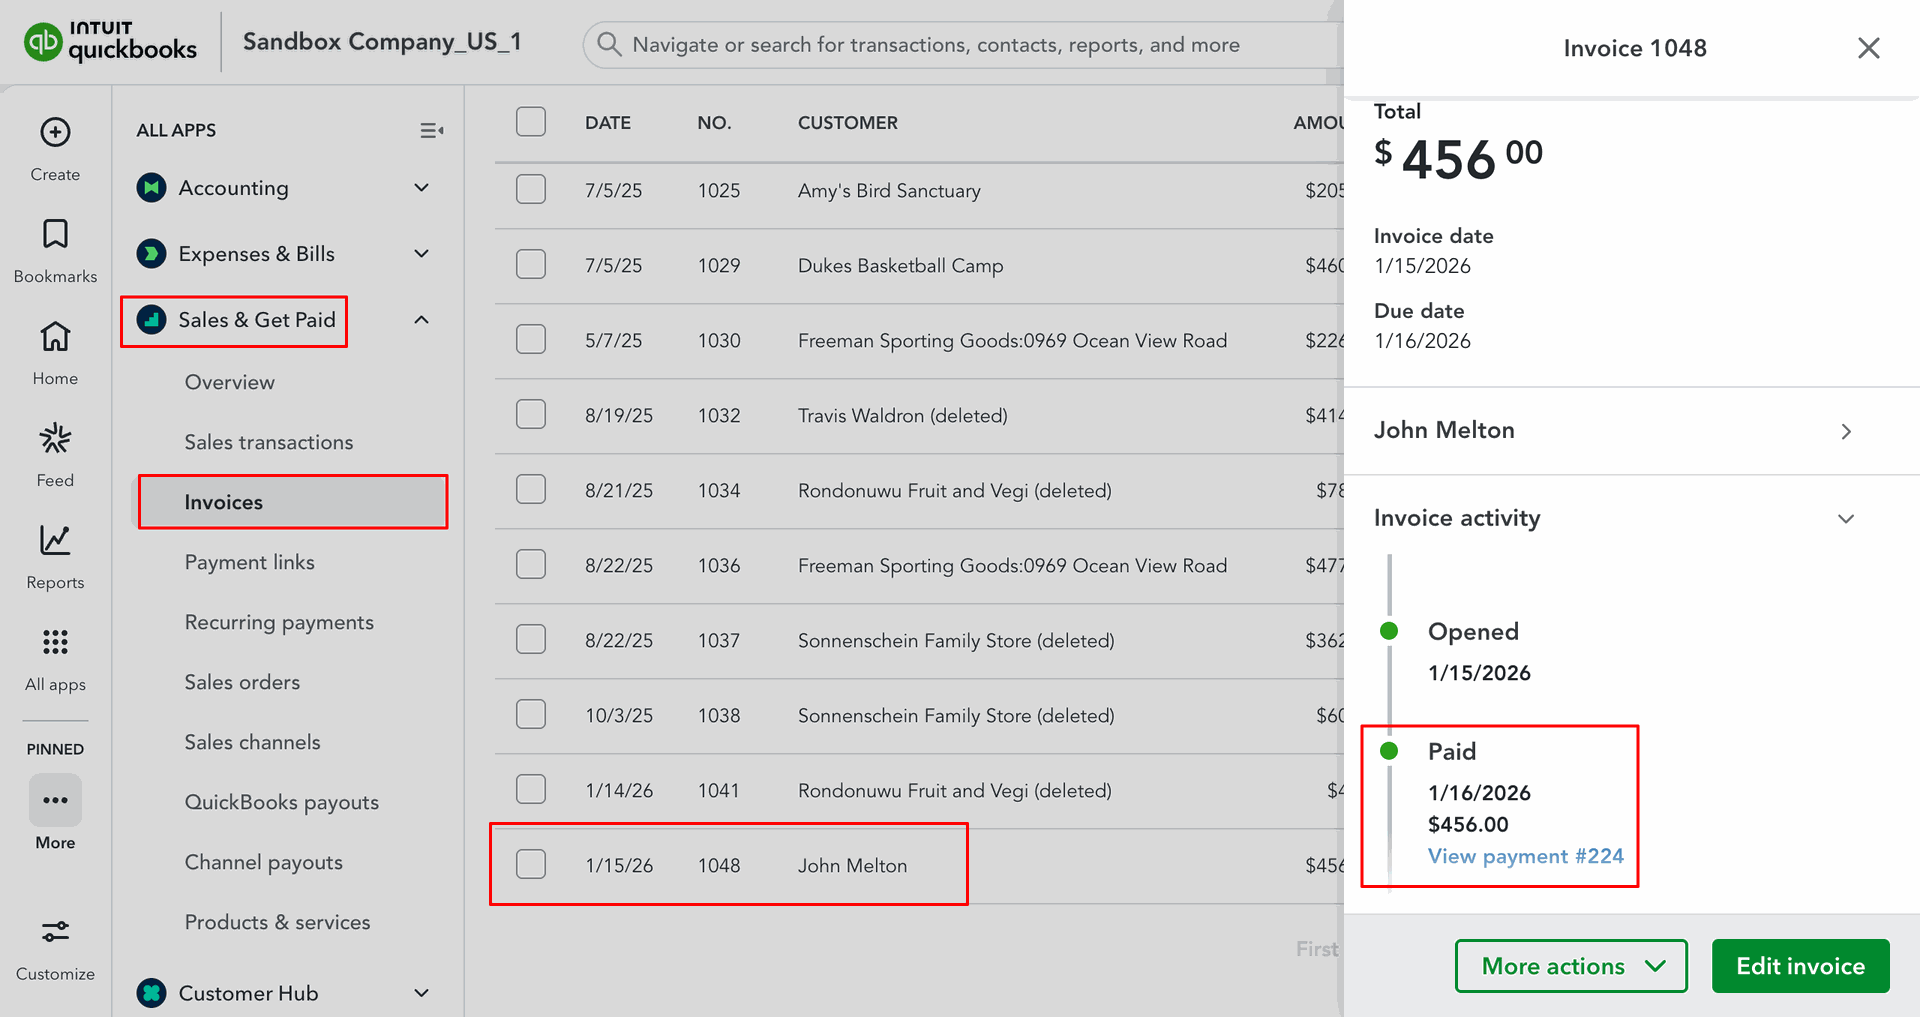
For the import, go to the 'Payment' Tab, enable 'Import Invoice Payment', and click 'Import'.
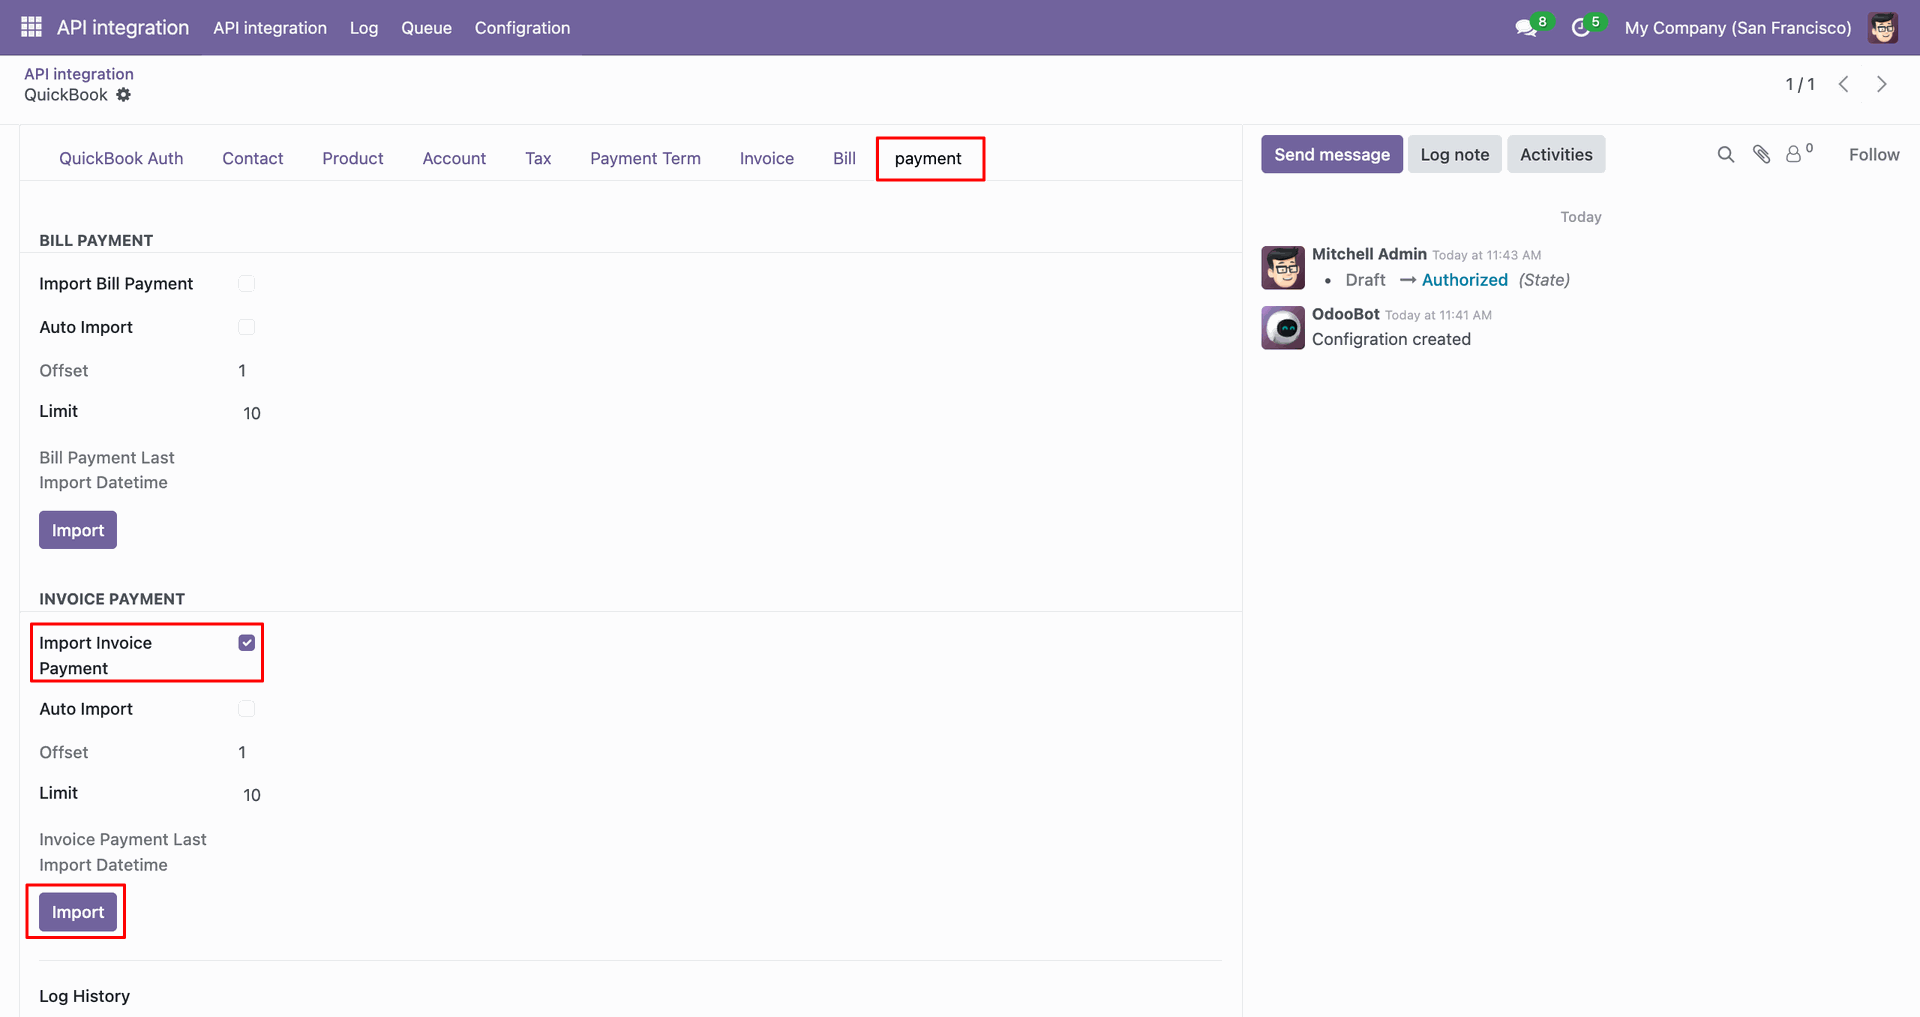
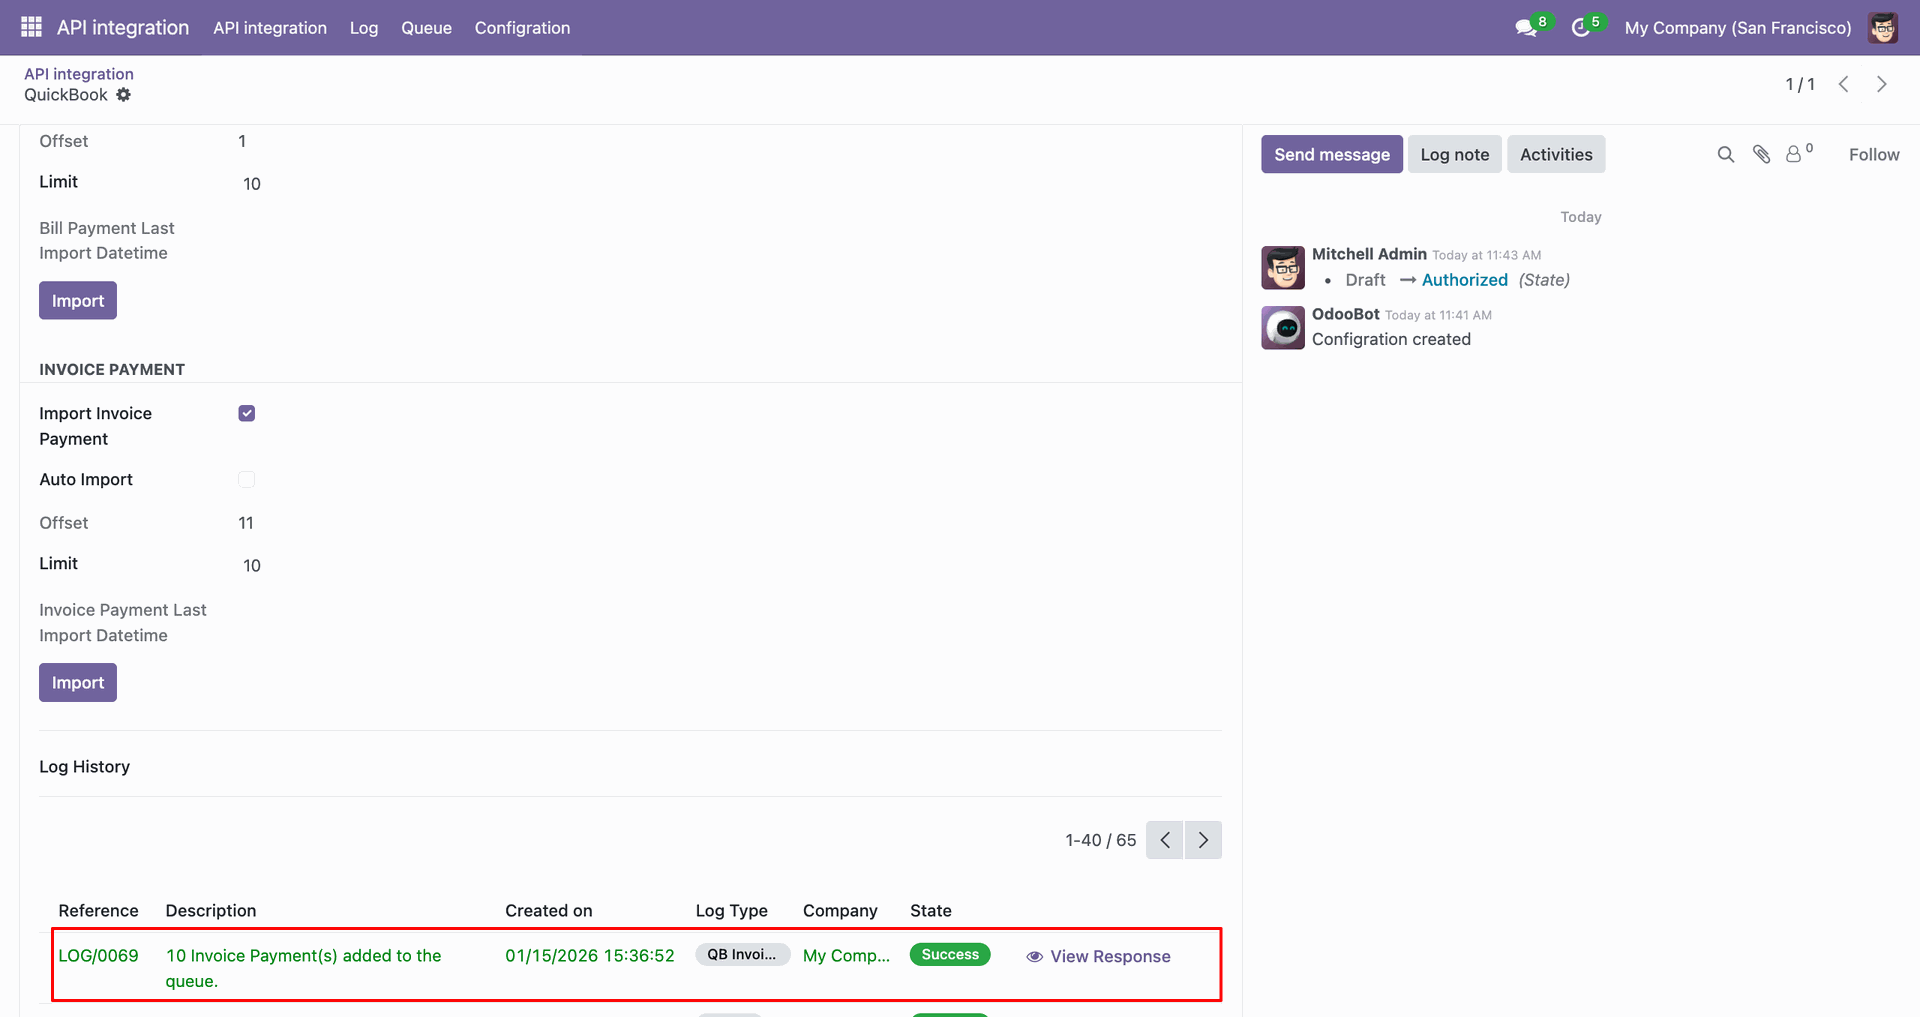
Log with imported data.
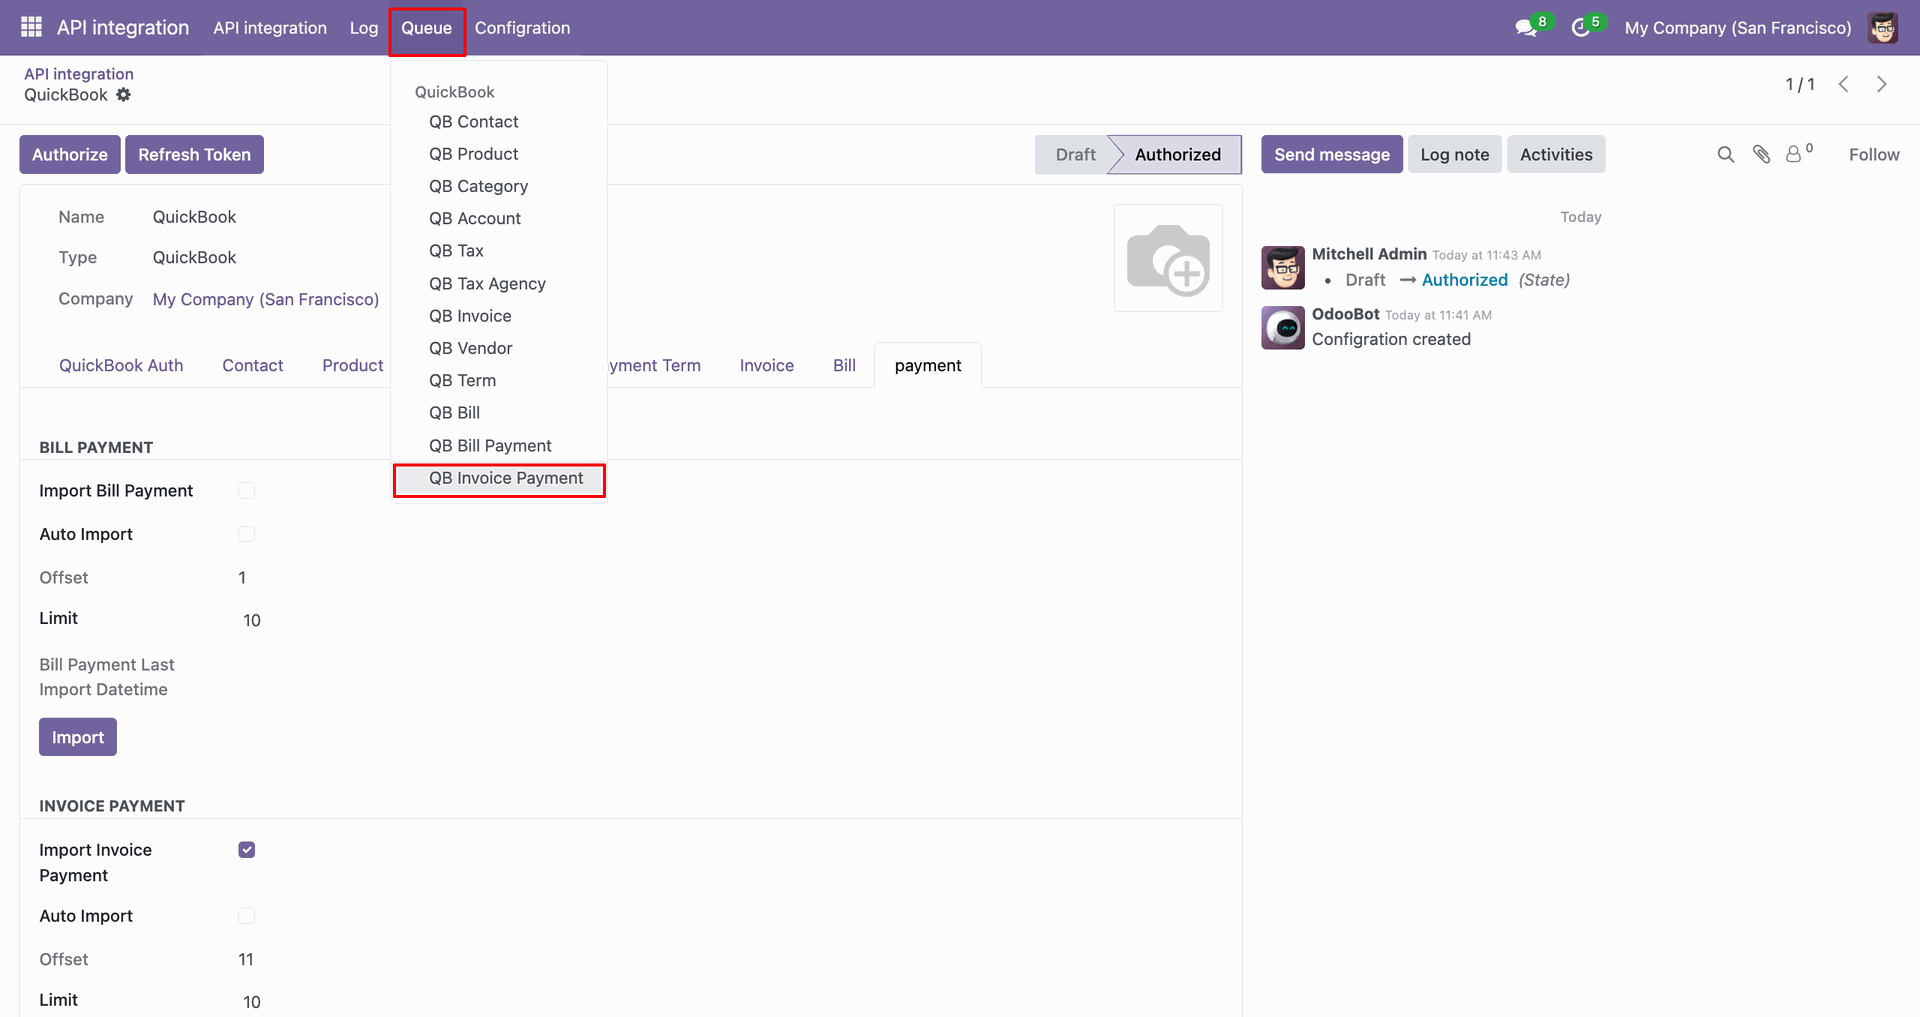
Go to the Queue, 'QB Invoice Payment'.
It will open the queue.
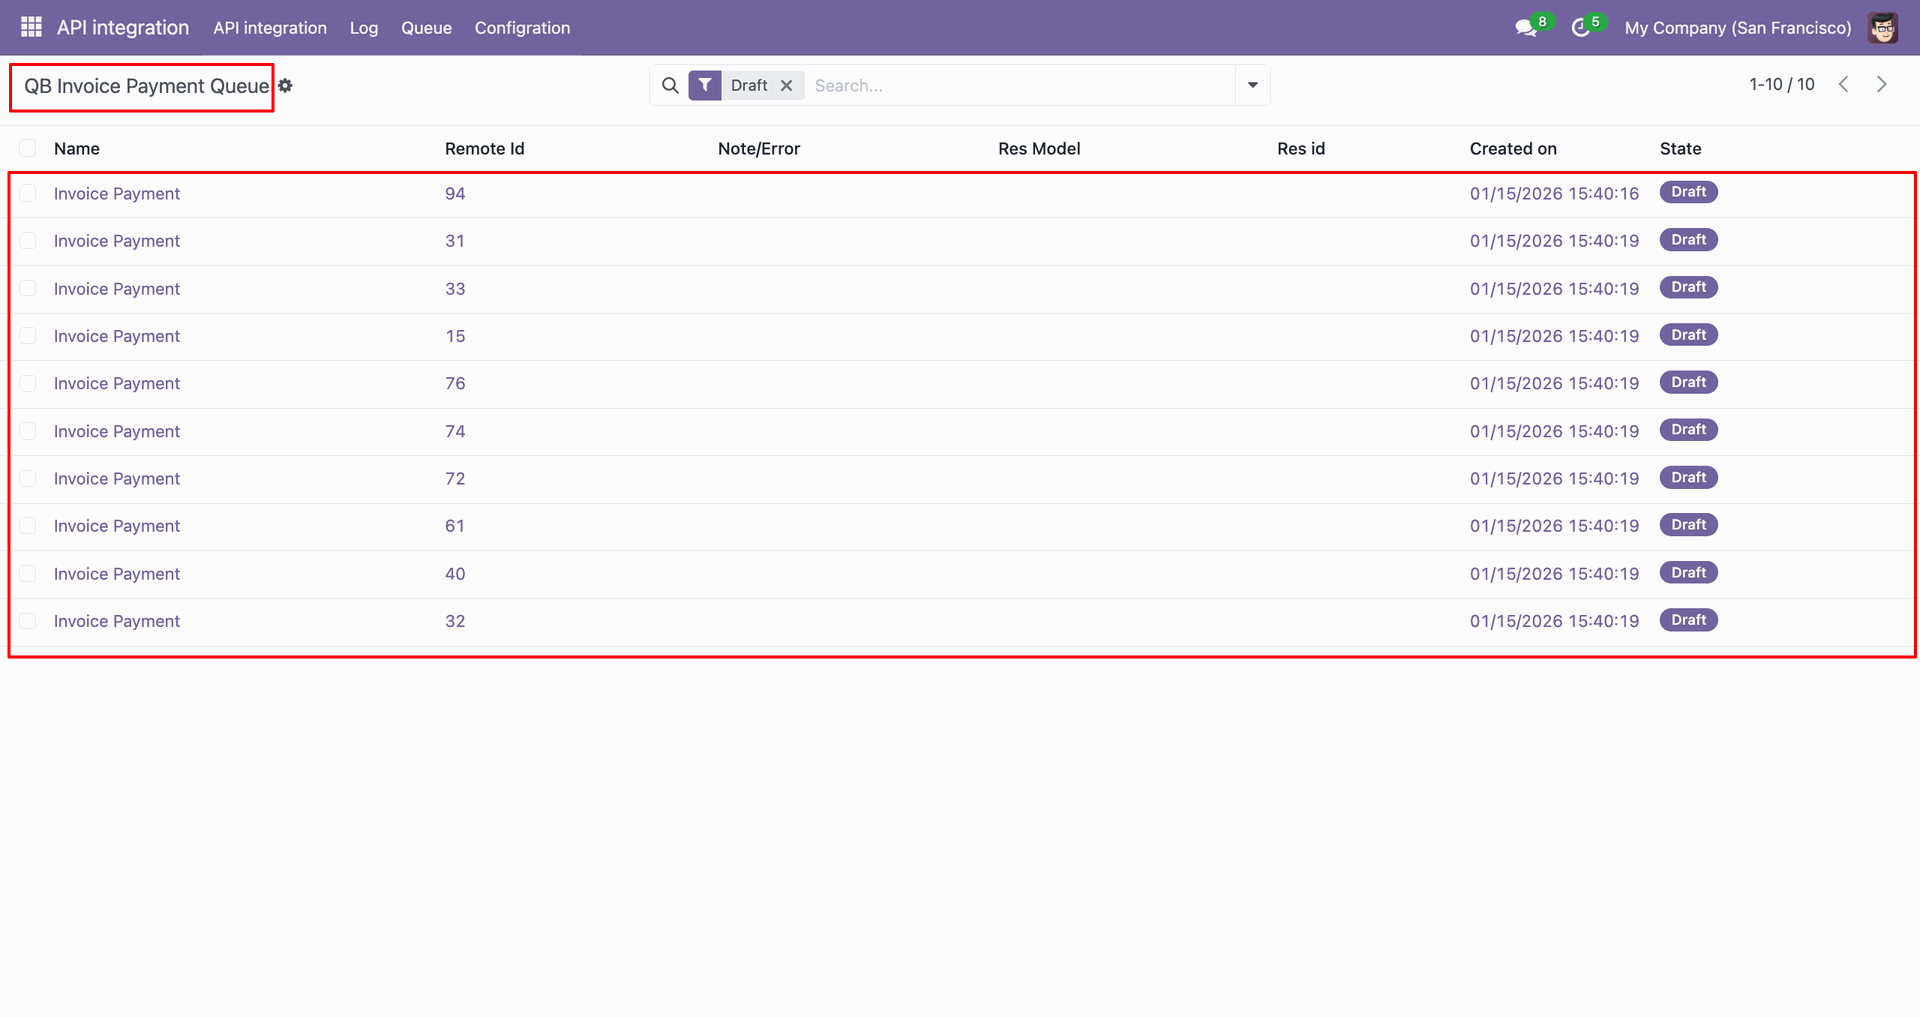
You can import from the queue.
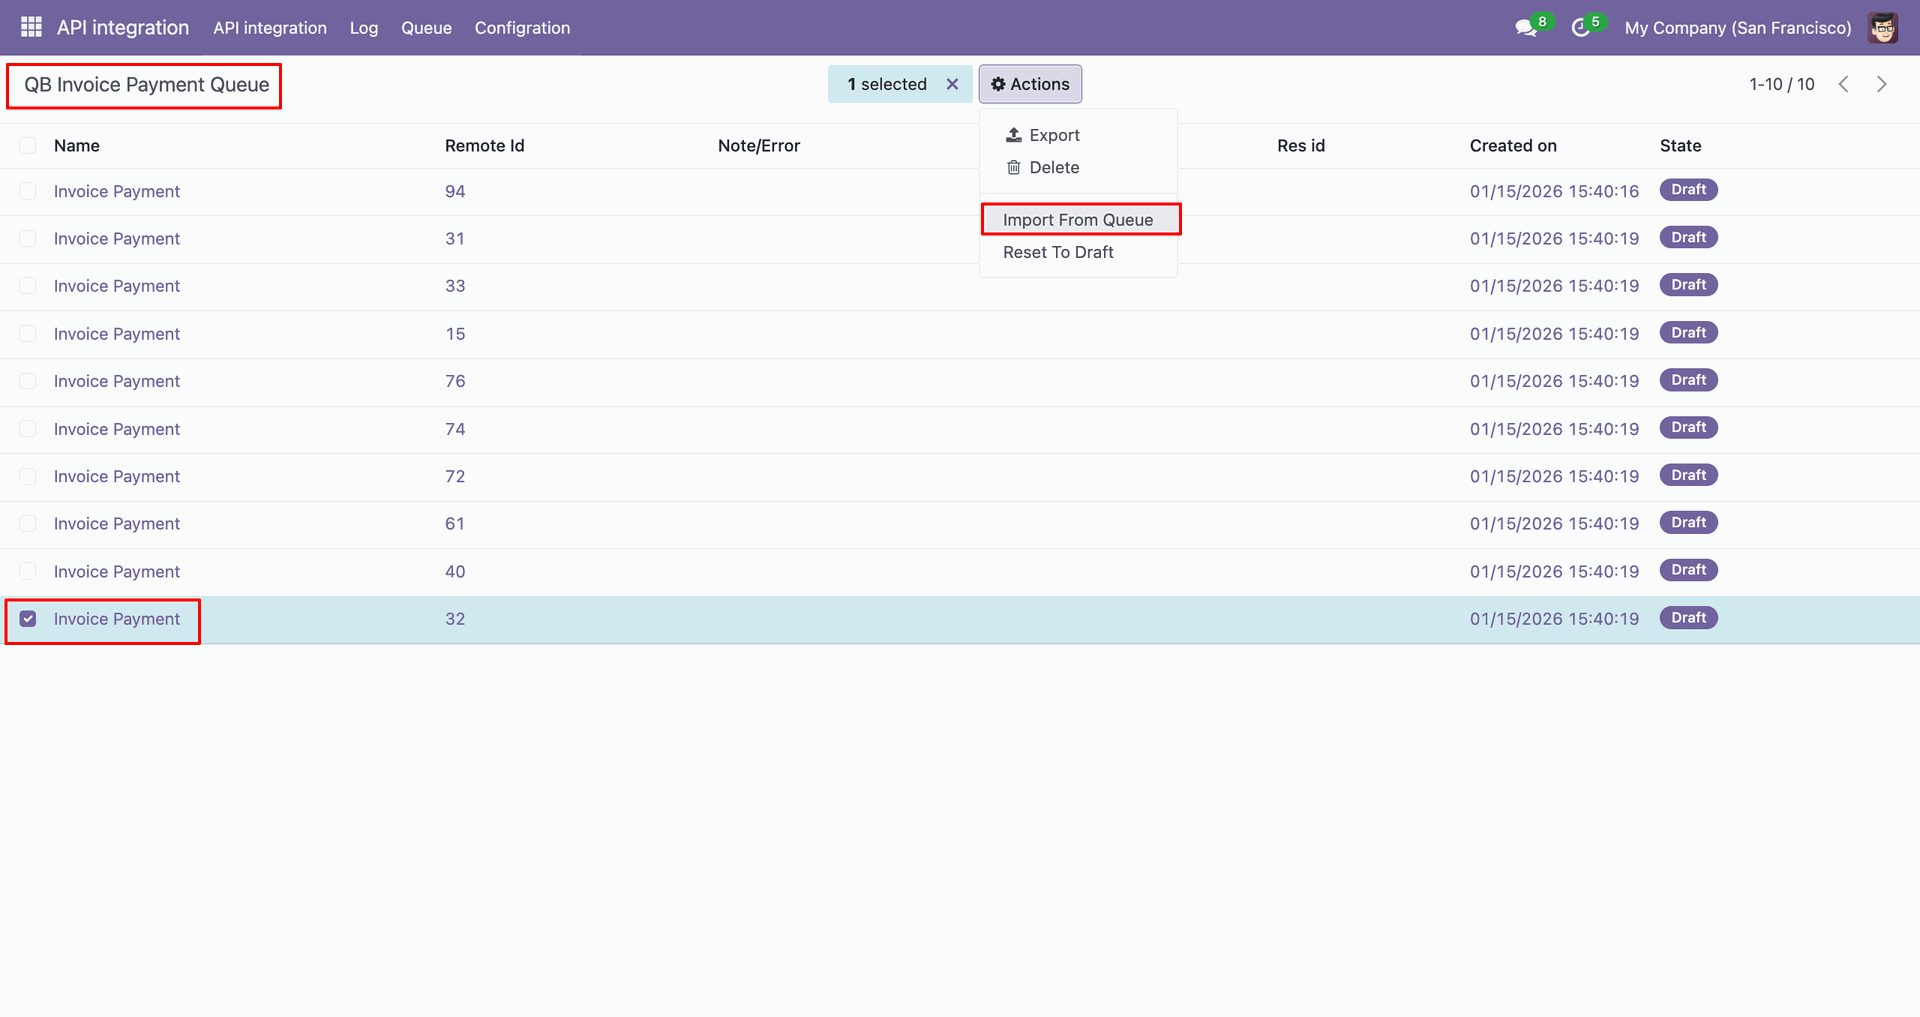
Log with details.
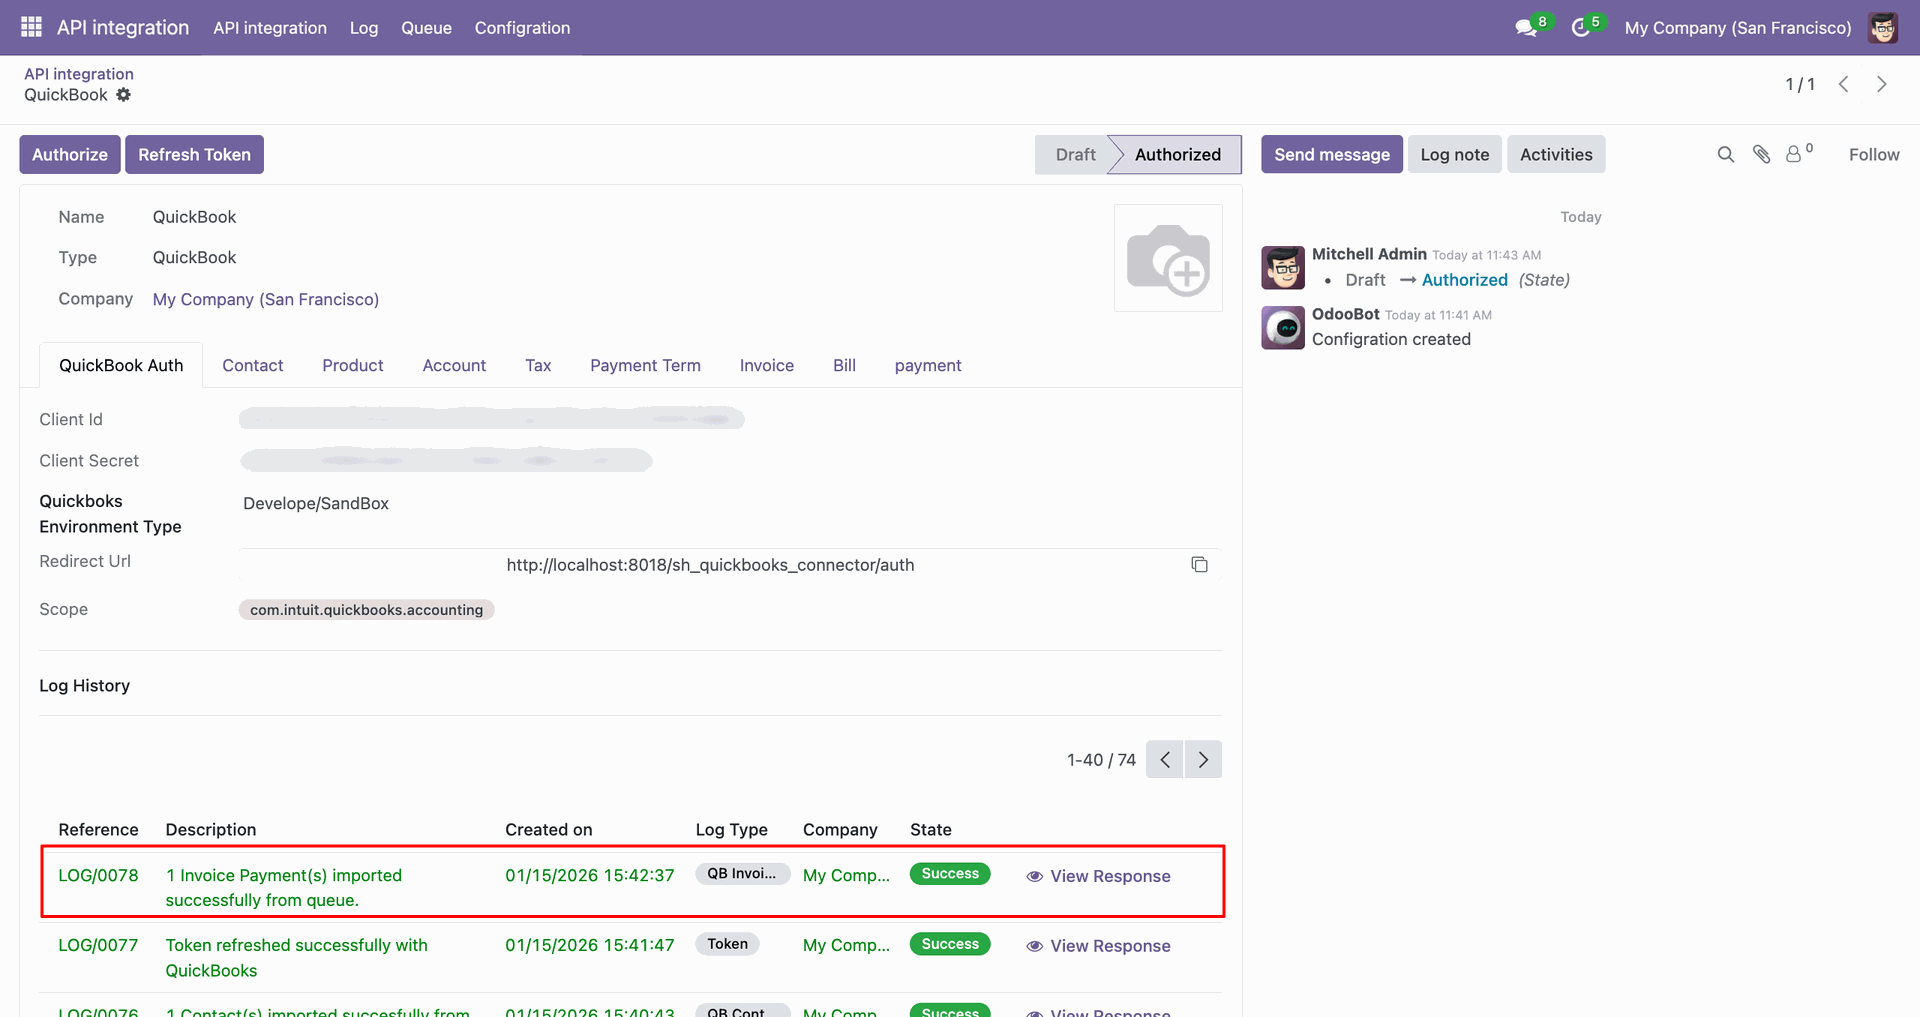
Group by with 'Status'.
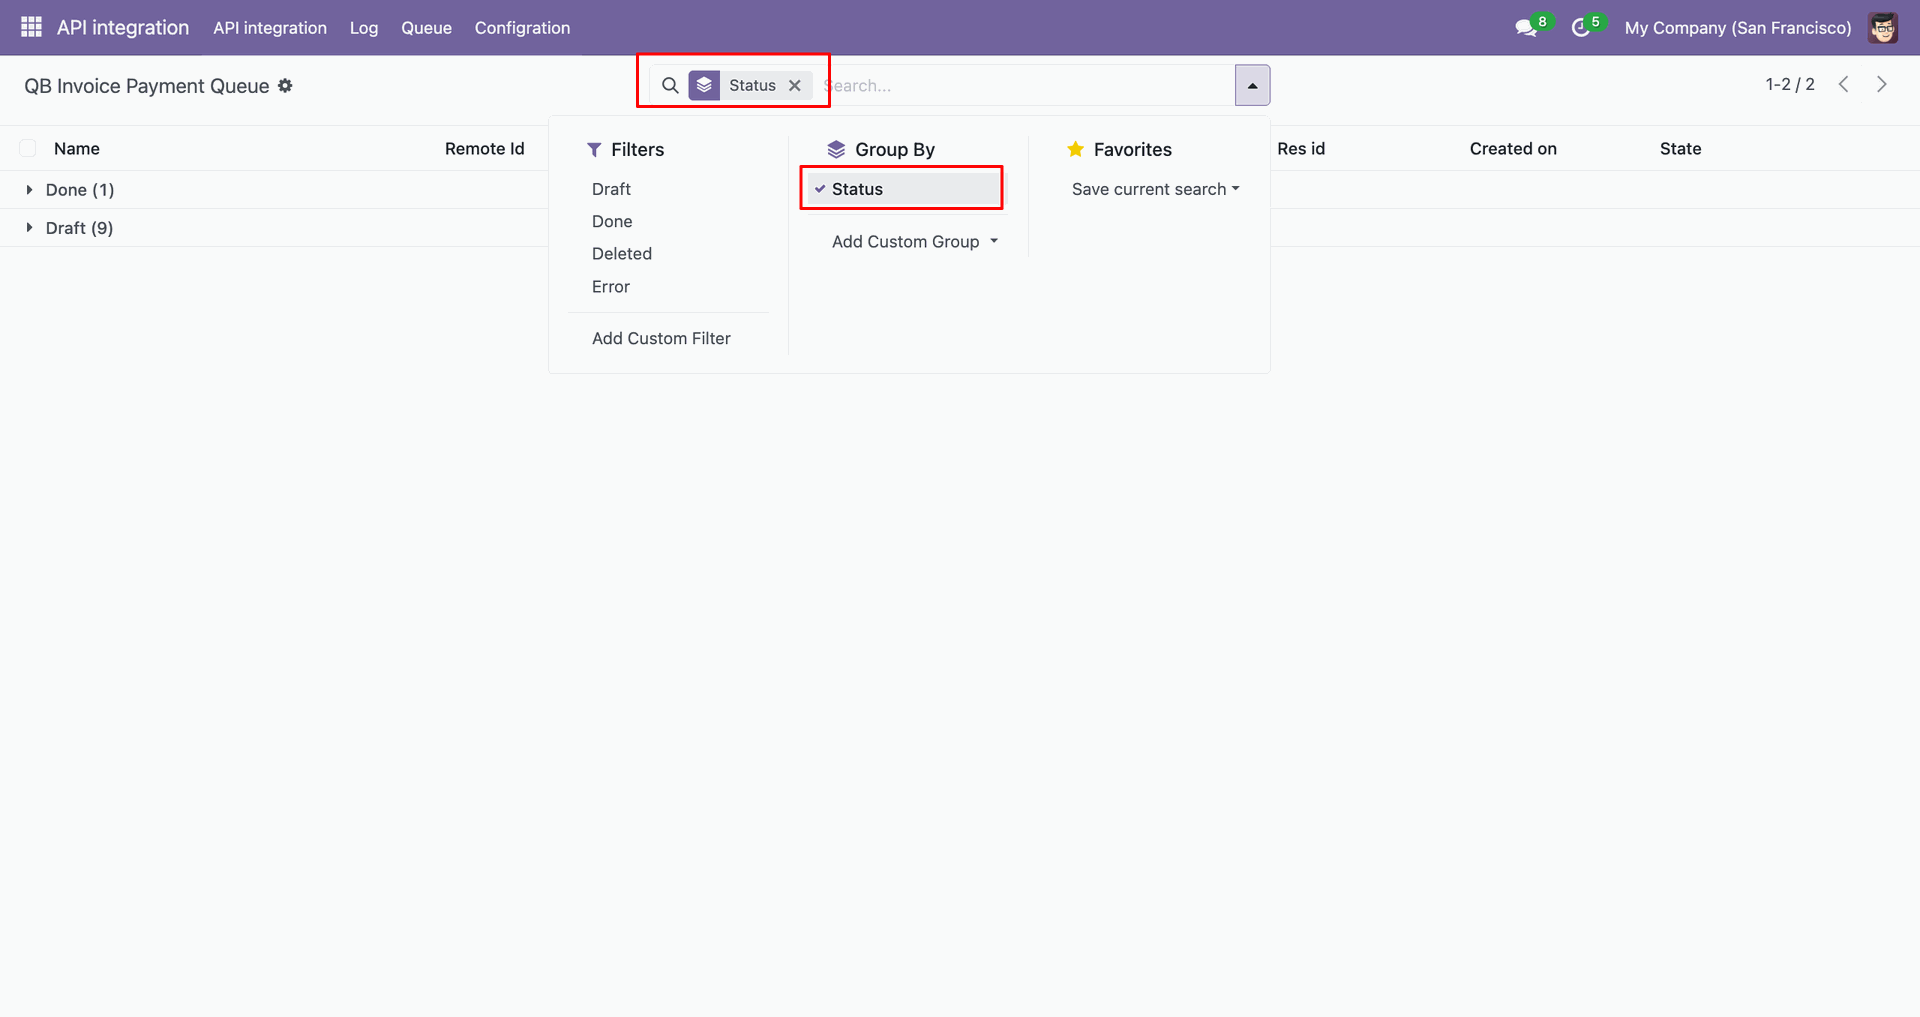
Group by result.
Payments with filter.
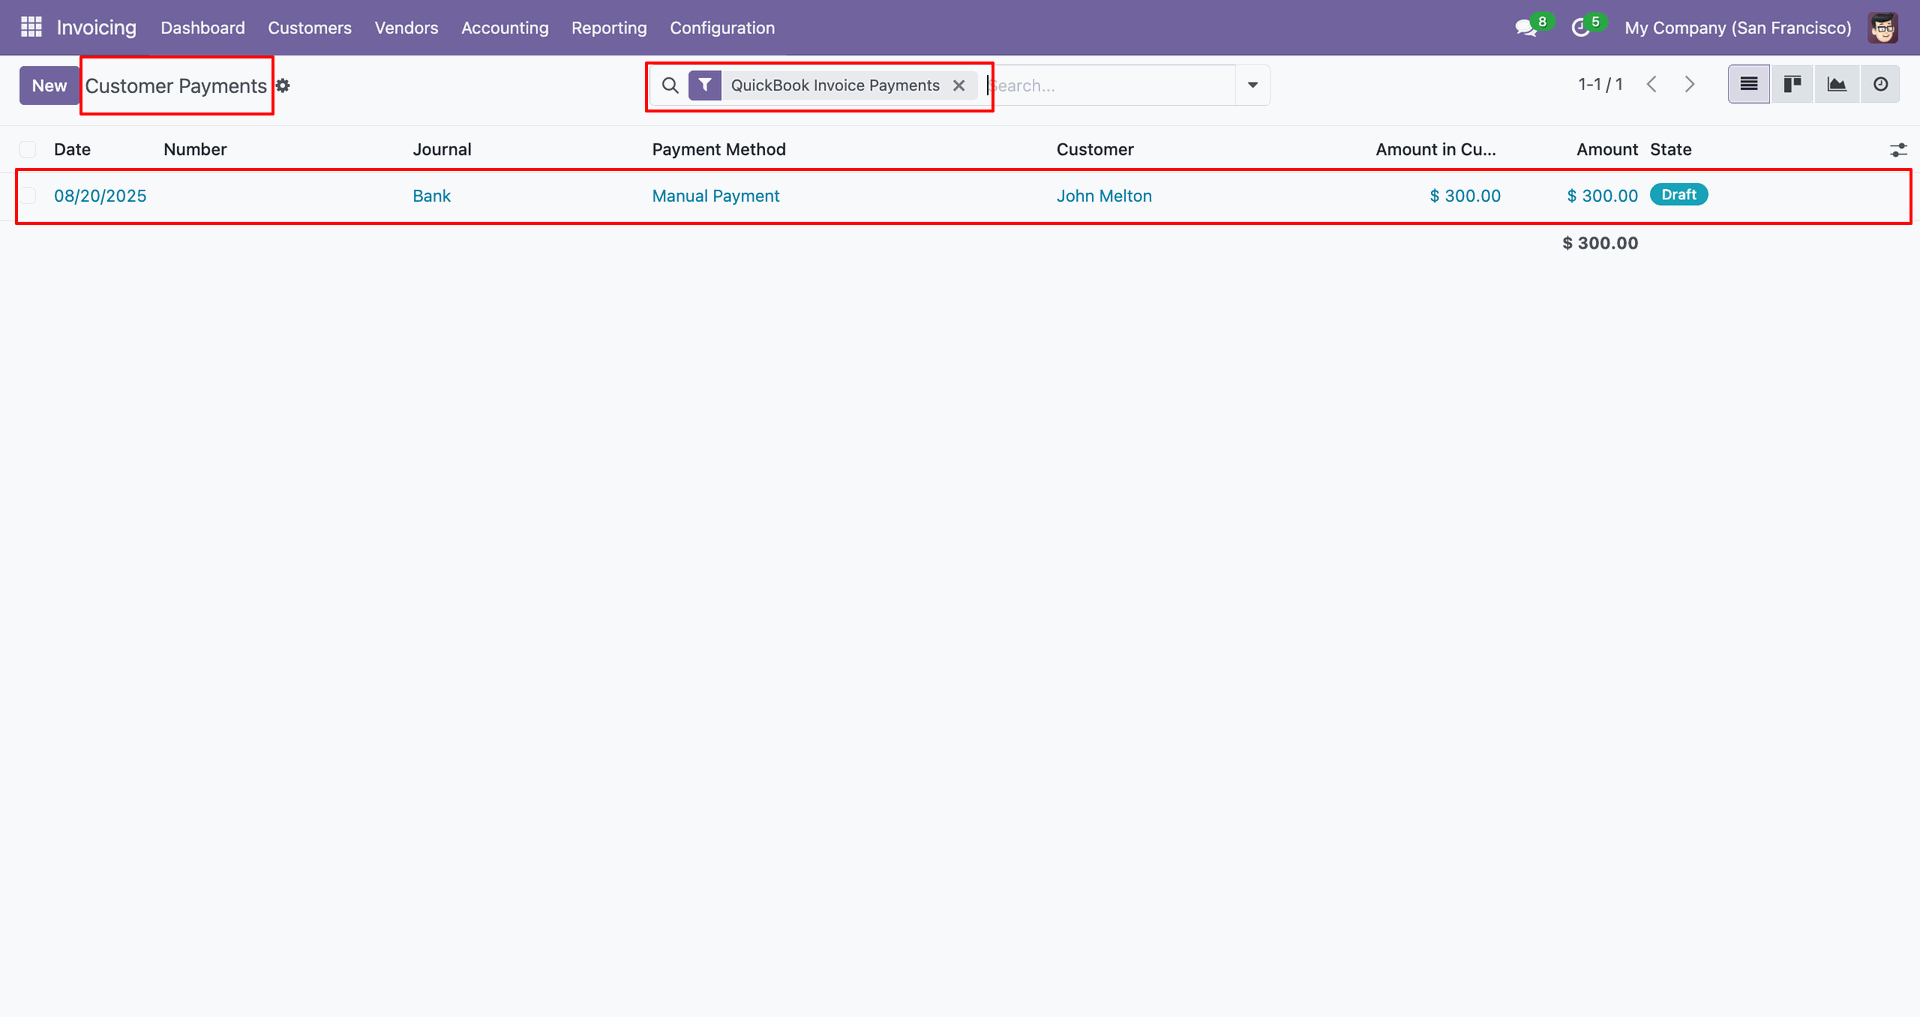
Go to the 'Vendors', click 'Bills'.
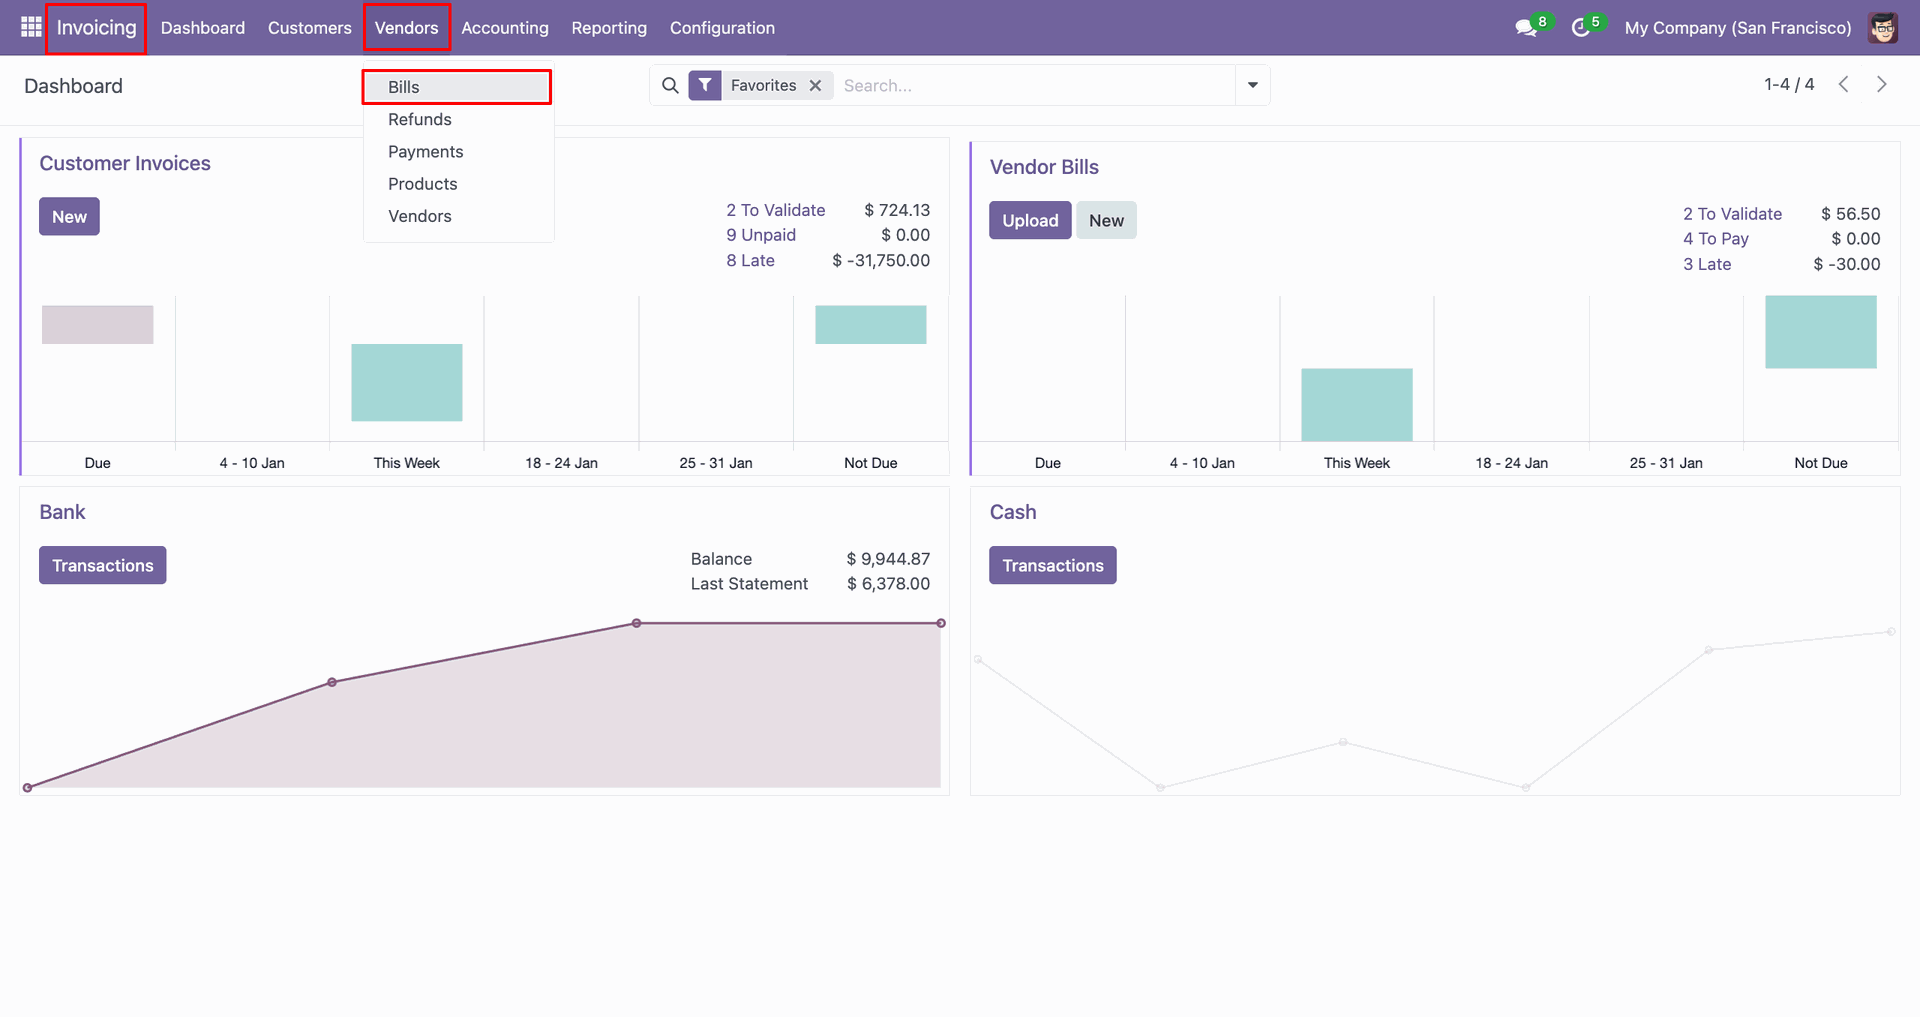
You can export from the 'Action'.
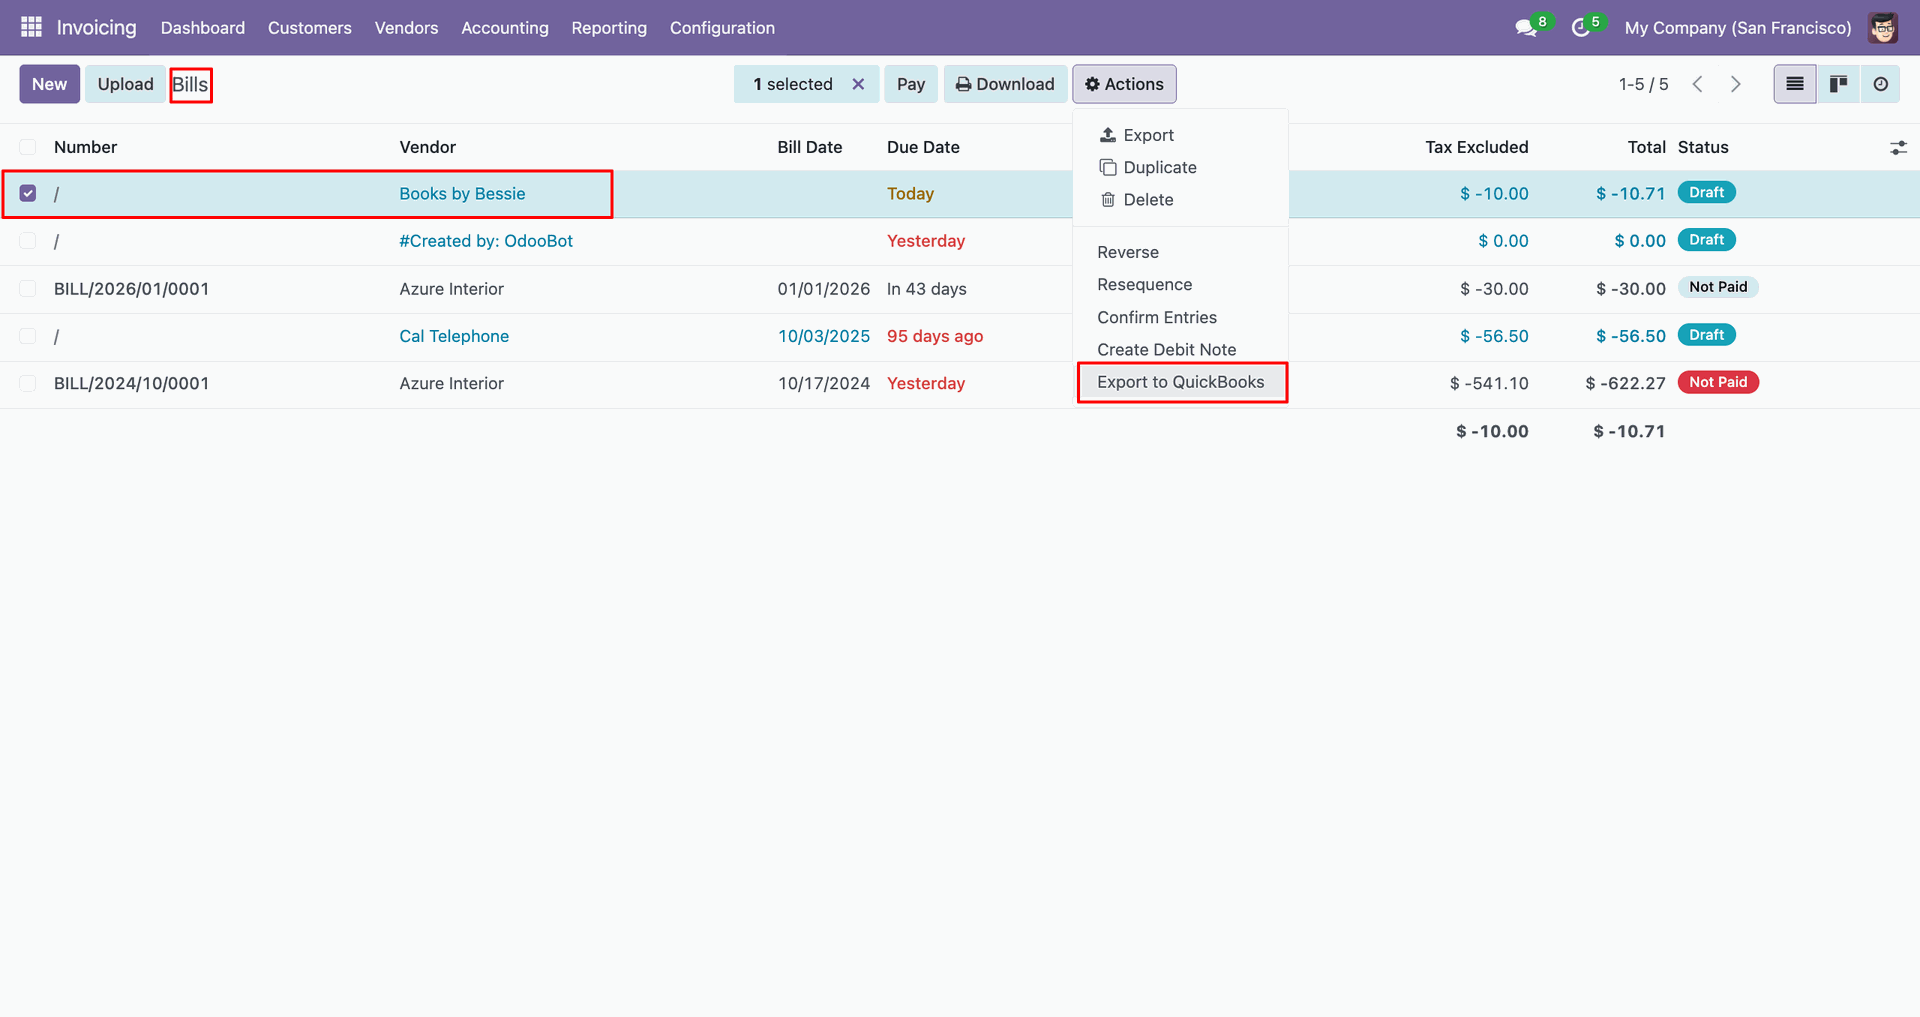
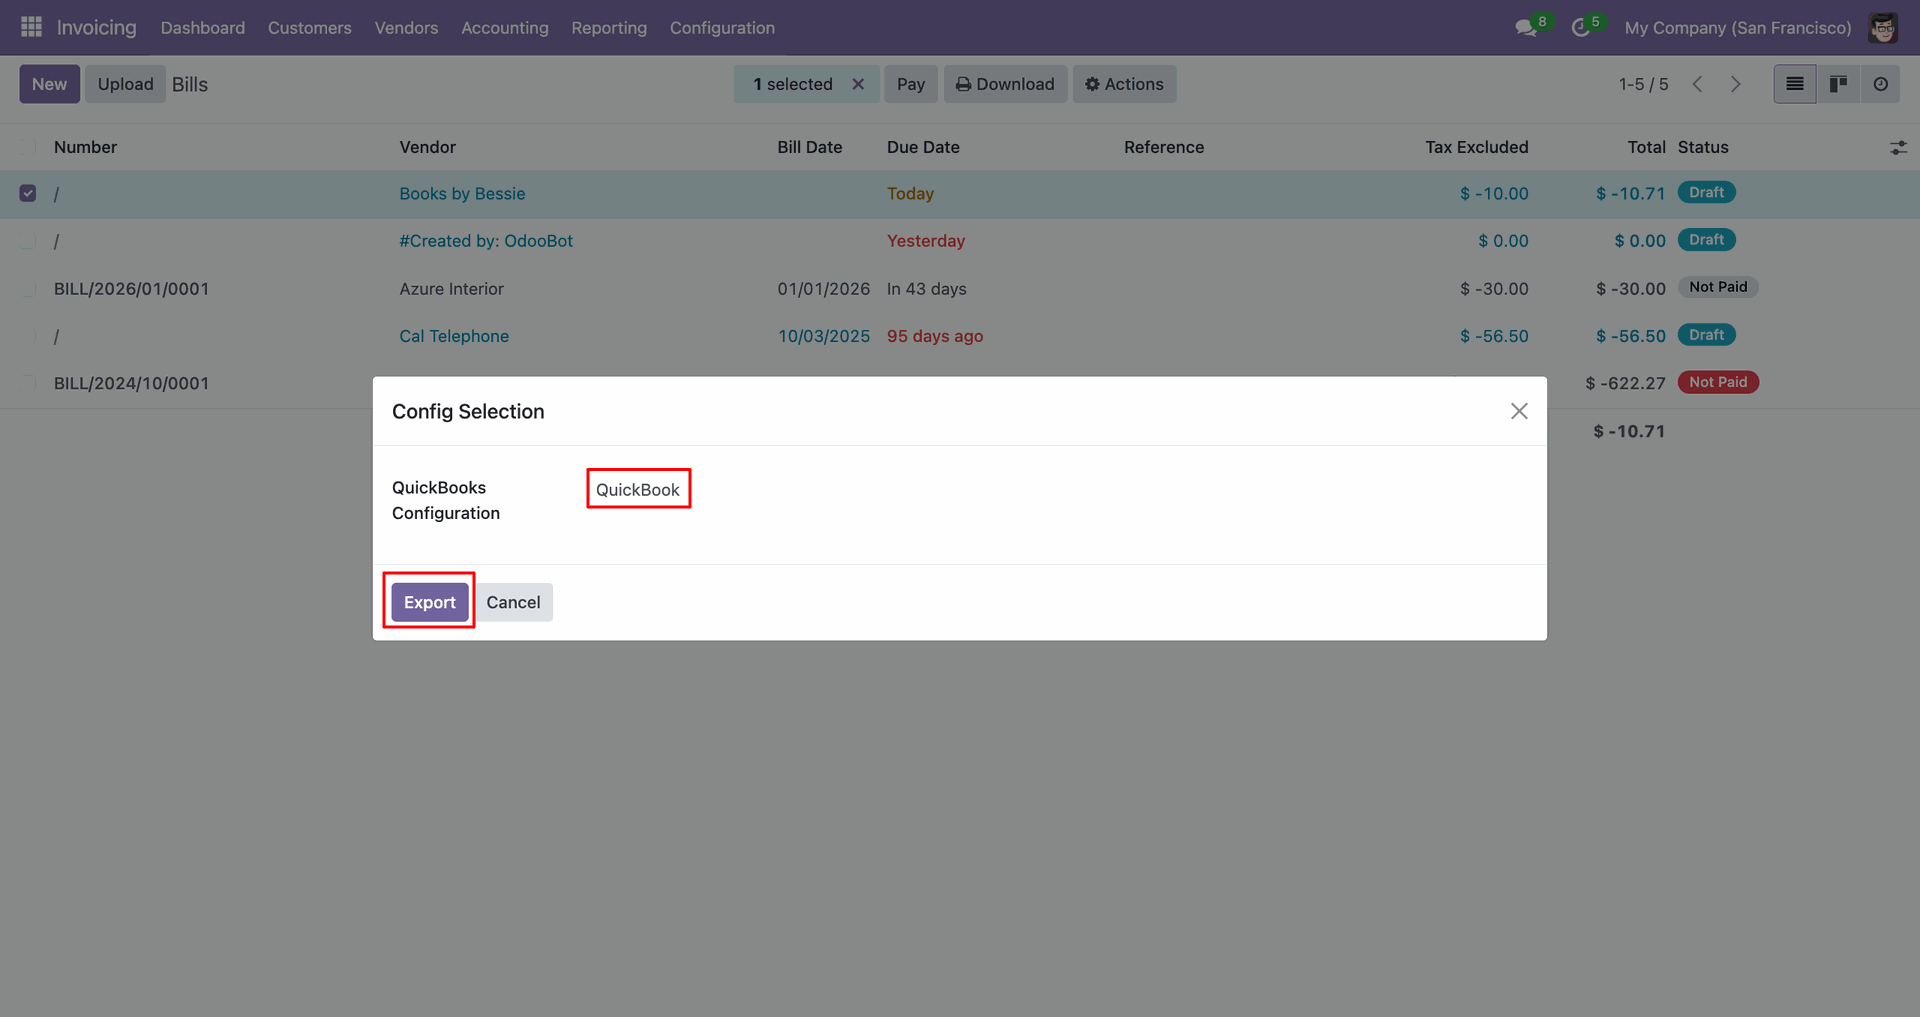
Config selection popup.
Select 'QuickBooks' and click 'Export'.
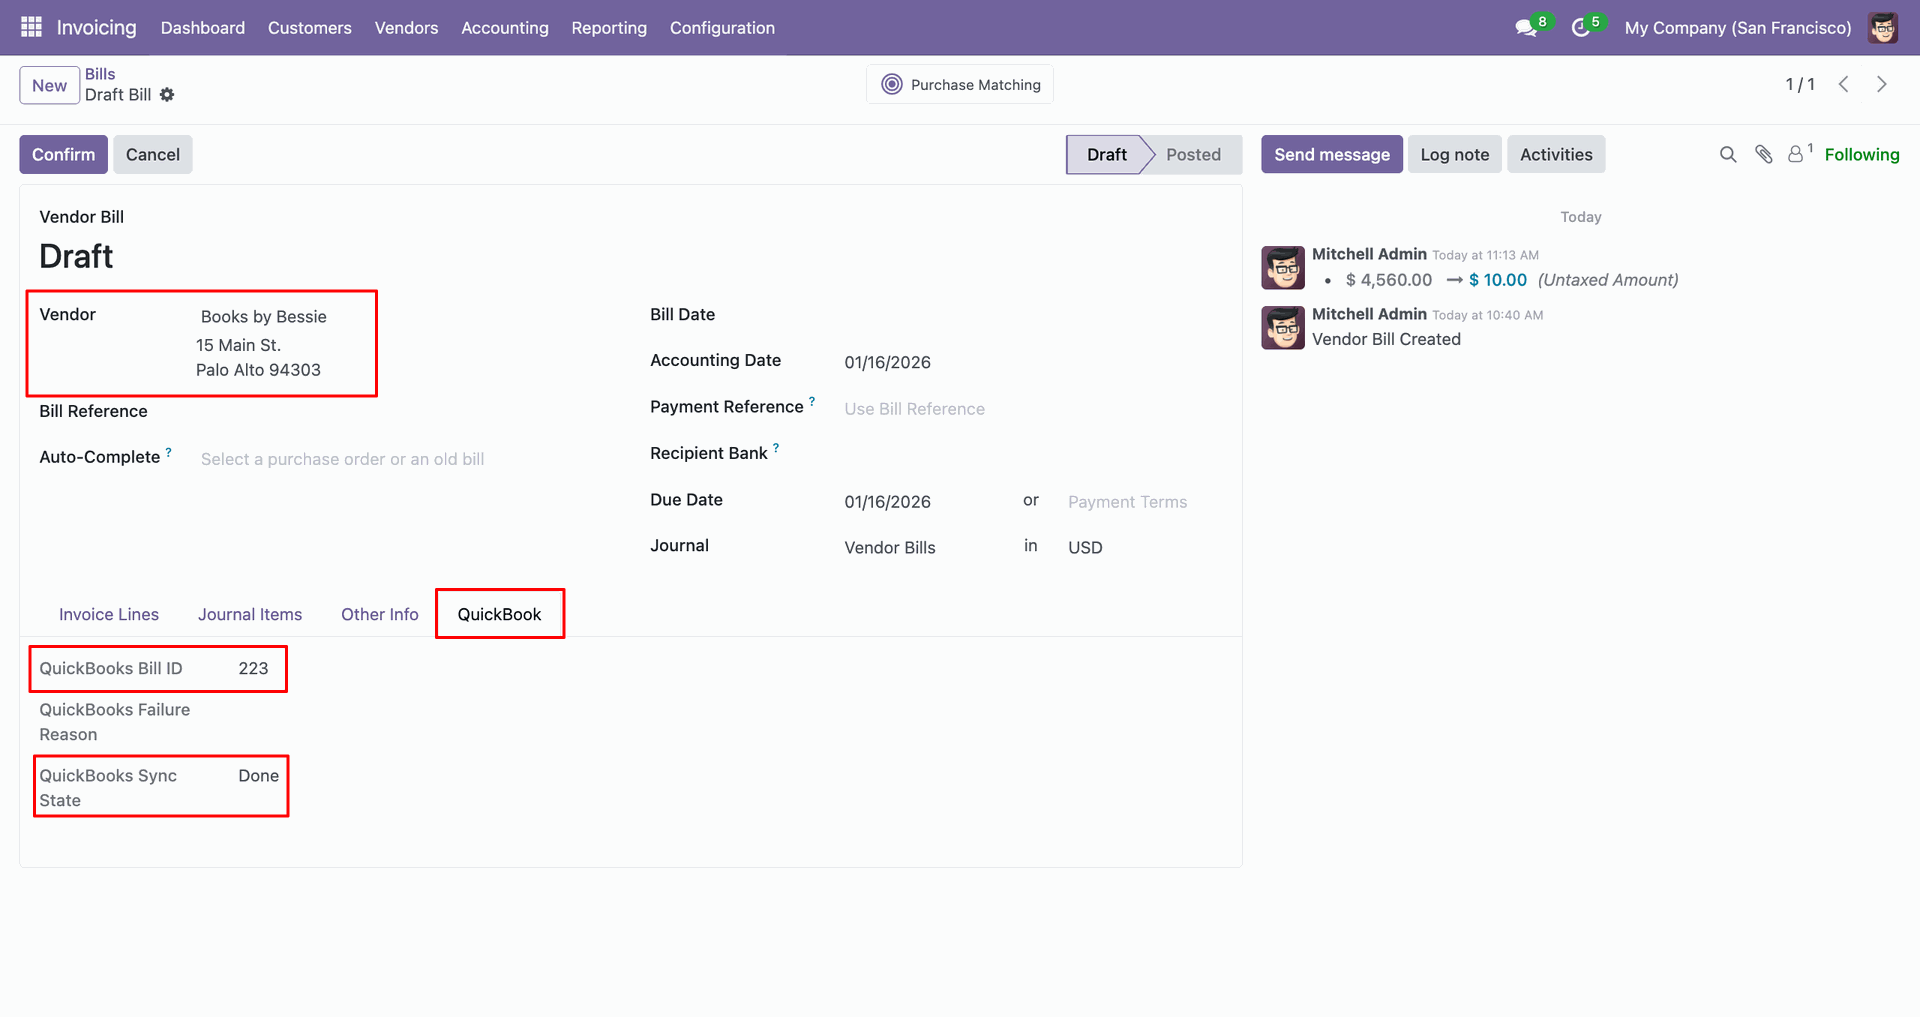
The form view contains Quickbook ID and sync state.
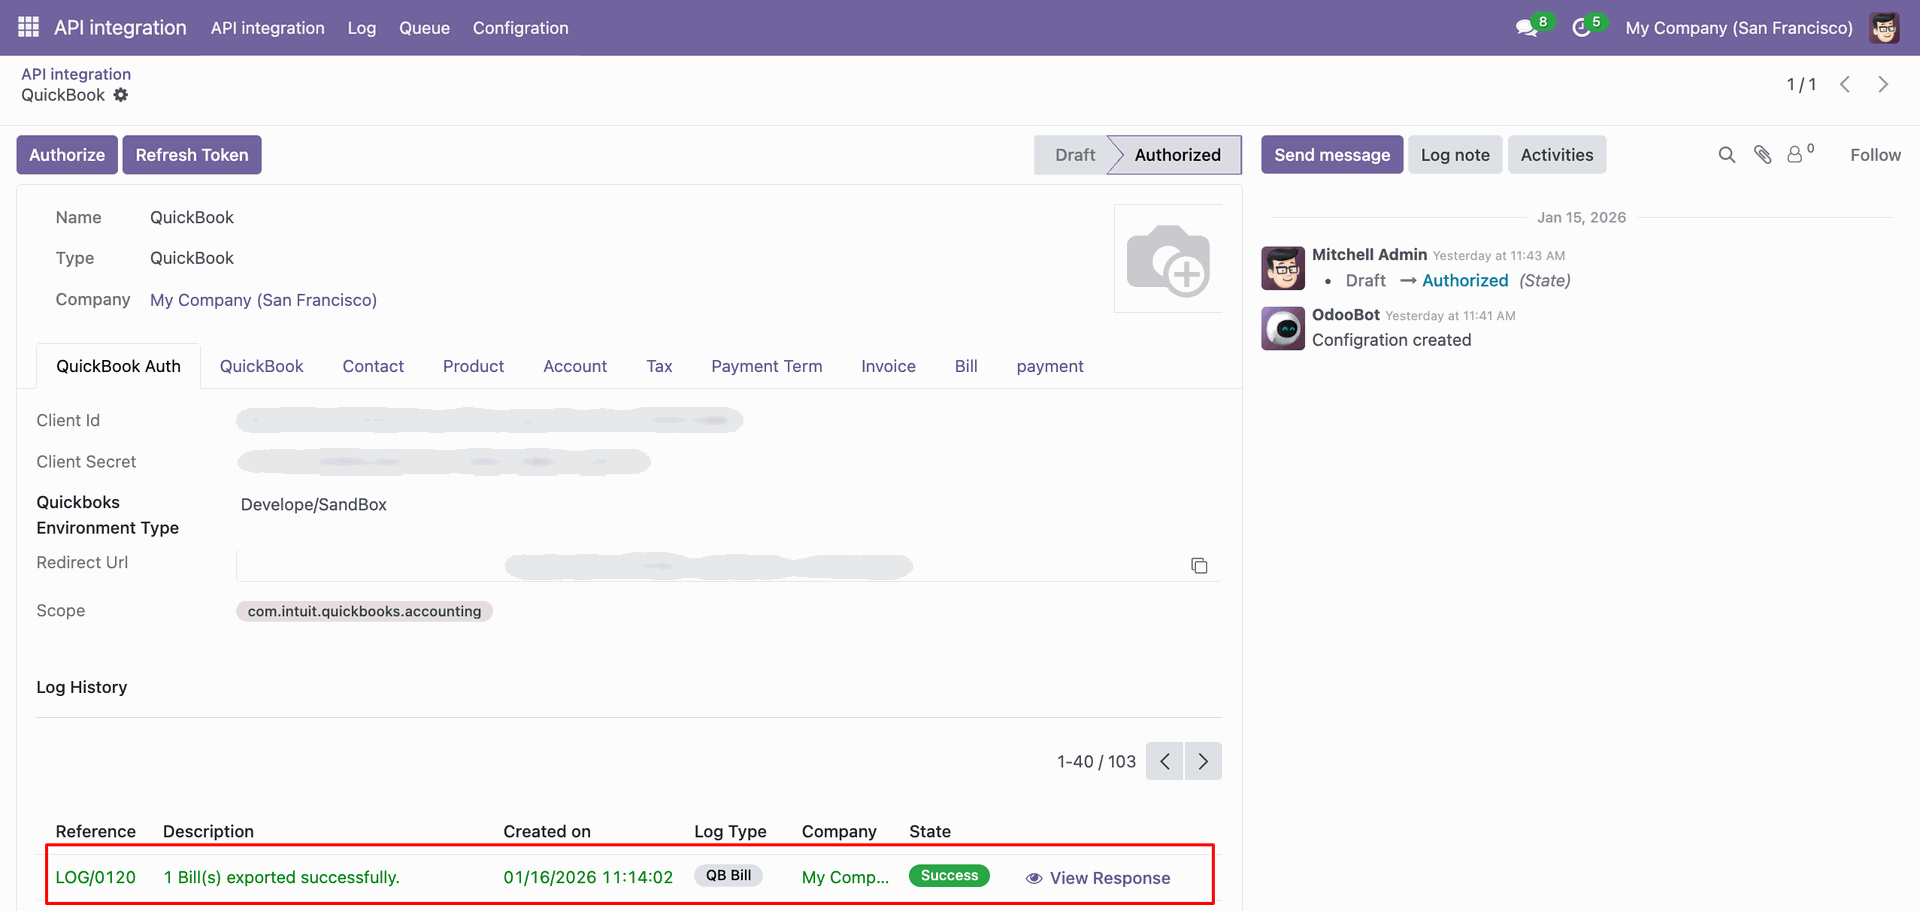
Log with details.
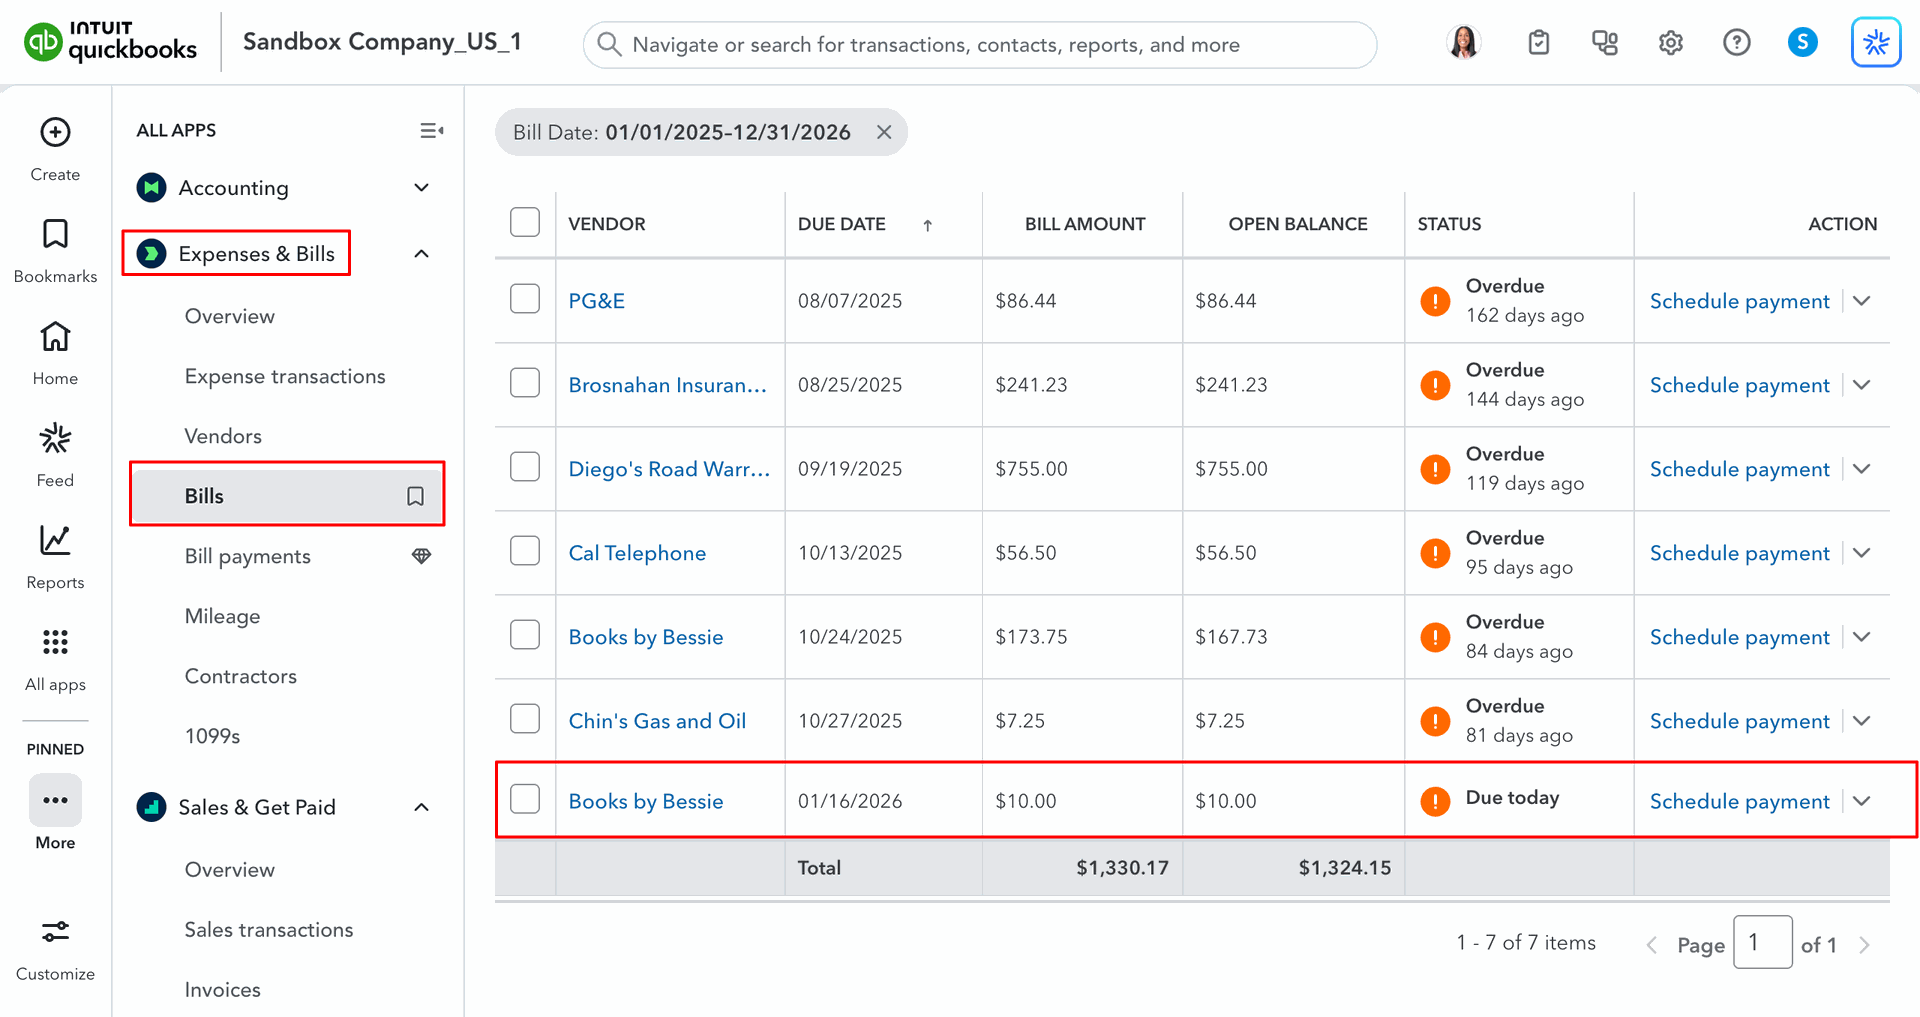
Bills in QuickBooks.
For the import, go to the 'Bill' Tab, enable 'Import Vendor Bill', and click 'Import'.
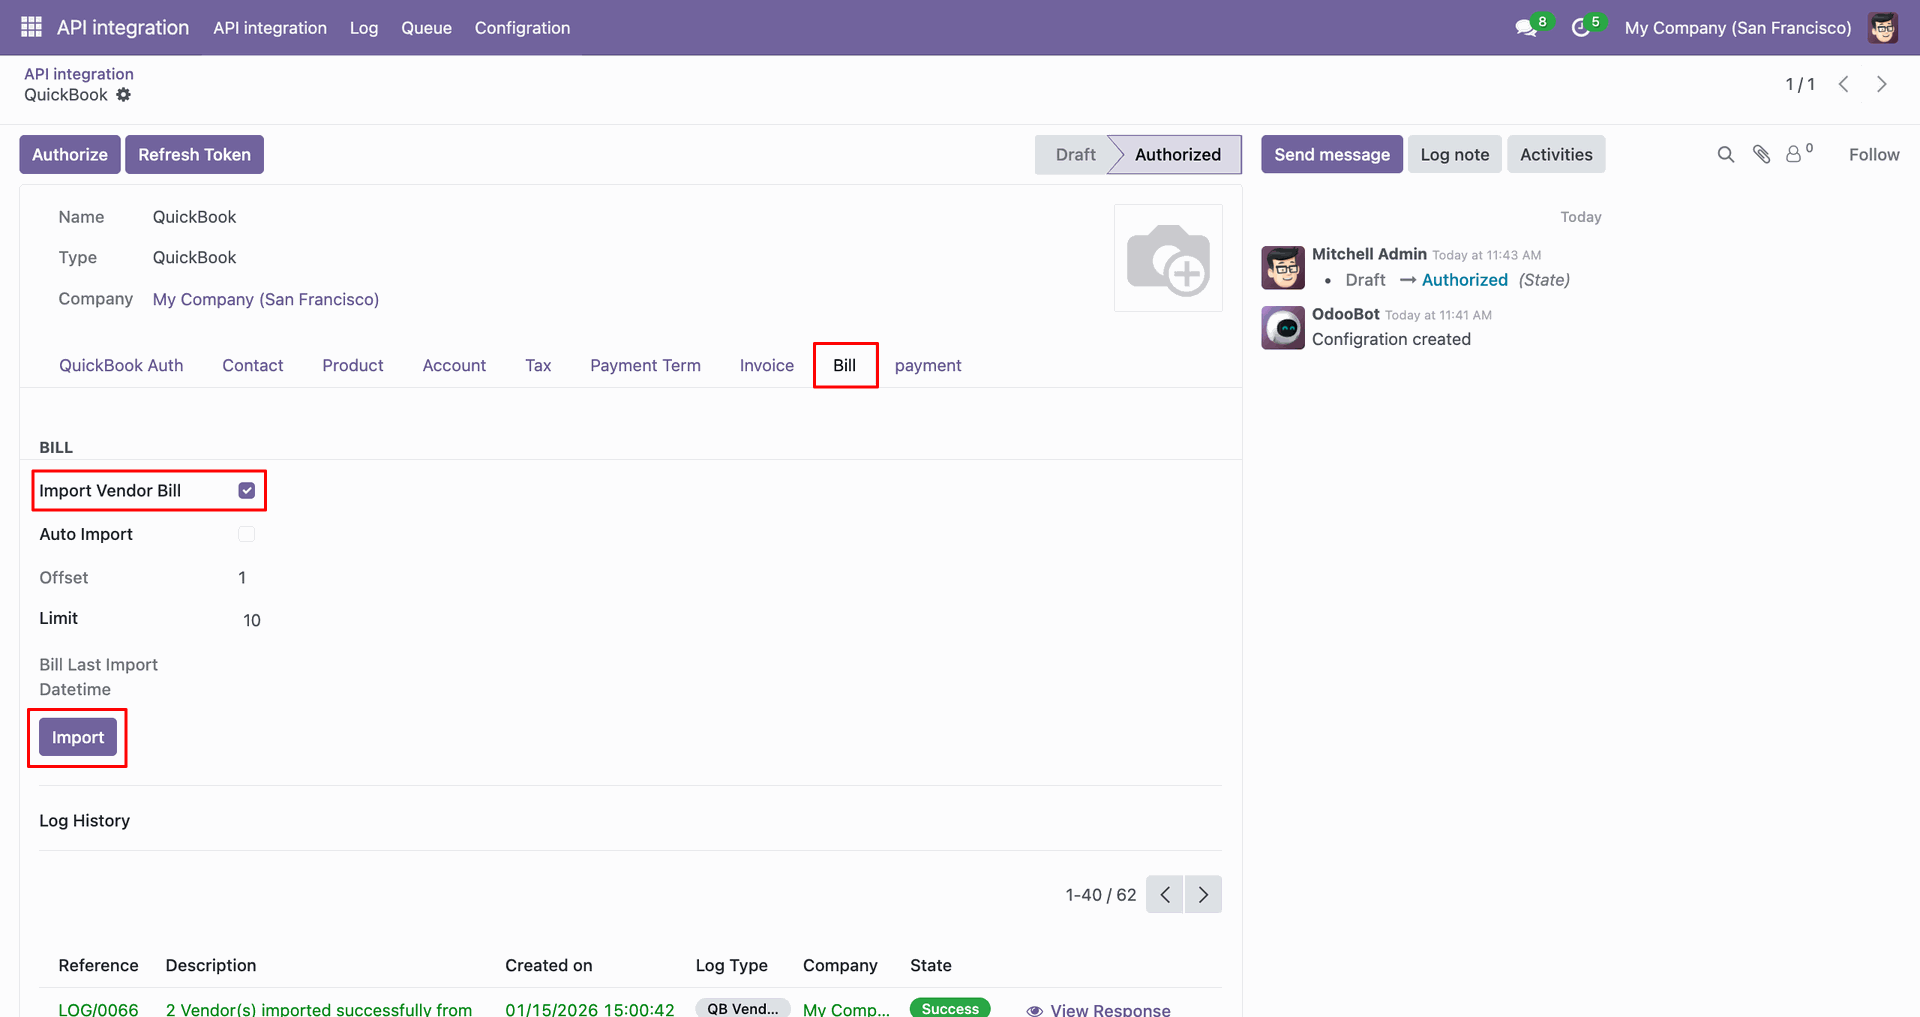
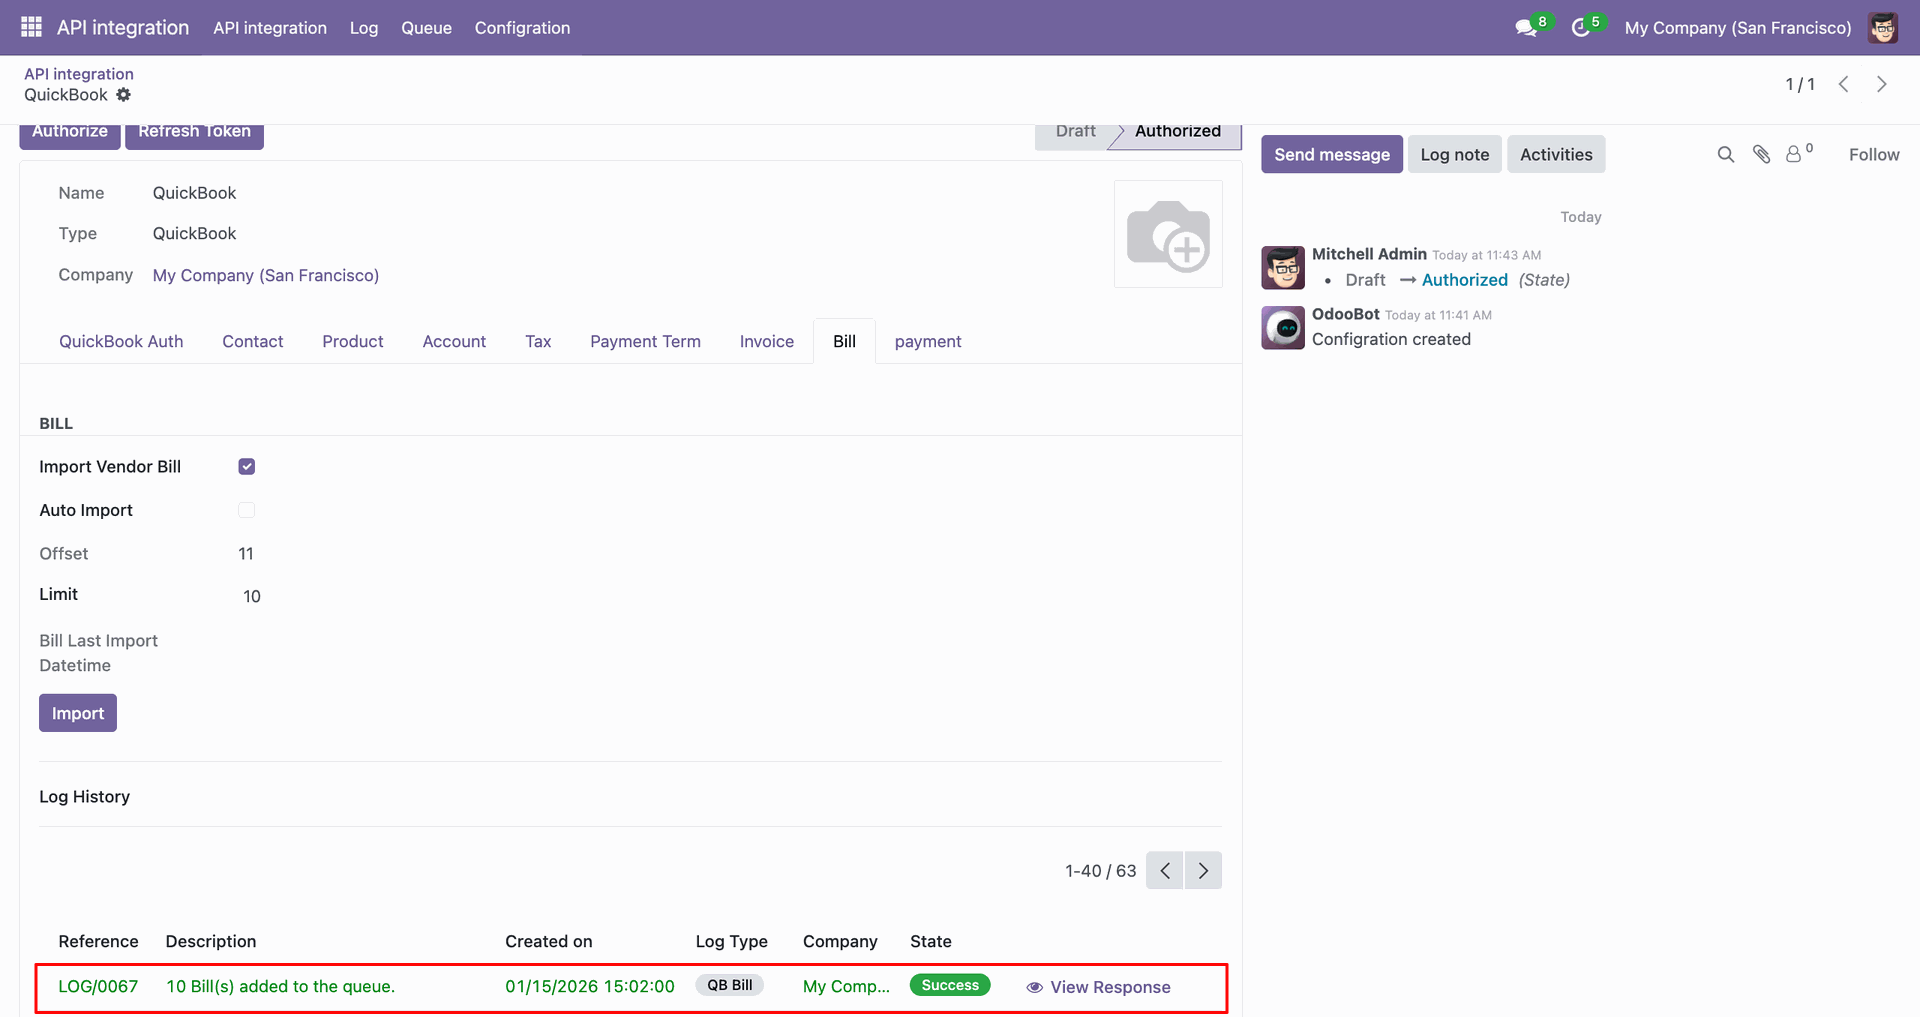
Log with imported data.
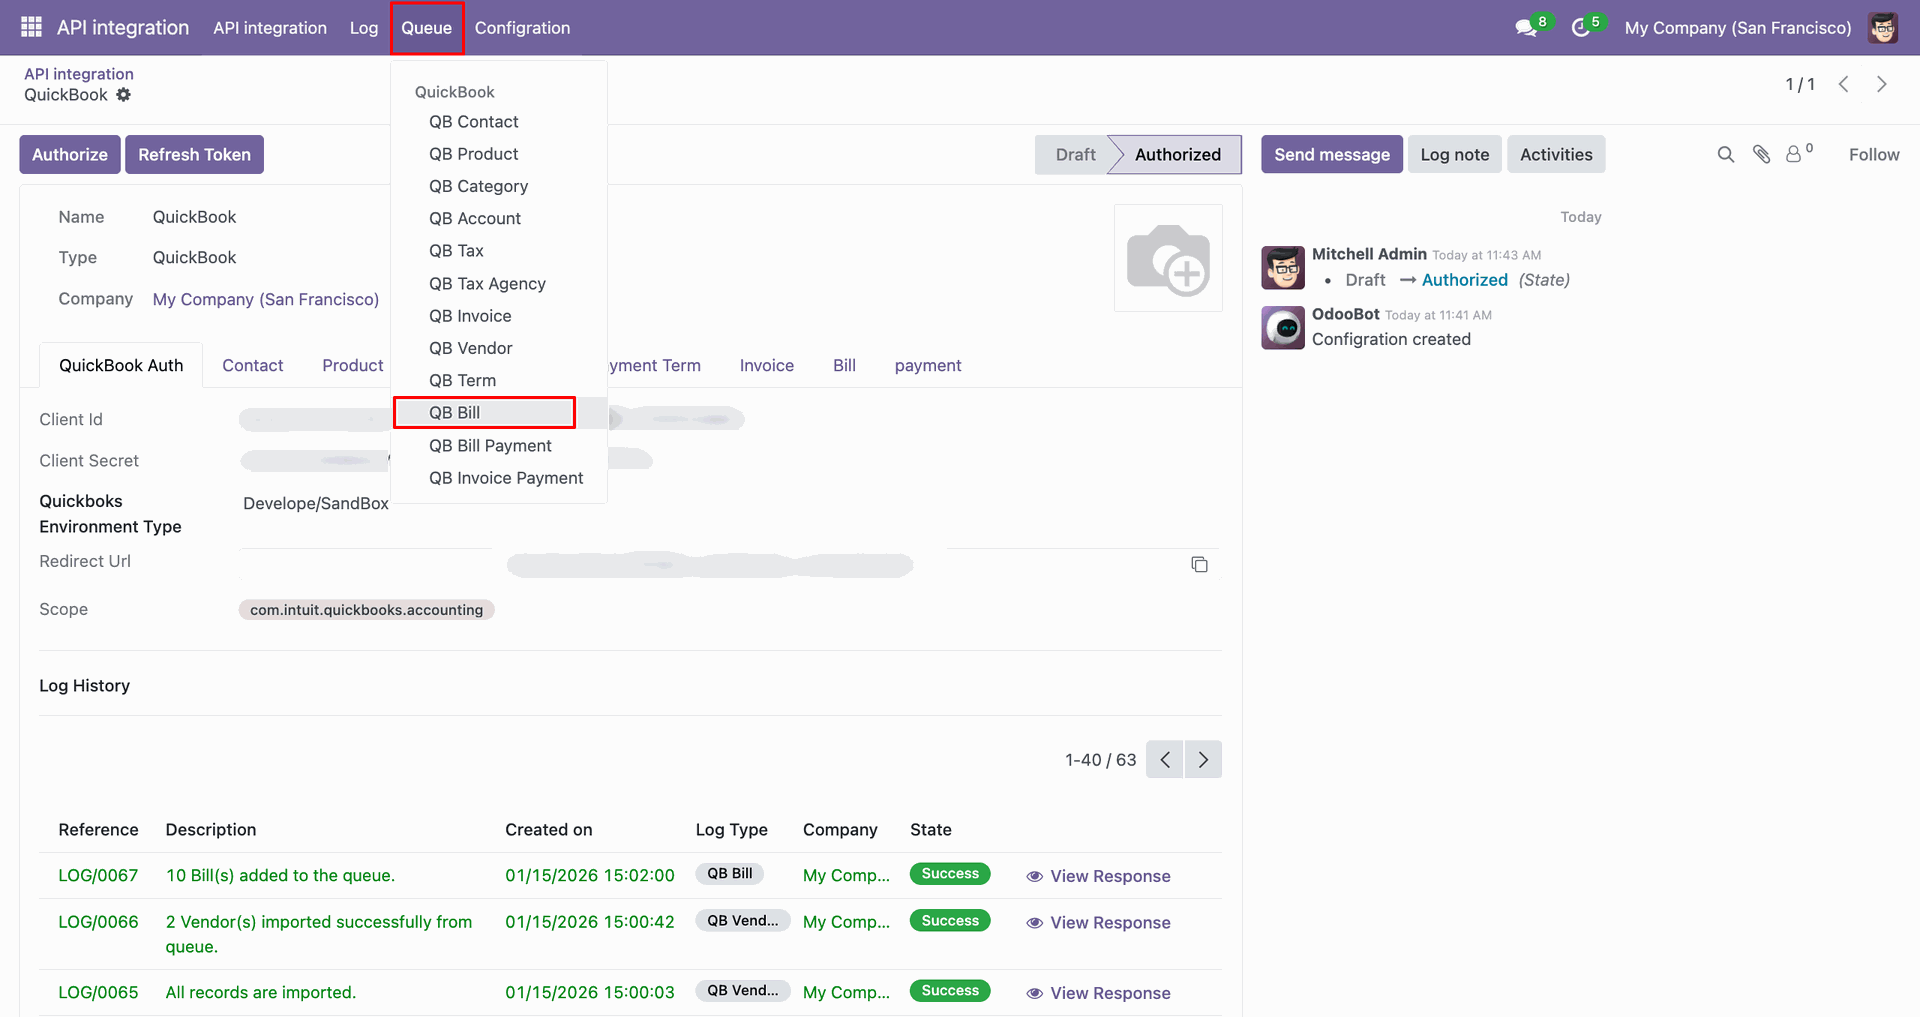
Go to the Queue, 'QB Bill'.
It will open the queue.
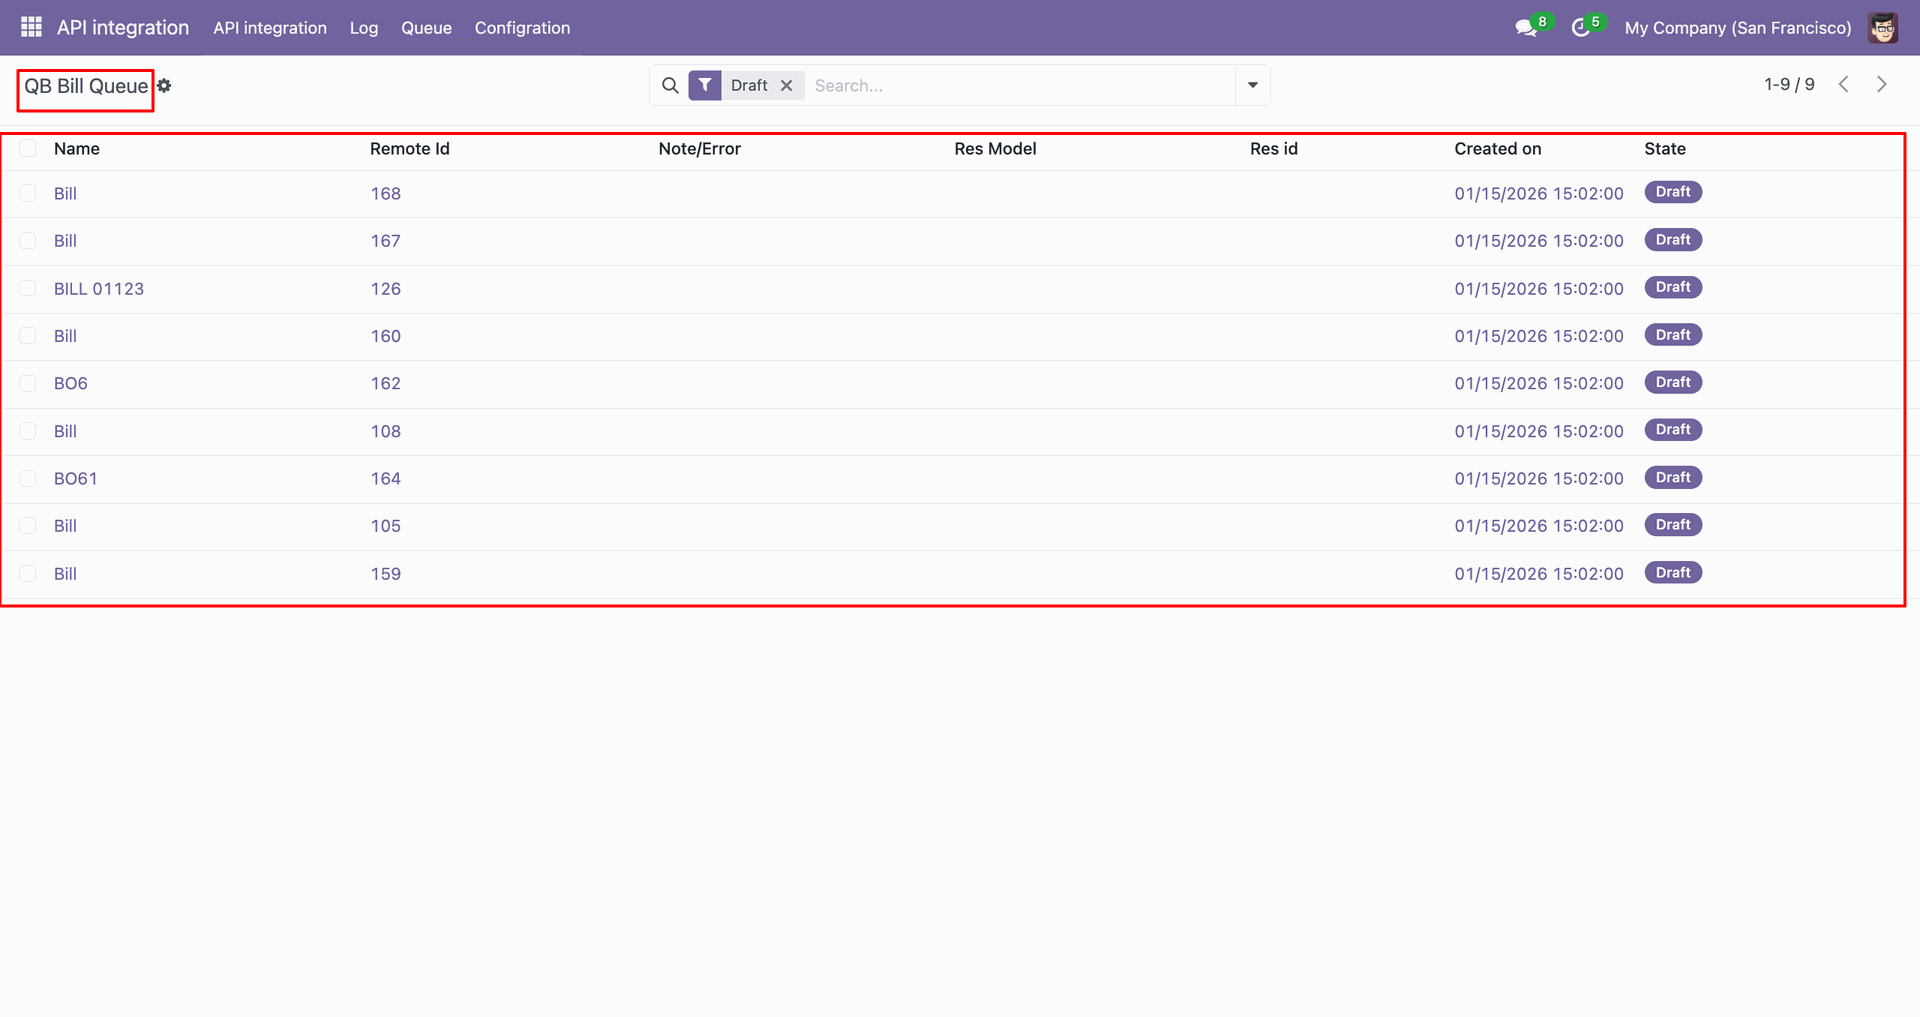
You can import from the queue.
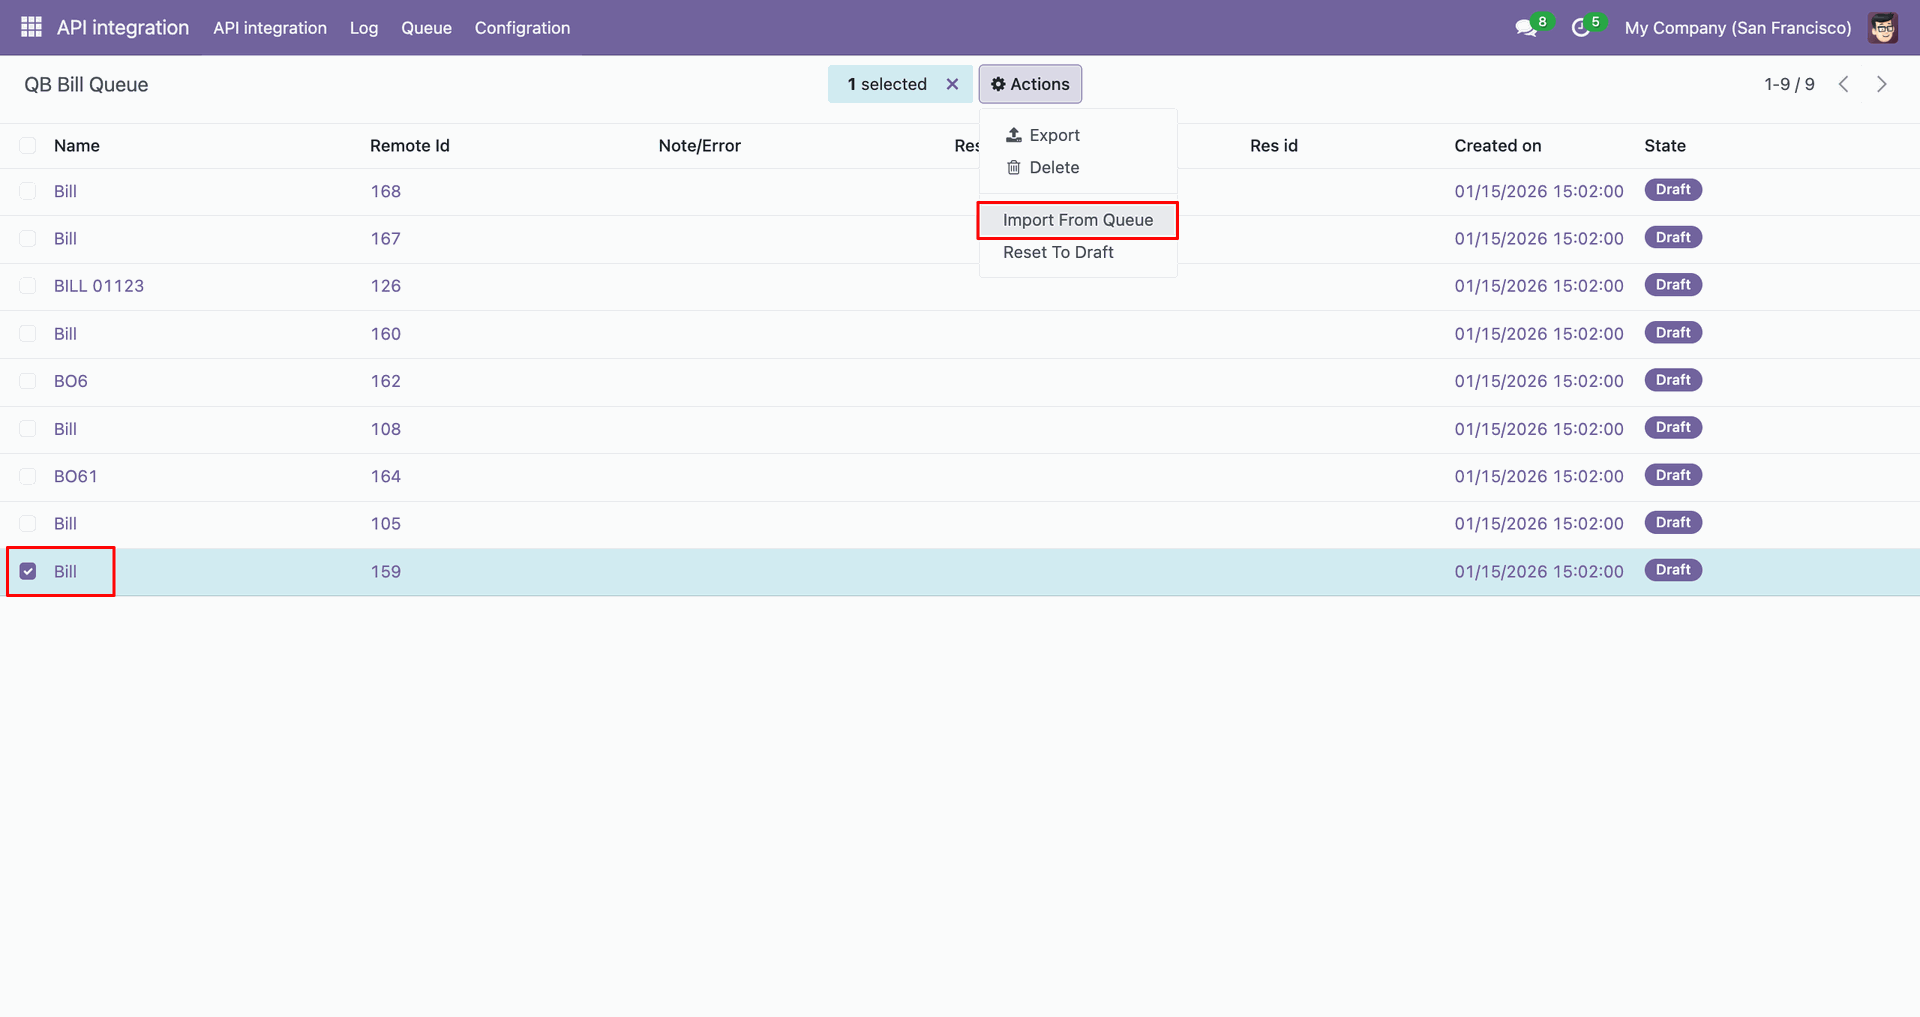
Log with details.
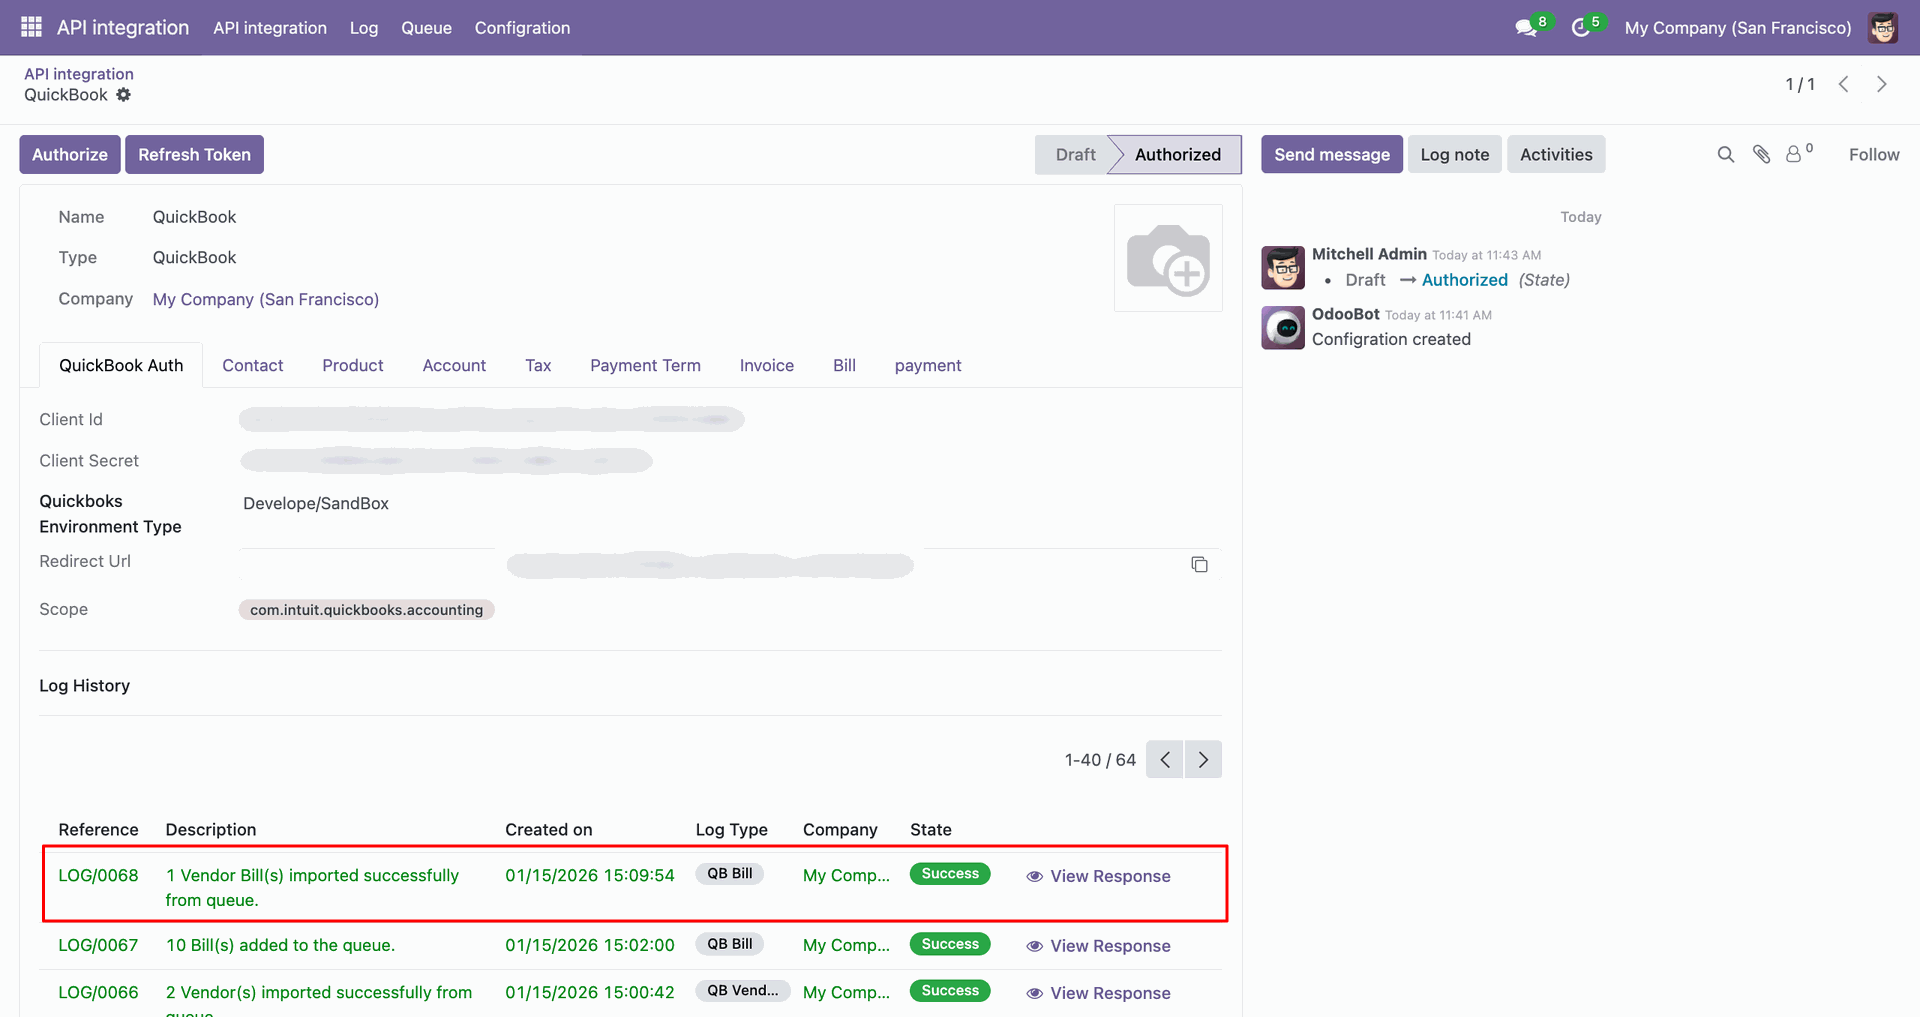
Group by with 'Status'.
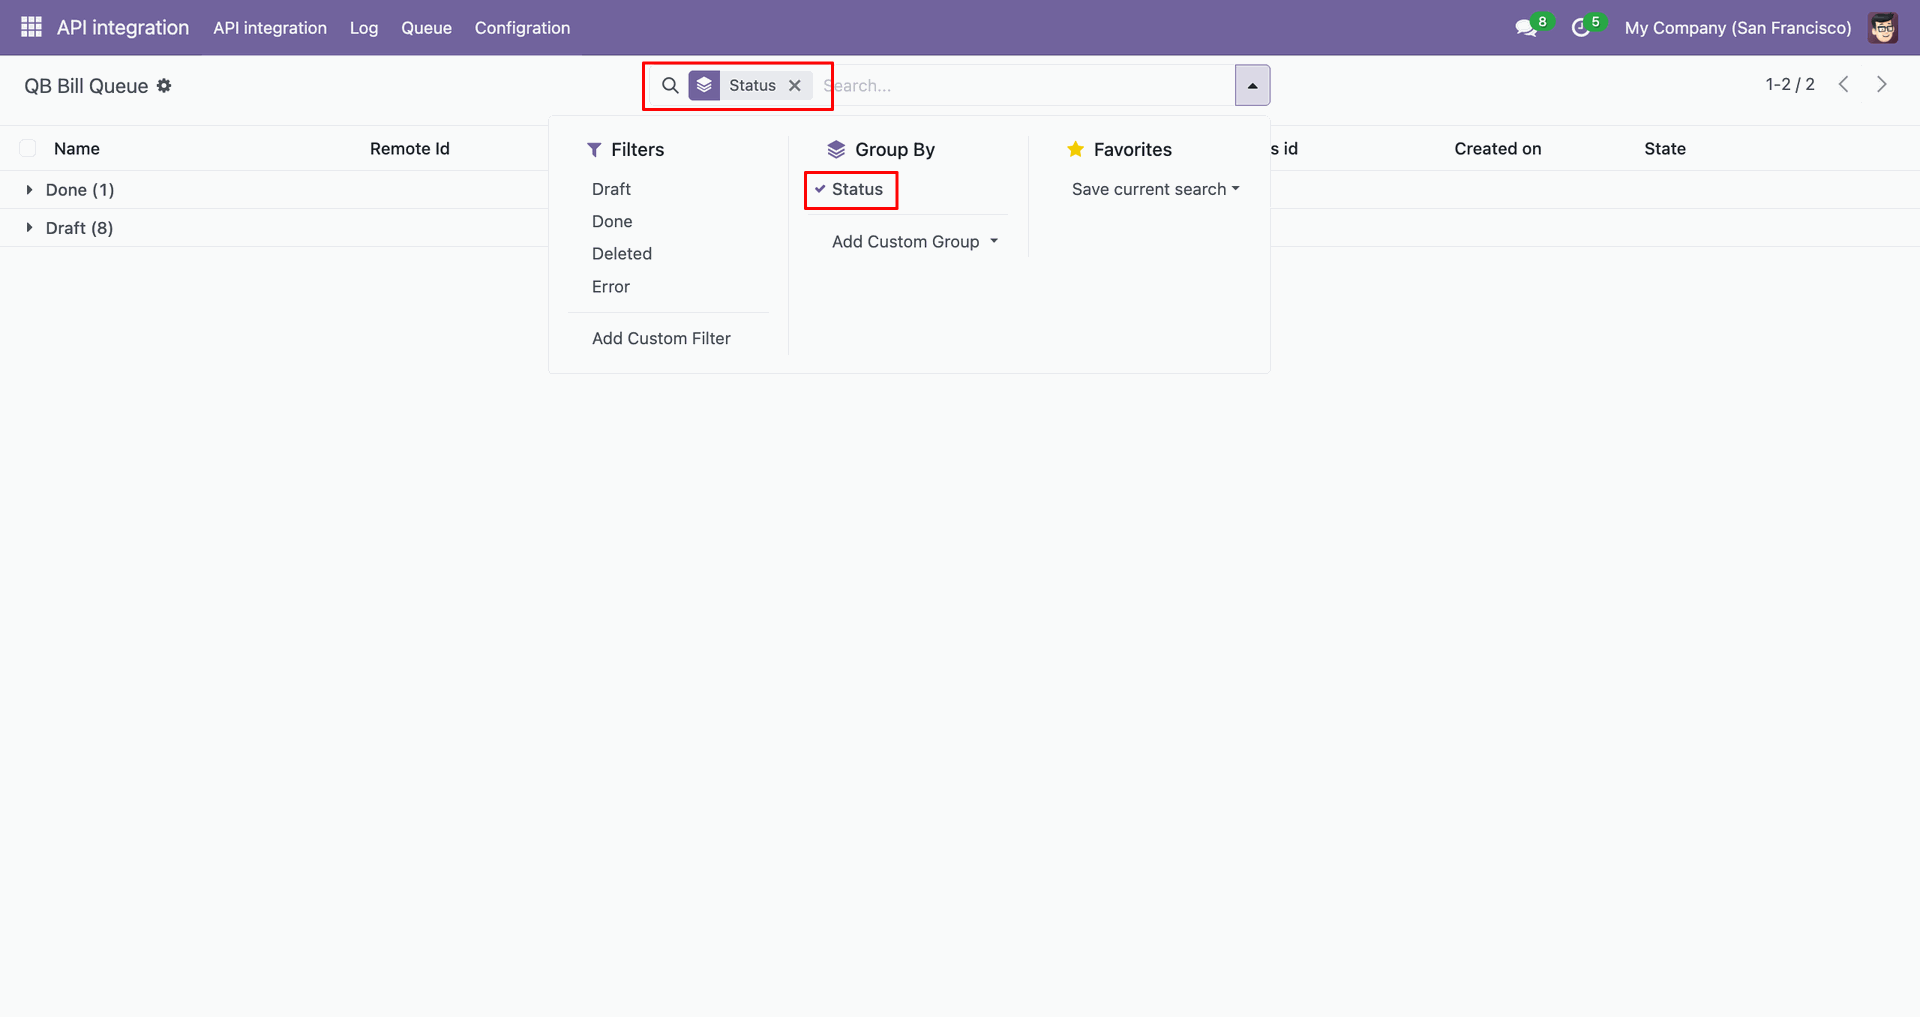
Group by result.
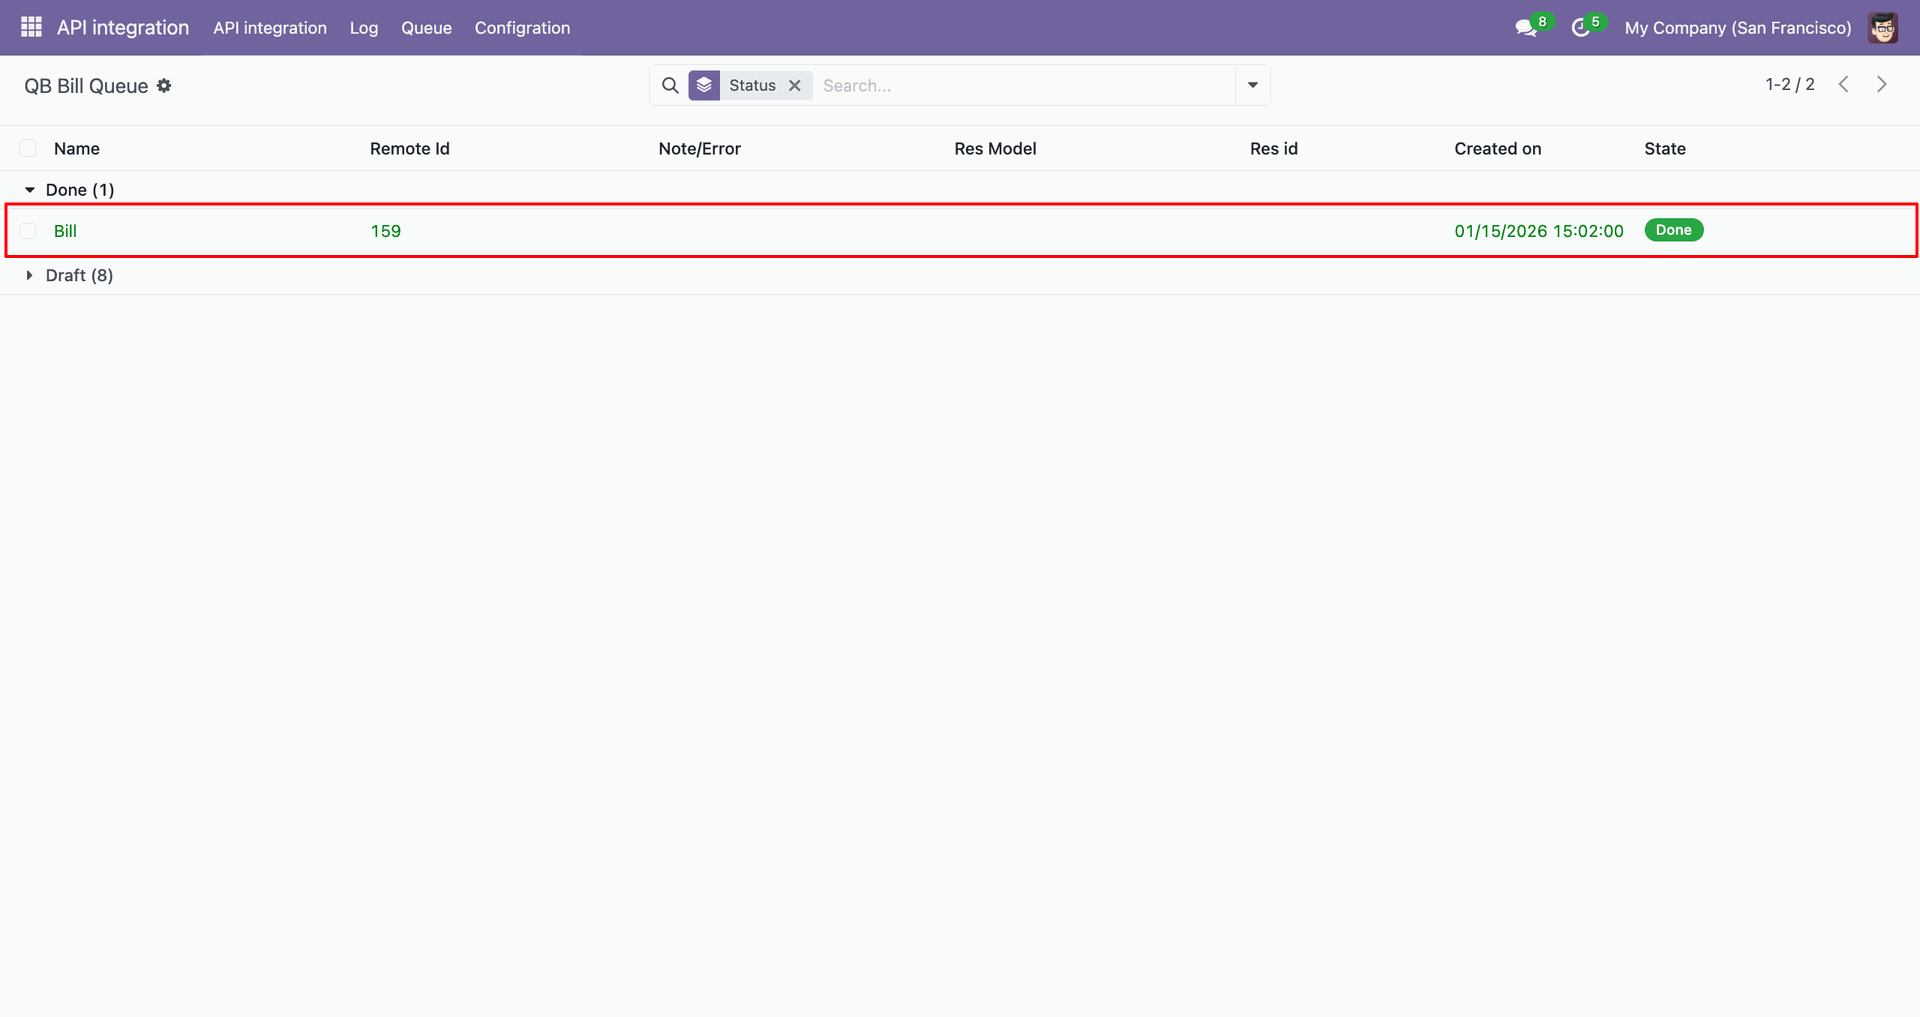
Filter Quickbooks bills.
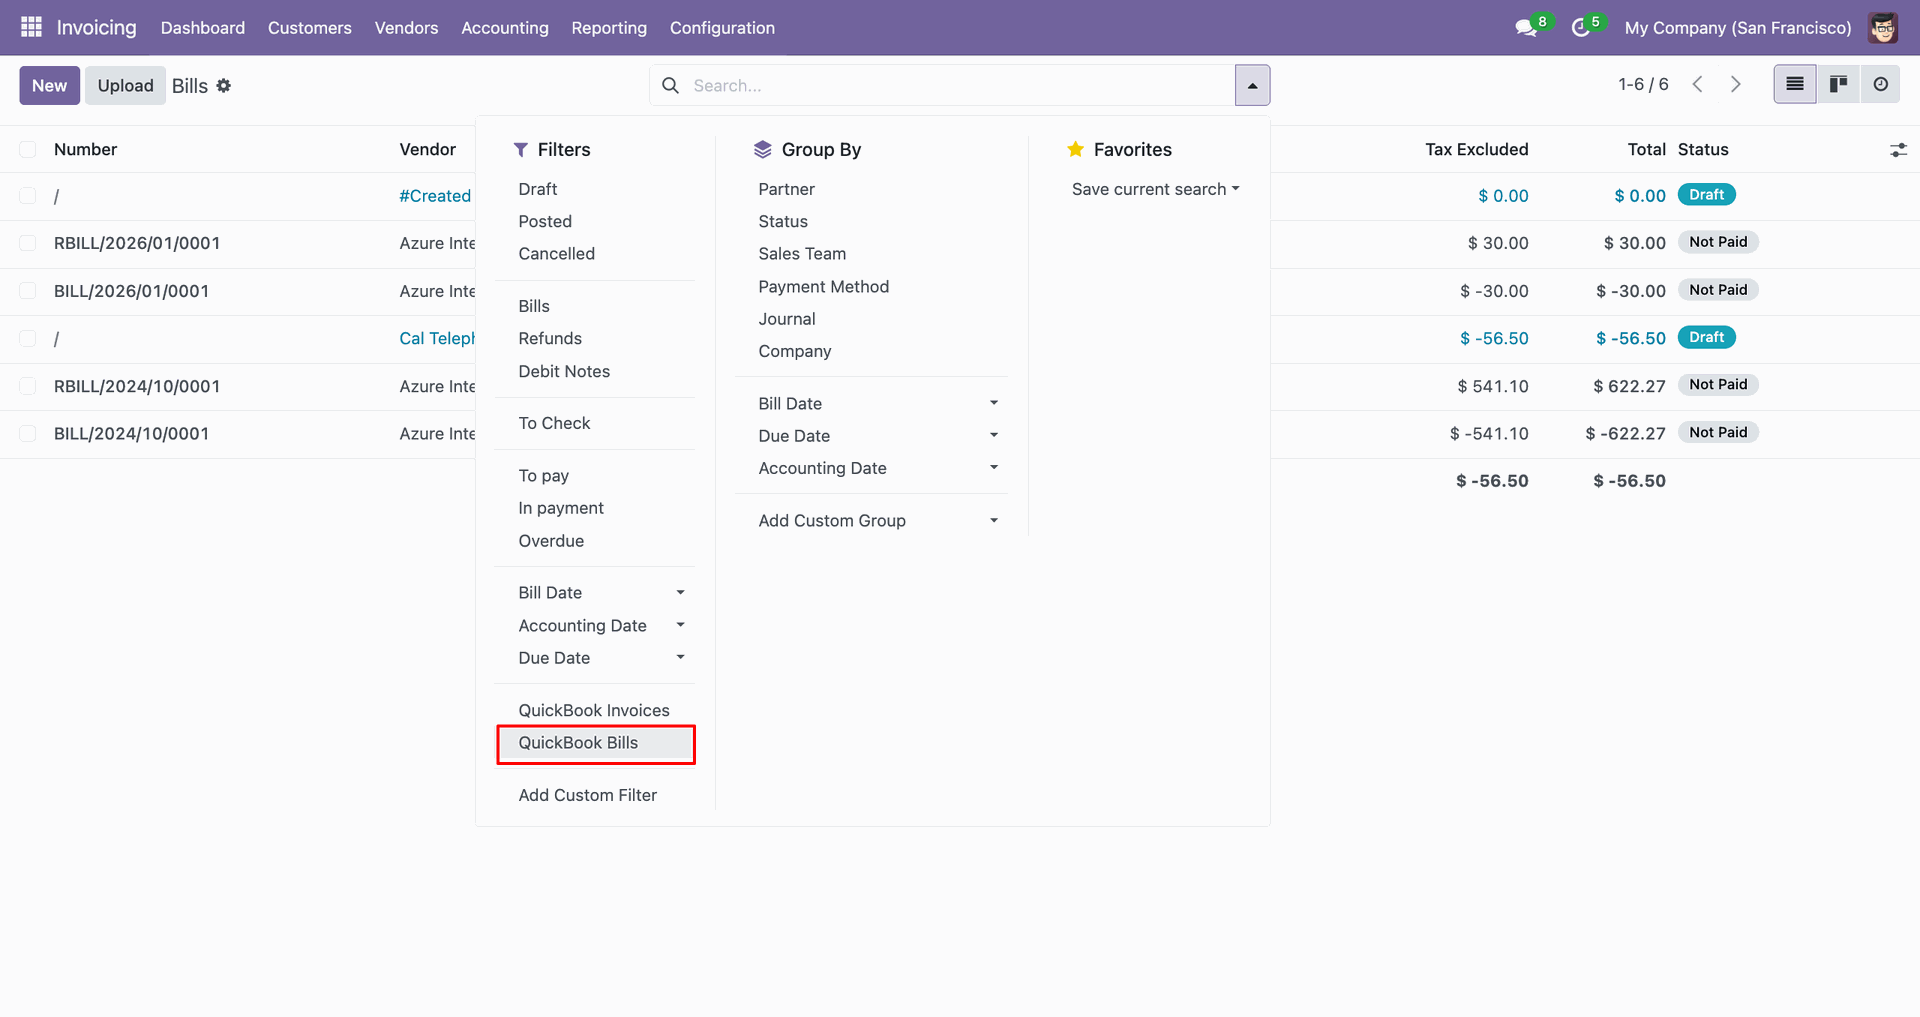
Filter result.
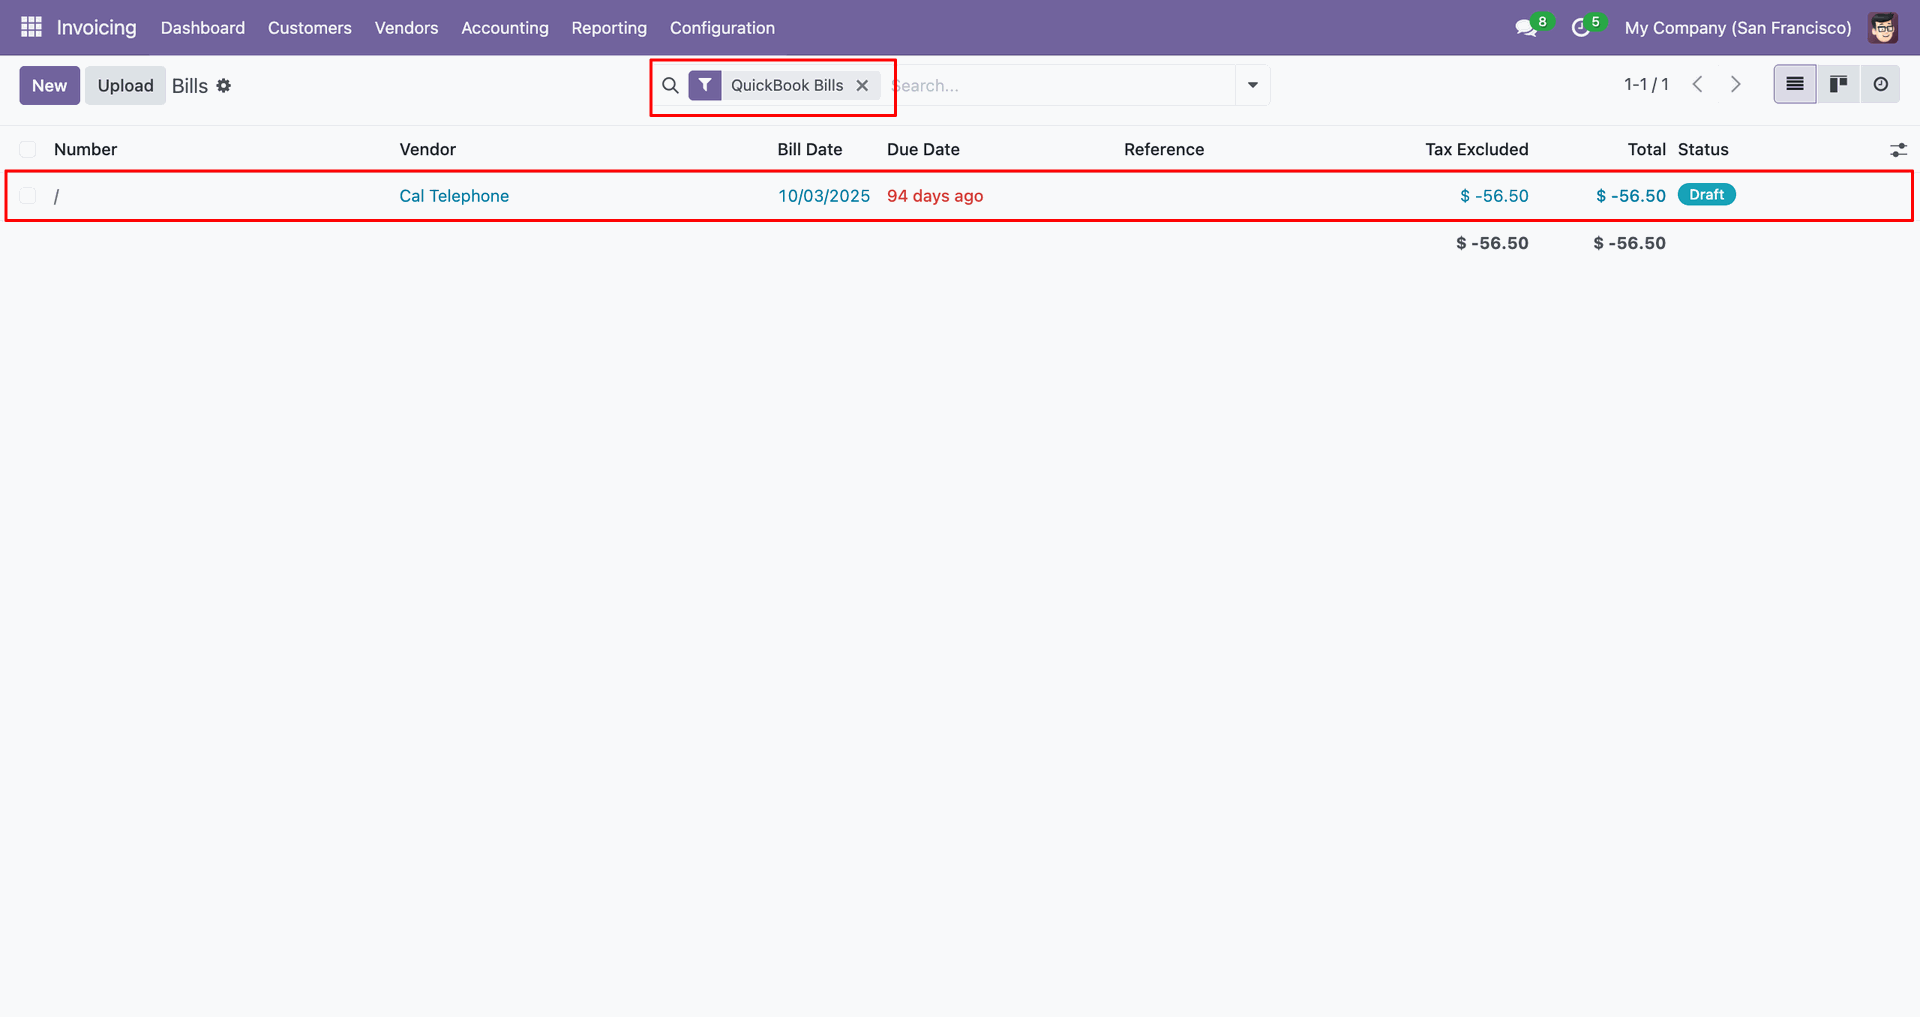
Go to the 'Vendors', click 'Payments'.
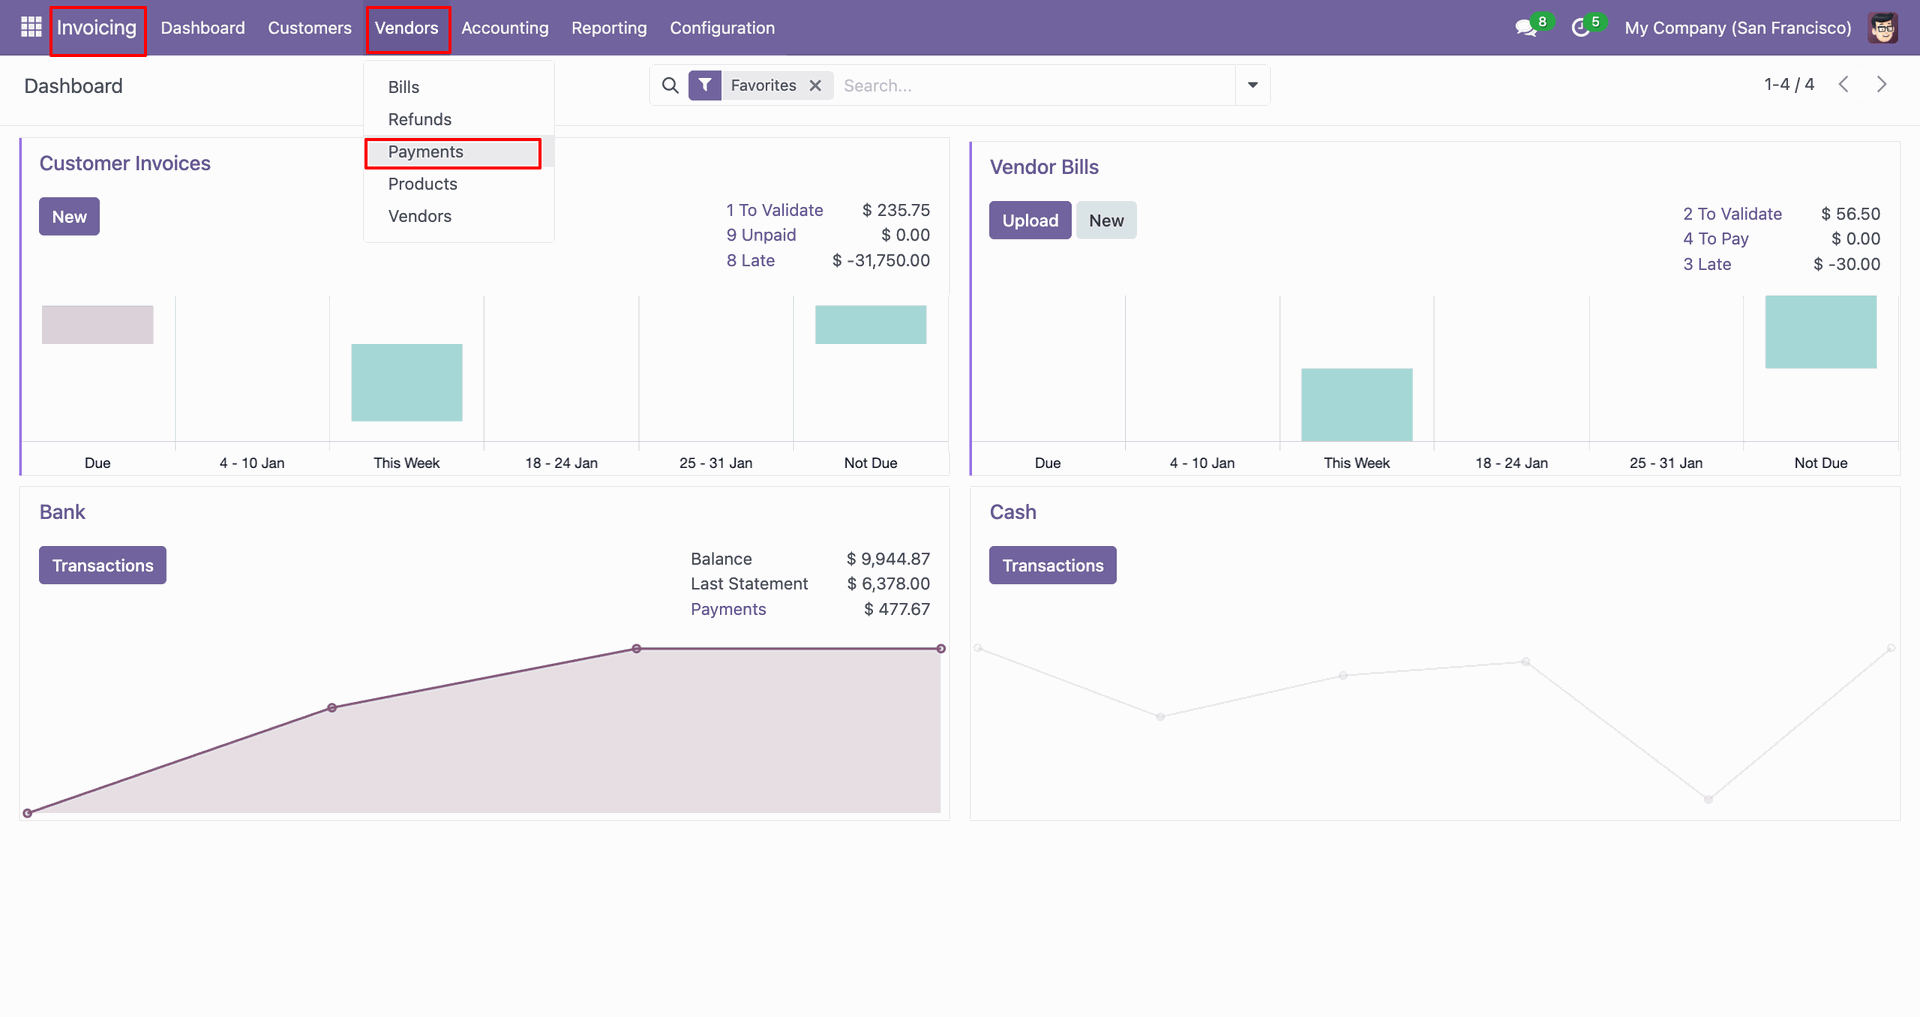
You can export from the 'Action'.
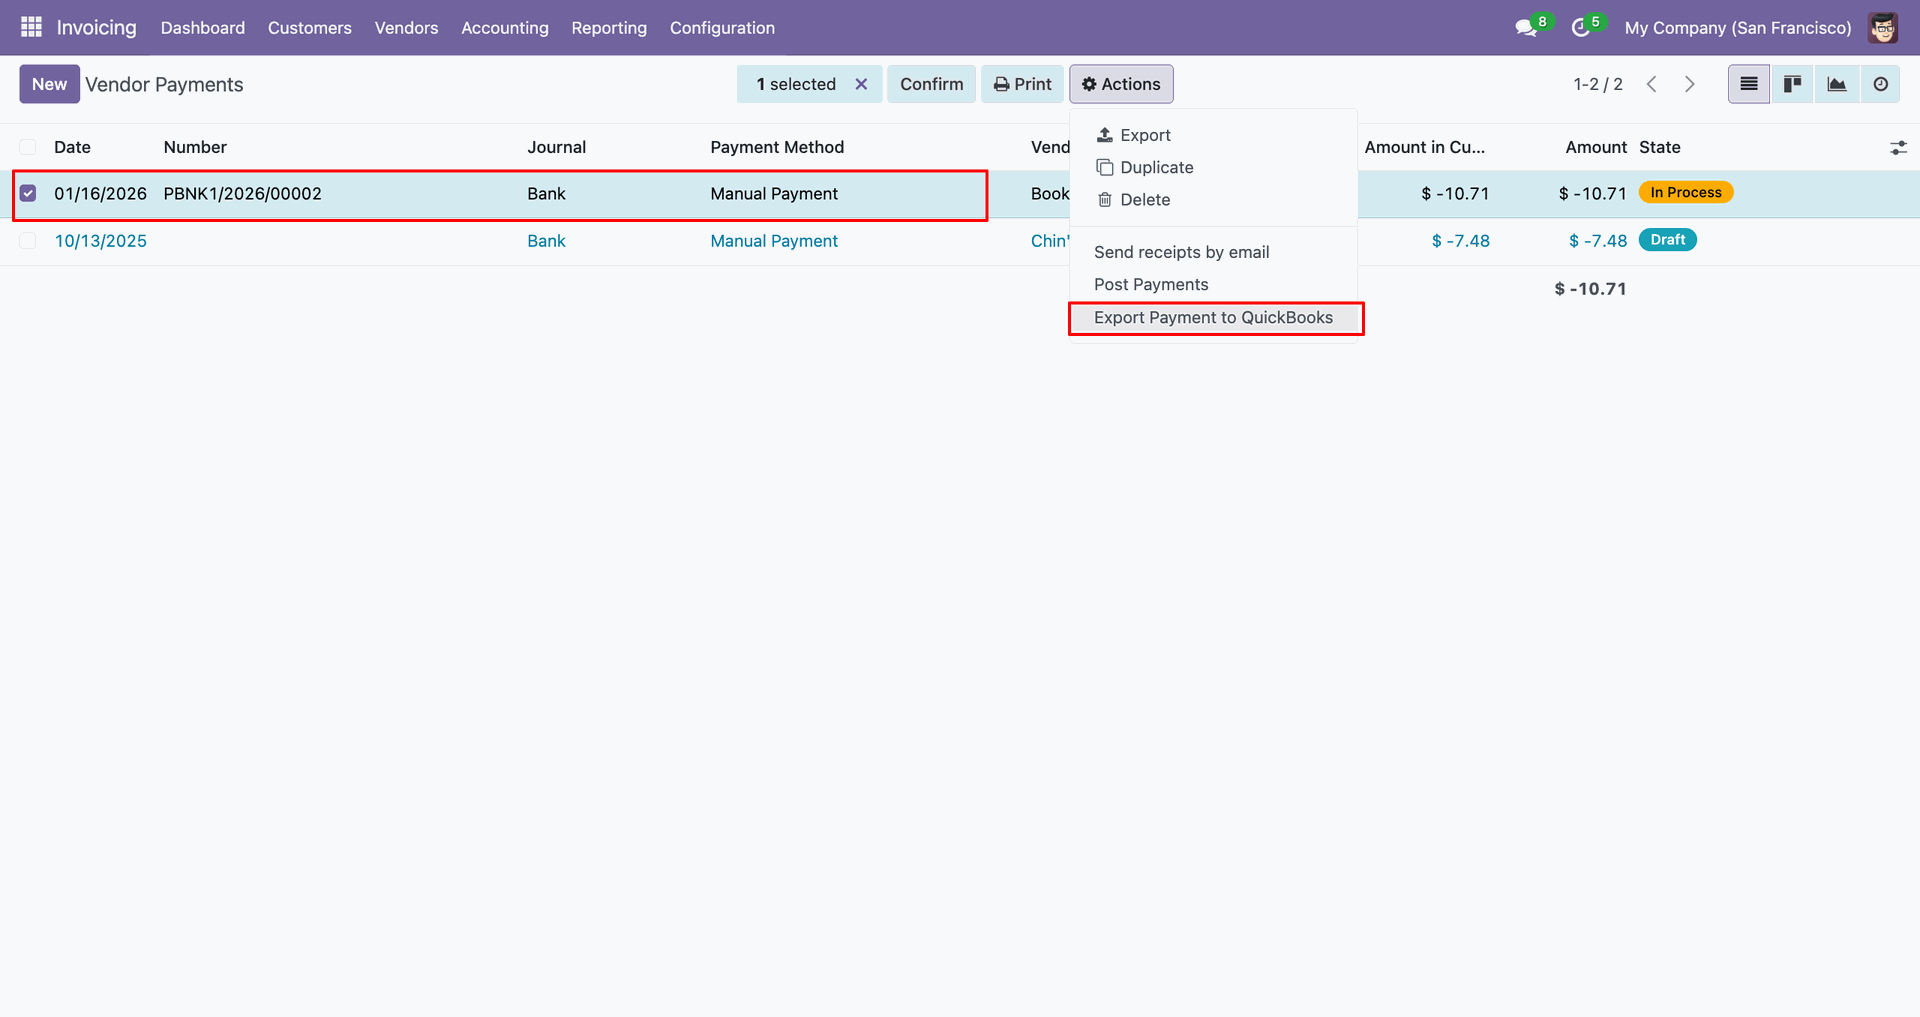
Config selection popup.
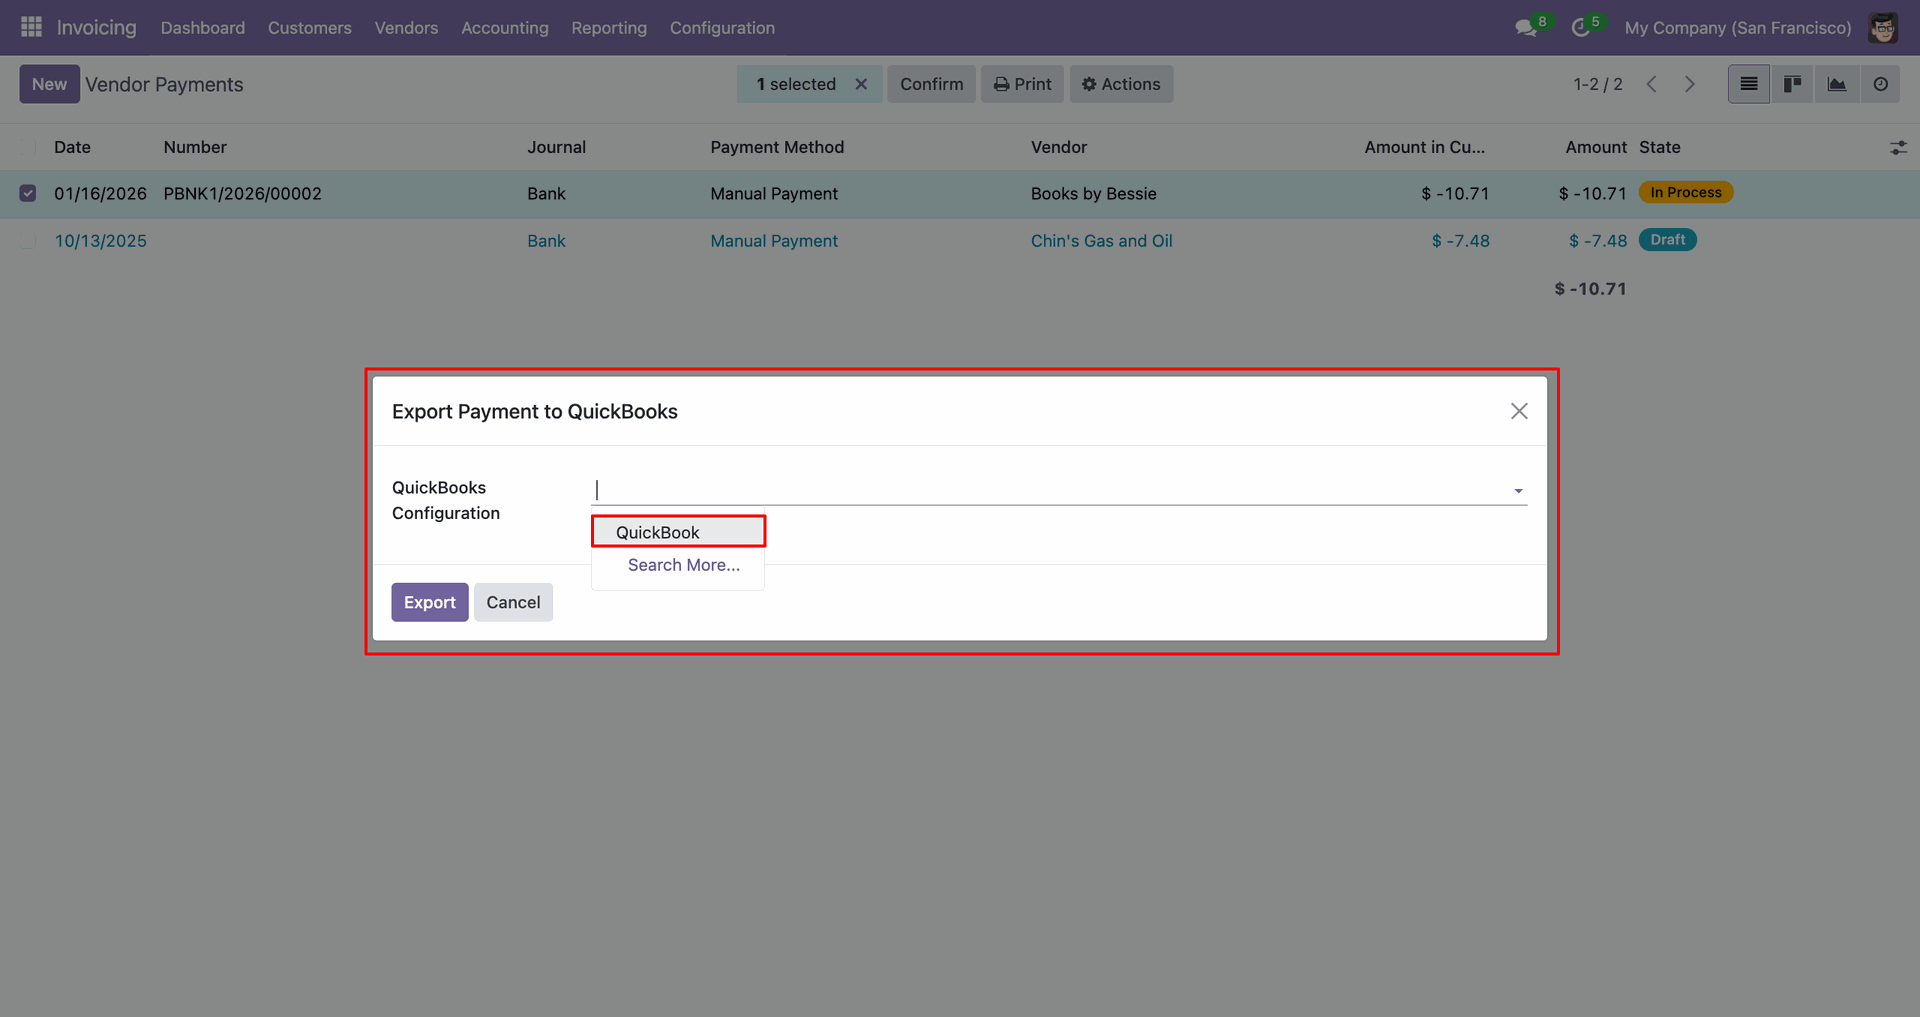
Select 'QuickBooks' and click 'Export'.
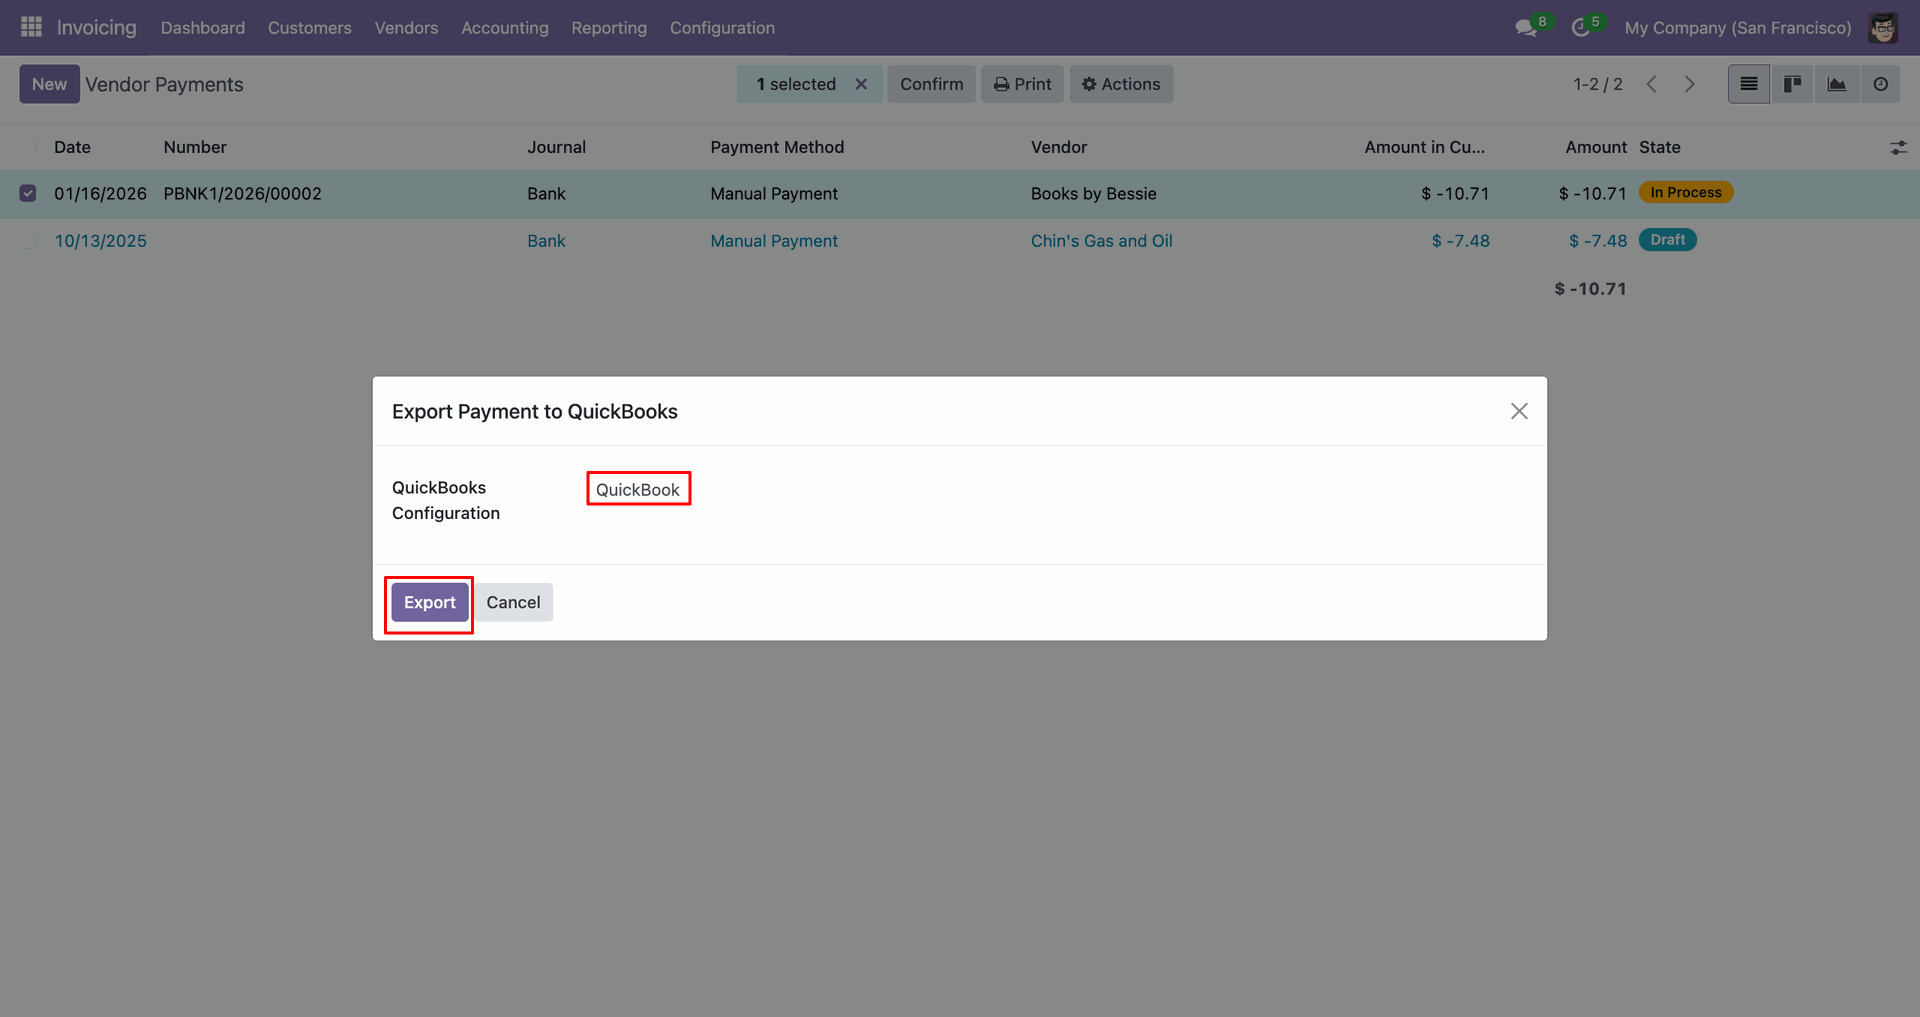
The form view contains Quickbook ID and sync state.
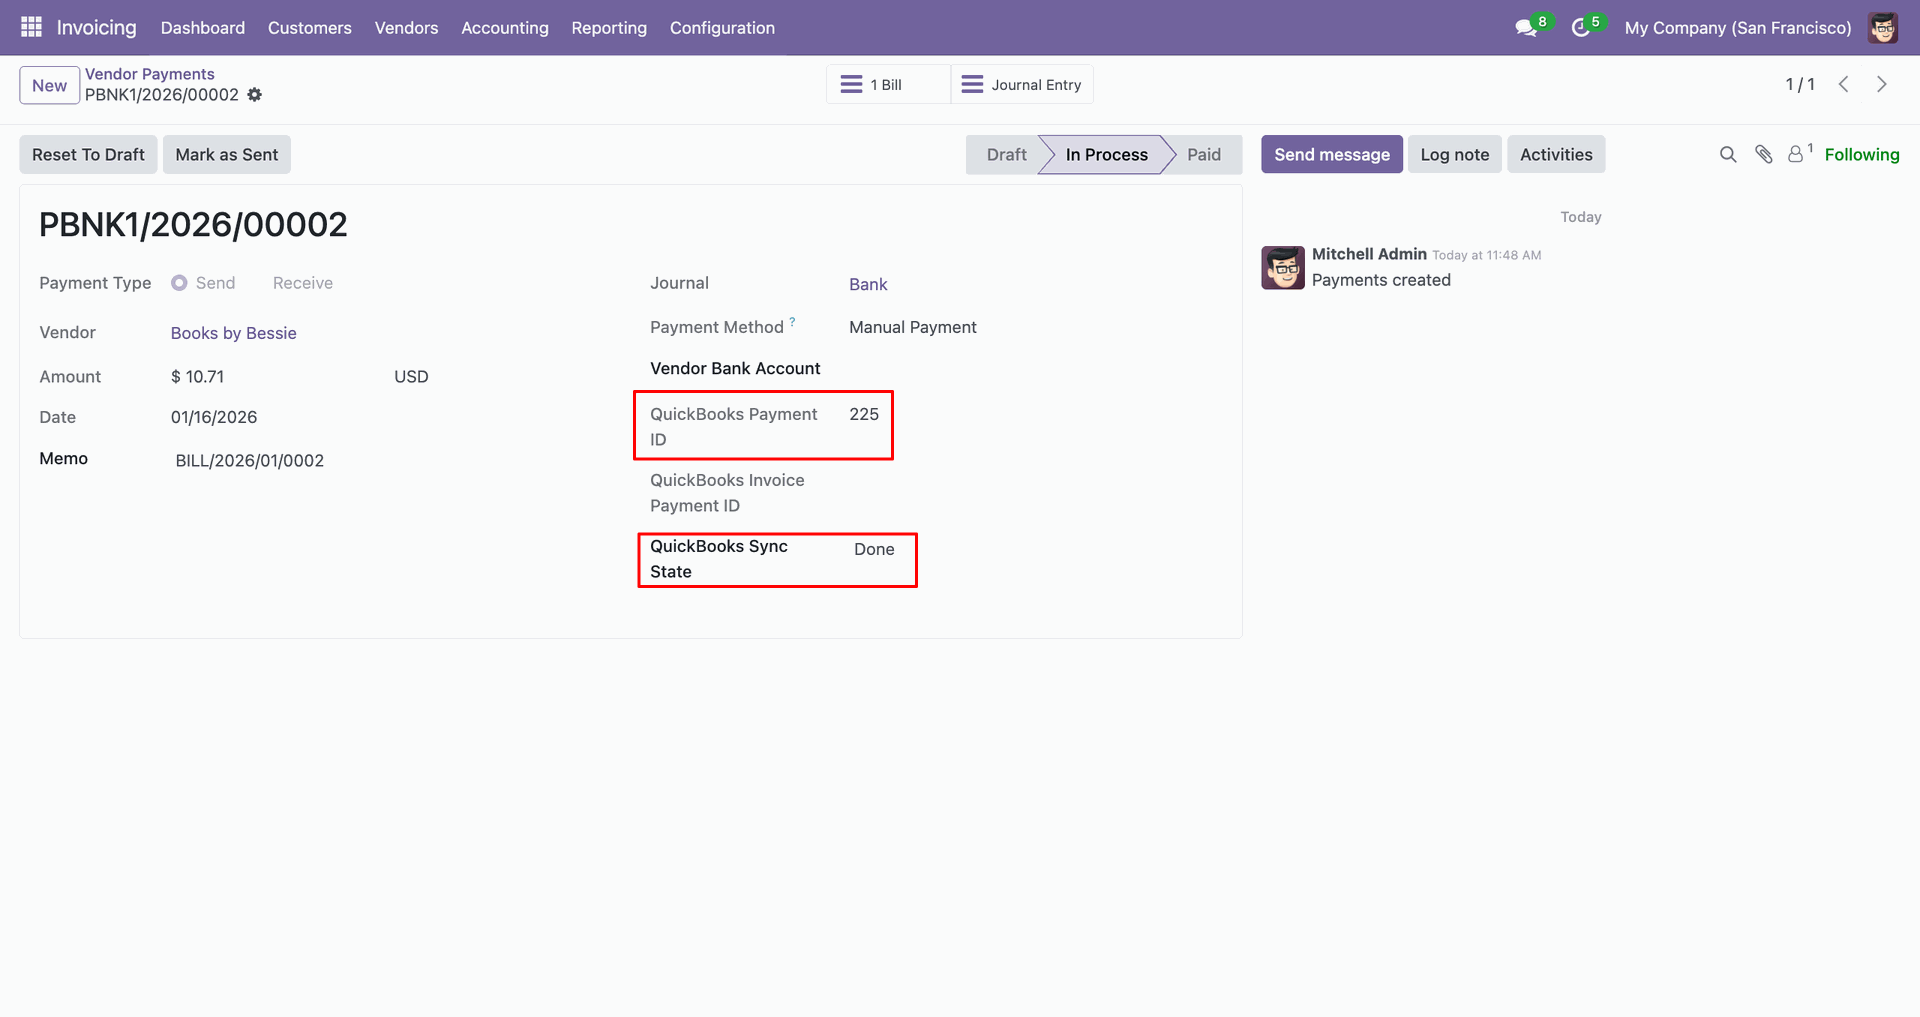
Log with details.
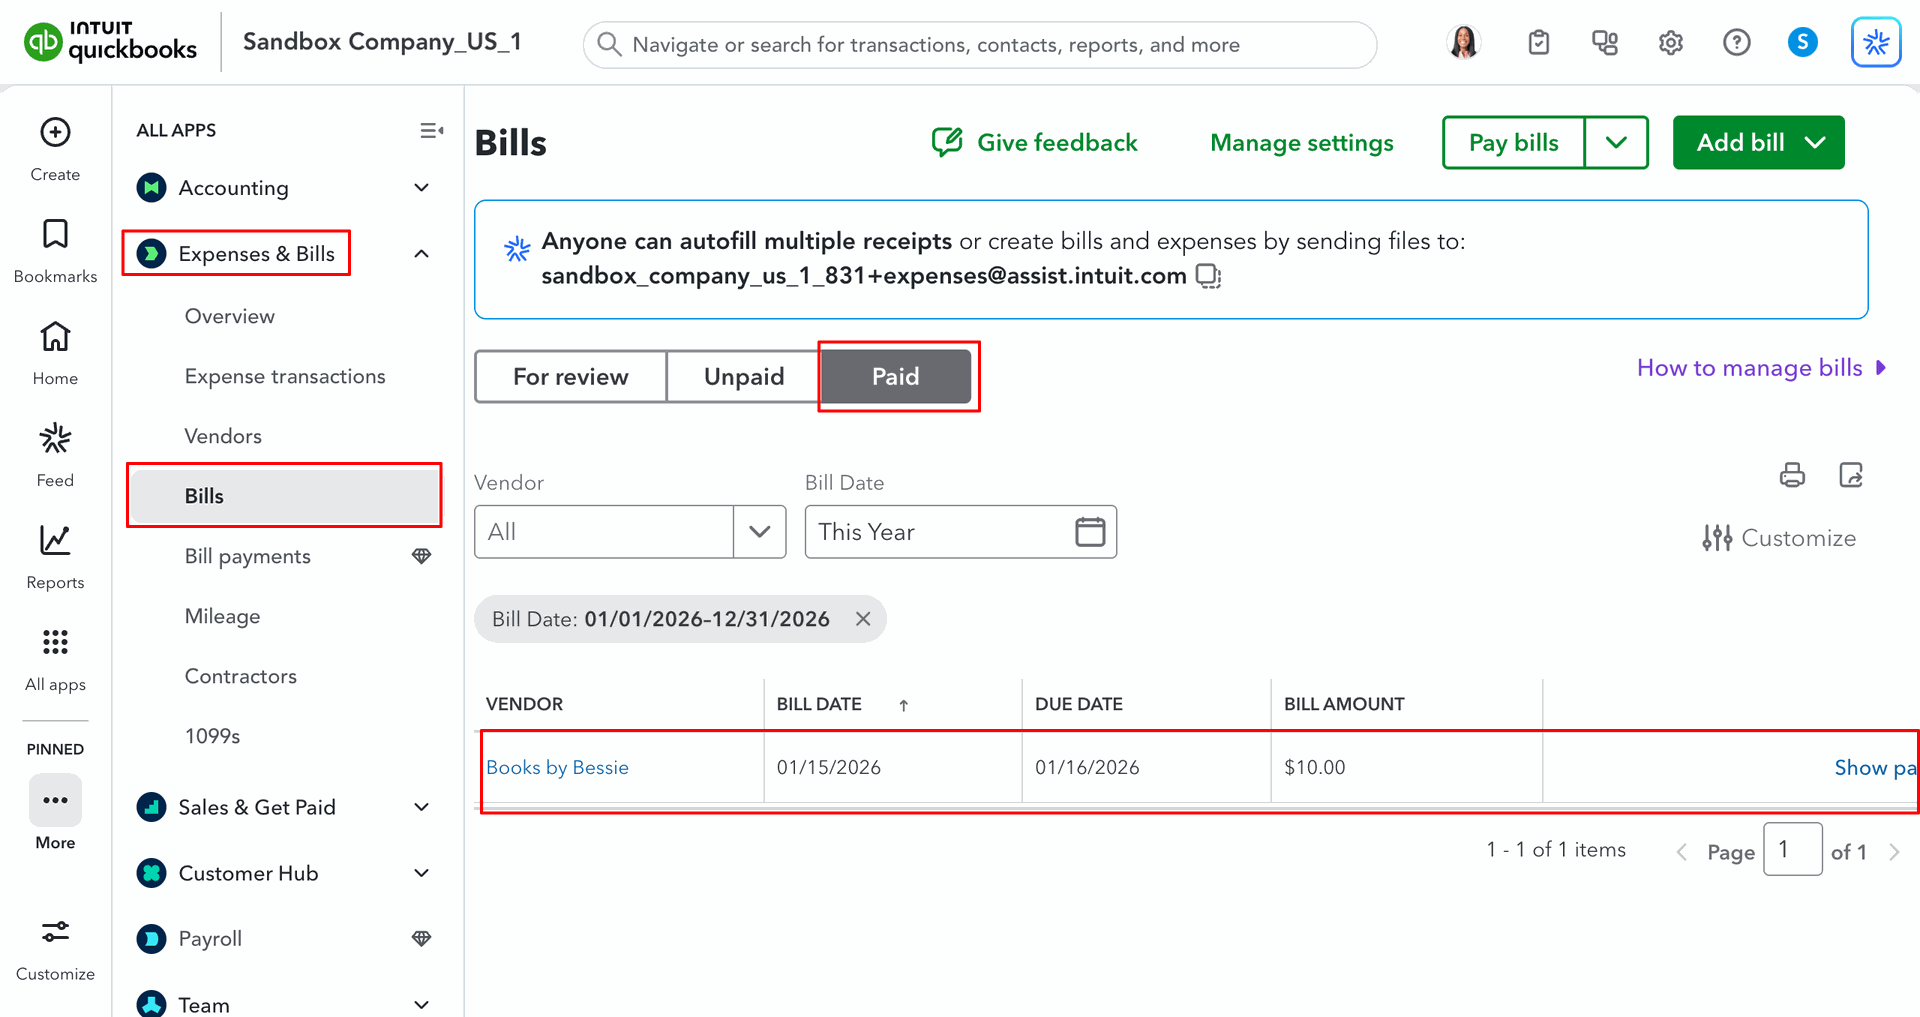
Payments in QuickBooks.
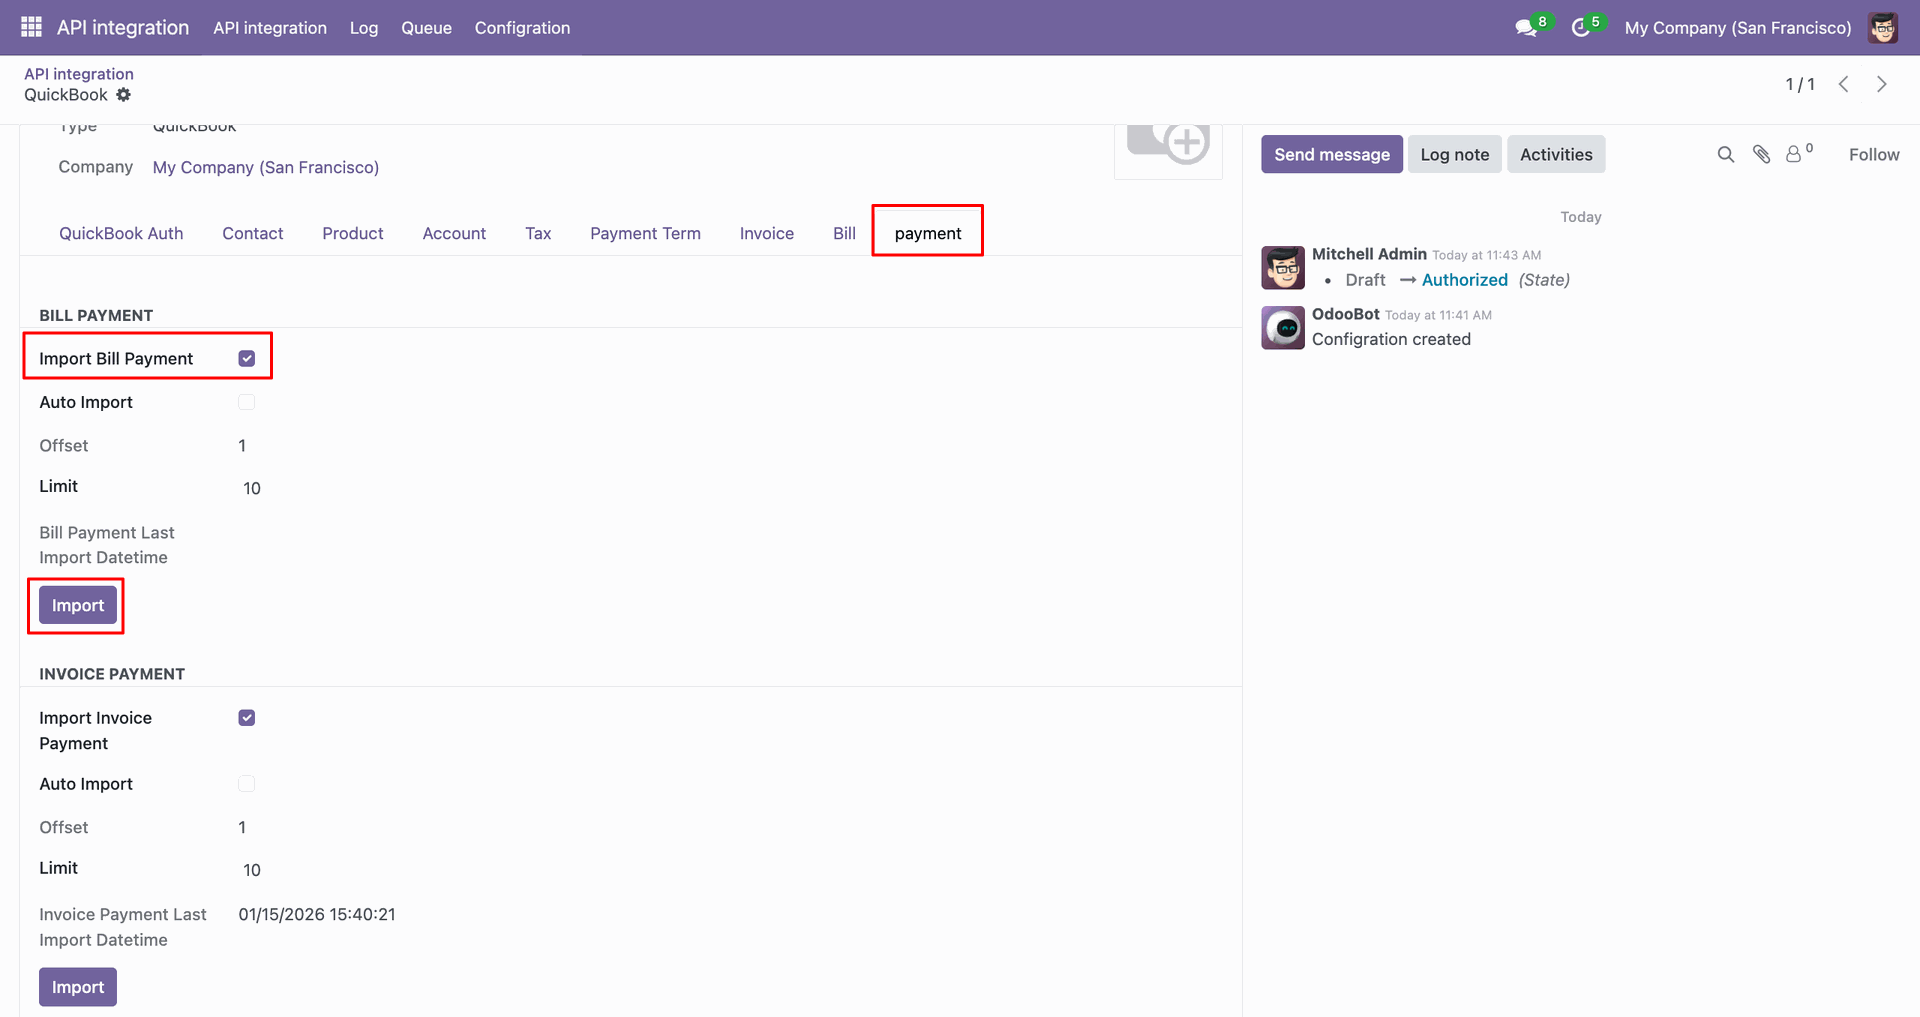
For the import, go to the 'Payment' Tab, enable 'Import Bill Payment', and click 'Import'.
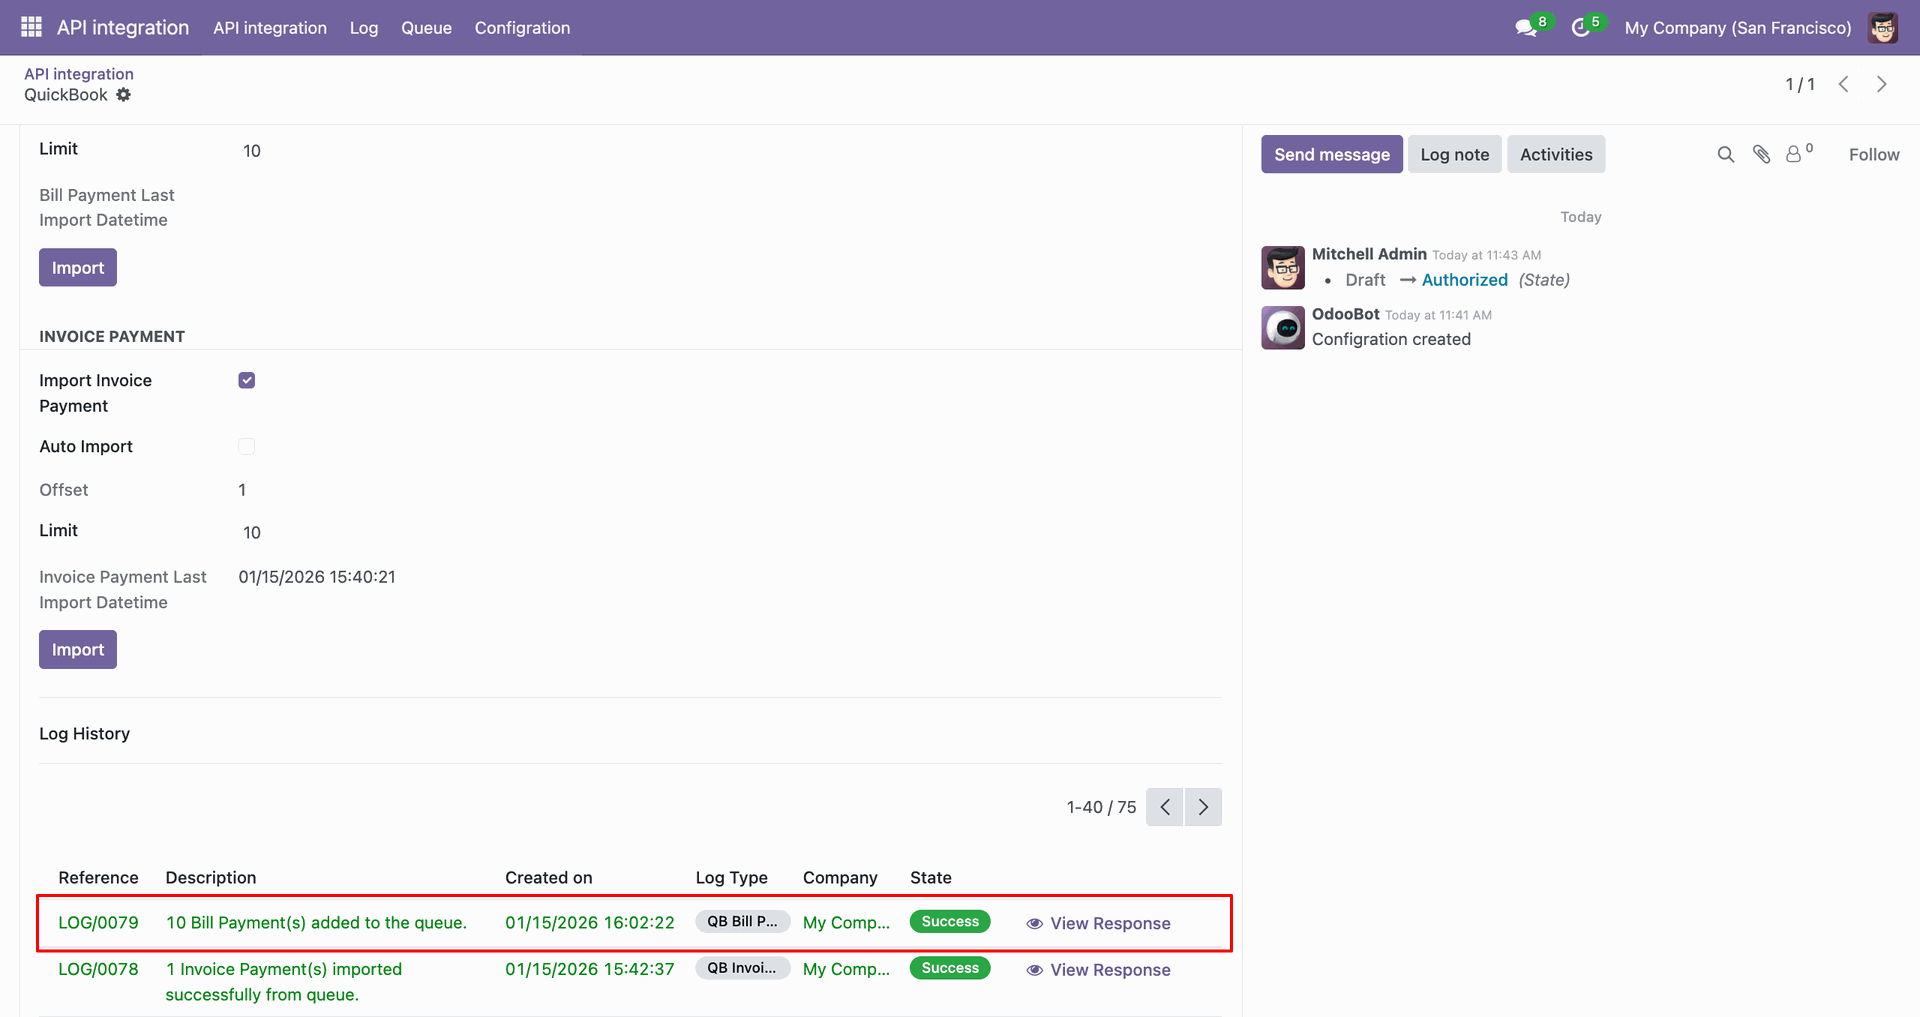
Log with imported data.
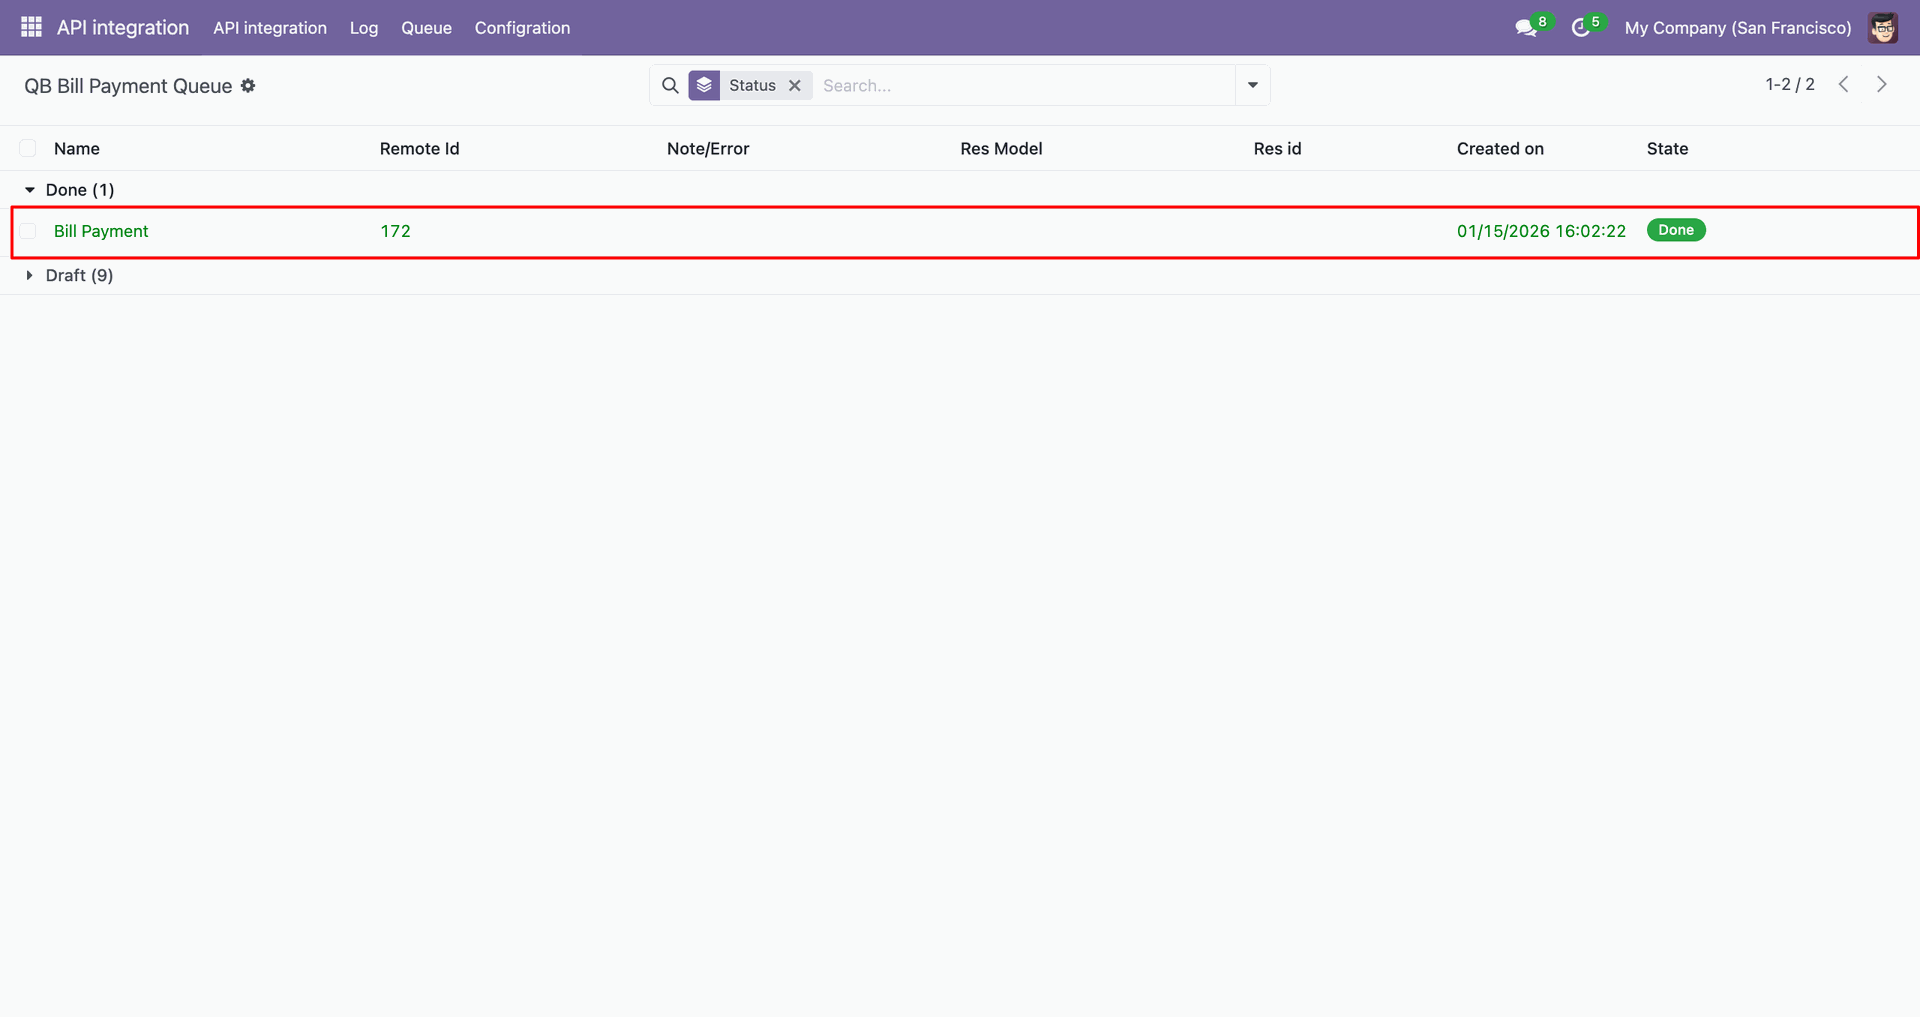
Go to the Queue, 'QB Bill Payment'.
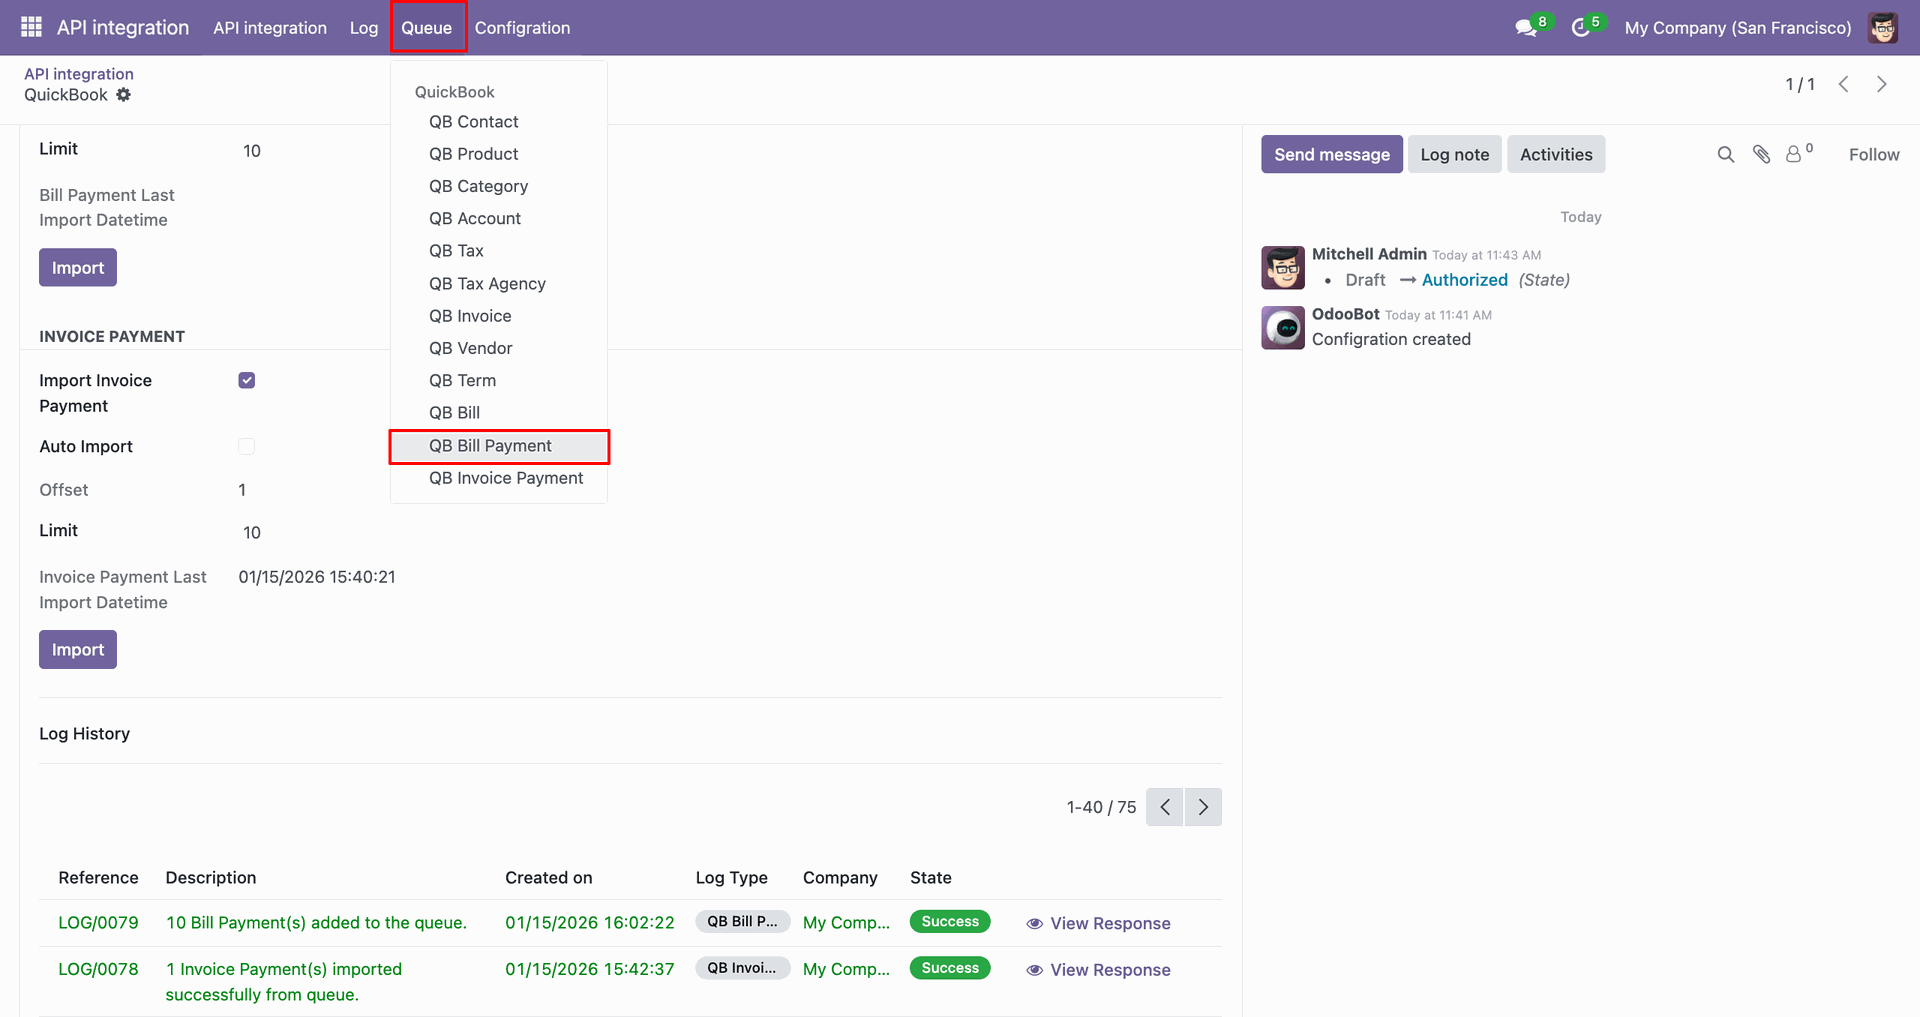
It will open the queue.
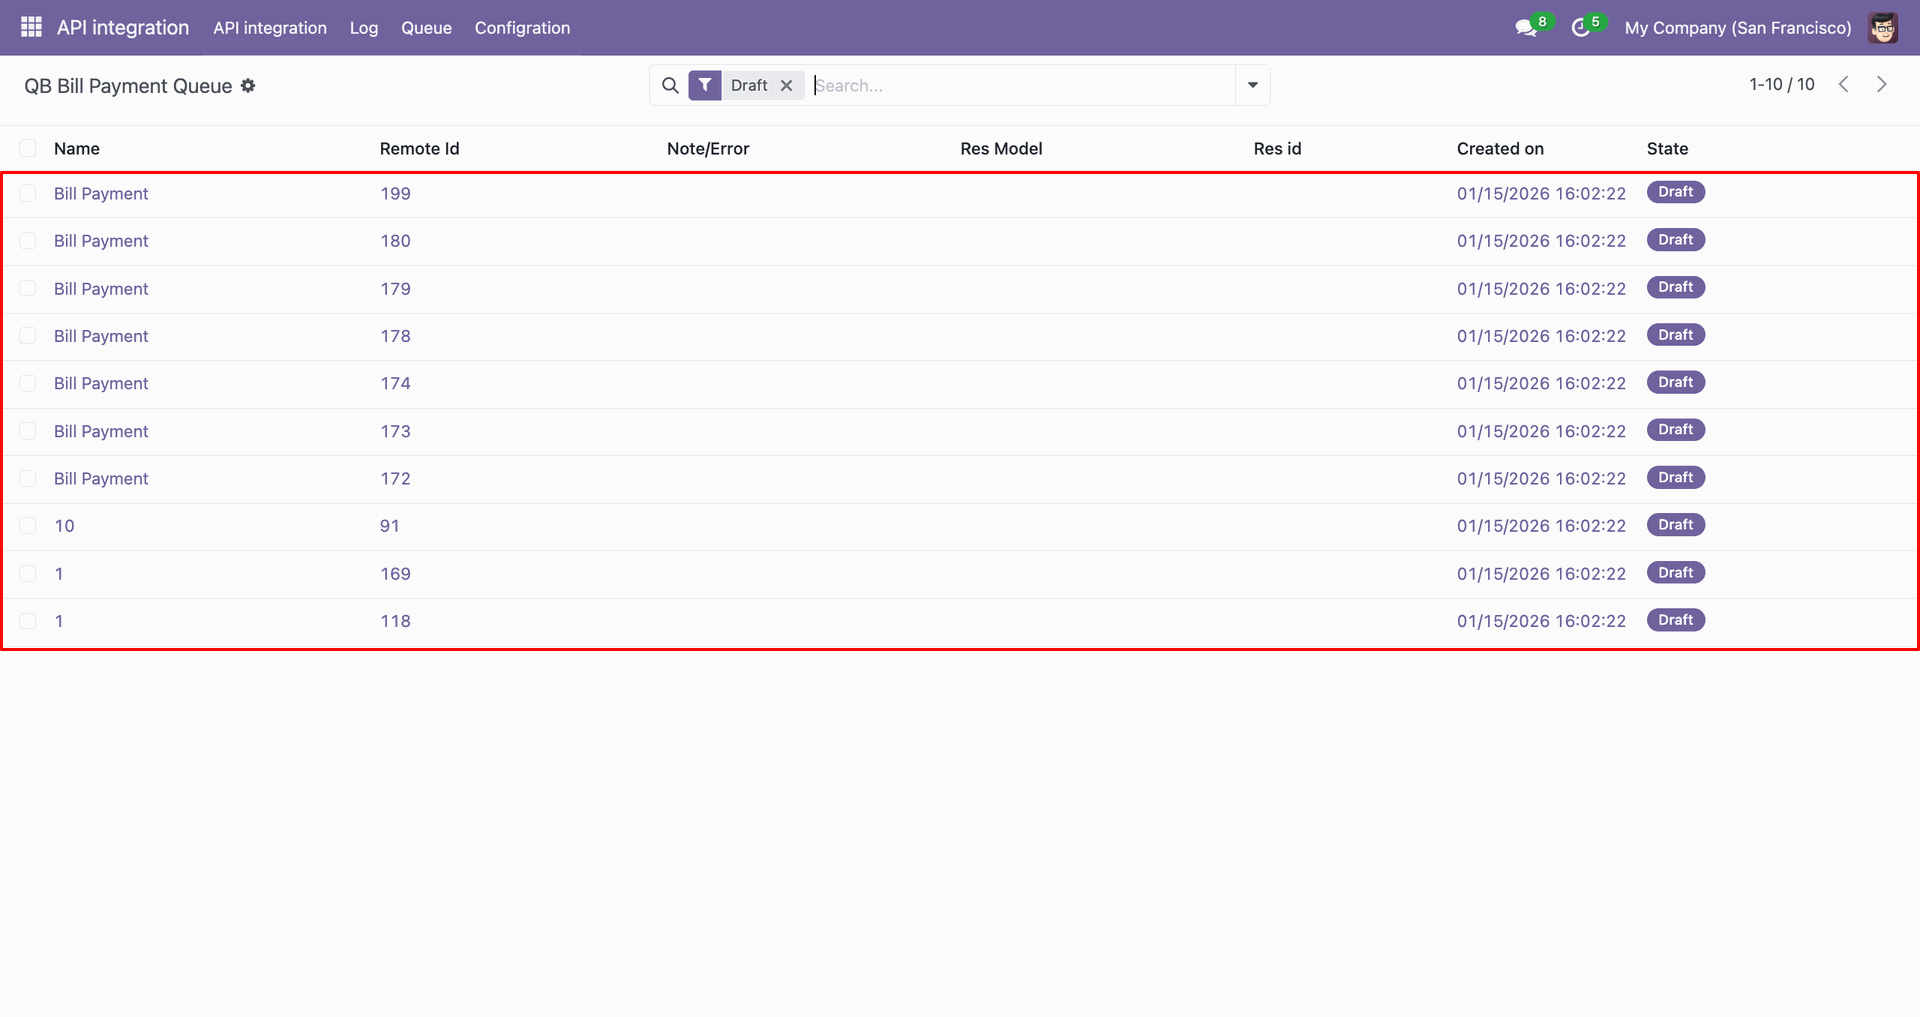
You can import from the queue.
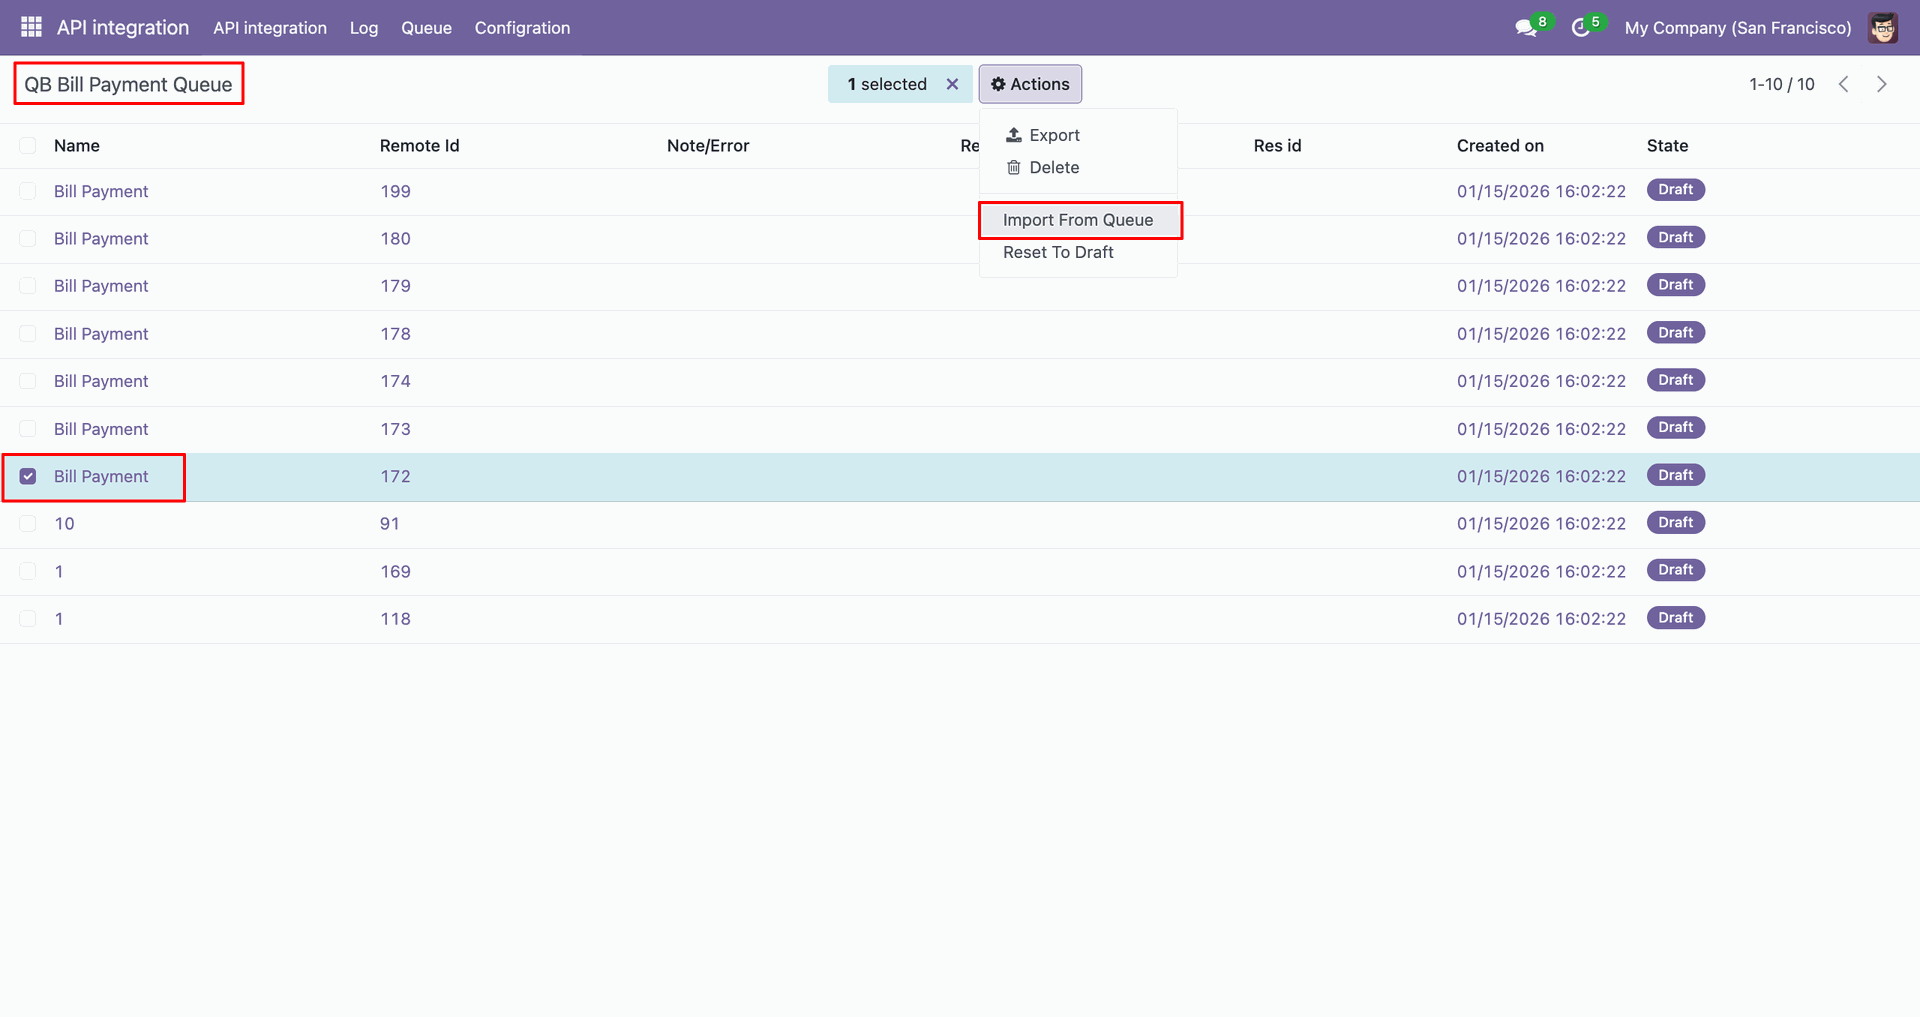
Log with details.
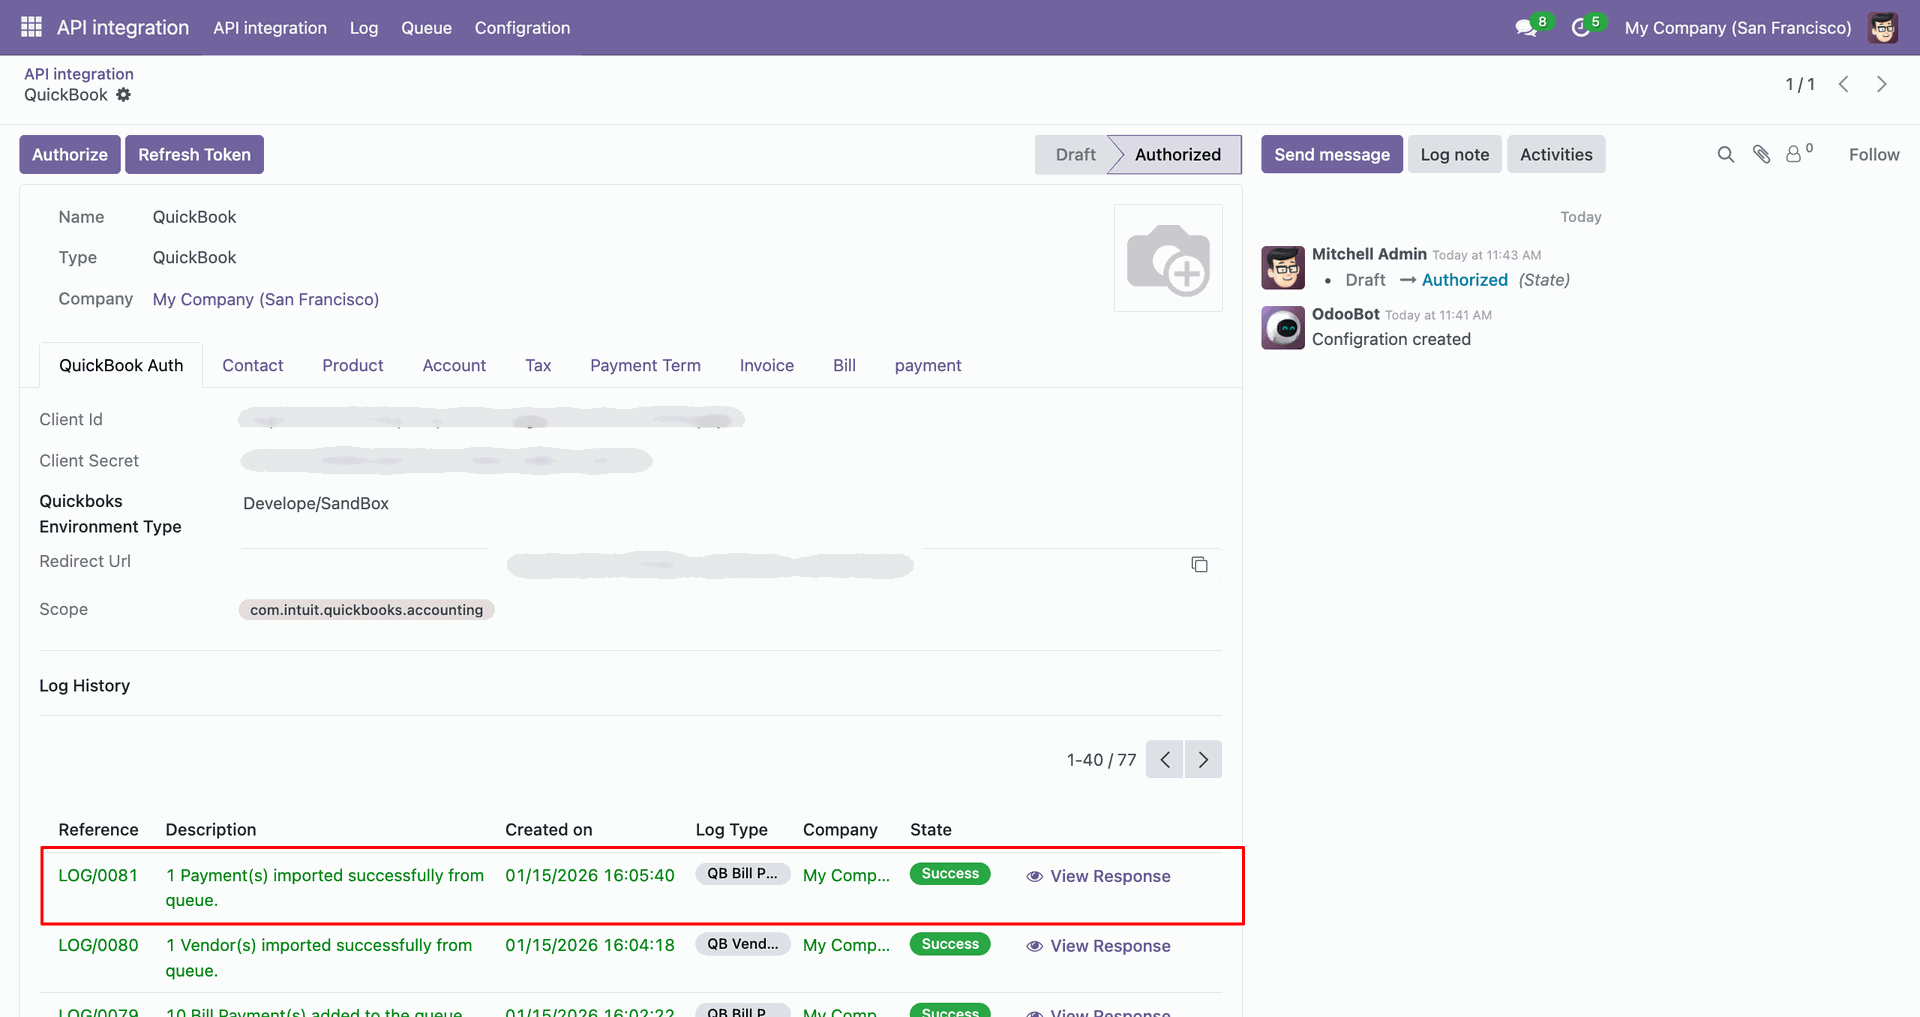
Group by with 'Status'.
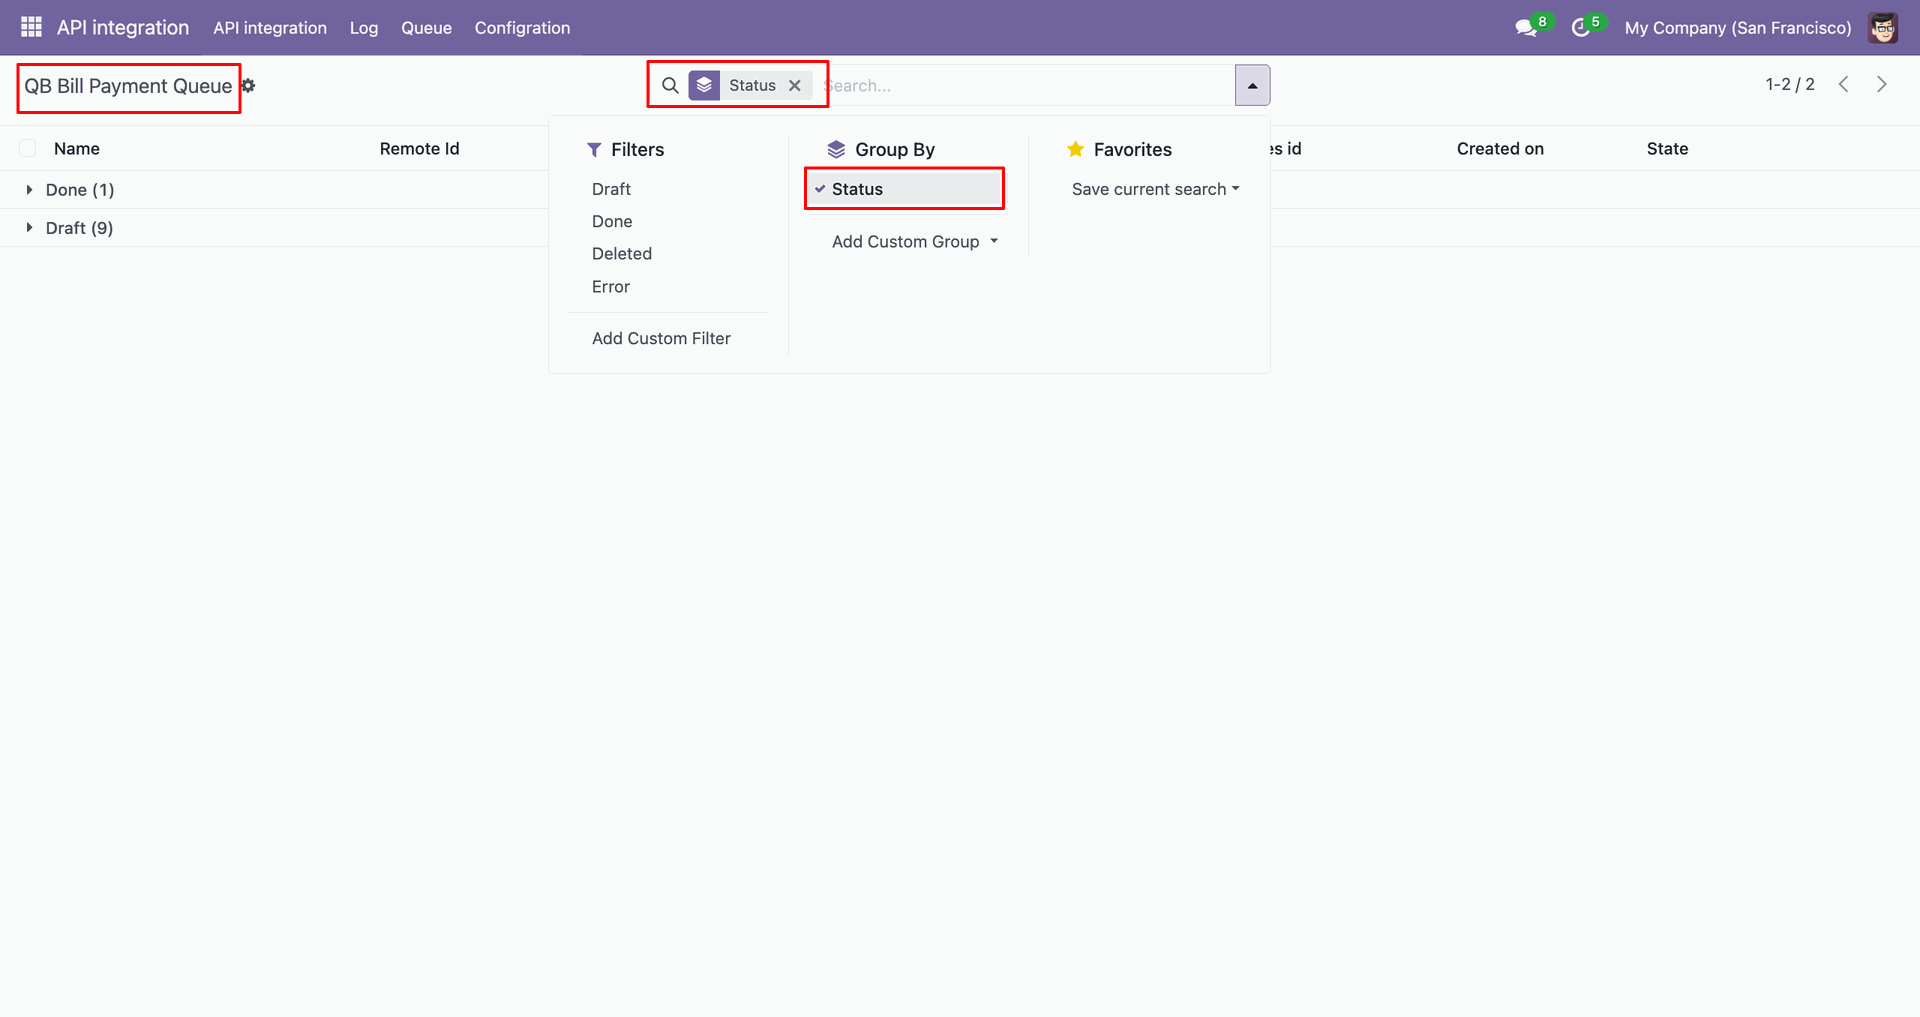
Group by result.
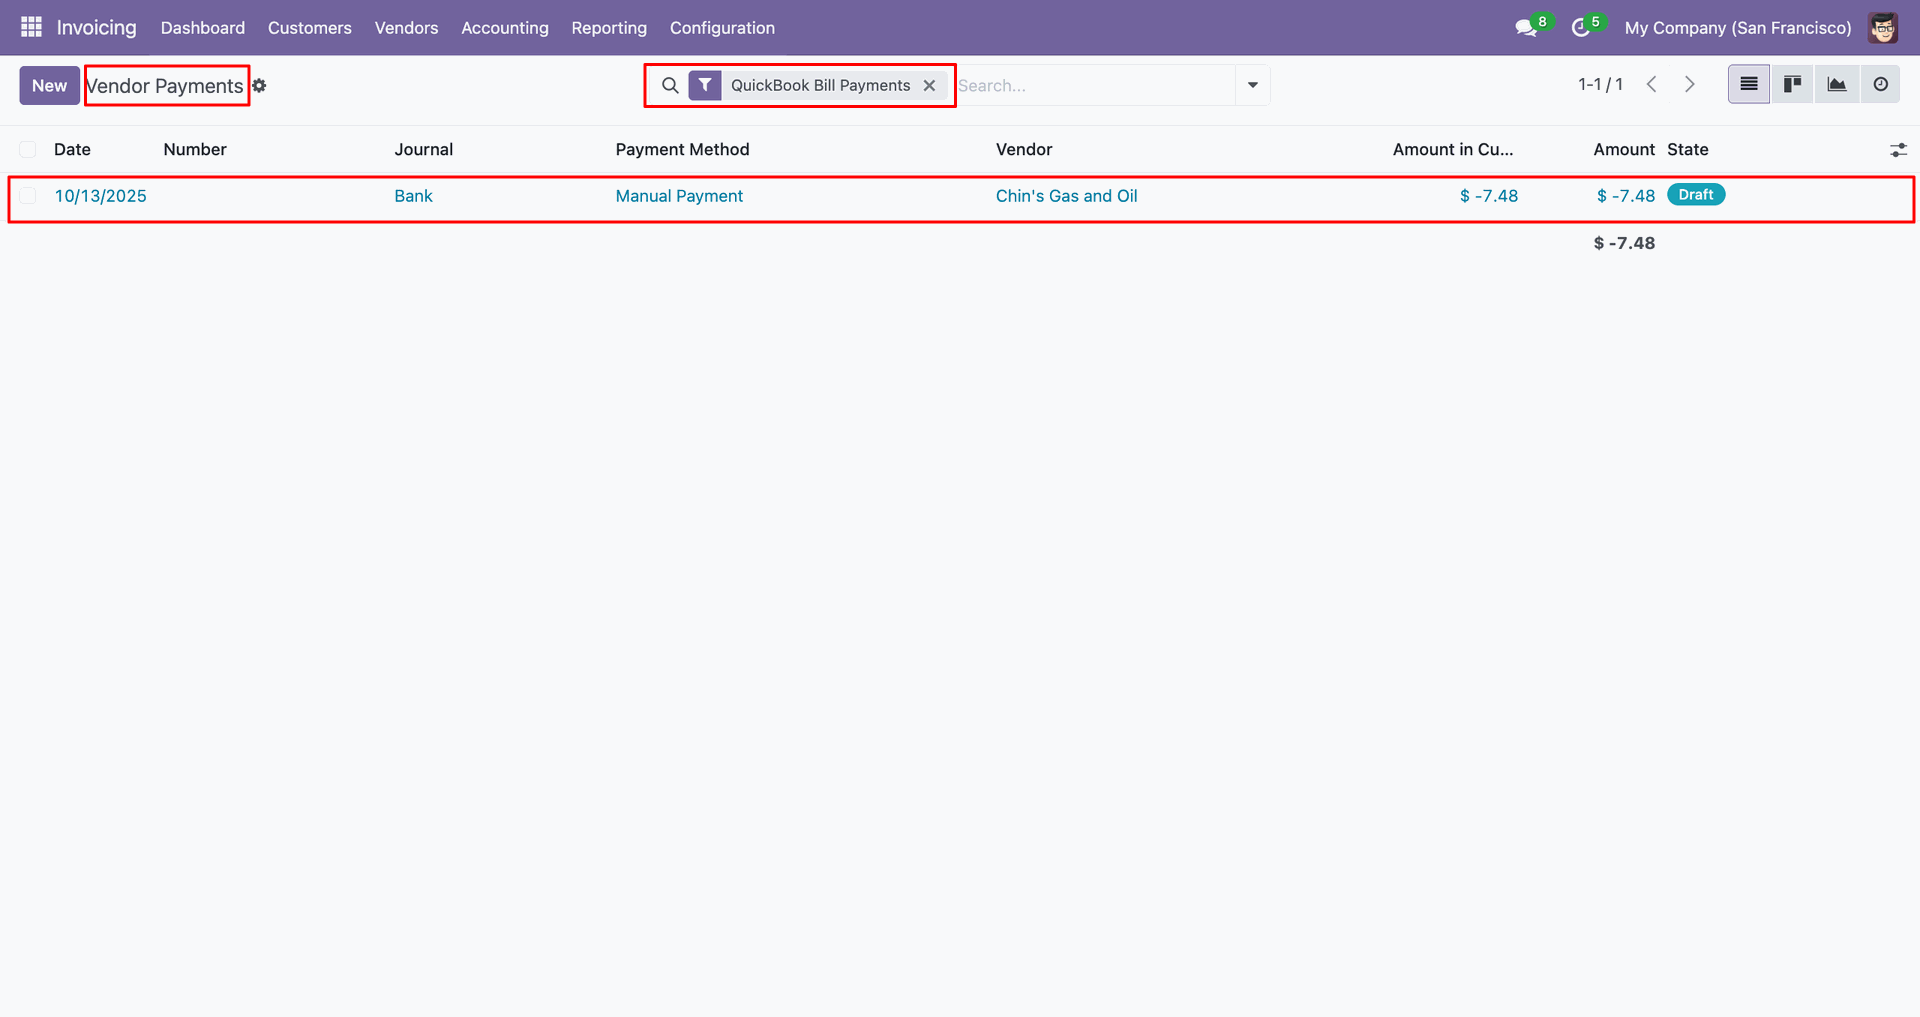
Filter Quickbooks bills.
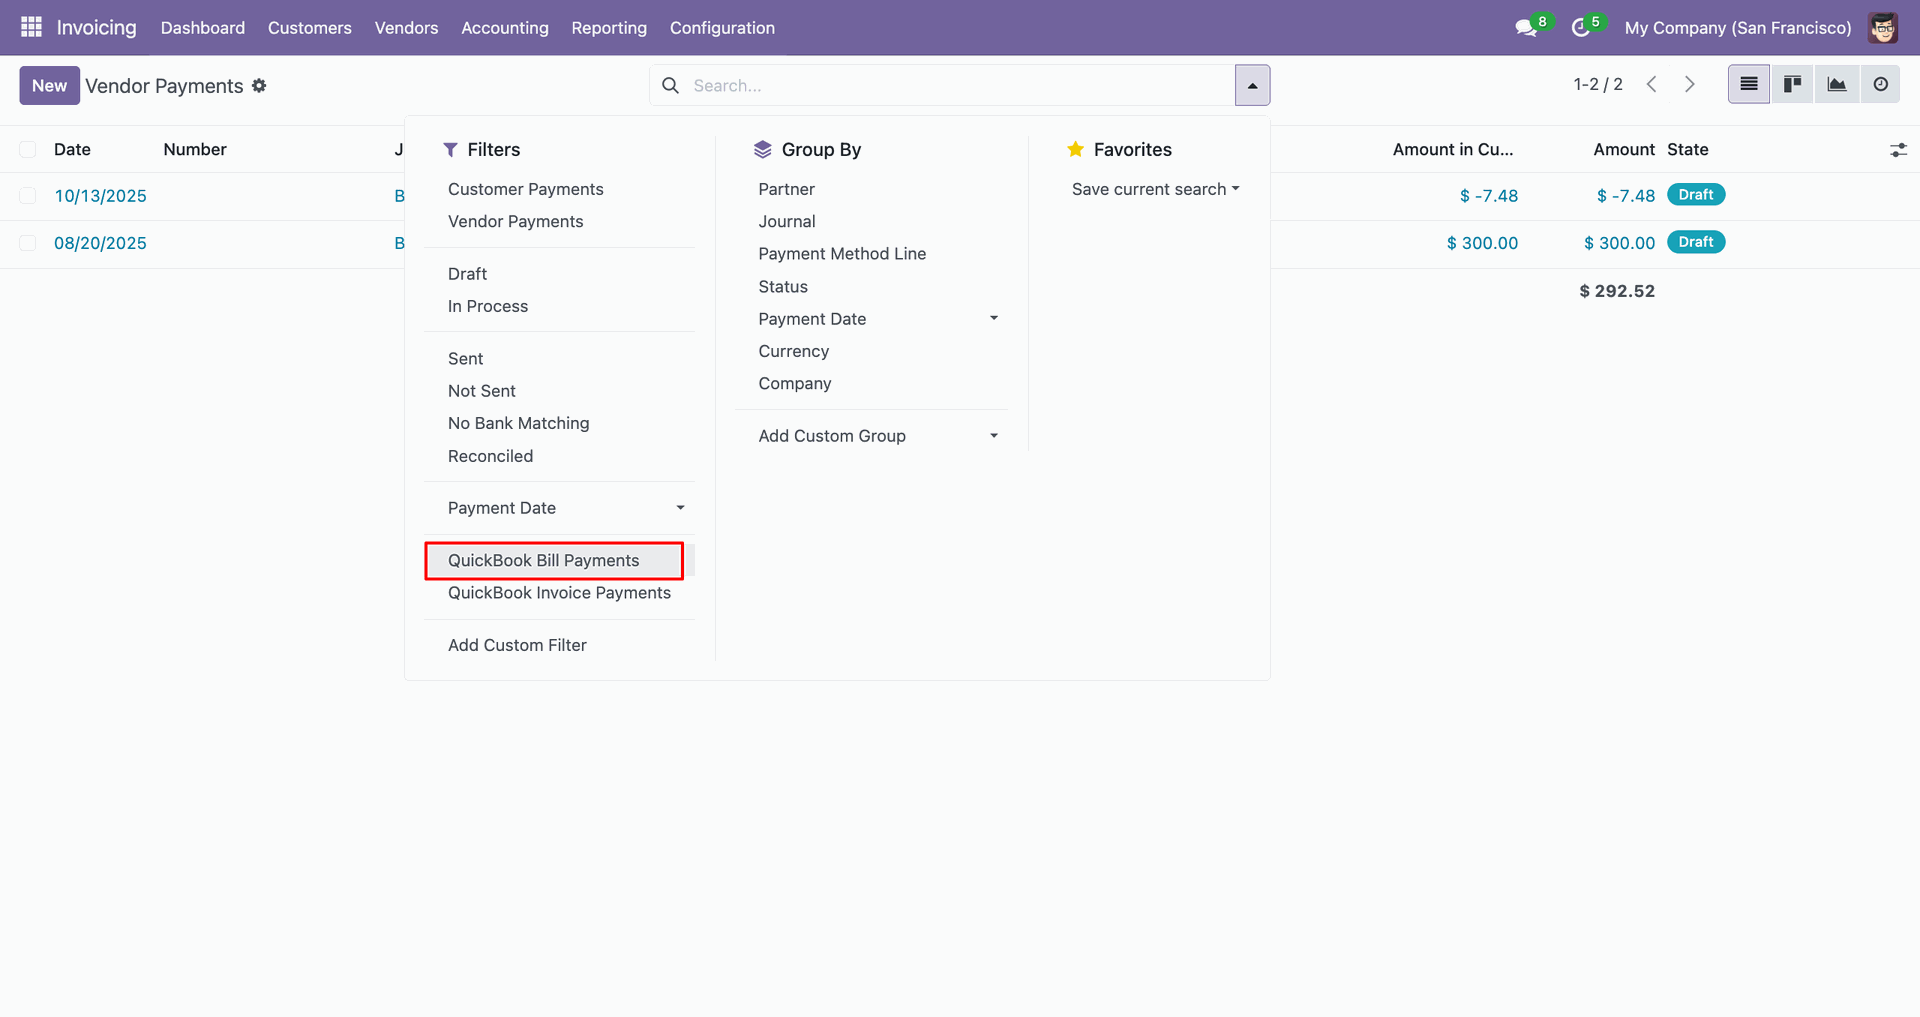
Filter result.
Go to the 'Configuration', click 'Payment Terms'.
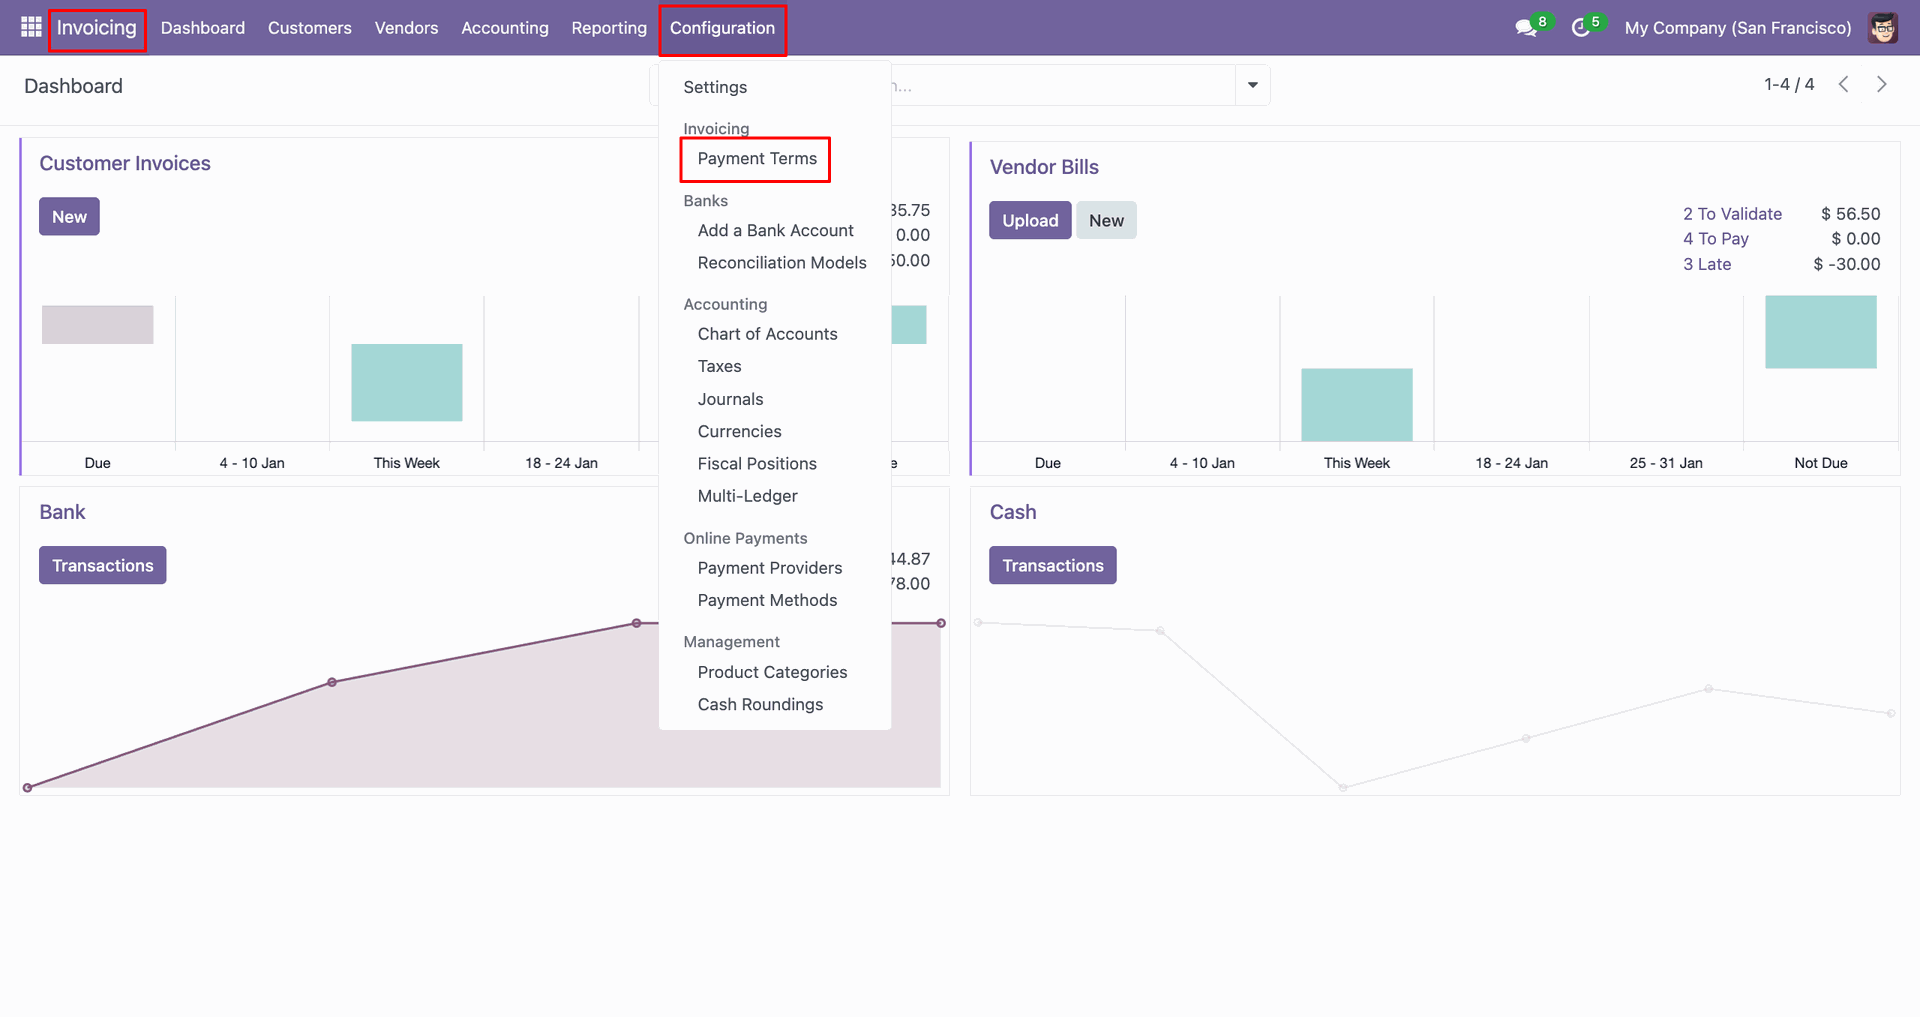
You can export from the 'Action'.
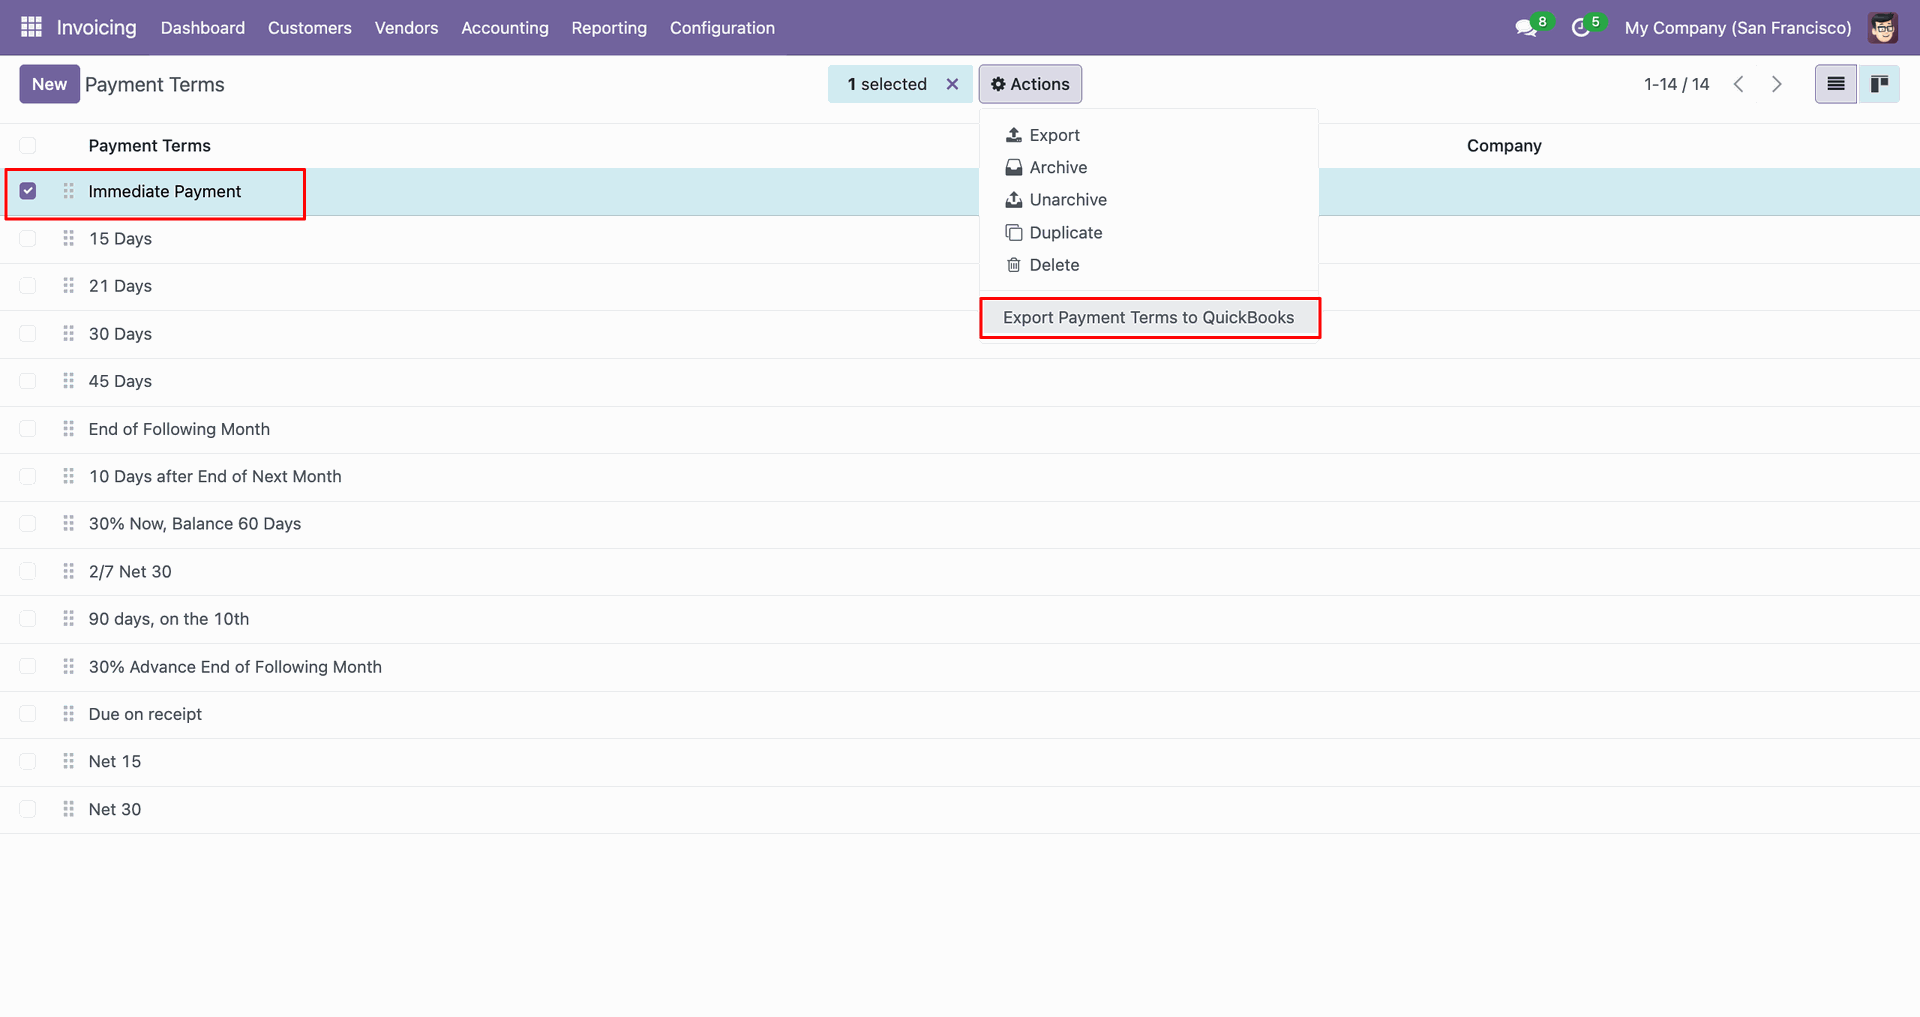
Config selection popup.
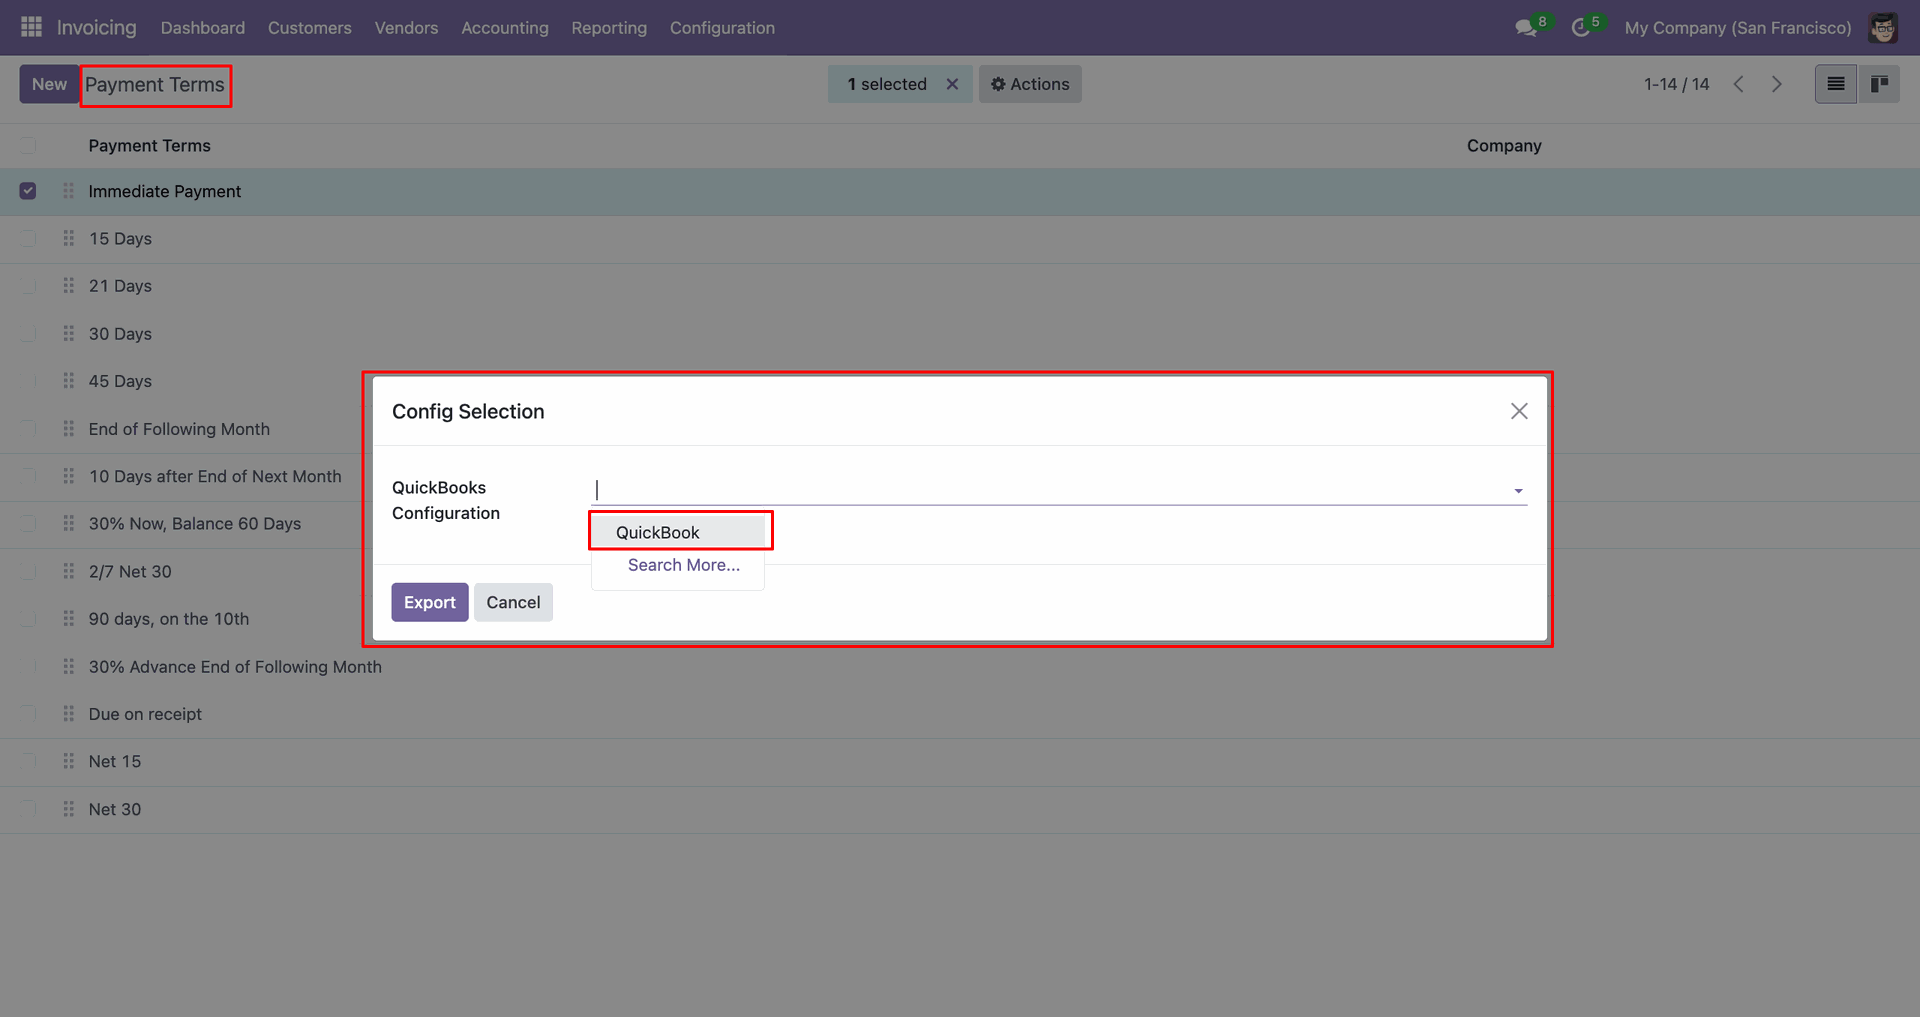
Select 'QuickBooks' and click 'Export'.
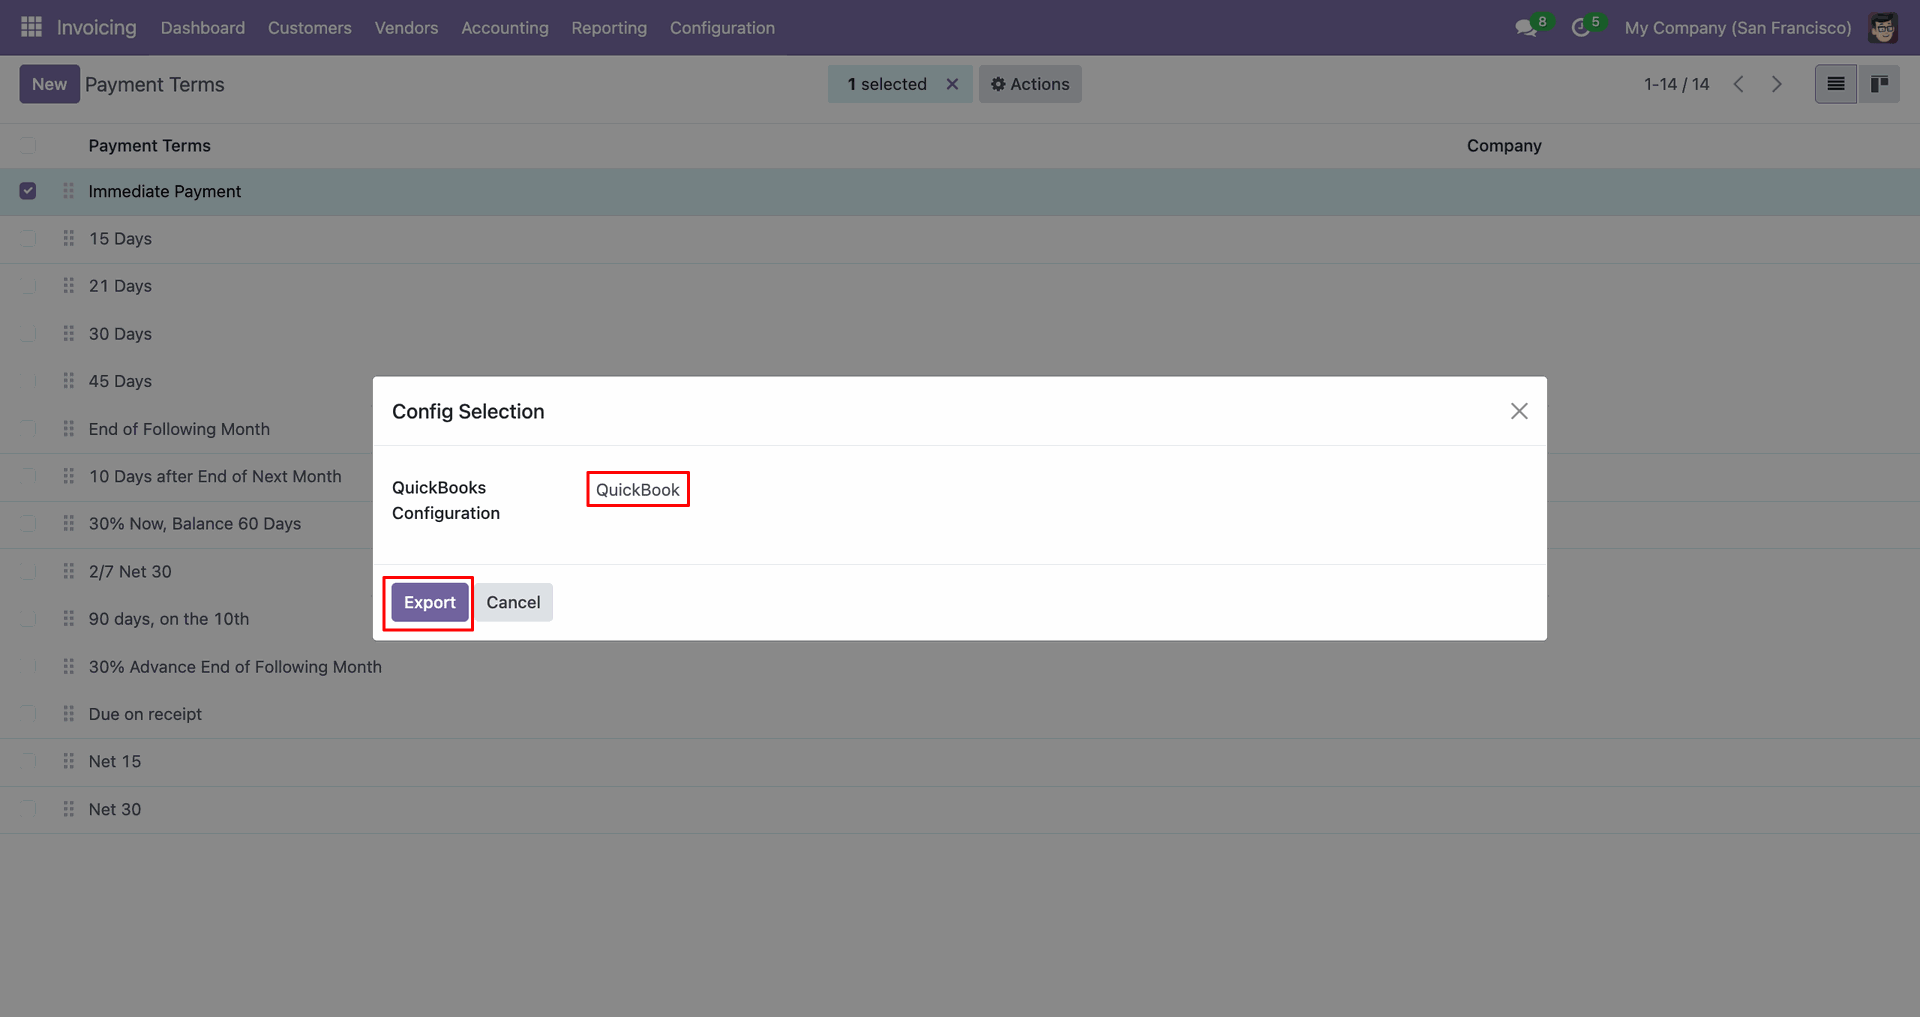
The form view contains Quickbook ID and sync state.
Log with details.
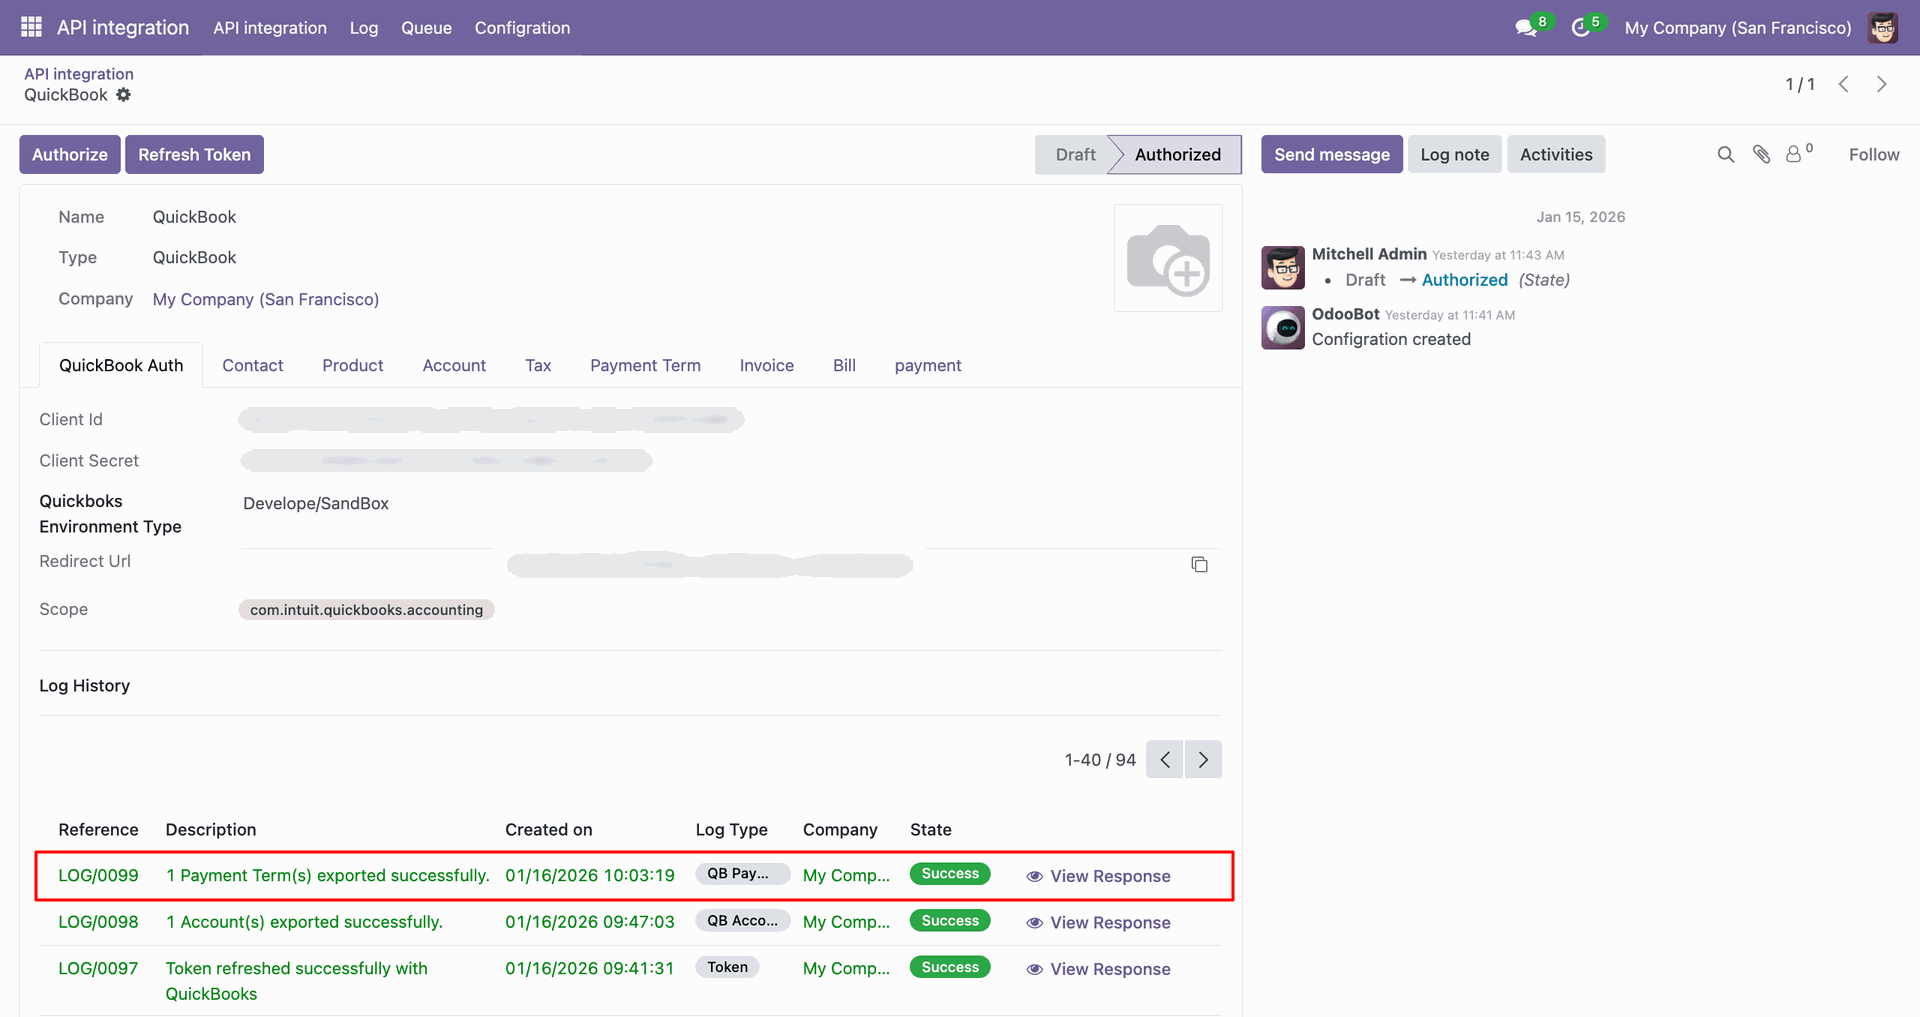
Payment terms in QuickBooks.
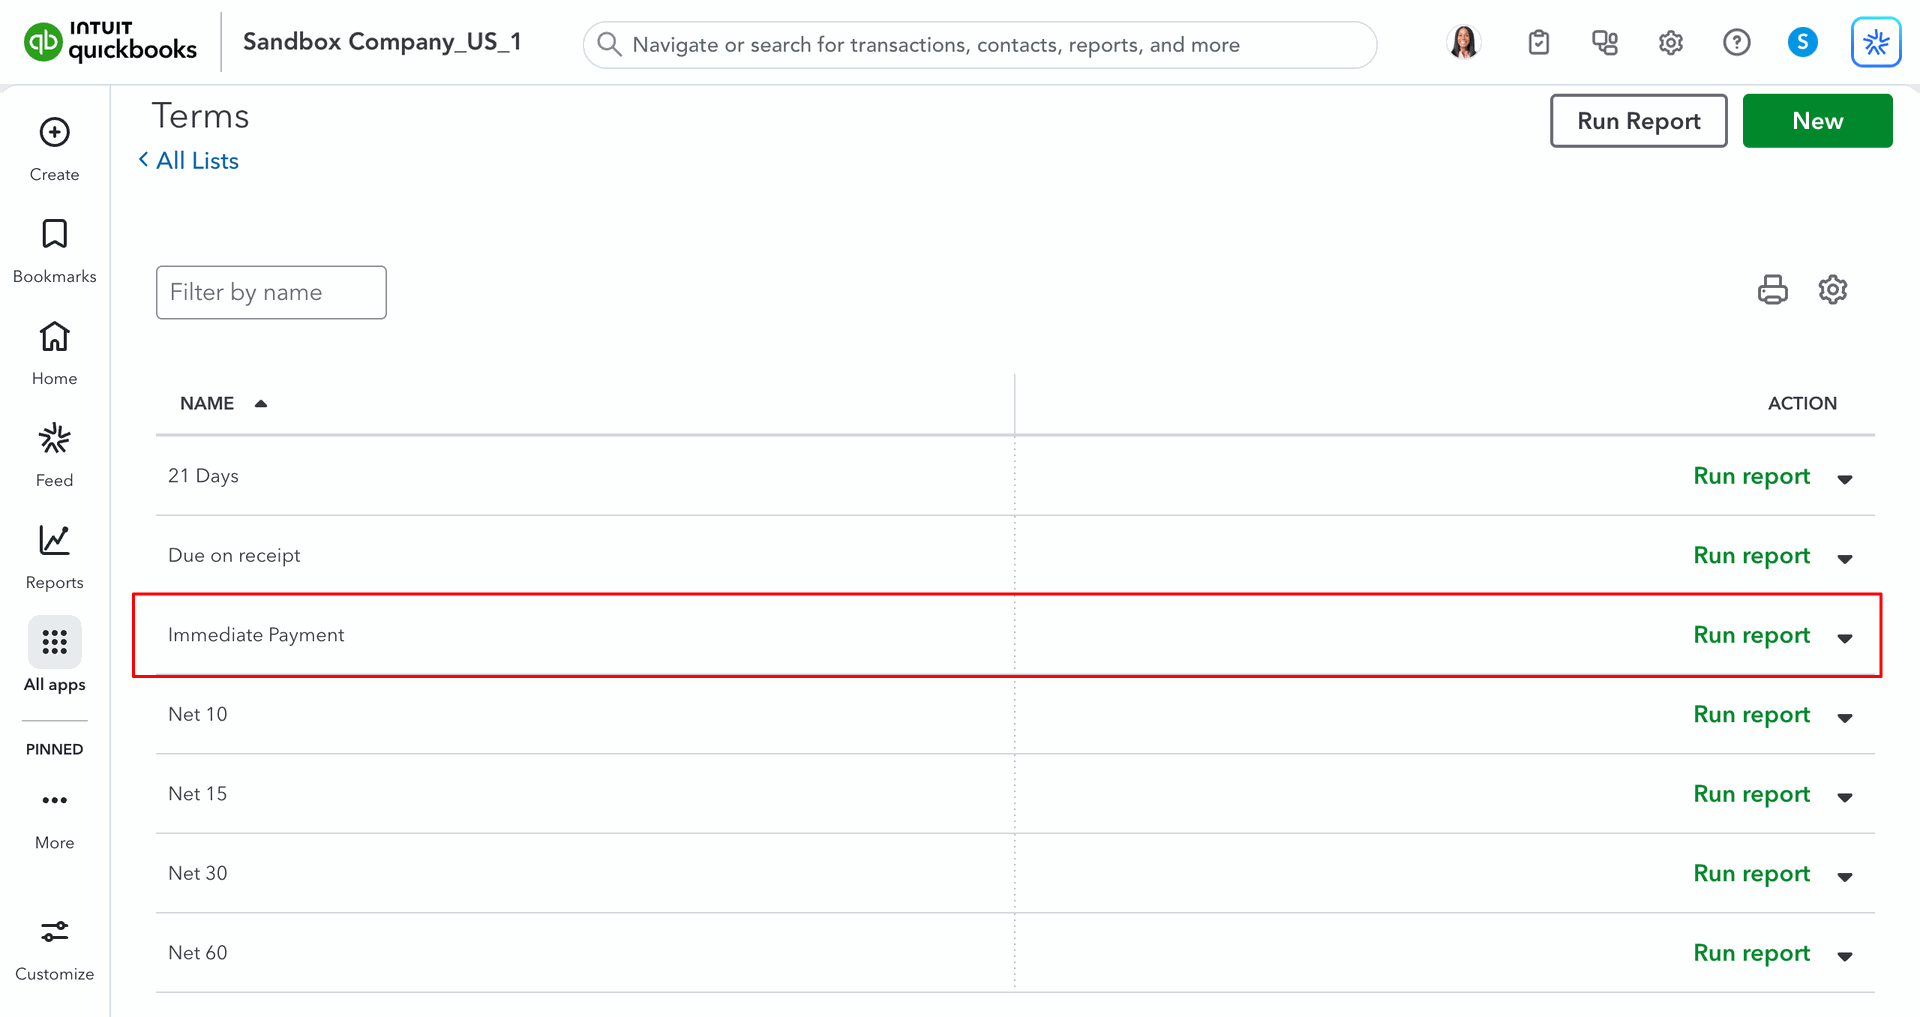
For the import, go to the 'Payment Term' Tab, enable 'Import Payment Terms', and click 'Import'.
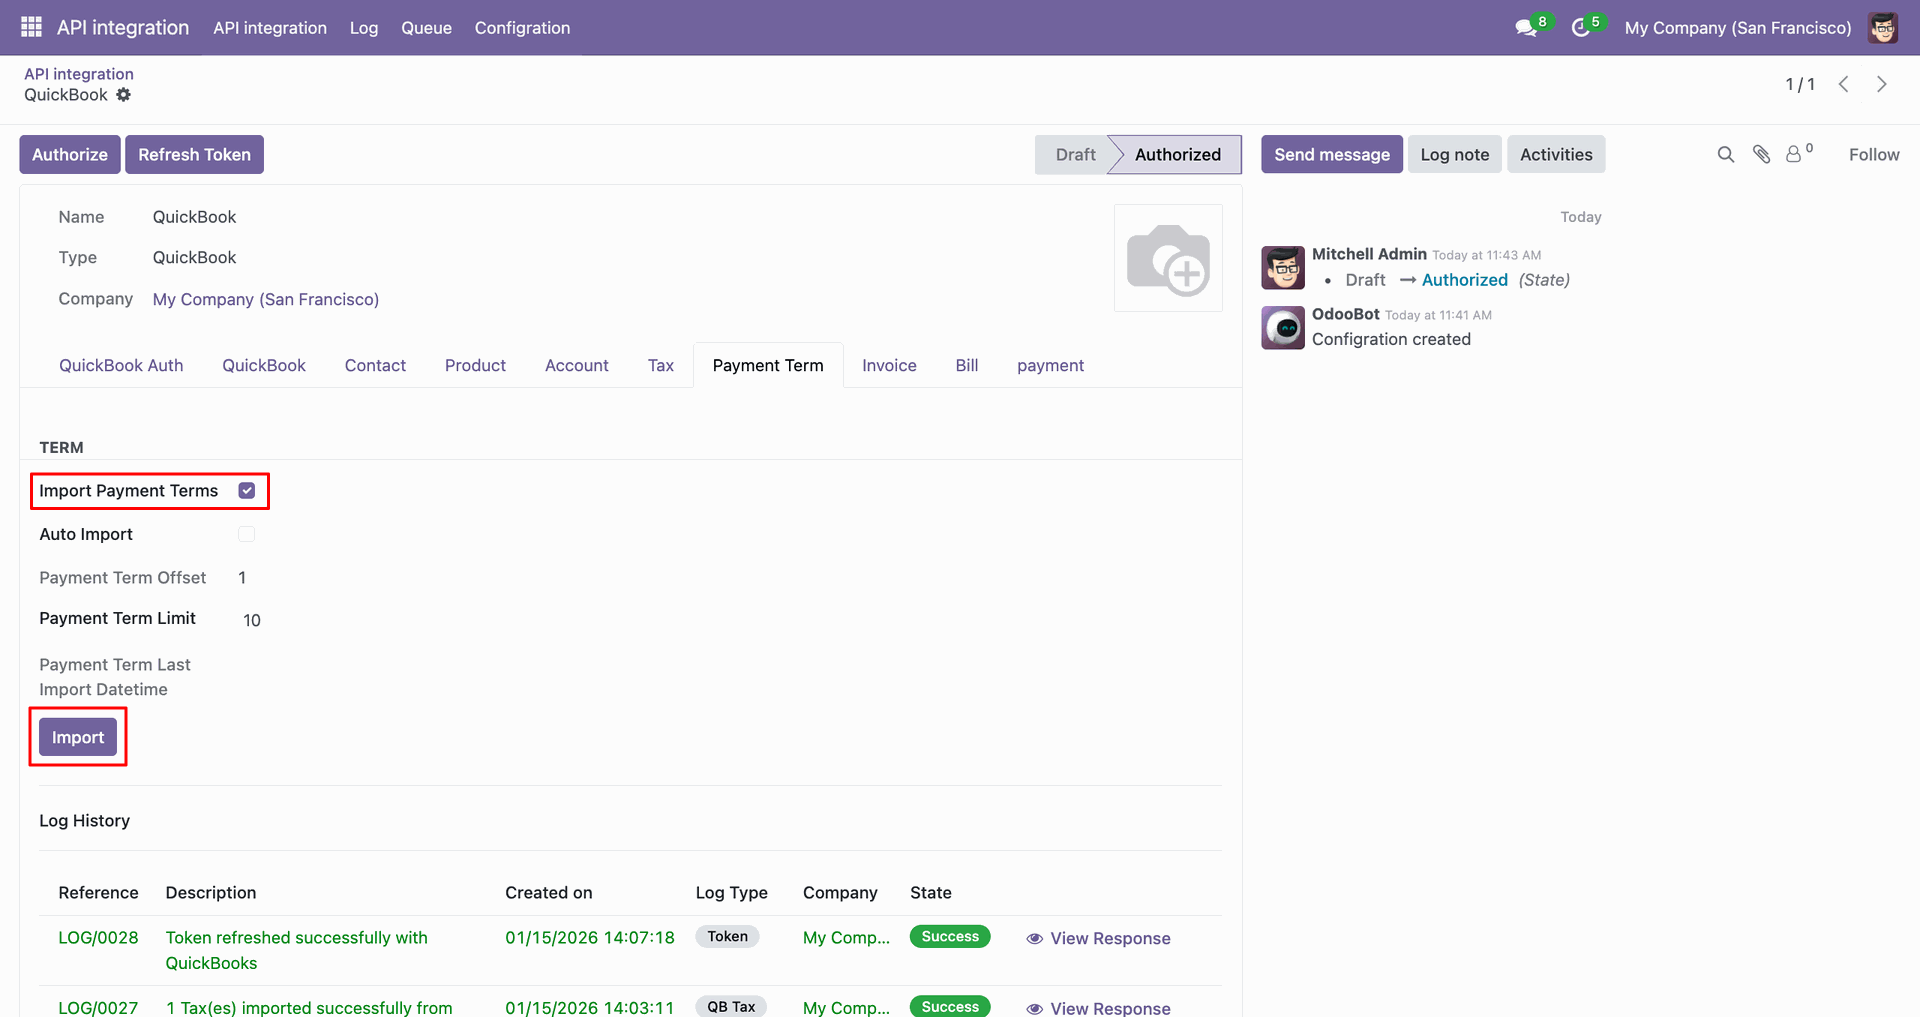
Log with imported data.
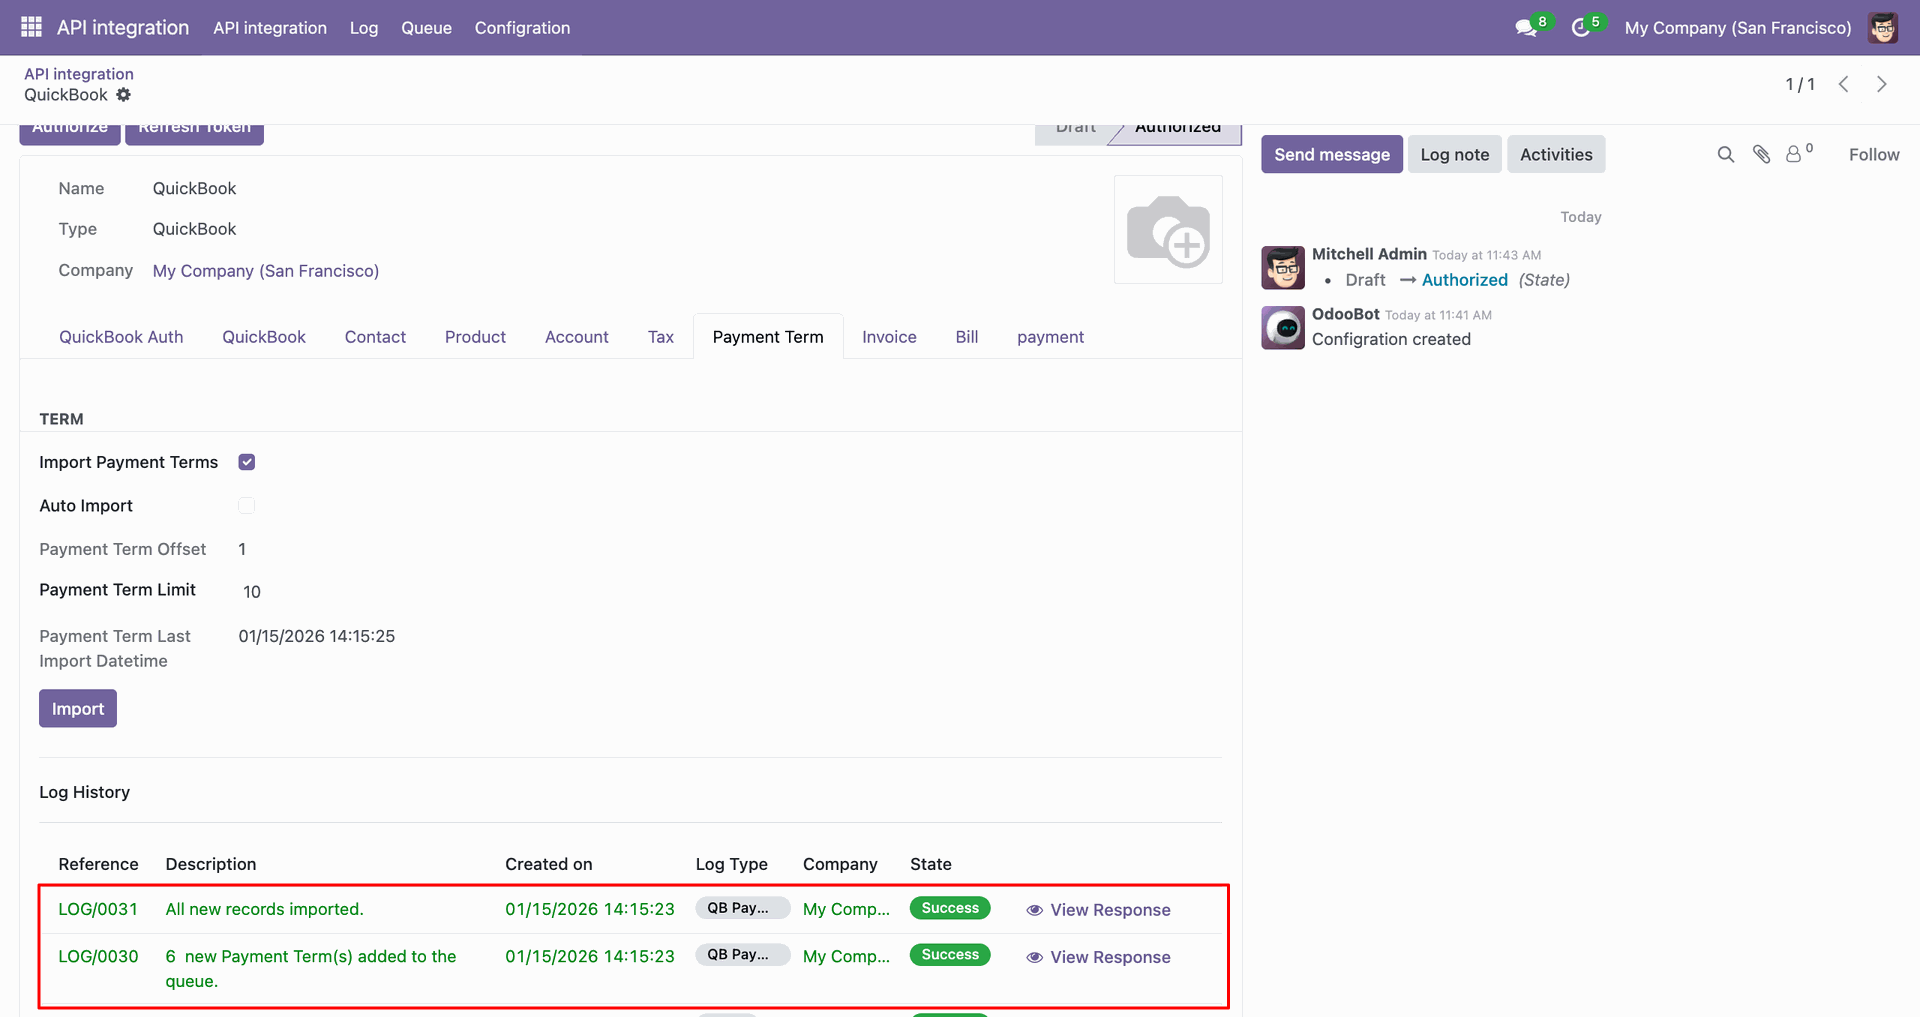
Go to the Queue, 'QB Term'.
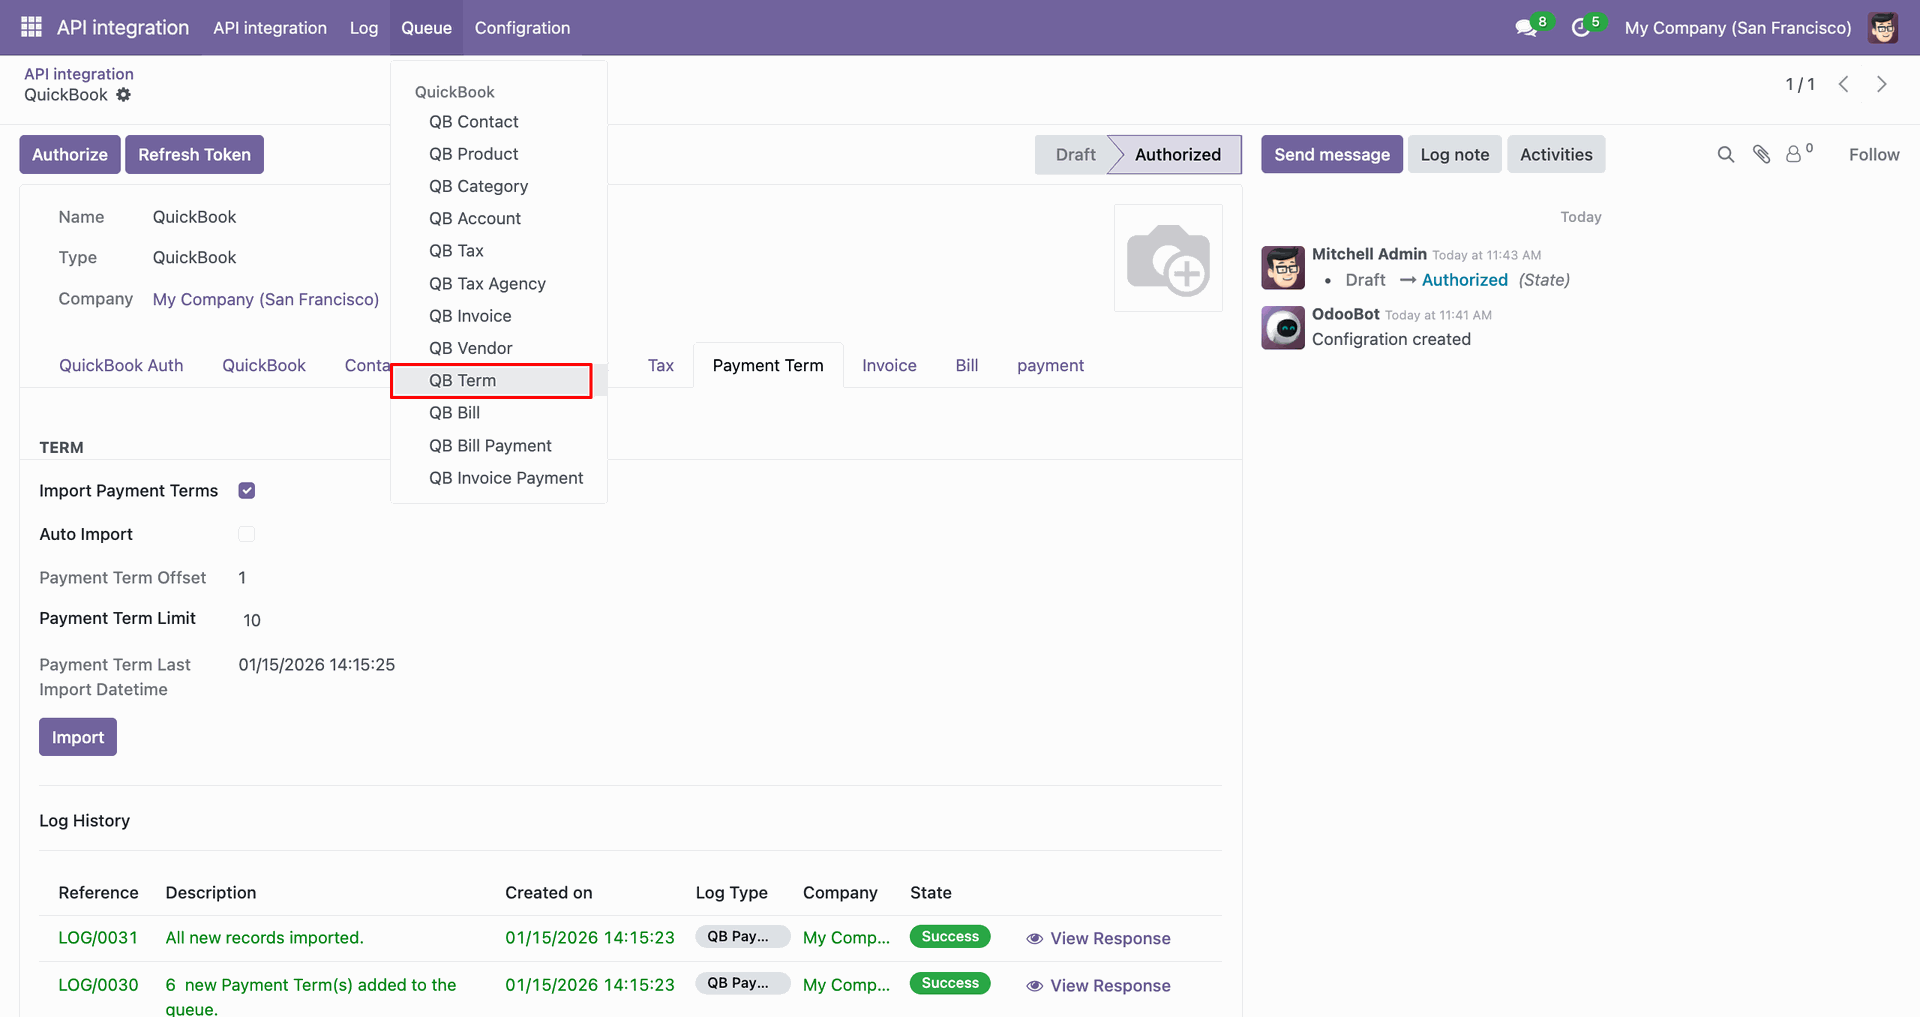
It will open the queue.
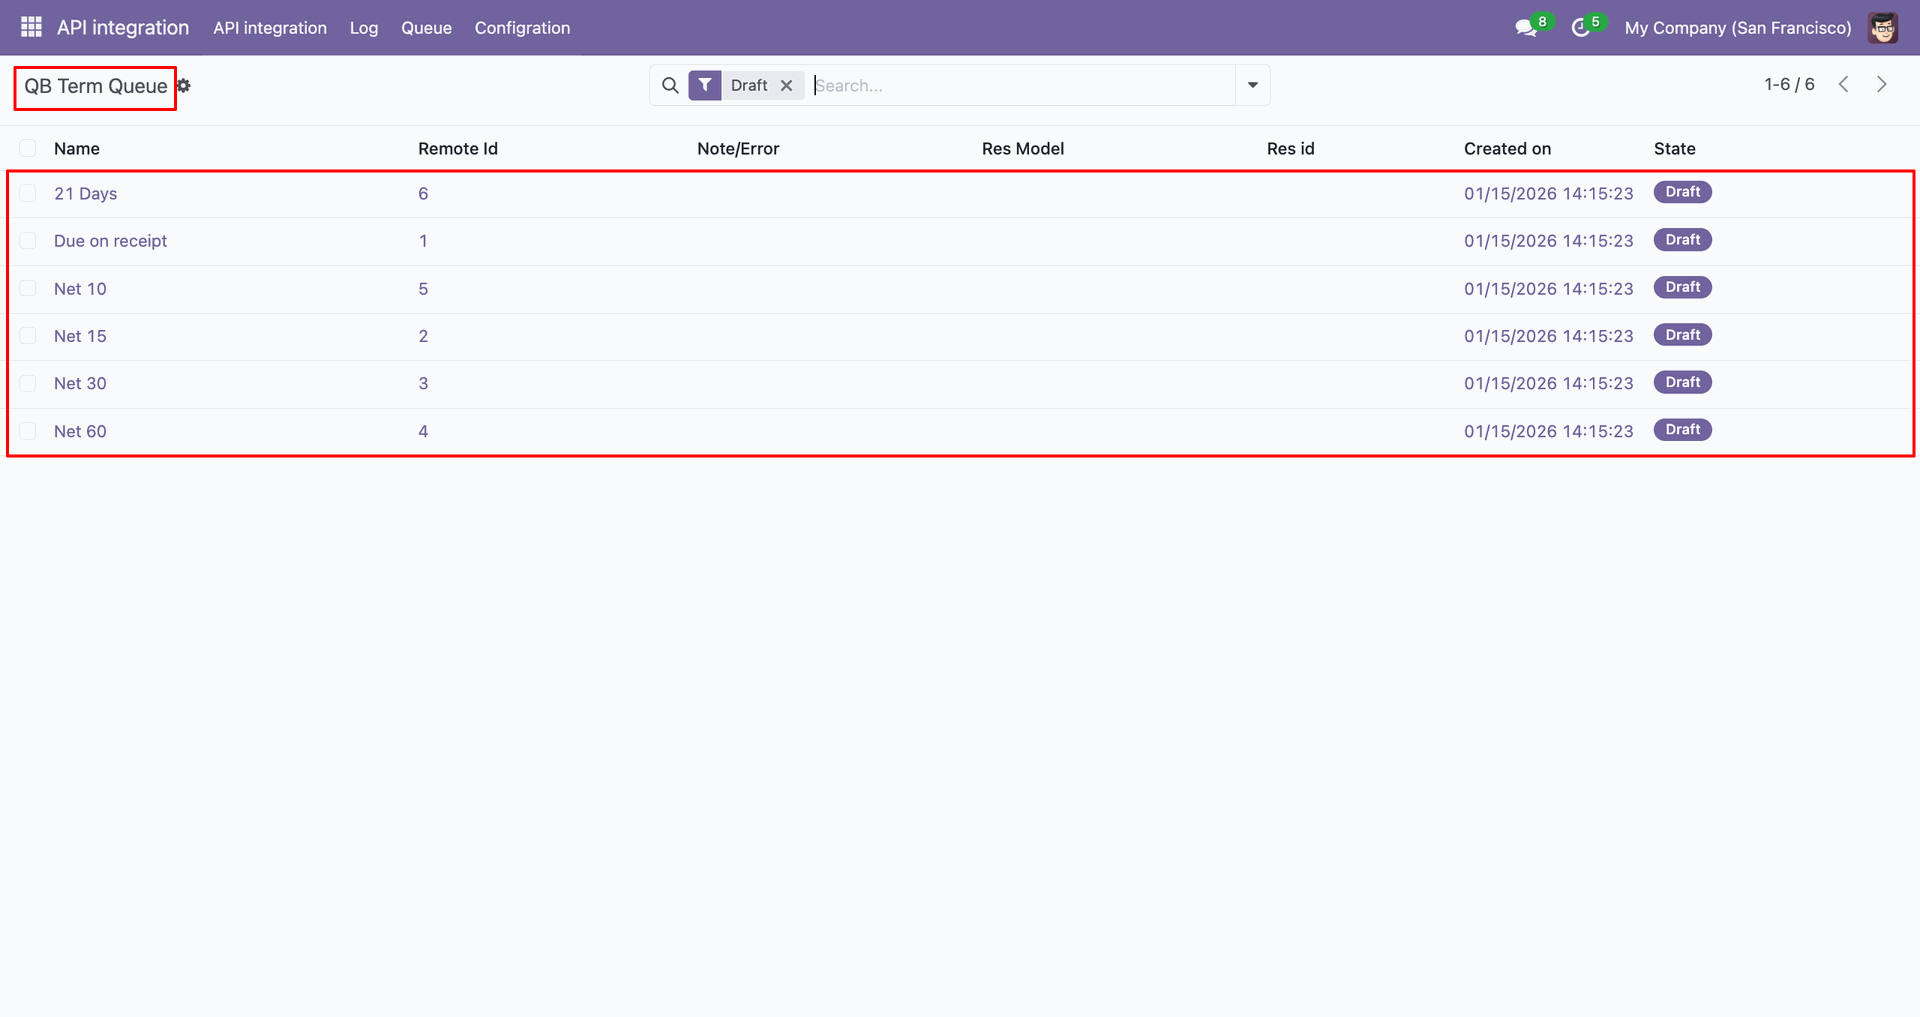
You can import from the queue.
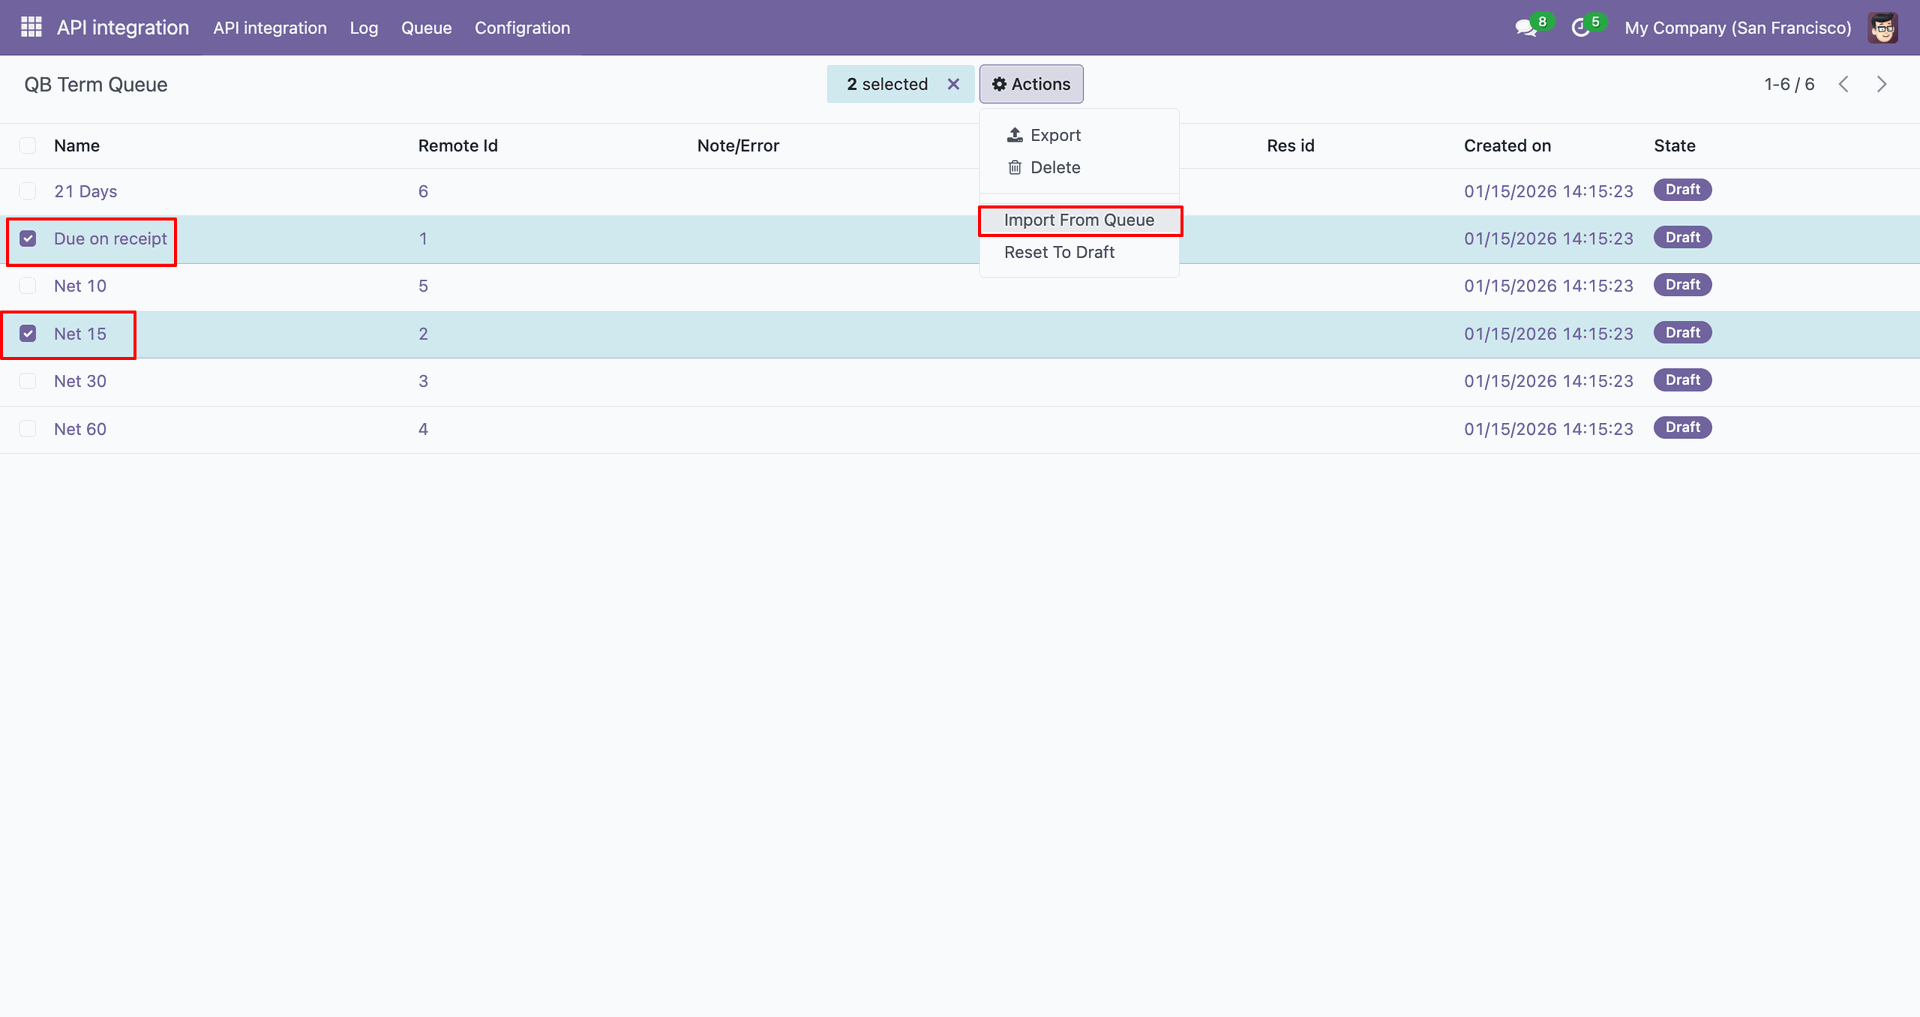
Log with details.
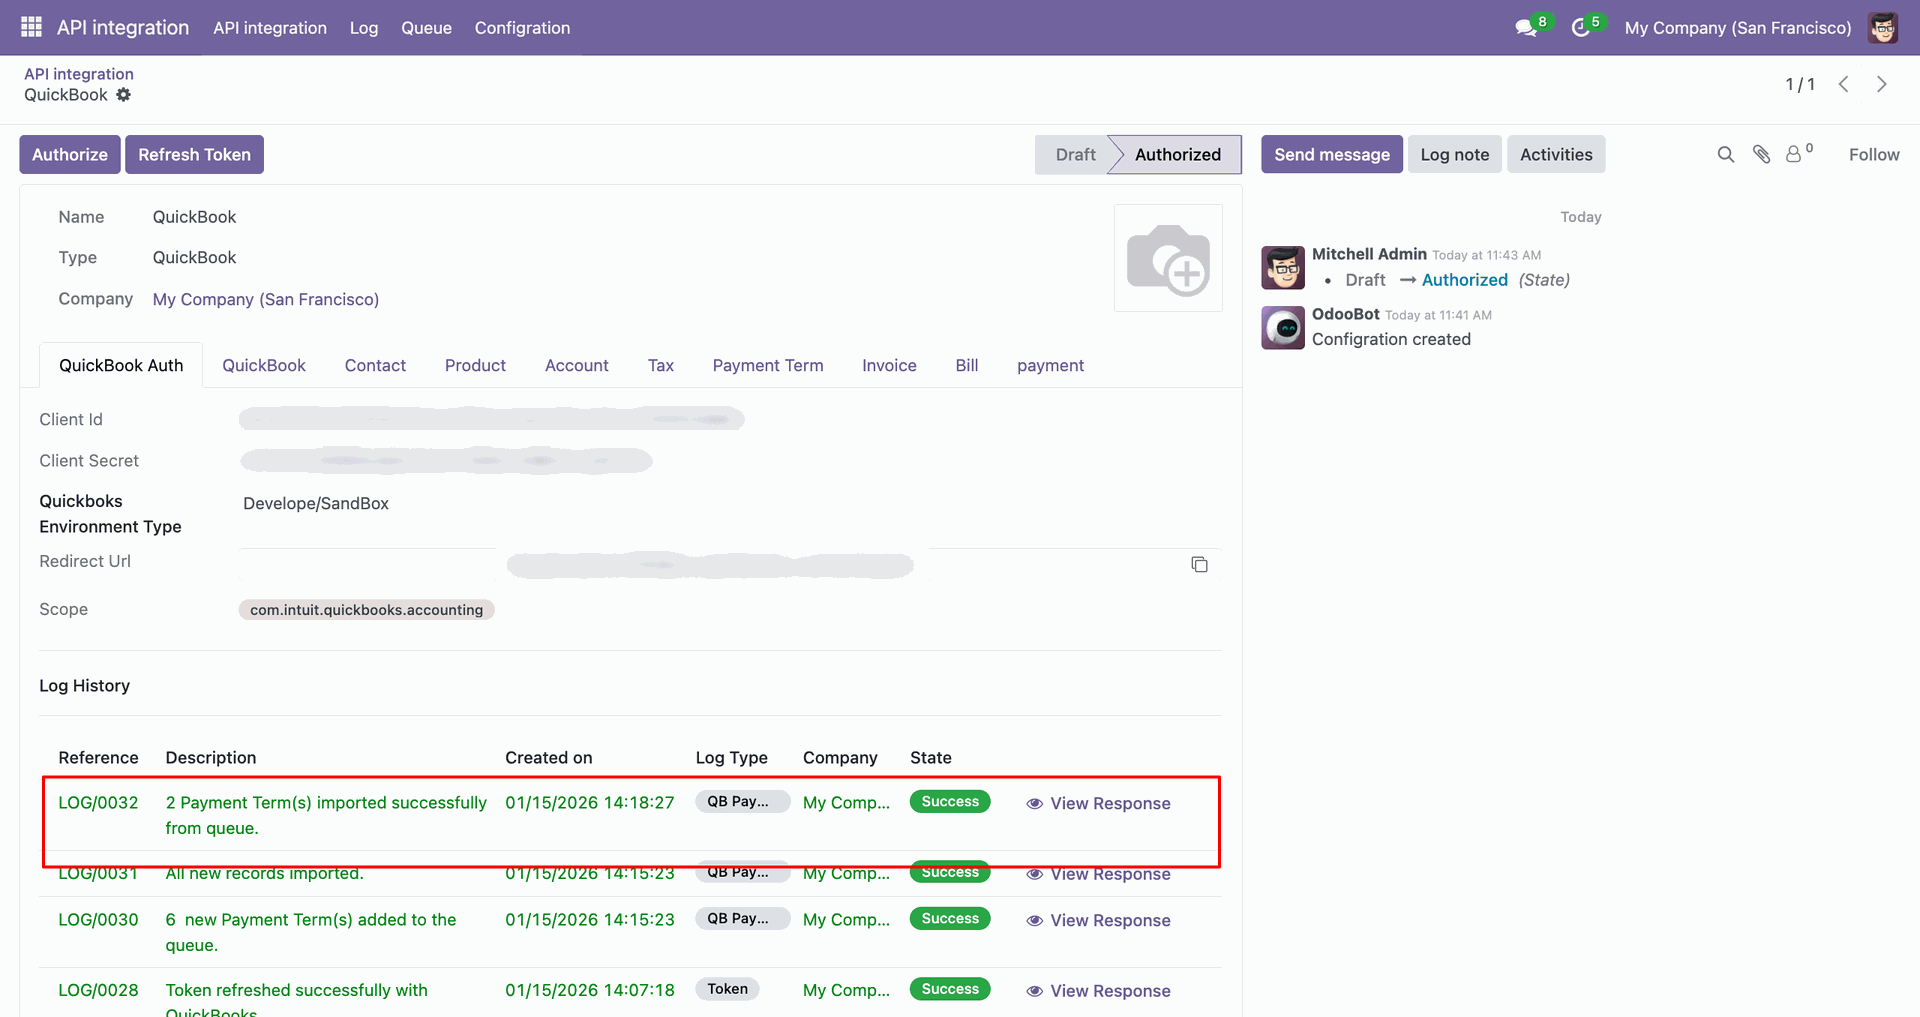
Group by with 'Status'.
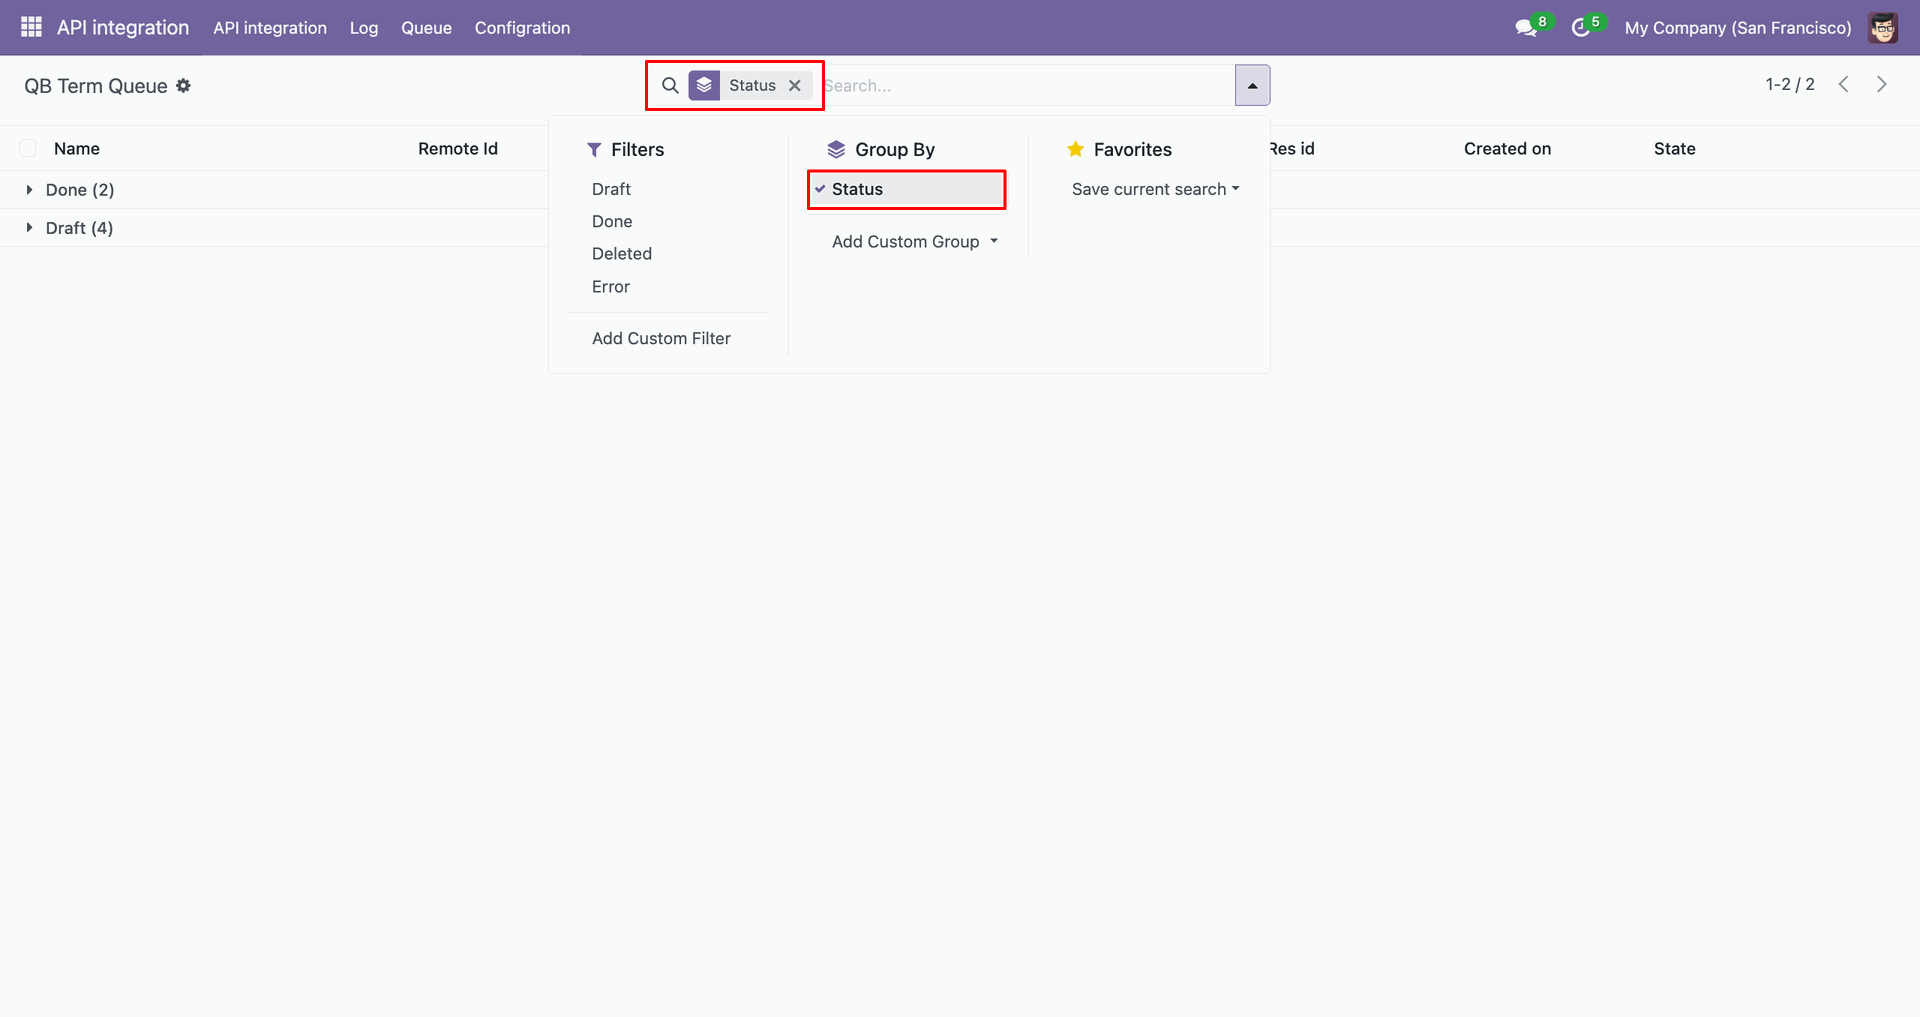
Group by result.
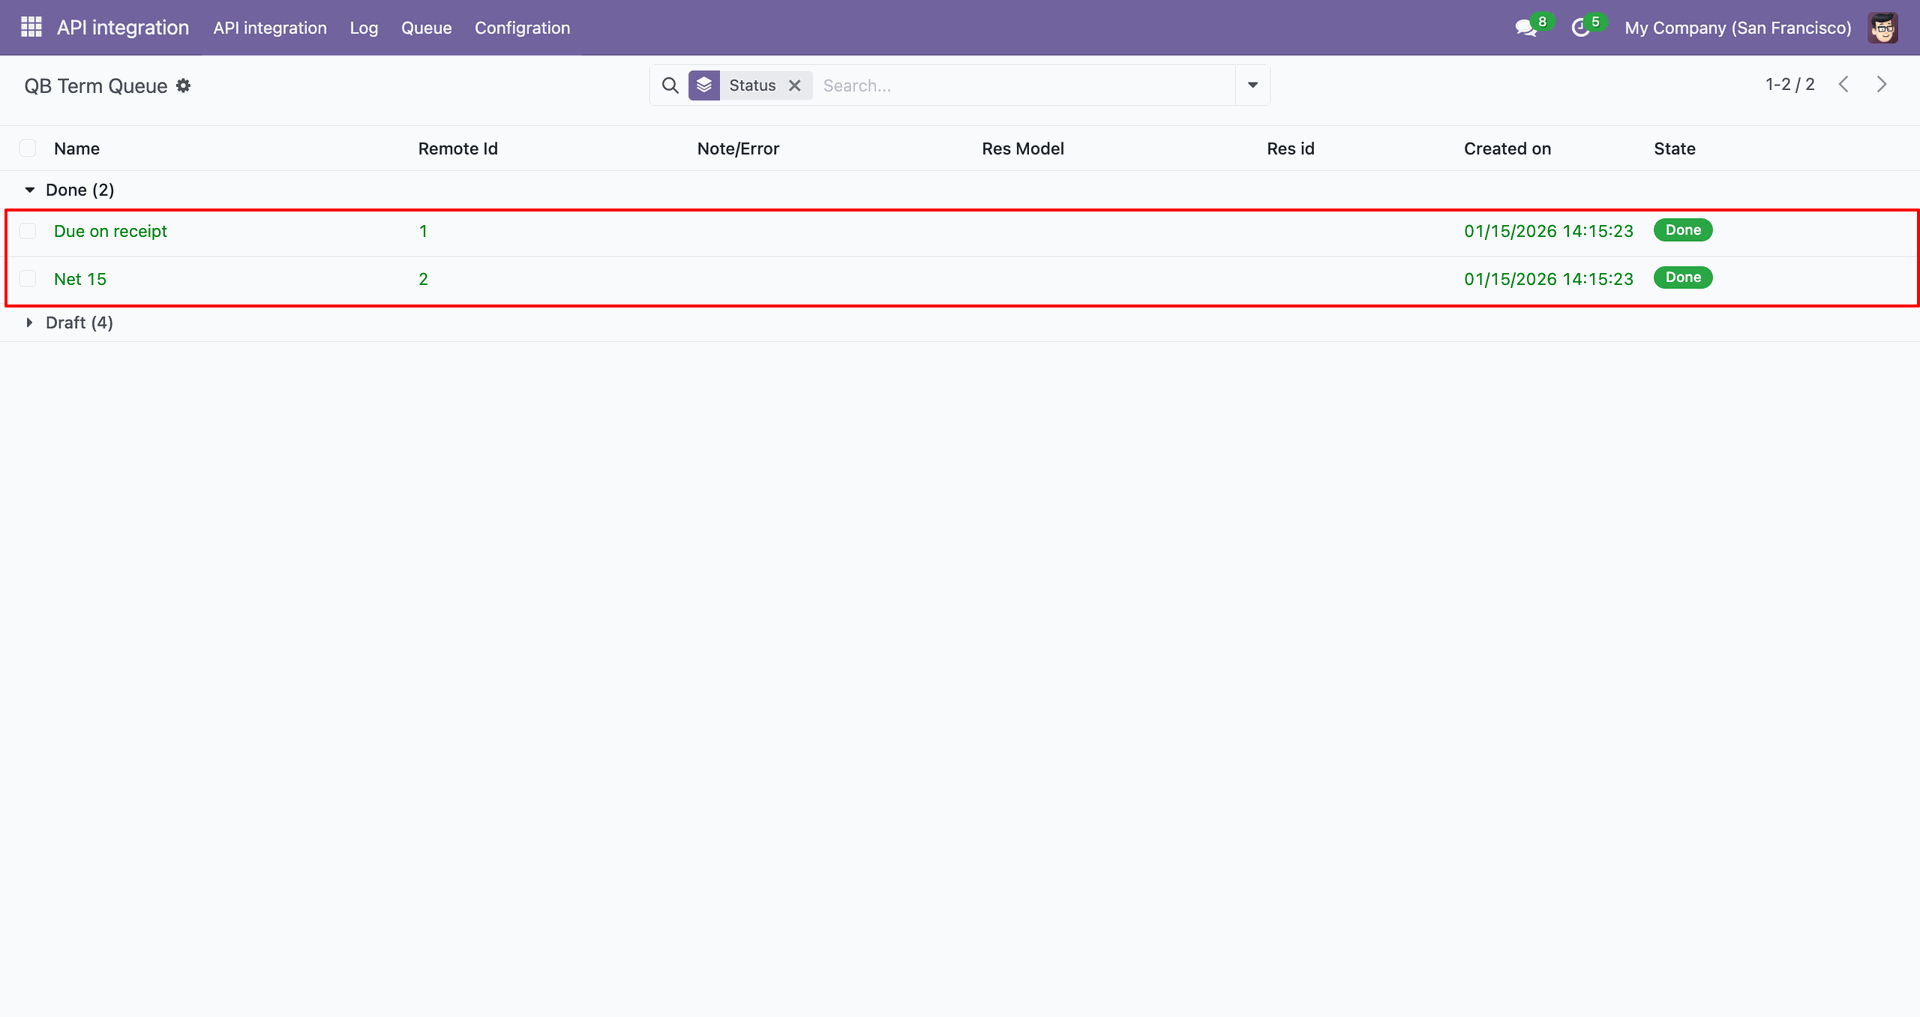
Payments with filter.
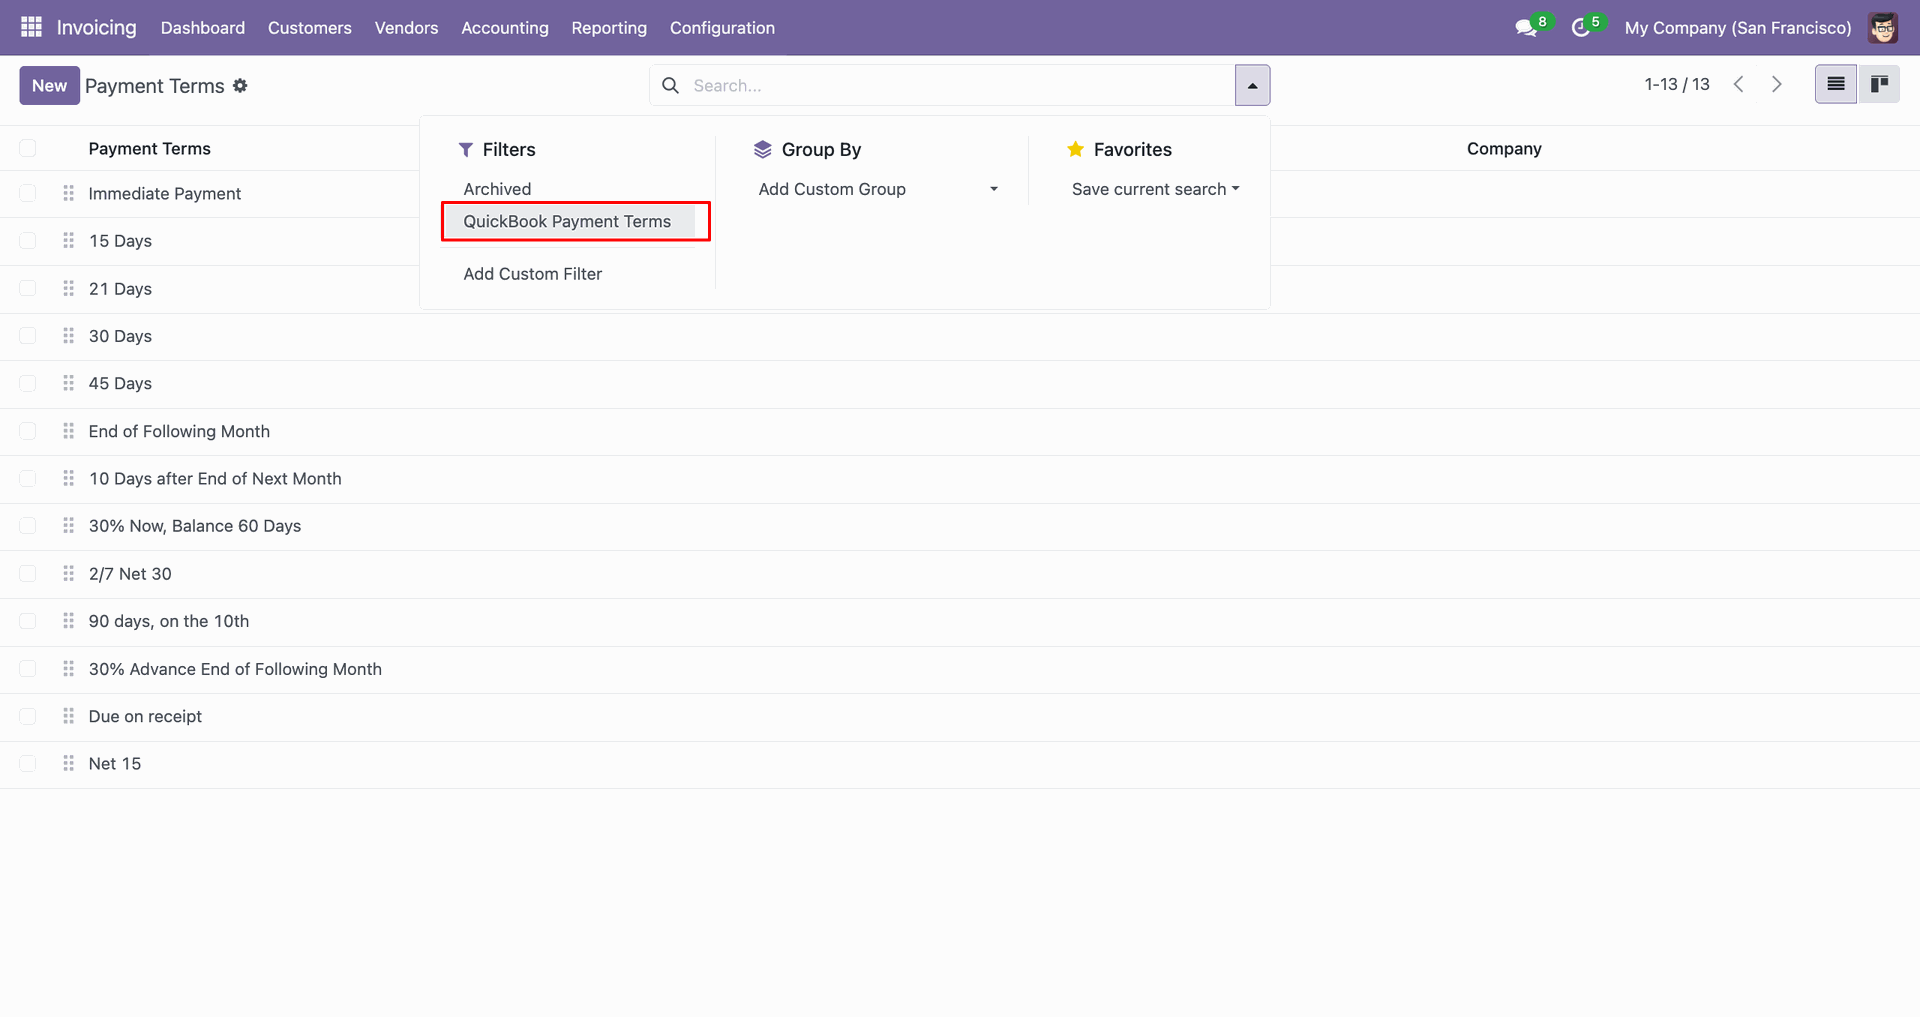
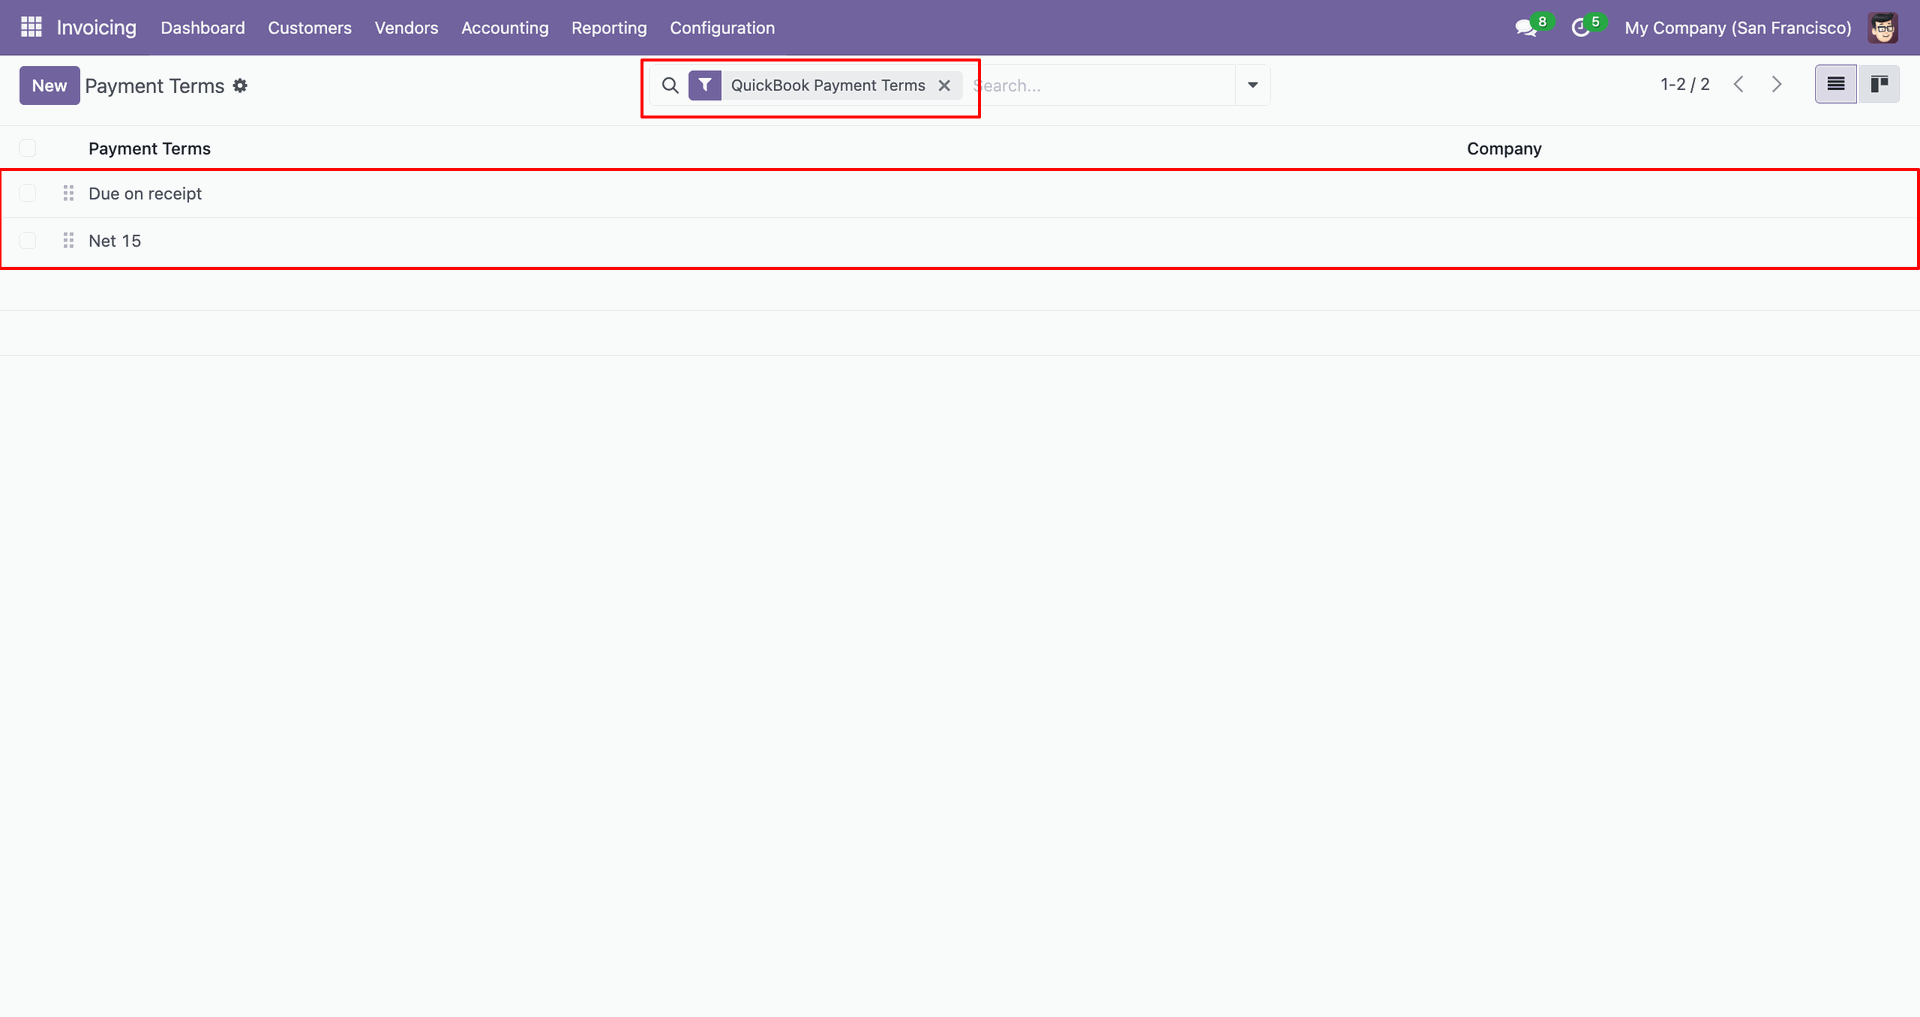
Filter result.
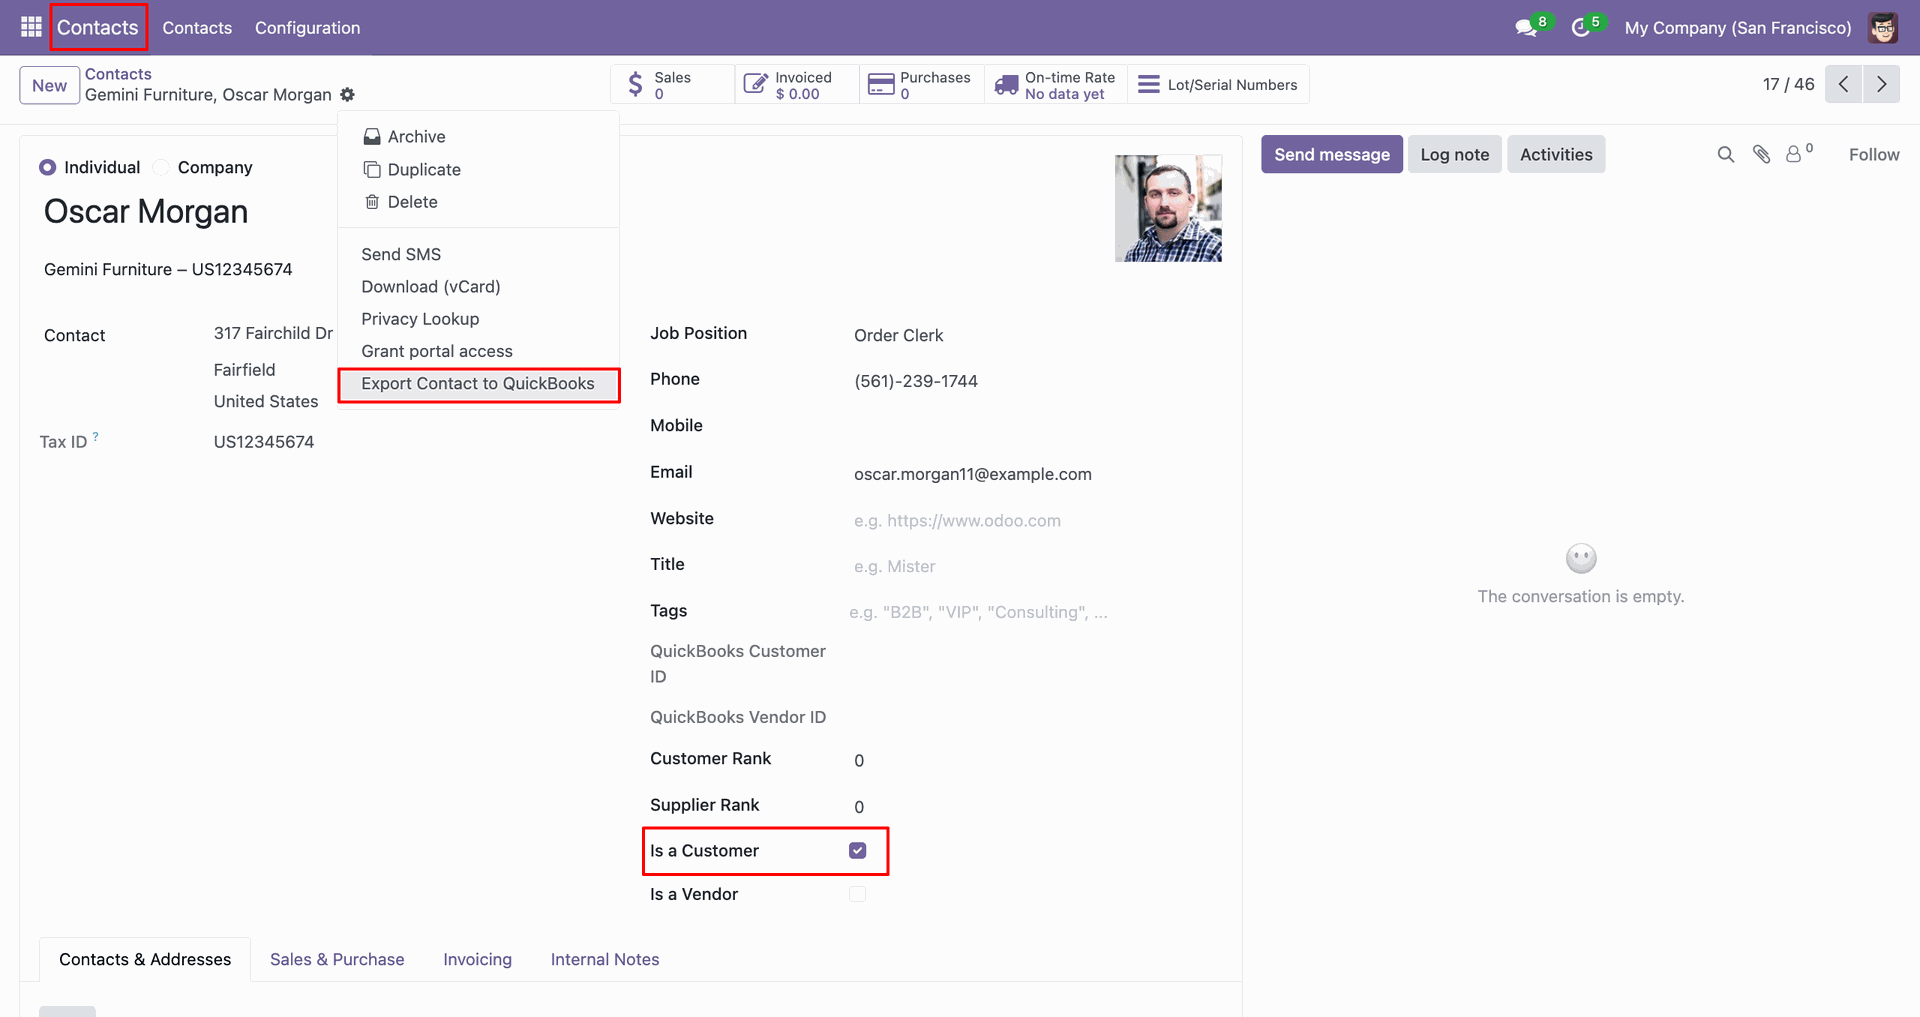
Go to the 'Contacts', Enable 'Is a Customer'. After that, go to the 'Action', click 'Export Contact to QuickBooks'.
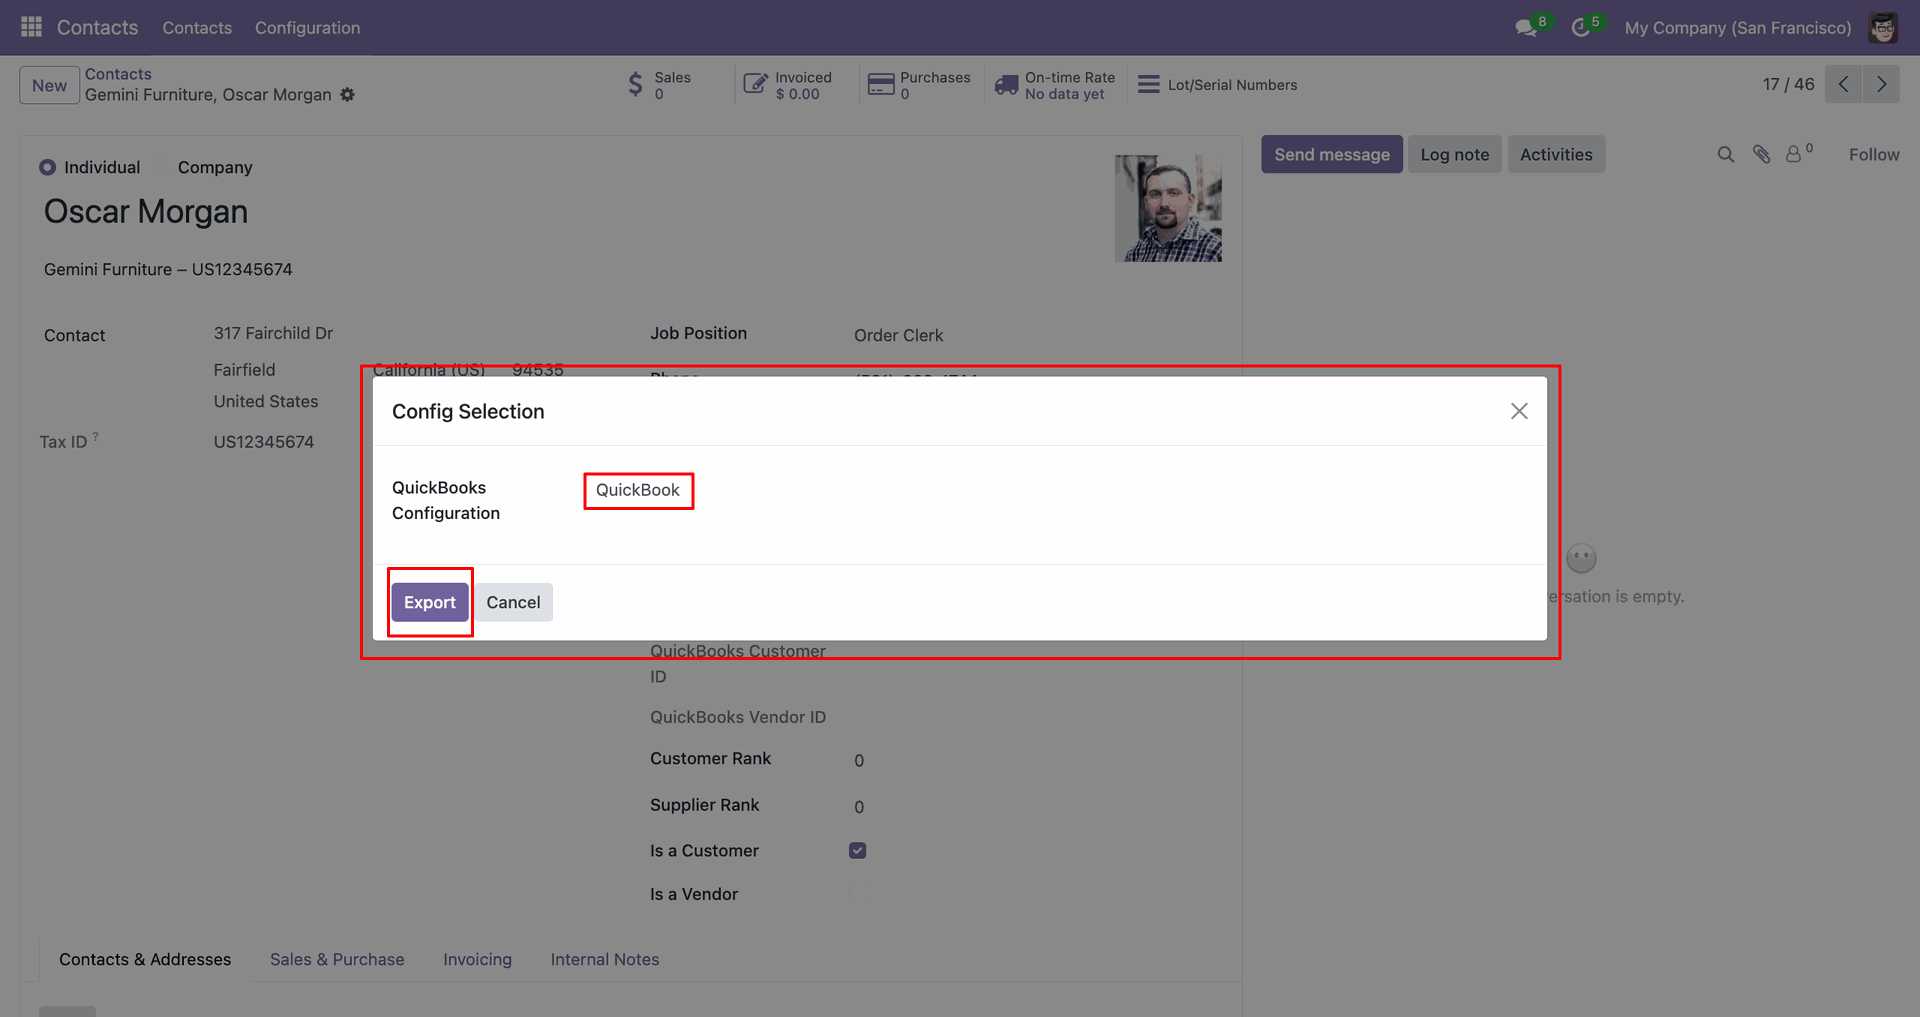
Config selection popup. Select 'QuickBooks' and click 'Export'.
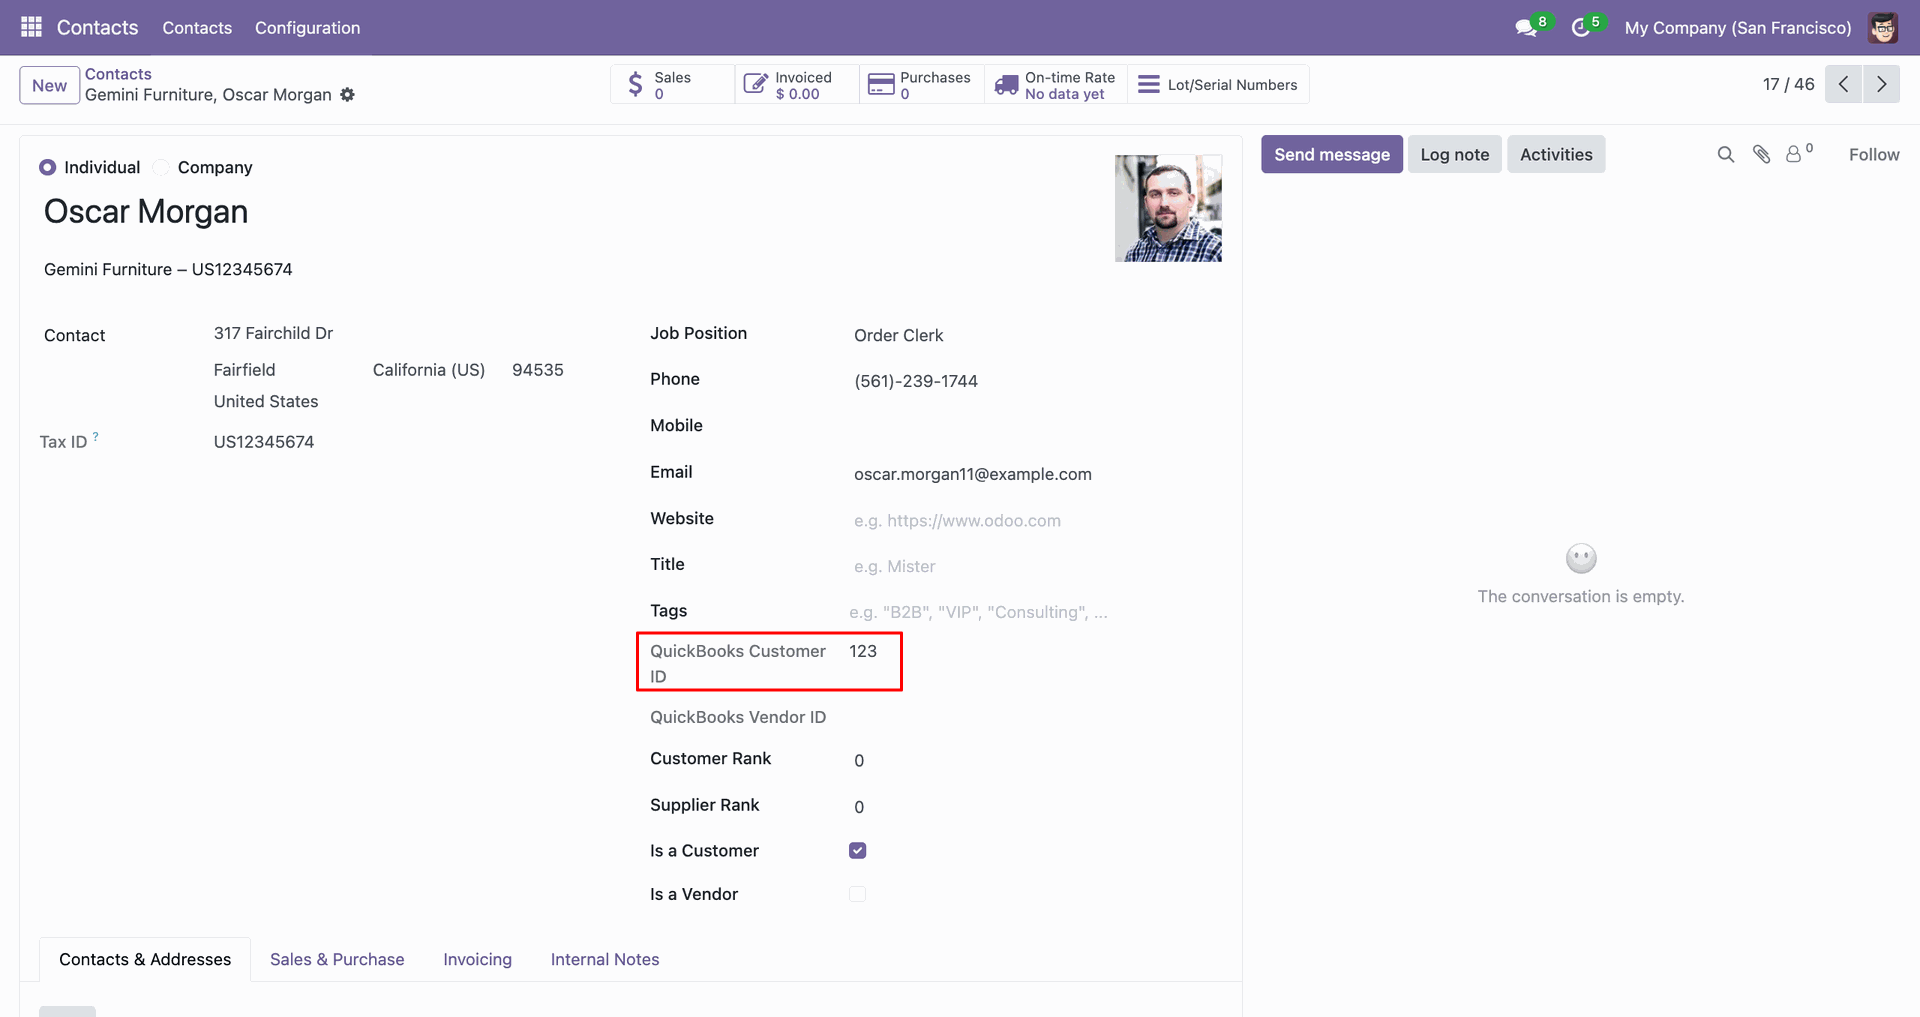
The form view contains Quickbook customer ID.
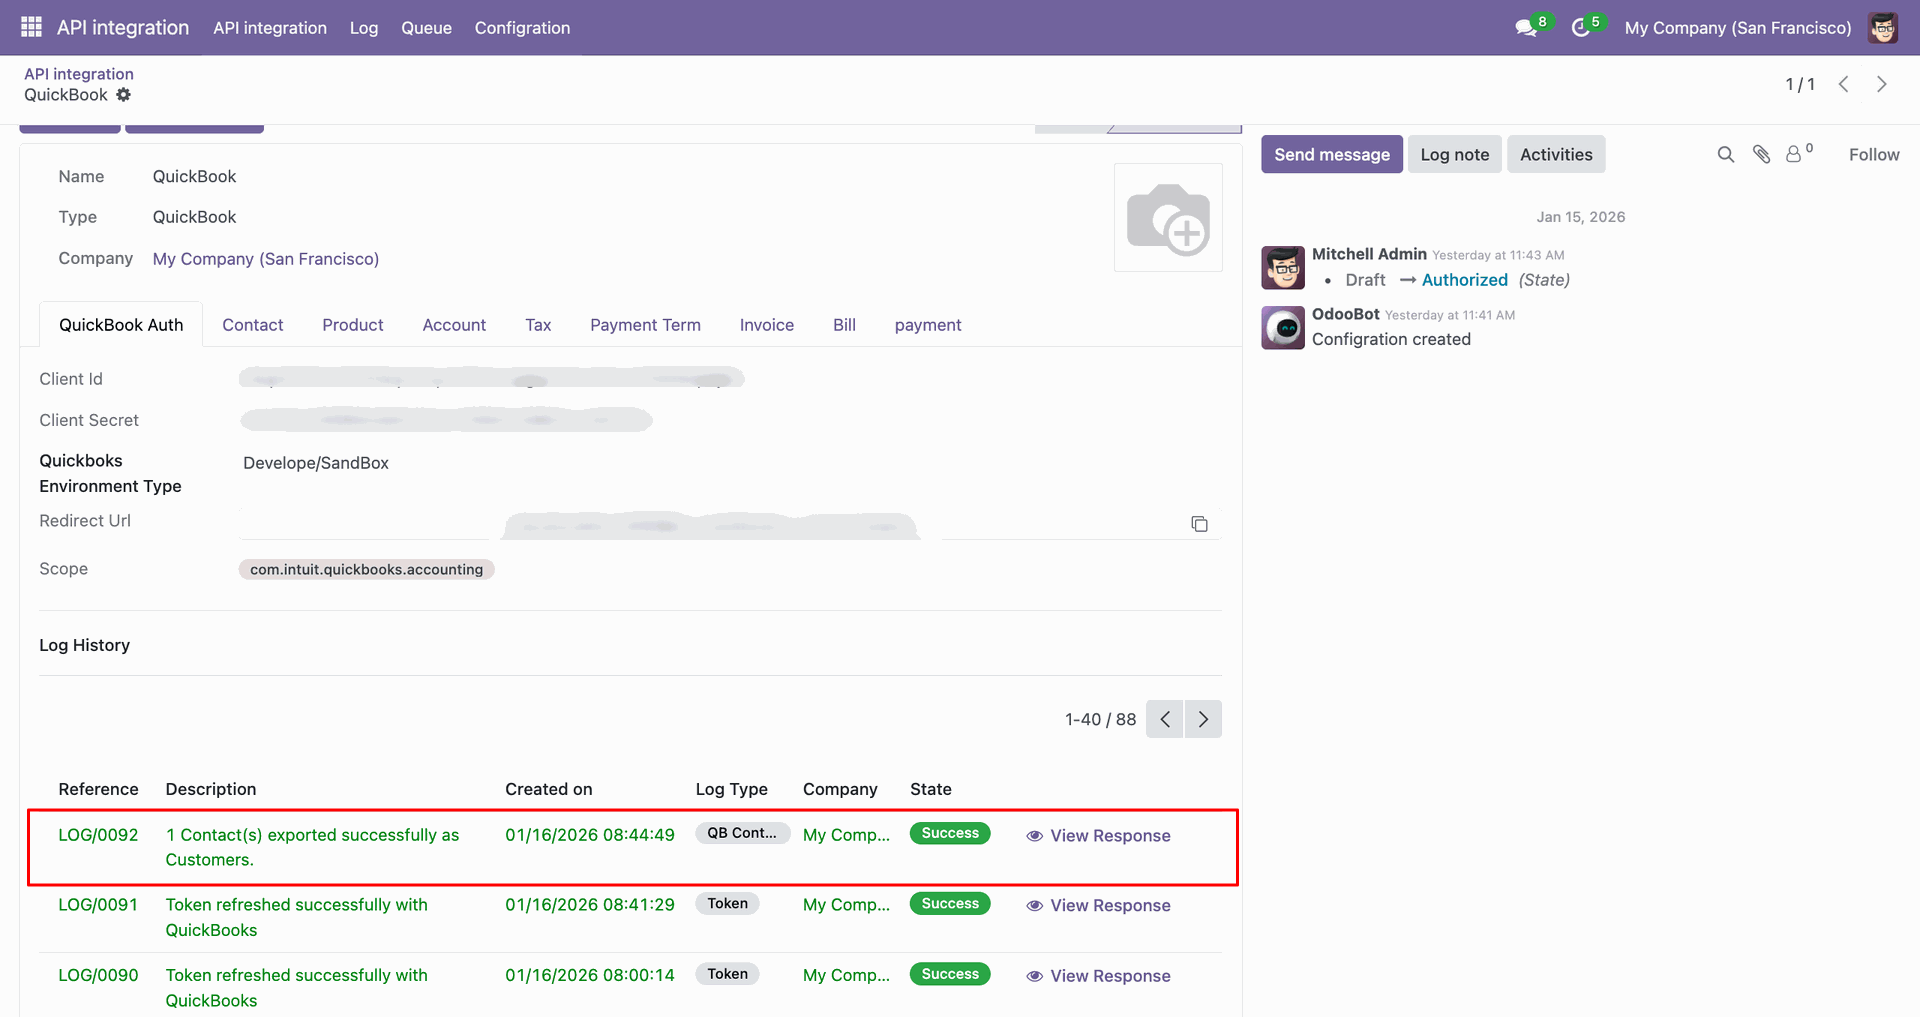
Log with details.
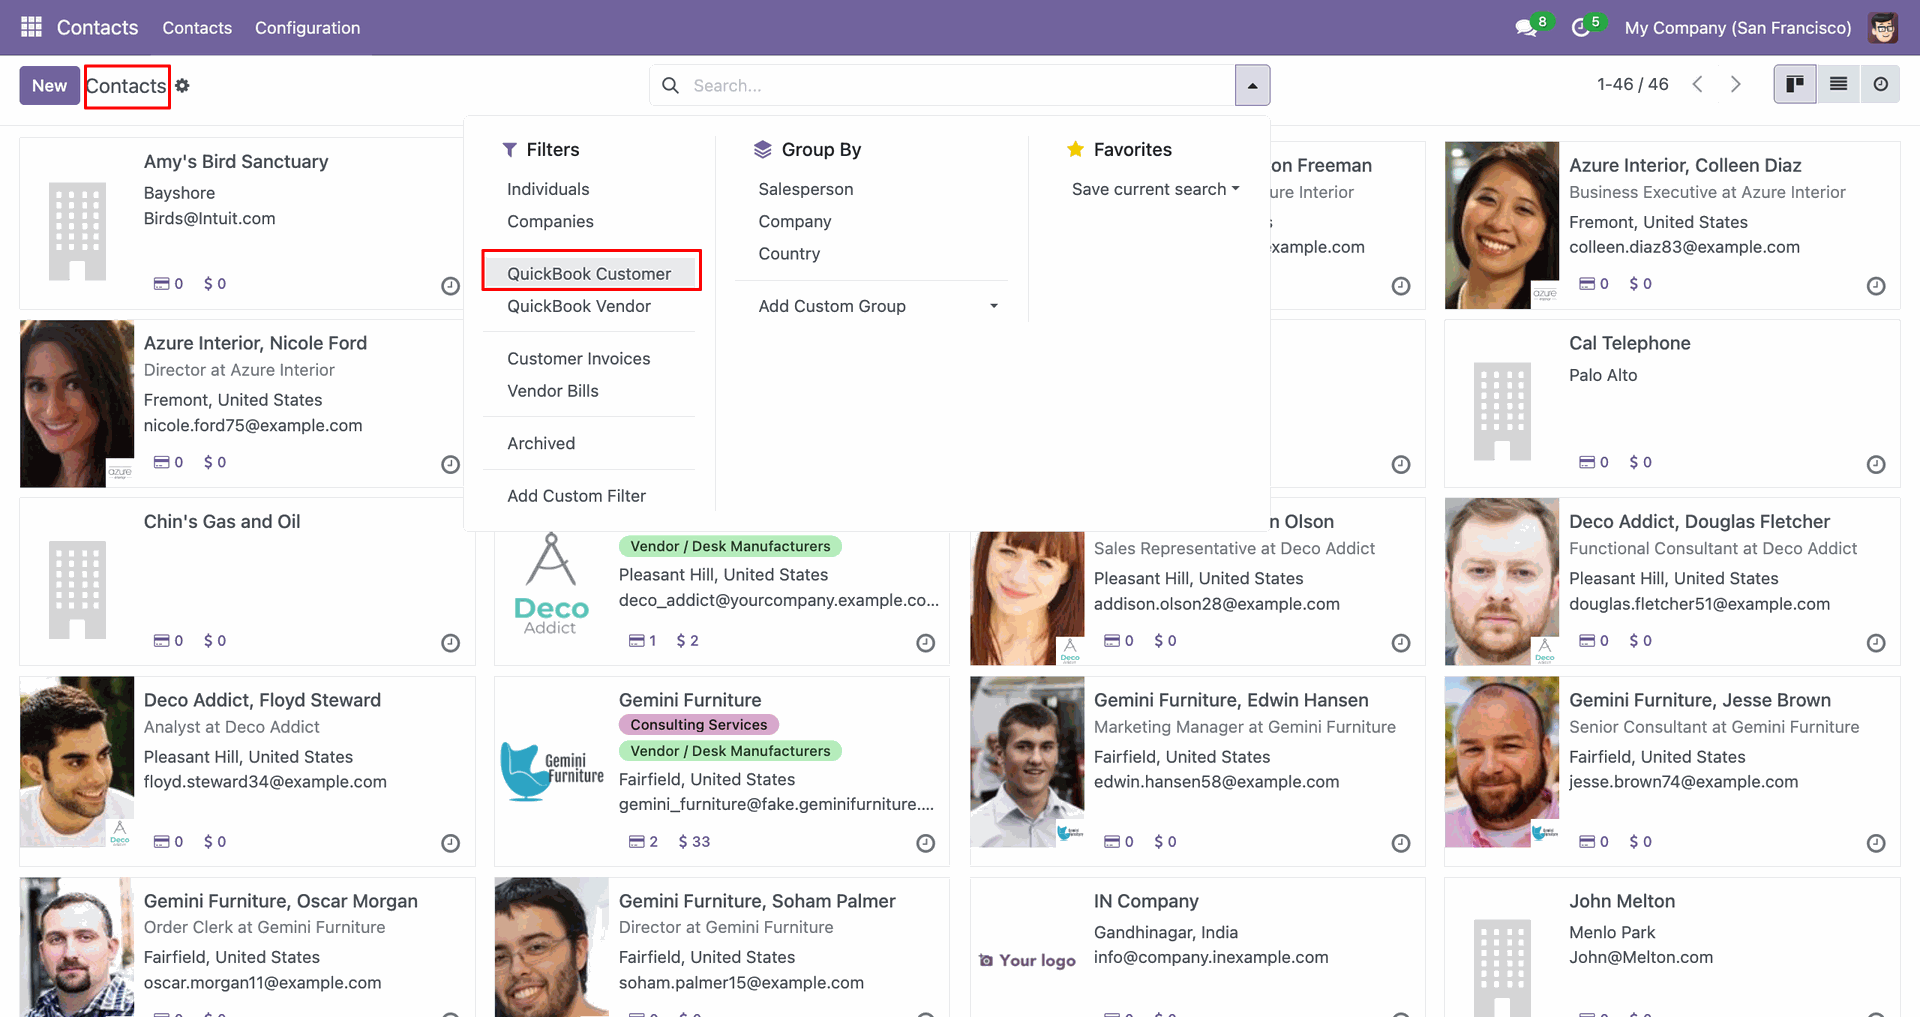
You can filter by QuickBooks Customer.
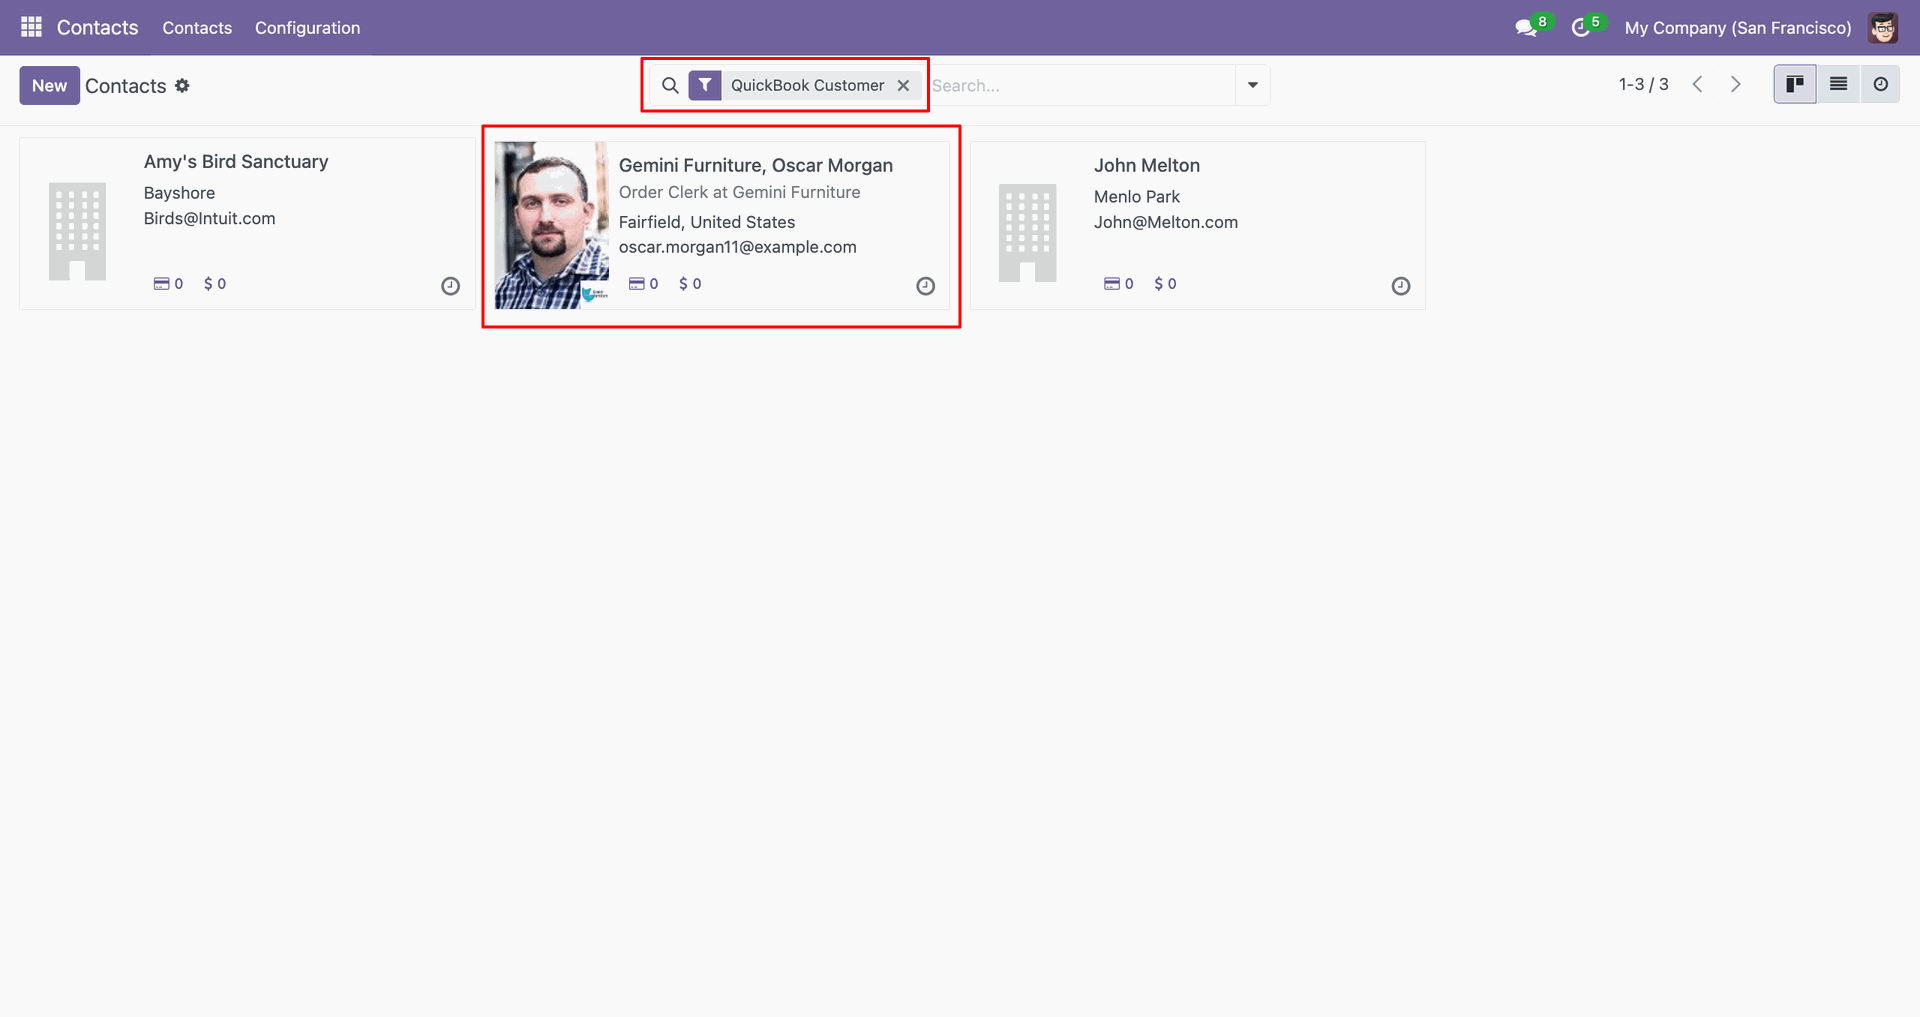
Filter result.
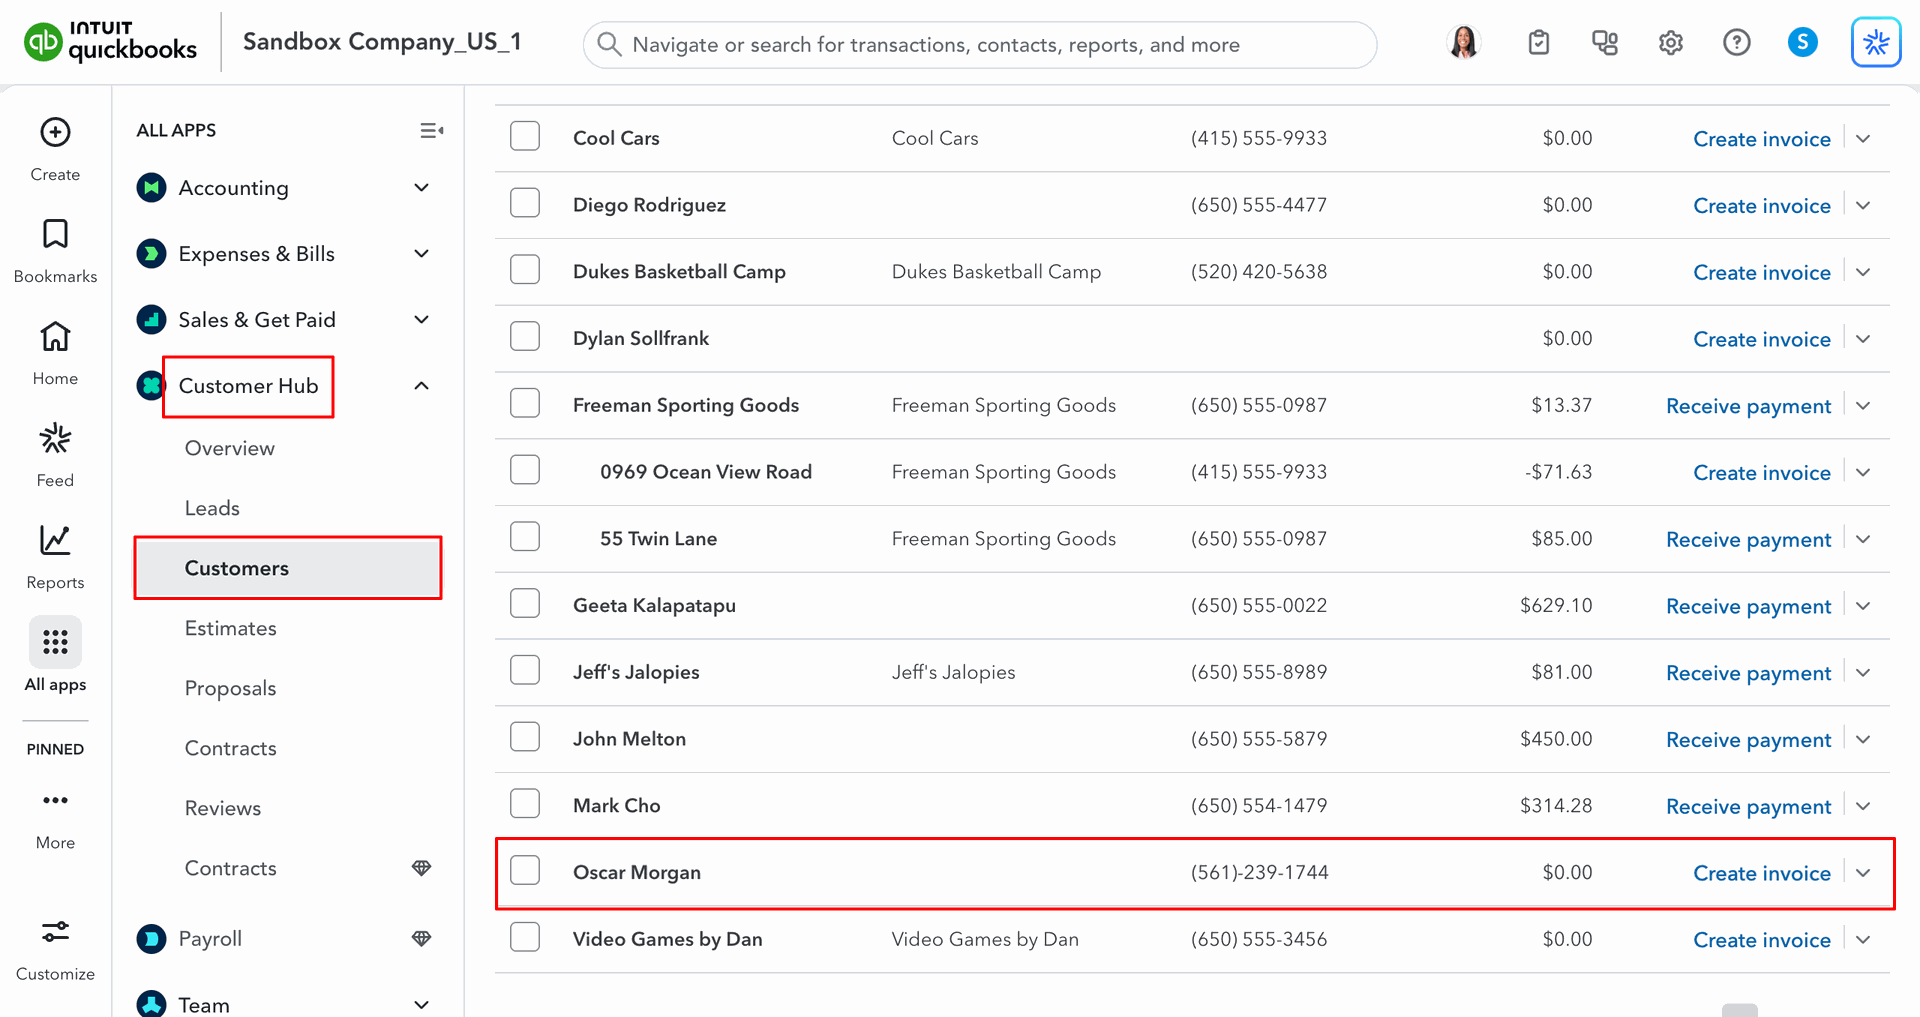
Customers in QuickBooks.
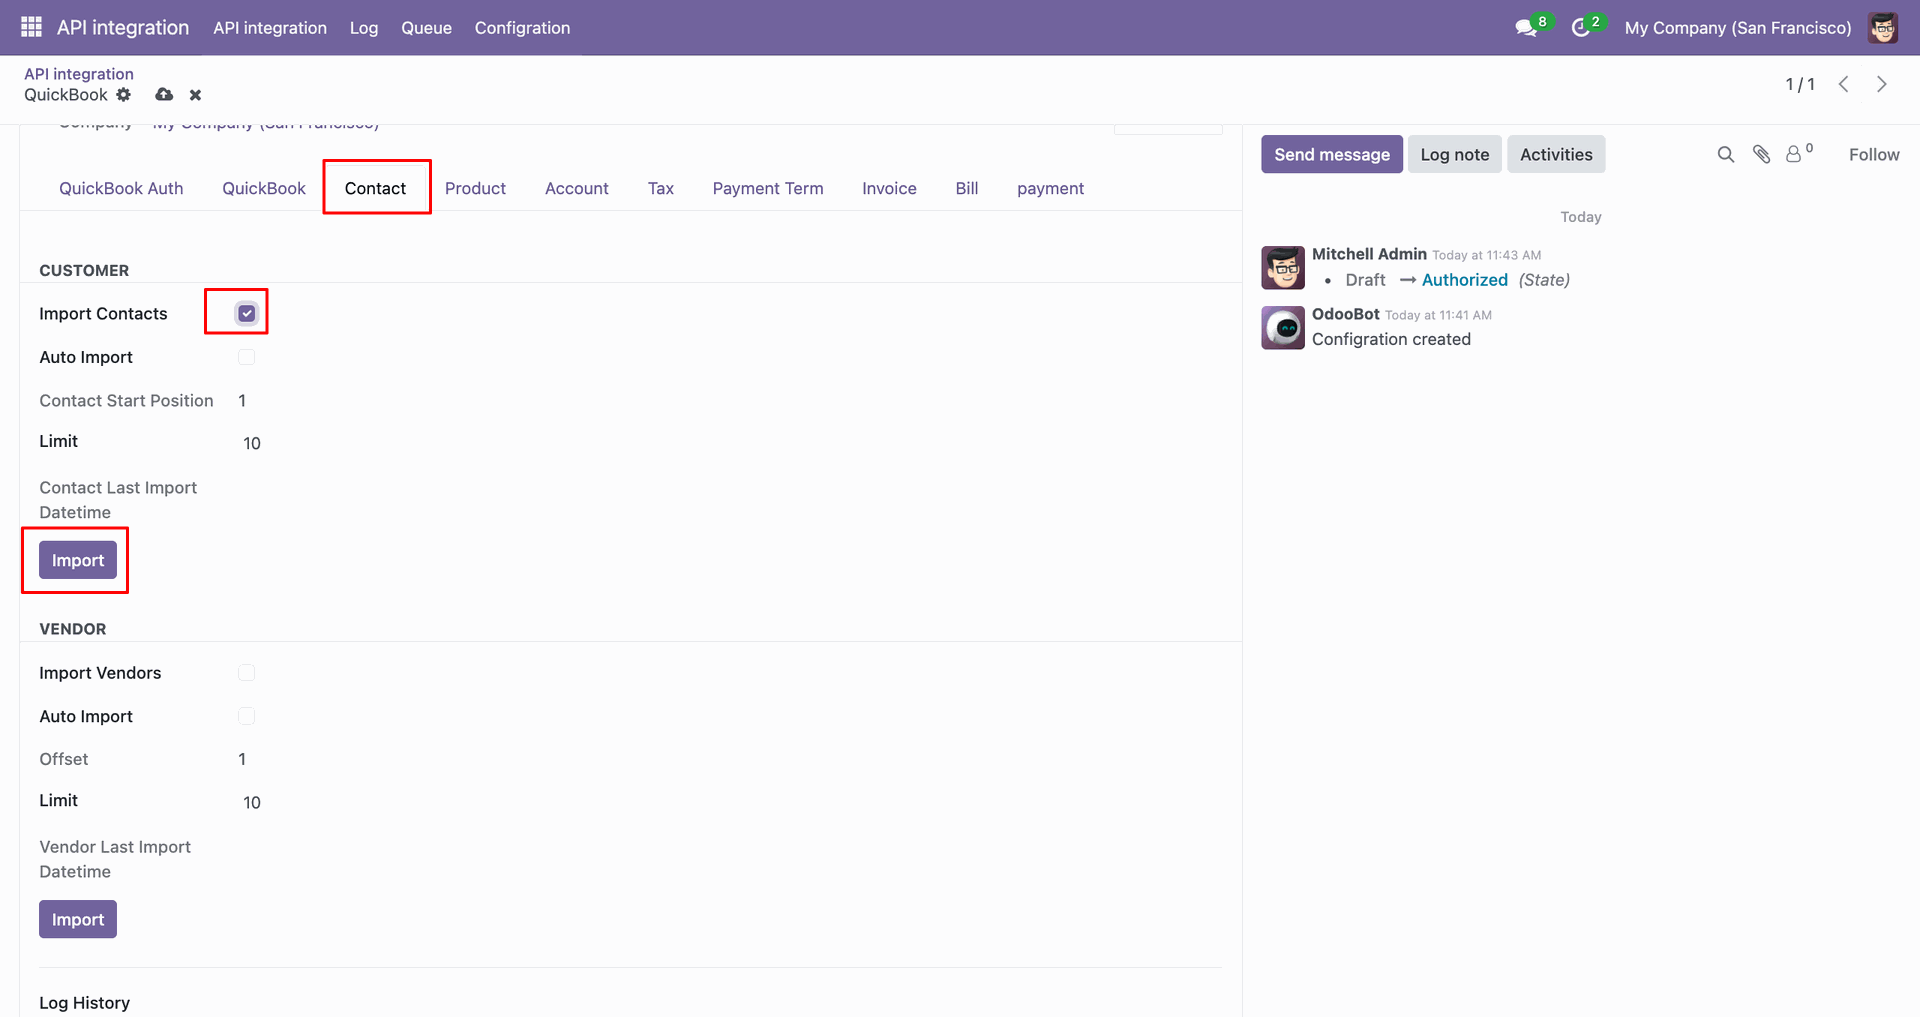
For the import, go to the 'Contact' Tab, enable 'Import Contacts', and click 'Import'.
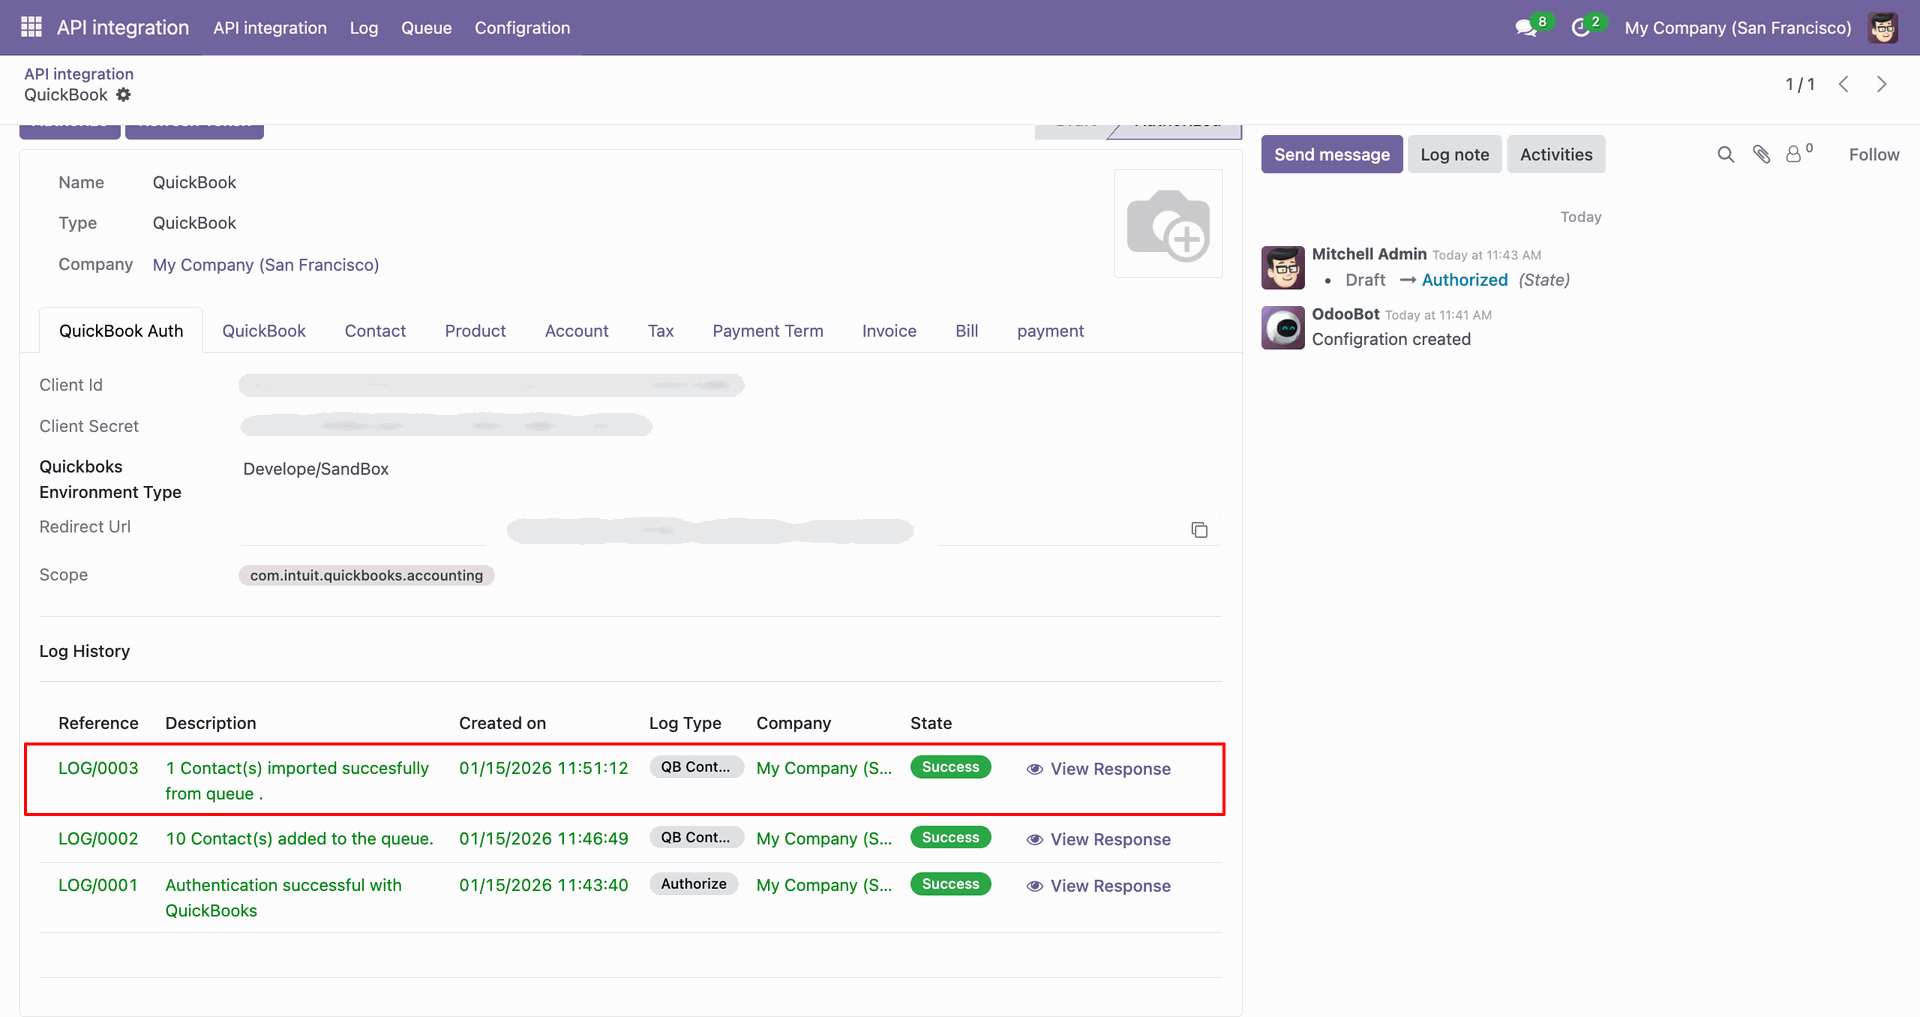
Log with imported data.
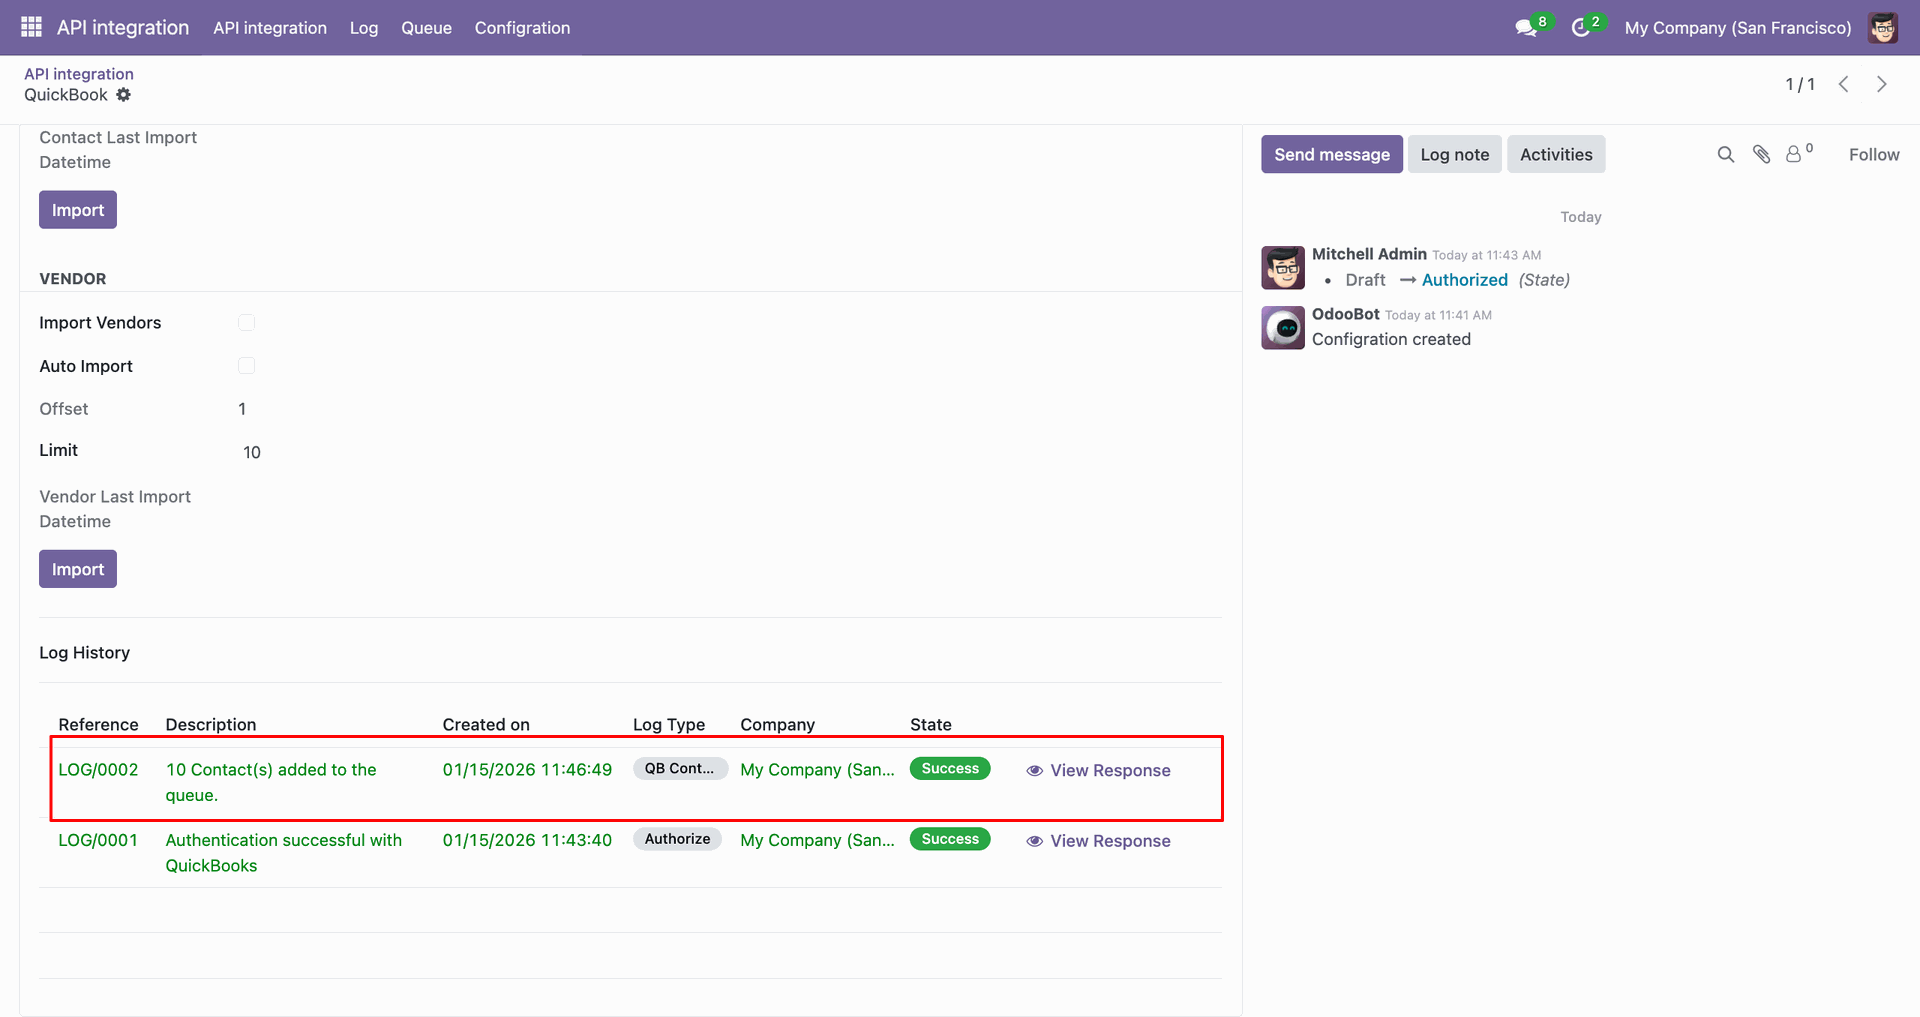
Go to the Queue, 'QB Contact'.
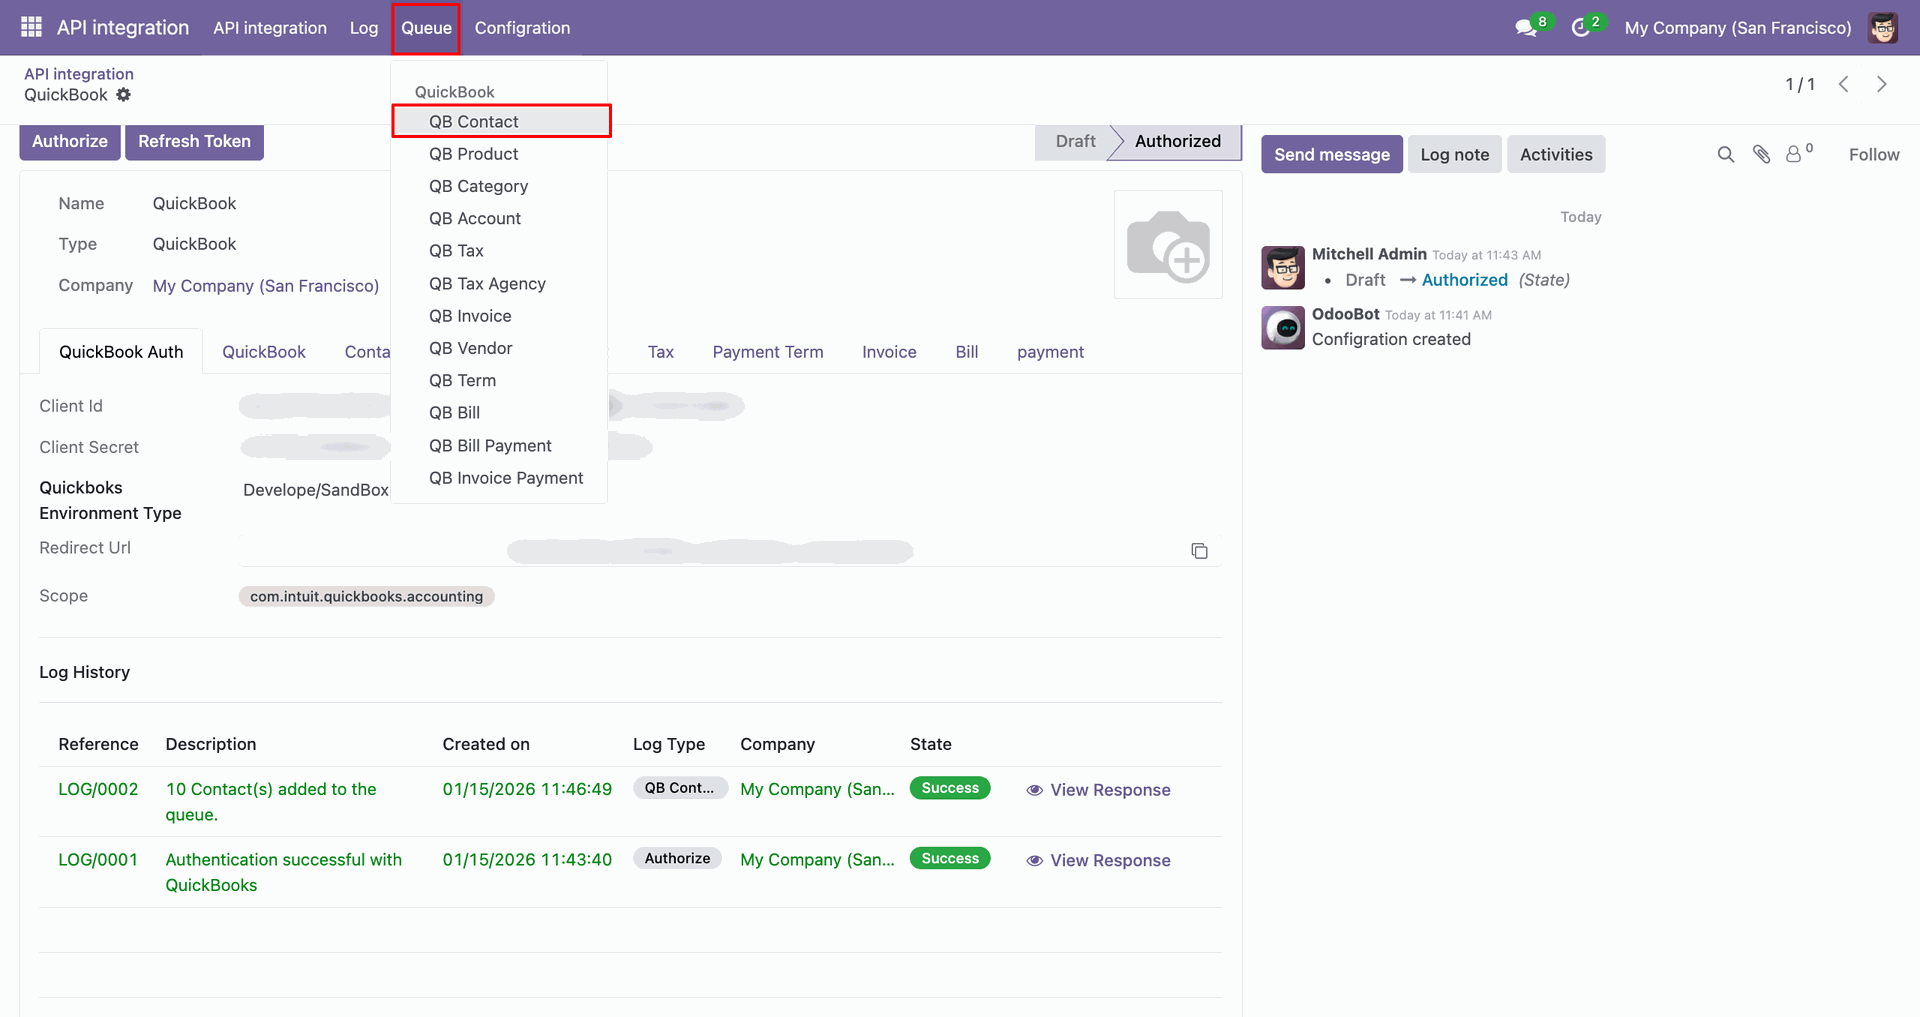
It will open the queue.
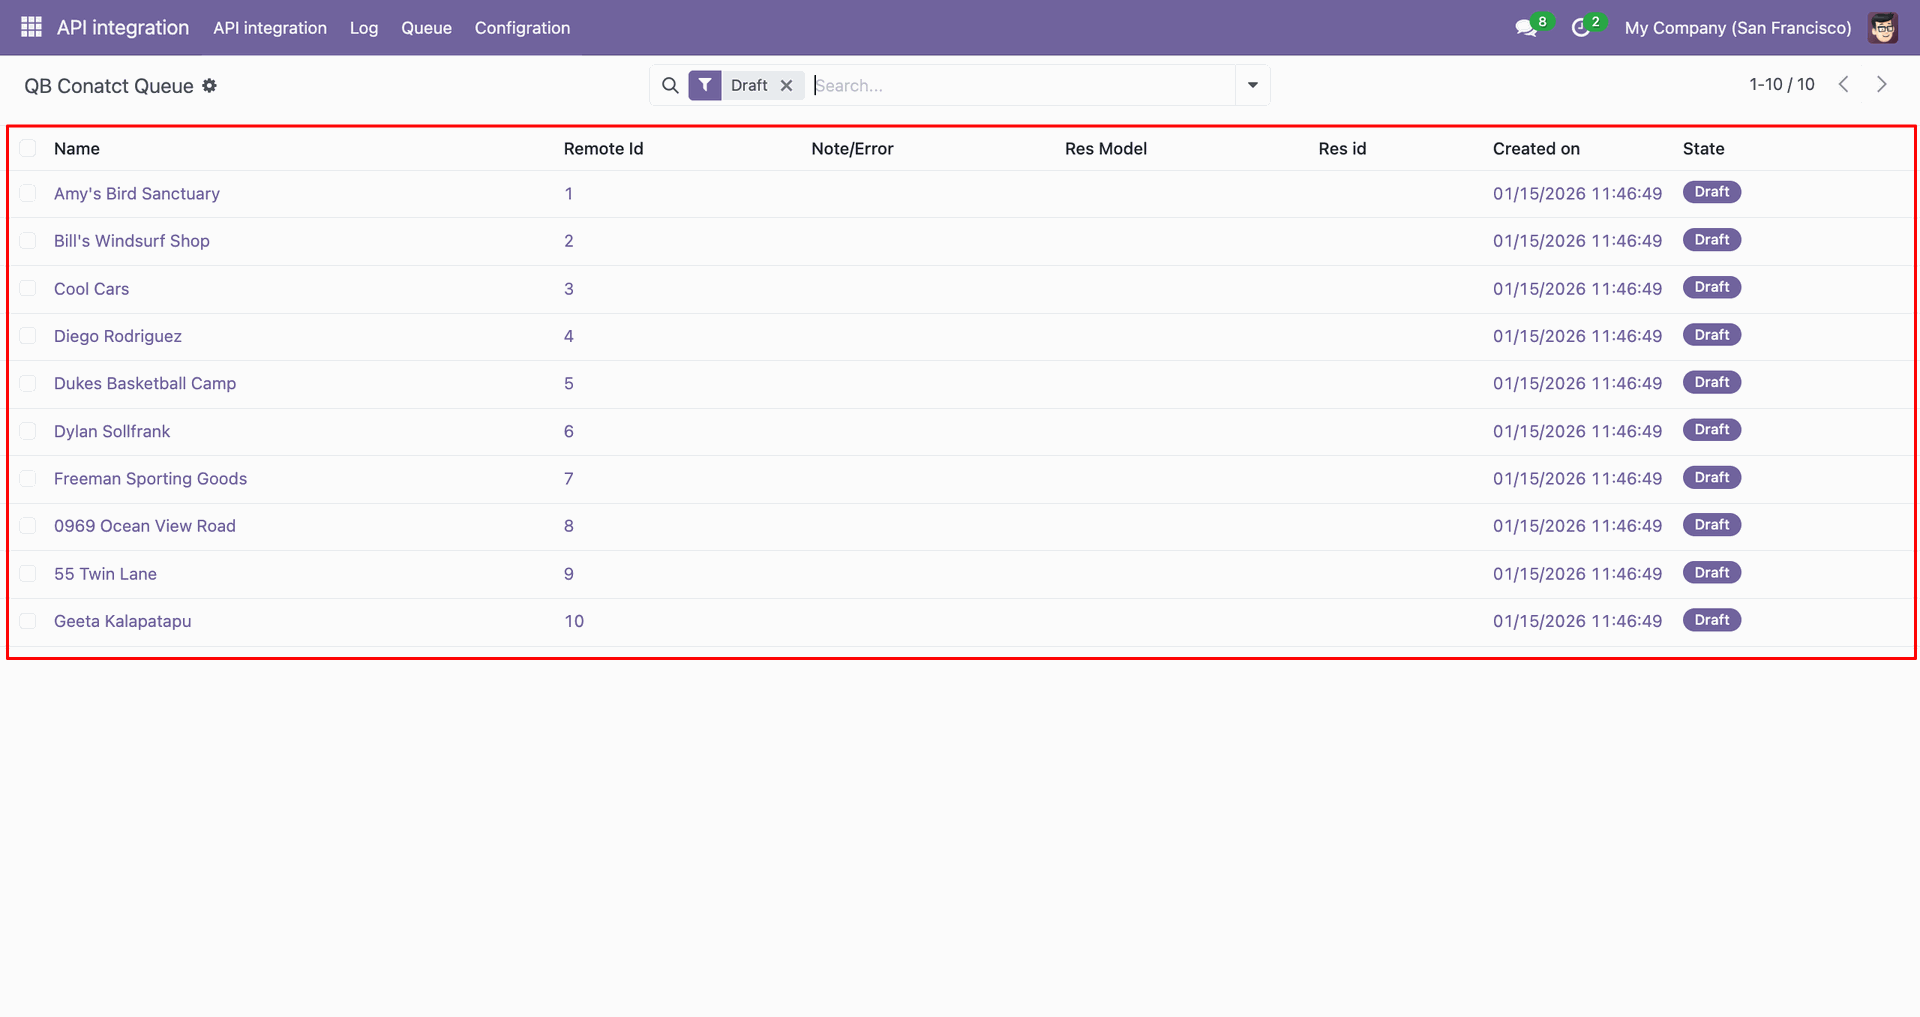
You can import from the queue.
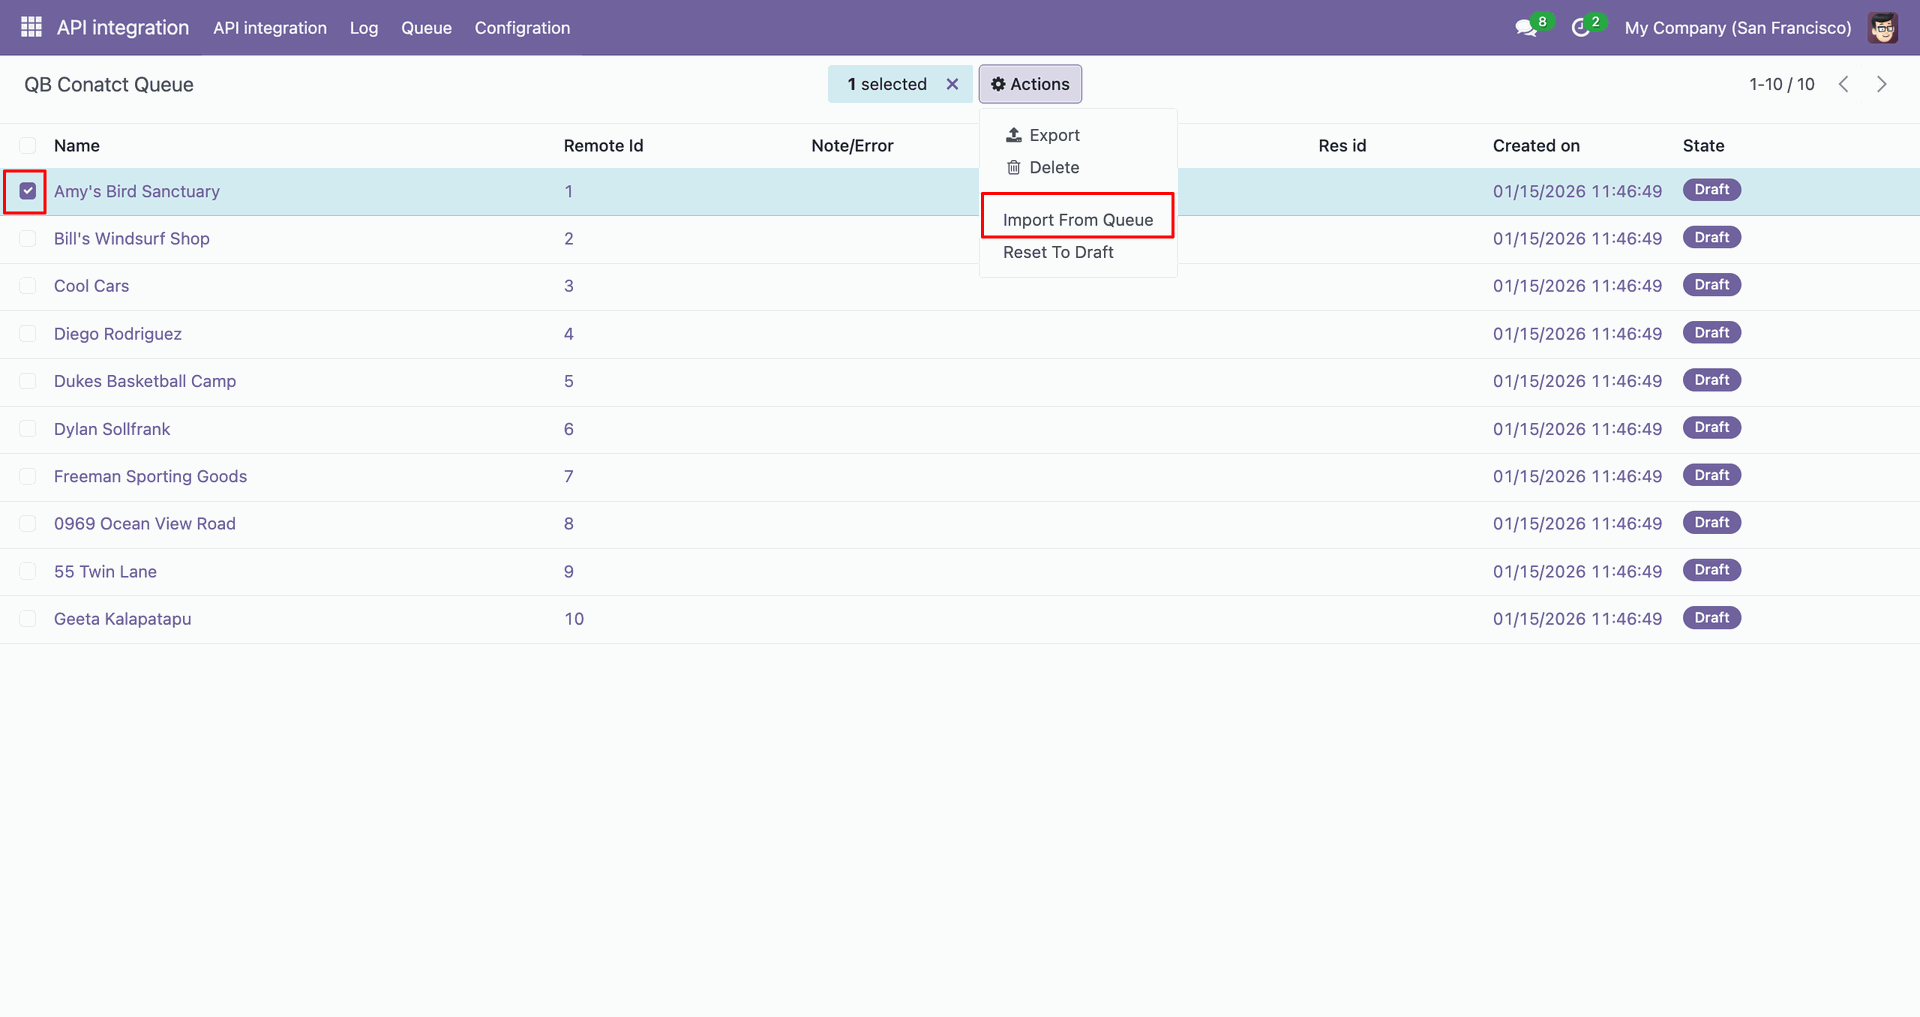
Log with details.
Group by with 'Status'.
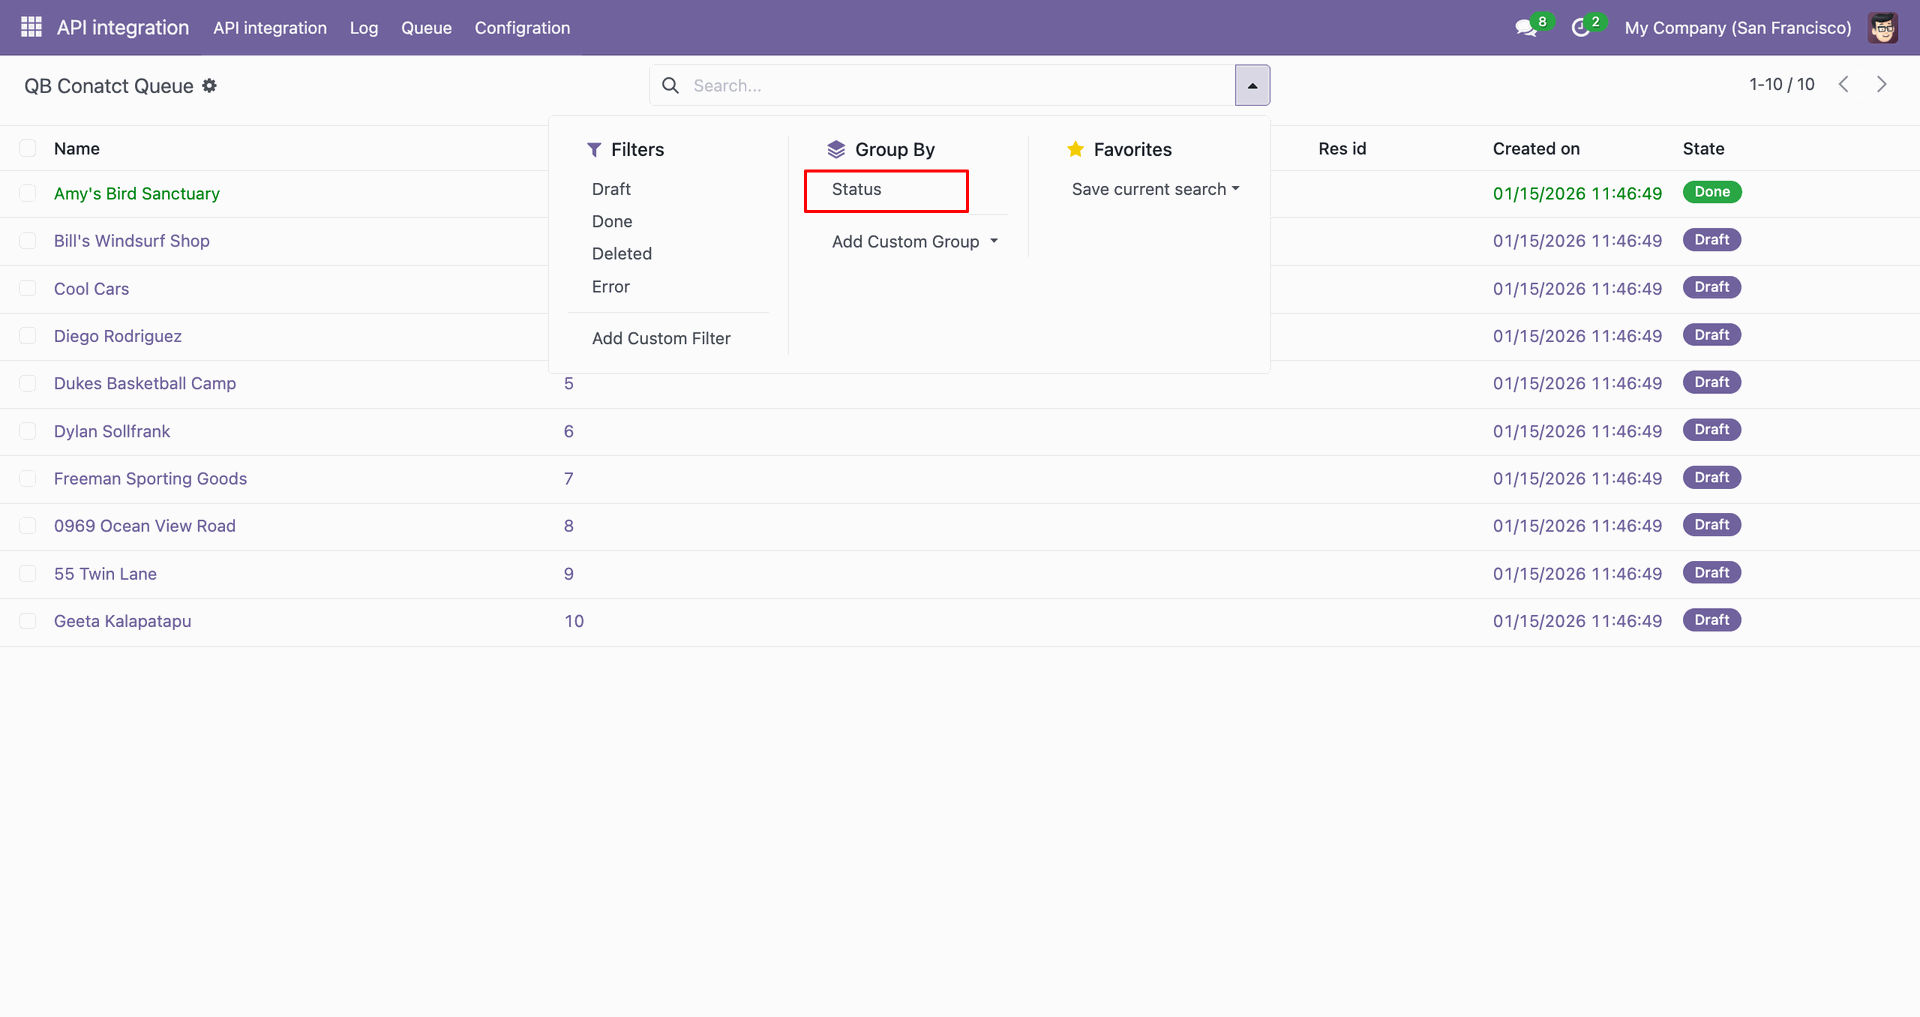
Group by result.
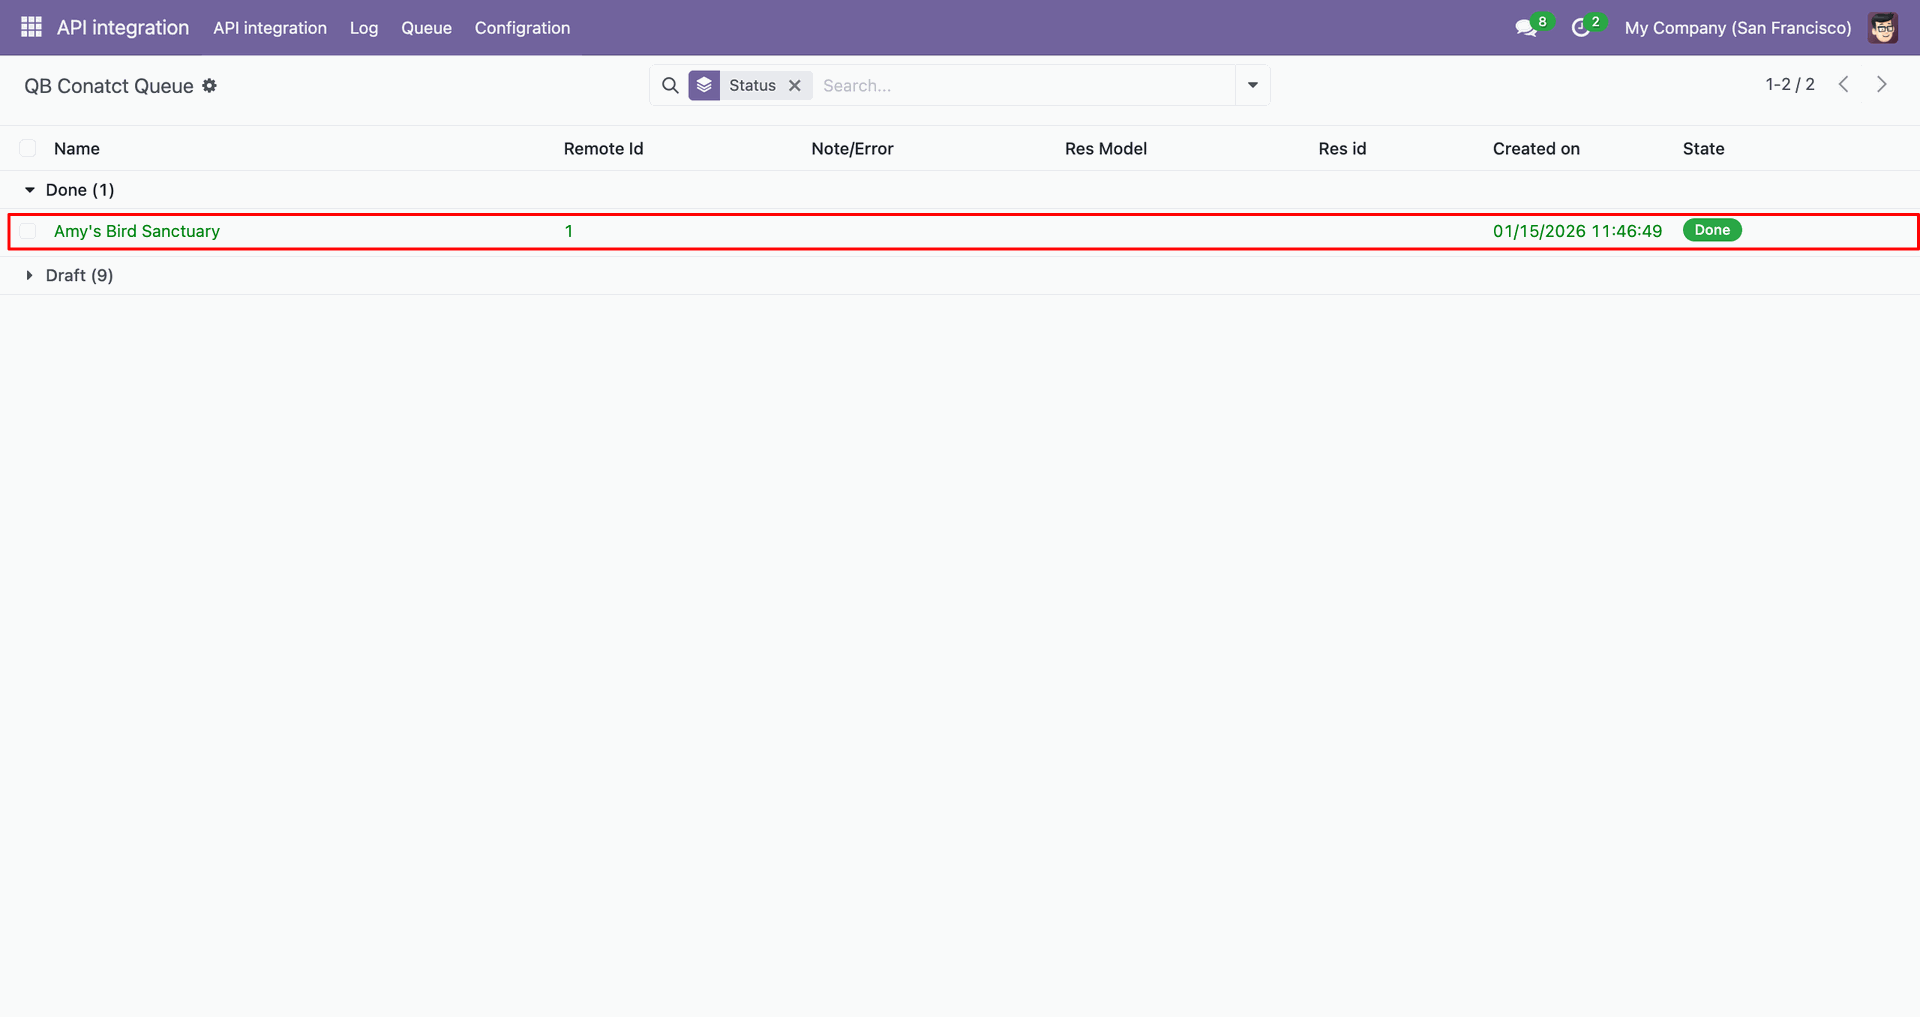
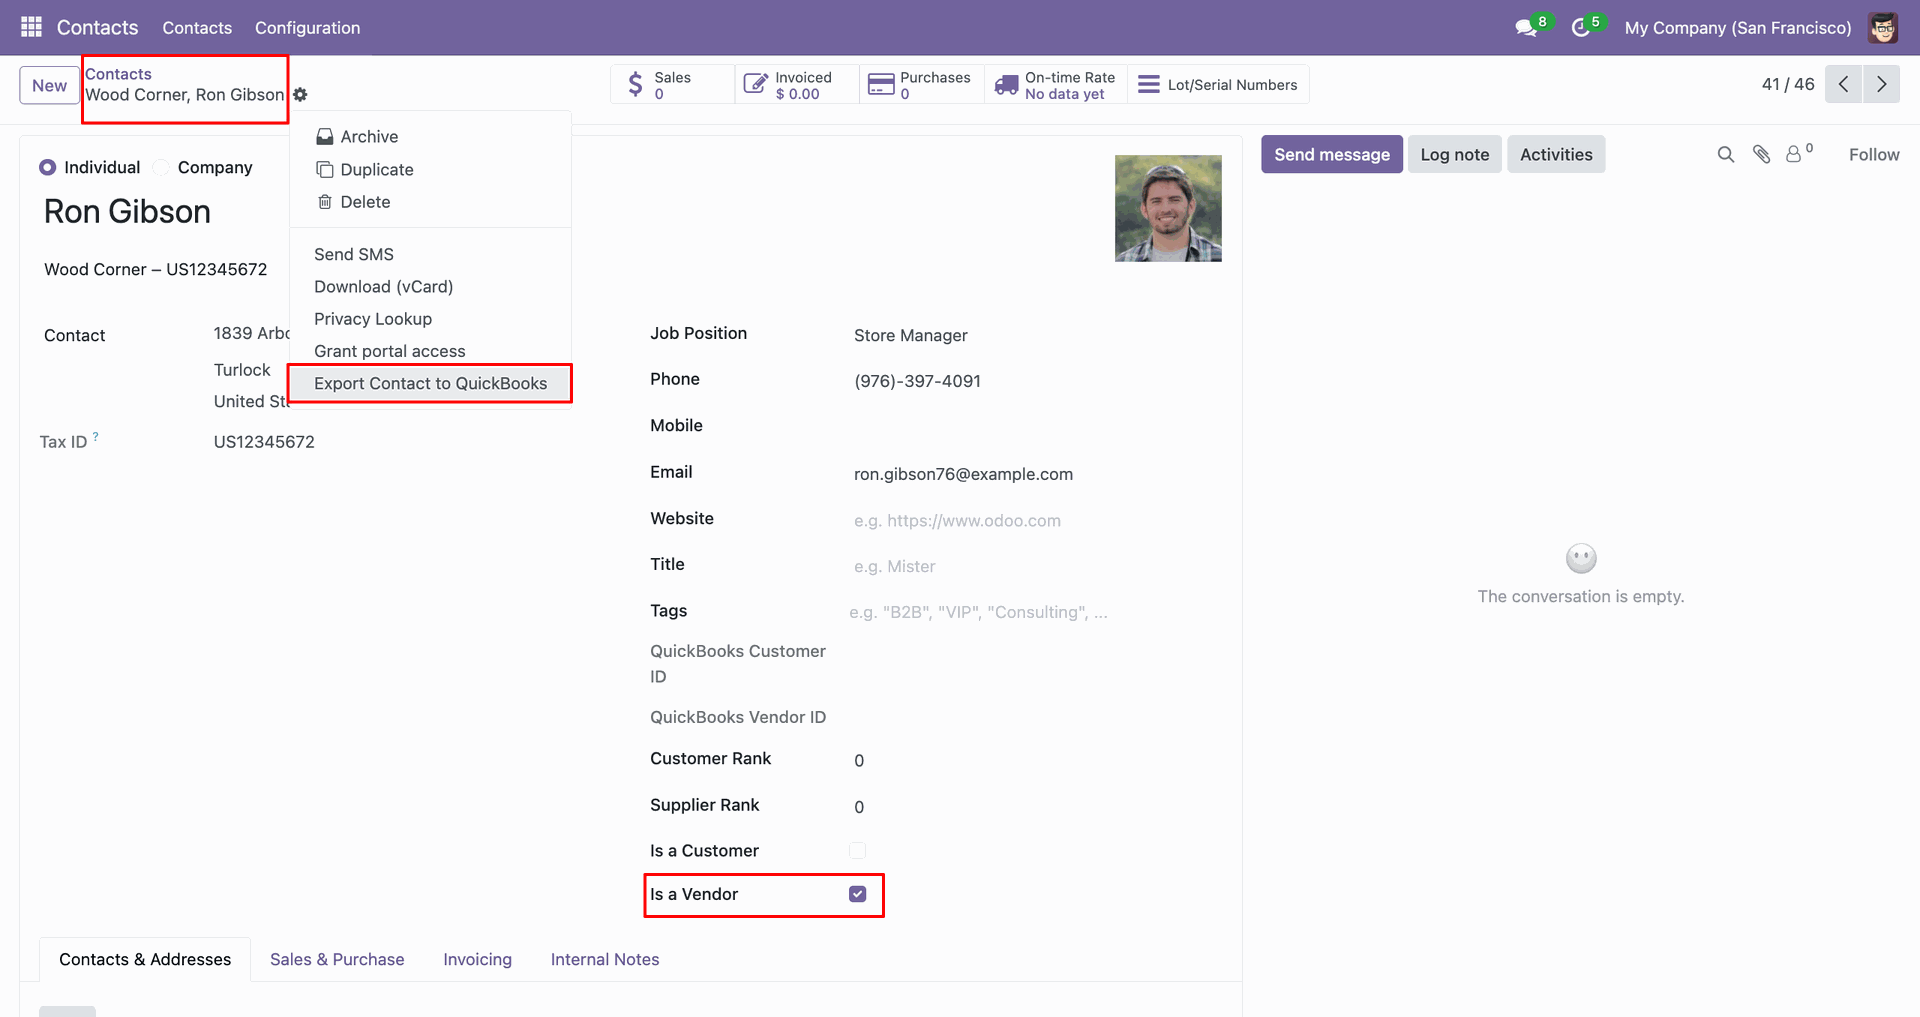
Go to the 'Contacts', Enable 'Is a Vendor'. After that, go to the 'Action', click 'Export Contact to QuickBooks'.
Config selection popup.
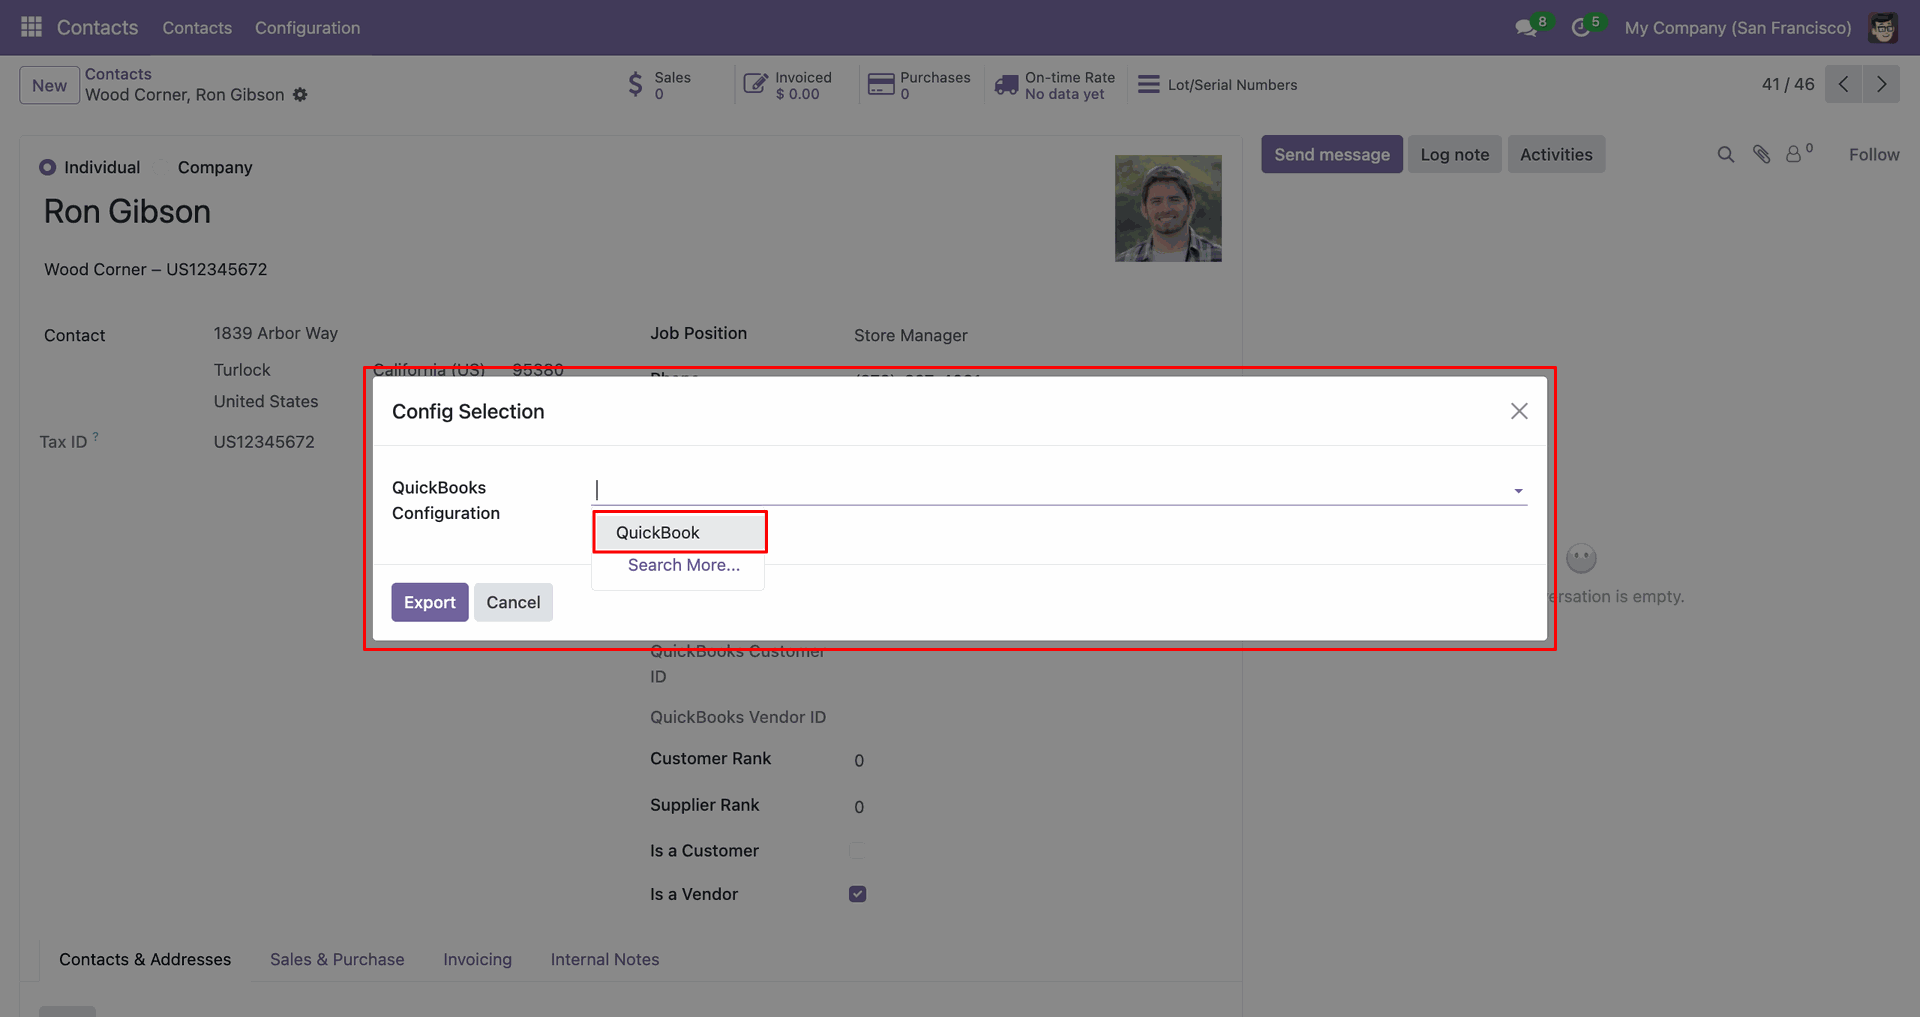
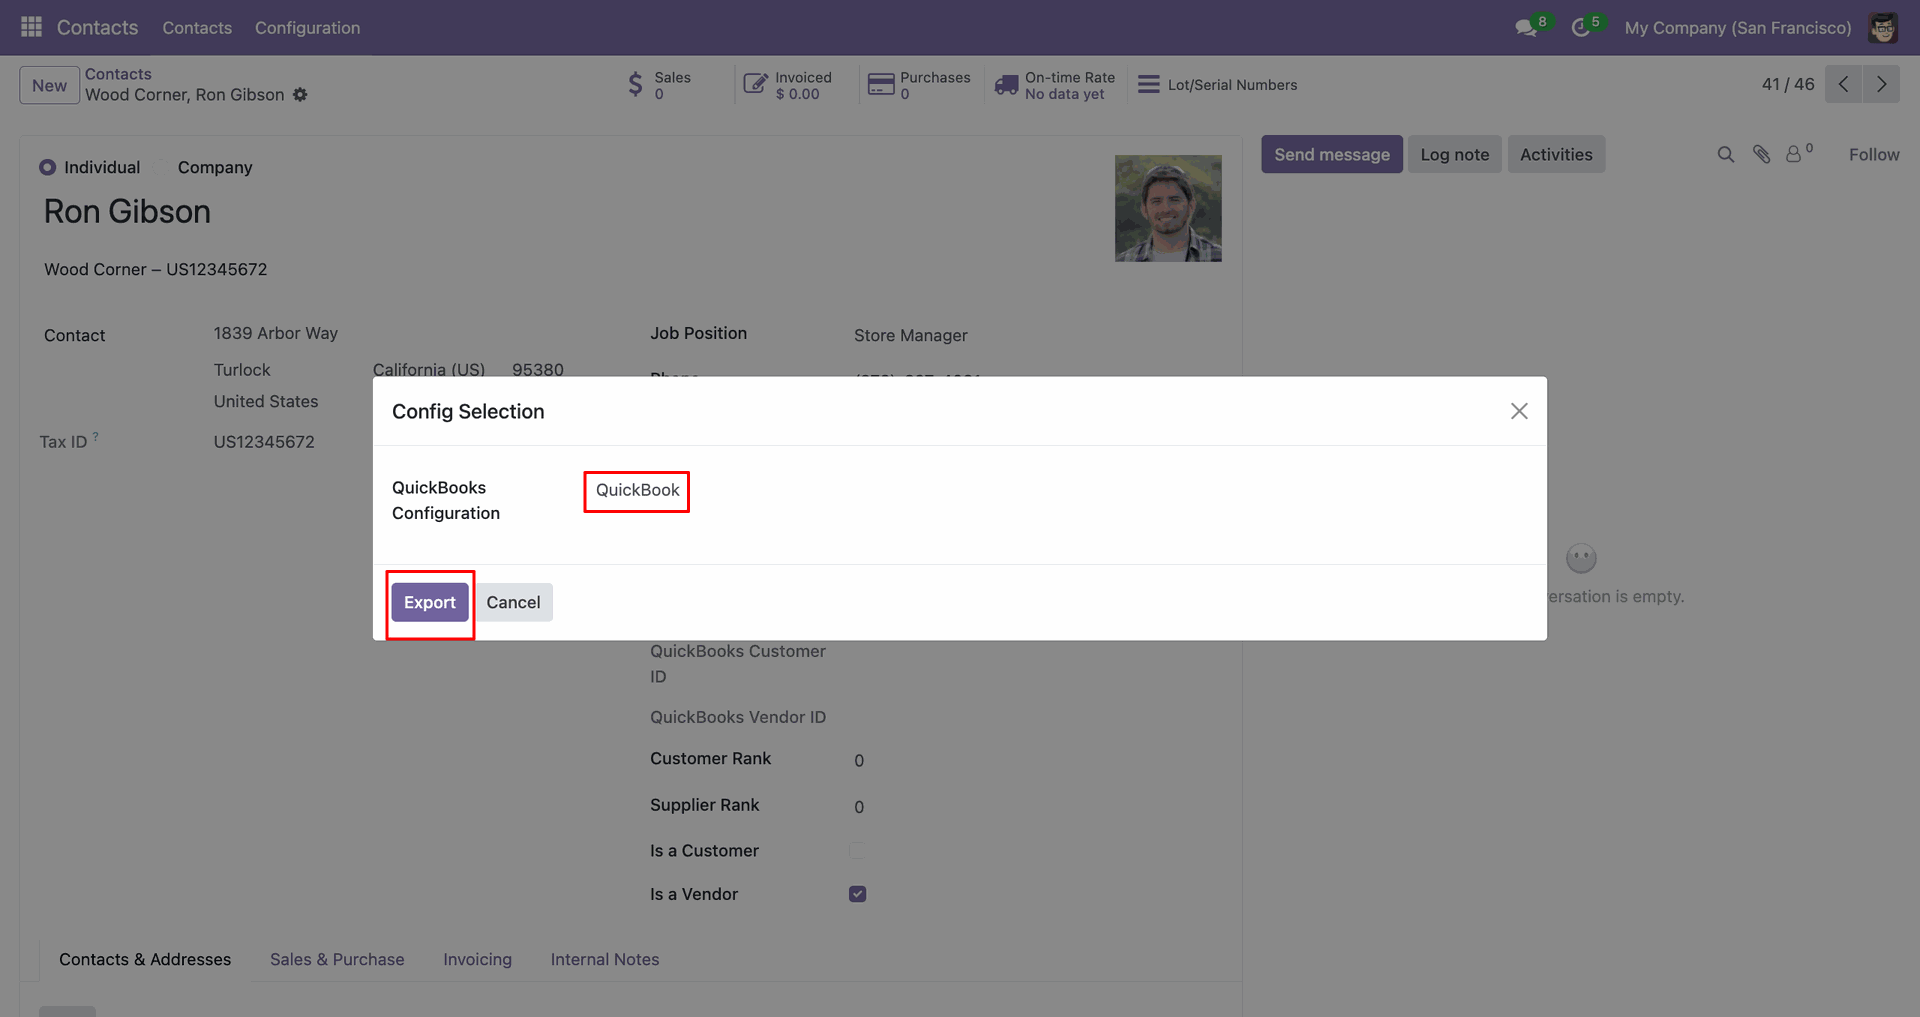
Select 'QuickBooks' and click 'Export'.
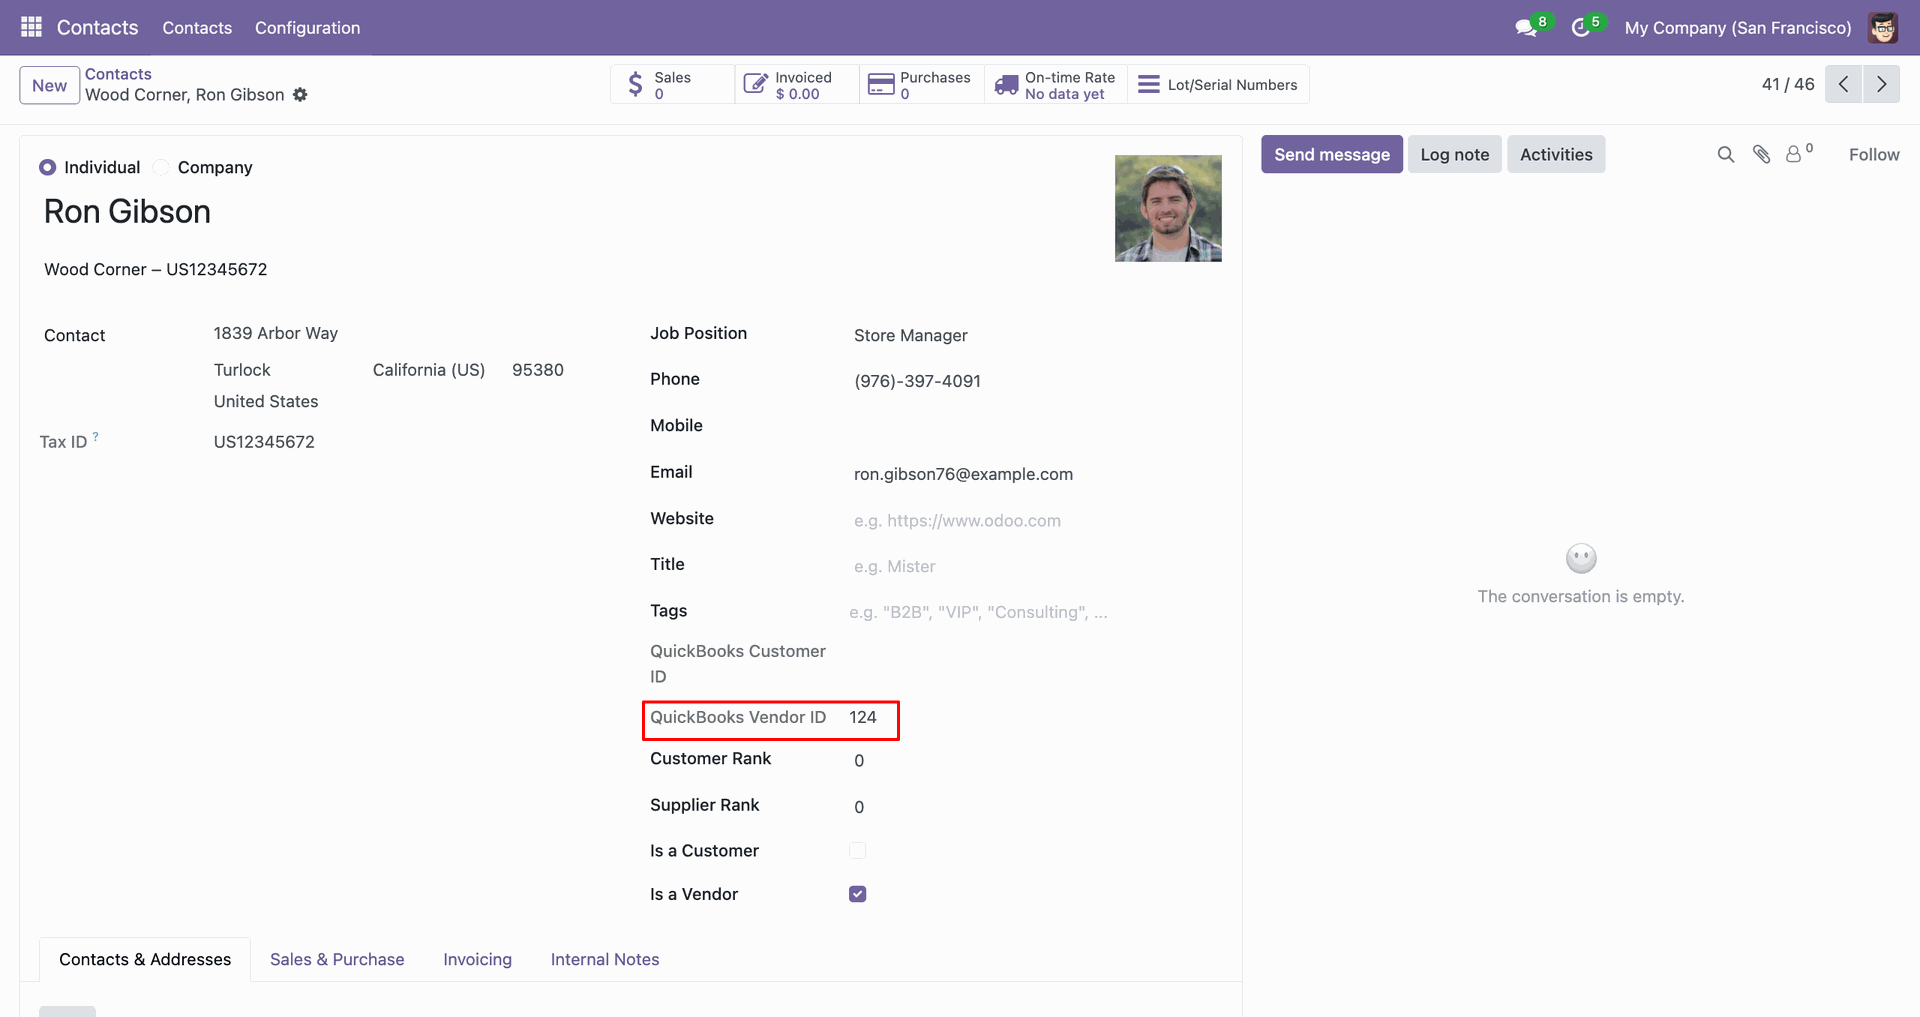
The form view contains Quickbook vendor ID.
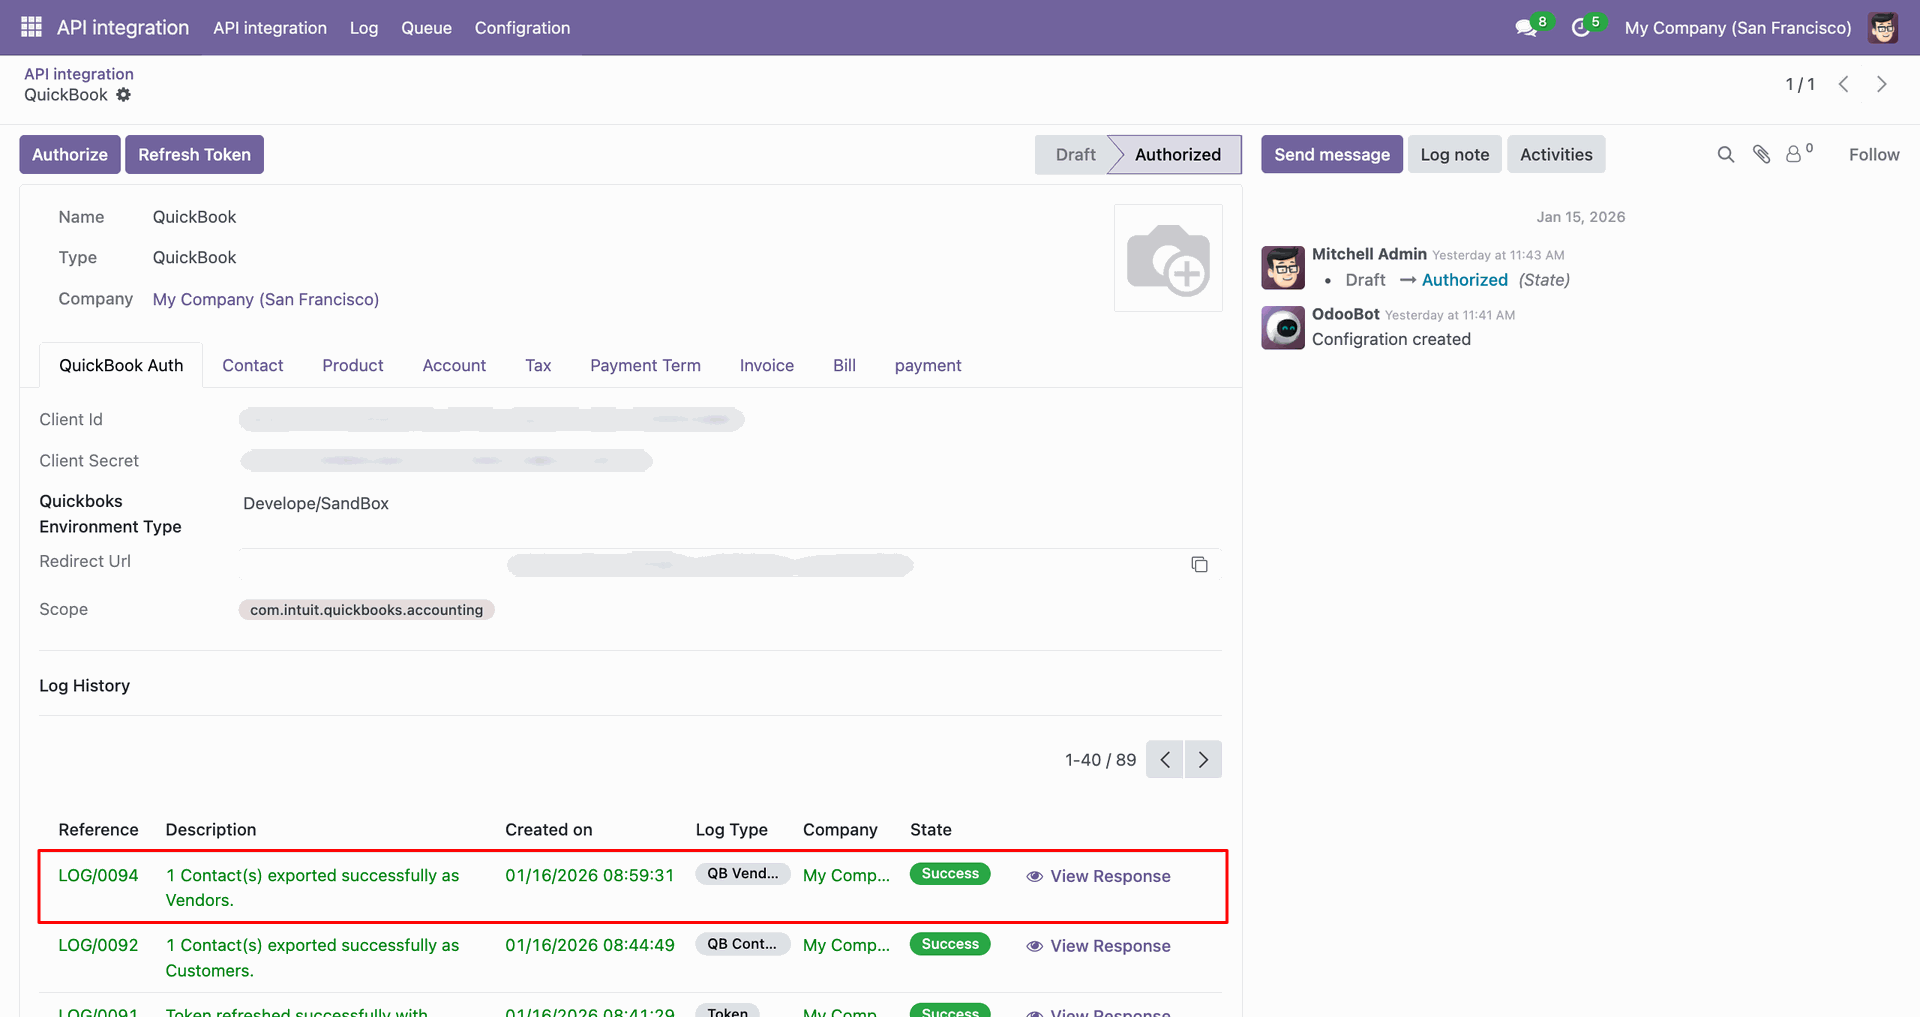
Log with details.
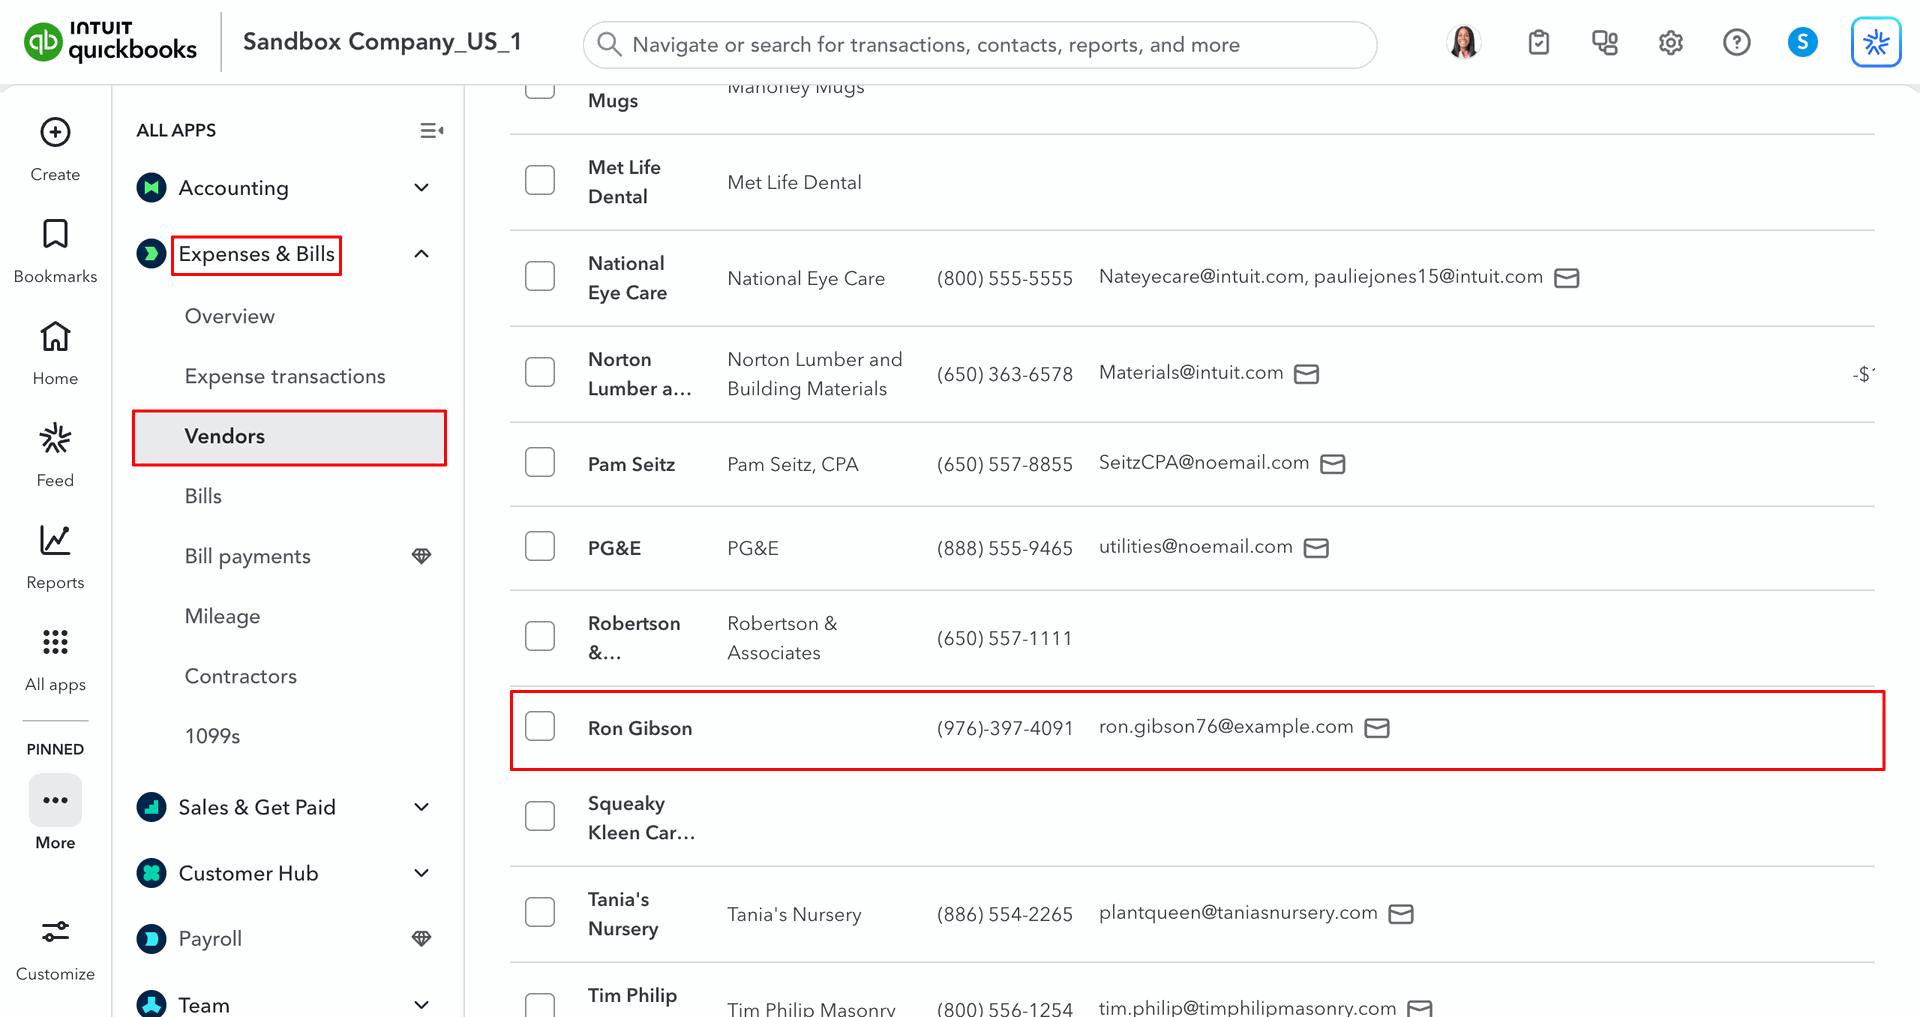
Vendors in QuickBooks.
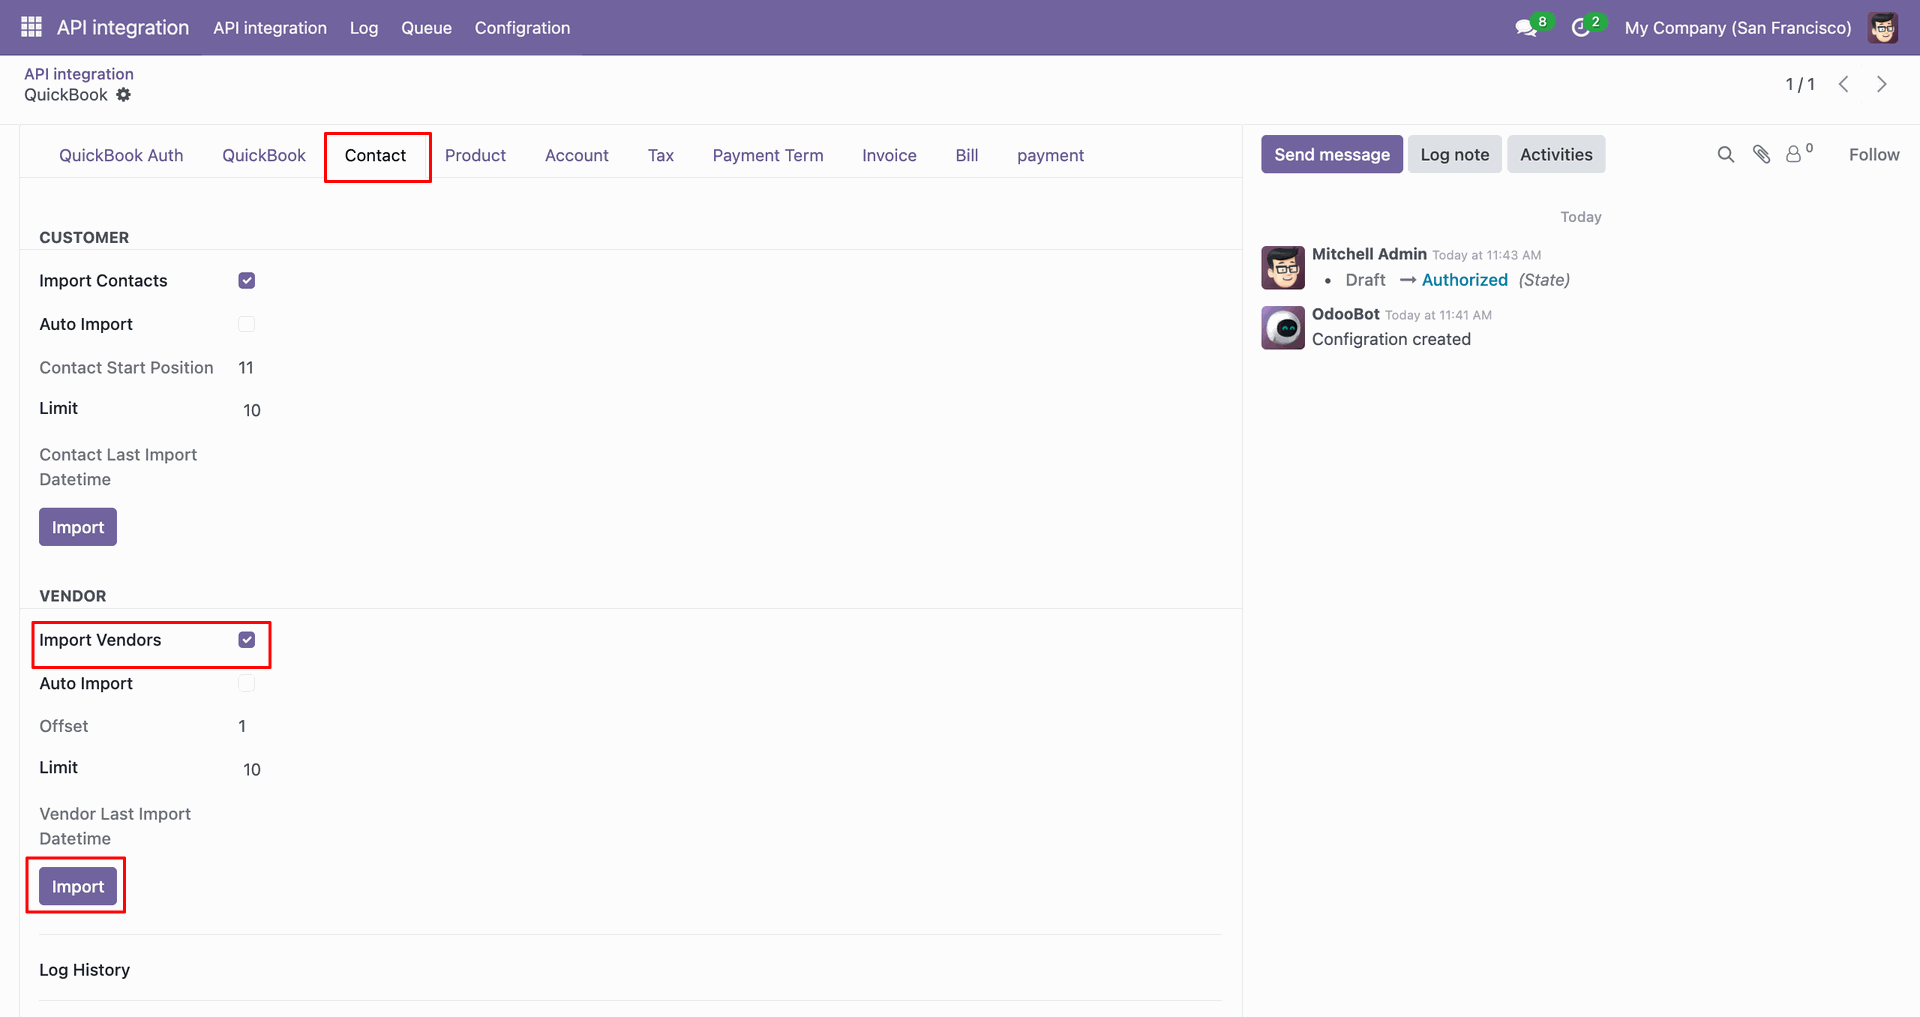
For the import, go to the 'Contact' Tab, enable 'Import Vendors', and click 'Import'.
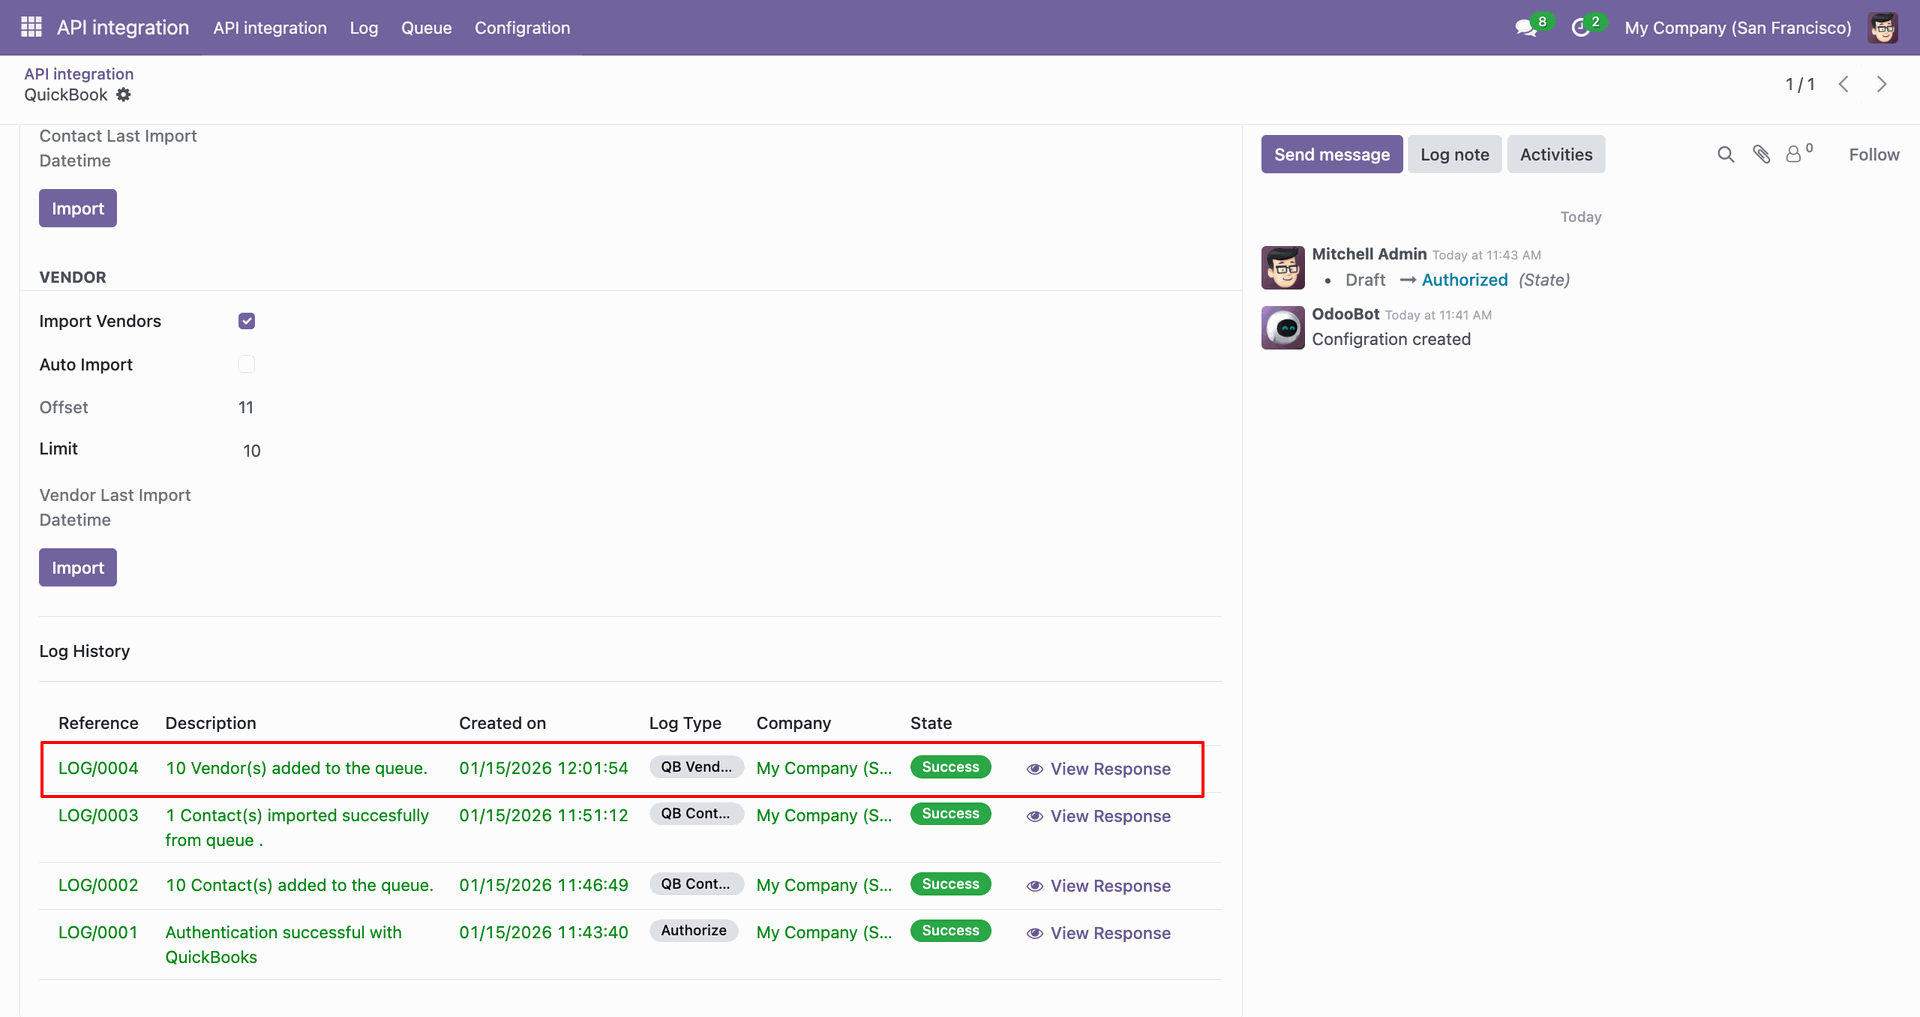
Log with imported data.
Go to the Queue, 'QB Vendor'.
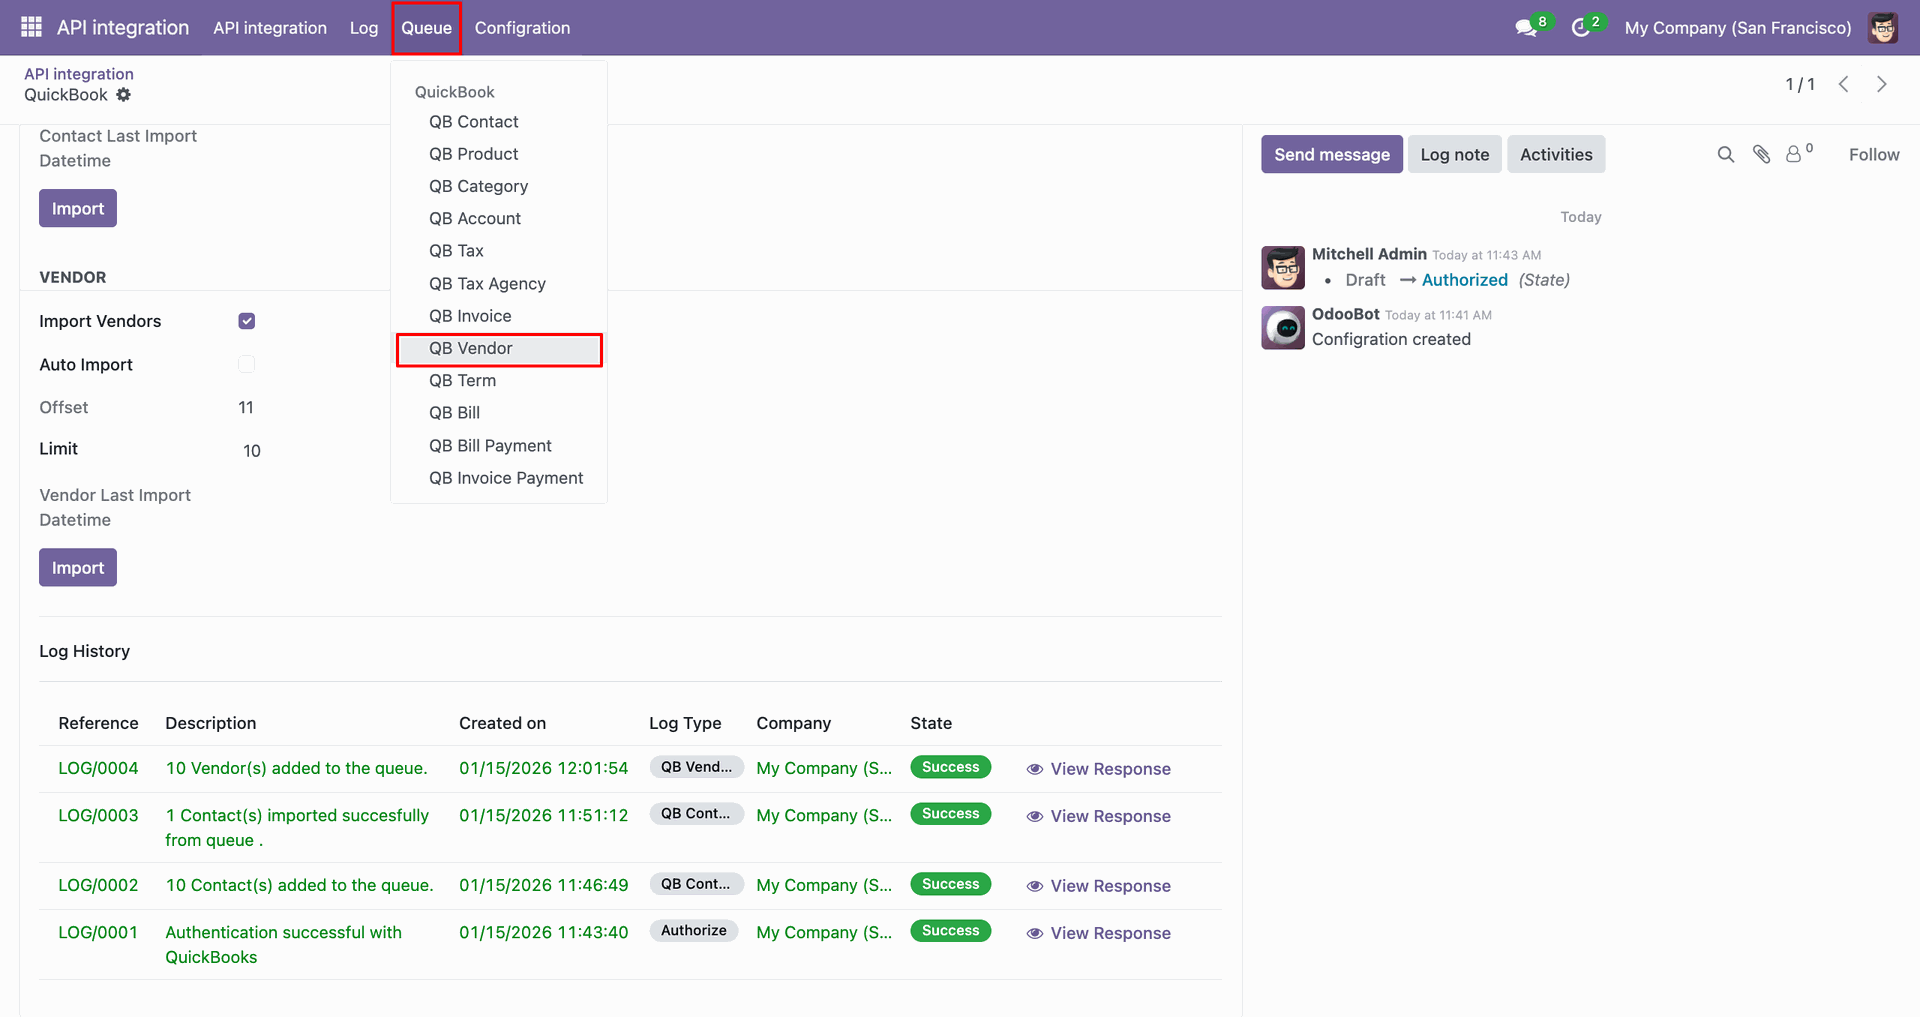
It will open the queue.
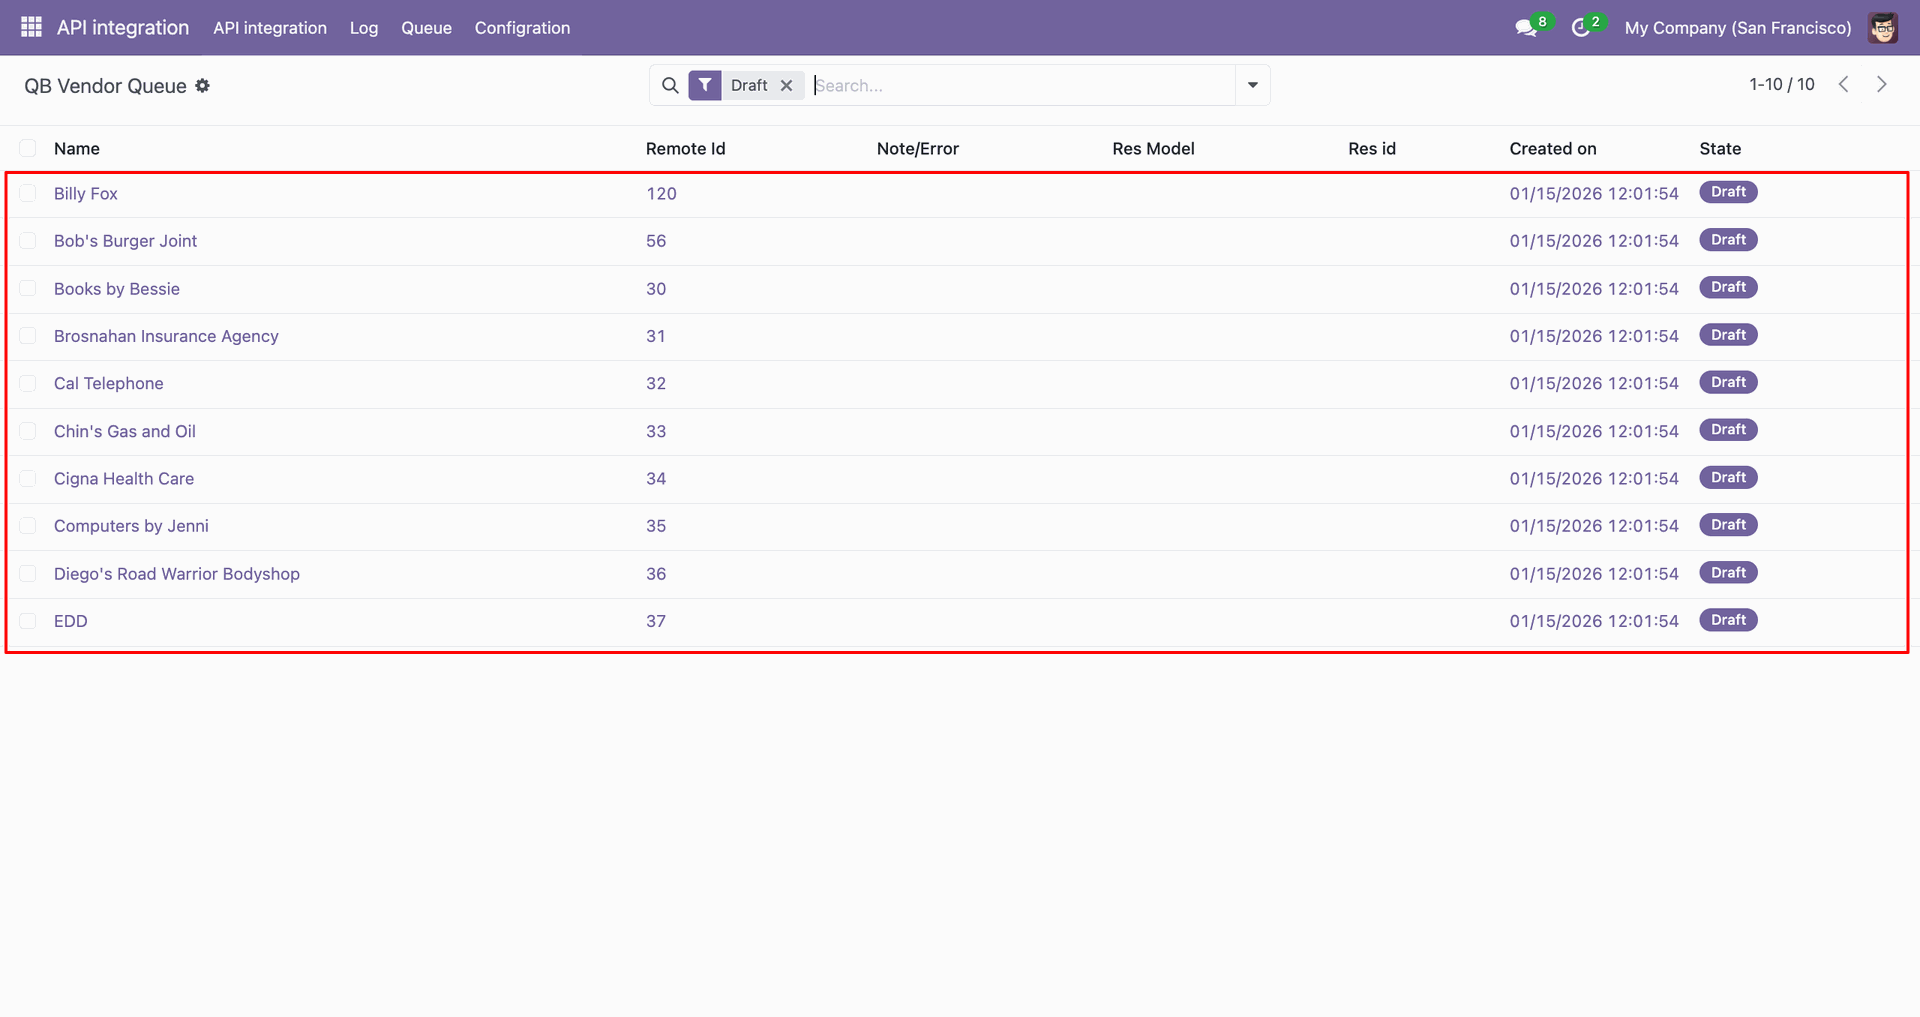
You can import from the queue.
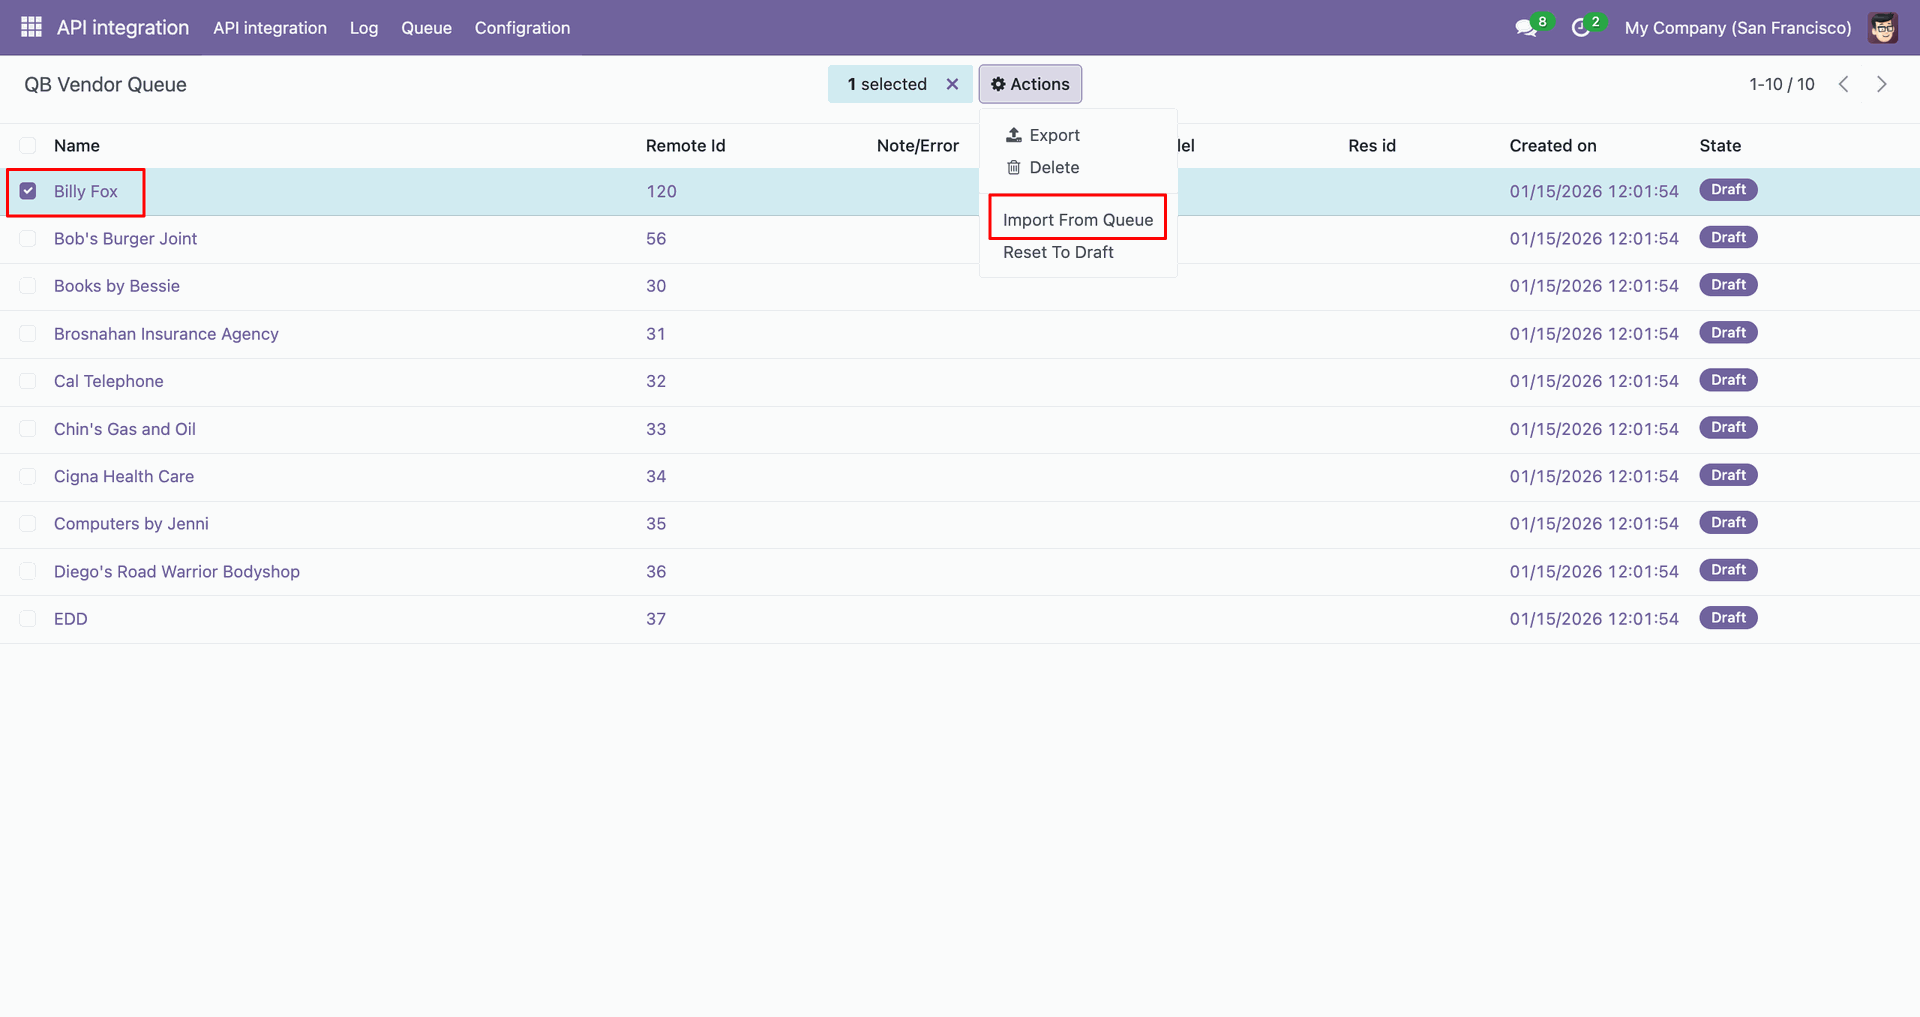
Log with details.
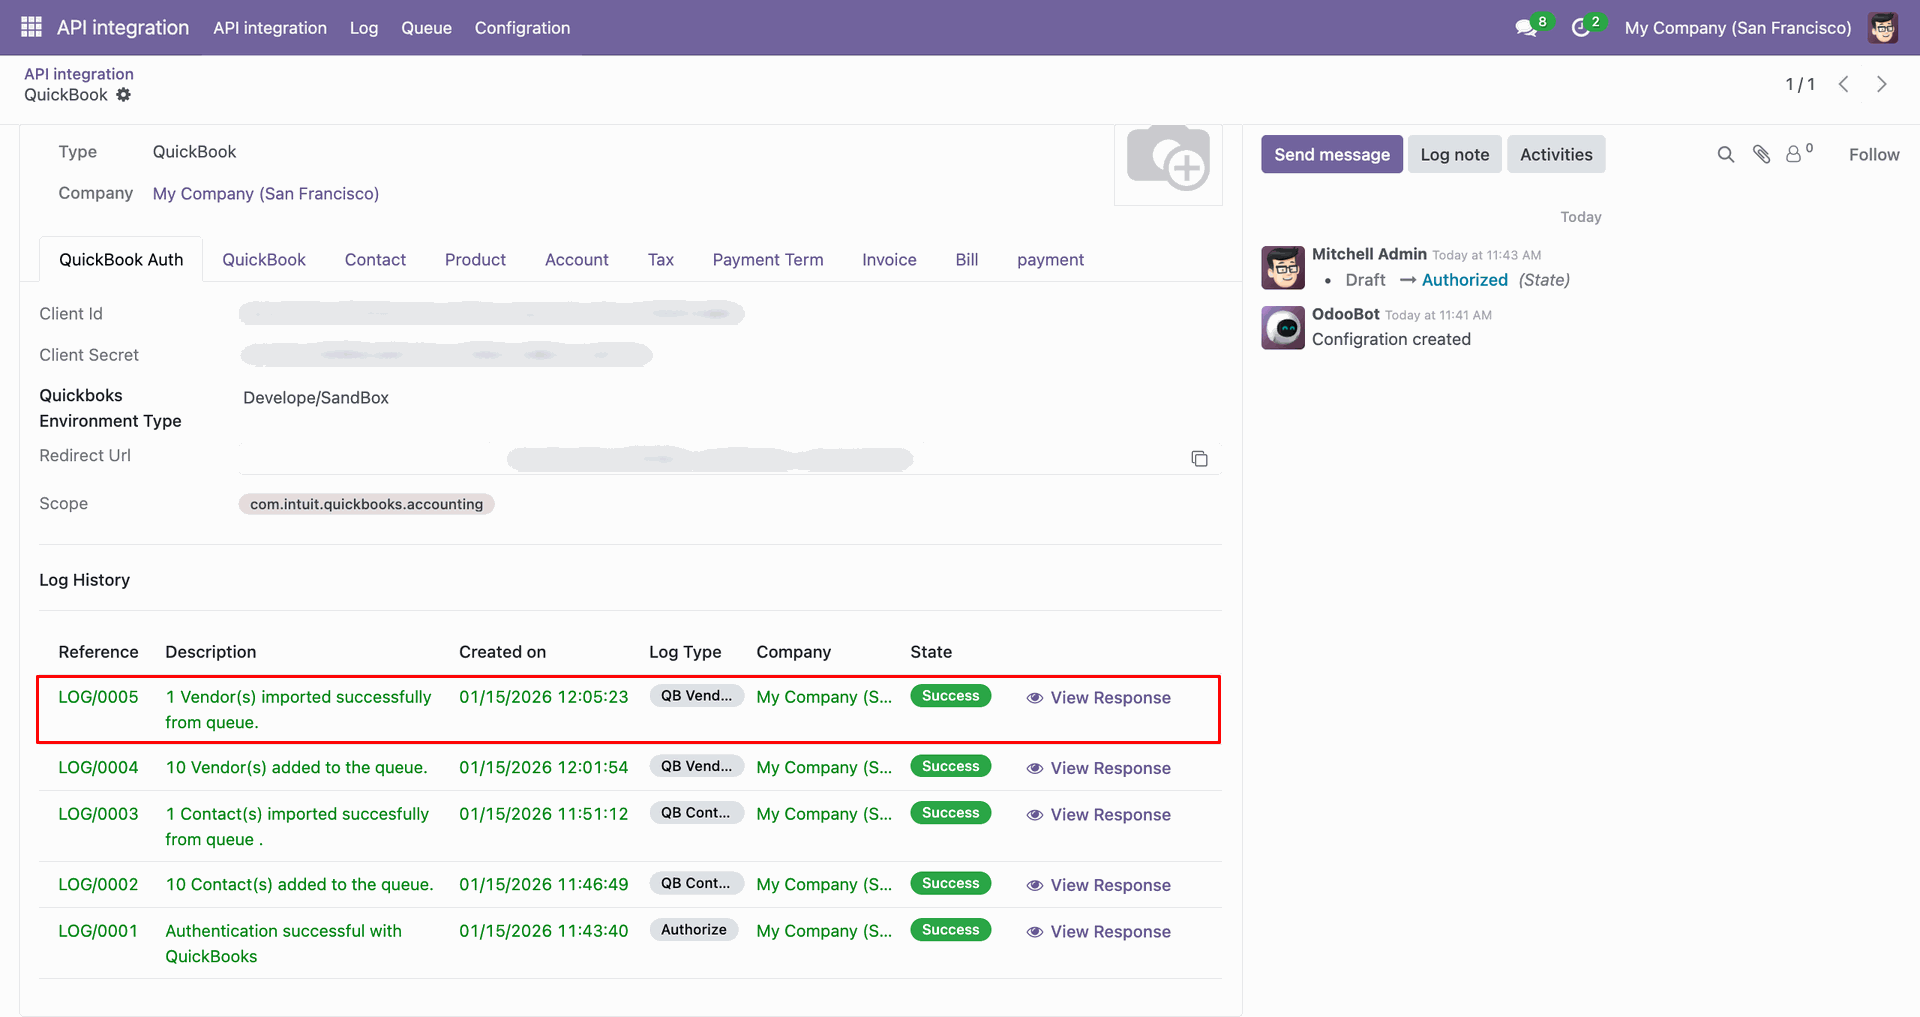
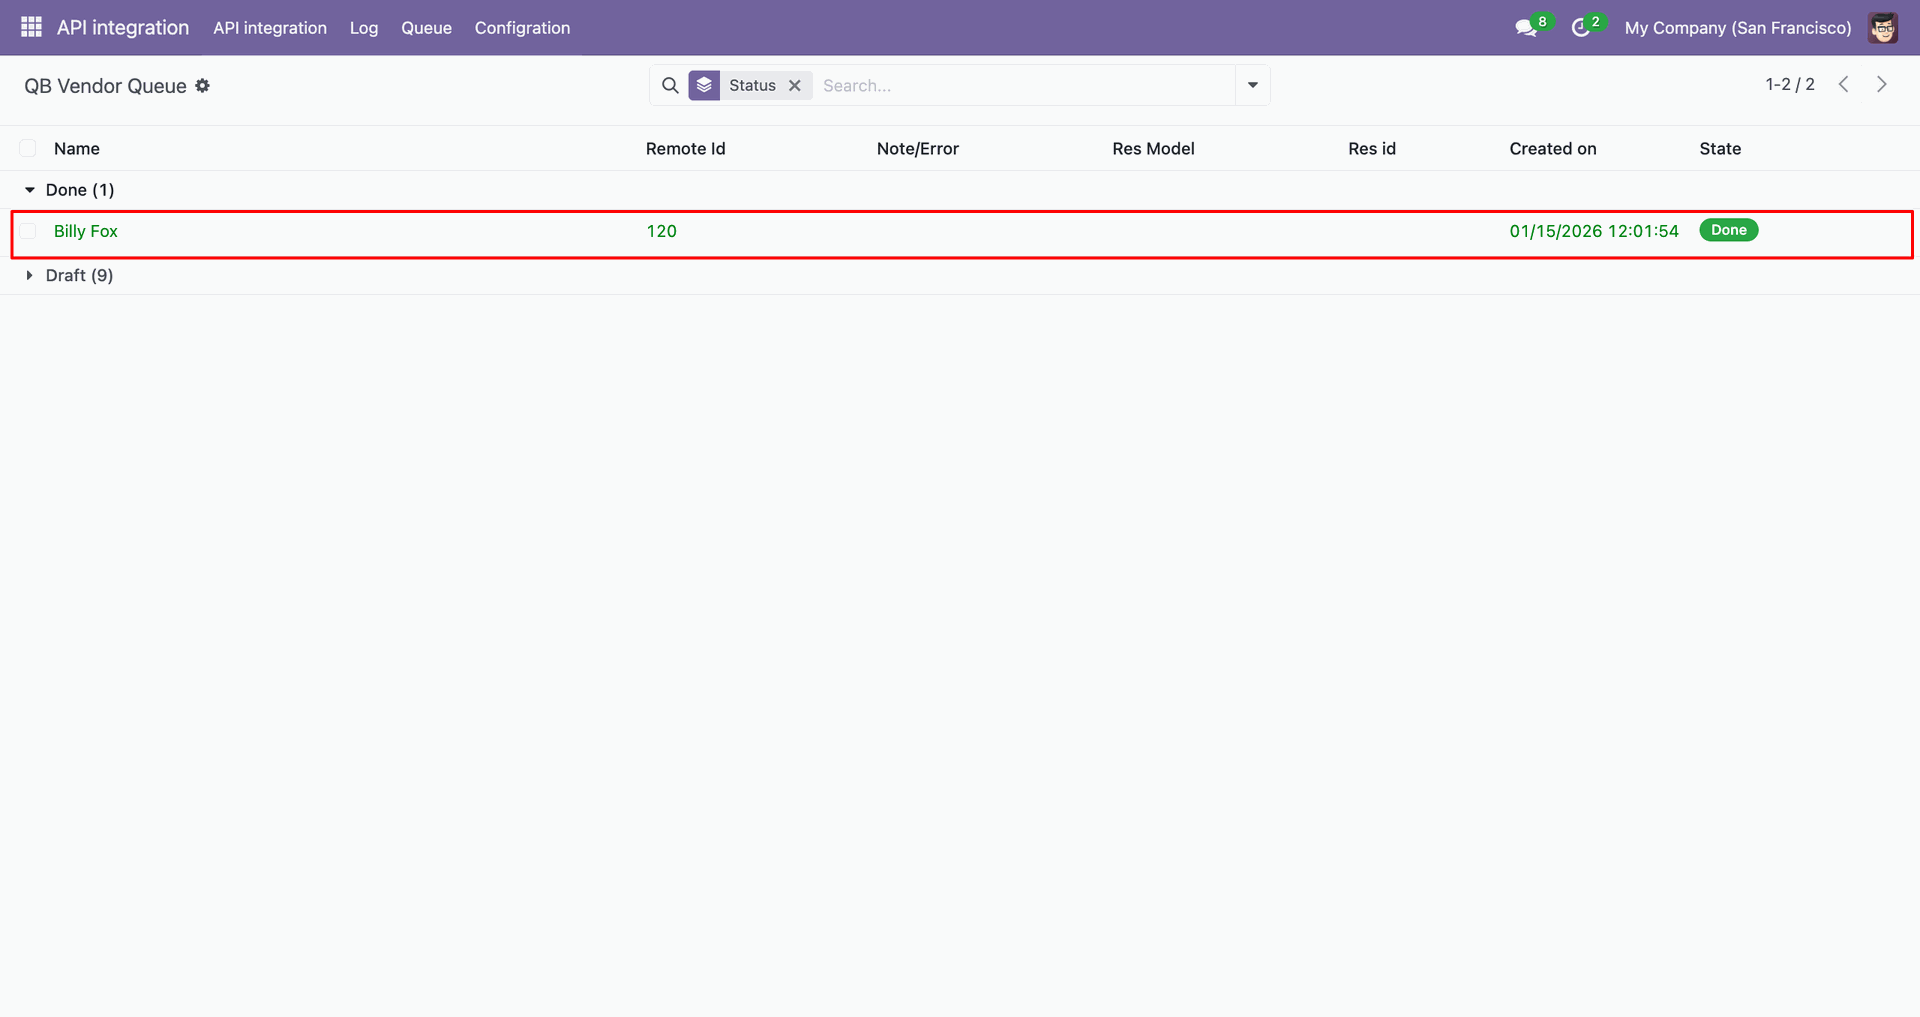
Group by with 'Status'.
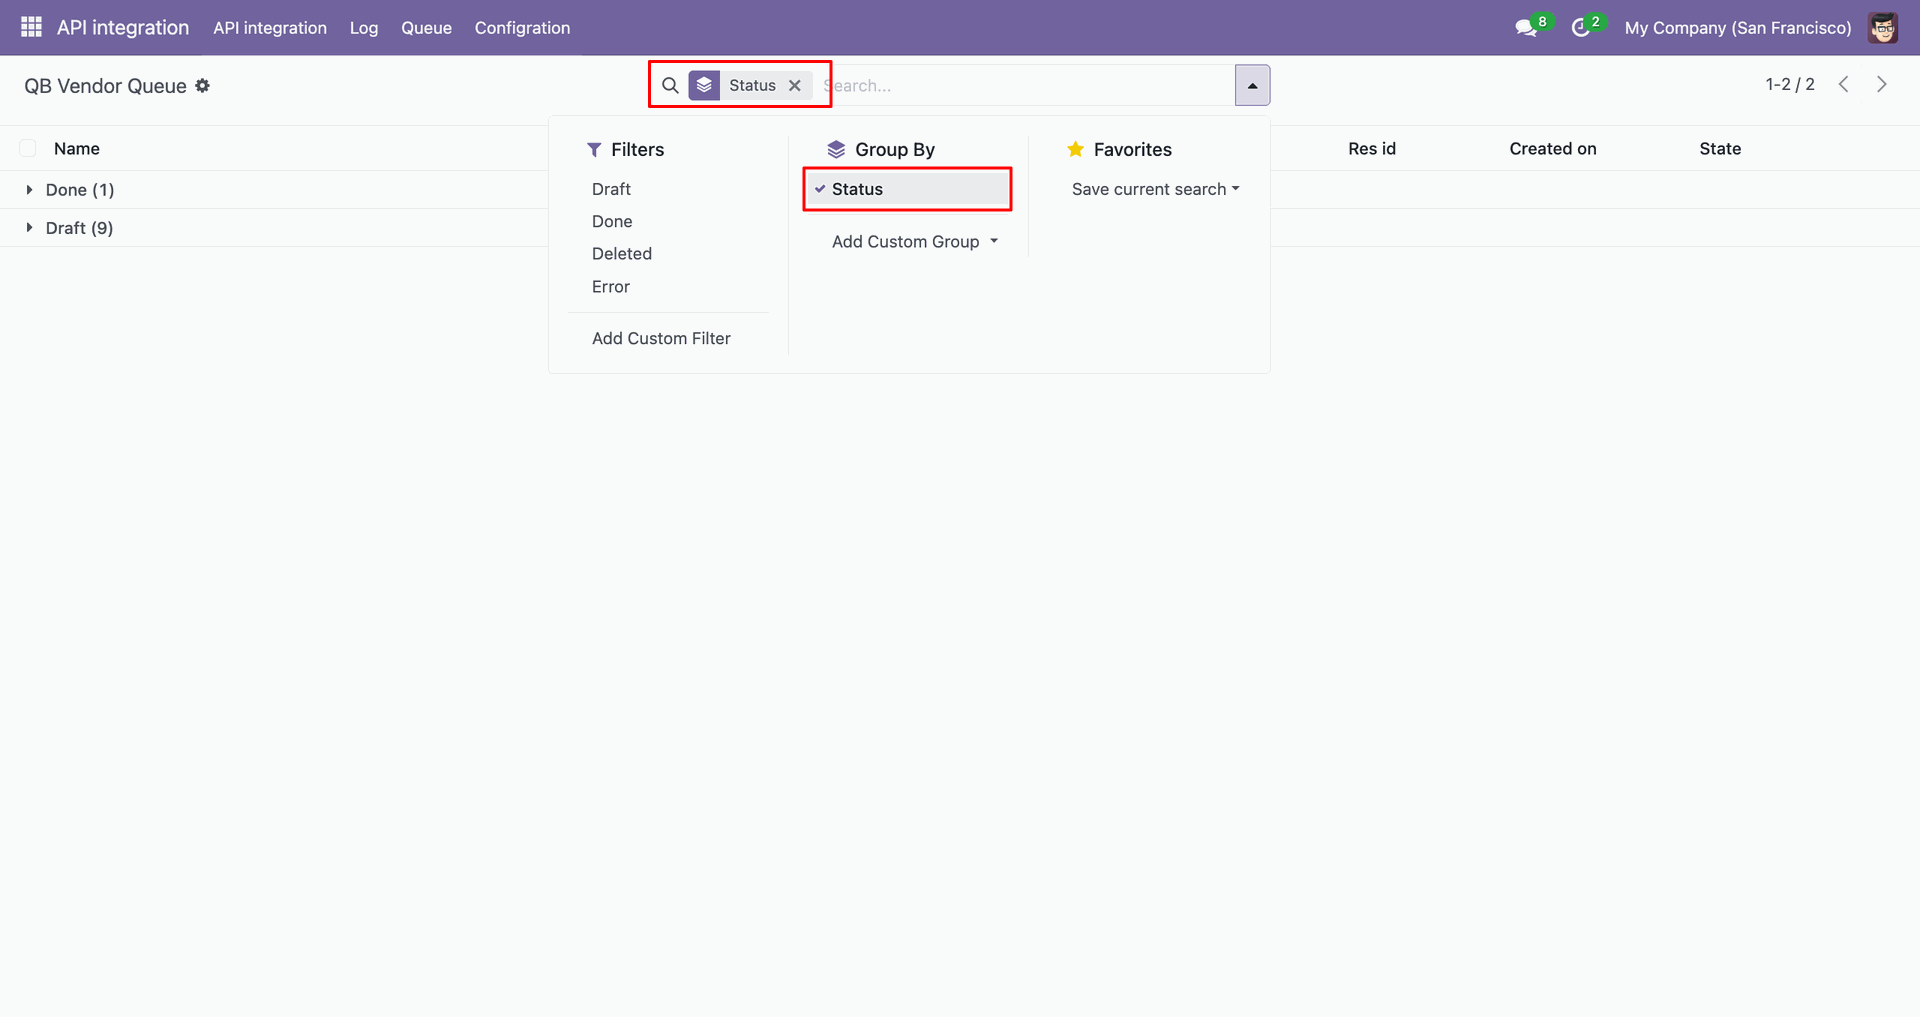
Group by result.
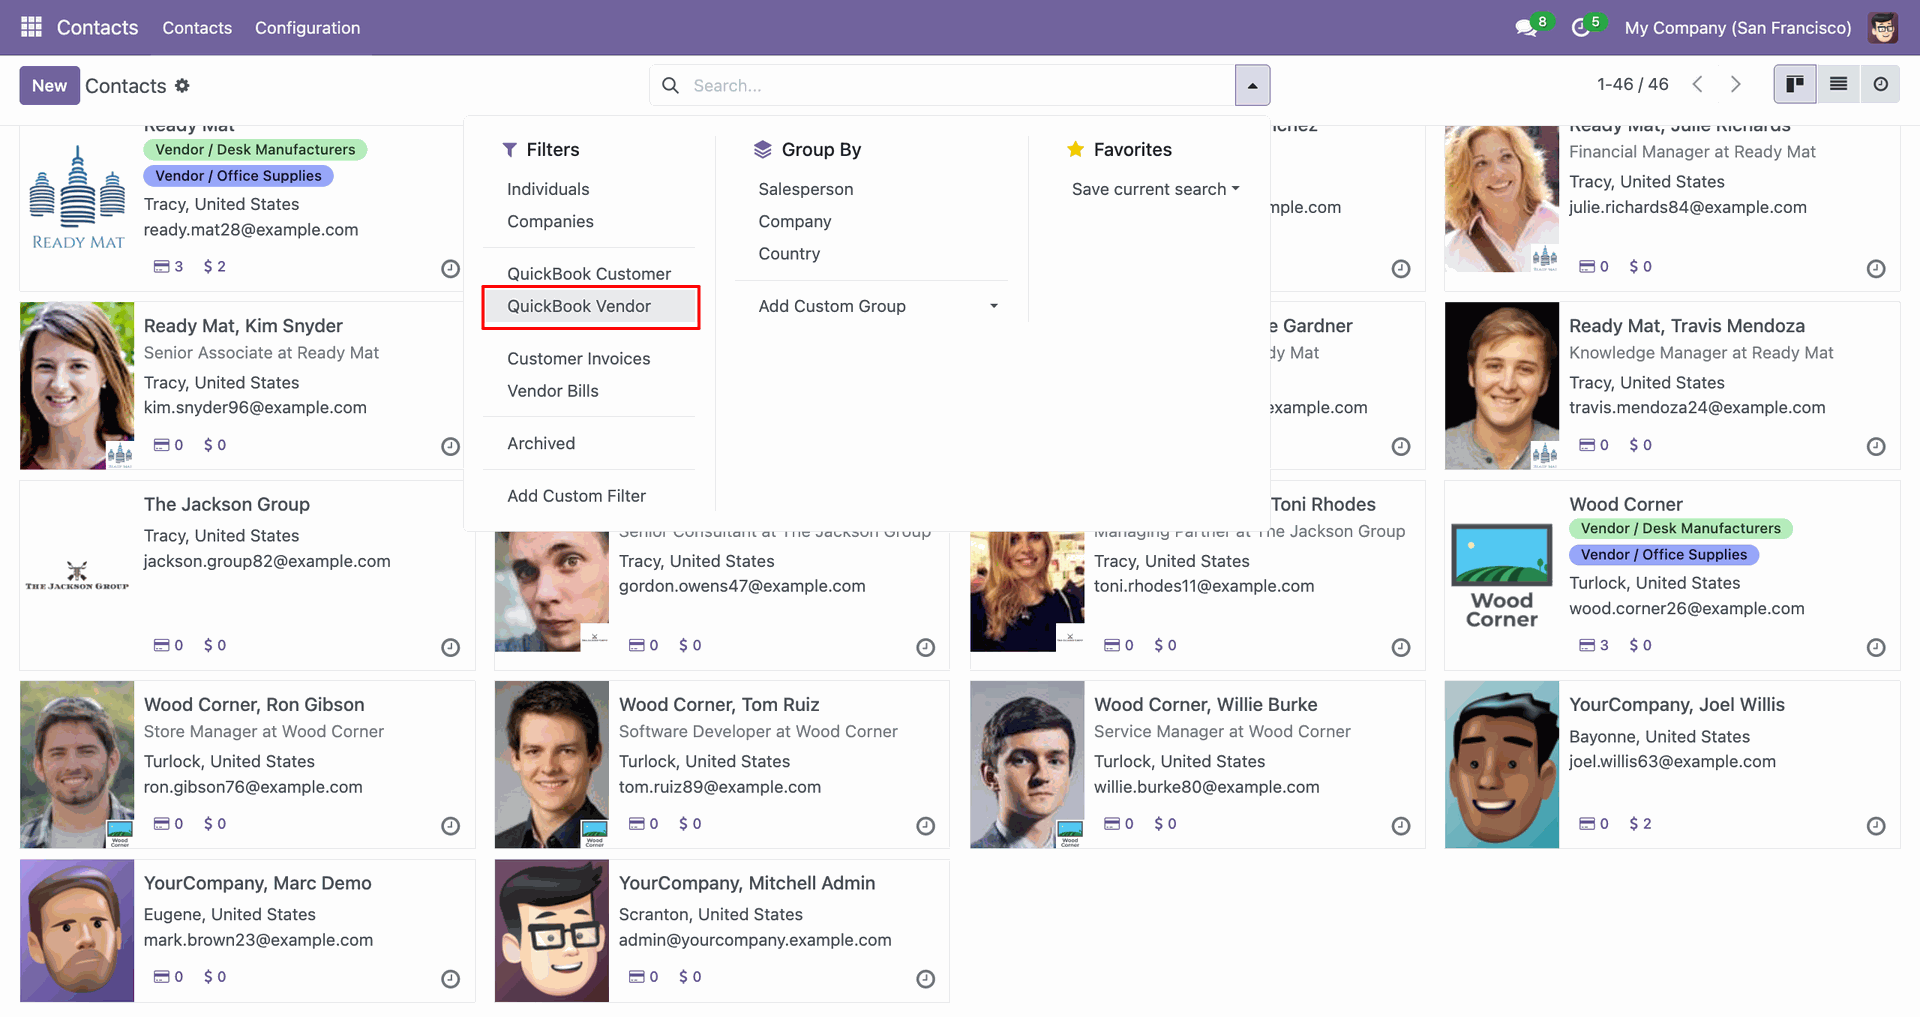
You can filter by QuickBooks Vendor.
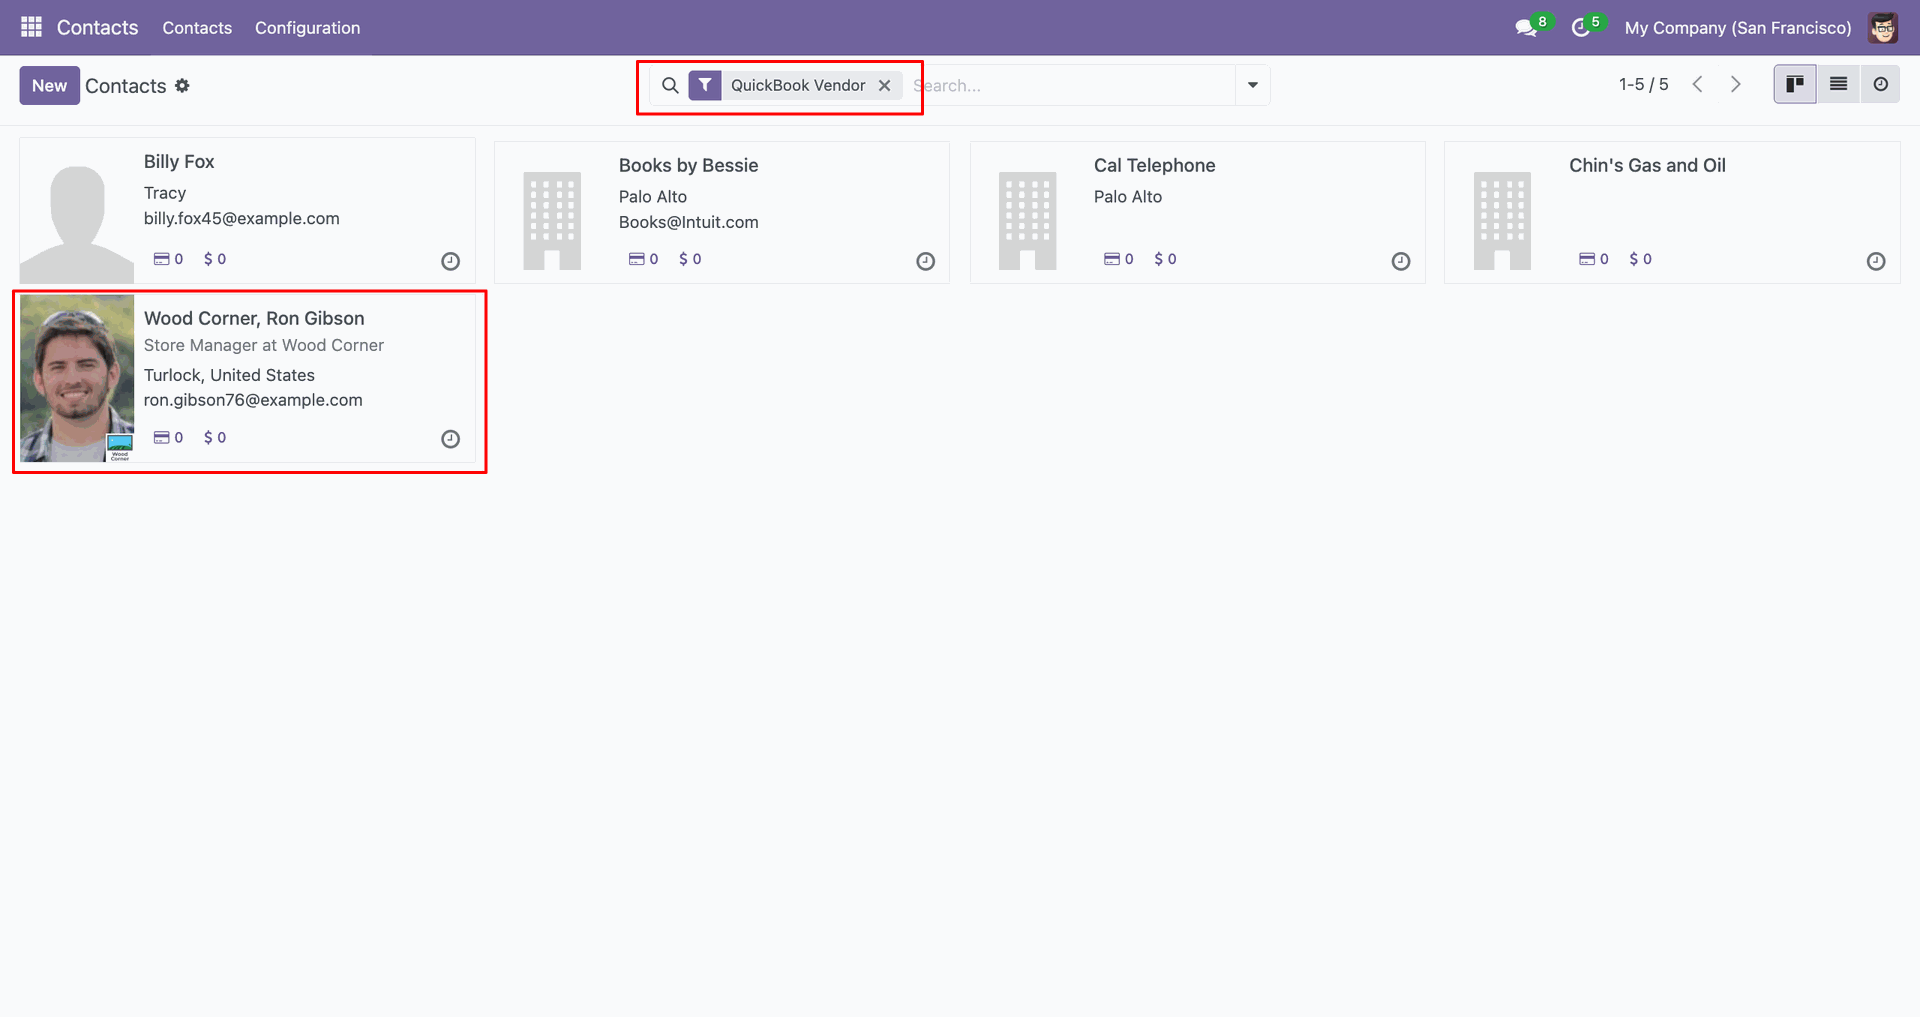
Filter result.
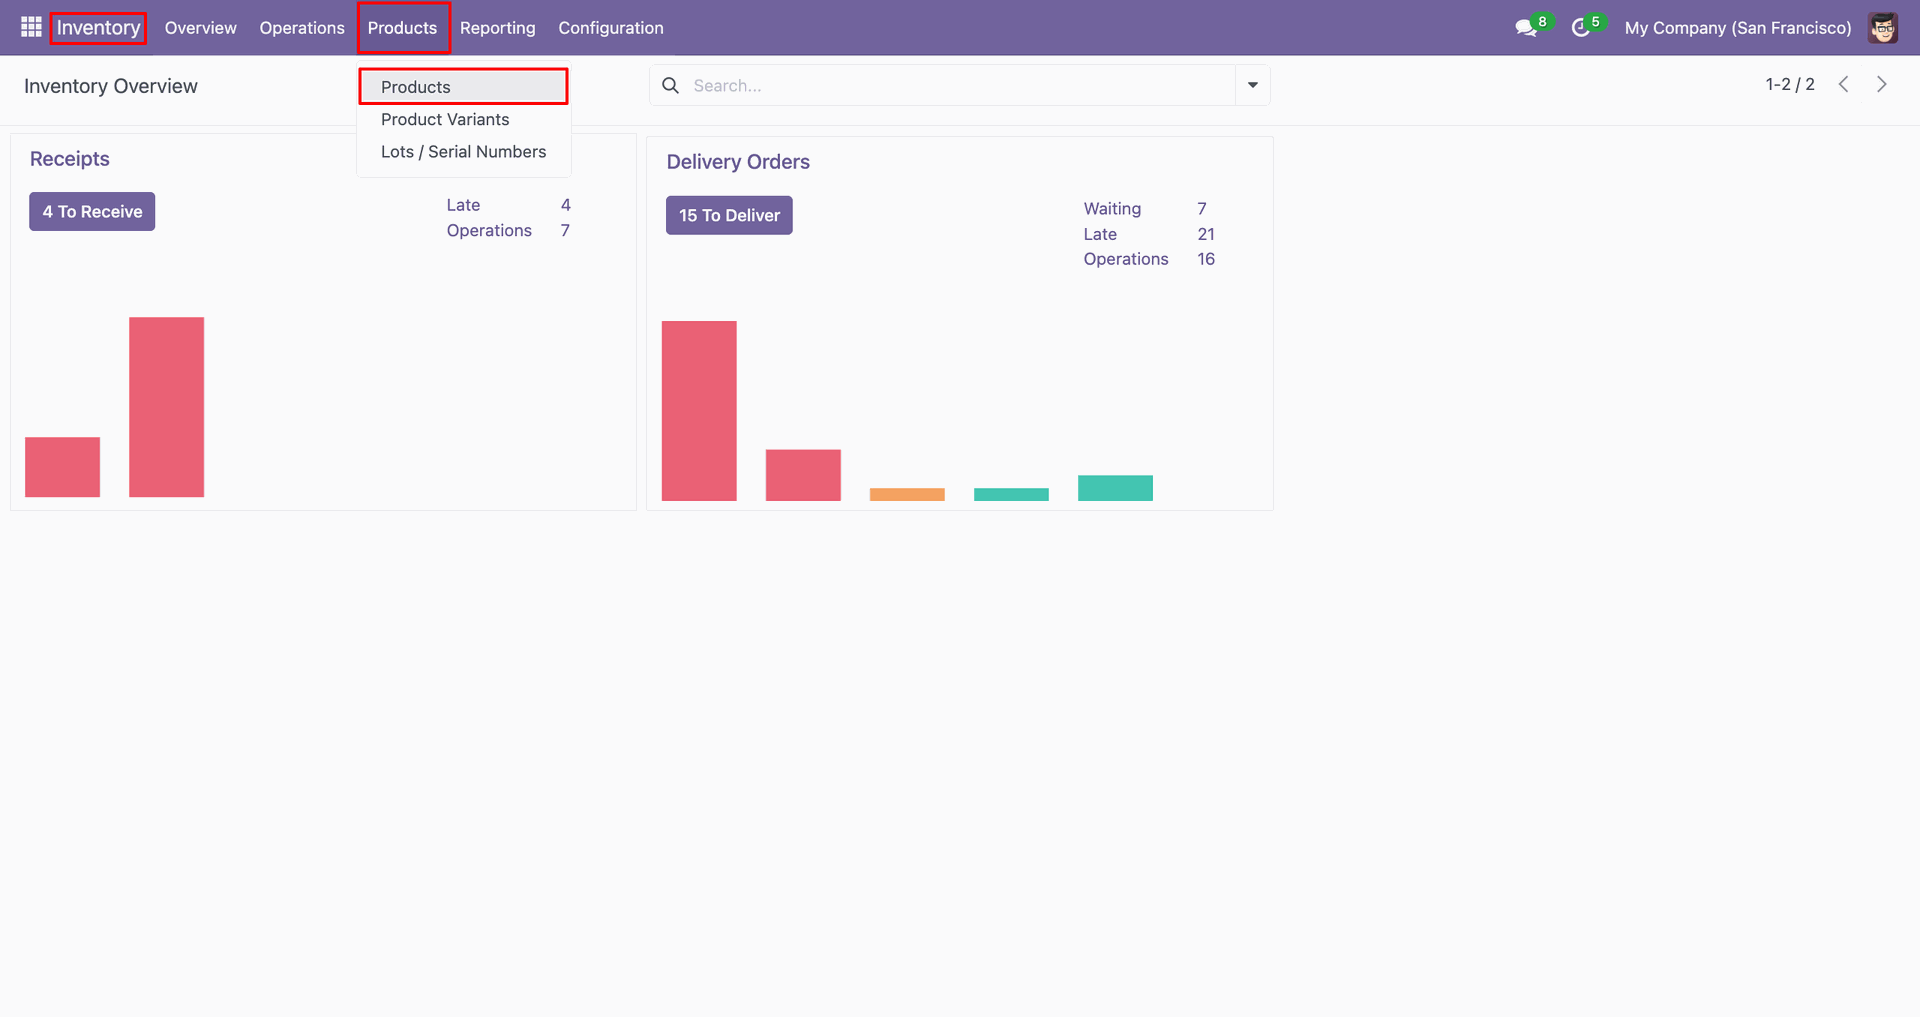
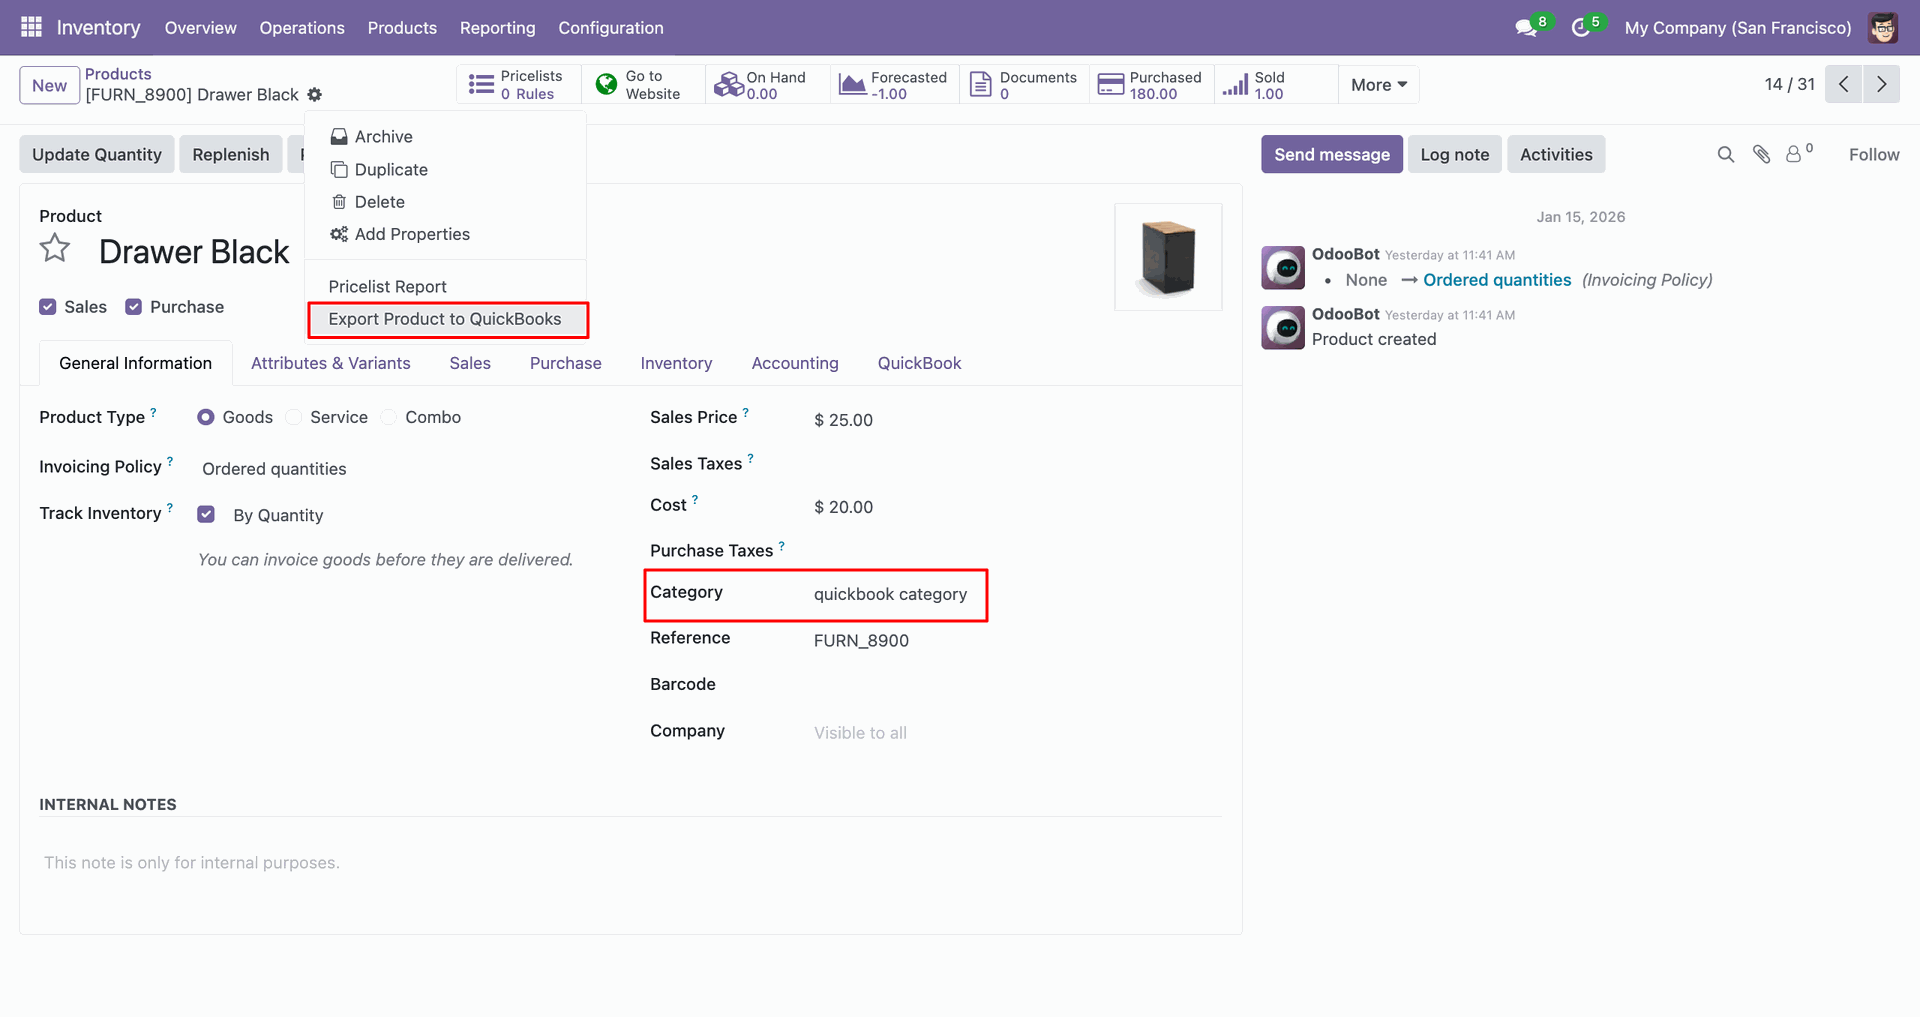
Go to the 'Products'.
Product form view contains QuickBook category. Go to the 'Action', click 'Export Product to QuickBooks'.
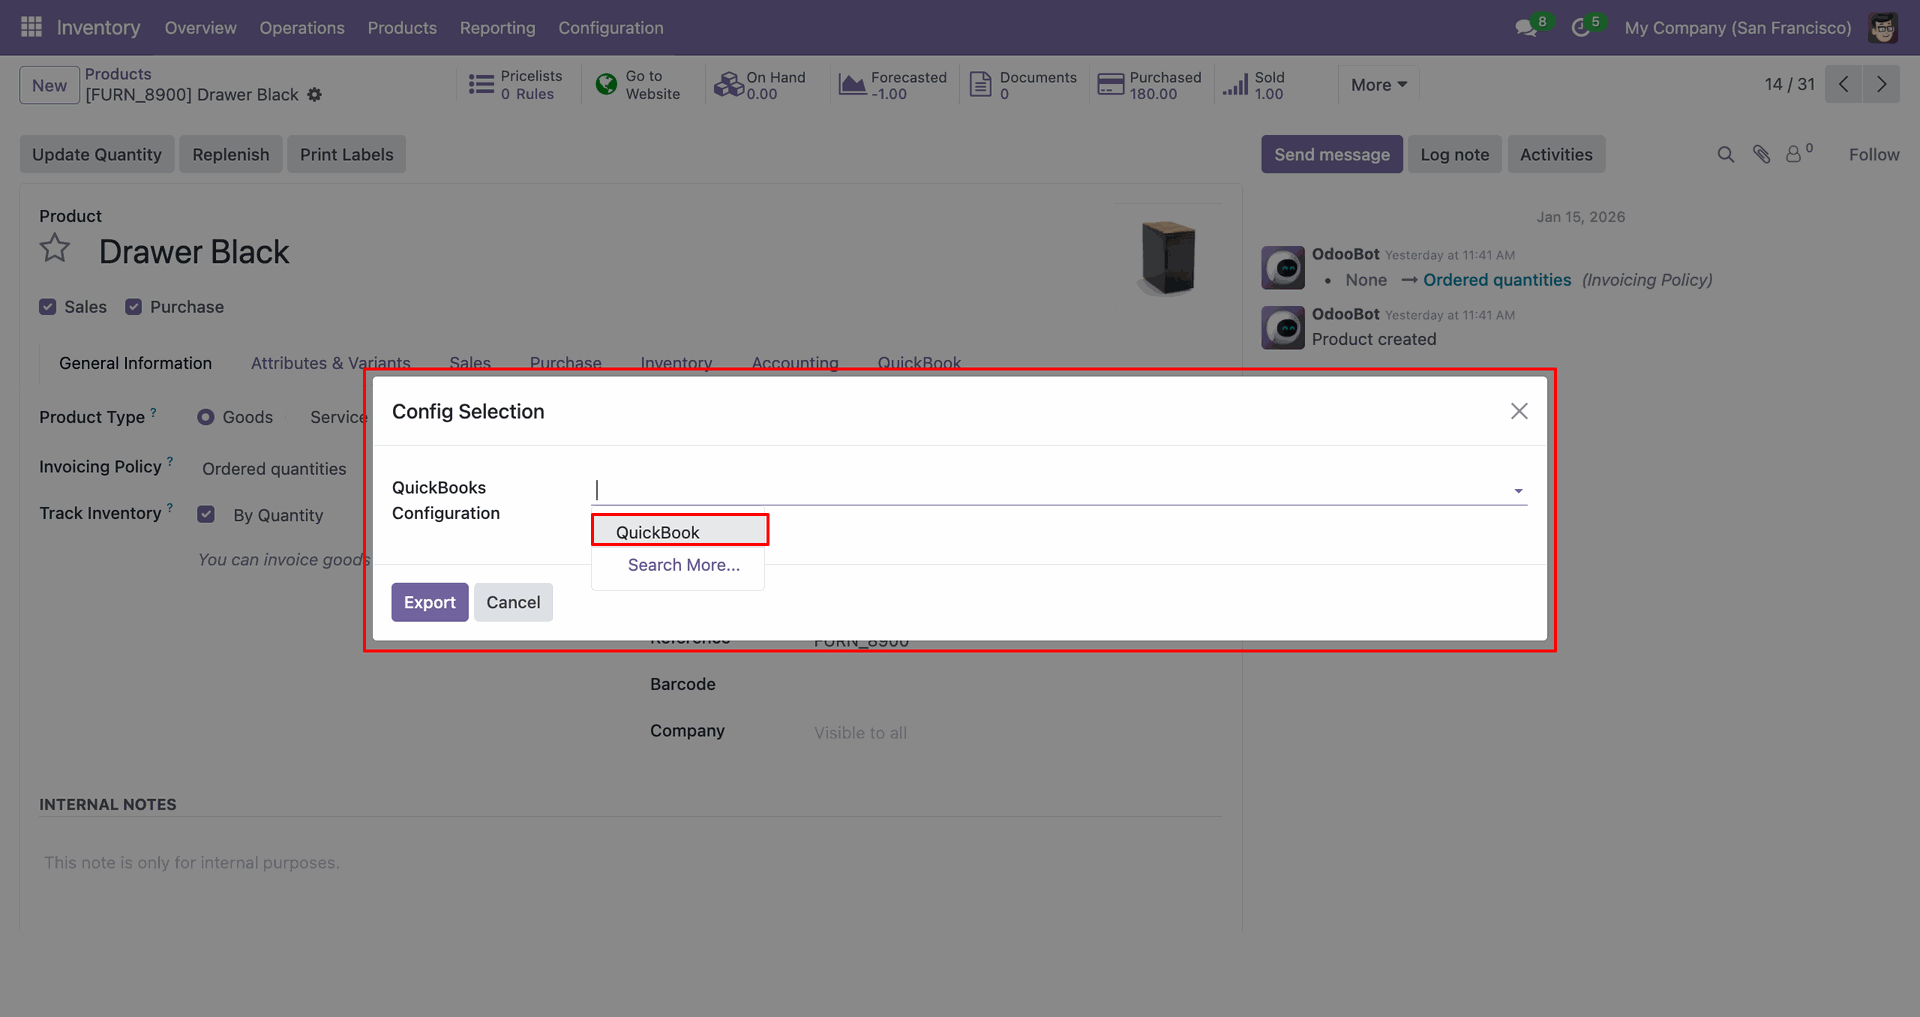
Config selection popup.
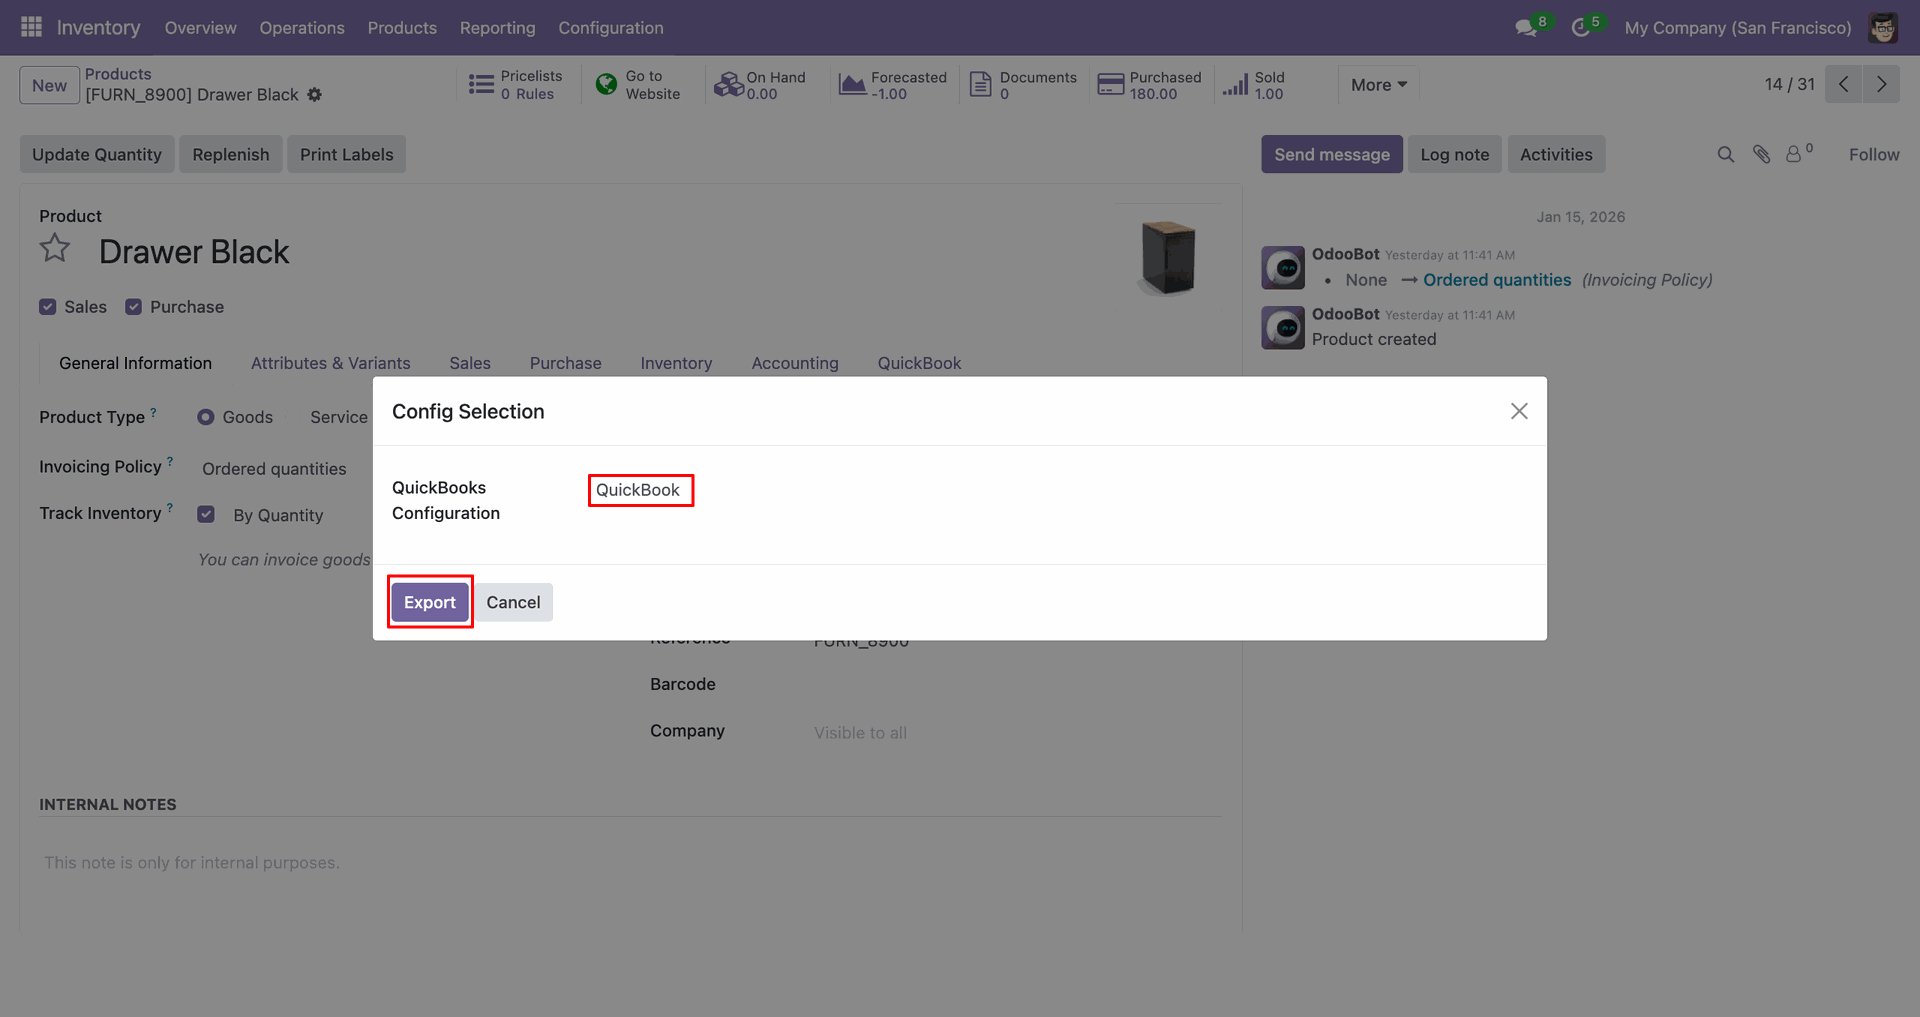
Select 'QuickBooks' and click 'Export'.
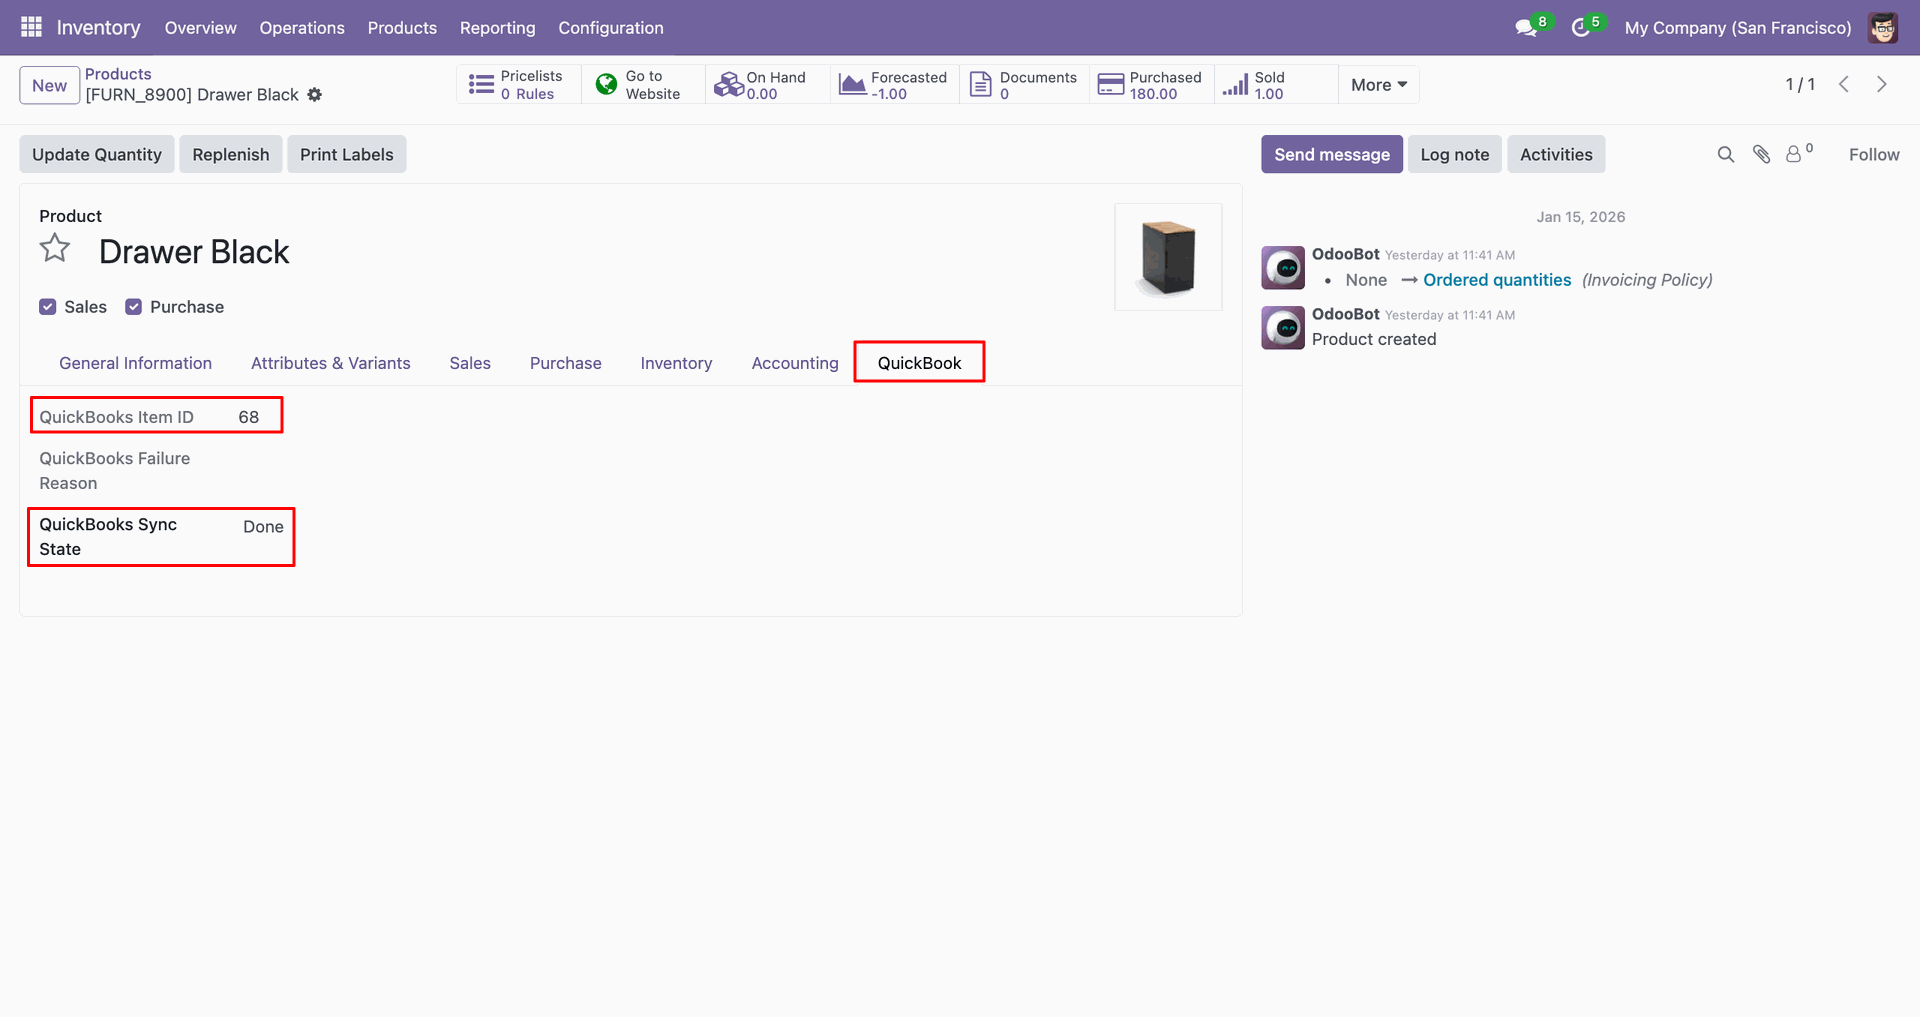
The Quickbook tab contains Quickbook ID and sync state.
Log with details.
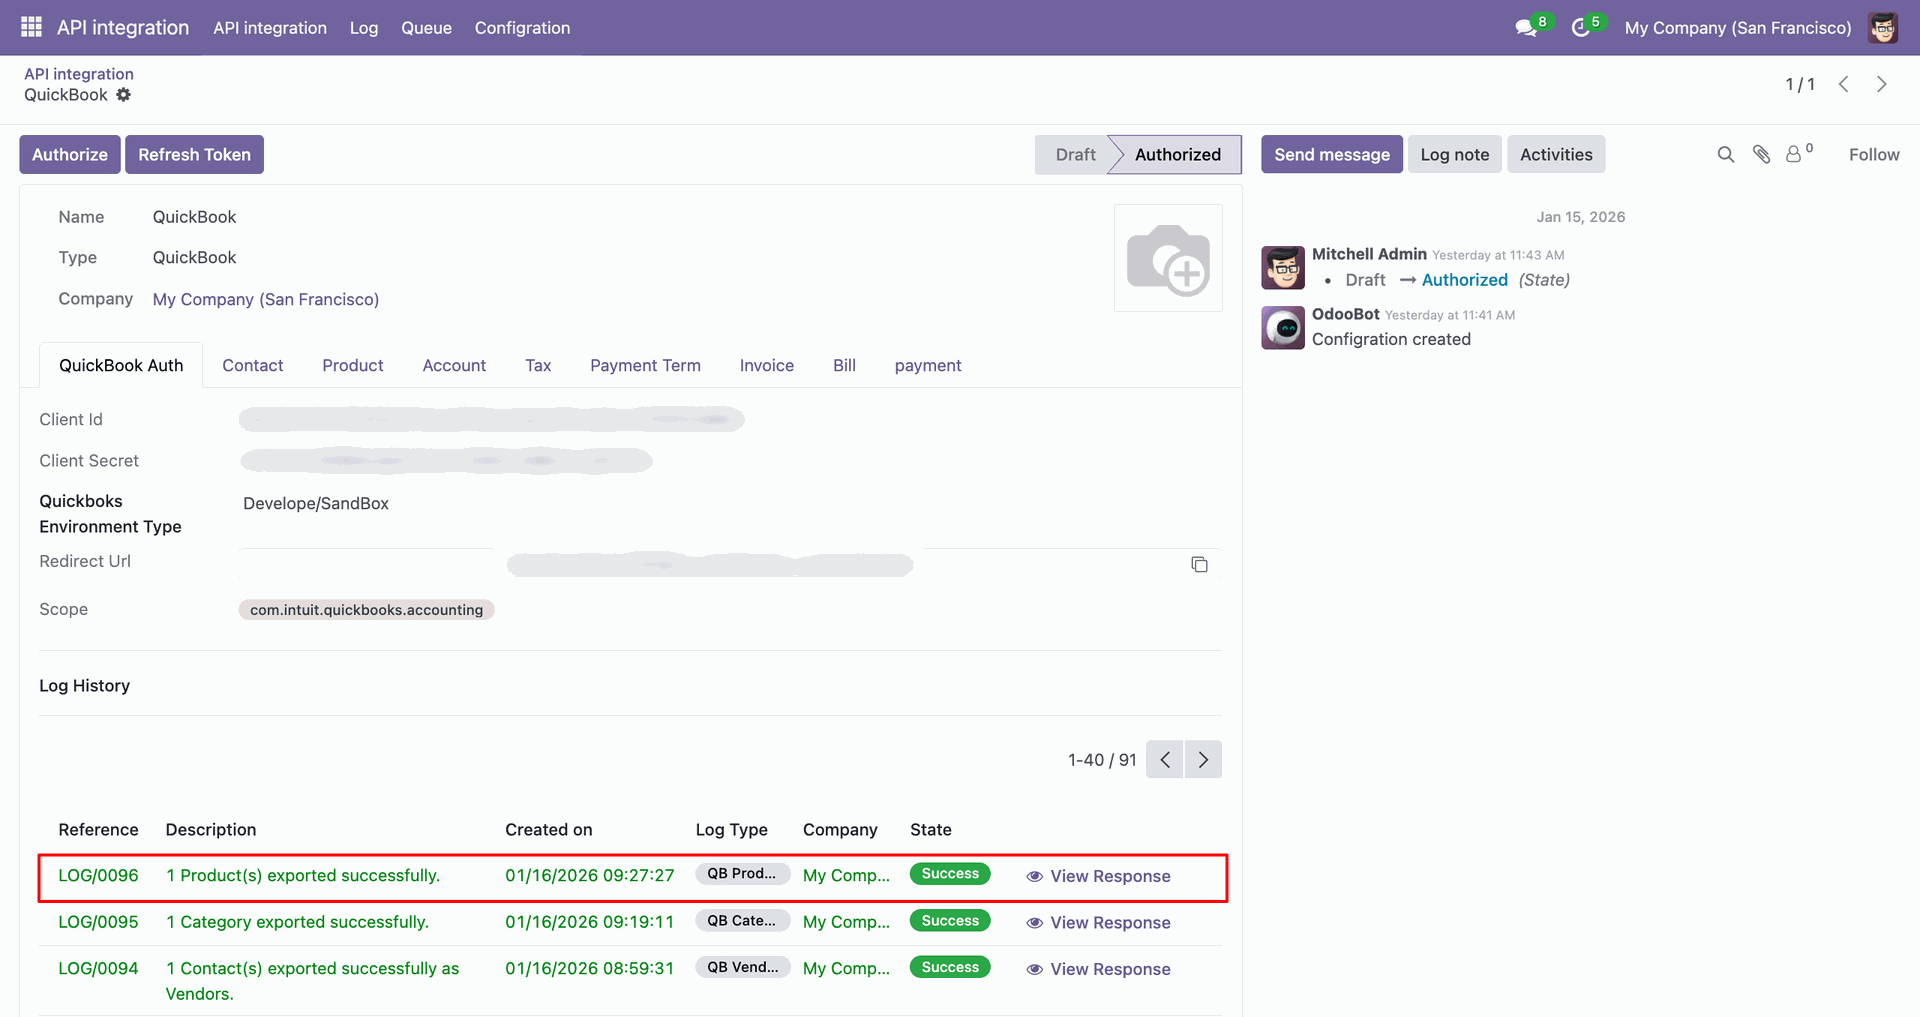
Products in QuickBooks.
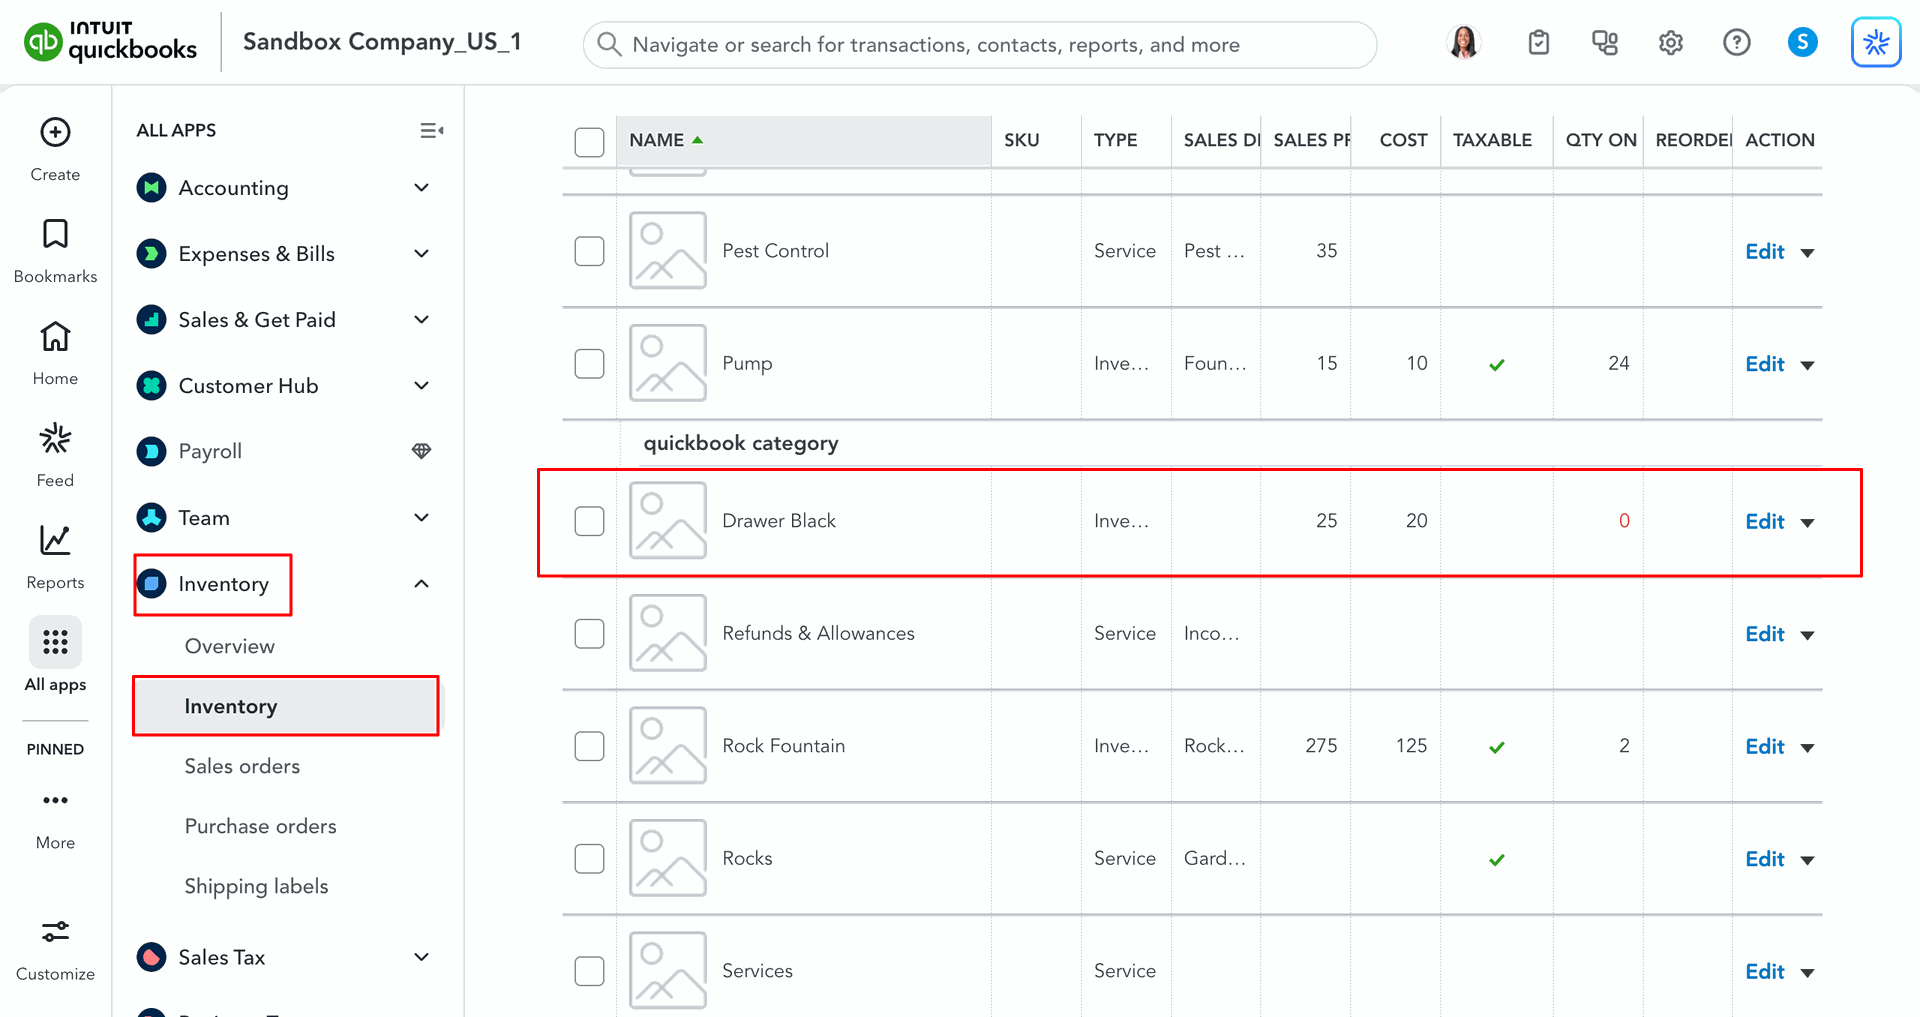
For the import, go to the 'Product' Tab, enable 'Import Products', and click 'Import'.
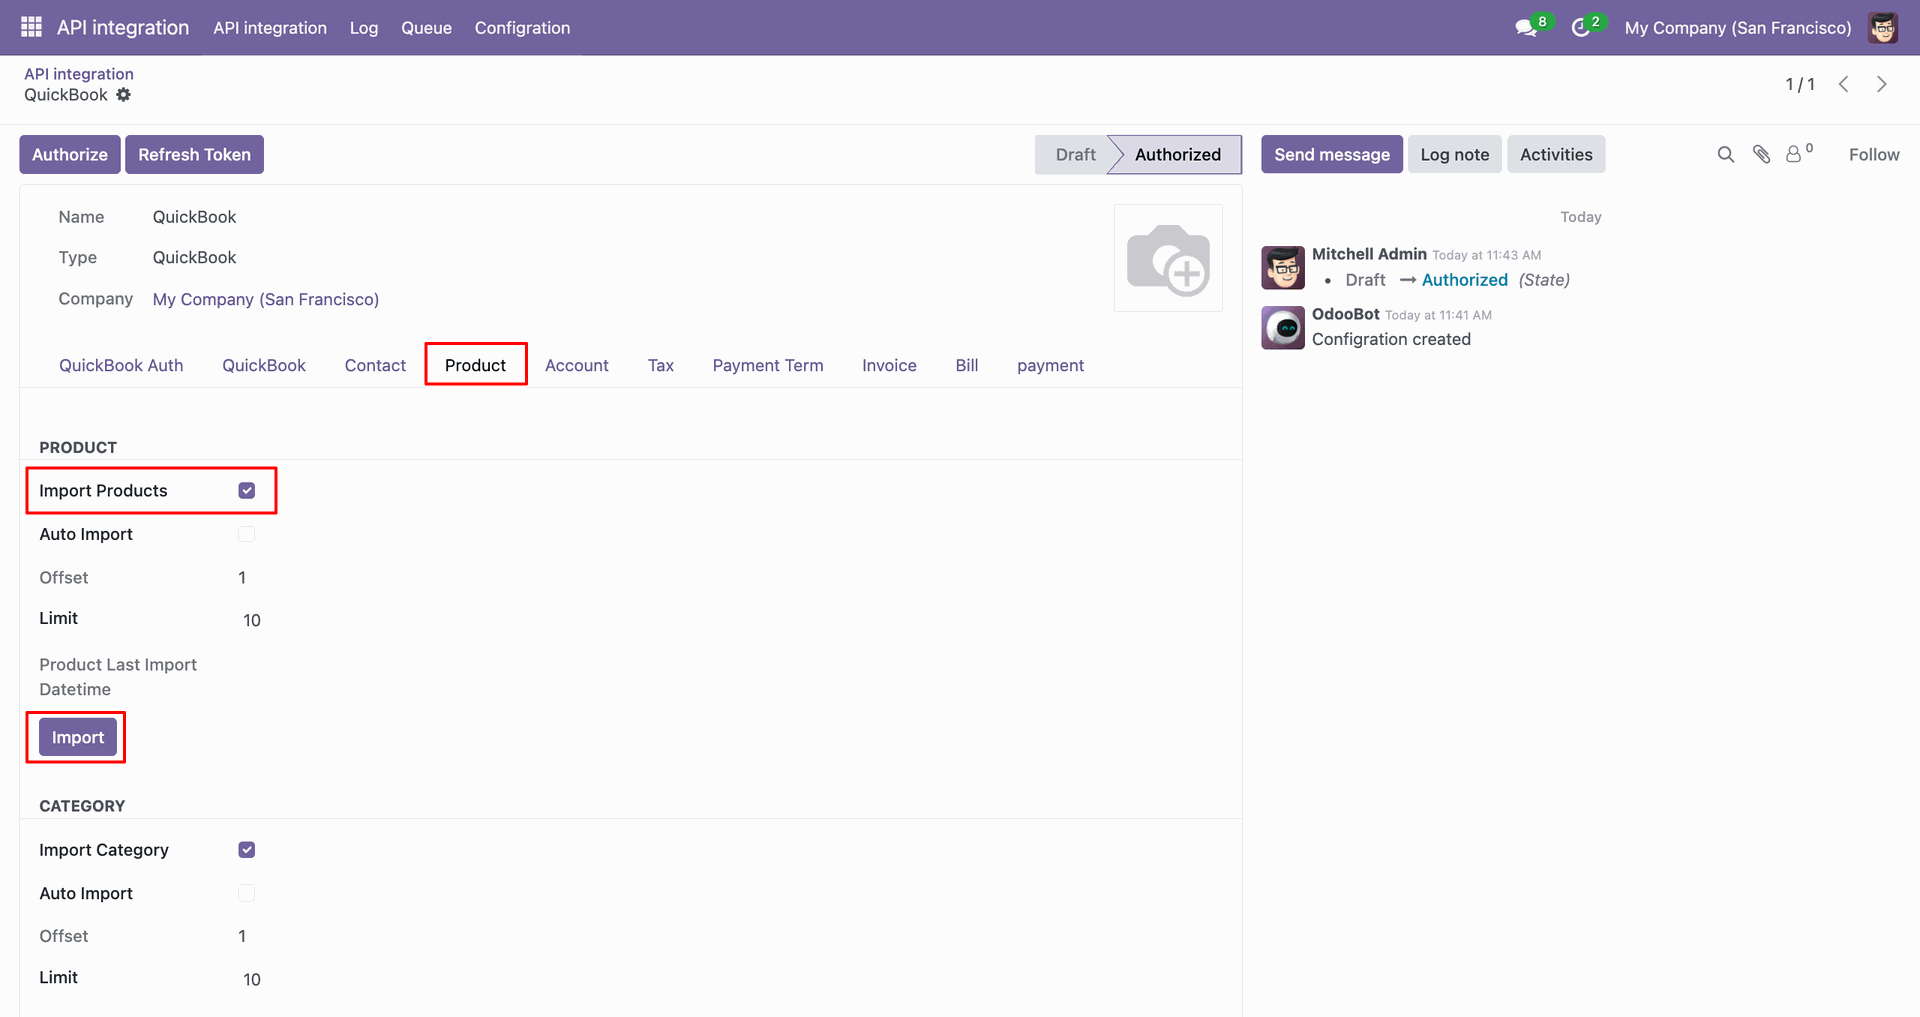
Log with imported data.
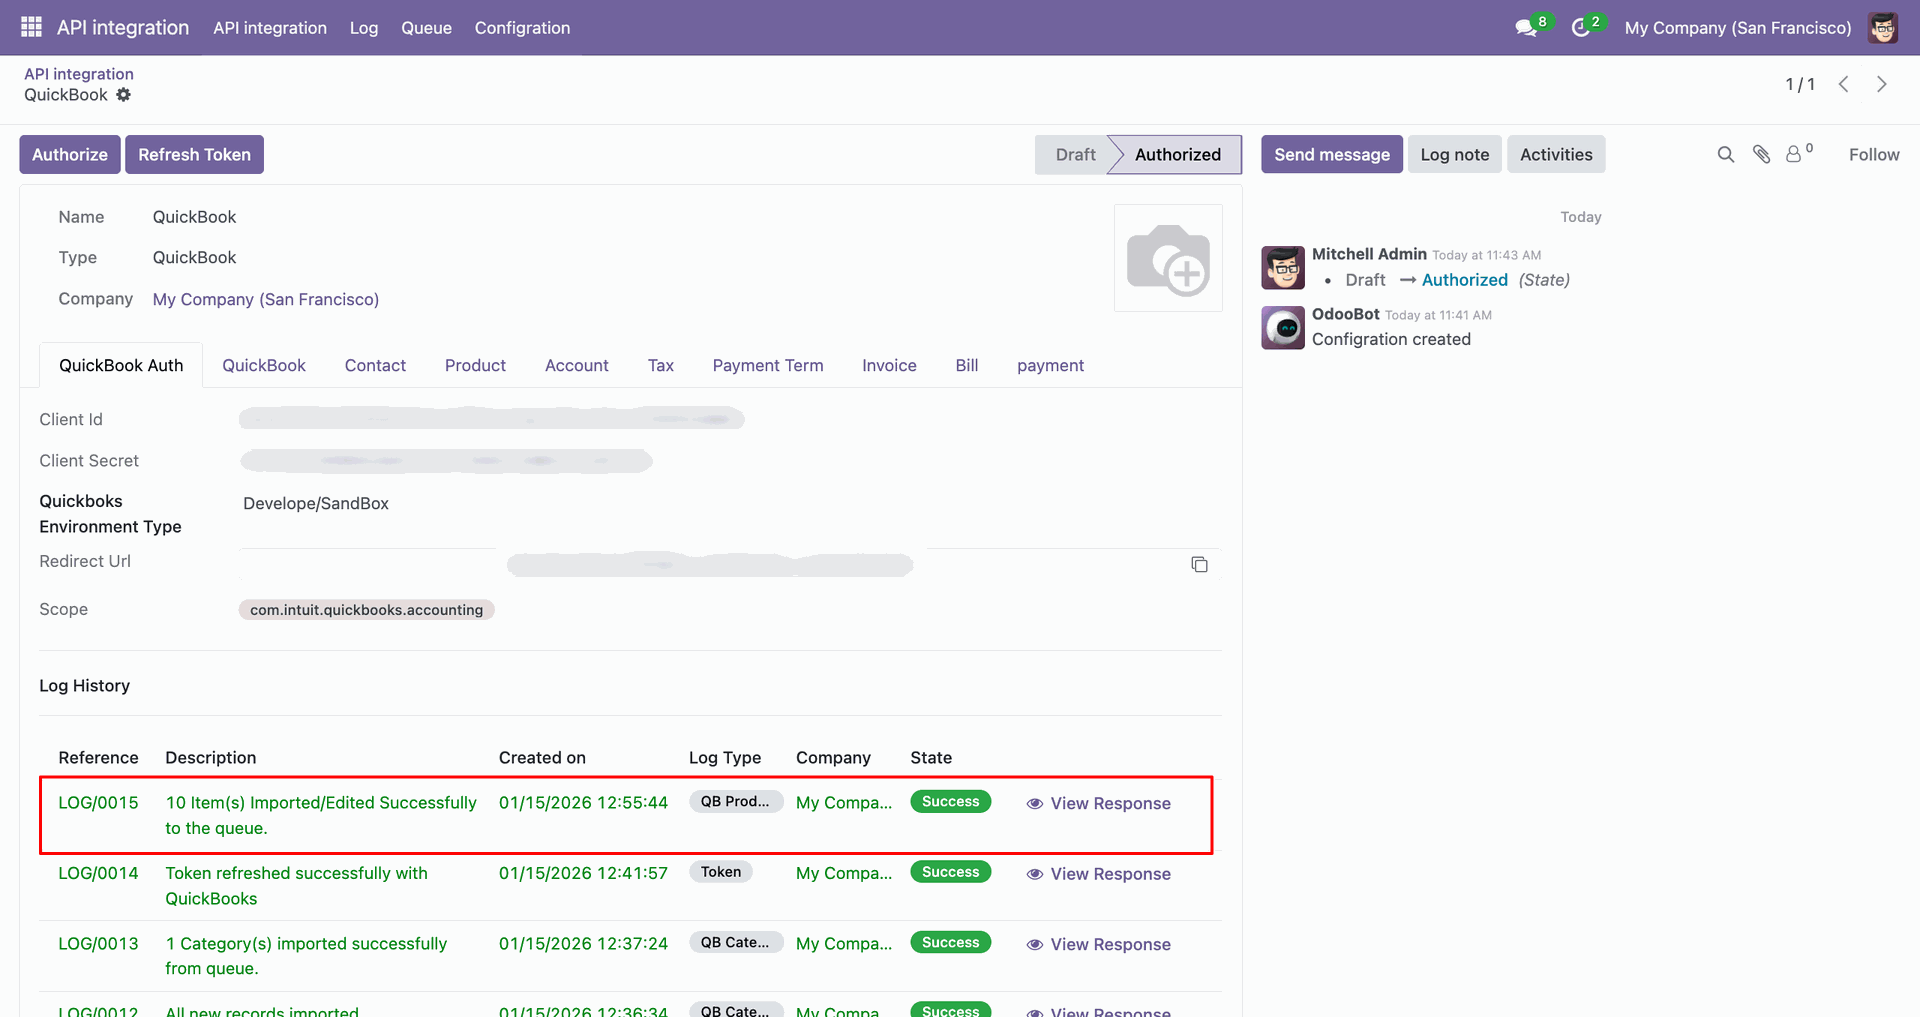
Go to the Queue, 'QB Product'.
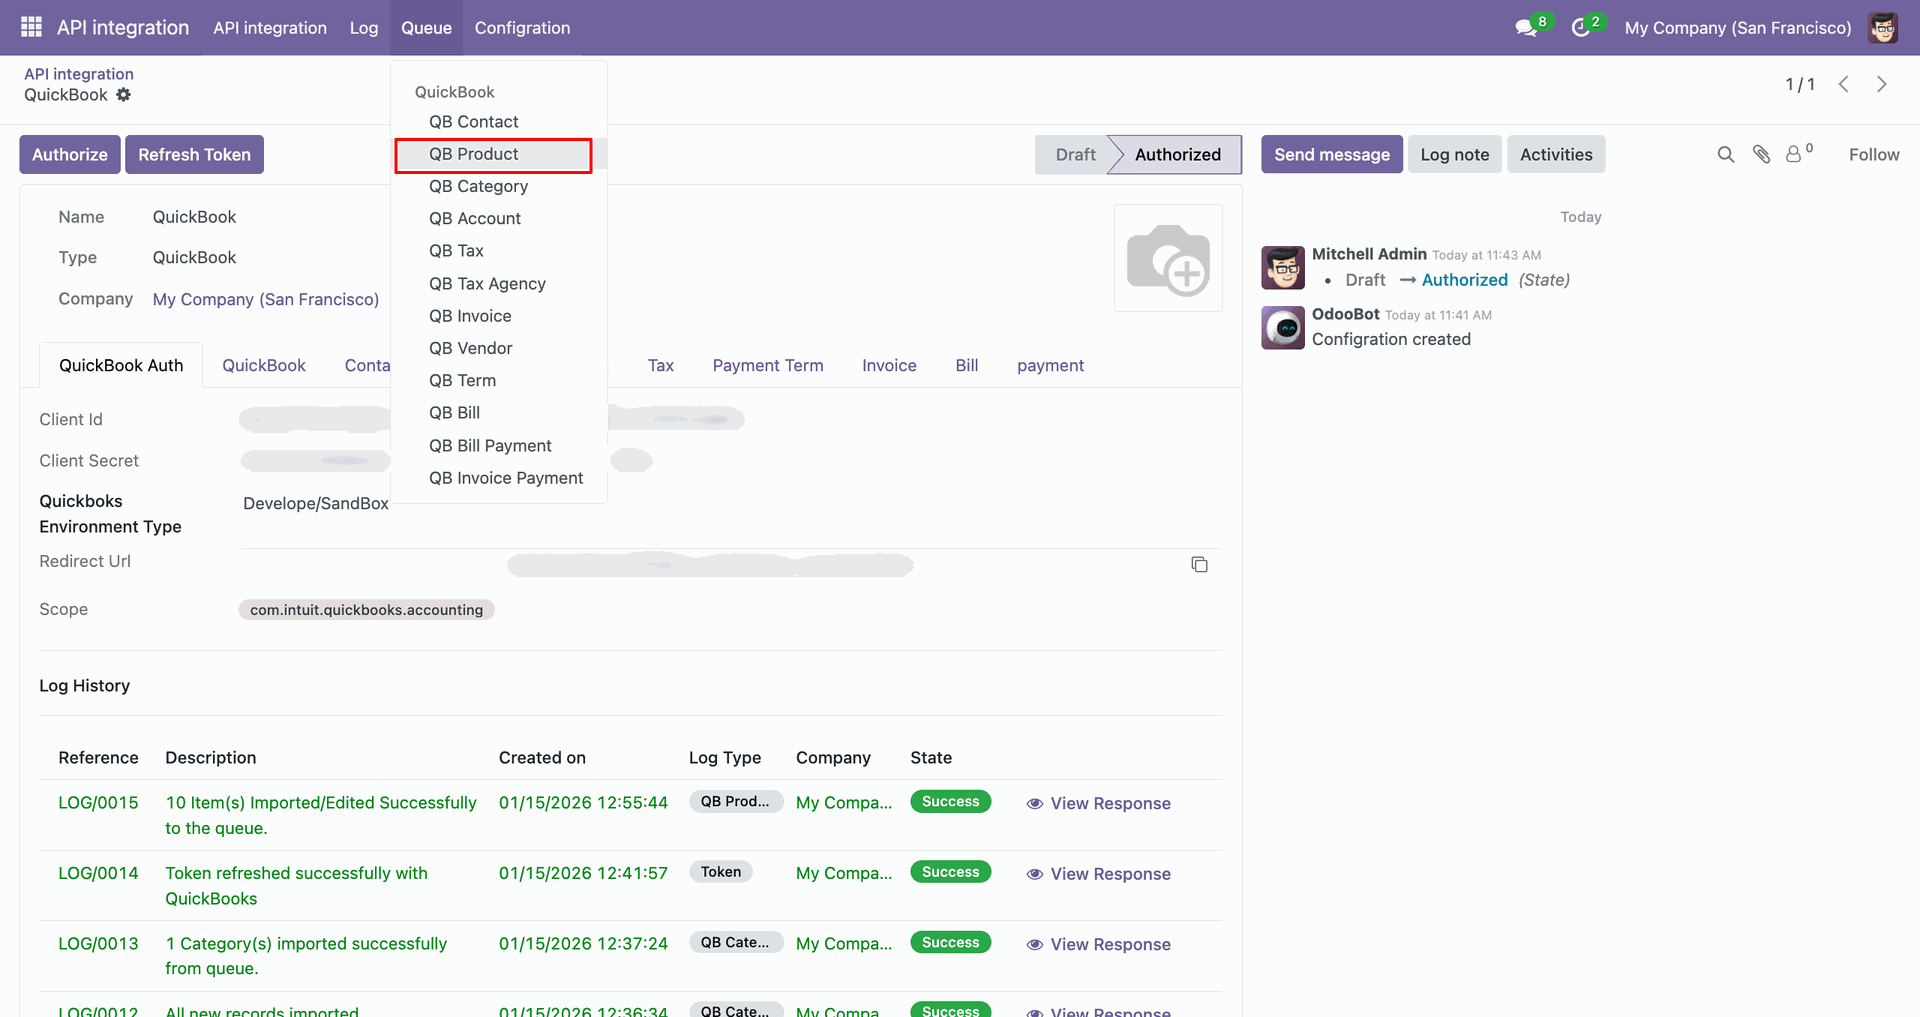
It will open the queue.
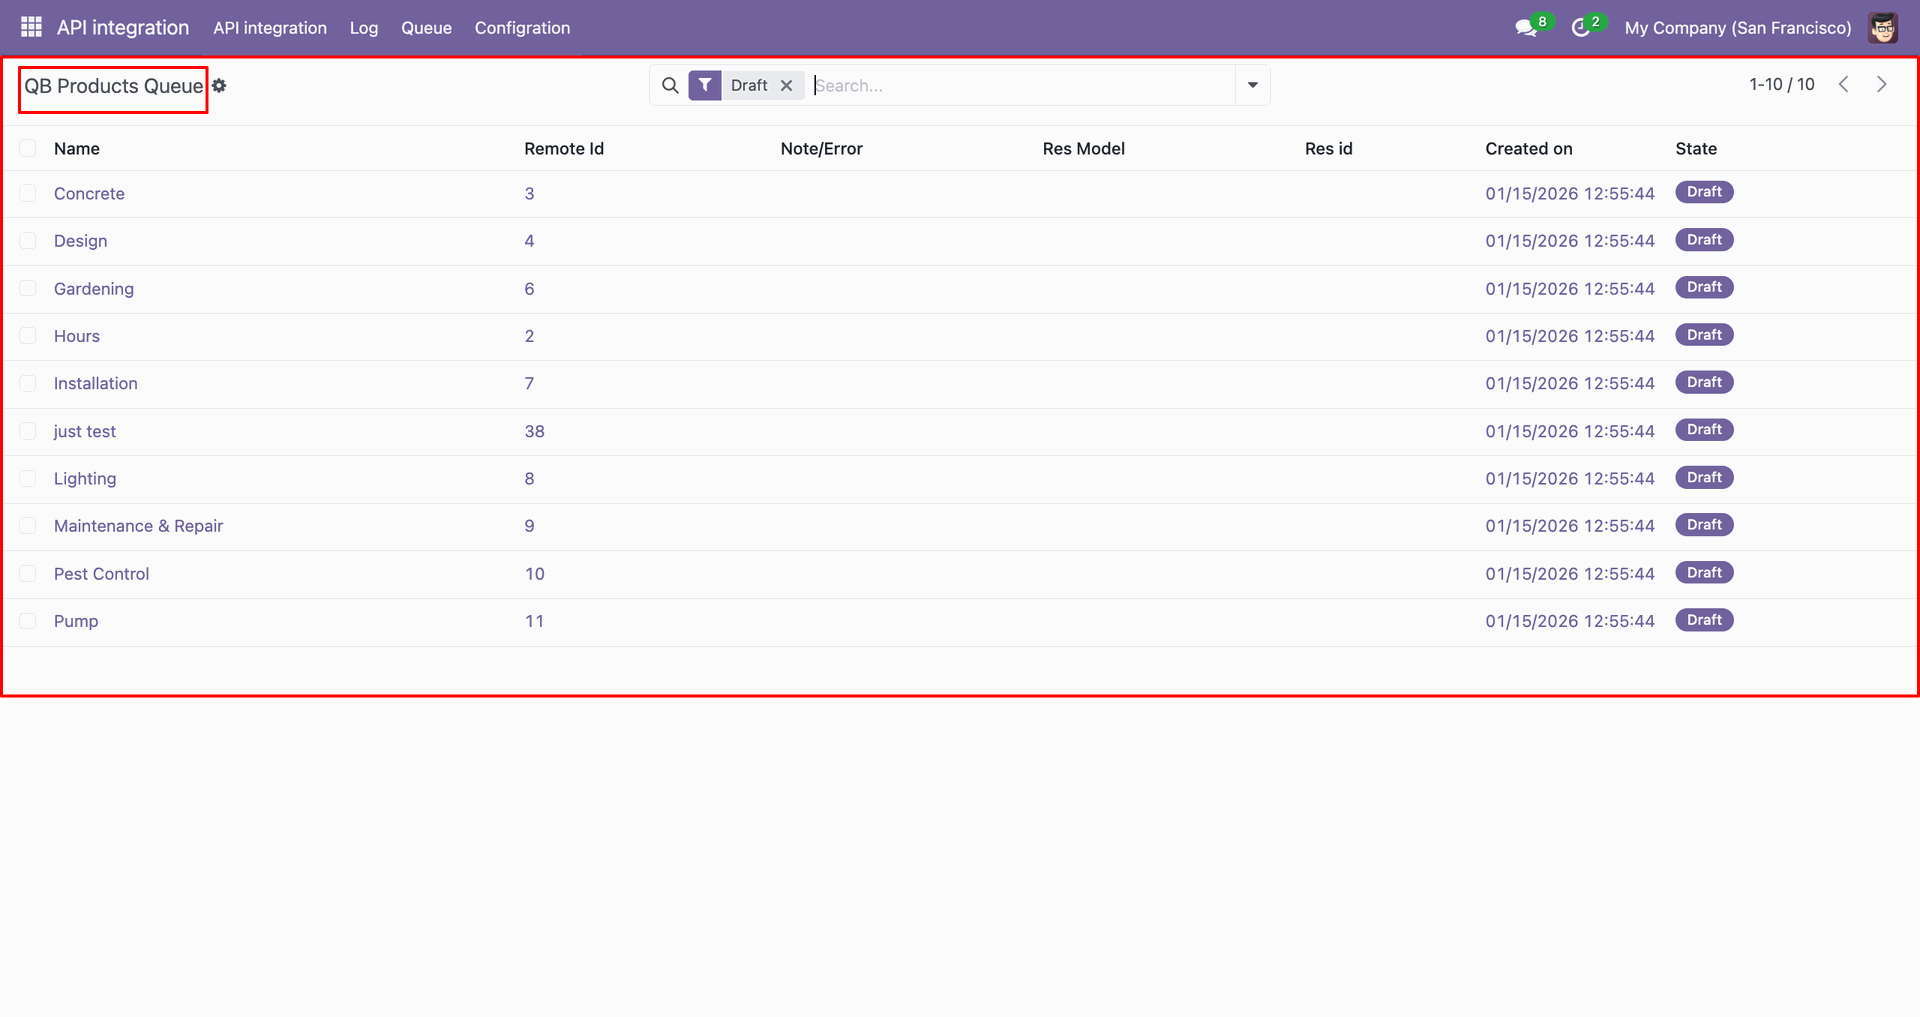
You can import from the queue.
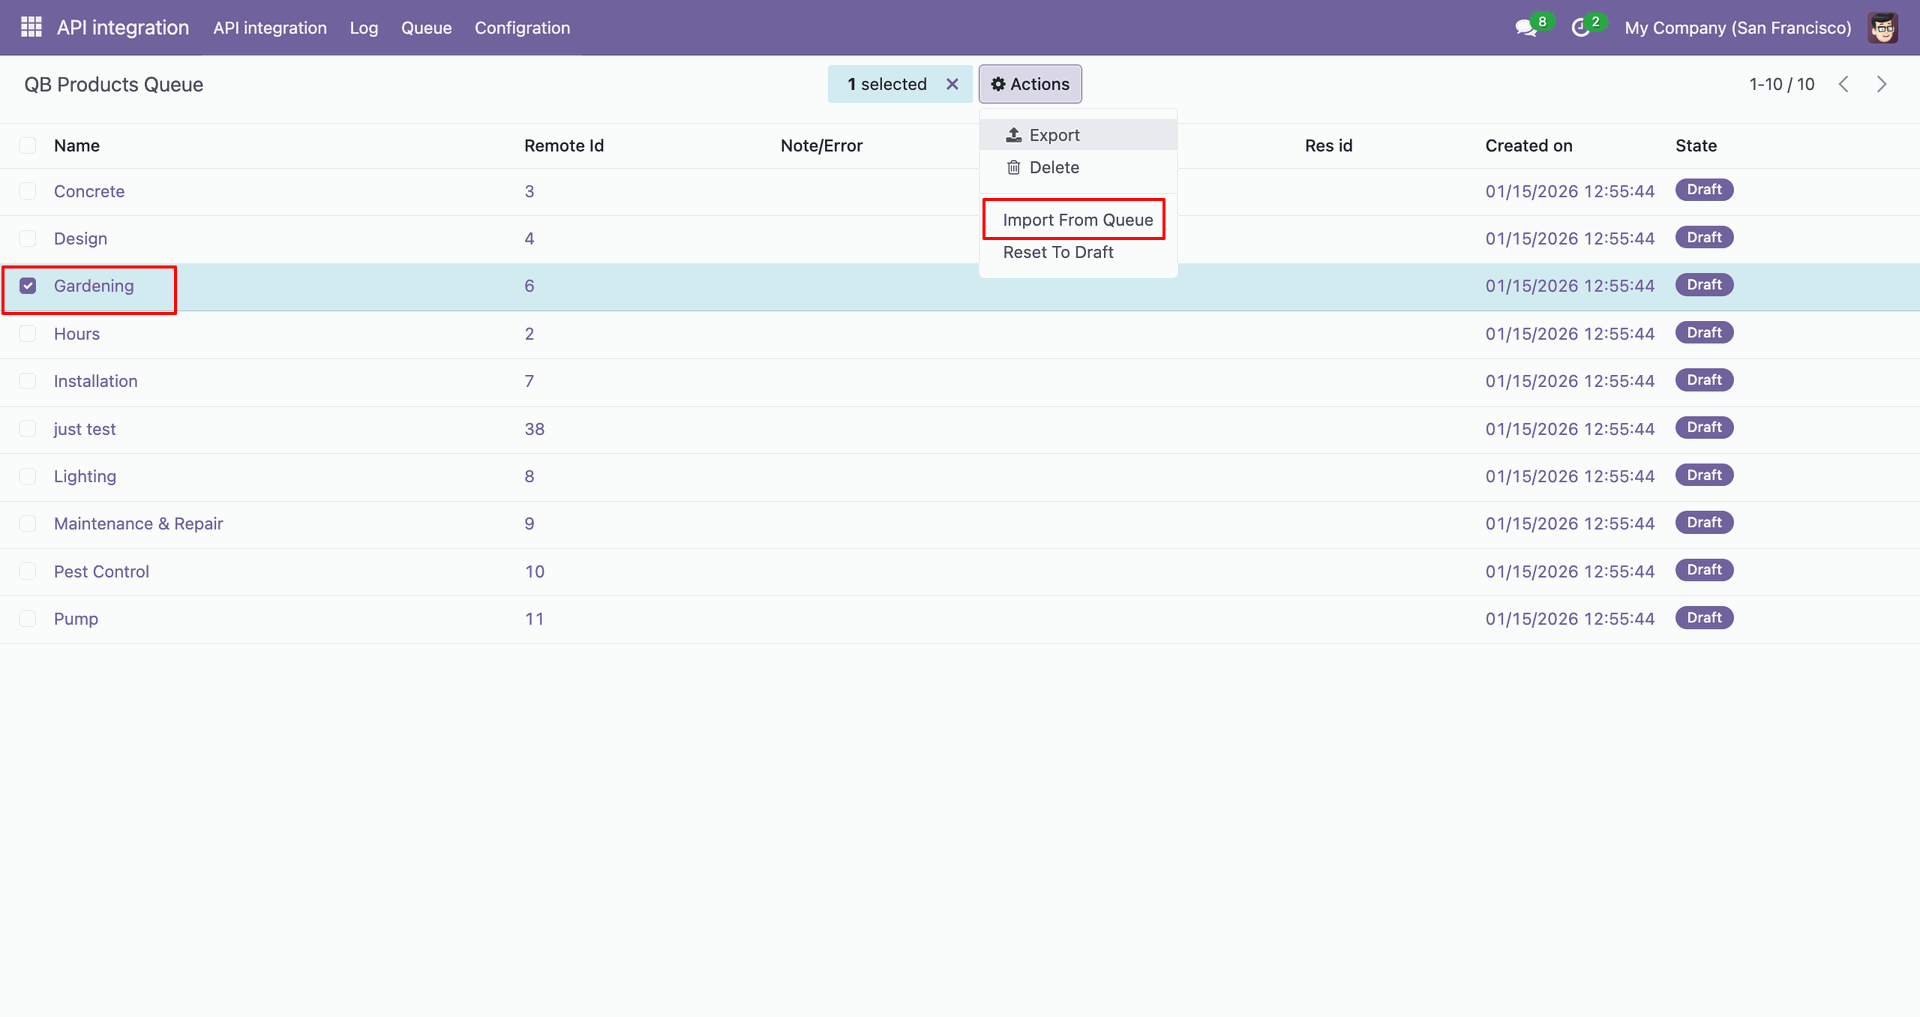
Log with details.
Group by with 'Status'.
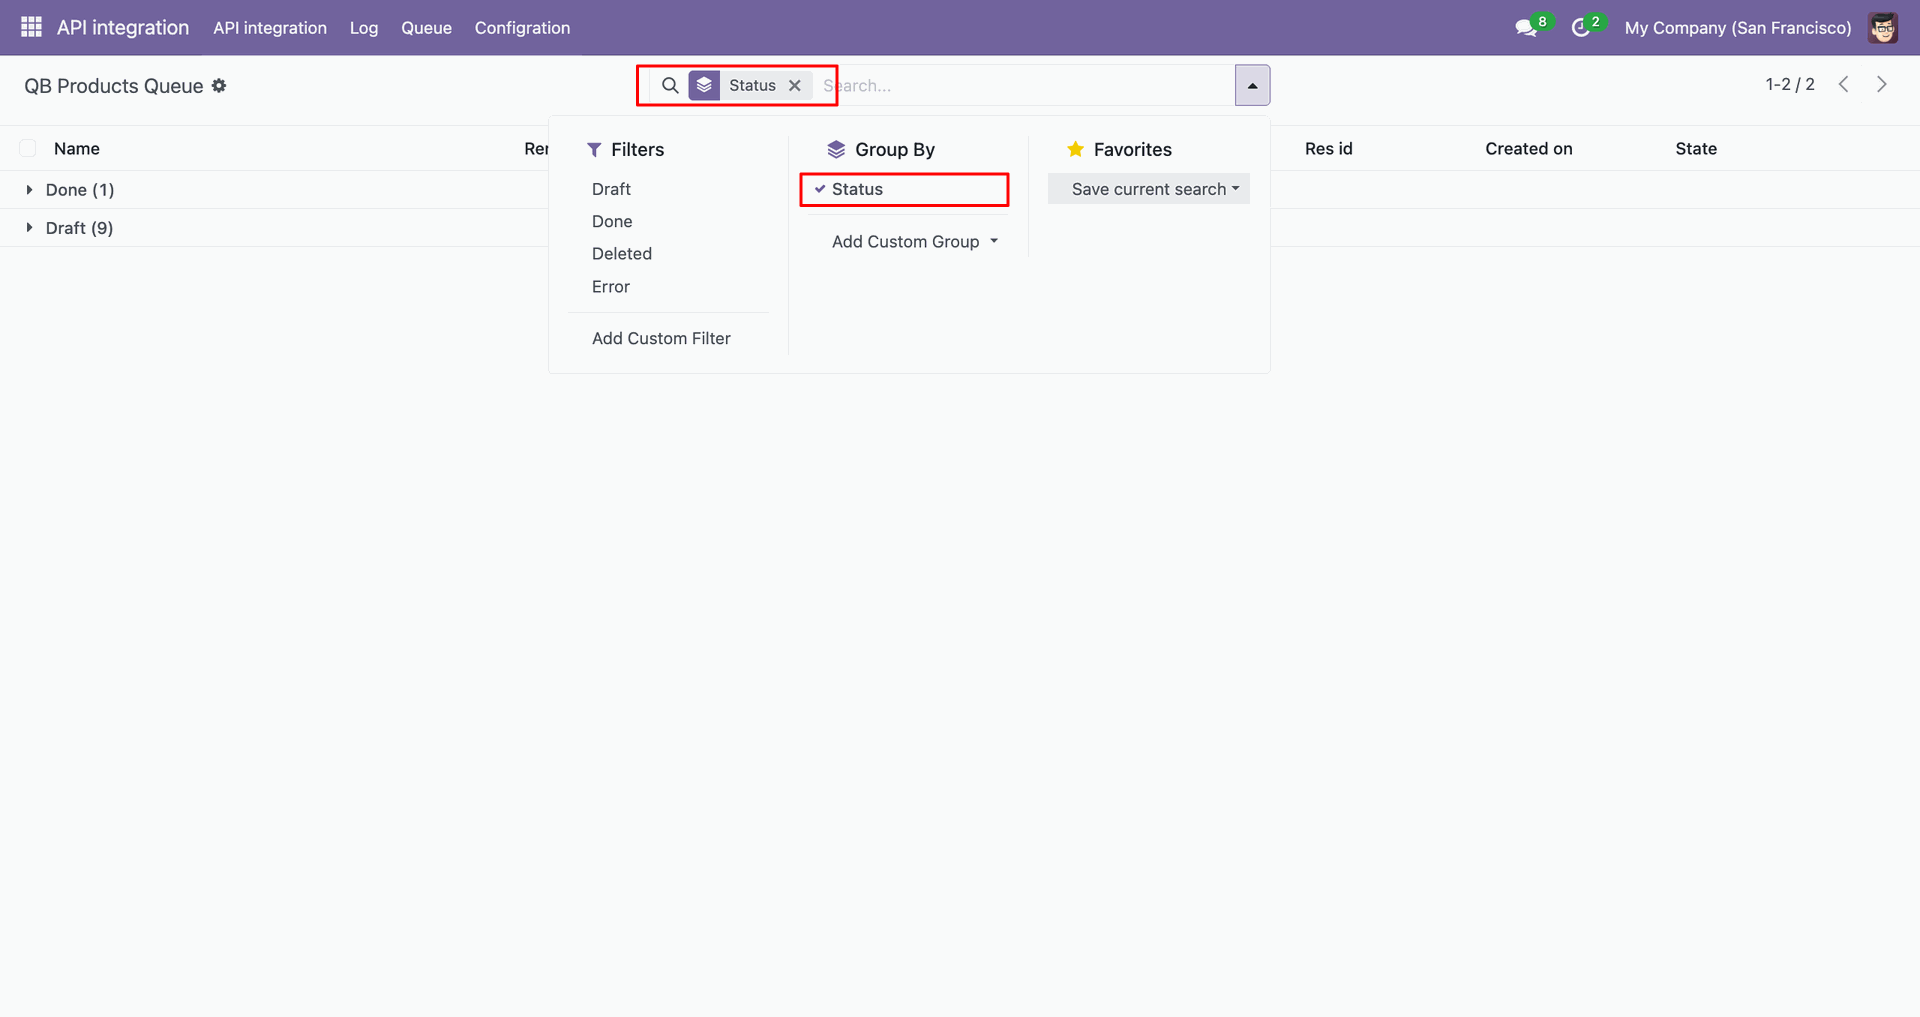
Group by result.
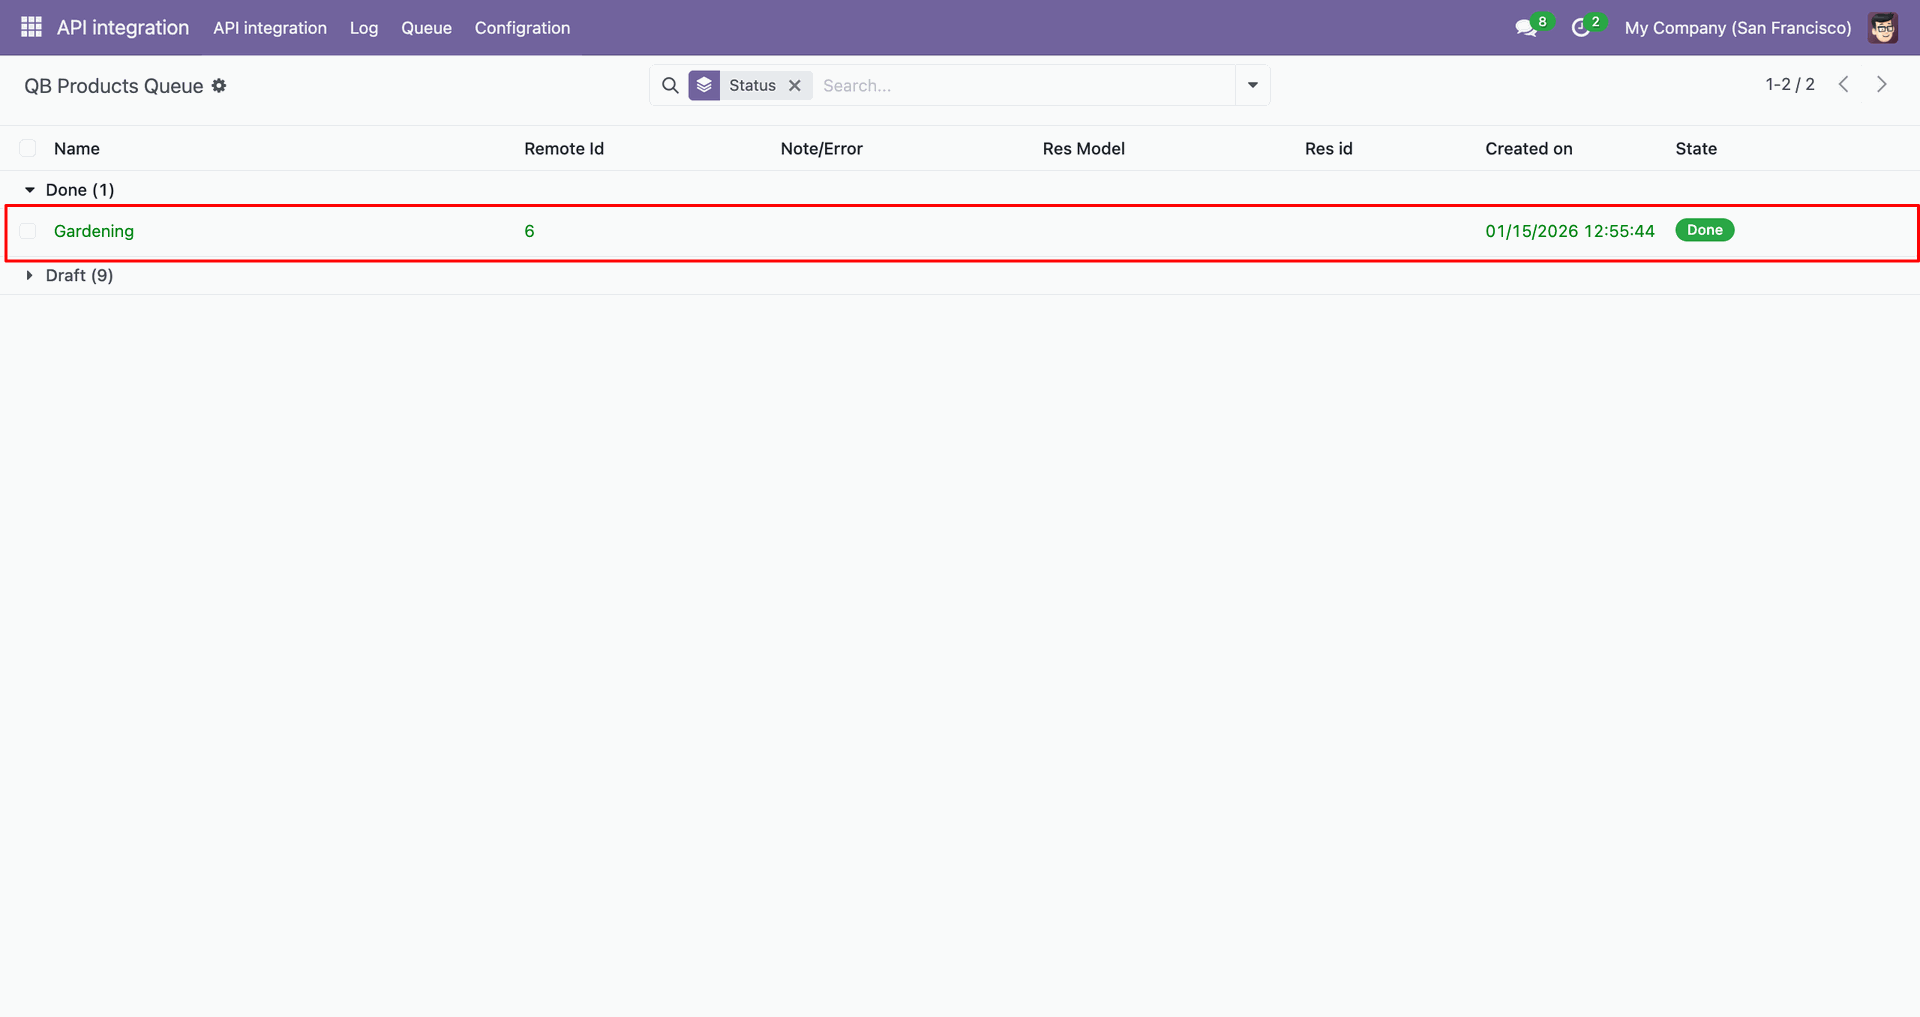
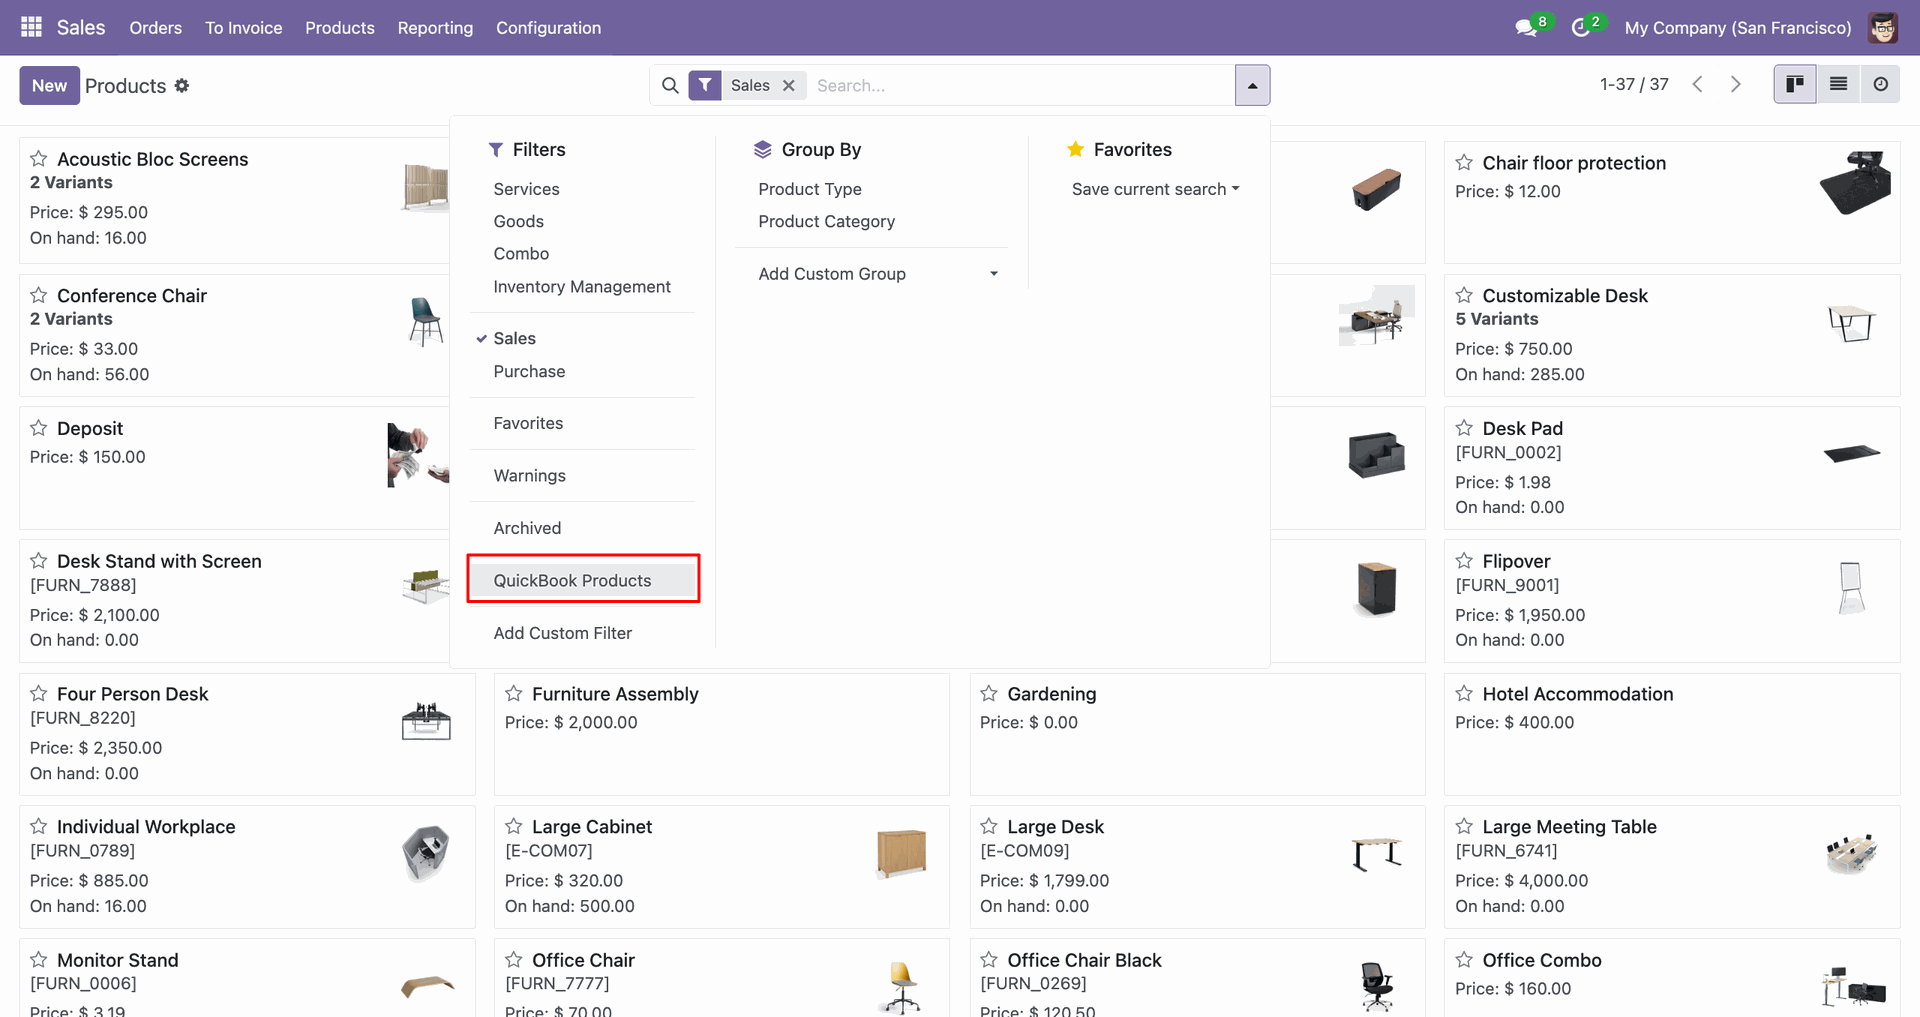
You can filter by QuickBooks Products.
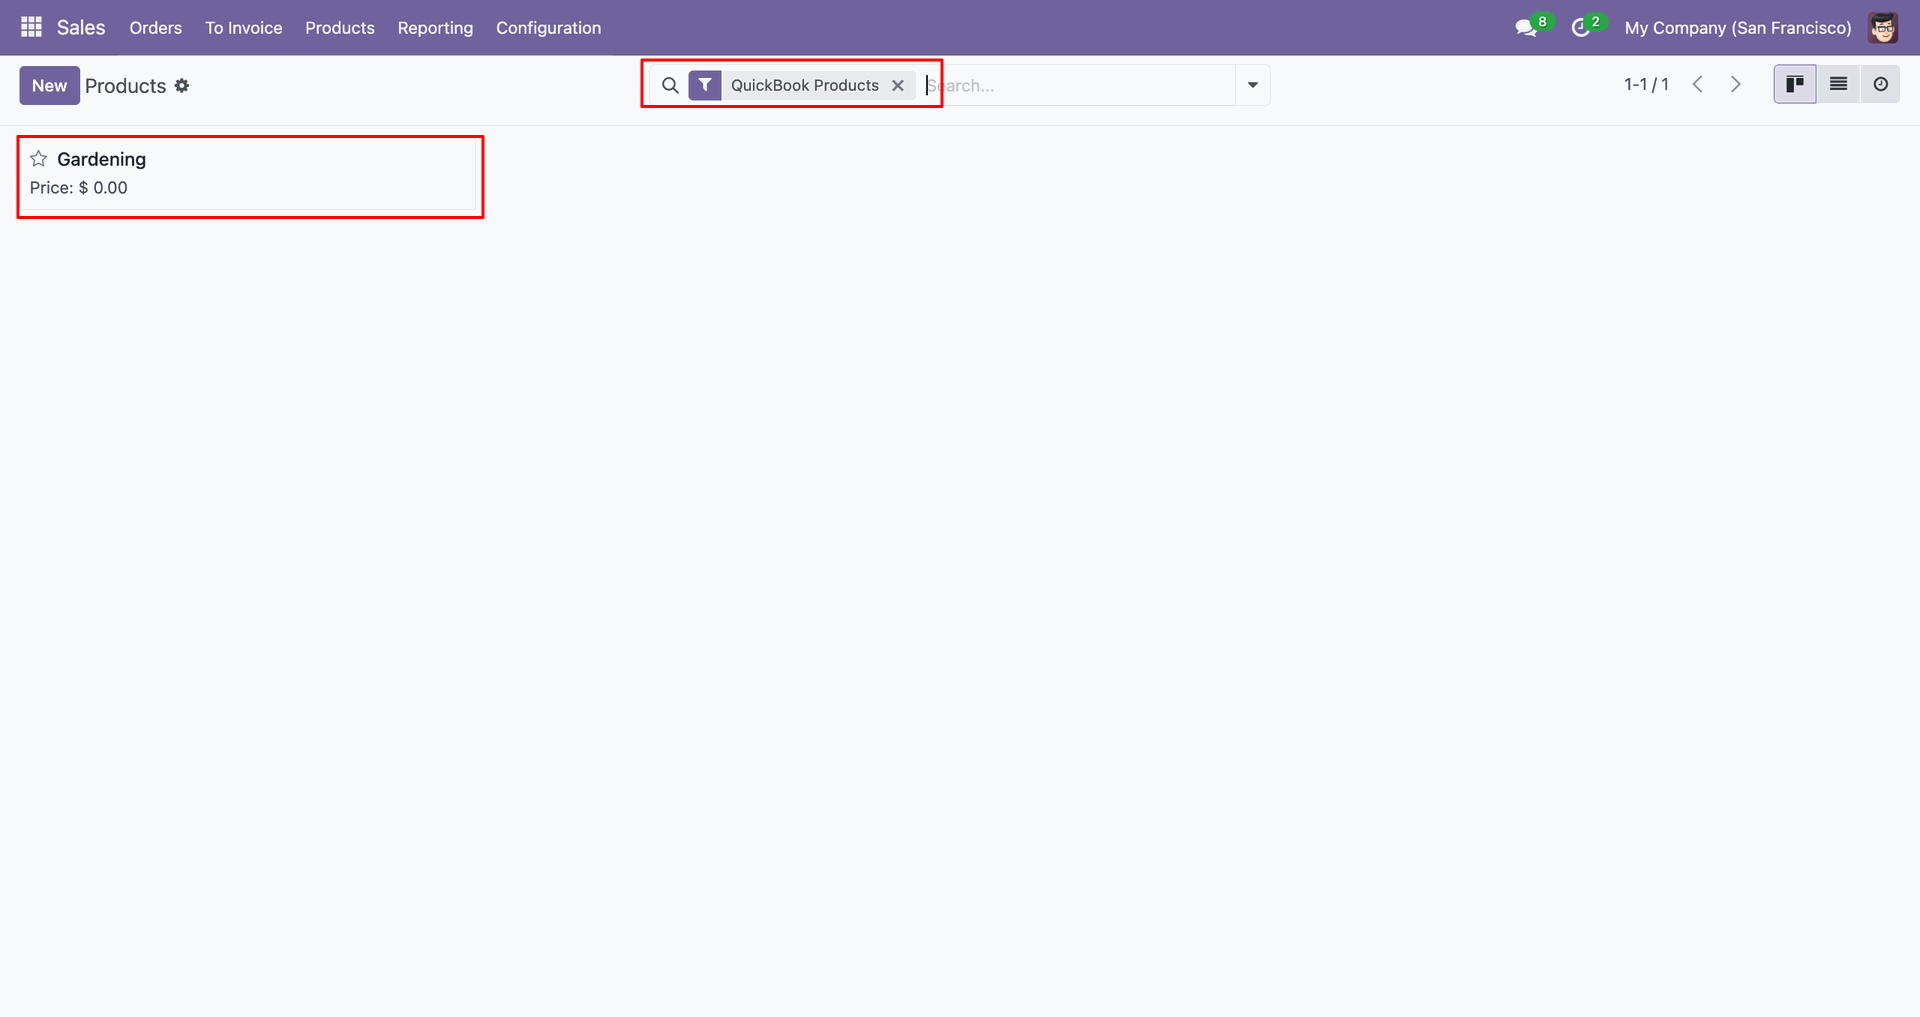
Filter result.
Go to the 'Product Categories'.
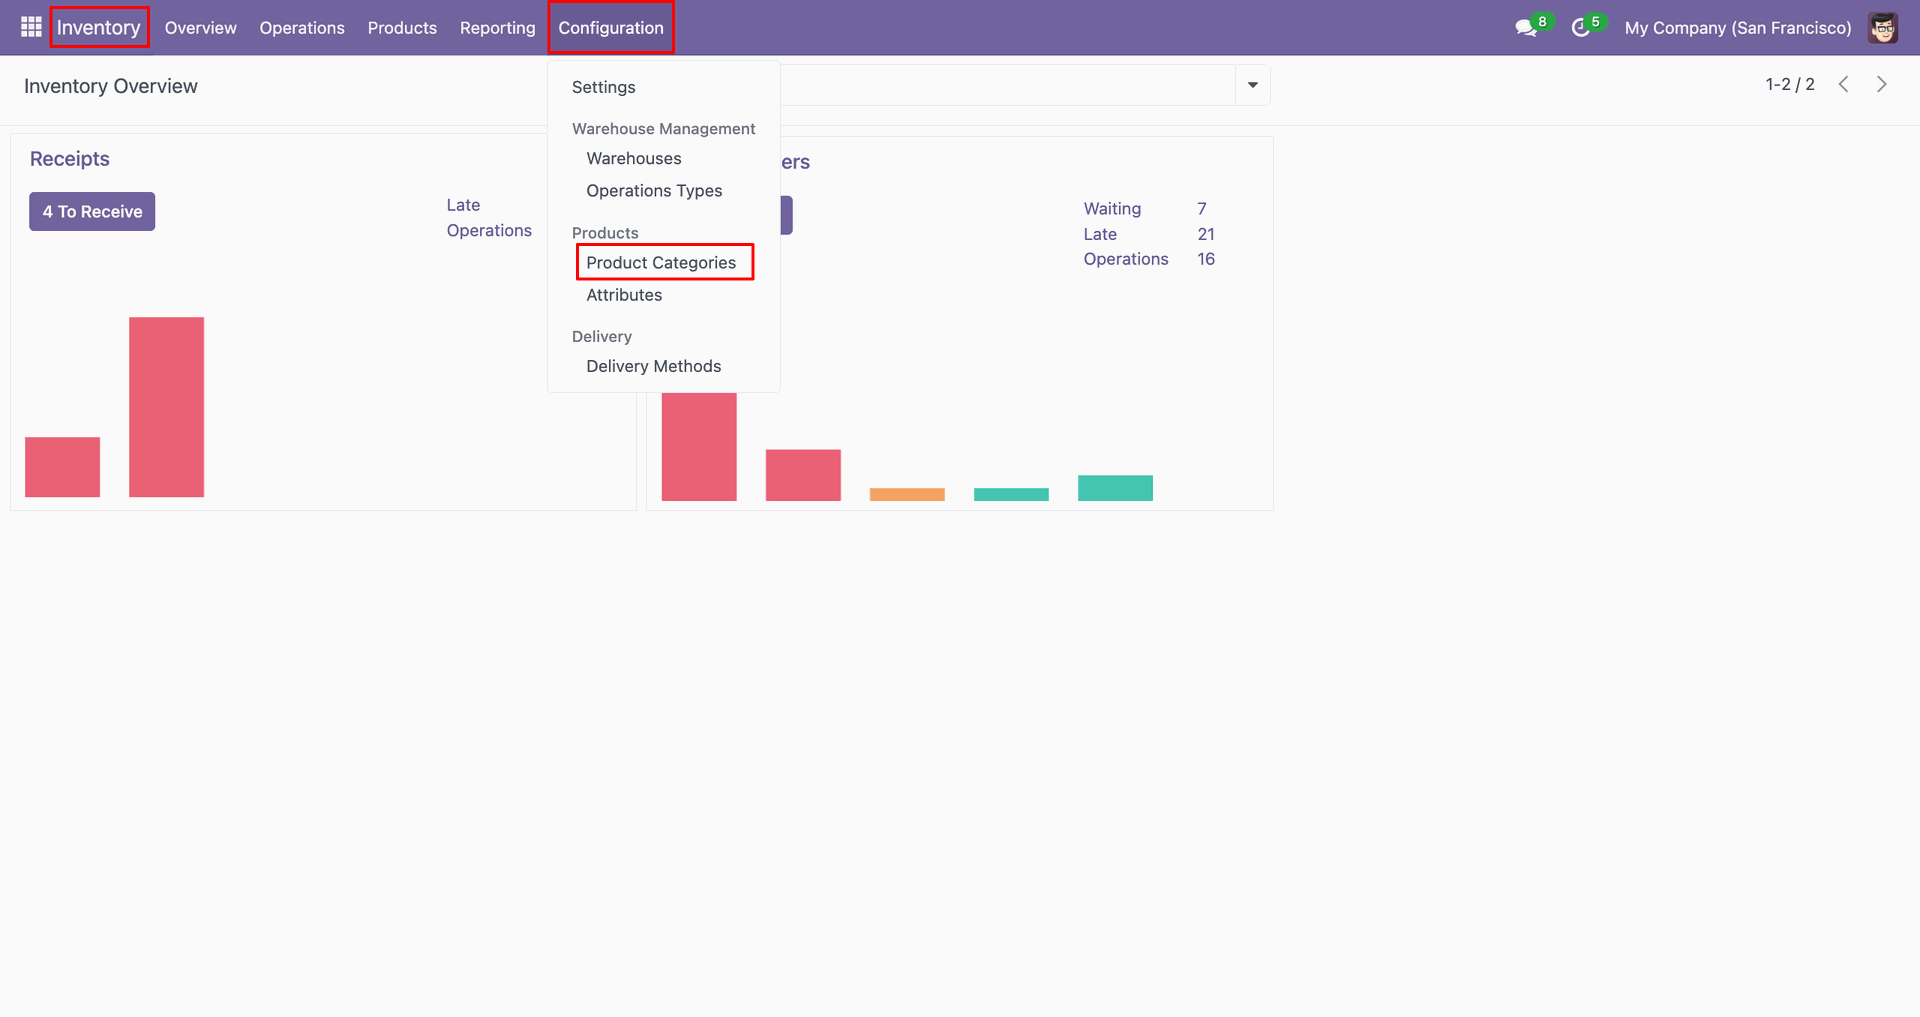
Click the 'Action', click 'Export Category to QuickBooks'.
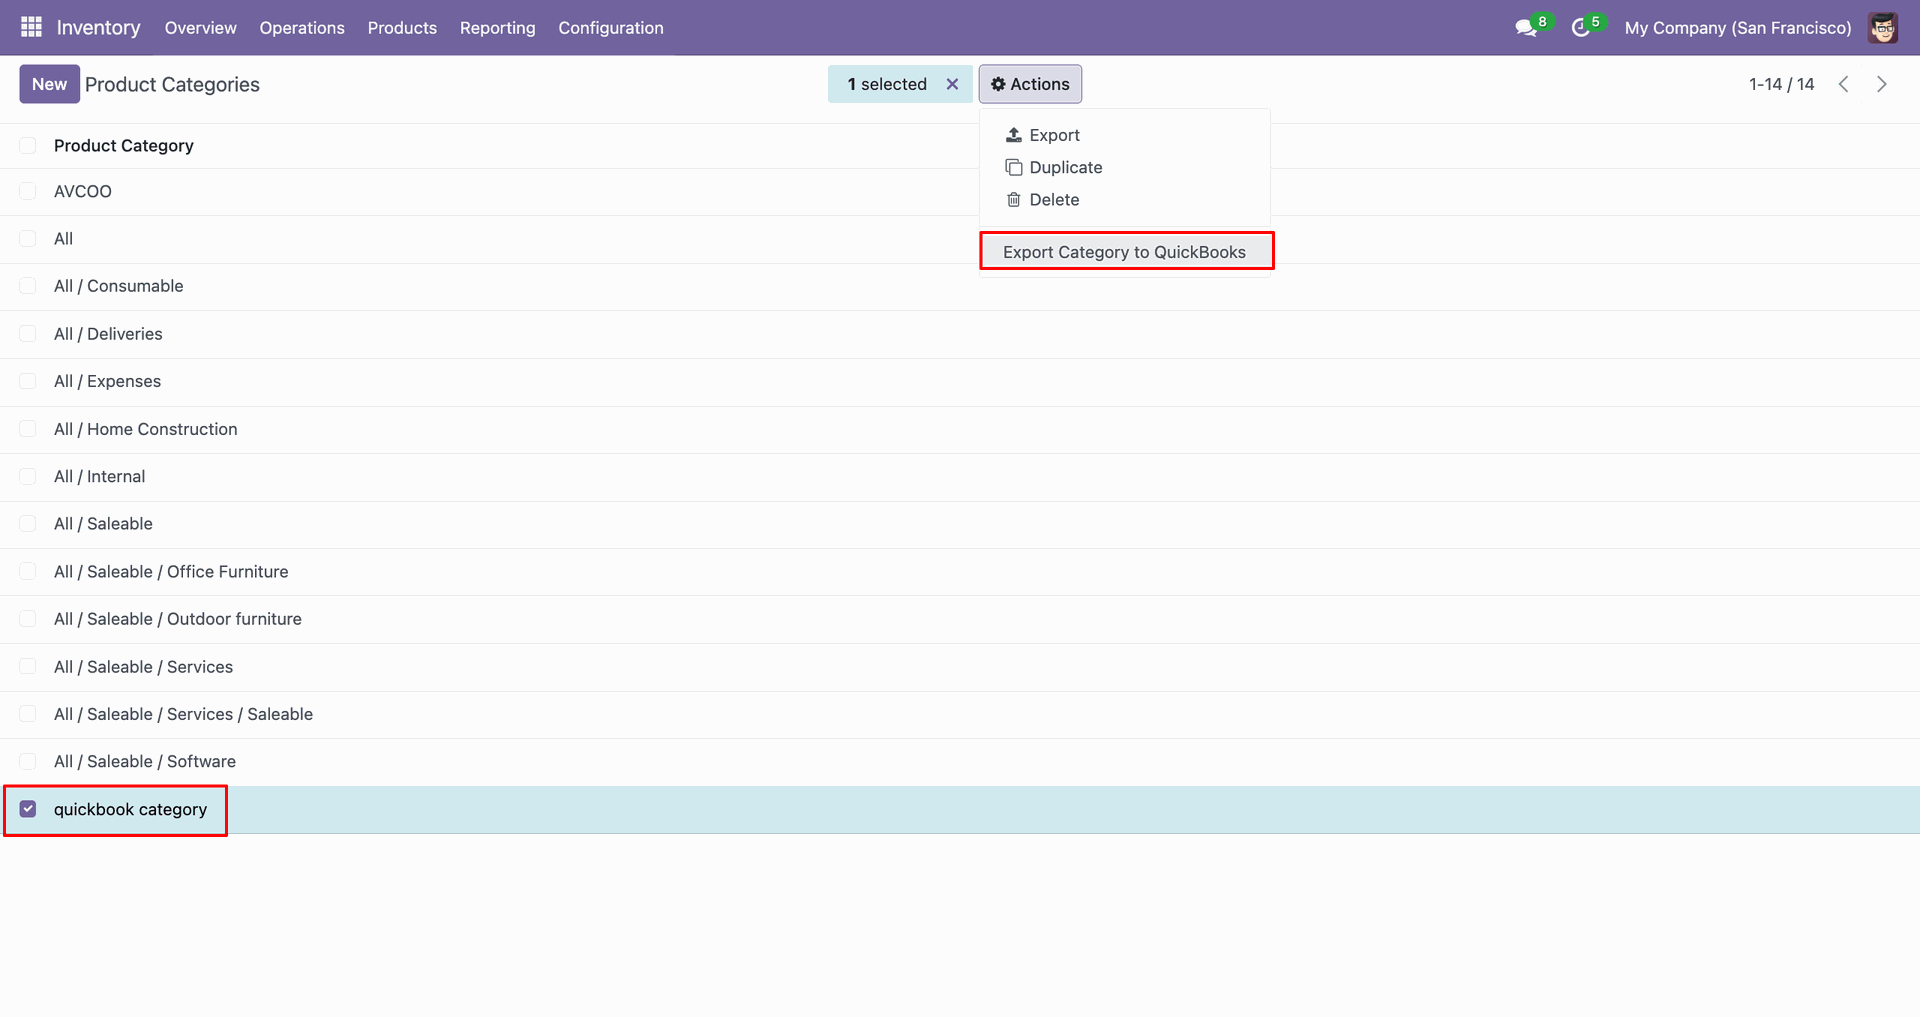
Config selection popup.
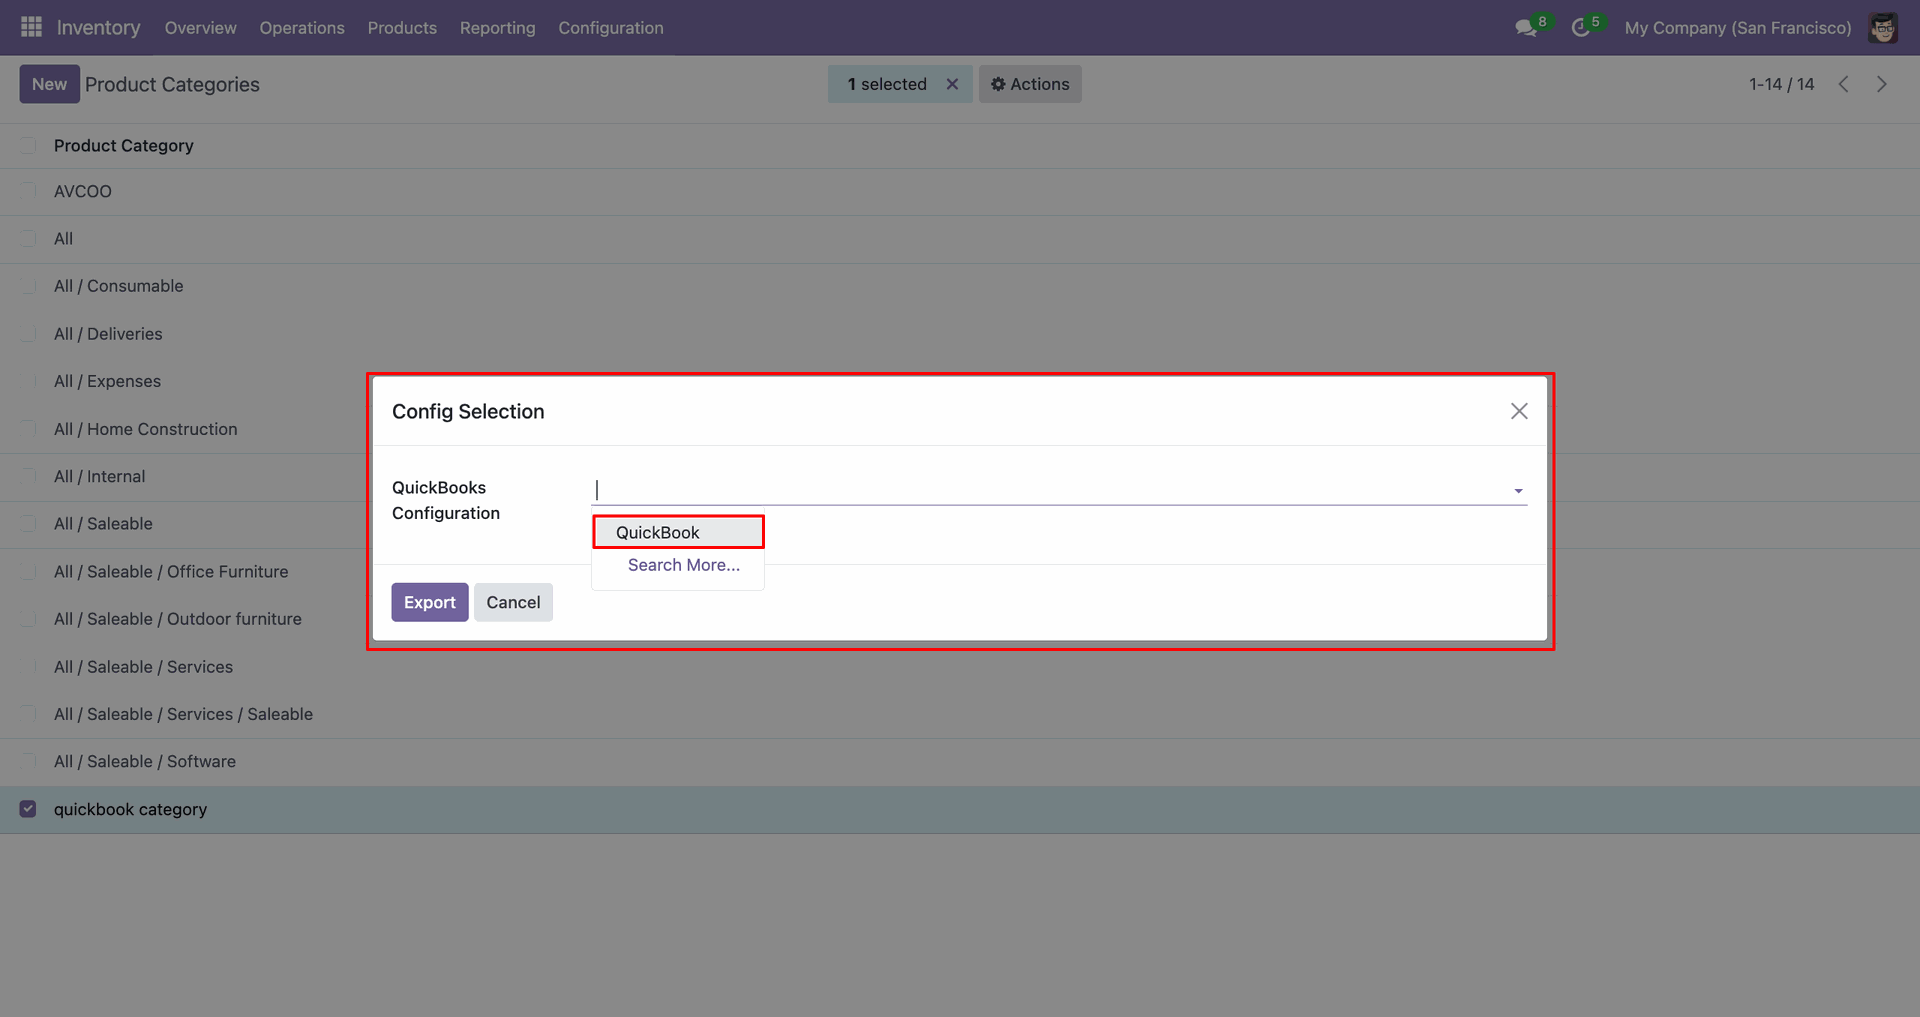
Select 'QuickBooks' and click 'Export'.
Log with details.
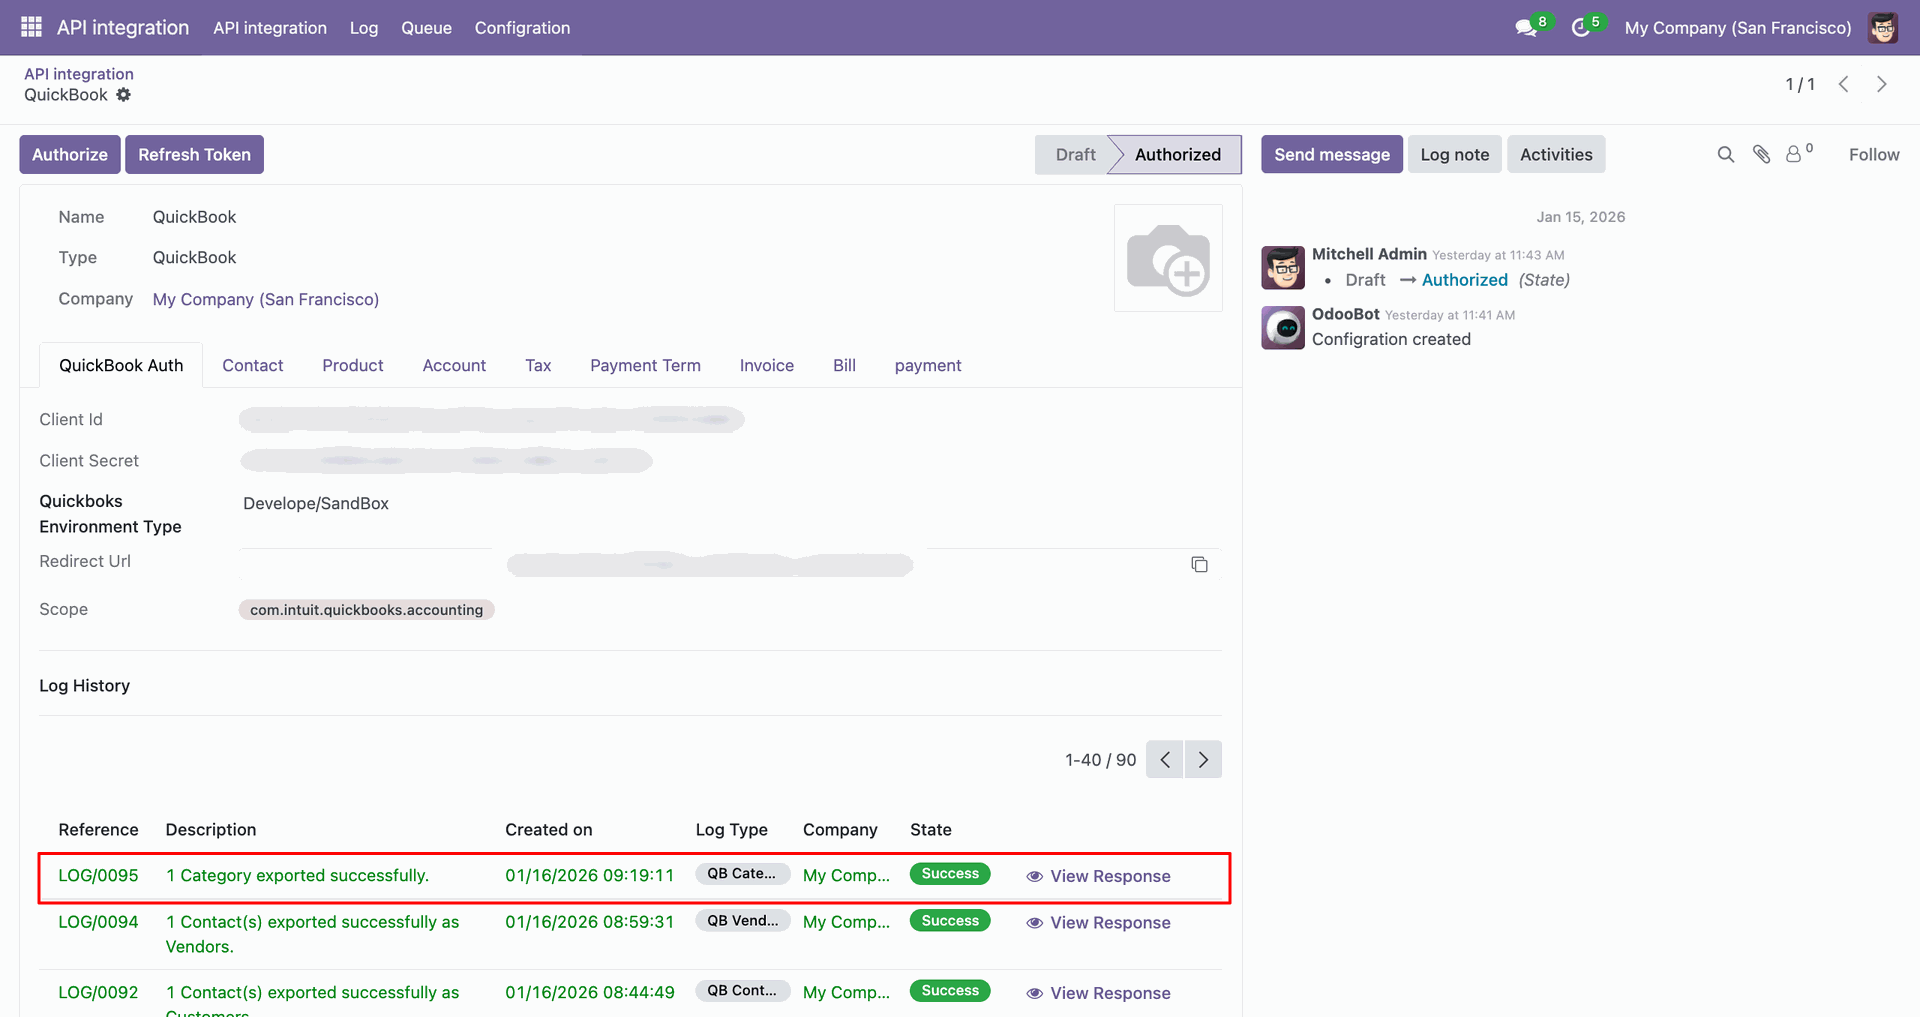
Products Category in QuickBooks.
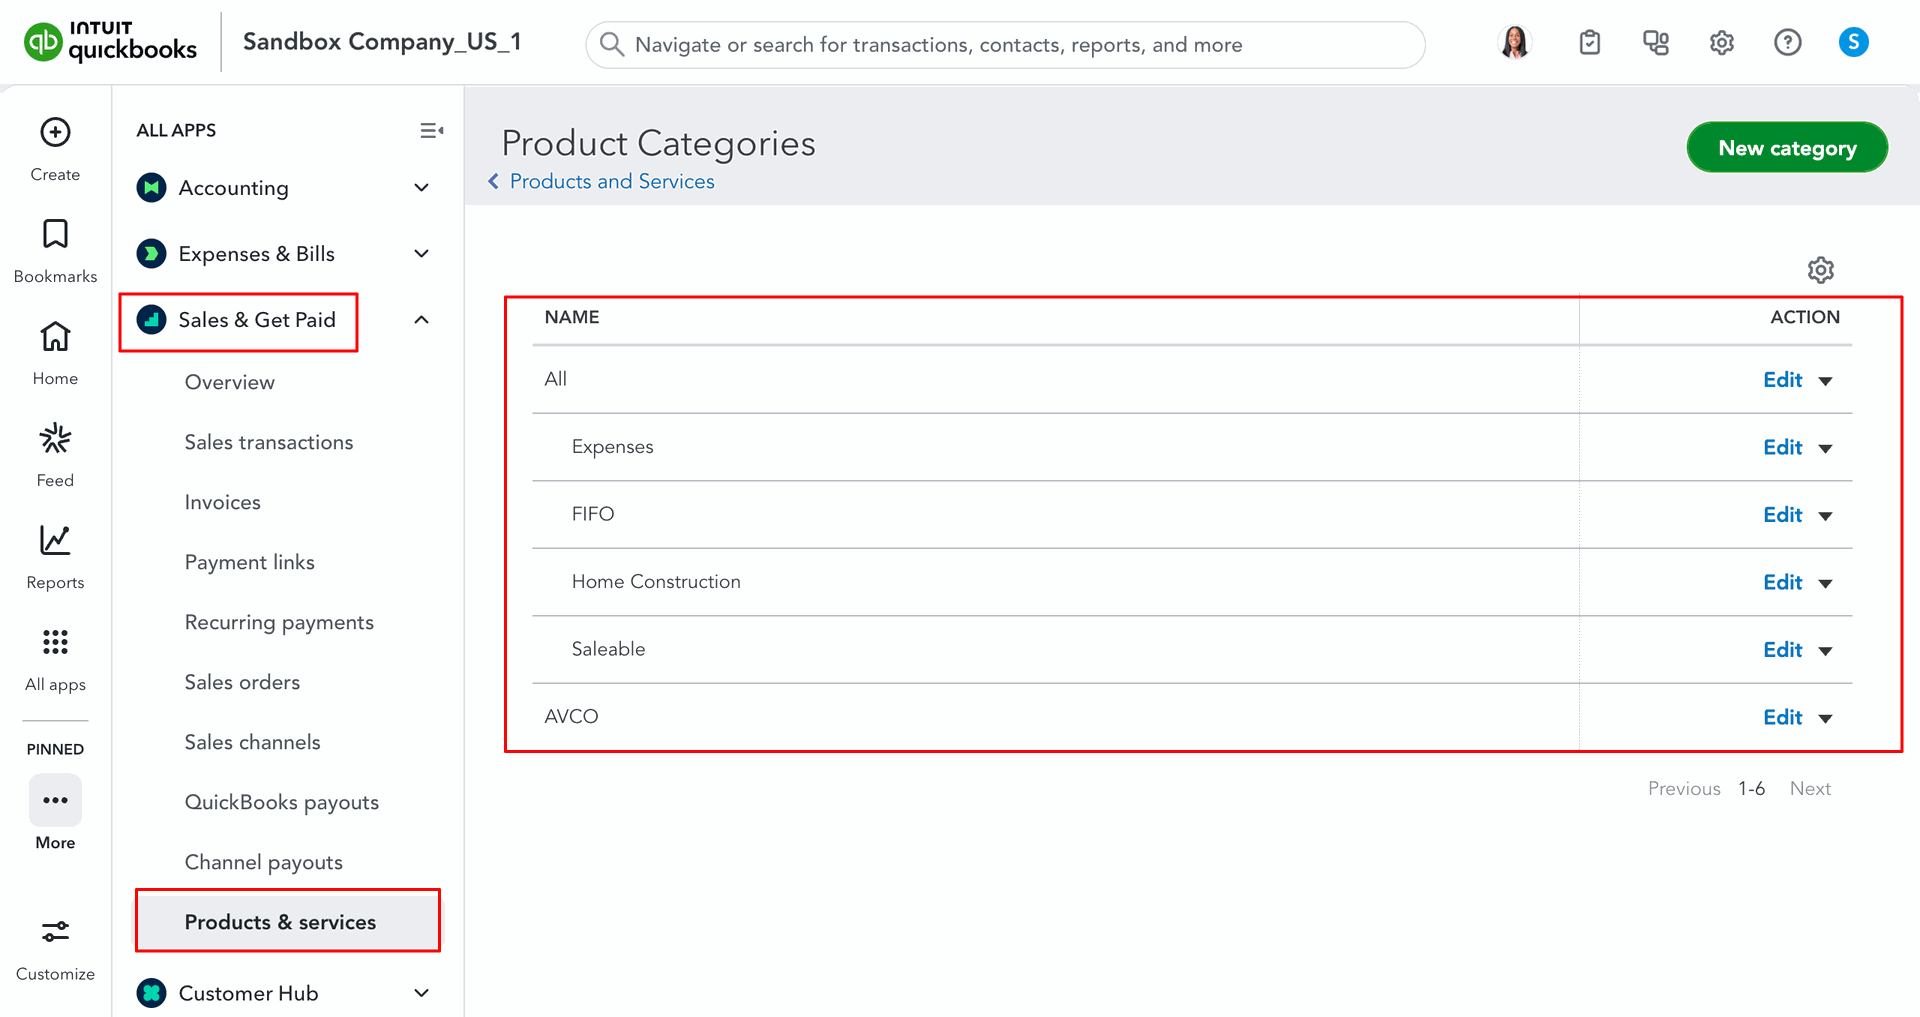
For the import, go to the 'Product' Tab, enable 'Import Category', and click 'Import'.
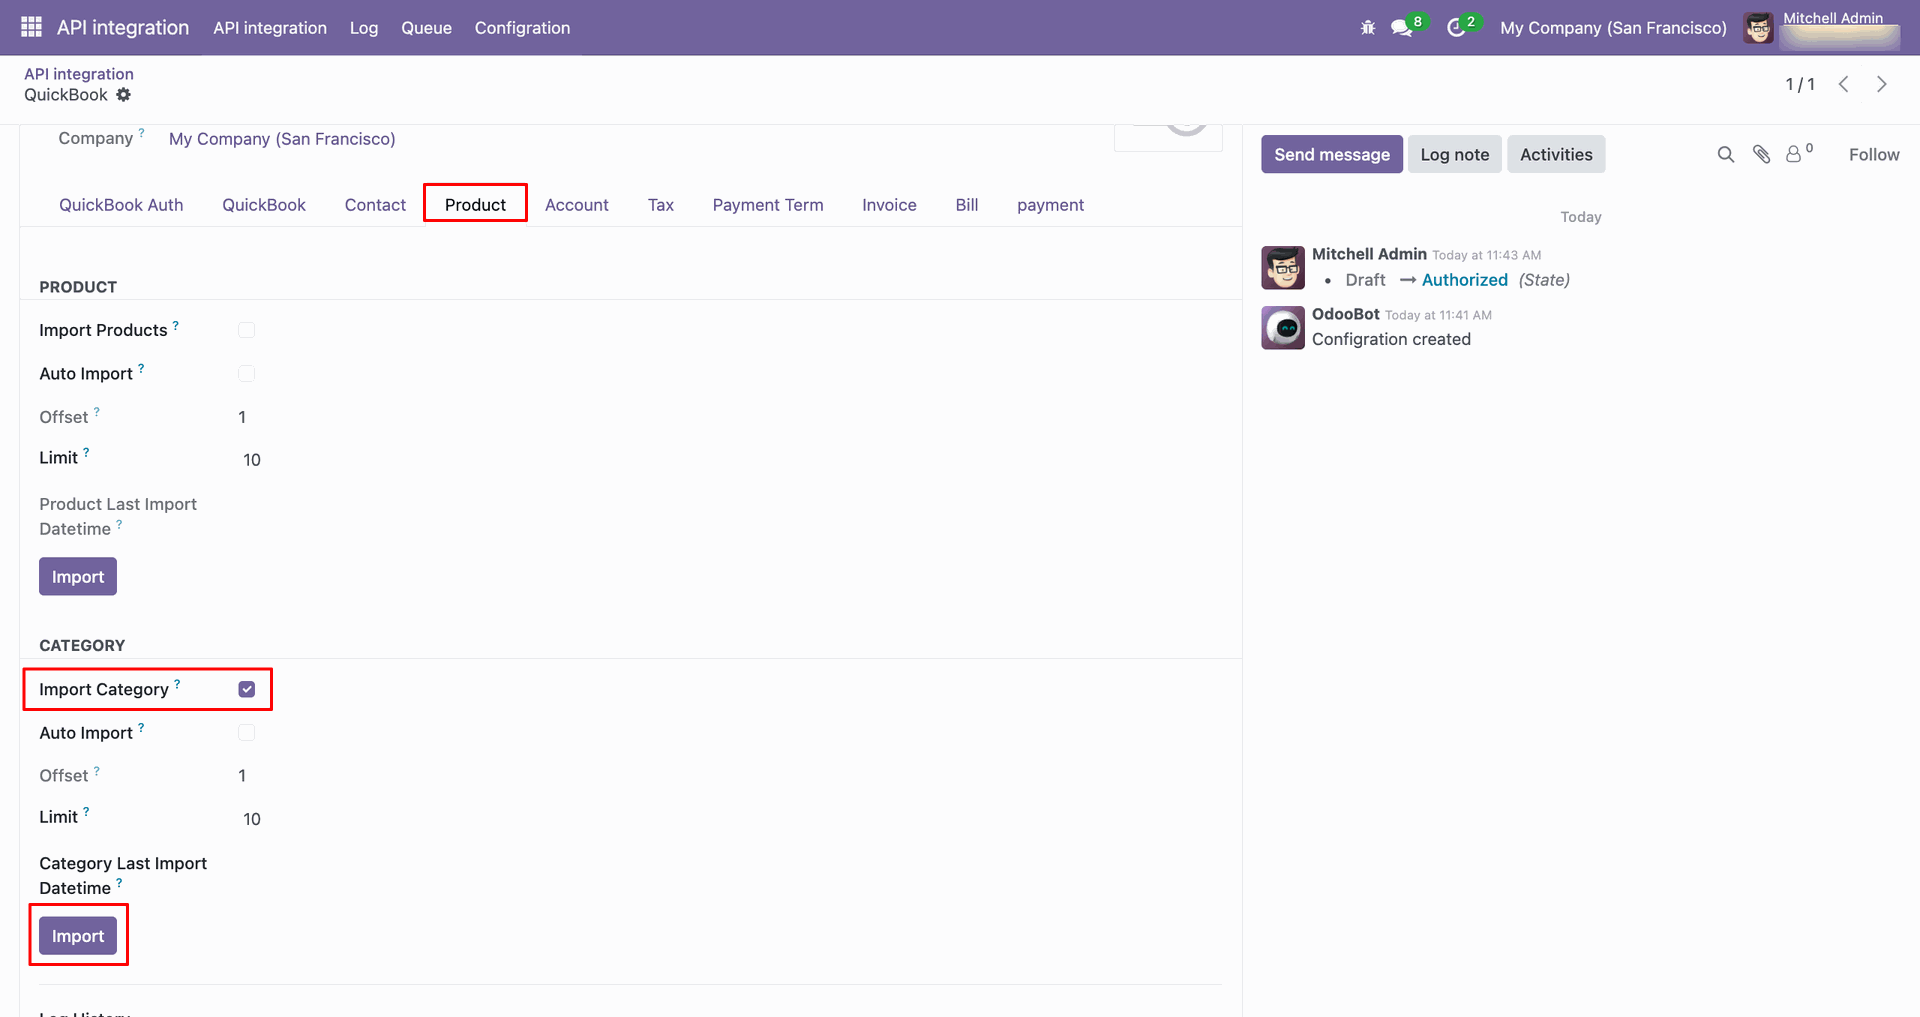
Log with imported data.
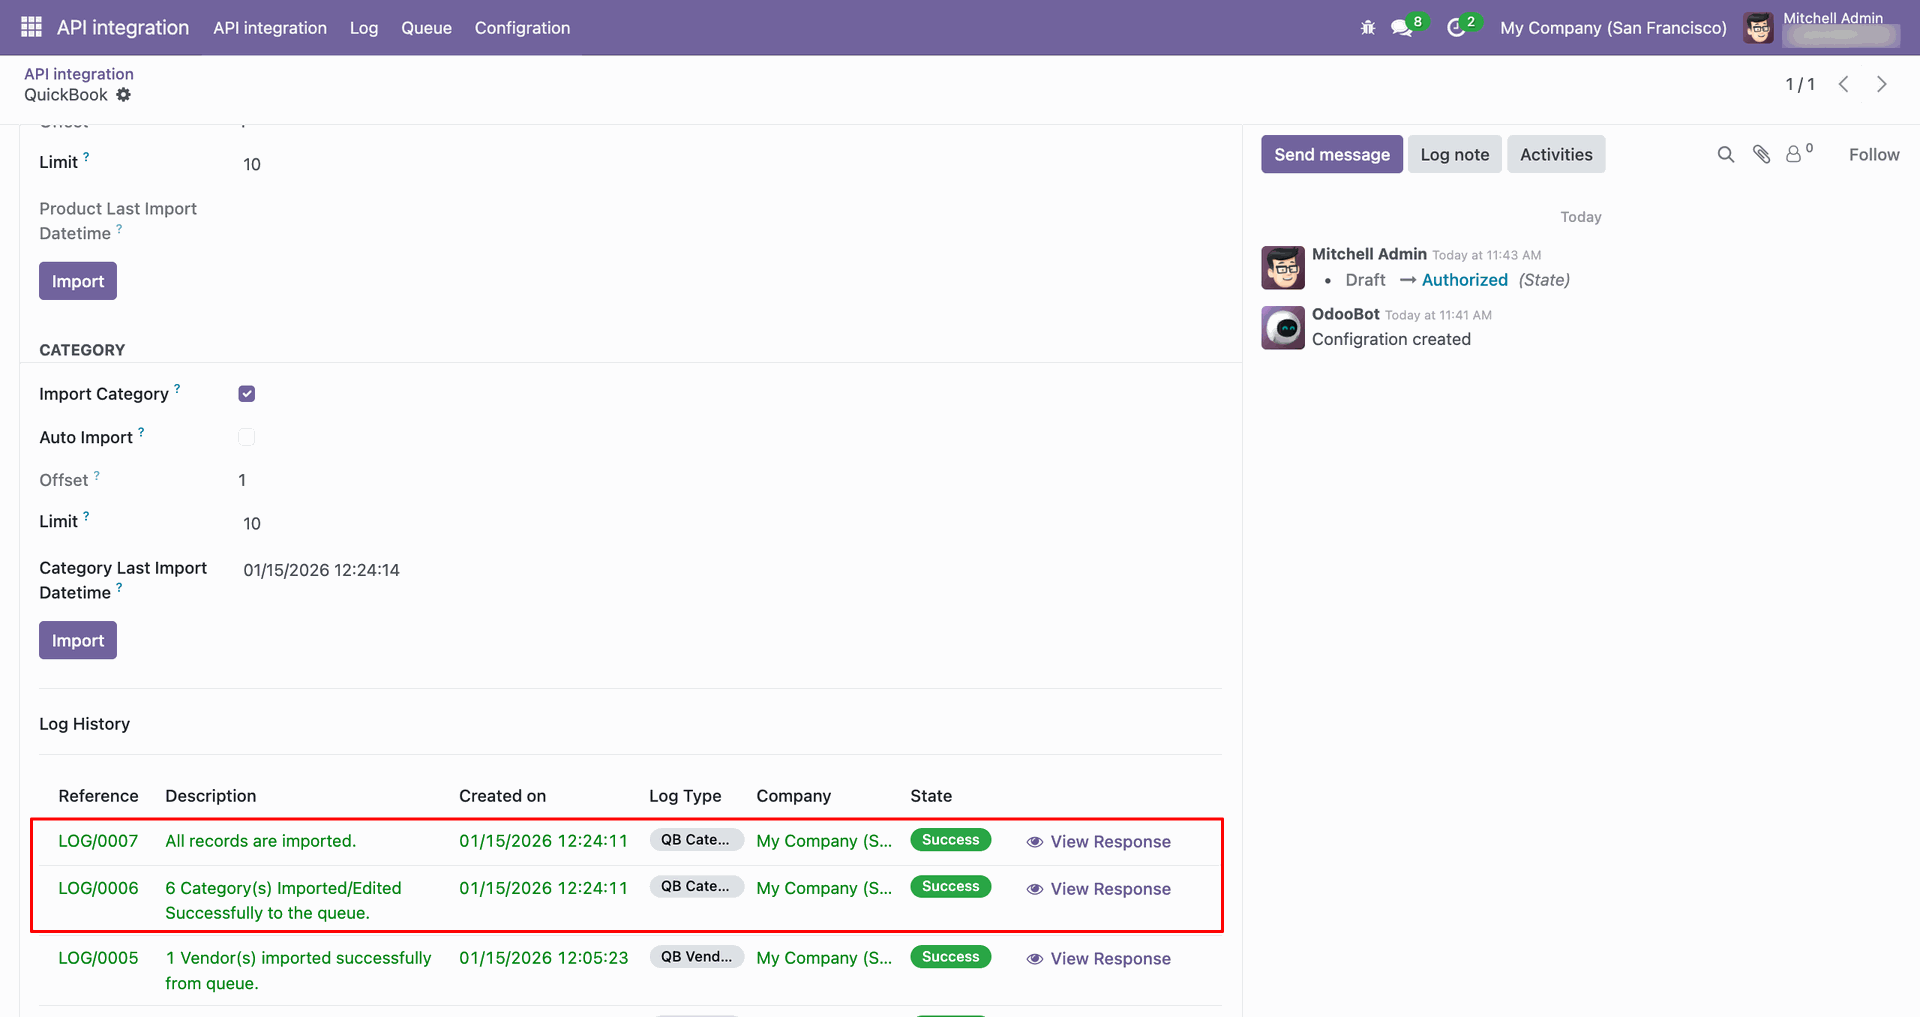
Go to the Queue, 'QB Category'.
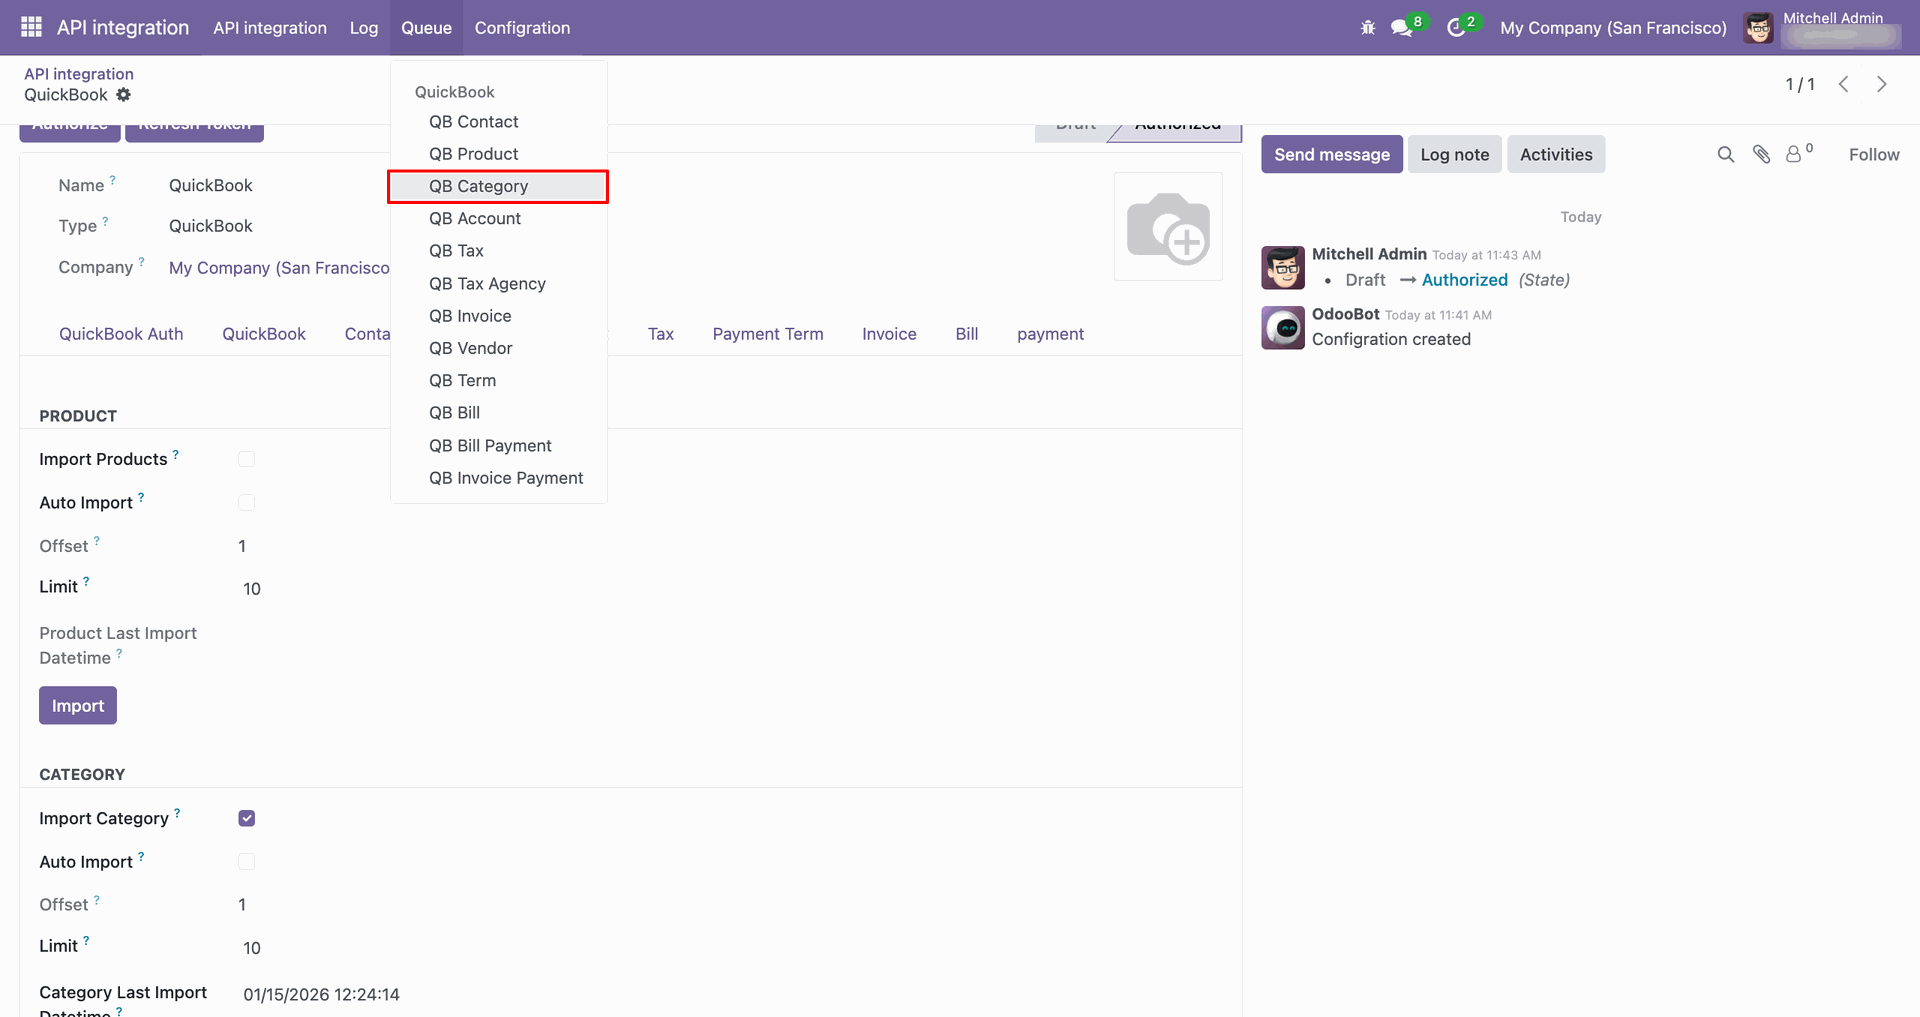
It will open the queue.
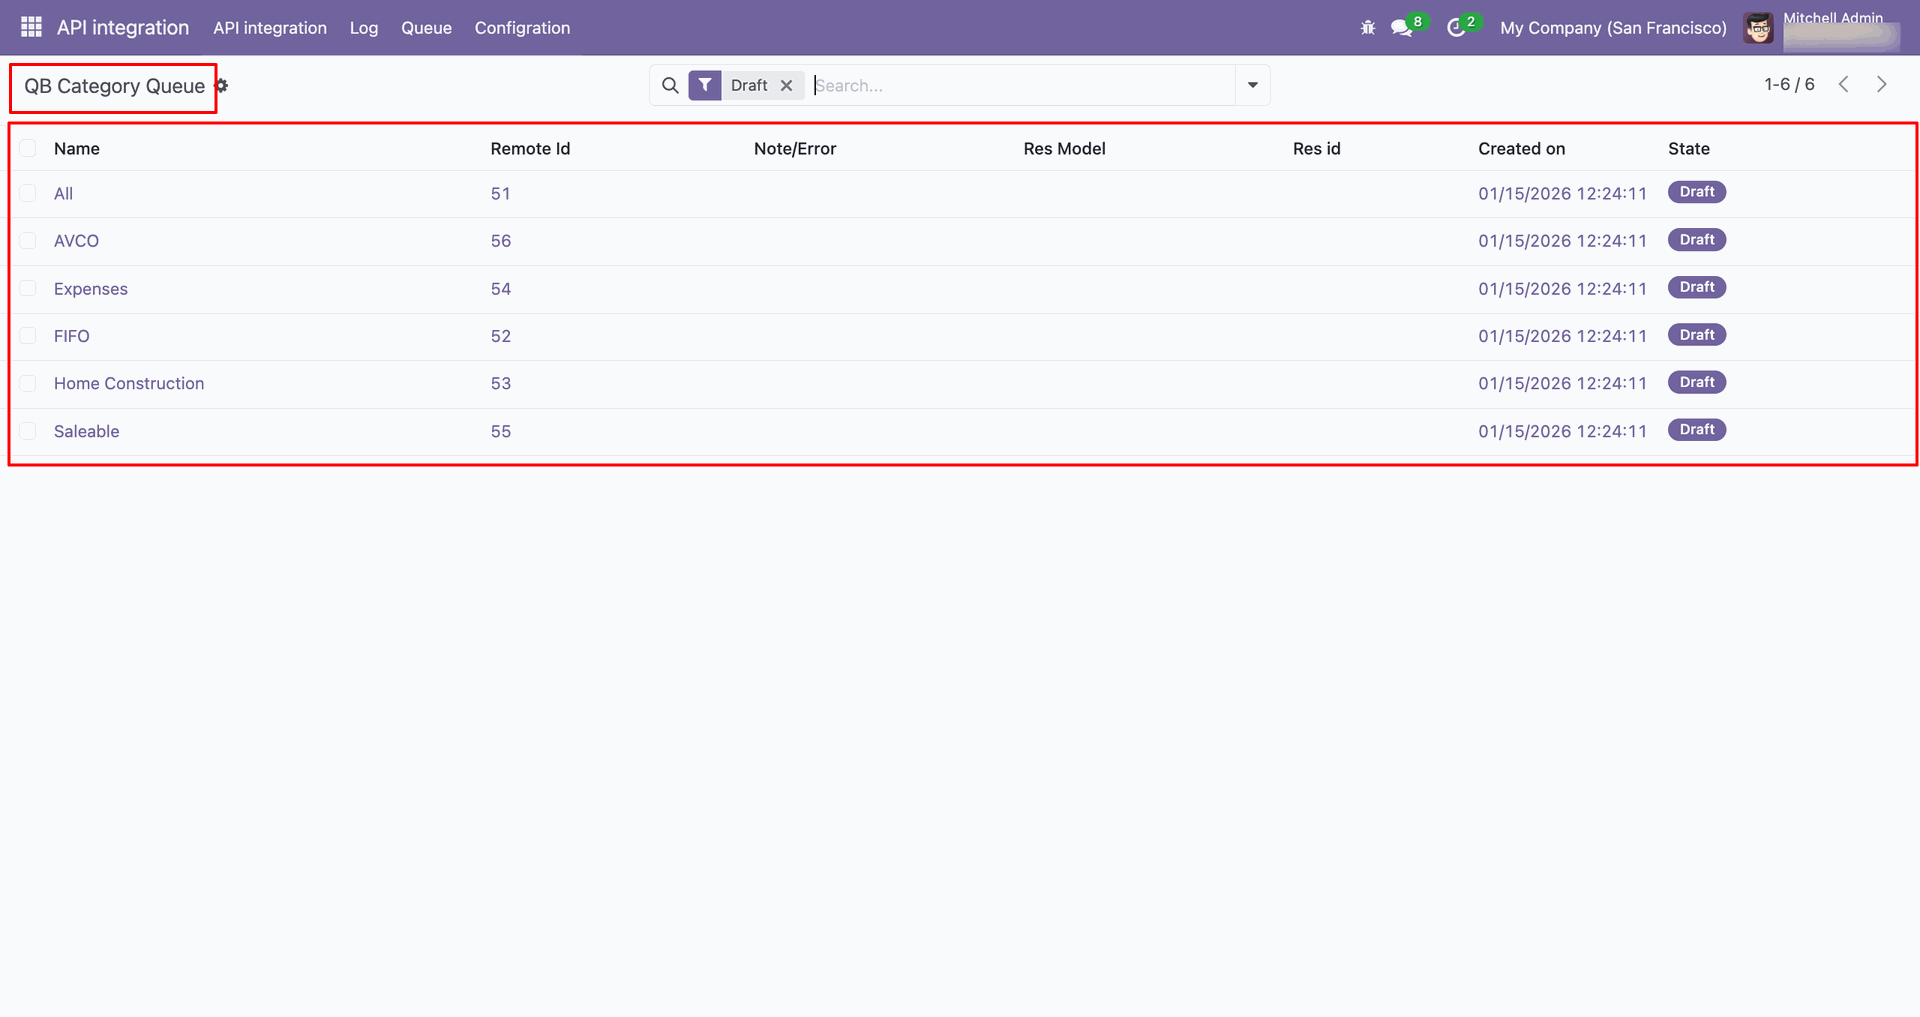
You can import from the queue.
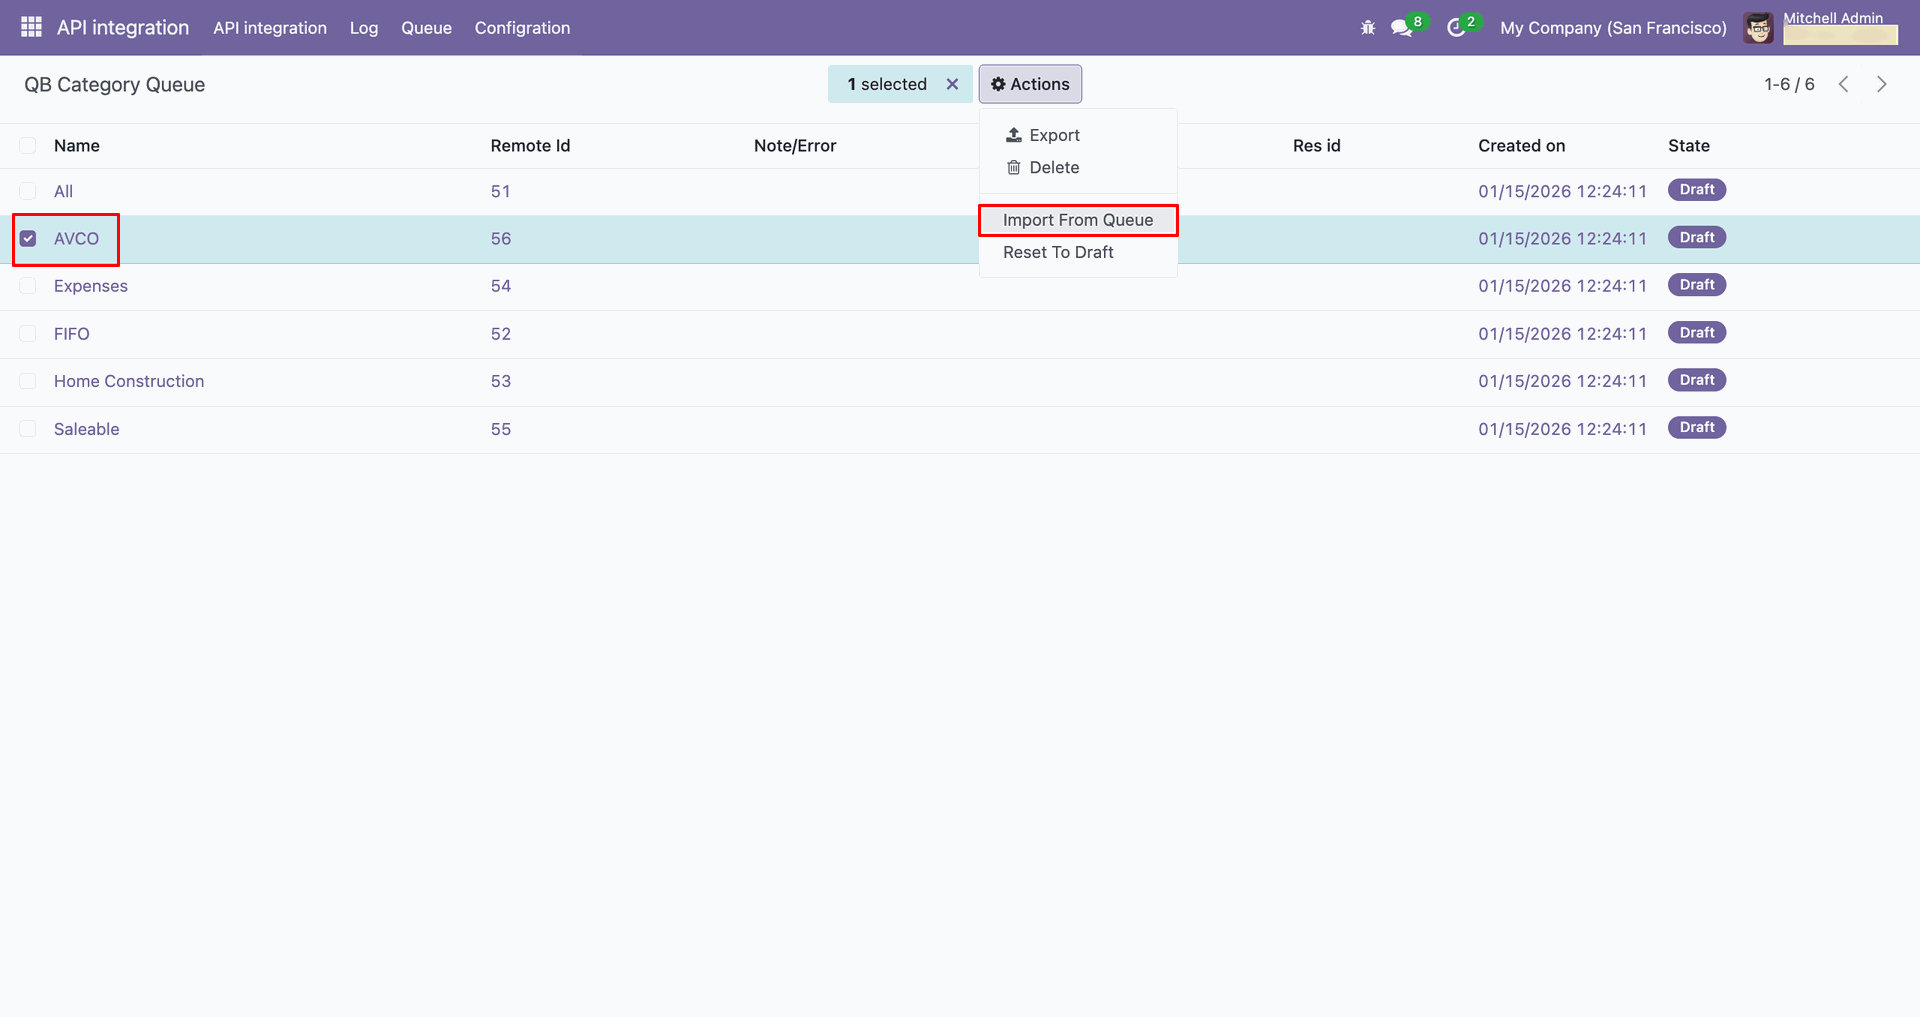
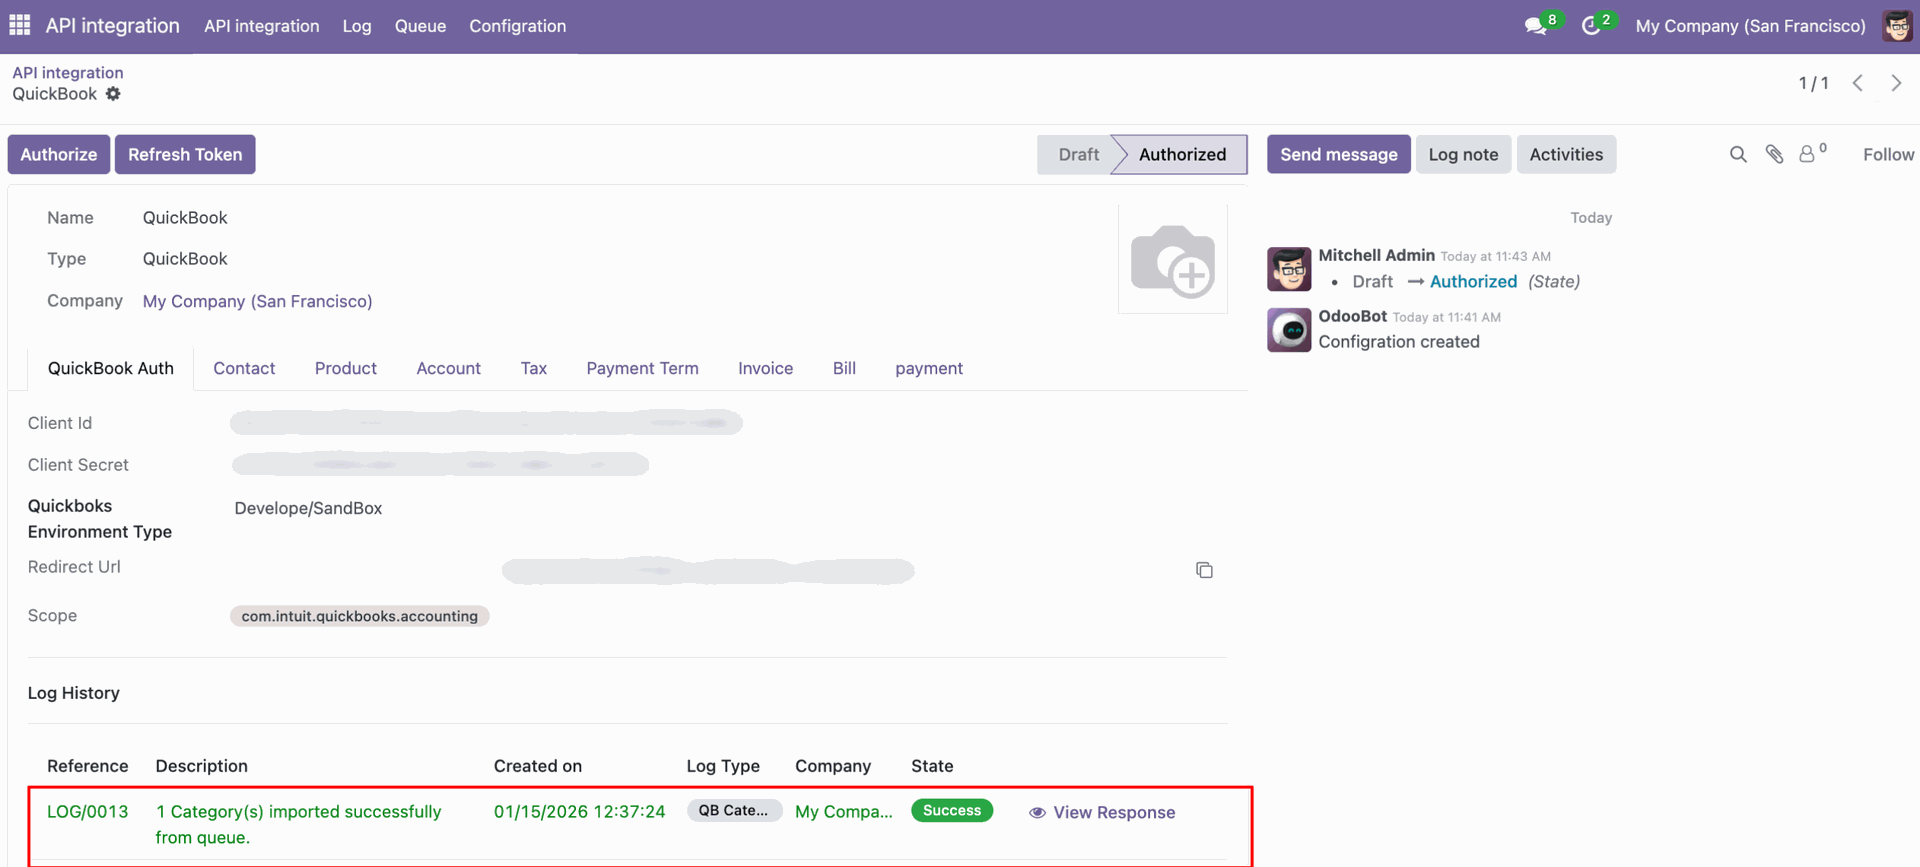
Log with details.
Group by with 'Status'.
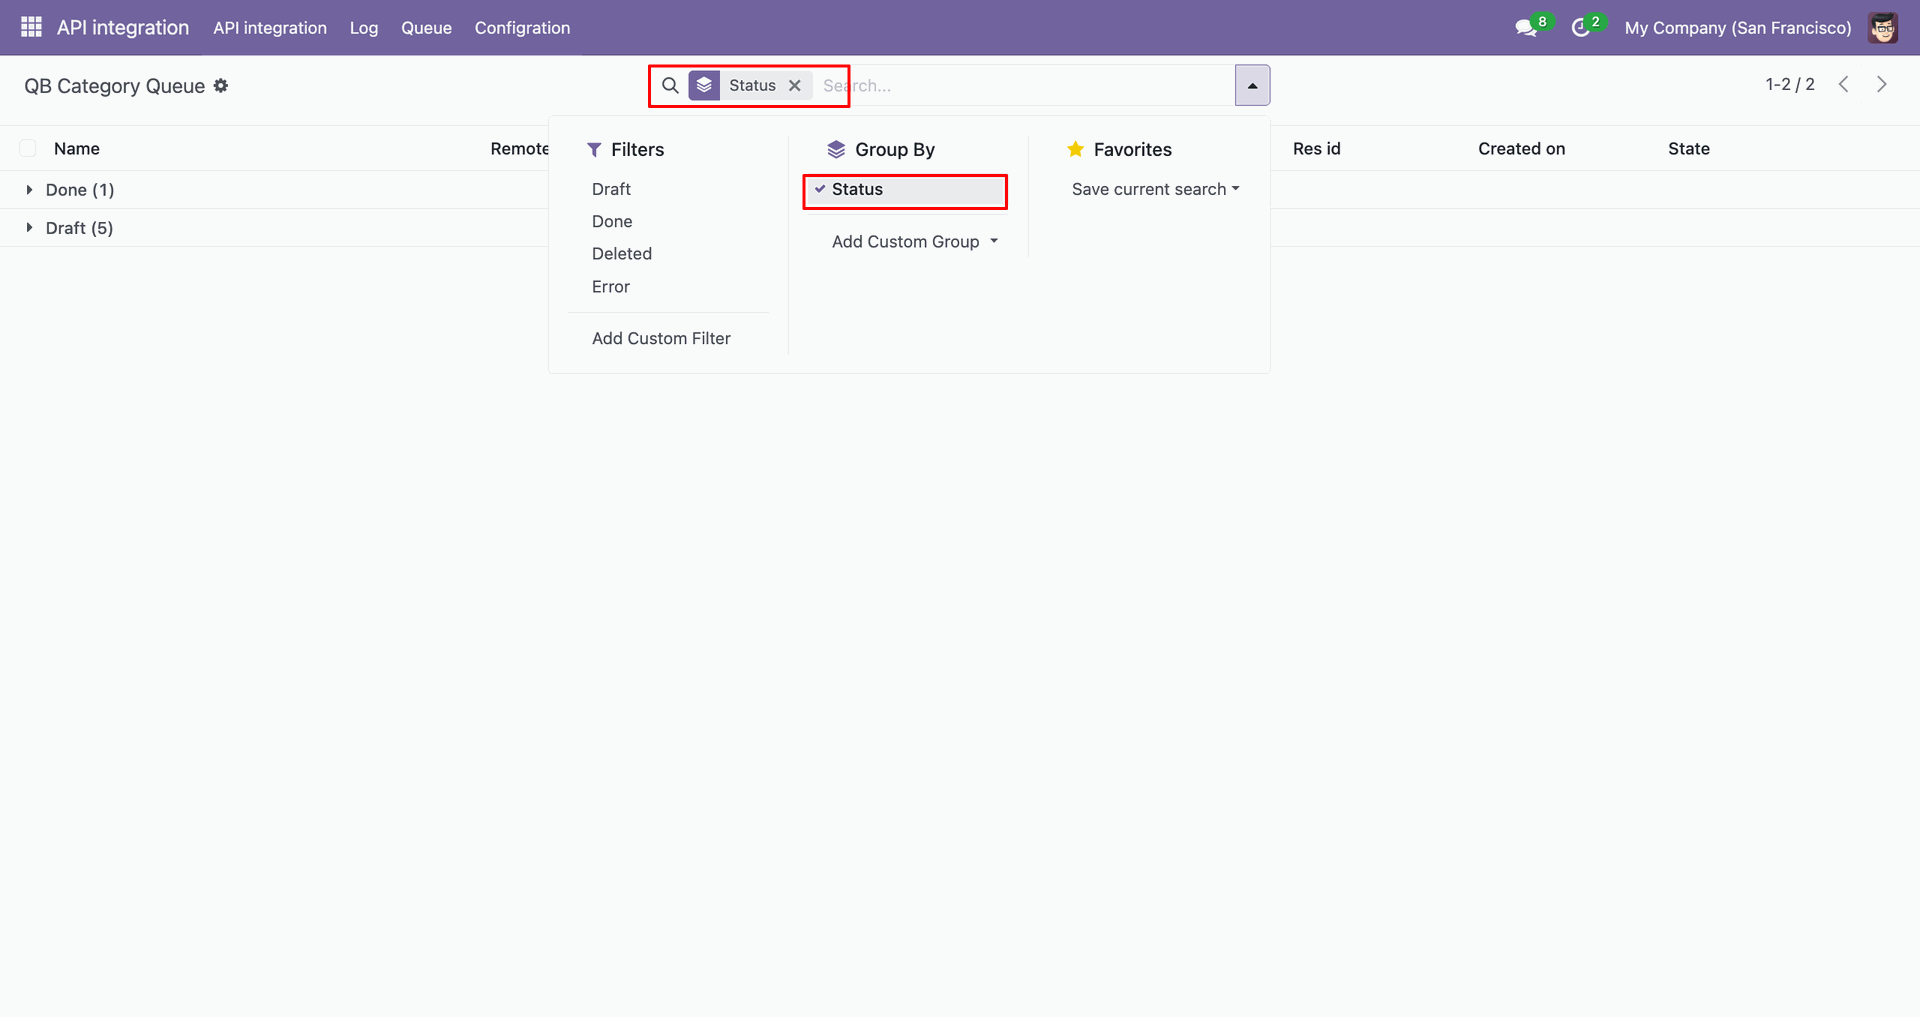
Group by result.
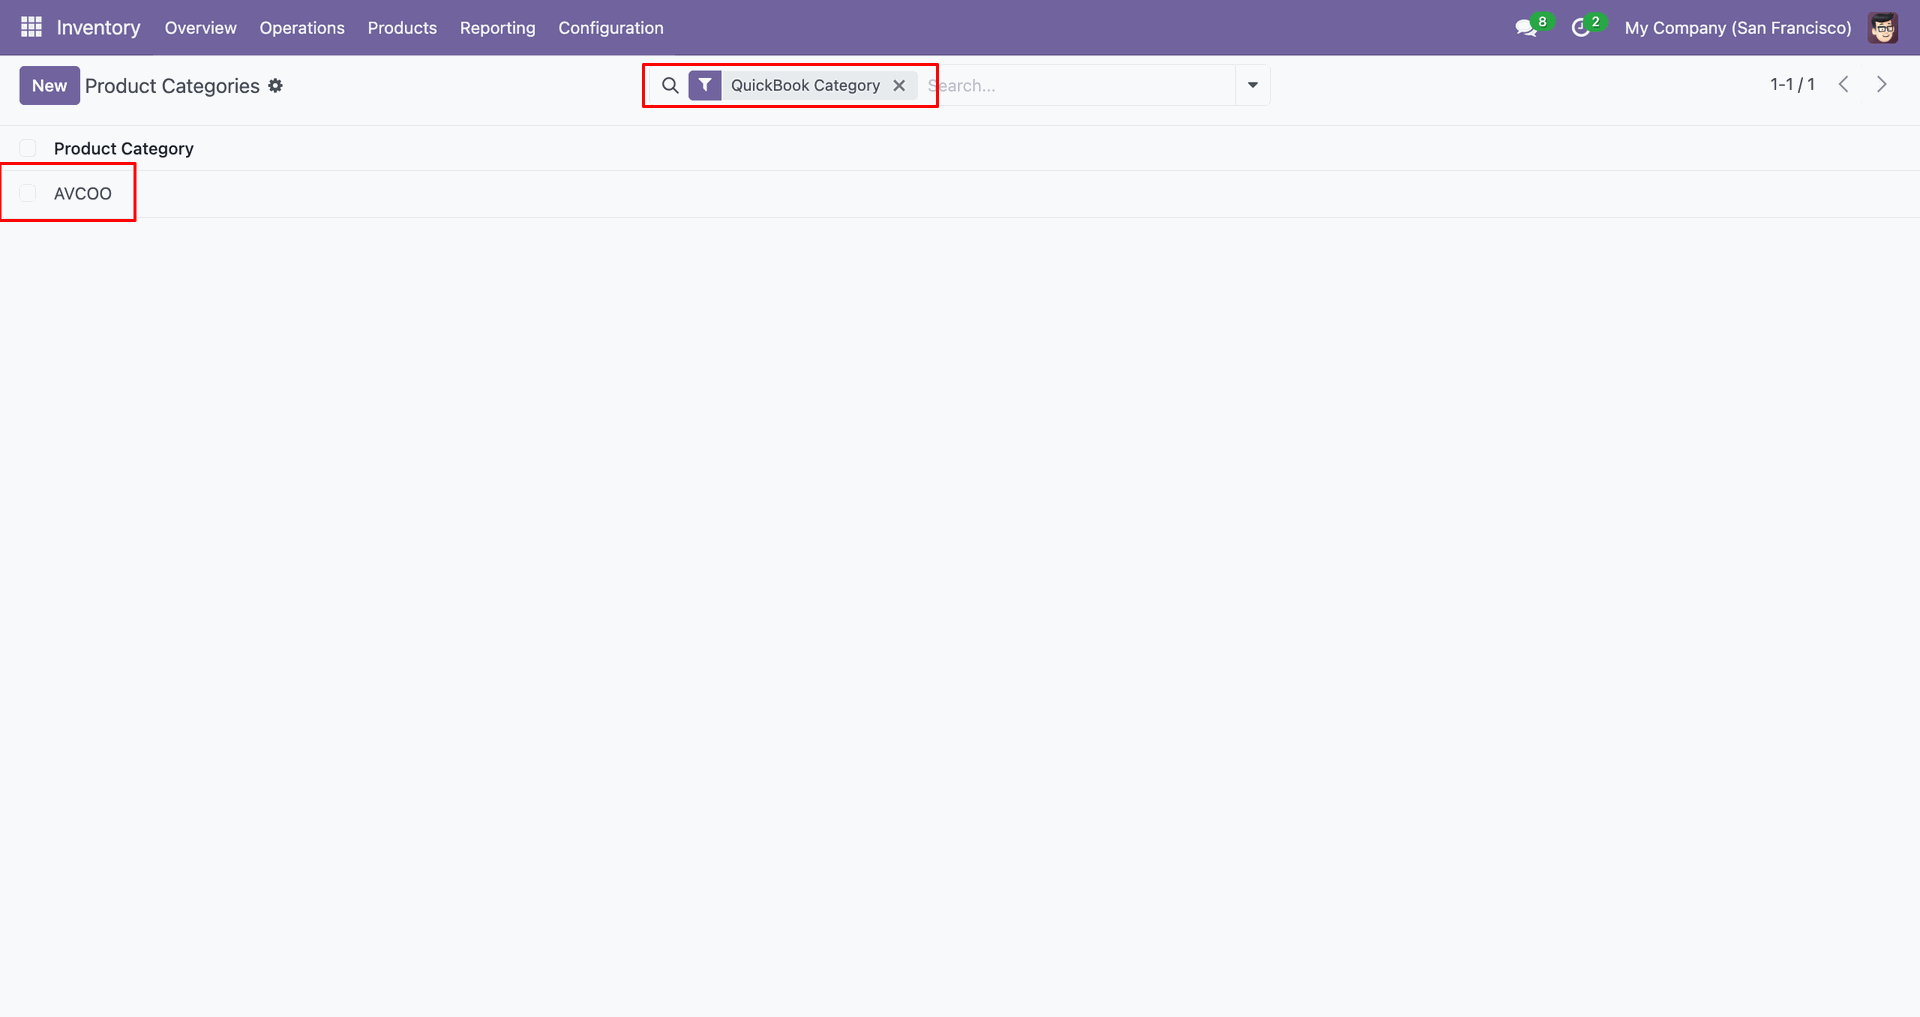
You can filter by QuickBooks Category.
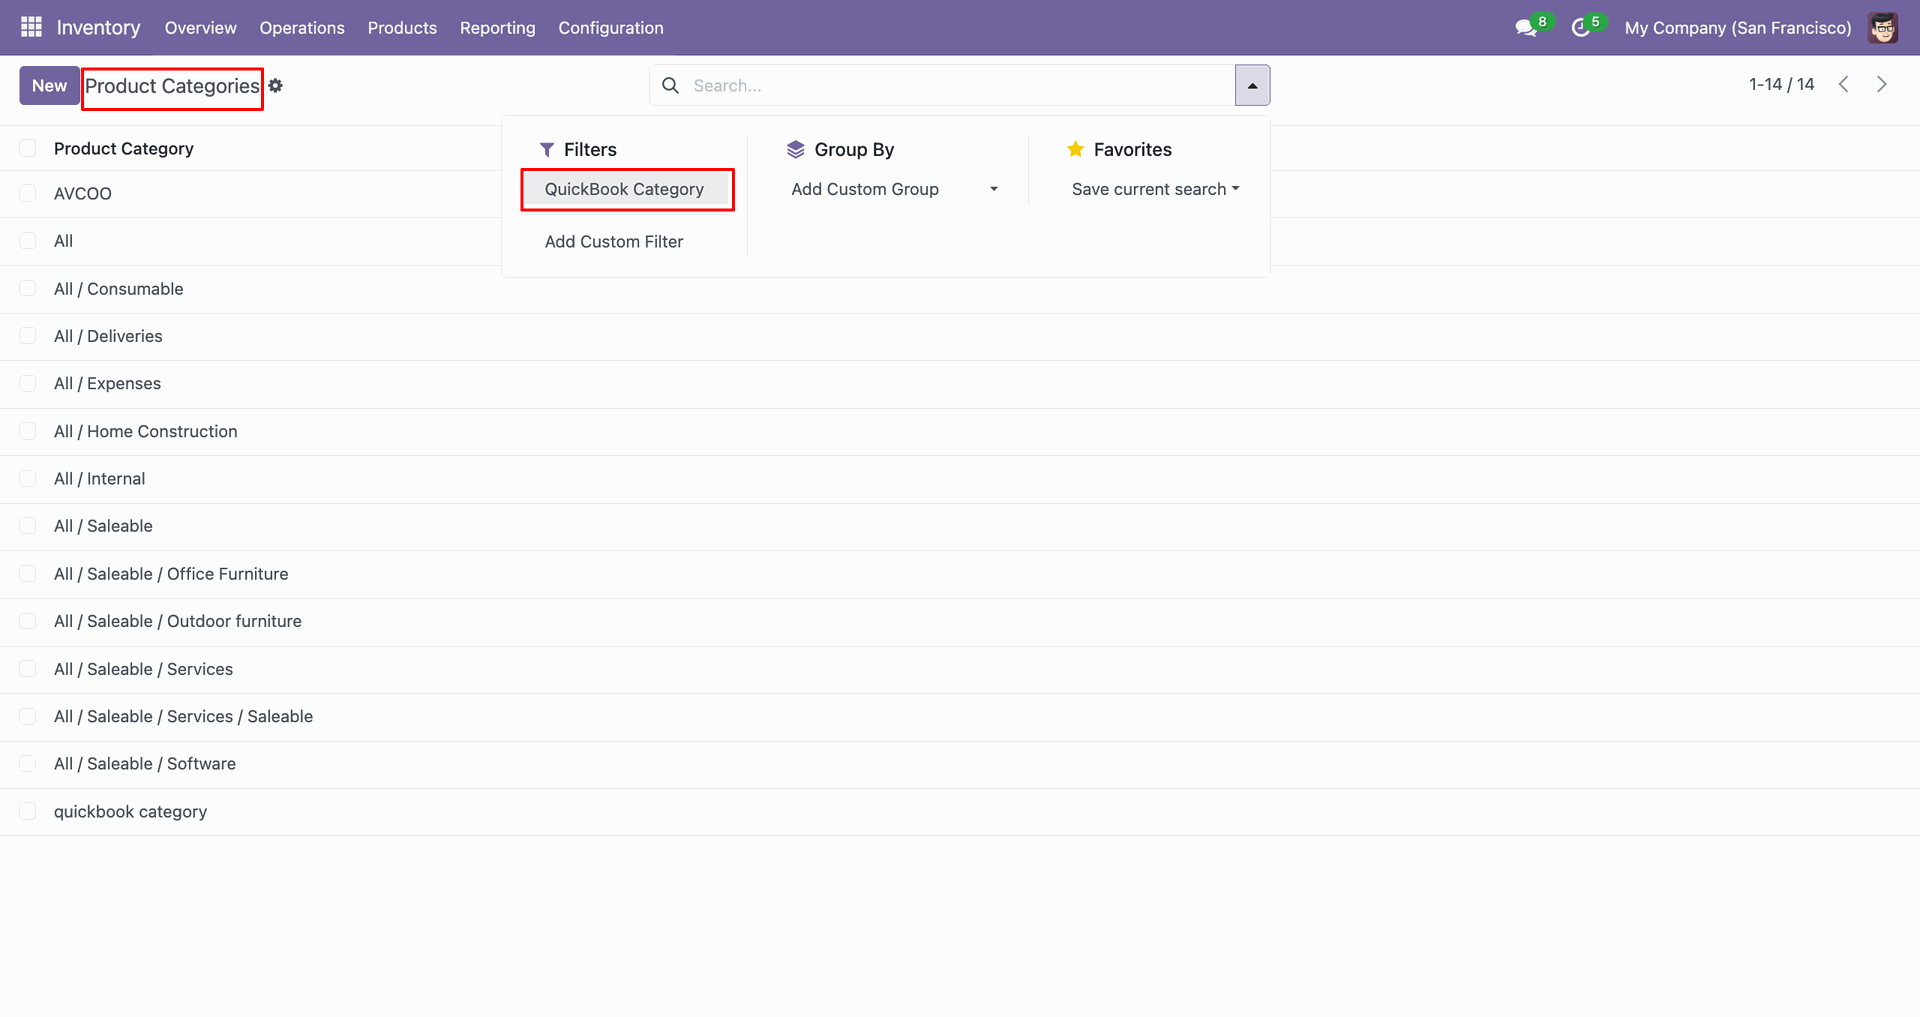
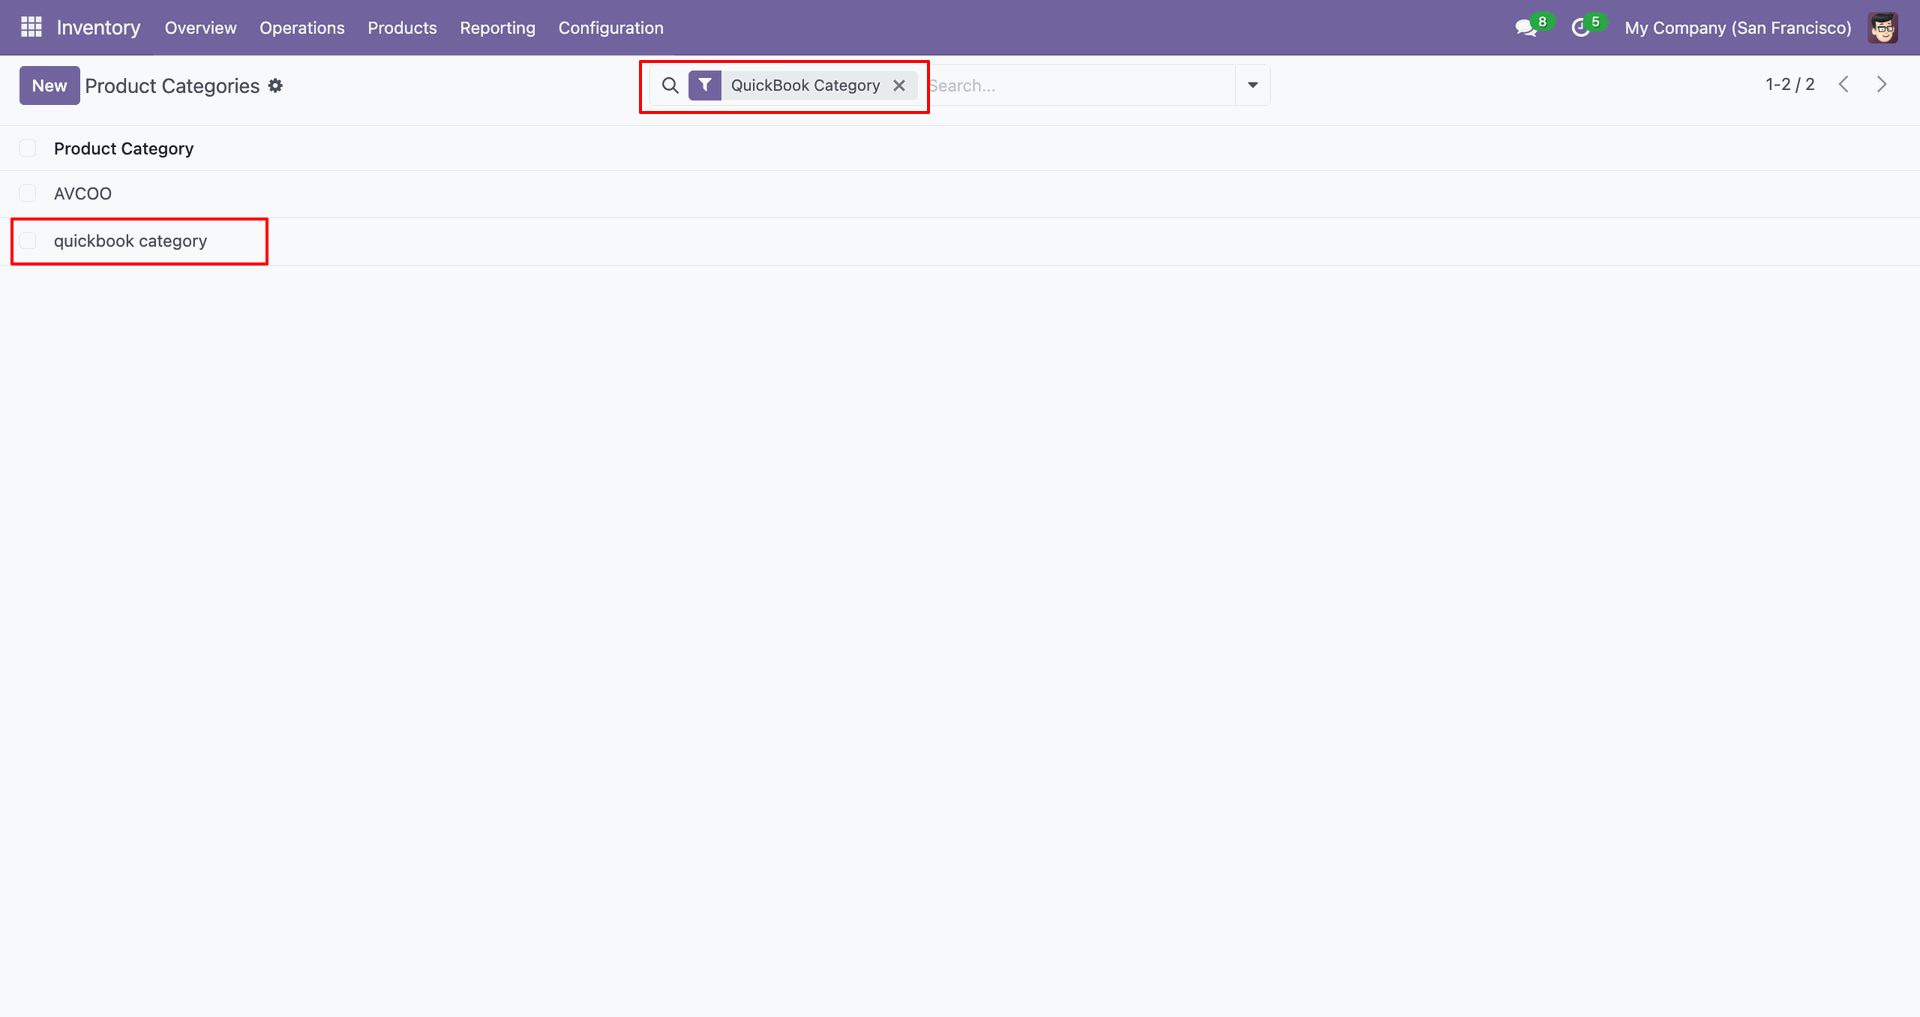
Filter result.
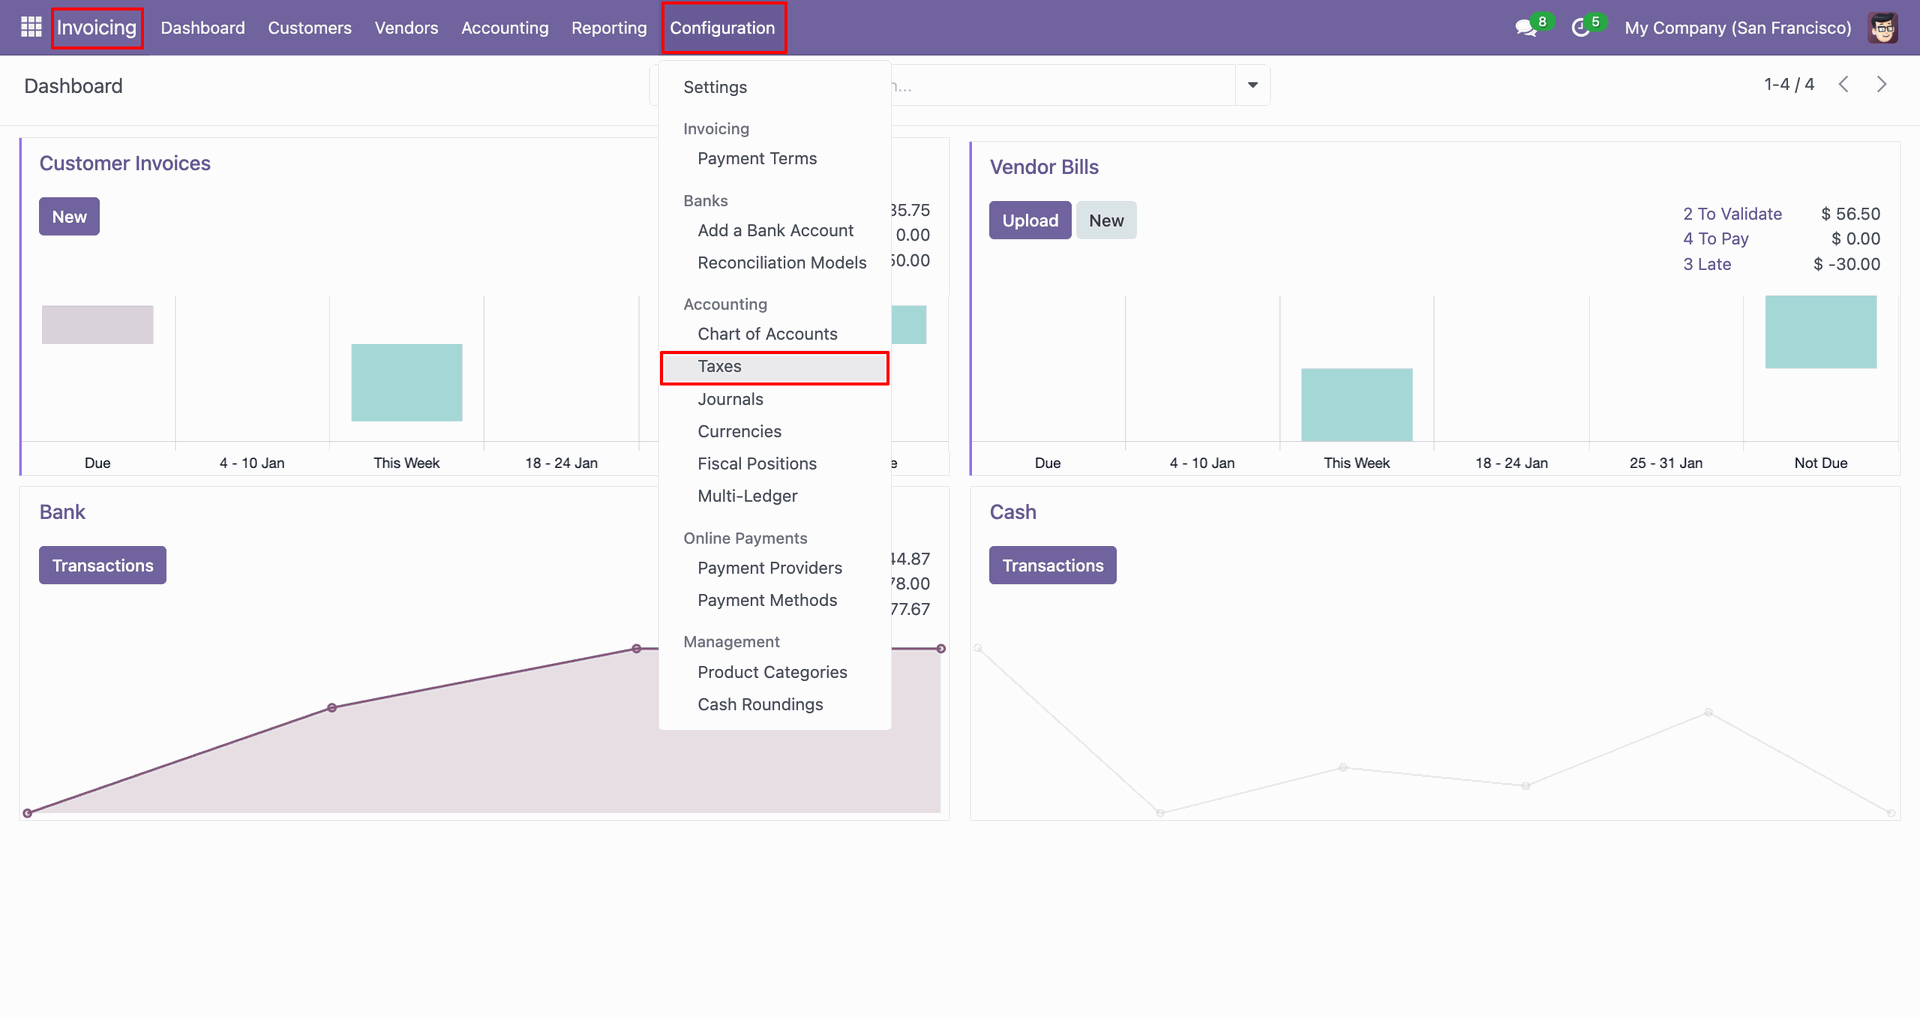
Go to the 'Configuration', click 'Taxes'.
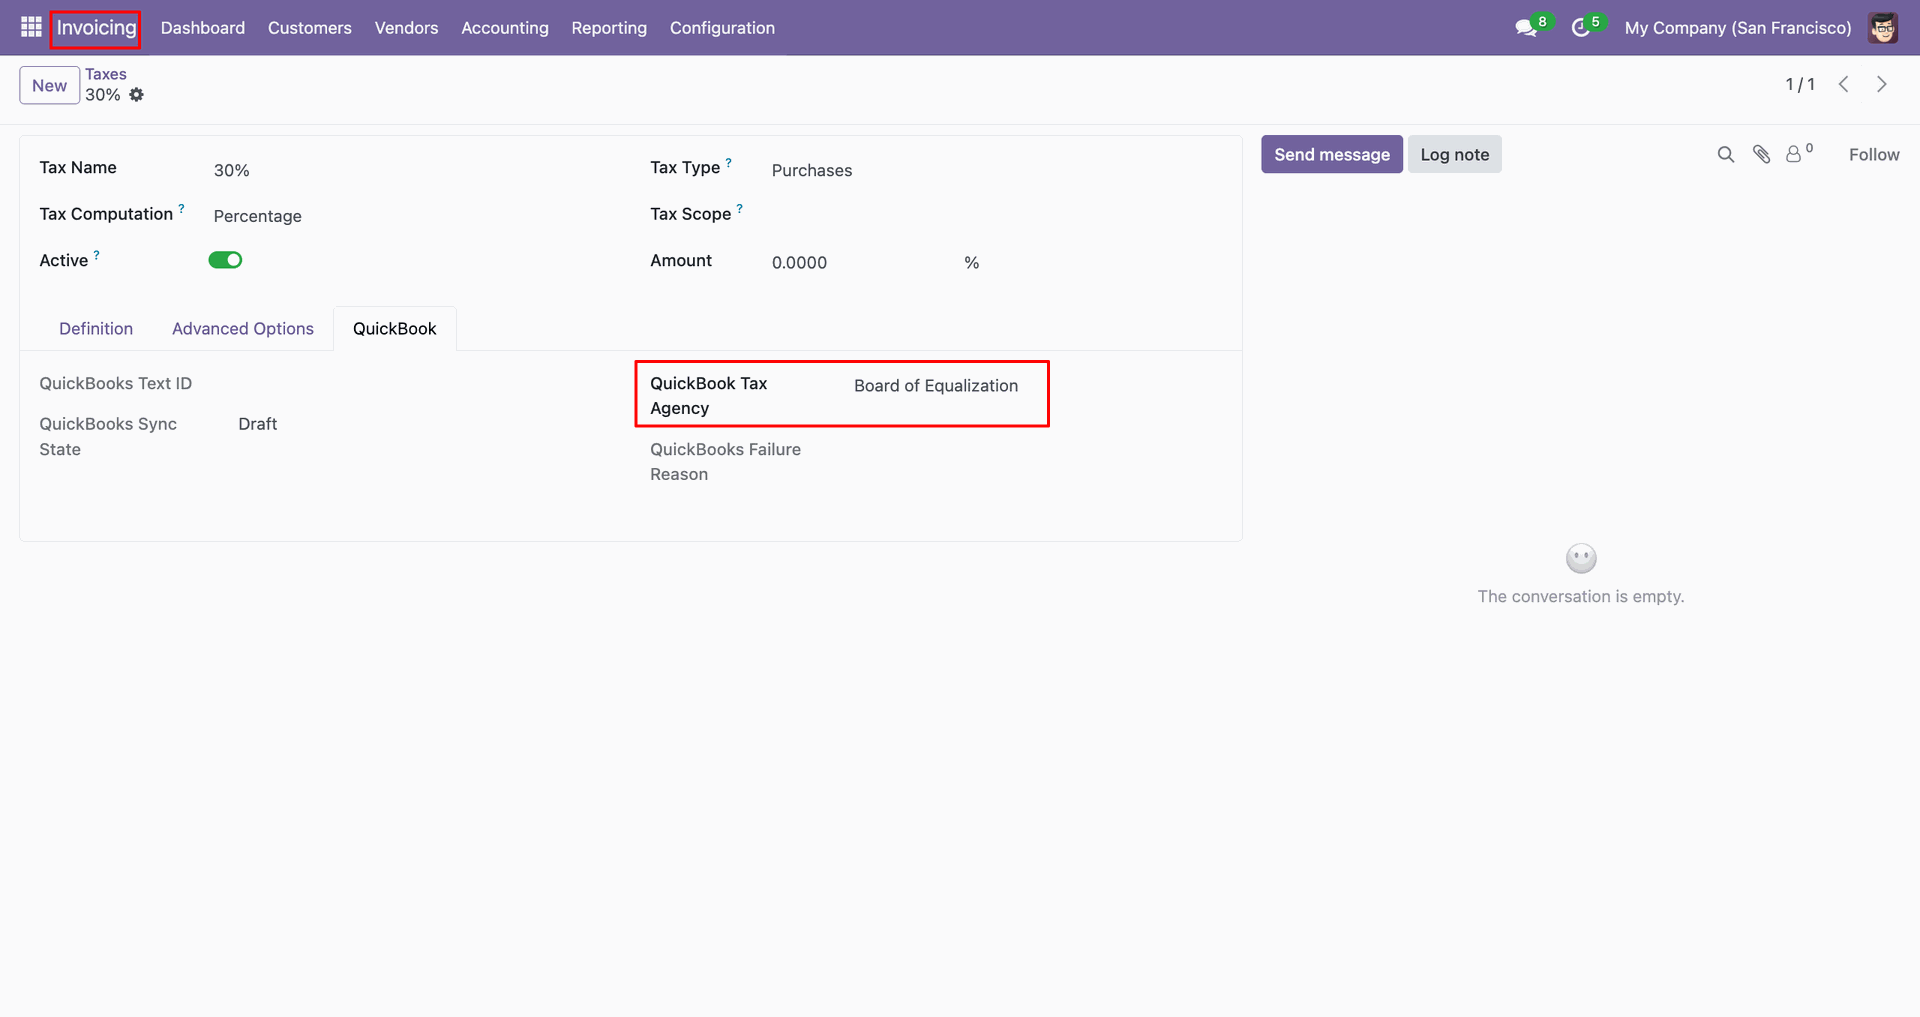
Taxes form view contains QuickBook Tax Agency field.
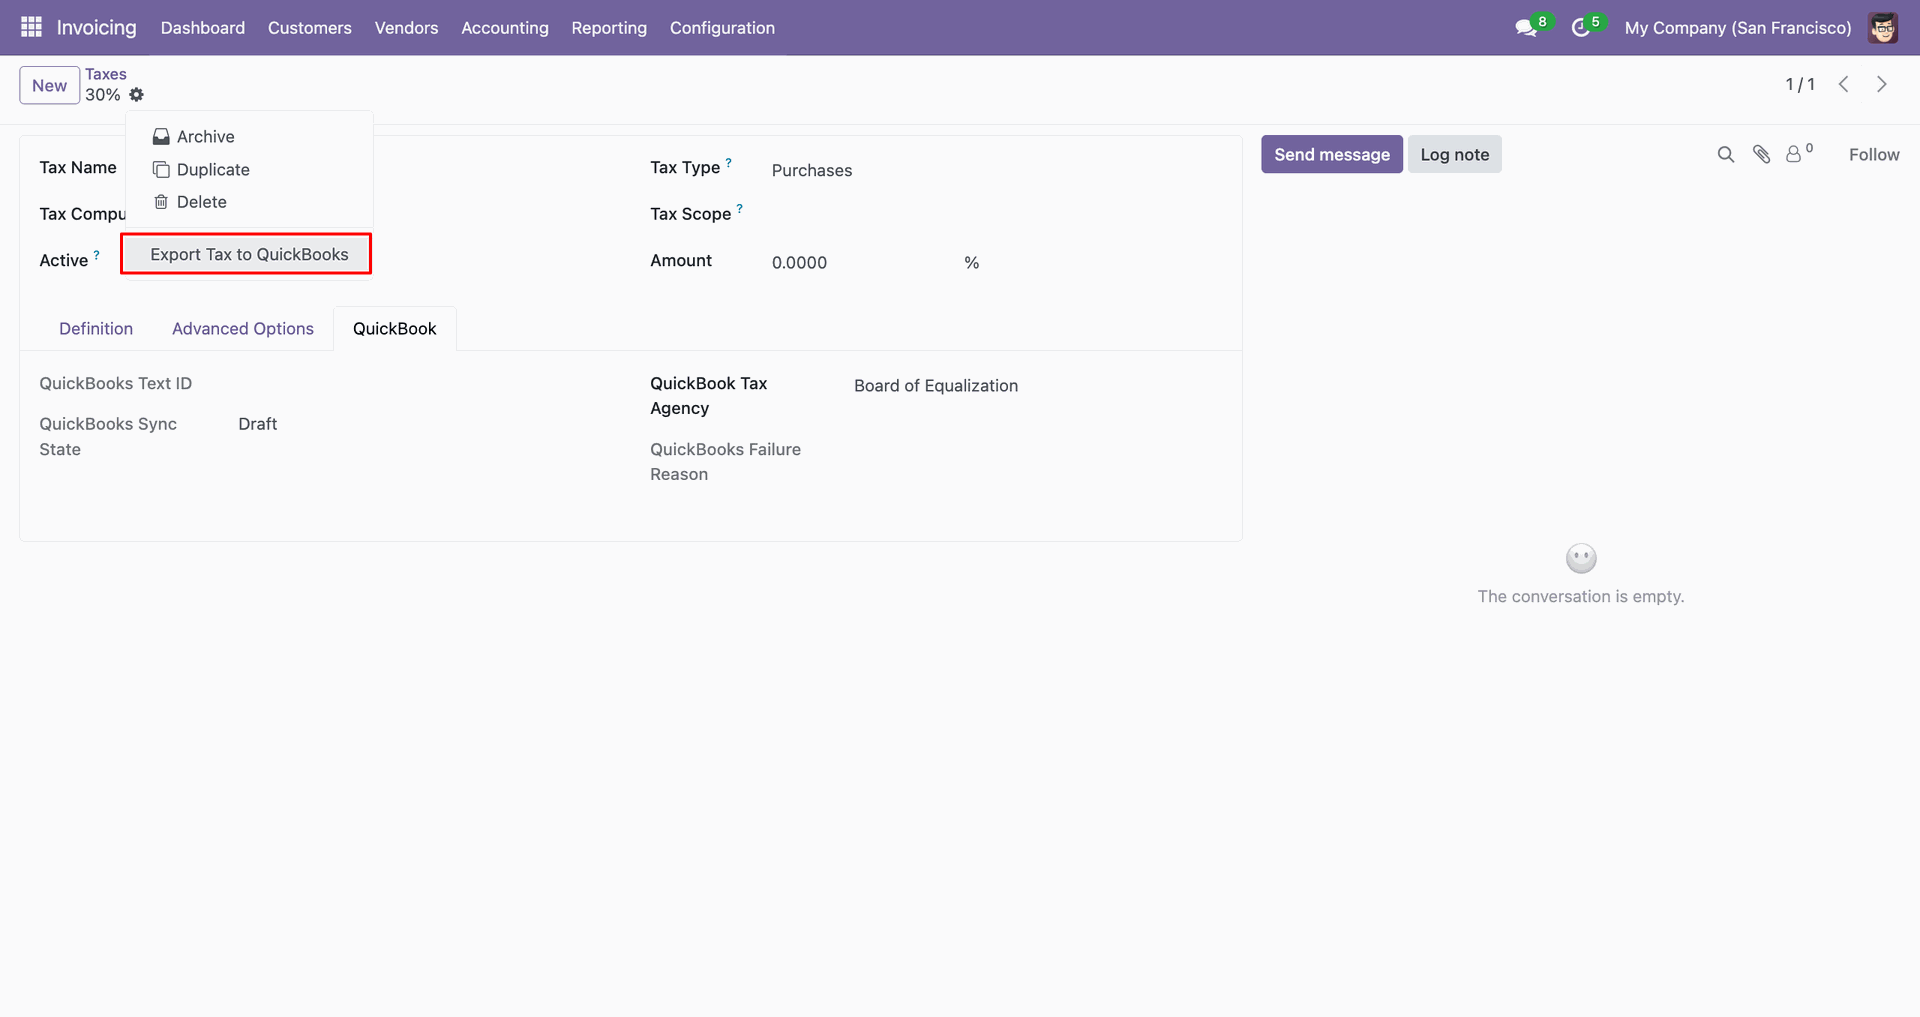
You can export from the 'Action'.
Config selection popup.
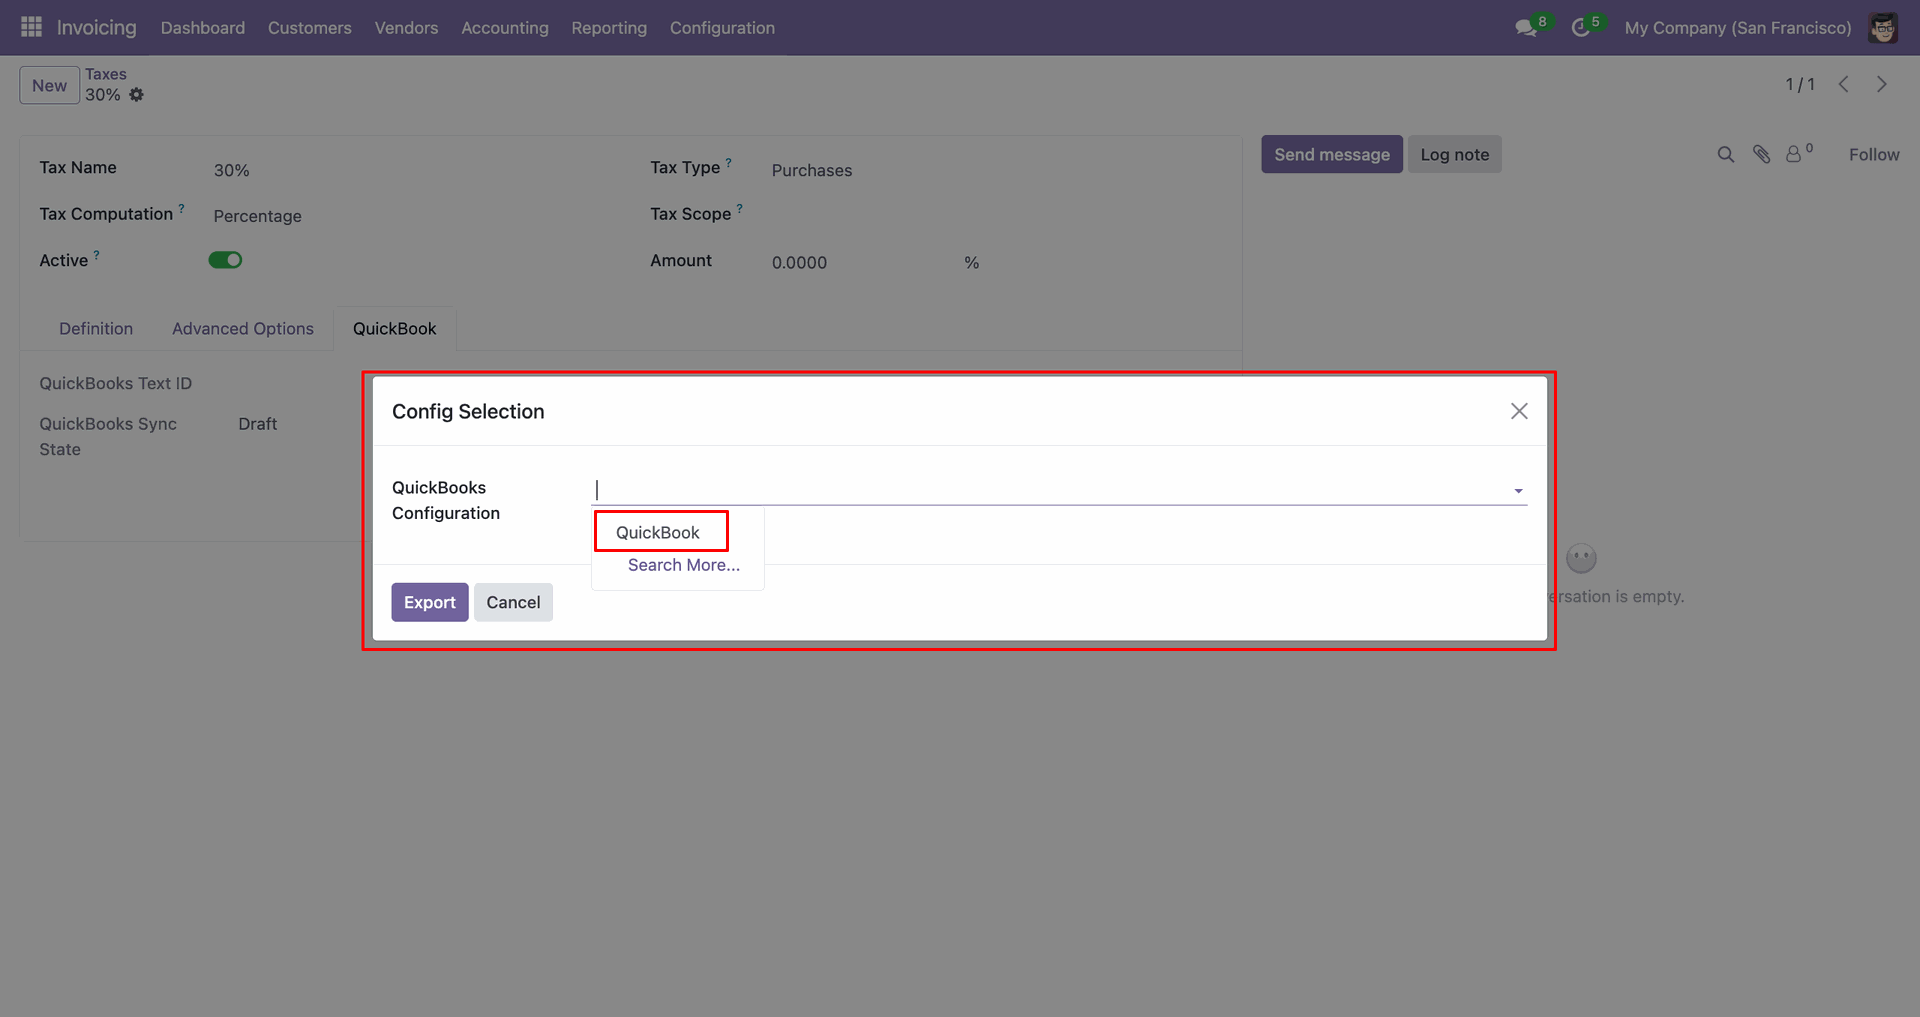
Select 'QuickBooks' and click 'Export'.
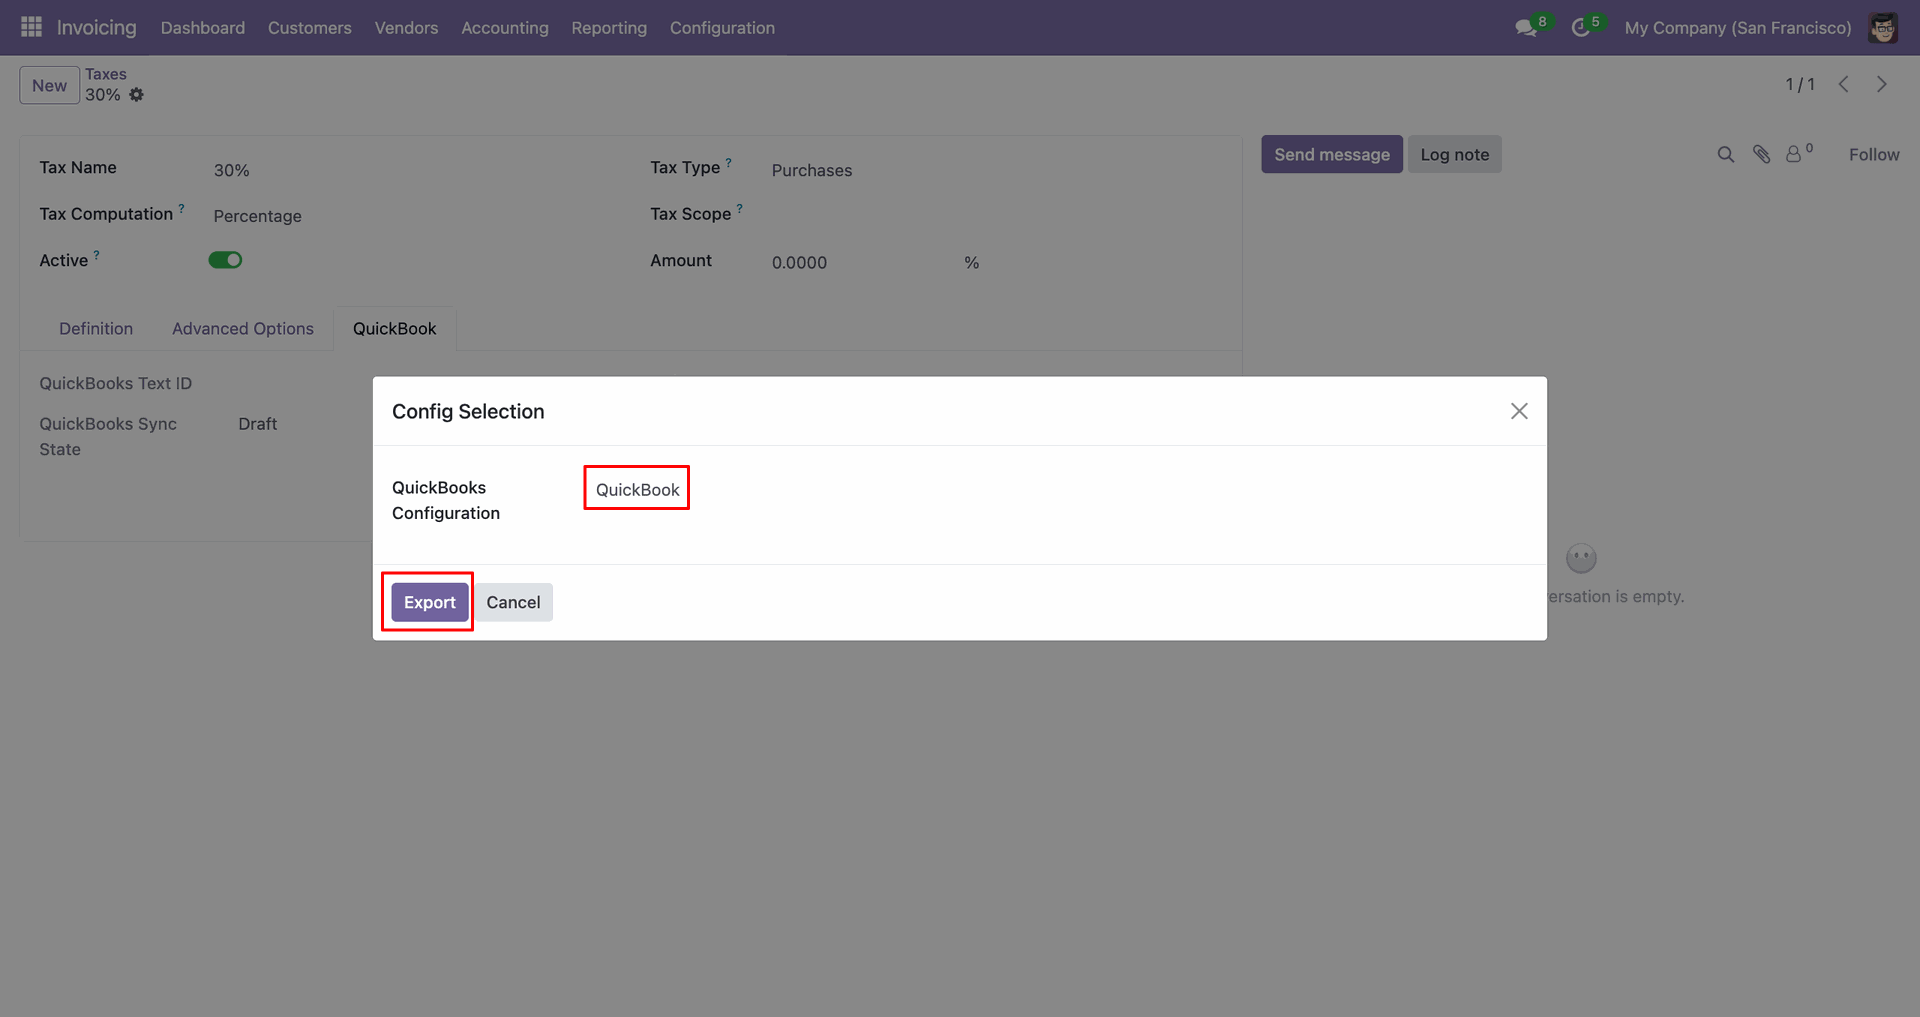
The form view contains Quickbook ID and sync state.
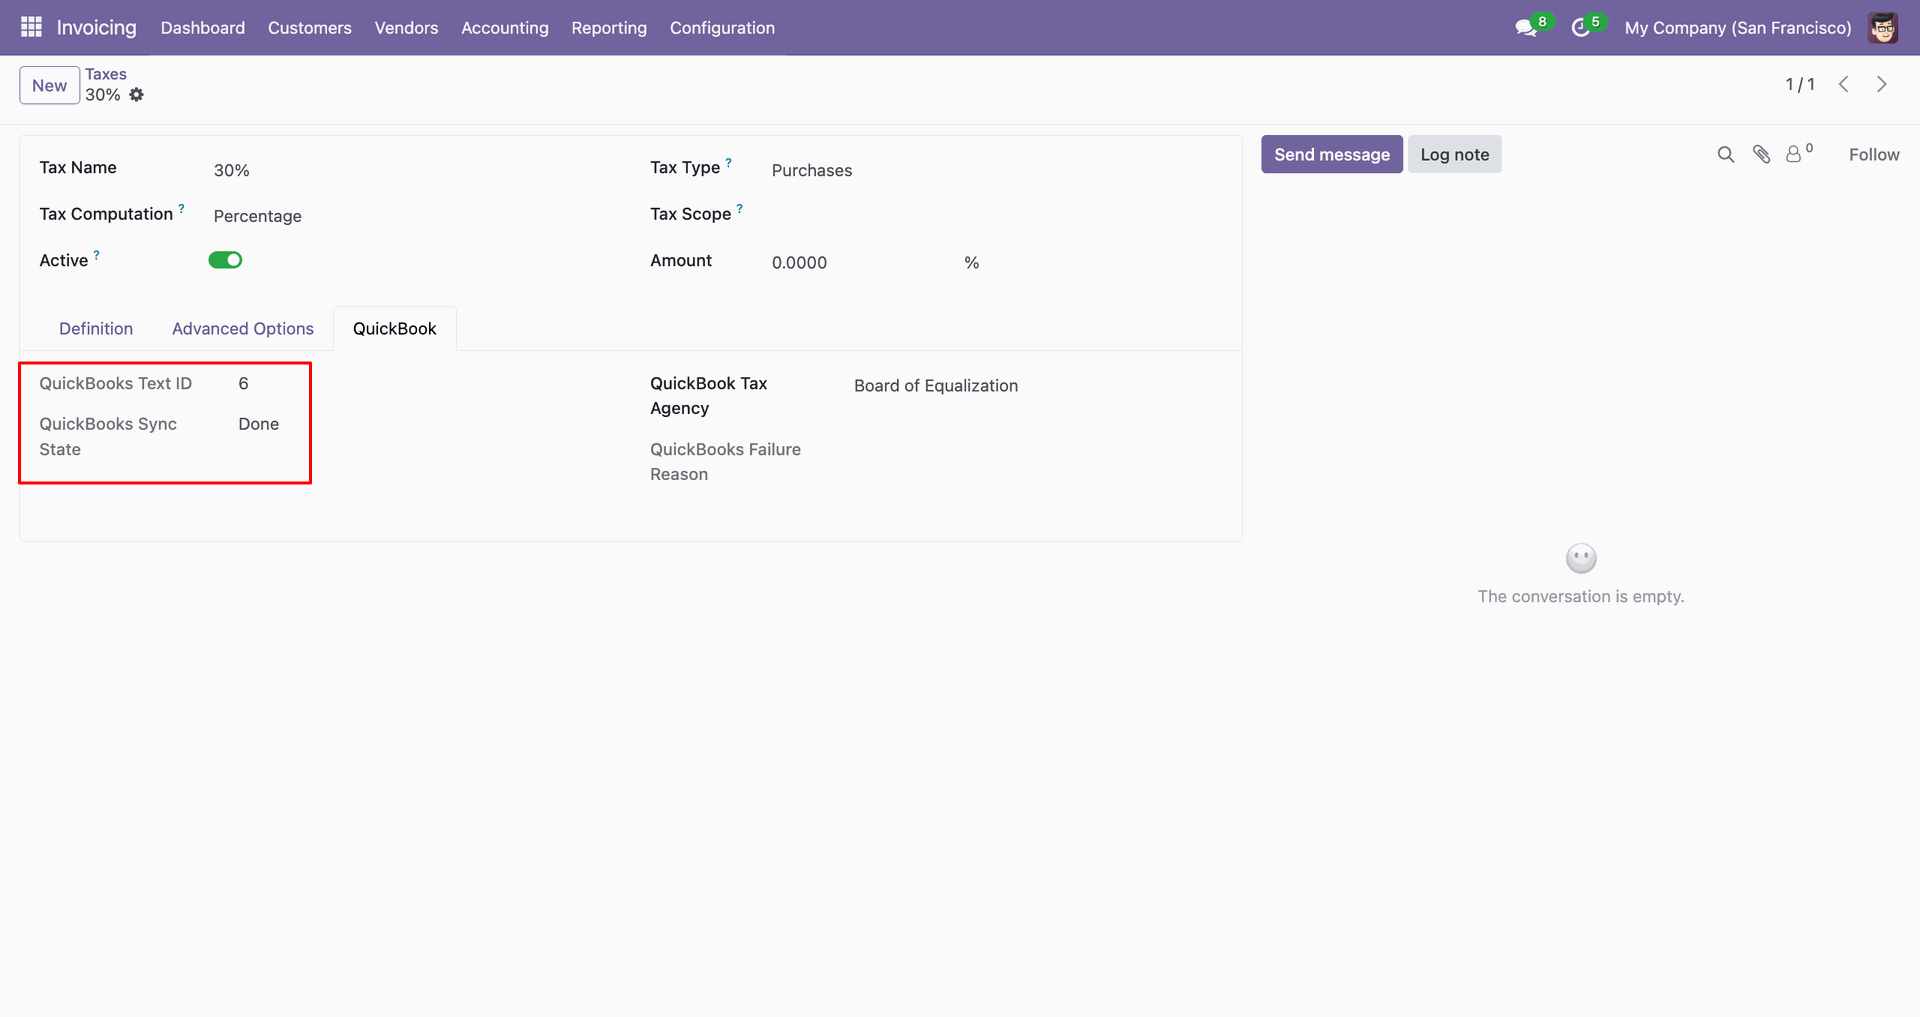
Log with details.
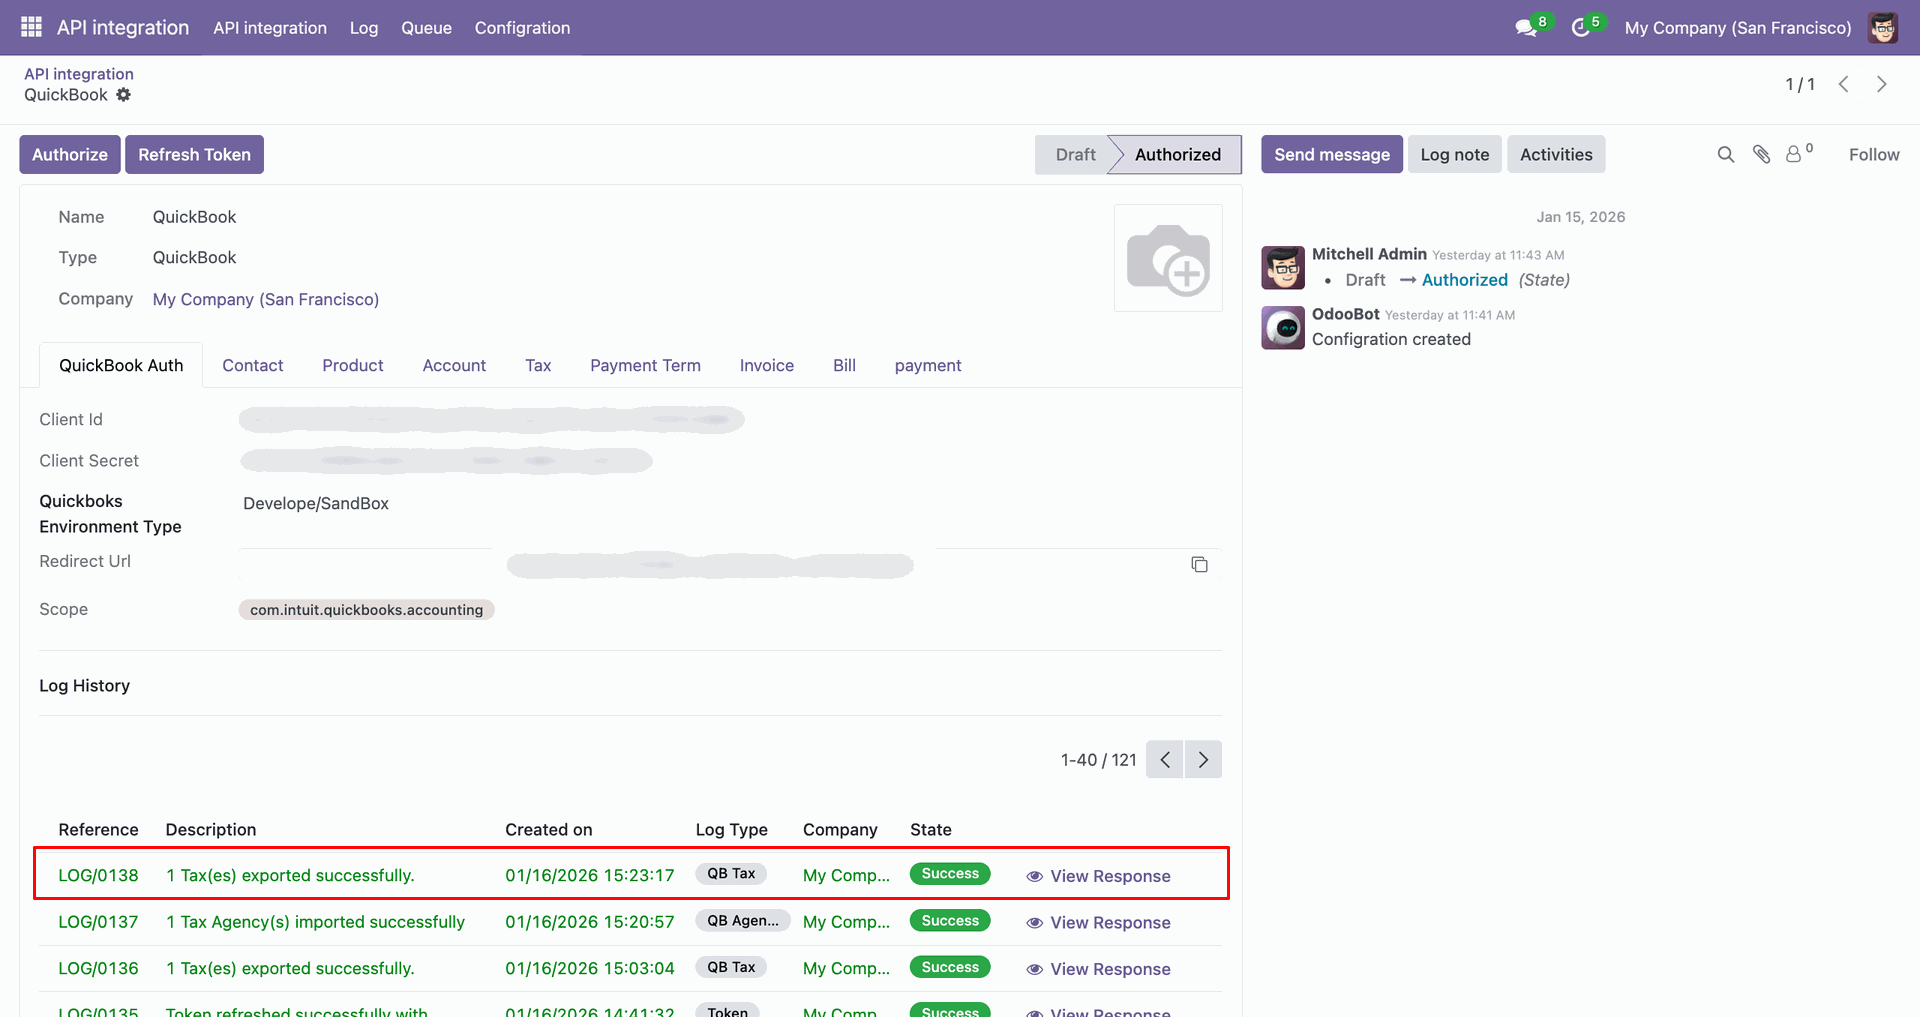
Payment terms in QuickBooks.
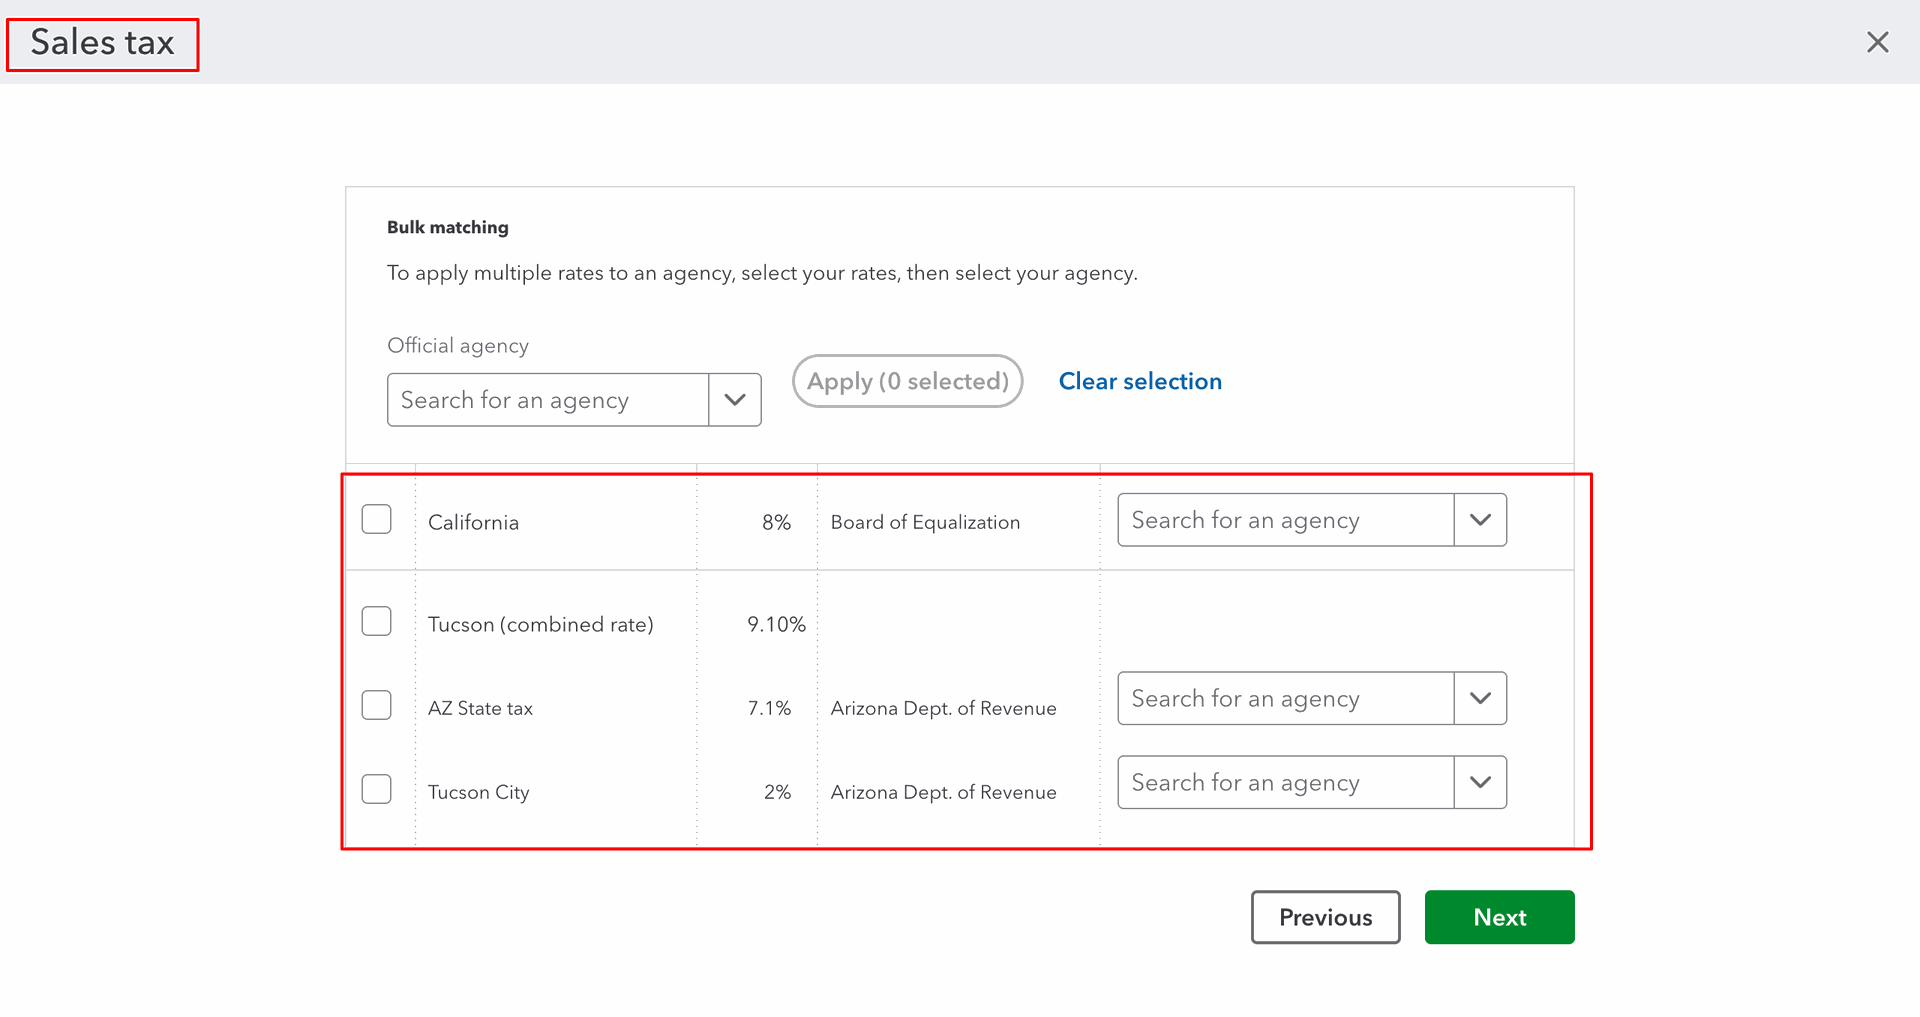
For the import, go to the 'Tax' Tab, enable 'Import Tax', and click 'Import'.
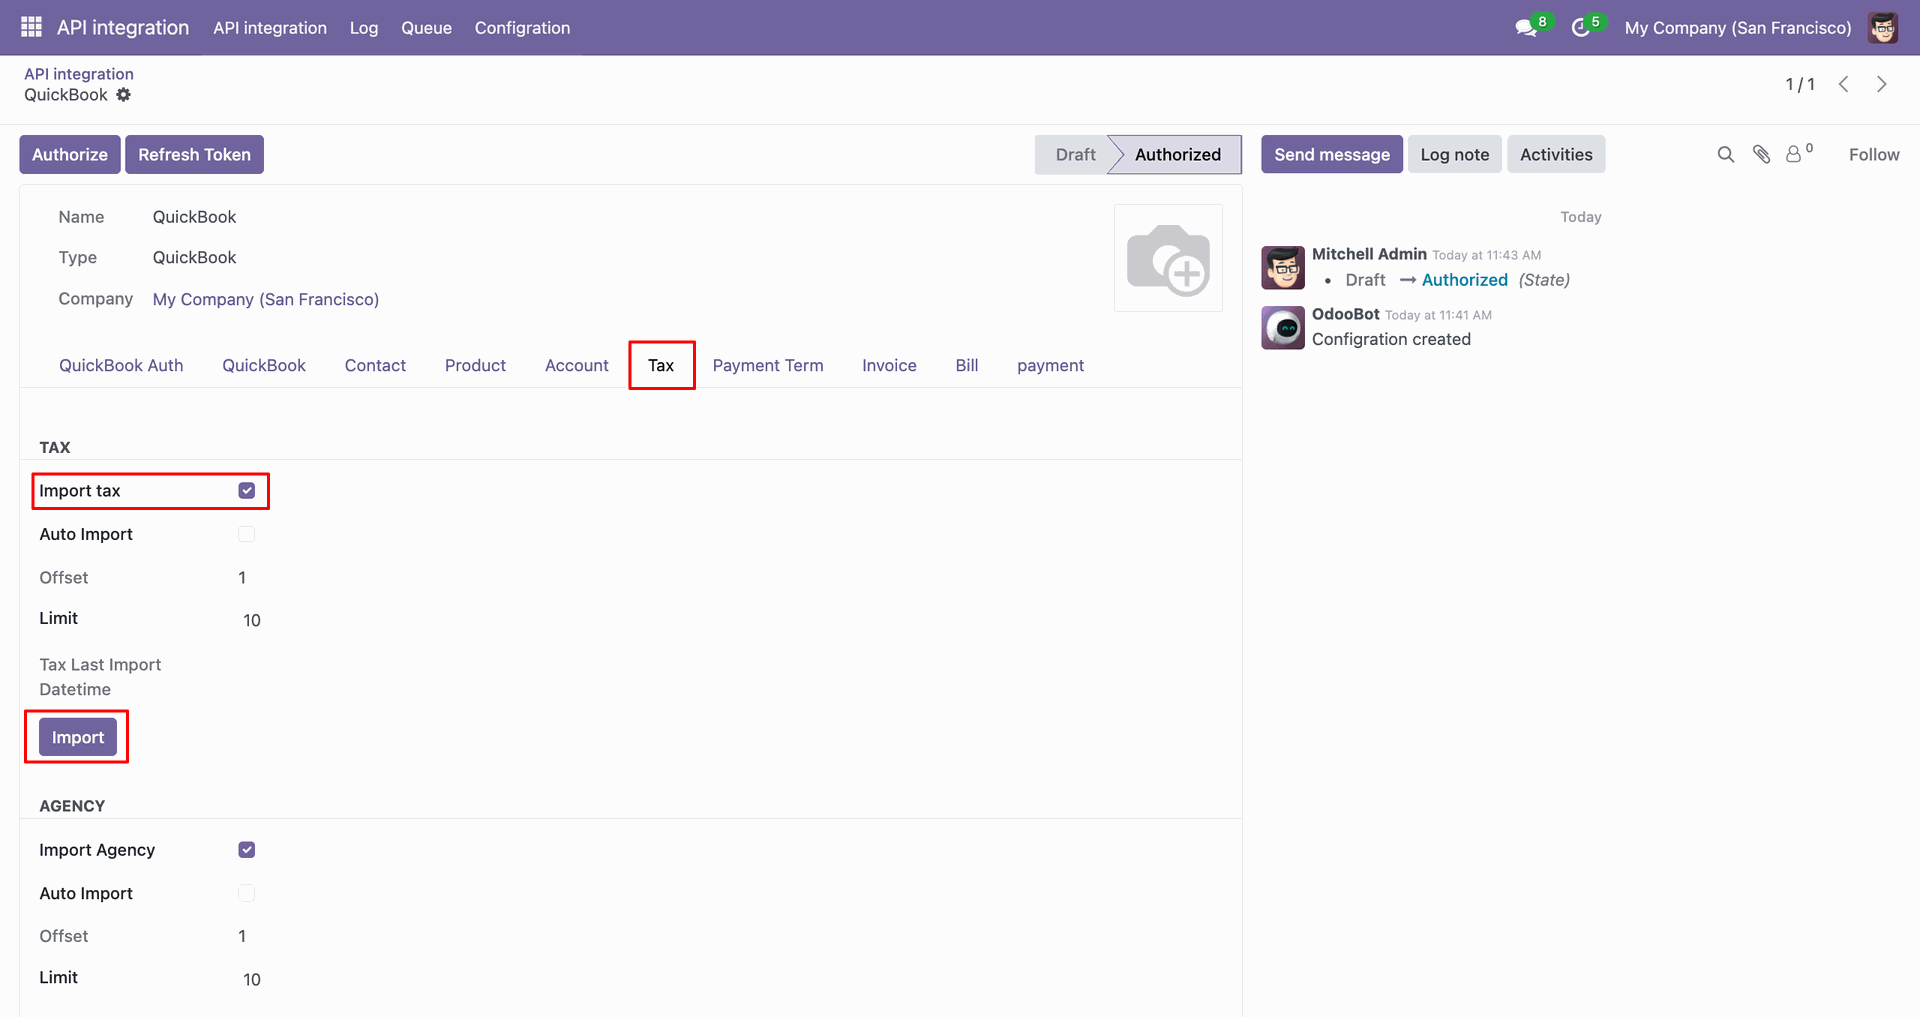
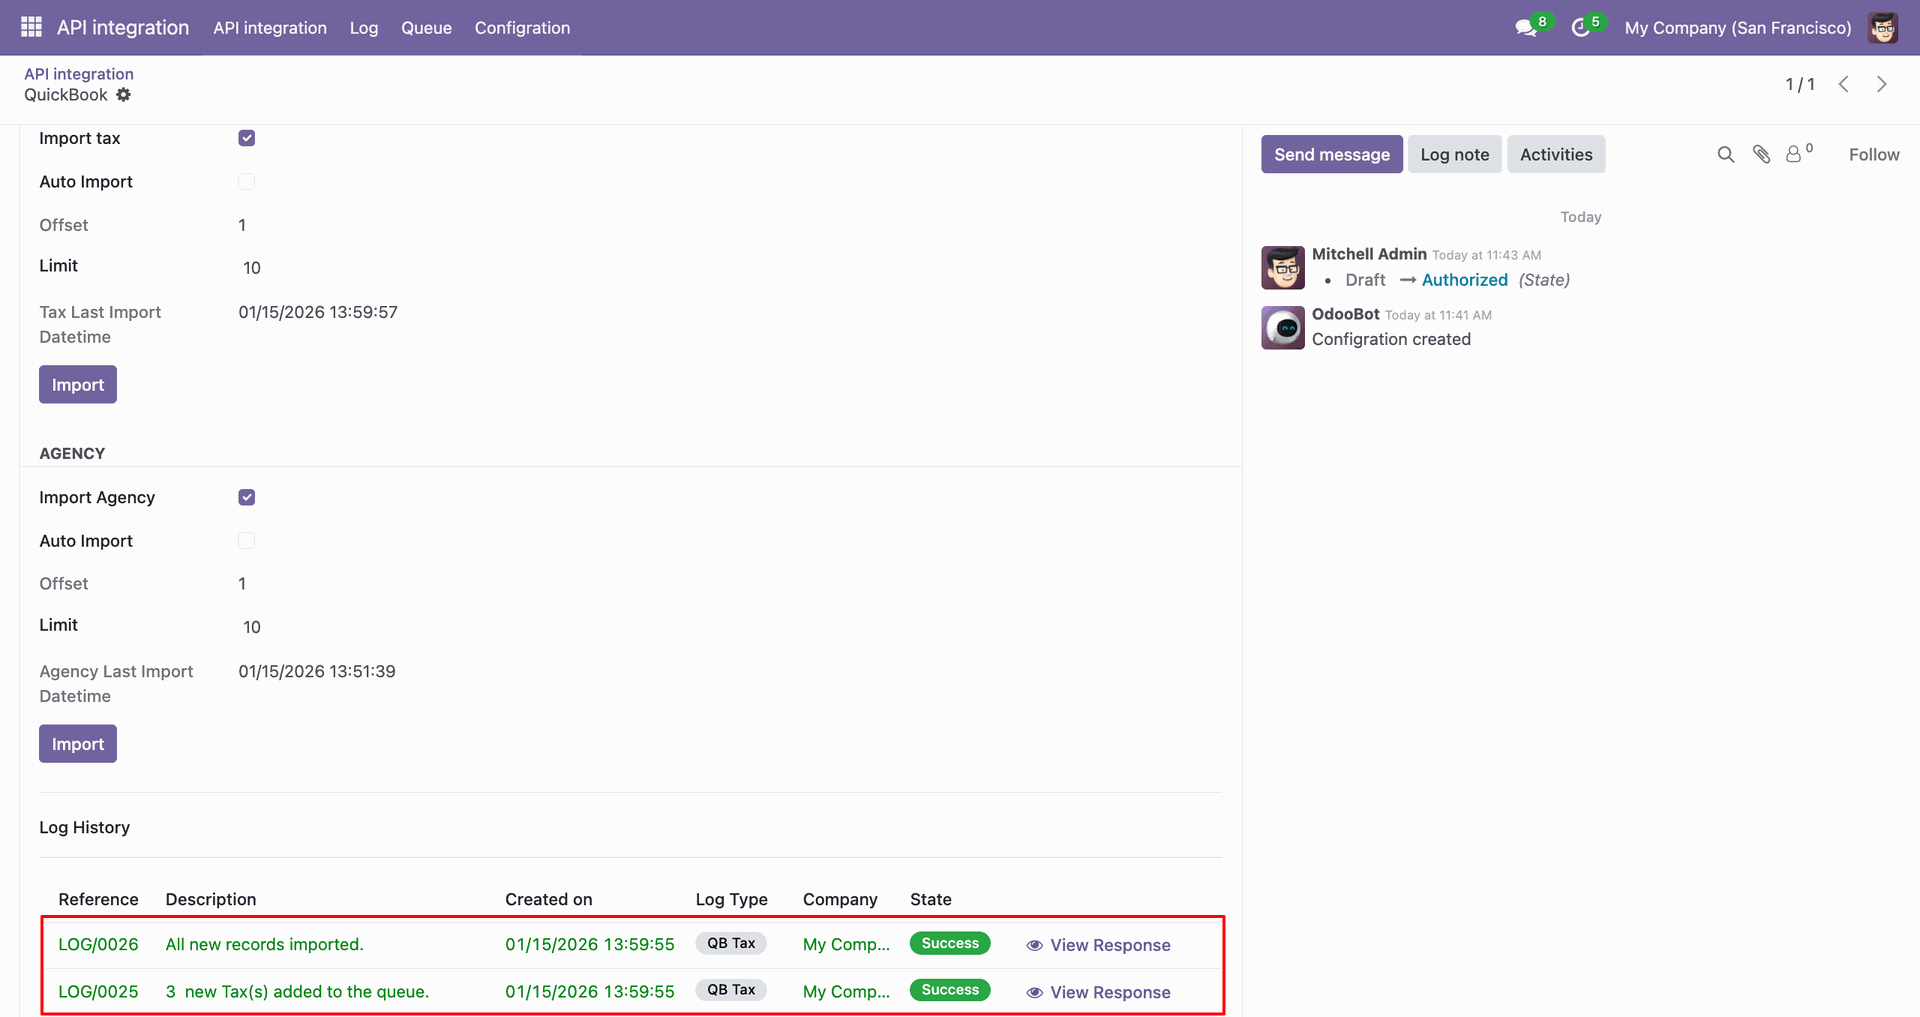
Log with imported data.
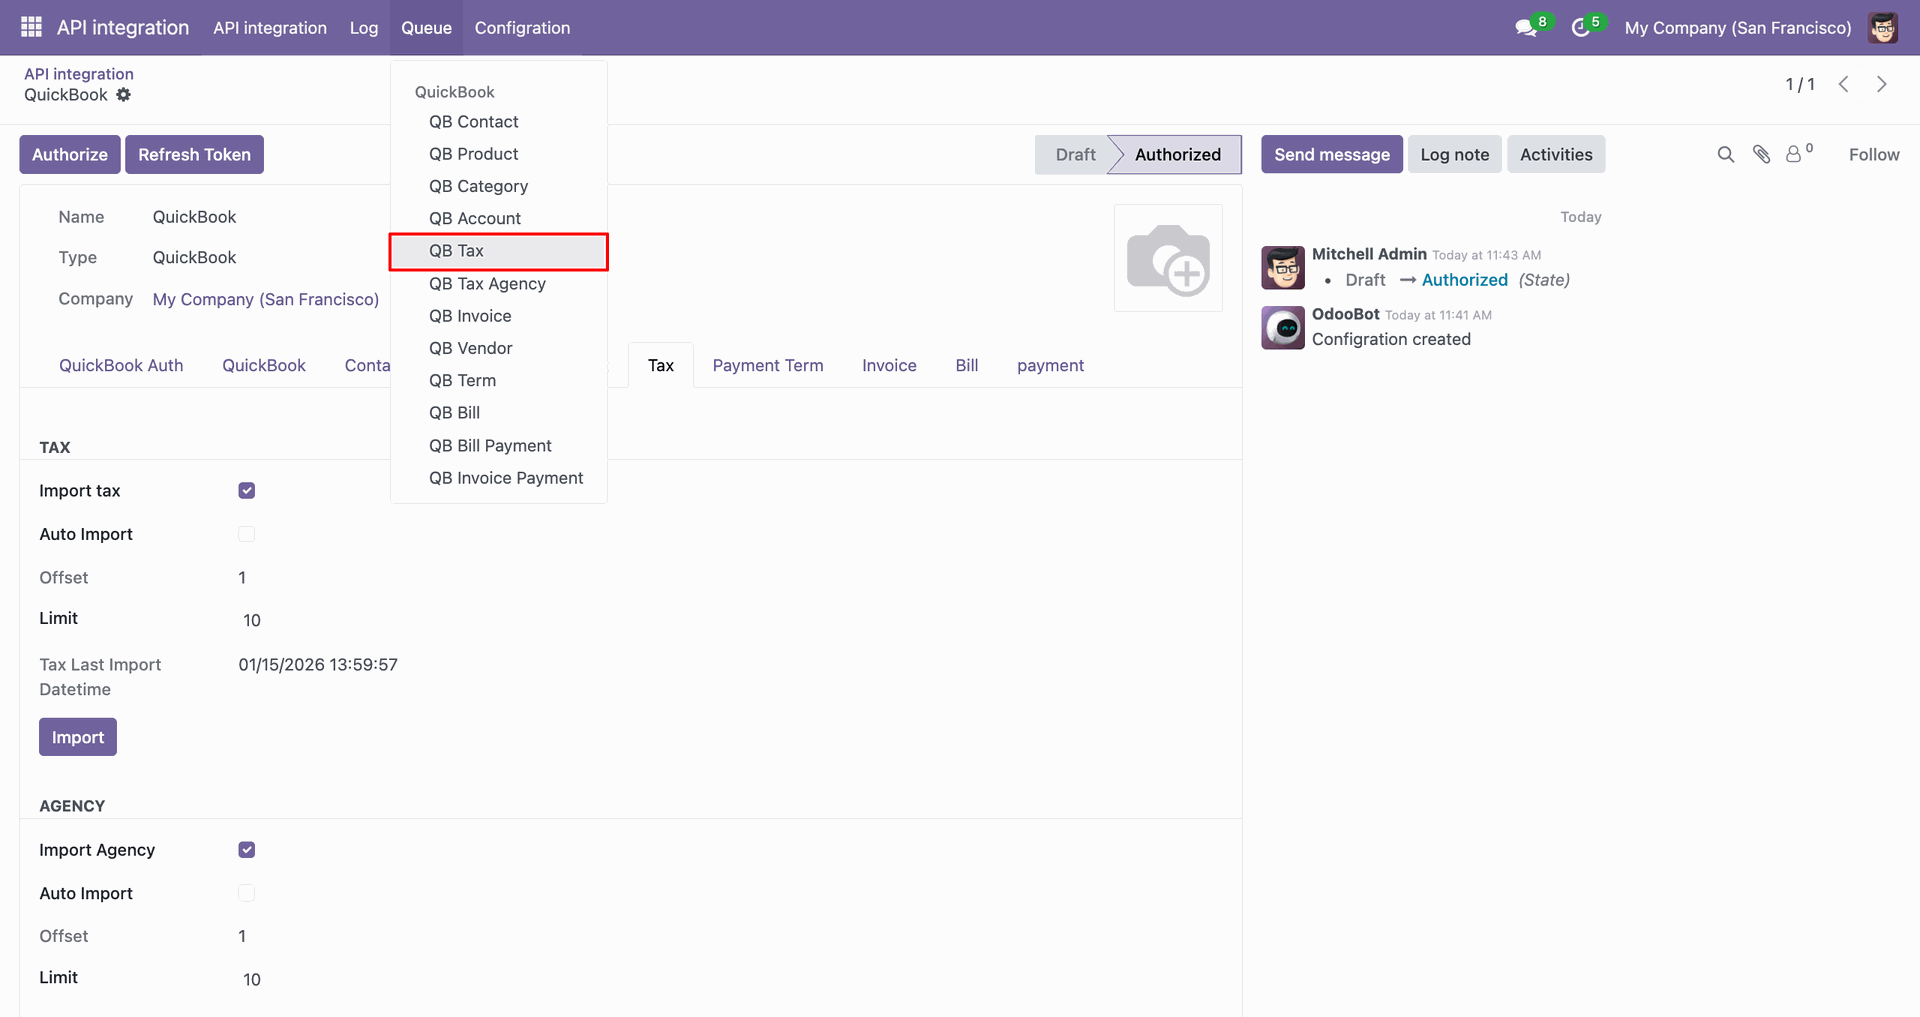
Go to the Queue, 'QB Tax'.
It will open the queue.
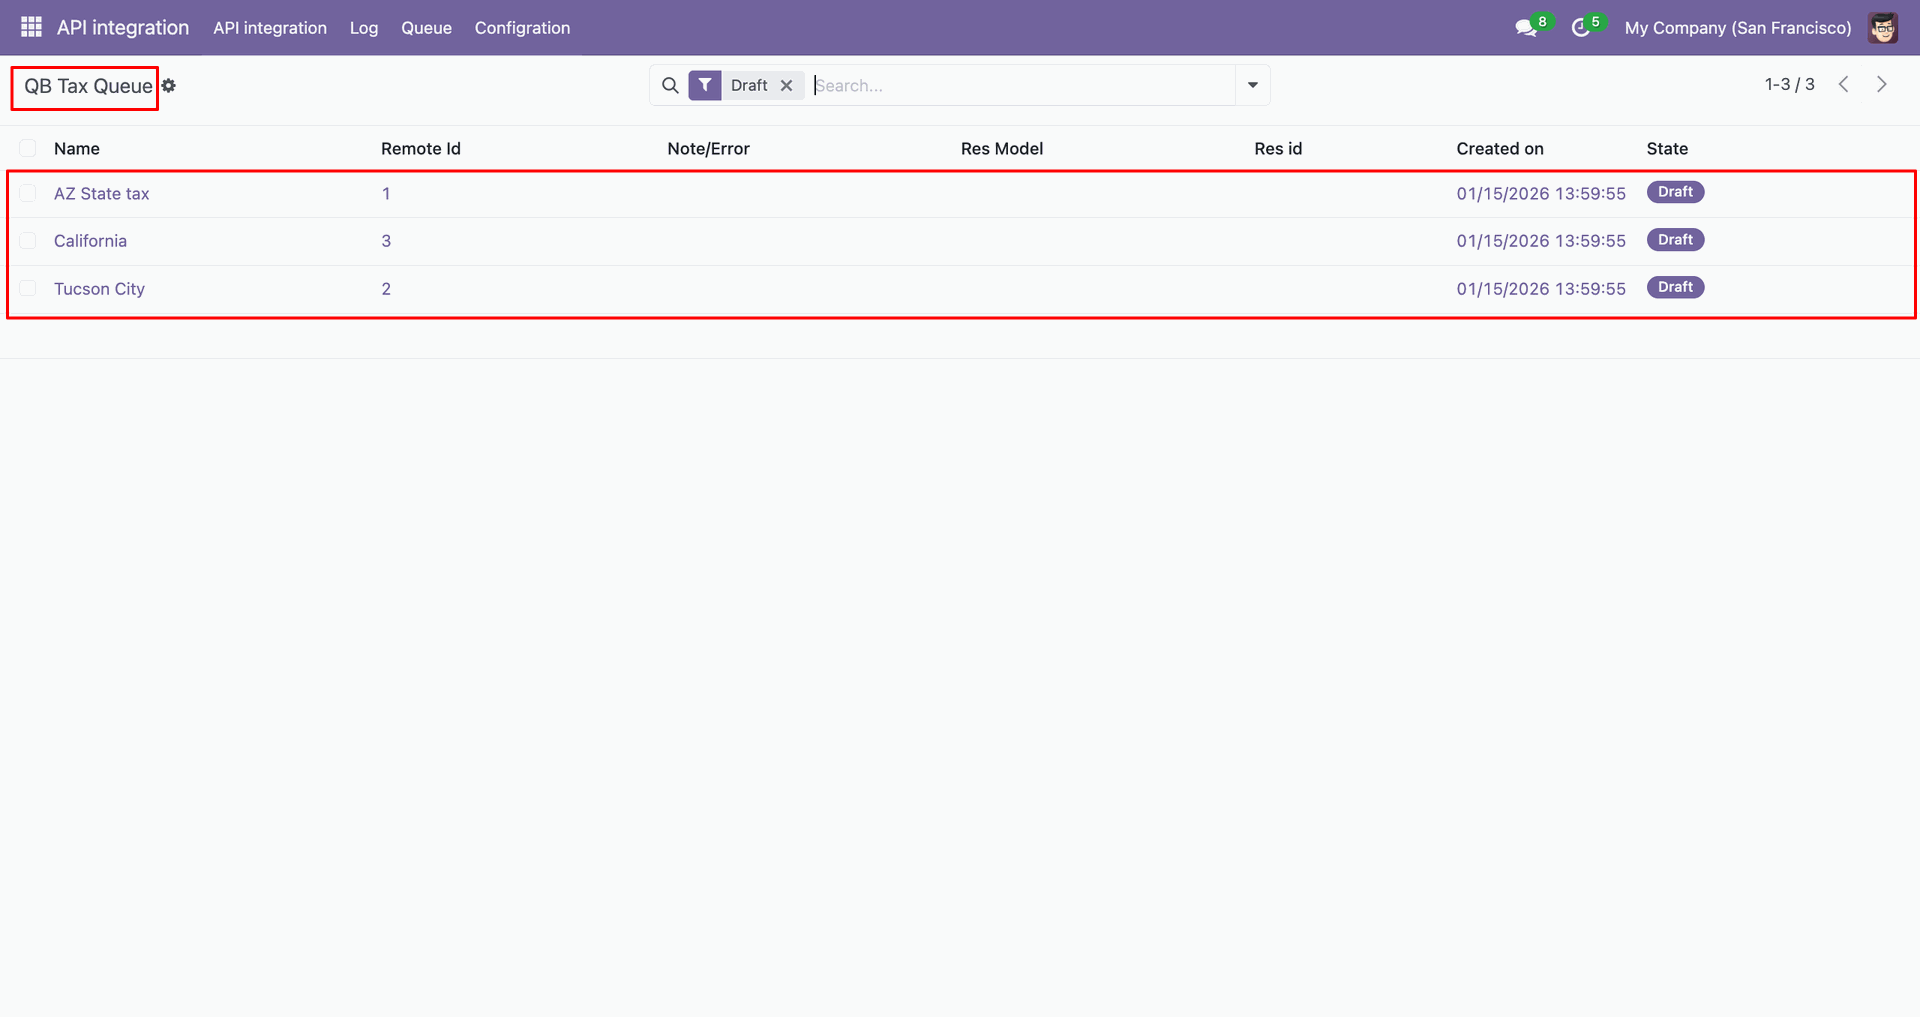
You can import from the queue.
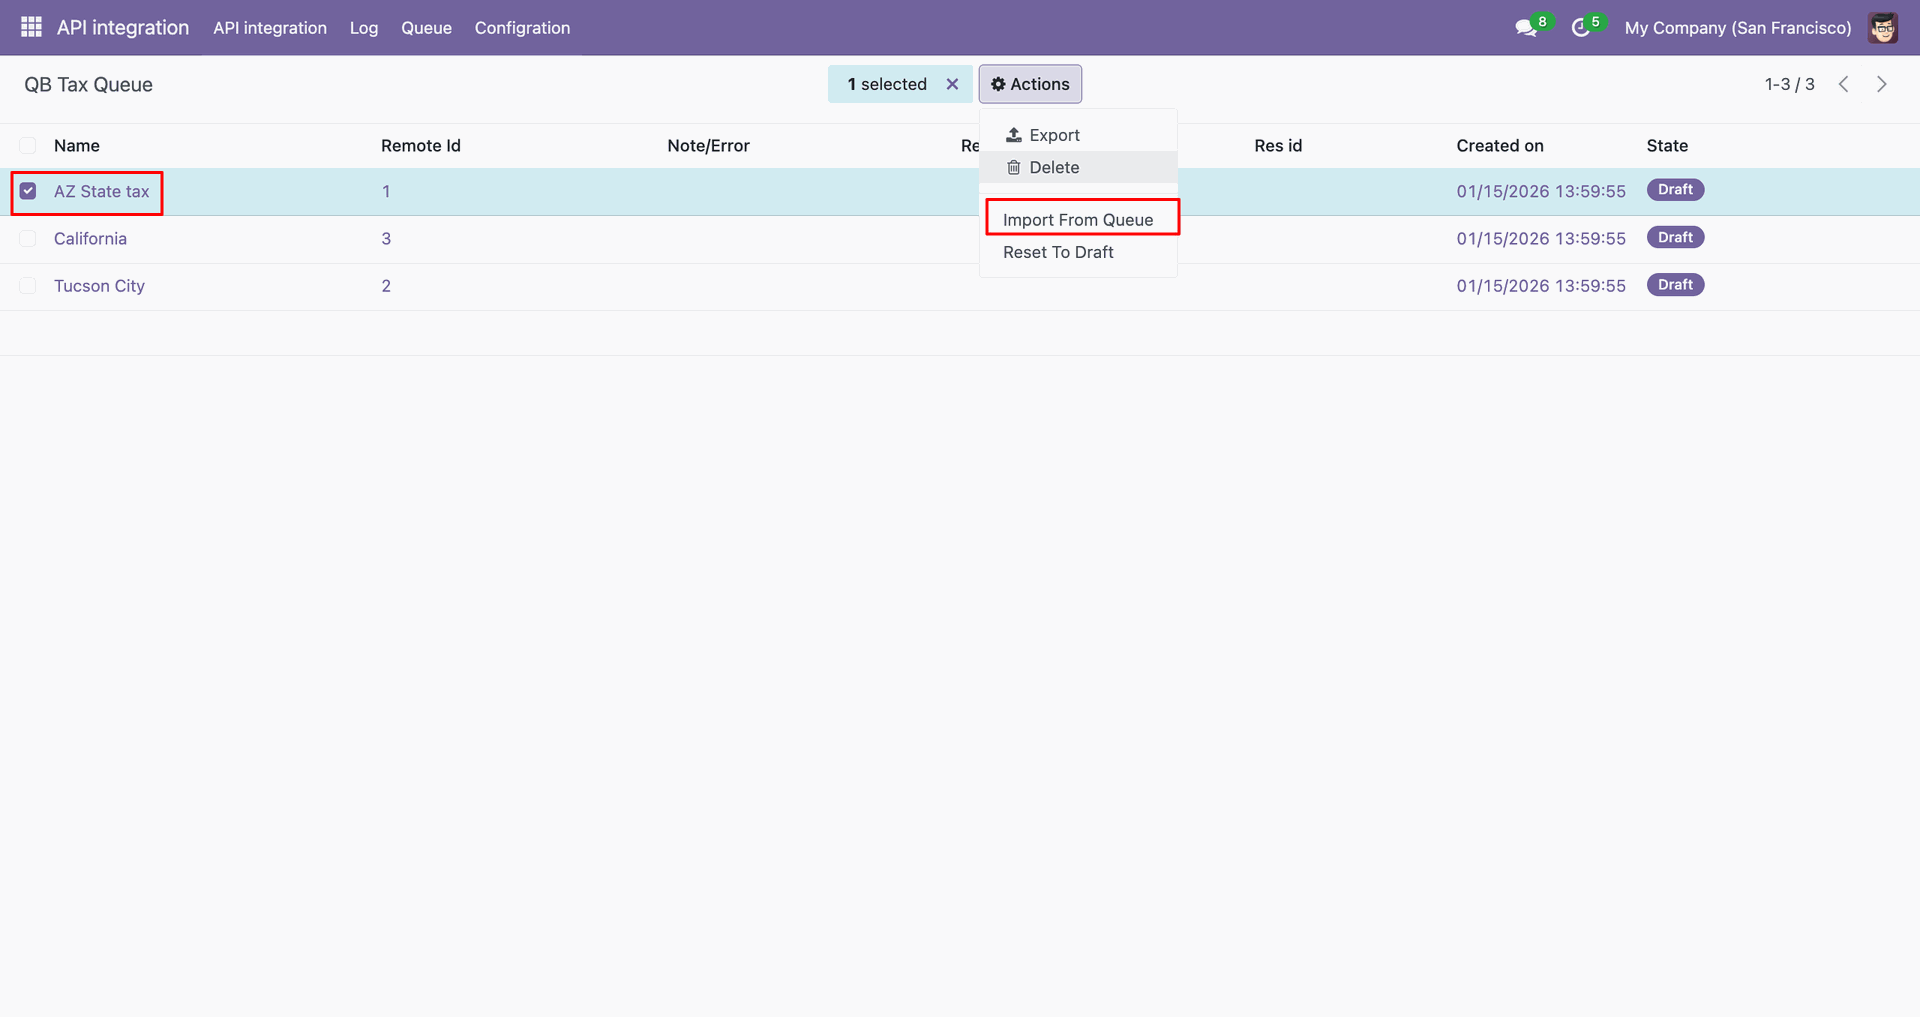
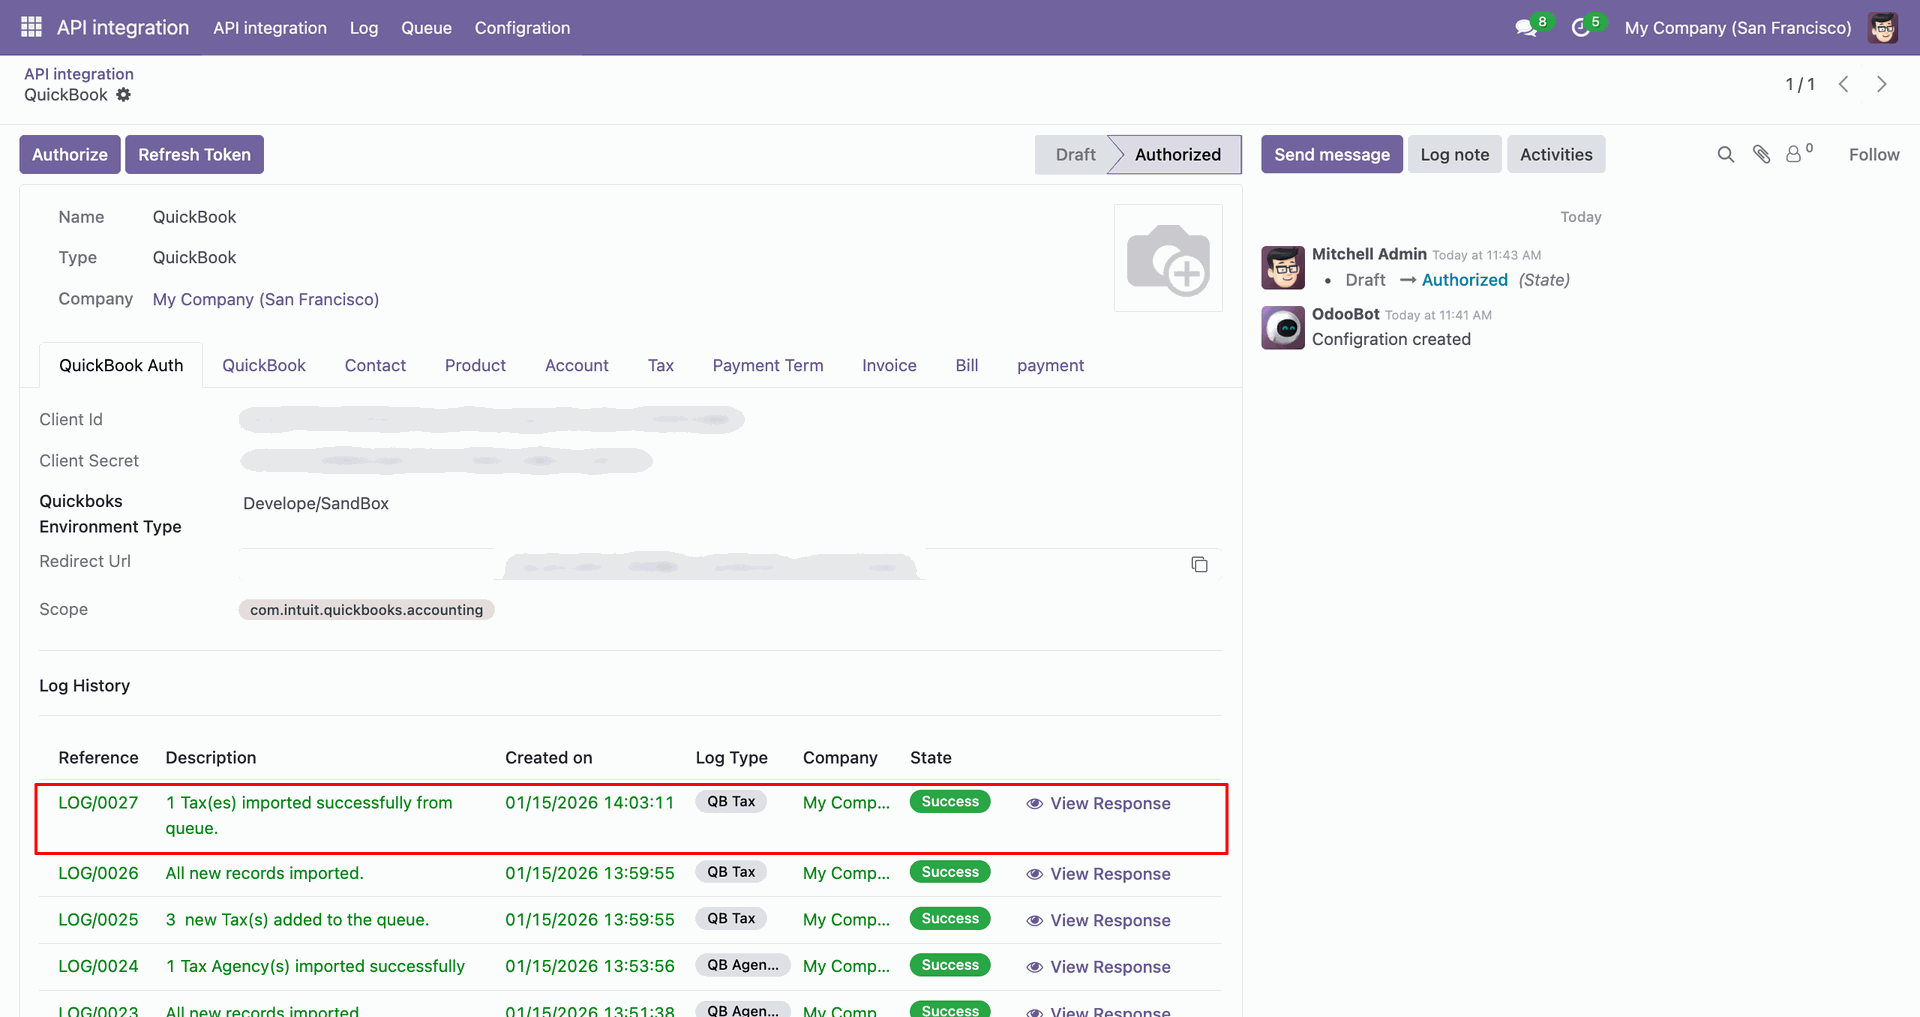
Log with details.
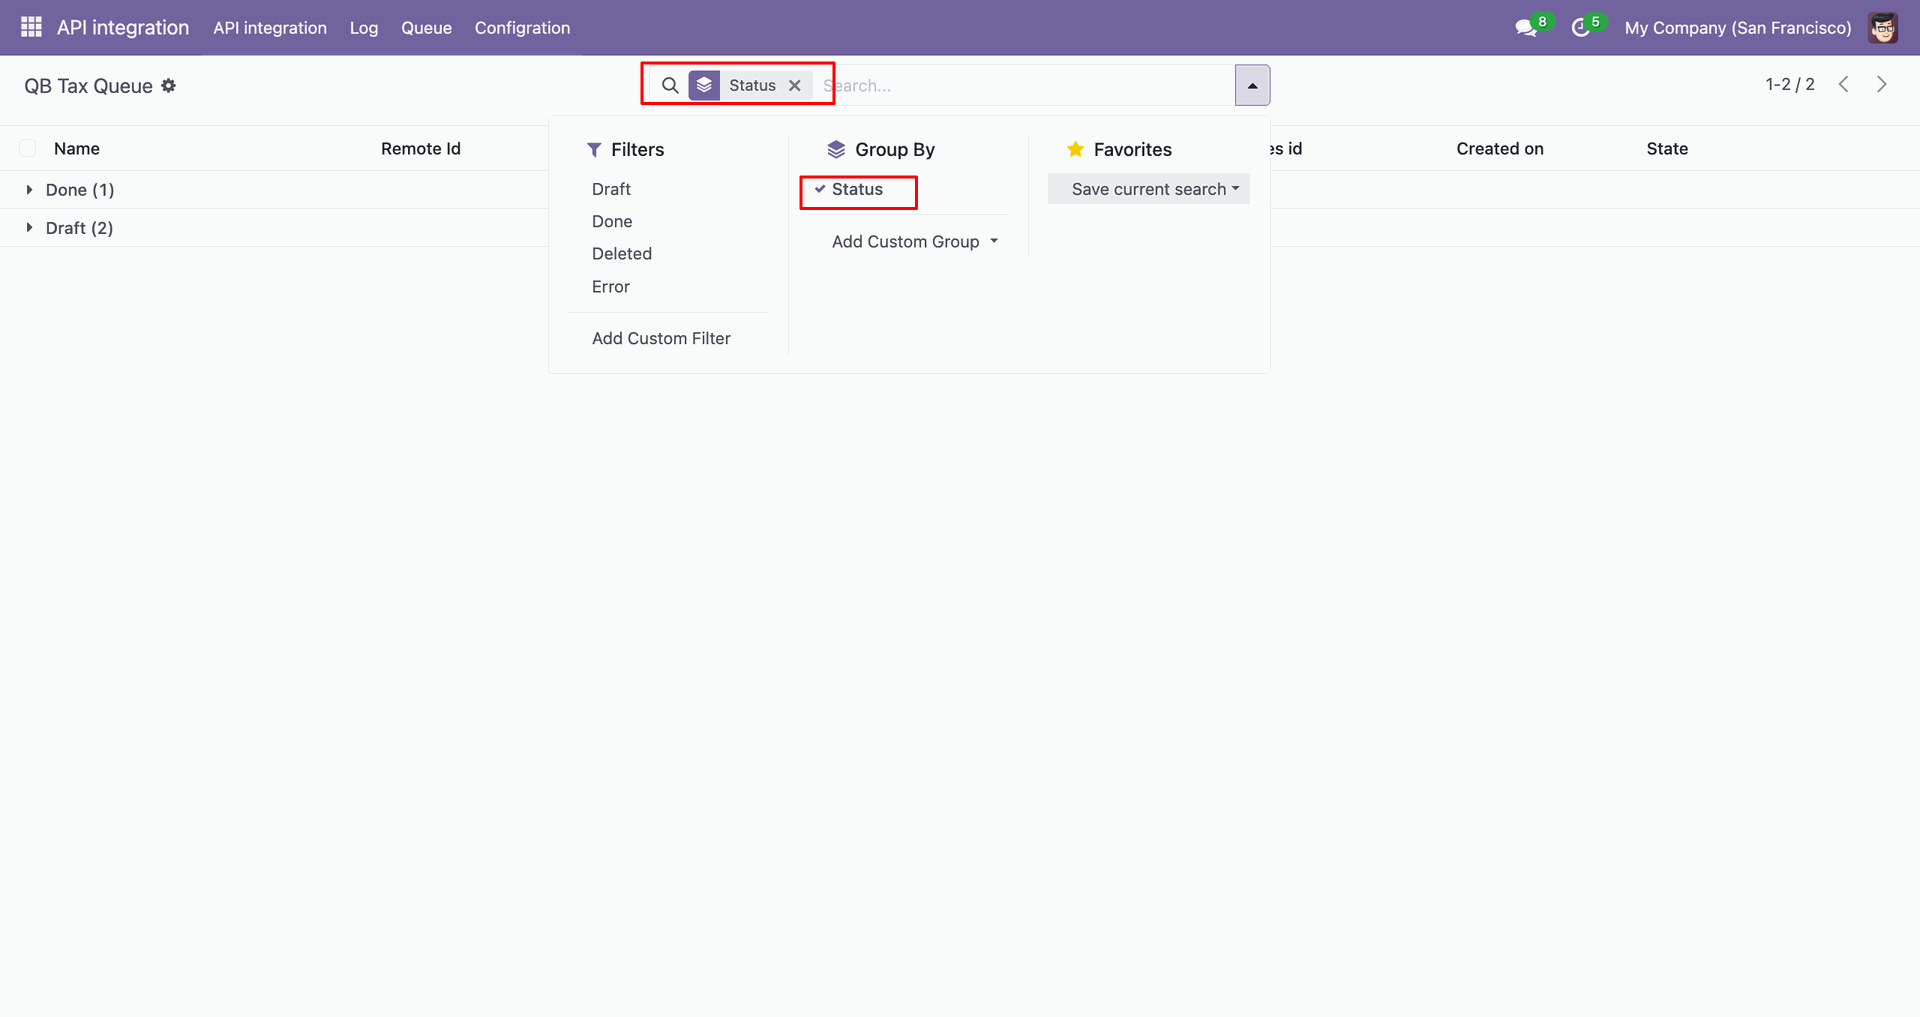
Group by with 'Status'.
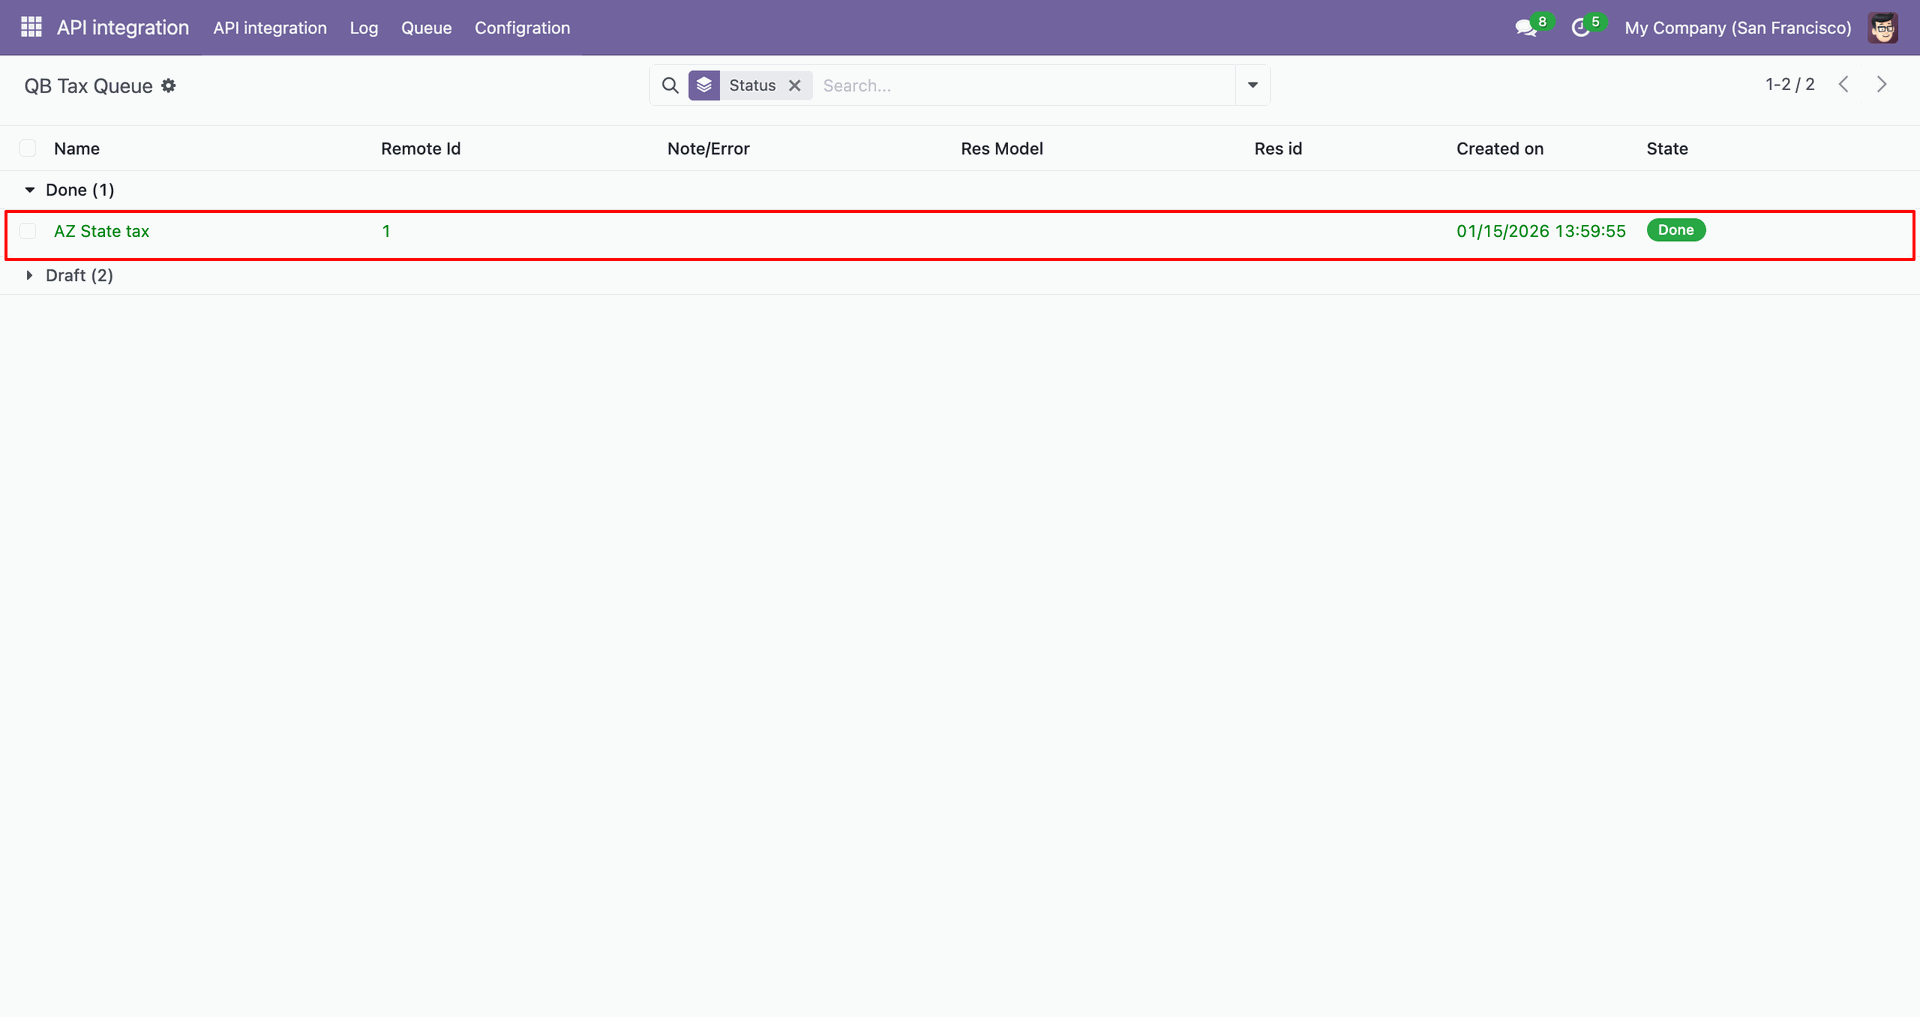
Group by result.
Taxes with filter.
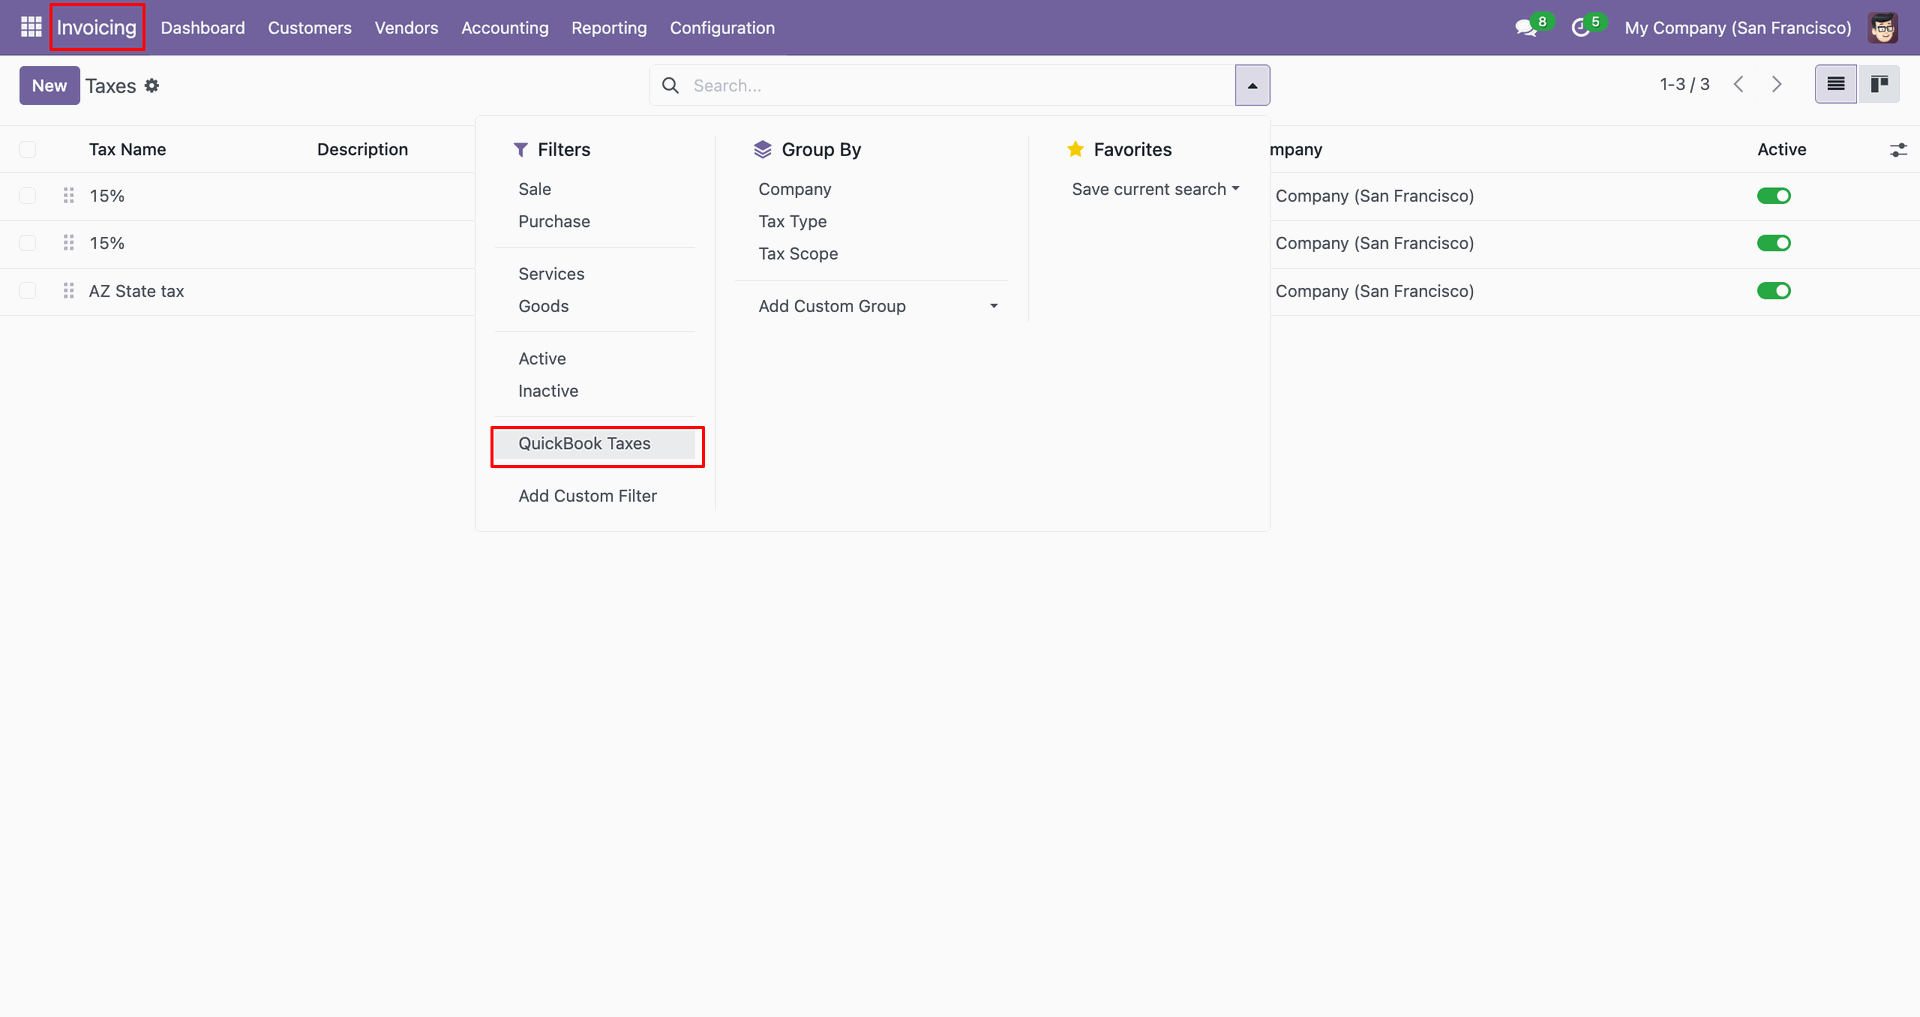
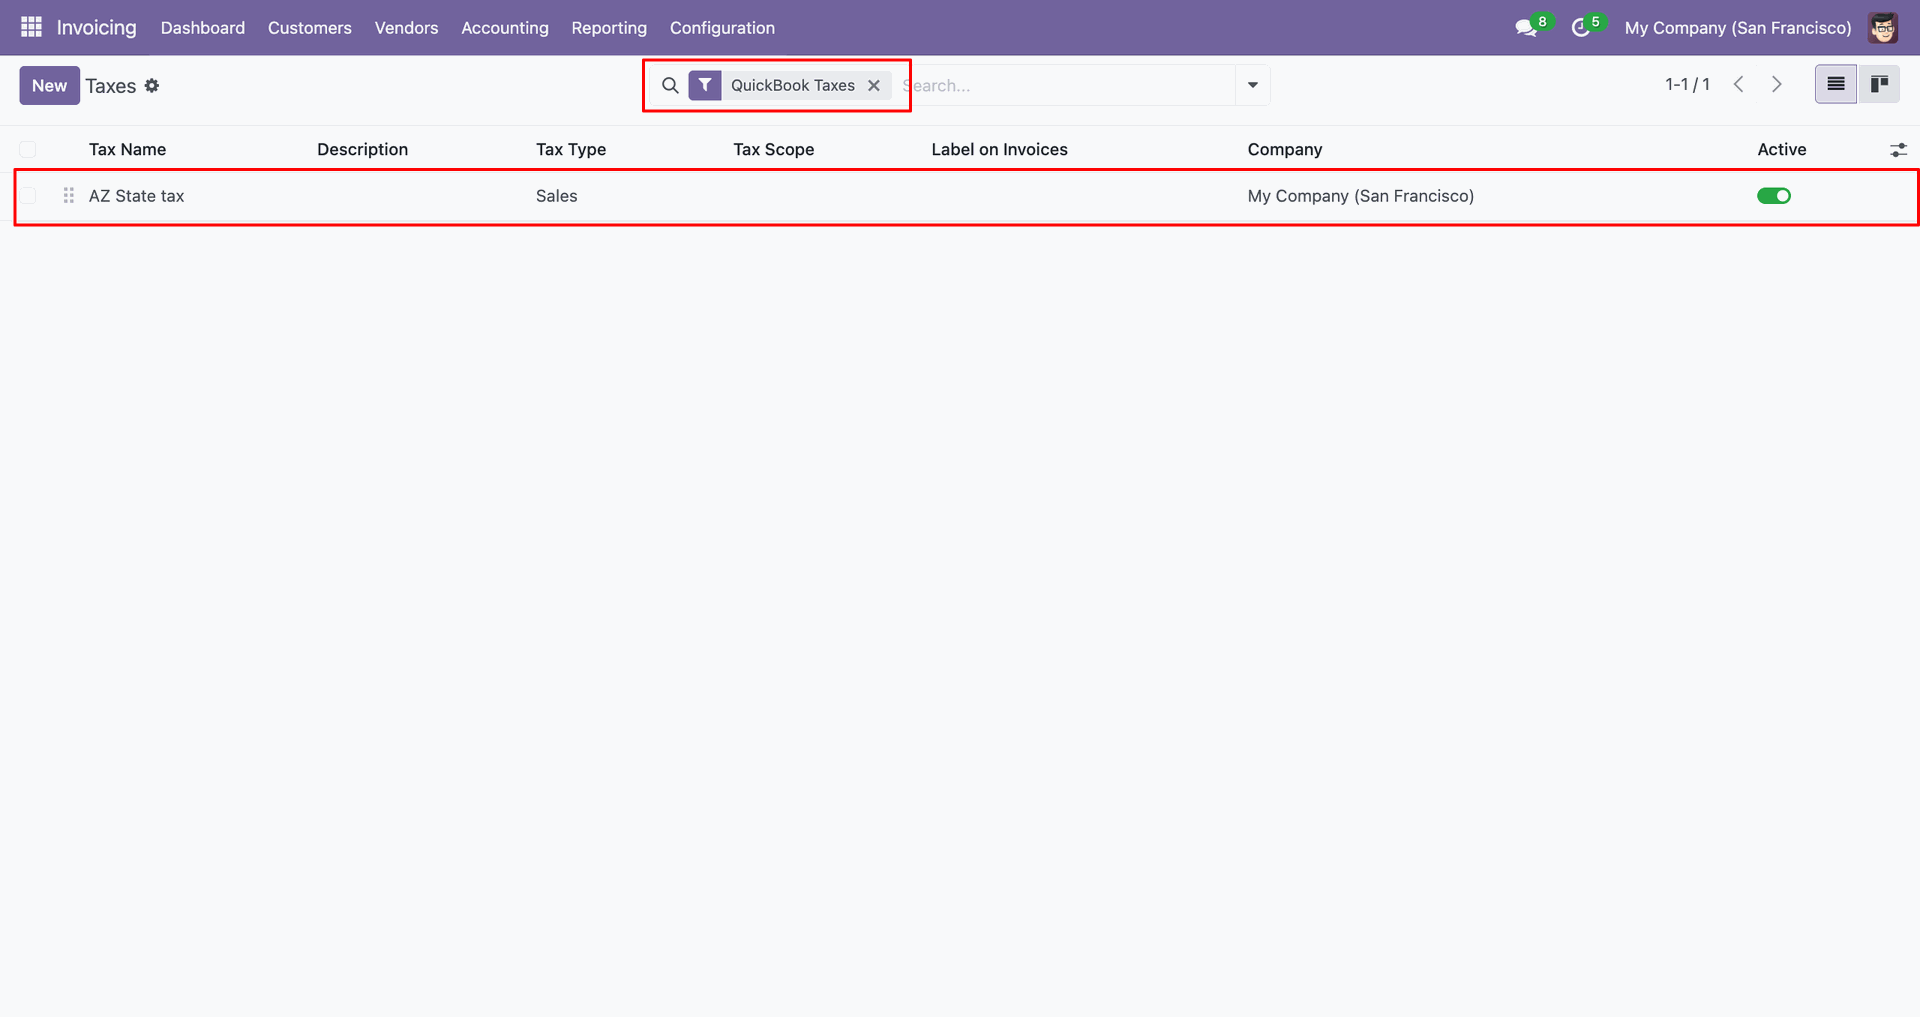
Filter result.

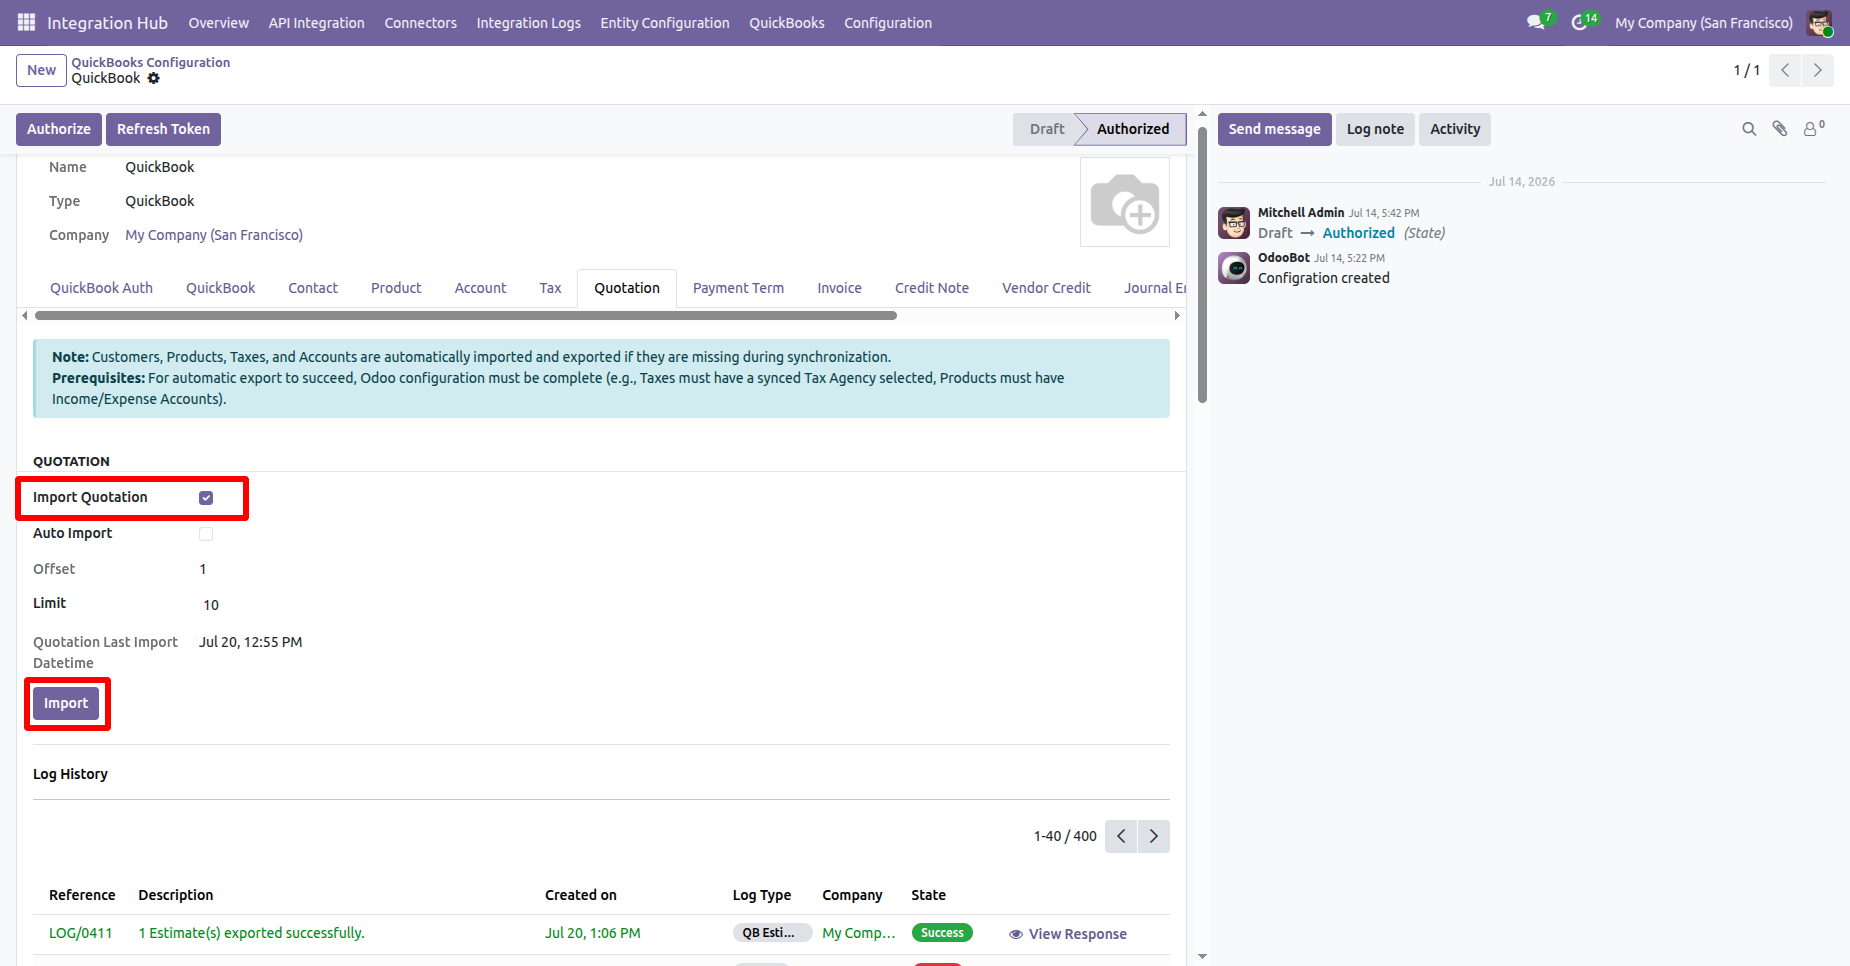
Go to QuickBooks Configuration -> Quotations and enable Import Quotations. Then click the Import button to import quotations from QuickBooks.
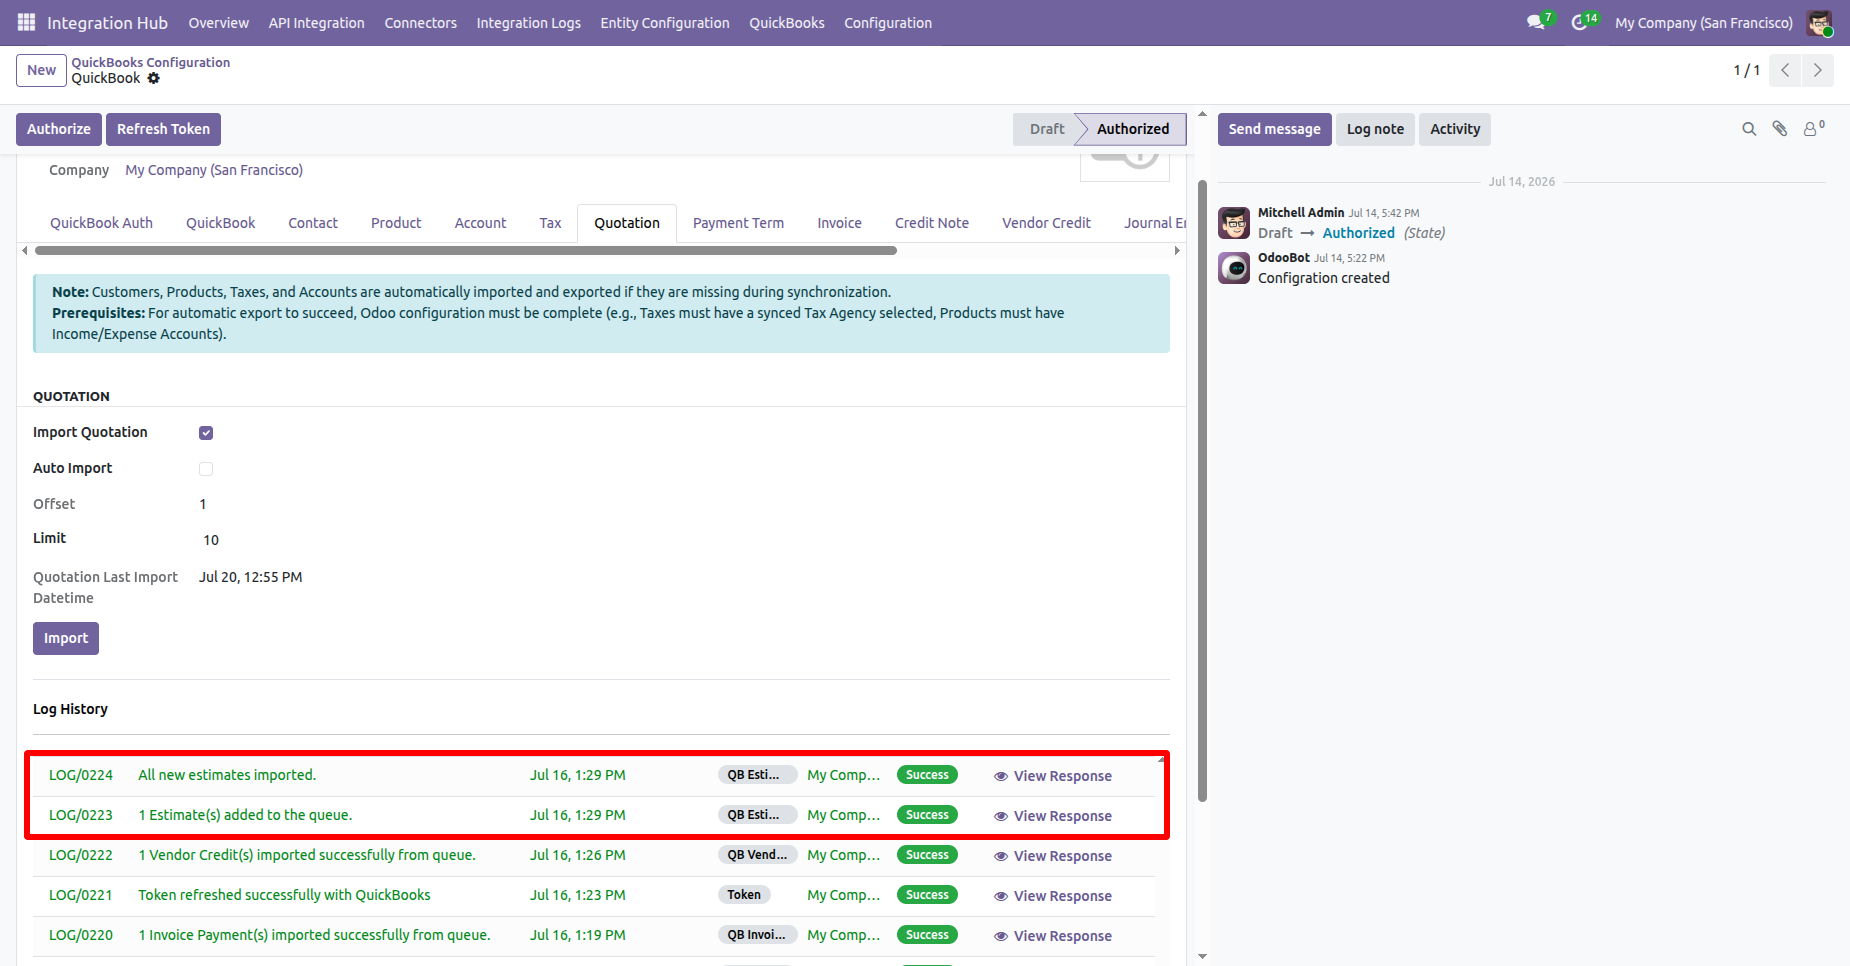
The Log History shows a success message confirming that the quotations were imported or added in a queue successfully.
Go to the QuickBooks Estimate Queue list, select a queue record, then open the Action menu and choose Import from Queue to import the estimate.
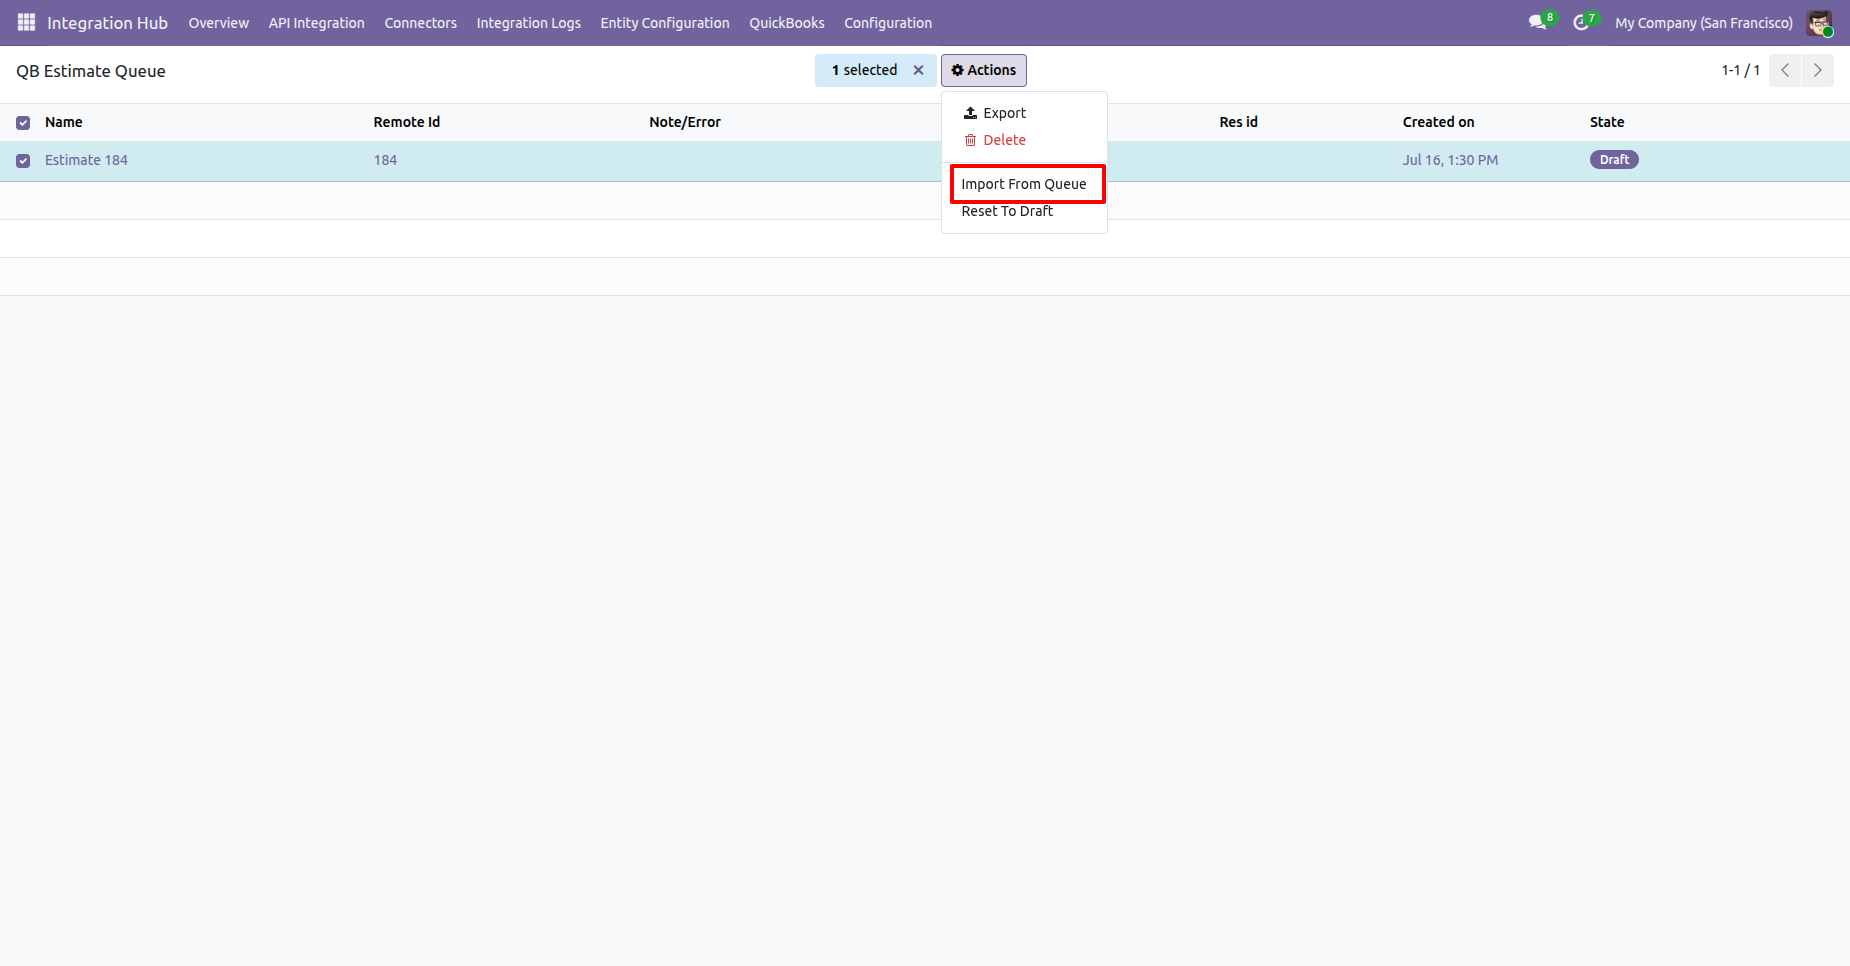
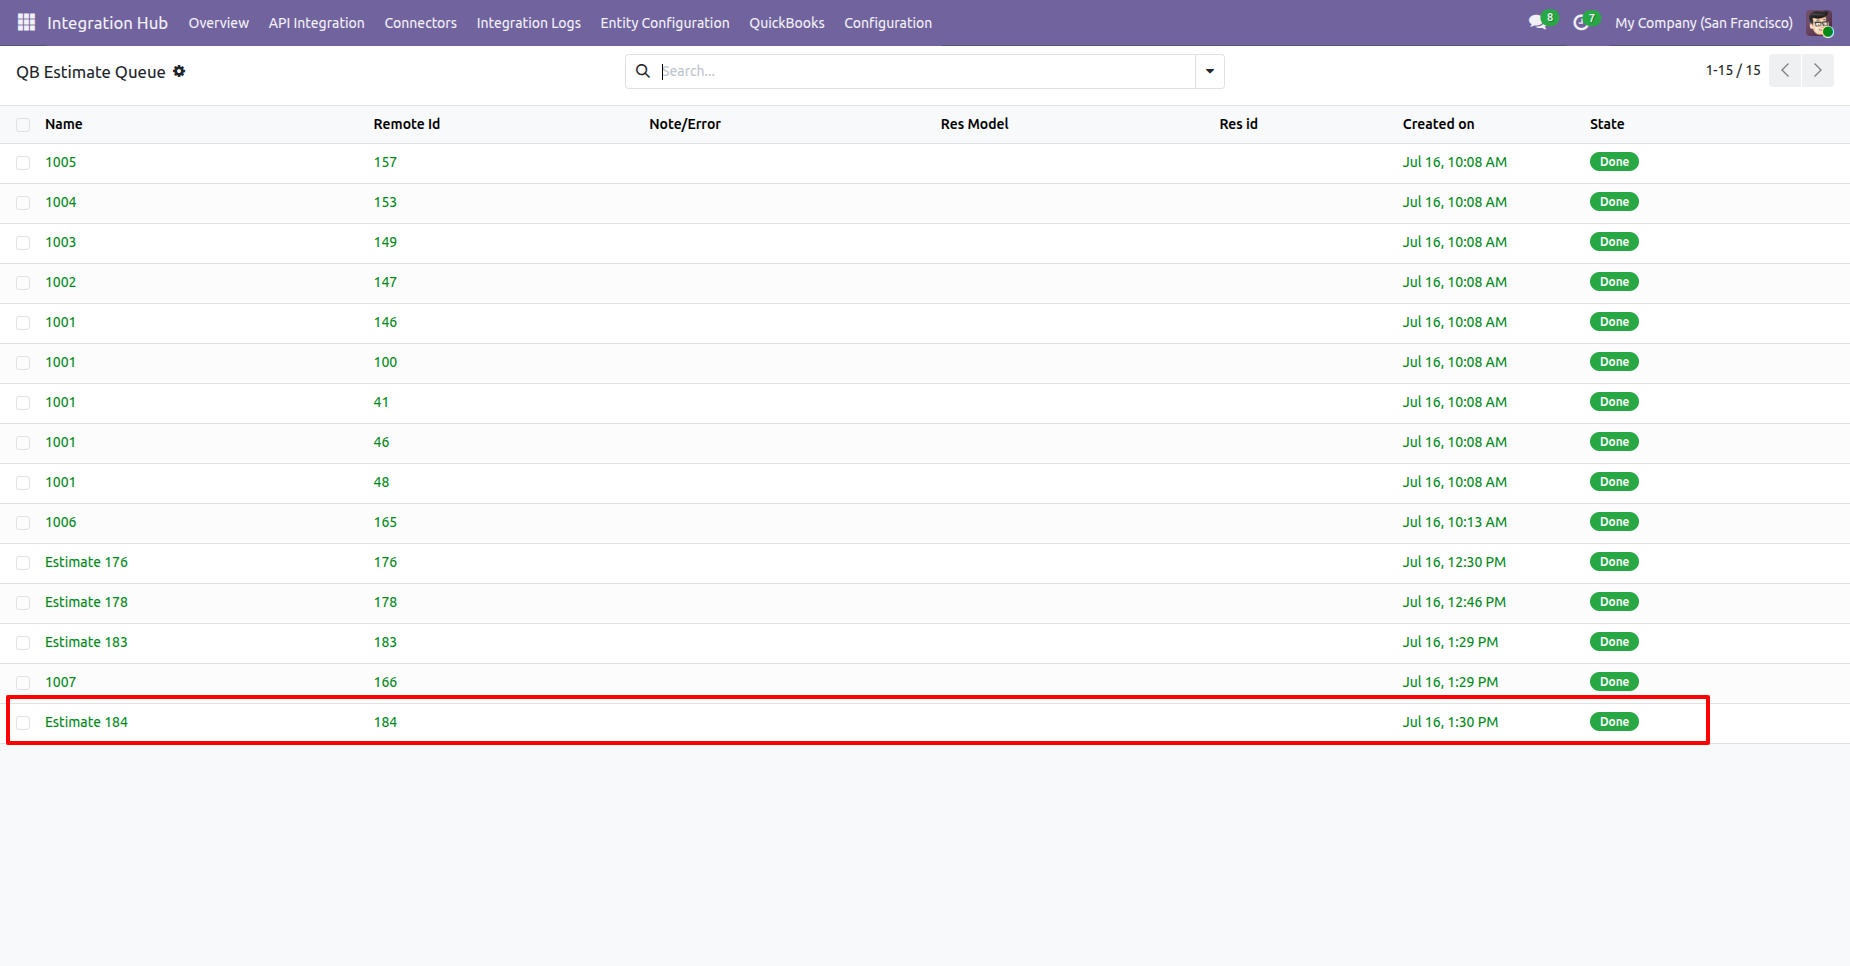
The Estimate Queue will be imported successfully.
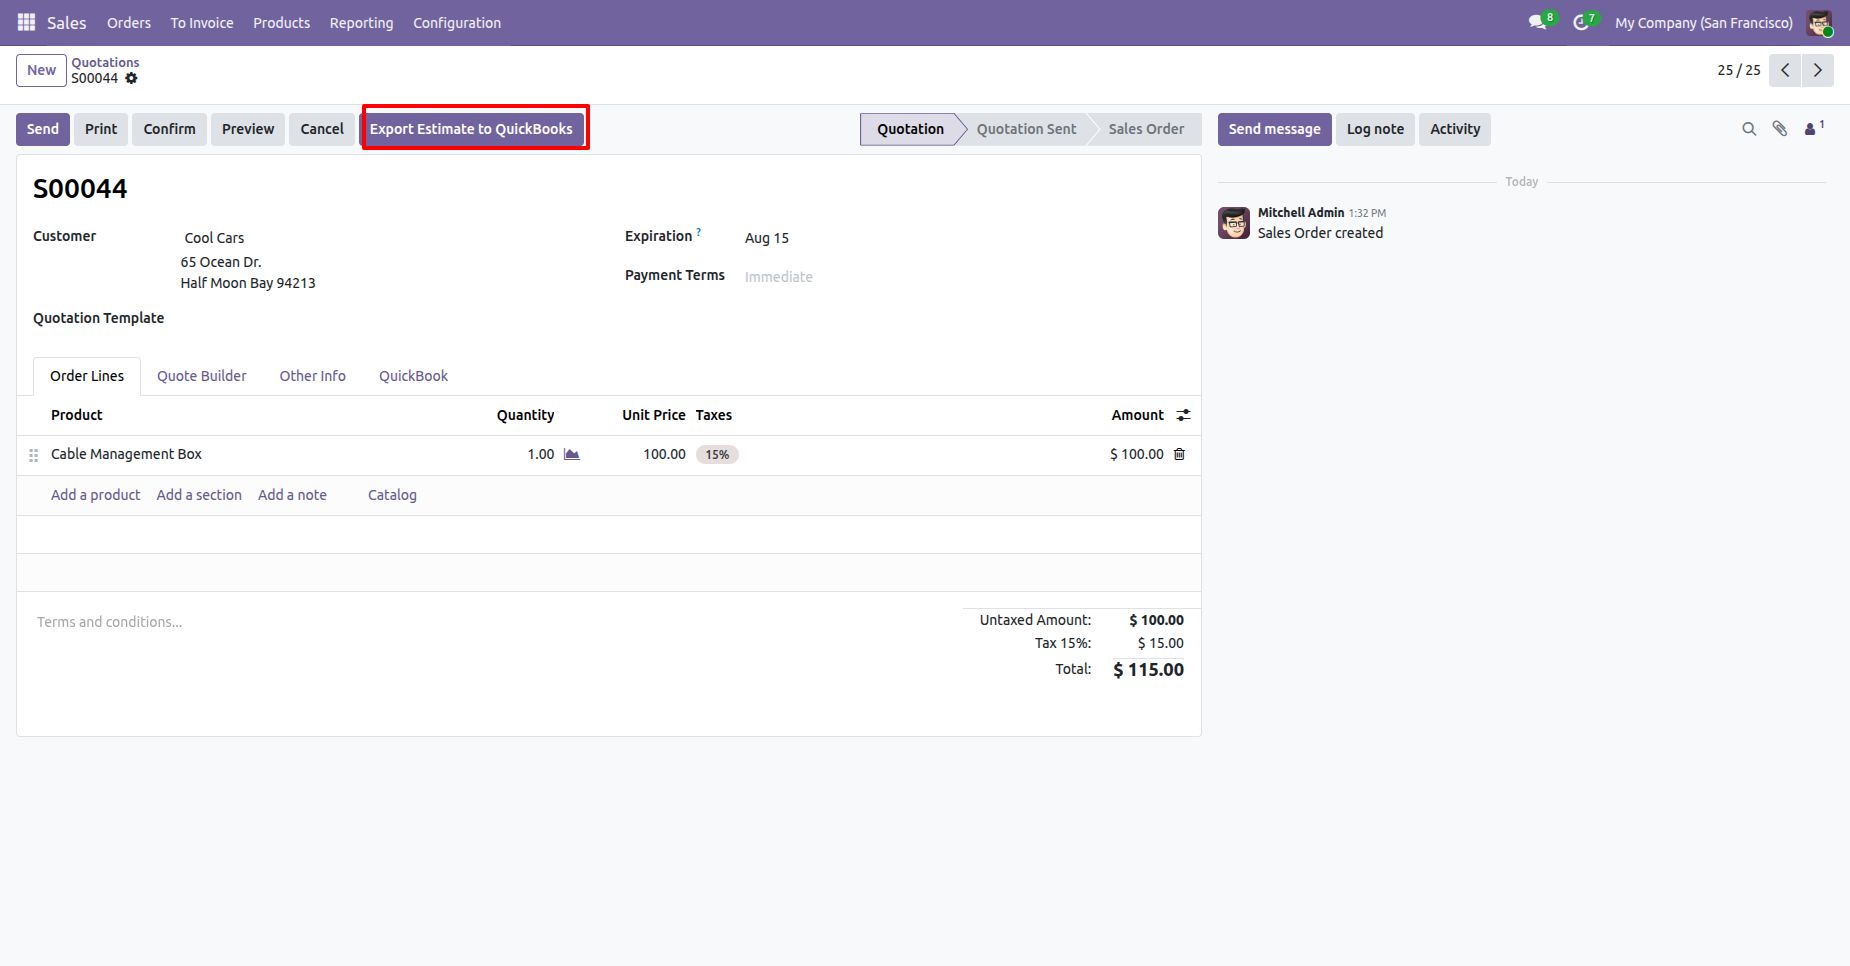
Go to the Quotation Form view and click the “Export Estimate to QuickBooks” button.
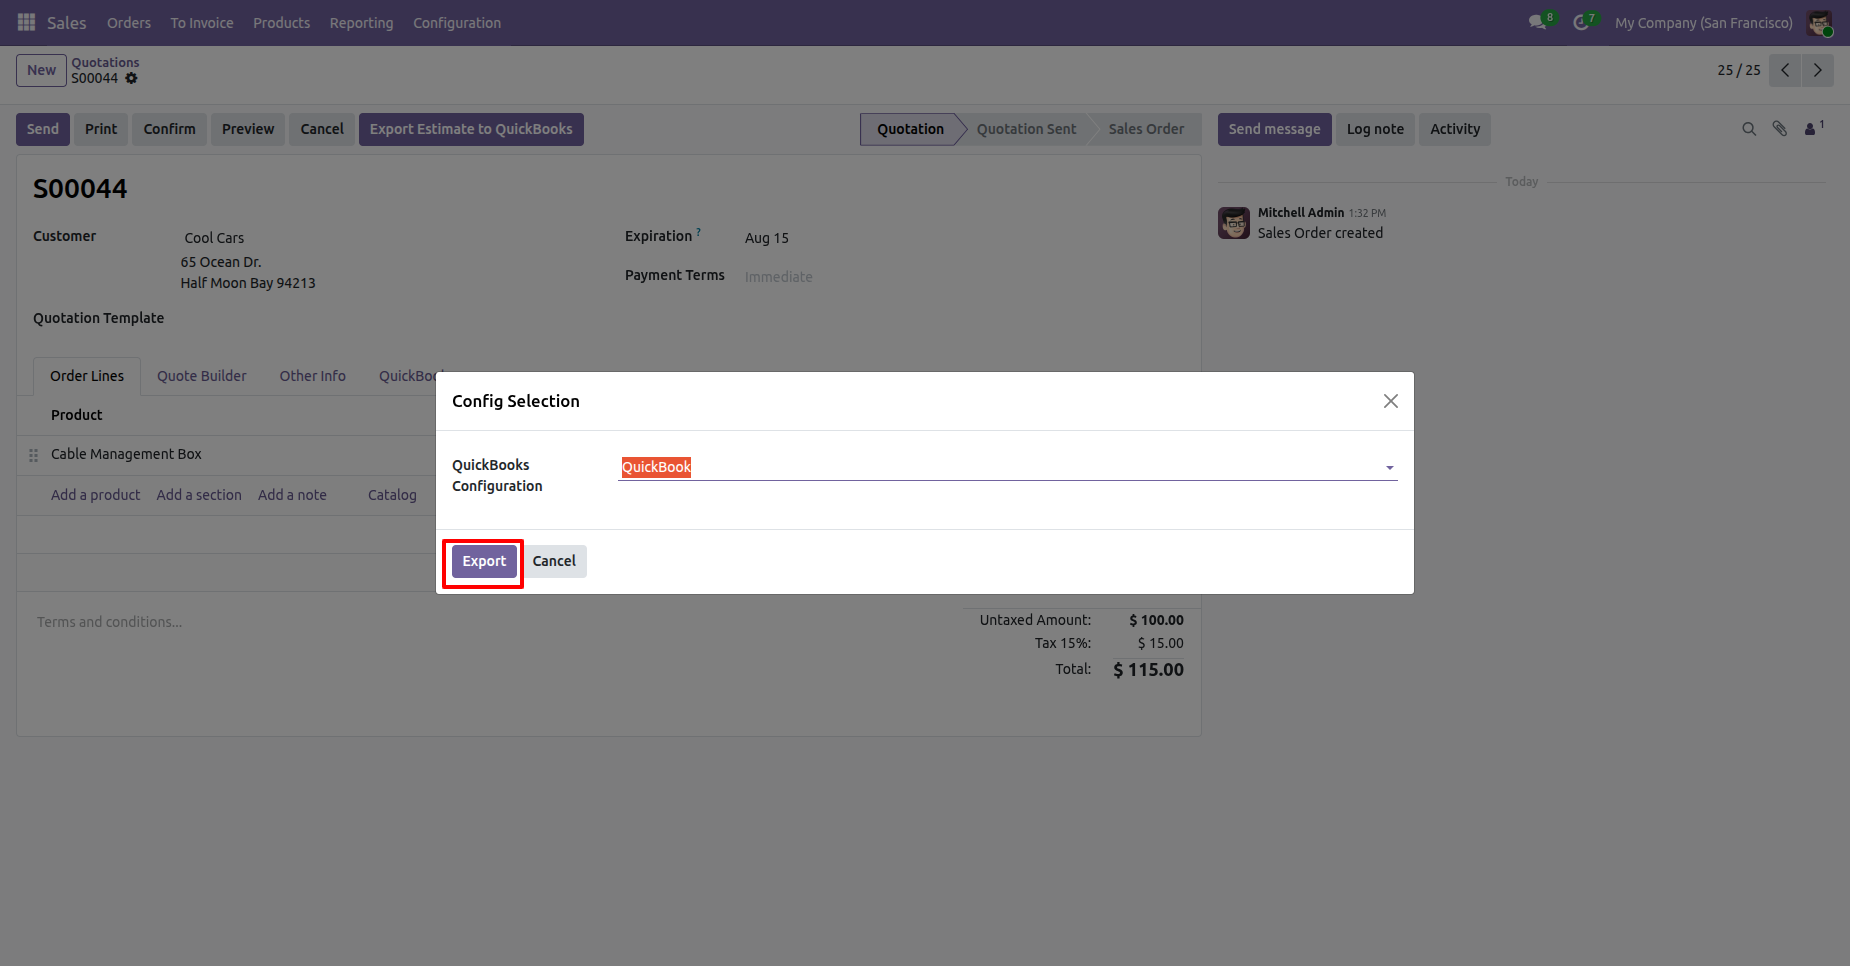
Select the QuickBooks configuration from the Configuration Wizard and click the “Export” button.
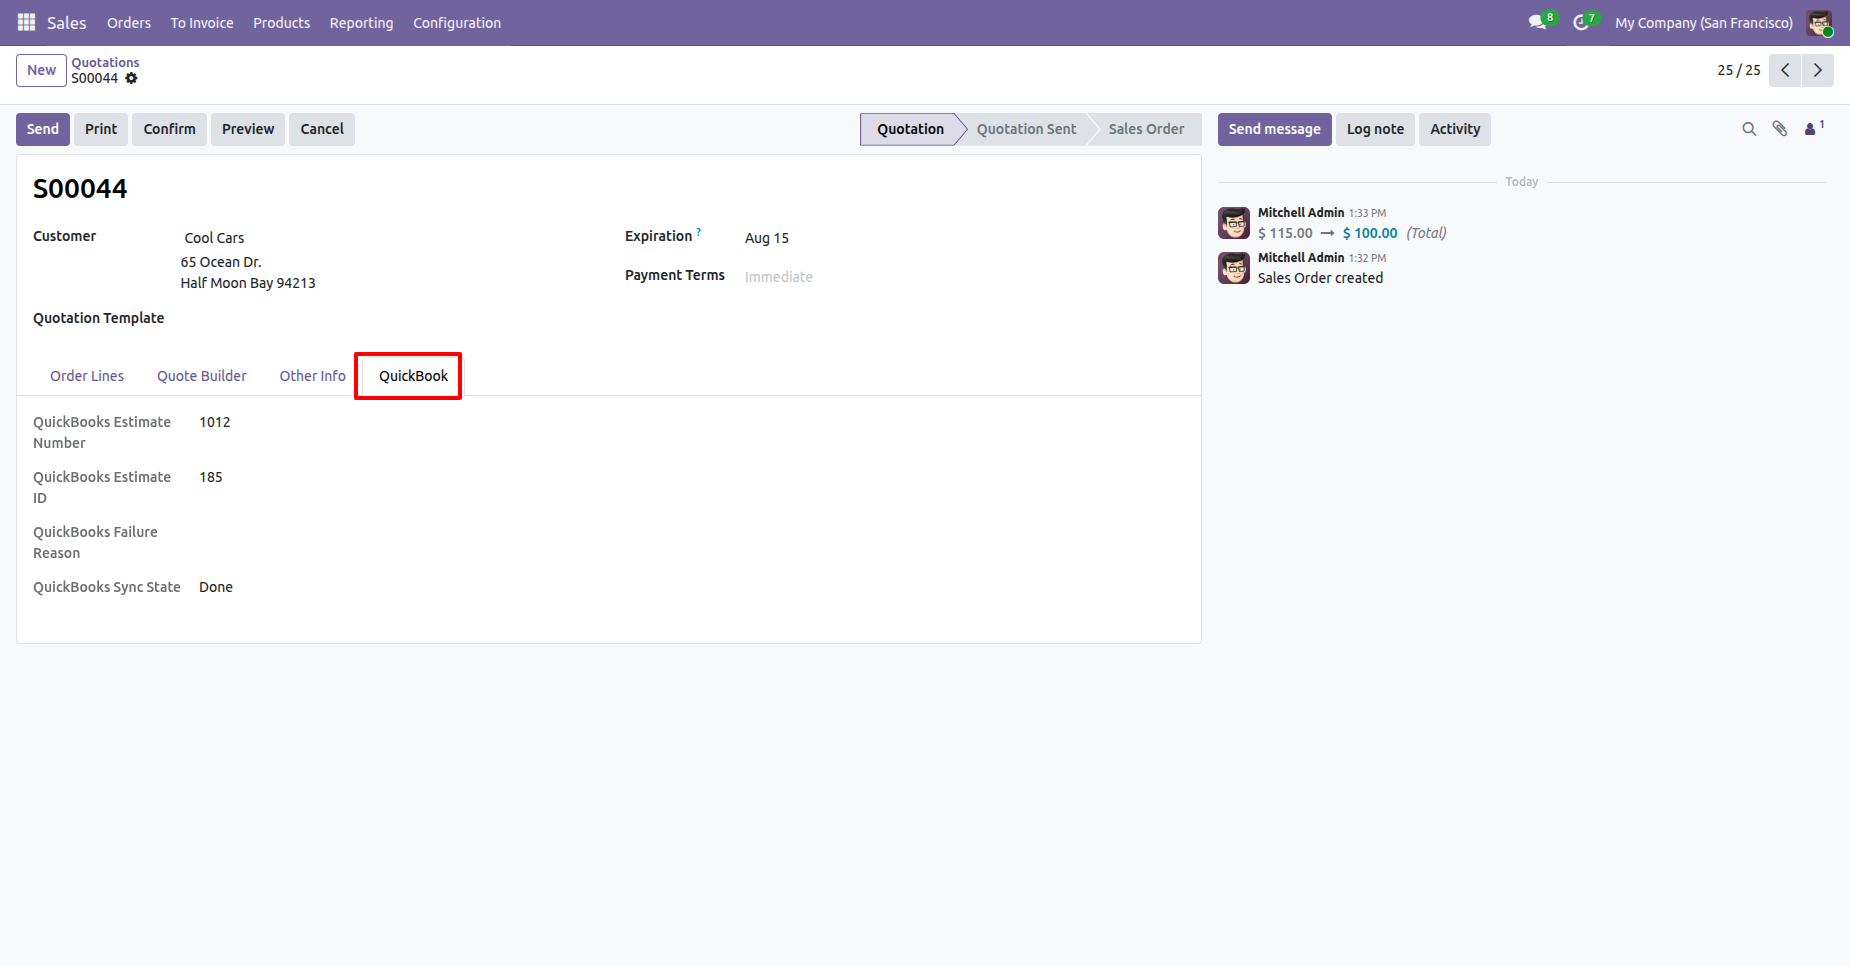
Navigate to the QuickBooks tab in the quotation. Here, the user can view the QuickBooks Estimate Number, Estimate ID, and Sync Status.
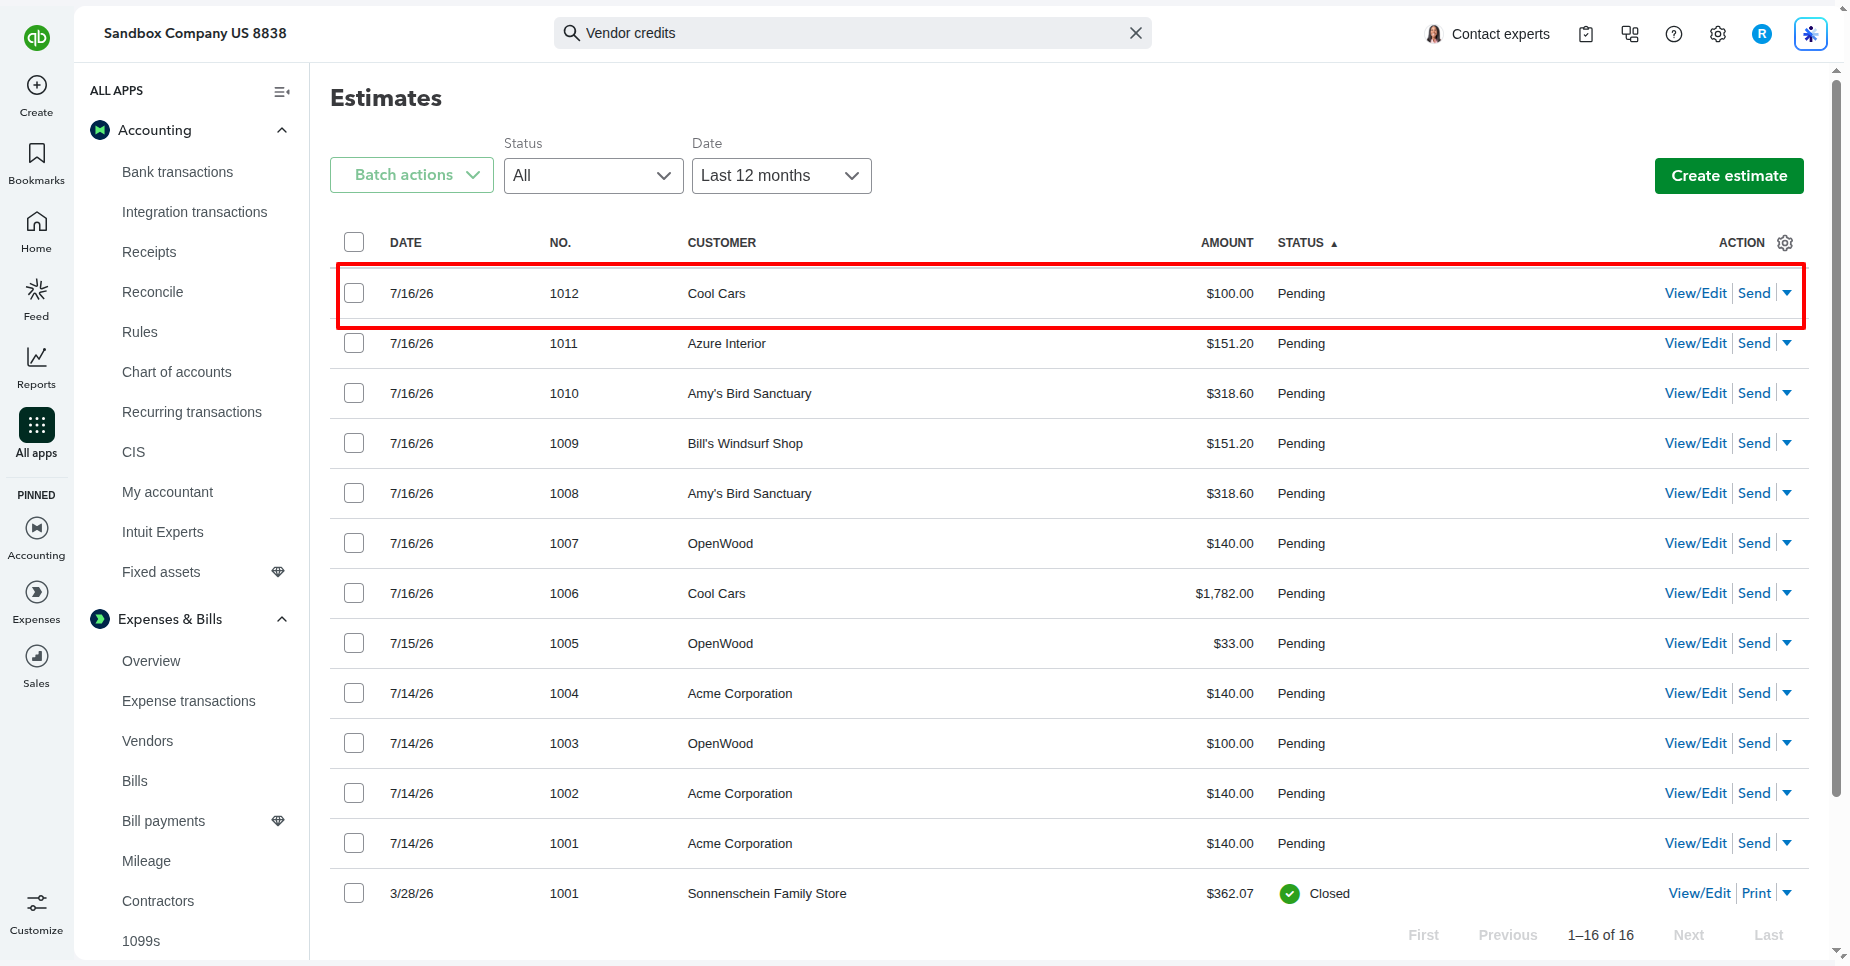
The exported quotation will be visible in QuickBooks.
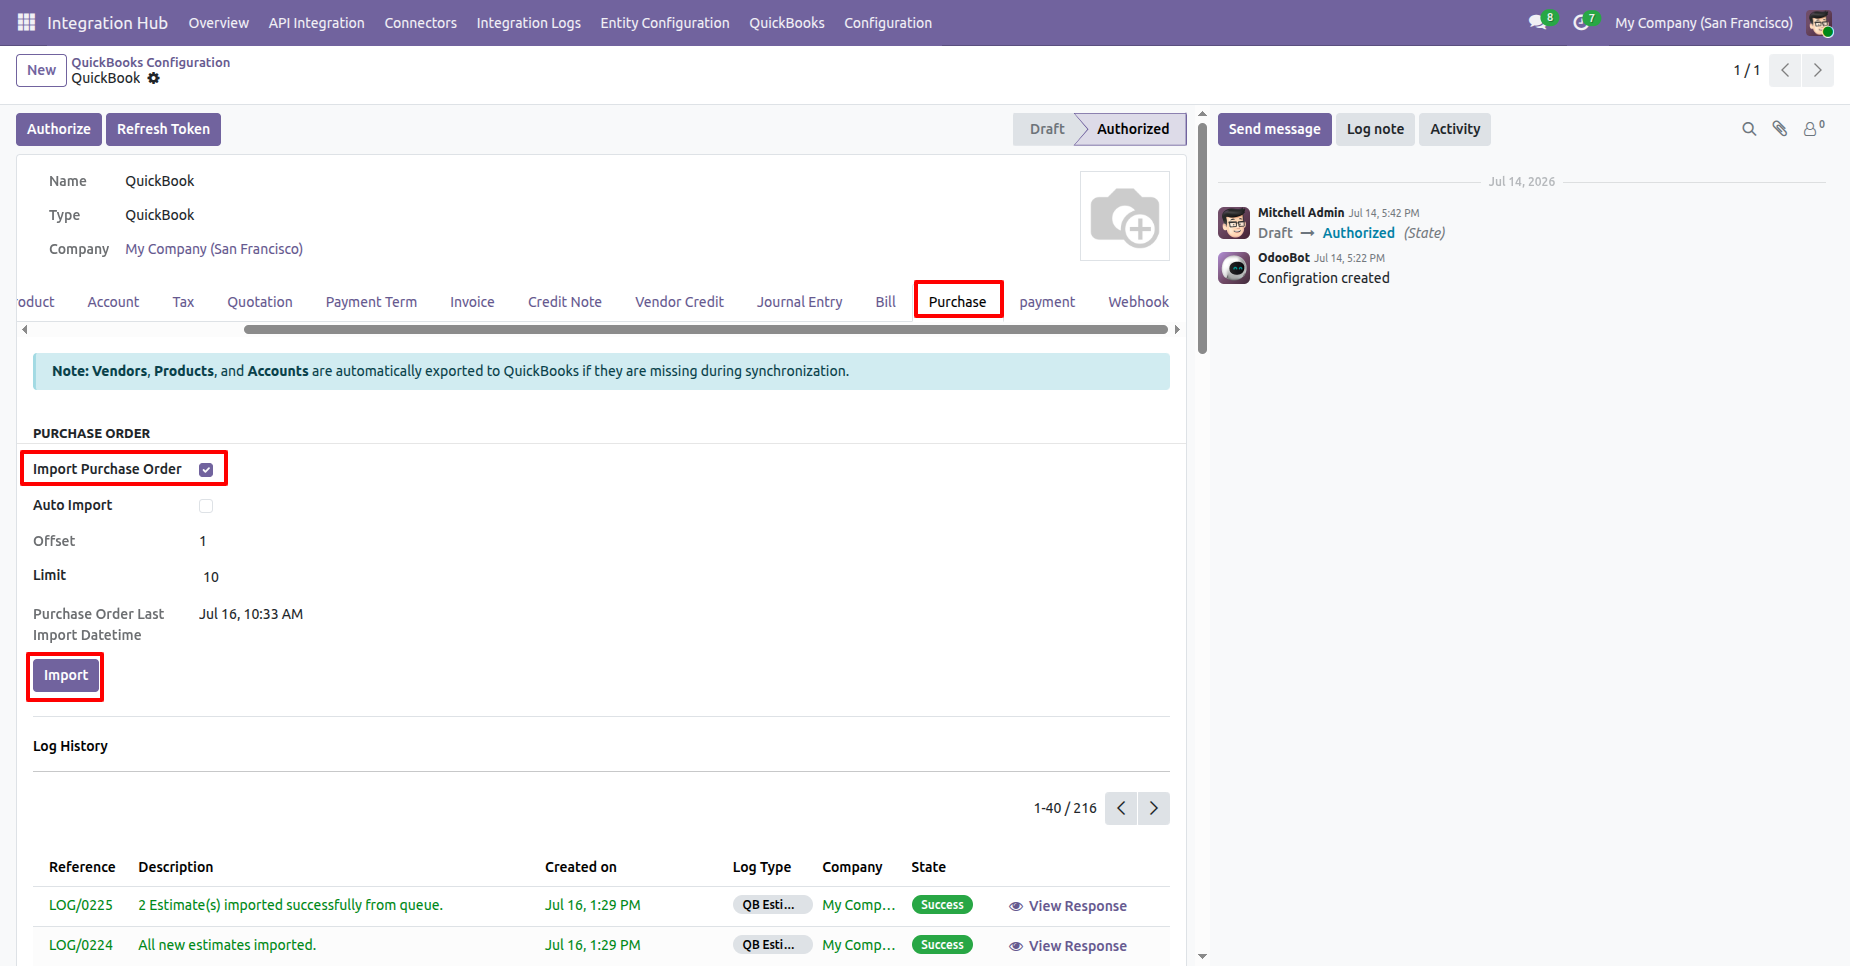
Go to QuickBooks Configuration -> Purchase and enable Import Purchase Order. Then click the Import button to import PO from QuickBooks.
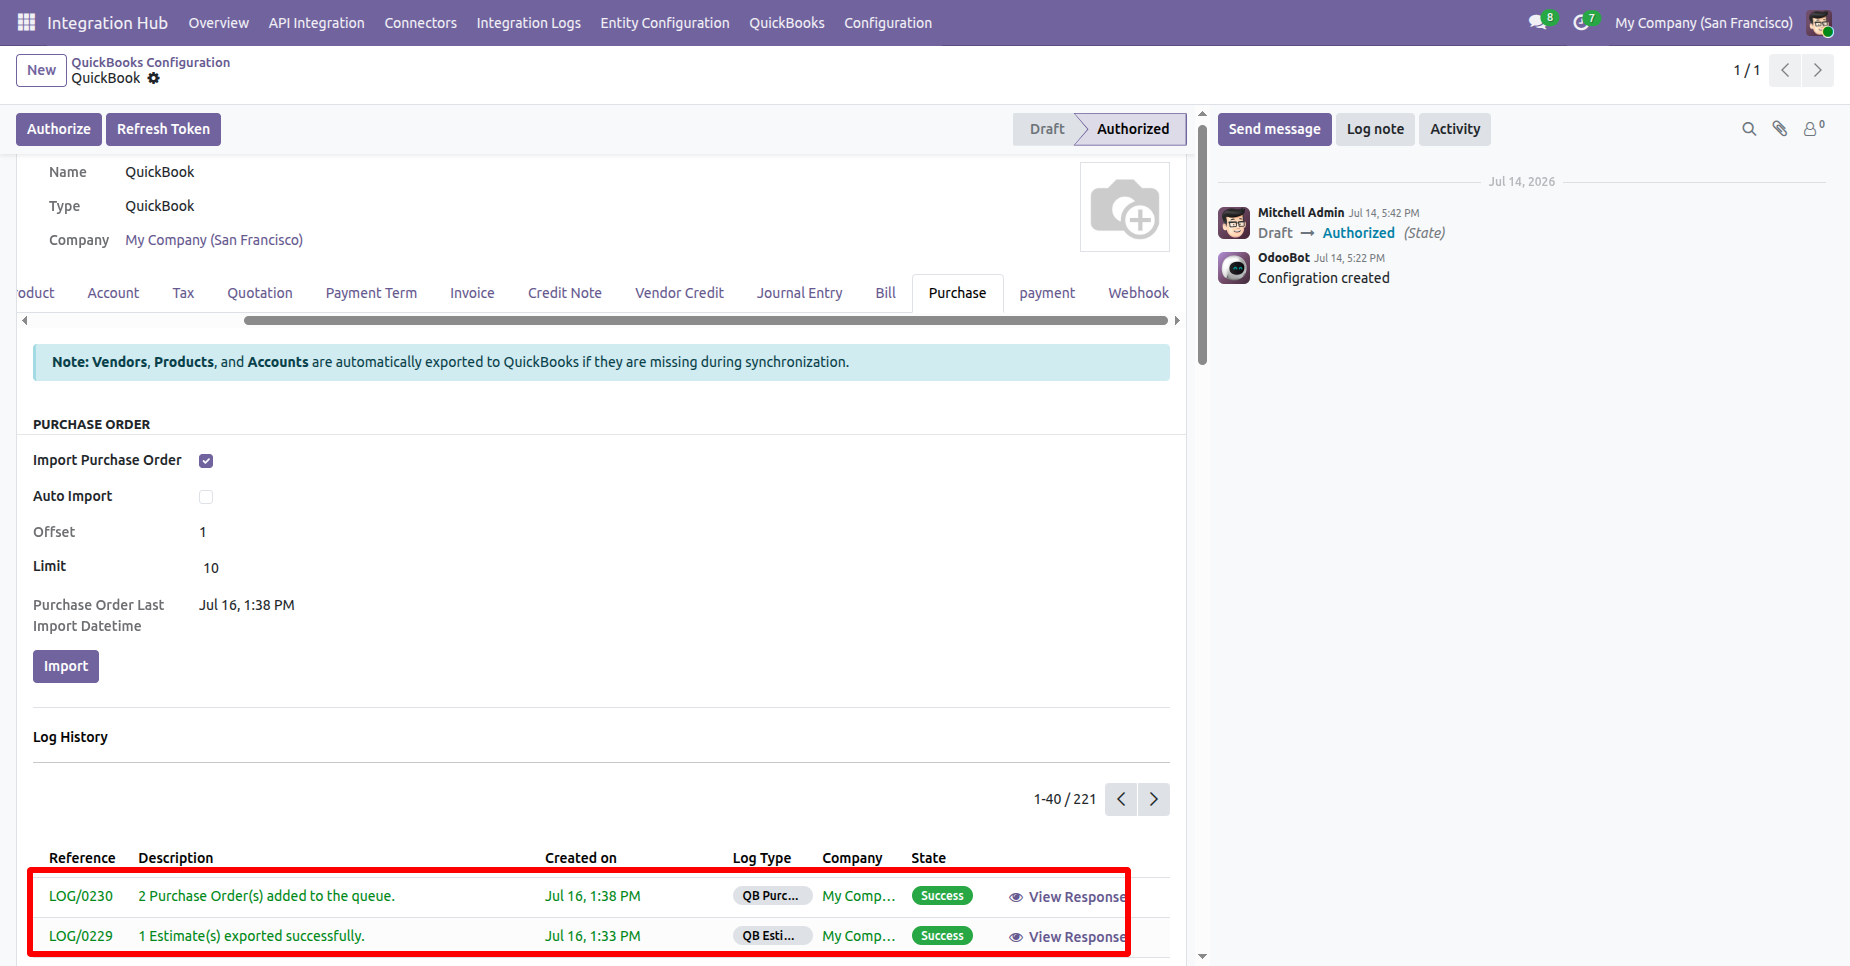
The Log History shows a success message confirming that the Purchase Order were imported or added in a queue successfully.
Go to the QuickBooks Purchase Order Queue list, select a queue record, then open the Action menu and choose Import from Queue to import the Purchase Order.
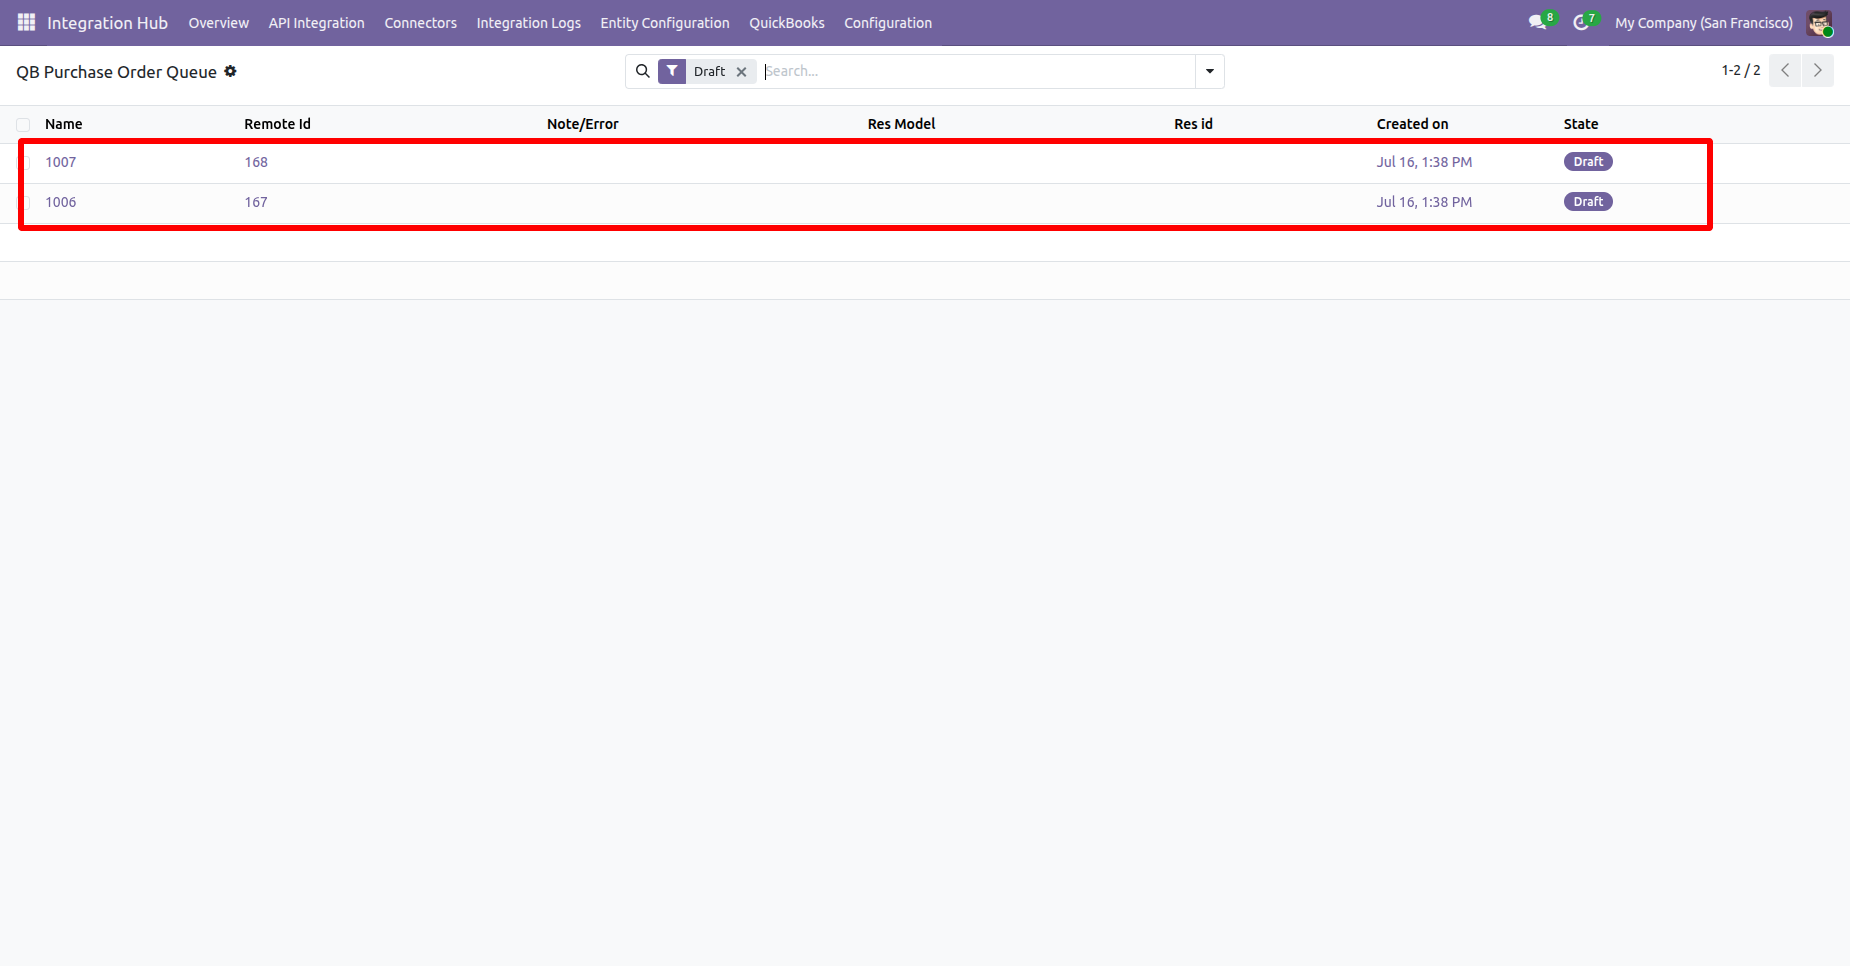
The Purchase Order Queue will be imported successfully.
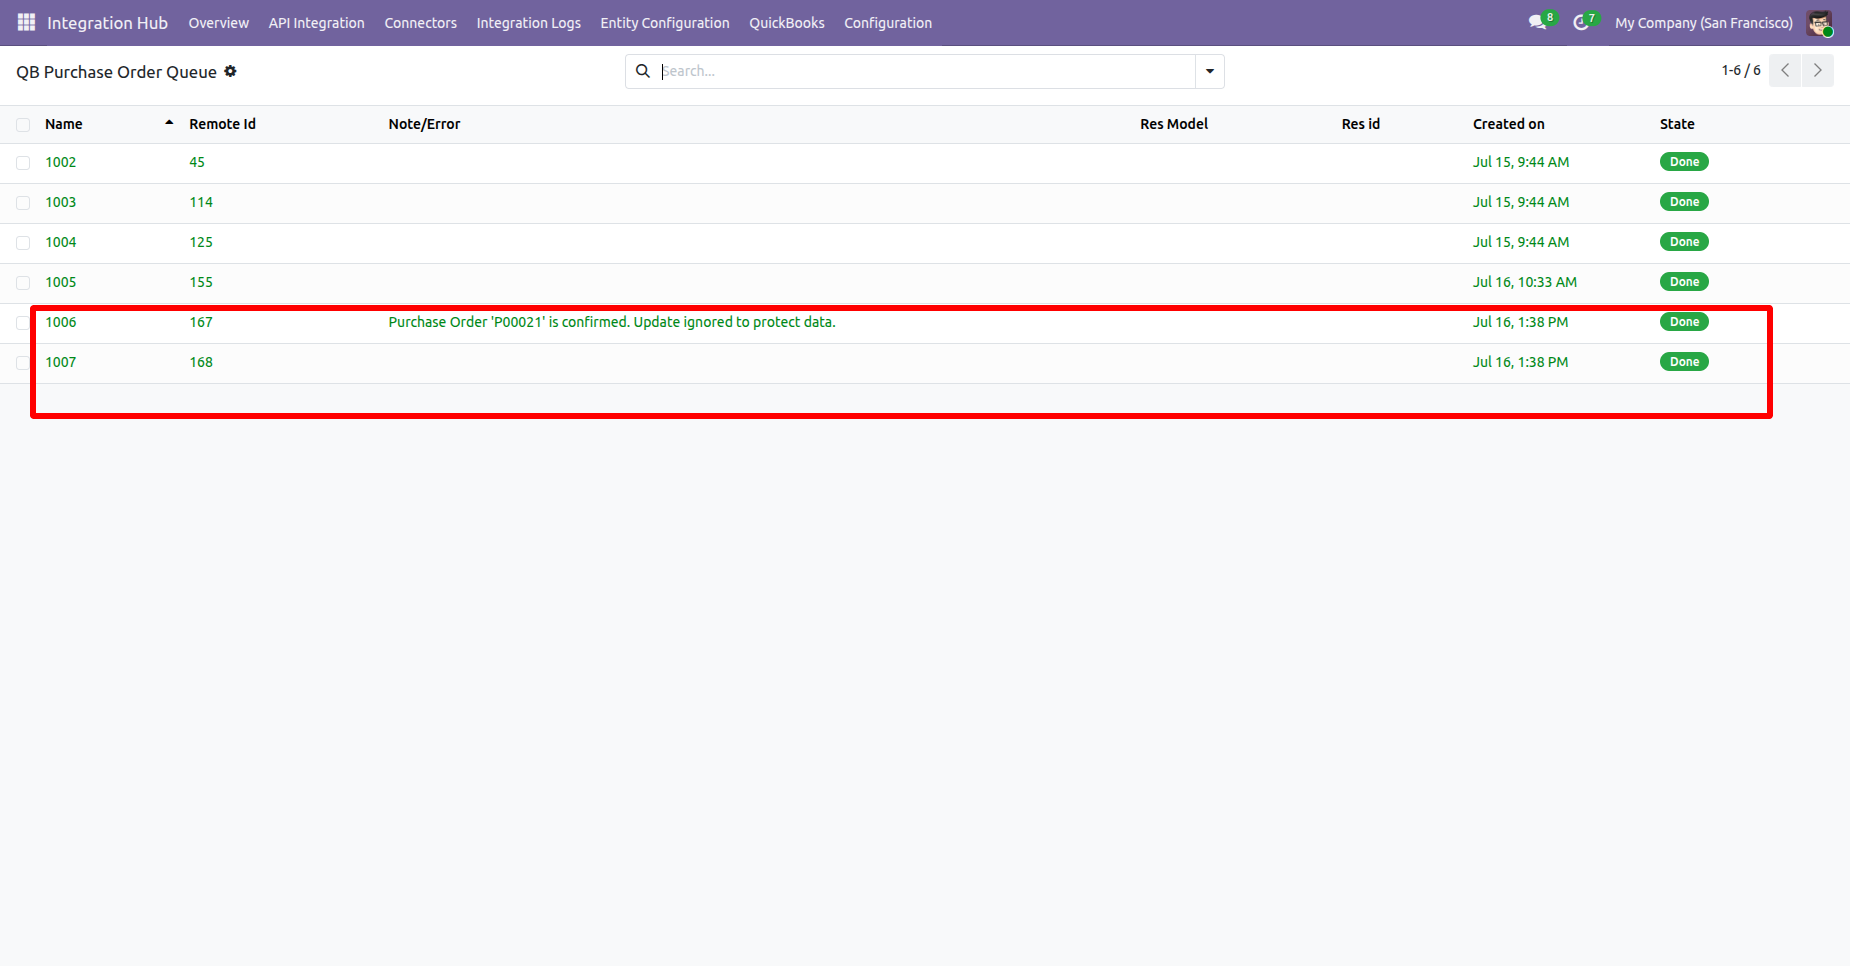
Go to the Request for Quotation Form view and click the “Export to QuickBooks” button.
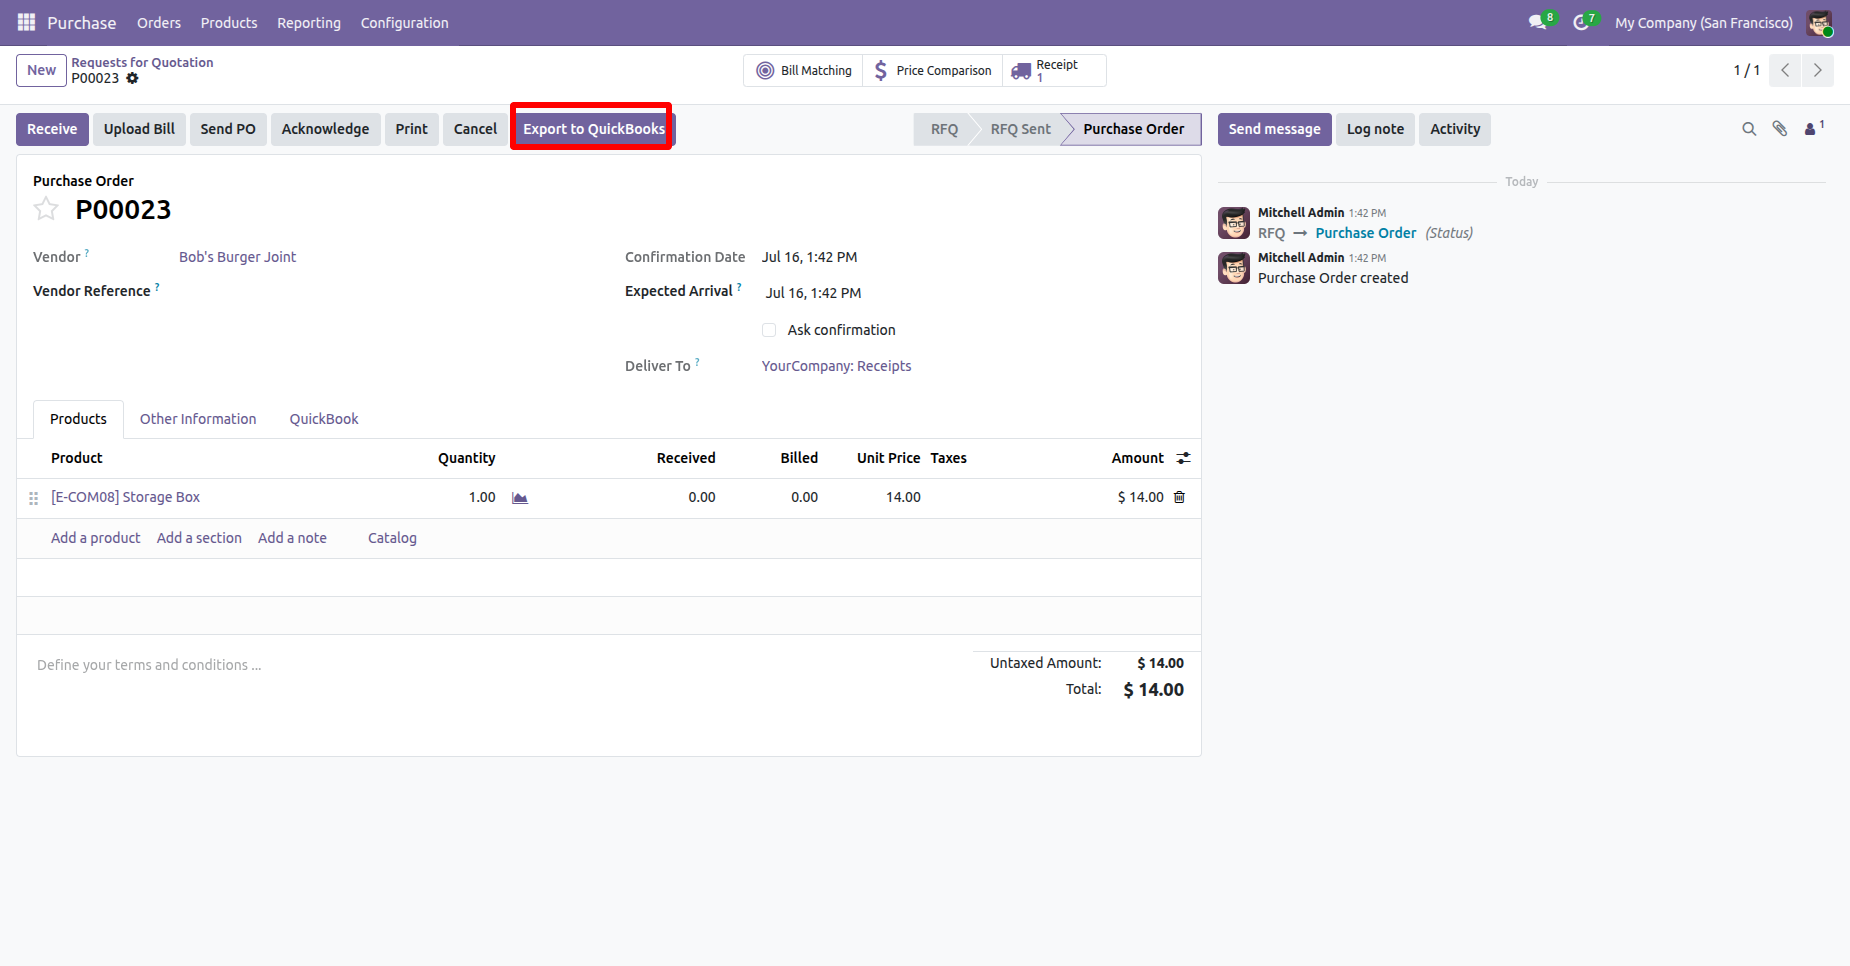
Select the QuickBooks configuration from the Configuration Wizard and click the “Export” button.
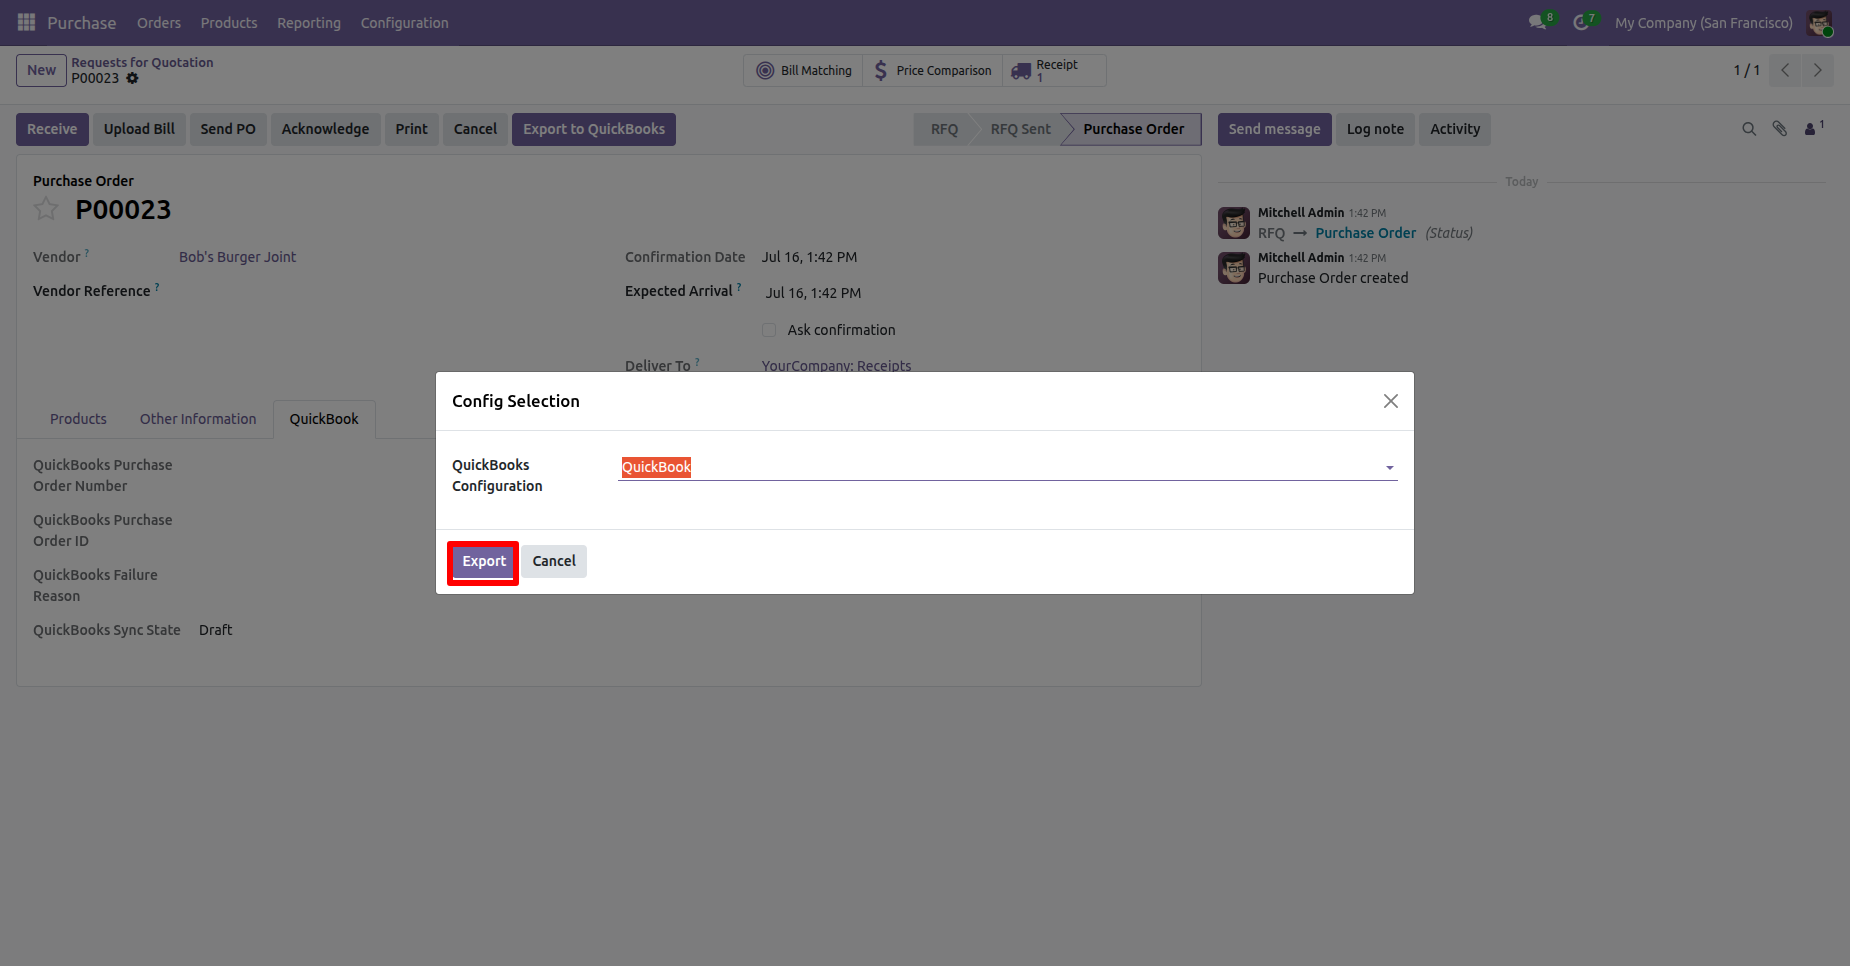
Navigate to the QuickBooks tab in the request for quotation. Here, the user can view the QuickBooks Purchase Order Number, Purchase Order ID, and Sync Status.
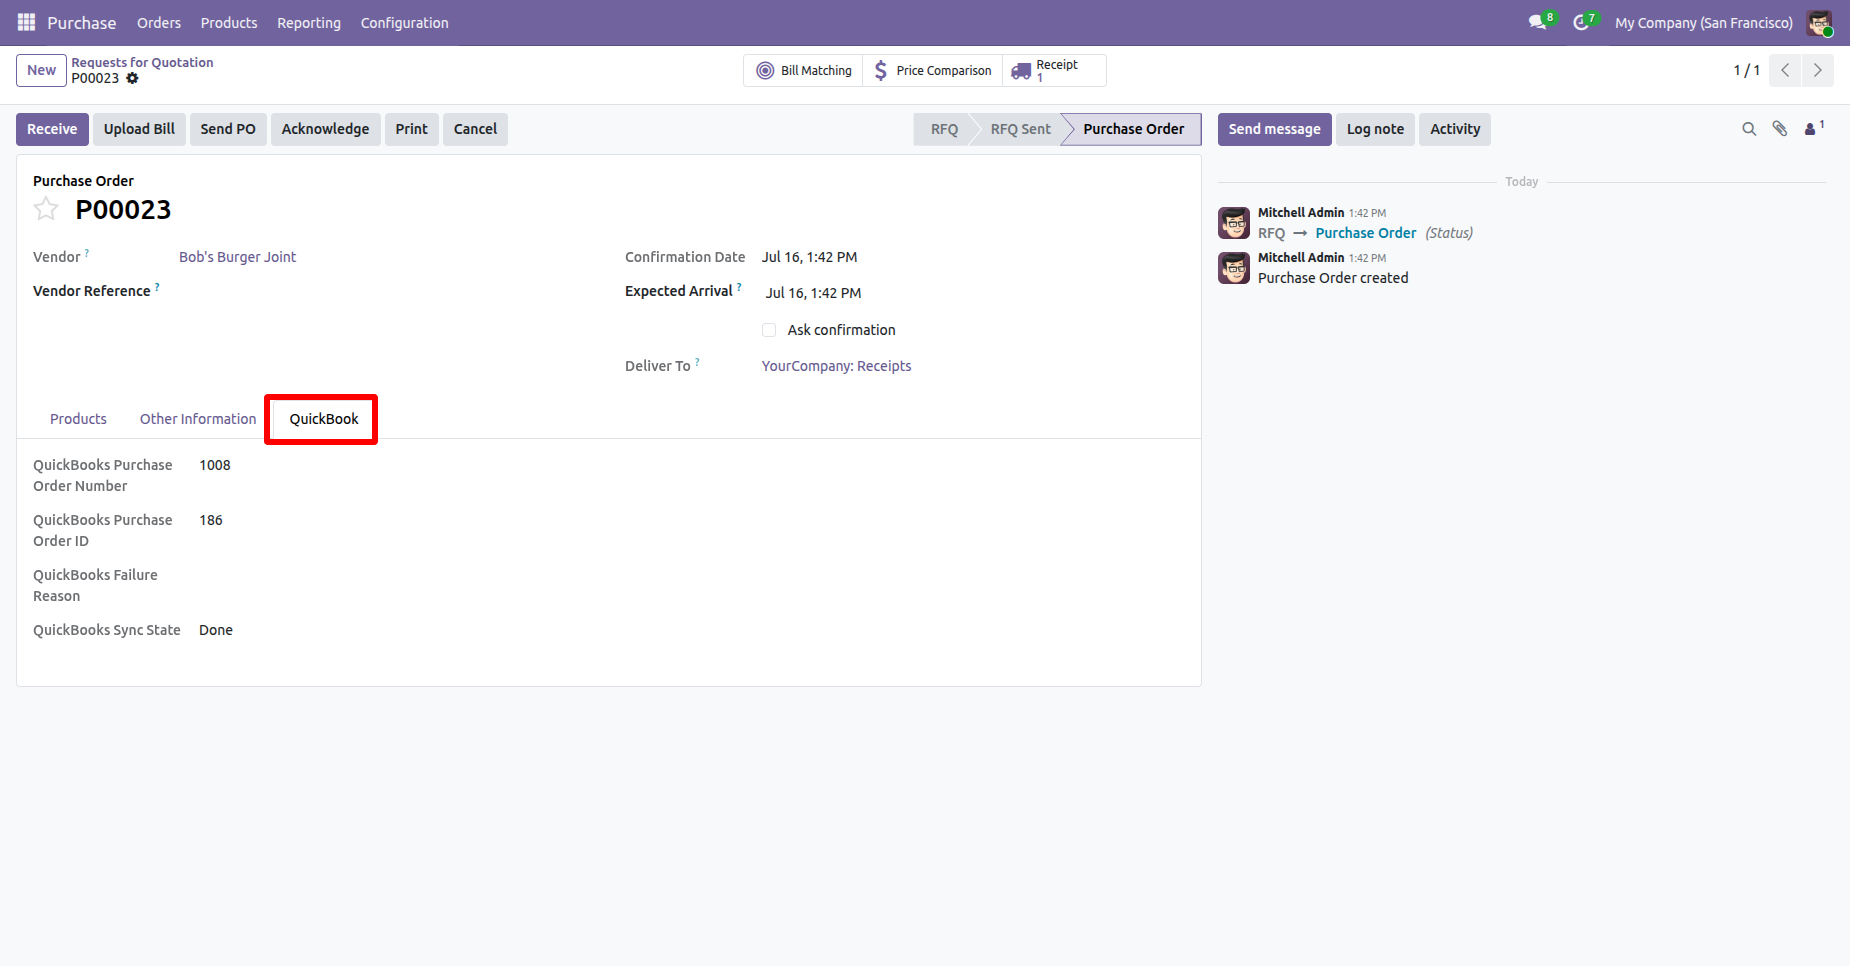
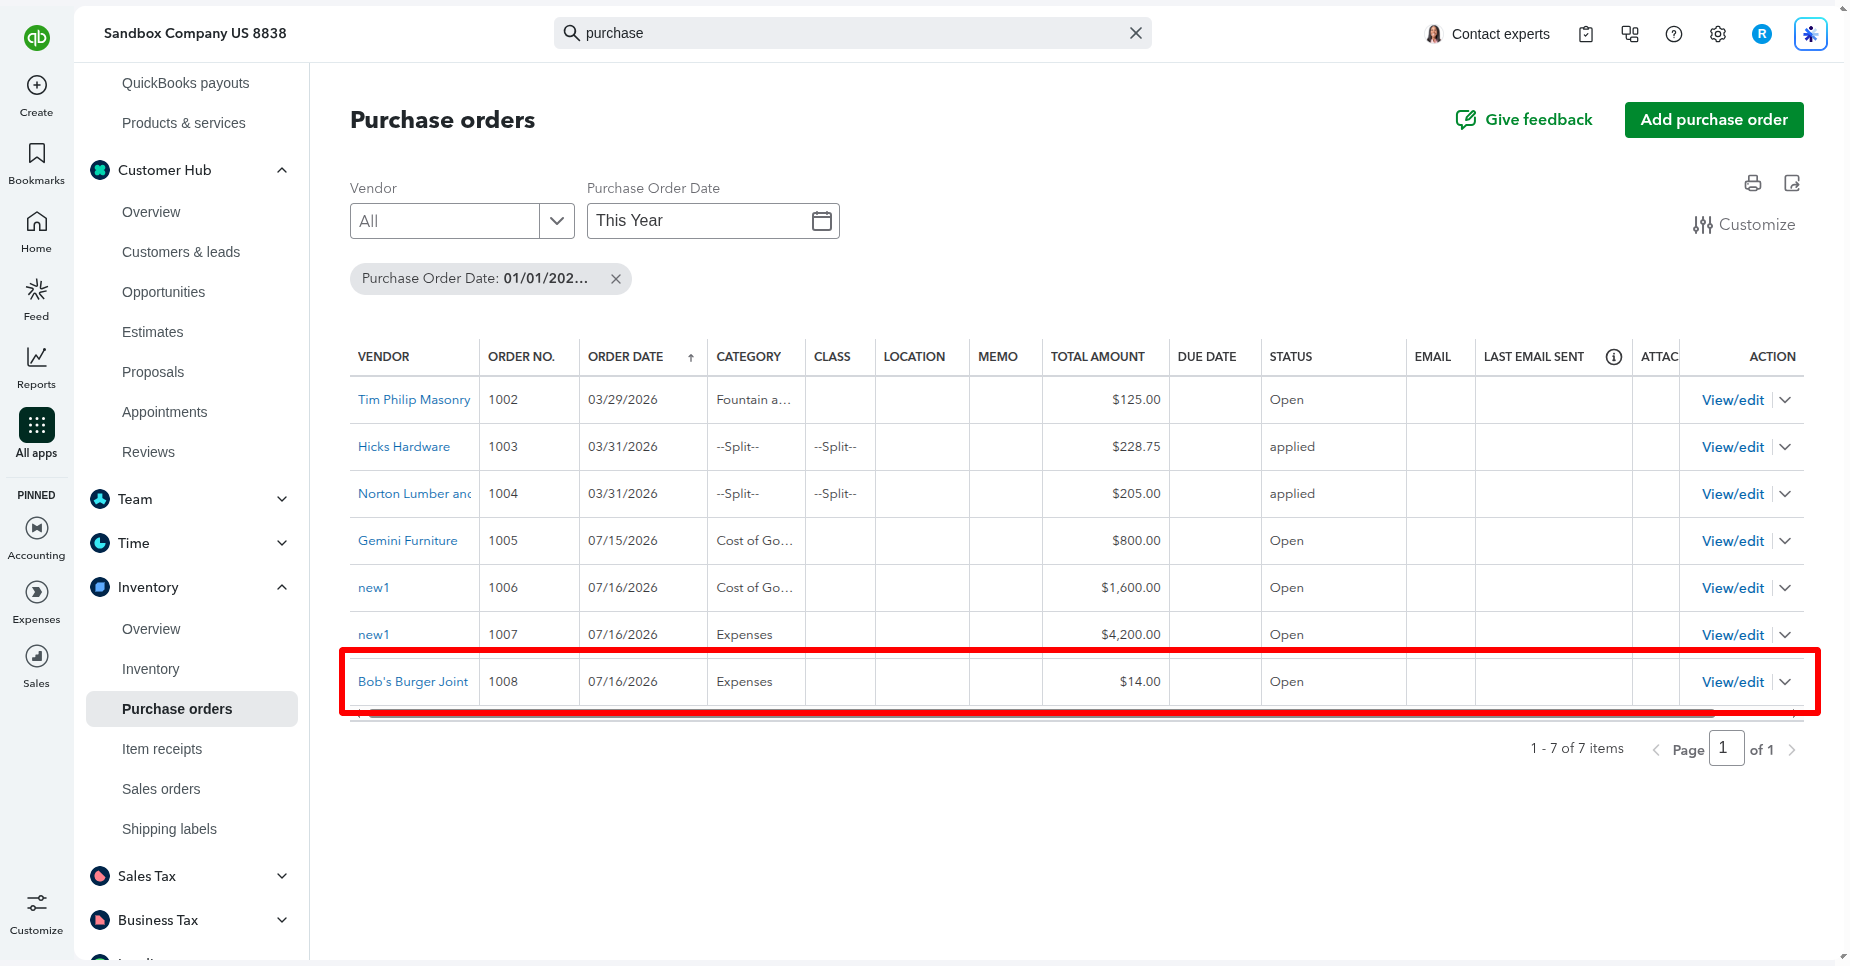
The exported purchase order will be visible in QuickBooks.
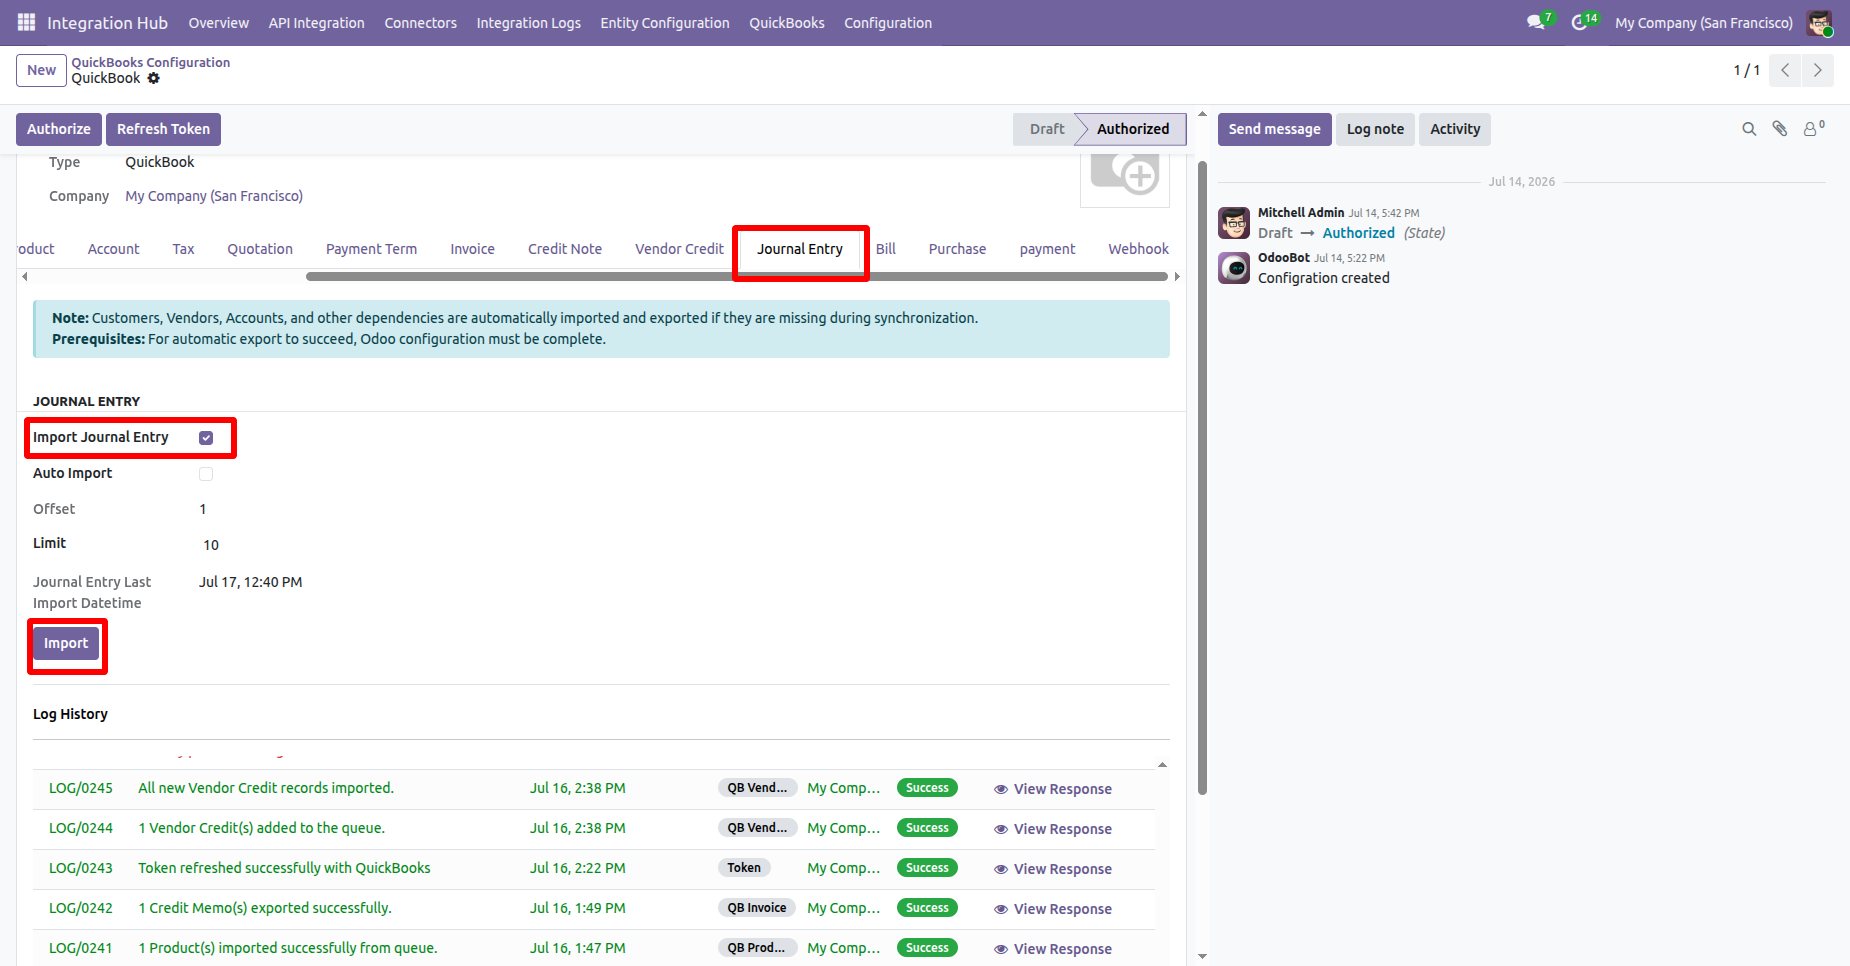
Go to QuickBooks Configuration -> Journal Entry and enable Import Journal Entry. Then click the Import button to import Journal Entry from QuickBooks.
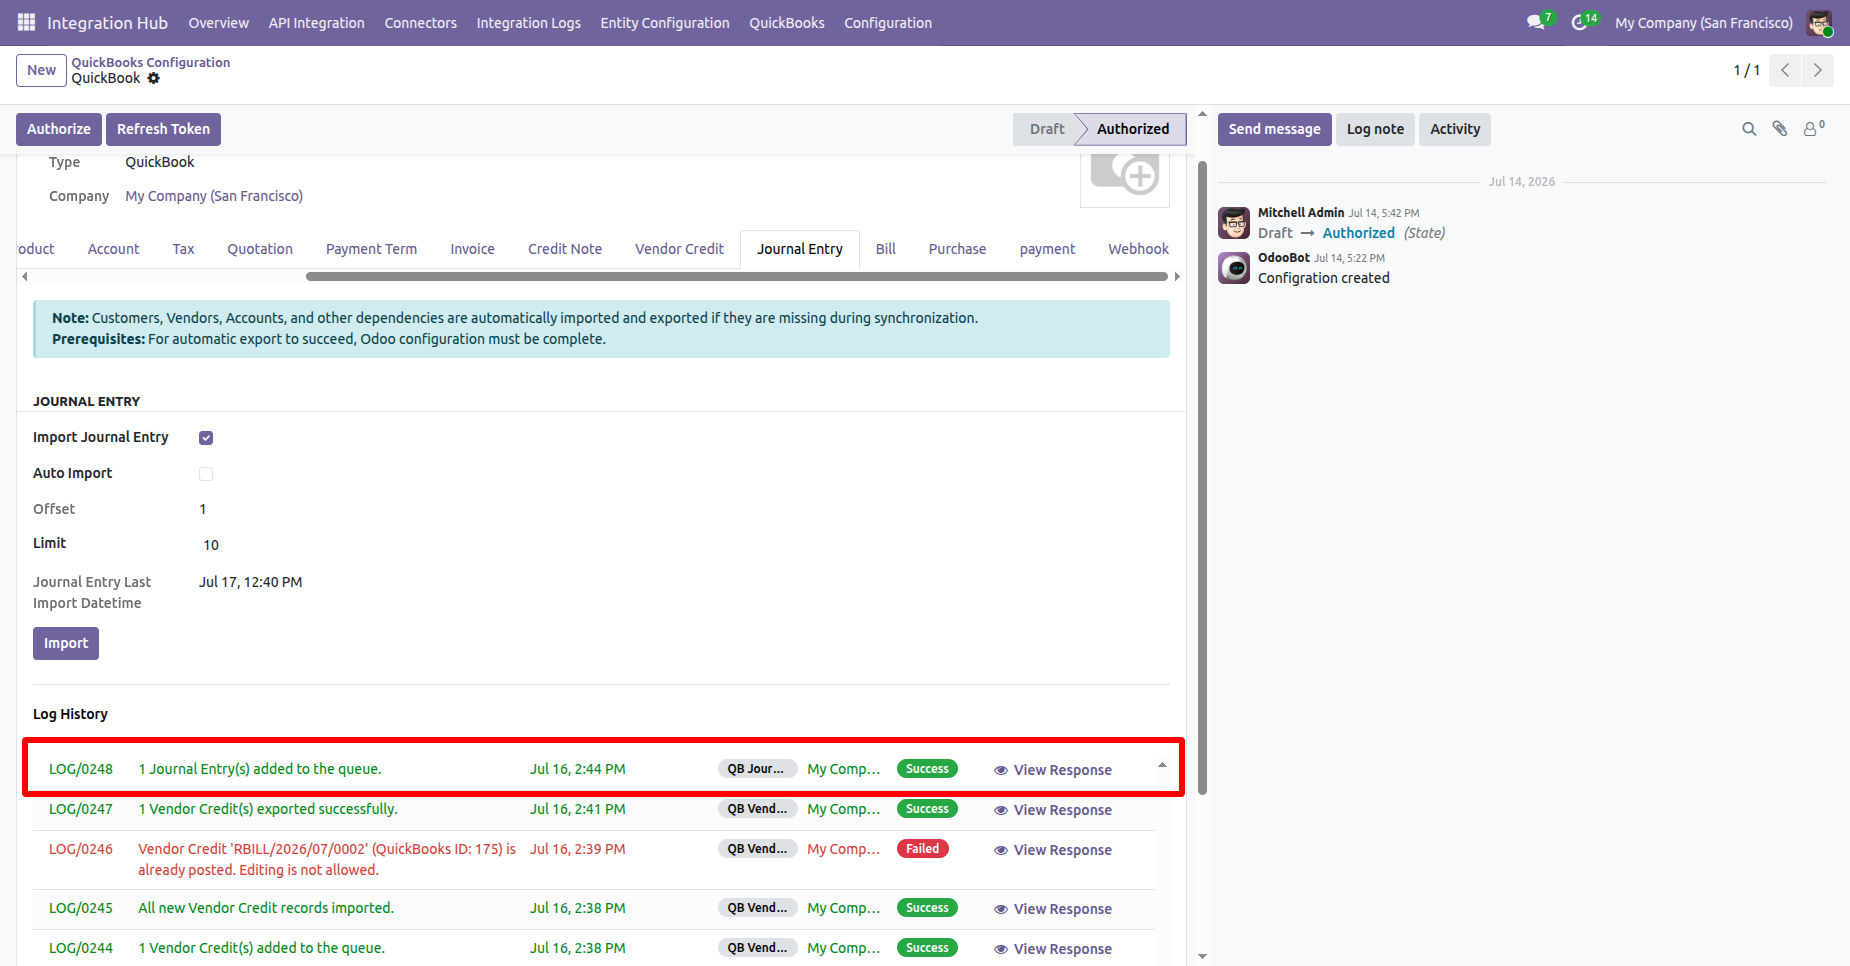
The Log History shows a success message confirming that the Journal Entry were imported or added in a queue successfully.
Go to the QuickBooks Journal Entry Queue list, select a queue record, then open the Action menu and choose Import from Queue to import the Journal Entry.
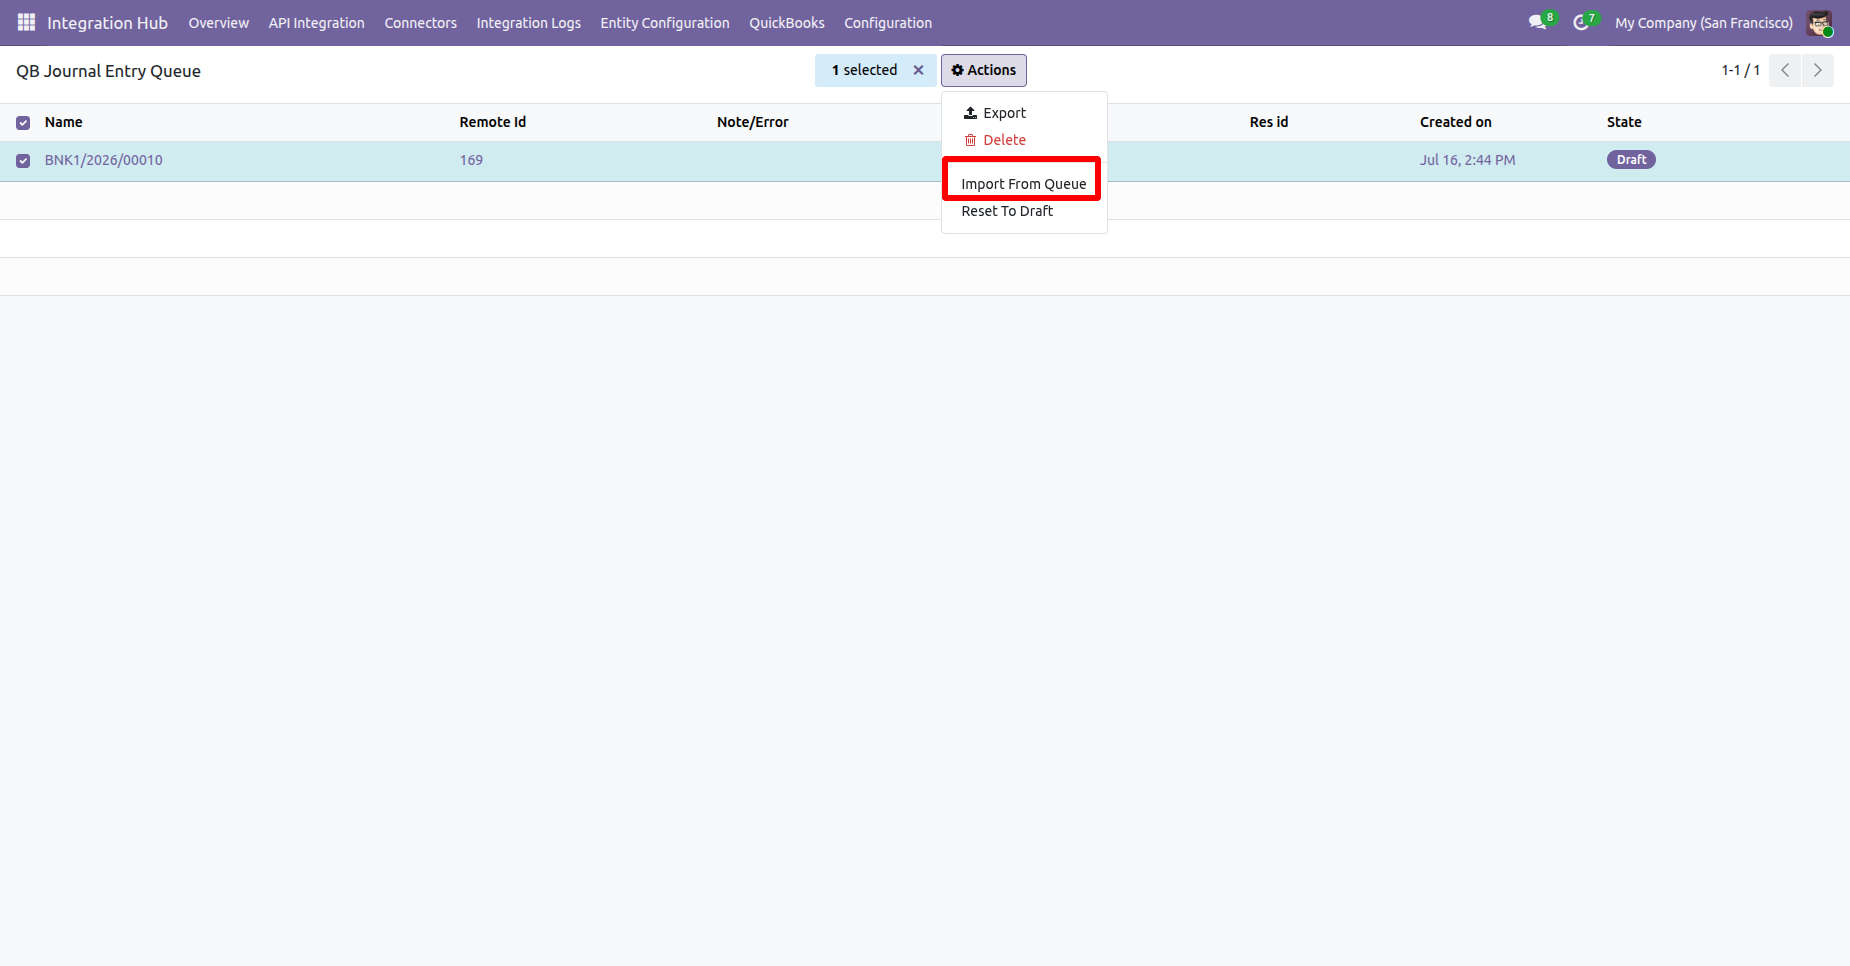
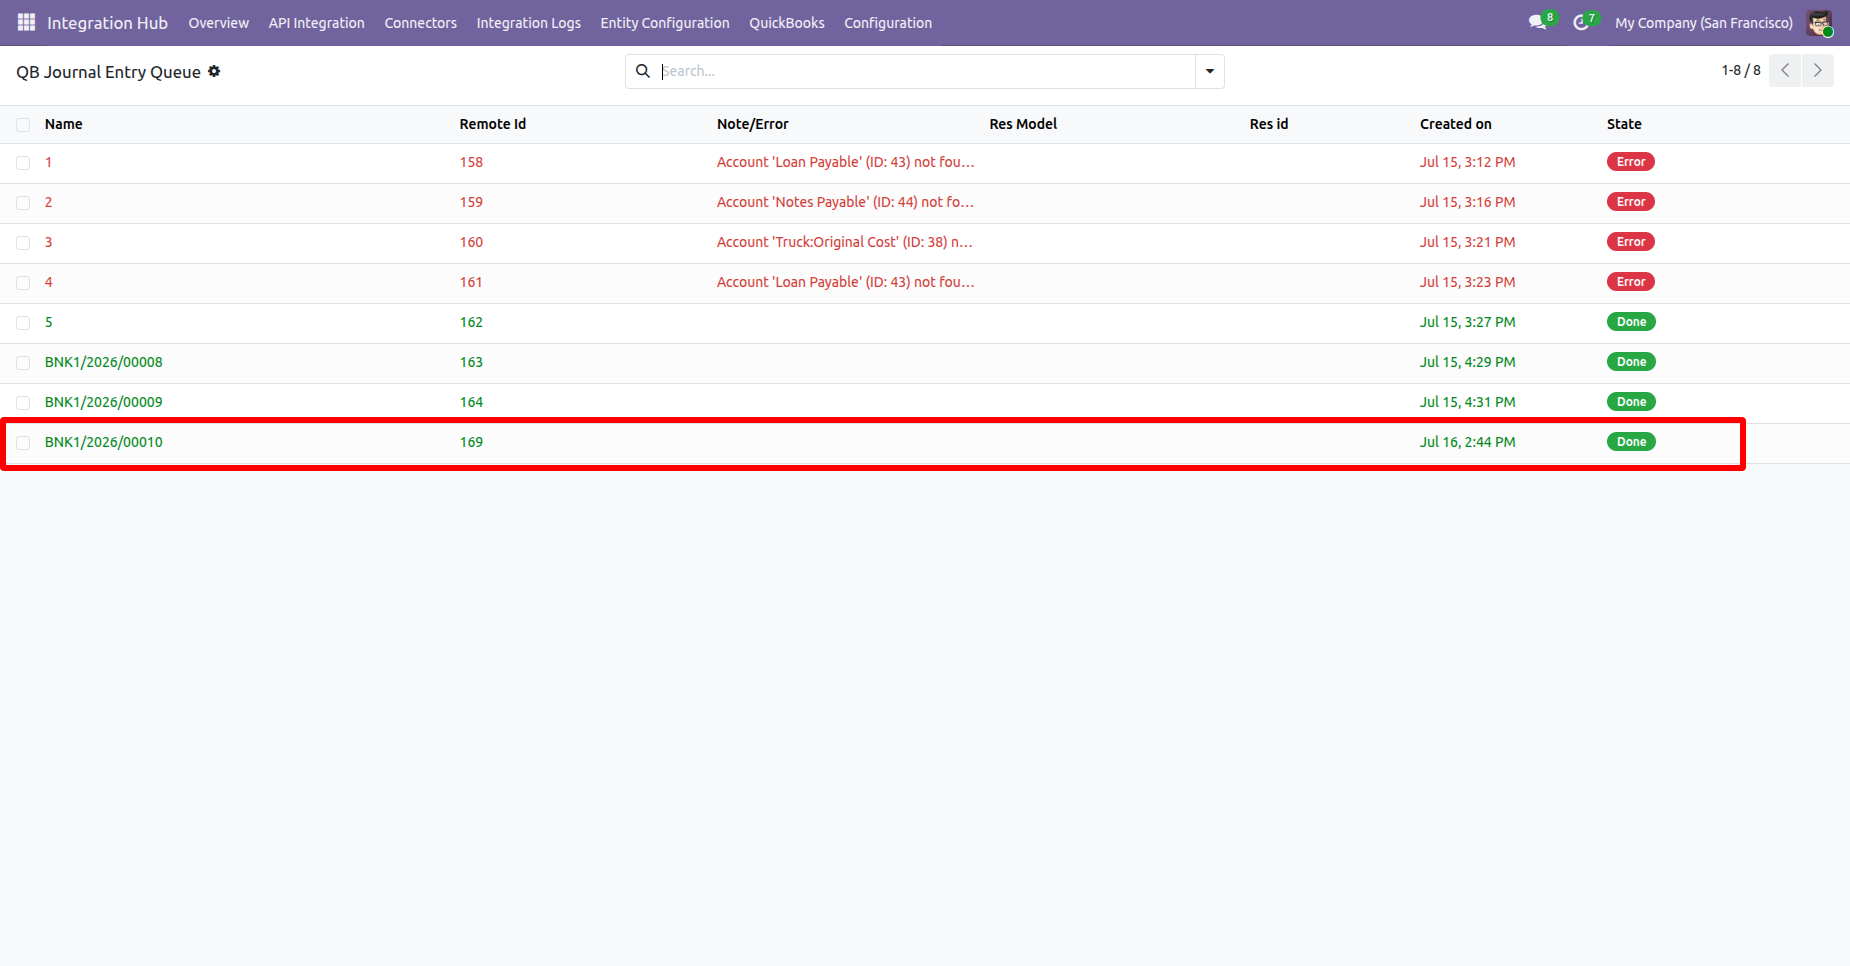
The Journal Entry Queue will be imported successfully.
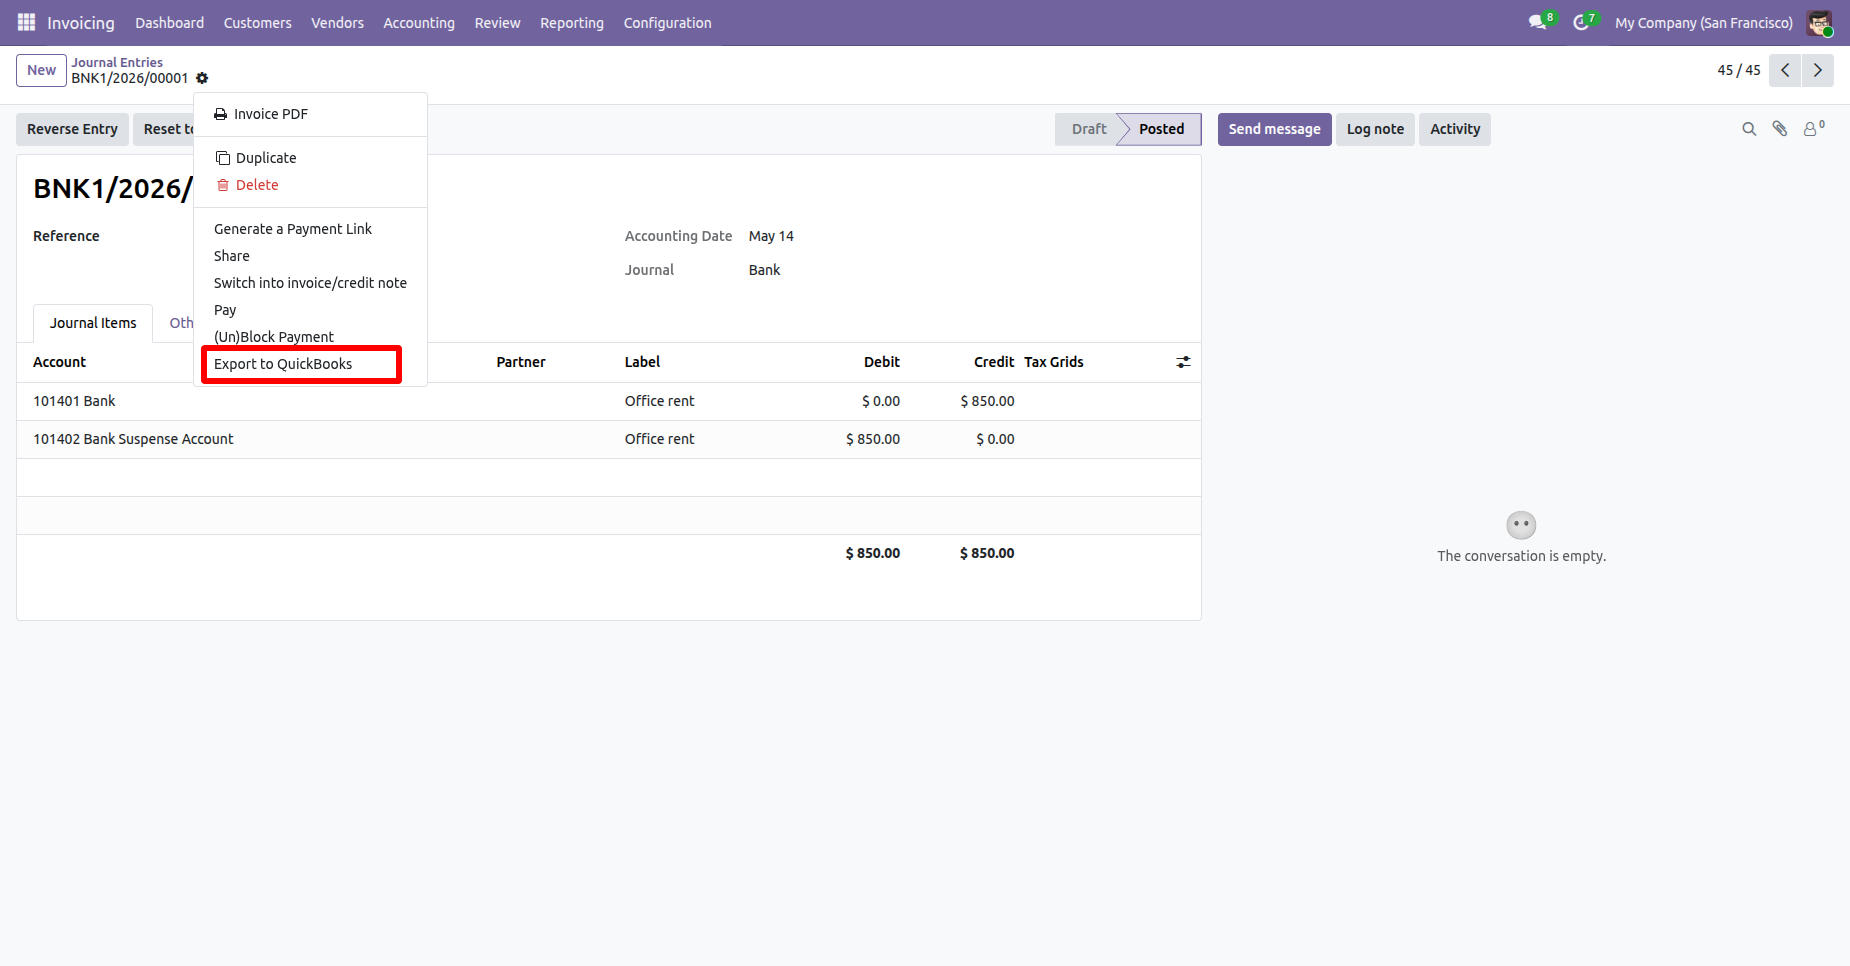
Go to the Journal Entry Form view and click the “Export to QuickBooks” from action.
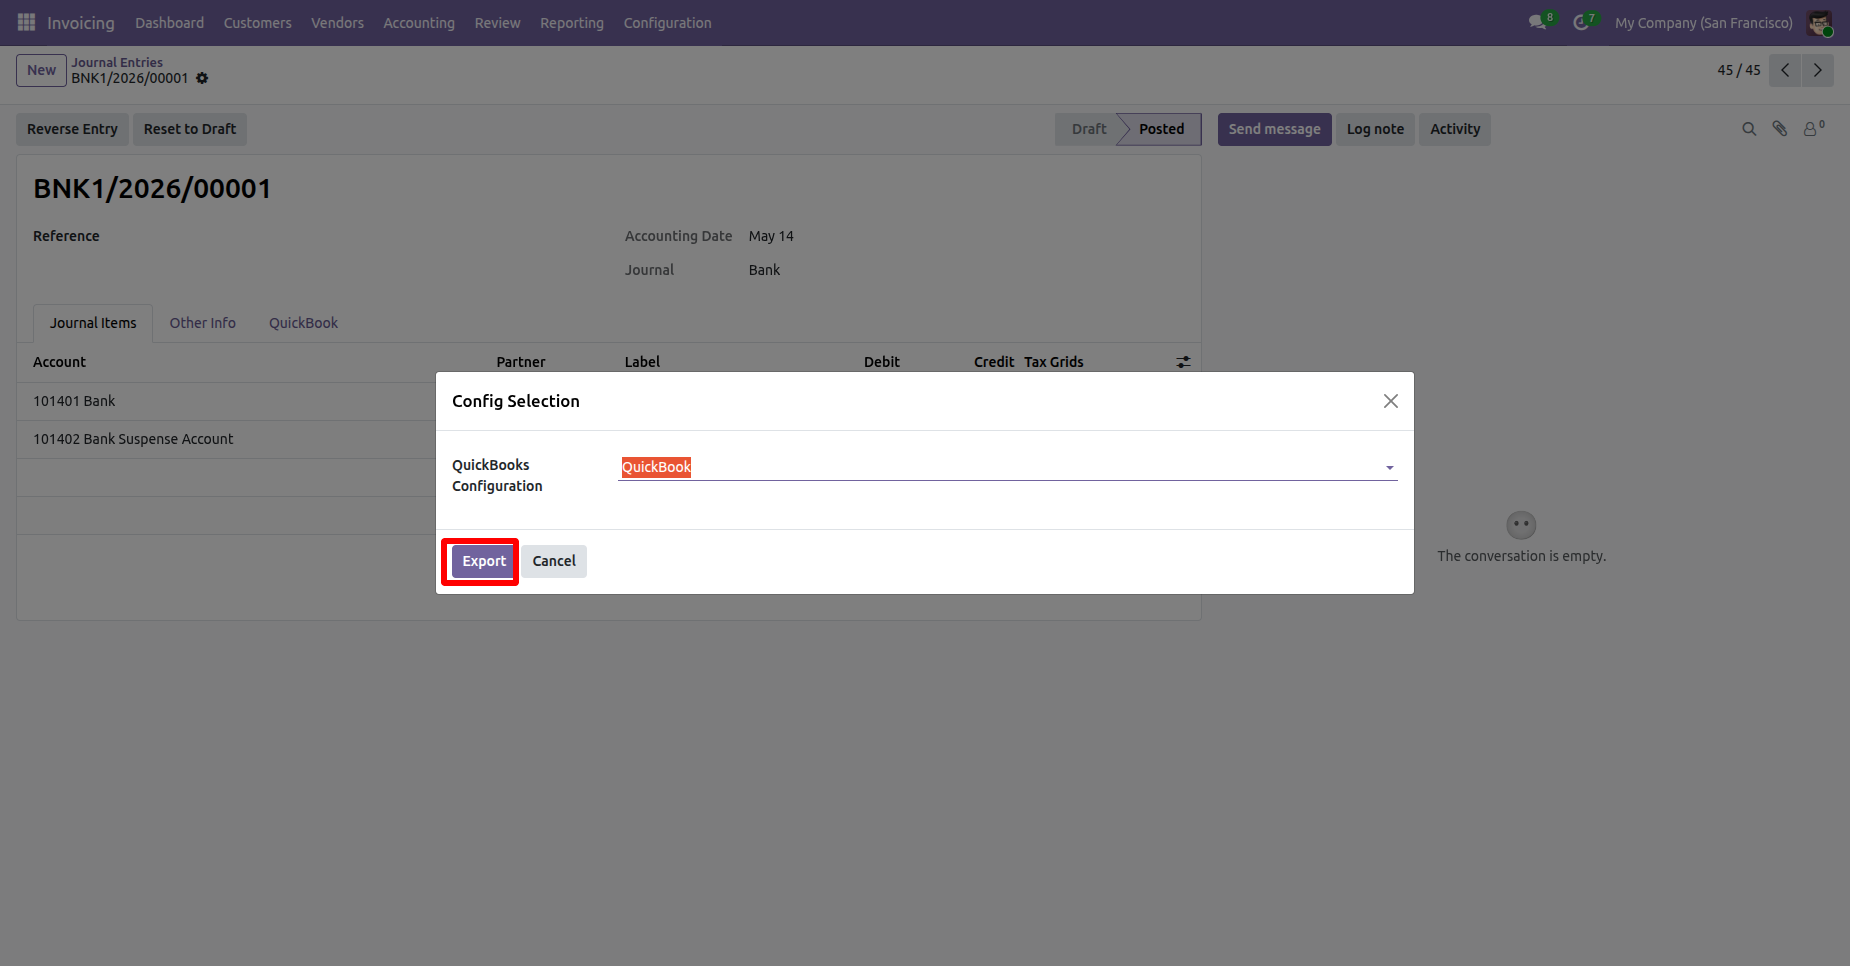
Select the QuickBooks configuration from the Configuration Wizard and click the “Export” button.
Navigate to the QuickBooks tab in the Journal Entry. Here, the user can view the QuickBooks Journal Entry Number, Journal Entry ID, and Sync Status.
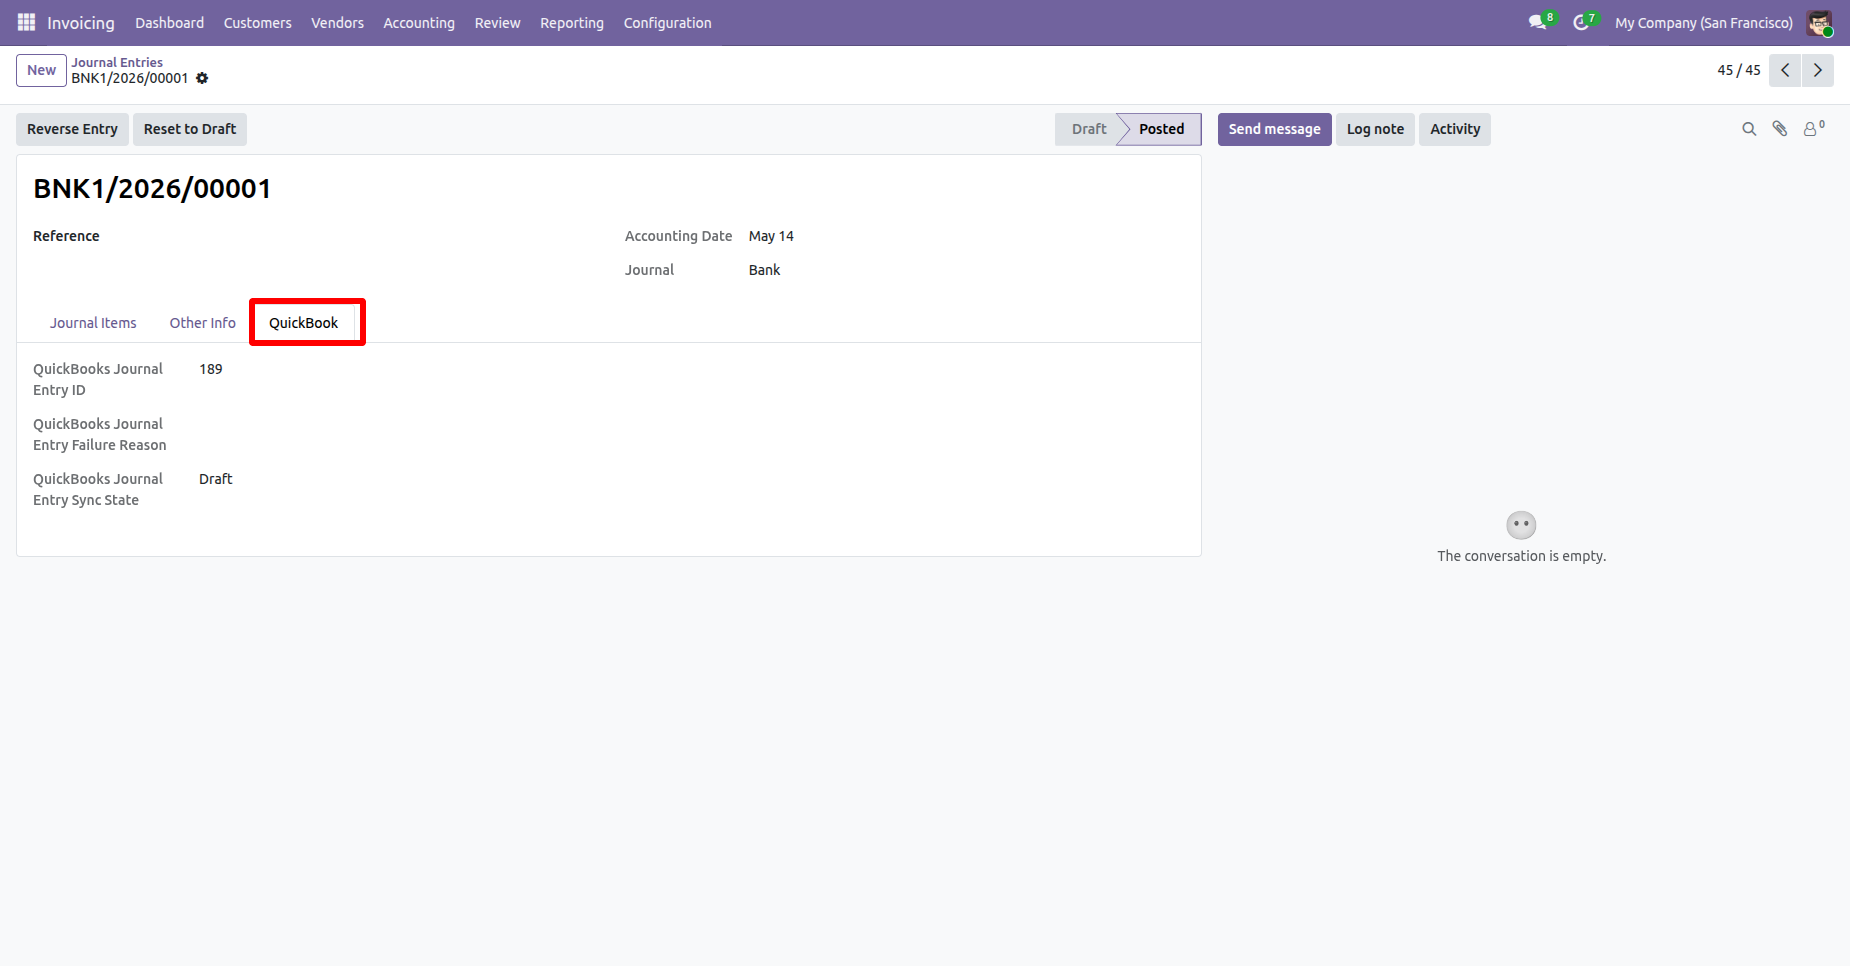
The exported Journal Entry will be visible in QuickBooks.
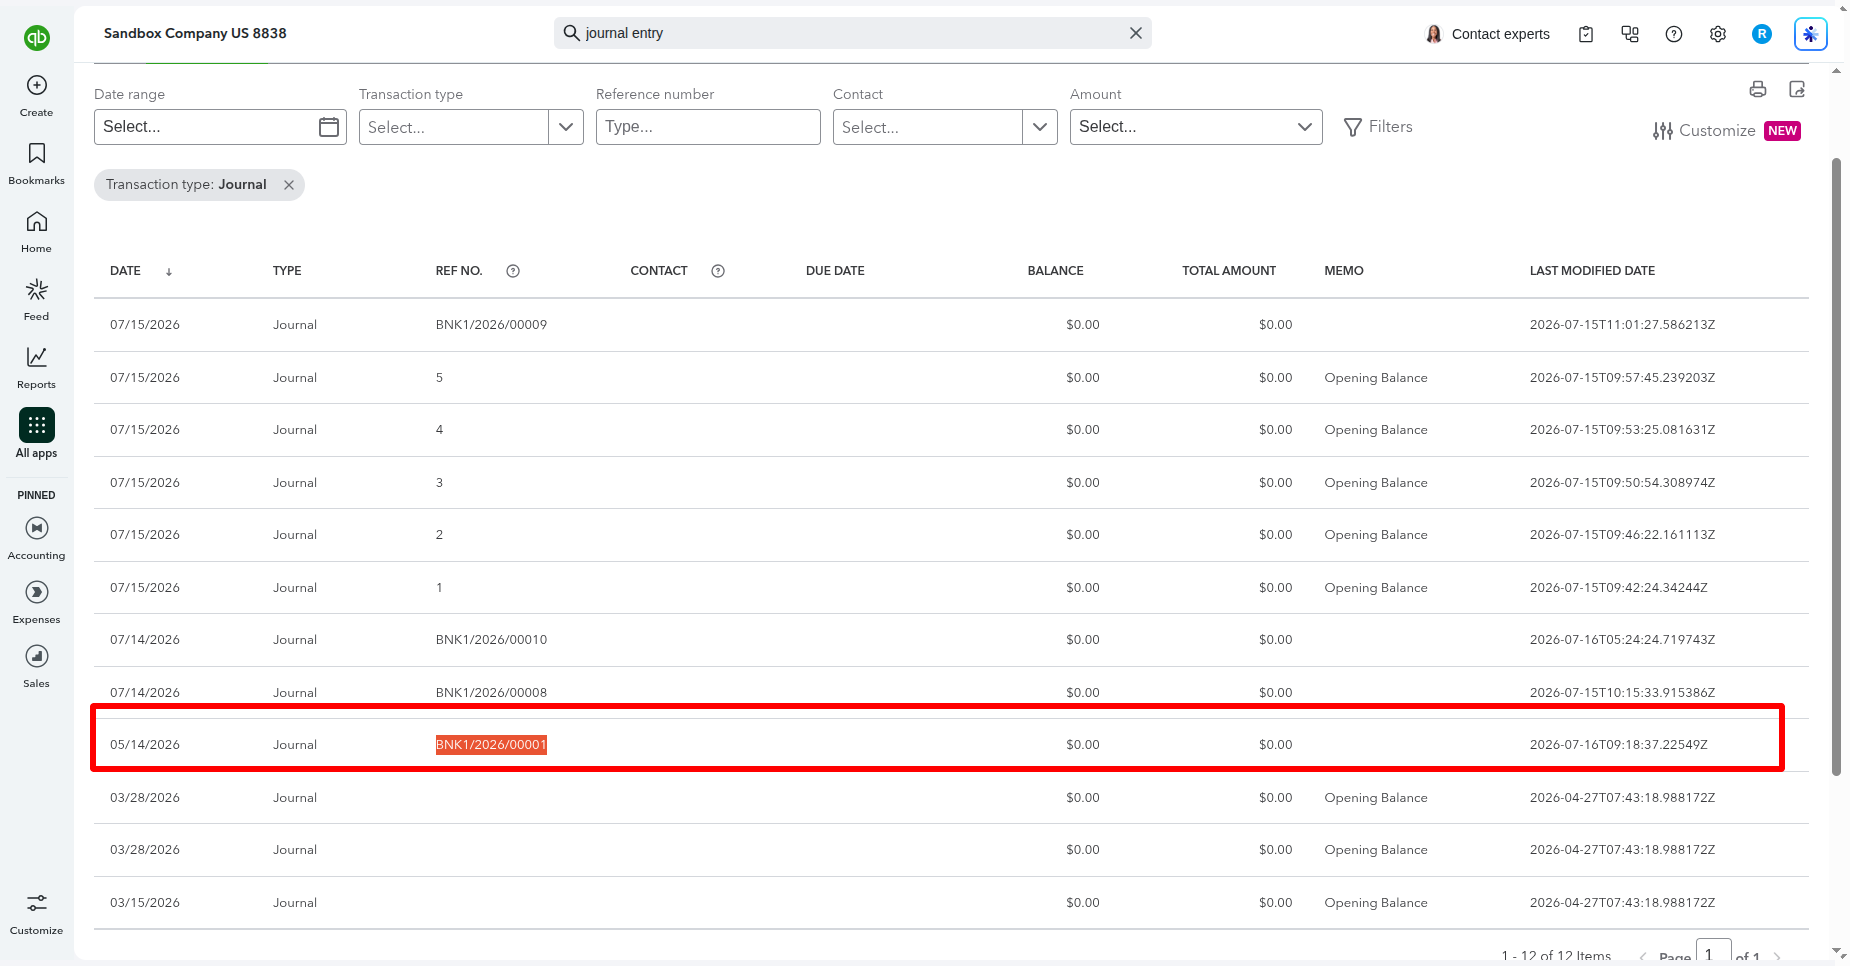
Go to QuickBooks Configuration -> Credit Note and enable Import Credit Note. Then click the Import button to import Credit Notes from QuickBooks.
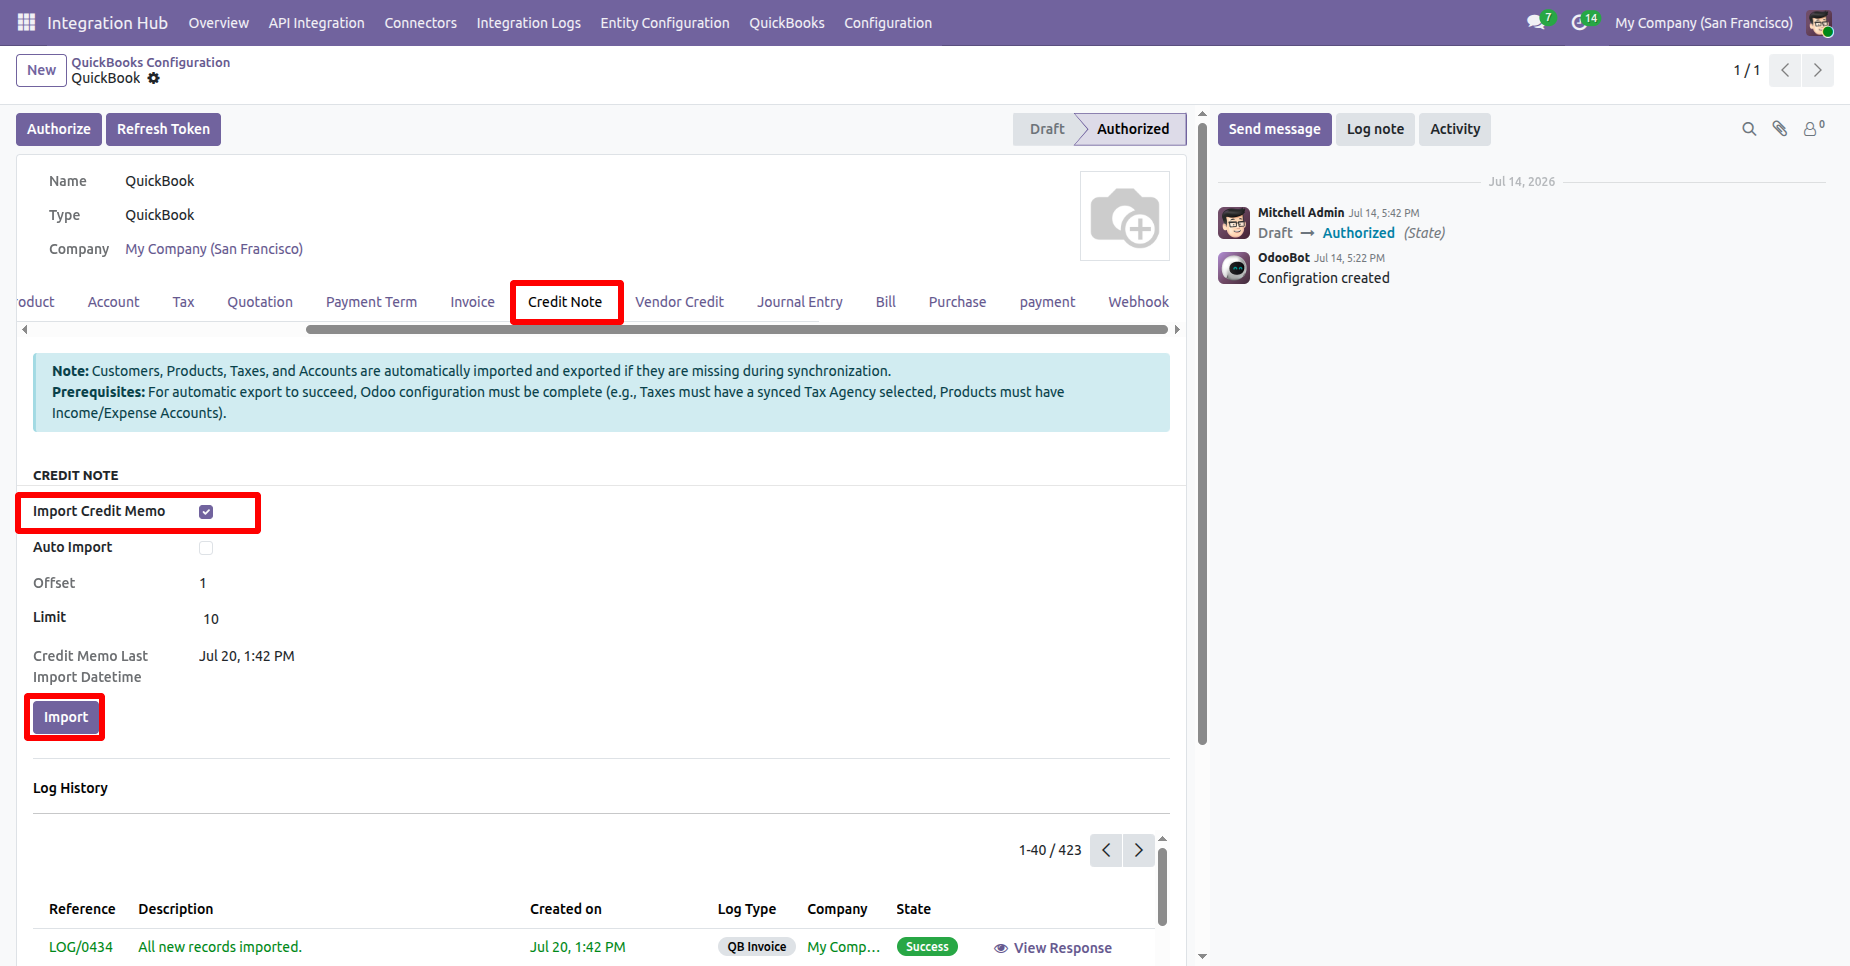
The Log History shows a success message confirming that the Credit Notes were imported or added in a queue successfully.
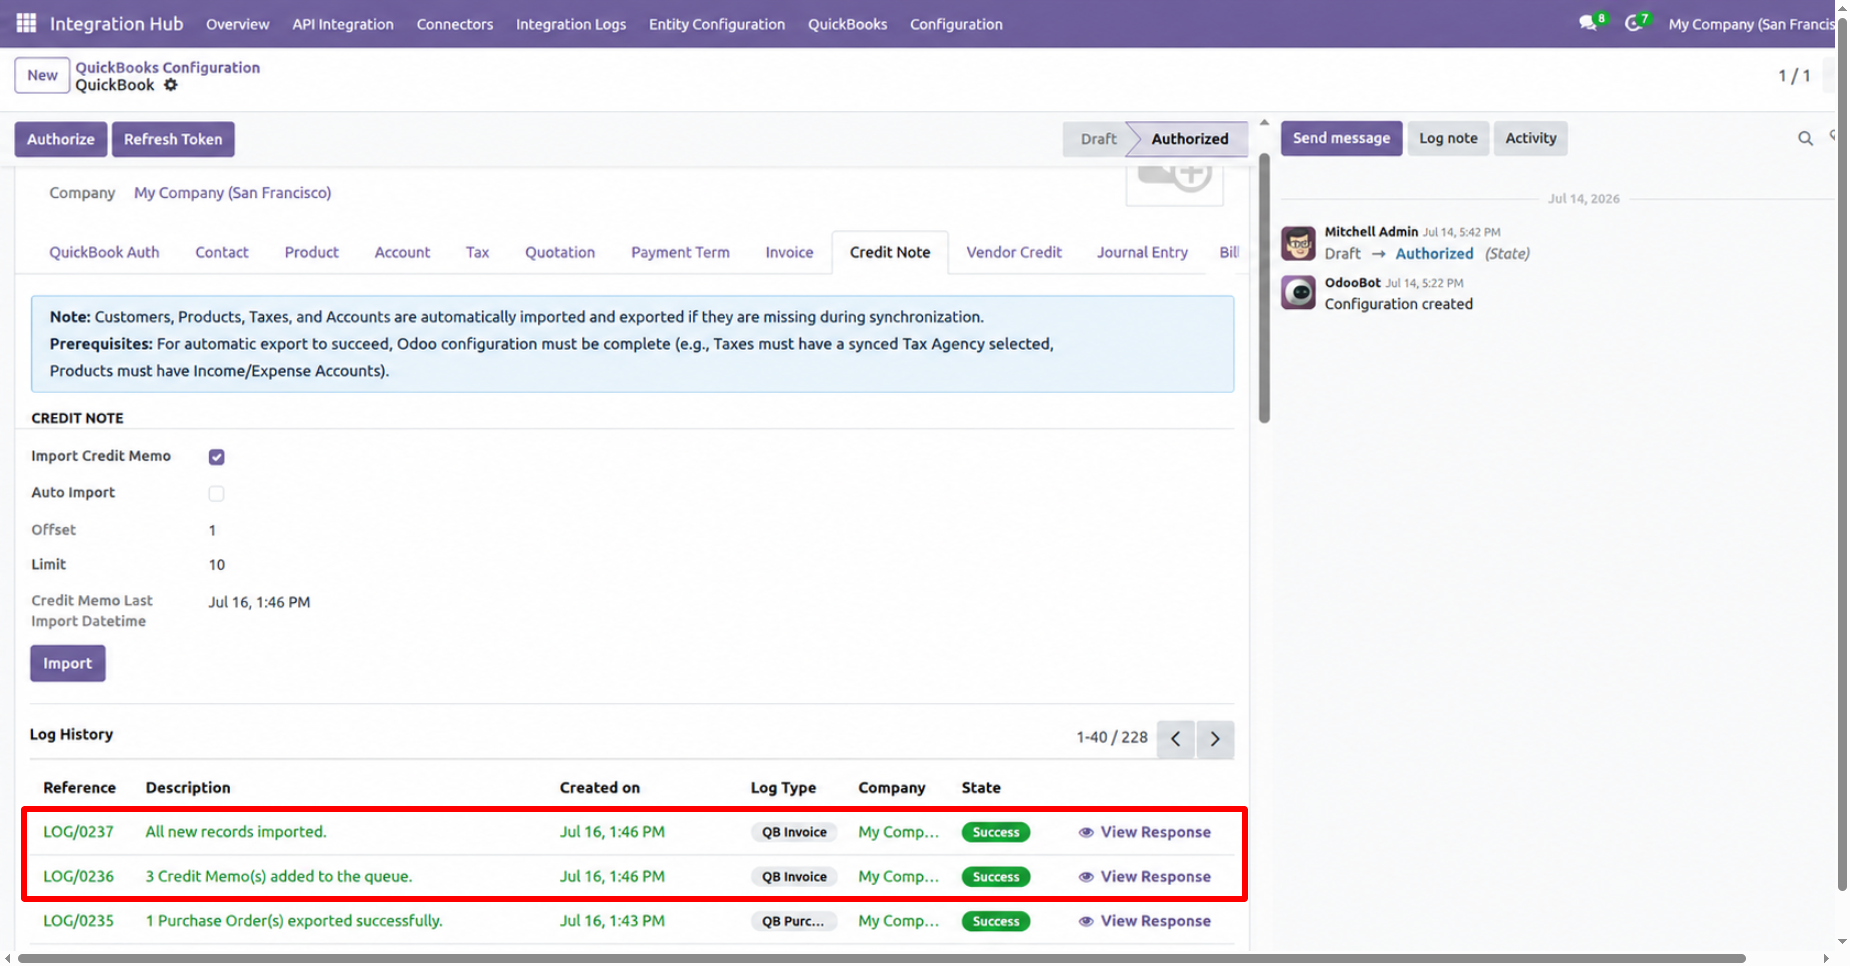
Go to the QuickBooks Credit Note Queue list, select a queue record, then open the Action menu and choose Import from Queue to import the Credit Note.
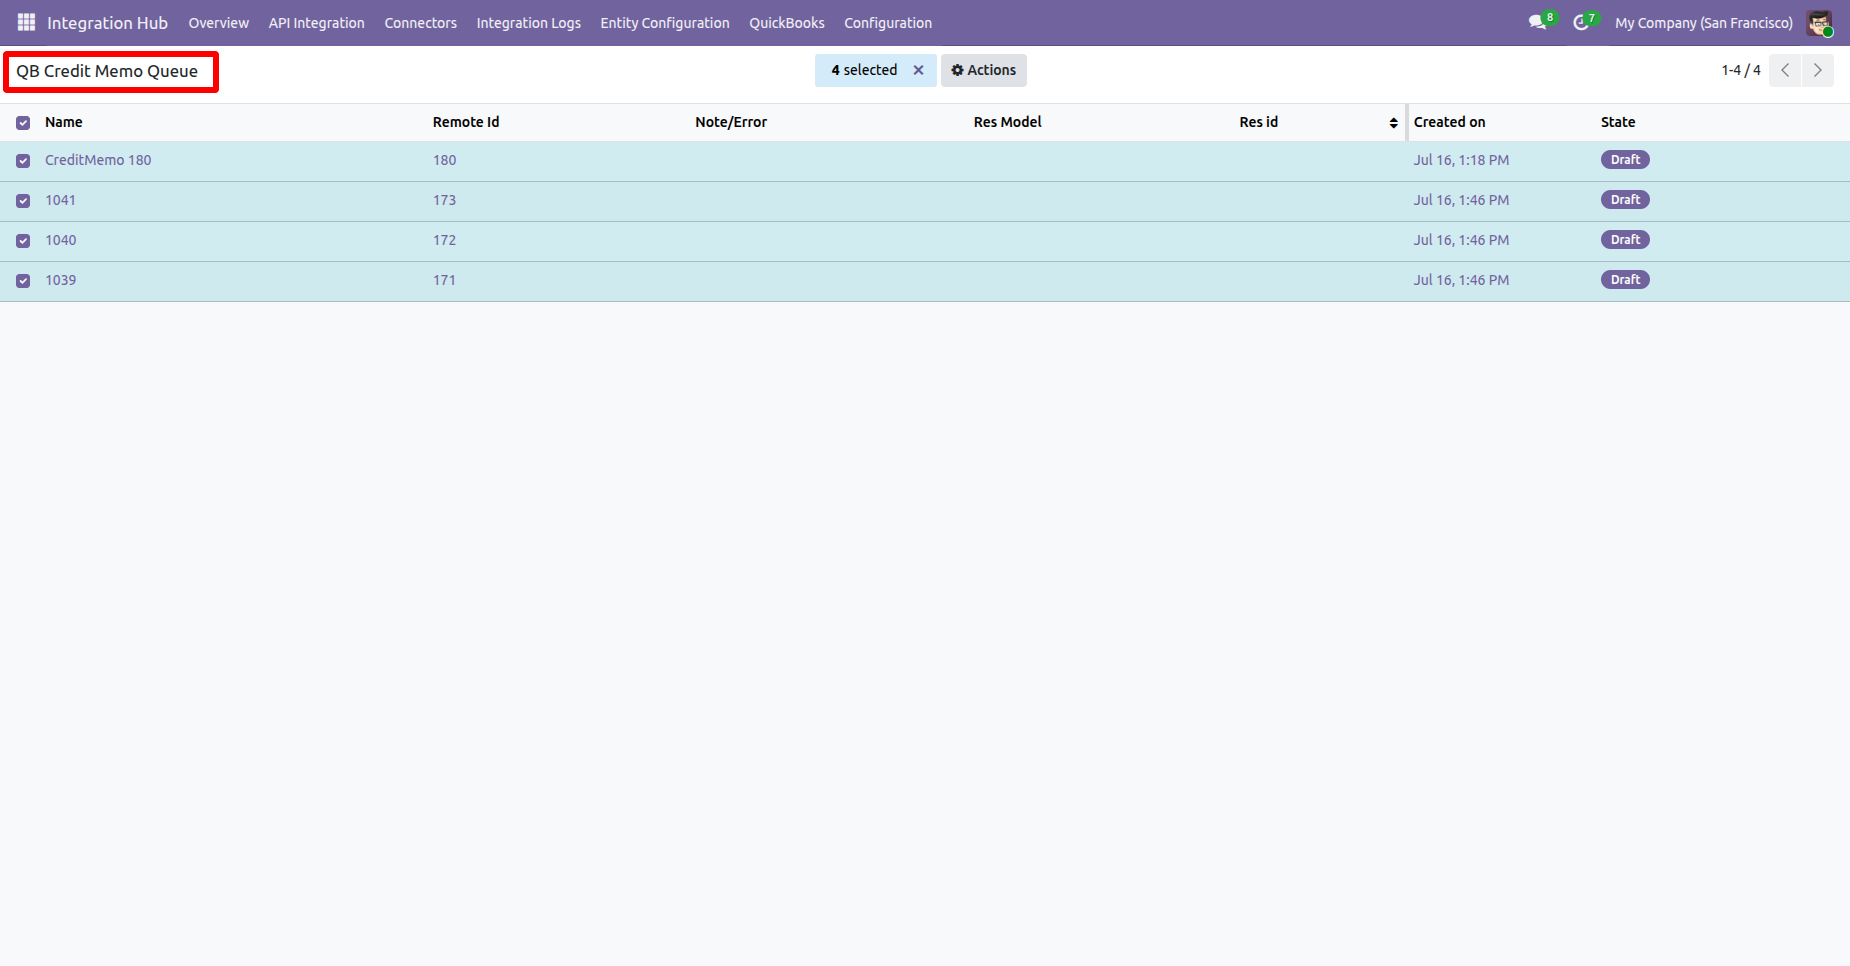
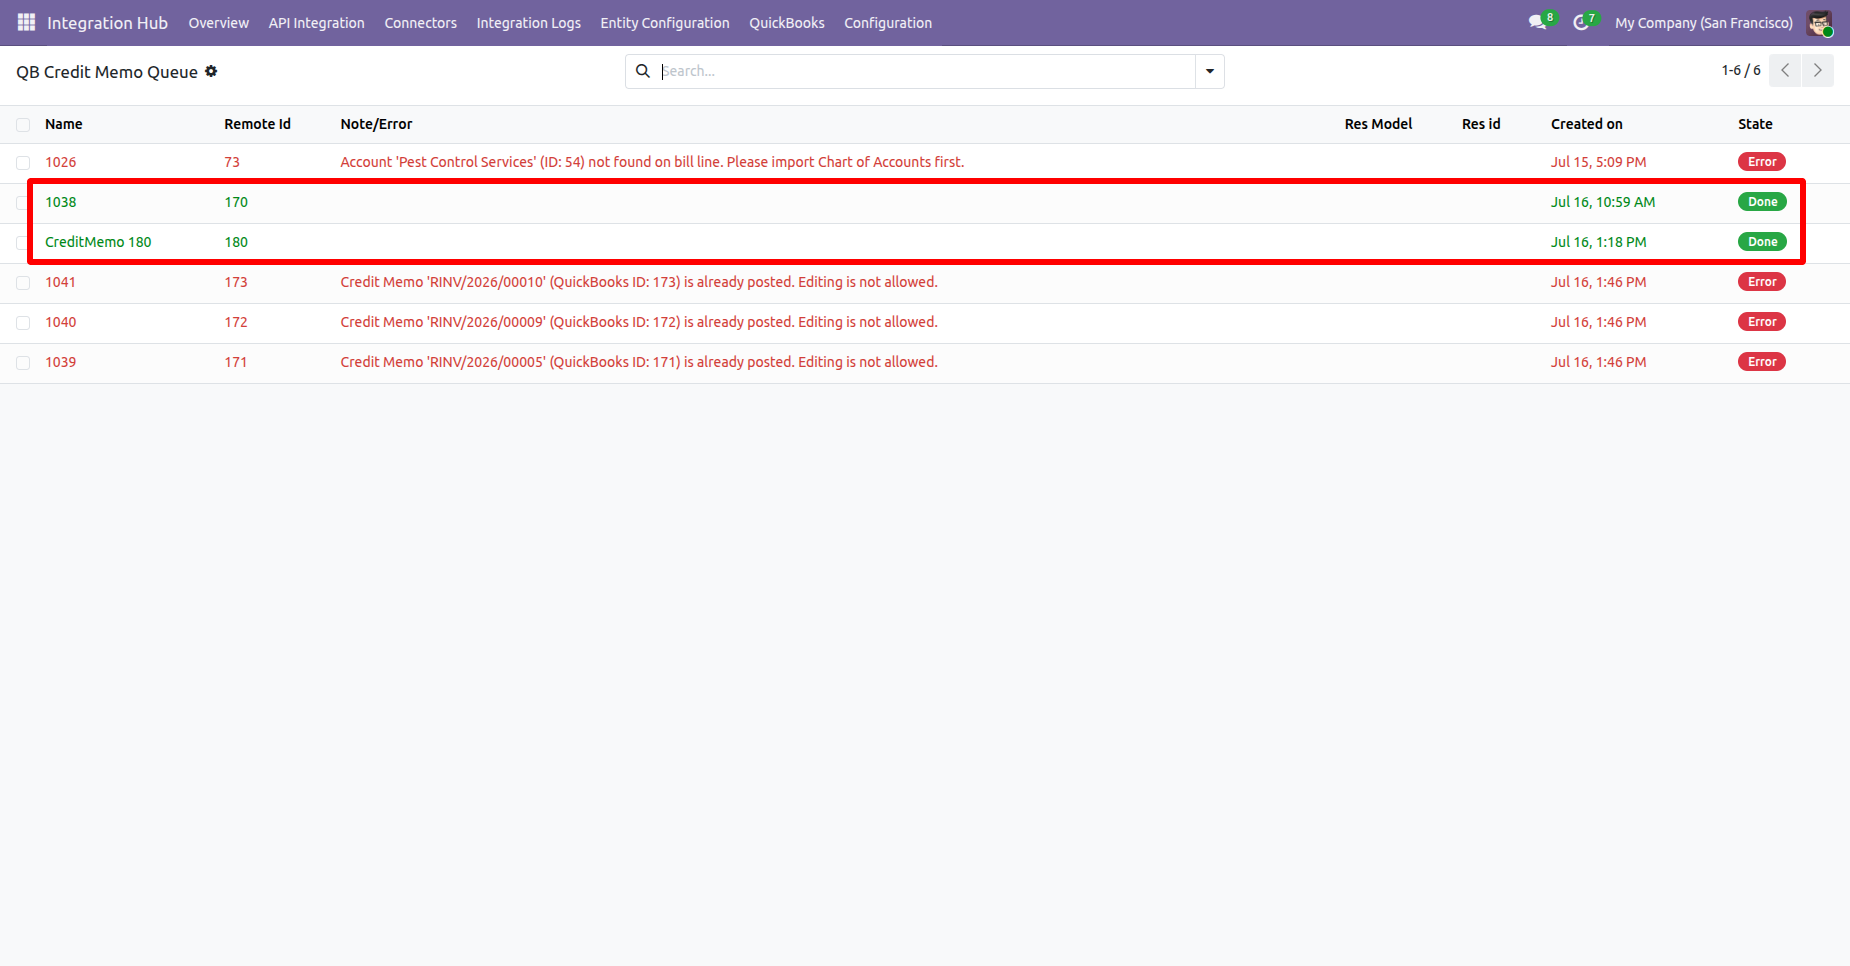
The Credit Note Queue will be imported successfully.
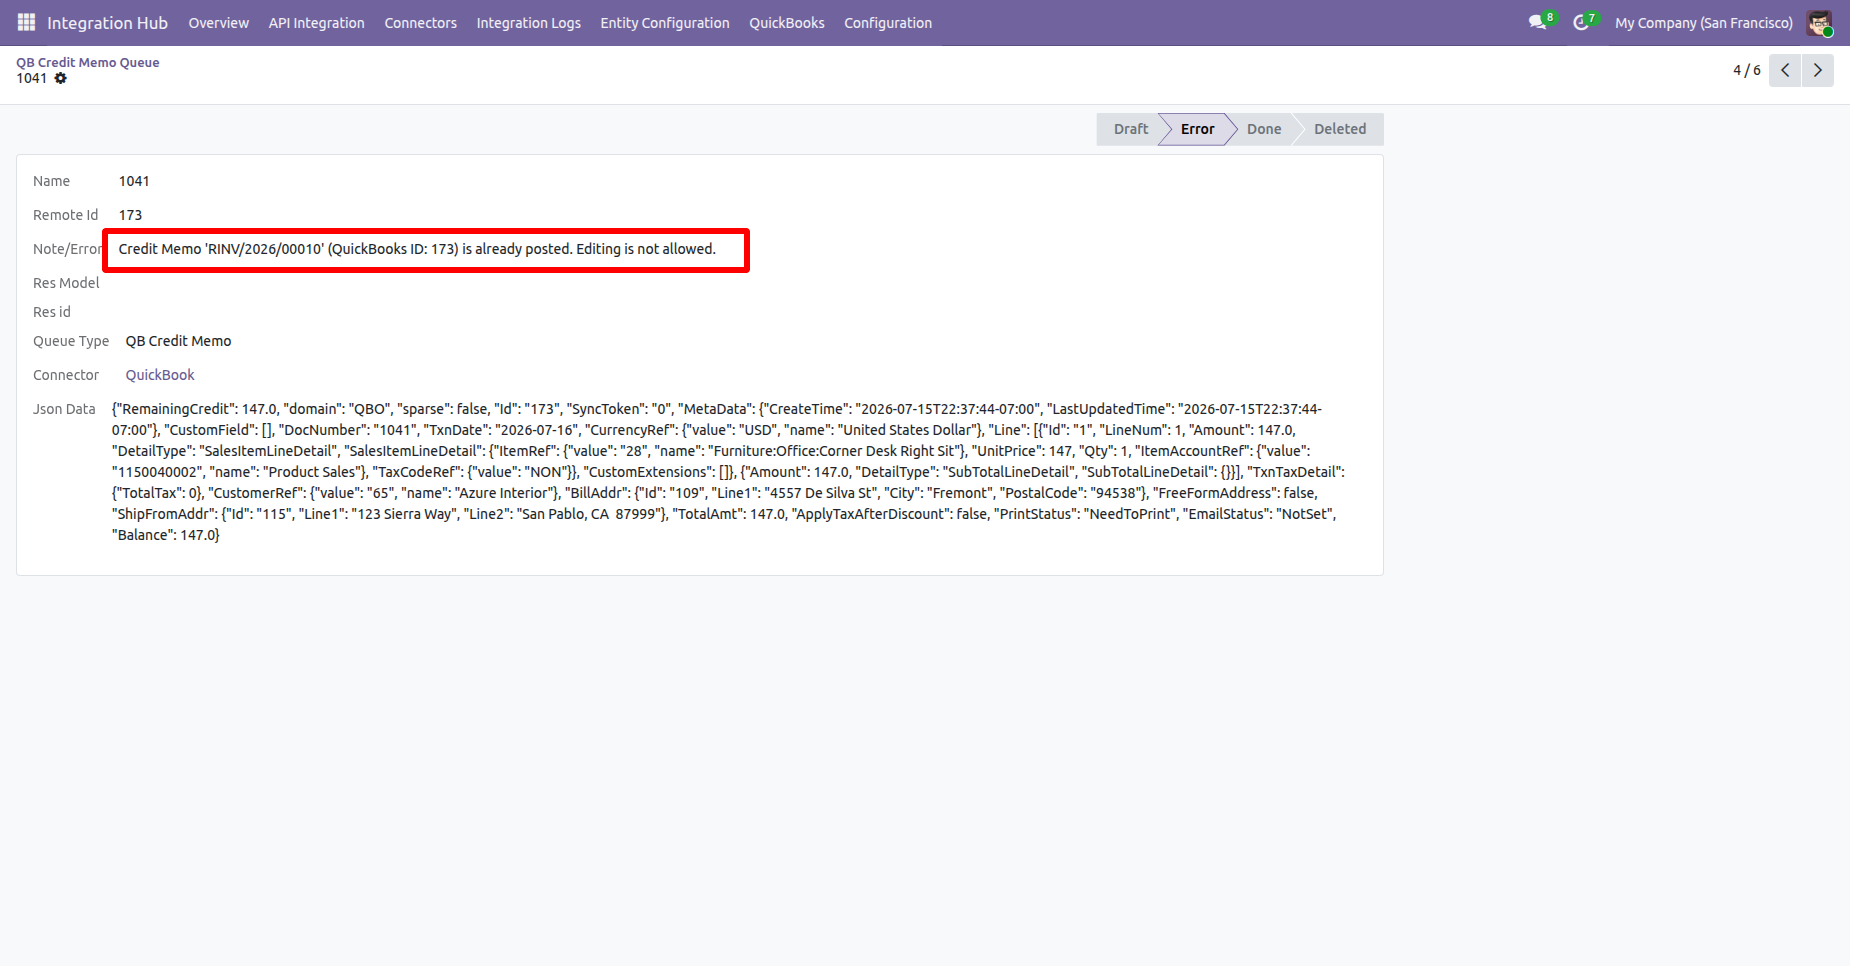
Open a credit note failed queue to check the error.
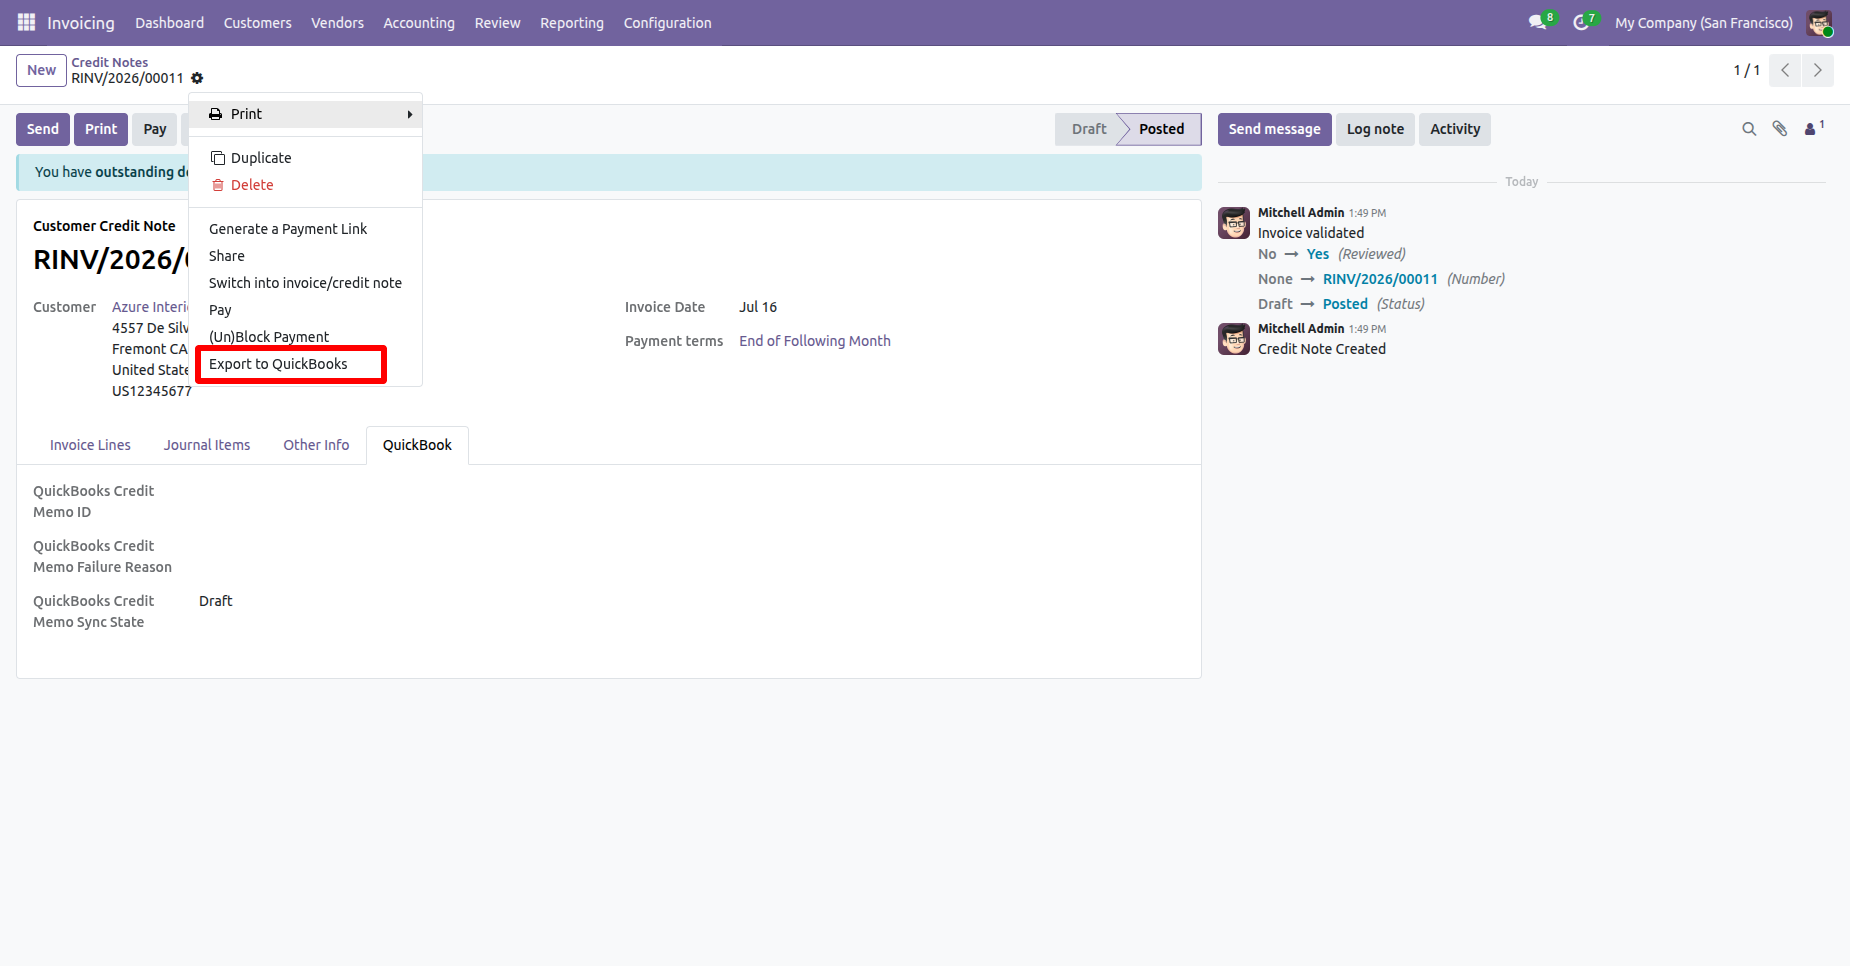
Go to the Credit Note Form view and click the “Export to QuickBooks” from the action.
Select the QuickBooks configuration from the Configuration Wizard and click the “Export” button.
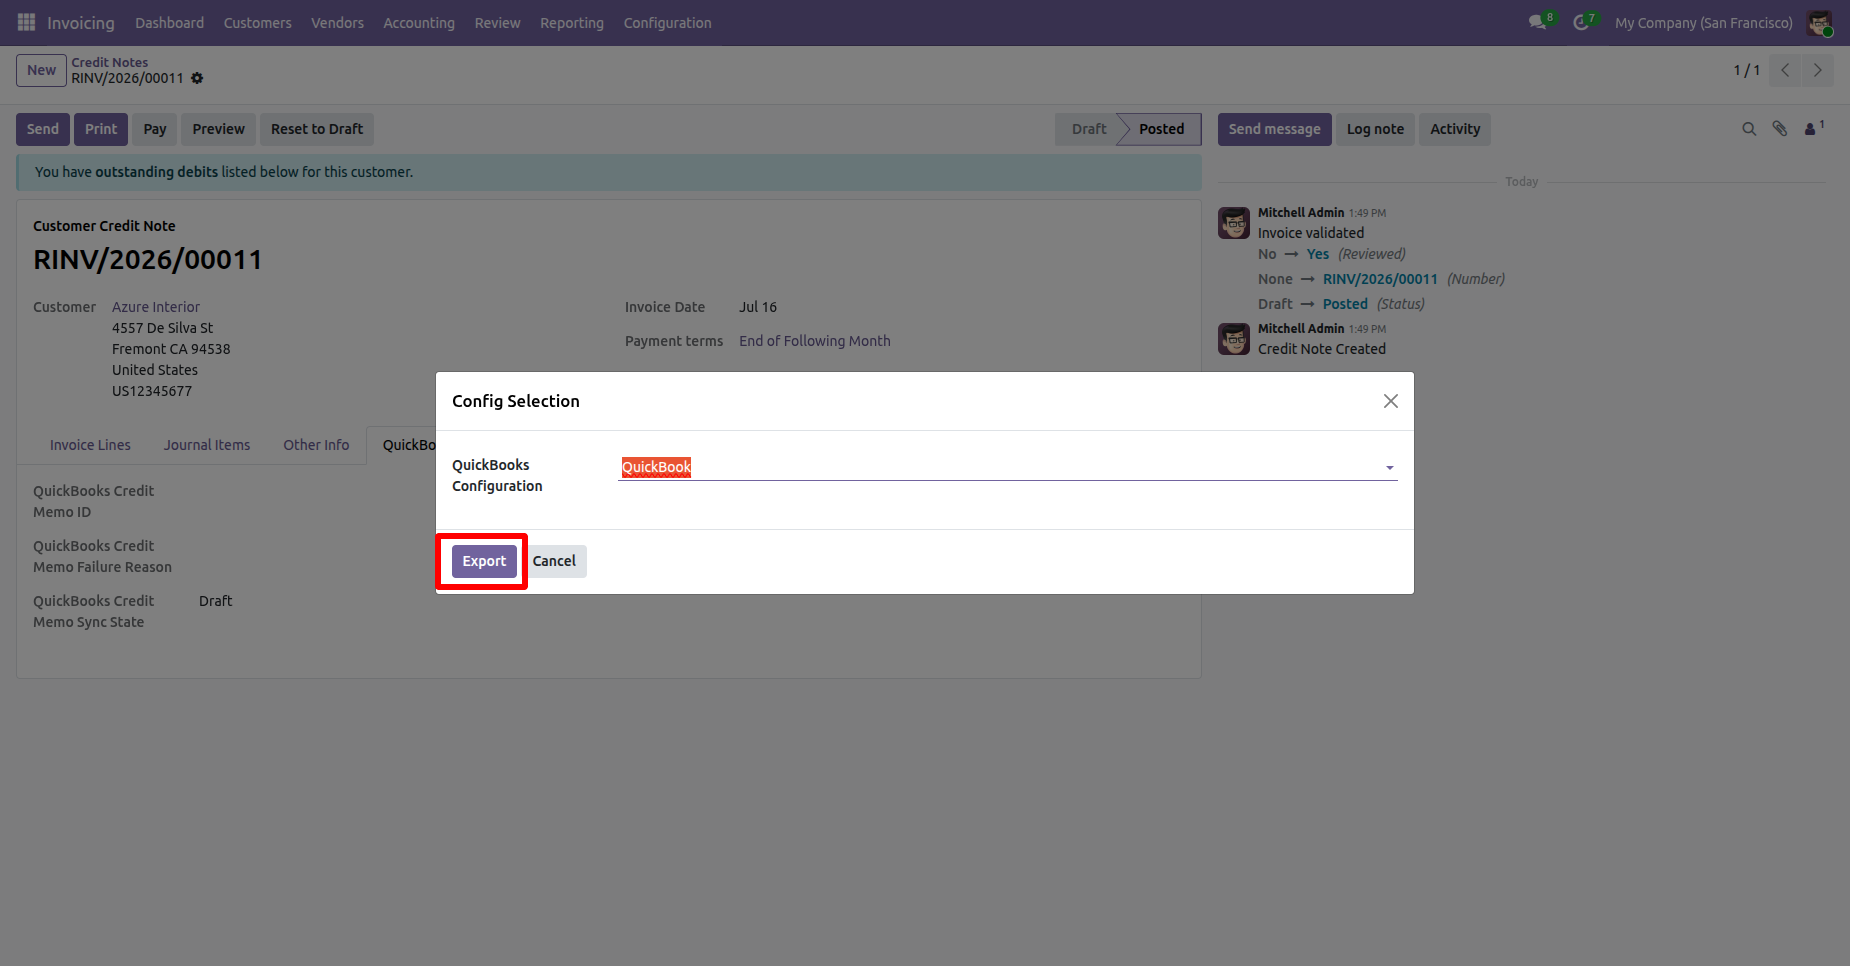
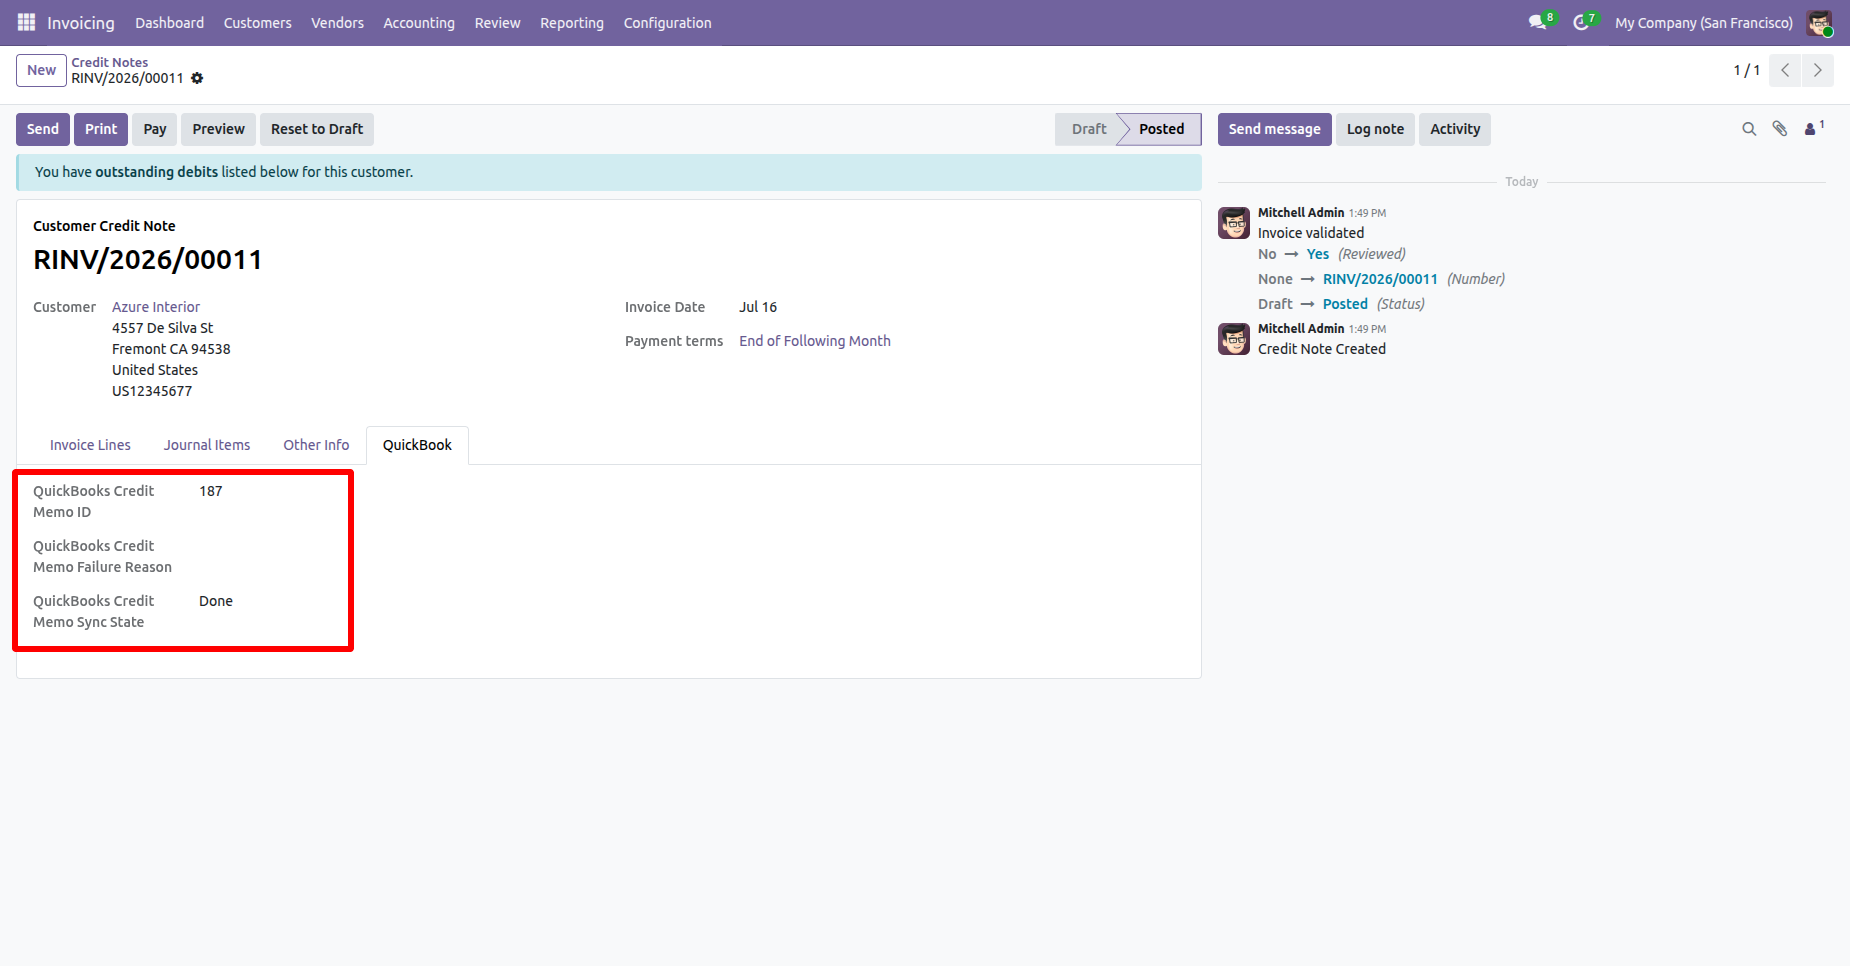
Navigate to the QuickBooks tab in the Credit Note. Here, the user can view the QuickBooks Credit Note Number, Credit Note ID, and Sync Status.
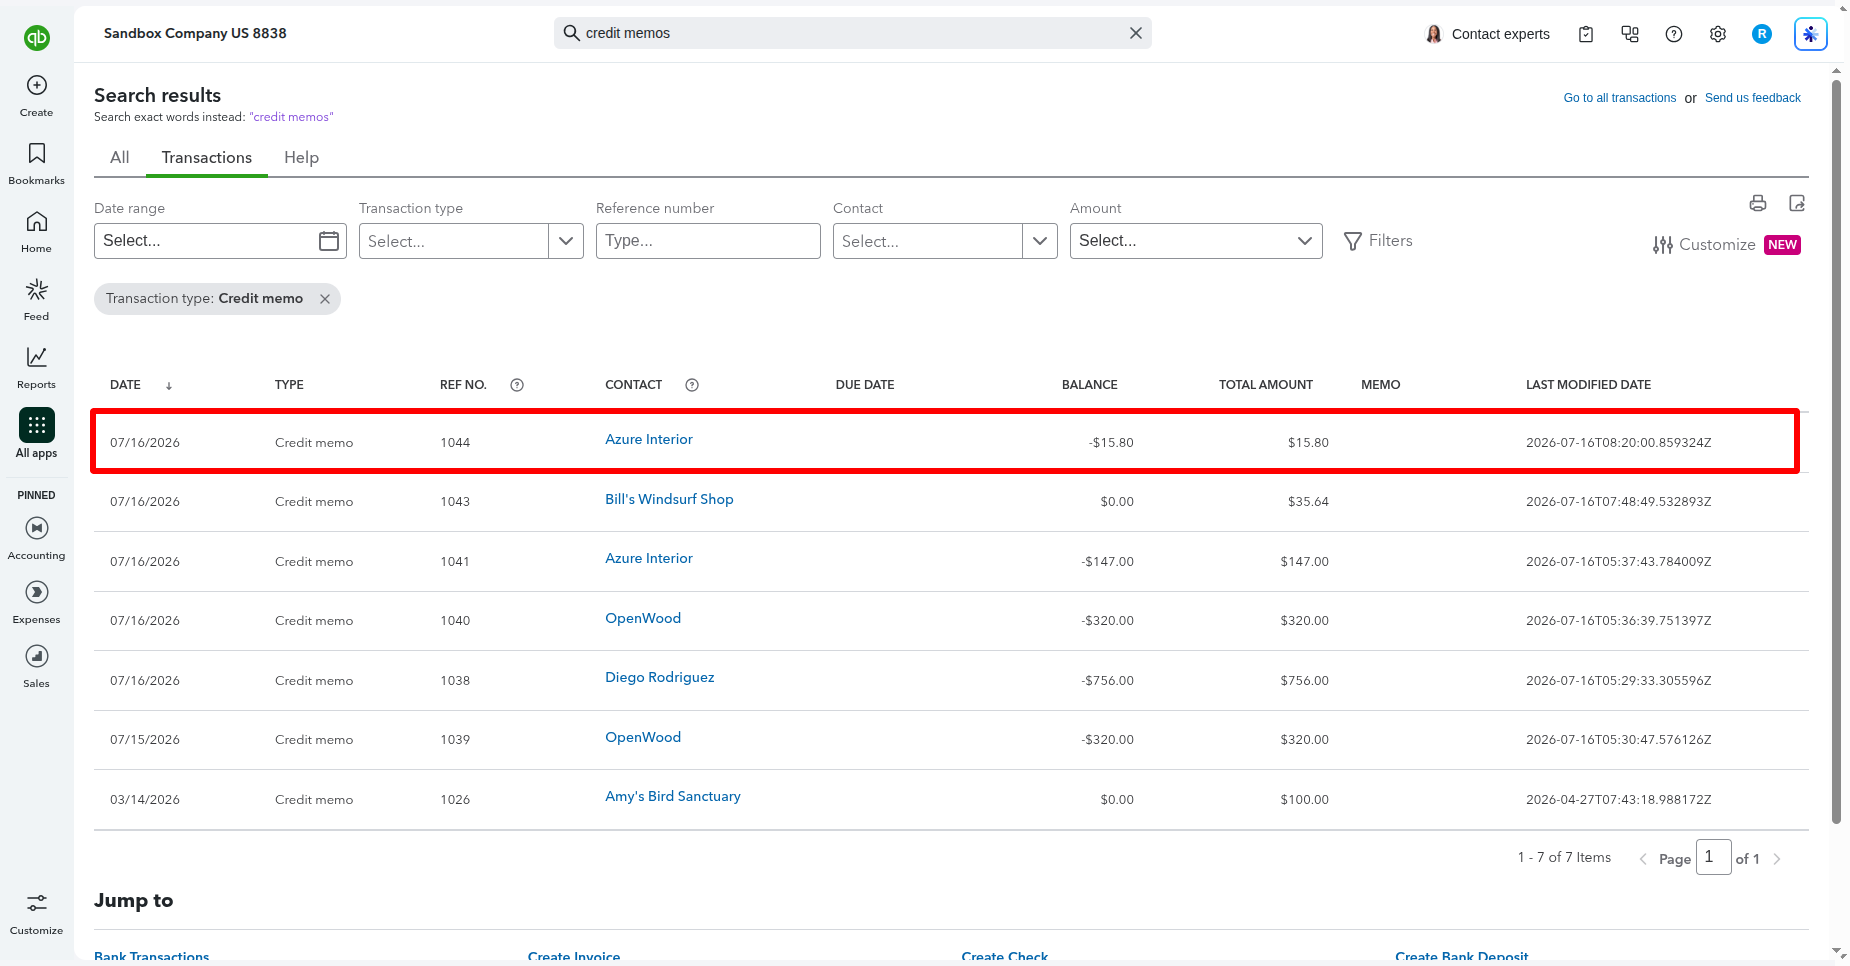
The exported Credit Note will be visible in QuickBooks.
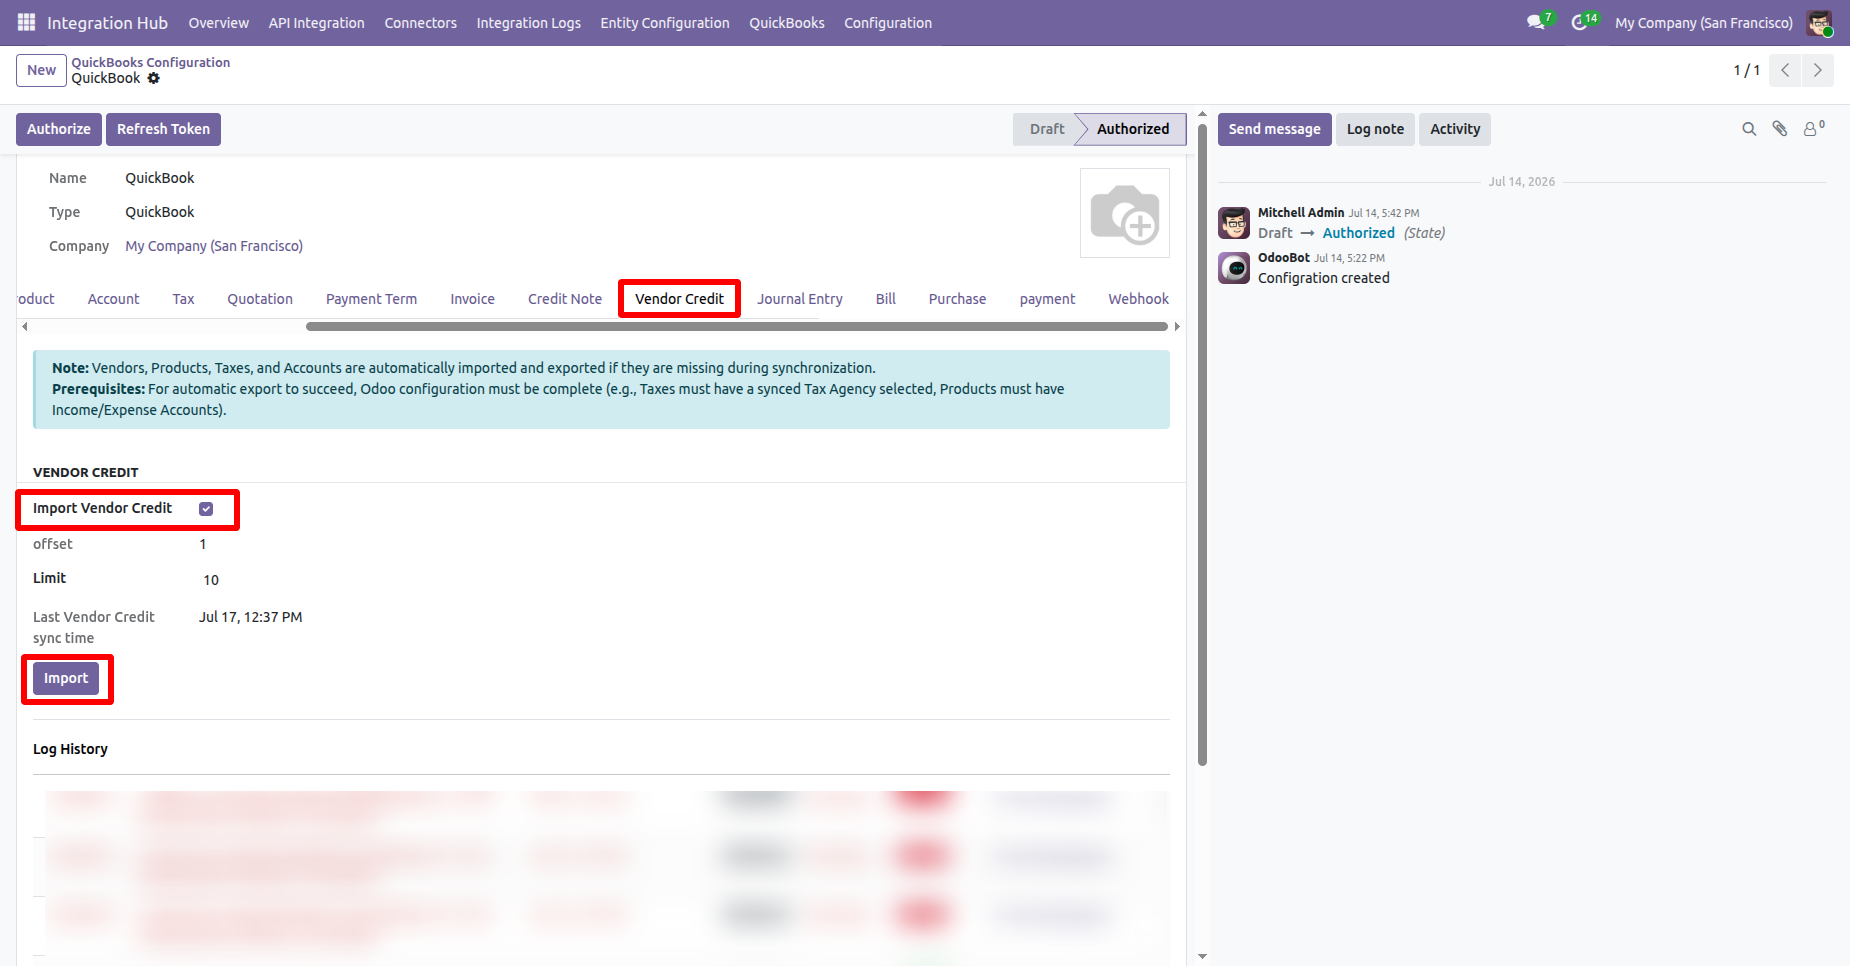
Go to QuickBooks Configuration -> Vendor Credit and enable Import Vendor Credit. Then click the Import button to import Vendor Credits from QuickBooks.
The Log History shows a success message confirming that the Vendor Credits were imported or added in a queue successfully.
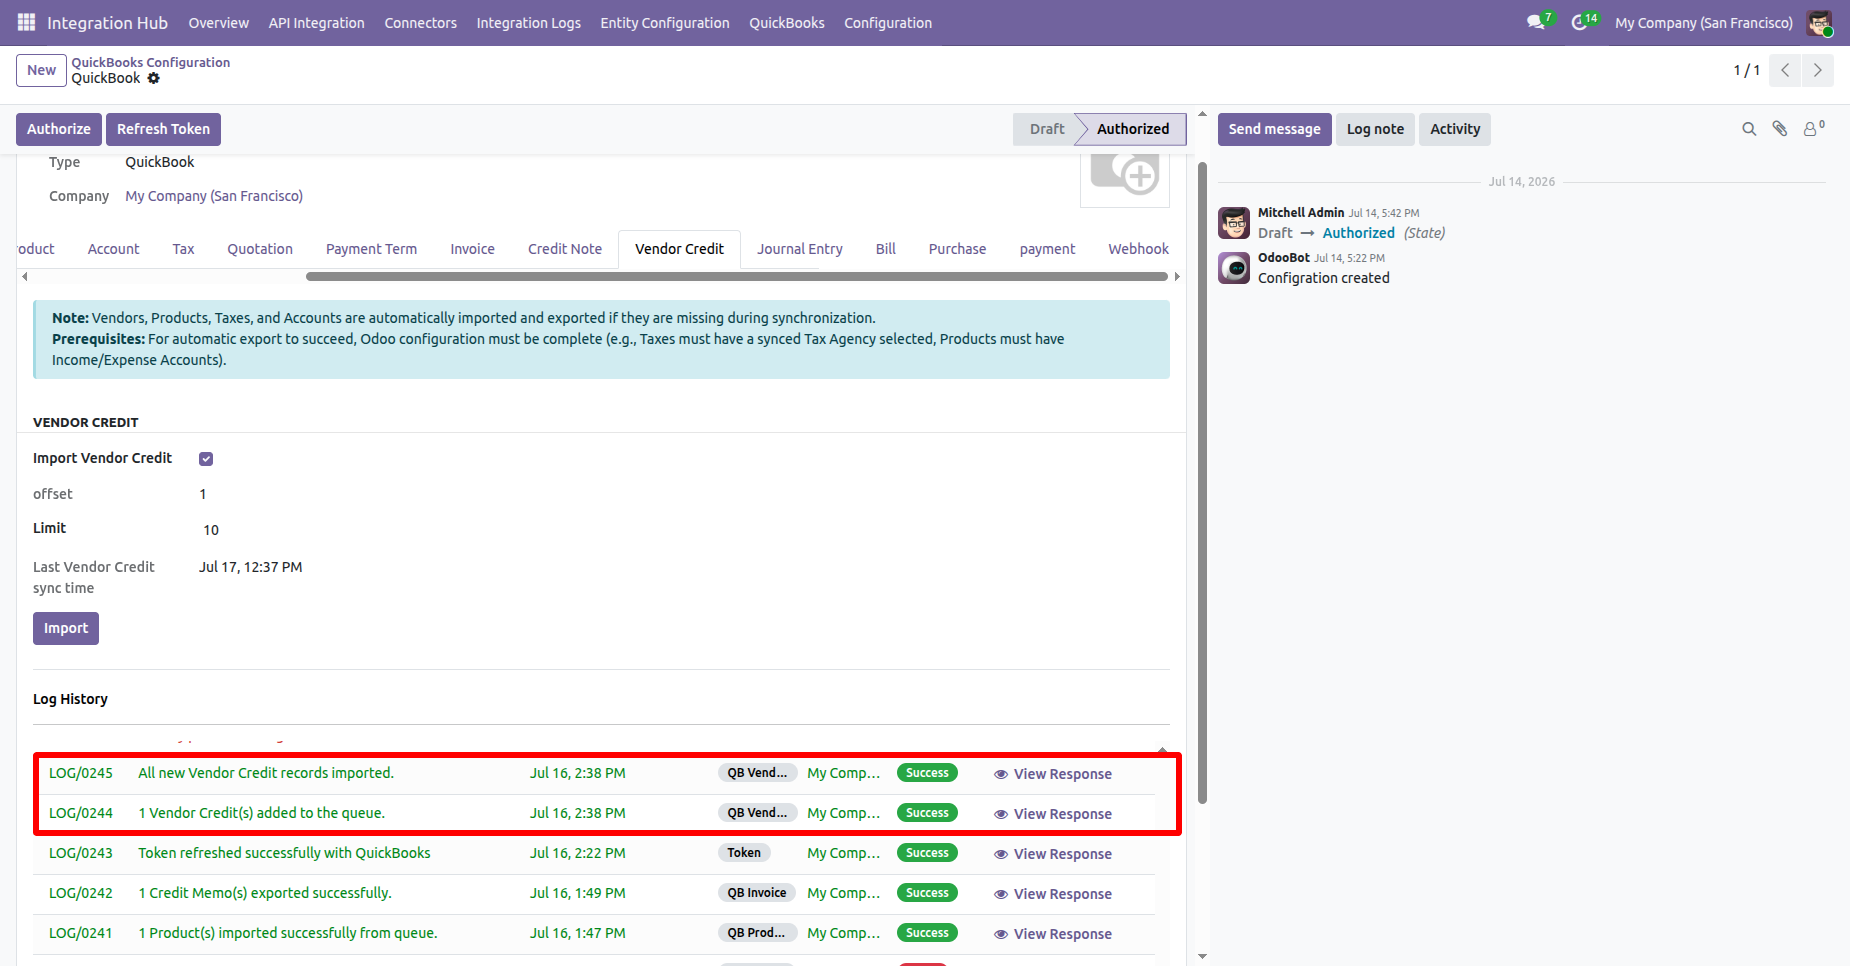
Go to the QuickBooks Vendor Credits Queue list, select a queue record, then open the Action menu and choose Import from Queue to import the Vendor Credits.
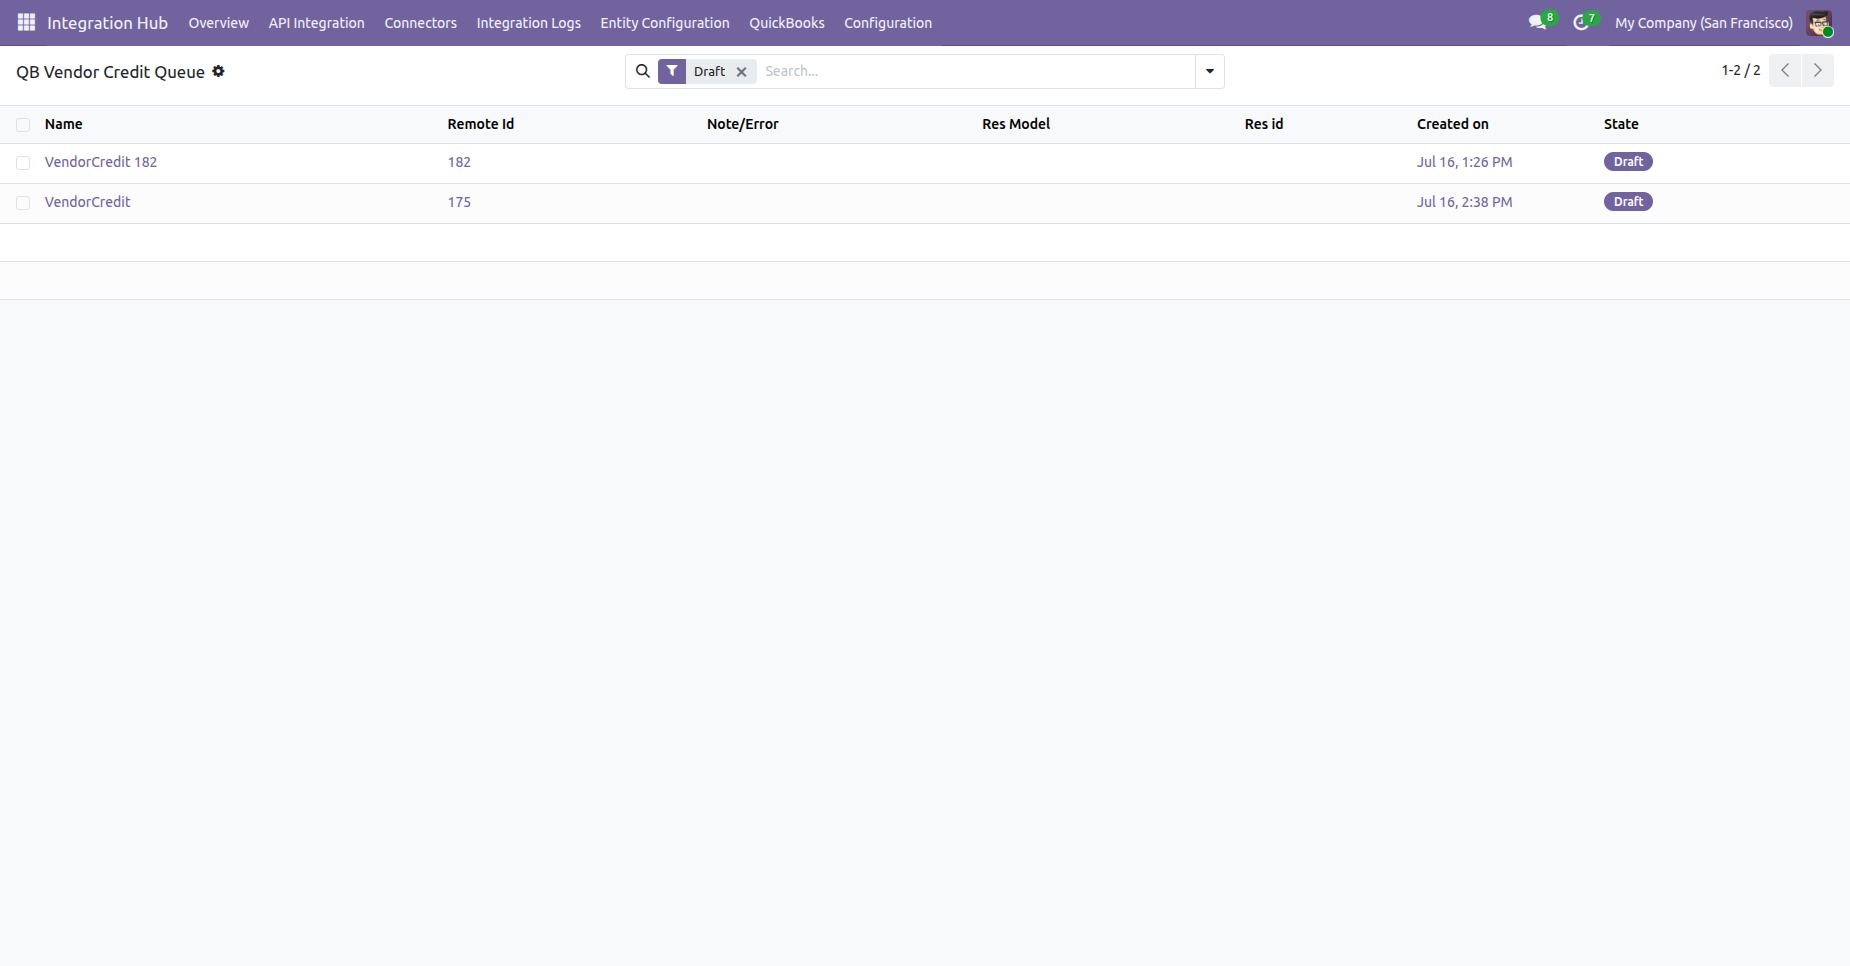
The Vendor Credit Queue will be imported successfully.
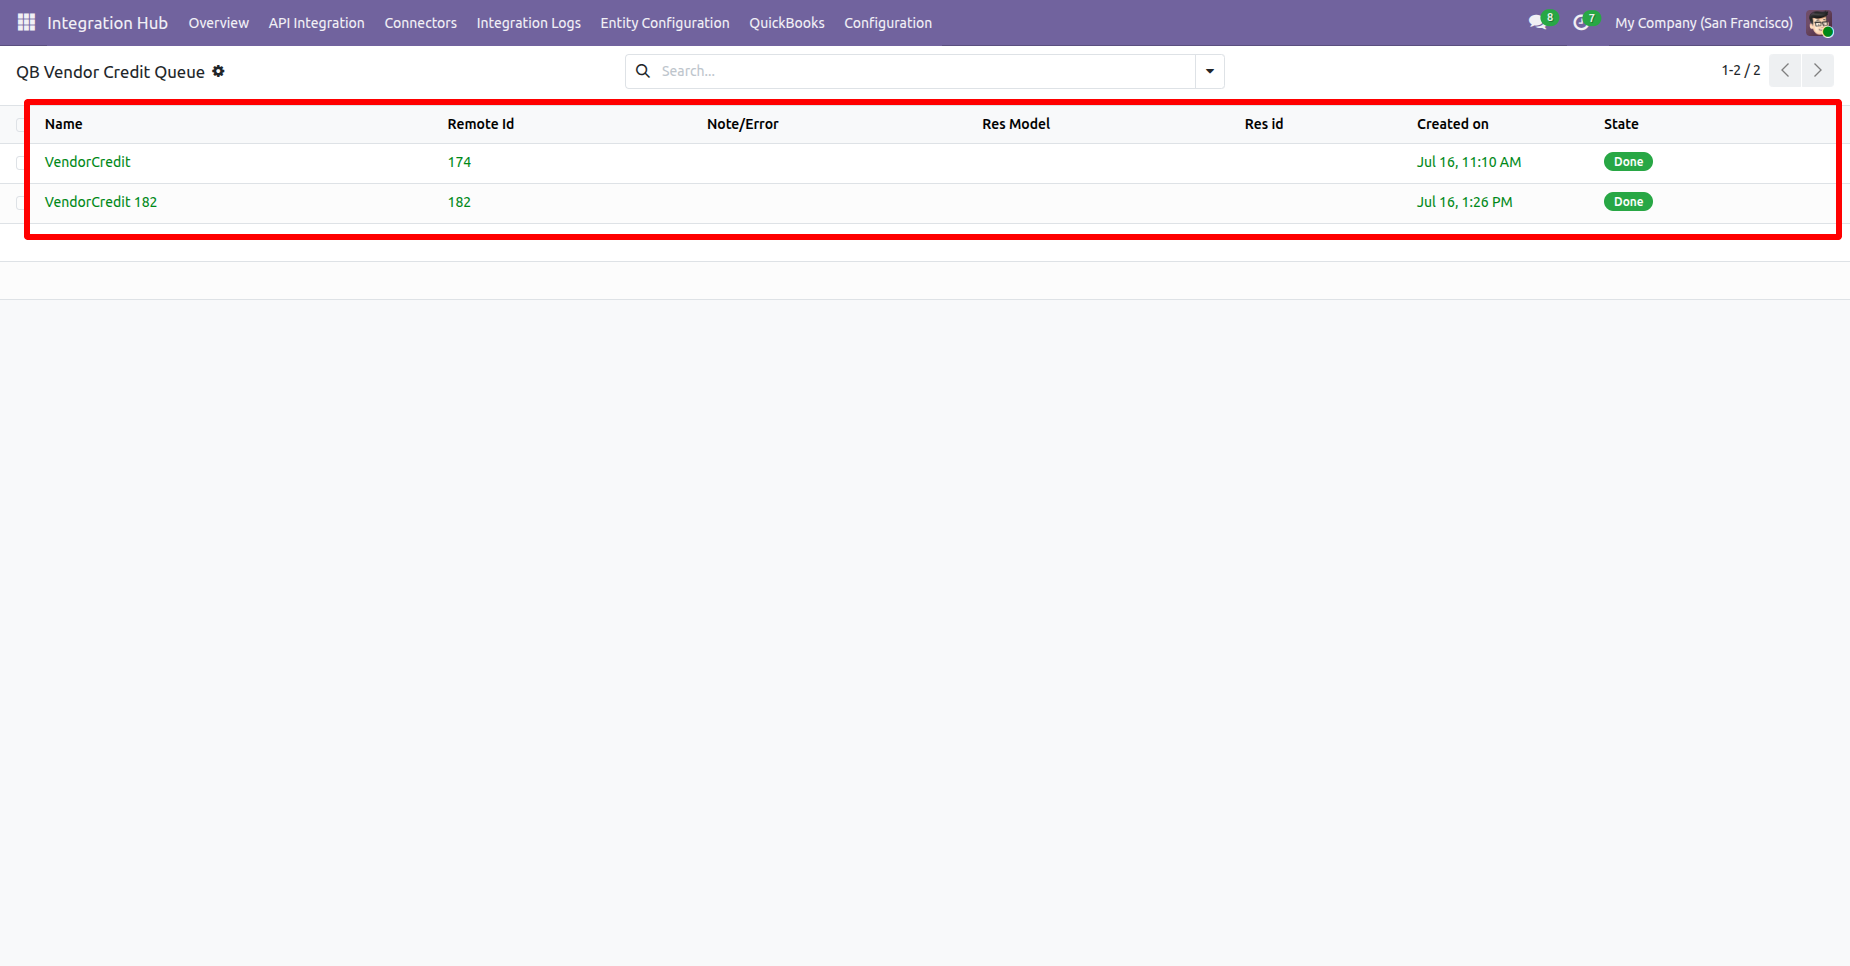
Go to the Refund Form view and click the “Export to QuickBooks” from the action.
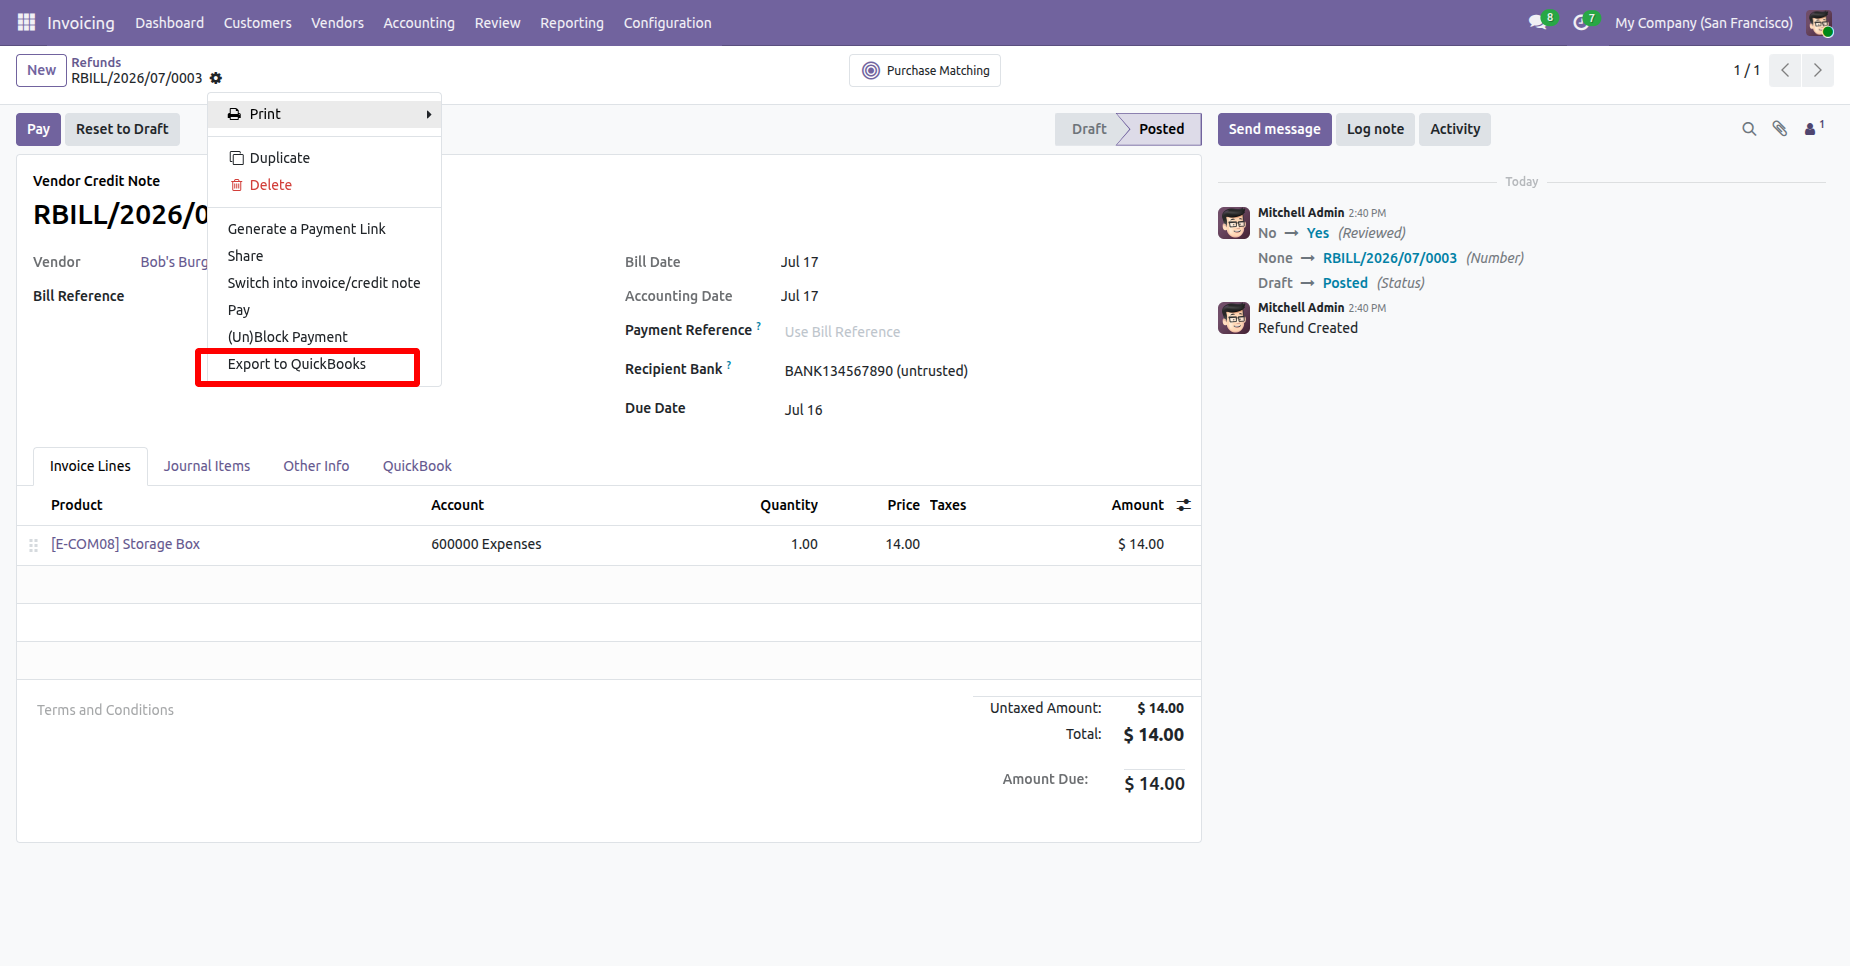
Select the QuickBooks configuration from the Configuration Wizard and click the “Export” button.
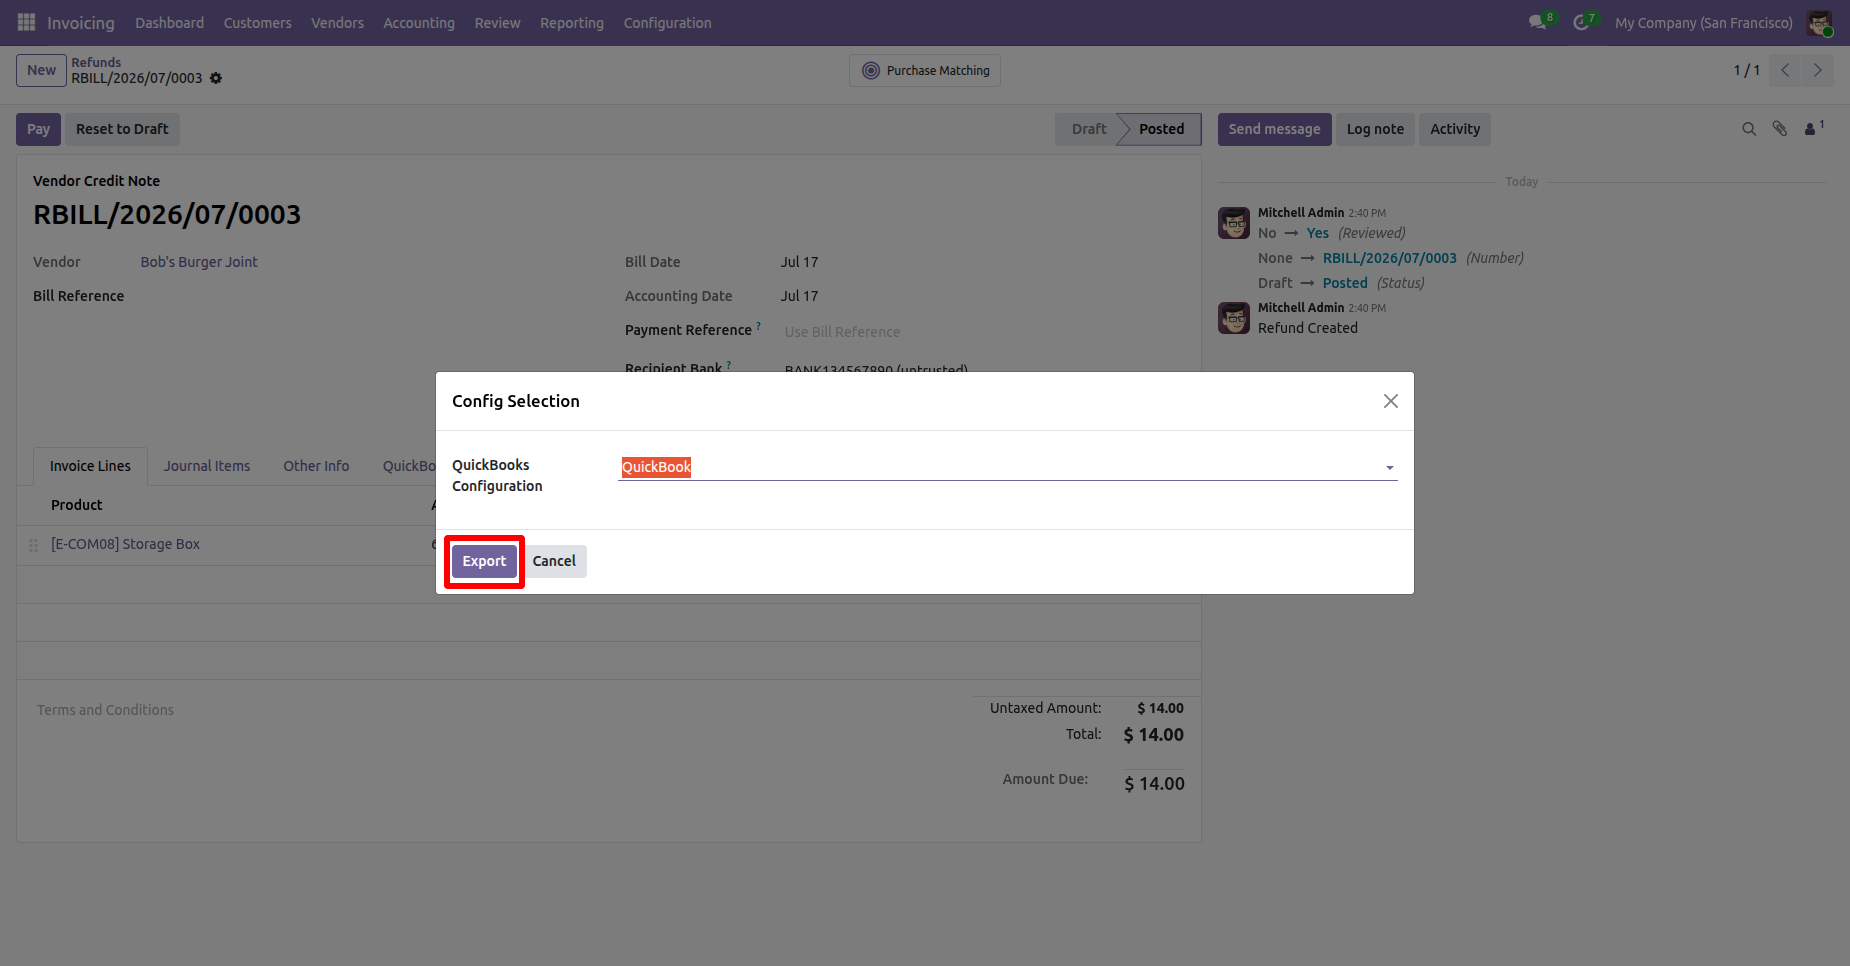
Navigate to the QuickBooks tab in the Refund. Here, the user can view the QuickBooks Vendor Credit Number, Vendor Credit ID, and Sync Status.
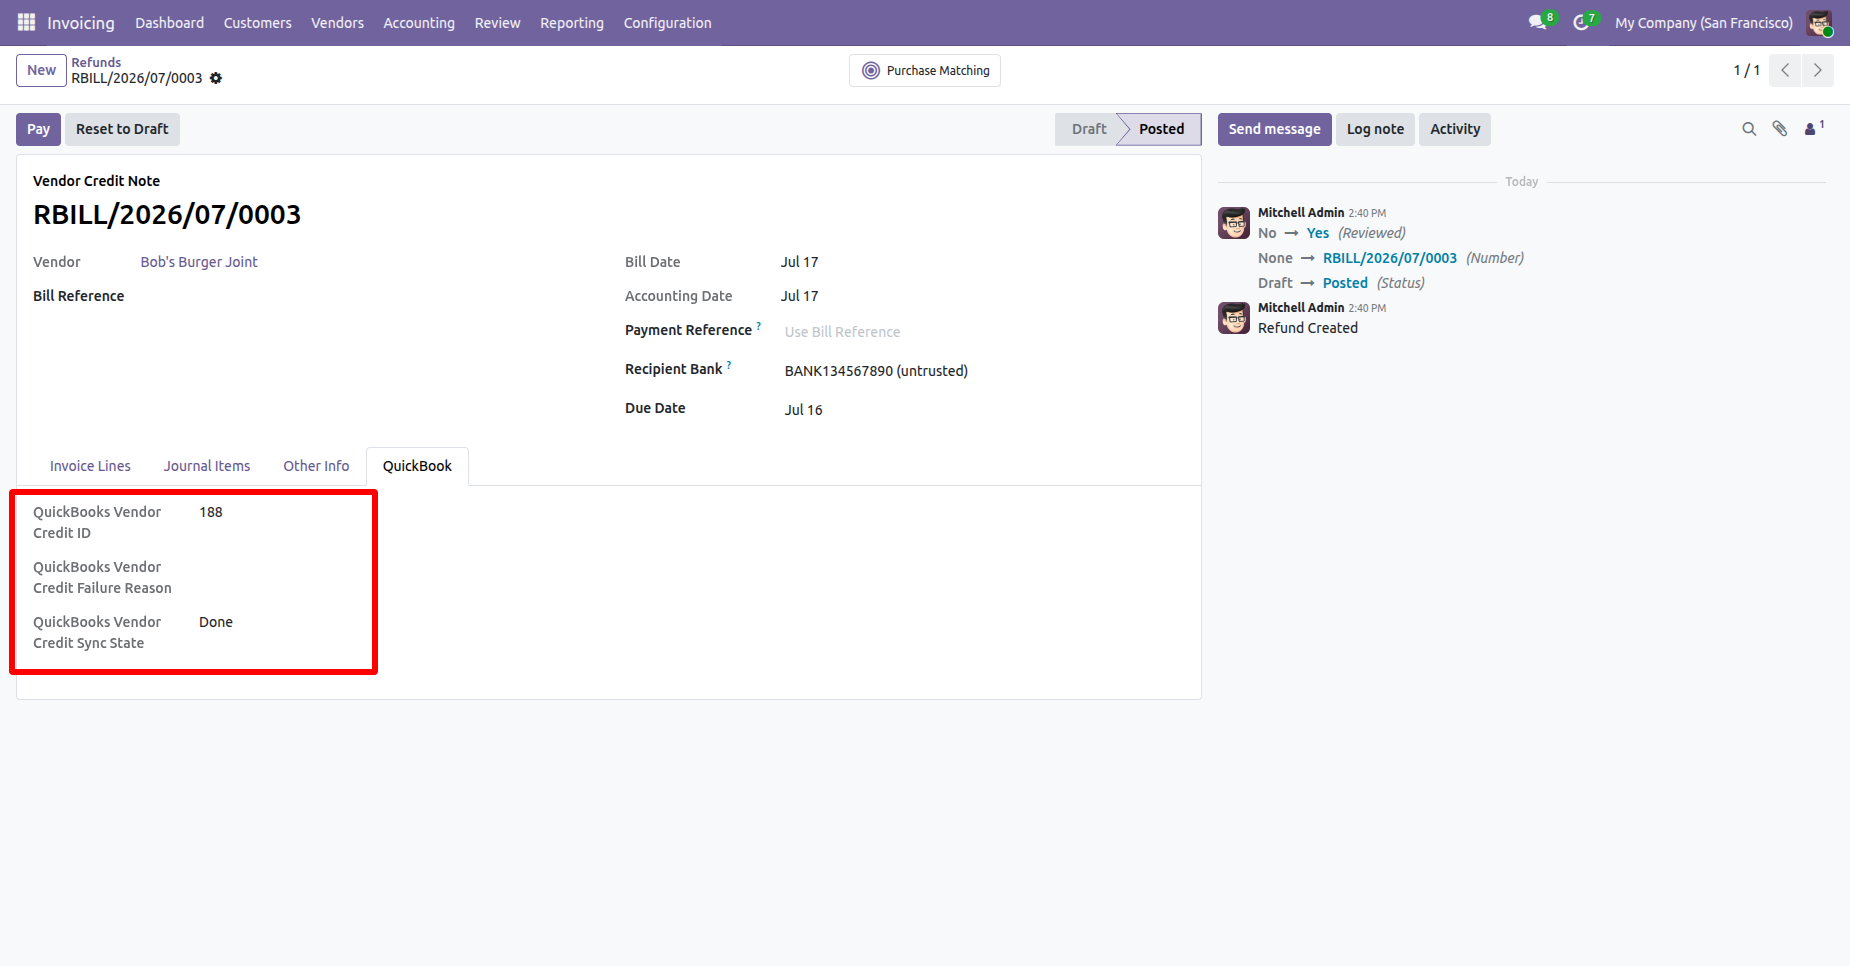
The exported Vendor Credit Note will be visible in QuickBooks.
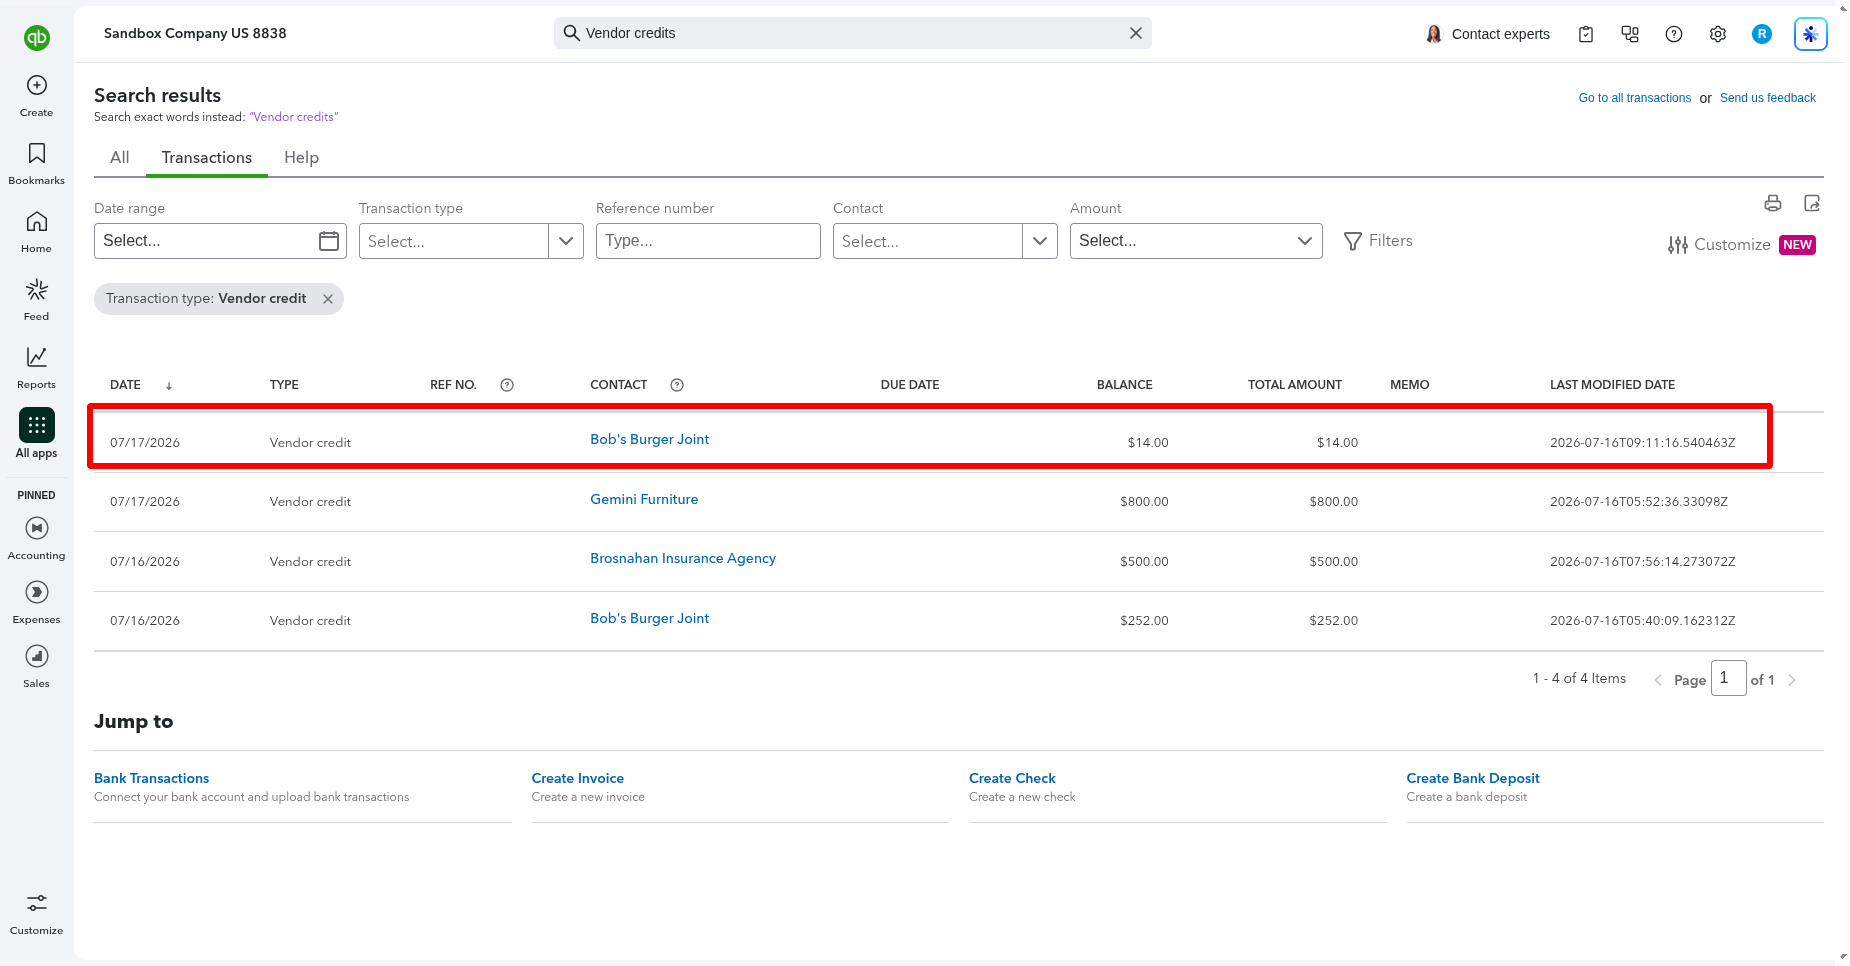
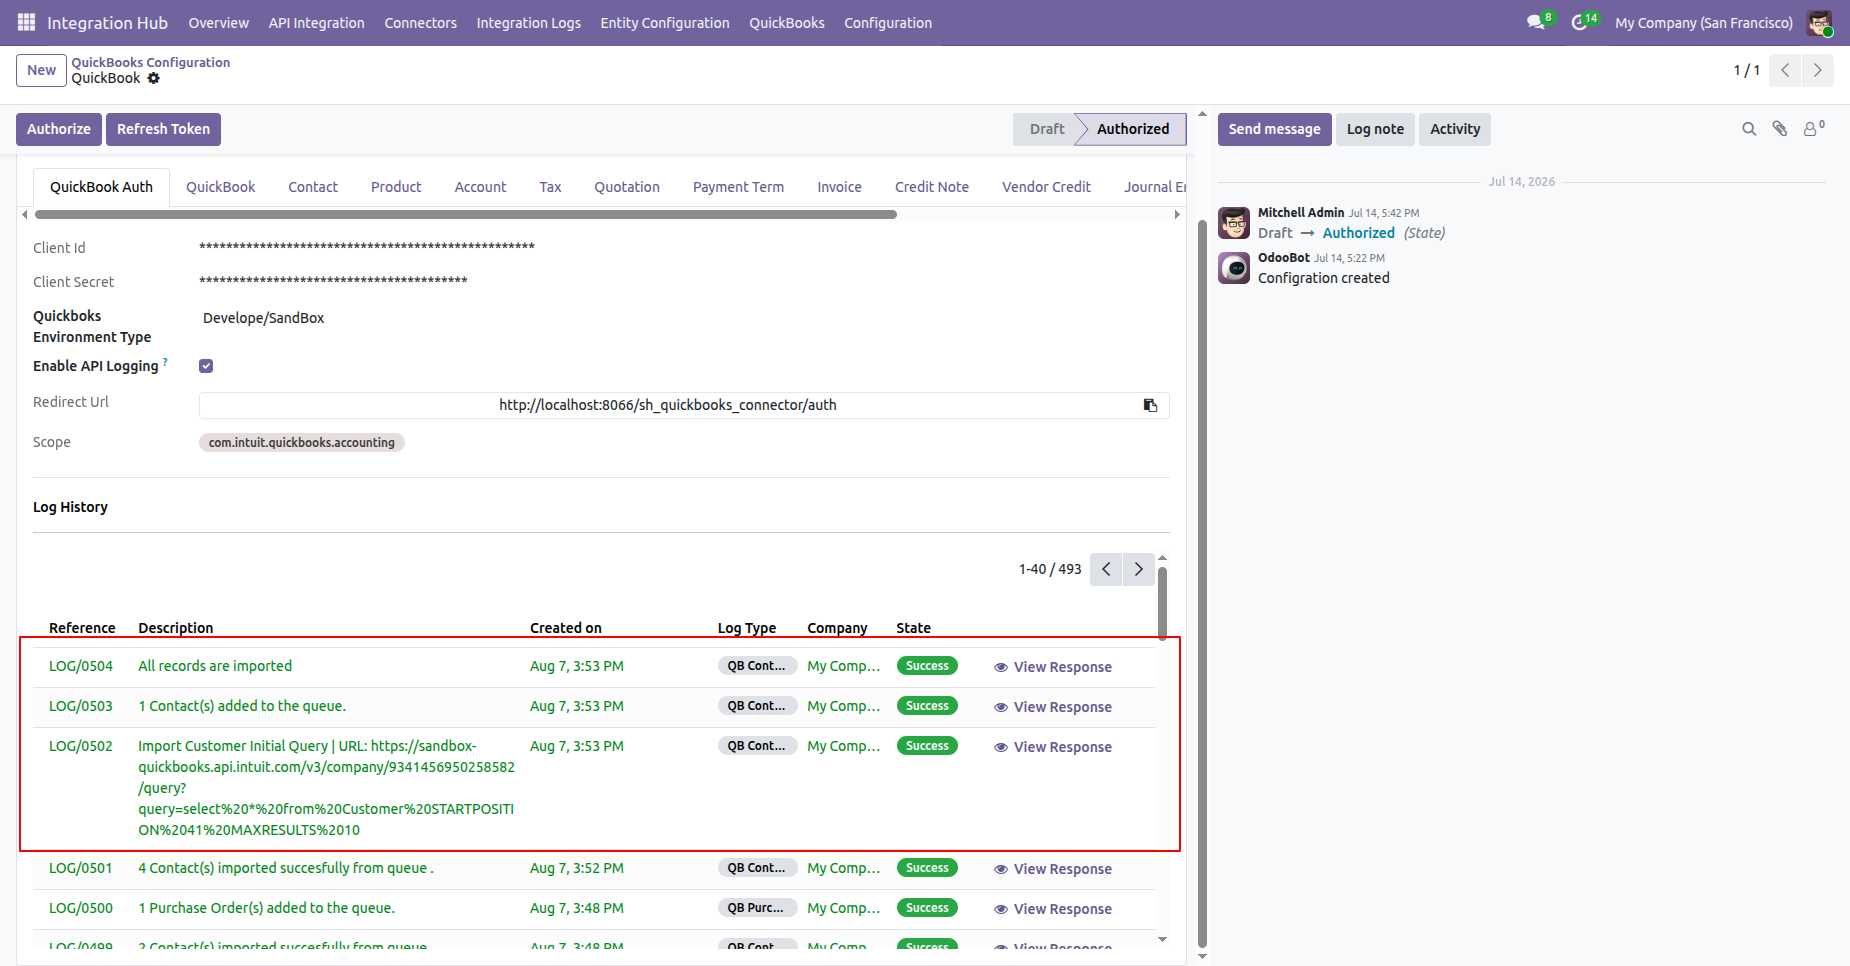
Go to QuickBooks Configuration -> QuickBook Auth and enable API Logging.
Imported data with log.
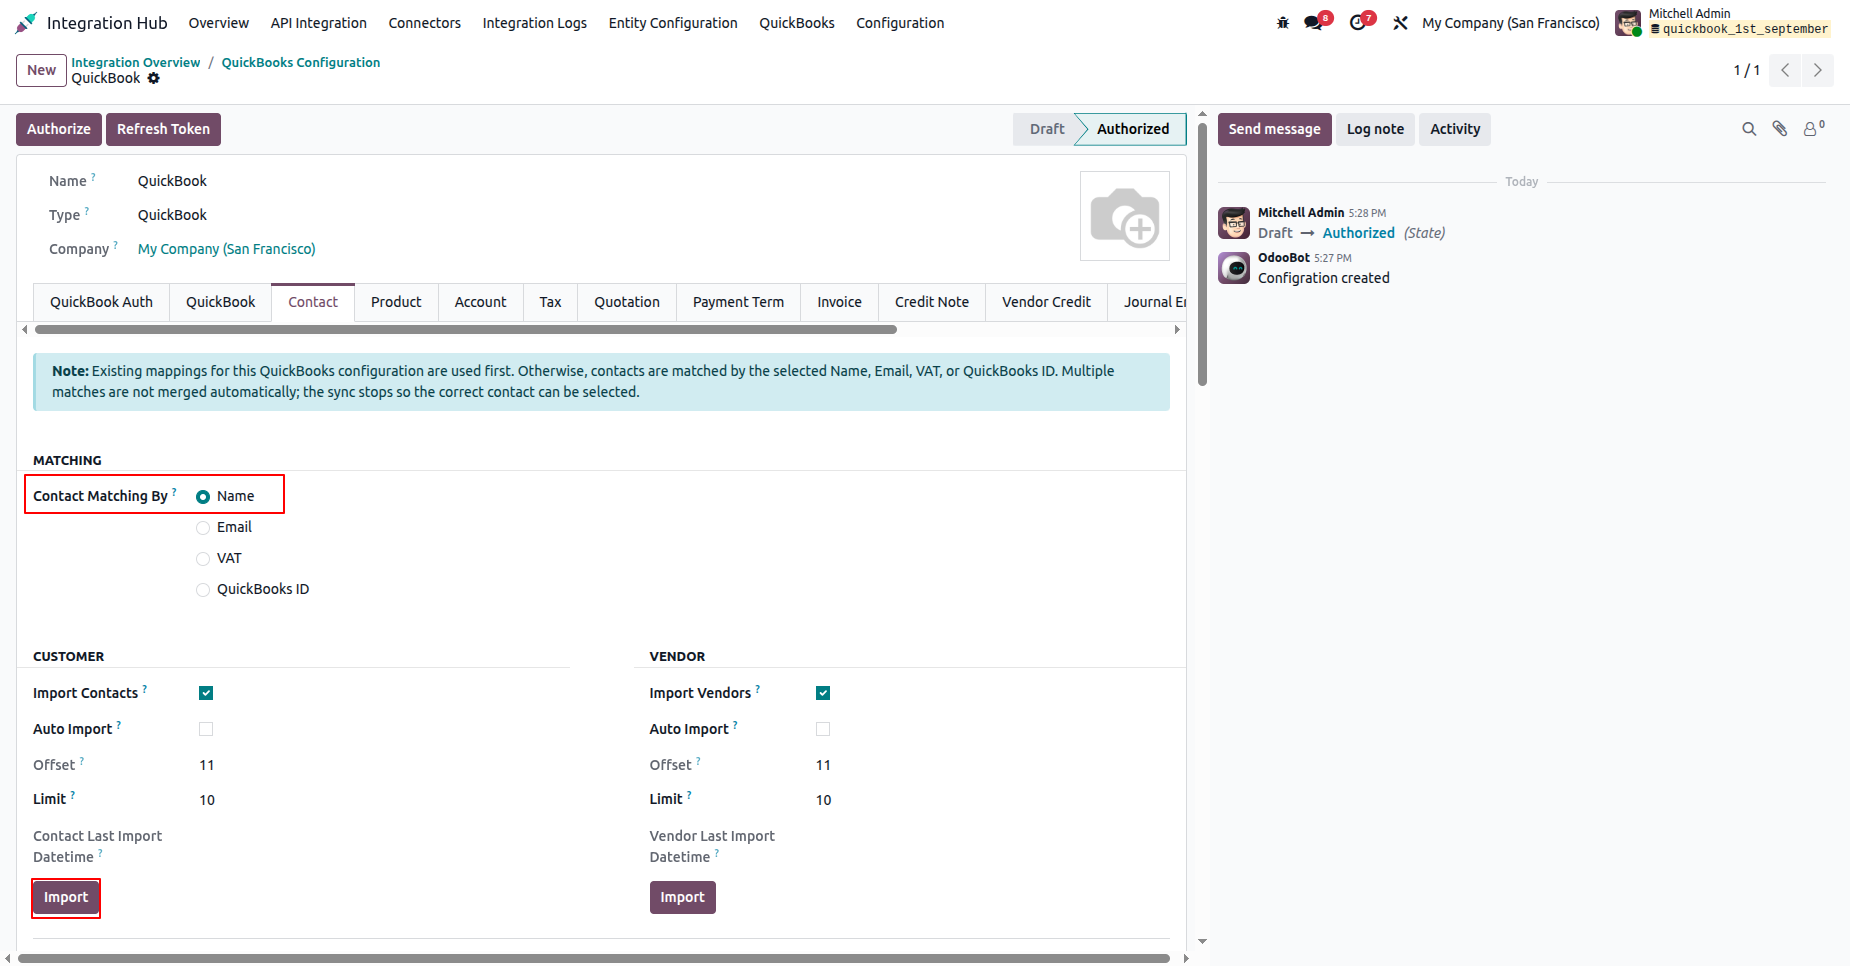
Go to QuickBooks Configuration -> Contact and select contact matching by options.
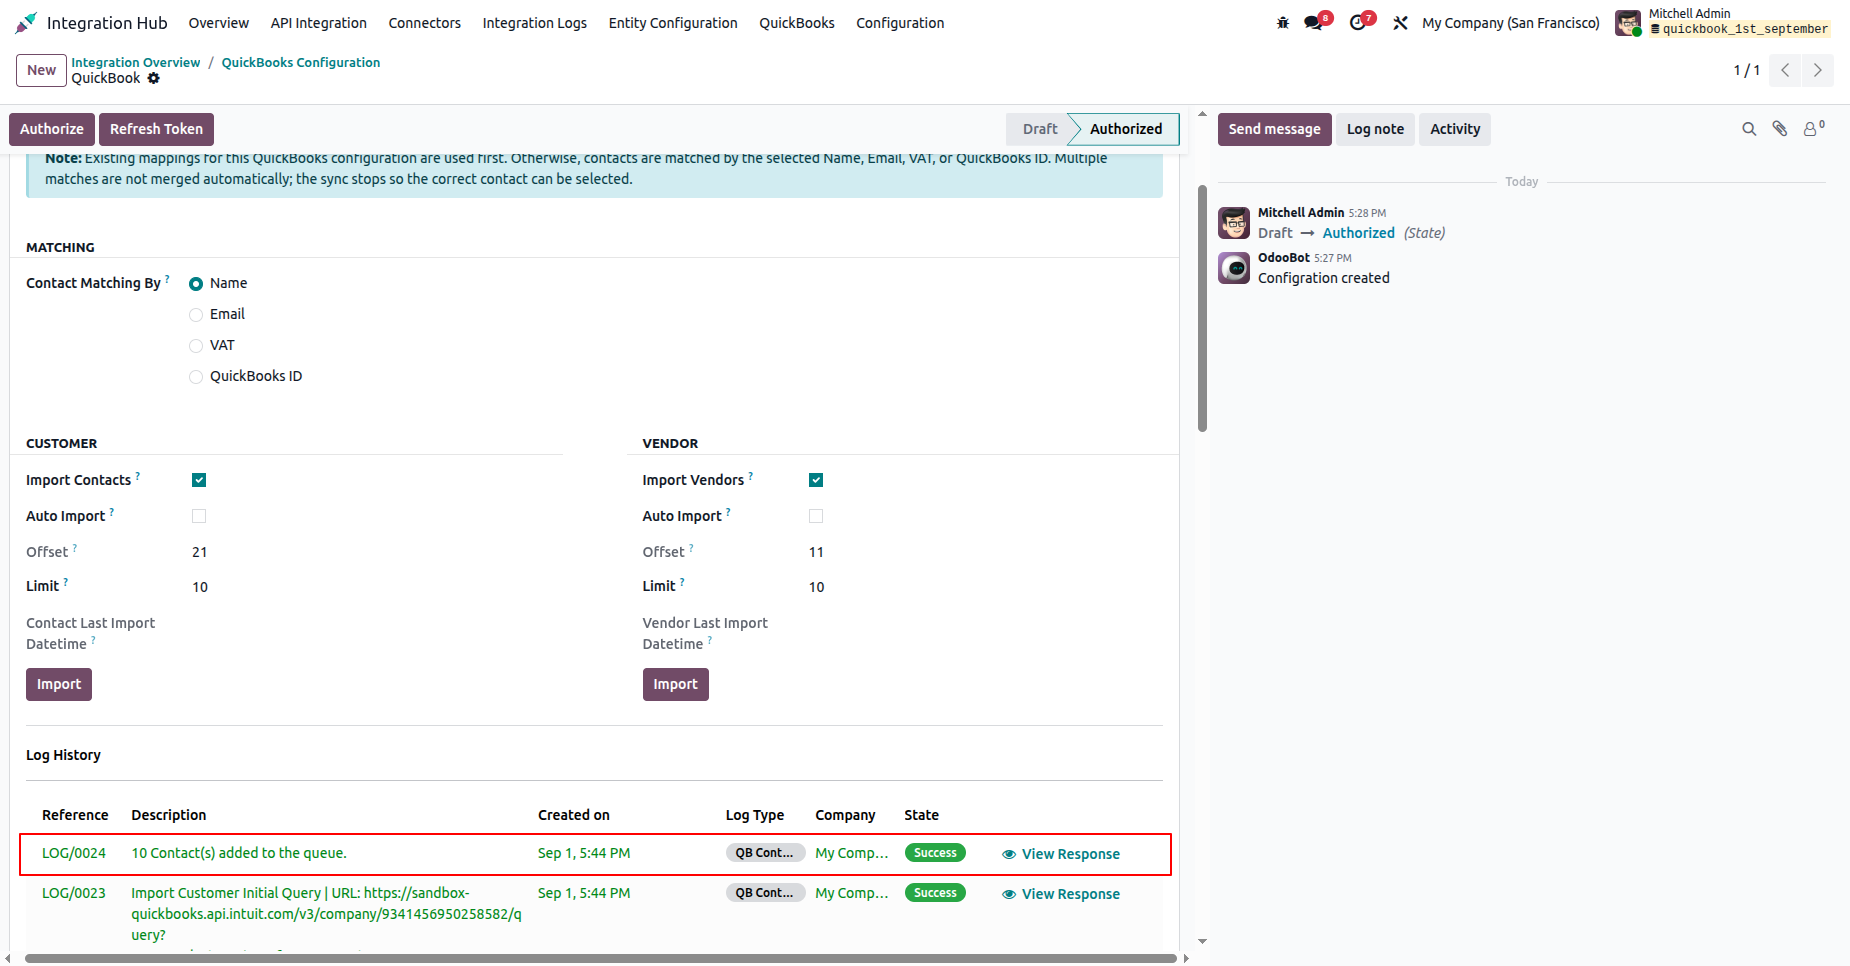
Imported data with log.
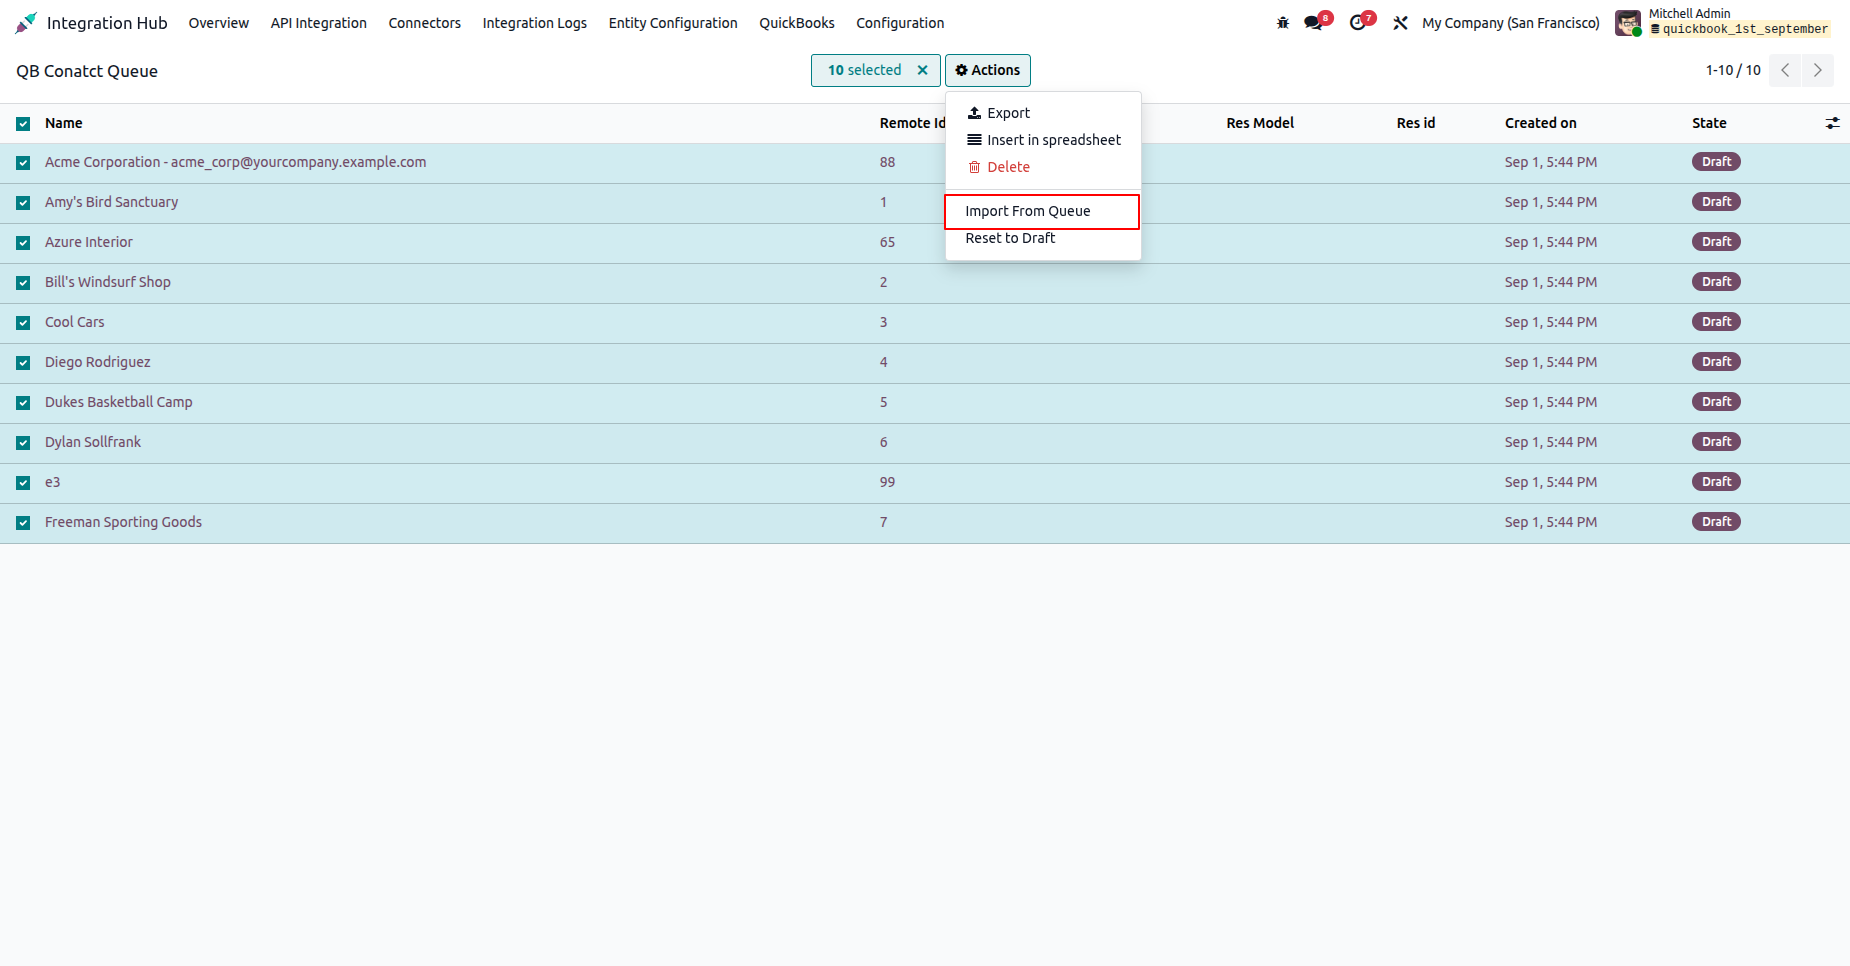
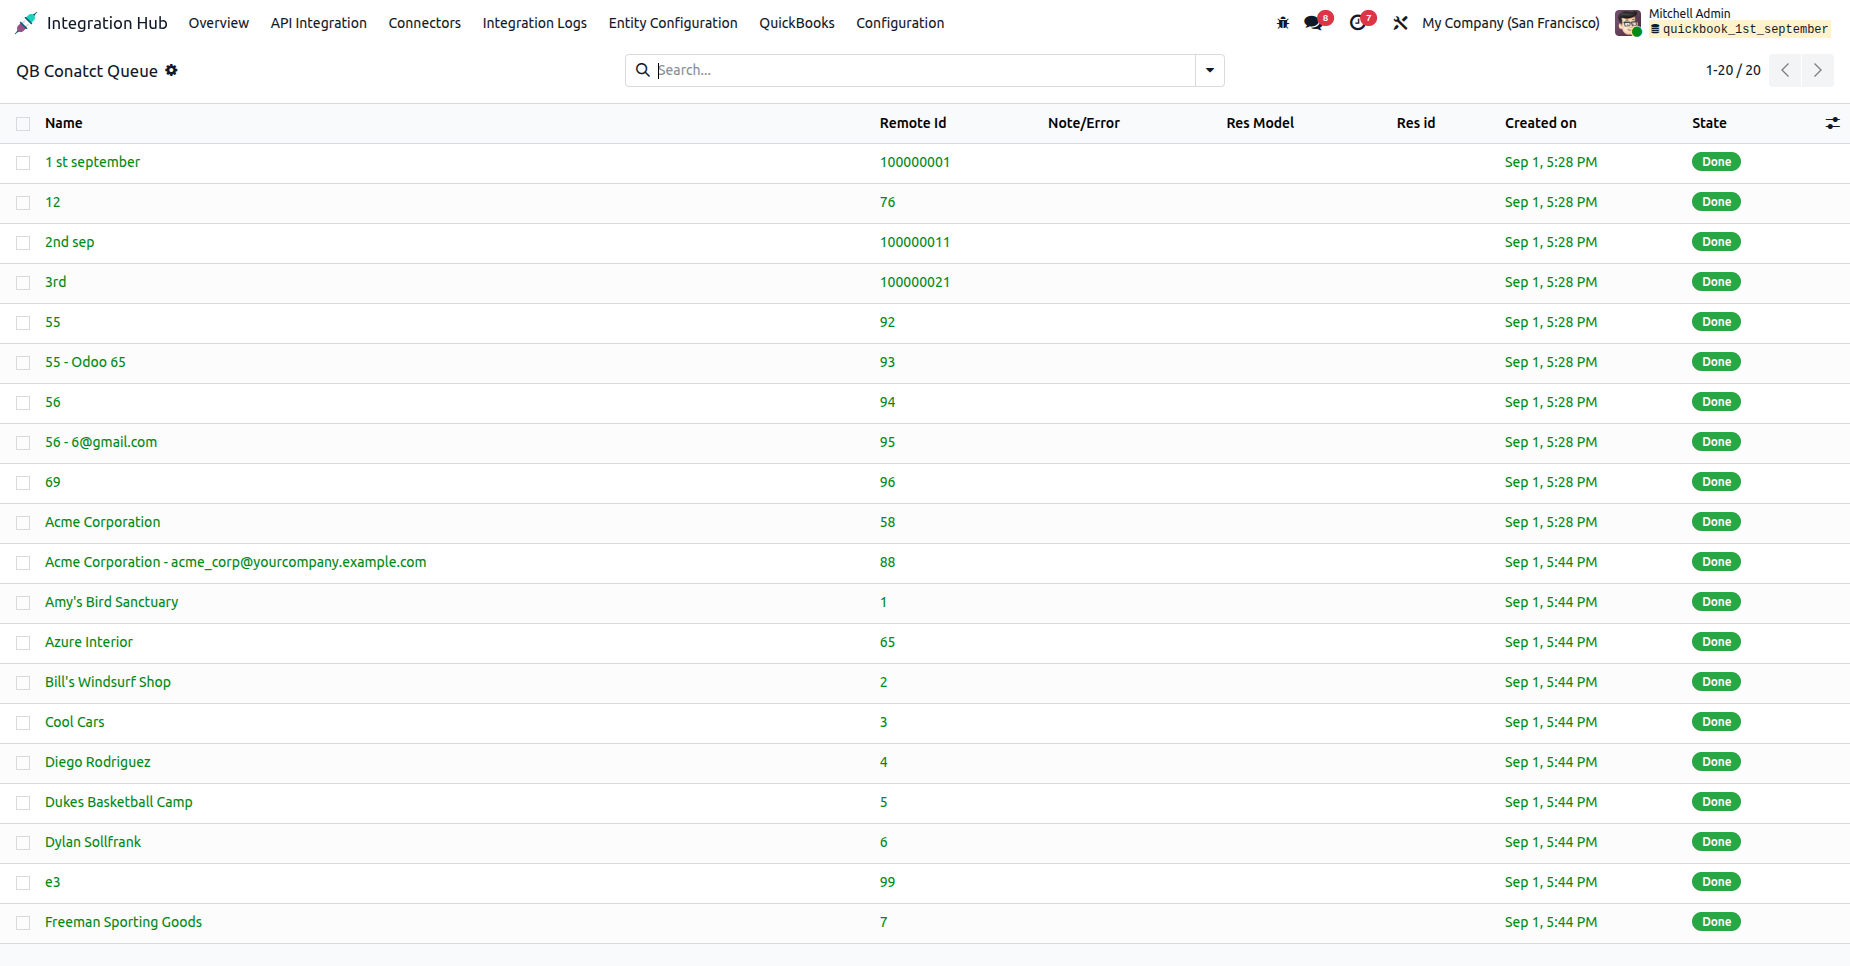
Go to the QuickBooks Contact Queue list, select a queue record, then open the Action menu and choose Import from Queue to import the contacts.
The Contact Queue will be imported successfully.
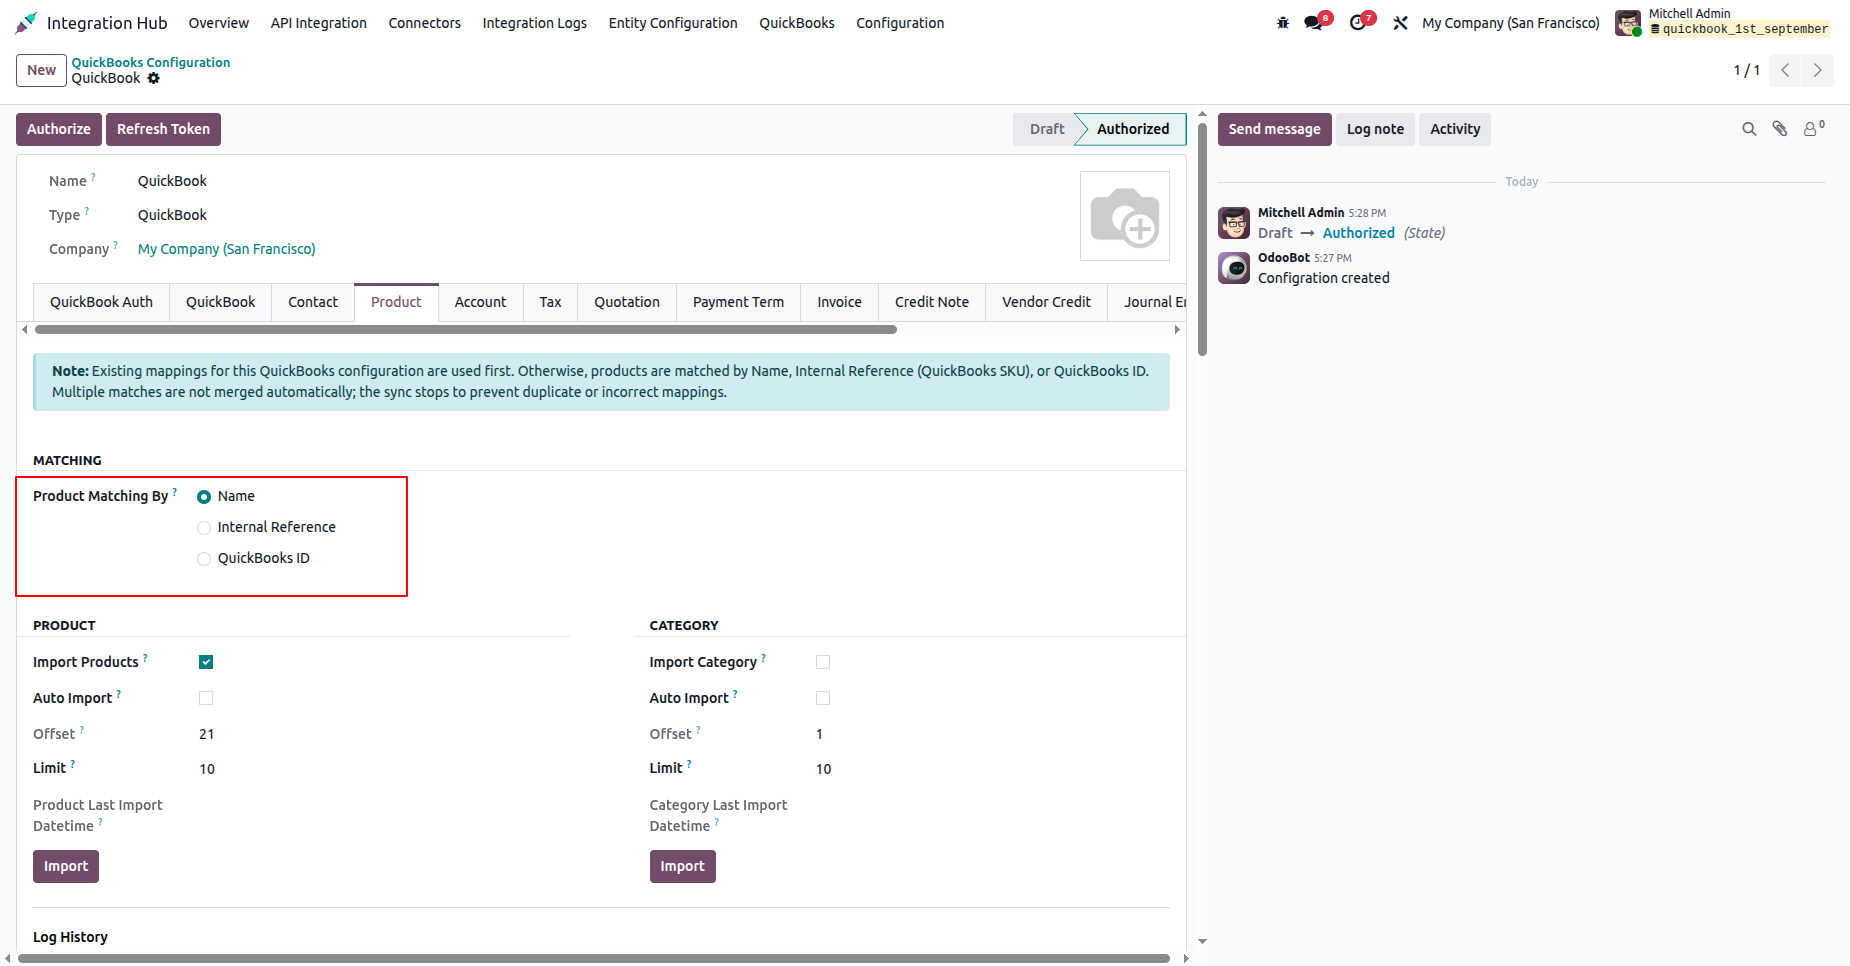
Go to QuickBooks Configuration -> Product and select Product matching by options.
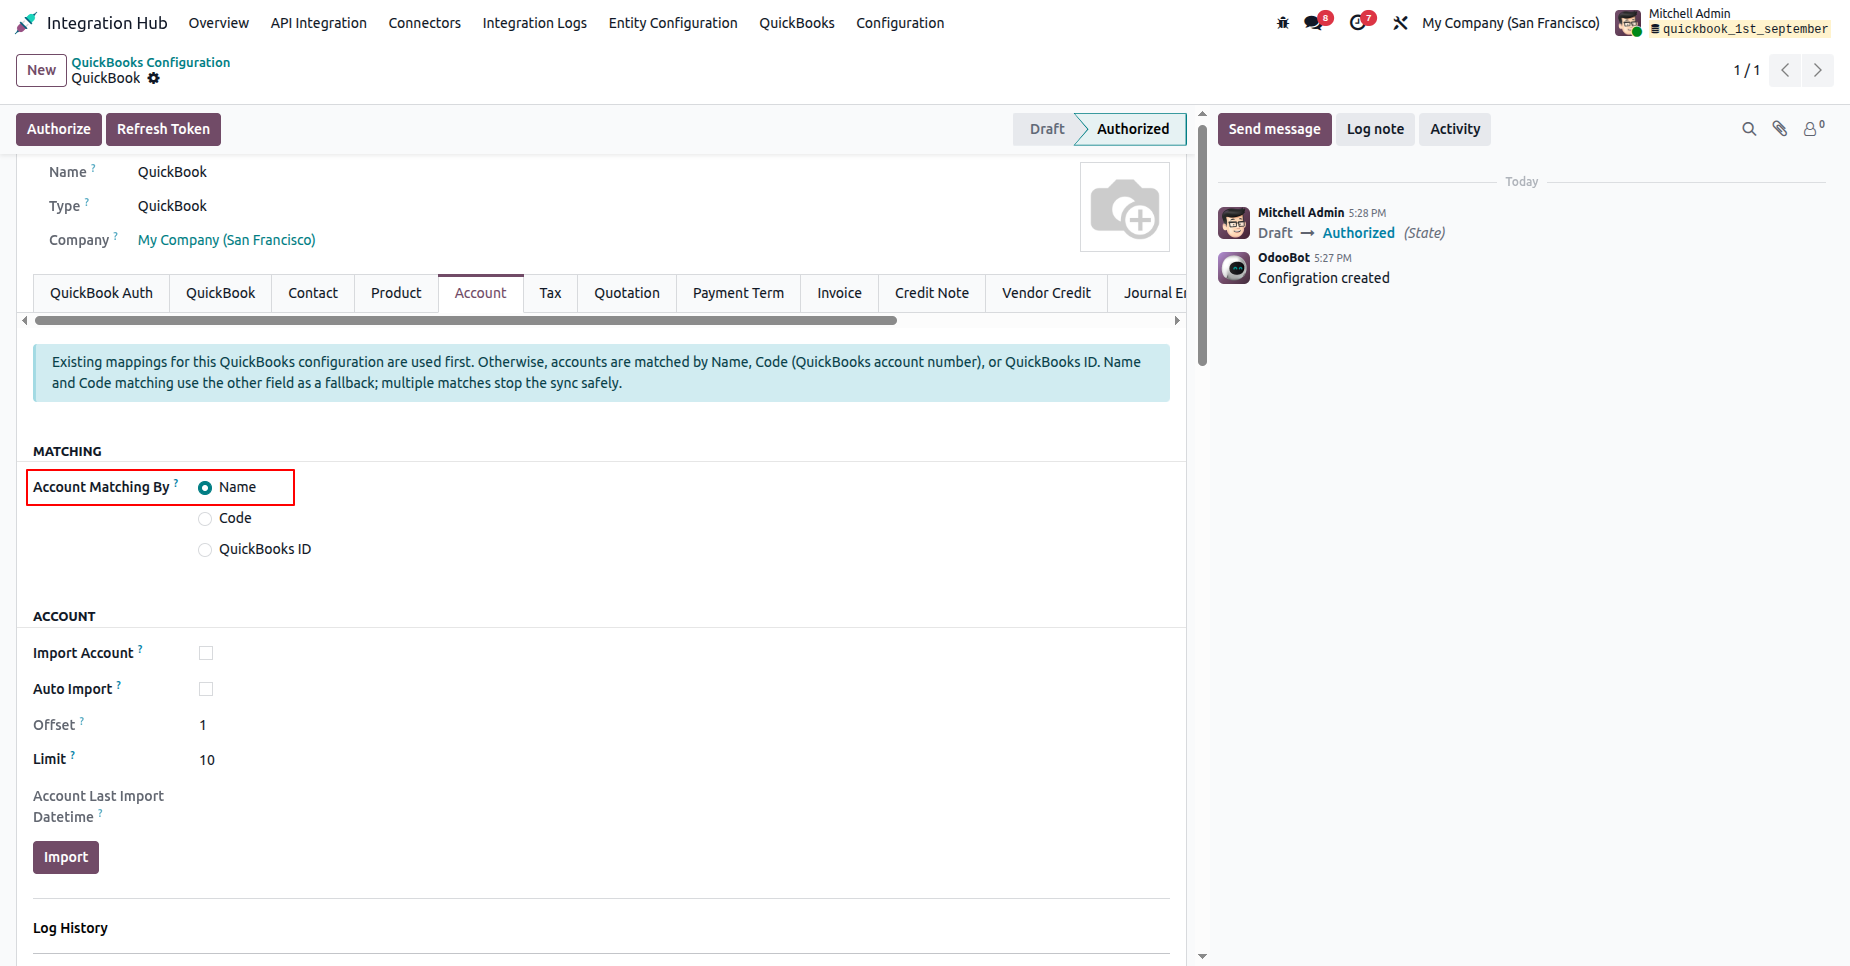
Go to QuickBooks Configuration -> Account and select Account matching by options.
Version 20.0.1.0.0 | Released on : 15th September 2026
- Yes, this app works perfectly with Odoo Enterprise (Odoo.sh & Premise) as well as Community.
- No, this application is not compatible with odoo.com(odoo saas/Odoo Online)
- Yes, to test this module, please contact us at sales@softhealer.com.
- Please contact us at sales@softhealer.comto request customization.
- Yes, we provide free lifetime support for the version you purchased.
- Yes, you will receive lifetime free updates for the version of the module you purchased.
- No, there is no need to install any additional libraries.
- Yes, for version 12 and above, you need to purchase the module separately for each version you intend to use.
- No, exchanges or refunds are not allowed. Please make sure to select the correct version before purchasing.
- You can contact us at support@softhealer.com for language translation support. We use Google Translator tools to provide translations in multiple languages, so the accuracy may vary. We welcome your suggestions to help improve translations.
Discover Our Latest Apps