












Movie Show Booking System - Backend

"Movie Show Booking System - Backend" is a backend module for a full movie booking system. You can manage movie shows with different screens. You can arrange the seat as per screens. Hurray!
Related Modules
Key Features
Features

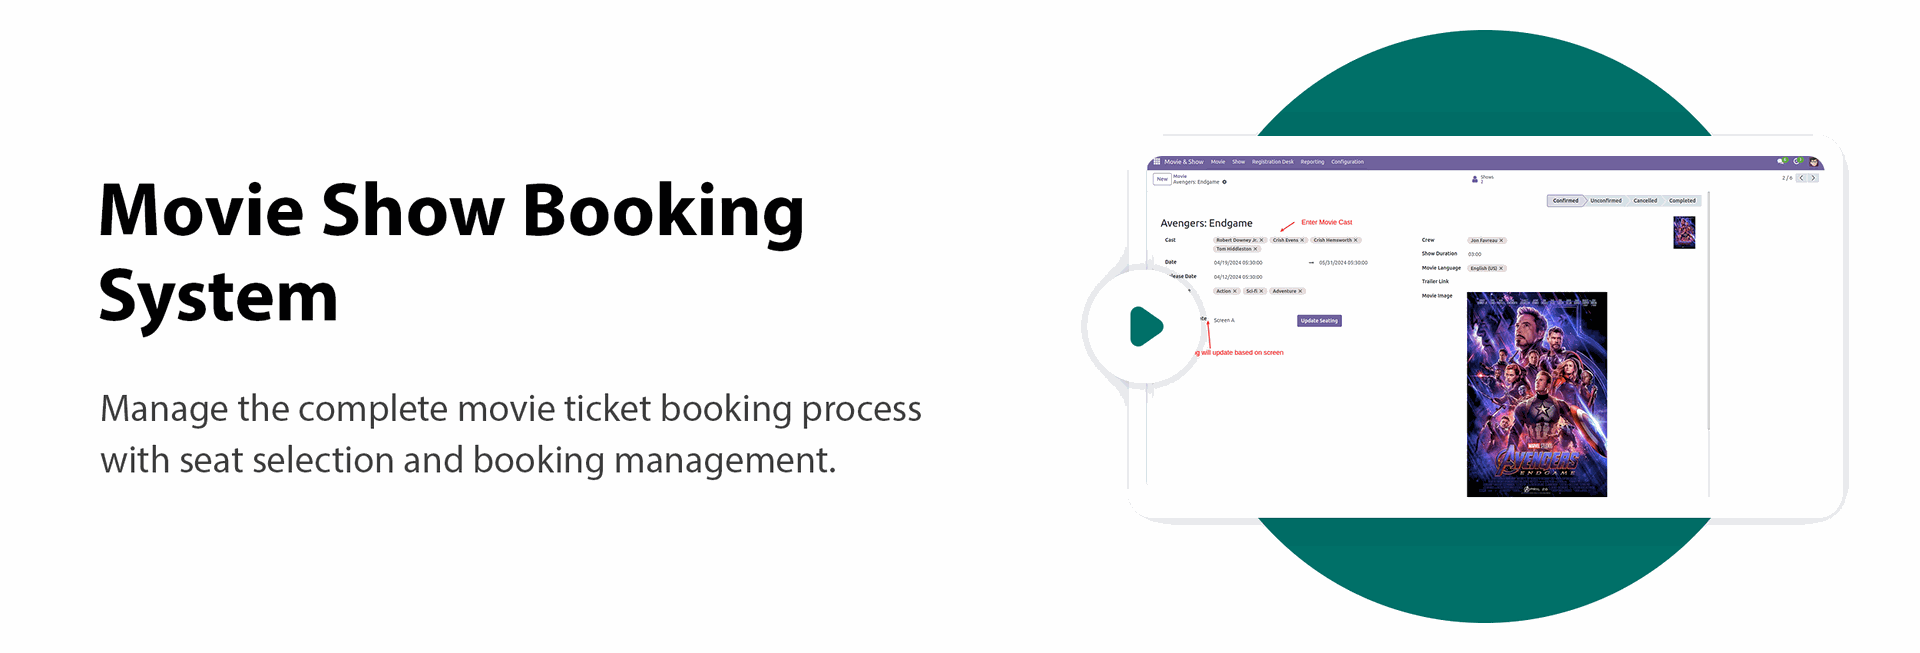
Movie Show Management
Create and manage movie shows with schedules, screens, and timings.

Movie Certificate Management
Manage movie certification details such as U, UA, A, and other rating categories.

Show Type Management
Configure and manage different show types such as 2D, 3D, IMAX, or VIP.

Seating Template Management
Create and manage seating templates for different cinema halls and screen layouts.

Ticket Printing
Generate and print movie tickets with booking and seat details.
Automatic Hold Ticket Release

Automatically release blocked or on-hold seats after the configured timeout using cron.

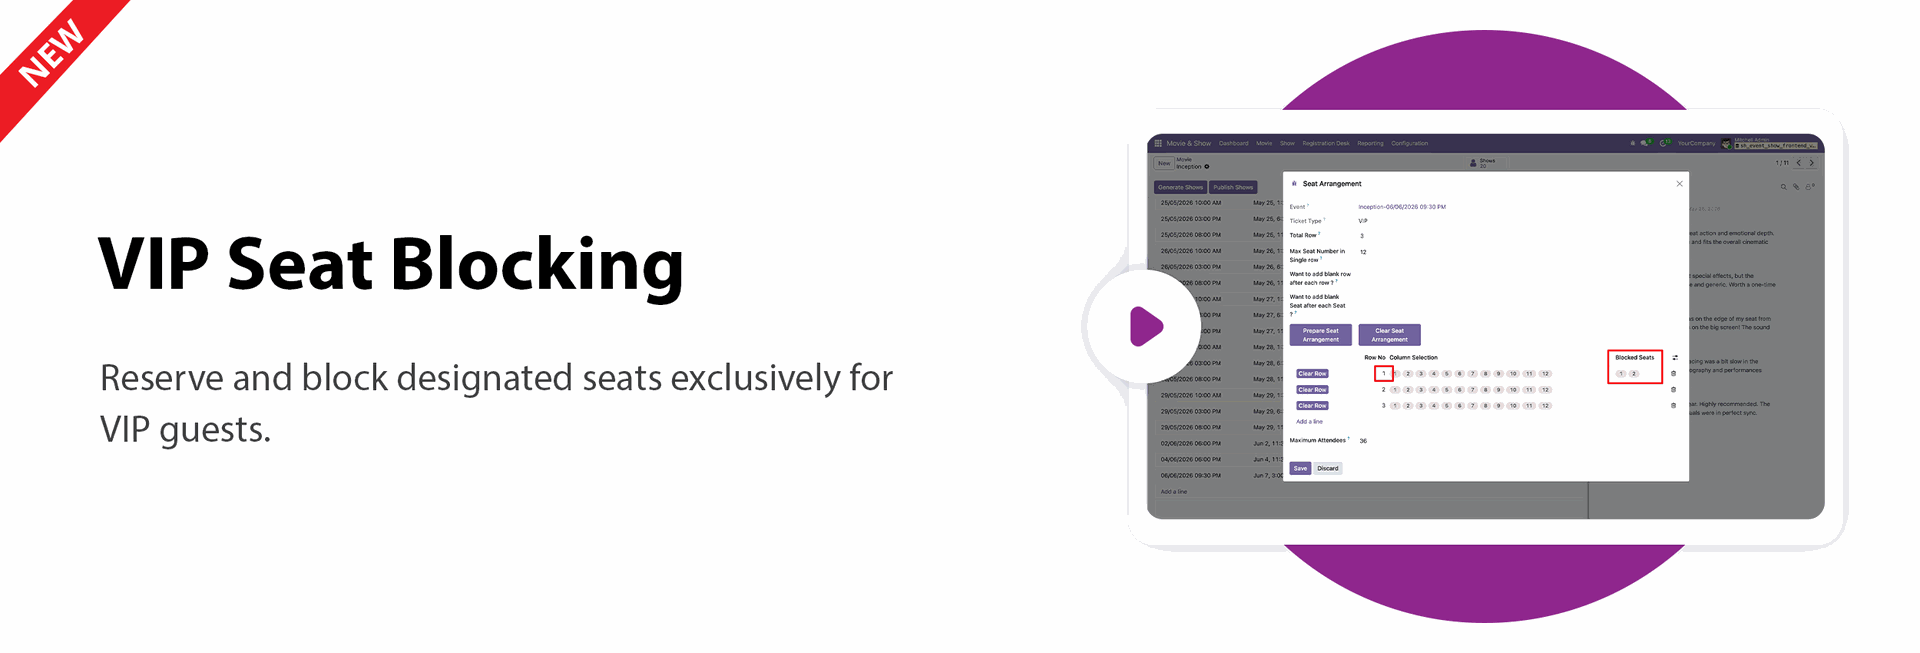
VIP Seat Blocking
Reserve and block designated seats exclusively for VIP guests.

Movie Cast Management
Maintain detailed information about movie cast members.

Movie Crew Management
Manage crew details, including actors, directors, producers, and other contributors.

One-Click Ticket Booking
Book movie tickets instantly with a single click.
Separate Booking Interface
Provide a dedicated interface for fast and convenient movie ticket booking.

Booking Confirmation via Email & WhatsApp
Send booking confirmation with a QR code through email and WhatsApp after successful ticket booking.
Automatic Unpaid Ticket Cancellation
Automatically cancel unpaid ticket bookings using scheduled cron jobs.

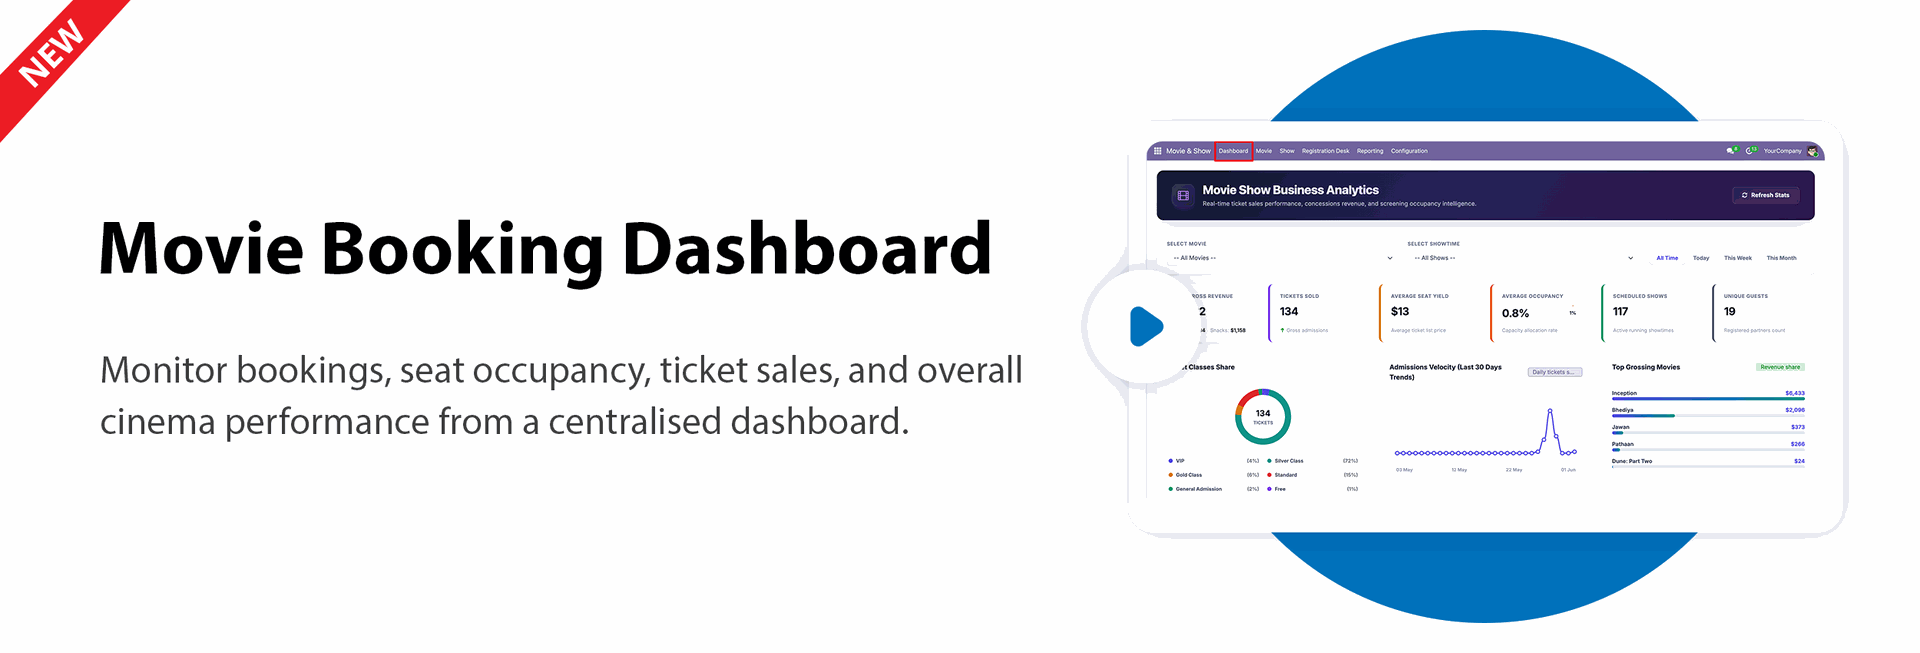
Movie Booking Dashboard
Monitor bookings, seat occupancy, ticket sales, and overall cinema performance from a centralized dashboard.

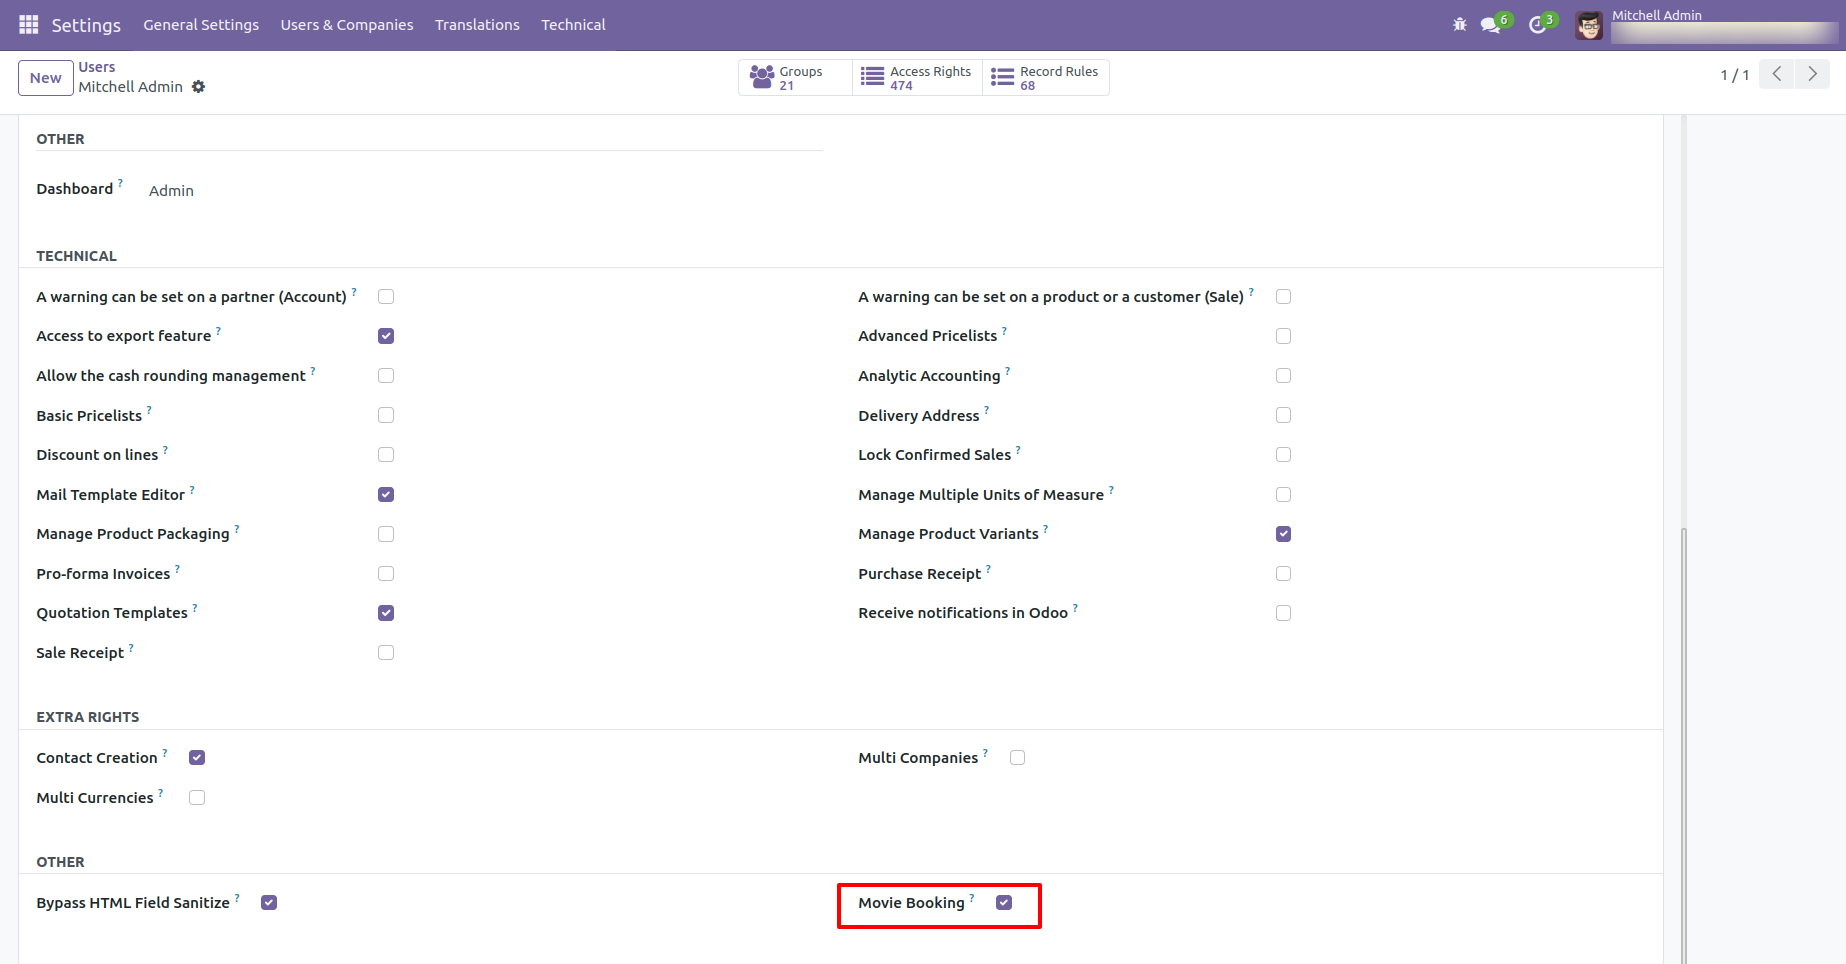
Tick the 'Movie Booking' in the user for movie booking.
Go to the configuration for the configure movie cast, cast type, movie crew, show type, movie certificate & seating templates.
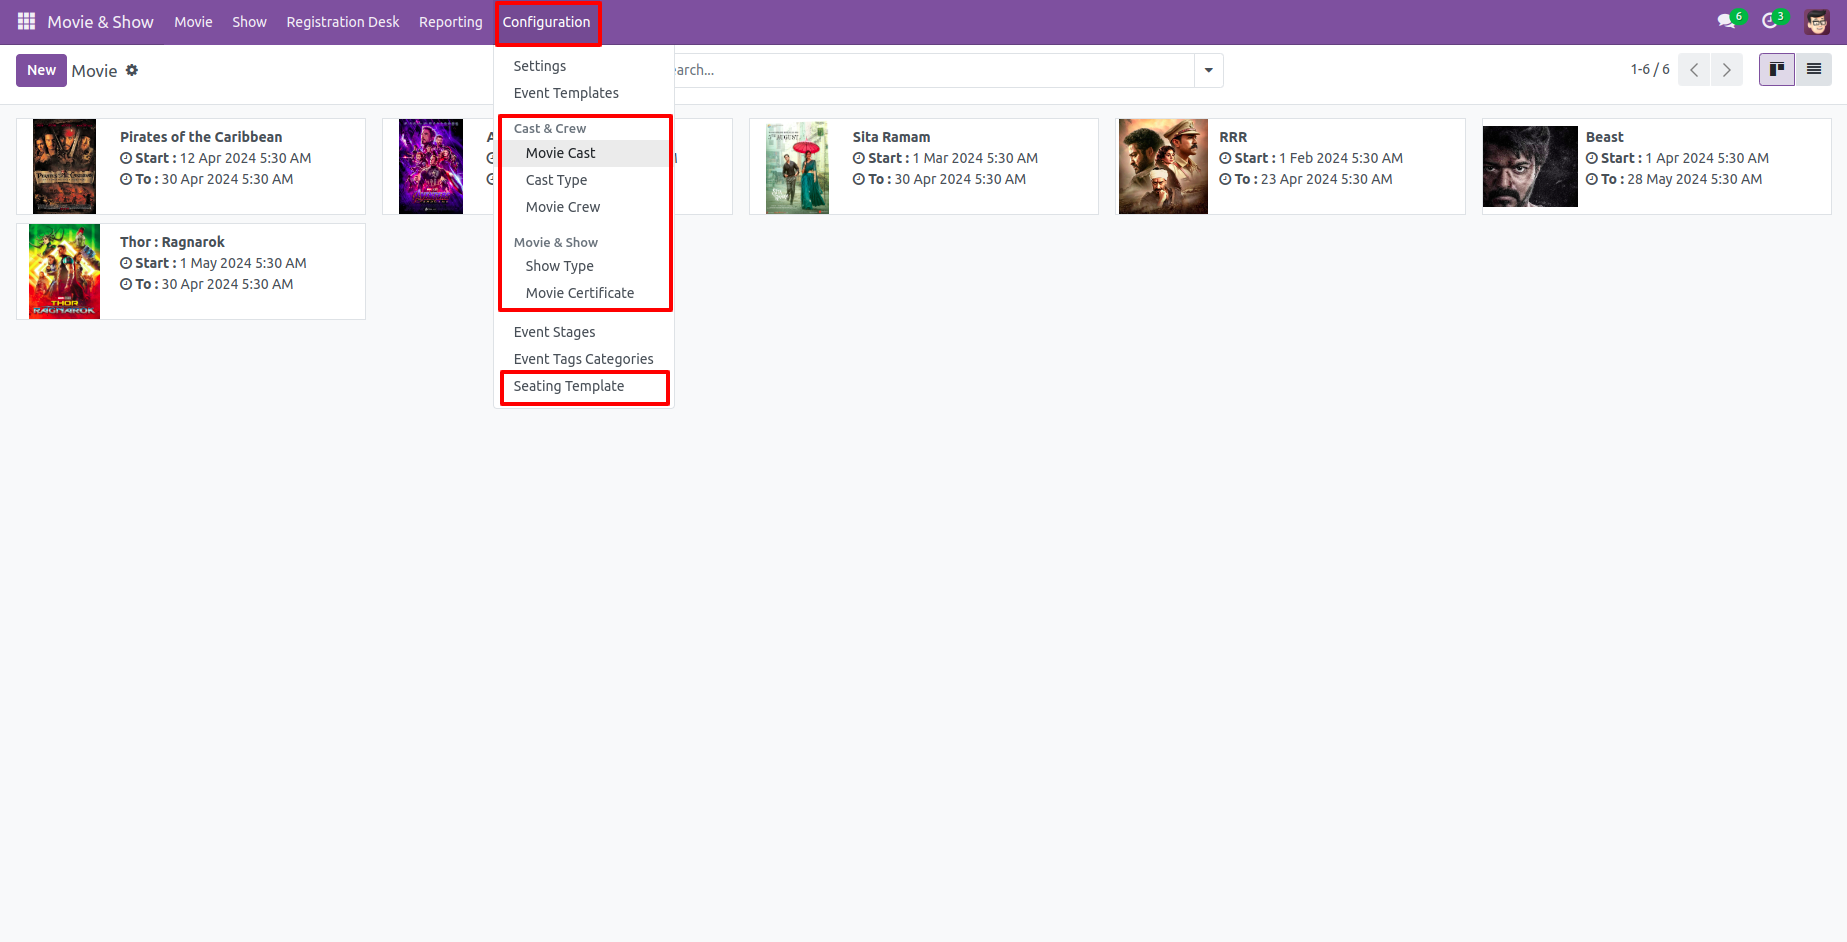
The movie cast tree view, You can configure the movie cast from here.
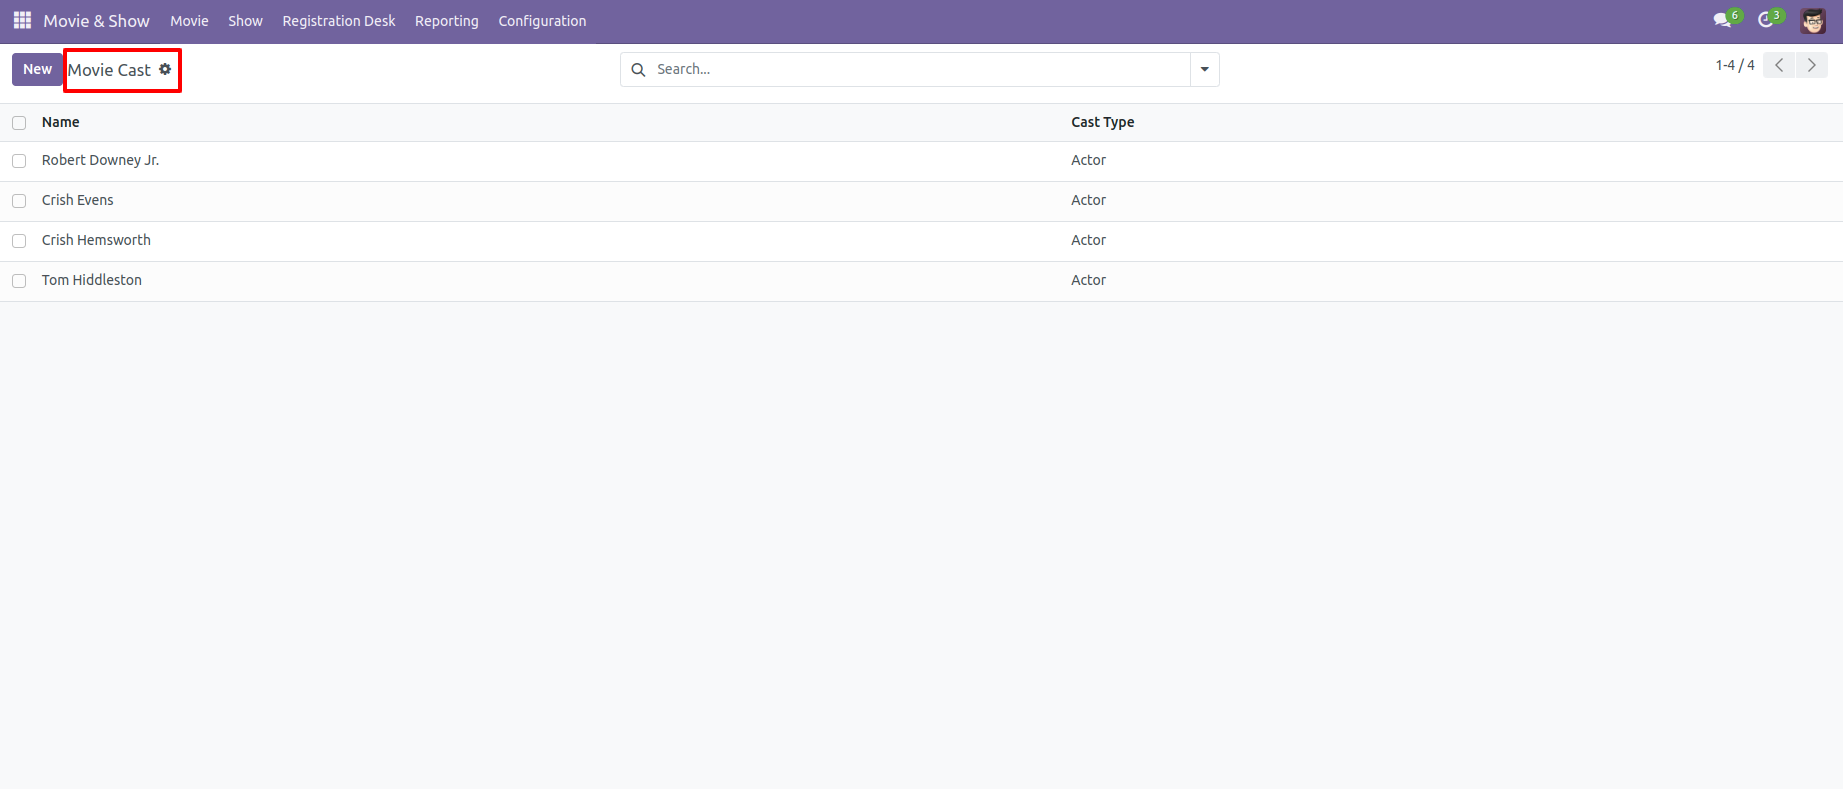
The movie cast form view.
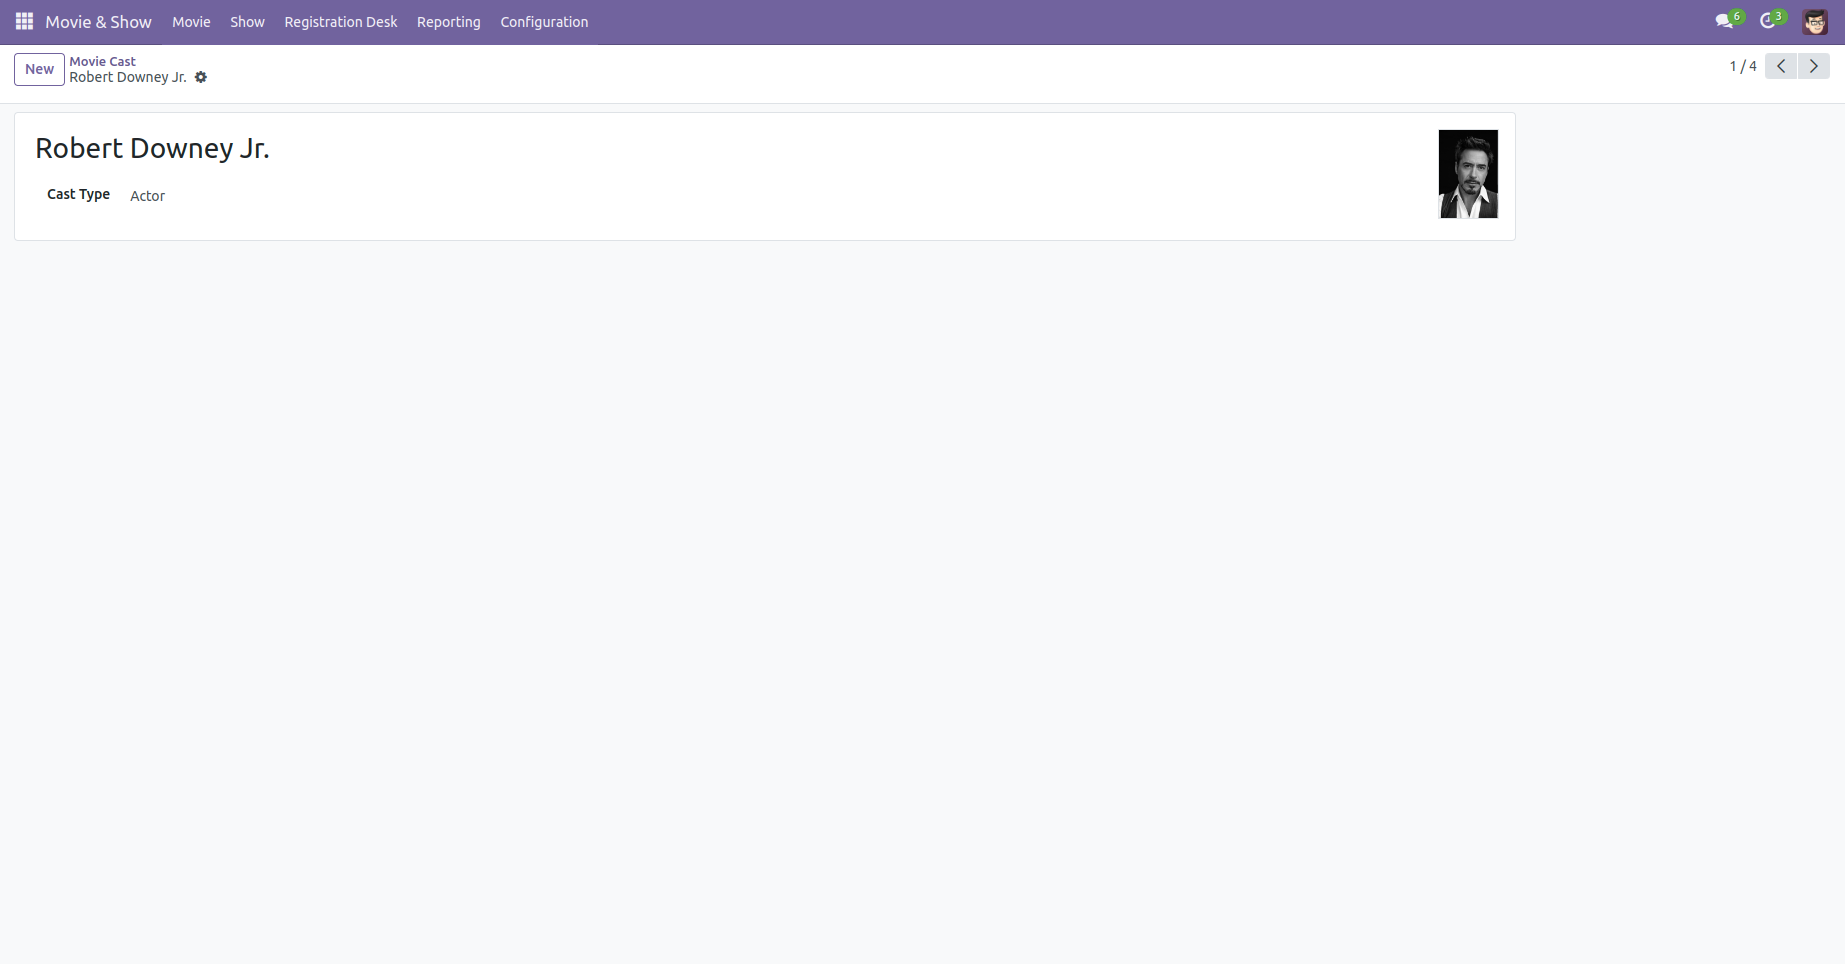
The movie cast type tree view, You can configure the movie cast type from here.
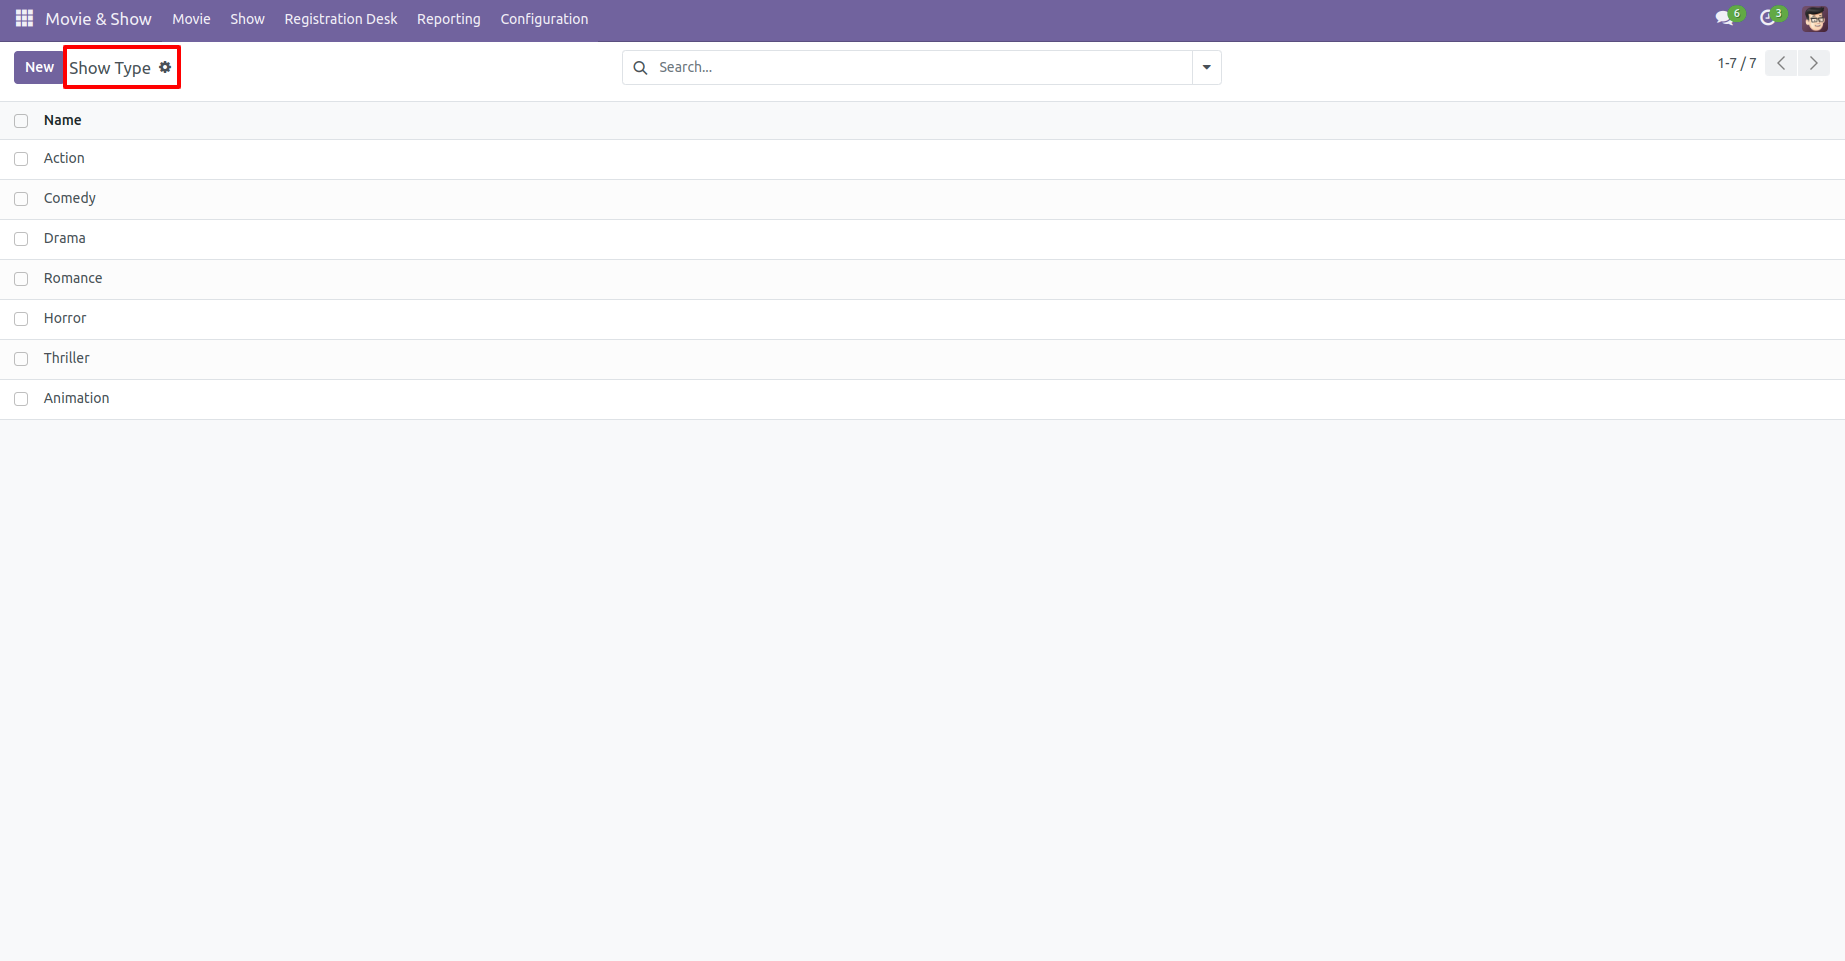
The movie show type tree view, You can configure the show type from here.
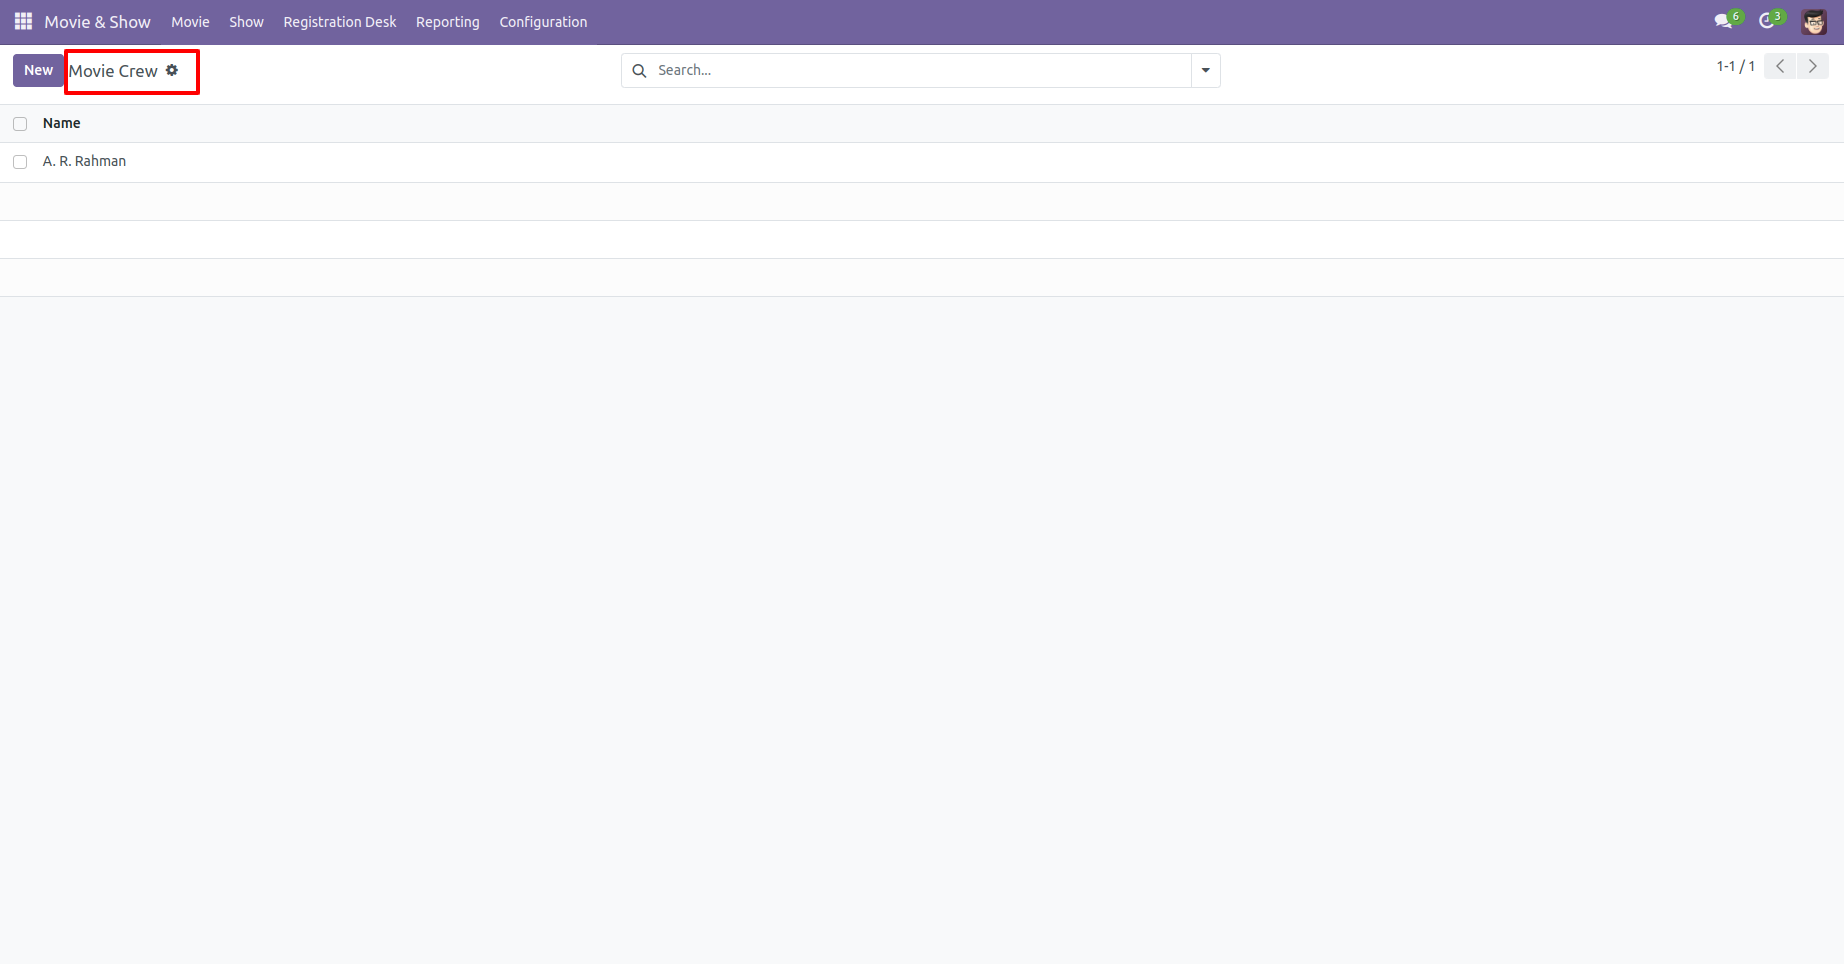
The movie crew tree view, You can configure the crew from here.
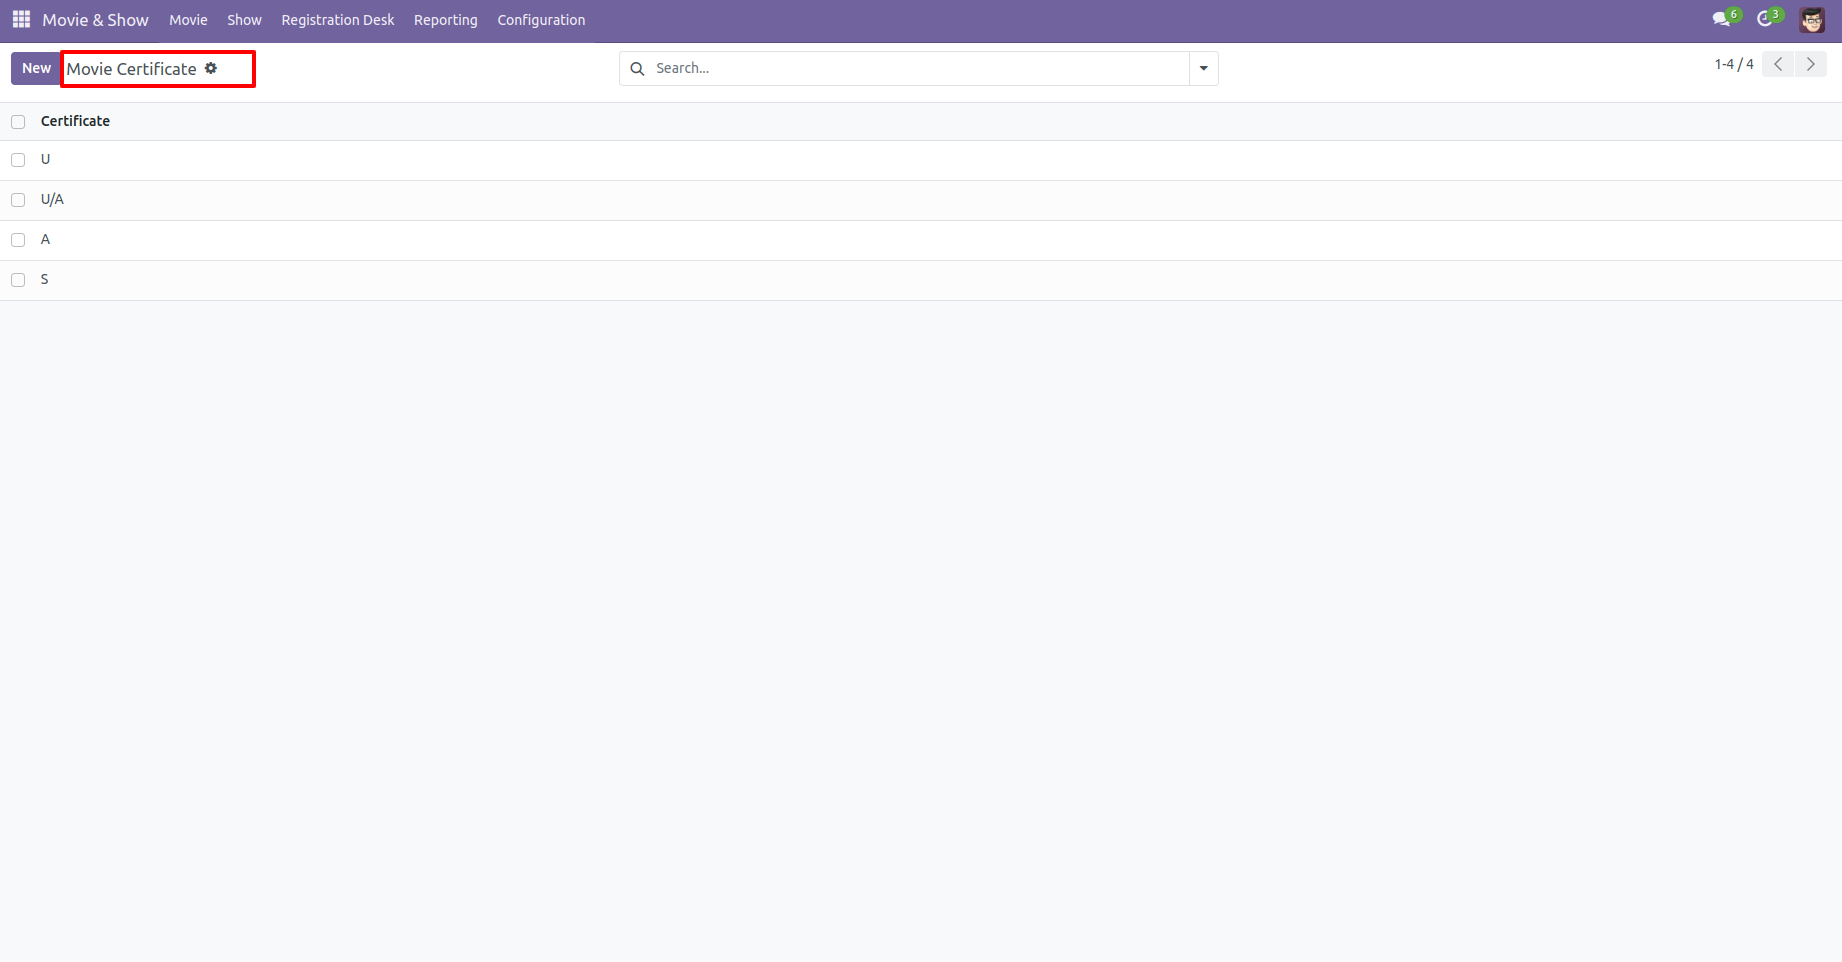
The movie certificate tree view, You can configure the movie certificate from here.
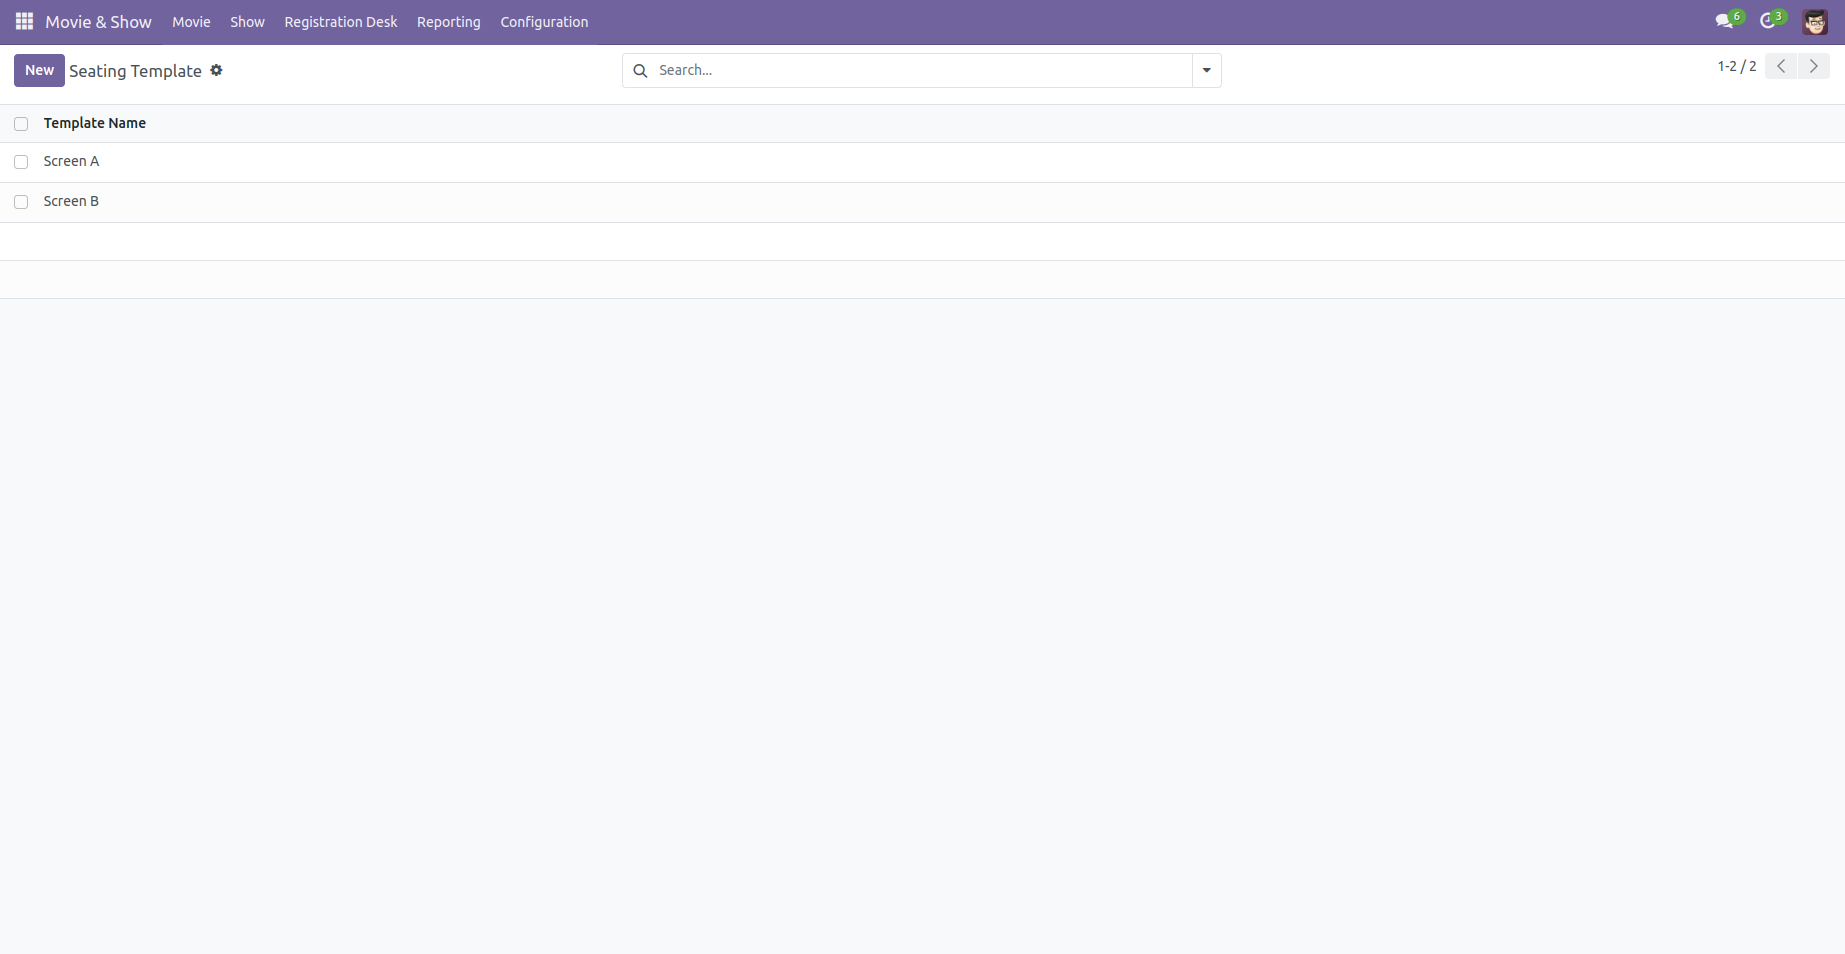
Seating templates tree view.
Seating templates form view, you can manage movie screens and seating arrangements from seating templates.
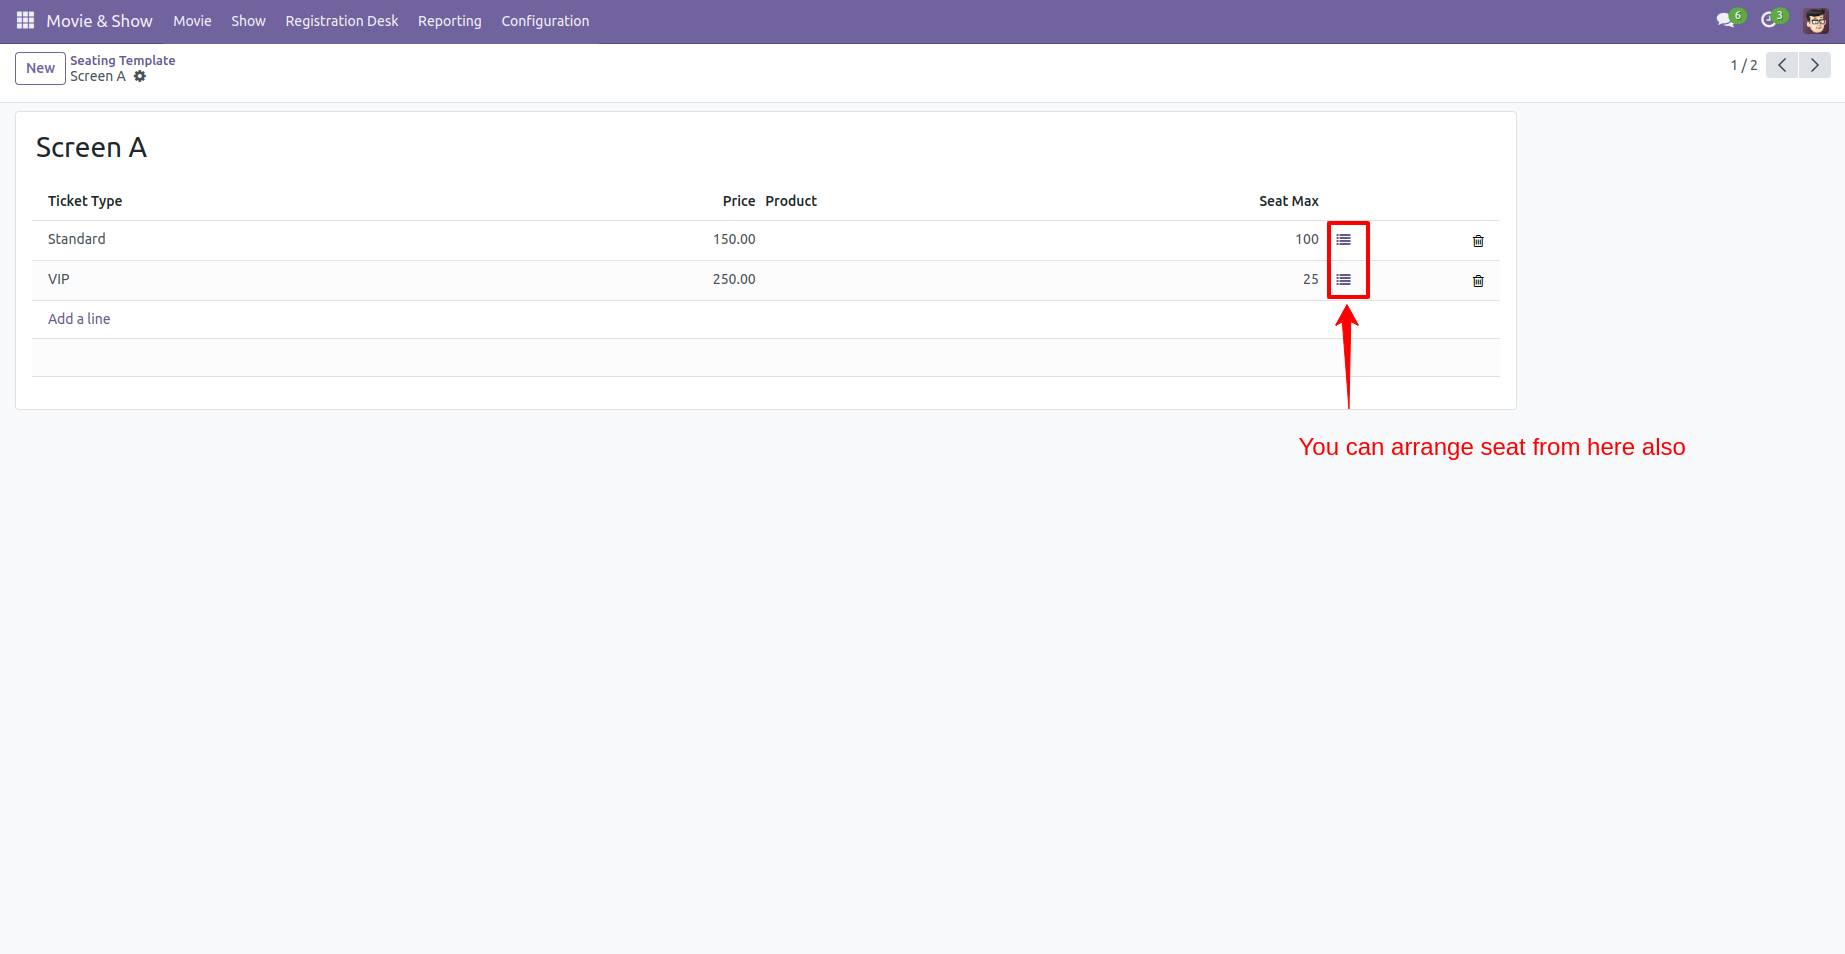
After pressing 'Open Seat Arrangement' this popup opens, You can manage seating from here.
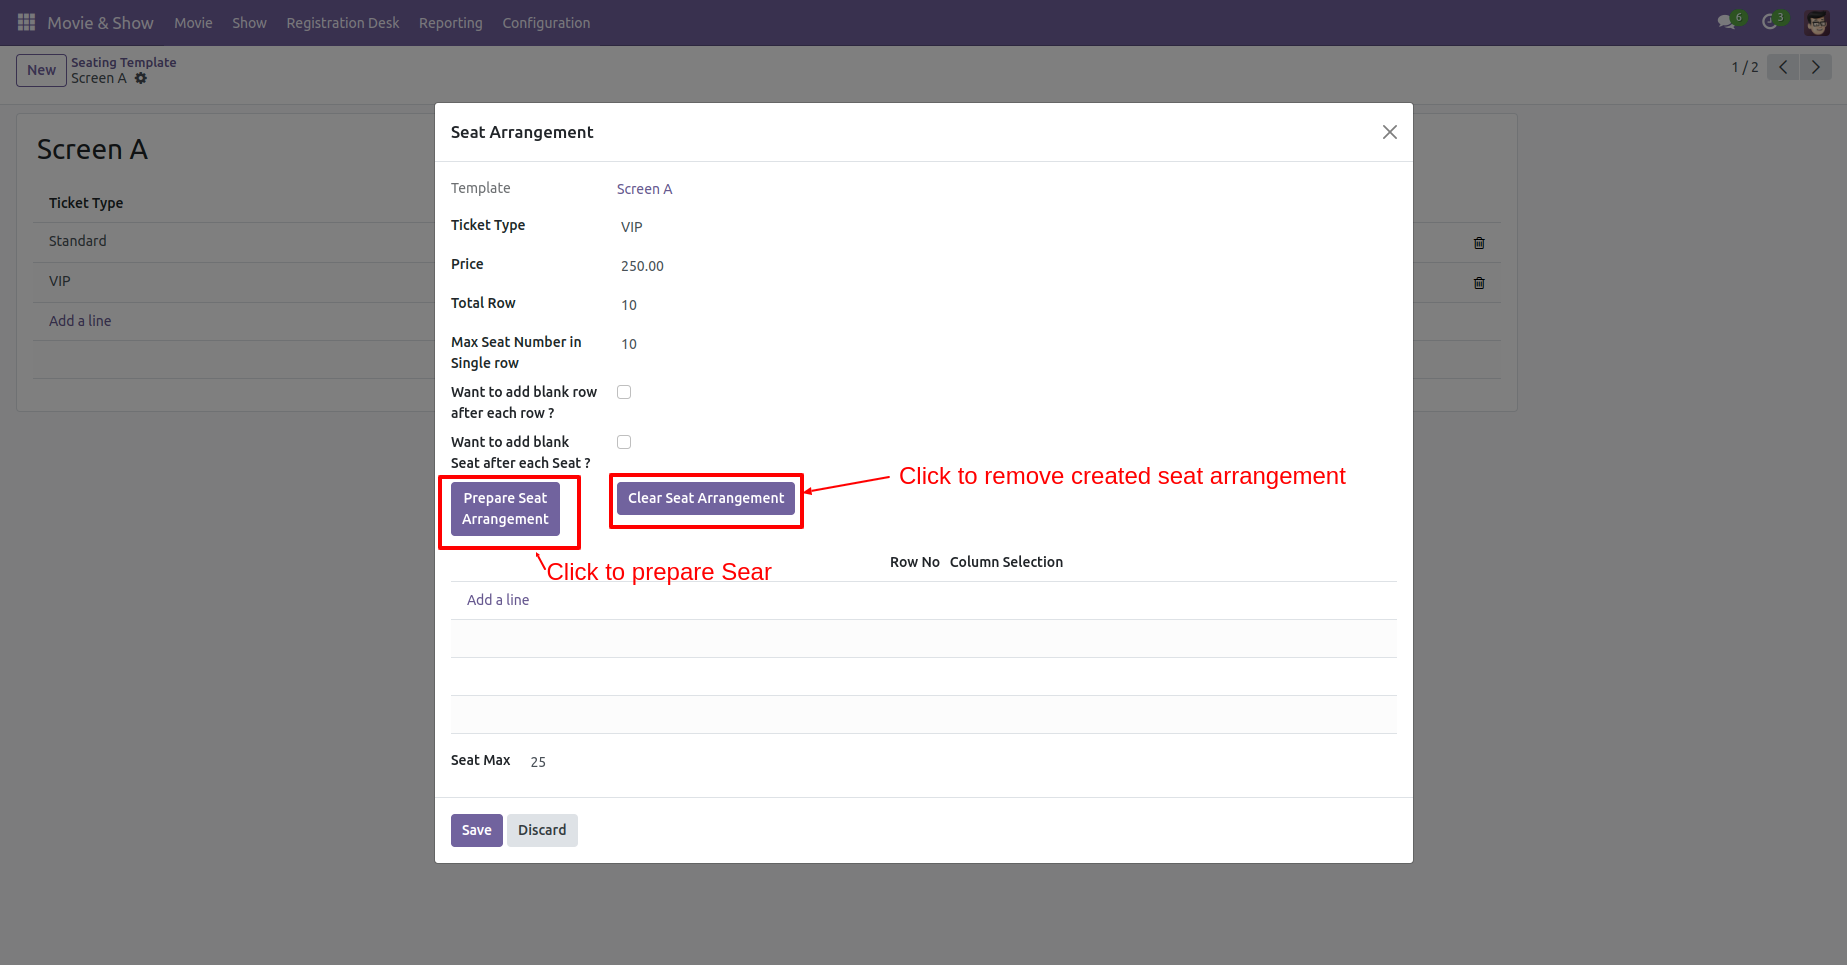
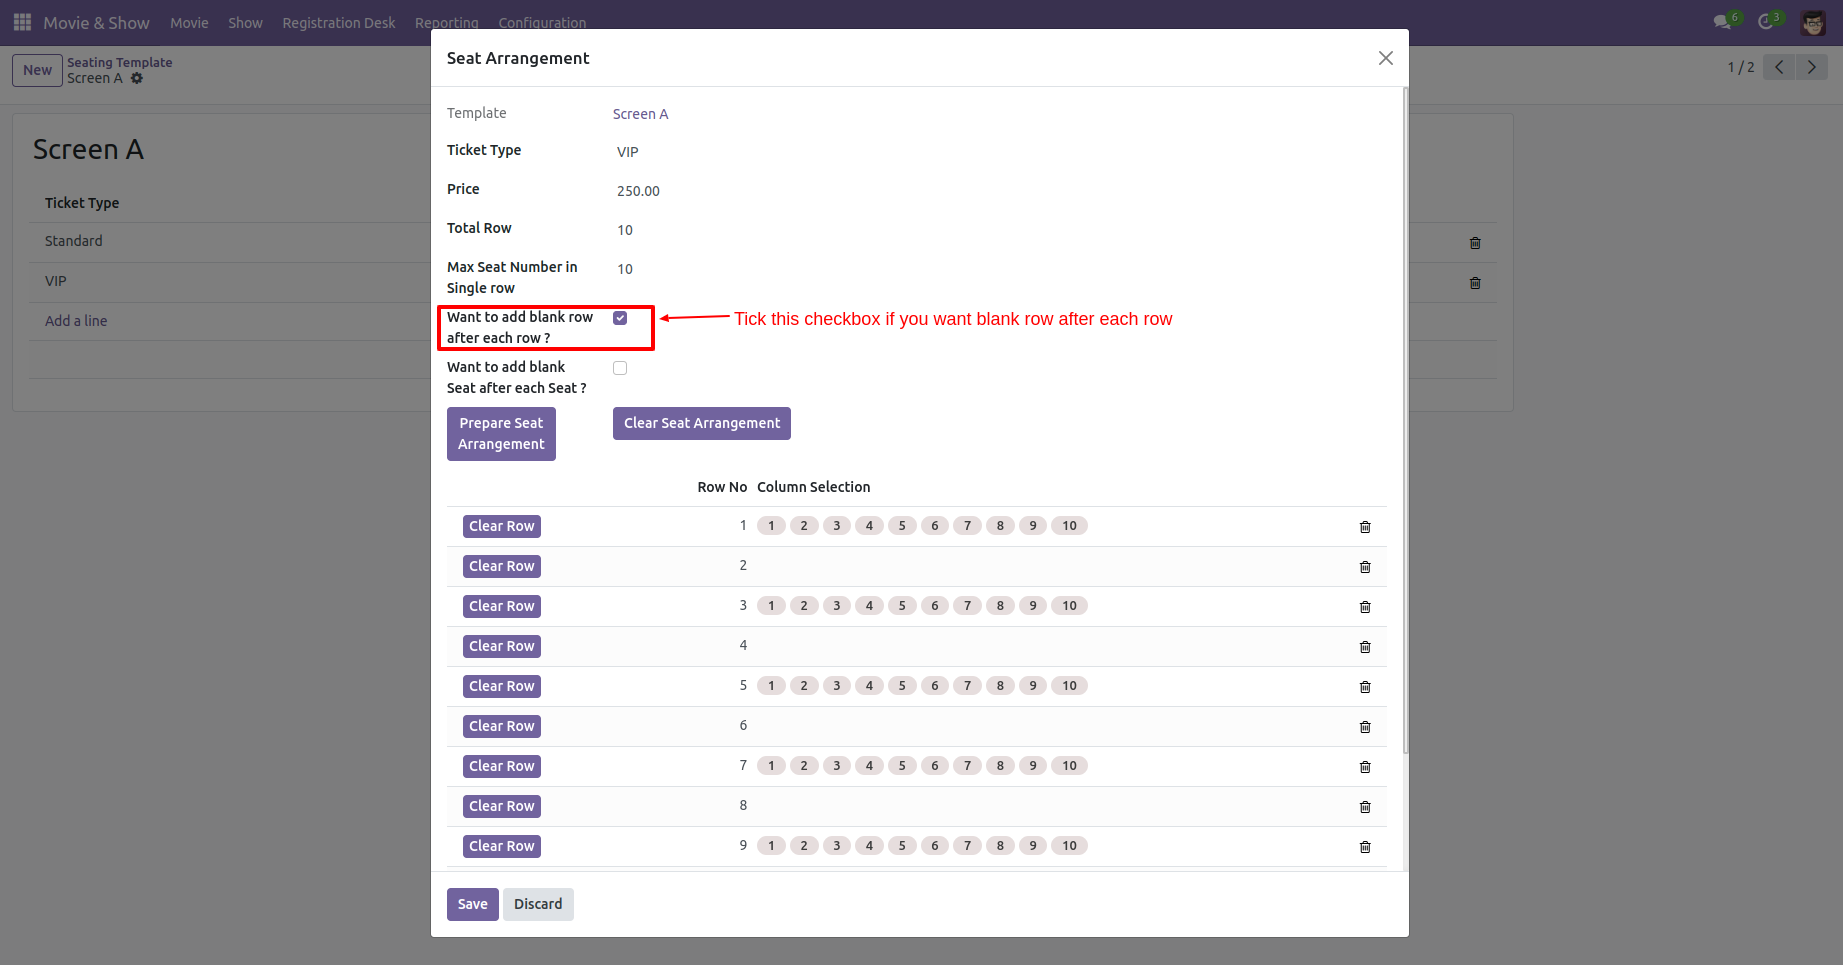
Fill the details and click 'Prepare Seat Arrangement'. You can add a blank row after each row.
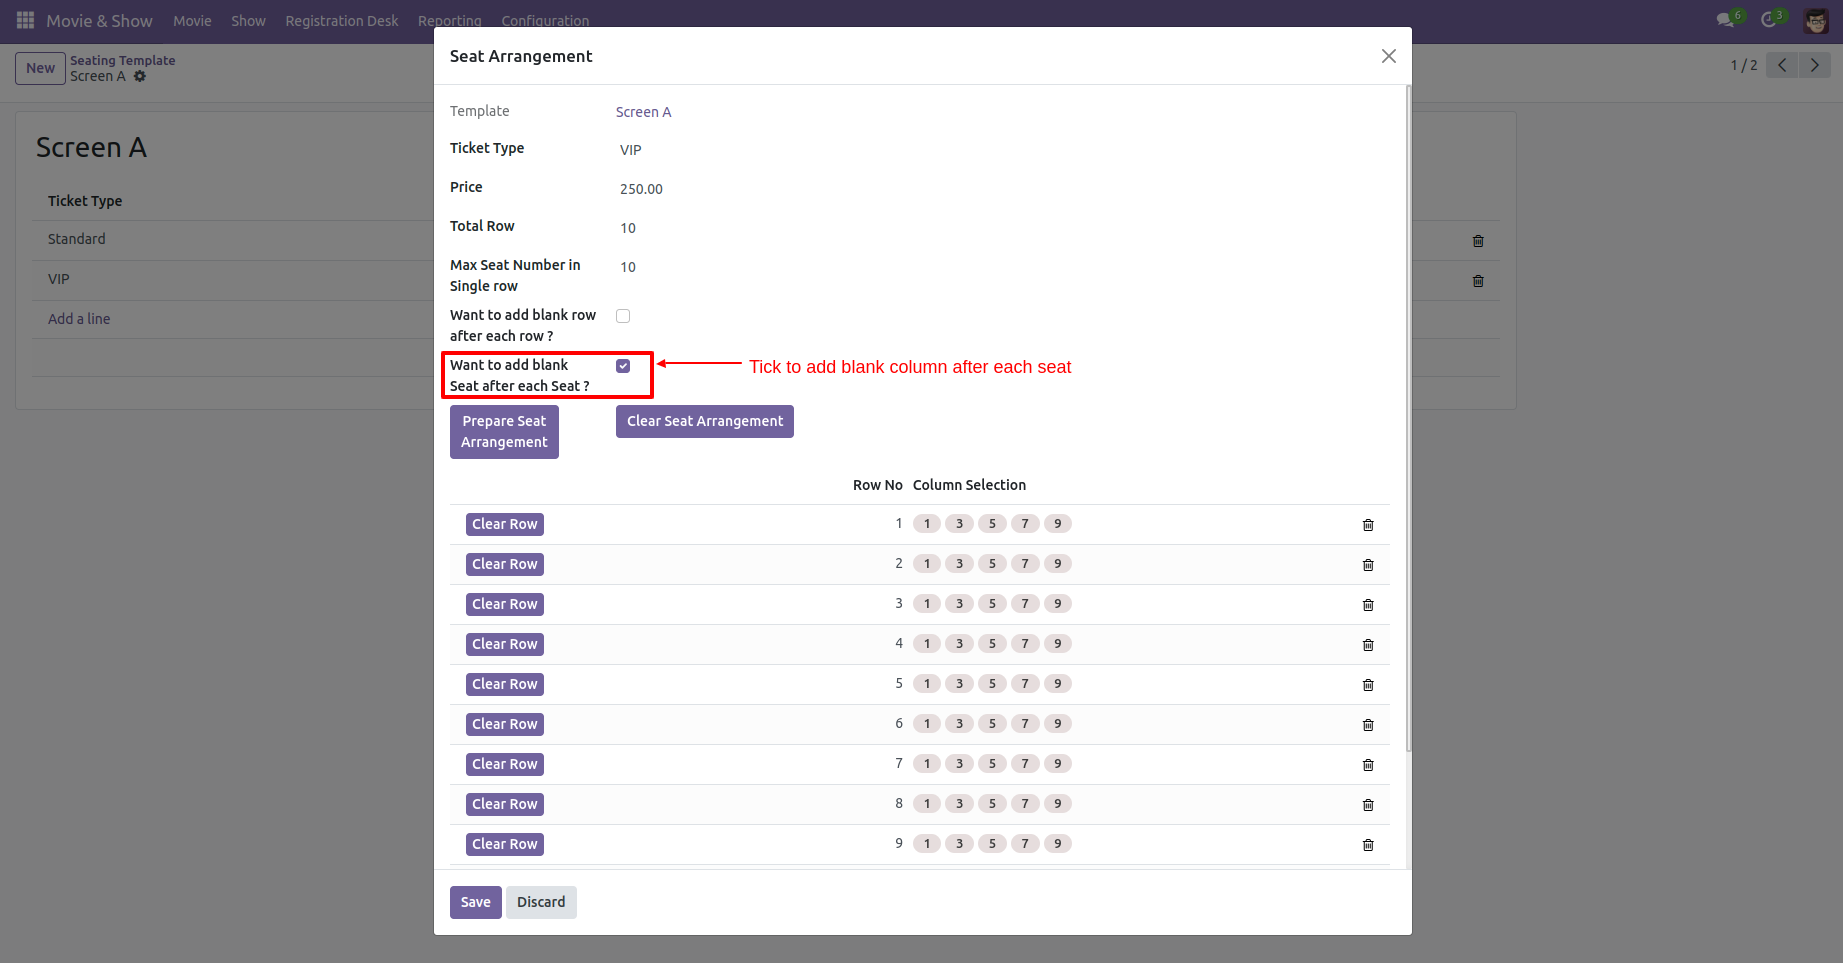
You can add a blank column after each seat.
You can add a blank row & column both after each row and seat.
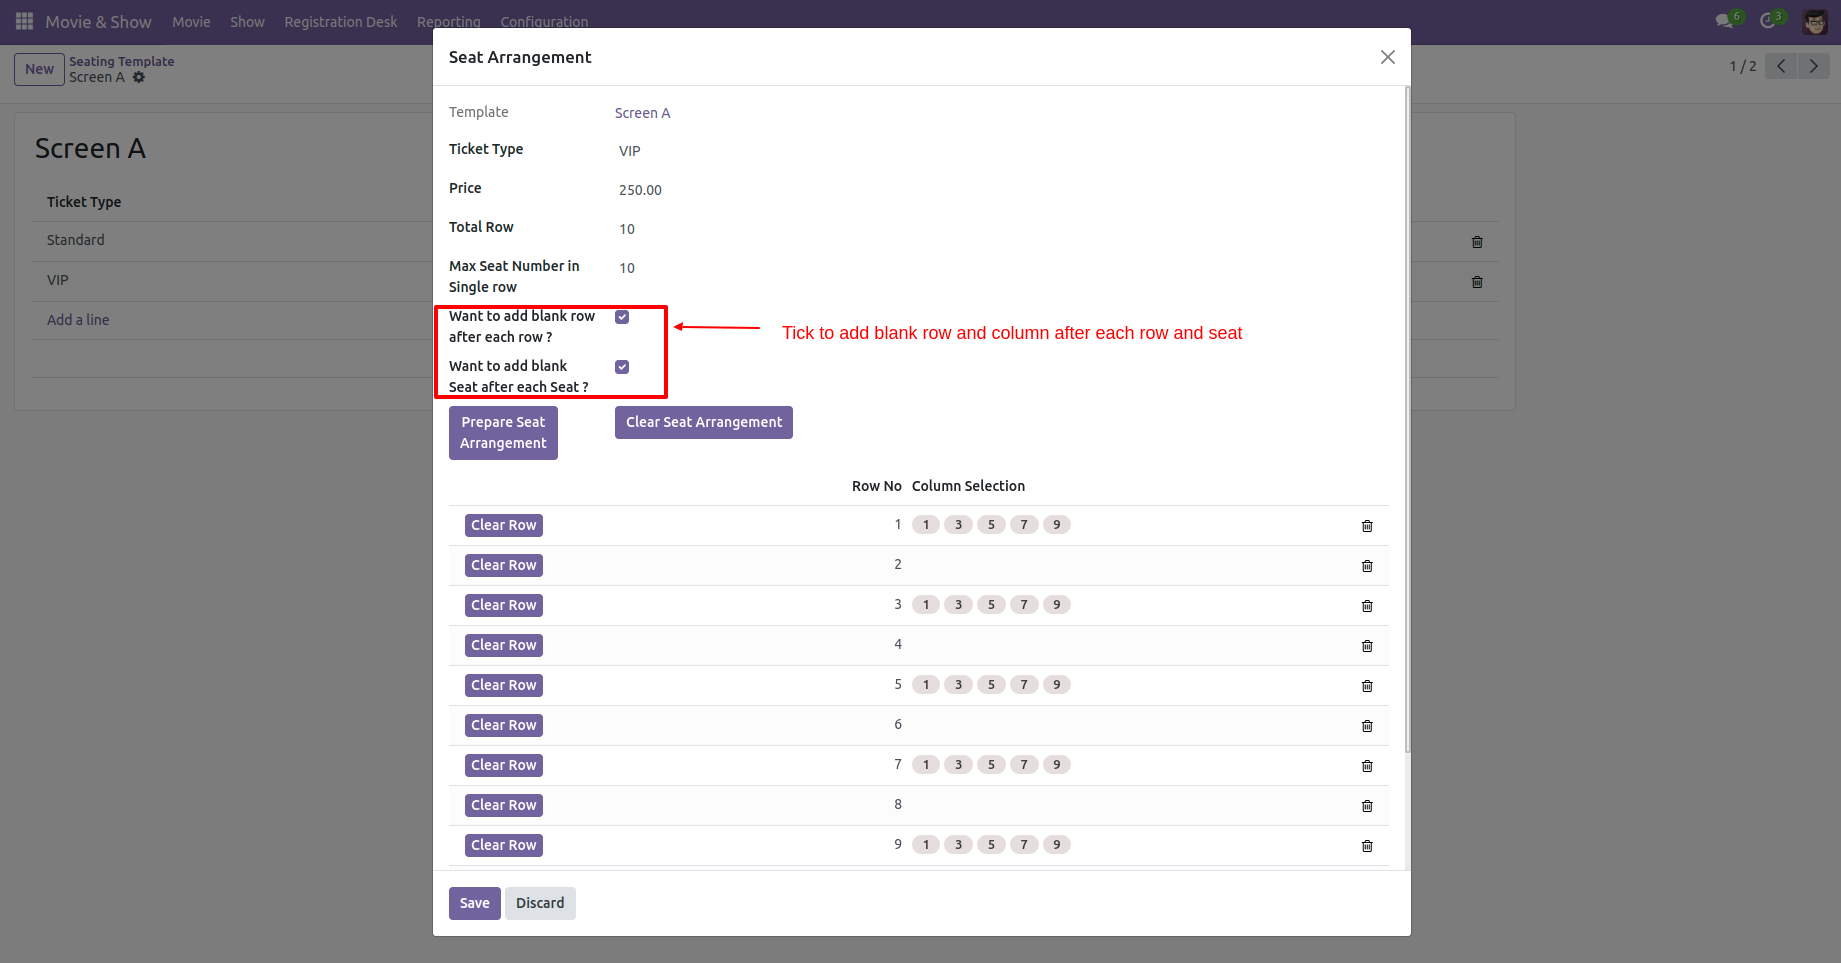
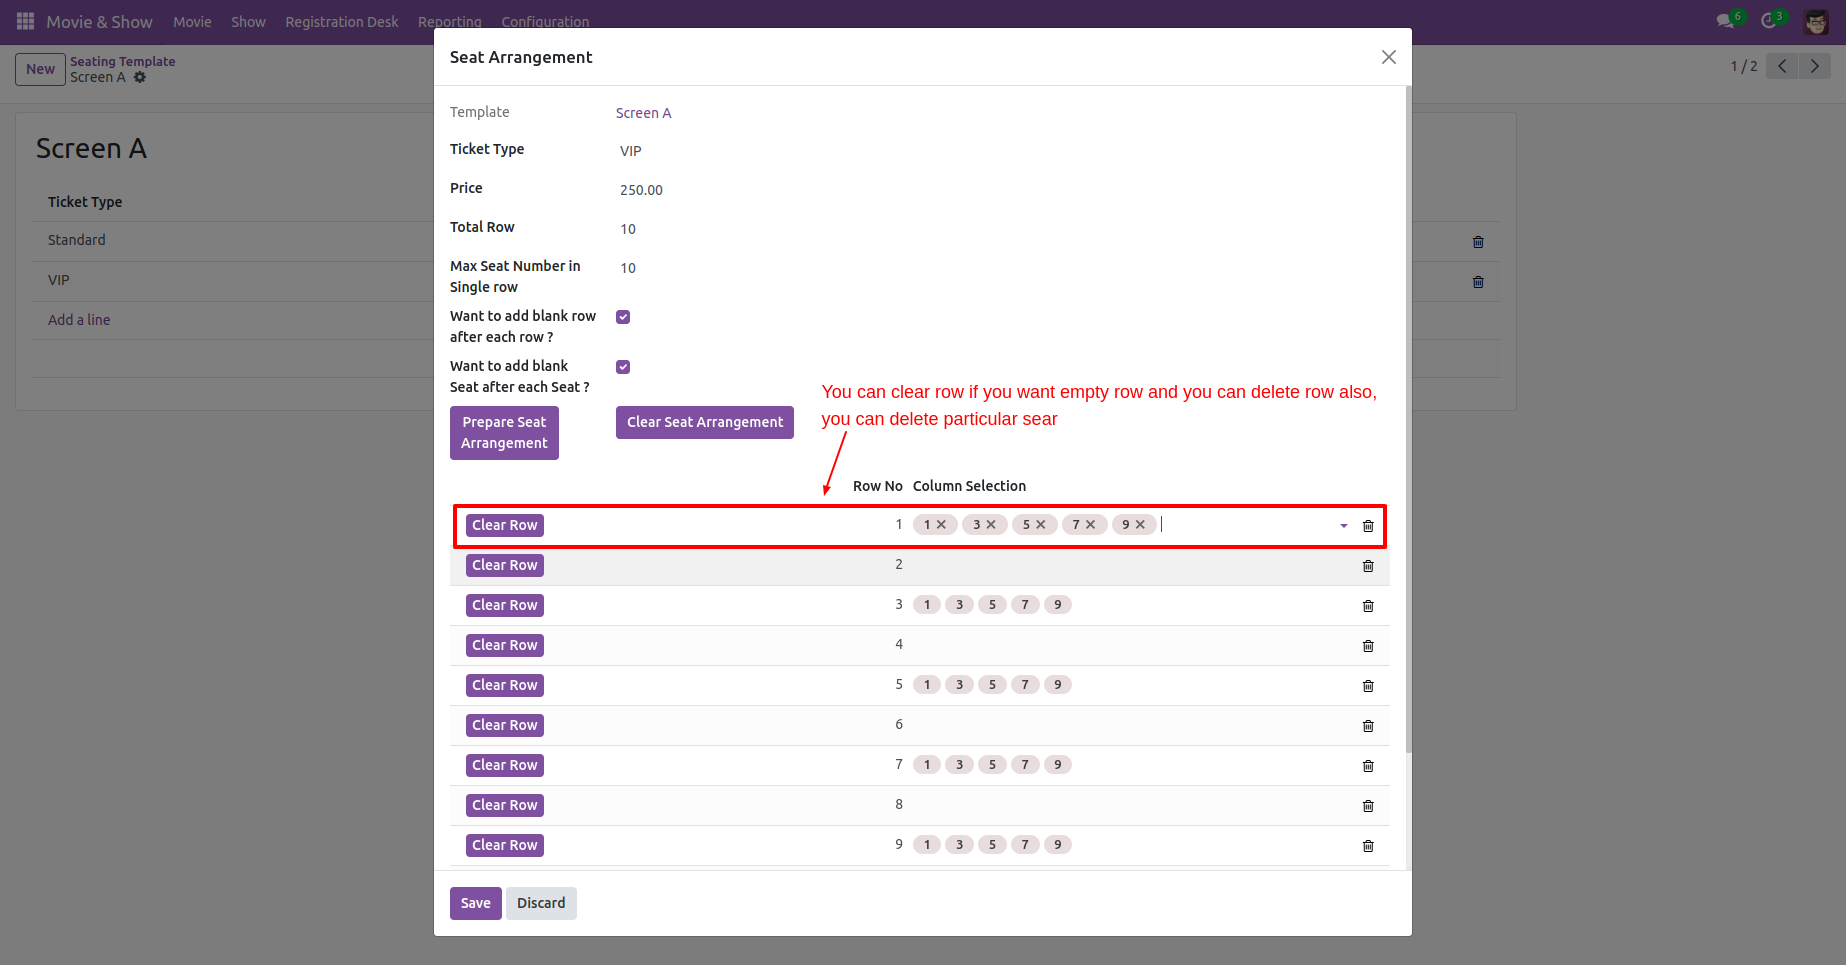
You can delete the particular row or seat.
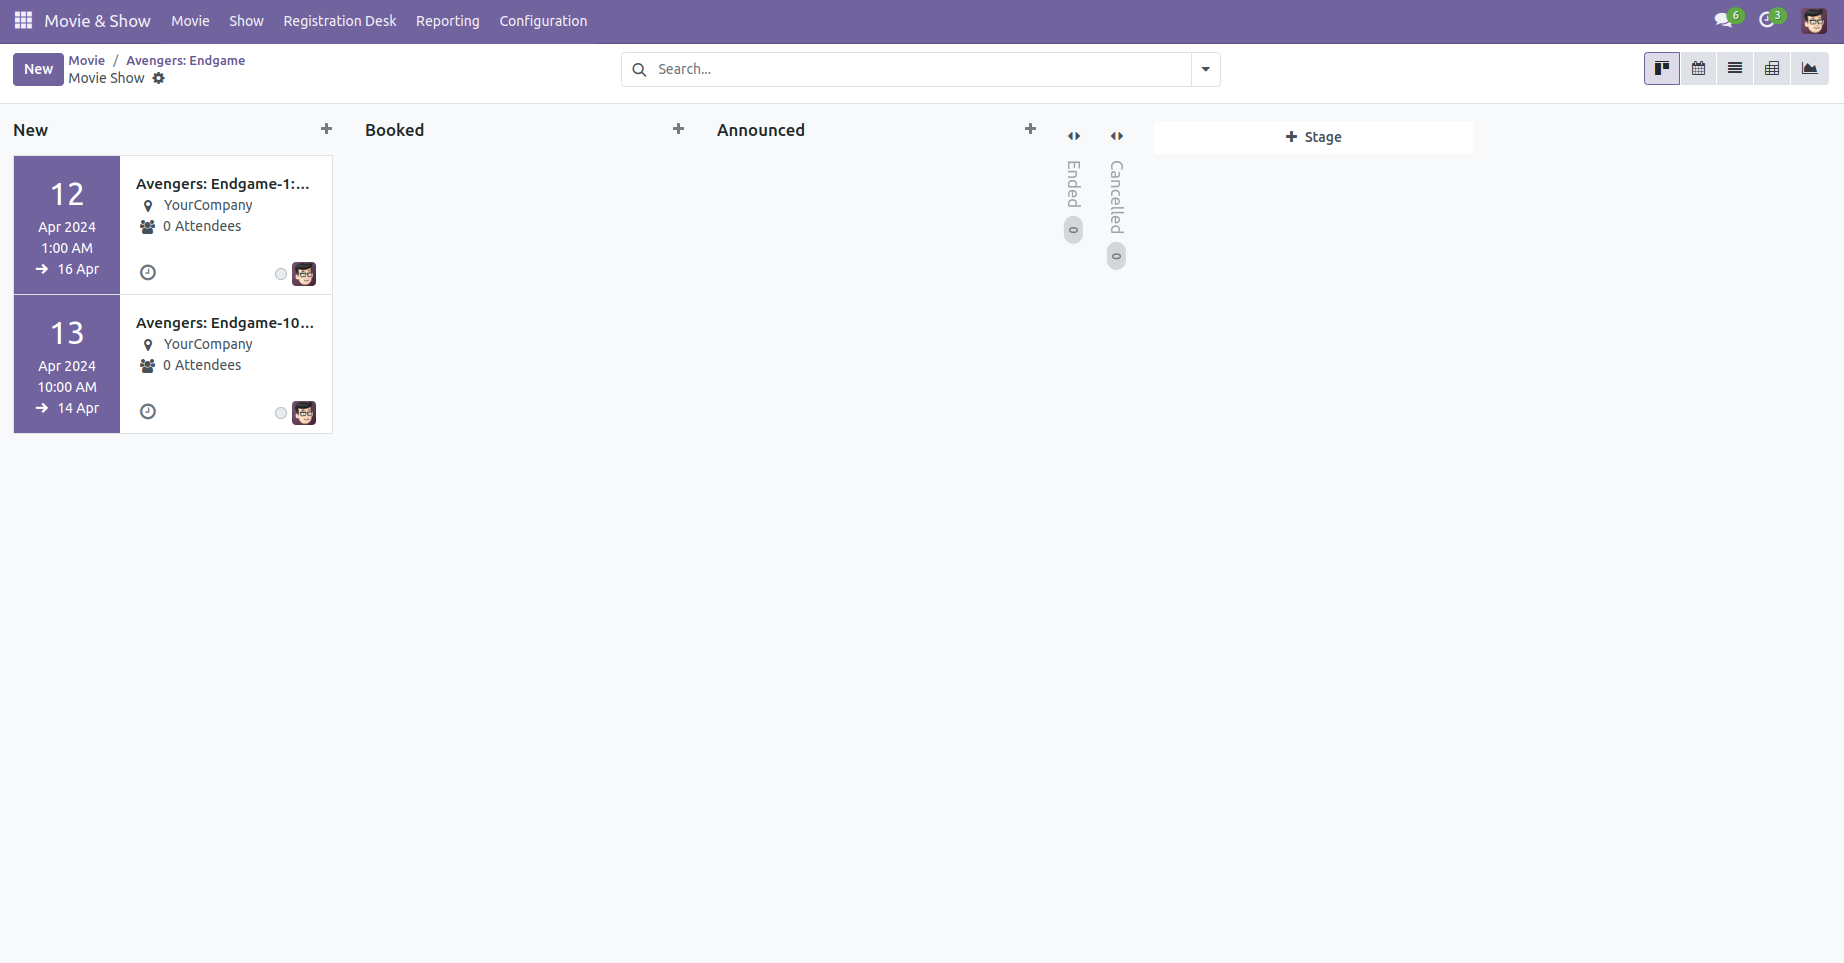
Movie & Show kanban view looks like this.
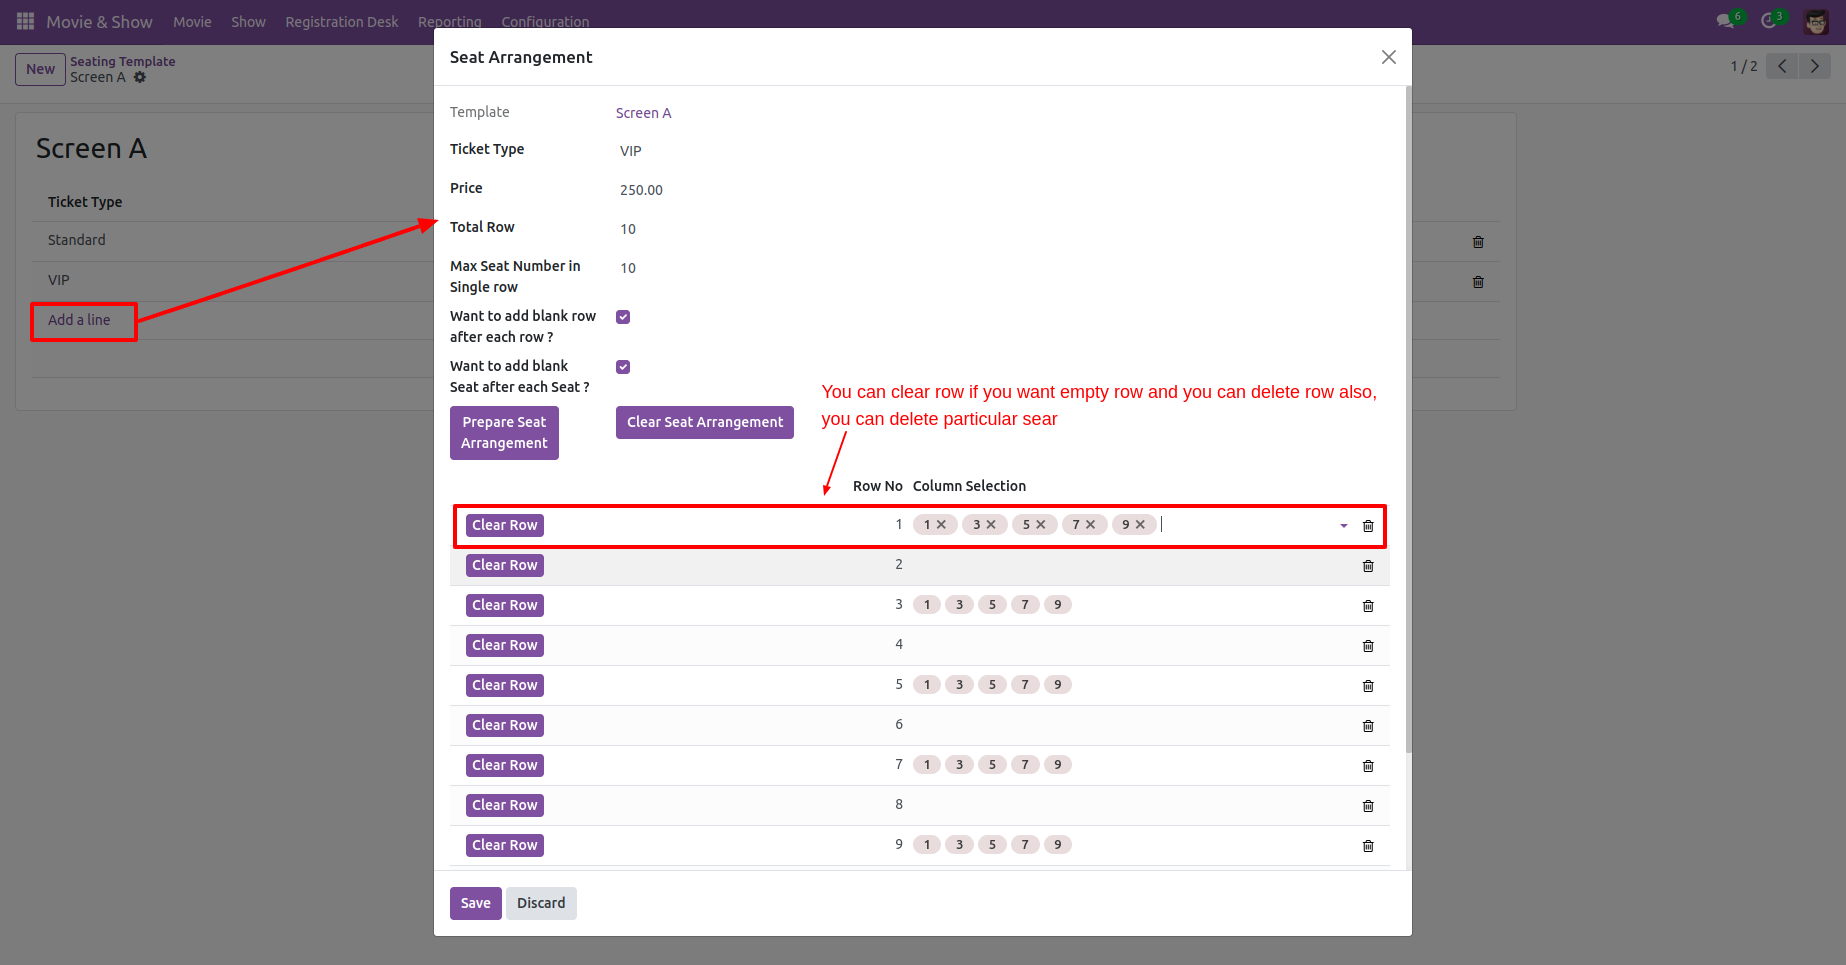
Seating template form view.
Click on the add a line. Set seating template and click on the 'Save' button.
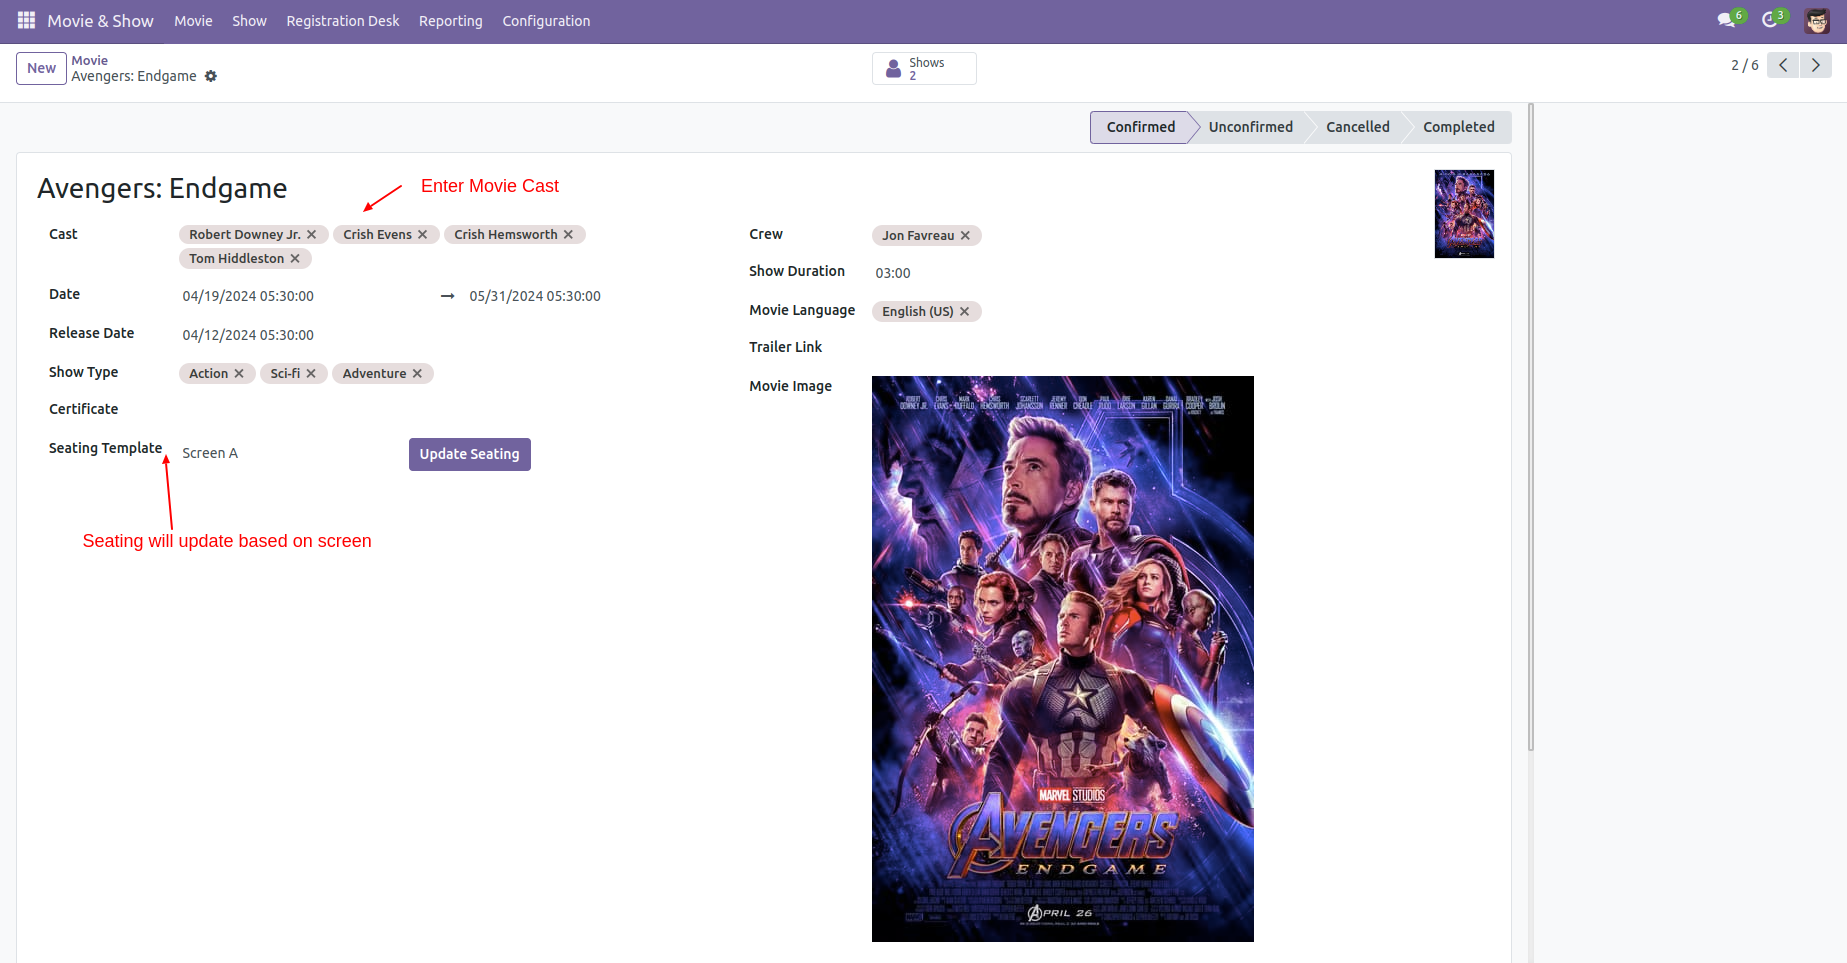
Movie form view looks like this, you can set movie cast, movie date, release date, show type, certificate, crew, duration, movie language, trailer link, movie image & seating template. You can update seating as per seating templates from here.
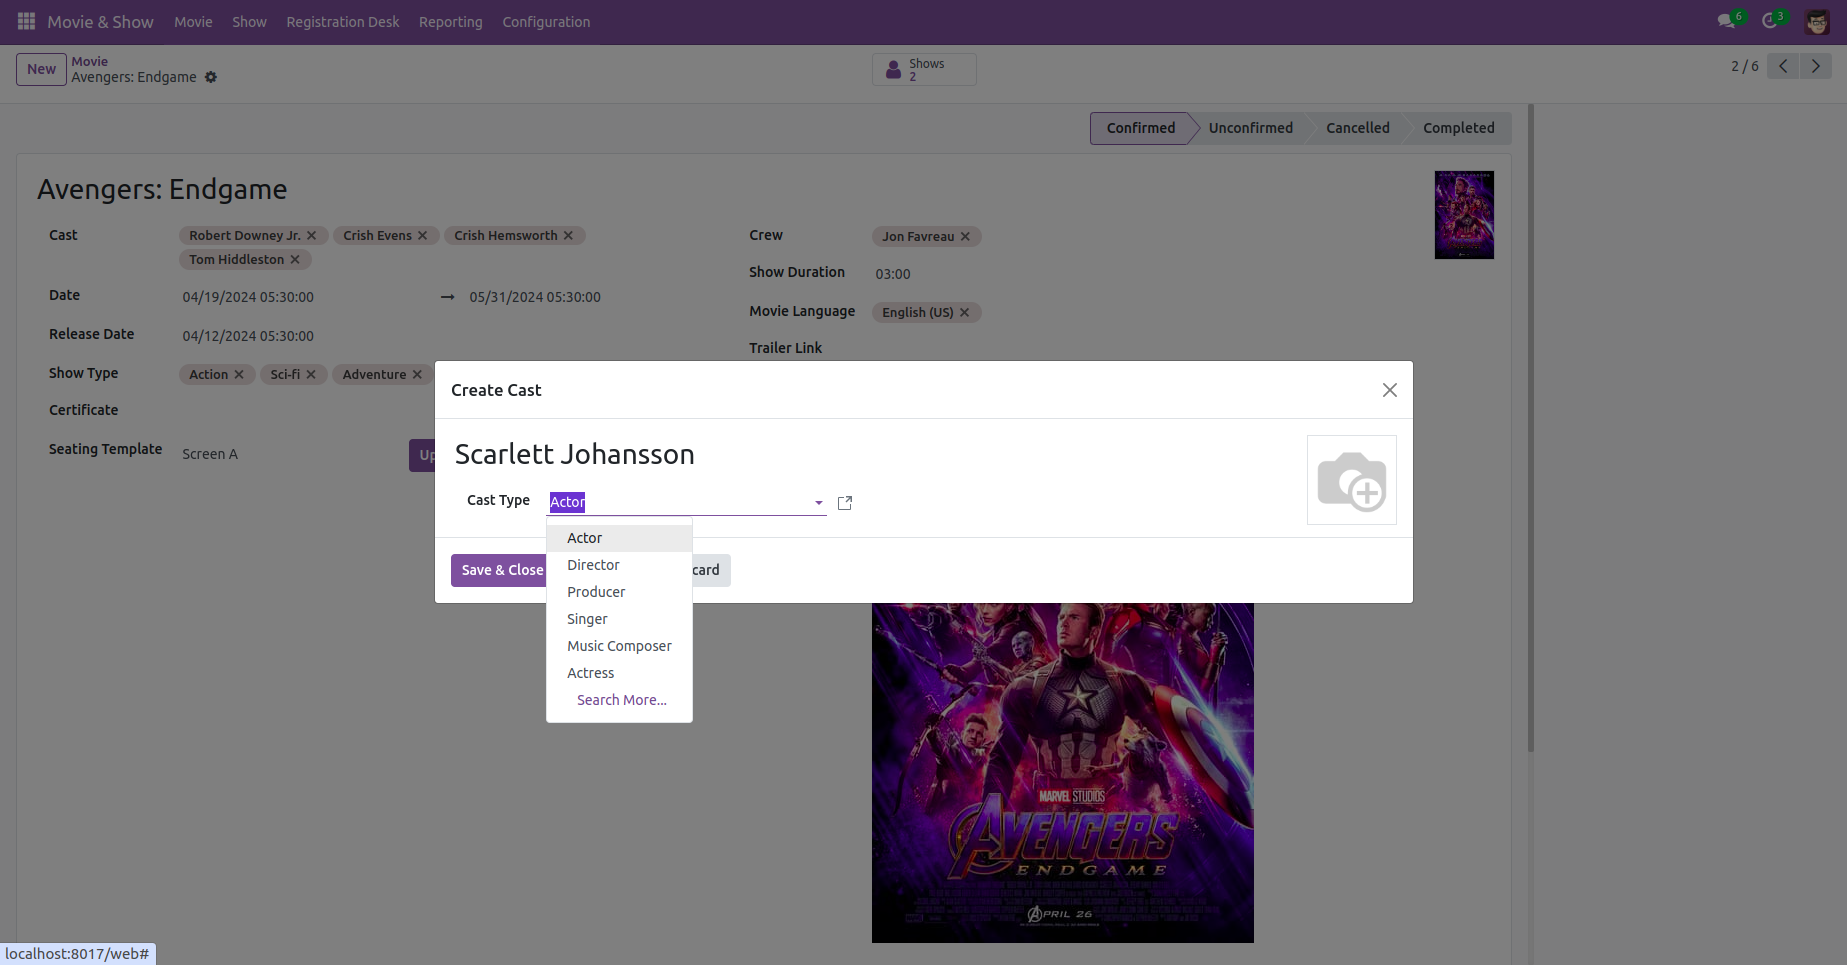
You can create a movie cast from the movie form view also.
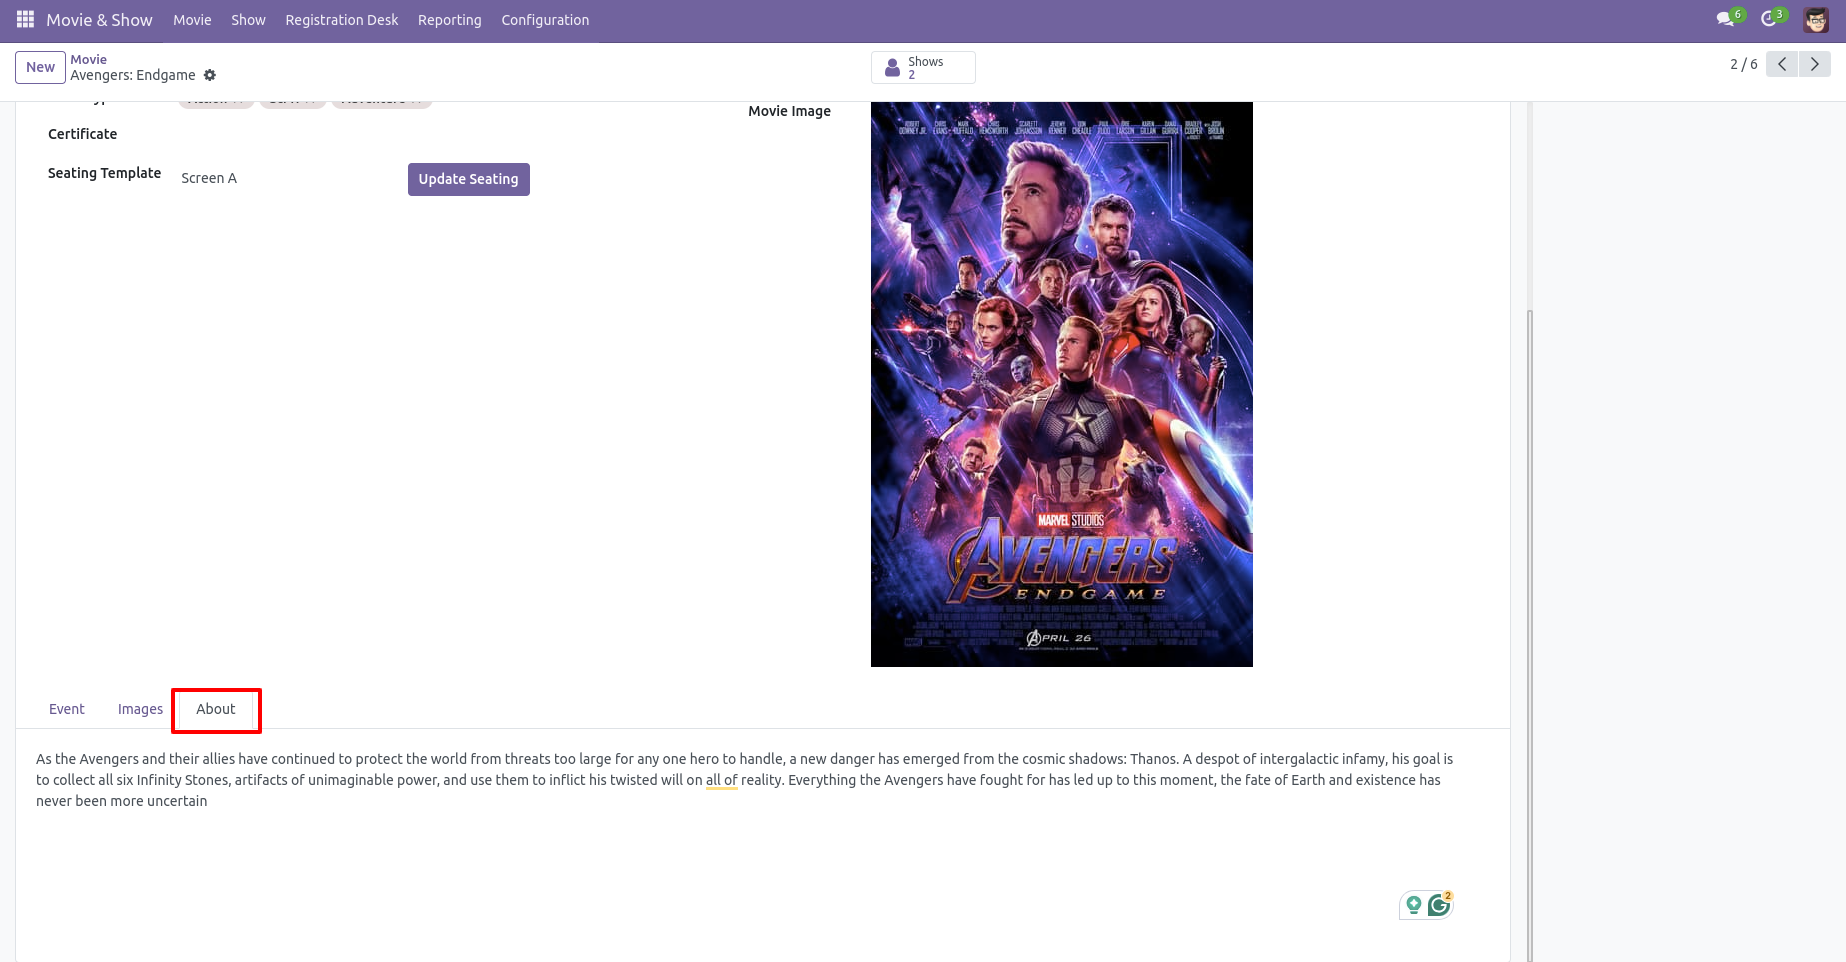
You can write about a movie from the about tab.
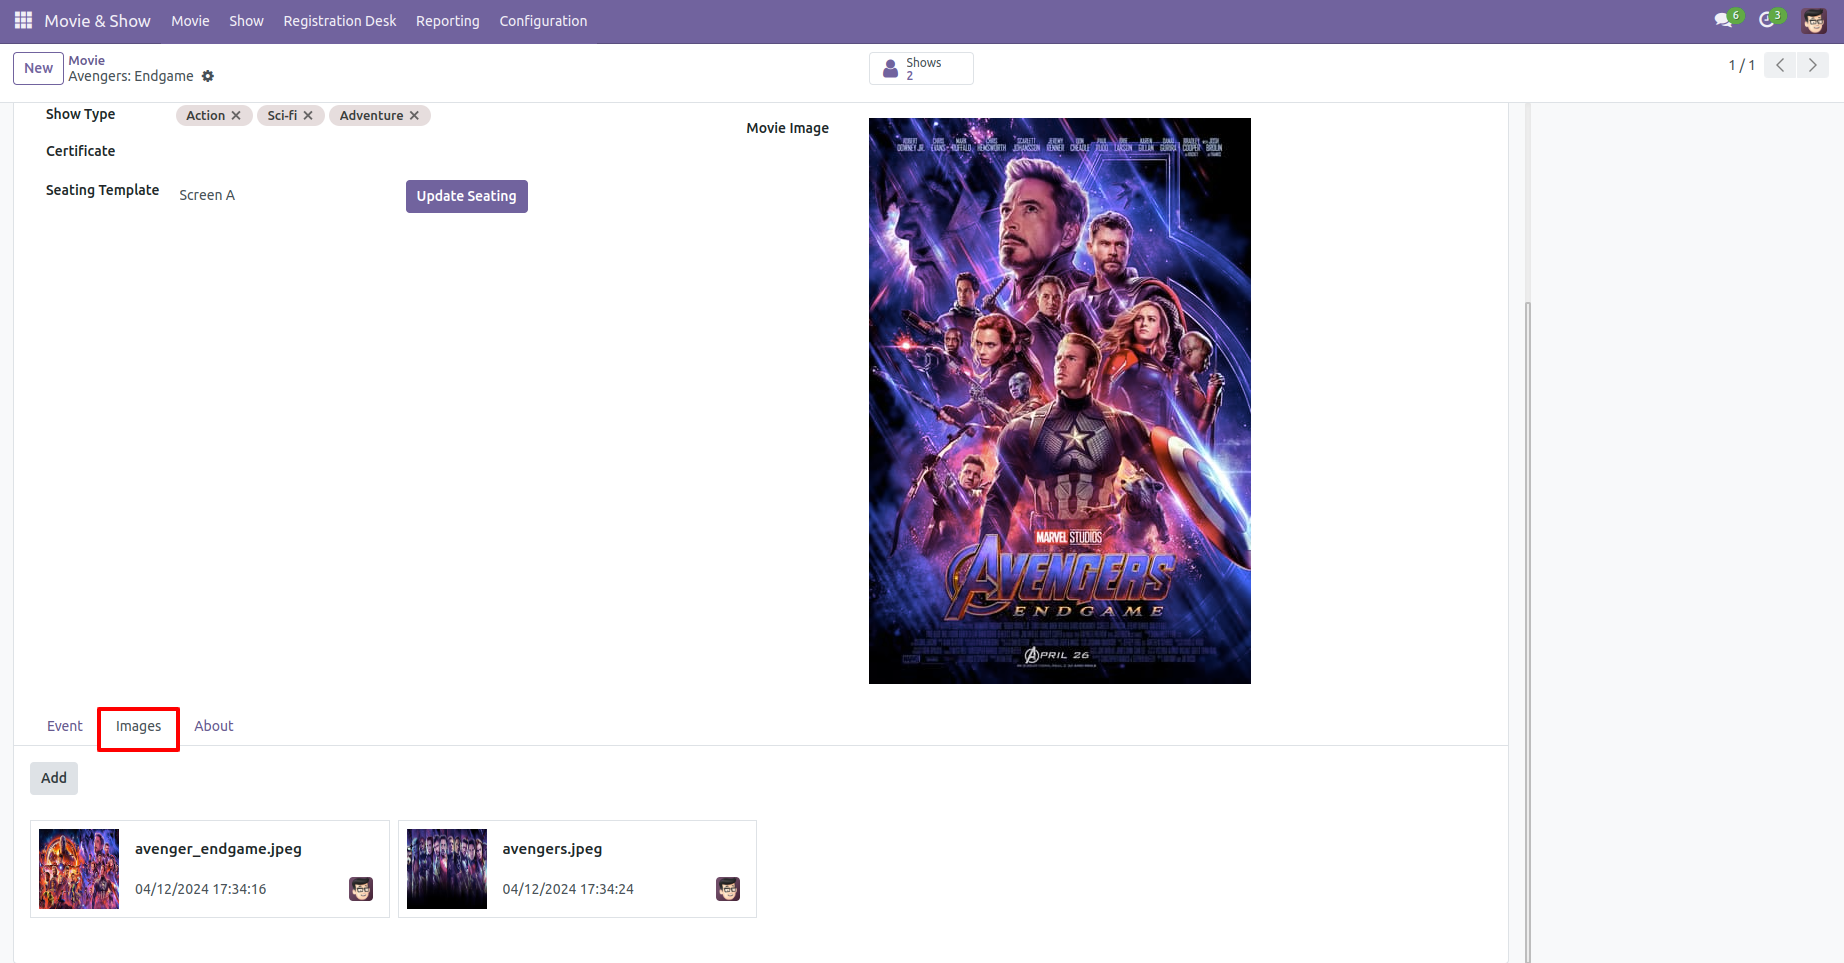
You can add movie images from the images tab.
You can arrange a movie show with a seating arrangement from the event tab.
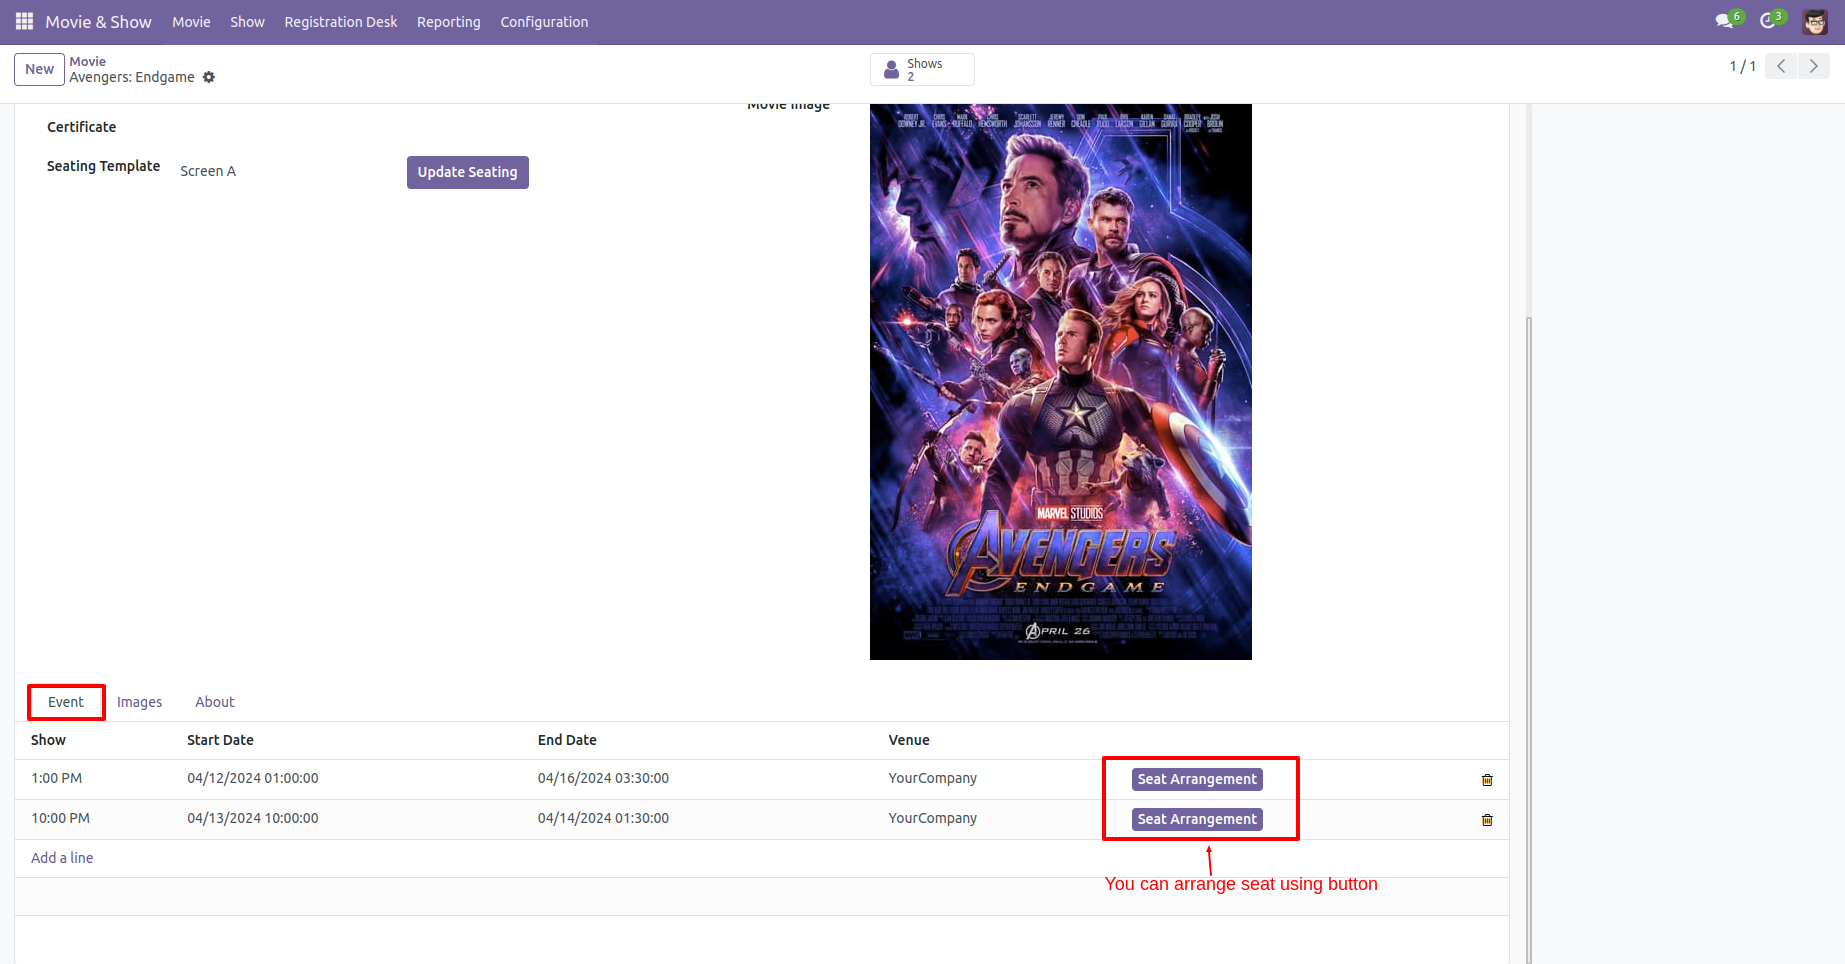
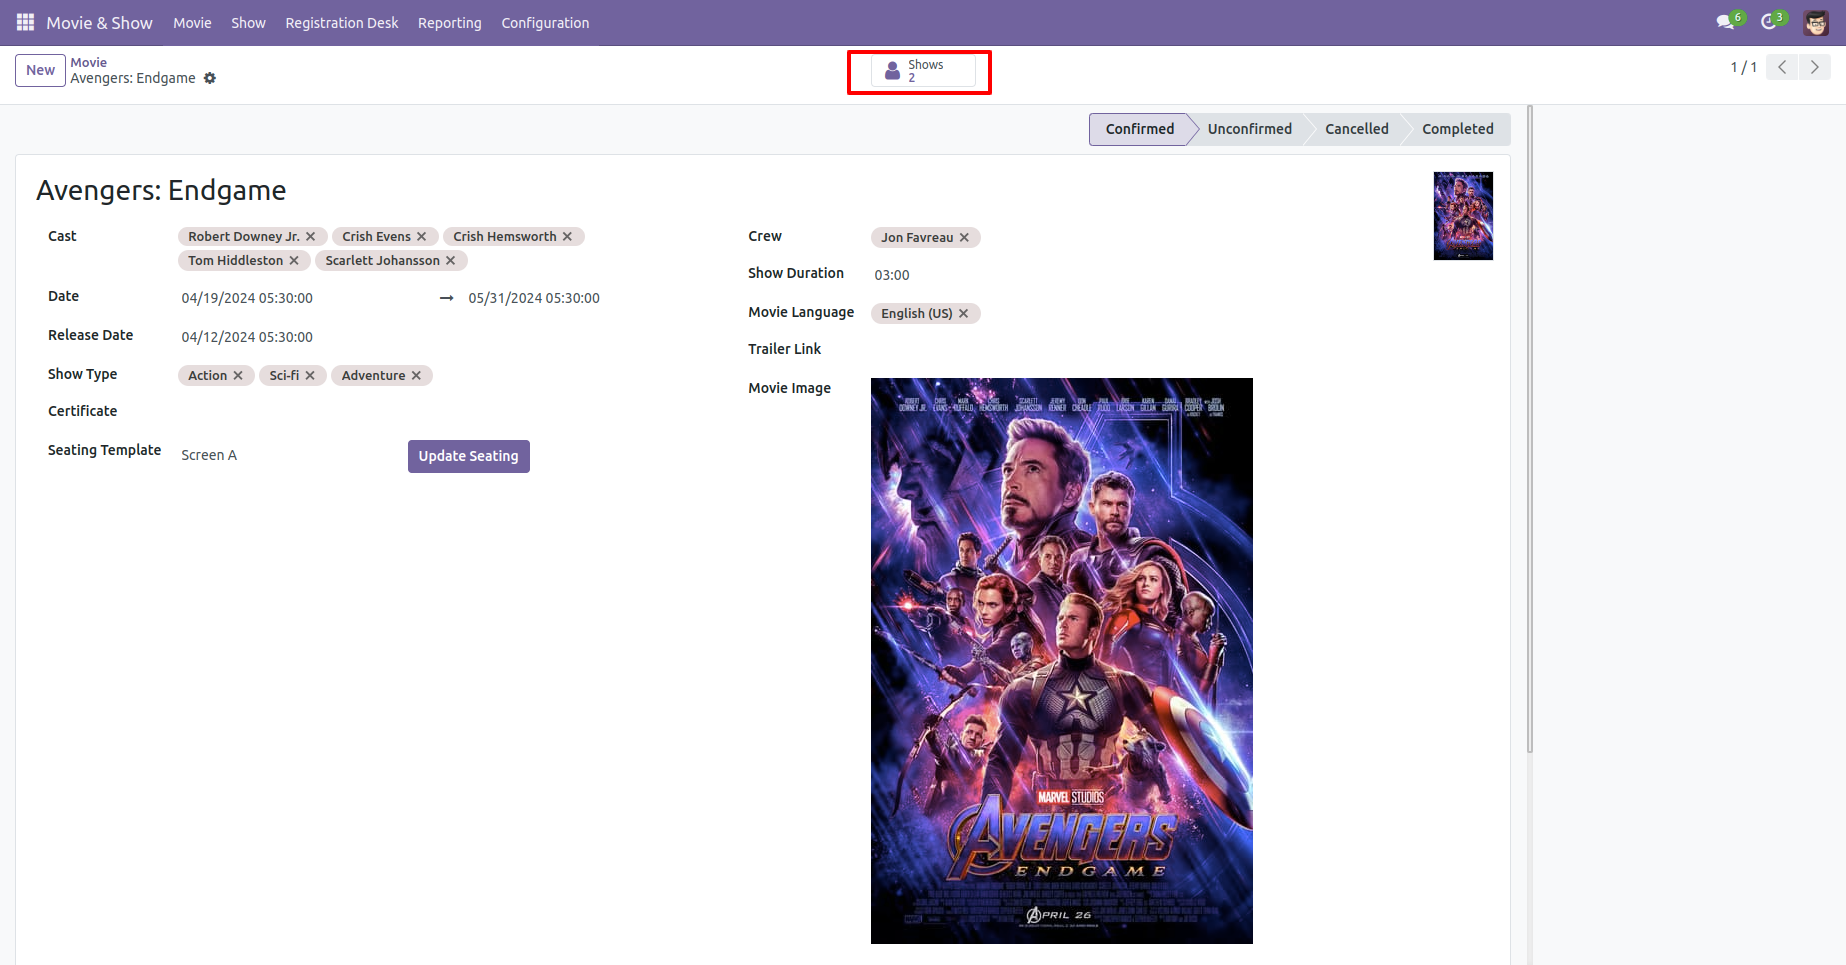
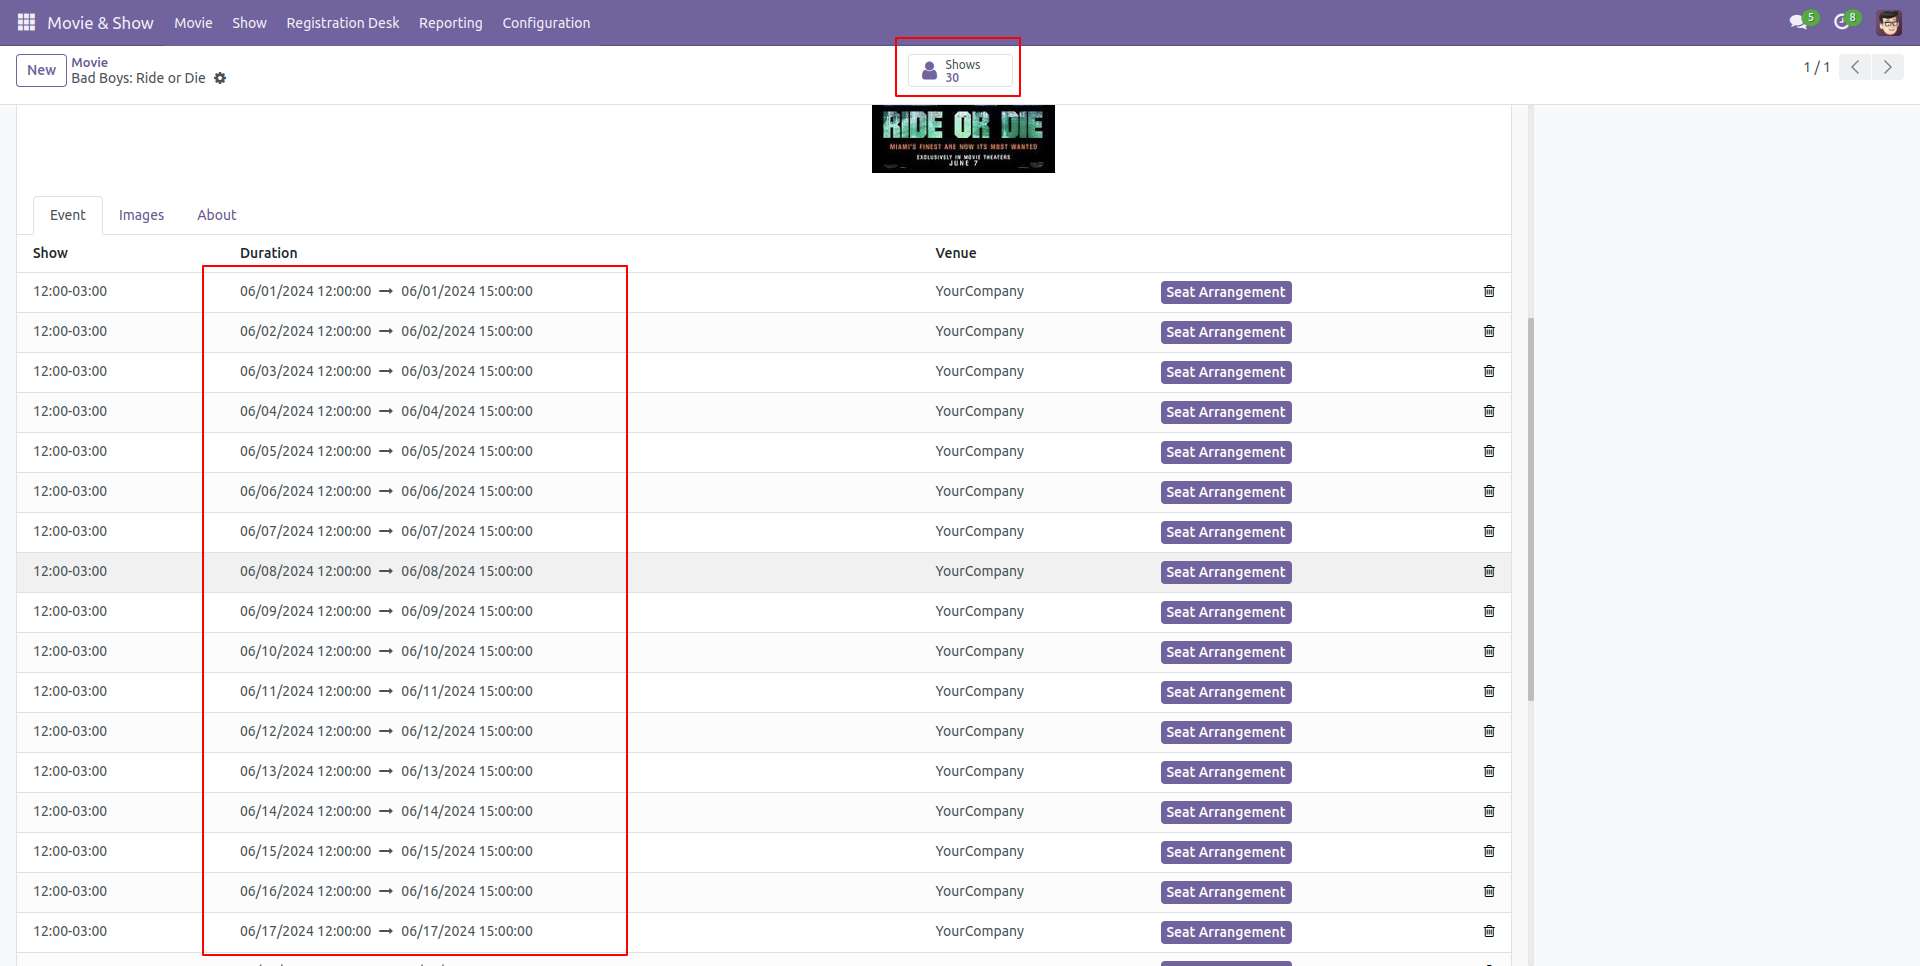
You can see total movie shows from the 'Shows' smart button.
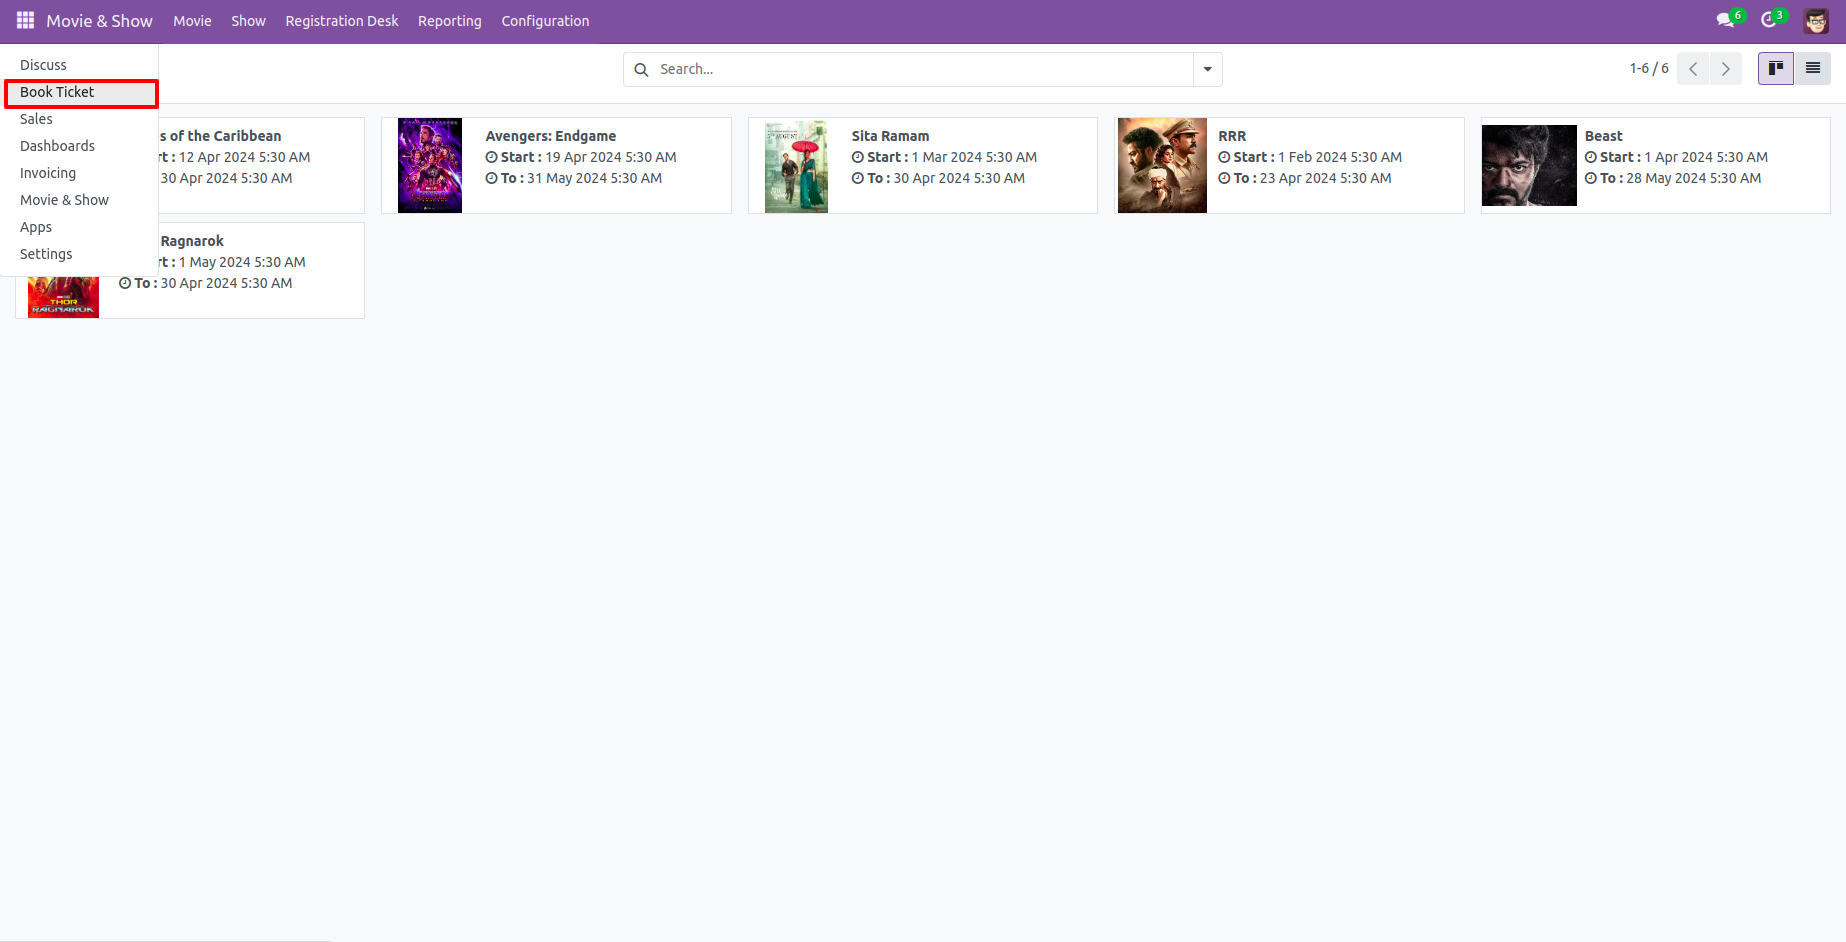
Click on the 'Book Ticket' menu.
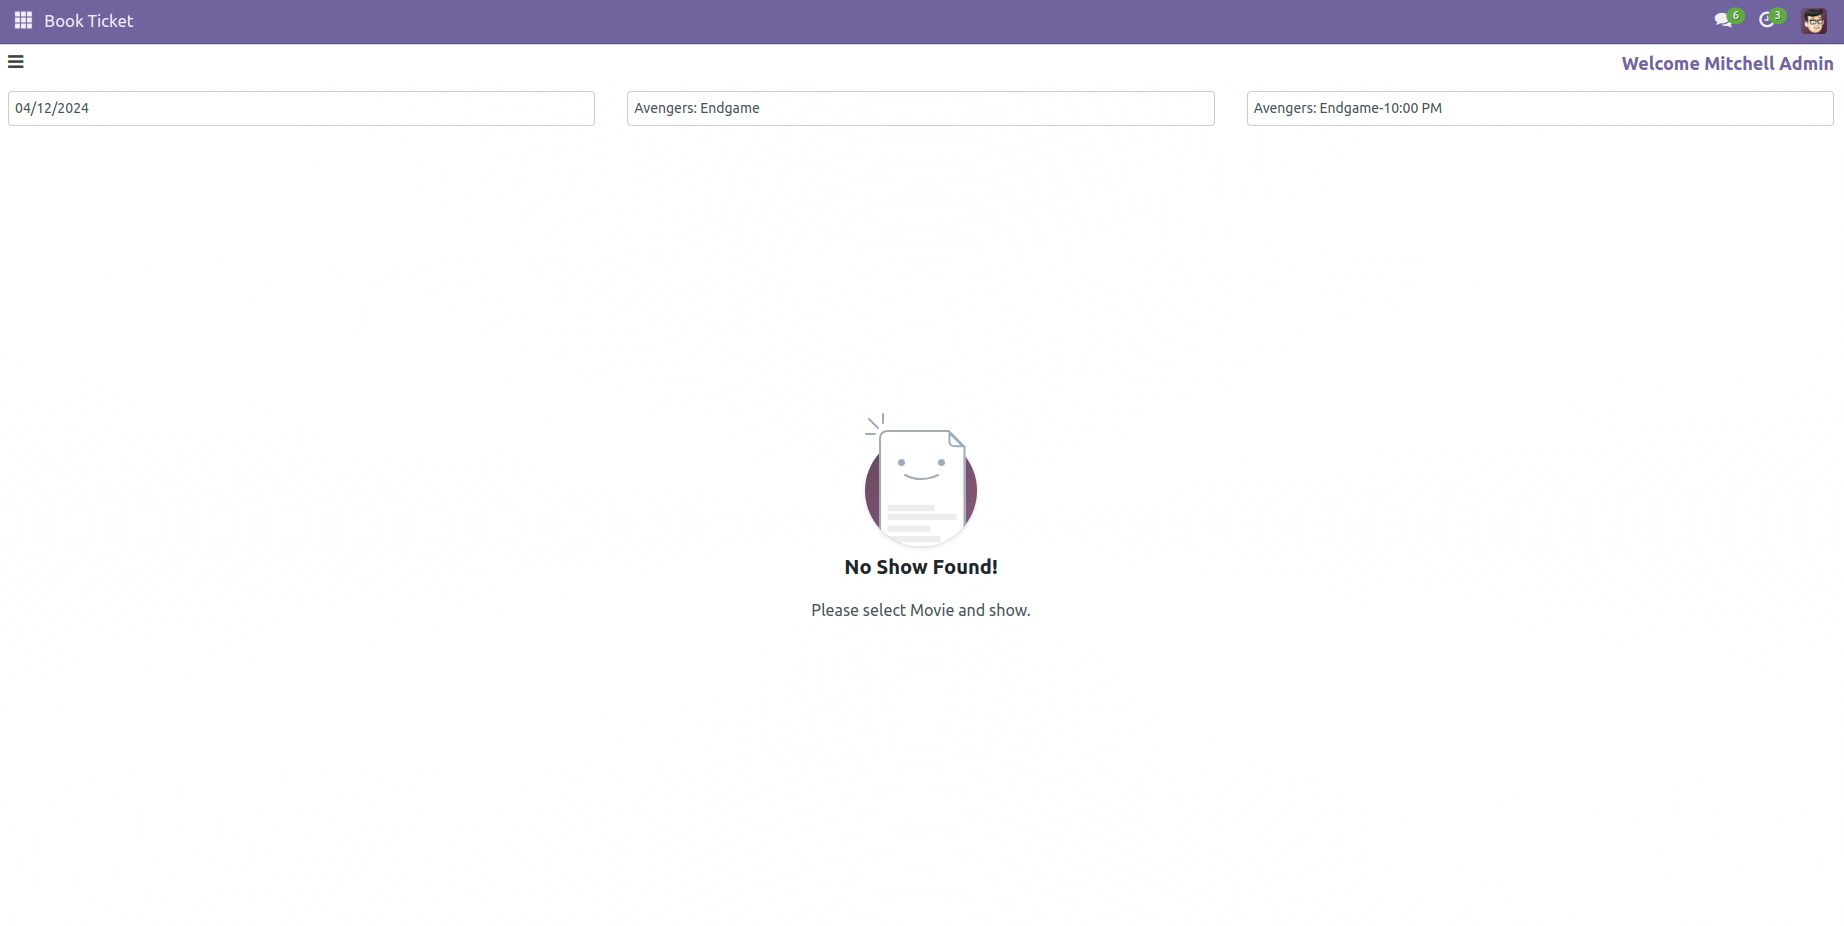
You can book a ticket from here, select date-time & movie.
You can book a ticket using the toggle button also.
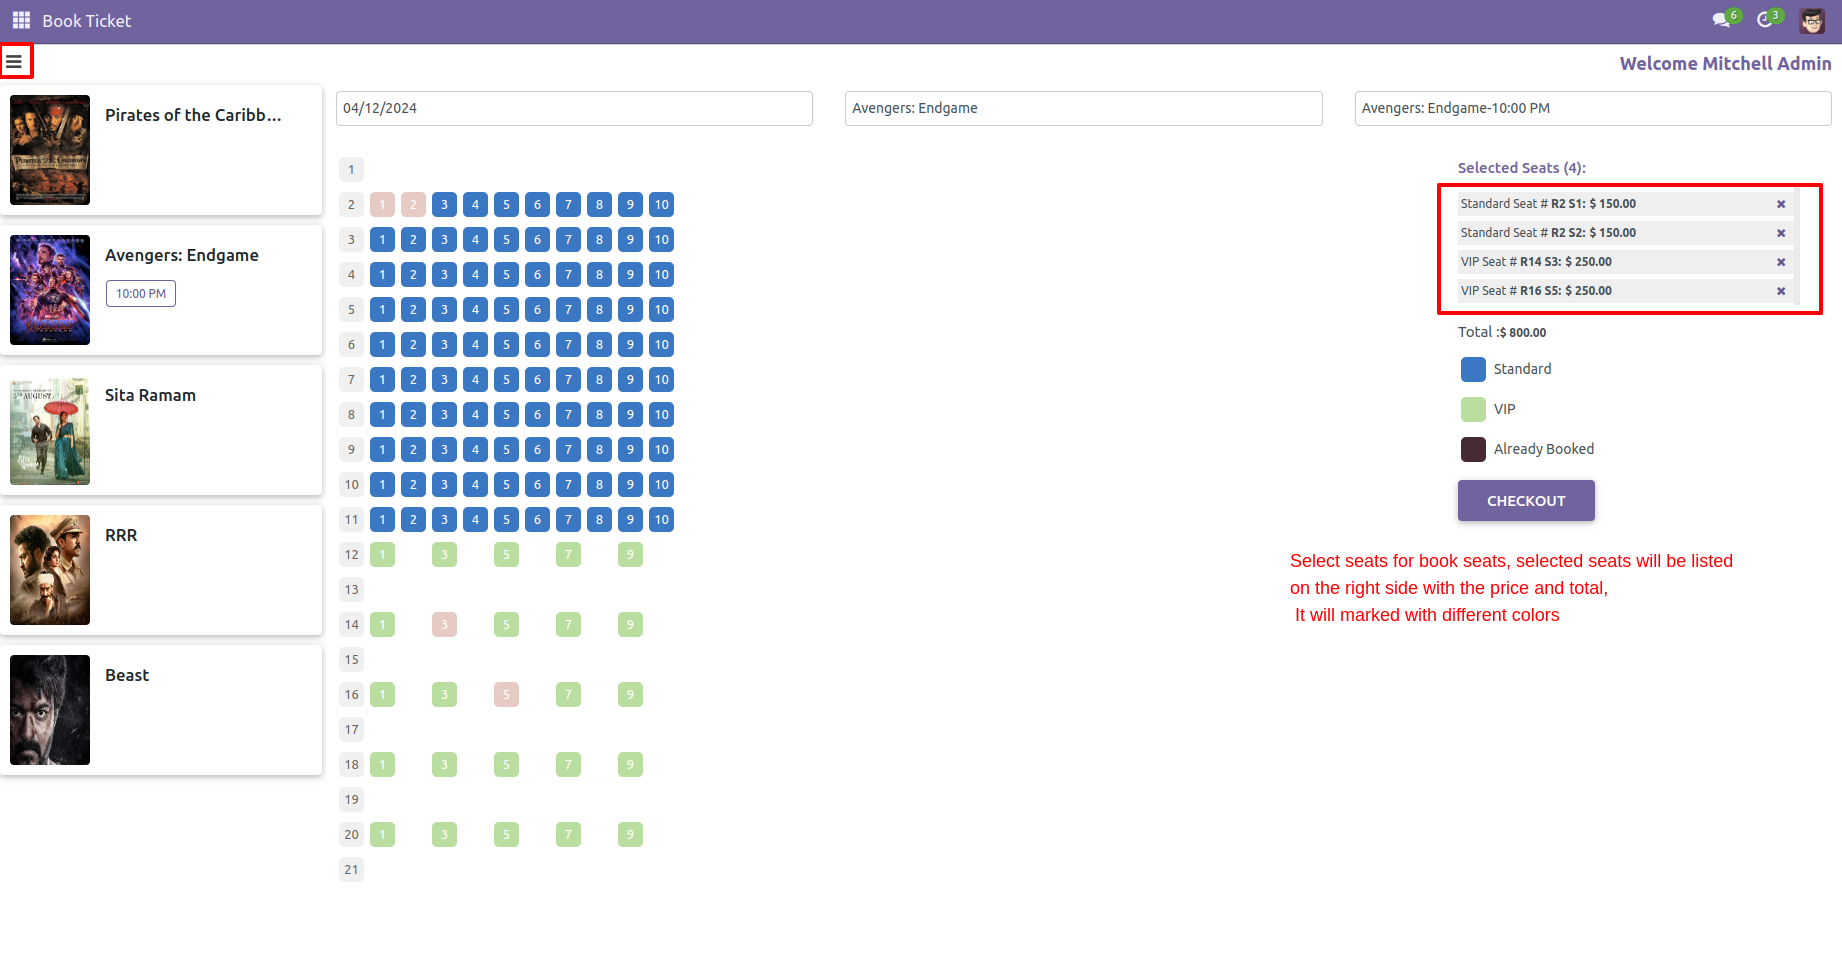
After selecting tickets enter details for the payment process.
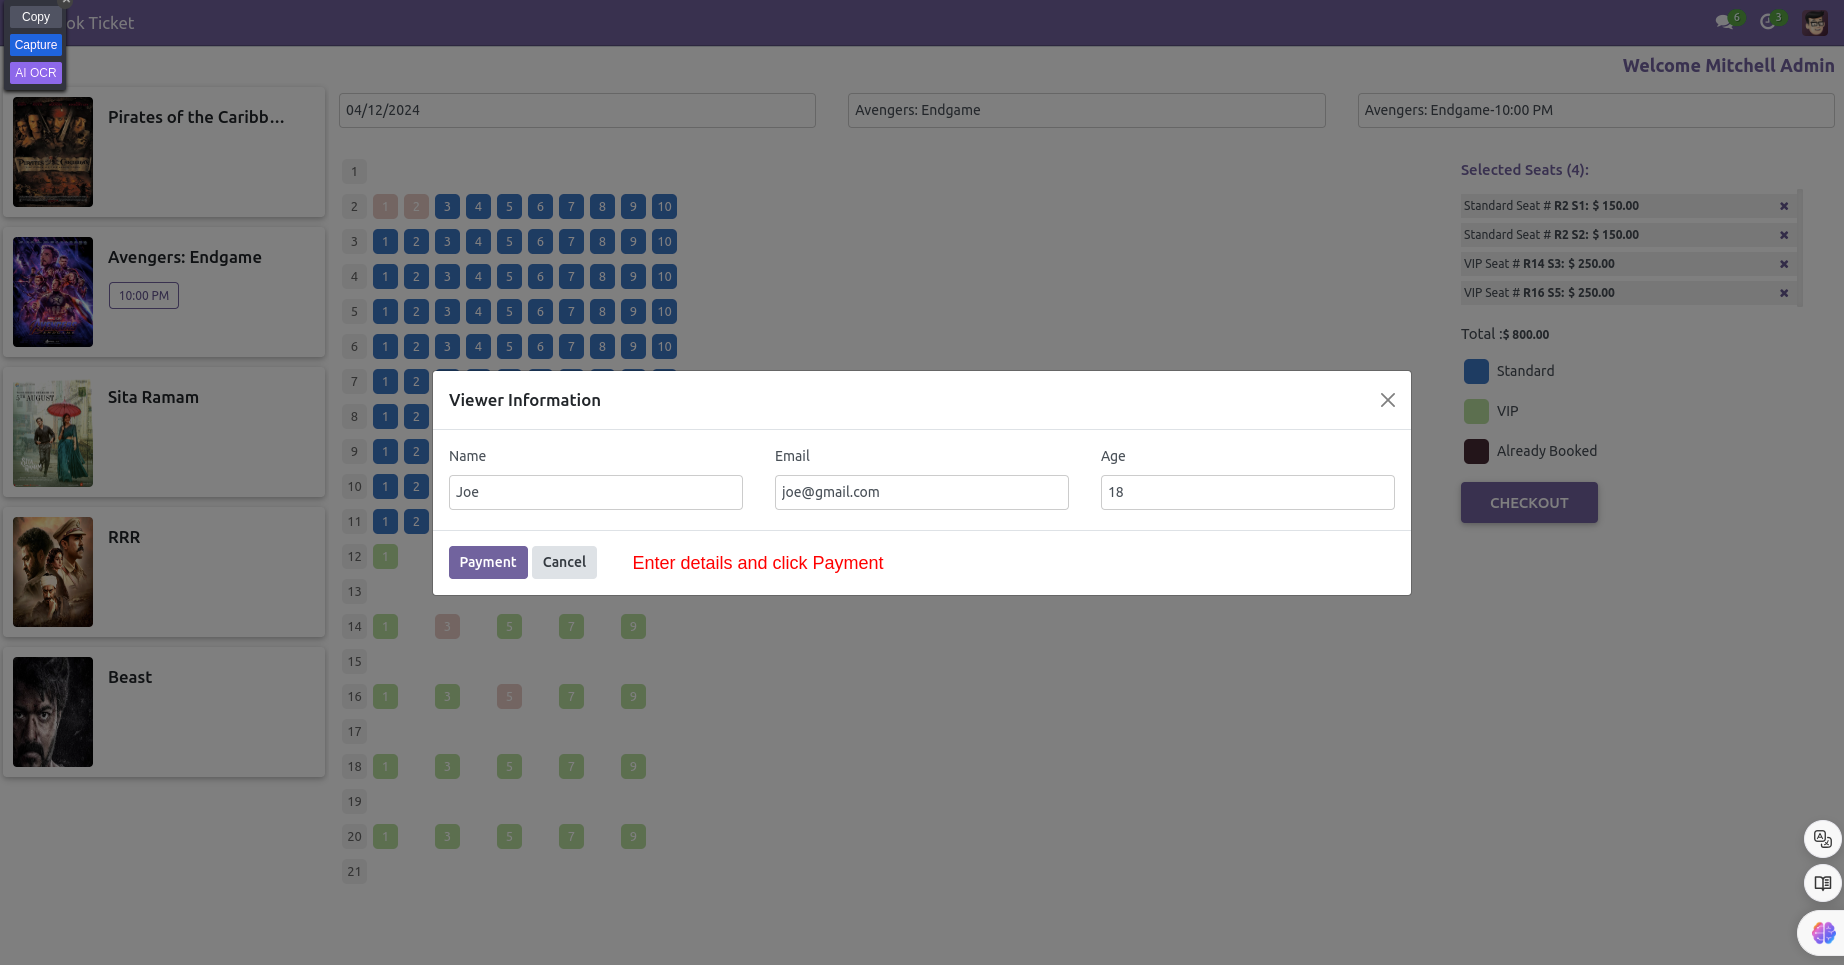
After successfully ticket book, you can print your ticket.
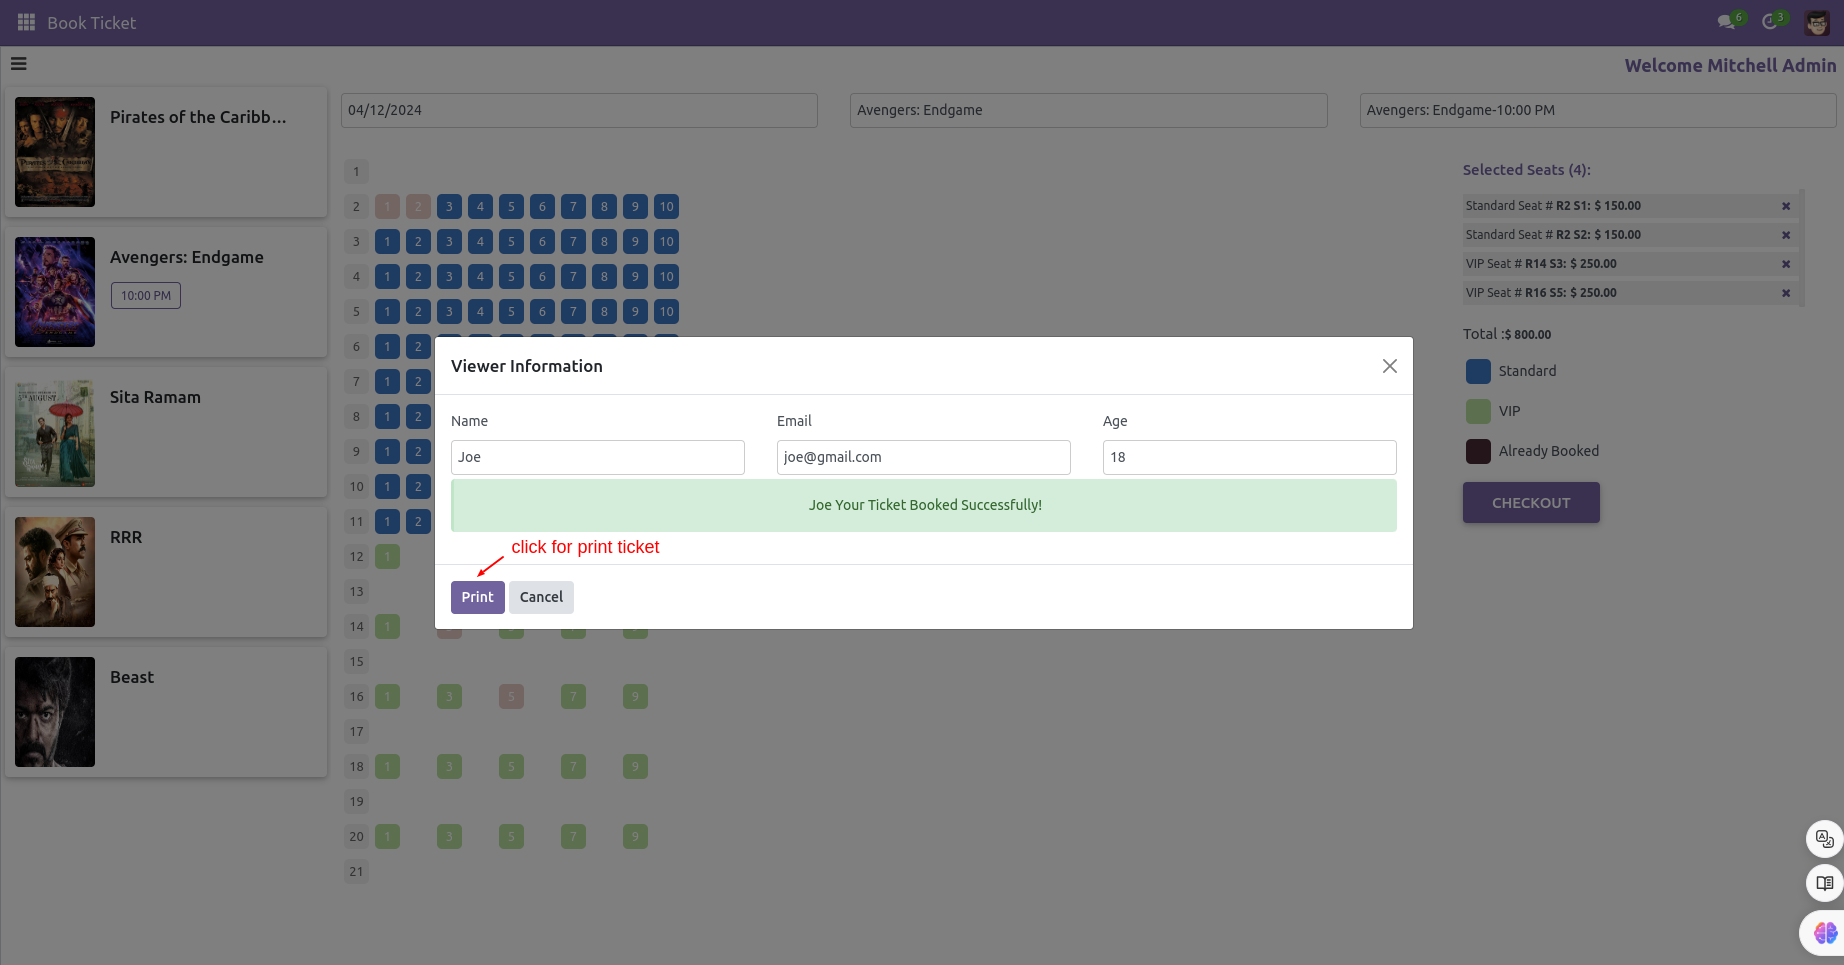
The printed ticket looks like this.
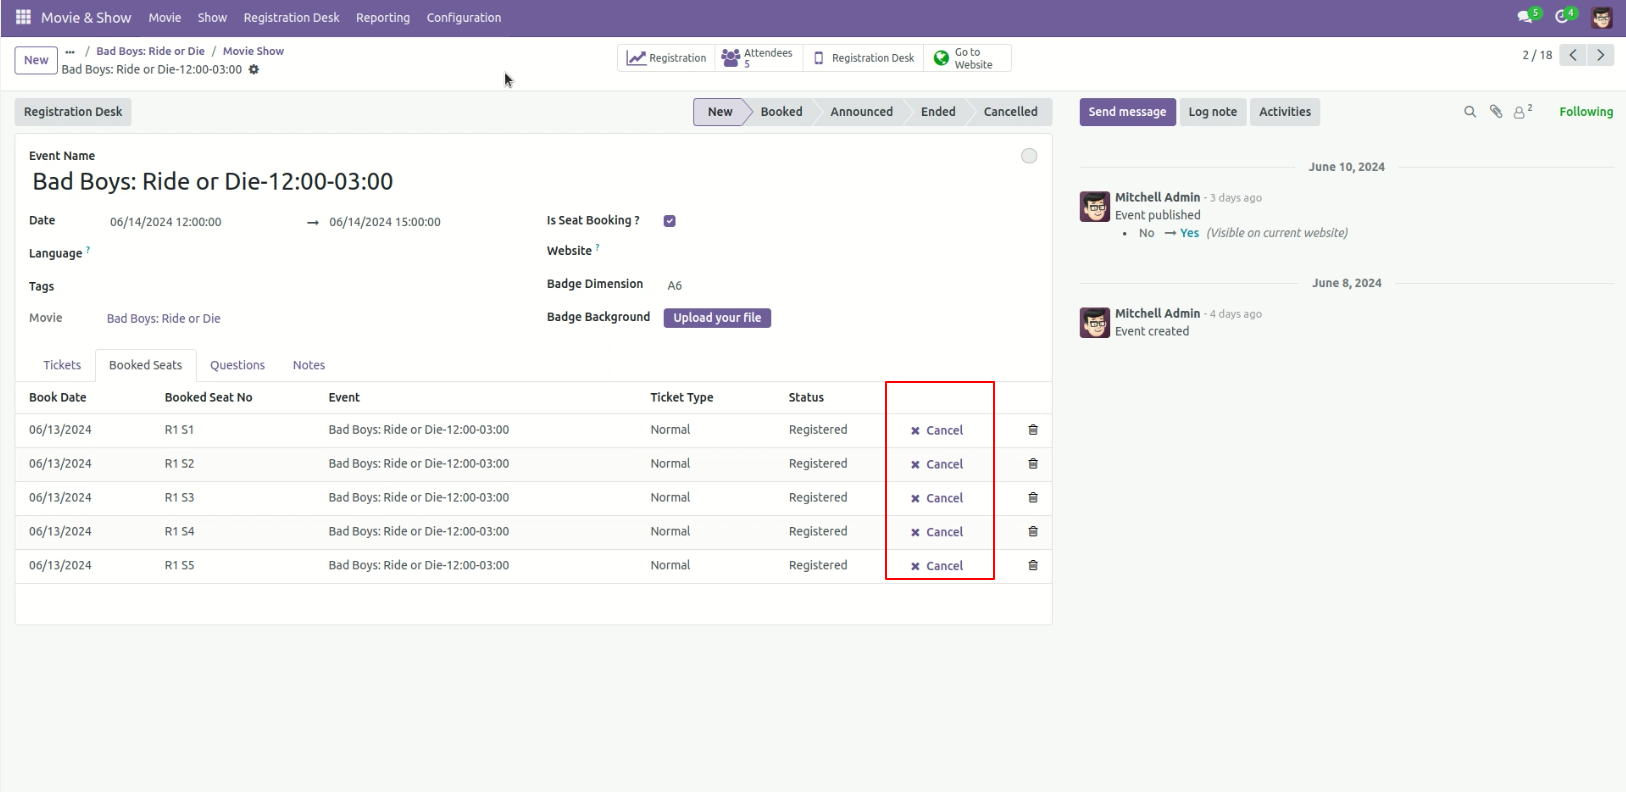
Here you can the cancel option.
Click on 'Cancel'.
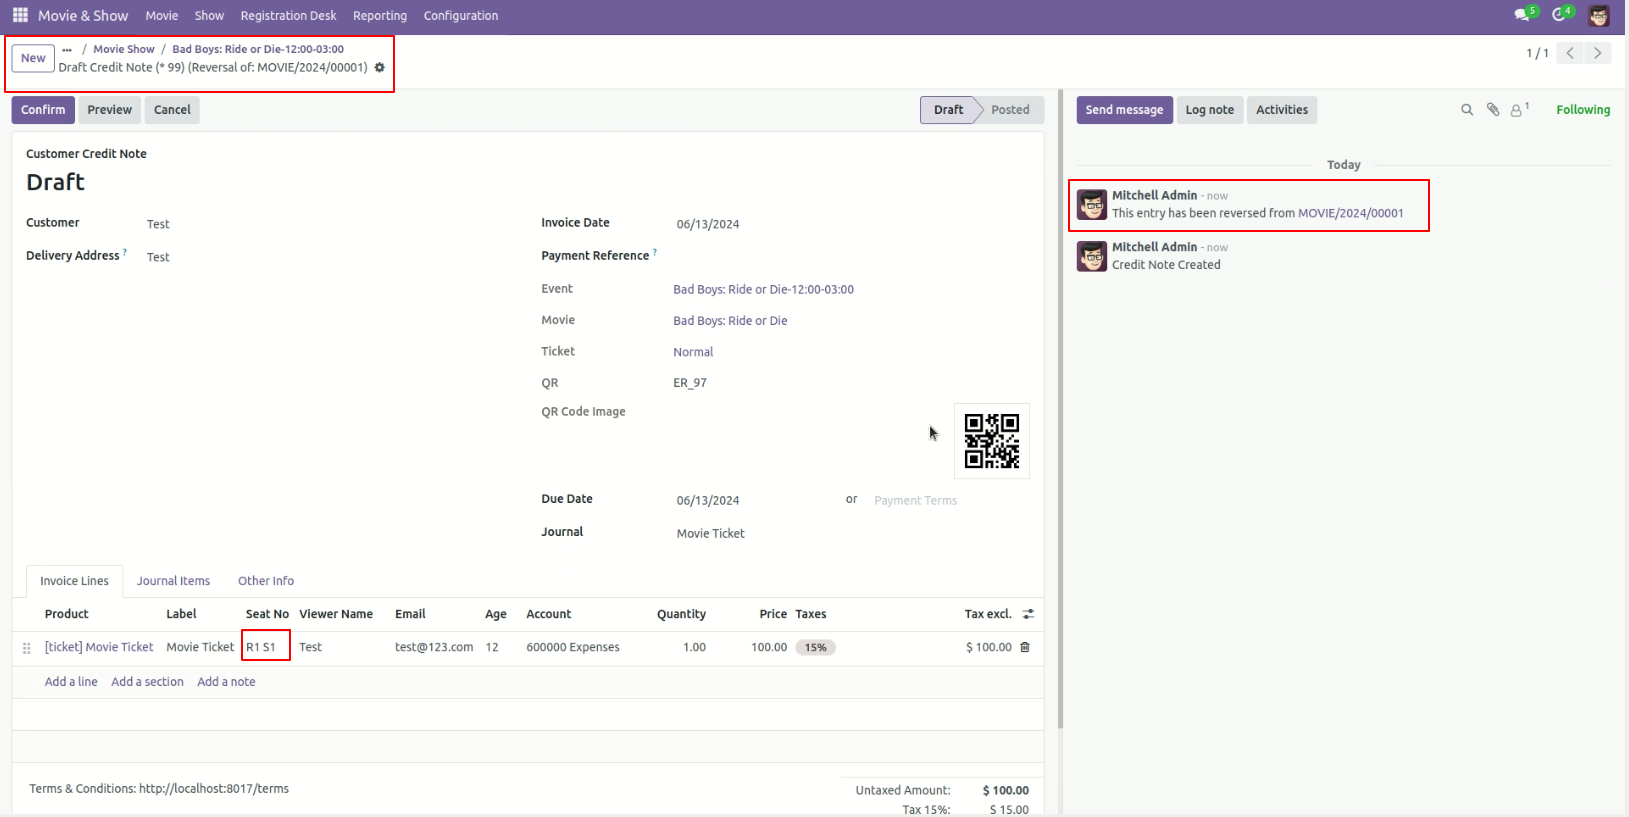
Afte that, you will redirect to the credit note form view.
Click on the 'Confirm' button.
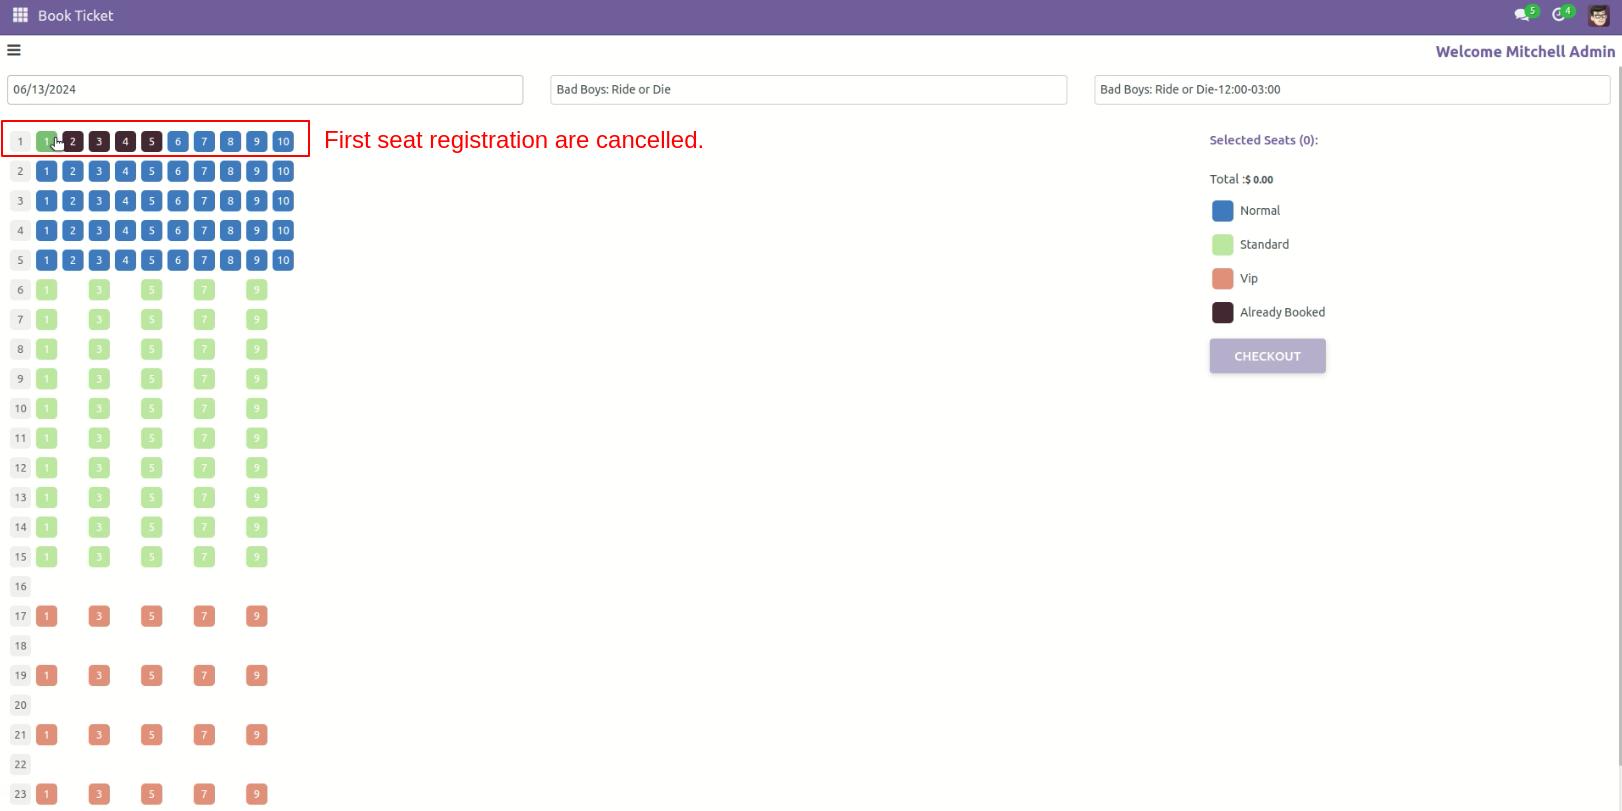
1st seat is cancelled.
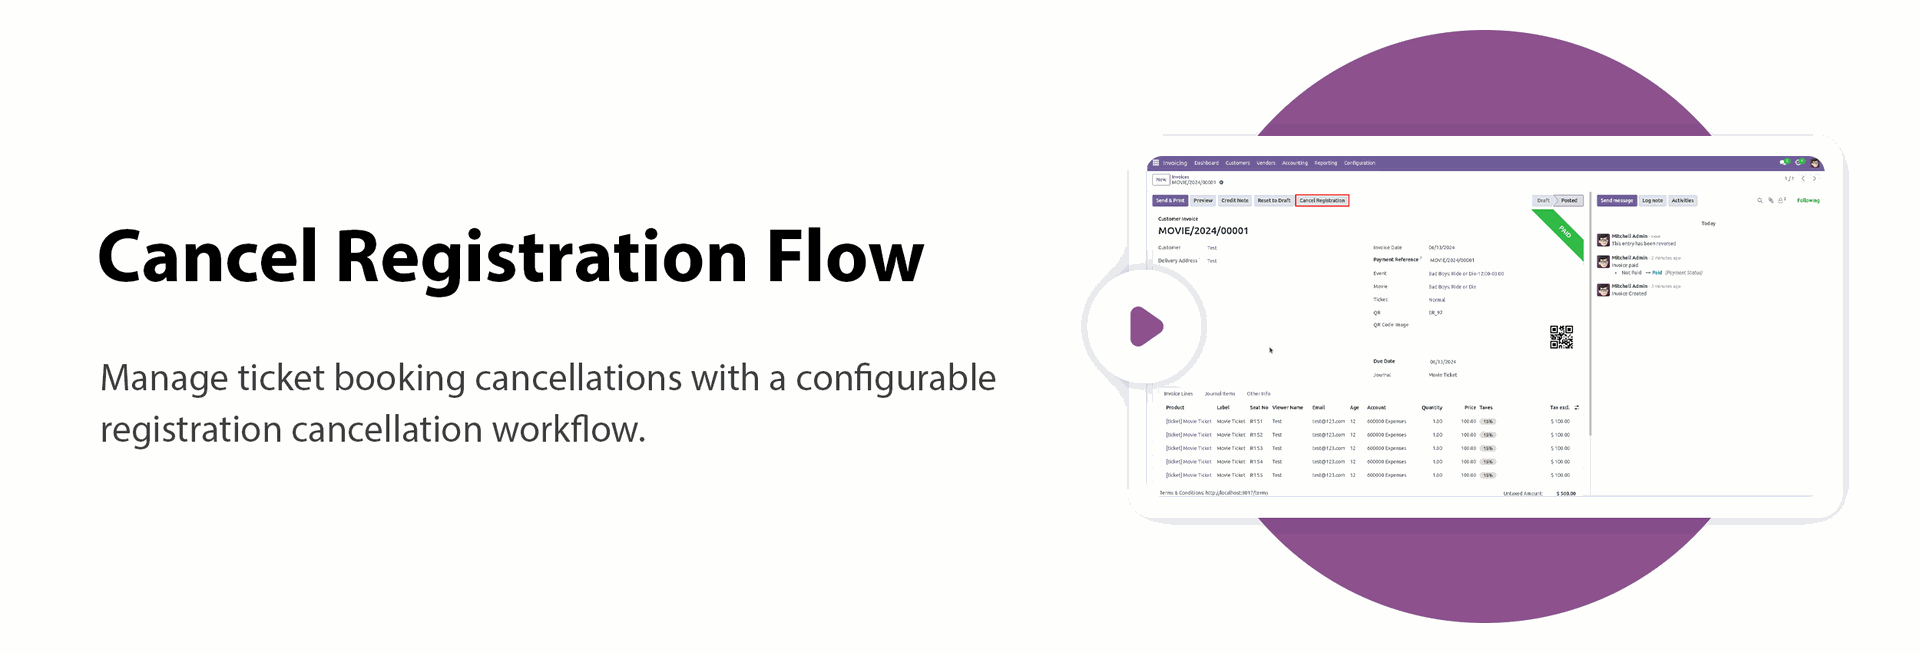
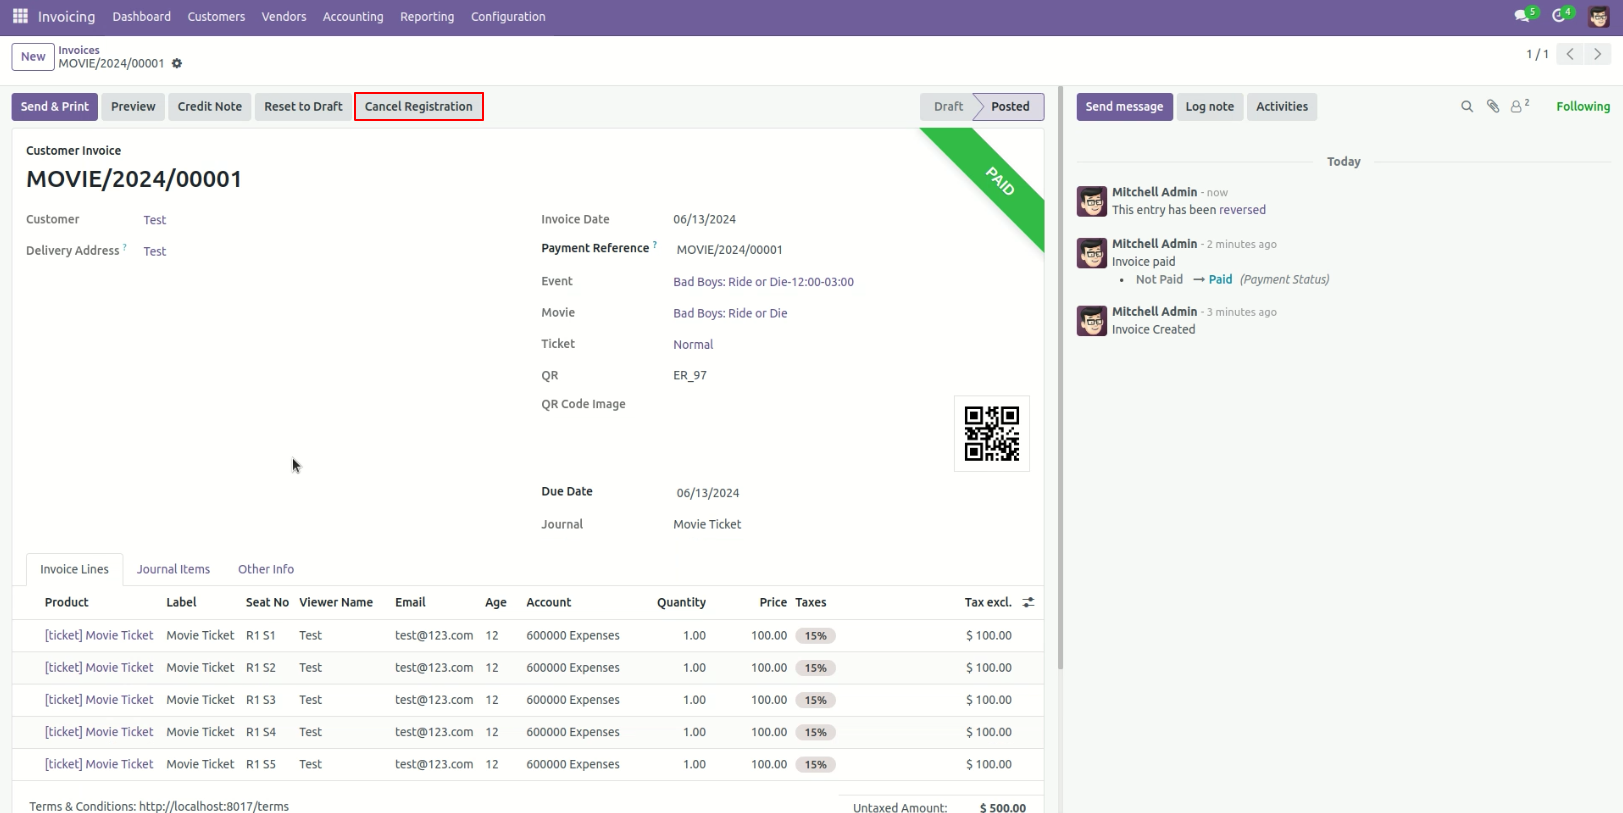
To cancel all booked seats, go to the Invoices and click on the 'Cancel Registration' button to cancel the show.
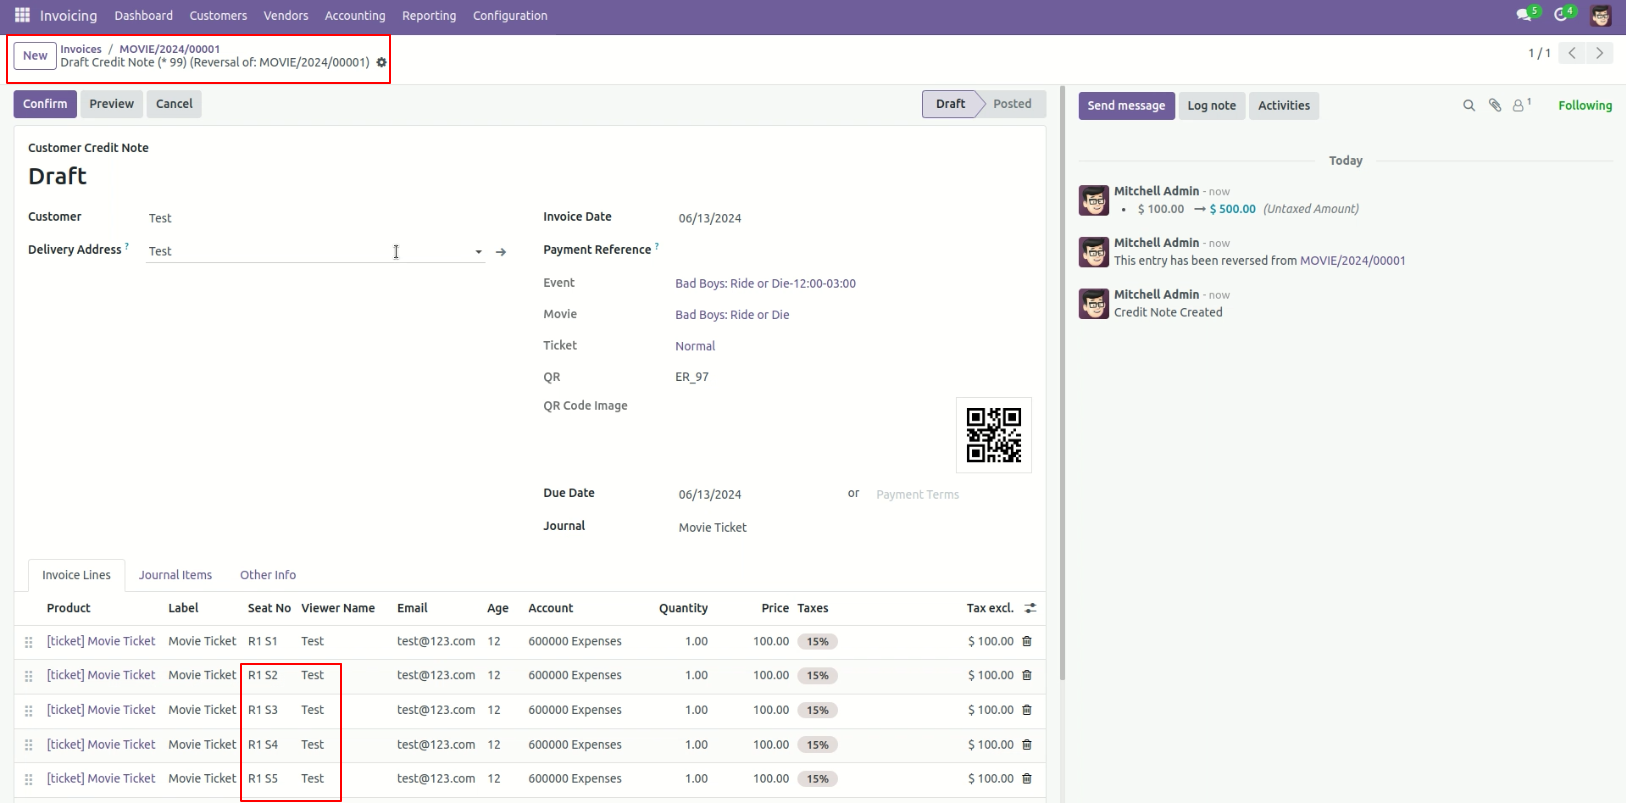
Afte that, you will redirect to the credit note form view.
Click on the 'Confirm' button.
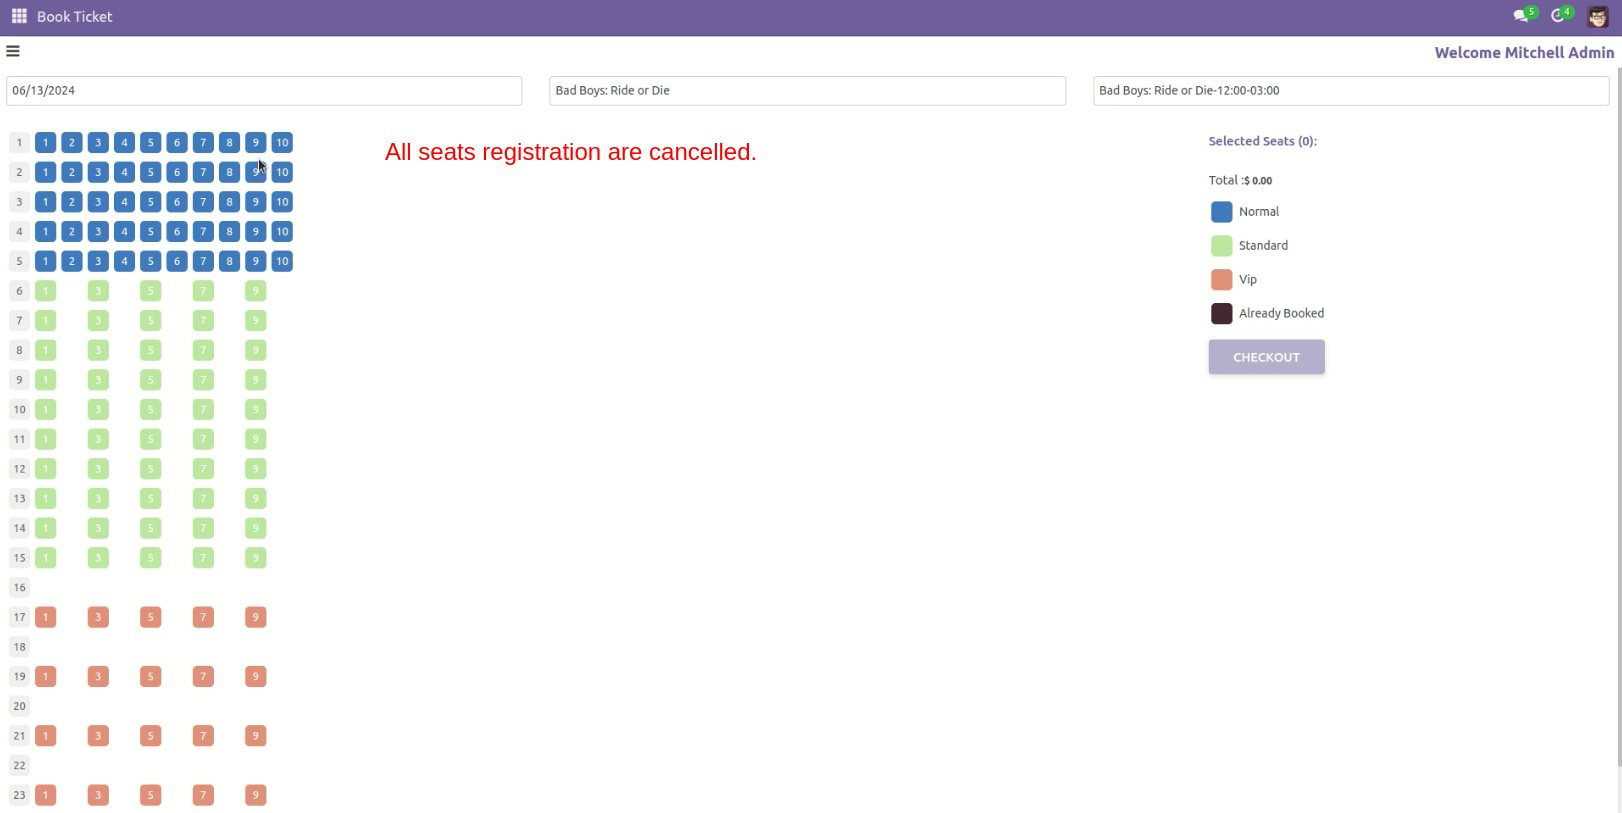
All registrations have been cancelled.
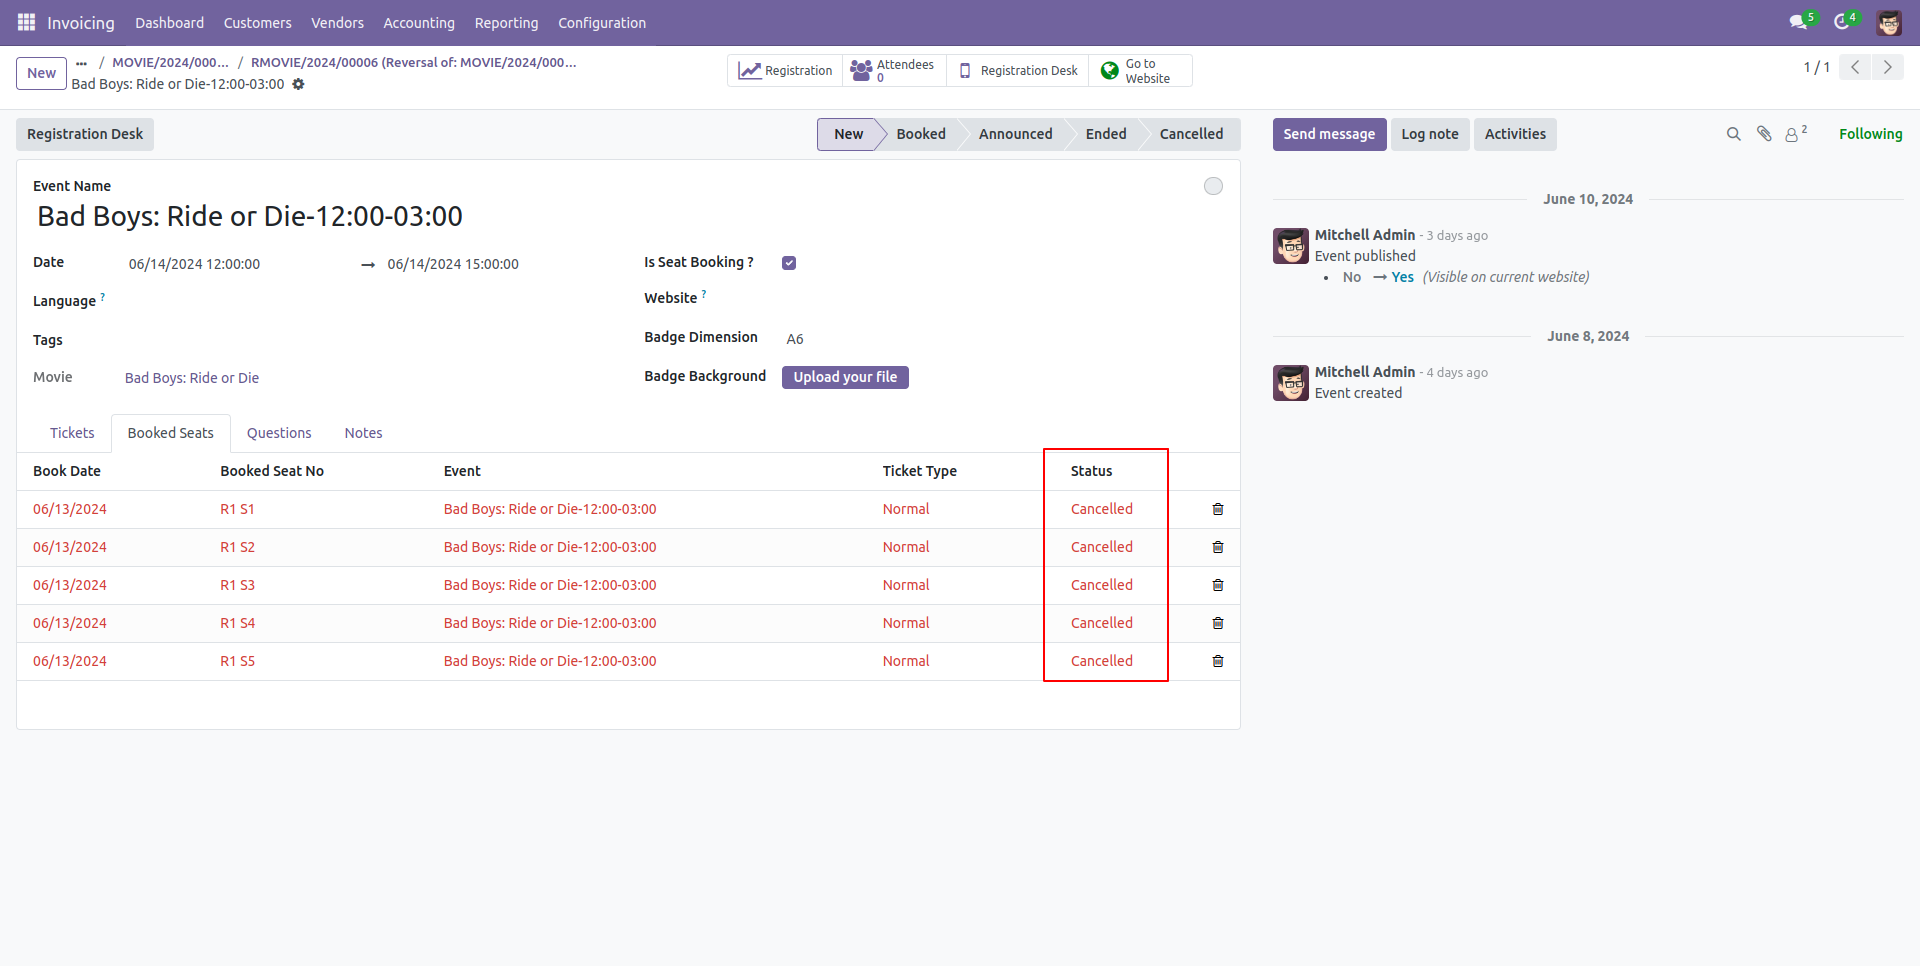
Here, you can see that the status is marked as 'Cancelled' in the Booked Seats tab.
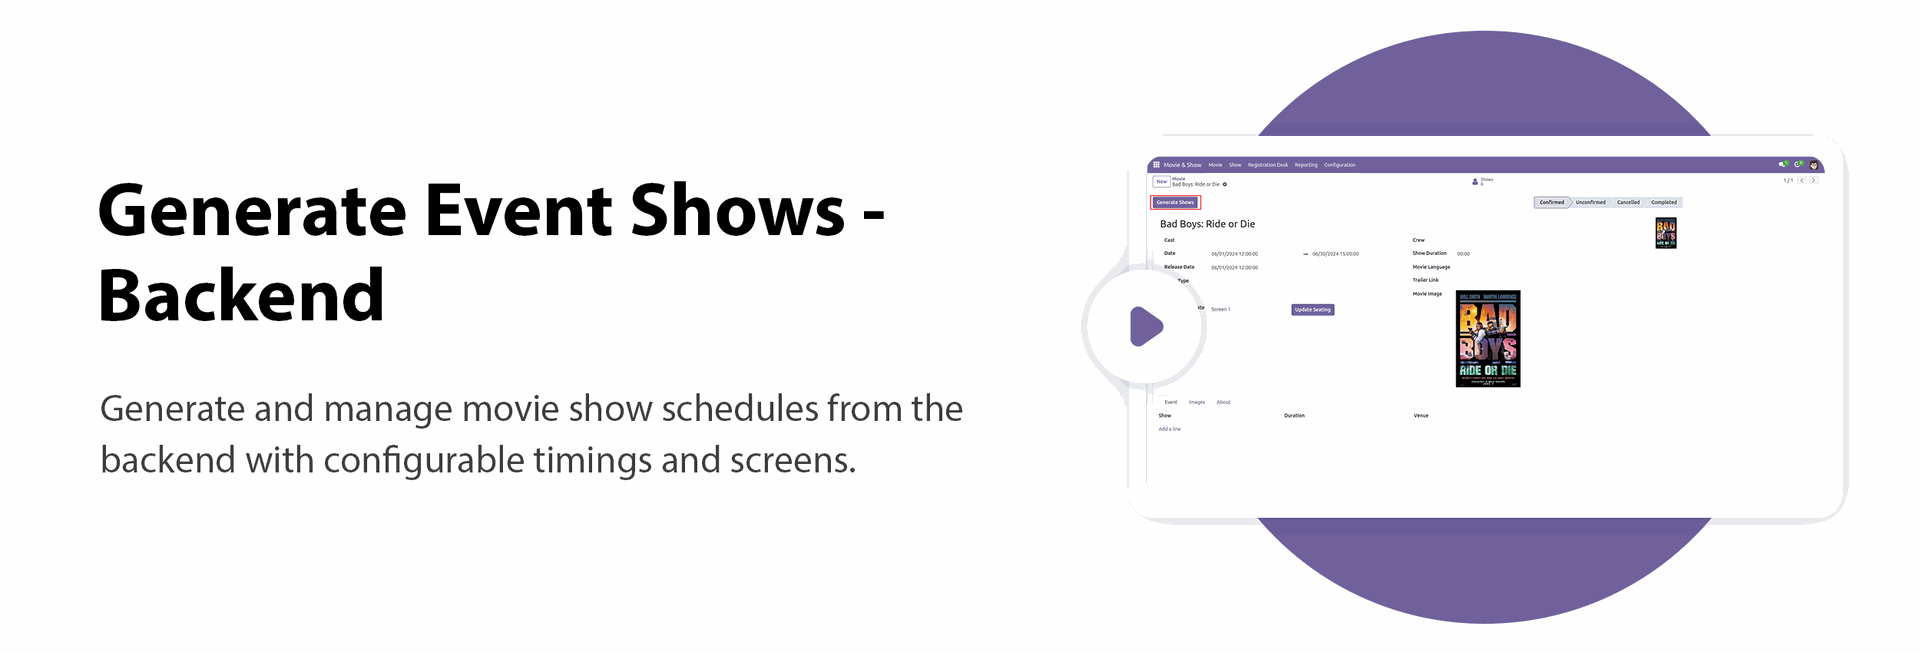
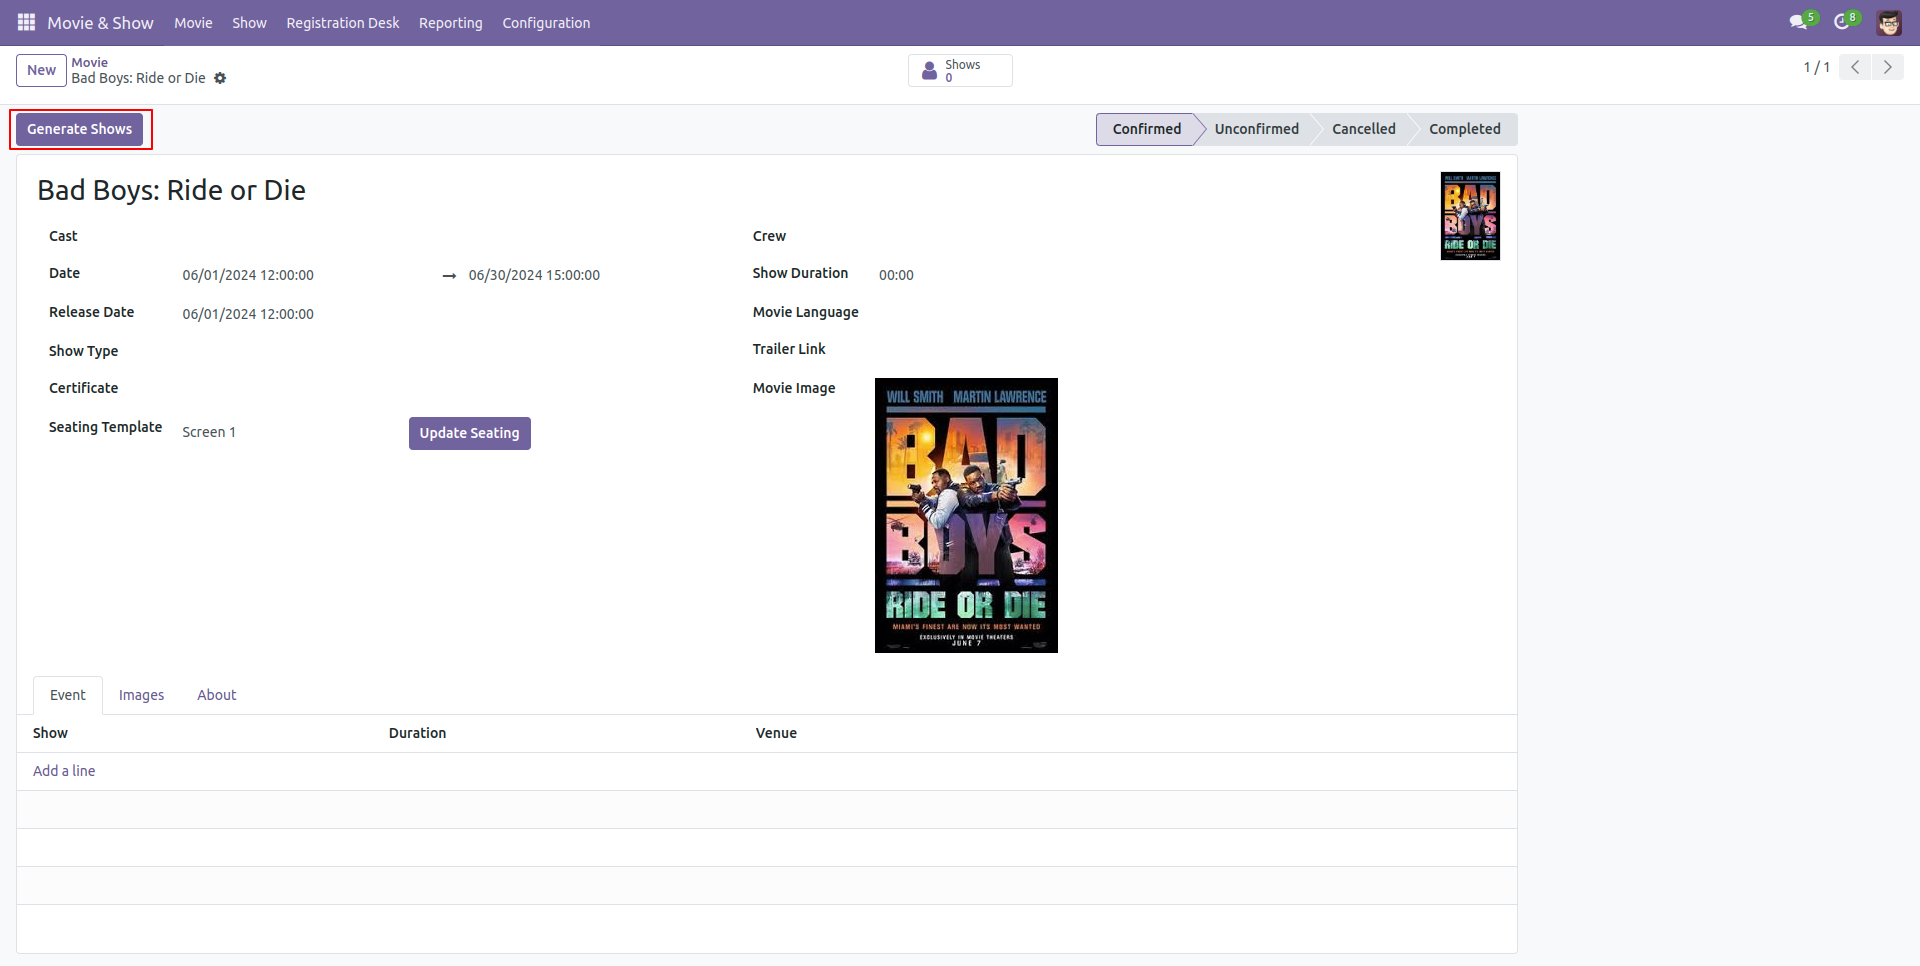
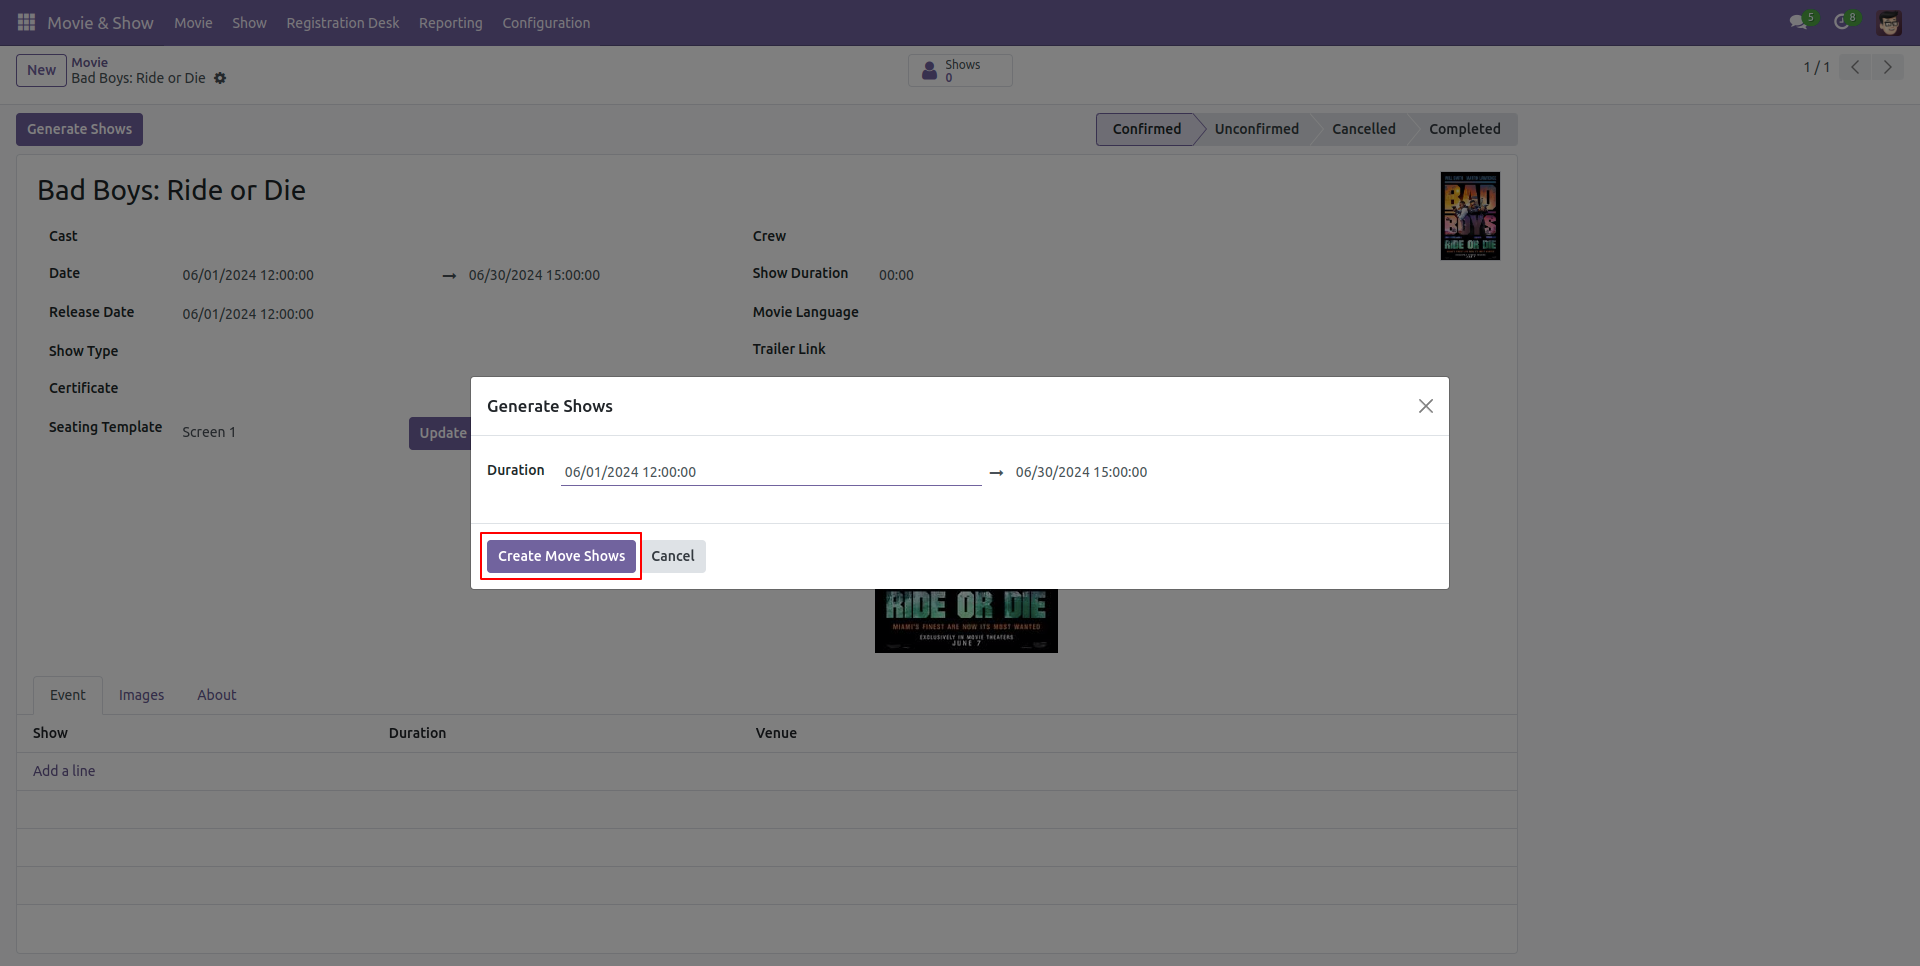
To generate the show, click on the 'Generate shows' button.
Enter the duration and click the 'Create Movie Show' button.
Here you can see that the shows have been generated.
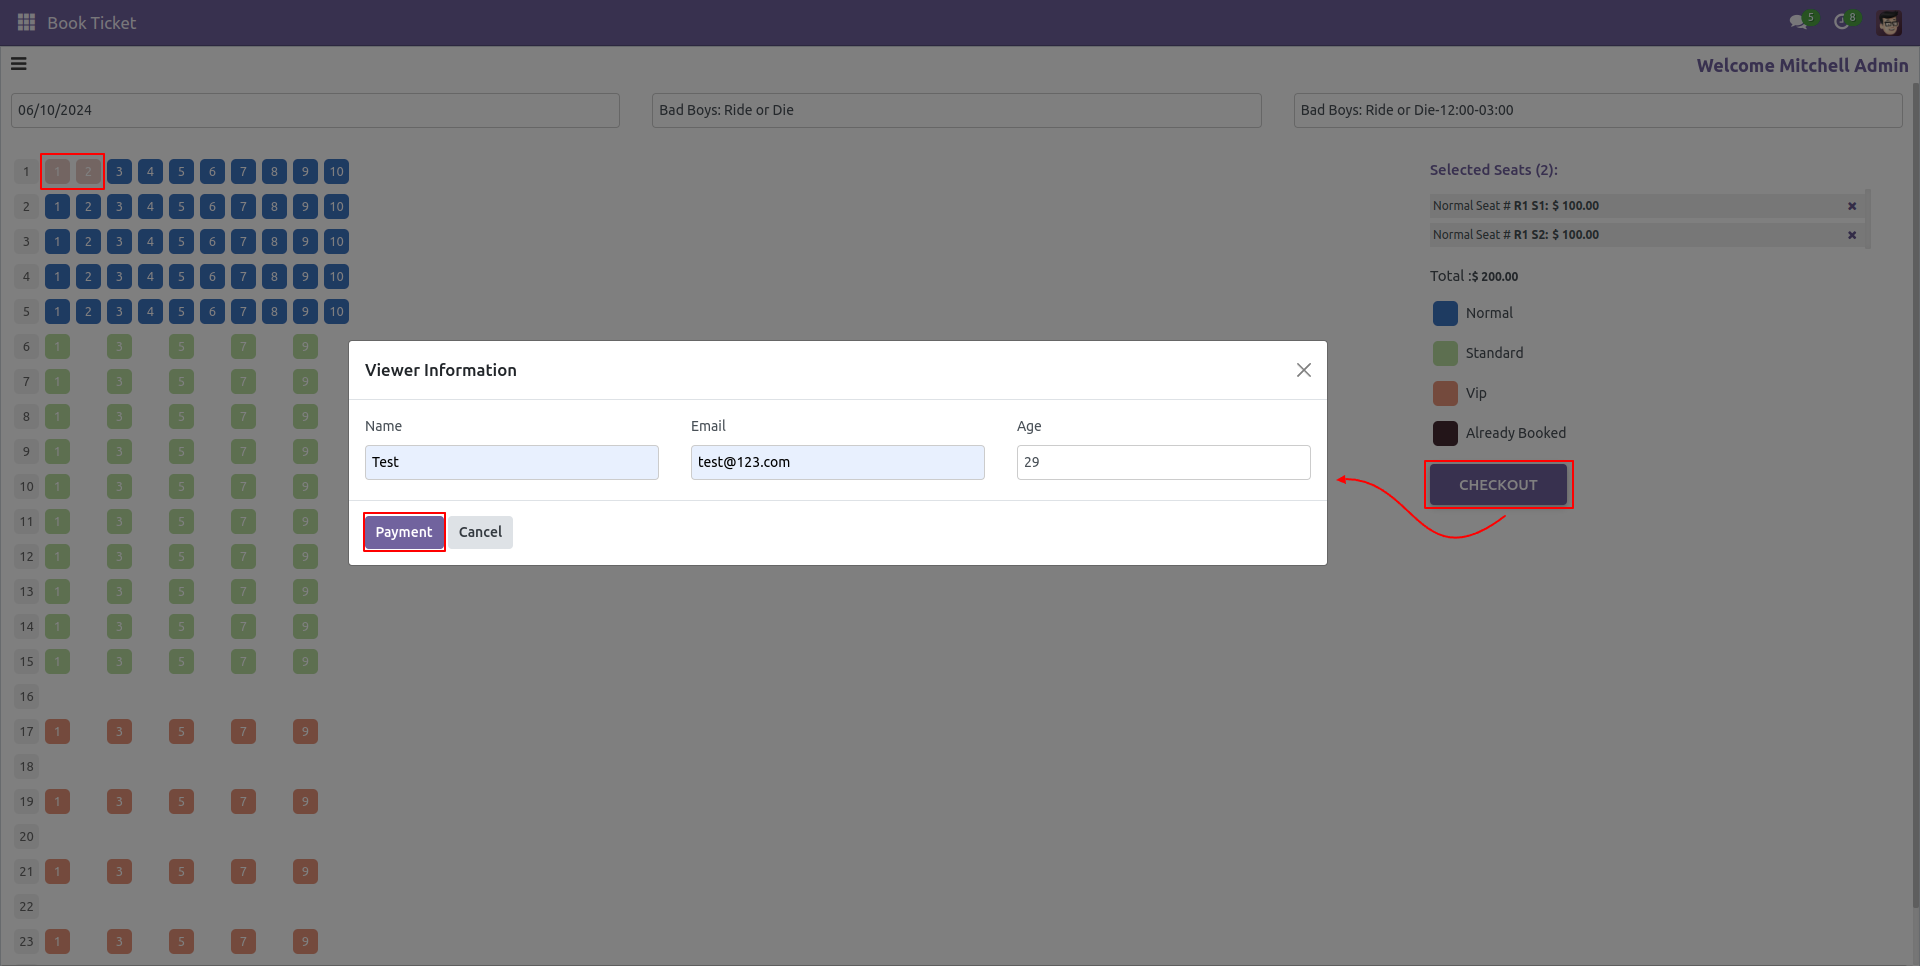
In the book ticket form view, select your seat and click the 'Checkout' button. Enter the required information and click the 'Payment' button.
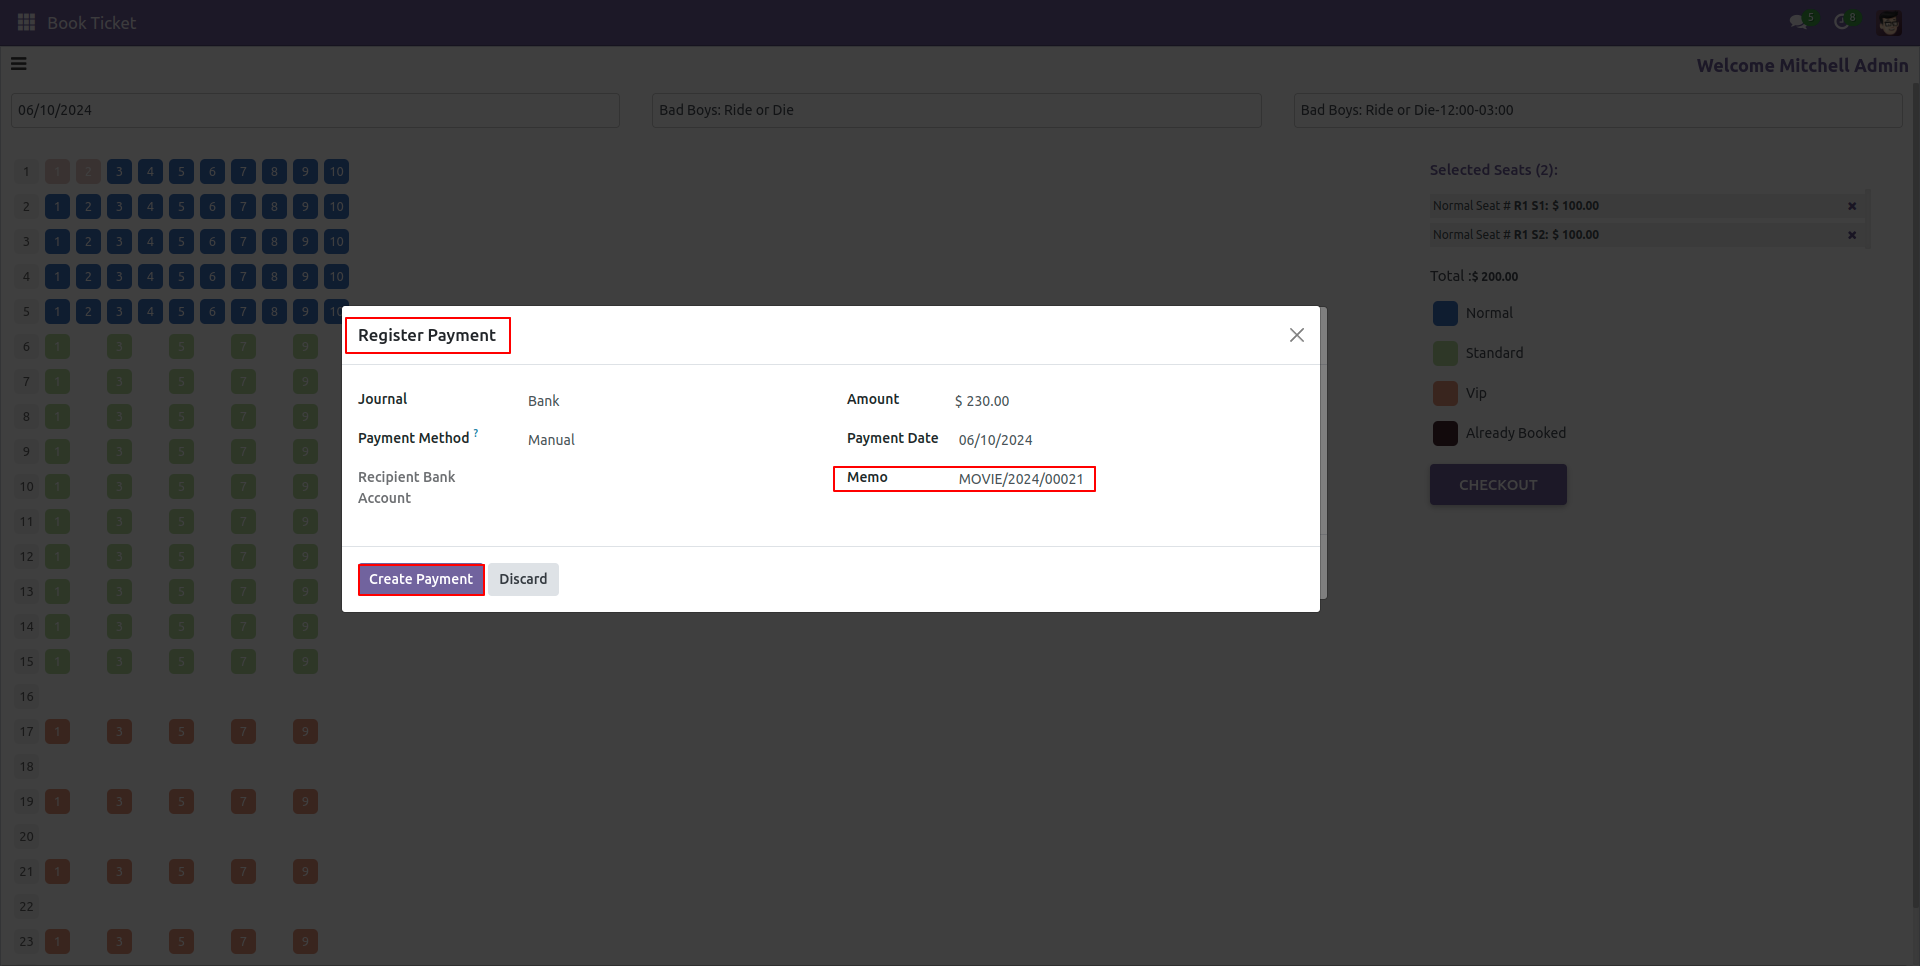
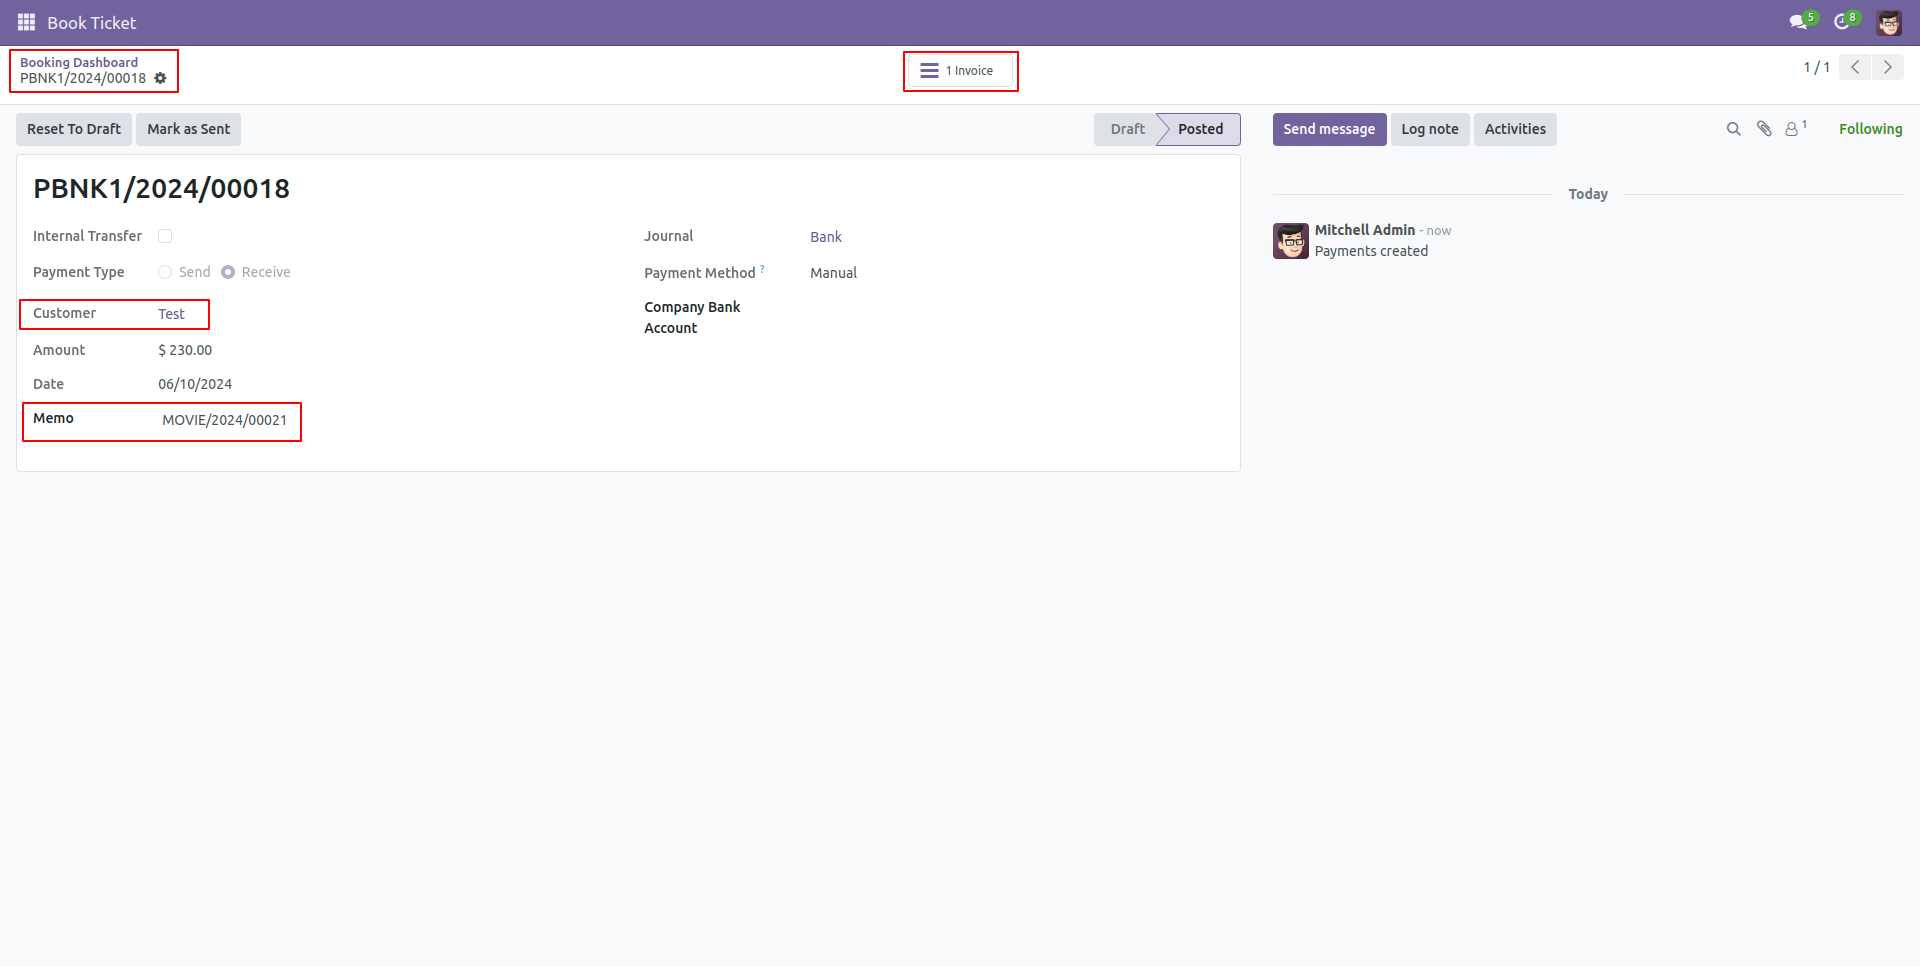
Create payment.
In the booking dashboard form view, you can view the invoice by clicking the 'Invoice' smart button.
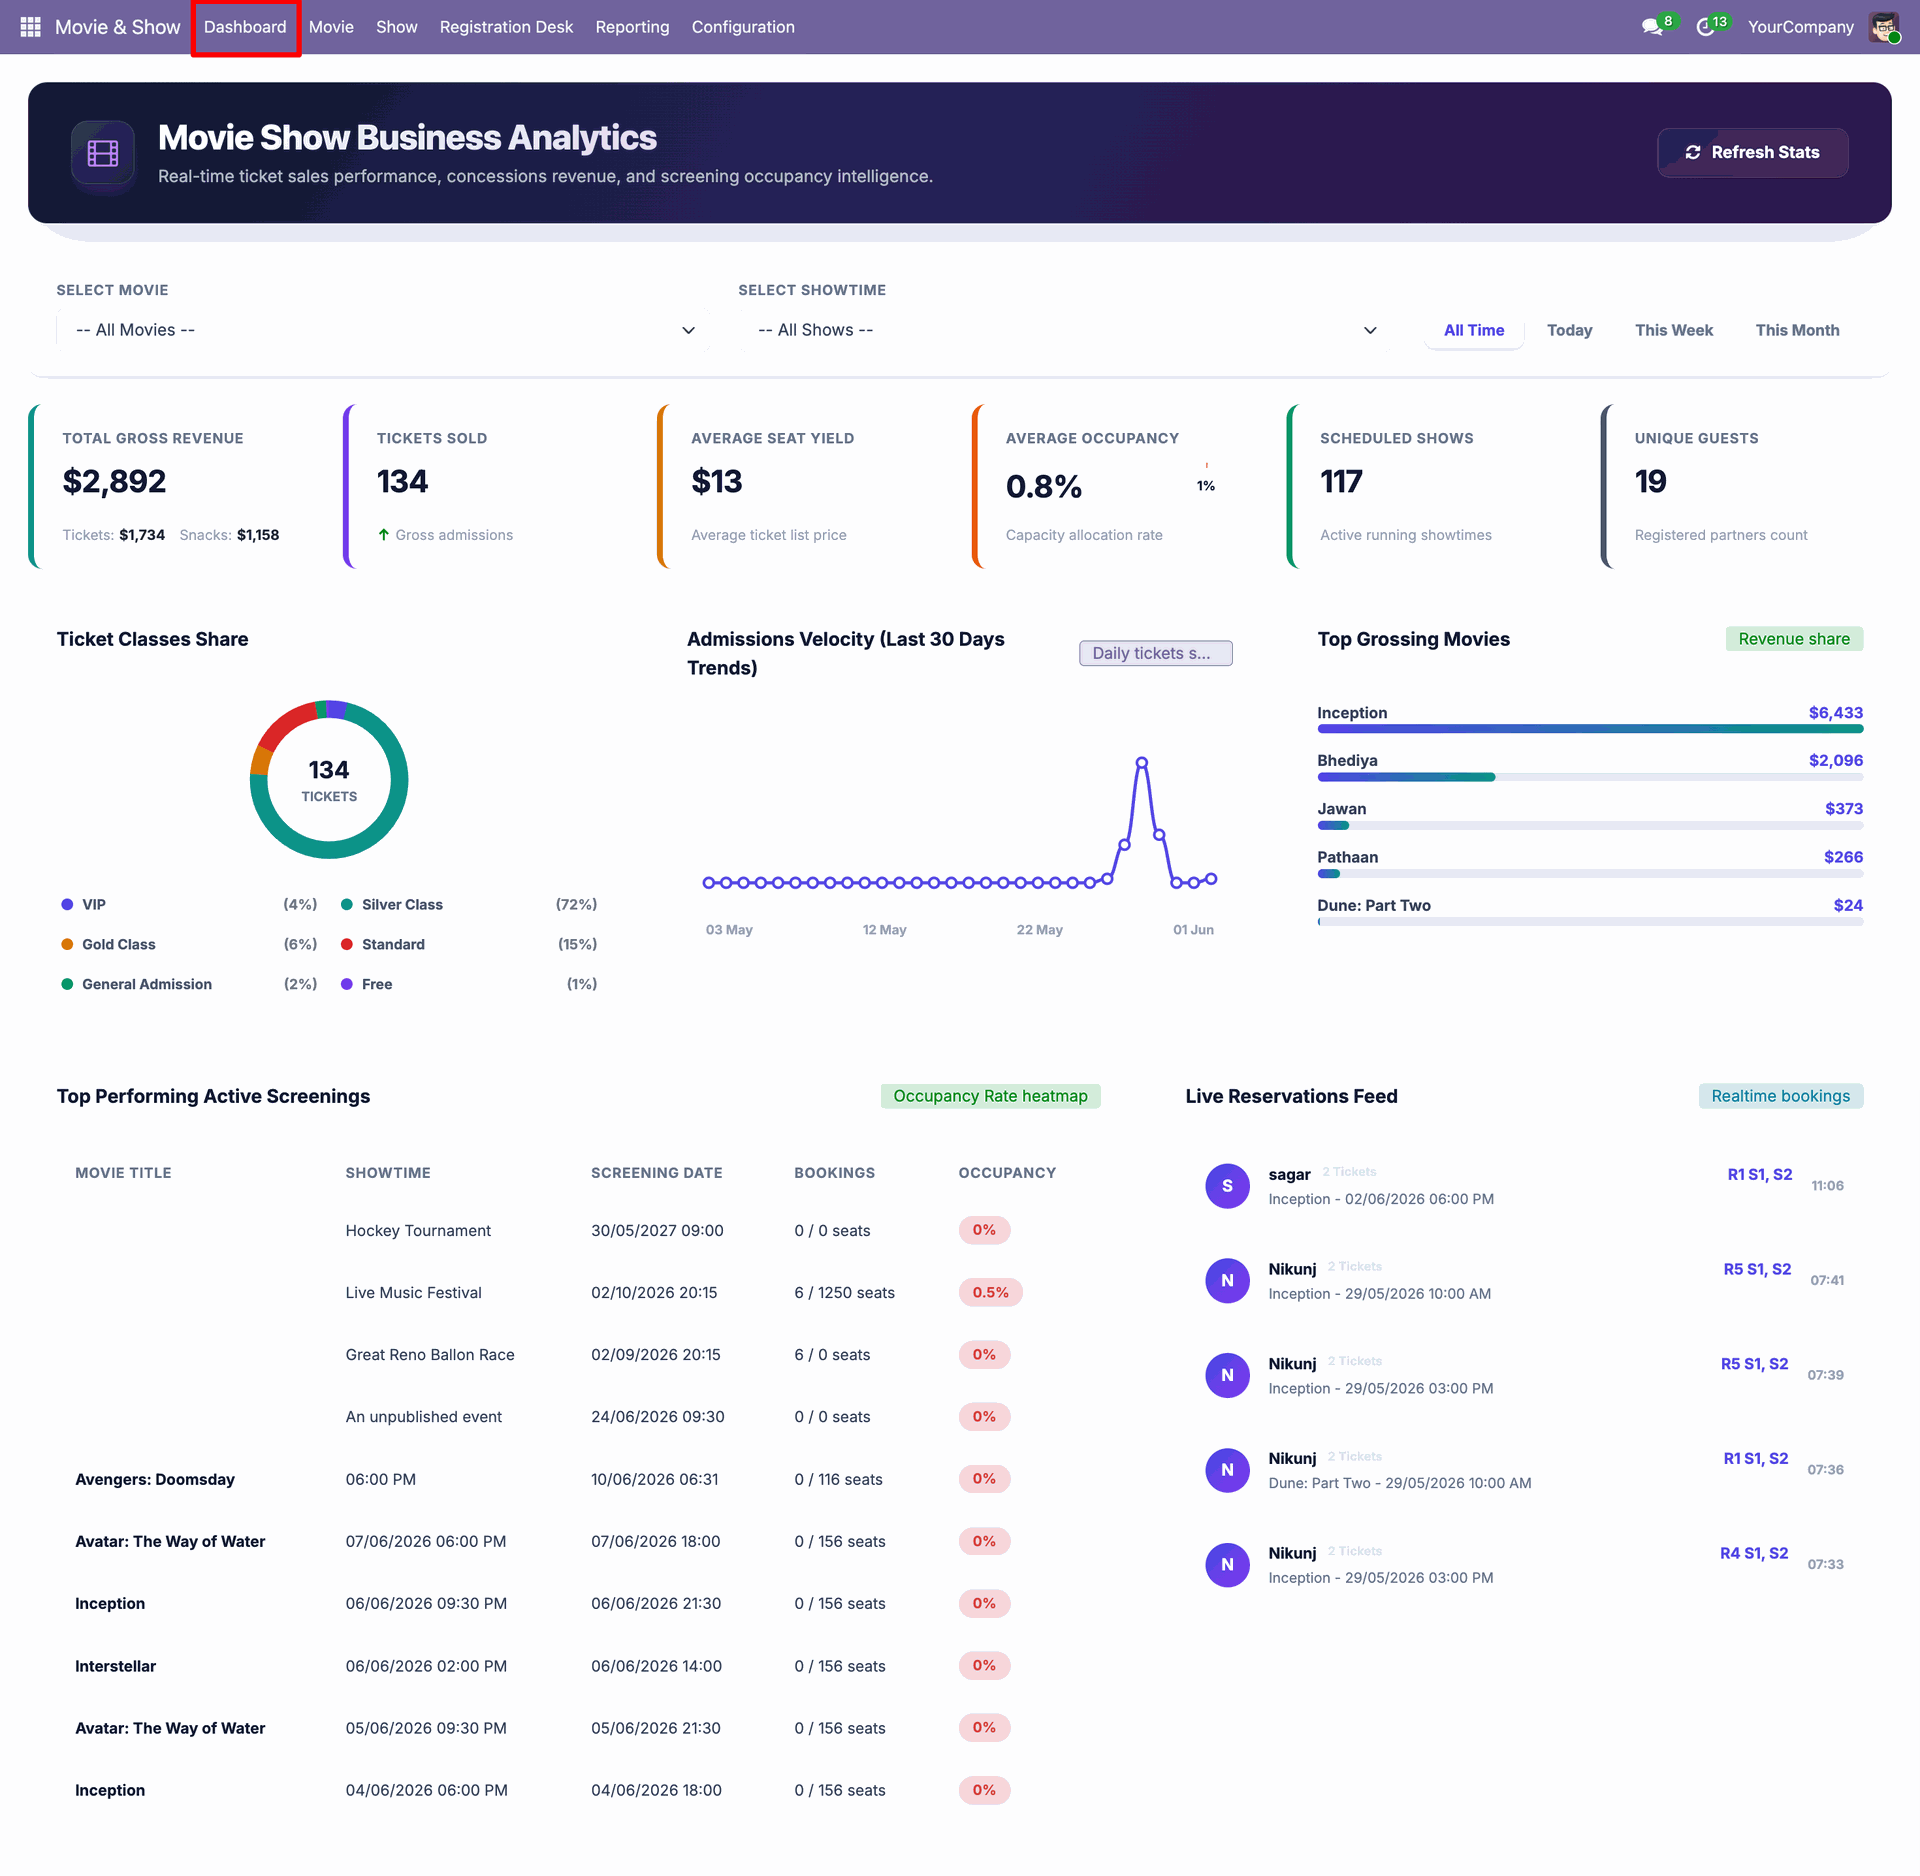
Monitor your cinema operations with a comprehensive, real-time analytics dashboard.
Gain valuable insights into ticket sales, revenue, seat occupancy, scheduled shows, and customer engagement from a single screen.
Users can filter dashboard data by movie, show time, or selected time period for detailed analysis.
The dashboard also features Ticket Class Share, Admissions Velocity, and Top Grossing Movies charts,
along with Top Performing Screens and a Live Reservation Feed table to track bookings and screen performance in real time.
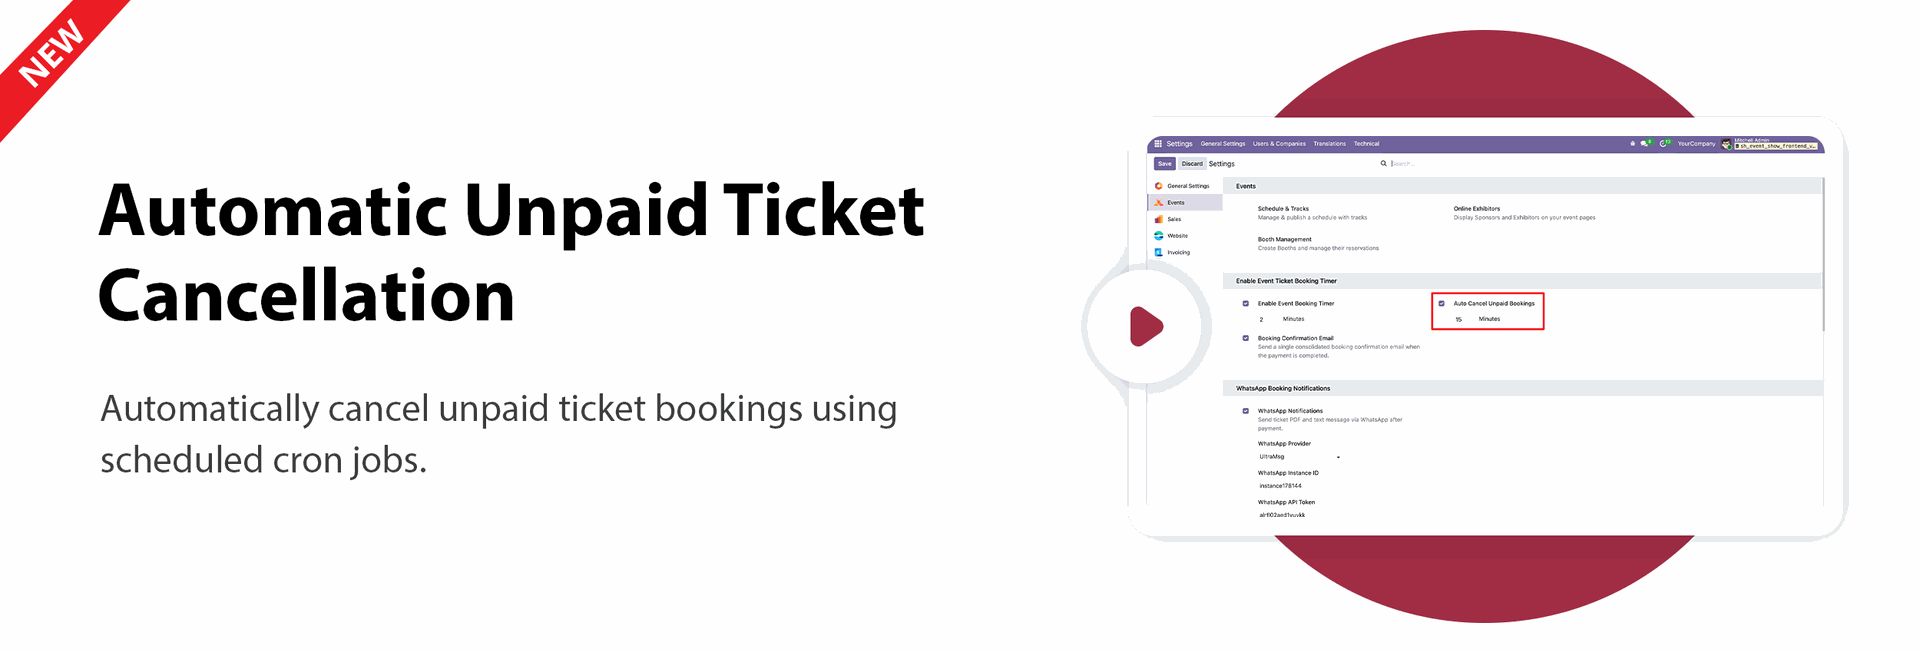
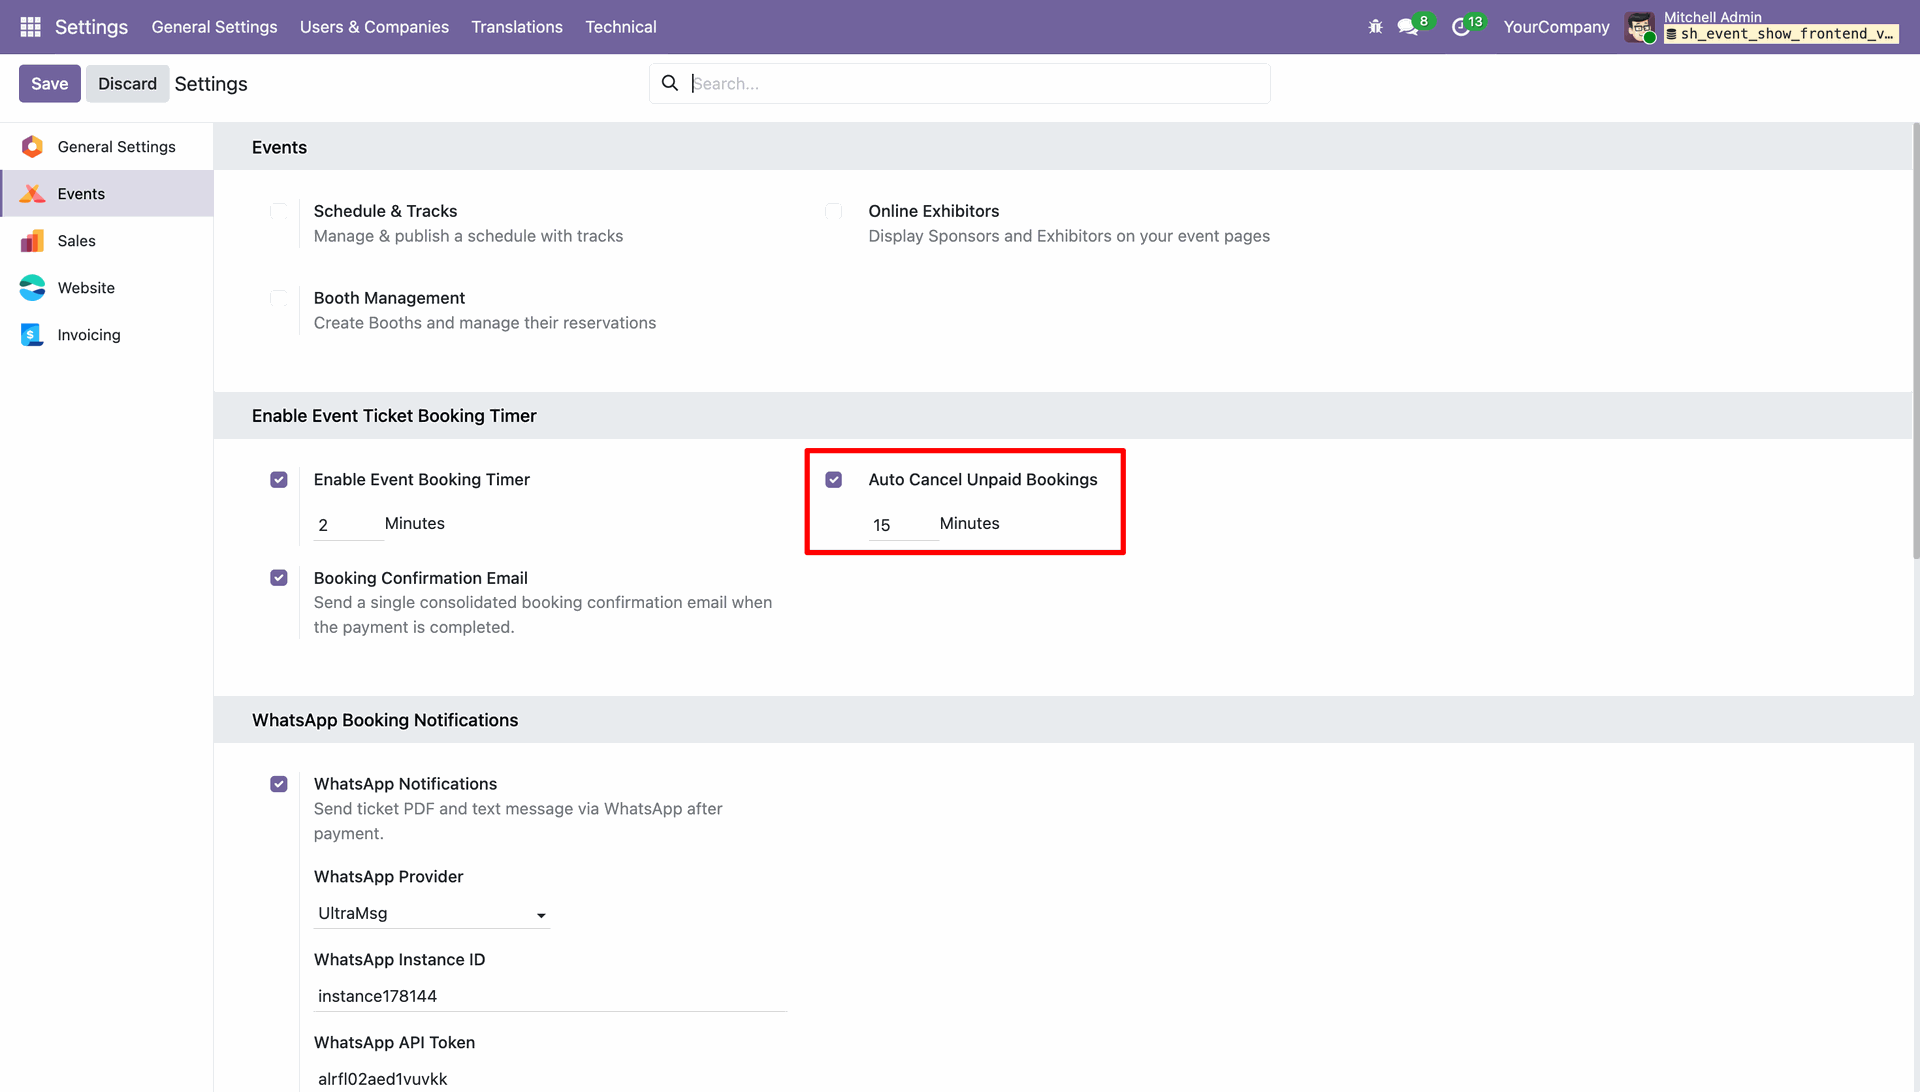
Go to the Events Configuration menu and set the Auto Cancel Unpaid Bookings time to automatically cancel bookings that remain unpaid after the specified duration, ensuring seats are released for new reservations.
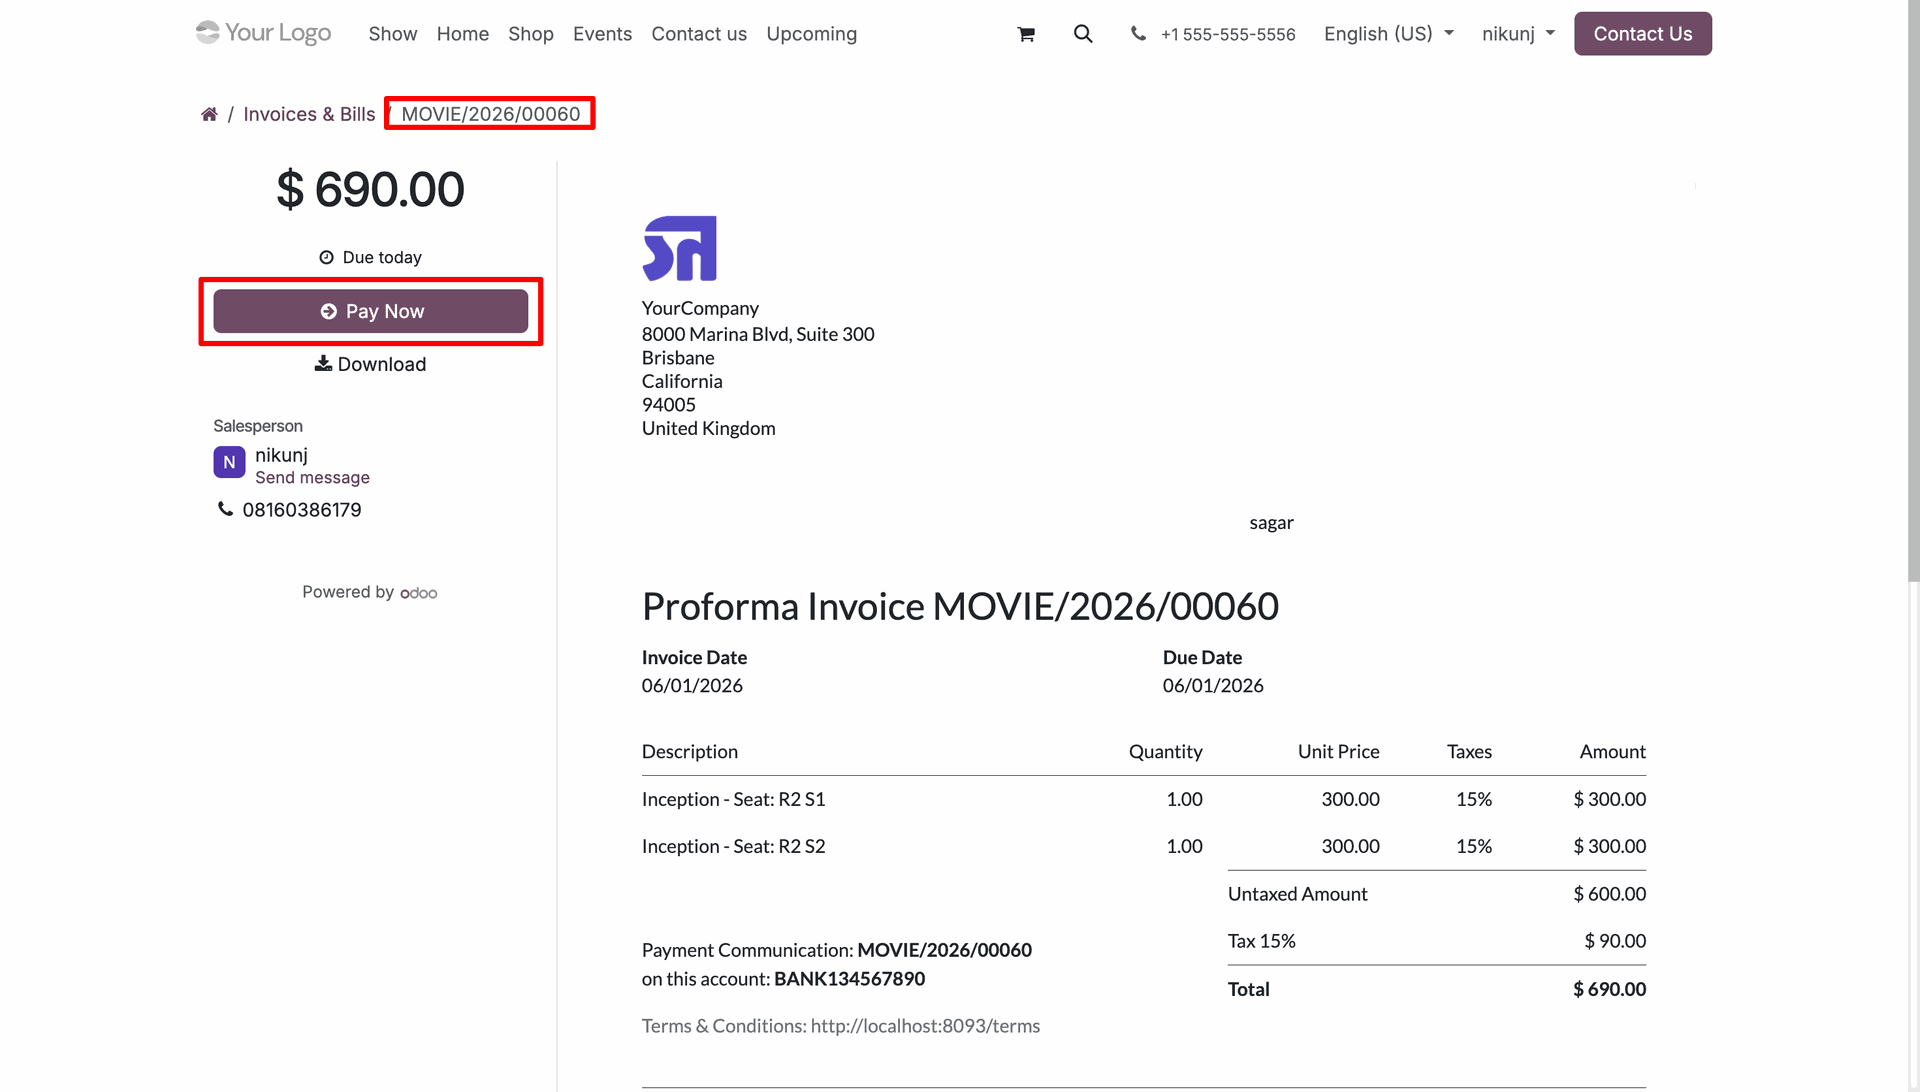
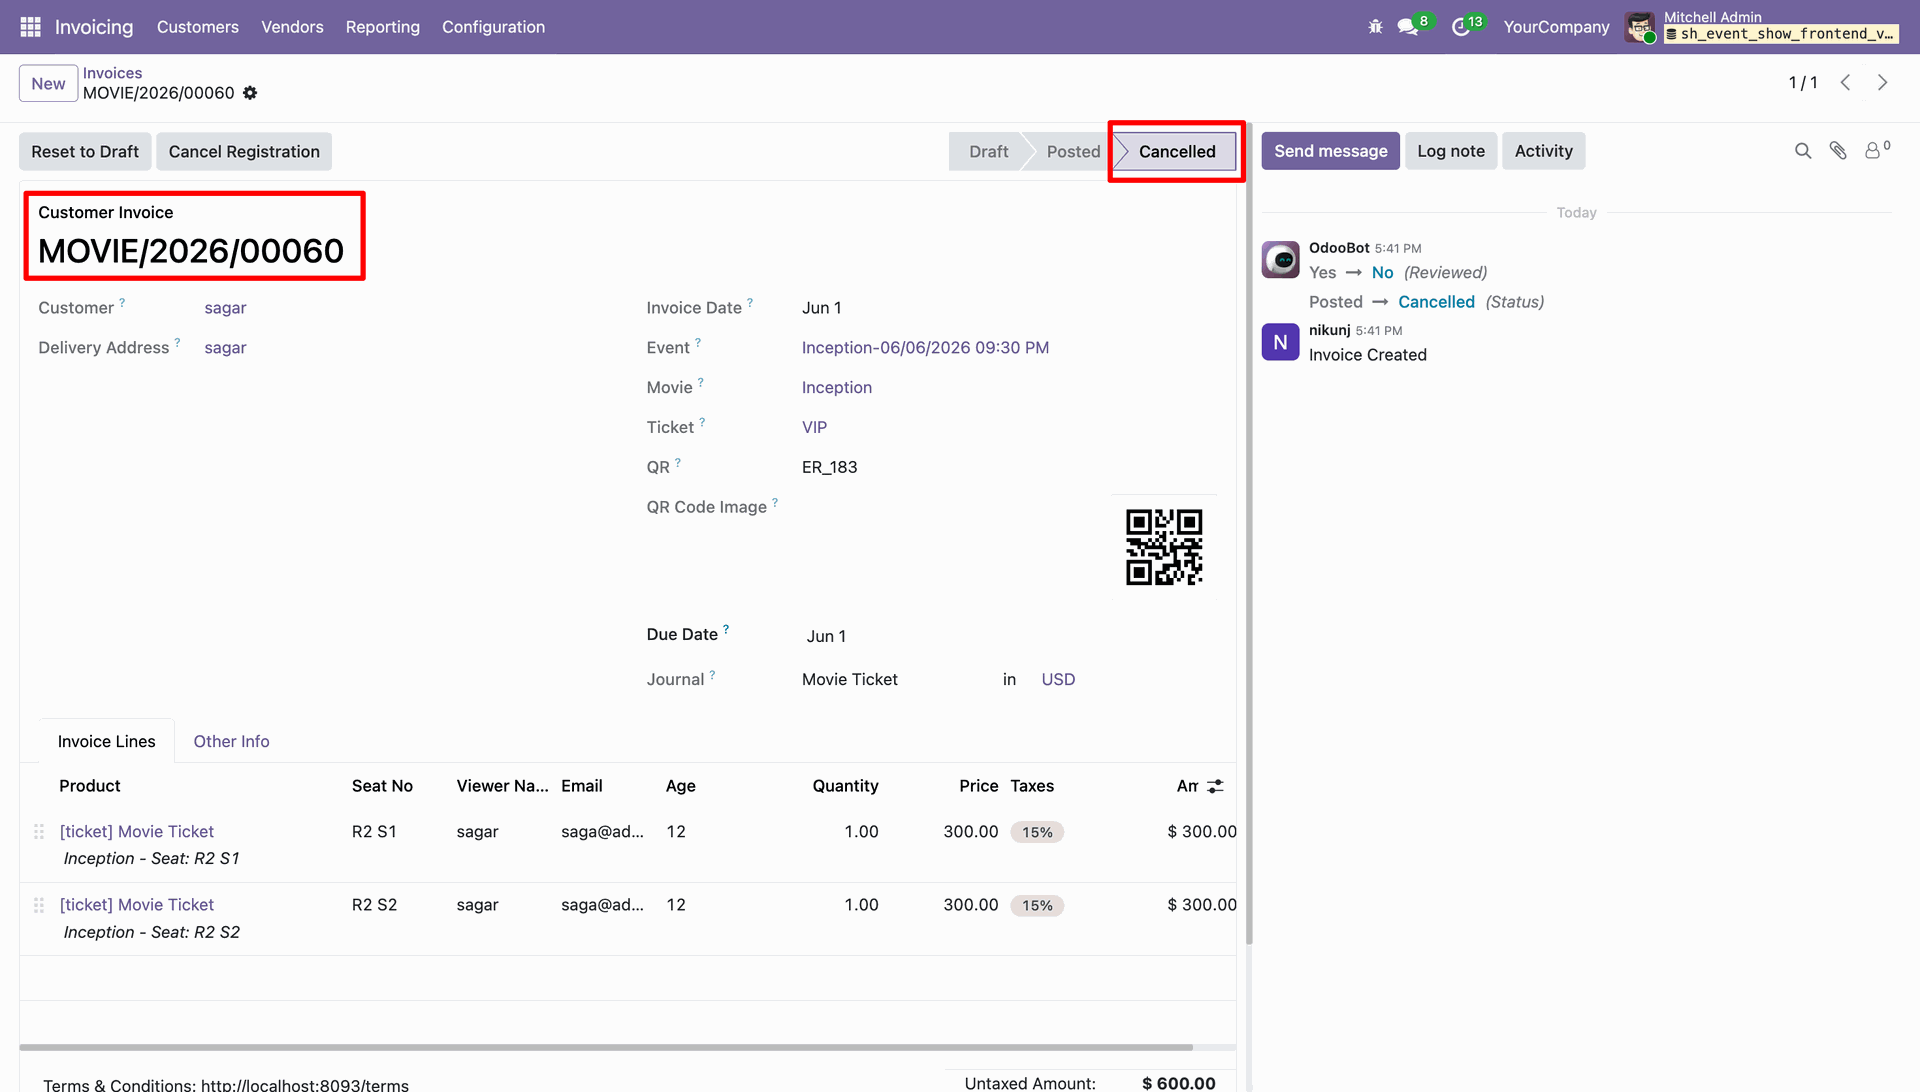
If a ticket booking invoice remains unpaid for the configured duration, the system will automatically cancel the booking, releasing the reserved seats for new bookings.
The Auto Cancel Unpaid Bookings scheduled action automatically identifies unpaid ticket bookings that have exceeded the configured time limit.
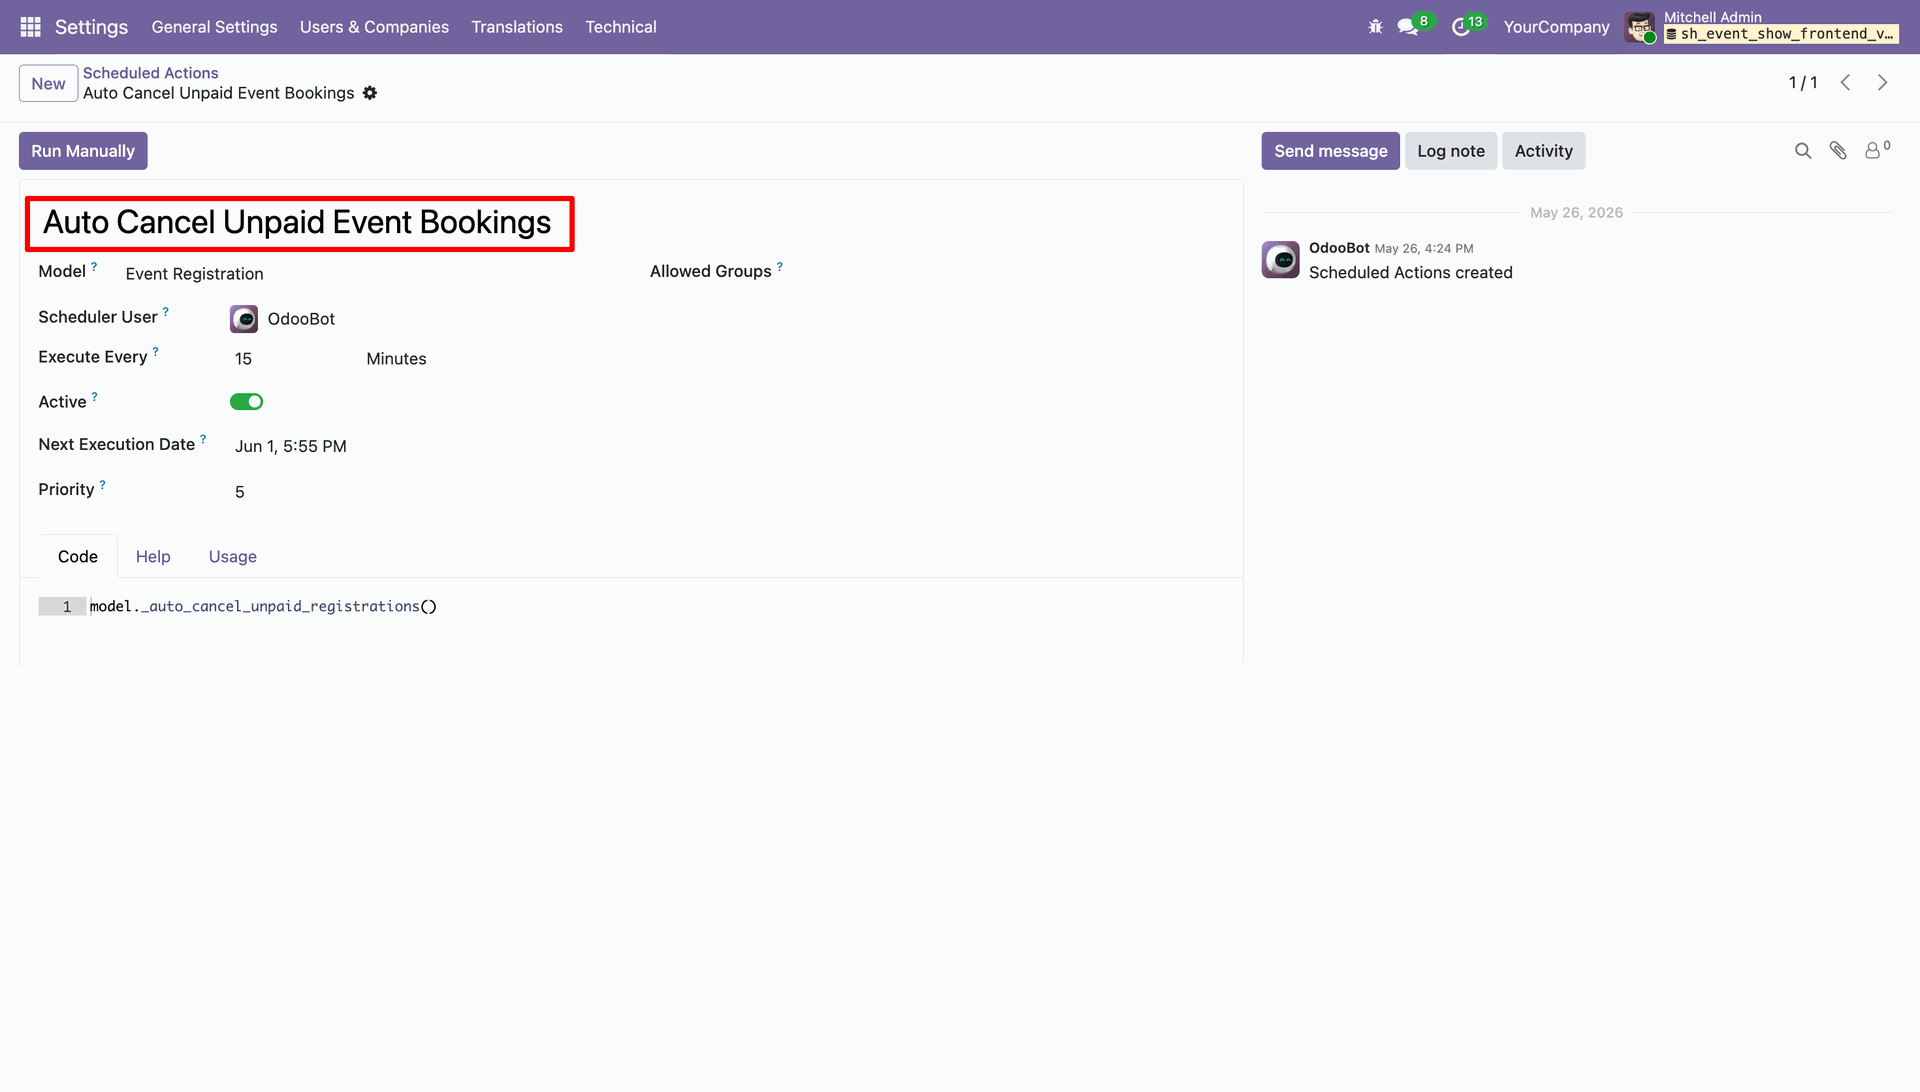
If the ticket booking invoice is not paid within the specified time, the booking will be automatically cancelled.
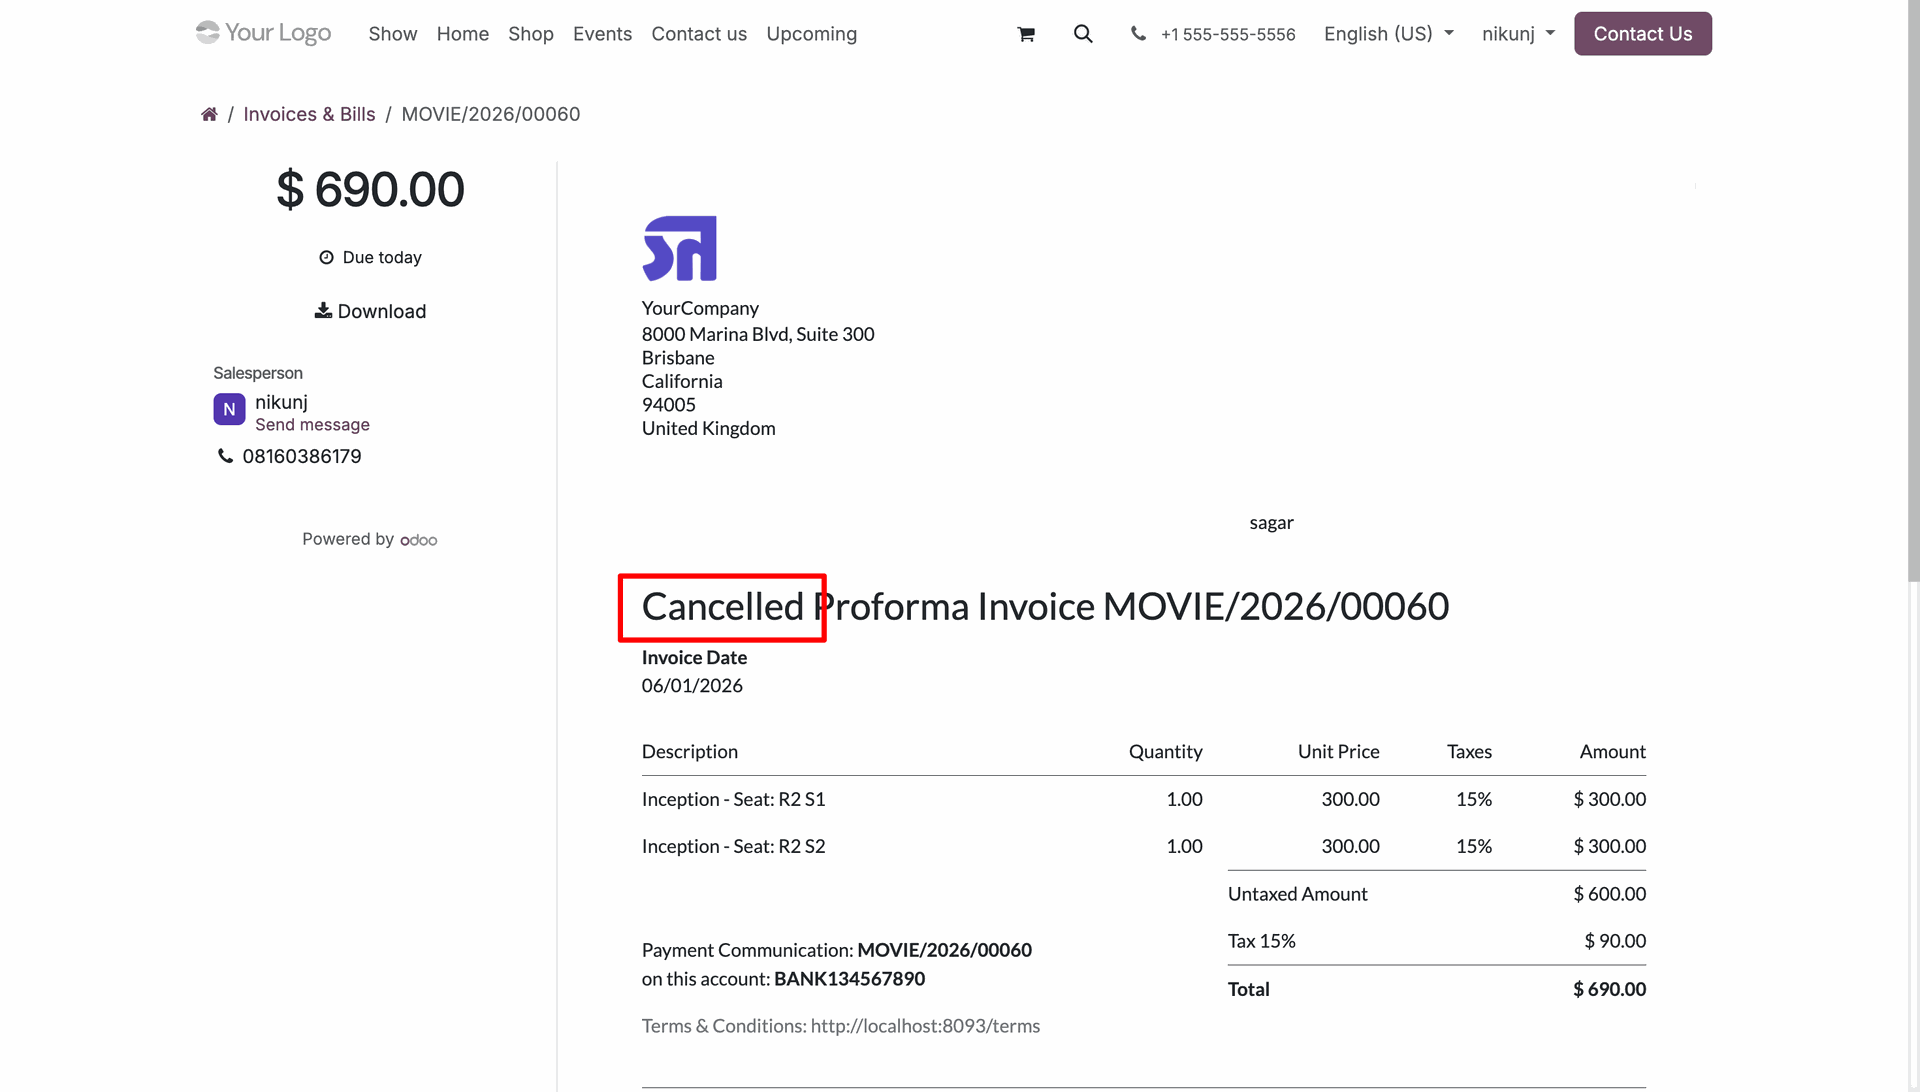
The booking cancellation is also reflected on the customer portal, allowing users to view the updated booking status after it has been automatically cancelled.
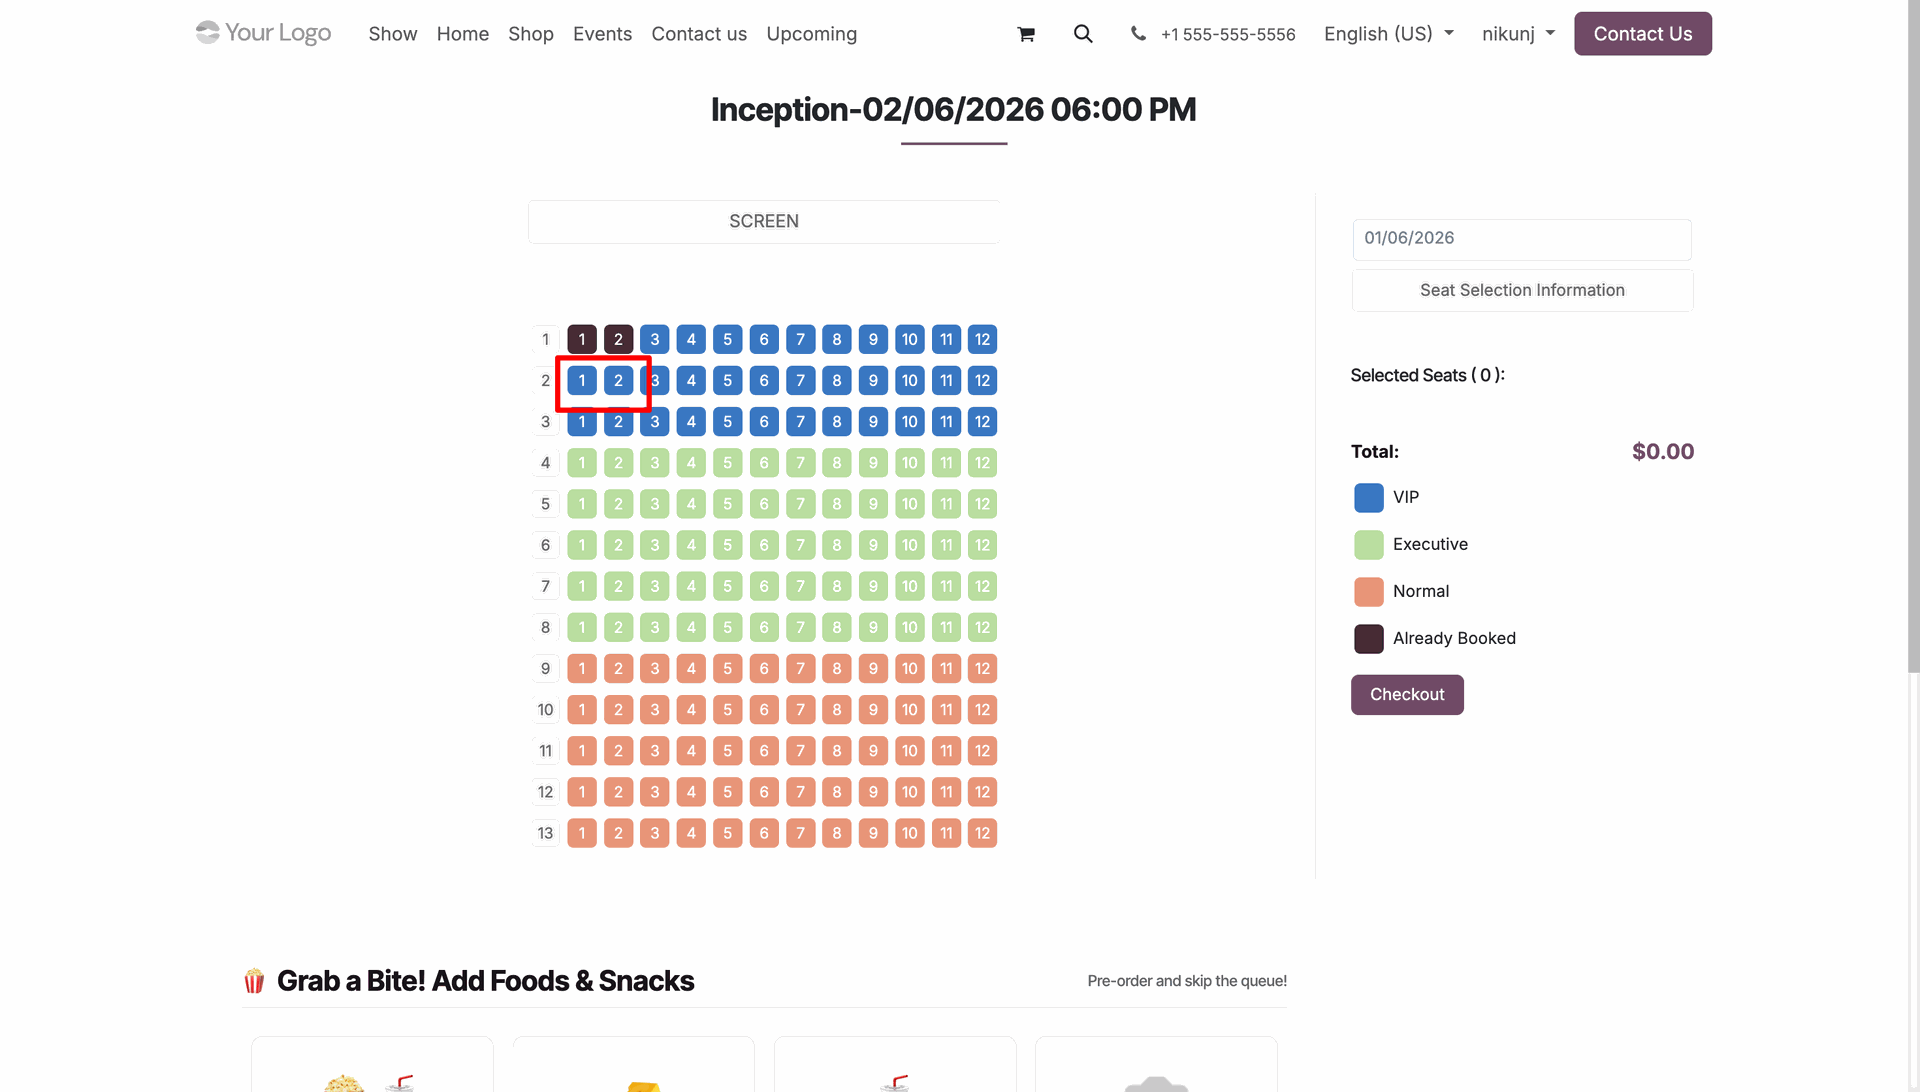
Once the booking is cancelled, the reserved seats are automatically released and become available for new bookings.
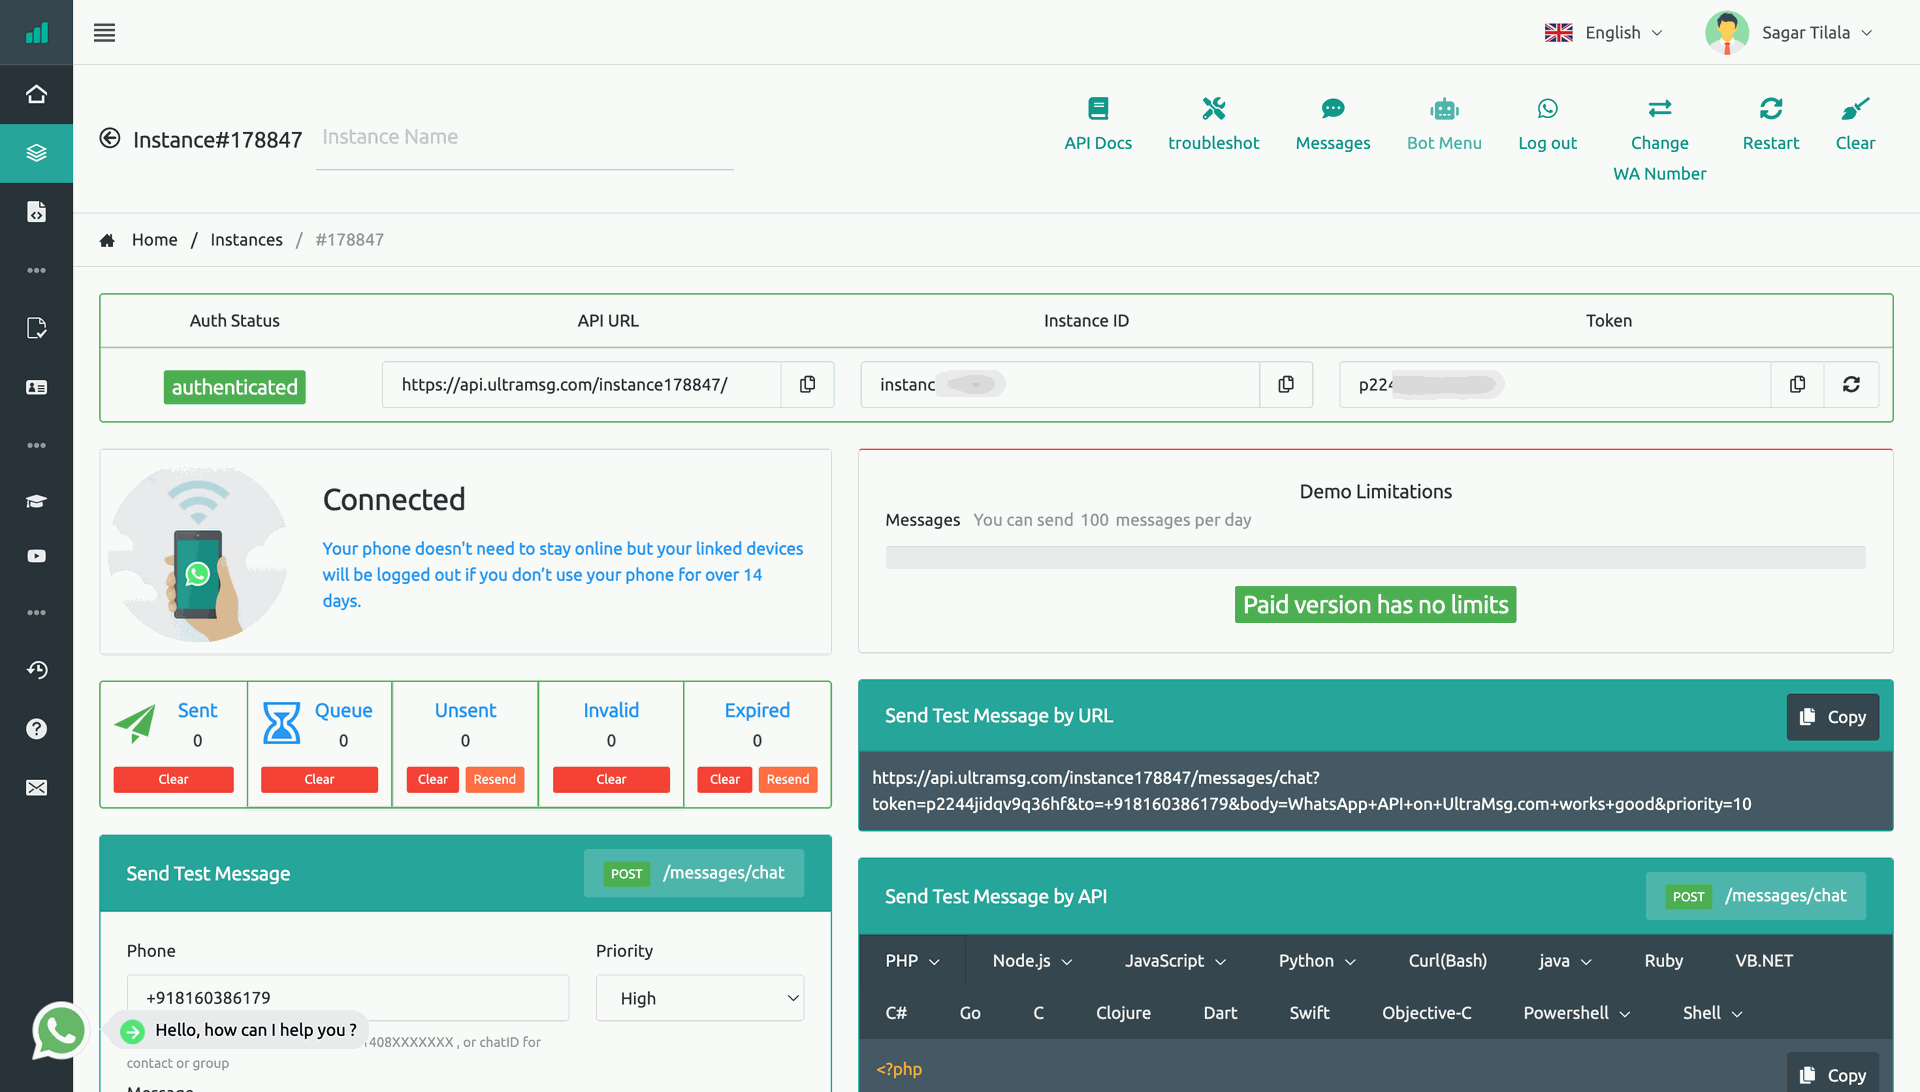
Generate WhatsApp Instance API ID and Token.
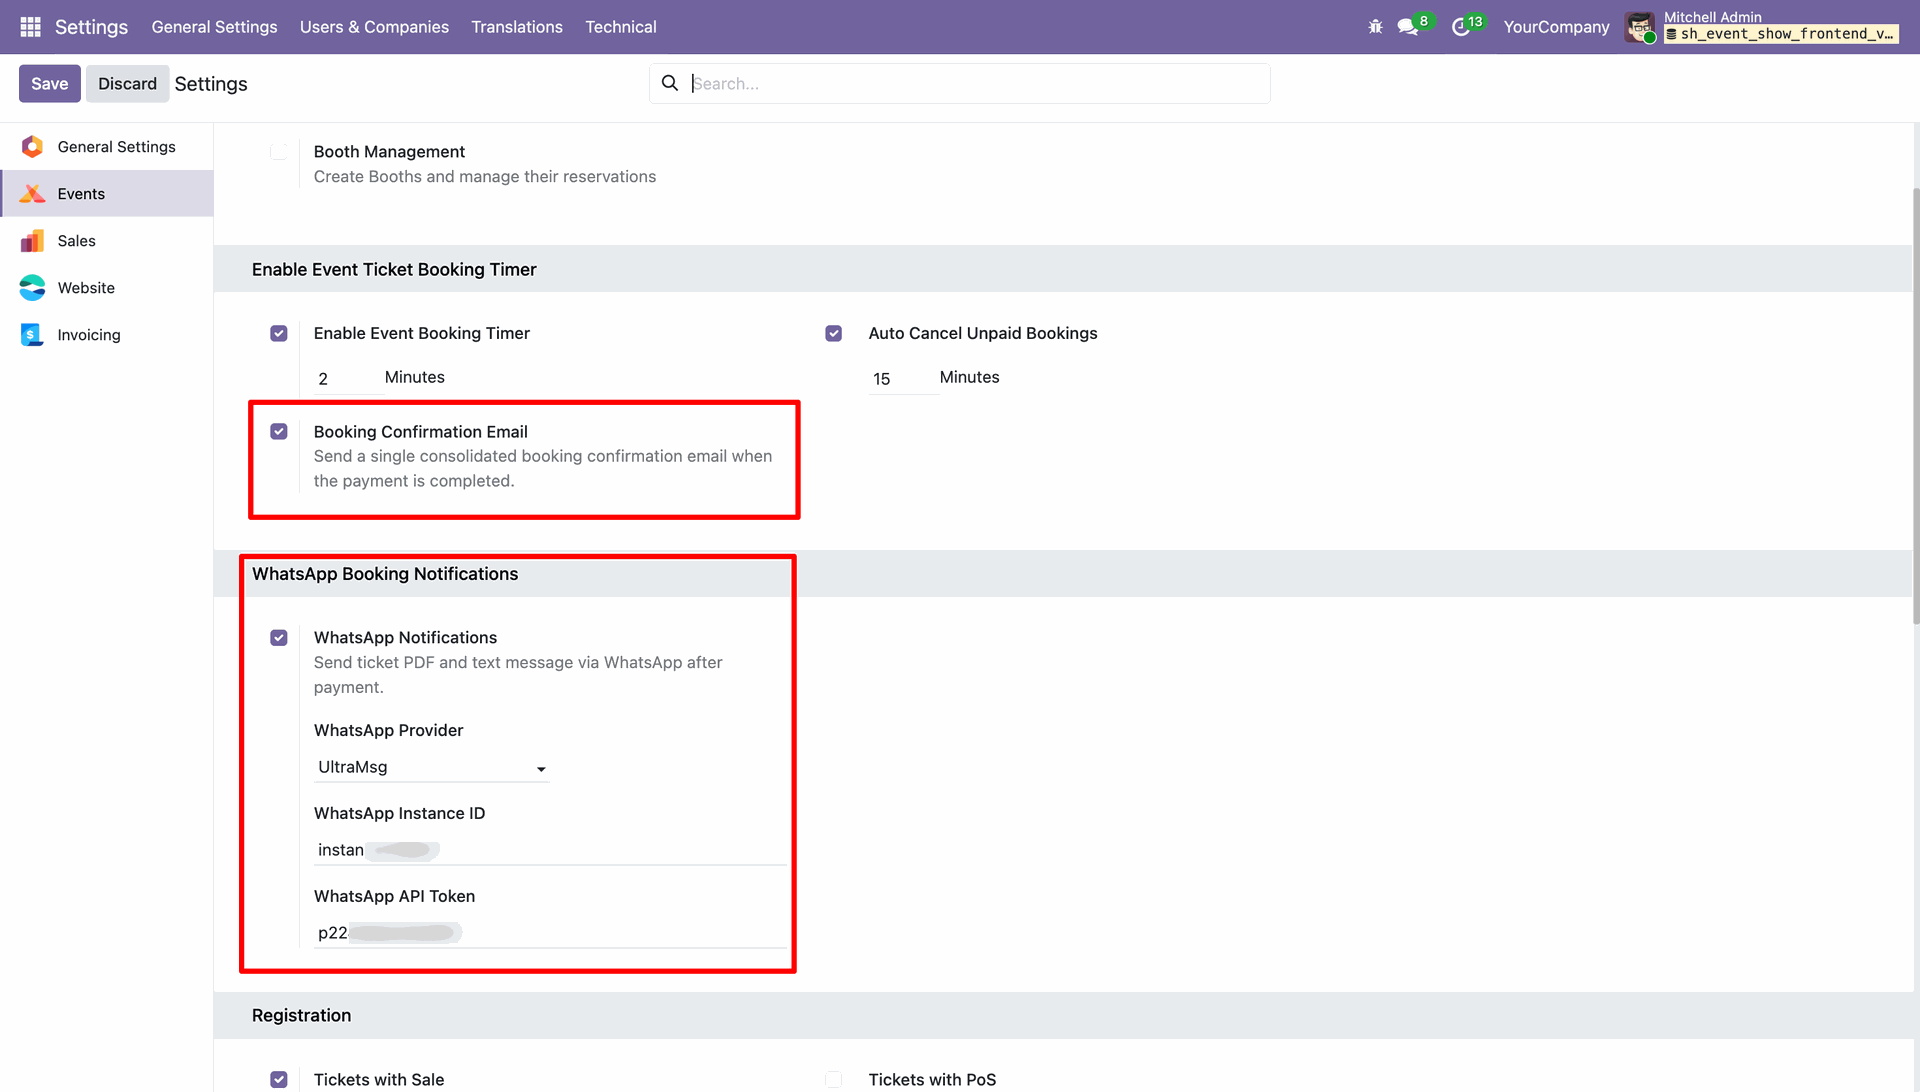
Go to the Events Settings, enable Booking Confirmation Email, then enable WhatsApp Notifications. After that, configure the WhatsApp Provider, enter the Instance ID and API Token, and save the settings.
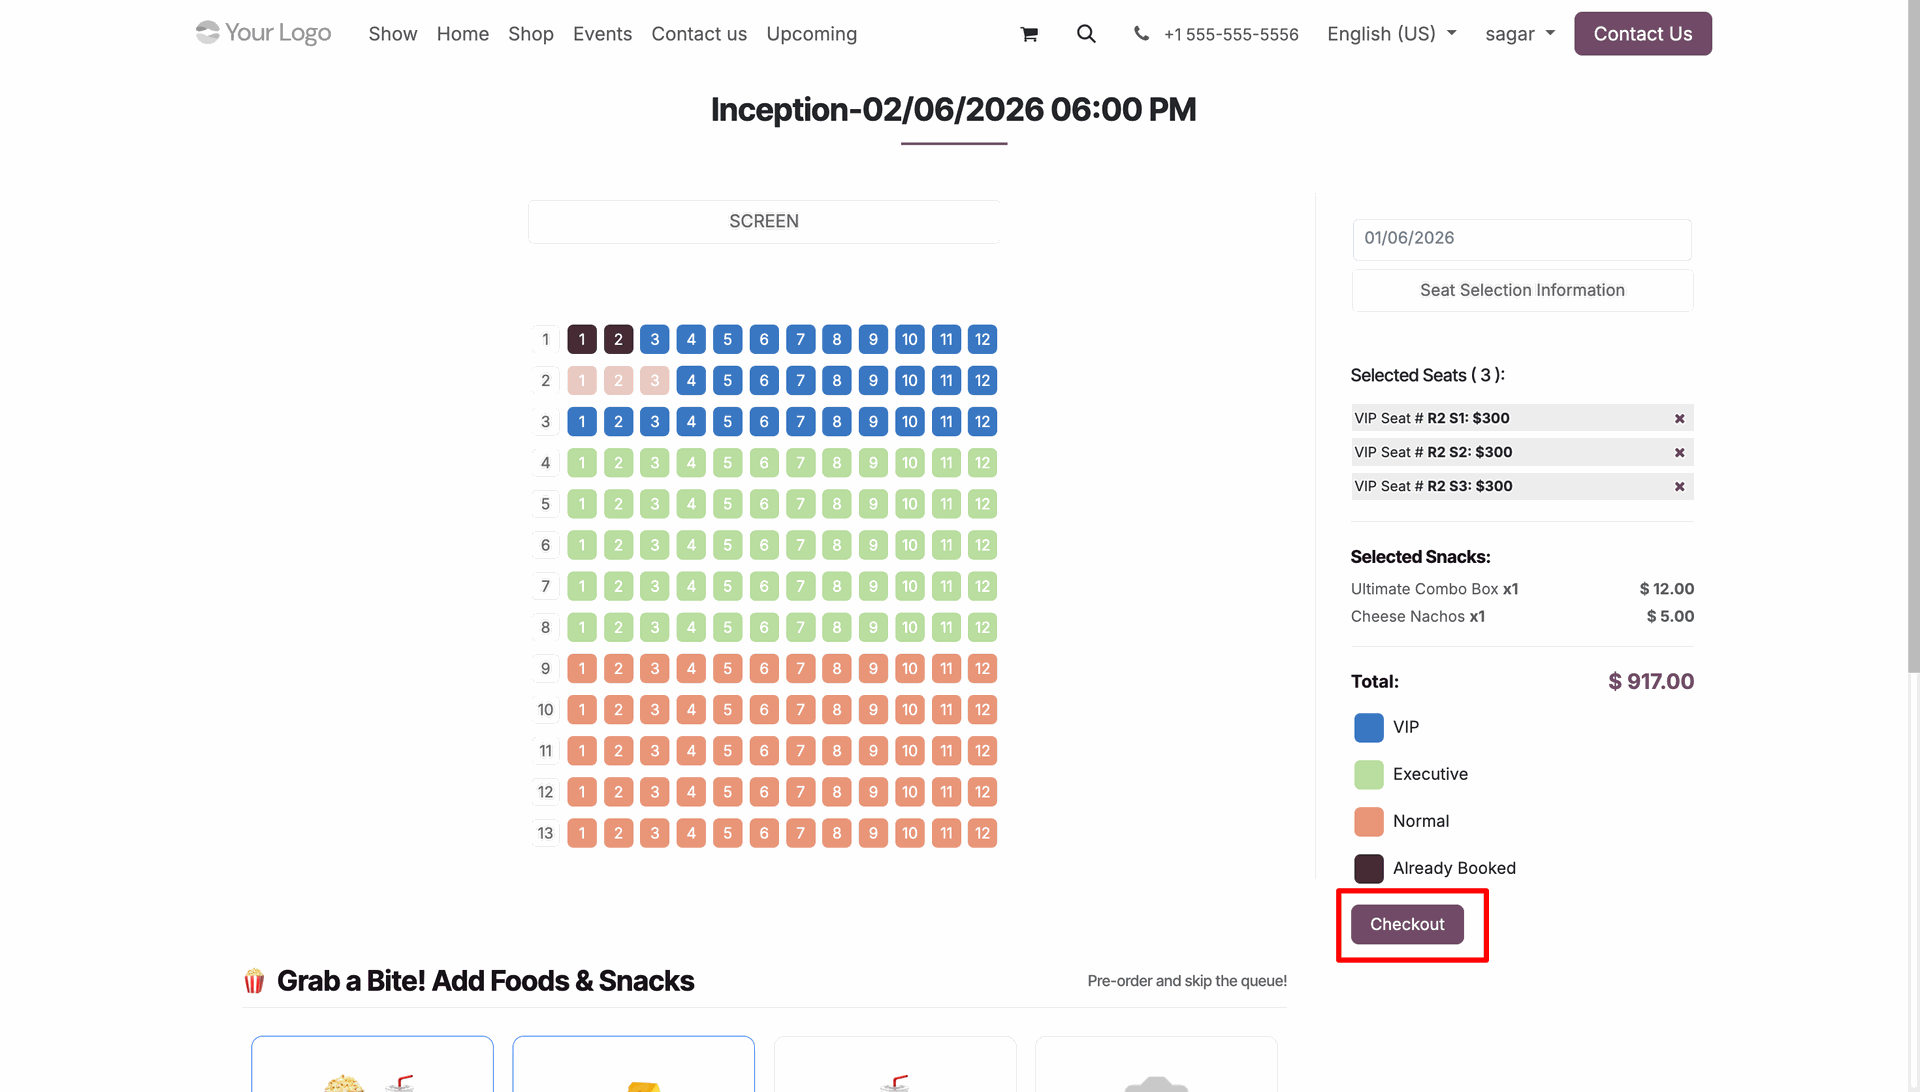
Select the desired movie tickets and click the Checkout button to proceed with the booking and payment process.
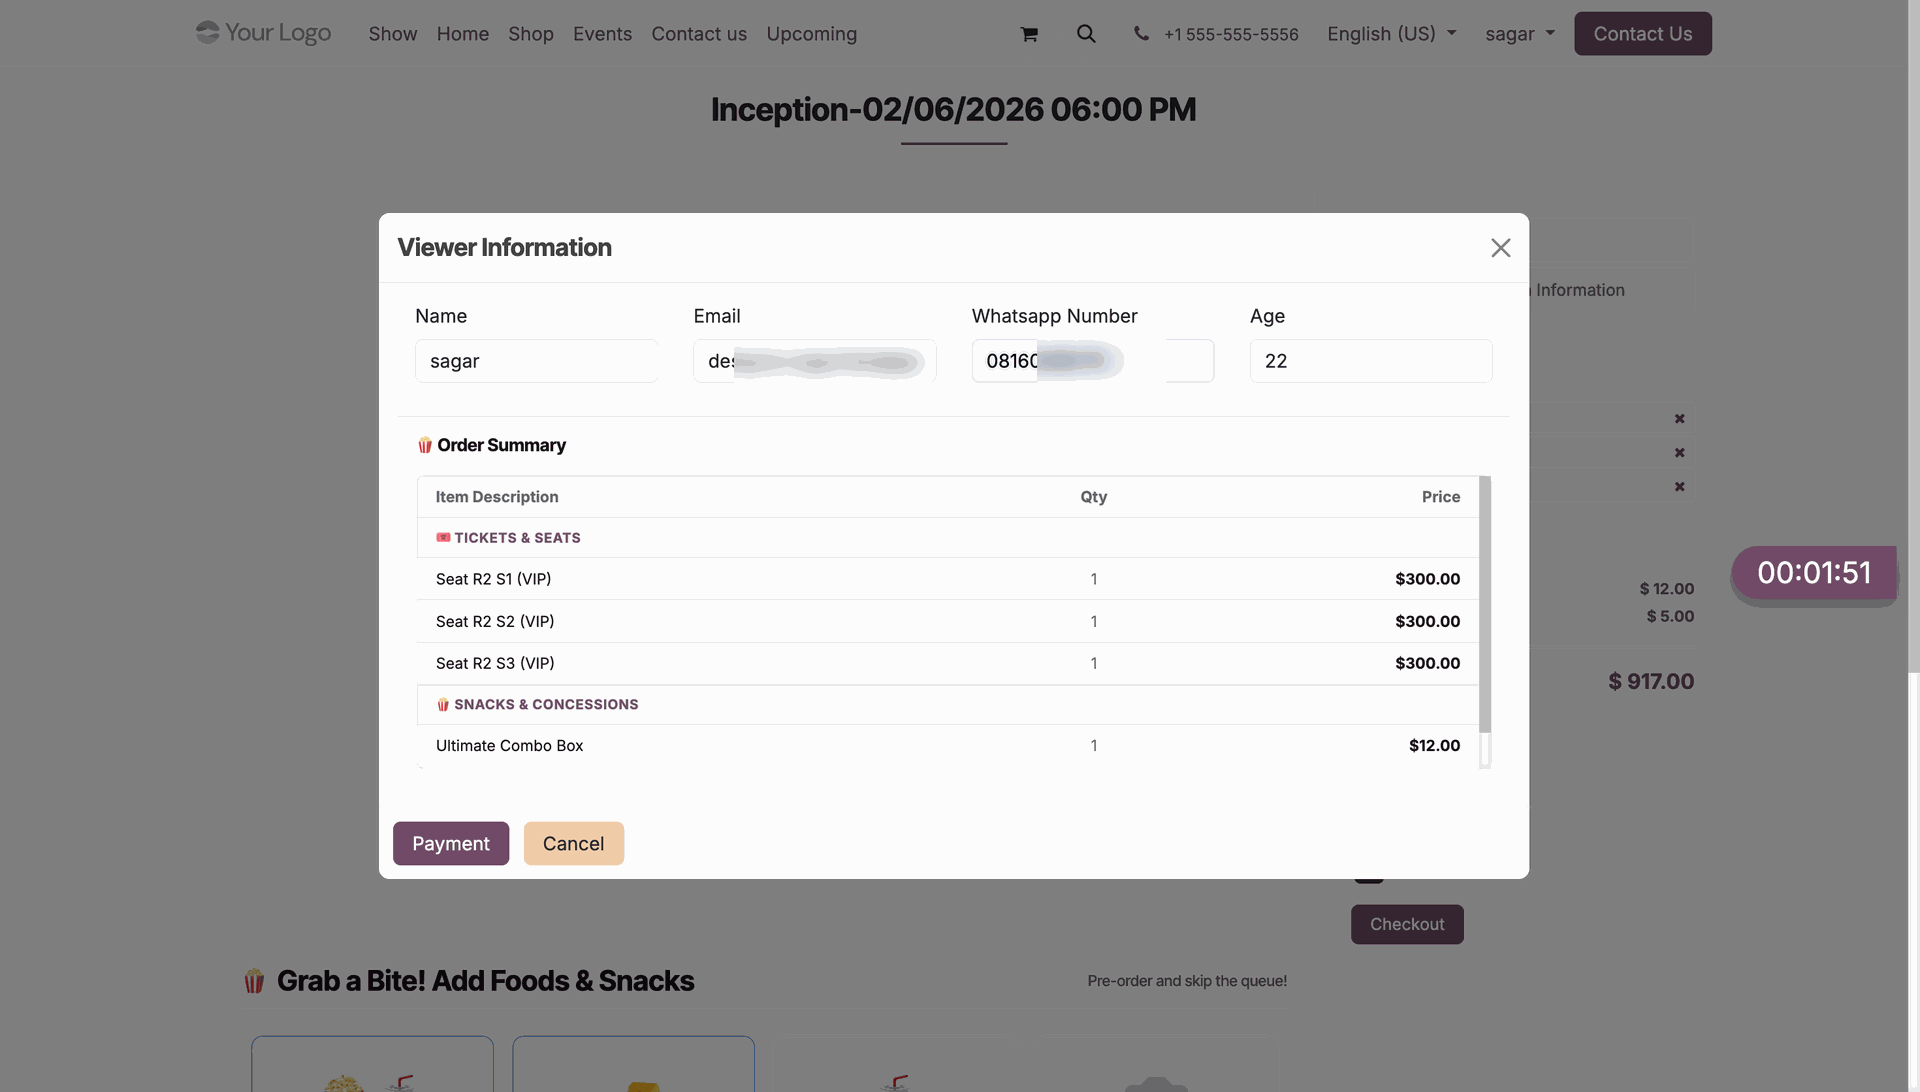
Clicking the Checkout button opens the Viewer Information page. checked the required viewer details, then click the Payment button to continue with the payment process.
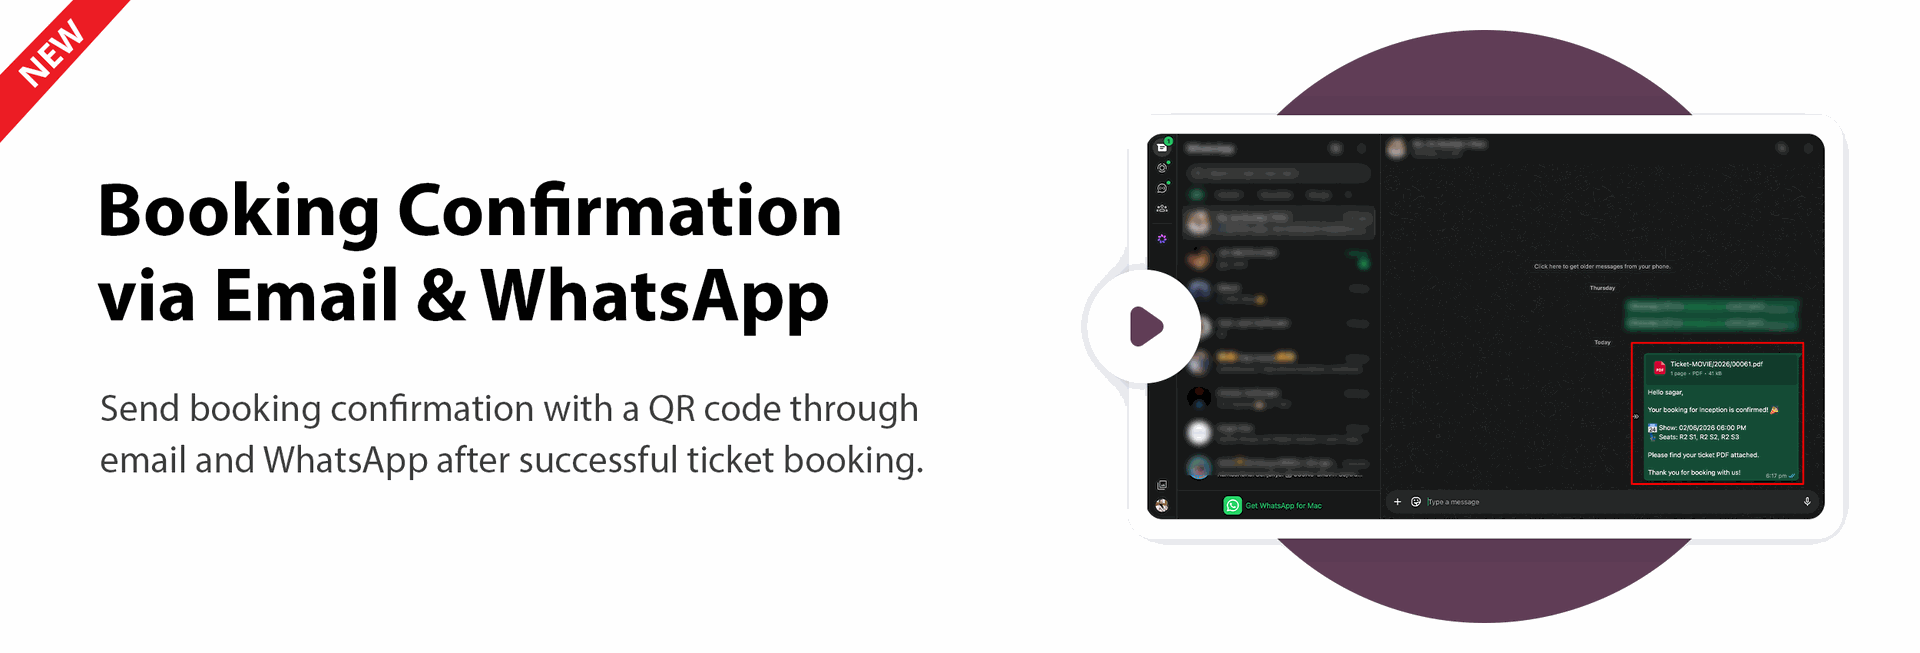
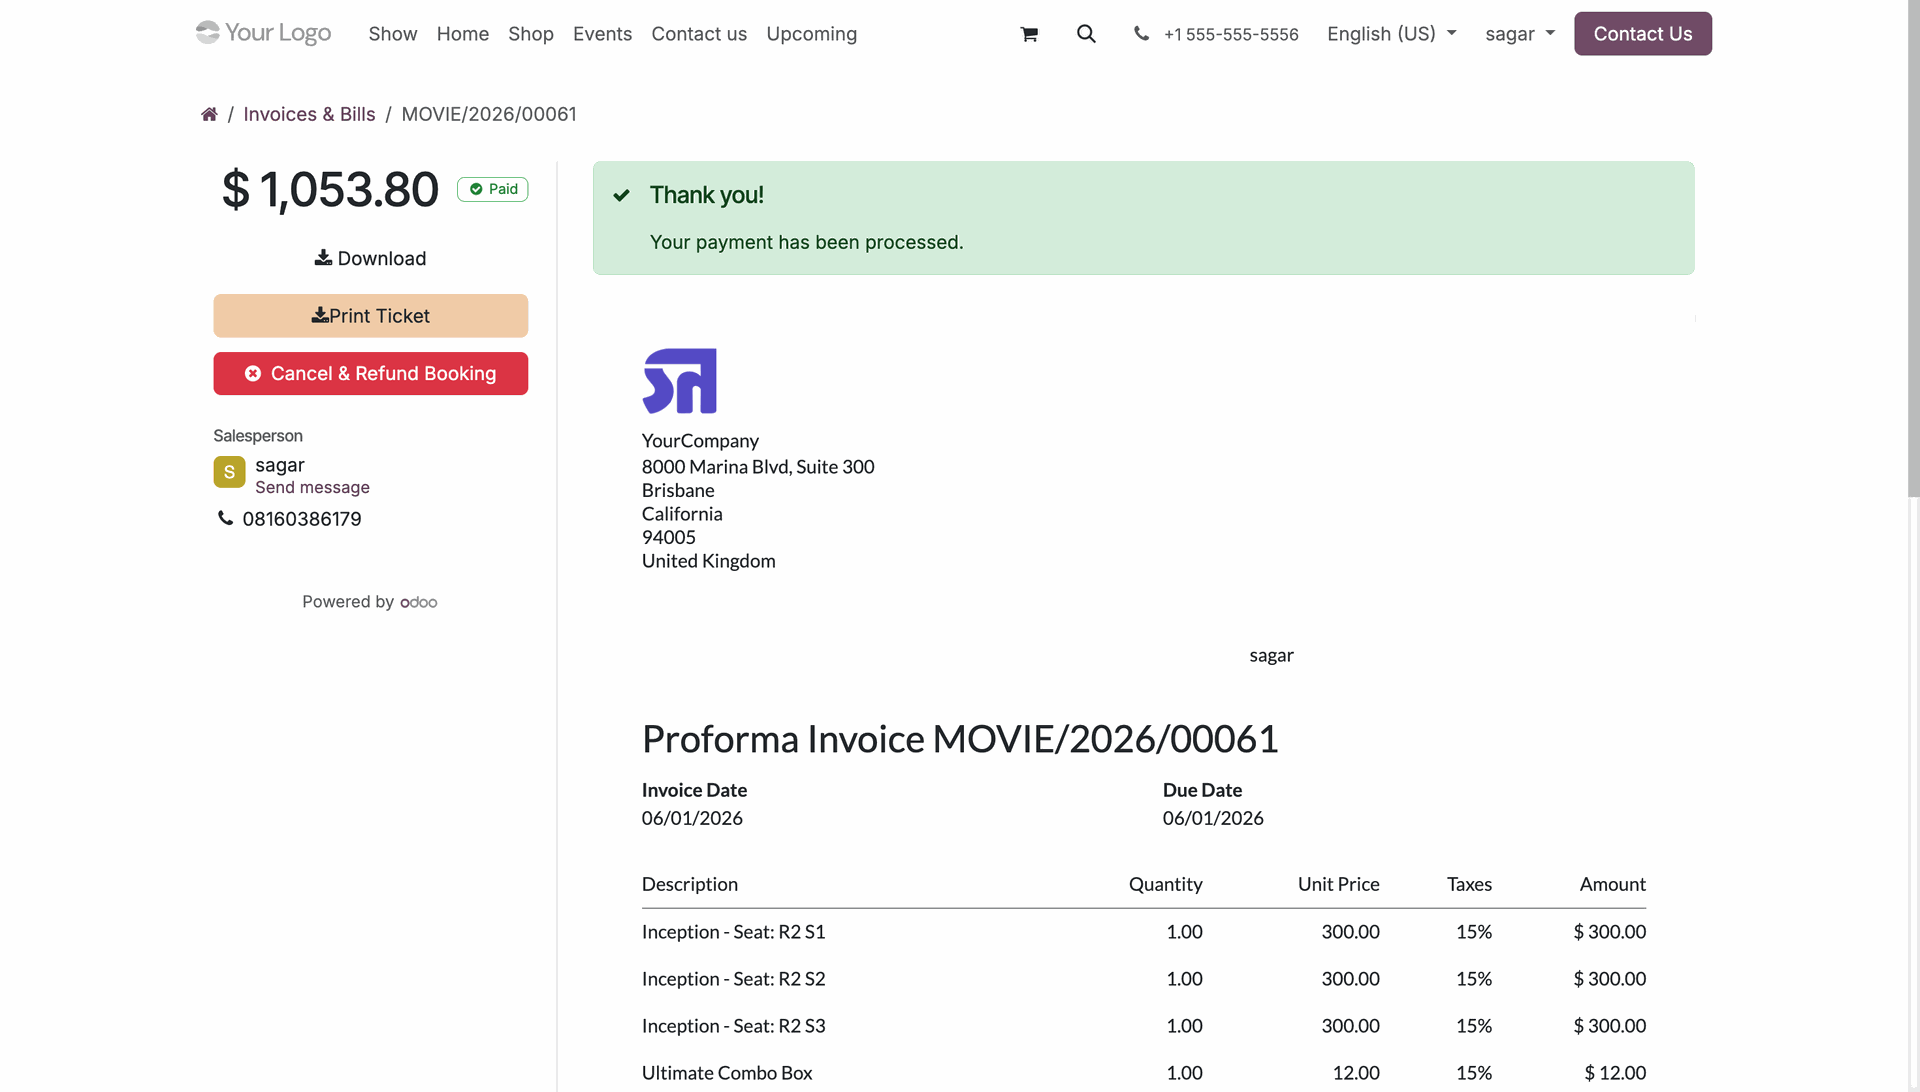
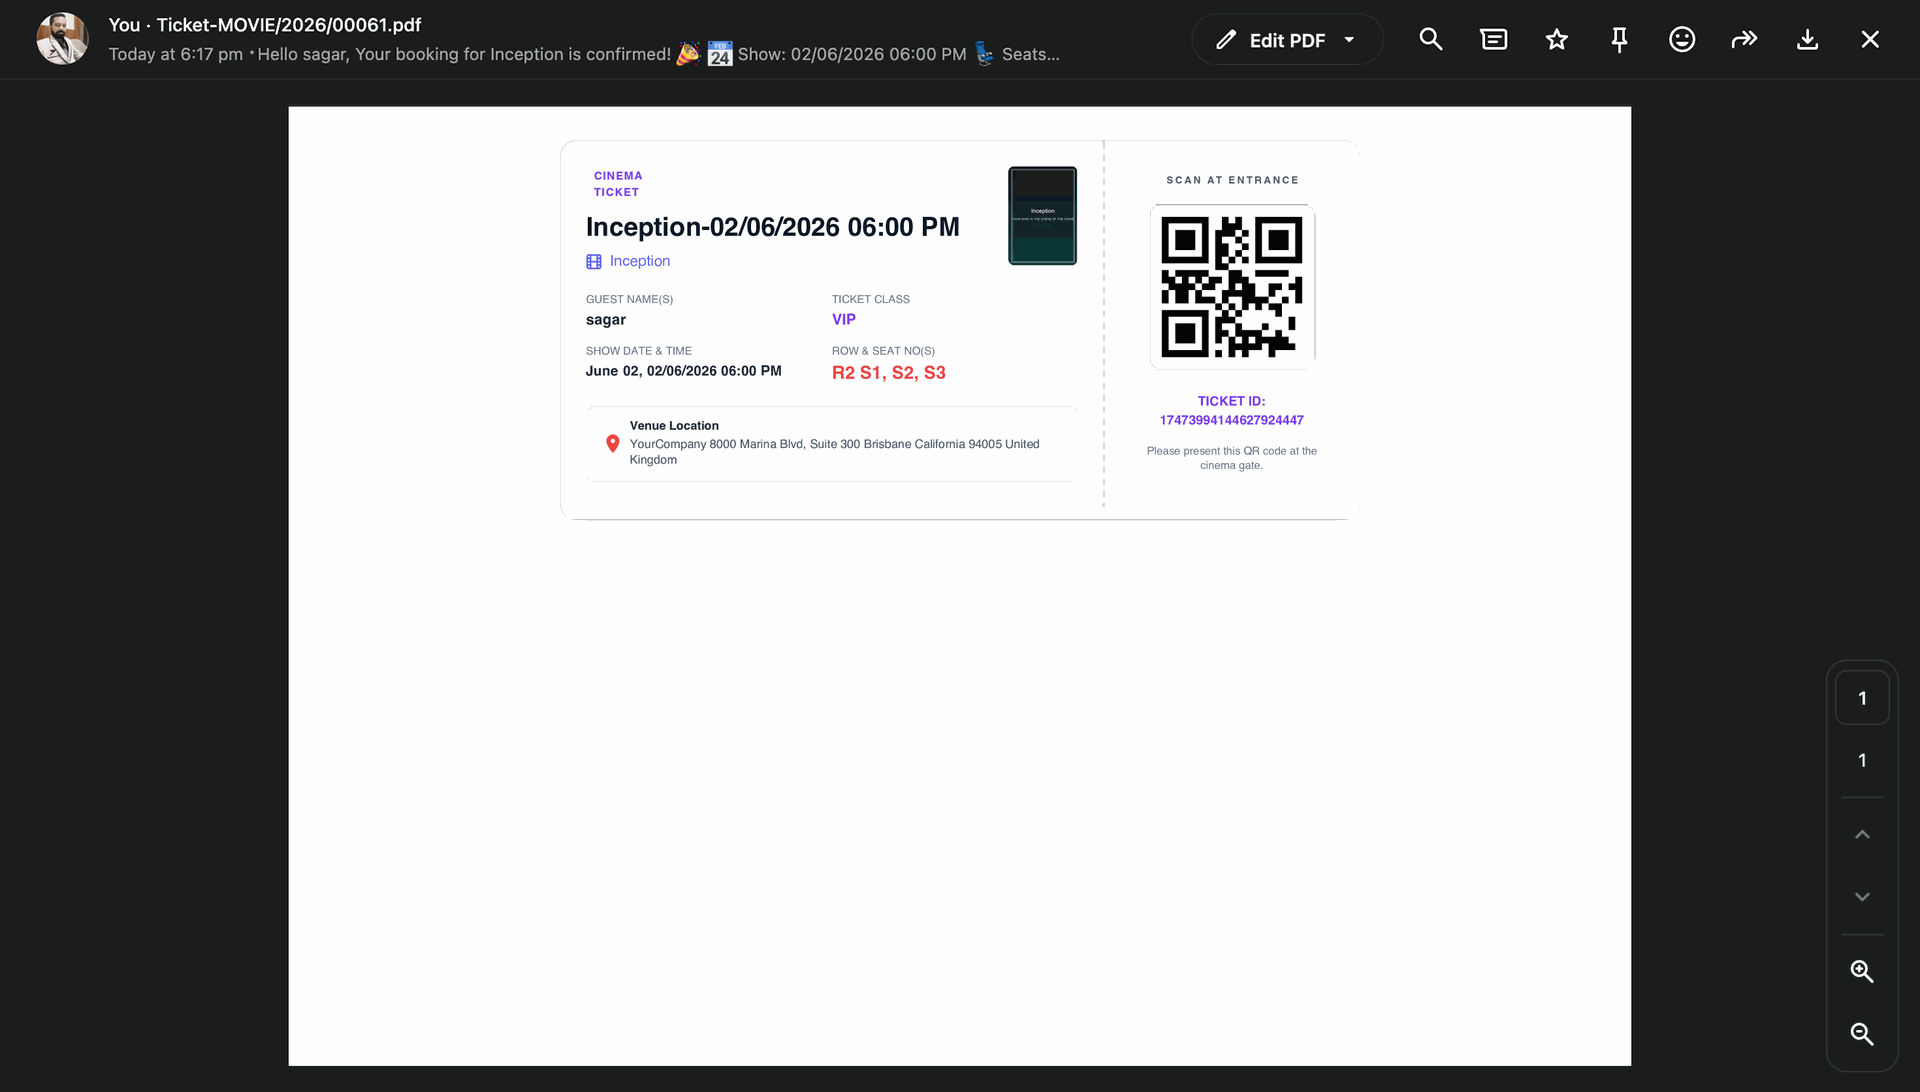
The payment has been successfully processed, and the ticket booking is confirmed. A booking confirmation email and WhatsApp notification are automatically sent to the customer with the booking details and QR code.
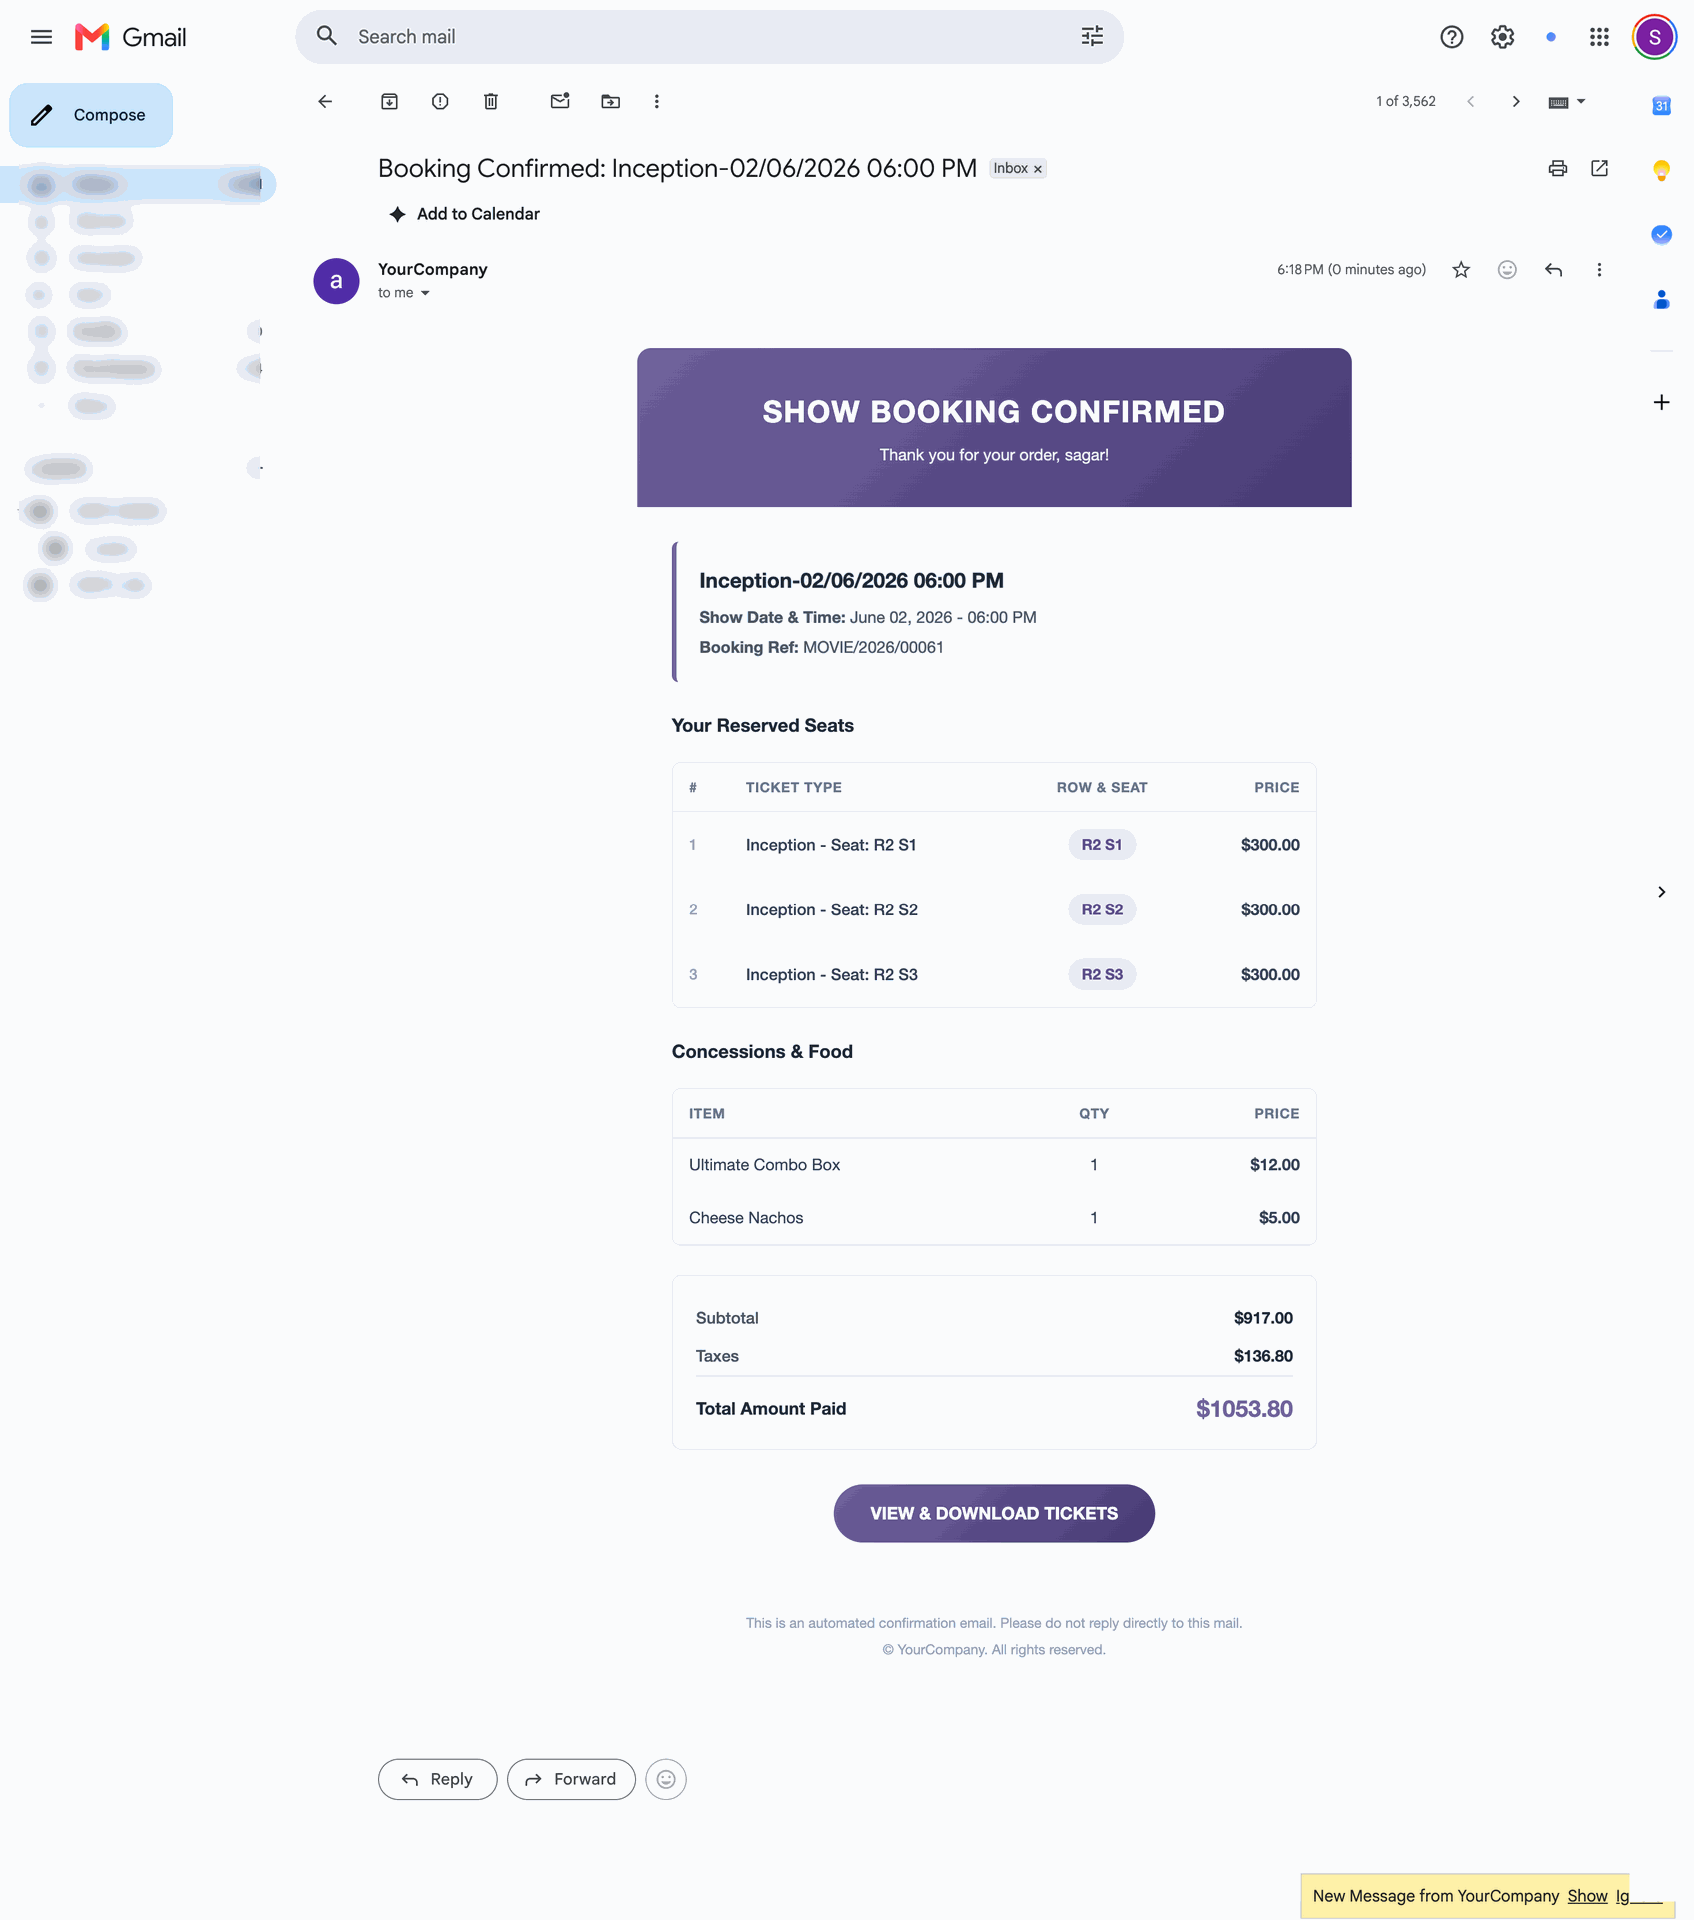
Upon successful booking, a Booking Confirmation email is automatically sent to the customer with the booking details, ticket information, and other relevant confirmation details.
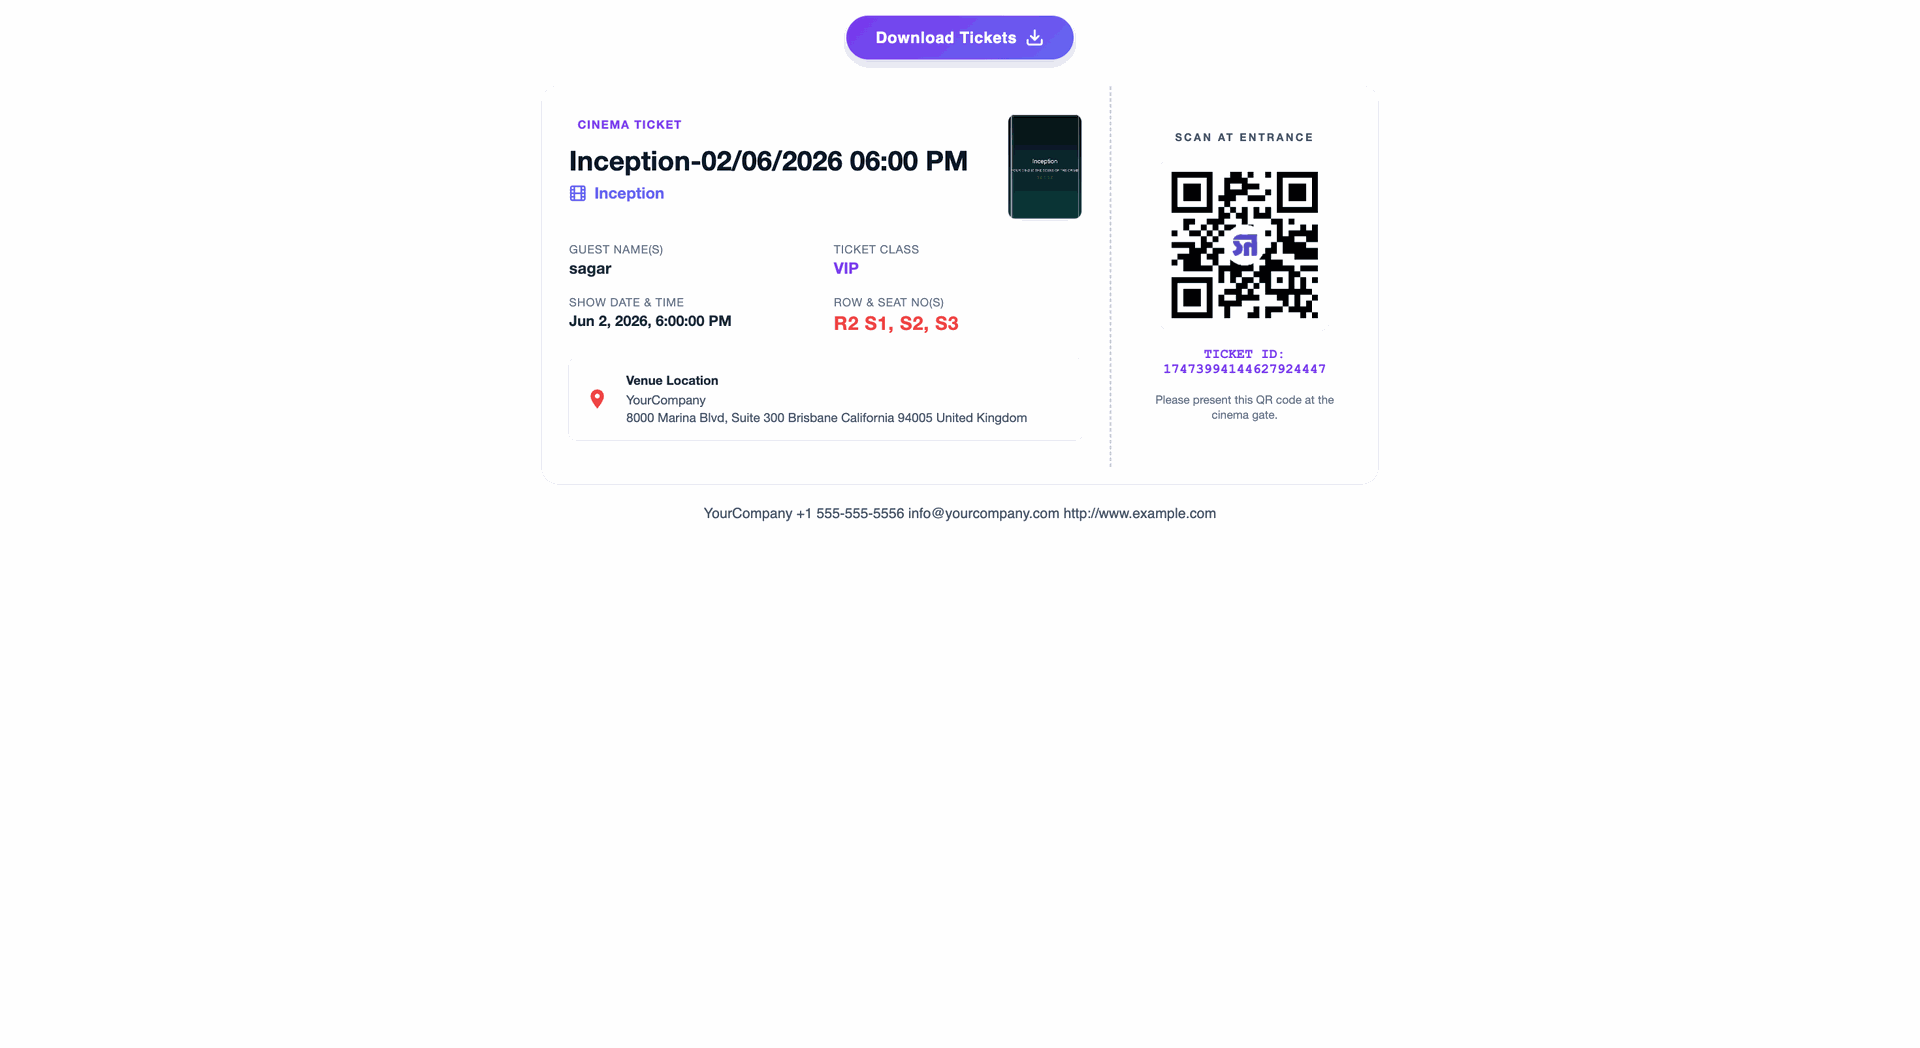
Users can view and download their ticket directly from the Booking Confirmation email.
Upon successful booking, a Booking Confirmation WhatsApp message is automatically sent to the customer with the booking details, ticket information, and a link or attachment to access the ticket the Search Functionality of the Knowledge Base.
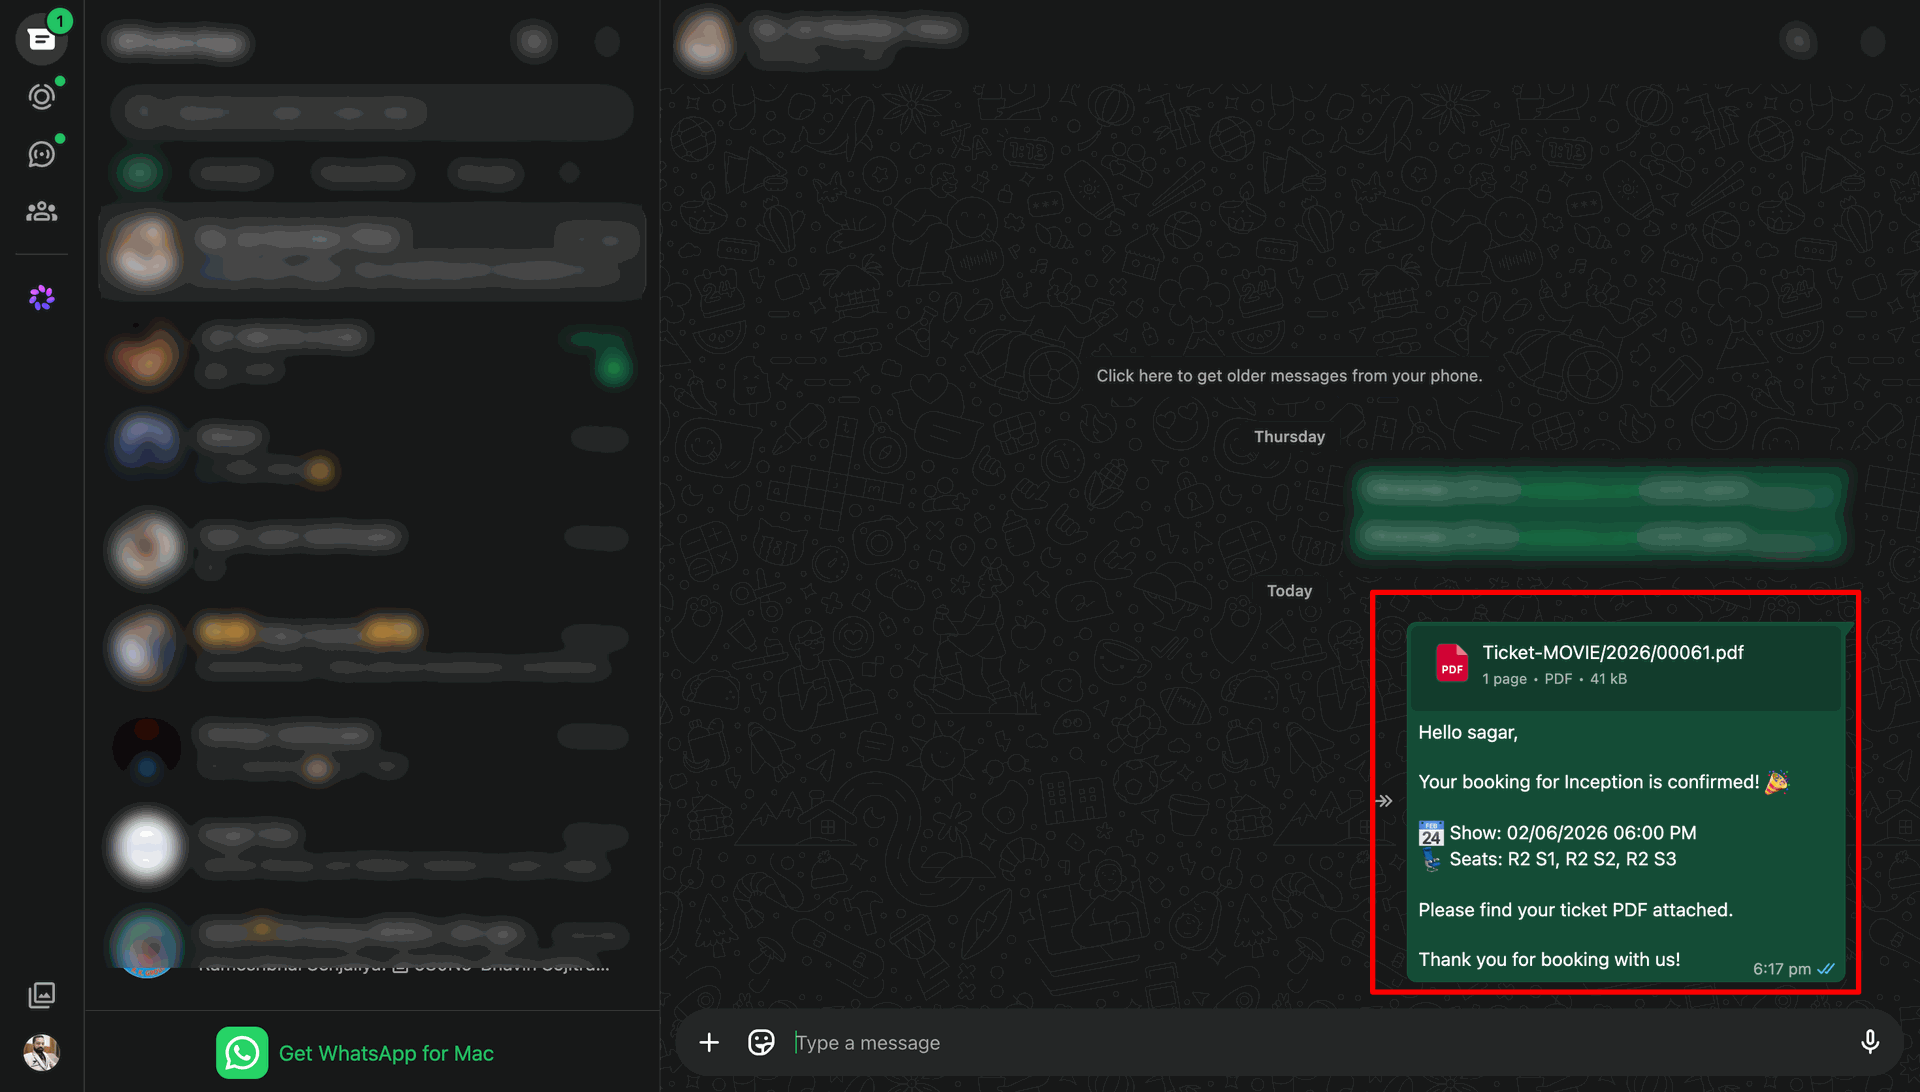
Users can also view and download the ticket directly from the Booking Confirmation WhatsApp message, providing quick and convenient access to their booking.
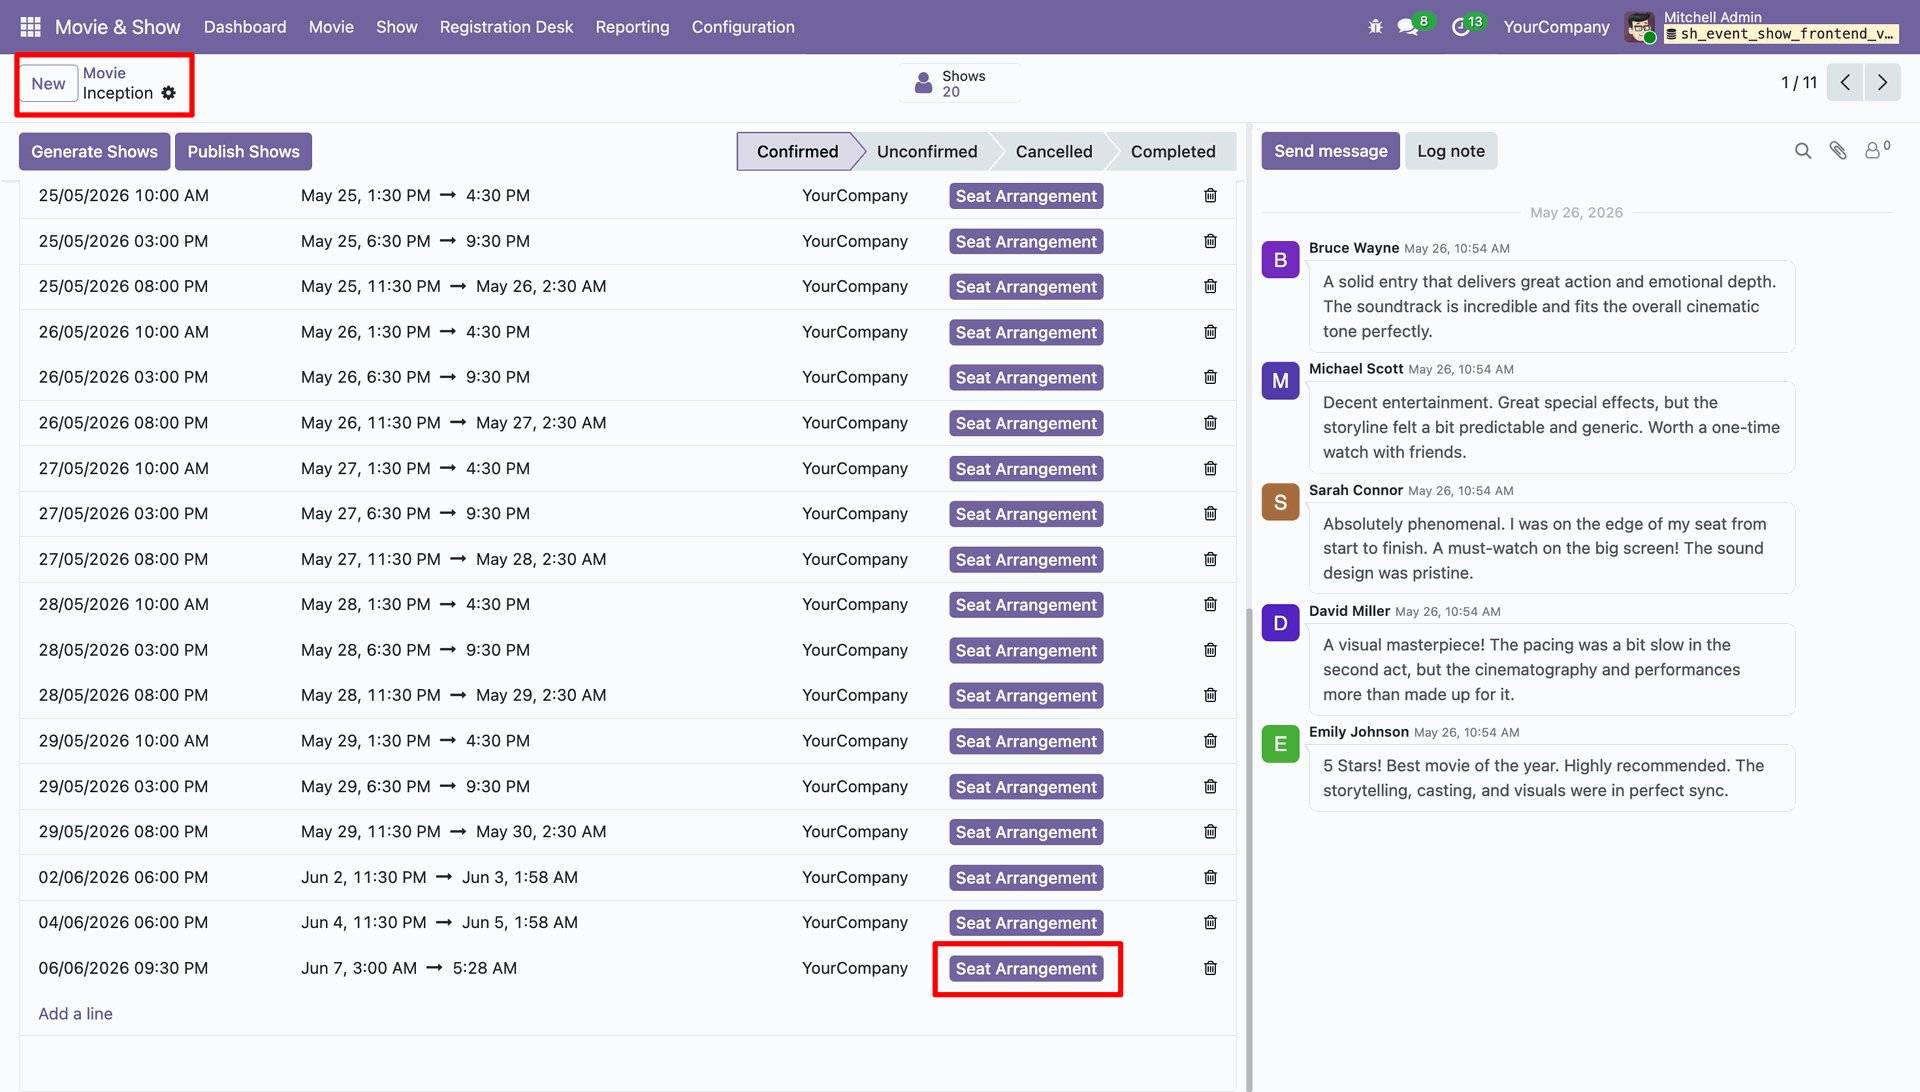
Go to the Movie Form View and click the Seat Arrangements button to configure and manage the seating layout for the selected movie or show.
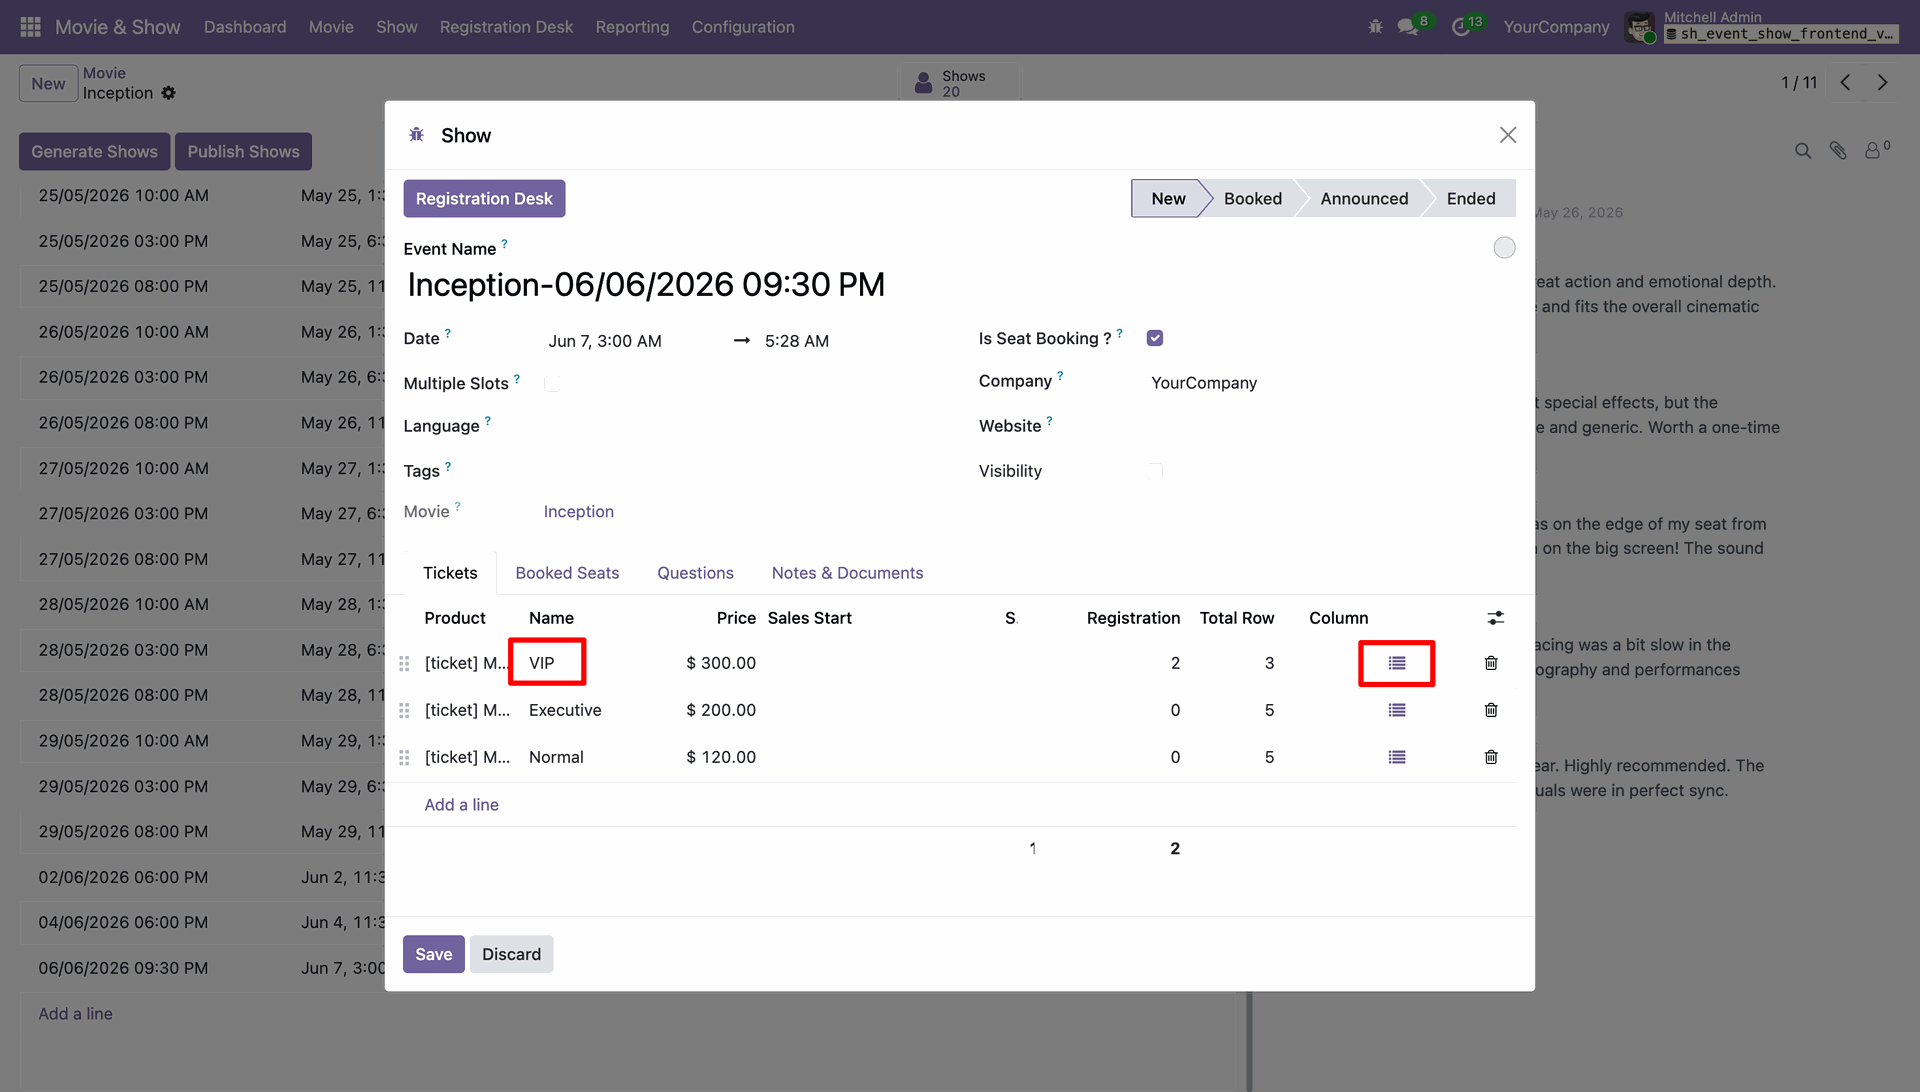
A Show wizard will open. Add the VIP seats as required, then click Open Seat Arrangement to configure and manage the seating layout.
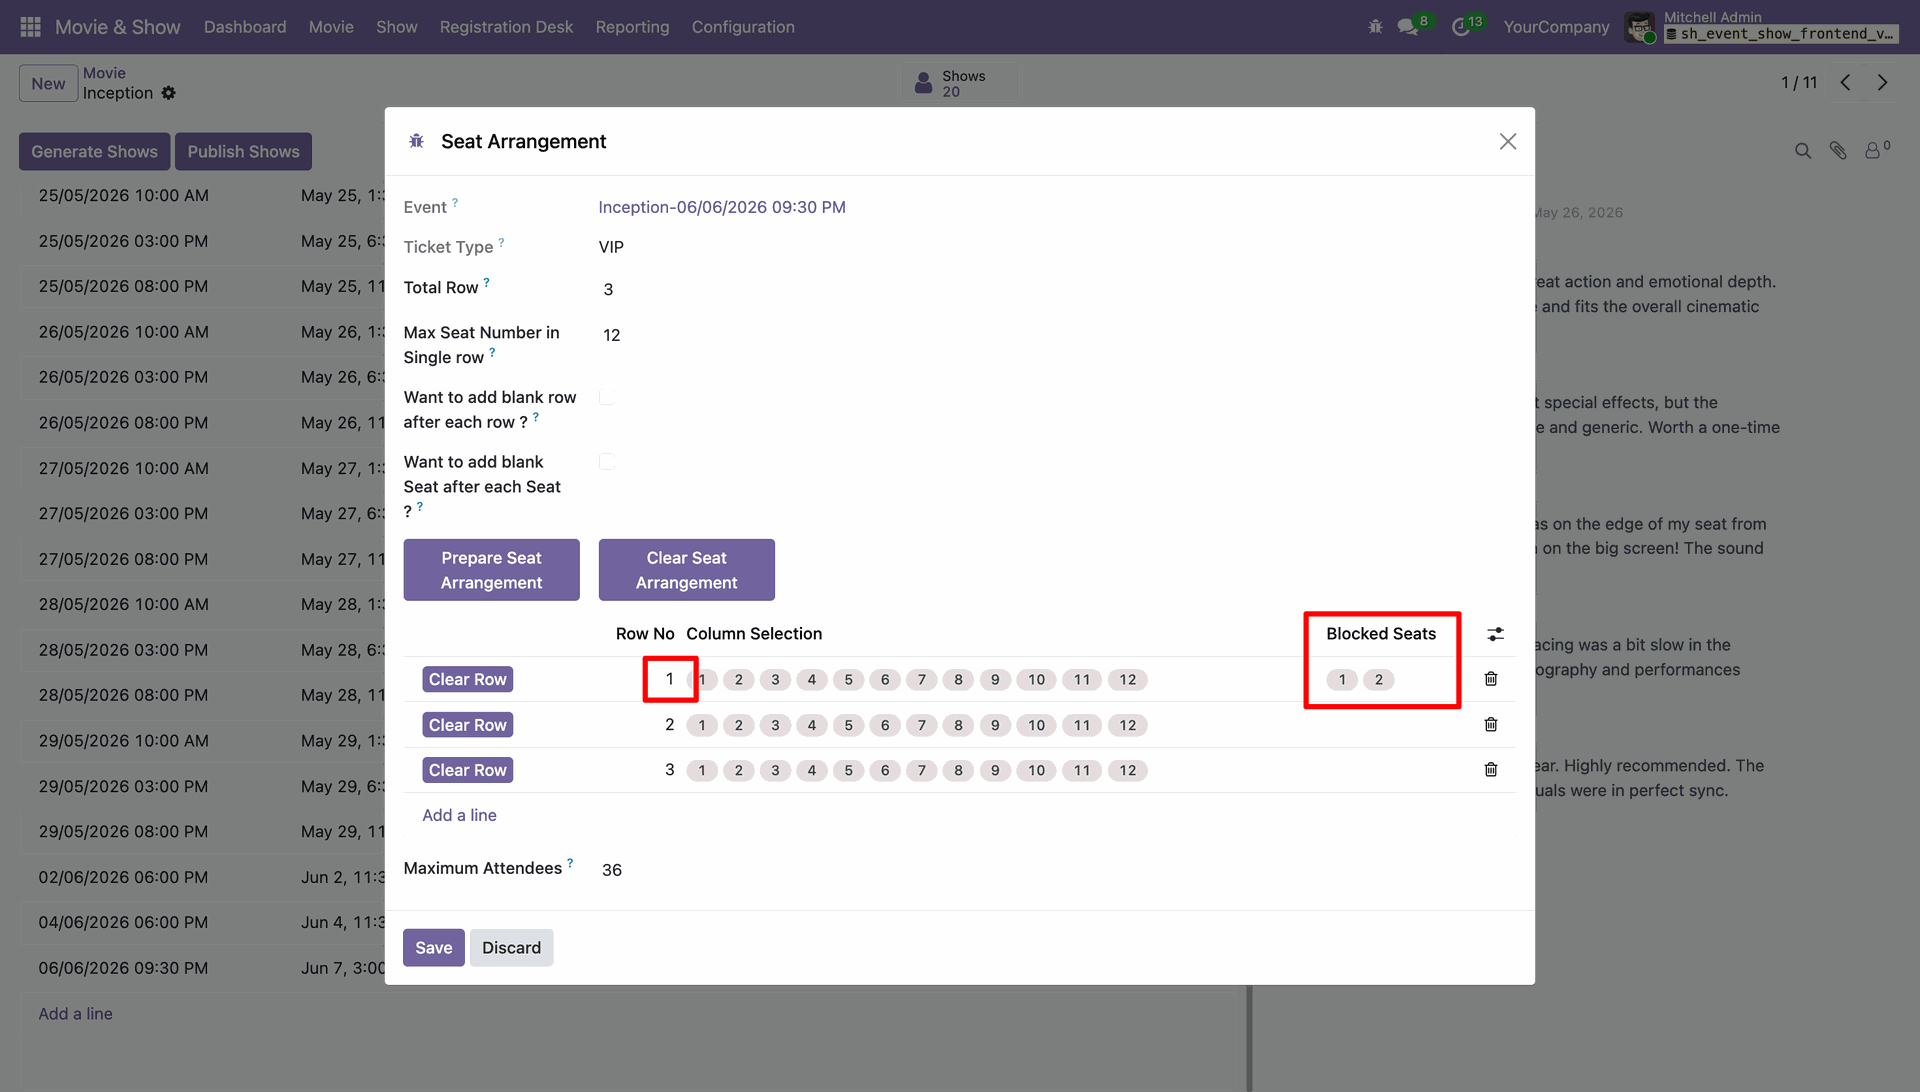
The Seat Arrangement wizard will open. Enter the seat numbers you want to block, then save the configuration to prevent those seats from being selected during ticket booking.
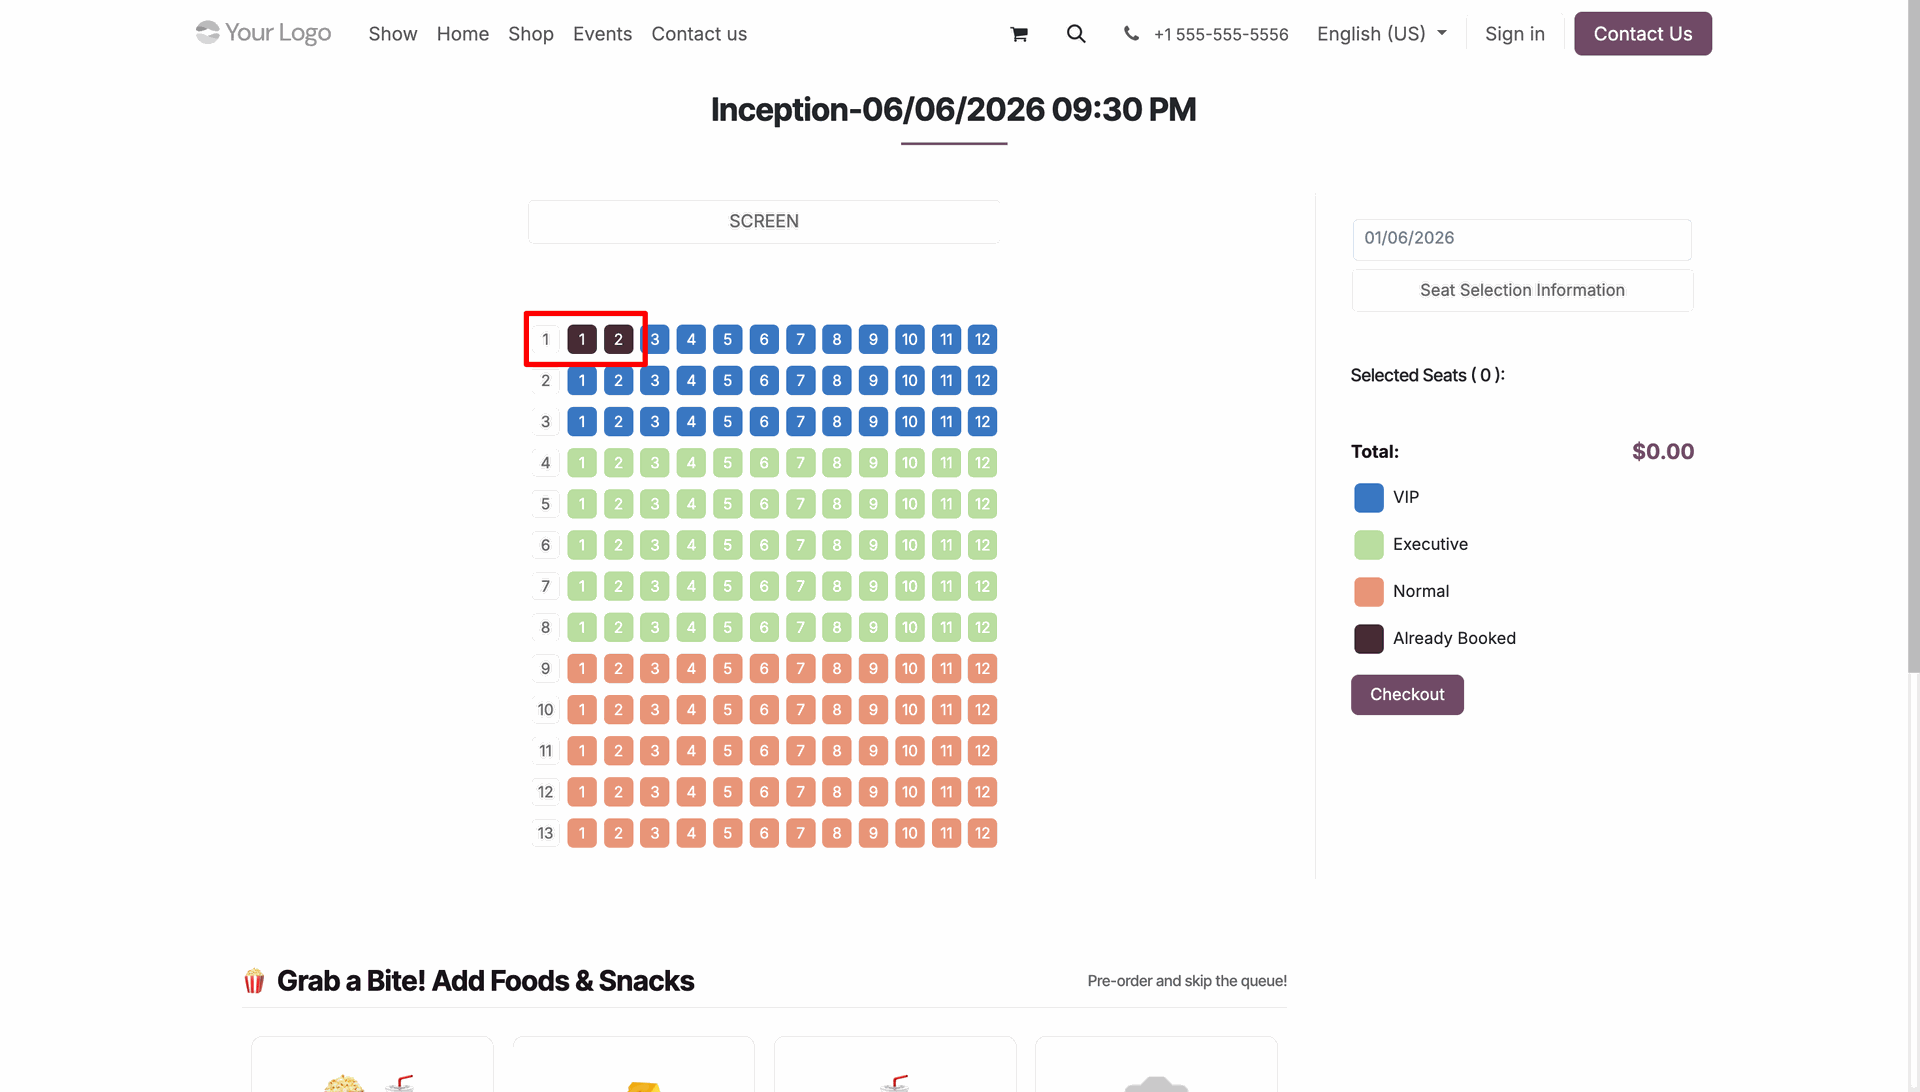
The configured seats will be blocked on the booking page and will not be available for customers to select during the ticket booking process.
Version 18.0.2.0.0 | Released on : 30th July 2024
Version 18.0.1.0.0 | Released on : 1st October 2025
- Yes, this app works perfectly with Odoo Enterprise (Odoo.sh & Premise) as well as Community.
- No, this application is not compatible with odoo.com(odoo saas/Odoo Online)
- Yes, to test this module, please contact us at sales@softhealer.com.
- Please contact us at sales@softhealer.com to request customization.
- Yes, we provide free lifetime support for the version you purchased.
- Yes, you will receive lifetime free updates for the version of the module you purchased.
- No, there is no need to install any additional libraries.
- Yes, for version 12 and above, you need to purchase the module separately for each version you intend to use.
- No, exchanges or refunds are not allowed. Please make sure to select the correct version before purchasing.
- You can contact us at support@softhealer.com for language translation support. We use Google Translator tools to provide translations in multiple languages, so the accuracy may vary. We welcome your suggestions to help improve translations.
Discover Our Latest Apps