












Insurance Management System Website

Insurance Management System Website Module: Enable customers to browse insurance plans, purchase policies, and manage their accounts through an intuitive self-service portal. Automate policy management, customer records, premium payments, and communication from a centralized Odoo backend, helping insurance providers streamline operations and deliver a faster, more efficient customer experience.
Related Modules

Hot Features
Online Policy Purchase
Allow customers to browse, select, and purchase insurance policies directly through the website.

Insurance Management Website Snippet
Build engaging insurance website pages using customizable drag-and-drop snippets to showcase plans, services, and other insurance content.

Insurance Policy Details
Insurance policy details refer to the specific information contained within an insurance policy.

Policy Time Period
Easy to manage policy terms in insurance policies and customise premiums based on the specified policy terms.

Wish Reminder - Backend
You can set a reminder for the day you want to send wishes. Simply enter the person's details, and the system will automatically send the wishes when the cron runs.

Quick Create Insurance - Backend
Easily create insurance records directly from the form view without navigating to multiple menus, saving time and improving efficiency.

Insurance & Claim reports - Backend
Insurance policy reports and Claim reports can be generated in PDF format.

Insurance Customer Portal
Allow customers to view policies, claims, documents, and insurance-related information through a dedicated portal.

Policy Catalog
Display and manage insurance policies on the website, allowing customers to browse available plans, compare coverage, and view policy details.

Nominee details
You can add nominees to the policy, indicating their relation to the policyholder and their proportional percentage.

Reminders - Backend
You can set reminder days for renewal, Installment and expiration of the policy.

Category Code In Sequence
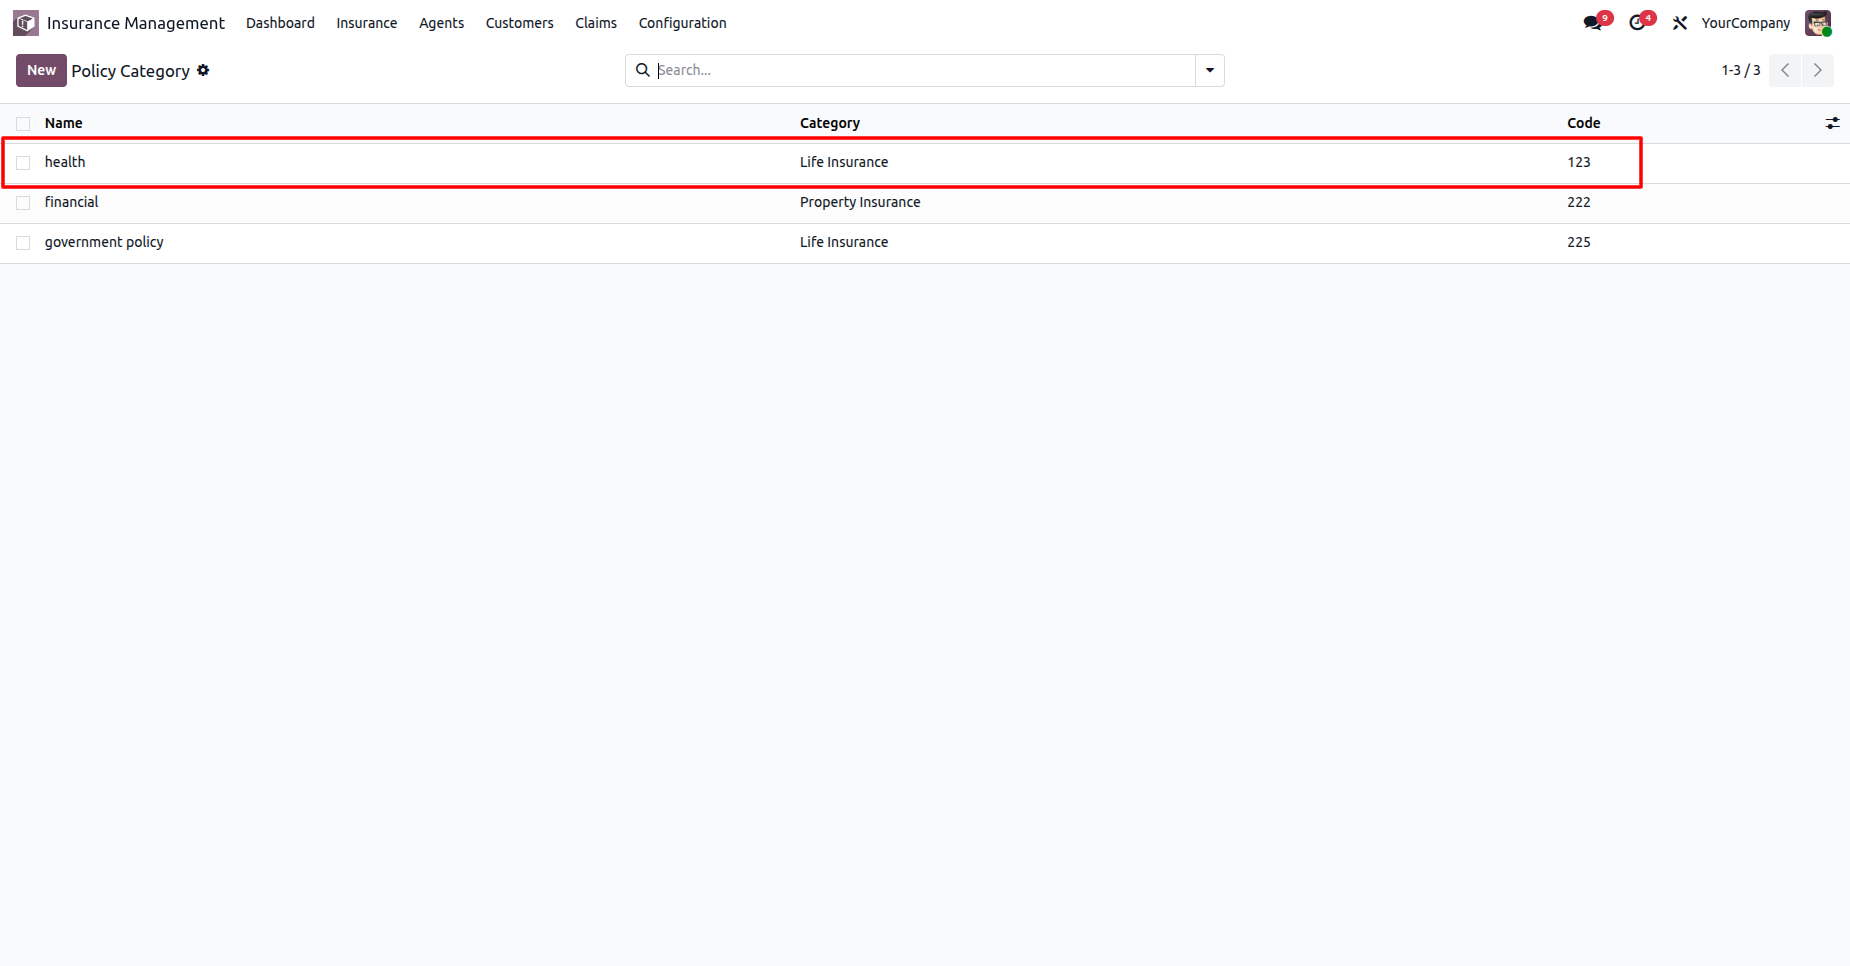
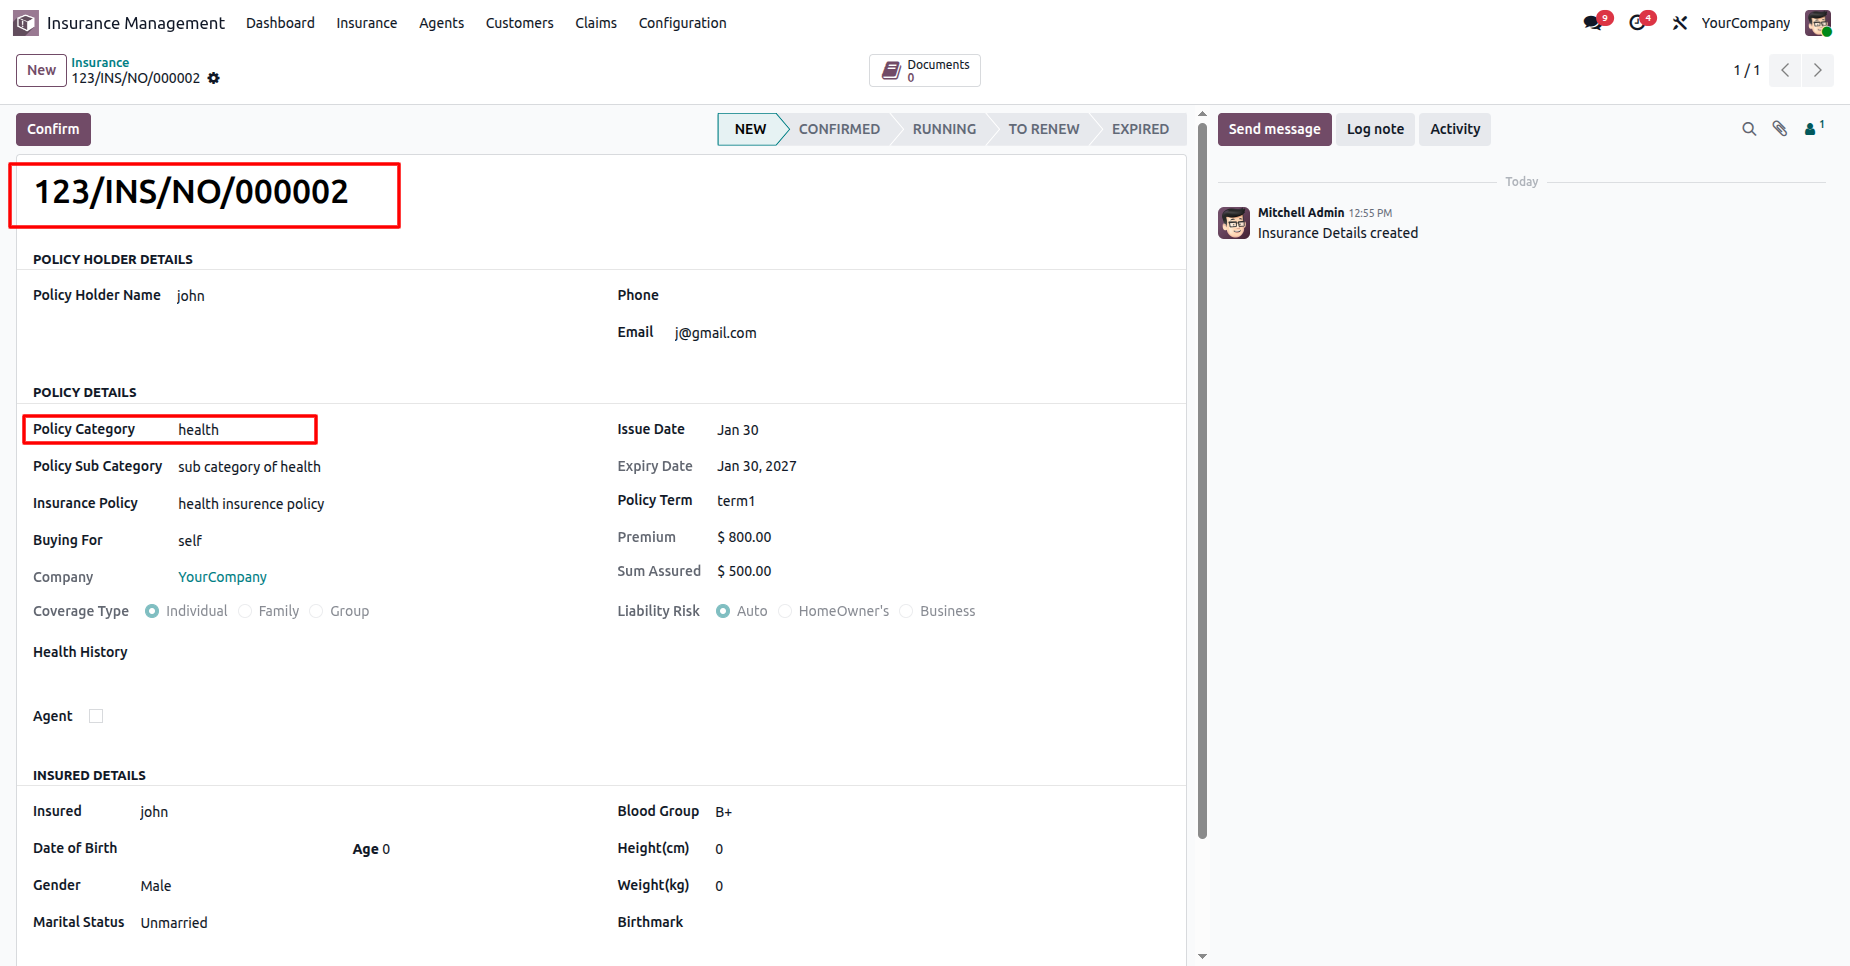
When a category is created, the category code is automatically generated in sequence if the 'Category Code In Sequence' boolean is enable.

Claim details - Backend
Easy to create a claim with the reason, required documents and create a claim settlement bill.

Renew Policy - Backend
Easy to renew the policy for an expired policy and it creates a new policy with auto-filled details of the policyholder.

Insurance Management Dashboard - Backend
Monitor policies, claims, renewals, customers, and key insurance metrics from a centralized dashboard.
Go to the Website Editor, open the Blocks panel, and drag the Insurance Management snippet onto the desired page to display insurance policies, services, and related information on your website.
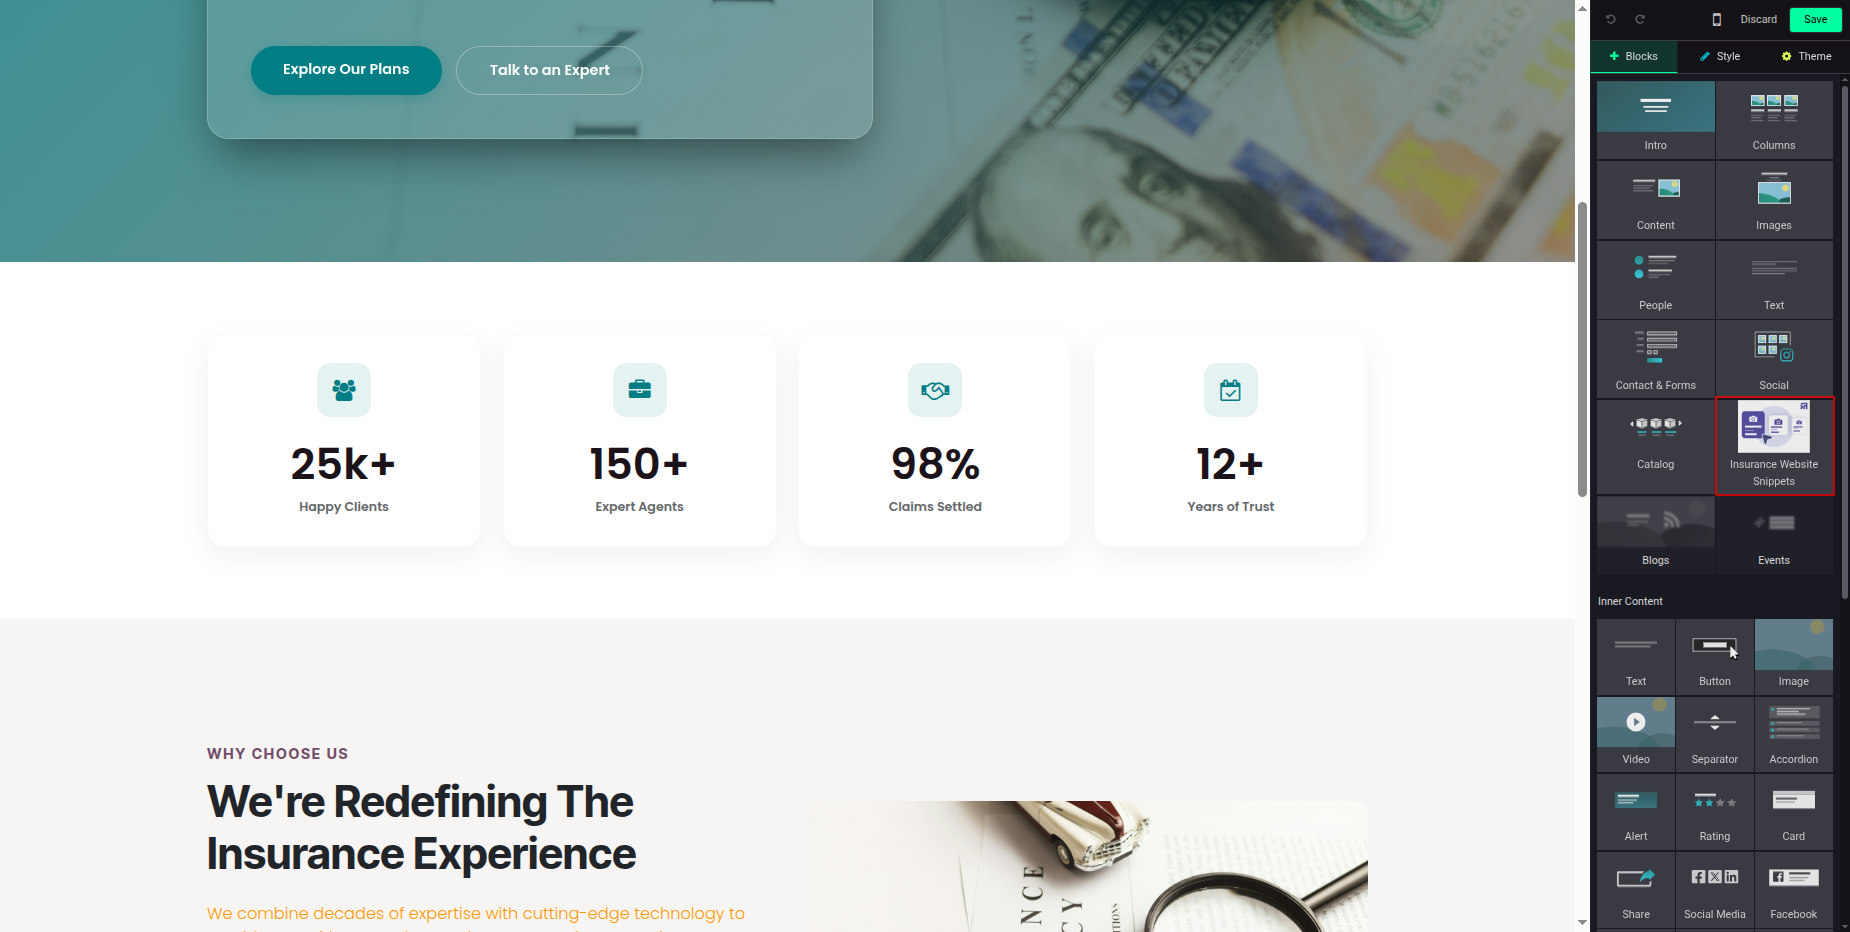
Configure the Insurance Management snippet on the website page to display the available Insurance Policy Plans, allowing visitors to browse and explore the offered plans.
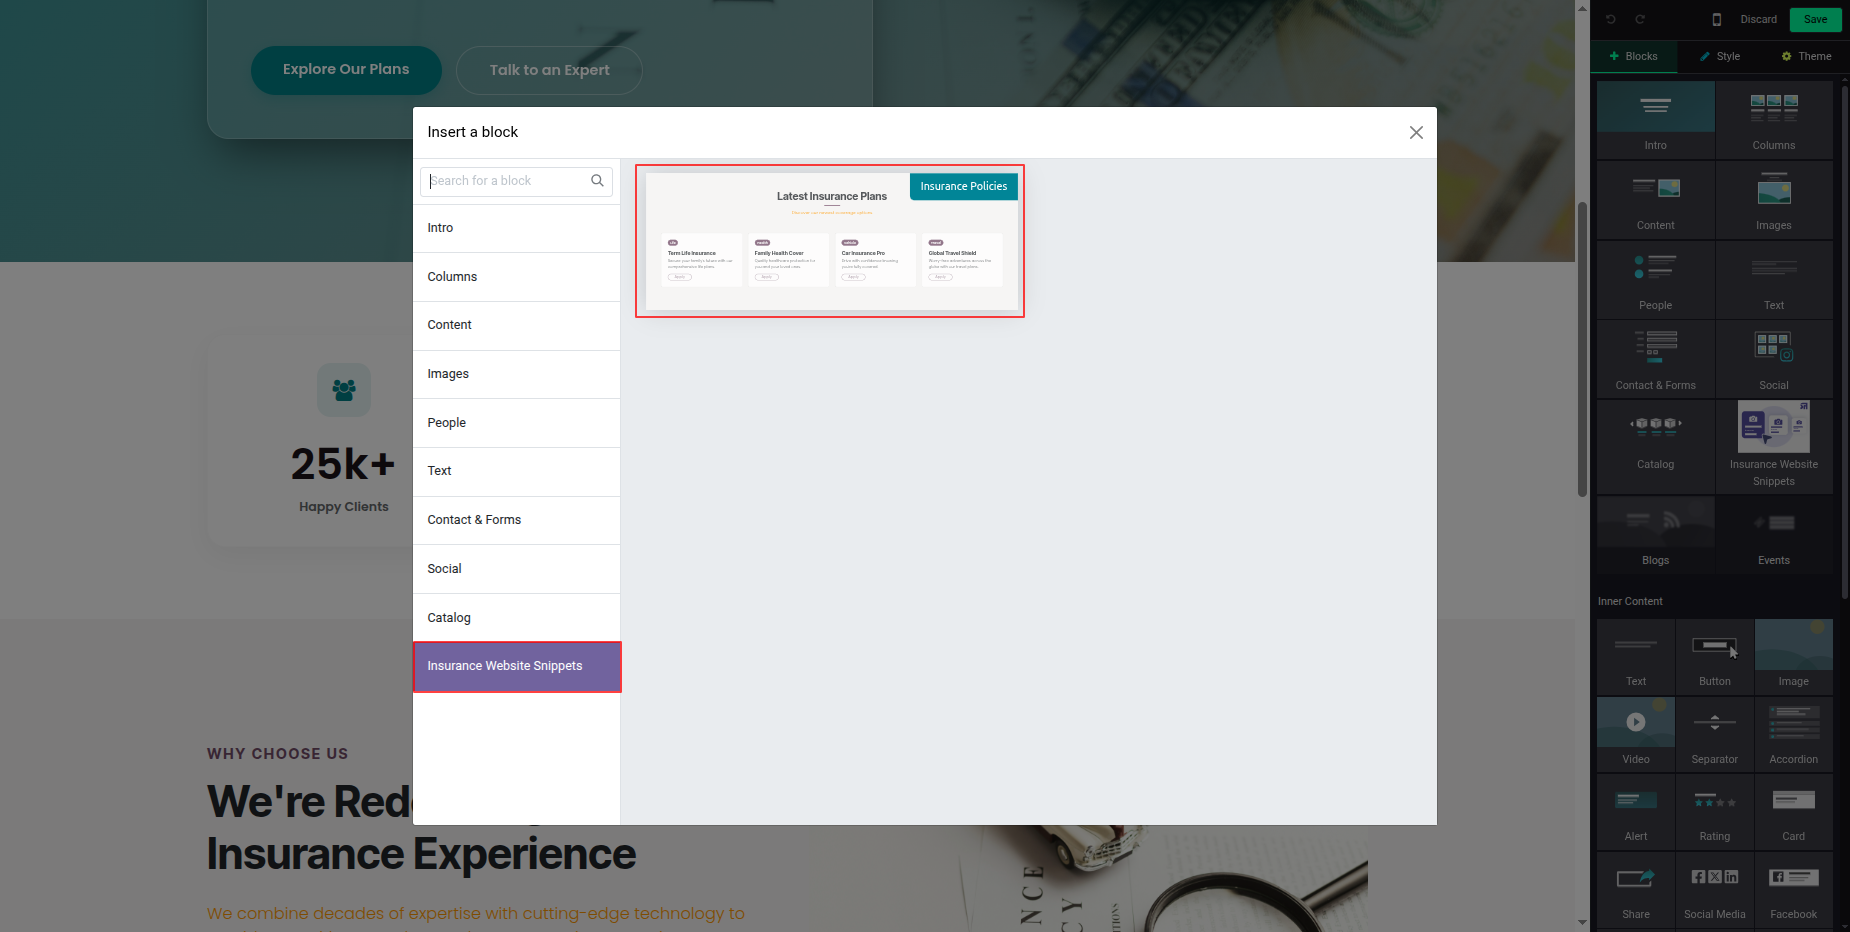
On the page where the Insurance Management snippet is added, users can view the latest insurance policies, making it easy to browse the most recently published plans.
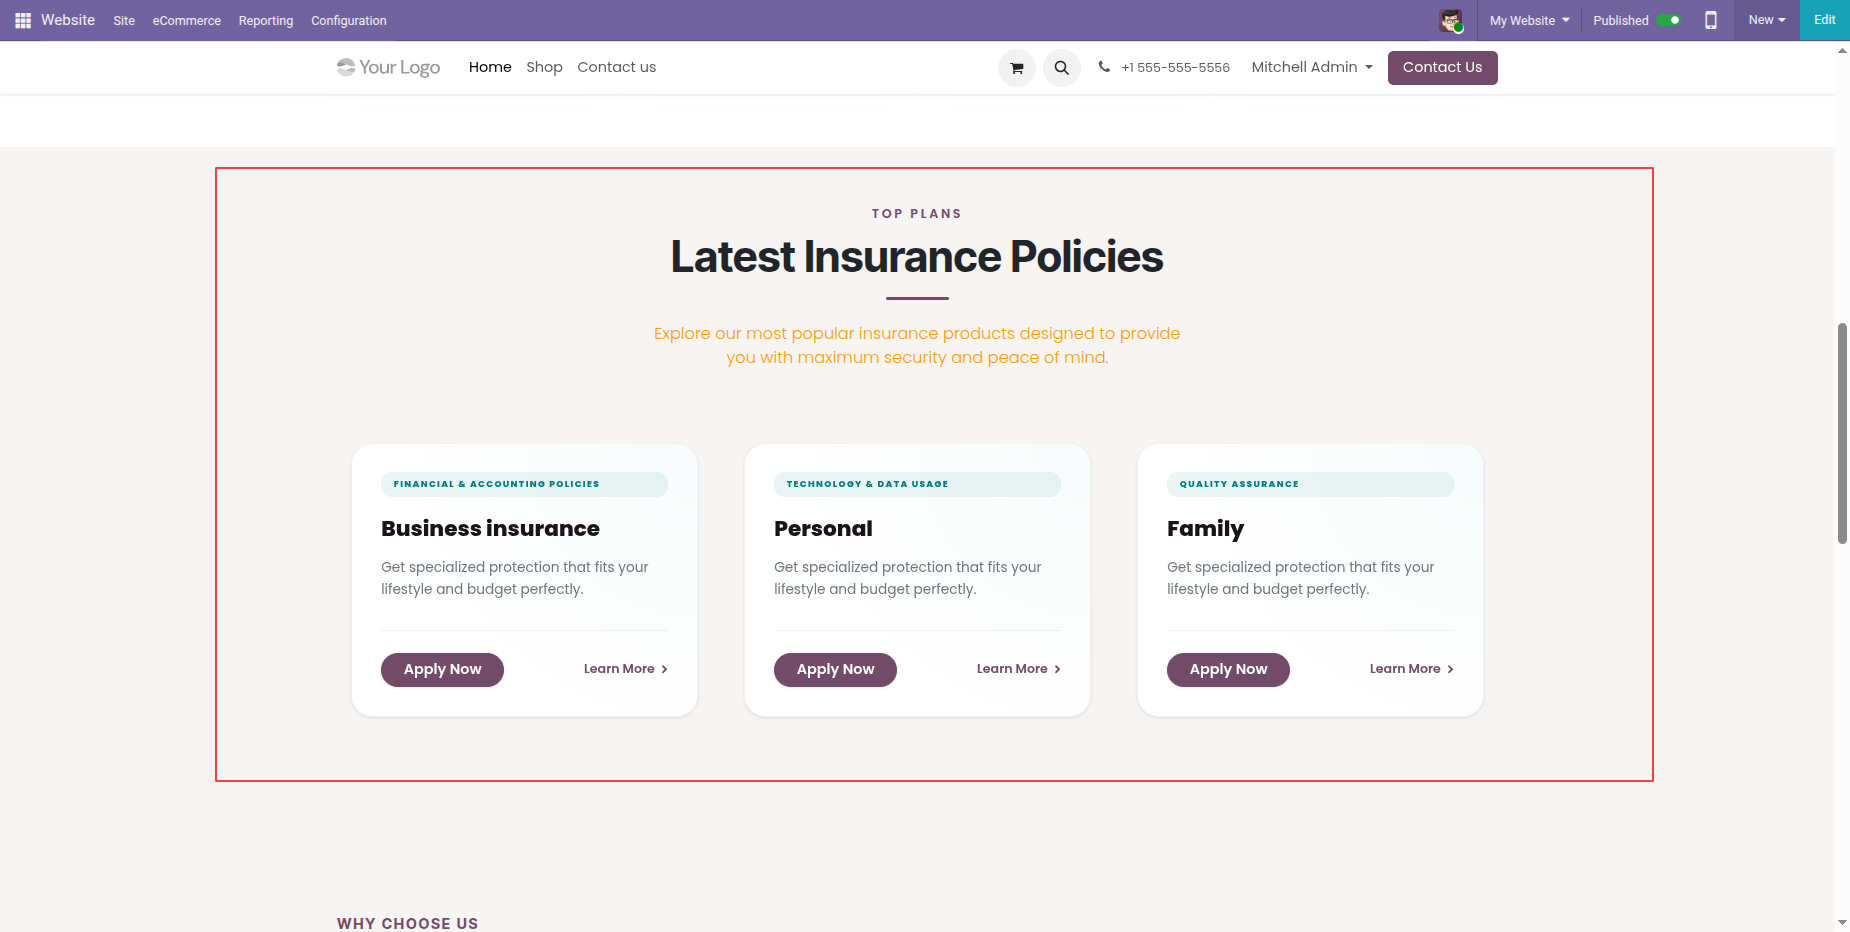
Click the Learn More button on a policy to view its detailed information, including coverage, benefits, pricing, and other relevant details.
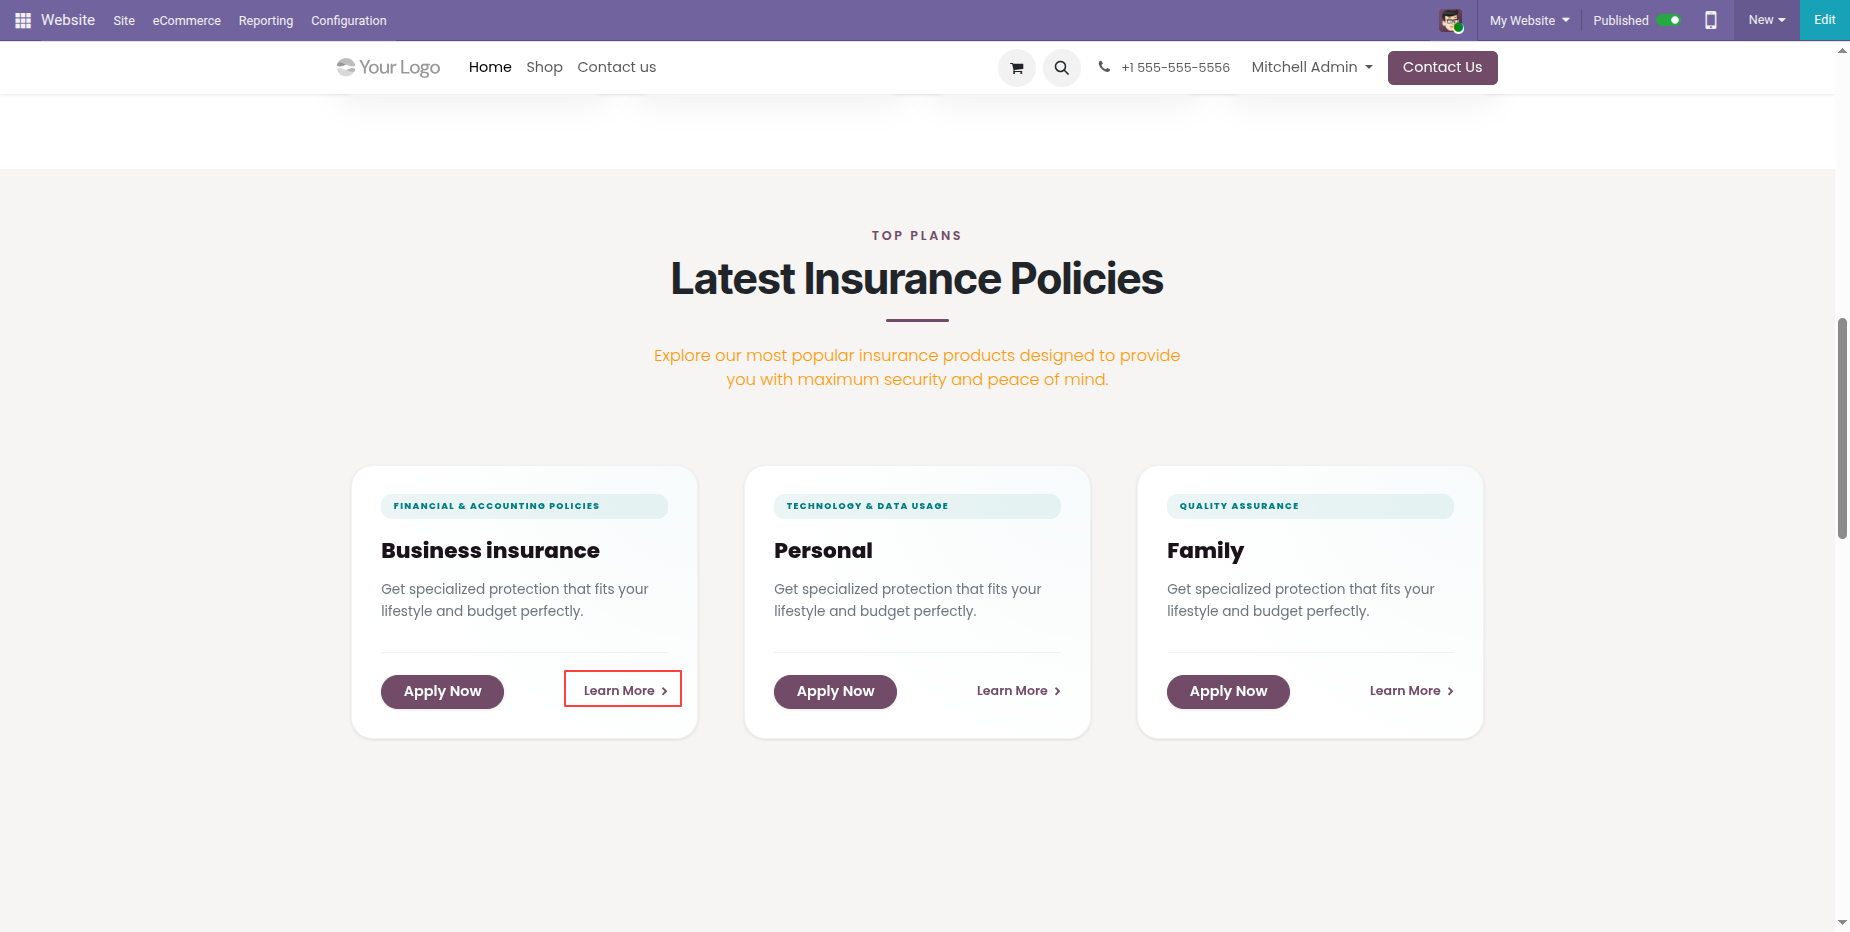
Clicking Learn More opens the Policy Details page, where users can view the
Plan Overview,
Terms & Conditions, Coverage, Benefits, and other relevant policy
information.
Click the Buy This Policy button.
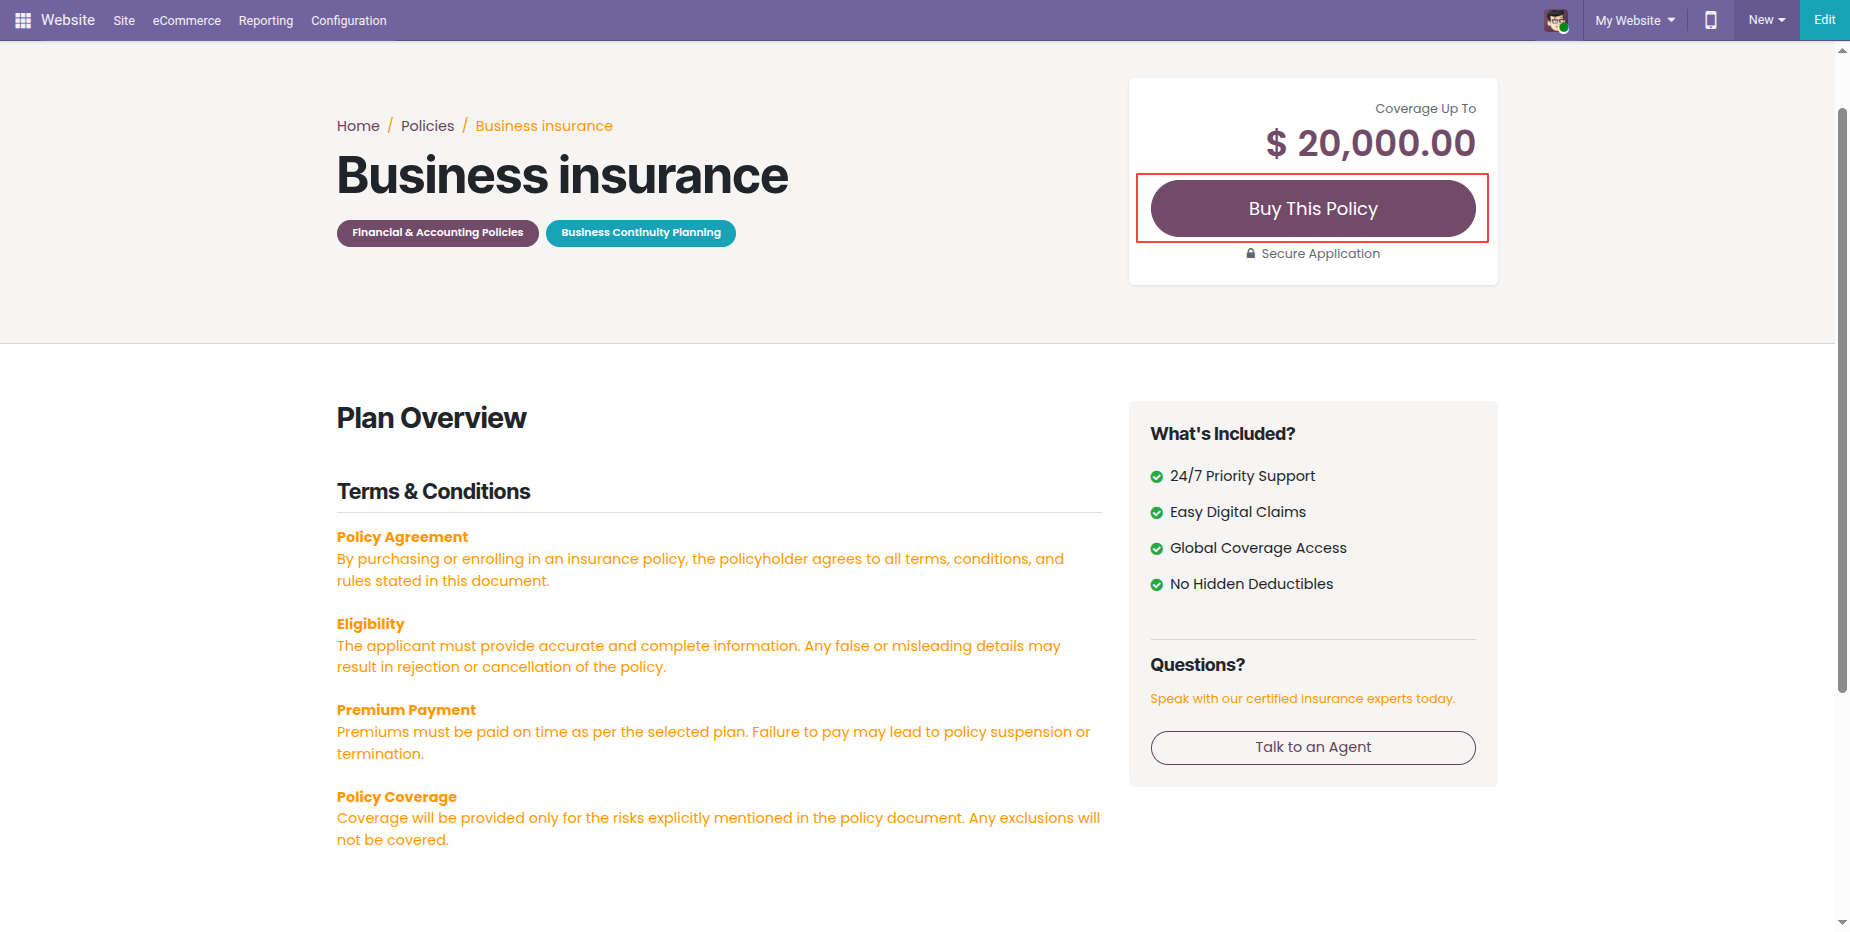
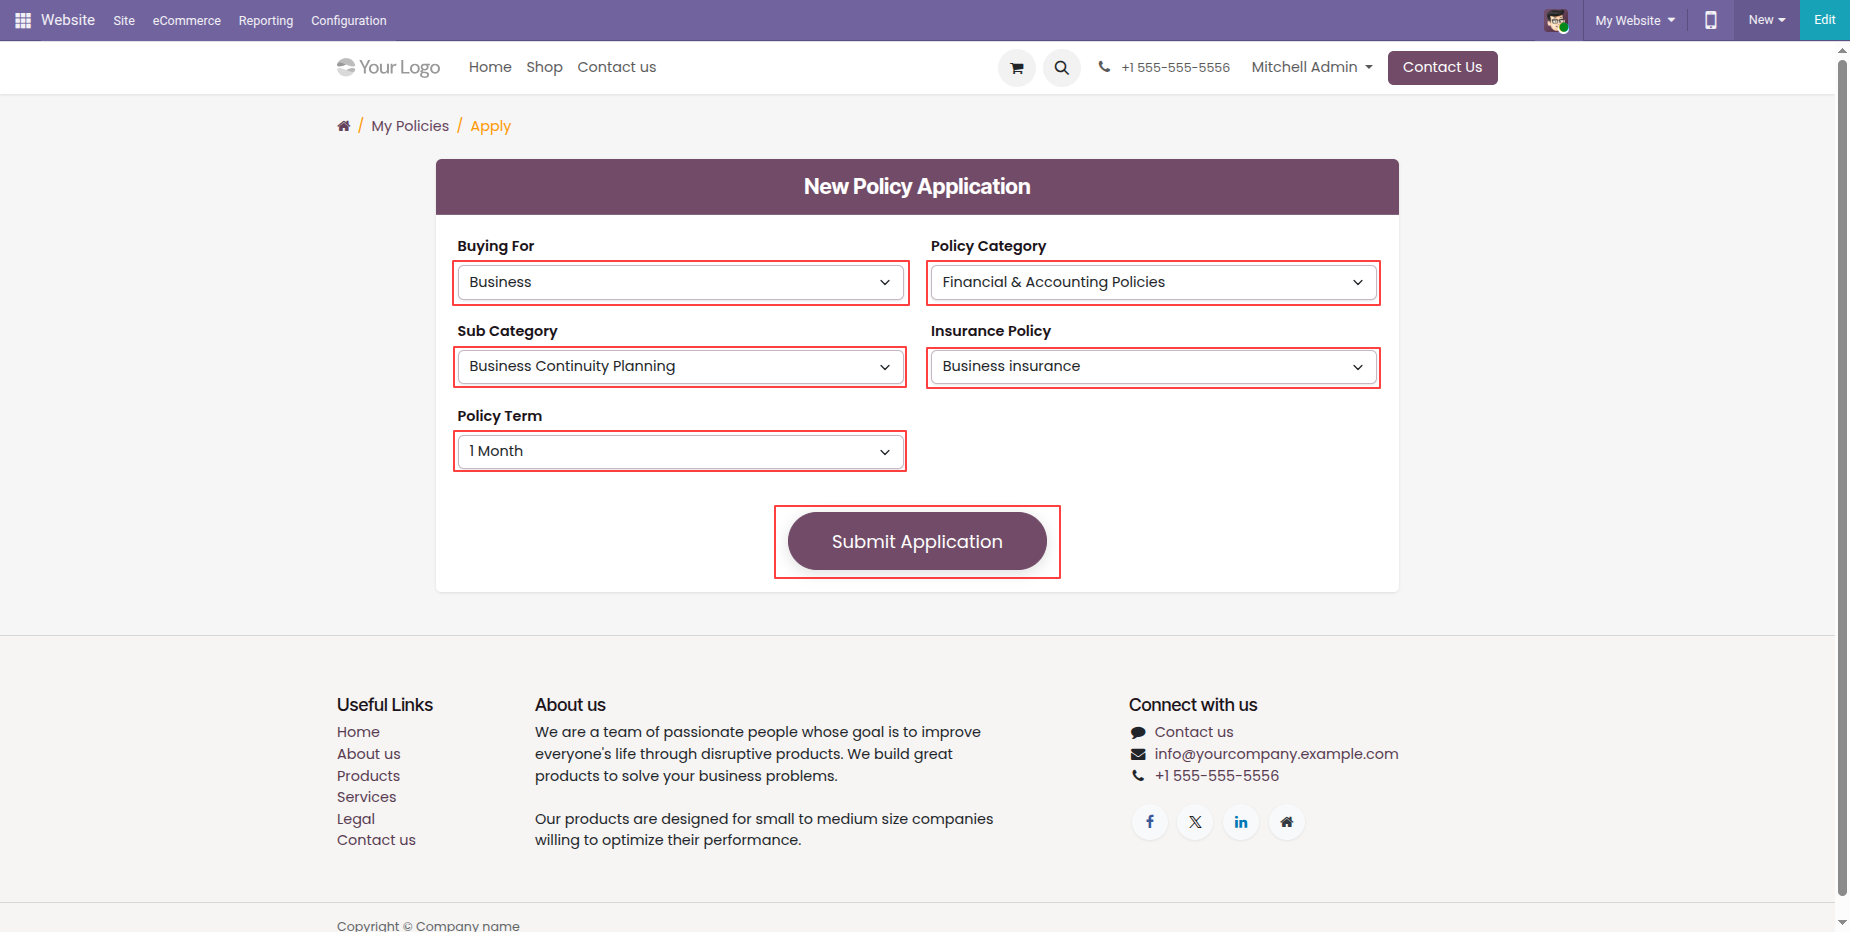
Clicking on the Buy This Policy button will open the Policy Application Form, where users can enter the required details to apply for the selected insurance policy.
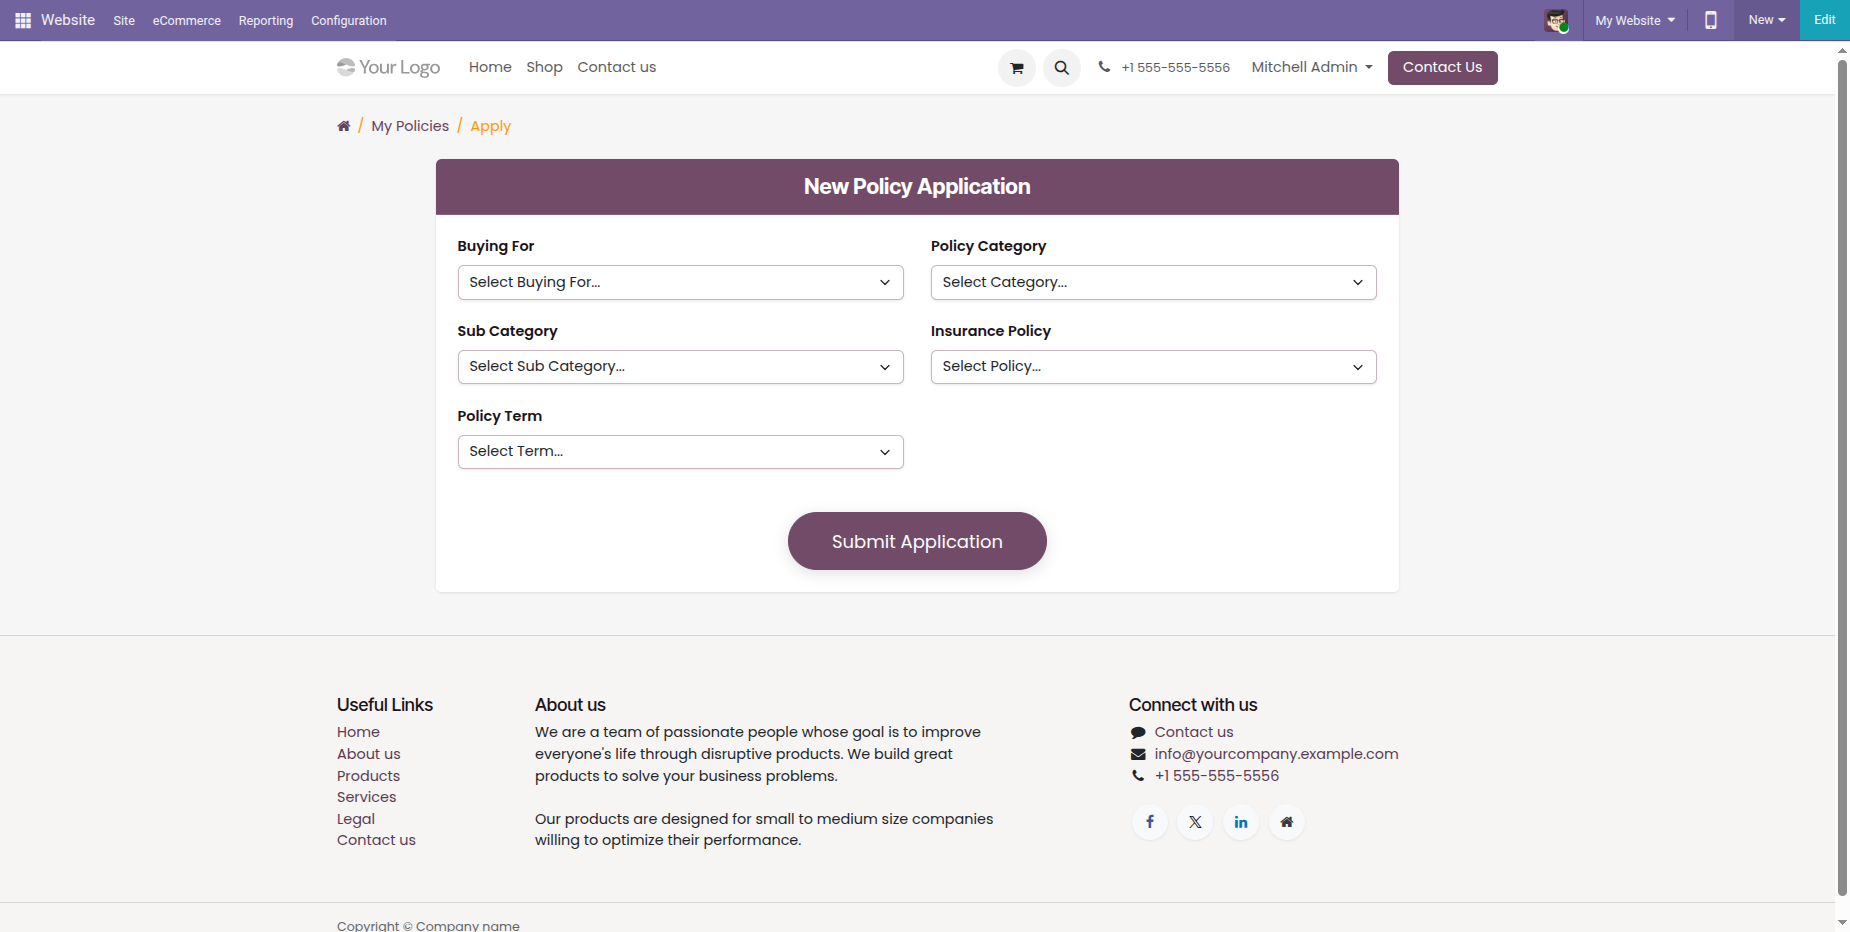
Fill in the required details in the Policy Application Form, then click the Submit Application button to submit the insurance policy application.
The application is submitted successfully, and a unique Policy Number is
generated.
Users can then upload the required documents to complete the policy
application process.
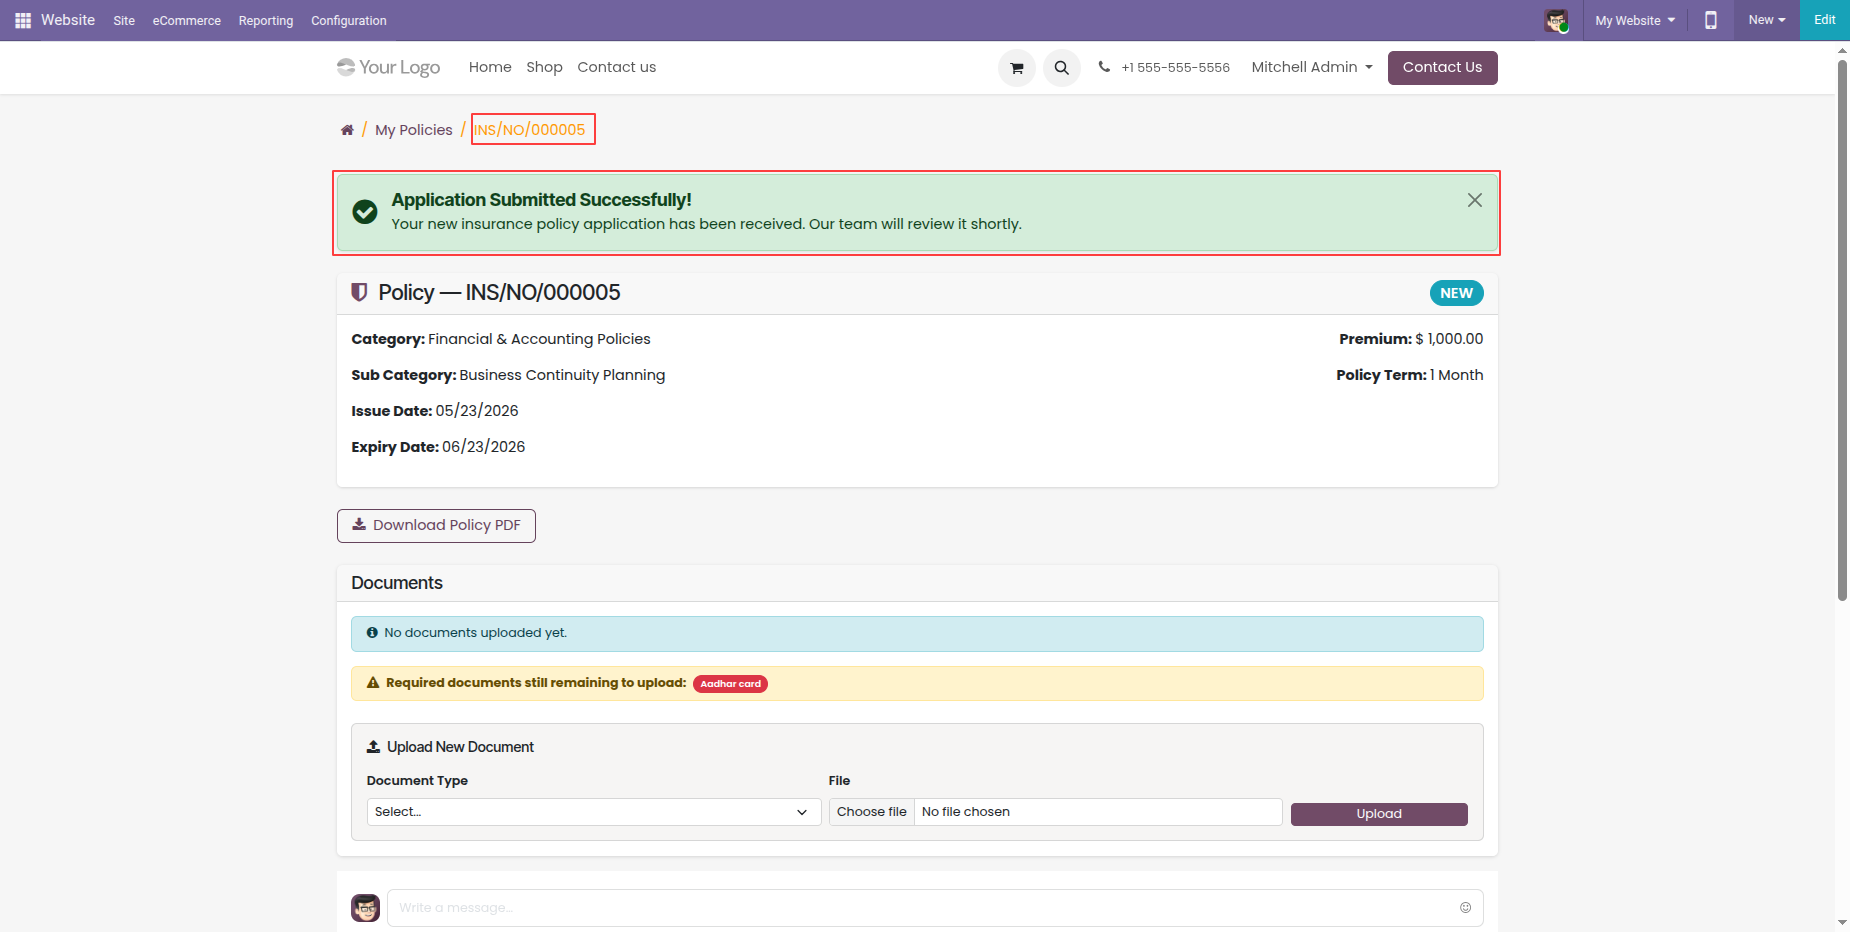
Under the Upload New Document section on the website, select the Document Type, upload the required document image, and save it to attach the document to the policy application.
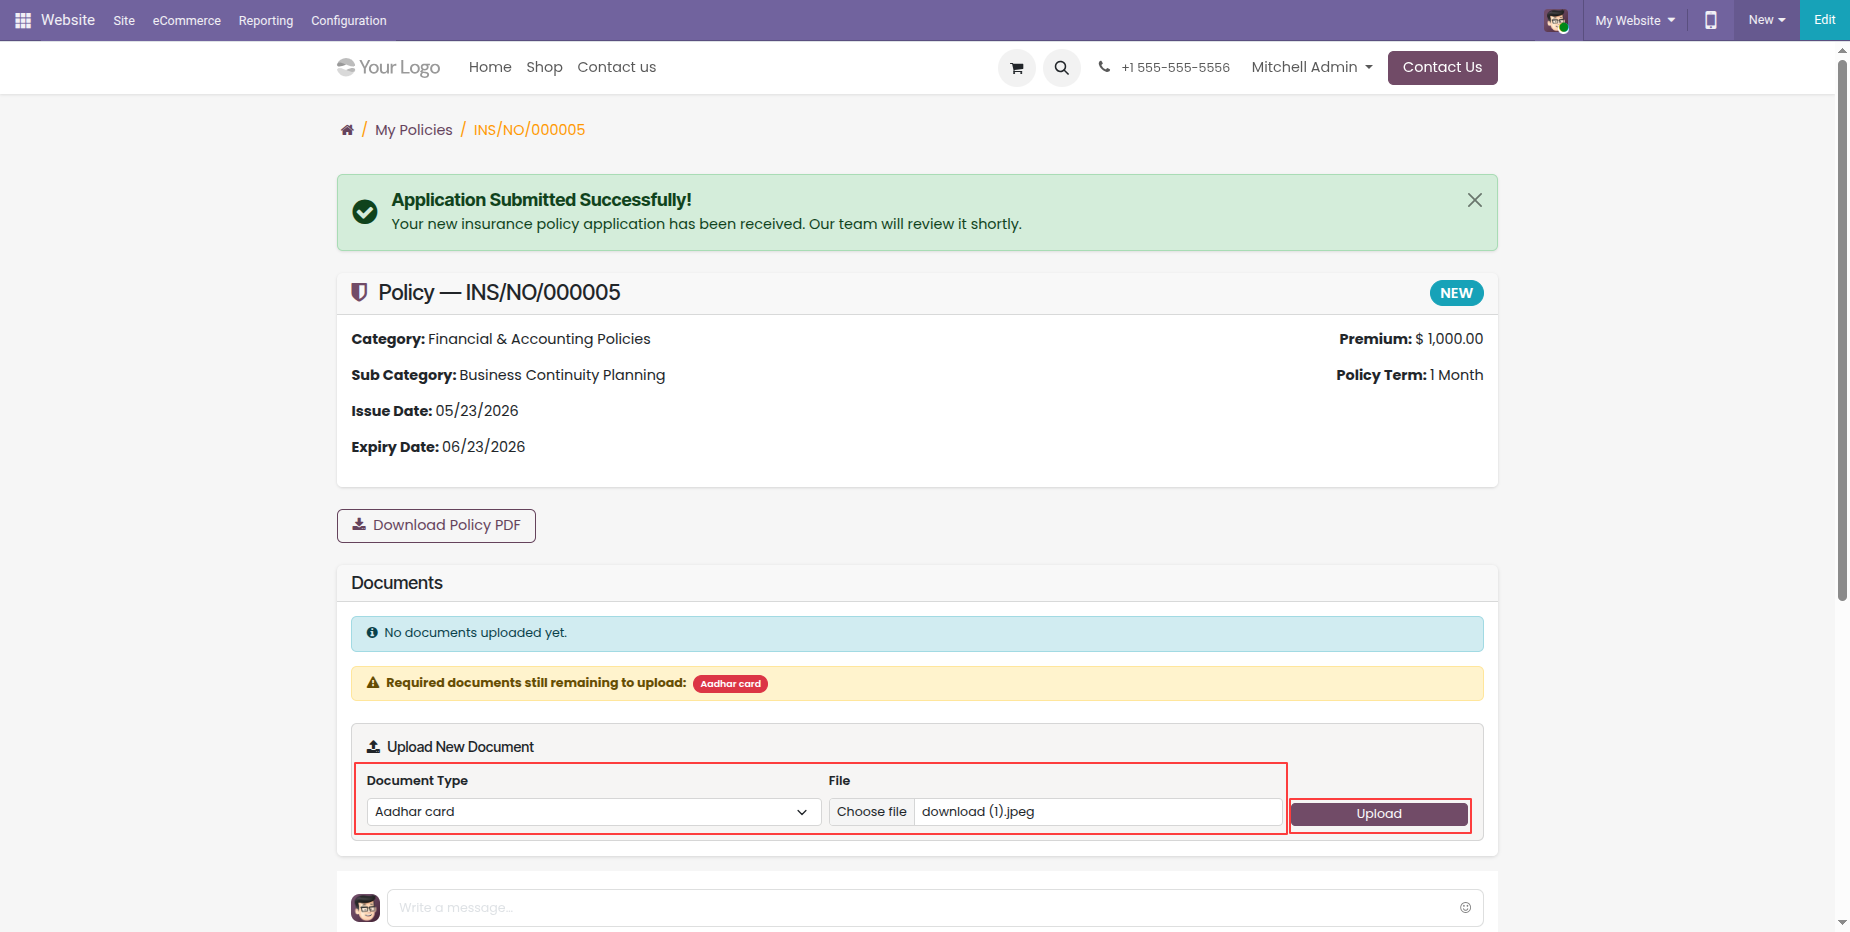
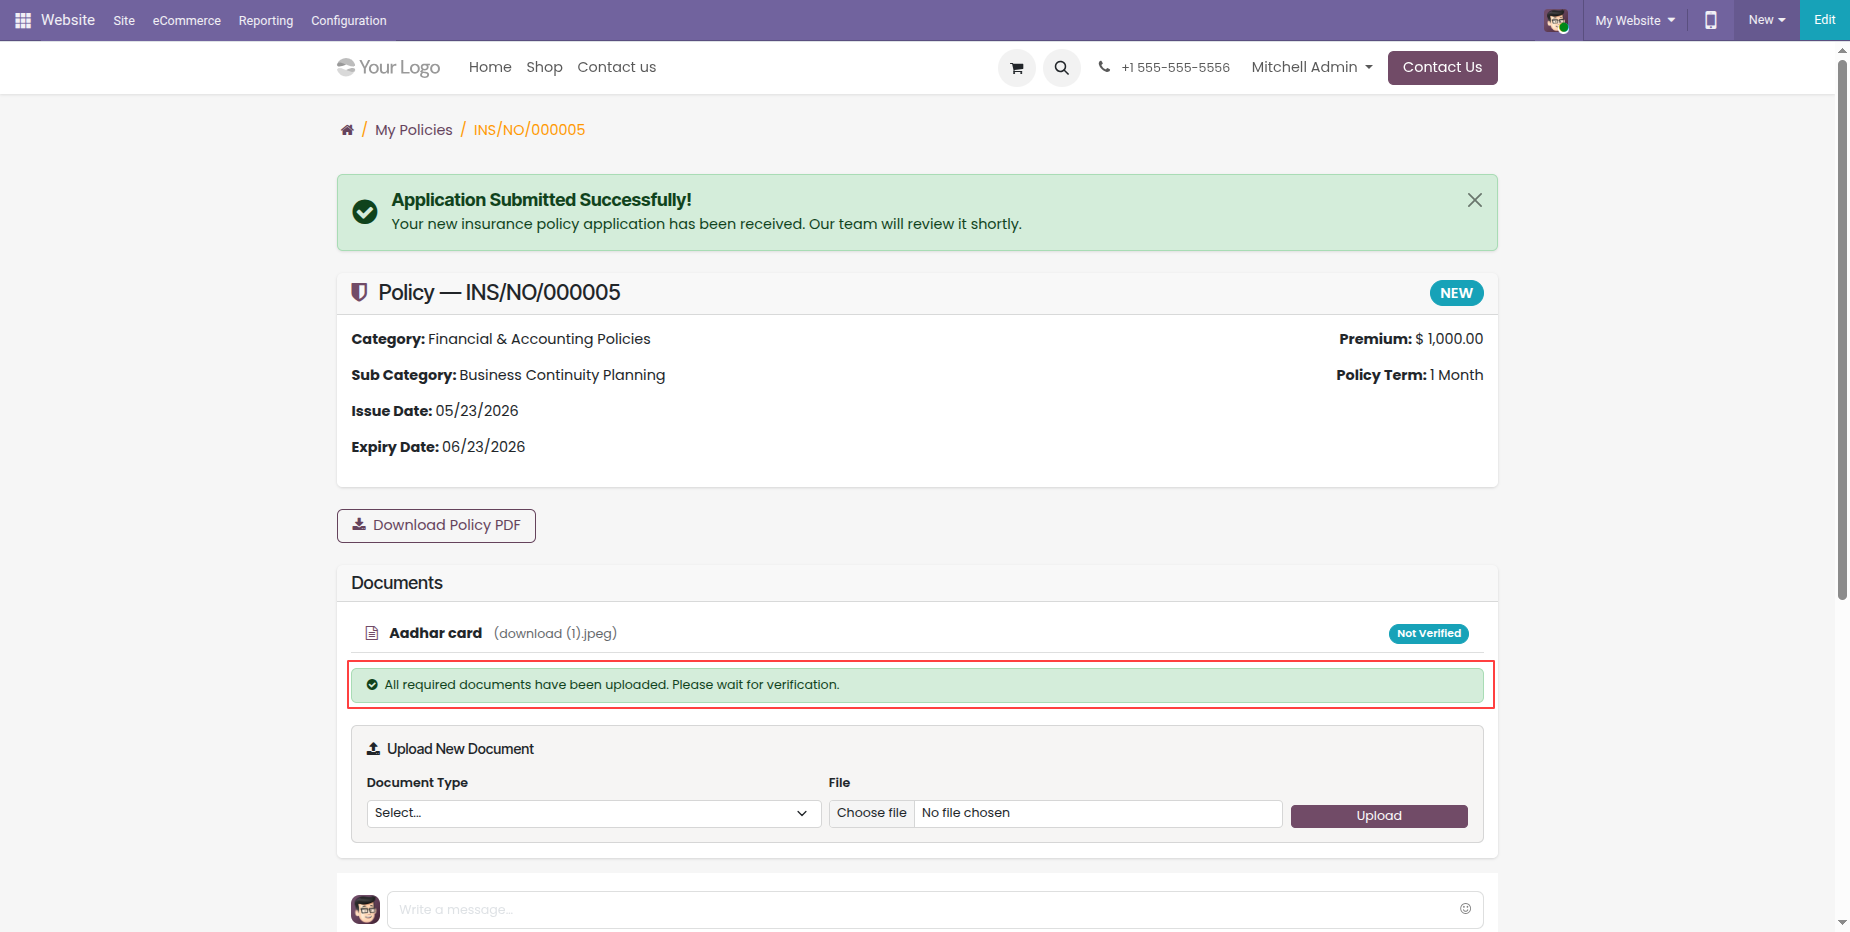
Once all the required documents are uploaded successfully, a success notification is displayed on the Insurance Application Form, confirming that the documents have been uploaded successfully.
The main Insurance Management Dashboard showing interactive KPI
tiles for Policies, Claims, Agents, and Customers.
Interactive Policy KPI cards: click on 'All Policies' to directly
view policy records.
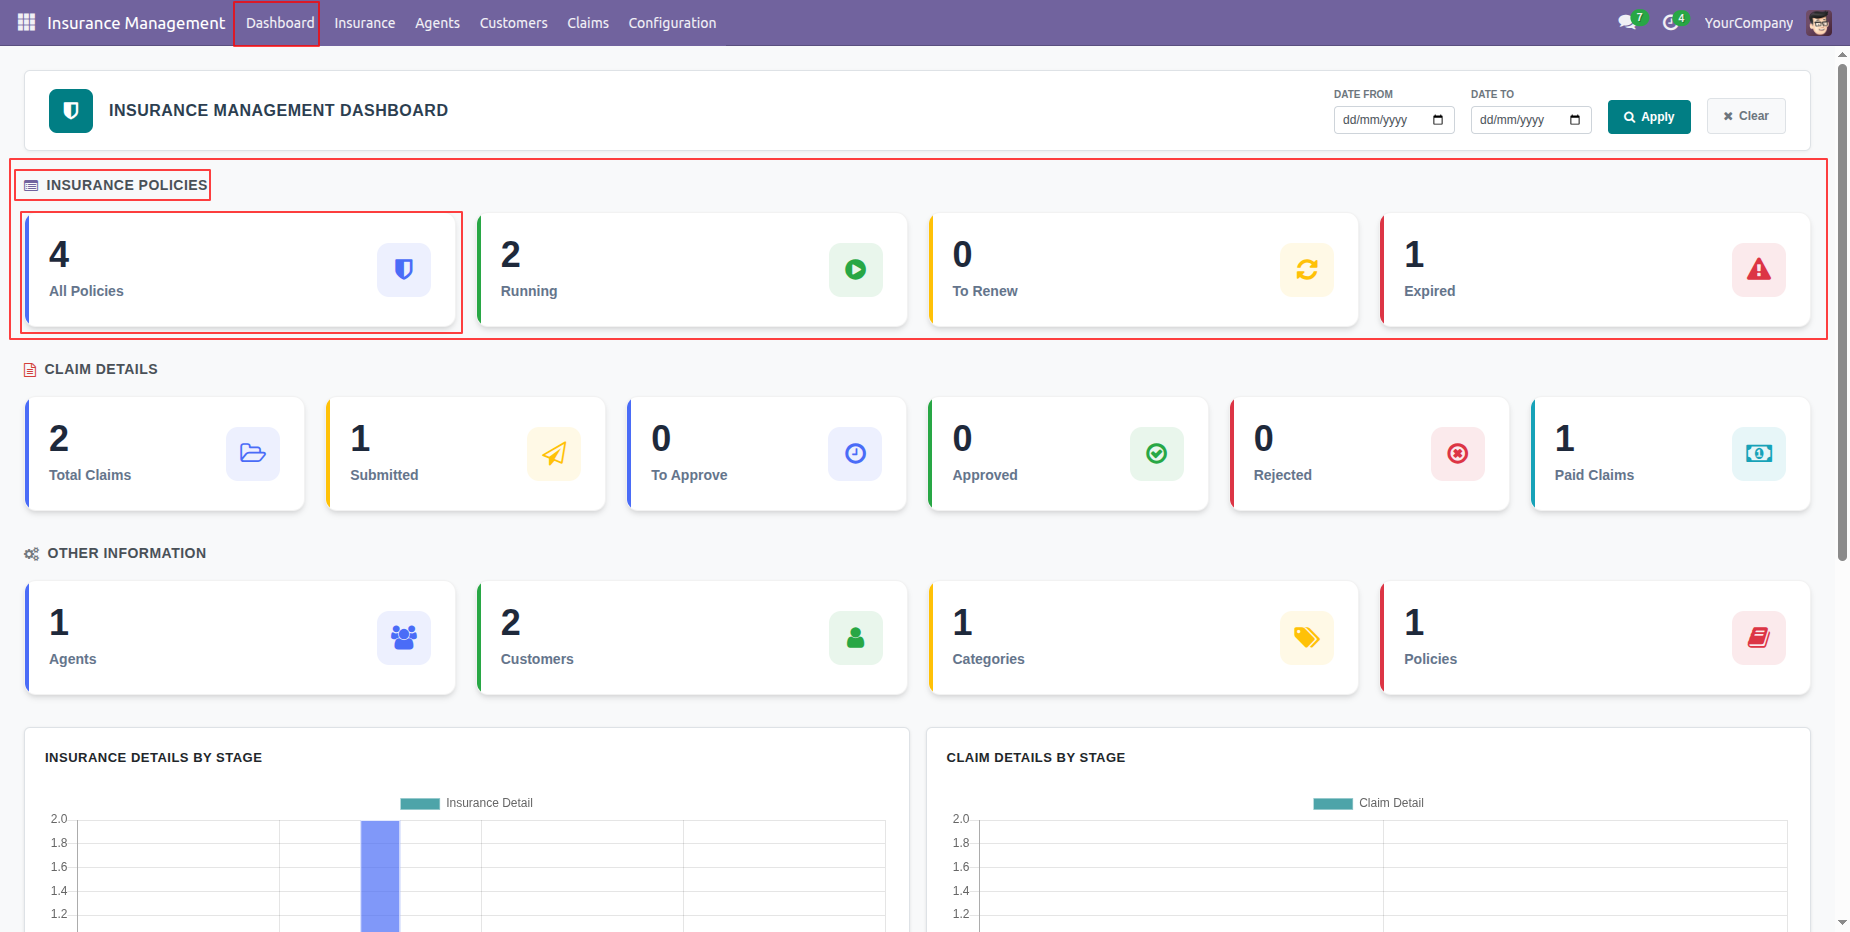
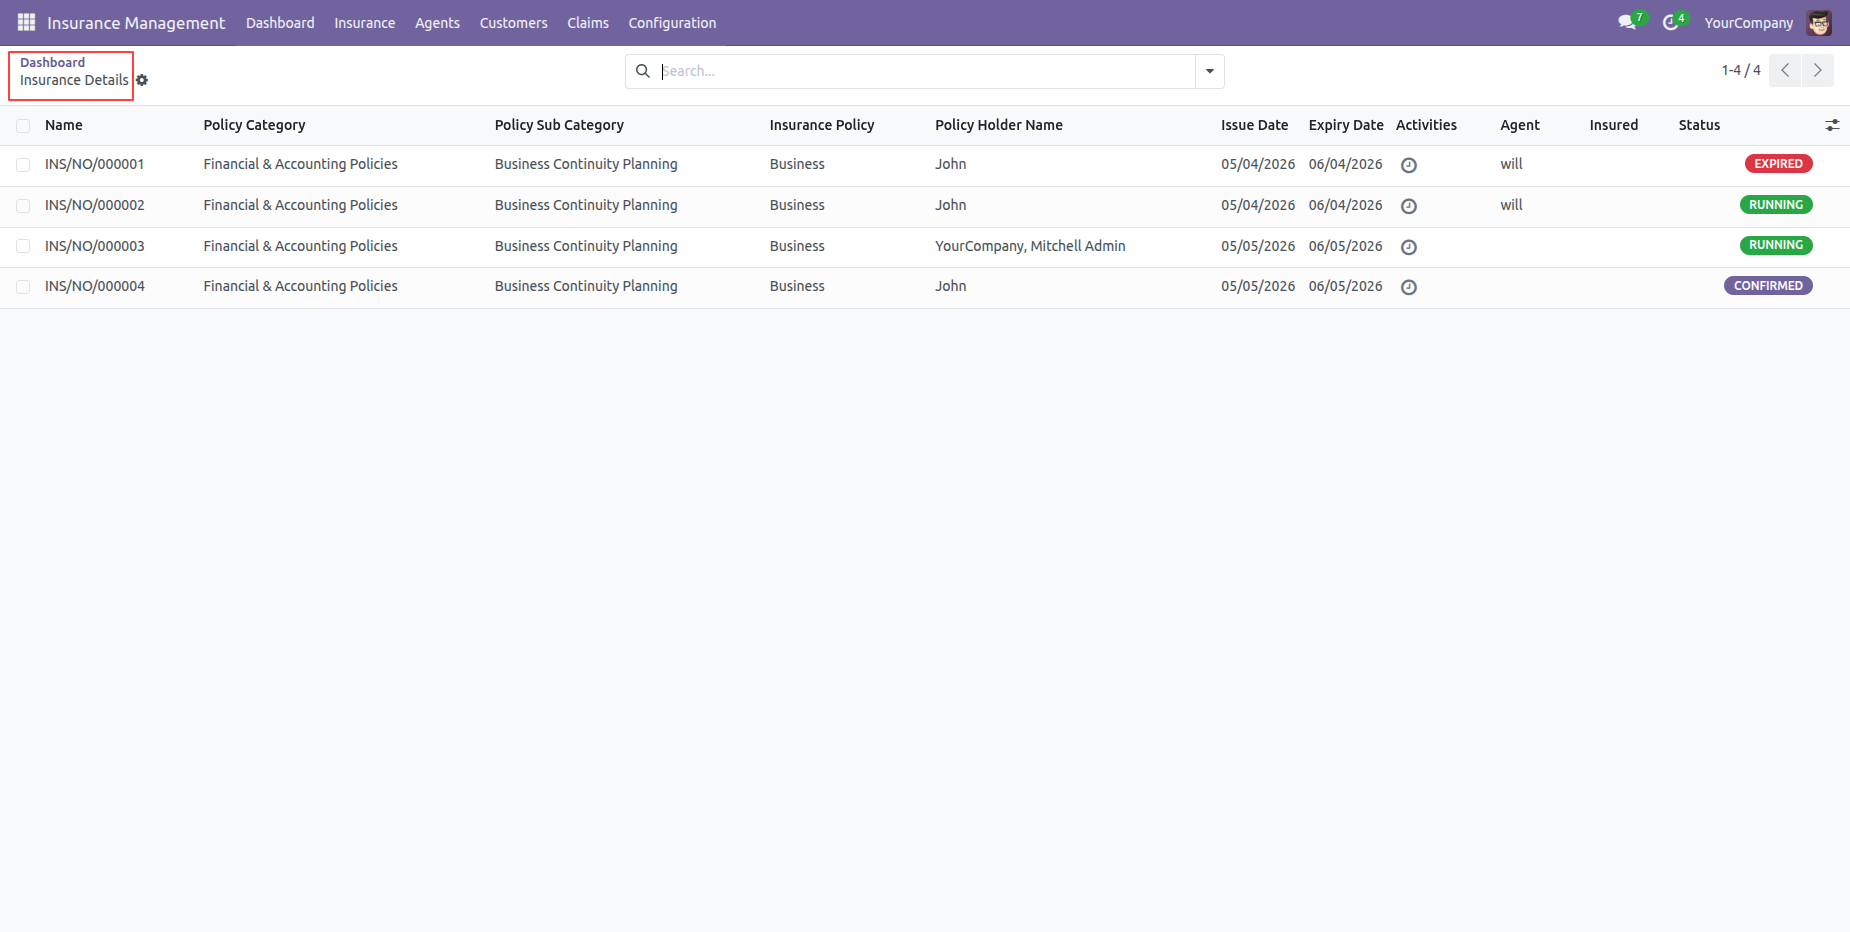
Clicking on the All Policies tile from the dashboard will open a list of all policies.
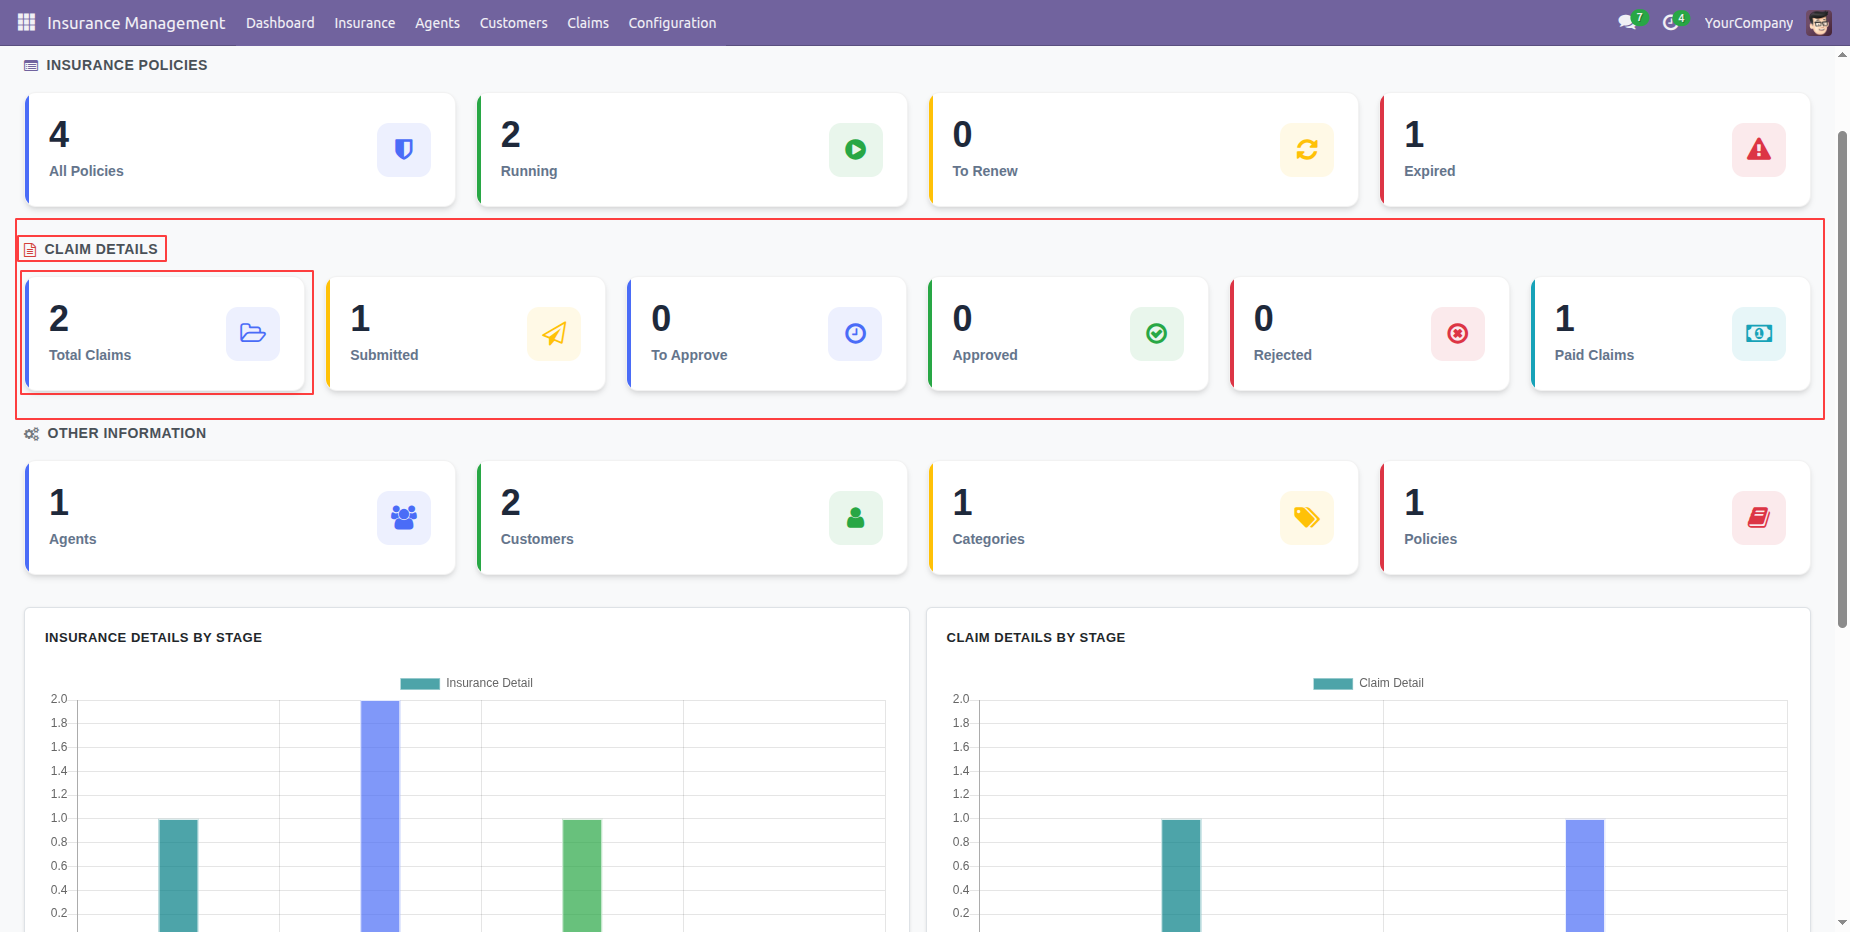
Click on the 'Total Claims' or other Claims KPI tiles to view the detailed list of claim records.
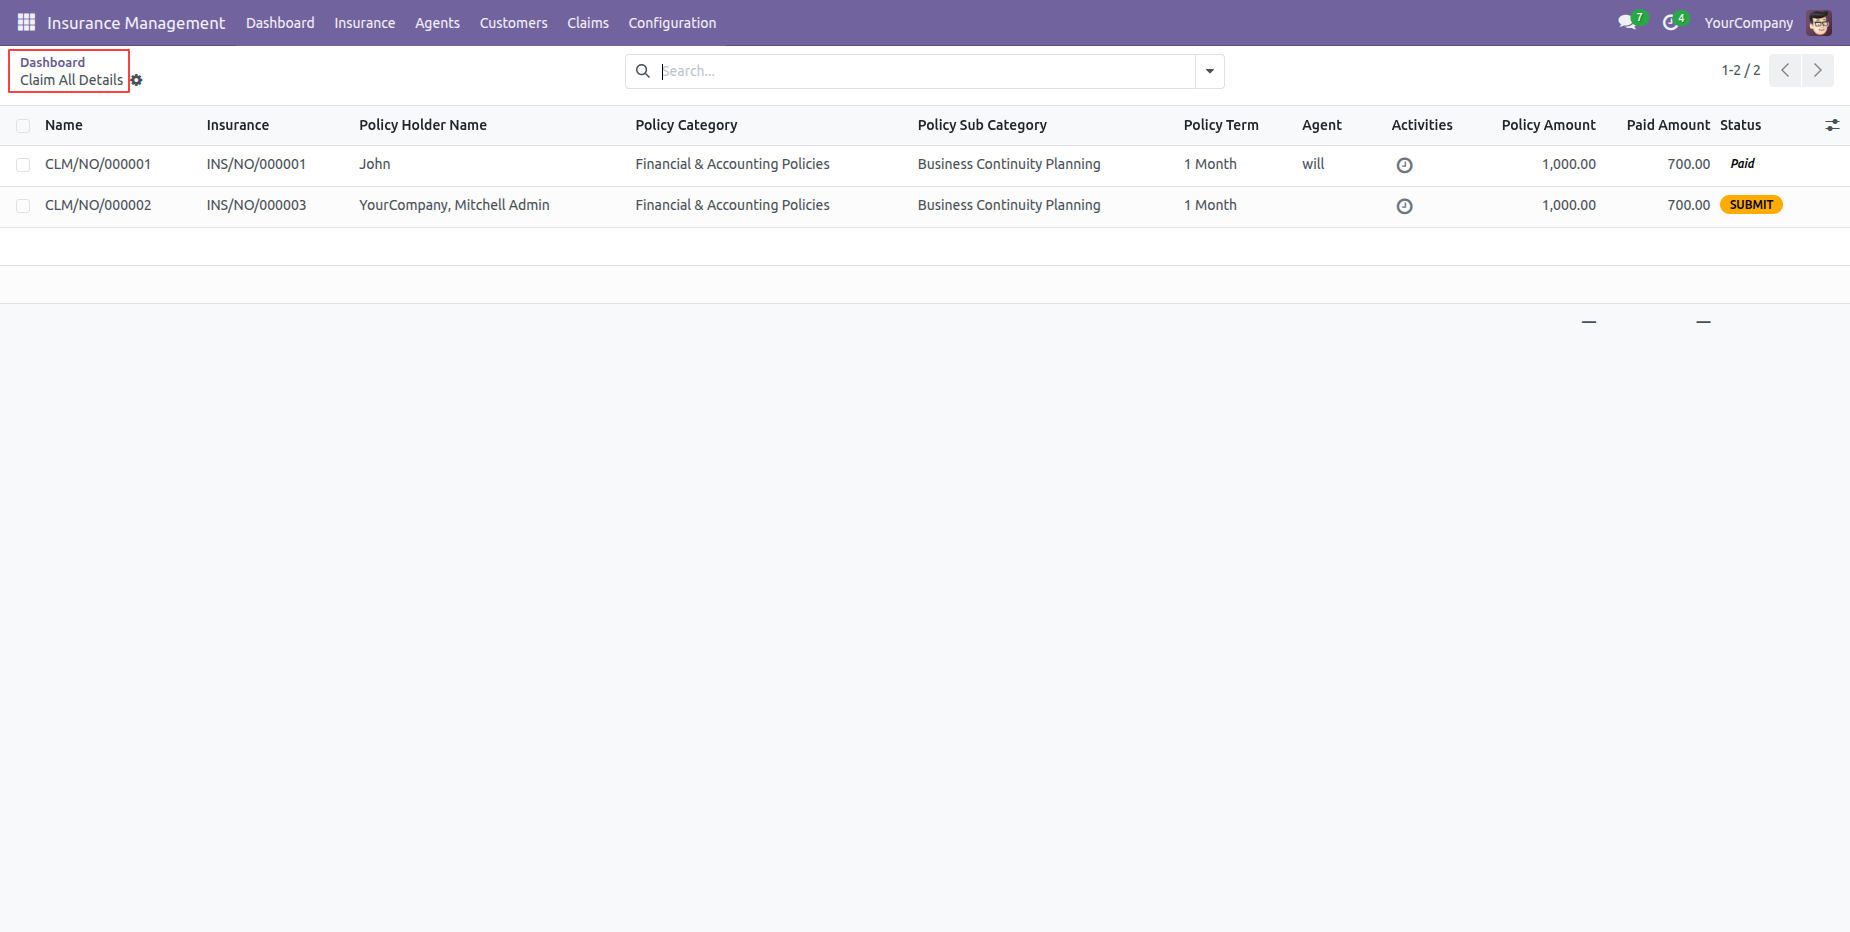
Clicking on the Total Claims tile from the dashboard will open a list of all claims.
Access related information like Agents, Customers, or Categories directly from the KPI dashboard tiles.
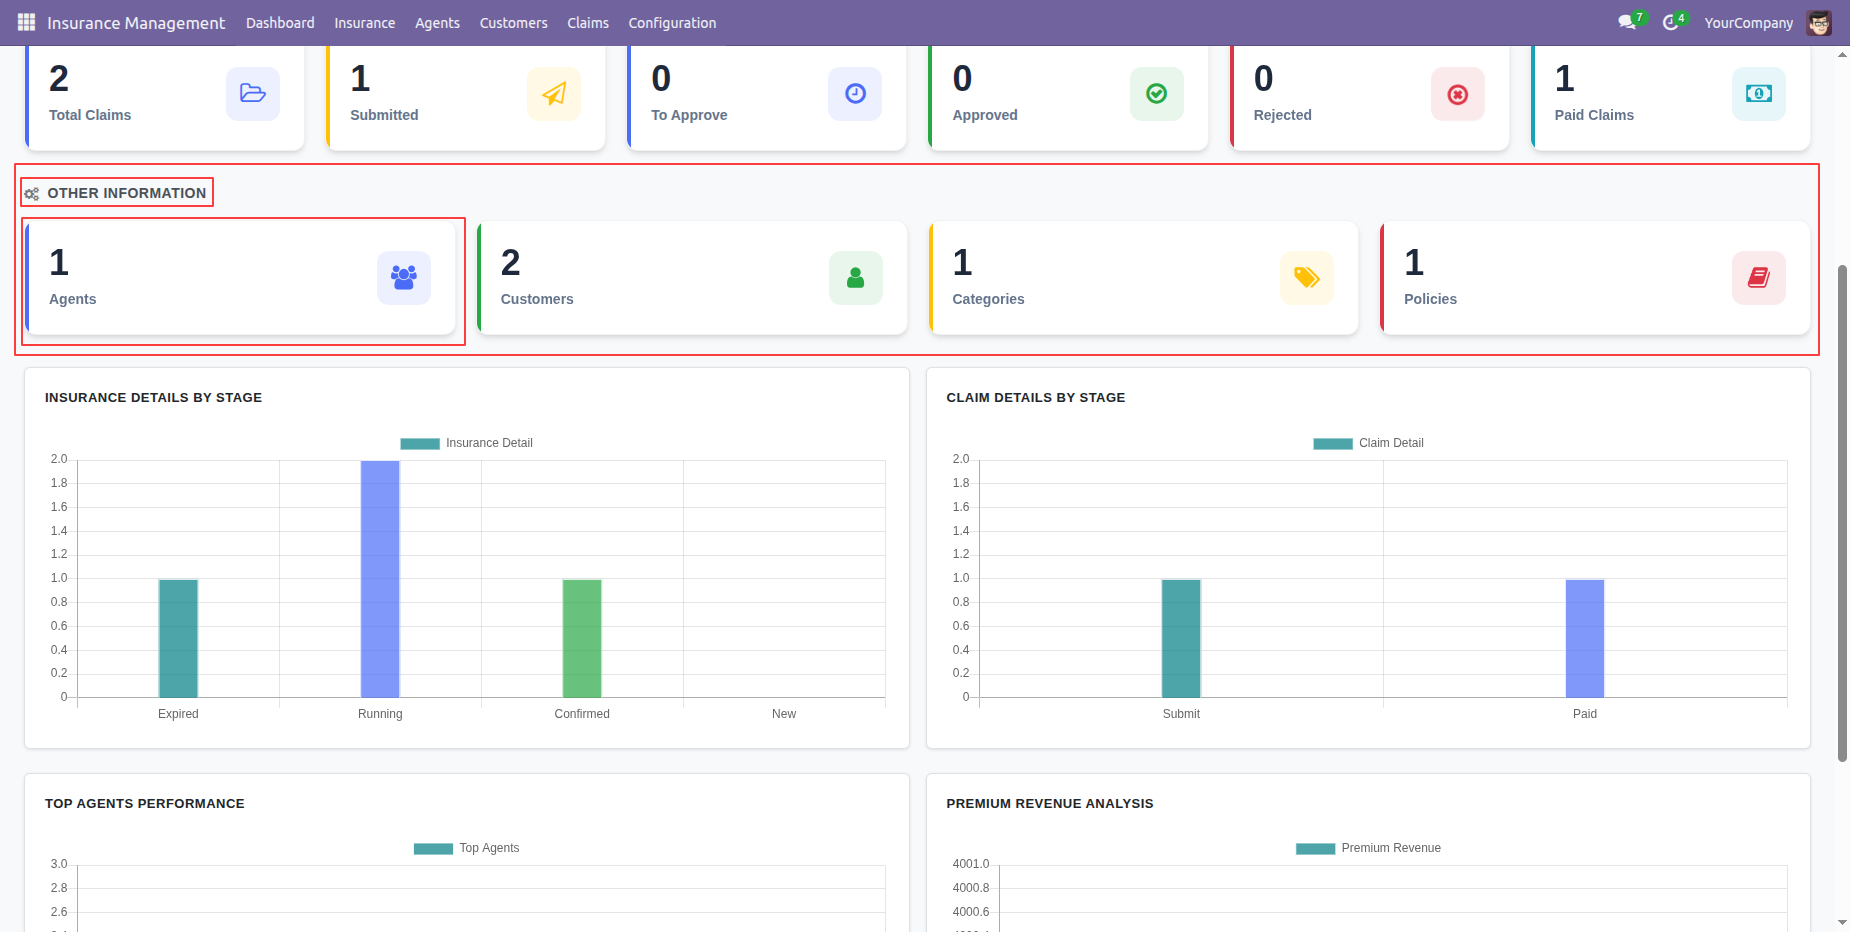
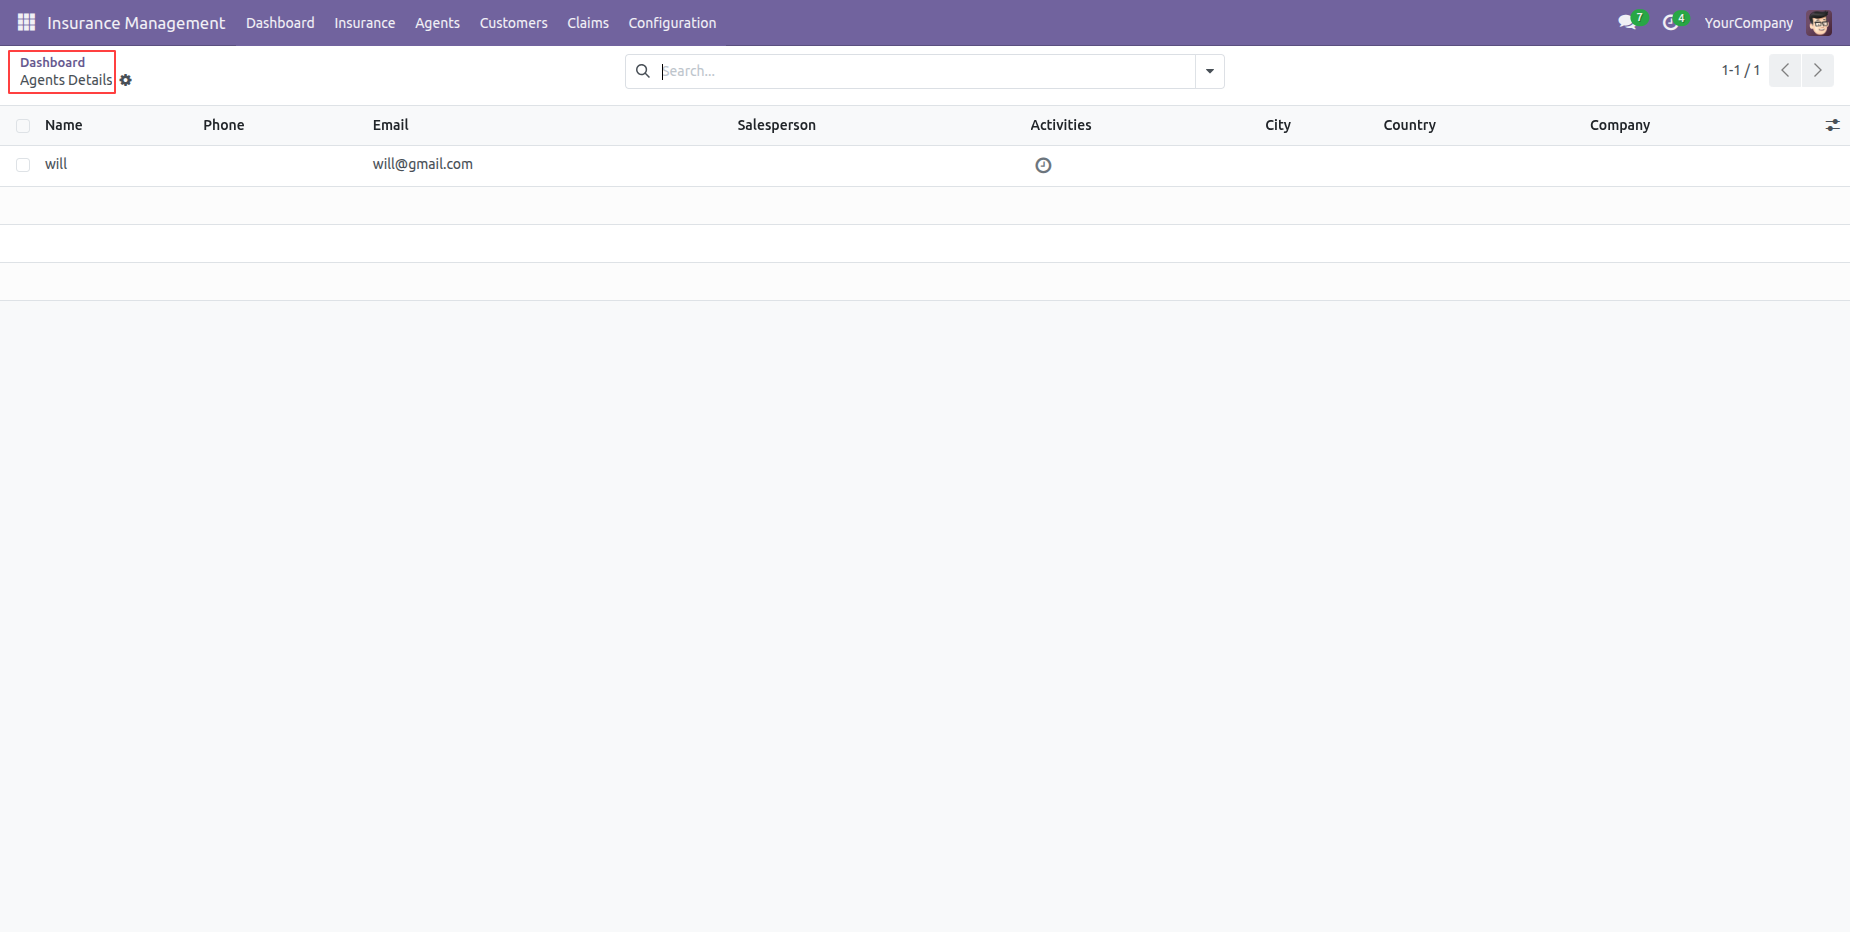
Clicking on the Agents tile from the dashboard will open a list of all agents.
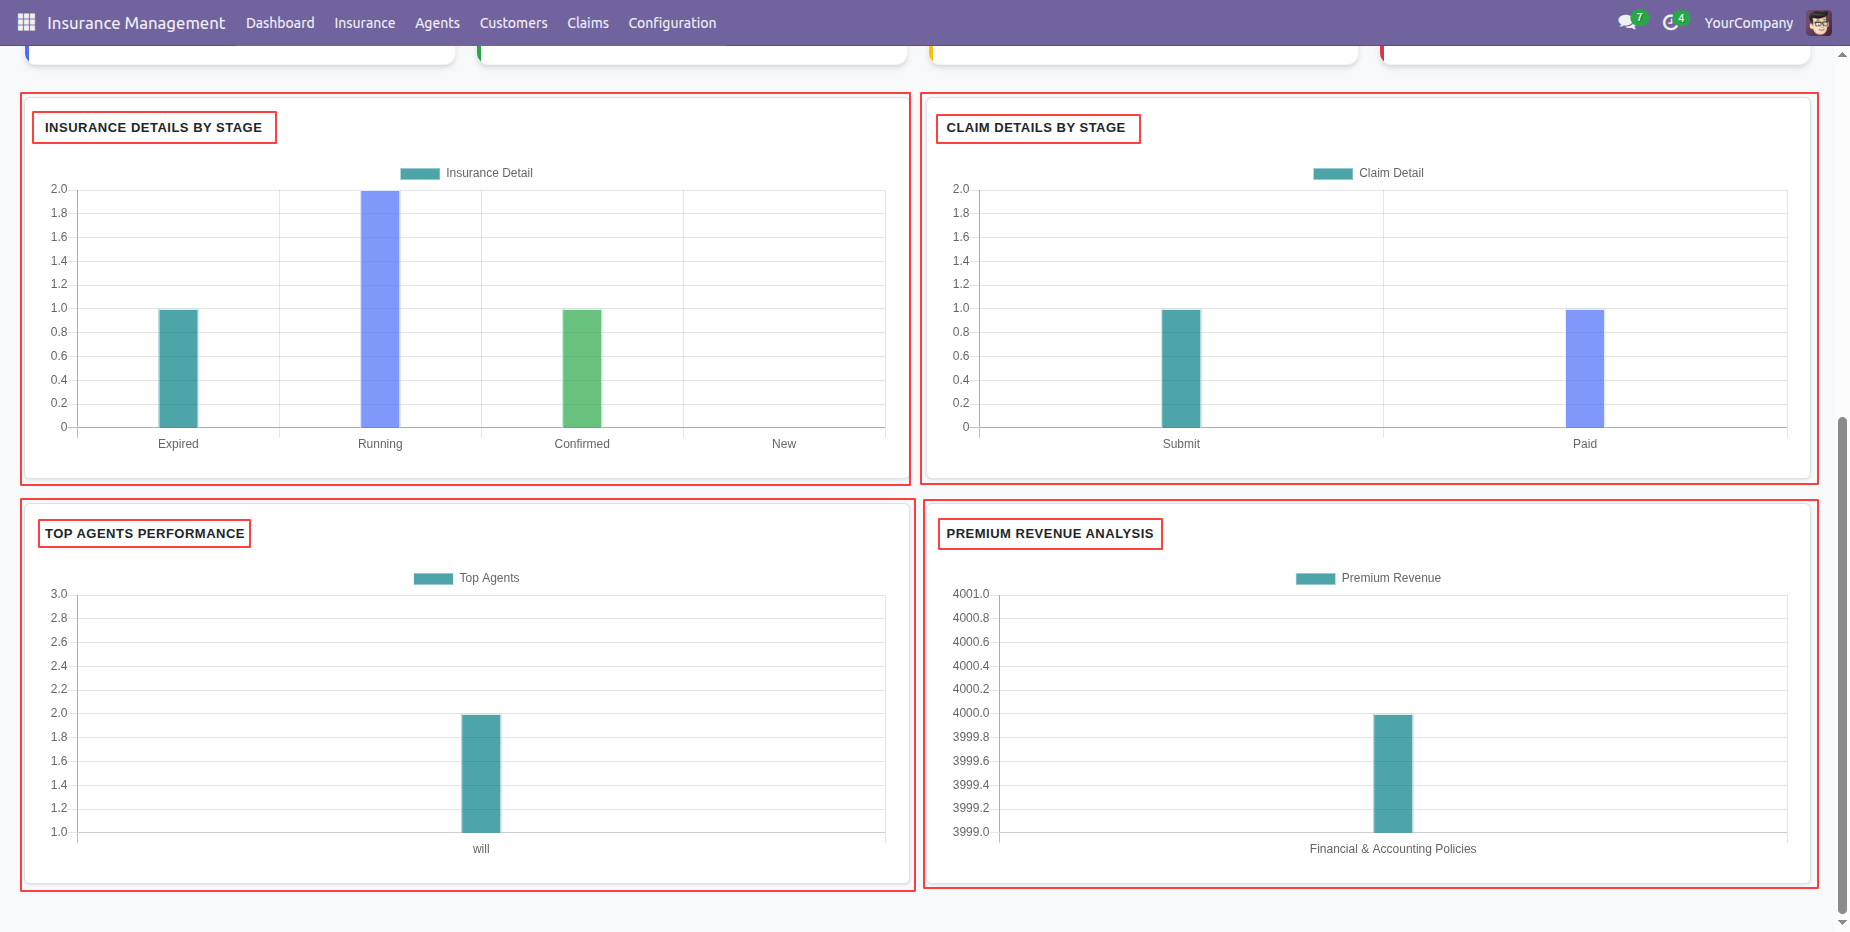
Visual analytics: view stage-wise charts representing 'Insurance
Details by Stage' and 'Claim Details by Stage'.
Perform in-depth analyses using the 'Top Agents Performance' and
'Premium Revenue Analysis' charts.
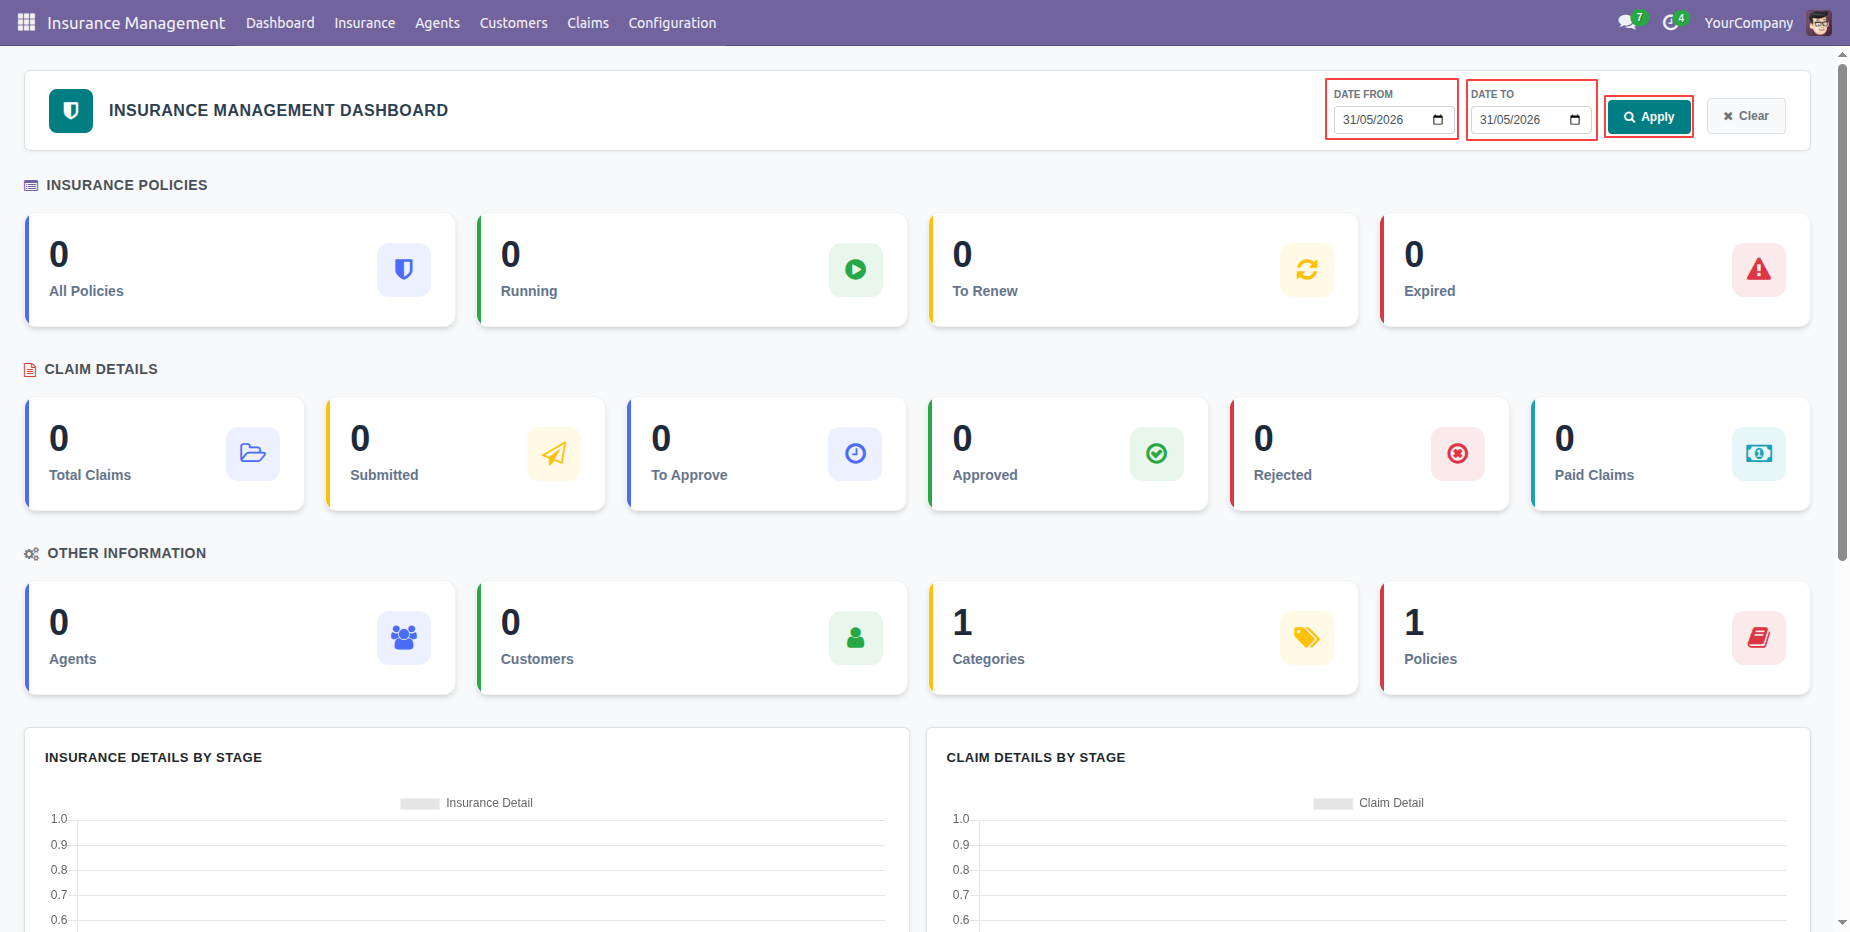
Filter all dashboard metrics dynamically using the custom 'DATE FROM' and 'DATE TO' date range filters.
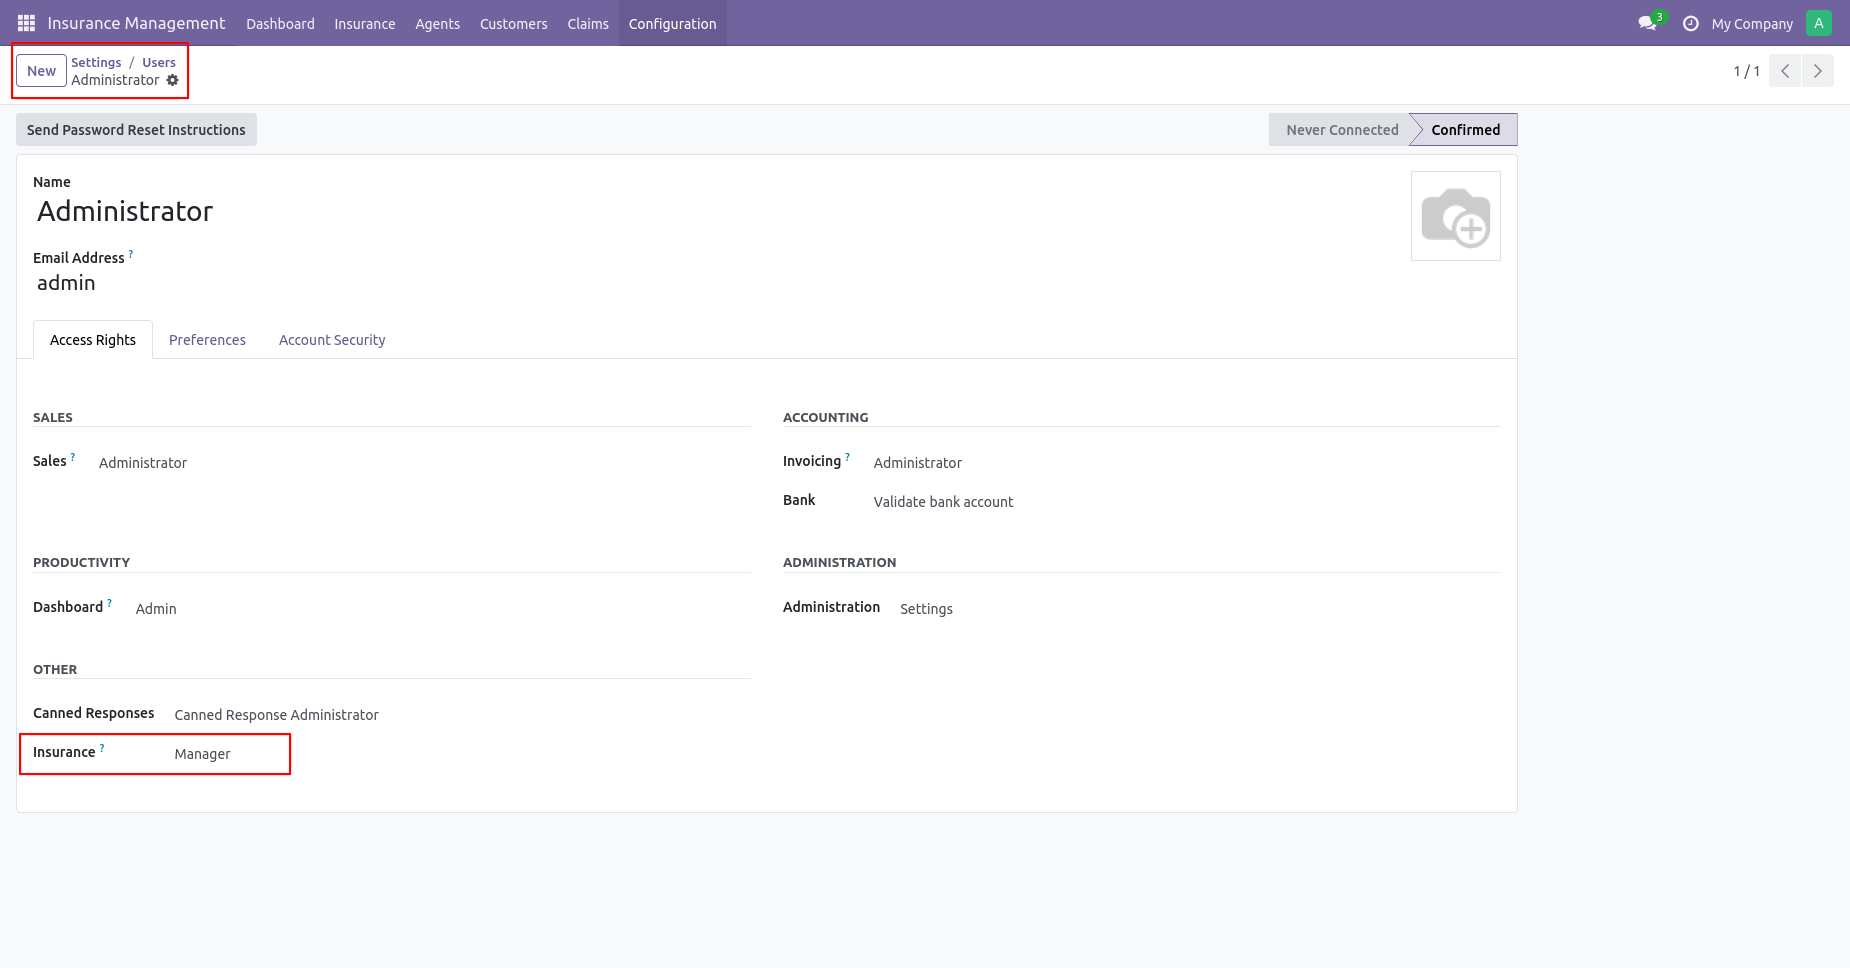
Go to your user settings ==> select Insurance Manager
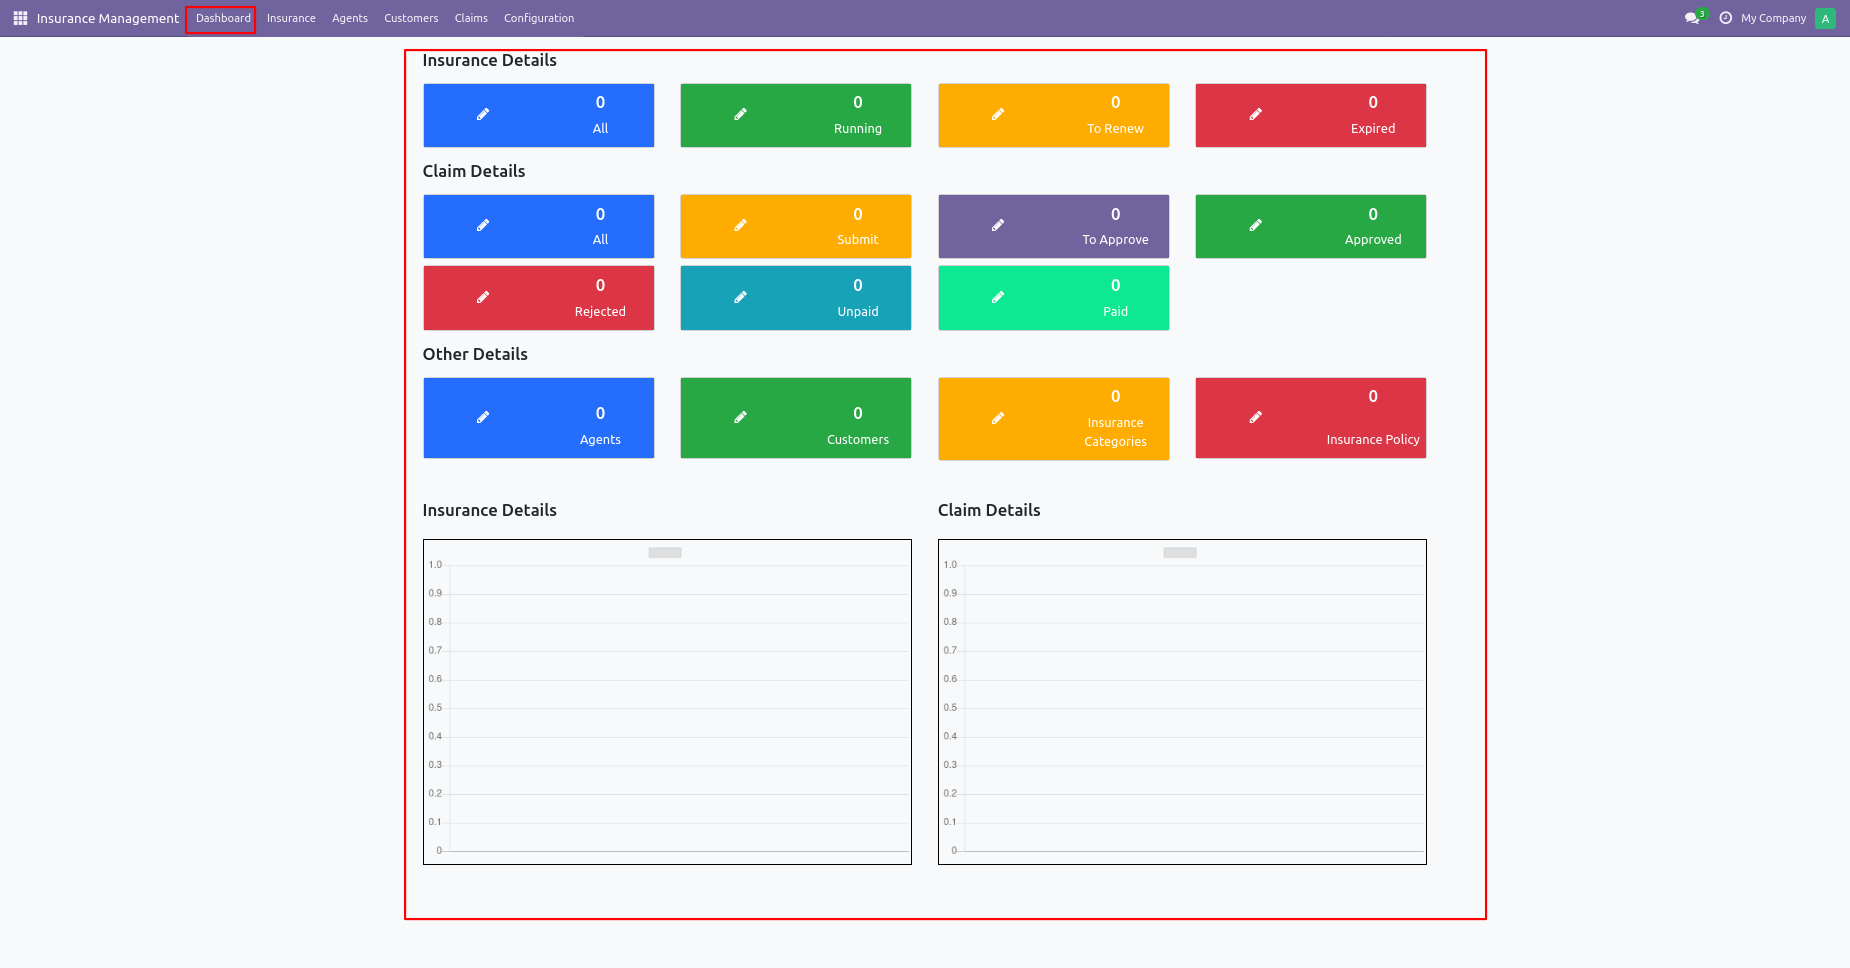
Insurance Management system colourful dashboard.
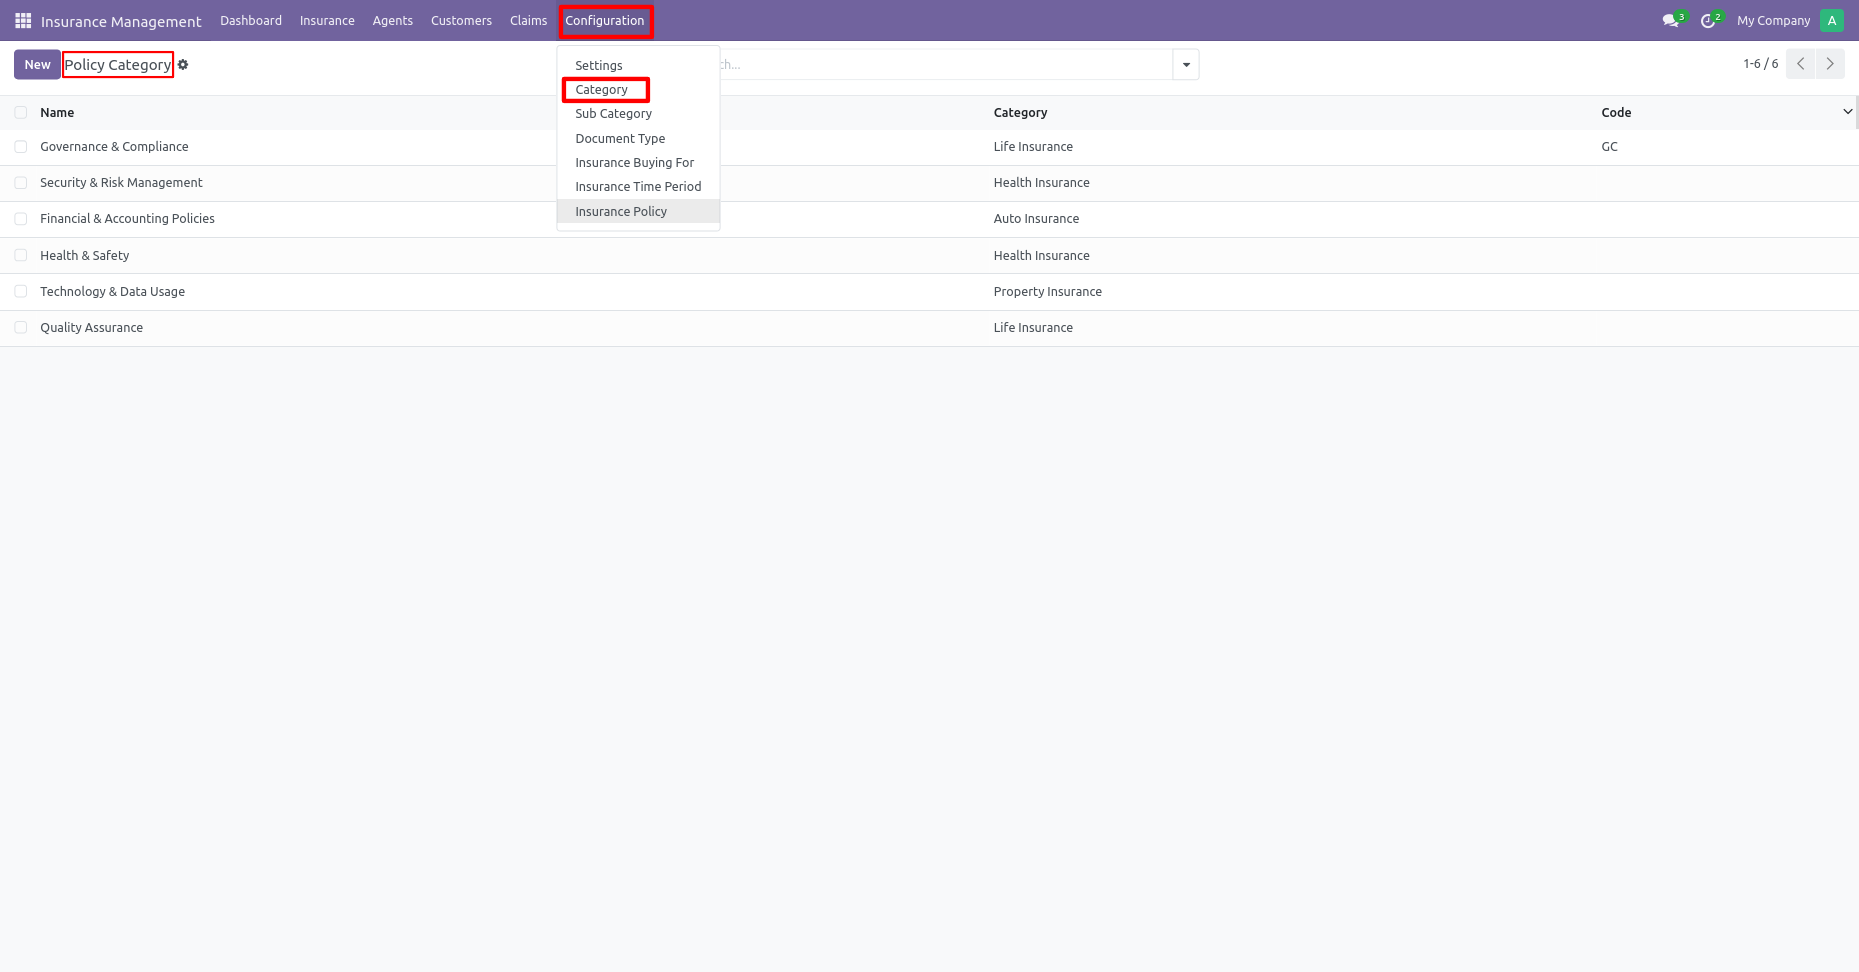
Go to insurance configuration and select the category menu.
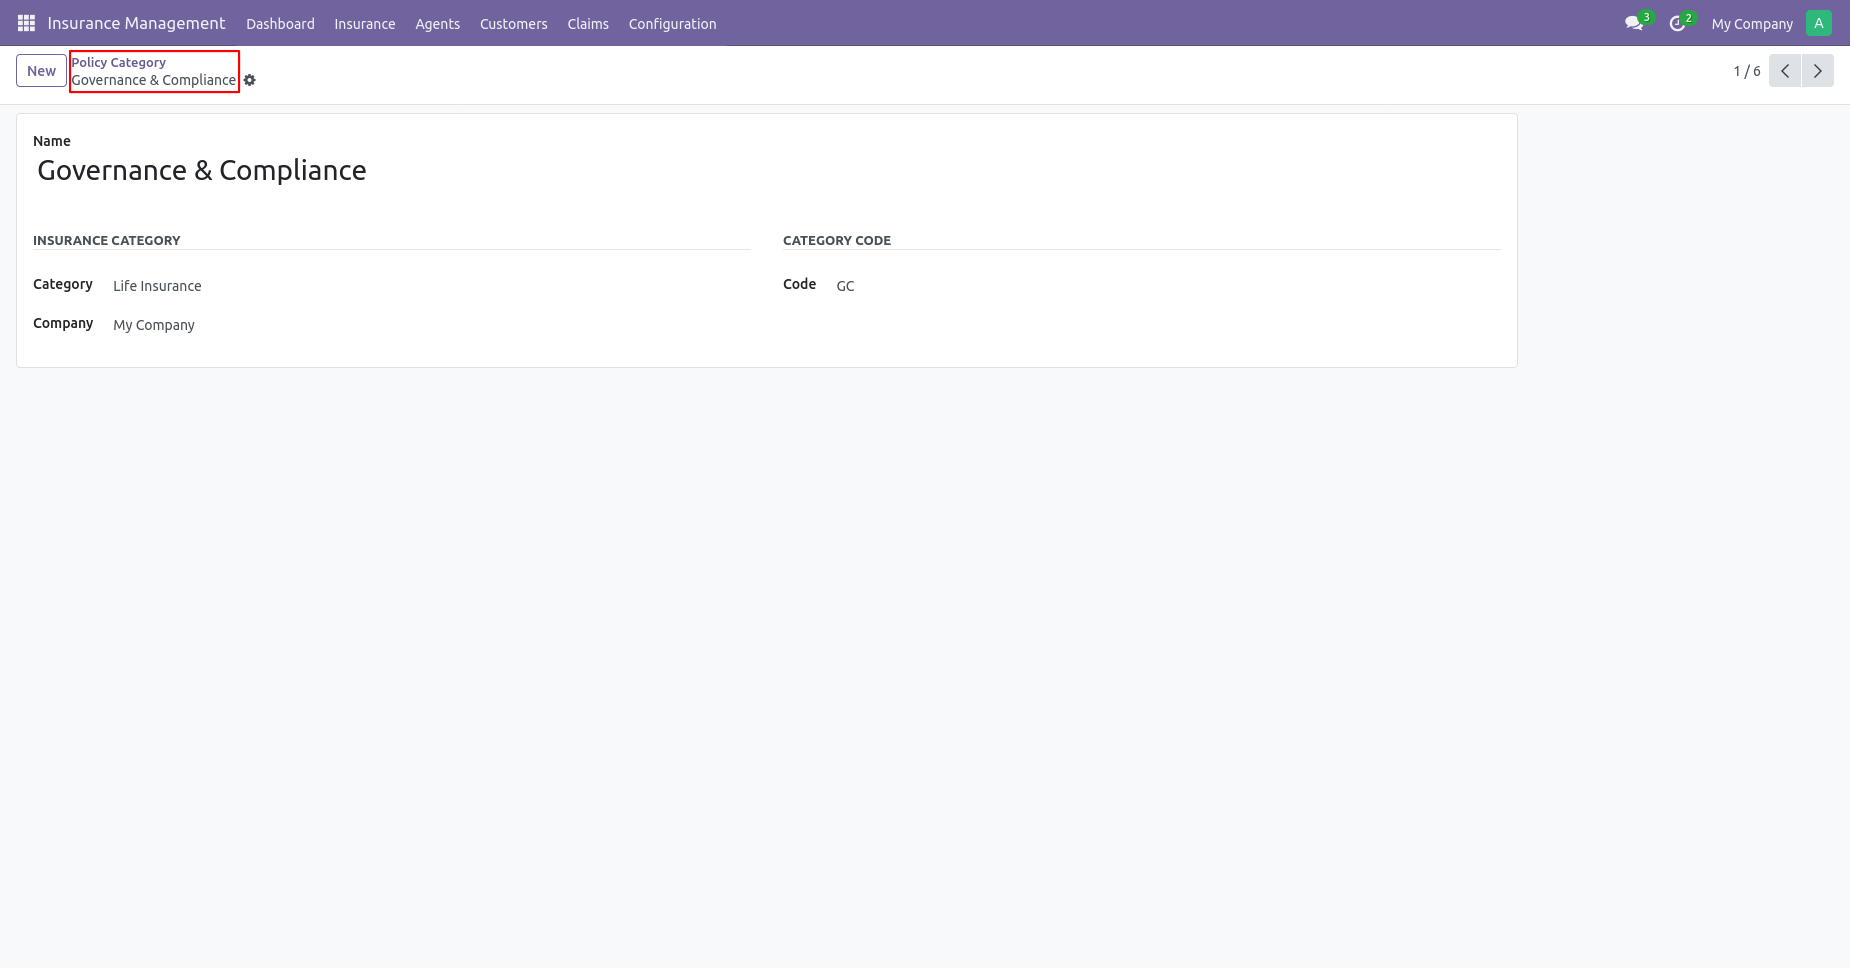
Create a policy category.
Go to insurance configuration and select the sub category menu.
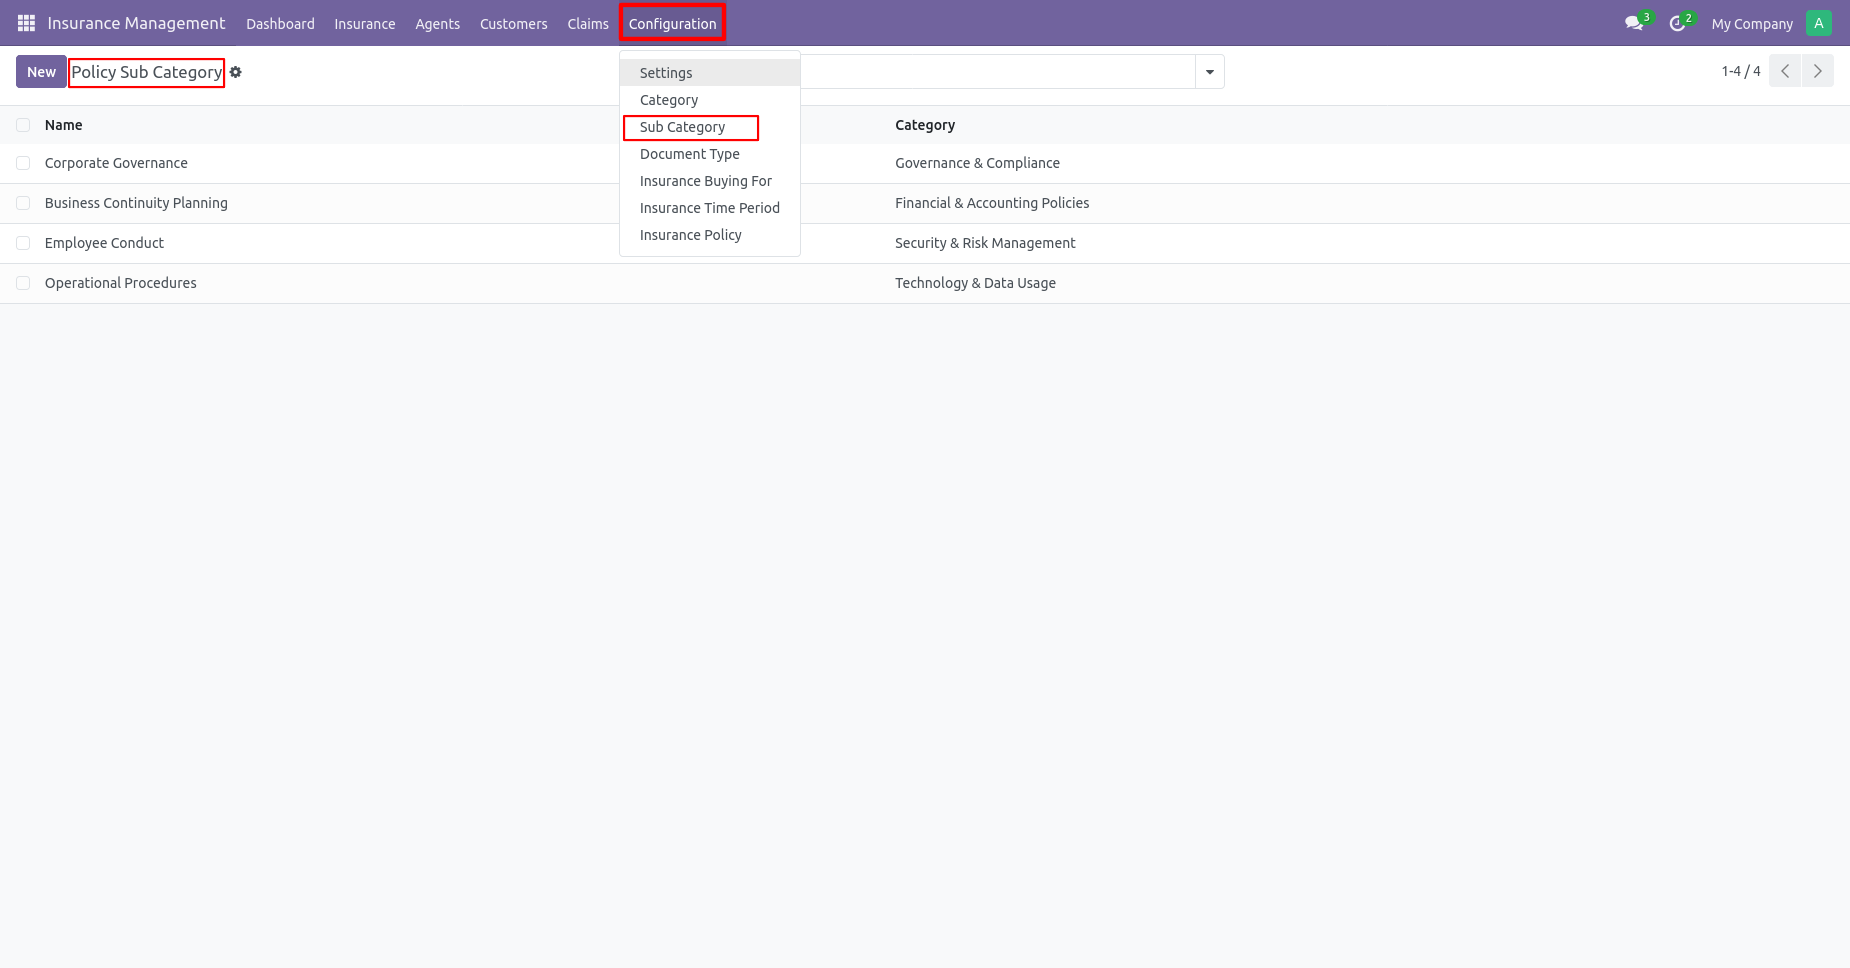
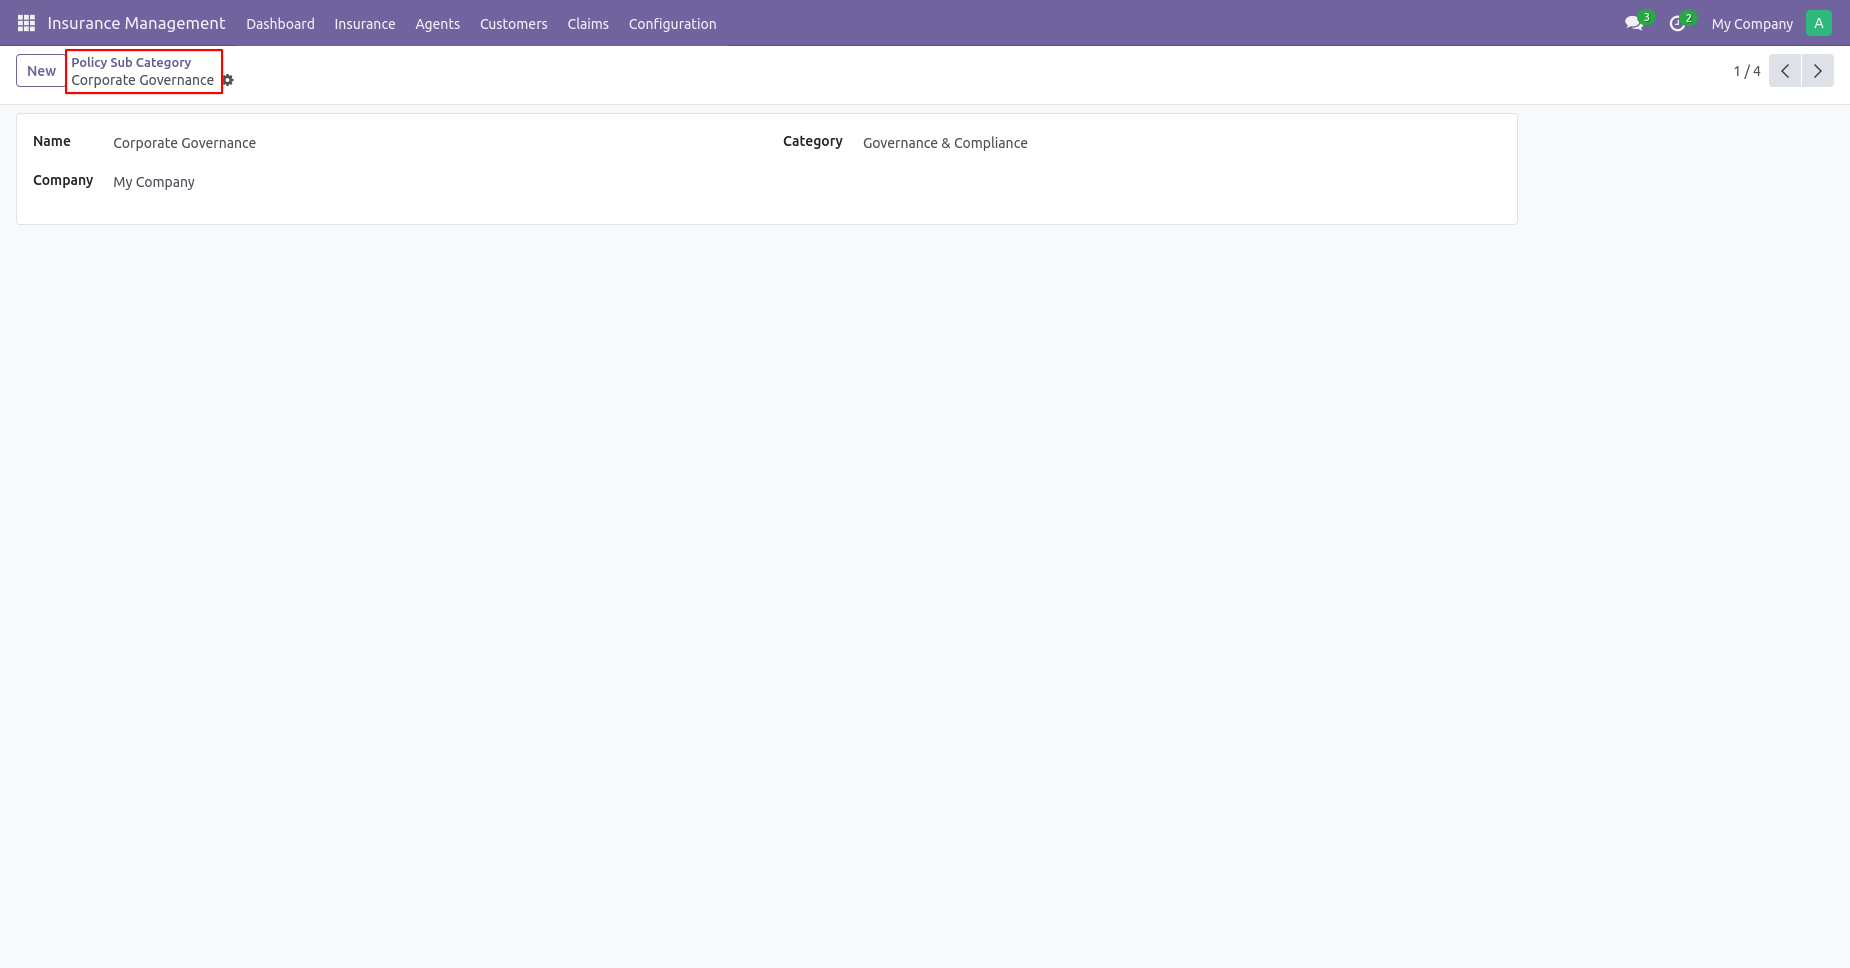
Create a policy sub category.
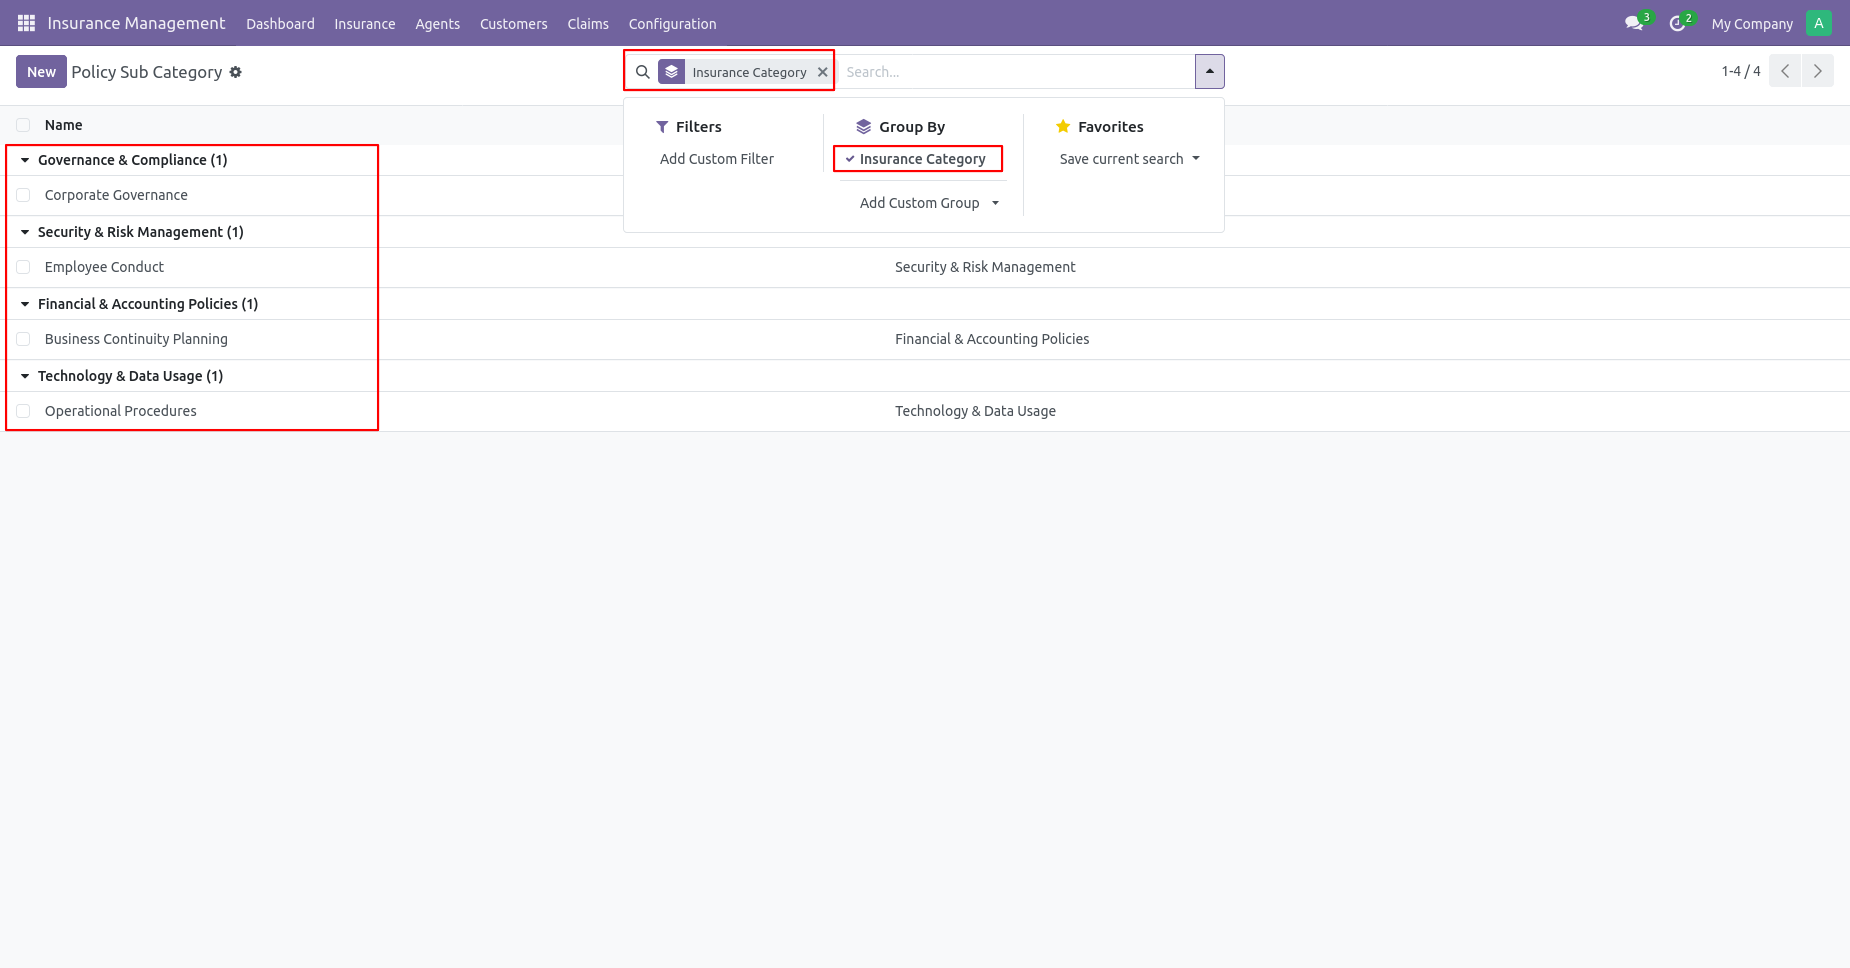
You can search insurance sub category group by insurance category.
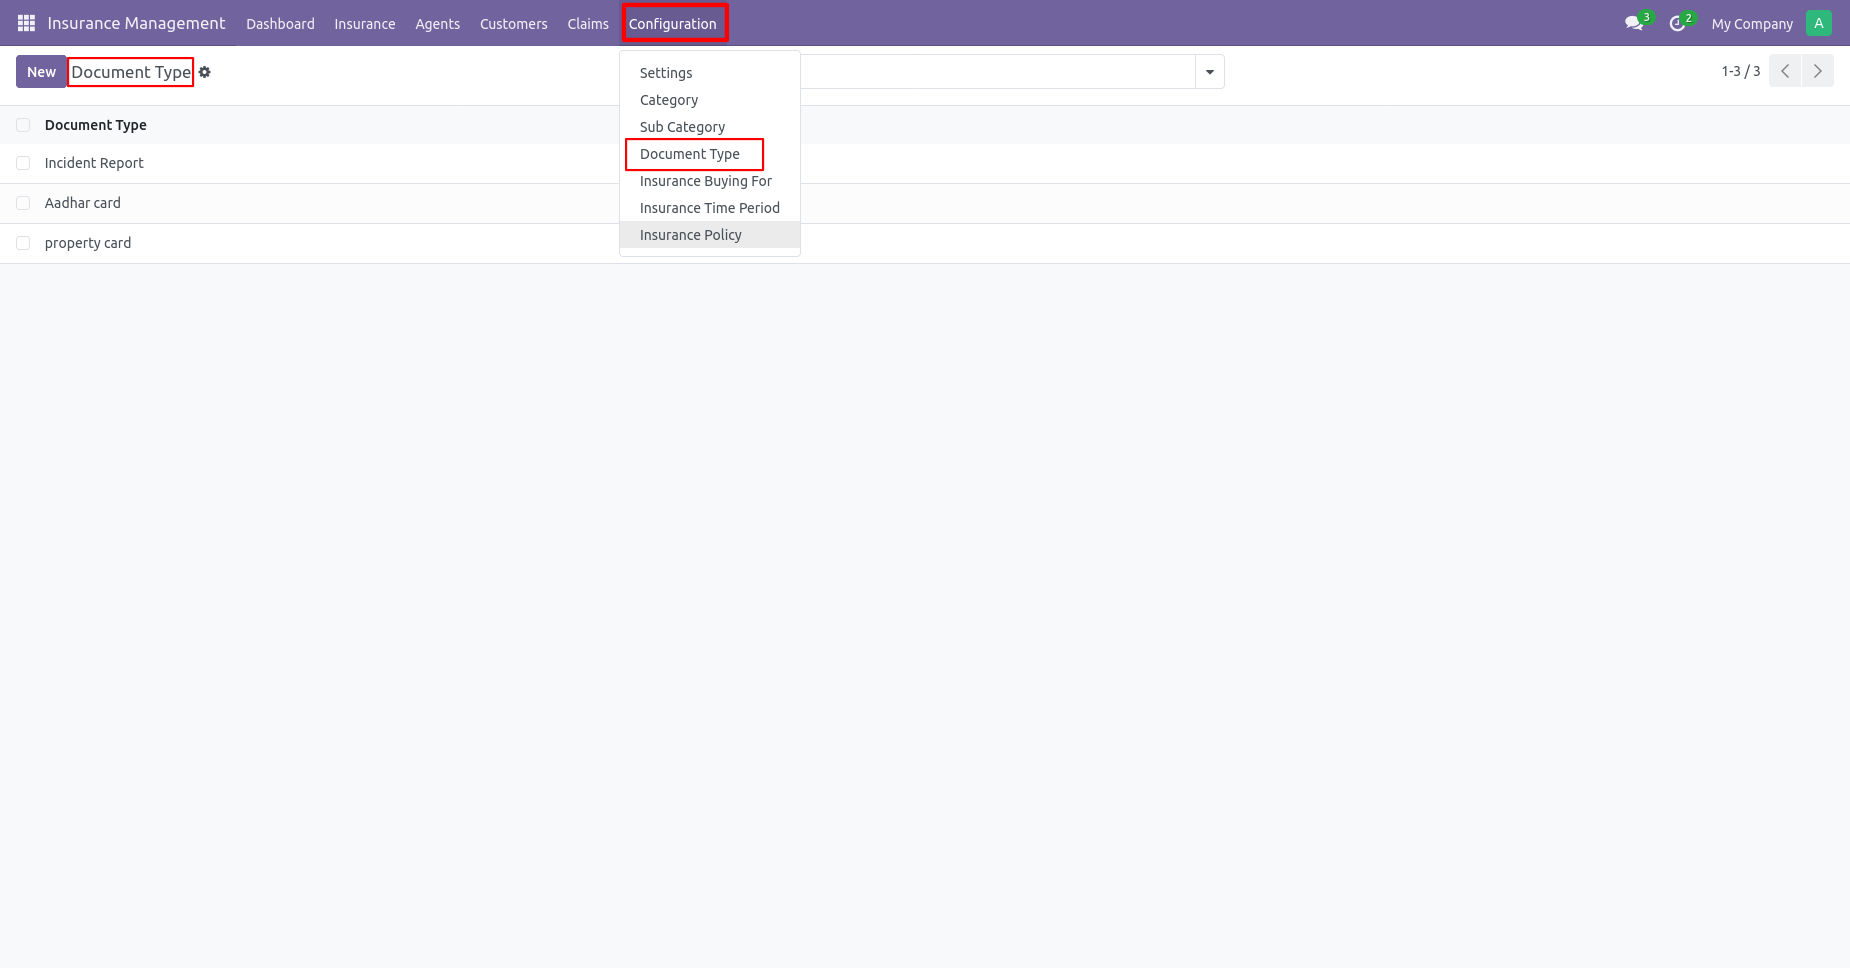
Go to insurance configuration and select the document type menu.
You can see the document type list view.
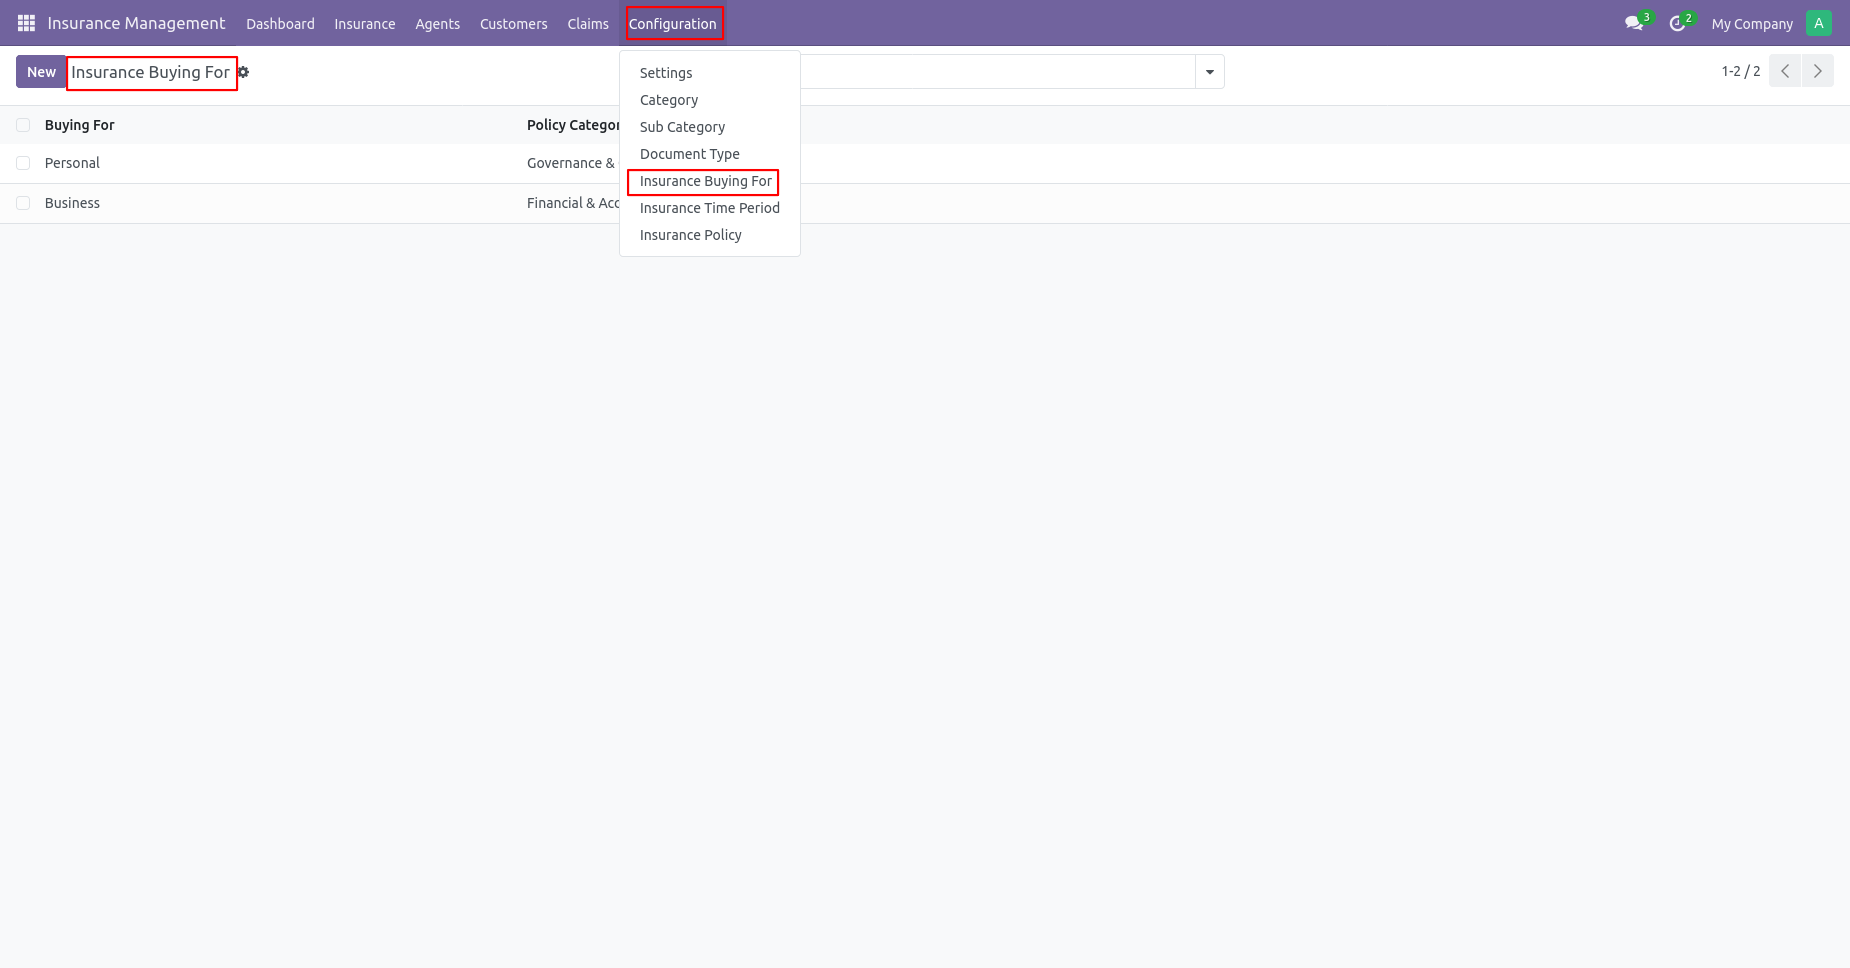
Go to insurance configuration and select insurance buying for the
menu.
You can see insurance buying for a list view.
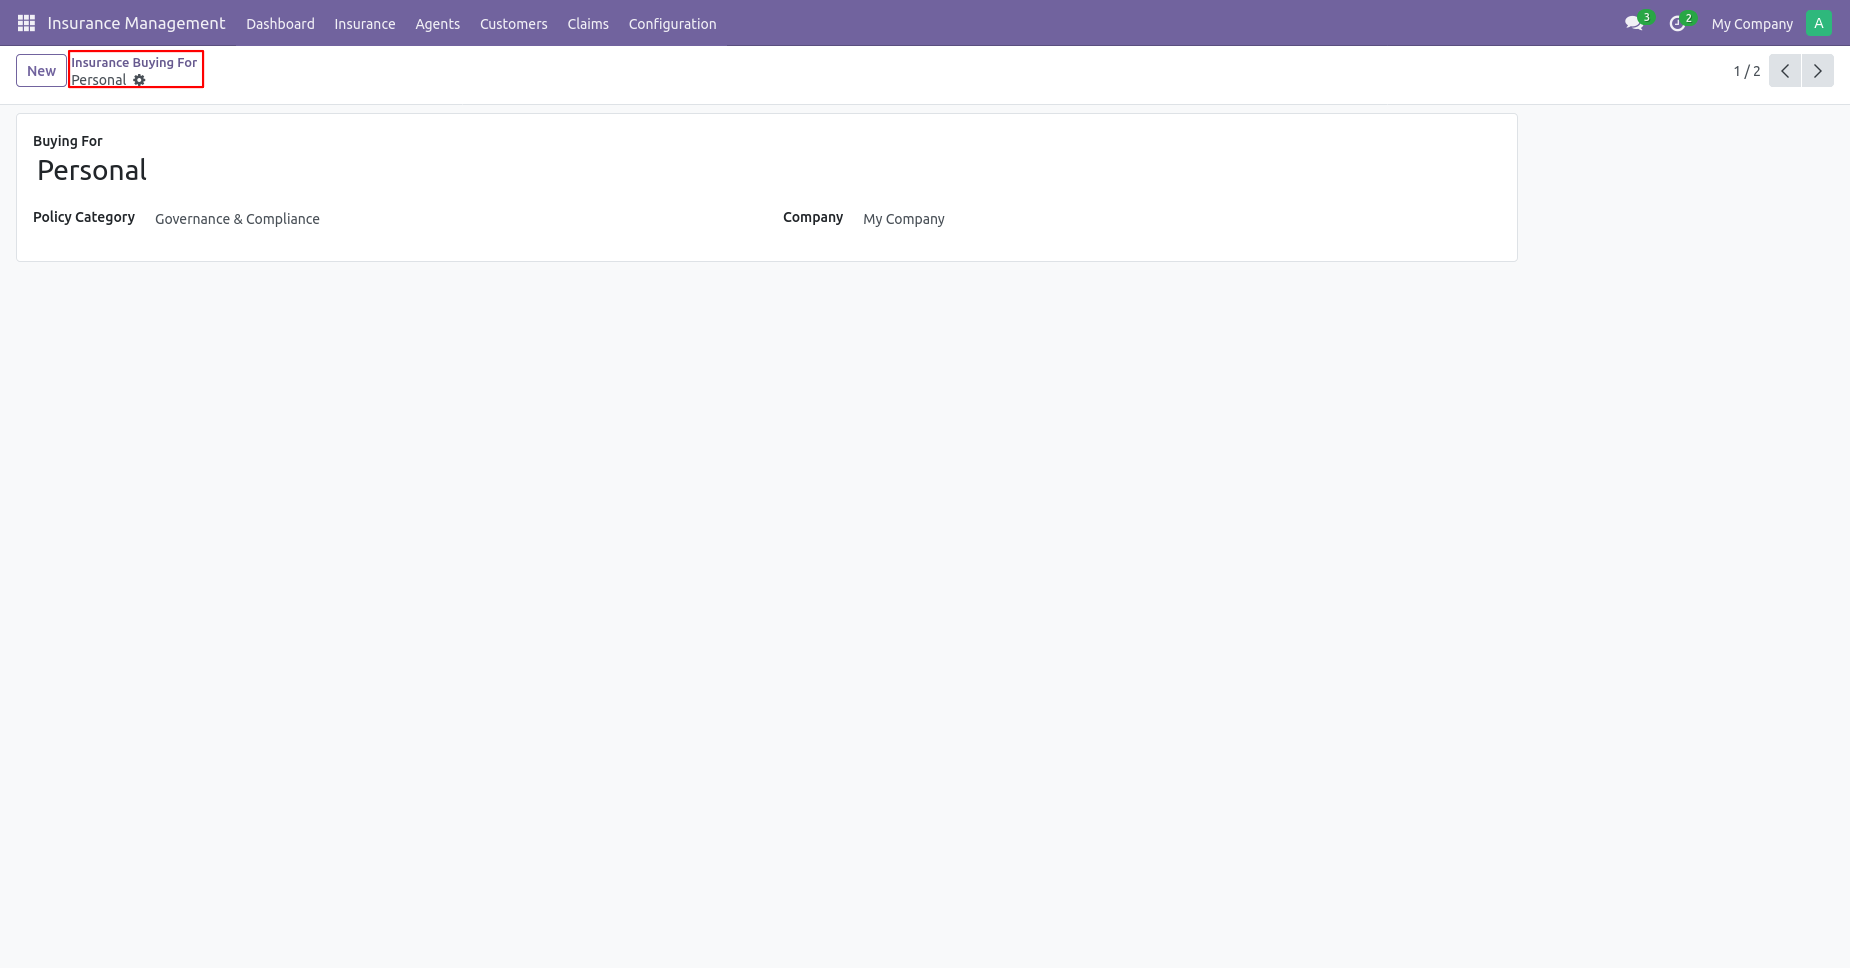
Form view of Insurance buying for.
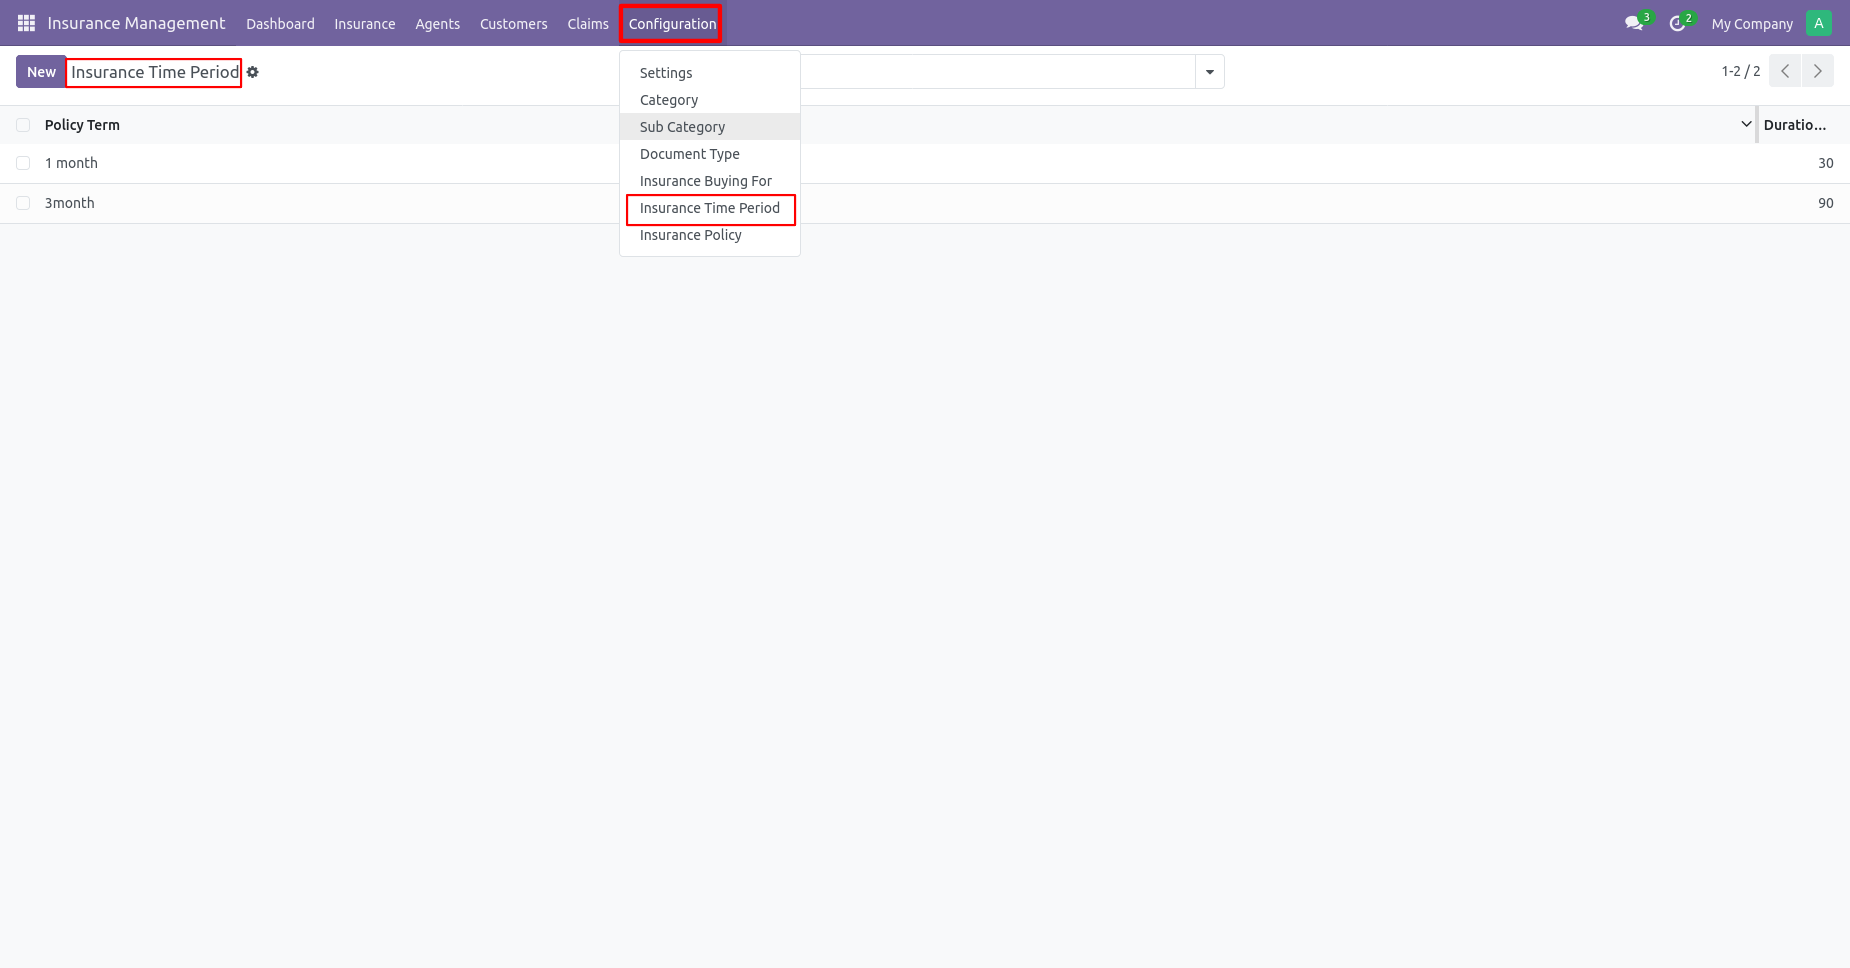
Go to insurance configuration and select the insurance time period
menu.
You can see the insurance time period list view.
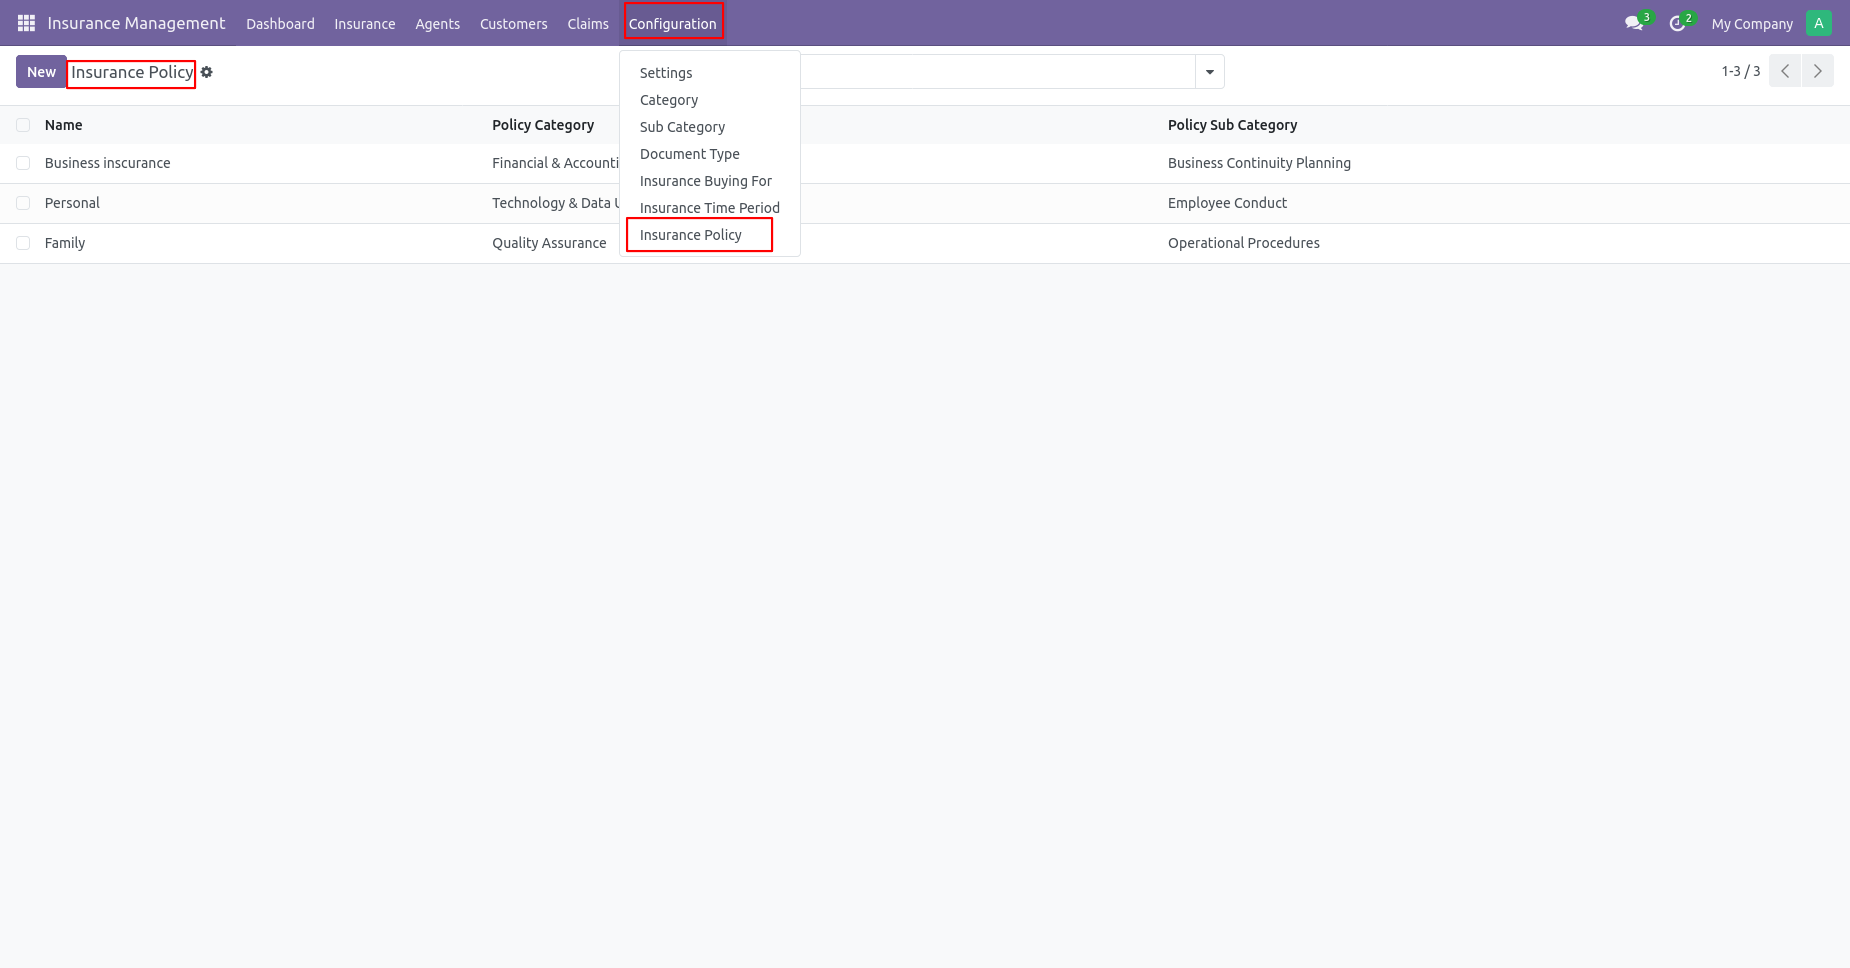
Go to insurance configuration and select the insurance policy
menu.
You can see the insurance policy list view.
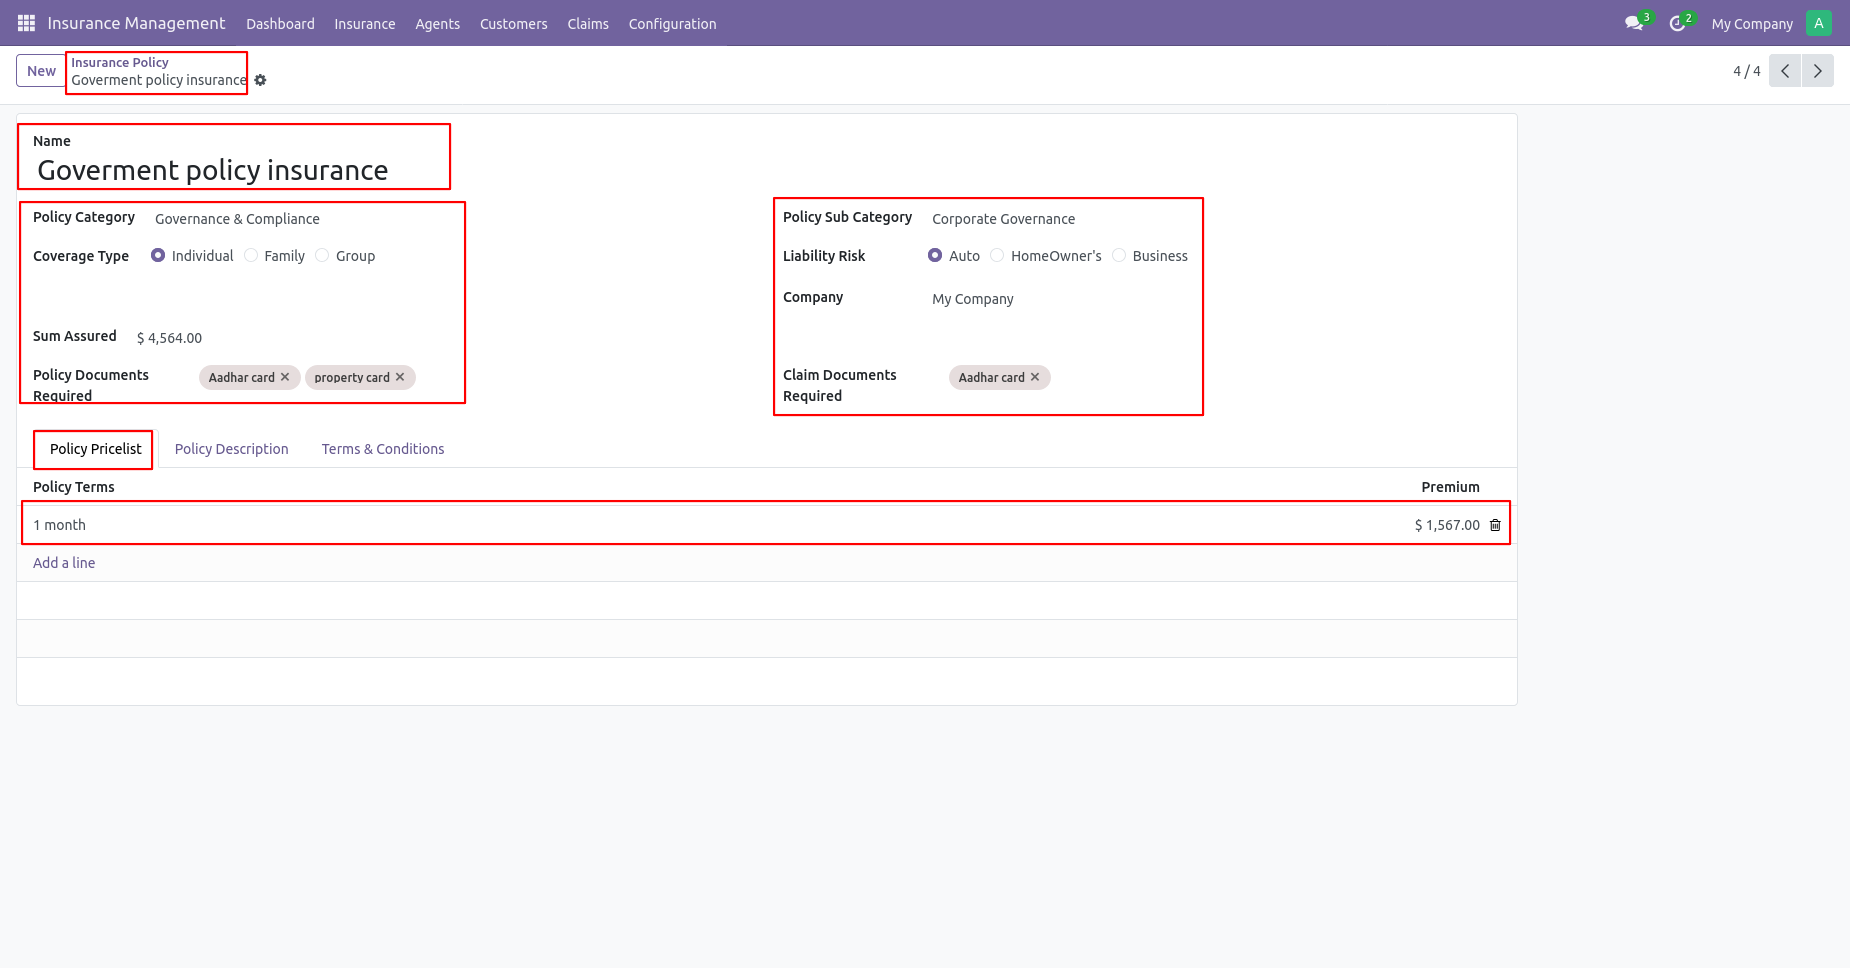
Insurance Policy form view.
You can add all the required details here in the policy form and
also add the
policy pricelist.
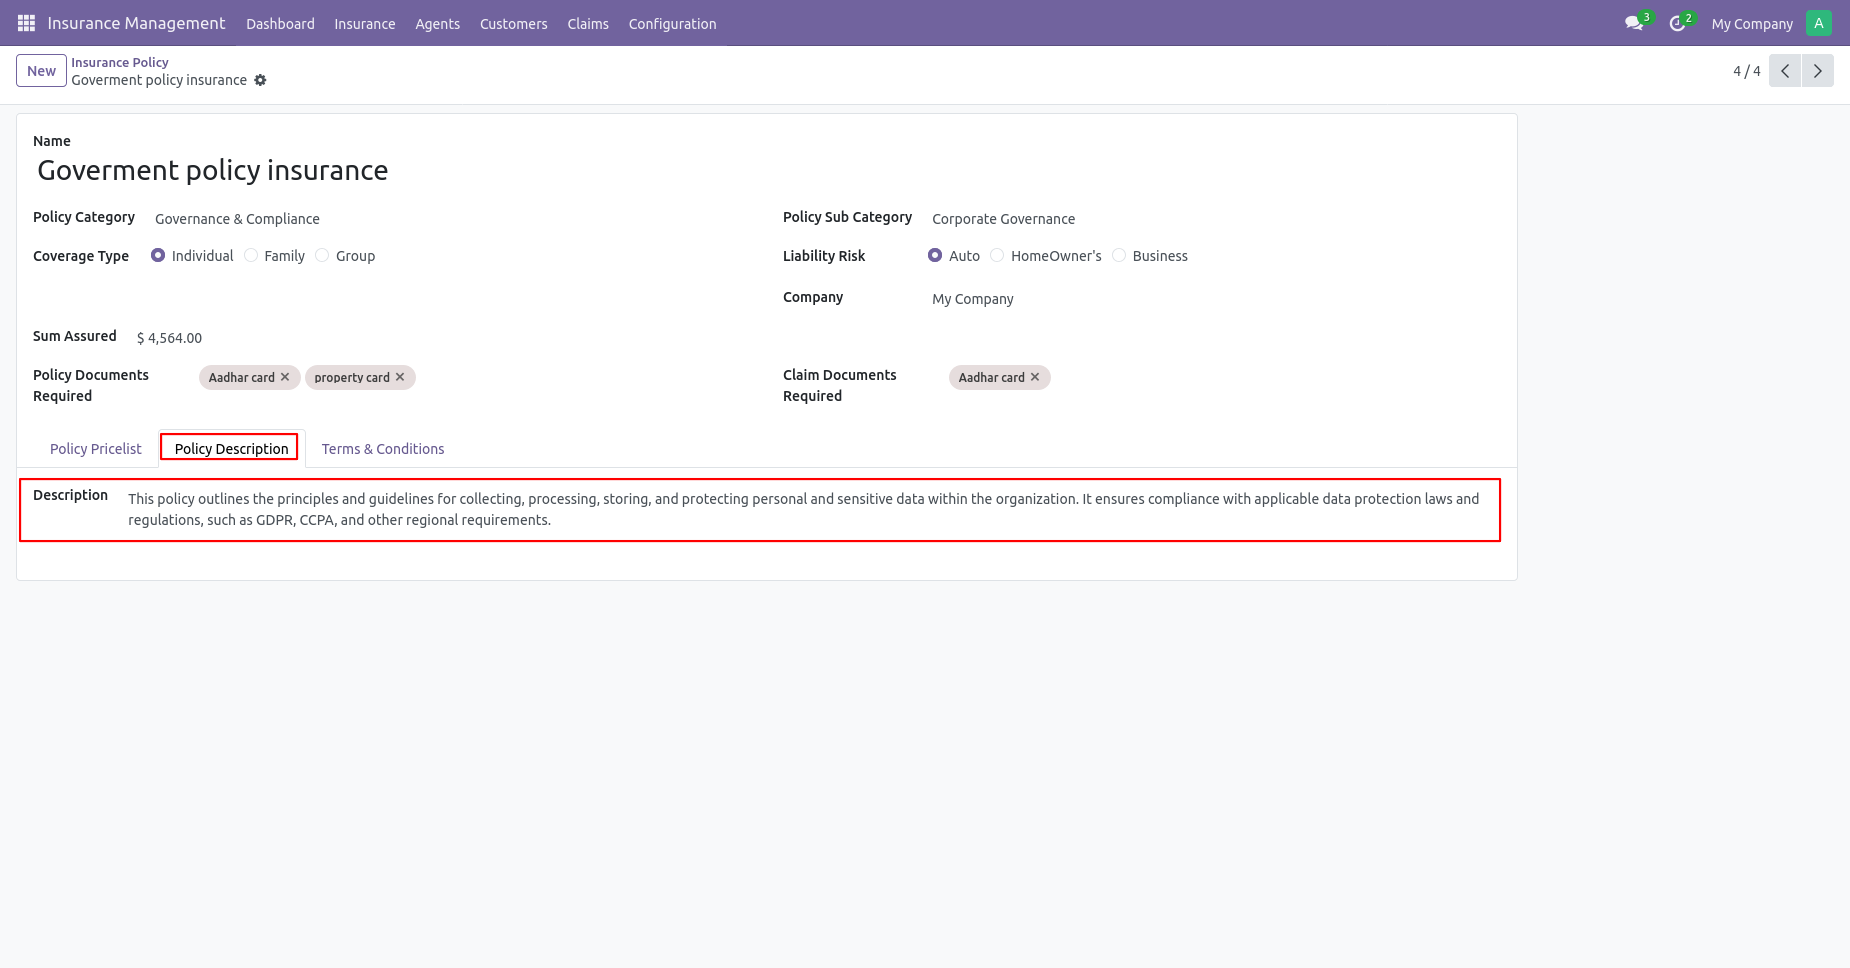
You can add a policy description.
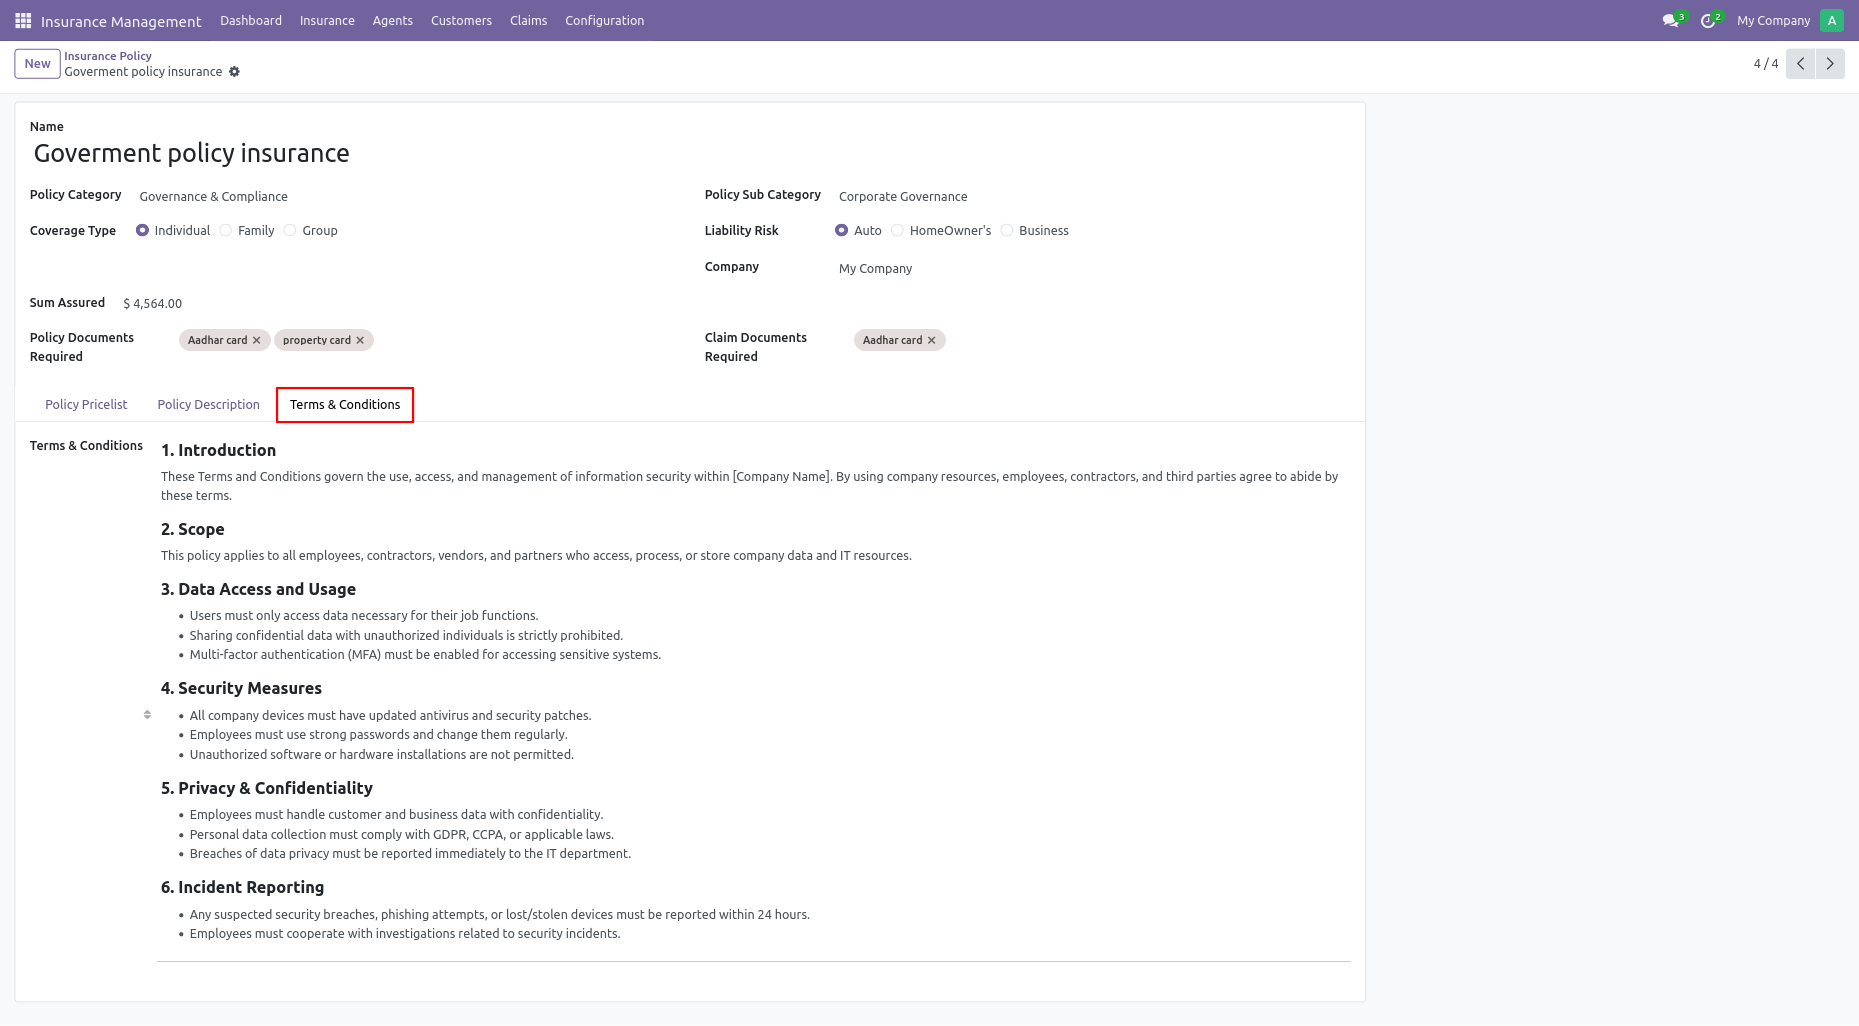
You can add all the required details here in the policy form and also add policy terms & conditions.
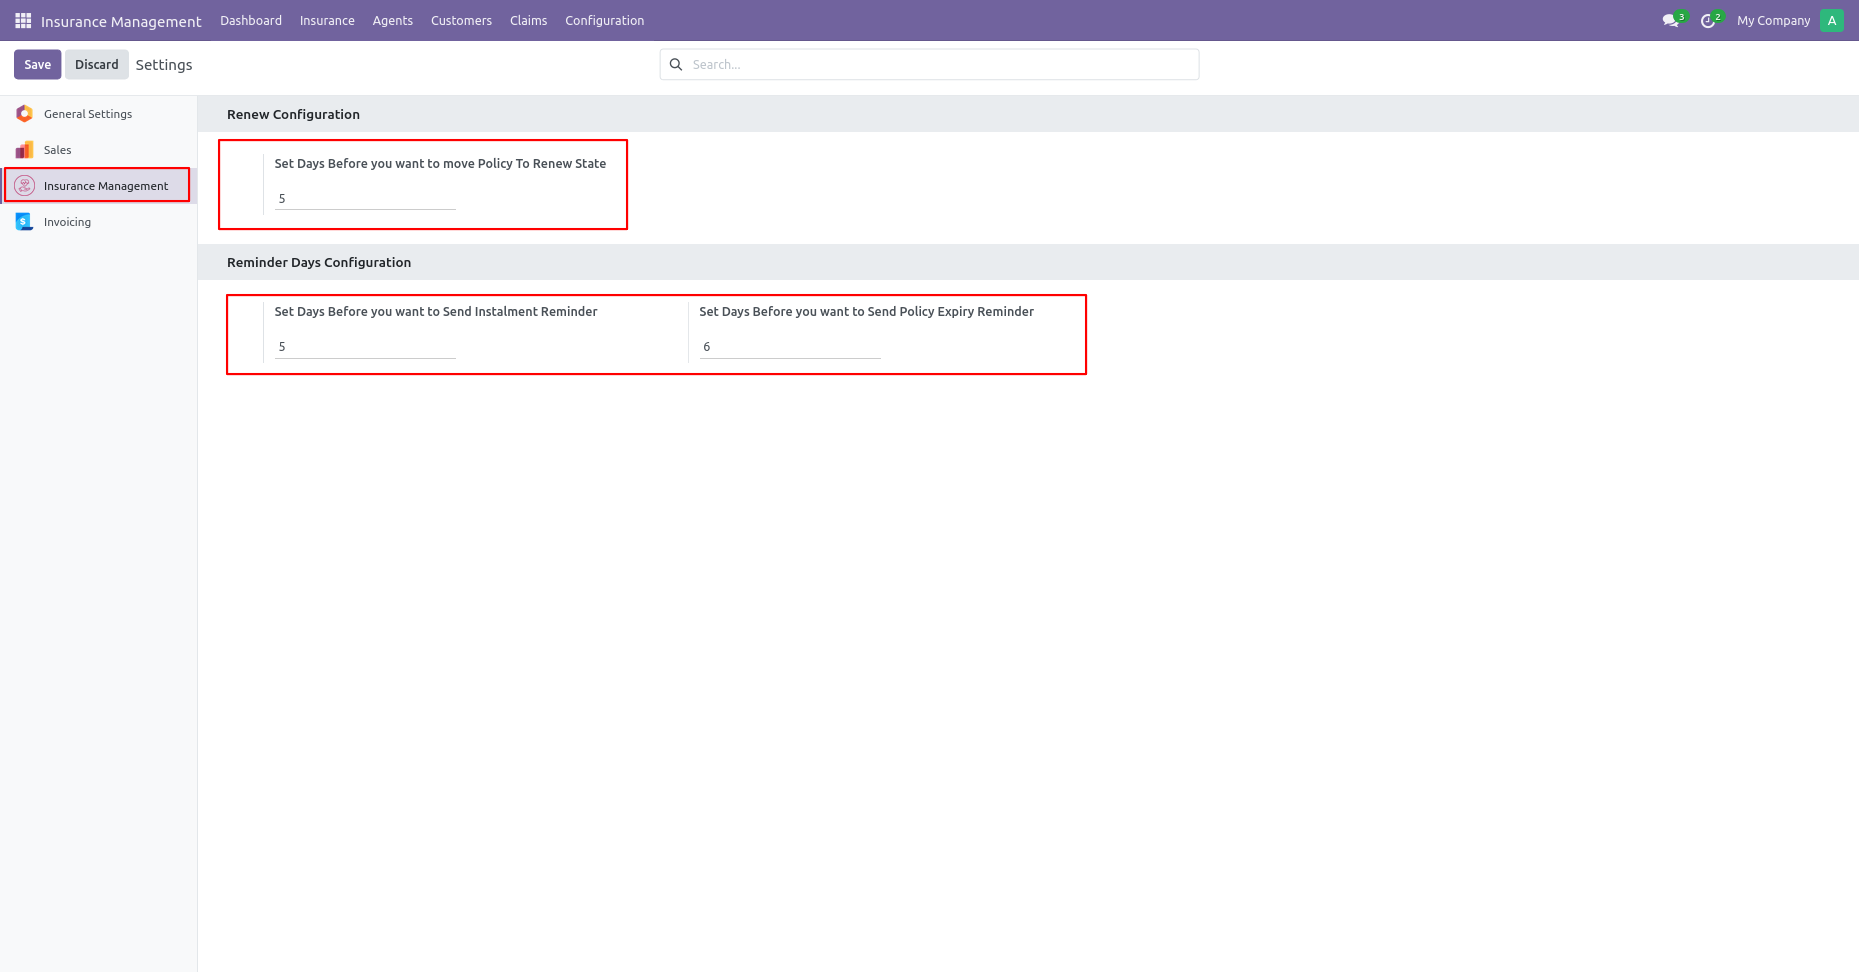
You can set reminders for renewal of the policy, for instalments and also for the expiry of the policy.
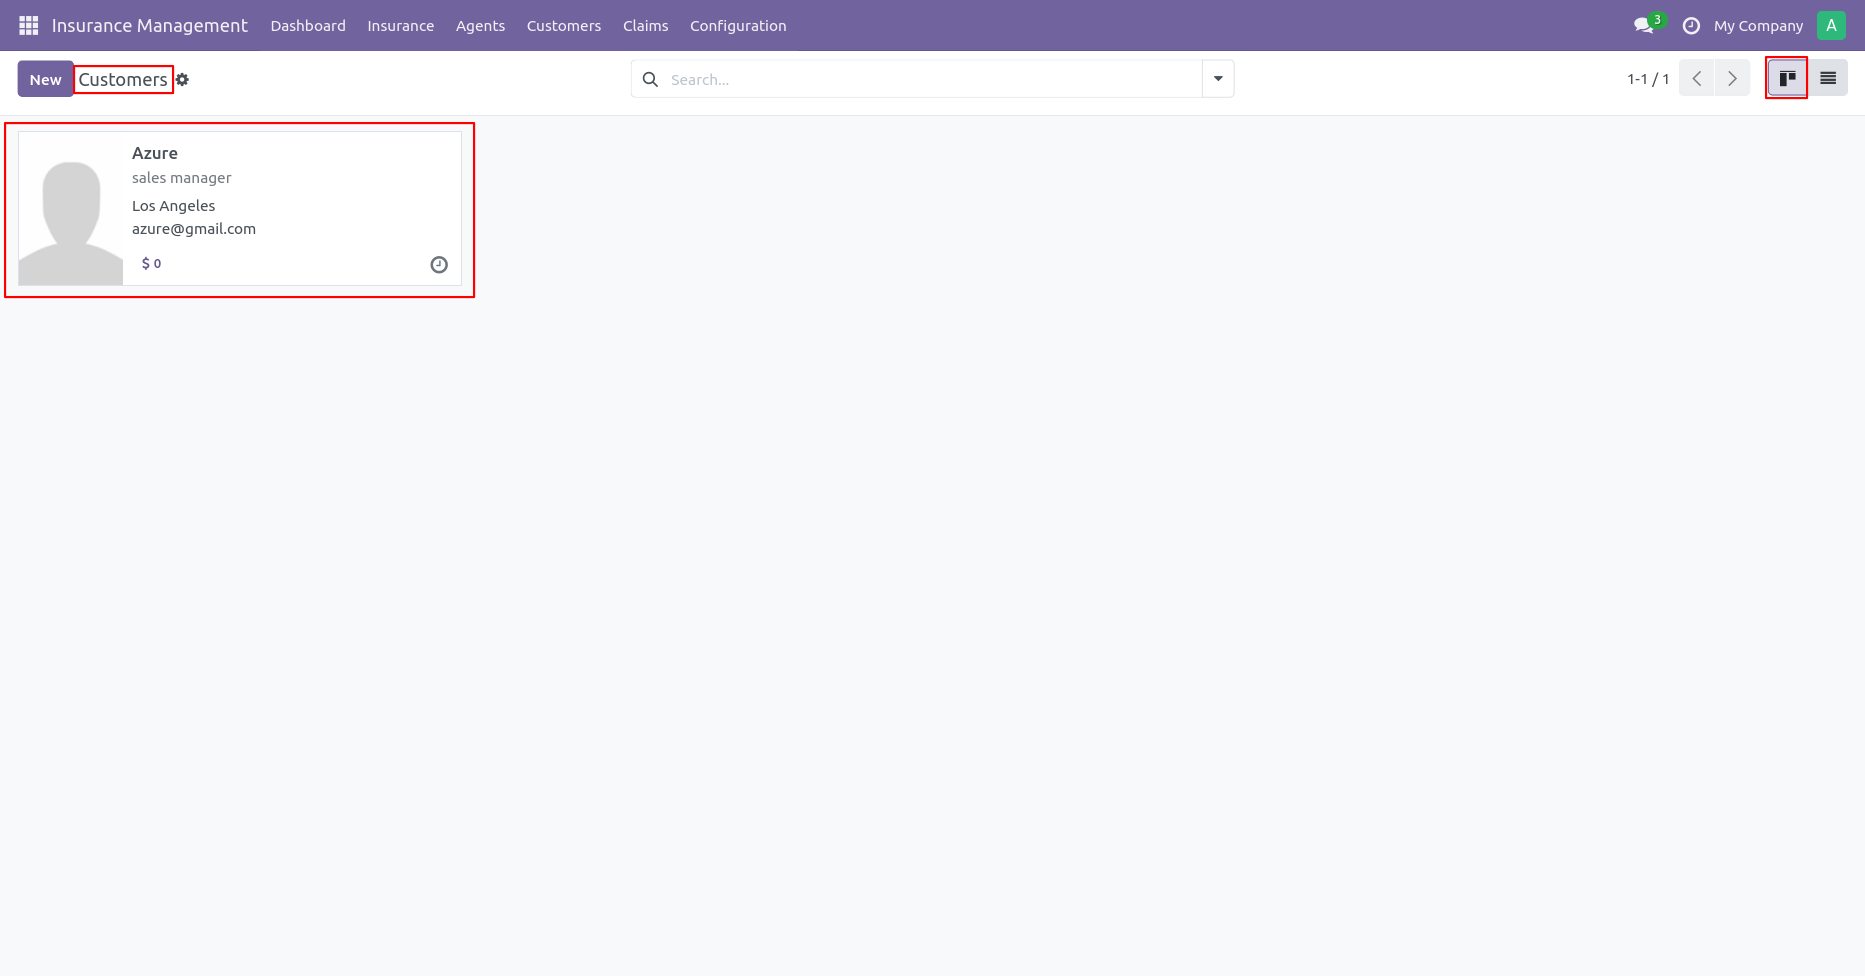
Customers kanban view.
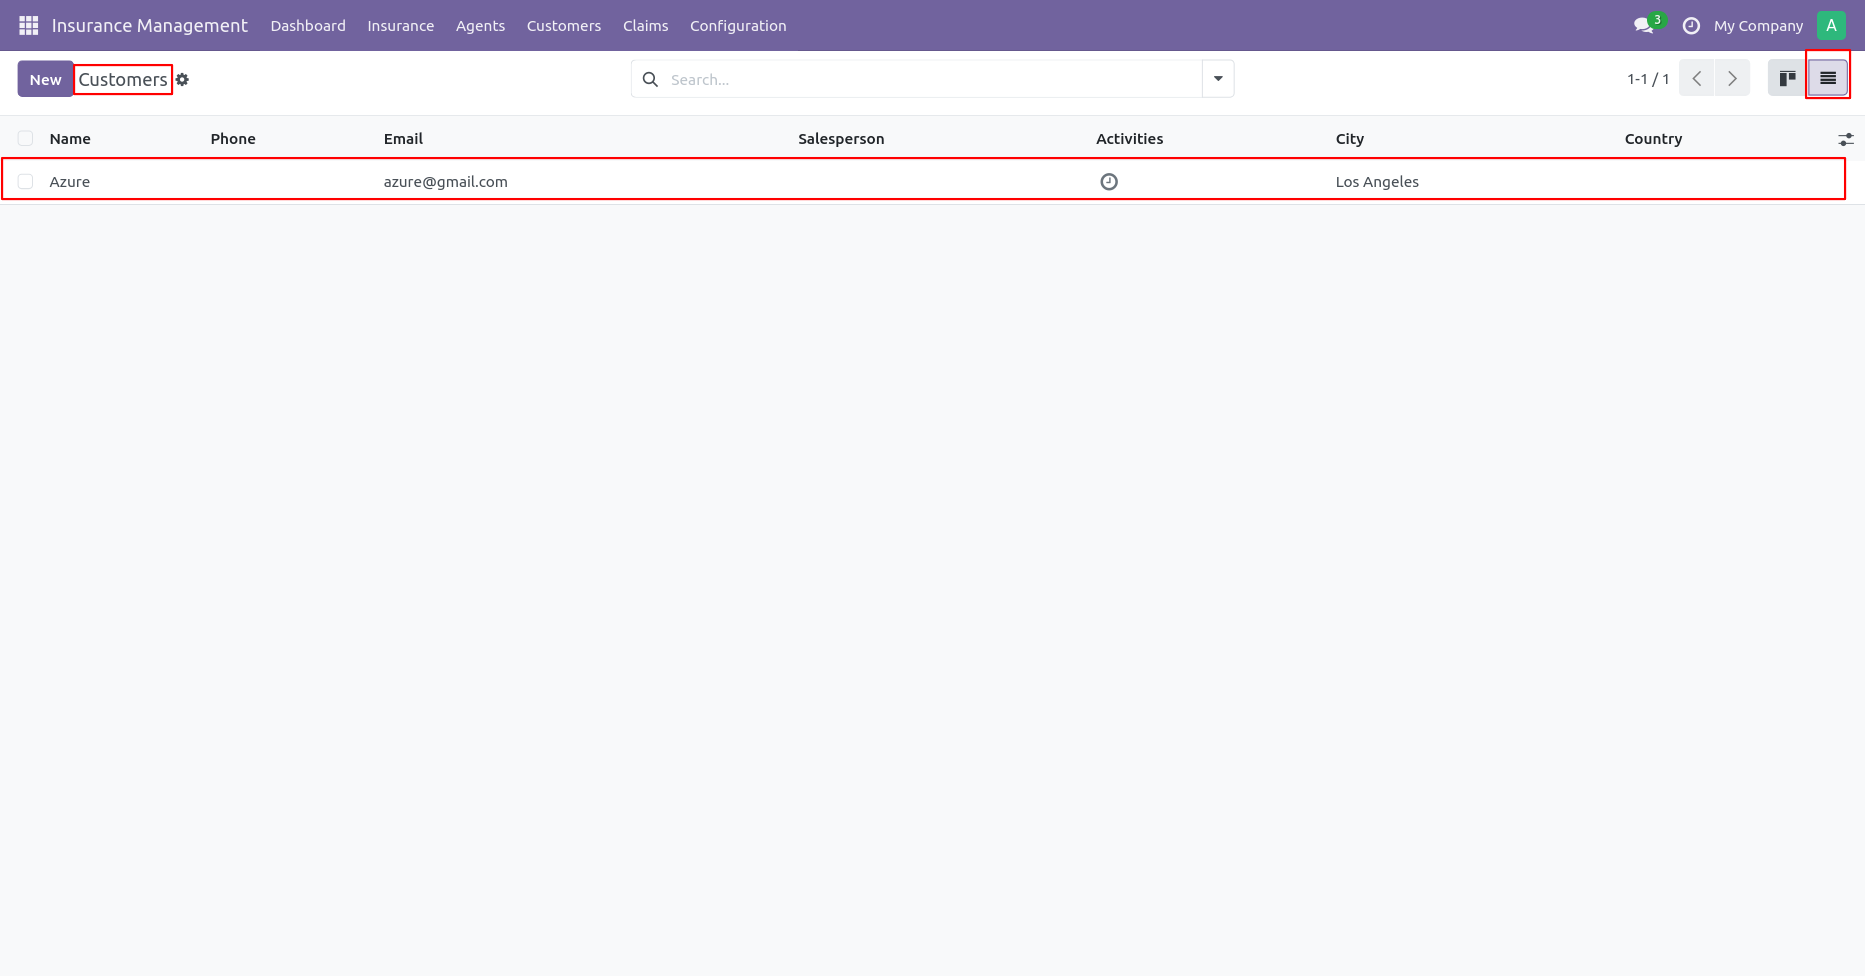
Customers list view.
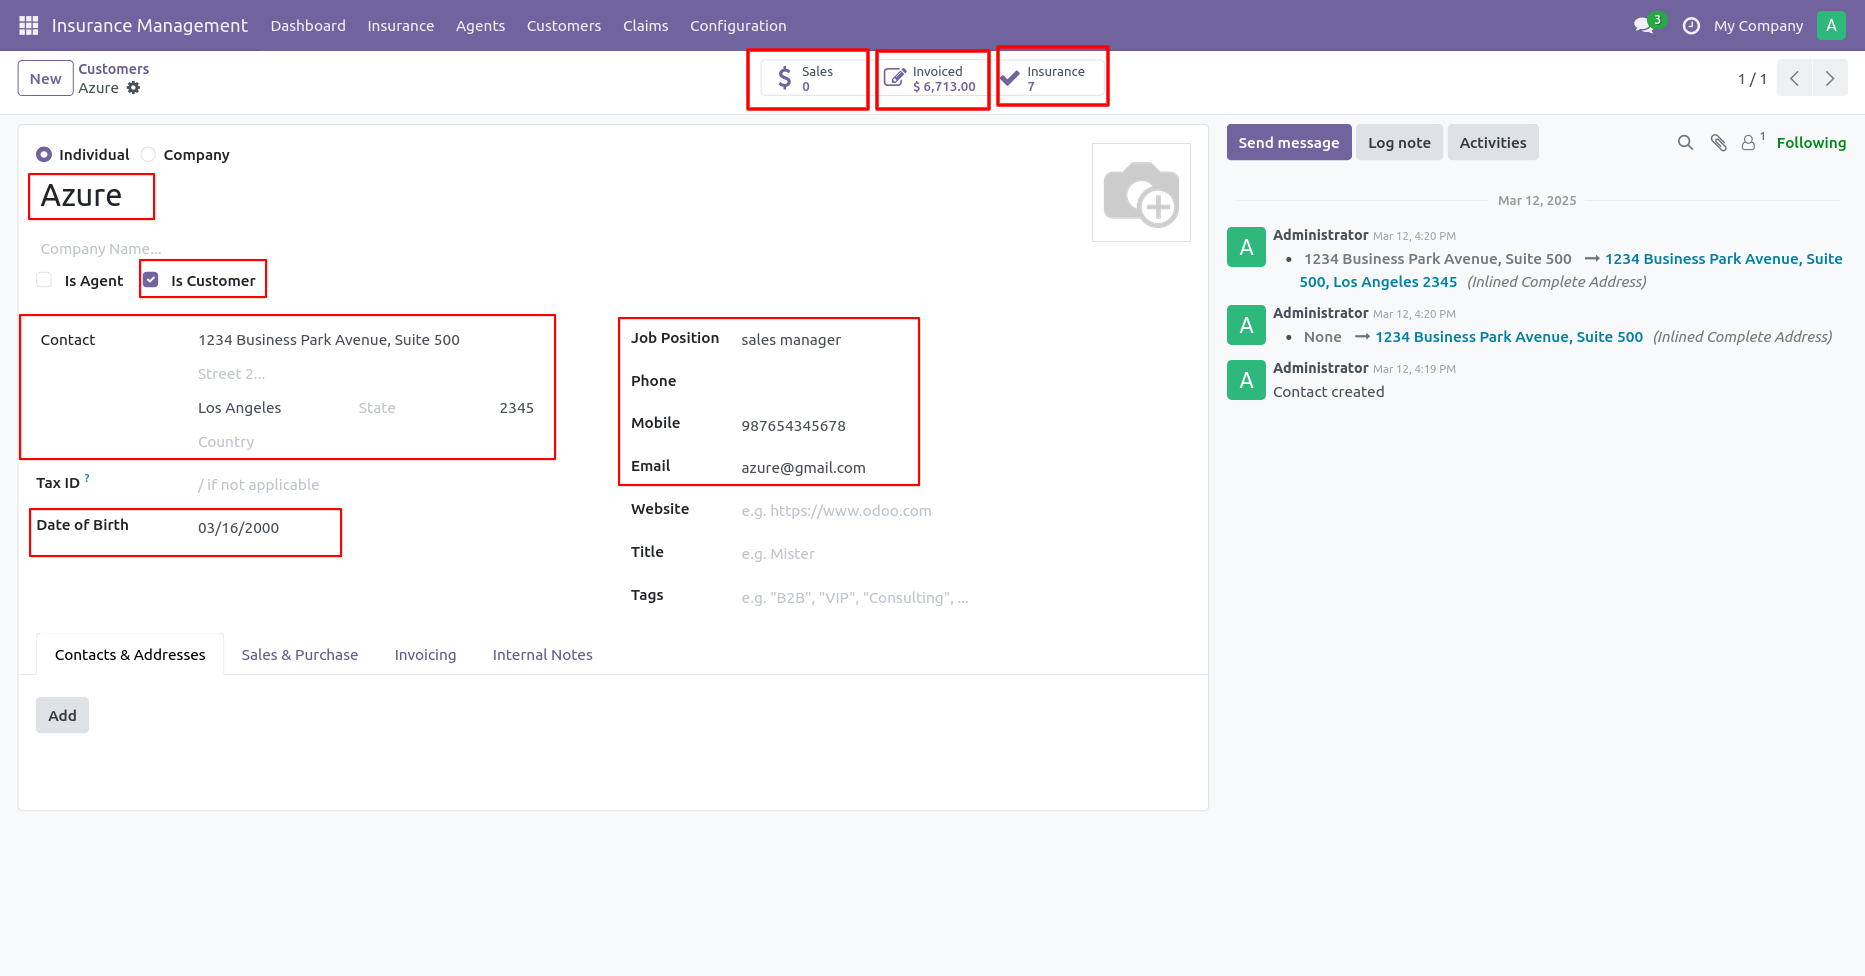
Create customers by clicking the Is Customer boolean and adding
all required
details.
You can see insurance details and claims of customers from the
smart button.
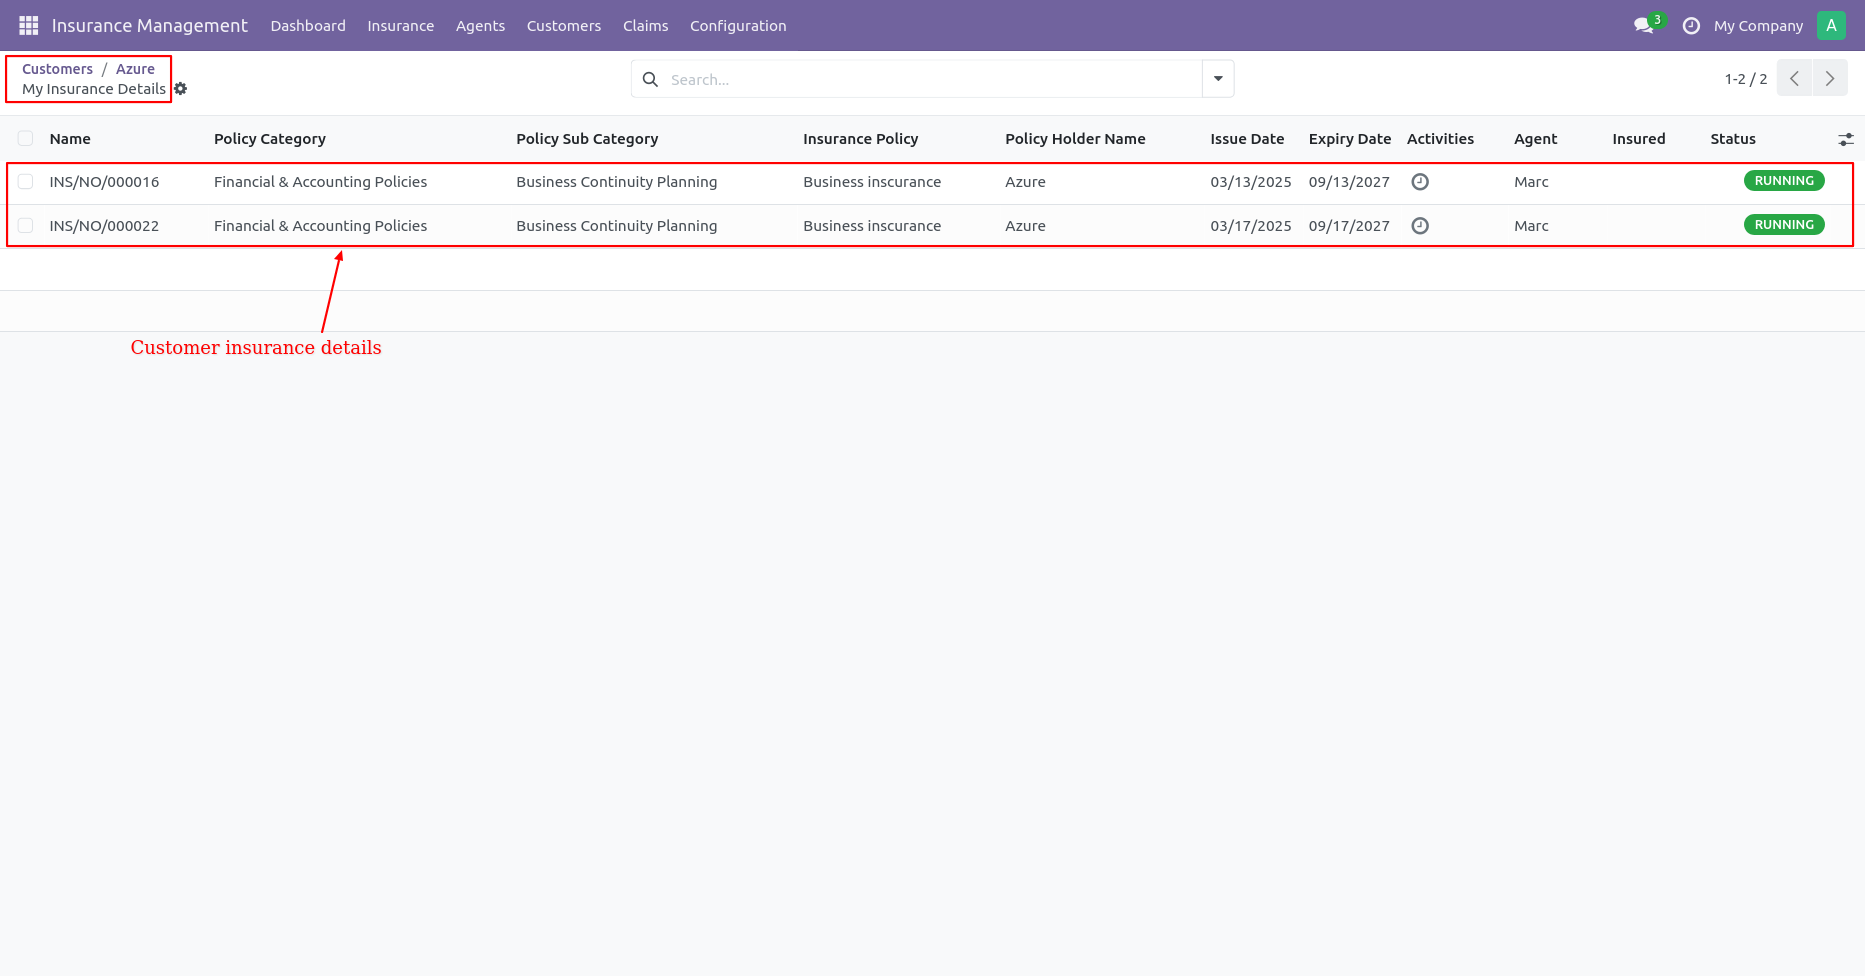
Click on the Insurance smart button from the customer and you can see a list of all policies of the selected customer.
Click on the Claim smart button from the customer and you can see a list of all claims of selected customers.
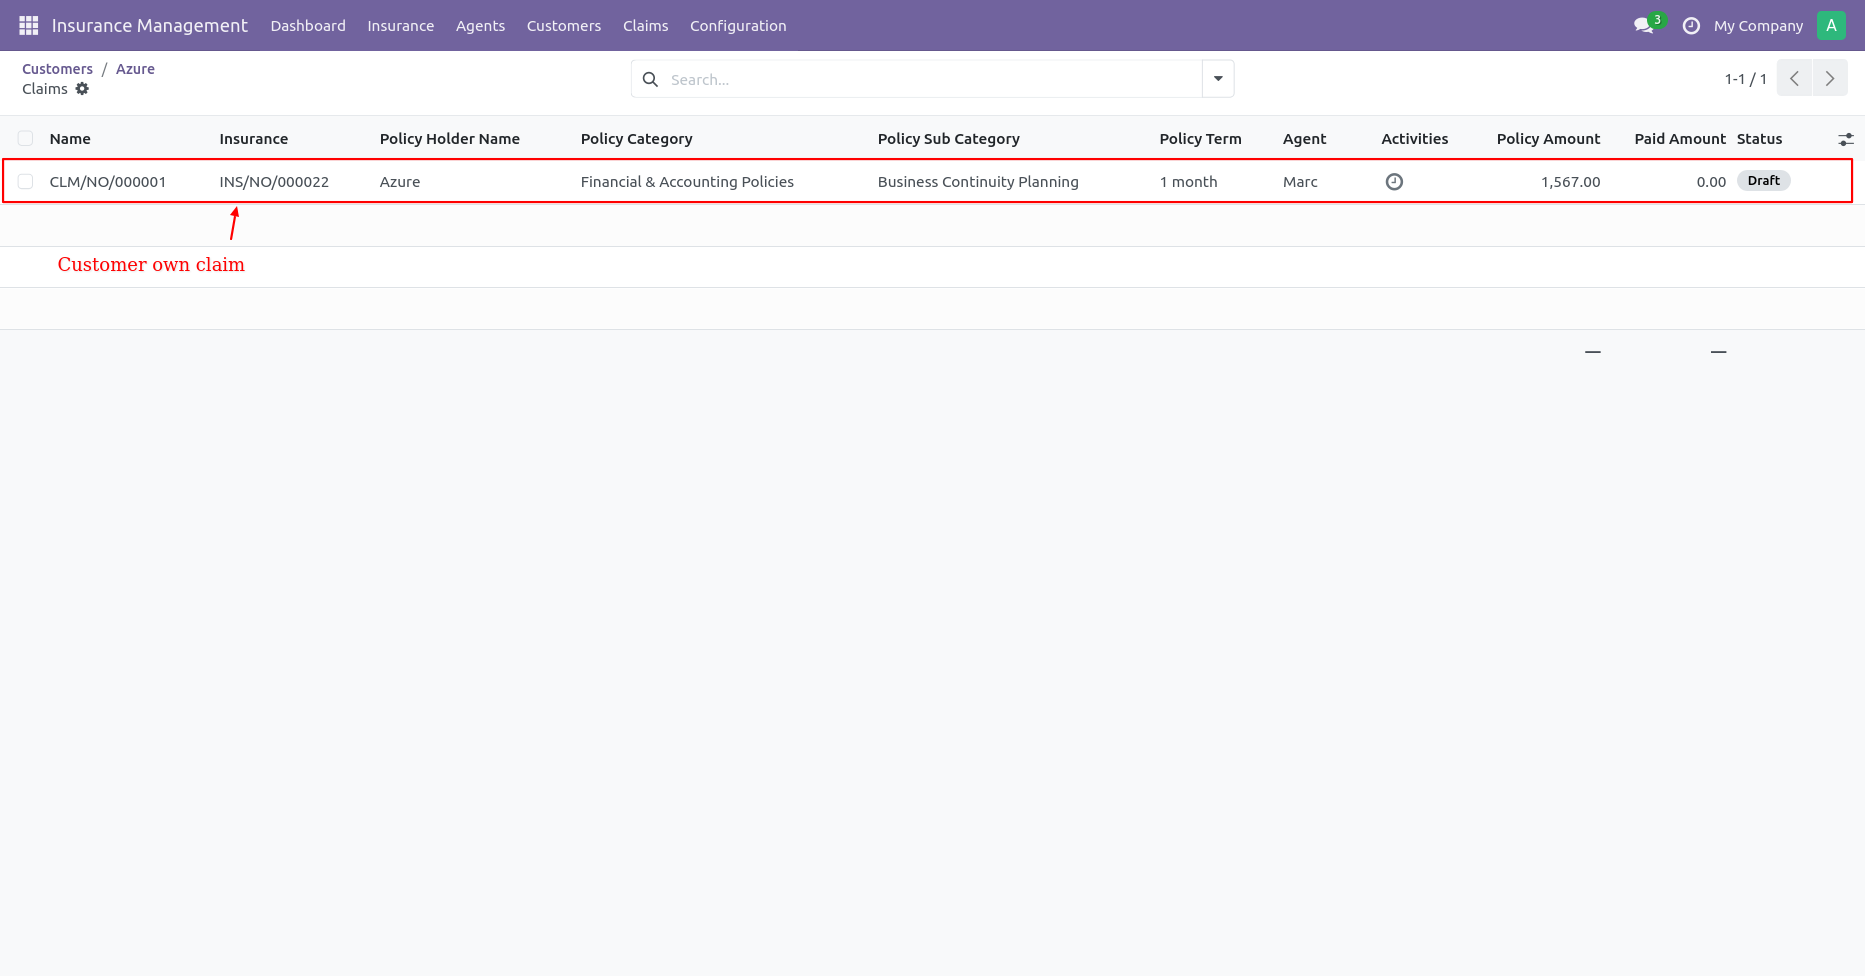
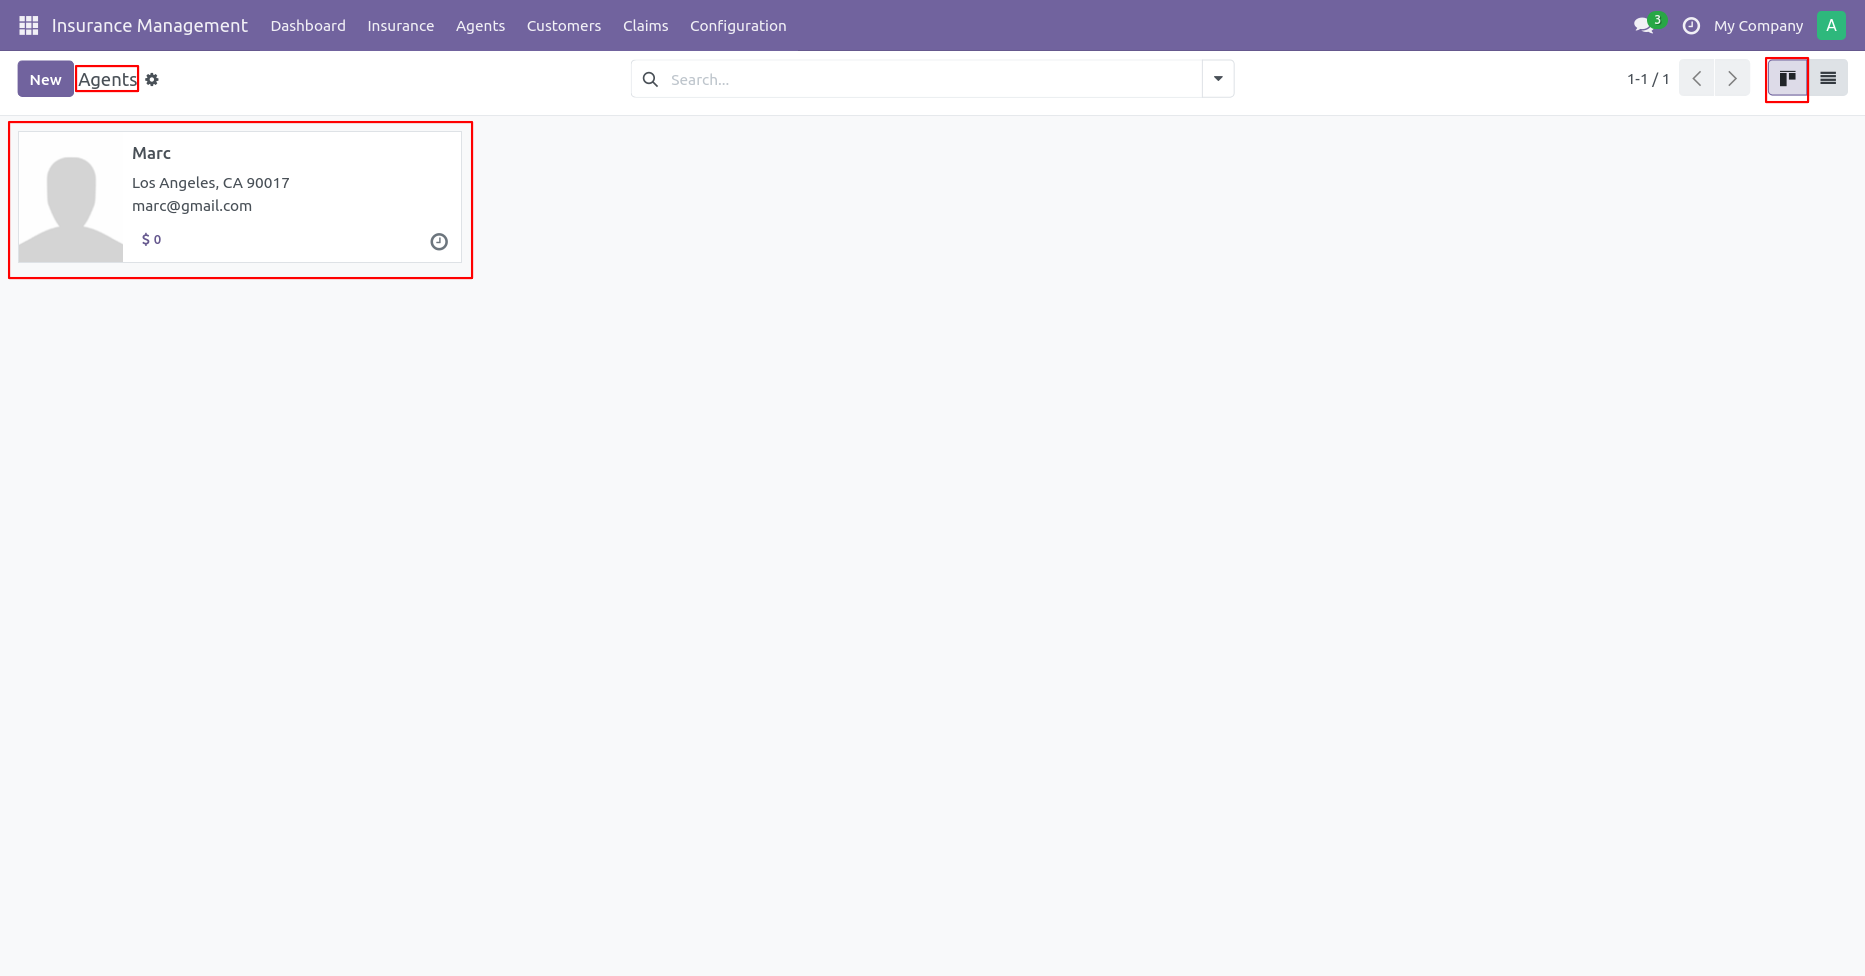
Agents kanban view.
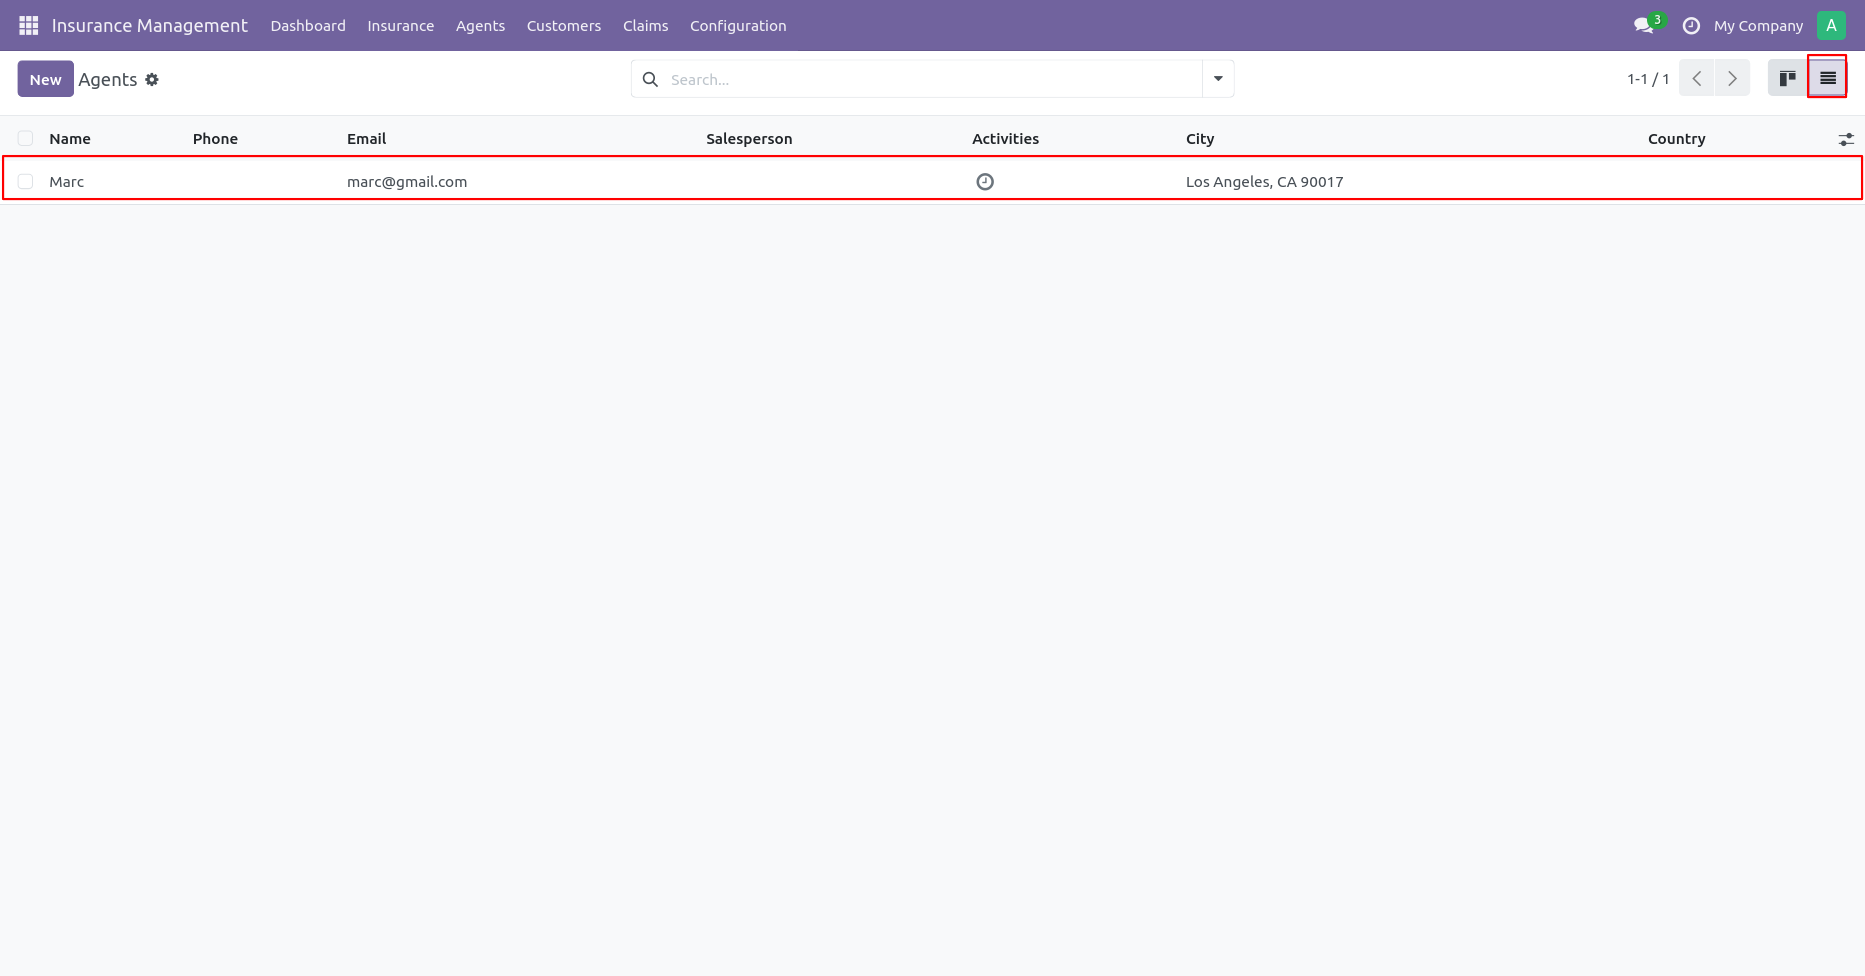
Agents list view.
Create agents by clicking the Is Agent boolean and adding all
required
details.
You can see insurance policies and commission bills from the smart
button.
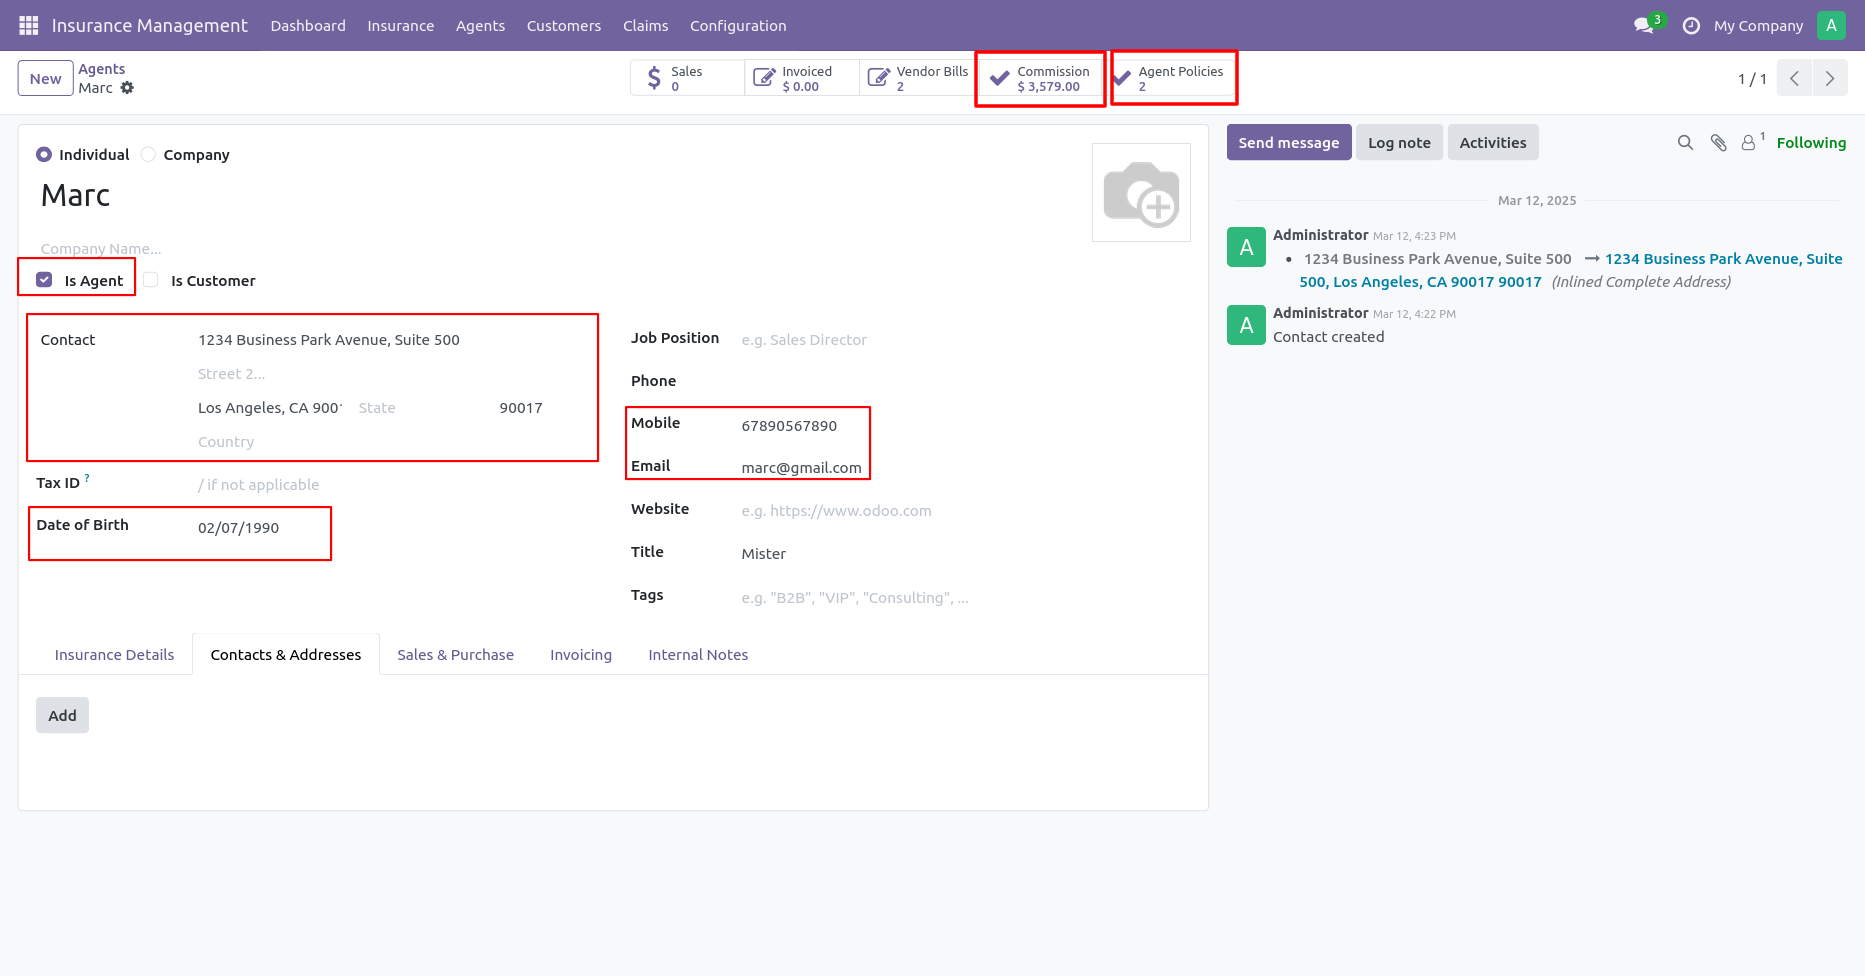
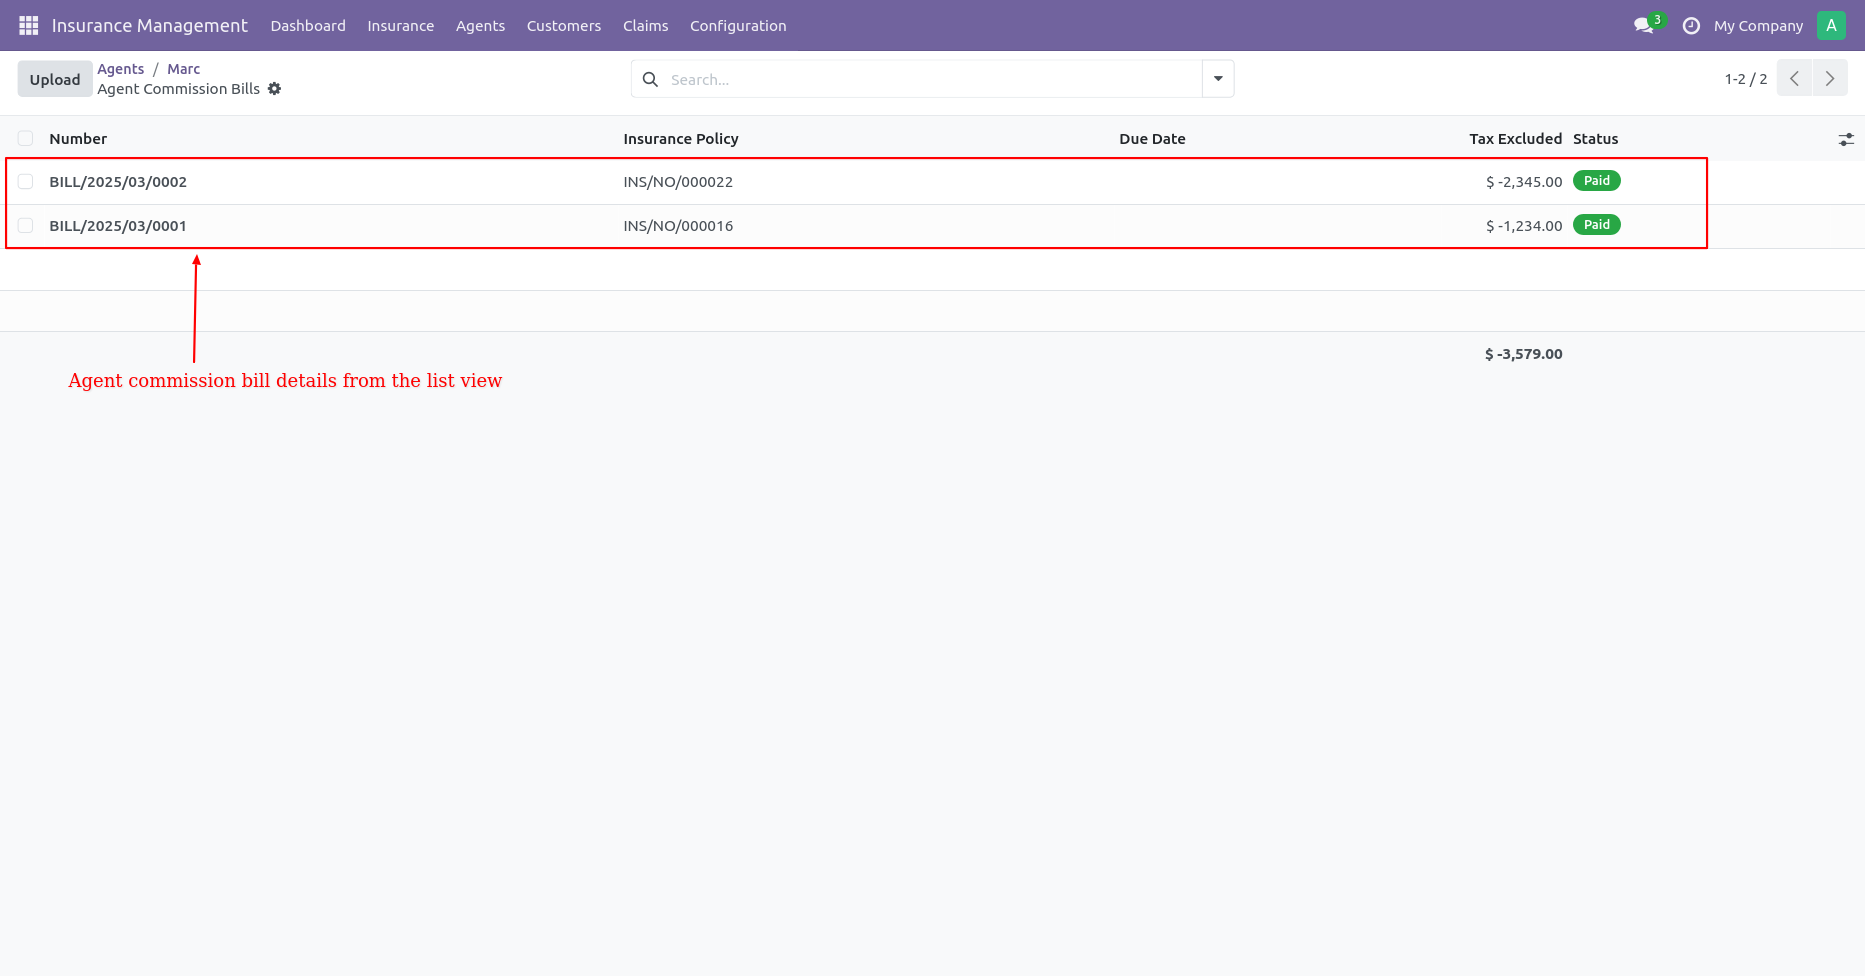
Click on the Commission Bills smart button from an agent and you can see a list of all commission bills of the selected agent.
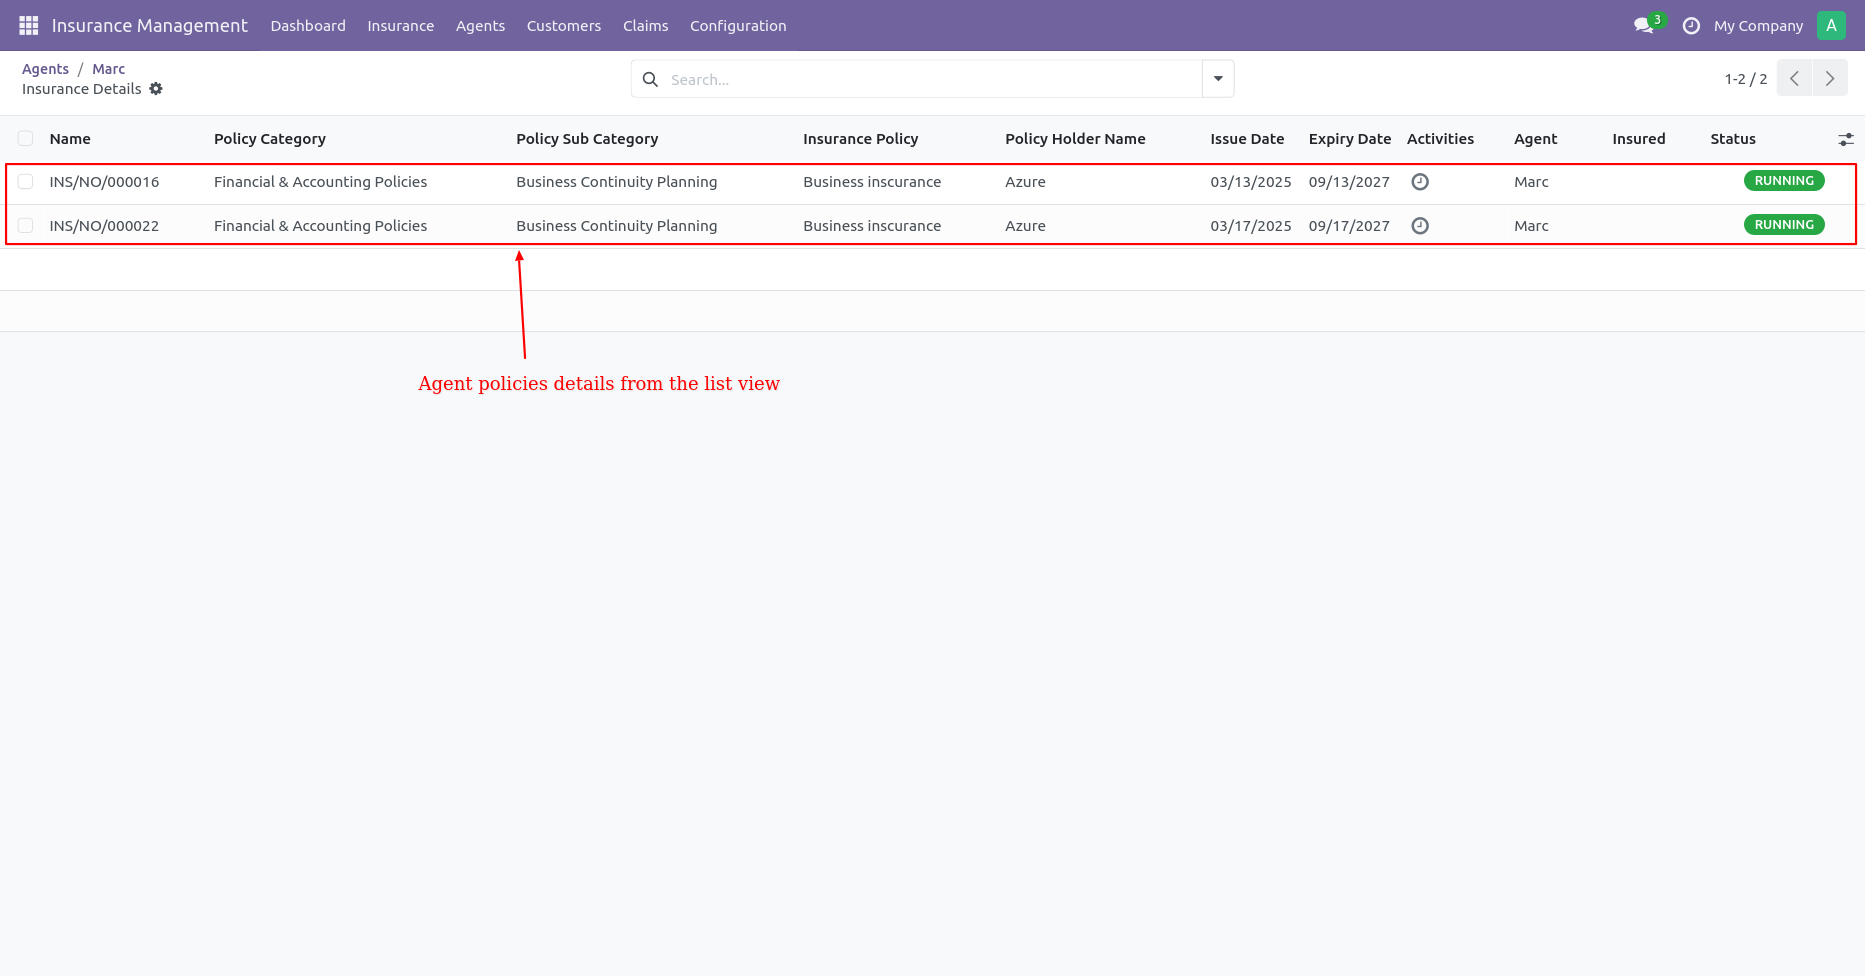
Click on the Insurance smart button from an agent and you can see a list of all policies of the selected agent.
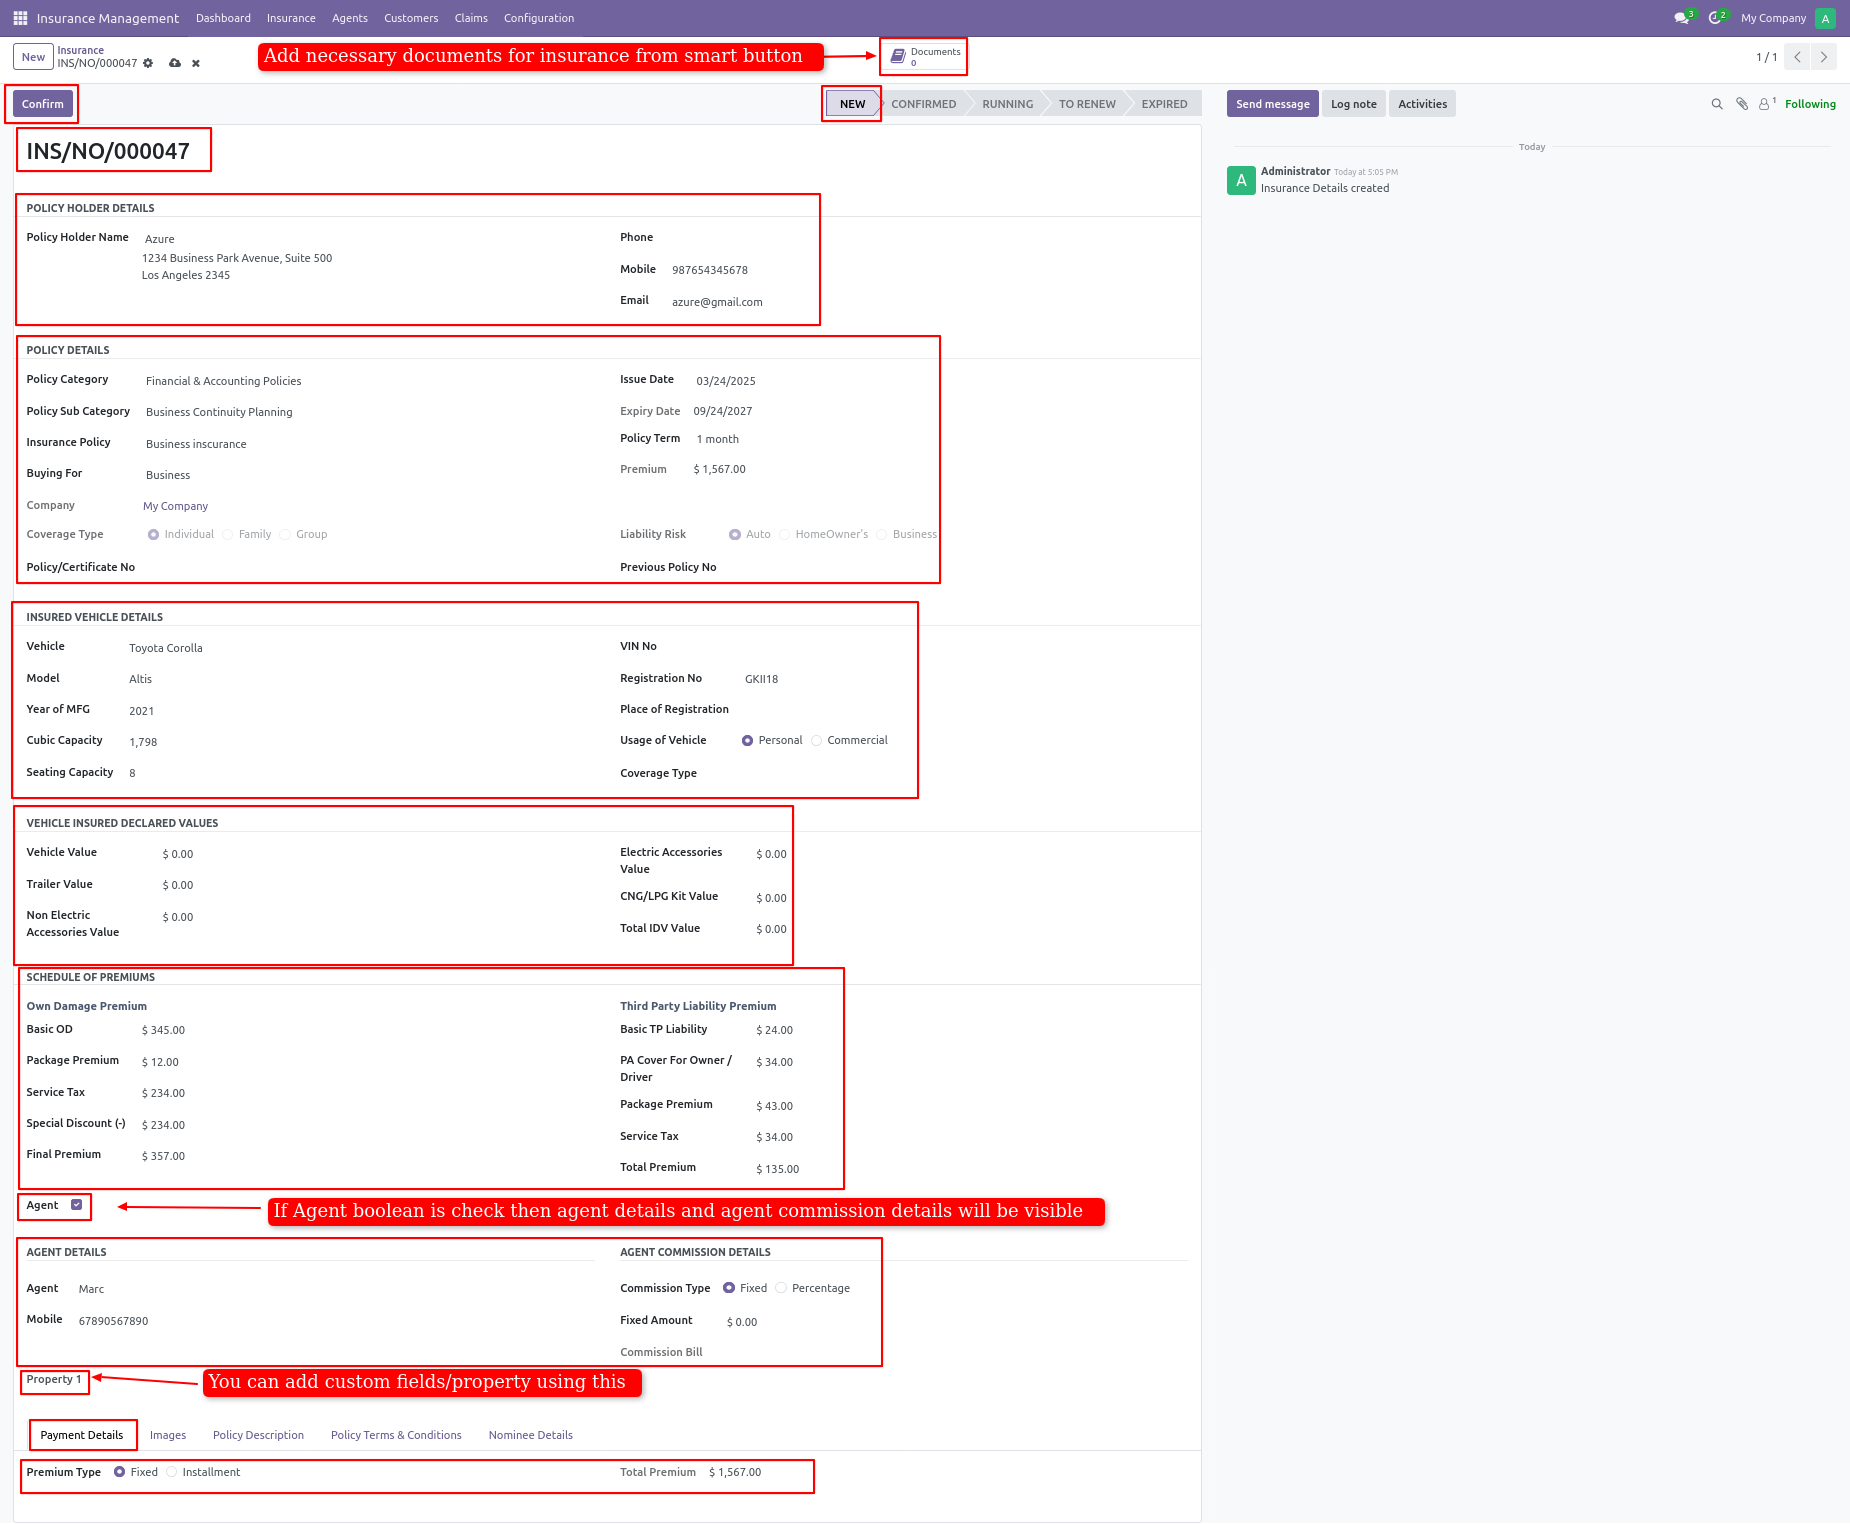
Create new insurance and add all the required details & select payment details.
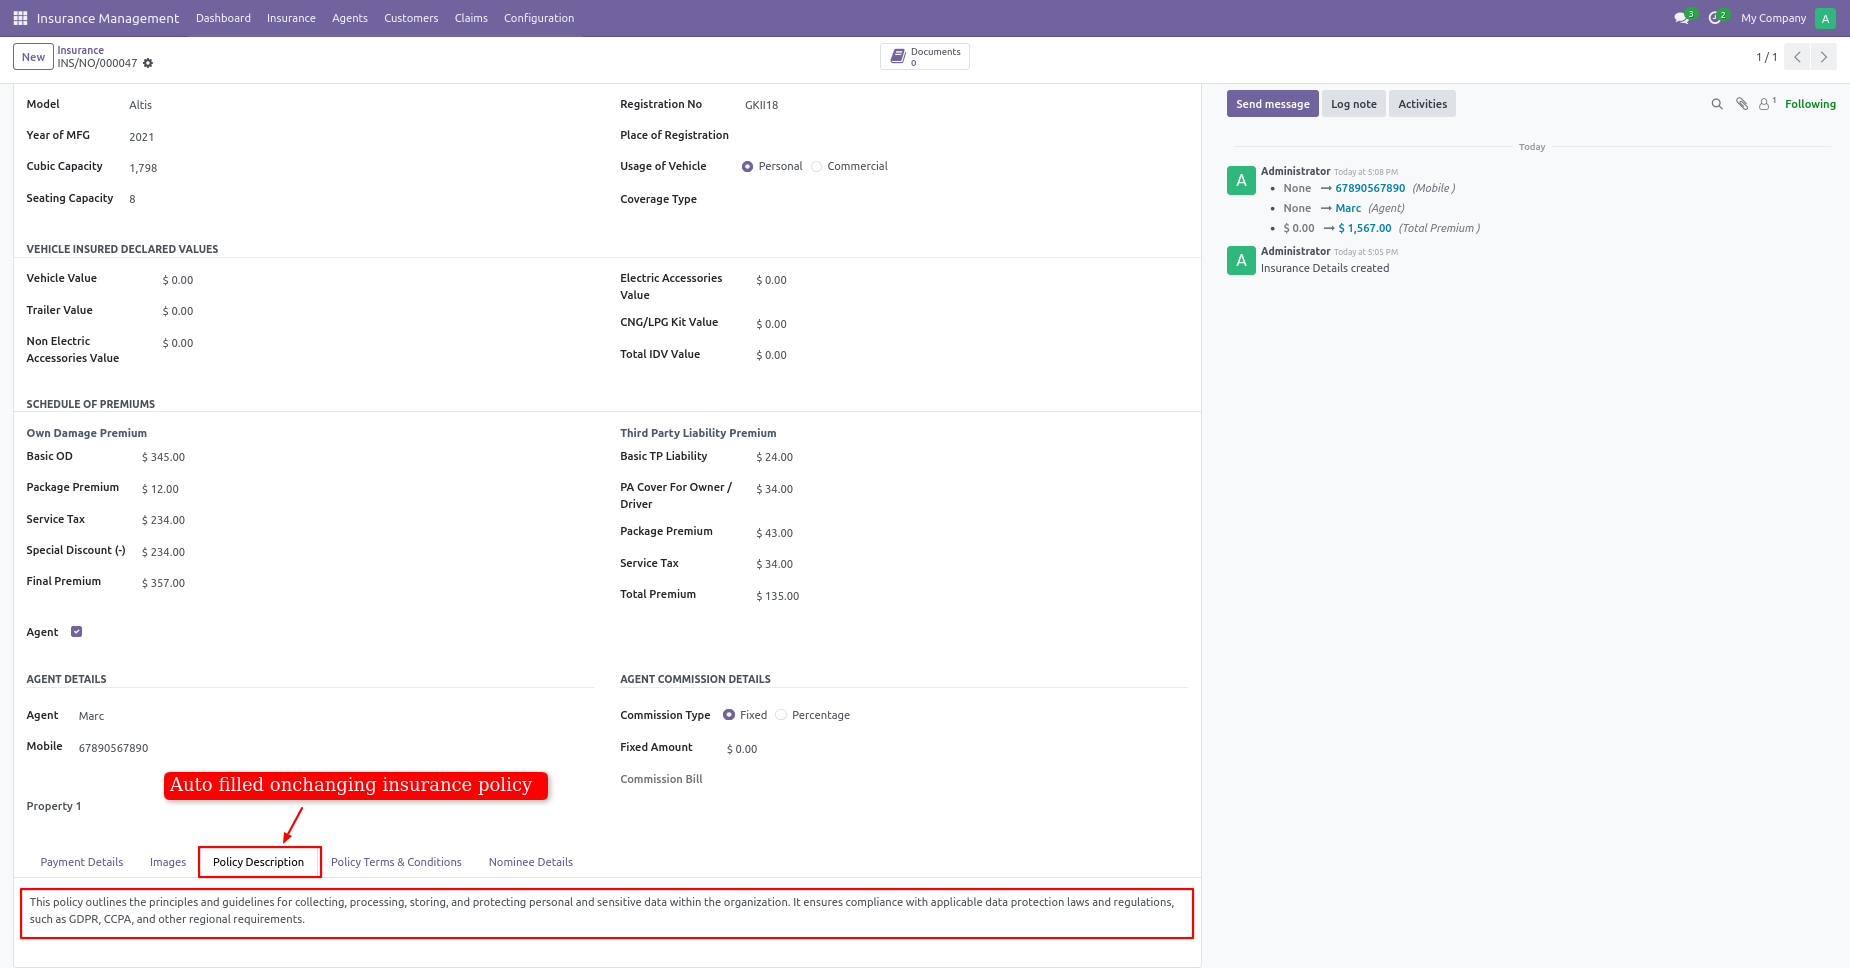
The policy description field is auto-filled upon selecting the insurance policy.
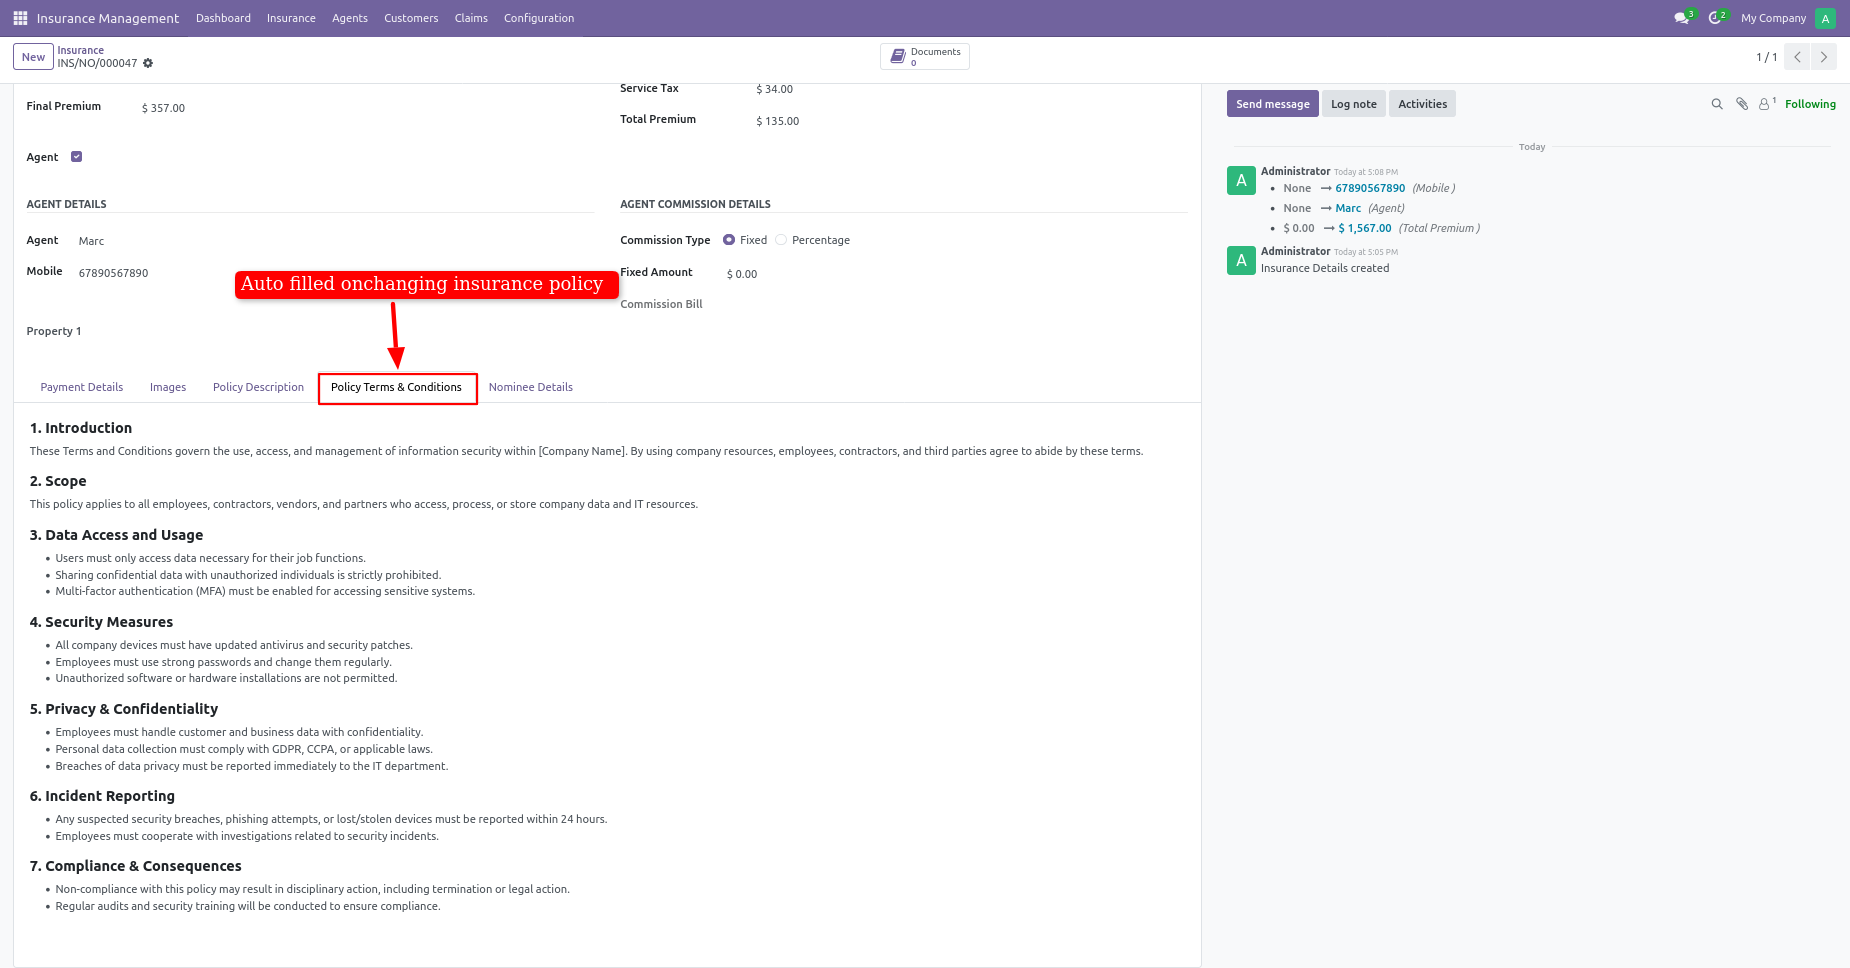
The policy Terms & Conditions field is auto-filled on selecting the insurance policy.
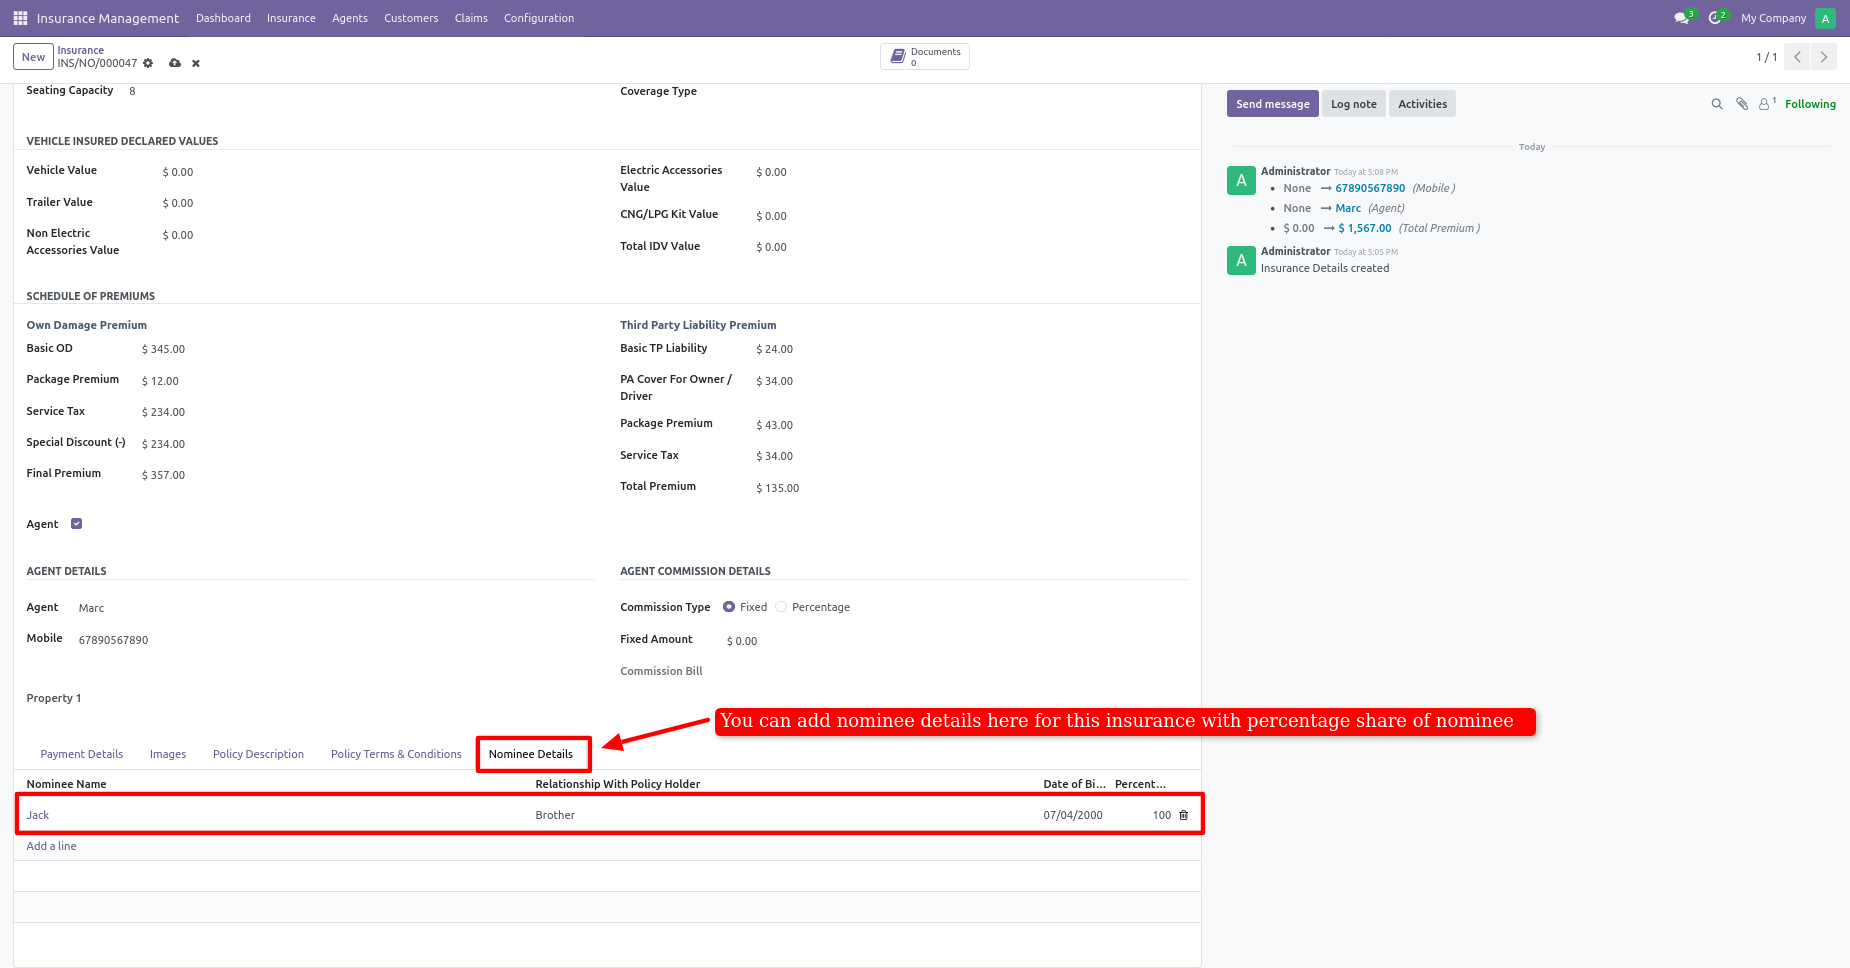
Add nominee details of the policy holder and also select the relation and percentage of the share.
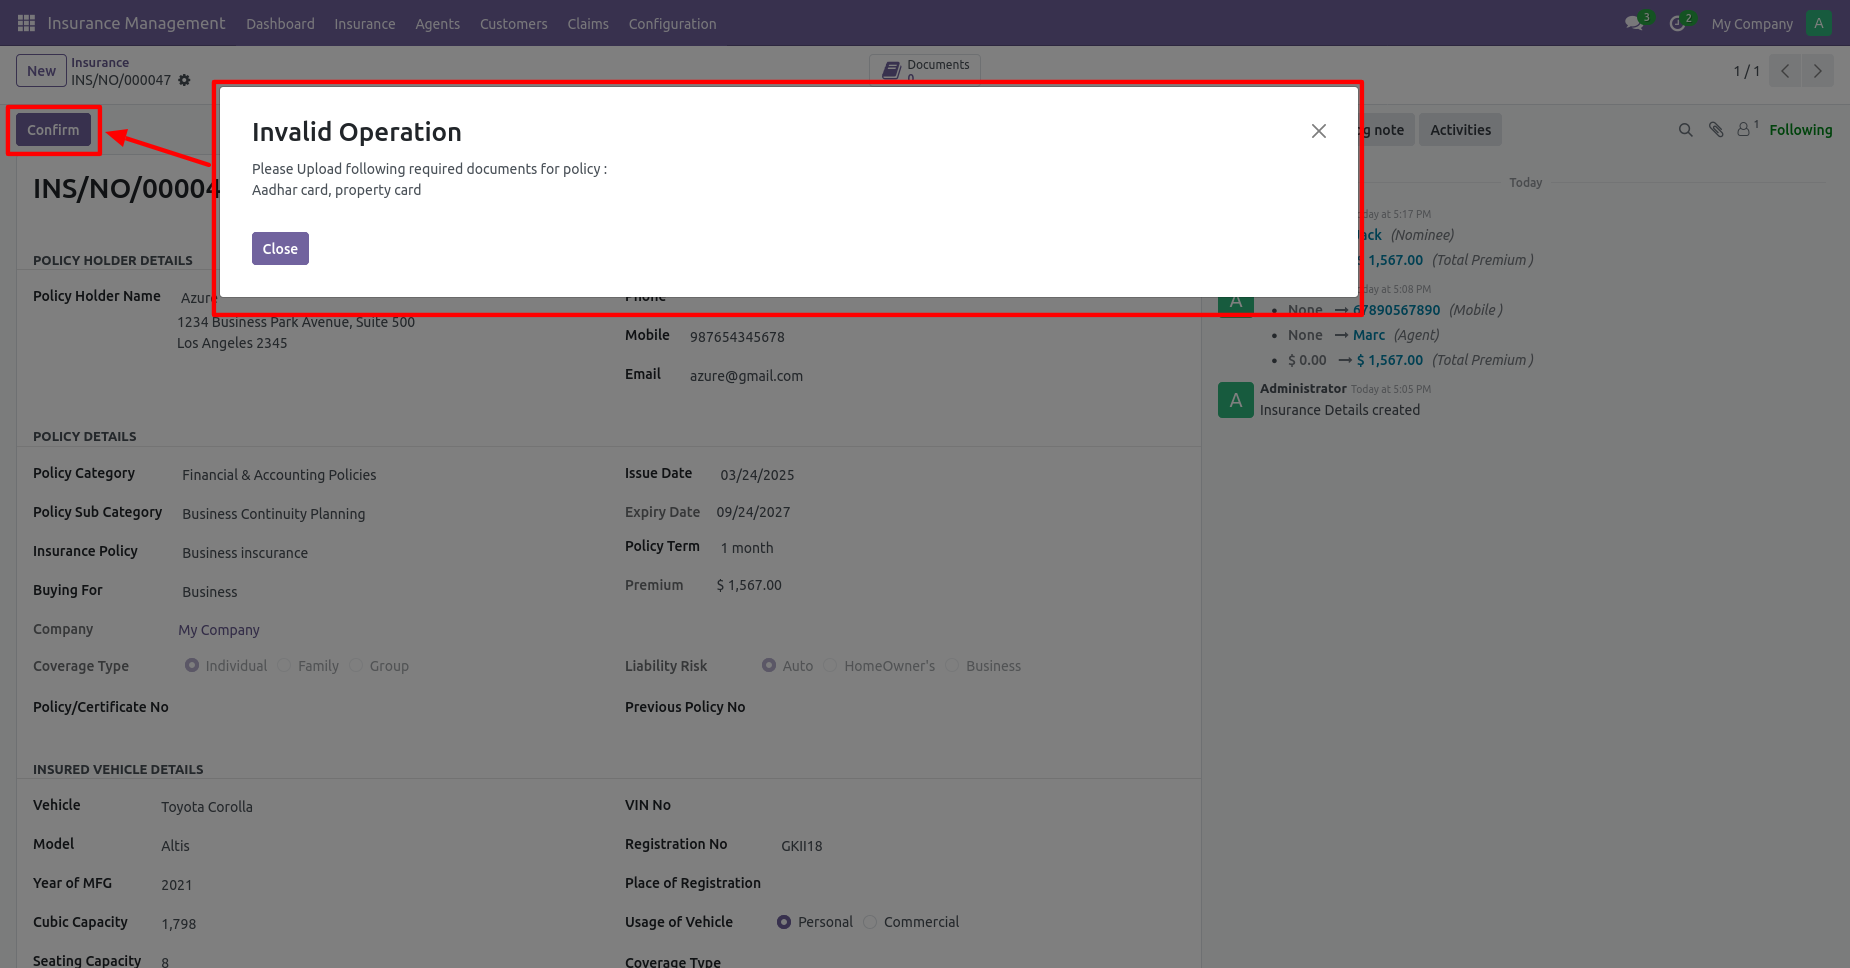
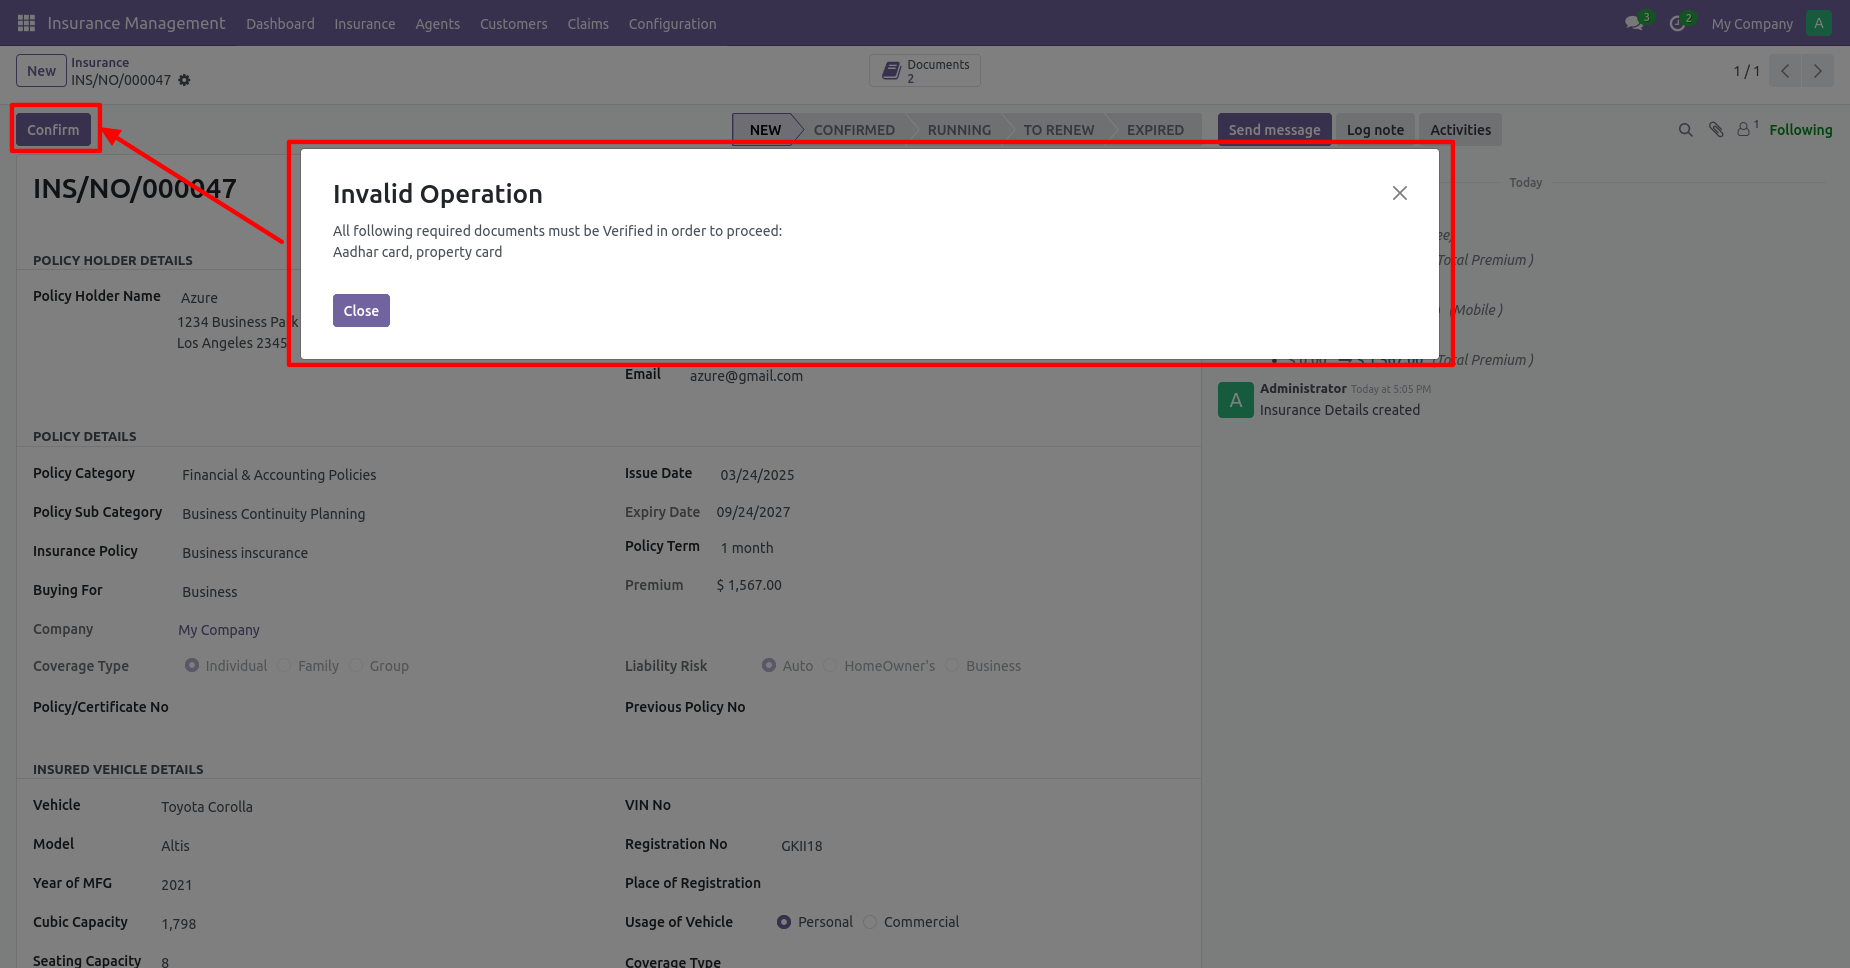
If you confirm without uploading documents it will accrue an error to upload a required document which we have set in an insurance policy.
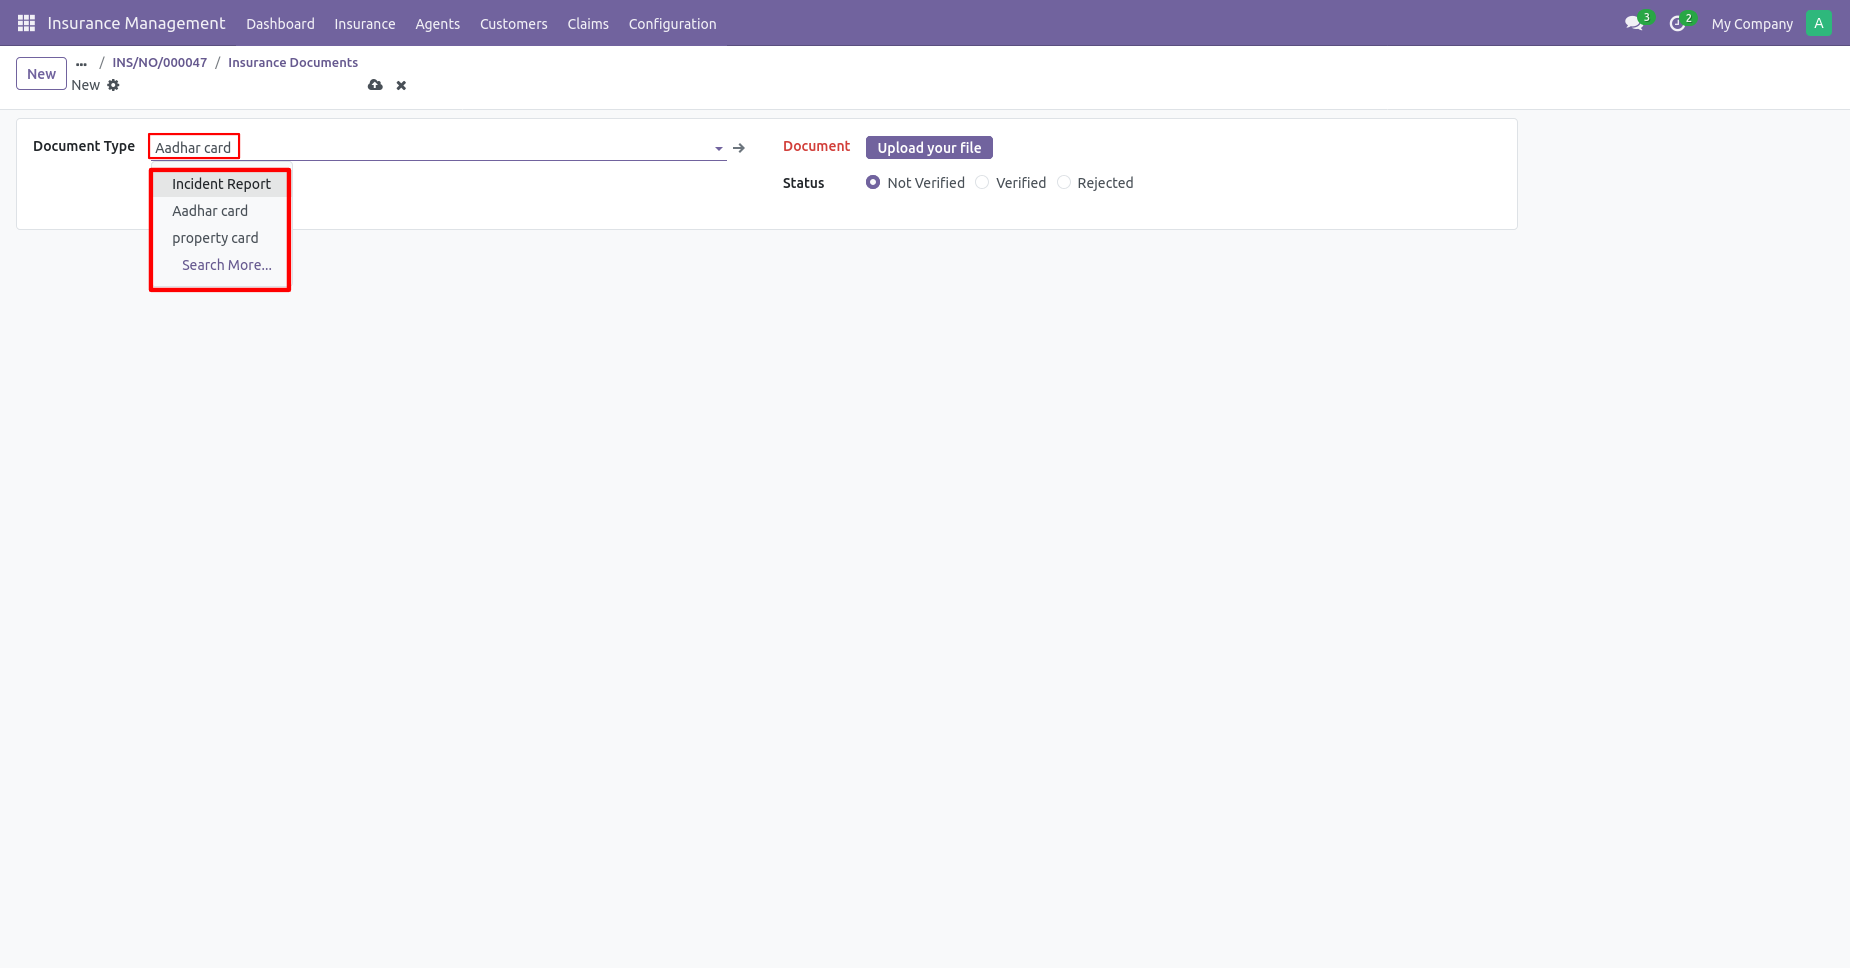
Insurance document form view.
Insurance document list view.
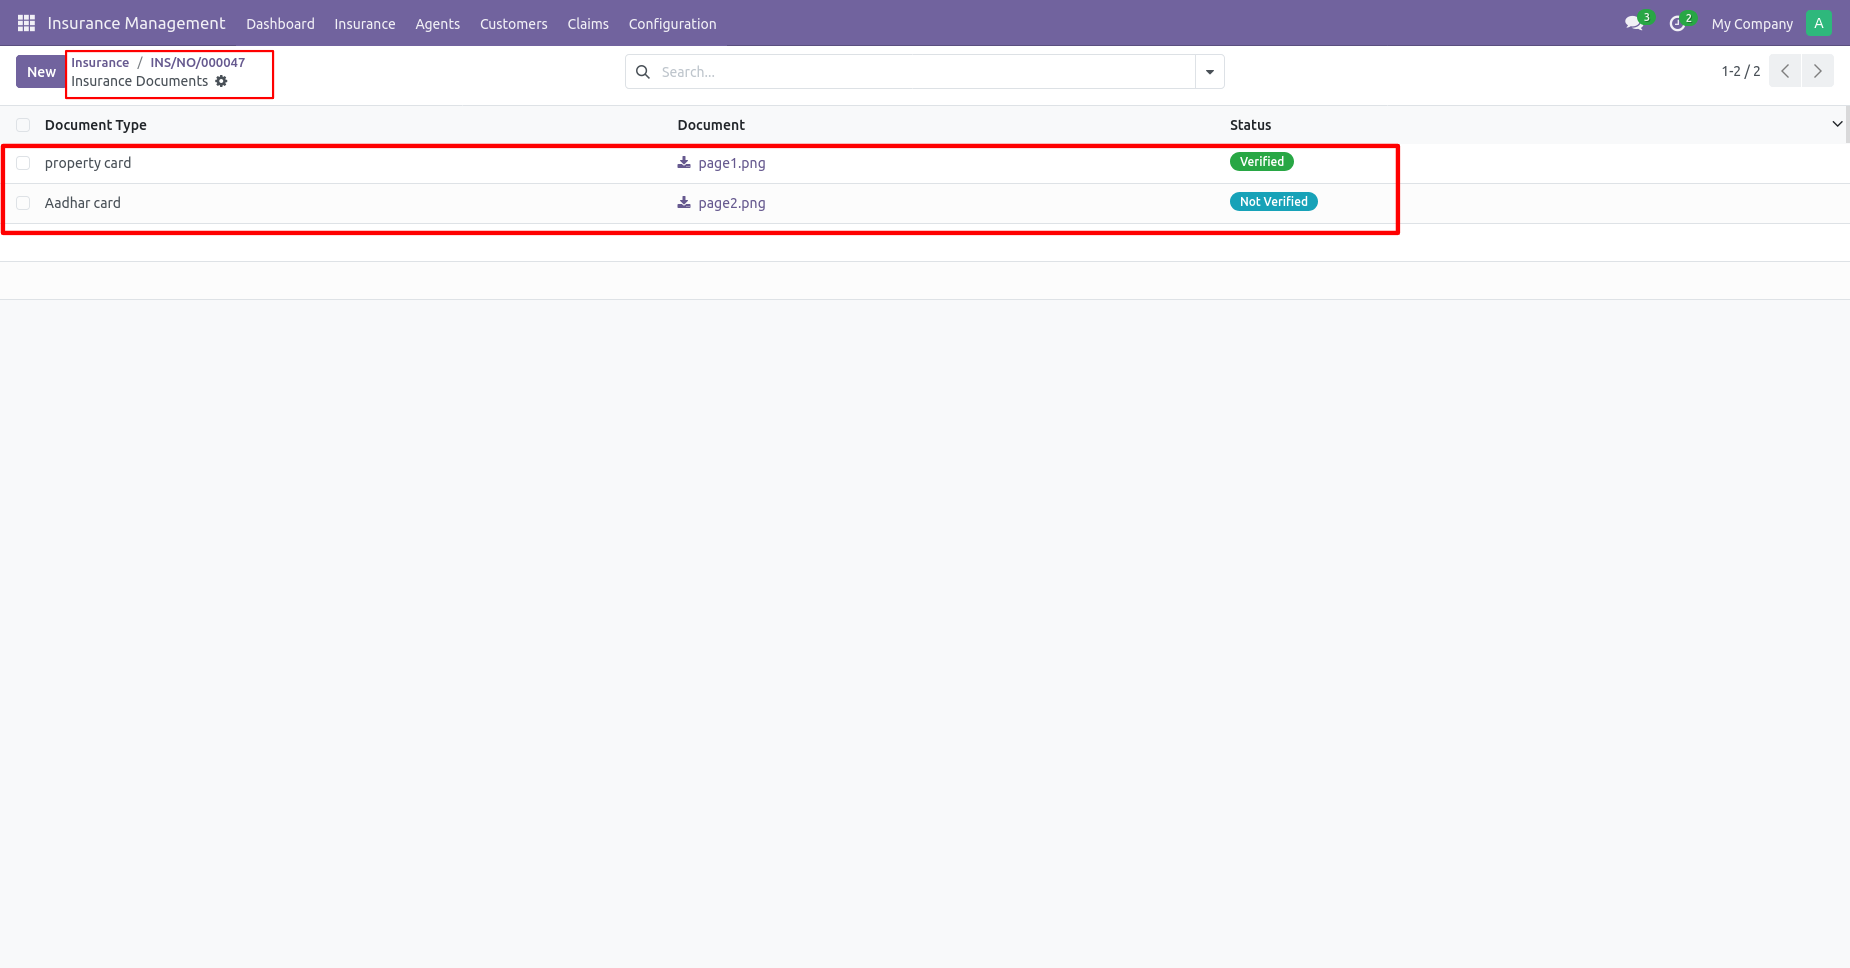
Uploaded documents must be verified if not verified it will generate a warning to varify the documents.
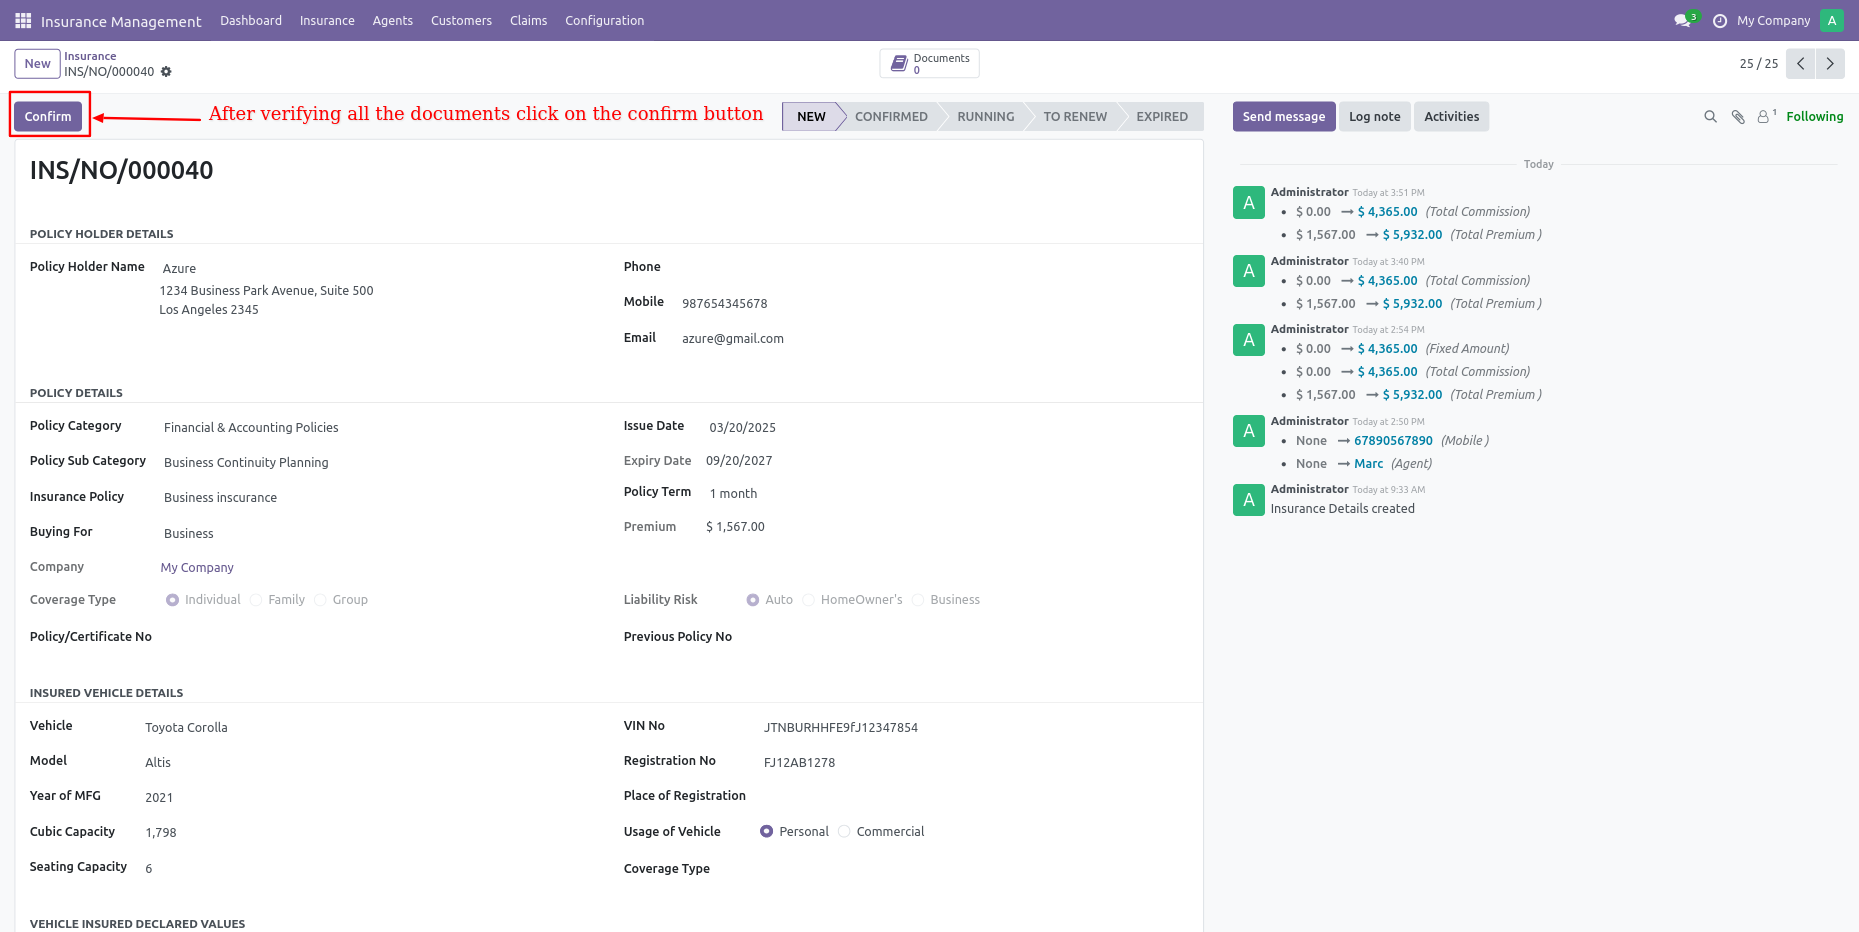
Click on the confirm button after all required documents are
verified.
The stage will change from new to confirmed.
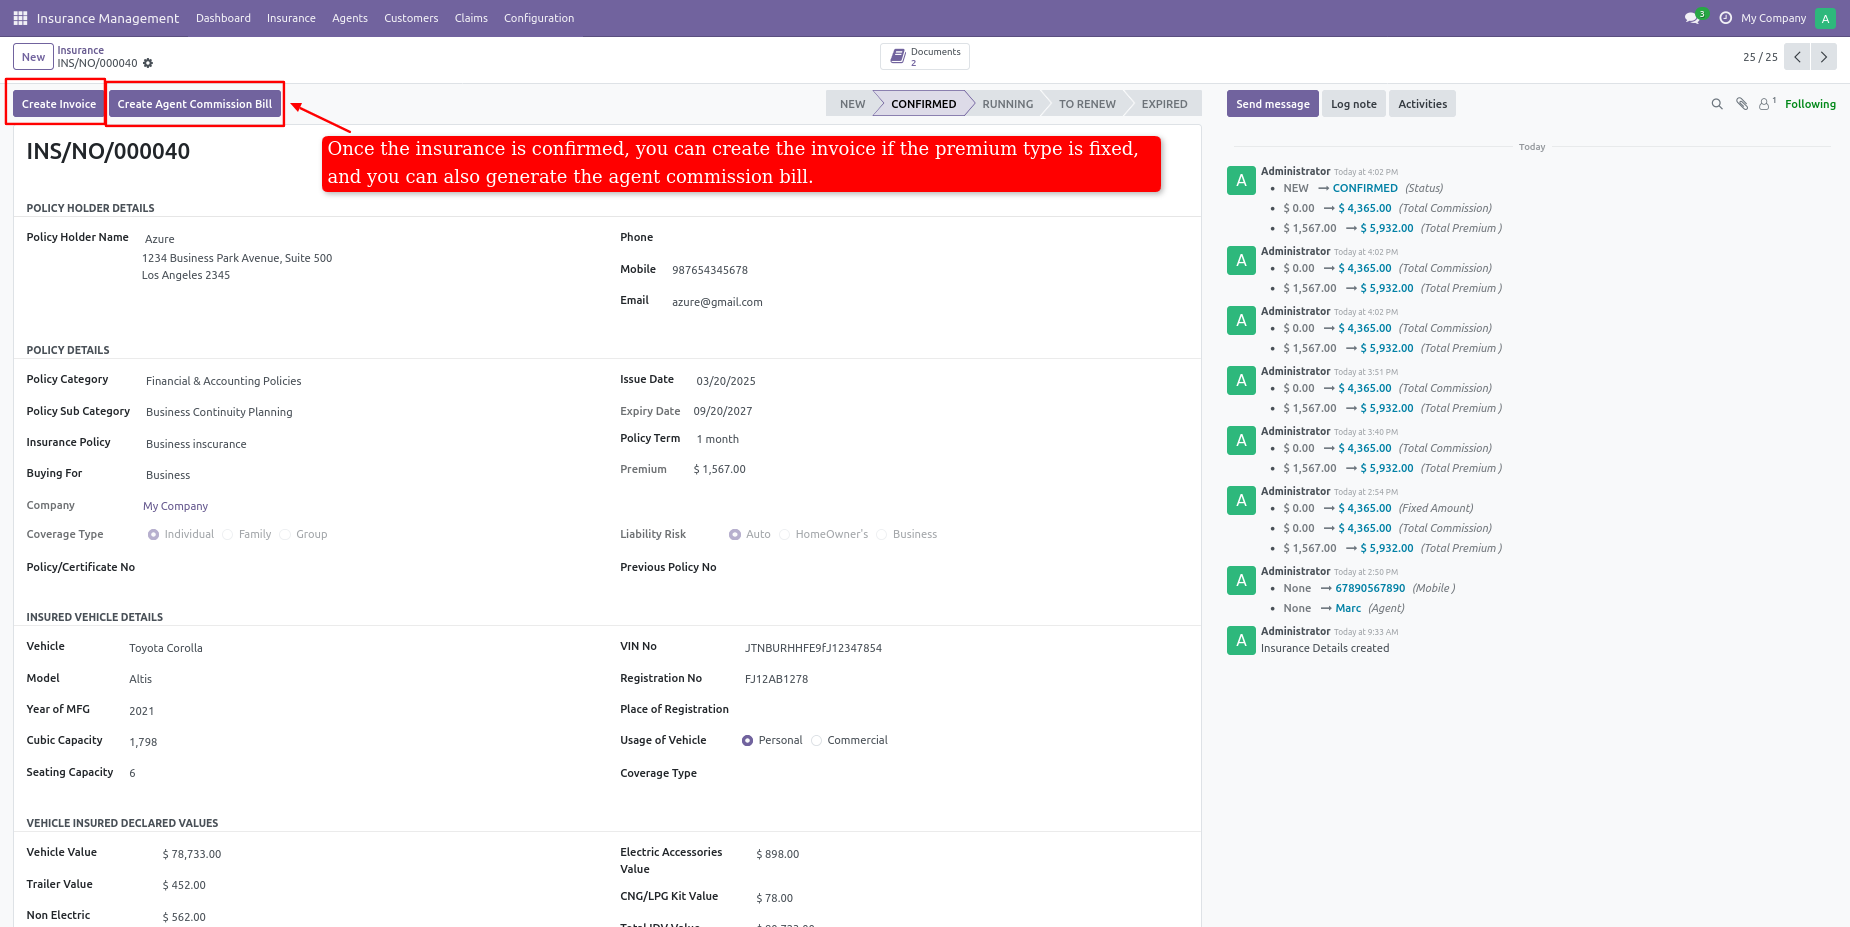
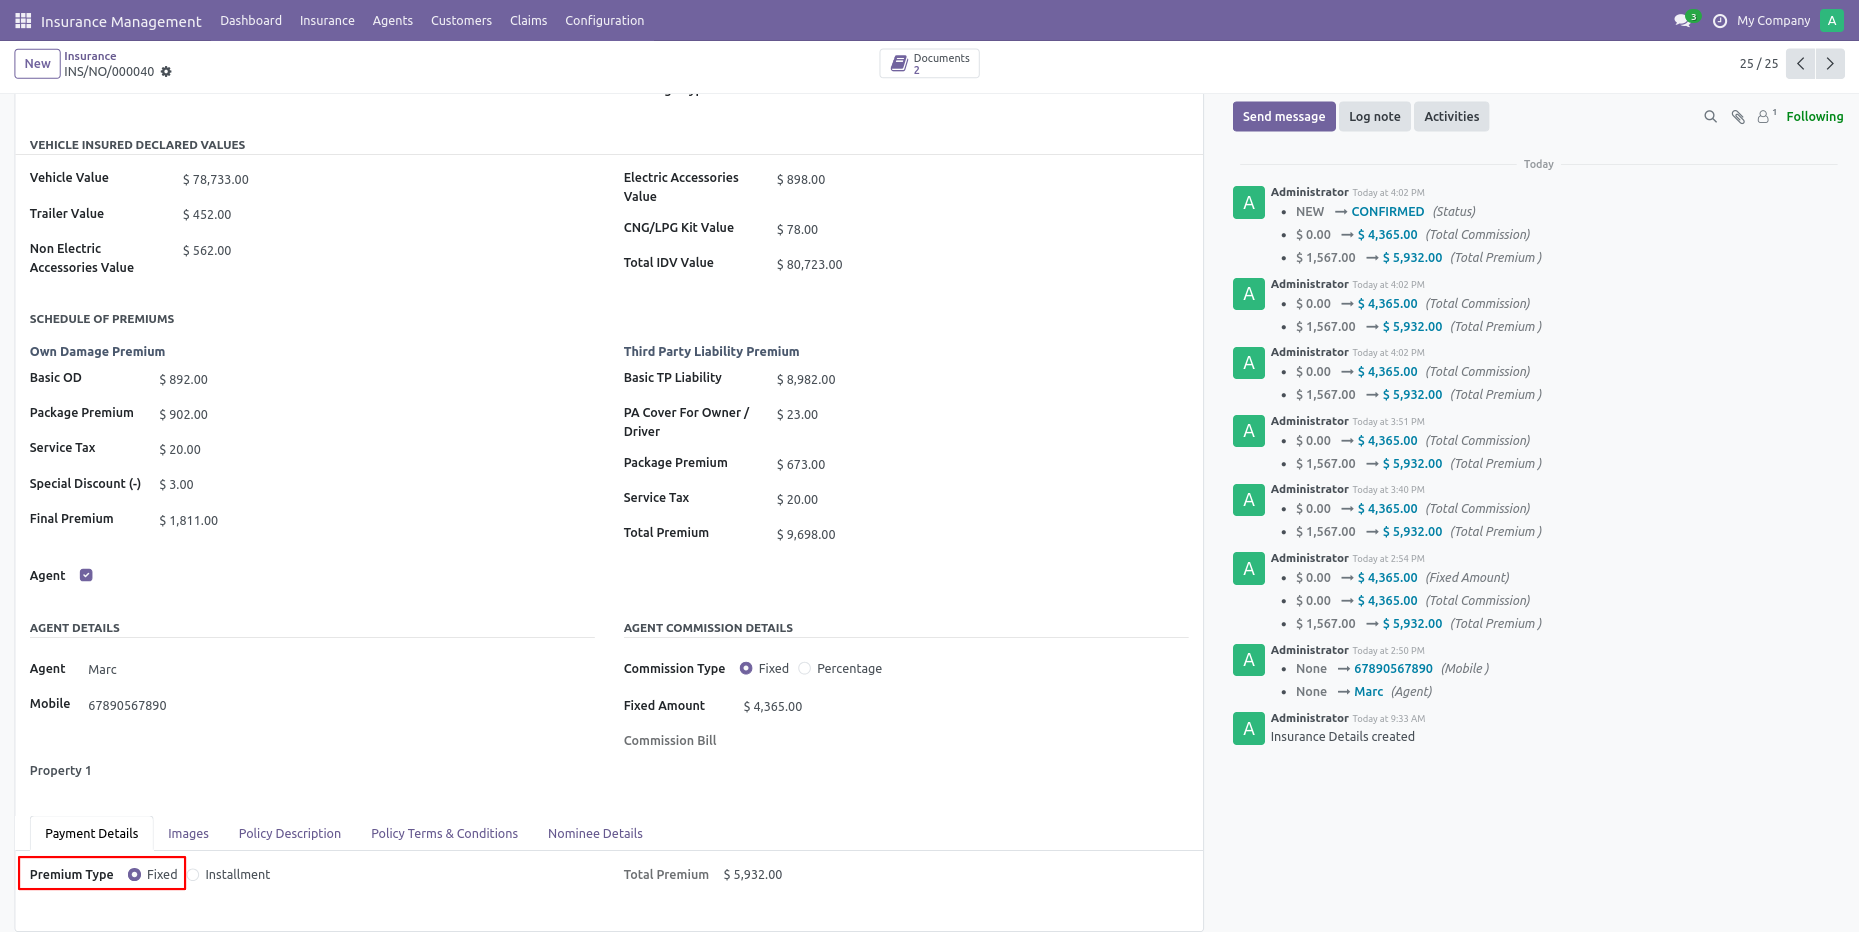
Once insurance is confirmed you can create an invoice if the
premium type is
selected fixed.
You can also create an agent commission bill from here.
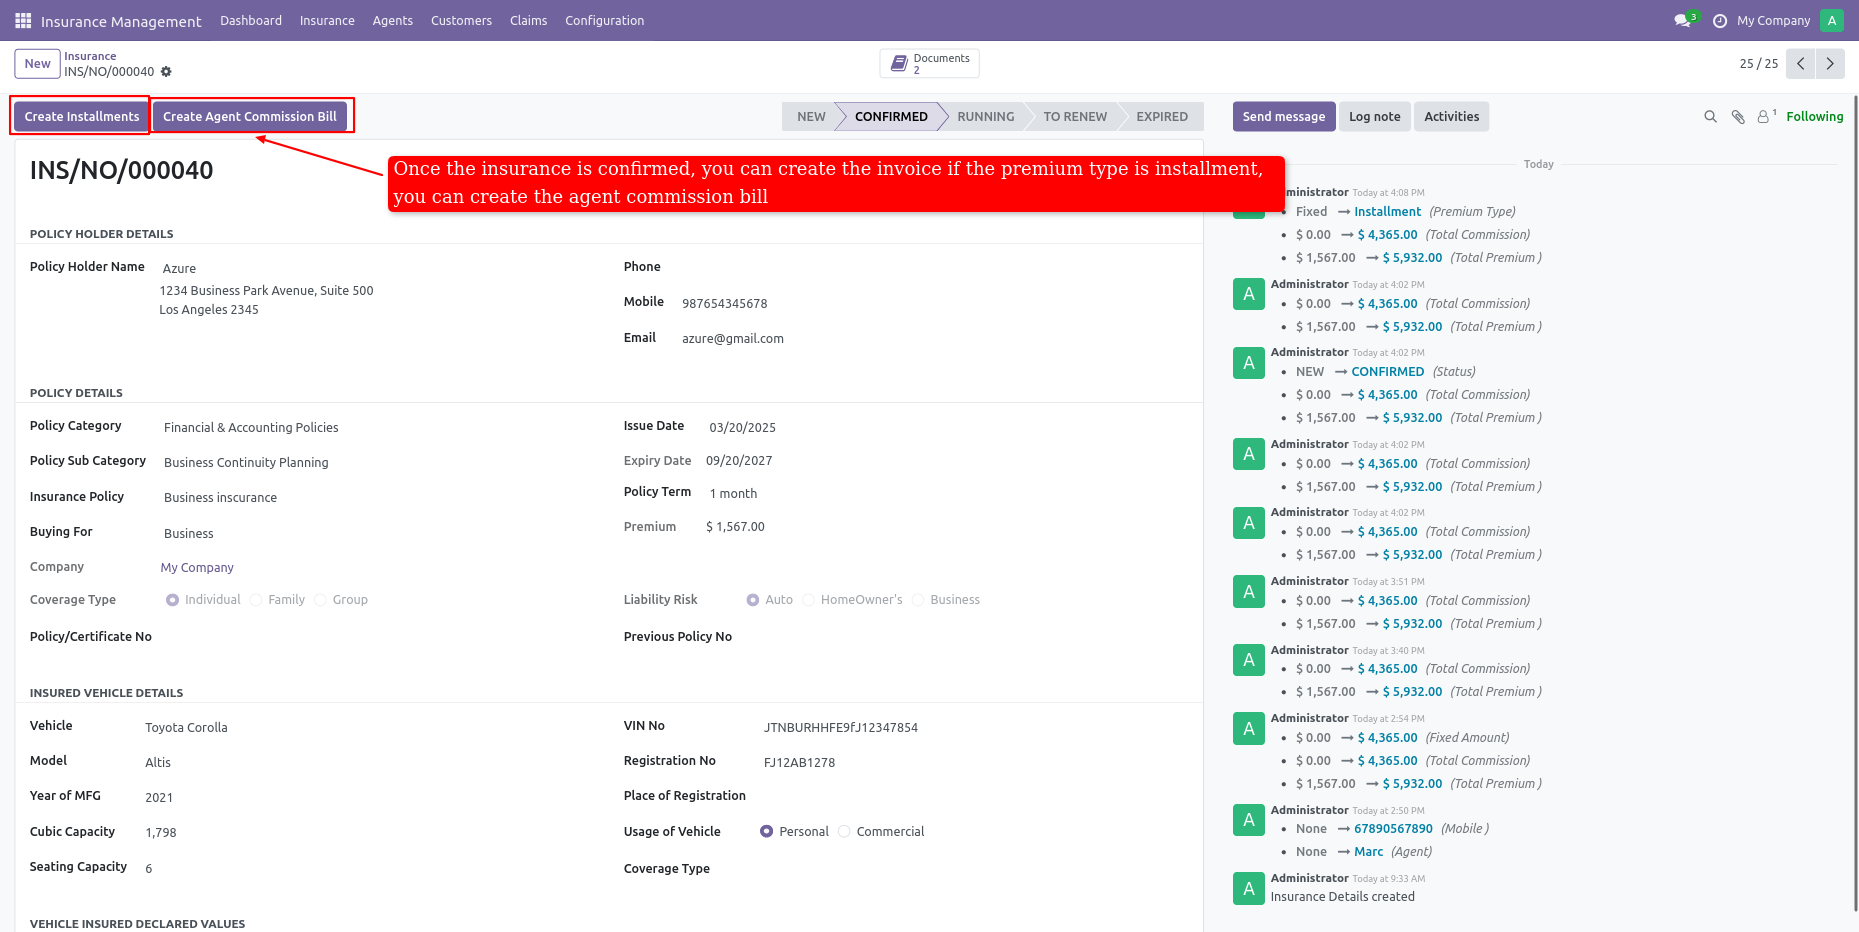
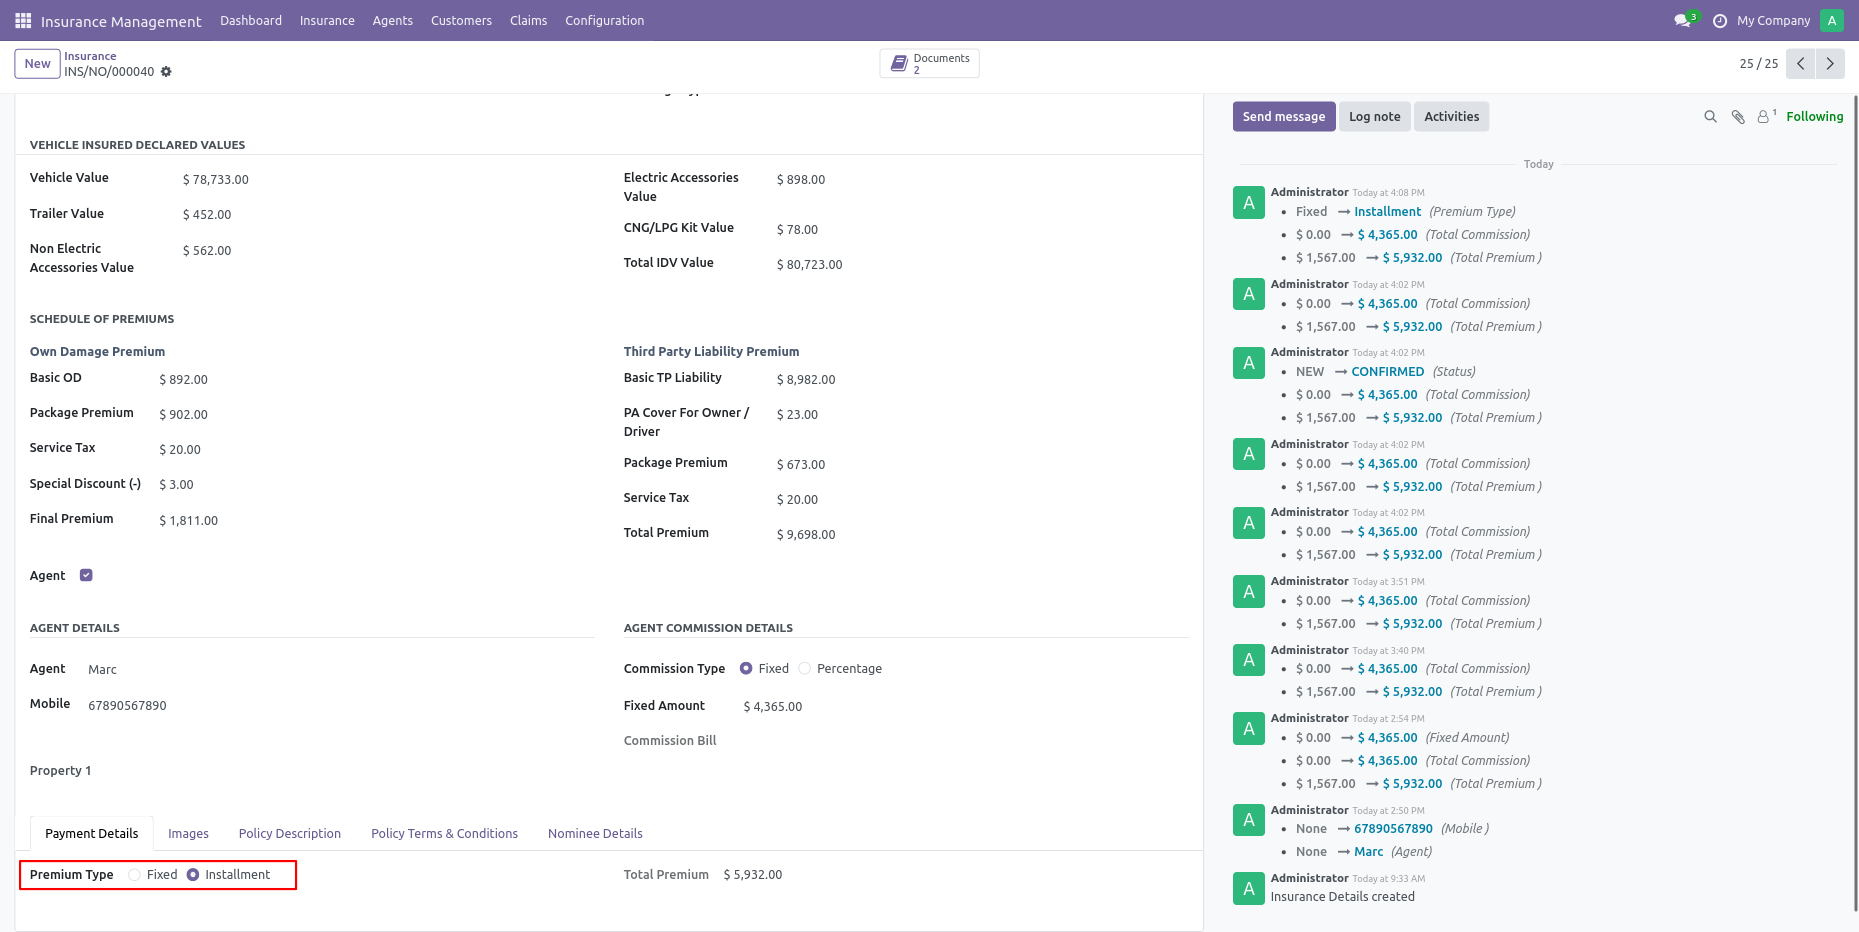
Once insurance is confirmed you can create instalments if the premium type is selected instalment.
If you want to start the policy first pay the fixed premium or
first installment.
when the invoice is paid and the commission bill is paid click on
the start
policy button.
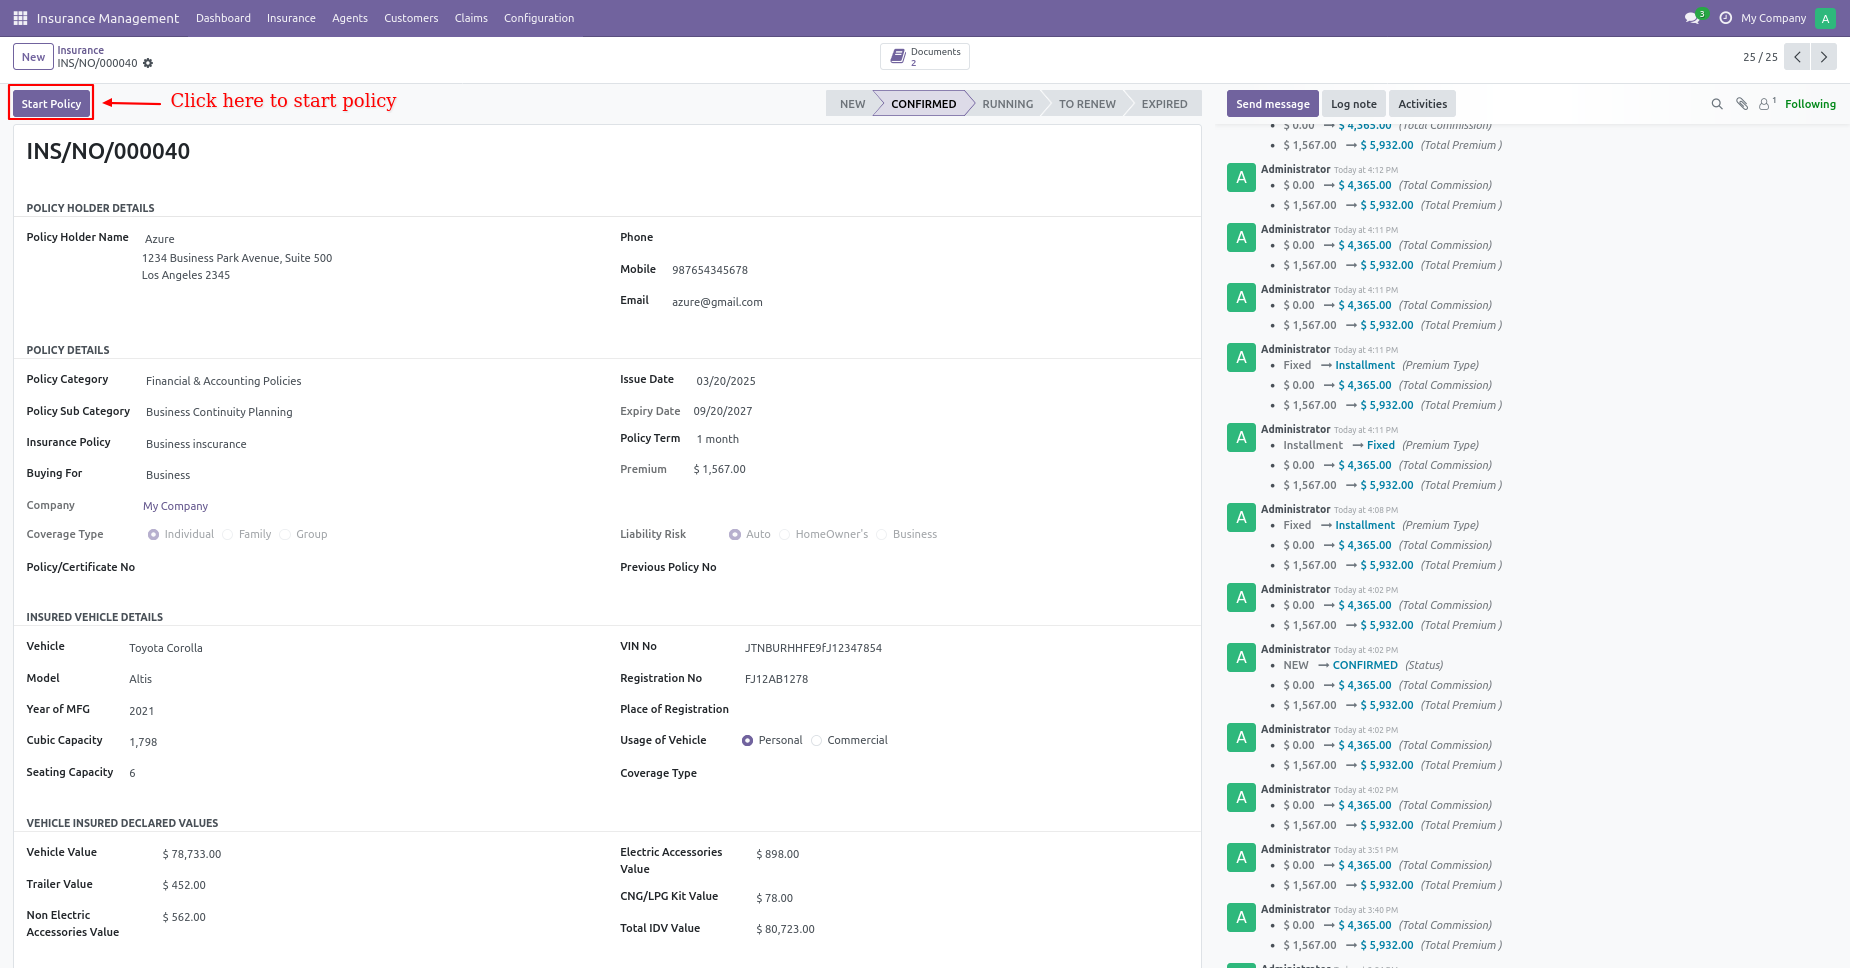
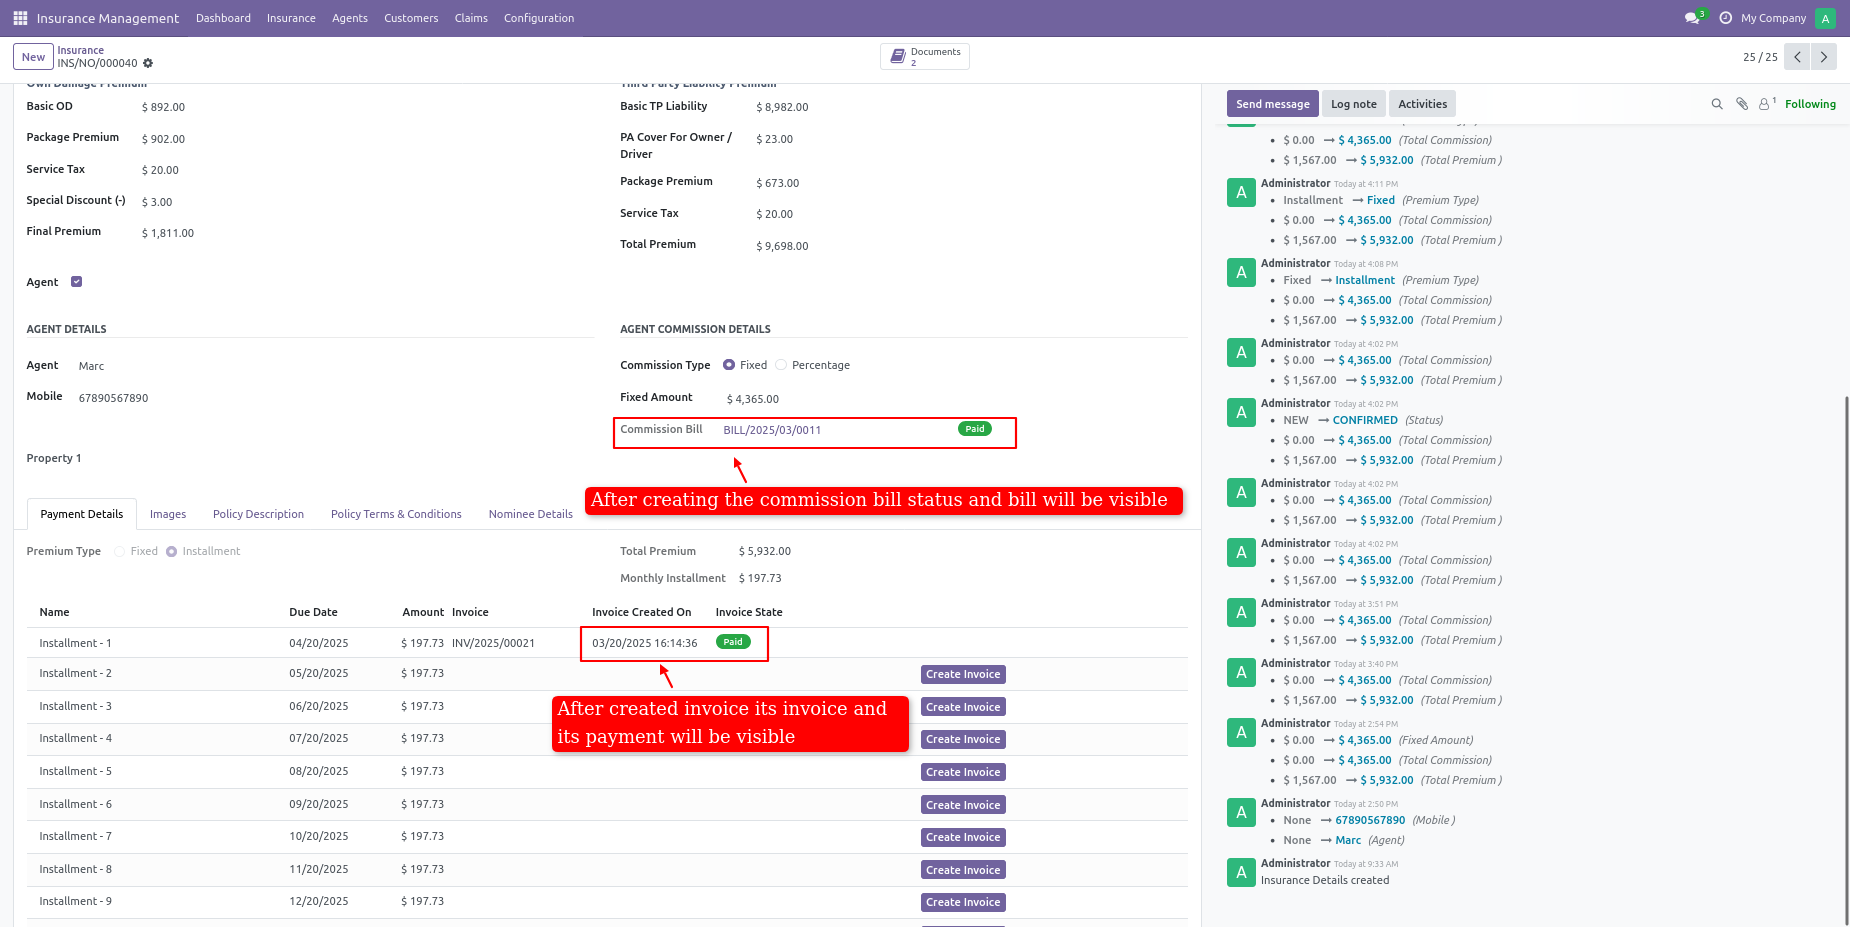
After the start policy, it will change in the running stage.
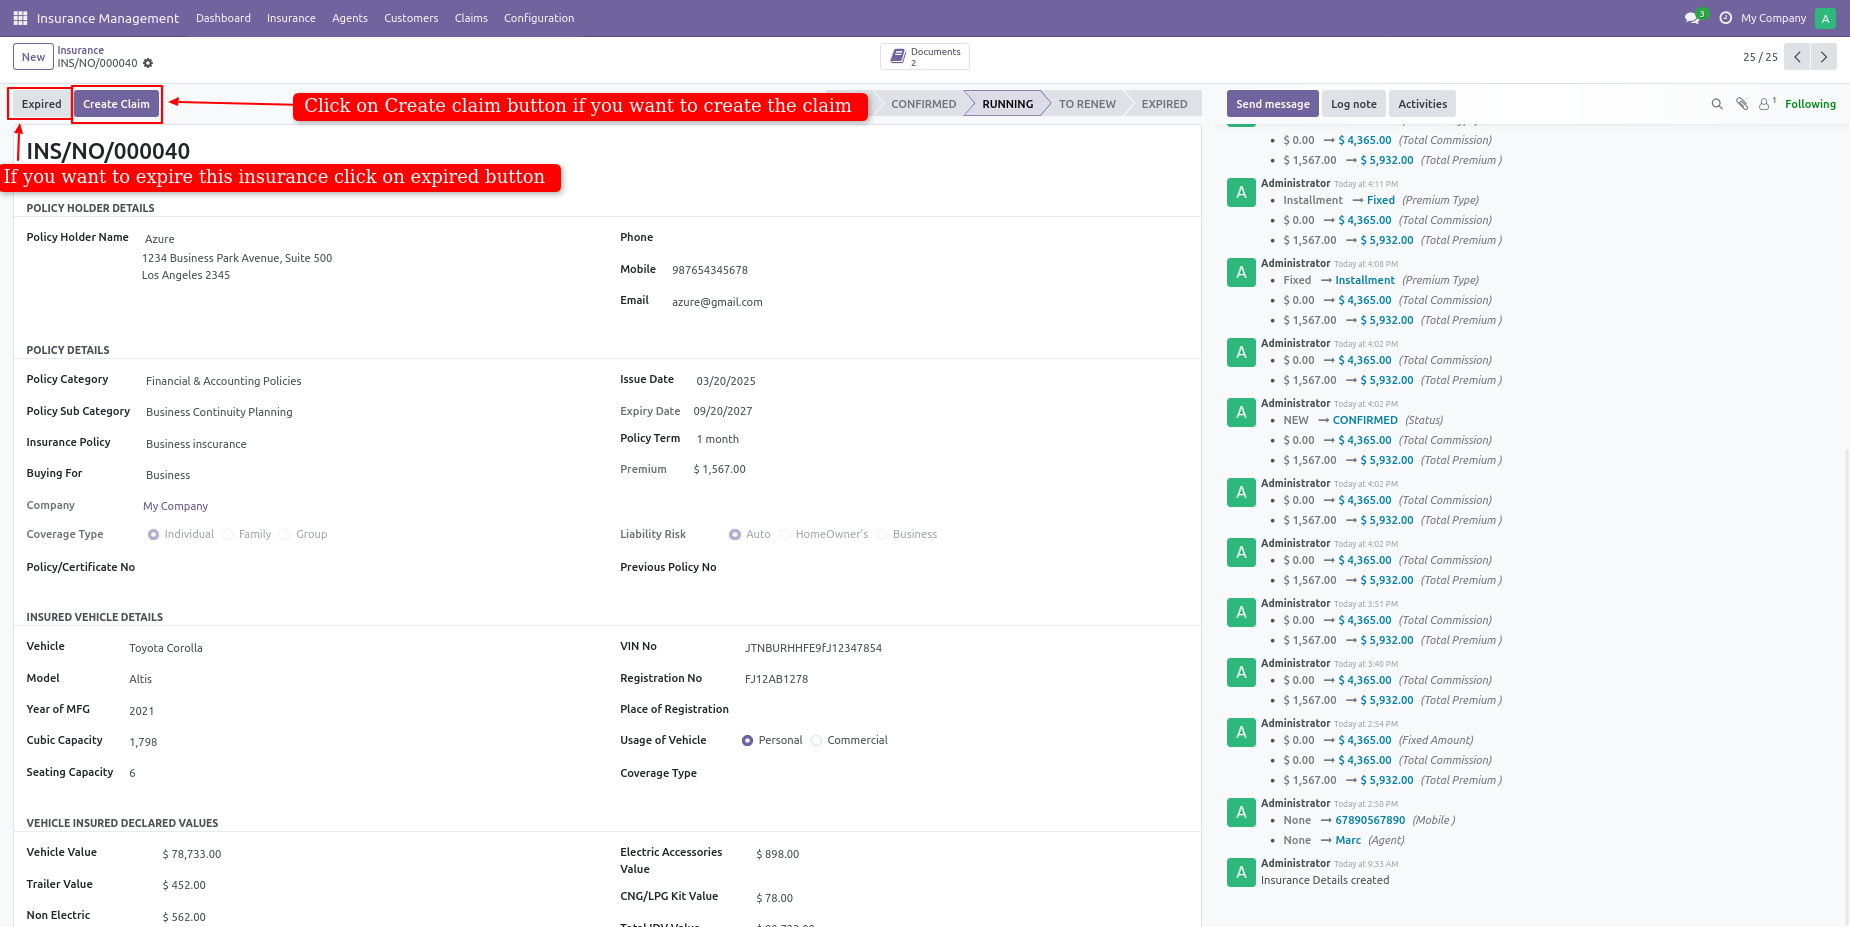
You can a create claim by clicking on the create claim button.
You can manually move to expire stage by clicking on an expired
button.
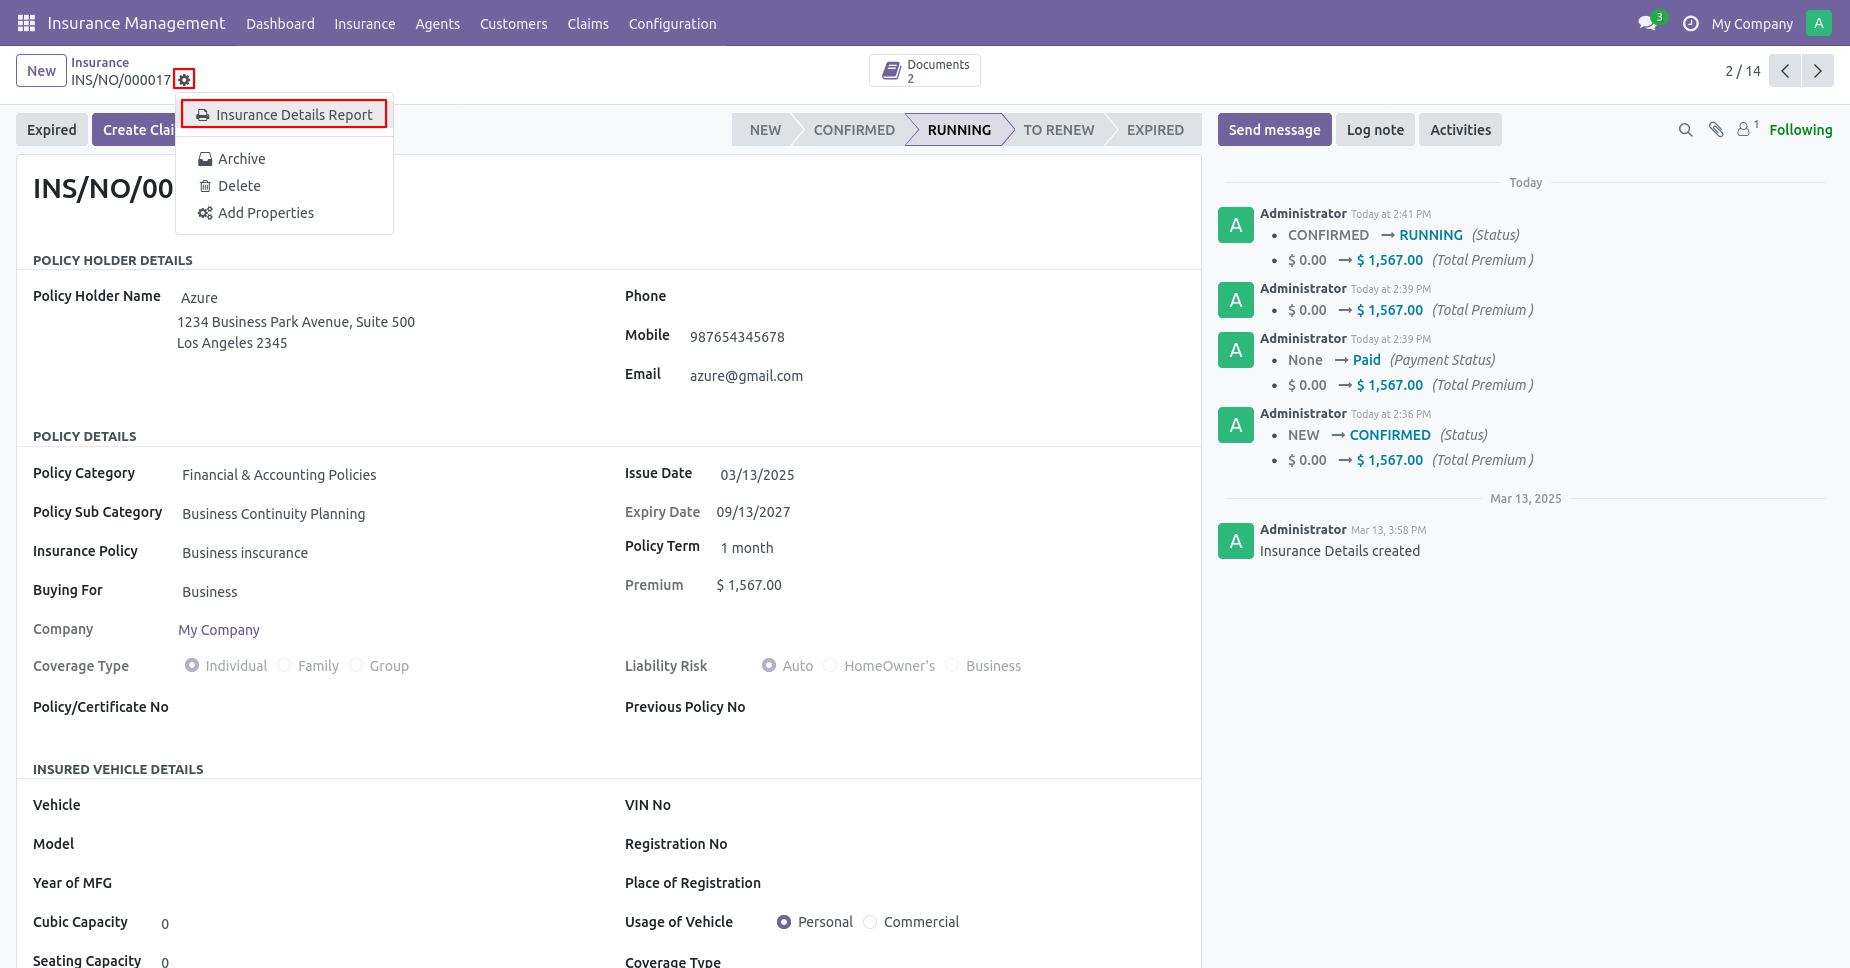
You can print insurance detail reports by clicking on print.
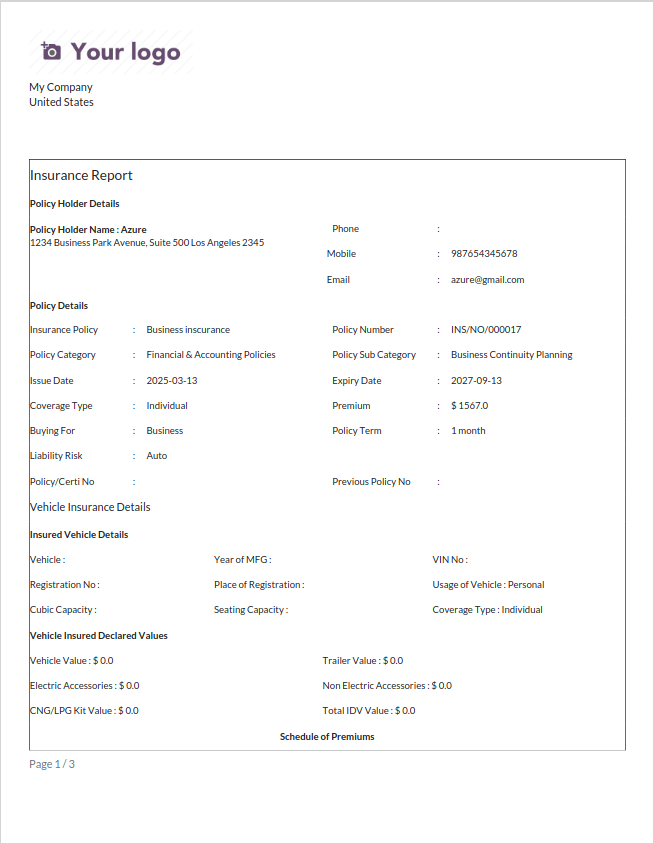
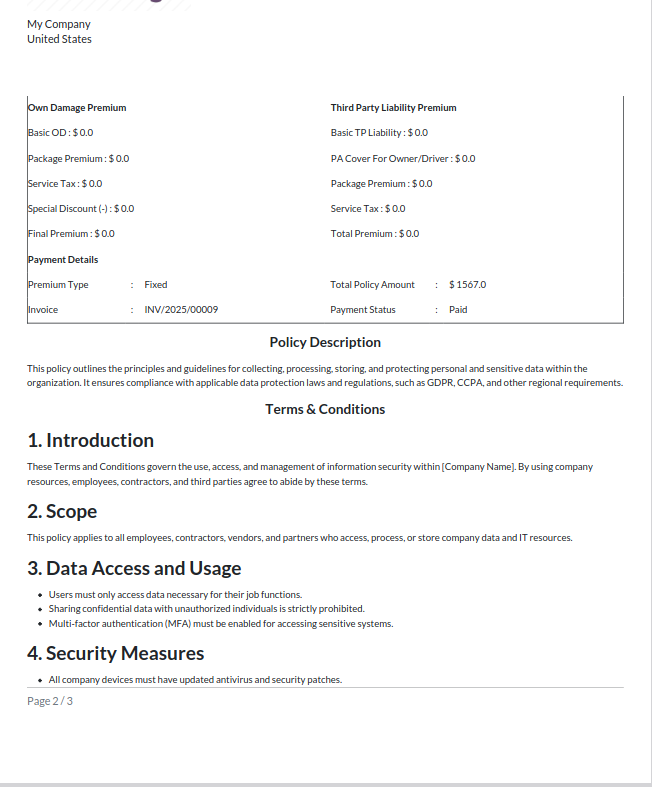
Insurance report in pdf format with all policy details.
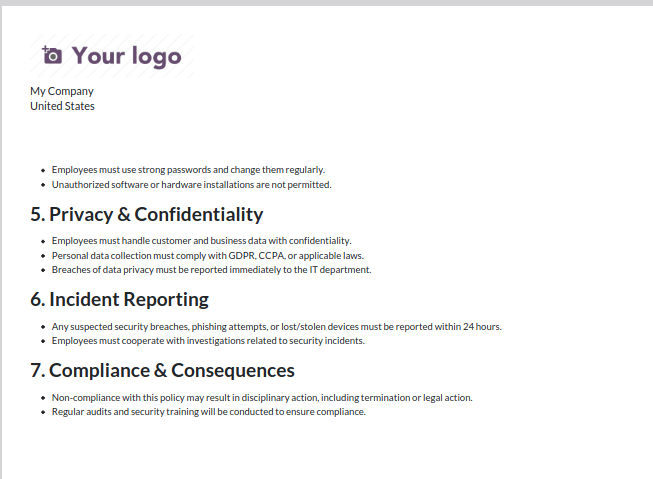
Policy description and terms & conditions in pdf print report.
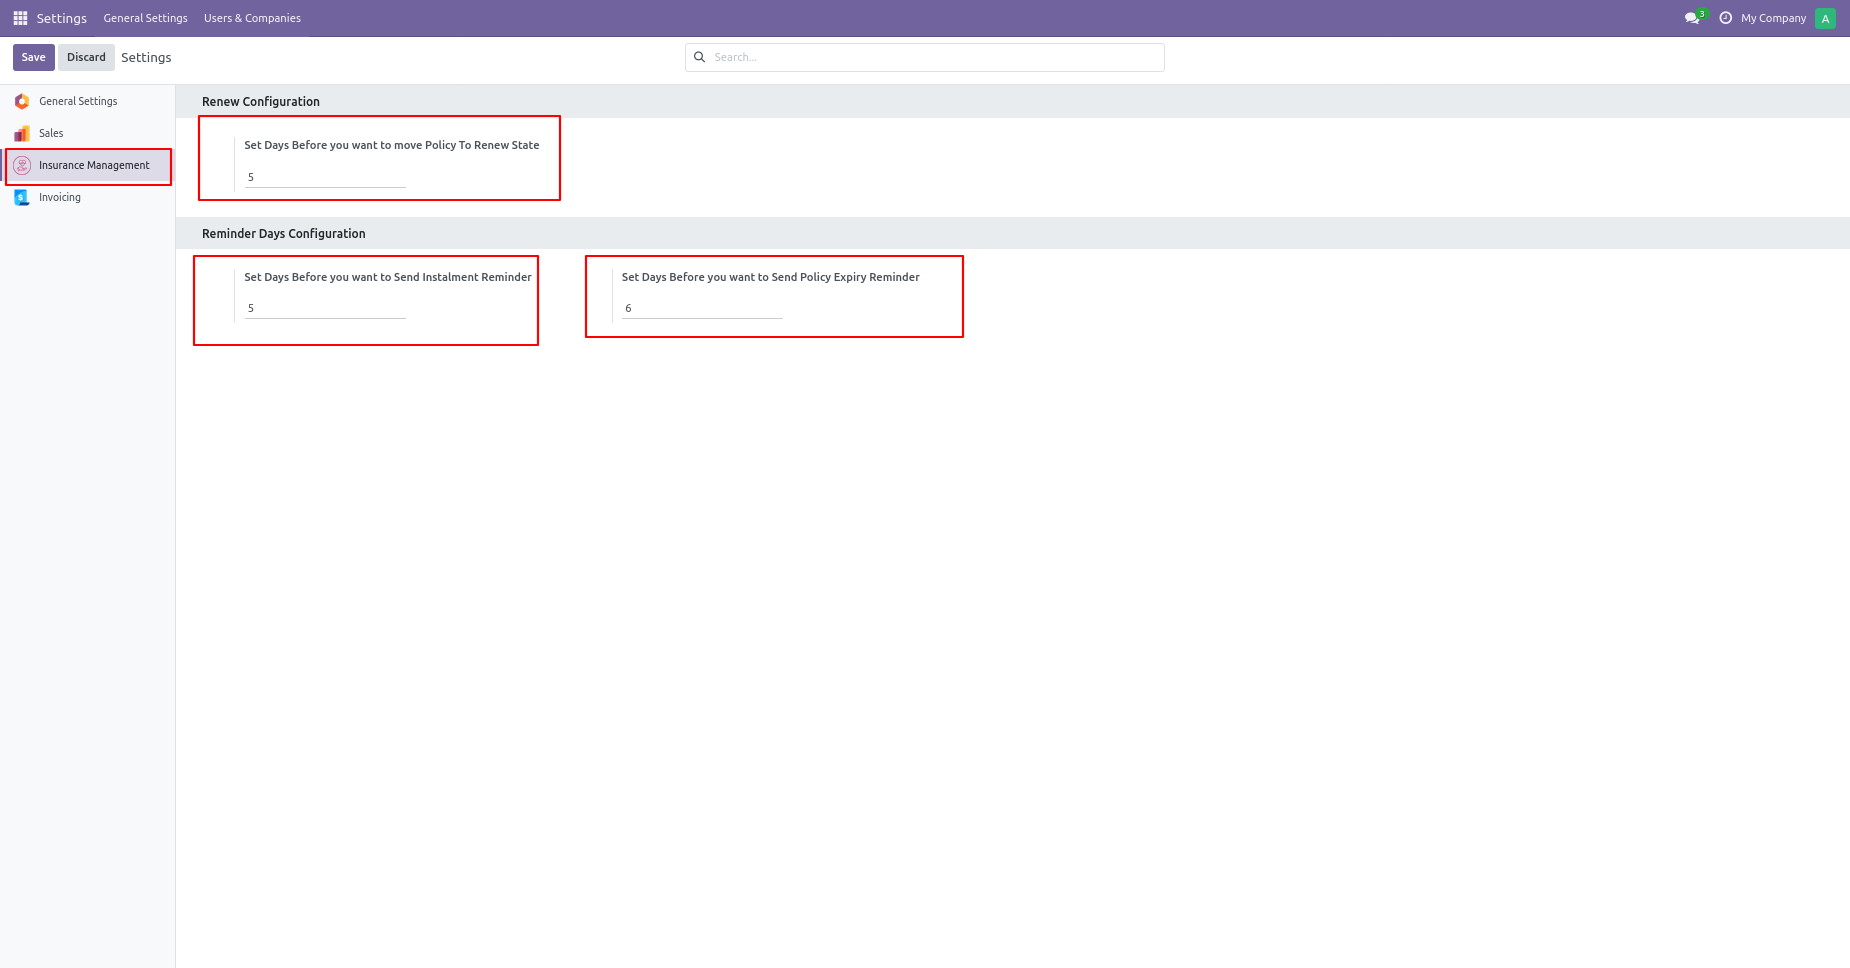
From Insurance management settings you can set reminders.
You can set renew configurations.
You can set reminder days configuration.
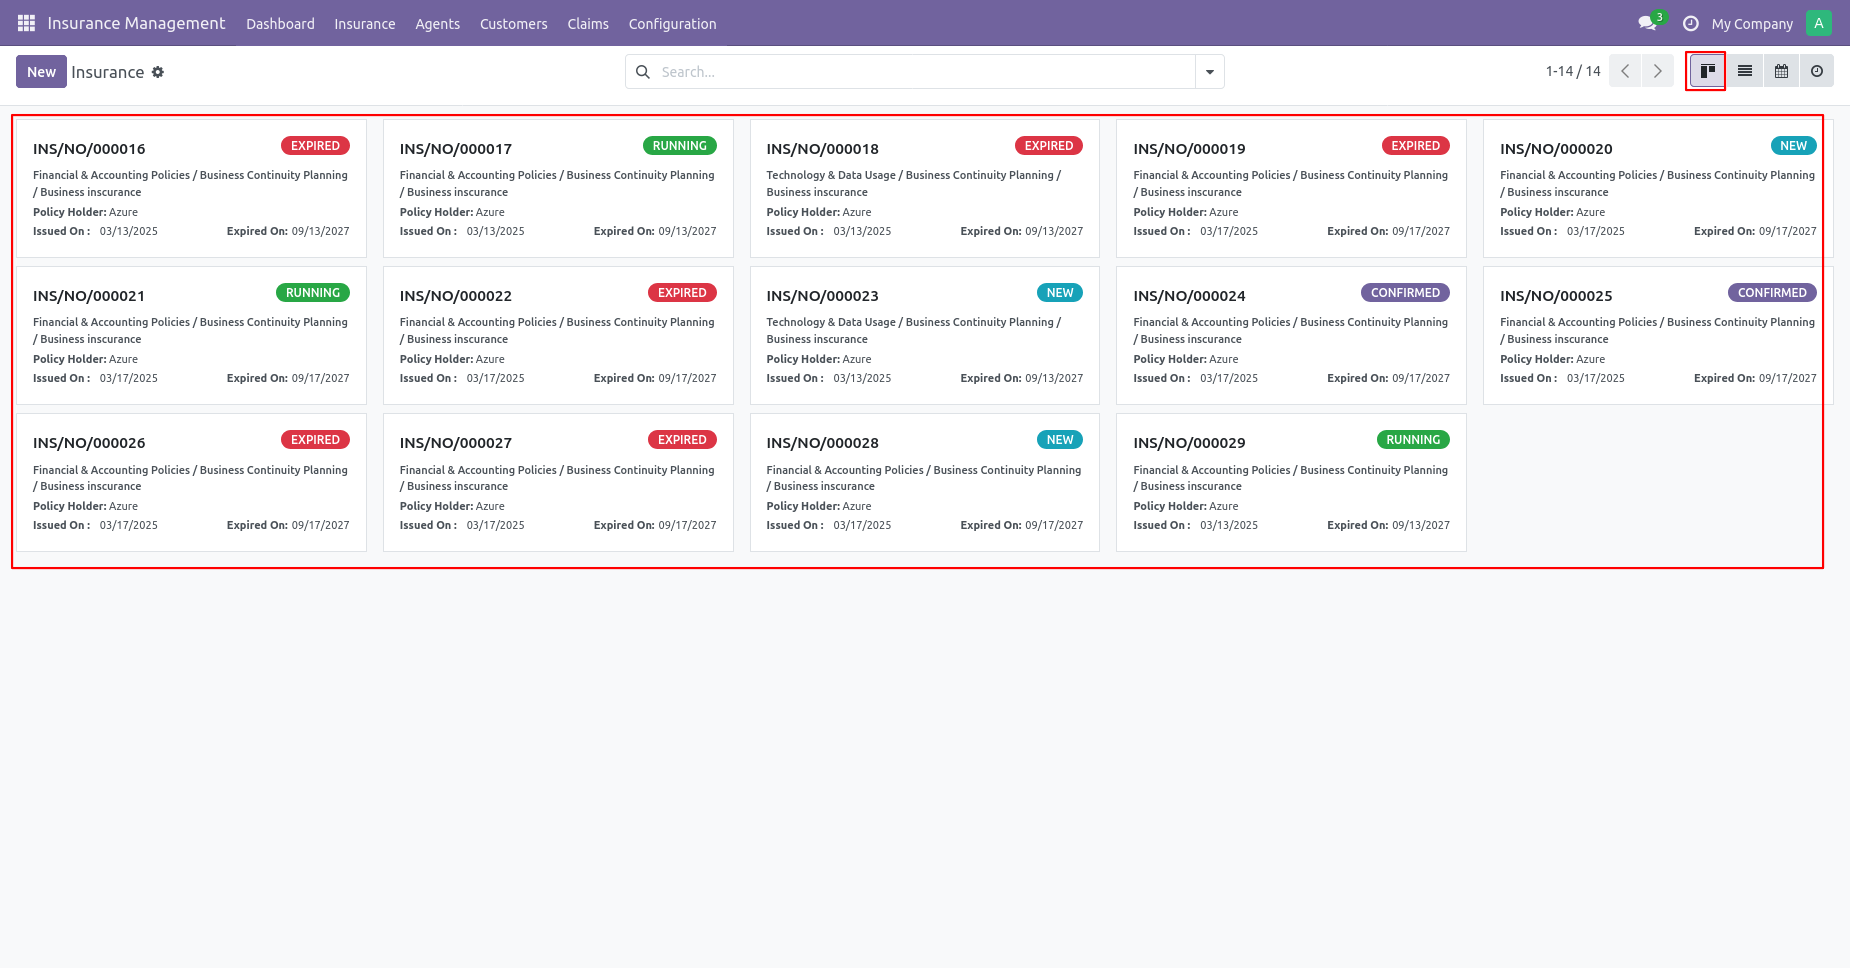
Insurance kanban view.
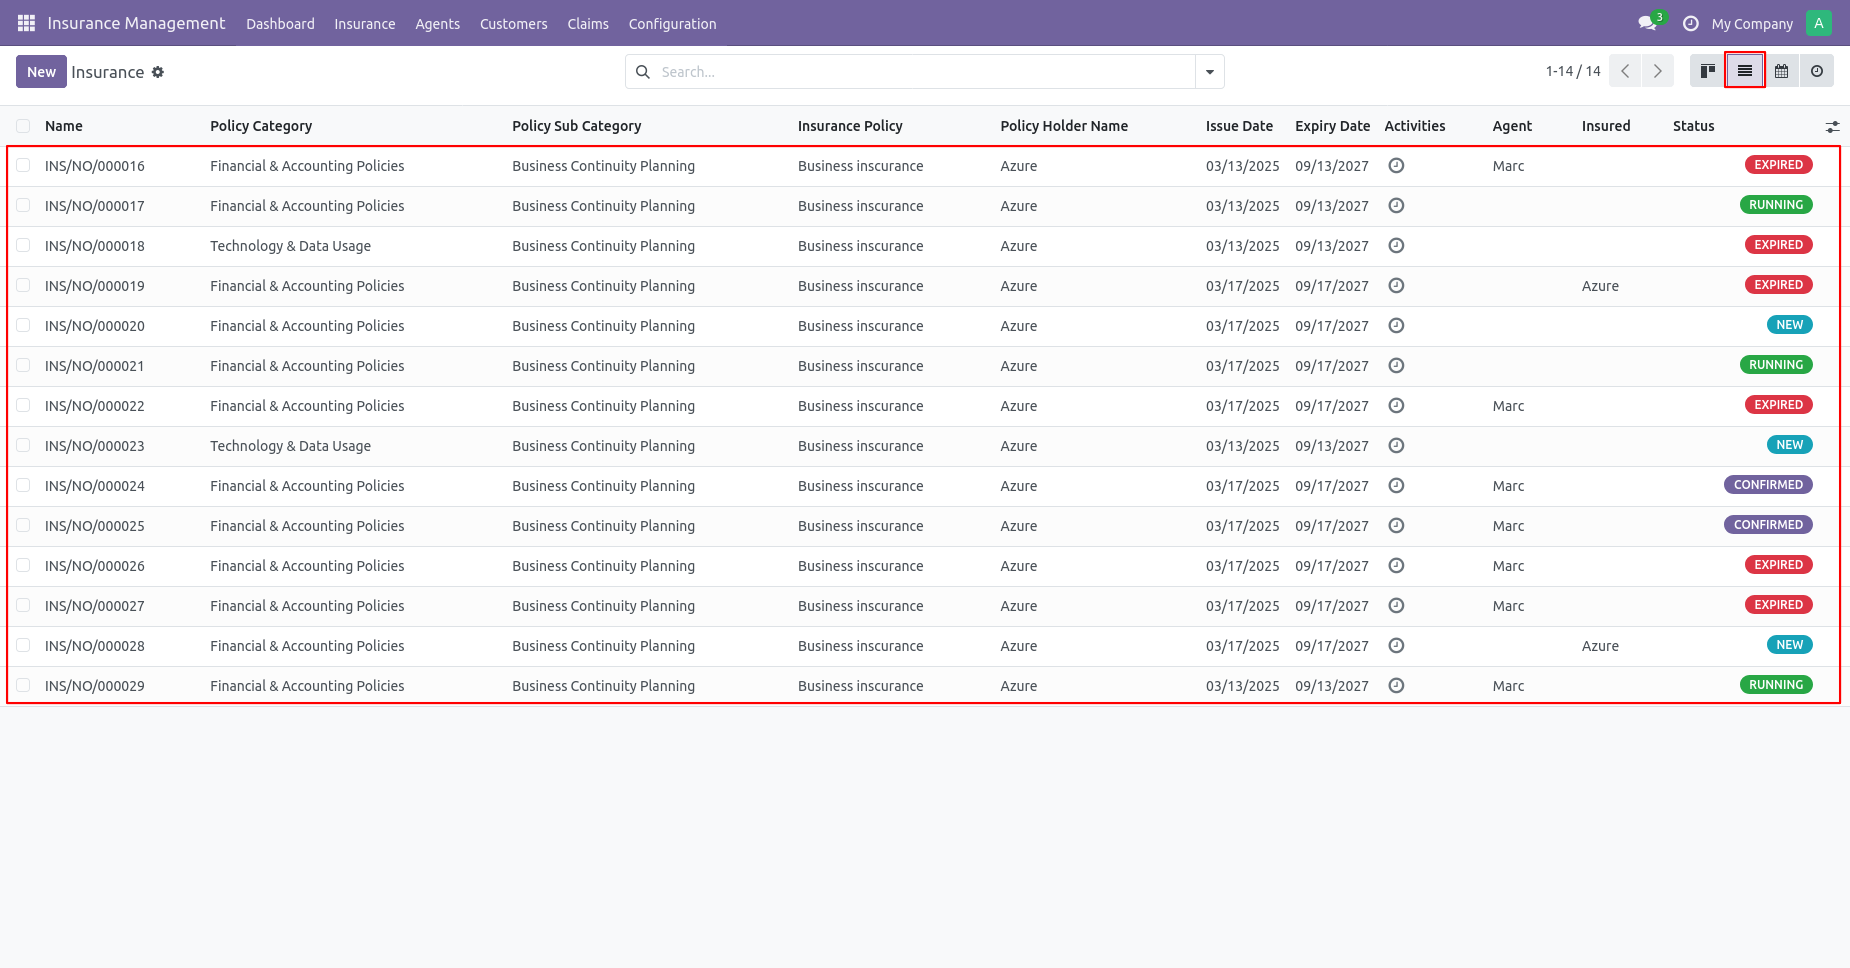
Insurance list view.
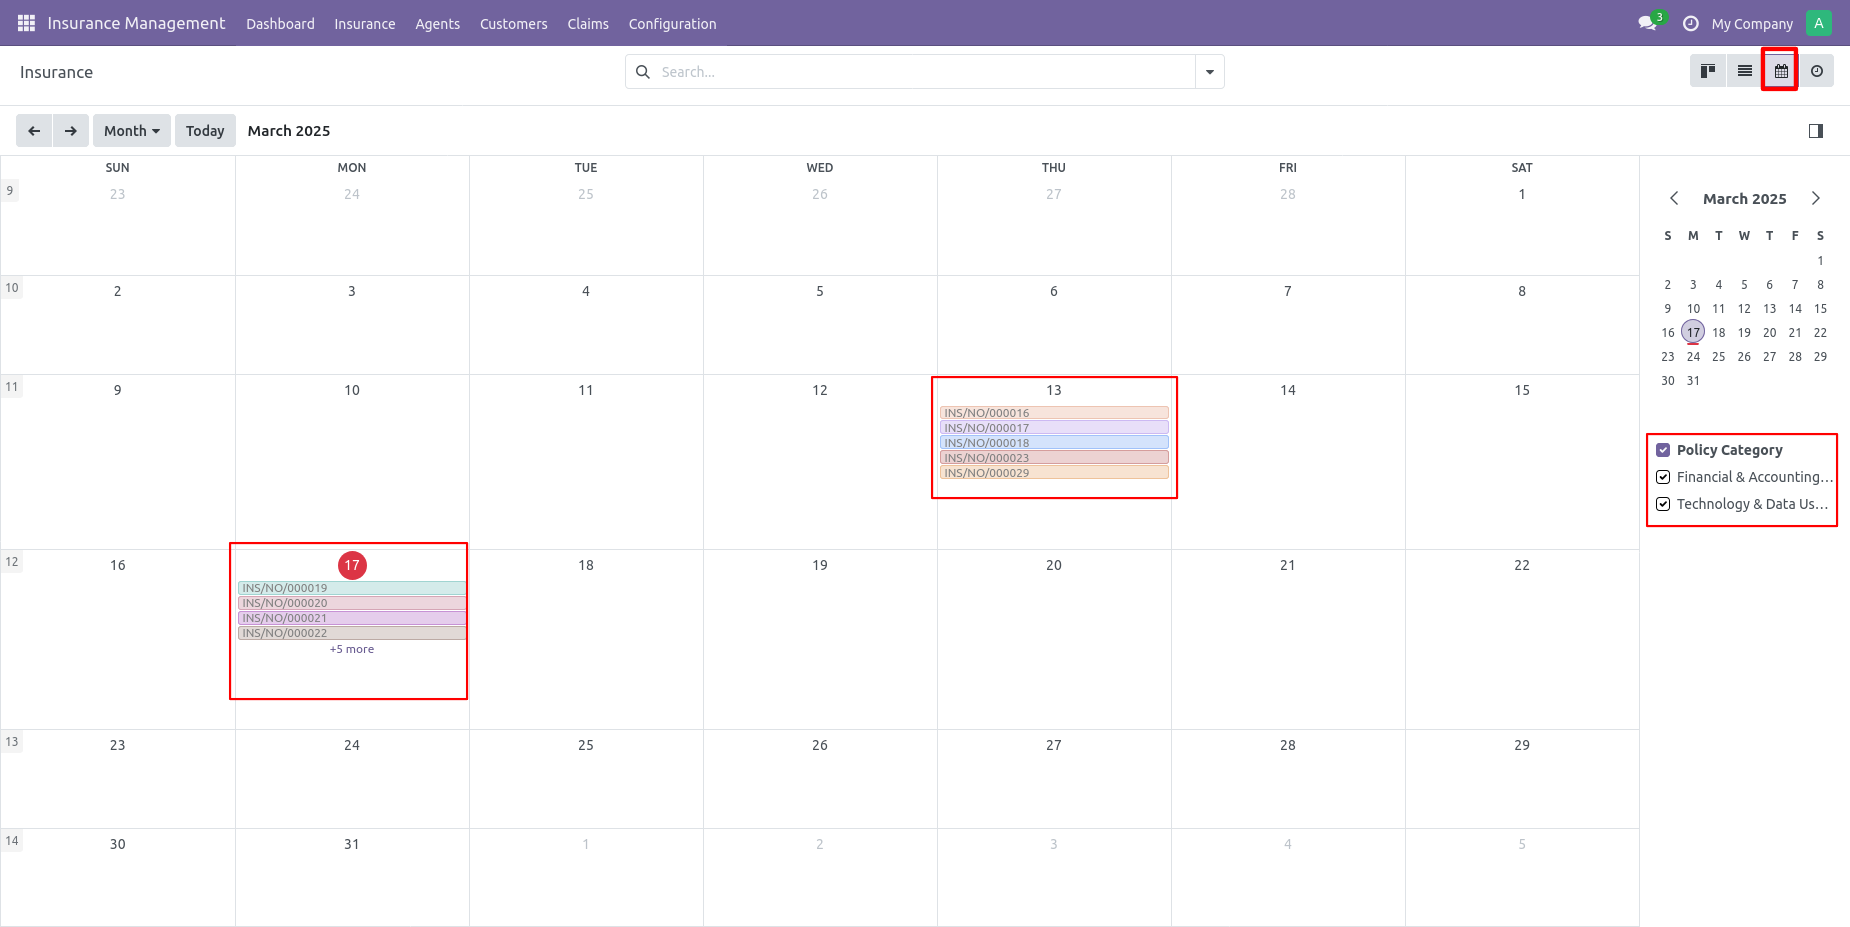
Insurance calendar view.
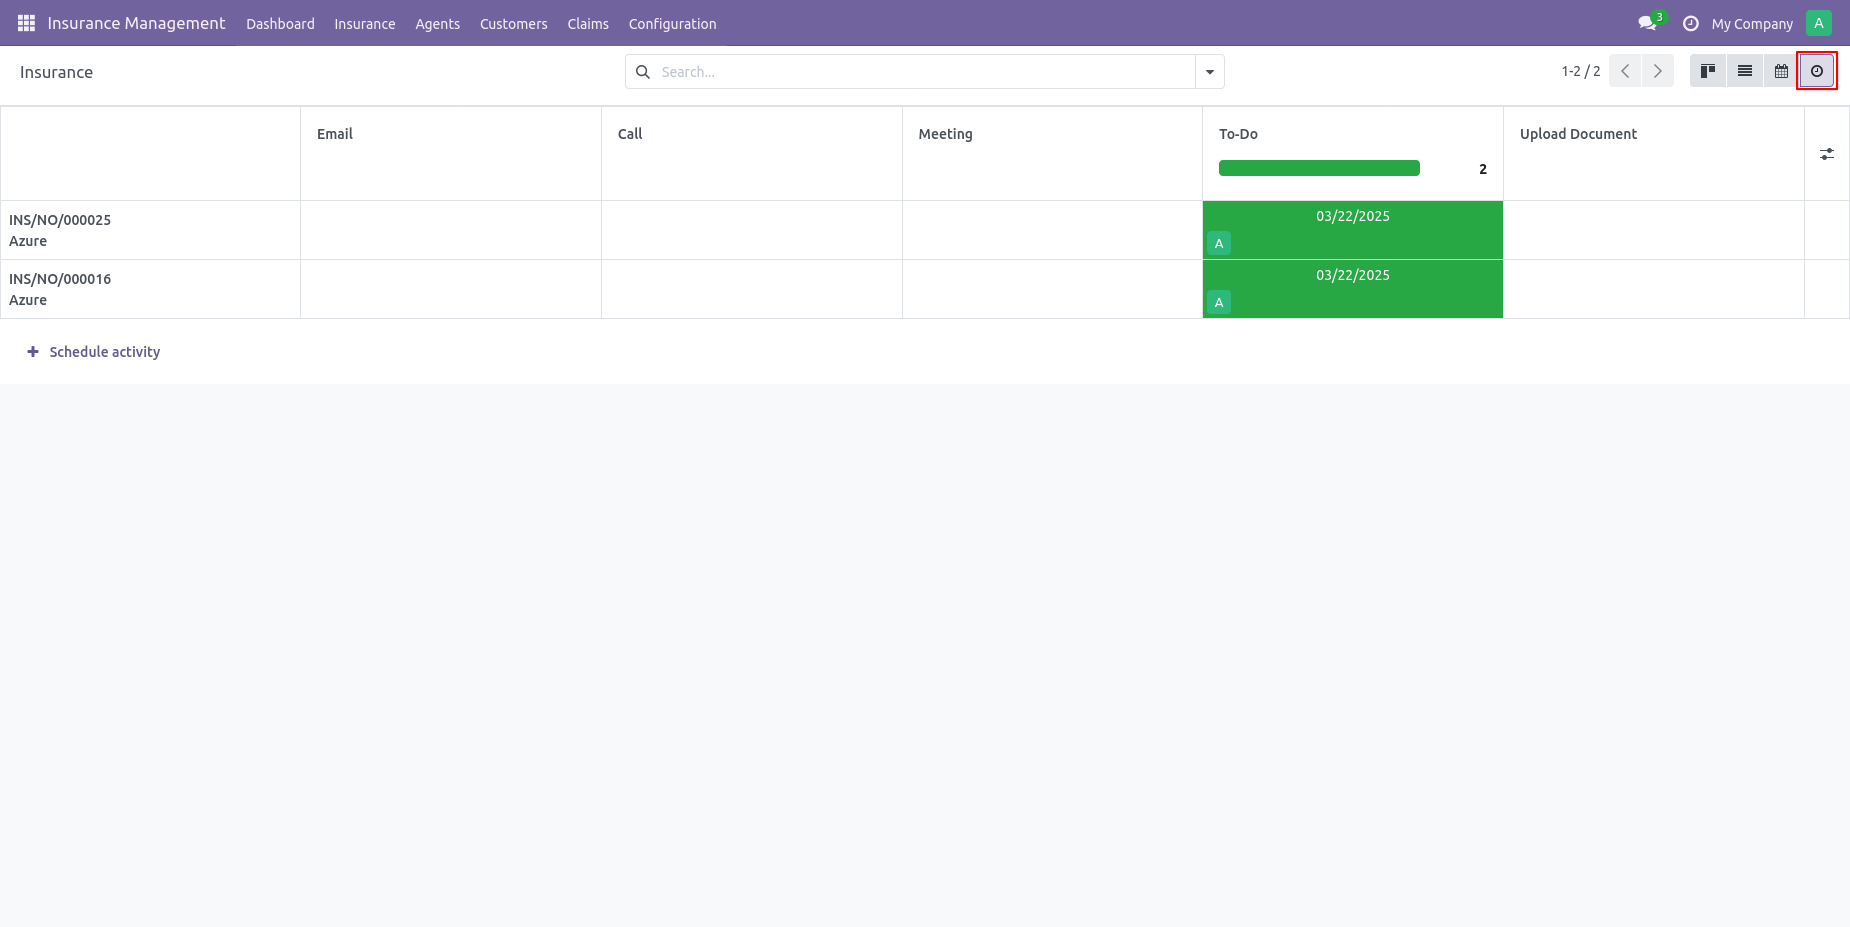
Insurance activity view.
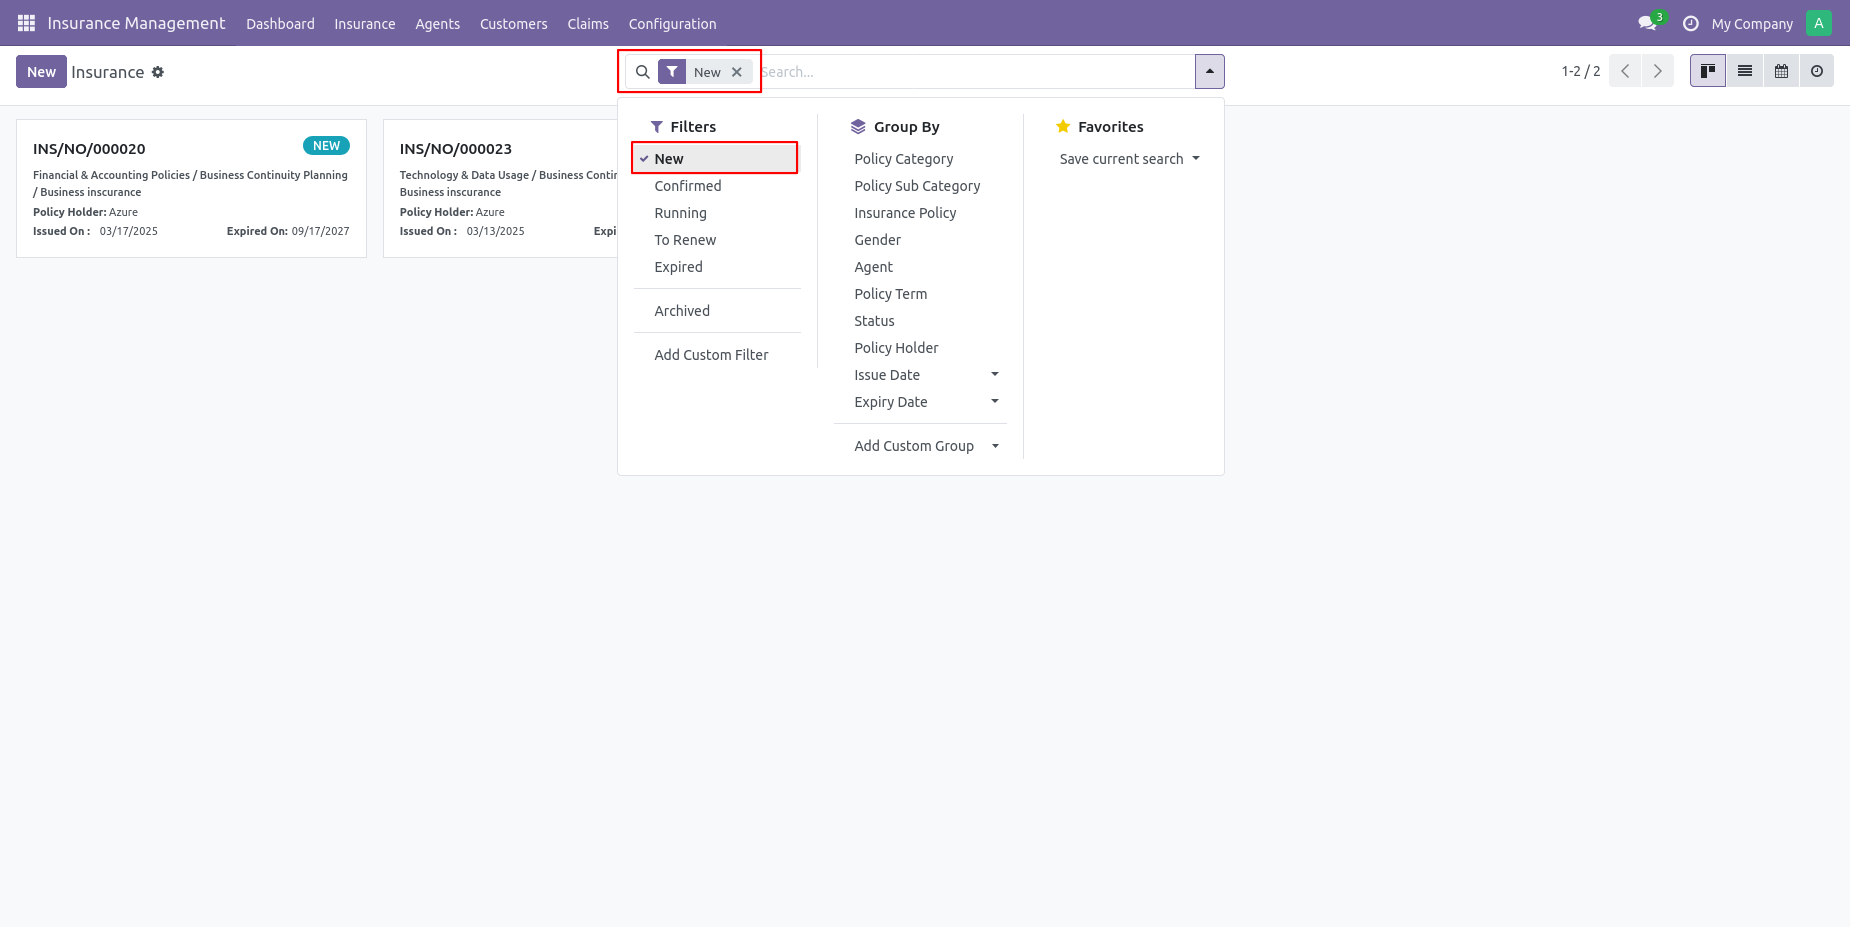
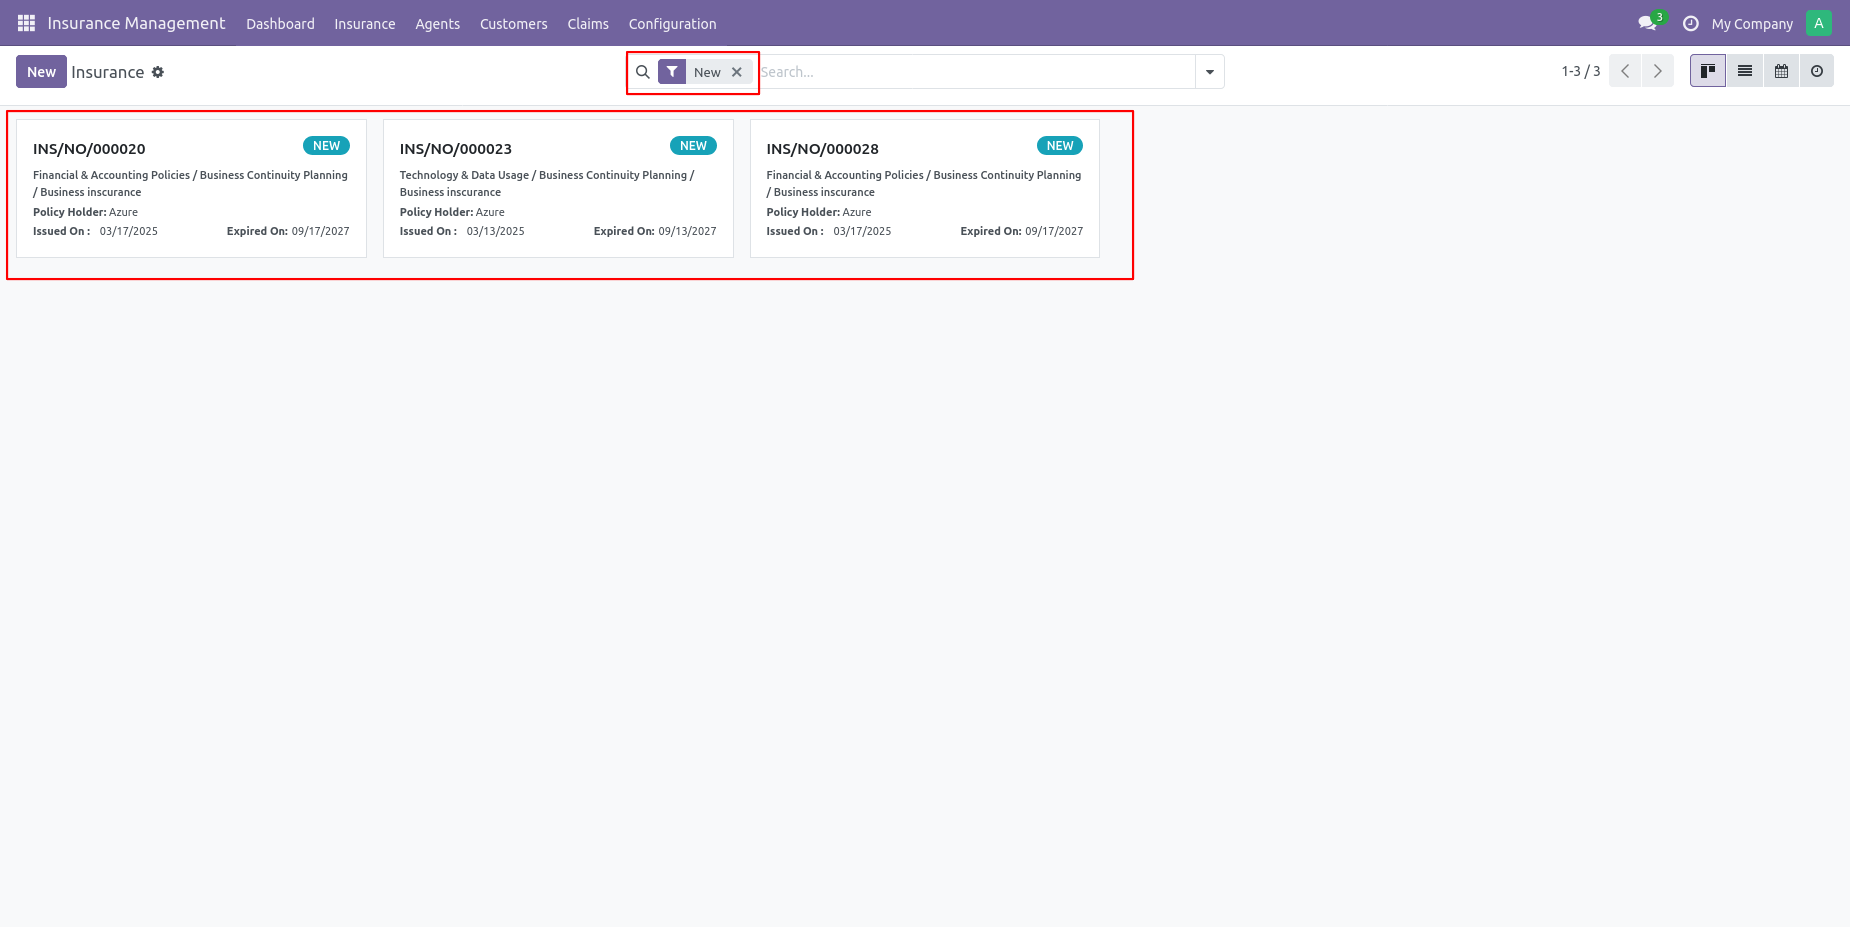
Insurance filter by different stages.
You can Archive or unarchive Insurance by action button.
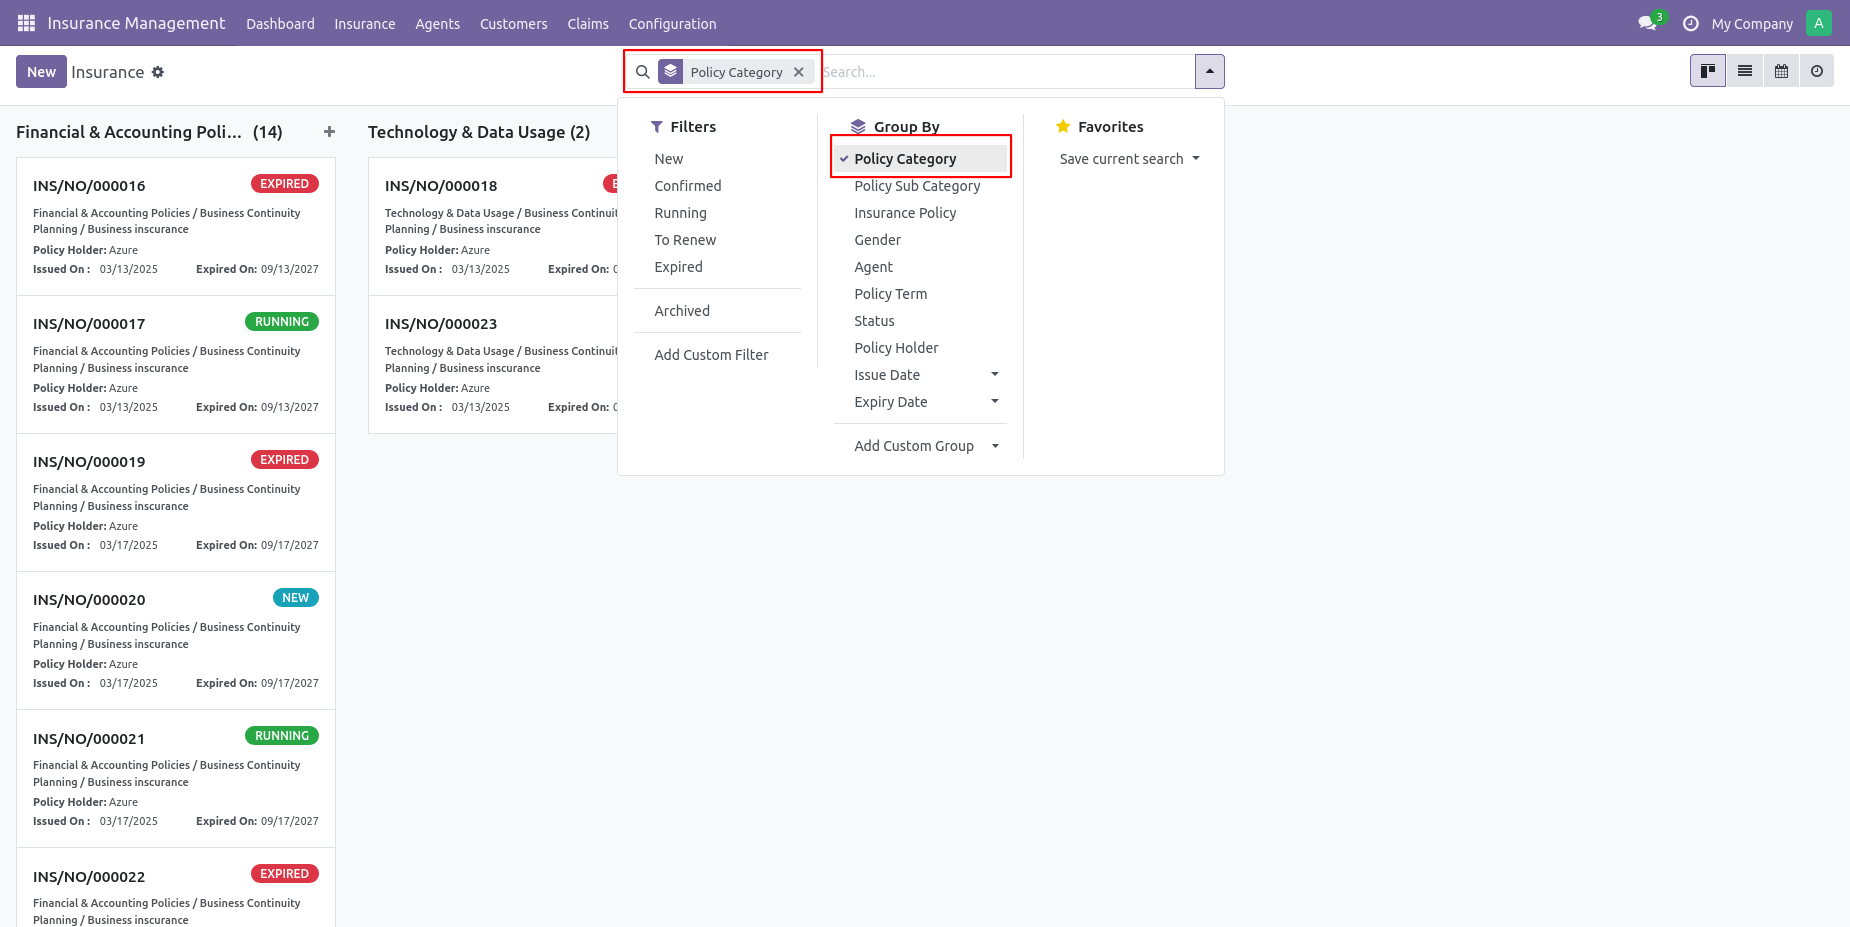
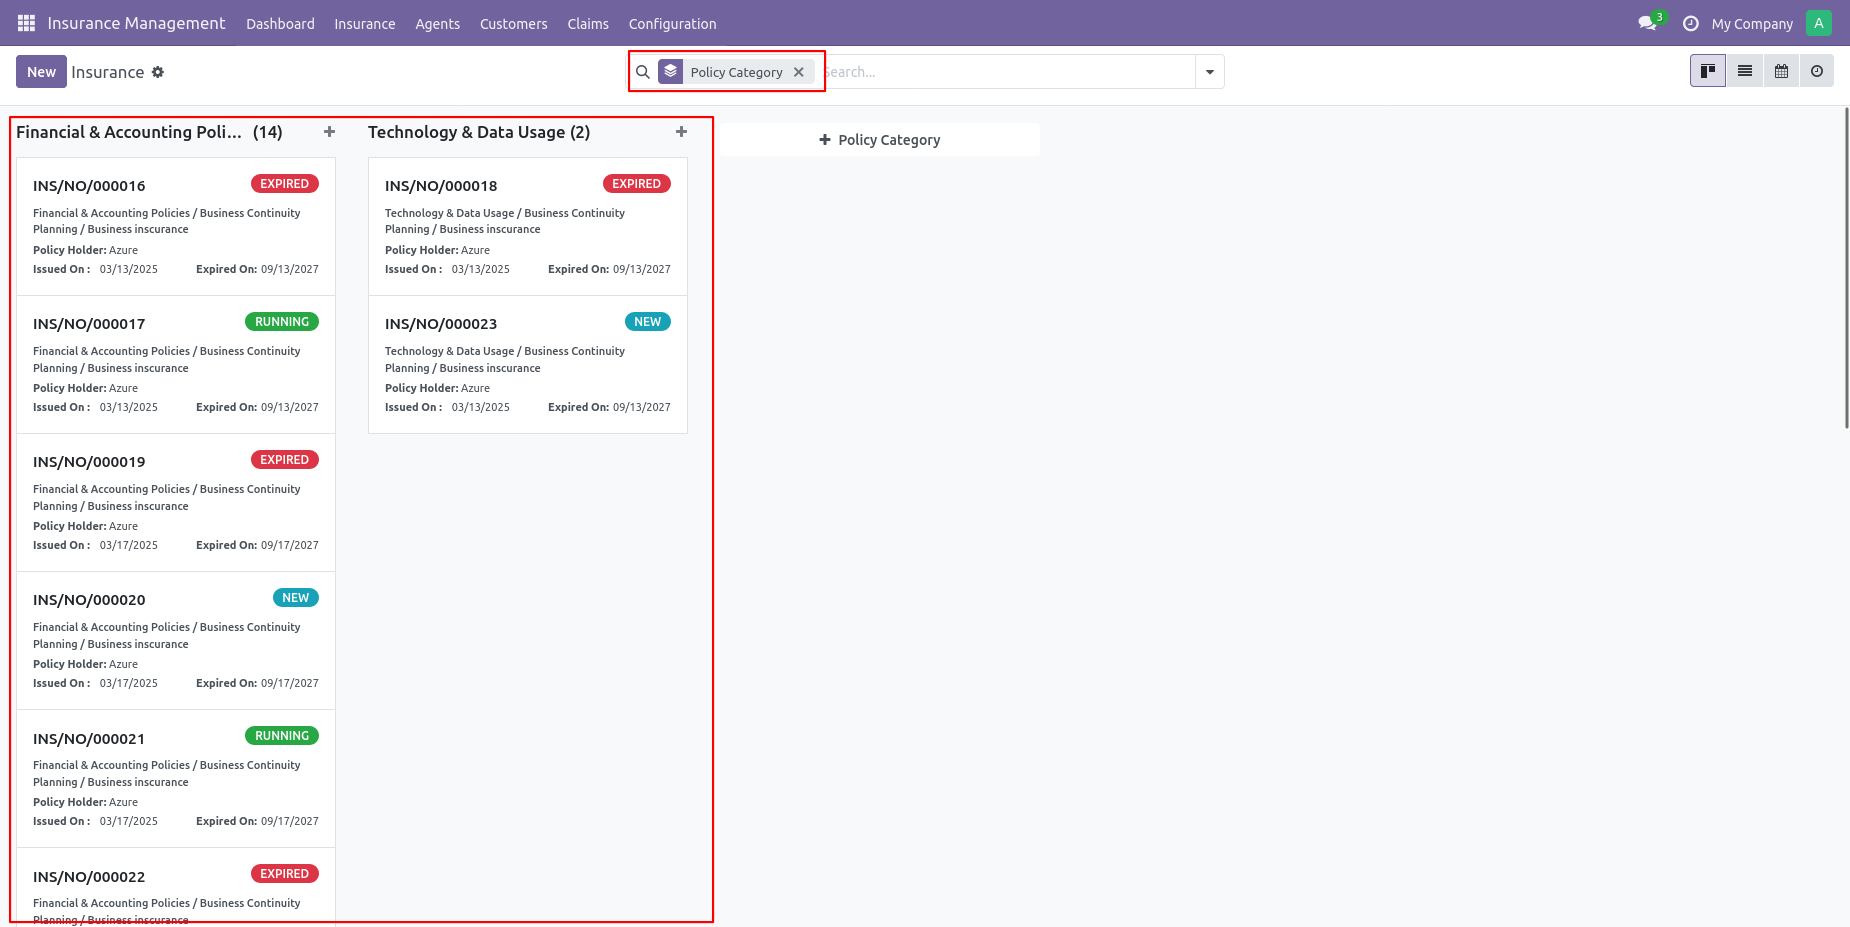
You can see the insurance group by Policy category.
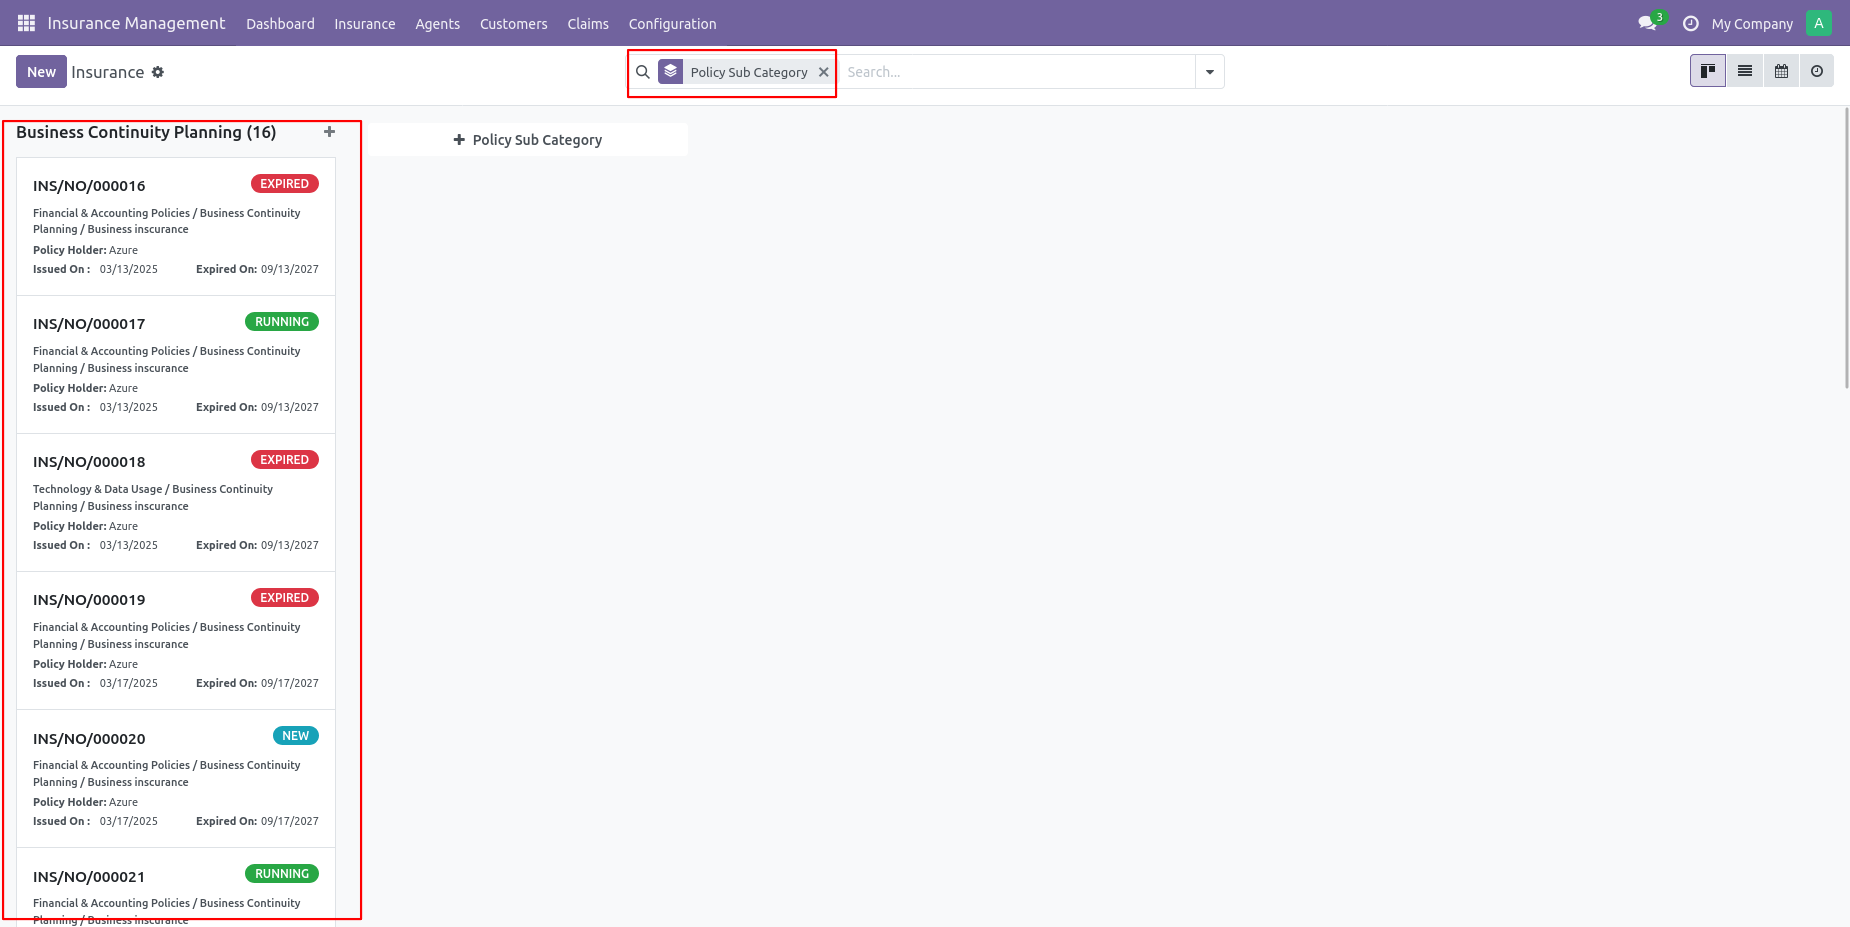
You can see the insurance group by Policy sub category.
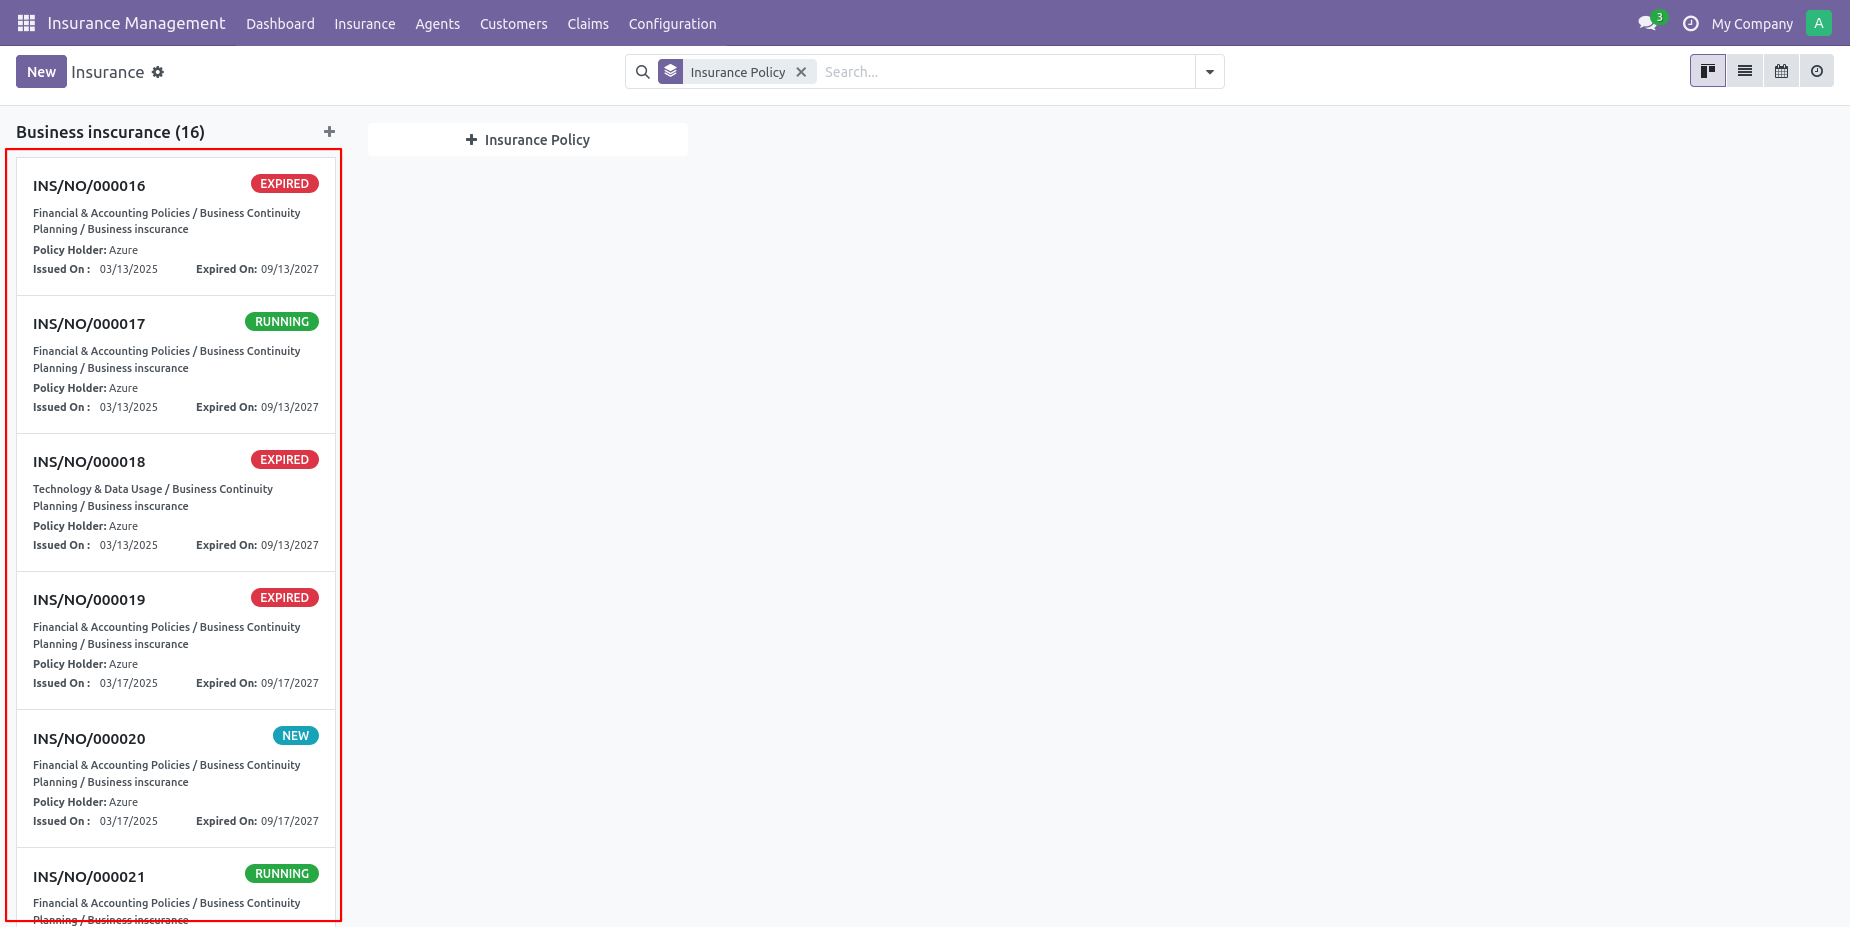
You can see the insurance group by Insurance Policy.
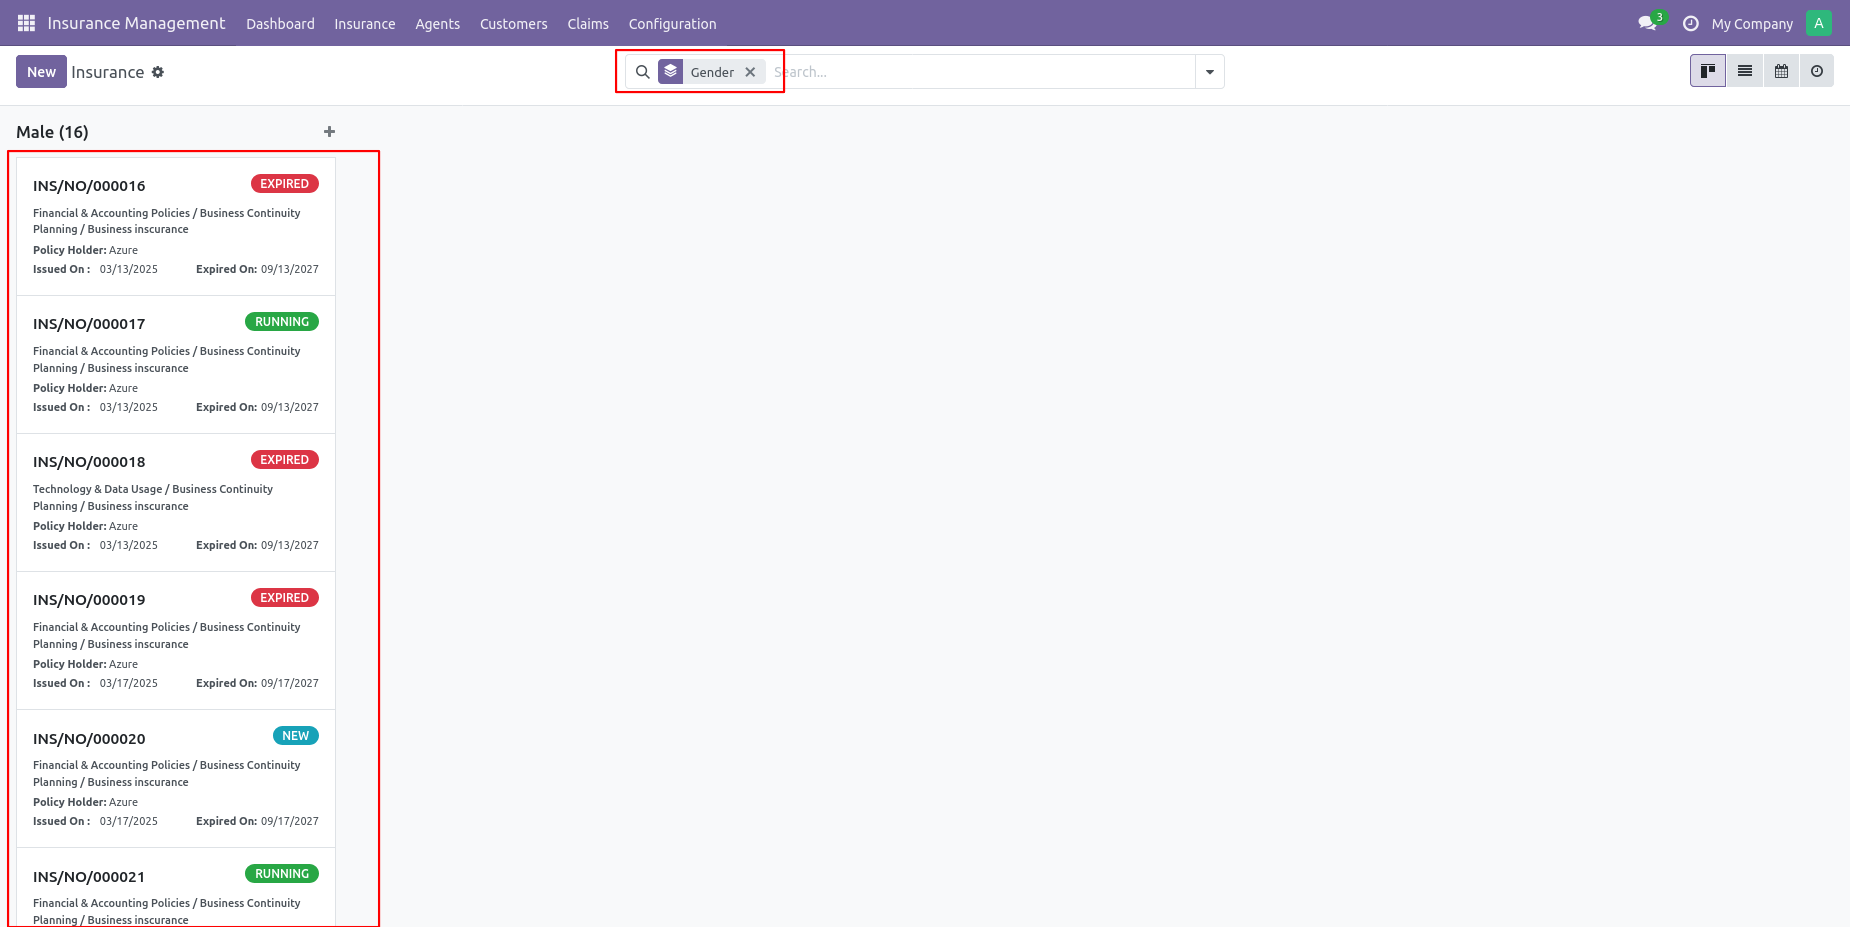
You can see the insurance group by Gender.
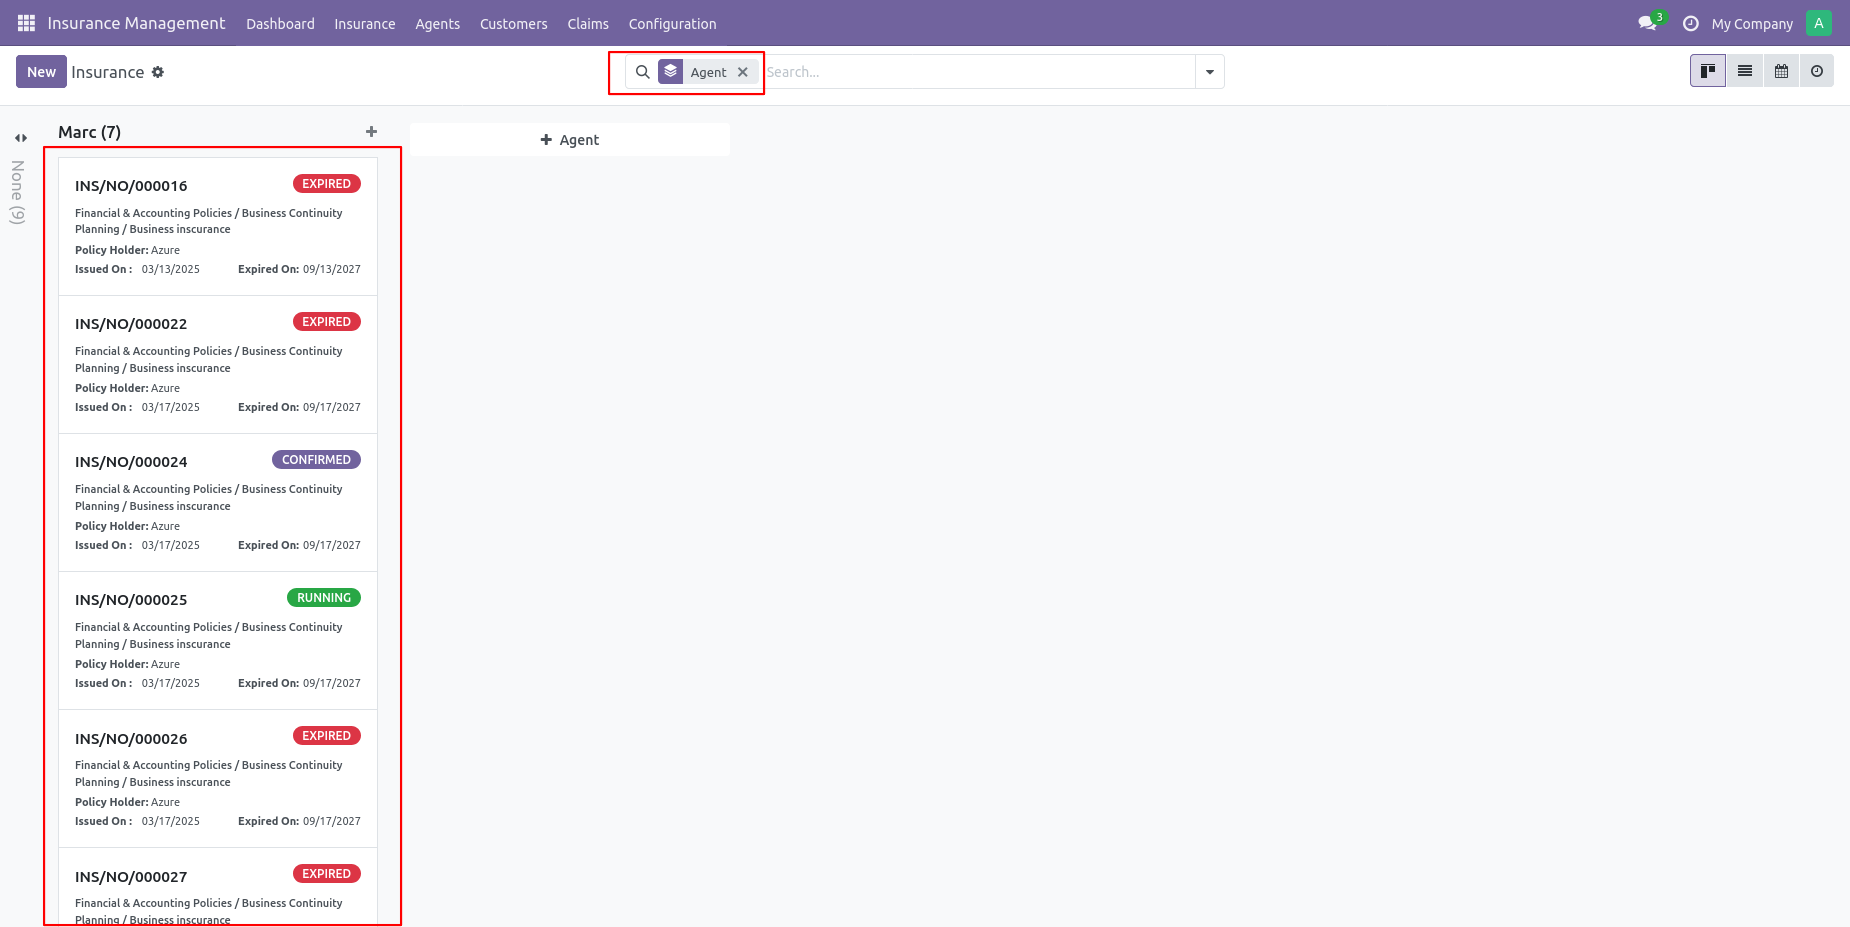
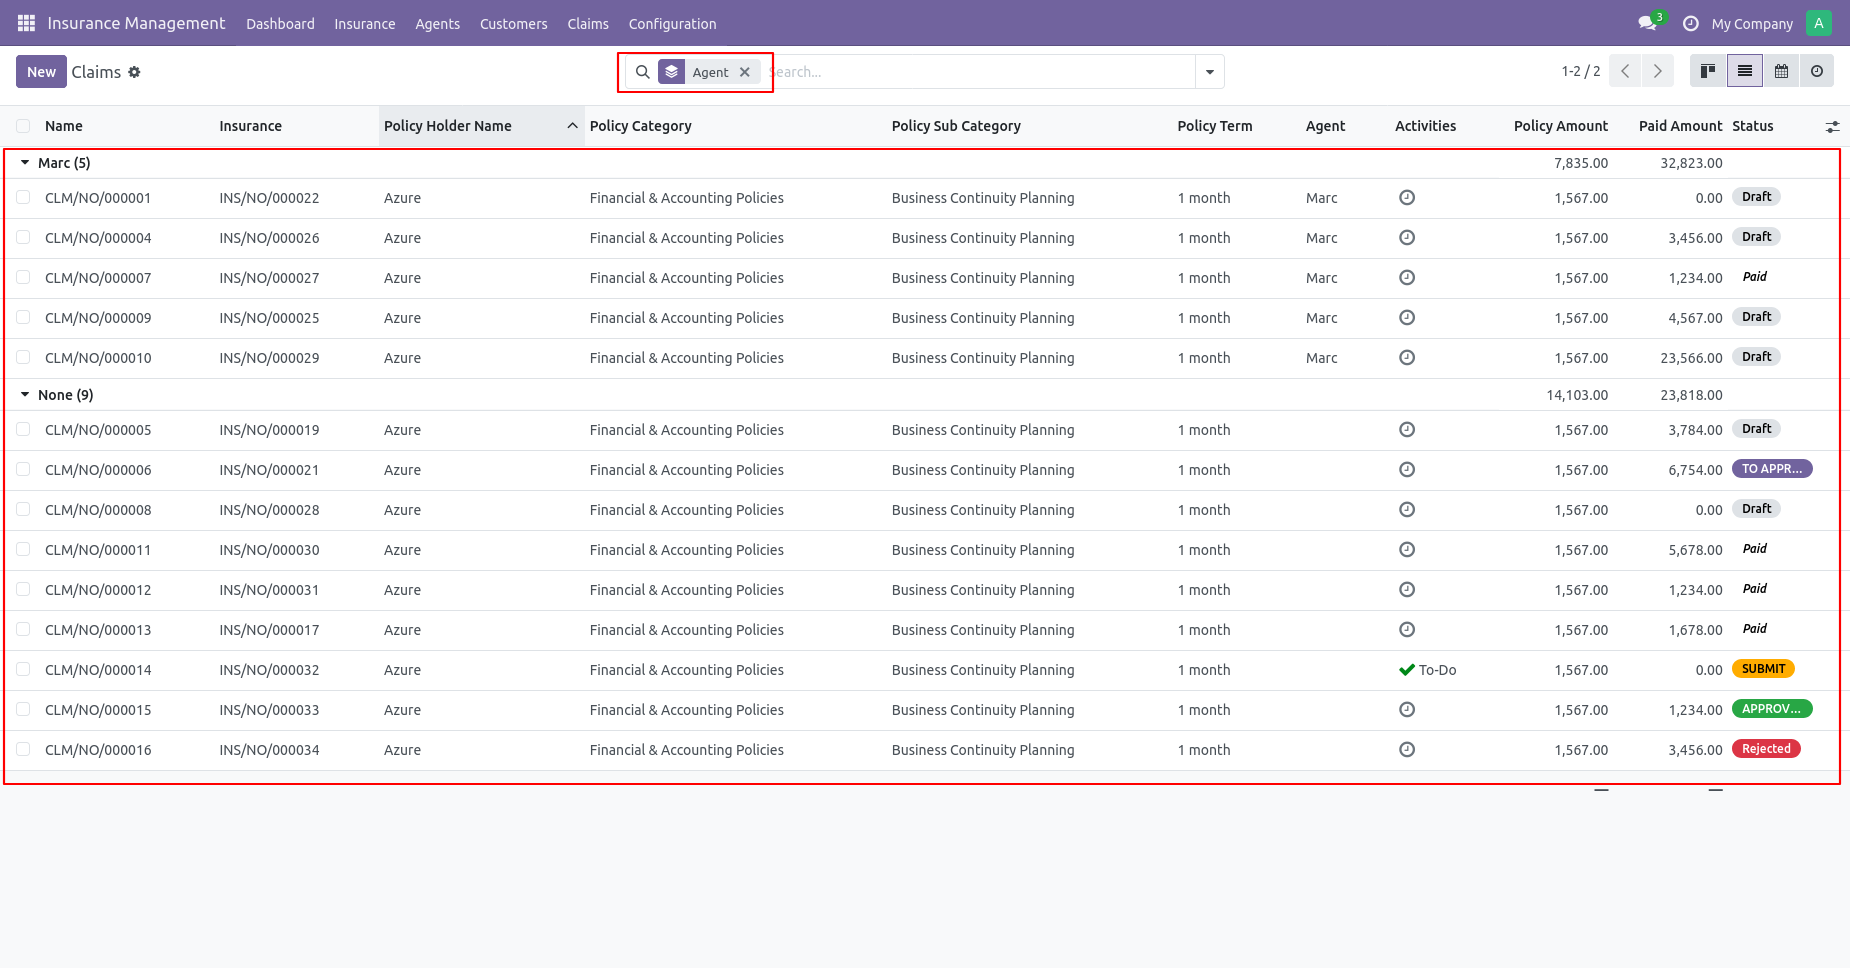
You can see the insurance group by Agent.
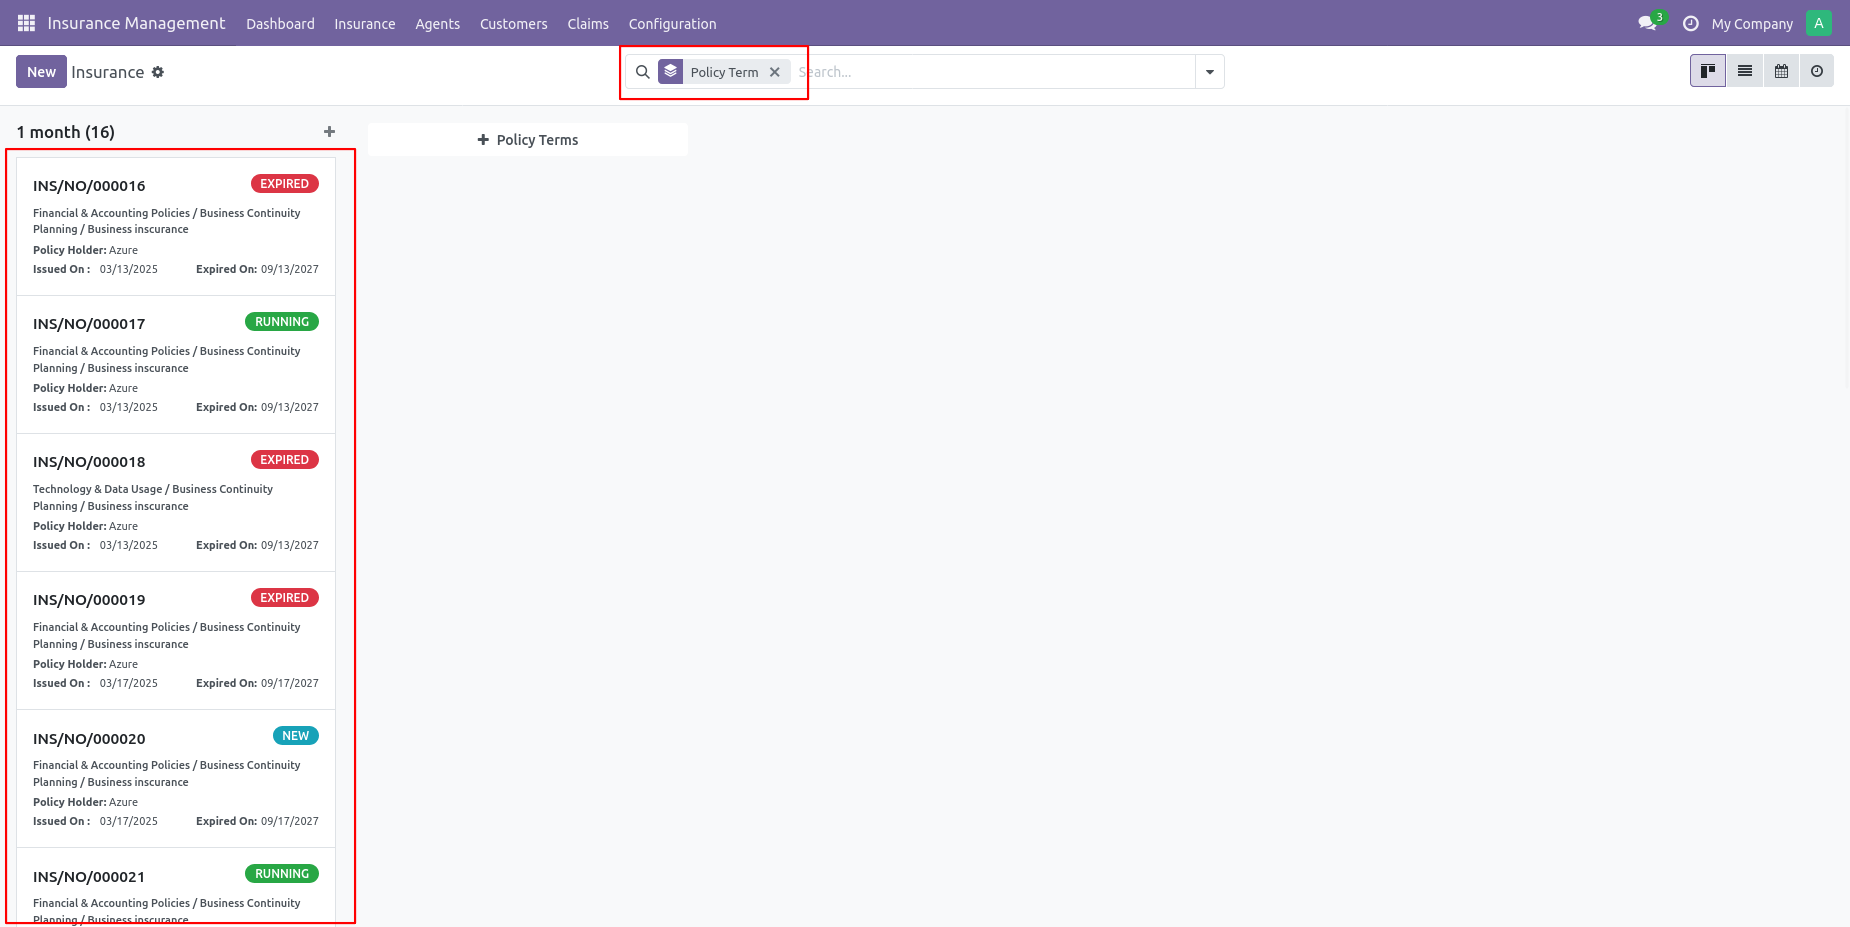
You can see the insurance group by the Policy term.
You can see the insurance group by Policy status.
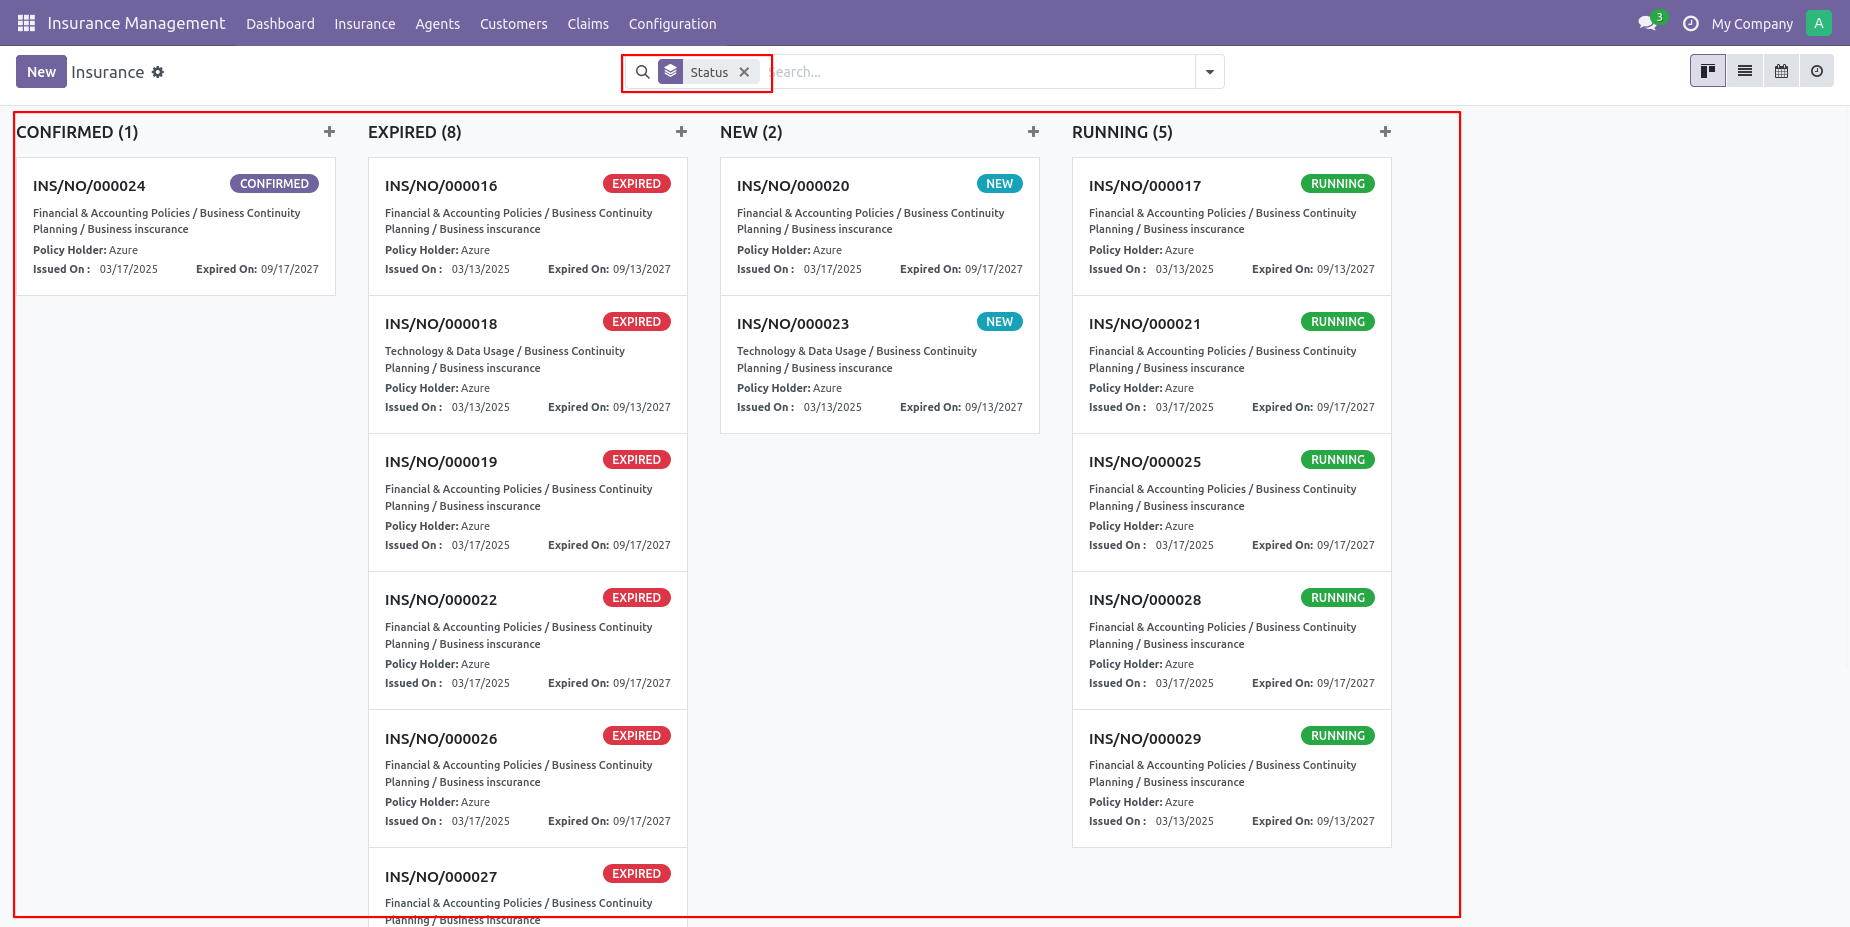
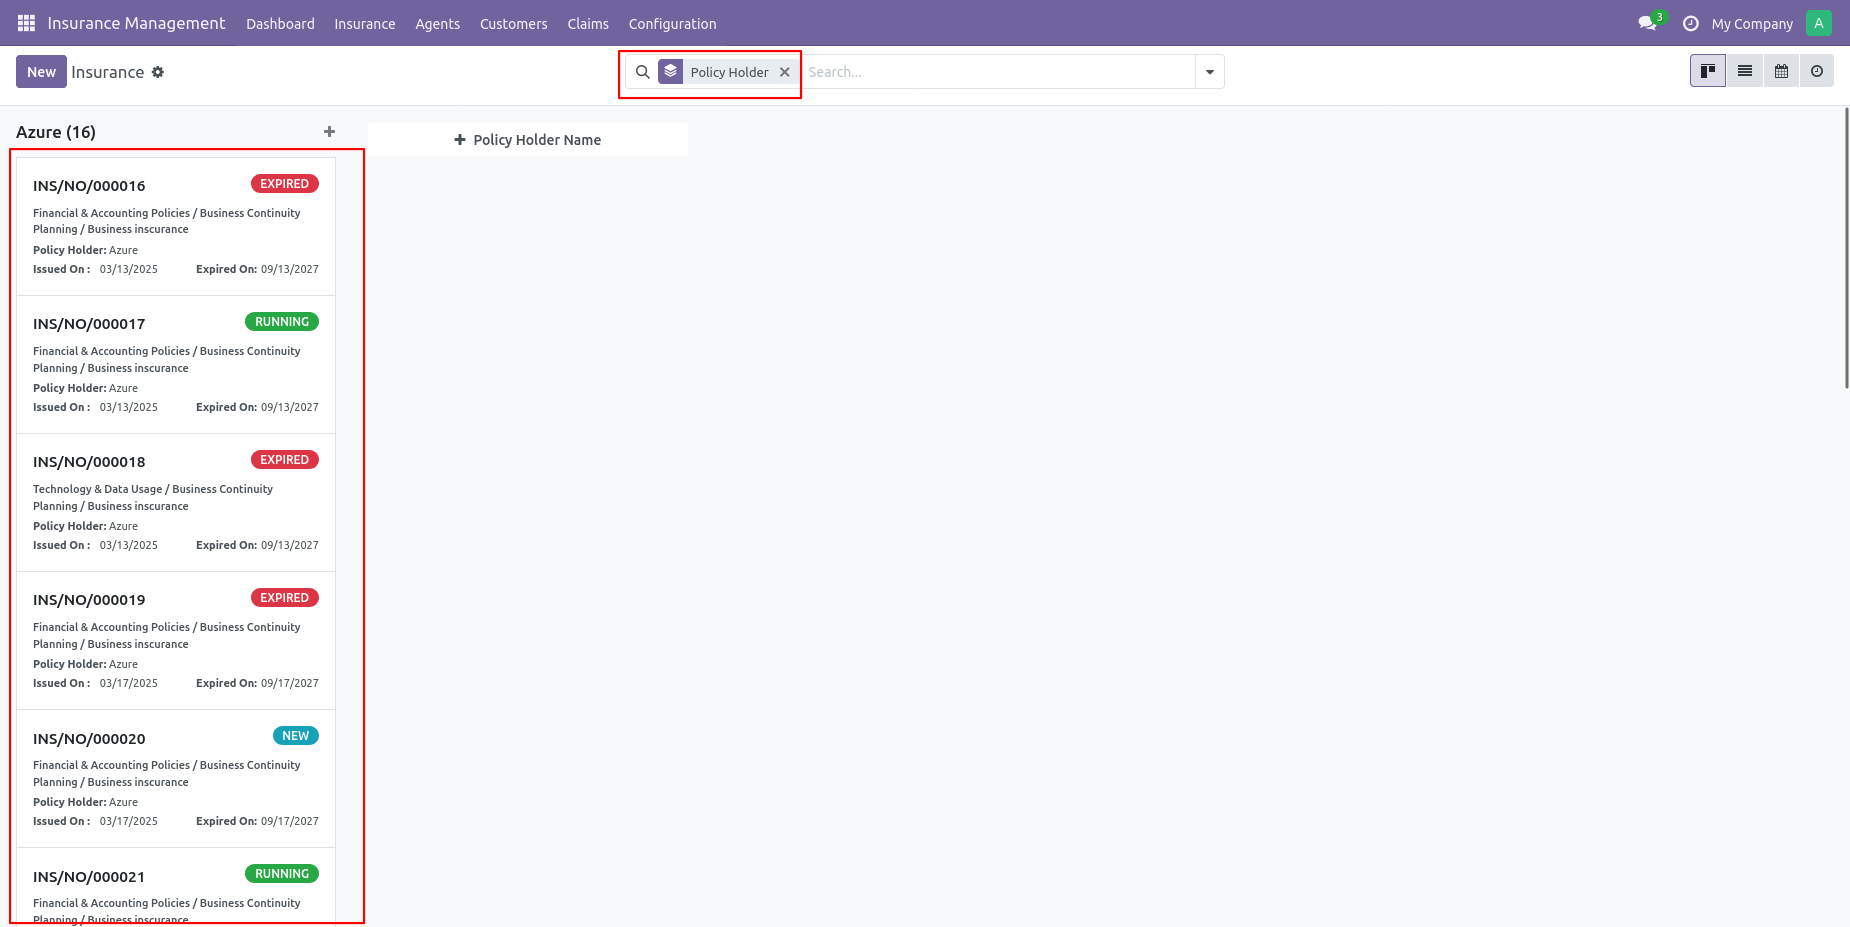
You can see the insurance group by Policy holder.
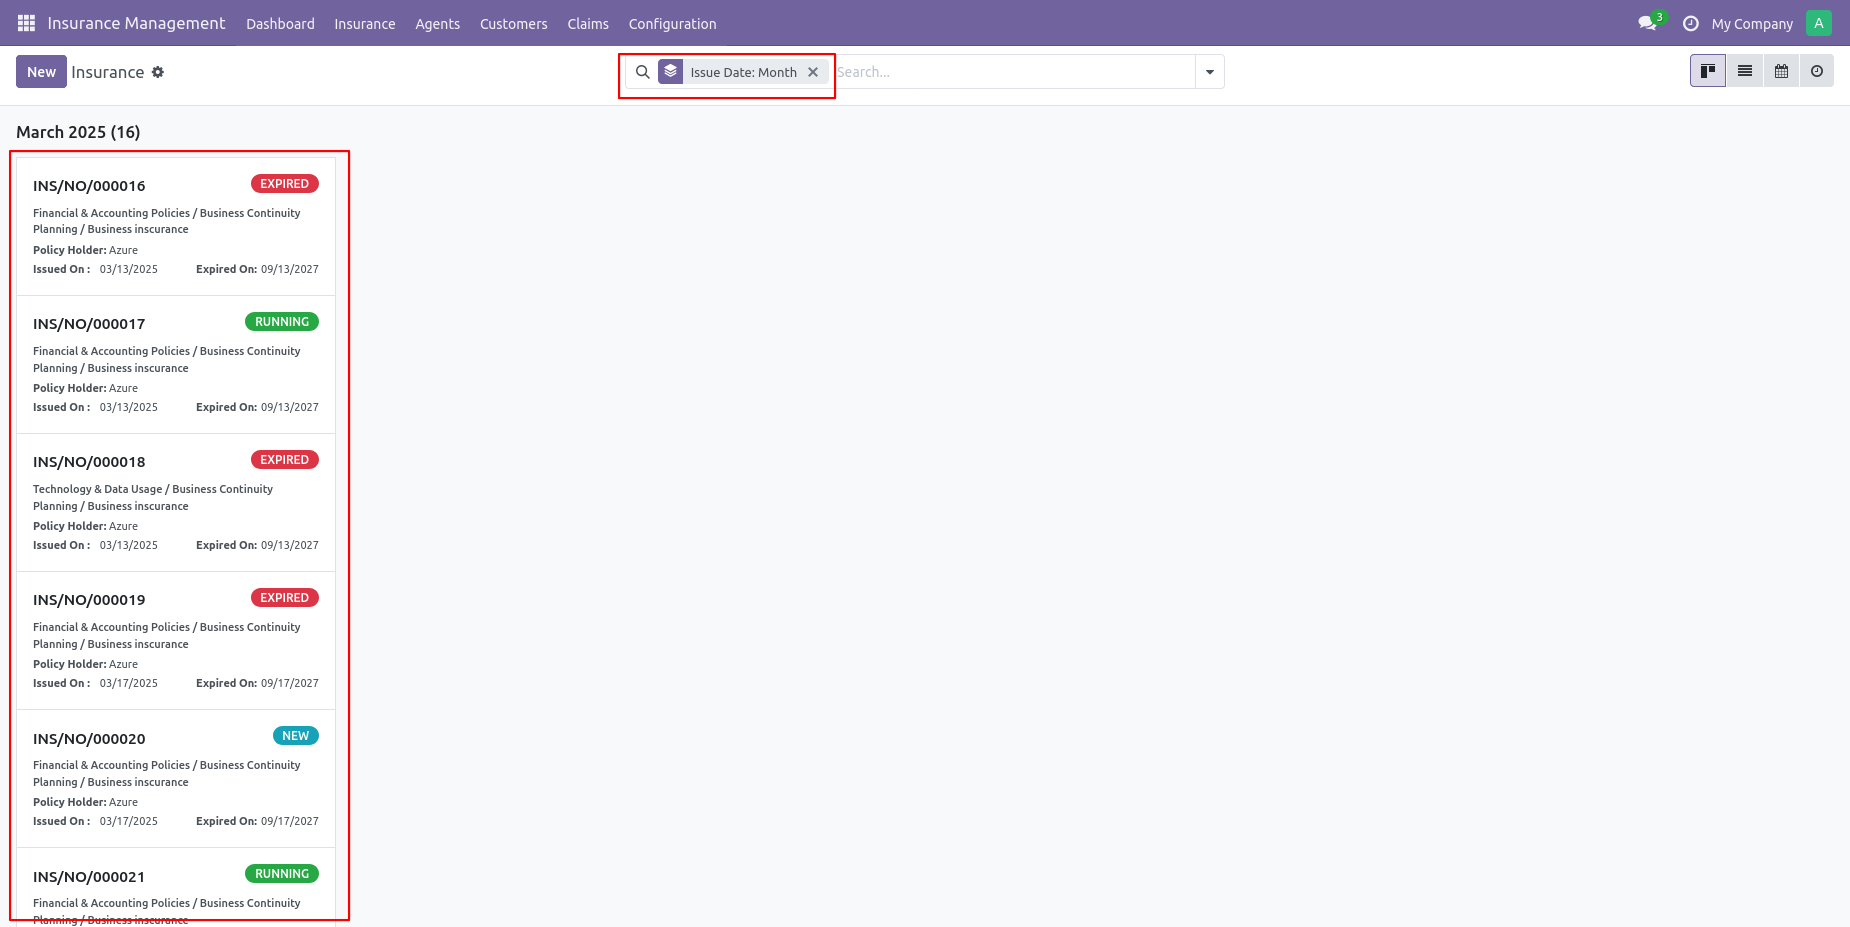
You can see the insurance group by issue date.
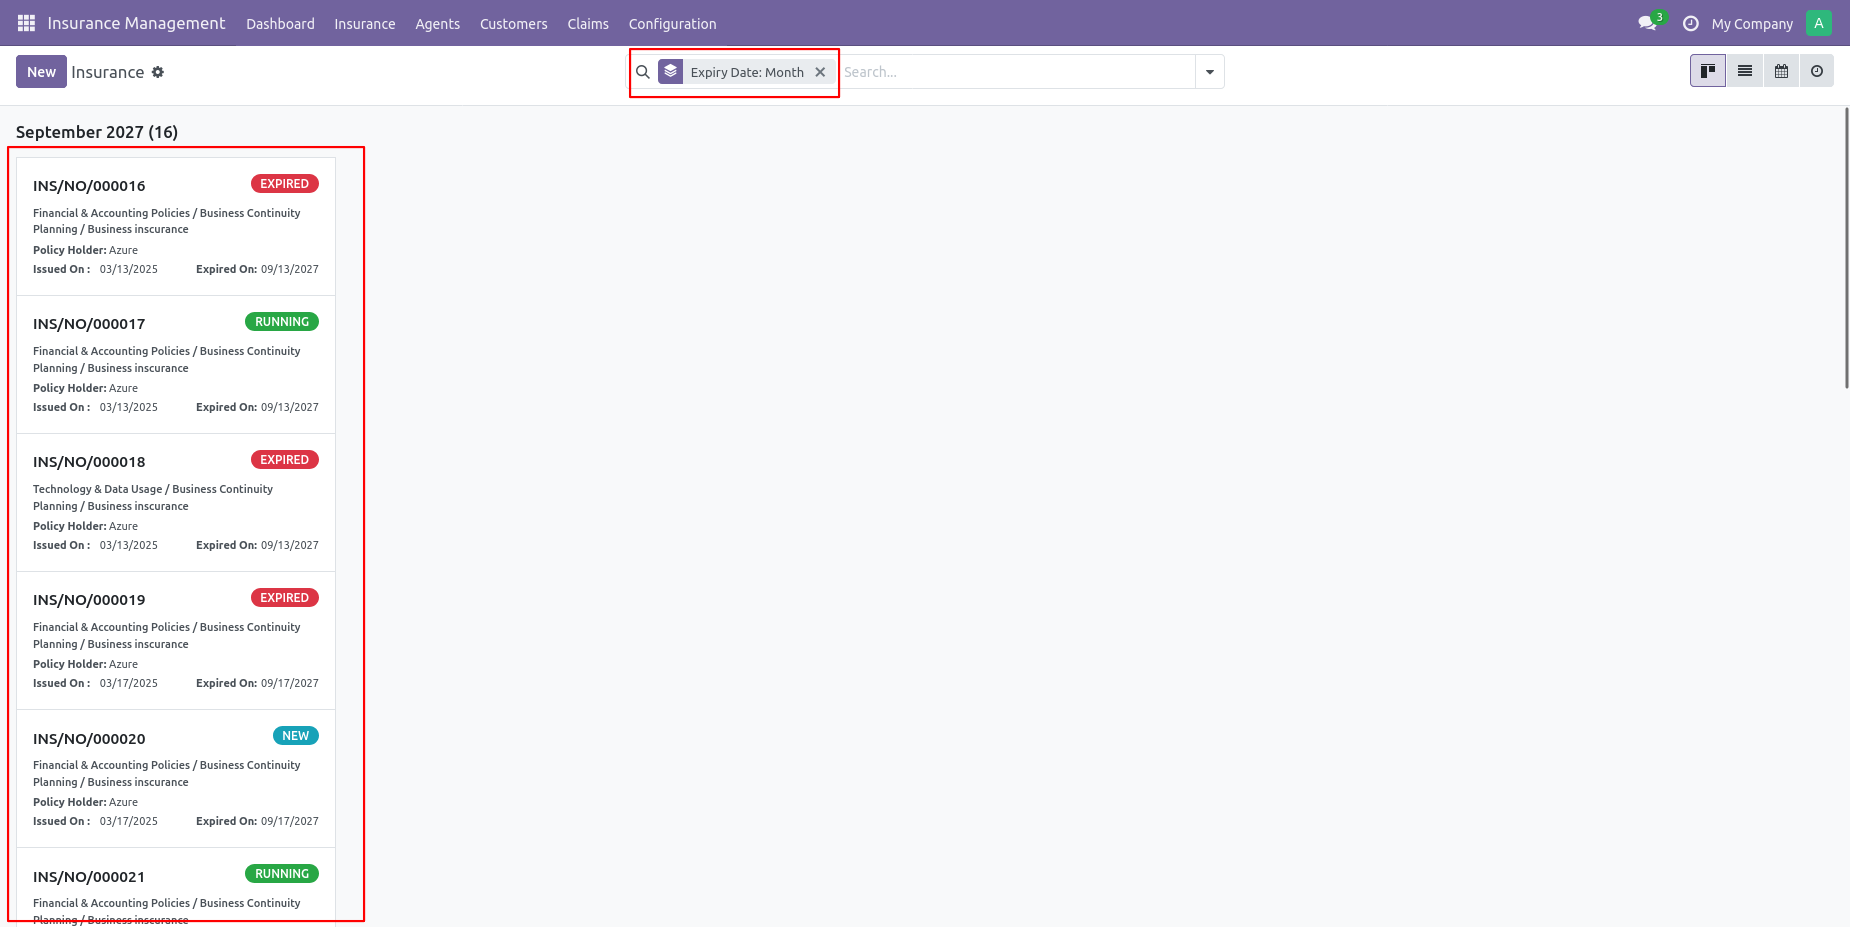
You can see the insurance group by expiry date.
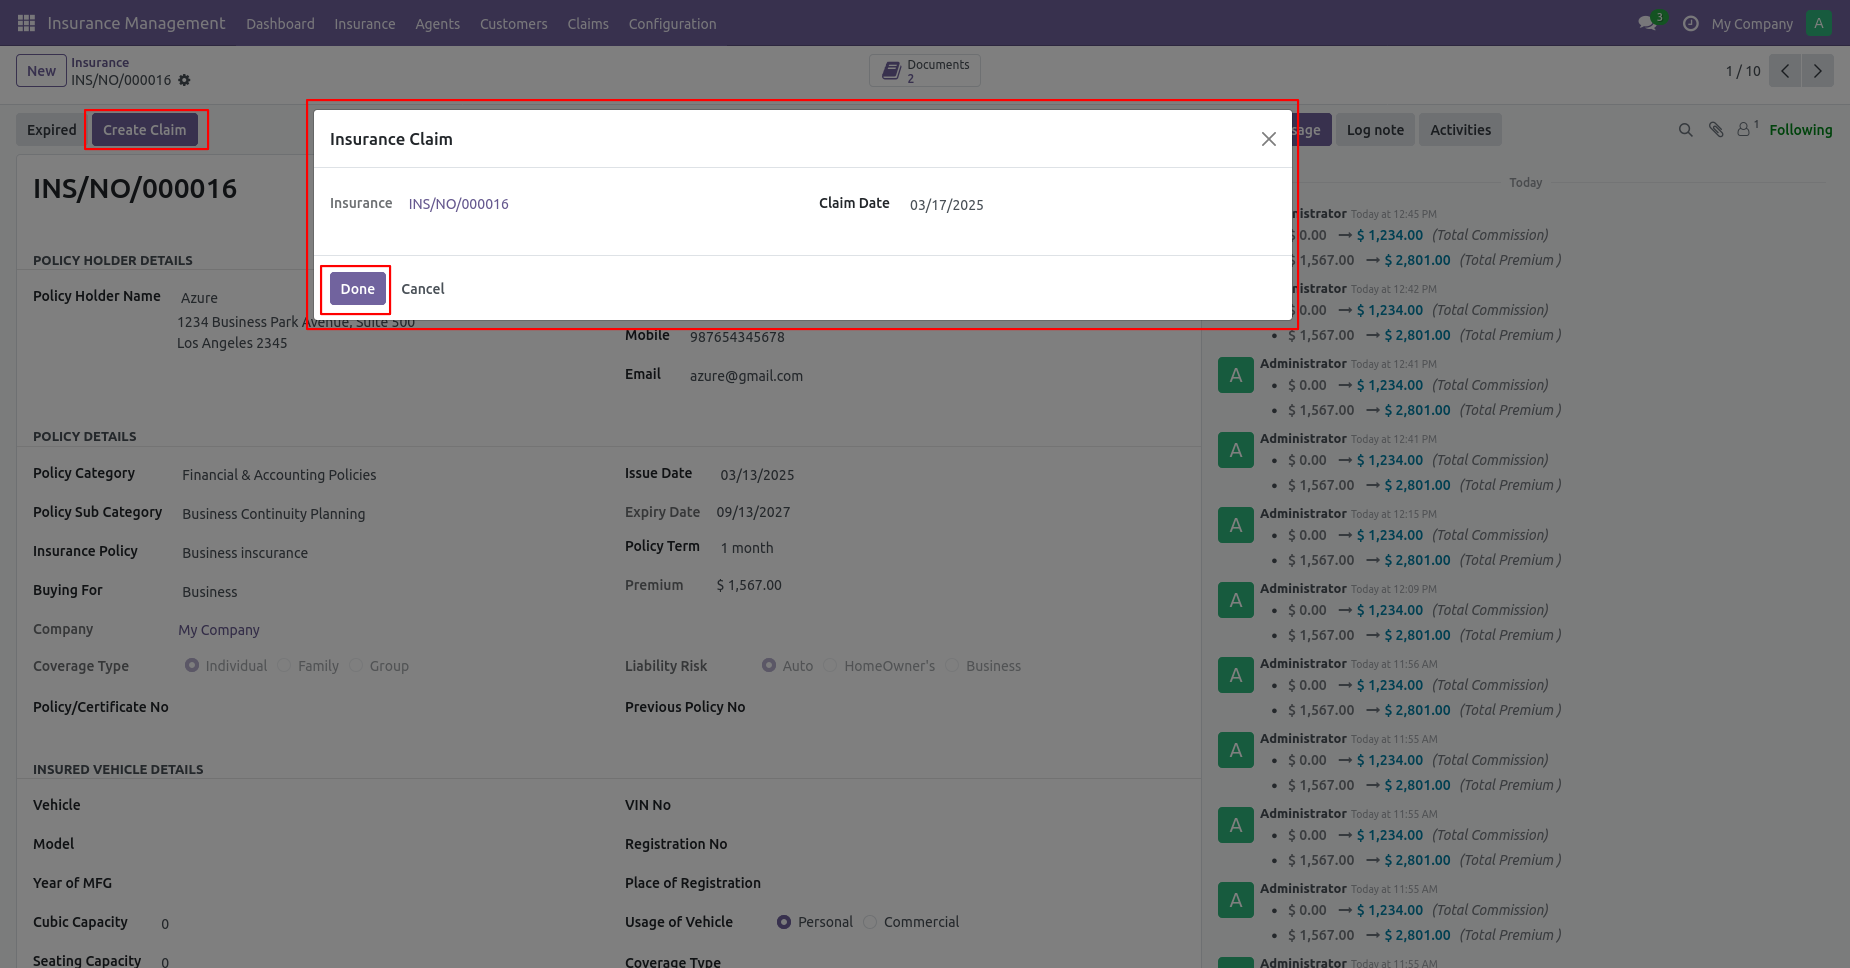
Create a claim by clicking on the Create Claim button from insurance.
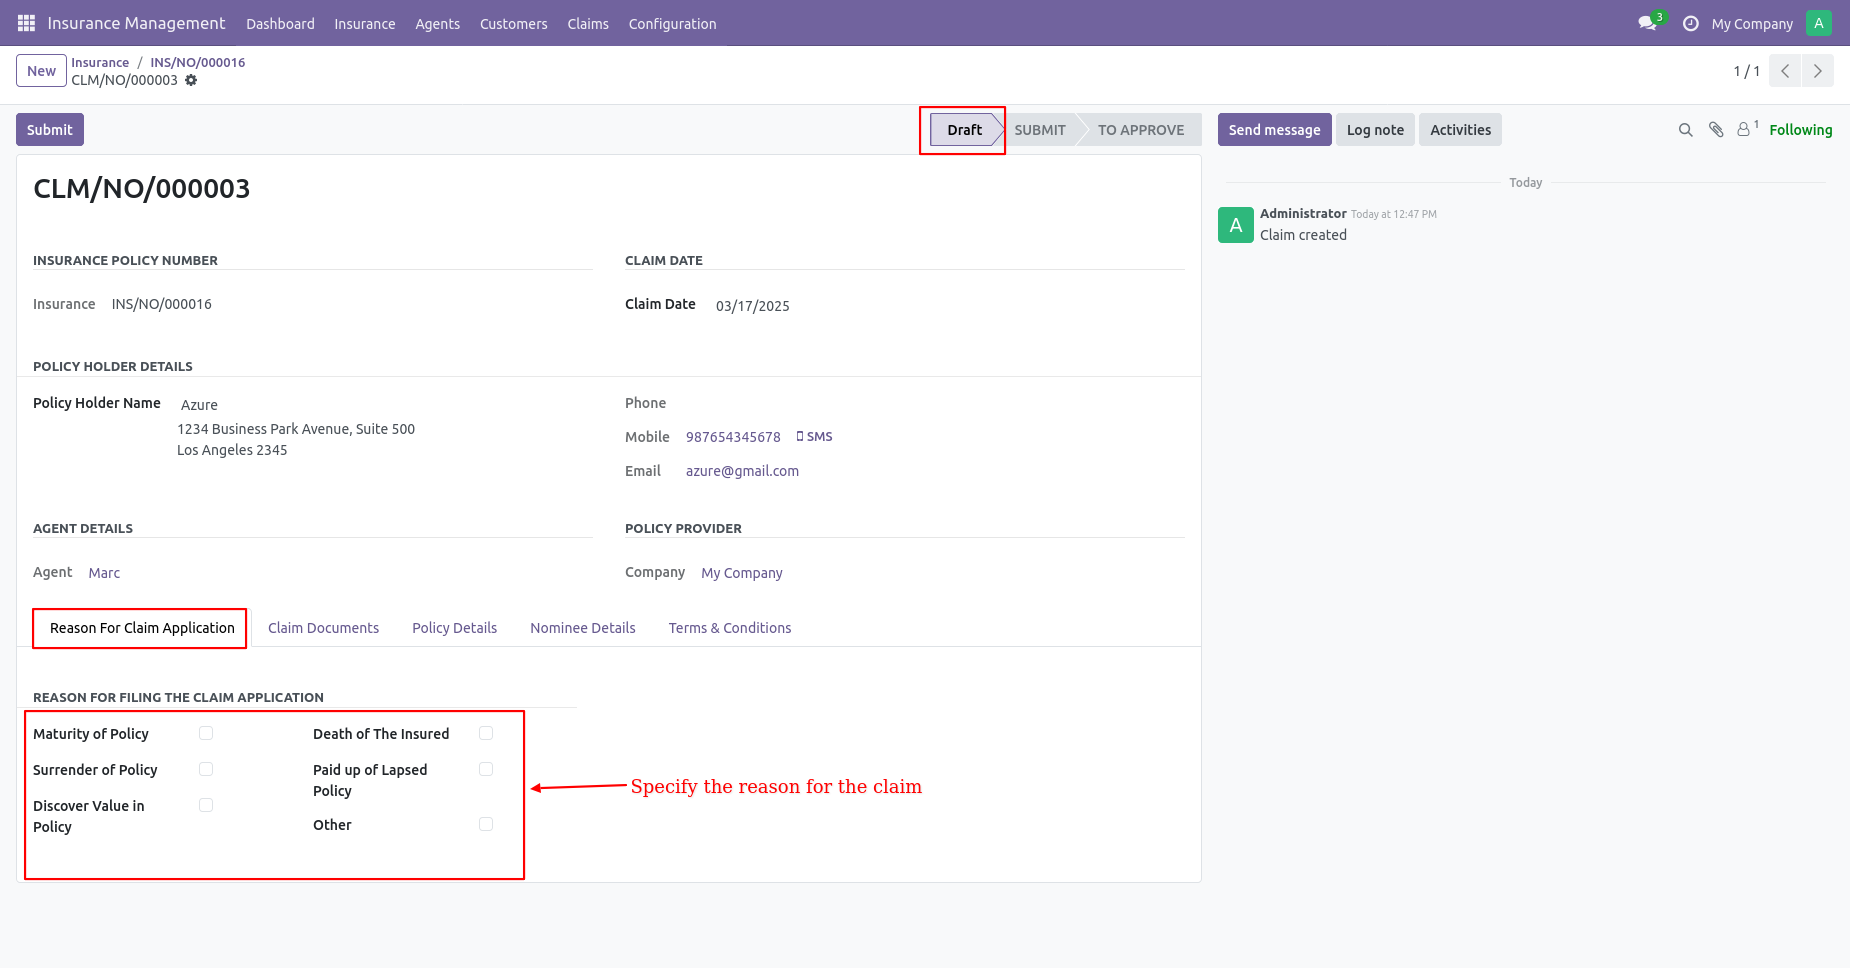
Claim in draft stage.
Enter a reason for the claim application.
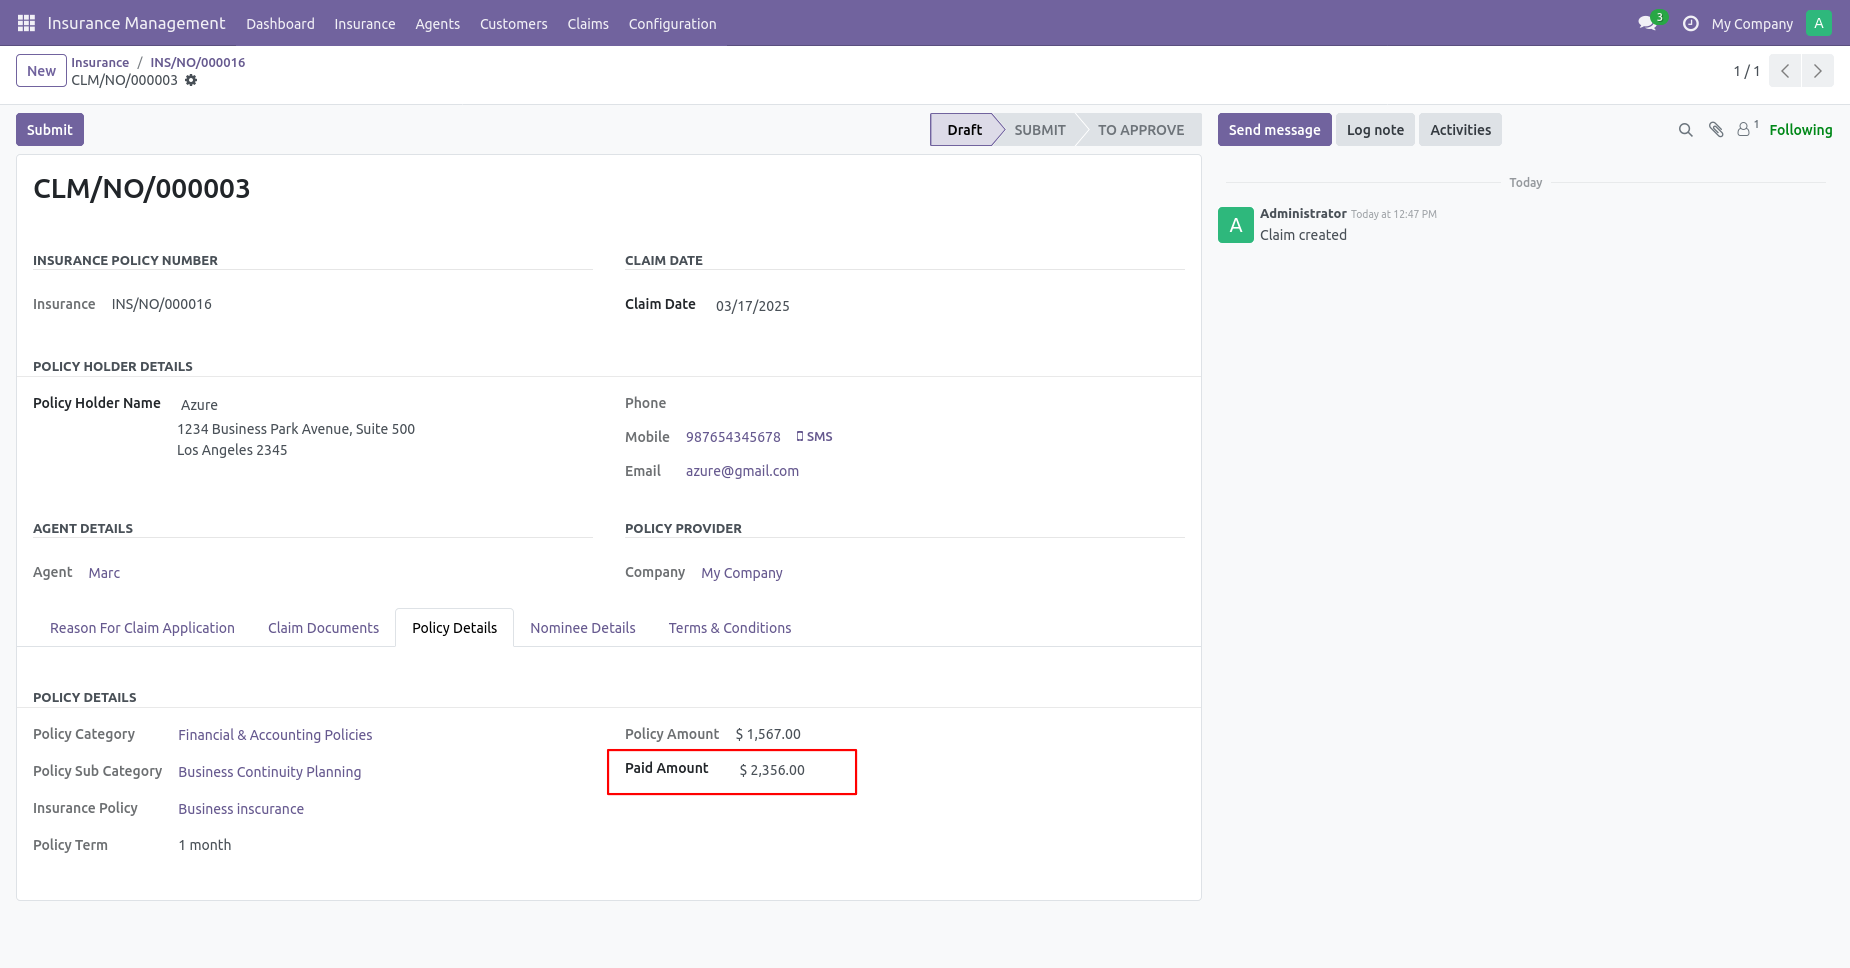
Enter policy details and add the claim amount in the paid amount field.
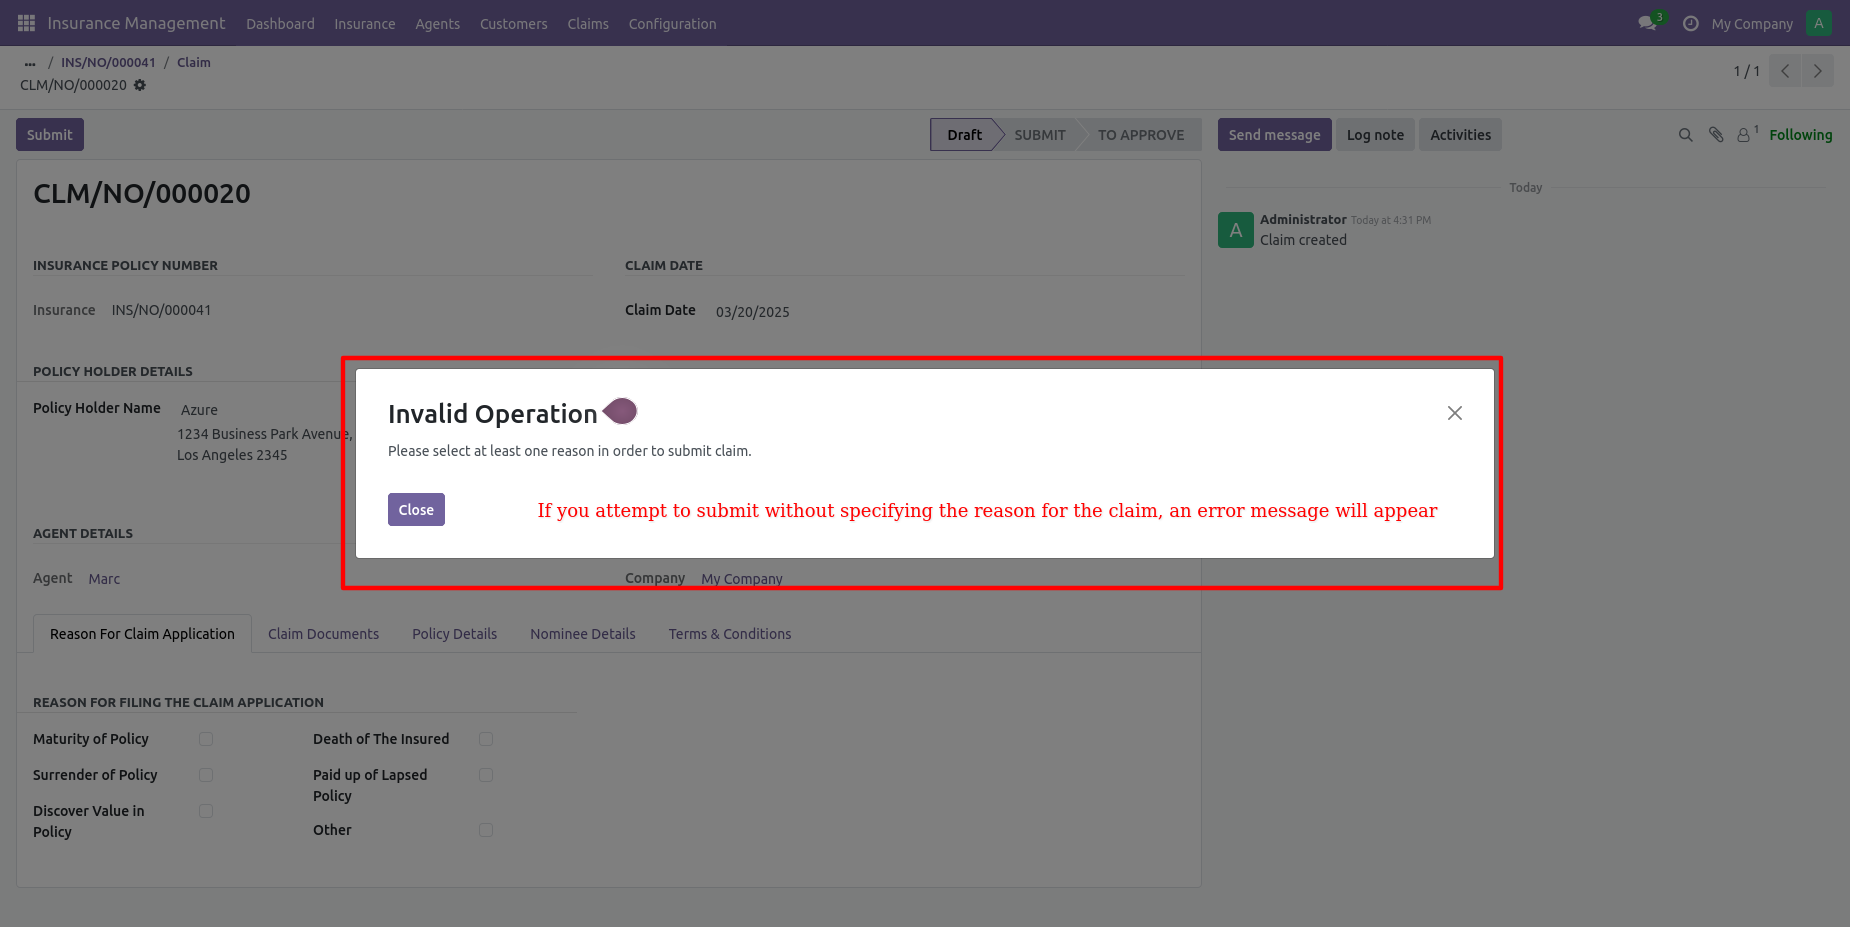
If you submit a claim without selecting any reason it will give a warning message to select reason.
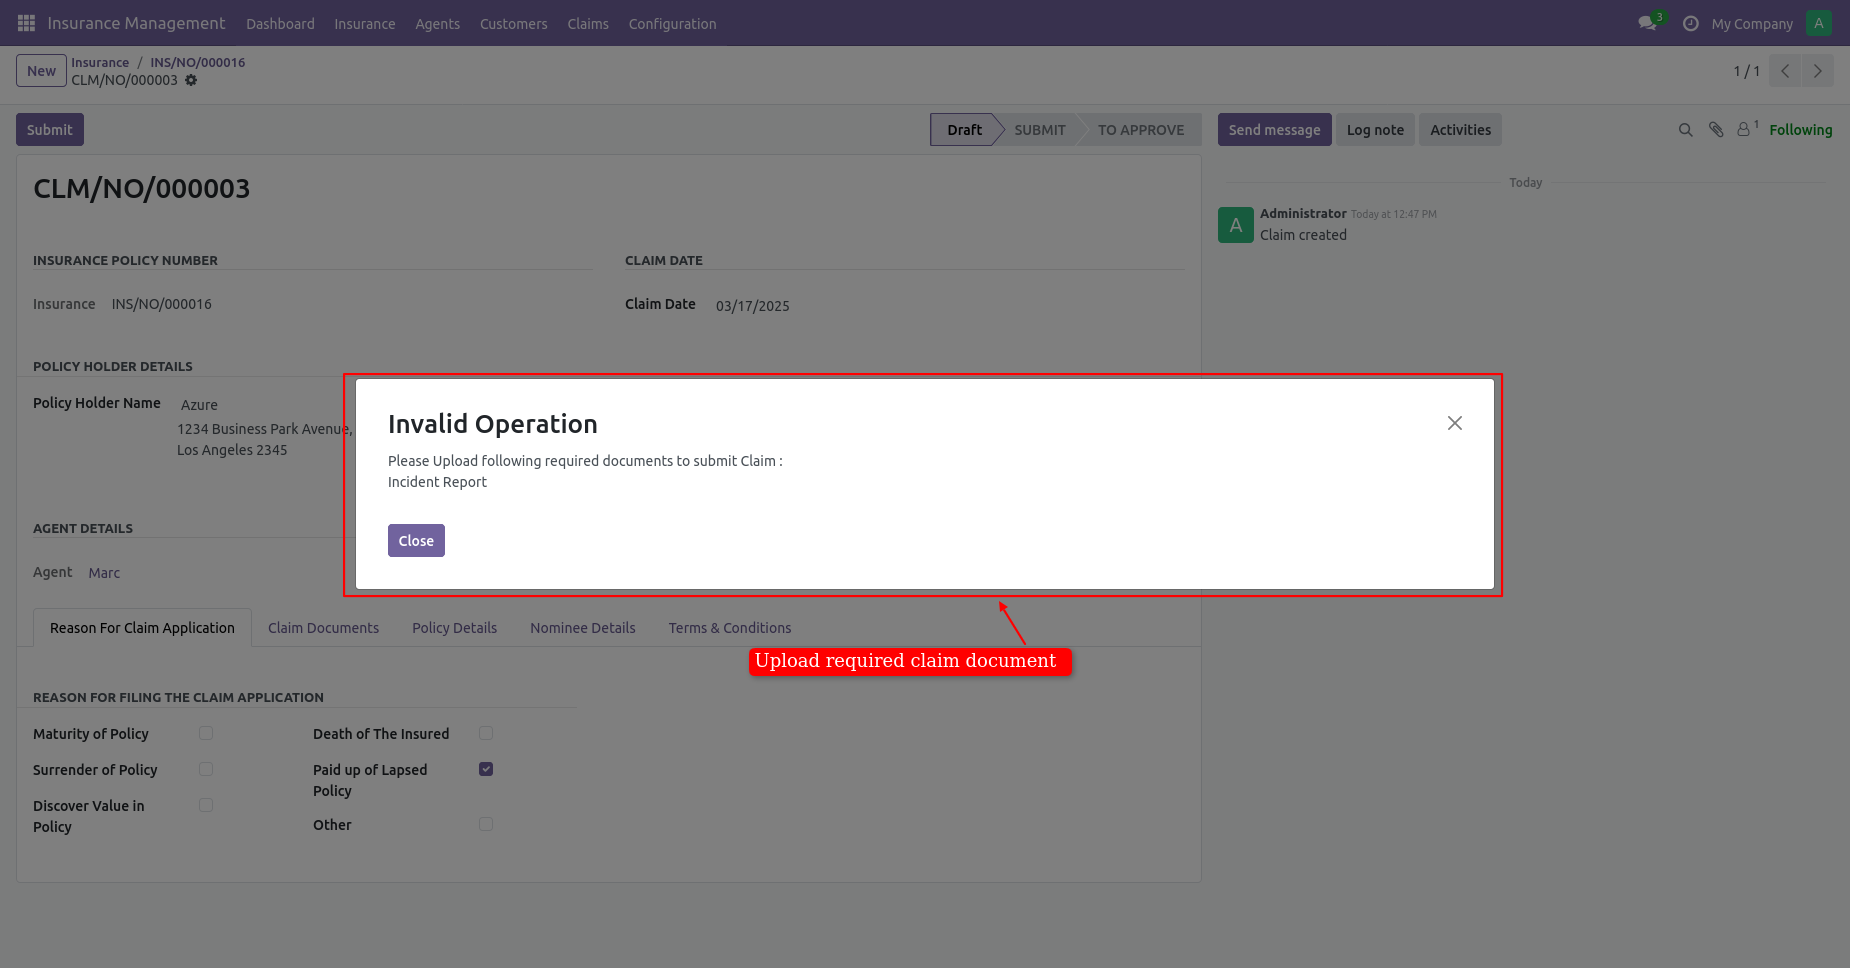
If you submit a claim without uploading a document it will give a warning message to upload a document.
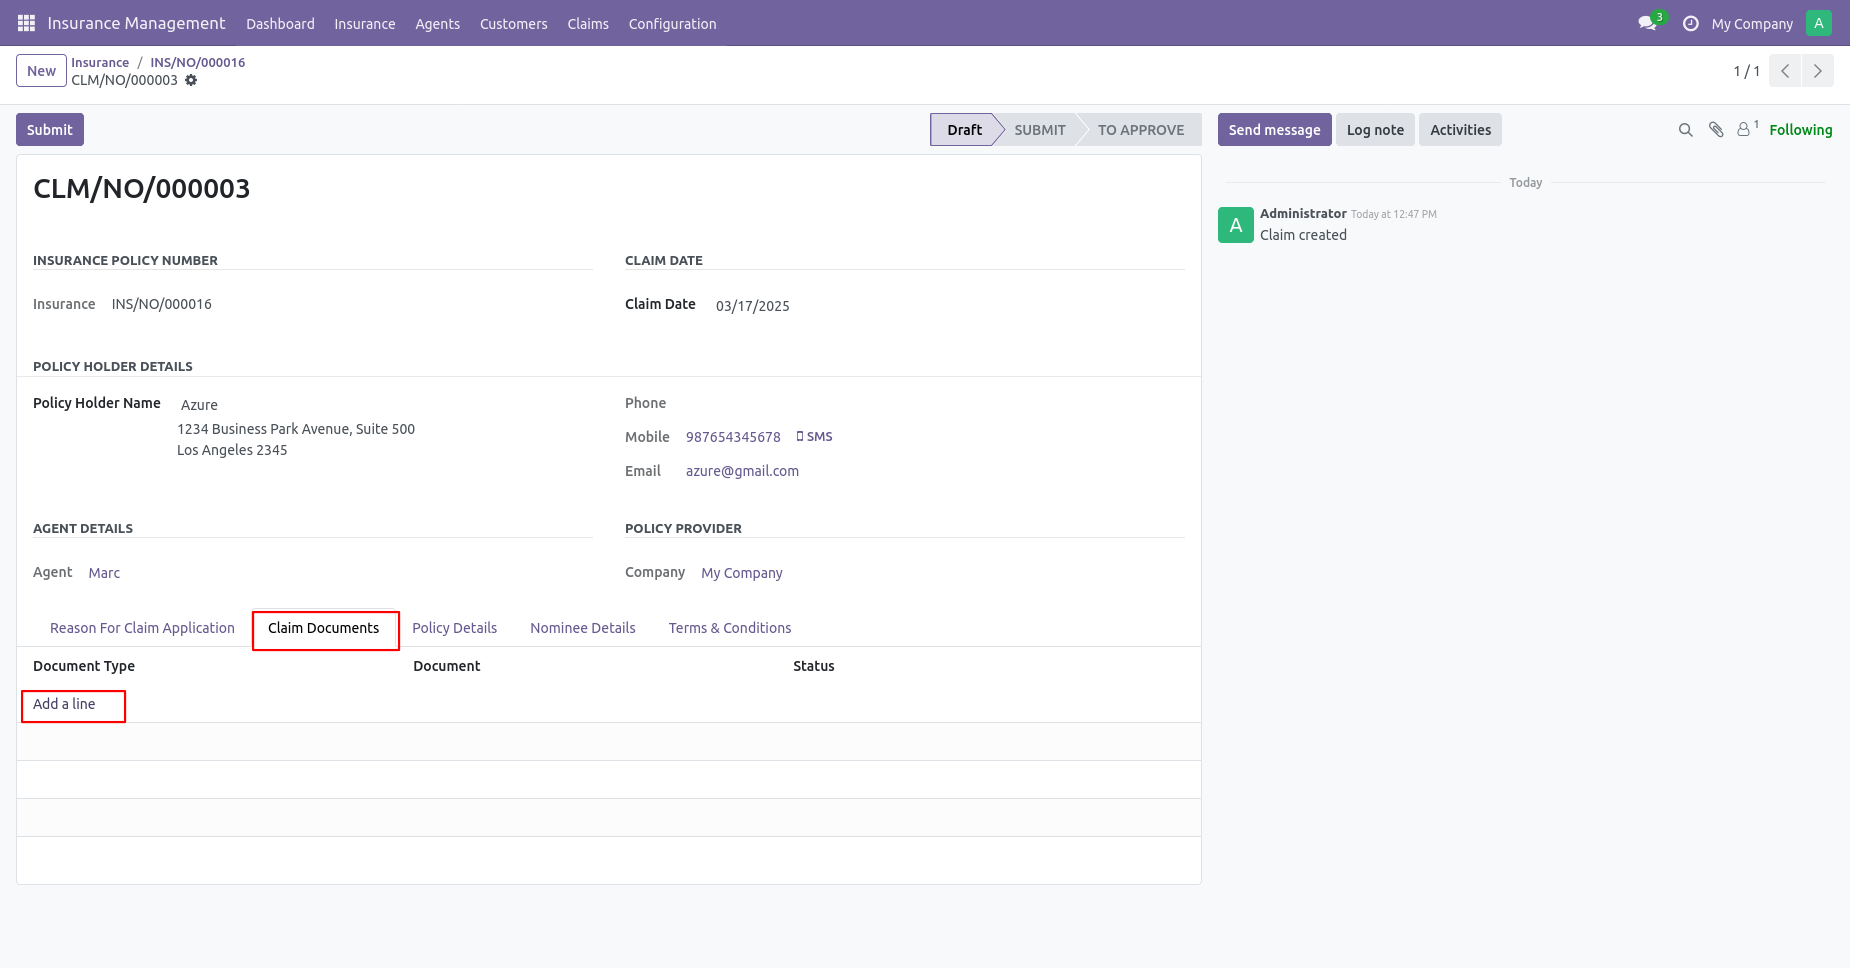
Click on Add a line from claim documents tab and upload claim documents.
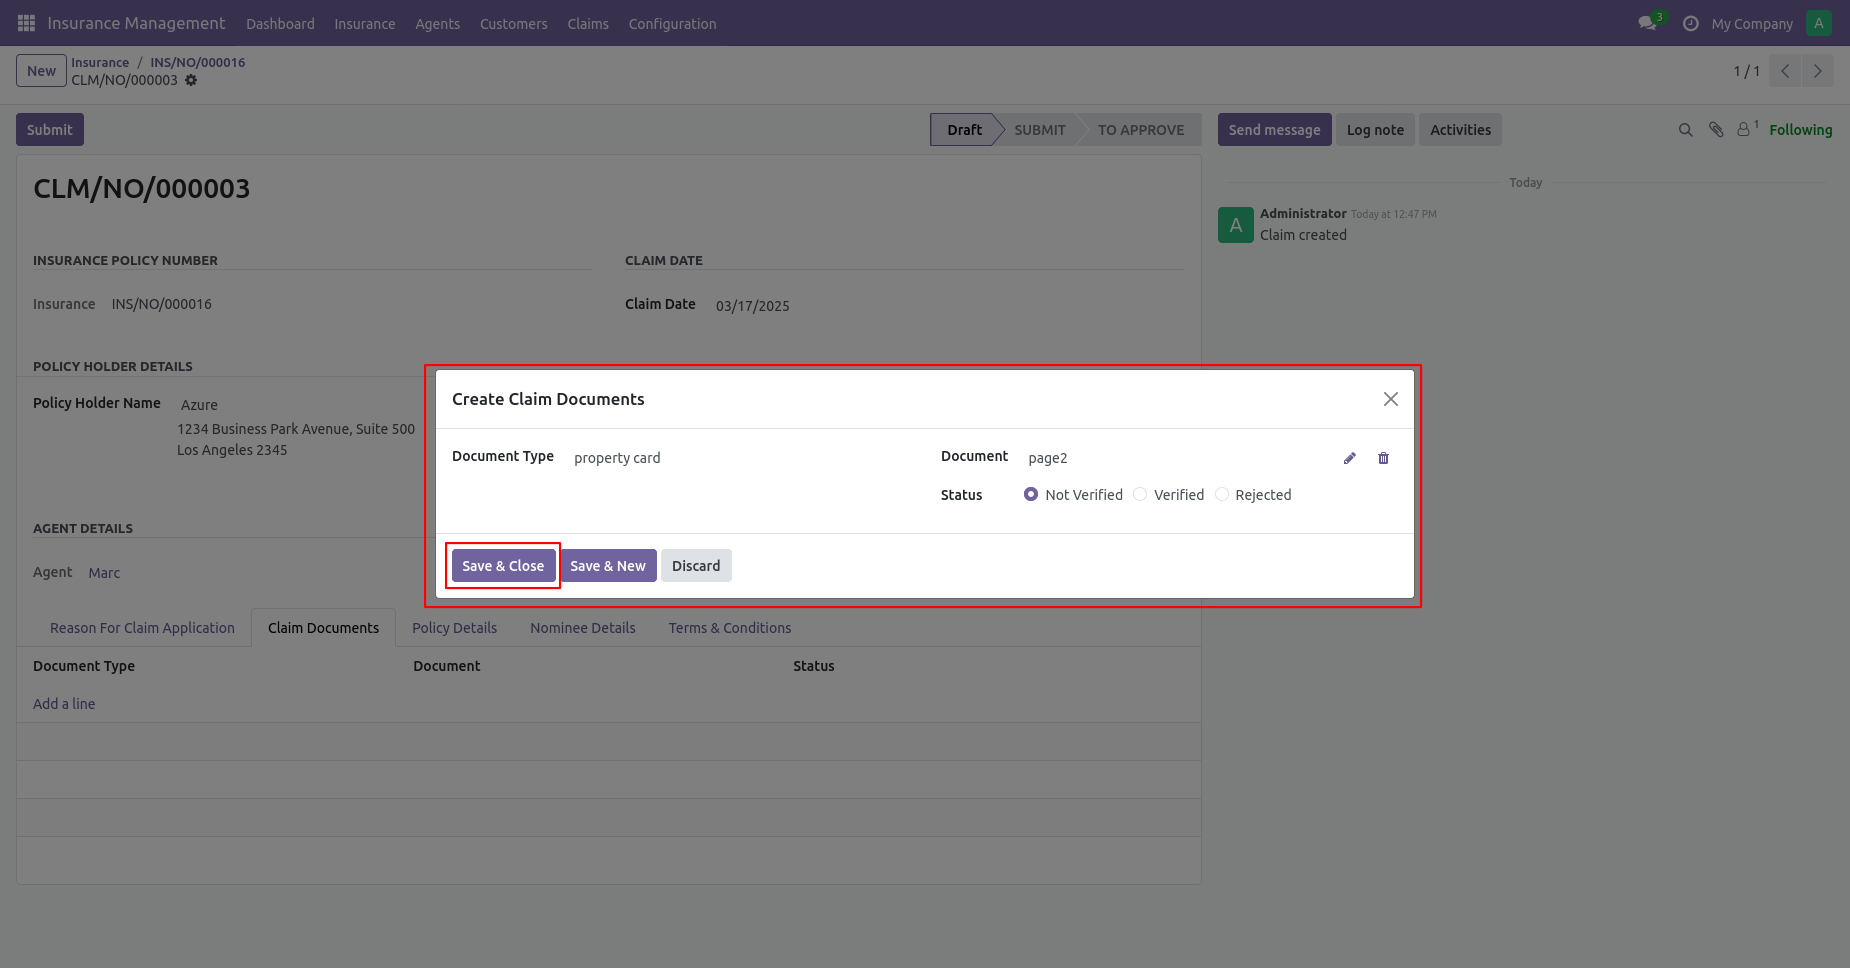
After that this wizard will appears. Add details and click on the ' Save & Close' button.
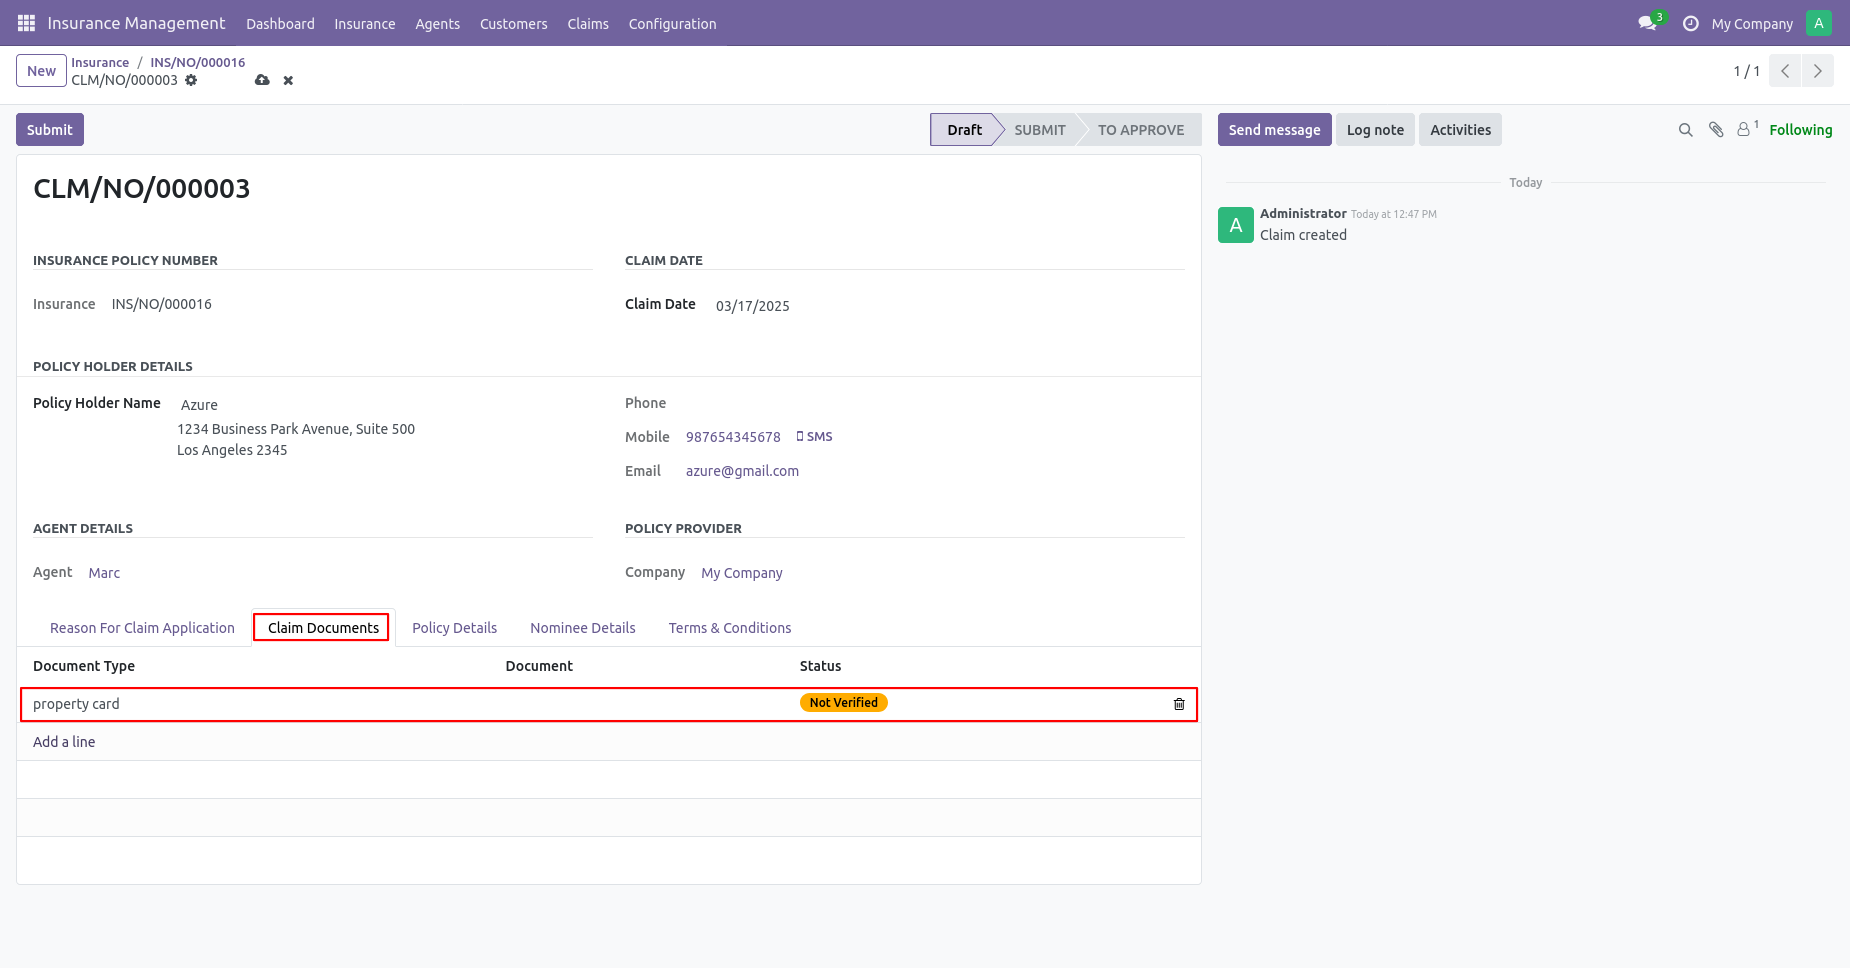
You can see a list of claim documents in the Claim Documents tab.
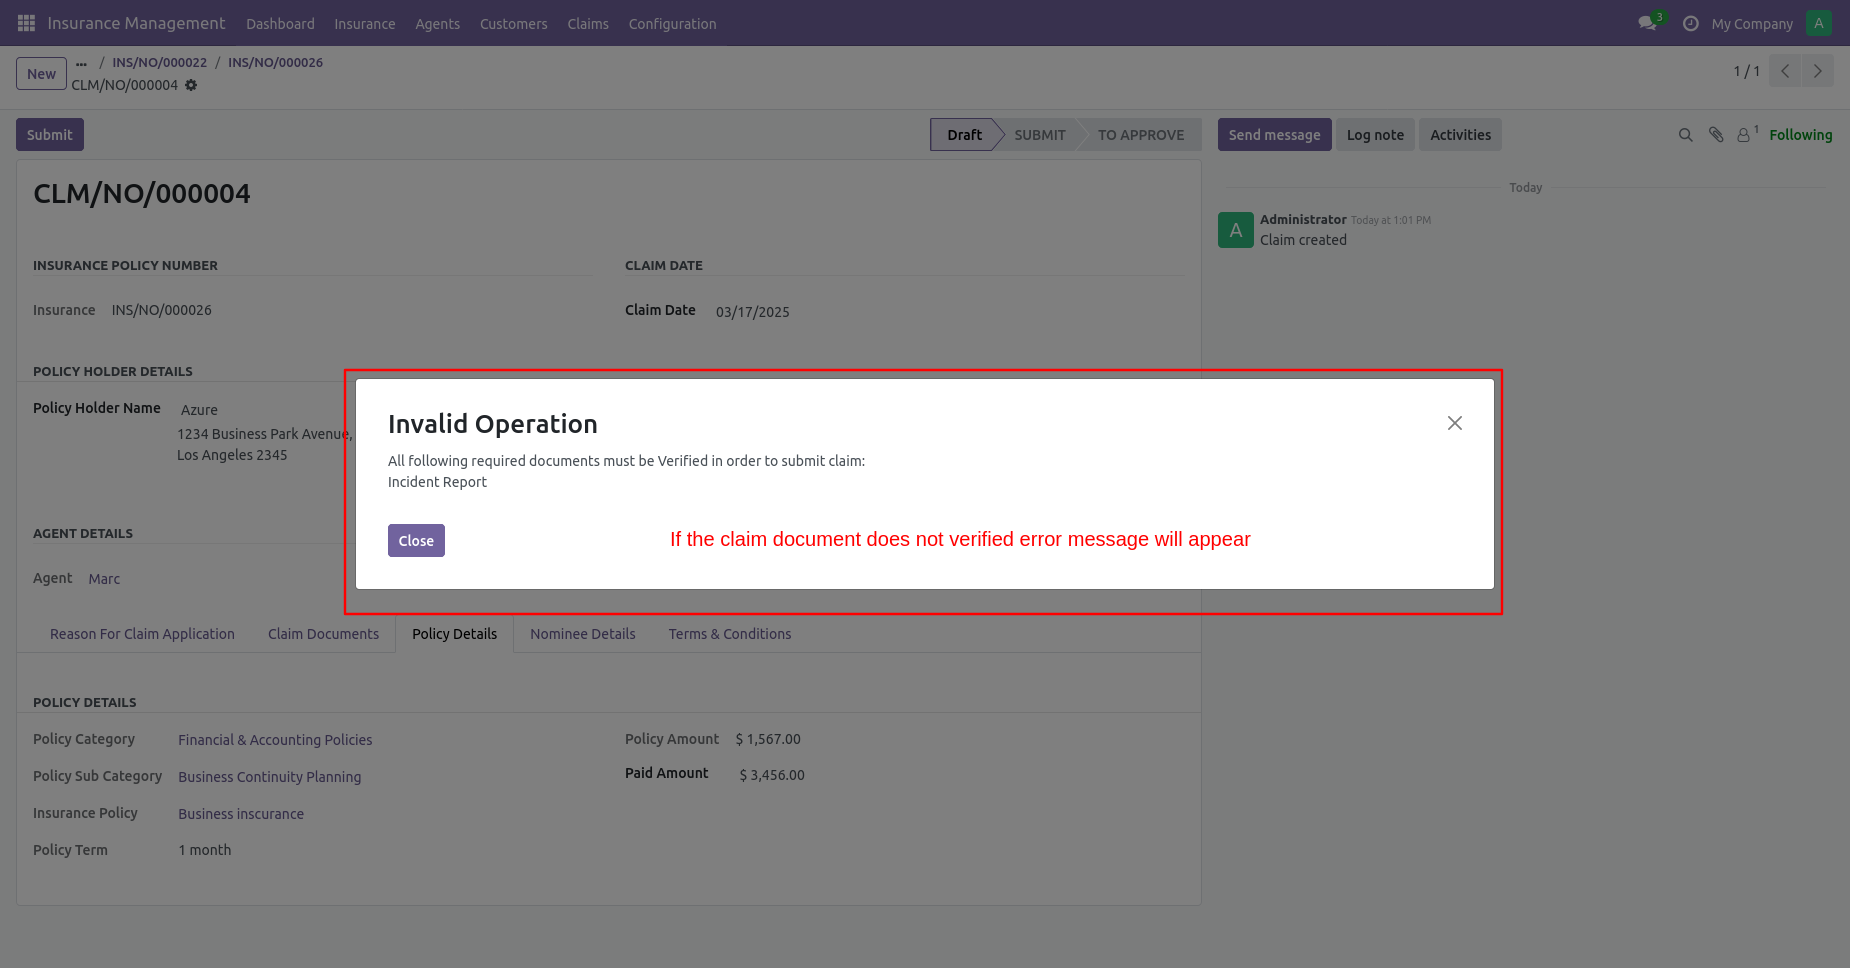
If you submit a claim without verifying the document it will give an error message to verify the documents.
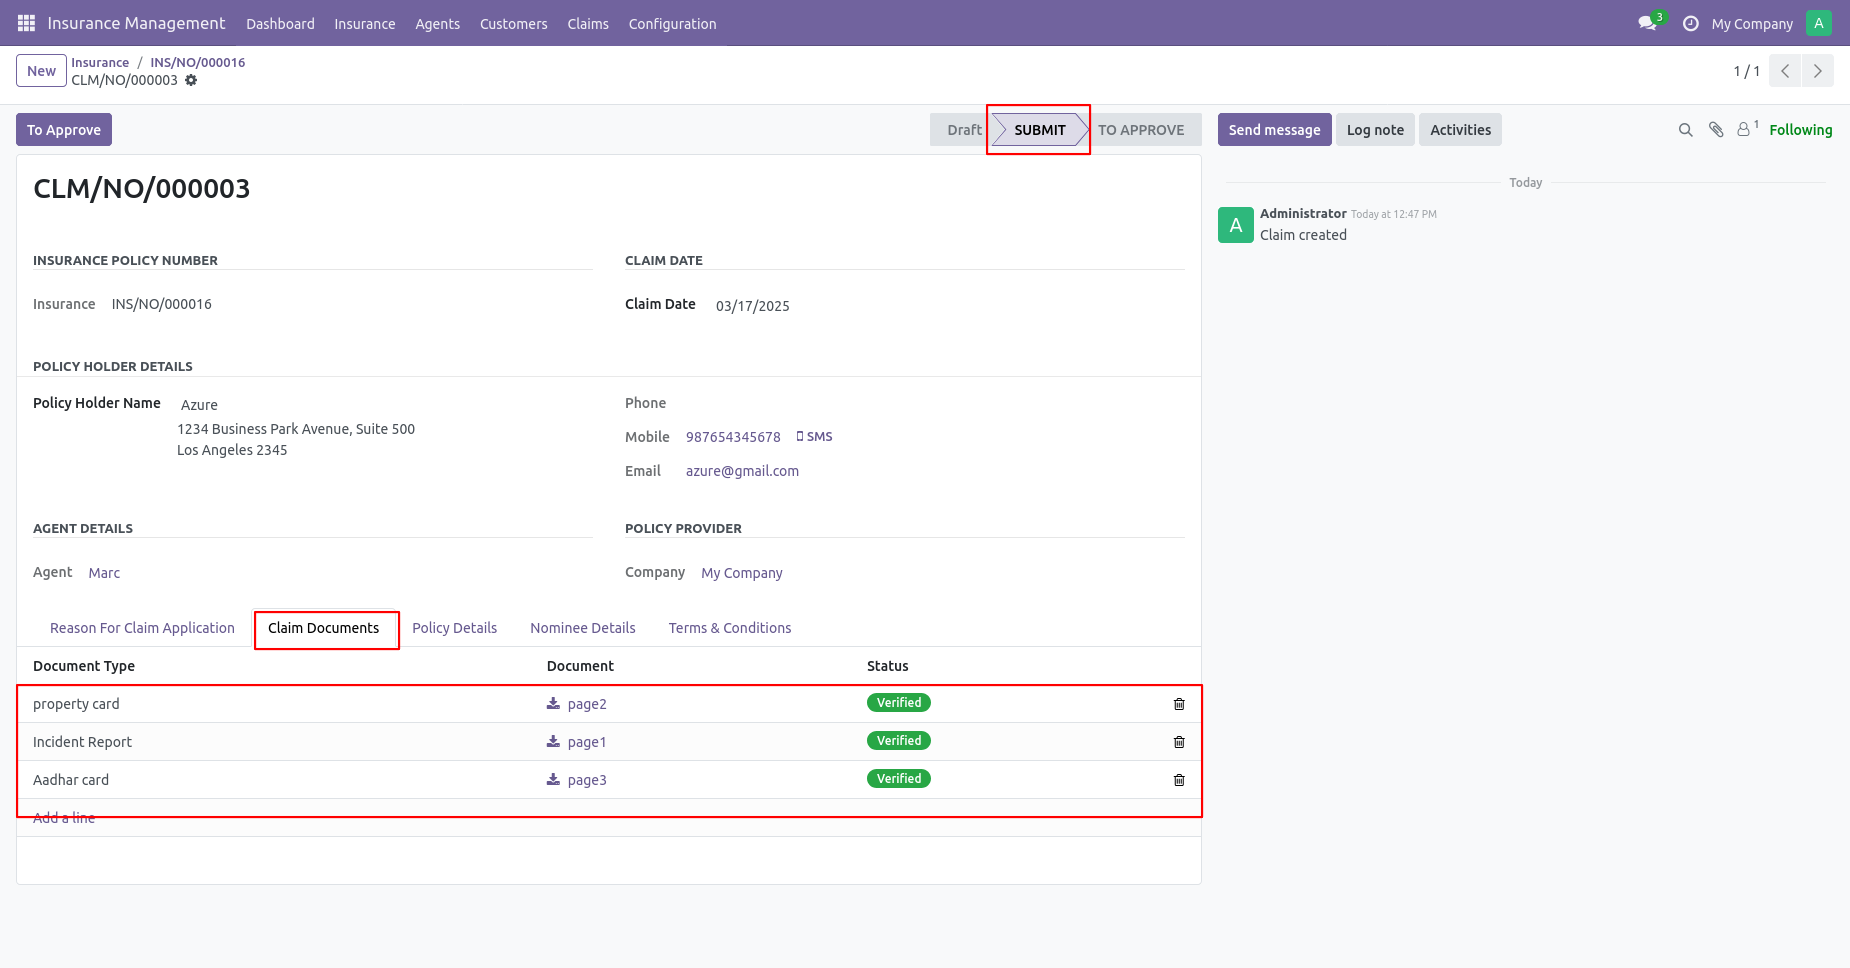
You can see a list of verified claim documents in the Claim Documents tab.
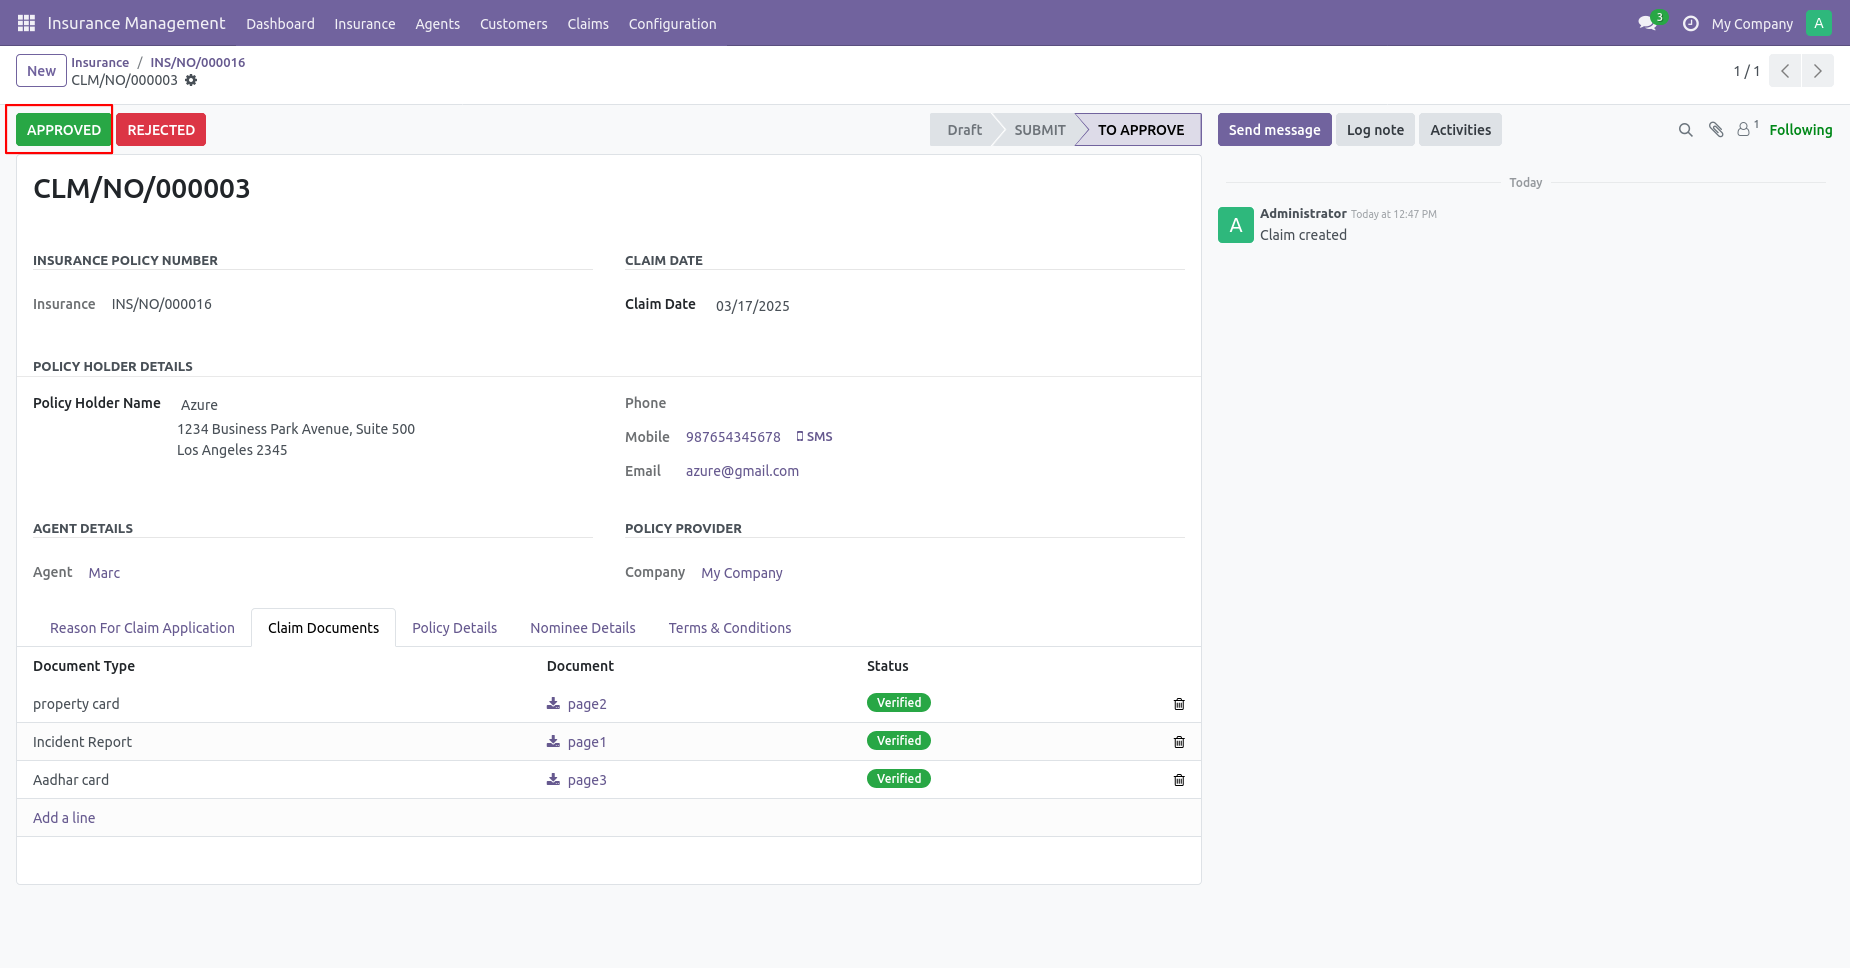
To approve a claim, click on the 'Approve' button.
The claim is approved now.
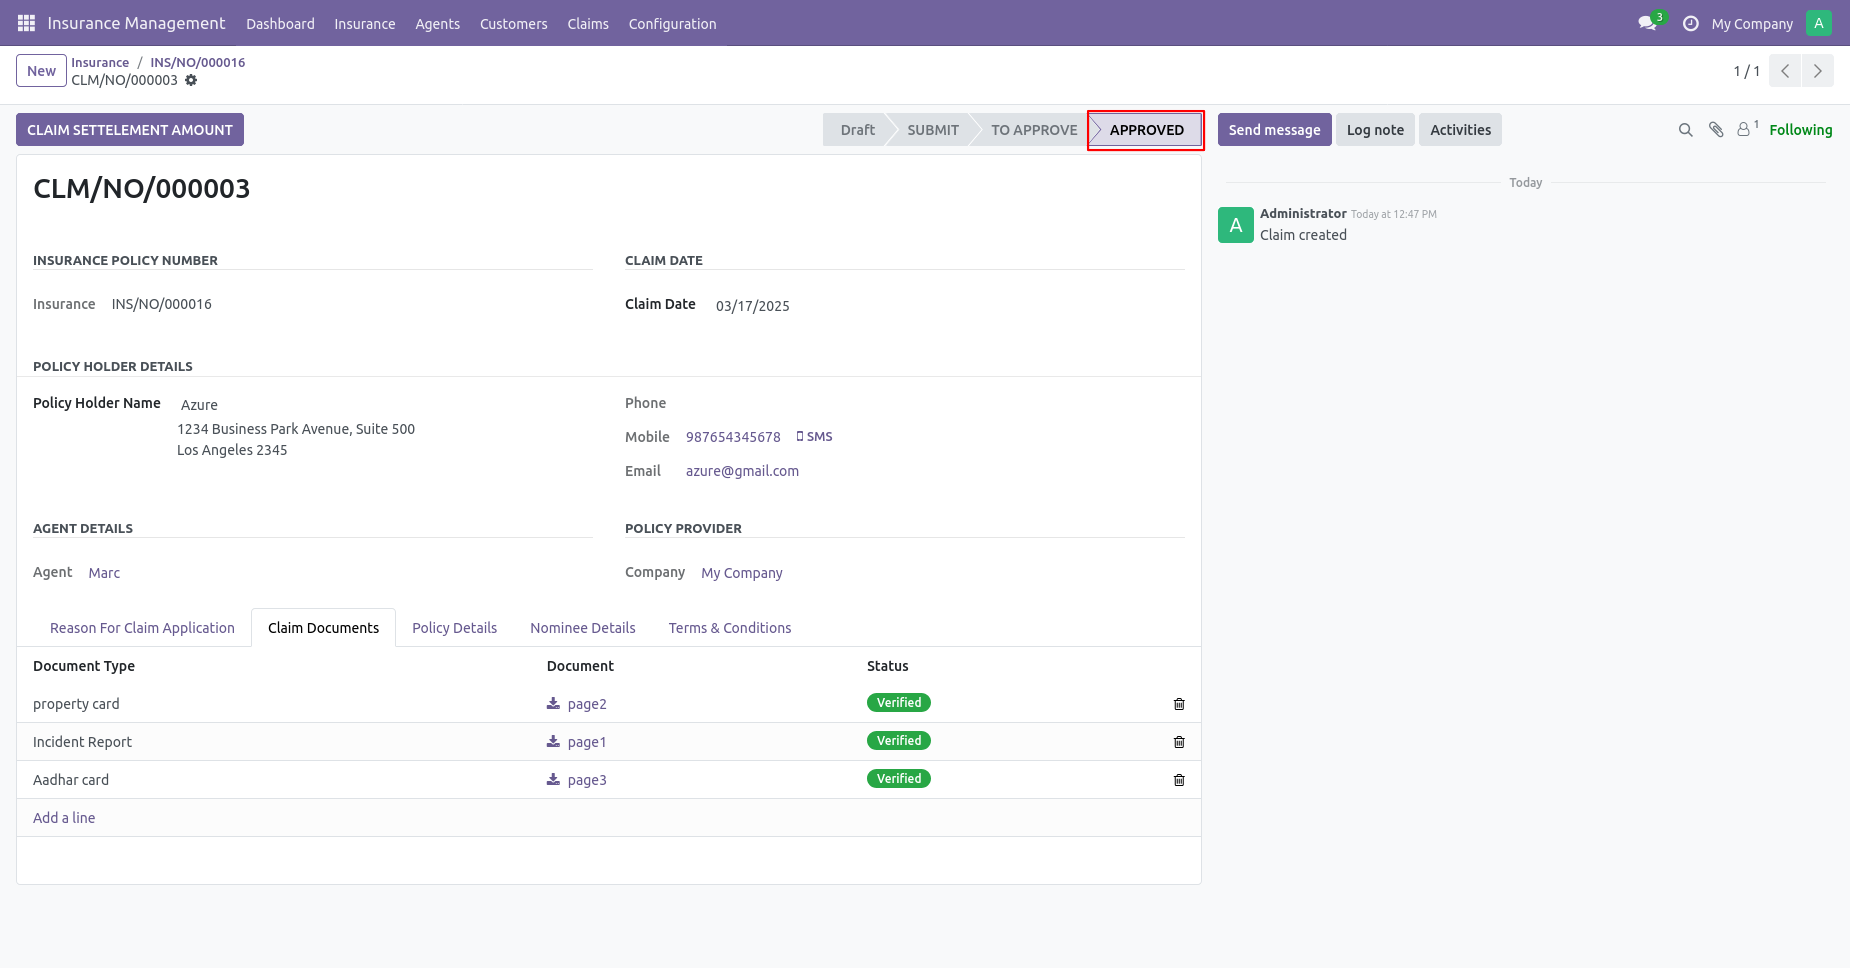
The claim is approved now.
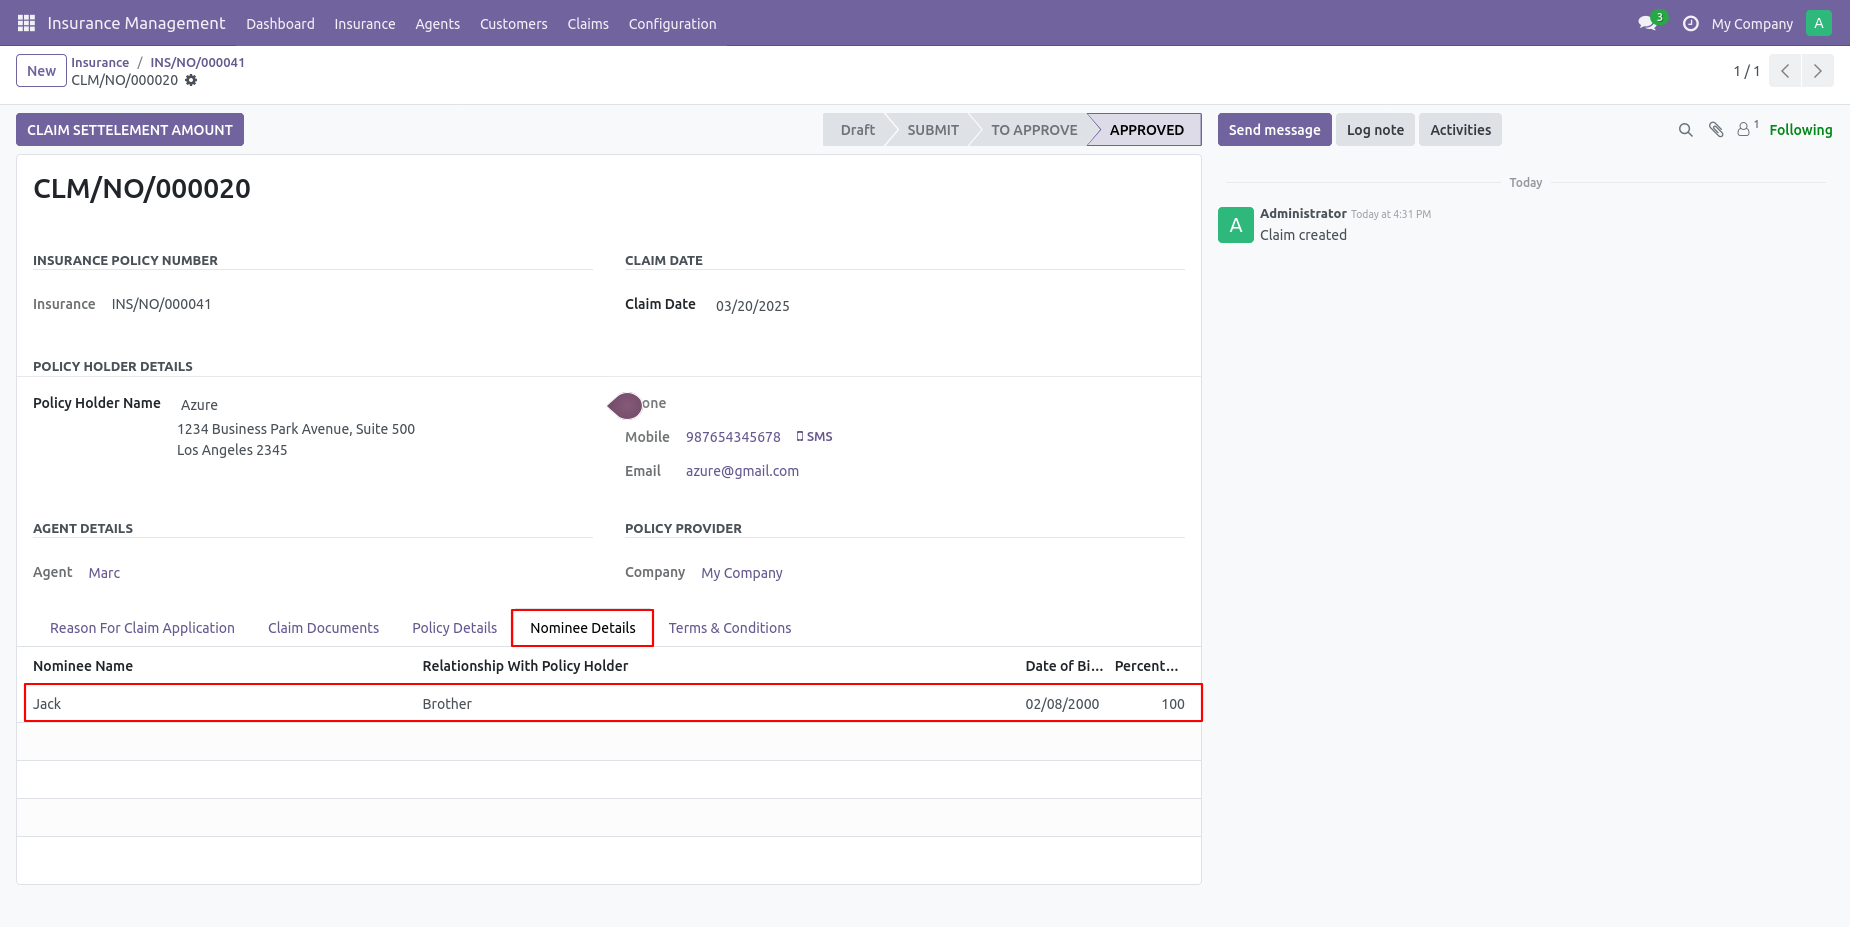
The claim is approved now.
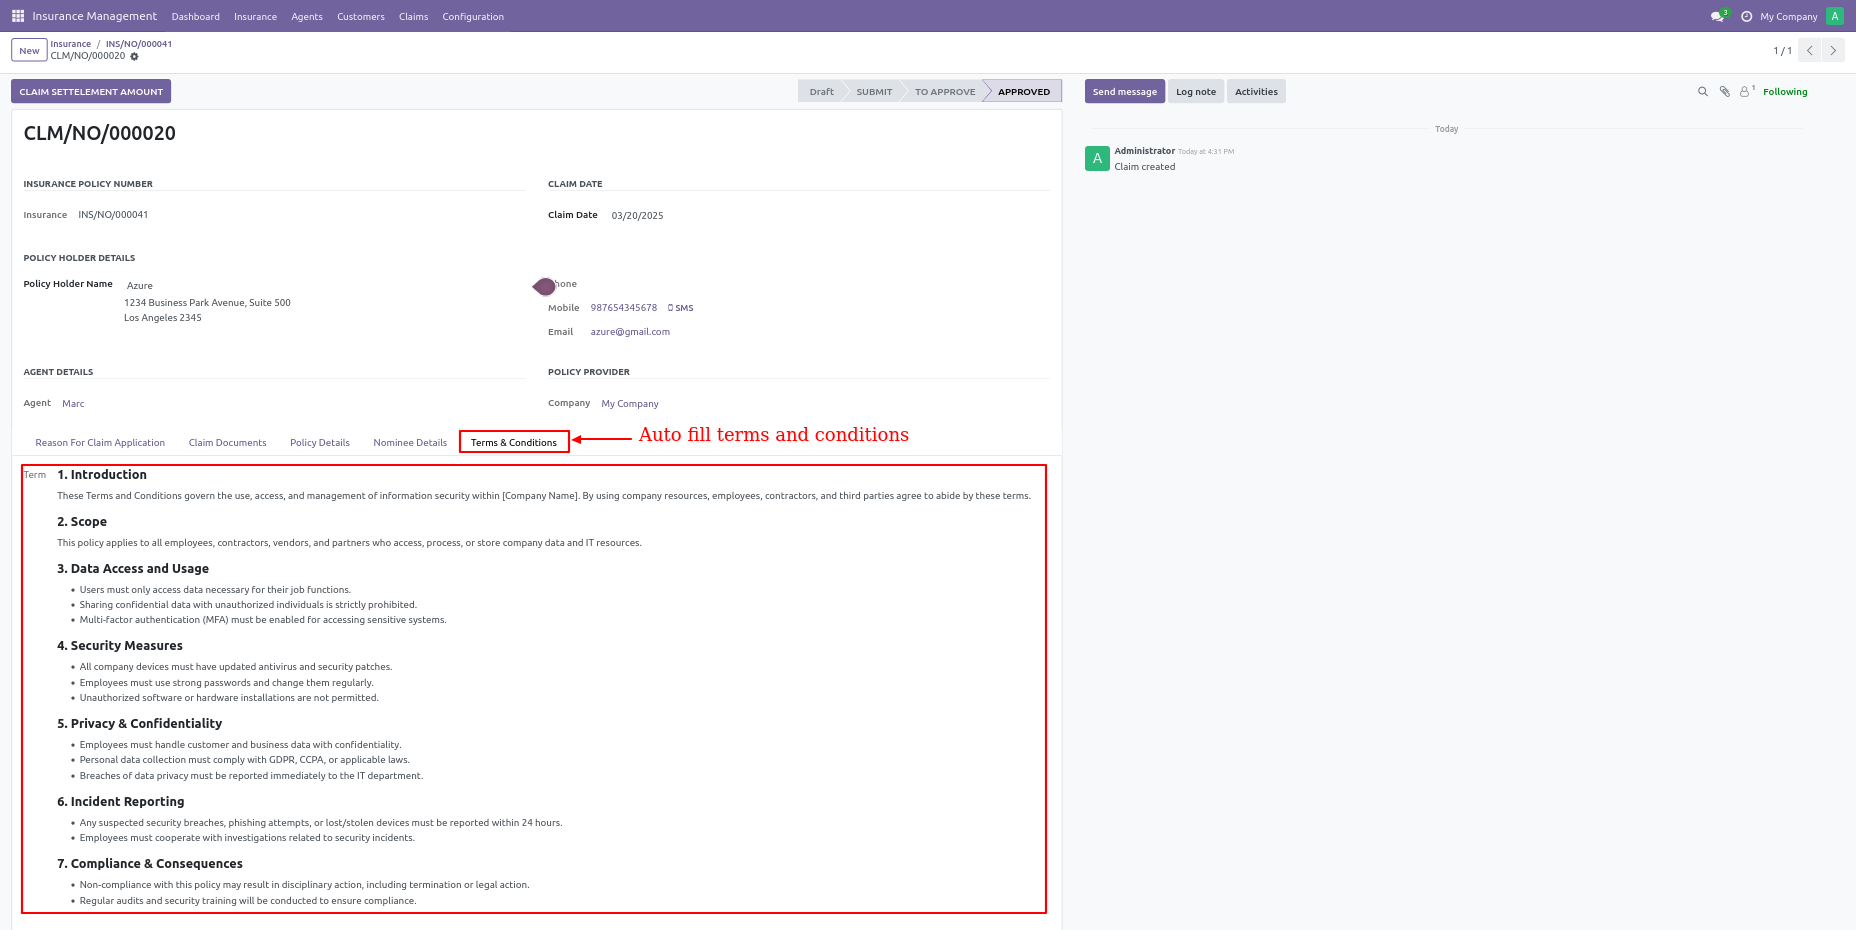
Click on the submit button after all documents are verified.
It will show the To Approve button to move the claim for insurance
manager
approval.
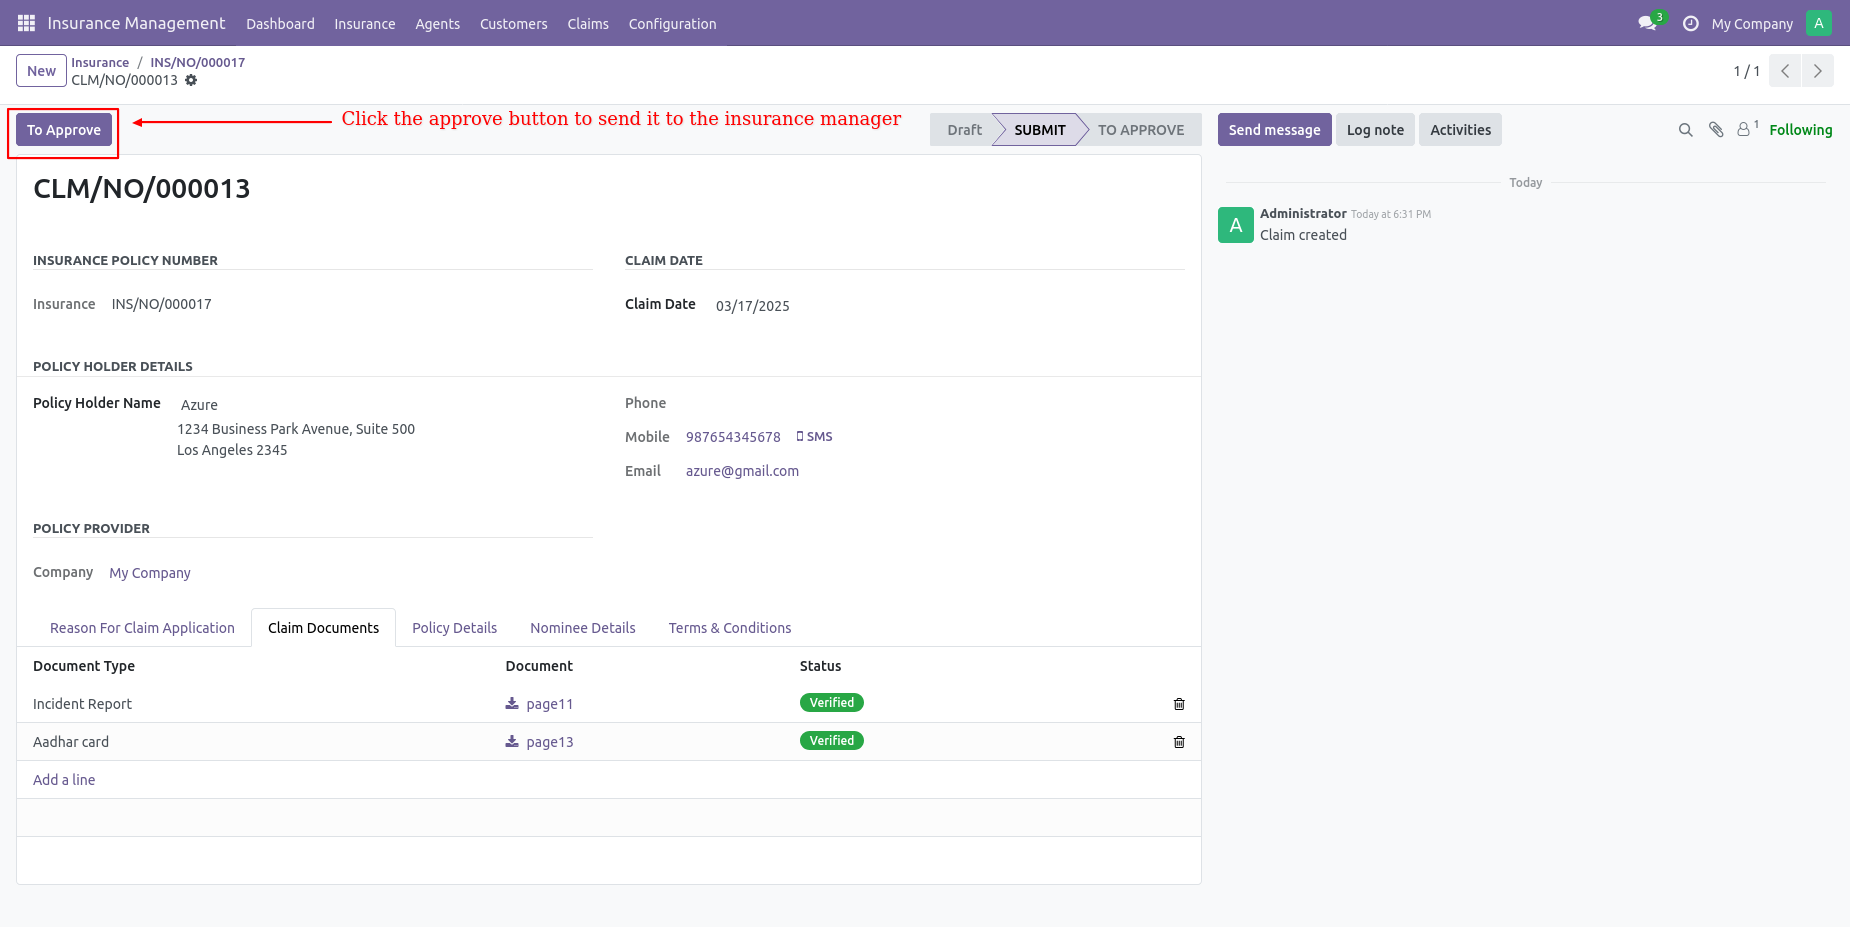
Click on to approve button. It will move to the To approve stage
from the submit
stage.
Approved and Rejected buttons are only visible to the
manager.
The insurance manager either approves or rejects the claim.
Approve the claim.
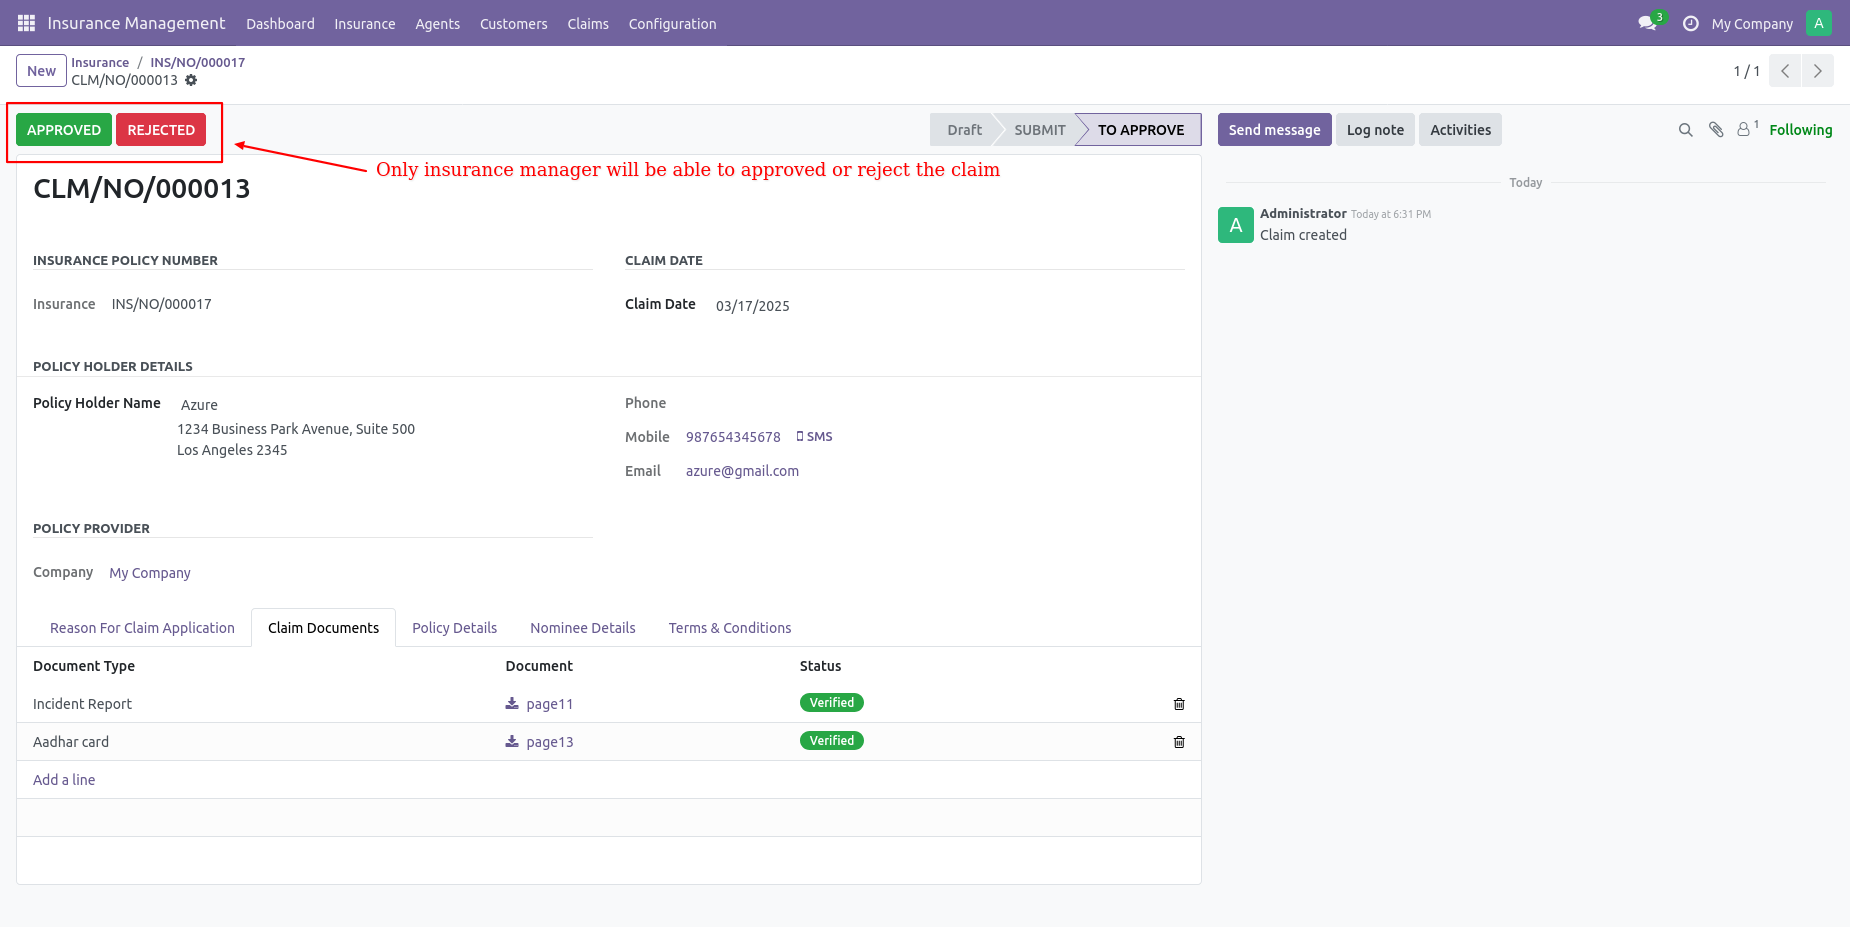
Once the manager approves the claim it will be in the Approved
stage.
After approval of the claim Claim Settlement Amount button will be
visible.
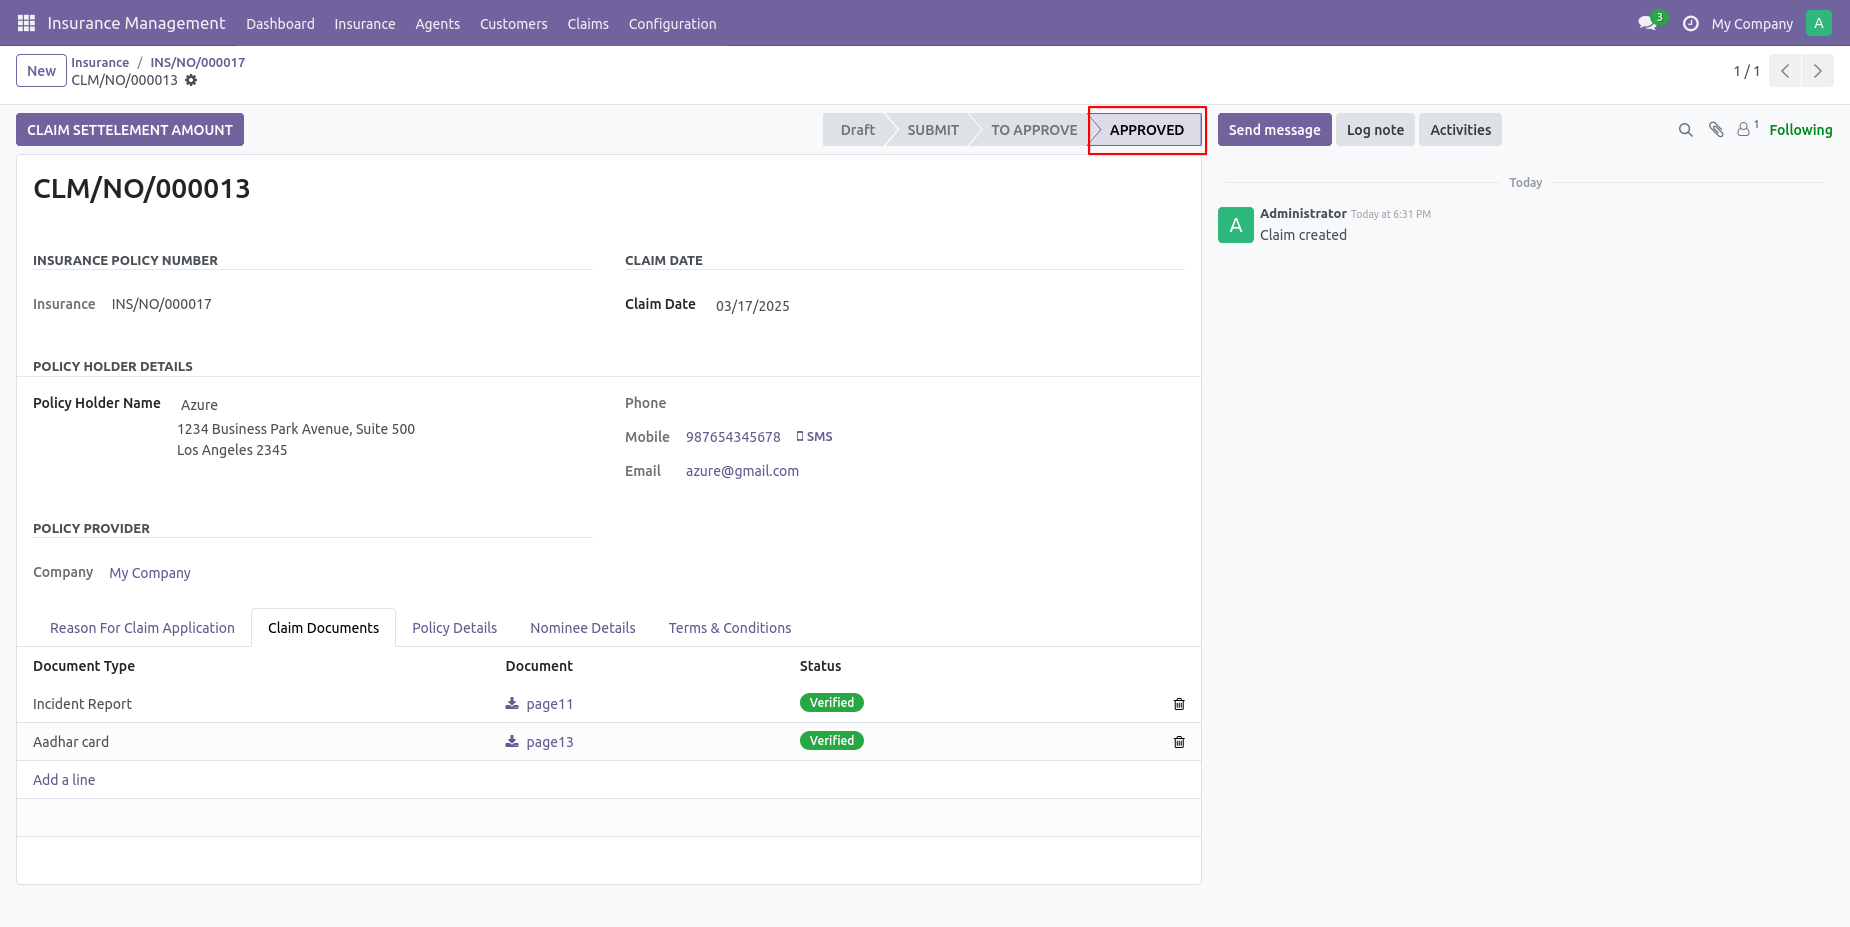
Click on the claim settlement amount button to create a claim bill.
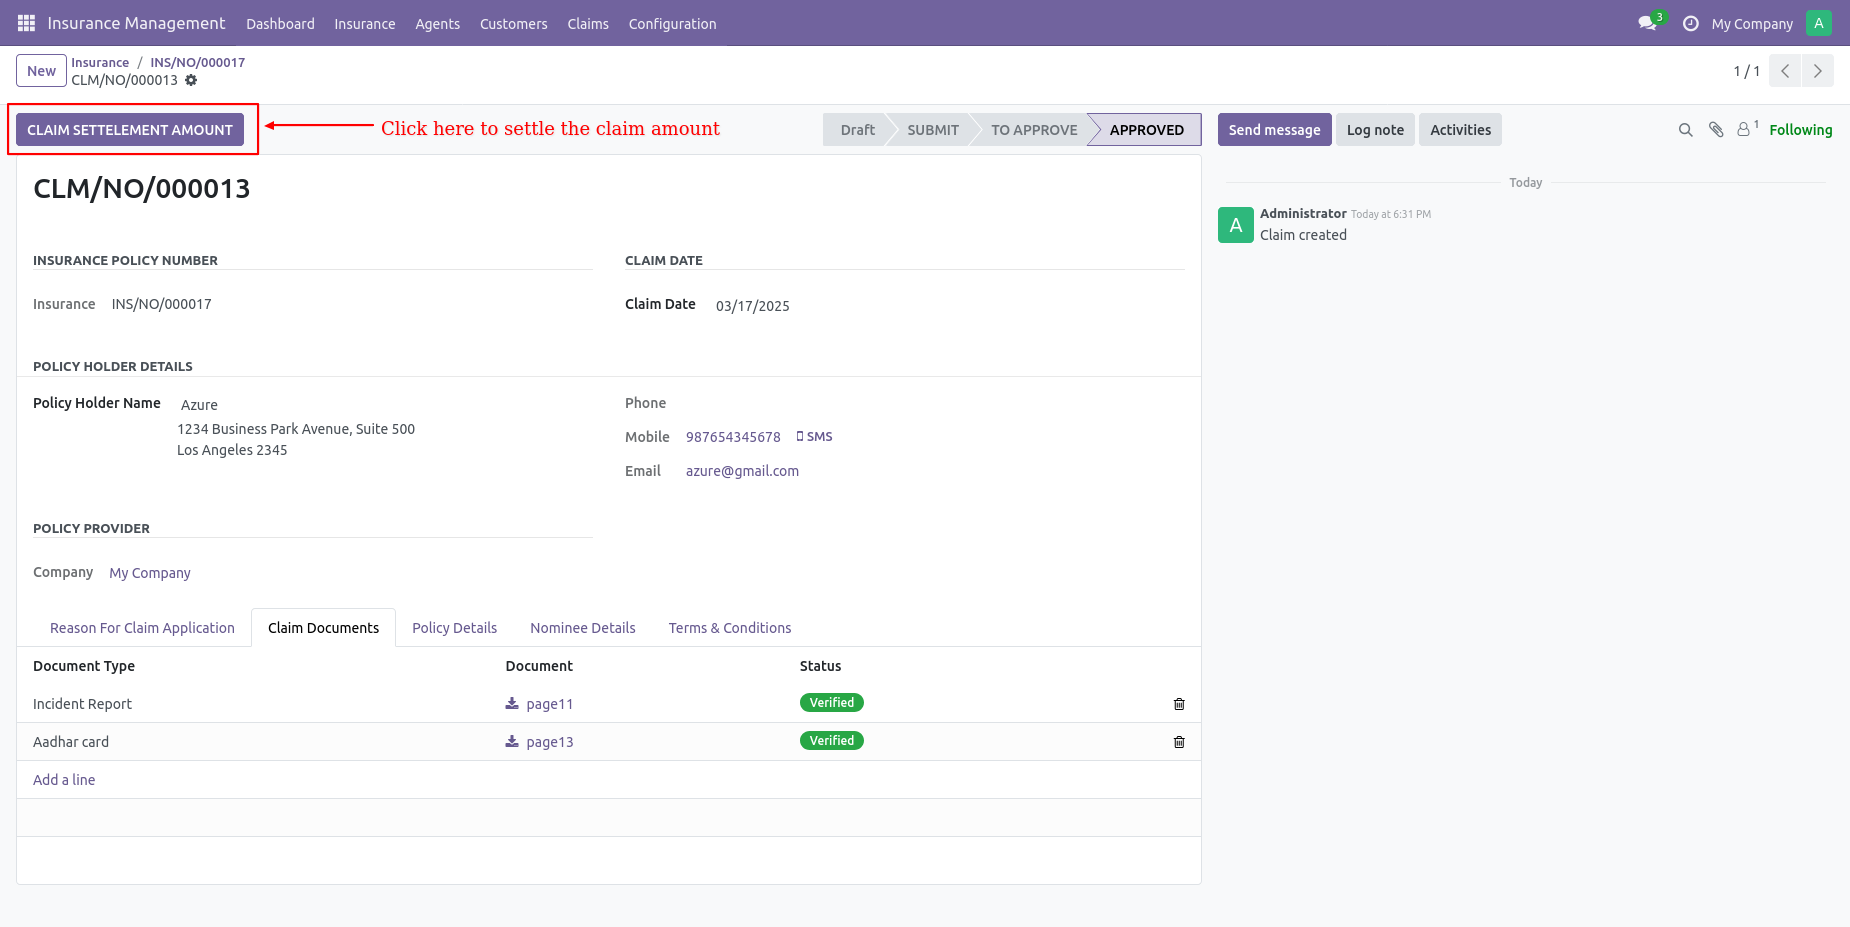
Click on the Register Claim Payment button to make a claim payment.
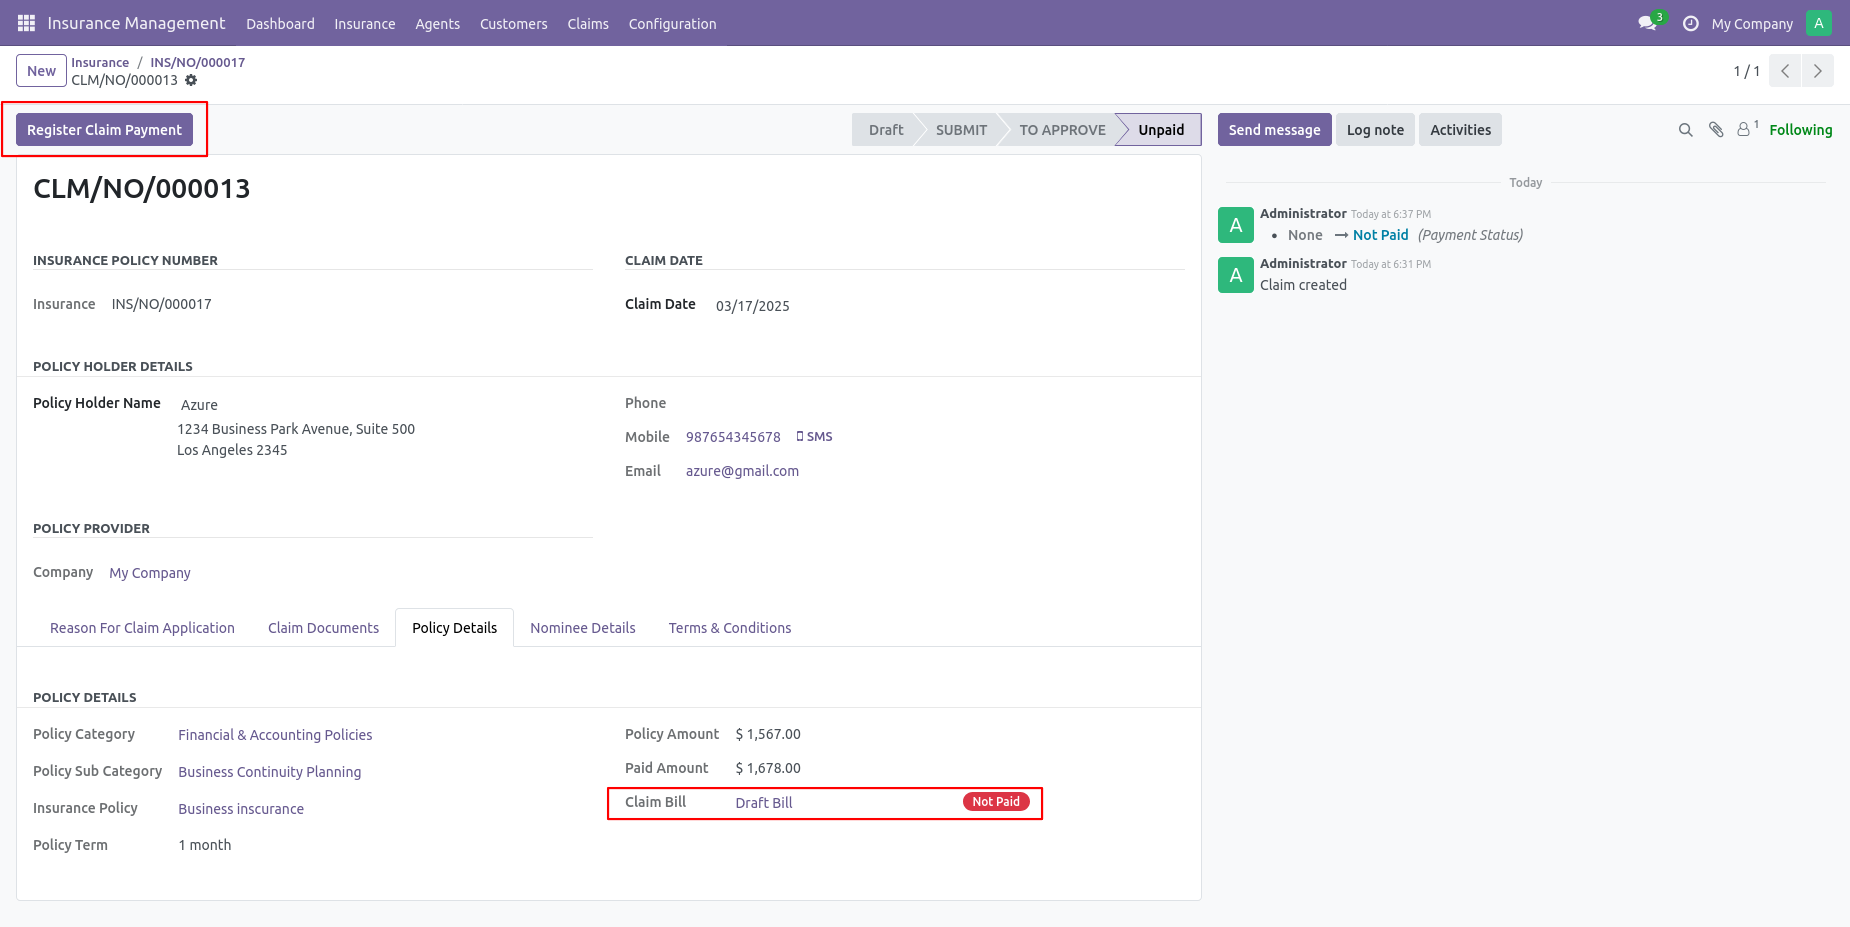
You can see the claim bill paid status in the Policy details.
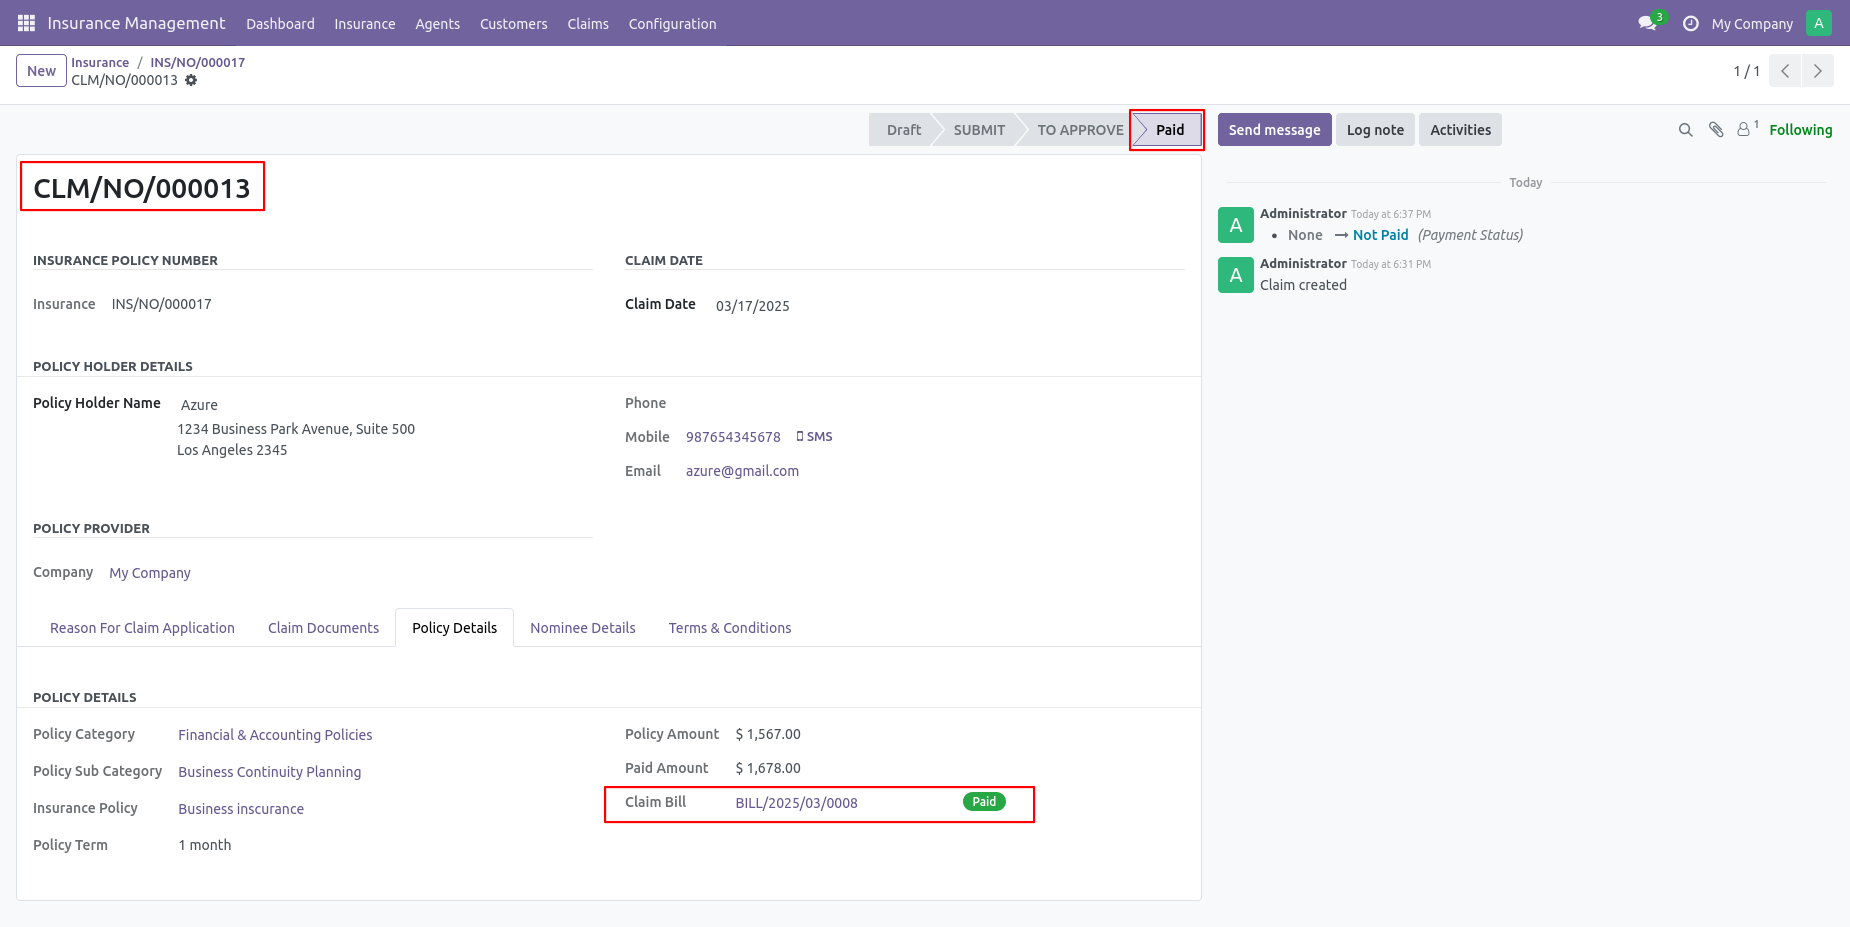
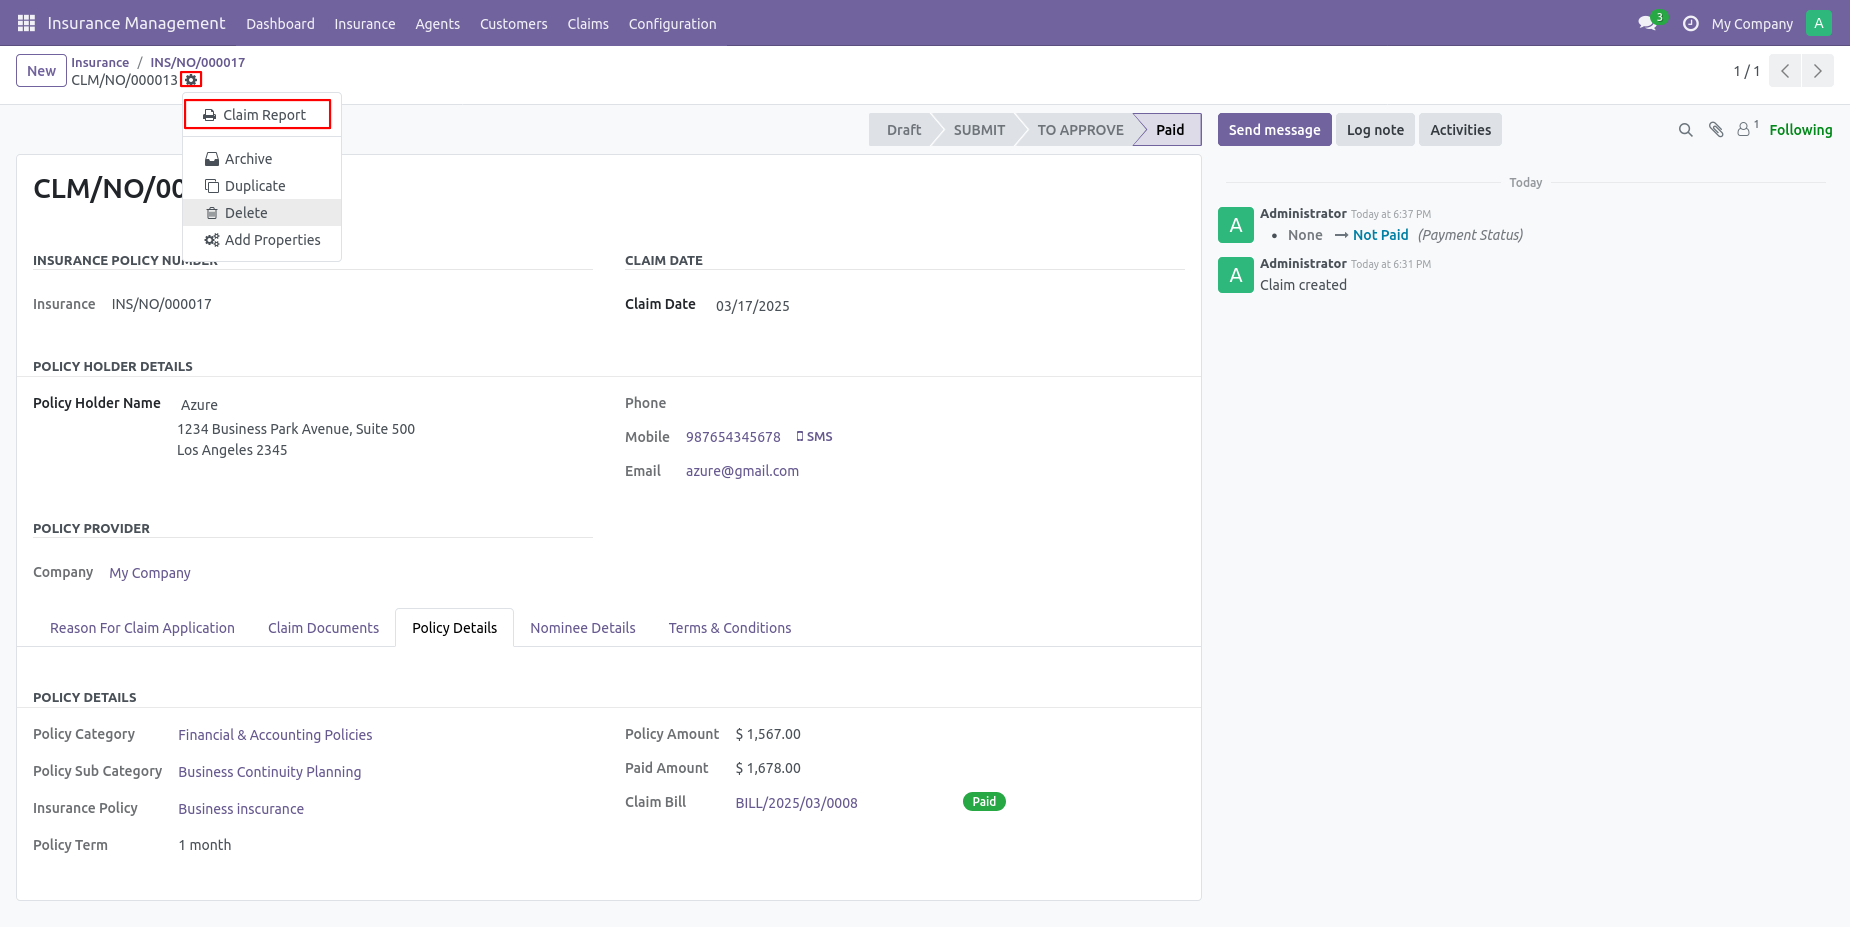
You can print the claim report.
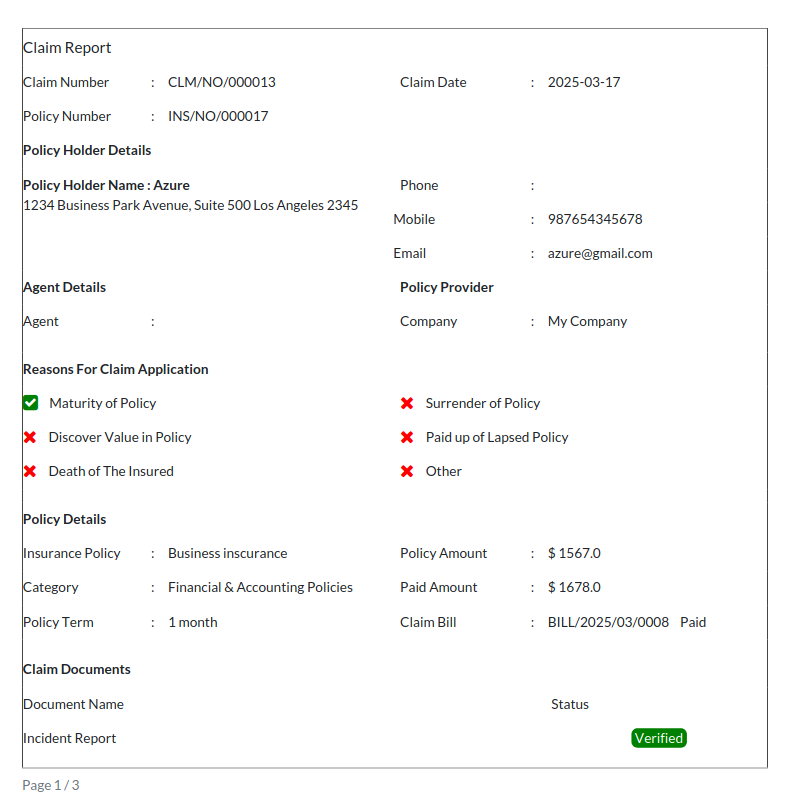
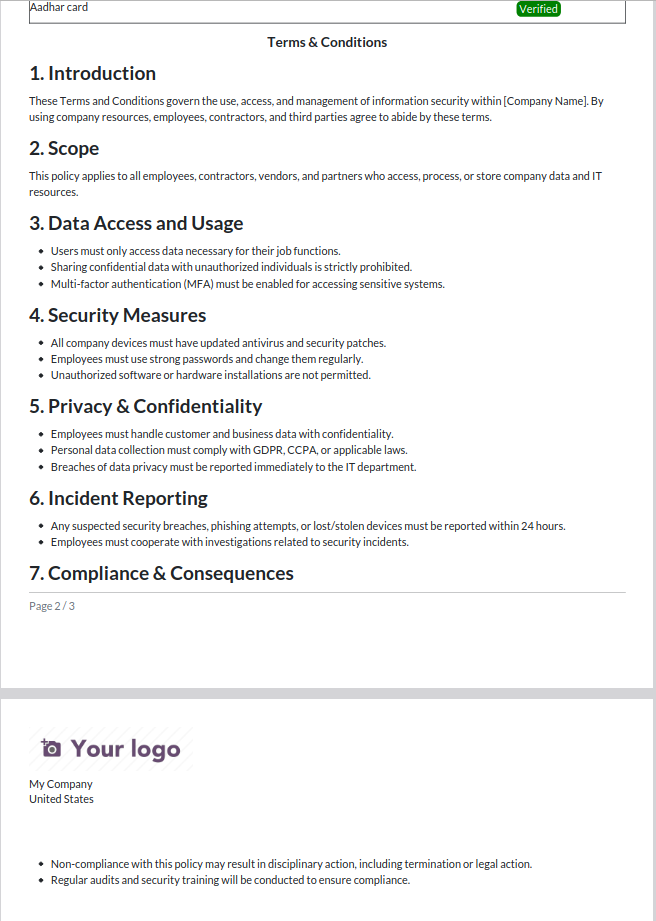
Claim report in pdf format with all relevant data.
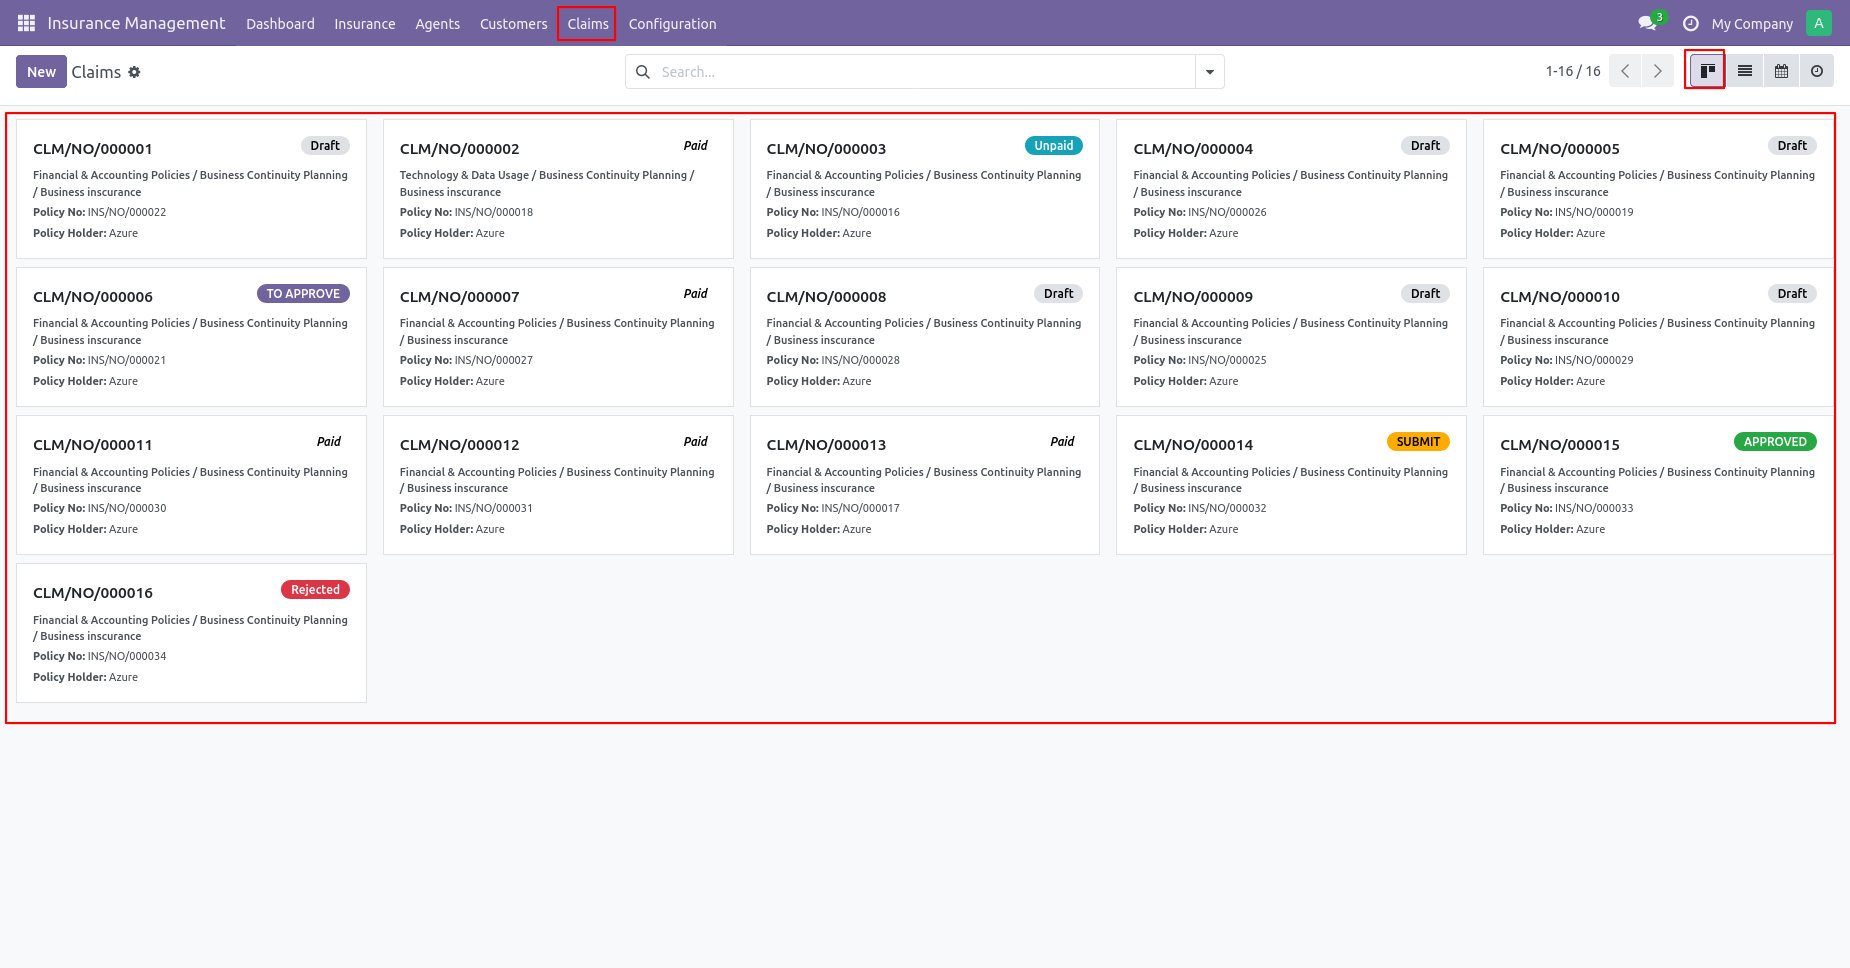
Claim kanban view.
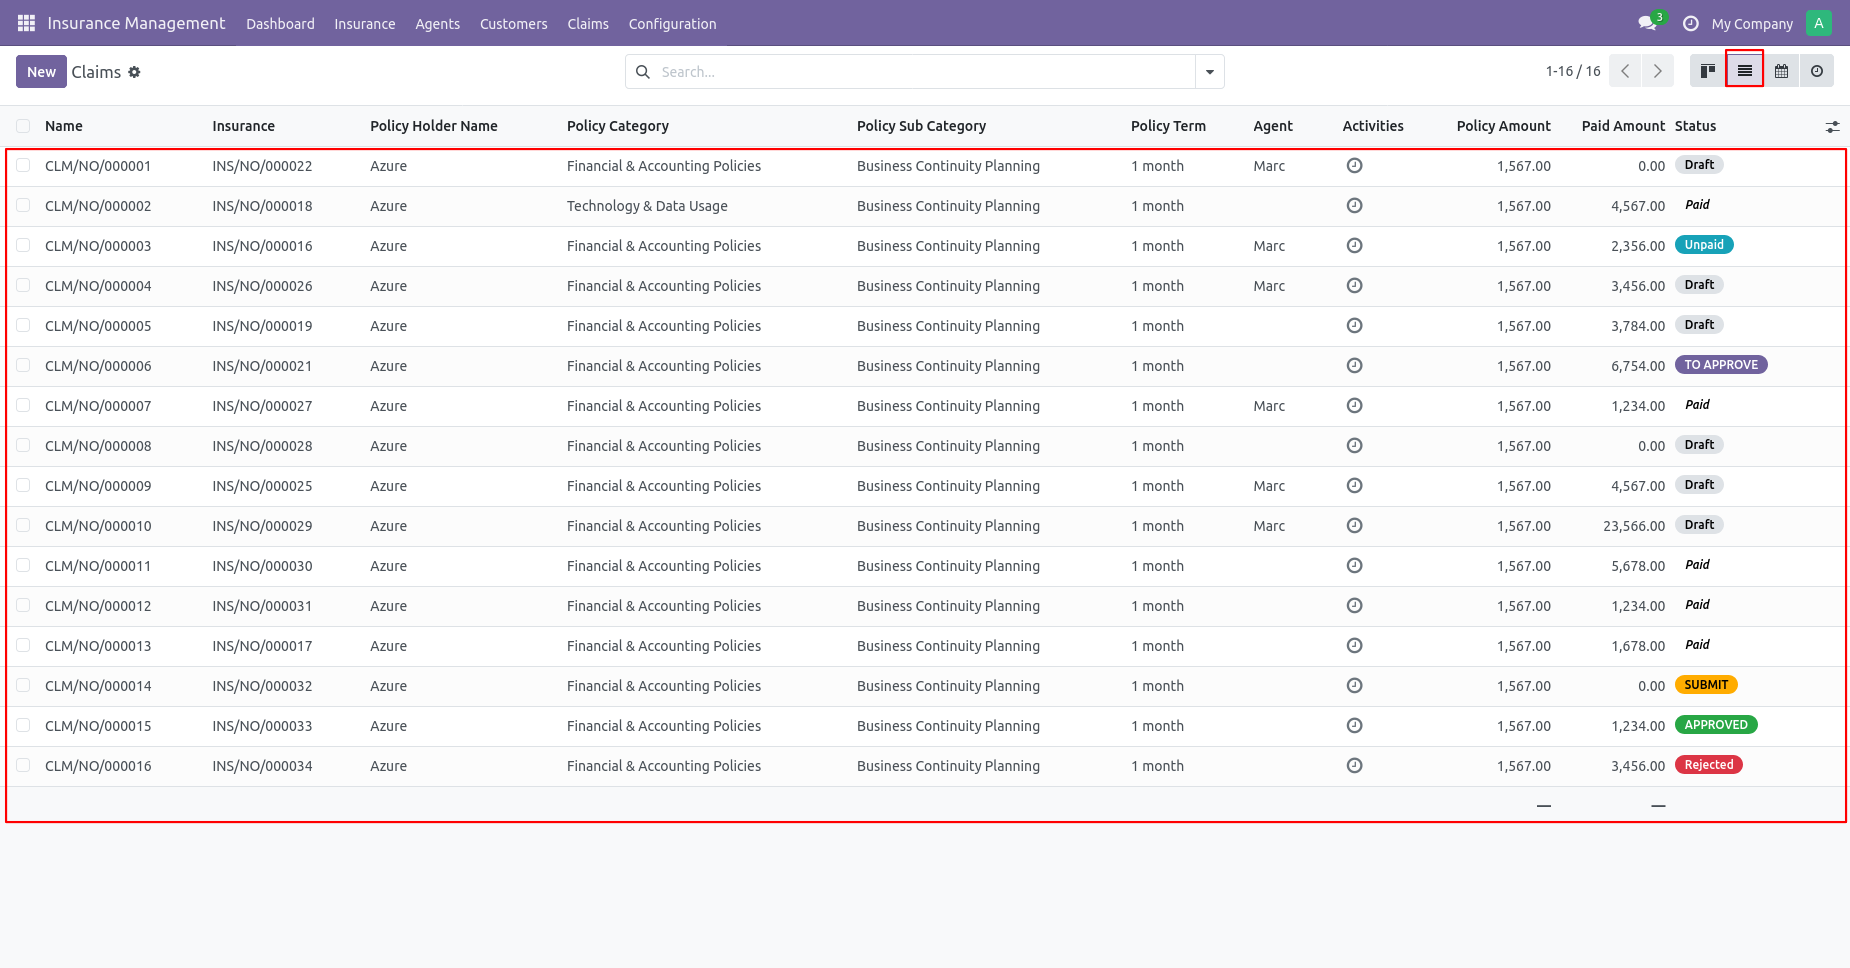
Click list view.
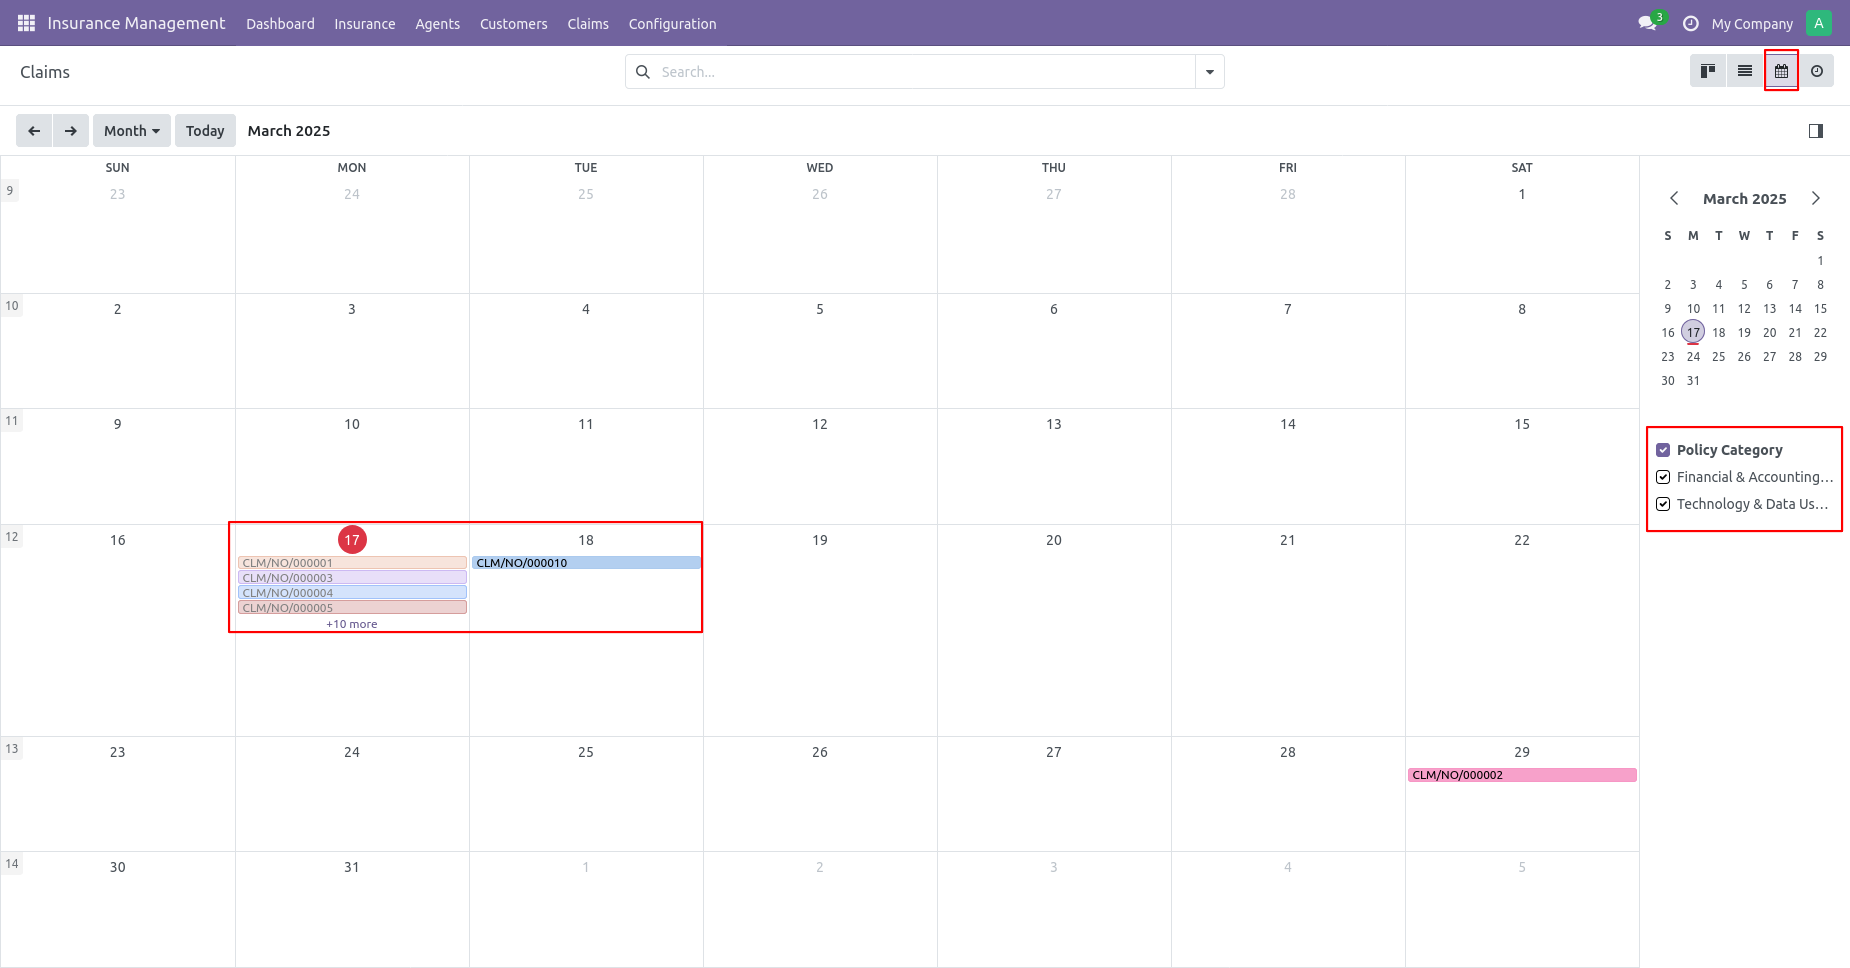
Claim Calendar view.
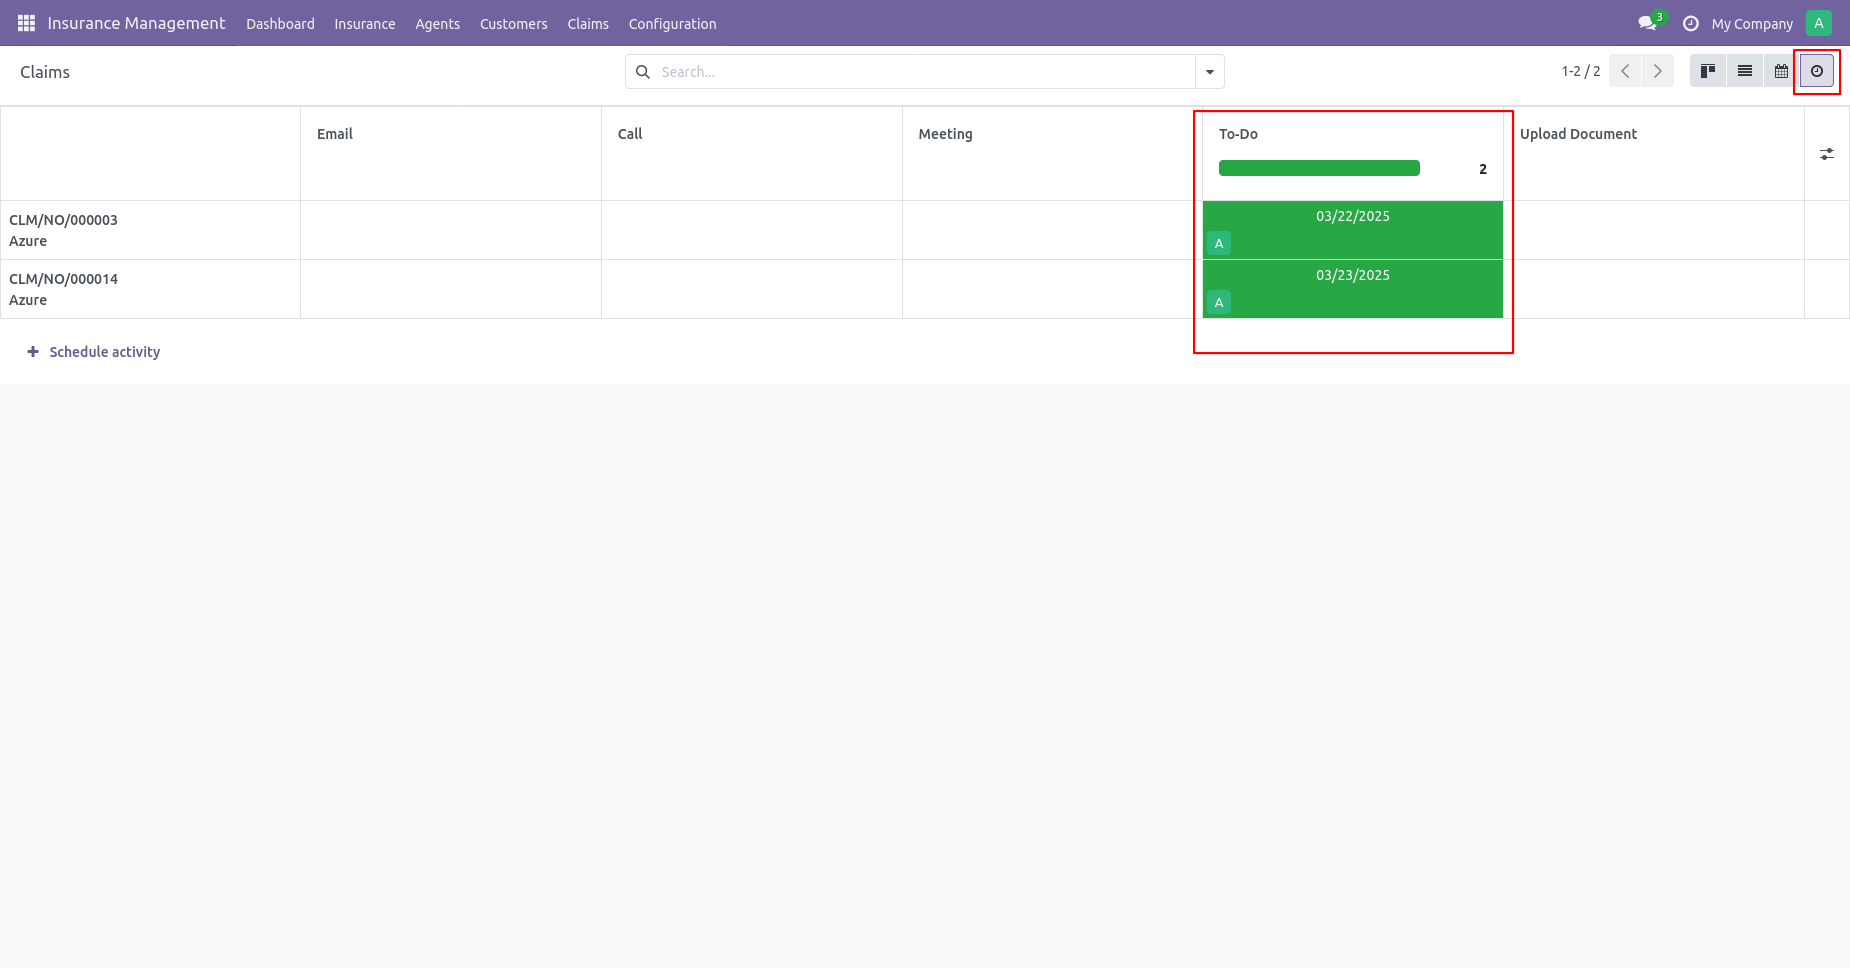
Claim activity view.
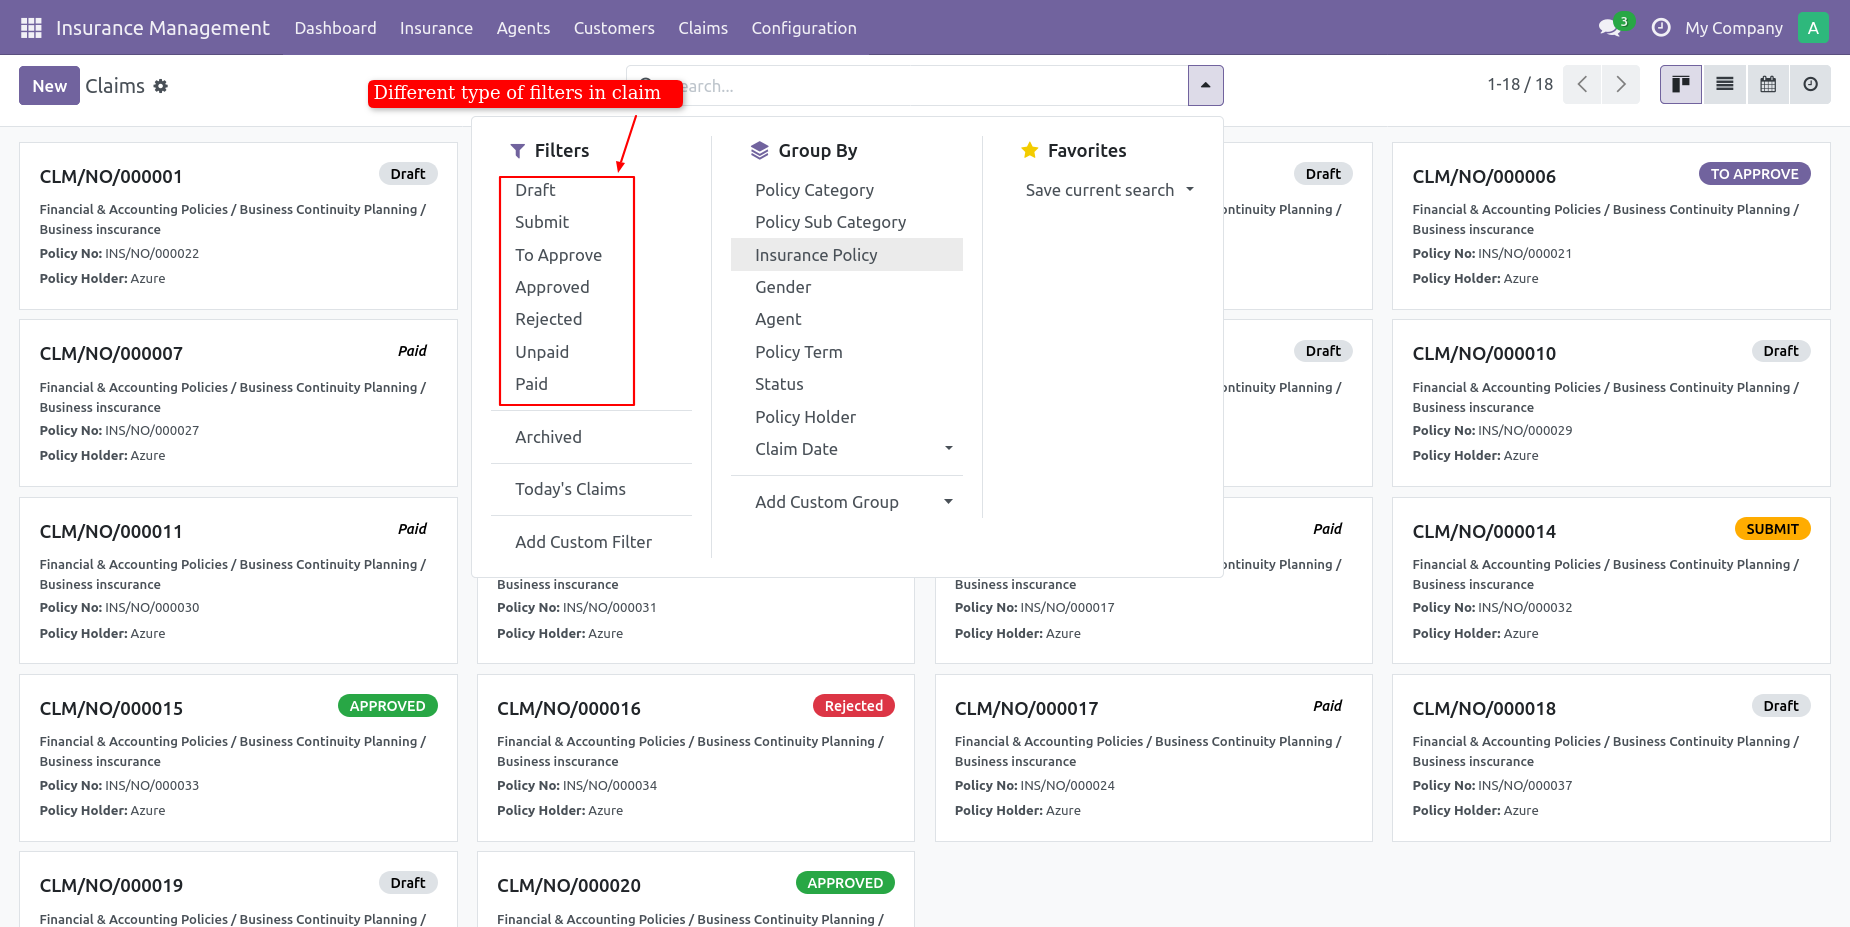
Filter claims with different stages.
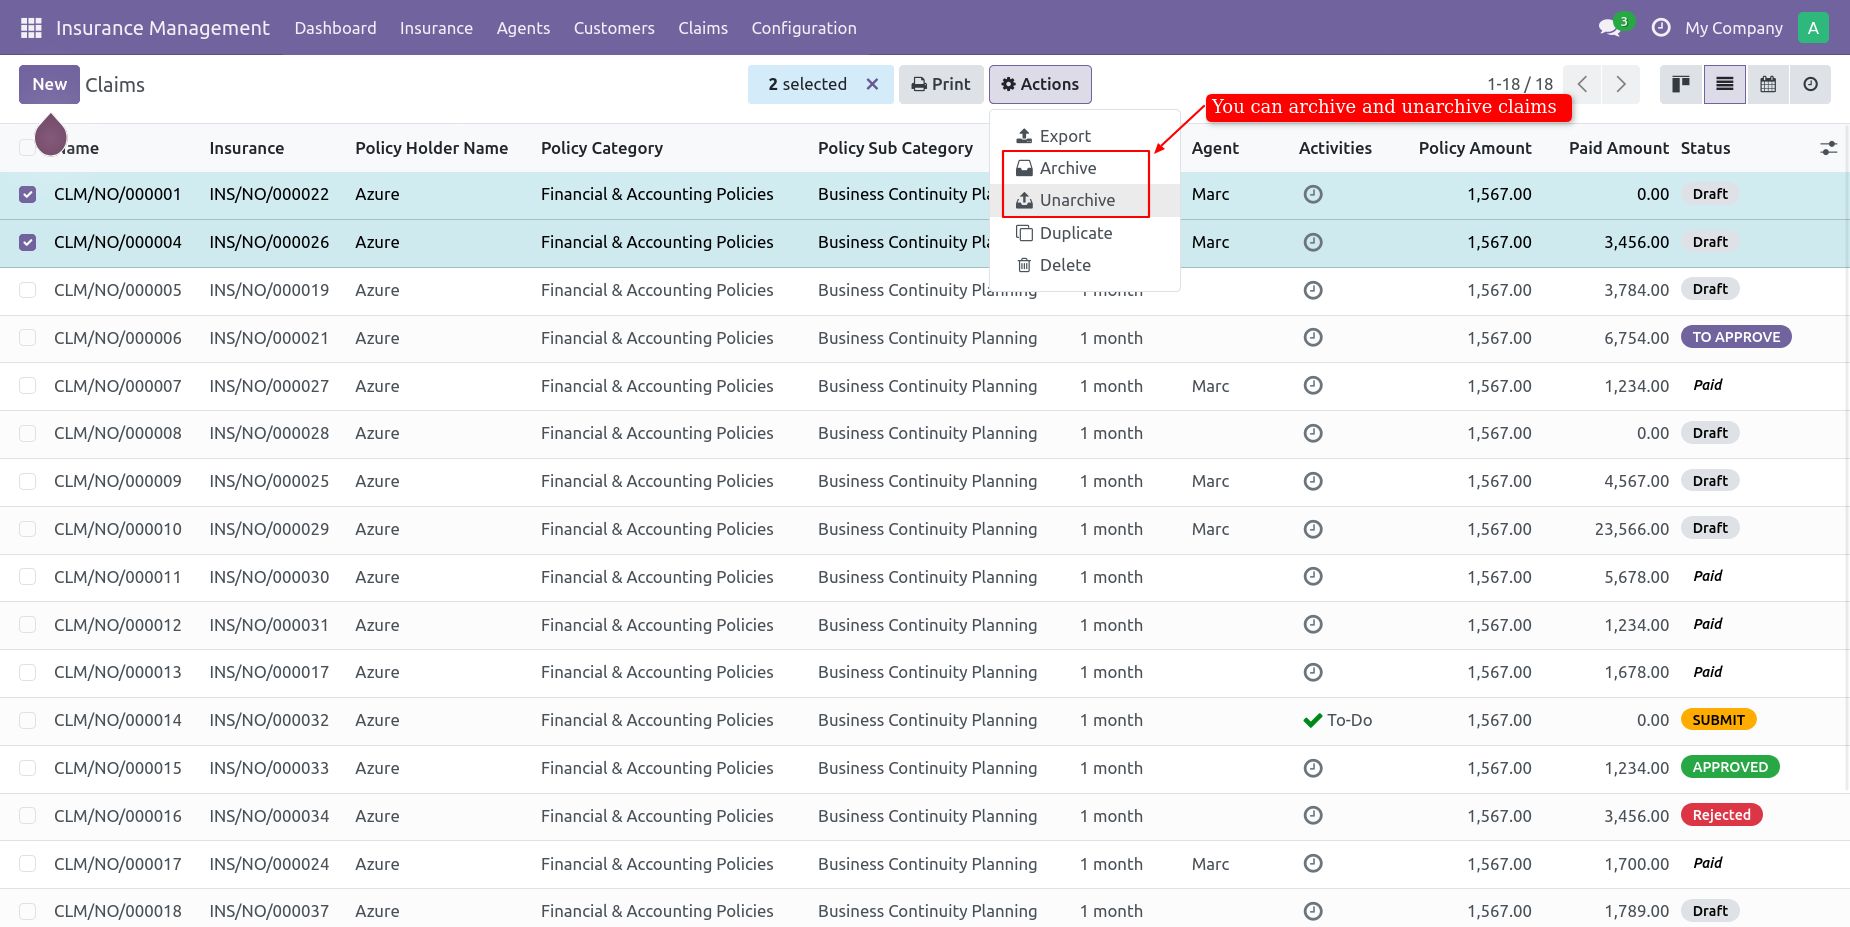
You can Archive or unarchive Insurance by action button.
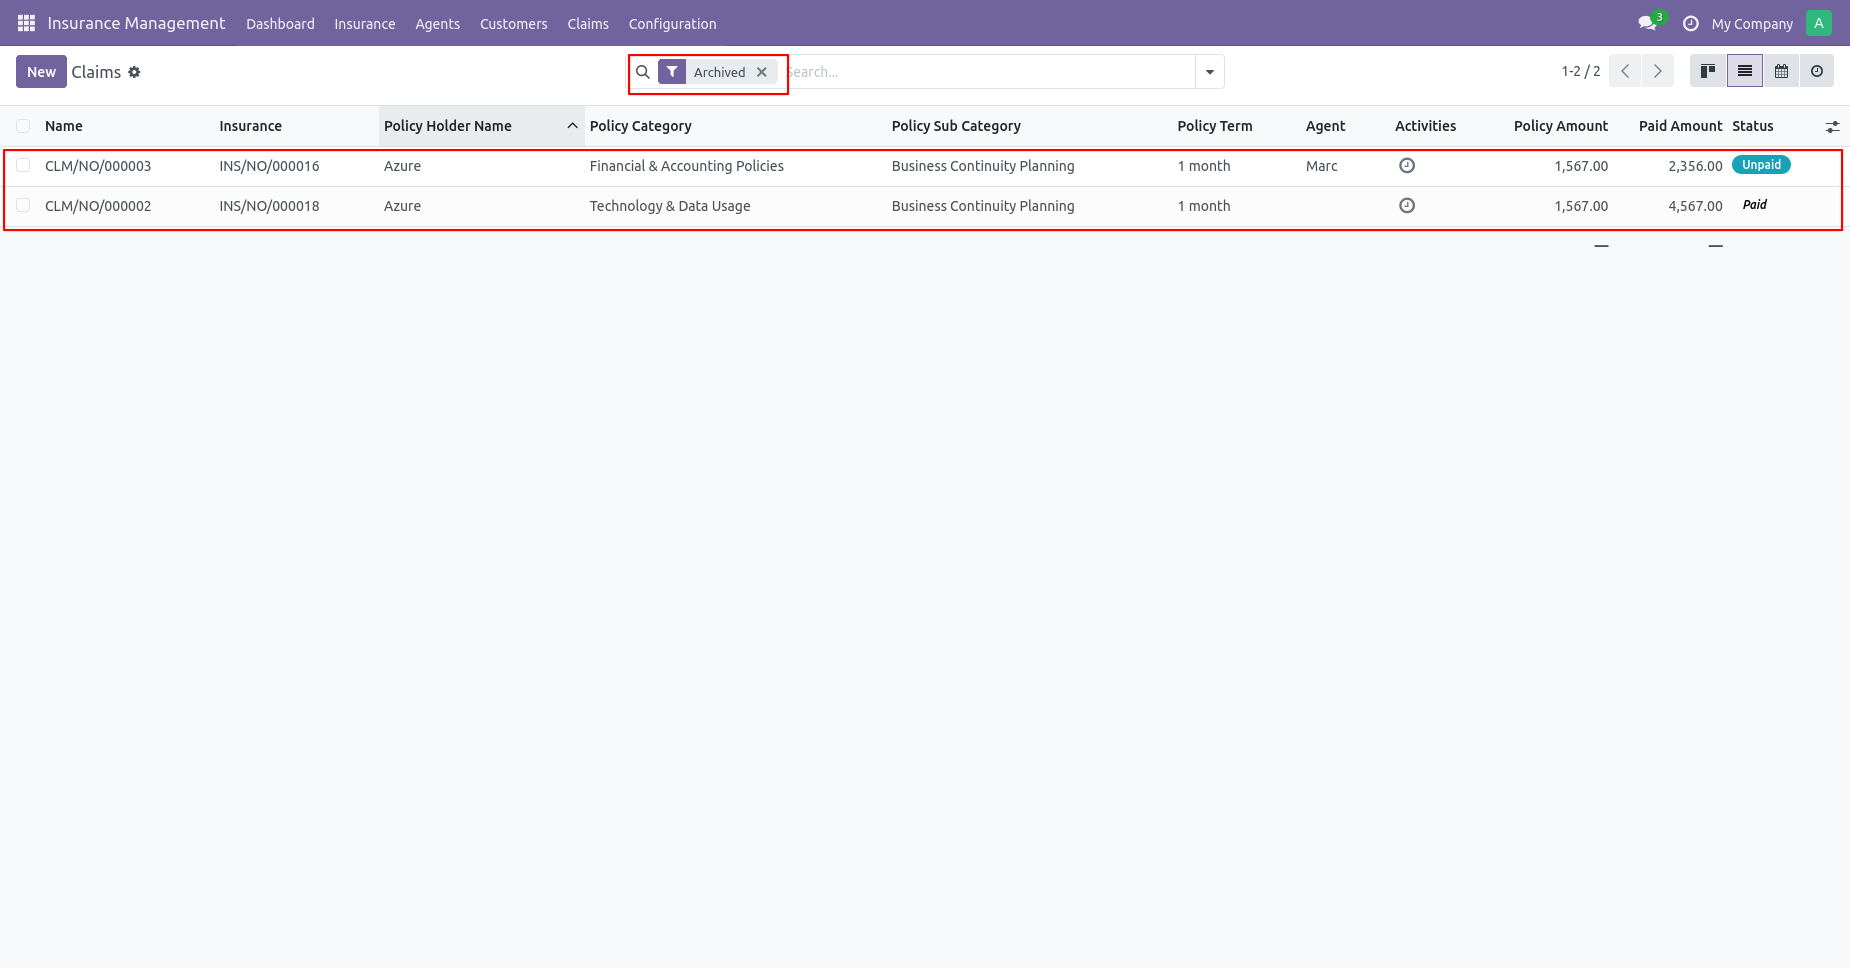
You can see archived claims from filtering by archive.
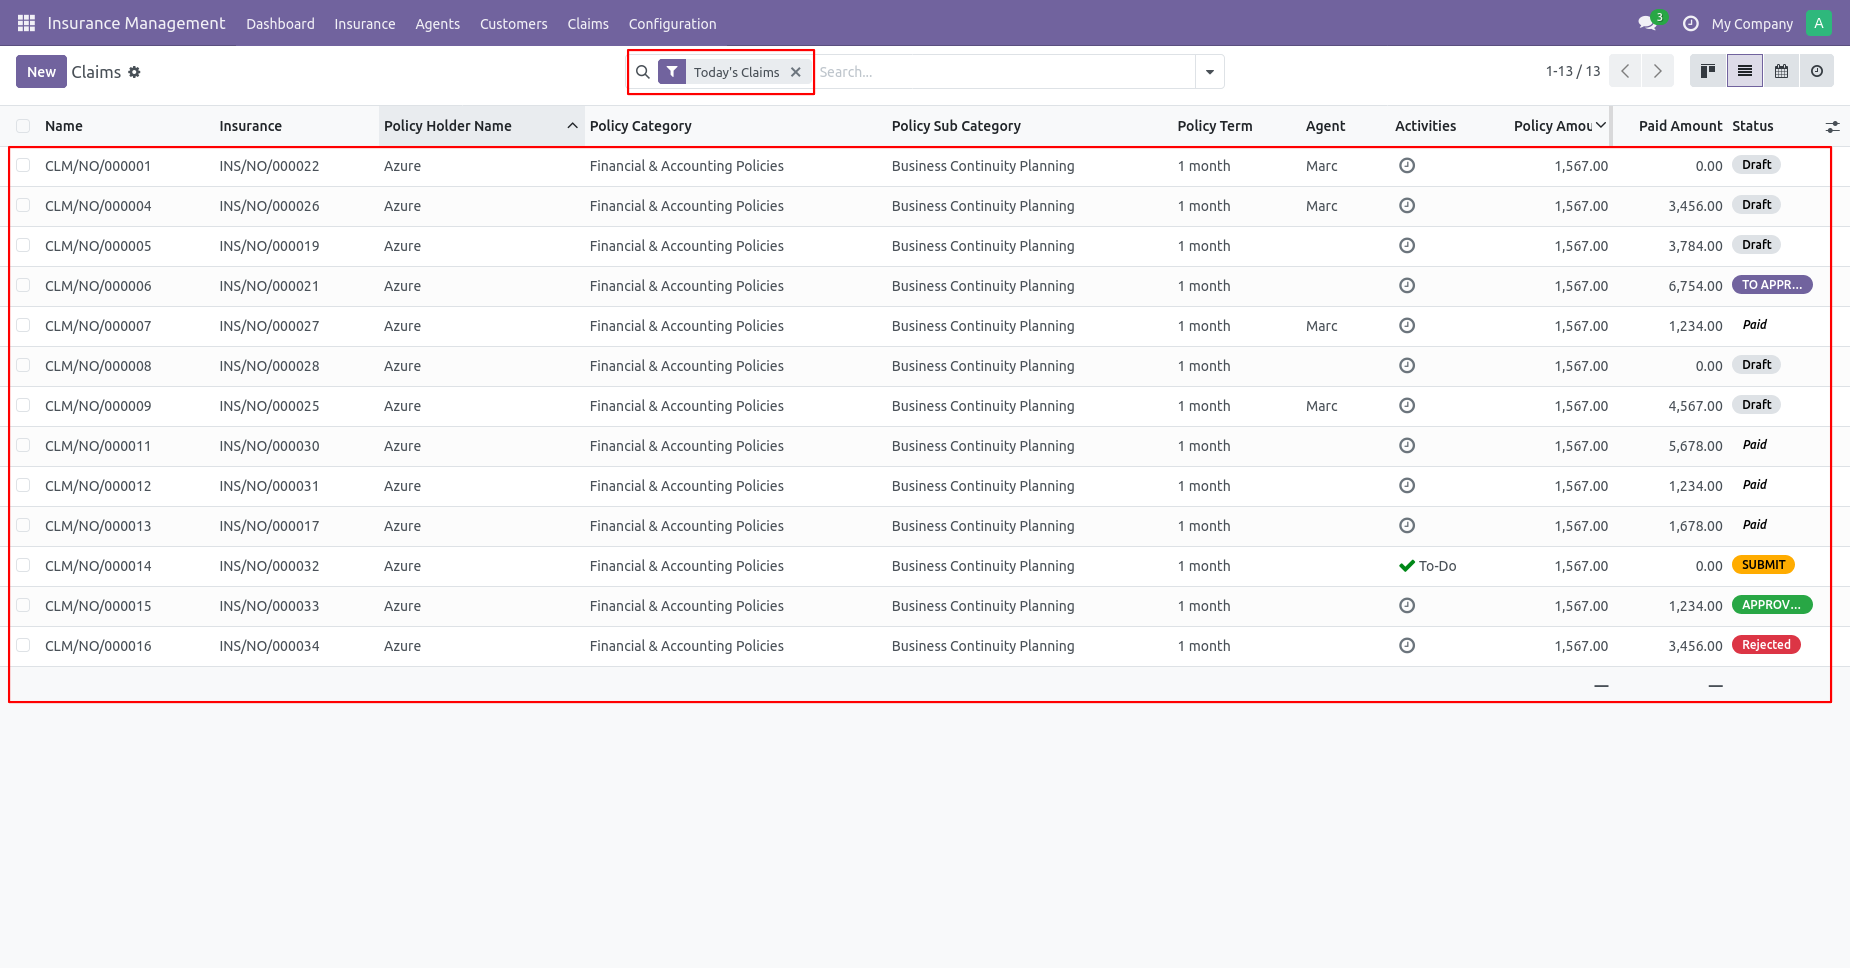
You can see Today's claim by filtering.
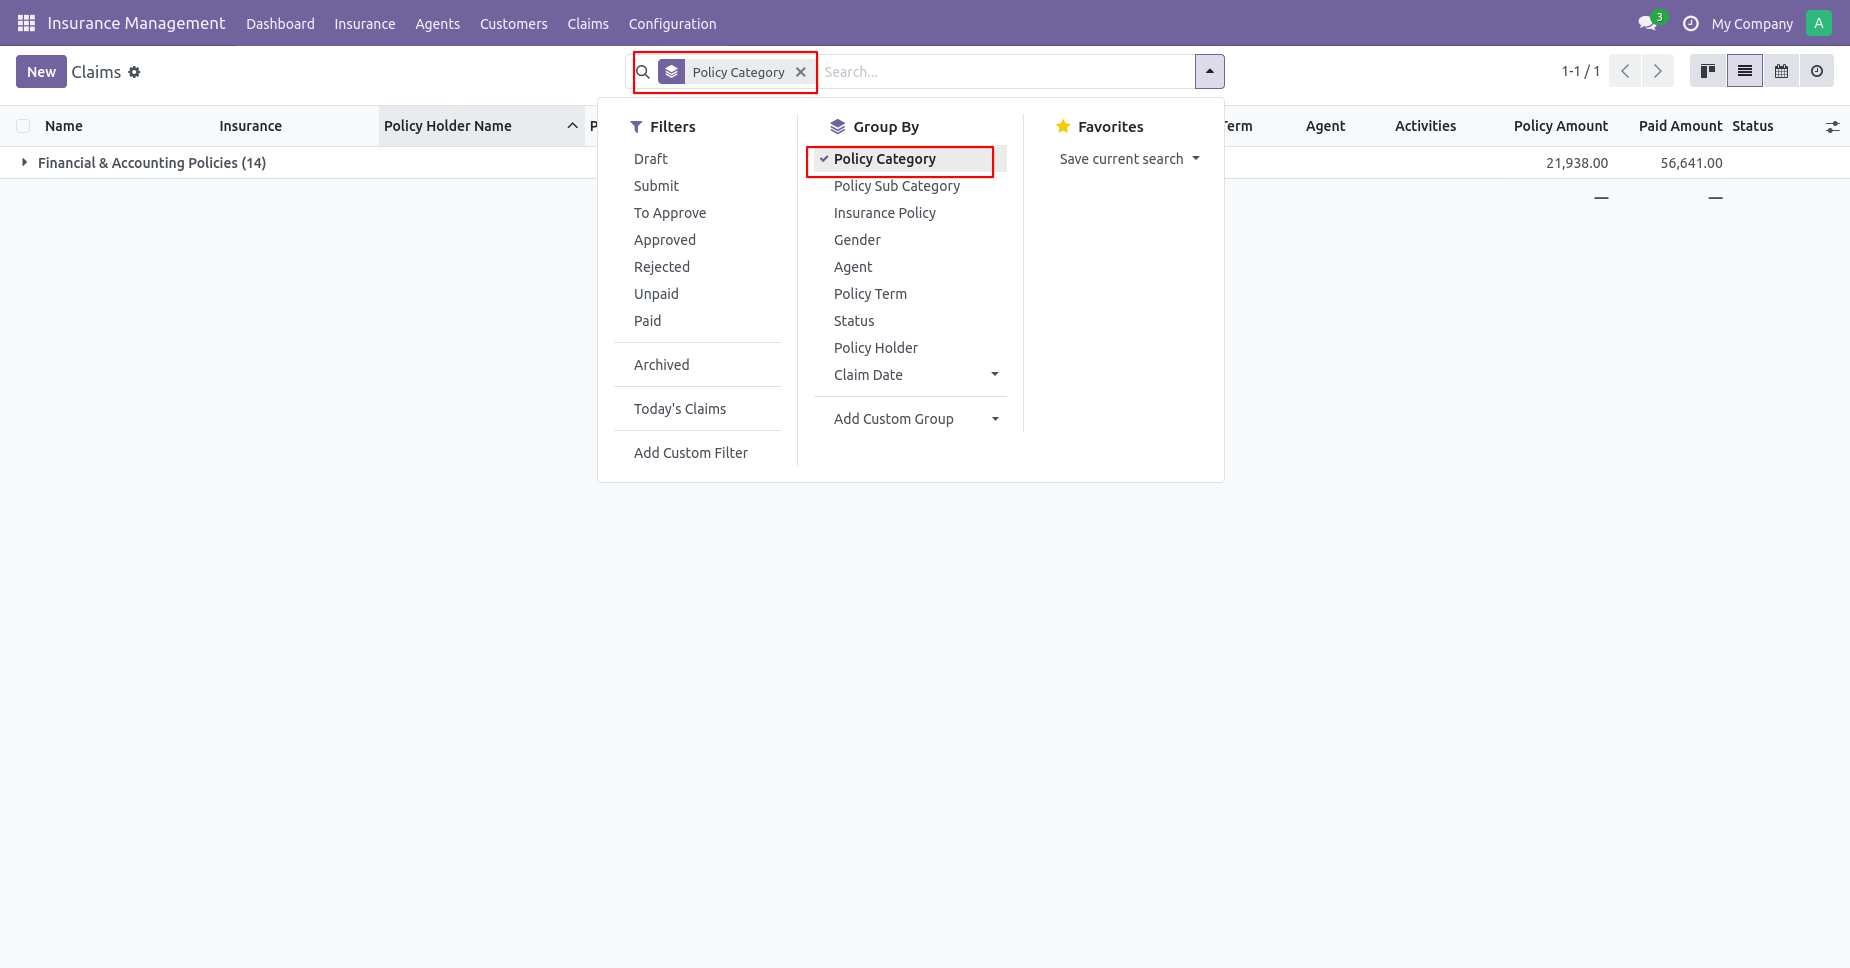
You can see the claim group by Policy category.
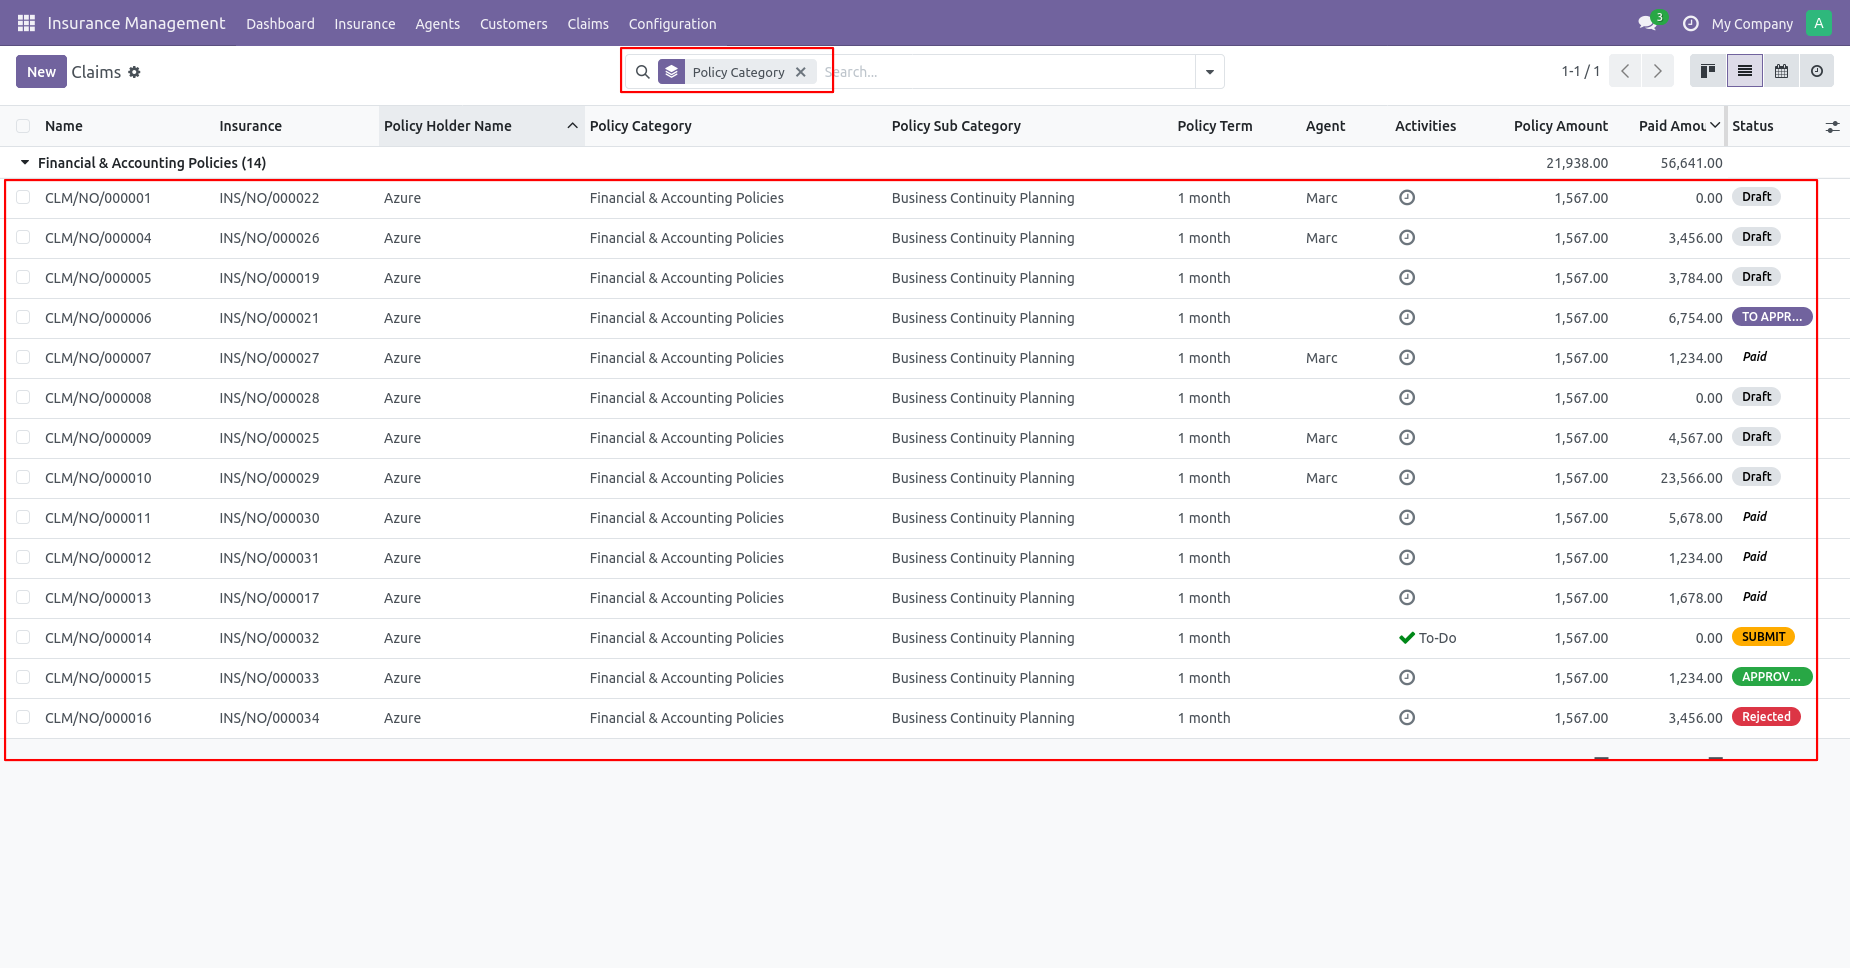
You can see the claim group by Policy Sub Policy.
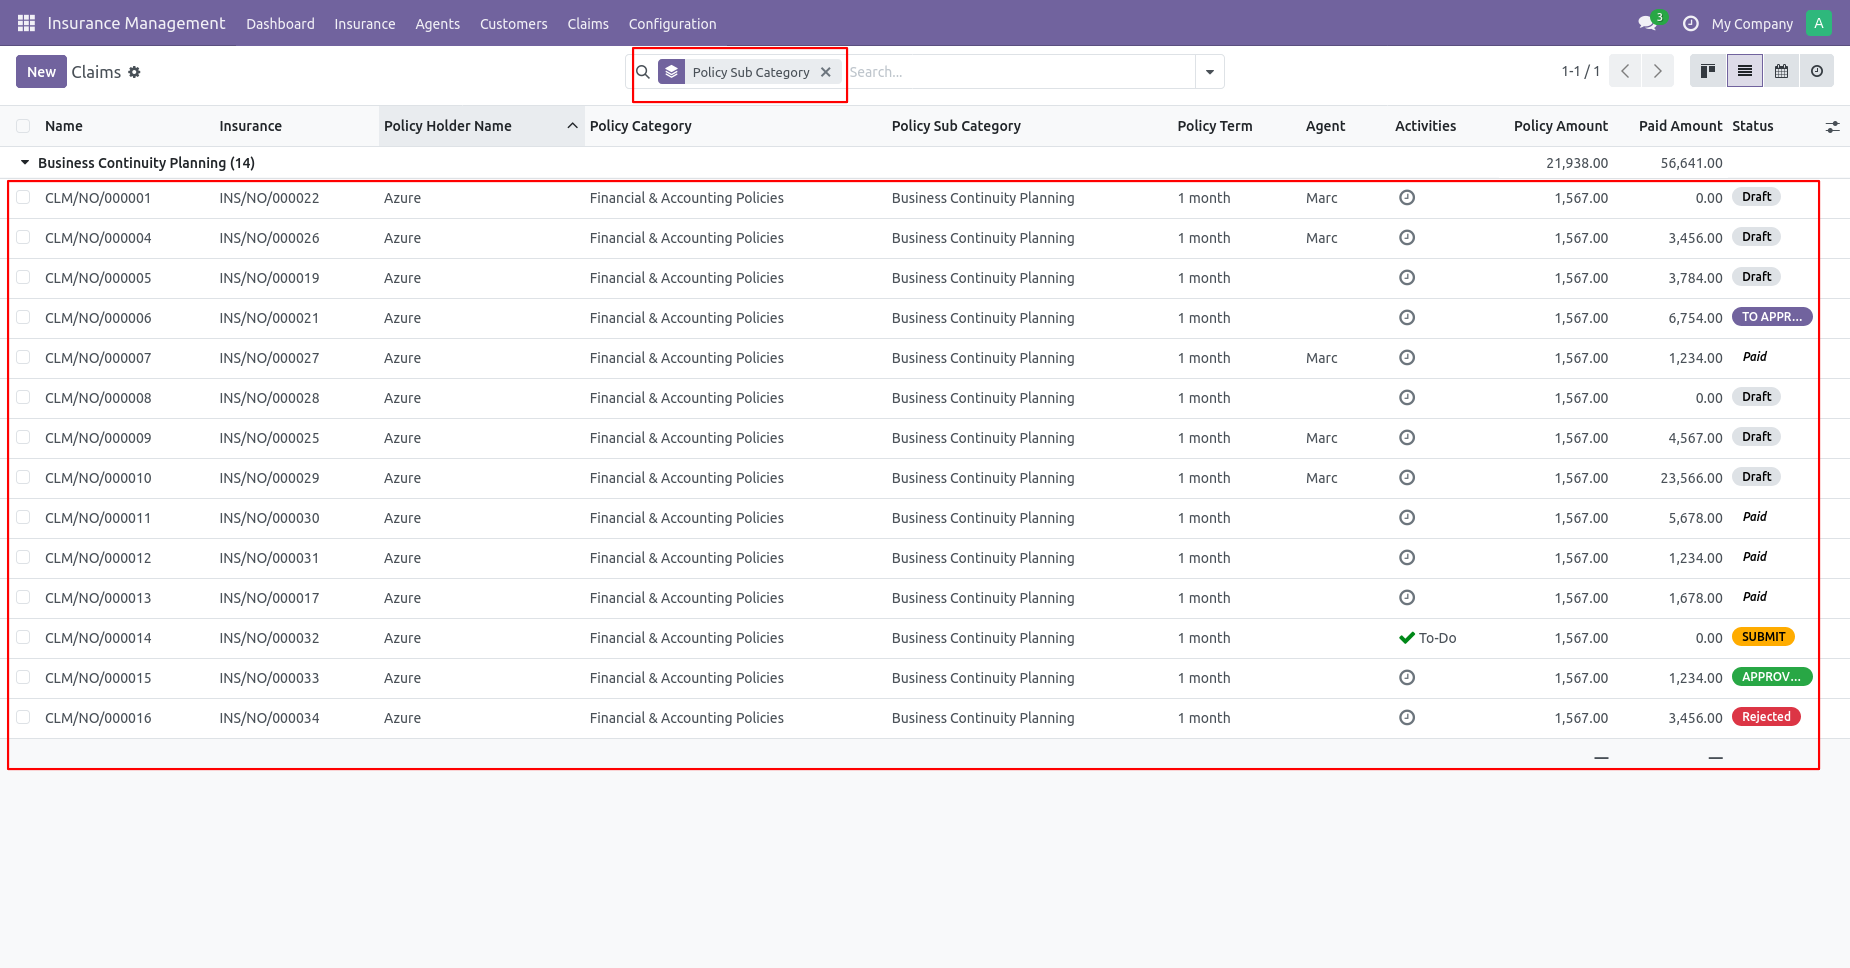
Filter claims with different stages.
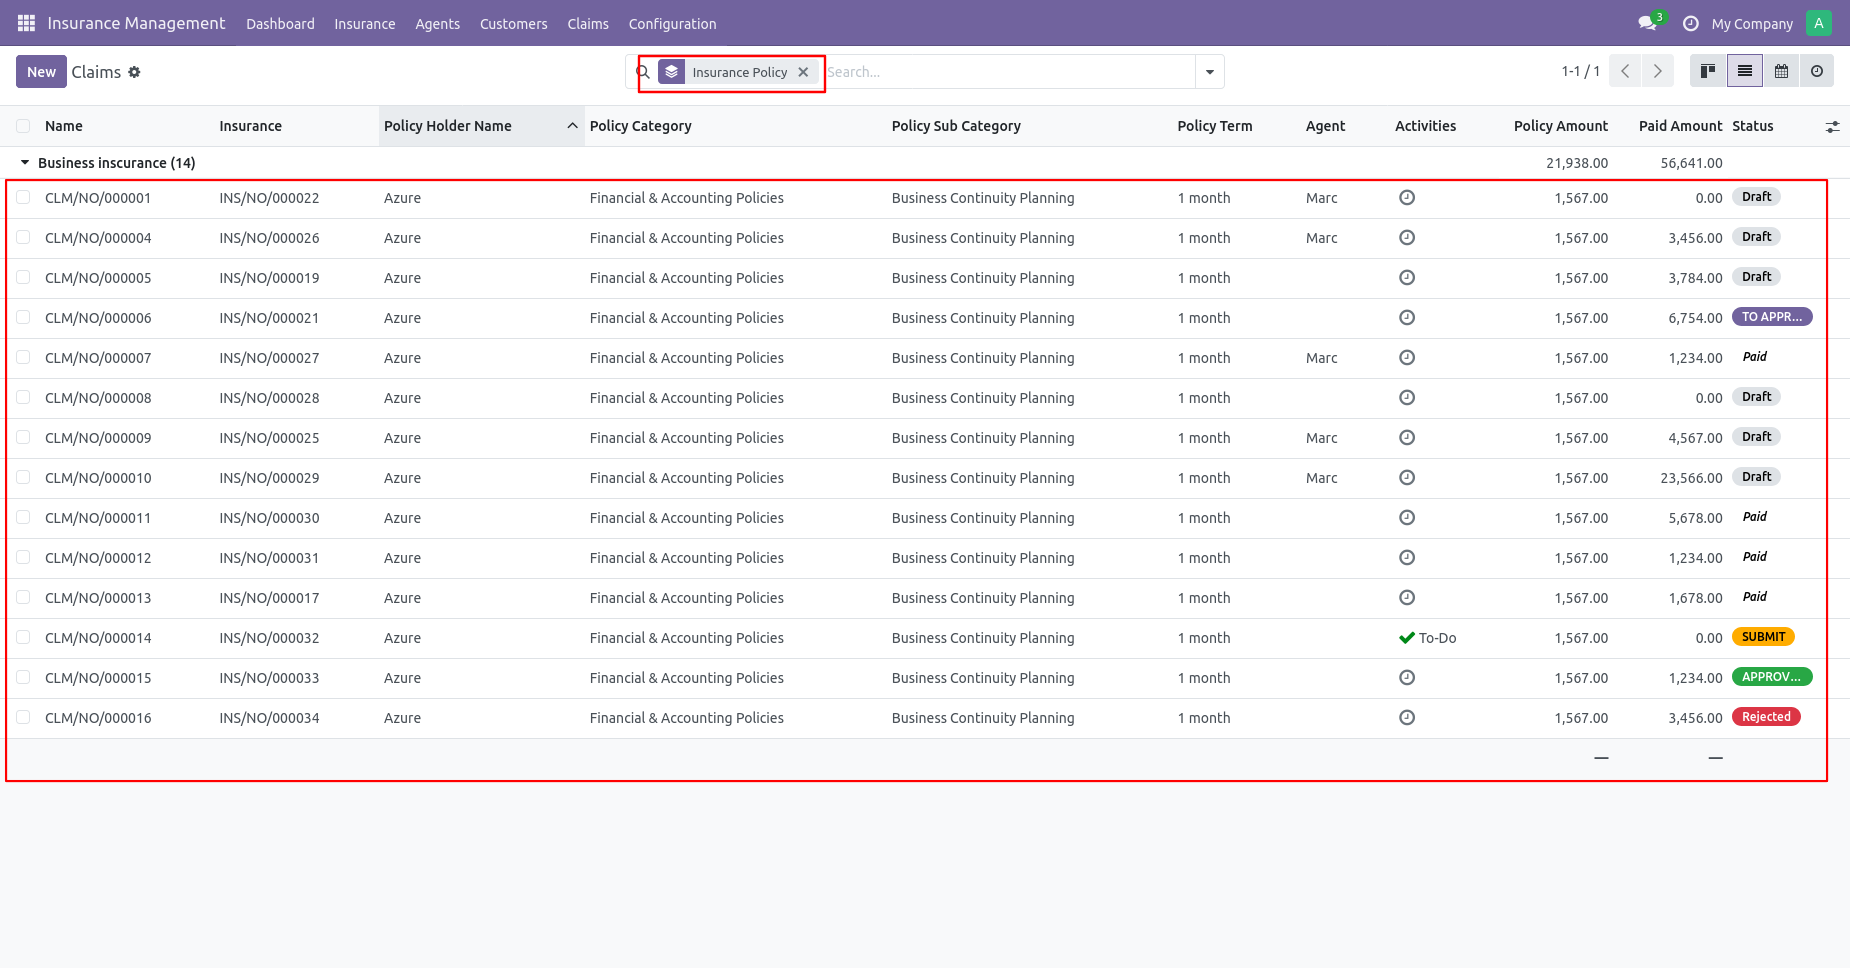
You can see the claim group by Gender.
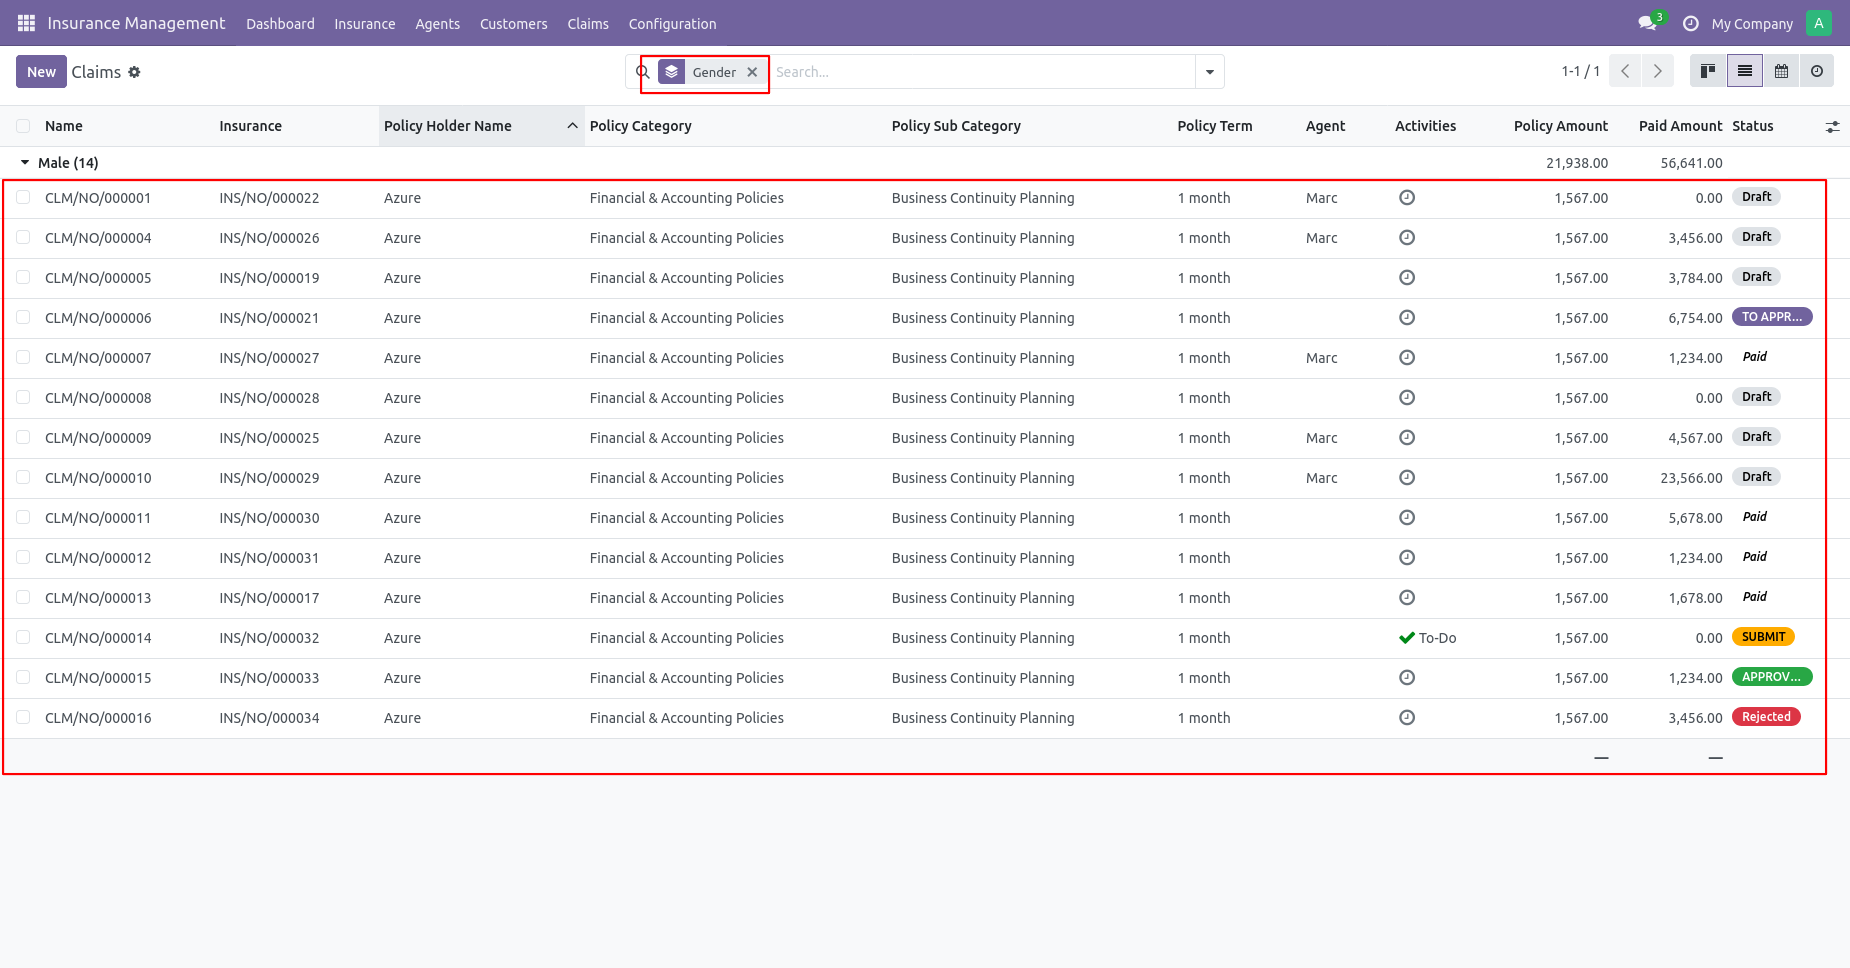
You can see the claim group by Agent.
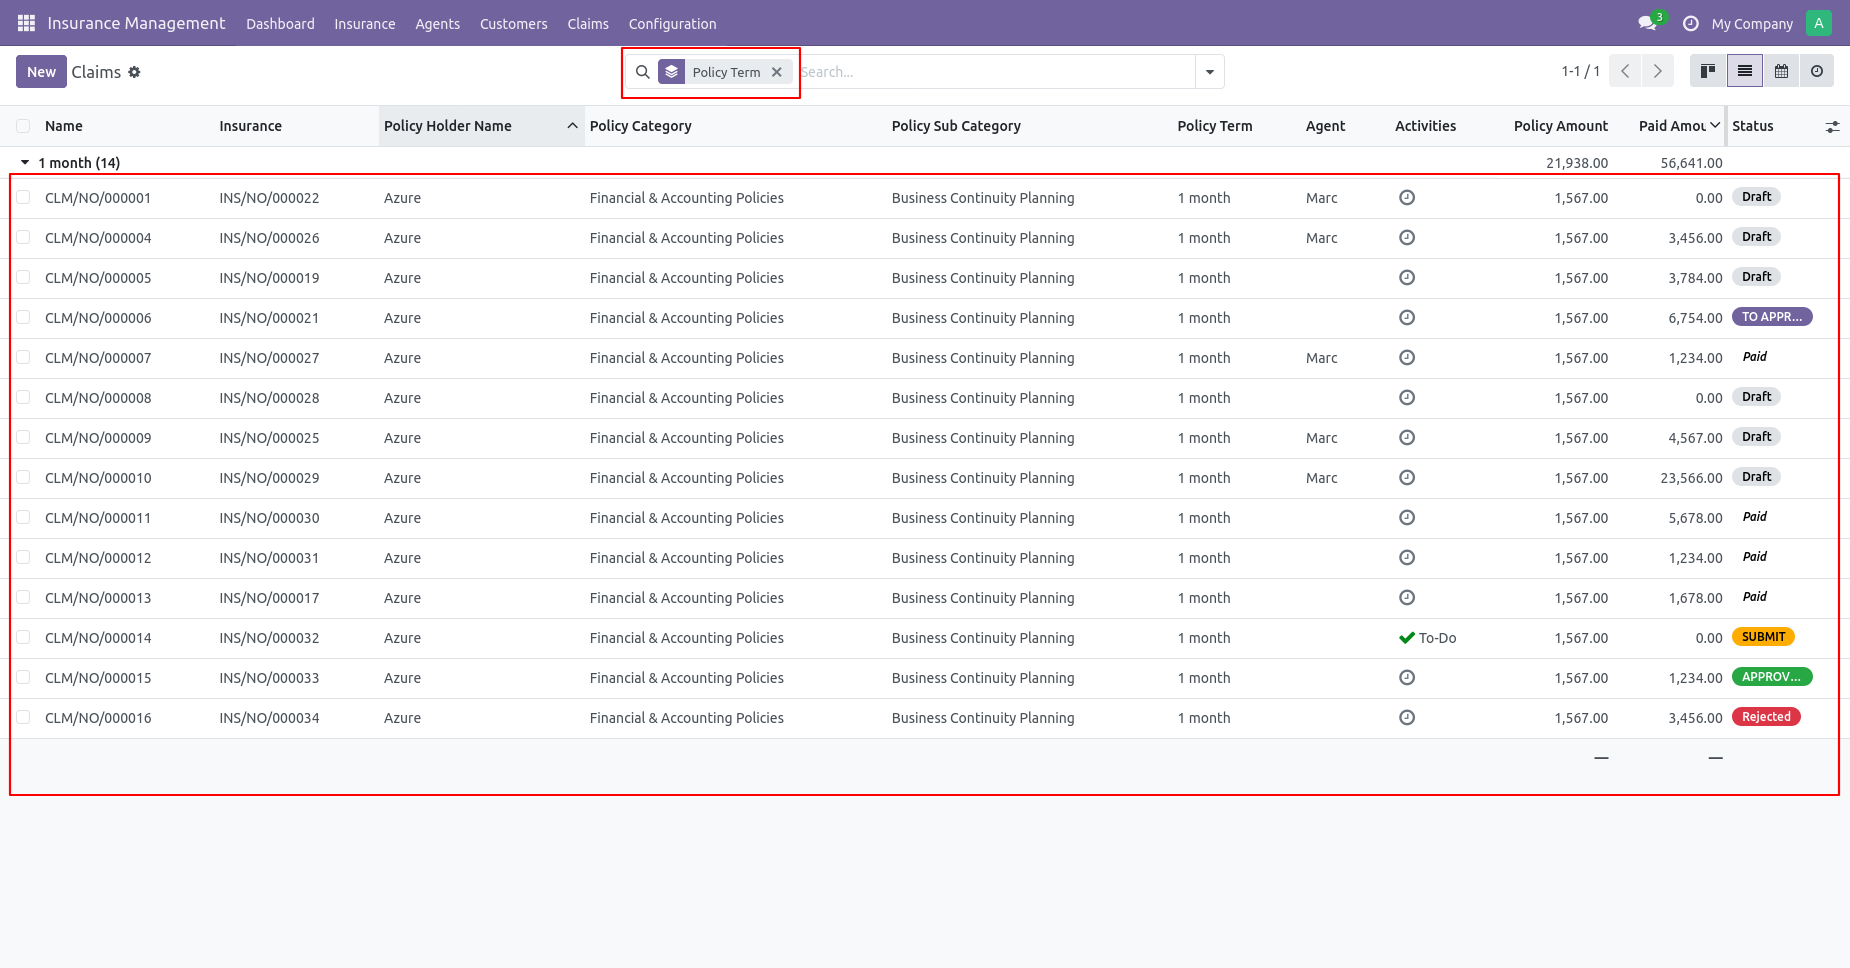
You can see the claim group by the Policy term.
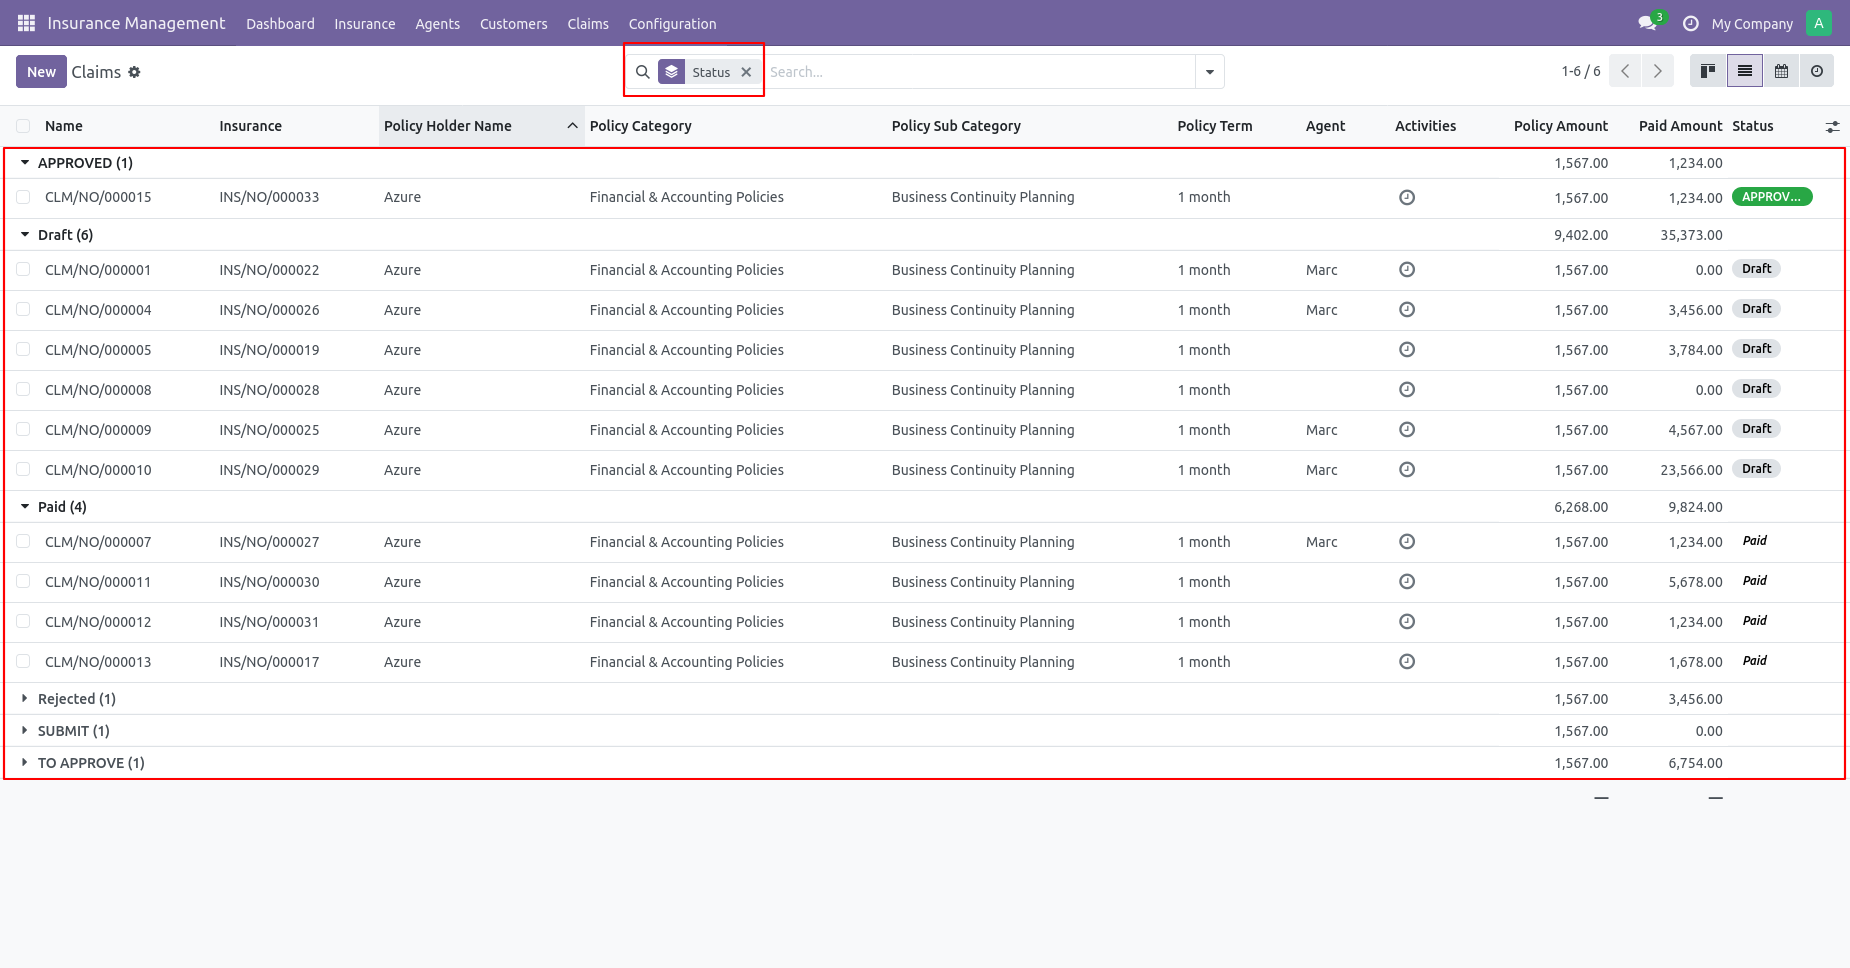
You can see the claim group by Policy status.
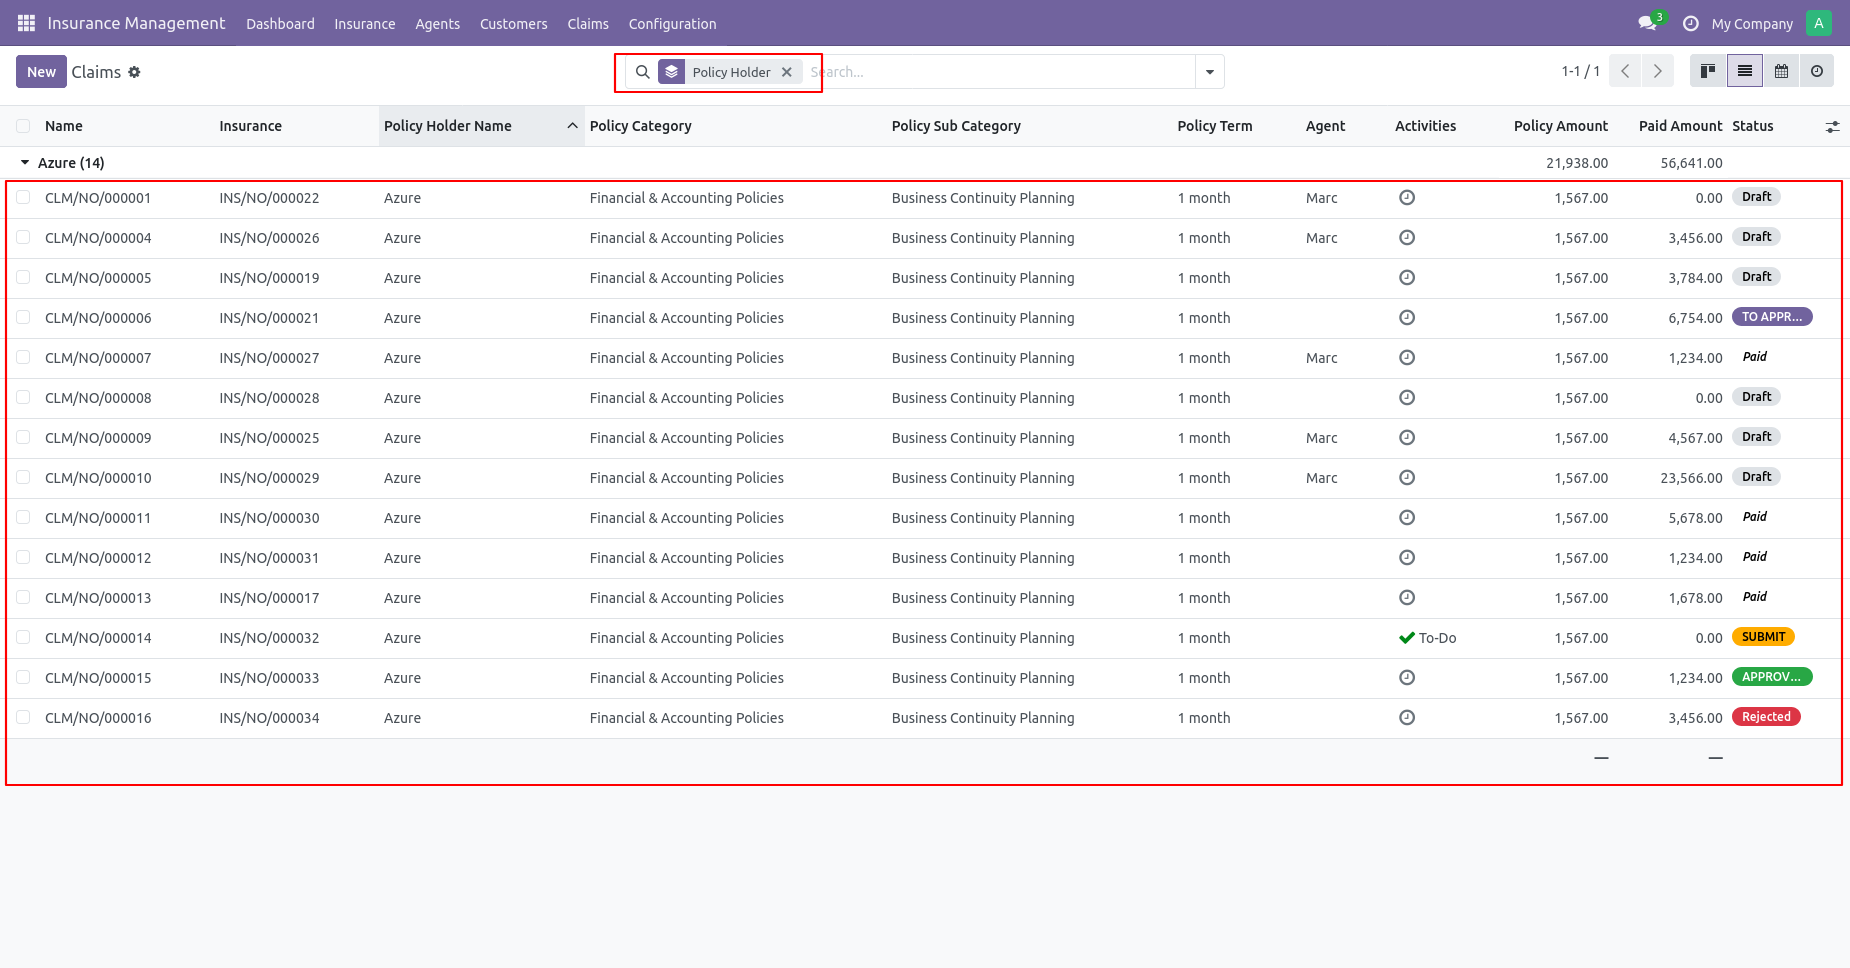
You can see the claim group by Policy holder.
You can see the claim group by claim date.
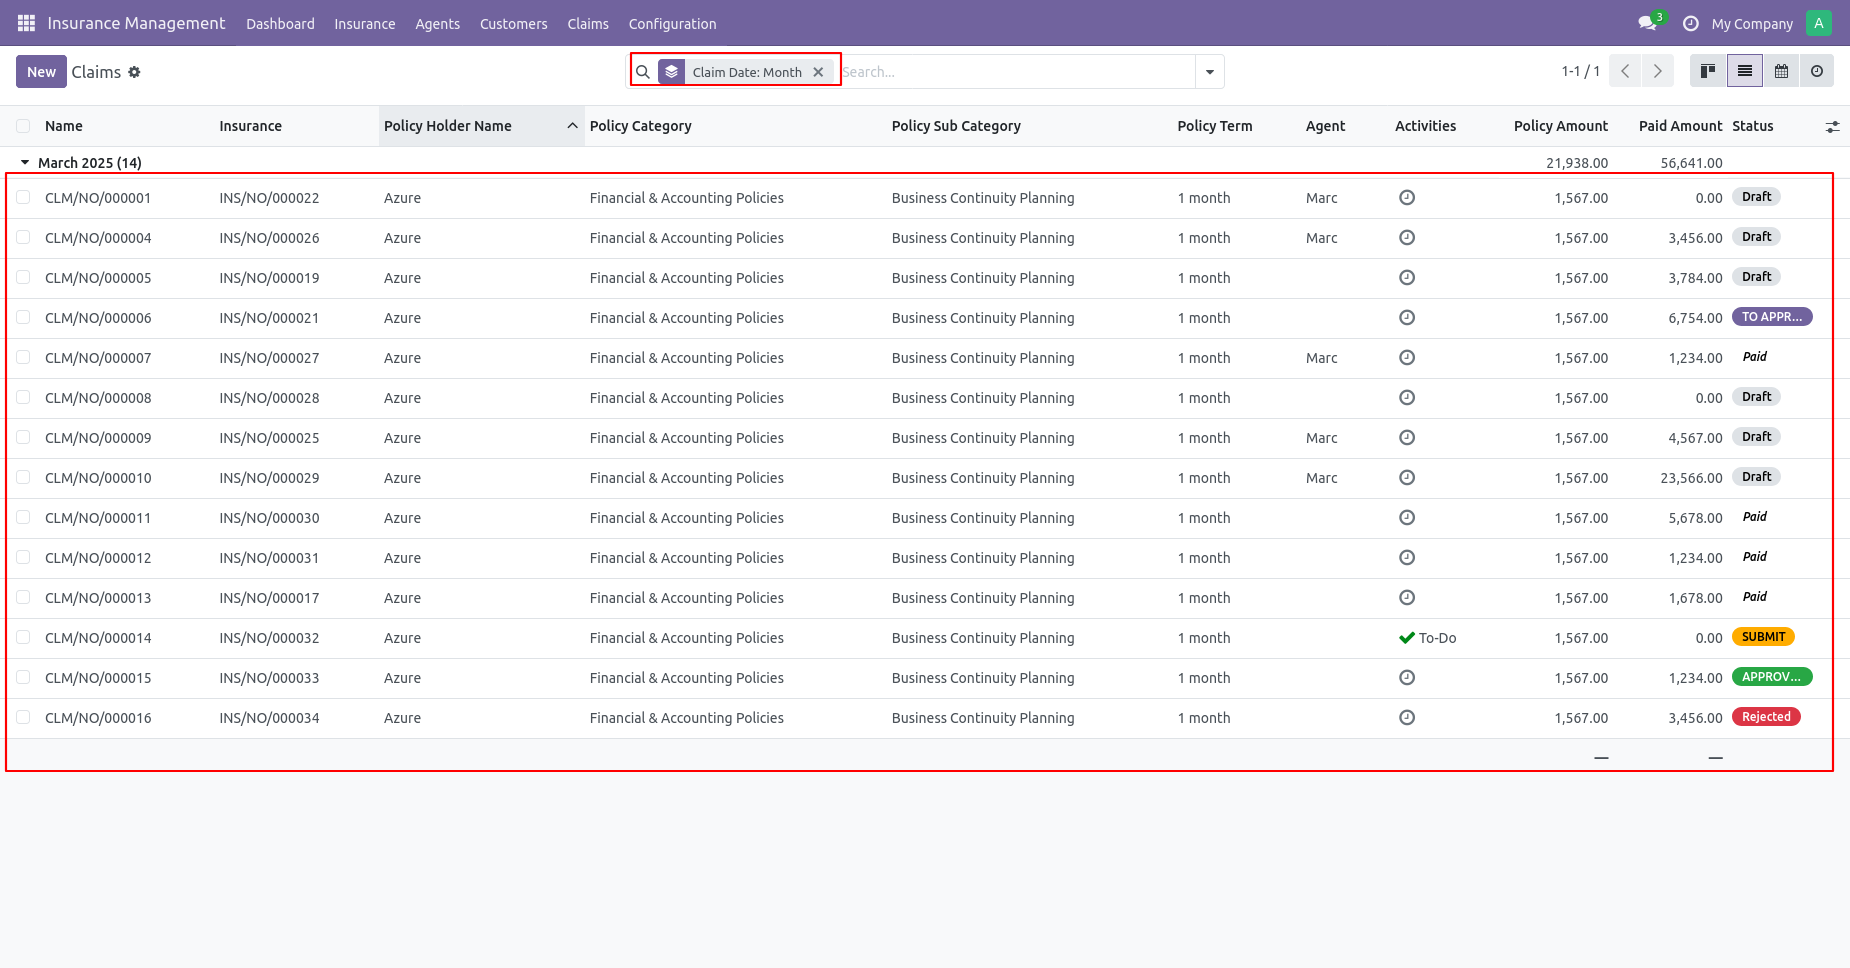
Once the claim has been paid insurance will automatically move to
the expired
stage.
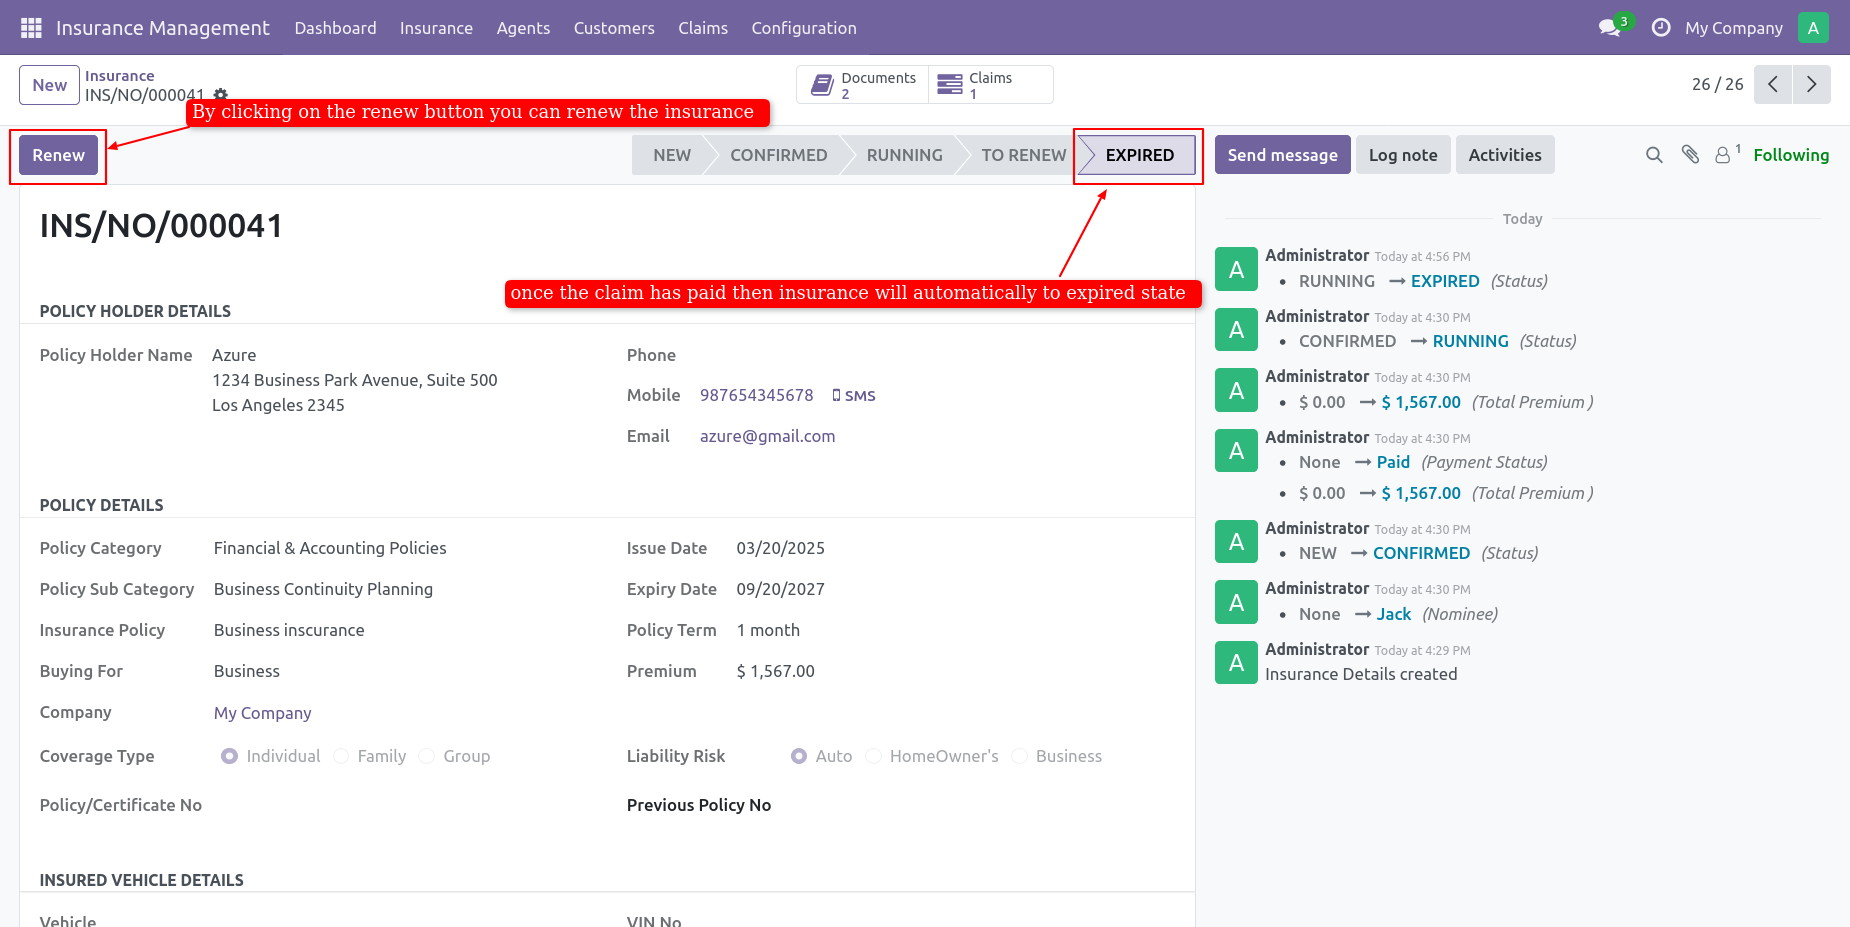
You can renew your insurance by clicking on the renew button.
Click on the renew button.
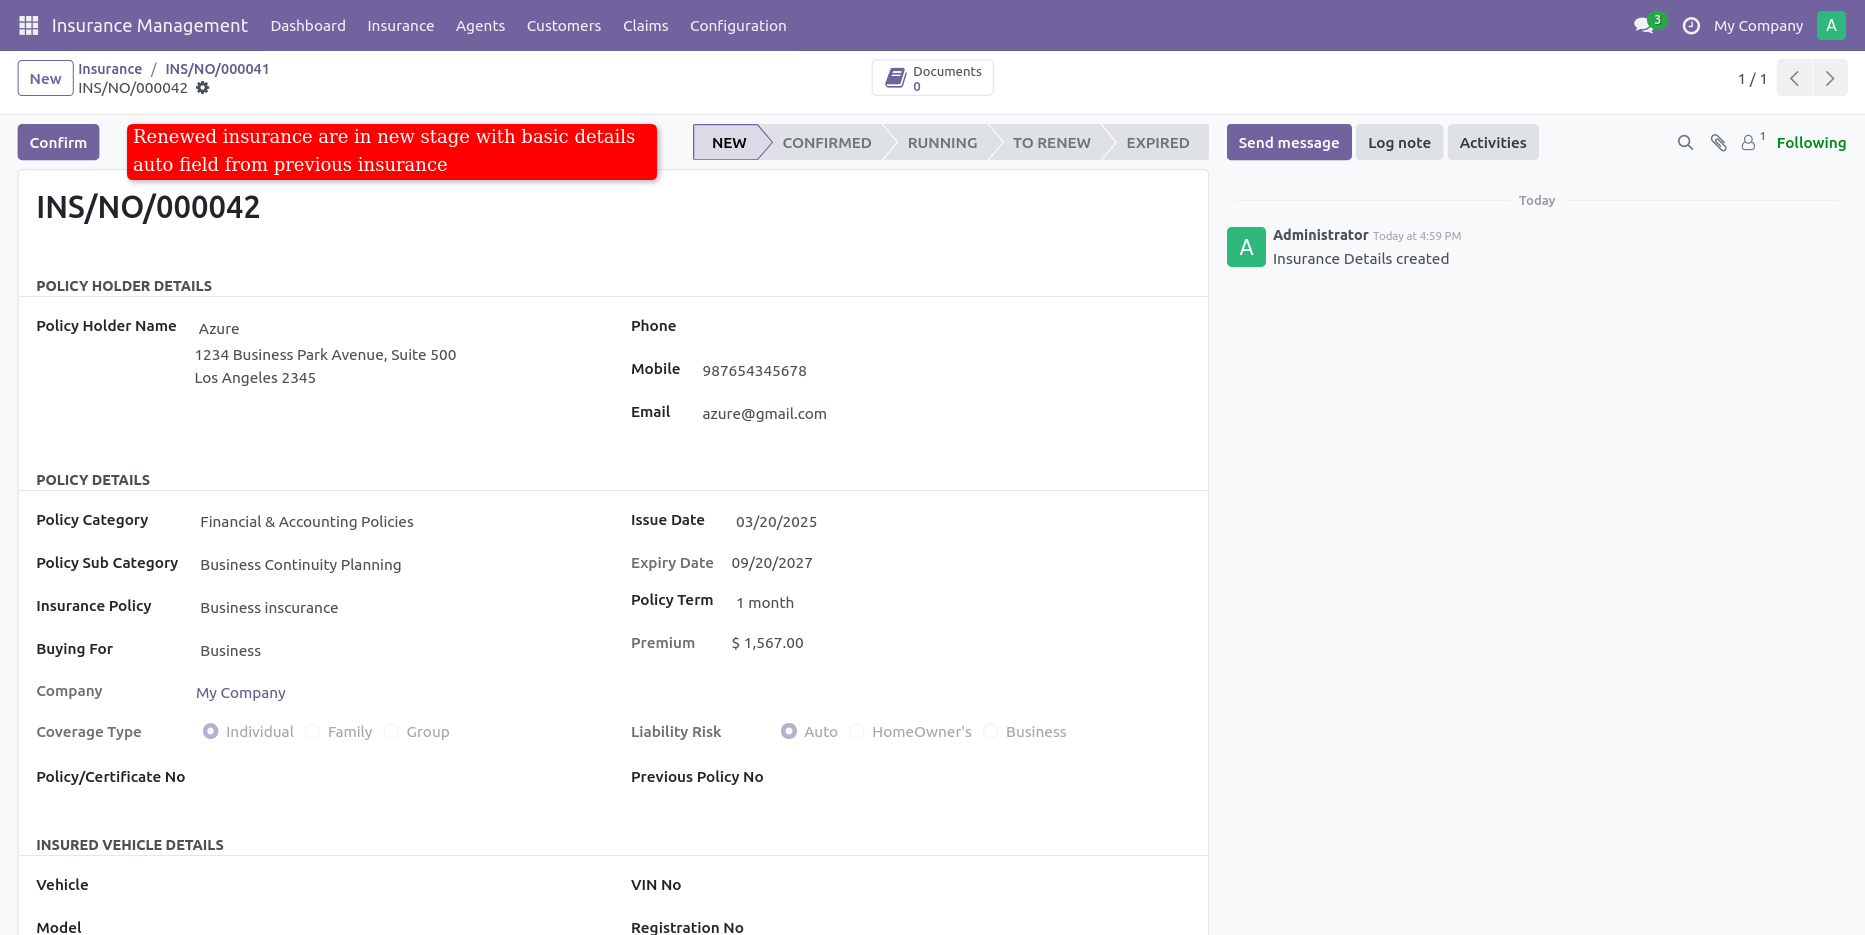
When clicking on the renew button it will create a new insurance policy with policyholder details.
Schedule Action For Expiry Policy
Wish Type Menu.
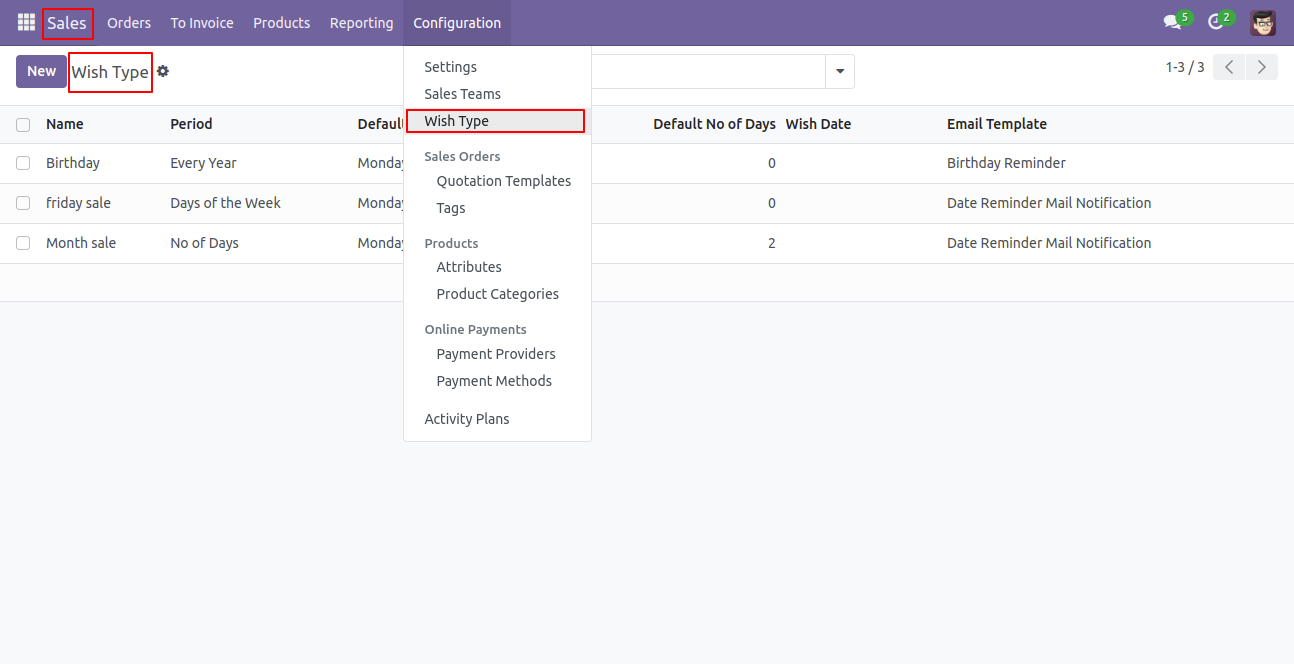
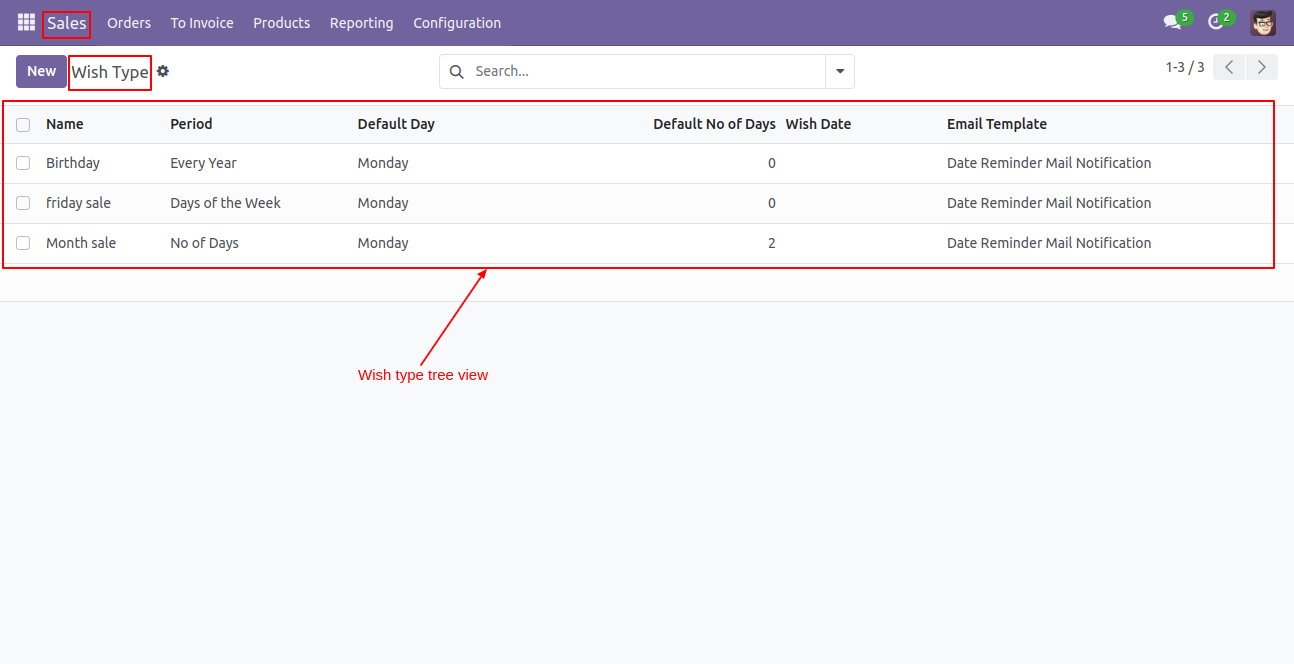
Wish Type Tree view.
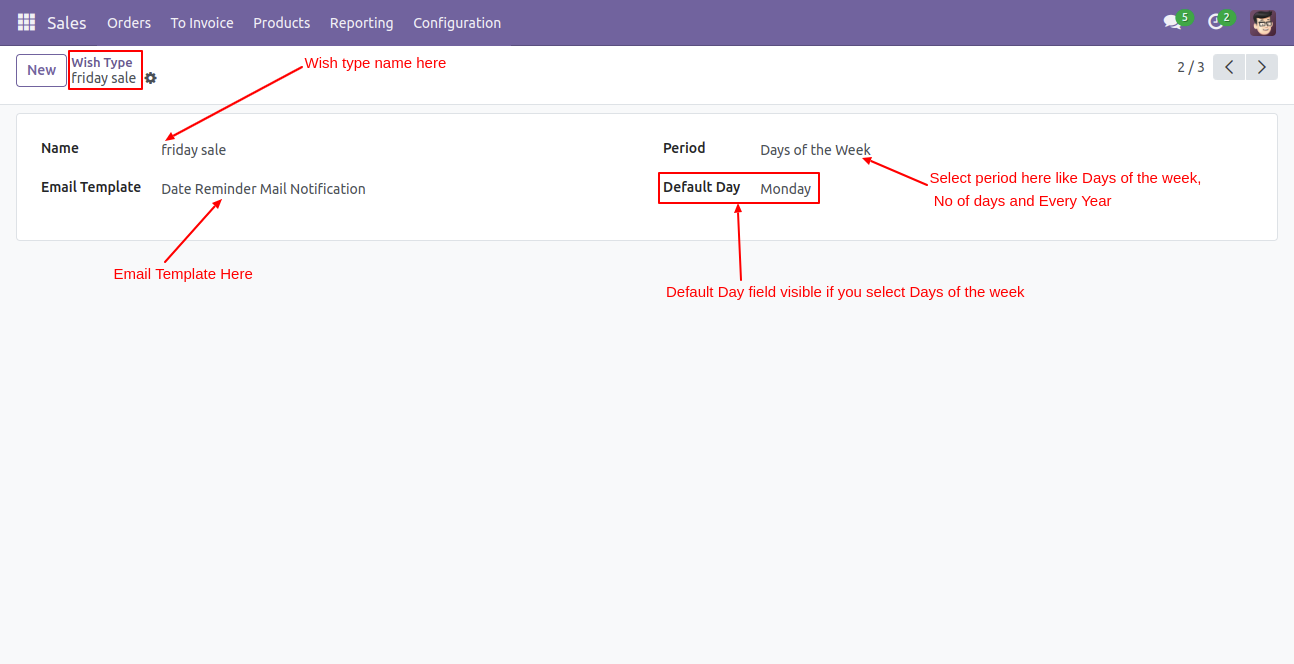
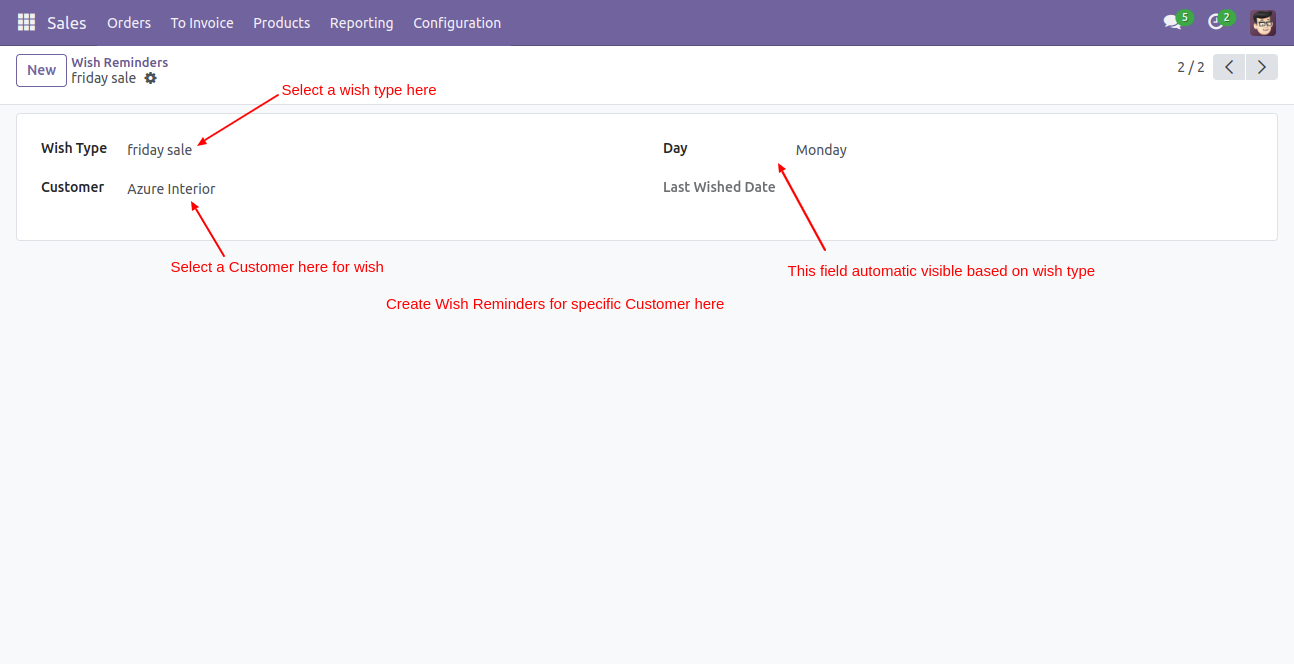
Wish type form view and Days of the week.
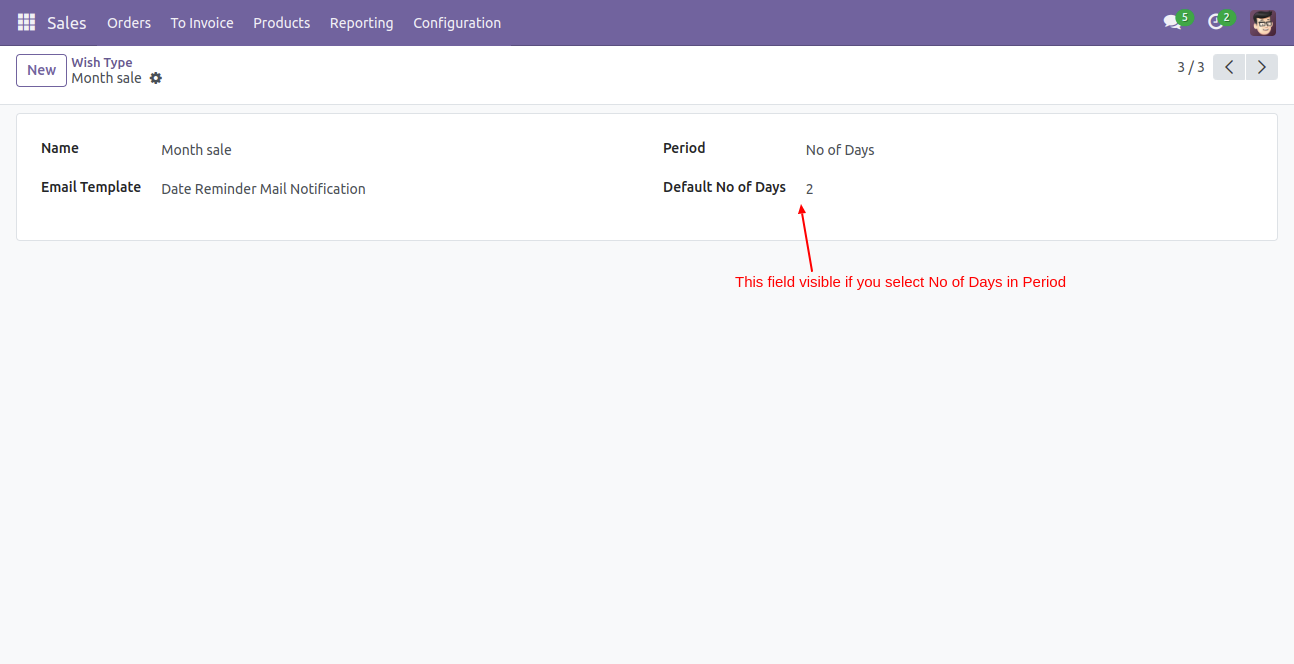
No of Days period.
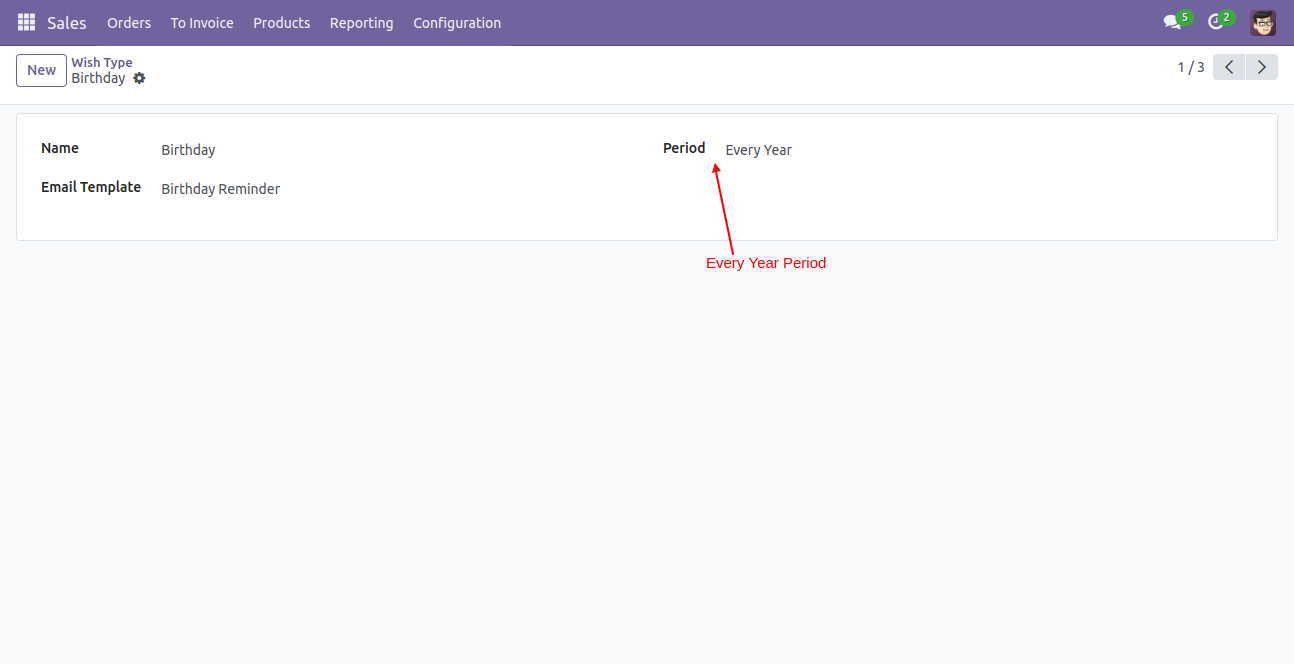
Every Year.
Wish Reminder menu.
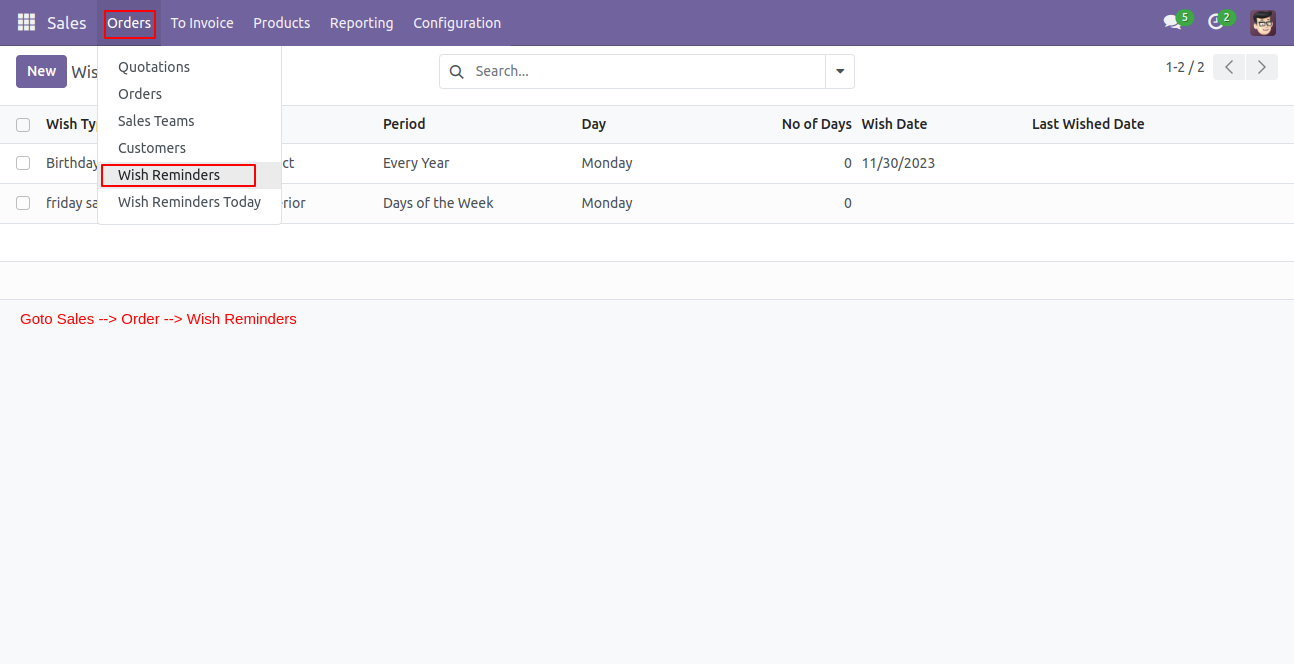
wish Type Menu.
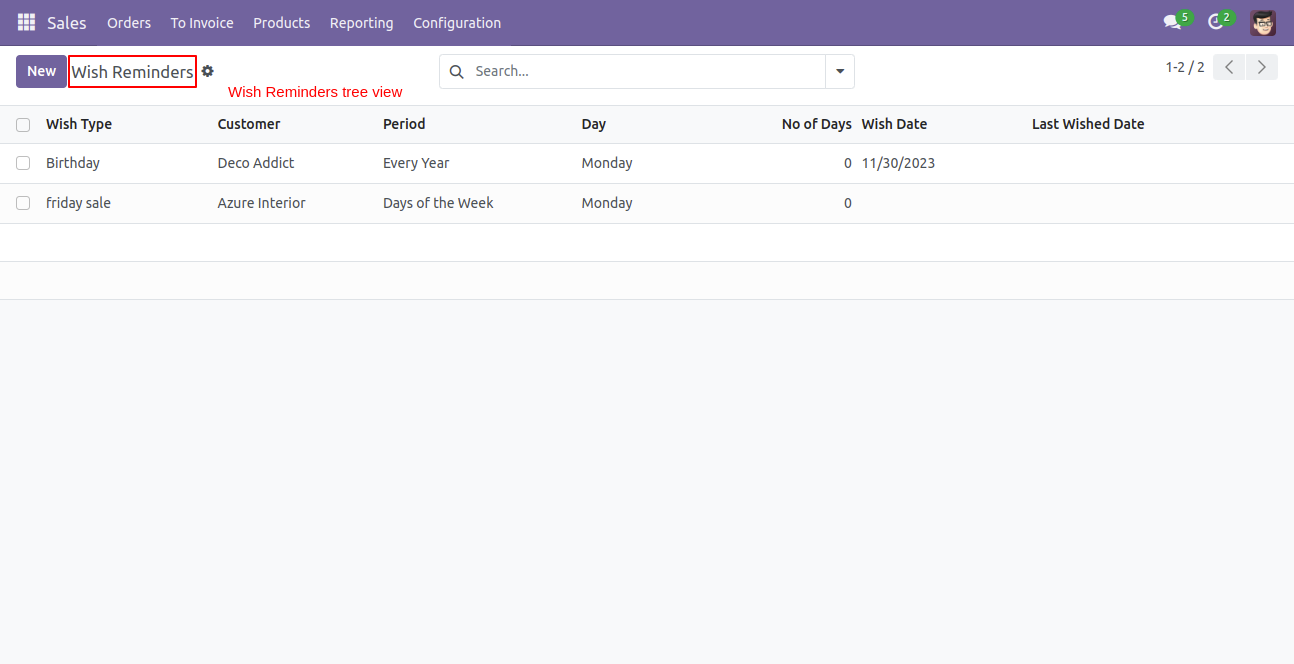
Wish Reminder Tree view.
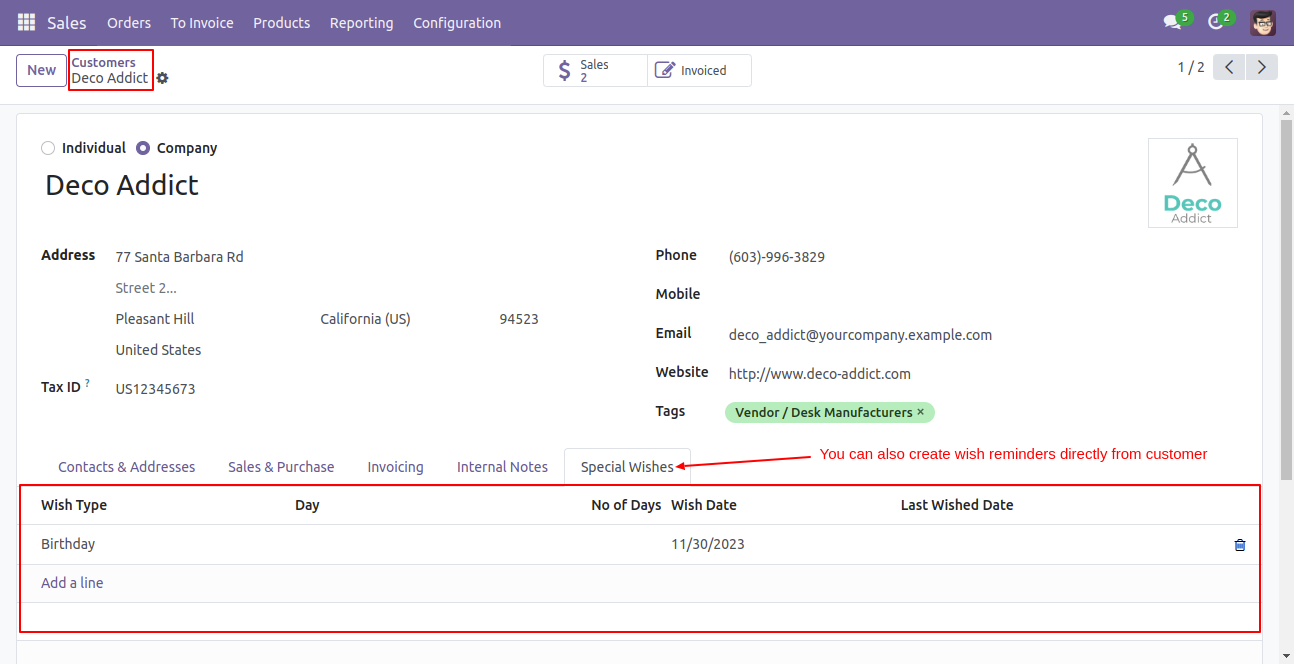
You can also create a wish reminder from the customer.
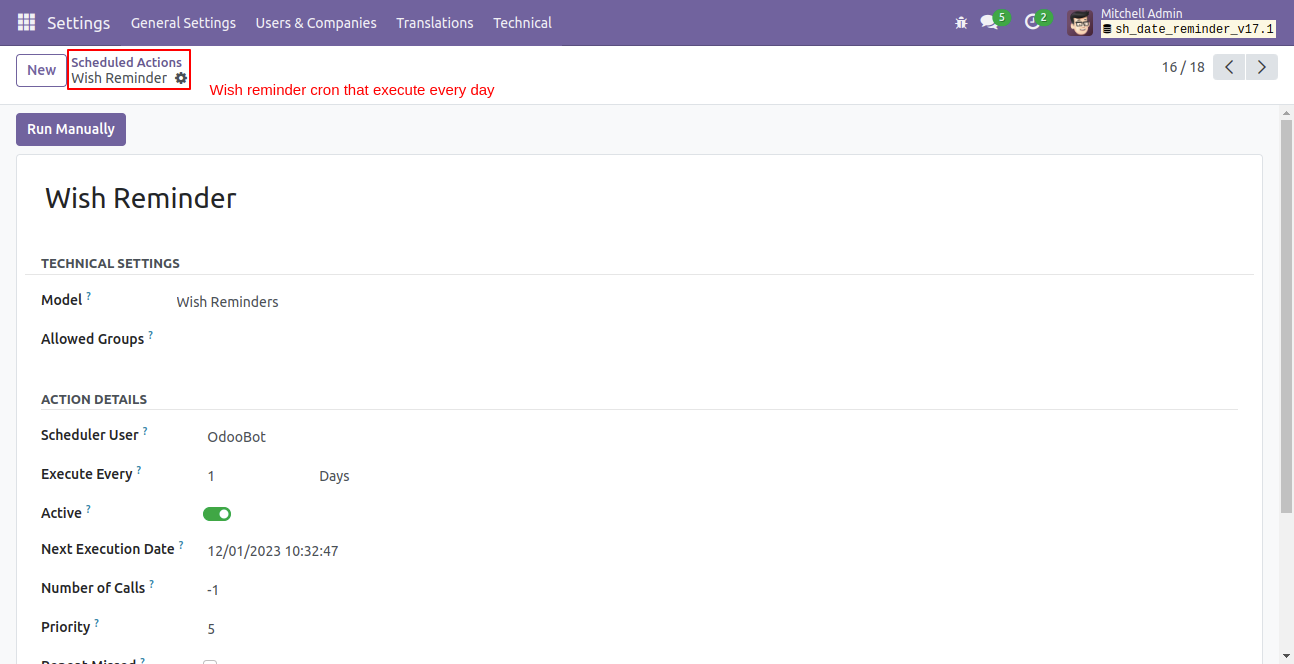
Wish Reminder Cron.
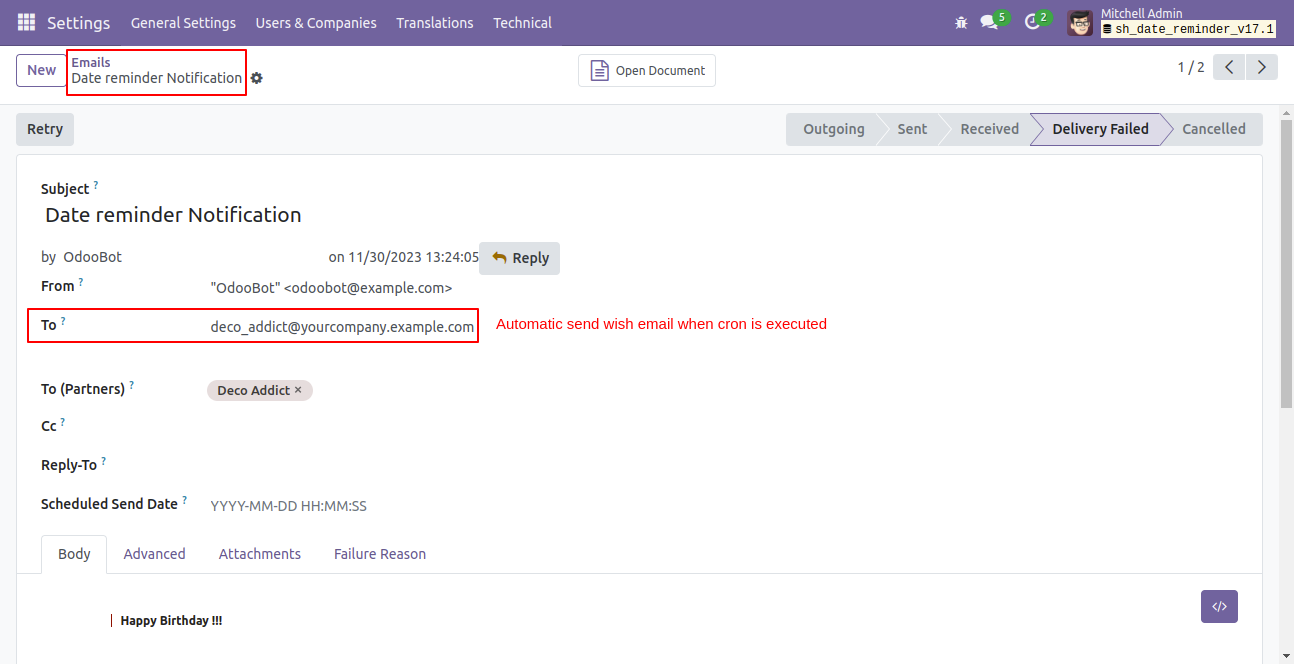
Automatic send wishes to the customer when the cron is executed.
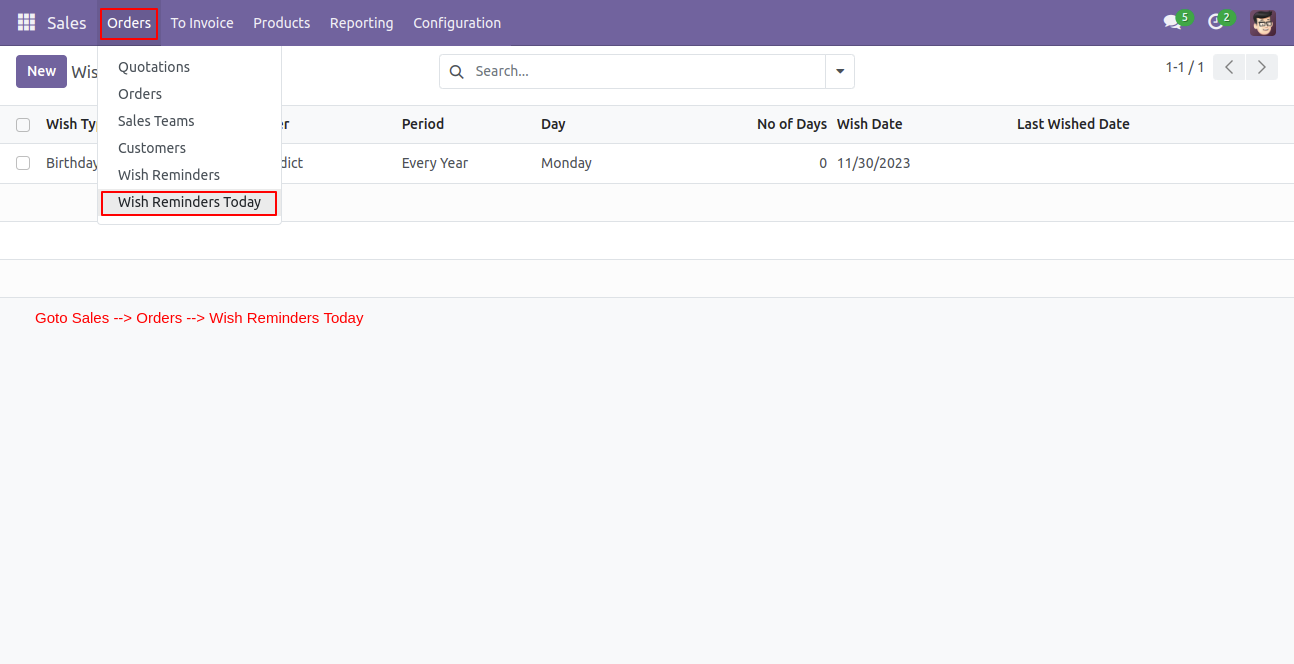
Wish reminder Today menu.
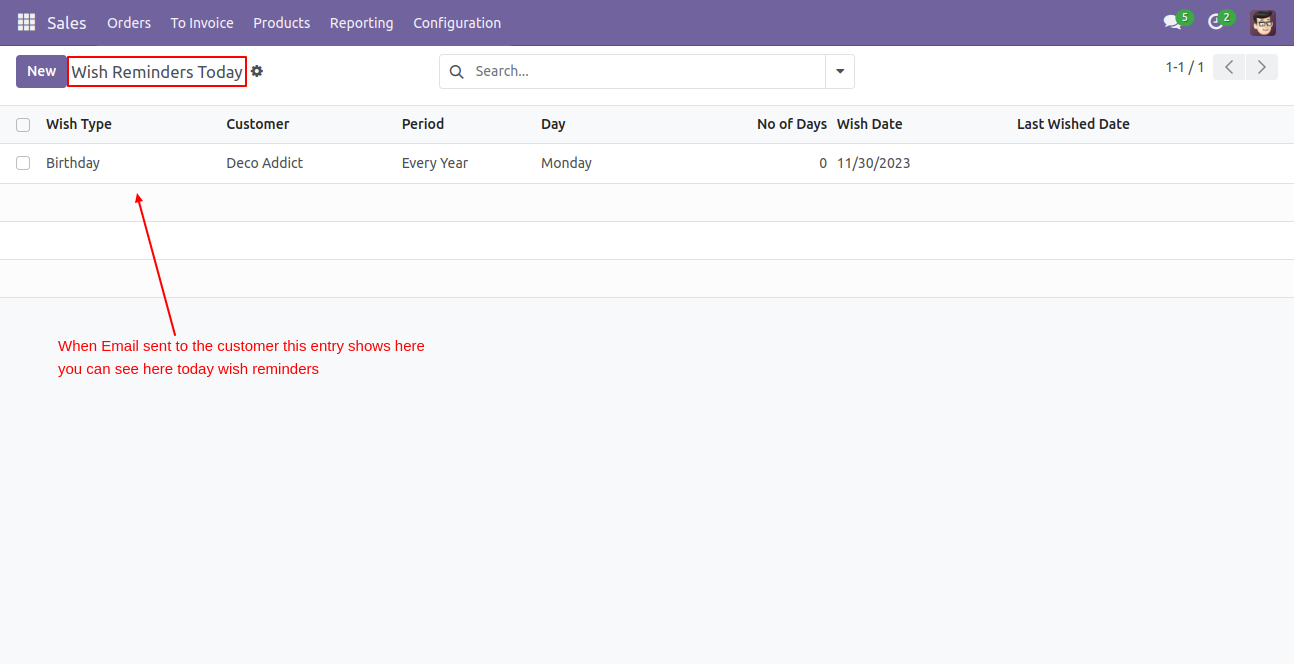
Wish reminder Today tree view that shows today sent wishes.
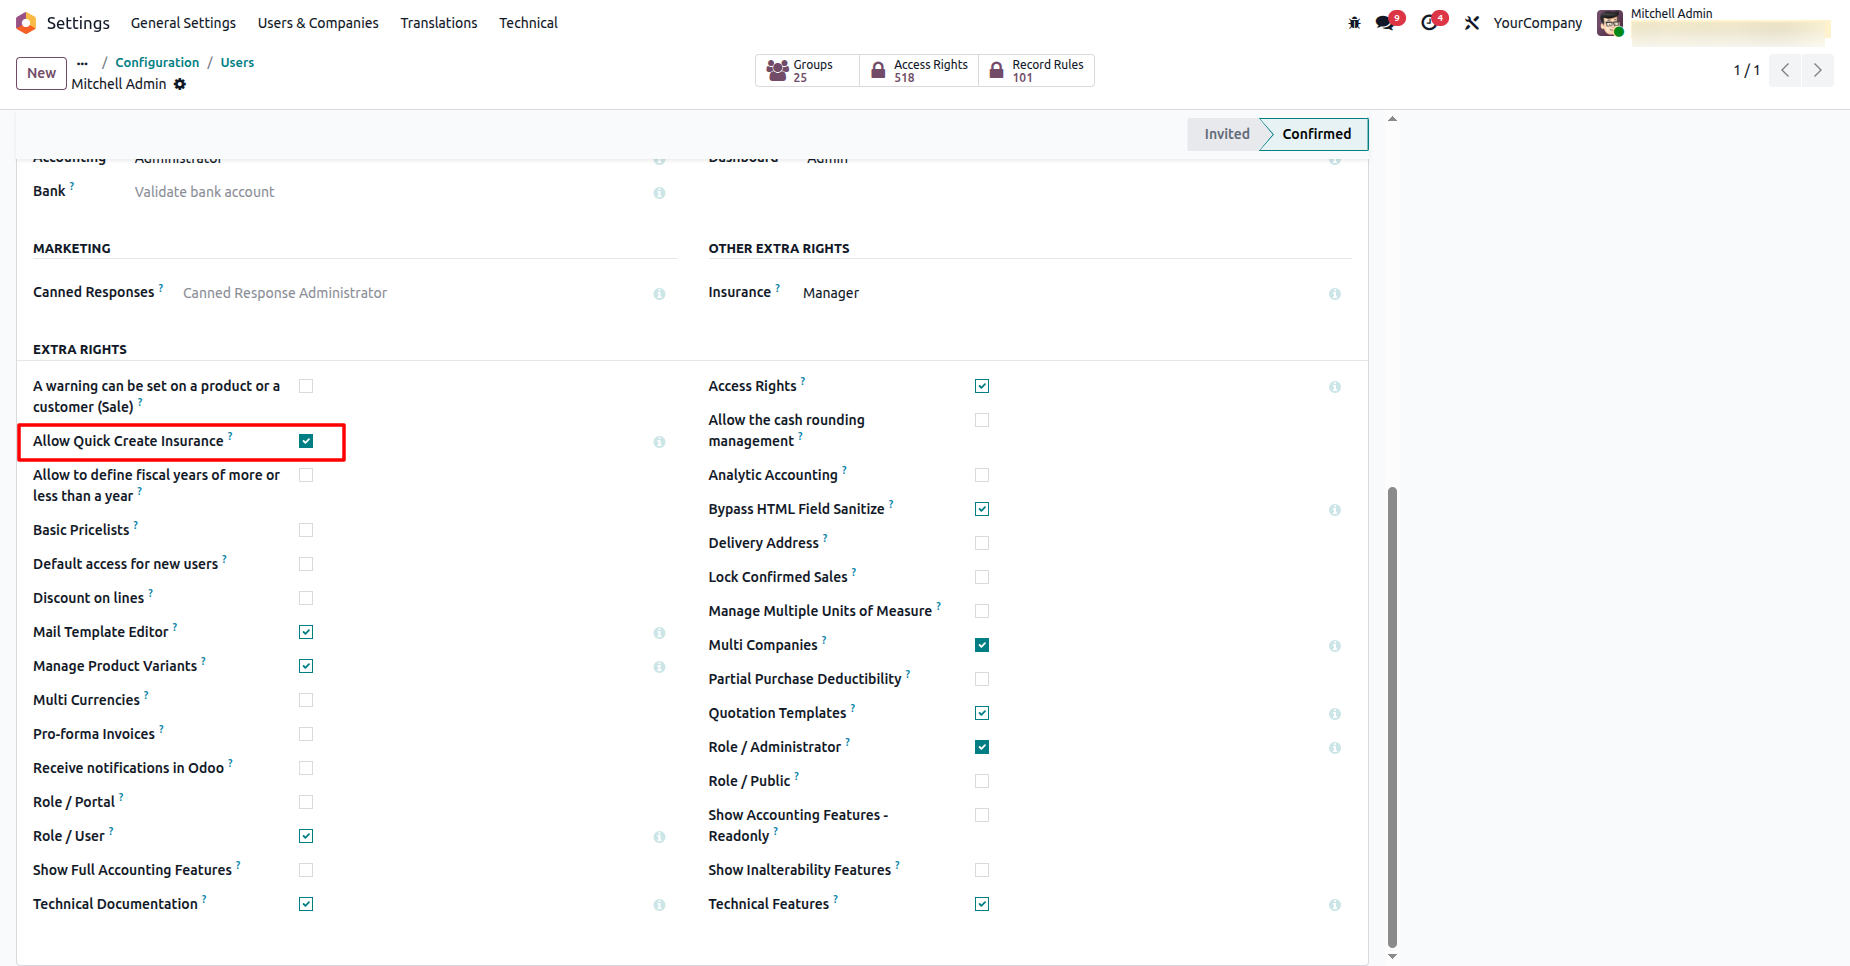
Go to your user settings ==> Tick the 'Allow Quick Create Insurance'.
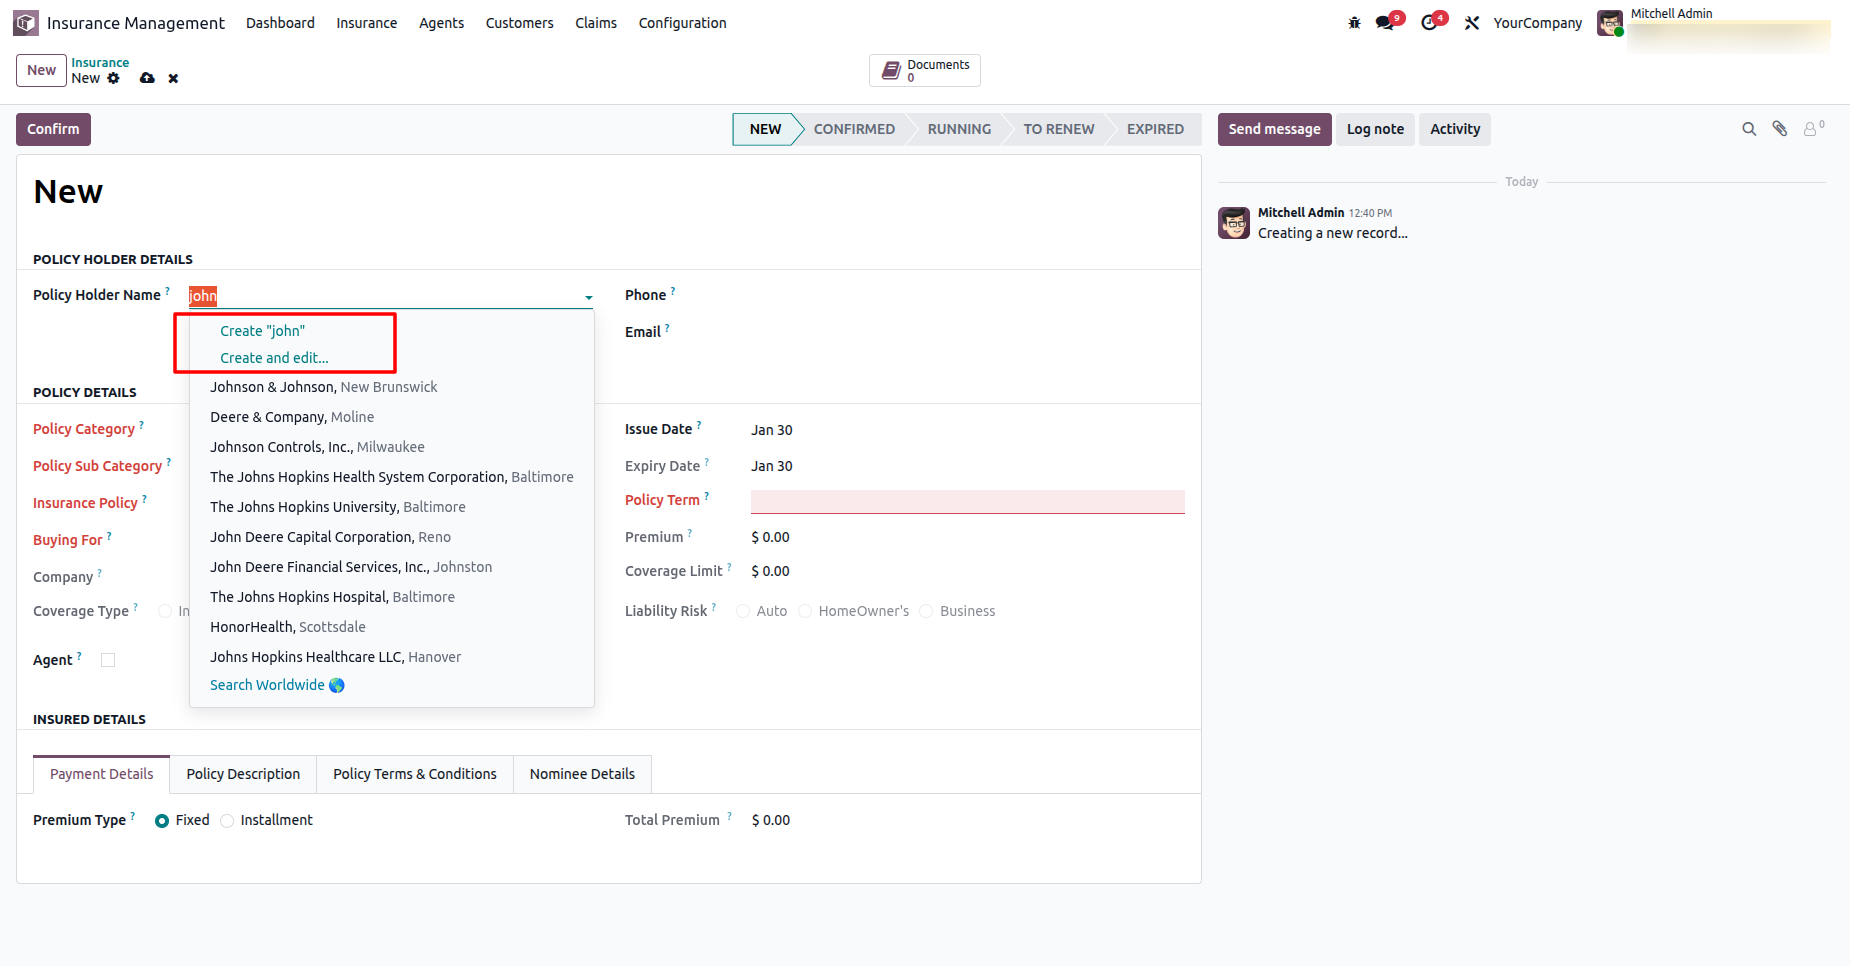
You can create the 'Policy Holder Name' directly from the insurance form view.
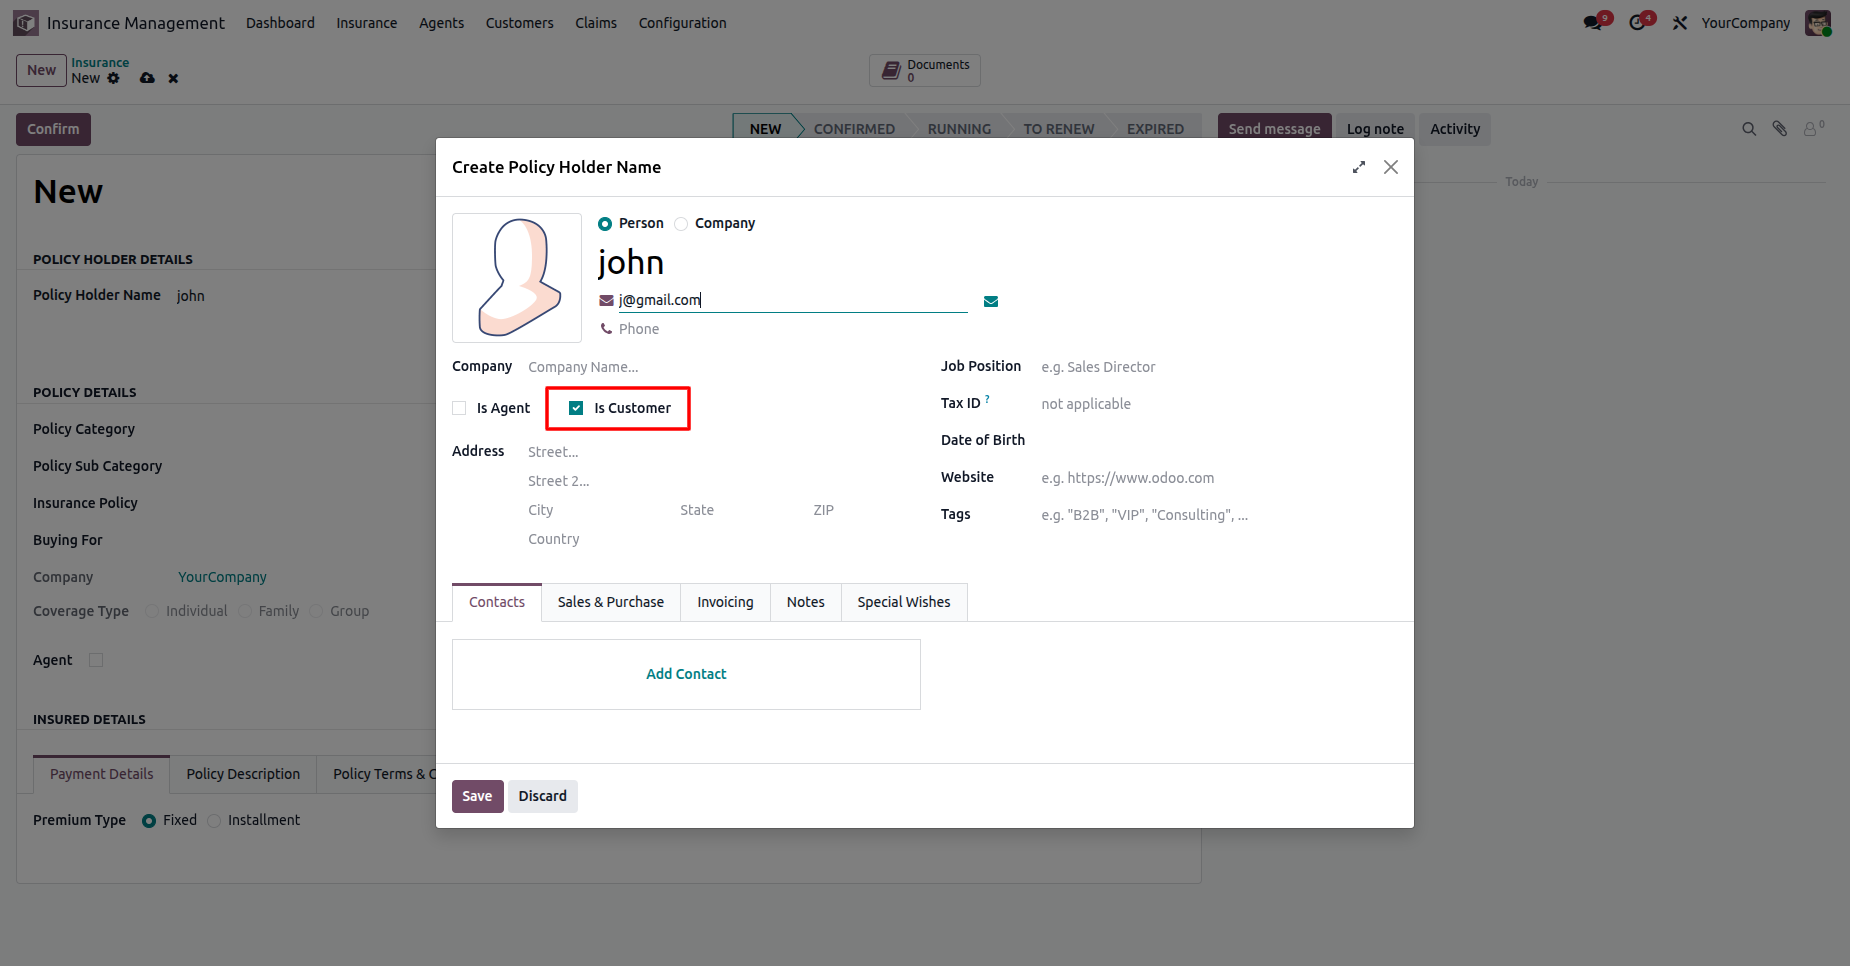
Add details and click on the 'Save' button.
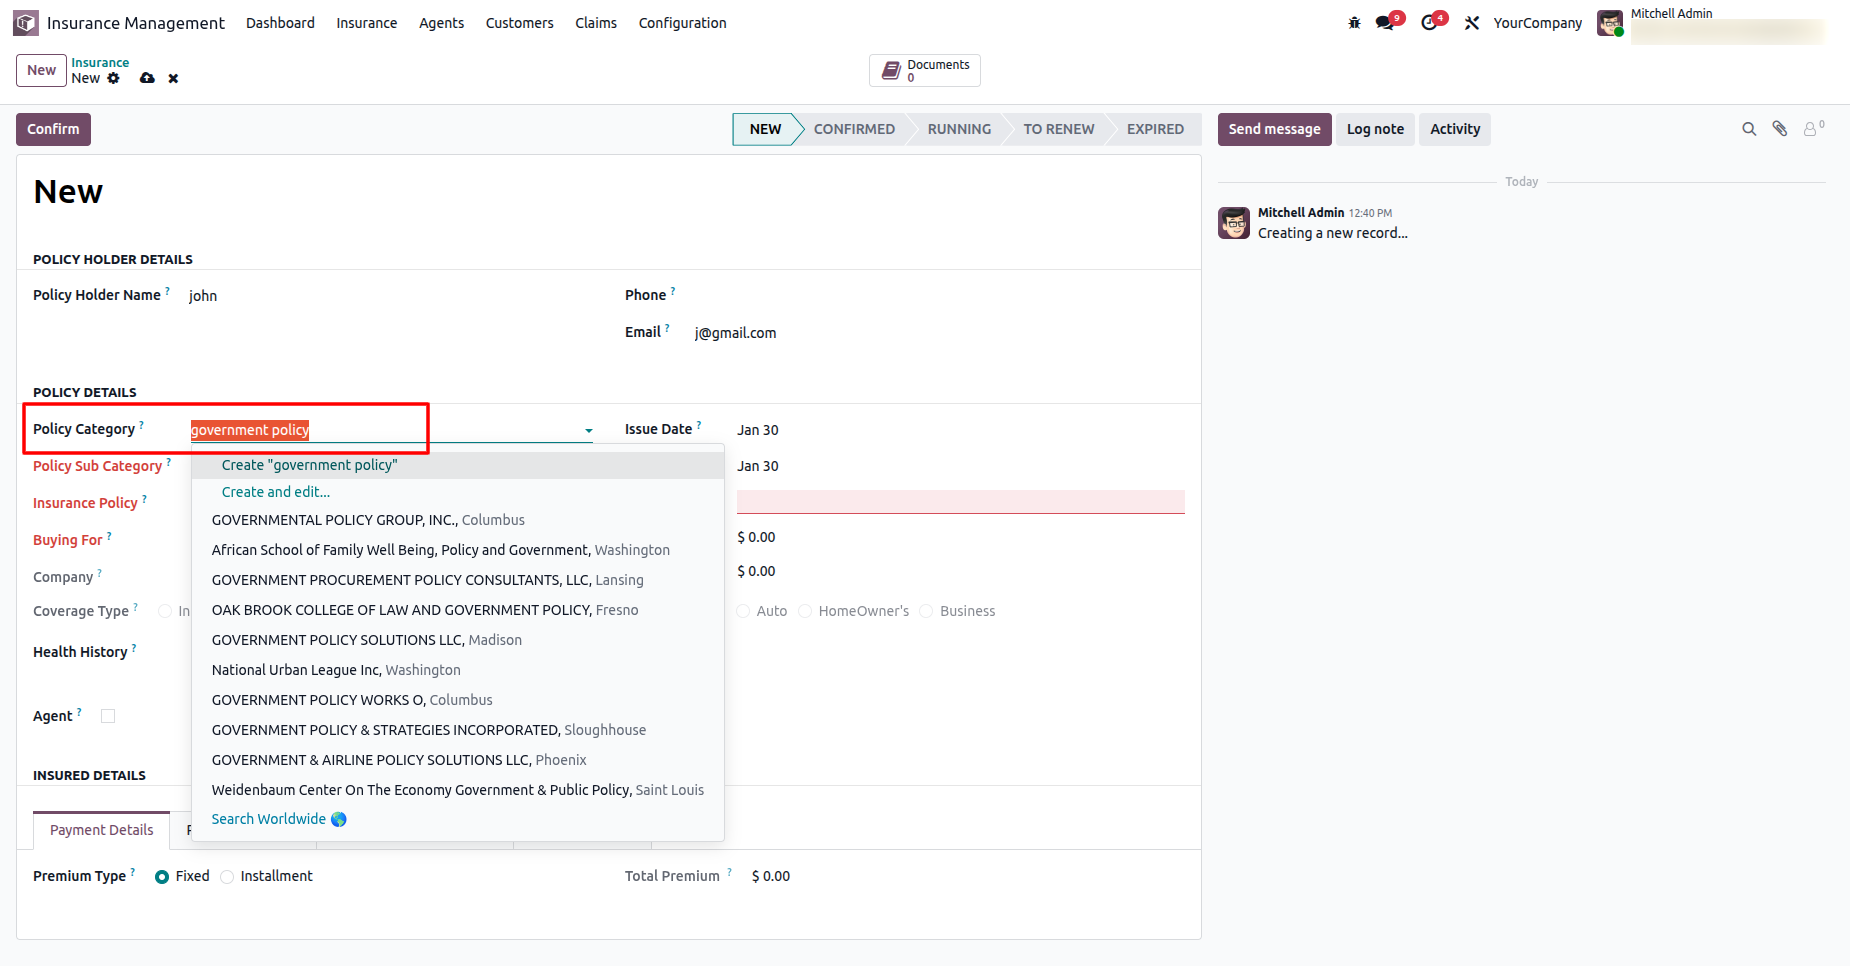
You can create the 'Policy Category' directly from the insurance form view.
You can create the 'Policy Sub Category' directly from the insurance form view.
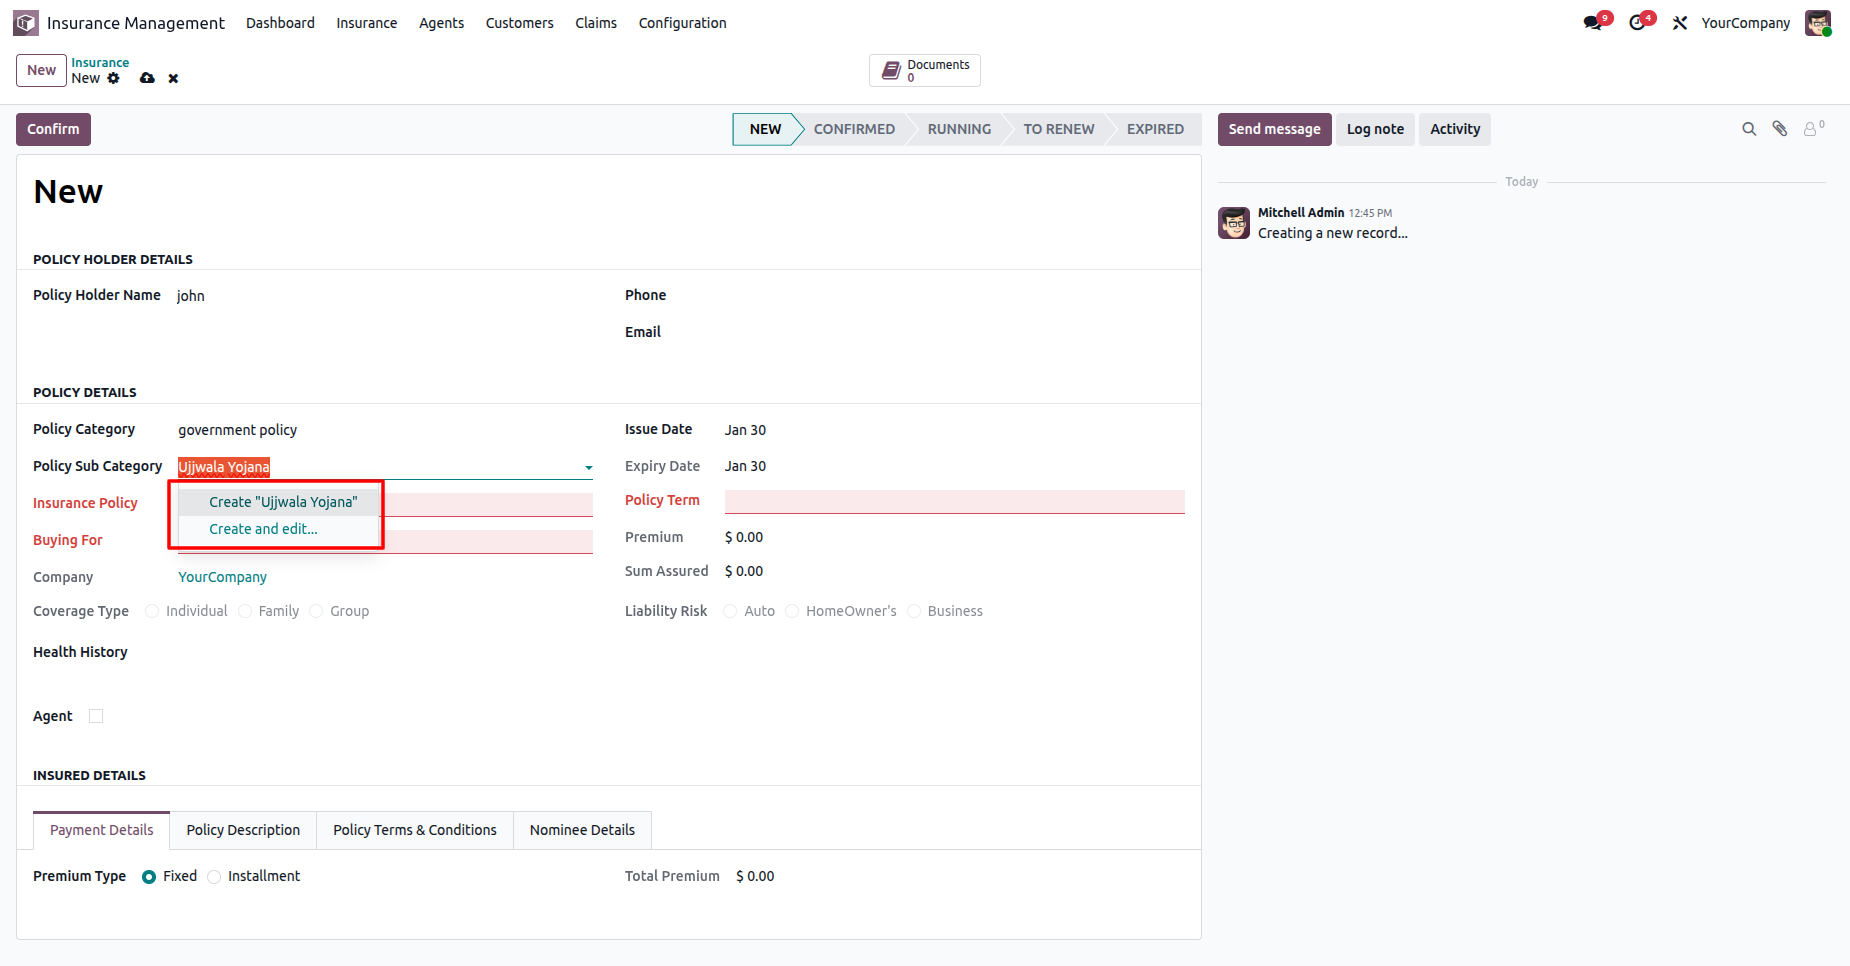
You can create the 'Insurance Policy' directly from the insurance form view.
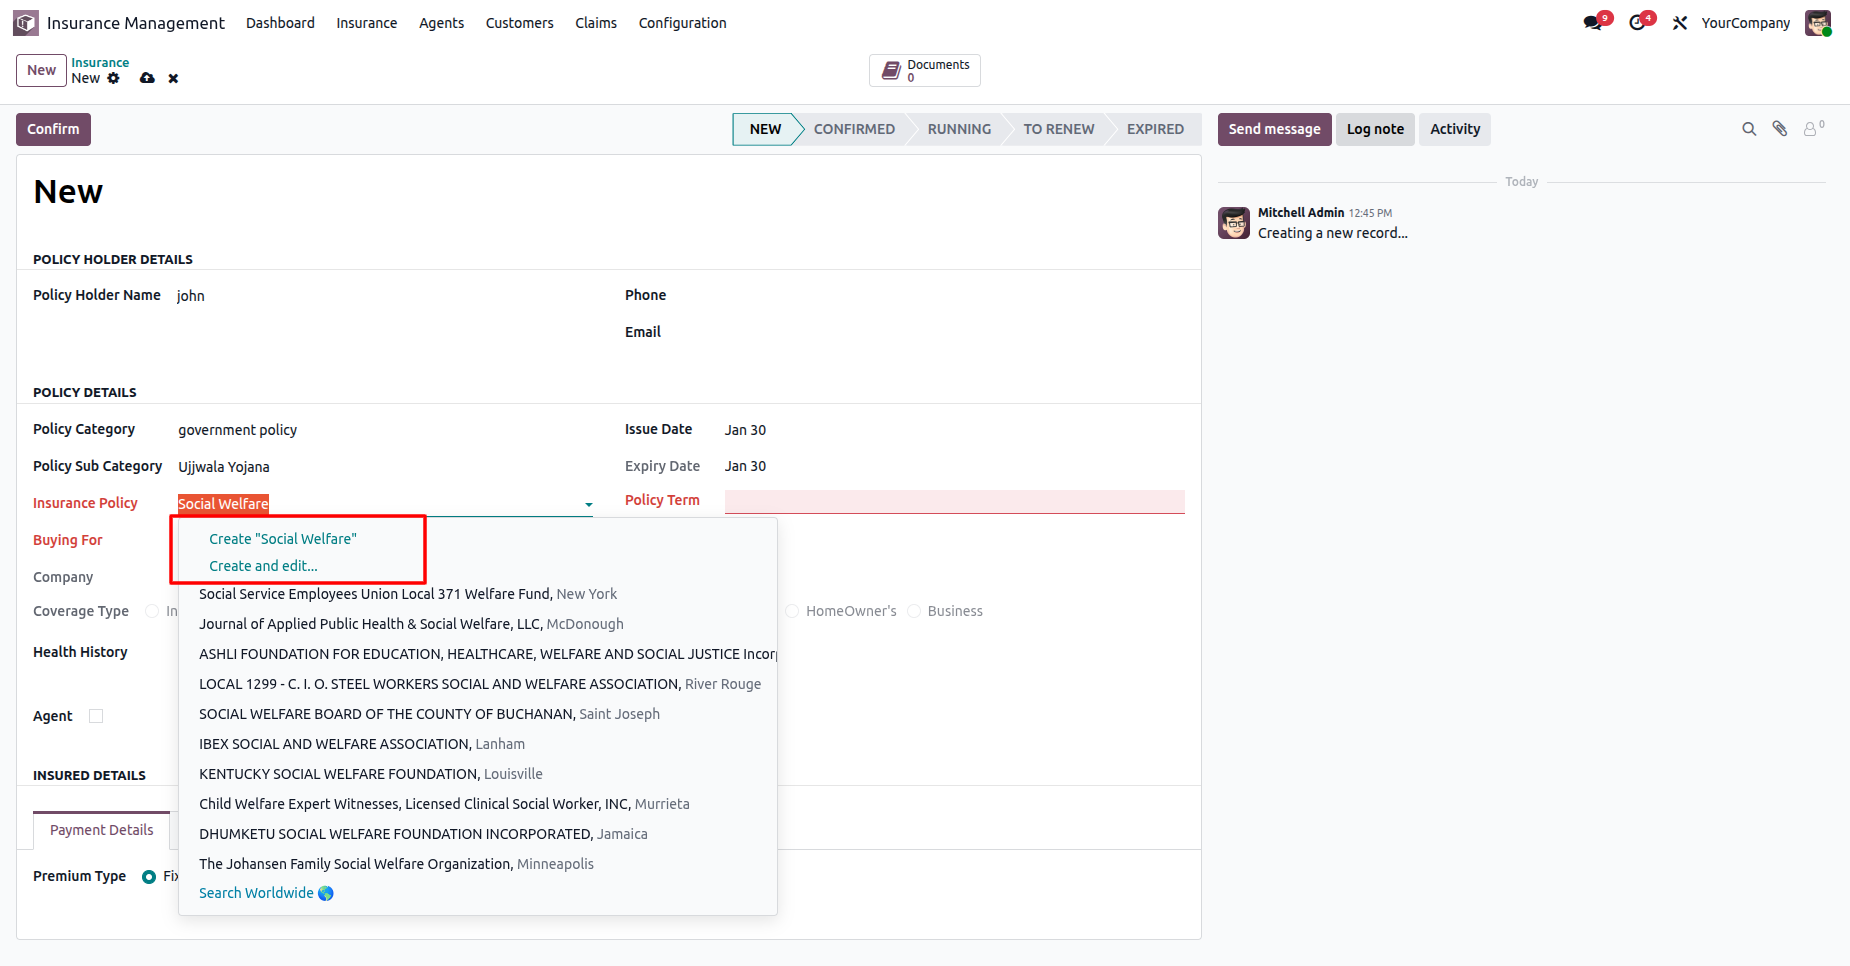
Add Insurance details and click on the 'Save' button.
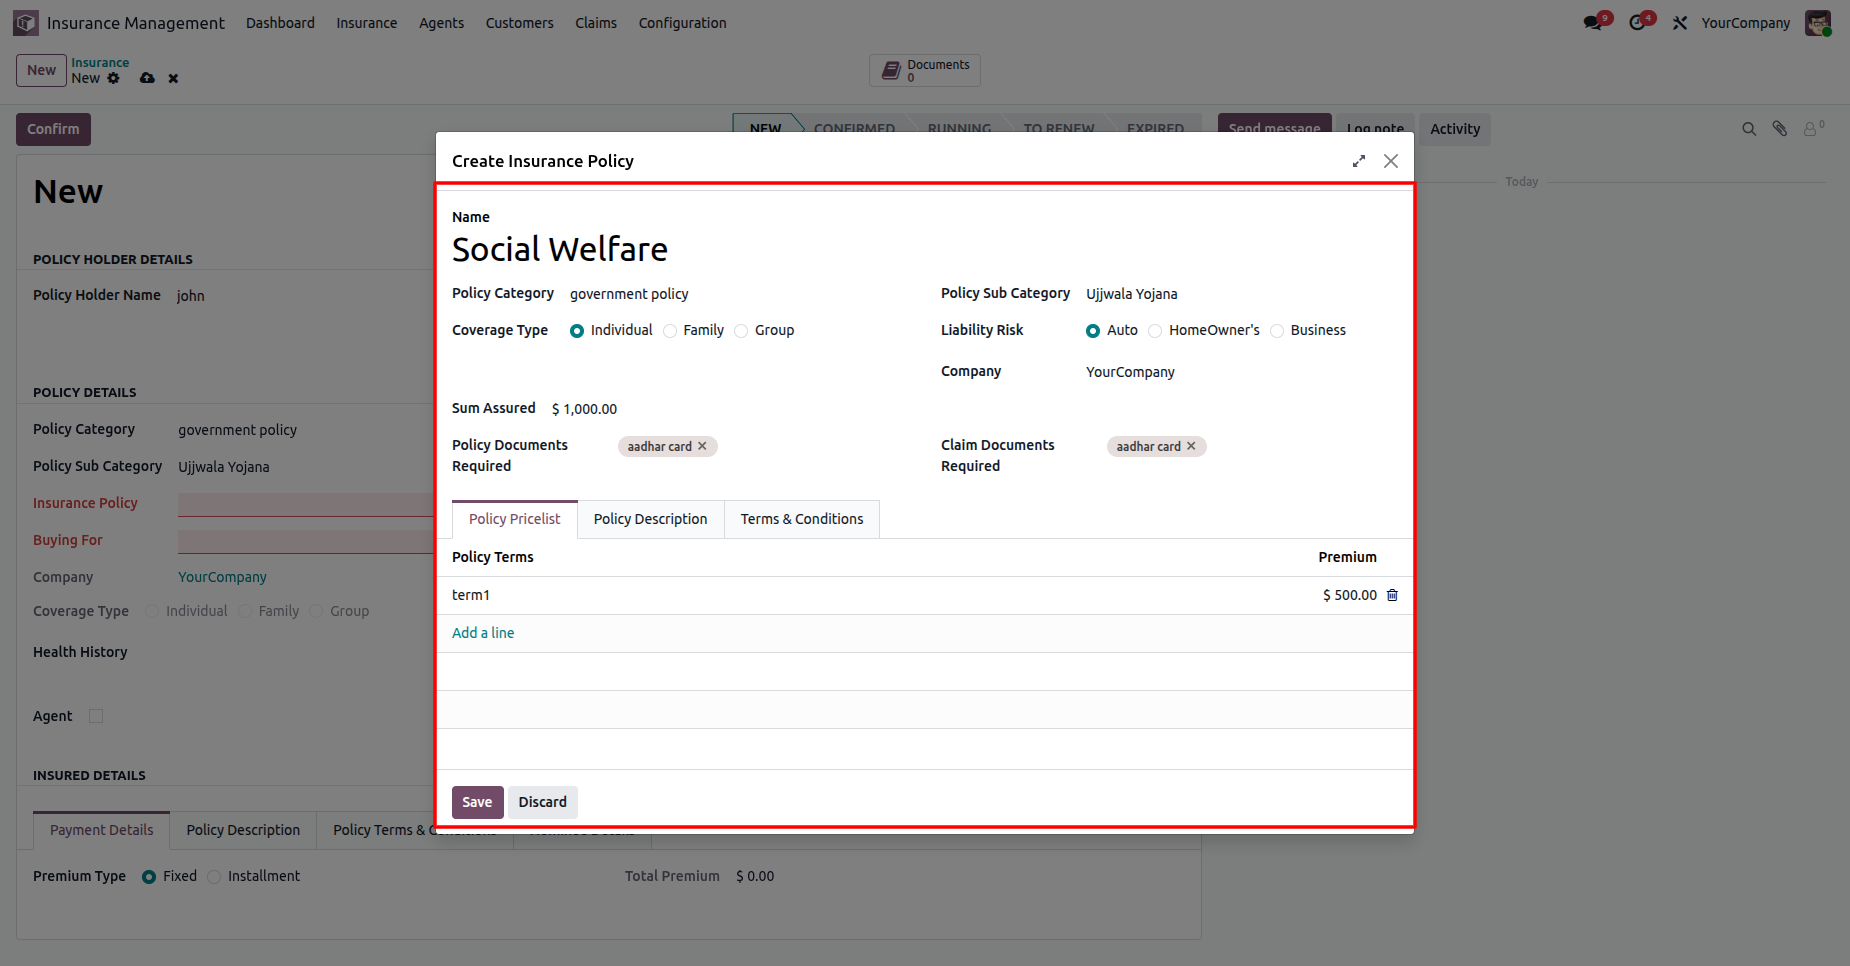
You can create the 'Buying For' directly from the insurance form view.
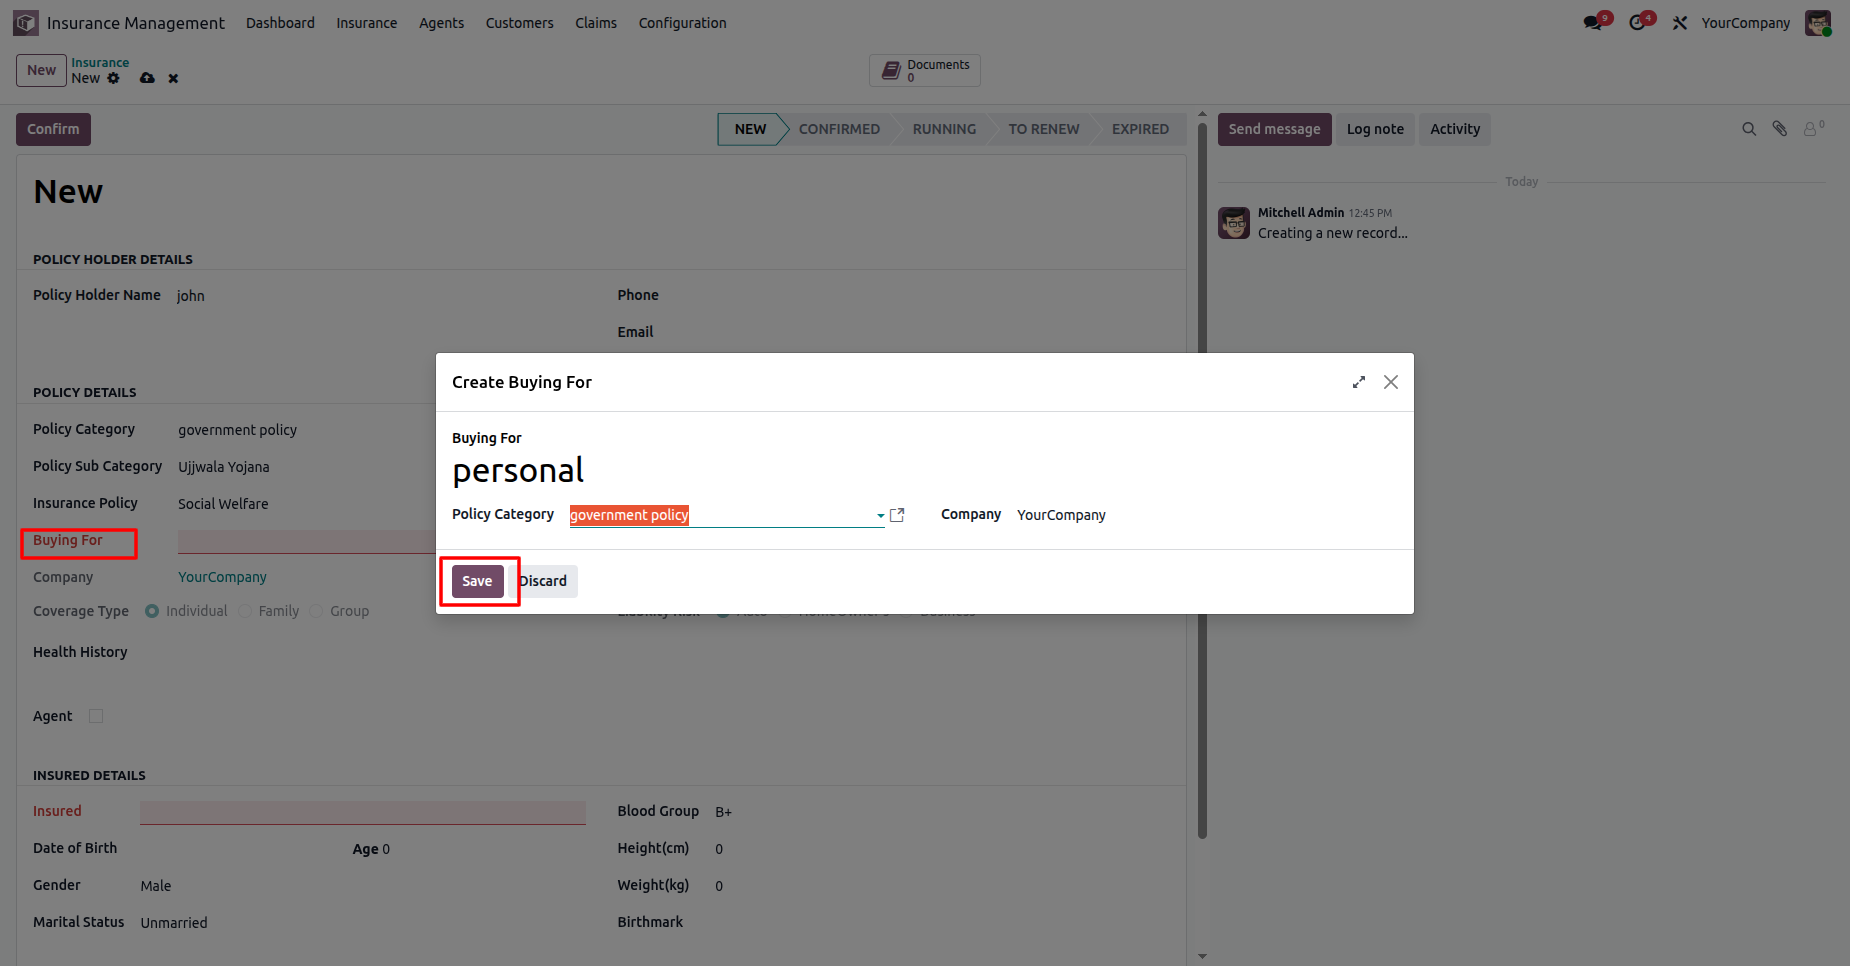
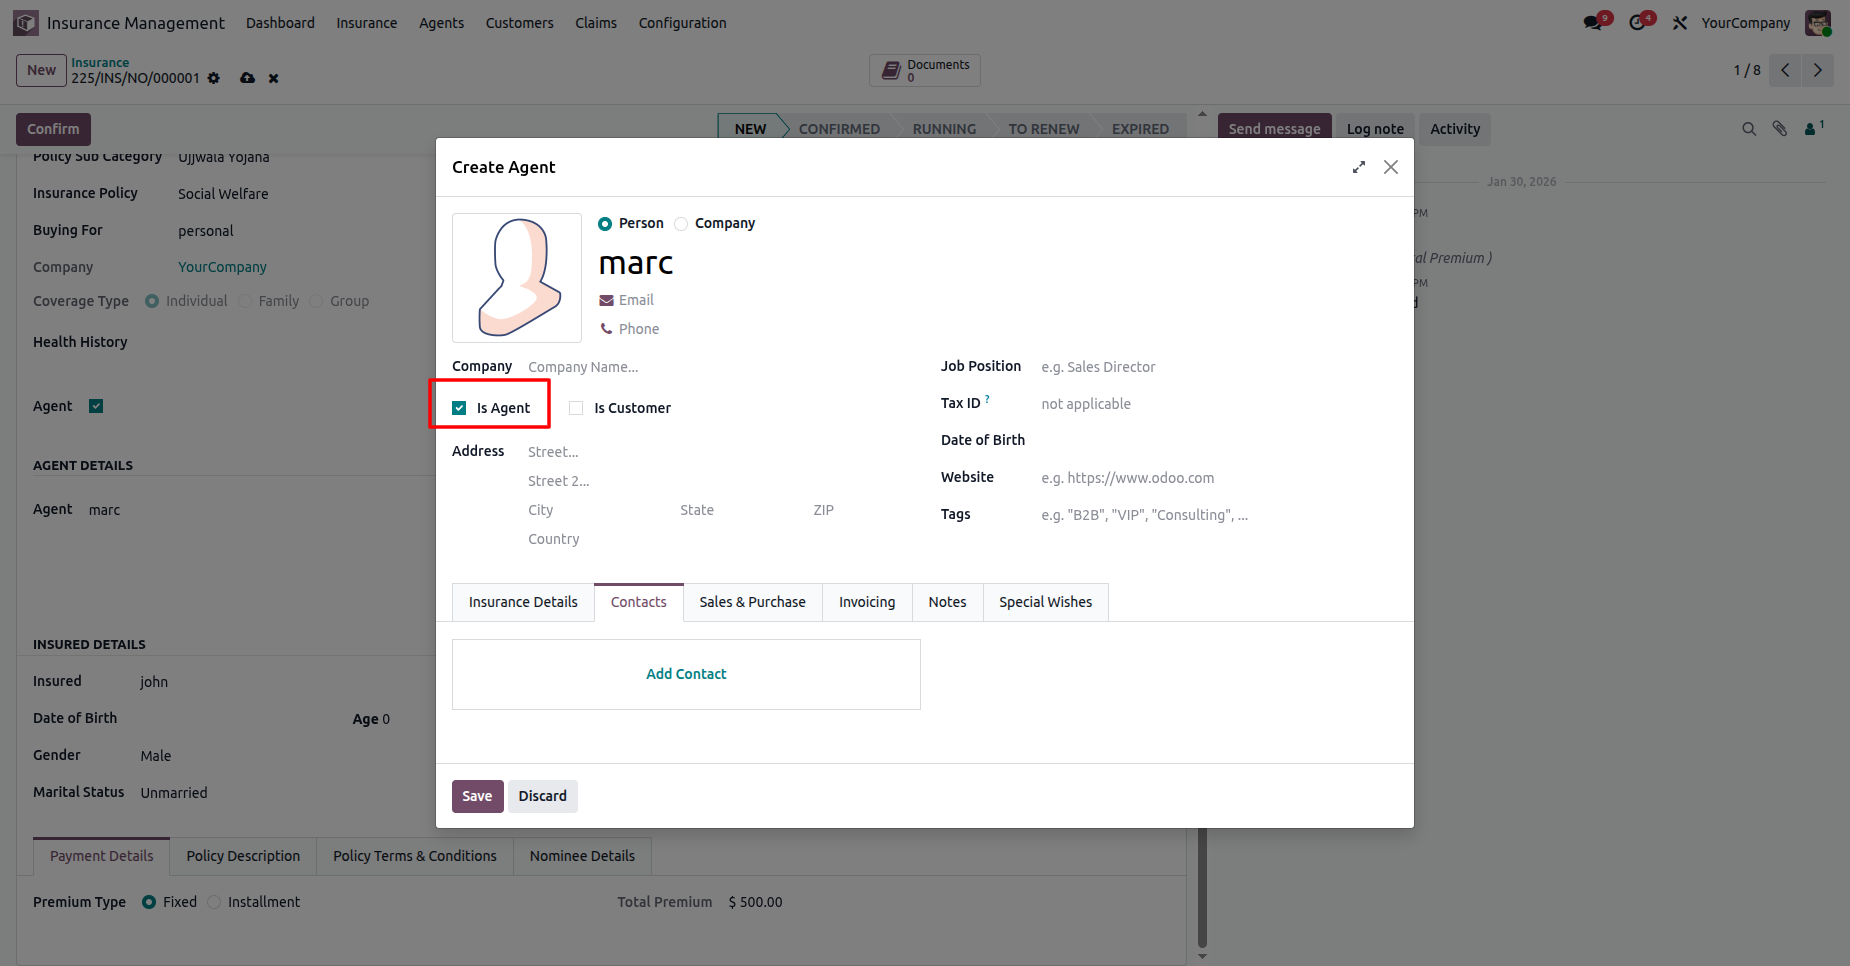
You can create the 'Agent' directly from the insurance form view.
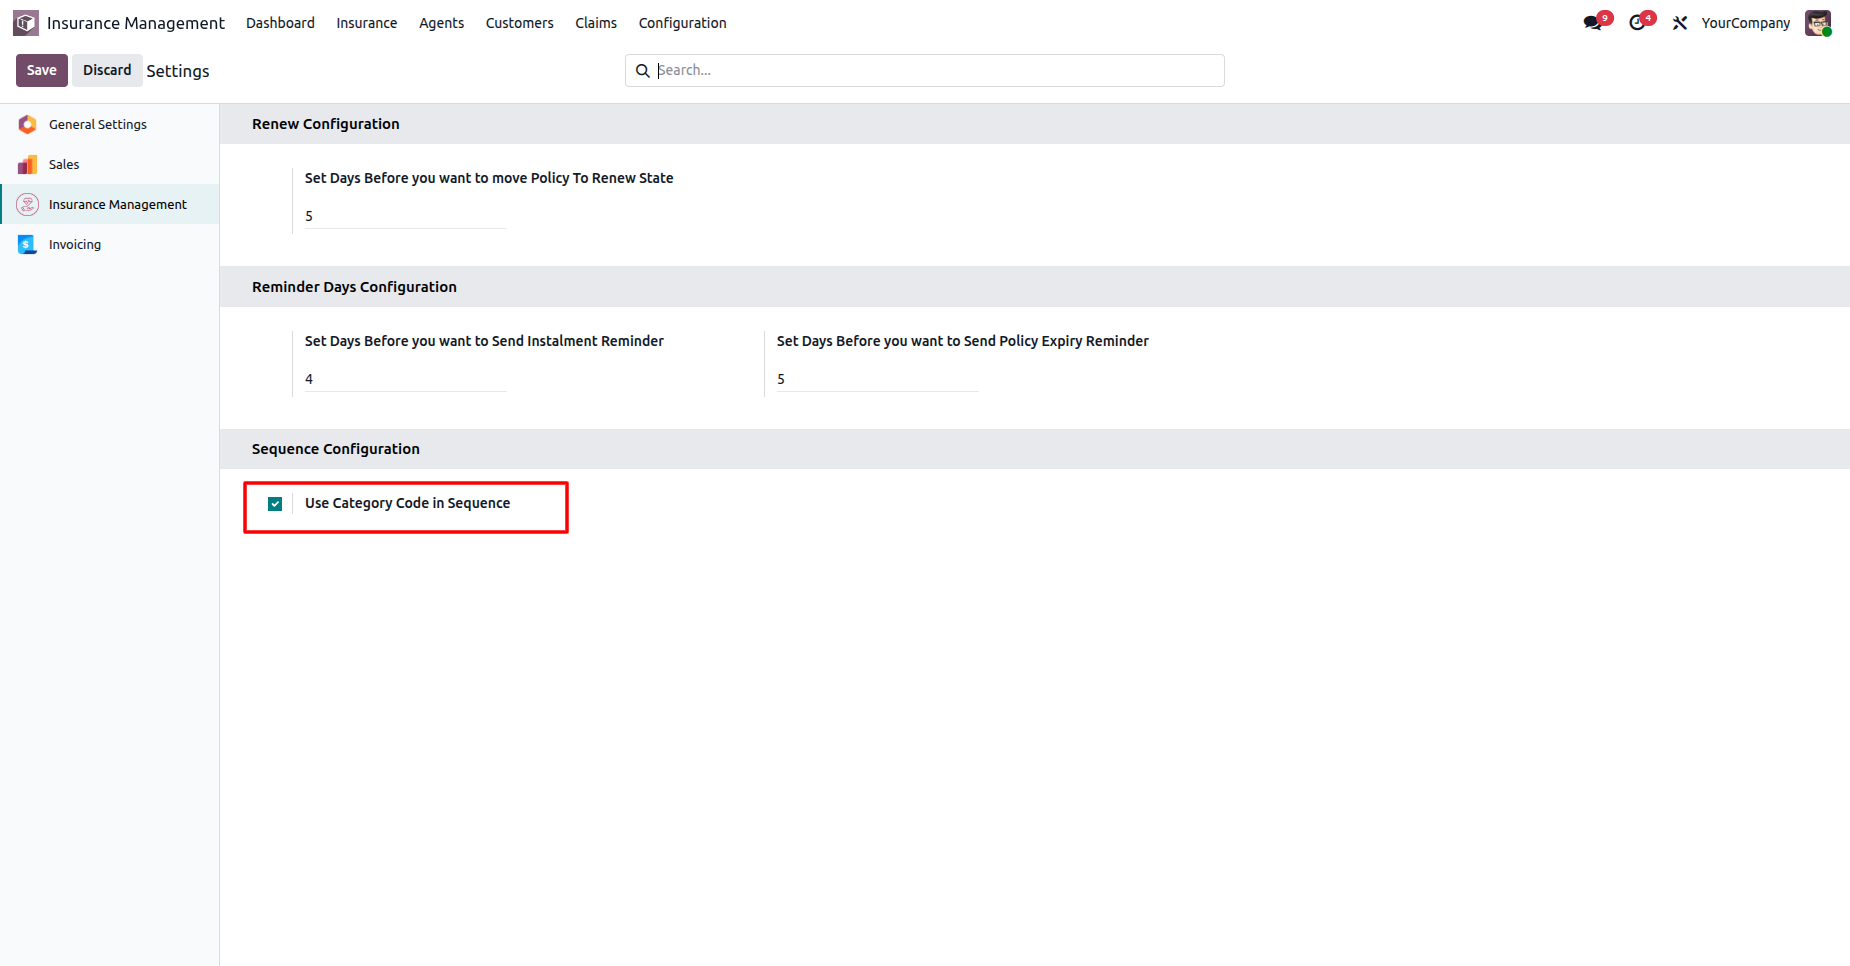
Go to your Insurance settings ==> Tick the 'Use Category Code in Sequence'.
The category codes are displayed in the correct sequence.
Form view of the insurance.
Portal home page displaying My Policies and My Claims.
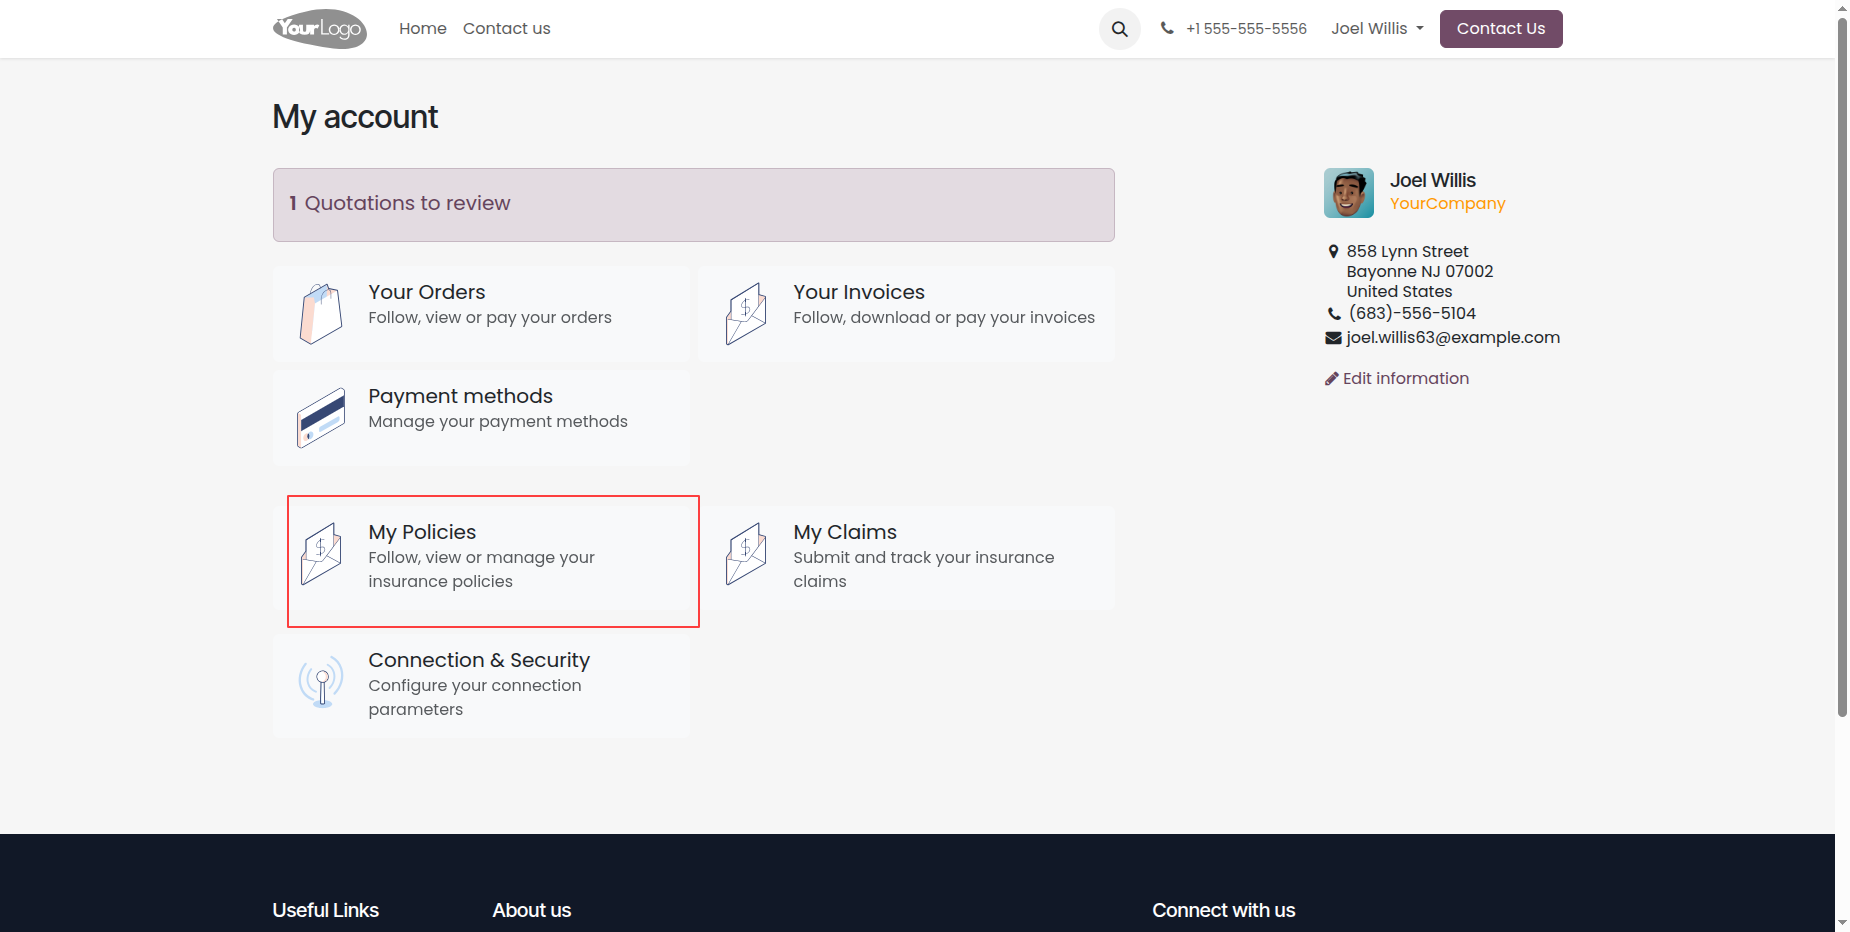
Click on 'Apply for Policy' from the My Policies list view to apply for a new insurance policy directly from the portal.
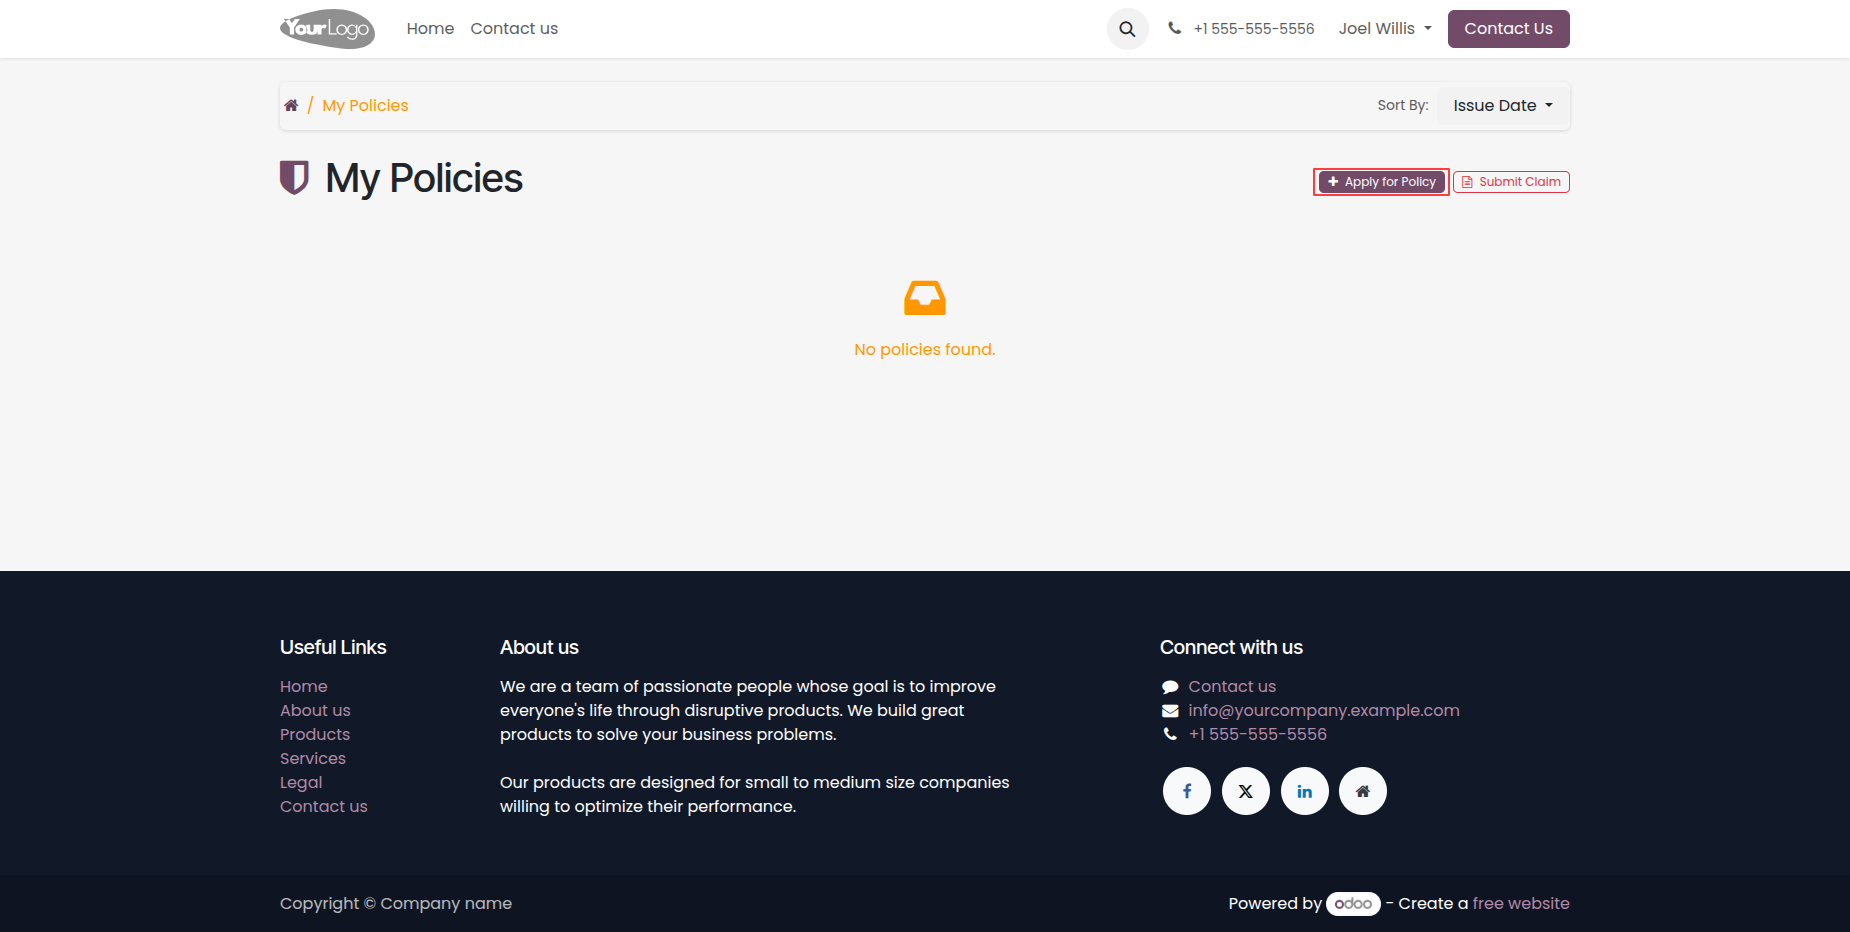
Form to apply for a new policy, allowing users to specify details like buying for, category, subcategory, policy, and term.
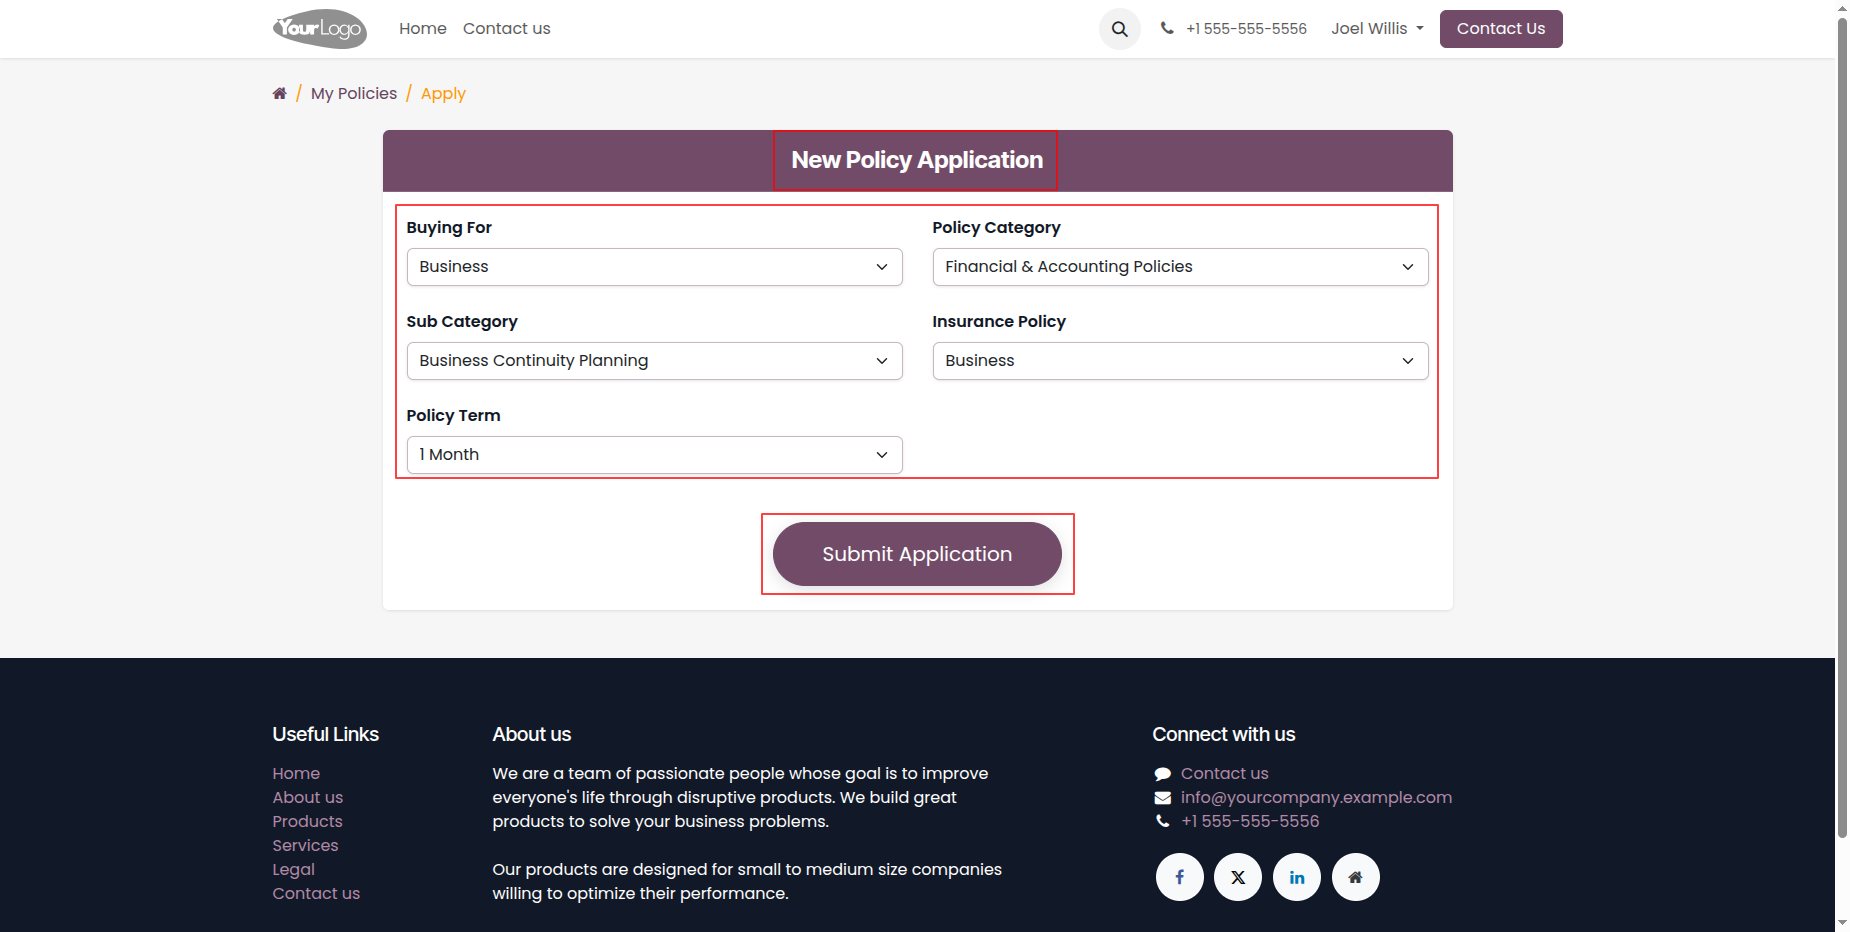
Submitting the policy application form from the customer portal.
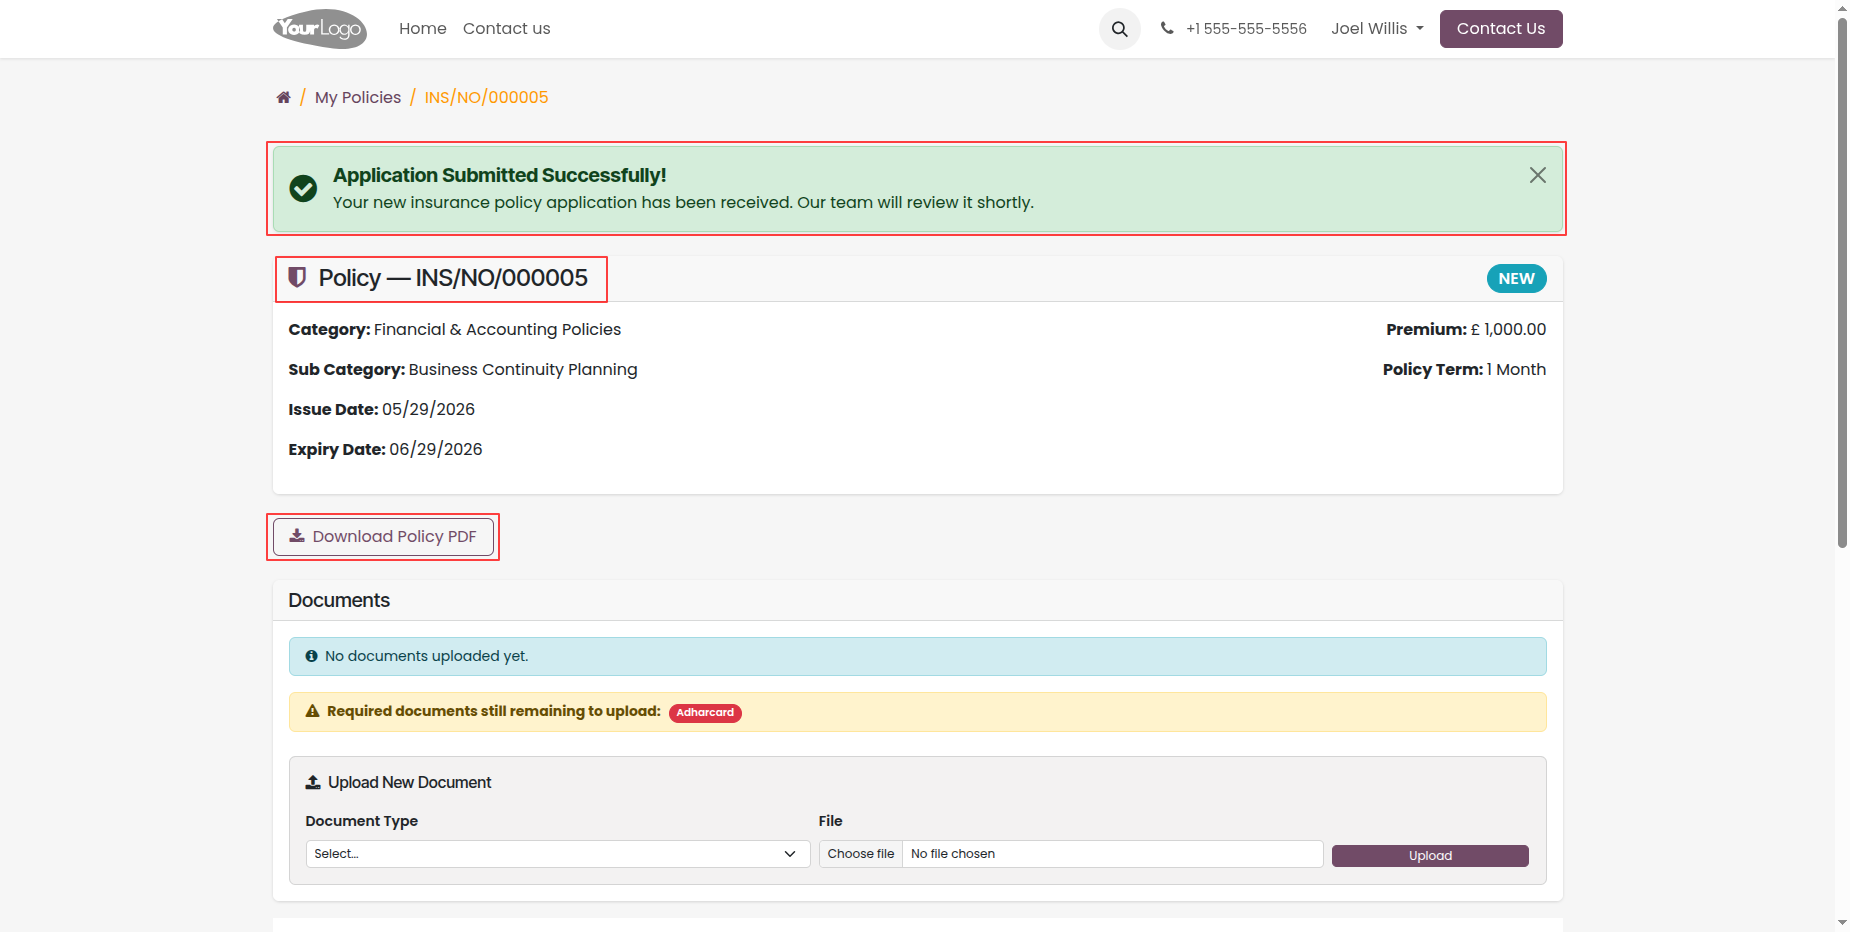
Also, customer can download the Policy in PDF format from the
portal after submission.
Form view of newly applied policy in 'New' state on the customer
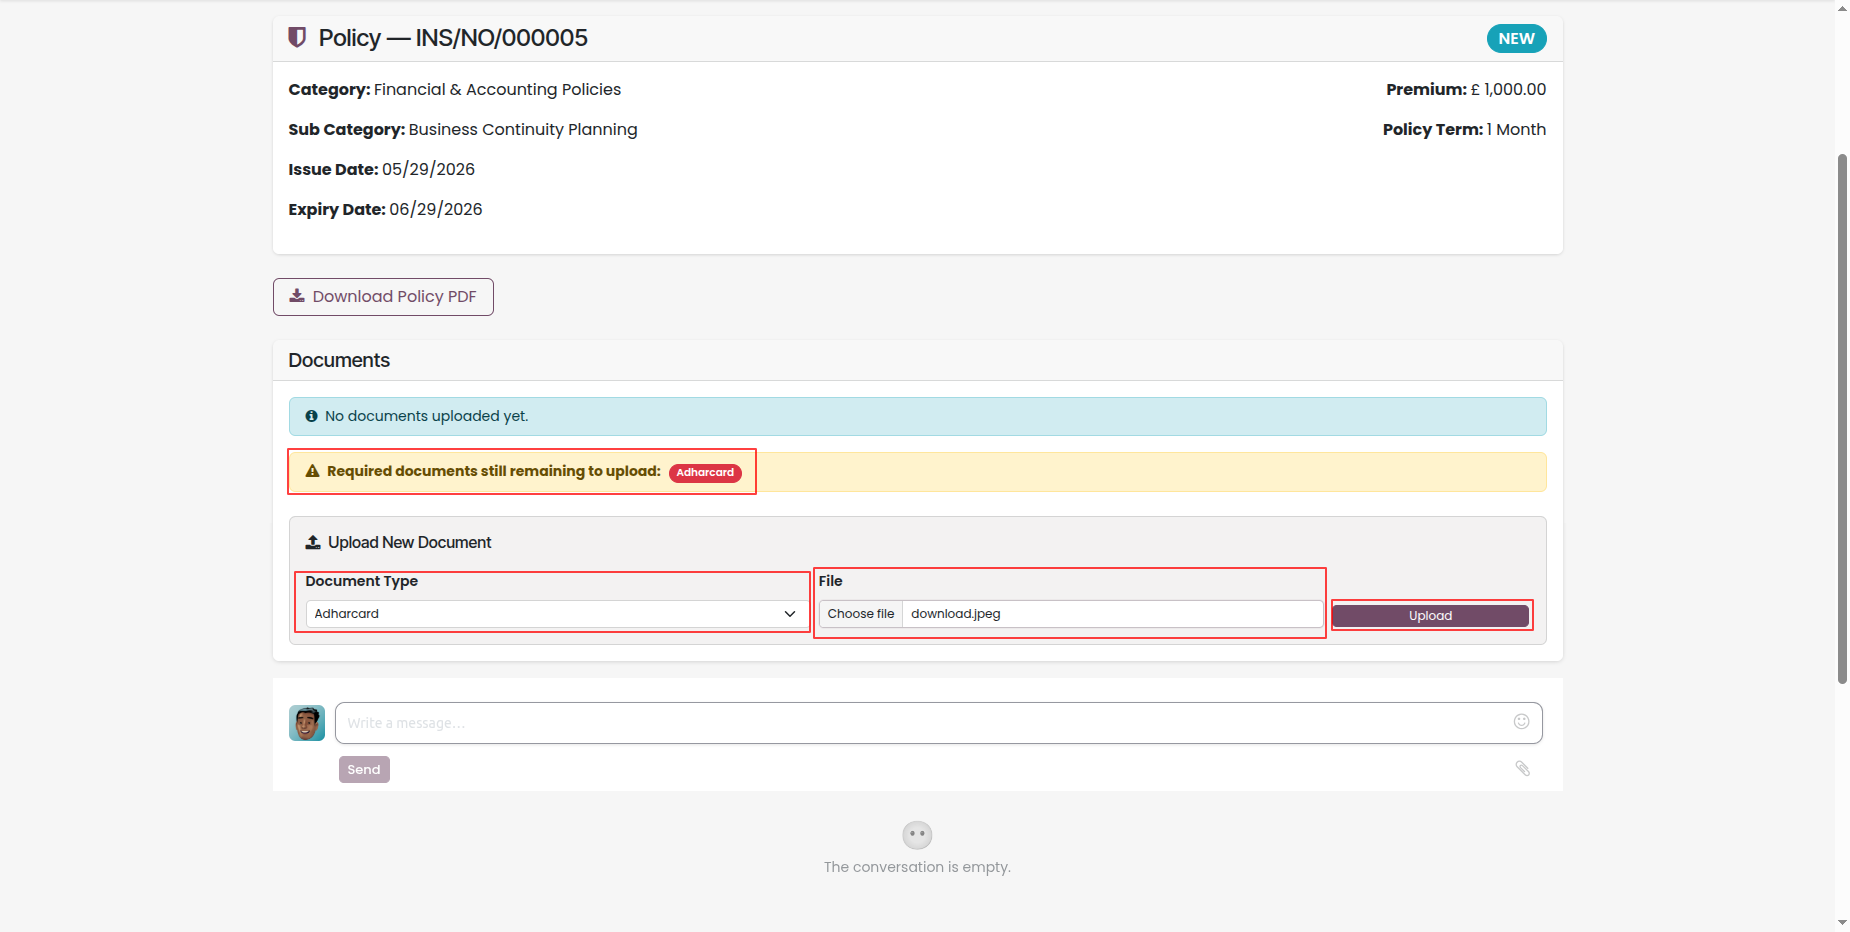
portal, showing warnings for remaining required documents.
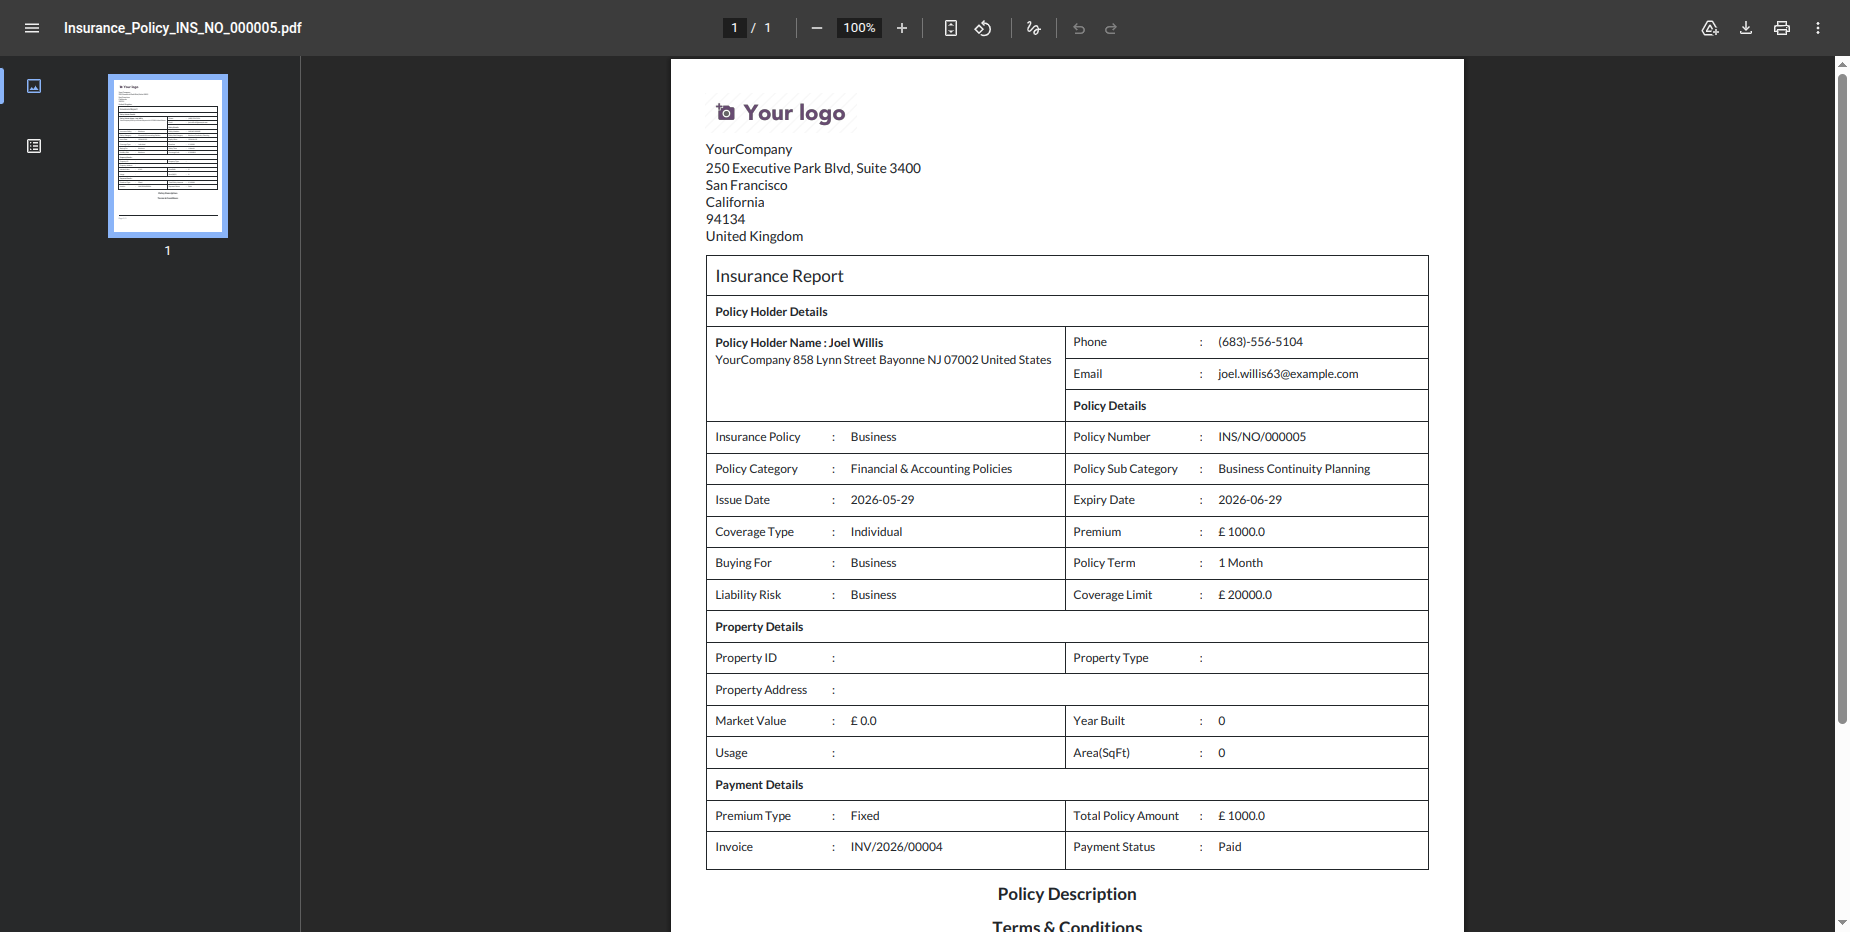
Policy in PDF format downloaded from the portal after submitting the application form, showing all entered details and generated policy number.
Allow users to select and submit required documents directly from the portal.
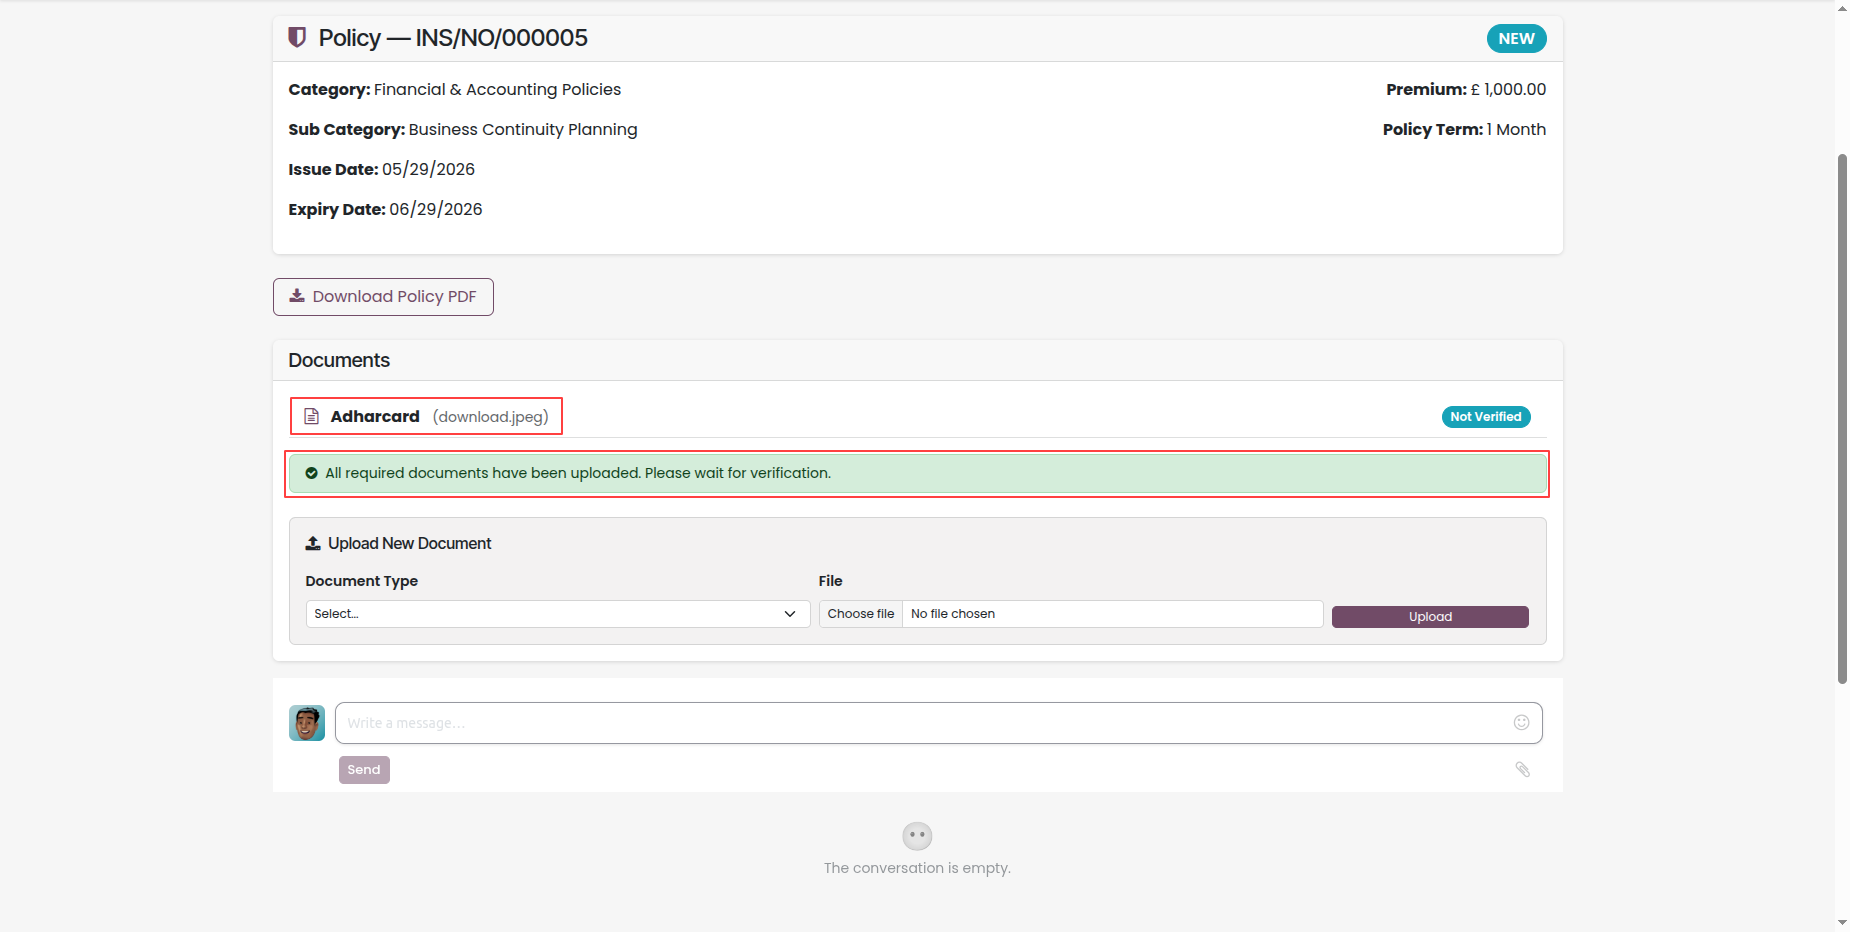
Green confirmation notification indicating that a document has been successfully uploaded.
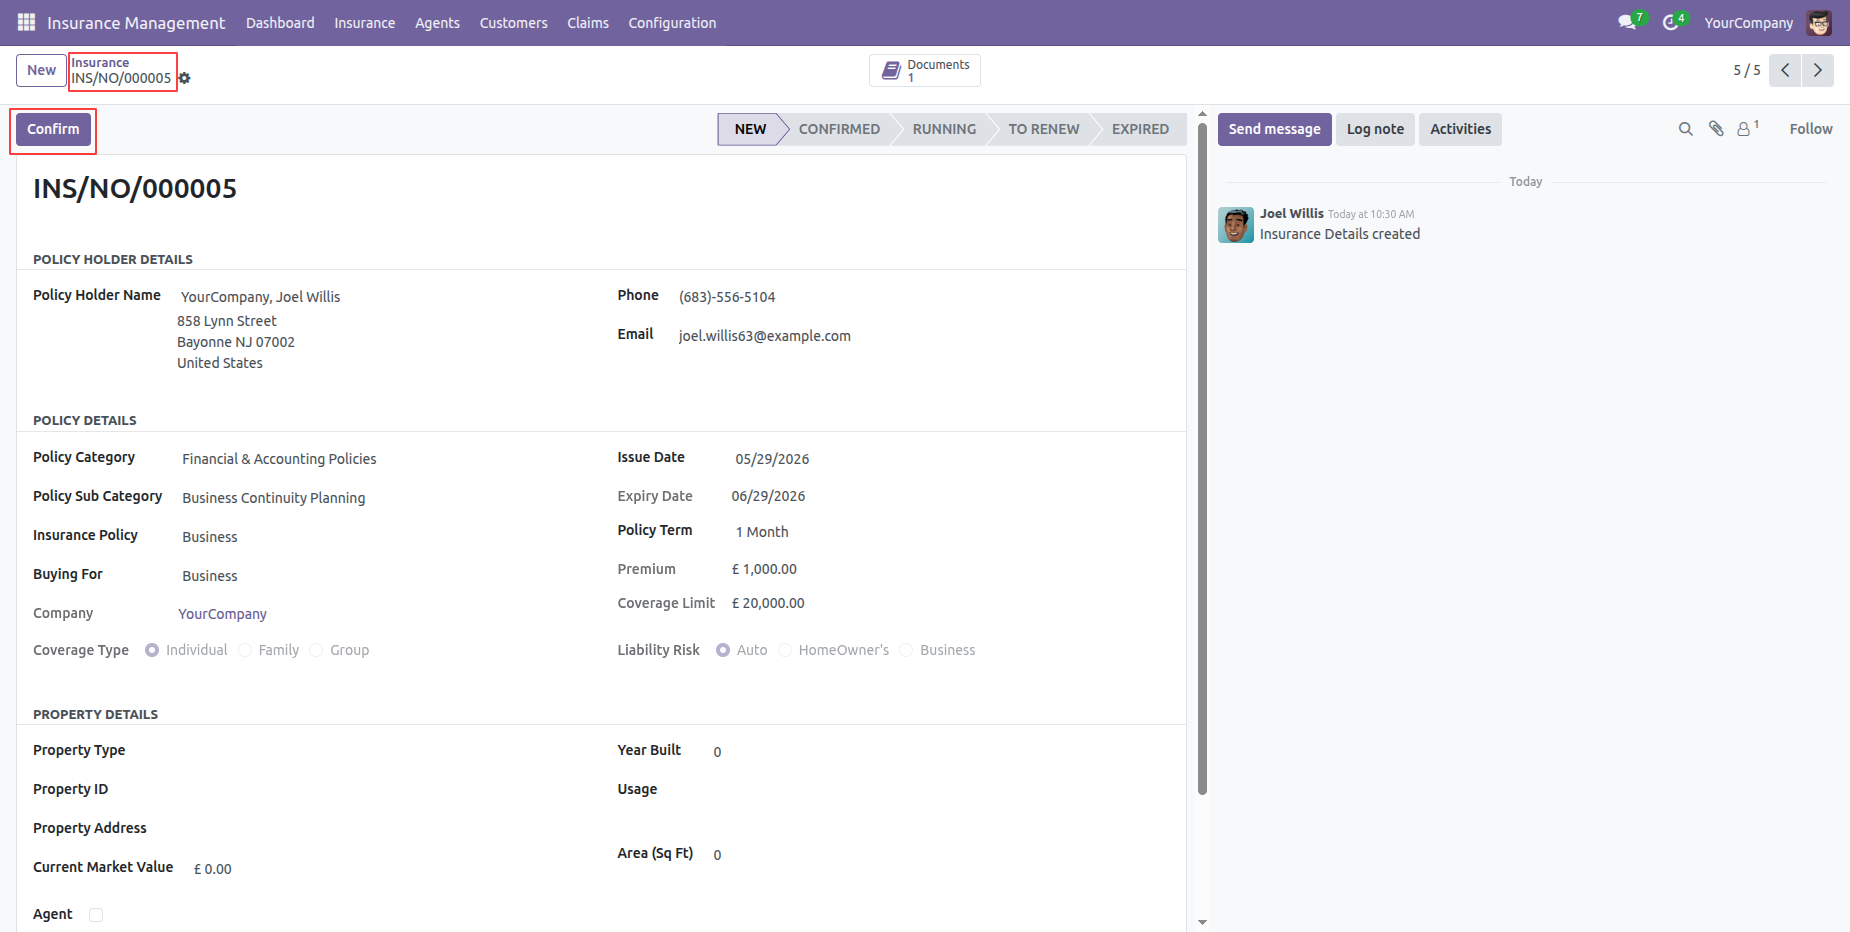
Form view of newly applied policy in 'New' state for backend user to confirm the policy.
Manager checks and verifies the uploaded documents in the backend to proceed with confirmation.
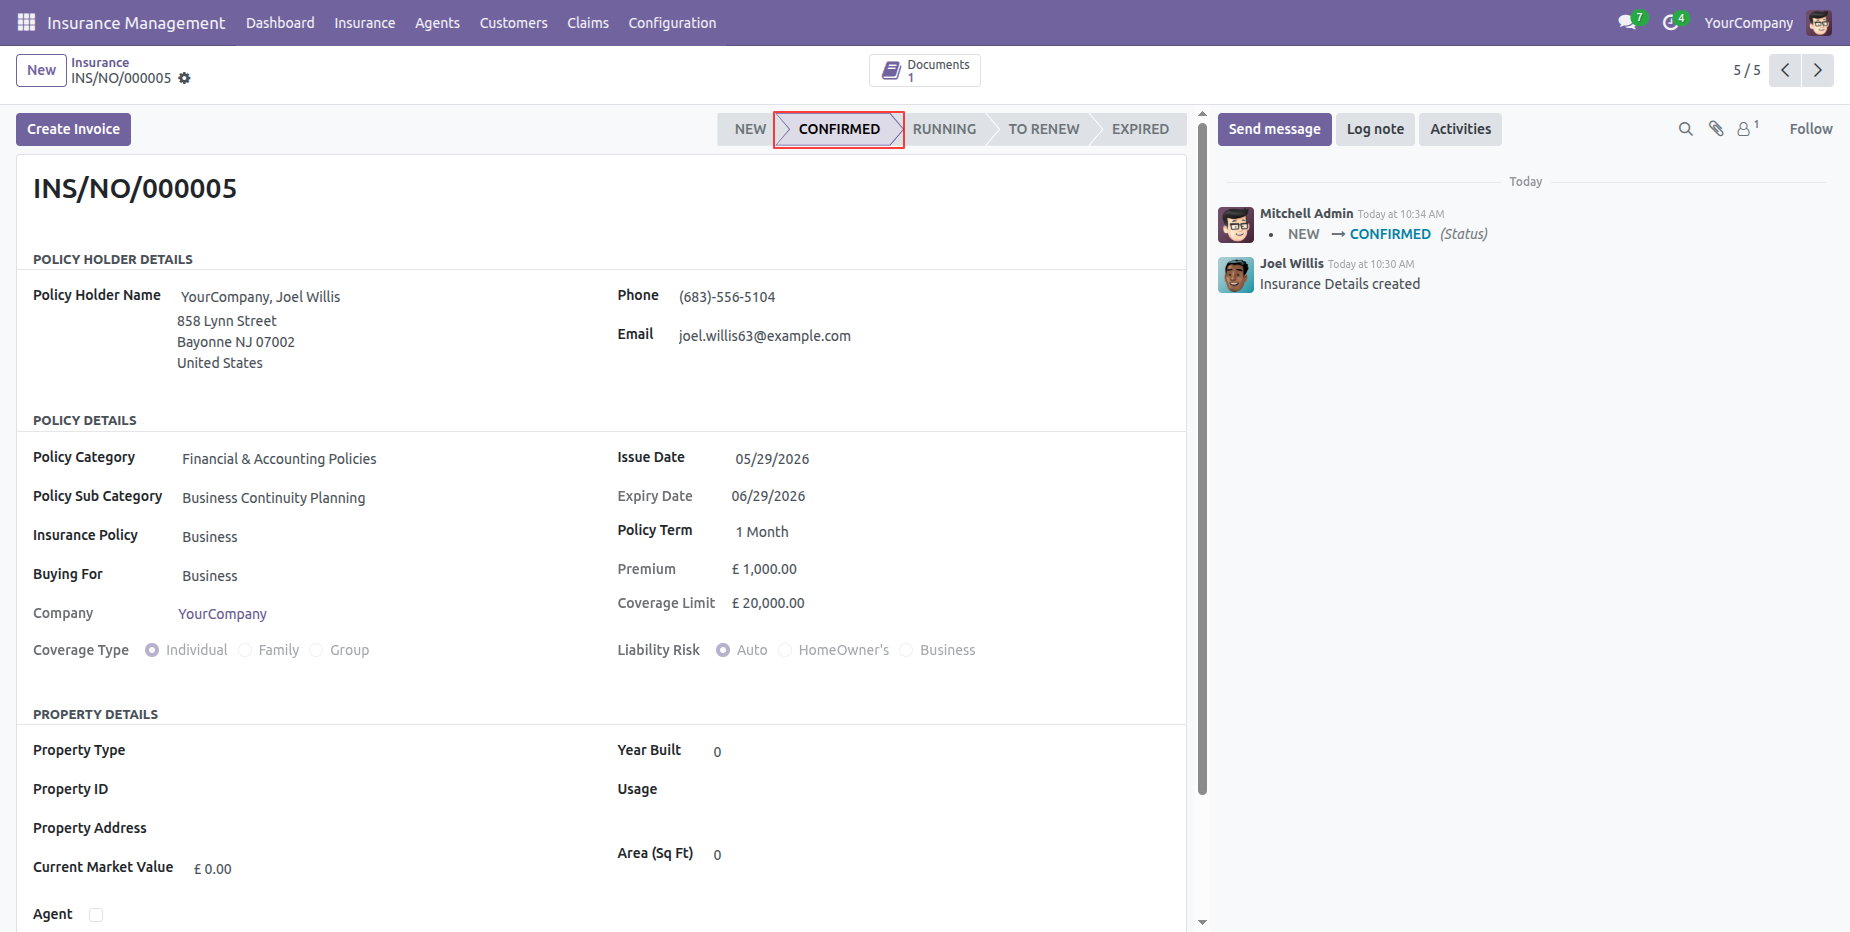
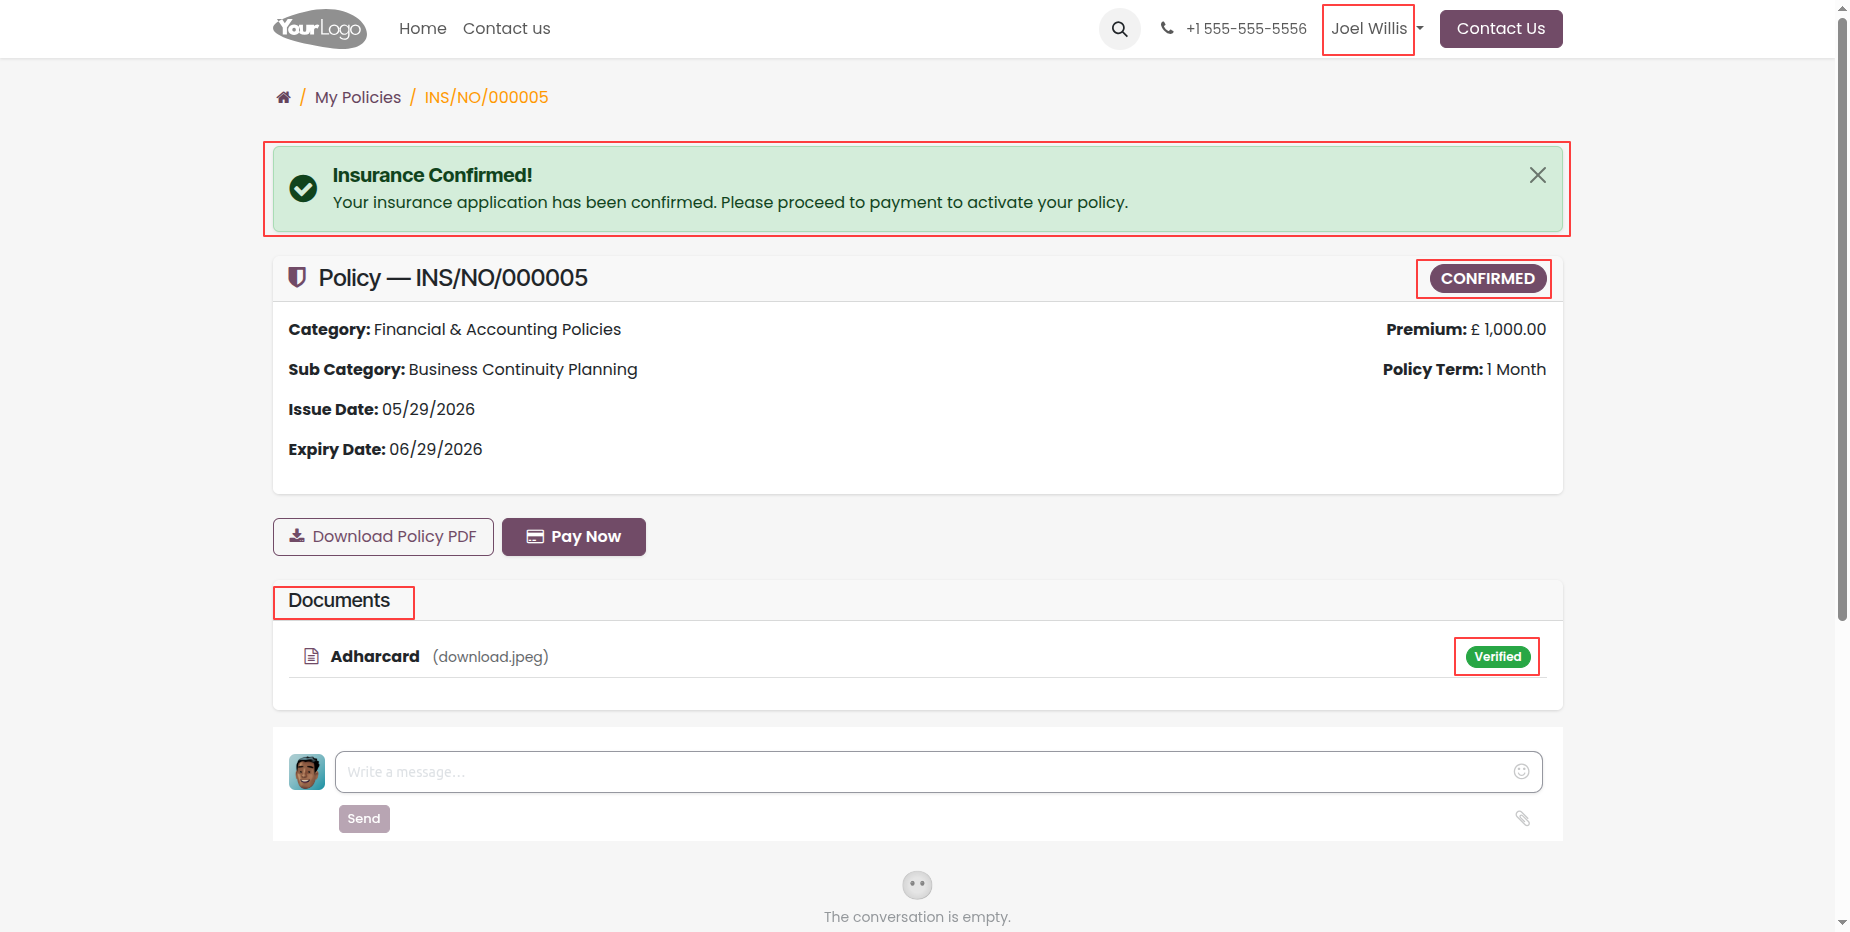
After document verification, the policy moves to 'Confirmed' state, showing the 'Pay Now' button on the portal.
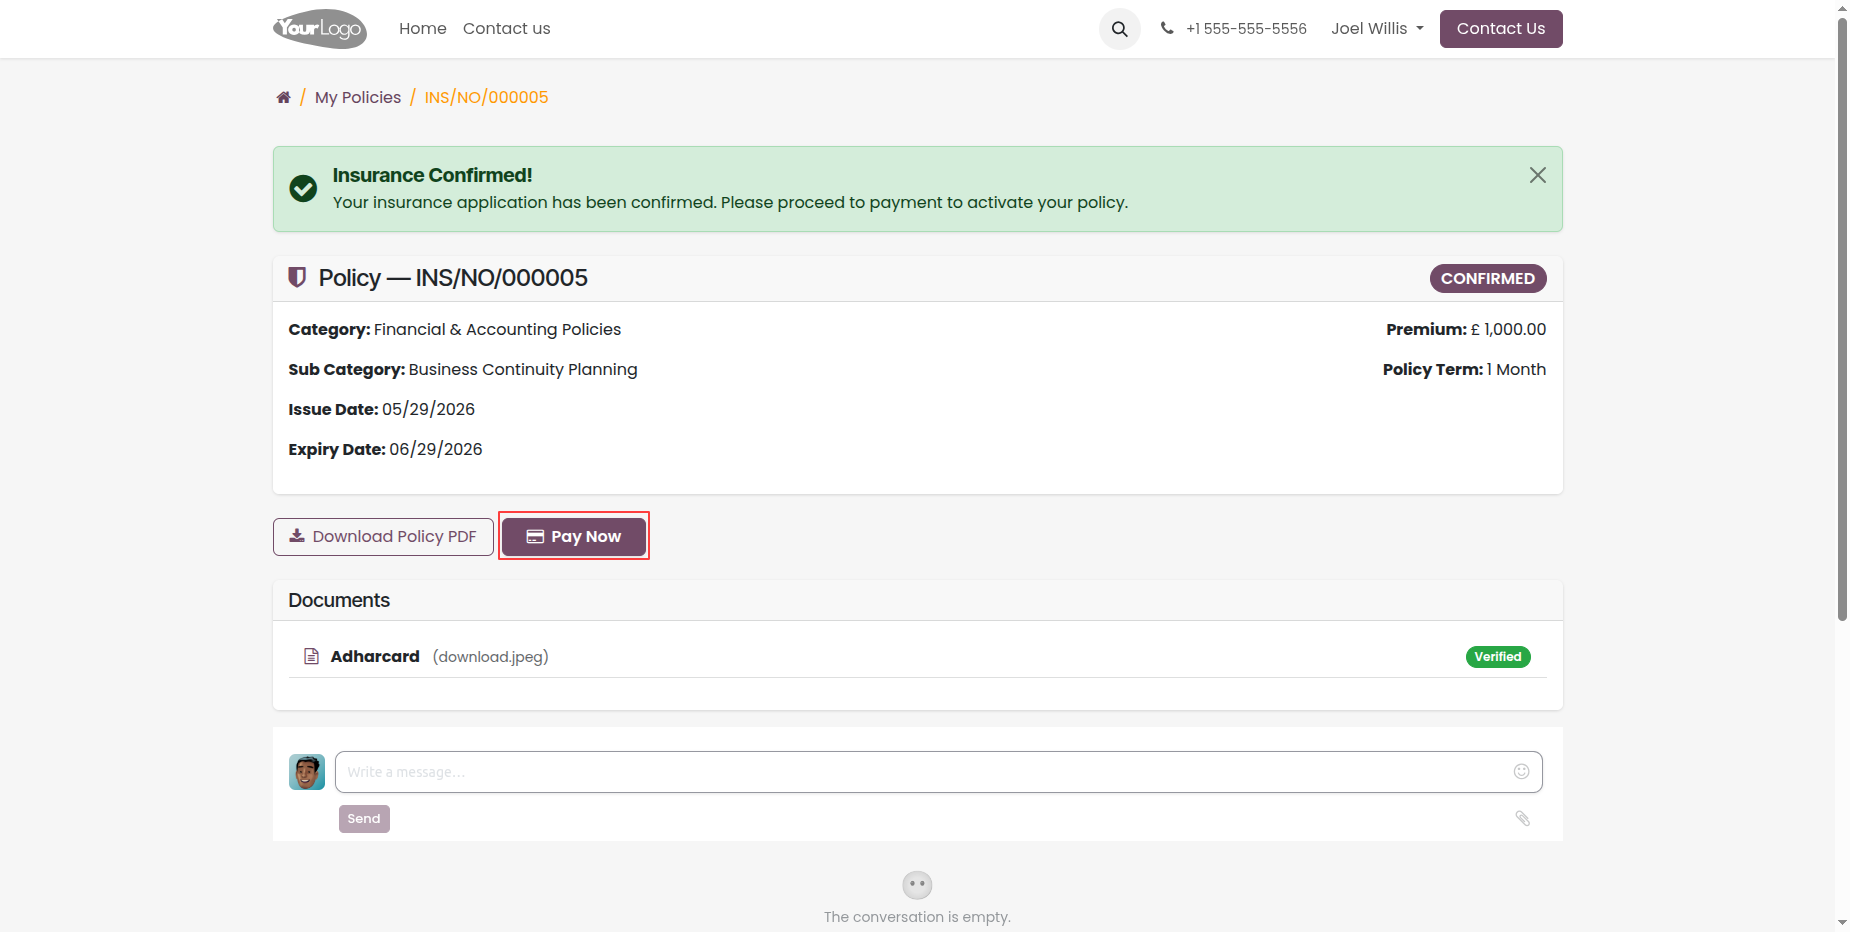
Clicking 'Pay Now' redirects the customer to the online portal invoice for premium payment.
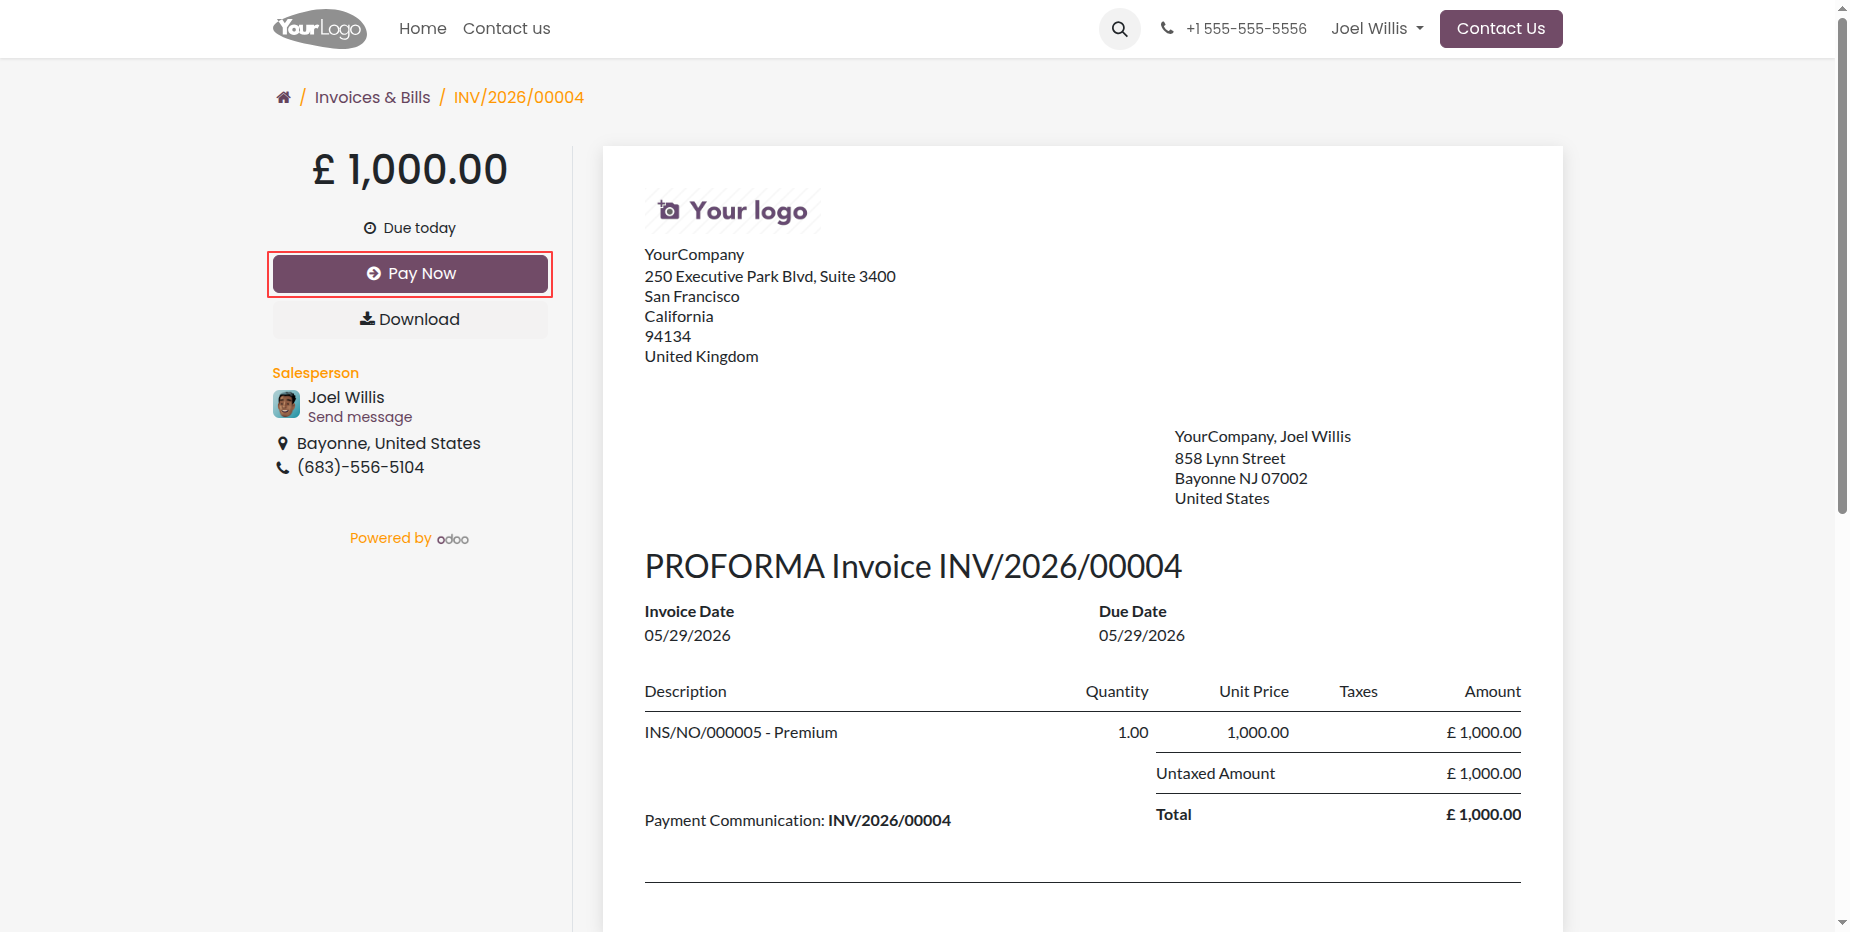
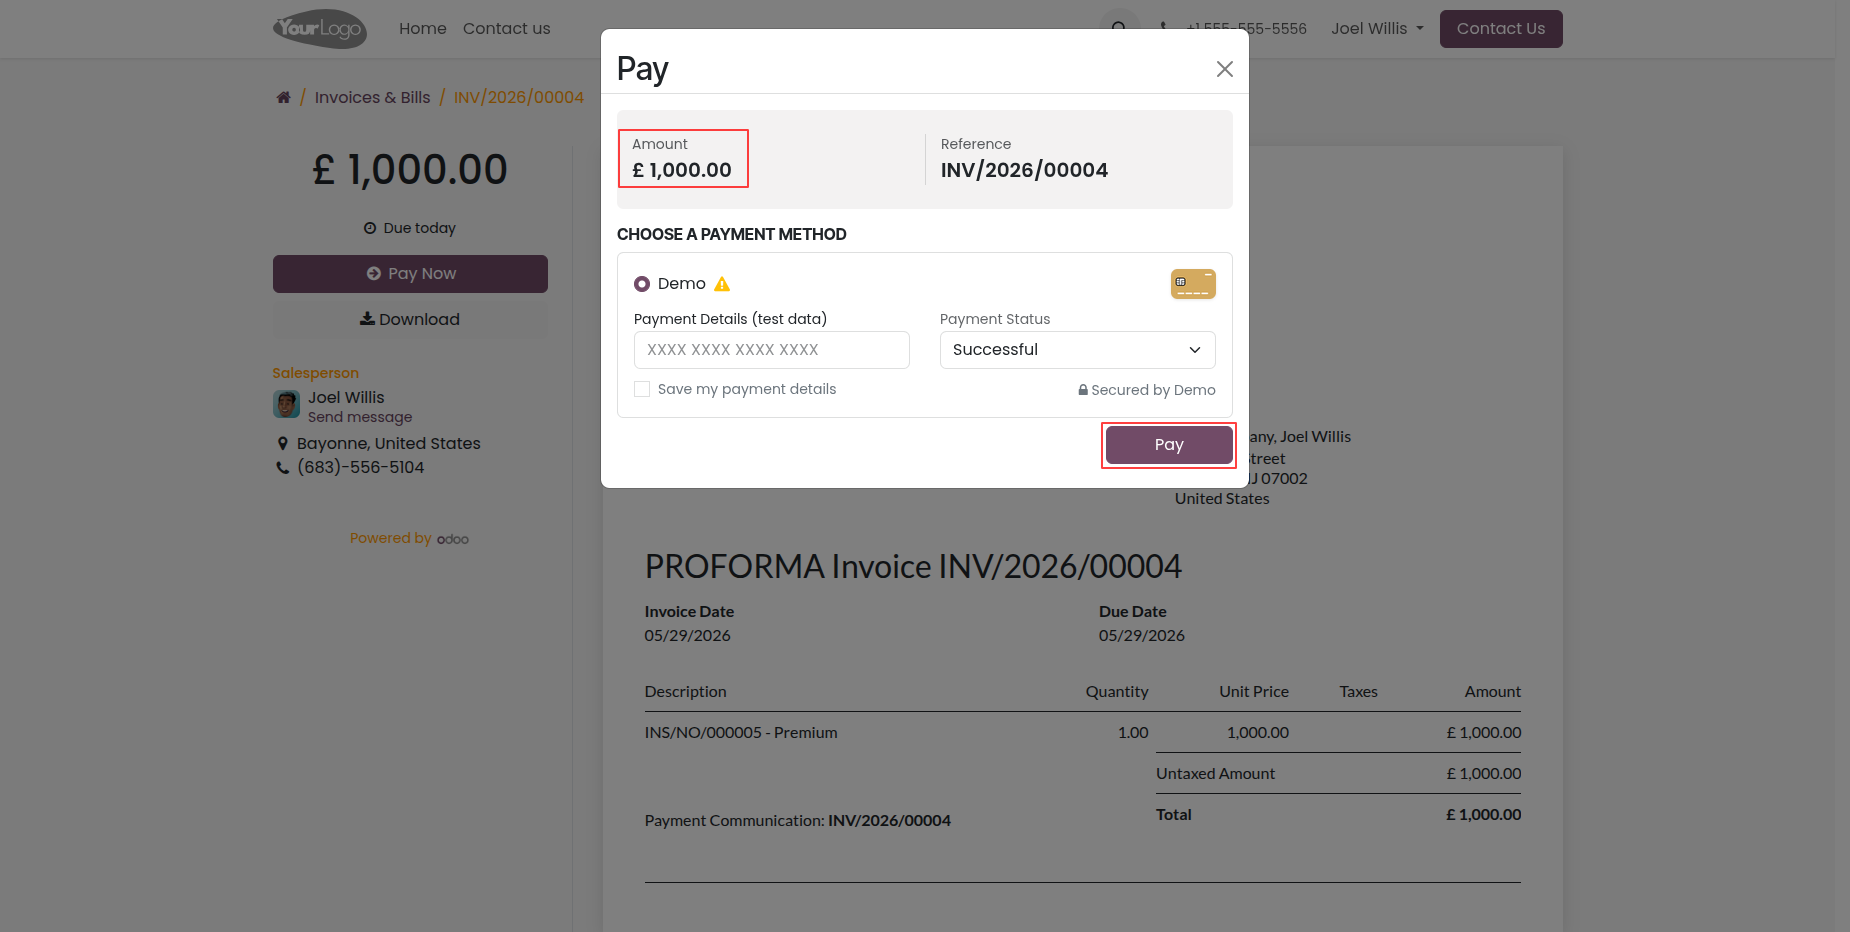
Invoice details page showing the payment status and transaction summary. Click on 'Pay Now' to proceed with the payment.
By clicking 'Pay Now' on the invoice details page, the customer is redirected to the payment gateway to complete the payment process.
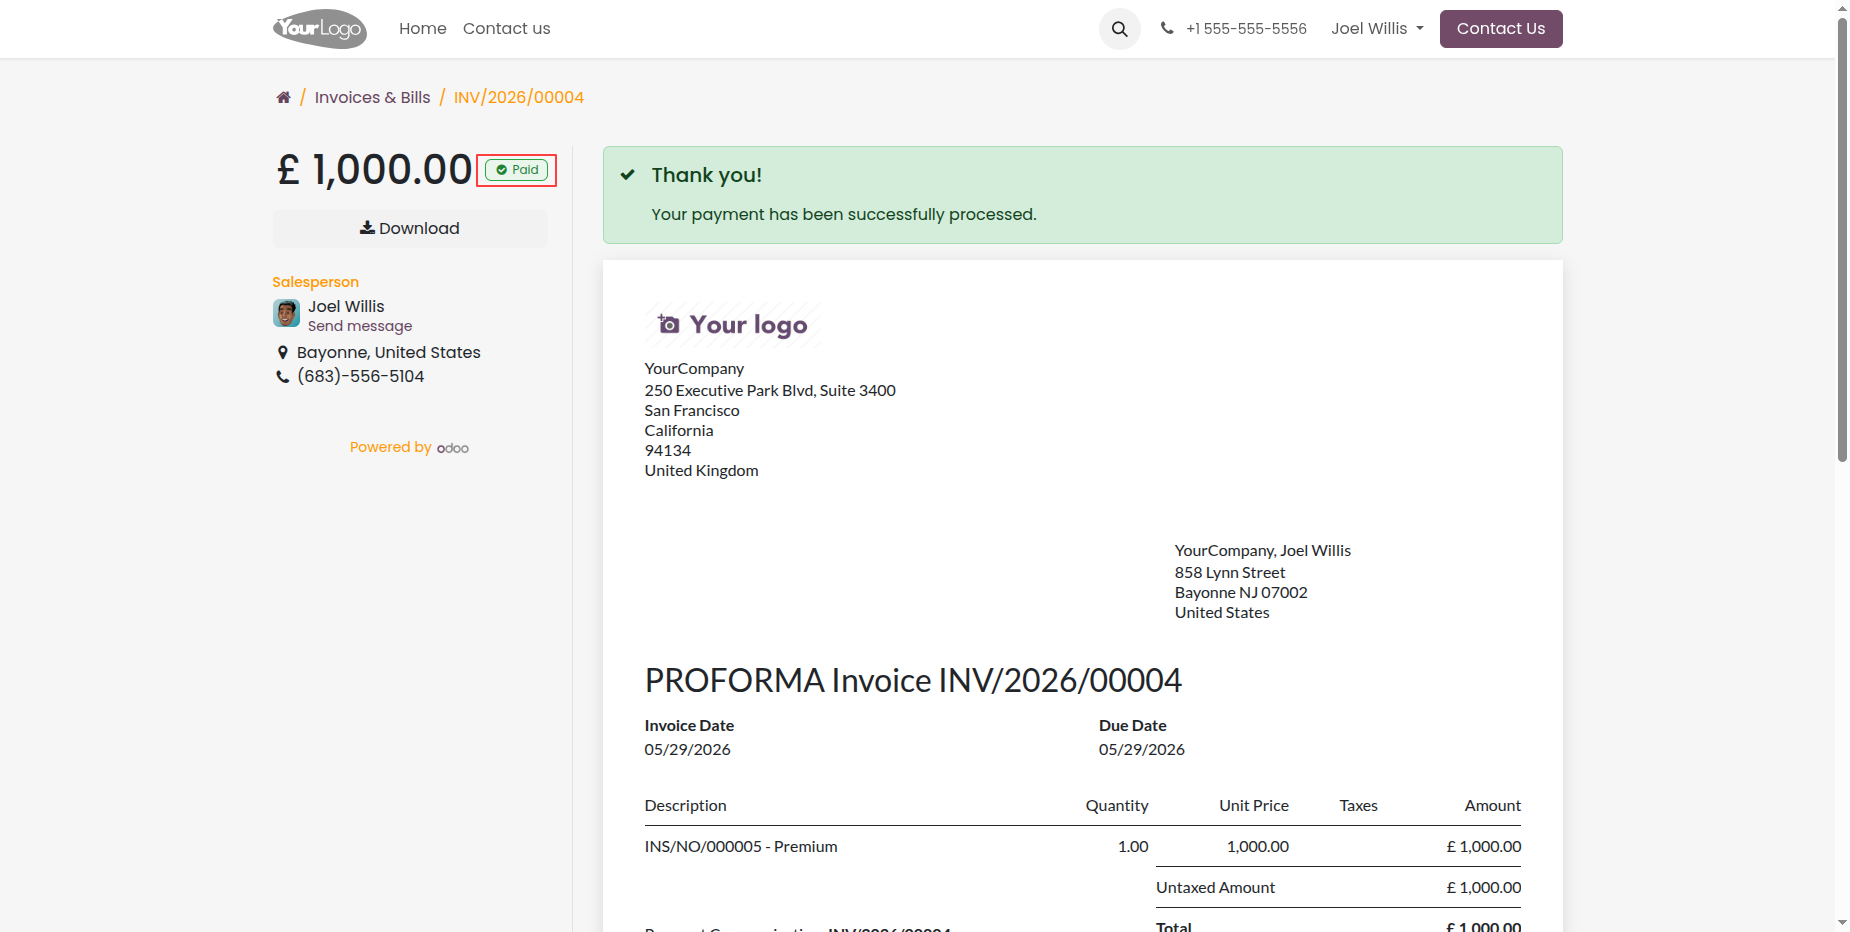
Green notification alert confirming that the payment has been successfully received.
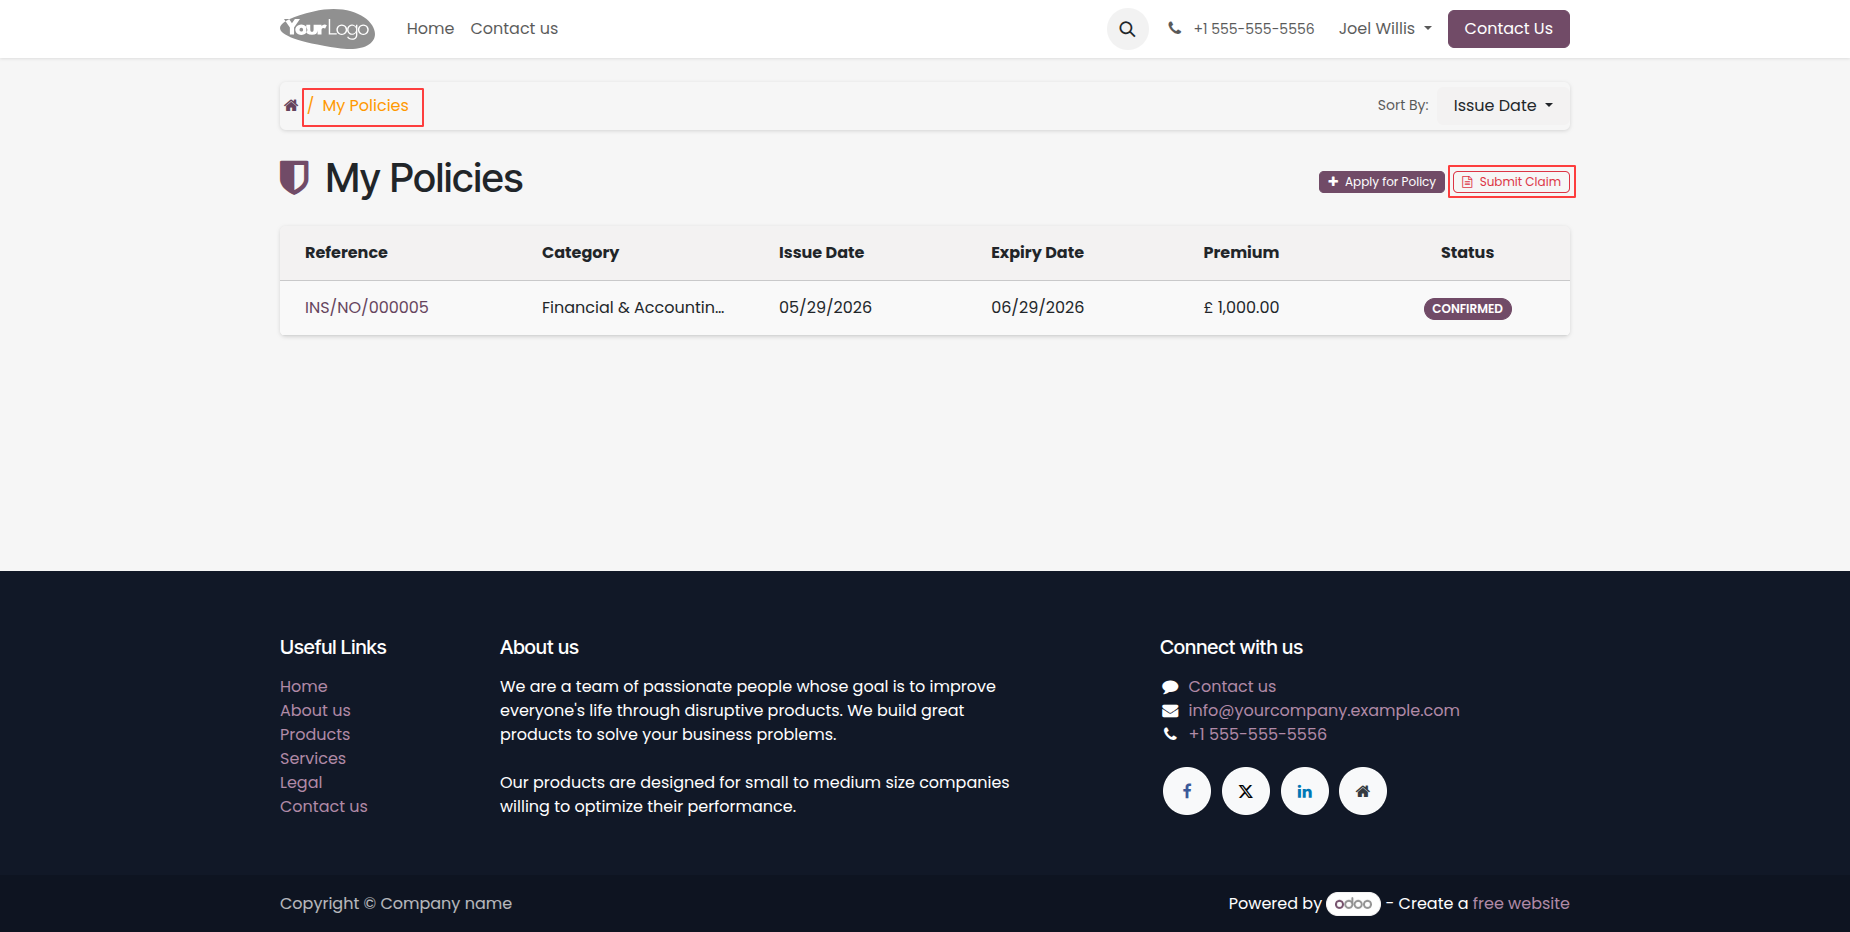
My Policies list view page showing references, categories, premium
amounts, issue/expiry dates, and status badges.
To submit the Claim for a policy, click on the 'Submit Claim'
button from the My Policies list view.
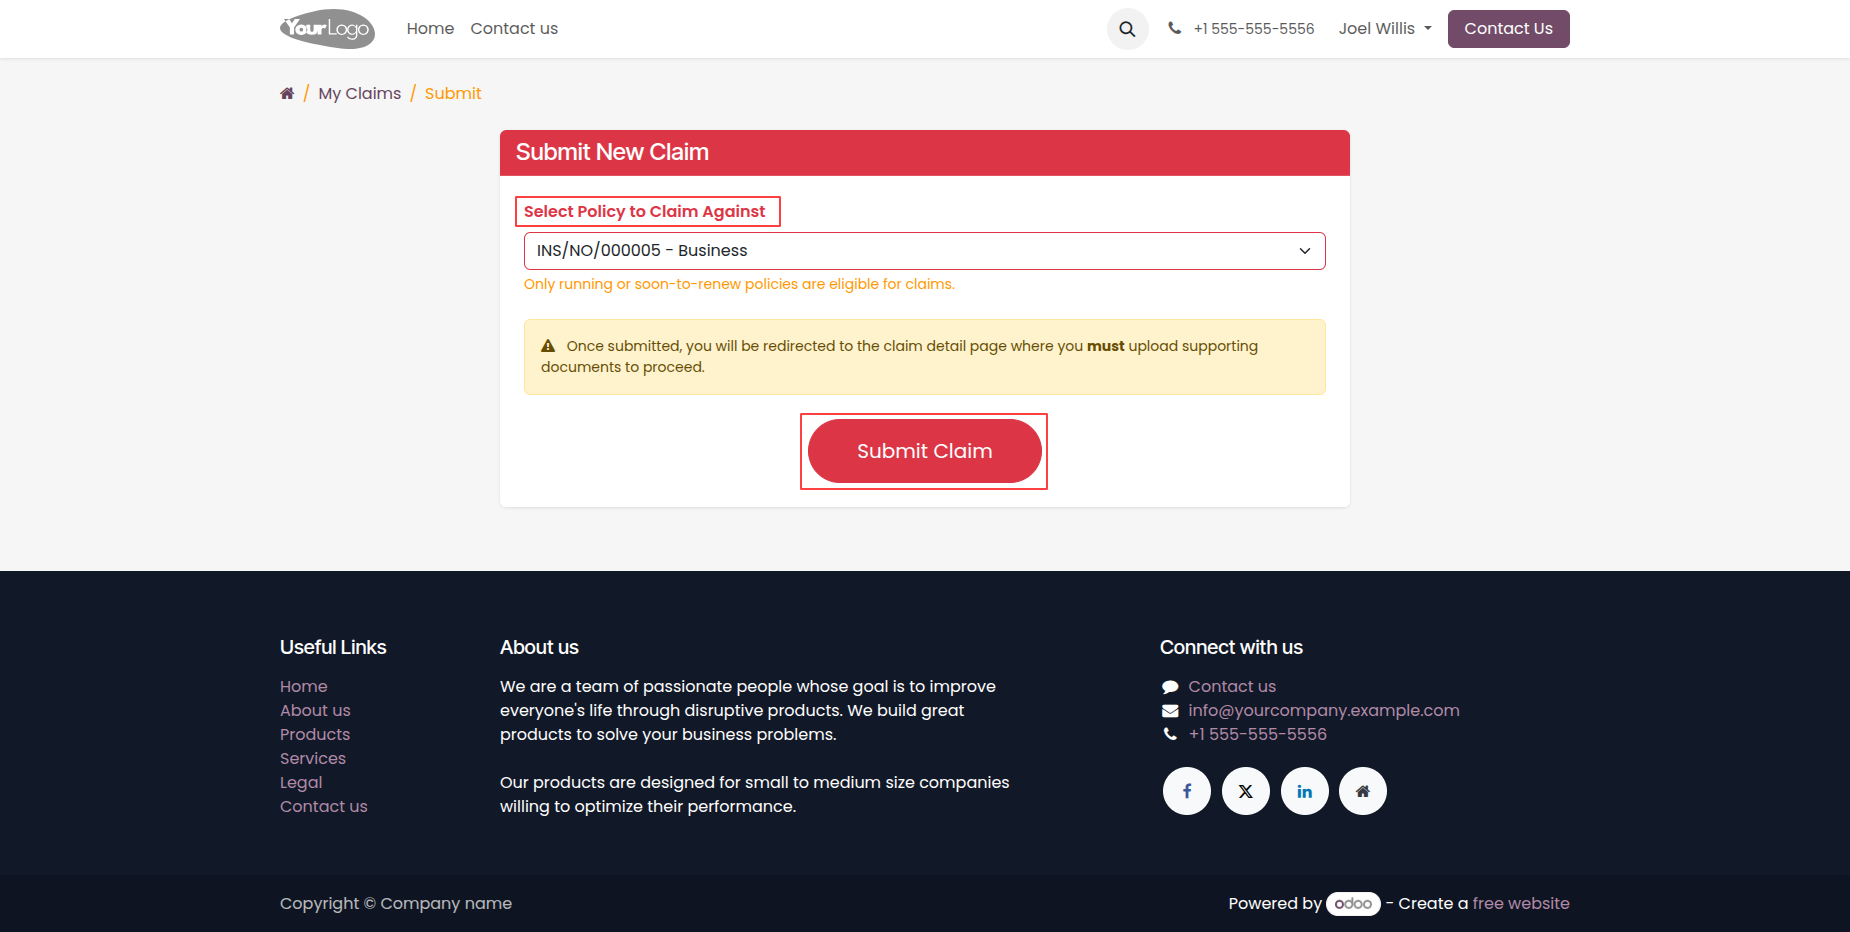
Submit Claim form page where users select the policy to file a claim against. Users can easily submit a claim for their insurance policy directly from the portal.
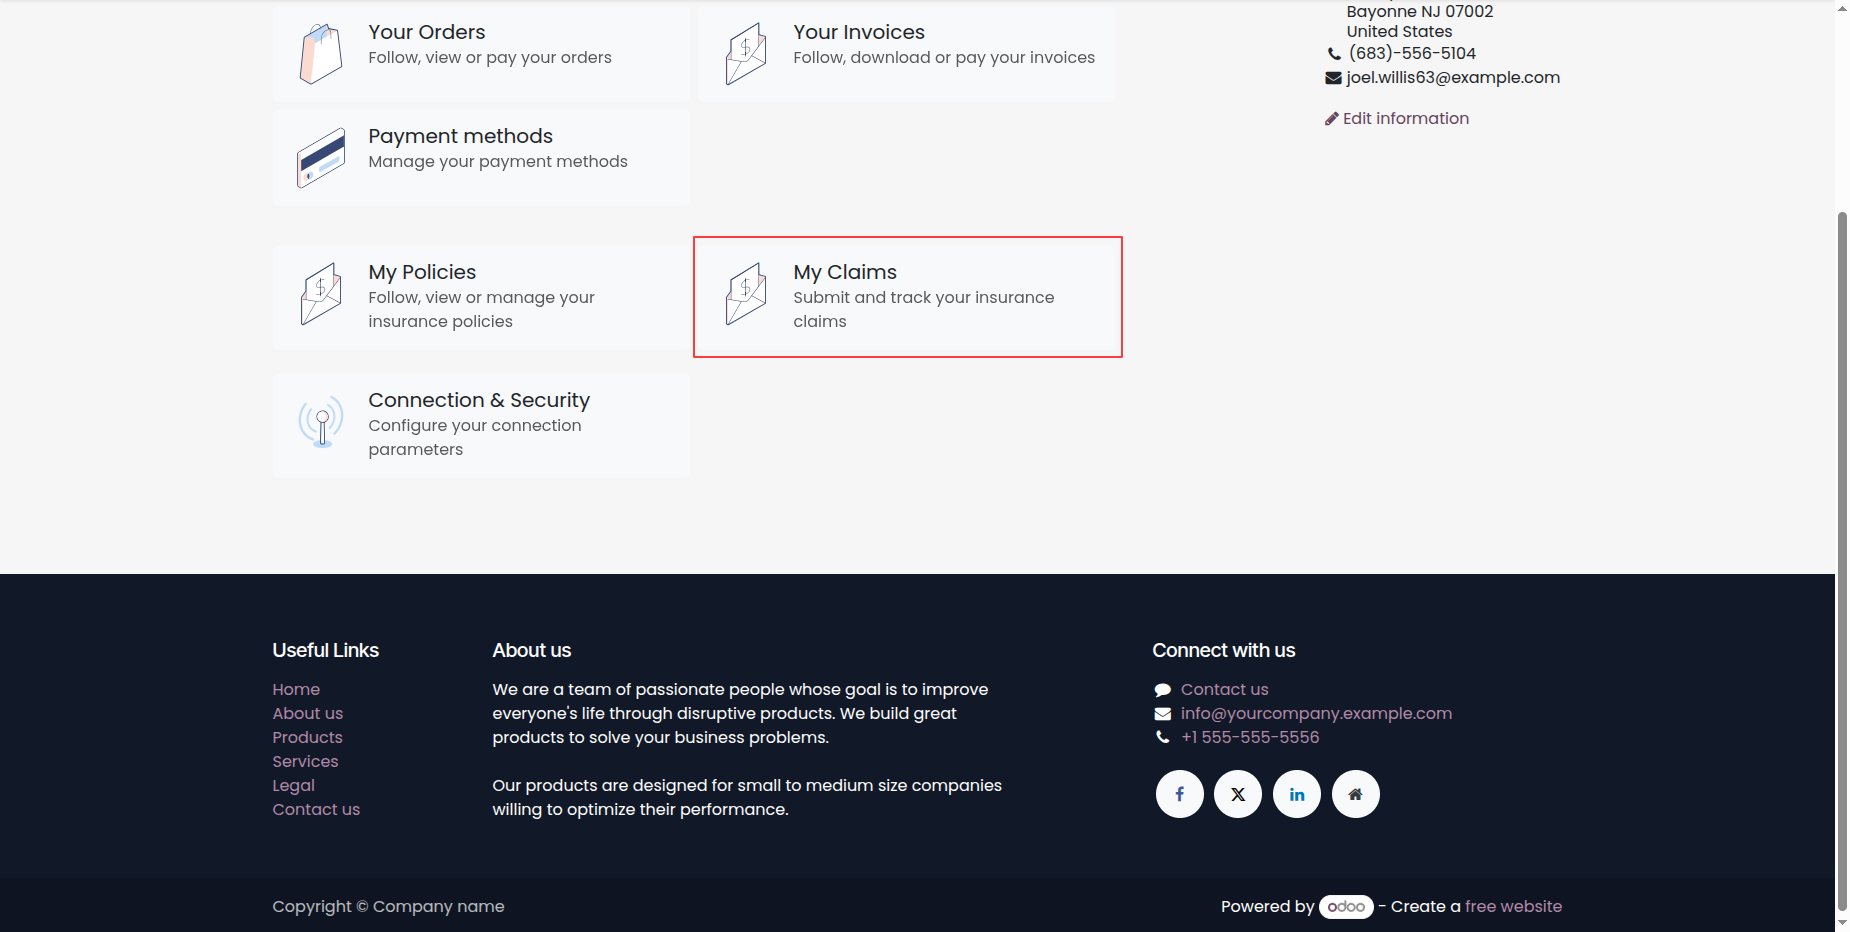
Customer portal home page showing 'My Claims' badge.
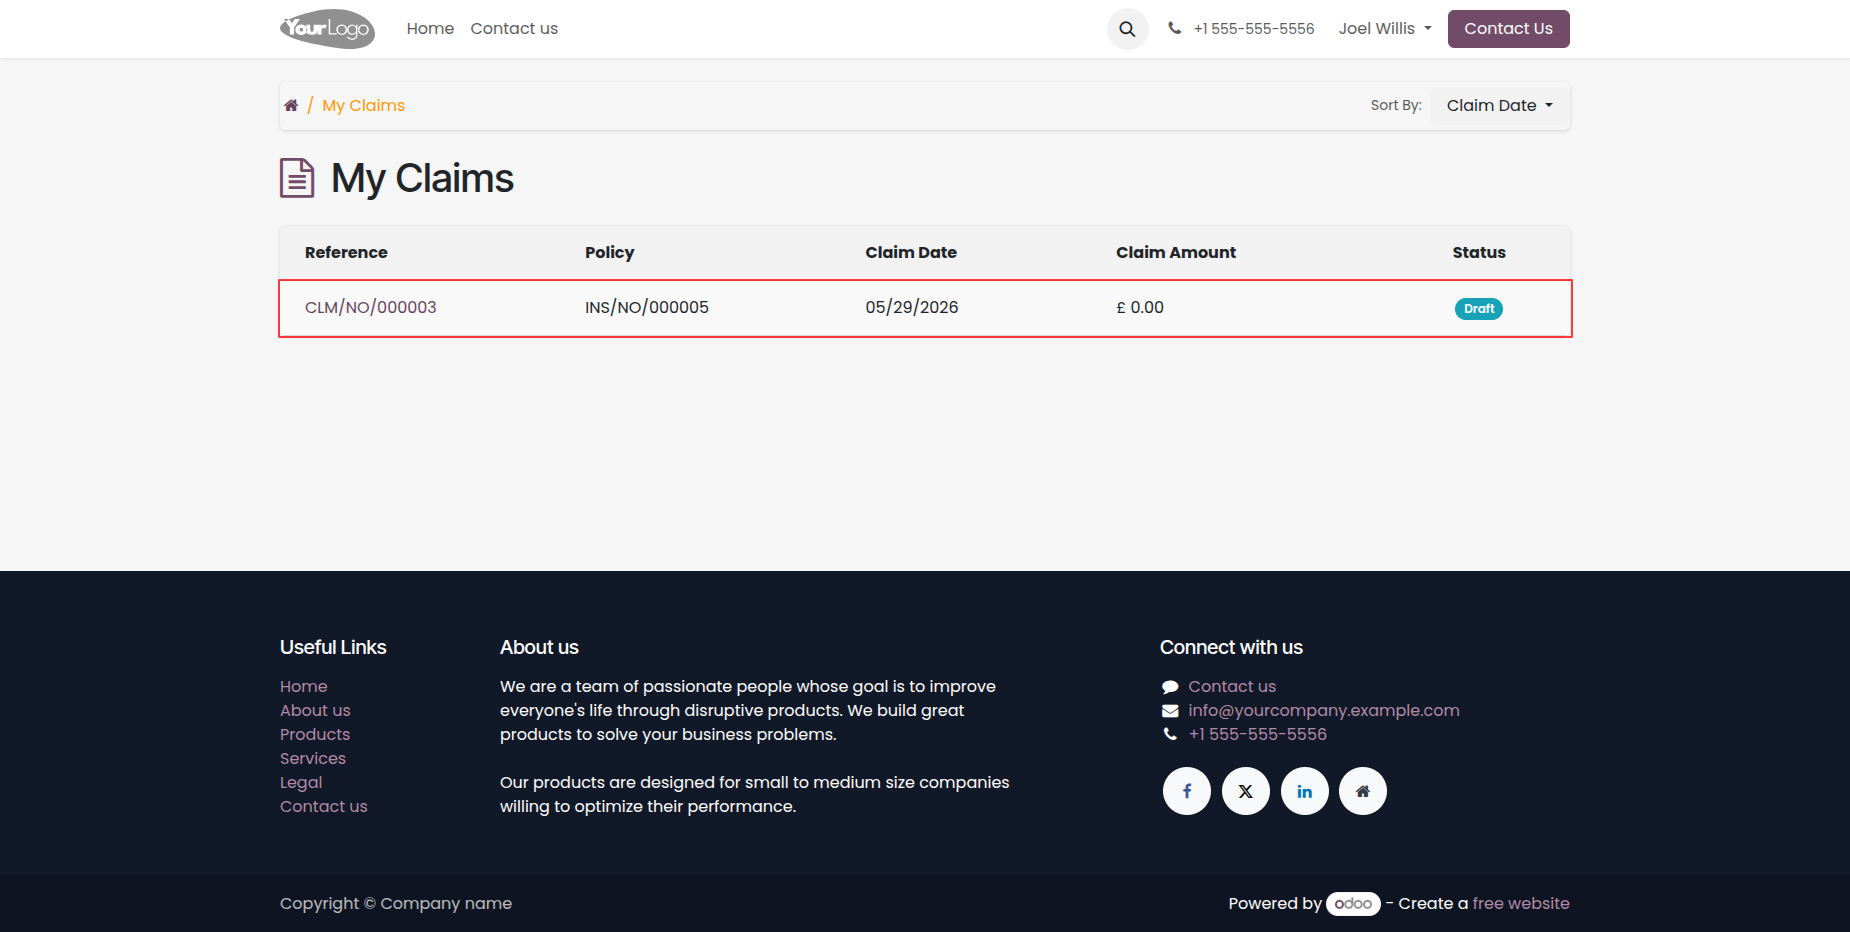
My Claims list view page showing references, associated policies, dates, amounts, and statuses.
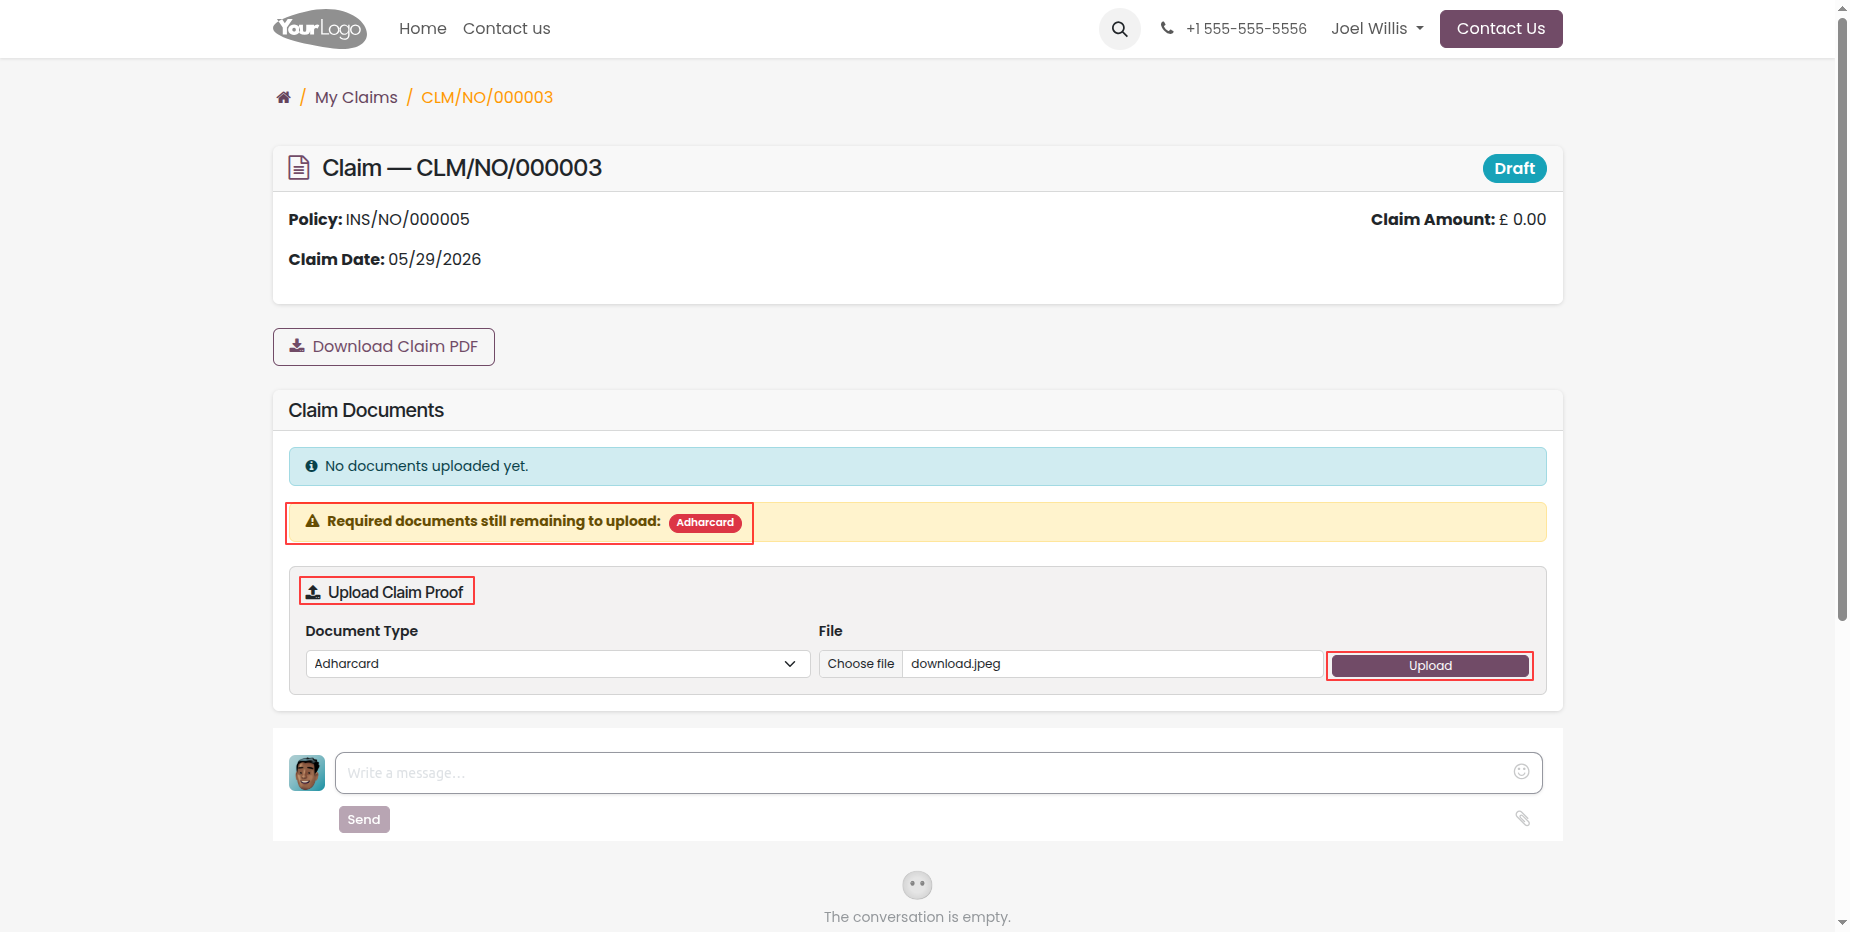
Newly submitted claim page in 'New' state showing status and basic
information.
Claim detail view showing required claim proof documents remaining
to be uploaded.
Selecting document type and uploading proof file to support the
insurance claim.
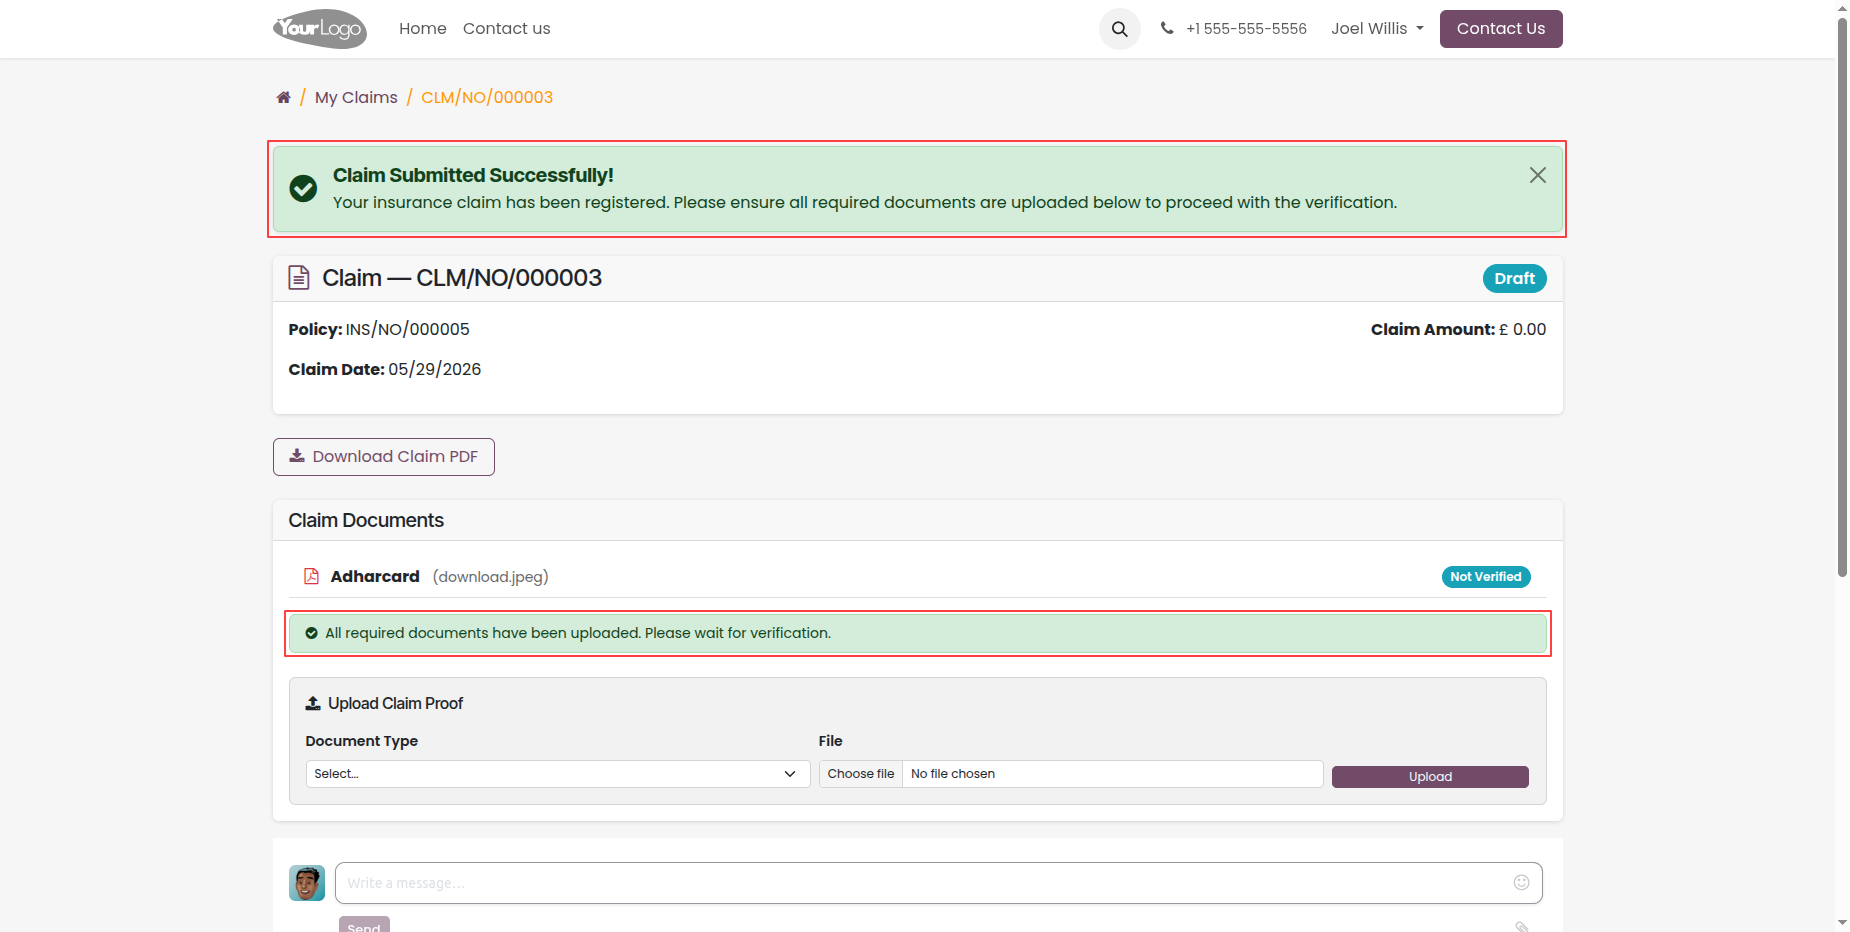
Success notification confirming that the claim proof document has been uploaded successfully.
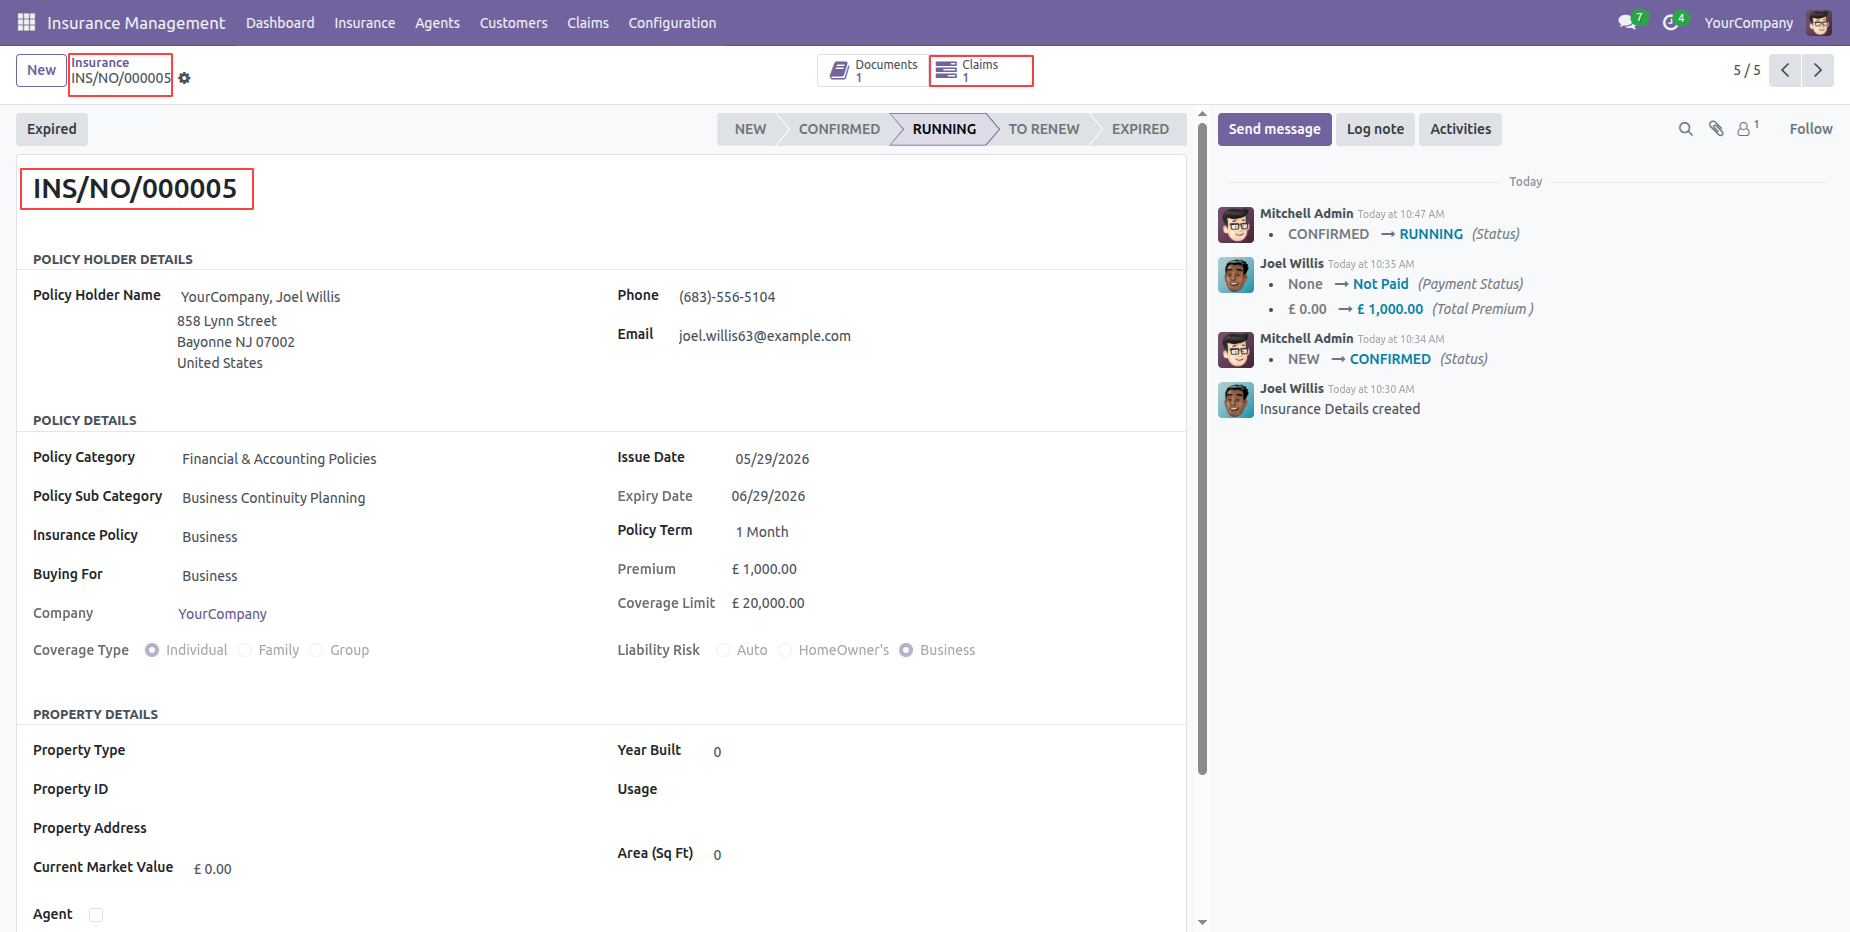
Claims can be viewed from the Insurance Policy through the Claims smart button by backend users.
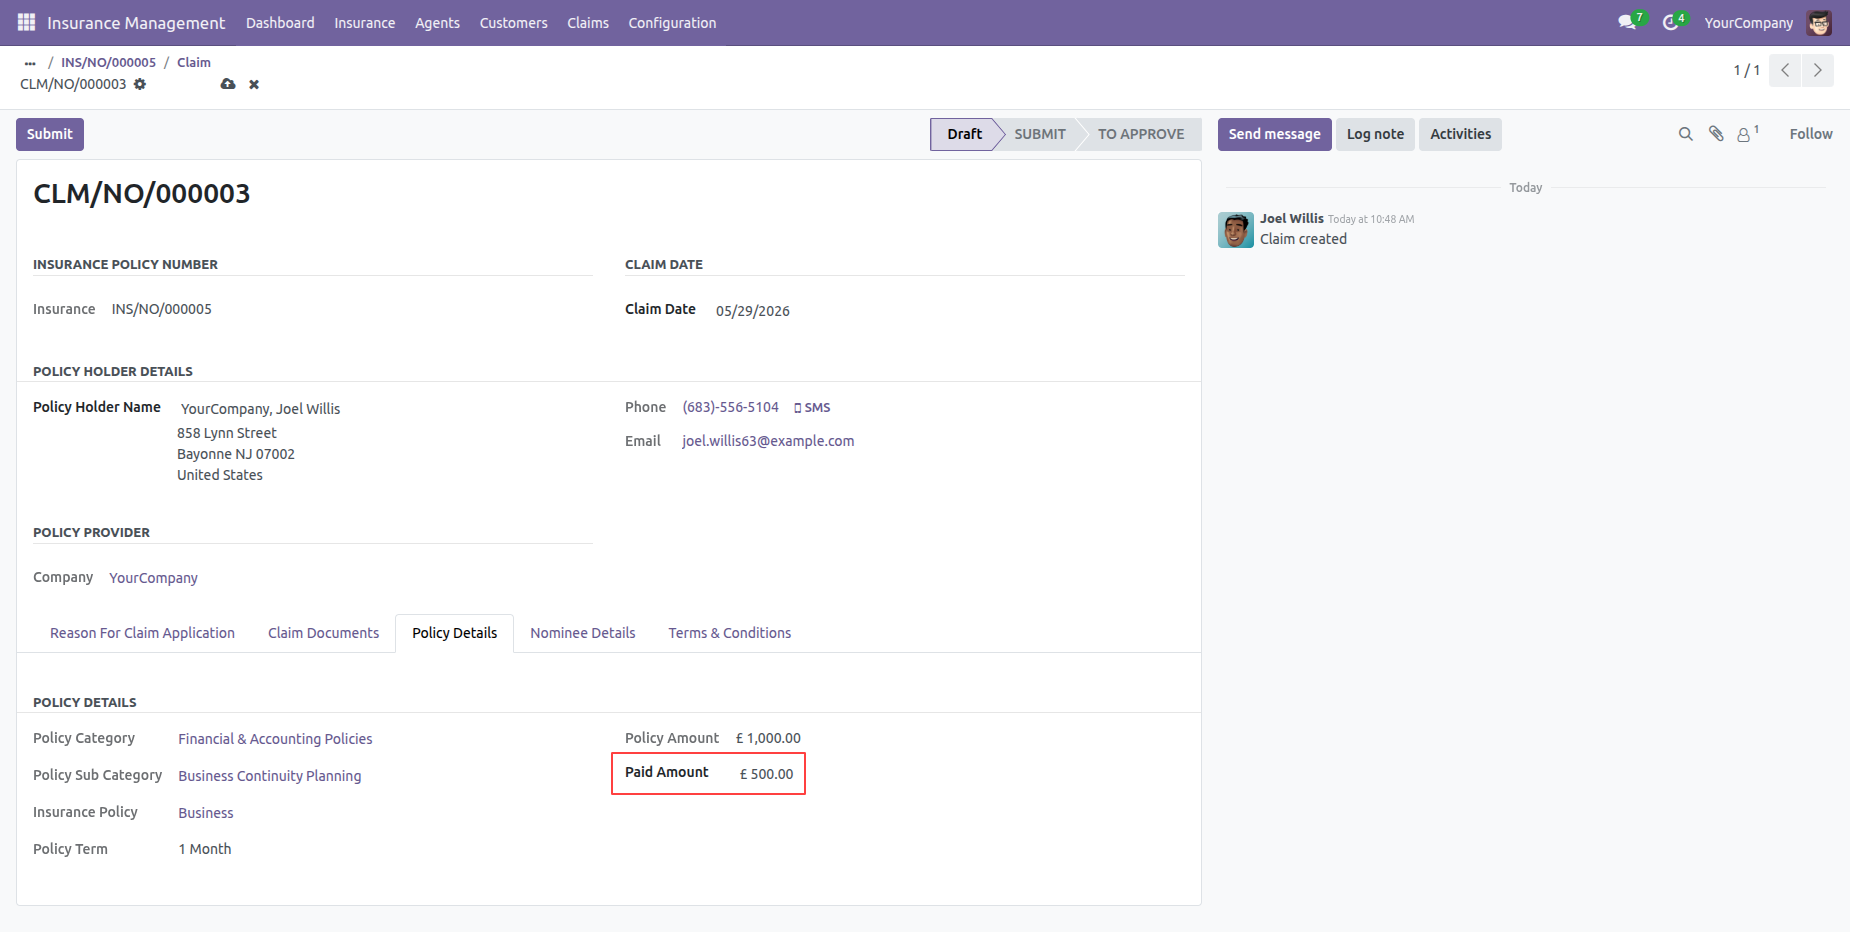
The claim form created by the portal customer can be viewed by backend users in a draft stage.
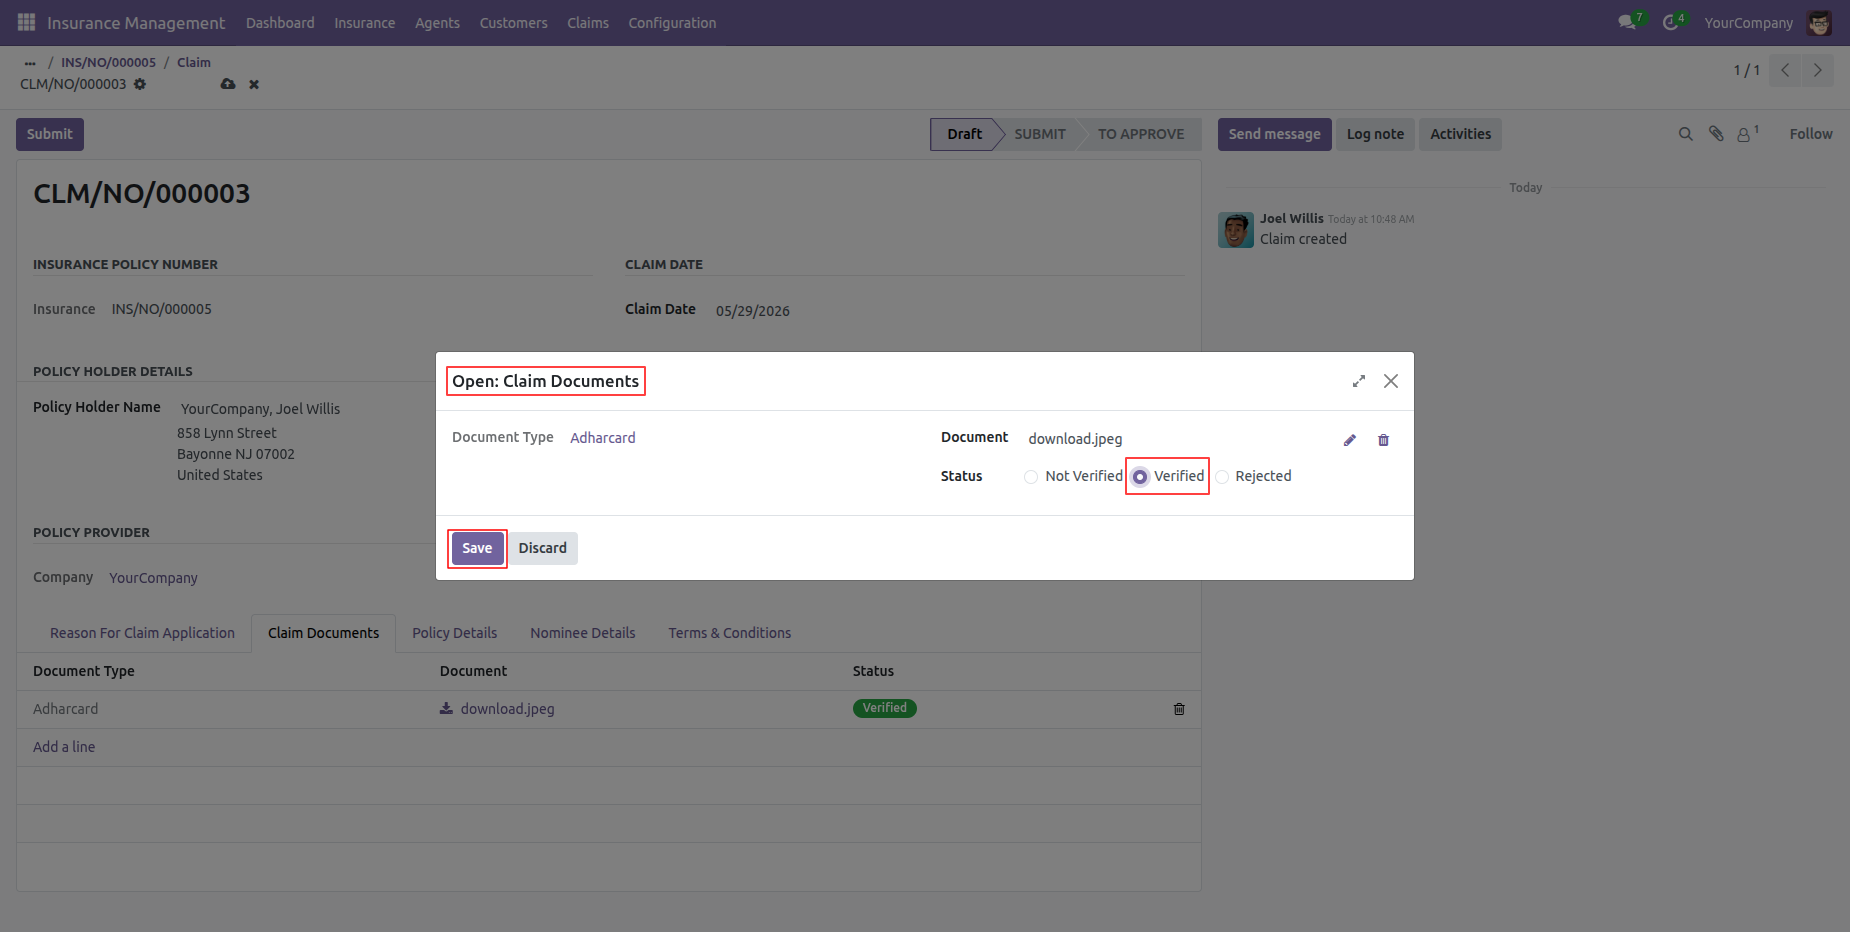
List of uploaded documents showing current verification status (e.g., 'Not Verified', 'Verified').
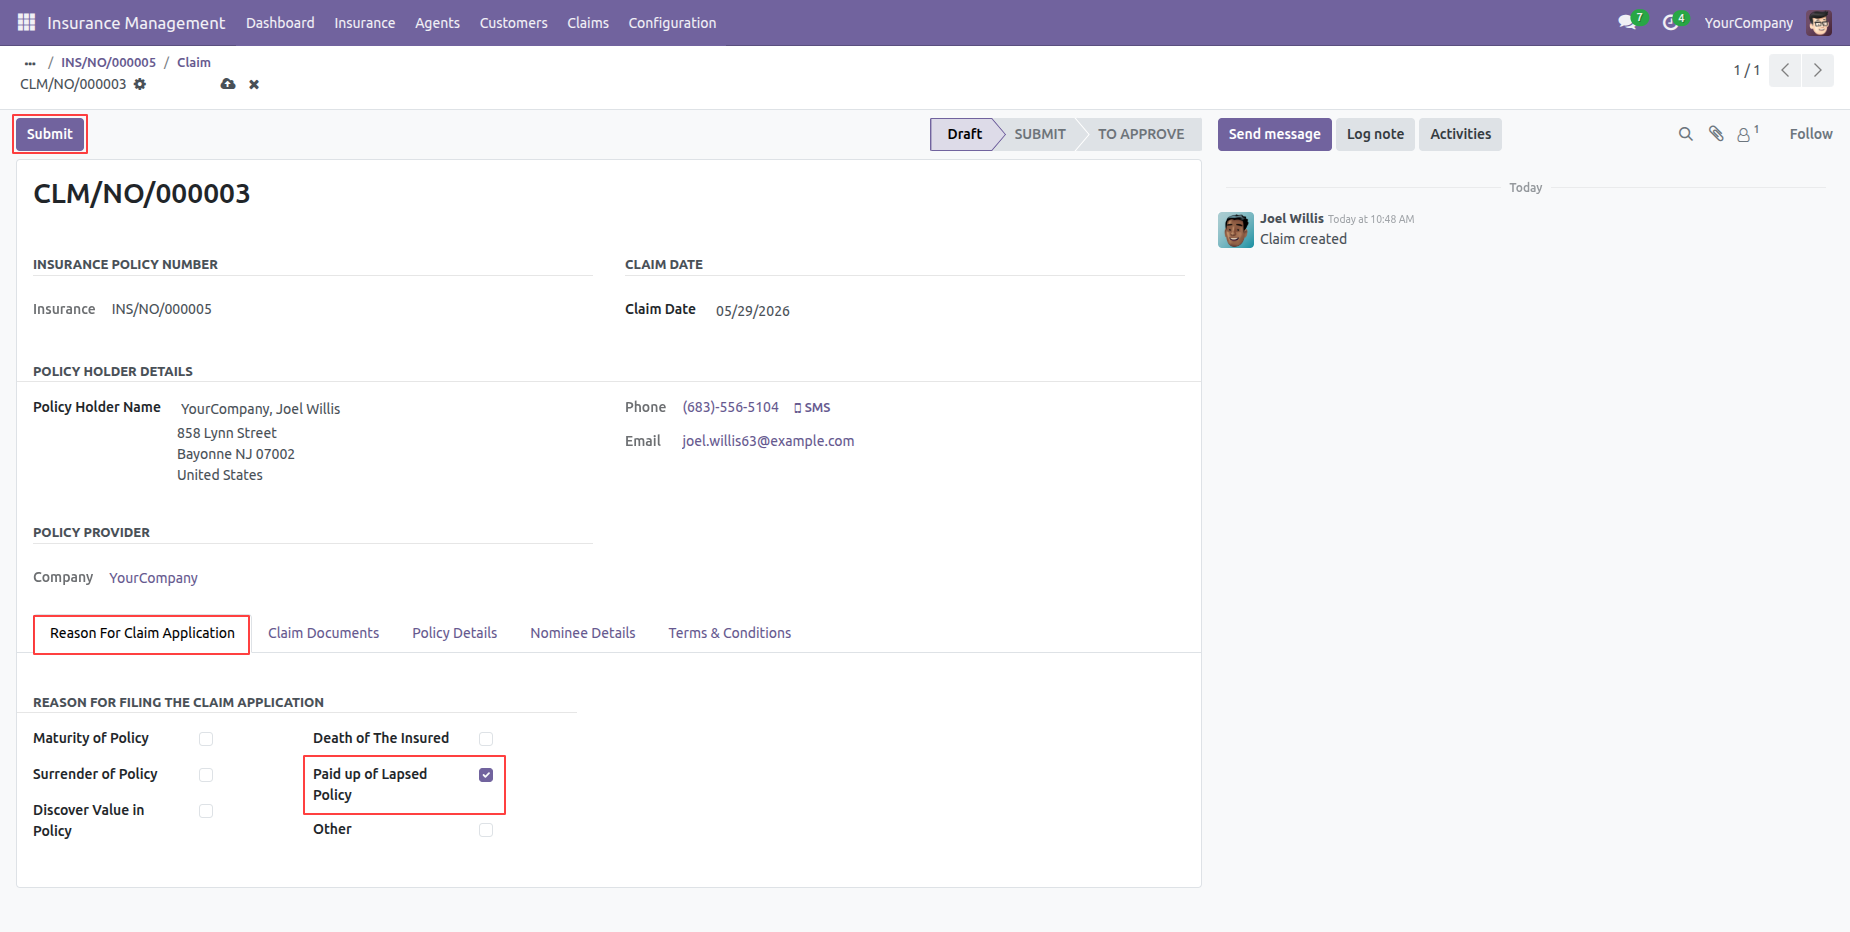
Insurance manager reviews and approves the claim from the backend system.
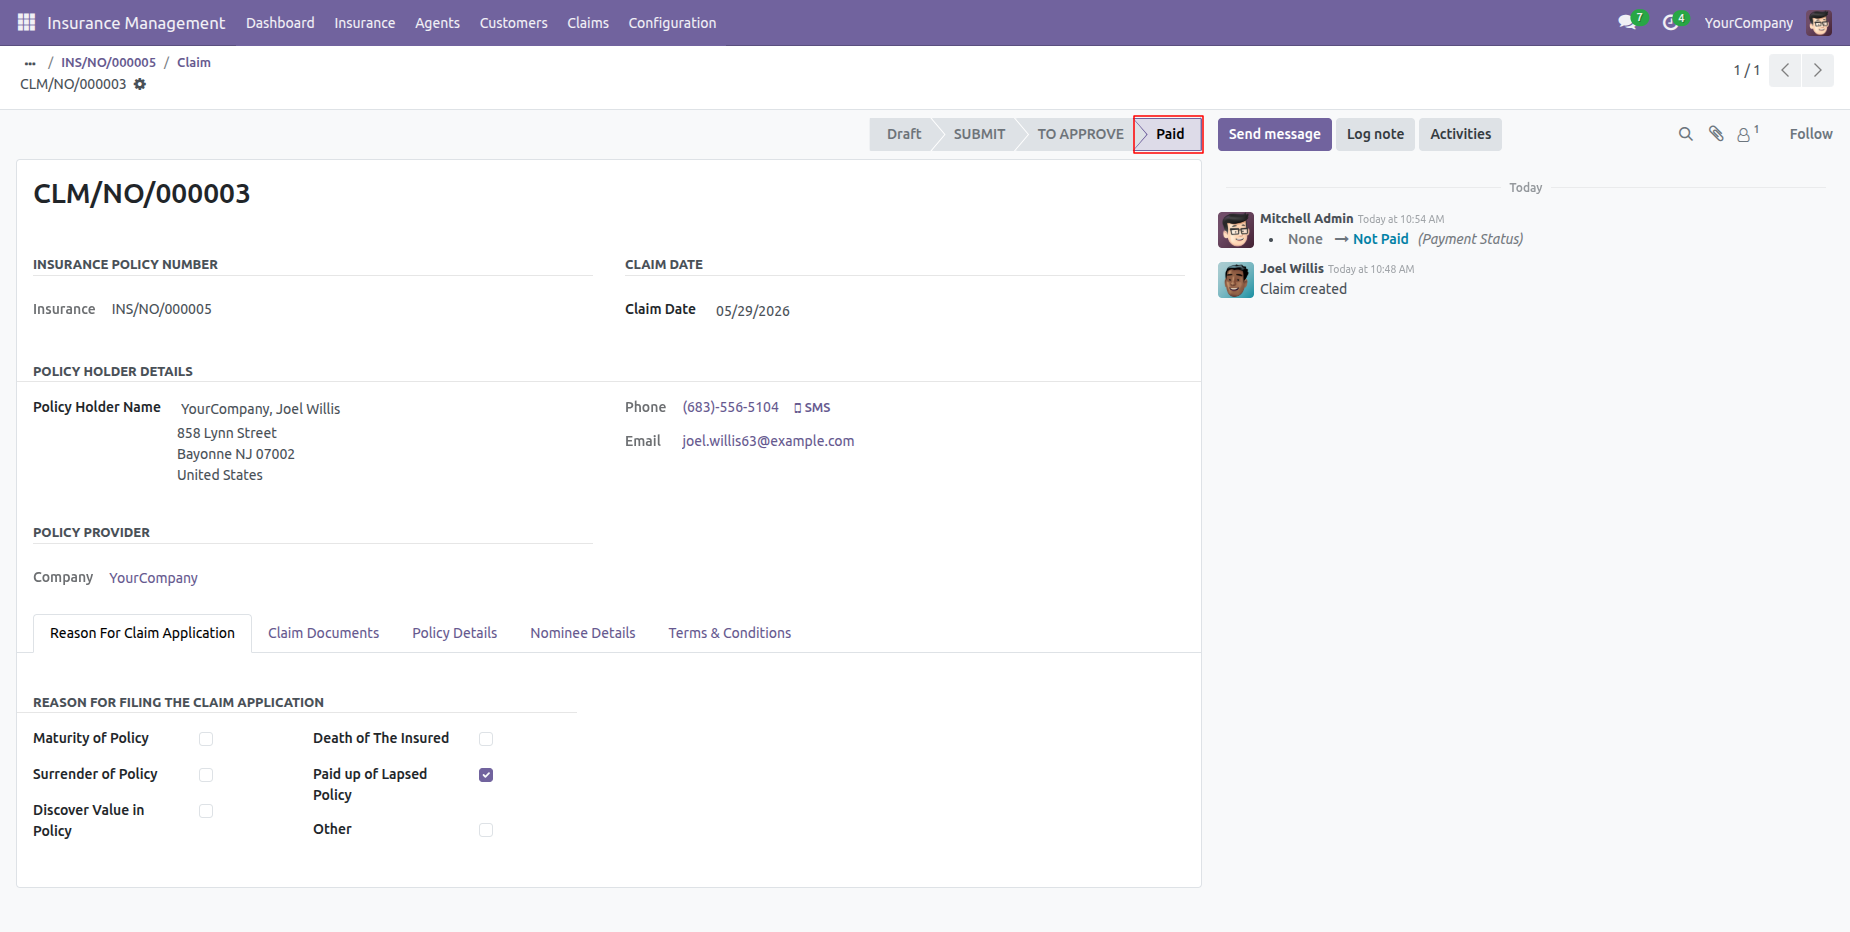
The claim has been marked as paid by the backend user.
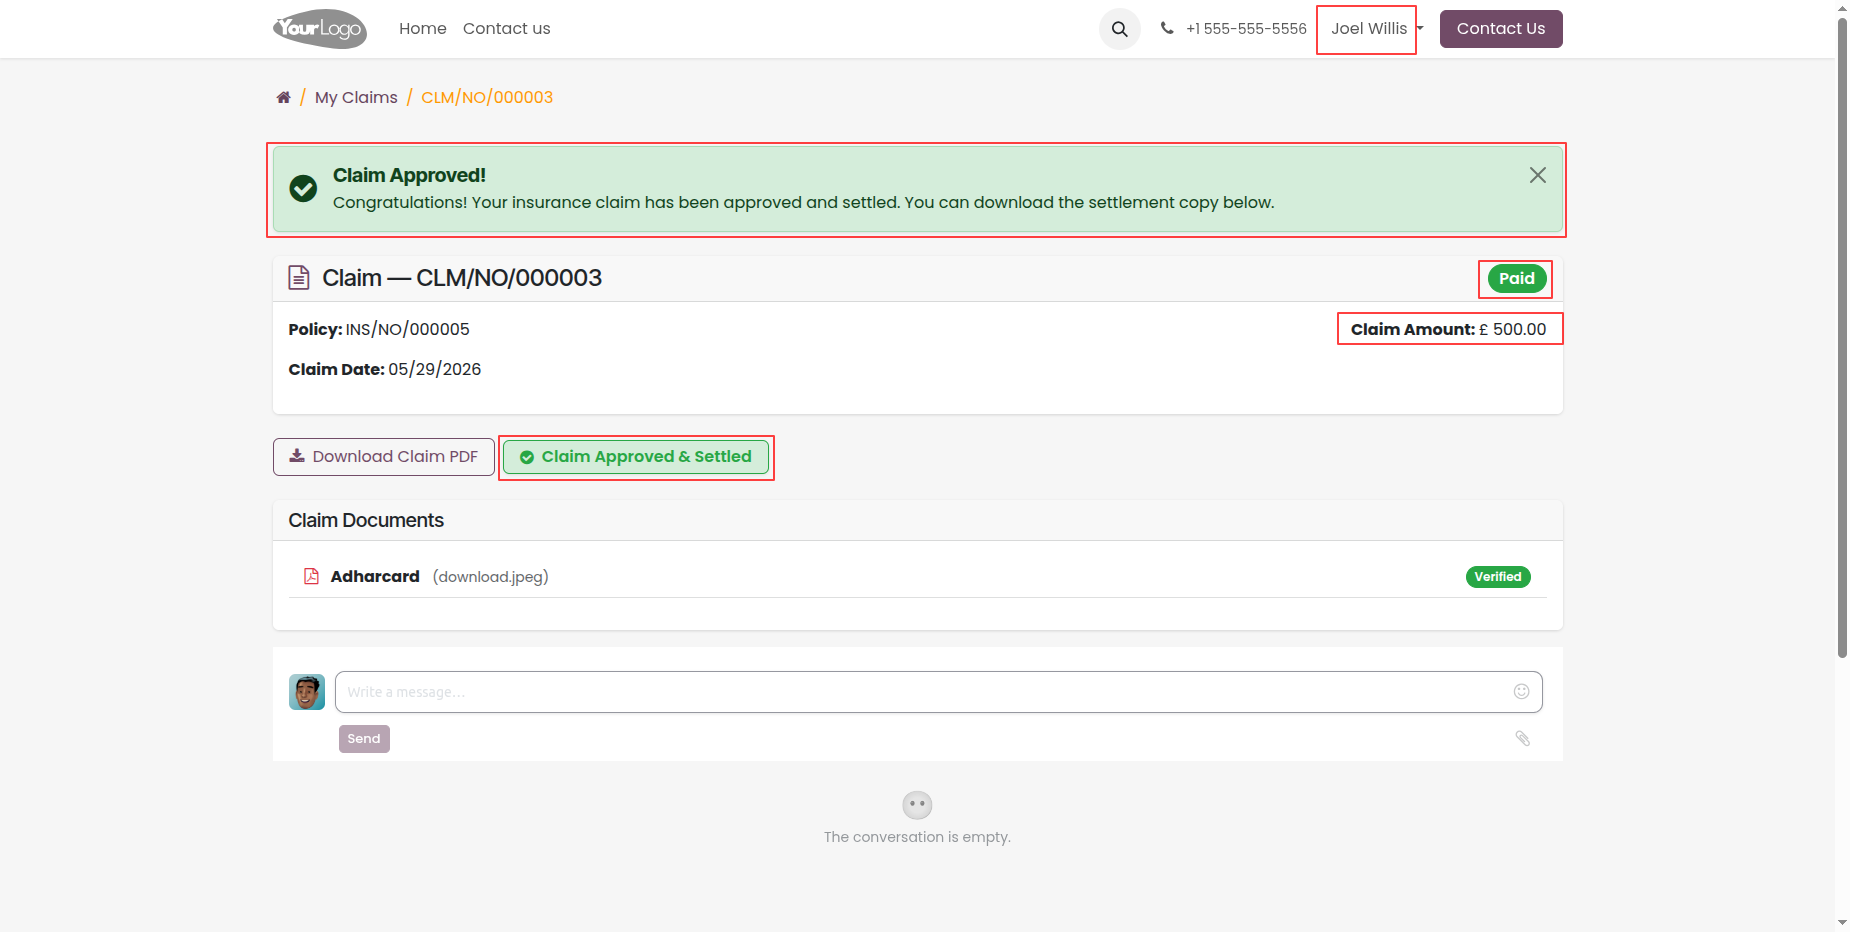
Approved claim detail page on the customer portal displaying 'Claim Approved' green alert.
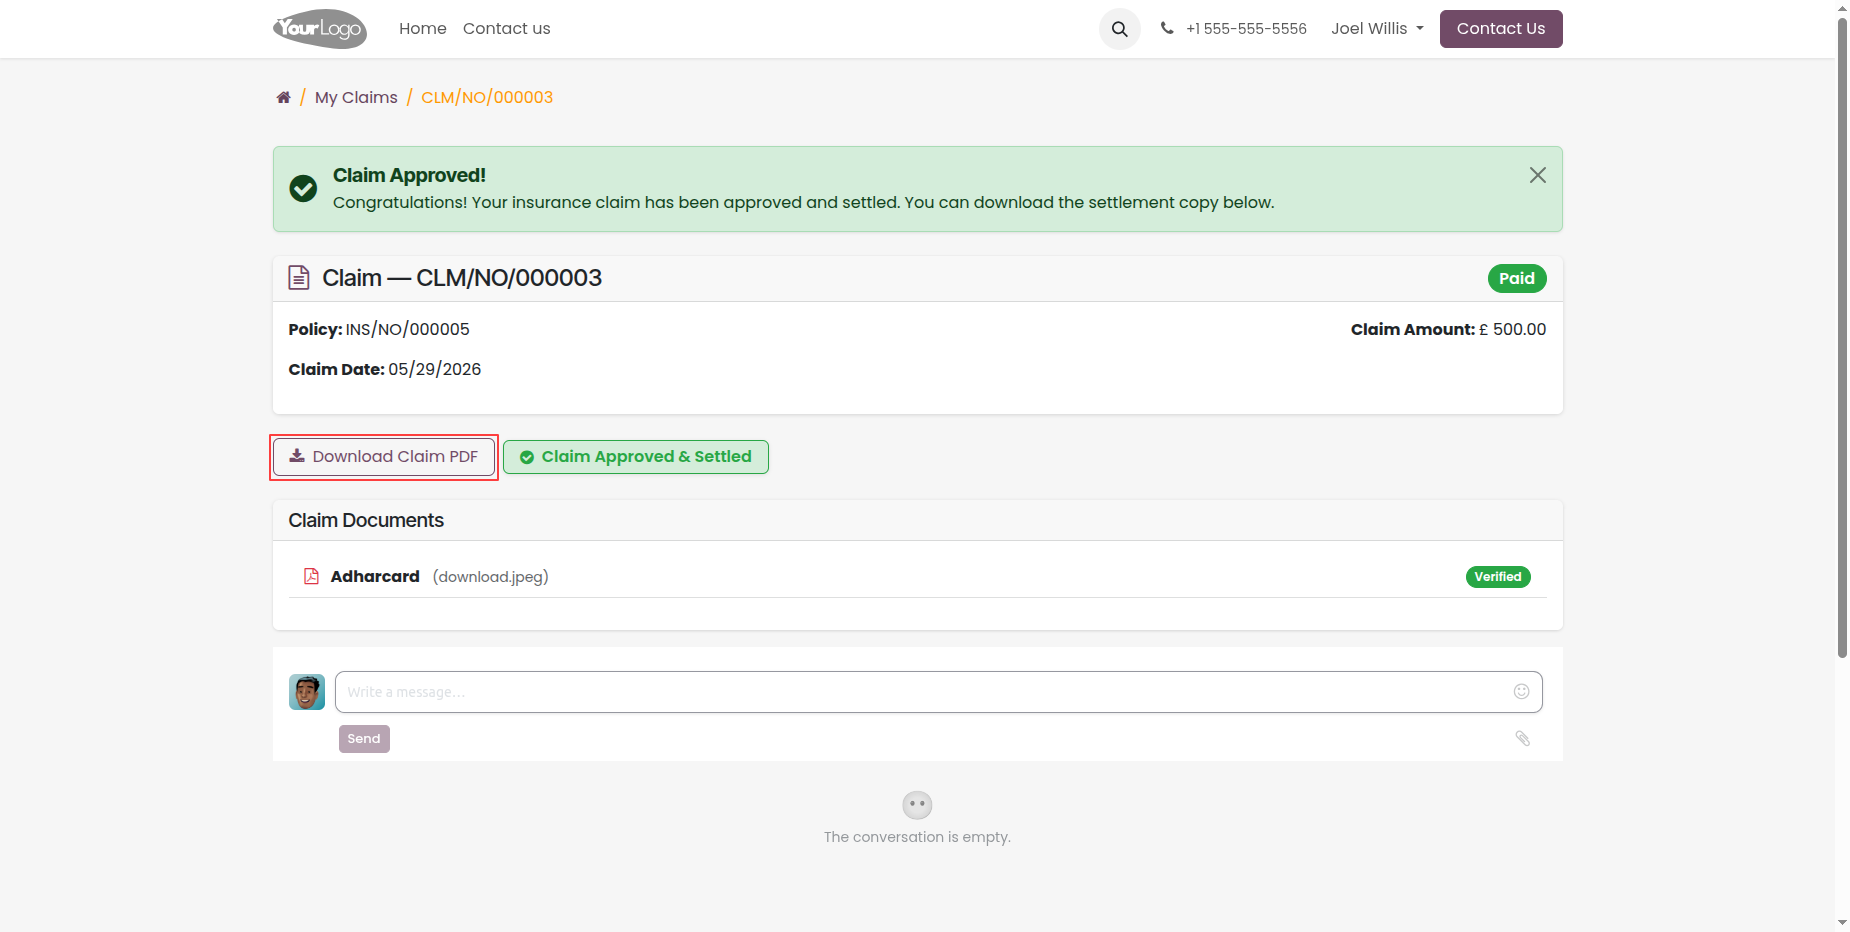
Customer can download the Claim PDF from the portal after approved claim.
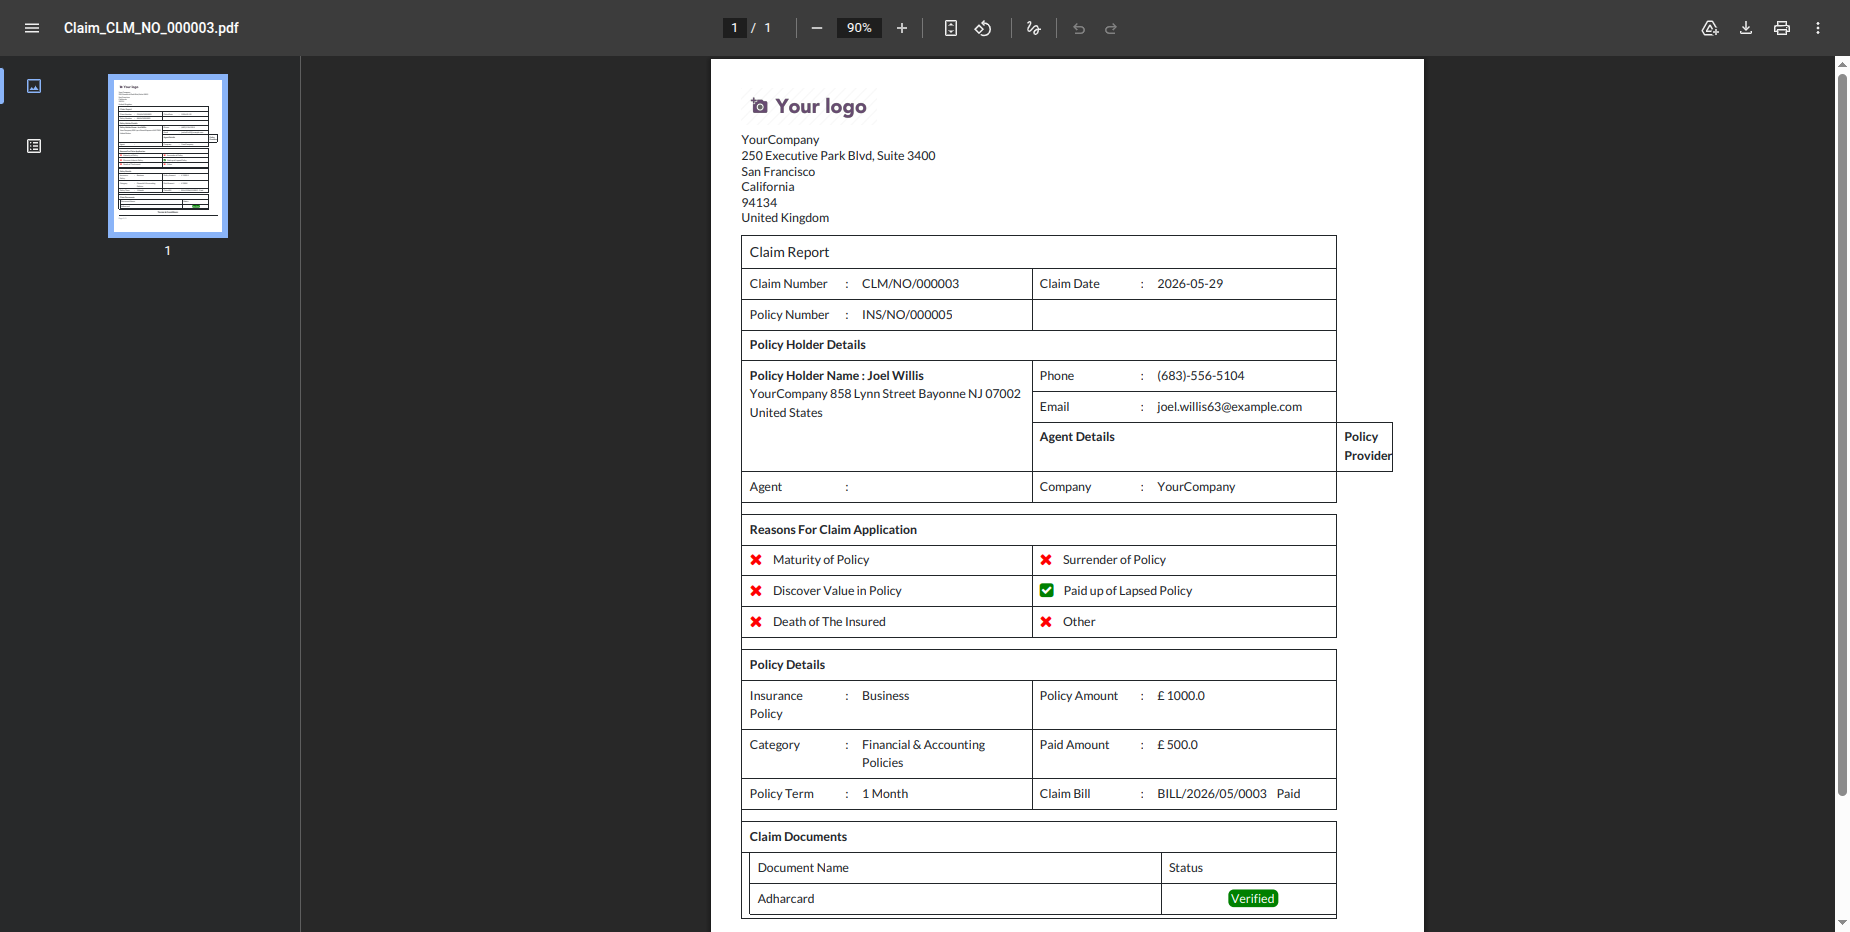
Claim in PDF format downloaded from the portal after claim approval, showing all entered details, claim status, and reference policy information.
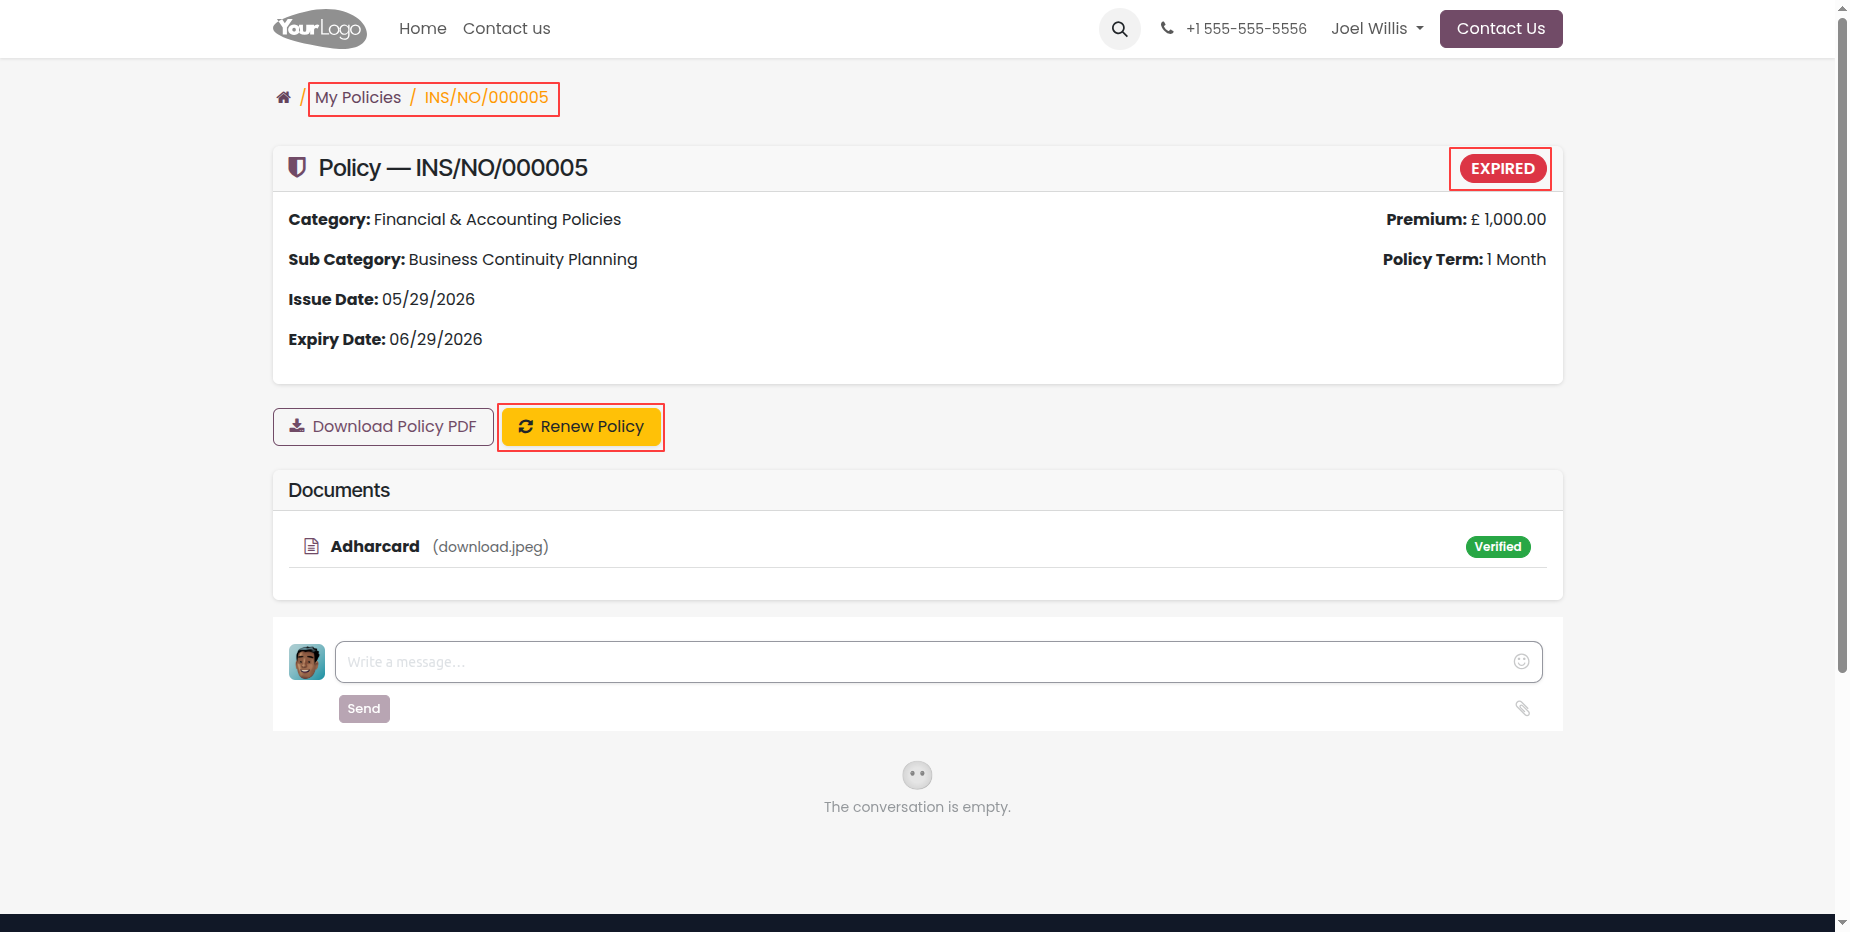
Expired policy or policy nearing expiry showing the 'Renew Policy' action button on the portal.
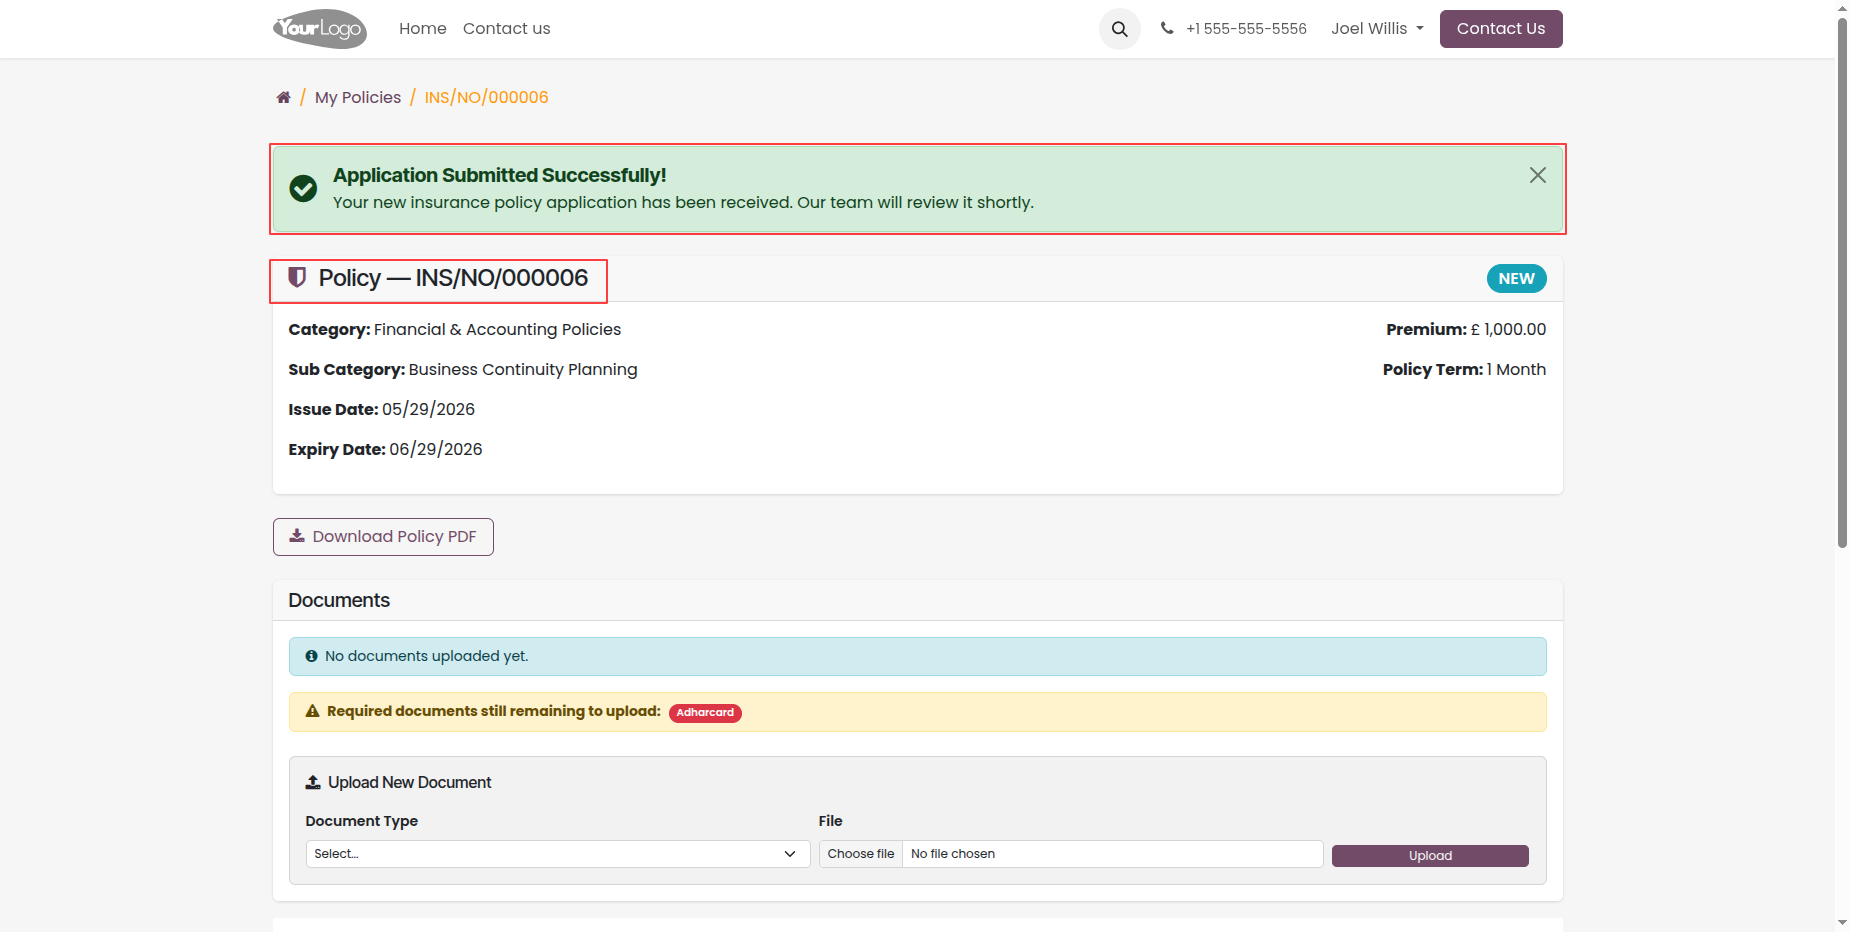
Successful renewal notification alert showing the newly generated policy details.
Version 19.0.1.0.0 | Released on : 08th August 2026
- Yes, this app works perfectly with Odoo Enterprise (Odoo.sh & Premise) as well as Community.
- No, this application is not compatible with odoo.com(odoo saas/Odoo Online)
- Yes, to test this module, please contact us at sales@softhealer.com.
- Please contact us at sales@softhealer.com to request customization.
- Yes, we provide free lifetime support for the version you purchased.
- Yes, you will receive lifetime free updates for the version of the module you purchased.
- No, there is no need to install any additional libraries.
- Yes, for version 12 and above, you need to purchase the module separately for each version you intend to use.
- No, exchanges or refunds are not allowed. Please make sure to select the correct version before purchasing.
- You can contact us at support@softhealer.com for language translation support. We use Google Translator tools to provide translations in multiple languages, so the accuracy may vary. We welcome your suggestions to help improve translations.
Discover Our Latest Apps