Import Task from CSV/Excel file
This module is useful to import tasks from CSV/Excel. You can import custom fields from CSV or Excel.
Related Module
All In One Import - Partner, Product, Sales, Purchase, Accounts, Inventory, BOM, CRM, Project (Advance Module)
All In One Basic Import - Partner, Product, Sales, Purchase, Accounts, Inventory (Related Module)
Features
- Easy to import.
- Import CSV or Excel.
- Easy to import different modes of the project task.
- Easy to import custom fields.
- Easy to import custom fields from CSV or Excel.
- Easy to import Text, Integer, Float, Character, Boolean, Selection, Many2one, Many2many custom fields.
- No special configuration required, install it, use it.
- This module saves your important time.
- It reduces human efforts.
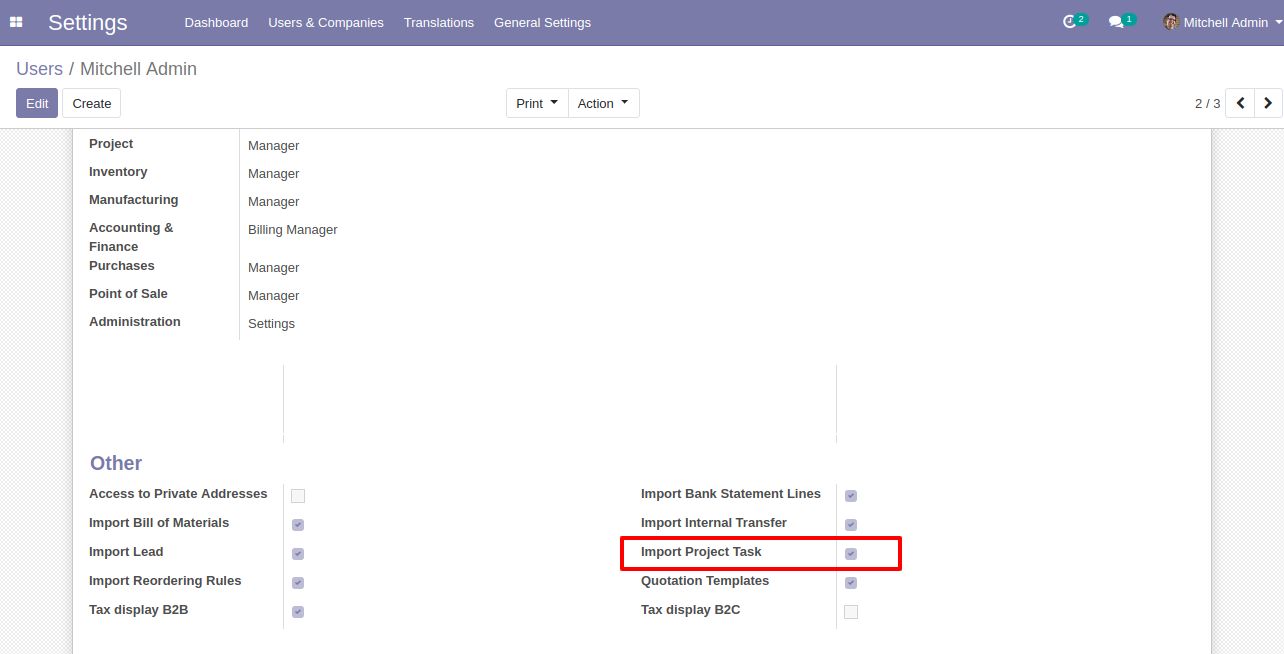
First, you need to tick the "Import Project Task" group to import the project task.
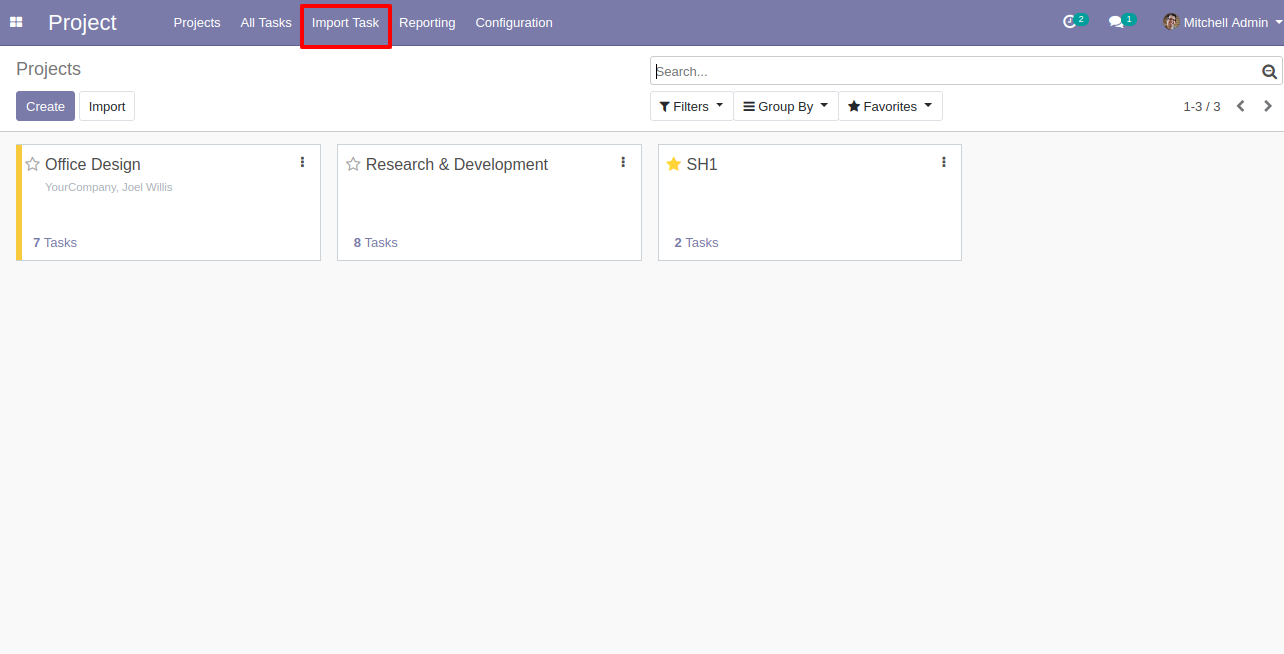
"Import Project Task" menu in the projects.
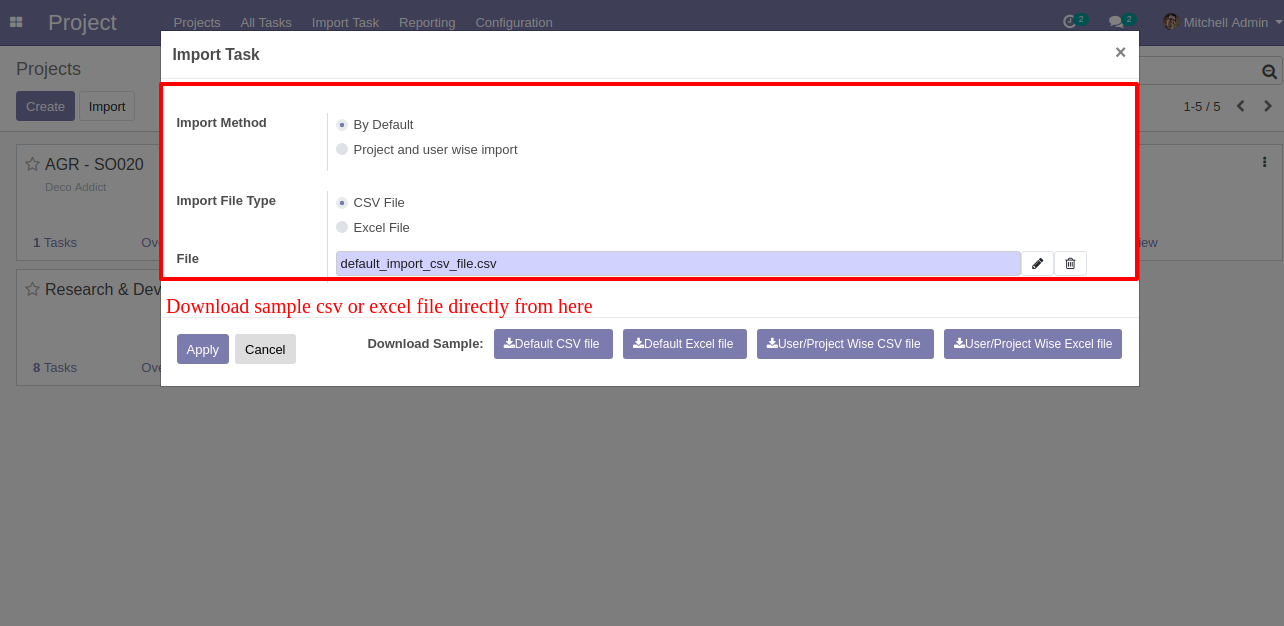
When you click the "Import Task" menu, the wizard will open and it looks like below.
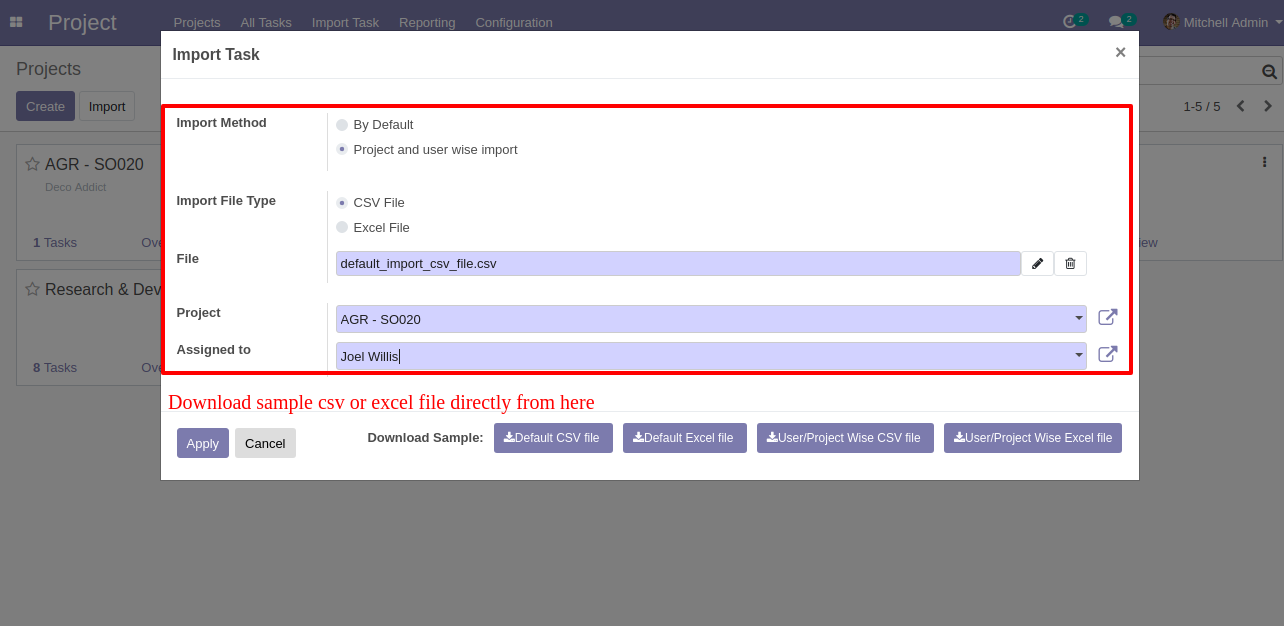
Project and user wise import wizard.
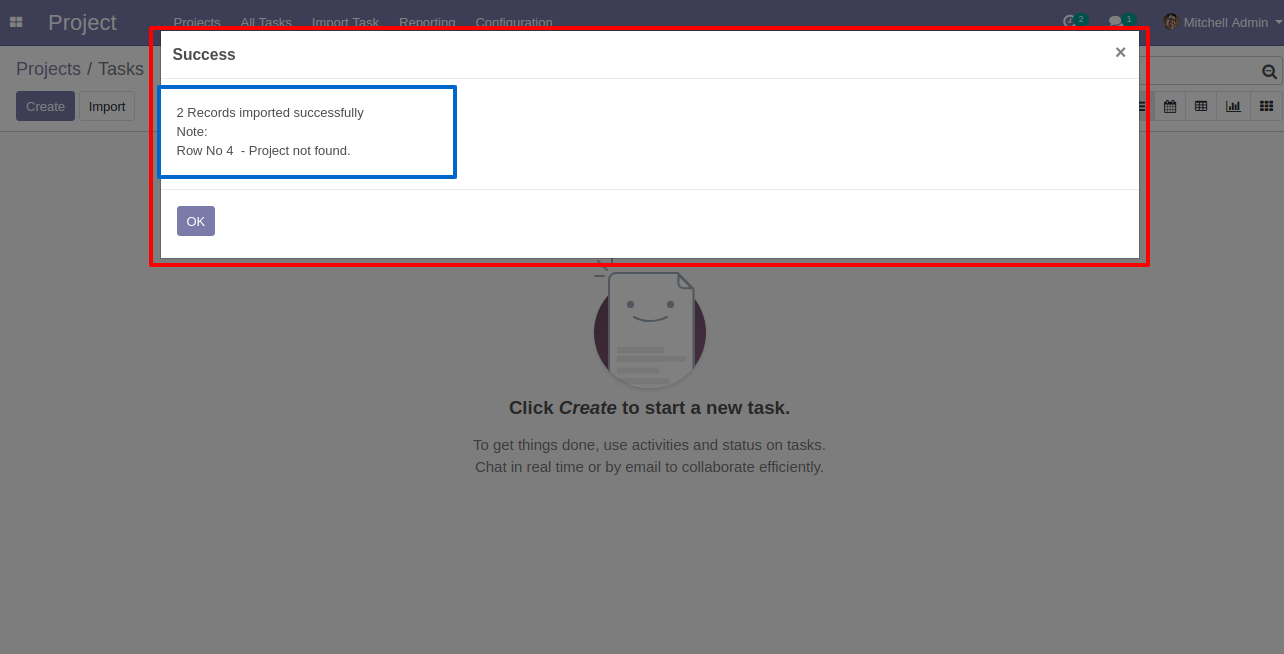
Success message looks like below it shows successfully imported records and also provides a list of unimported records with row number in sheet and relative details of data invalidation.
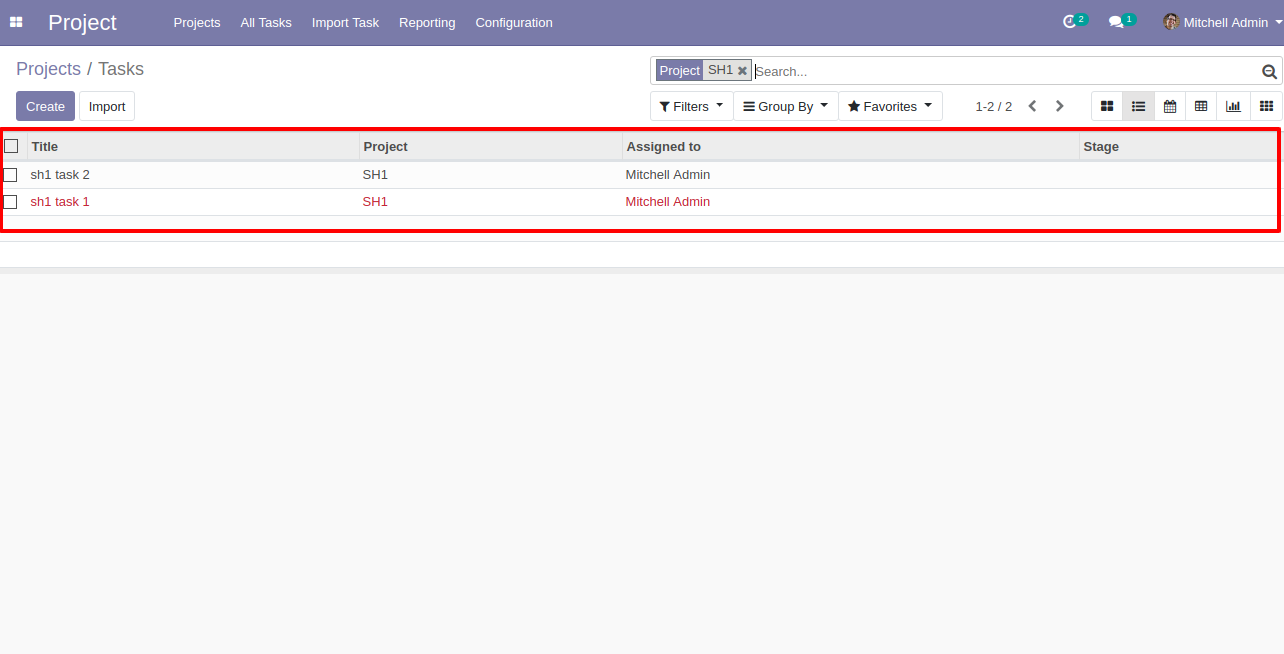
The following task is imported.
About Fields
| Column | Project Model | Field Name | Description | Required |
|---|---|---|---|---|
| A | Tasks (project.task) | Project | You have to write a Project Name here. | Yes |
| B | Tasks (project.task) | Assigned To | You have to write a User Name here. | No |
| C | Tasks (project.task) | Task | You have to write a Task Name here. | Yes |
| D | Tasks (project.task) | Description | You have to write a Description here. | No |
| E | Tasks (project.task) | Deadline | Define the Date Deadline. | No |
| F | Tasks (project.task) | Planned Hours | You have to write a Planned Hours here. | No |
| G | Tasks (project.task) | Custom Fields | You can import custom fields from here. Please go to the "Custom Fields" tab for more details. | No |
General Notes:
1)
Don't
remove
the
column
from
the
sample
sheet
given,
you
can
leave
an
empty
column
if
the
column
is
not
the
required
type.
You
can
see
the
table
above
for
that.
2)
Don't
change
the
sample
sheet
column
sequence.
3)
Please
don't
use
excel
if
you
don't
know
the
very
well
sheet
formatting
which
is
given
in
the
sample
sheet.
Use
CSV
for
hassle-free
import
without
format
issue.
If
you
want
to
use
excel
and
want
to
clear
the
format
then
please
check
this
video.
4)
Add
Custom
Fields
or
Non-Exist
Standard
odoo
fields
at
the
end,
For
adding
those
fields
pls
check
the
custom
fields
section.
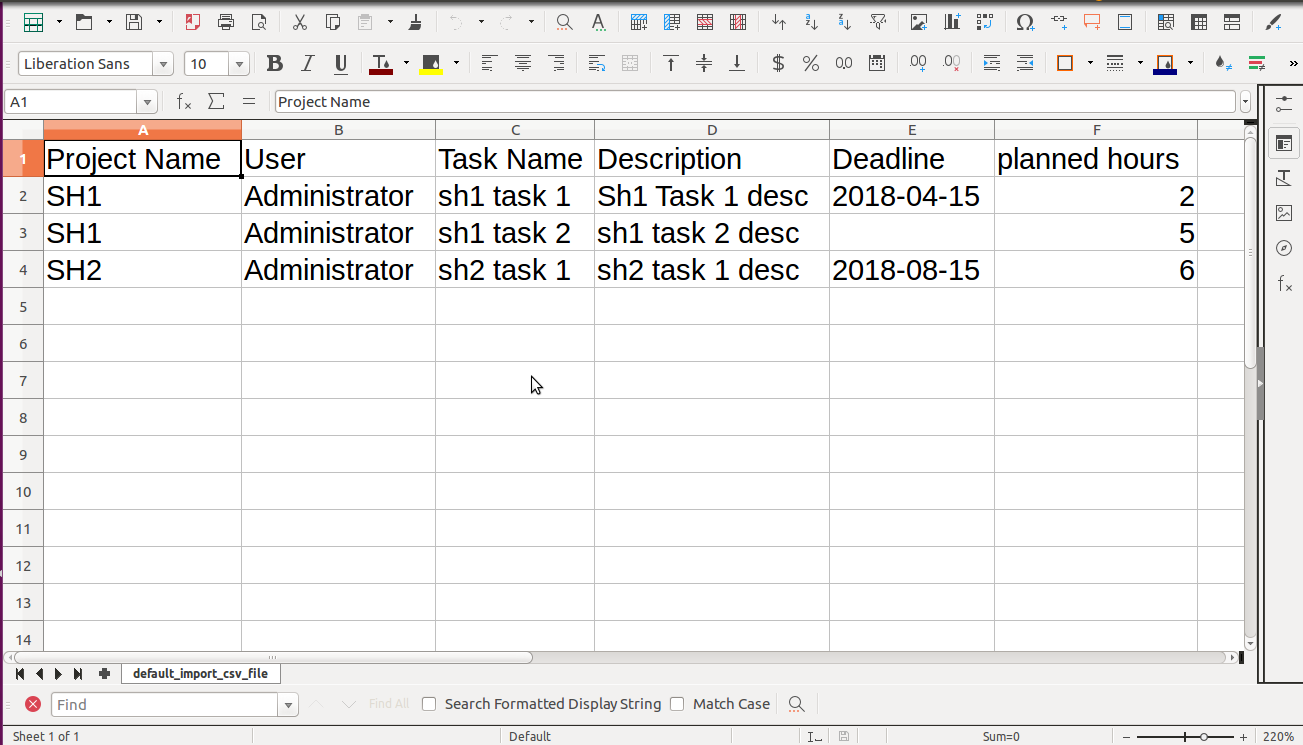
Default import CSV file format (your file format must match like below).
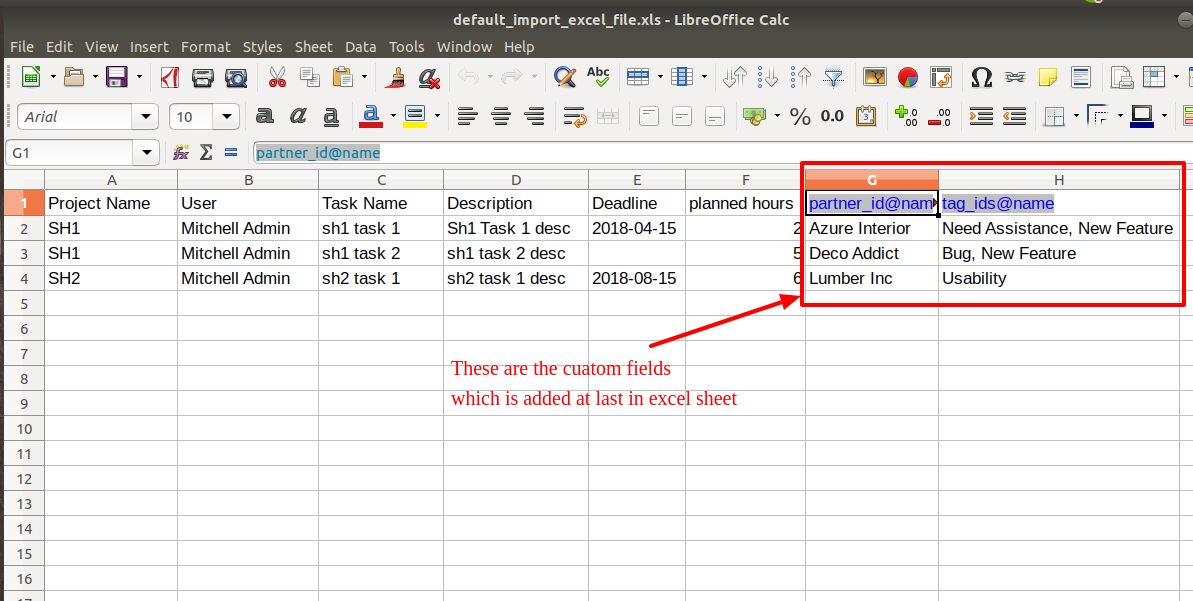
Default import Excel file format (your file format must match like below).
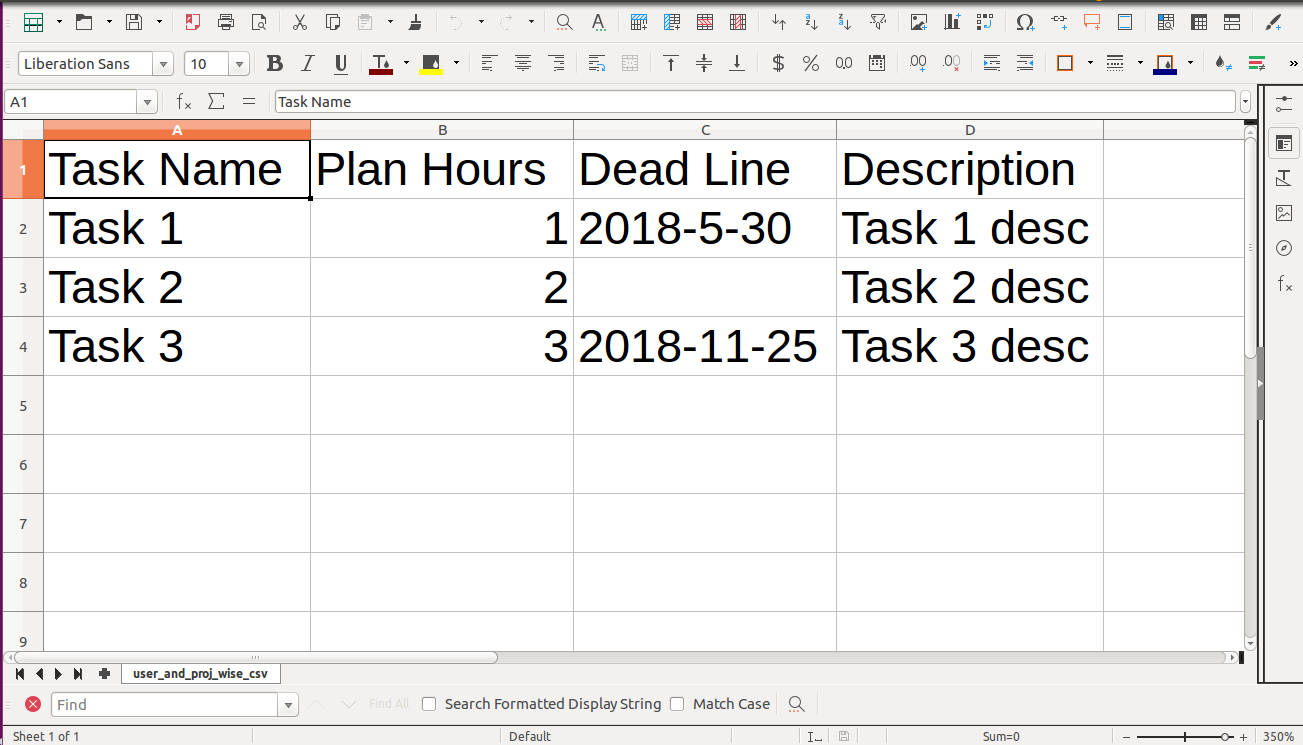
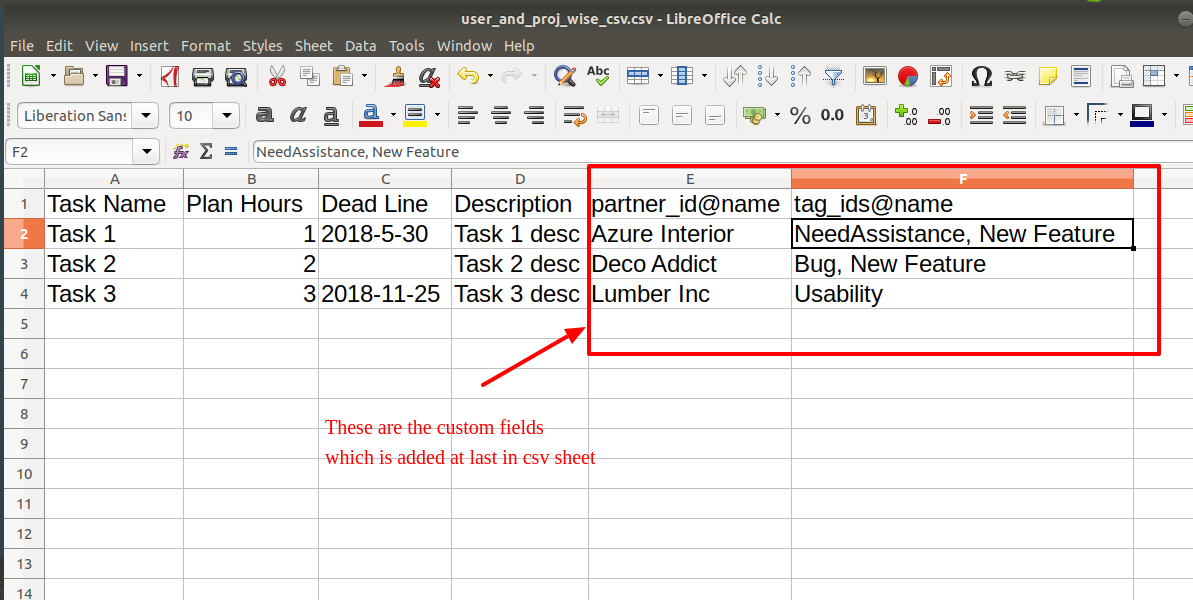
User and project wise import CSV file format (your file format must match like below).
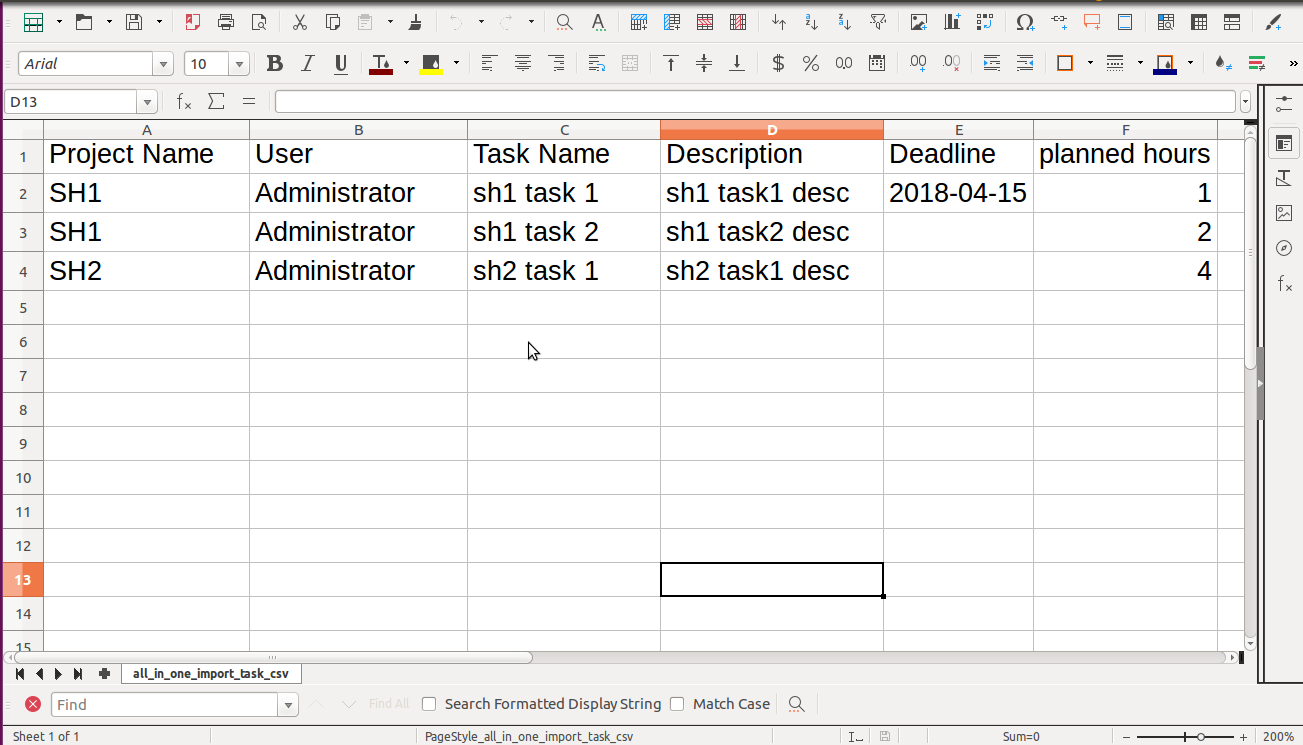
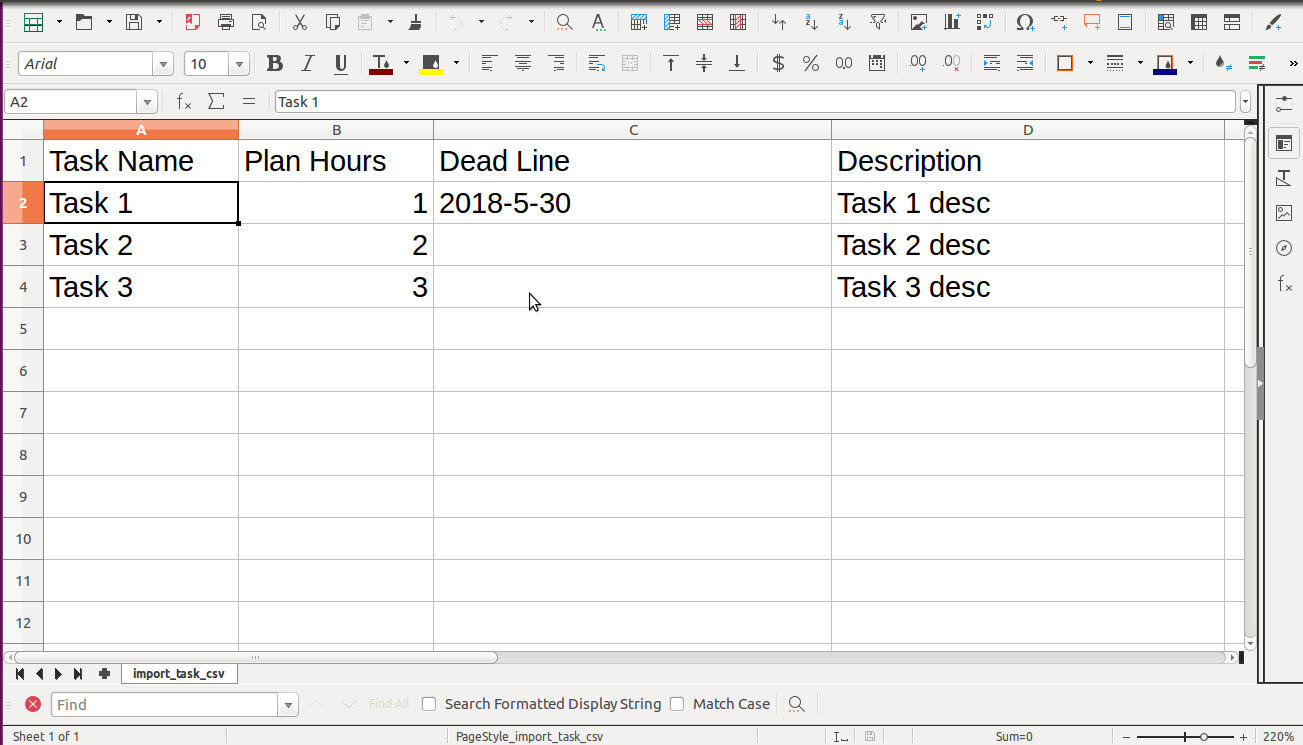
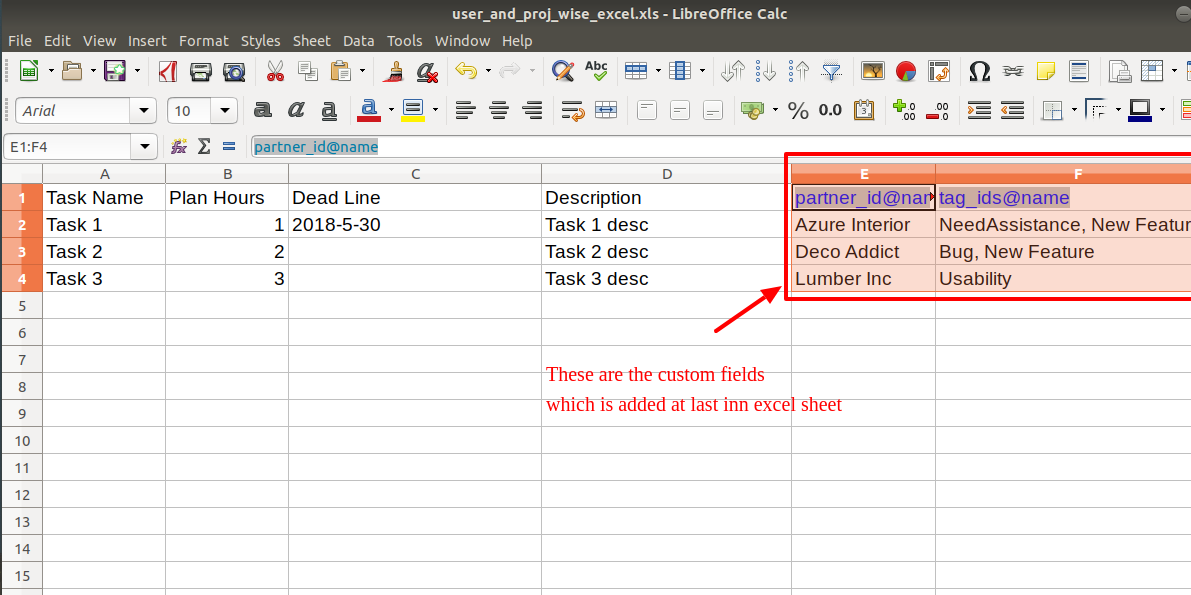
User and project wise import Excel file format (your file format must match like below).
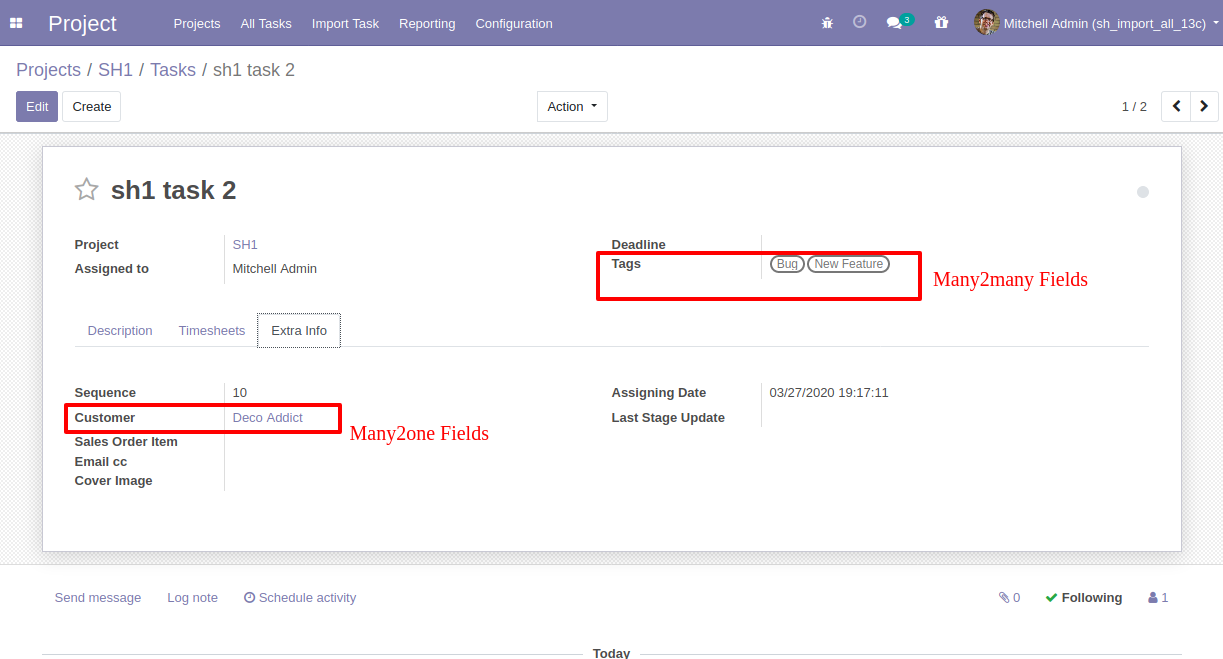
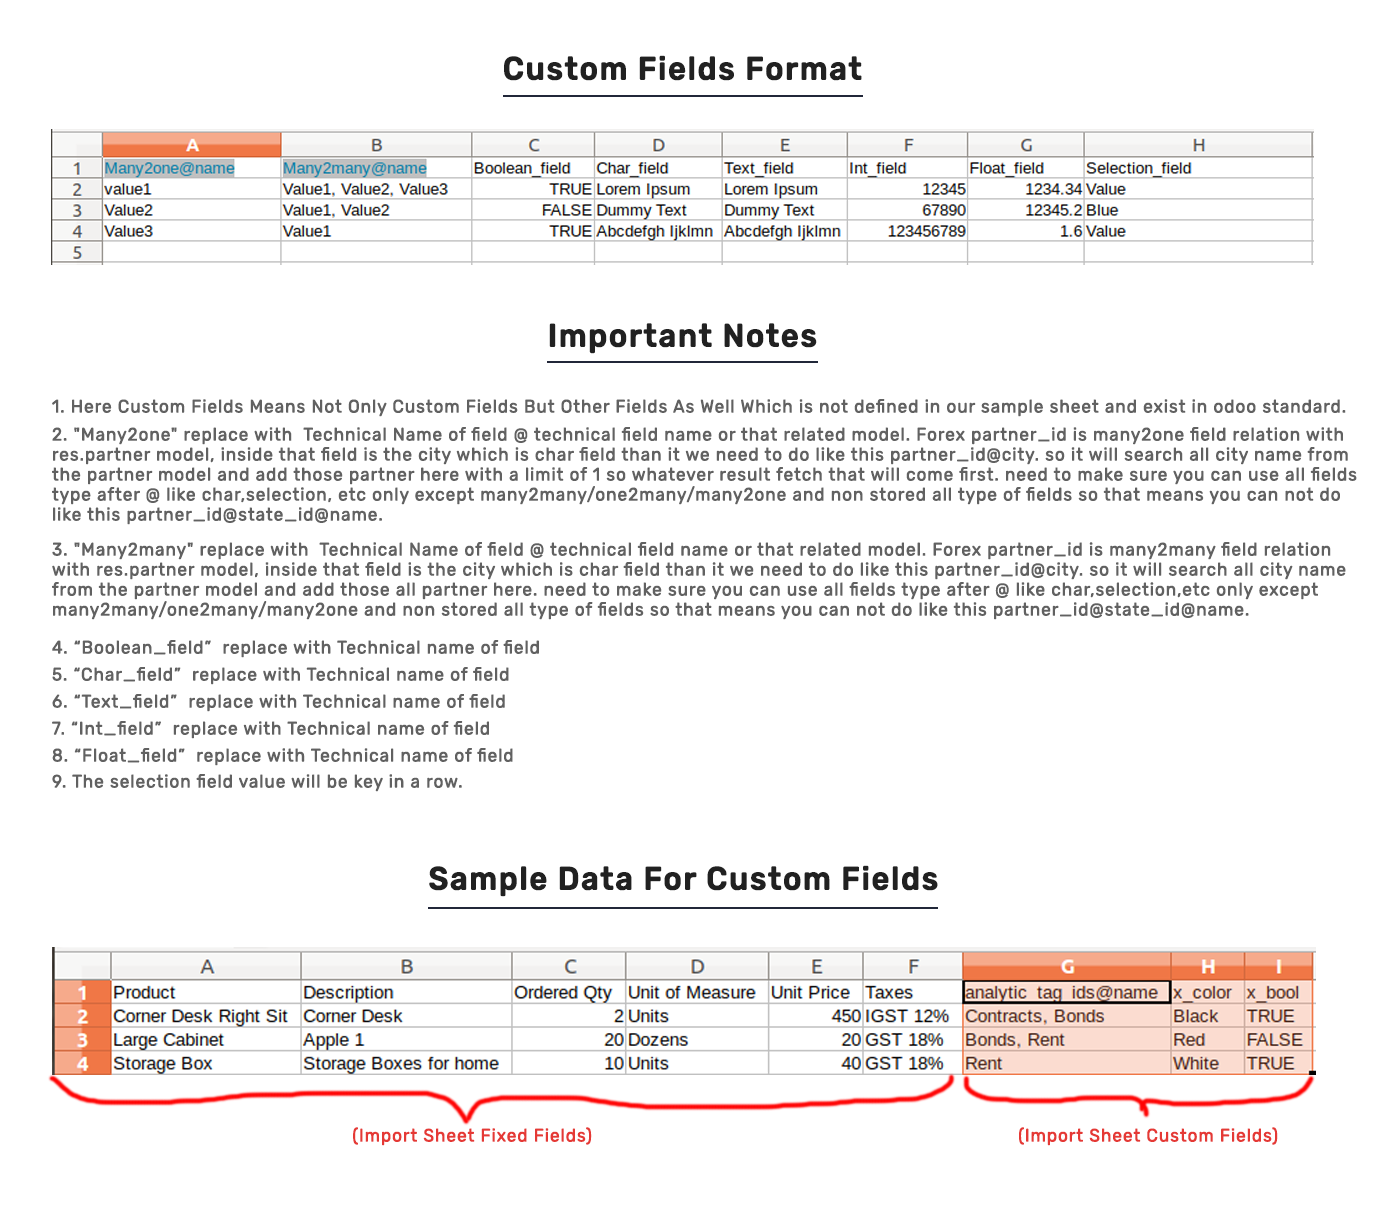
Custom fields imported with many2one & many2many fields.
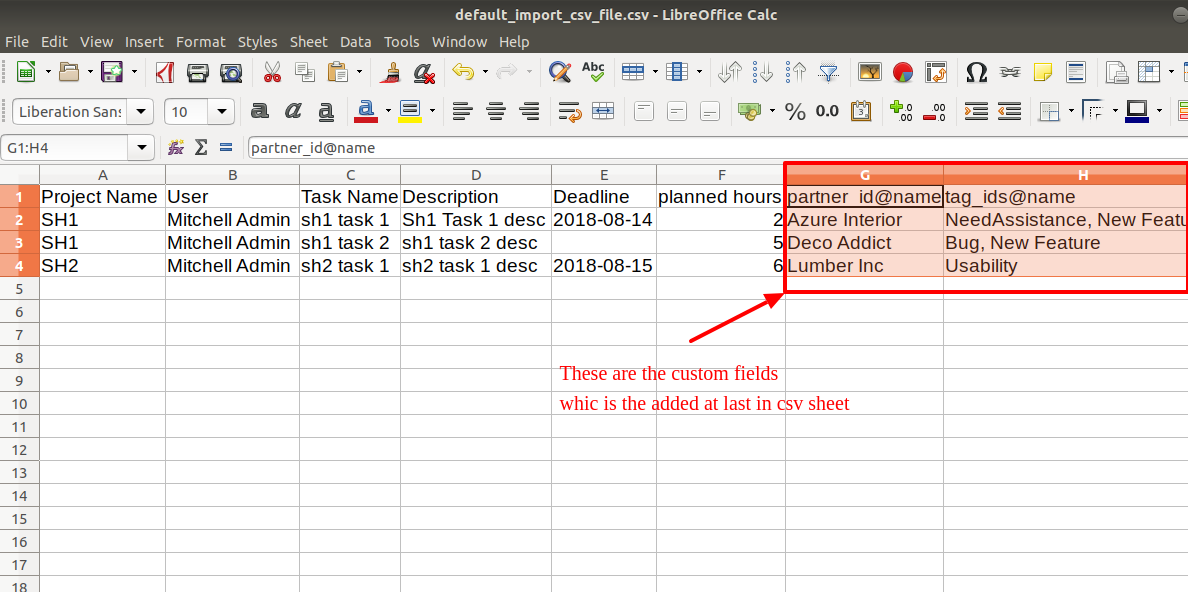
Default imported CSV file format with custom fields.
Default imported Excel file format with custom fields.
User and project wise imported CSV file format with custom fields.
User and project wise imported Excel file format with custom fields.
Custom Fields / Non Existing Standard Fields
Do you want to import fields which is created by any custom modules, odoo studio, or standard odoo fields which are not present inside the sample sheet provided in the module? You can add all those kinds of fields in the sheet at the end after the sample sheet fields it means from column "G".
Videos
Version 12.0.2 | Released on : 31st March 2020
- Easy to import custom fields from CSV or Excel.
Version 12.0.1 | Released on : 26th December 2019
- Initial Release.
- Please Contact Us at sales@softhealer.com to request customization.
- Yes, we provide free support for 90 days.
