


Key
Features

Owner Dashboard
 LATEST
Provide property owners with a dedicated dashboard to monitor bookings, revenue, and property performance.
Watch Video Dynamic Dashboard
LATEST
Monitor reservations, occupancy, revenue, and hotel operations from a dynamic dashboard.
Watch Video POS & Restaurant Integration
LATEST
Manage hotel restaurant orders and POS operations directly from the hotel management system.
Watch Video Maintenance Management
LATEST
Schedule, assign, and track maintenance requests for hotel rooms and facilities.
Watch Video Membership Management
LATEST
Create and manage guest membership programs with exclusive benefits and rewards.
Watch Video Guest Wallet
LATEST
Maintain prepaid guest wallets for seamless payments and service usage.
Watch Video Appointment Management
LATEST
Schedule and manage guest appointments for hotel services and facilities.
Watch VideoHousekeeping Management
LATEST
Manage room cleaning schedules, housekeeping tasks, and staff assignments efficiently.
Watch VideoAgent & Commission Management
LATEST
Manage booking agents and automatically track and calculate commission earnings.
Watch VideoStay Reschedule Wizard
LATEST
Manage booking agents and automatically track and calculate commission earnings.
Watch VideoMulti-Property Support
LATEST
Manage multiple properties from a single system with separate configurations and operations.
Watch VideoExtra Charge Per Person
LATEST
Automatically apply additional charges based on the number of guests in a reservation.
Watch VideoCustomer Rating & Feedback System
LATEST
Collect customer ratings and feedback to measure service quality and guest satisfaction.
Watch VideoCancellation History & Reason Tracking
LATEST
Track room cancellation history and record cancellation reasons through a dedicated cancellation workflow.
Watch VideoCheck-In Flow
Simplify the check-in process and complete the necessary procedures easily.
Watch VideoCheck-Out Flow
Simplify the check-out process and complete the necessary procedures easily.
Watch VideoCancel Rooms
The cancel room feature provides guests the flexibility to cancel their reservations easily.
Watch VideoRoom Booking & Availability
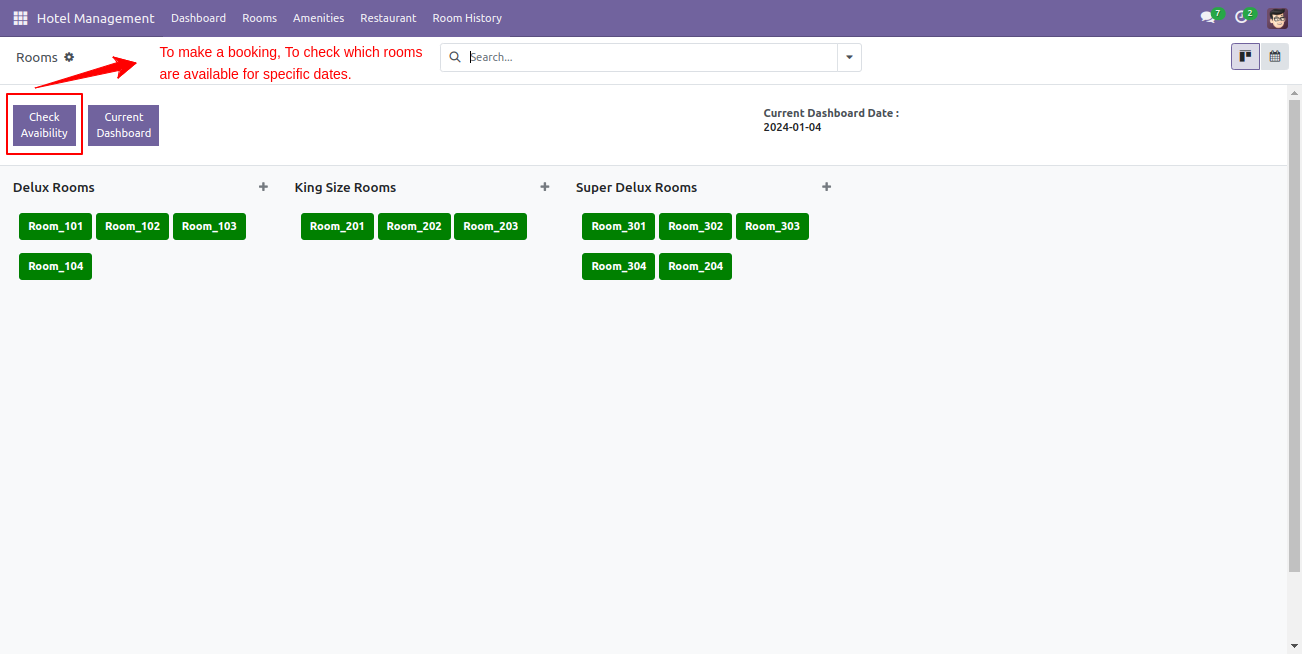
Quickly check room availability for specific dates and the number of guests. Easily book rooms by selecting the stay dates and guest count, ensuring a smooth and efficient reservation process.
Watch VideoChange Room
You can easily transfer room from one room to another with optional room change charges and track the complete room change history.
Watch VideoGenerate Comprehensive Hotel Reports
You can print a complete set of key reports, such as Reservation, Check-In / Check-Out, Guest History, Occupancy, Sales & Profit.
Watch Video Watch VideoColorful Dashboard, Amenities & Room Types
Organize rooms into different room types to accommodate diverse guest preferences and requirements. Manage amenities efficiently by grouping them according to room specifications. The colorful dashboard provides a clear visual overview of each room's current status, making room management quick and convenient.
Watch Video Setup & Configuration
 Release Notes
 Support
 FAQ's
FAQ's
-
 Owner Dashboard NEW
-
 Dynamic Dashboard NEW
-
 Basic Flow
-
 Booking Flow
-
 Check-In Flow
-
 Check-Out Flow
-
 Room History With Form & Tree View
-
 Cancel Room
-
 Change Room
-
 Report
-
 Cancel Room History & Reason NEW
-
 Housekeeping Management NEW
-
 Stay Reschedule NEW
-
 Multi-Property Support NEW
-
 Extra Charge Per Person NEW
-
 Customer Rating & Feedback System NEW
-
 Agent & Commission Management NEW
-
 POS & Restaurant Integration NEW
-
 Maintenance Management NEW
-
 Membership Management NEW
-
 Guest Wallet NEW
-
 Appointment Management NEW
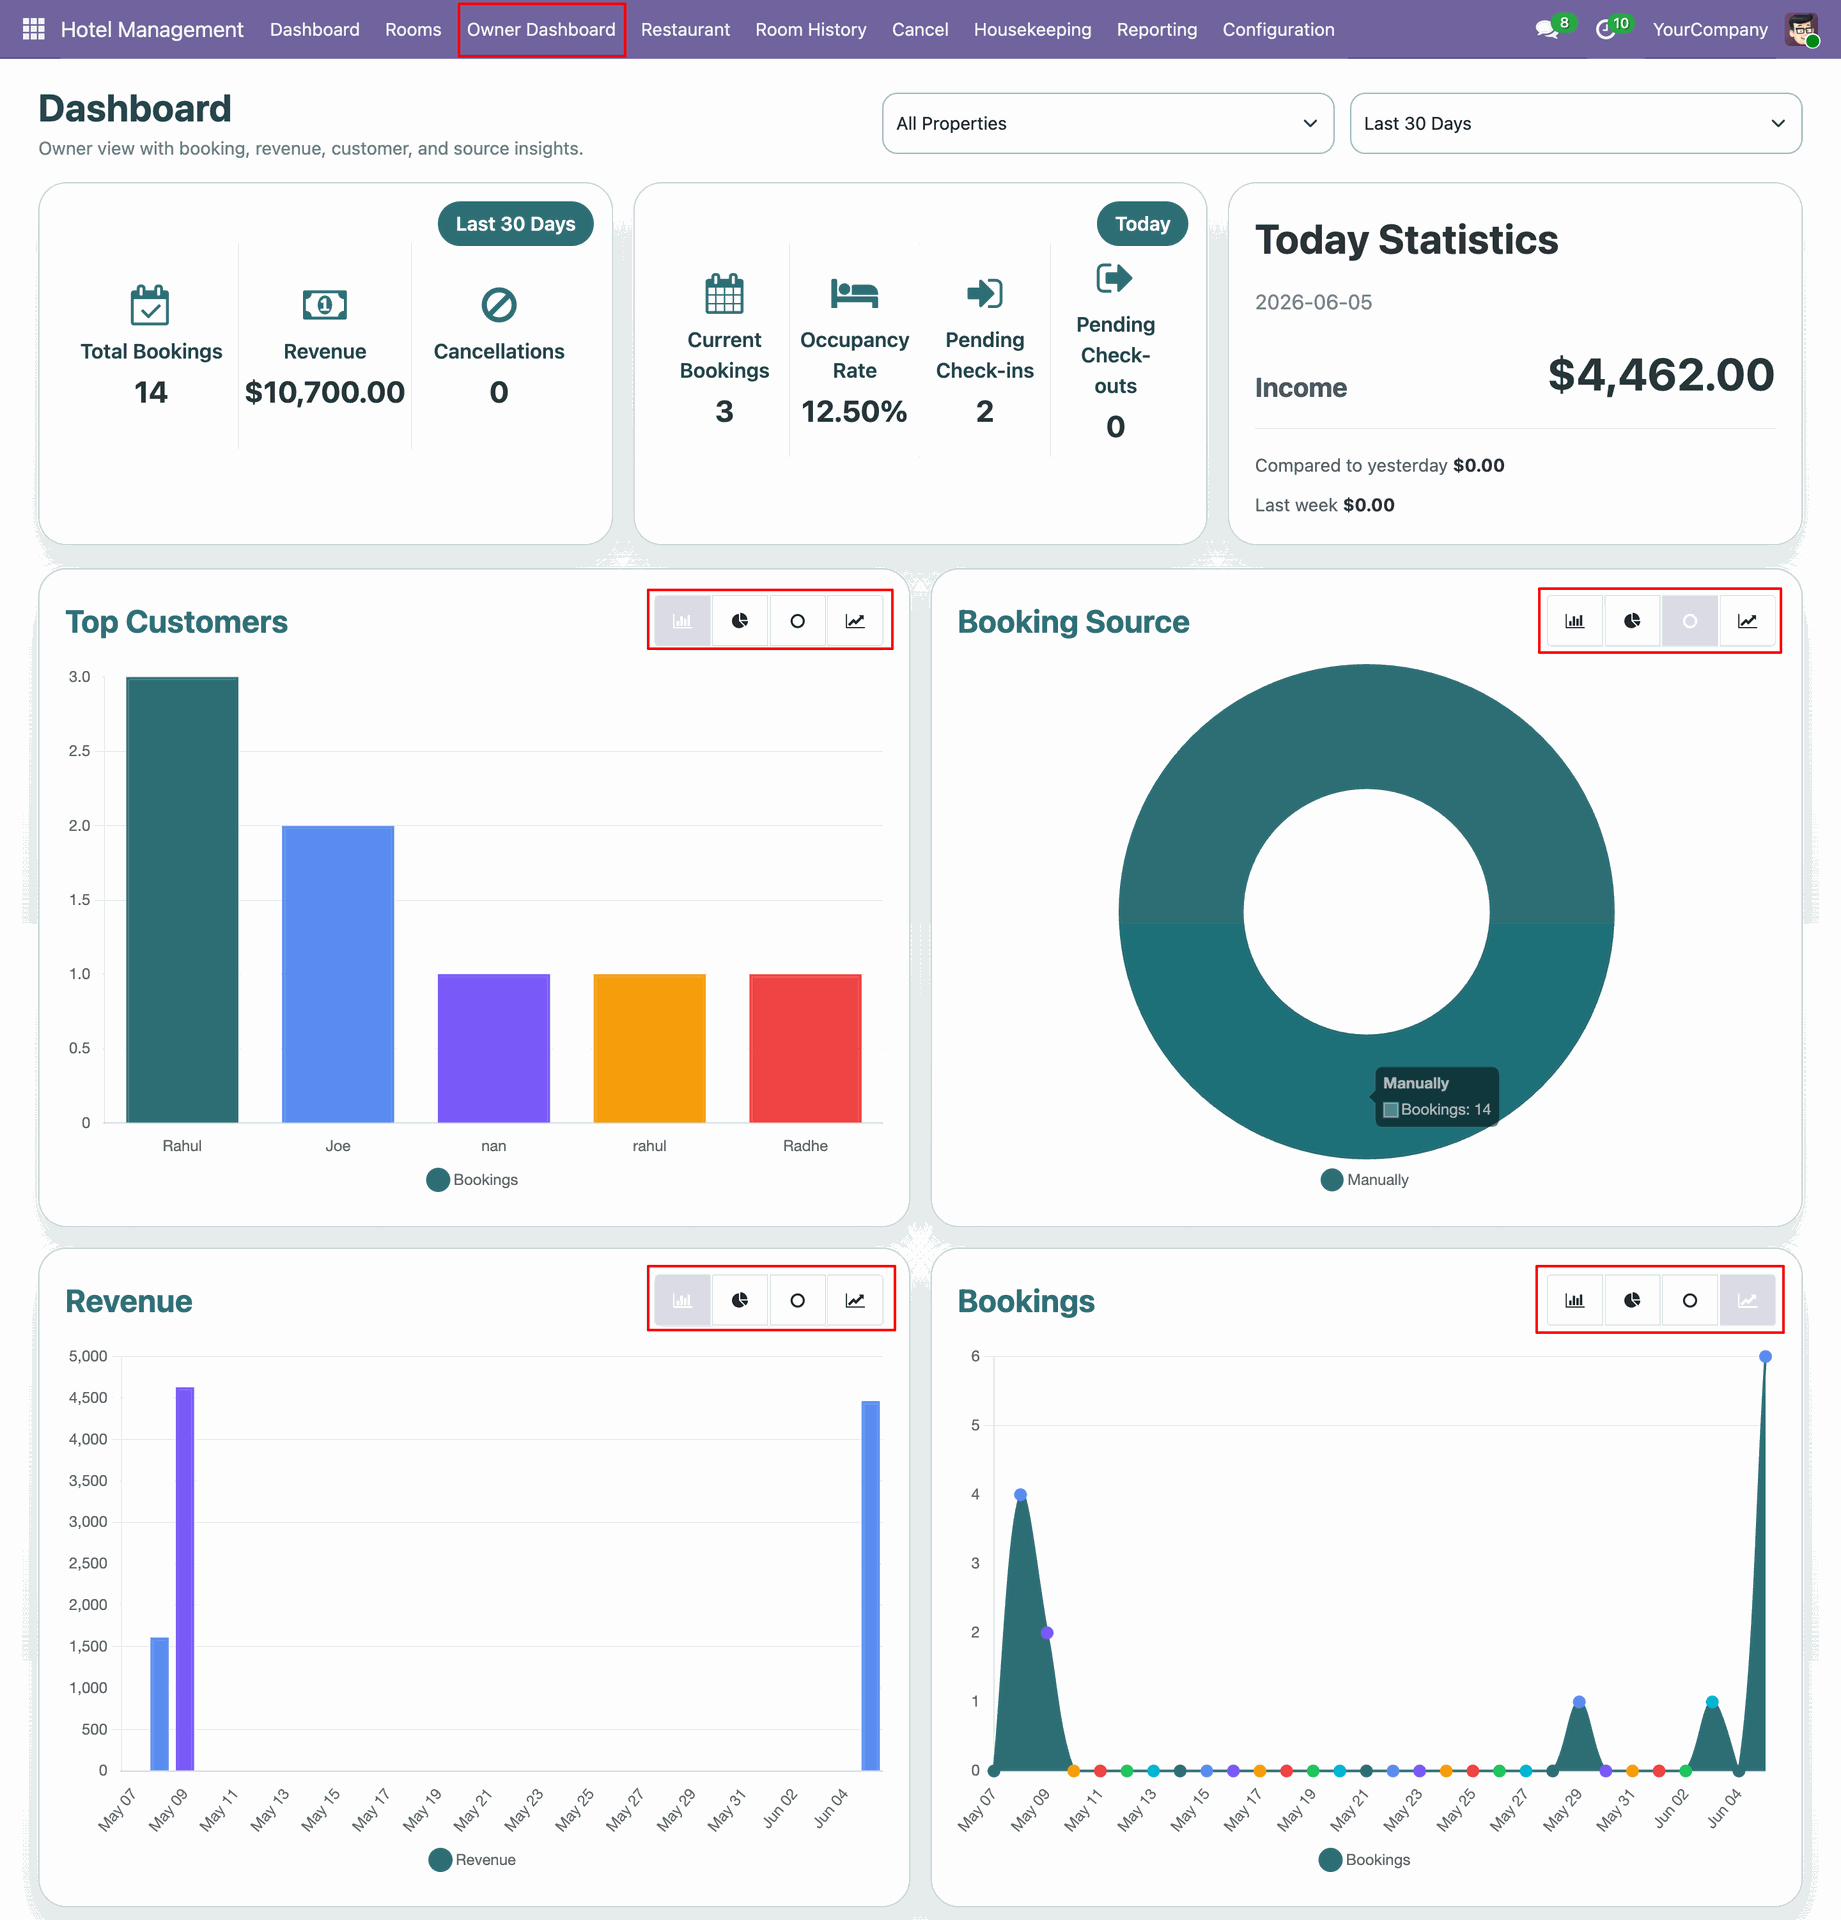
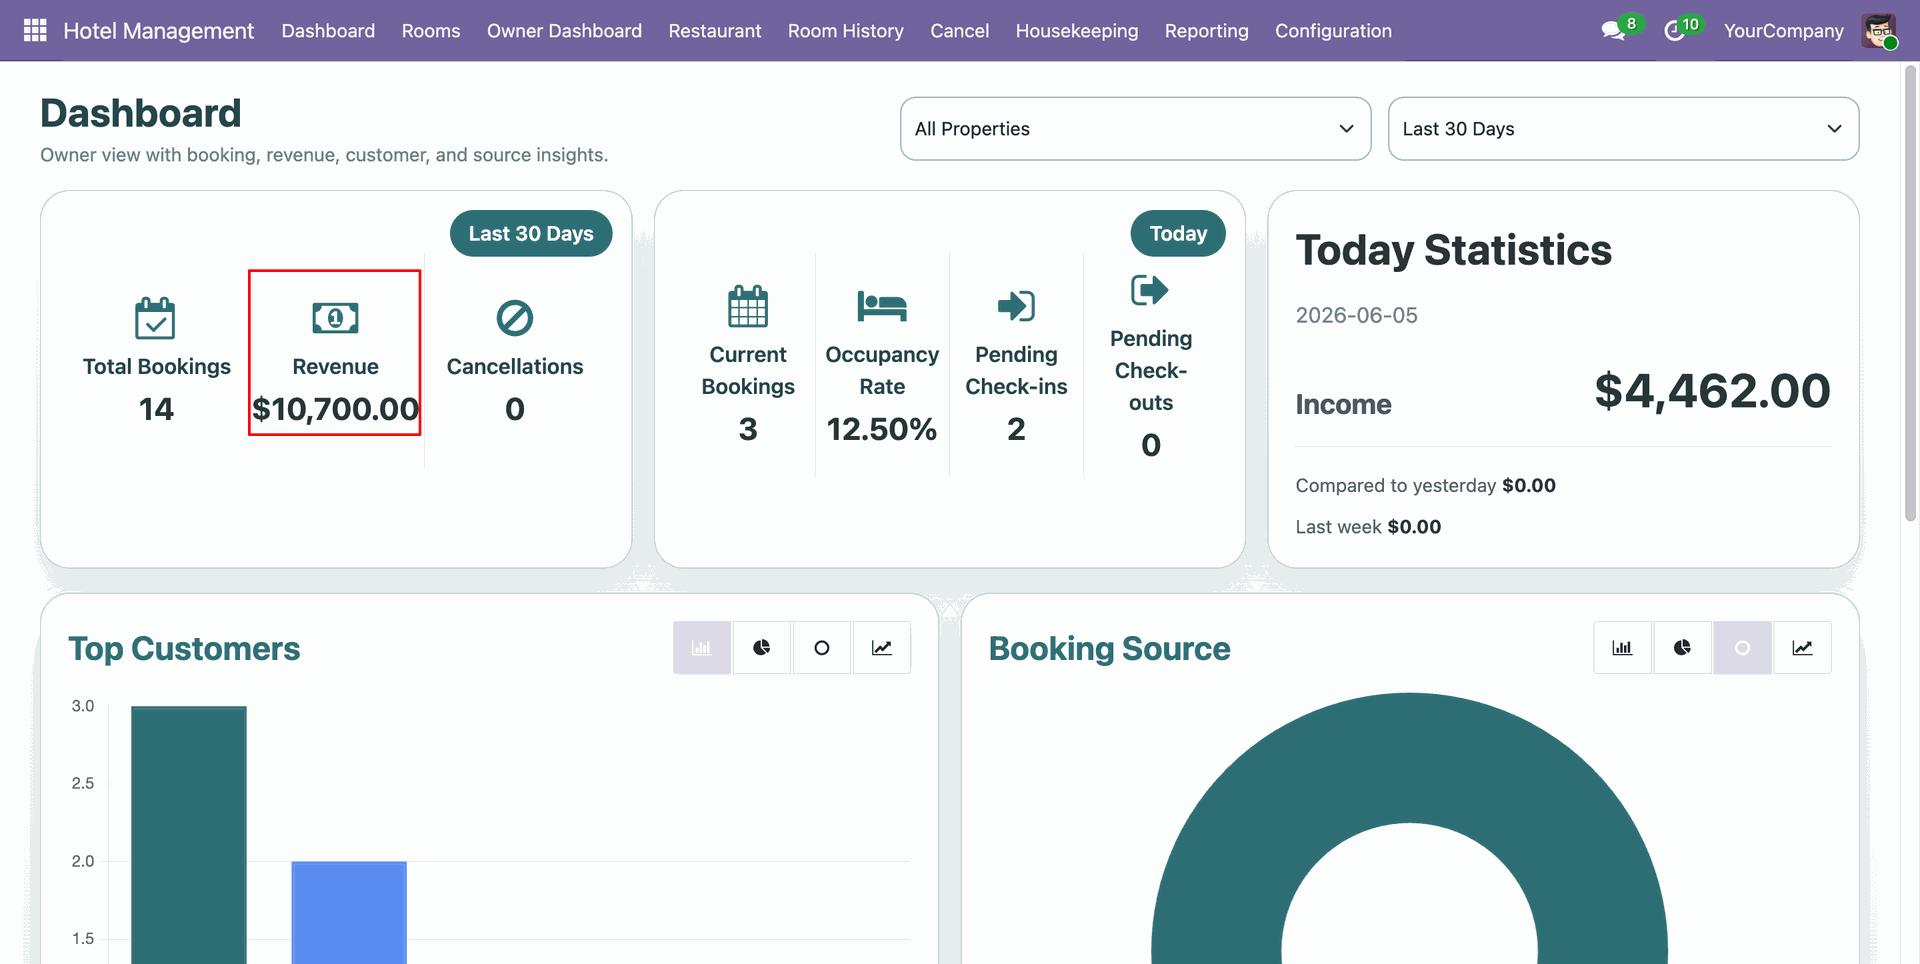
Go to the Owner Dashboard to view and monitor hotel management details, including reservations, occupancy, revenue, and other key hotel performance metrics.
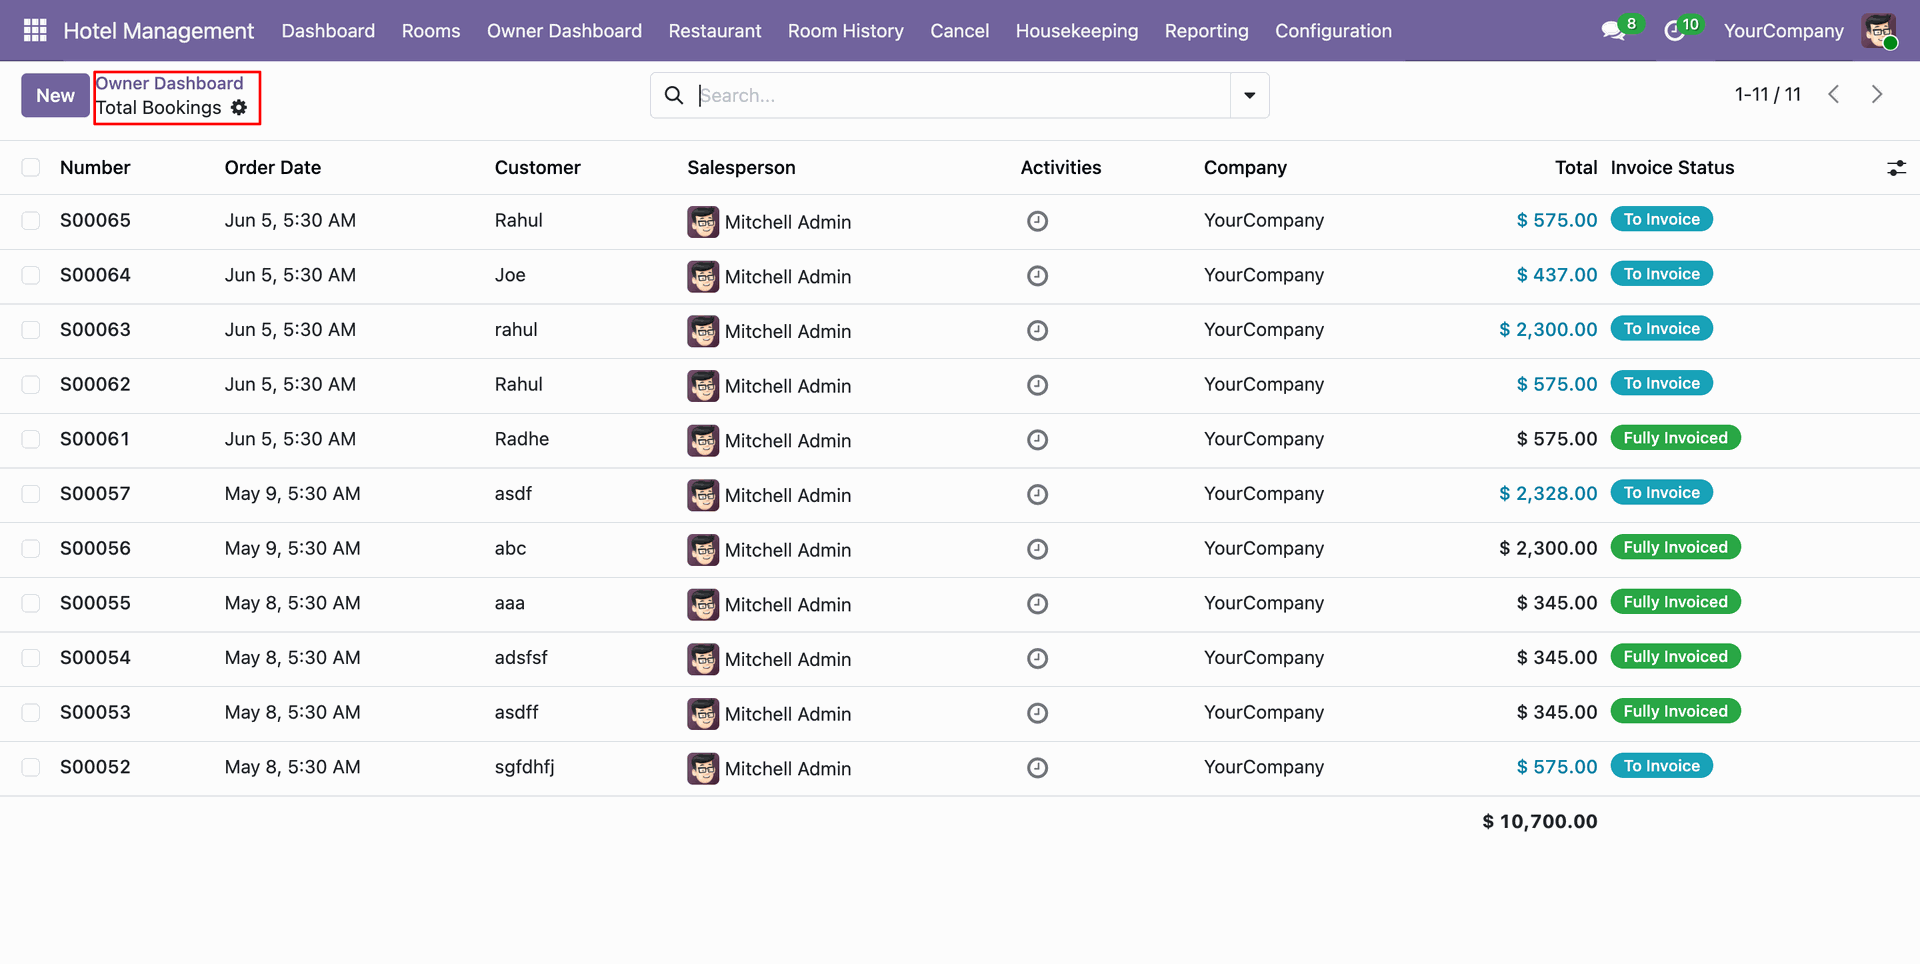
Click on the Total Bookings from the Owner Dashboard.
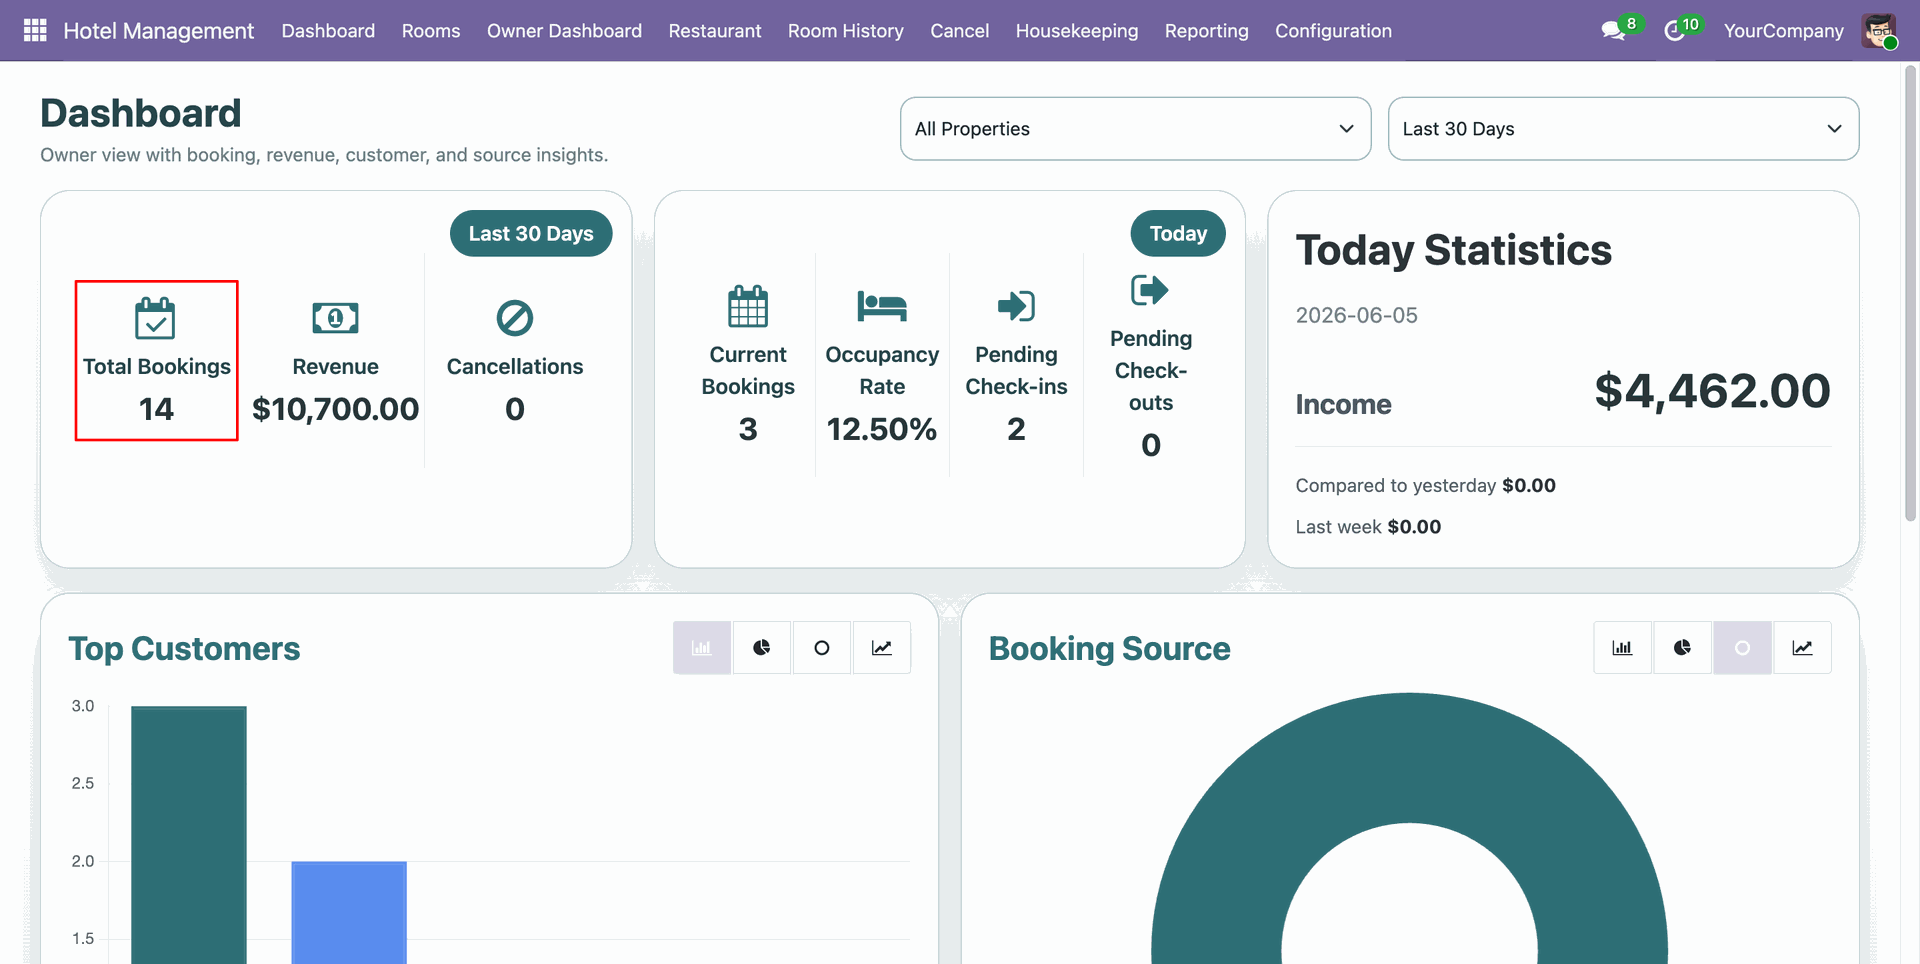
Clicking on the Total Bookings from the Owner Dashboard will open all bookings in a list View, allowing users to review and manage booking records efficiently.
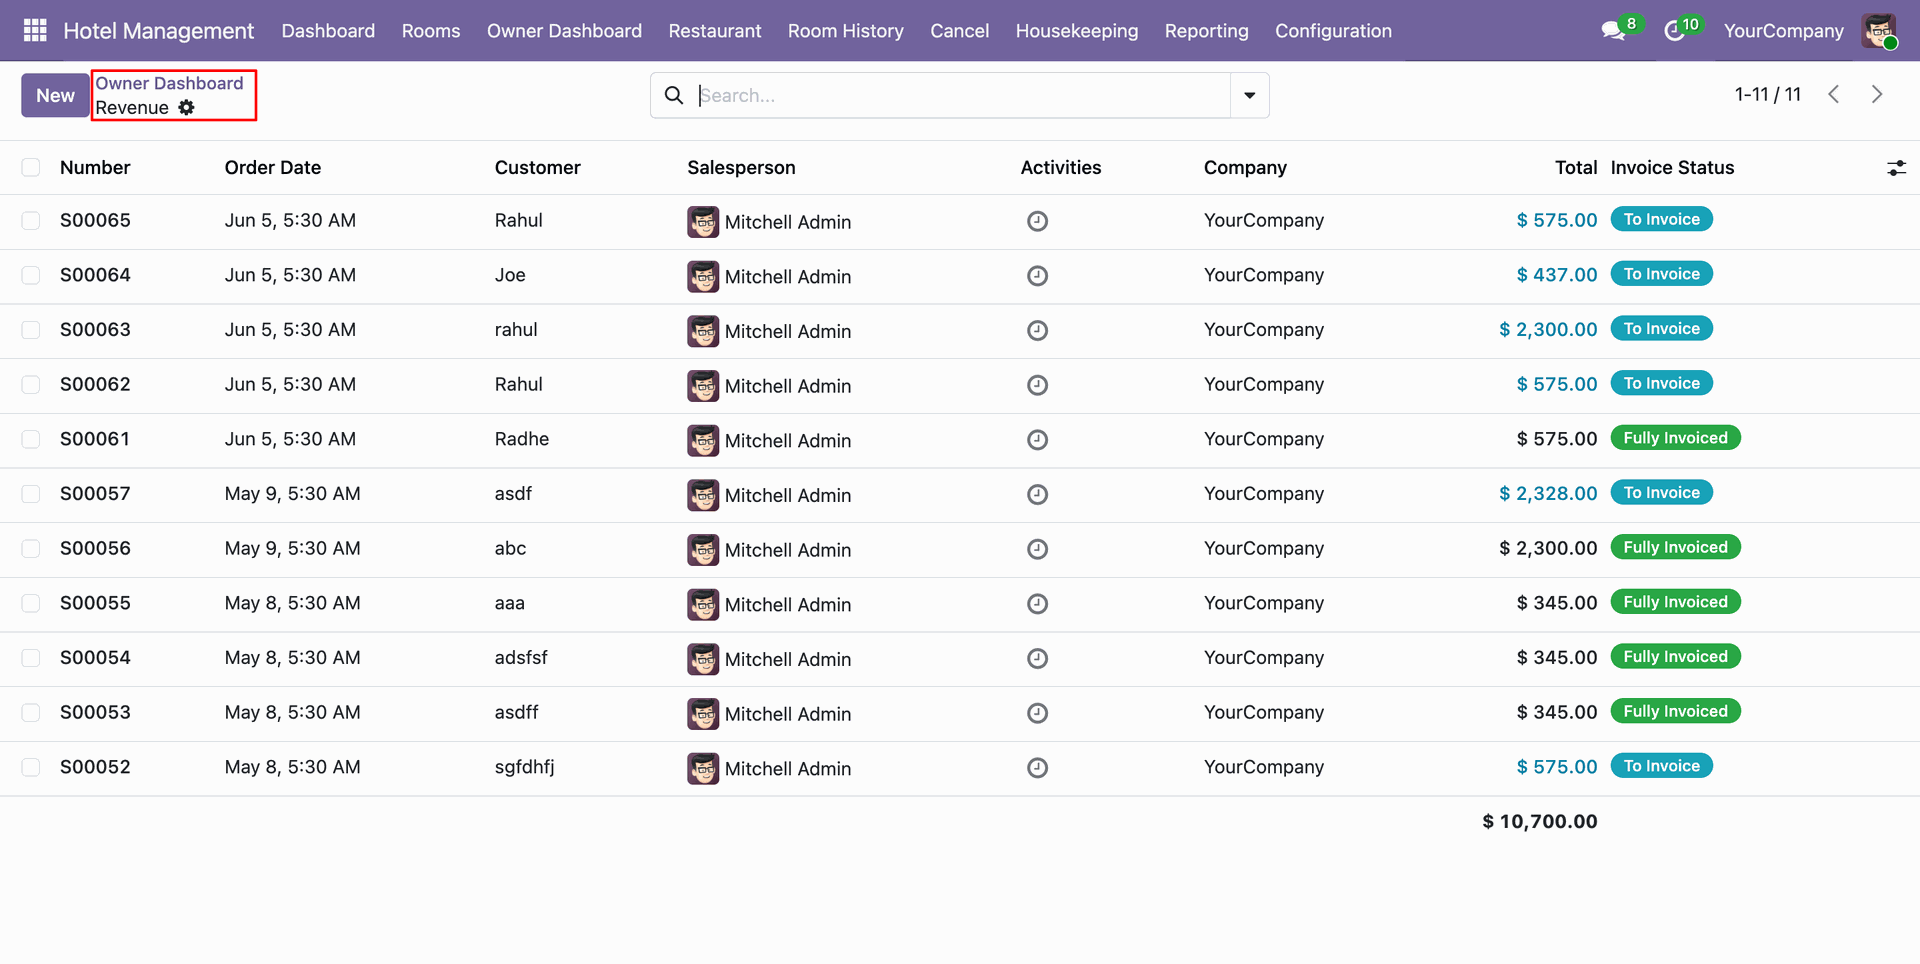
Click on the Revenue from the Owner Dashboard
Clicking on the Revenue from the Owner Dashboard will open a list View of all revenue records.
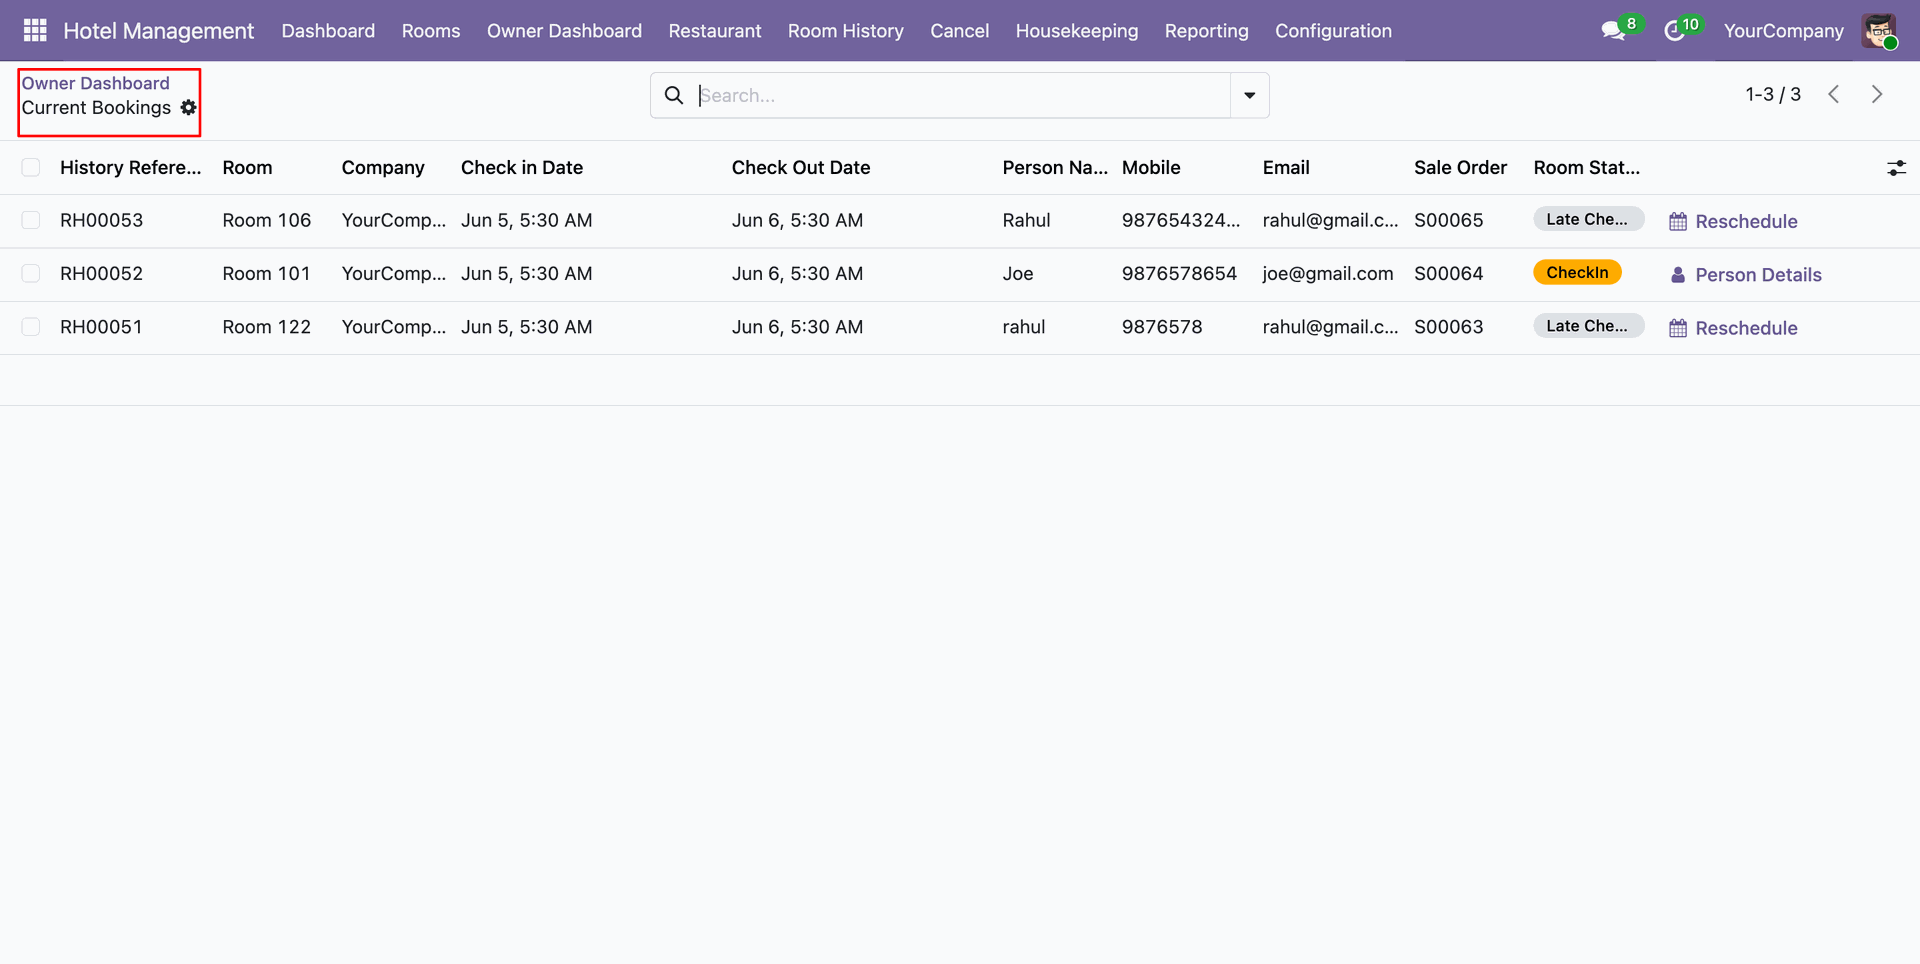
Click on the Current Bookings from the Owner Dashboard.
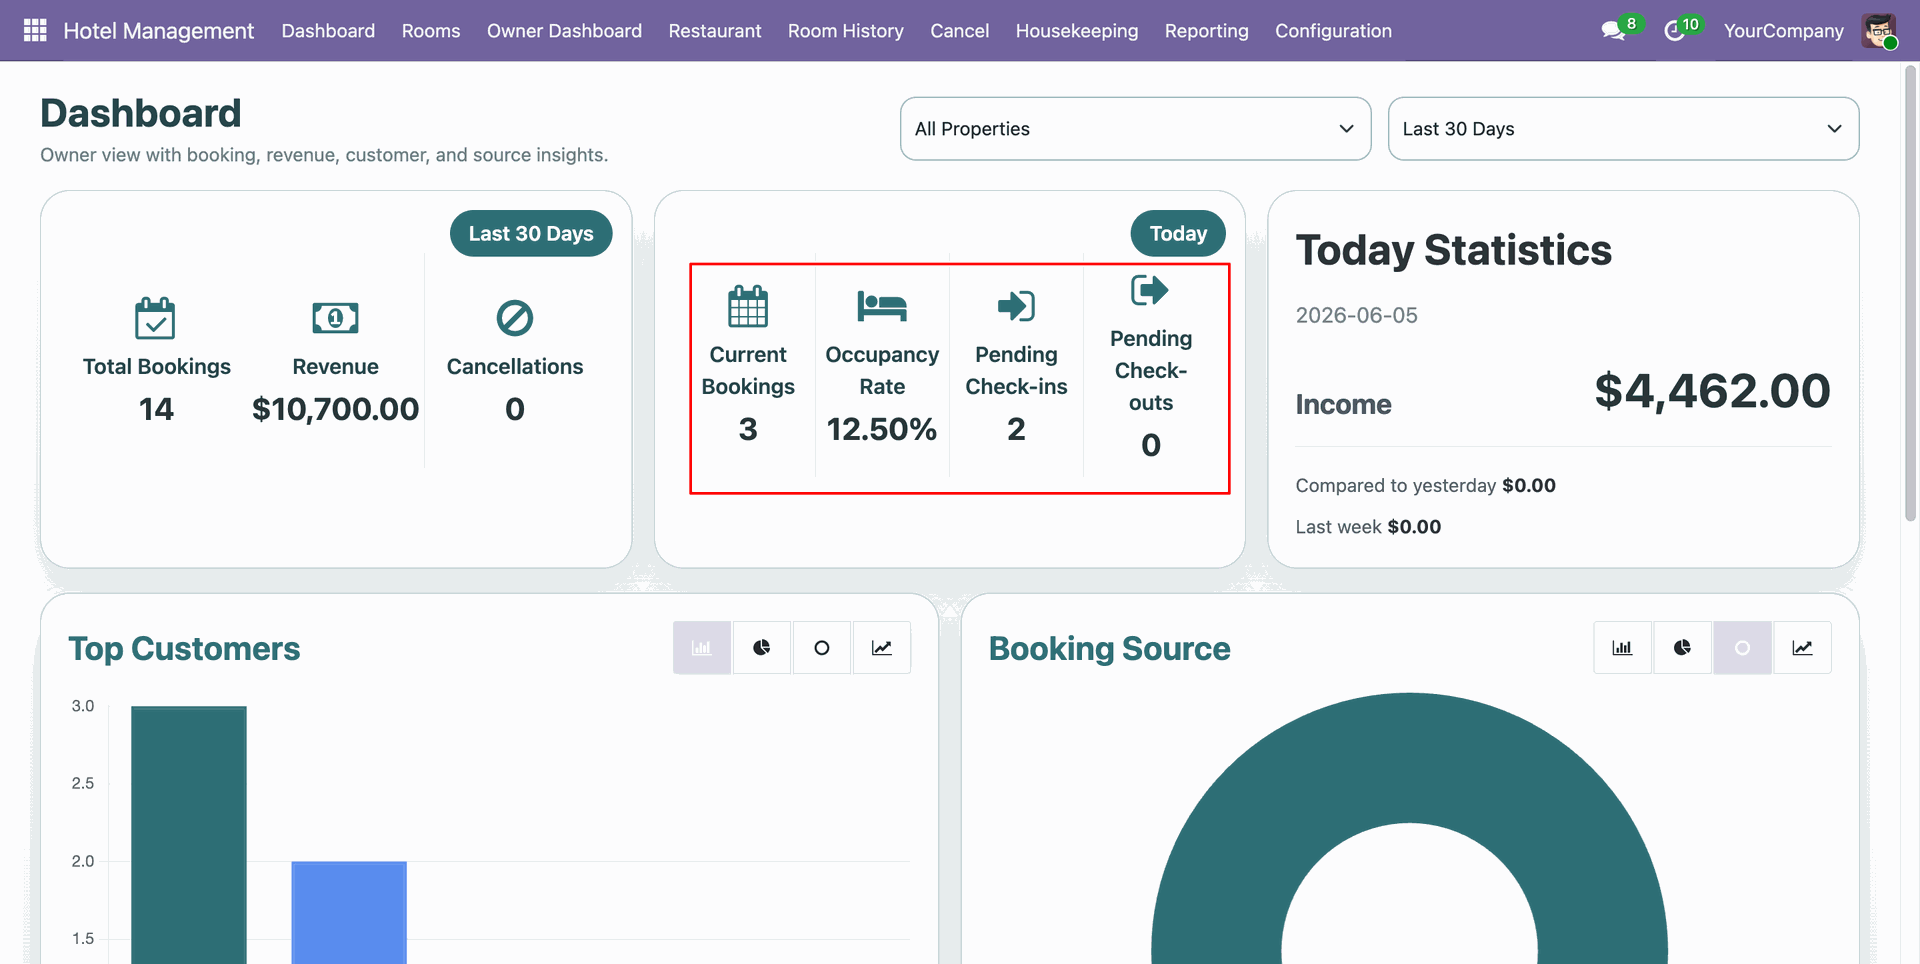
Clicking on the Current Bookings tile from the Owner Dashboard will open a list View of all todays' bookings.
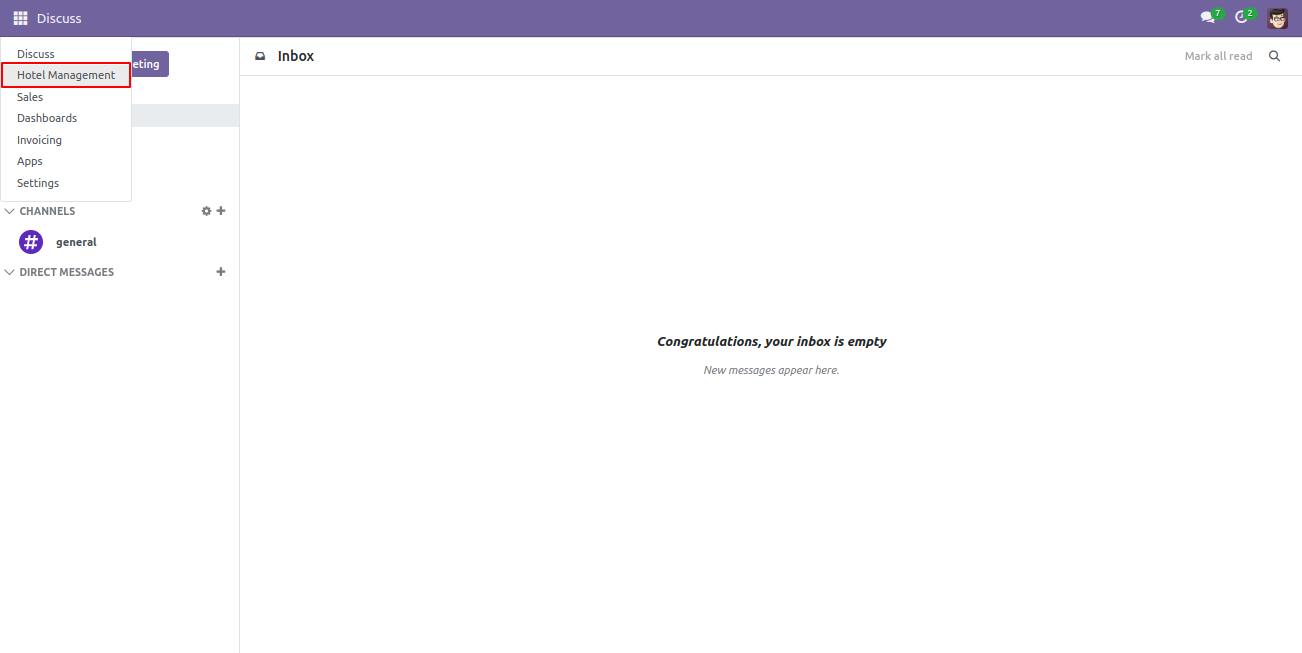
Go to the 'Hotel Management' menu.
First, we create amenities.
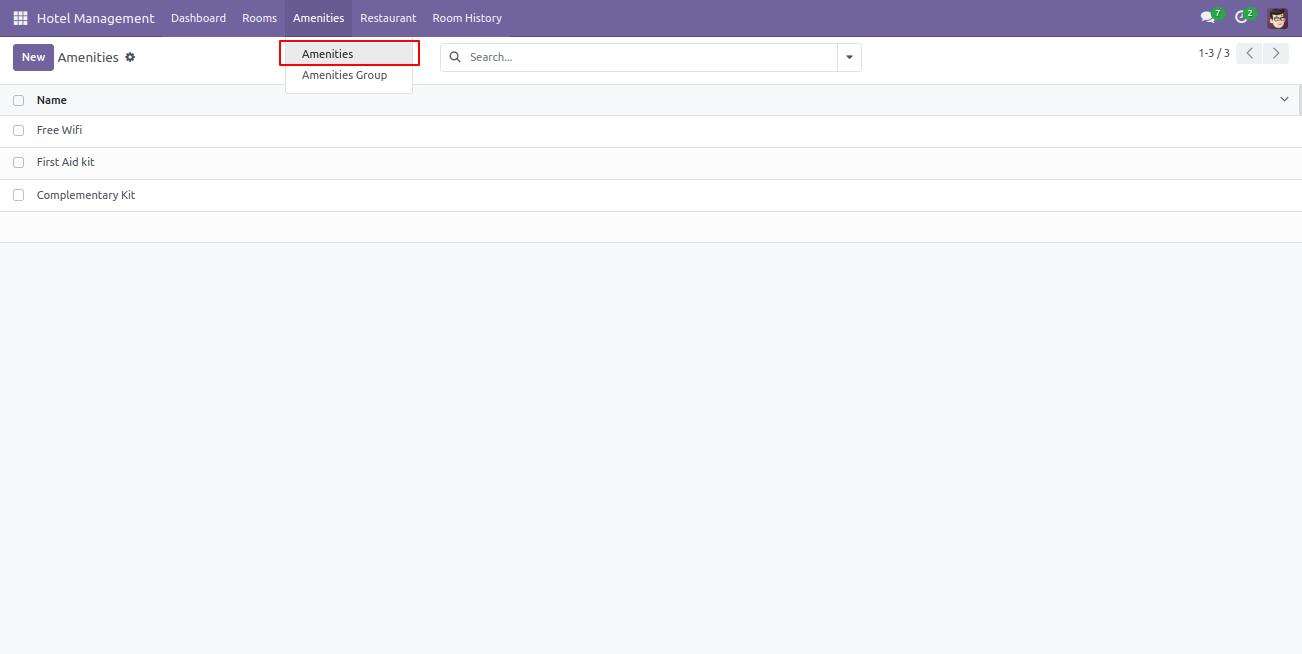
You can create amenities as per room type.
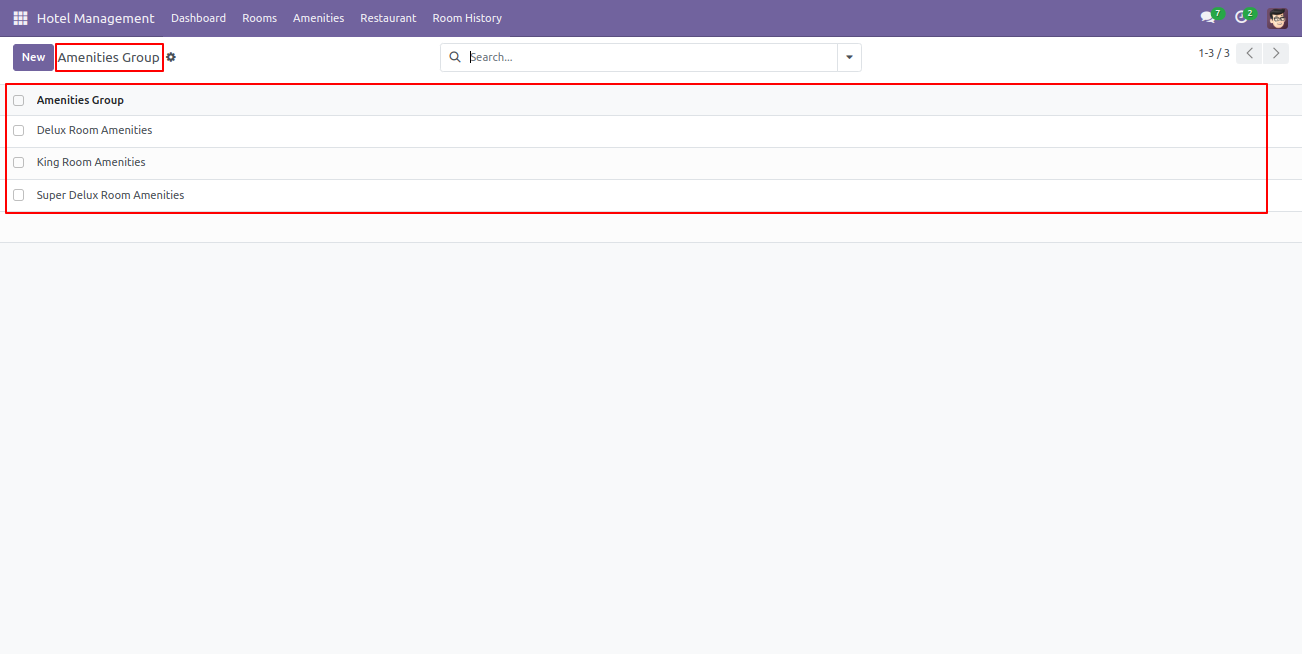
Amenities group form view, select amenities as per room.

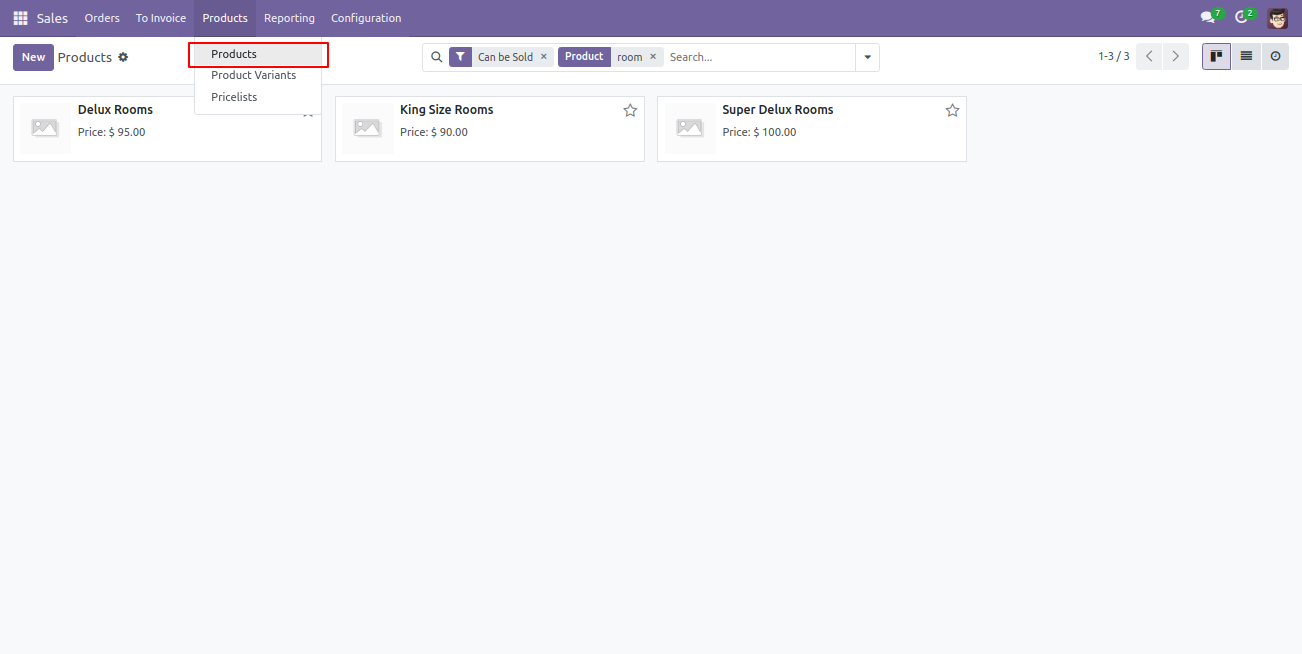
Now we create a room, so go to the products.
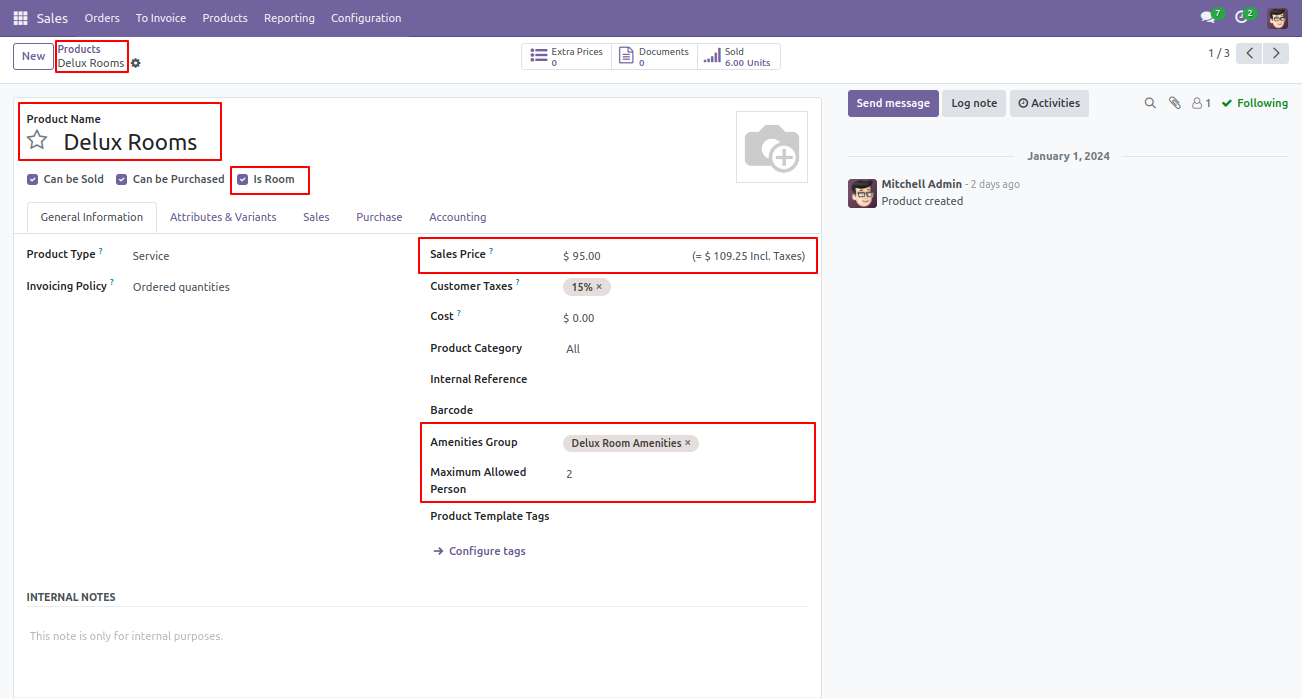
The room form view looks like this, fill in the details and save it.
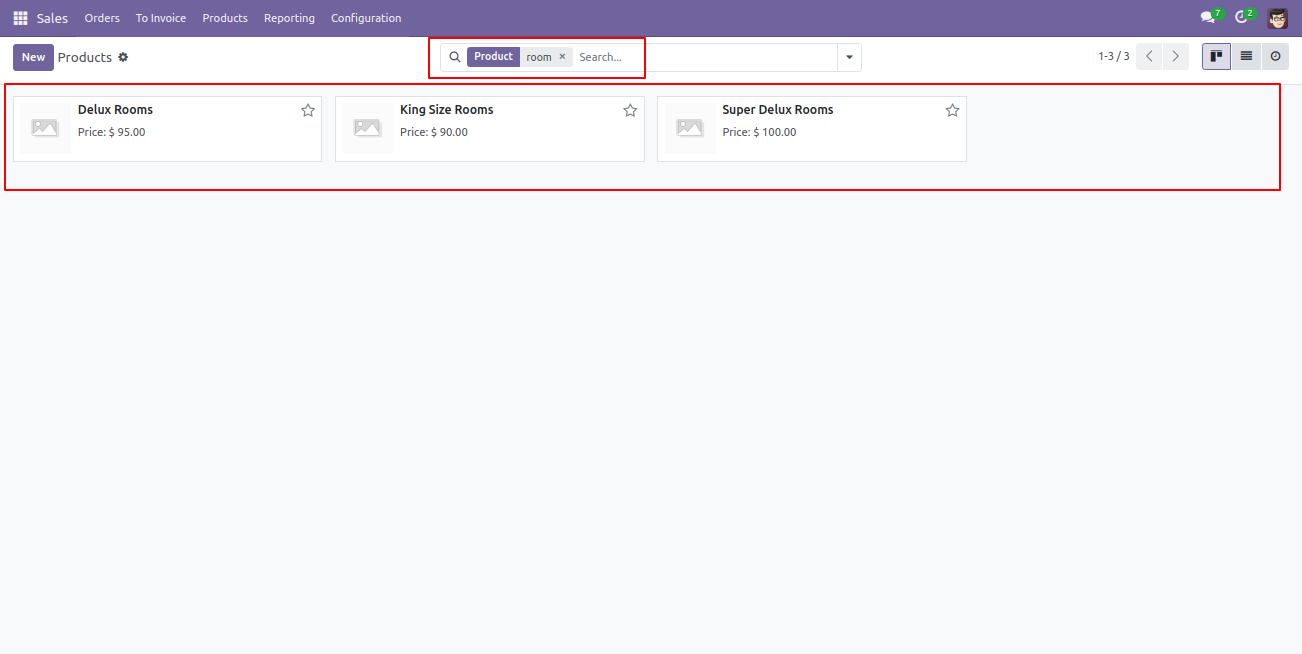
The room kanban view looks like this.
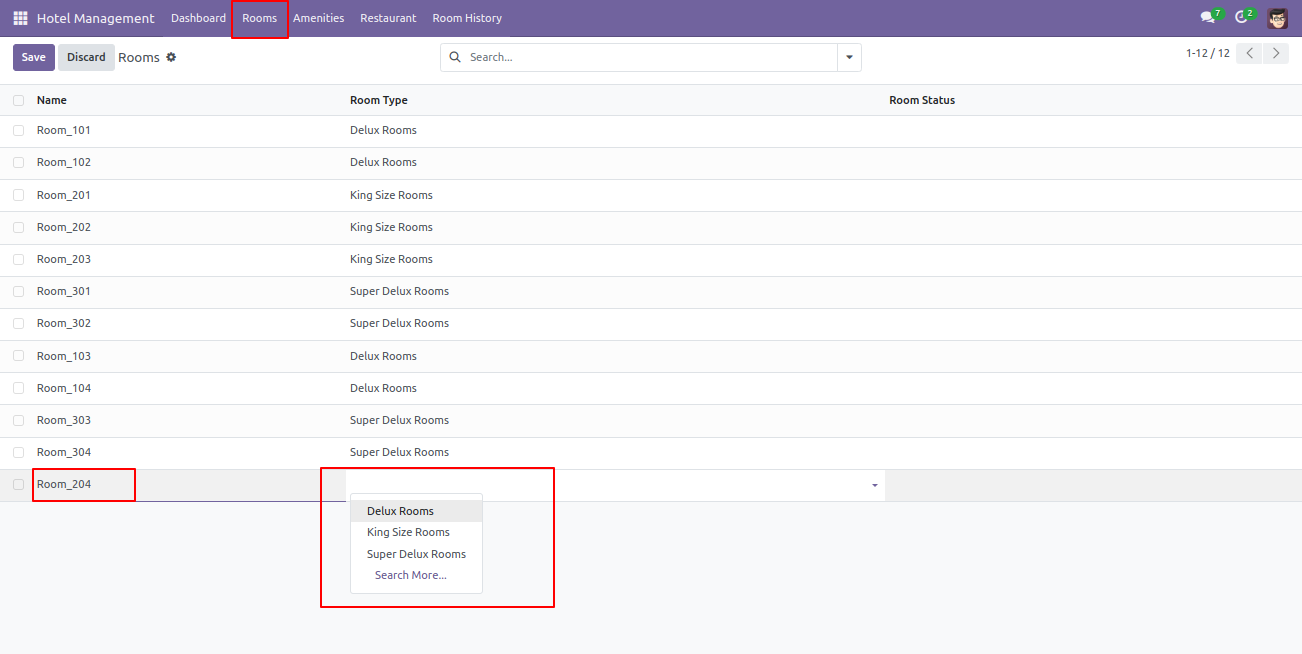
Now you can set the room number as per room type from the 'Rooms' menu.
Our dashboard looks like this.
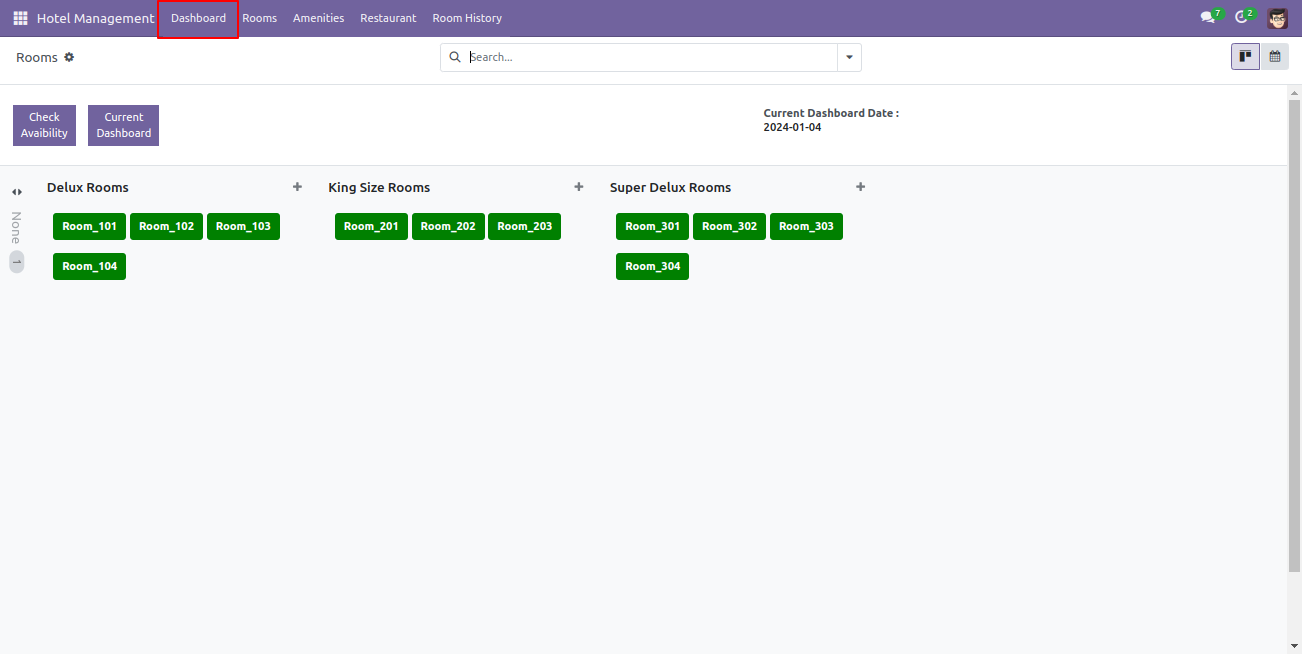
Kanban view of the Room.
To check room availability at the time of screenshots/Booking Flow, simply click on
the 'Check Availability' option.
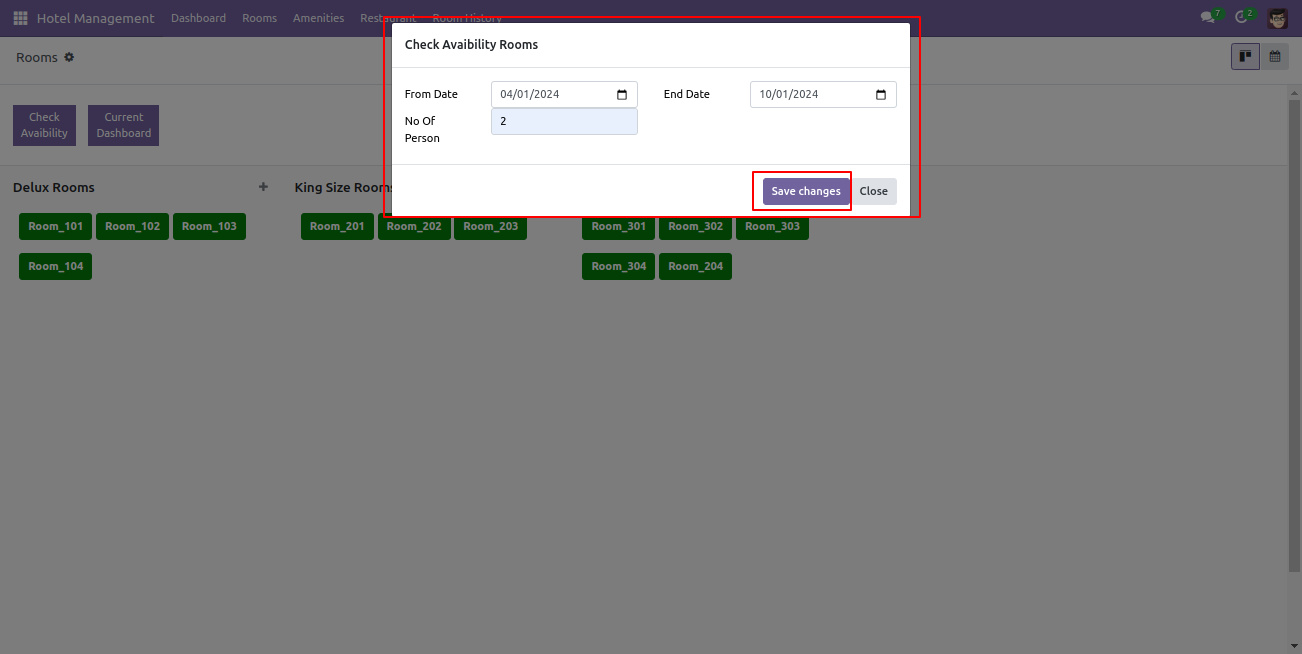
When you click on the 'Check Availability' button, Check Availability Room wizard
will appear.
Add the From date & End date with a number of person.
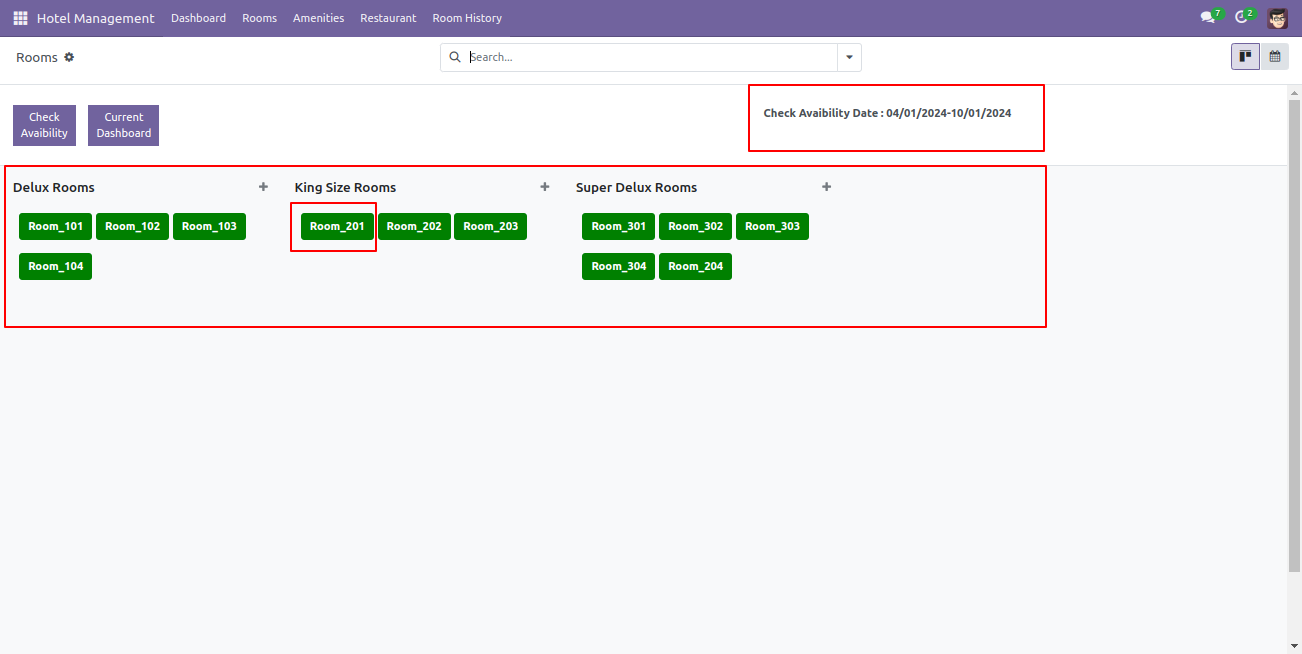
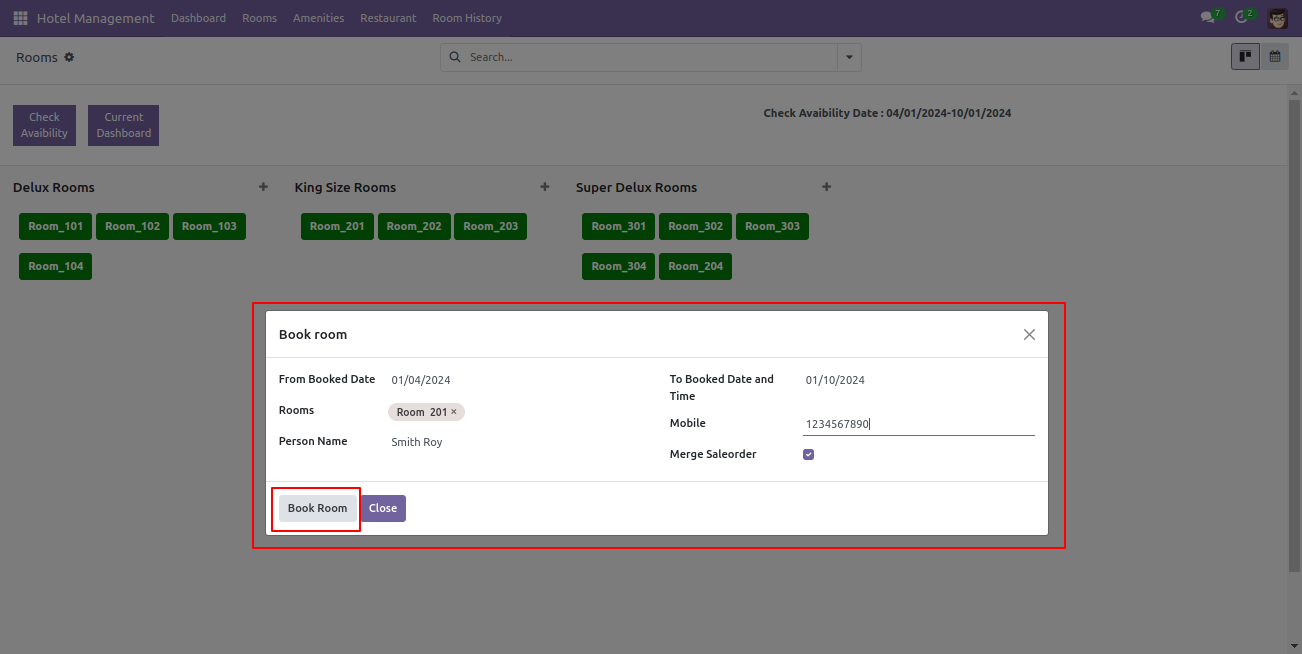
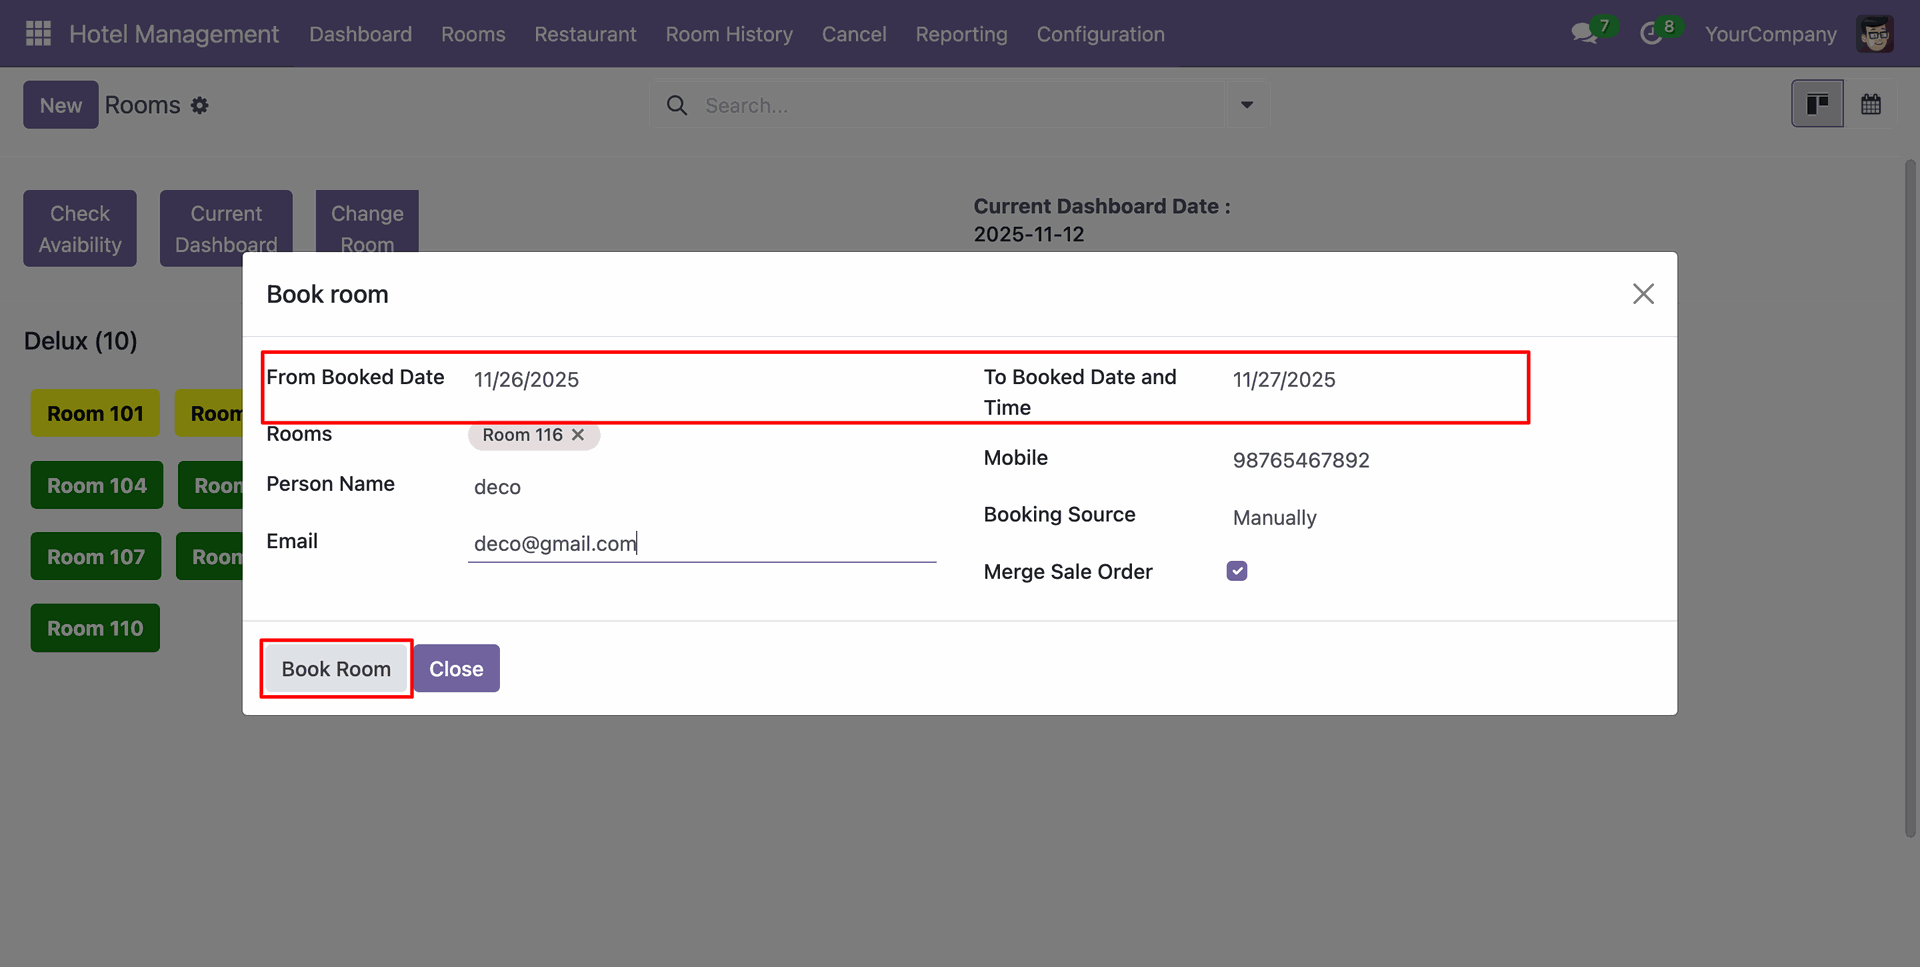
Here, you will find the list of available rooms. Simply click on the room option that you wish to book.
After that, Book Room wizard will appear. Fill-up the details and Click on the 'Book Room' button.
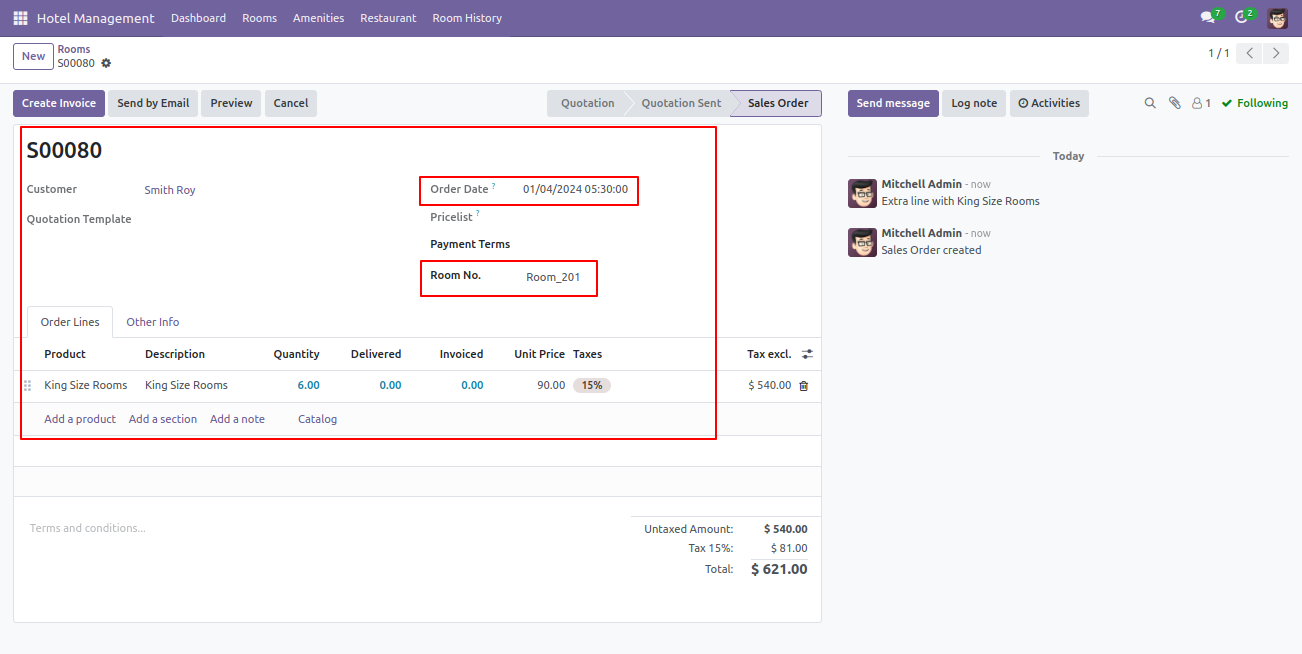
After room screenshots/Booking Flow, you can see all details in the sale order form view.
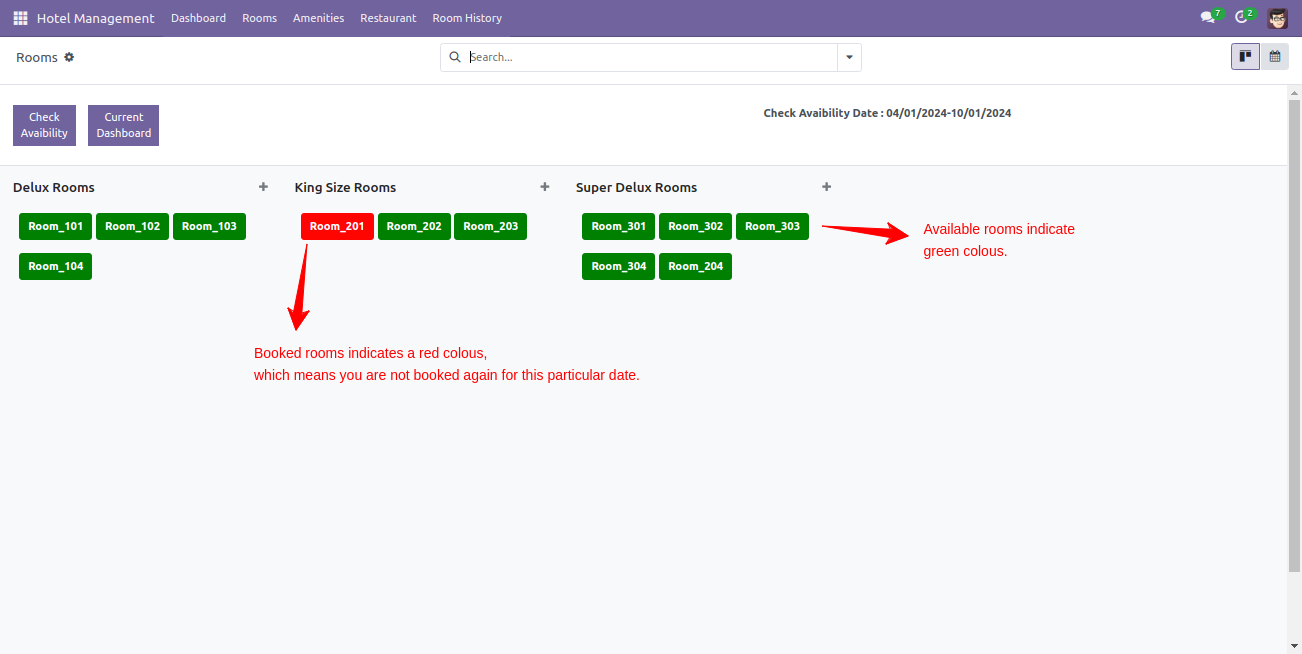
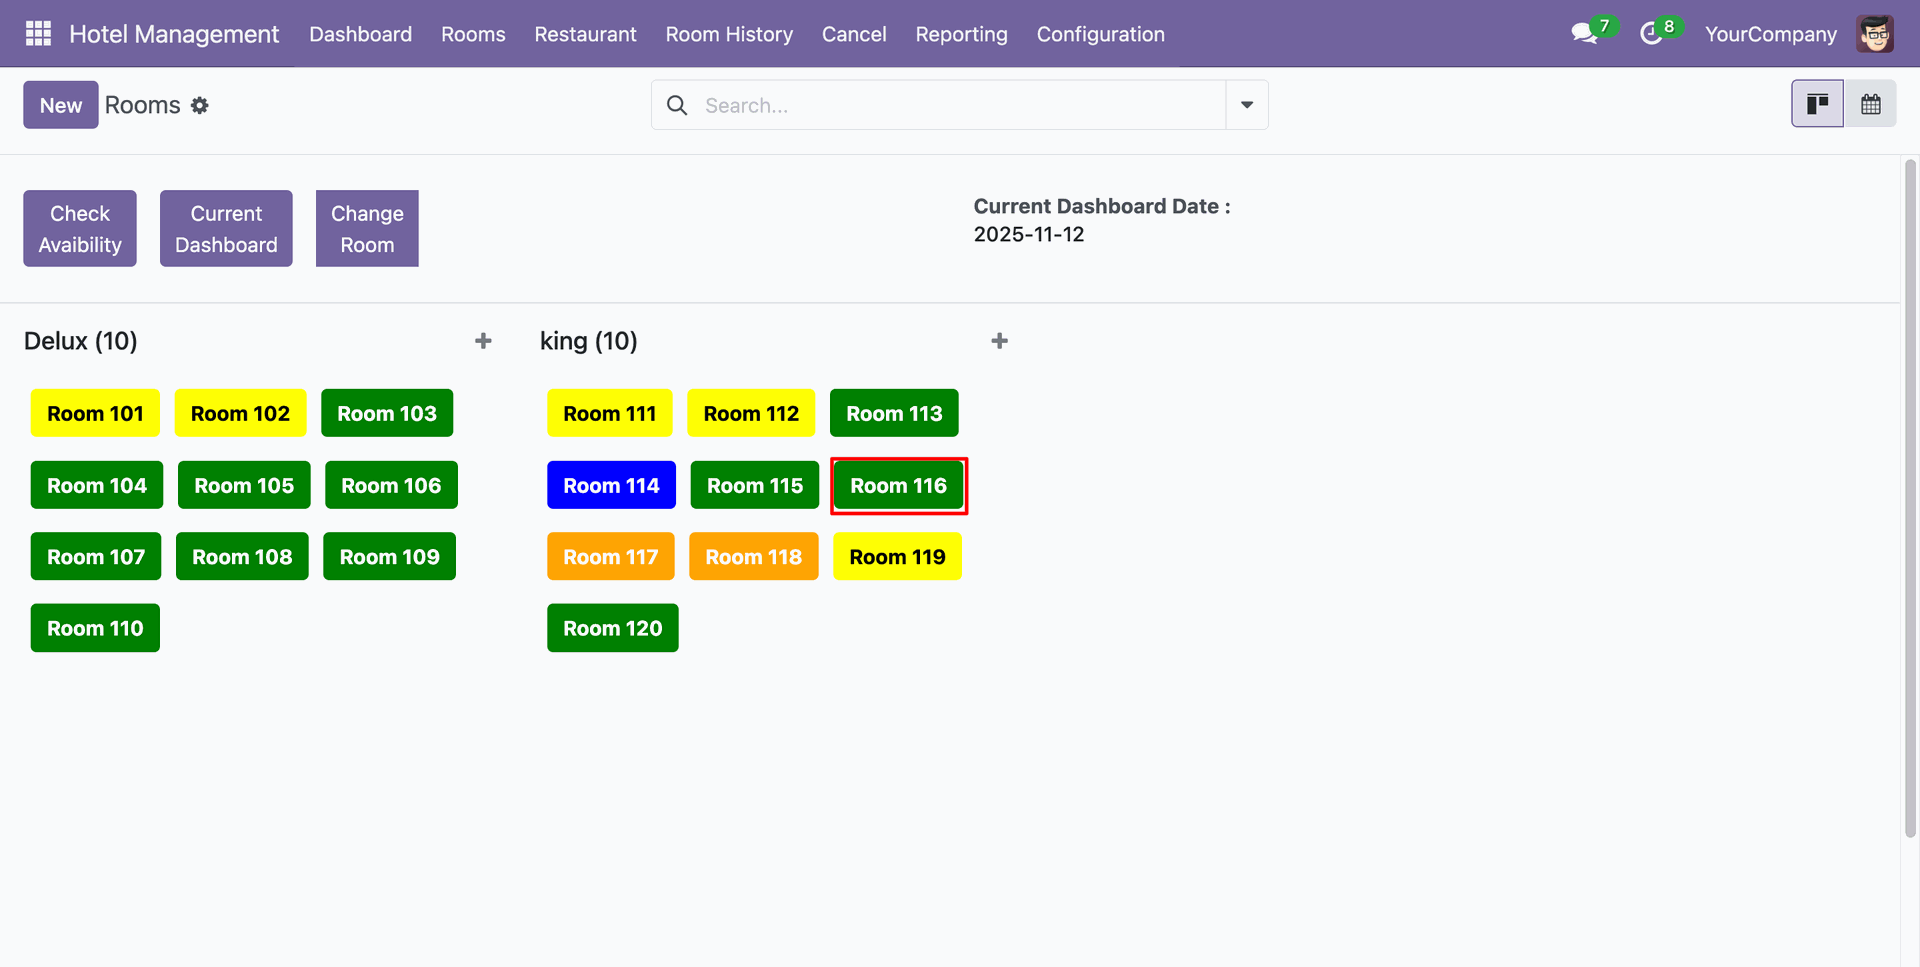
In the Kanban view of the Rooms, you will notice that booked rooms are displayed in red, while available rooms are displayed in green.
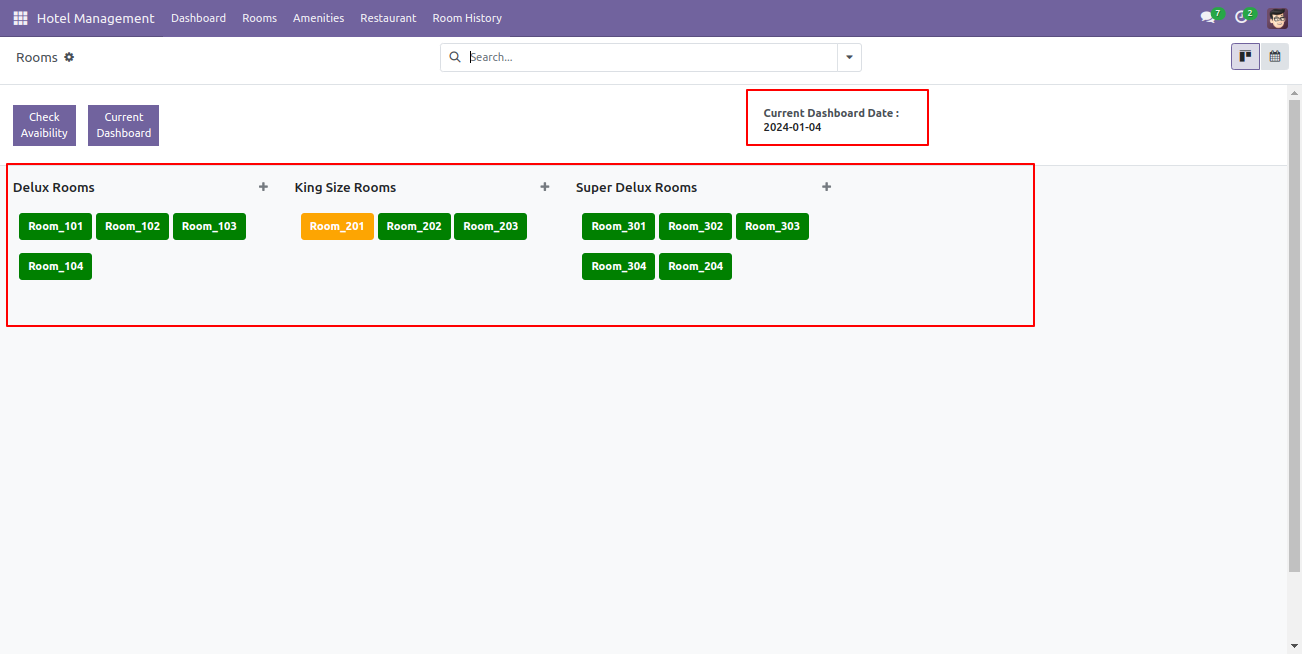
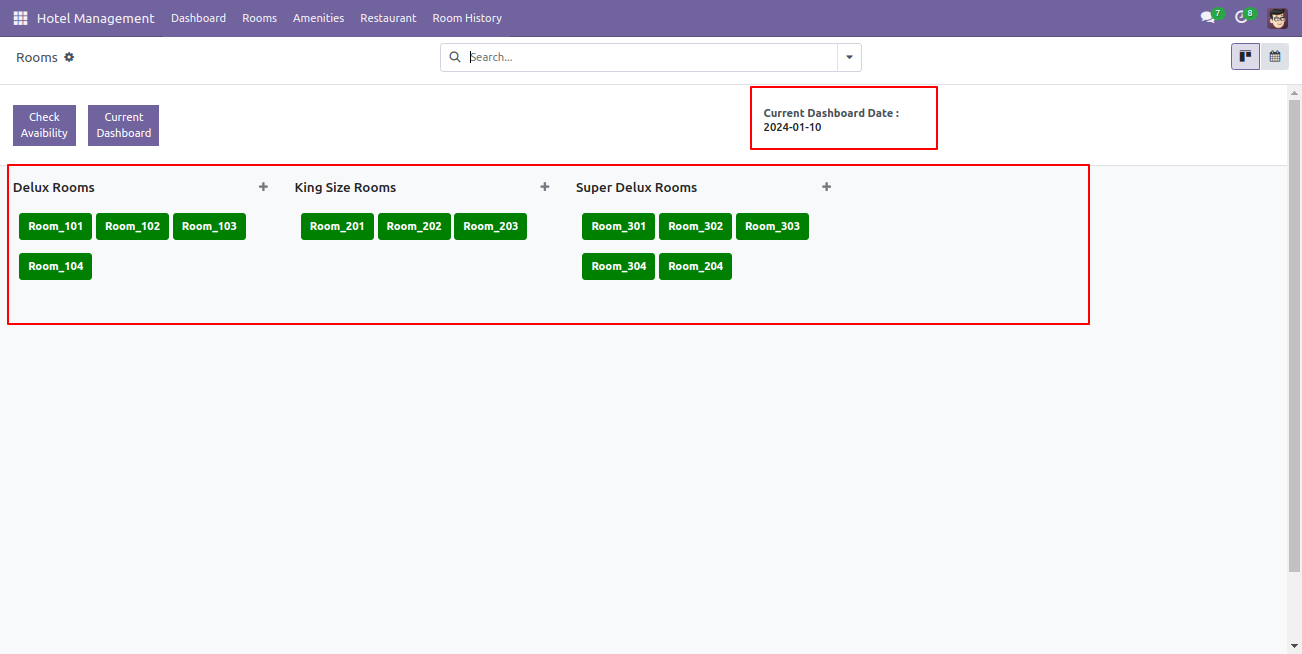
If you want to see the current dashboard, simply click on the 'Current Dashboard' button.
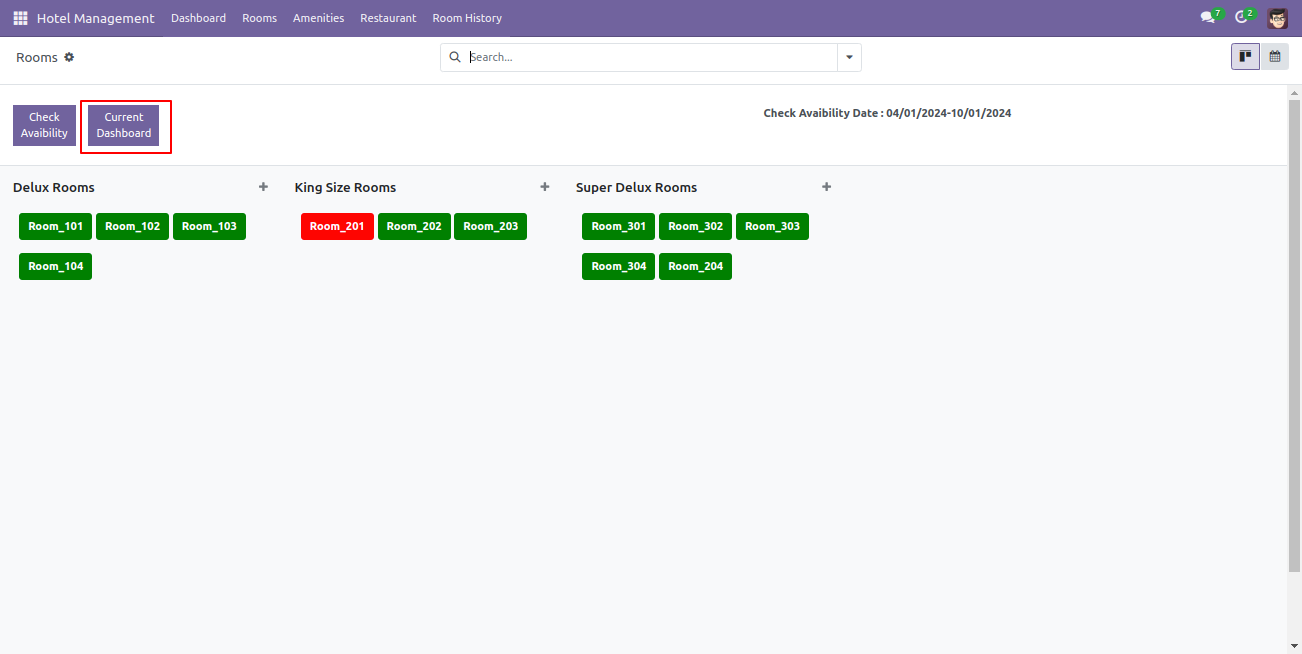
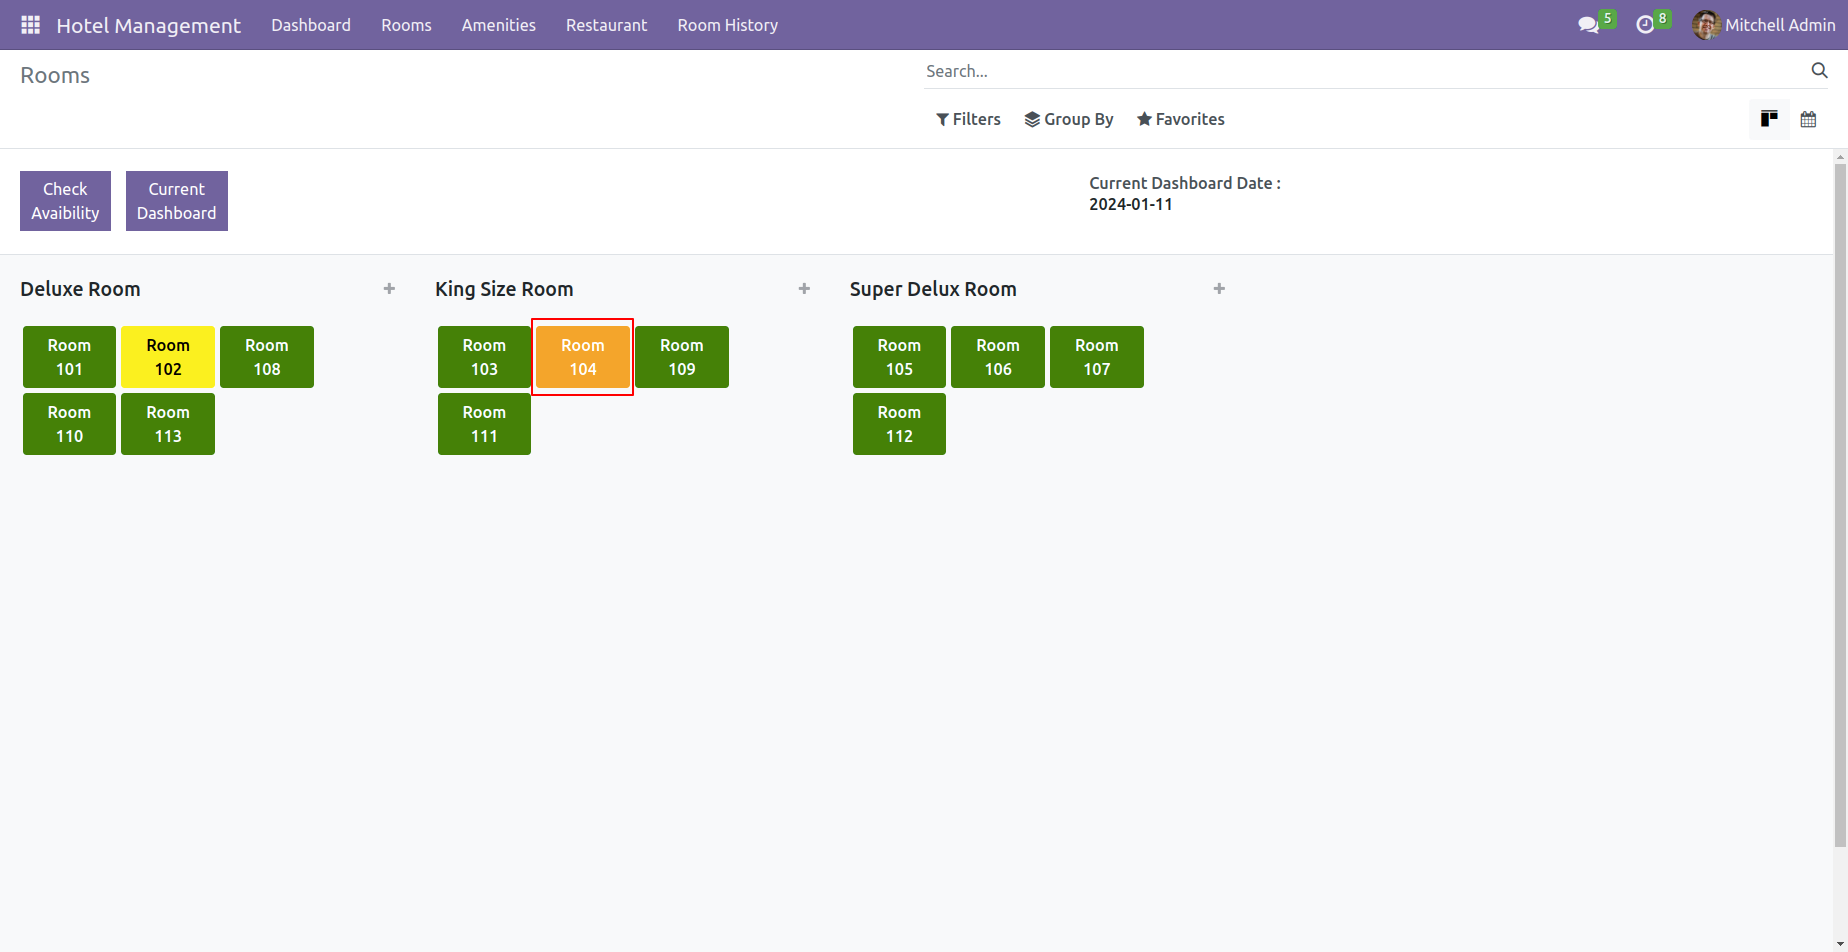
Here, you can see the current dashboard.
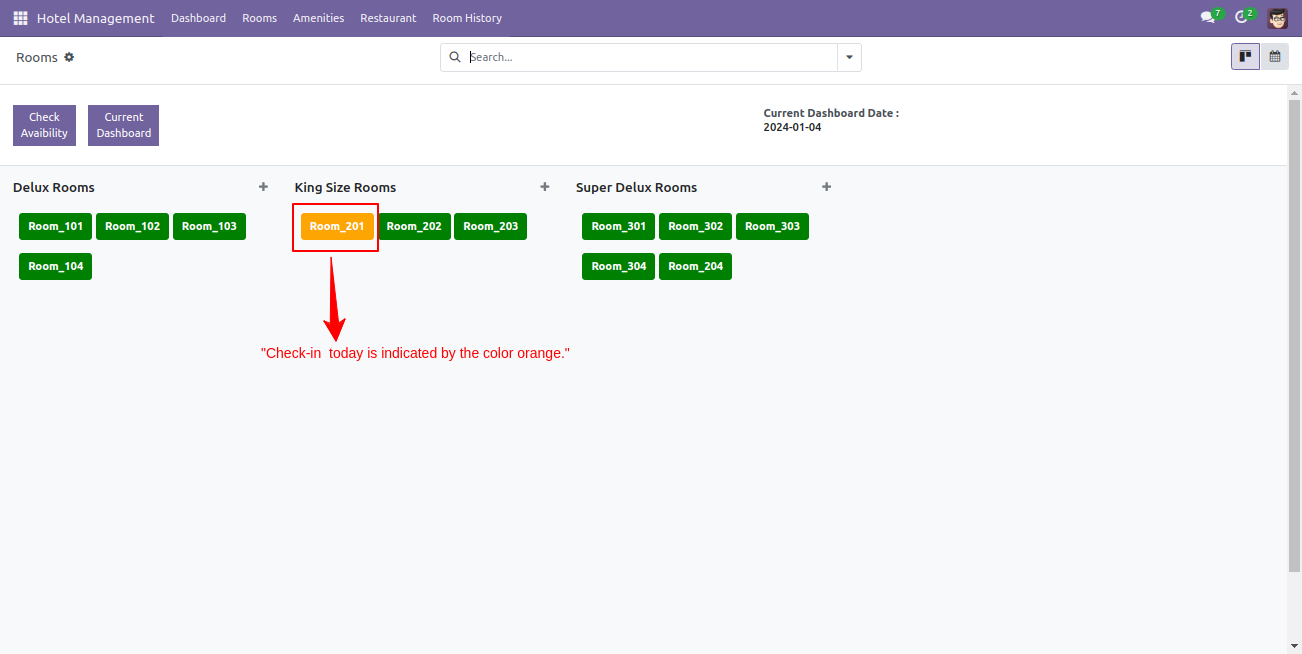
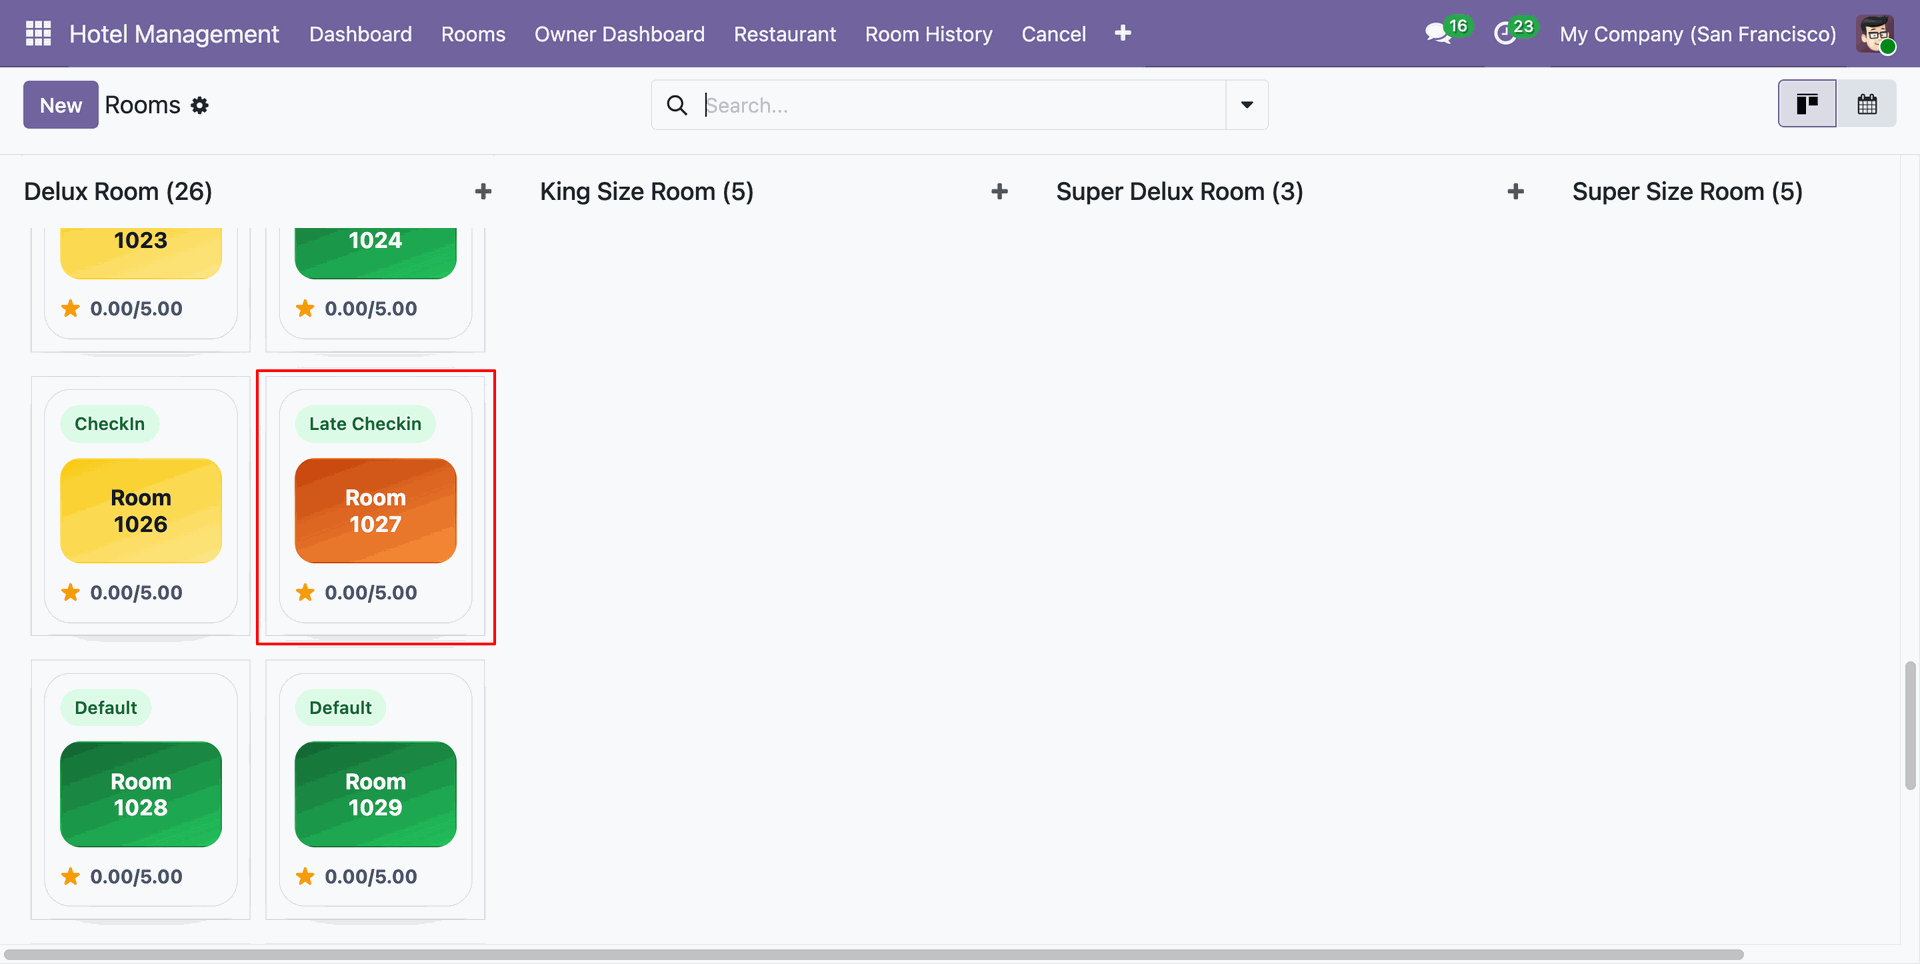
On the day of check-in, rooms will be
displayed in orange color.
To proceed with the check-in process, simply click on the booked room.
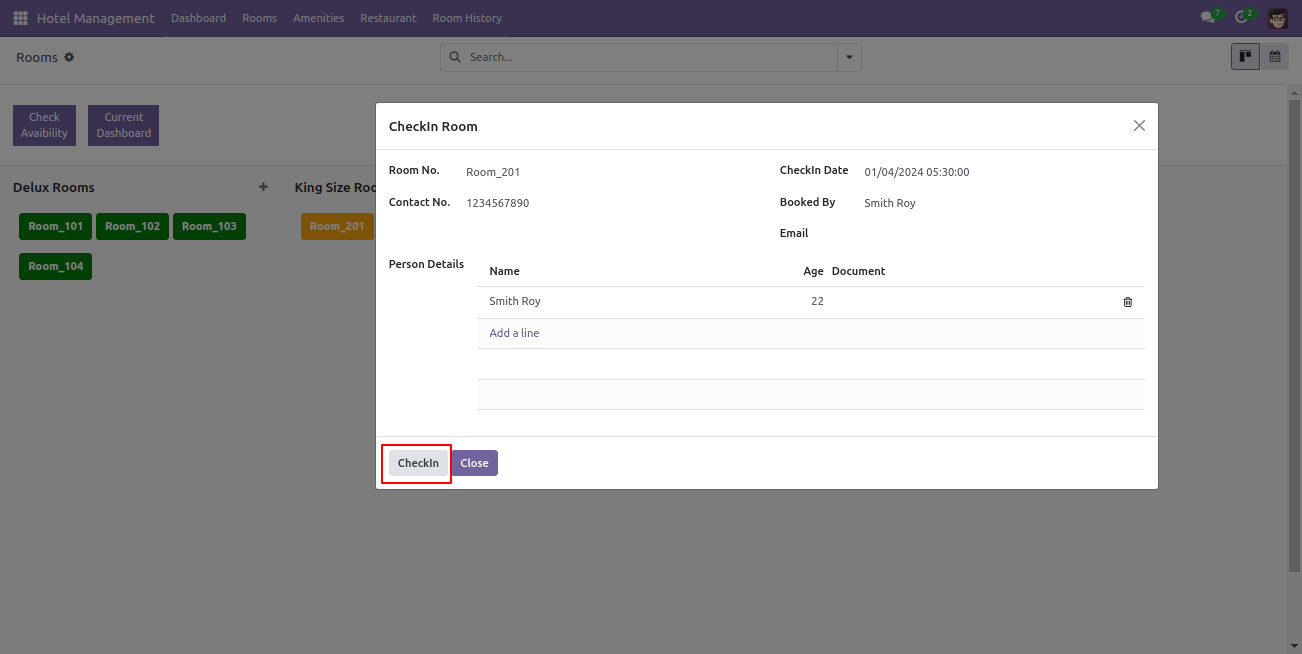
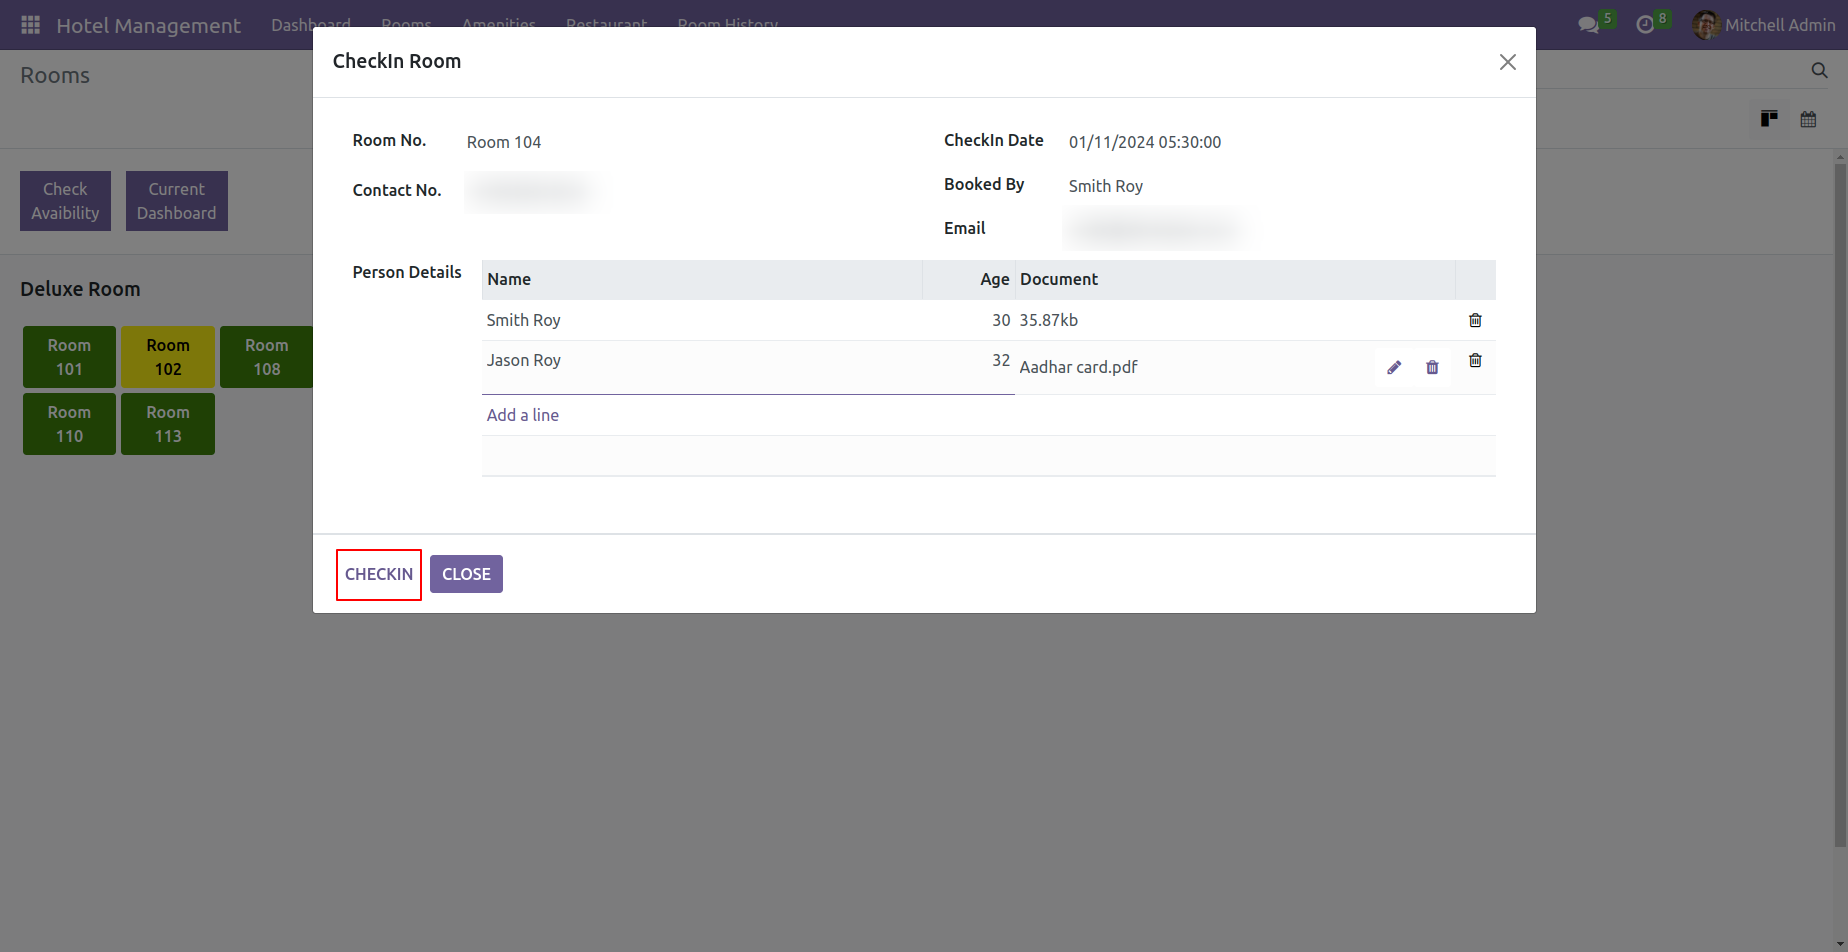
After that, check-in room wizard will appear, fill details and click on the 'Check-in' button.
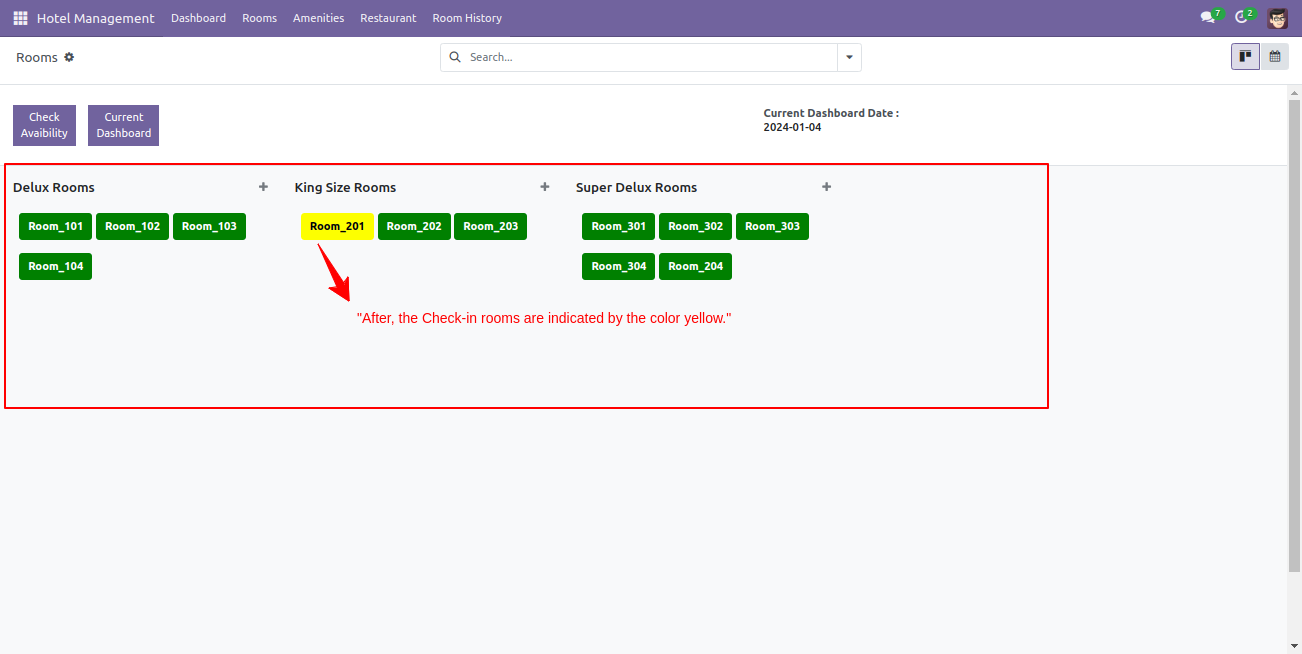
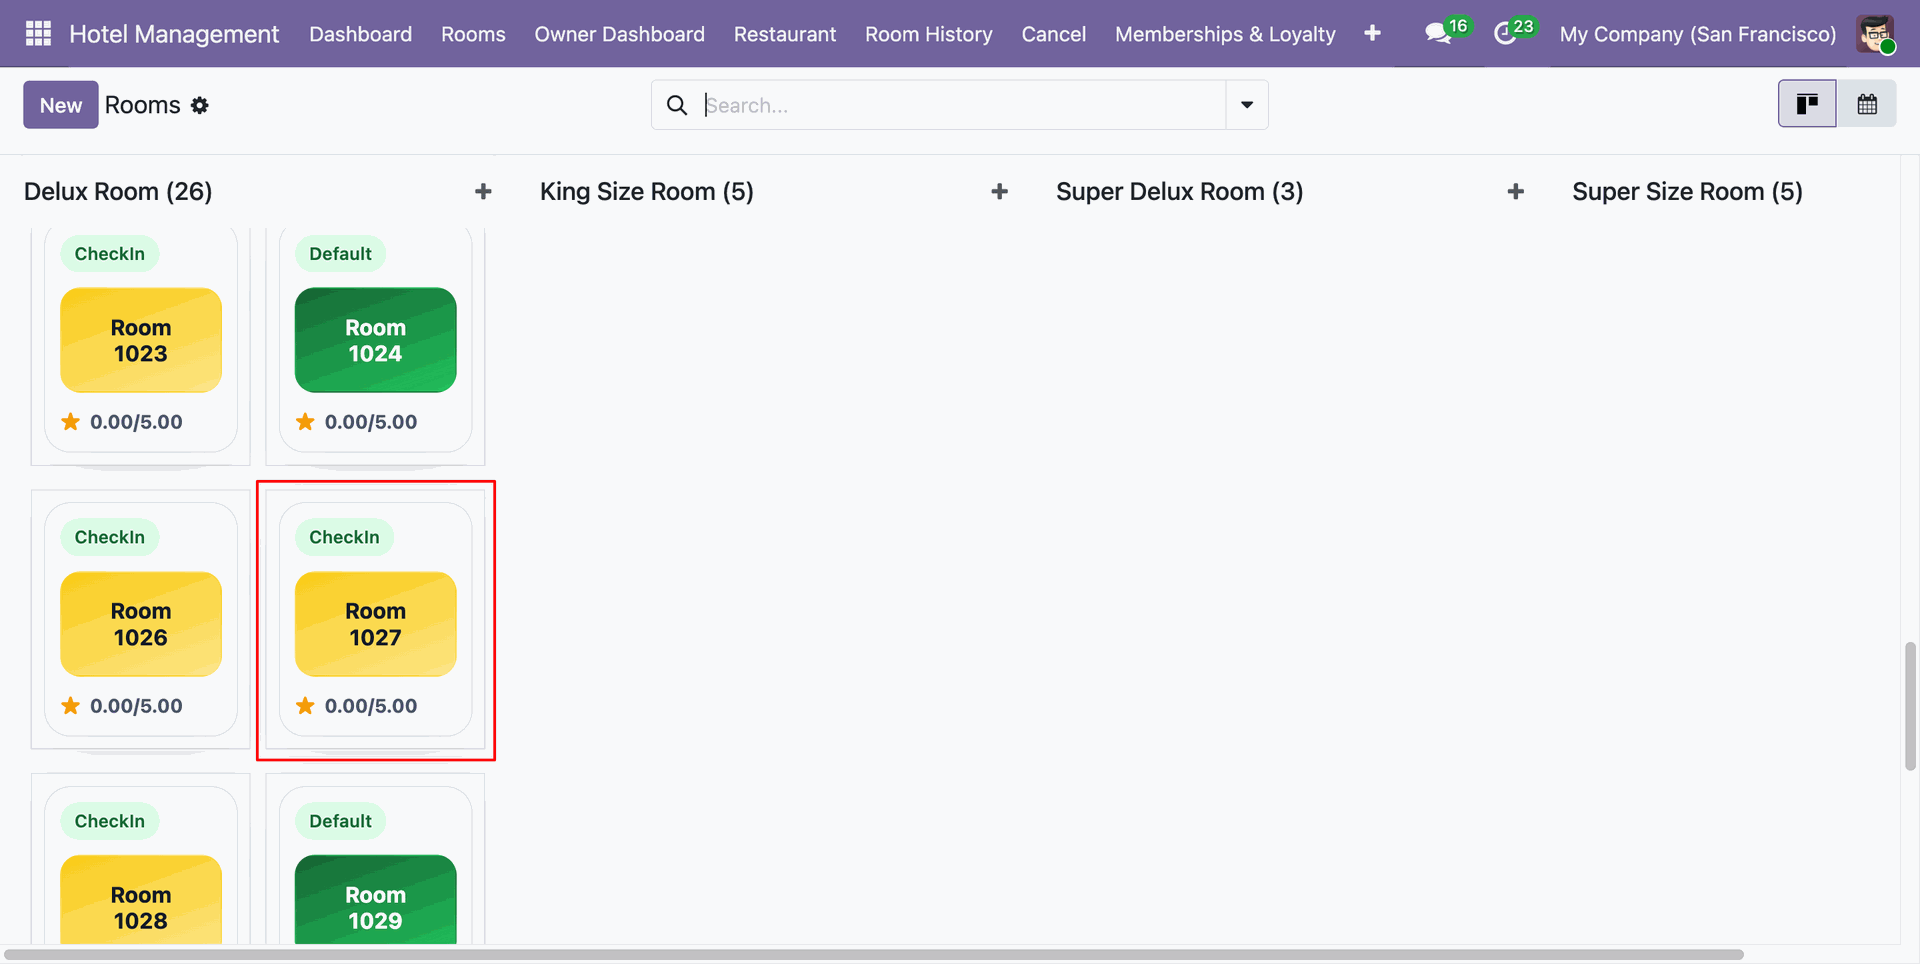
After check -in you will see the rooms are displayed in yellow color.
At the check-out time, click on the room you have booked.
Note: If you choose to check out before the specified screenshots/Checkout Flow date
you selected during the screenshots/Booking Flow process, the rooms will be
displayed in yellow.

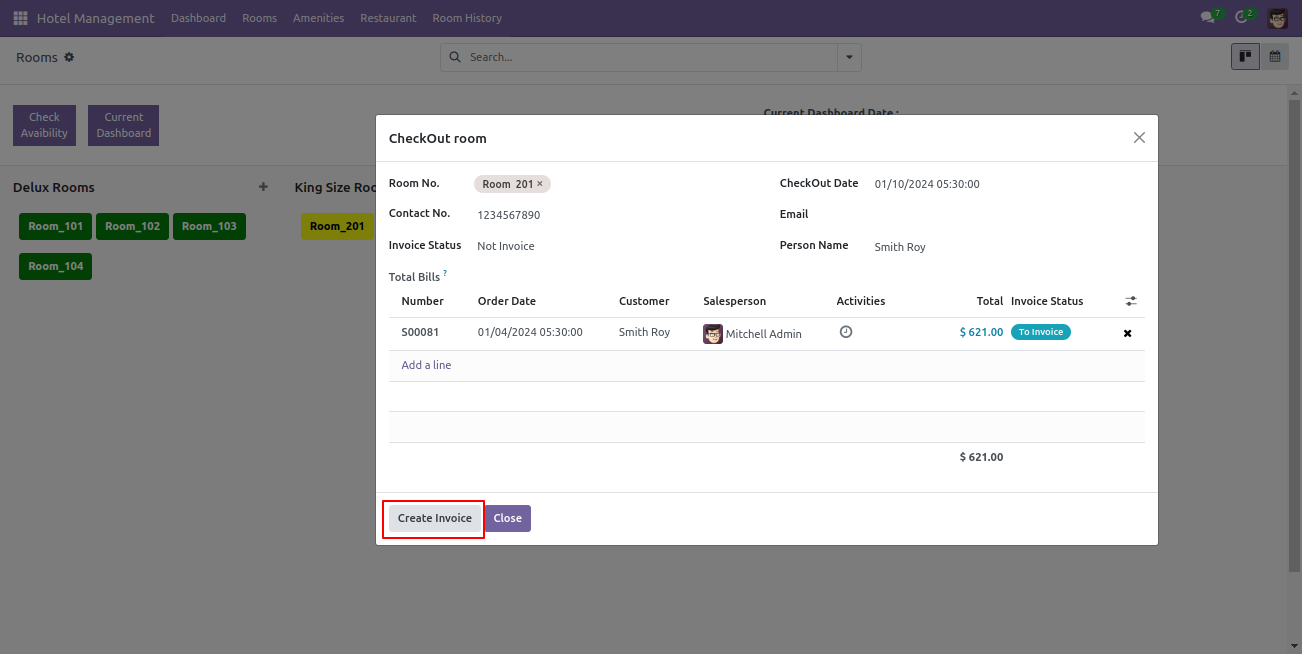
After that, check-out room wizard will appear. Click on the 'Create Invoice' button.
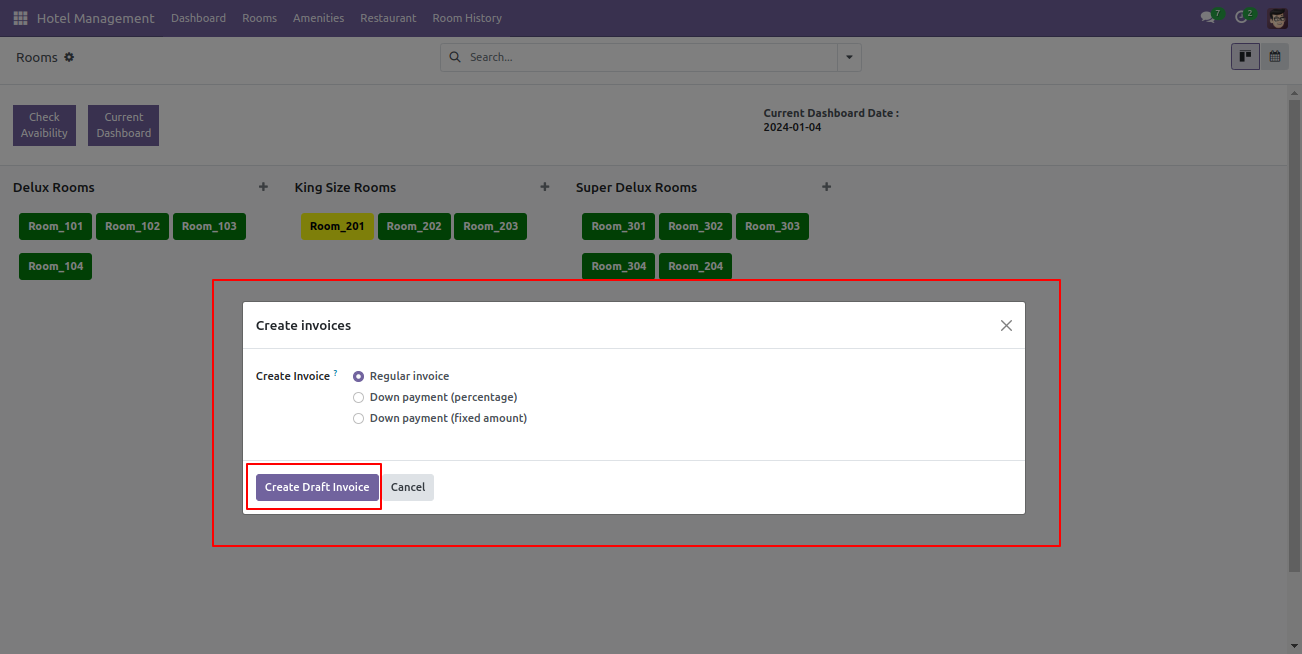
Select the invoice option and click on the 'Create A Draft Invoice' button.
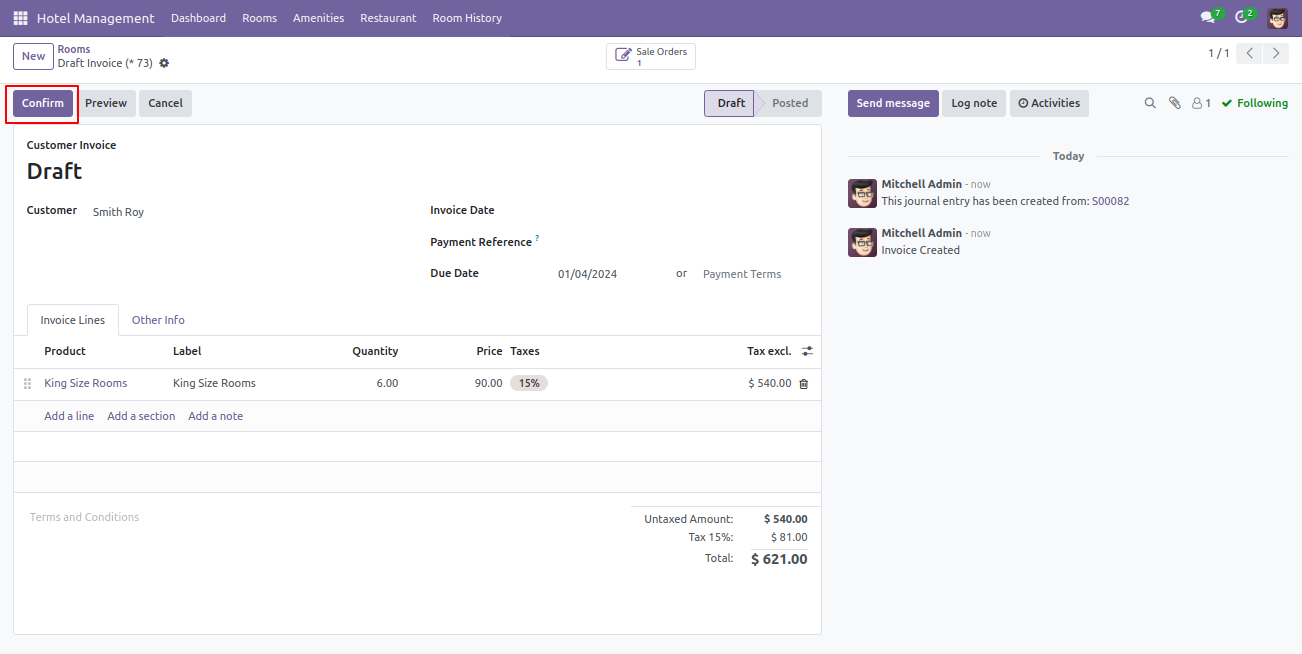
After that, you will be automatically redirected to the invoice form view. To proceed with confirmation, click on the 'confirm' button.
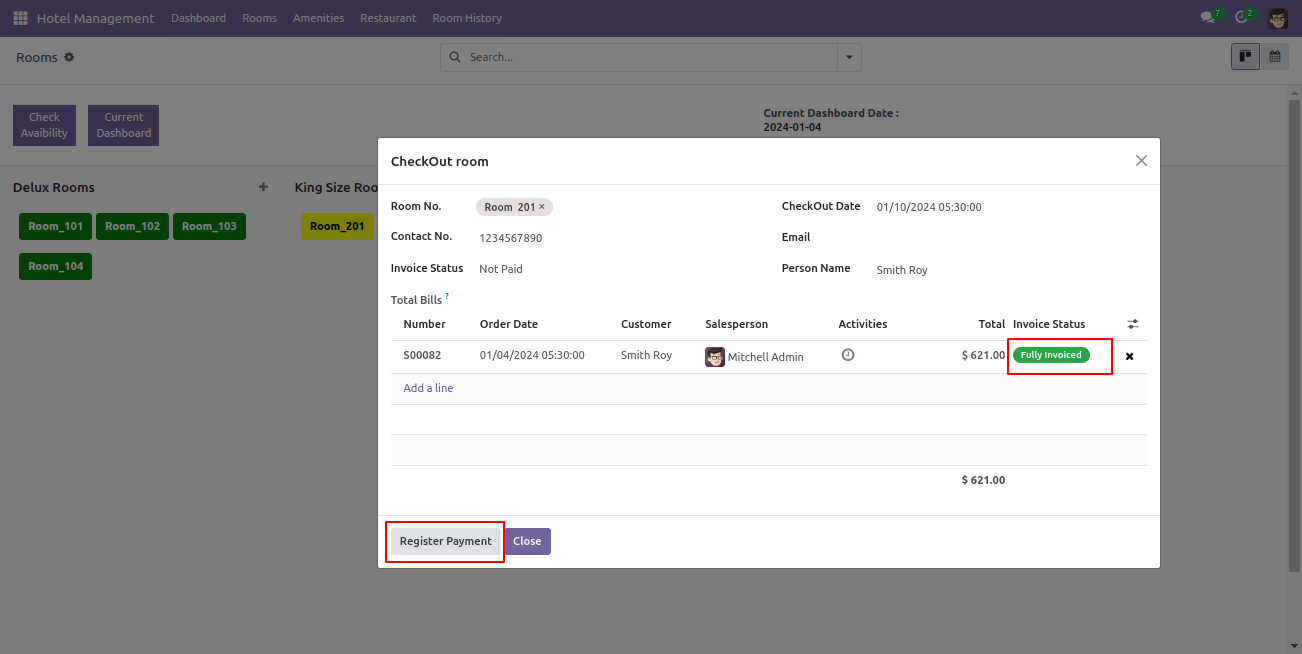
Again click on the booked room.
In the check-out room wizard, you can see the invoice status, which will be
indicated as "Fully Invoiced."
To proceed with making a payment, click on the 'Register Payment'.
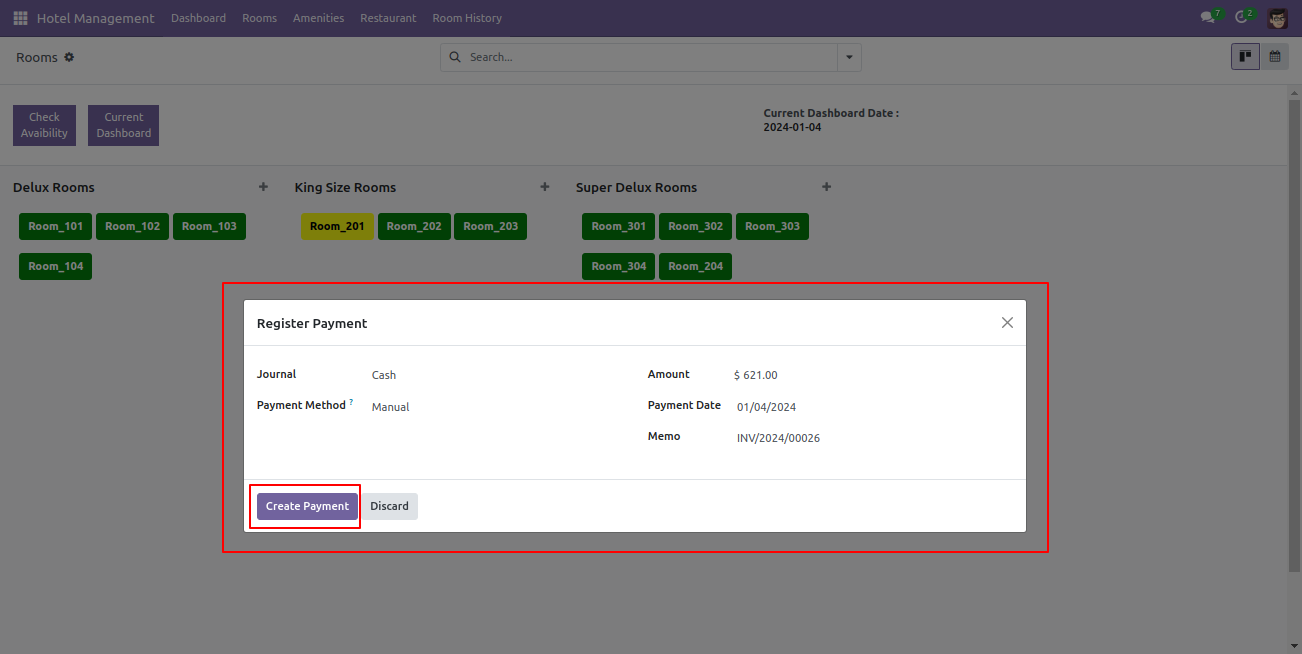
Add payment details and click on the 'Create Payment' button.
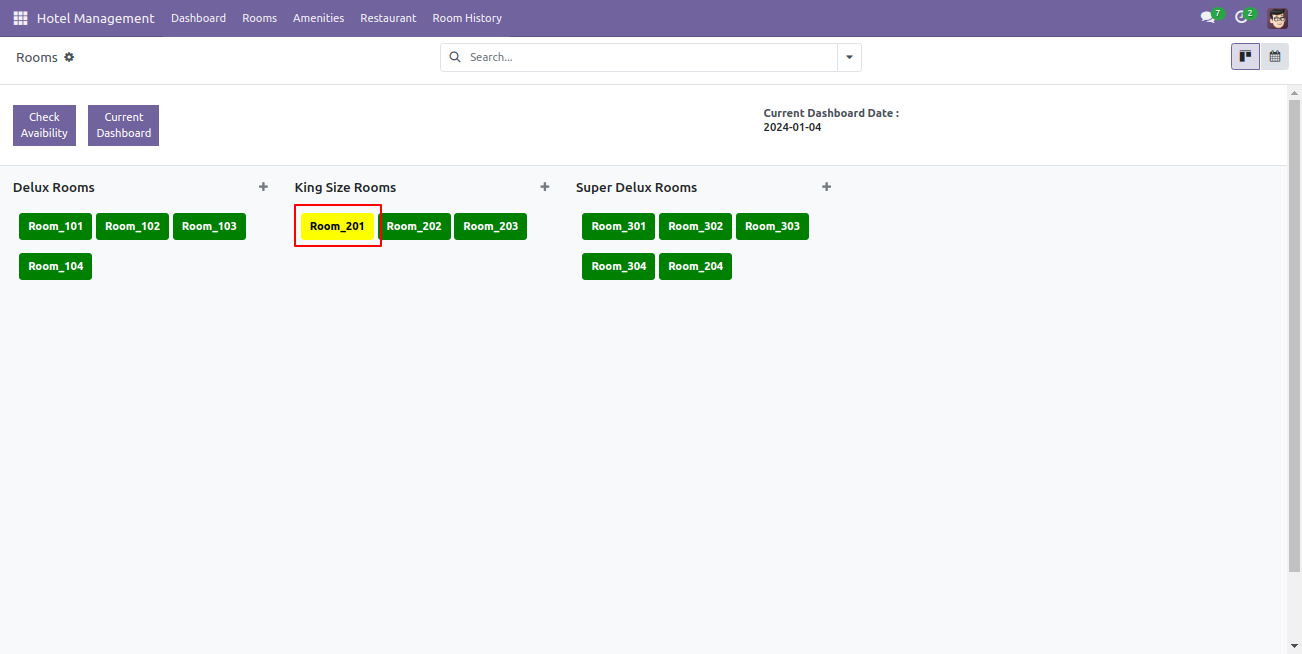
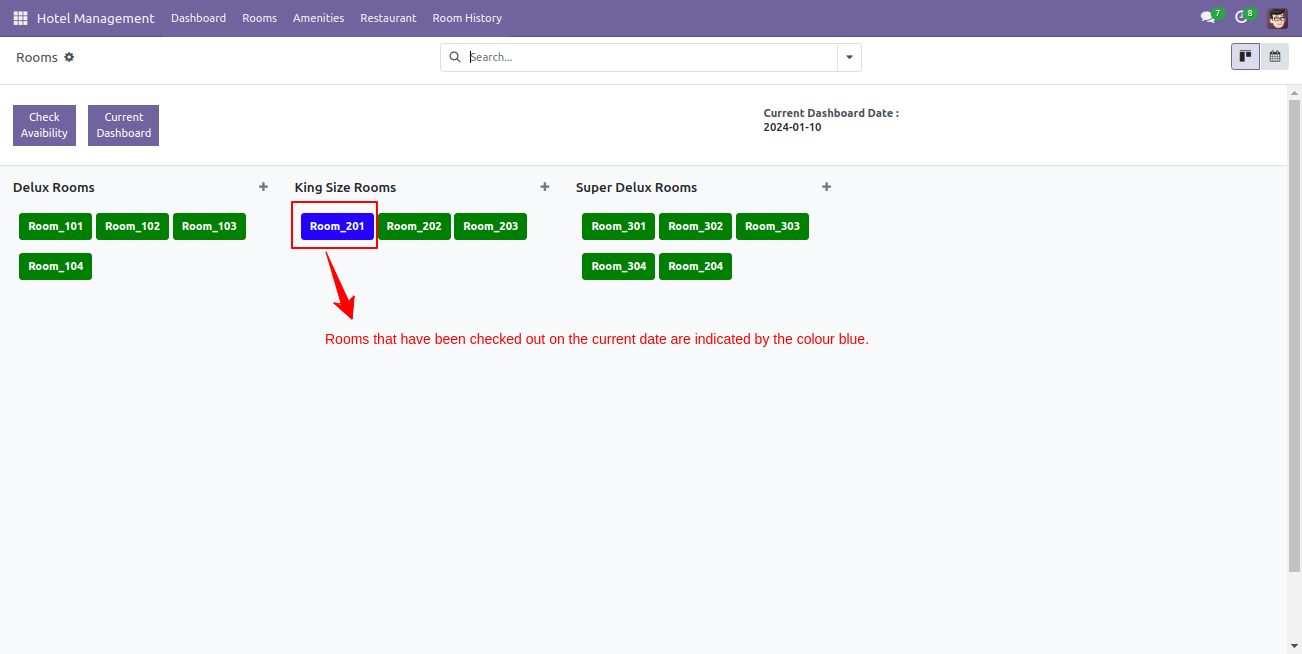
On the day of check-out, rooms will be displayed in blue color for easily
identification.
To proceed with the check-out process, click on the booked room.
Note: If you check out on the specified check-out date you selected during the
screenshots/Booking Flow,
the rooms will be displayed in blue color.
Click on the check-out button.
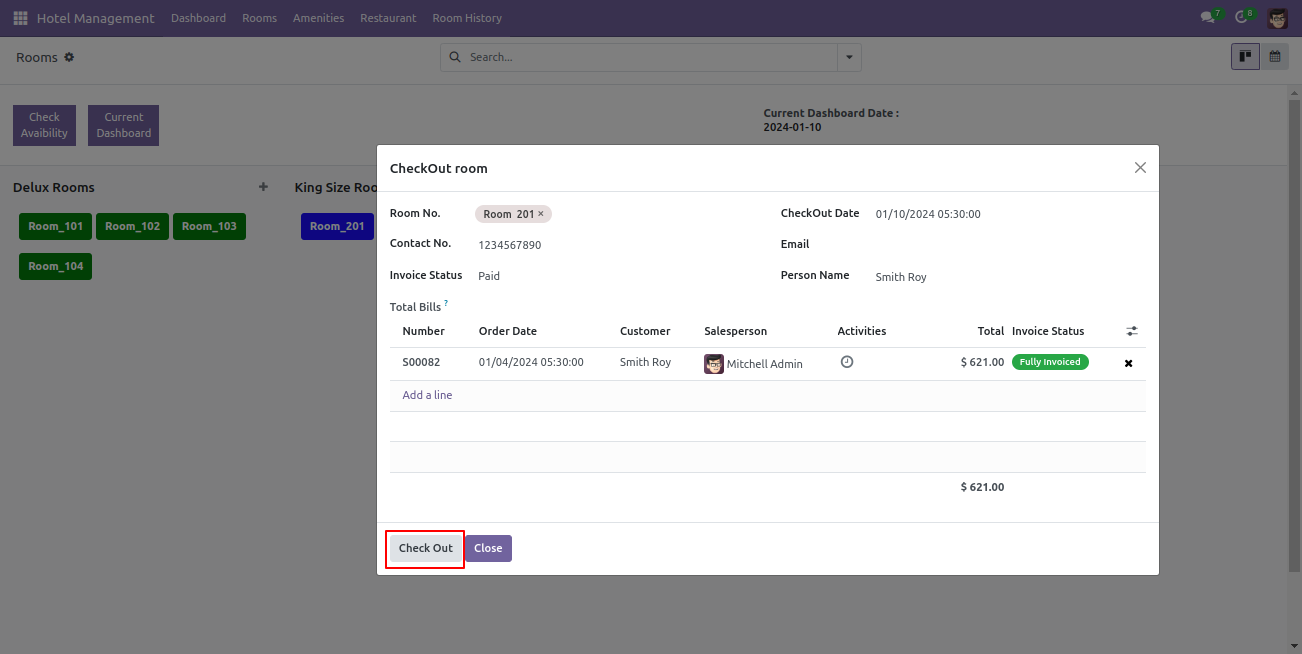
Now you can see the availability of the rooms you have checked out.
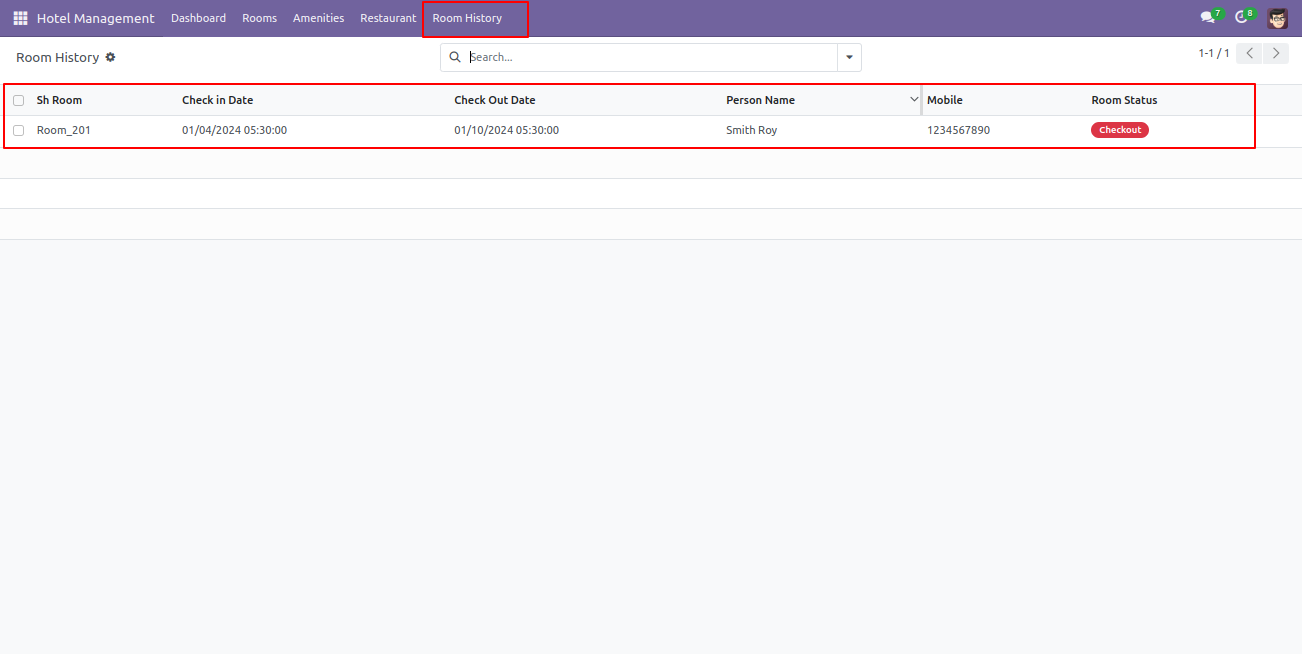
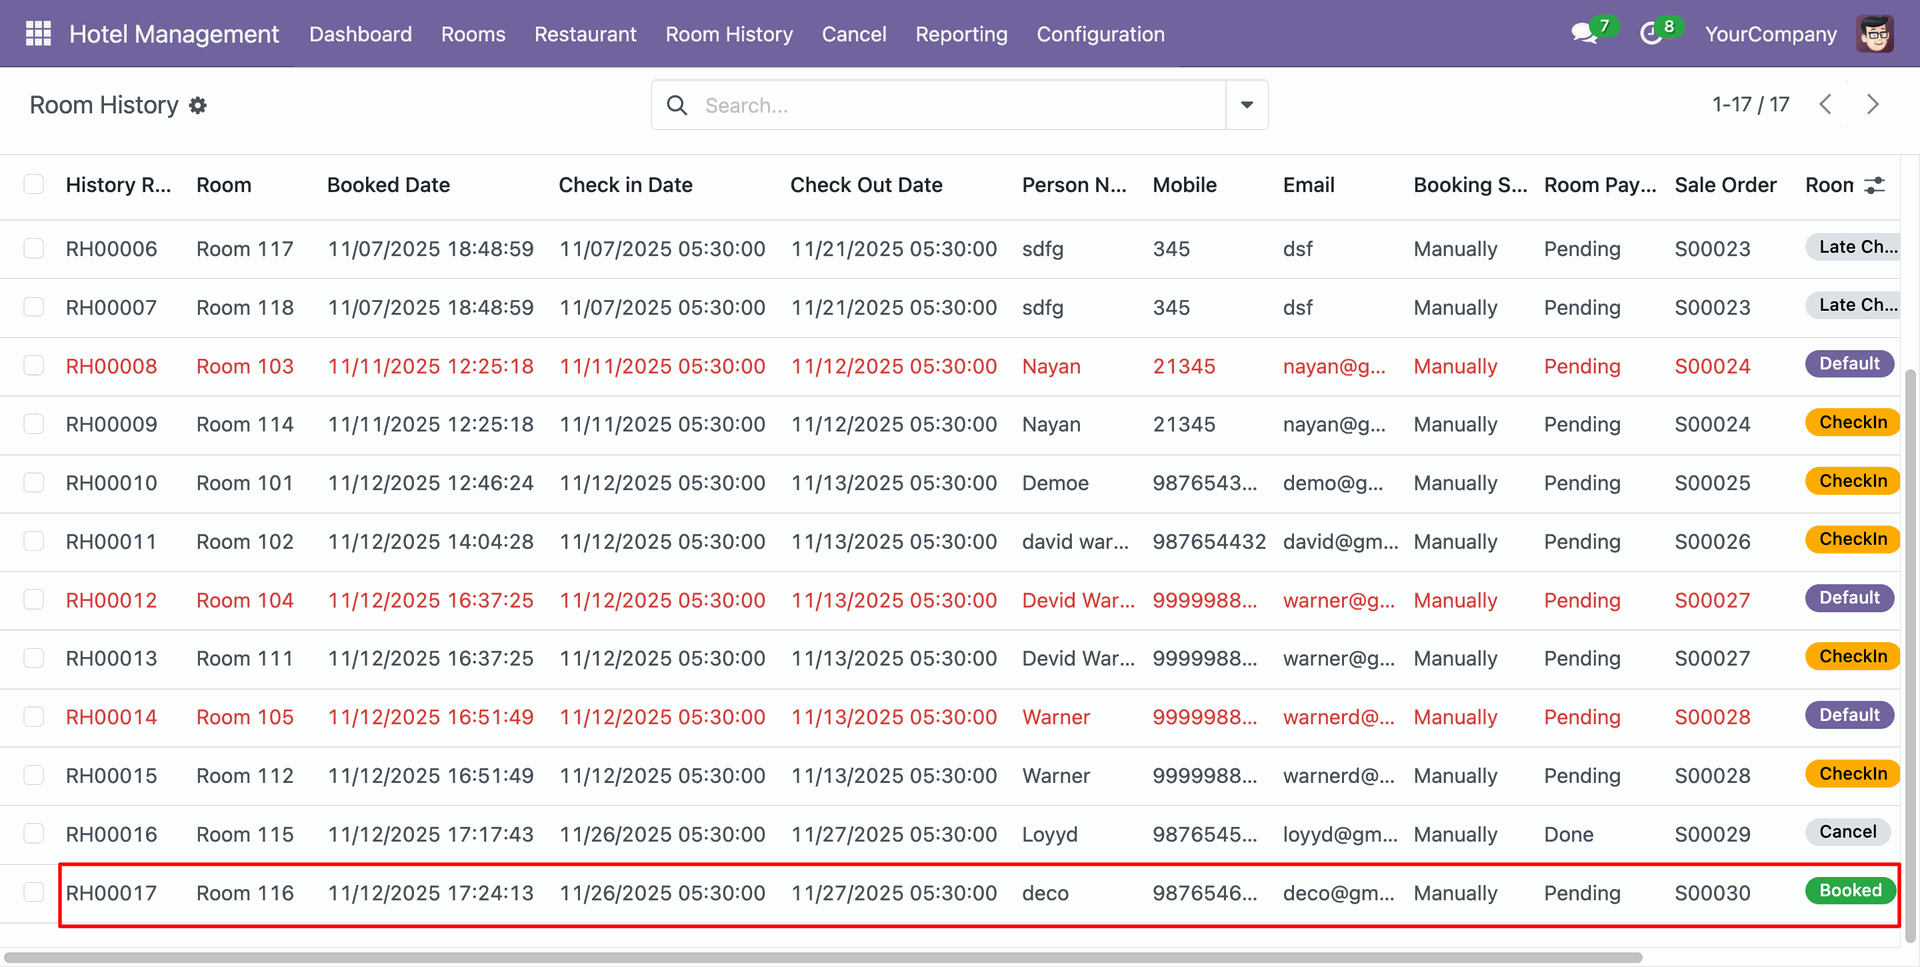
To check room history. Go to the room history menu.
Here, you can see the current dashboard.
On the day of check-in, rooms will be displayed in orange color. click on that room.
Fill up the details and click on the 'Checkin' button.
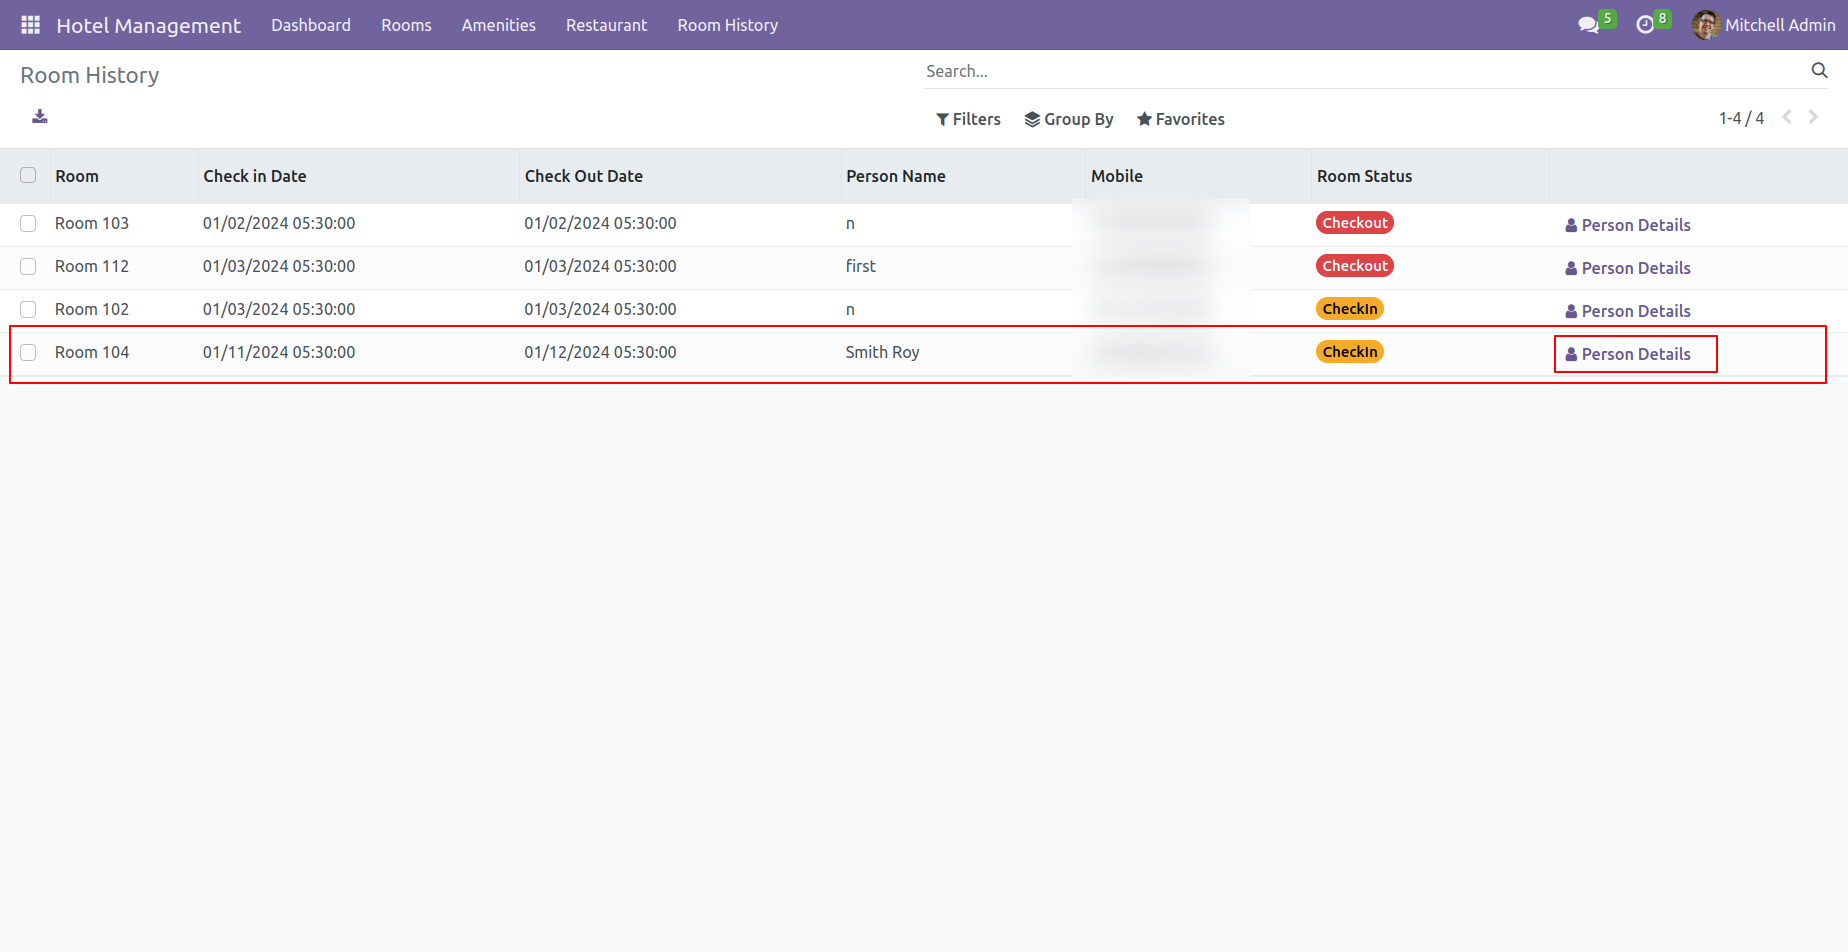
Tree view of the room history. click on the person details to view the details.
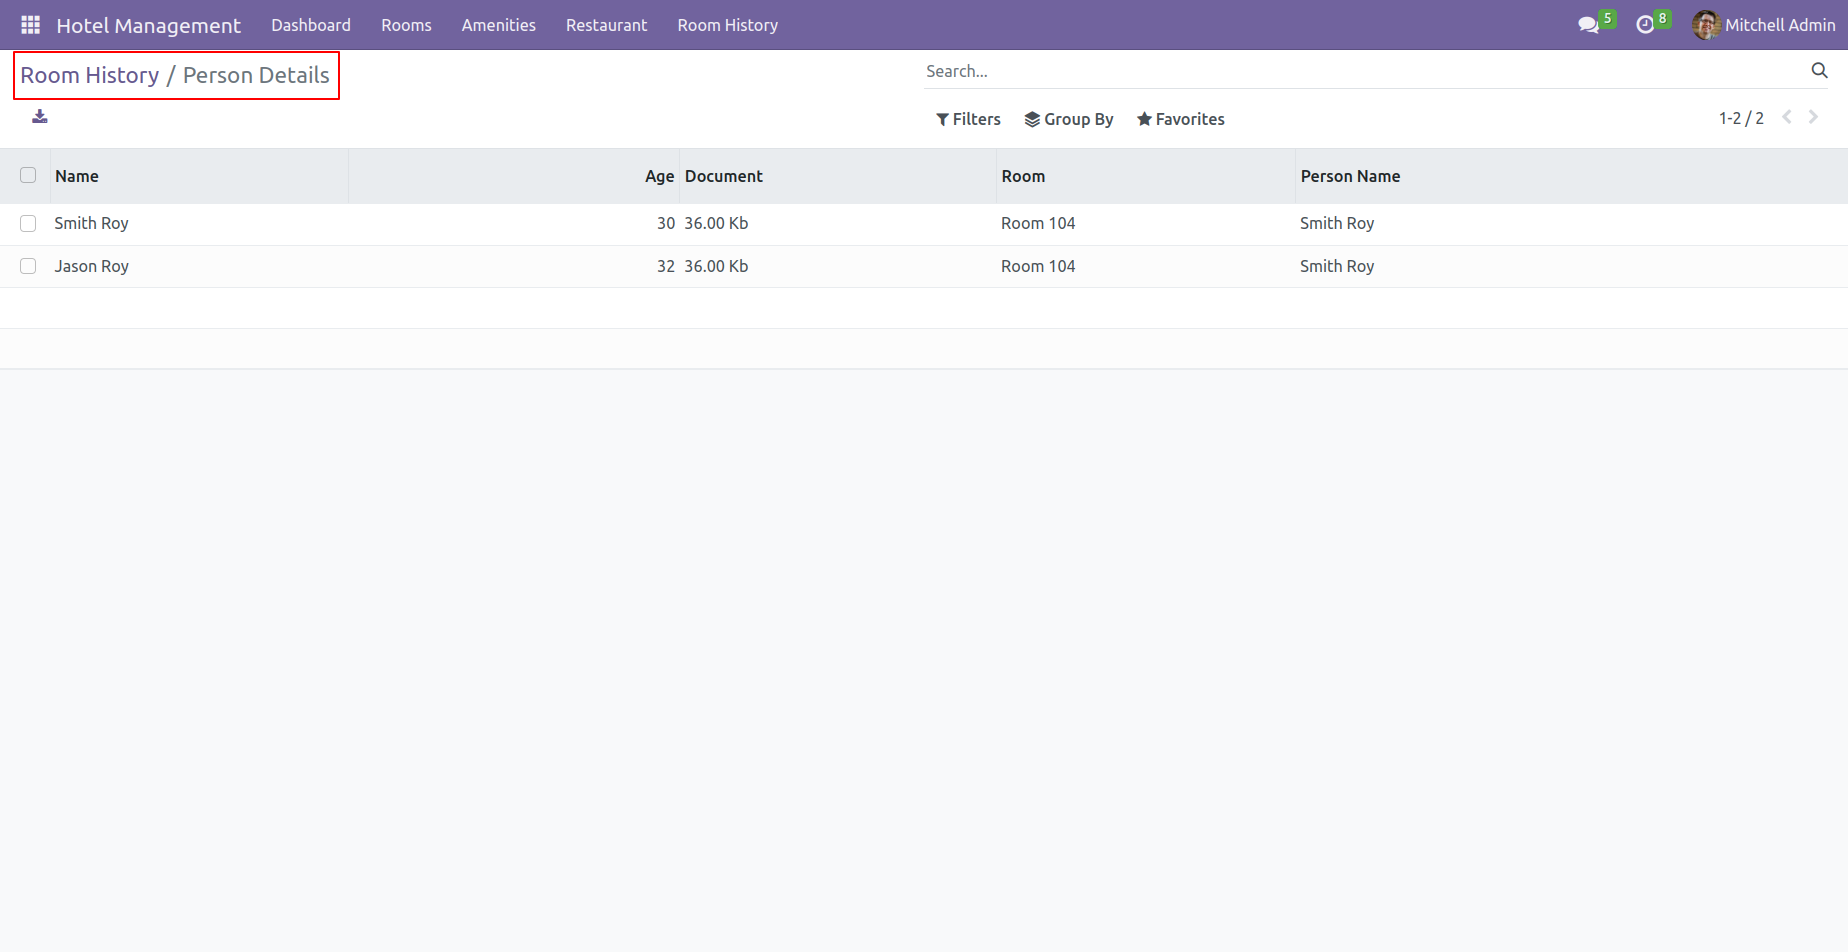
Tree view of the person's details. Click on the name of the person whose details you wish to review.
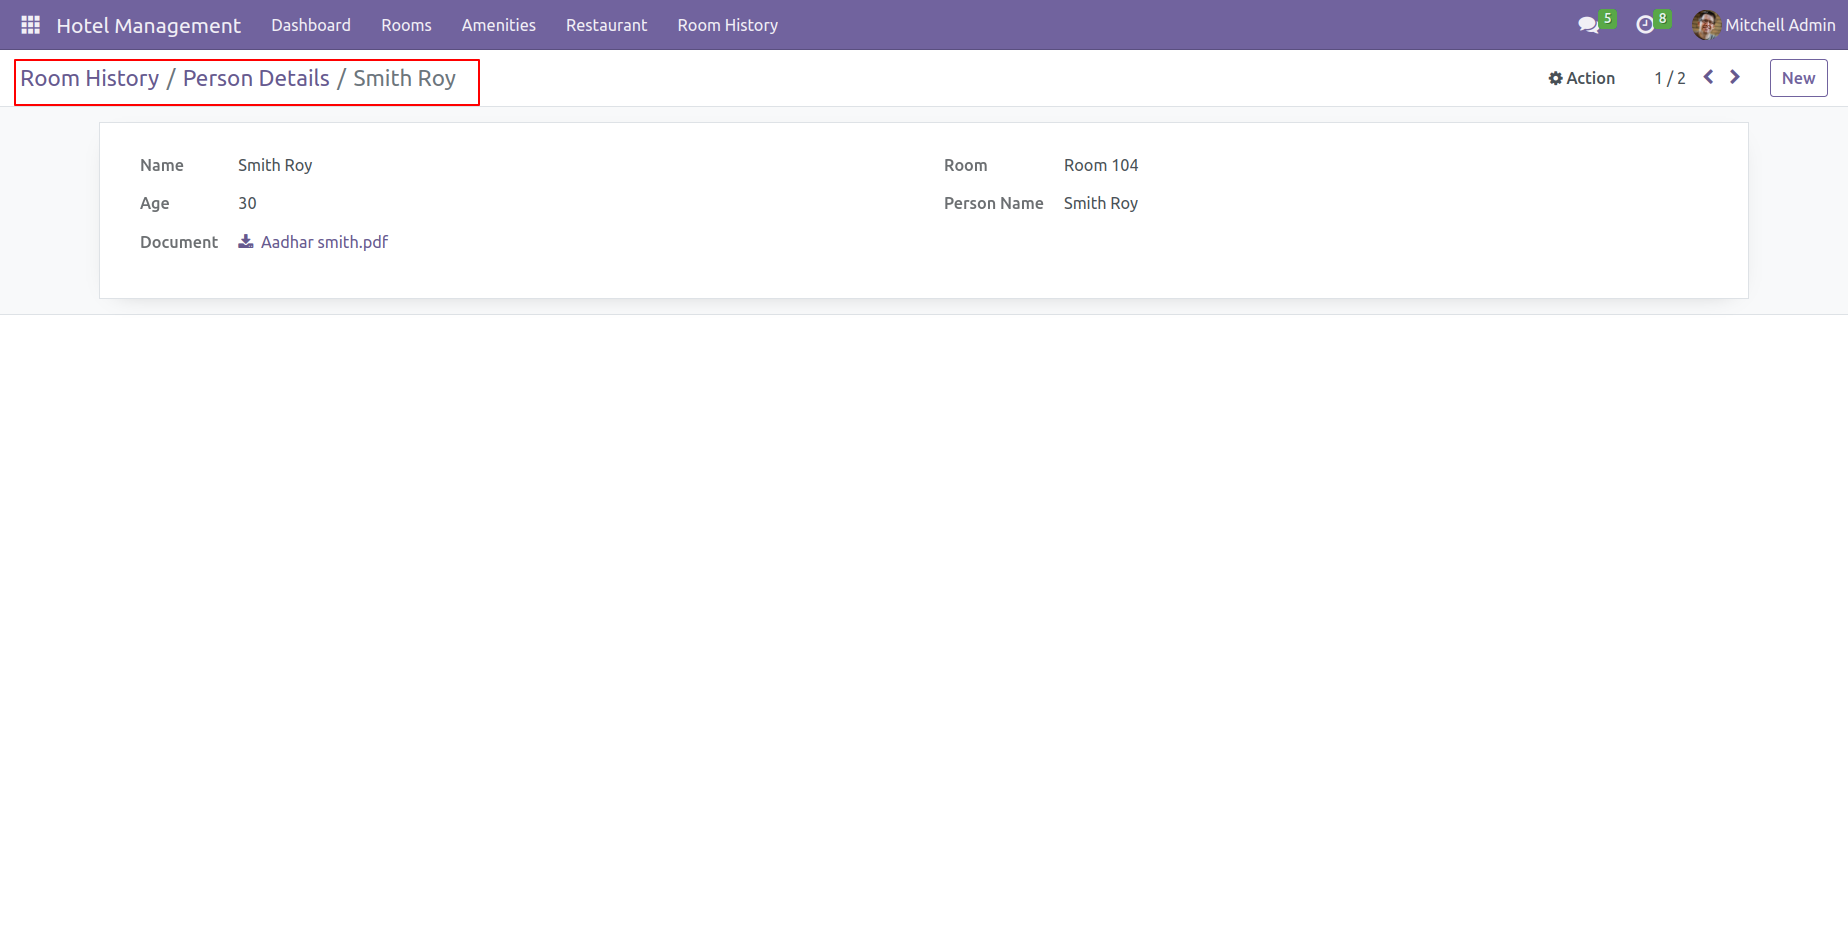
Form view of the person's details.
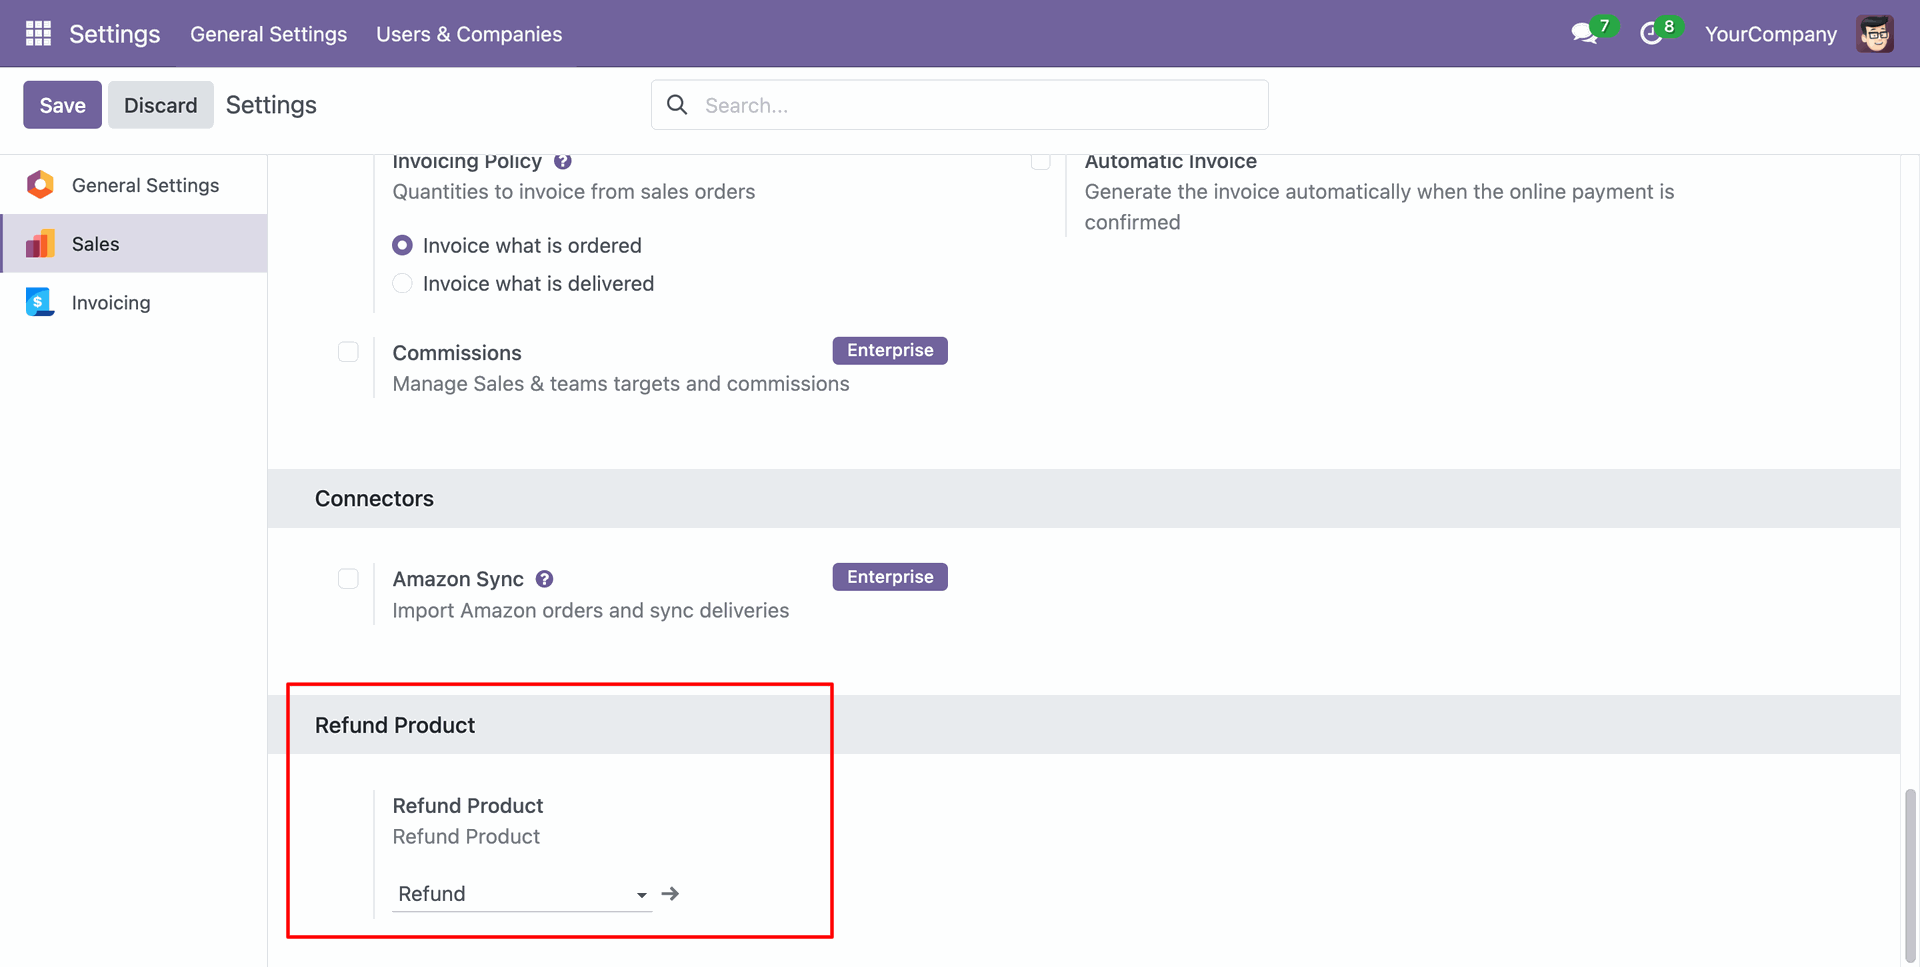
Go to the Sales settings and select the "Refund" in the Refund Product.
Click on the room you want to book.
Add details and click on the "Book Room" buton.
Here, you can see that the room has been booked.
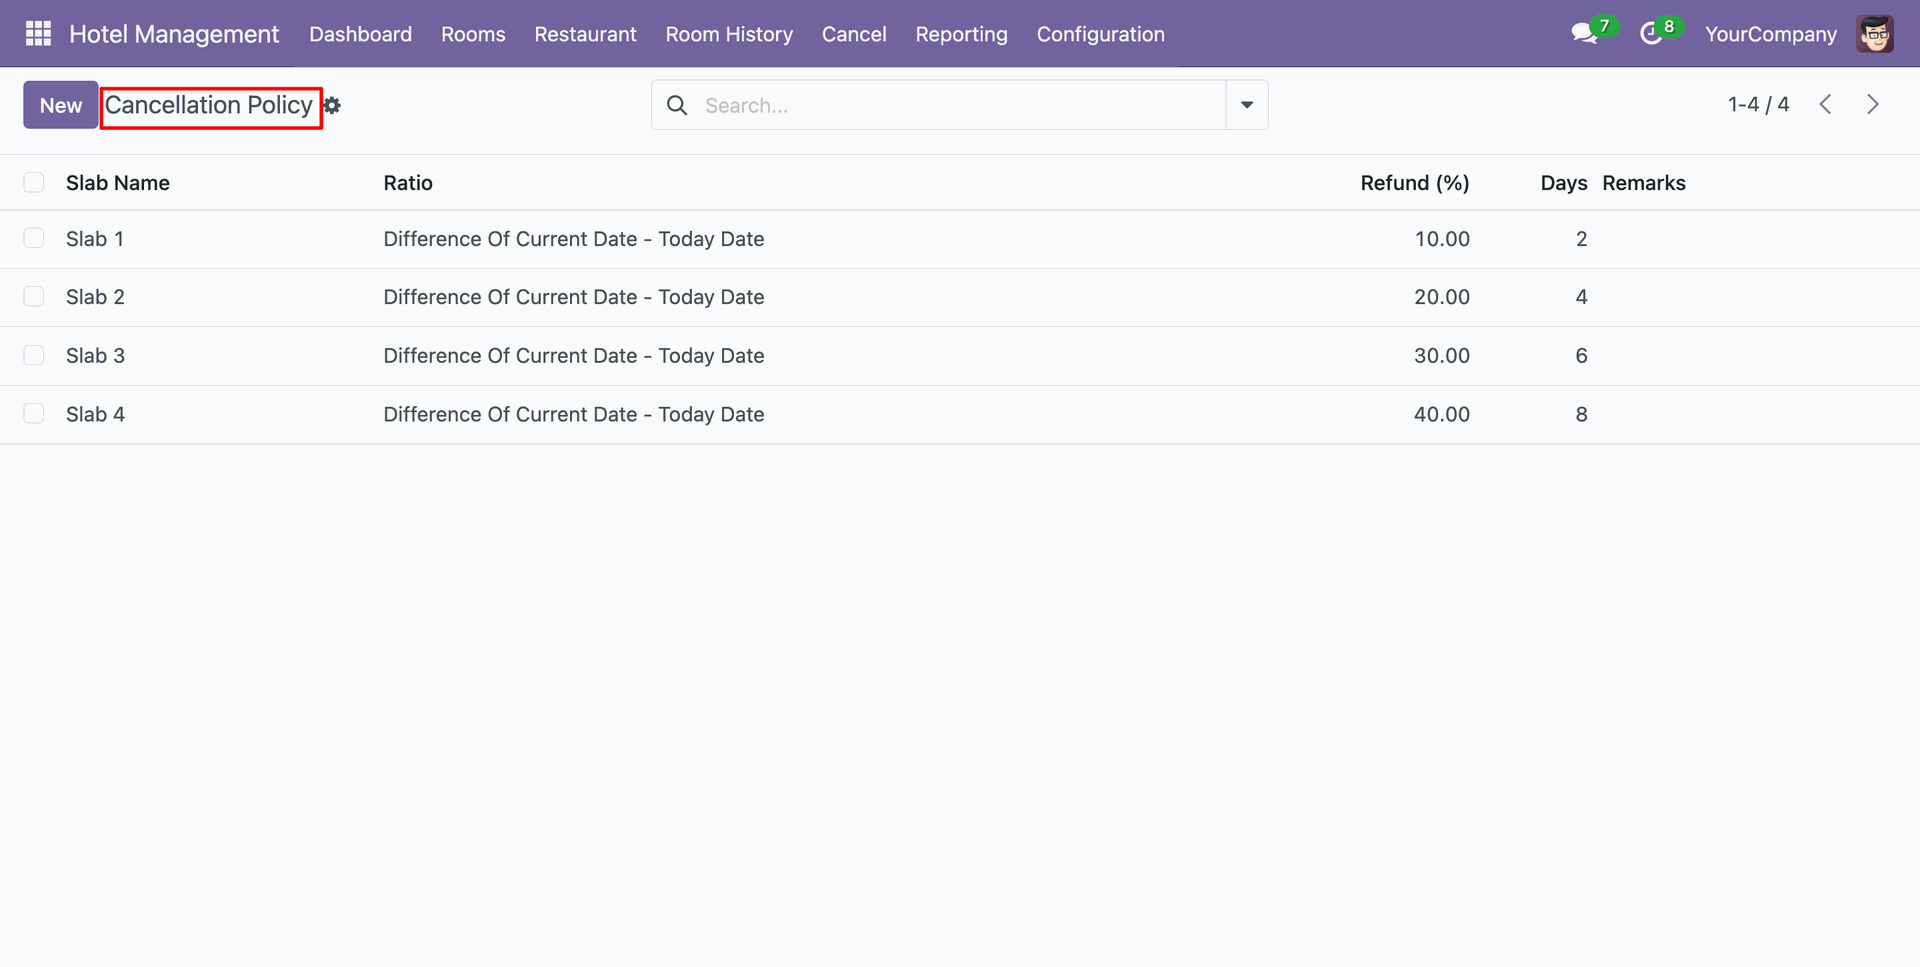
Tree view of the "Cancellation Policy".
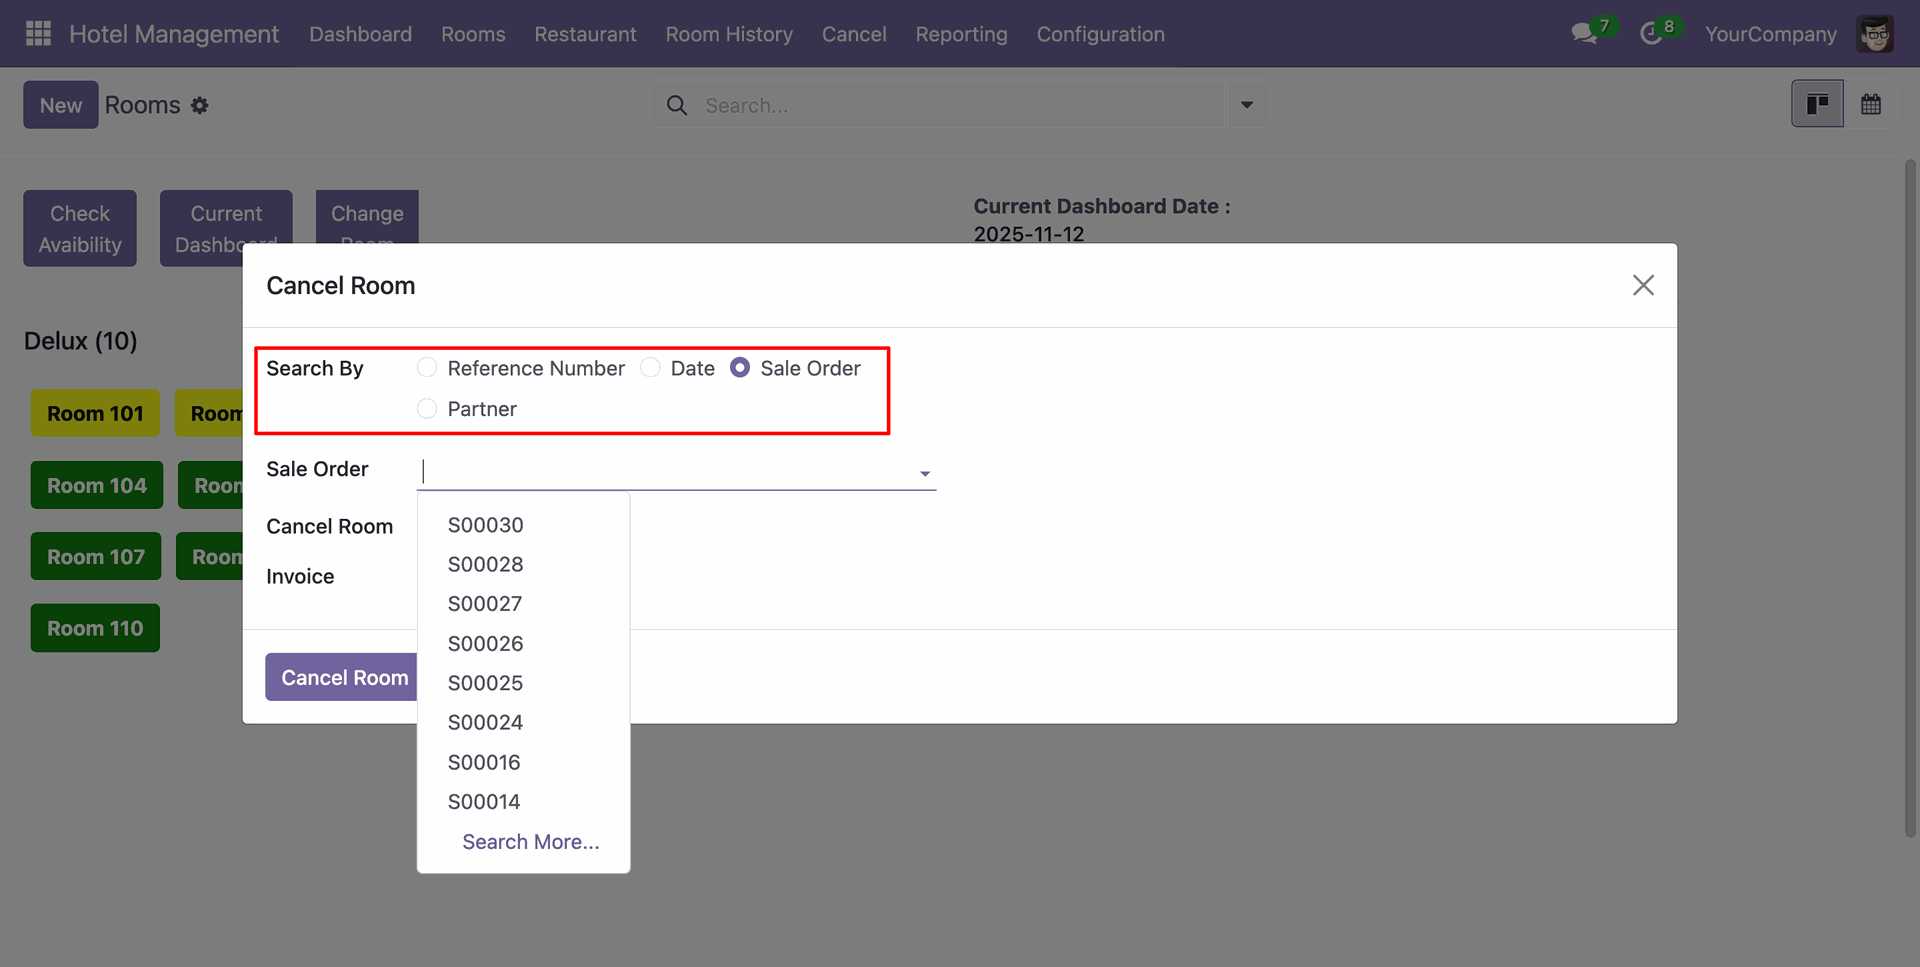
Click on the "Cancel" menu.

After that, Cancel Room wizard will appears.
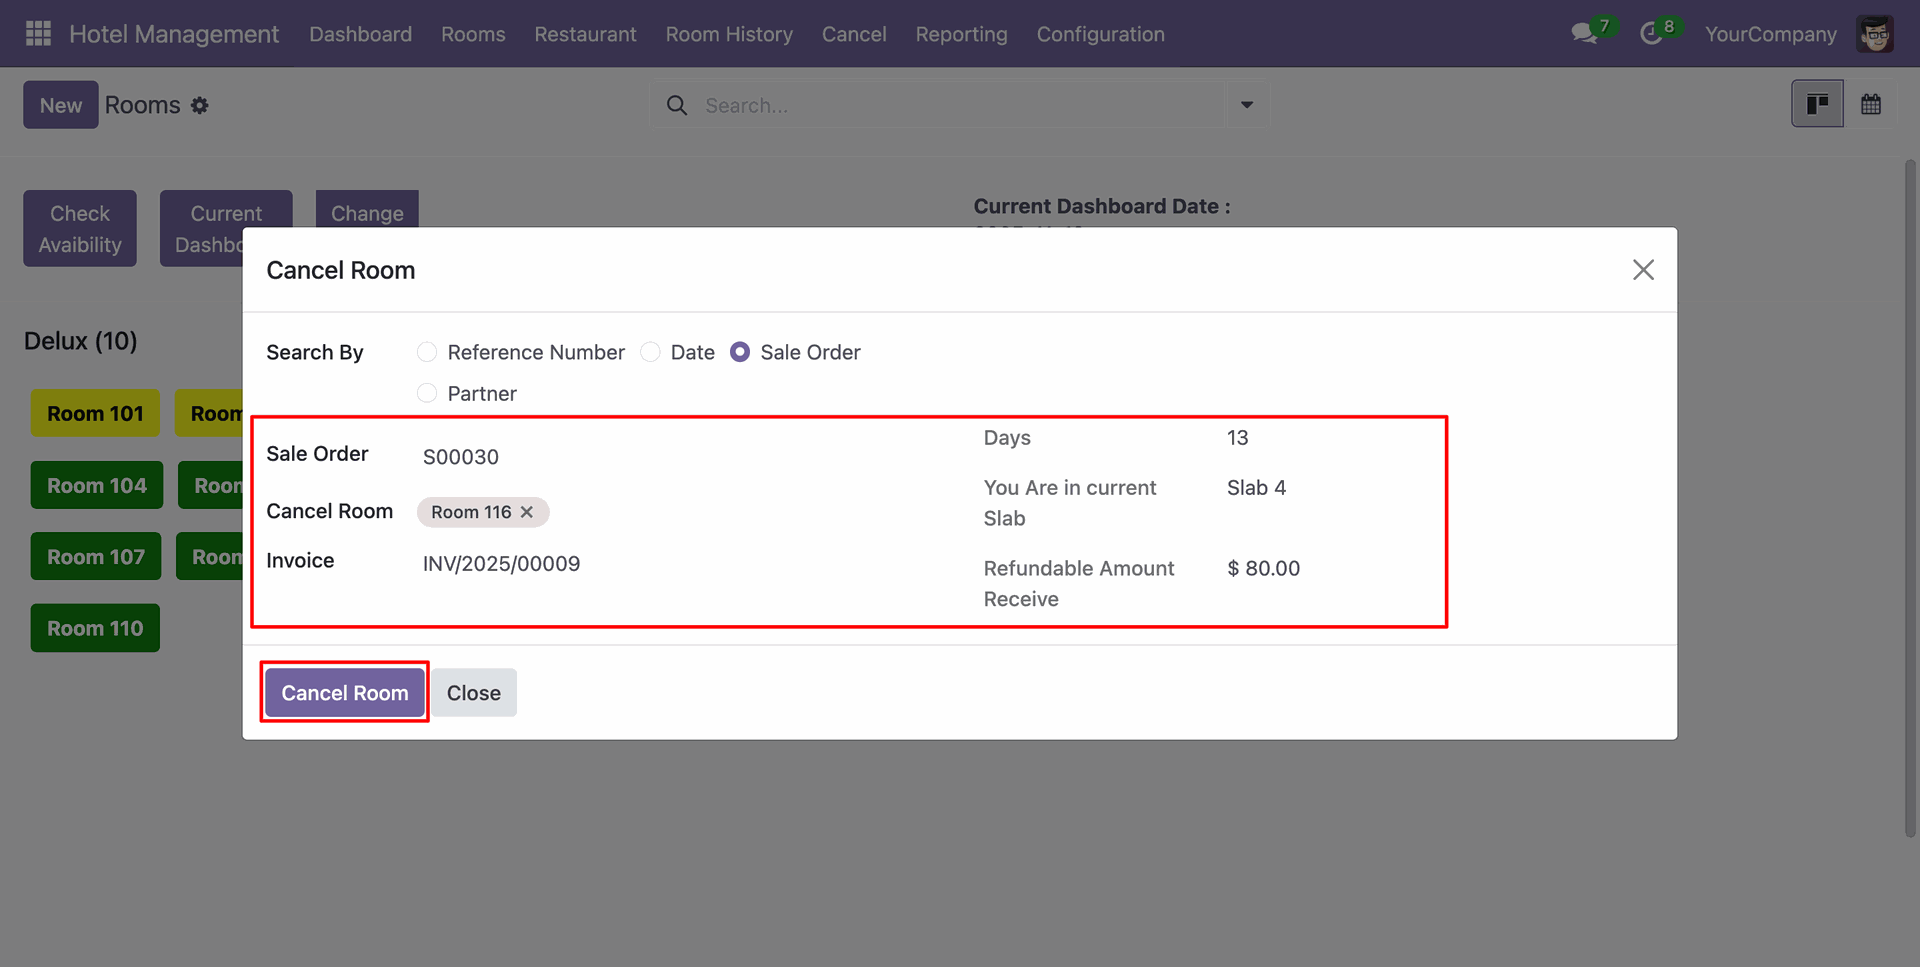
Select “Search By: Sale Order”, add the other details, and click on the “Cancel
Room”
button.
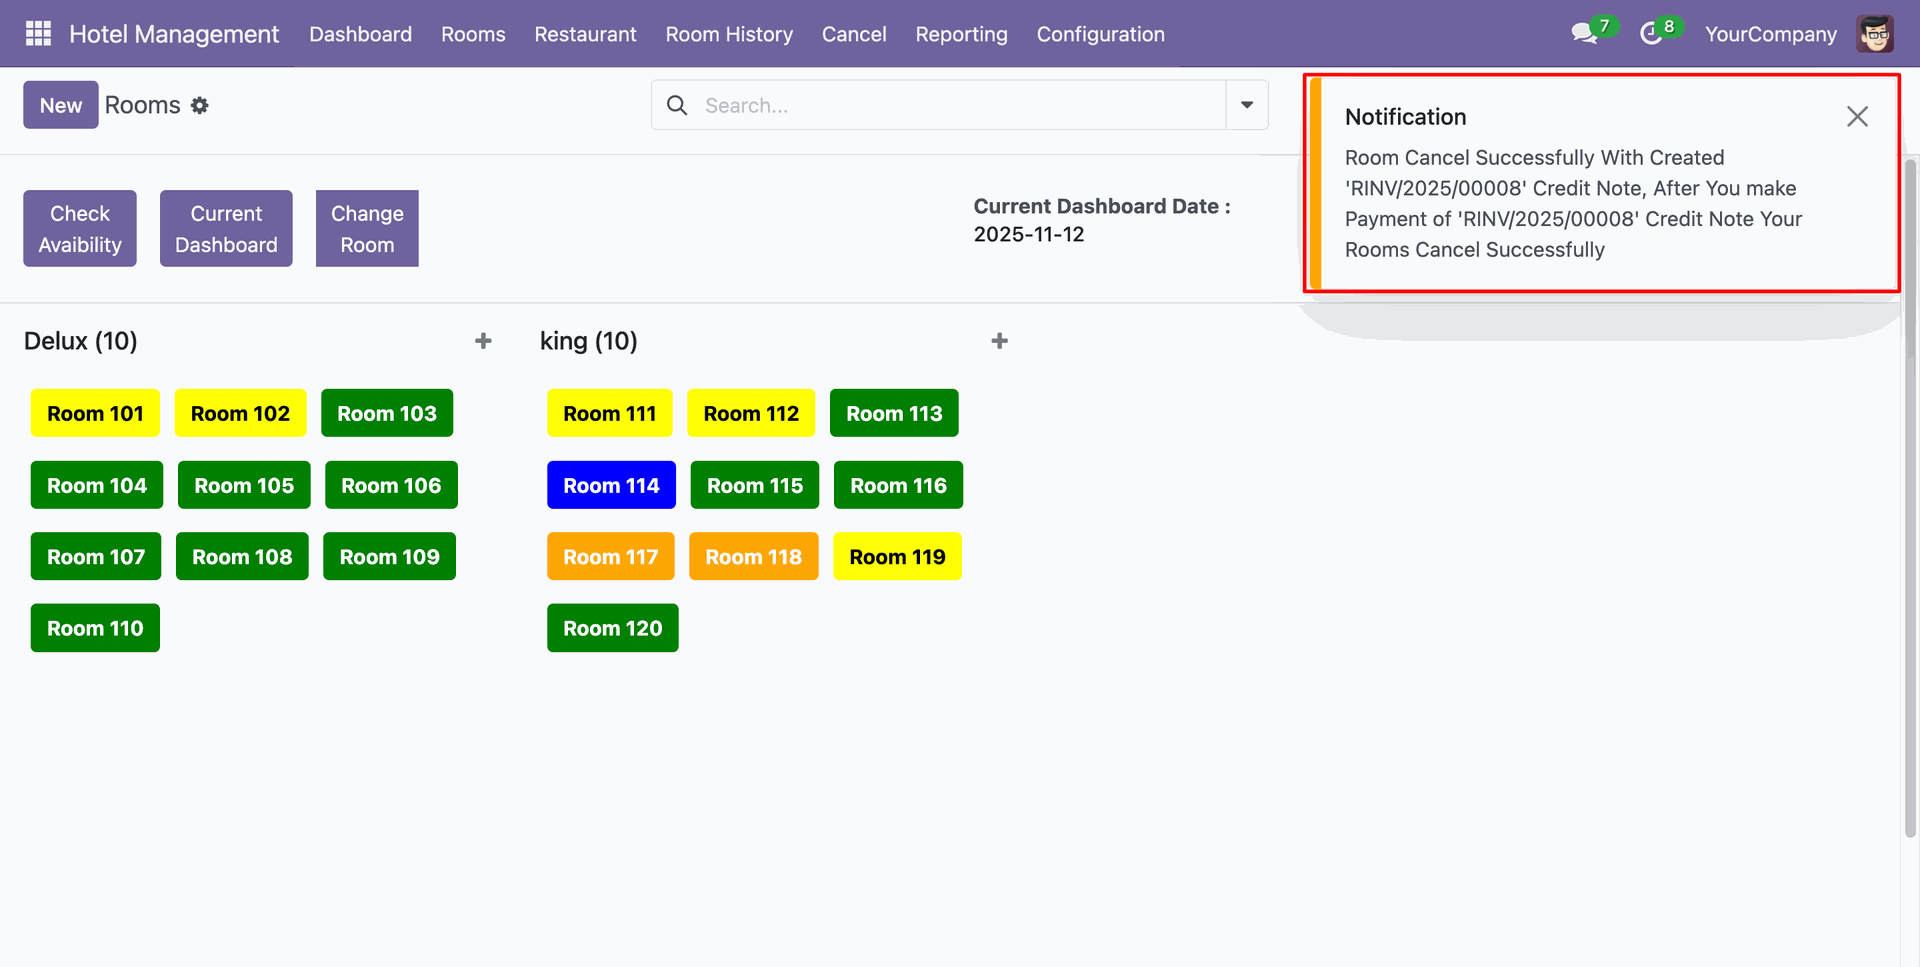
After that, a notification popup will appear saying “Room Cancel Successfully.”
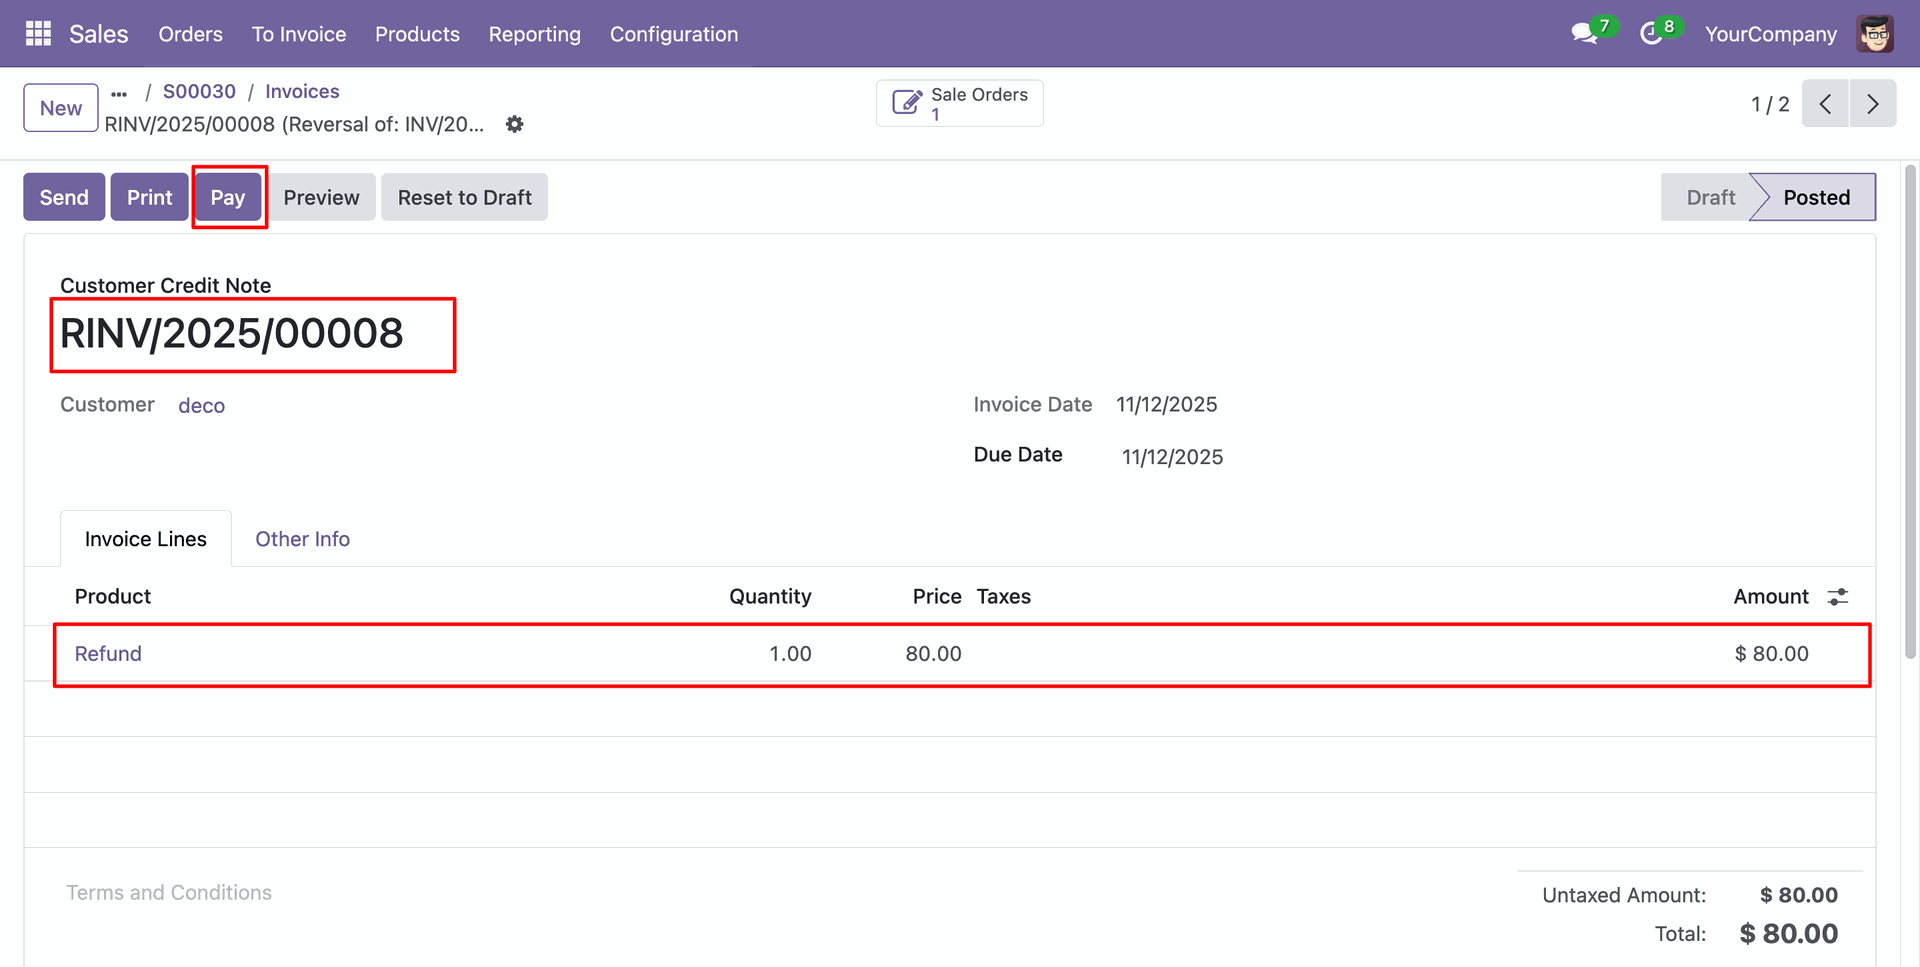
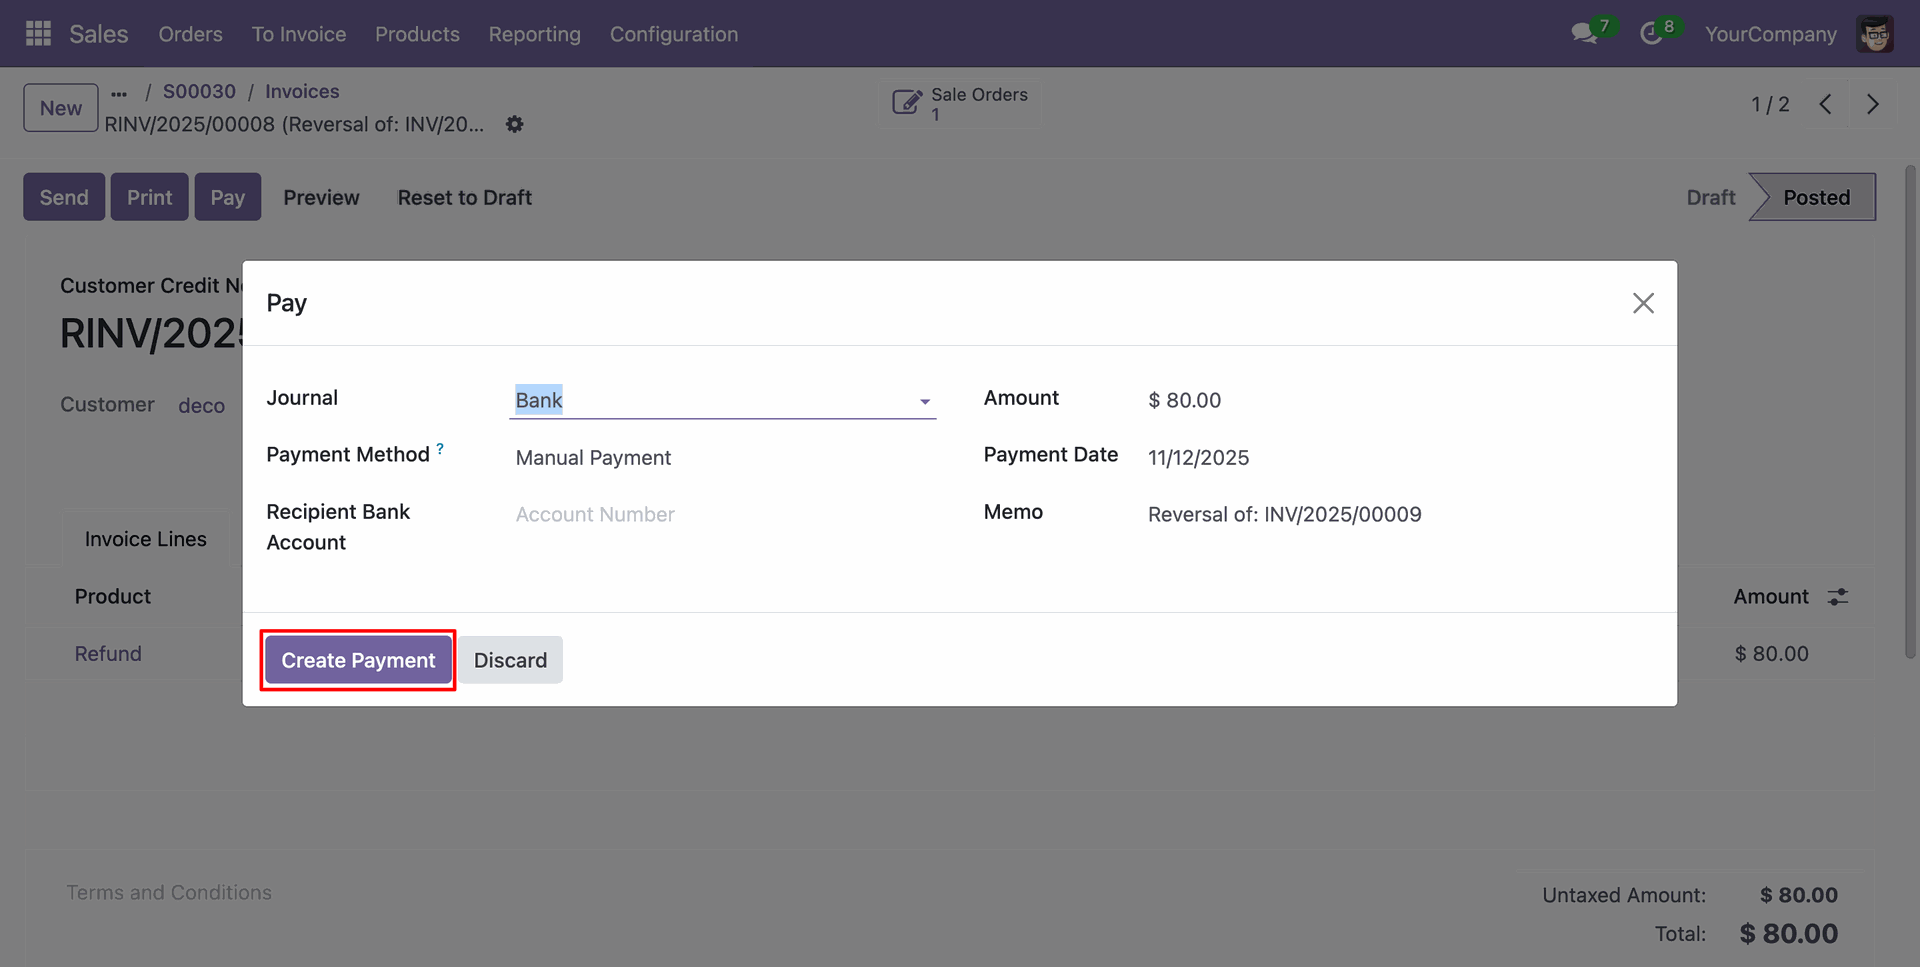
In the invoice form view, click on the “Pay” button.
Add details and click on the "Create Payment" button.
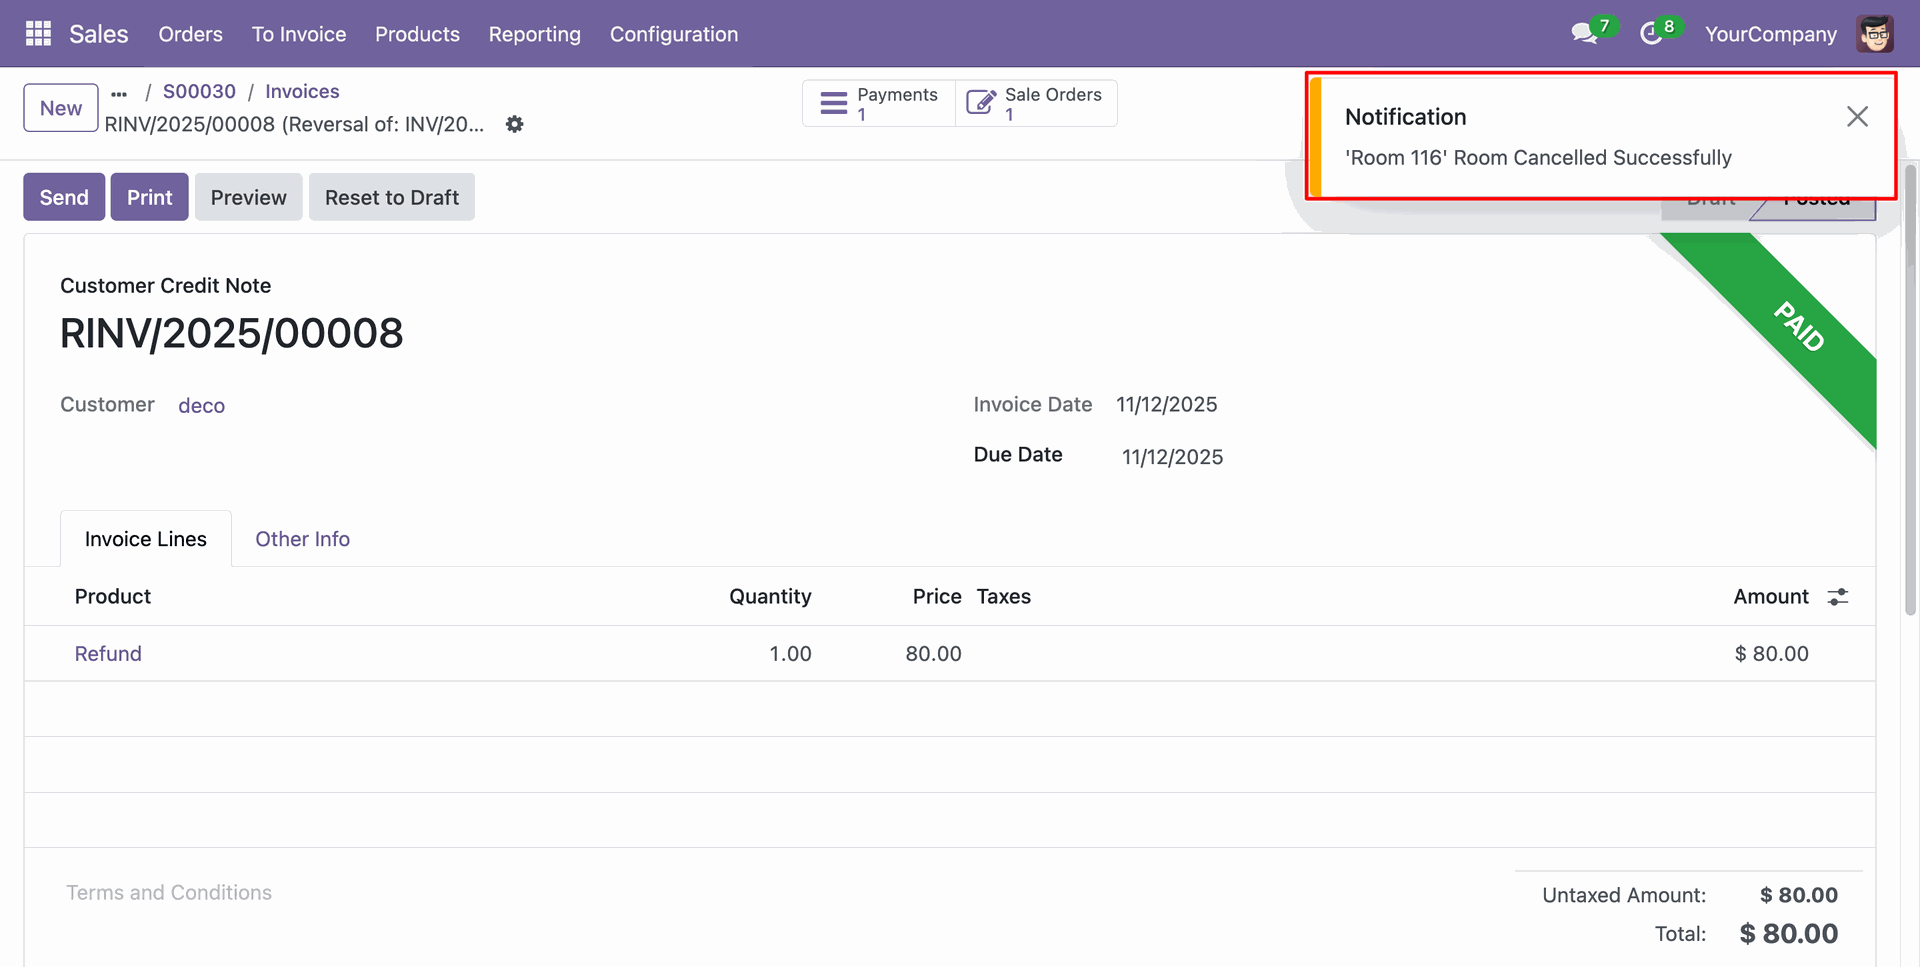
After that, a notification popup will appear saying “Room 116 Room Cancel Successfully.”
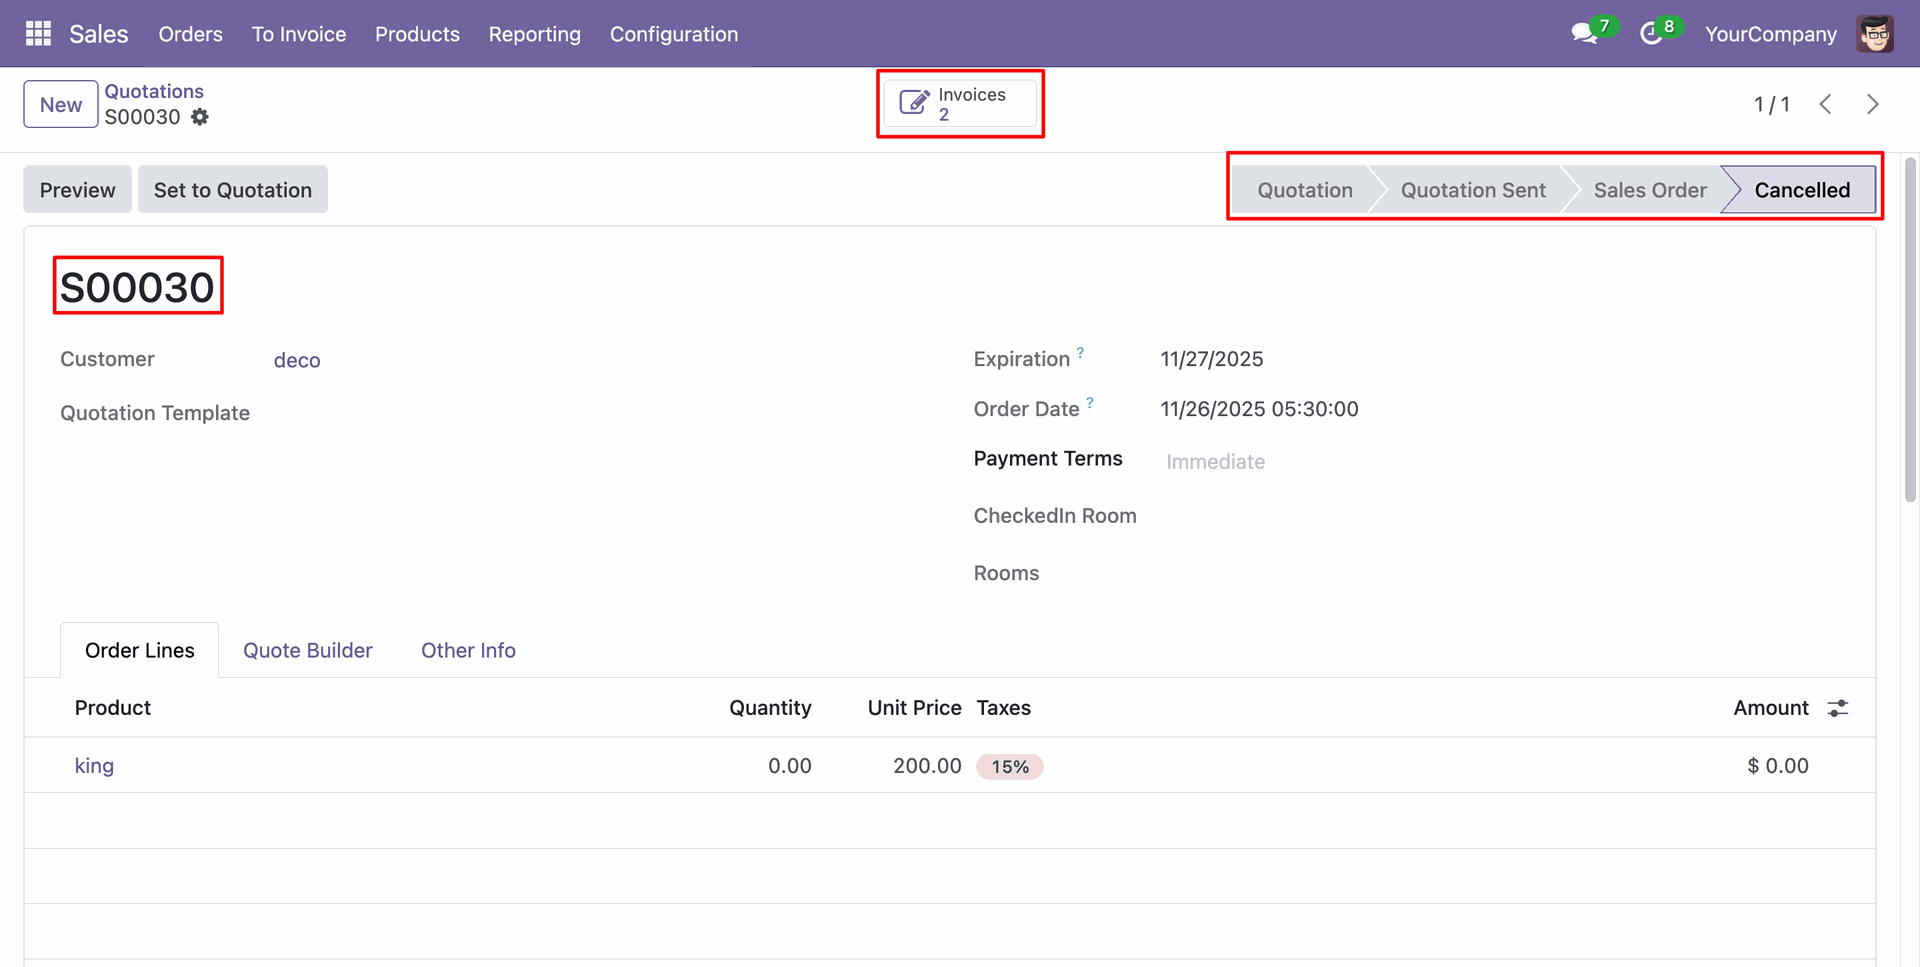
Now, the Sales Order has moved to the “Cancelled” stage, and you can find the two invoices under the “Invoices” smart button.
Click on the room you want to book.
Add details and click on the "Book Room" buton.

To check in, click on the "CheckIn Room" button.
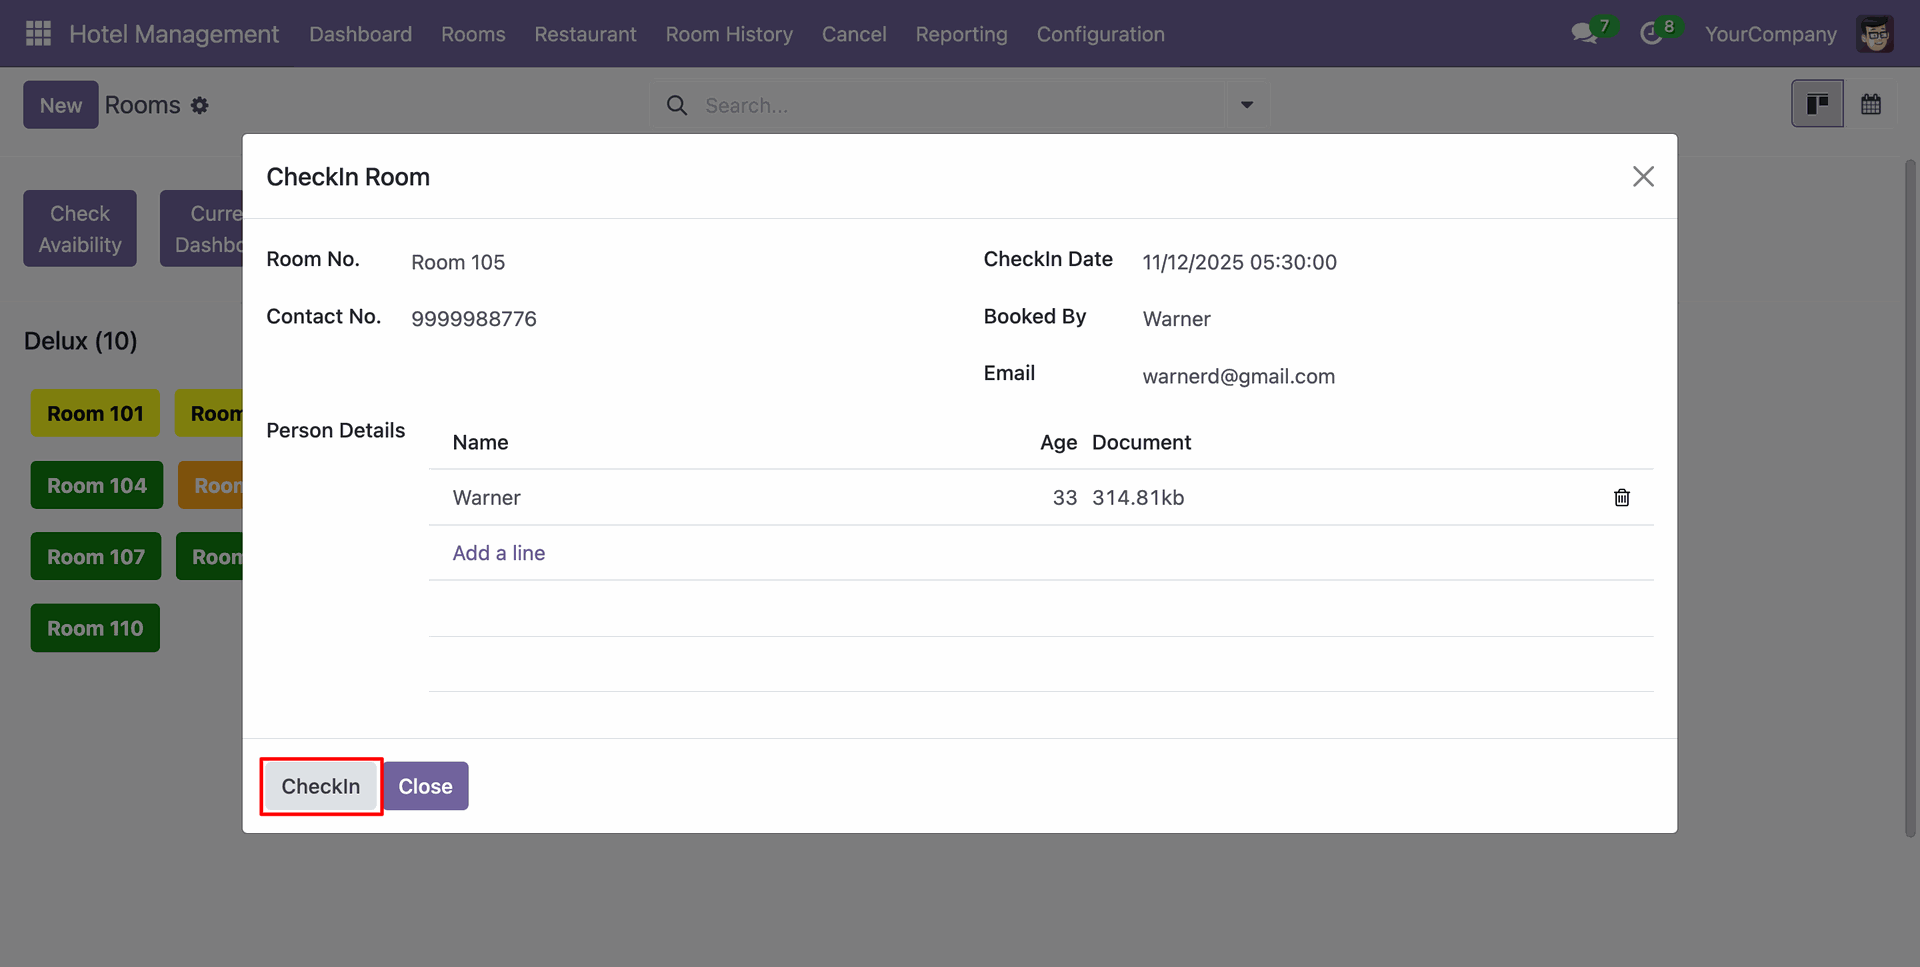
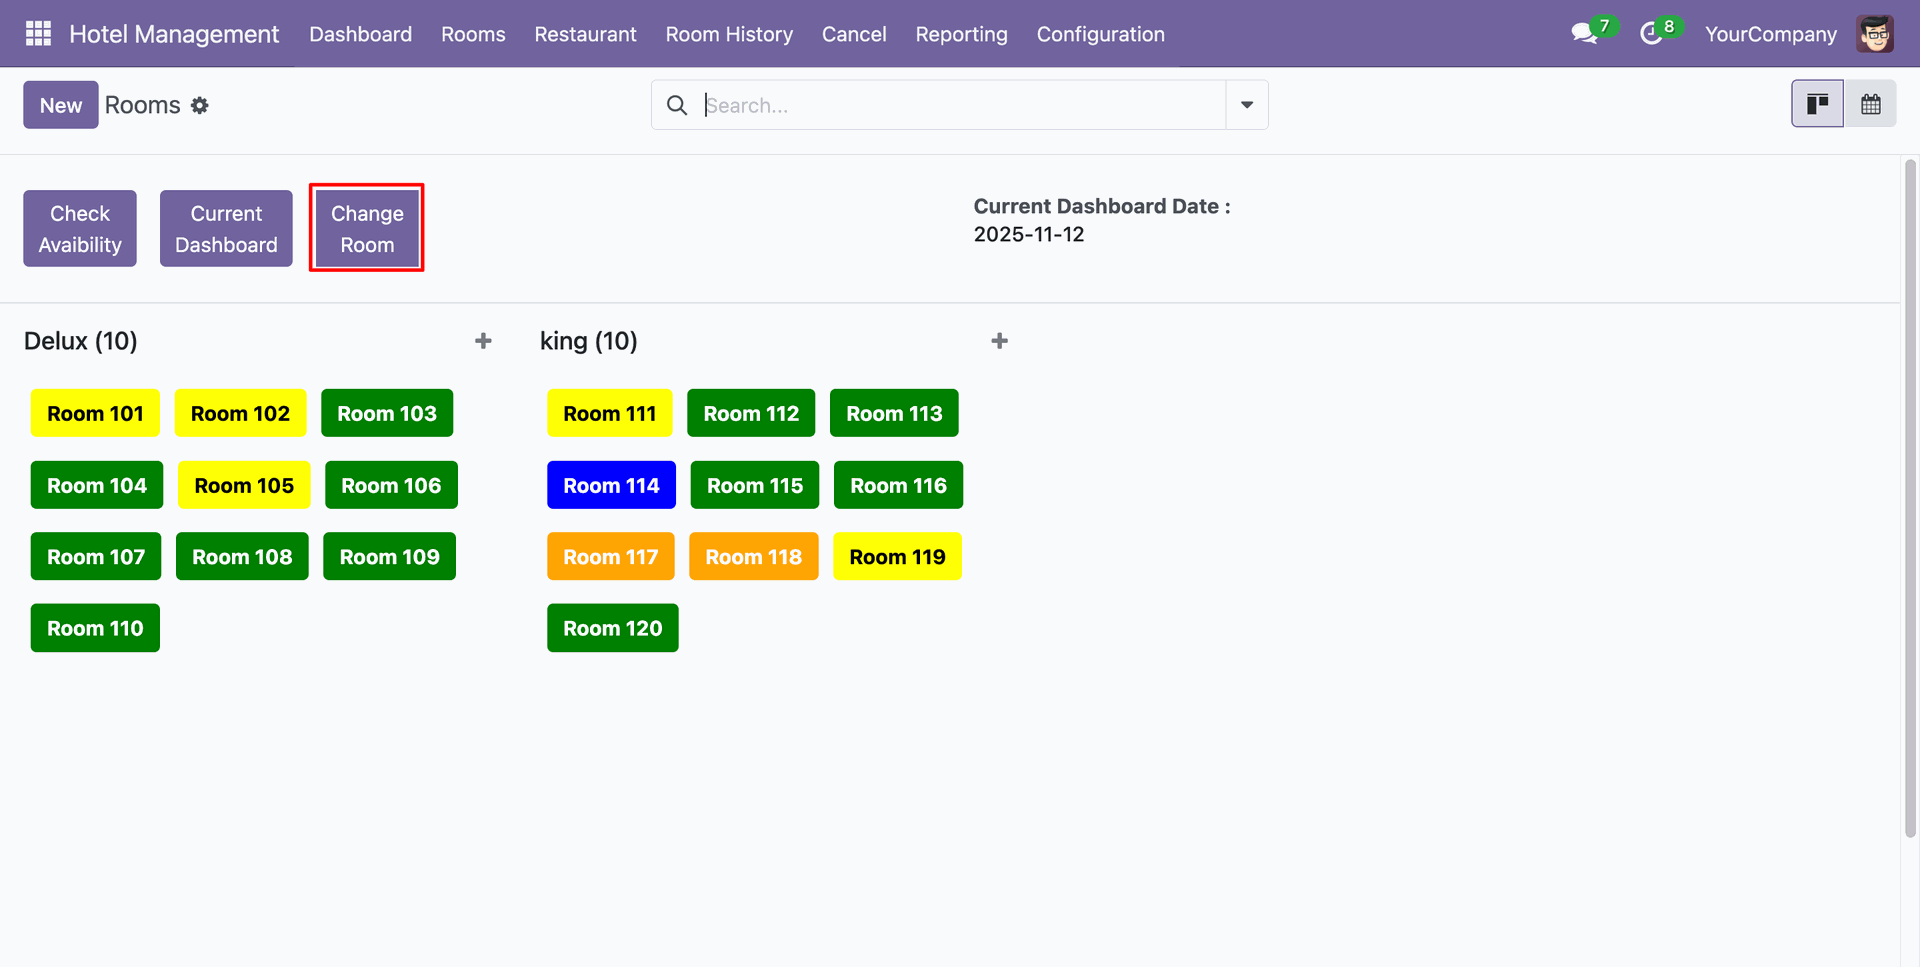
If you want to change the room, click on the “Change Room” button.
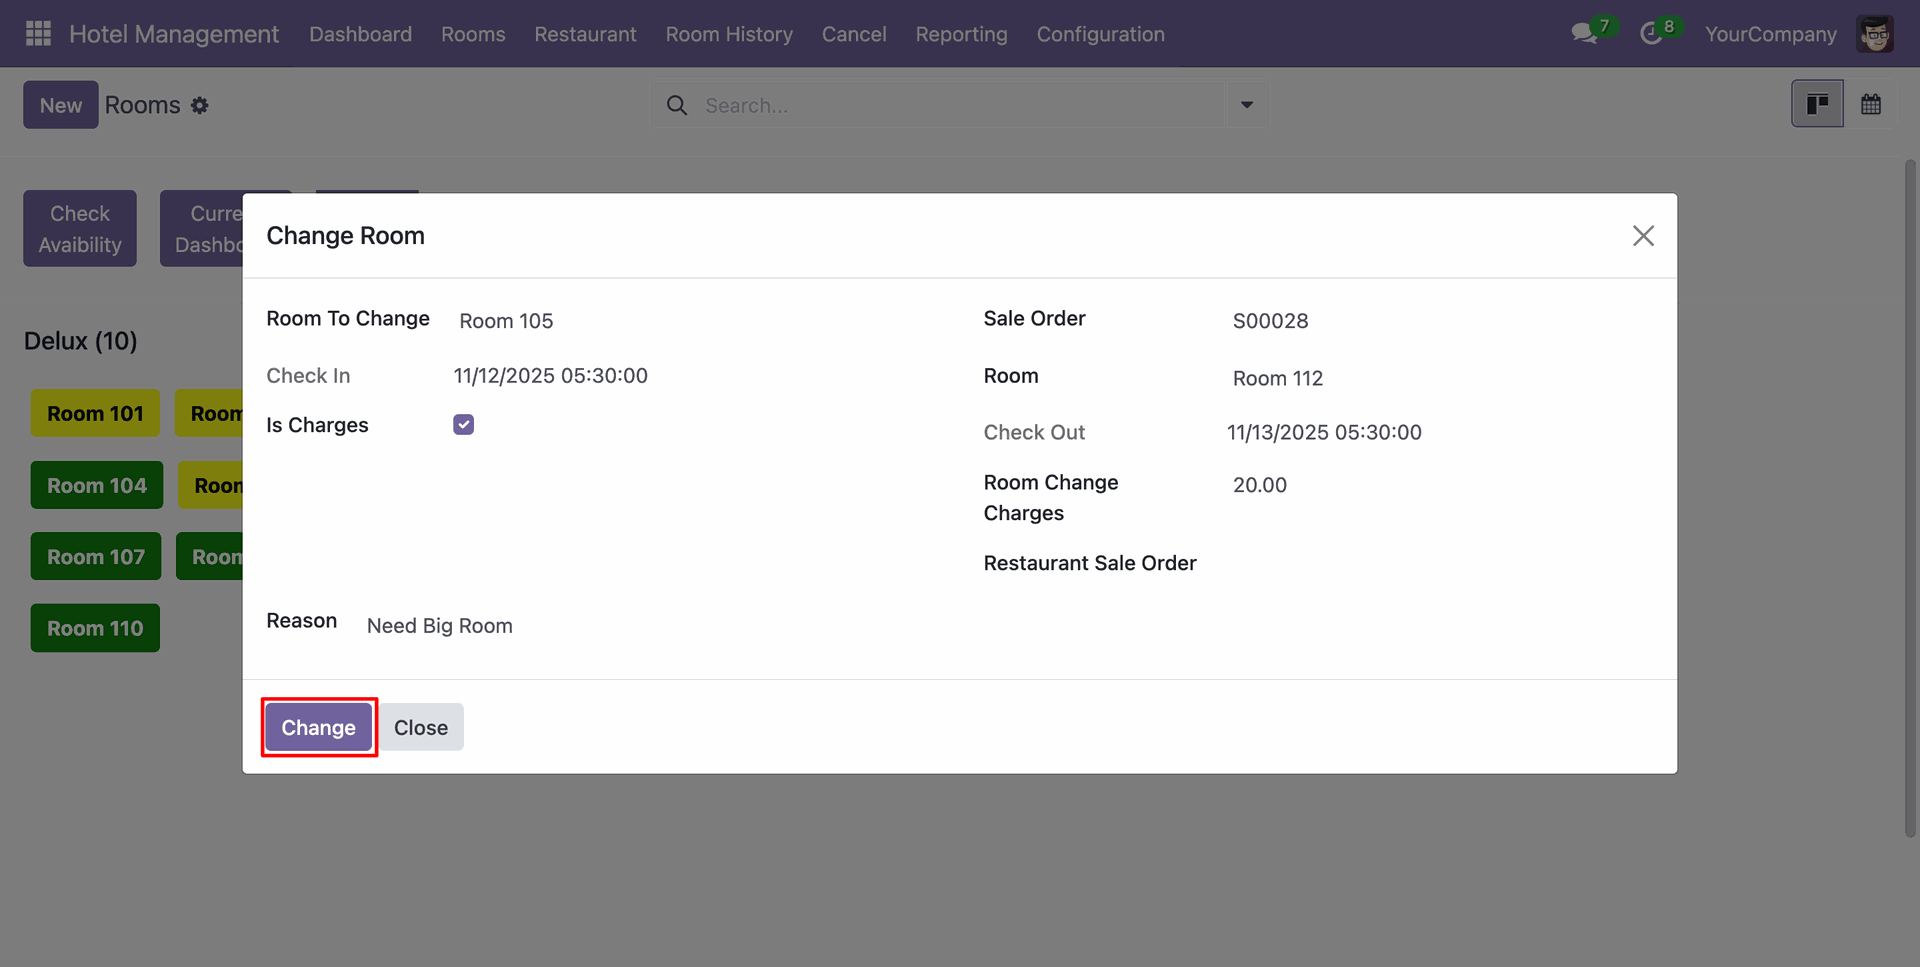
Add the other details, and click on the “Change” button.
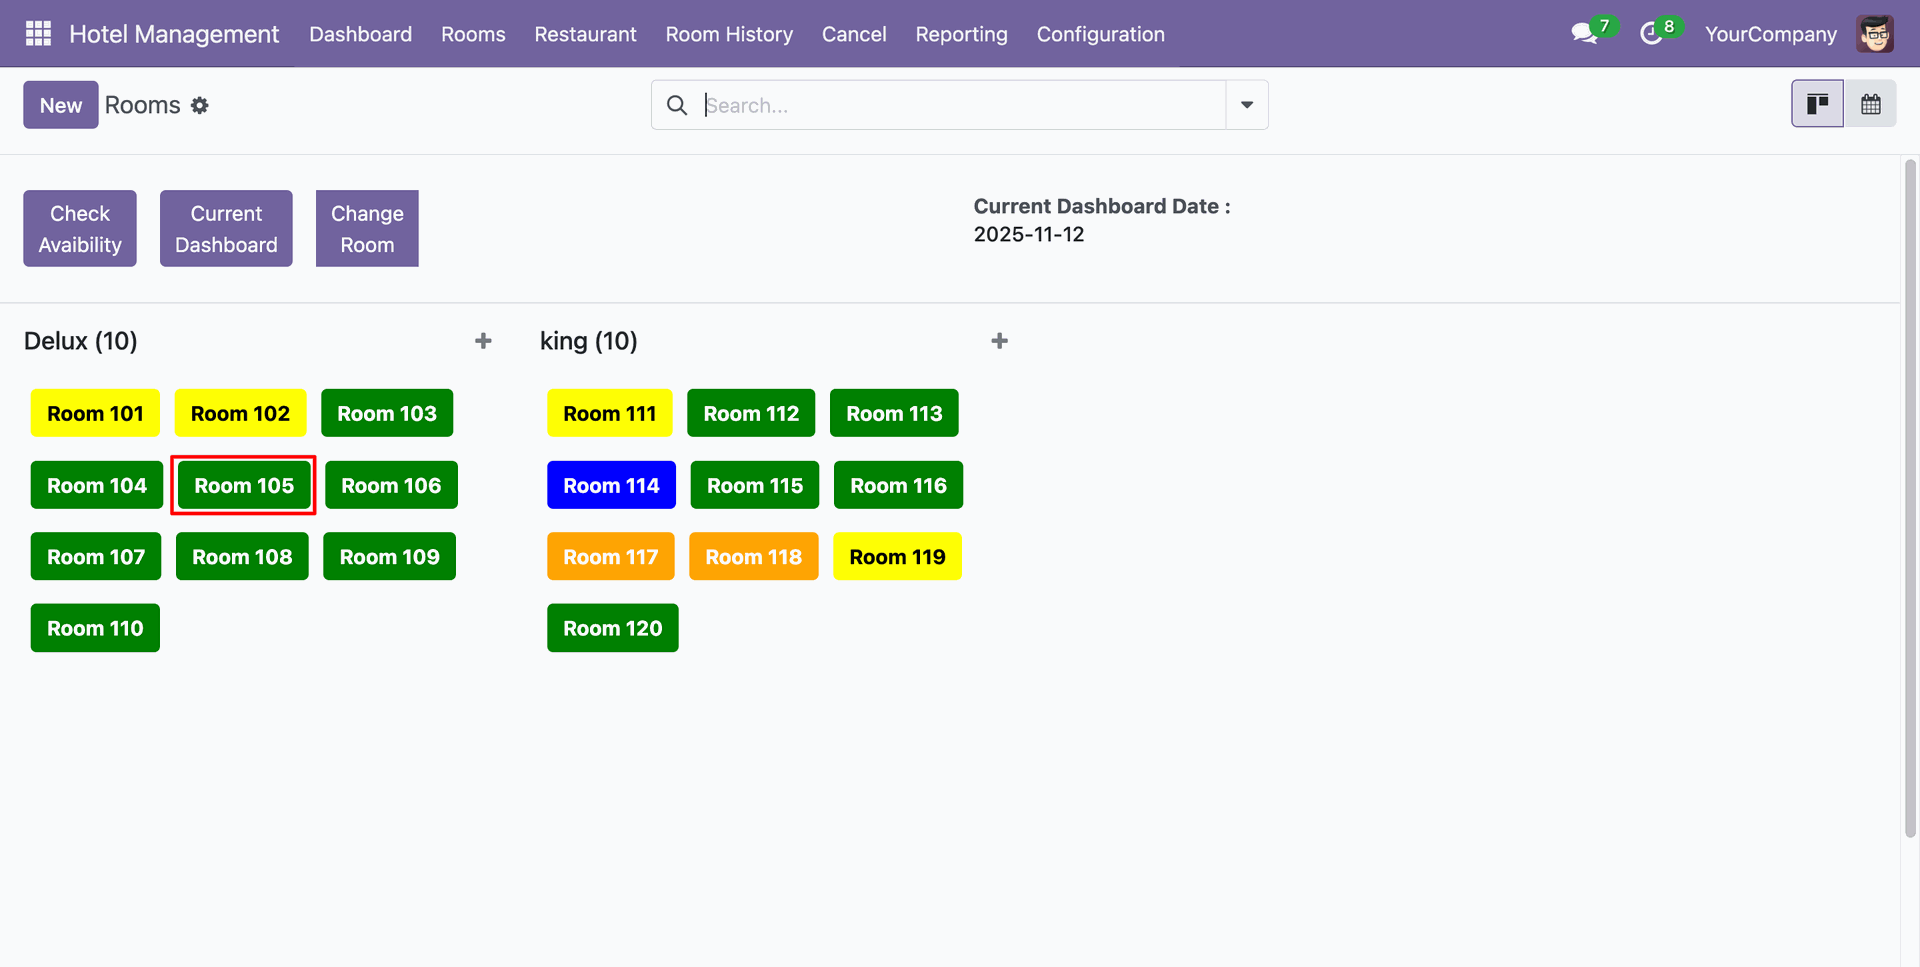
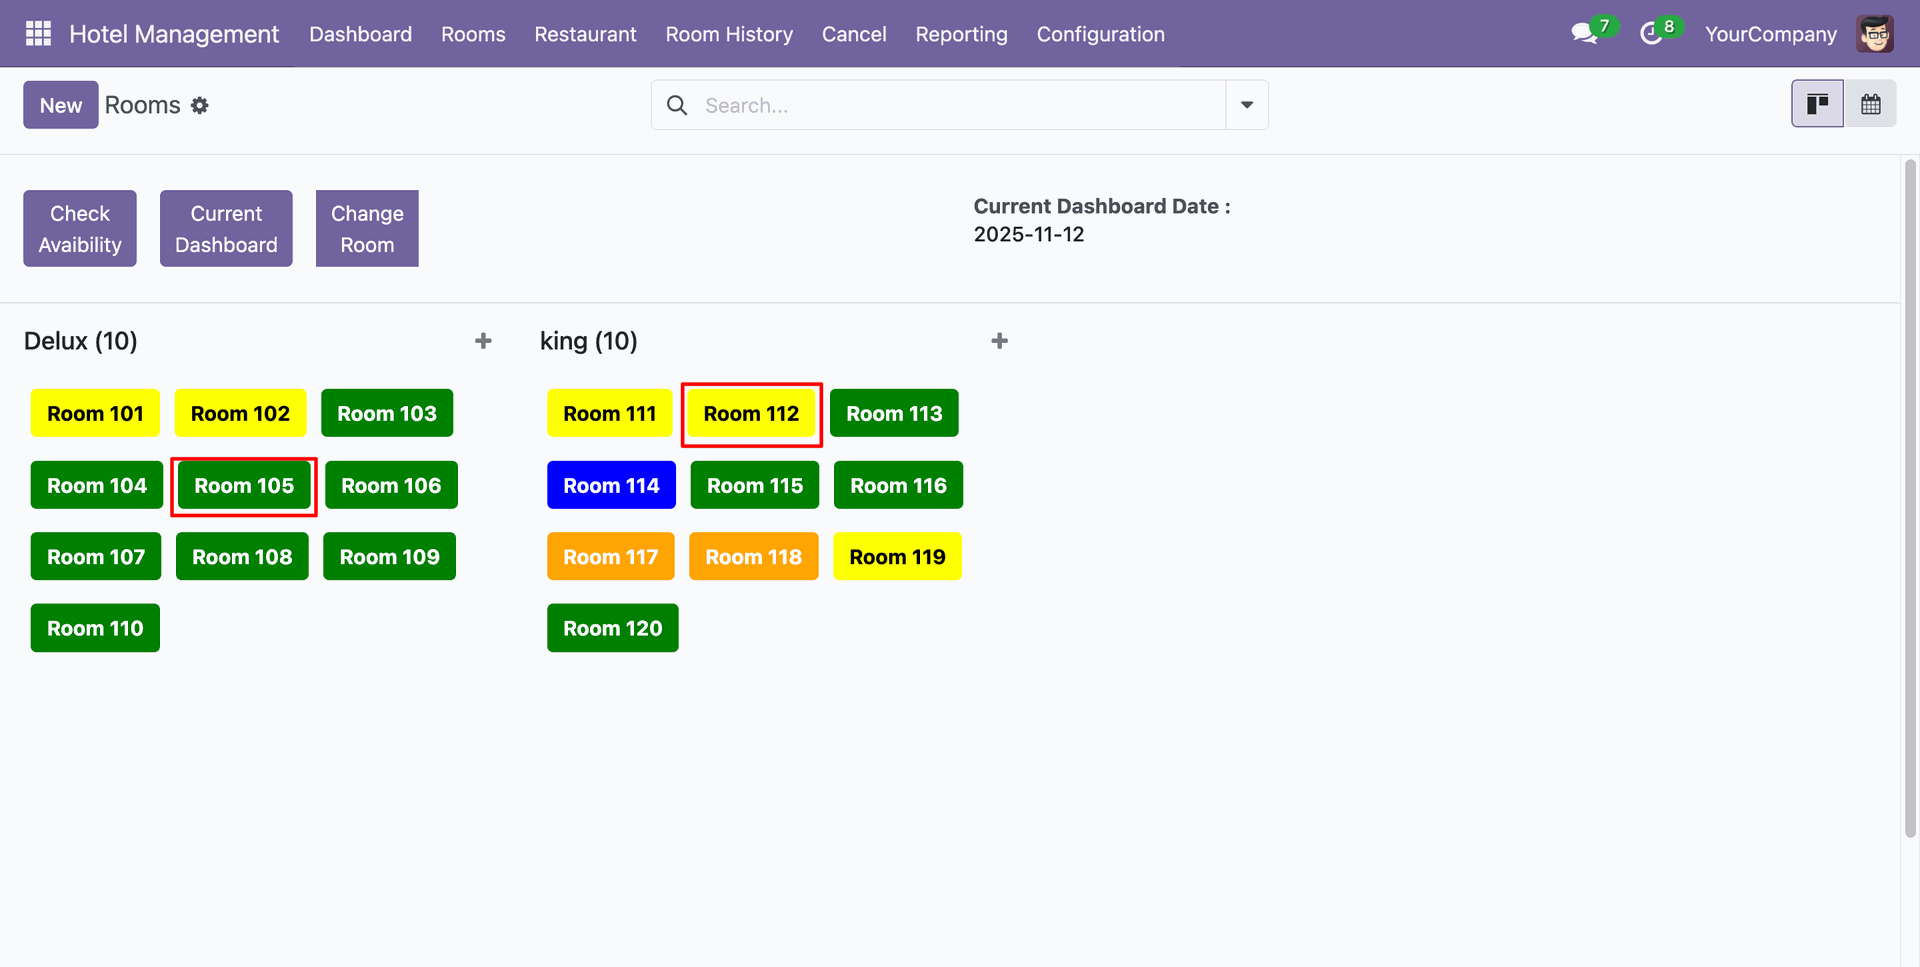
Here, you can see that "Room 105" is now available for booking, and "Room 112" is marked as Checked In.
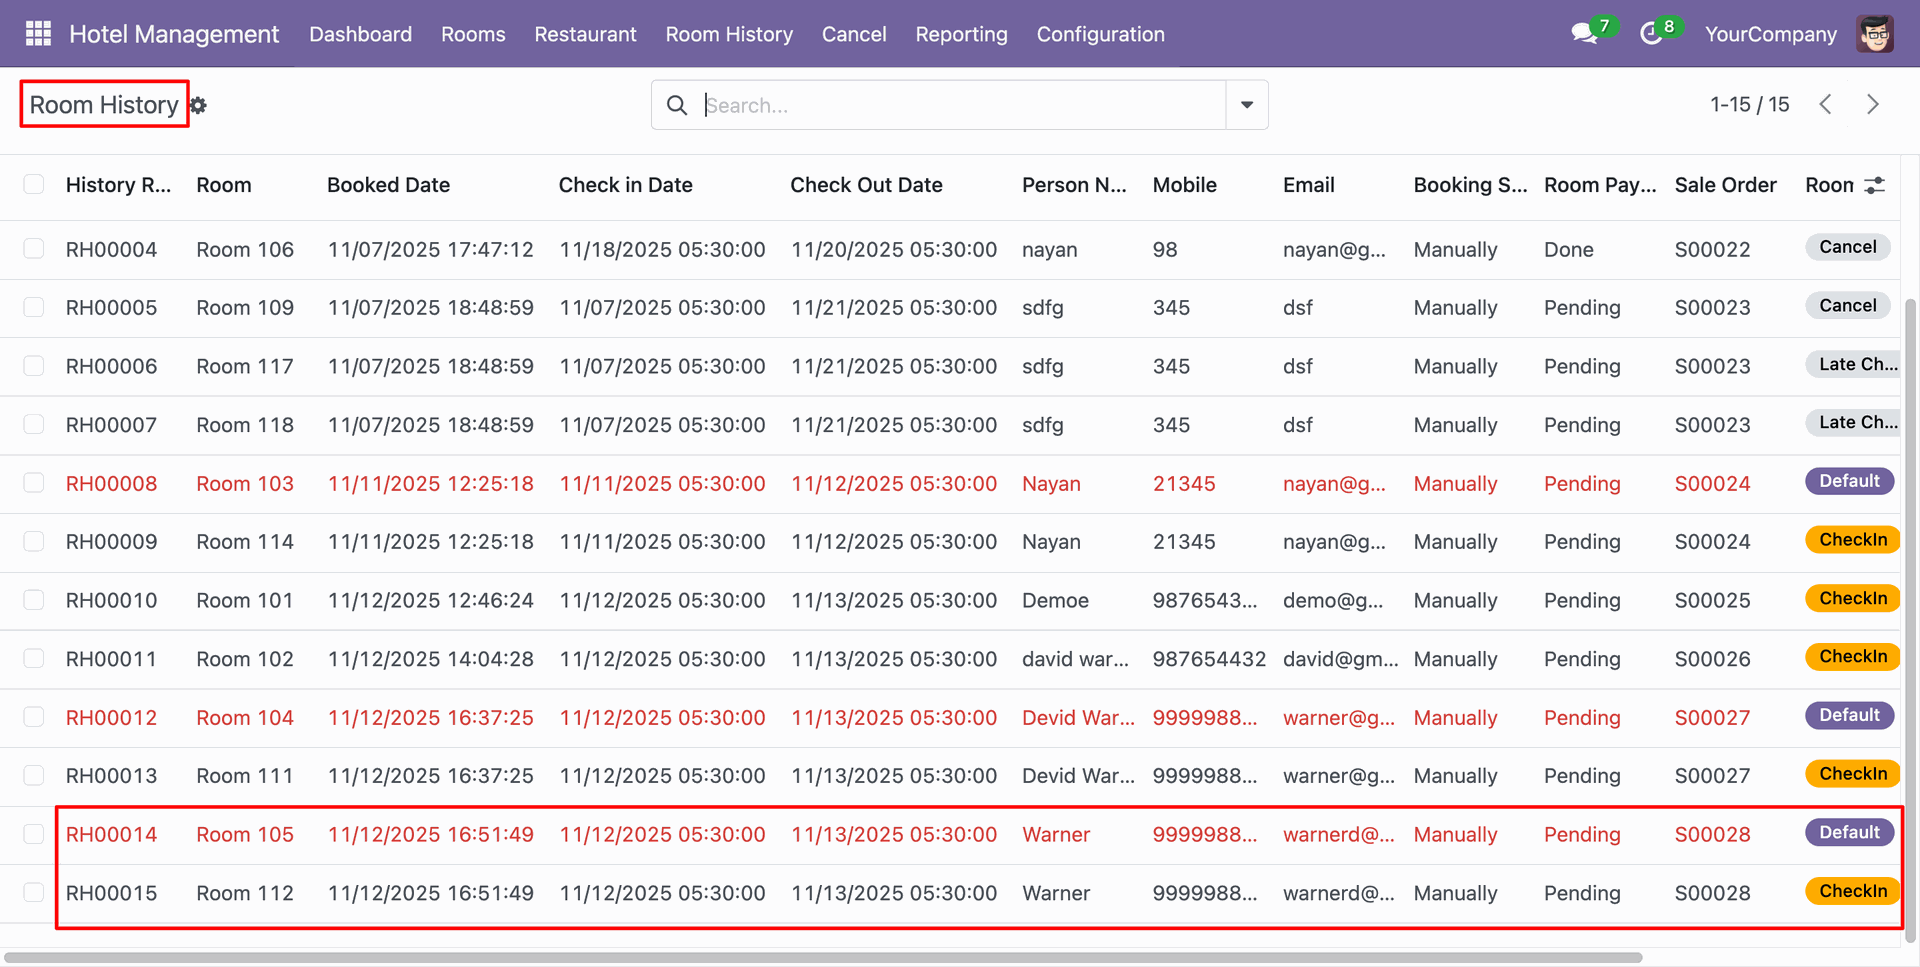
Here you can see the room history.
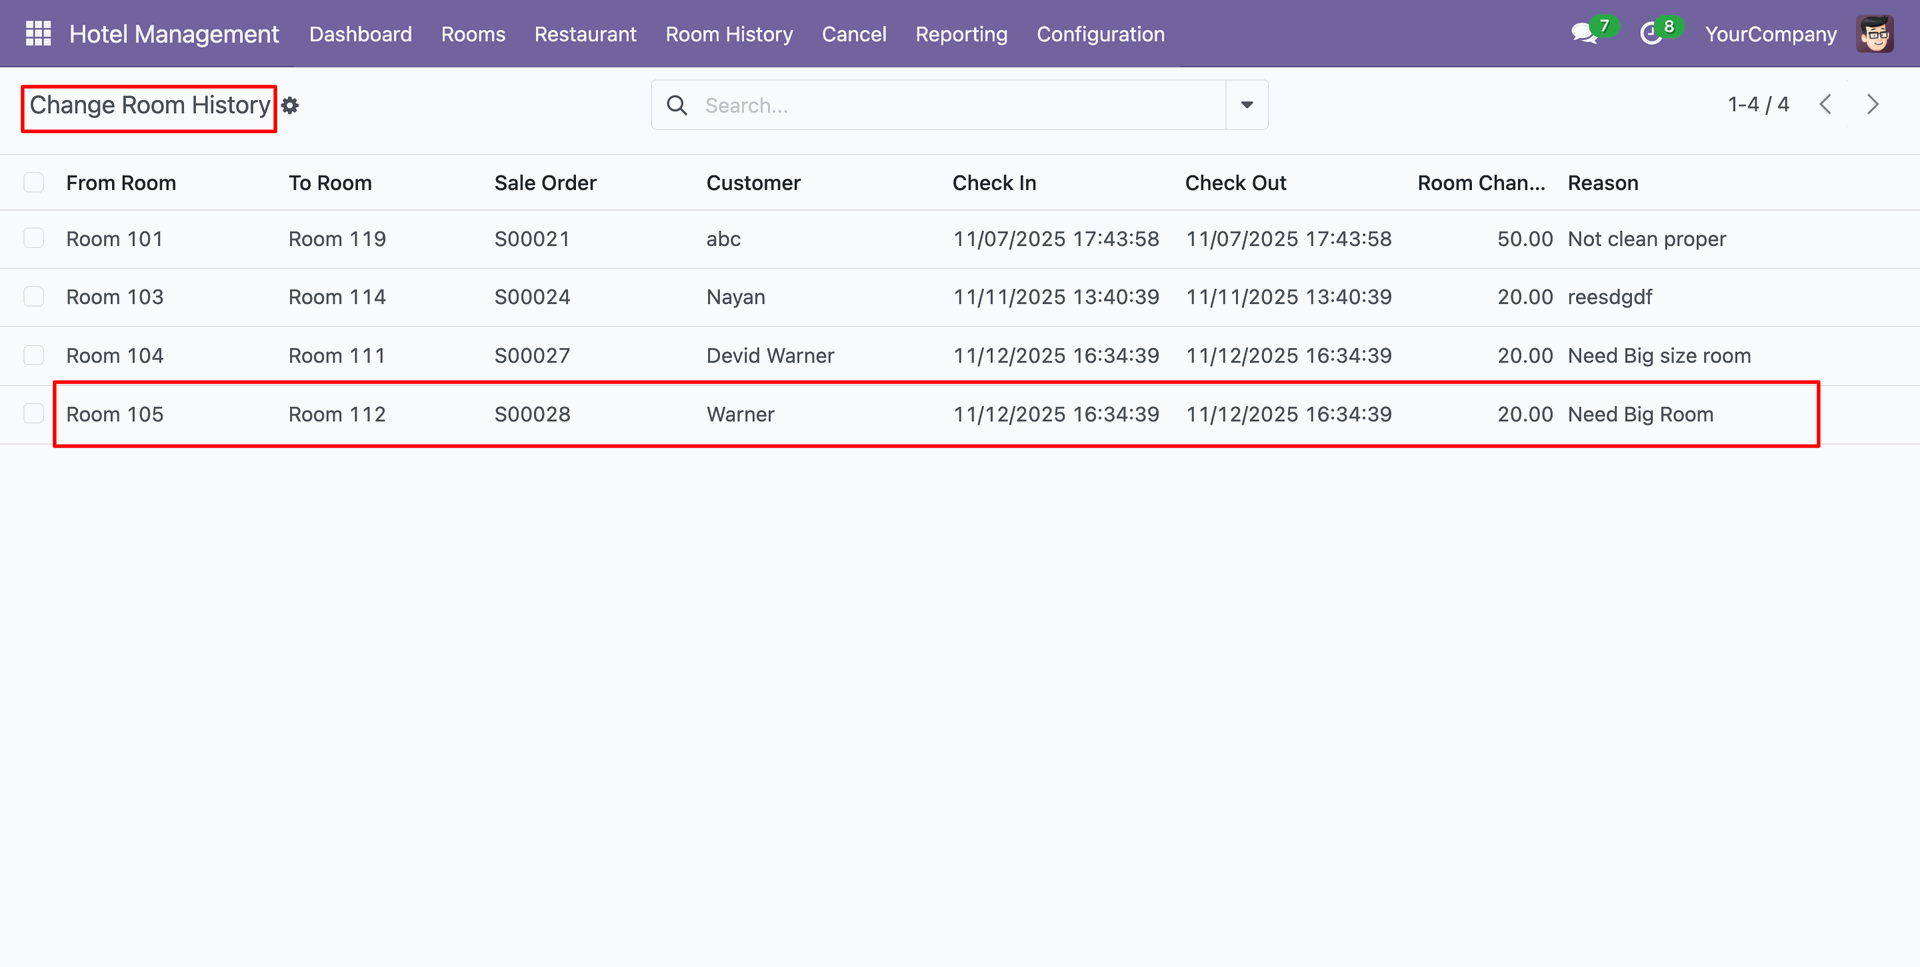
Here you can see teh Room Change History.
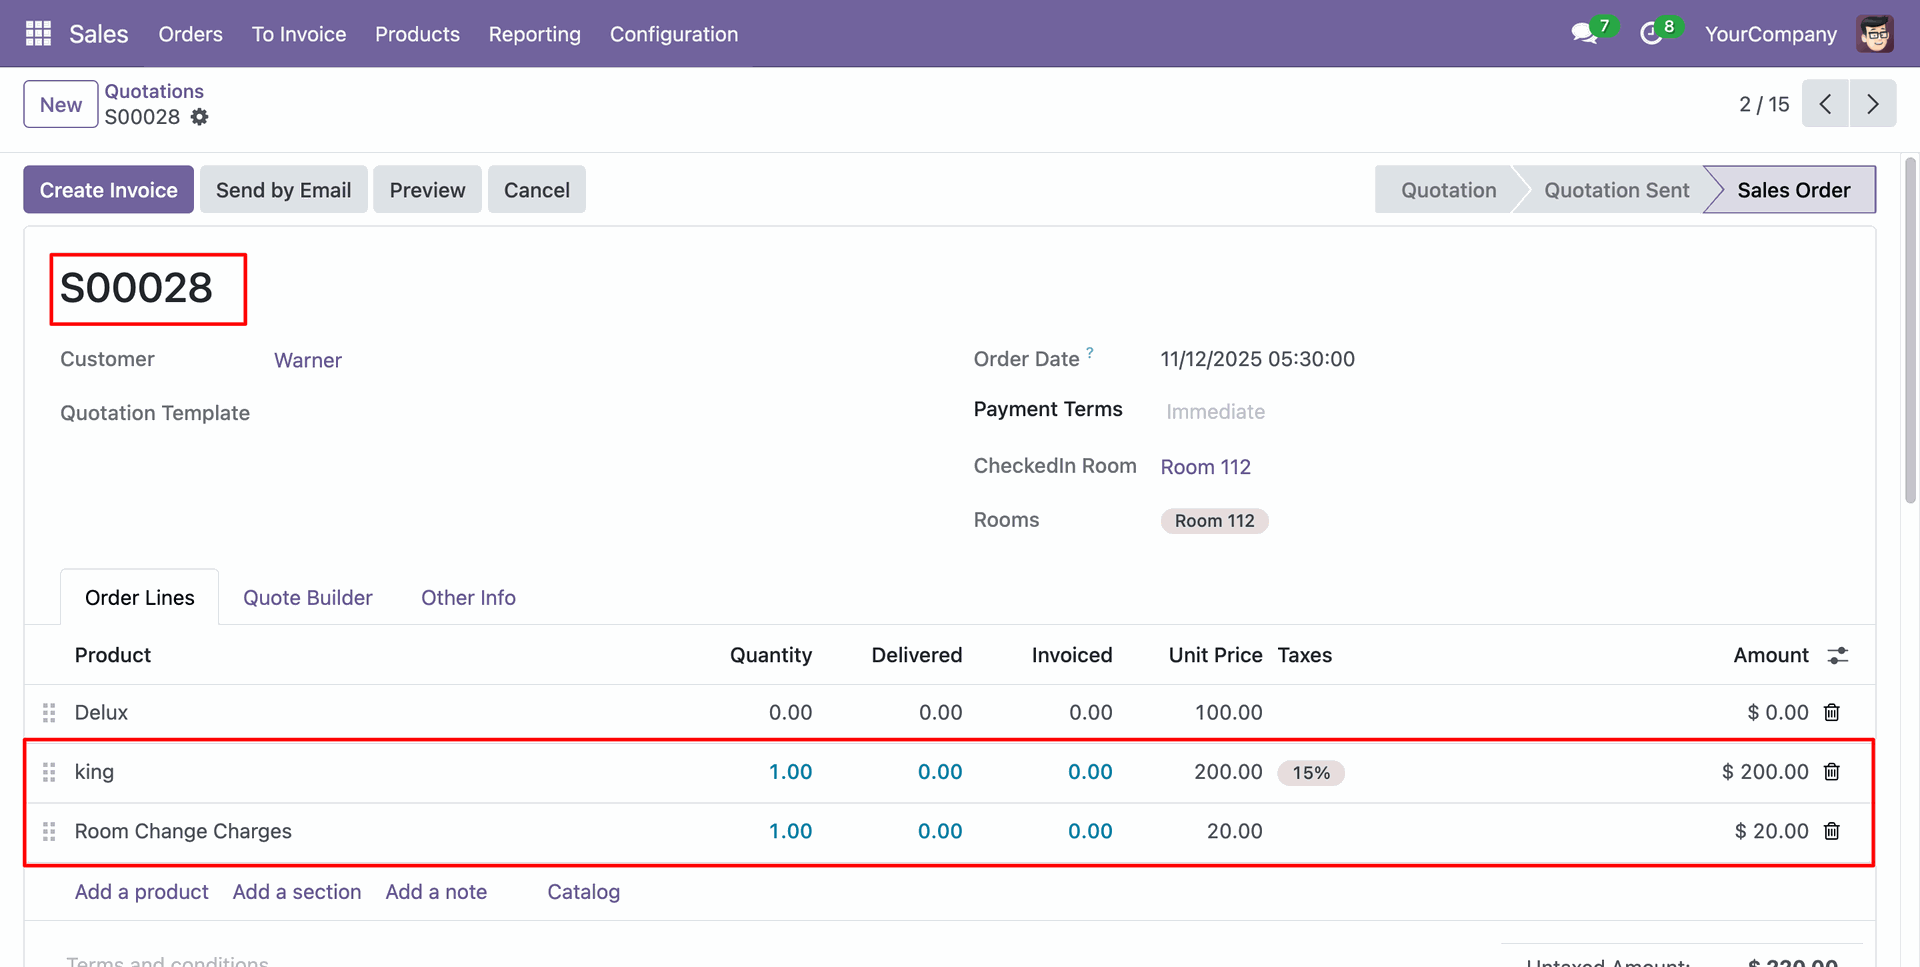
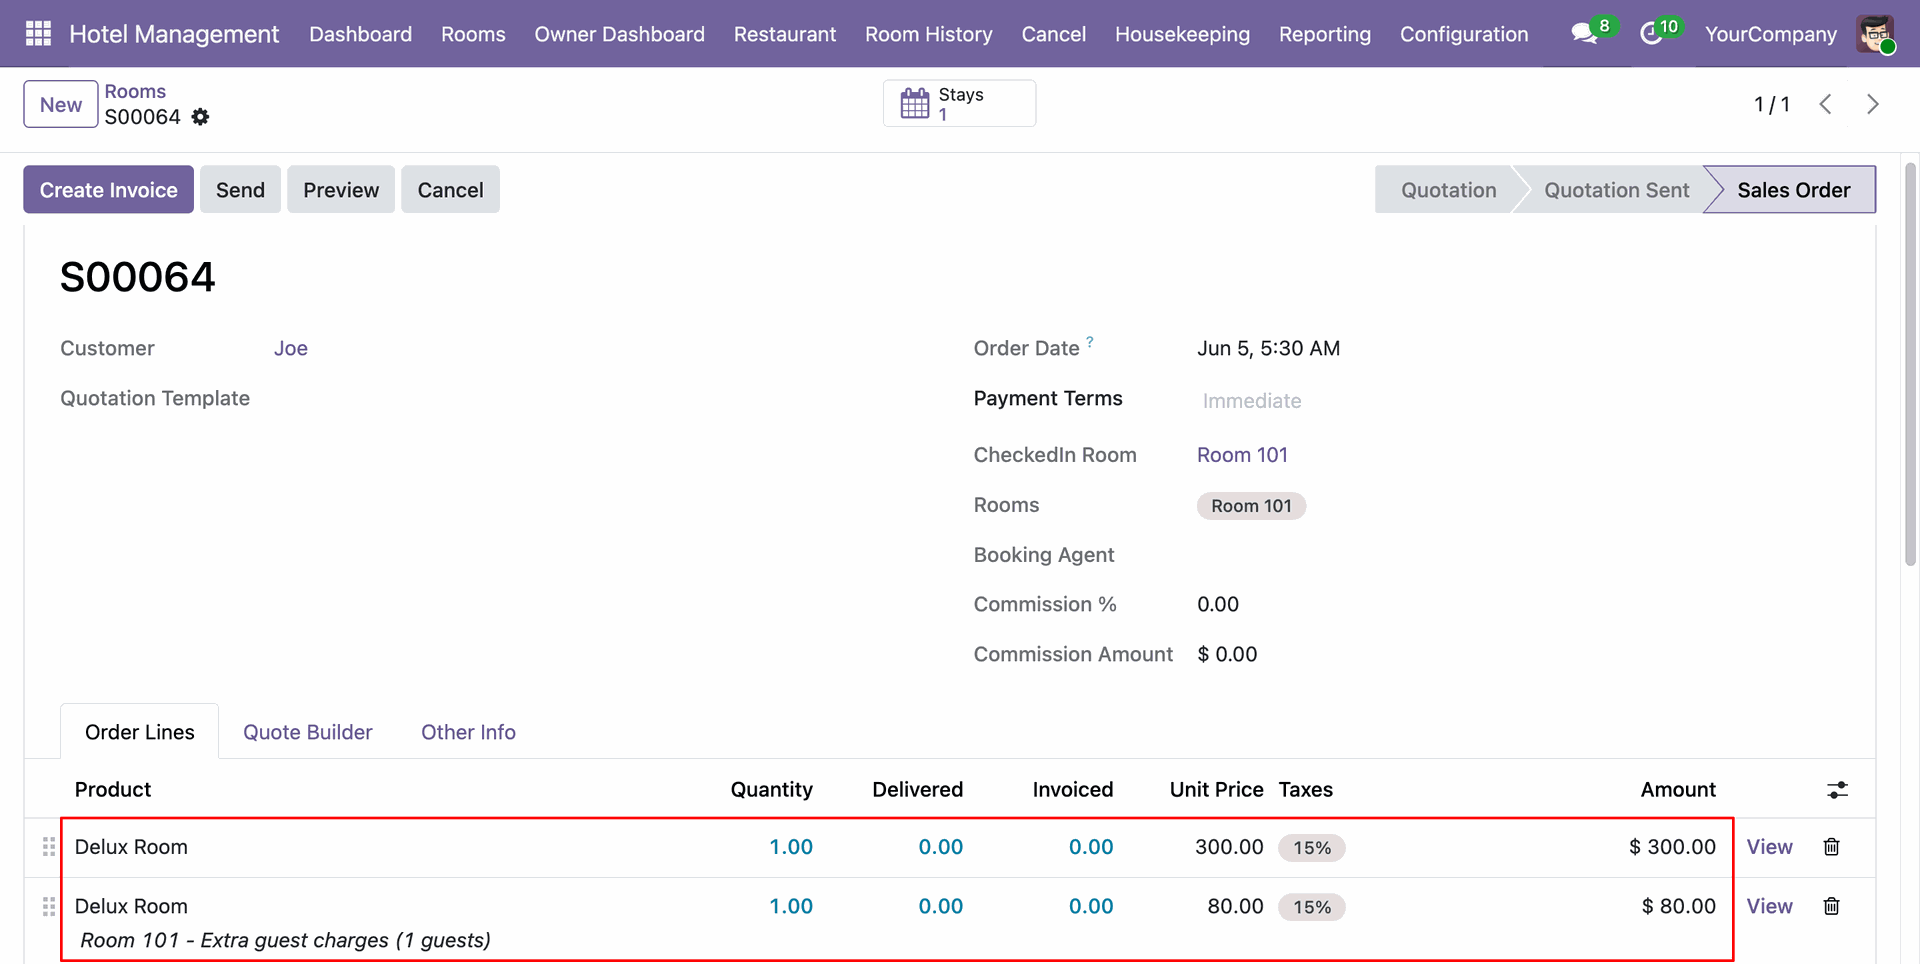
You can view the room price and room change charges in the Sales Order.
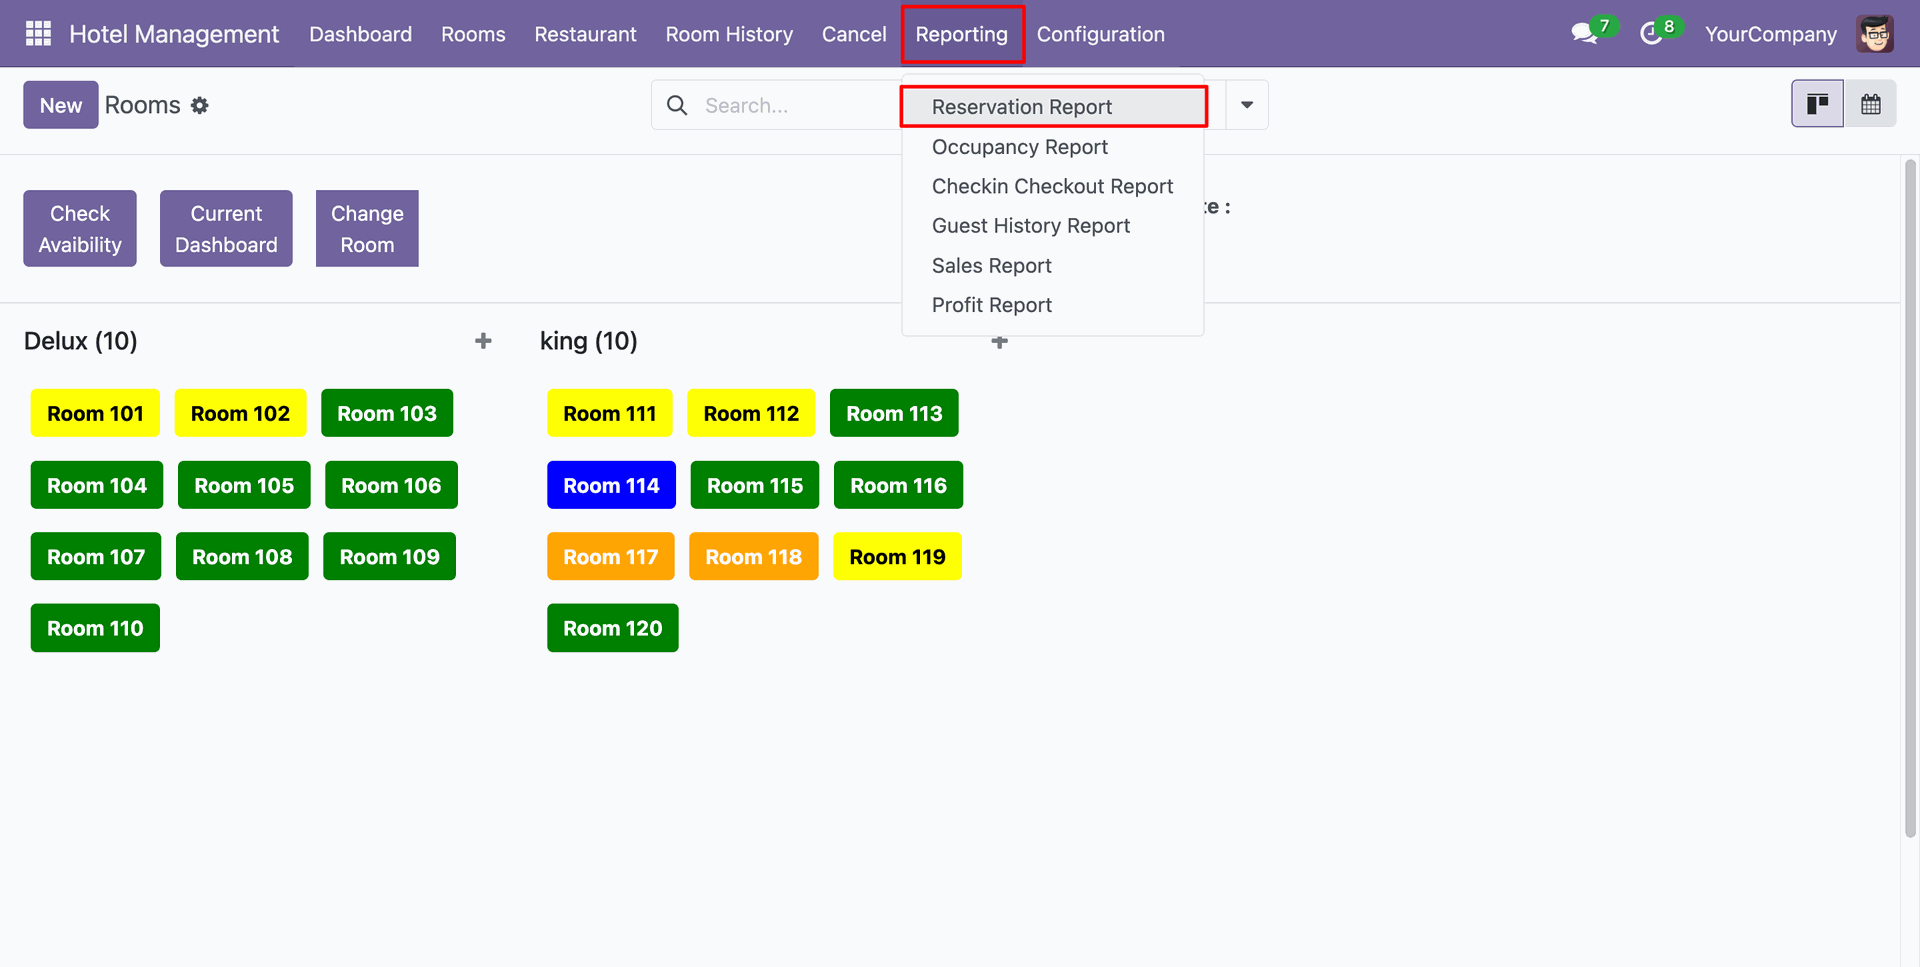
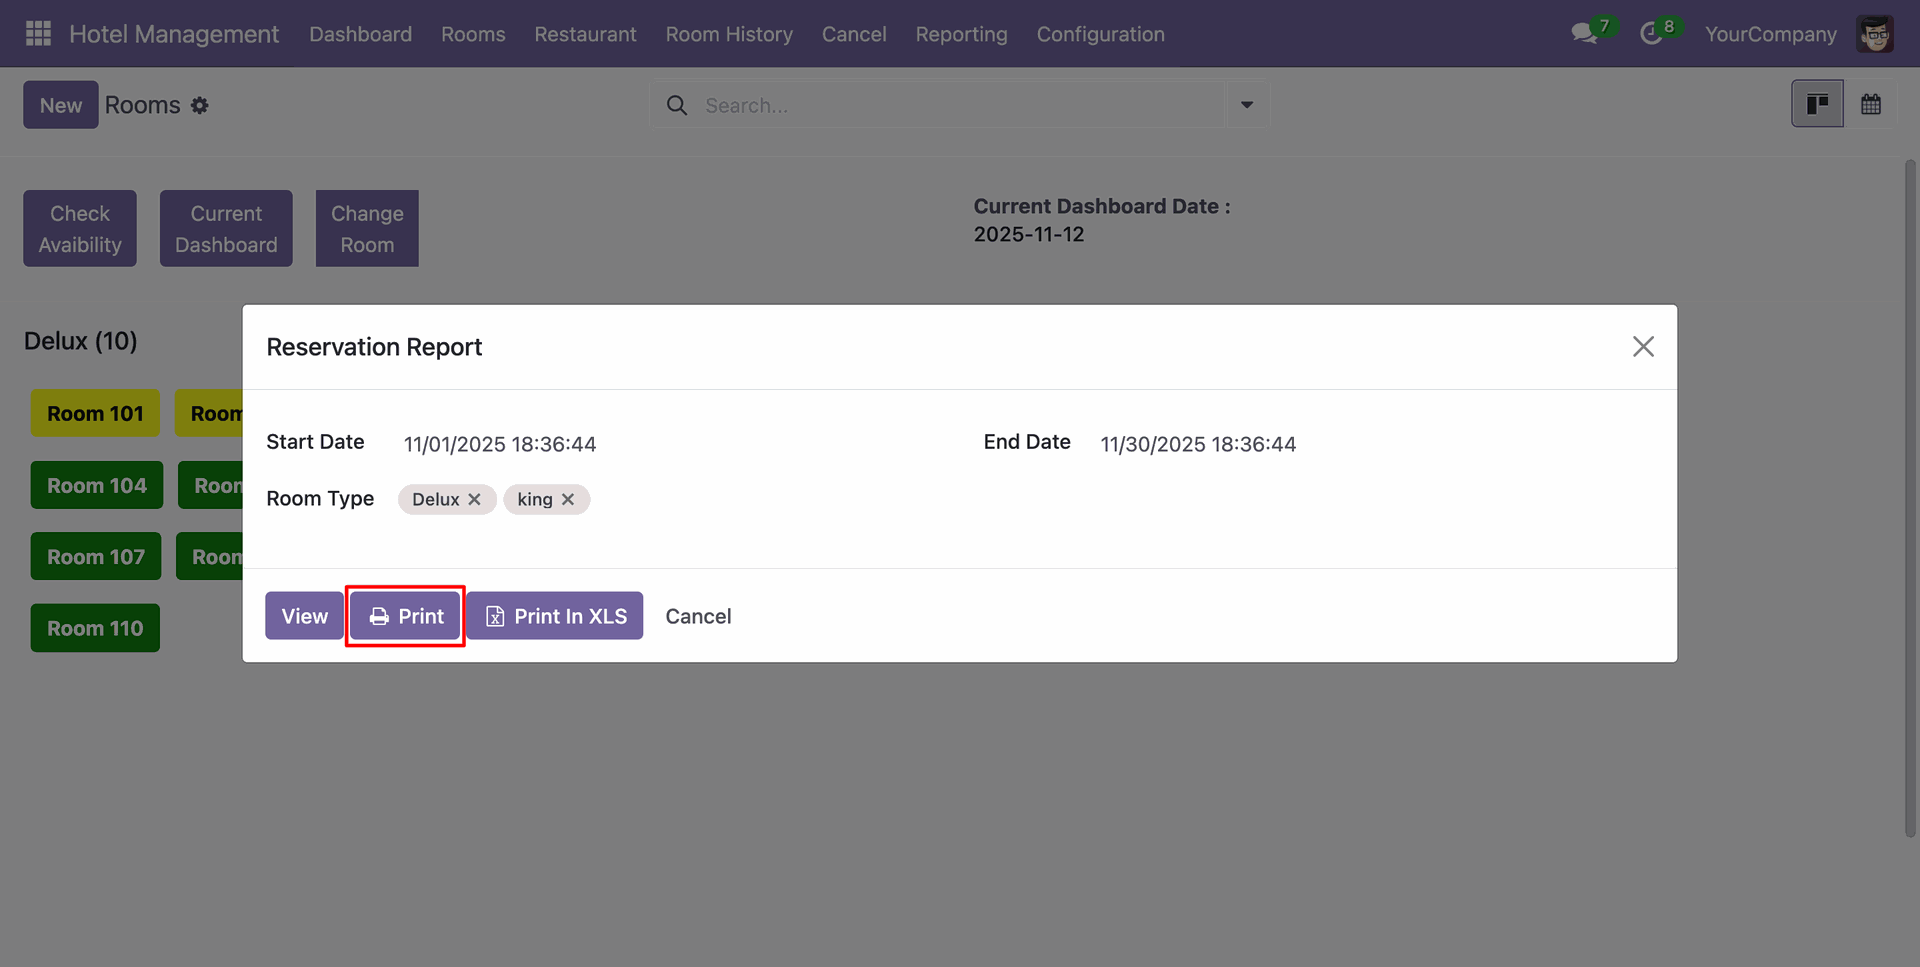
Go to the Reporting ==> Reservation Report
Add details and click on the "Print" button.
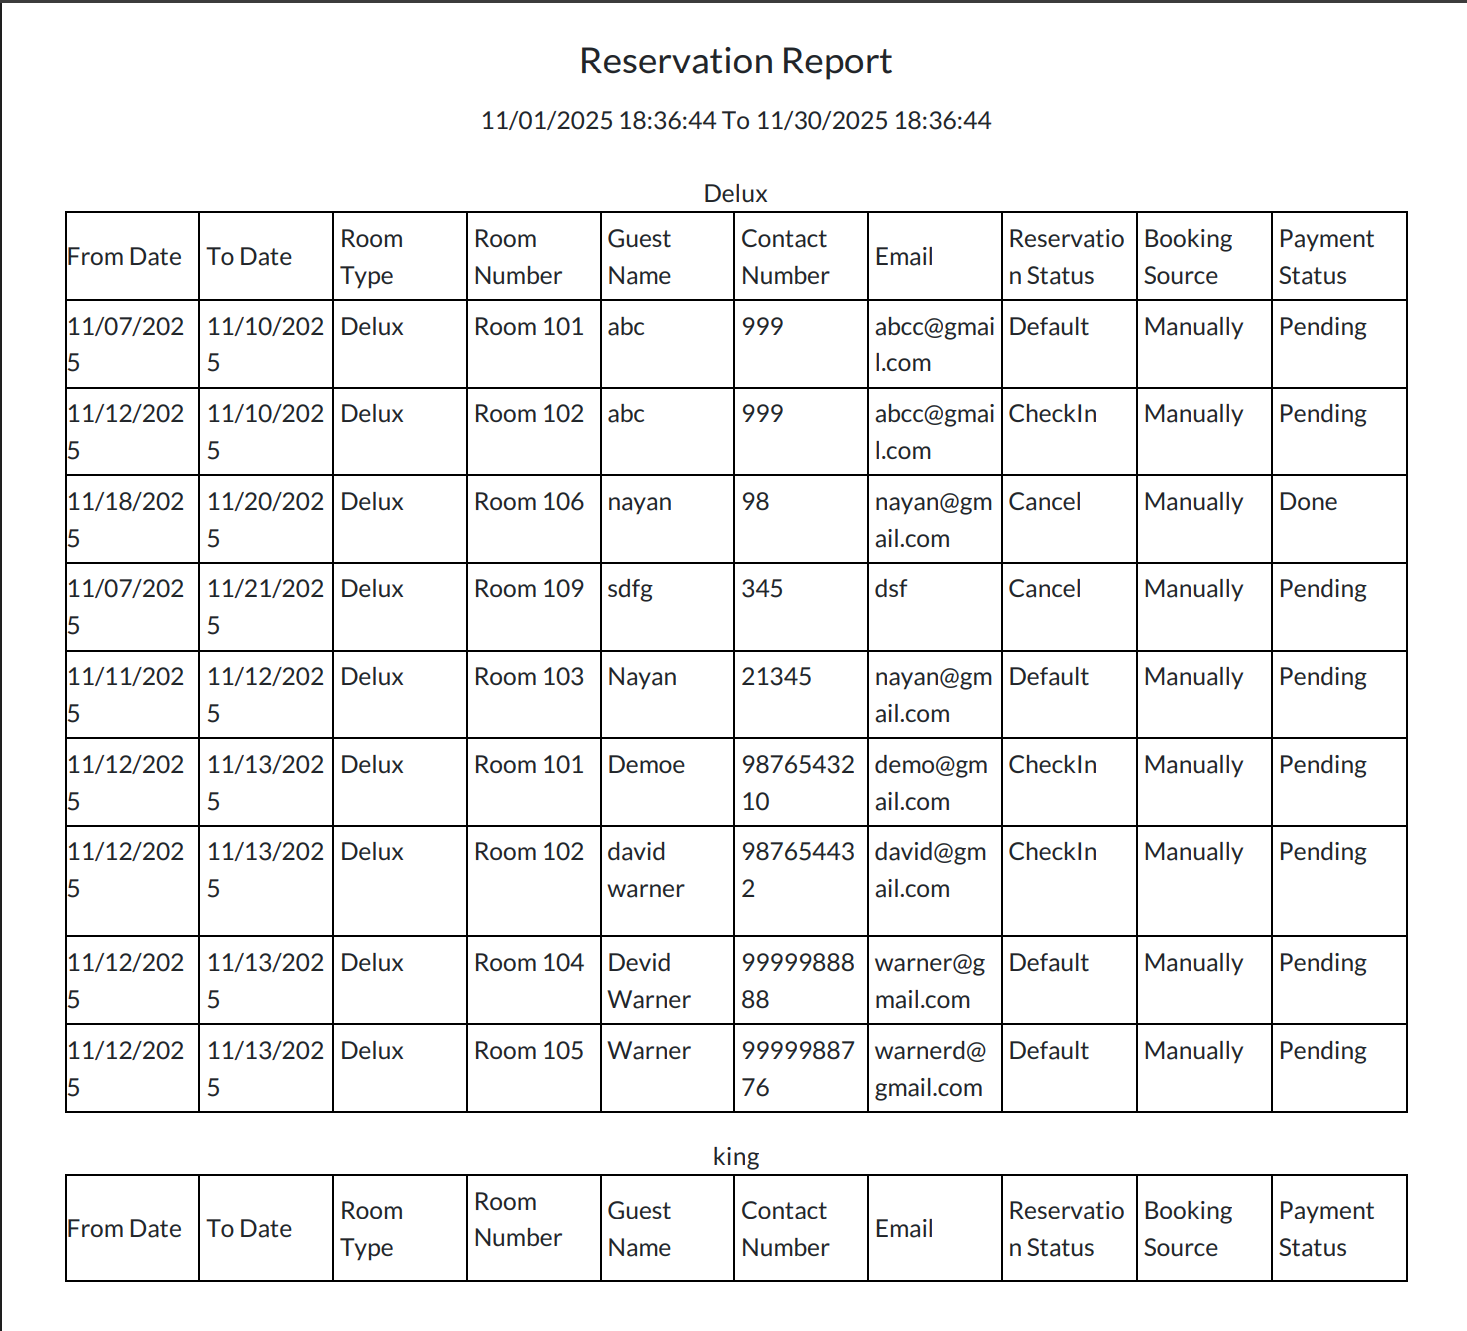
PDF report of the Reservation looks like below.
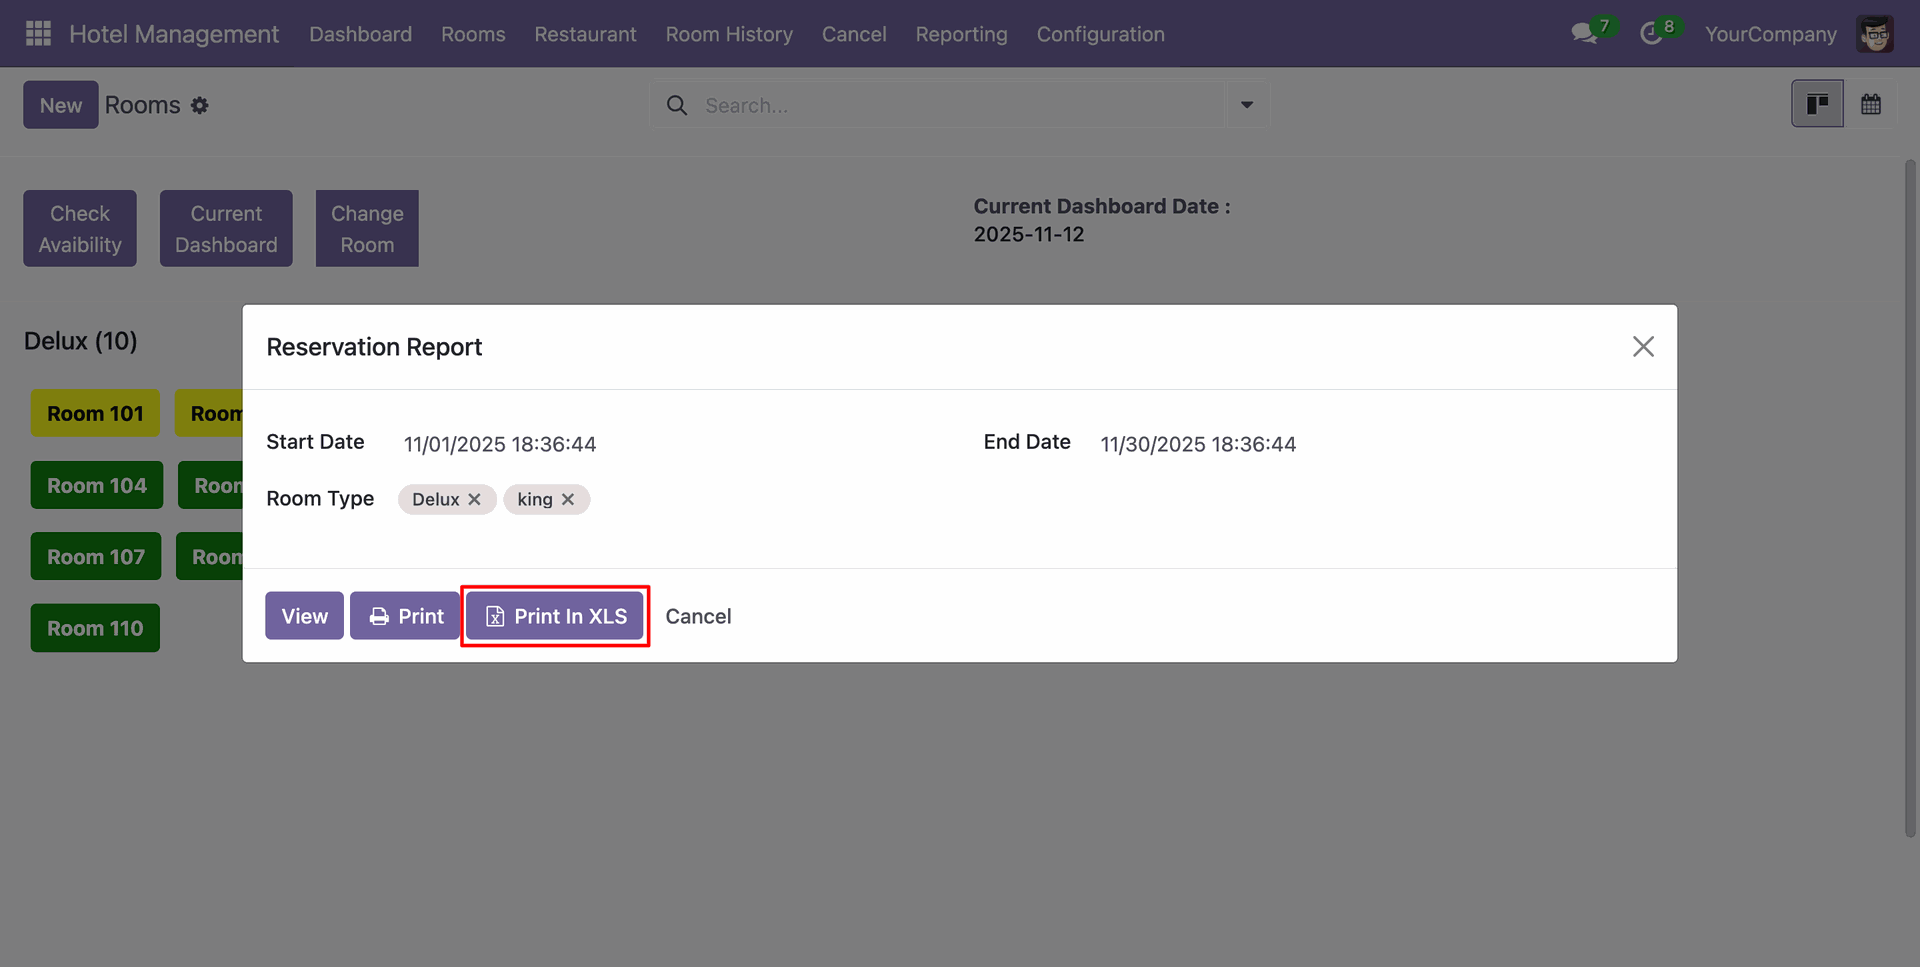
Add details and click on the "Print In XLS" button.
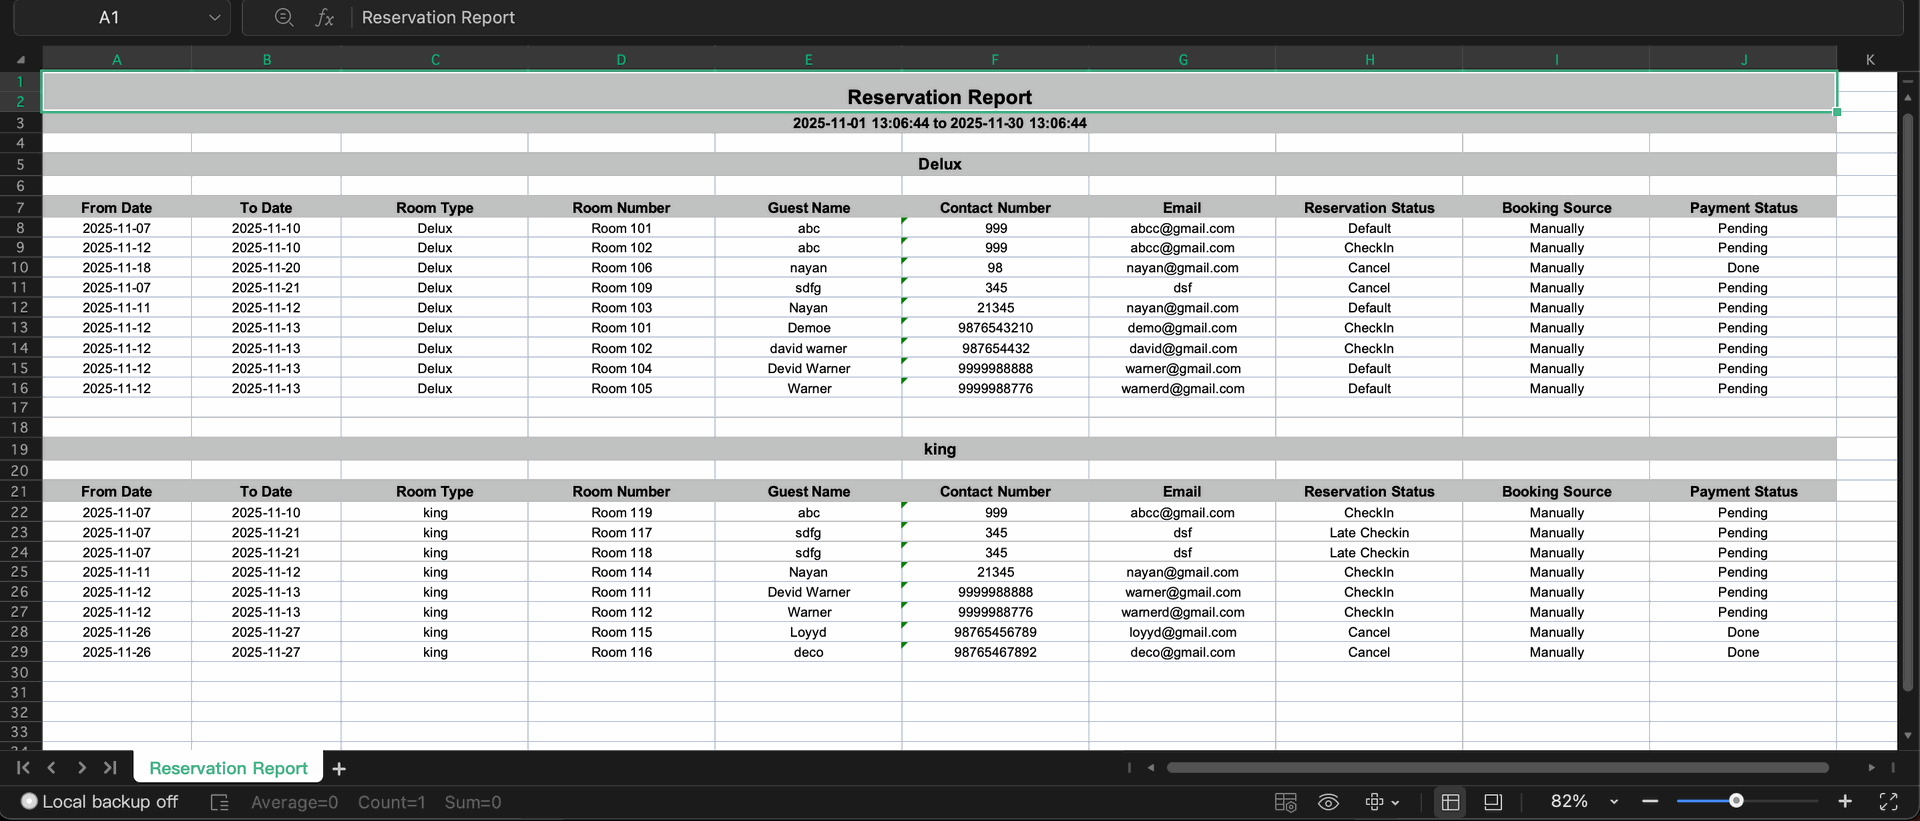
XLS report of the Reservation looks like below.
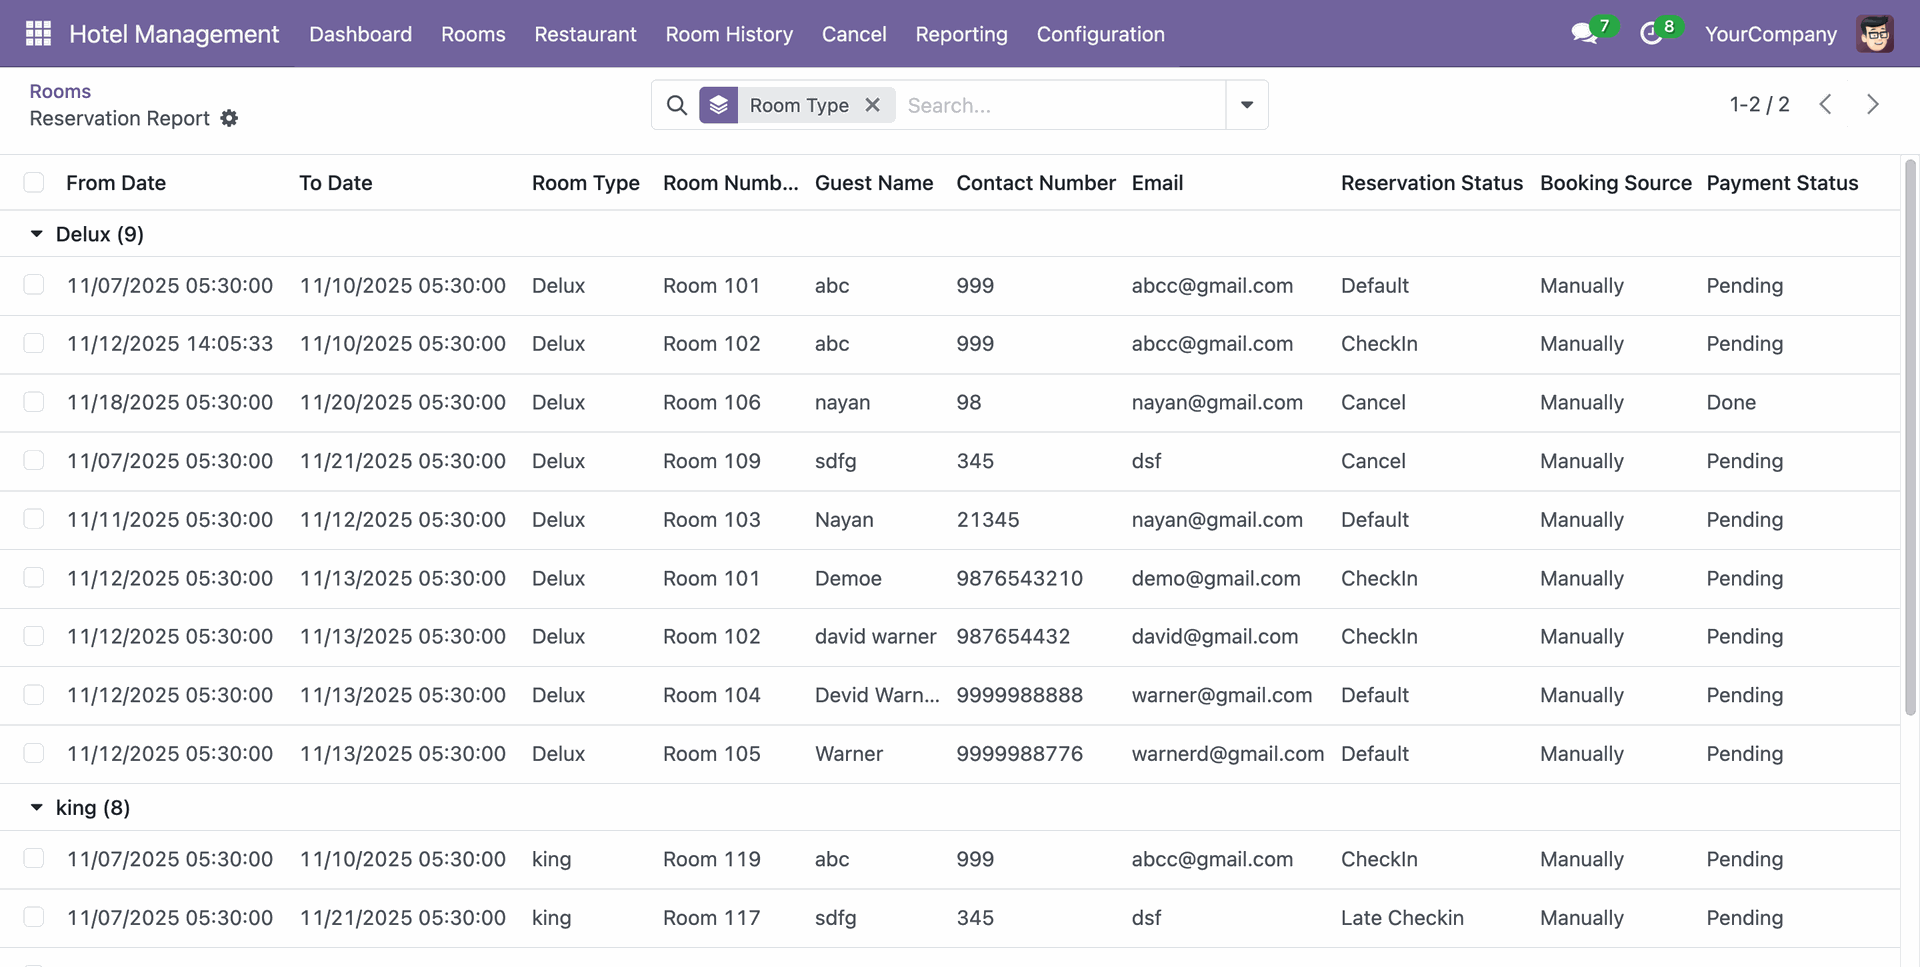
Add details and click on the "View" button.

Reservation Report view looks like below.
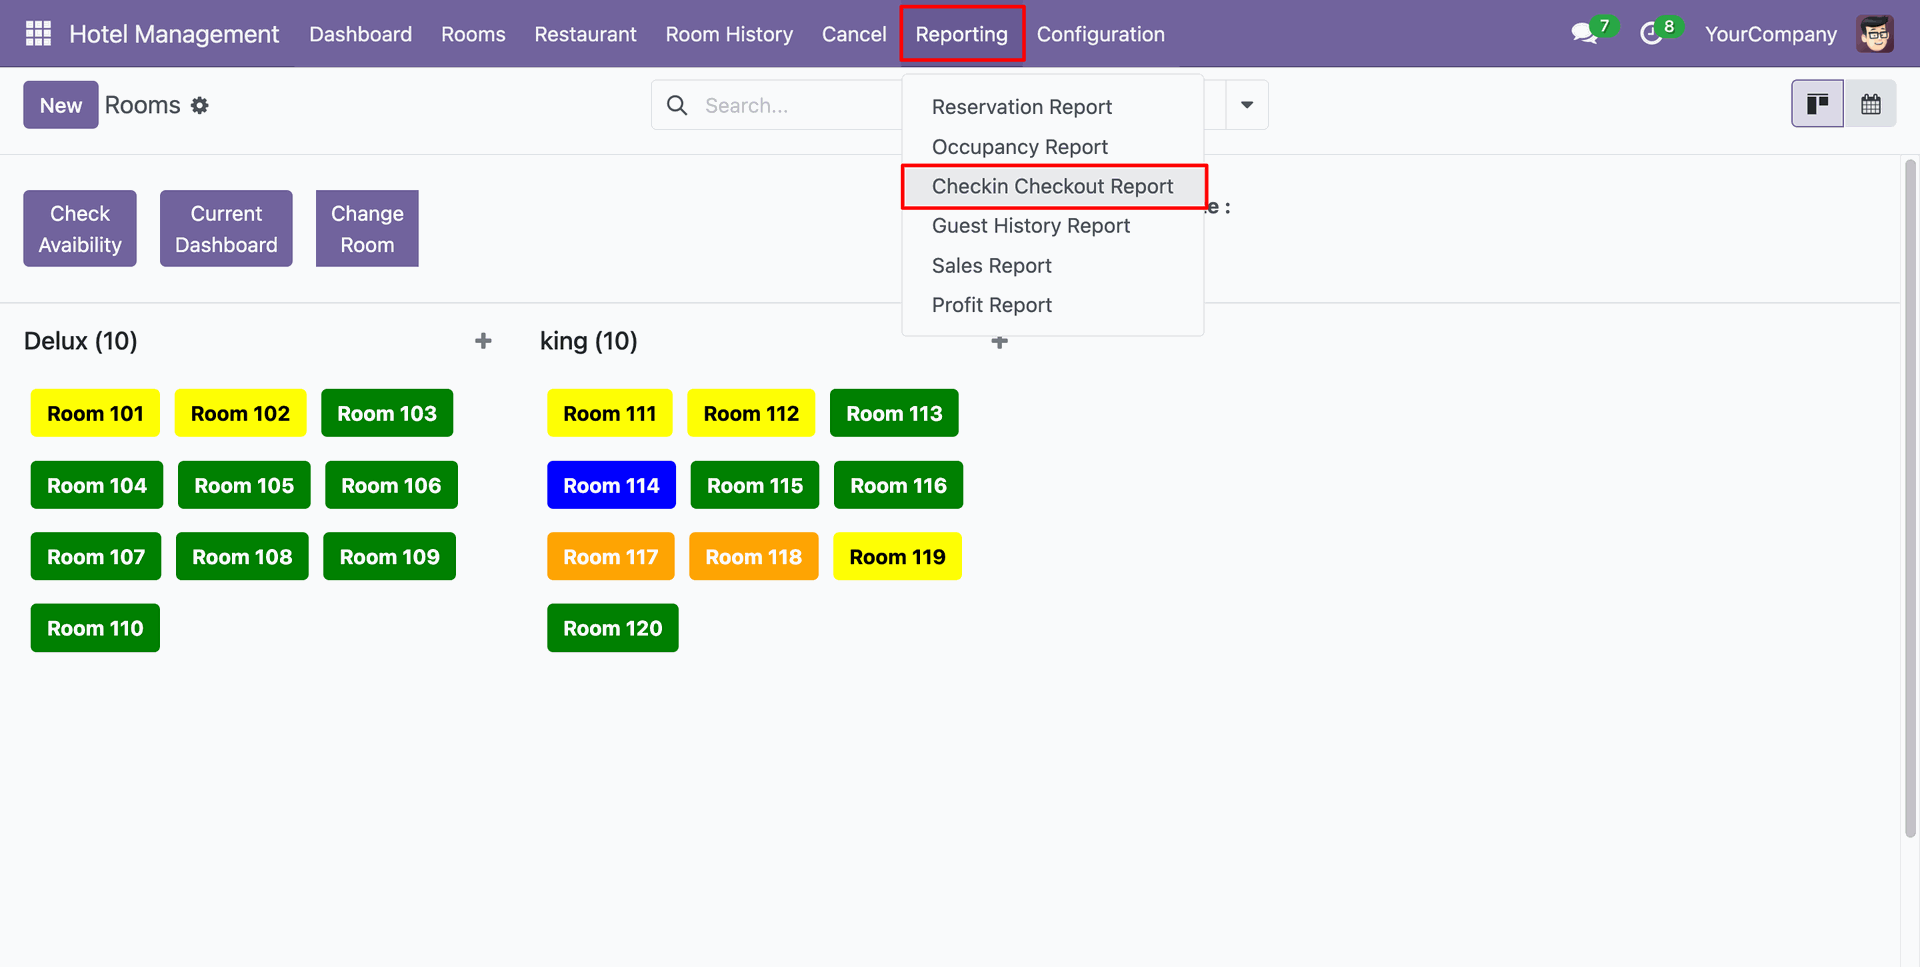
Go to the Reporting ==> CheckIn Checkouut Report
Add details and click on the "Print" button.

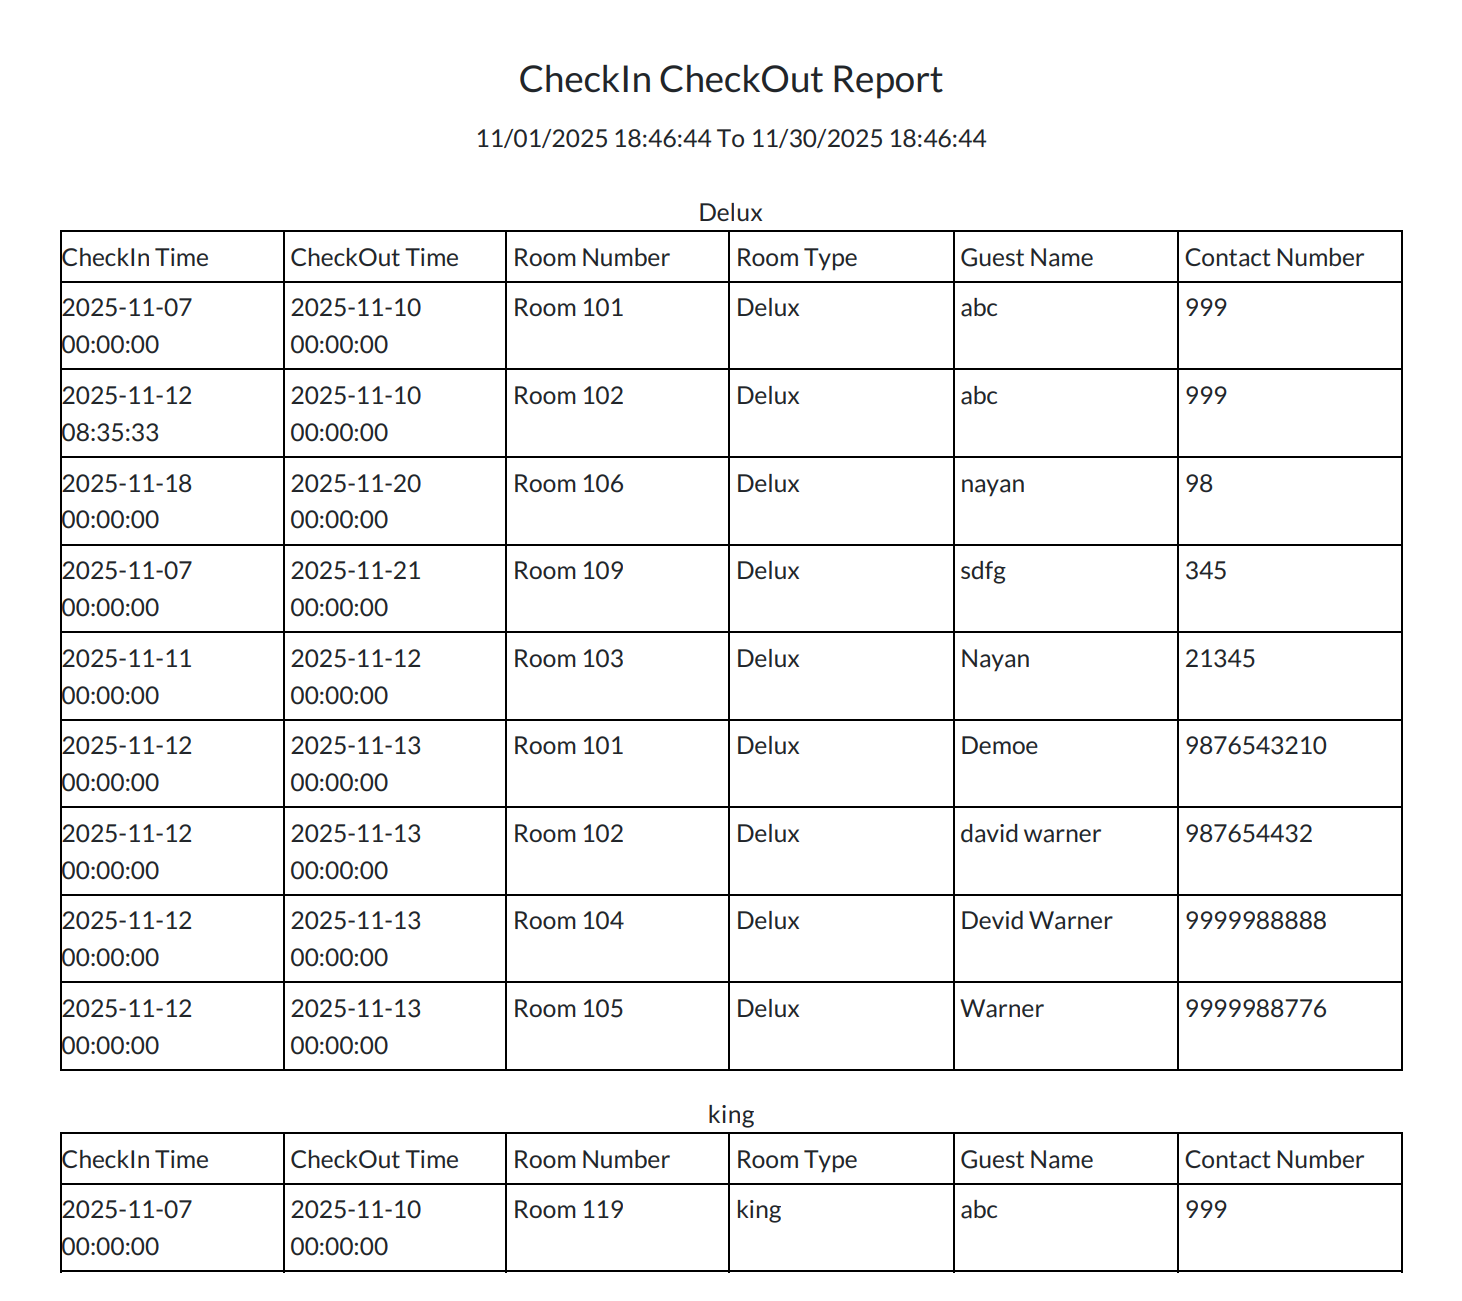
PDF report of the Reservation looks like below.
Add details and click on the "Print In XLS" button.

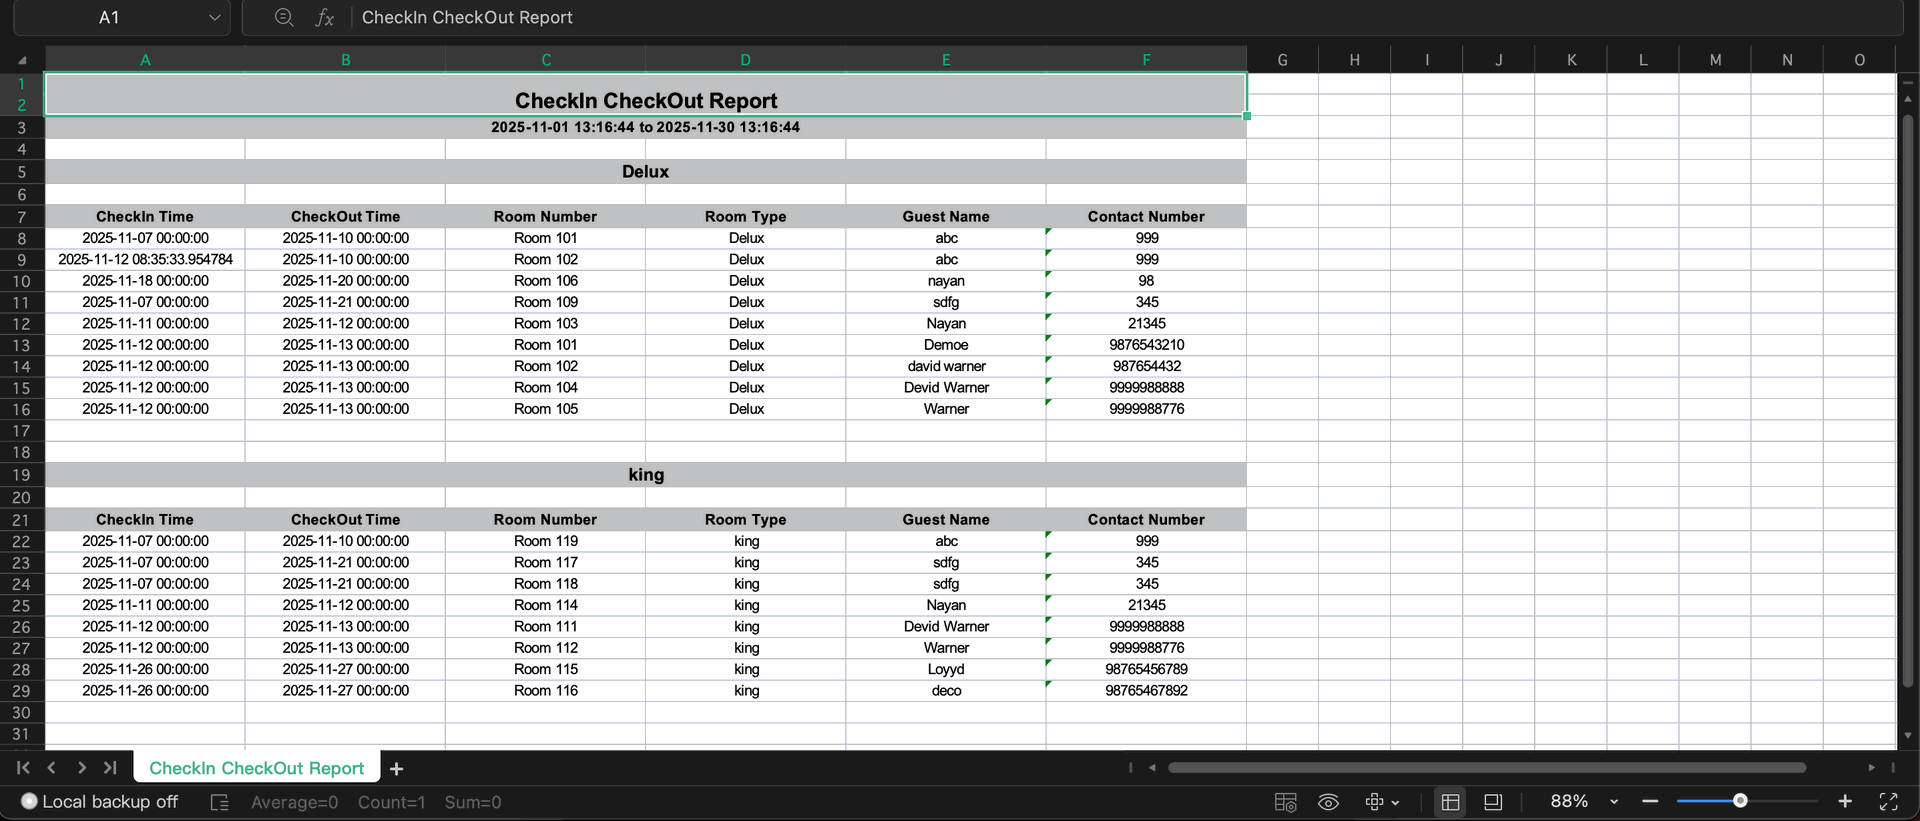
XLS report of the Reservation looks like below.
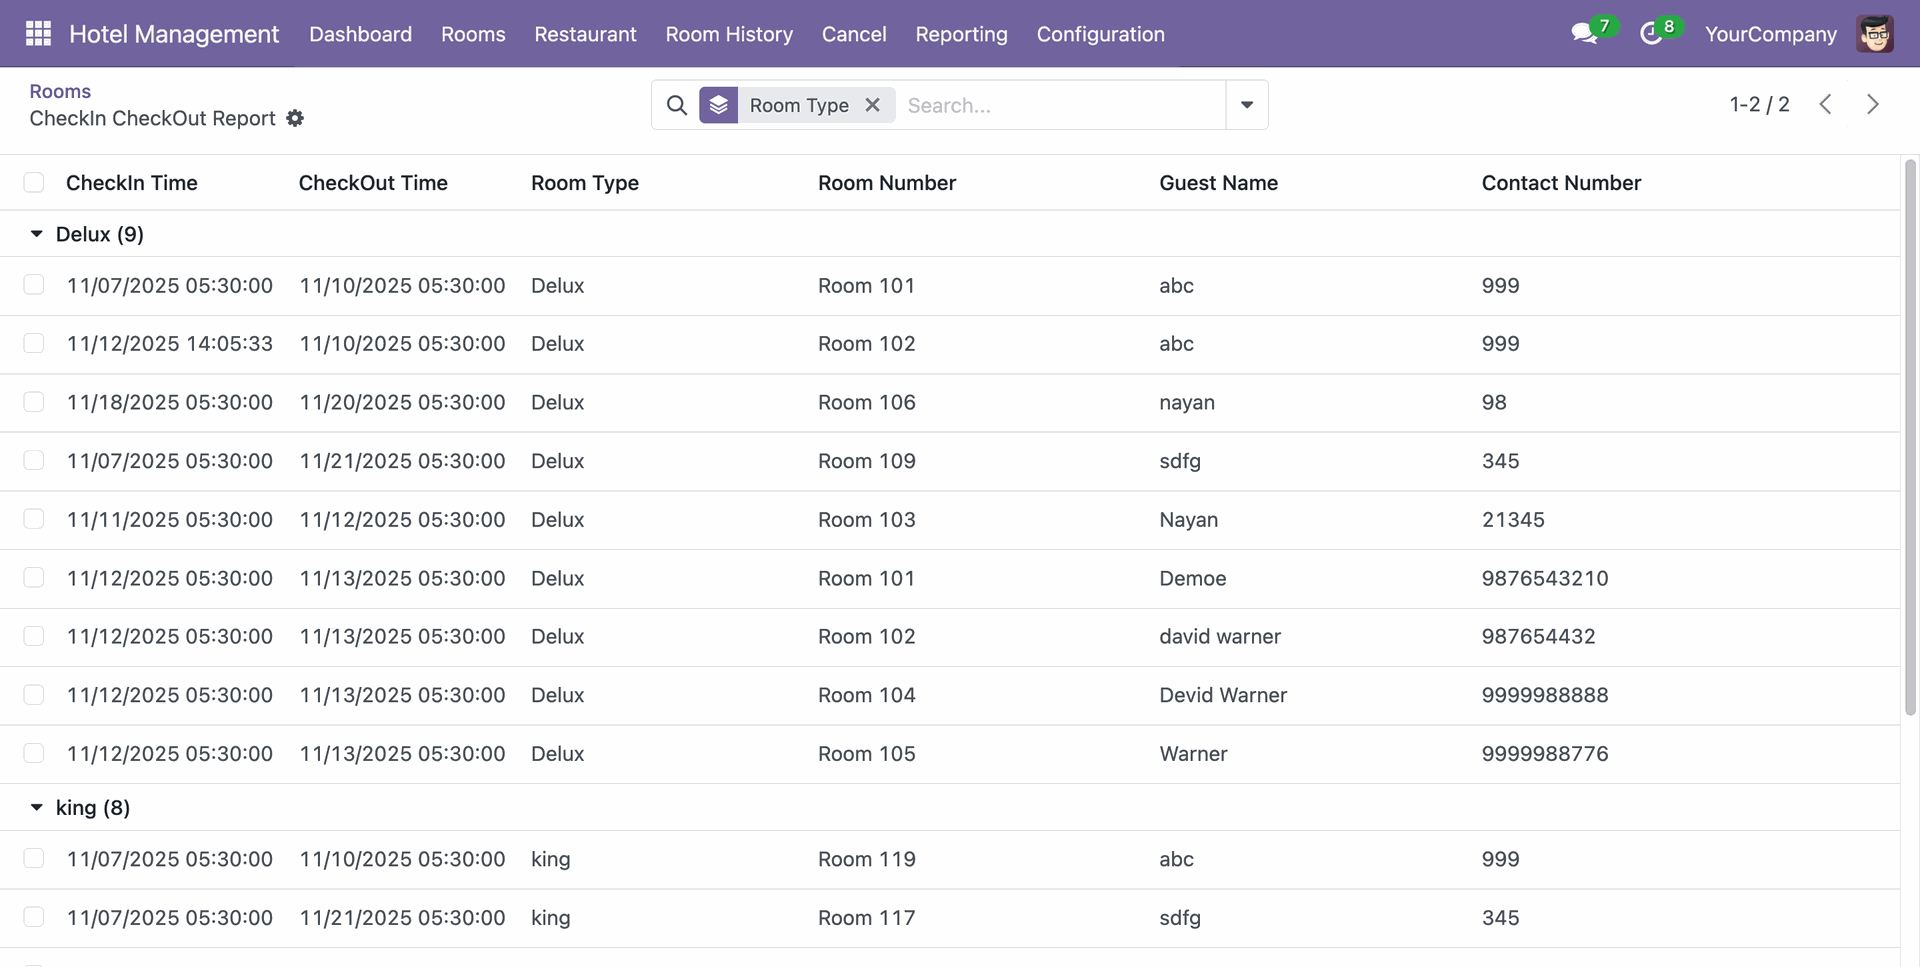
Add details and click on the "View" button.

CheckIn Checkouut Report view looks like below.
Go to the Reporting ==> Guest History Report

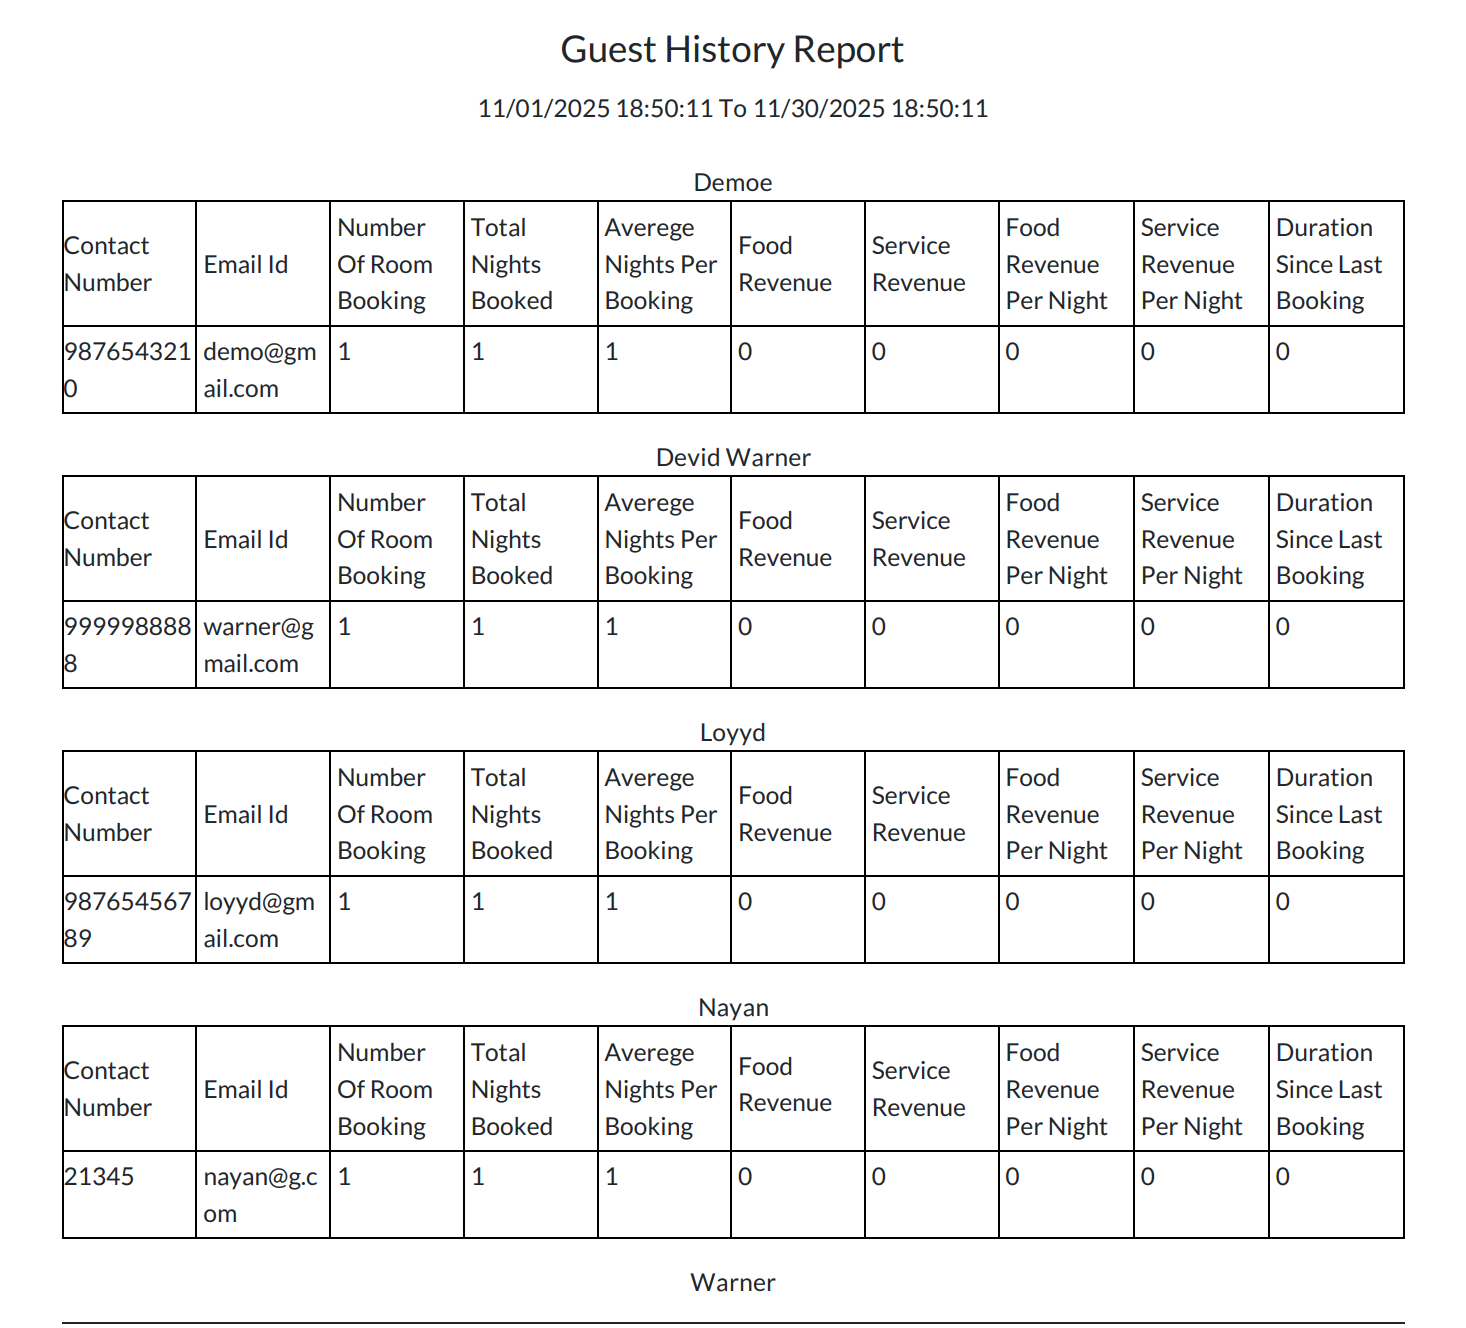
Add details and click on the "Print" button.
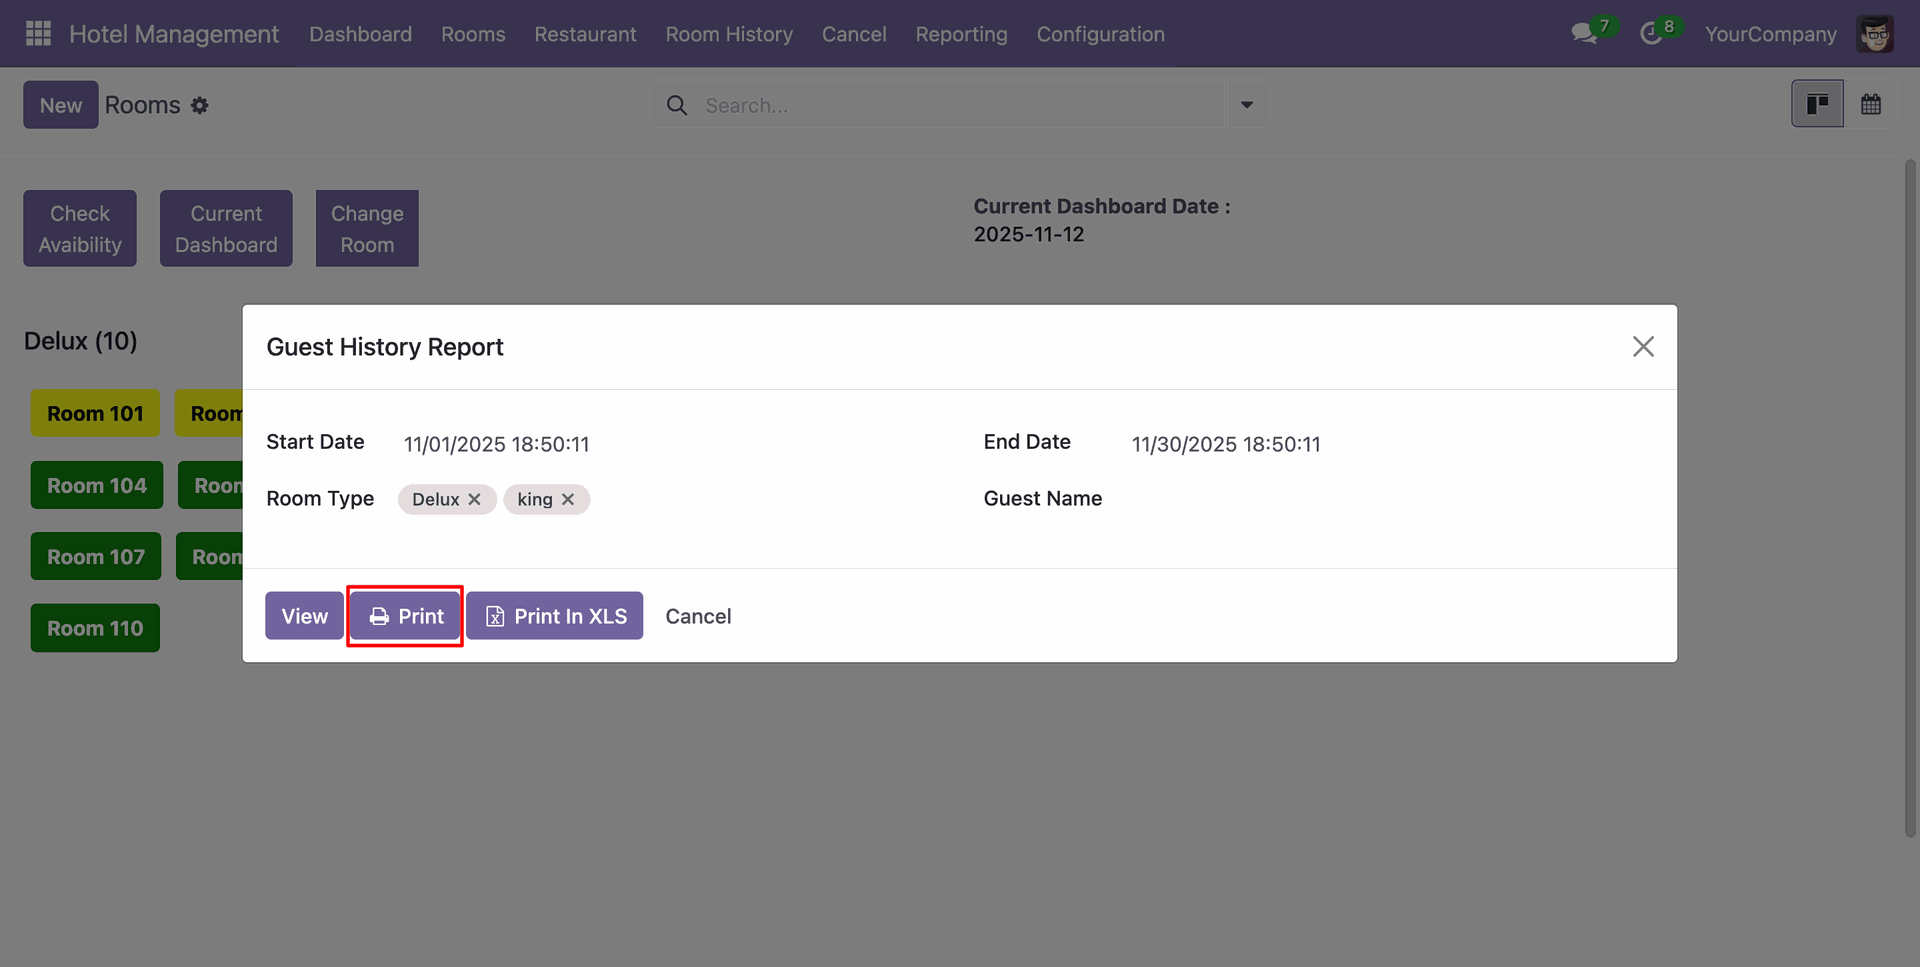
PDF report of the Reservation looks like below.
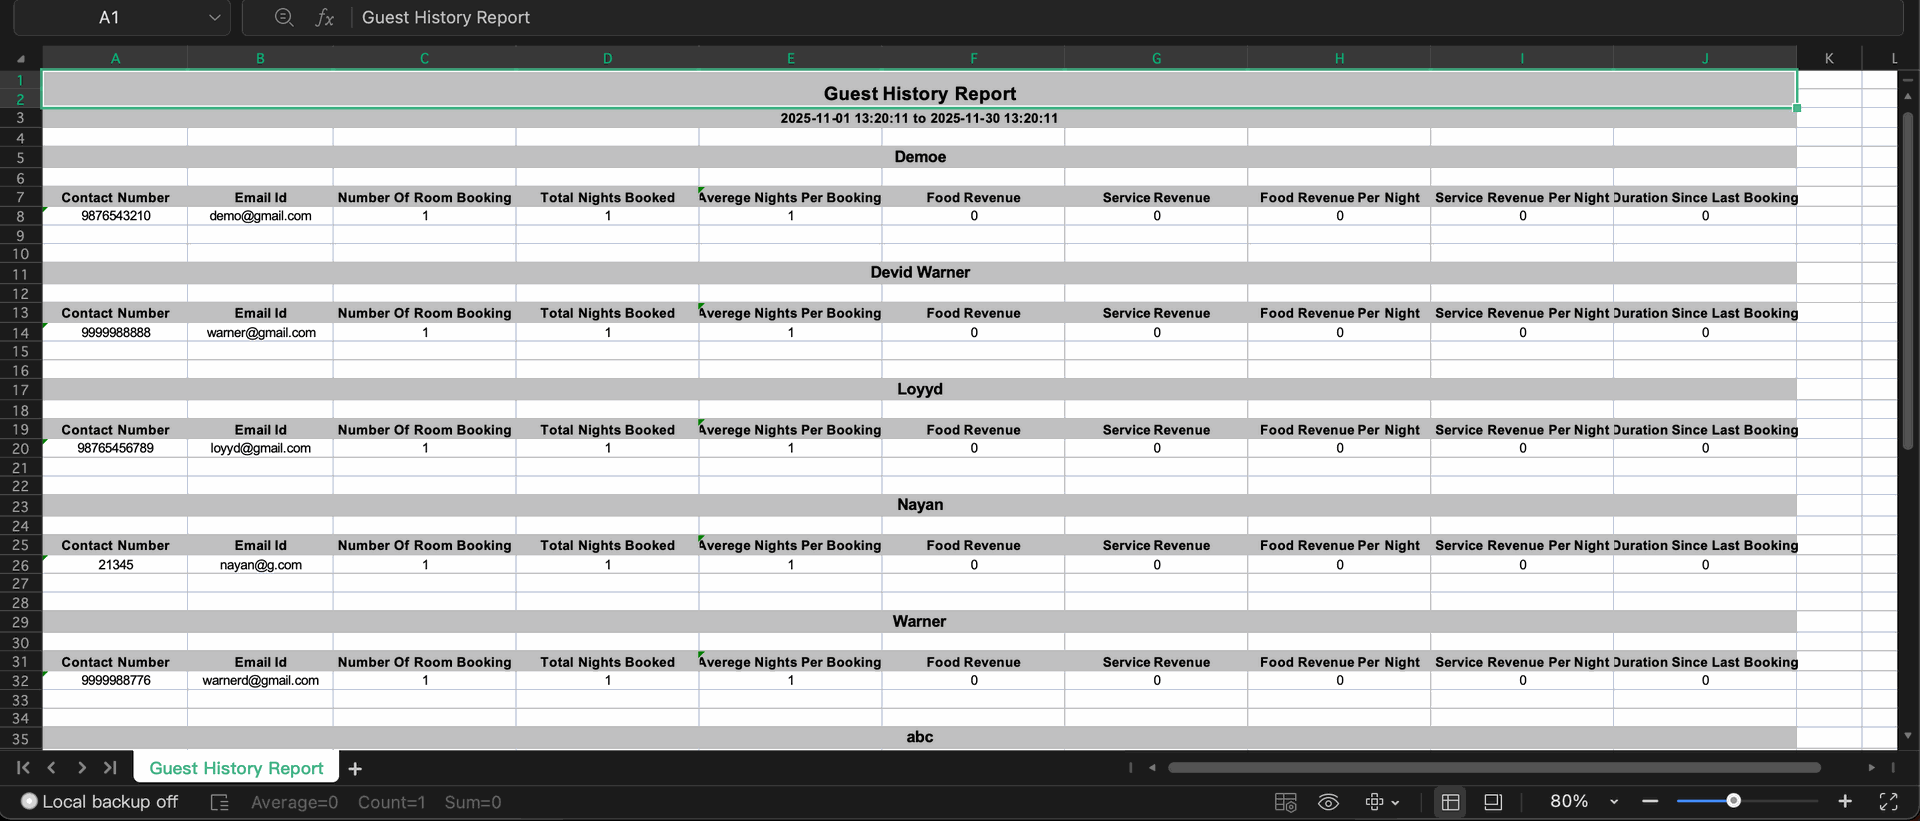
Add details and click on the "Print In XLS" button.
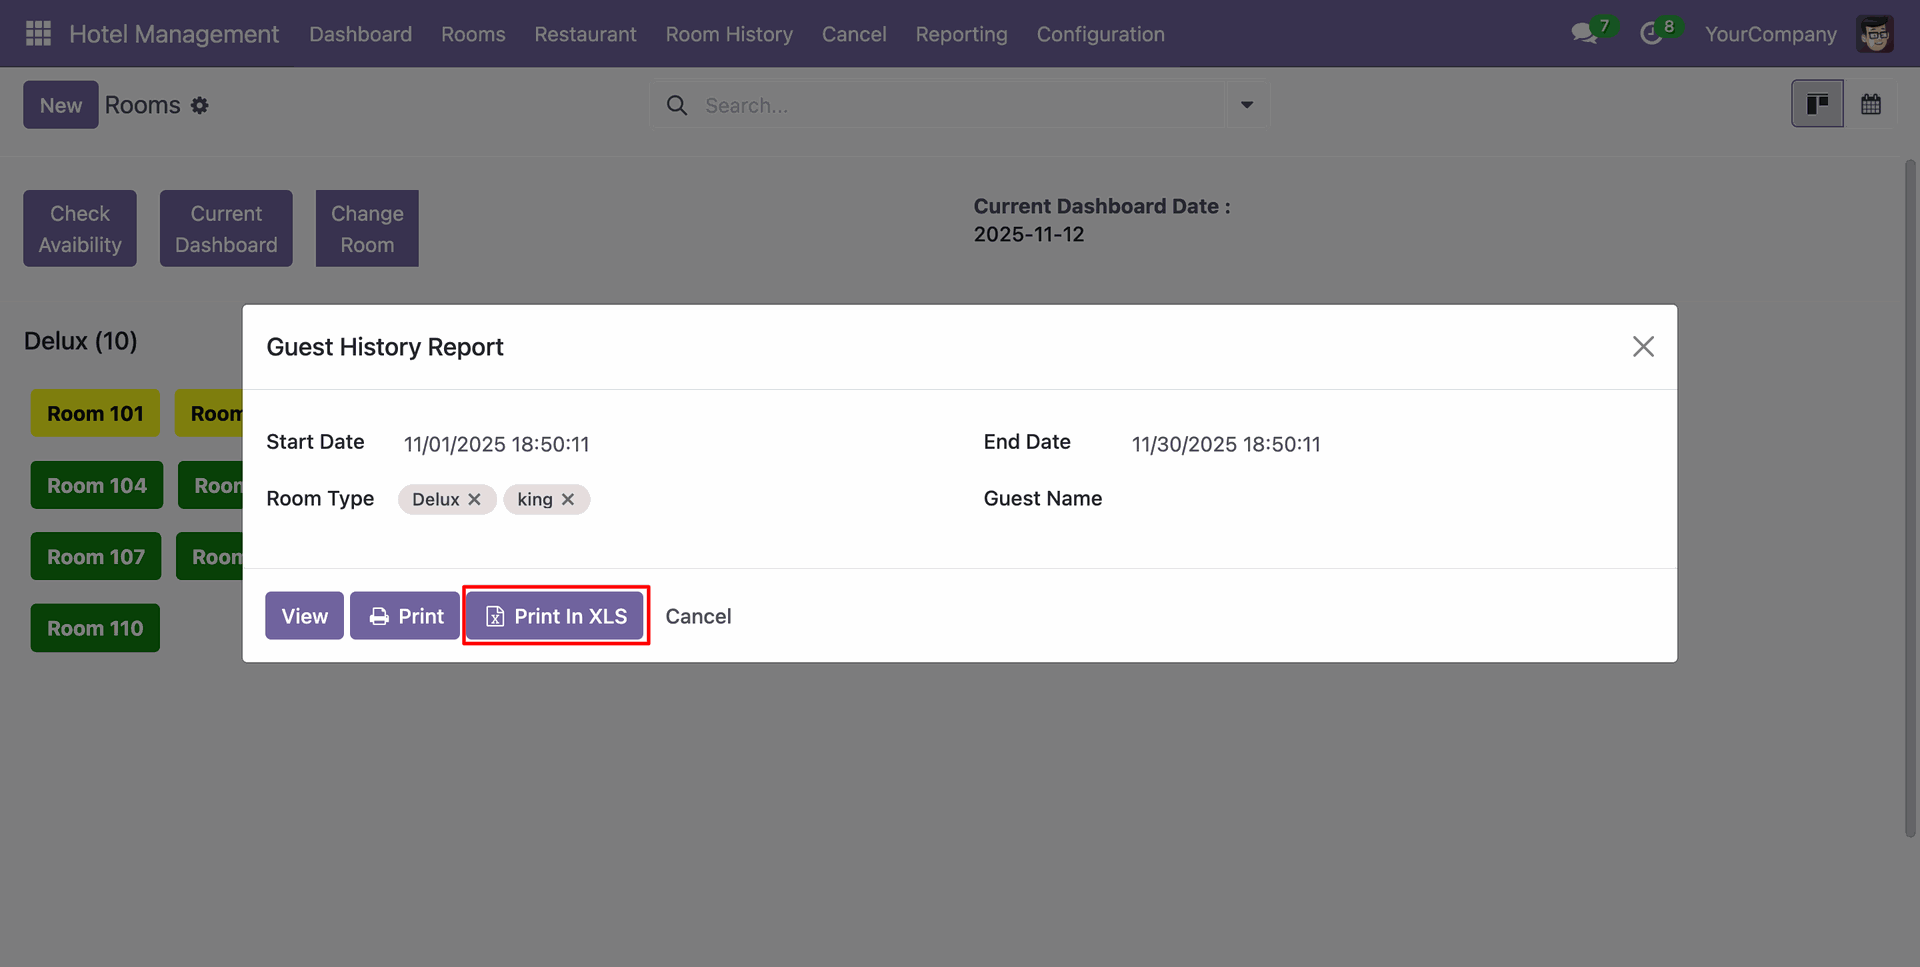
XLS report of the Reservation looks like below.
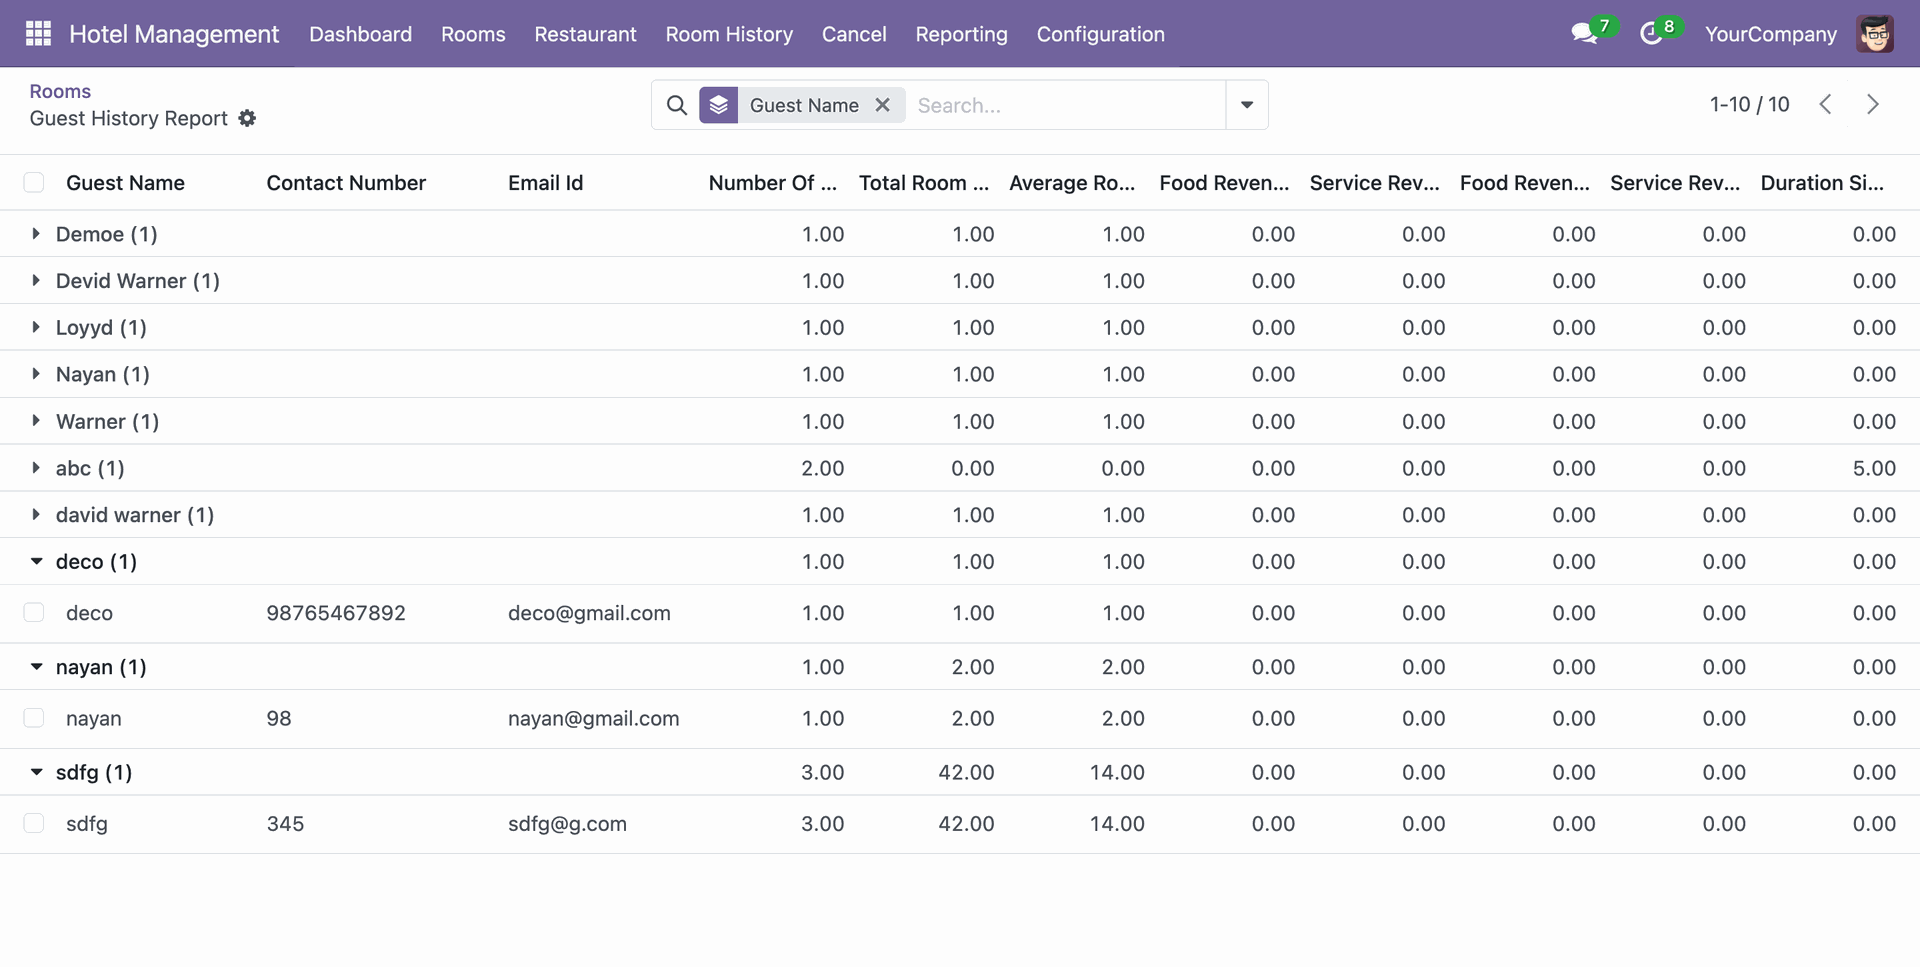
Add details and click on the "View" button.

Guest History Report view looks like below.
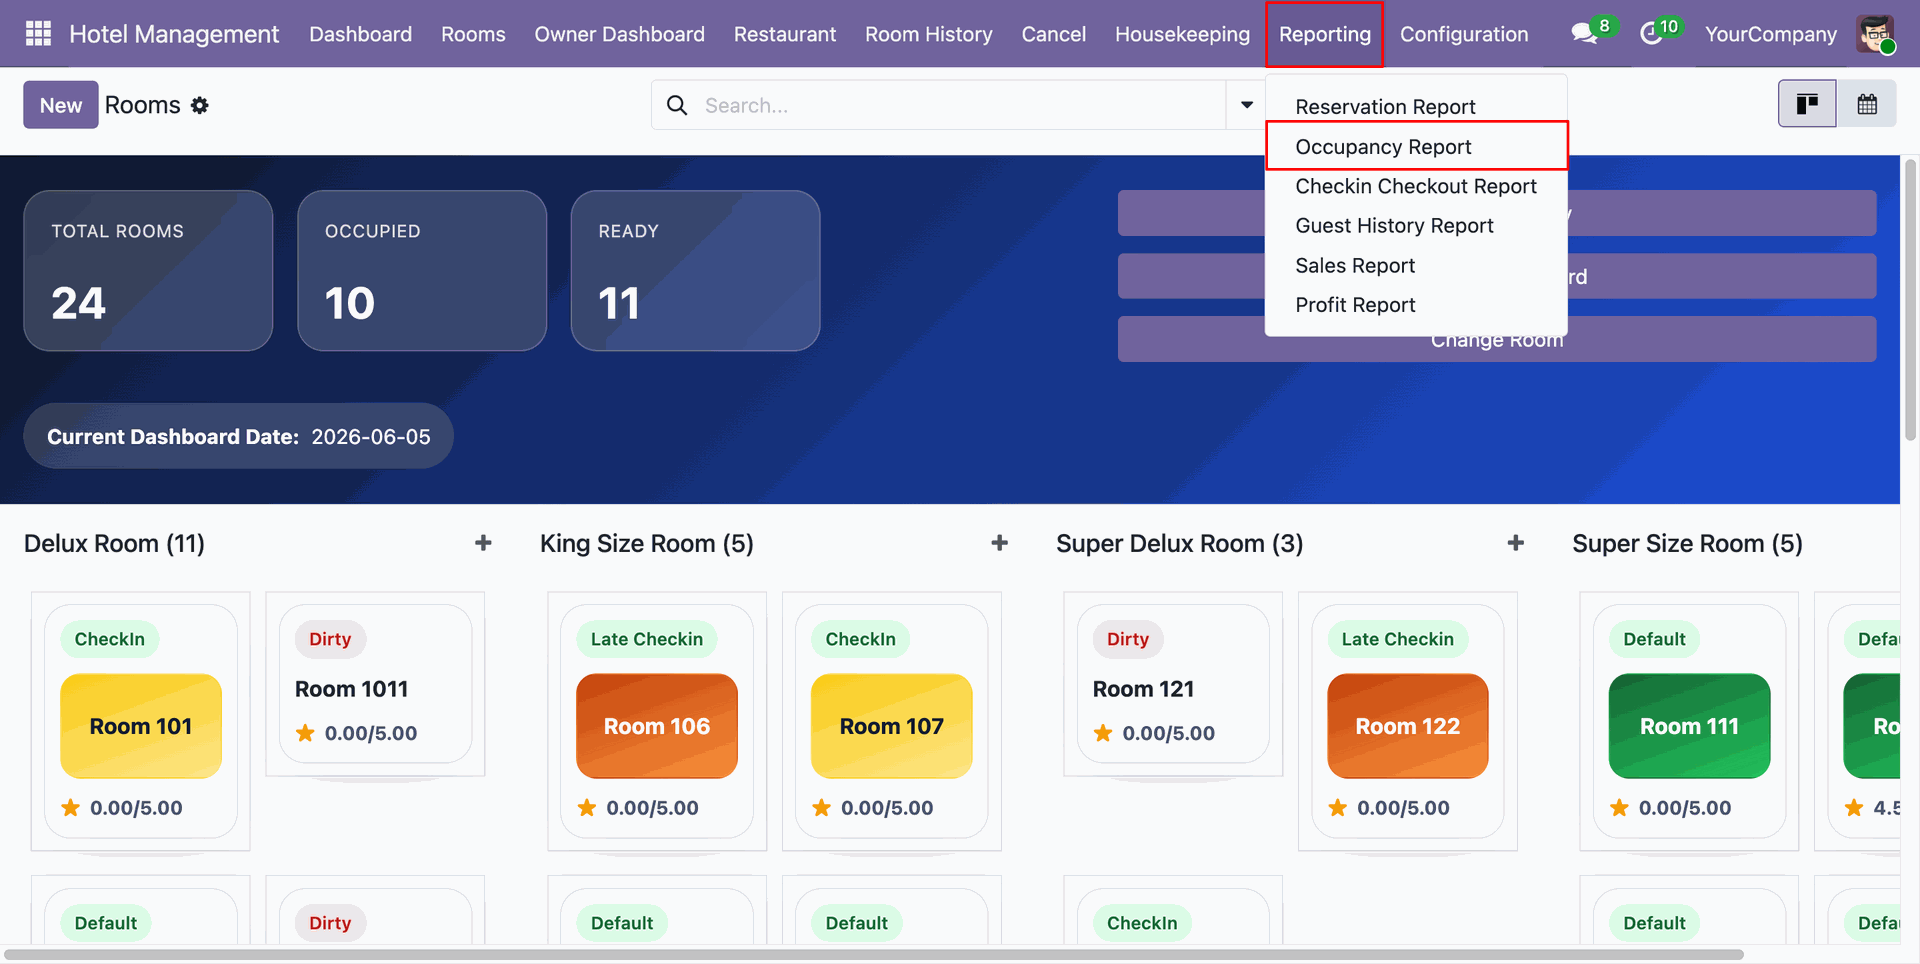
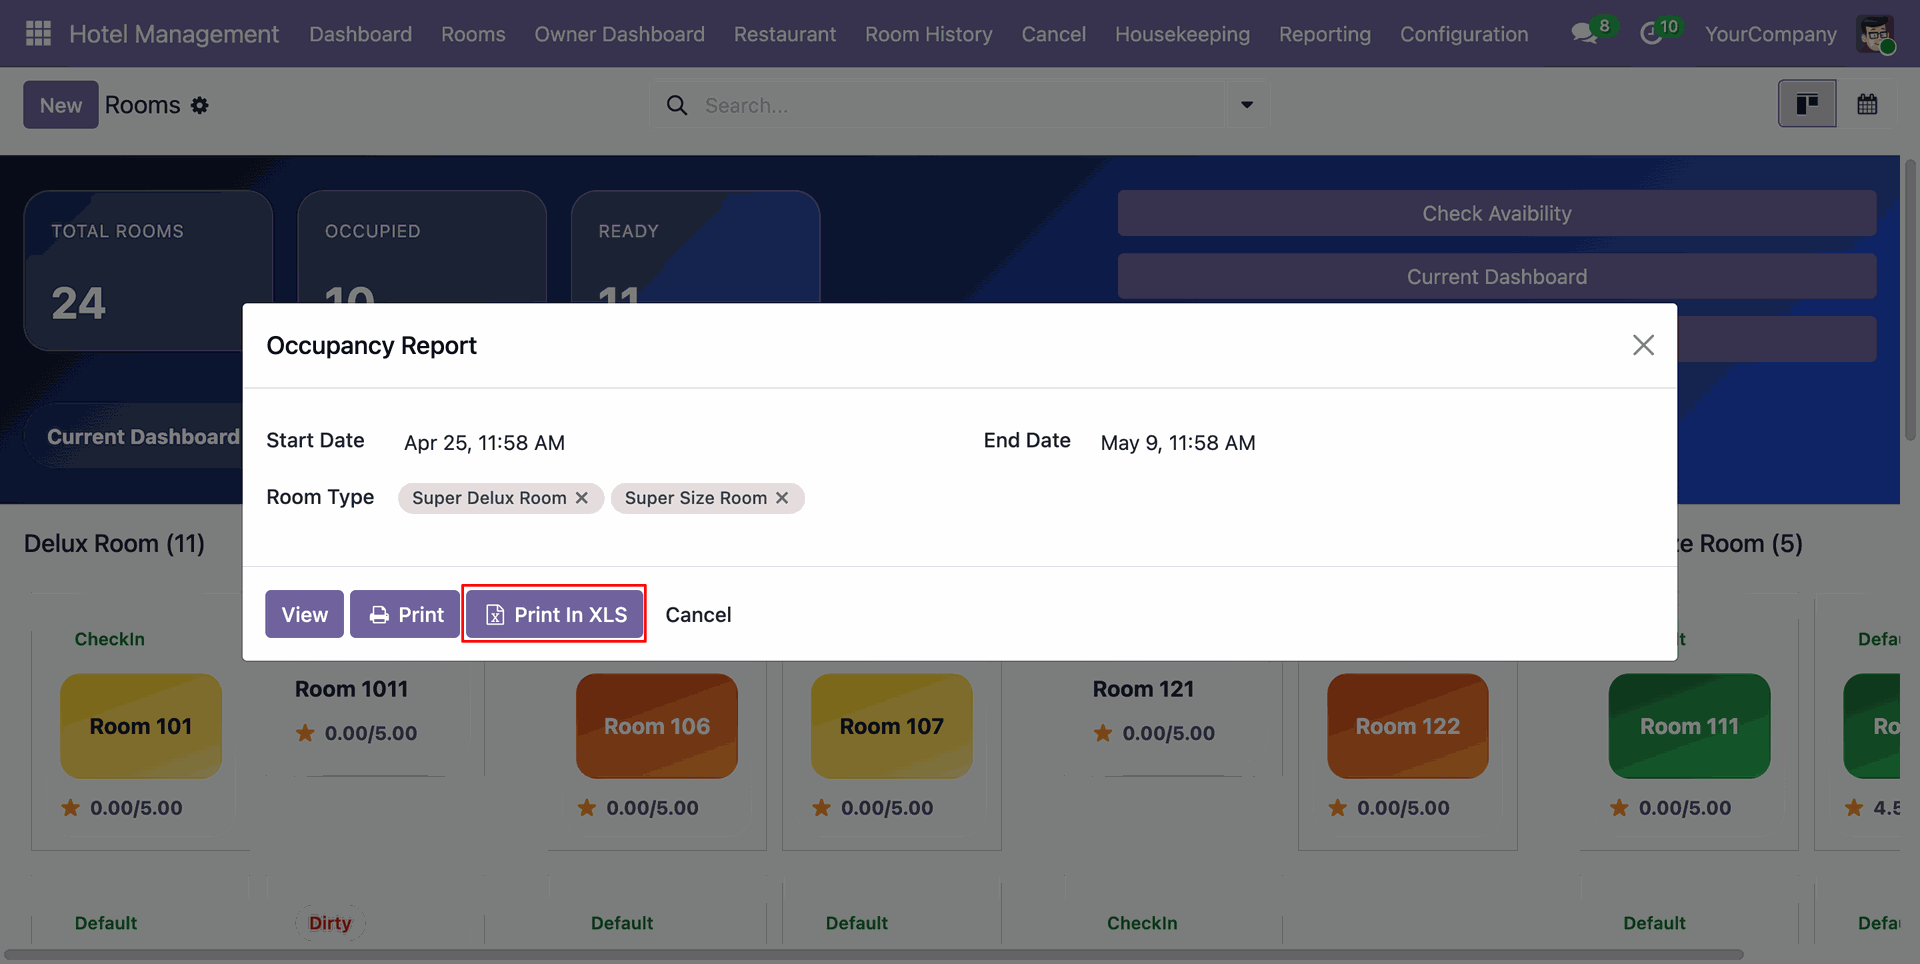
Go to the Reporting ==> Occupancy Report
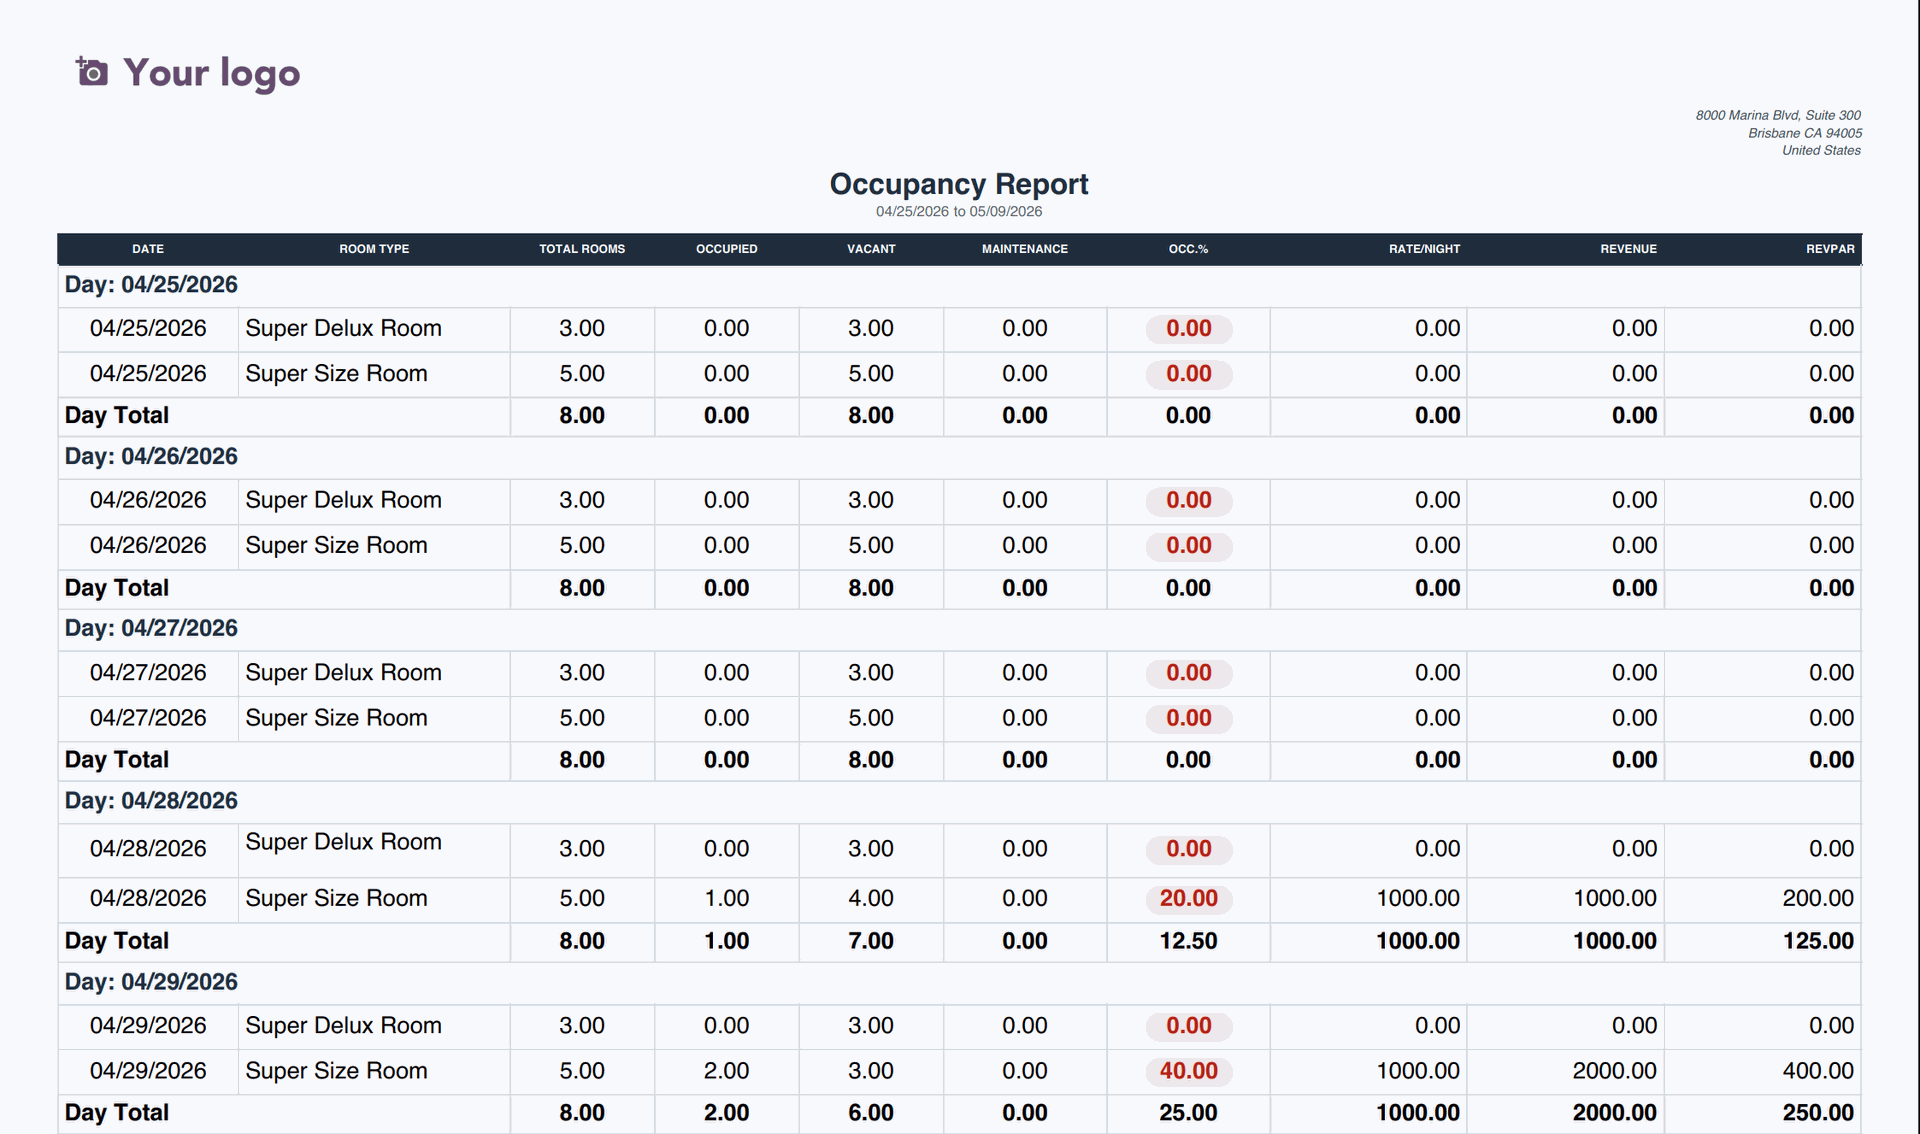
Add details and click on the "Print" button.

PDF report of the Reservation looks like below.
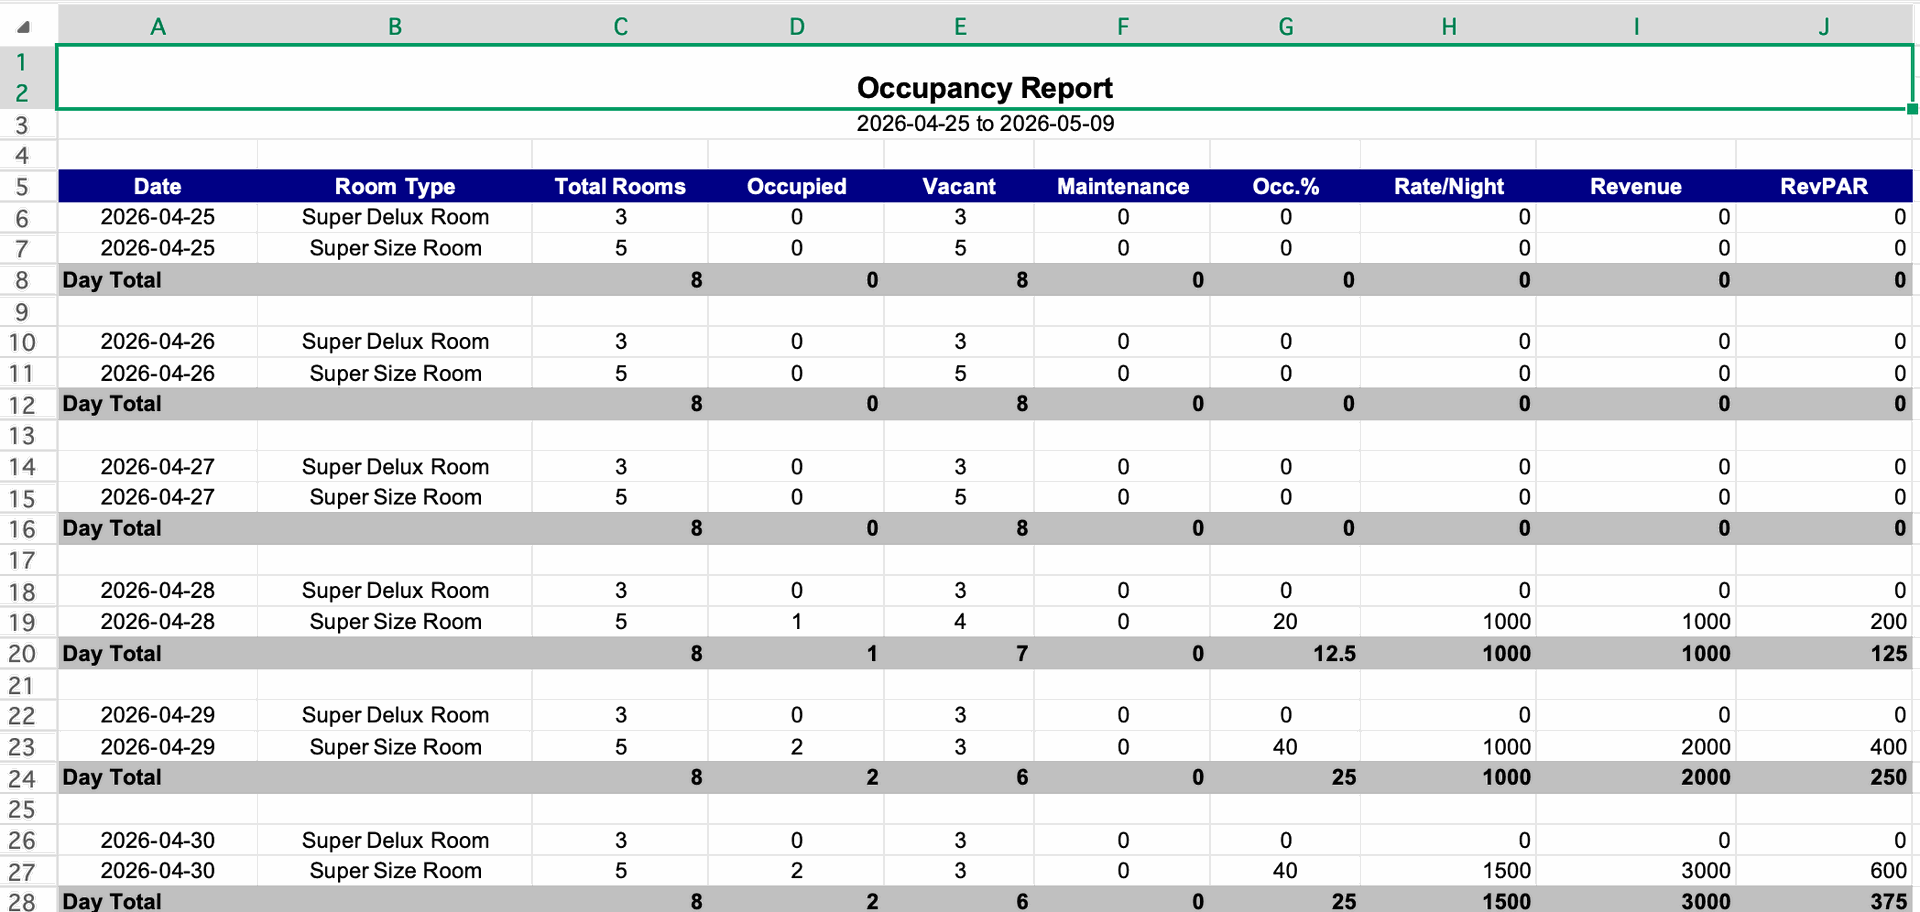
Add details and click on the "Print In XLS" button.
XLS report of the Reservation looks like below.
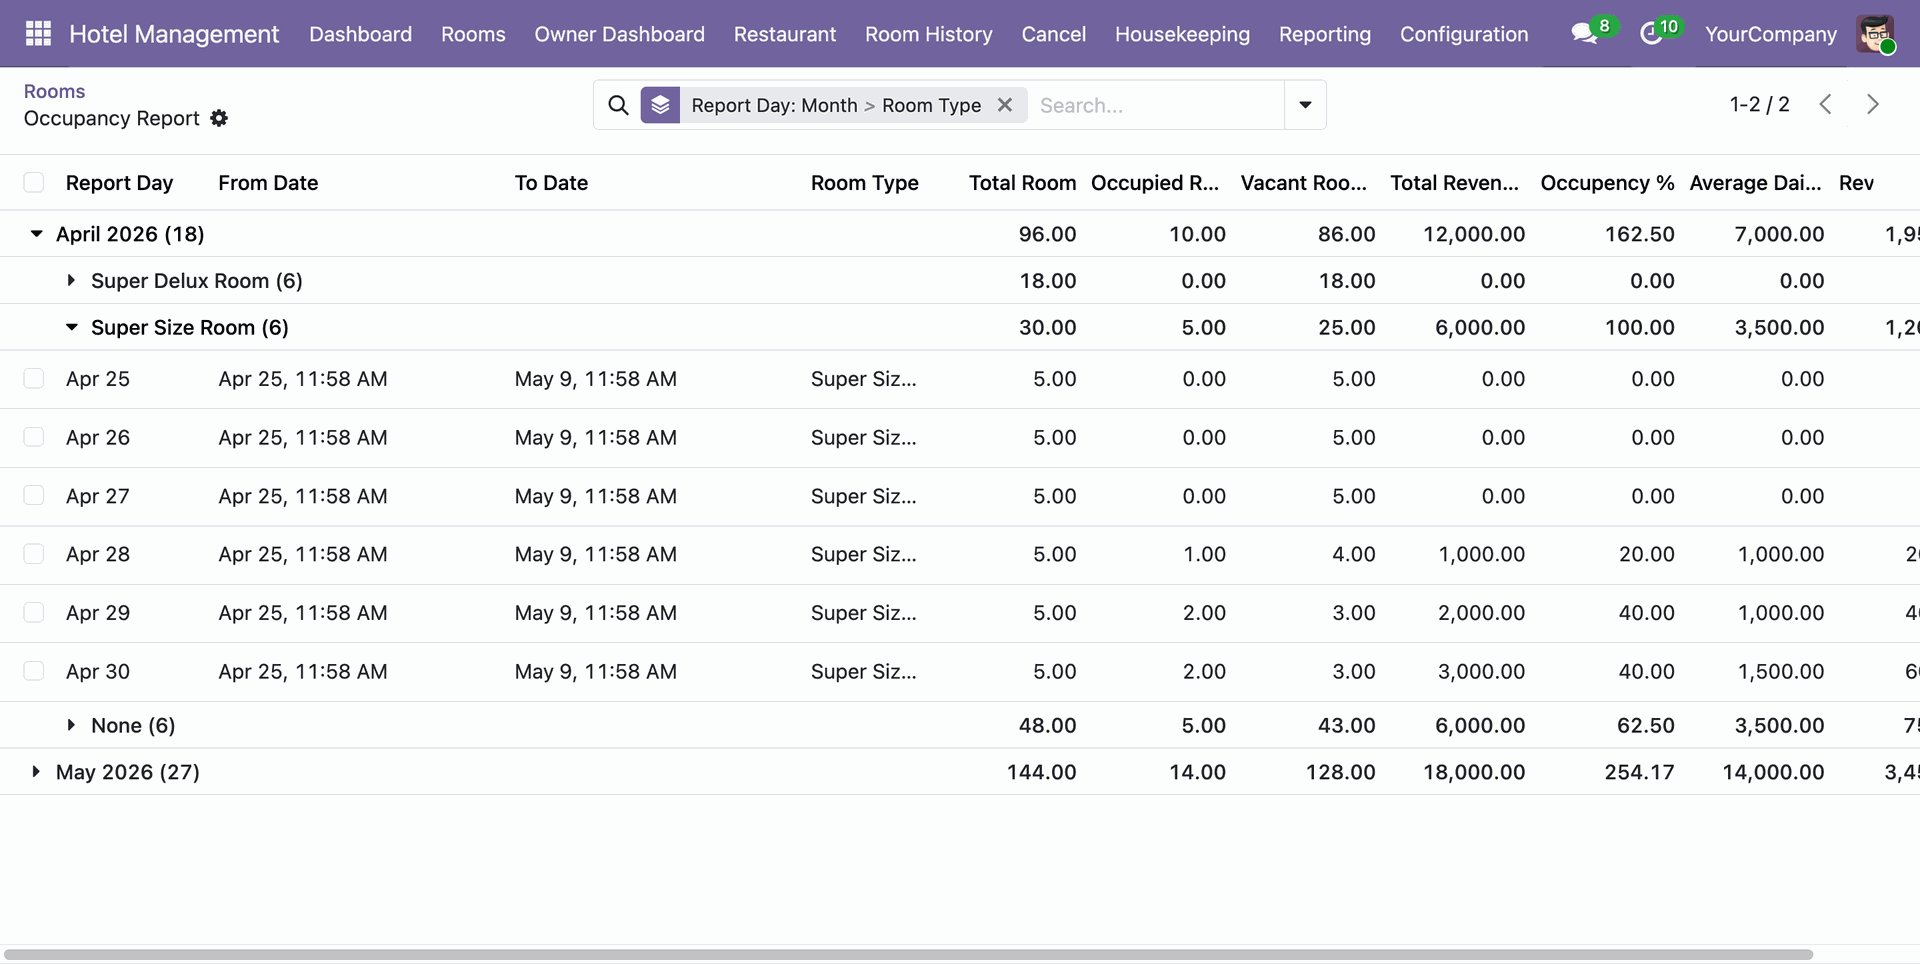
Add details and click on the "View" button.
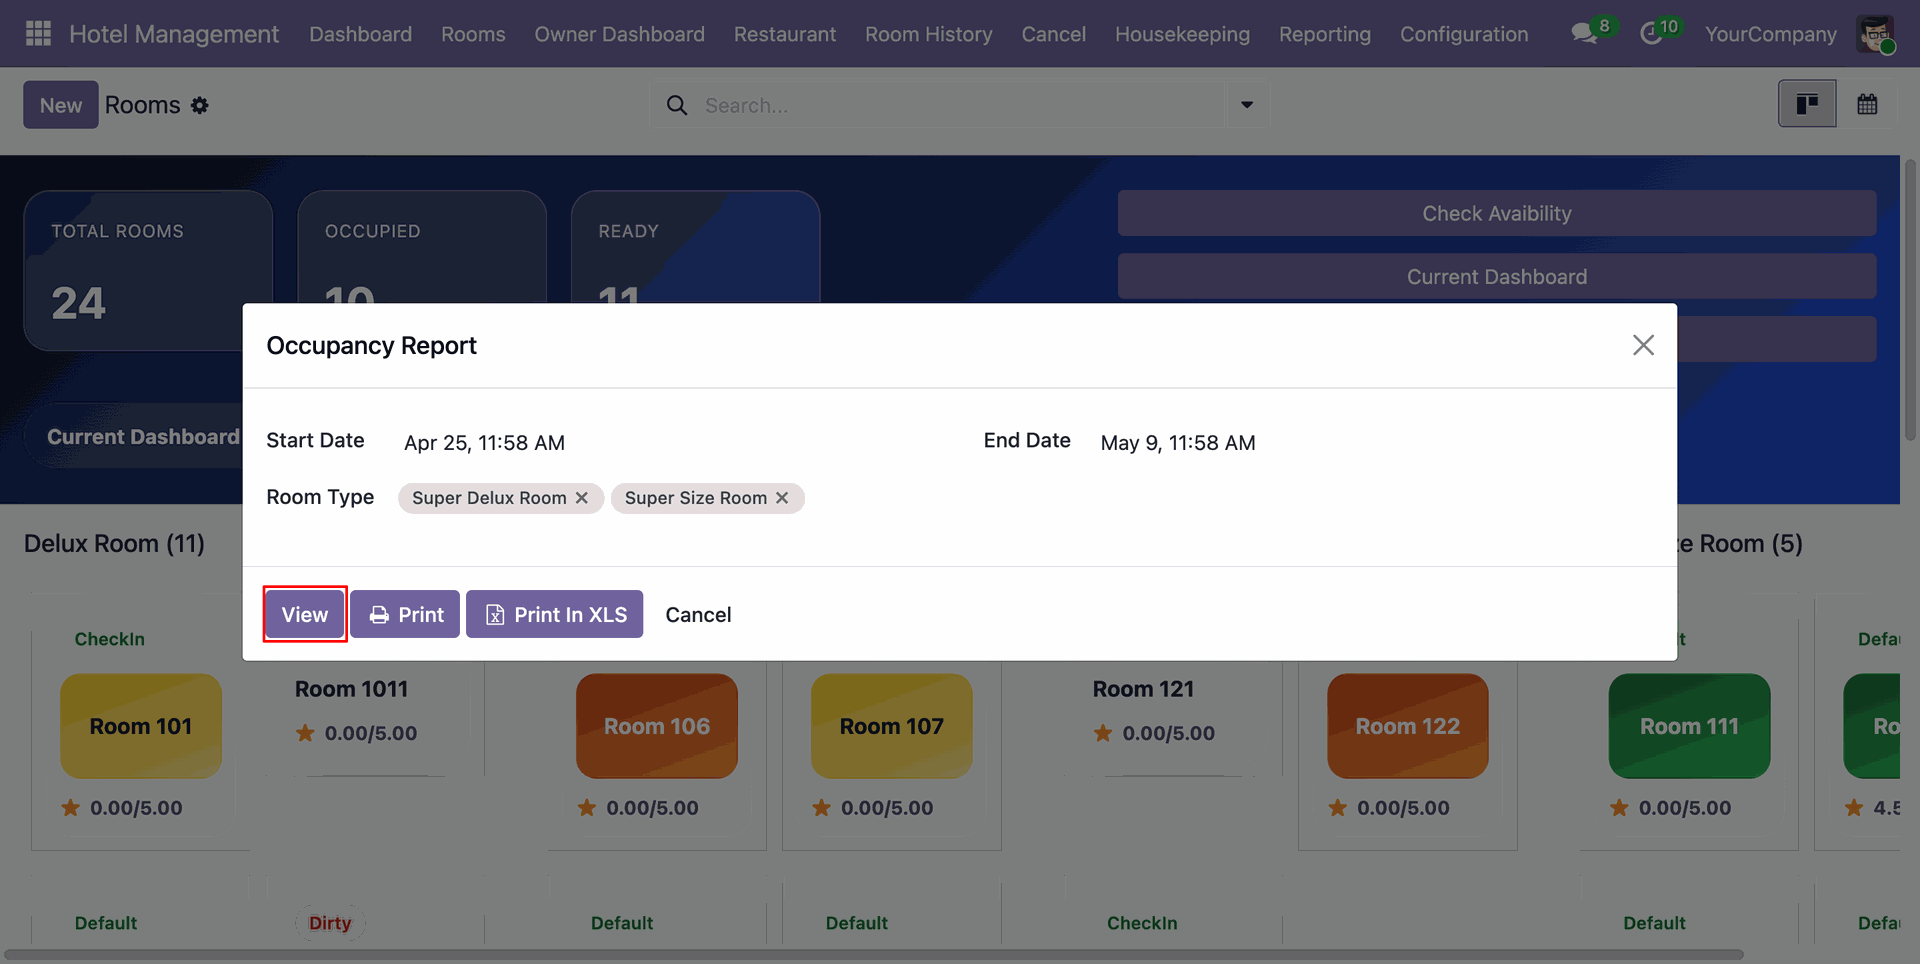
Occupancy Report view looks like below.
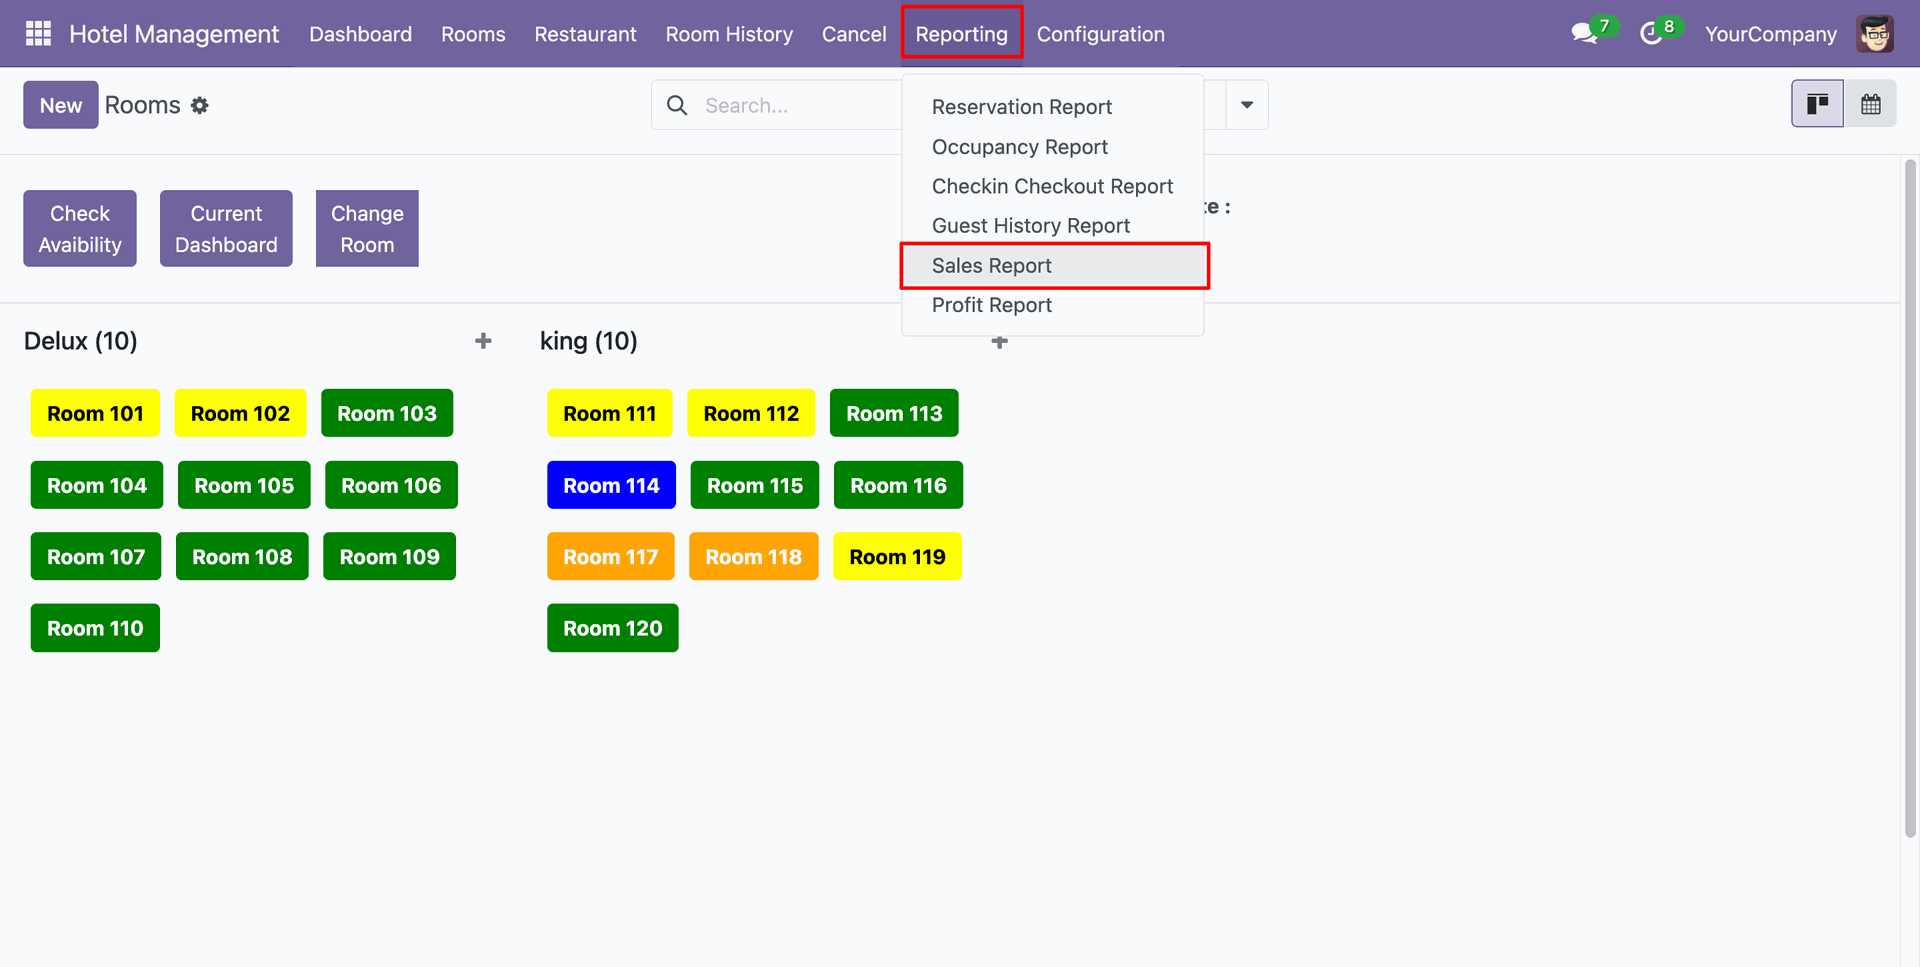
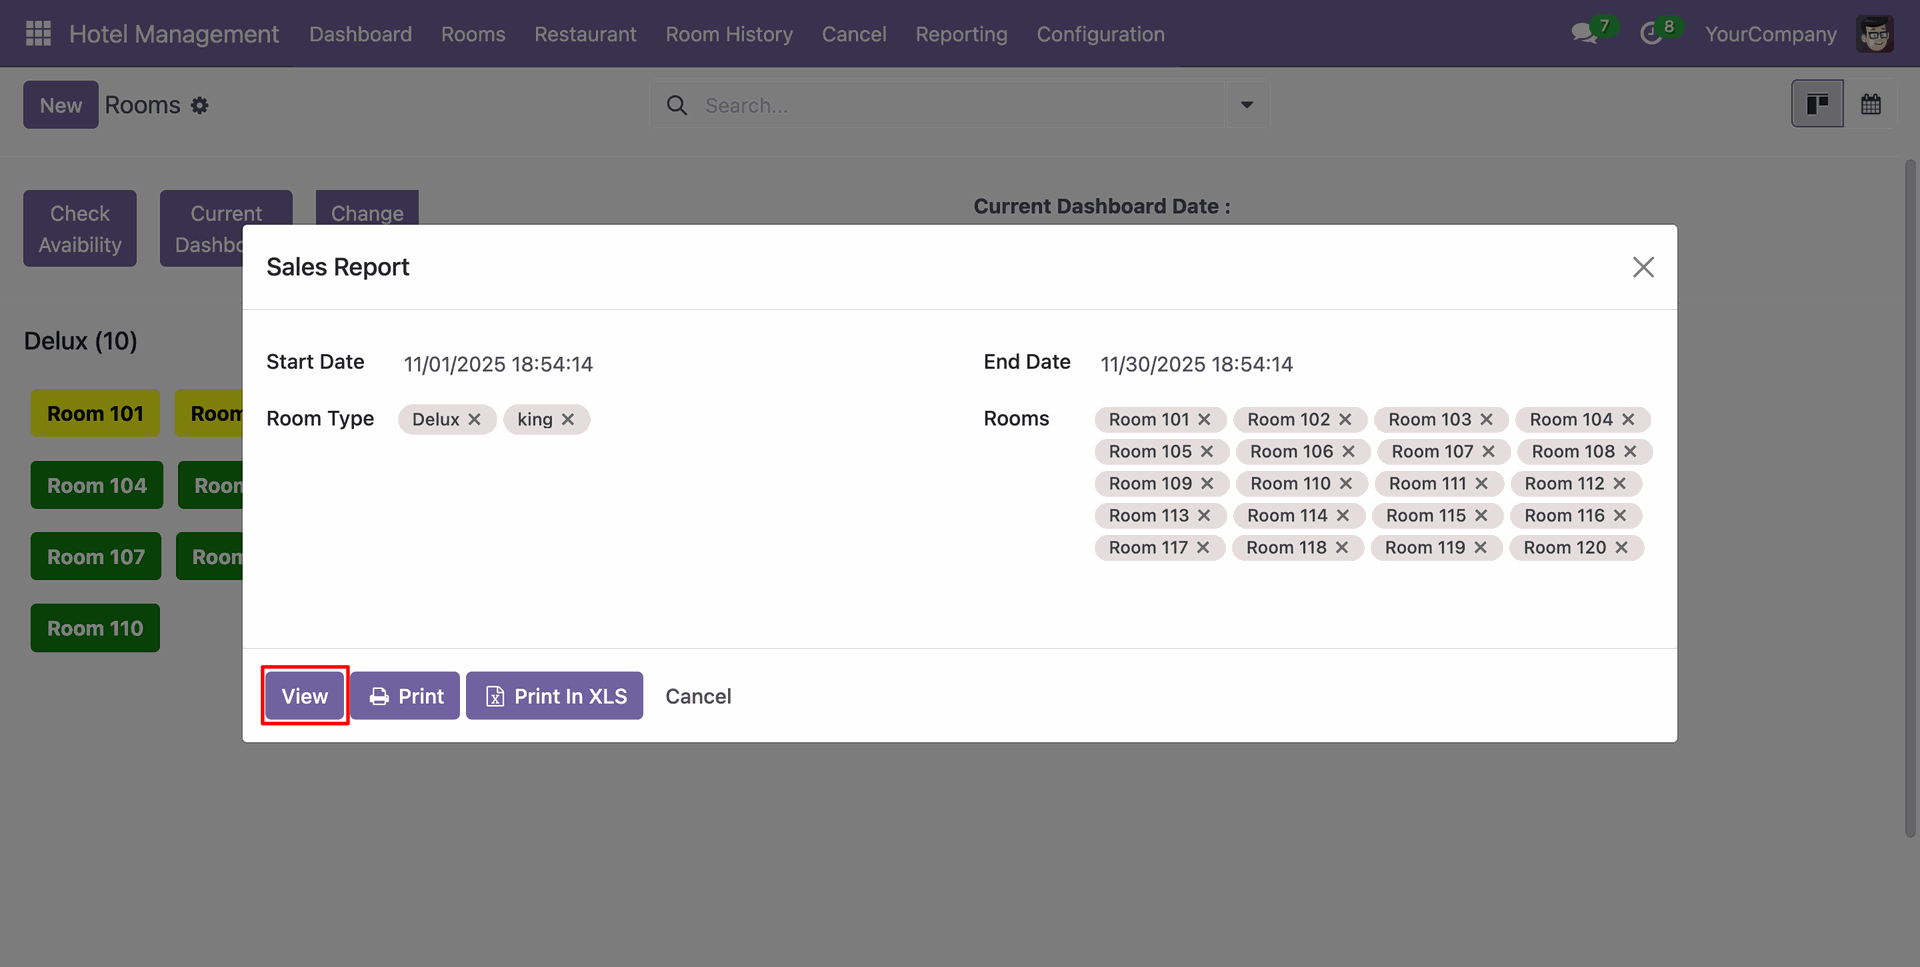
Go to the Reporting ==> Sales Report
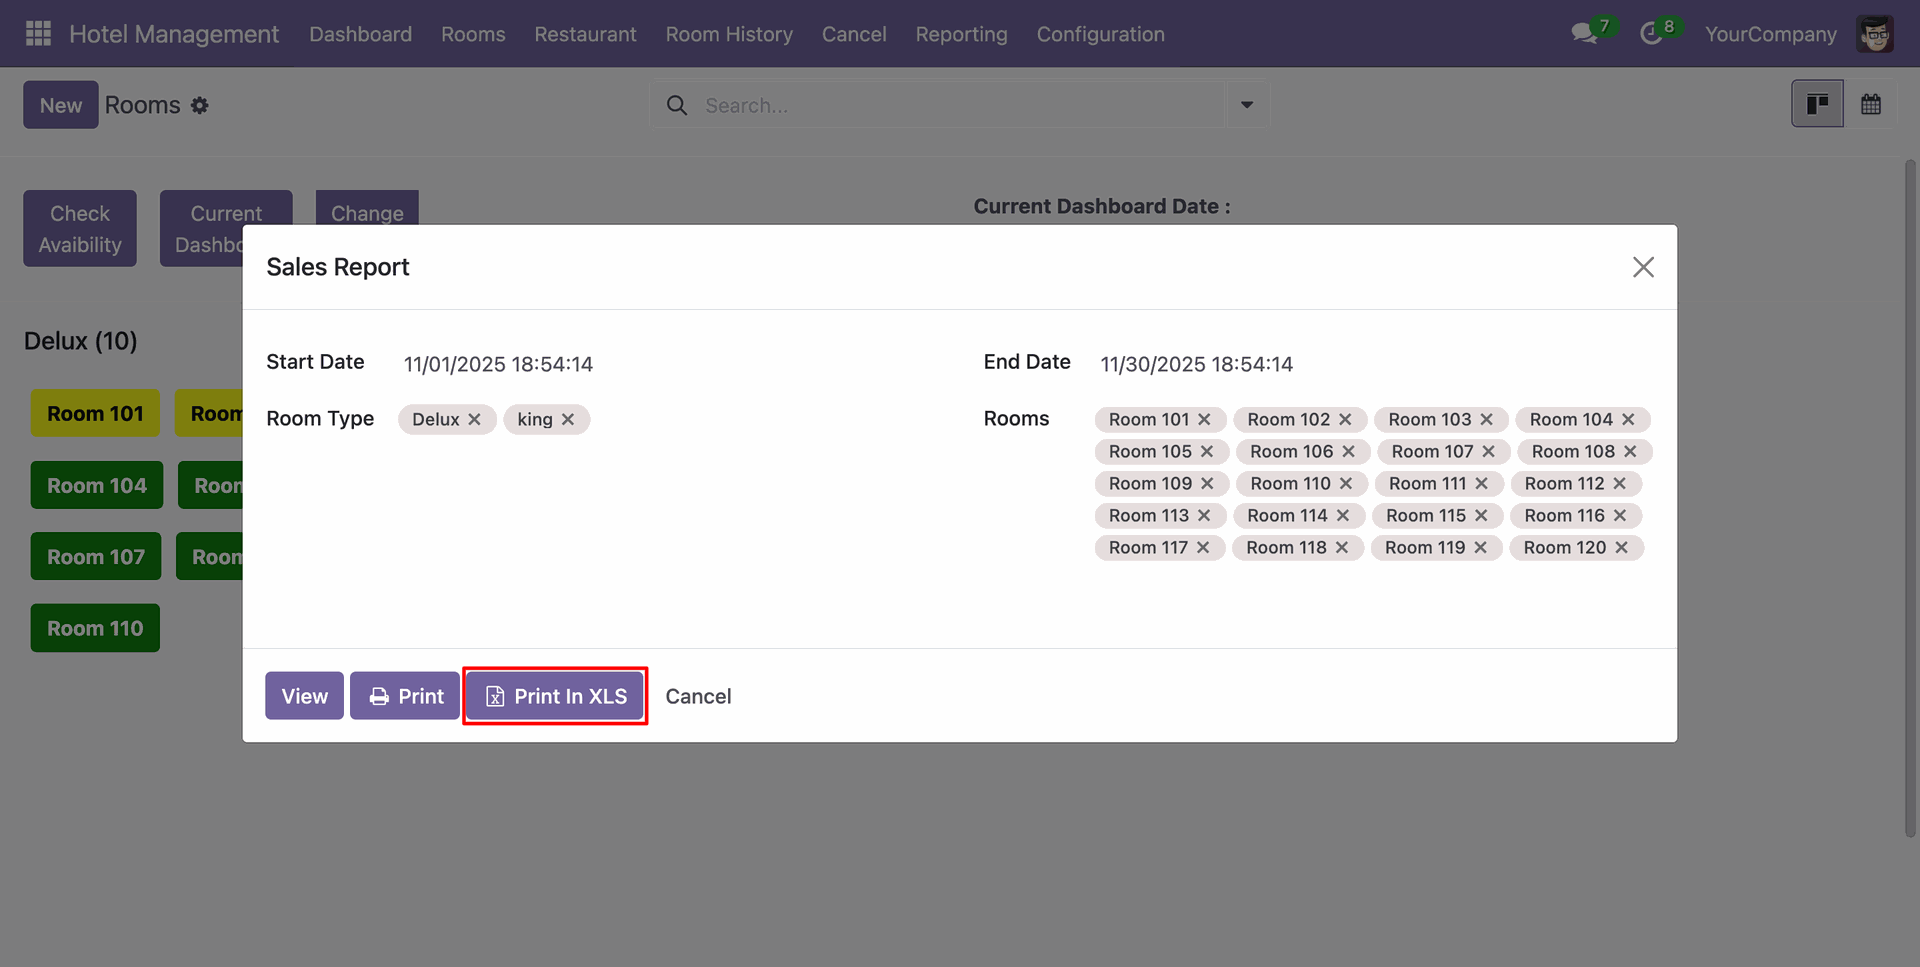
Add details and click on the "Print" button.

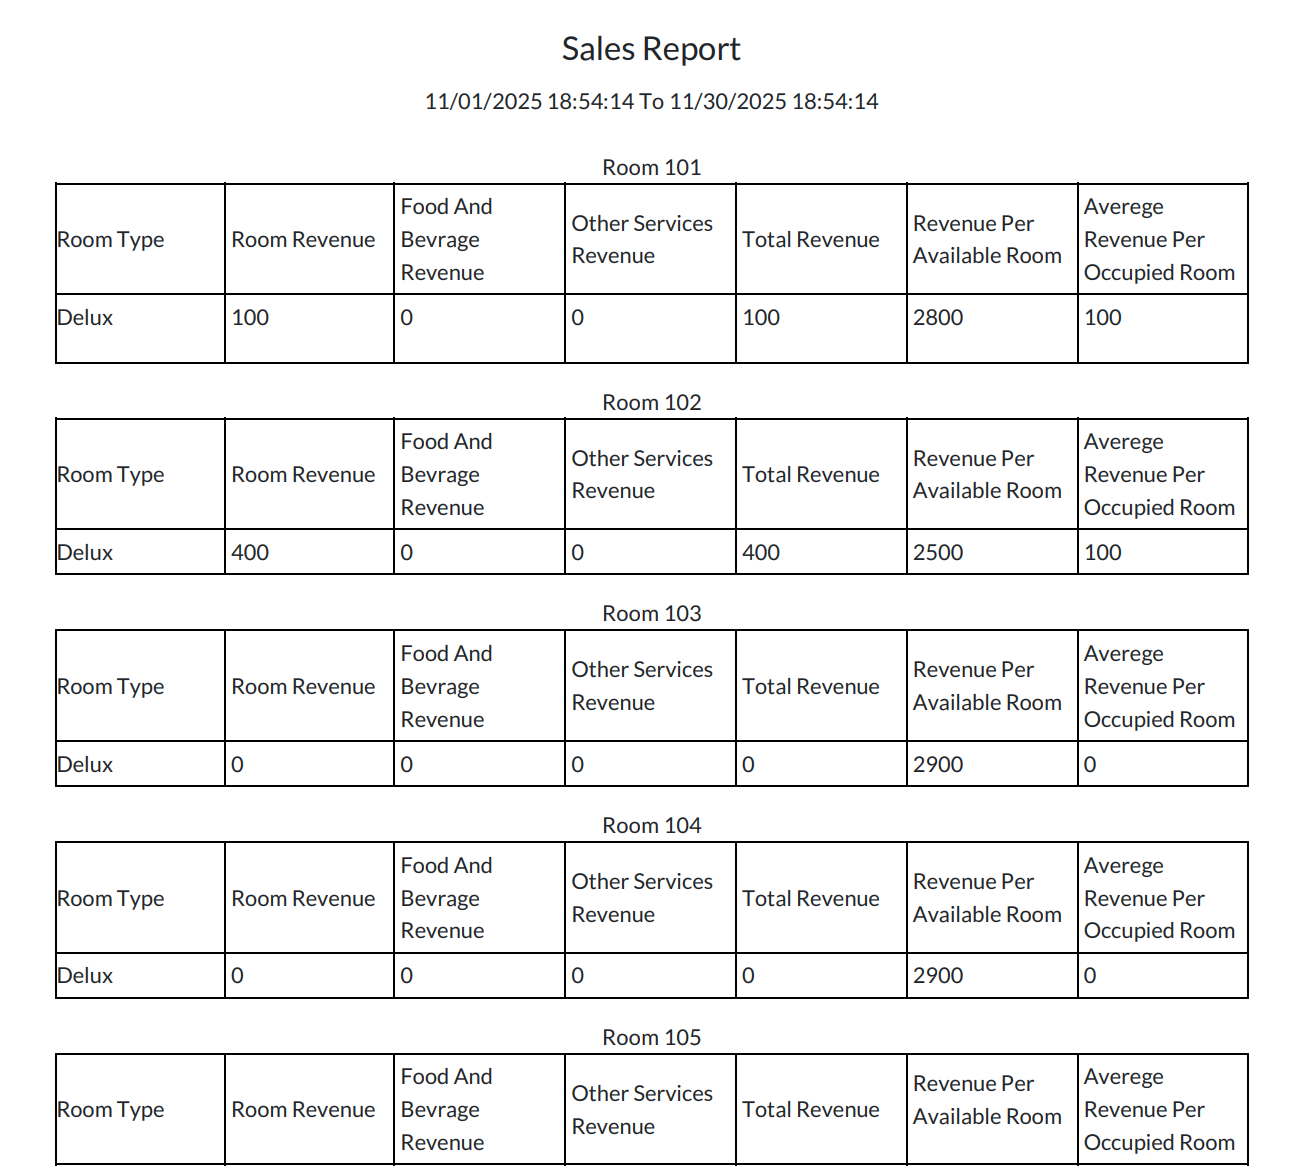
PDF report of the Reservation looks like below.
Add details and click on the "Print In XLS" button.
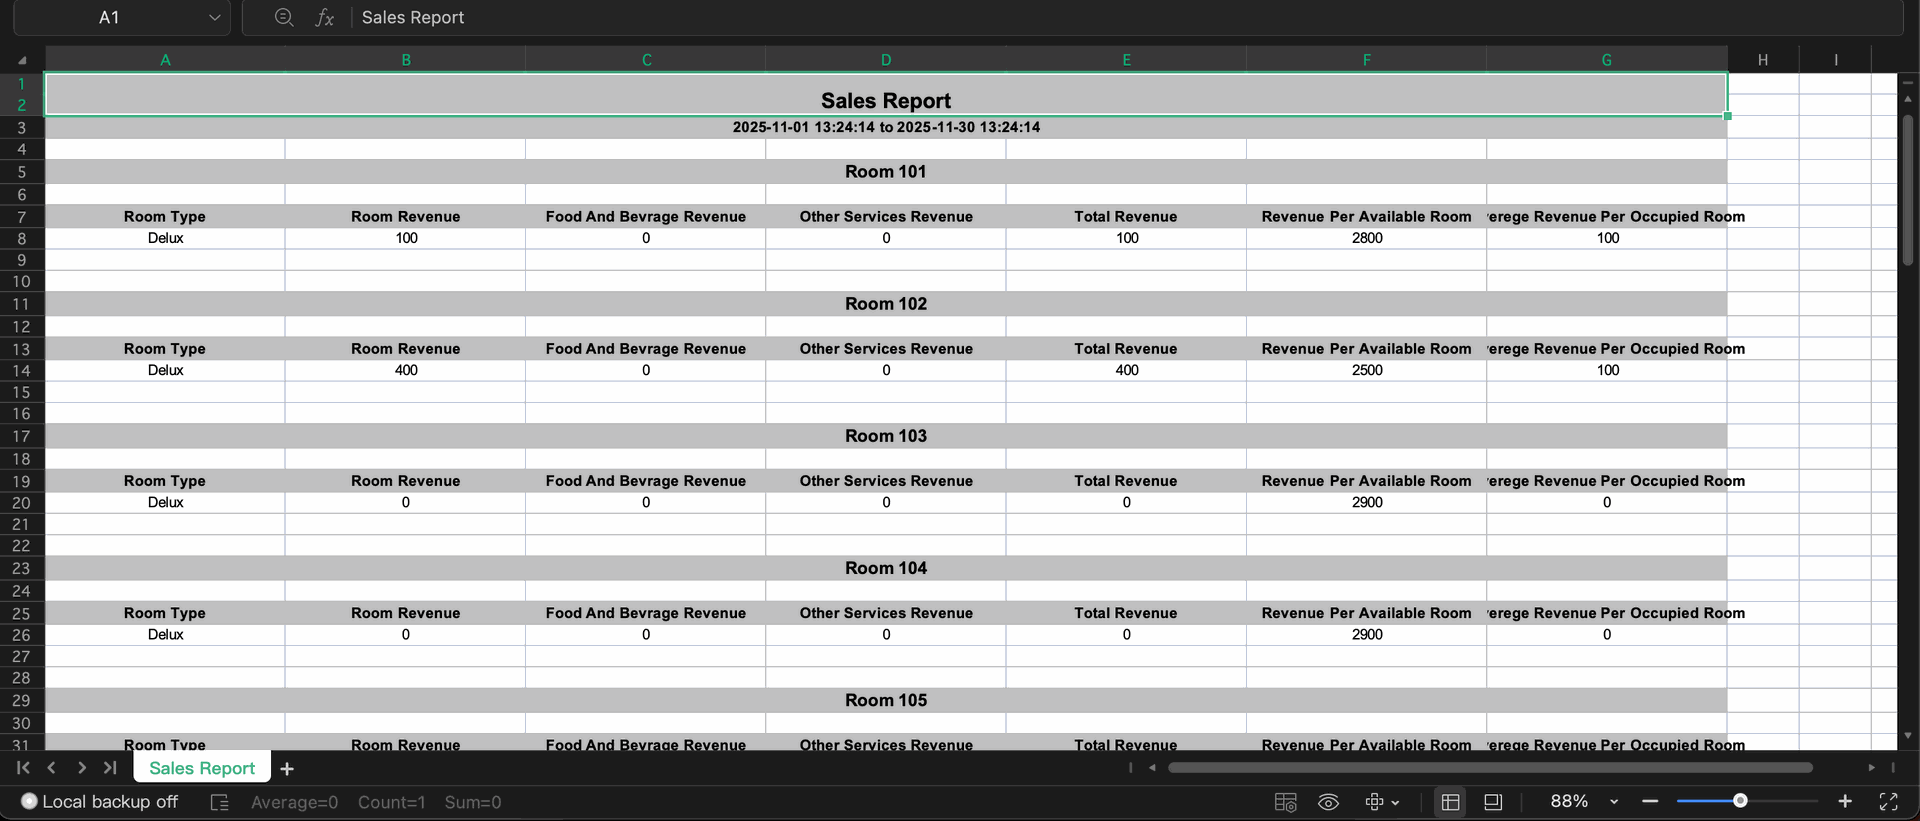
XLS report of the Reservation looks like below.
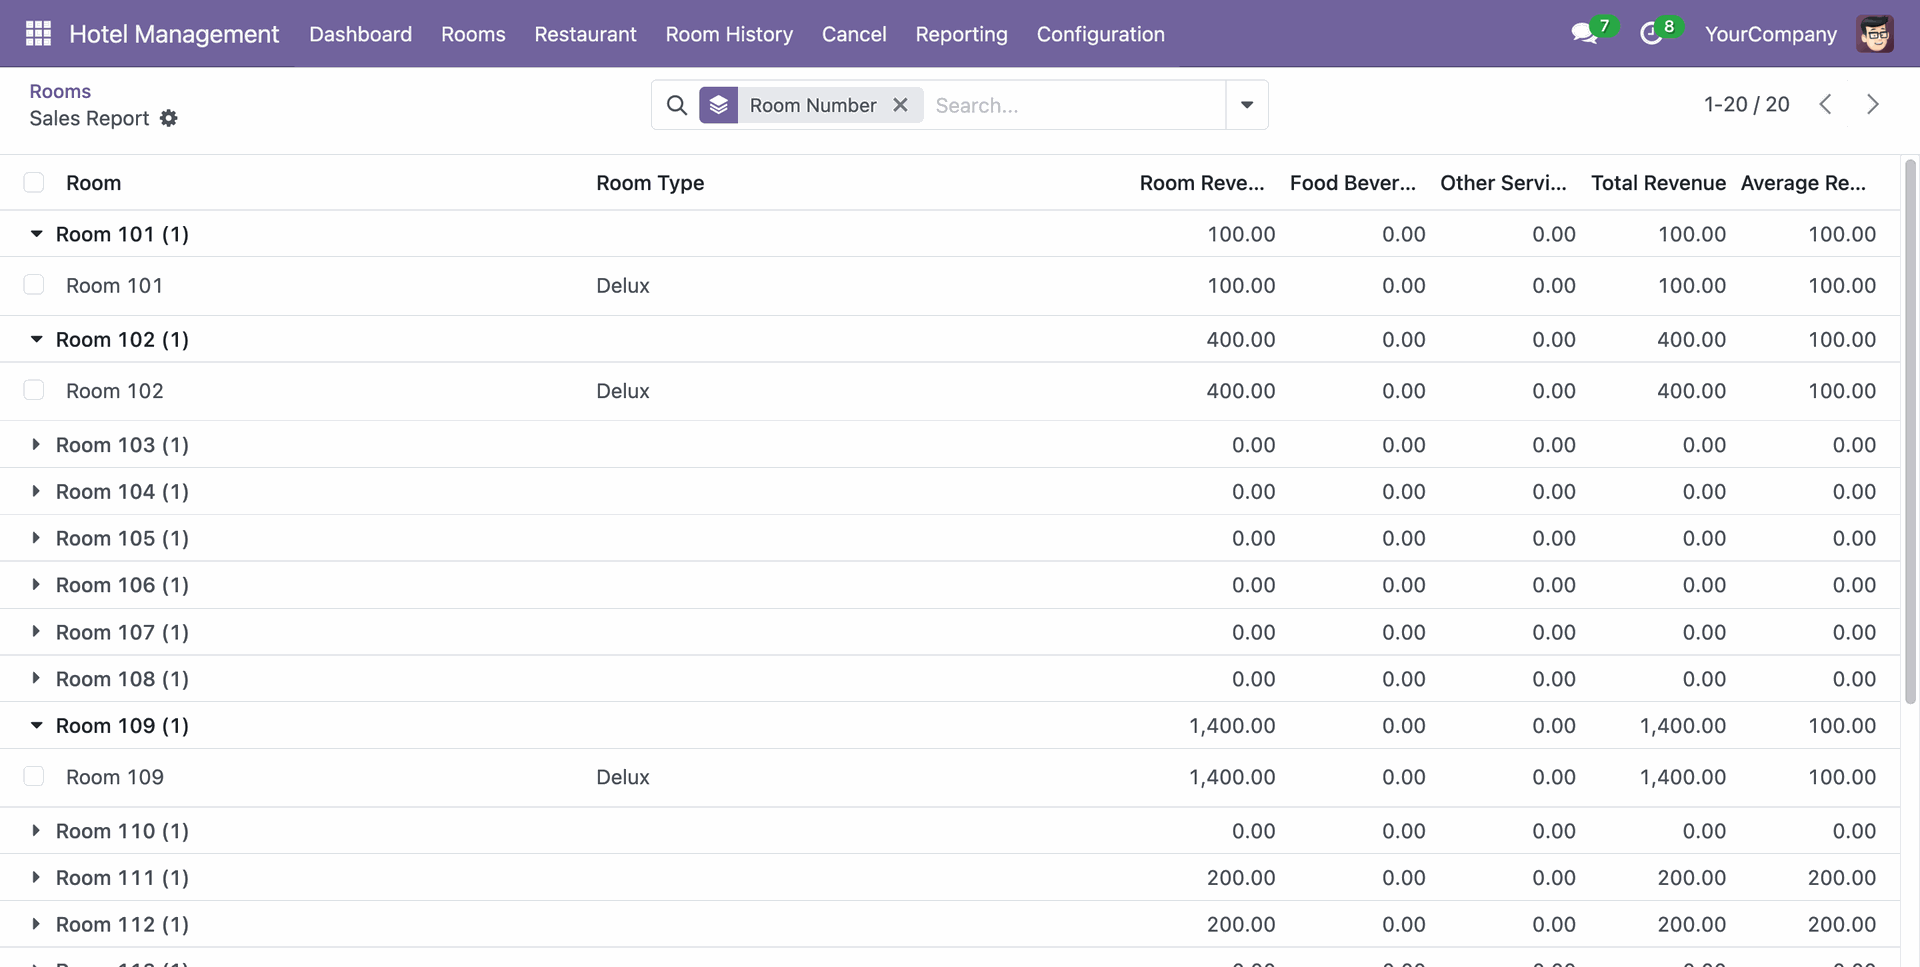
Add details and click on the "View" button.
Sales Report view looks like below.
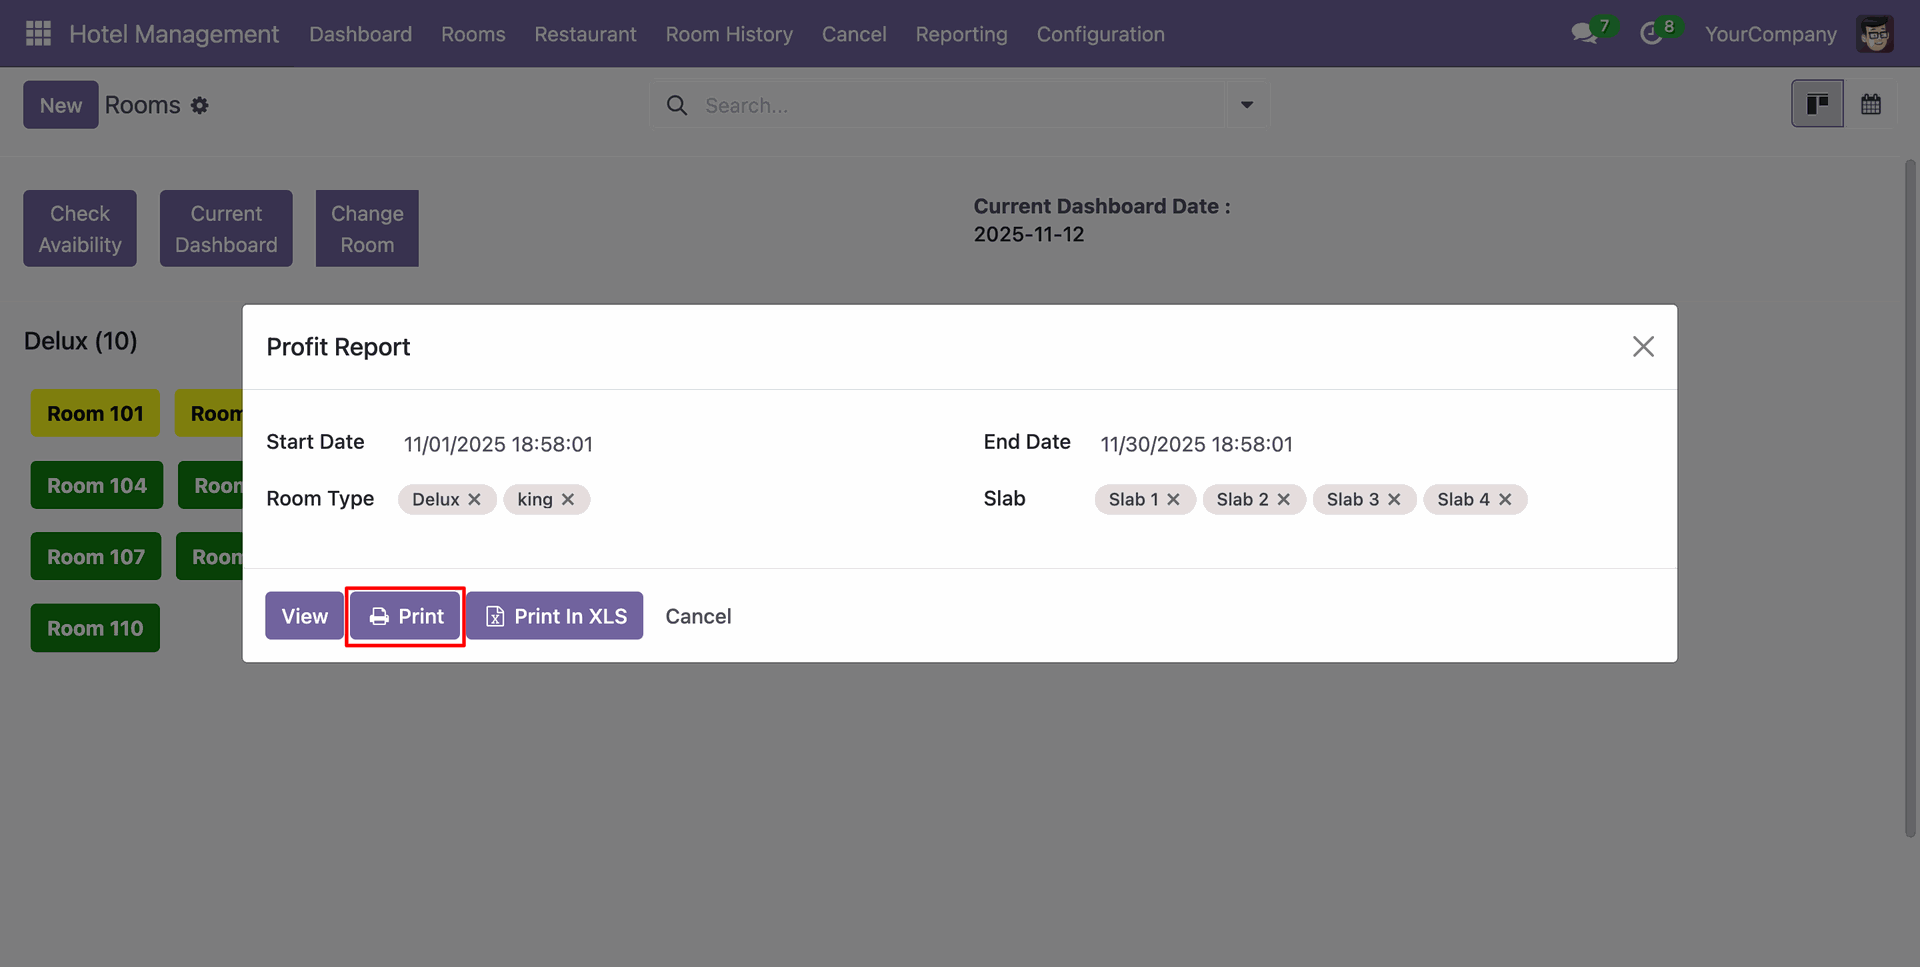
Go to the Reporting ==> Profit Report

Add details and click on the "Print" button.
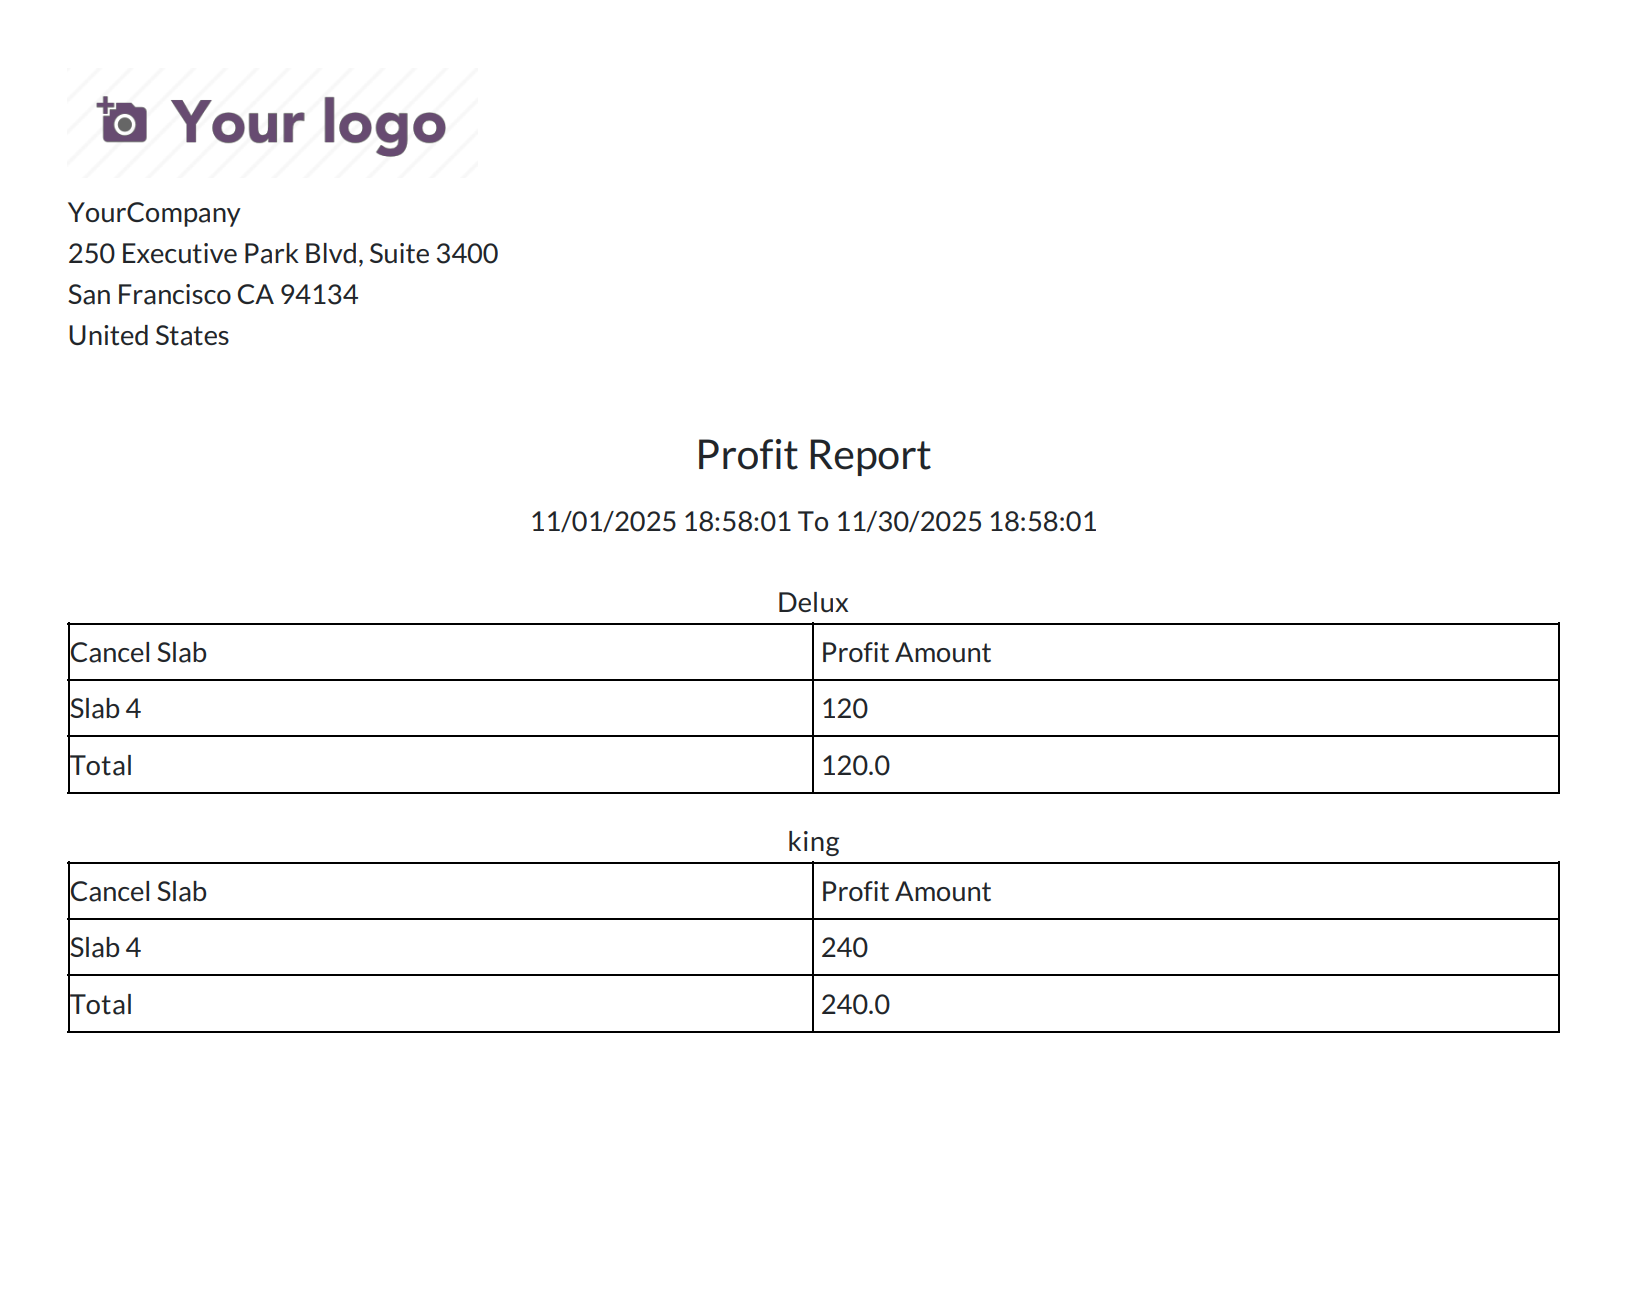
PDF report of the Reservation looks like below.
Add details and click on the "Print In XLS" button.

XLS report of the Reservation looks like below.
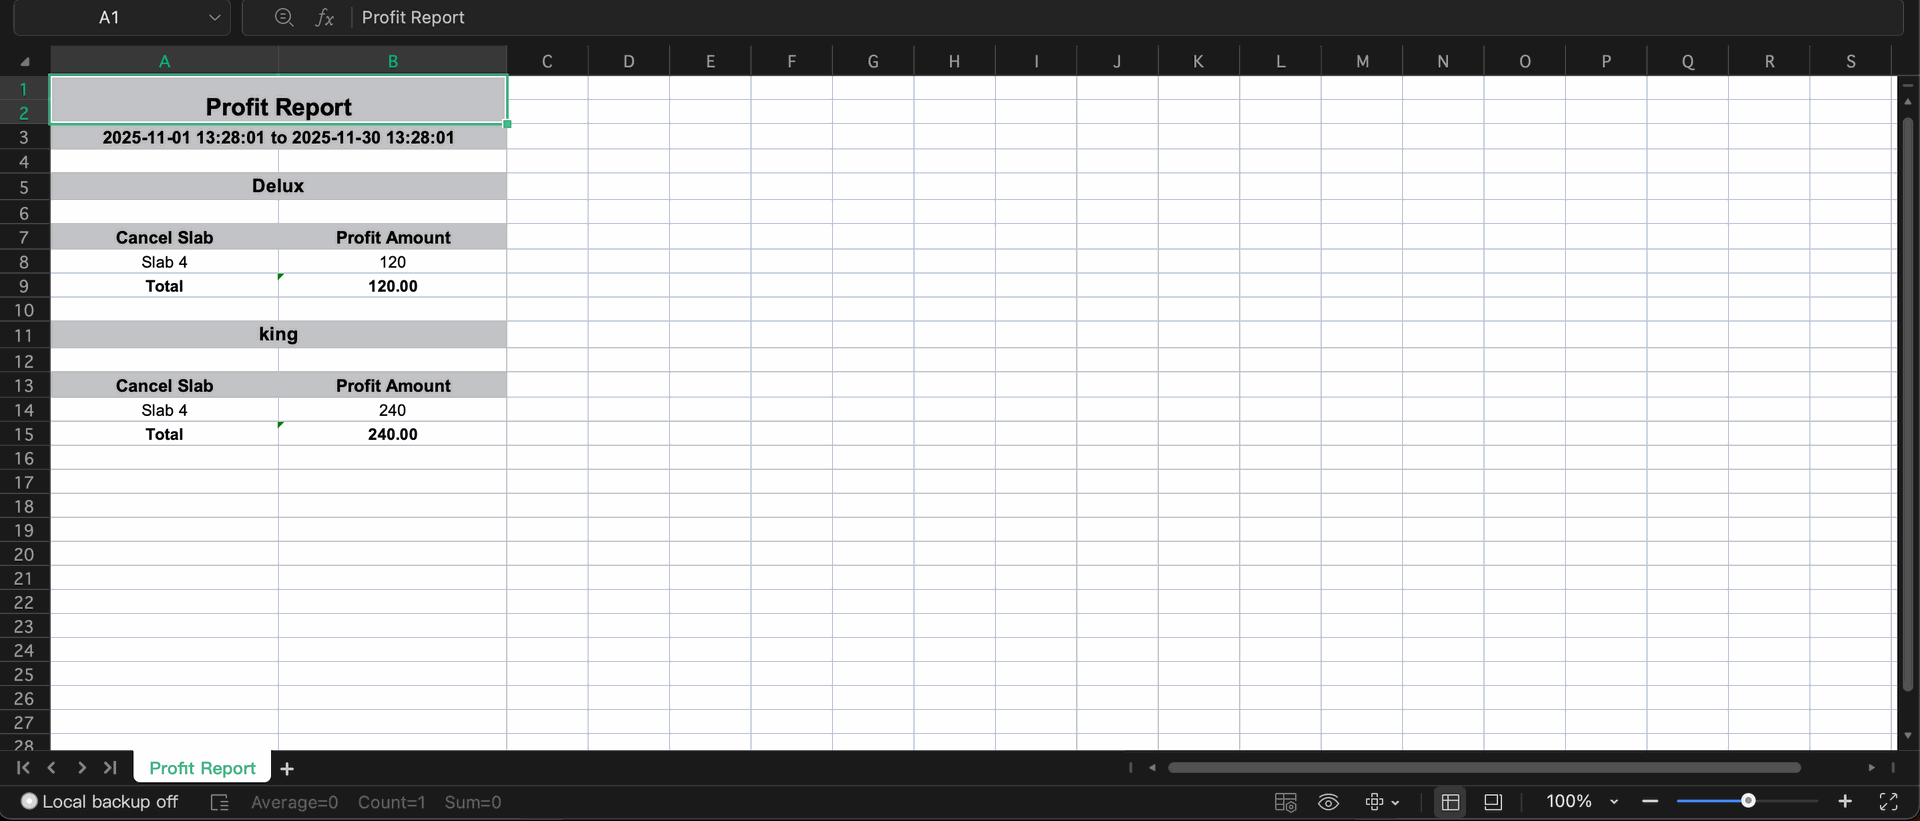
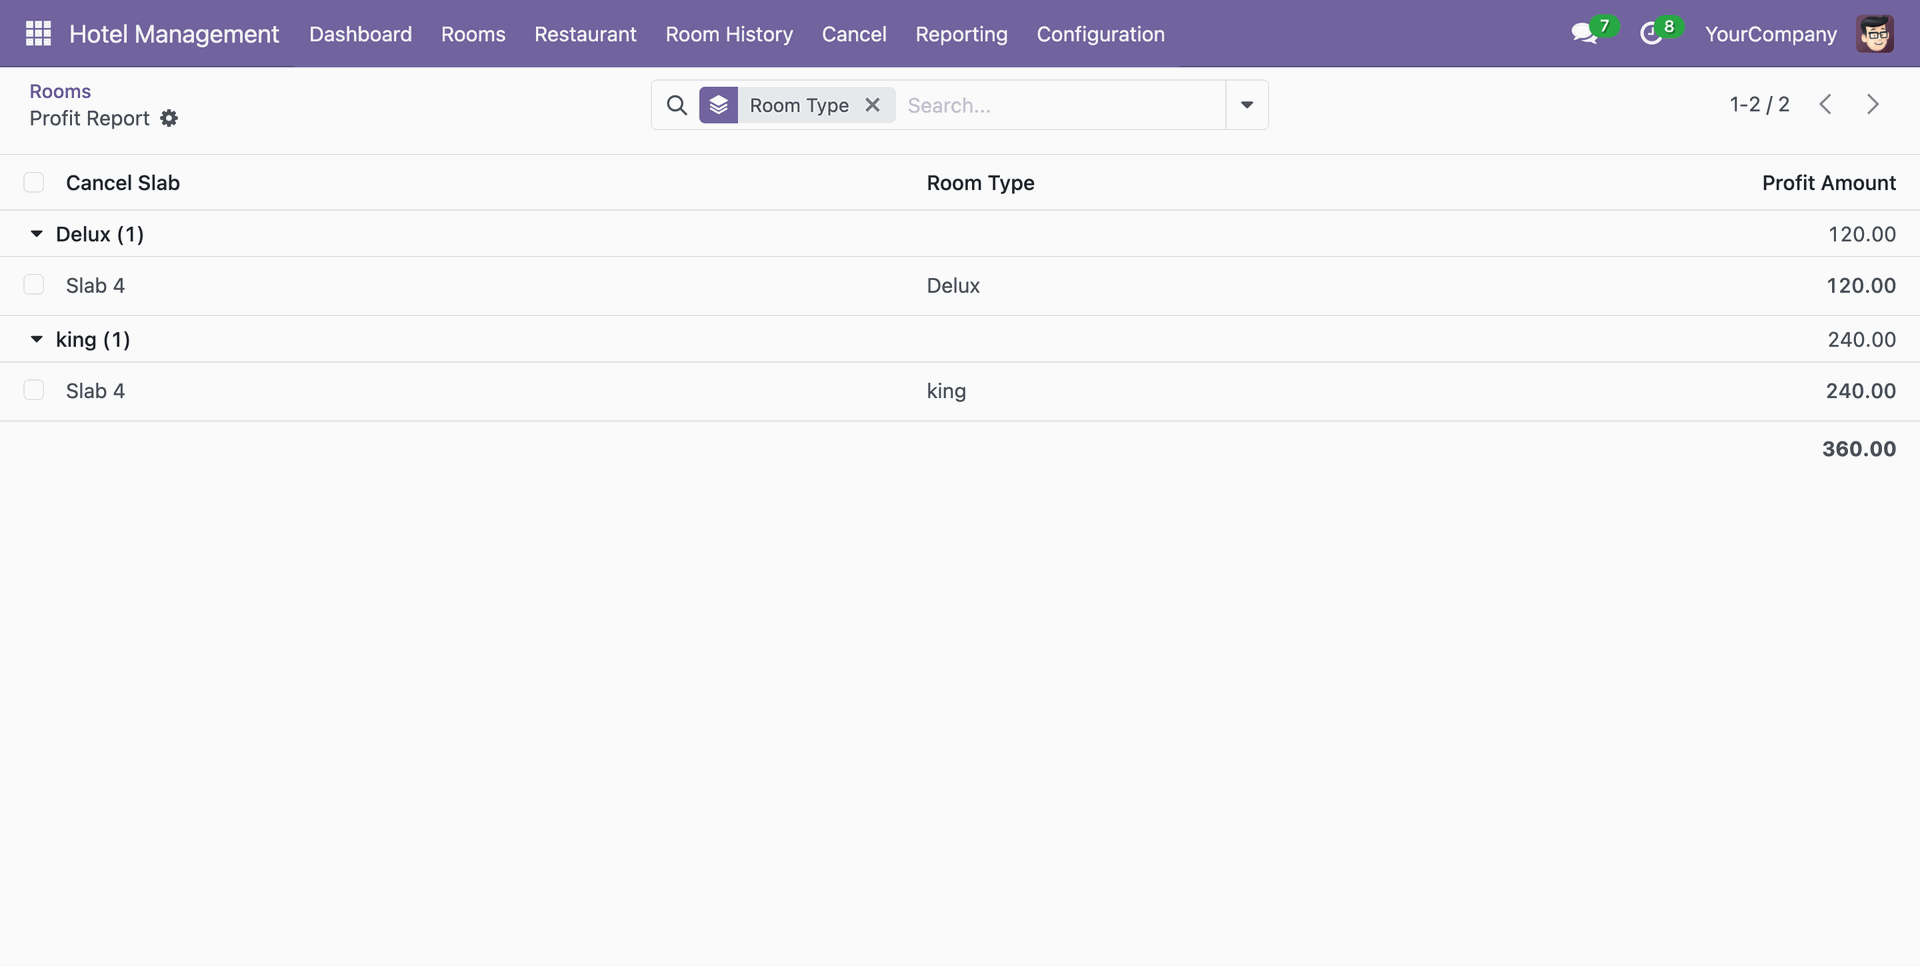
Add details and click on the "View" button.

Profit Report view looks like below.
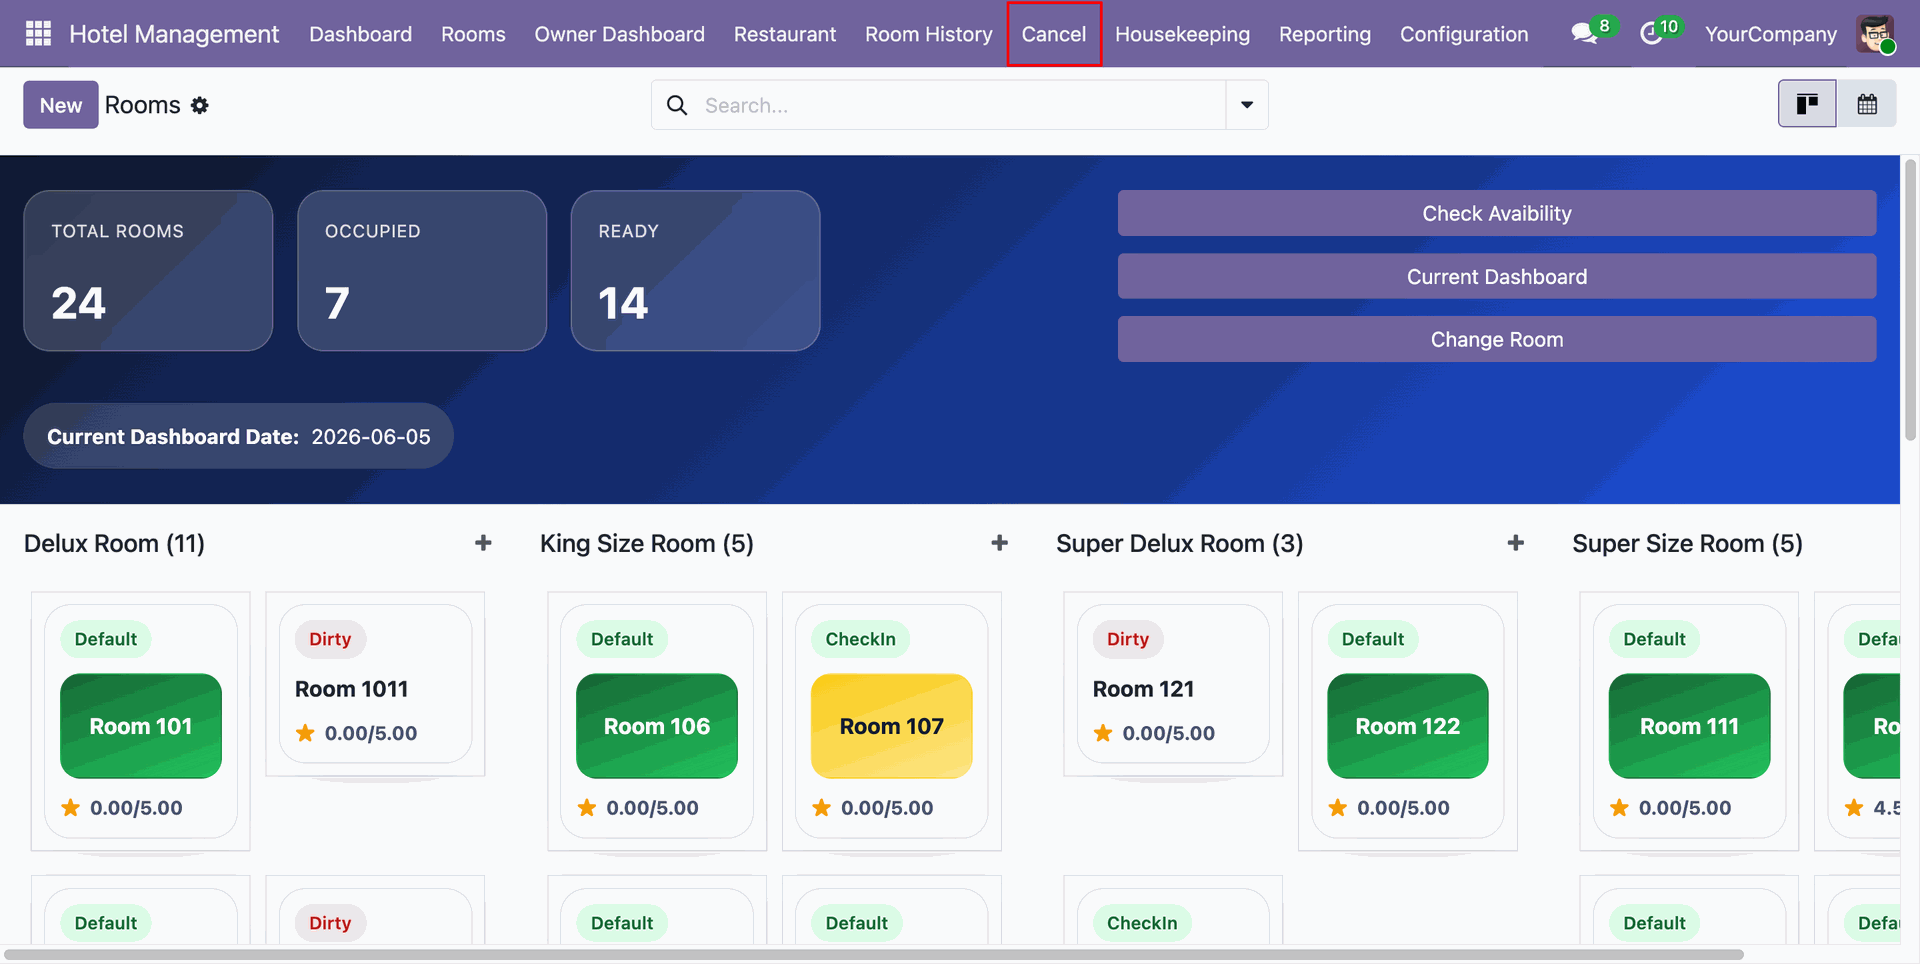
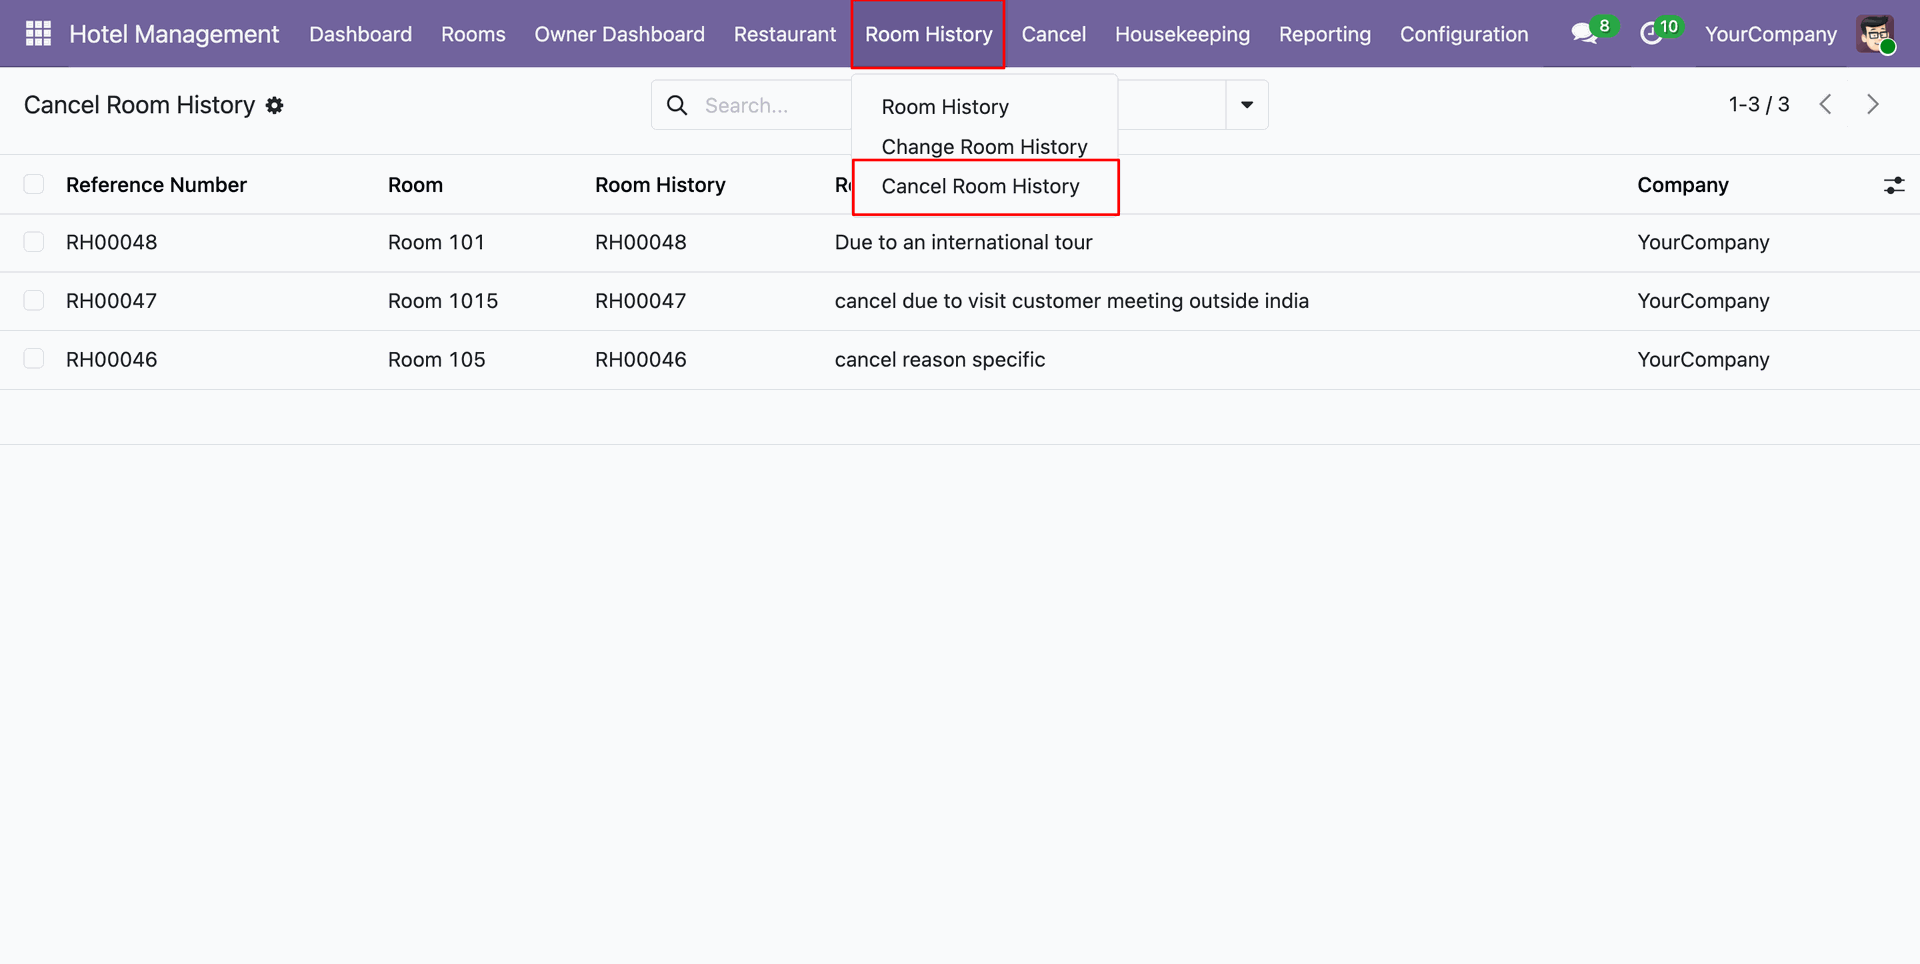
Click on the Cancel menu from to cancel the room reservation.
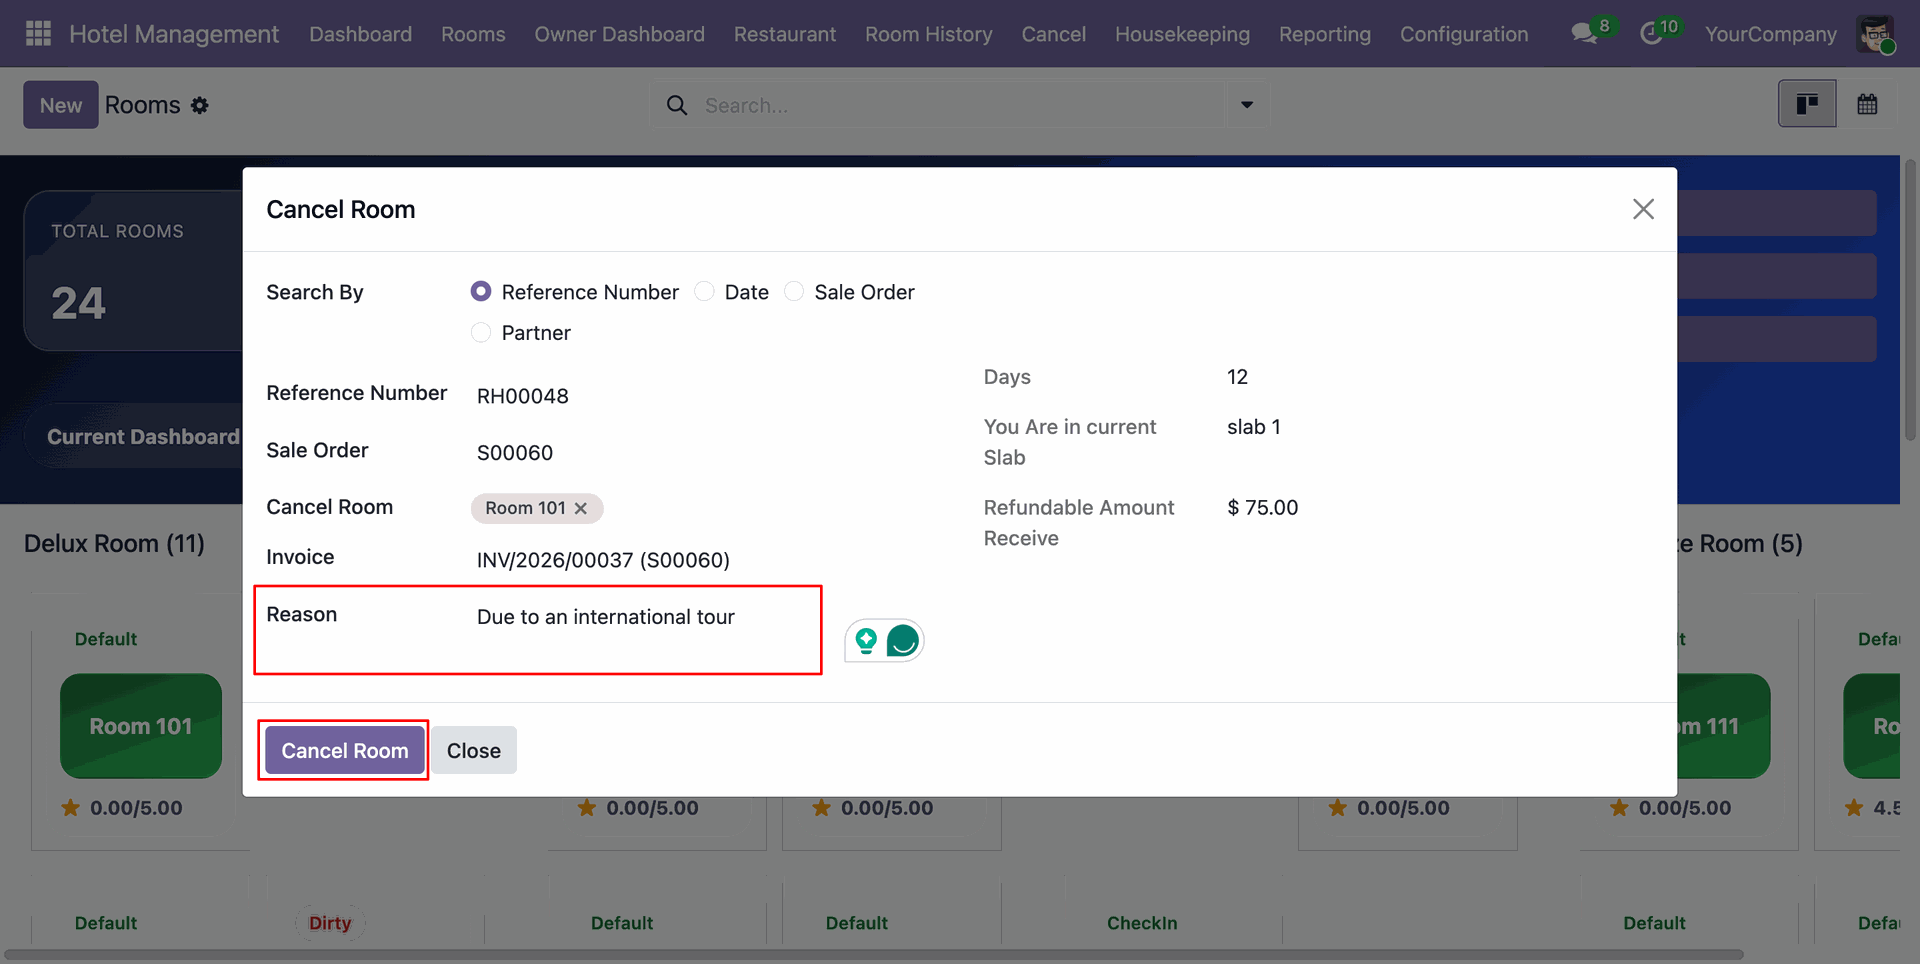
By clicking the Cancel menu, a Cancel Room wizard will open. Enter the relevant details, provide a Cancellation Reason, and then click Cancel Room to complete the room cancellation process.
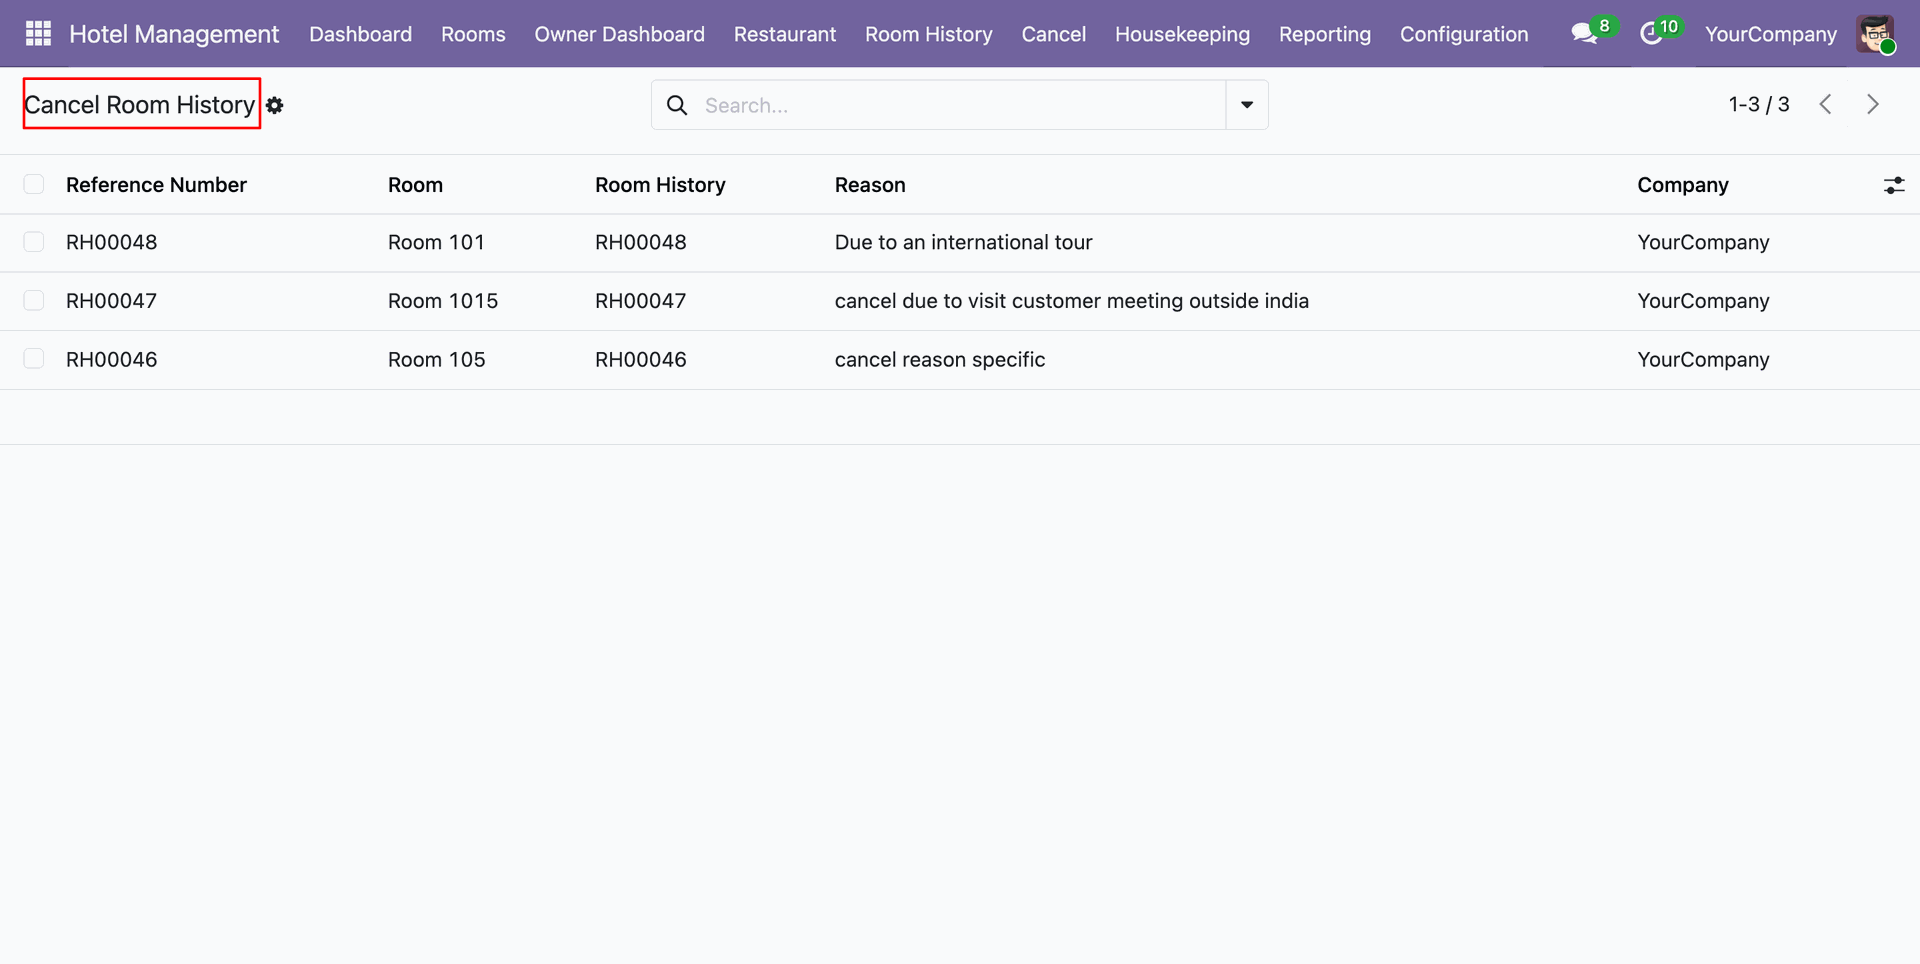
Go to the Cancel Room History menu to view all cancelled room bookings along with their cancellation details, reasons, and history records.
Clicking on the Cancel Room History menu will open a list view of all cancelled room records.
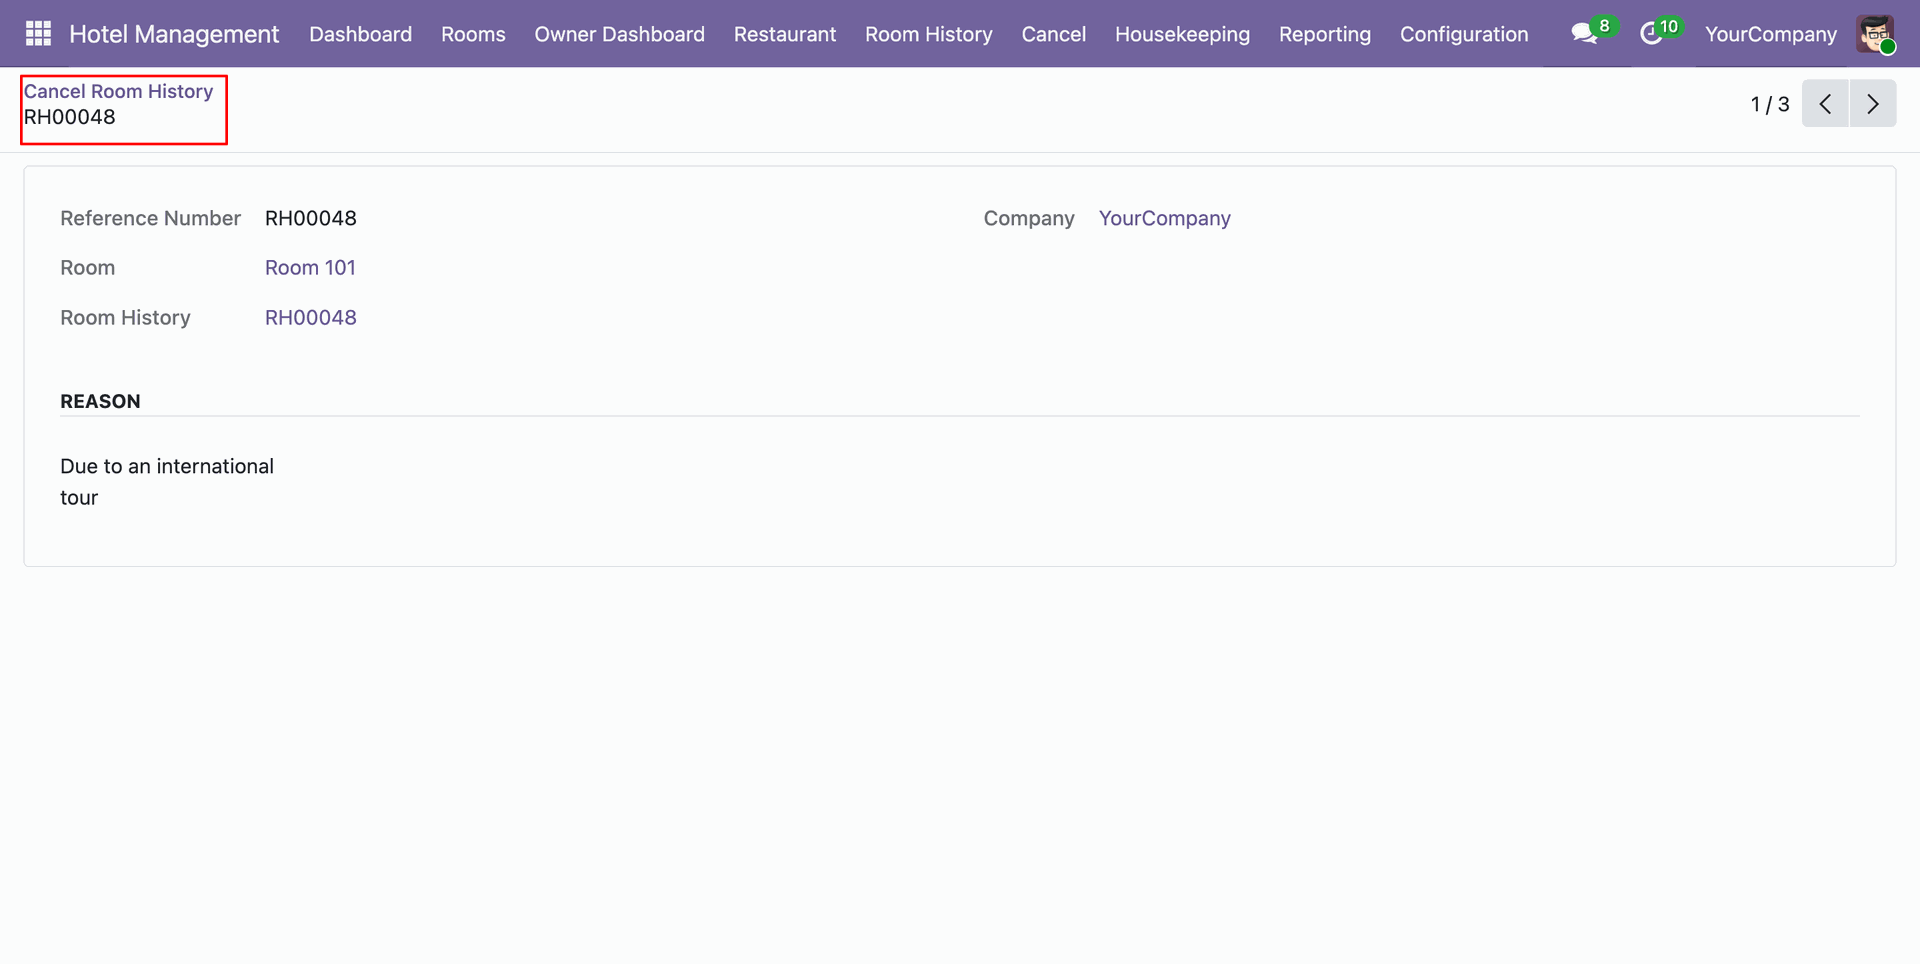
Open a record to view the cancellation details along with the reason.
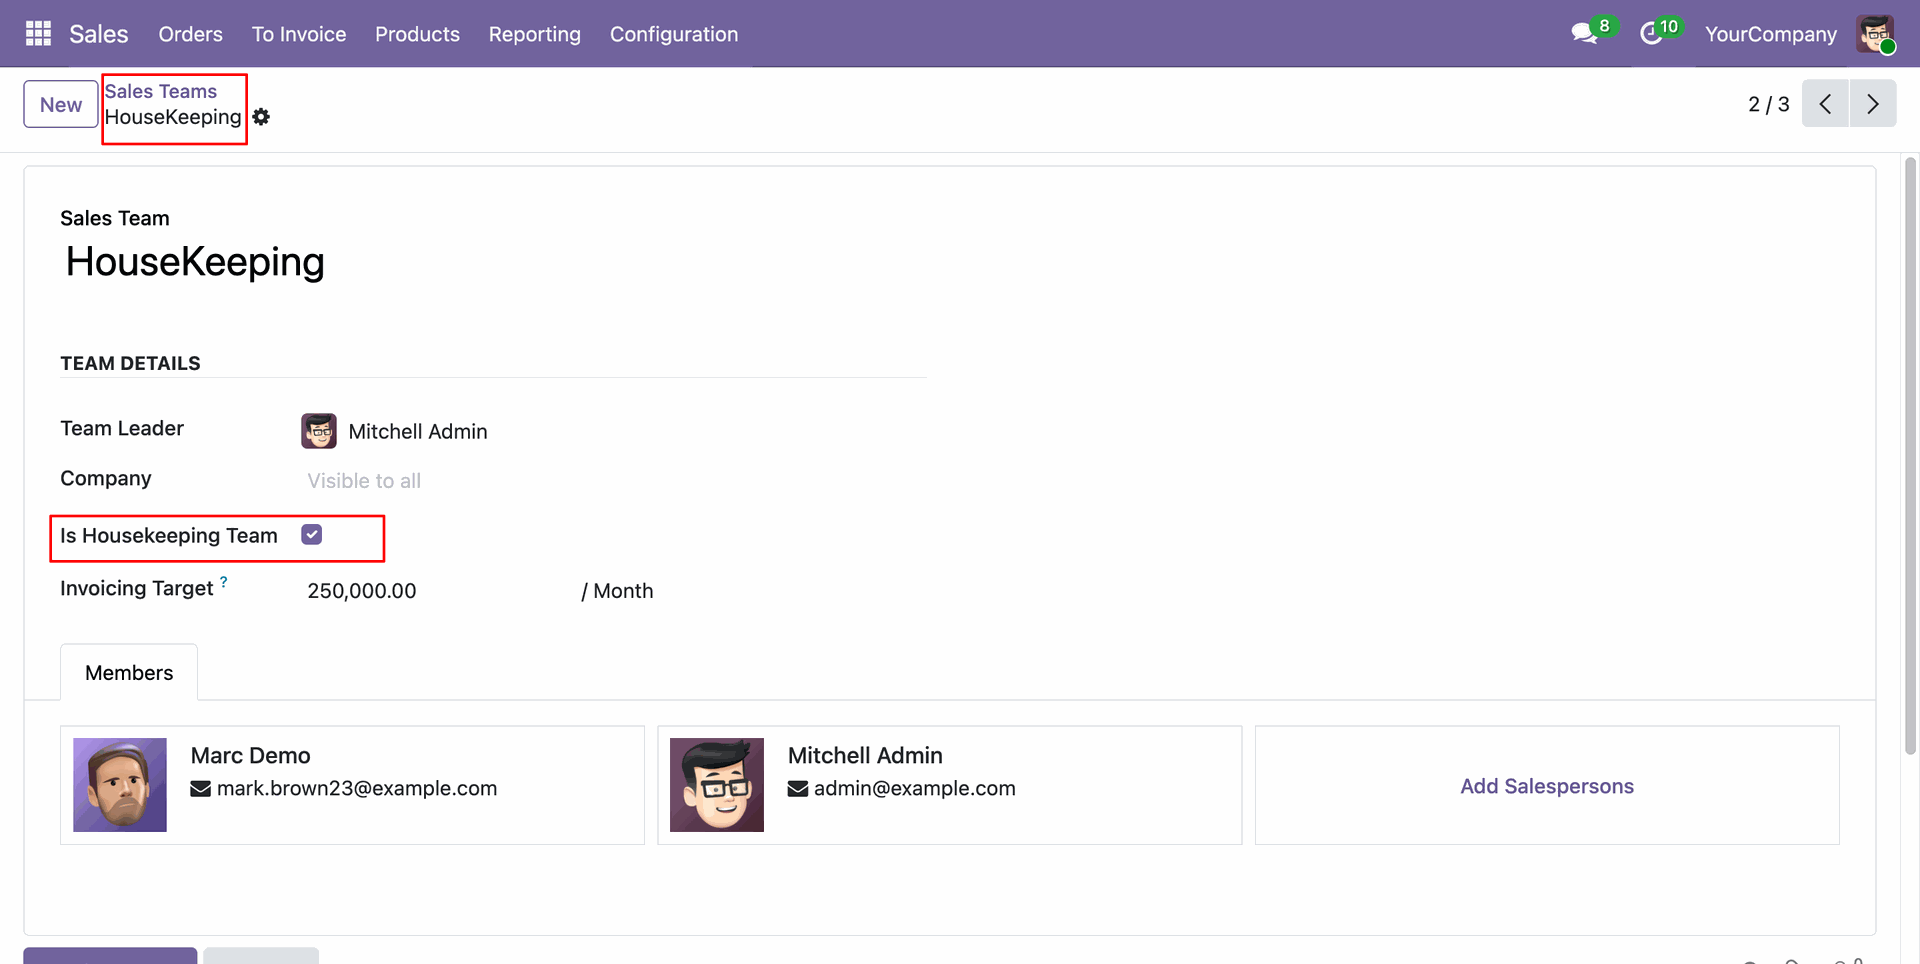
Go to the Sales Team menu and create a new team named Housekeeping Team. Enable the Is Housekeeping Team checkbox while creating the team record.
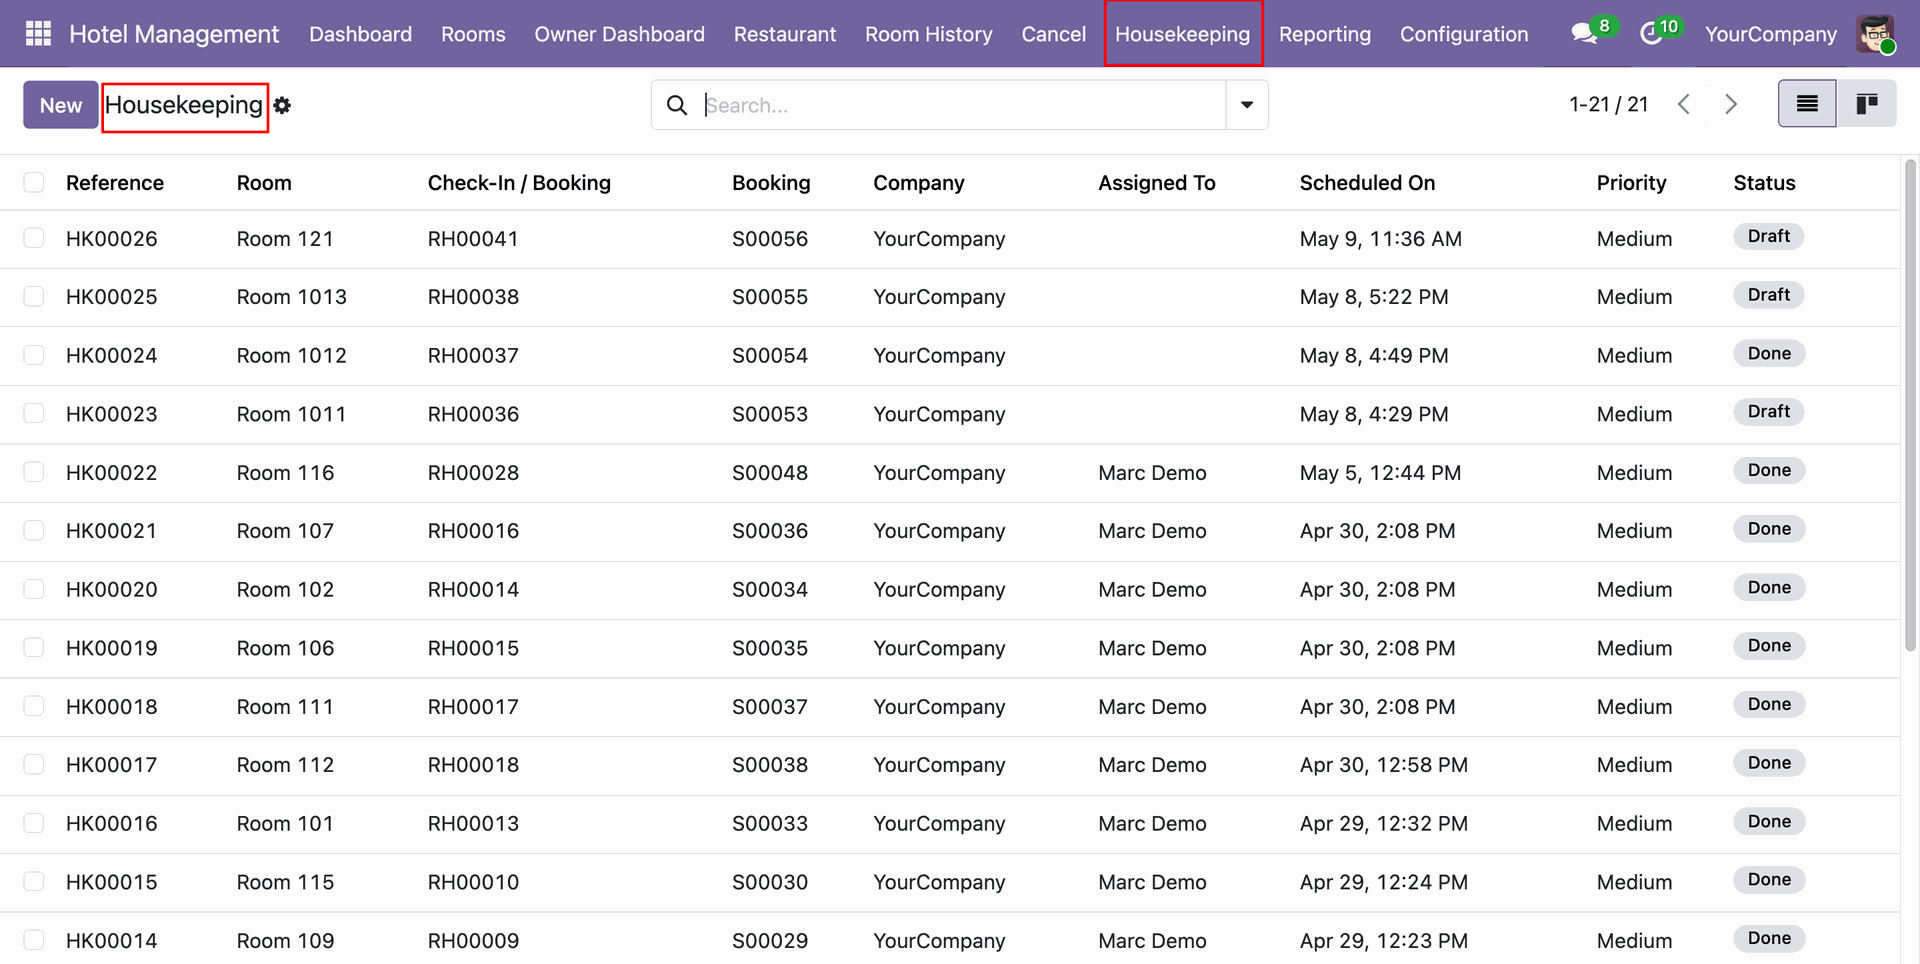
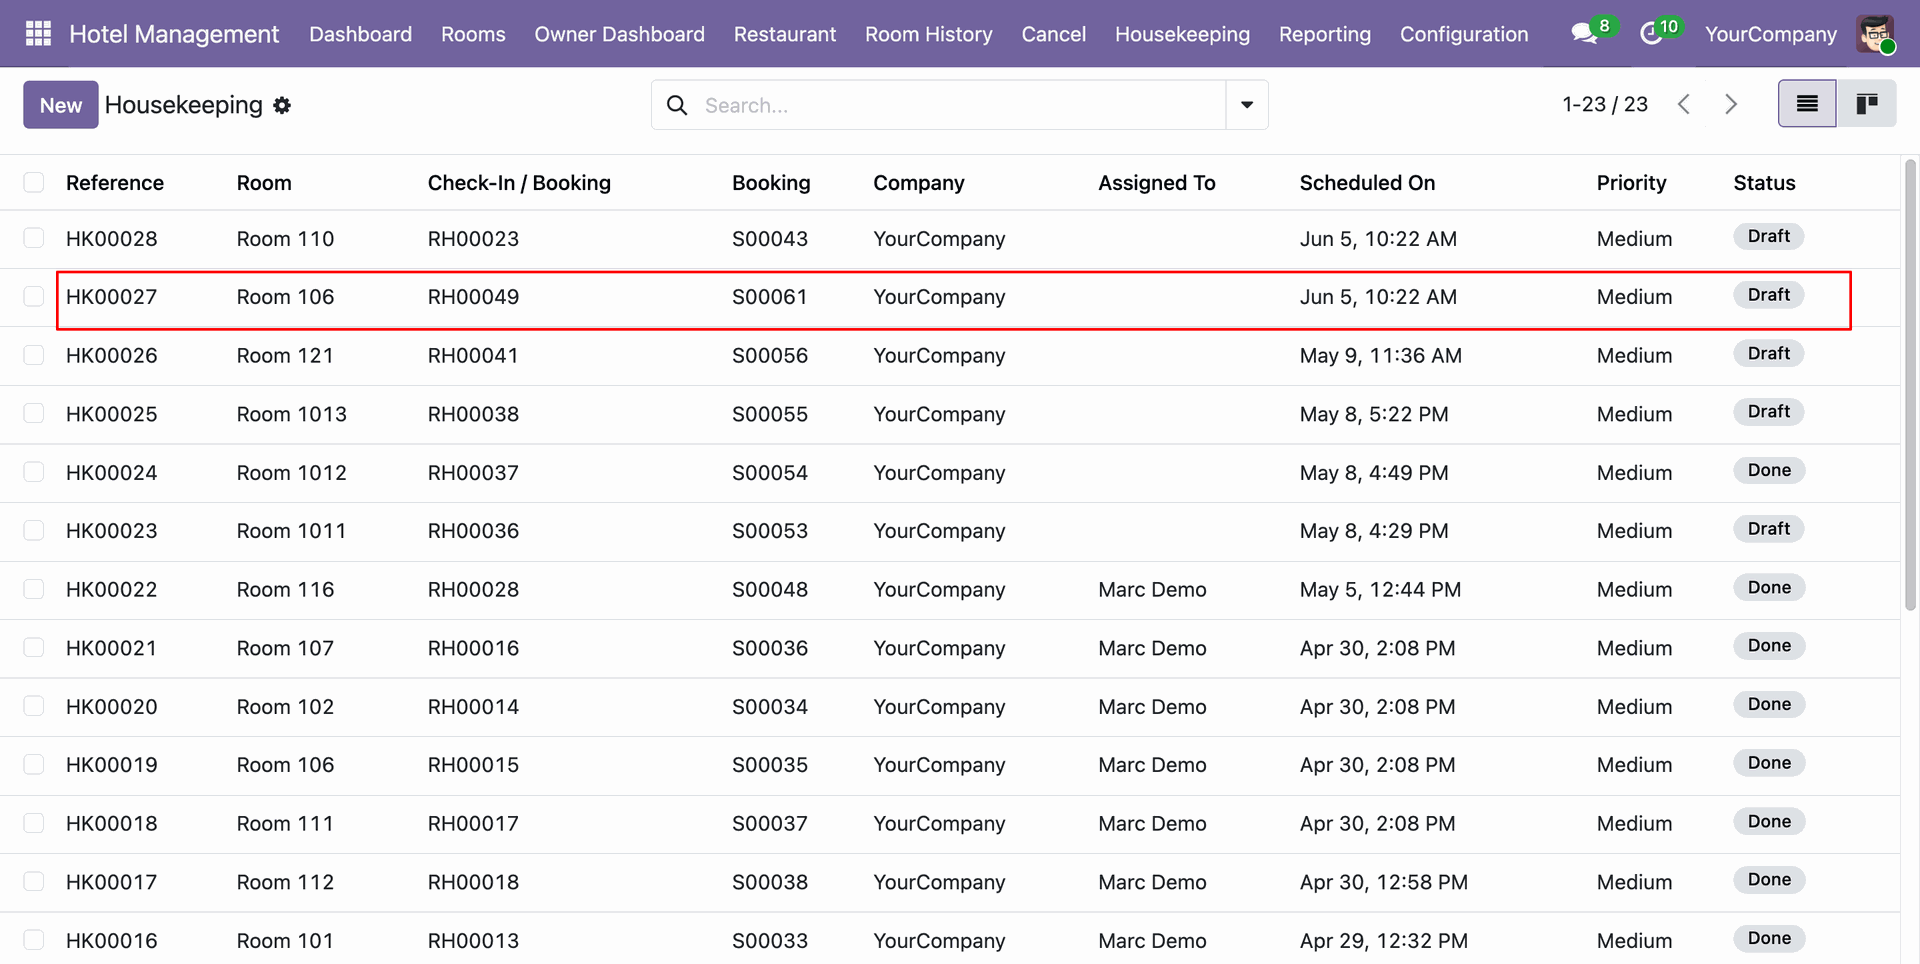
Clicking on the Housekeeping menu will open a list view of all housekeeping records.
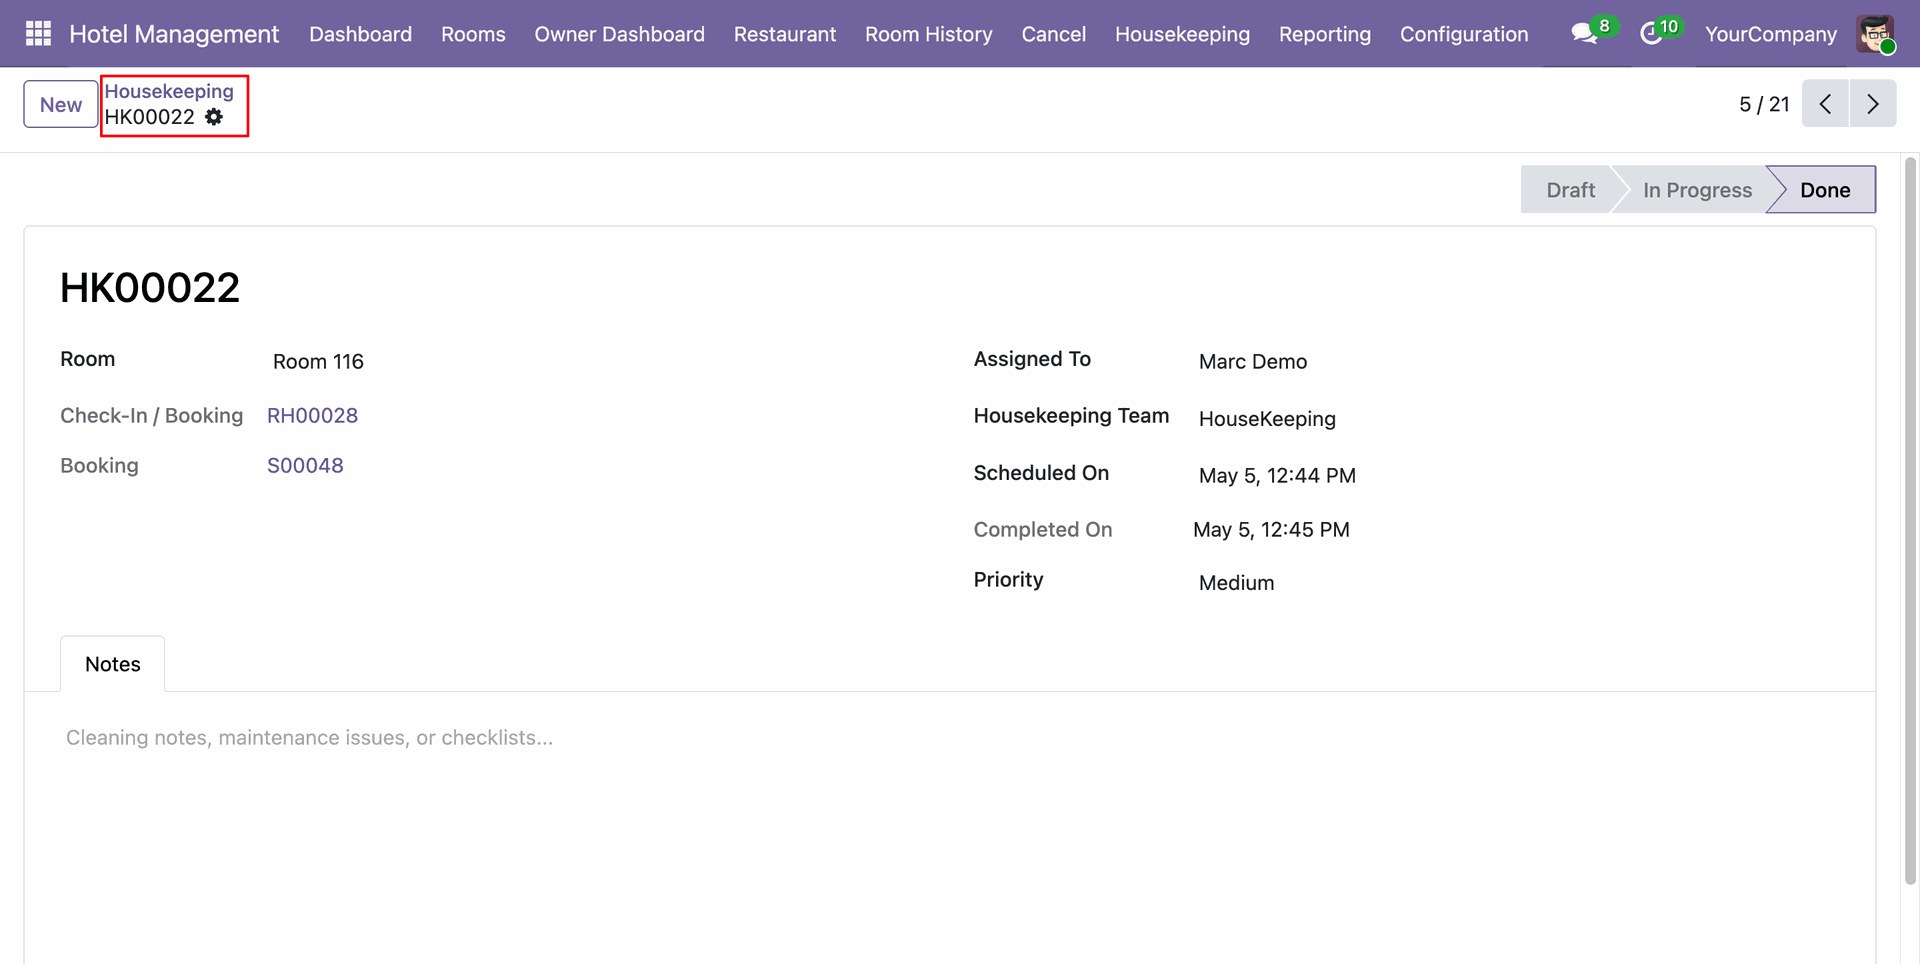
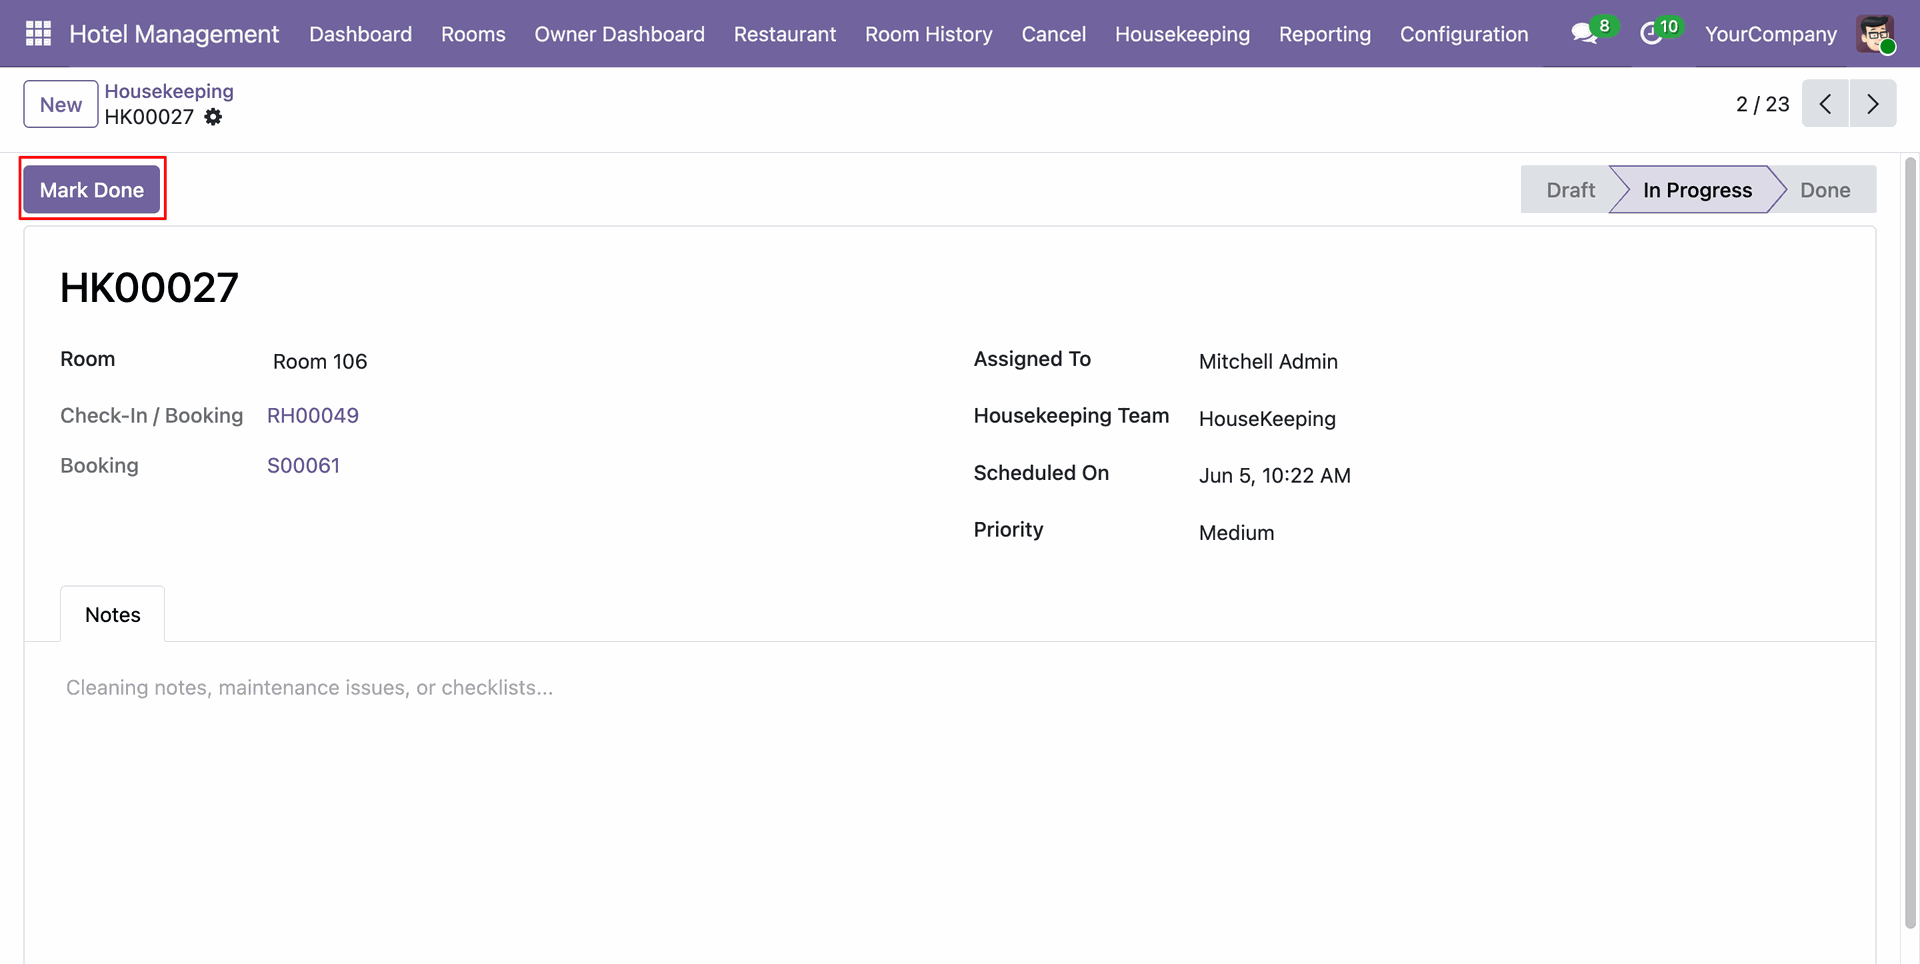
Clicking on any record in the list view will open the housekeeping record in form view.
Click on the Check-In Room tile from the dashboard.
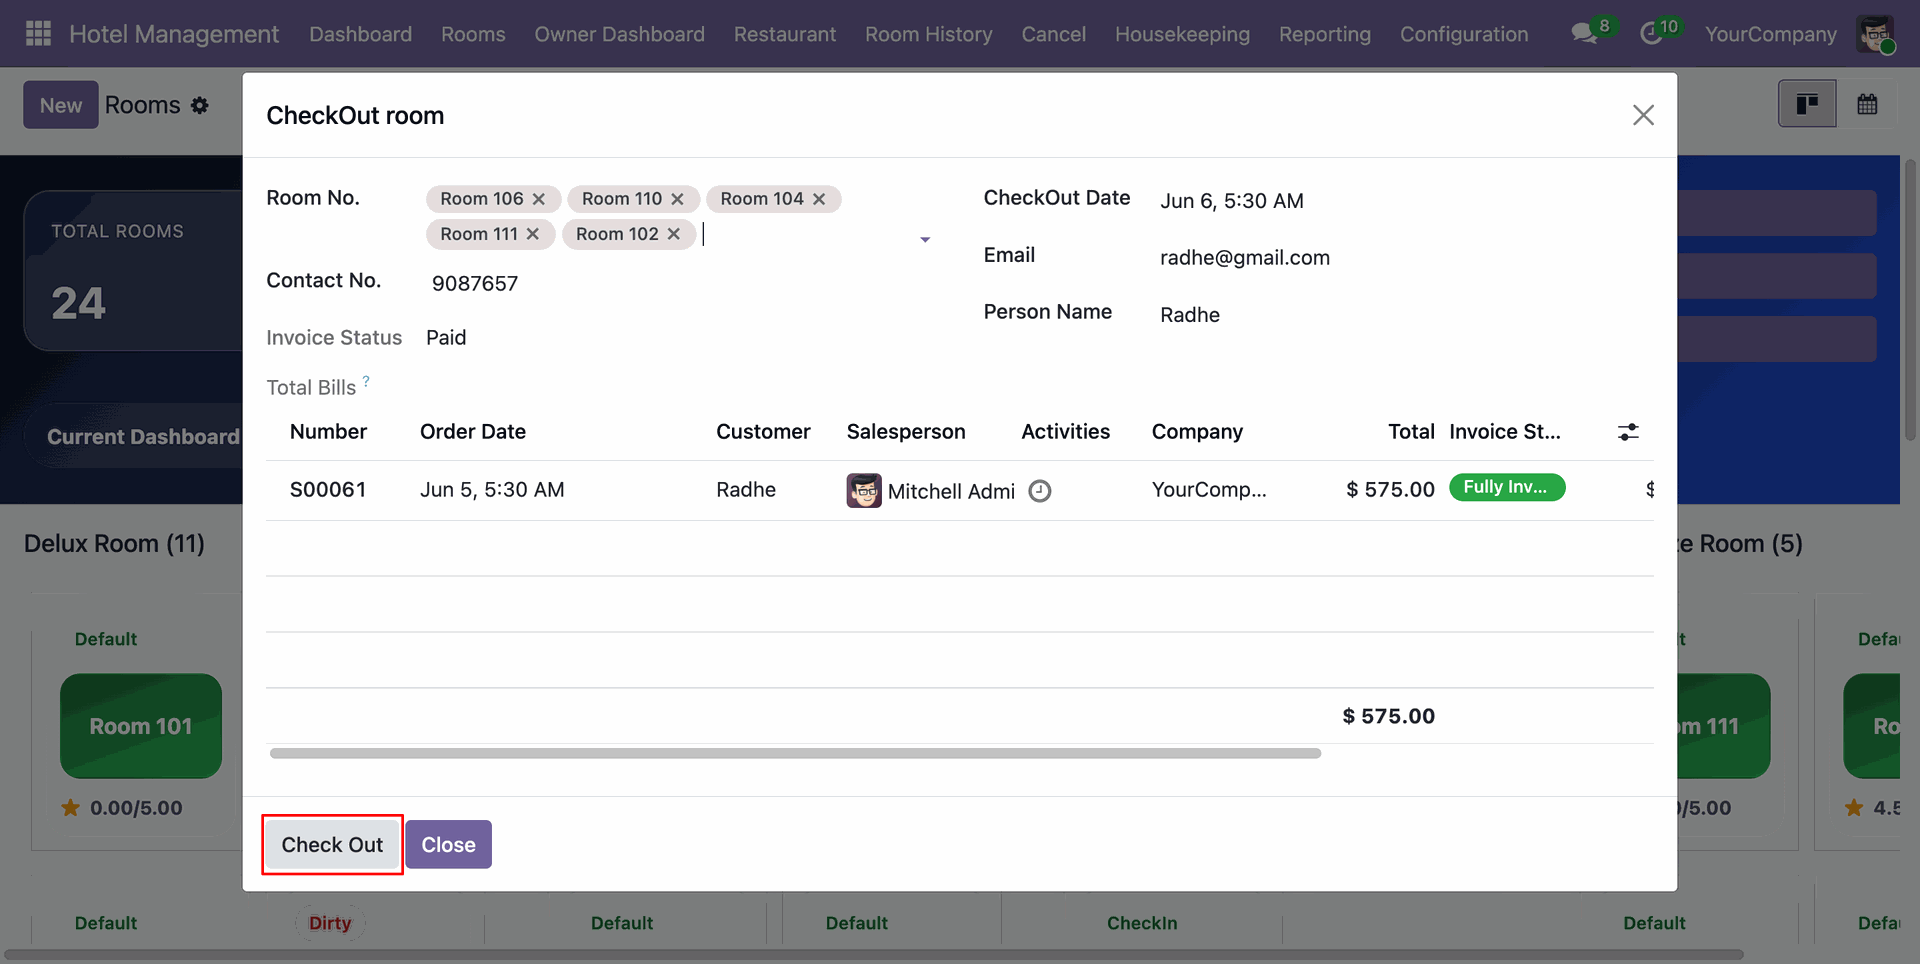
Clicking on the Checked-In Room will open the Check-Out Wizard. Enter the relevant details and click the Check Out button.
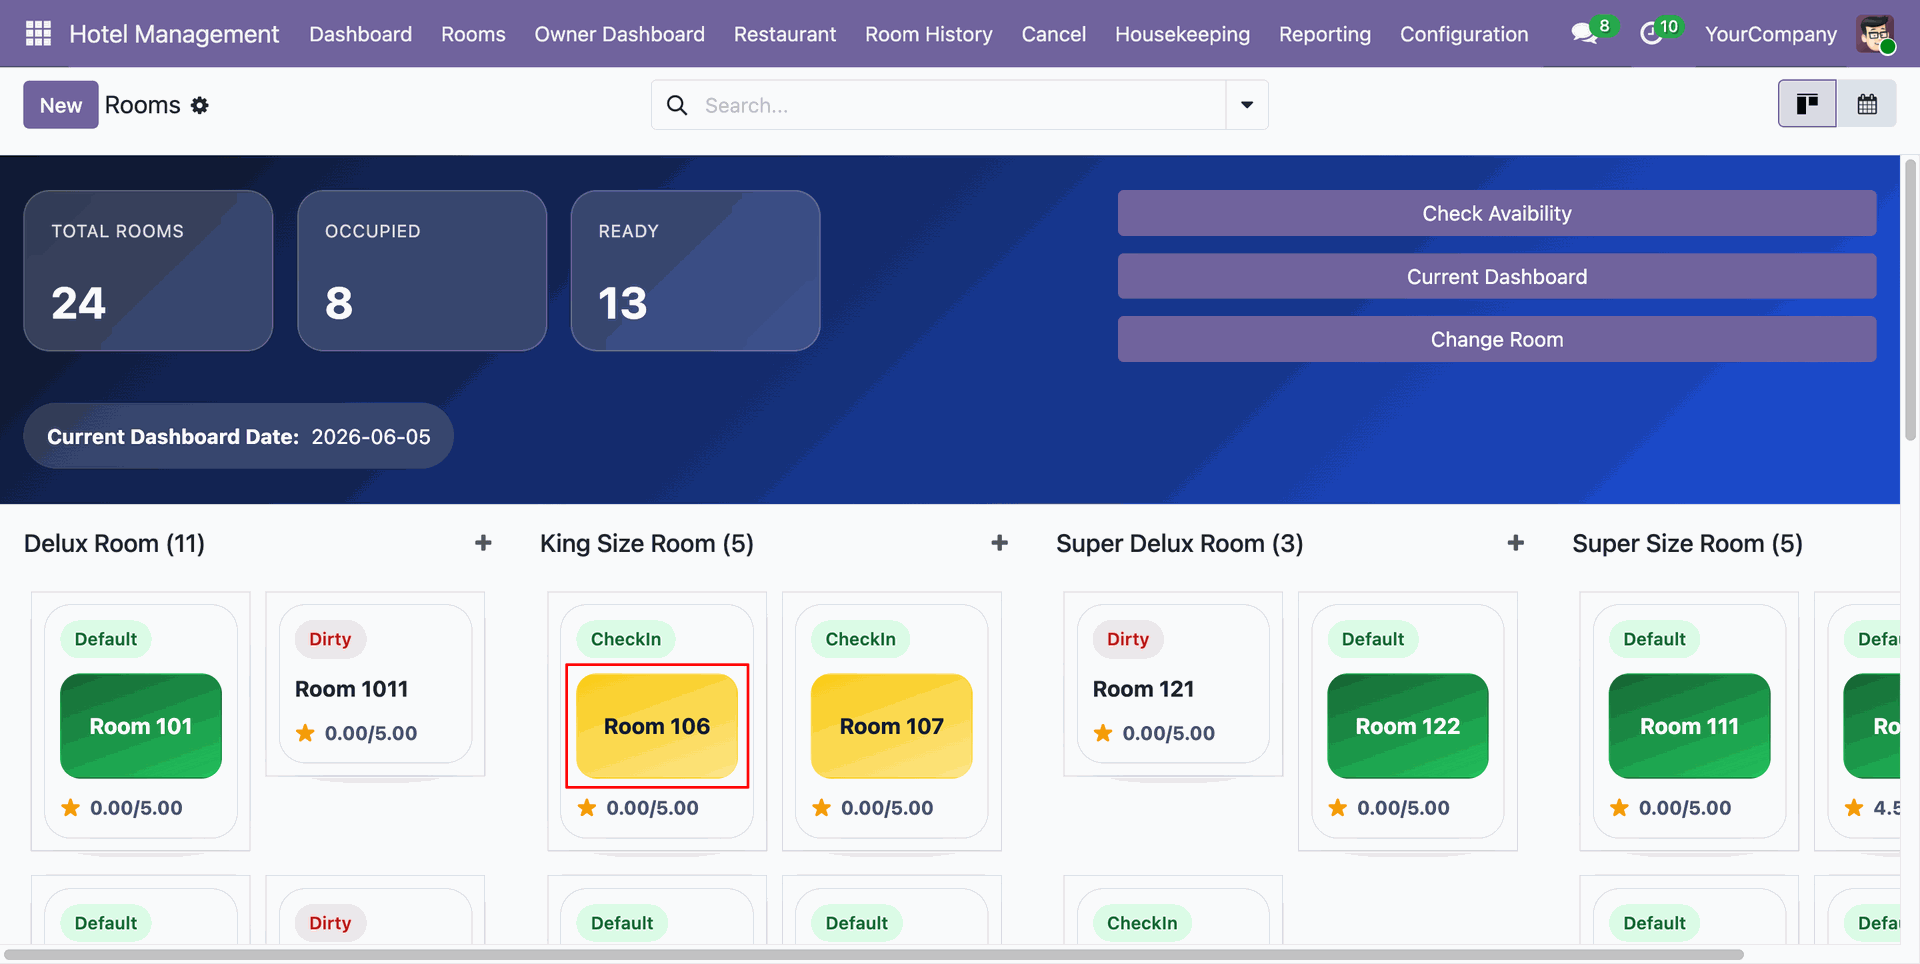
After check-out, the room will be displayed on the dashboard with a Dirty tag for housekeeping service.
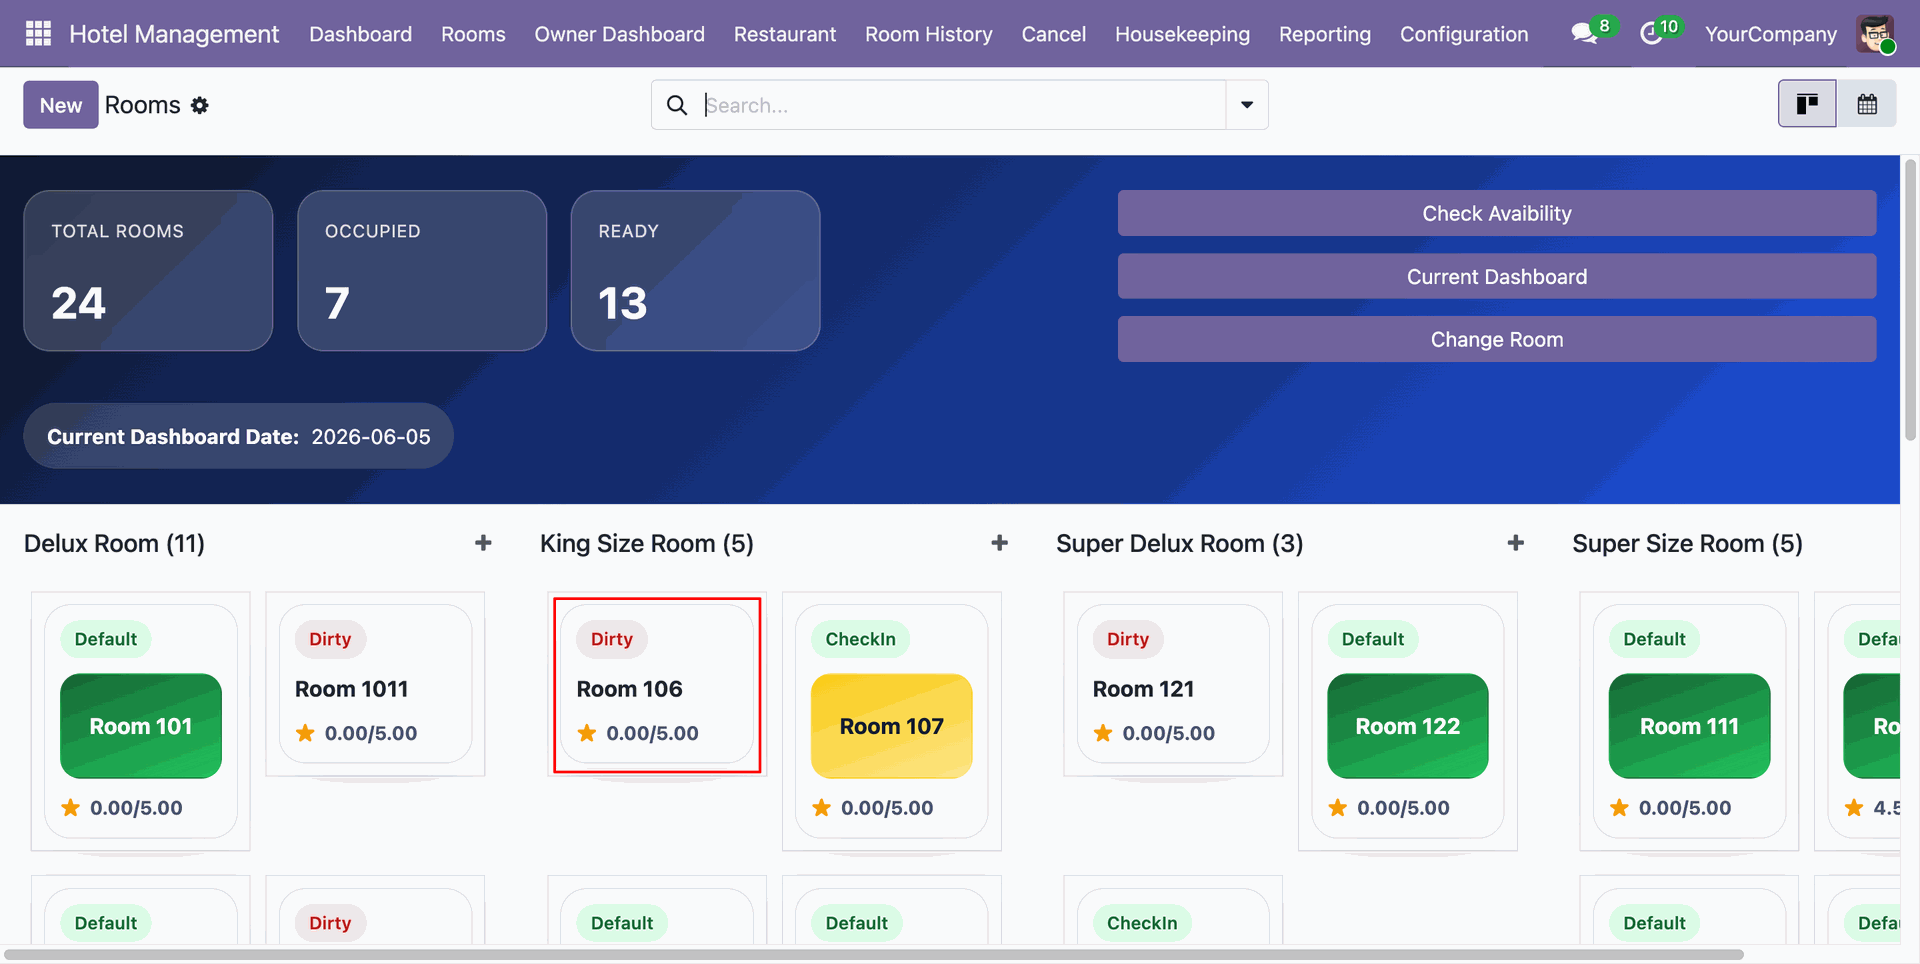
A housekeeping record will be created in Draft stage for the checked-out room.
Open the created record and move it to the In Progress stage. Once the service is completed, click Mark as Done.
Clicking Mark as Done will move the record to the Done stage.
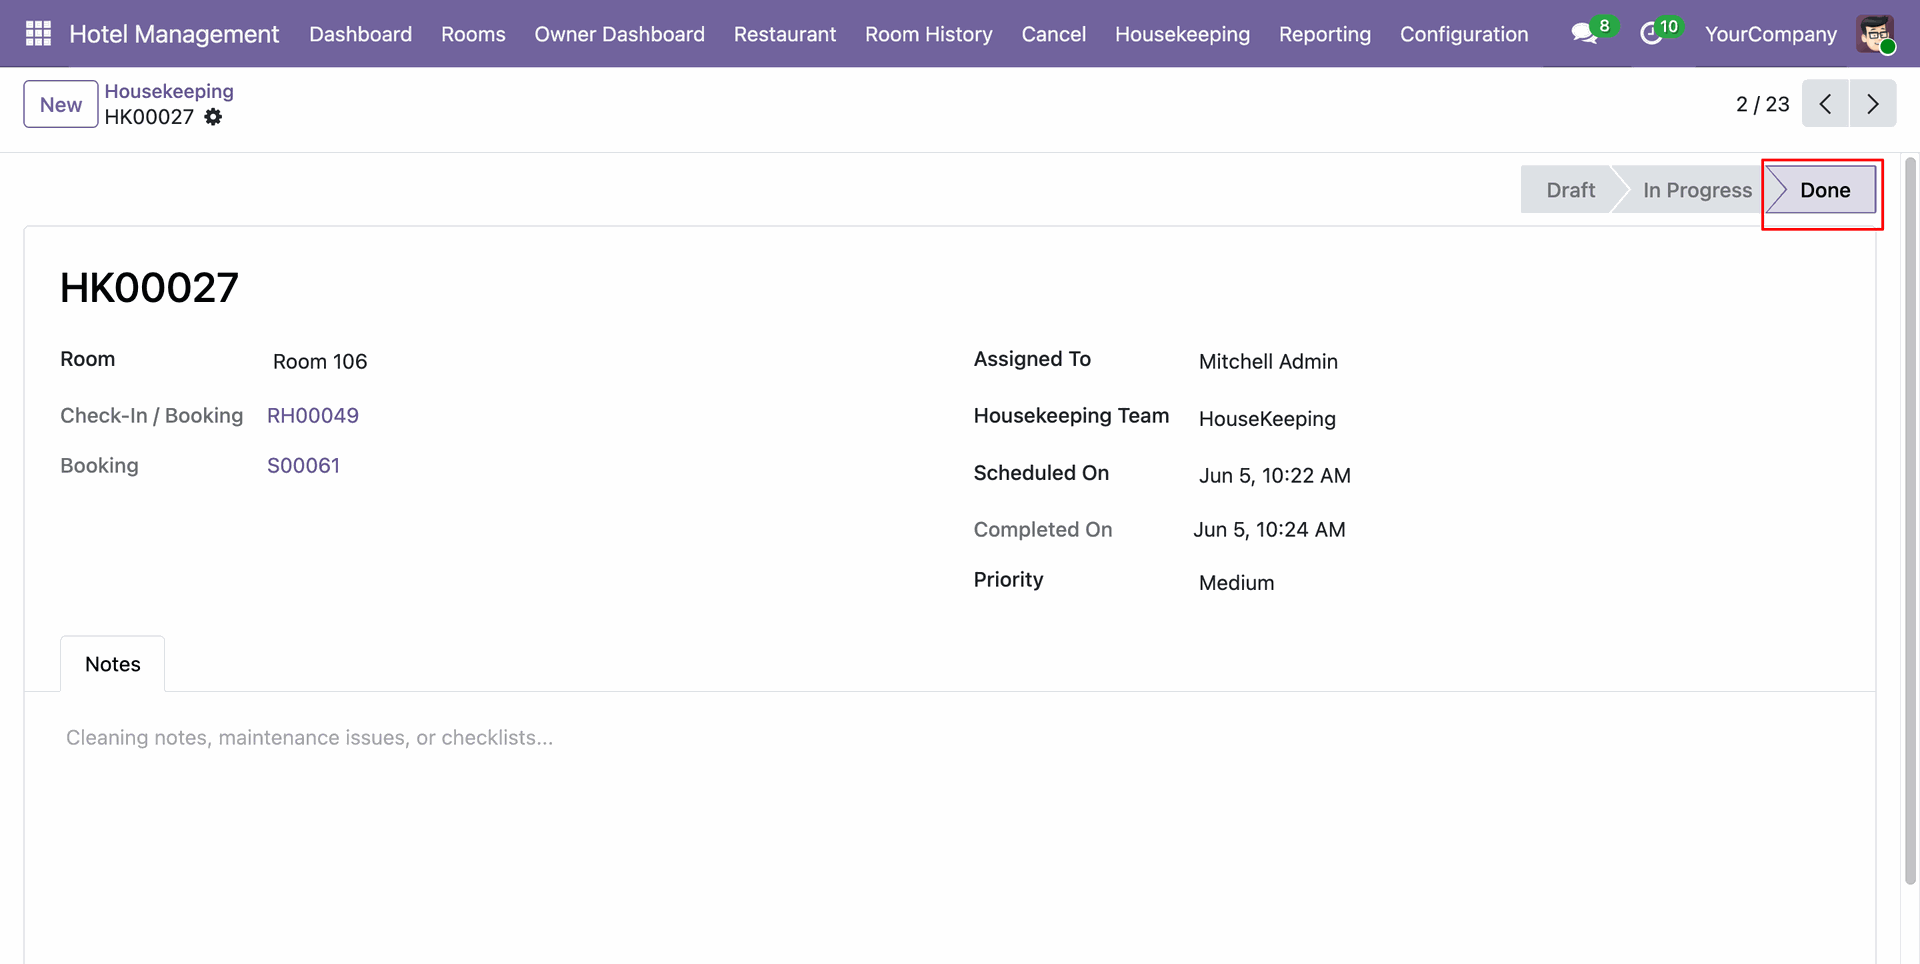
When the service is completed and the housekeeping record is in the Done stage, the room will be displayed on the dashboard with the default tag.
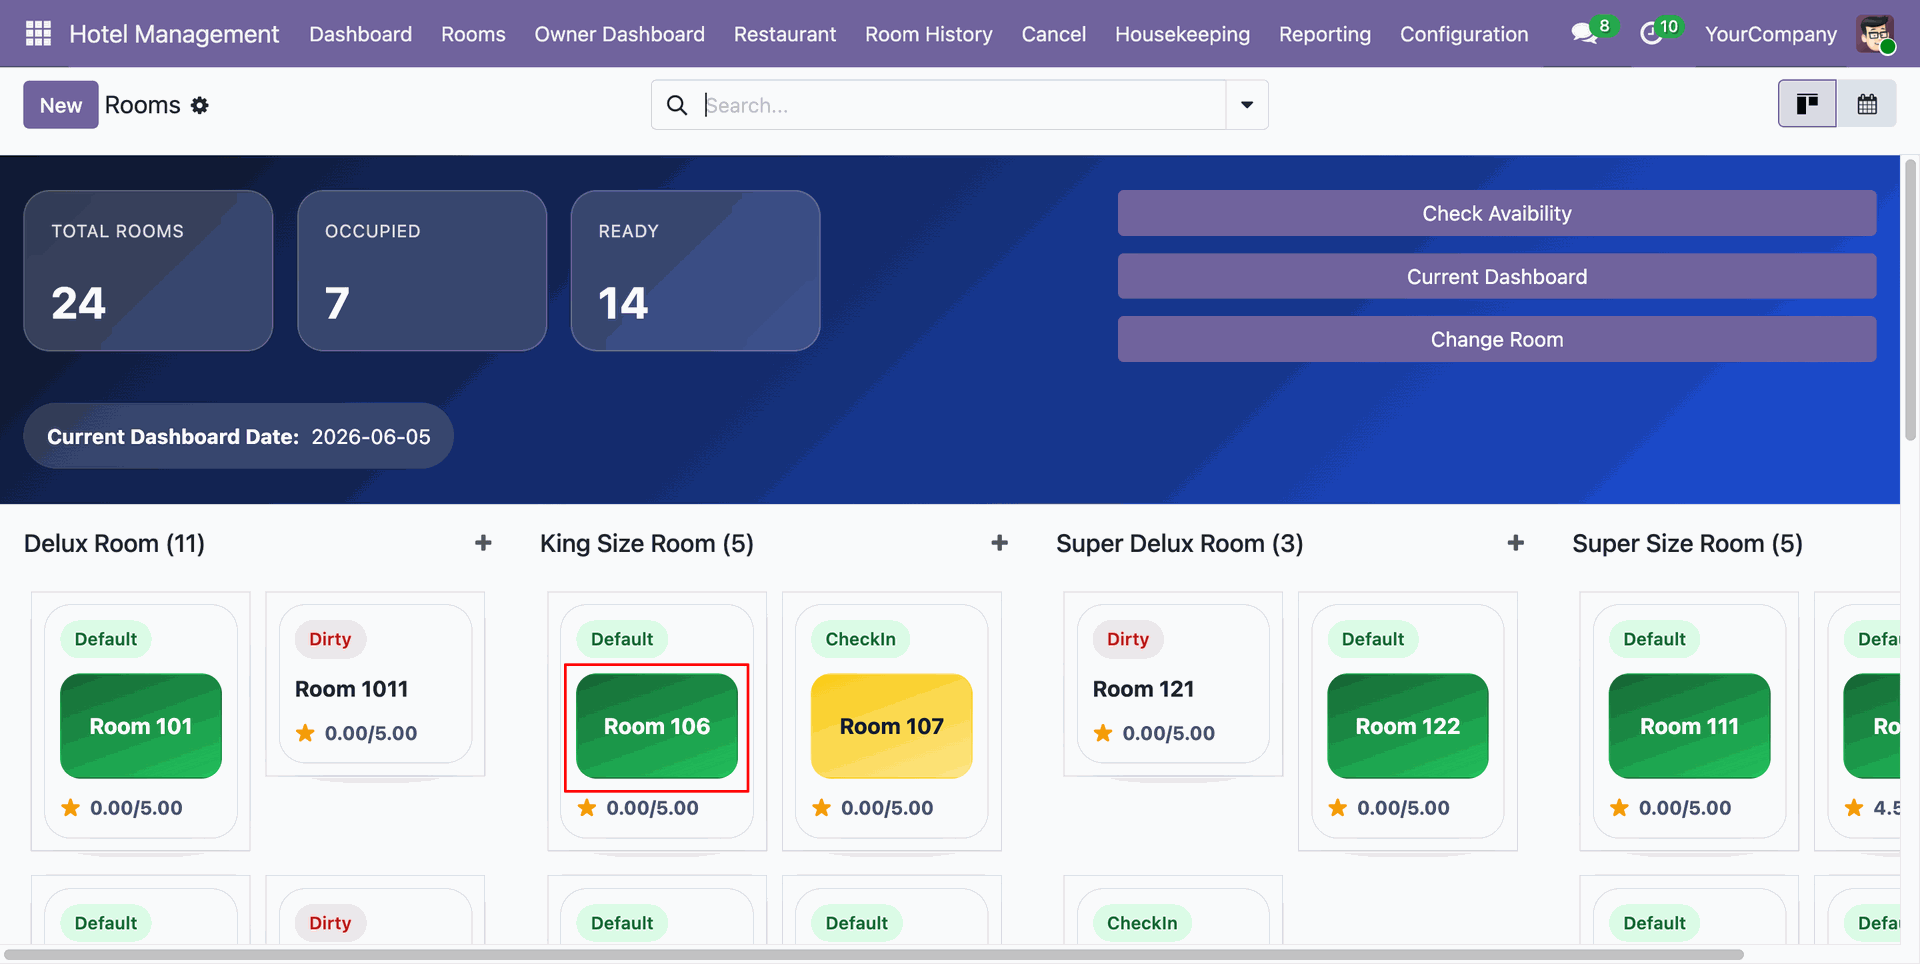
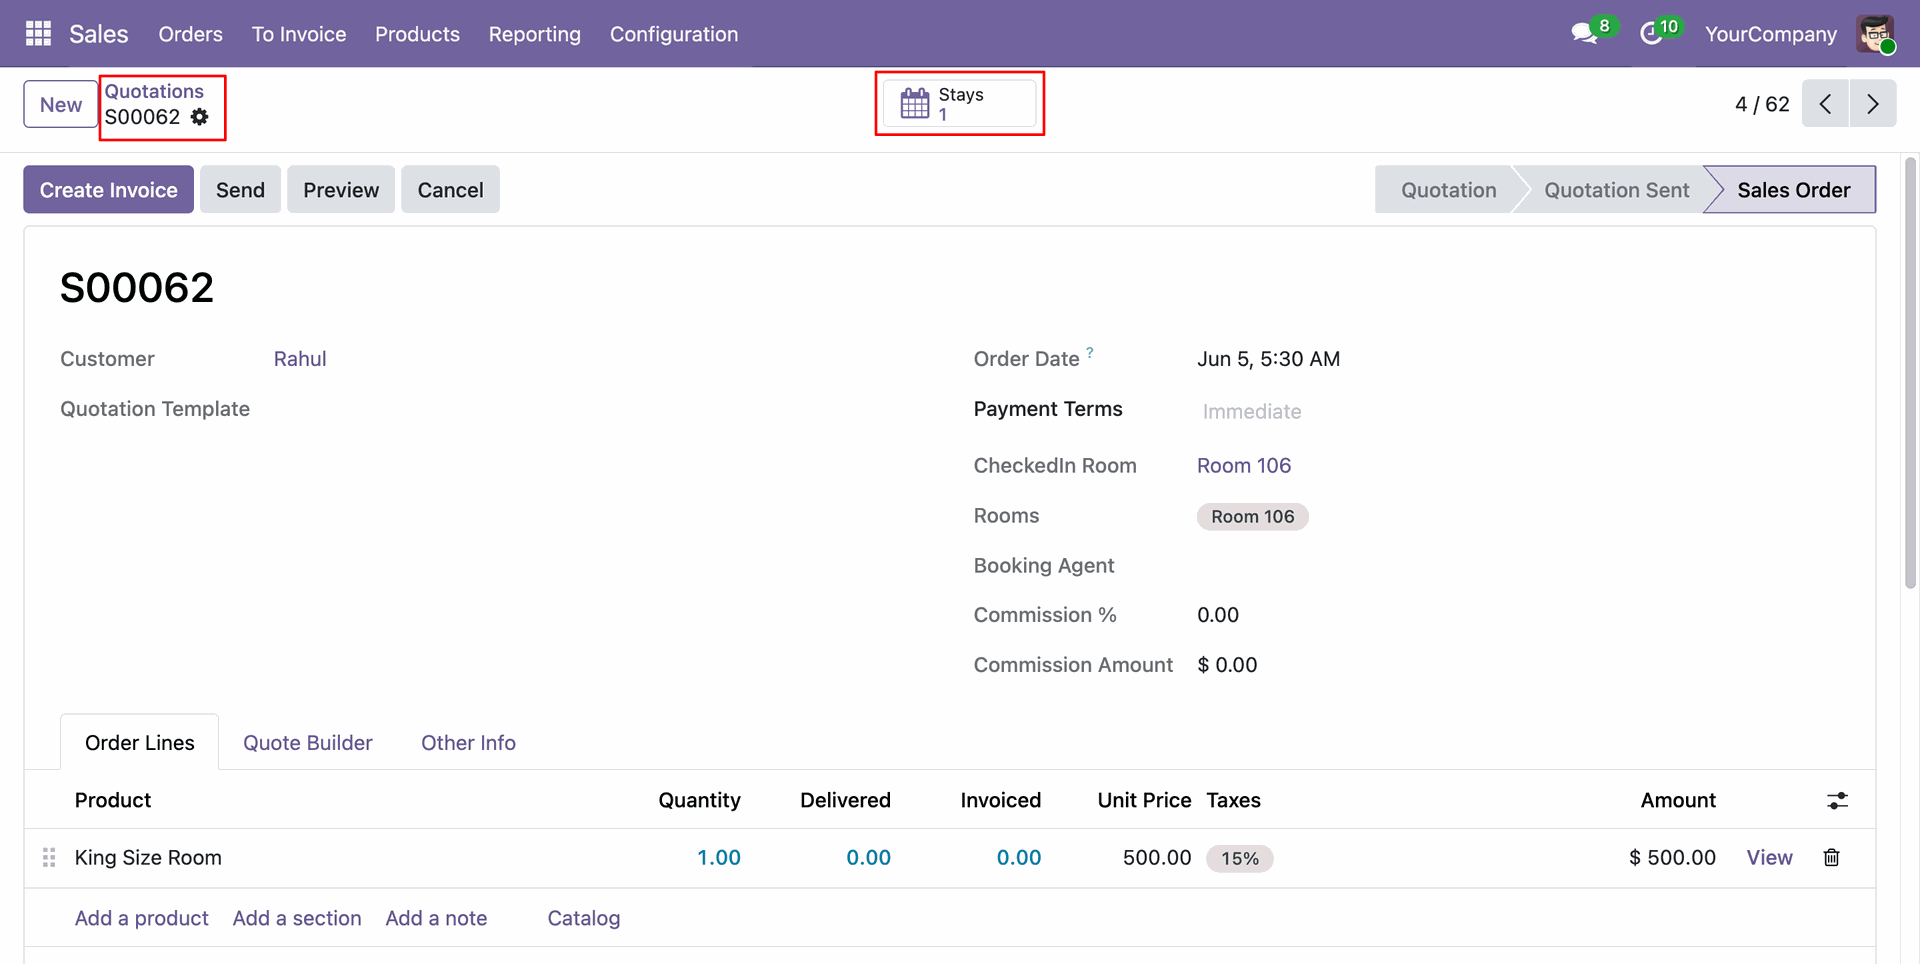
Go to the Sales Order created during room booking and click the Stay Smart button.
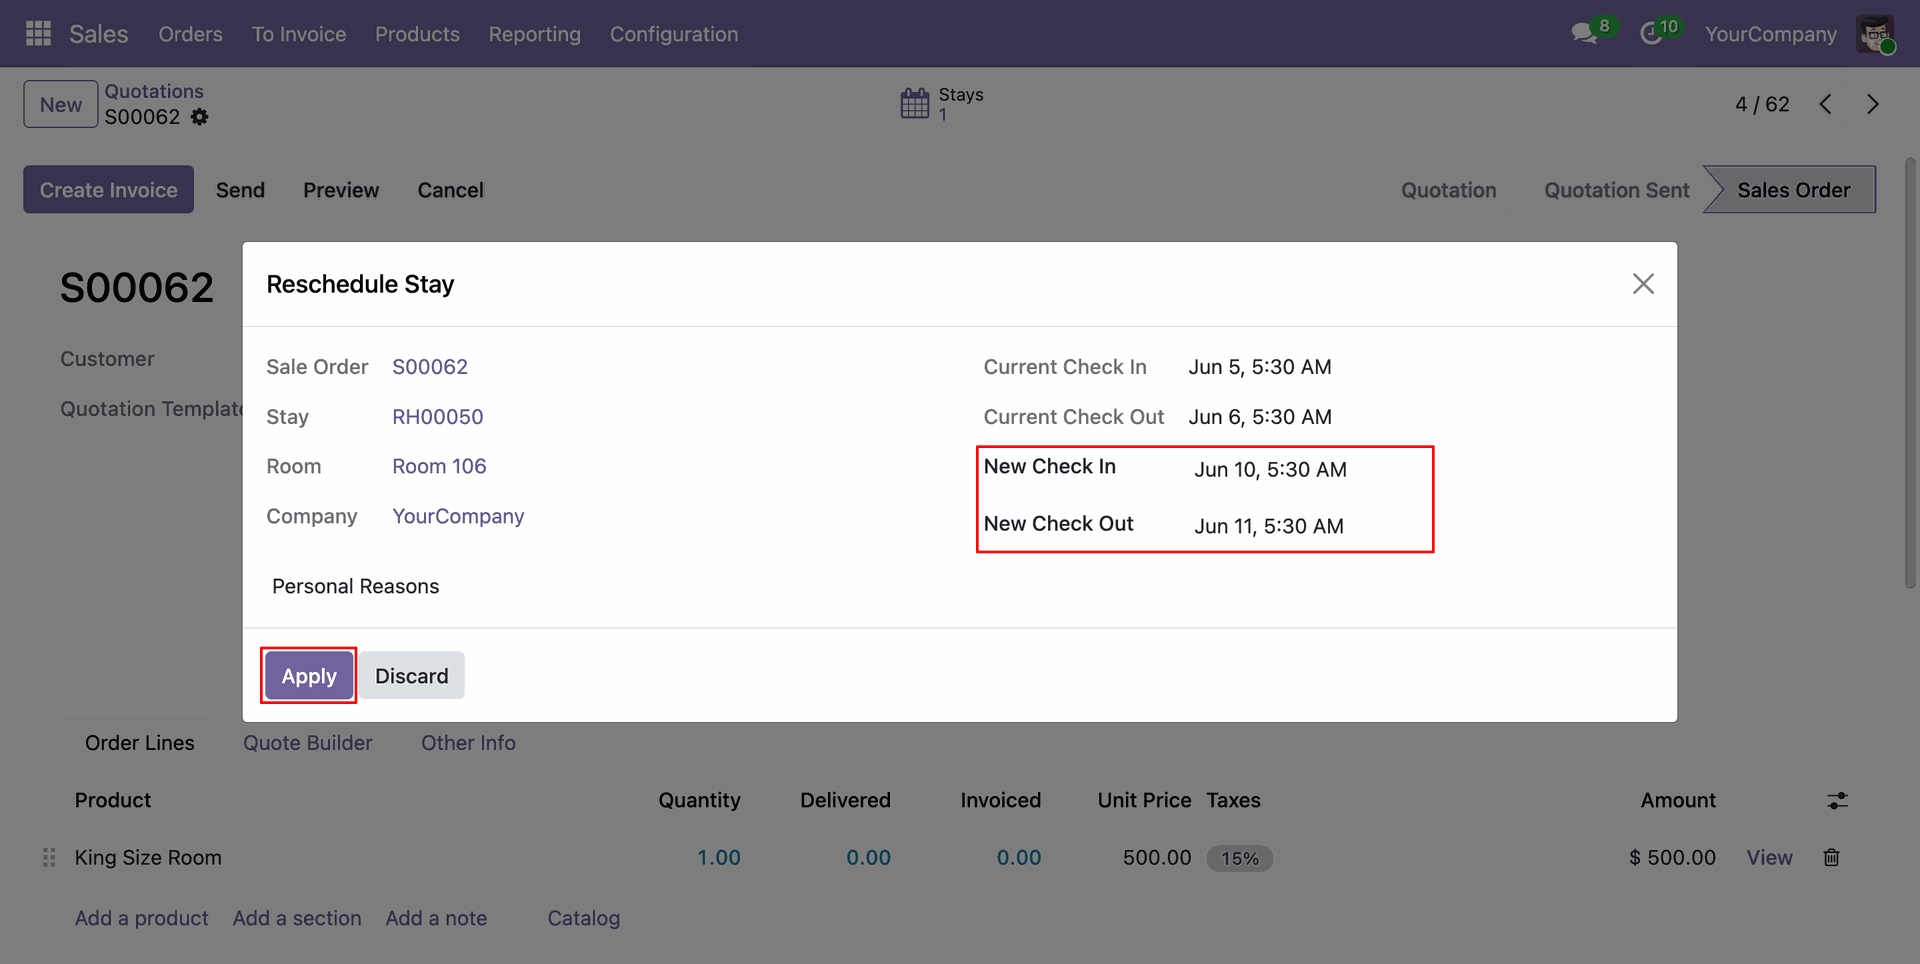
Clicking on the Stay Smart button from the sales order will open the Reschedule Stay Wizard. Enter the new check-in and check-out date and time, then click the Apply button.
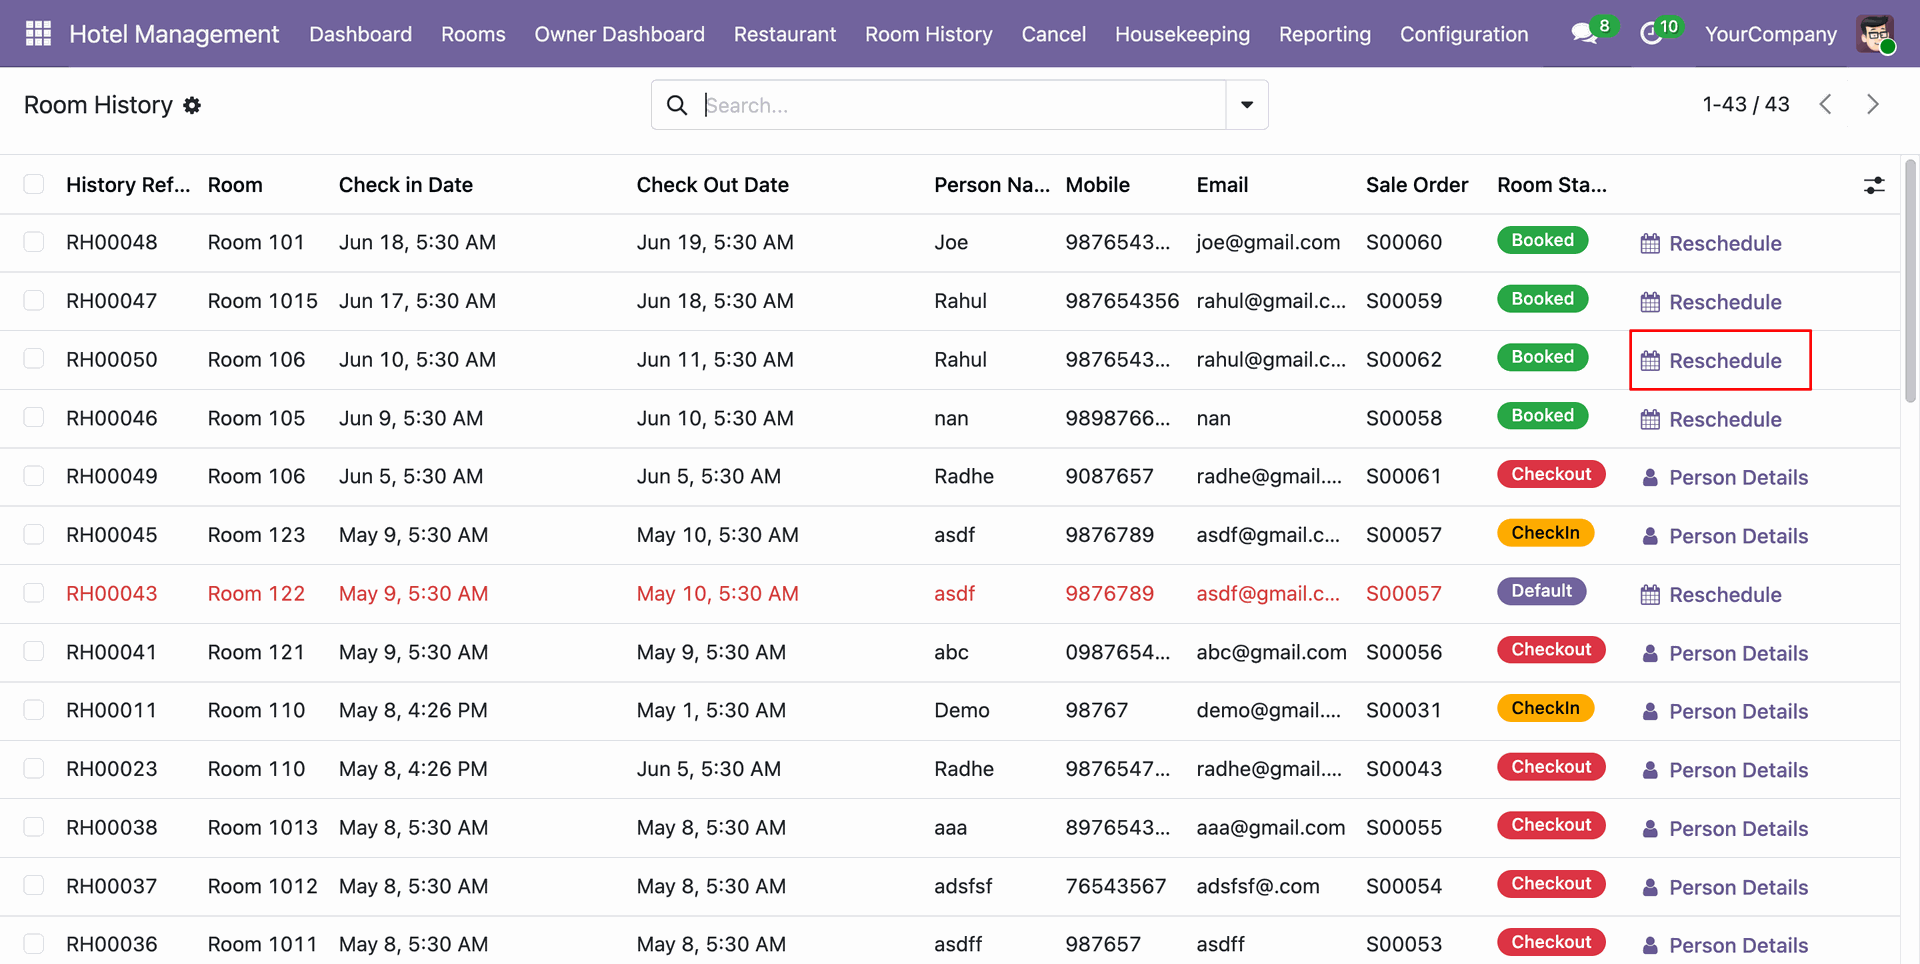
The rescheduled stay can be viewed in the Room History.
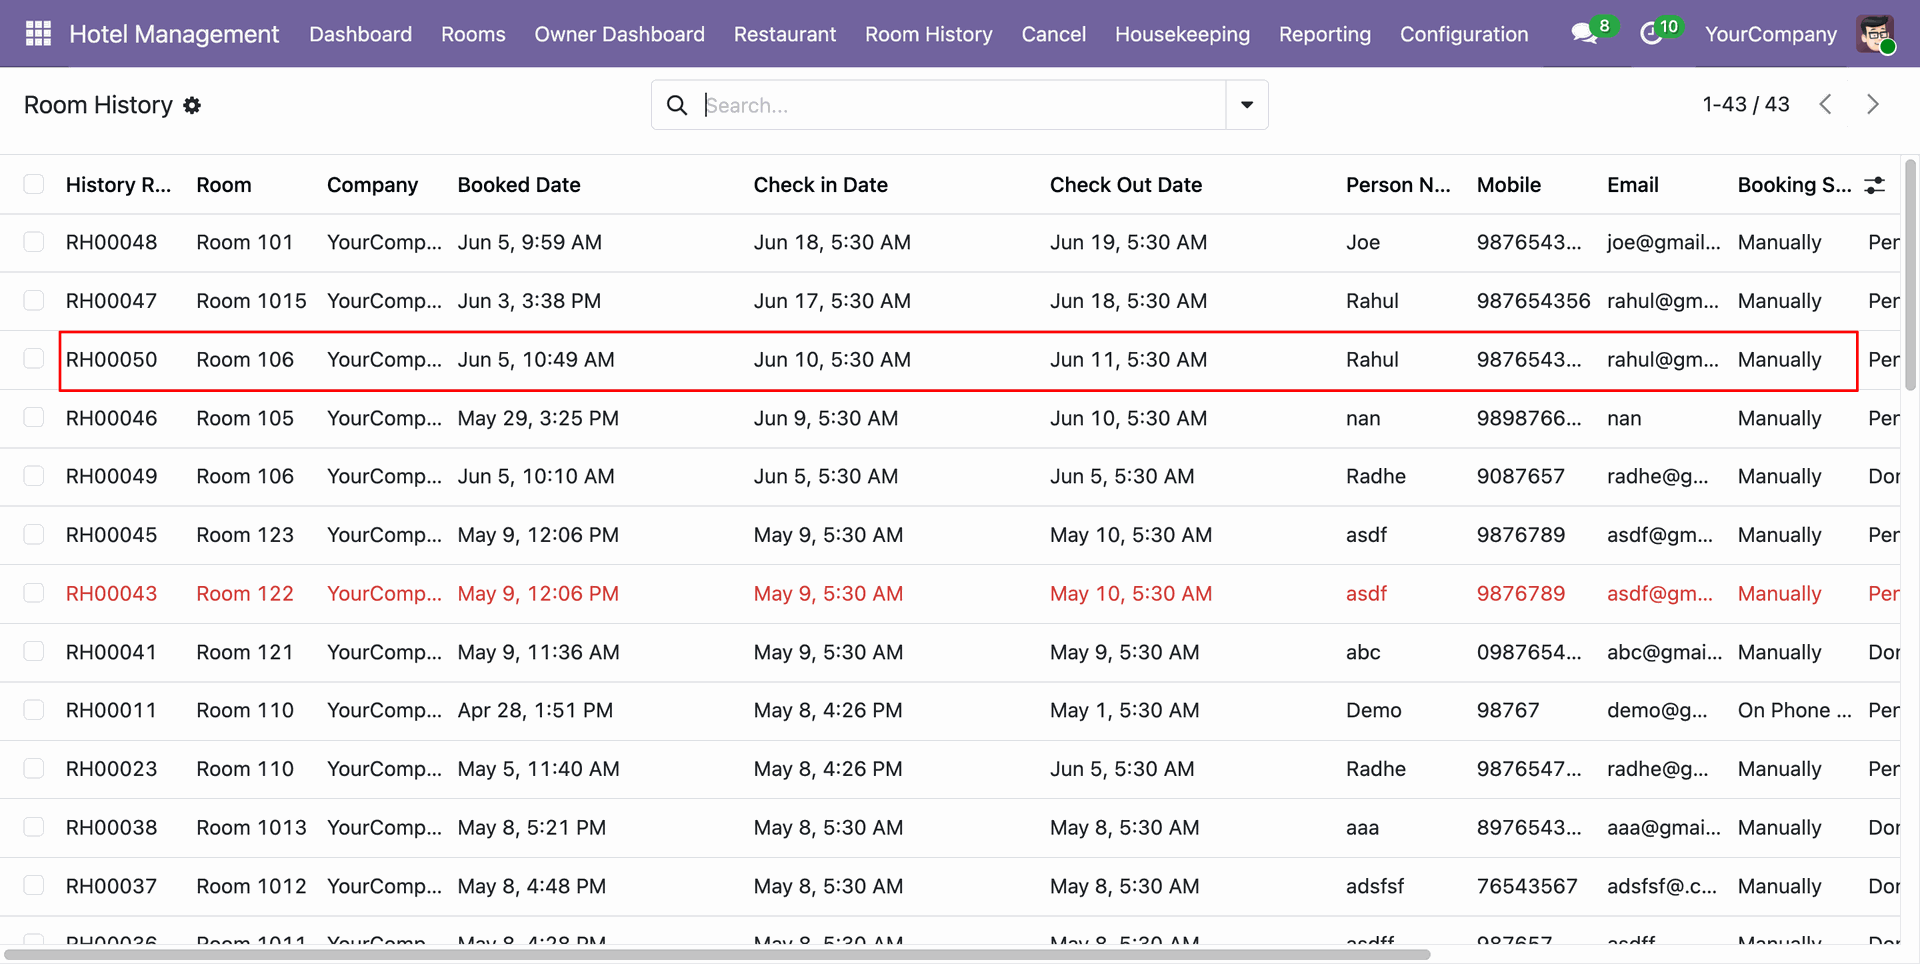
The user can reschedule the stay directly from the Room History list view.
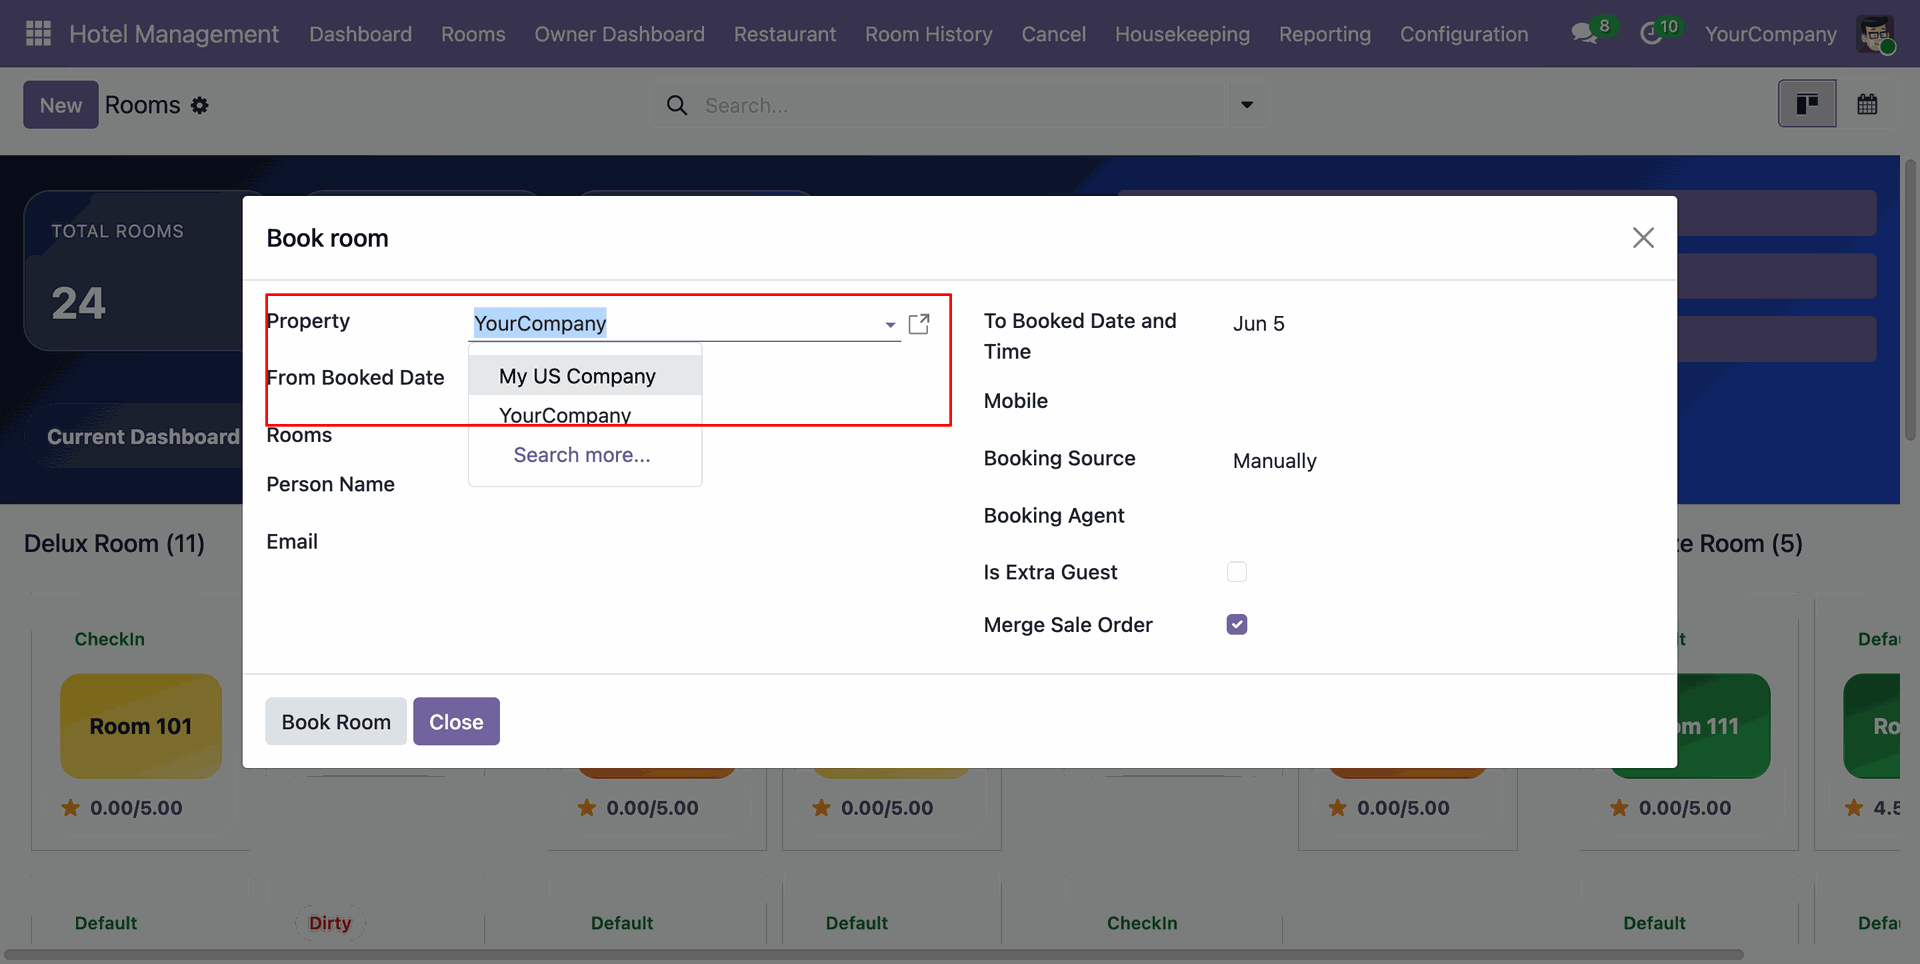
Book a room and select the property from the list of available properties.
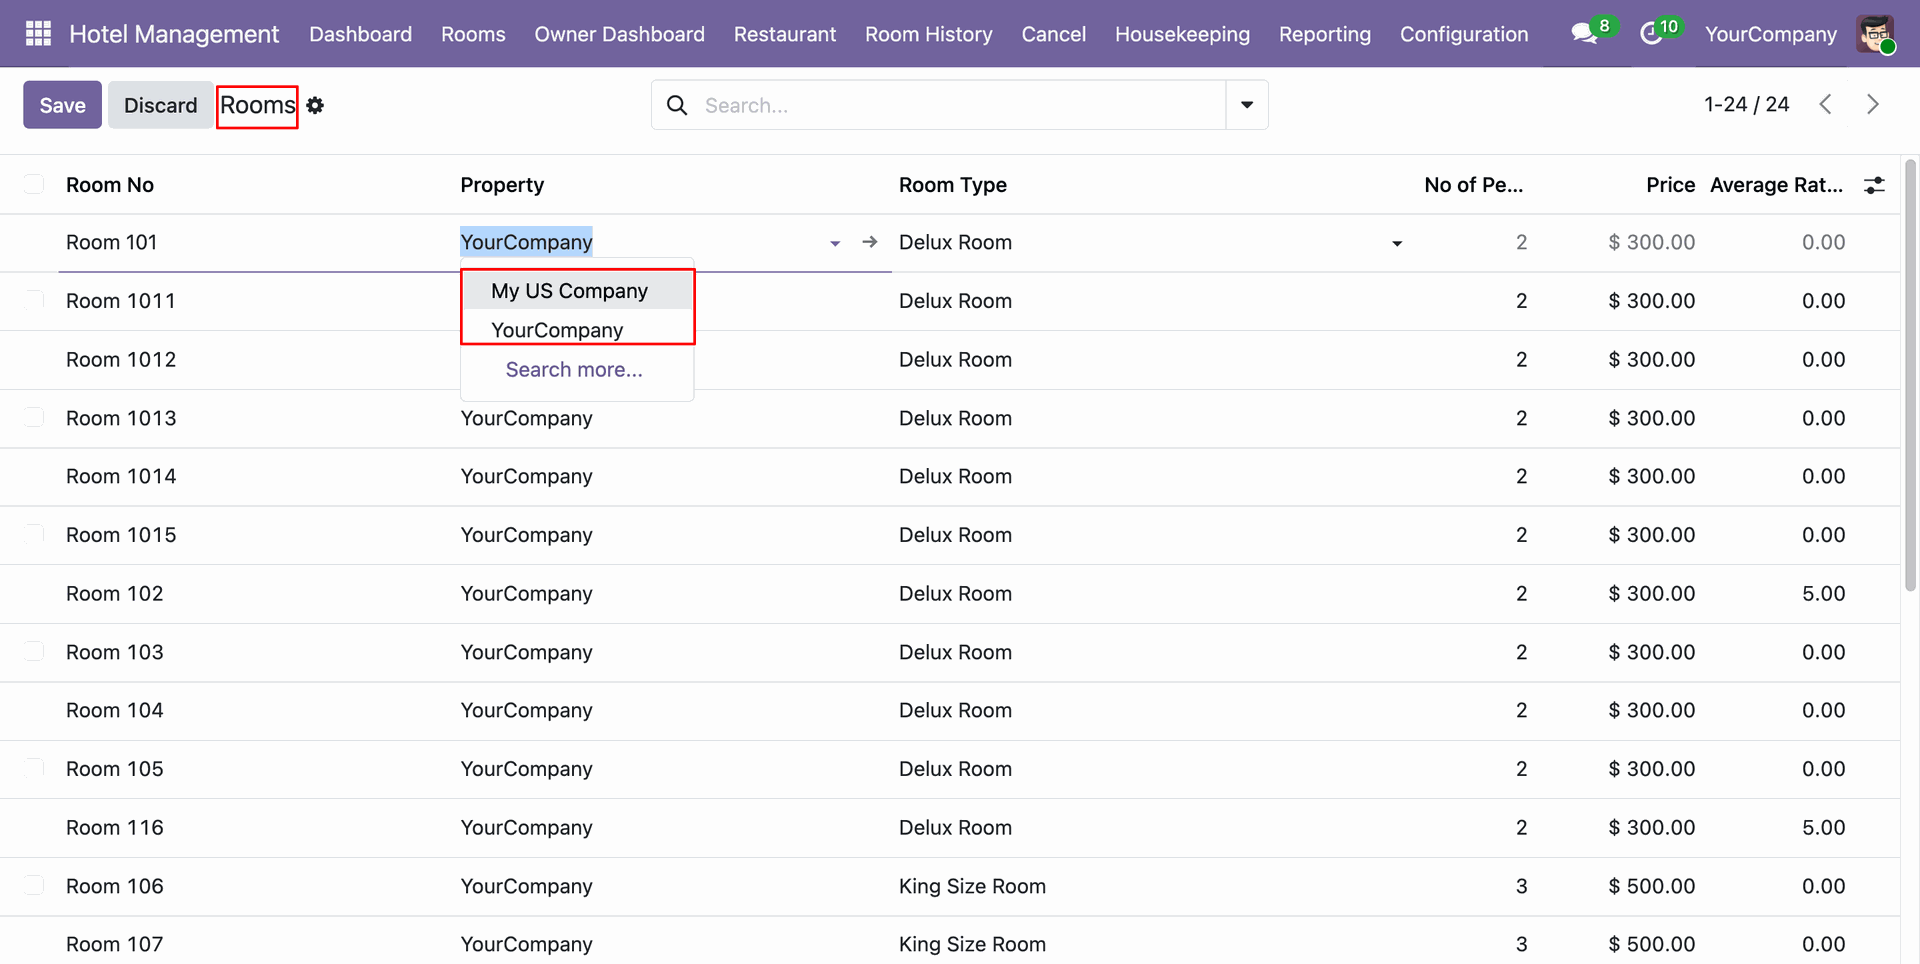
A property can be selected from the Rooms list view to assign each room to a specific property.
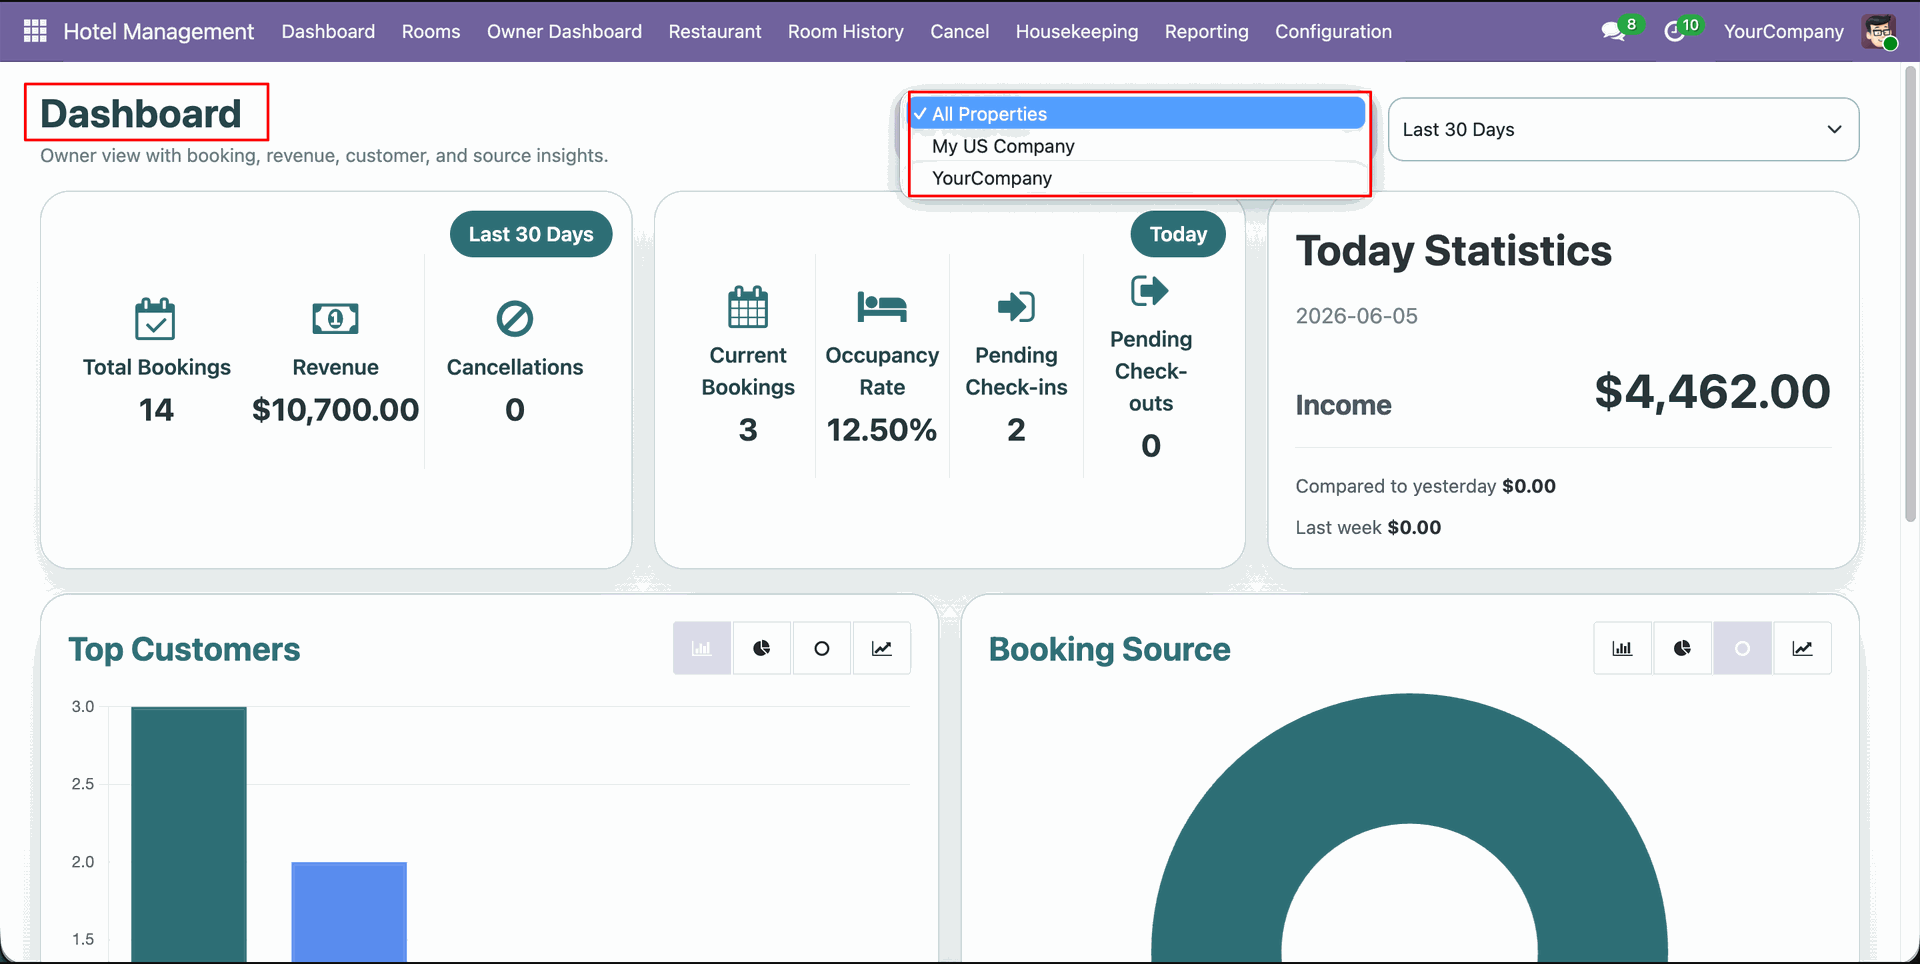
The dashboard displays data based on the selected property or for all properties, depending on the filter applied.
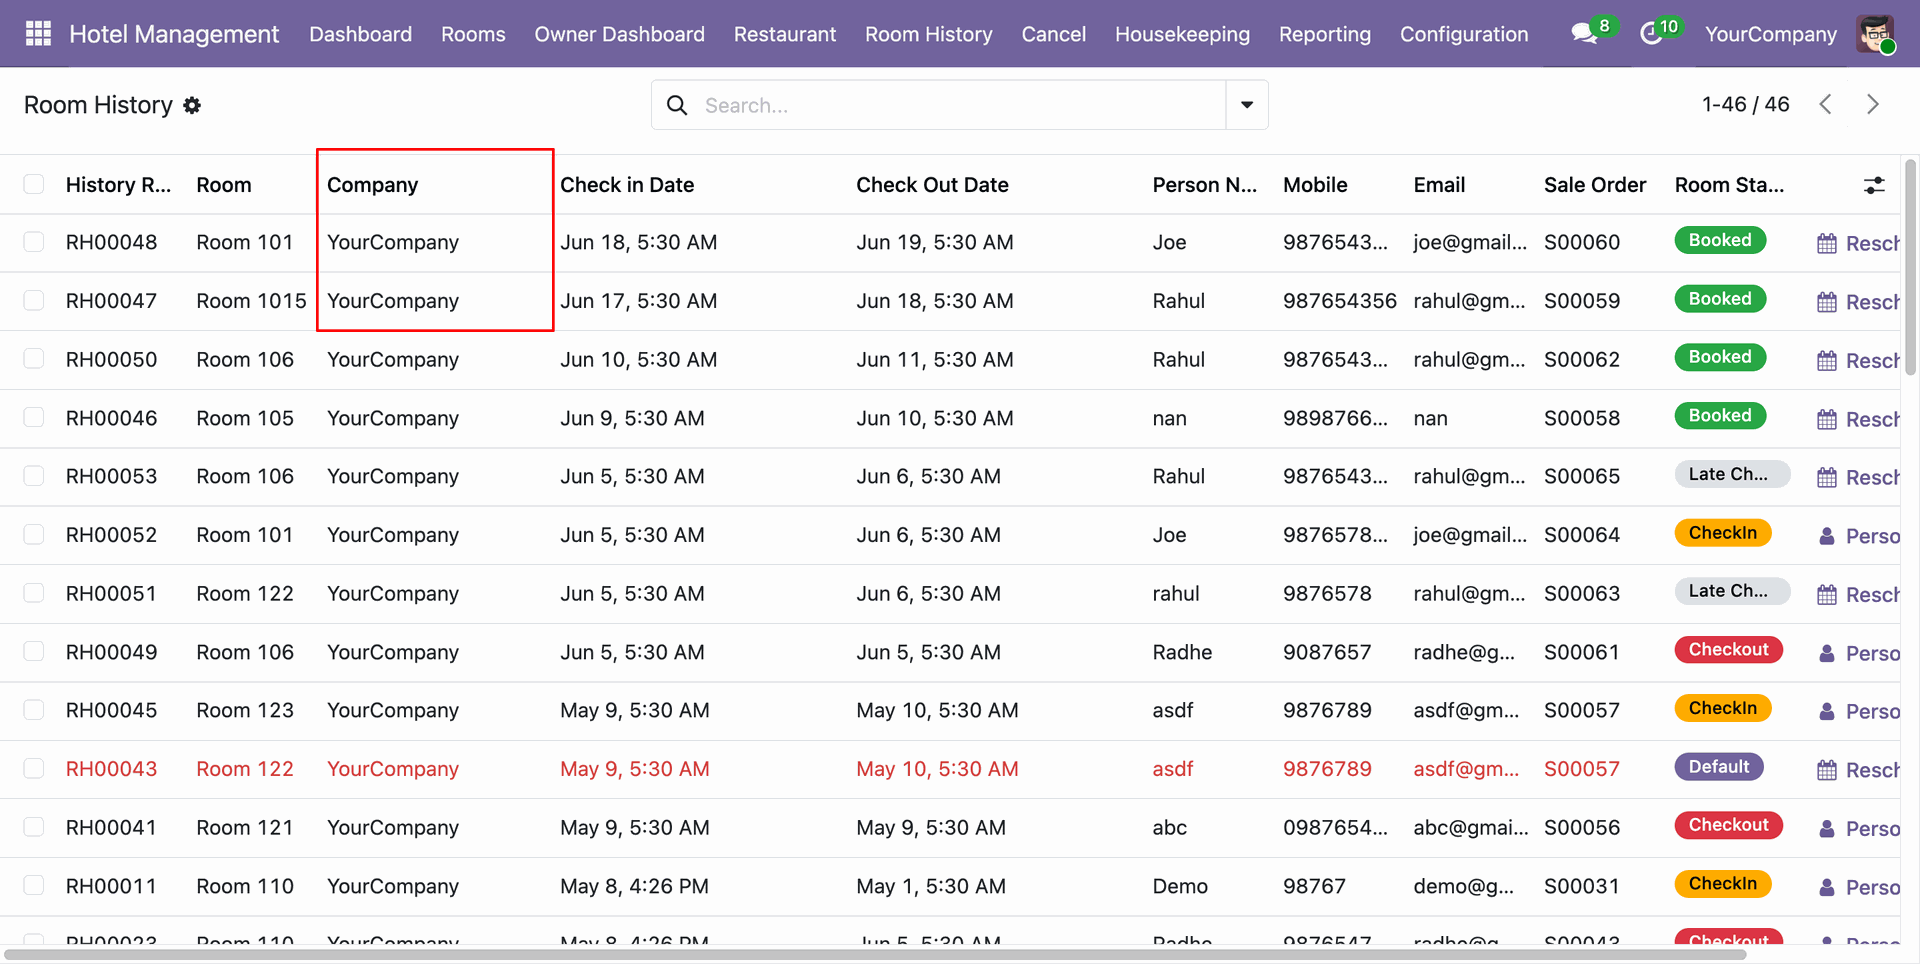
Room history supports multiple properties and displays records based on the selected property.
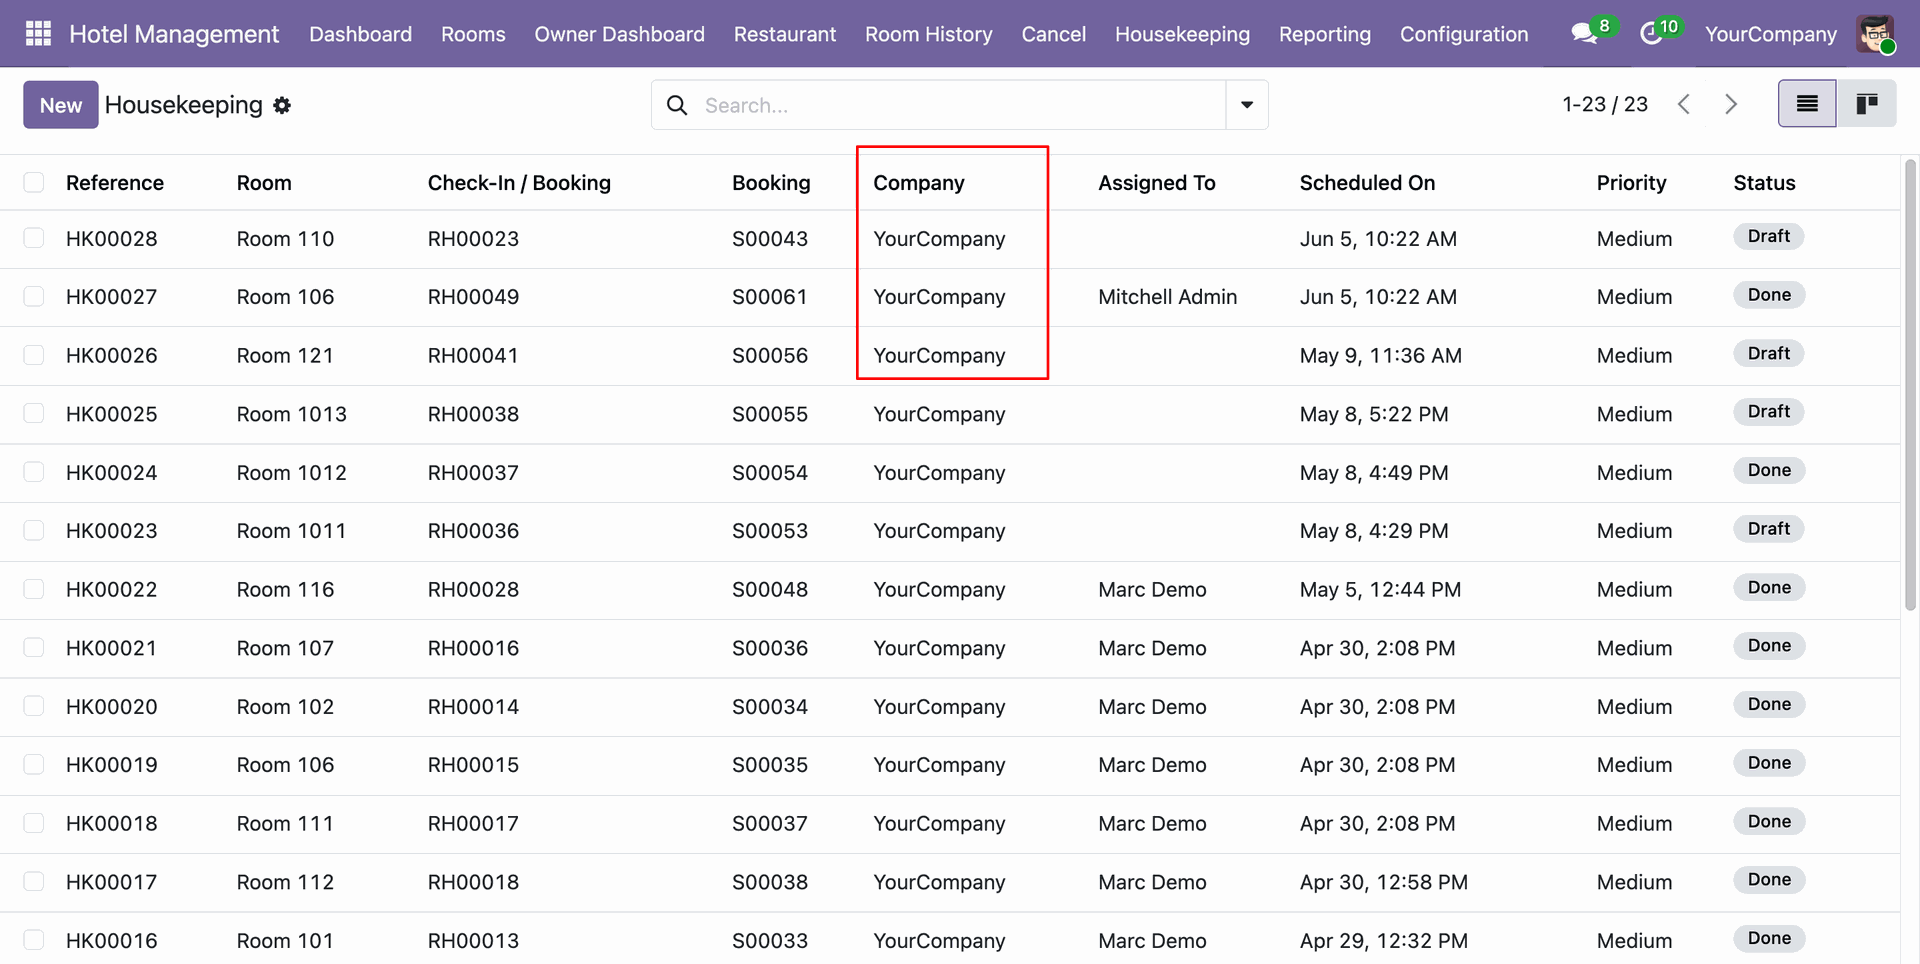
Housekeeping supports multiple properties and displays records based on the selected property.
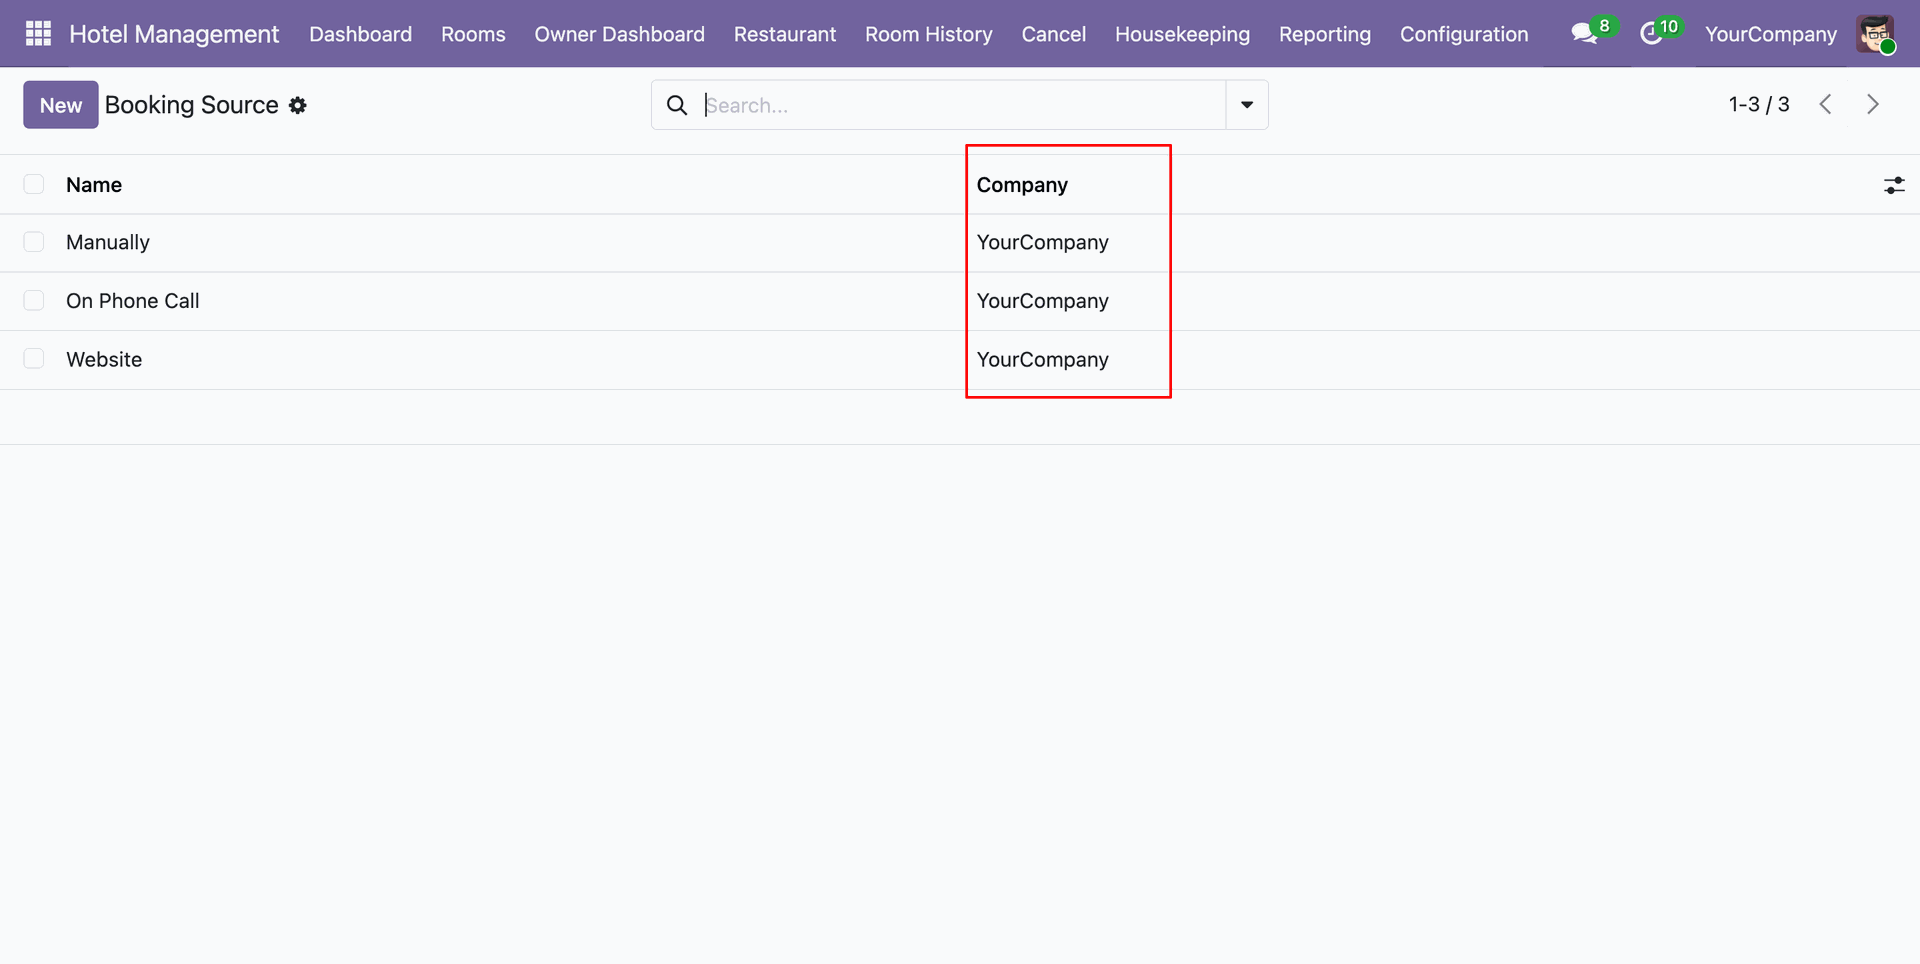
Booking source list view with selected property/company.
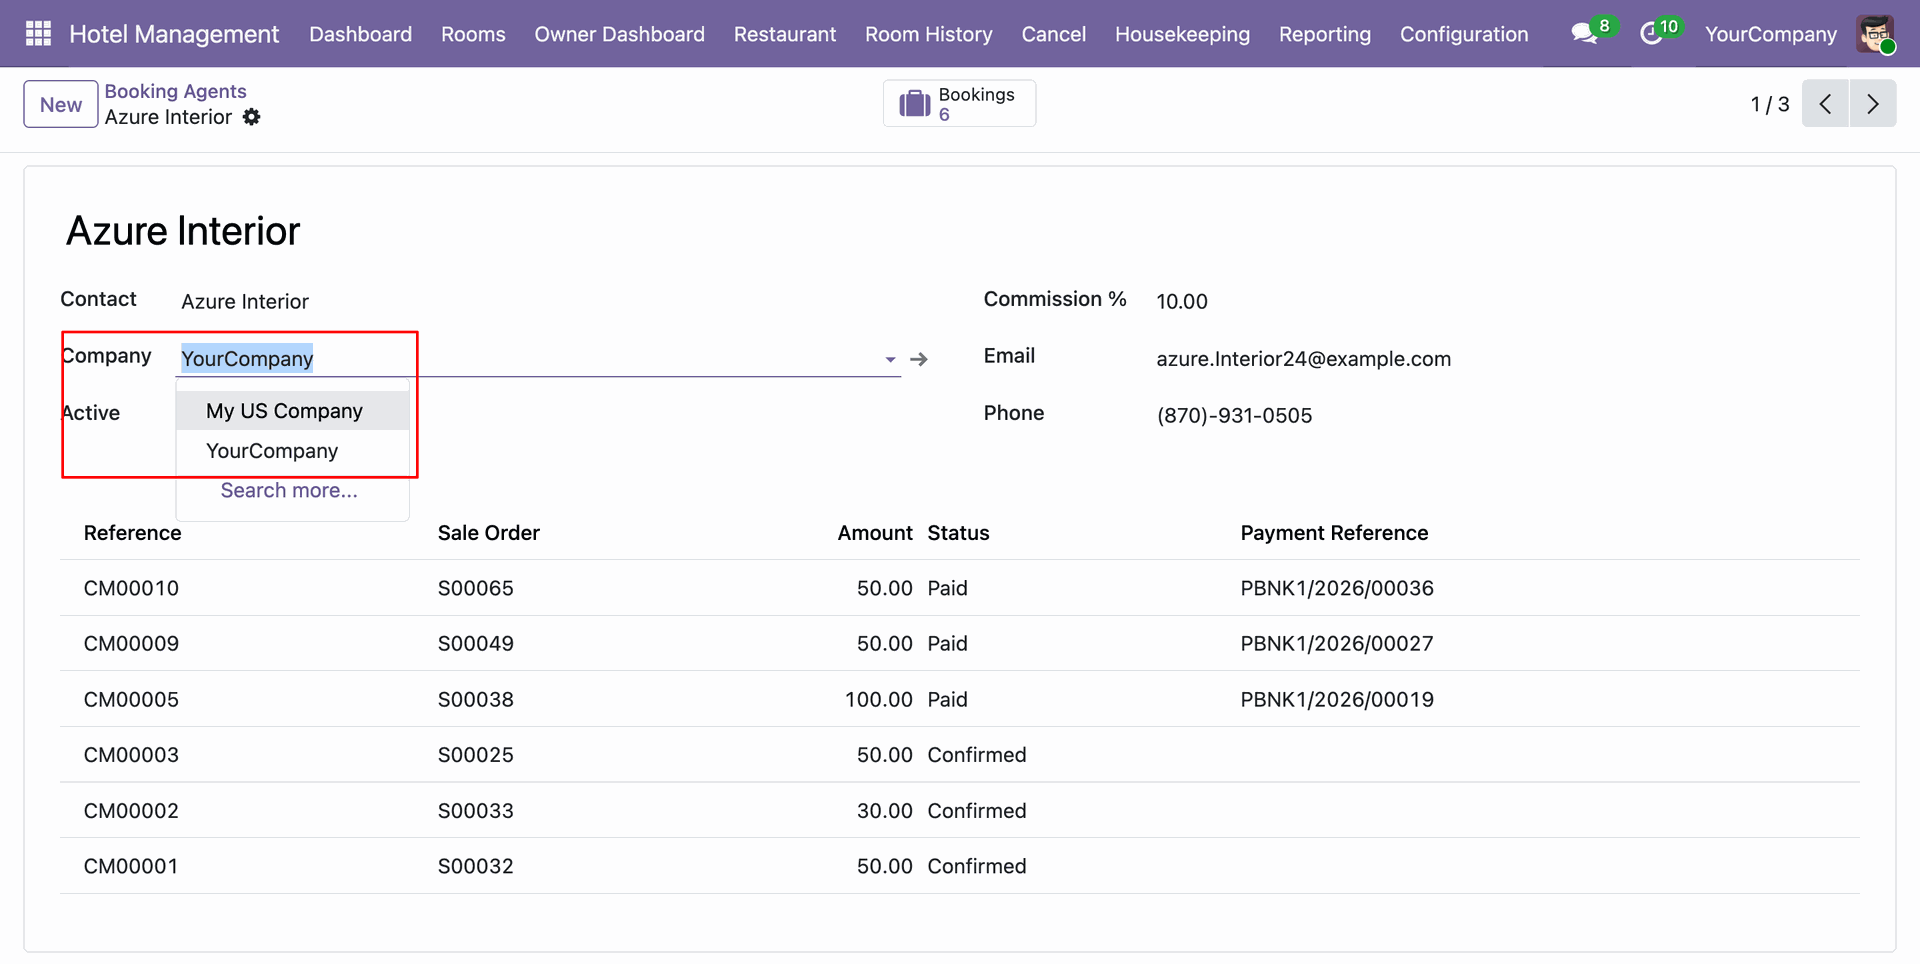
Booking agents list view with selected company.
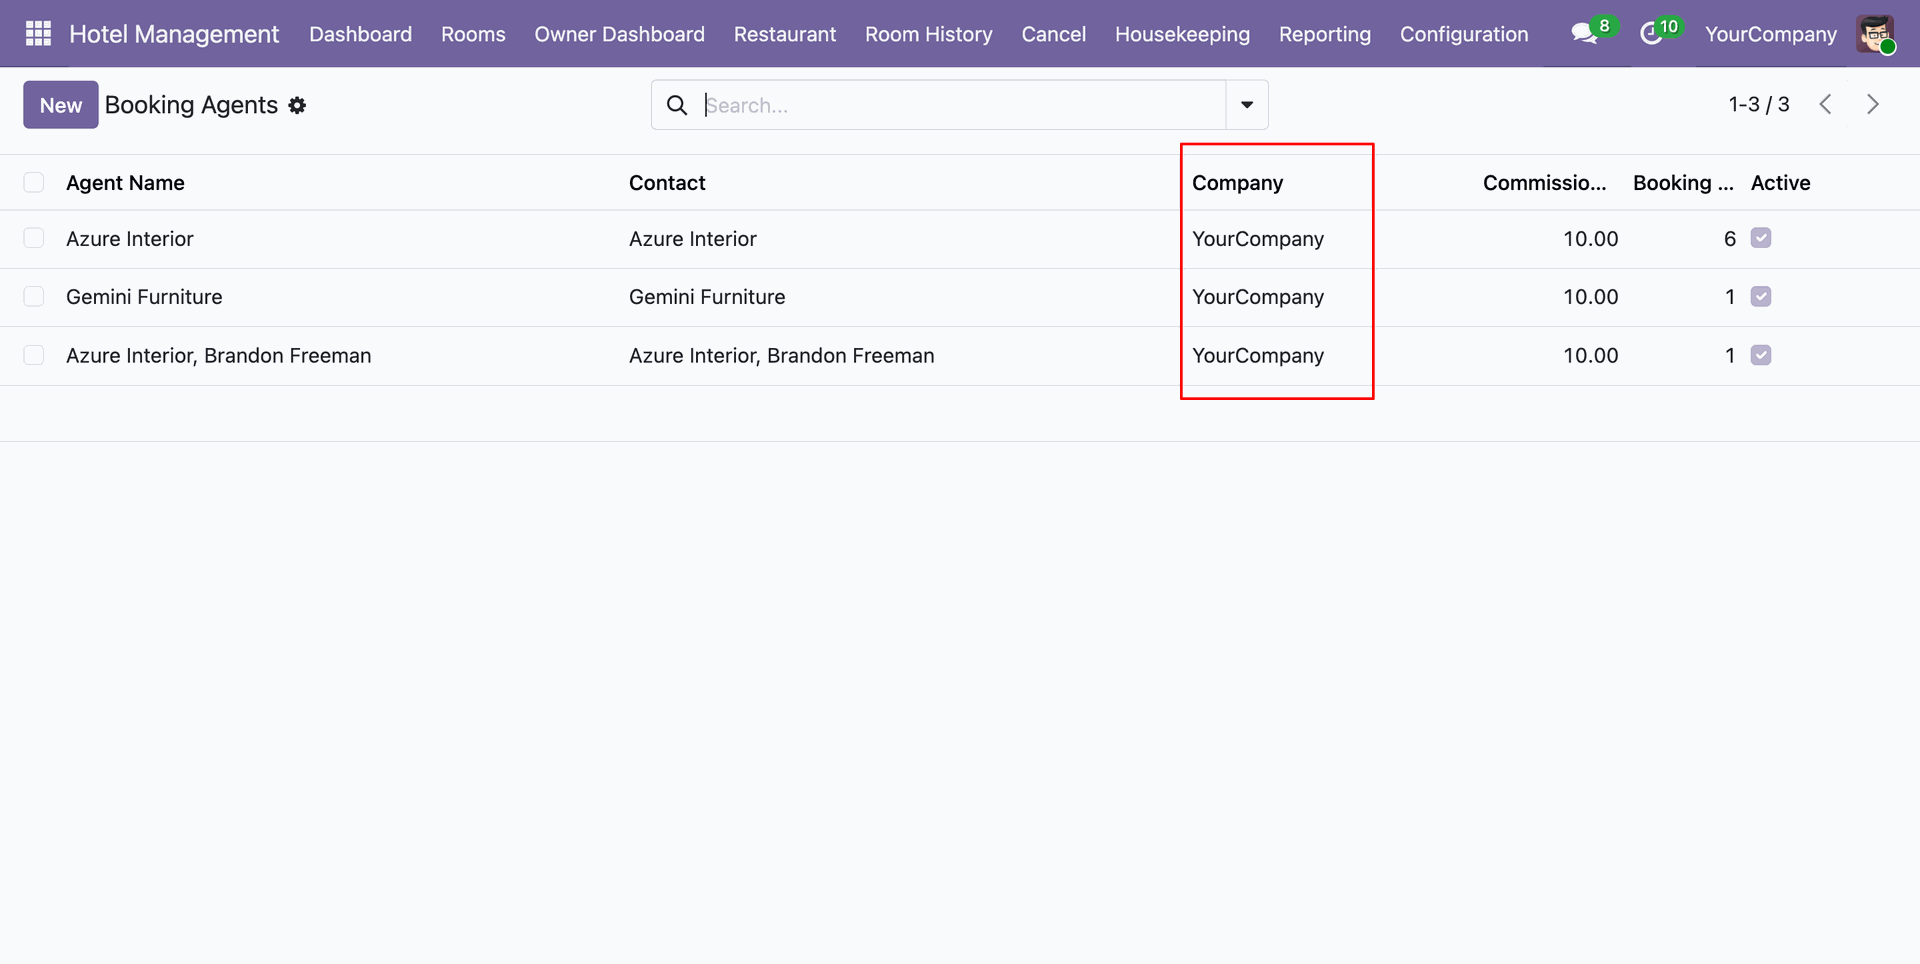
Create a Booking Agent and assign it to a specific company/property by selecting the appropriate company during creation.
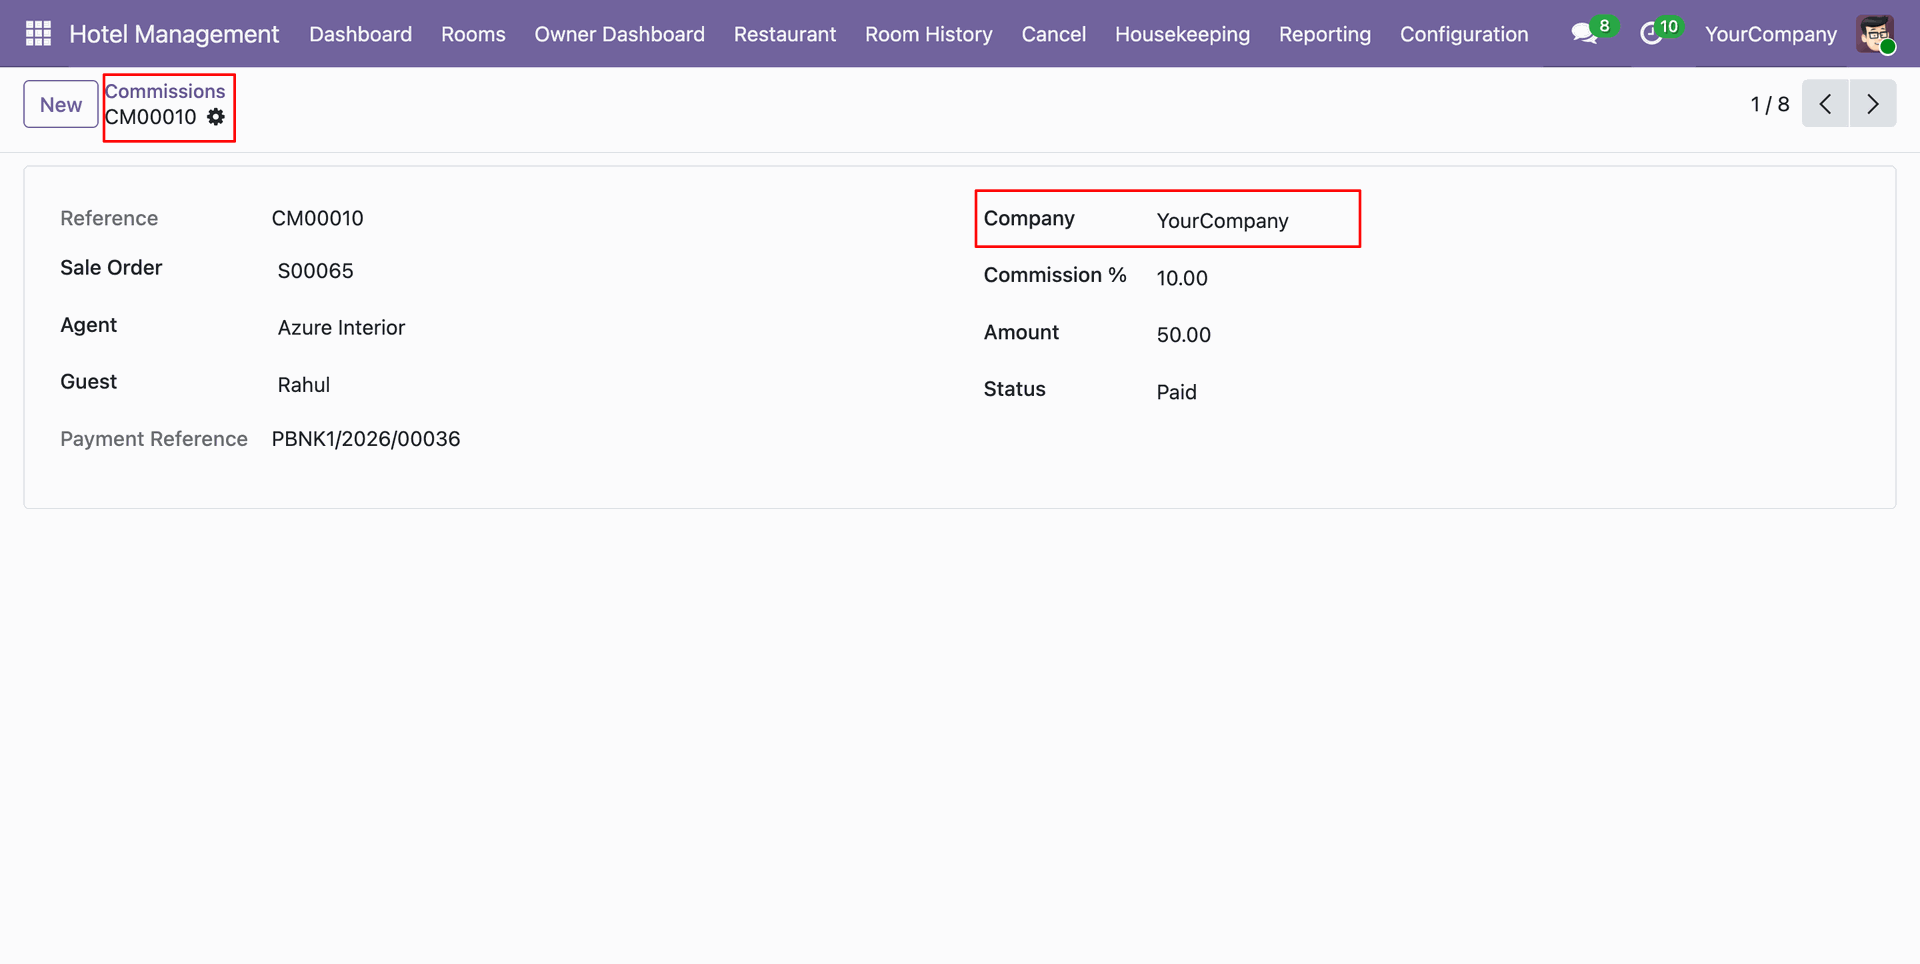
A commission record will be created for the selected agent and linked to the corresponding company/property record.
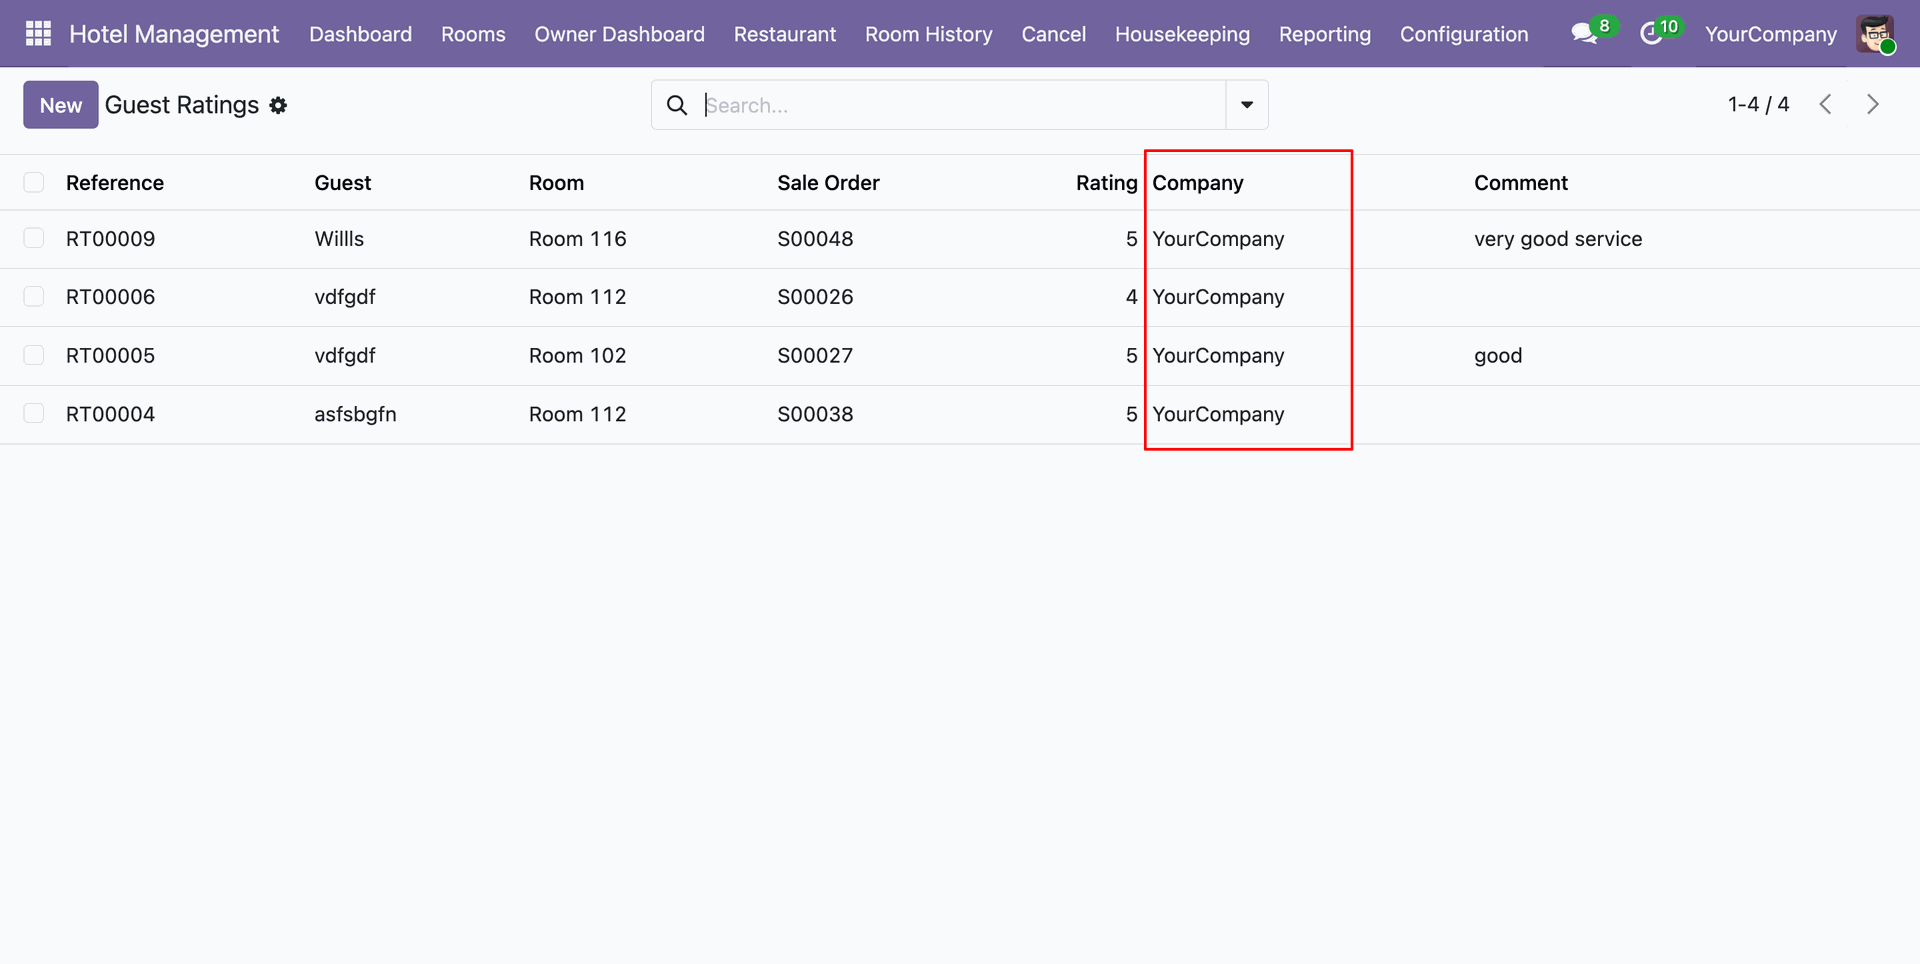
Guest ratings will be captured based on the rooms allocated to the selected company, ensuring ratings are linked to both the room and its assigned company.
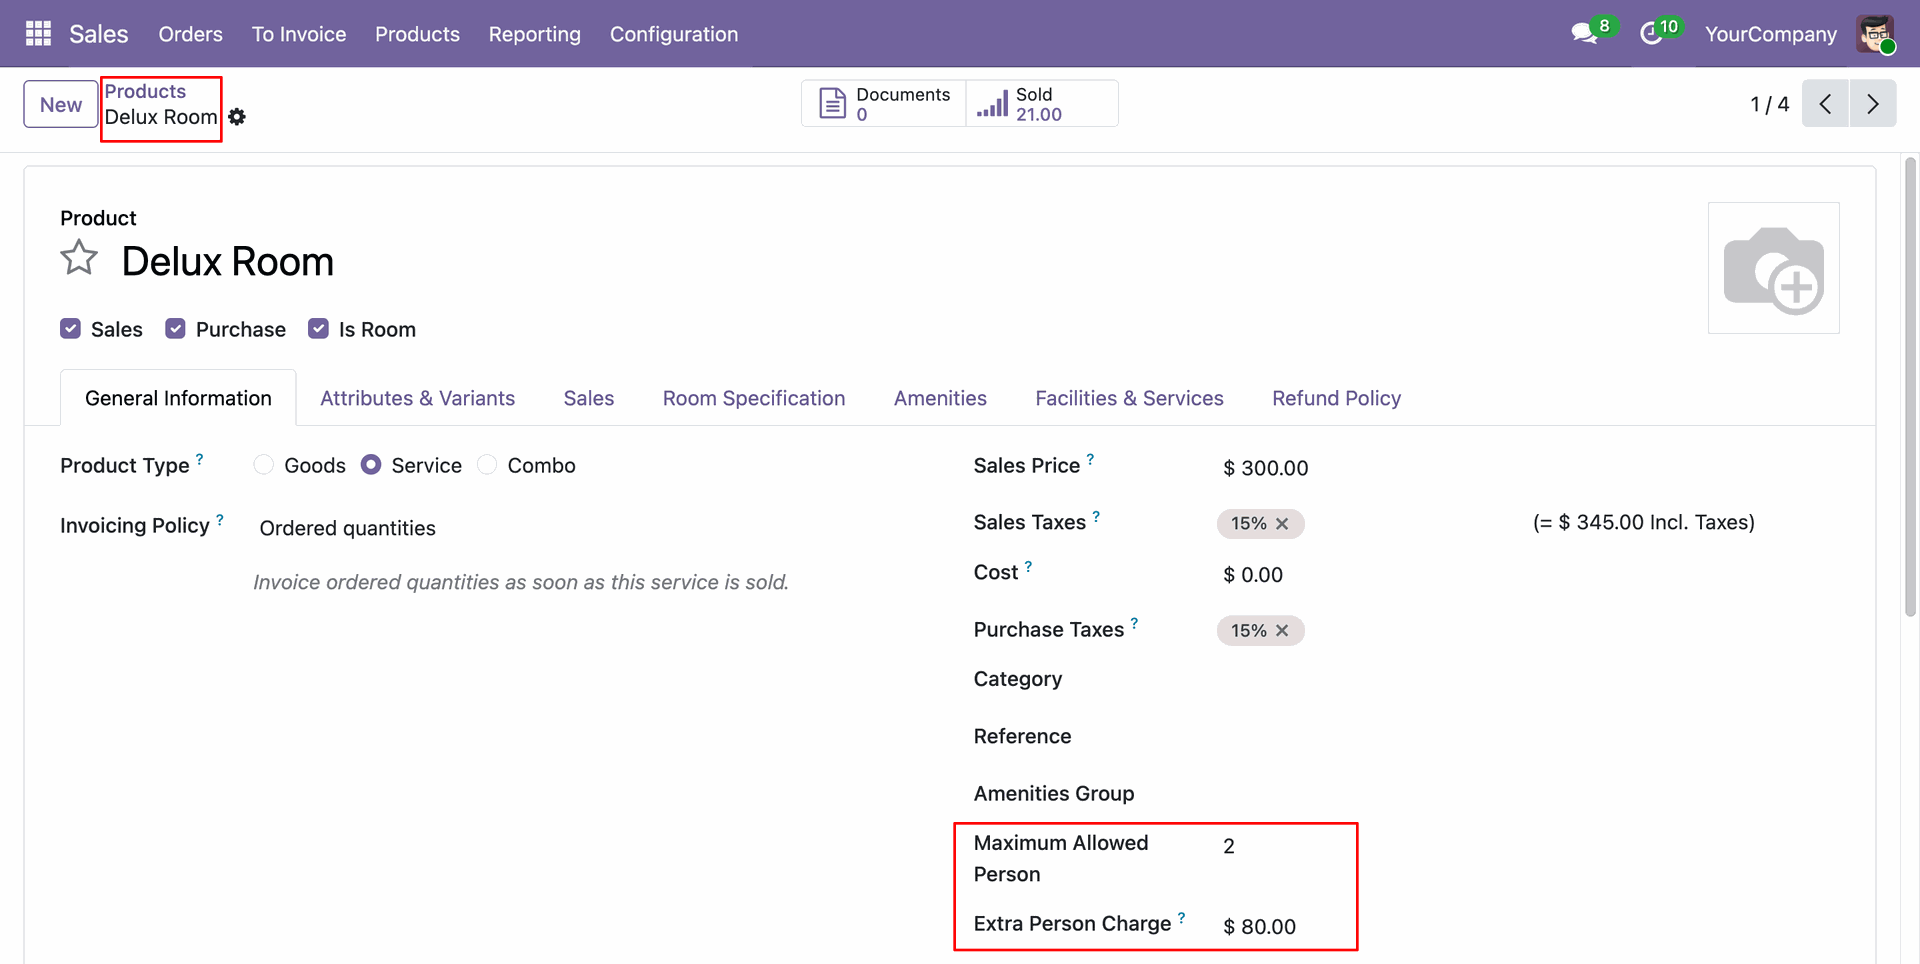
Go to Products, set the Maximum Allowed Persons, and define the Charge for Extra Persons.
Enable the Is Extra Person option in the Room Booking form, add the Extra Person Count, and then click the Book button.

A booking order will be created with the applicable extra person charges included.
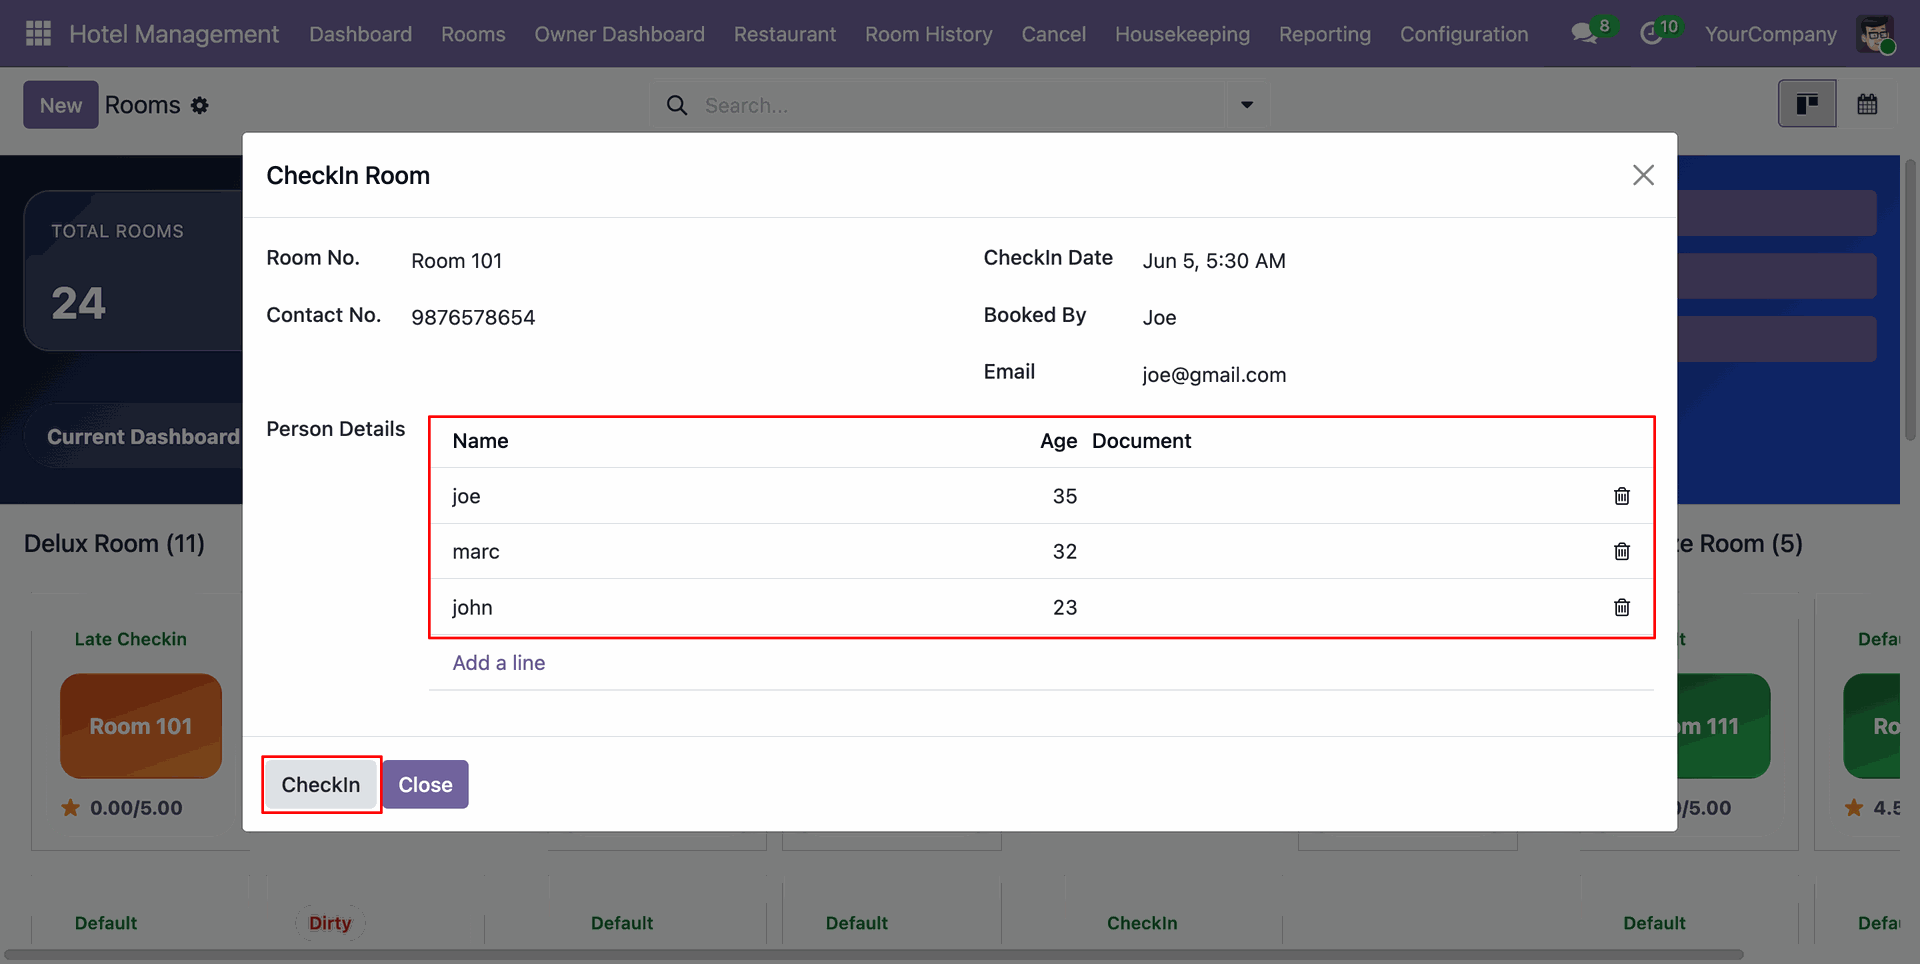
Go to Rooms, click Check-In, add the person details, and then click the Check-In button.
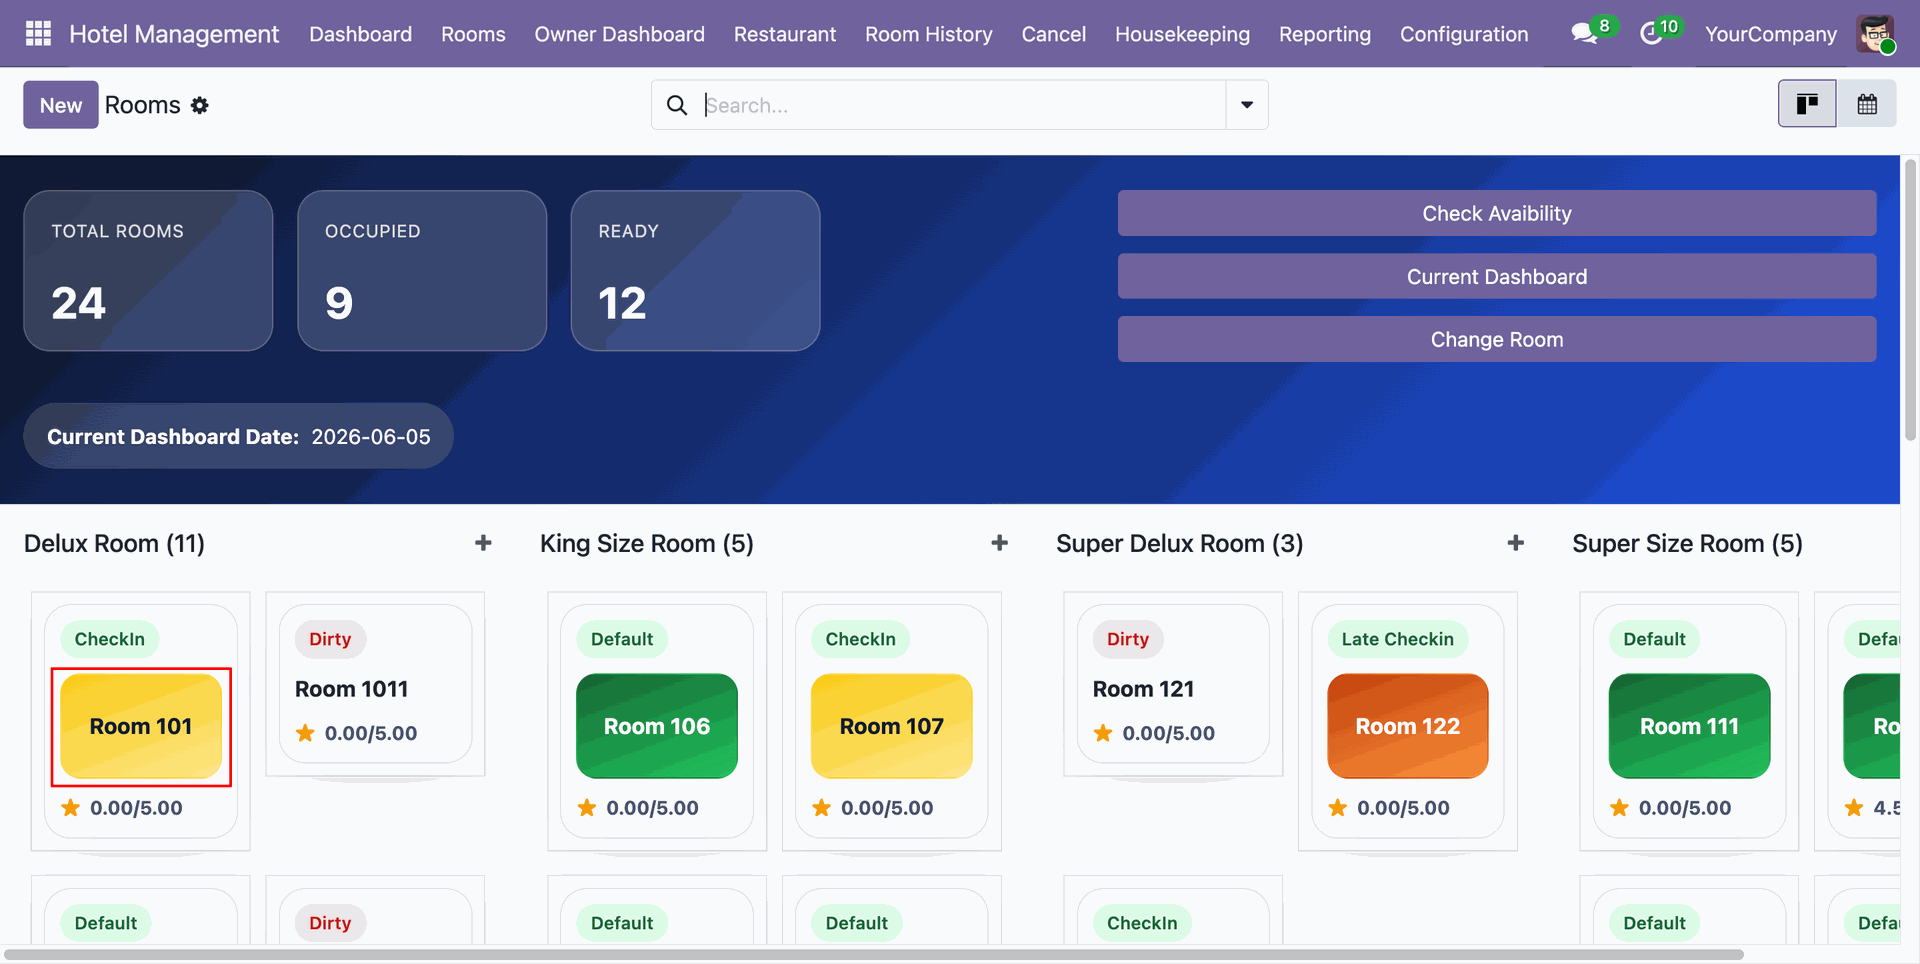
Once the check-in is completed, the room will appear on the dashboard with a Check-In tag on the room number.
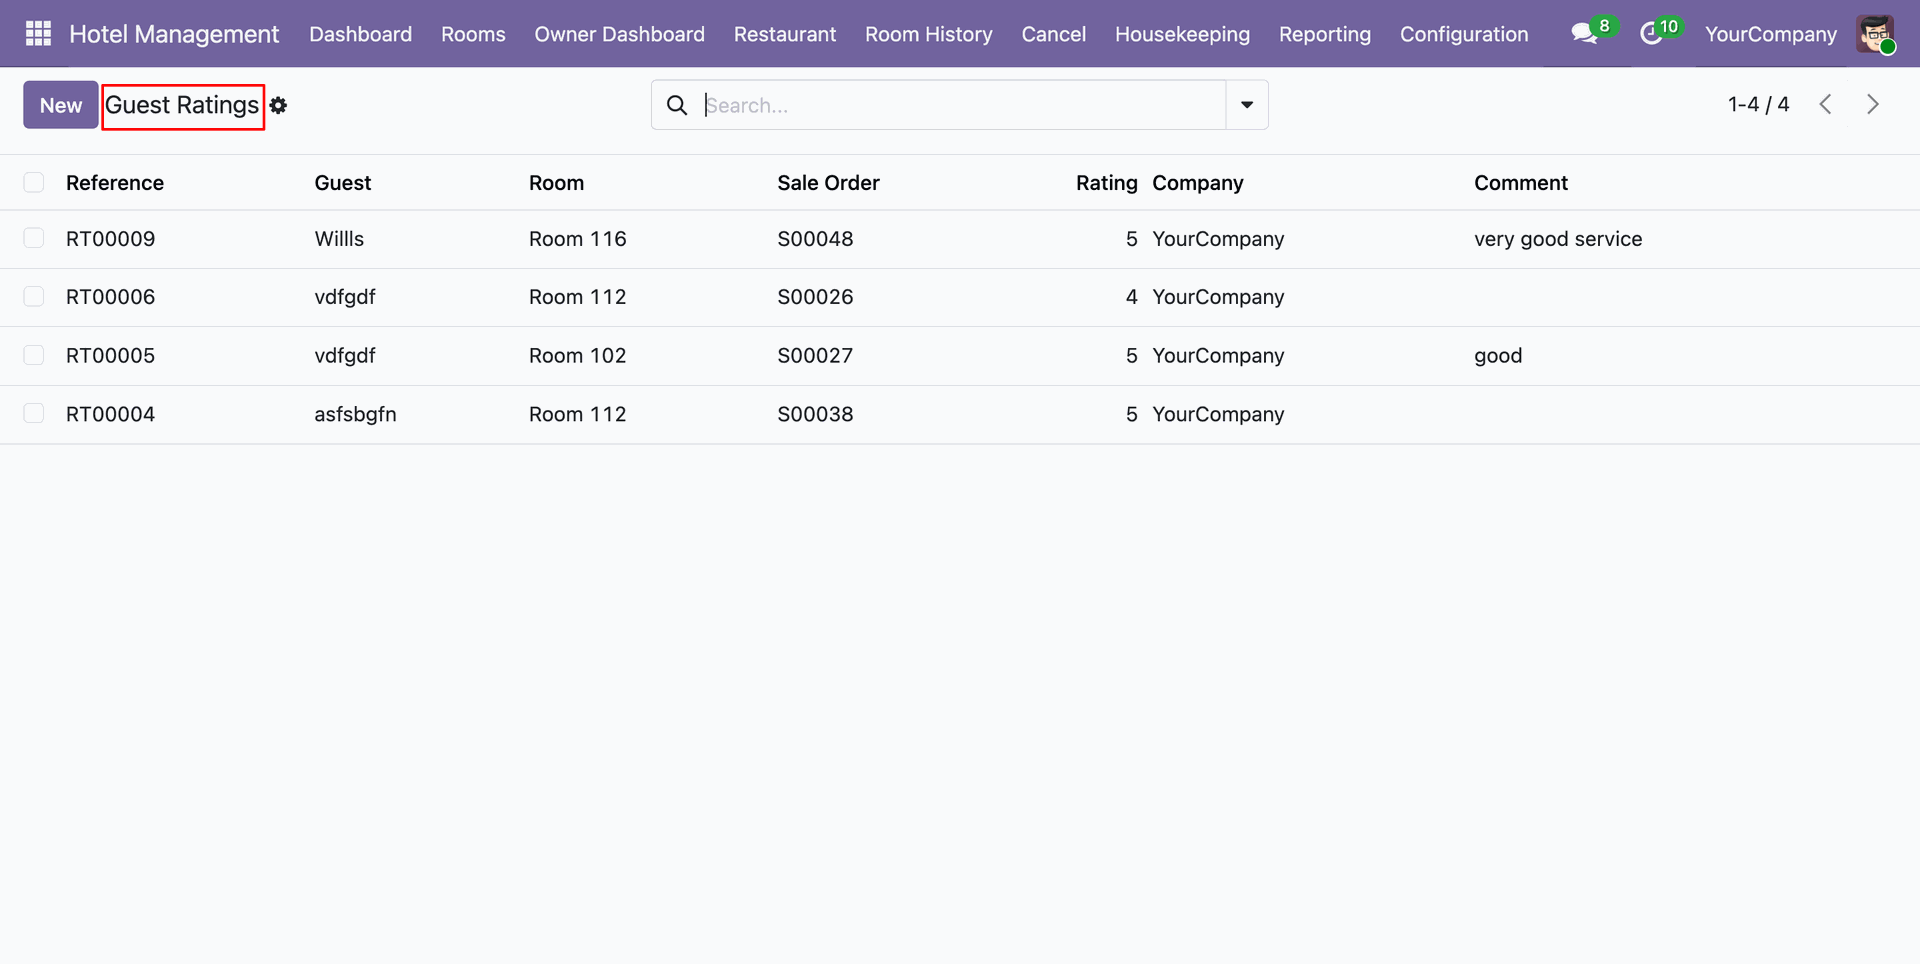
Go to Configurations and click on Guest Ratings sub menu.
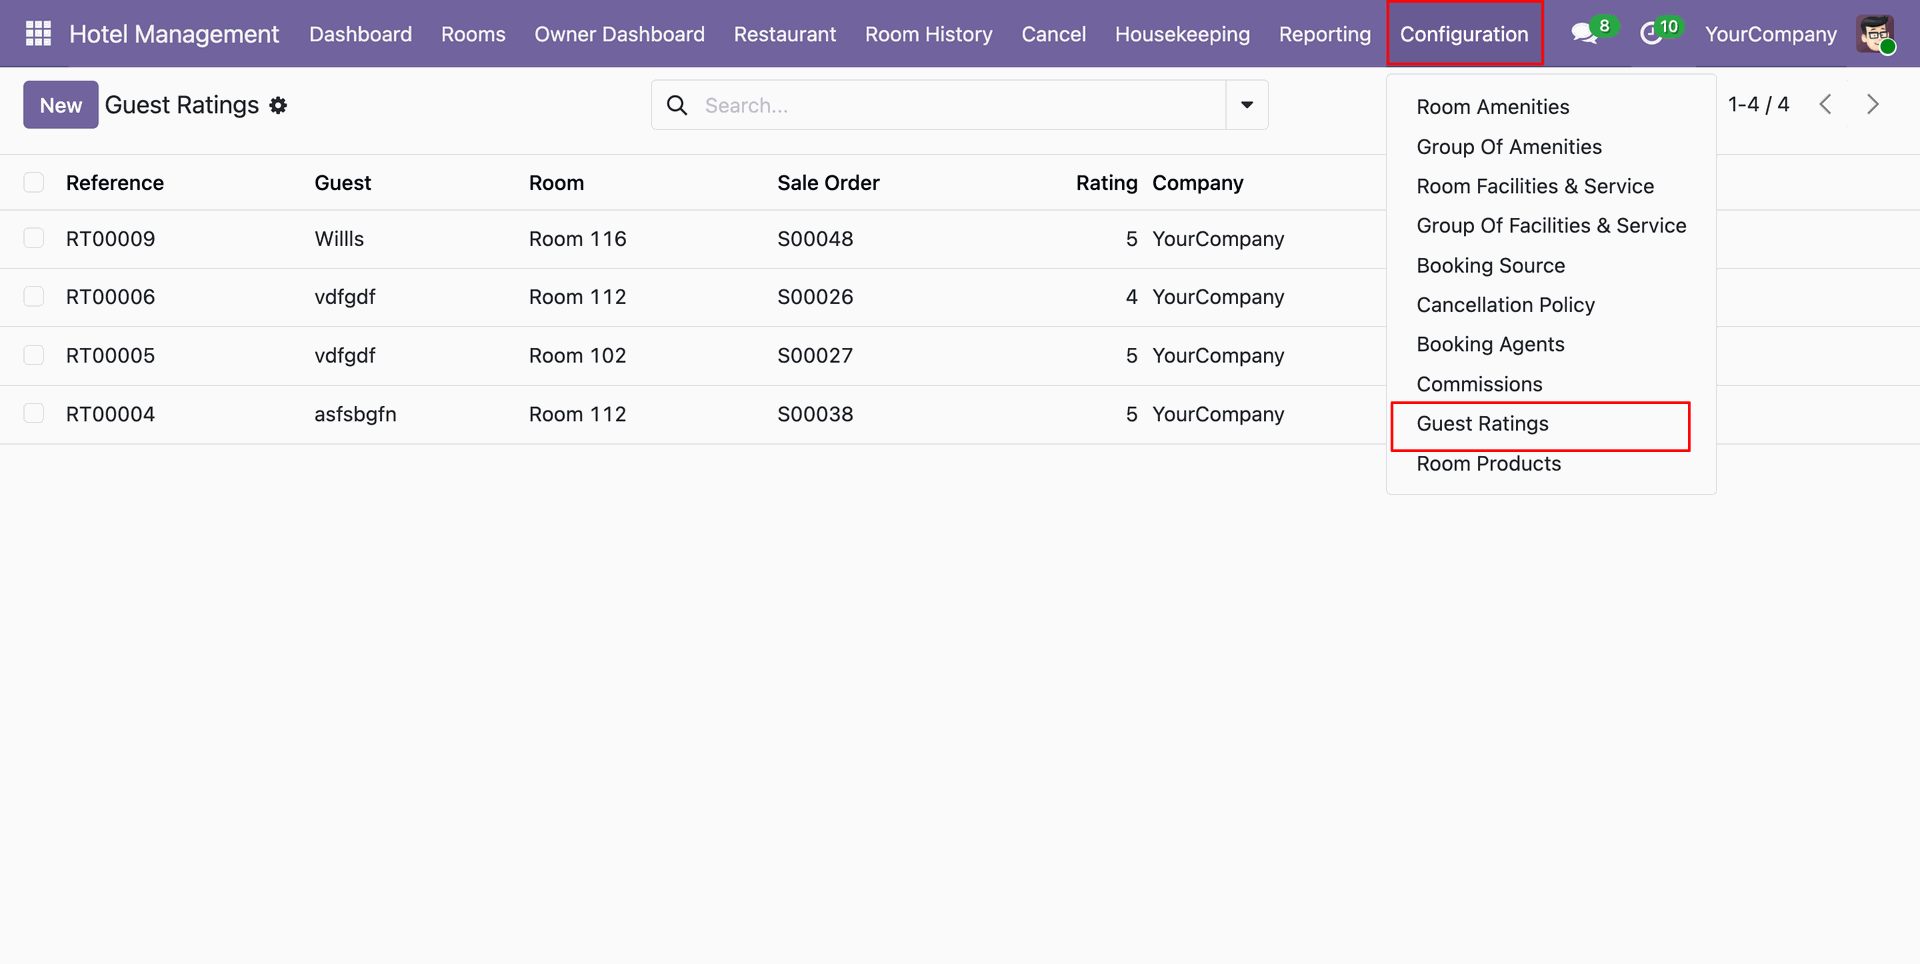
Users can view the Guest Ratings in a list view.
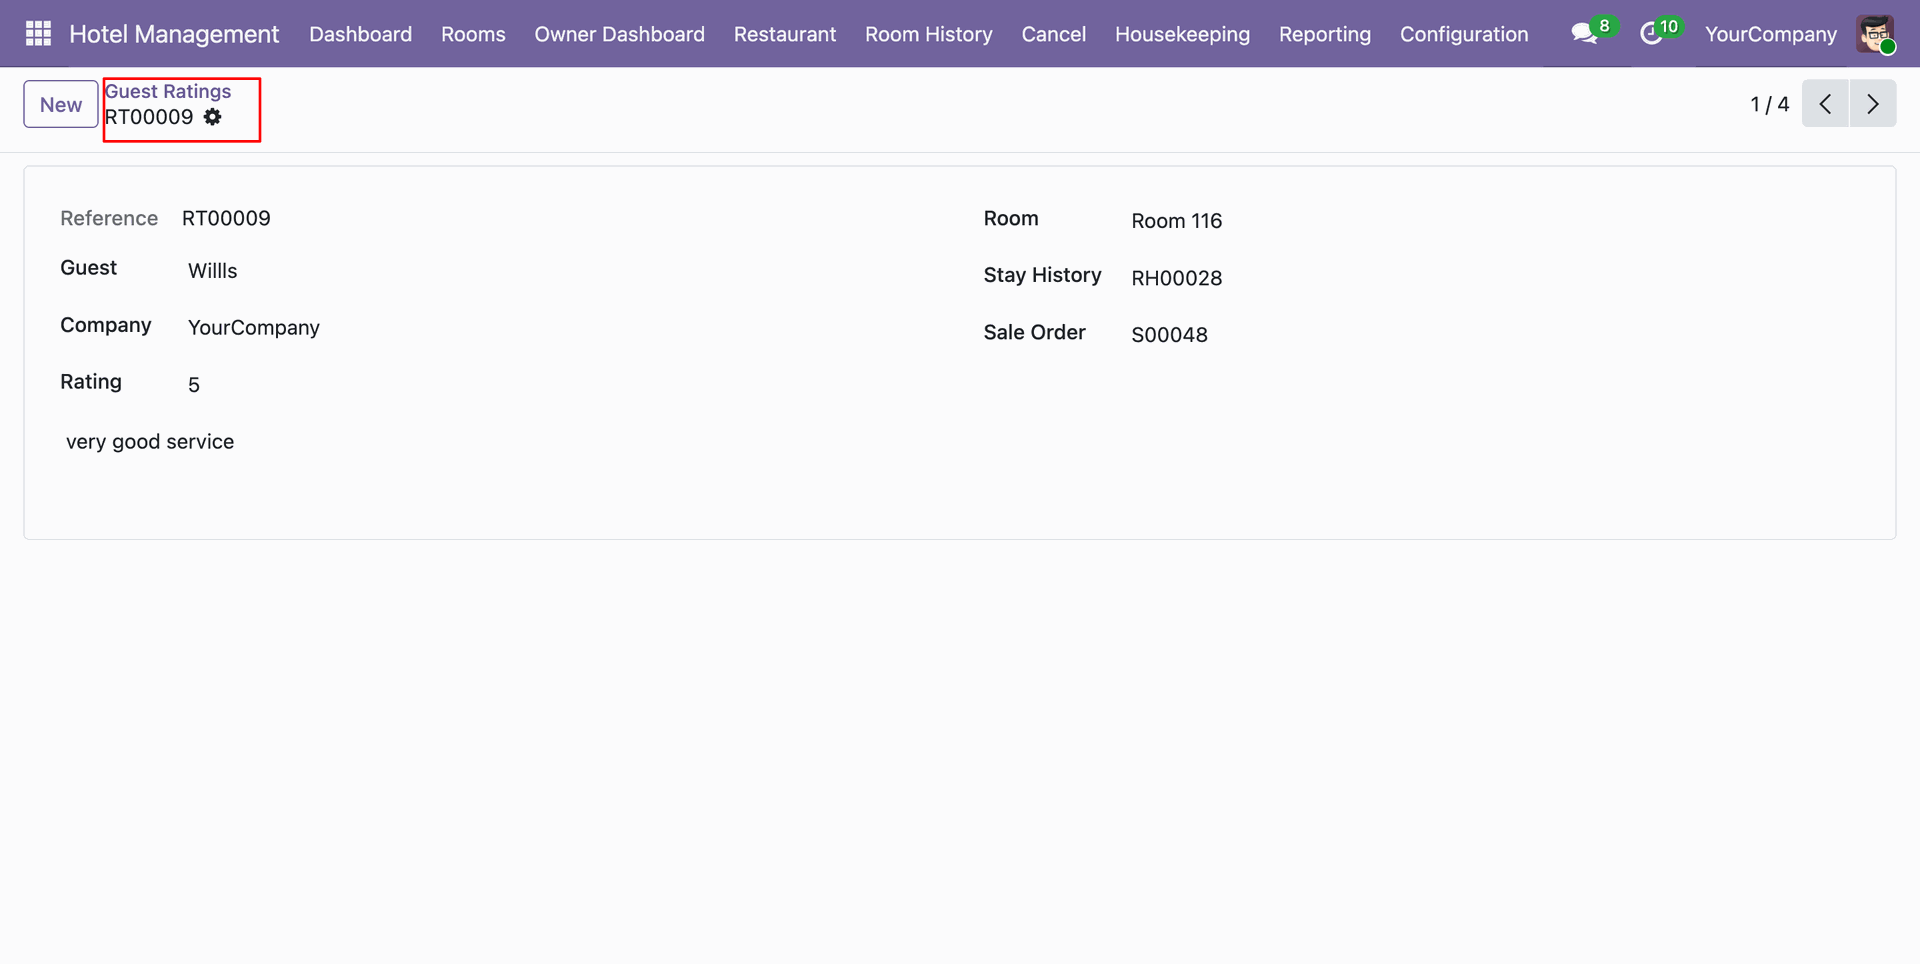
Clicking on a rating line will open the form view, where you can review the ratings and feedback in detail.
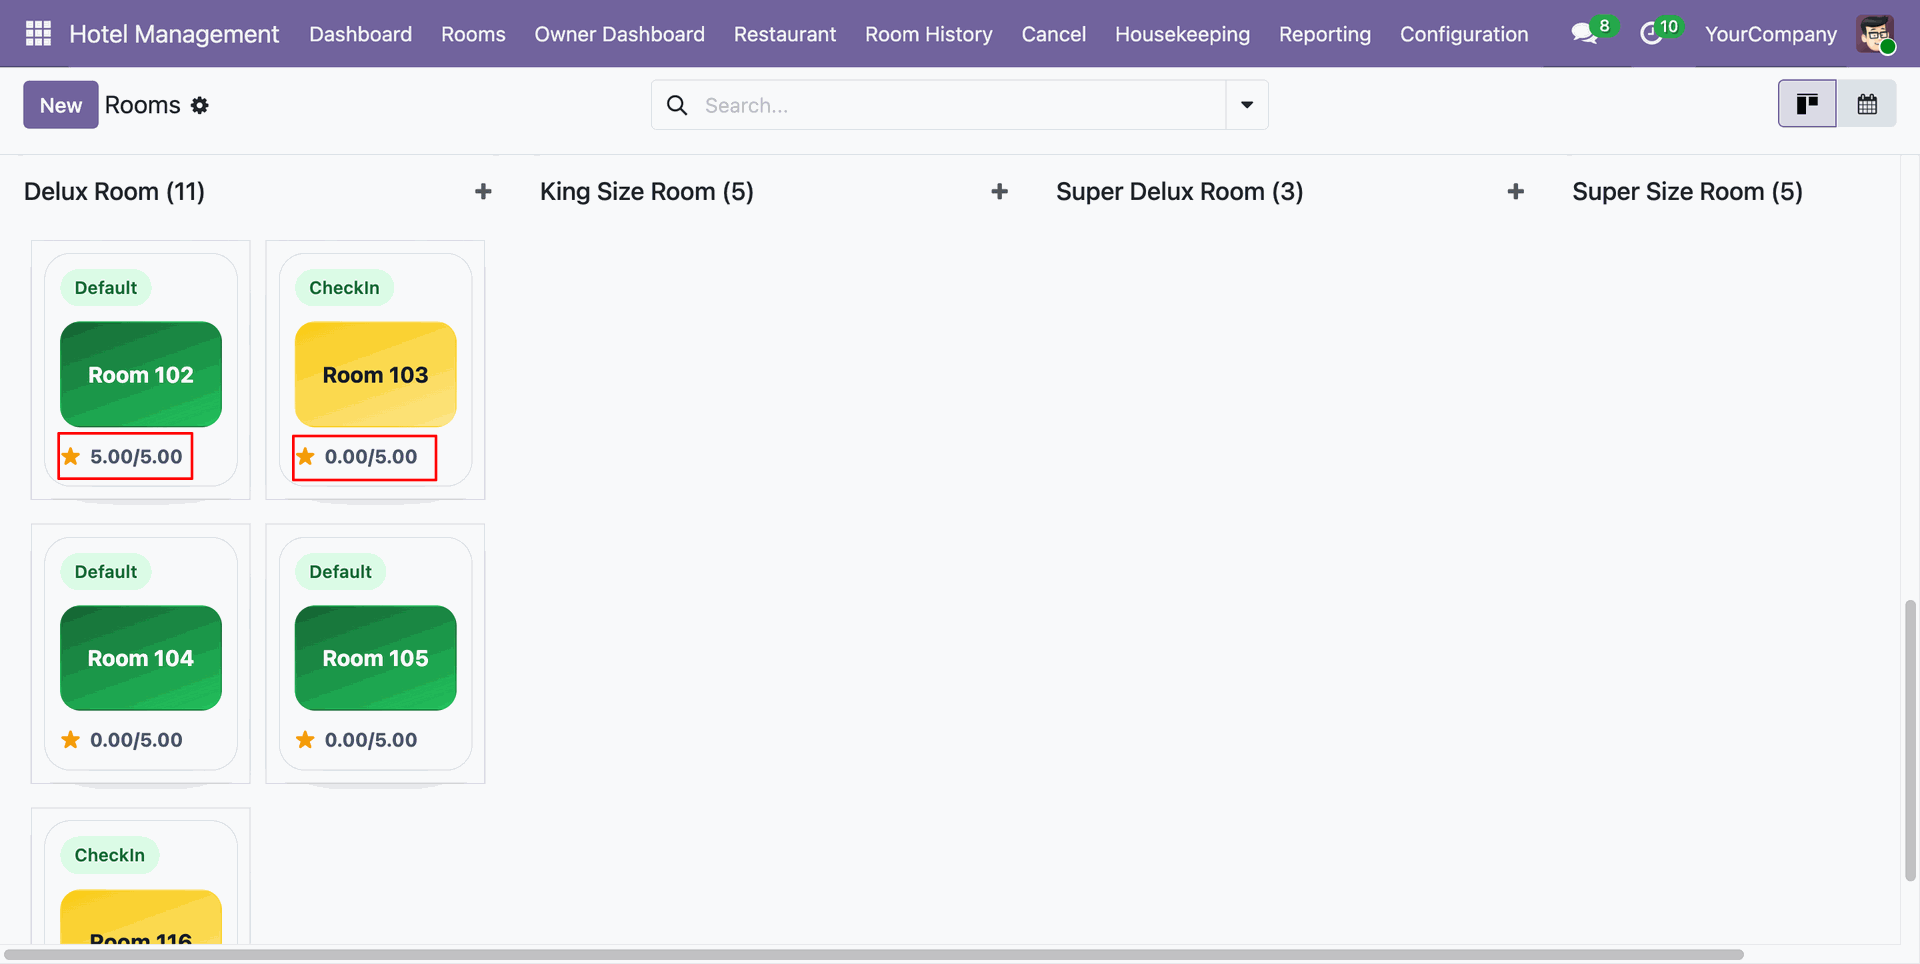
Users can view the ratings directly on the Rooms Dashboard.
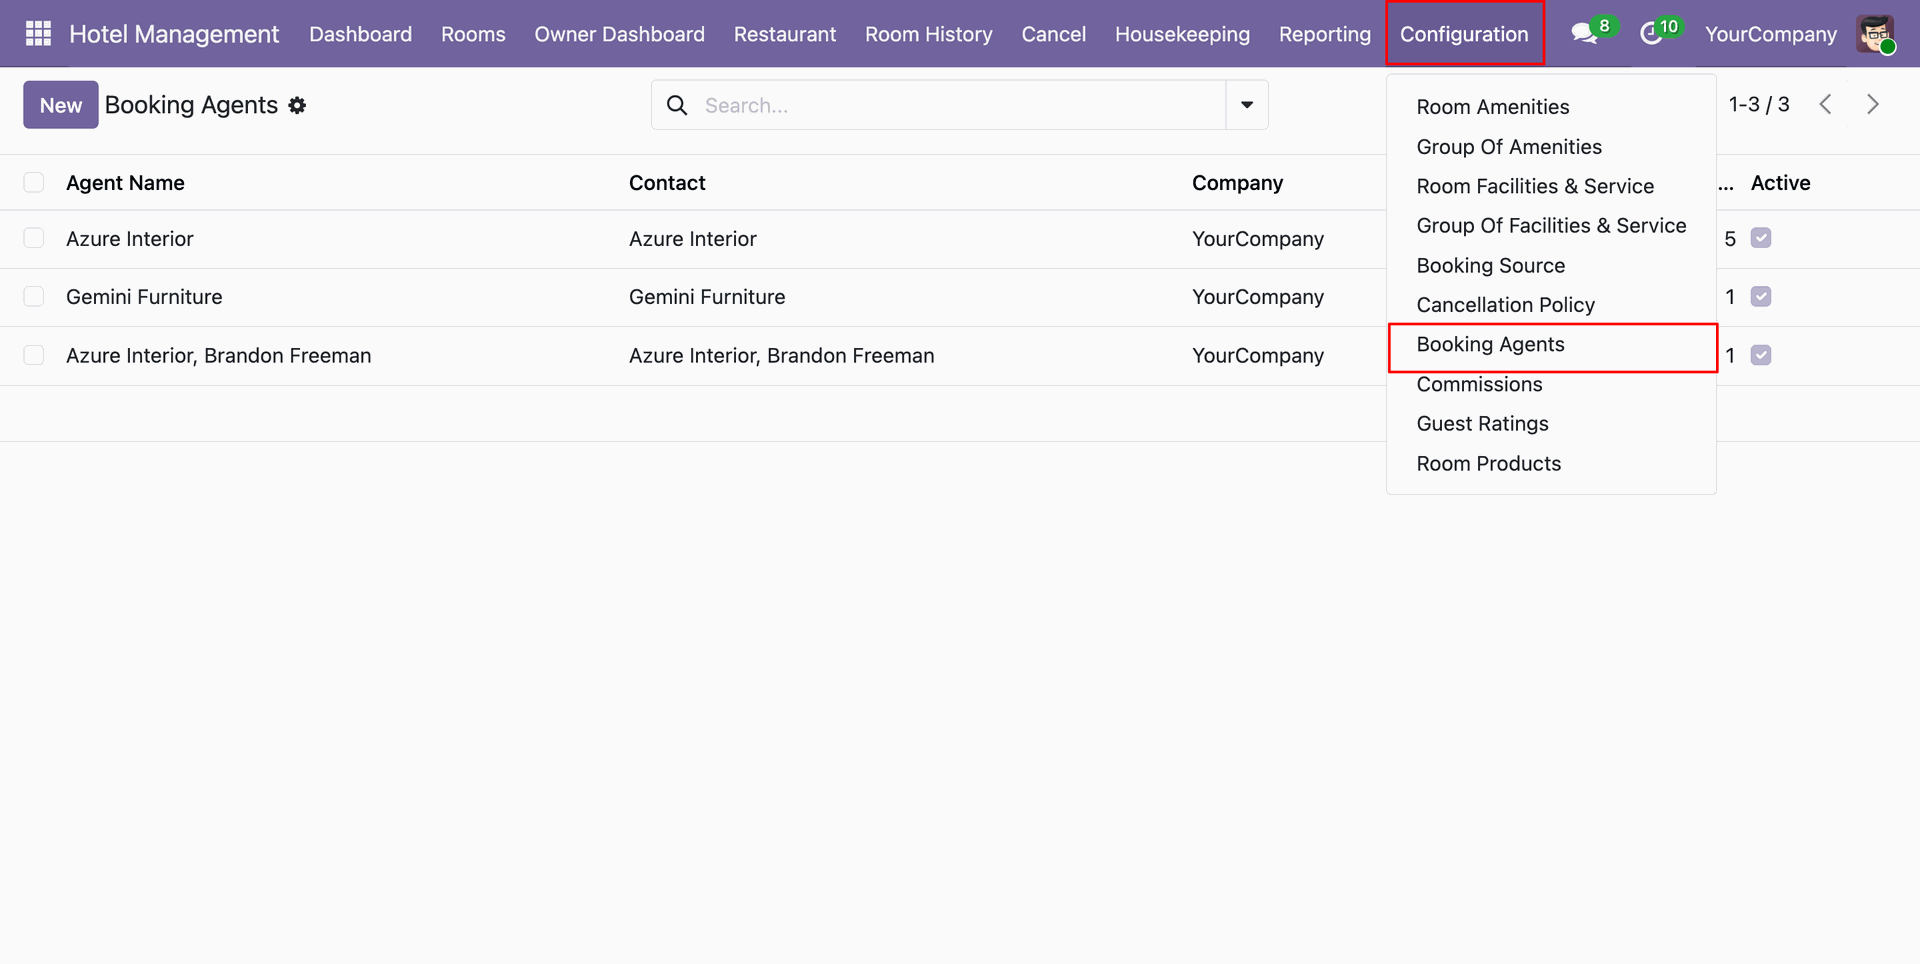
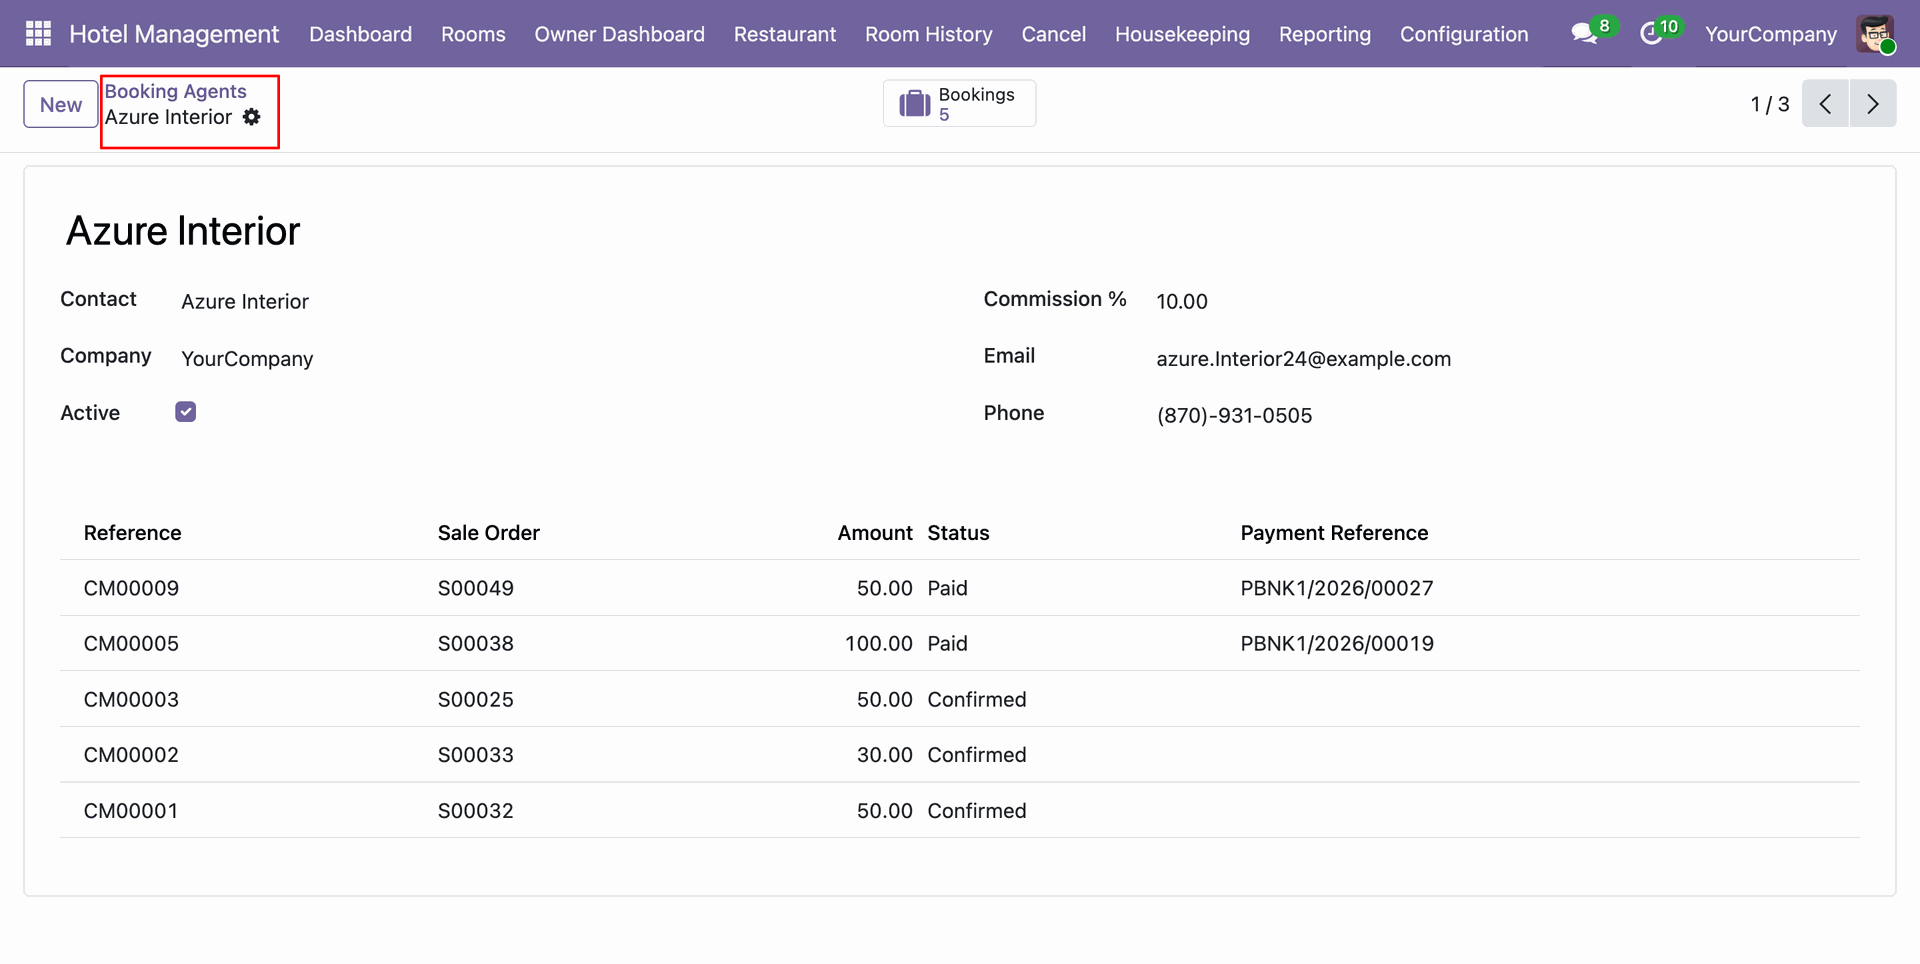
Go to the Booking Agents menu under Configurations to view the agent details.
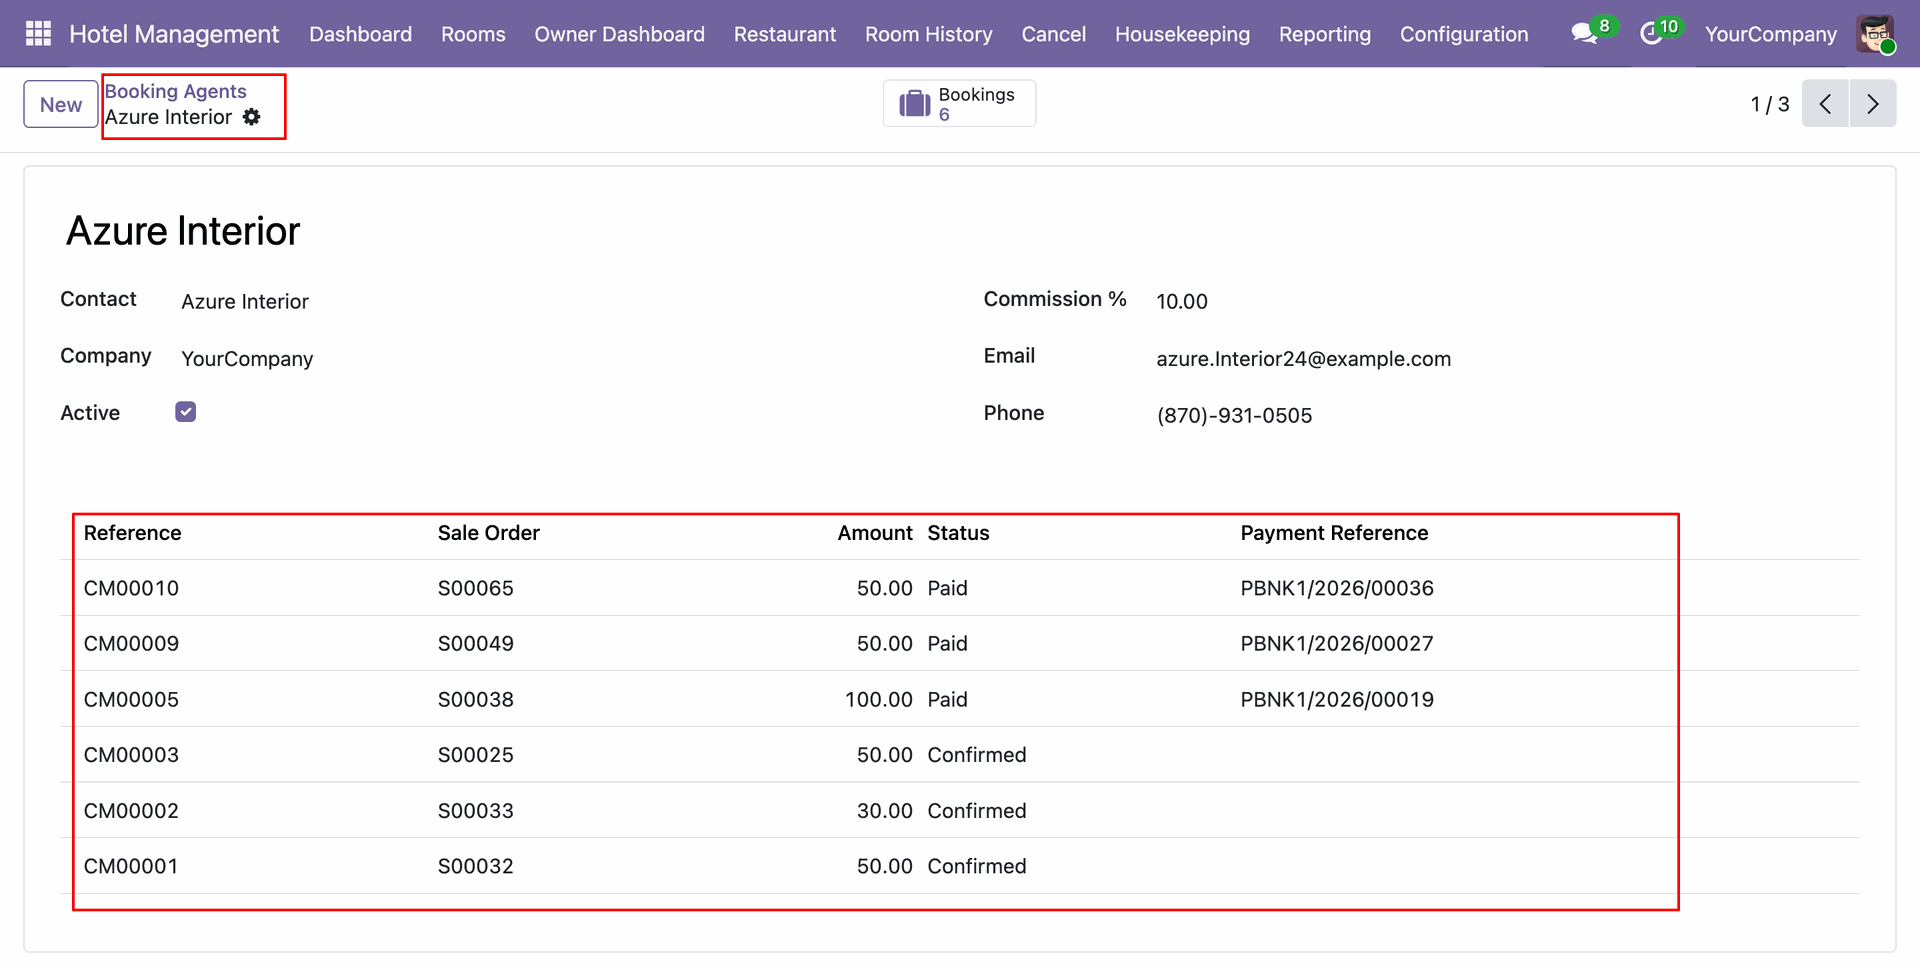
Clicking on a Booking Agent will open the form view, showing the agents' booking details.
Agent bookings can be viewed using a smart button on the agent form view.
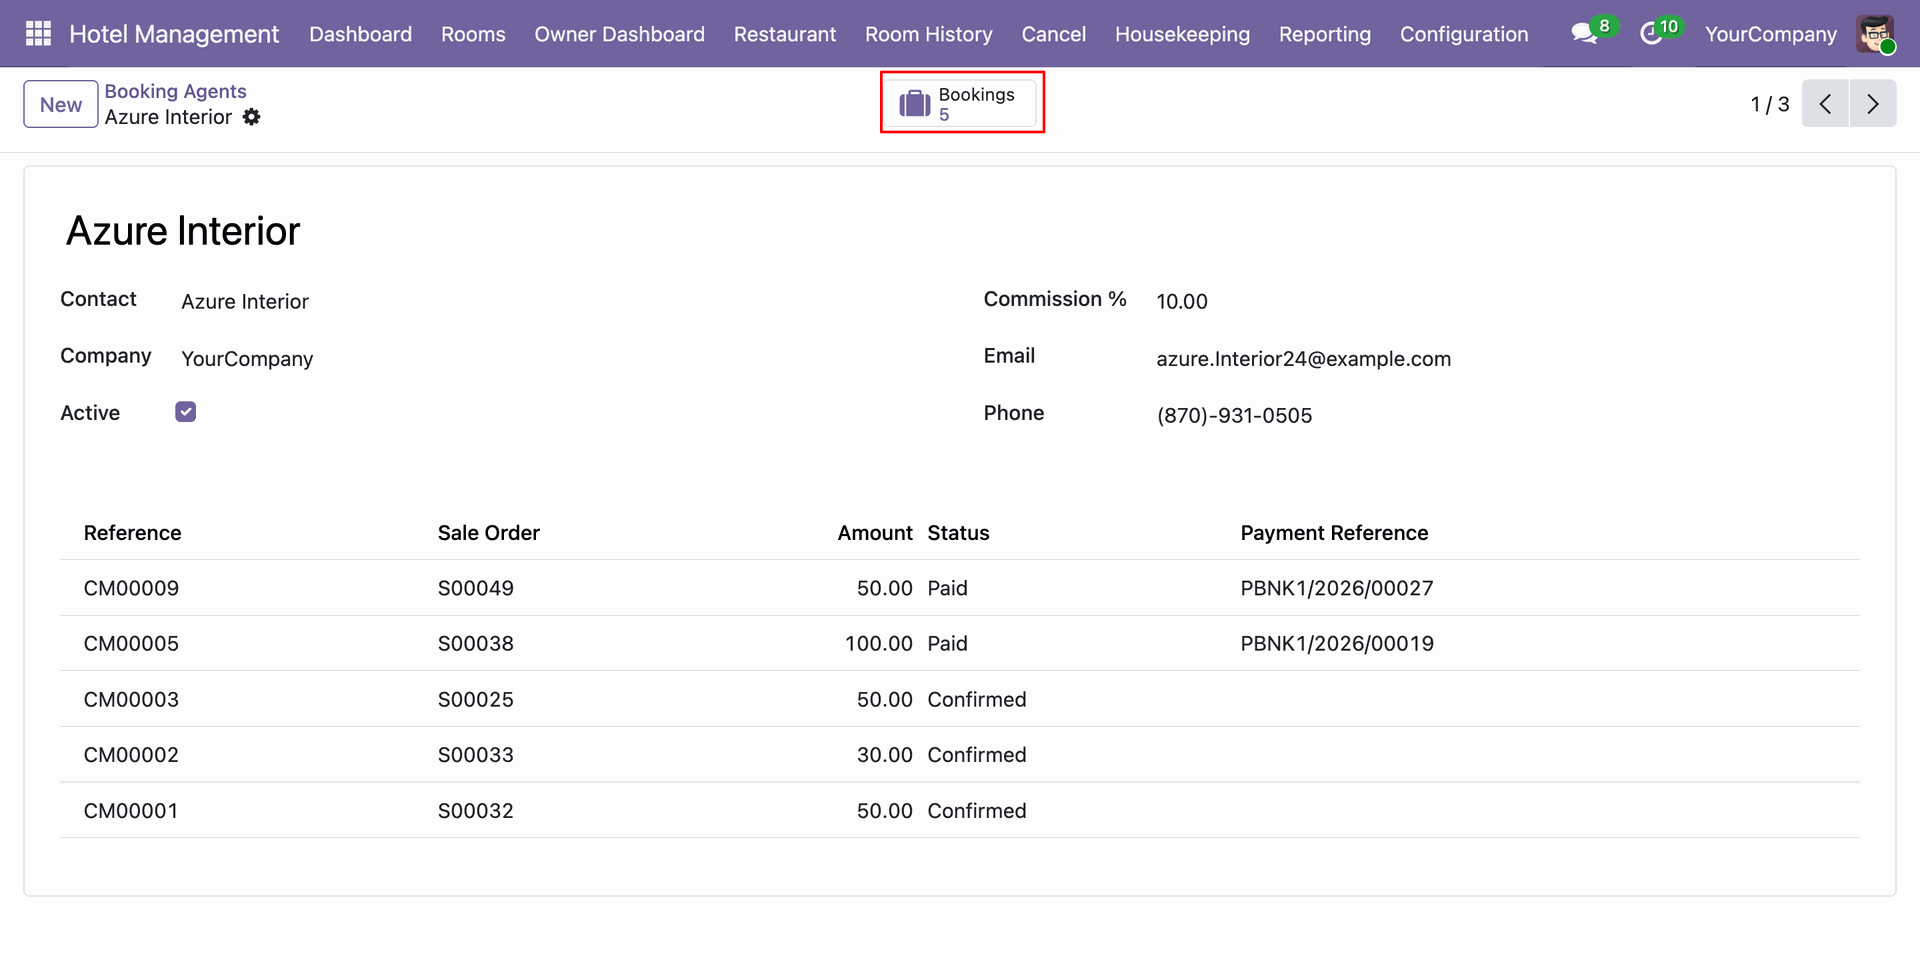
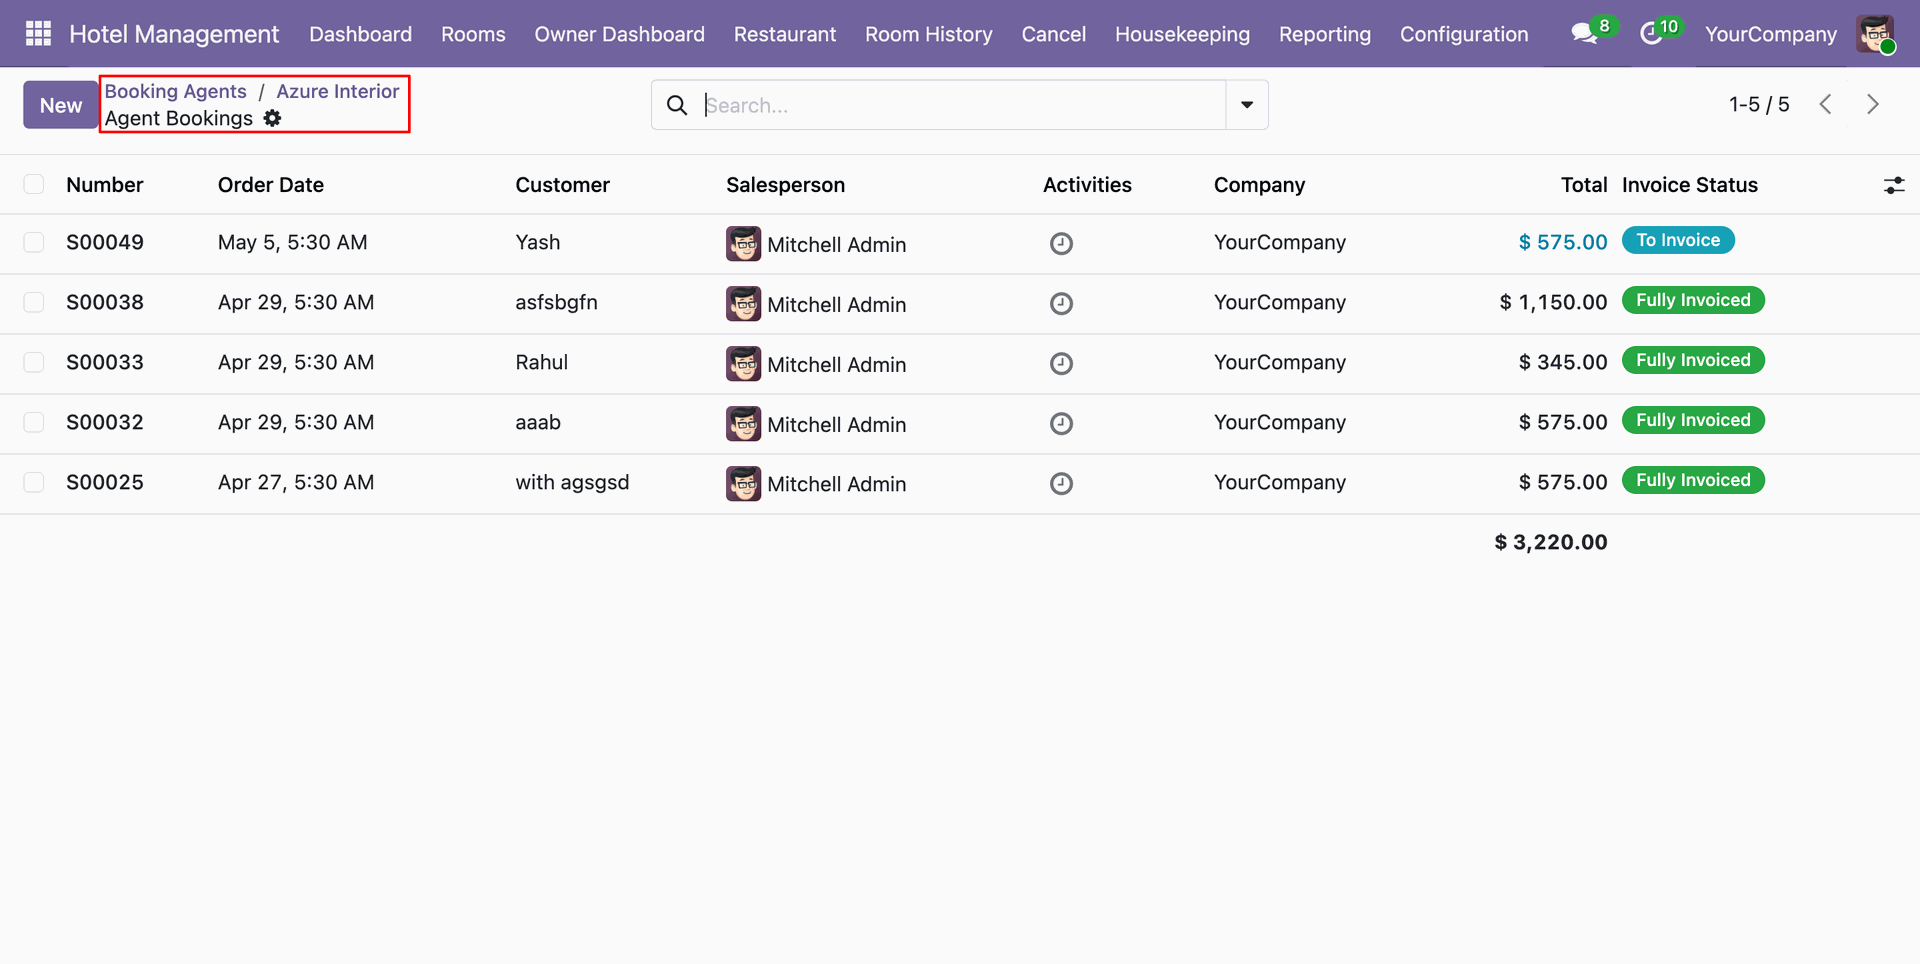
Clicking the Booking smart button will open the room booking records for that agent.
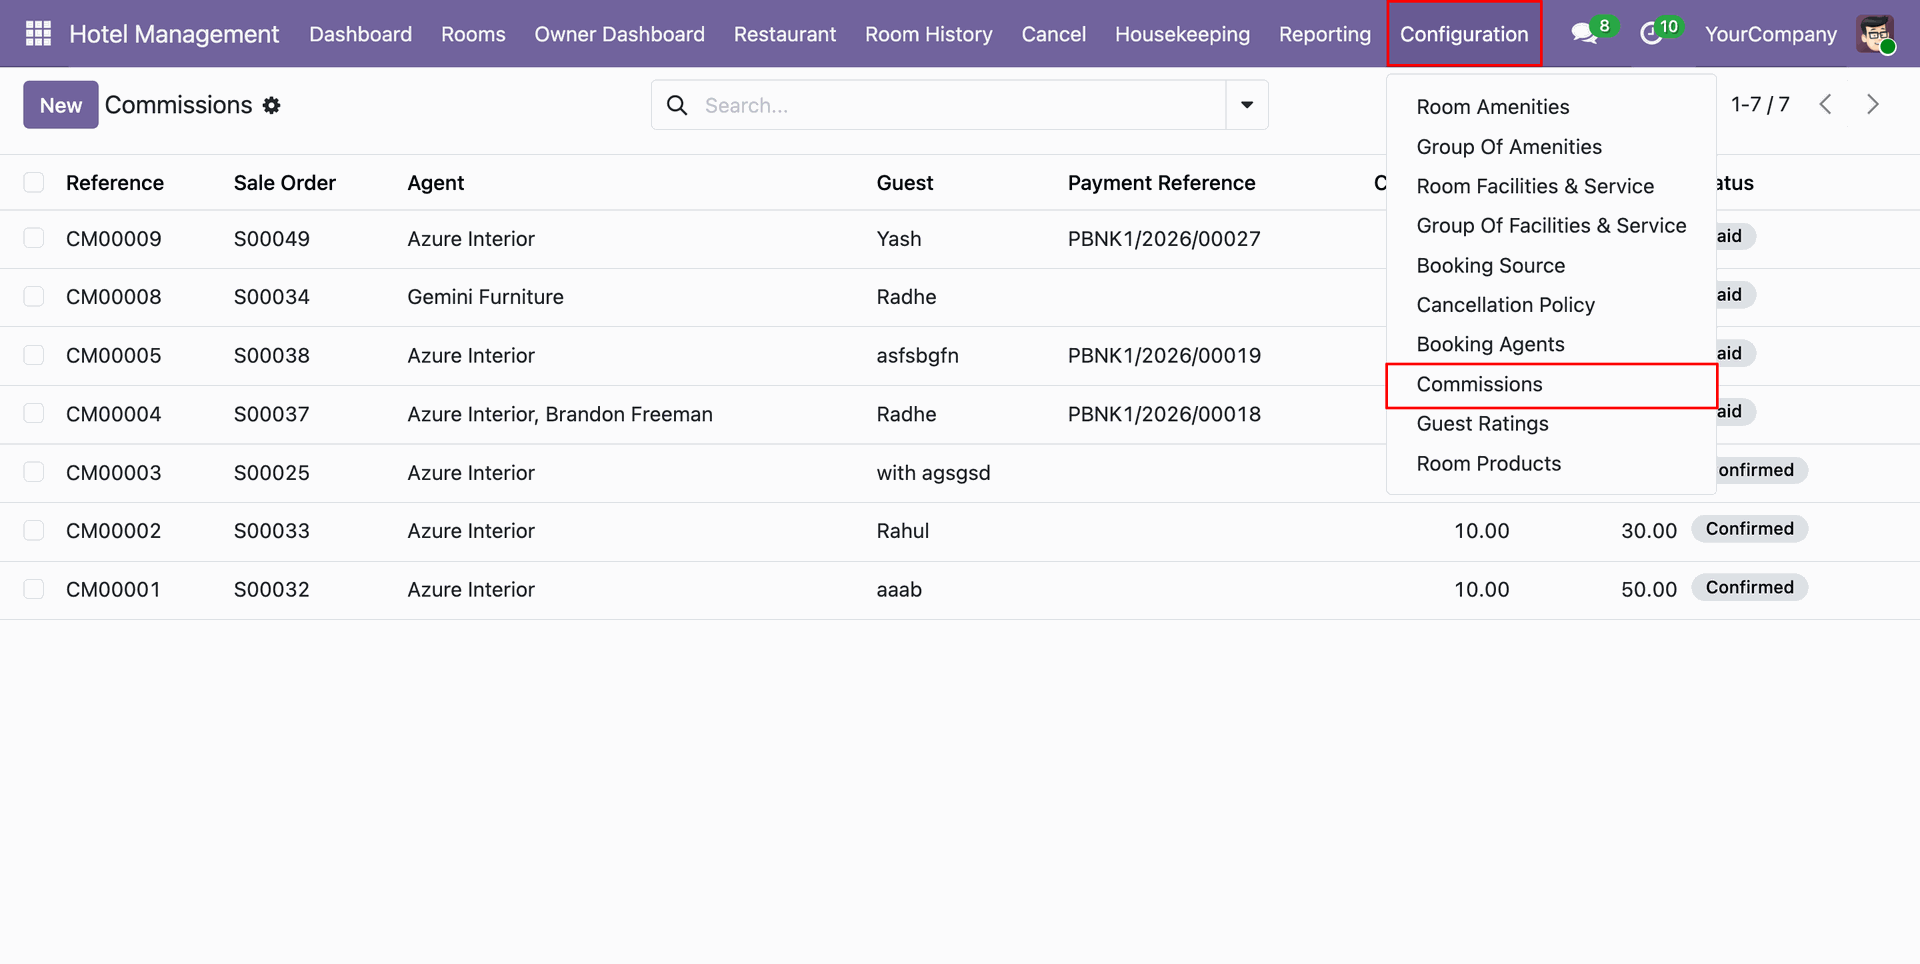
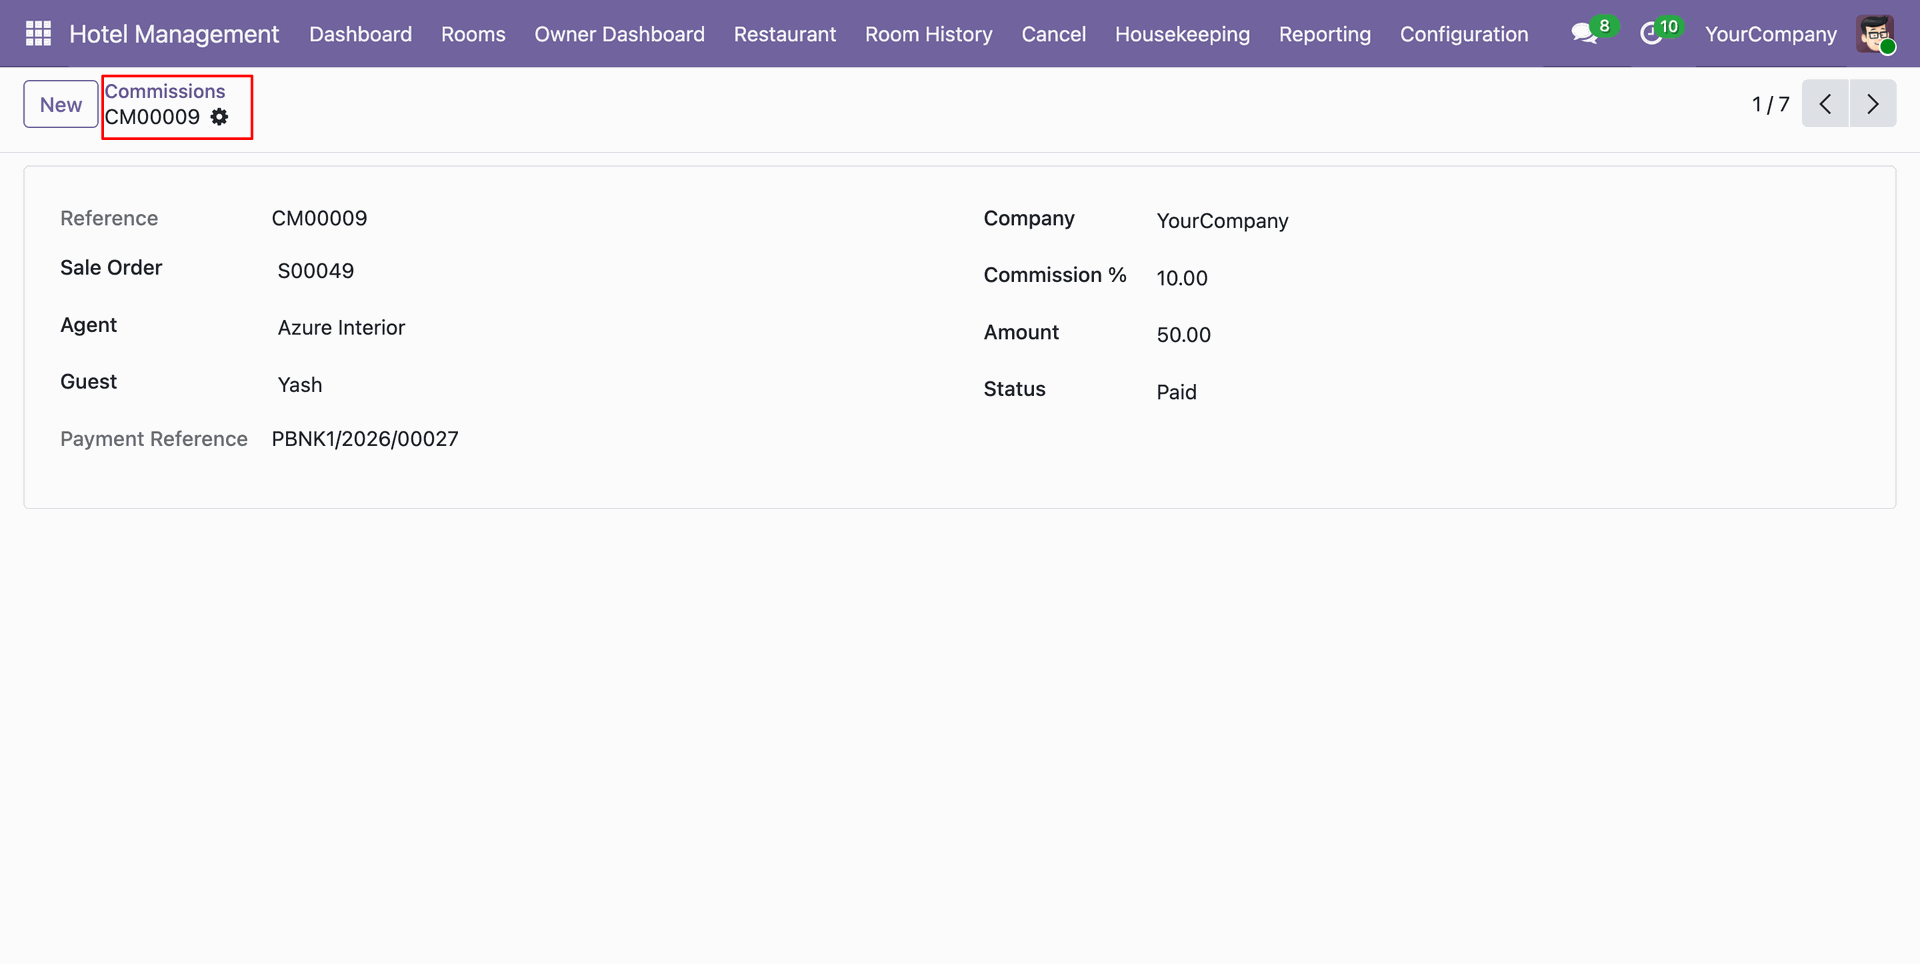
Go to Configurations and click on the Commission menu to open the commission list view.
Clicking on a Commission Order will open the form view, where you can review the commission payment details.
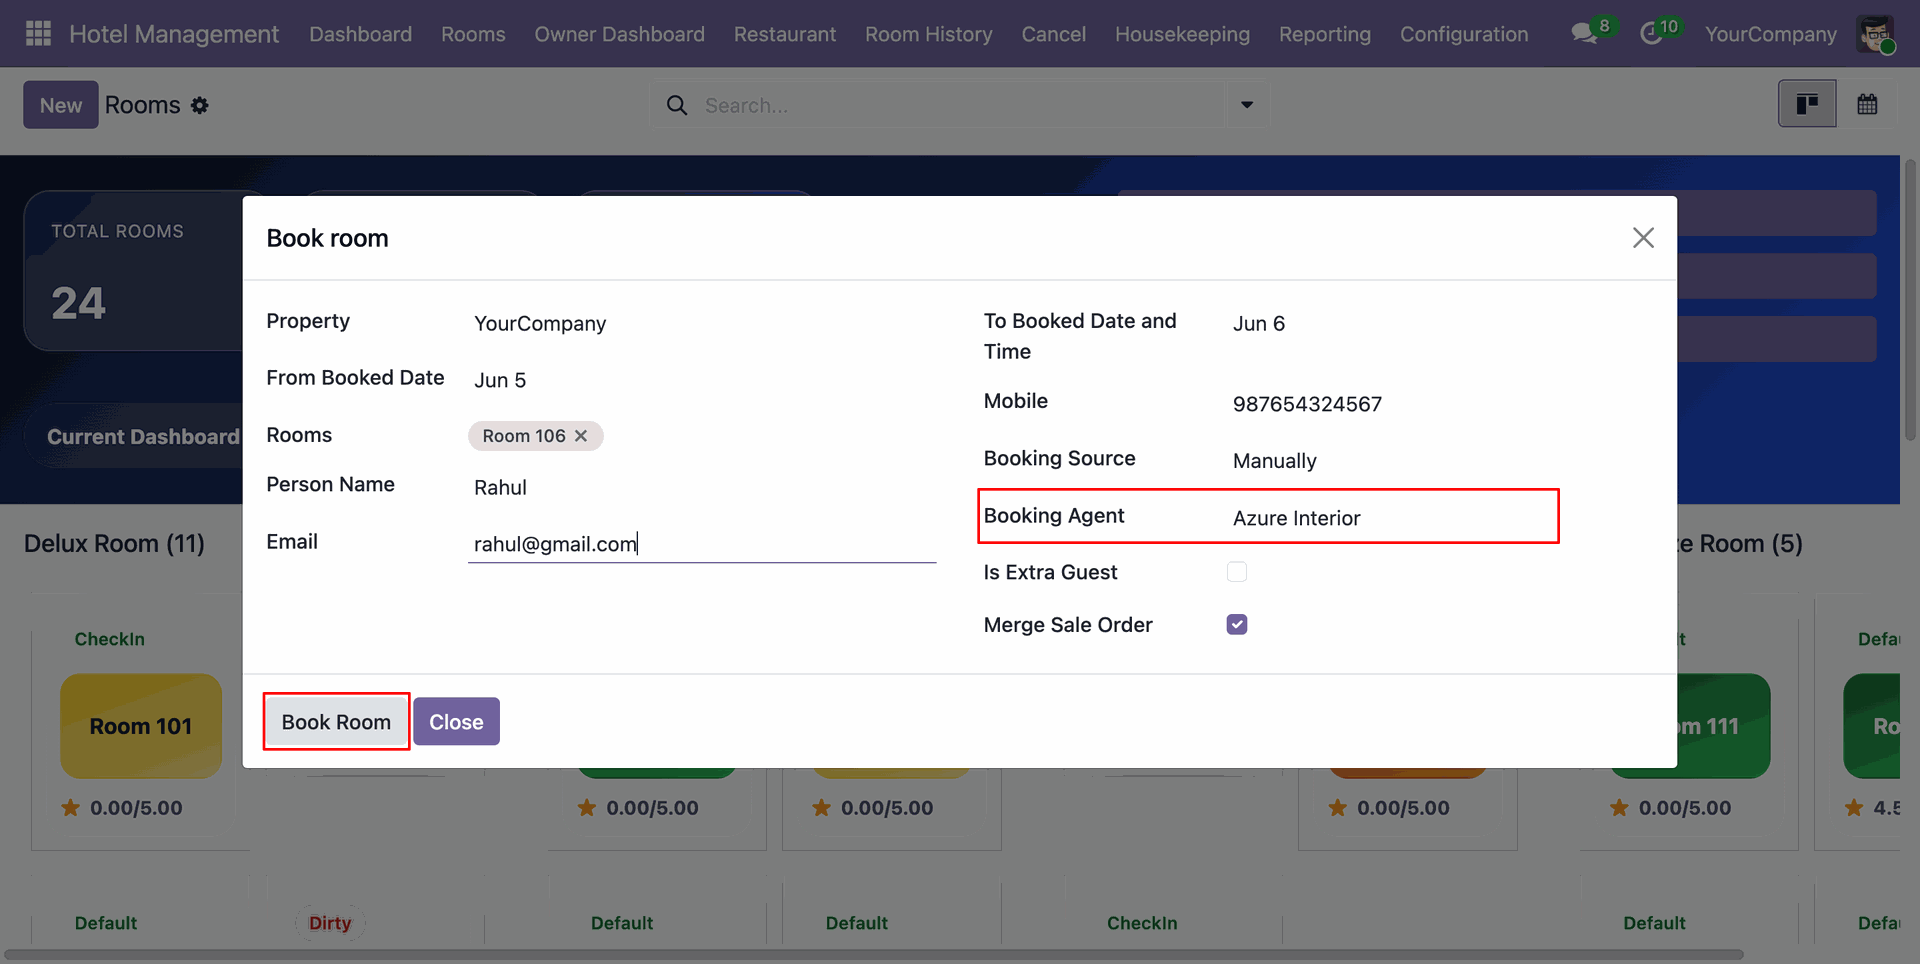
Book a room and select the agent while creating the booking.
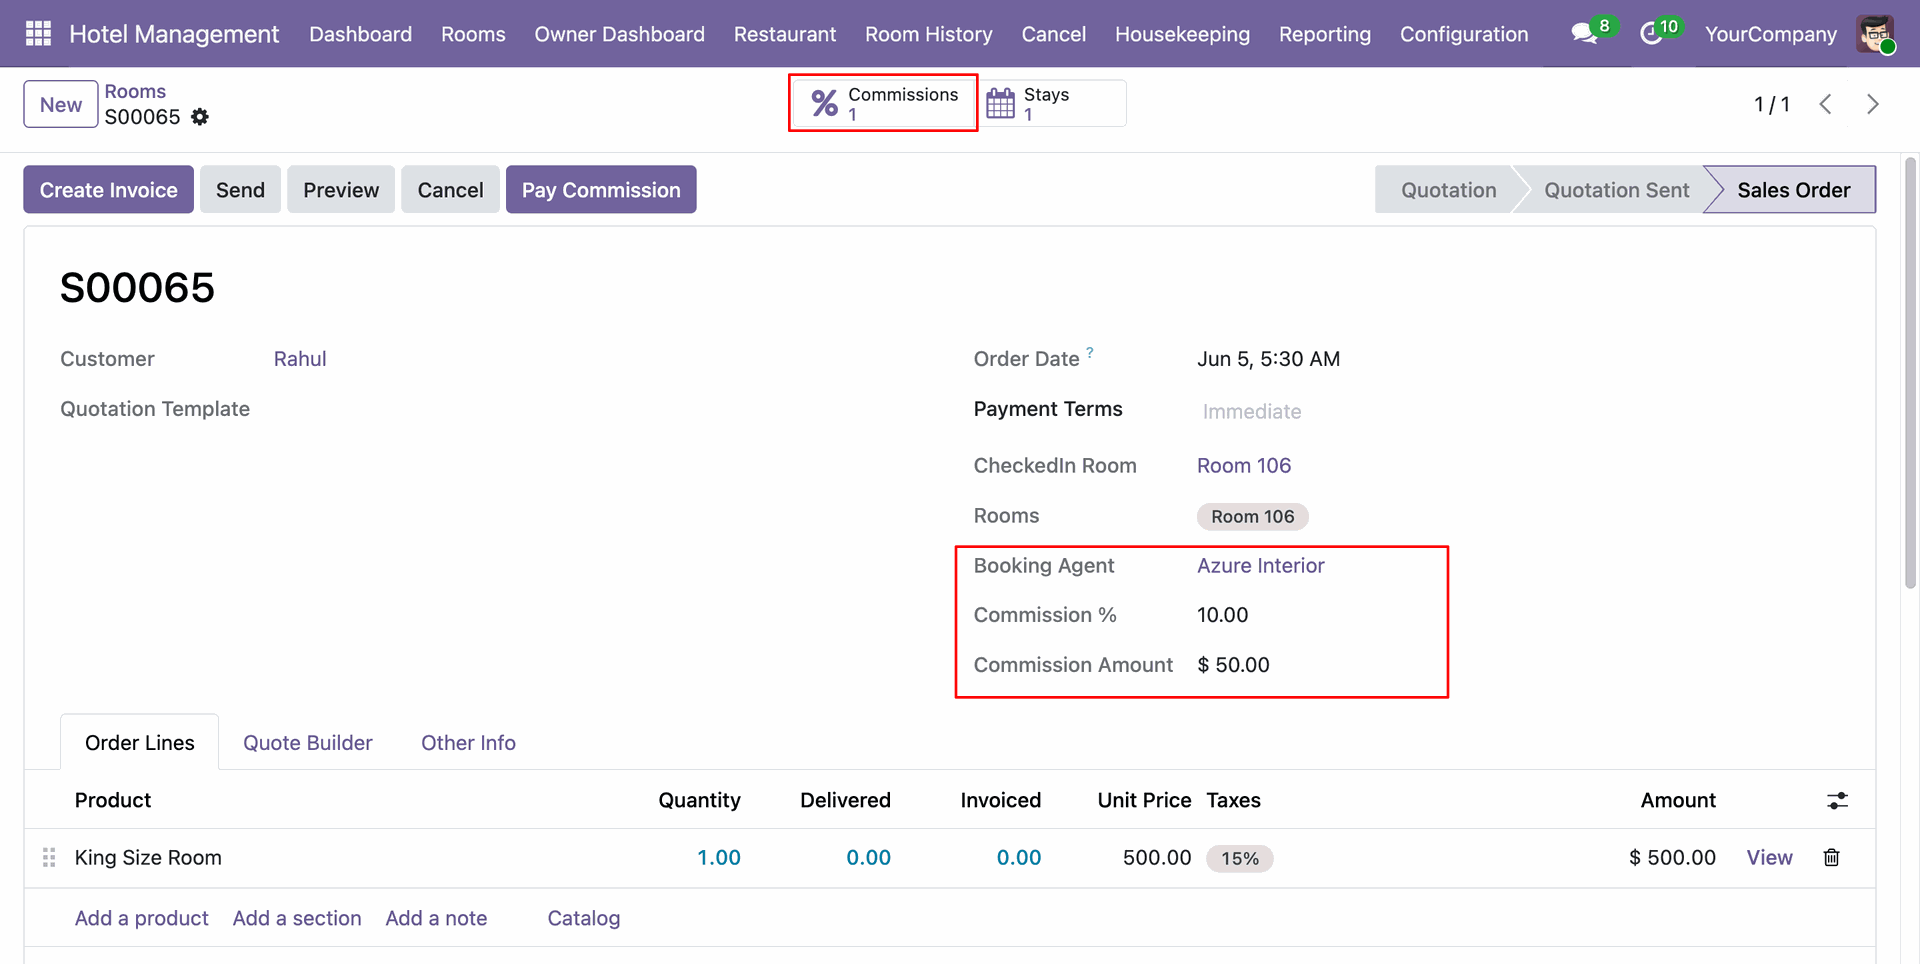
When creating a room booking order, the agent commission percentage and amount will be displayed automatically. The related commission order can also be accessed through a smart button.
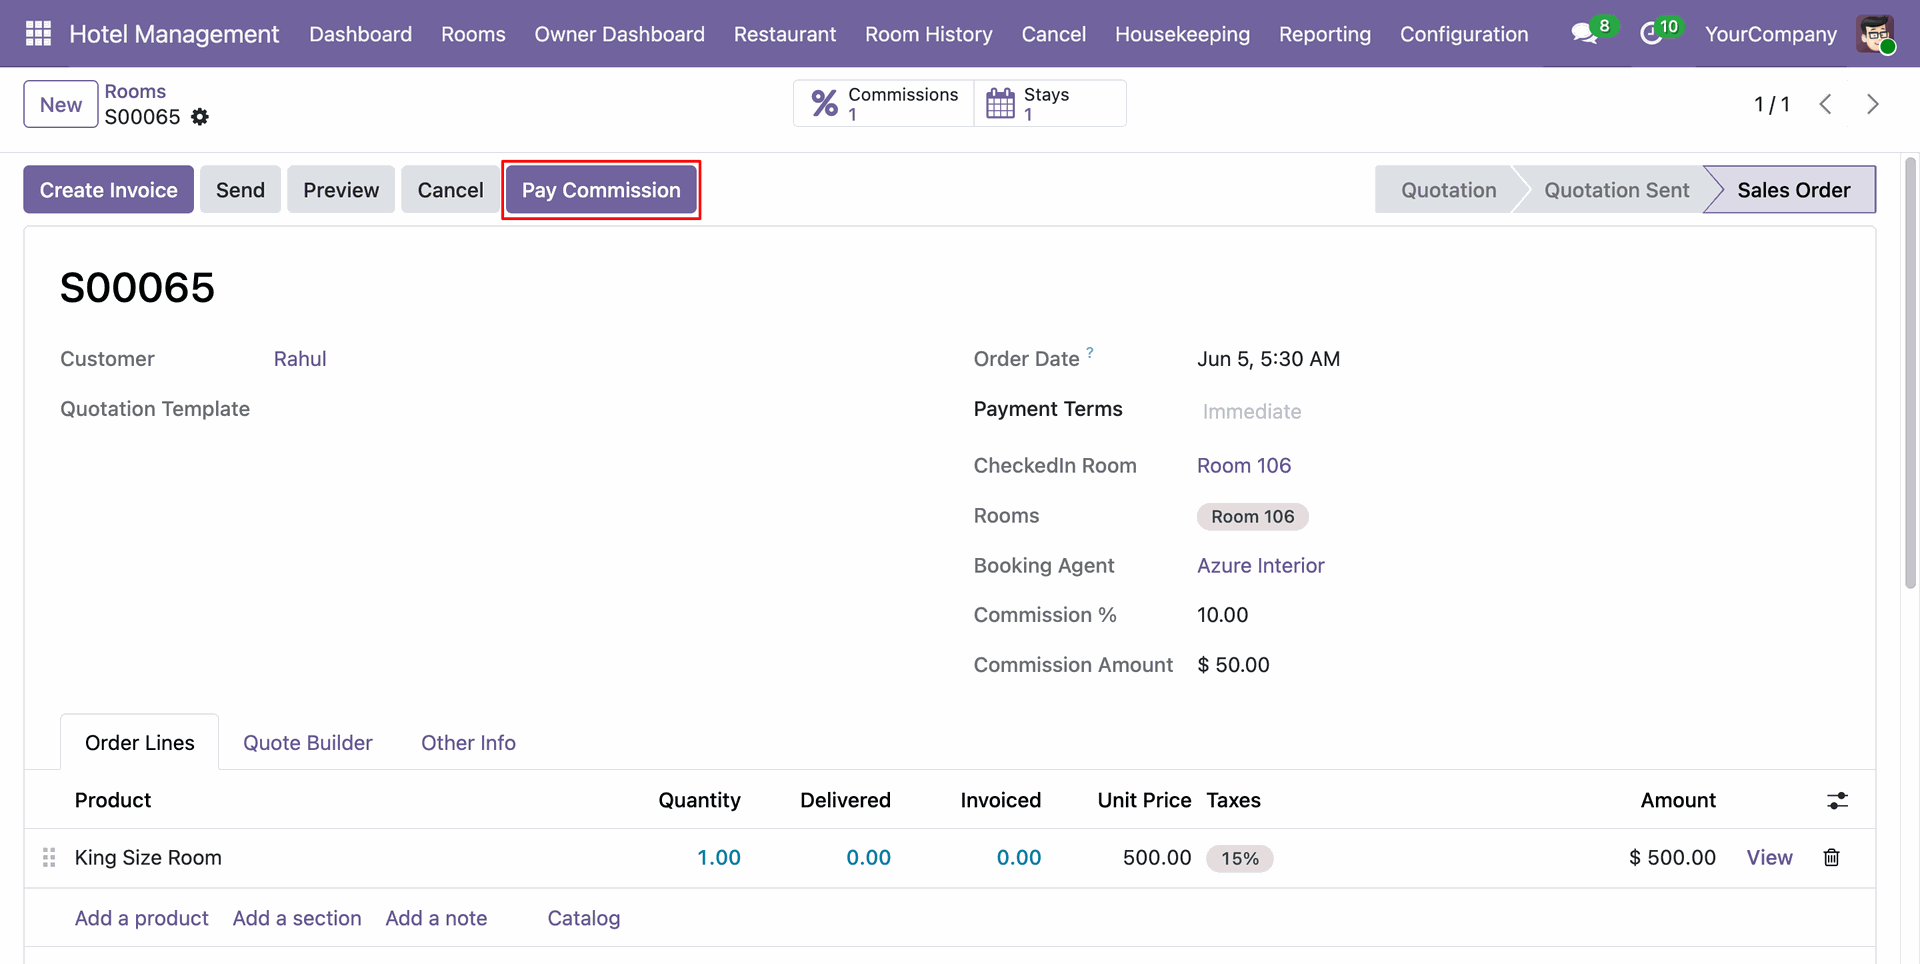
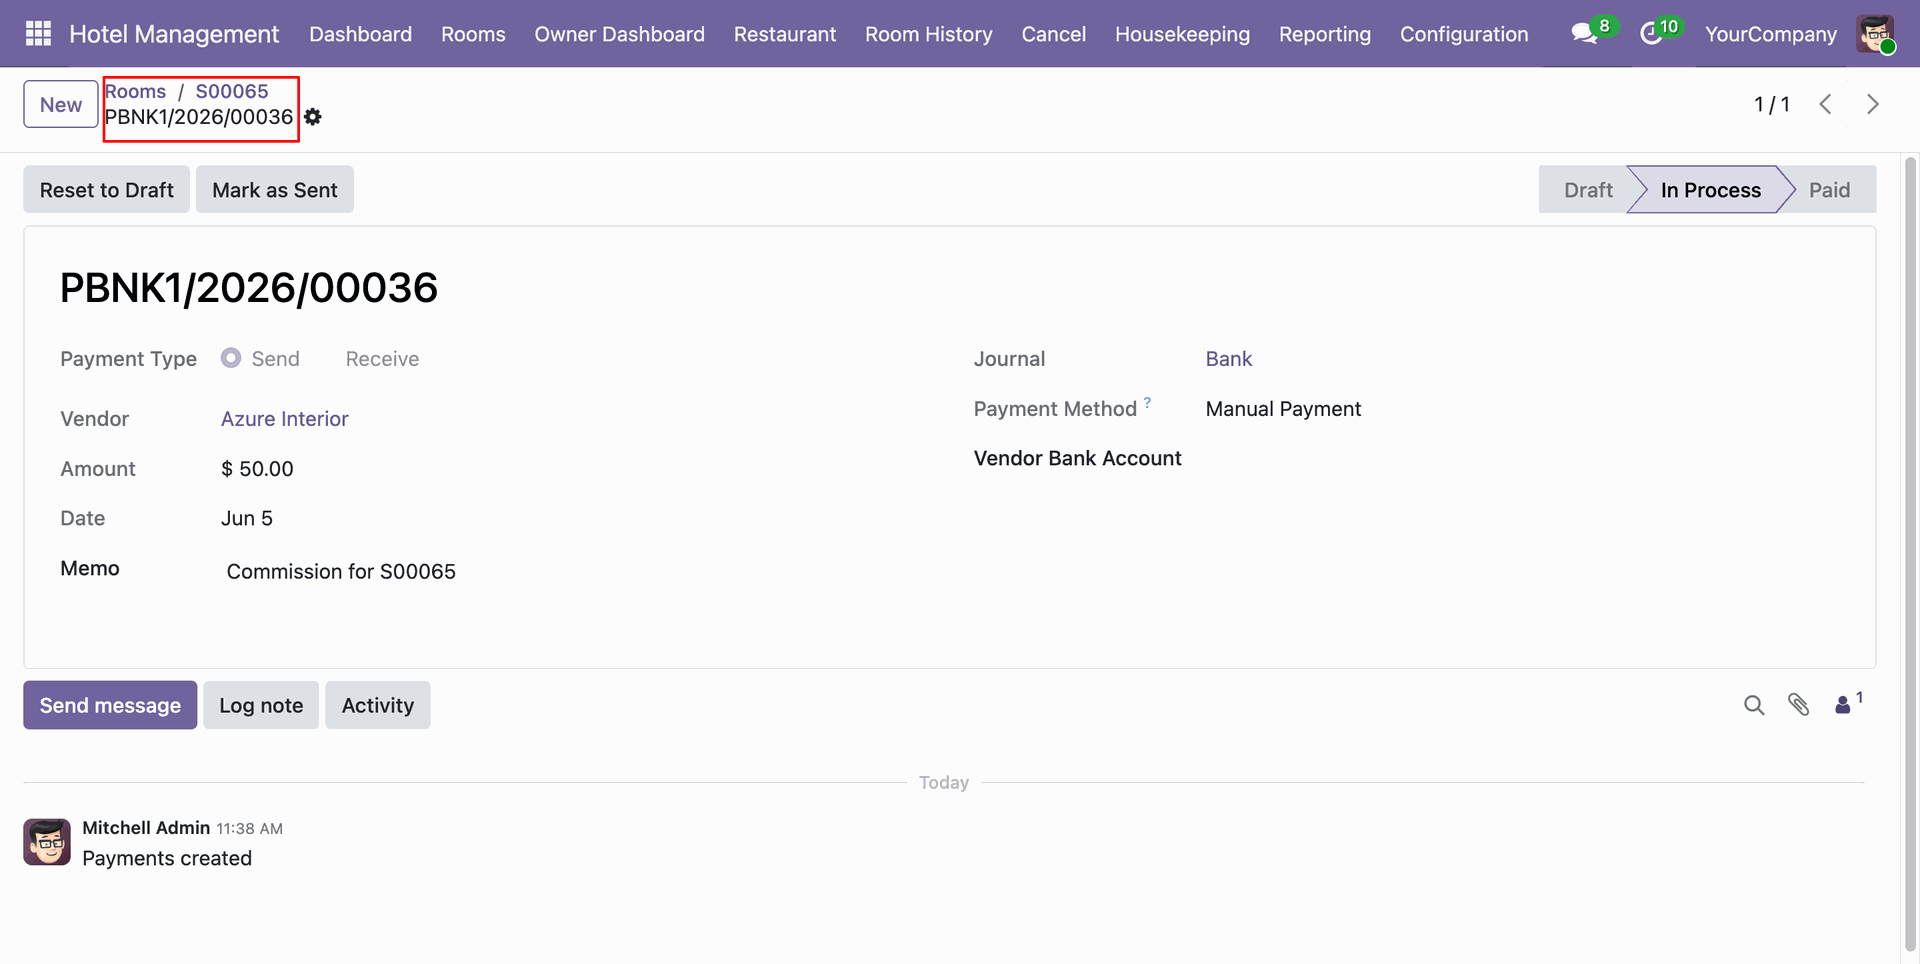
Click the Pay Commission button on the room booking order to process and pay the agents' commission.
Clicking the Pay Commission button will open a Payment Wizard to process the commission payment.
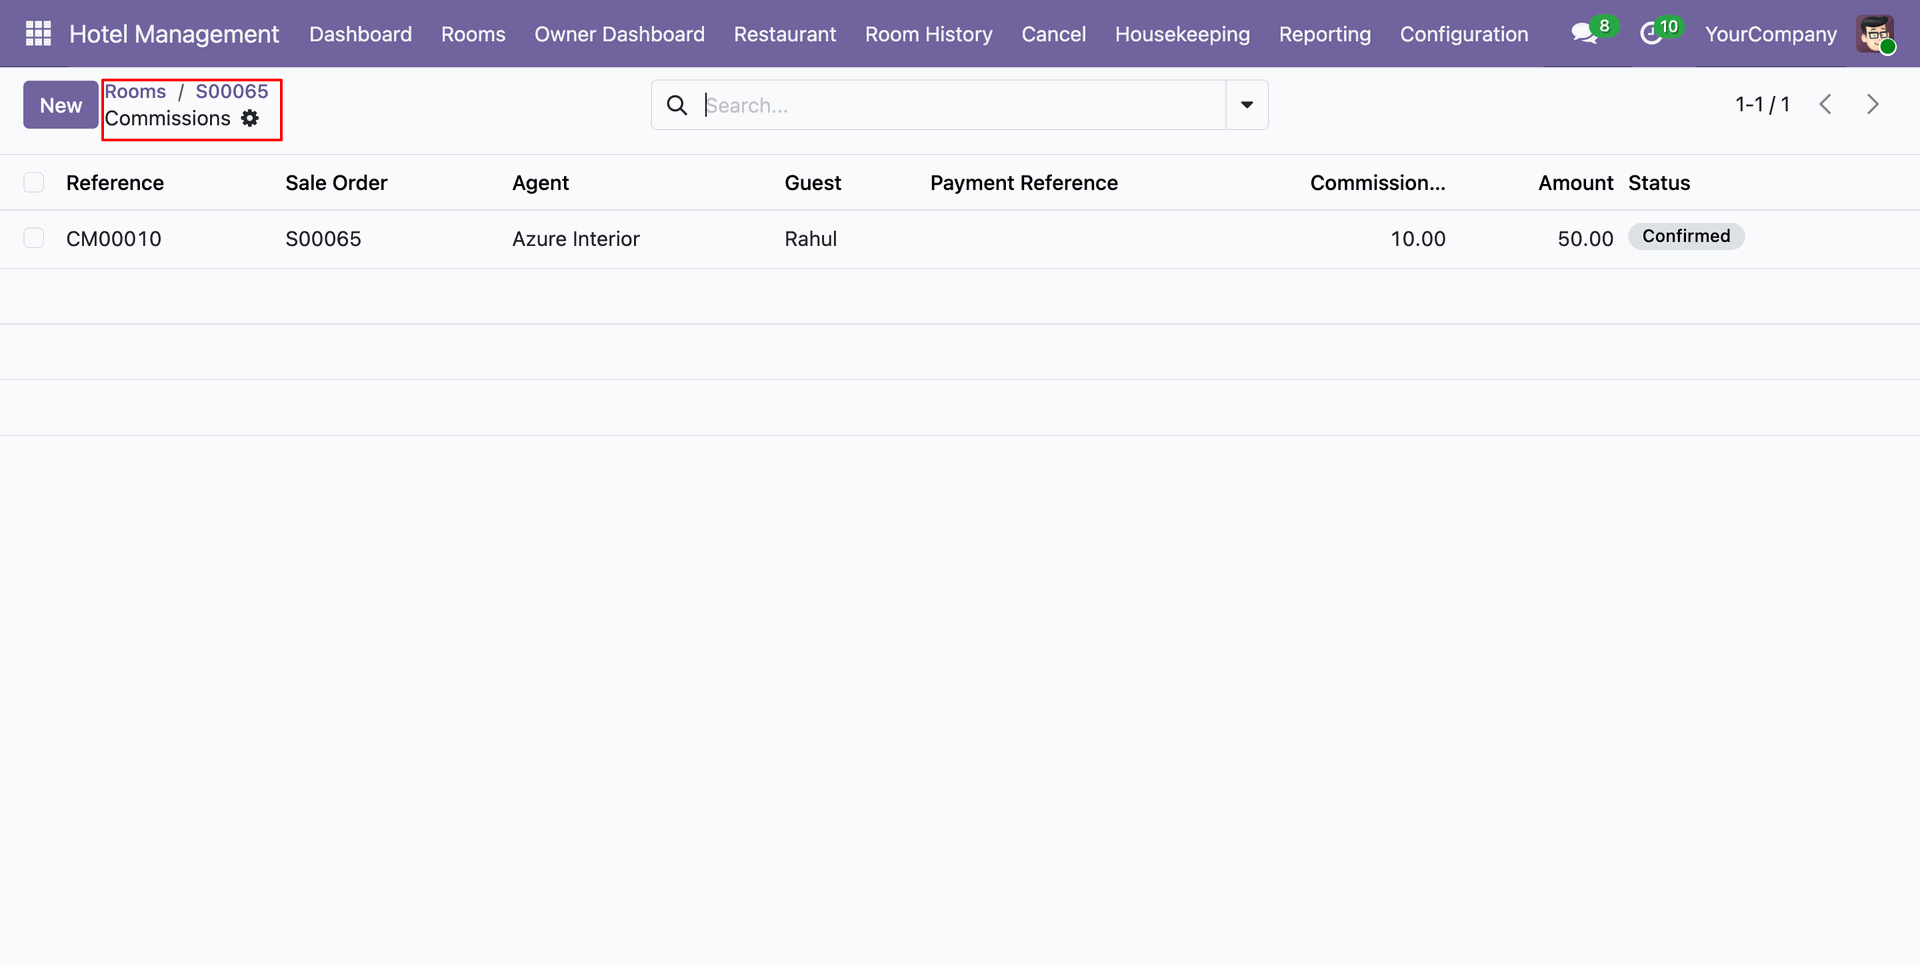
Clicking the Commission smart button on the room booking order will open the Commission Order list view.
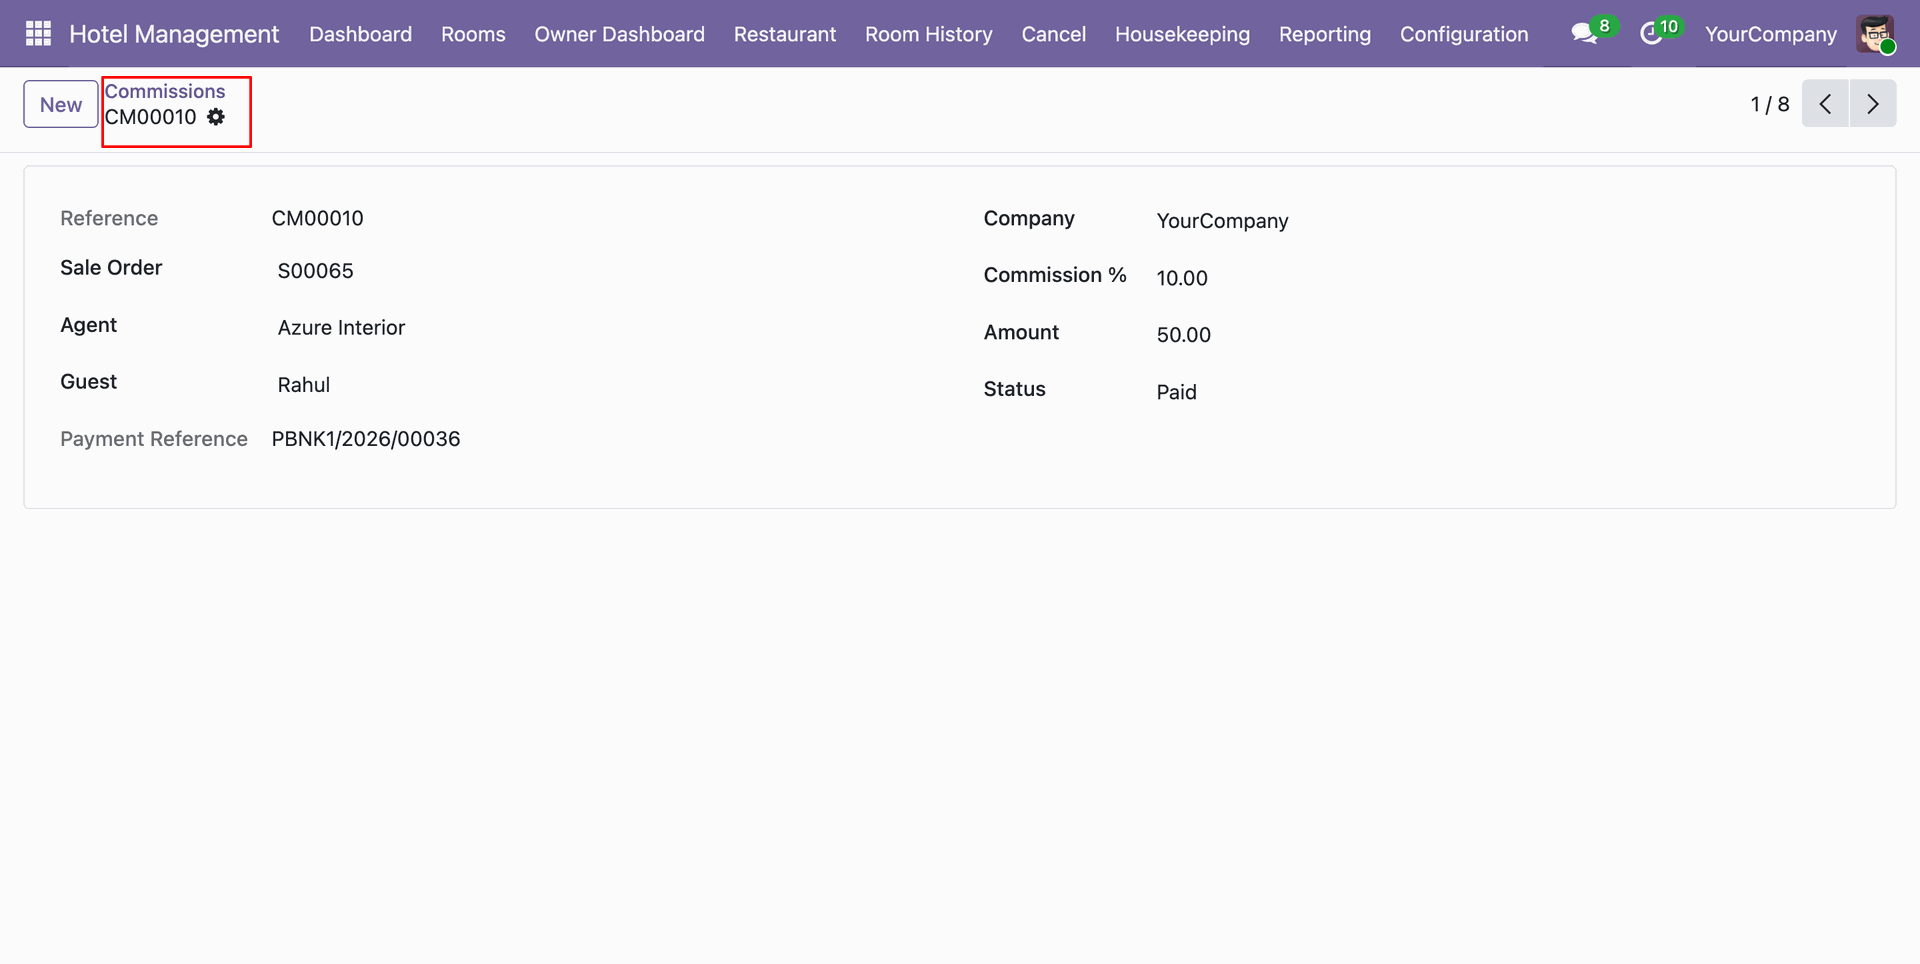
Clicking on a Commission Order will open the form view, where you can view the agent commission details, booking details, and payment details.
Paid and confirmed commissions will be recorded accordingly, while any unpaid commission details can be viewed from the Agent form view.
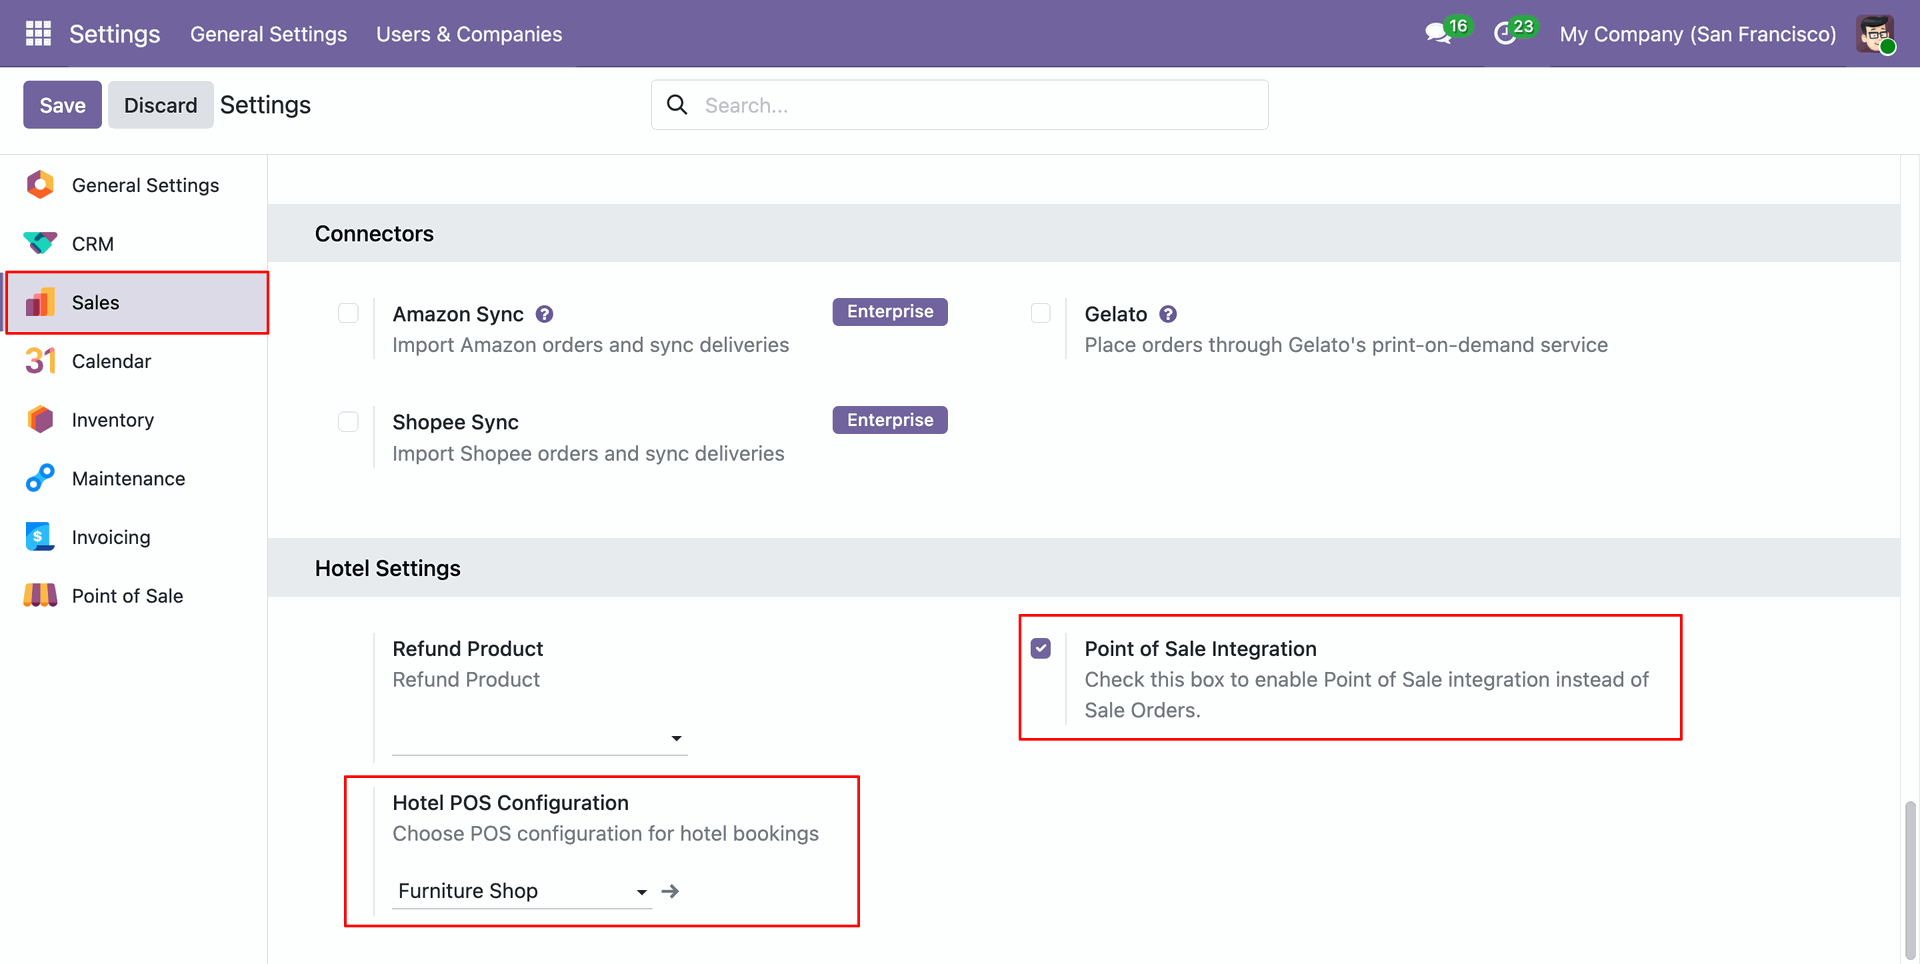
Go to Sales -> General Settings, enable Point of Sale Integration, and then configure the Hotel POS Settings under the Hotel Settings section to integrate hotel operations with the Point of Sale.
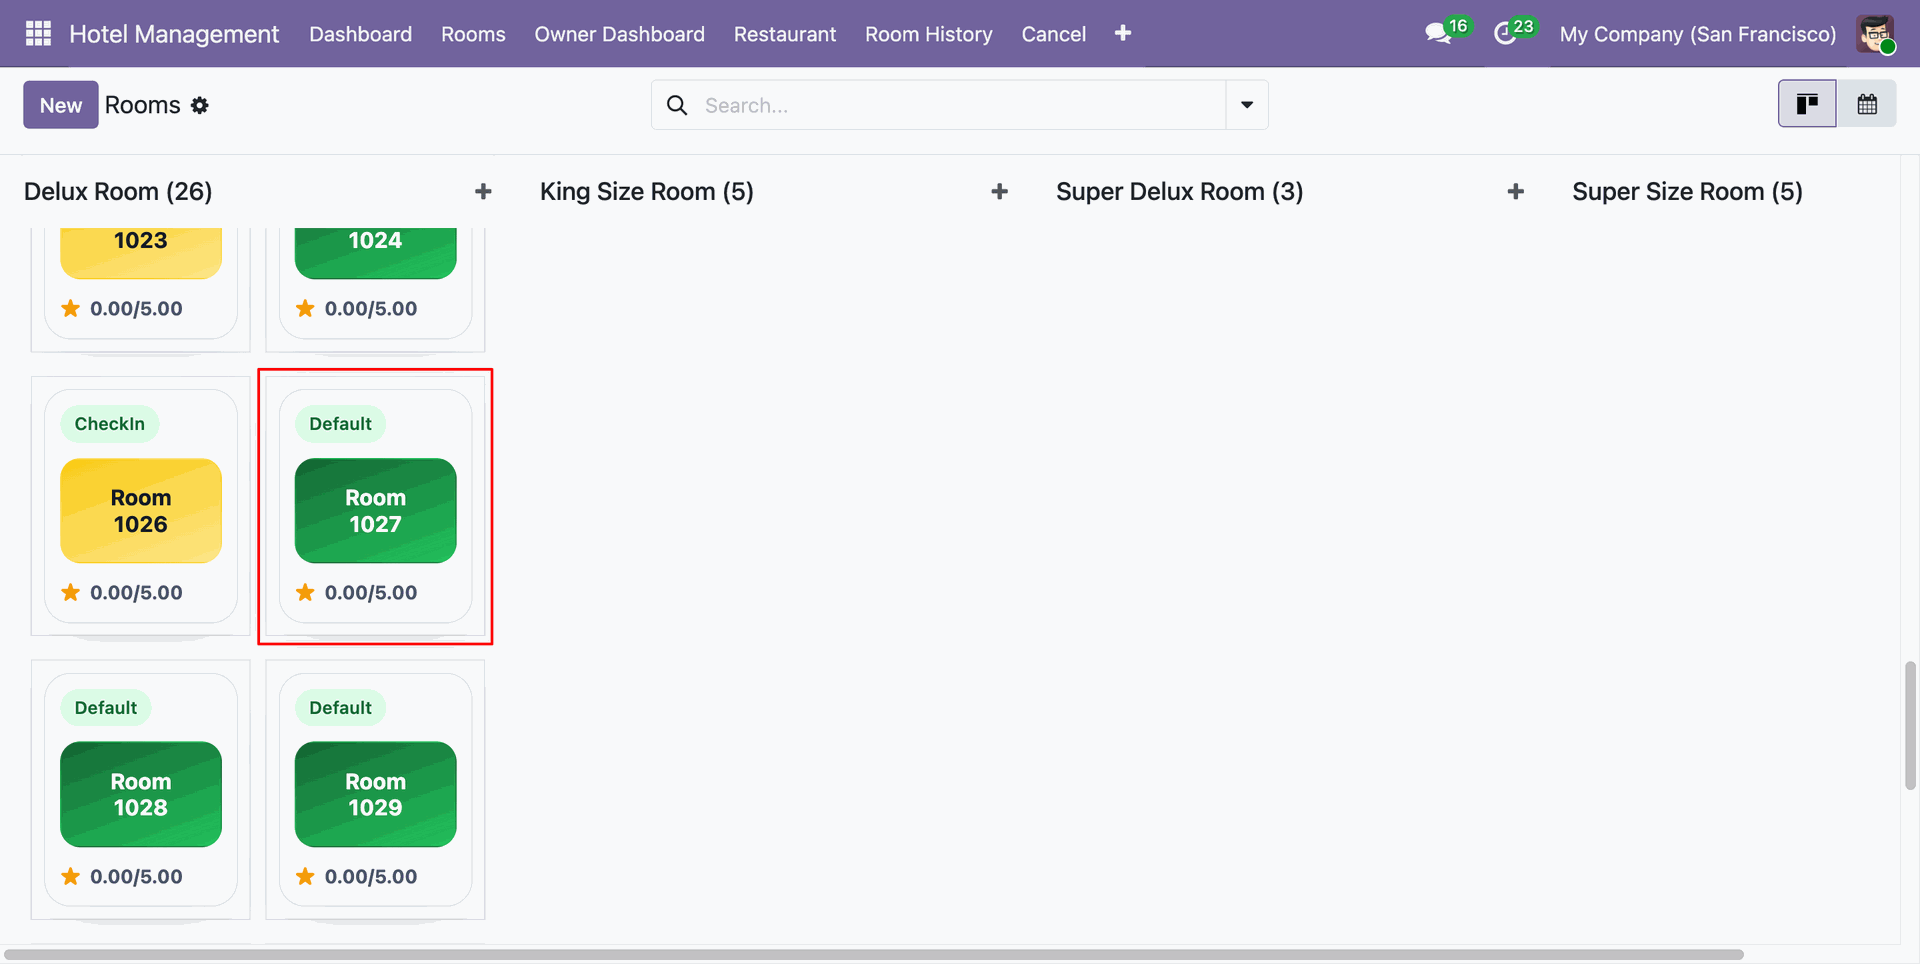
Go to the Rooms menu and select the room you want to book to begin the reservation process.
A Book Room wizard opens, allowing you to enter the guest details.
Enable the Merge POS Orders option in the Book Room wizard.
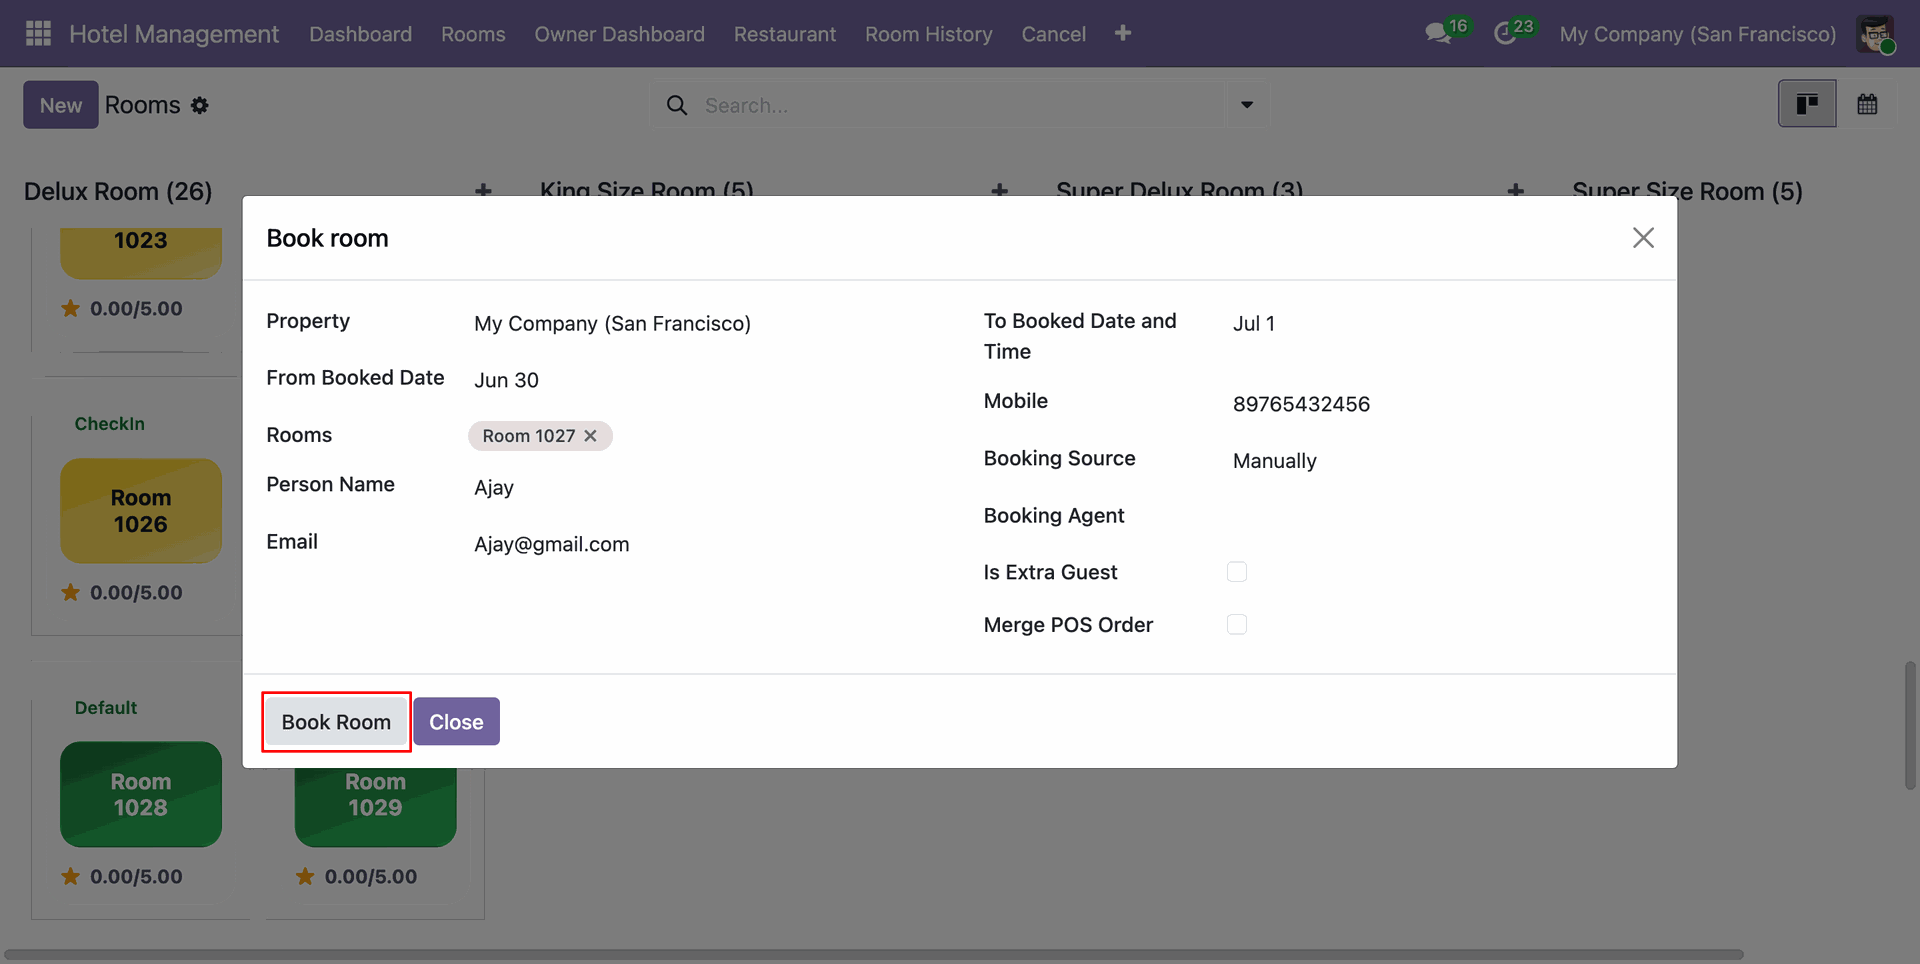
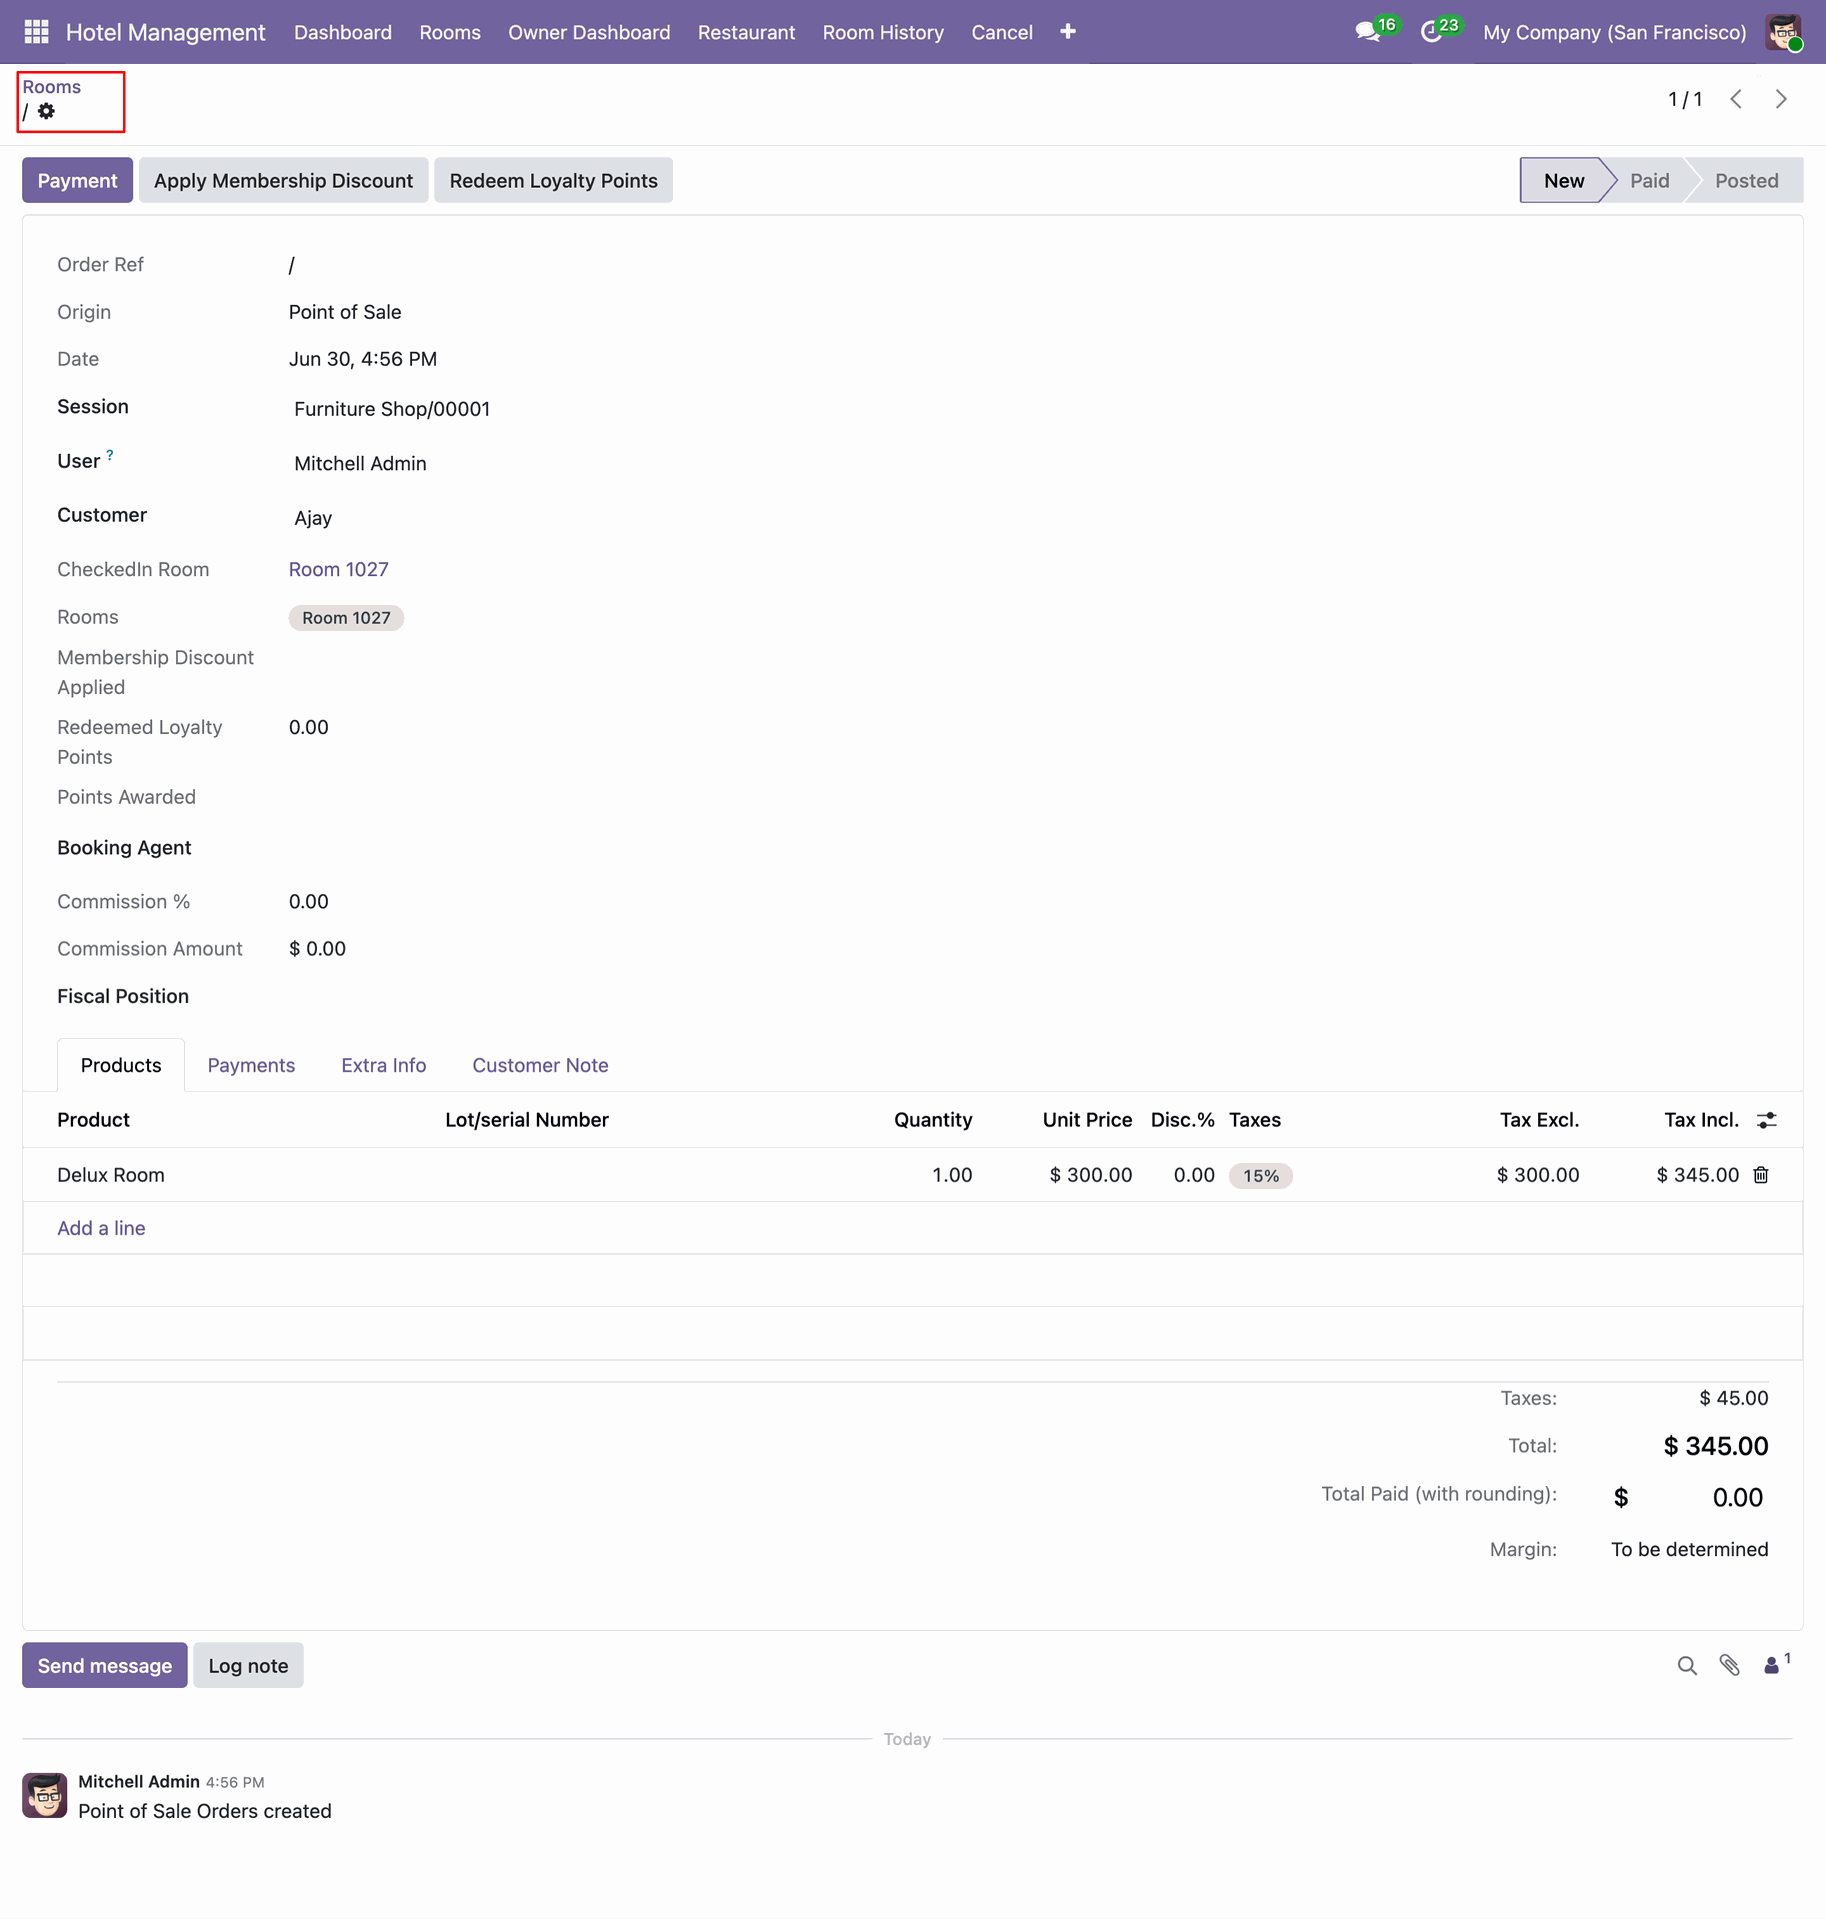
Click Book Room in the wizard. You will be redirected to the POS Order form.
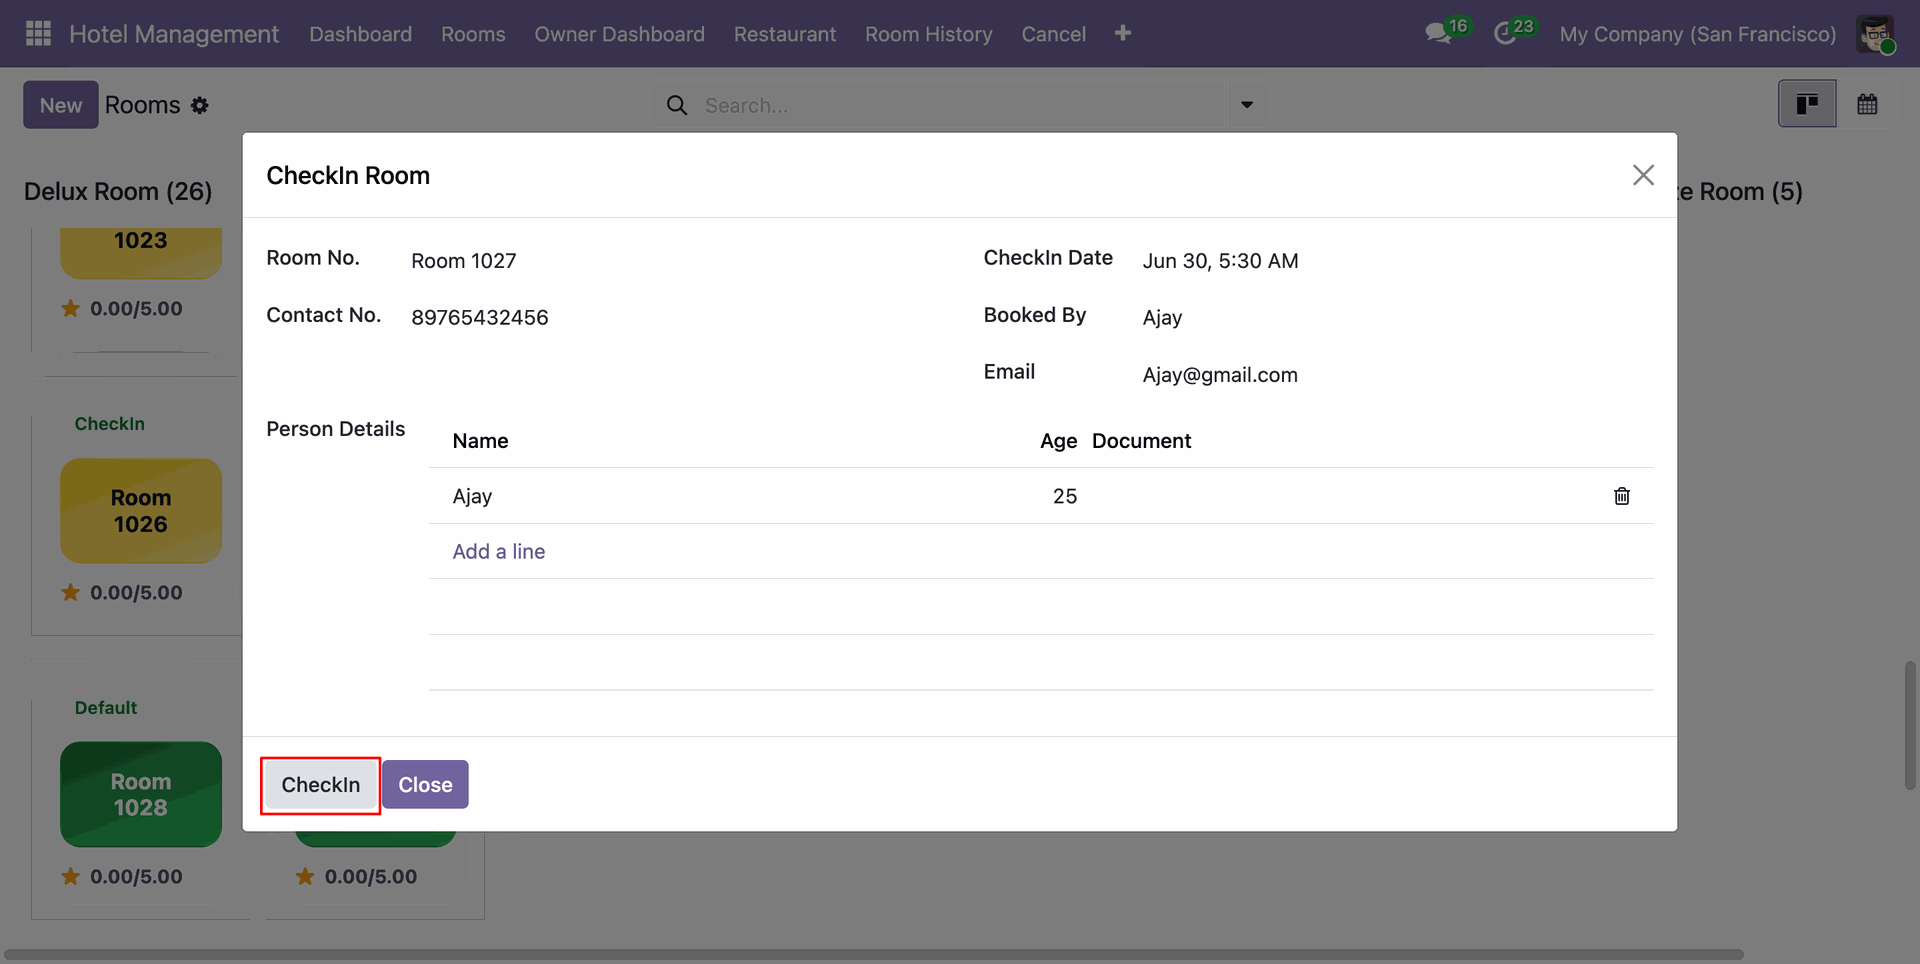
Go to the Rooms Dashboard and click on the Booked room to proceed with the Check-In process.
A Check-In Room wizard opens. Enter the required guest details and other check-in information, then click the Check-In button to complete the room check-in process.
Go to the Rooms Dashboard and click on the Checked-In room to initiate the Check-Out process.
A Check-Out Room wizard opens, allowing you to review the booking details, and click the Register Payment button to record the payment and complete the Check-Out process.

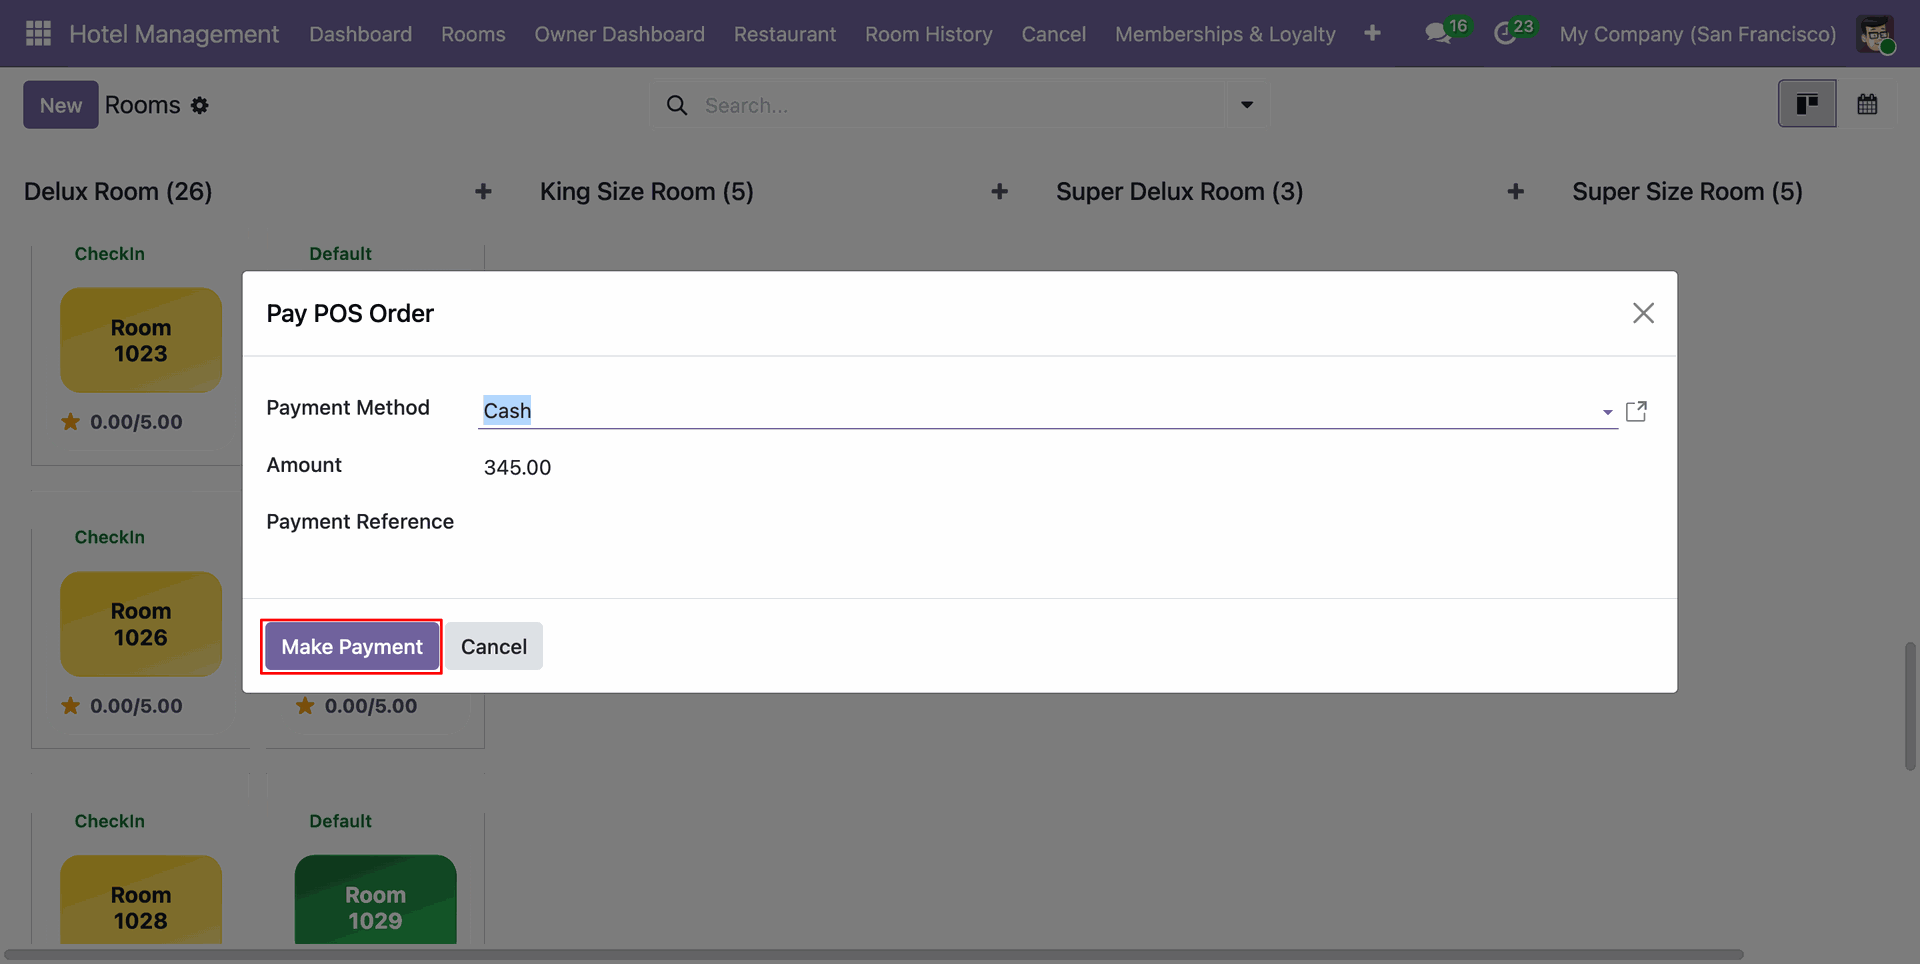
The POS Payment wizard opens. Select the Payment Method, enter the Payment Amount, and click the Make Payment button to complete the payment successfully.
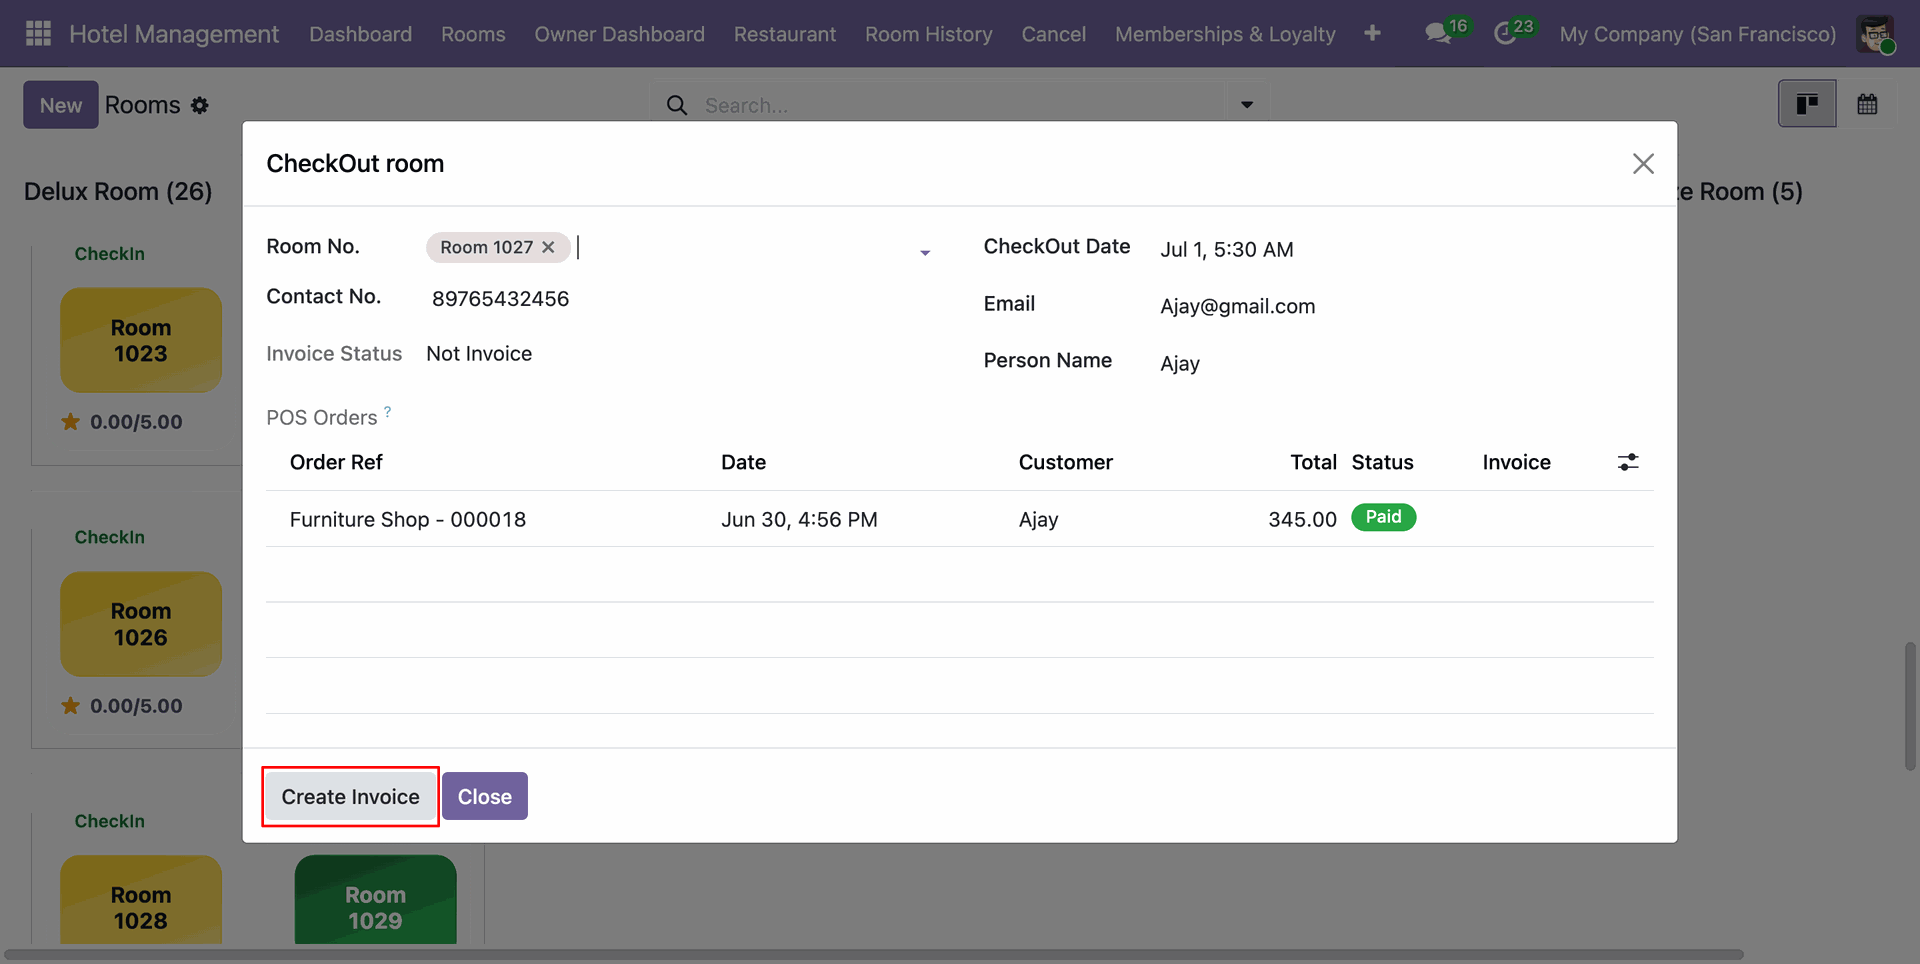
After completing the payment, go to the Rooms Dashboard, select the Booked room, and click Create Invoice to generate the invoice for the room booking.

The Check-Out Room wizard opens. Review the booking details, then click the Create Invoice button to generate the invoice for the room booking.
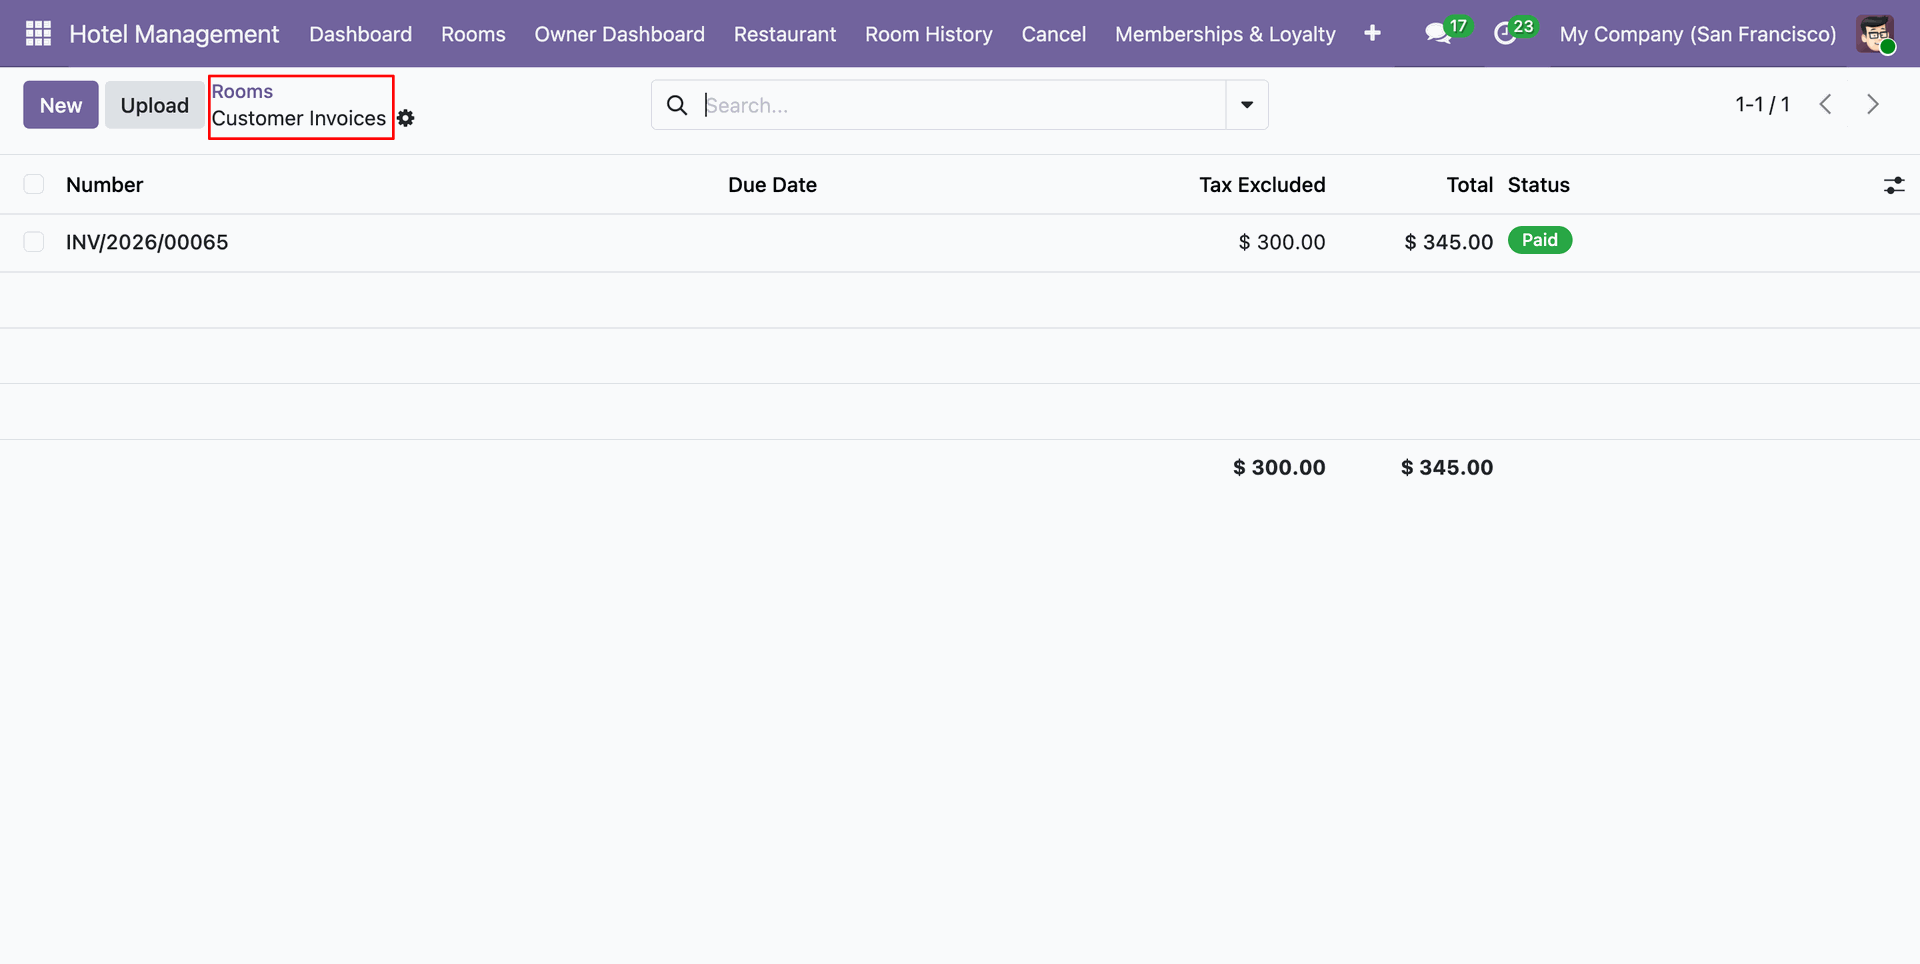
The invoice has been created successfully for the room booking.
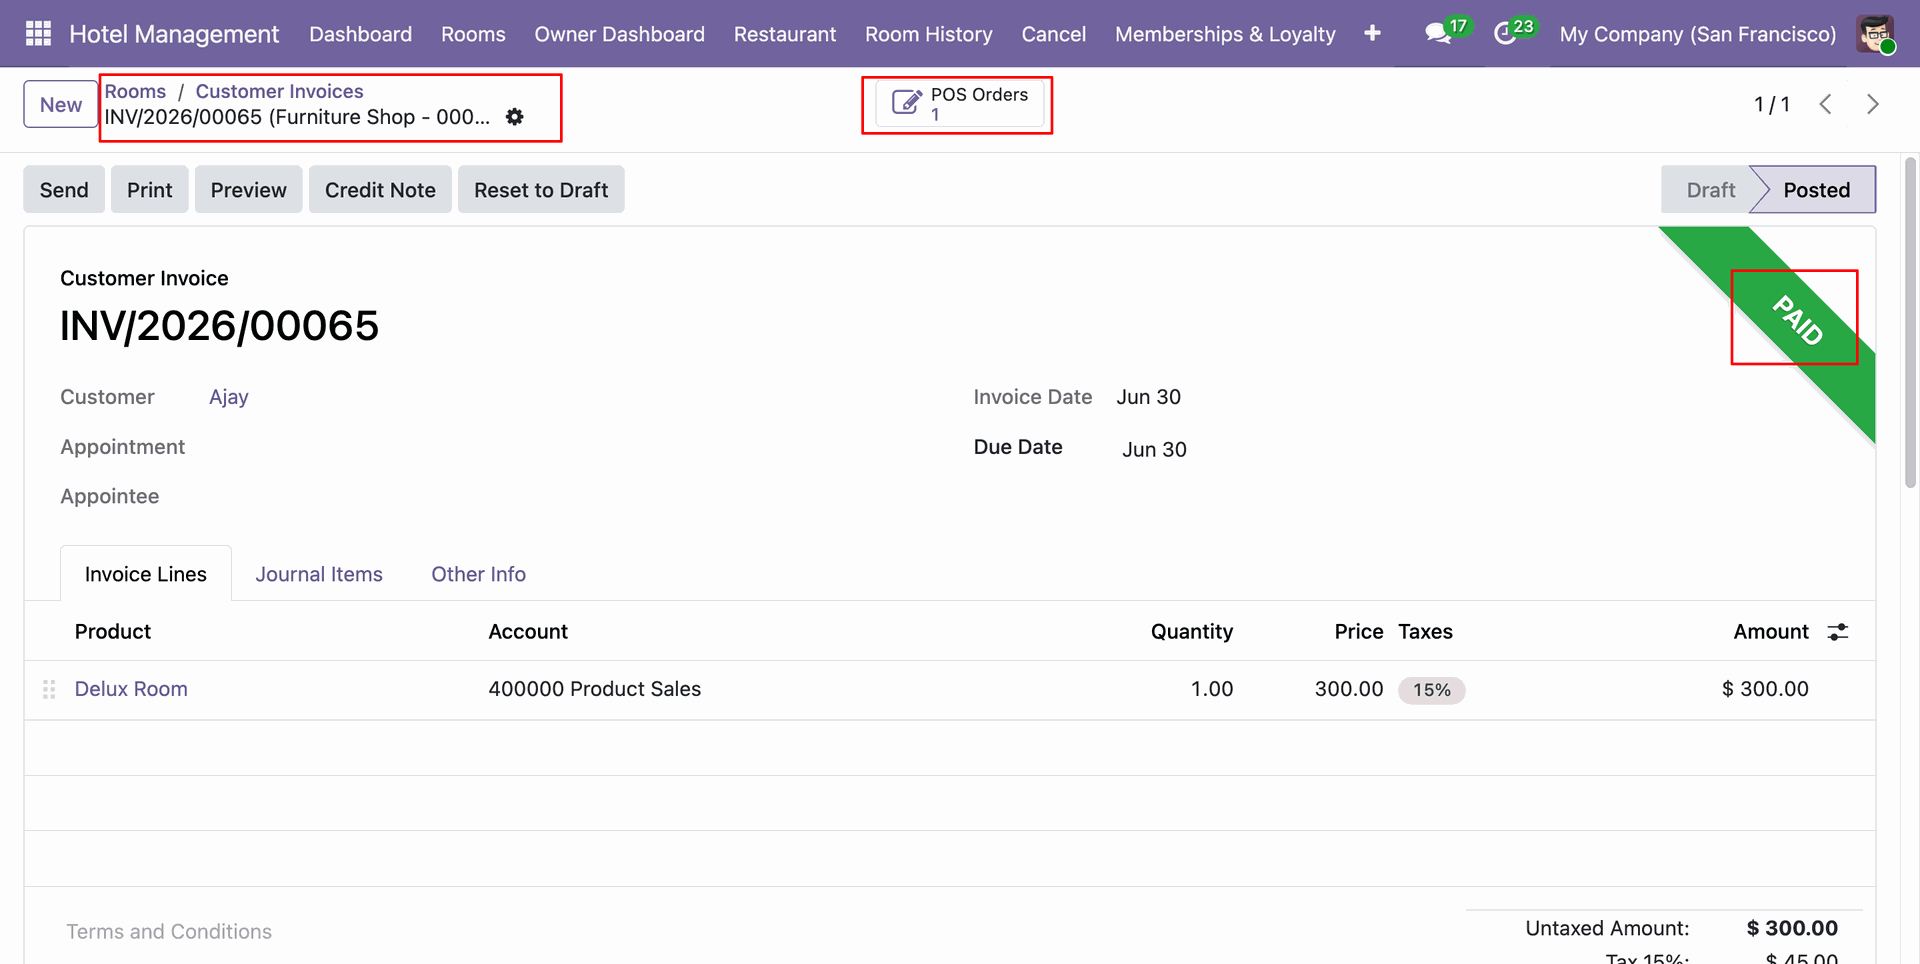
You can review the invoice linked to the POS Order by clicking the Invoice smart button available on the POS Order form.
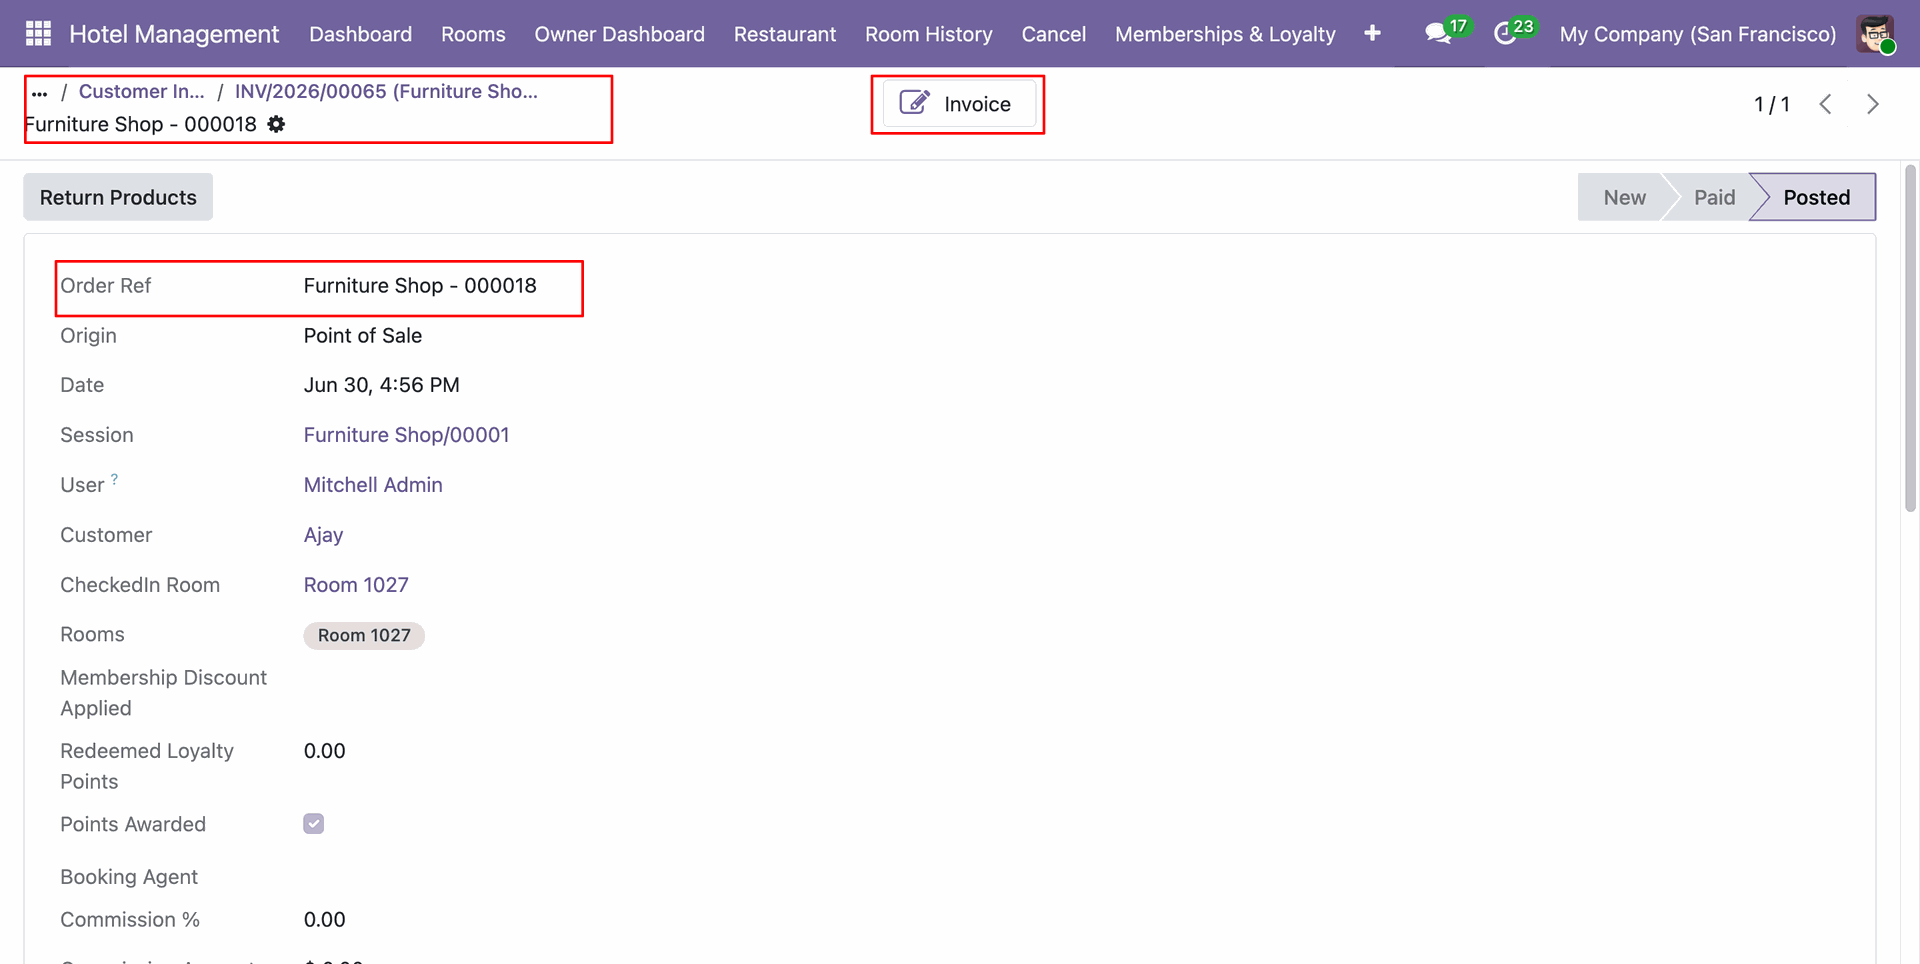
Click the **POS Order** smart button to open the **linked POS Order** associated with the room booking.
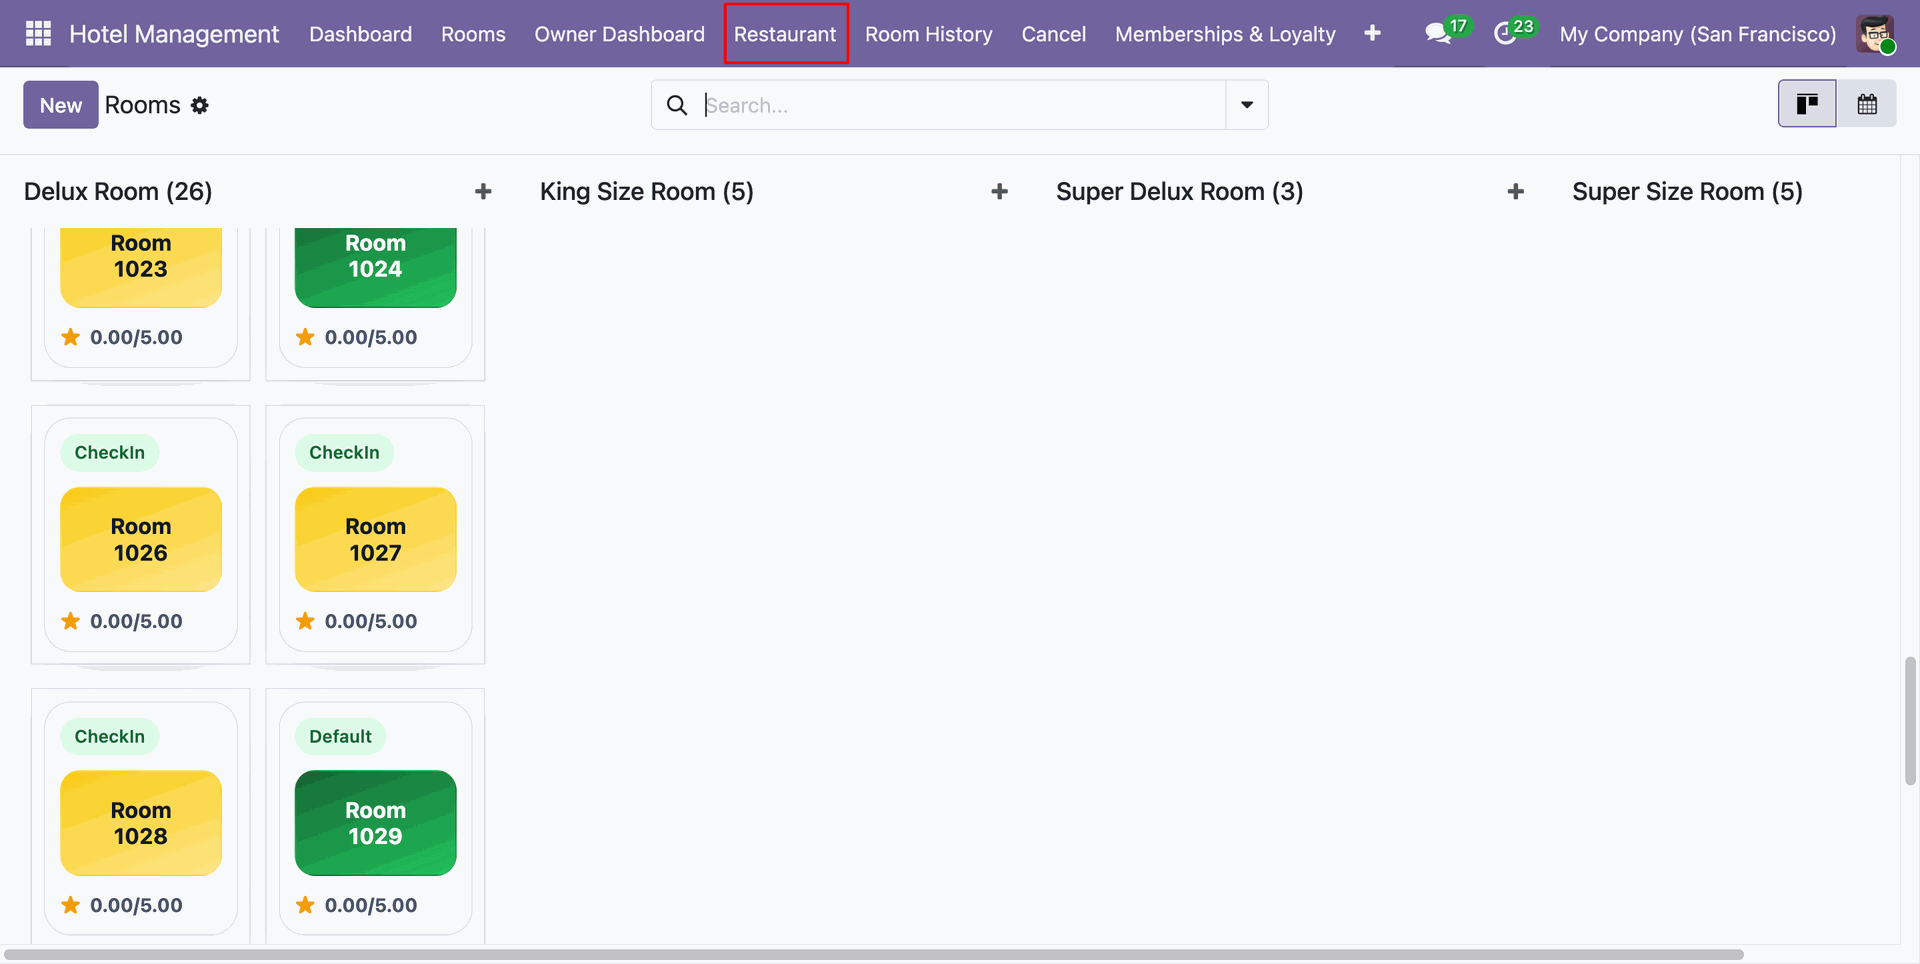
Go to the Restaurant menu.
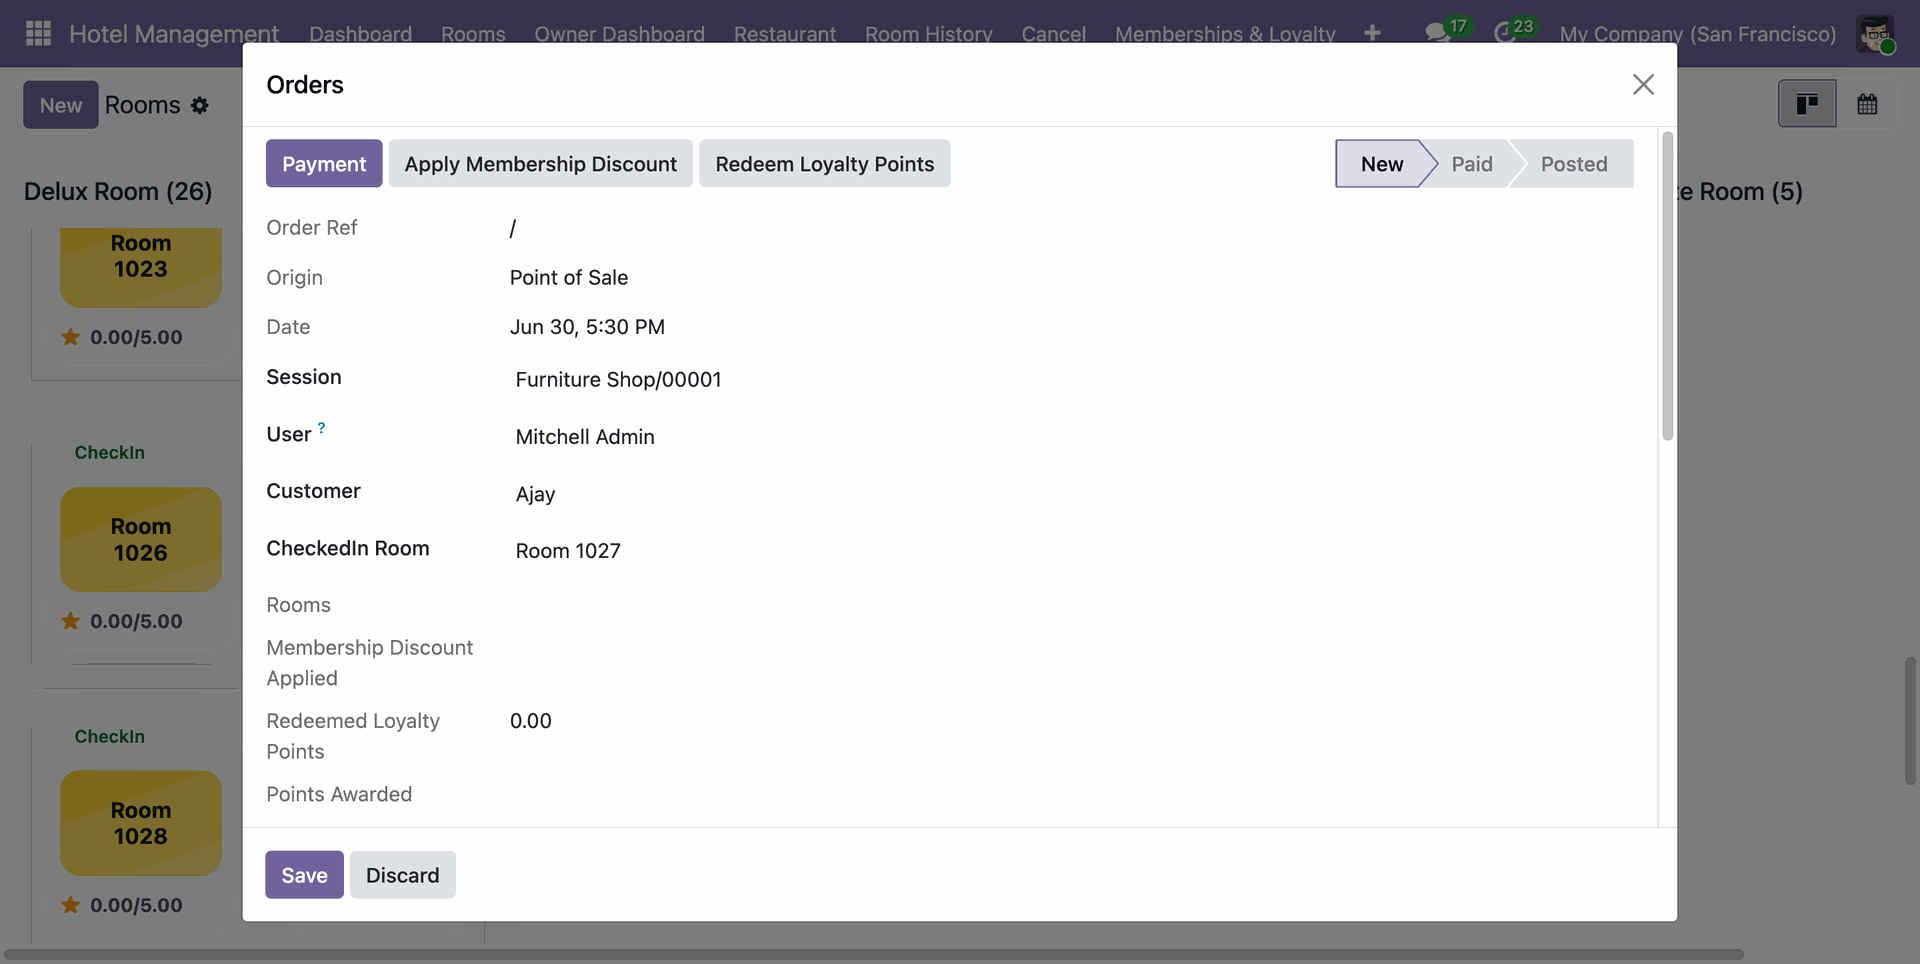
The Restaurant Order wizard opens select the customers and room, allowing you to create and manage restaurant orders for the guest during their stay.
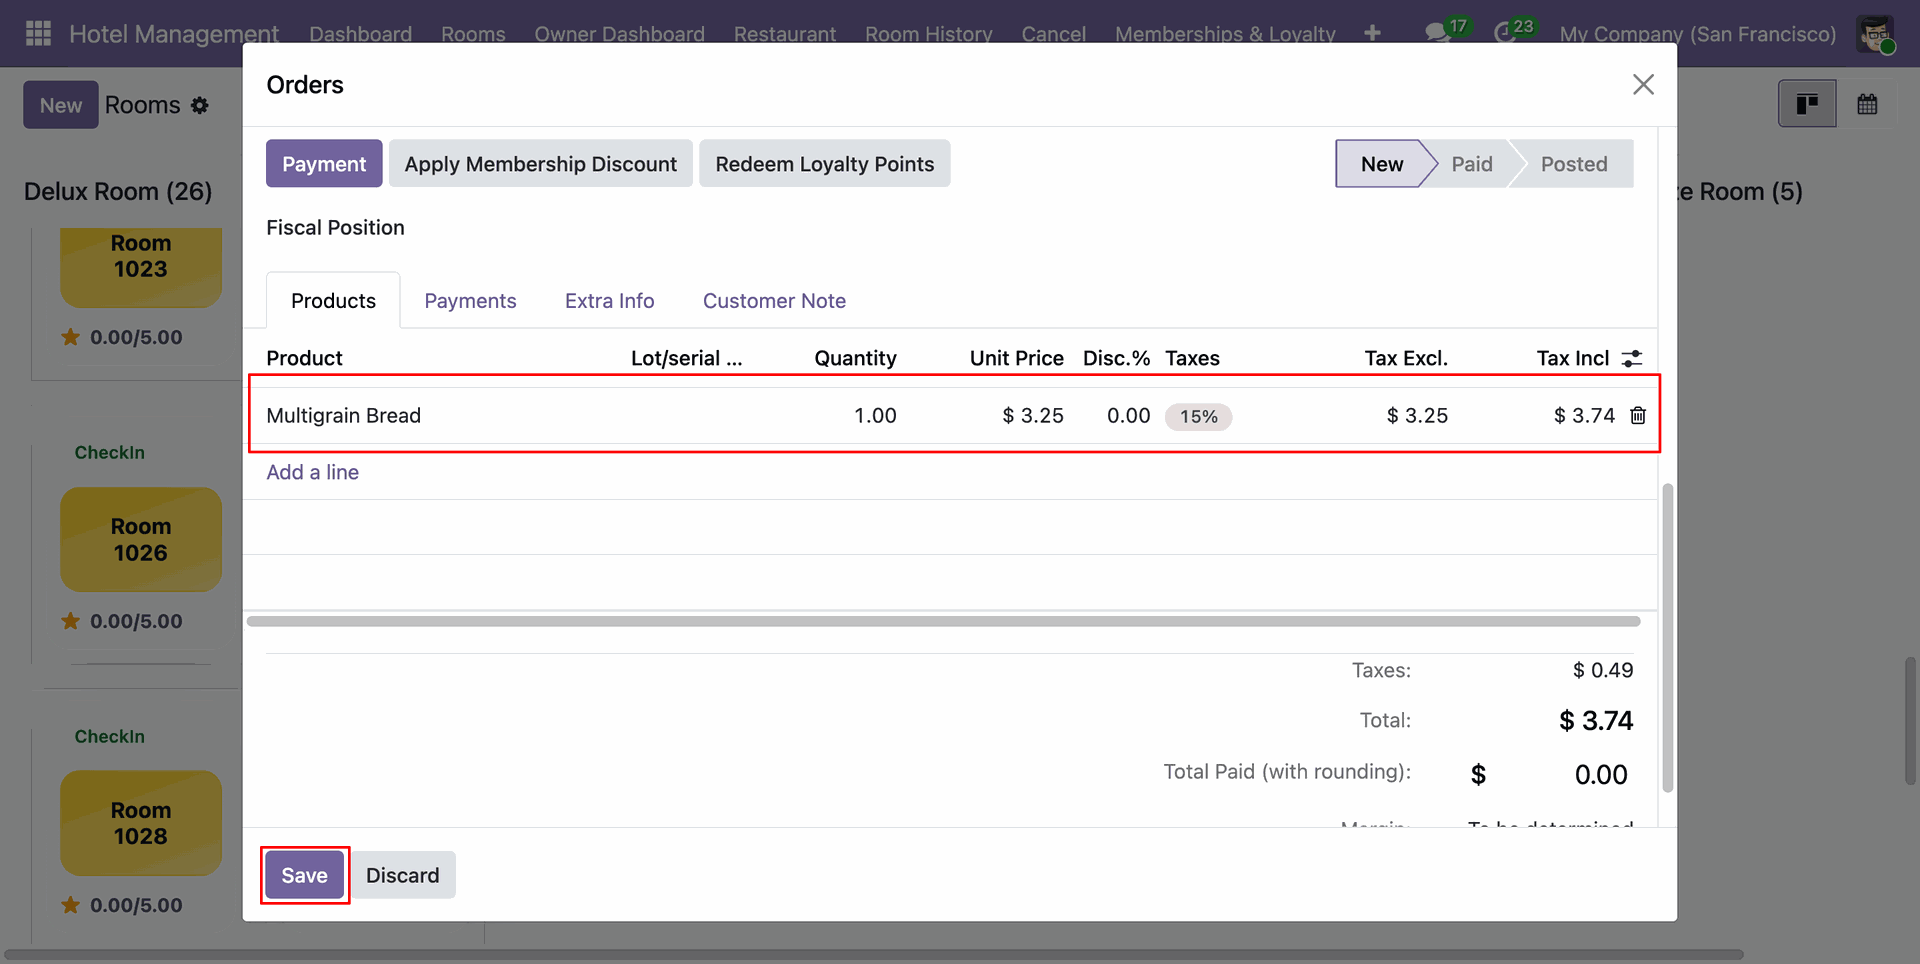
Under the Products tab, select the products you want to order, then proceed with the restaurant order for the checked-in room.
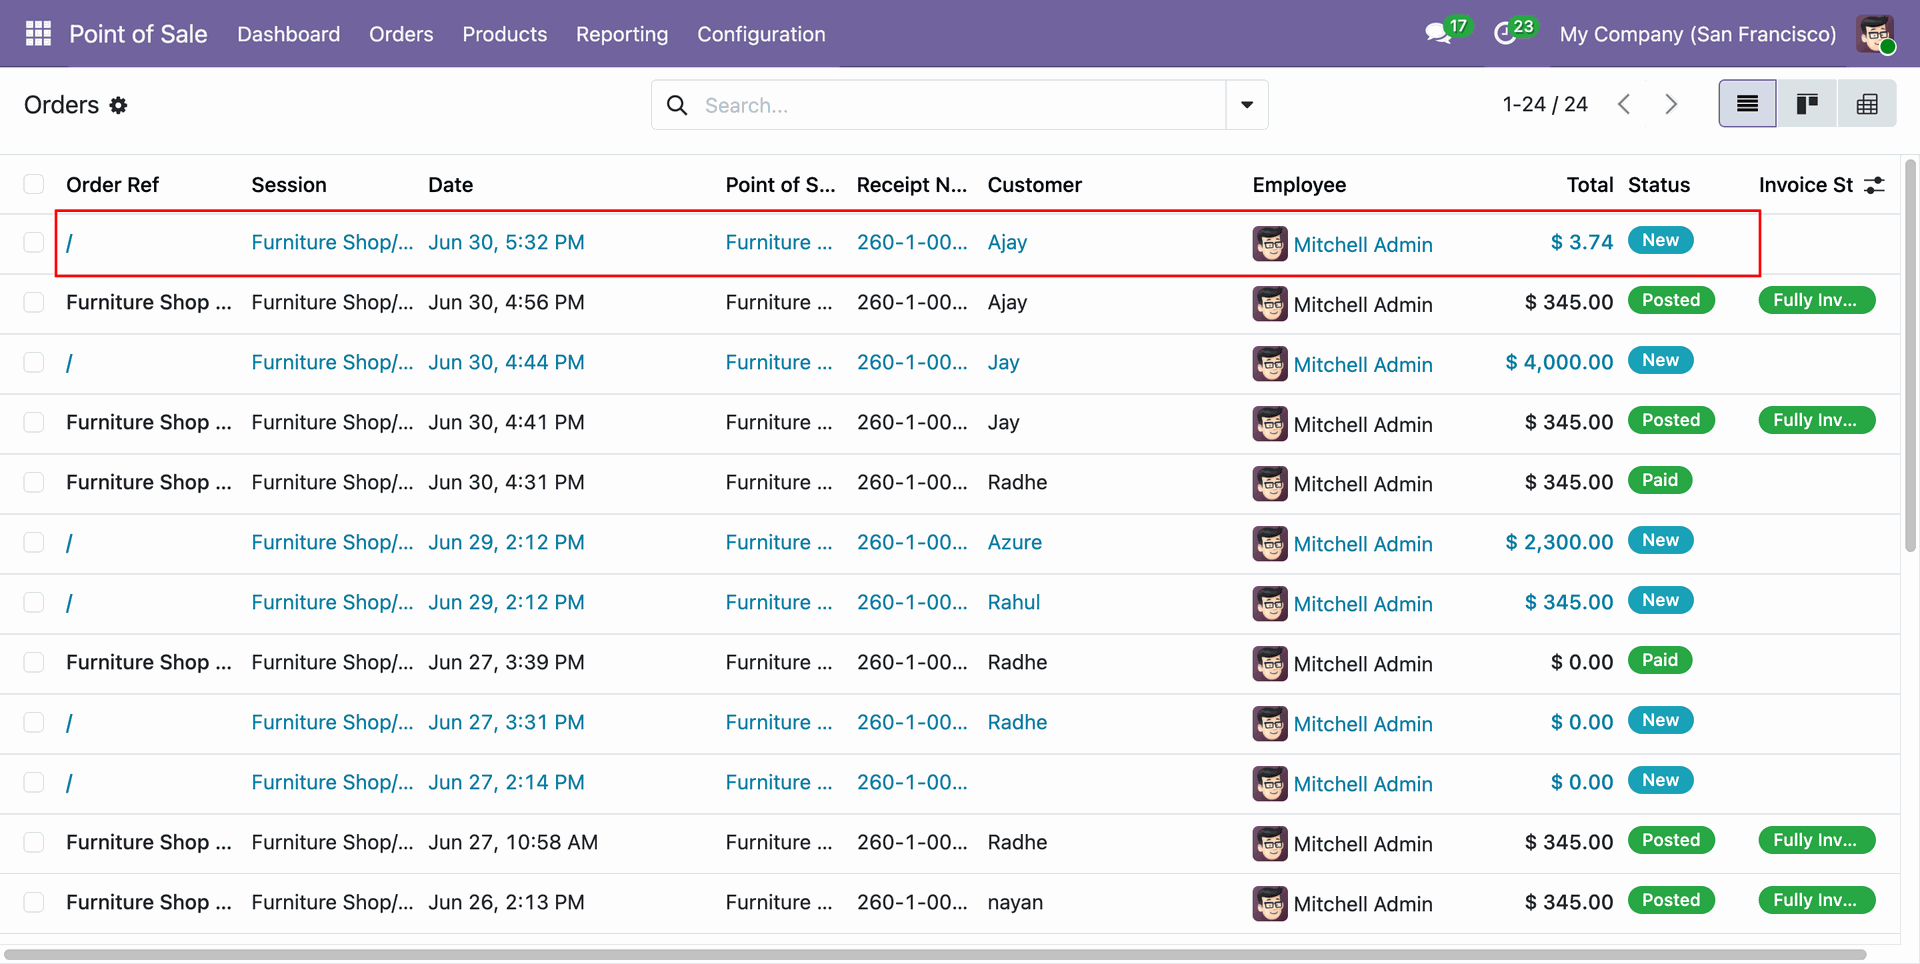
A POS Order is created successfully and is visible in the POS Orders list view.
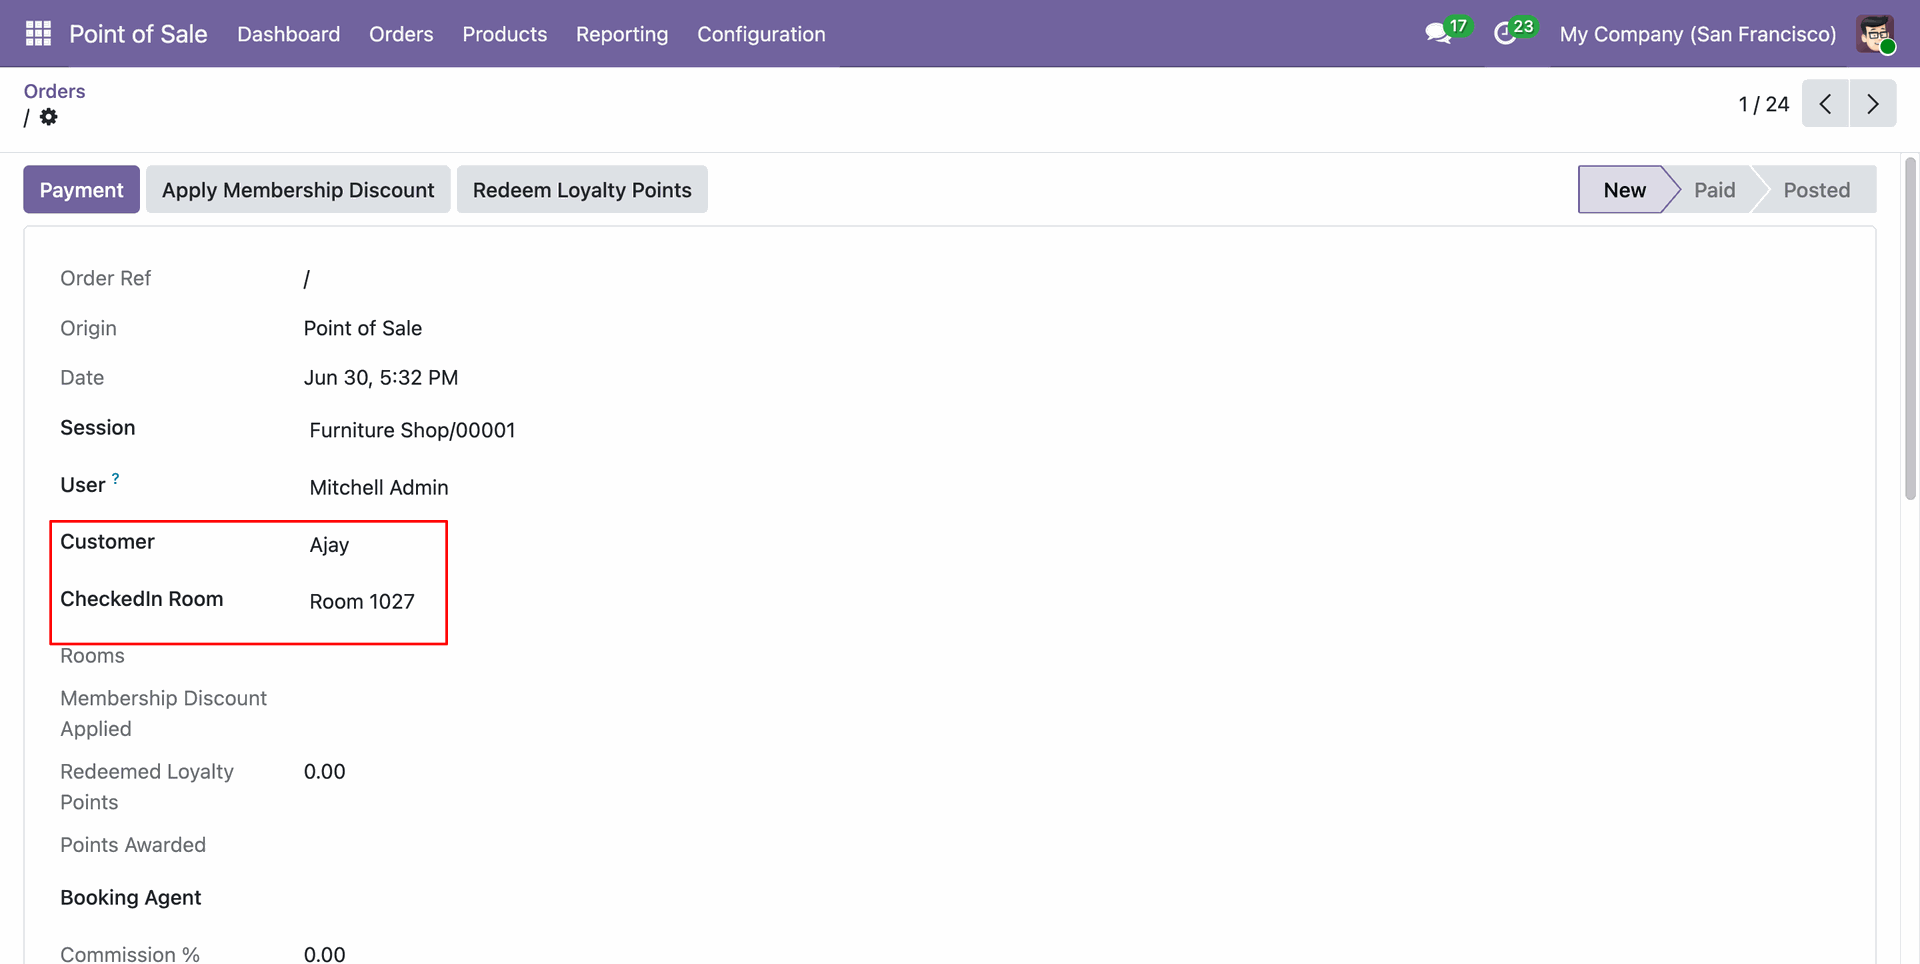
The POS Order Form View displays the associated Customer and Room details, allowing you to easily identify the guest and the room linked to the restaurant order.
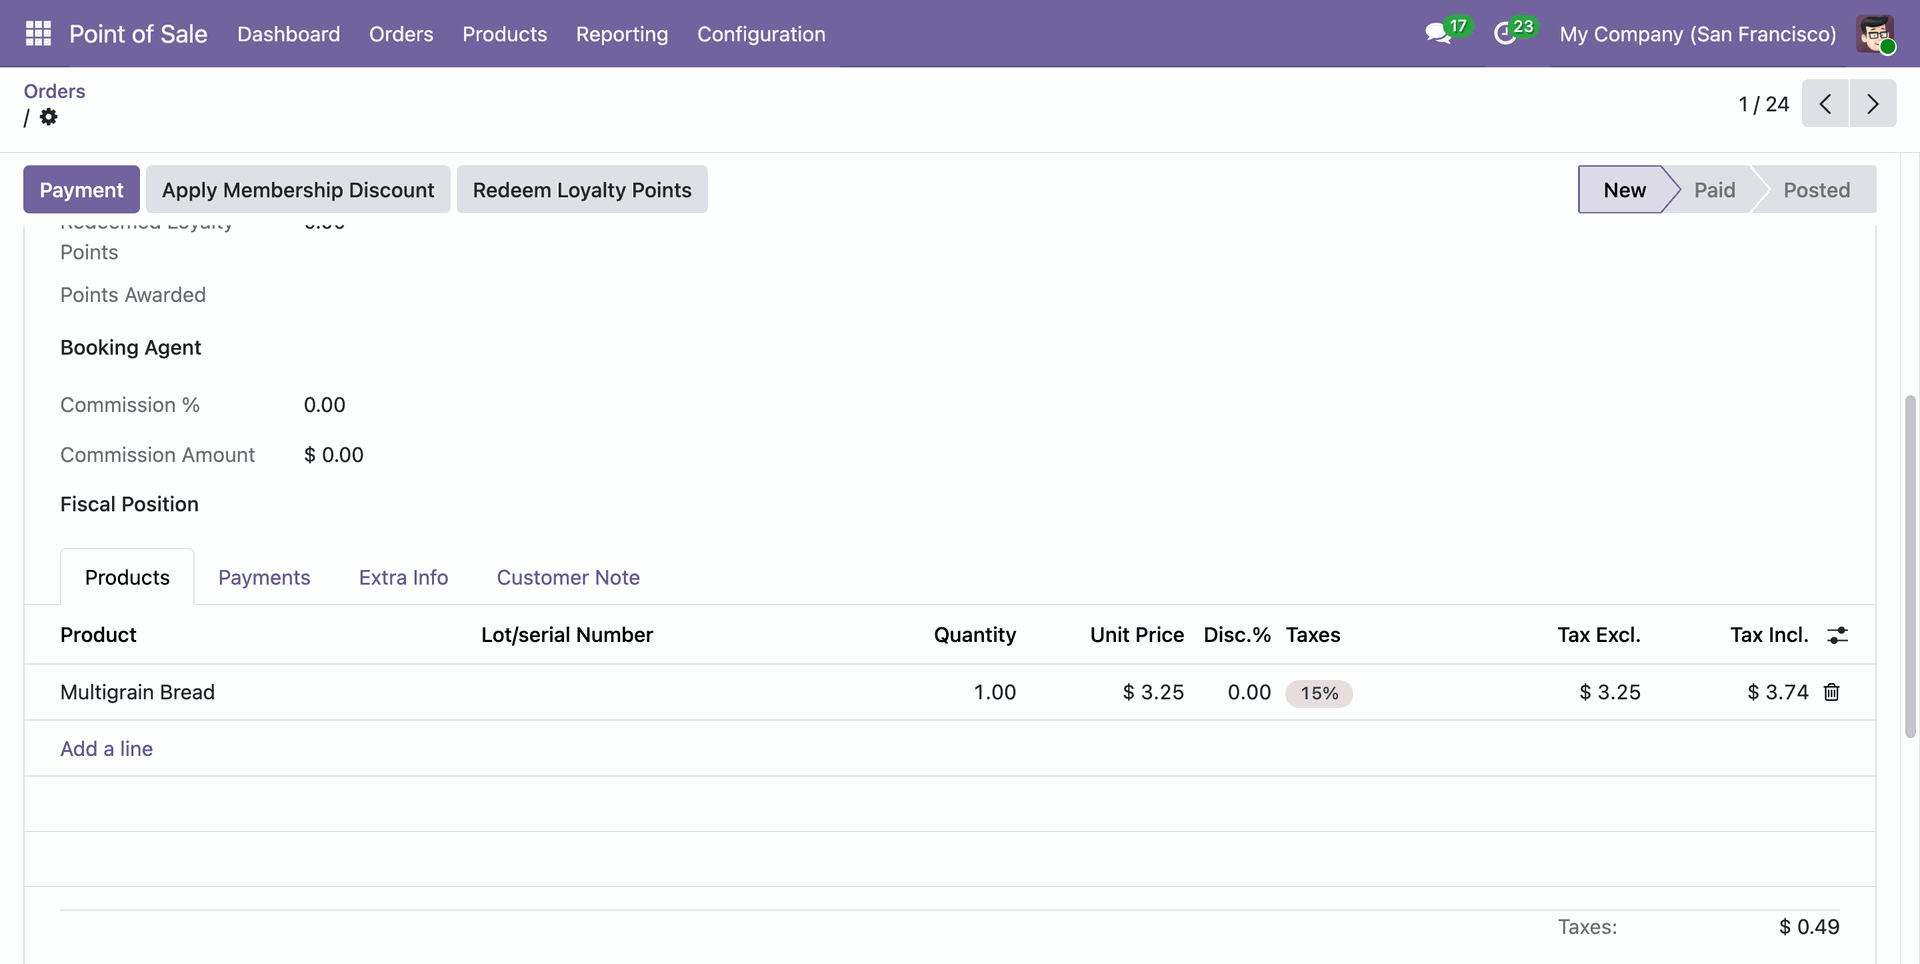
The POS Order Form View displays the ordered product details, including the product name, quantity, unit price, taxes, discount (if any), and subtotal/total amount.
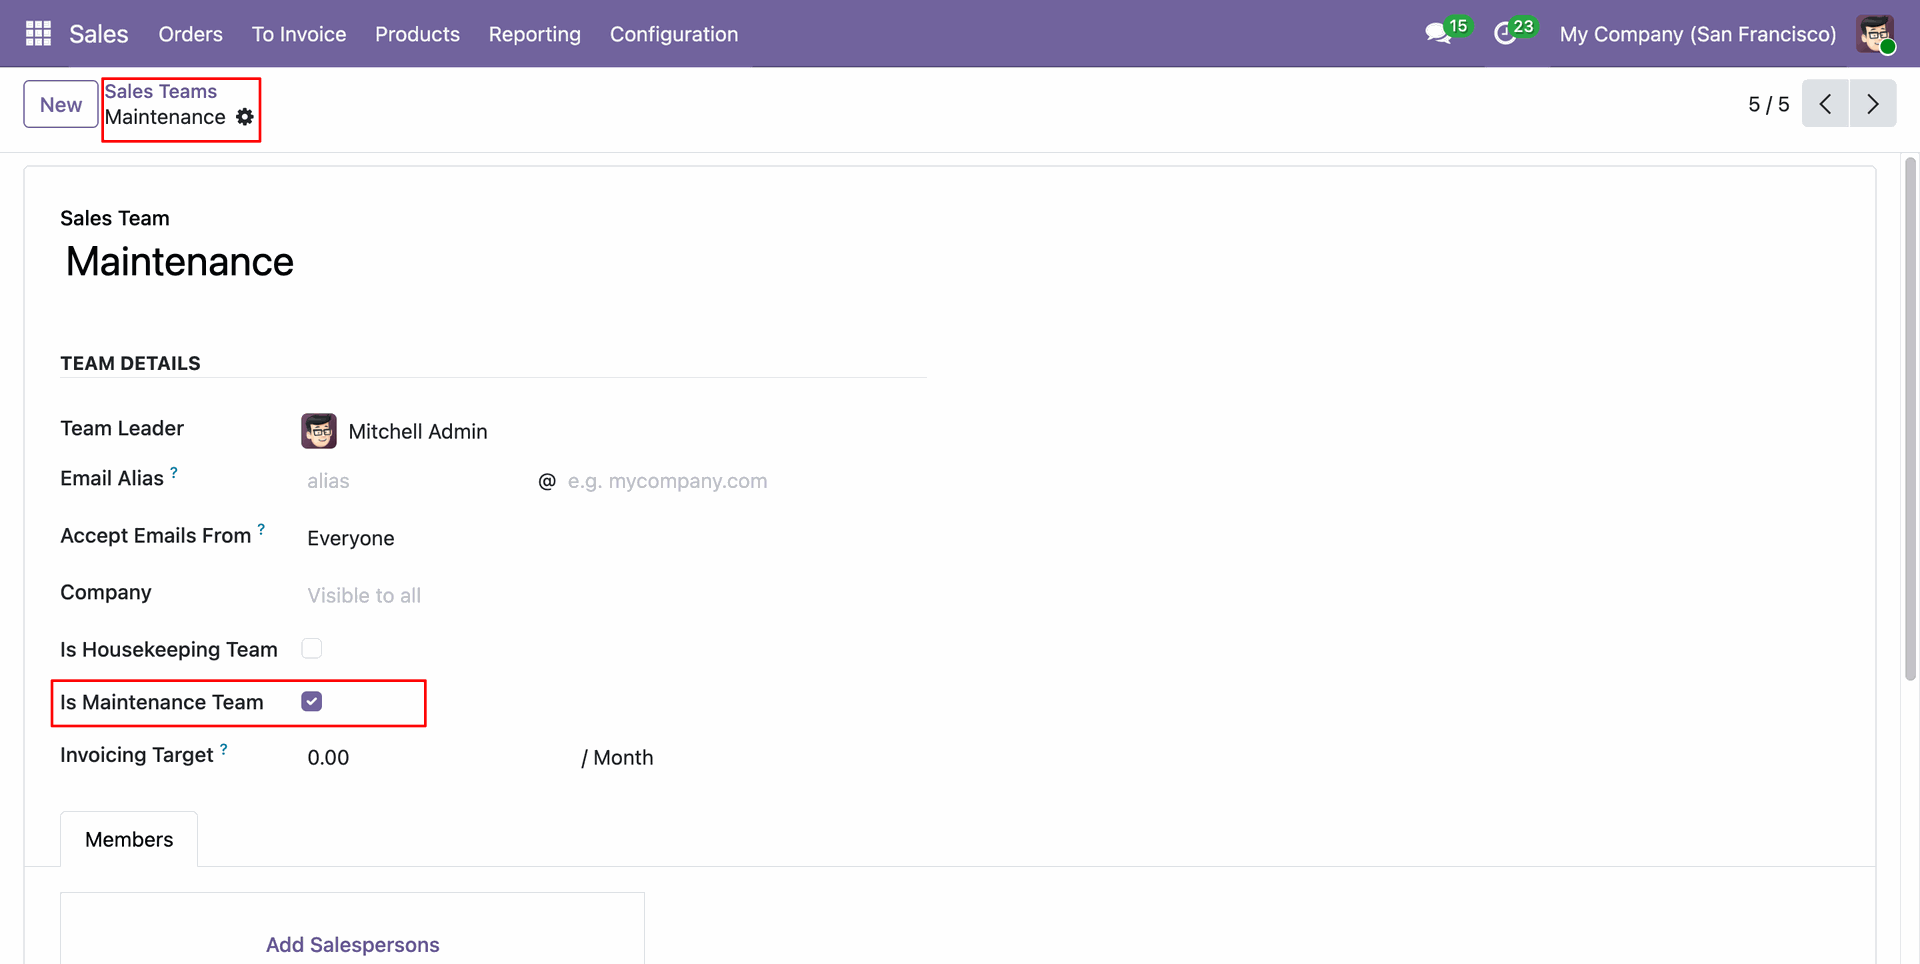
Go to the Sales Teams form view and enable the Is Maintenance Team boolean to designate the Maintenance Team for handling maintenance-related operations.
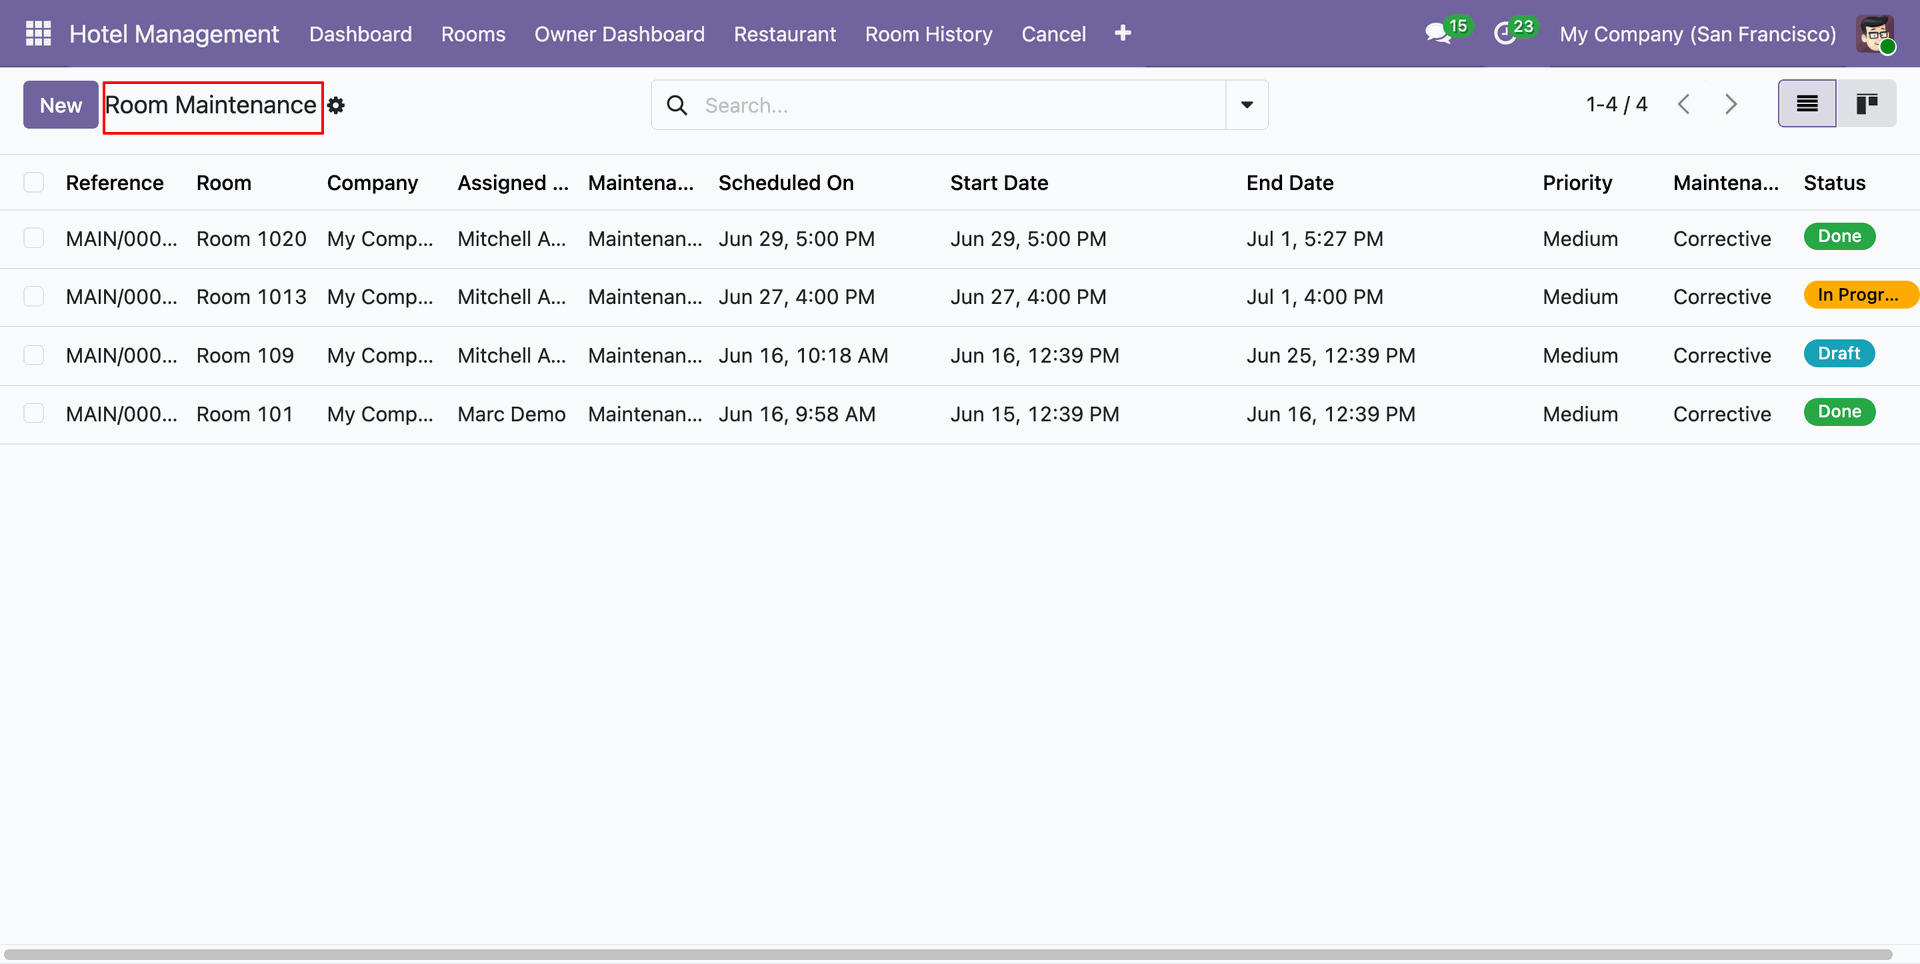
Go to the Maintenance menu to create, manage, and track maintenance requests.
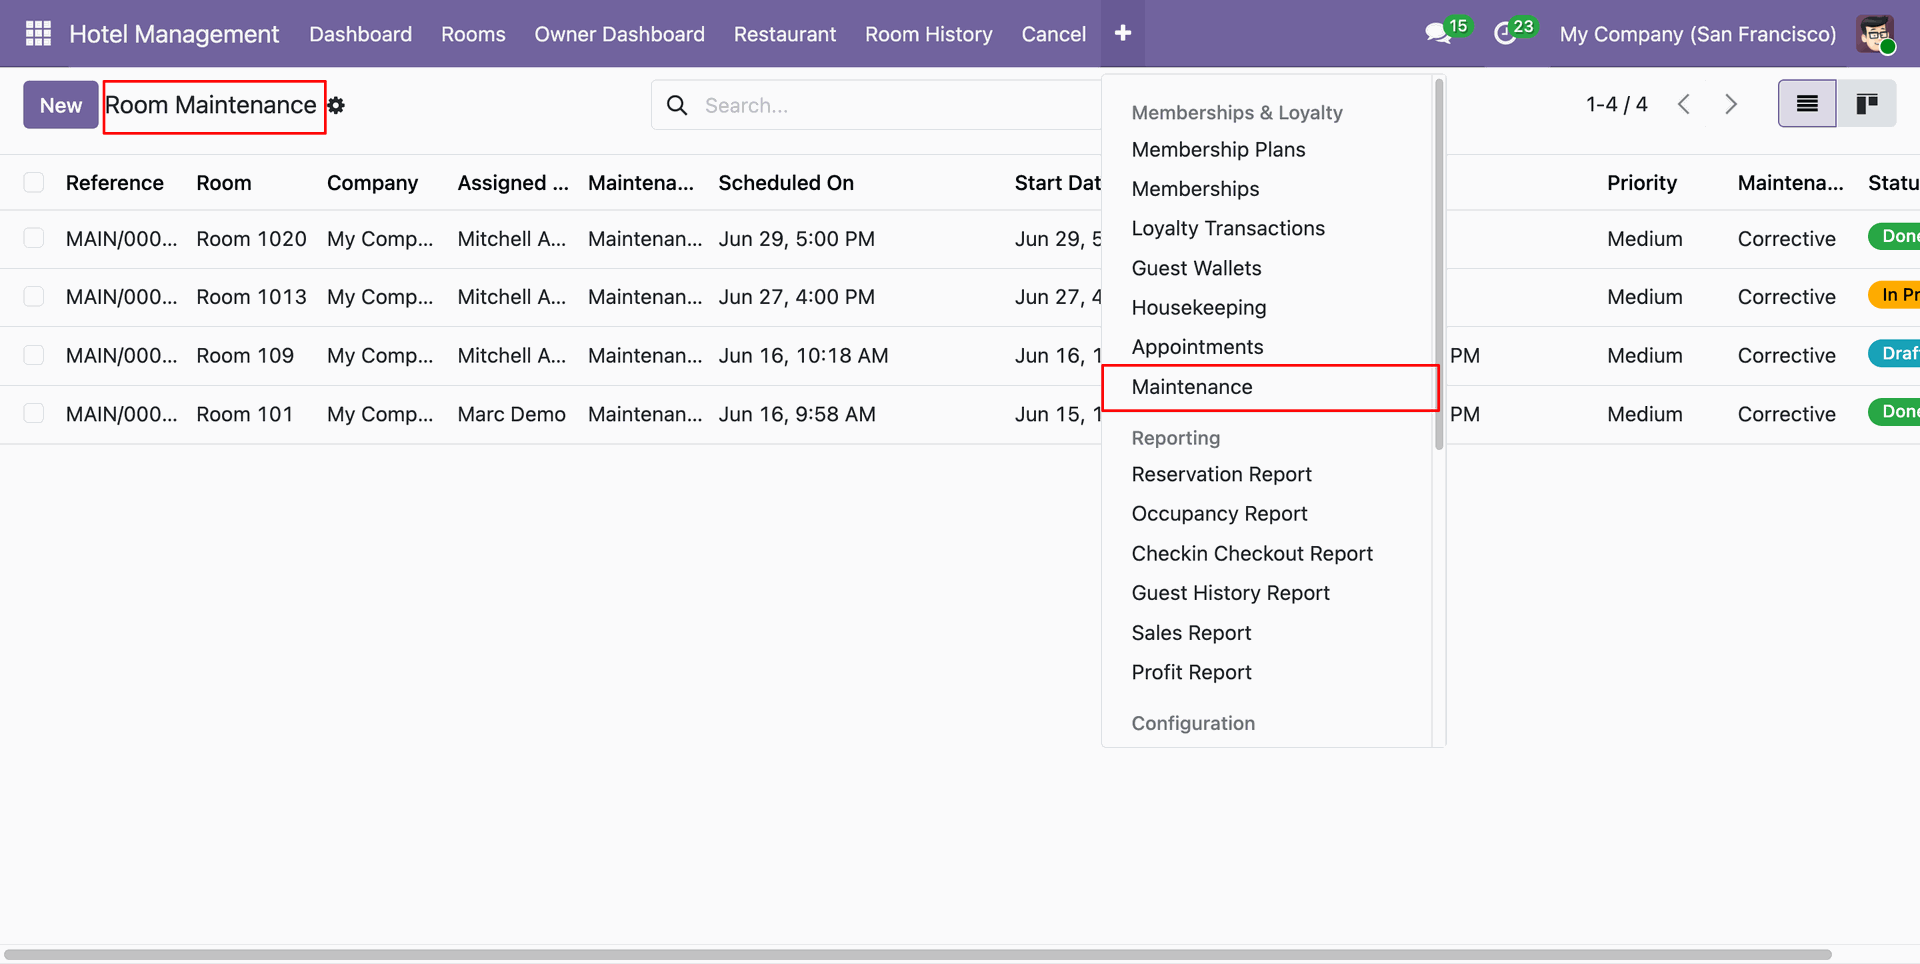
Room Maintenance list view.
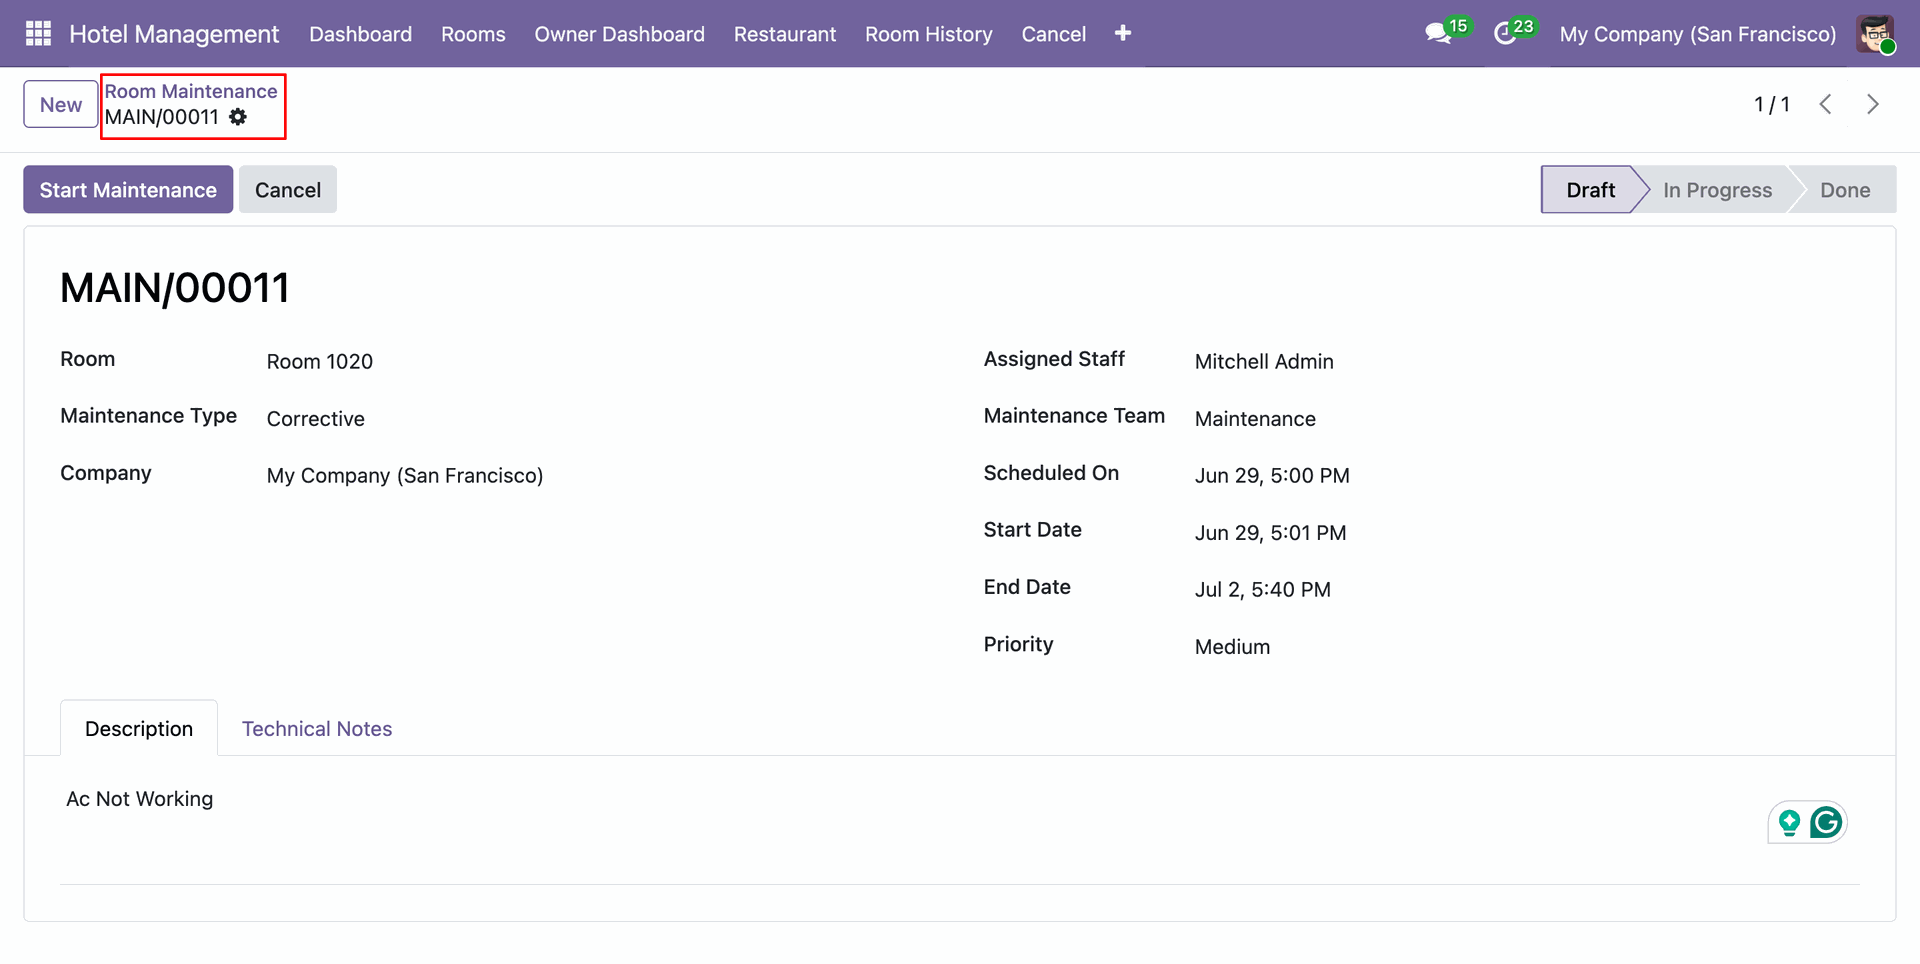
Create a new maintenance request for a room.
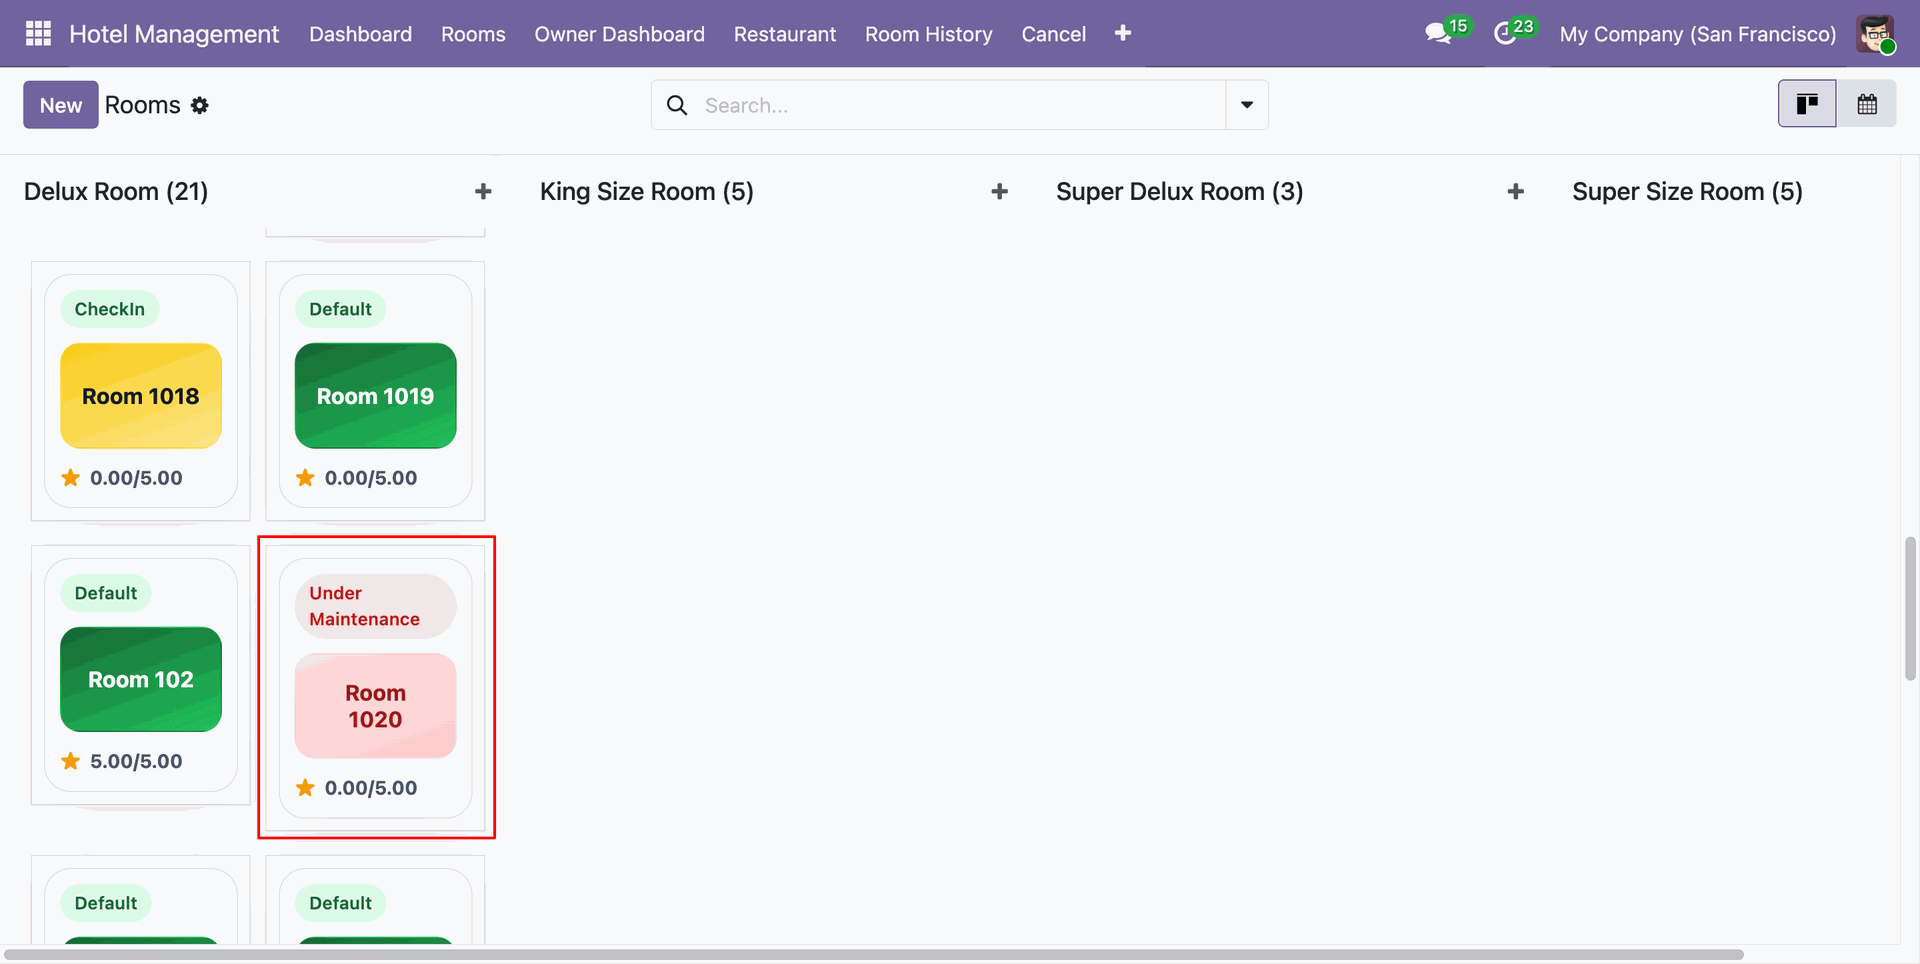
The user can see that the room is under maintenance from the Rooms Dashboard, where the room status is updated to indicate that it is currently unavailable for booking or check-in.
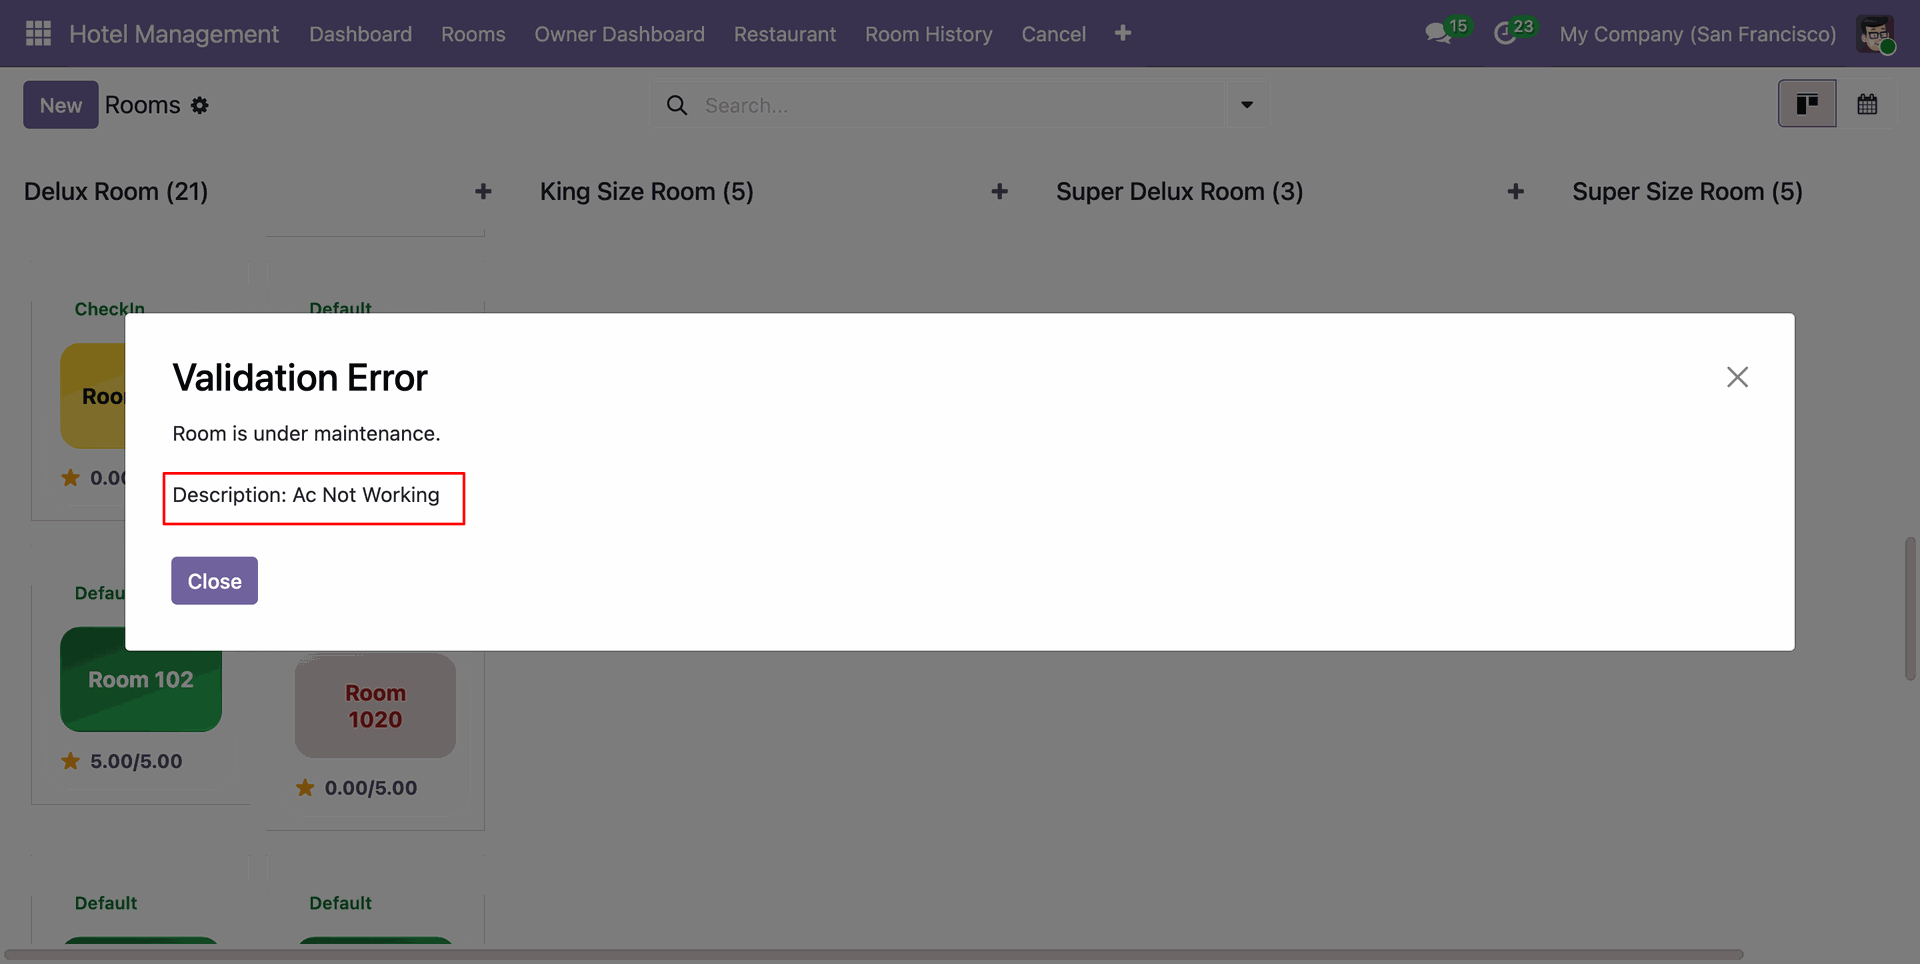
Clicking on a room marked as Under Maintenance from the Rooms Dashboard displays a validation error nd cannot be used for booking, check-in, or other room operations until the maintenance is completed.
Open the request to update its status.
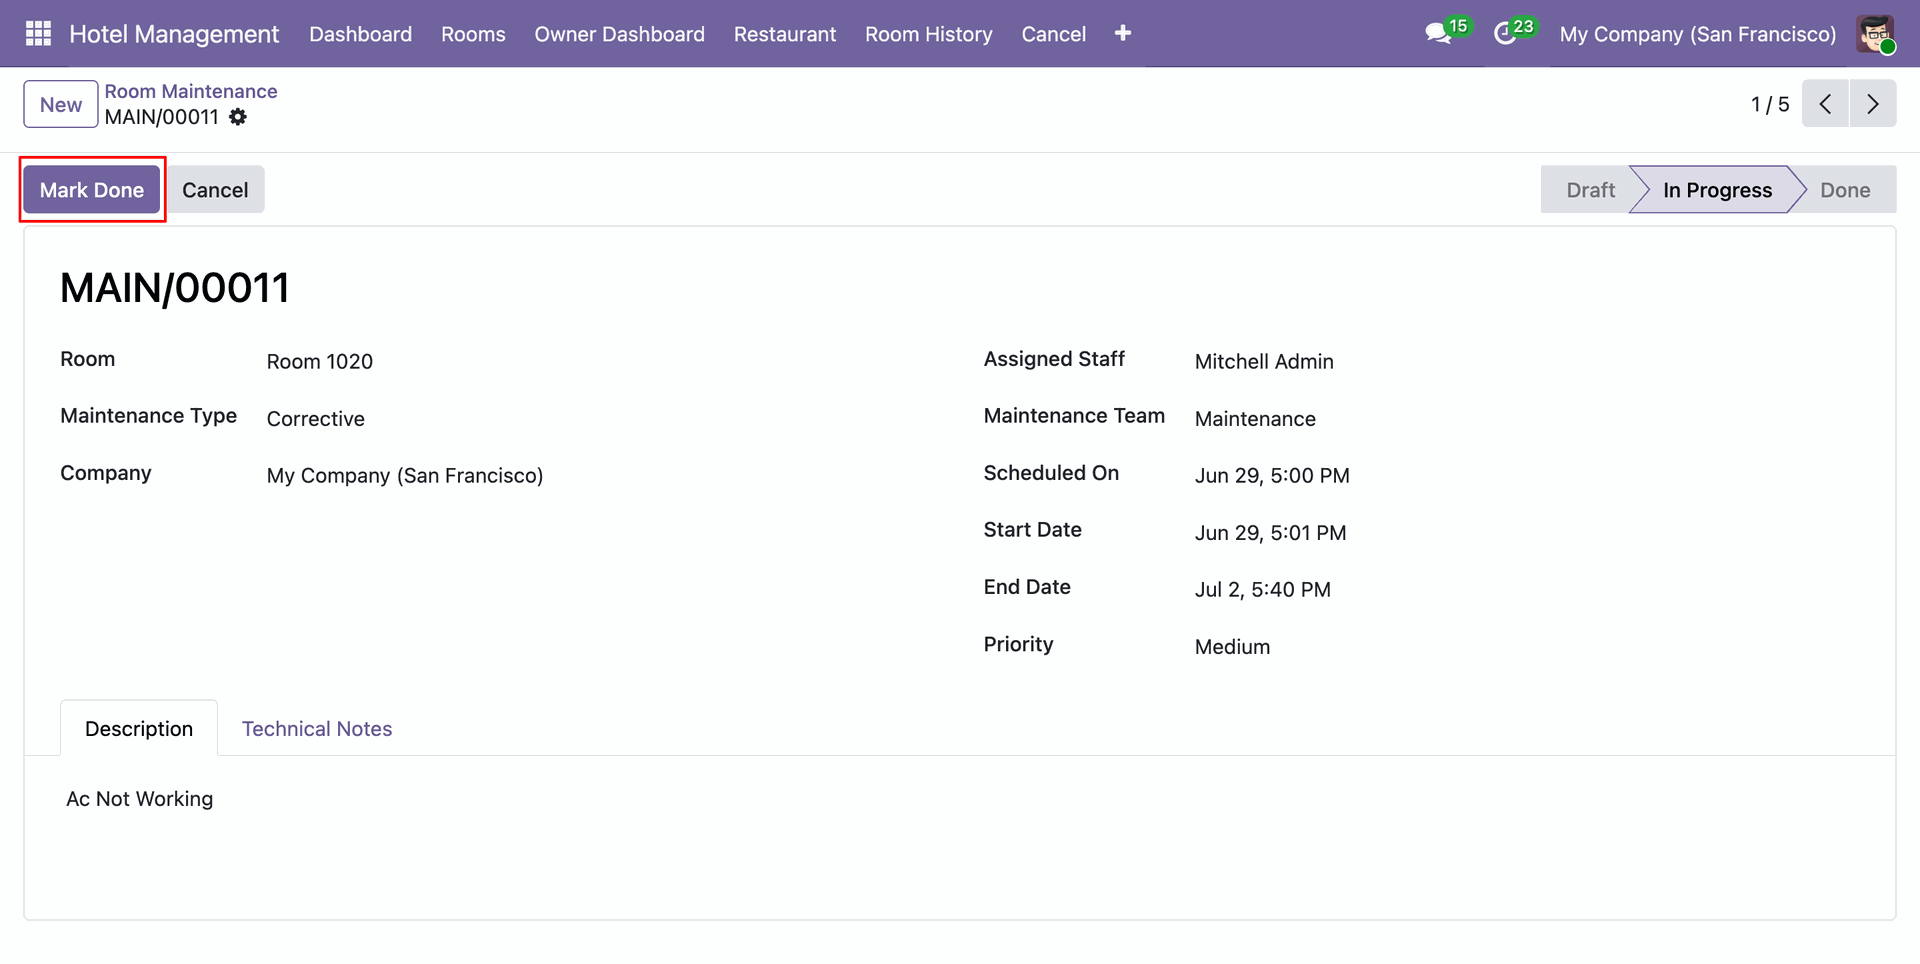
Mark the maintenance request as resolved or done.
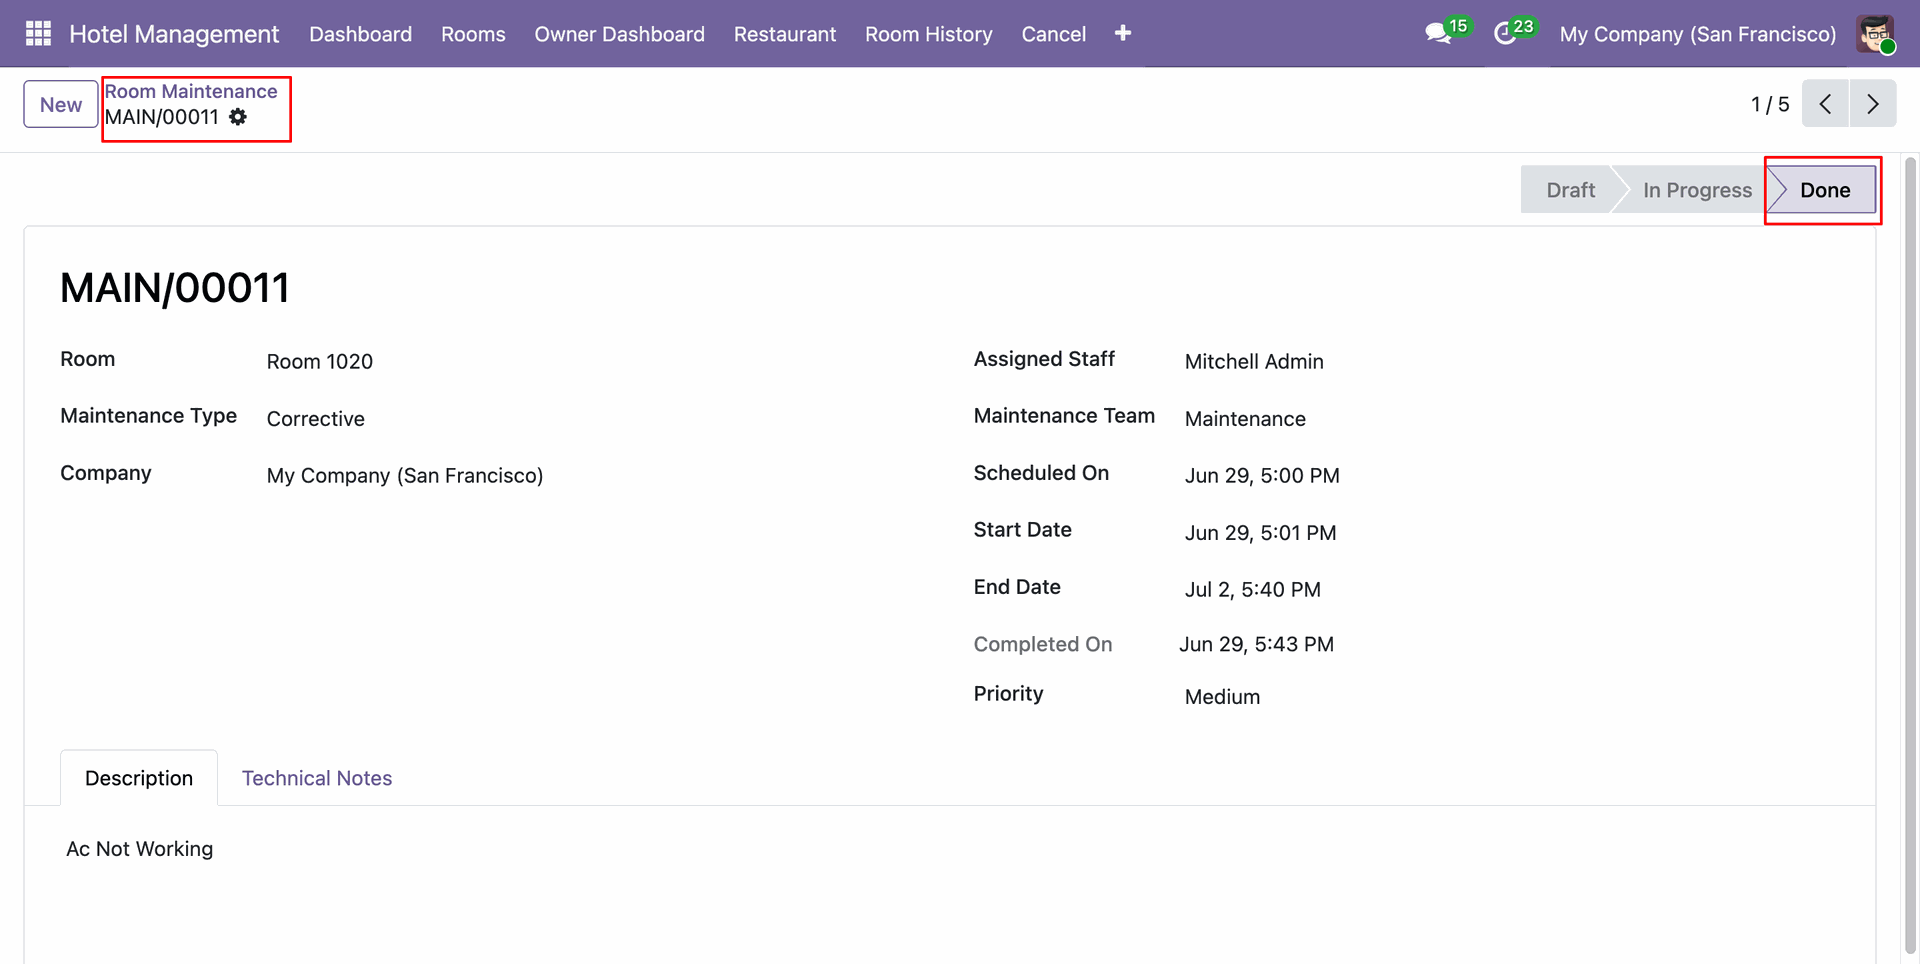
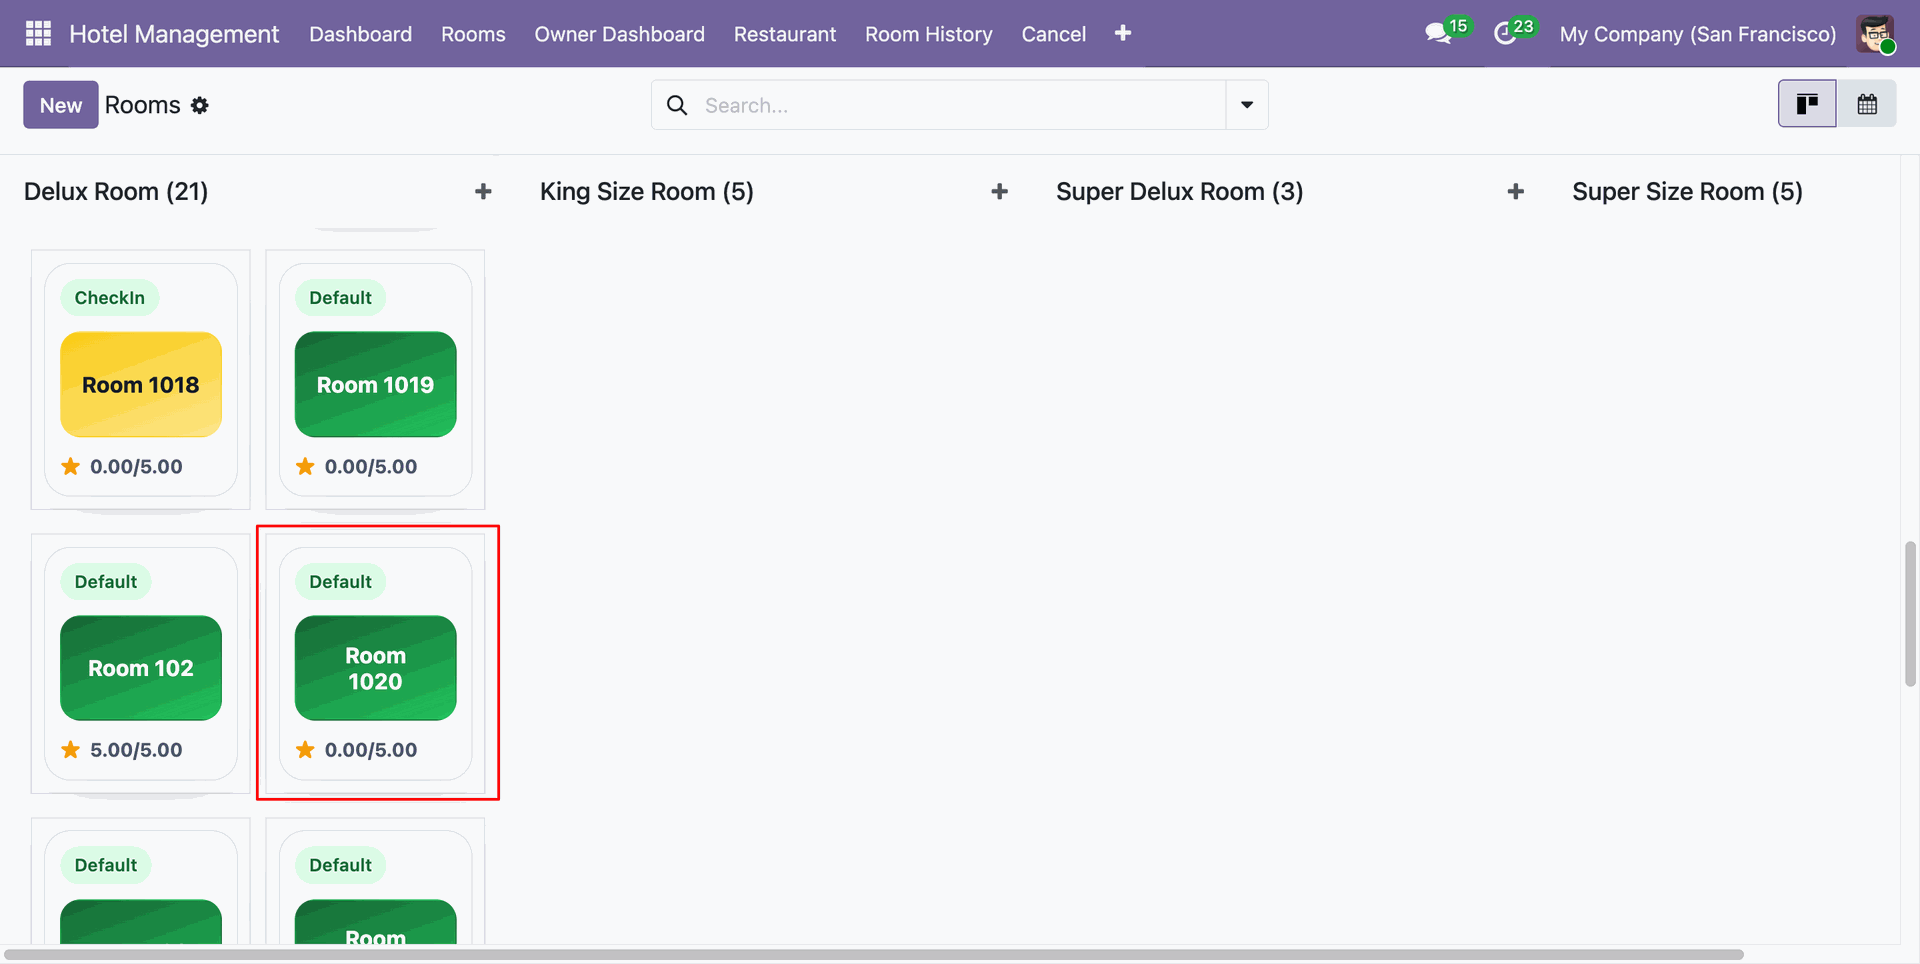
By clicking the Mark as Done button on the maintenance request, the room becomes available for booking again, and its updated status is reflected on the Rooms Dashboard.
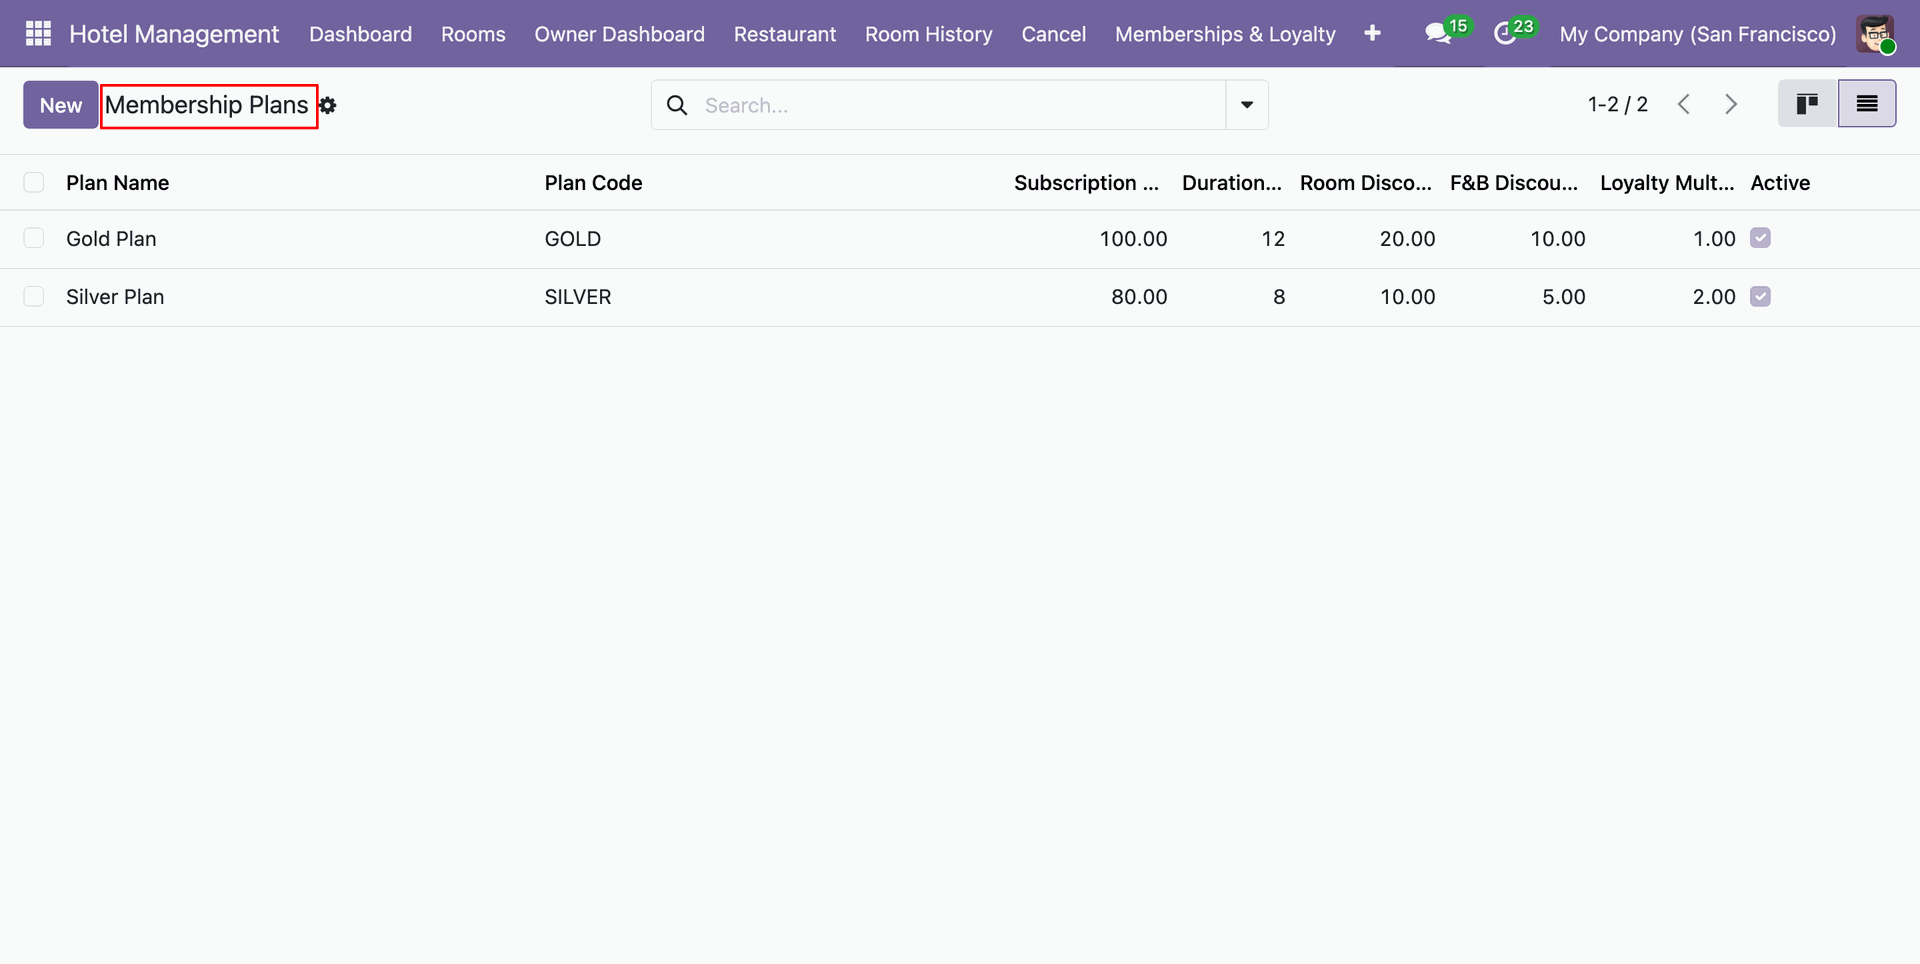
Go to the Membership & Loyalty menu and select the Membership Plans submenu to create, configure, and manage membership plans.
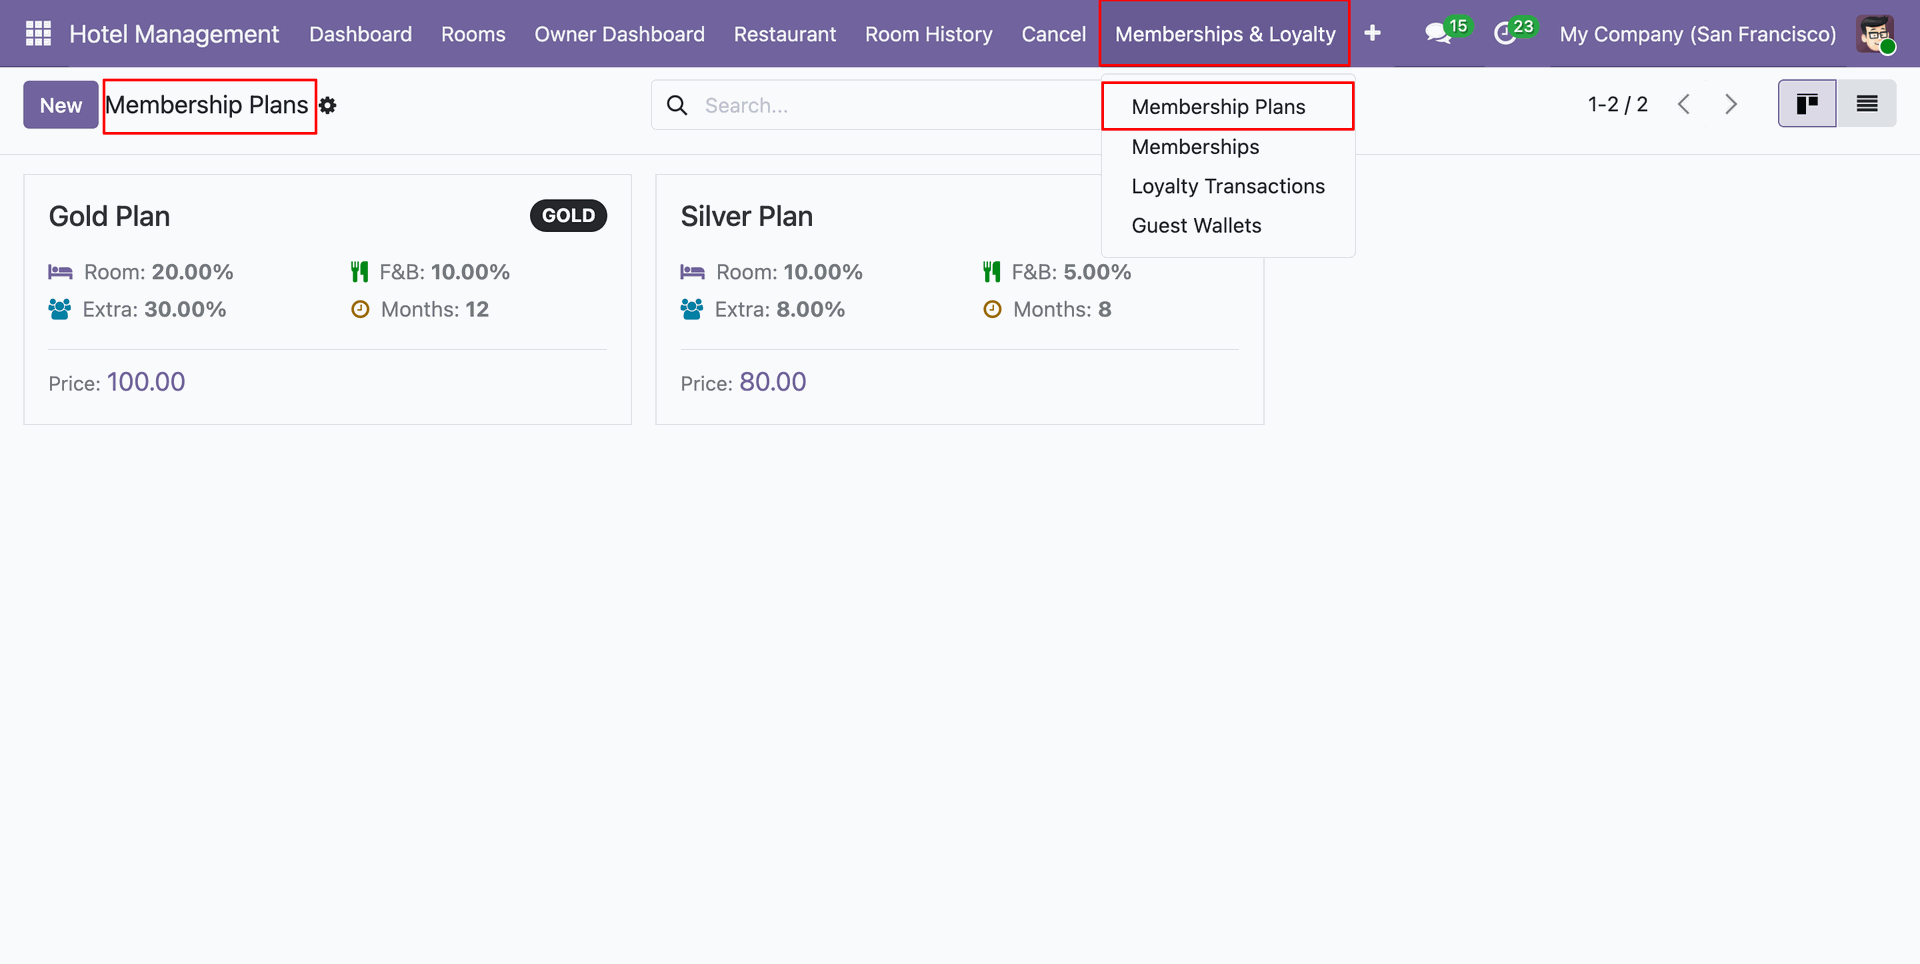
Membership Plans List View, where you can create, manage, and configure all available membership plans.
Open the Membership Plan. You can view all linked Membership Records by clicking the Membership Records smart button, which displays every membership associated with that plan.
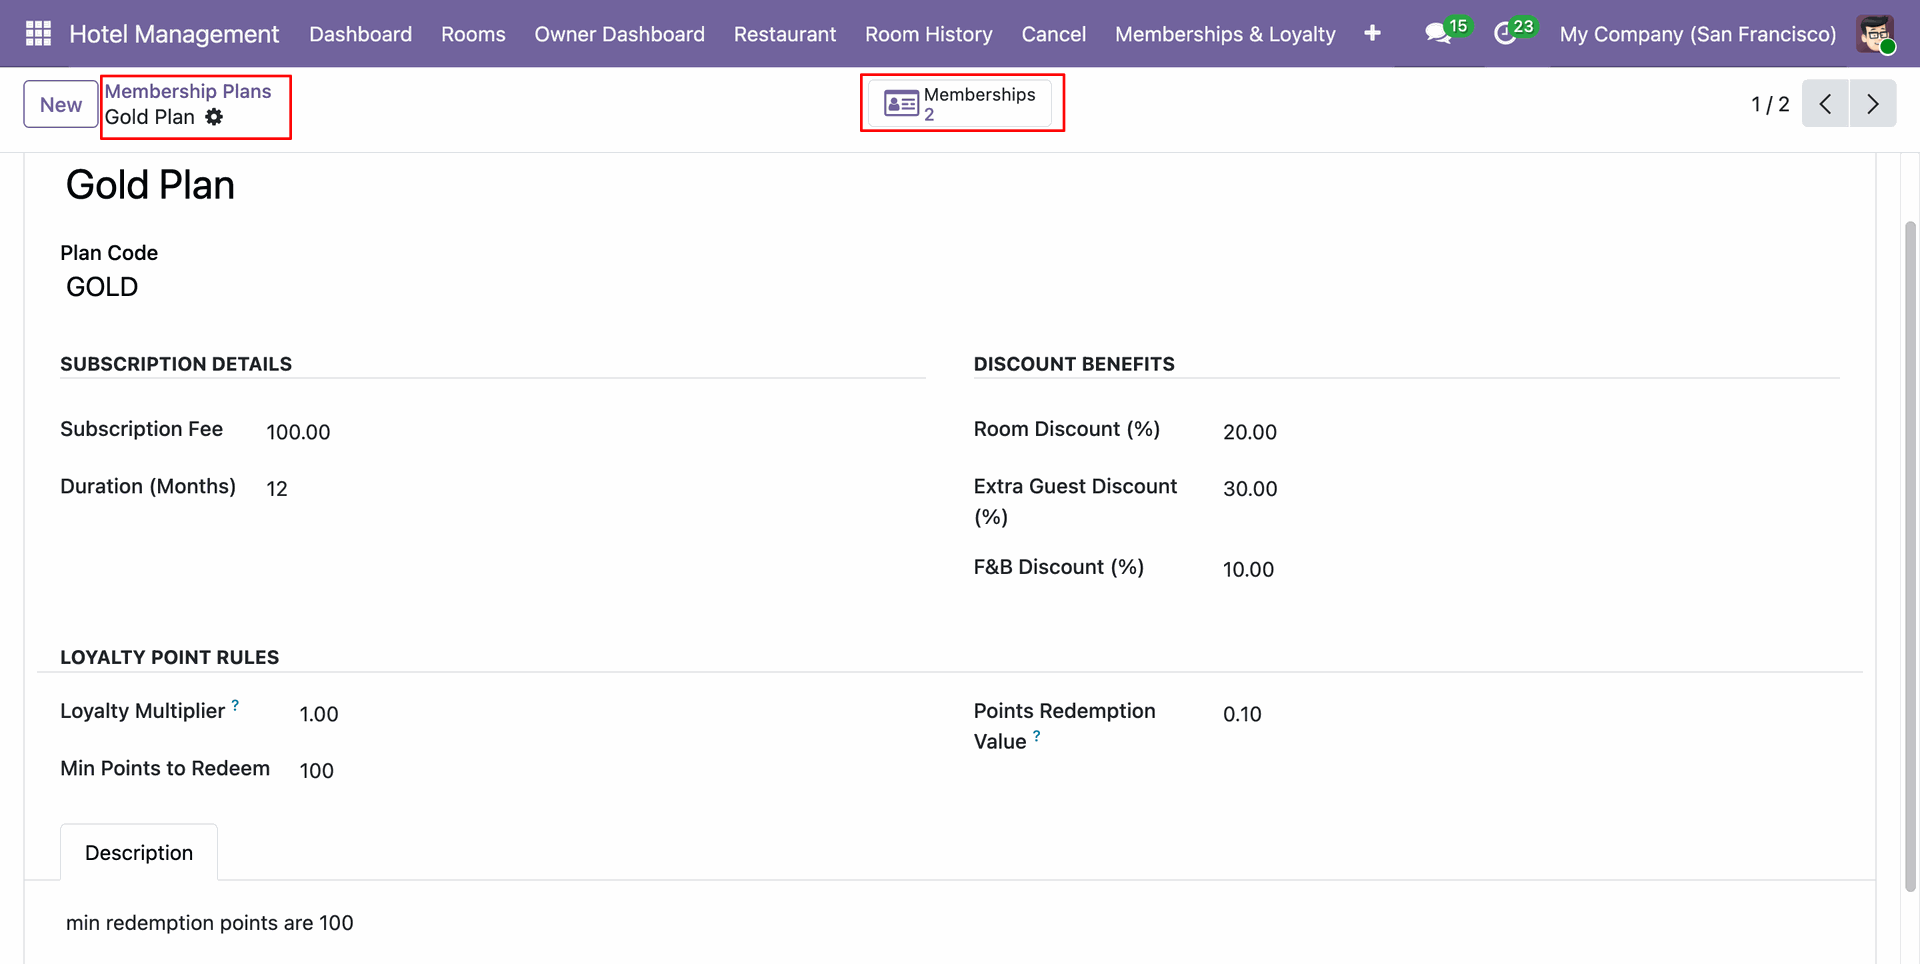
Click the Membership Records smart button to open the list of membership records linked to the selected Membership Plan.
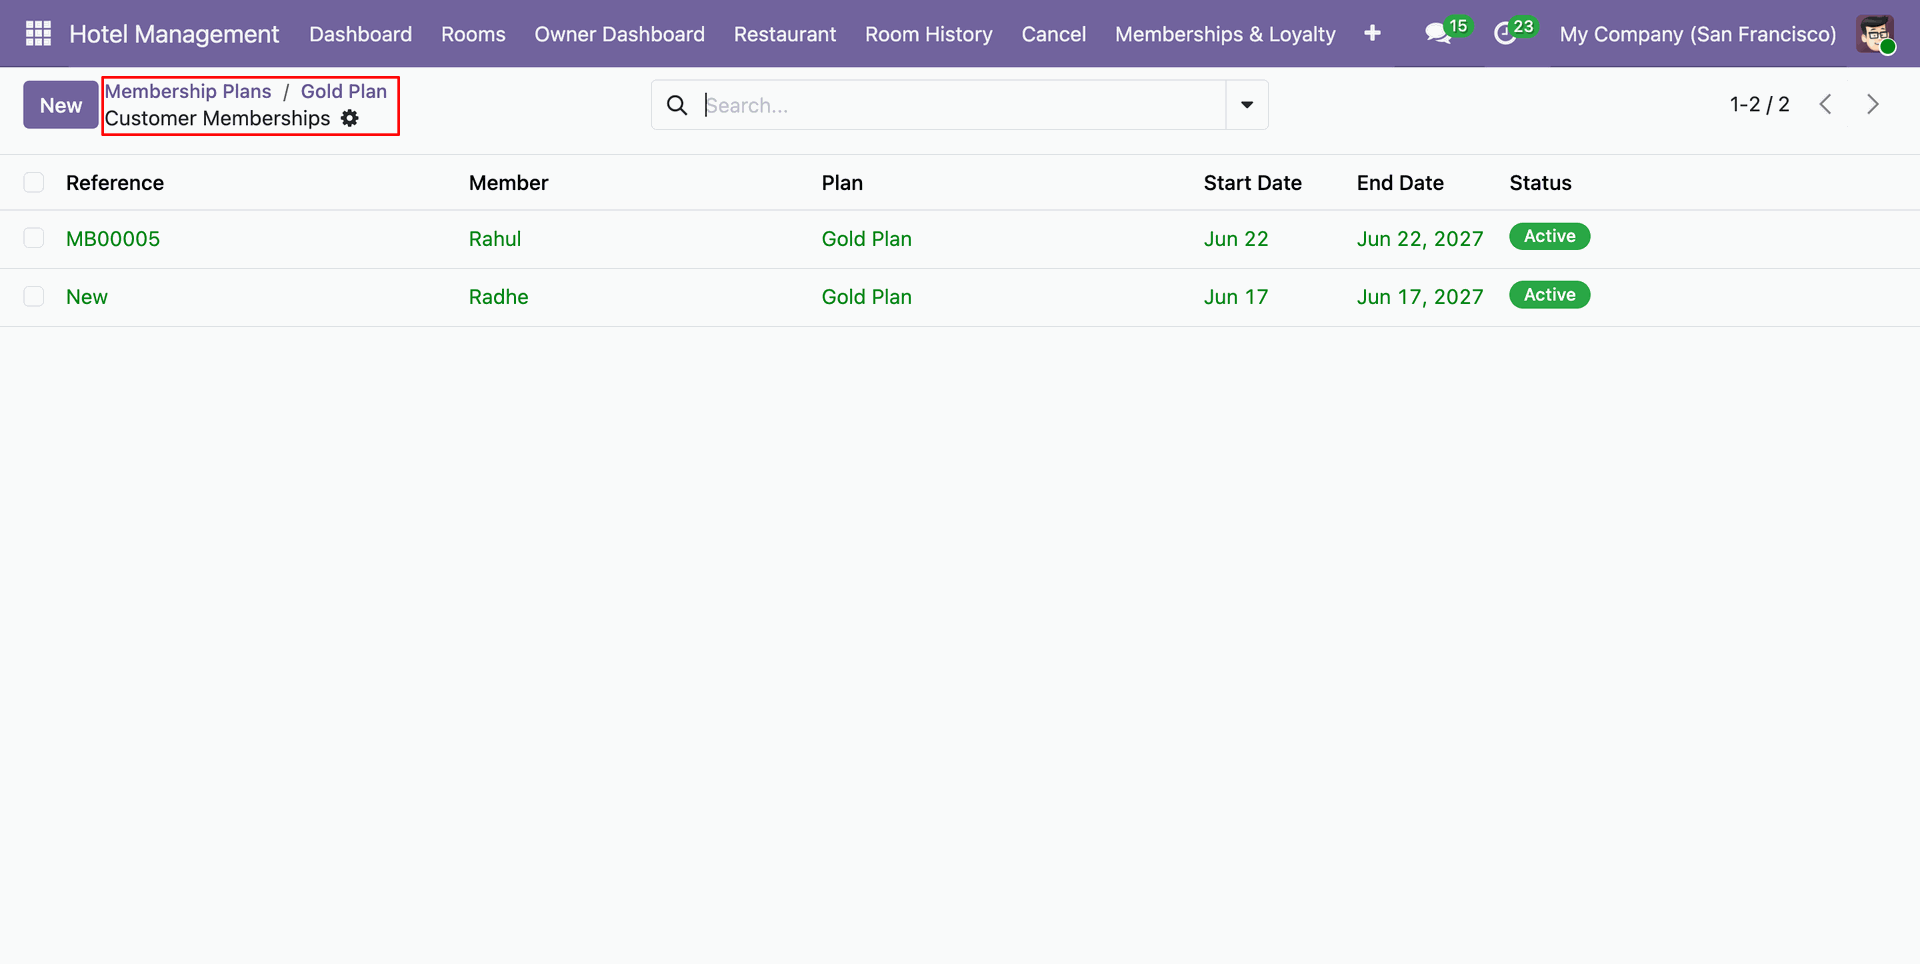
Go to the Membership & Loyalty menu and select the Membership submenu to view and manage all membership records.
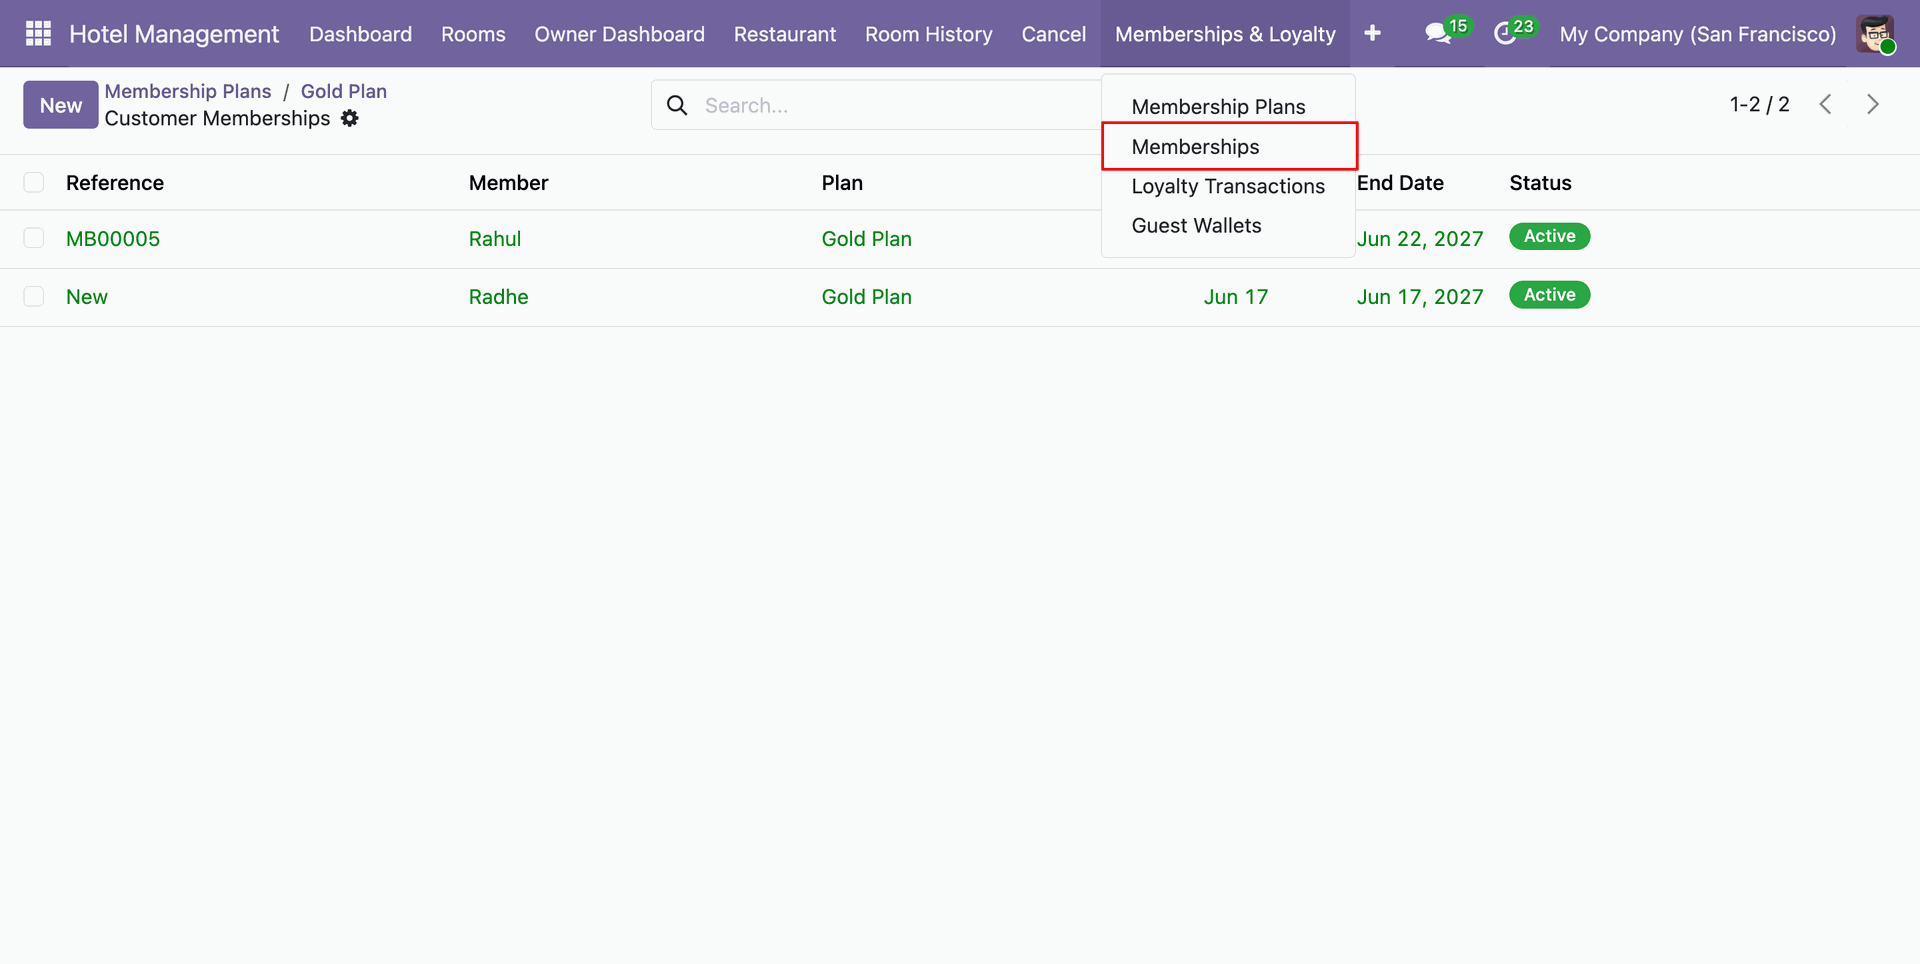
Membership List View, where you can view, manage, and track all membership records.
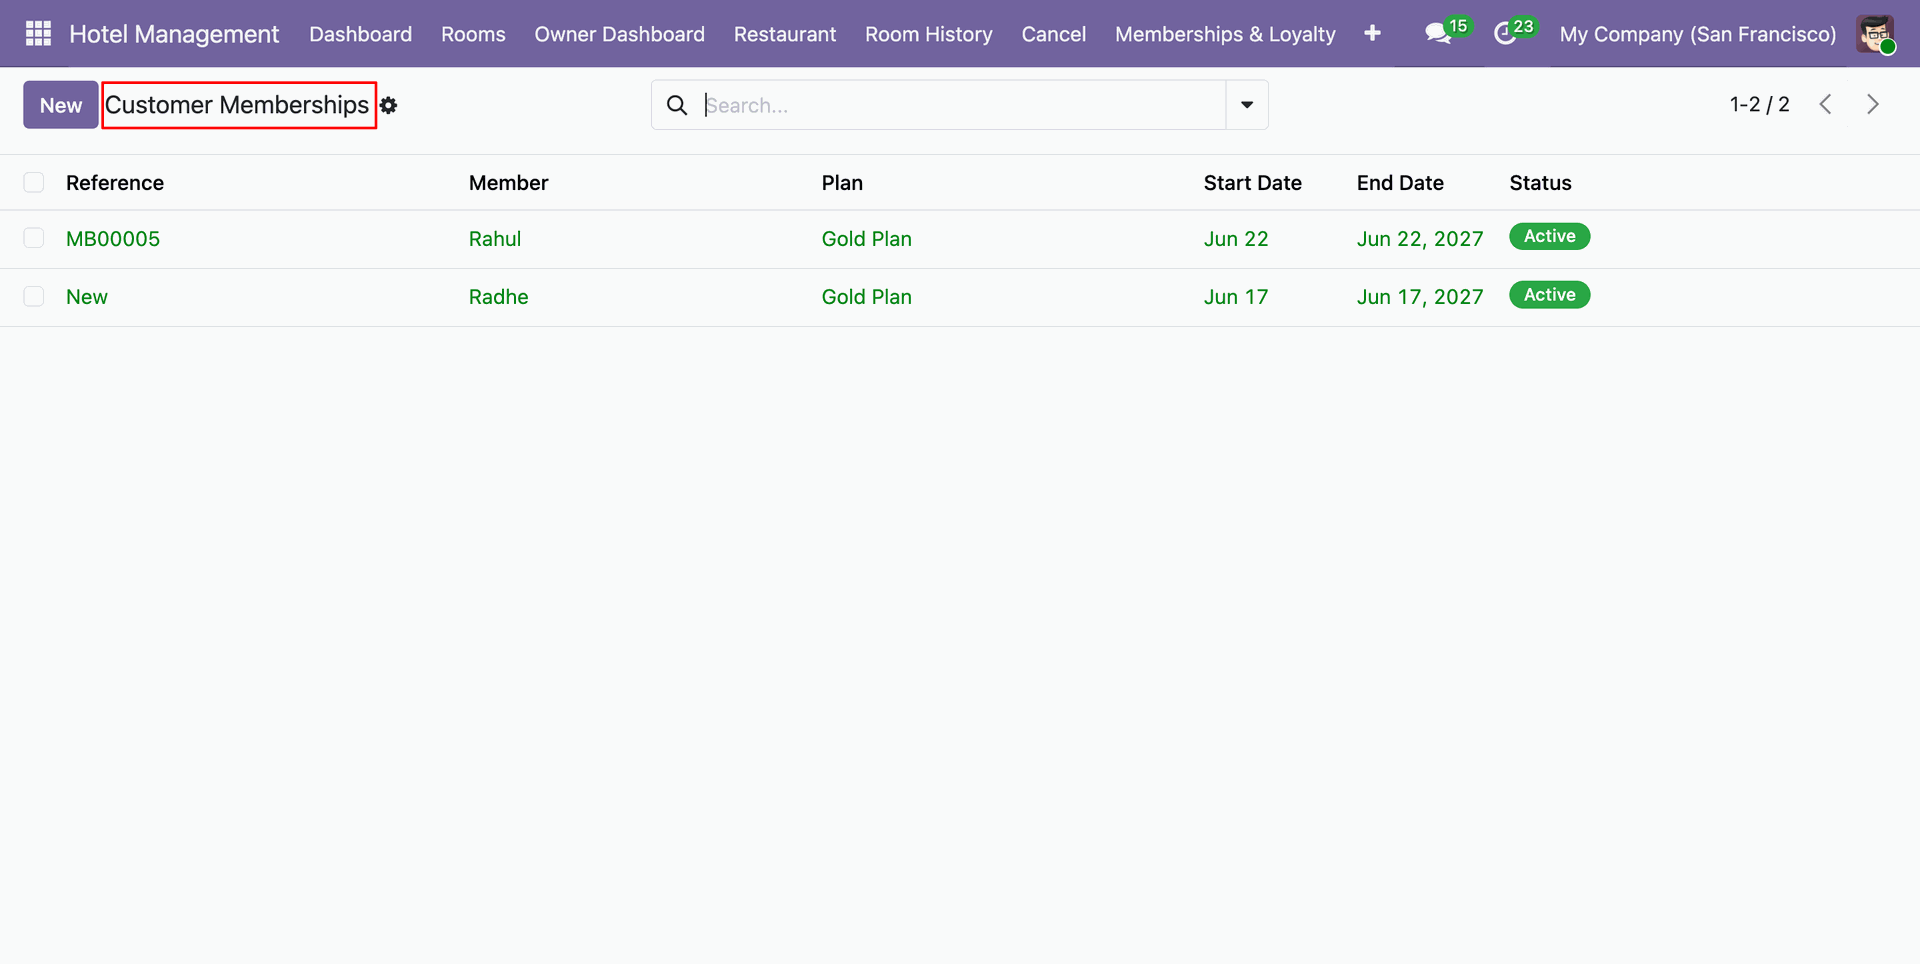
Membership List View, where you can view, manage, and track all membership records.
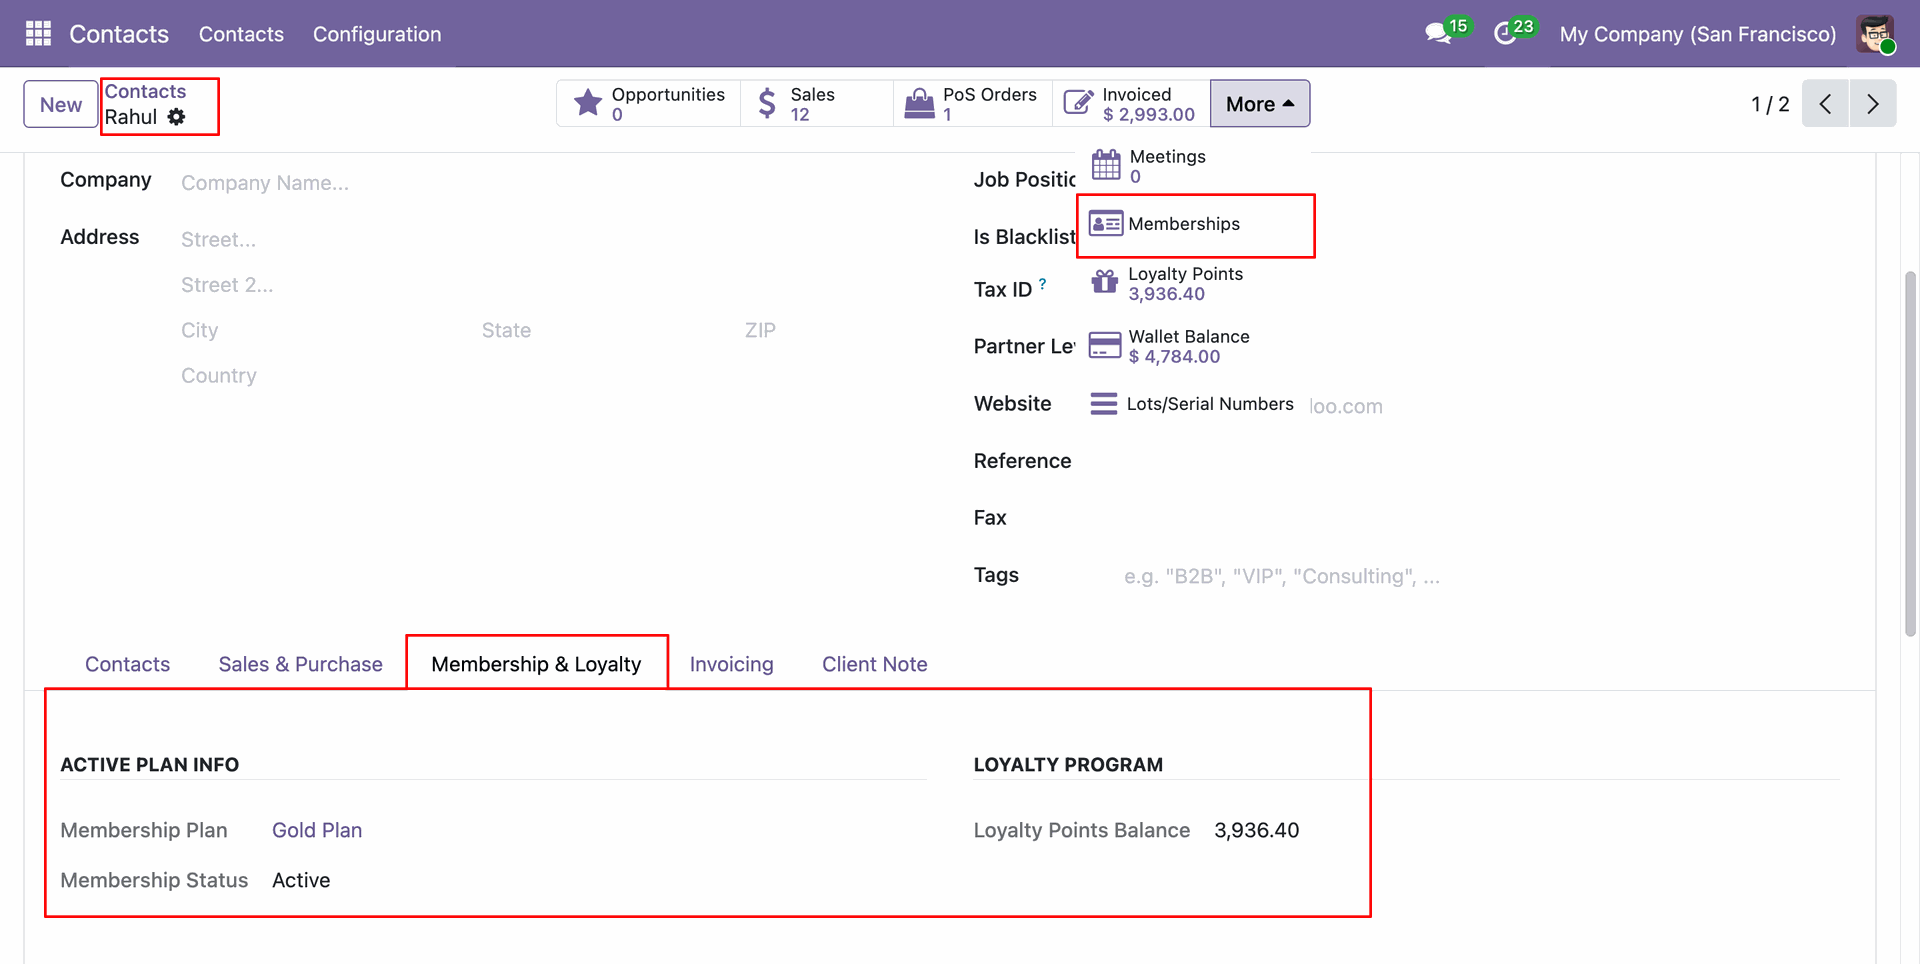
Go to the Contacts menu and open a Customer record. Under the Membership & Loyalty tab in the Contact Form View, you can view the customer's membership details. You can also access all related membership records by clicking the Membership smart button.
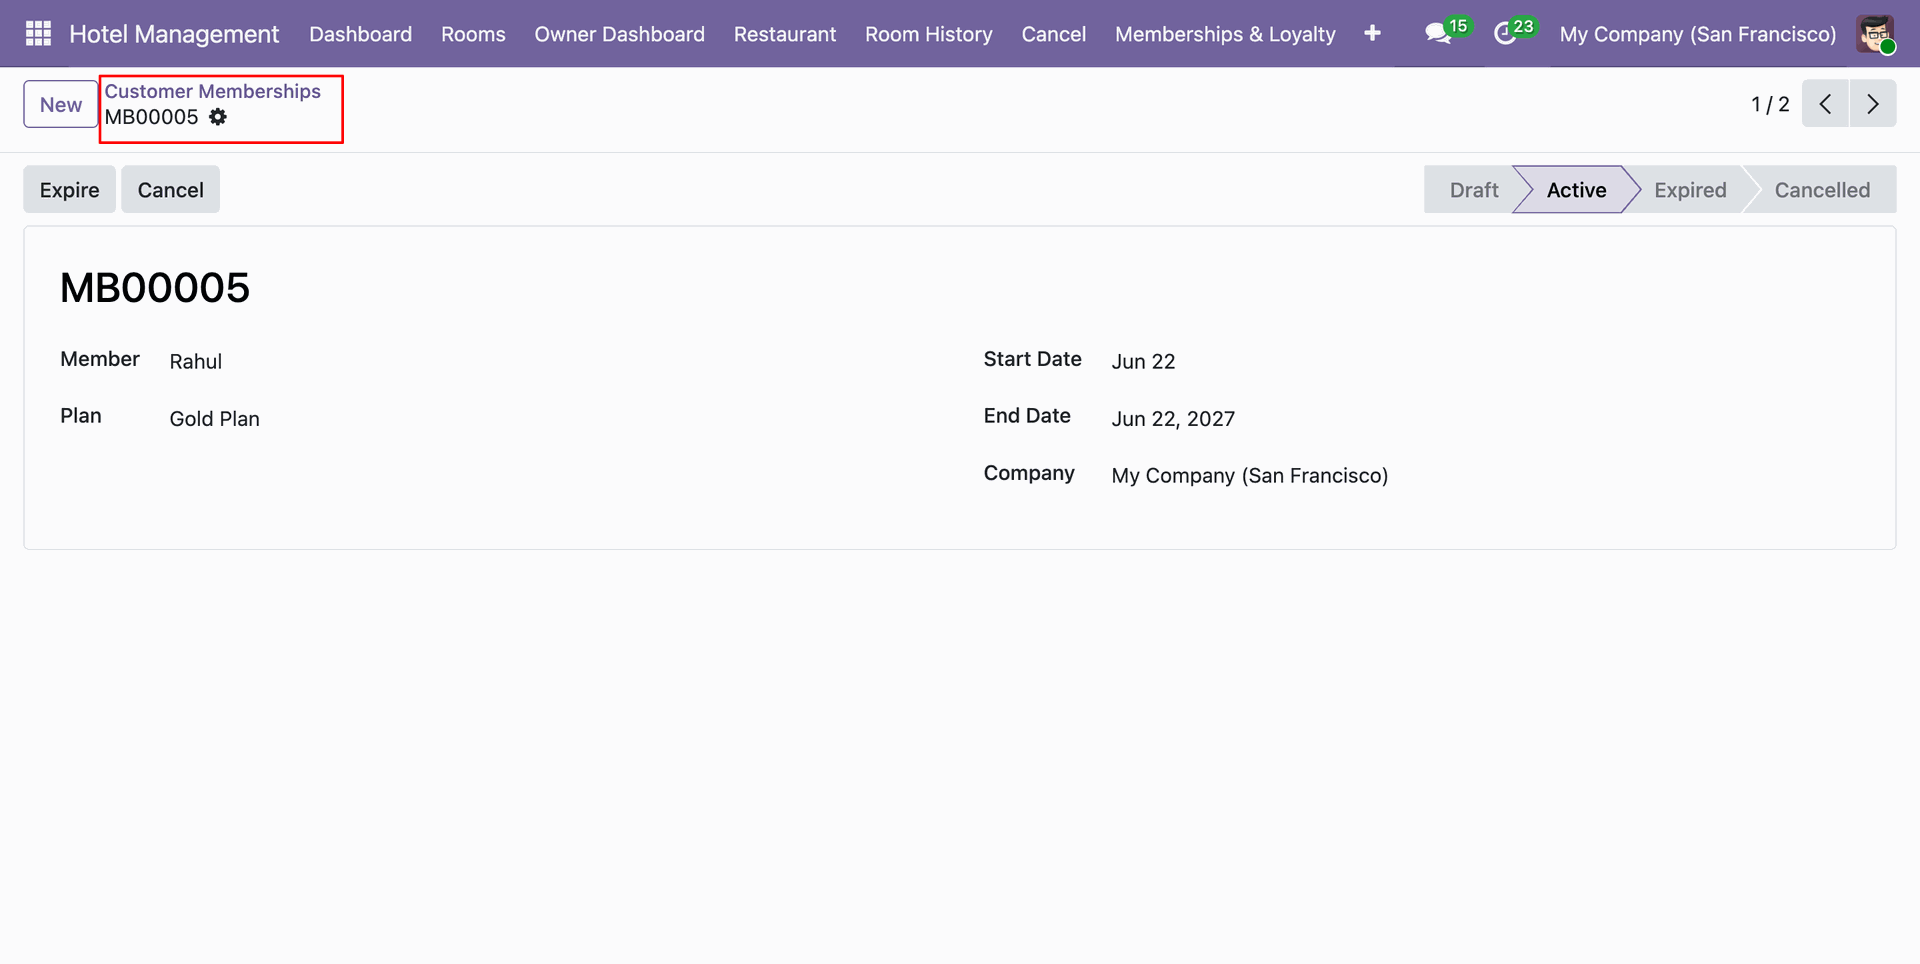
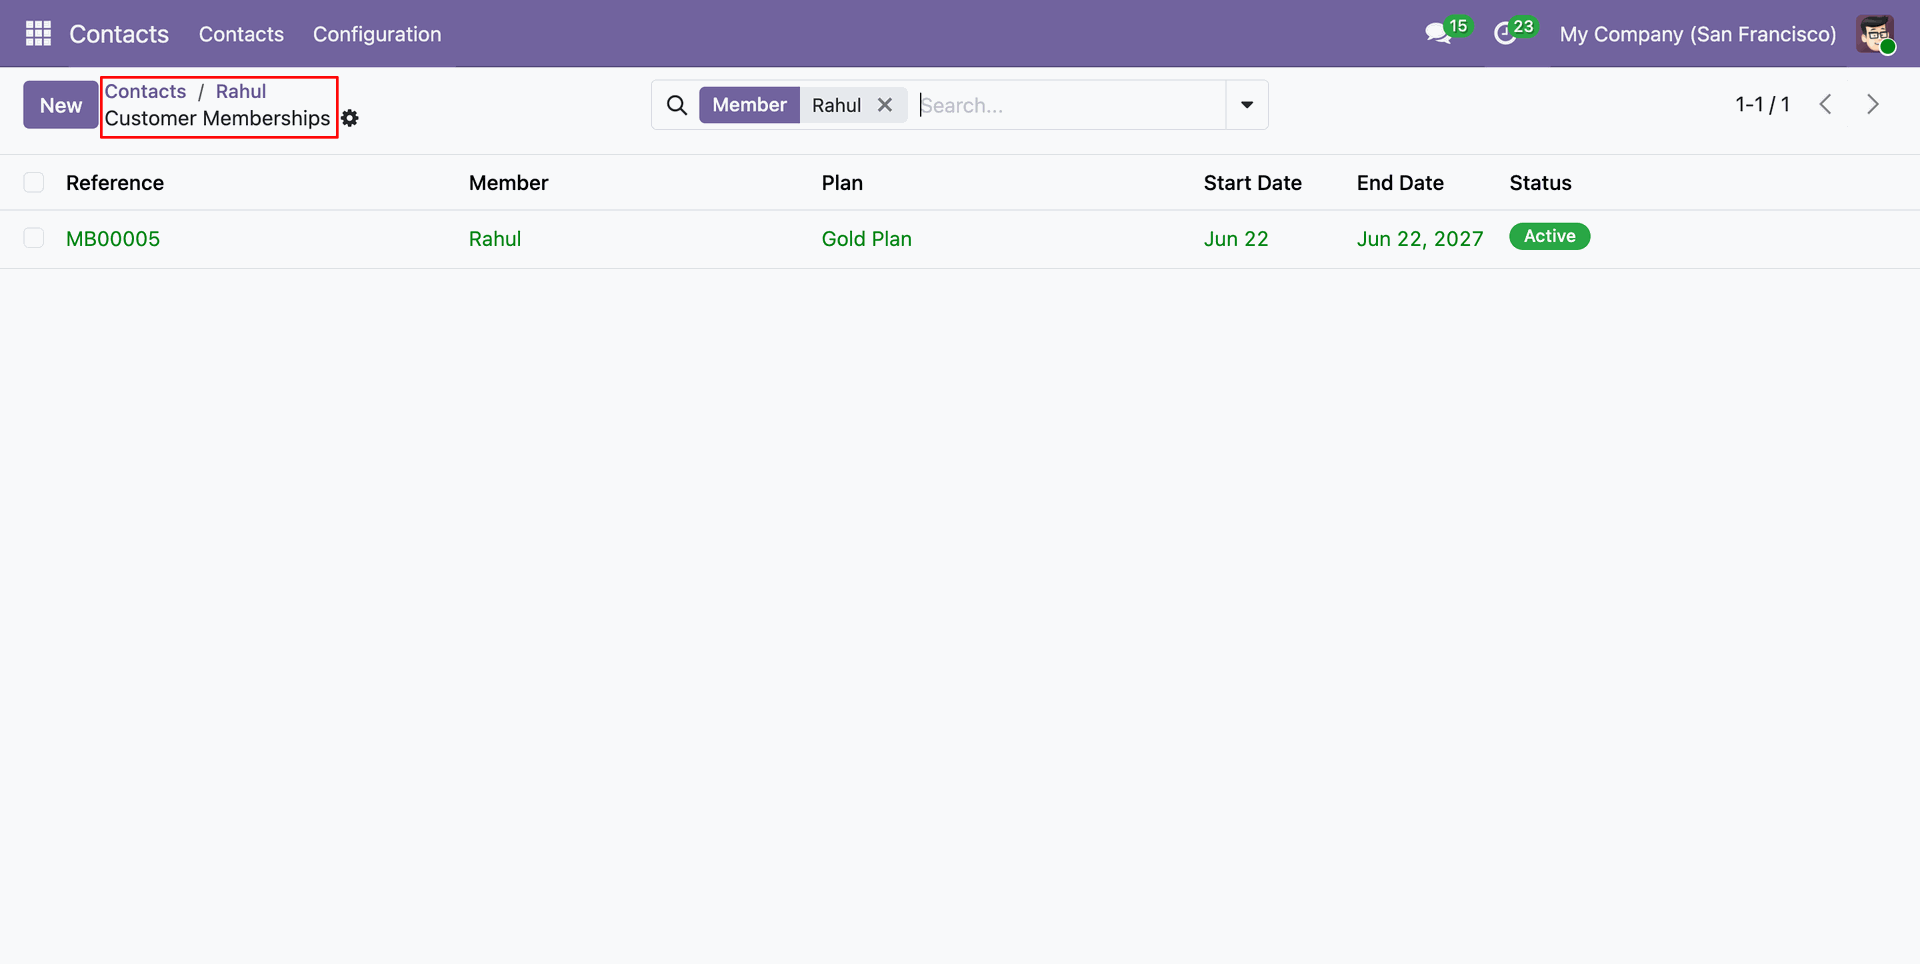
Click the Membership smart button to open the linked Membership Record.
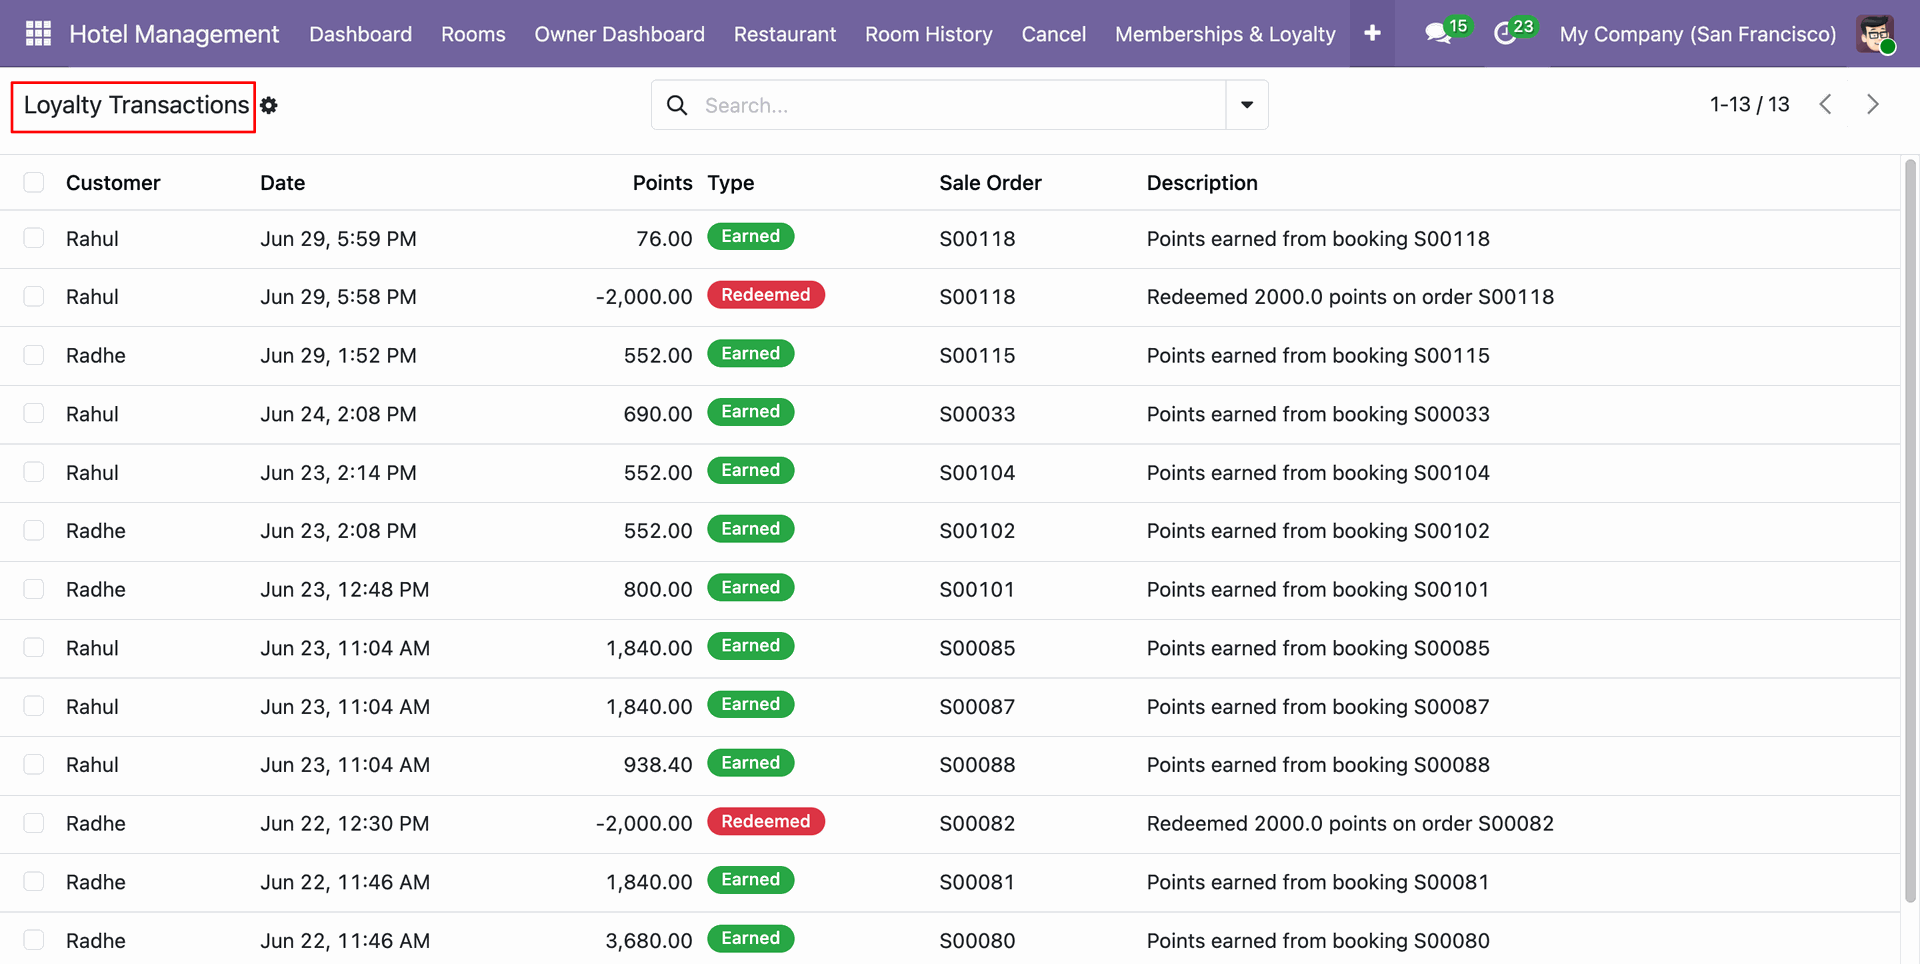
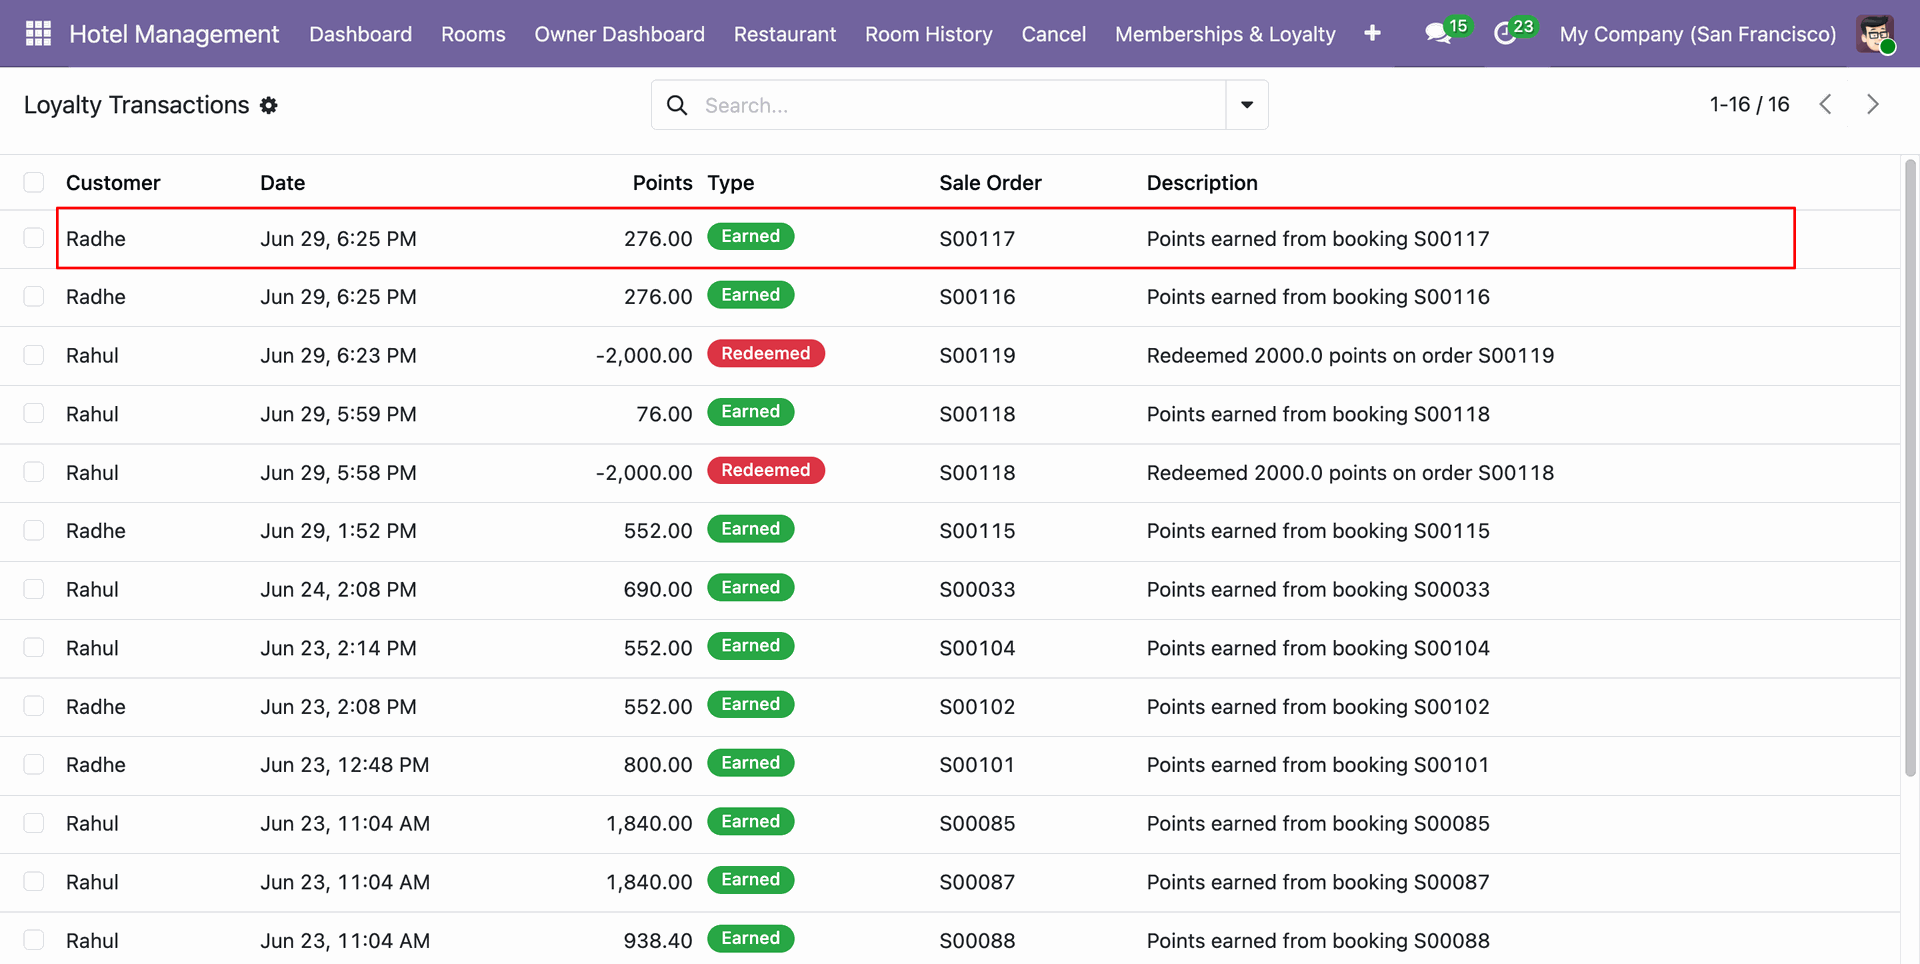
Go to the Membership & Loyalty menu and select the Loyalty Transactions submenu to view and manage all loyalty point transactions, including earned, redeemed, and adjusted loyalty points.
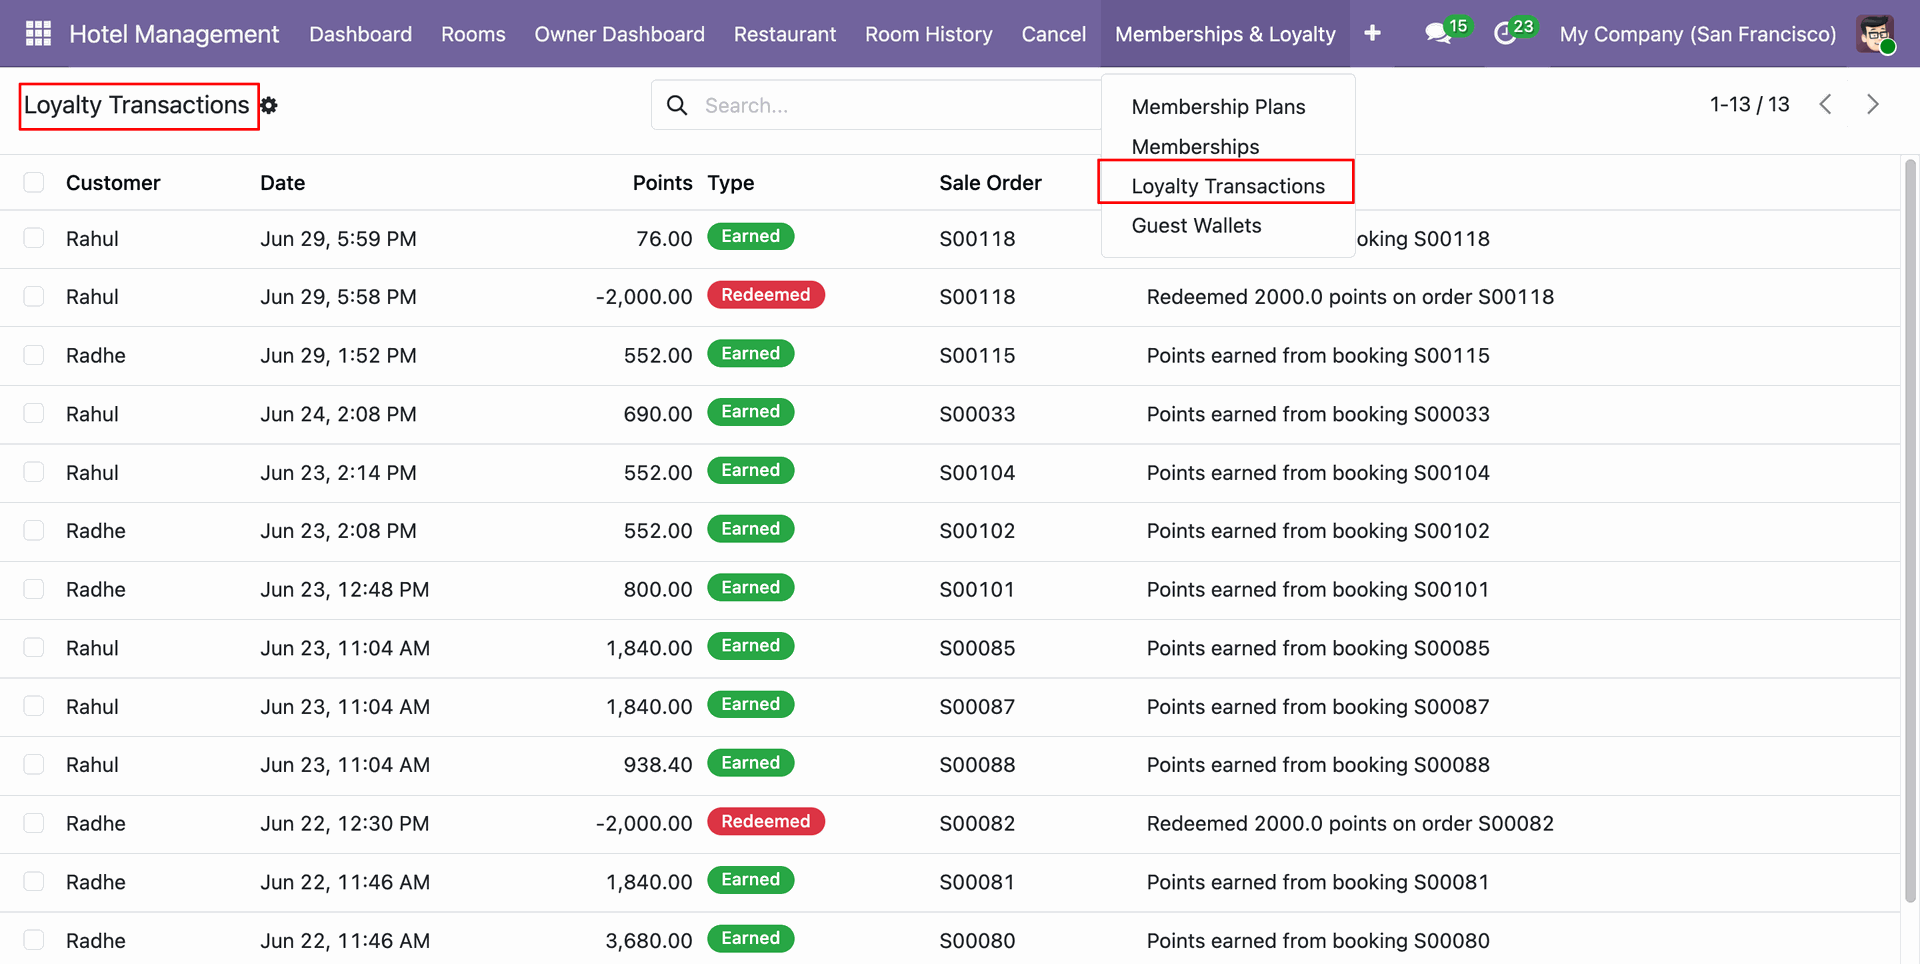
Loyalty Transactions List View, where you can view and track all loyalty point transactions, including earned, redeemed, and adjusted points for members.
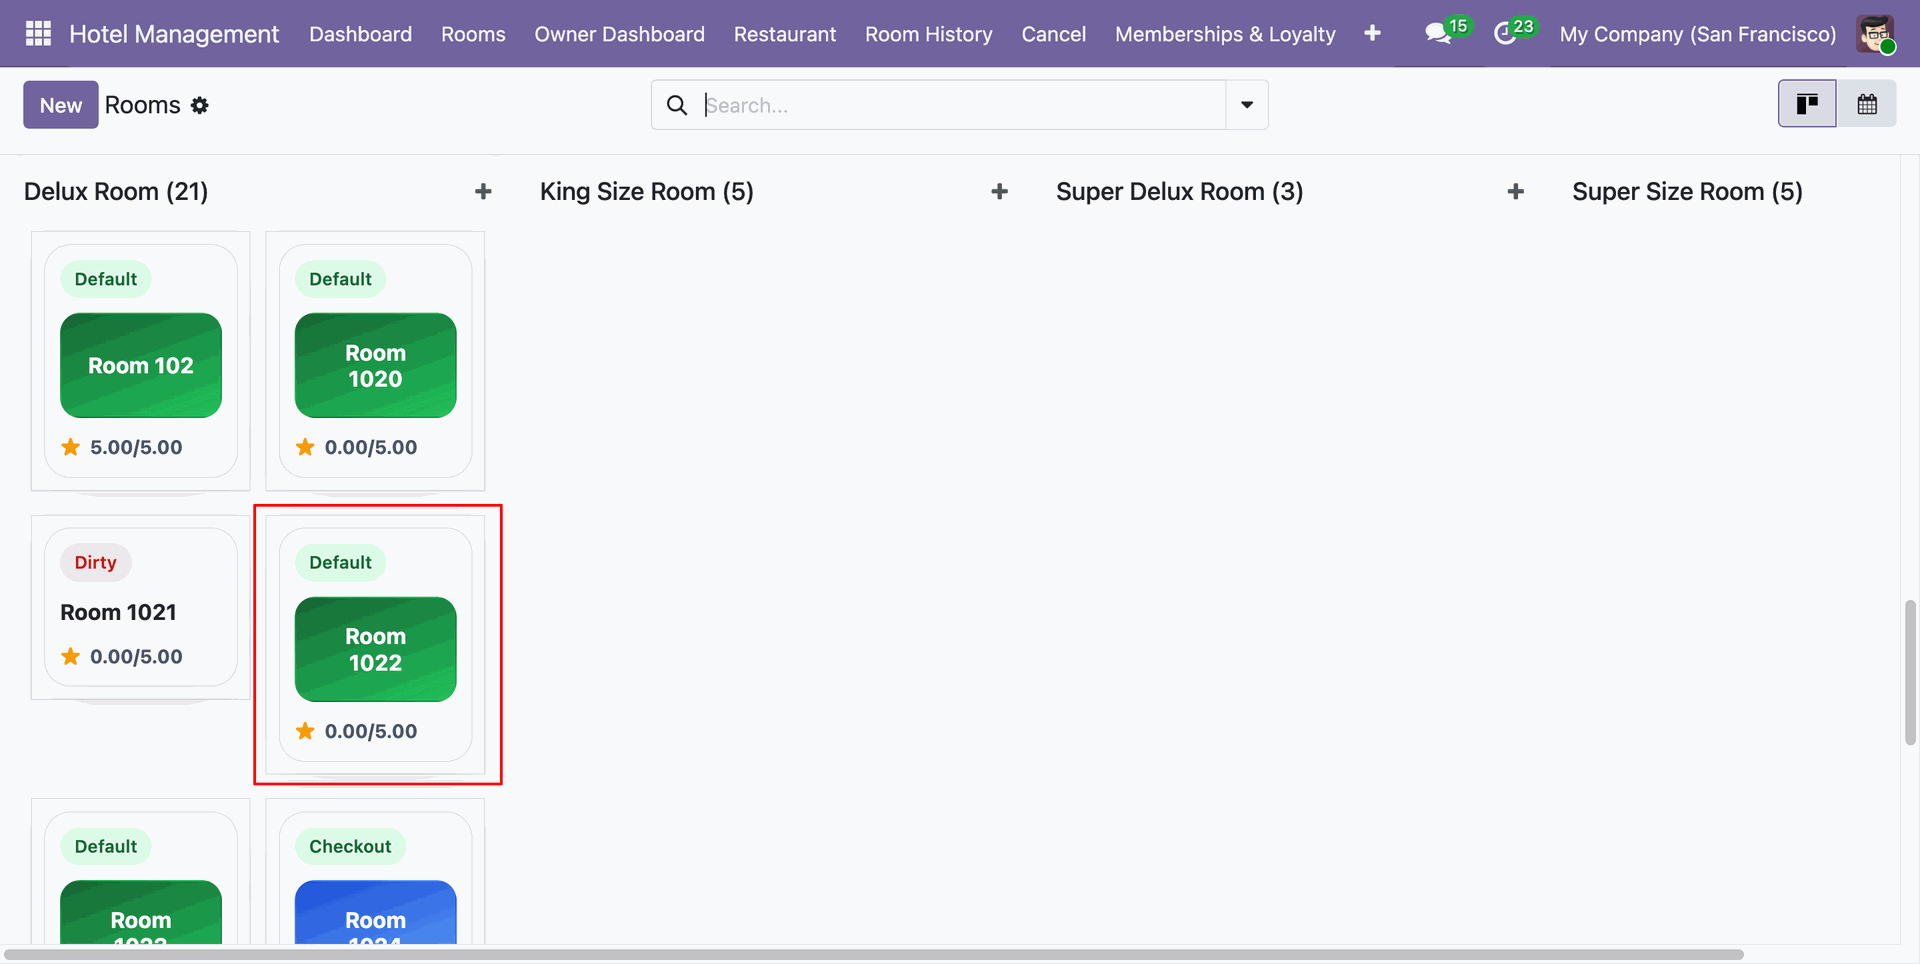
Click on the room from the Rooms Dashboard.
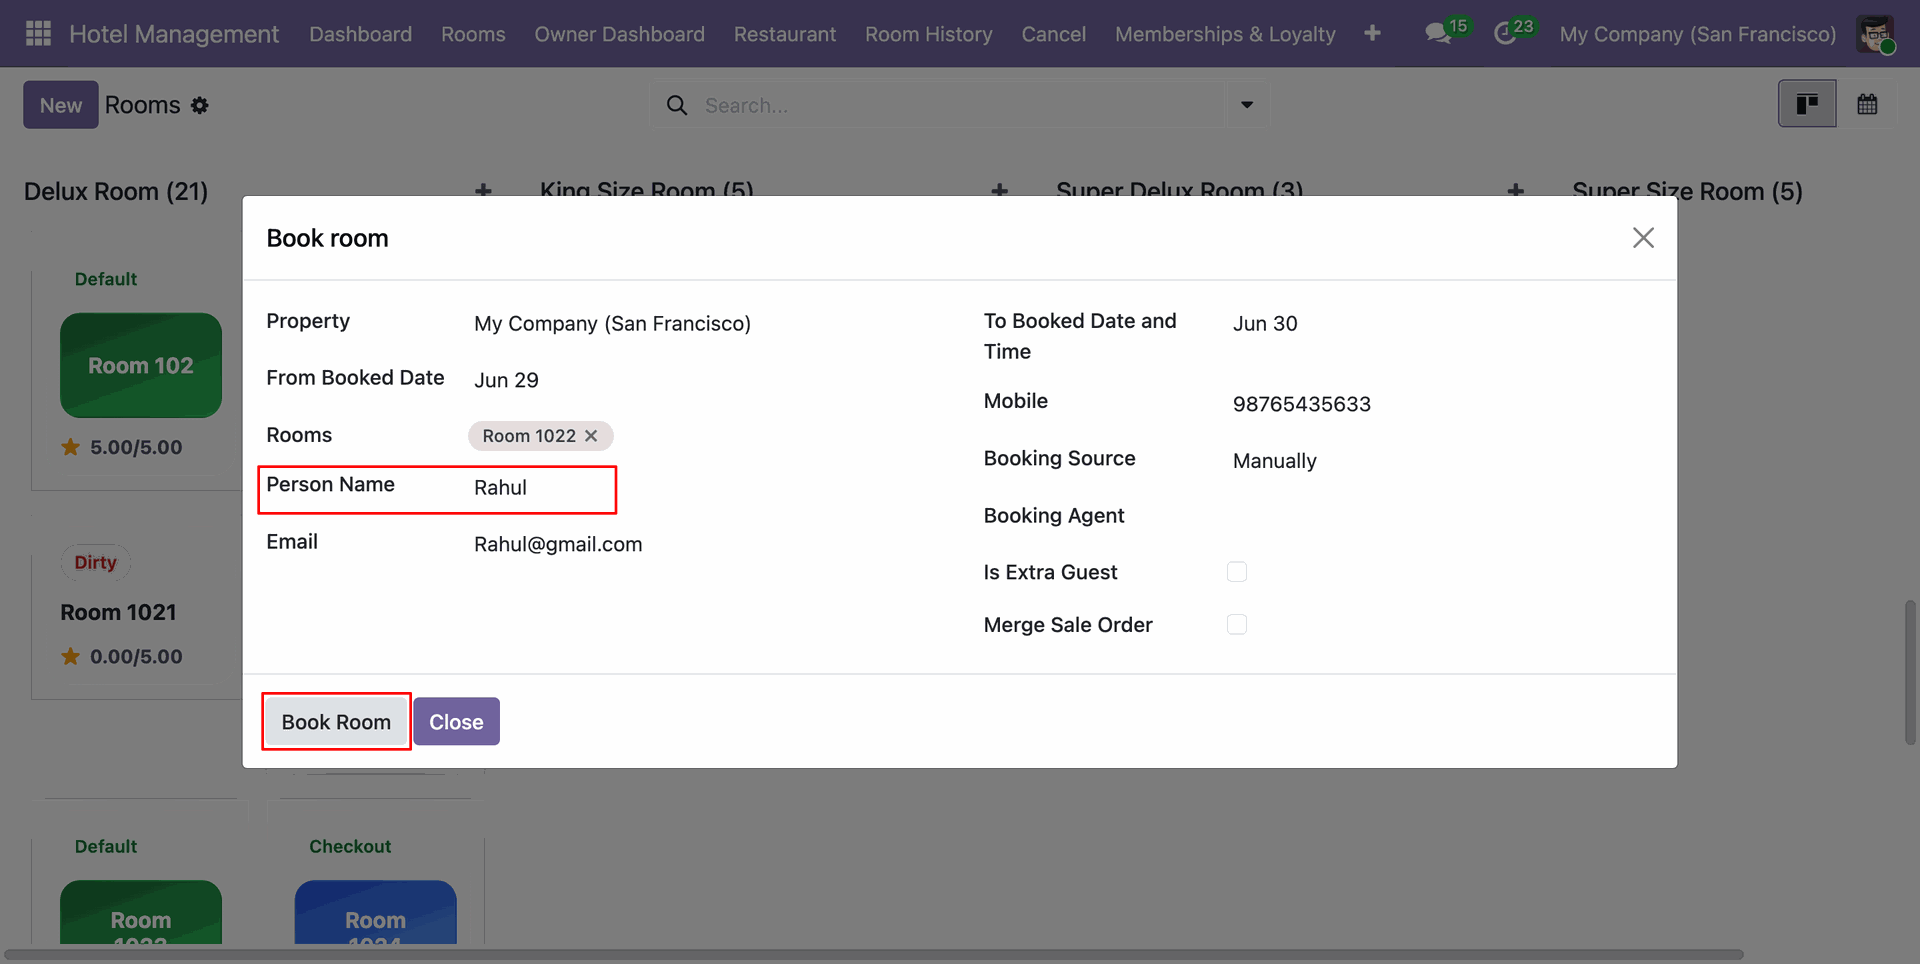
The Book Room wizard opens. Select a customer with an active membership, enter the required booking details, and proceed with the room reservation.
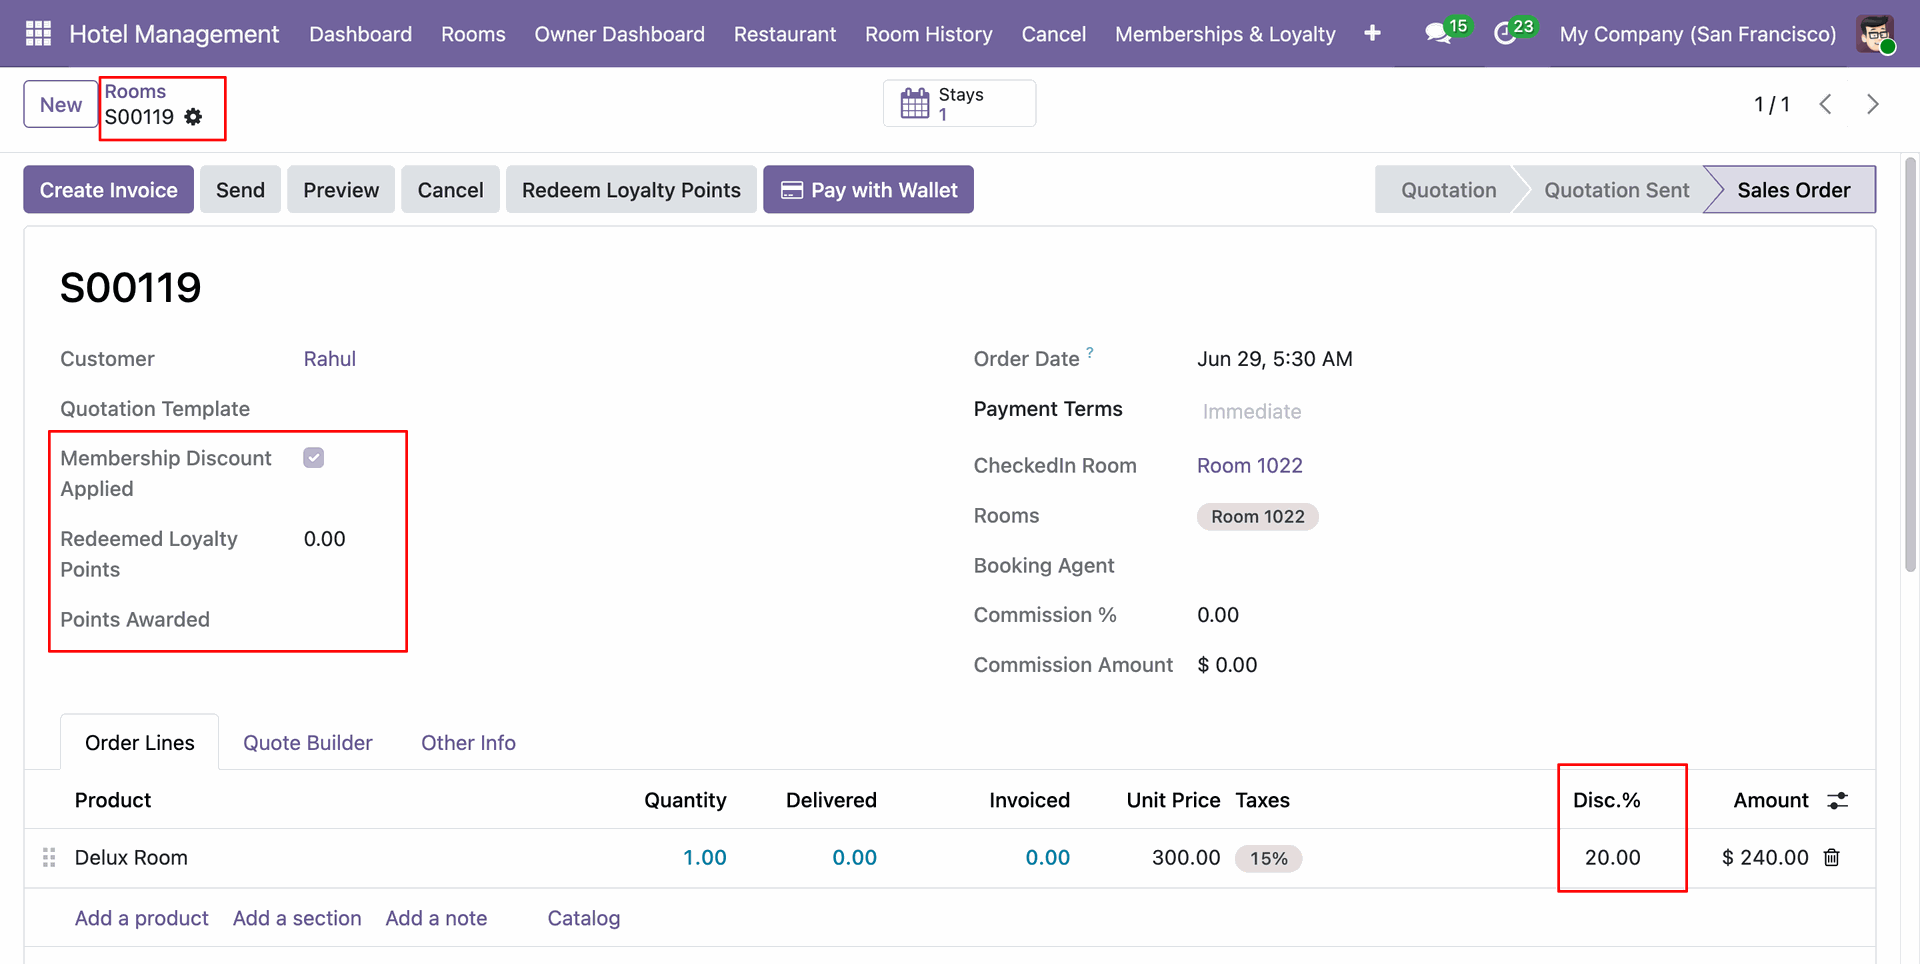
Open the Room Order. The membership discount is automatically applied based on the customer's active membership plan, and the discounted amount is reflected in the order total.
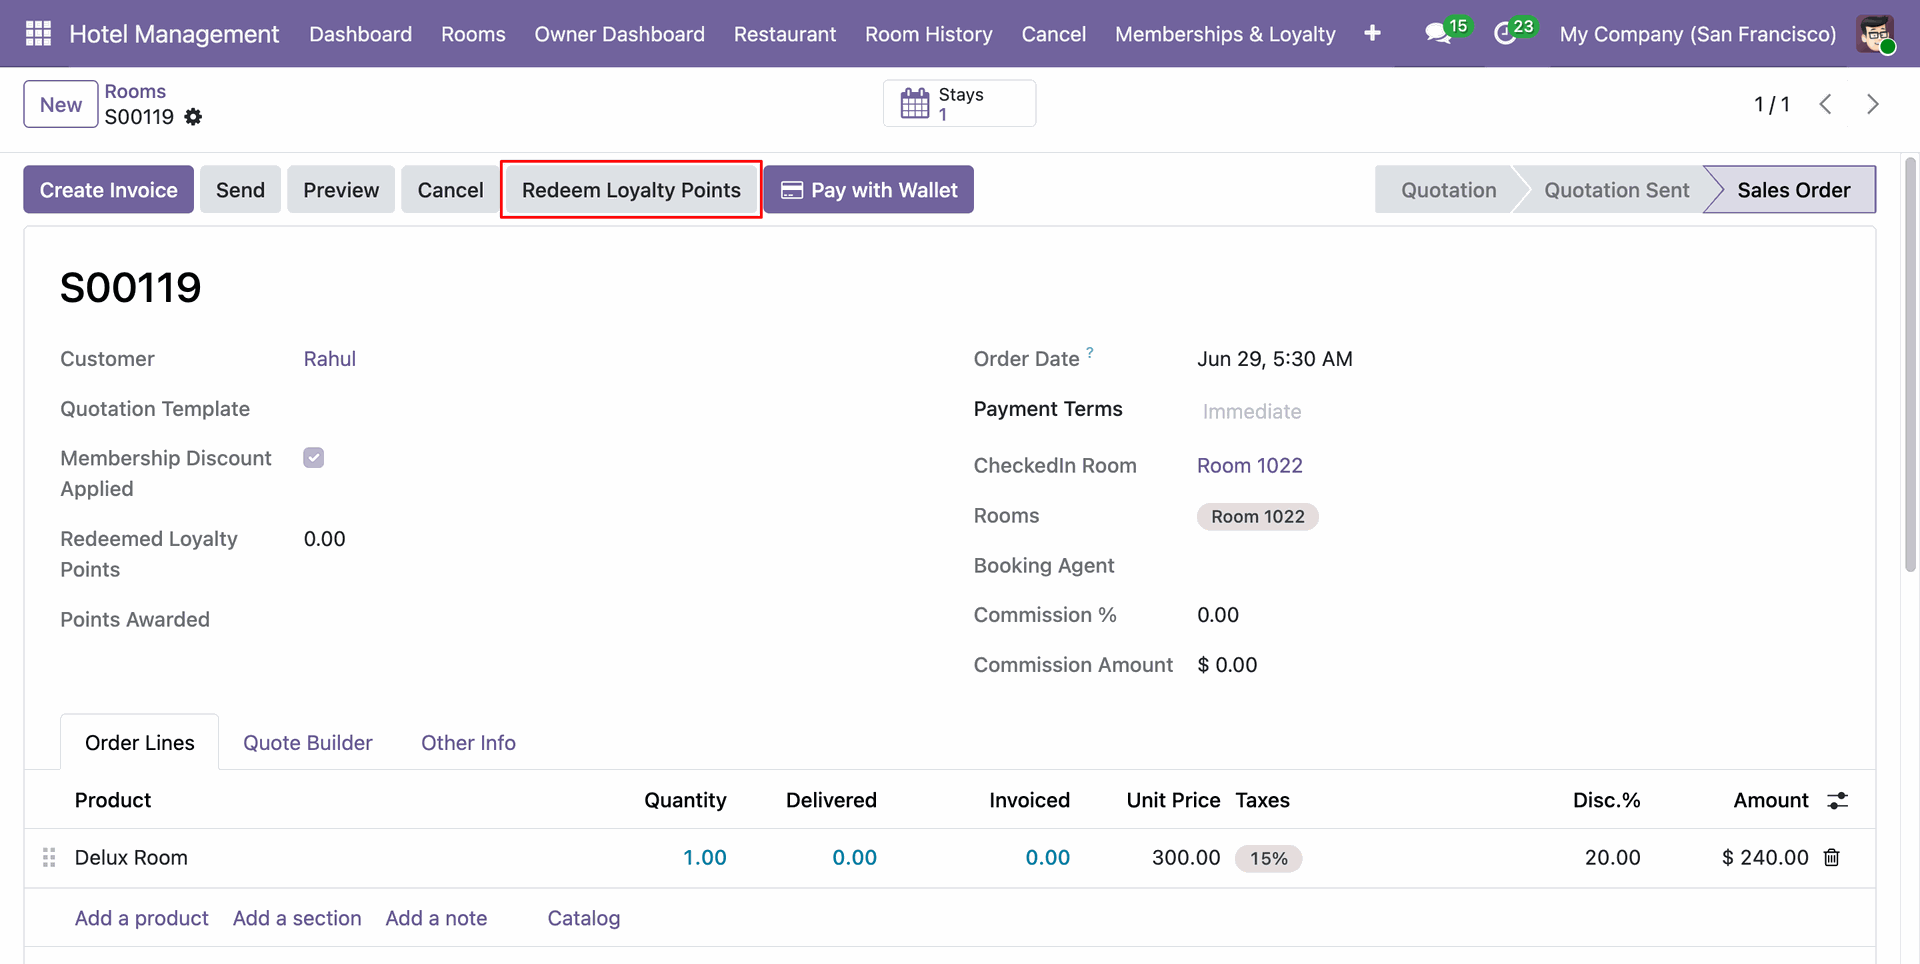
Click the Redeem Loyalty Points button on the Room Order to open the loyalty redemption wizard and apply the customer's available loyalty points to the order.
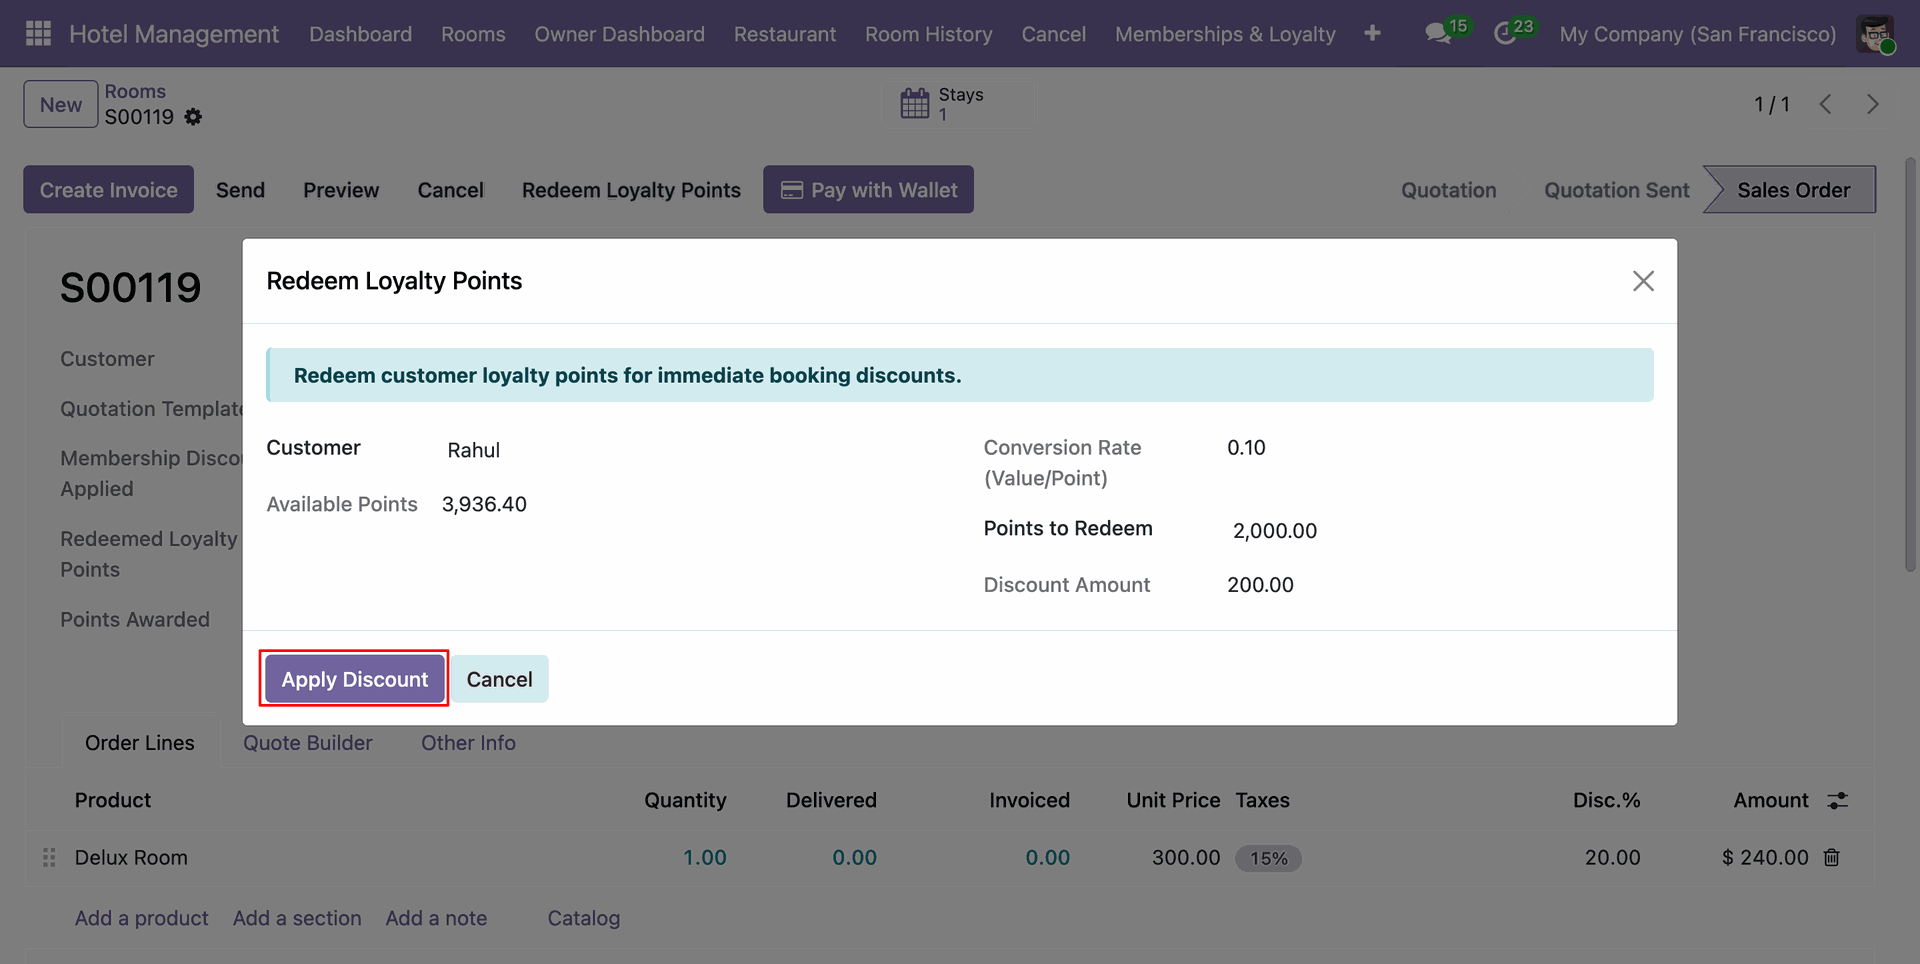
The Redeem Loyalty Points wizard opens. Enter the required redemption details, such as the number of loyalty points to redeem, and click the Apply Discount button to apply the loyalty discount to the order.
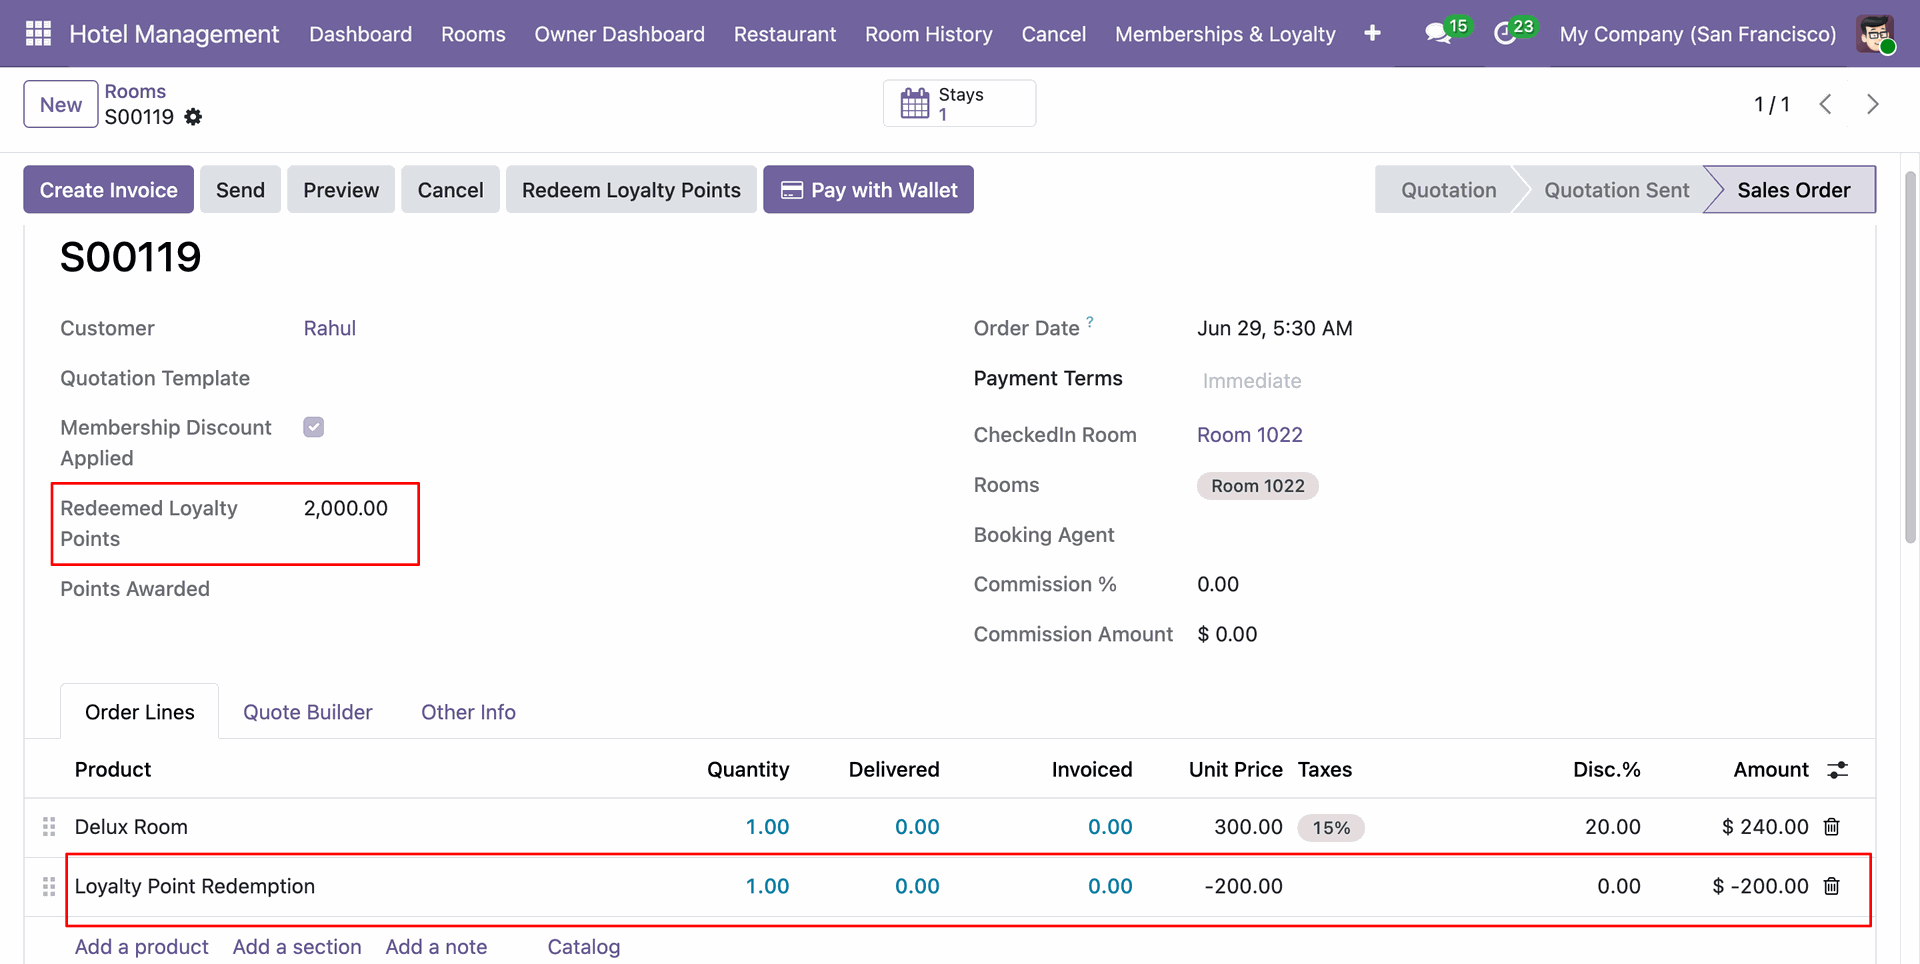
The redeemed loyalty points are displayed on the Room Order, and the corresponding discount amount is automatically deducted from the order total.
The earned and redeemed loyalty points are automatically recorded for the booking and are visible in the Loyalty Transactions list view.
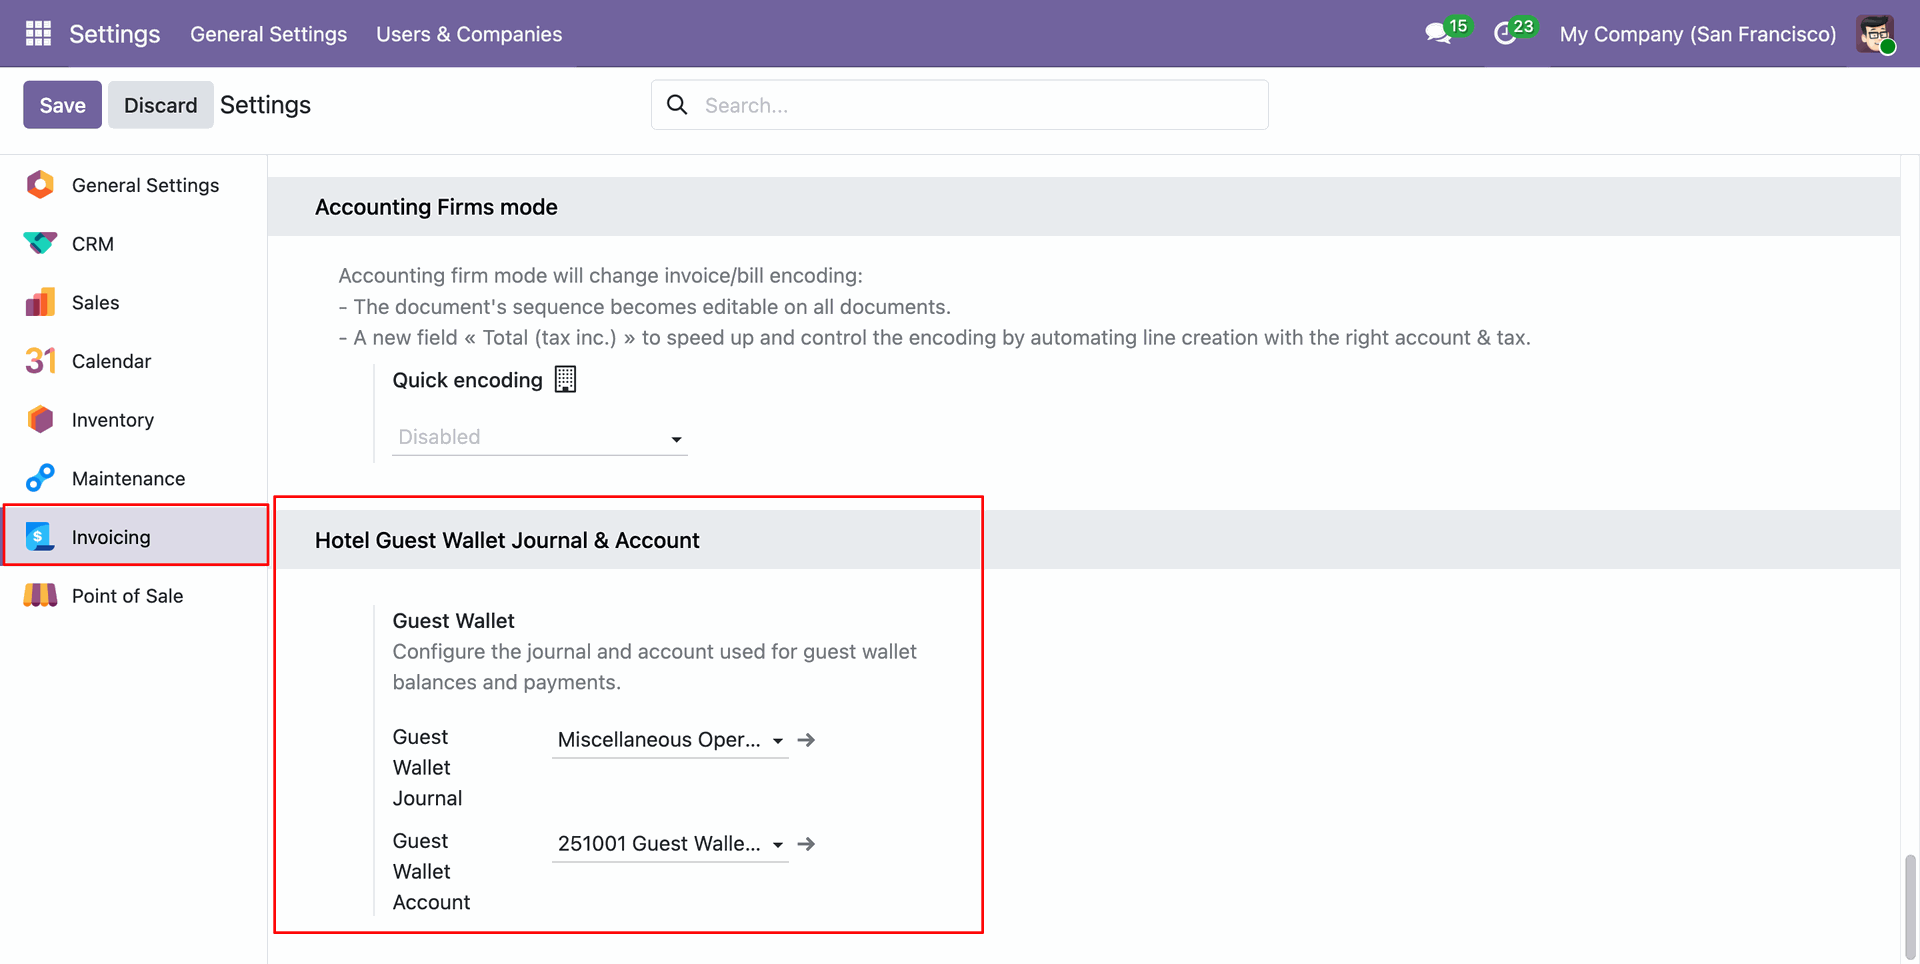
Go to Invoicing -> General Settings, then select the Guest Wallet Account and Guest Wallet Journal to configure the accounting settings for guest wallet transactions.
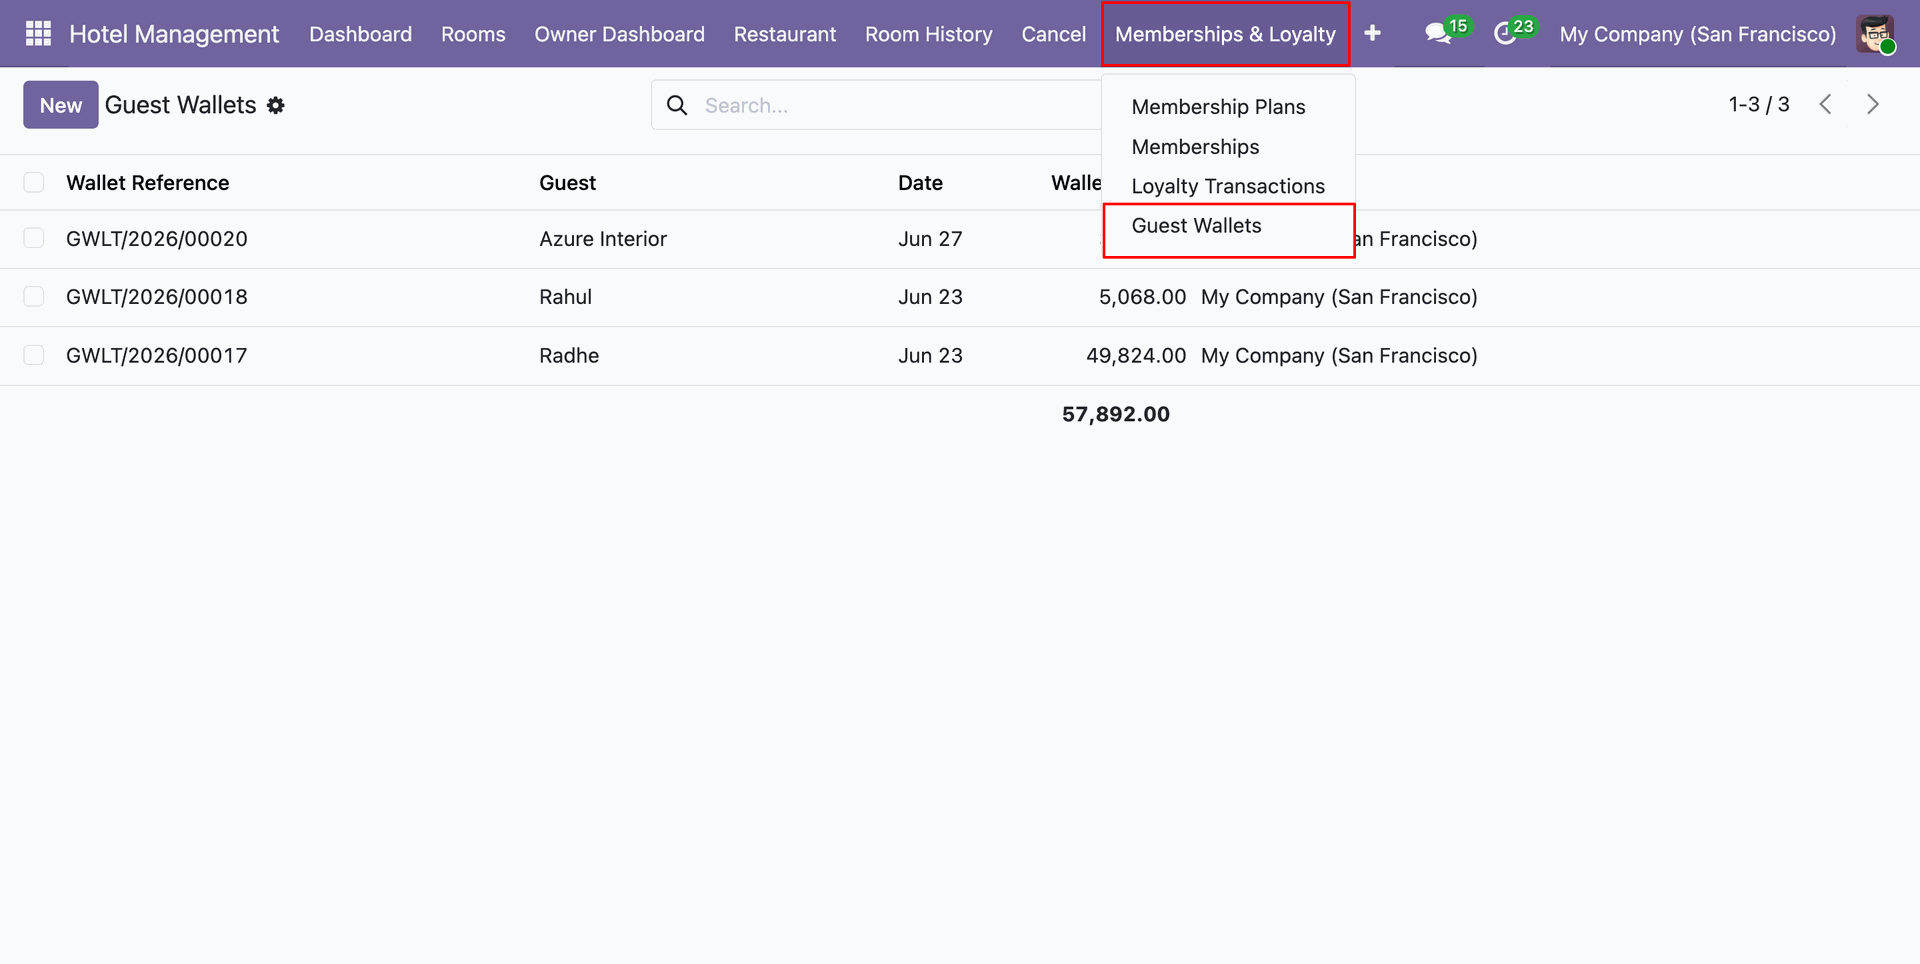
Go to the Membership & Loyalty menu and select the Guest Wallet submenu to view and manage guest wallet balances, transactions, and wallet activities.
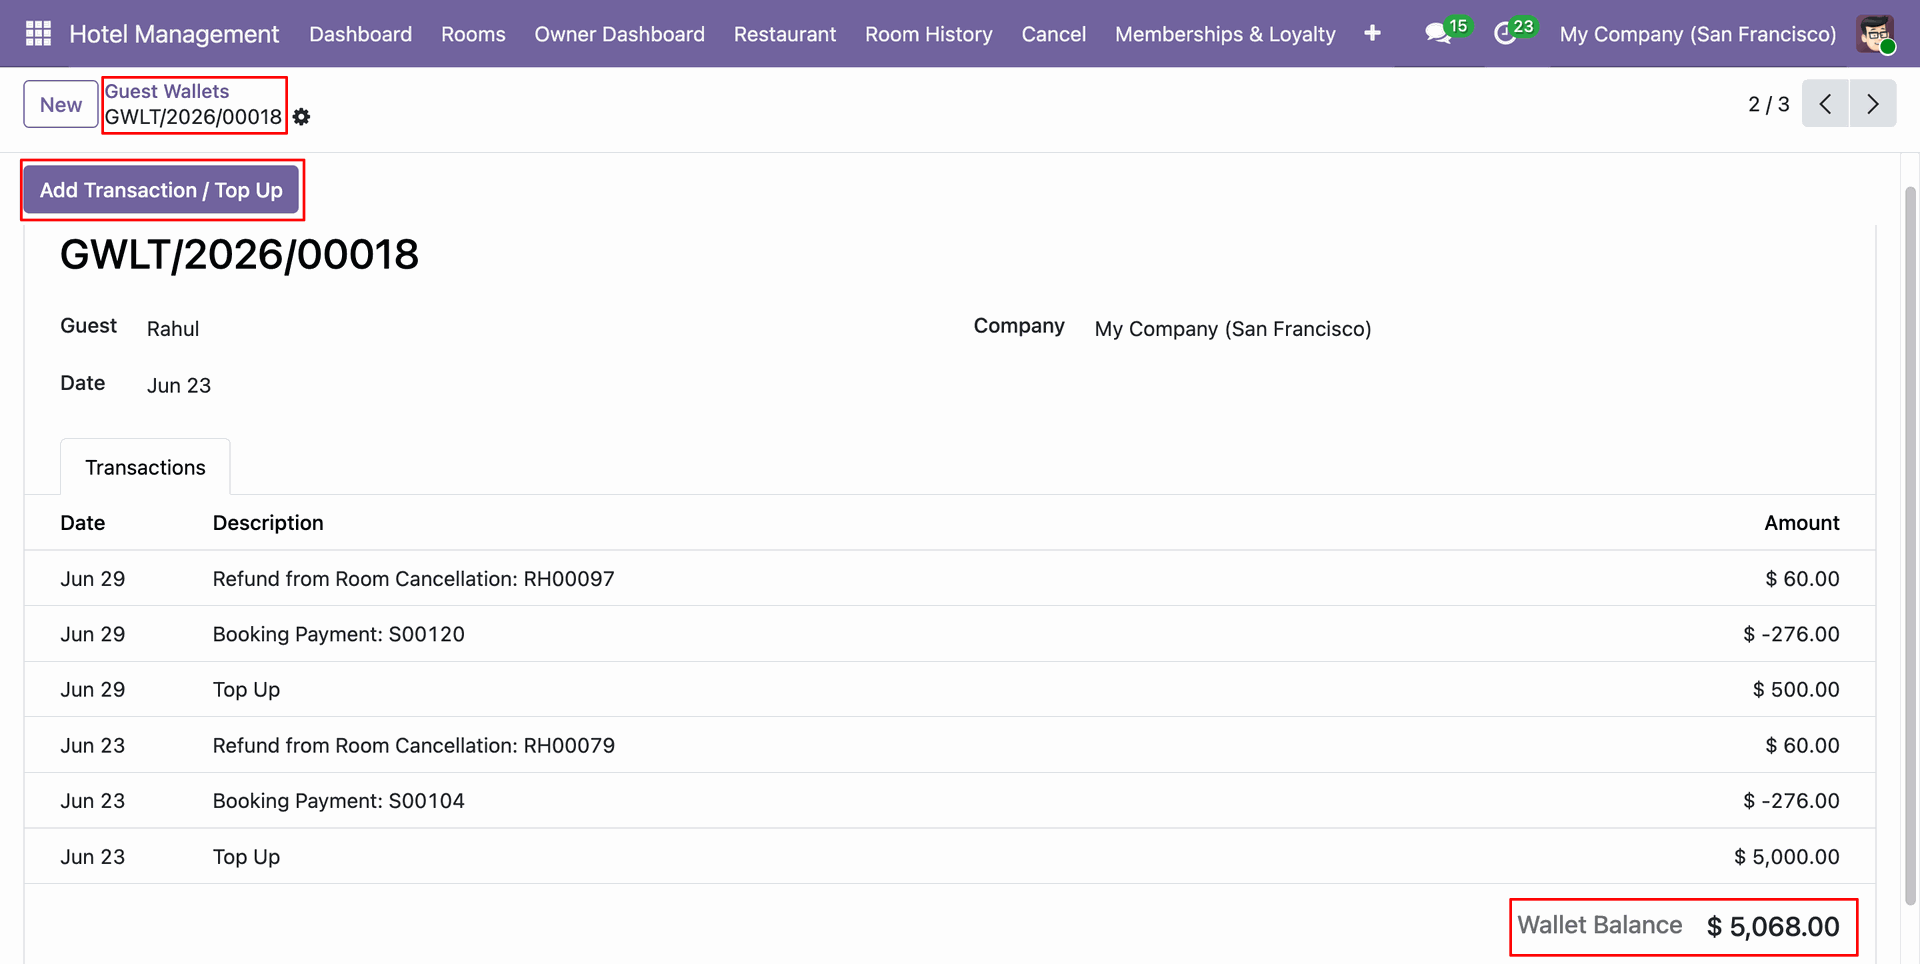
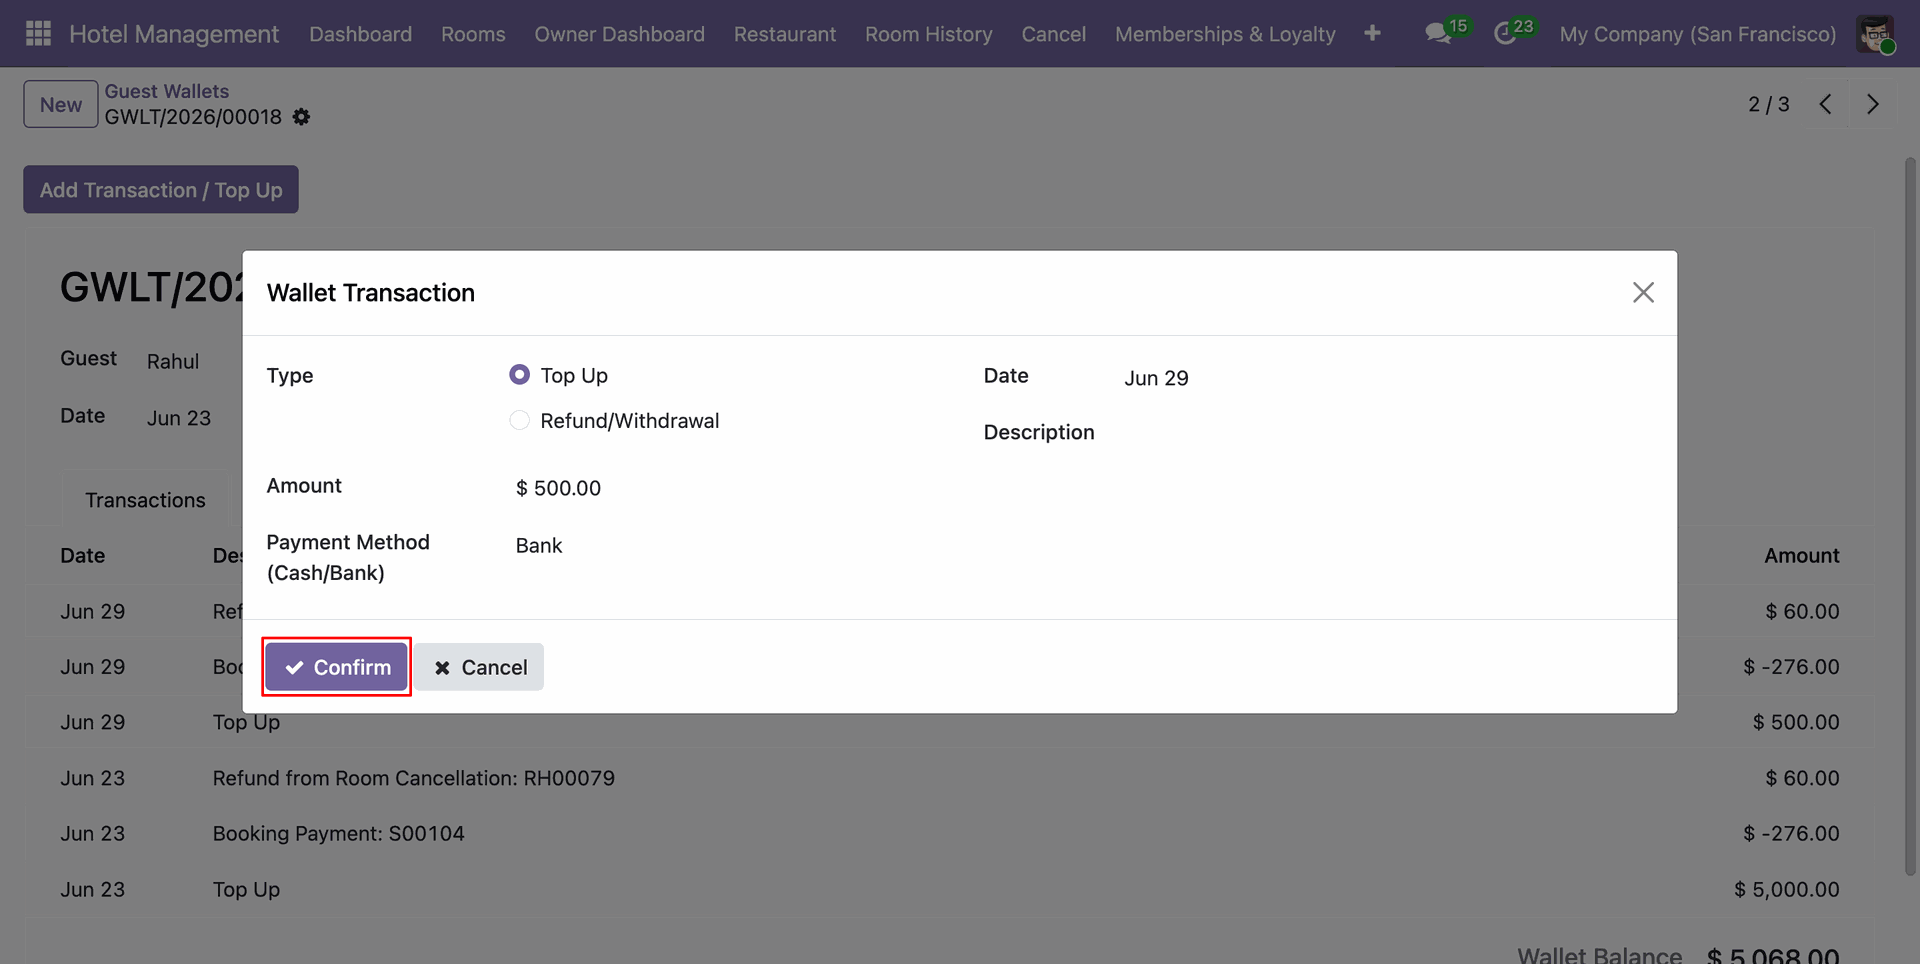
Open the Guest Wallet form view, then click the Add Transaction / Top Up button to add funds or record a wallet transaction for the selected guest.
The Wallet Transaction wizard opens. Select the Transaction Type, enter the Amount, choose the Payment Method, and then click the Confirm button to complete the wallet transaction.
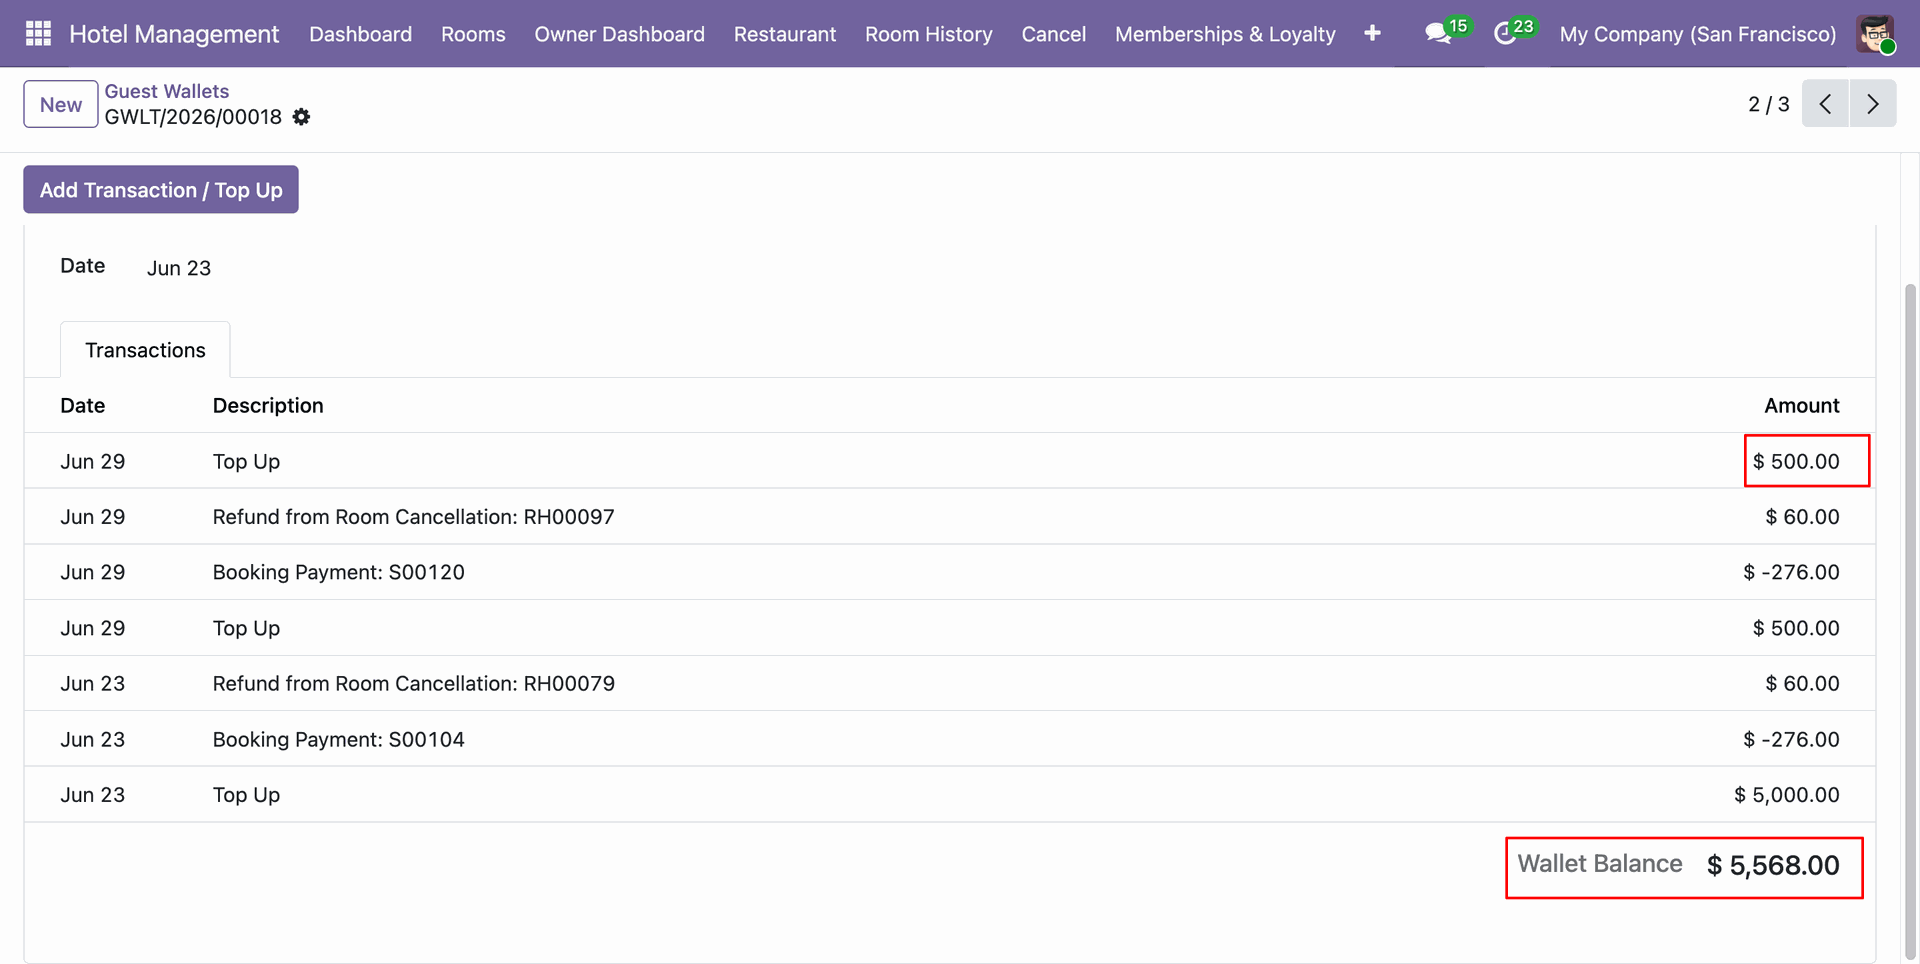
The guest's wallet balance is immediately updated.
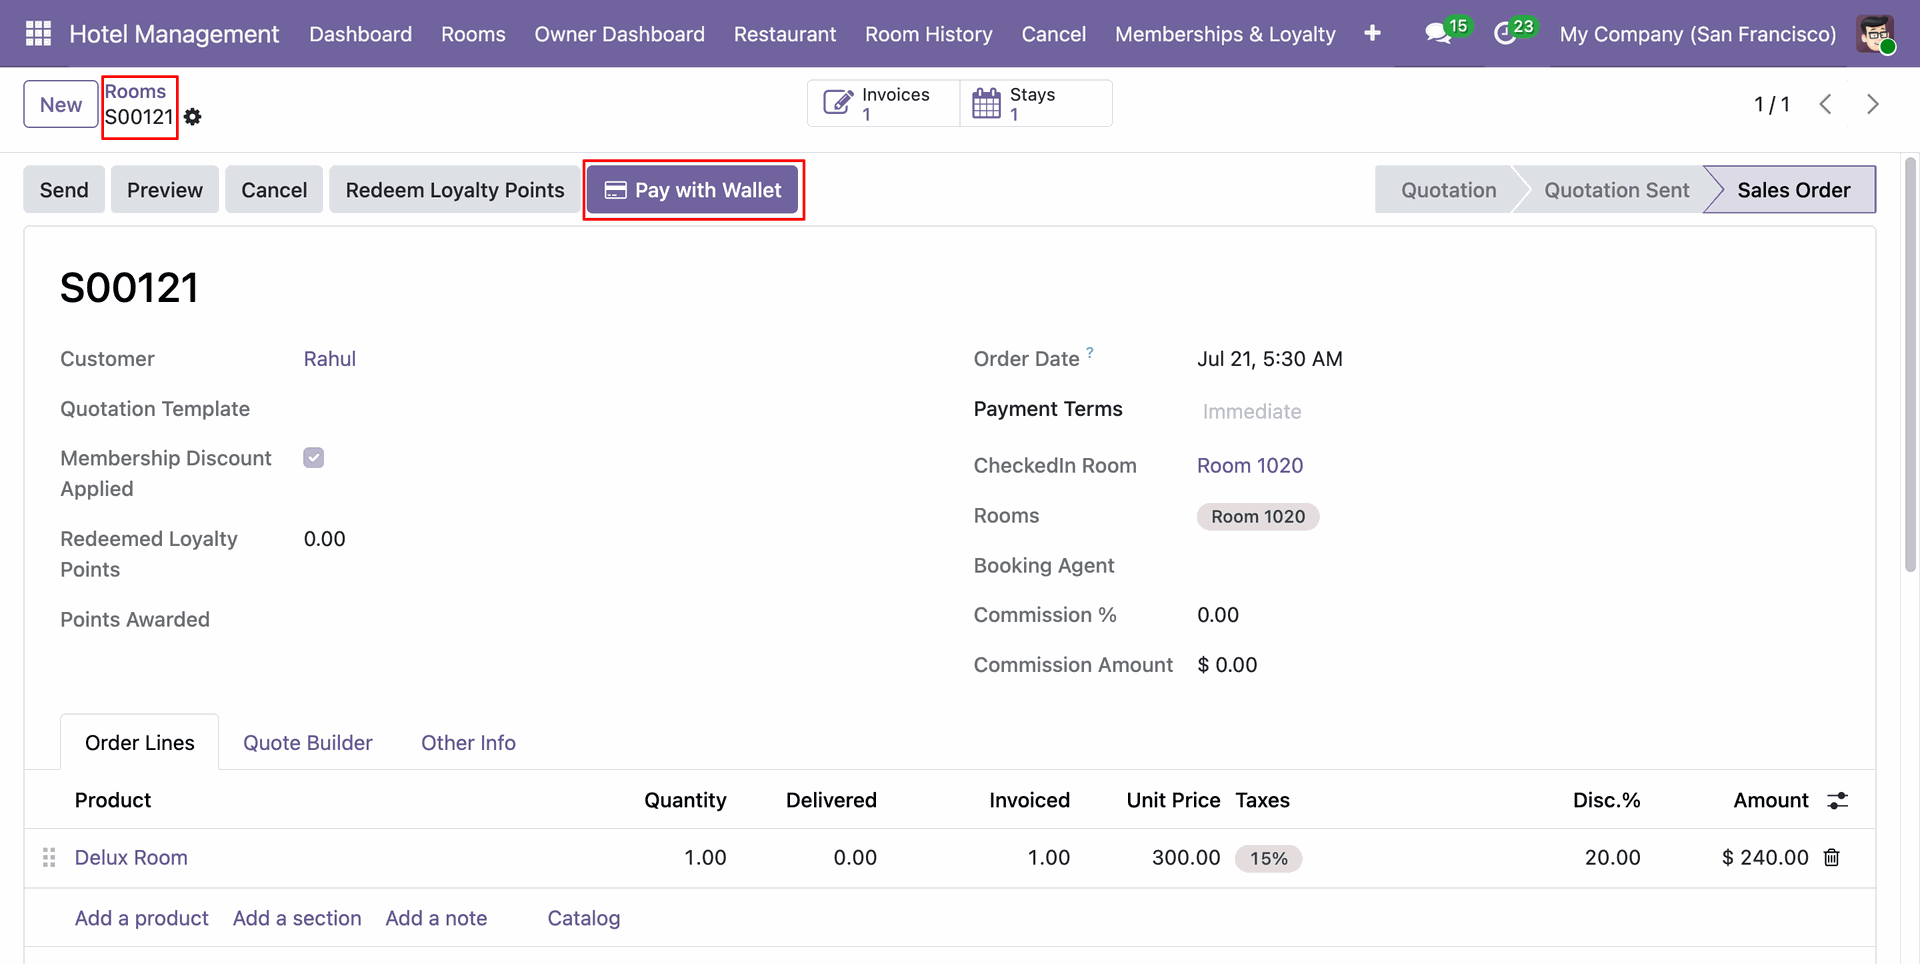
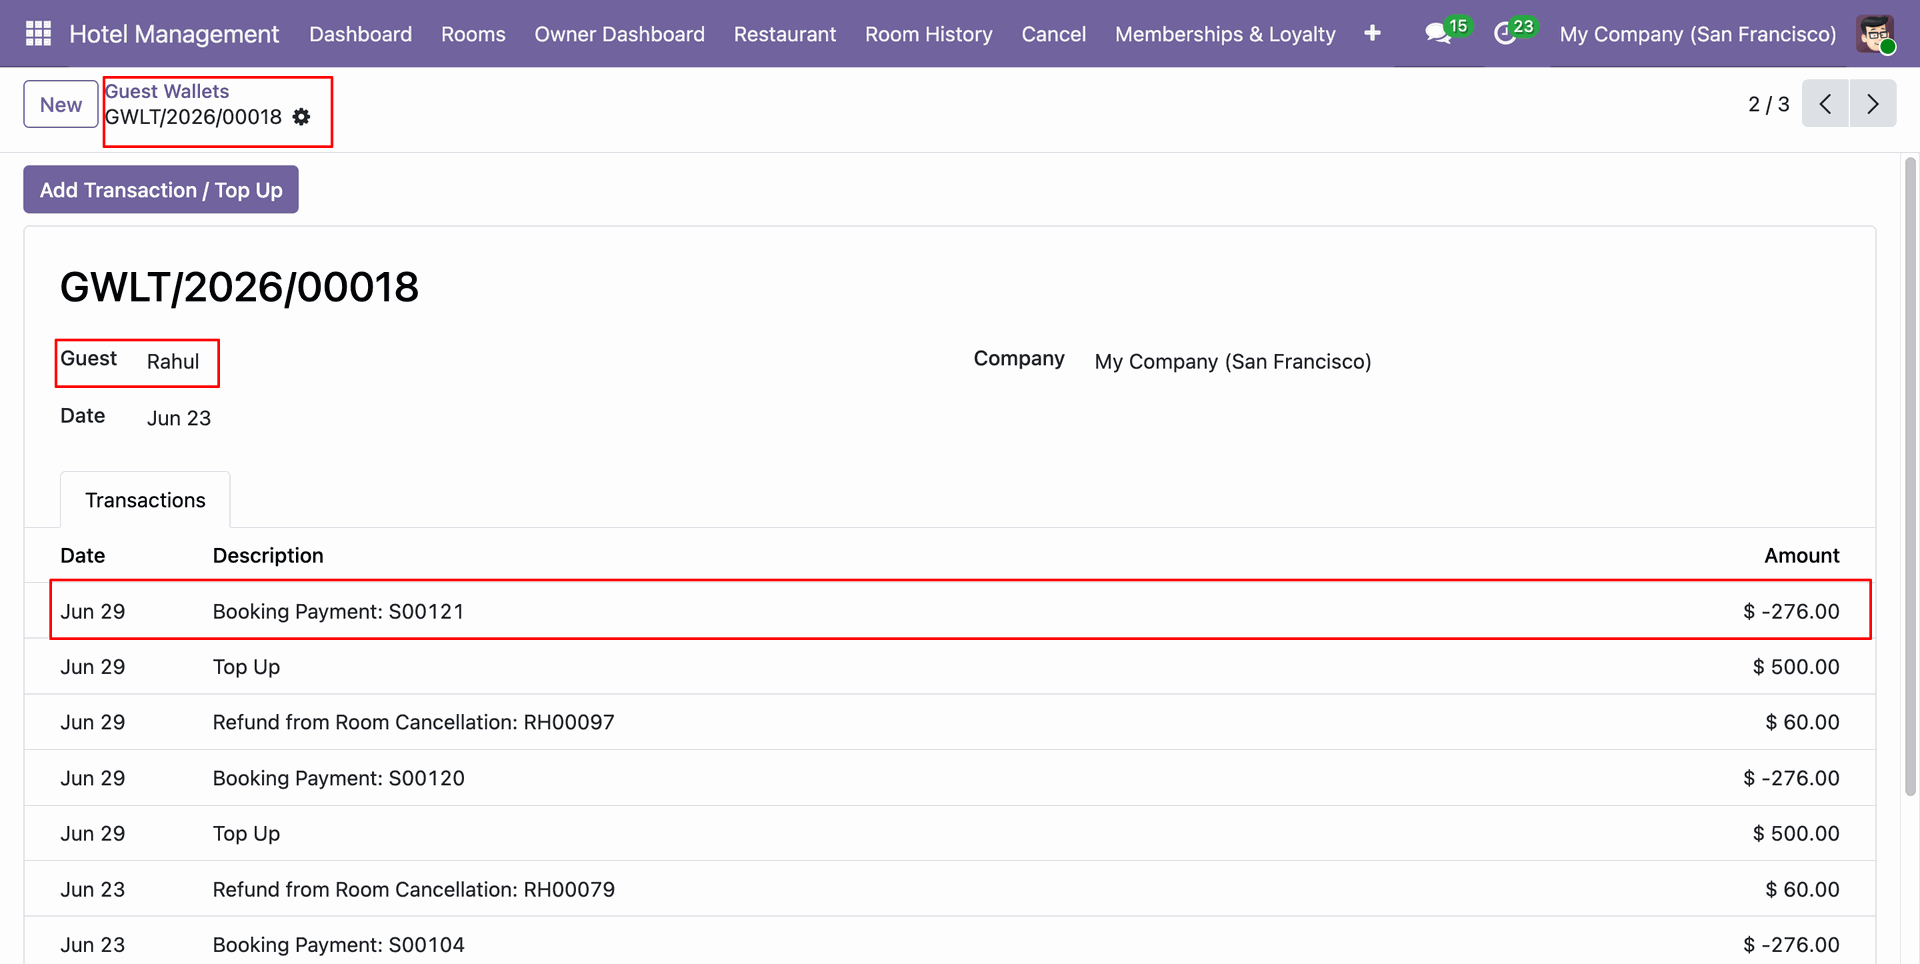
Go to the Room Order and click on the Pay with Wallet button.
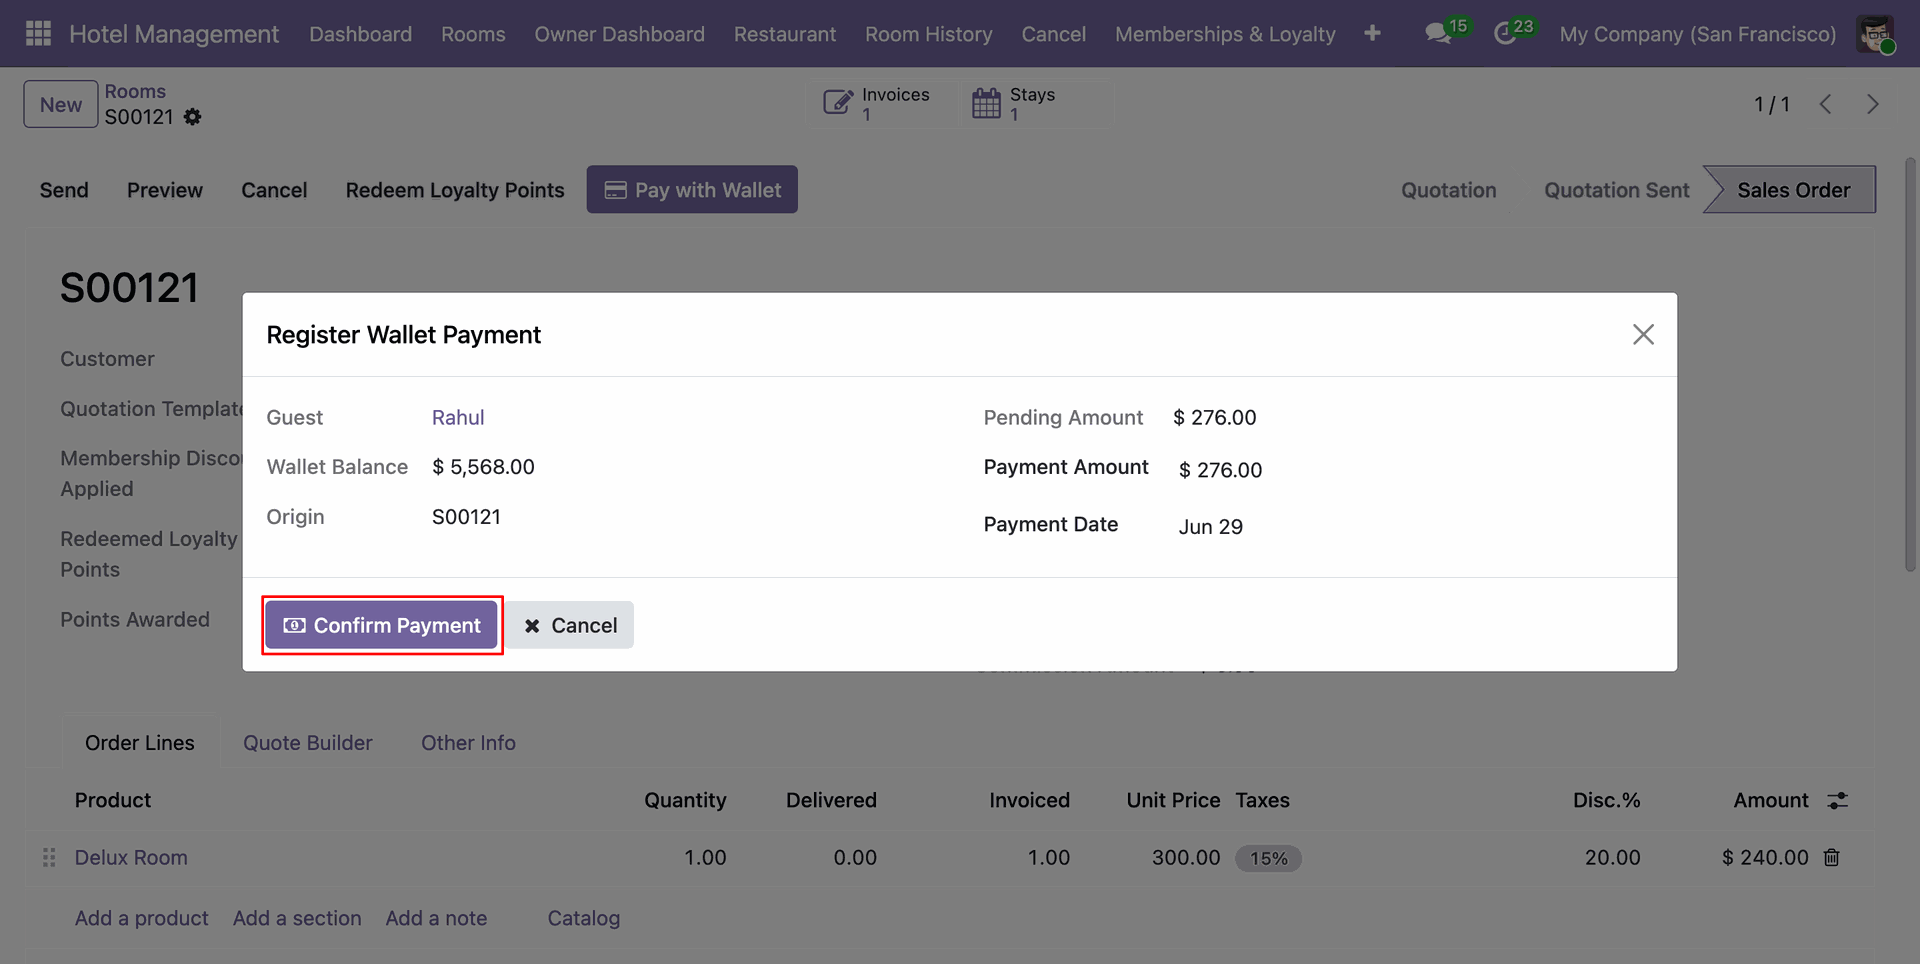
The Register Wallet Payment wizard will open. Check the details and click on the Confirm Payment button.
The invoice has been paid using the wallet balance.
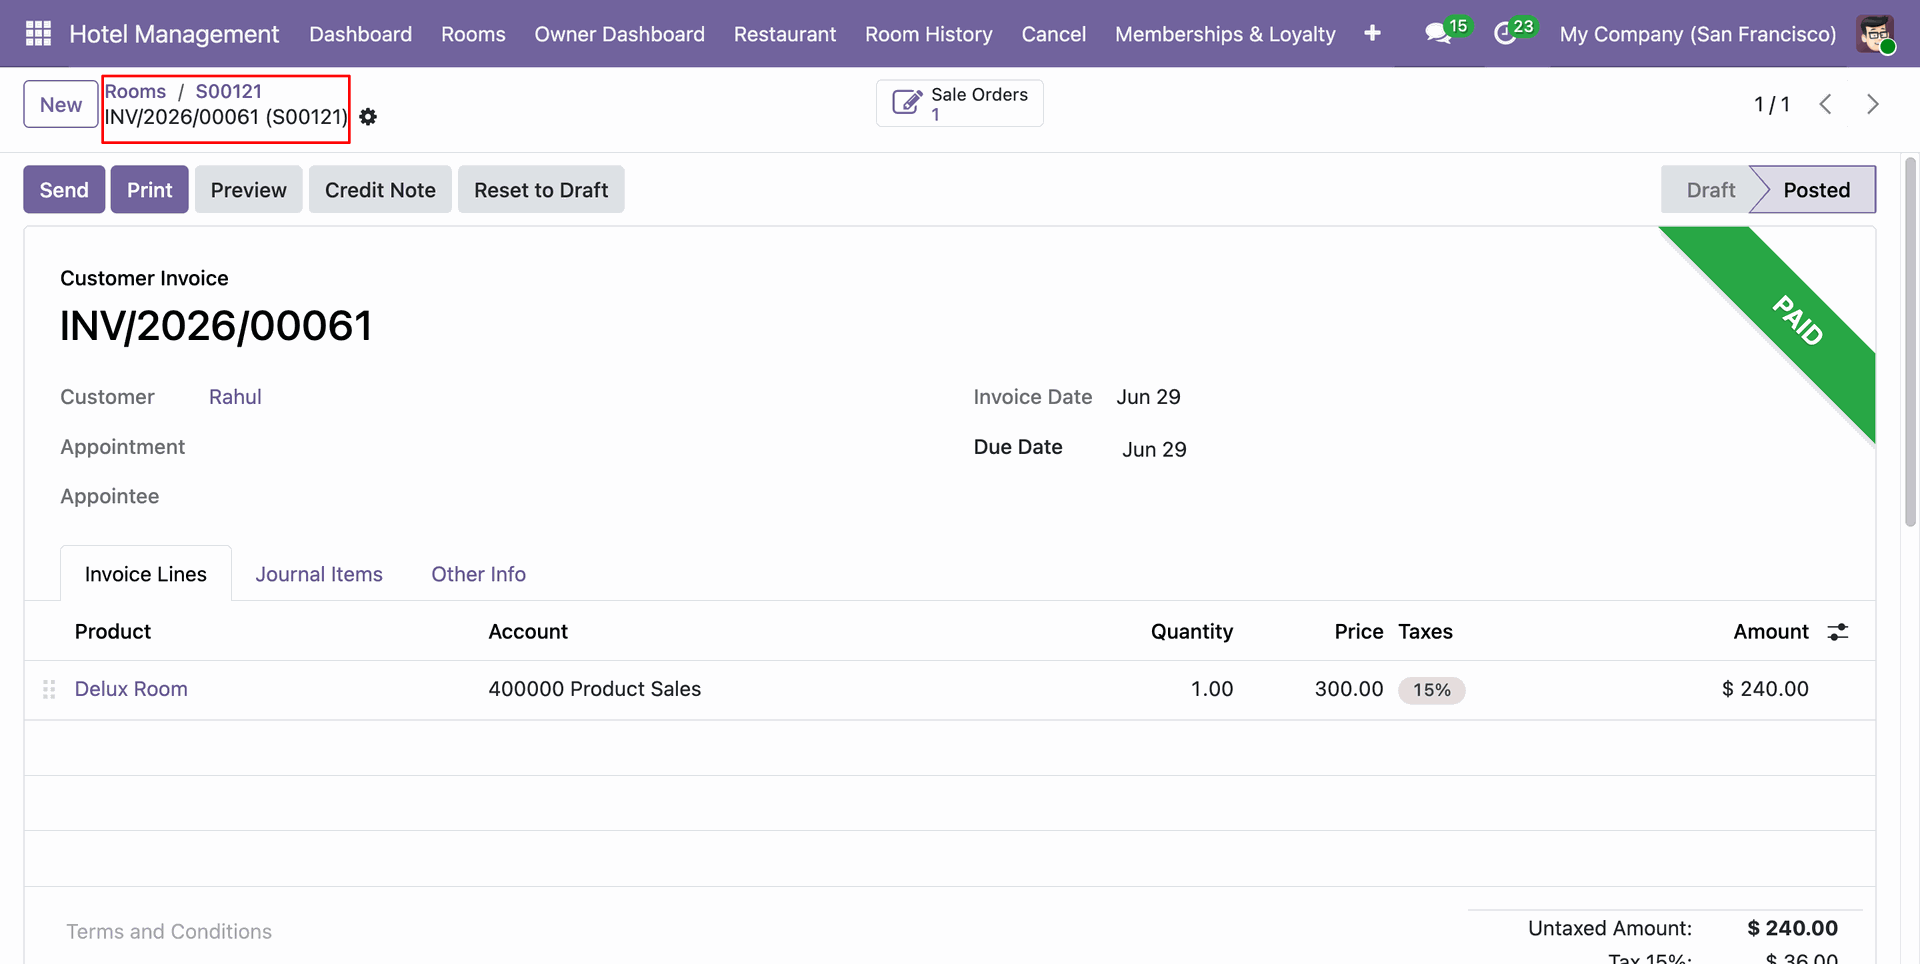
View the updated invoice status and remaining wallet balance.
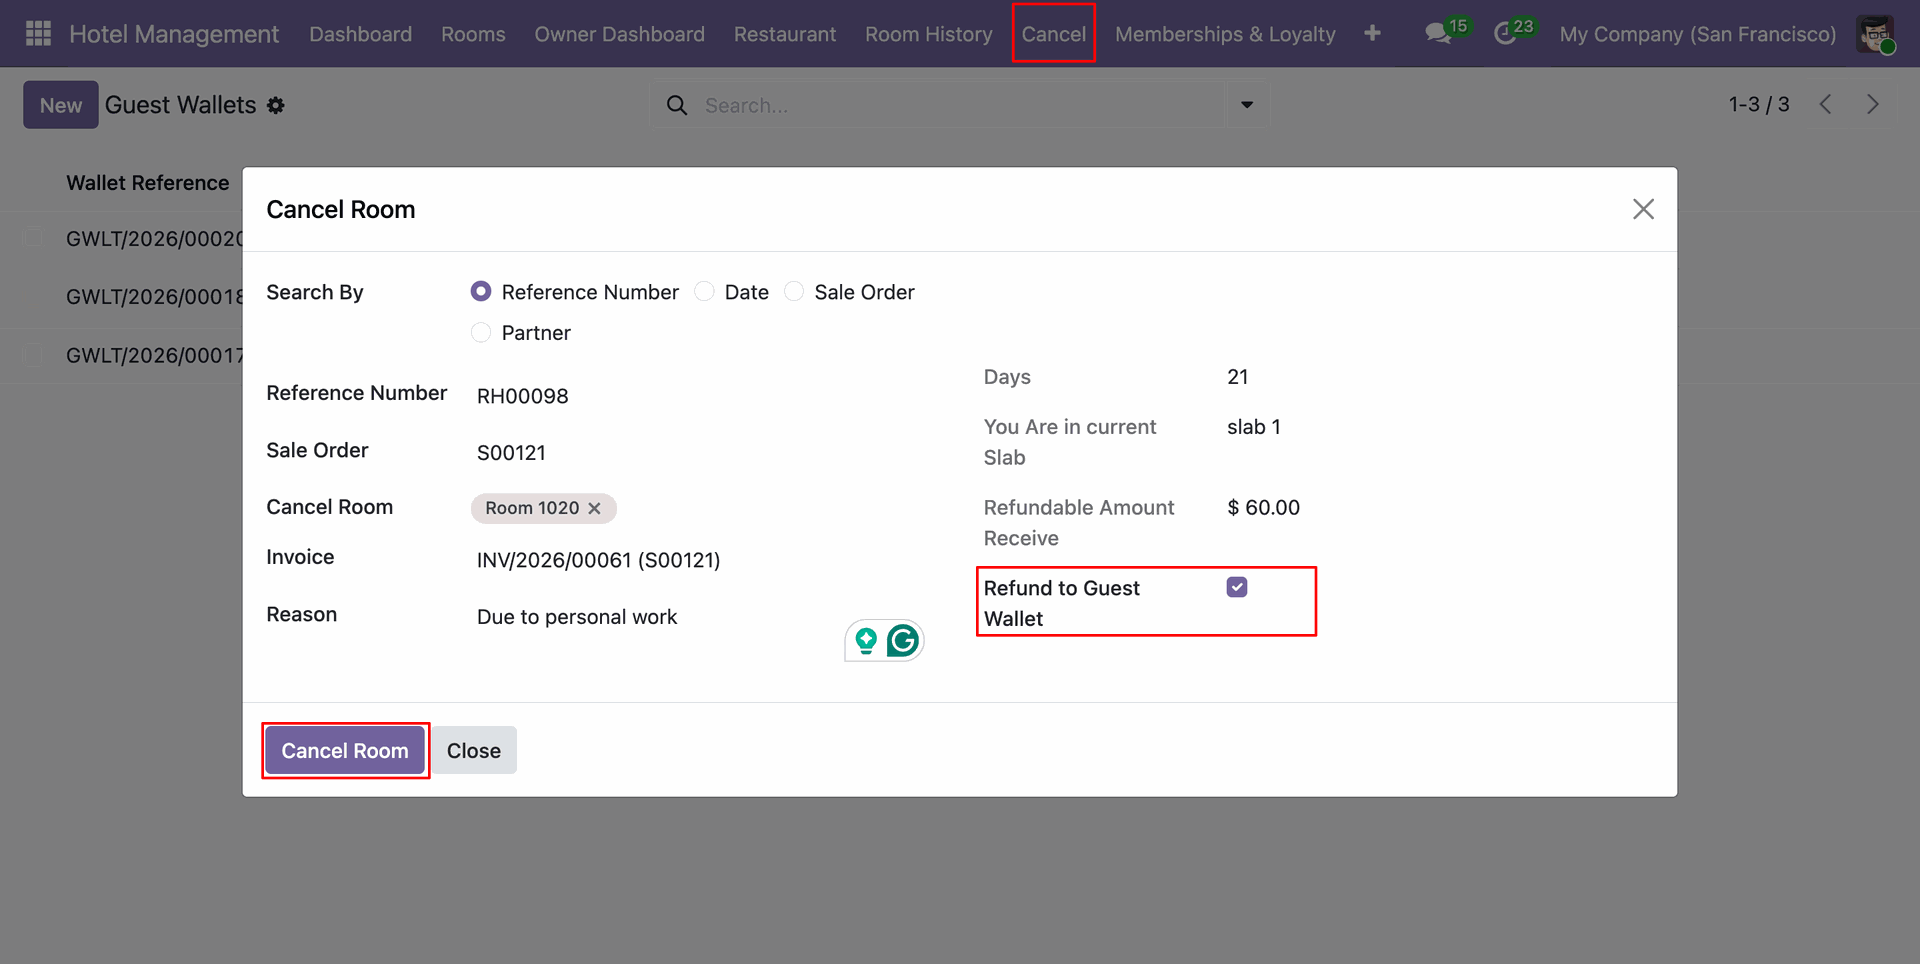
Click on Cancel to cancel the booked room. The Cancel Room wizard will open to refund the amount. Enable the Refund to Guest Wallet option from the wizard and click on the Cancel Room button.
The user can view the cancelled room and the refund-to-wallet notification.

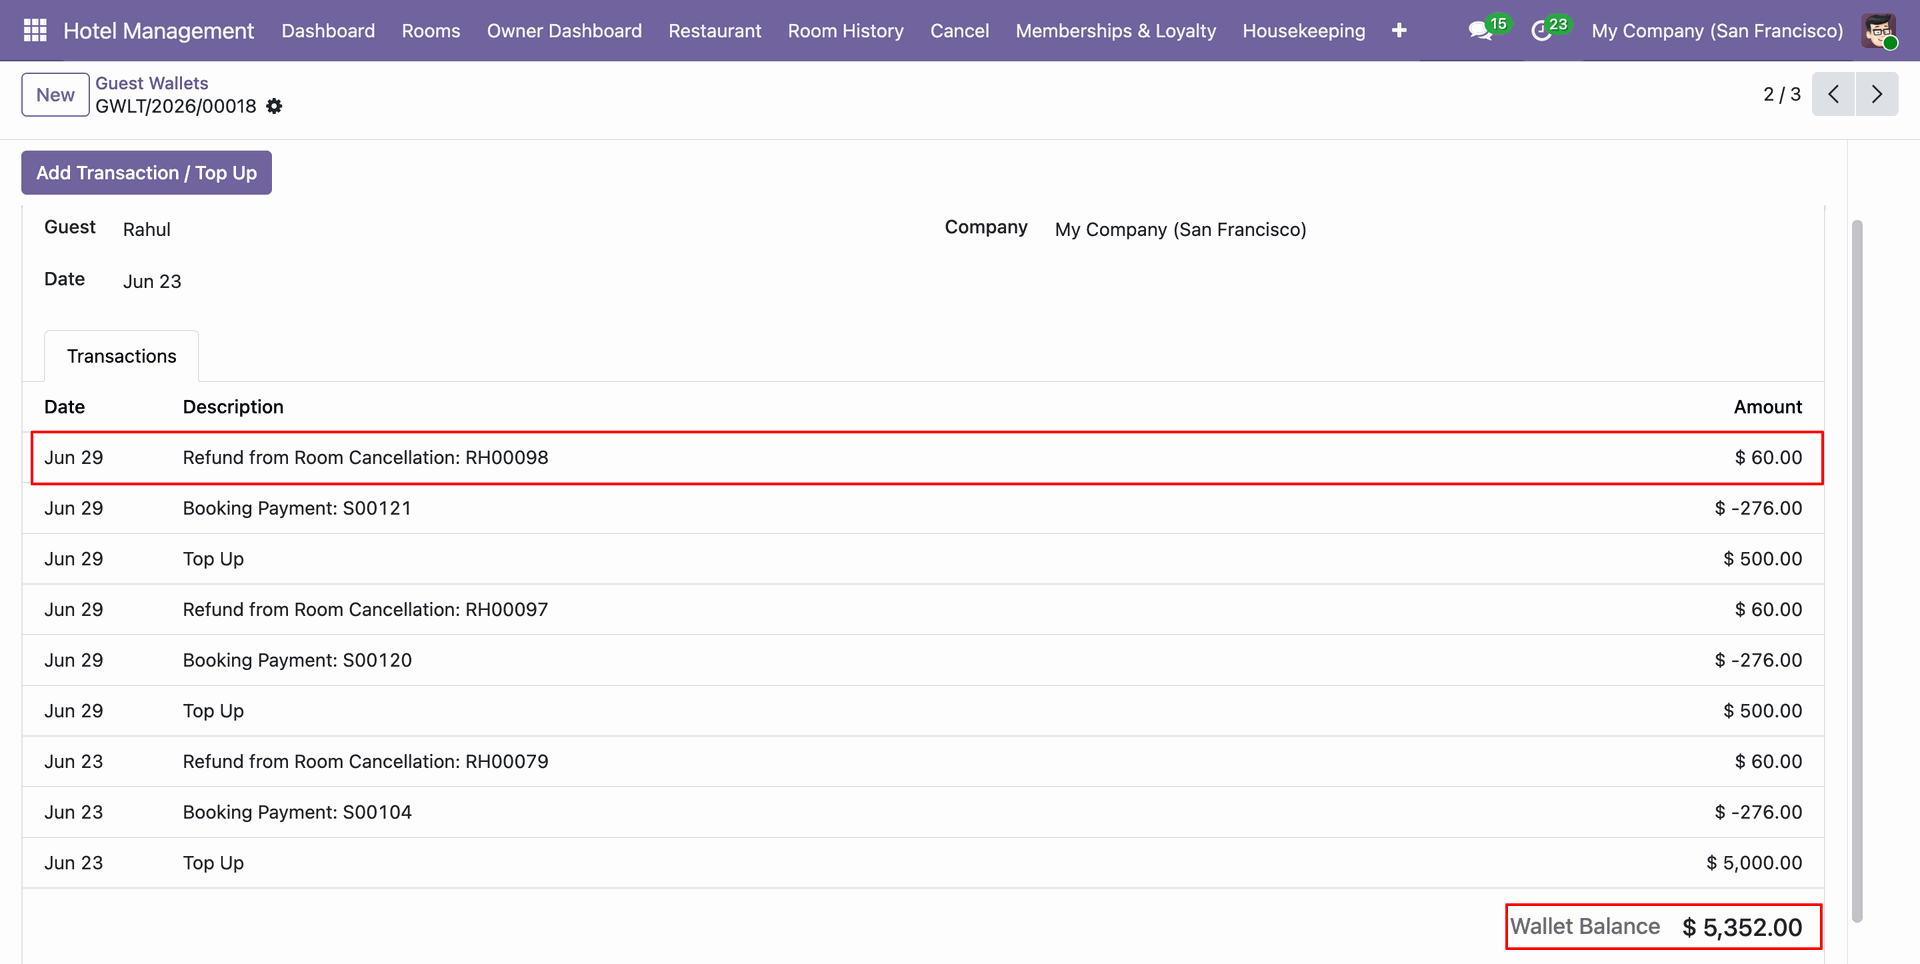
The refunded balance is added to the guest wallet balance and is visible in the Guest Wallet form view."
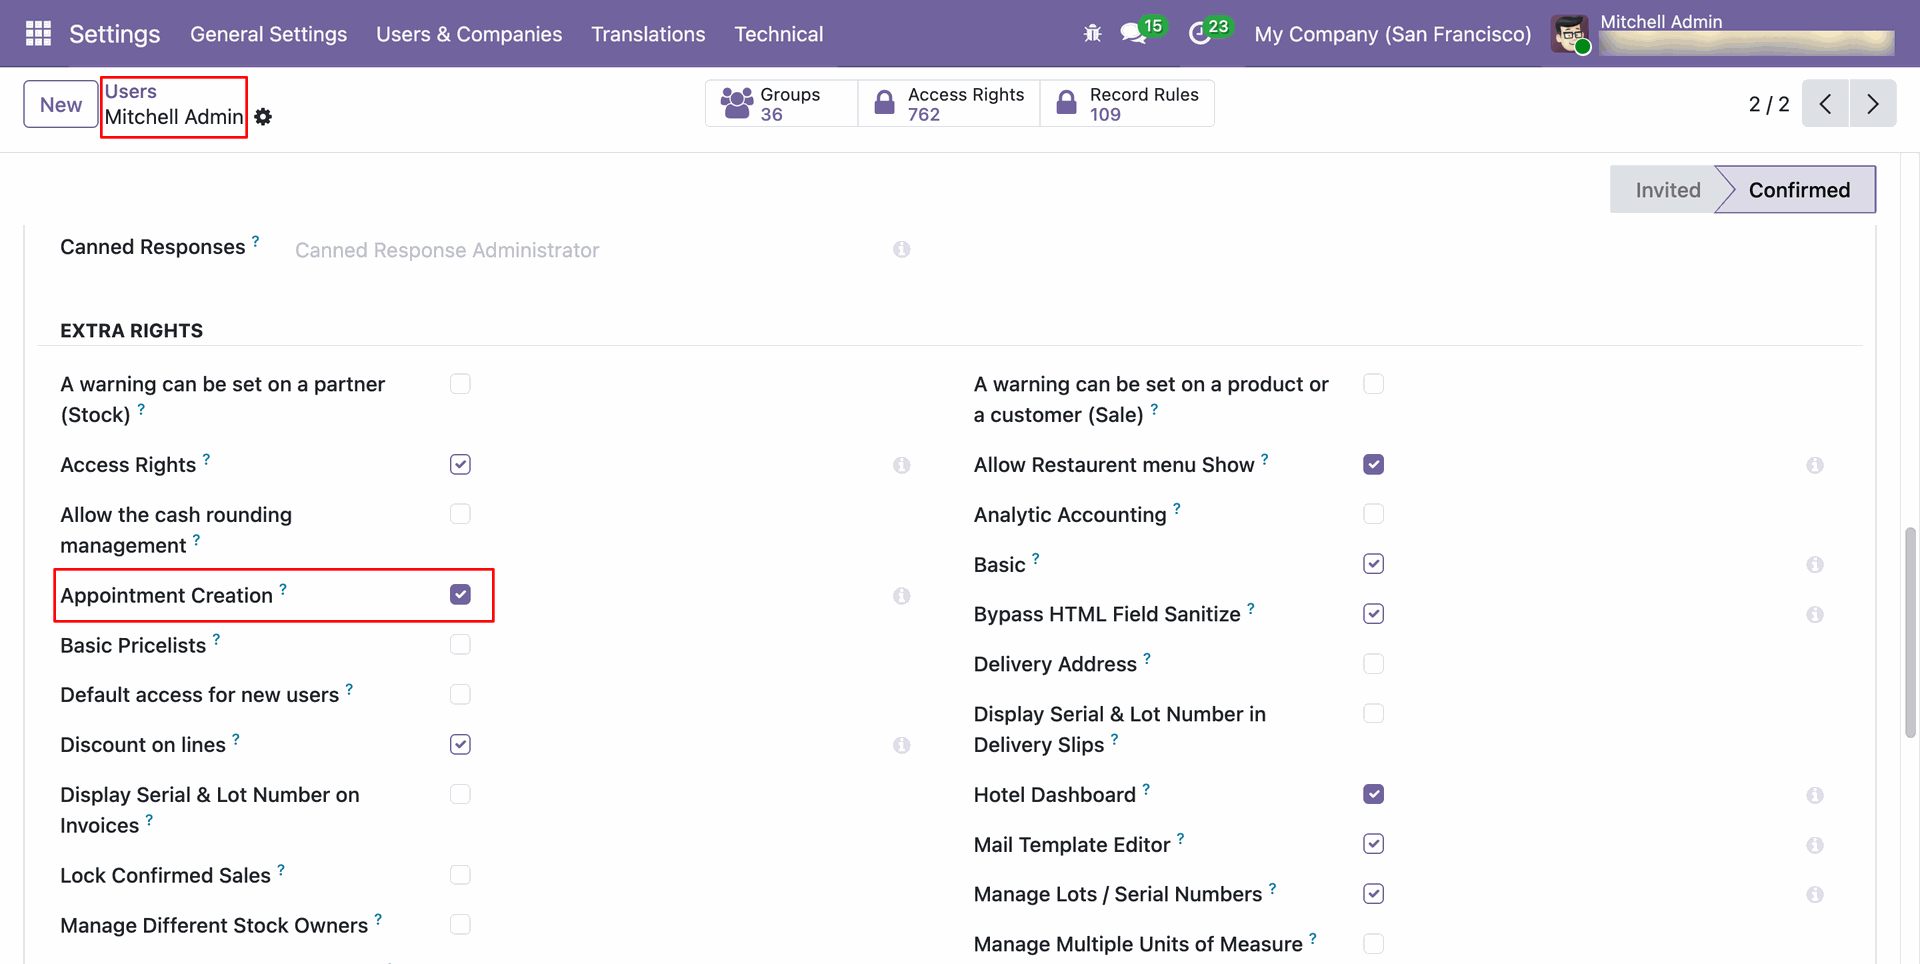
Enable appointment creation from the User Settings.
Open the Slots menu.
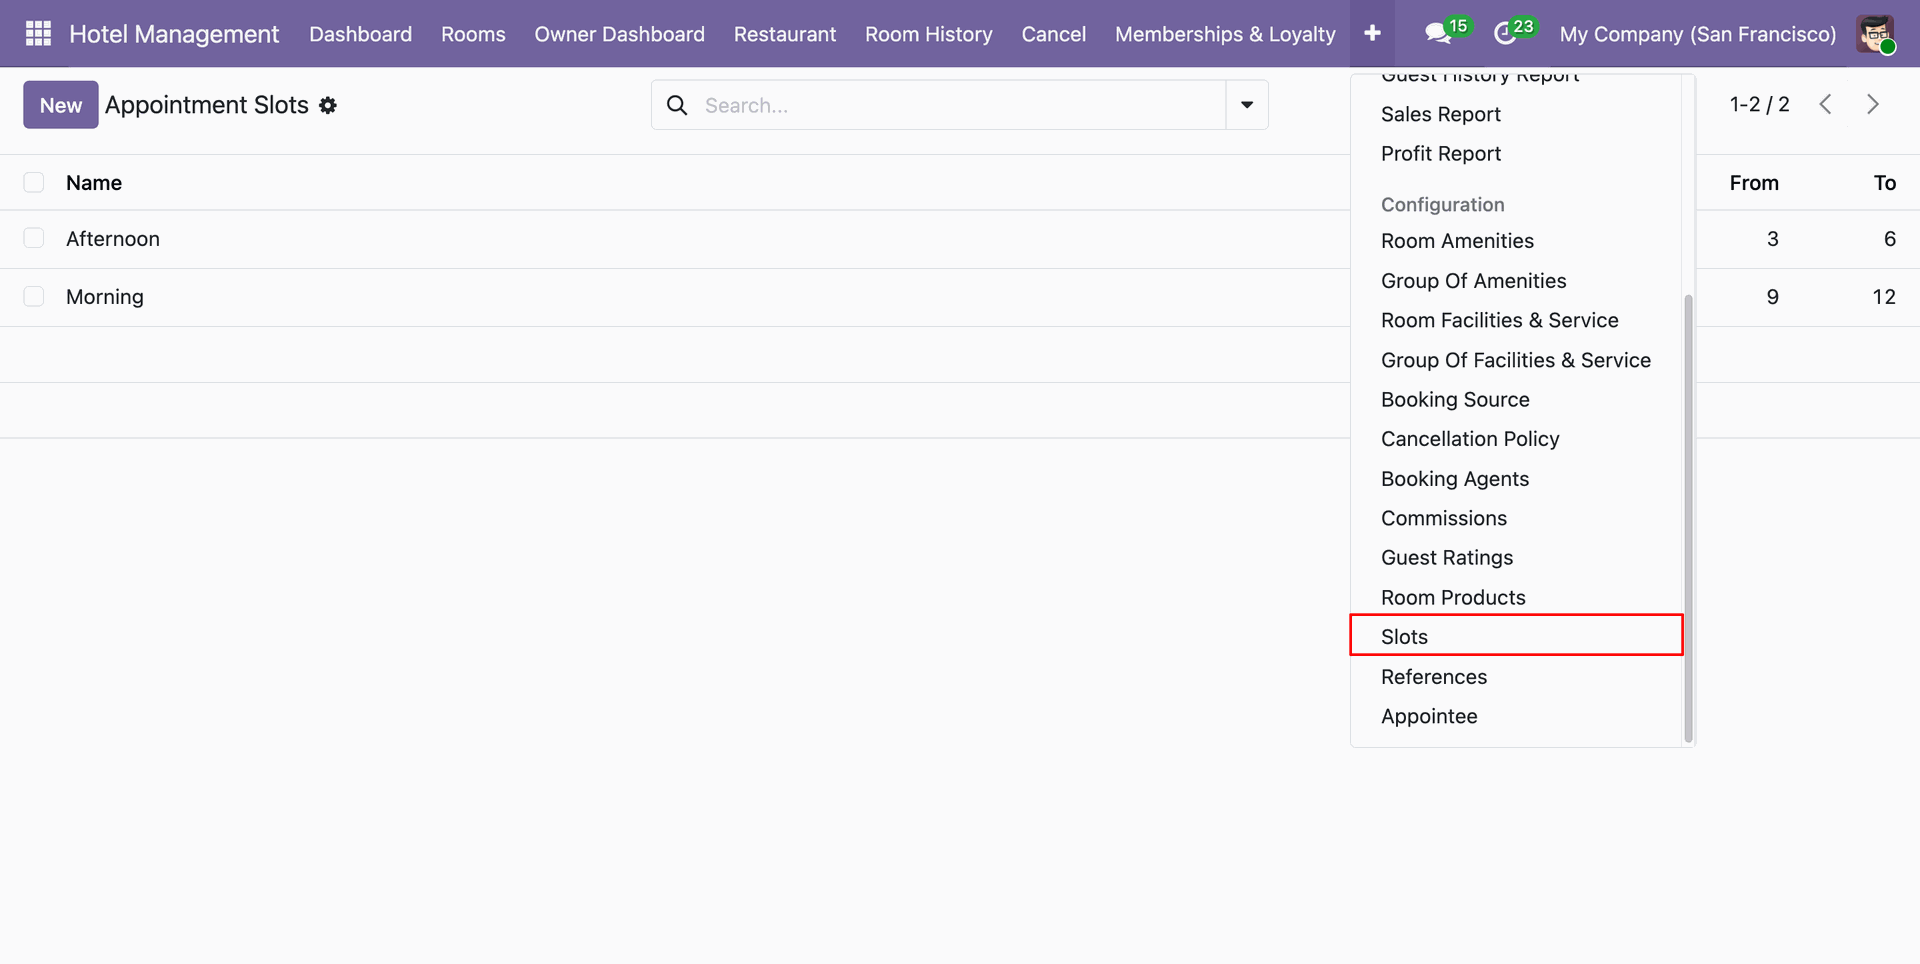
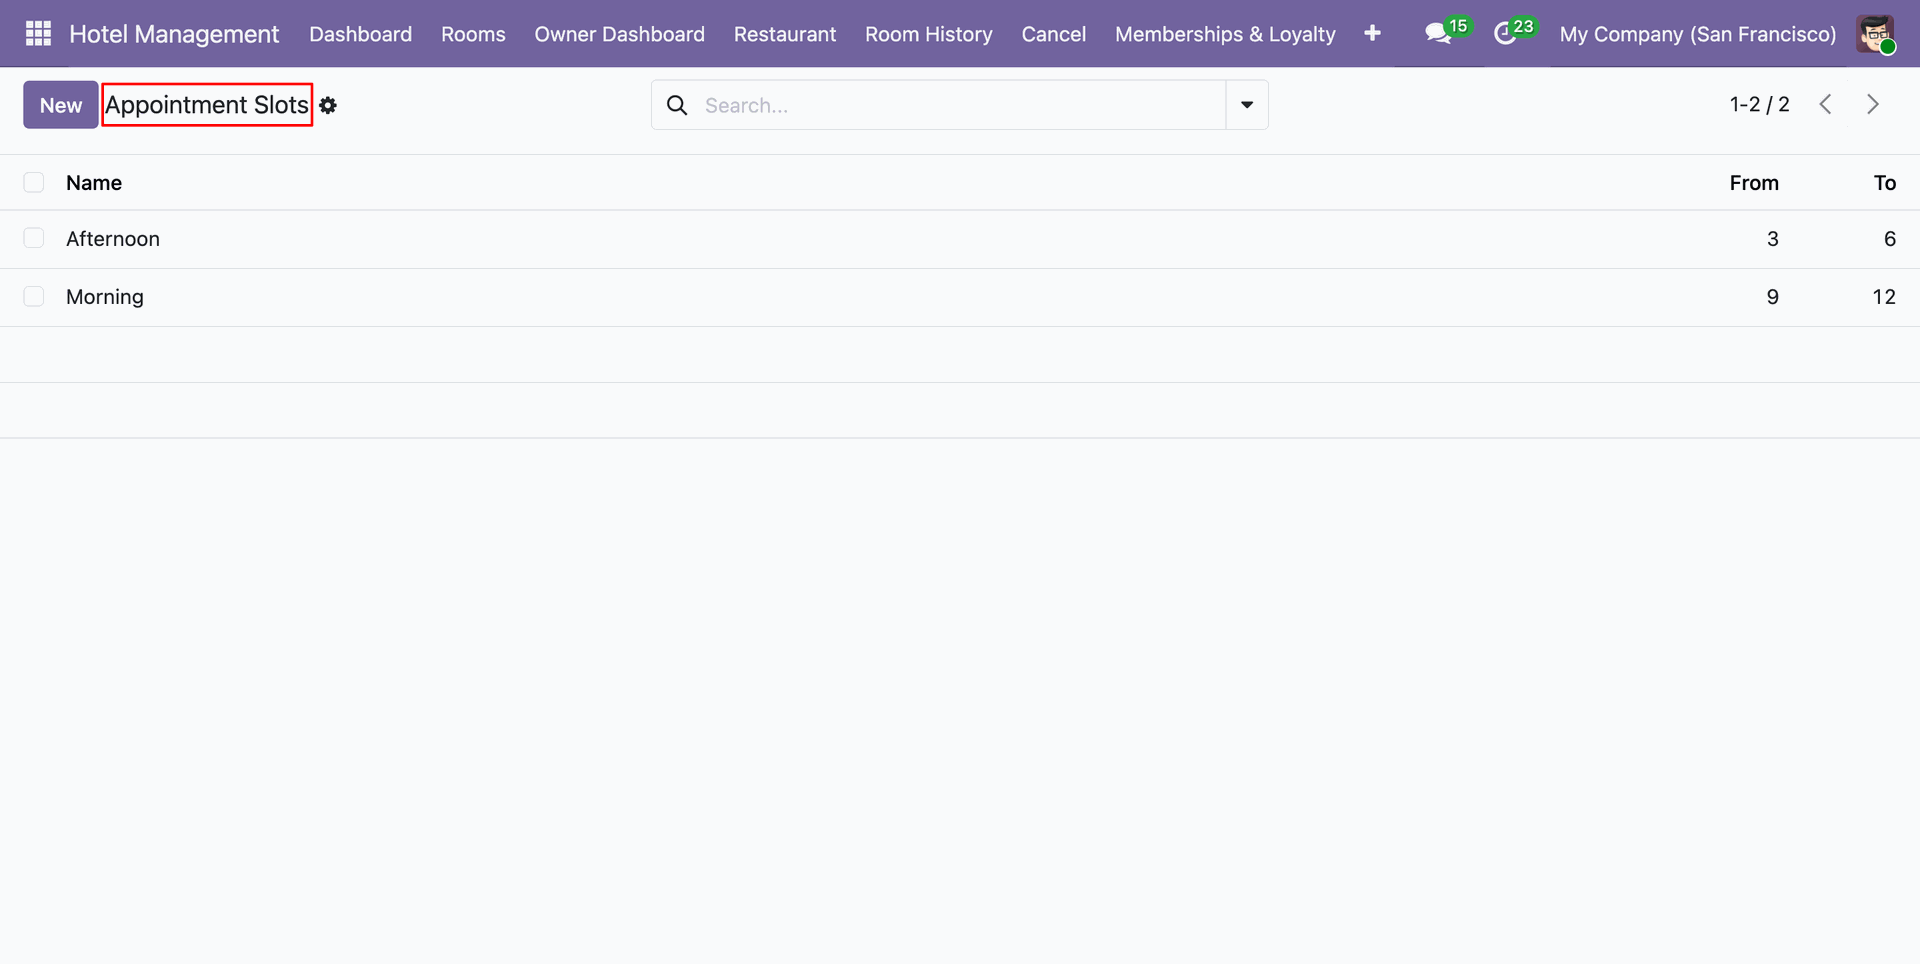
Appointment Slots List View.
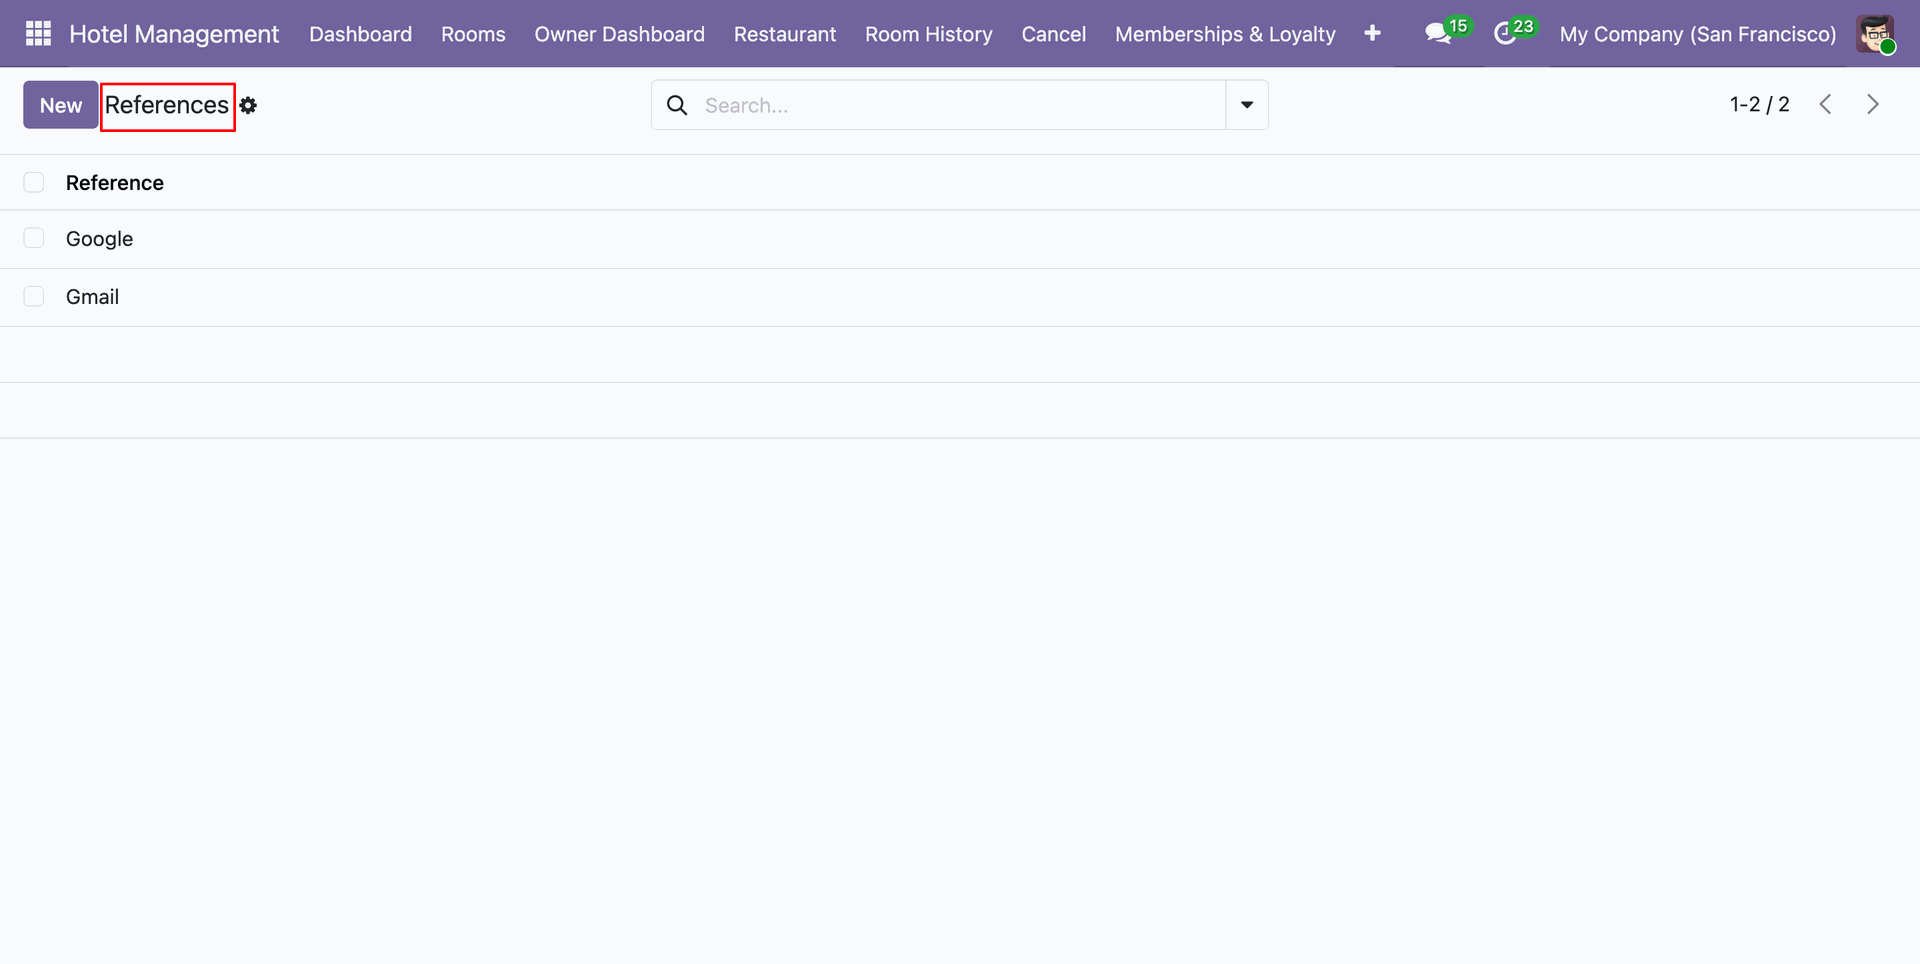
Open the References menu.
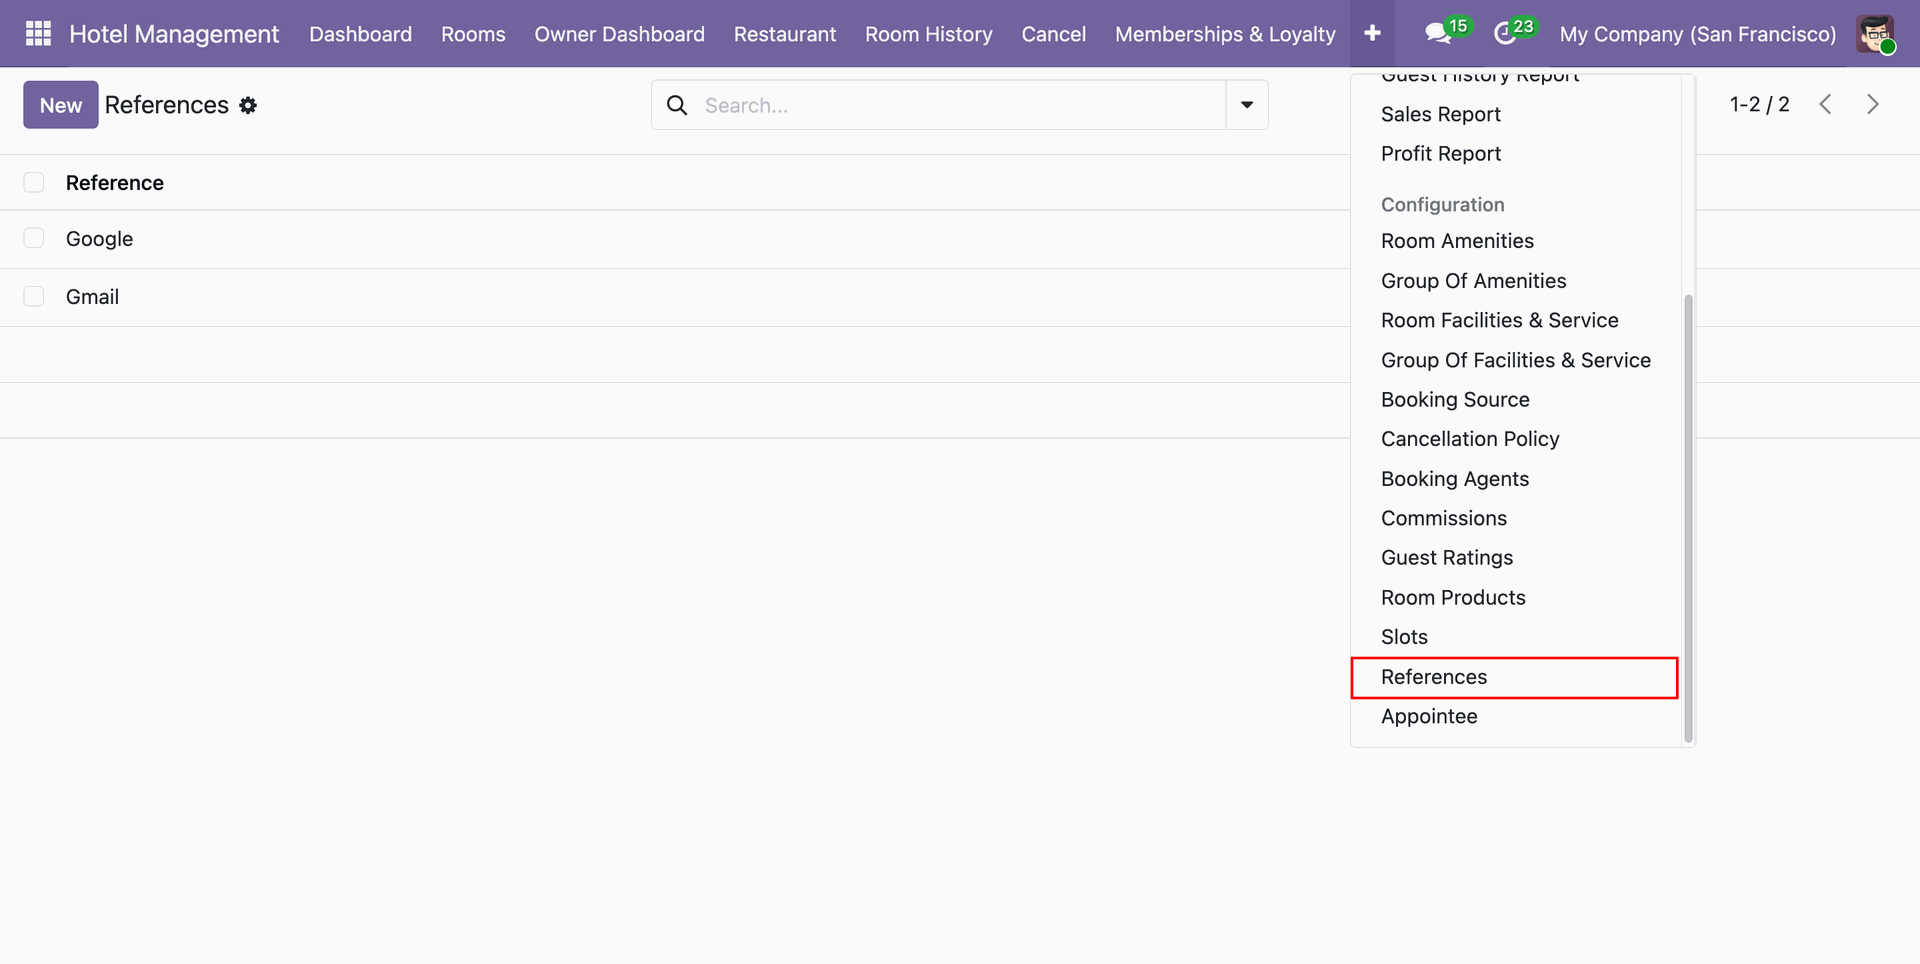
References List View.
Open the Appointee menu.

Appointee List View.
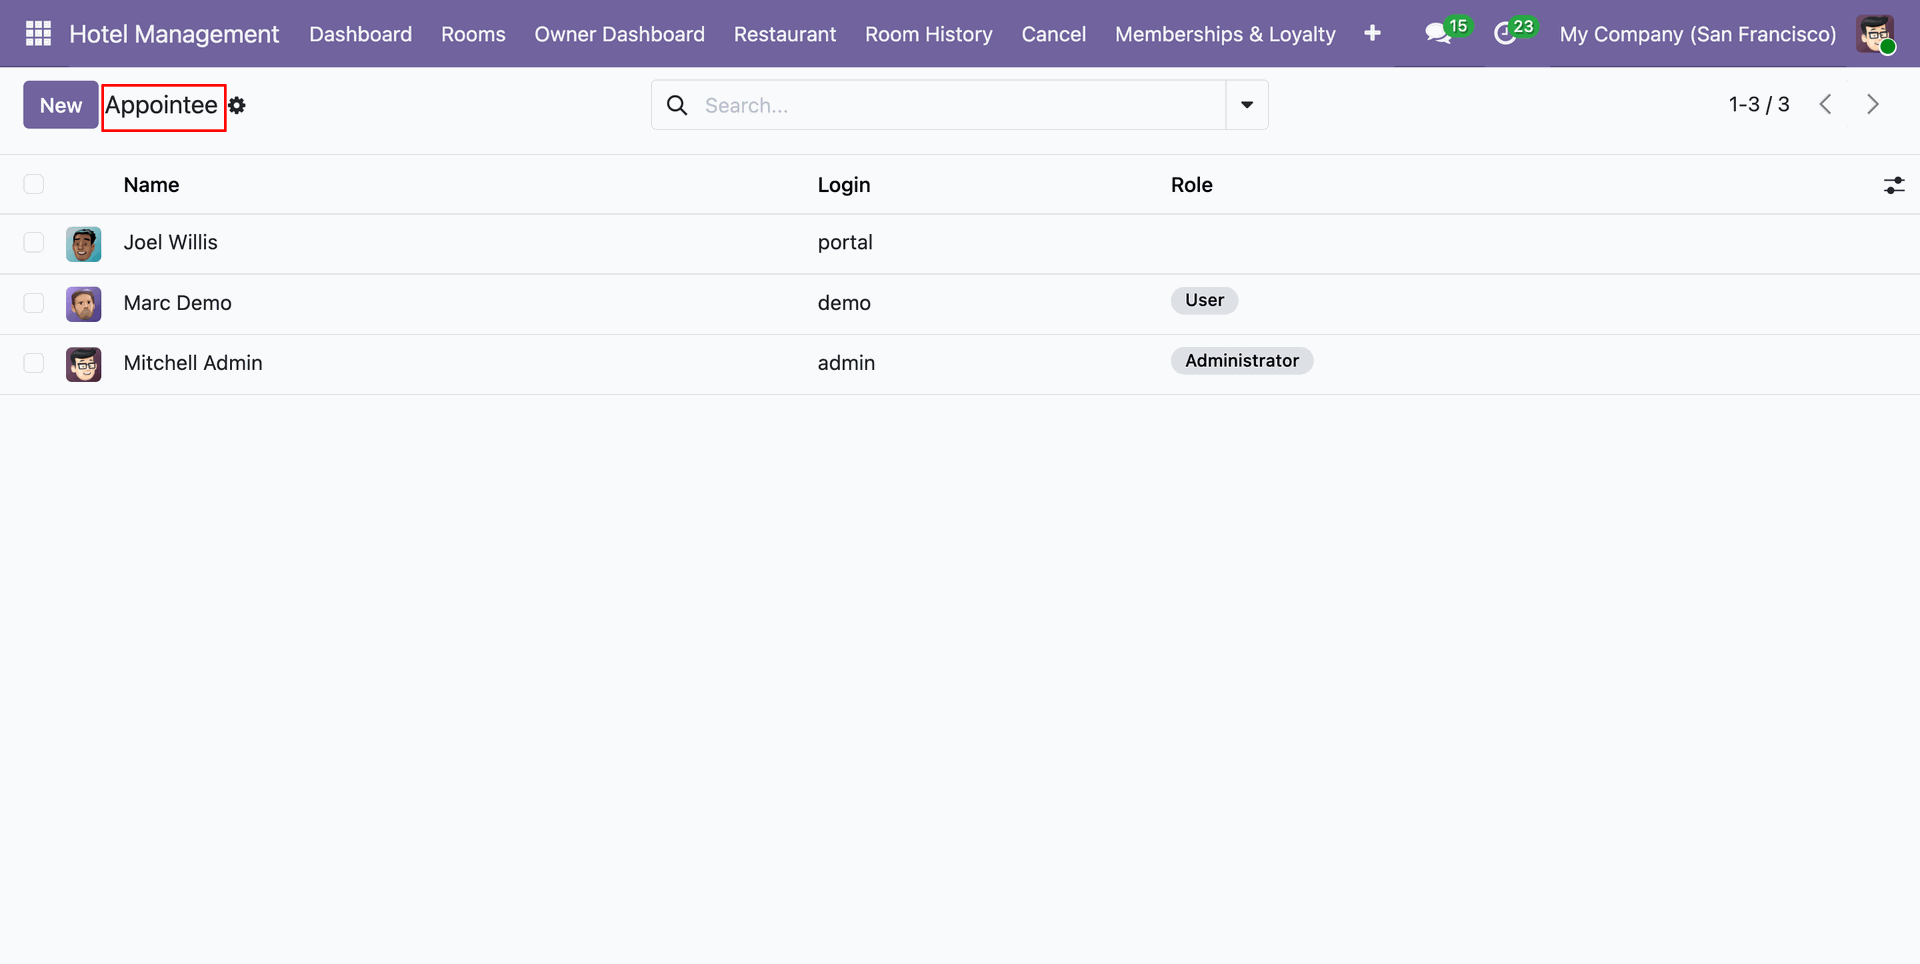
Appointee Filter Options.

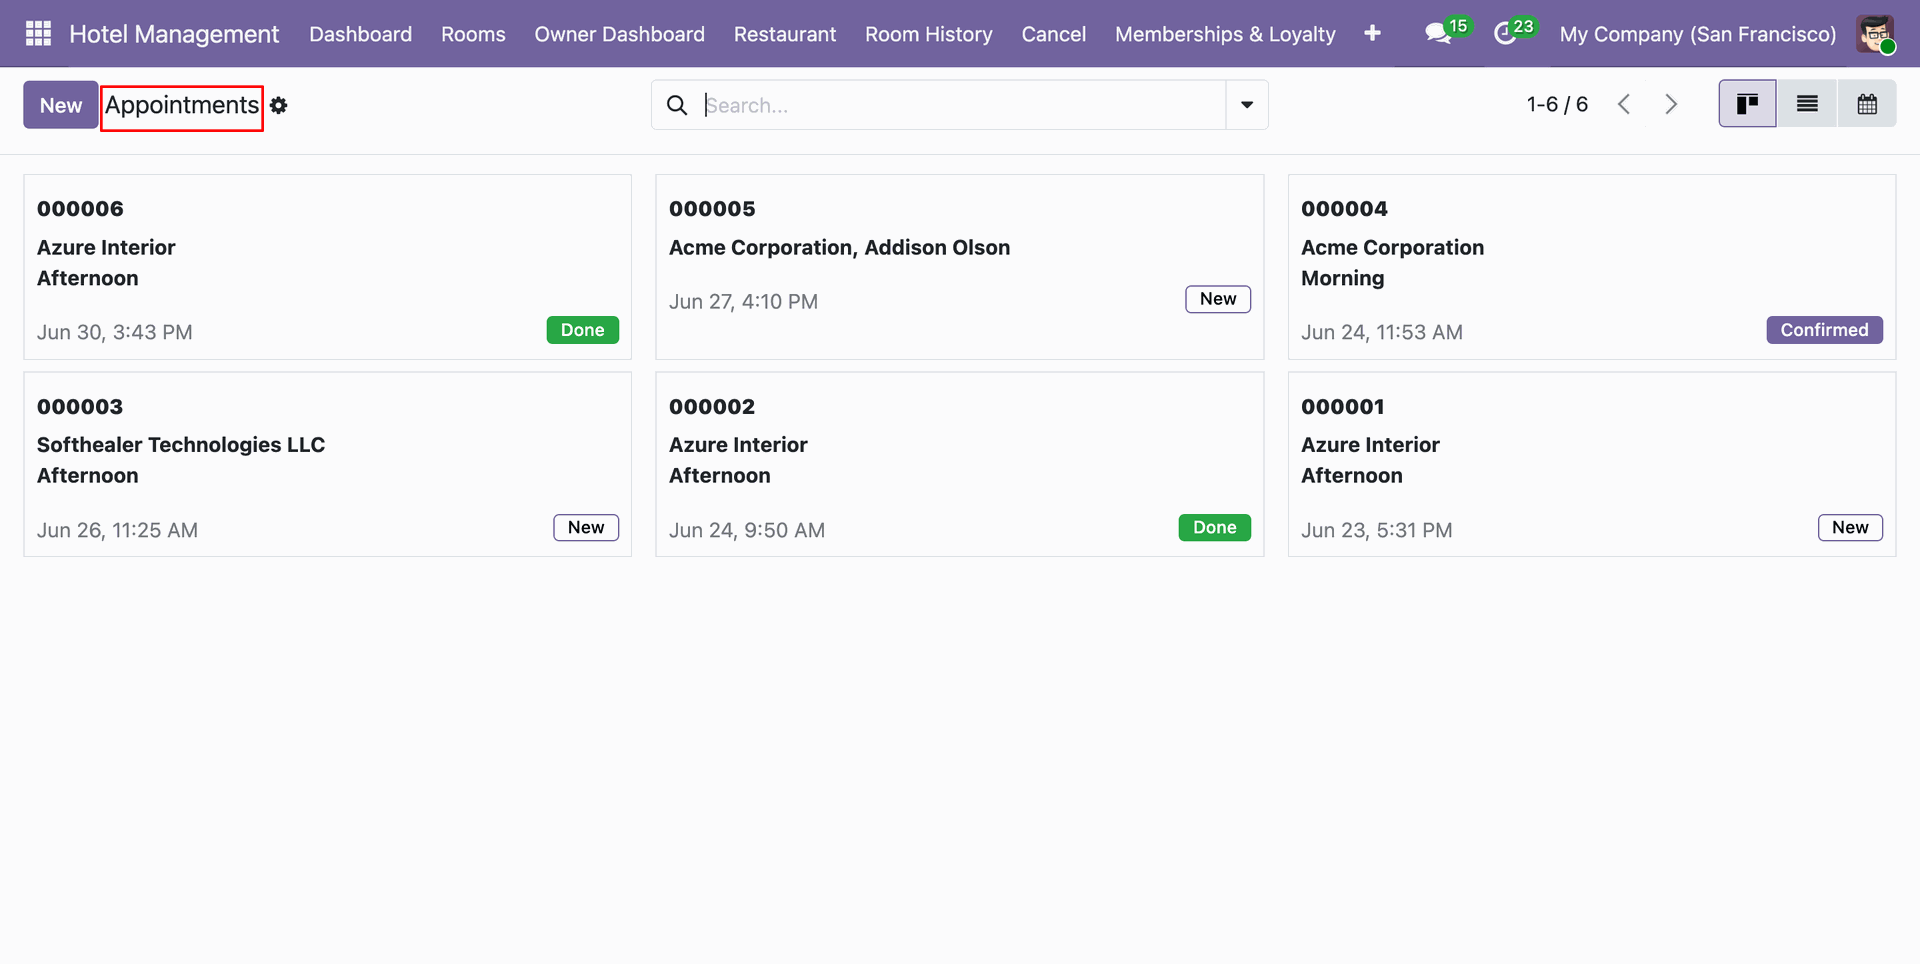
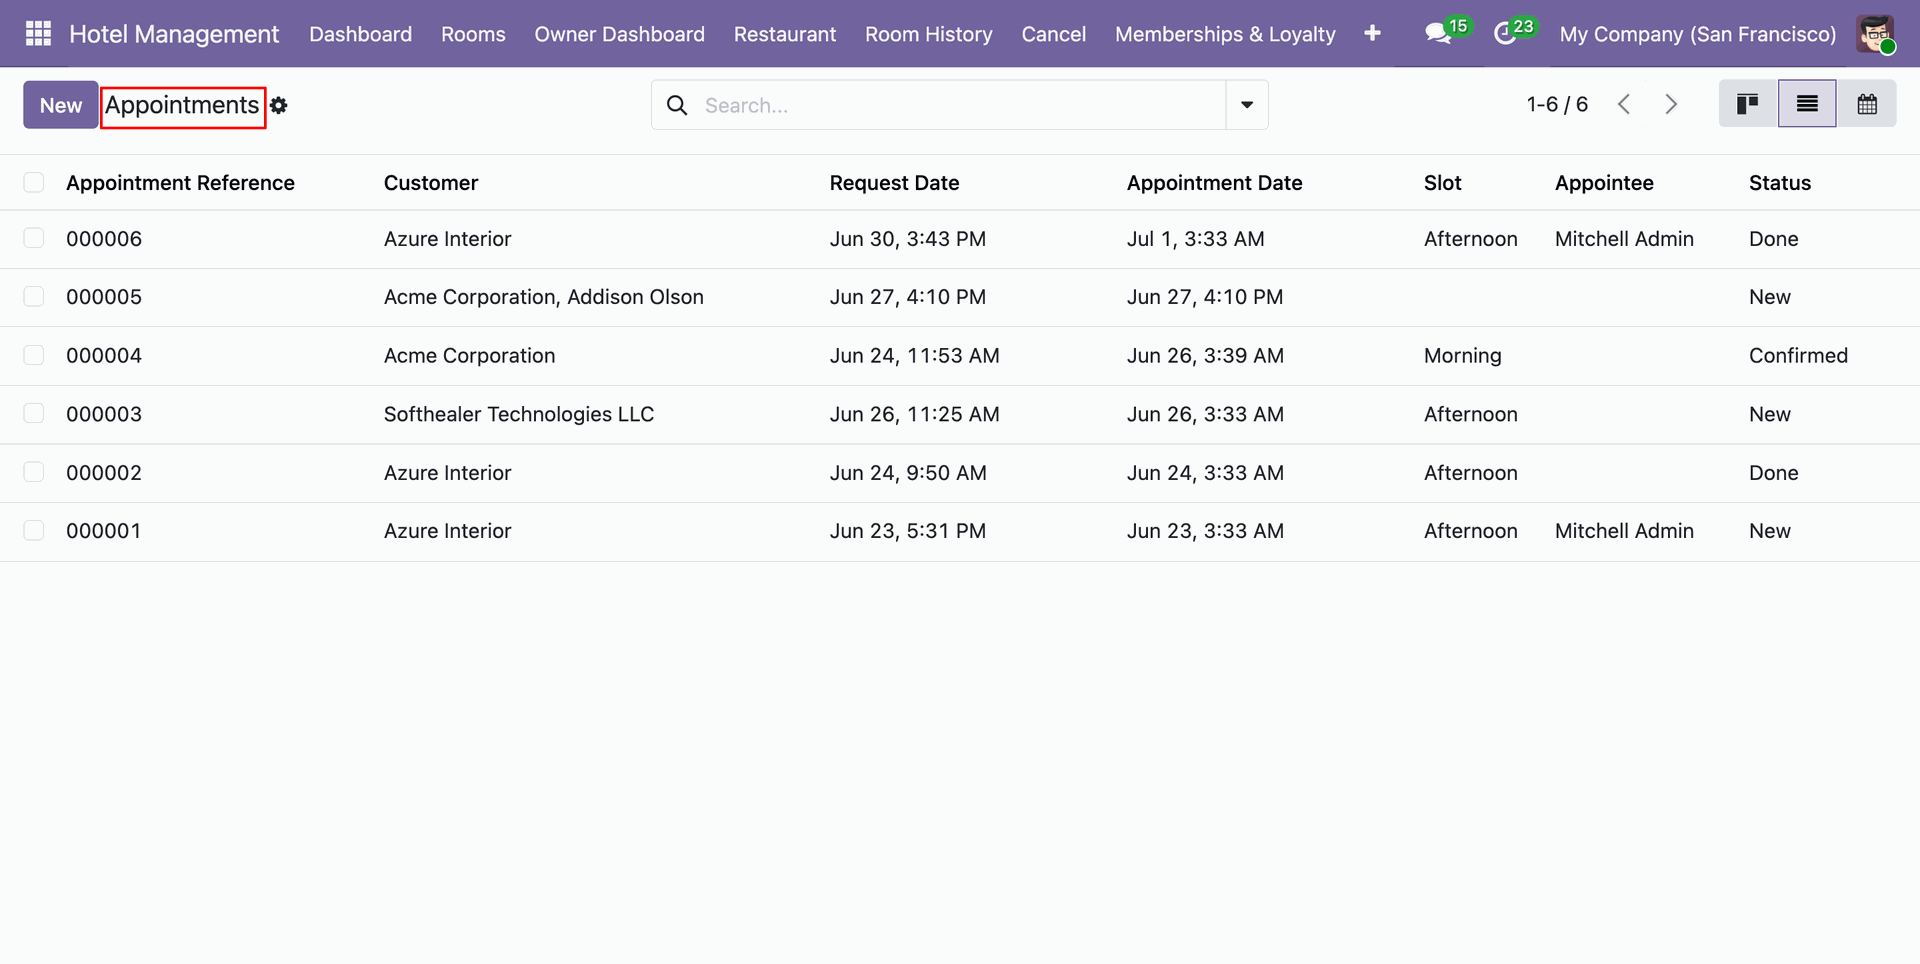
Open the Appointments menu.
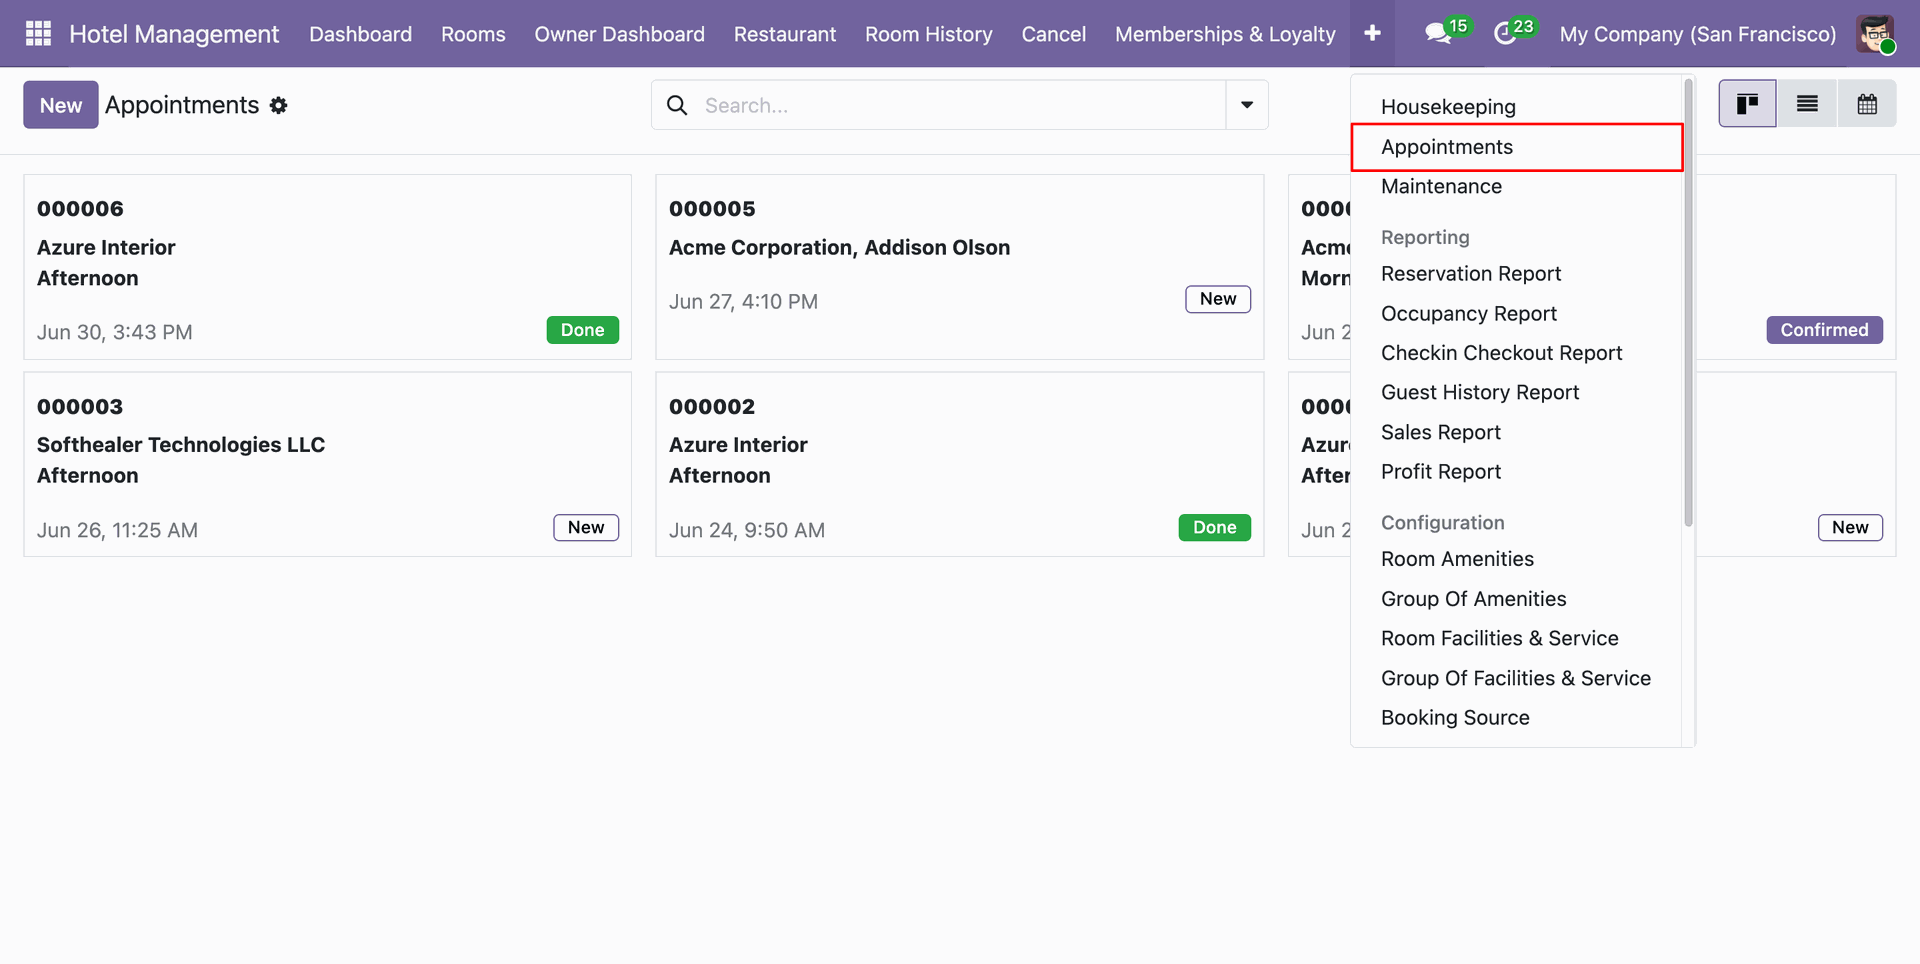
Appointments Kanban View.
Appointments List View.
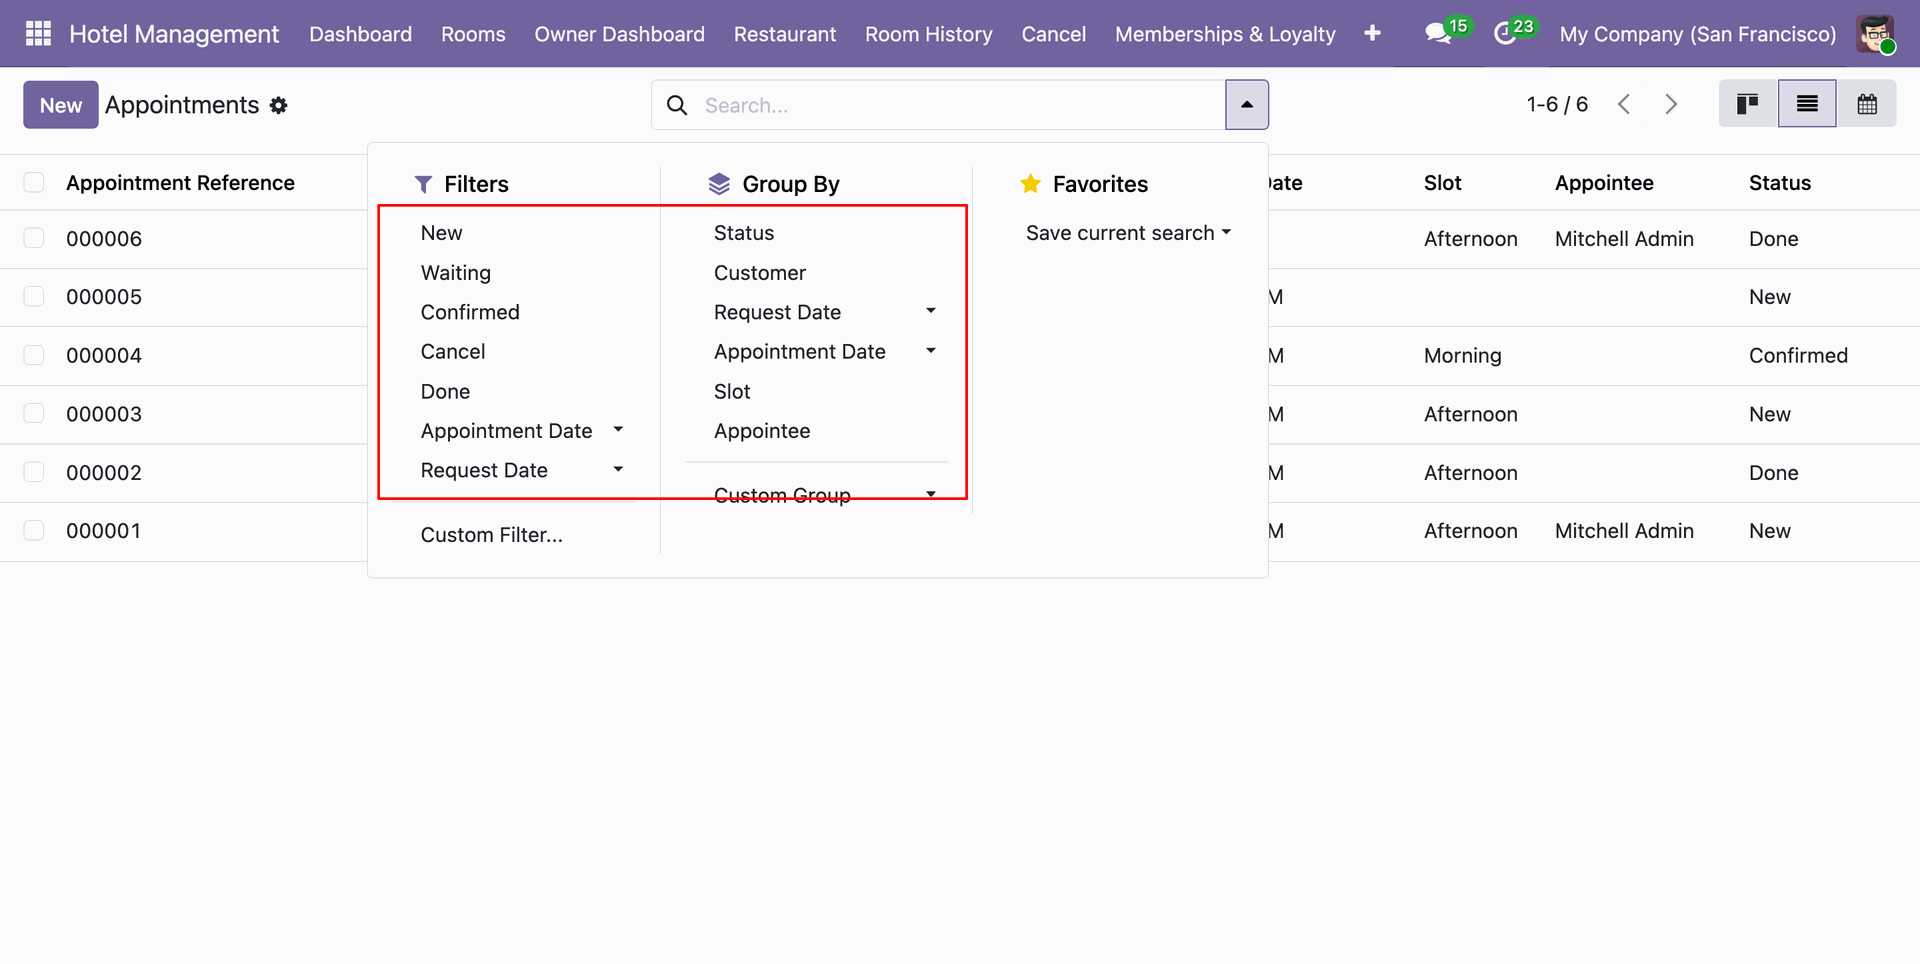
Appointments Filters, and Group By Options.
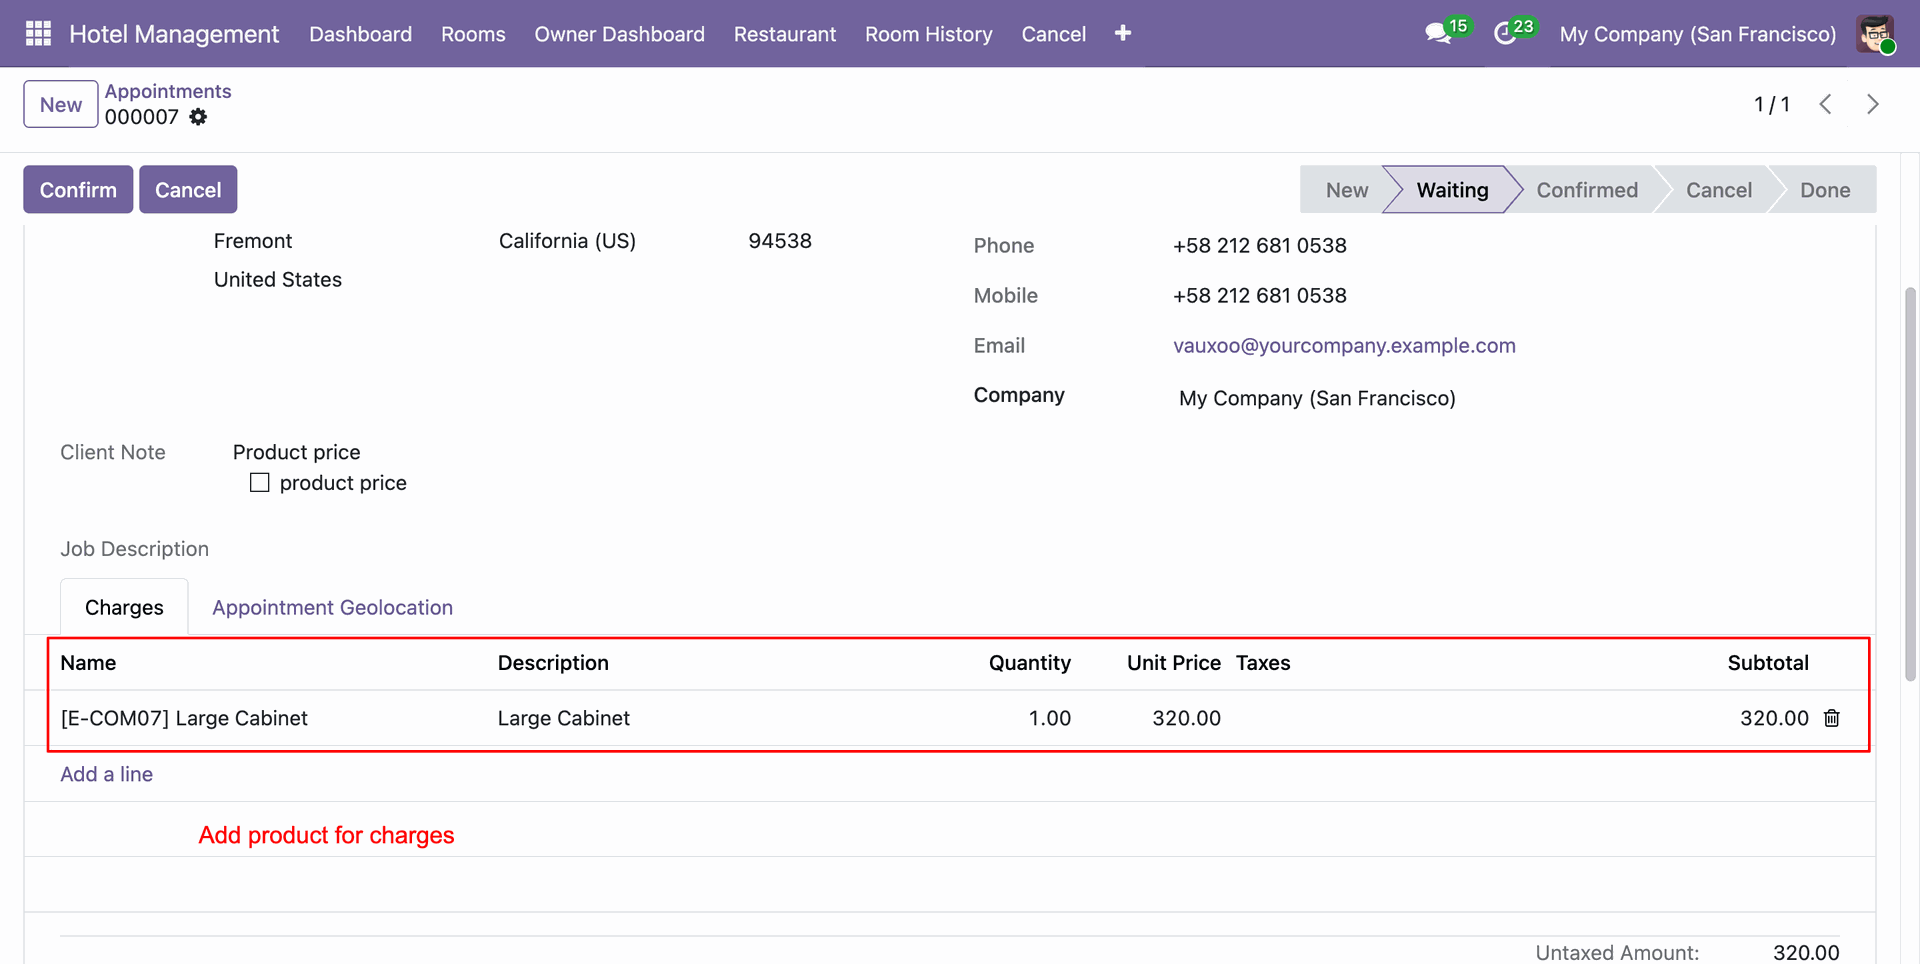
Open the Appointments Form View. You can see the Waiting, Confirm, and Cancel buttons.

Process the payment for the appointment services.
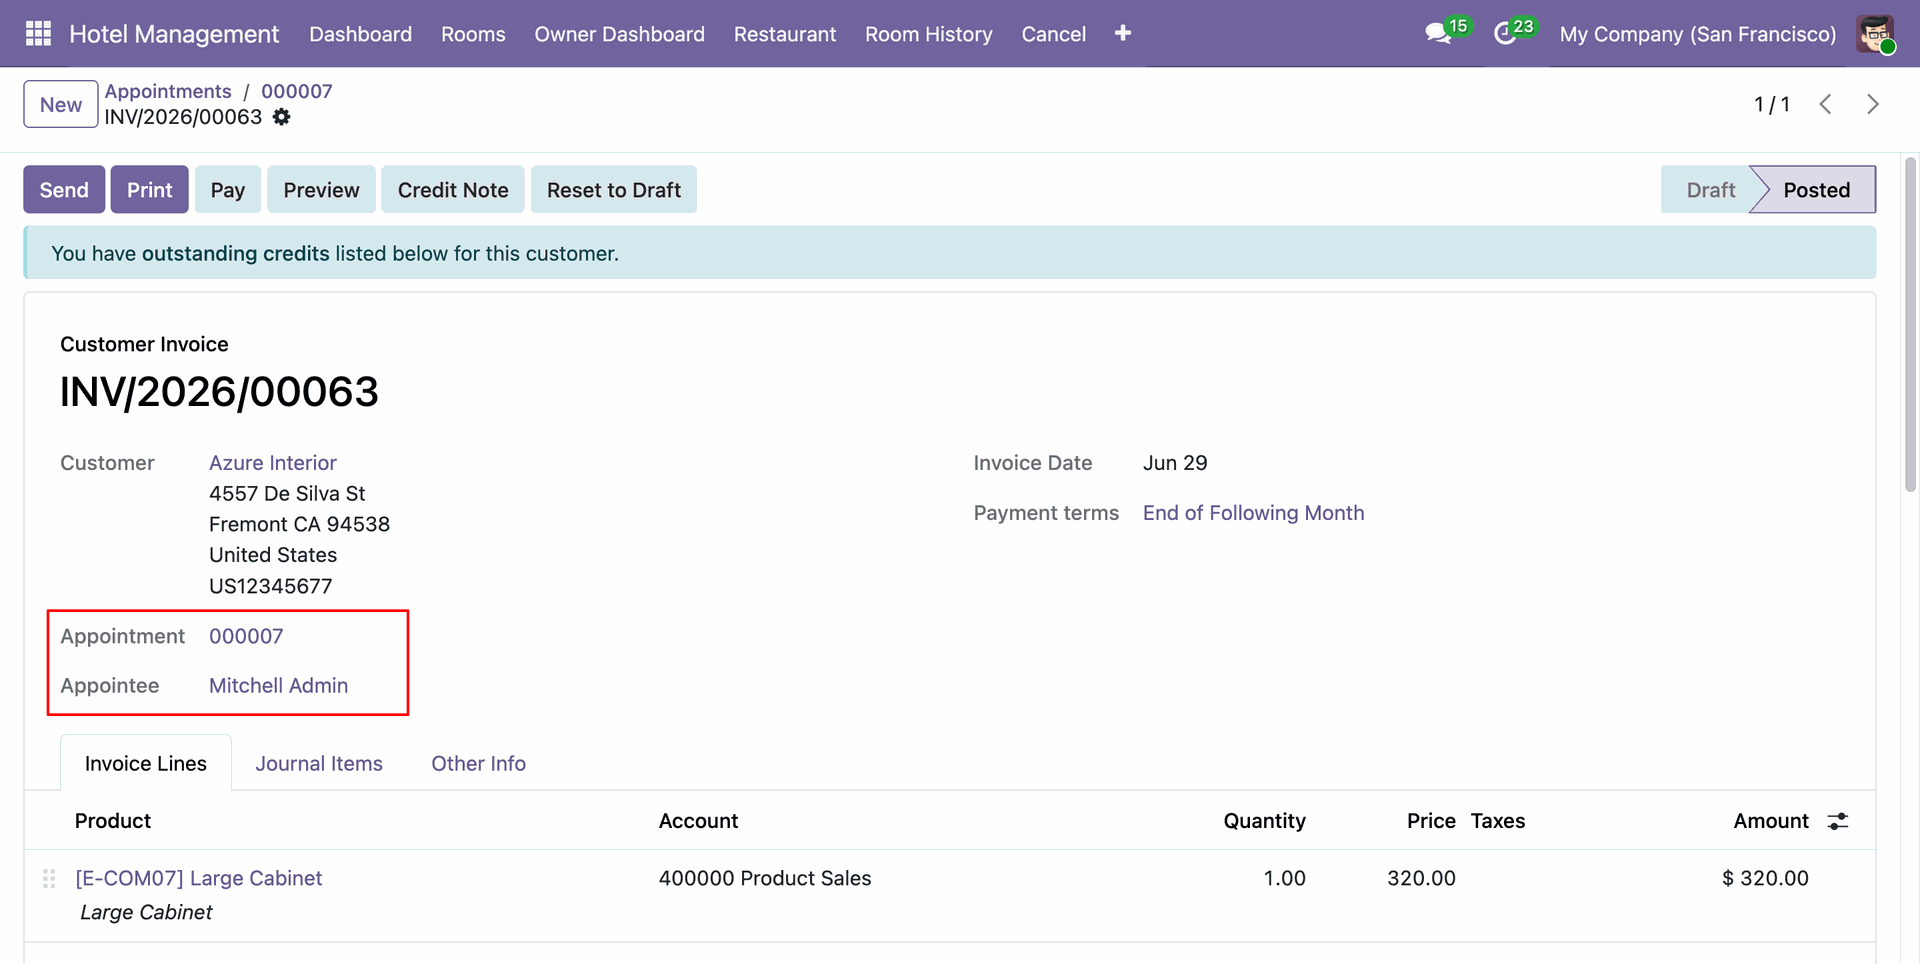
Click on the Create Invoice button to generate the invoice from the appointment.

Open the created invoice. You can see the linked Appointee and Appointment records.
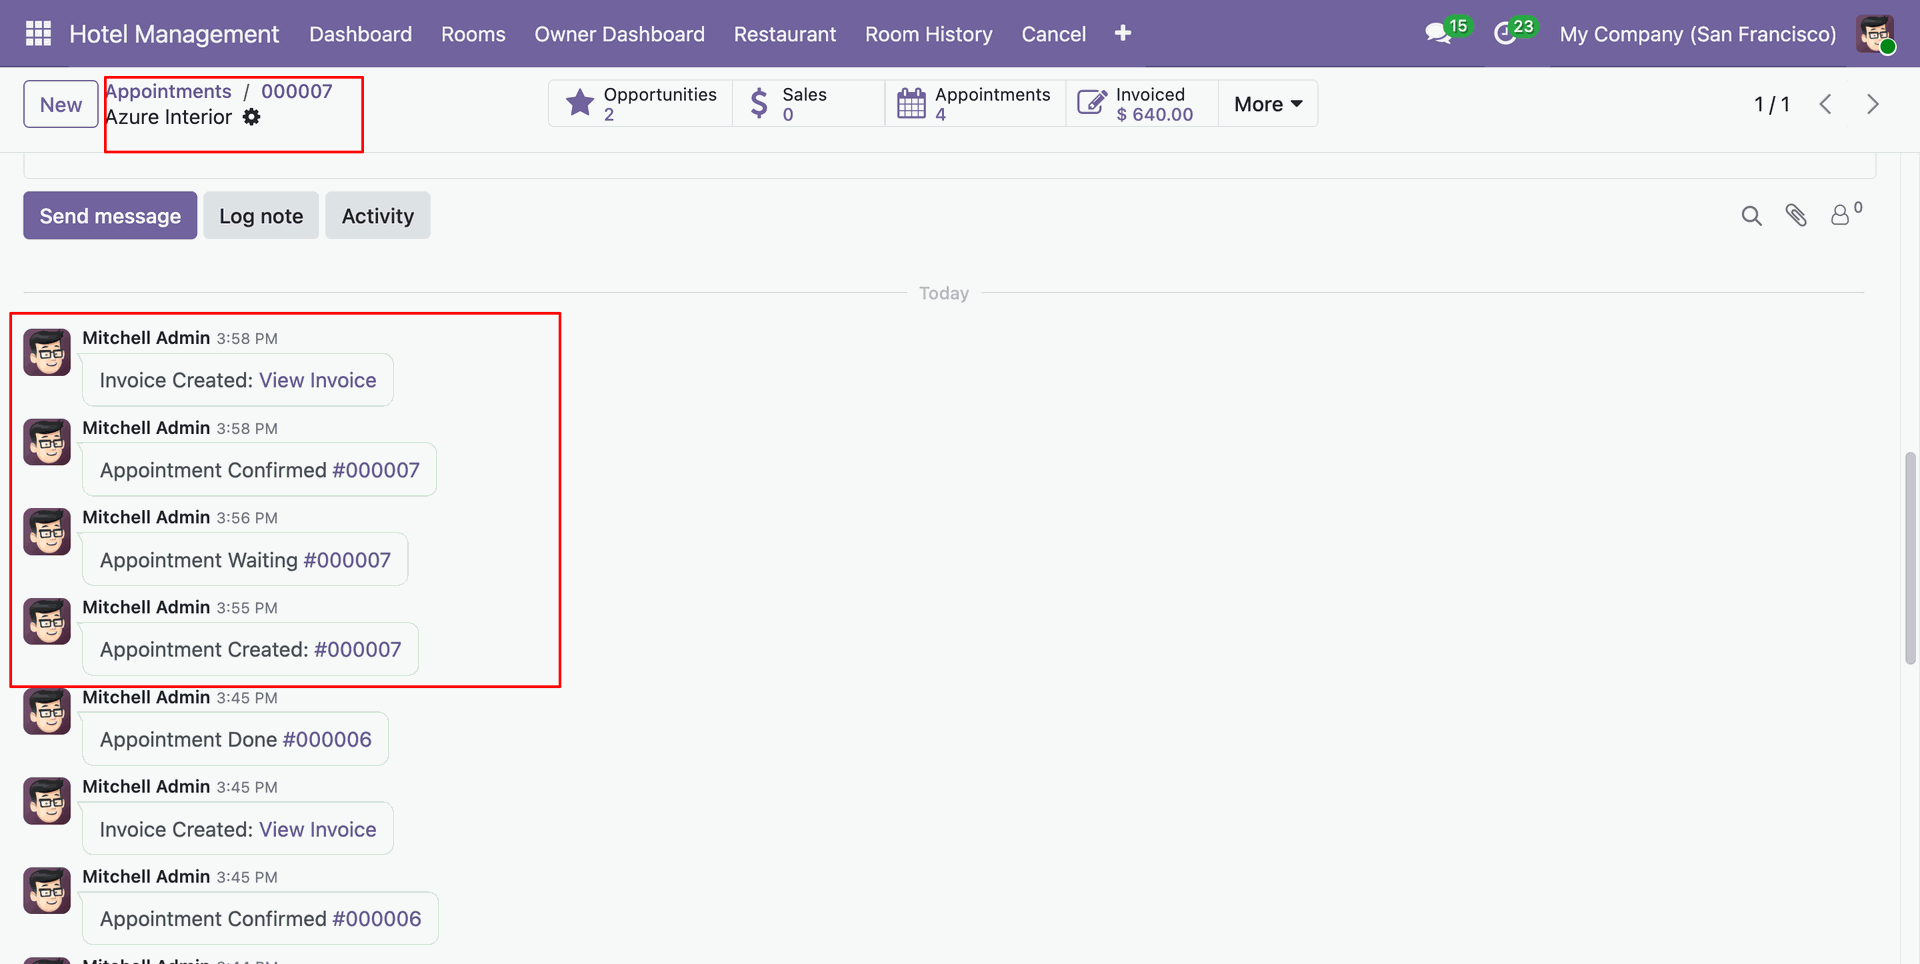
Appointment status changes will be visible in the chatter.
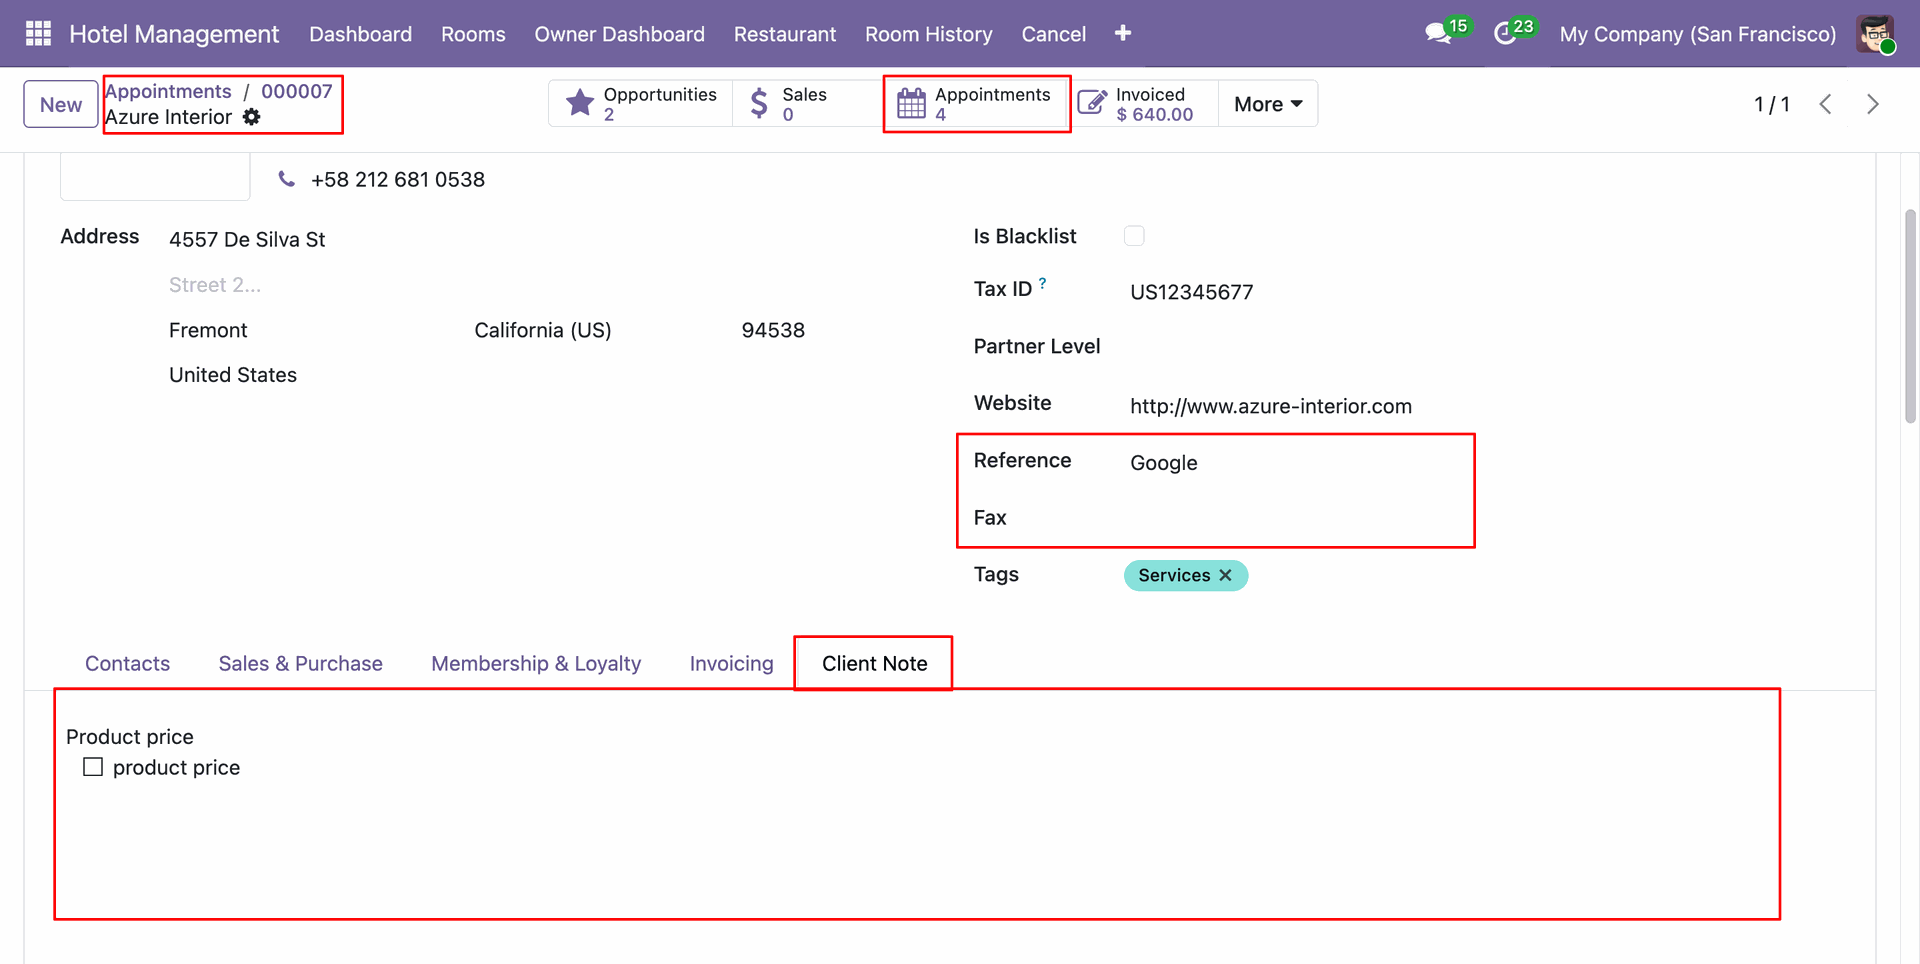
Open the Contact. You can see the client note under the Client Note tab, reference details in the form view, and appointment details in the smart button.
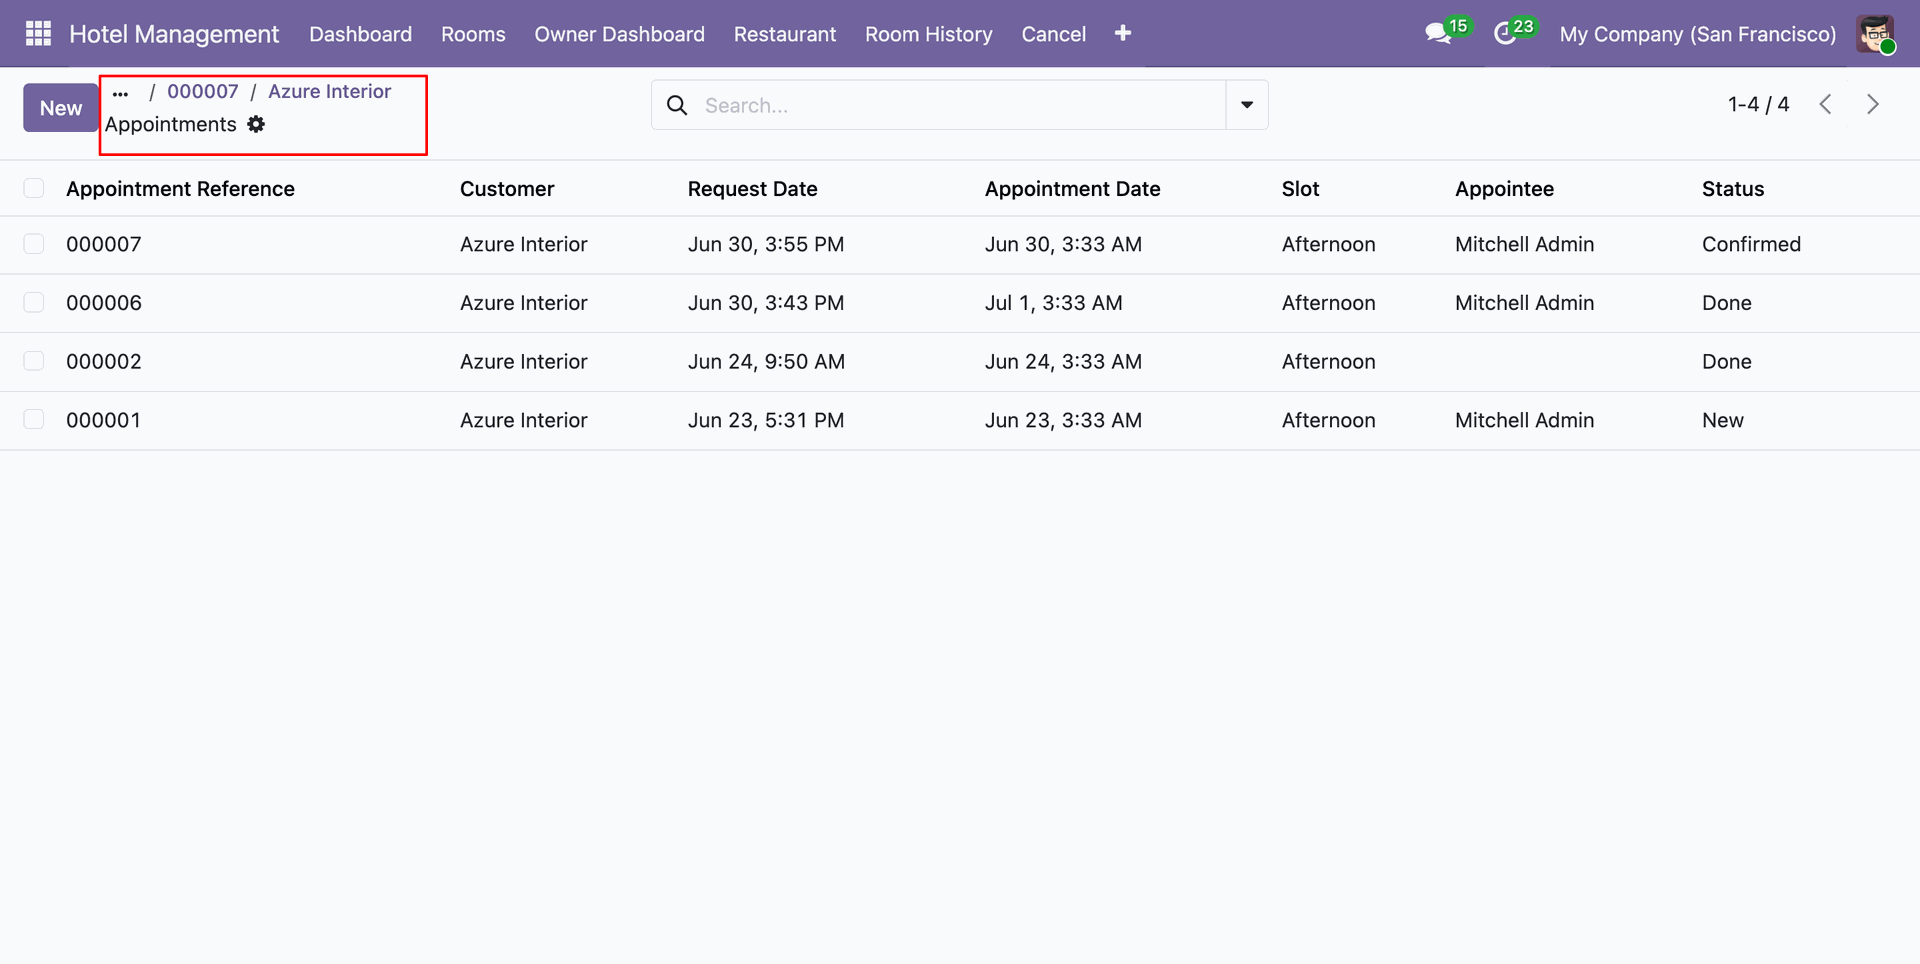
Click on the Appointment smart button from the Contact form view.
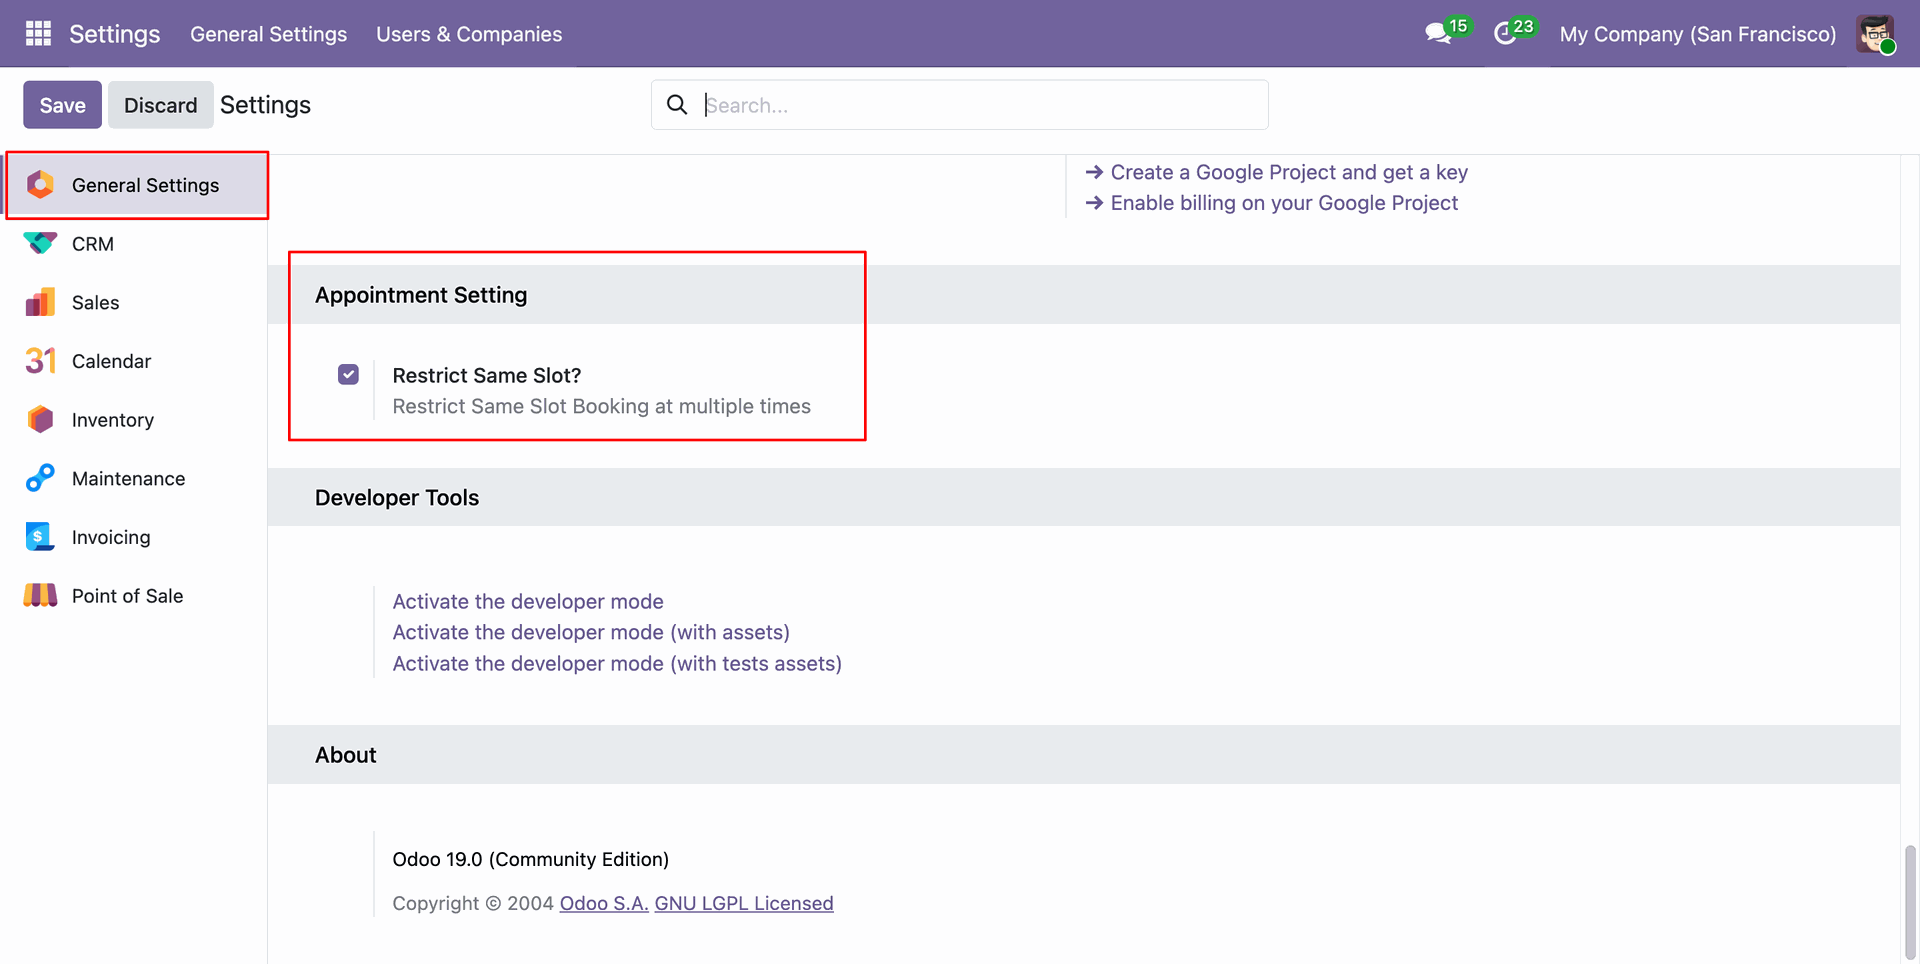
Go to the General Settings and enable the Restrict Same Slot for Appointment option.
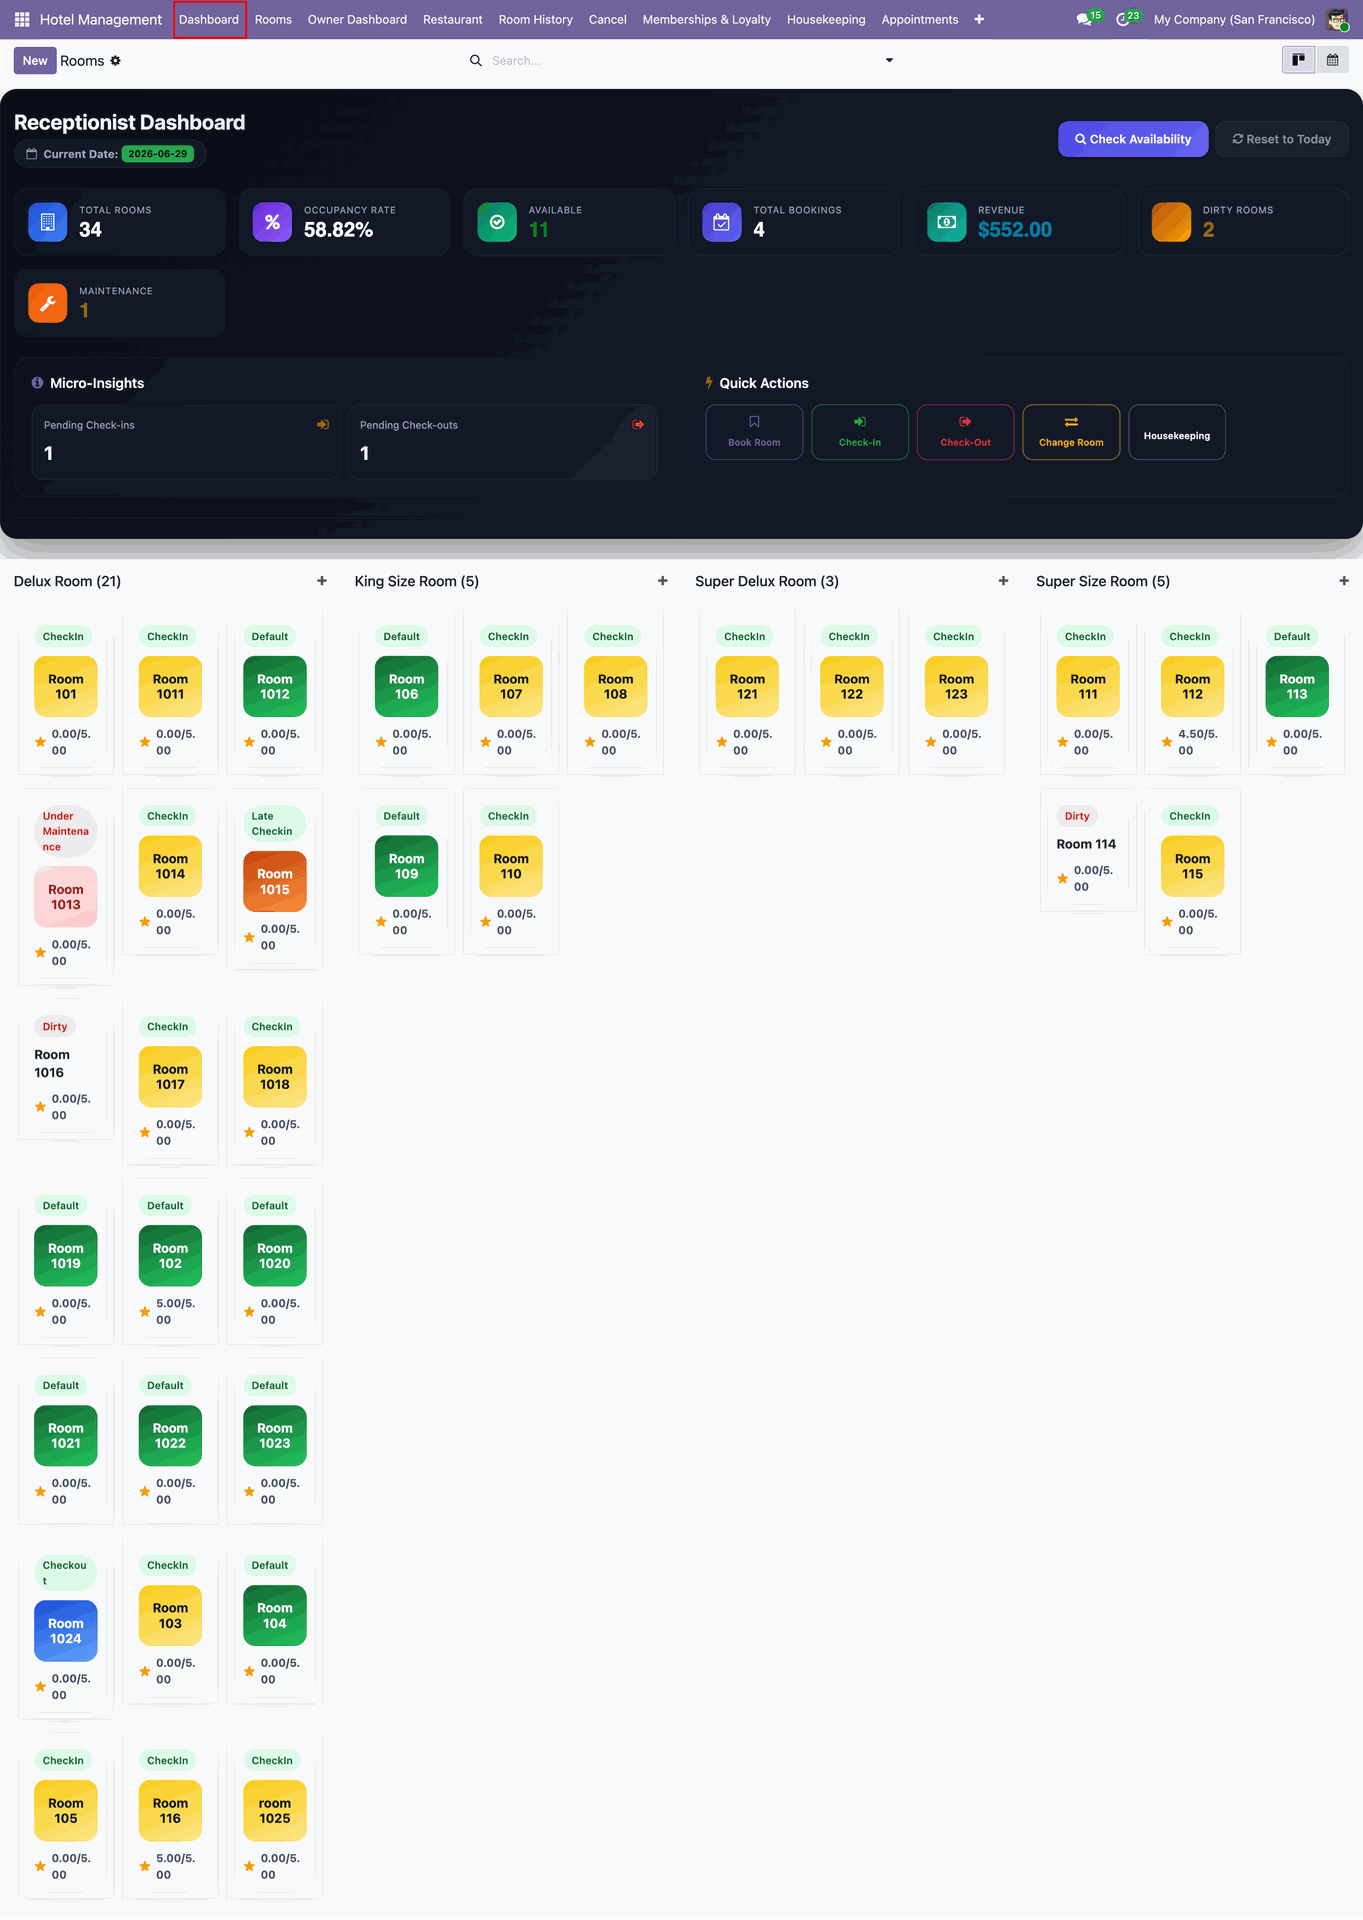
Open the Hotel Management Dynamic Dashboard.
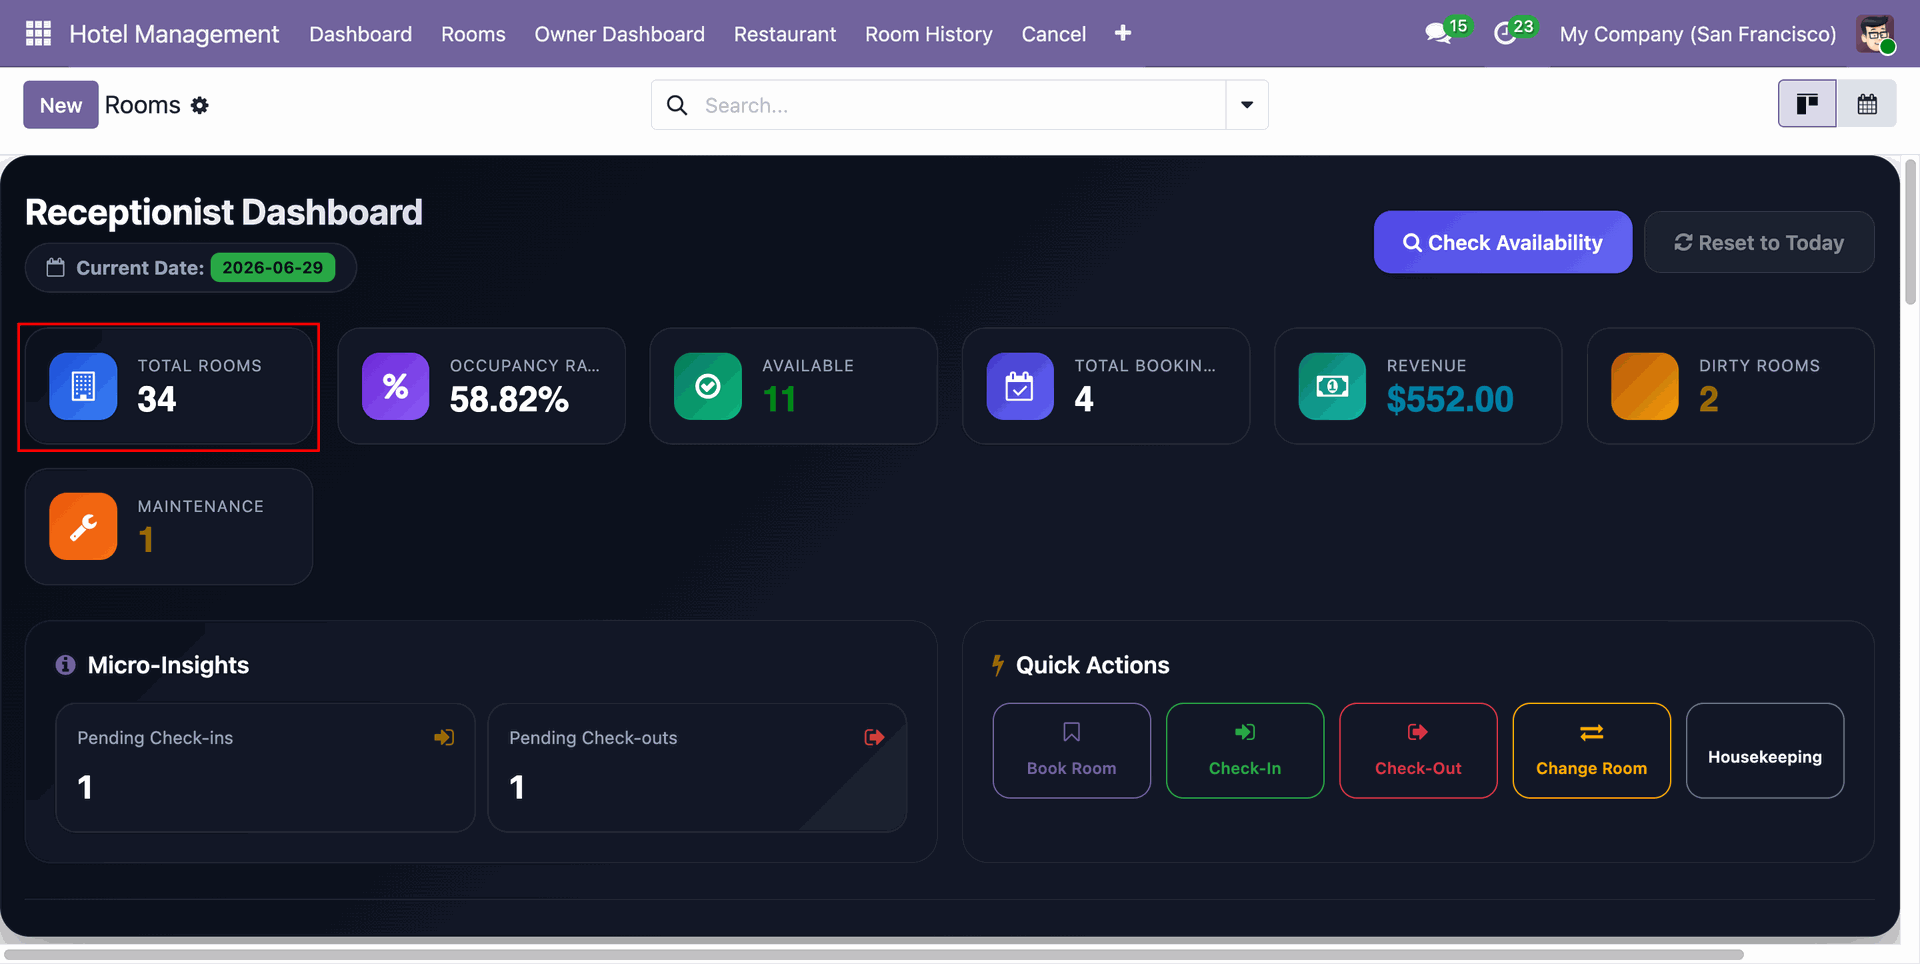
Click on the Total Rooms tile from the dashboard.
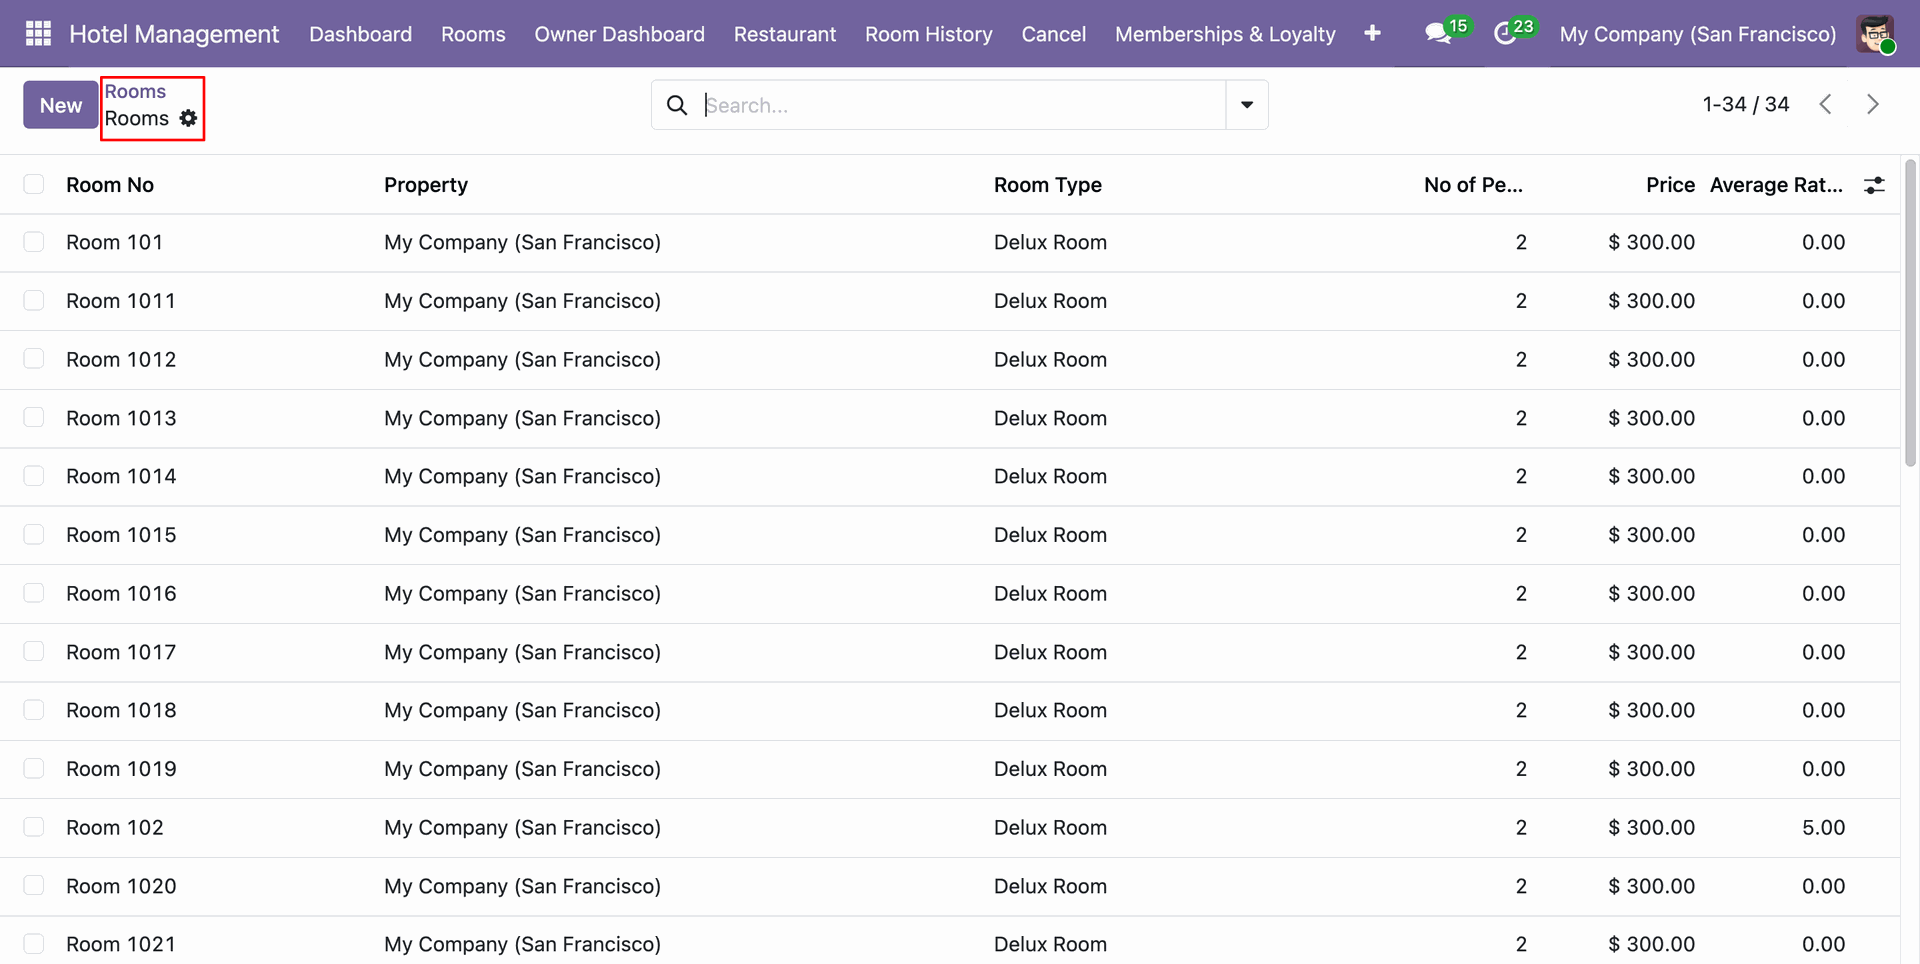
By clicking on the Total Rooms tile, the Rooms list view will open.
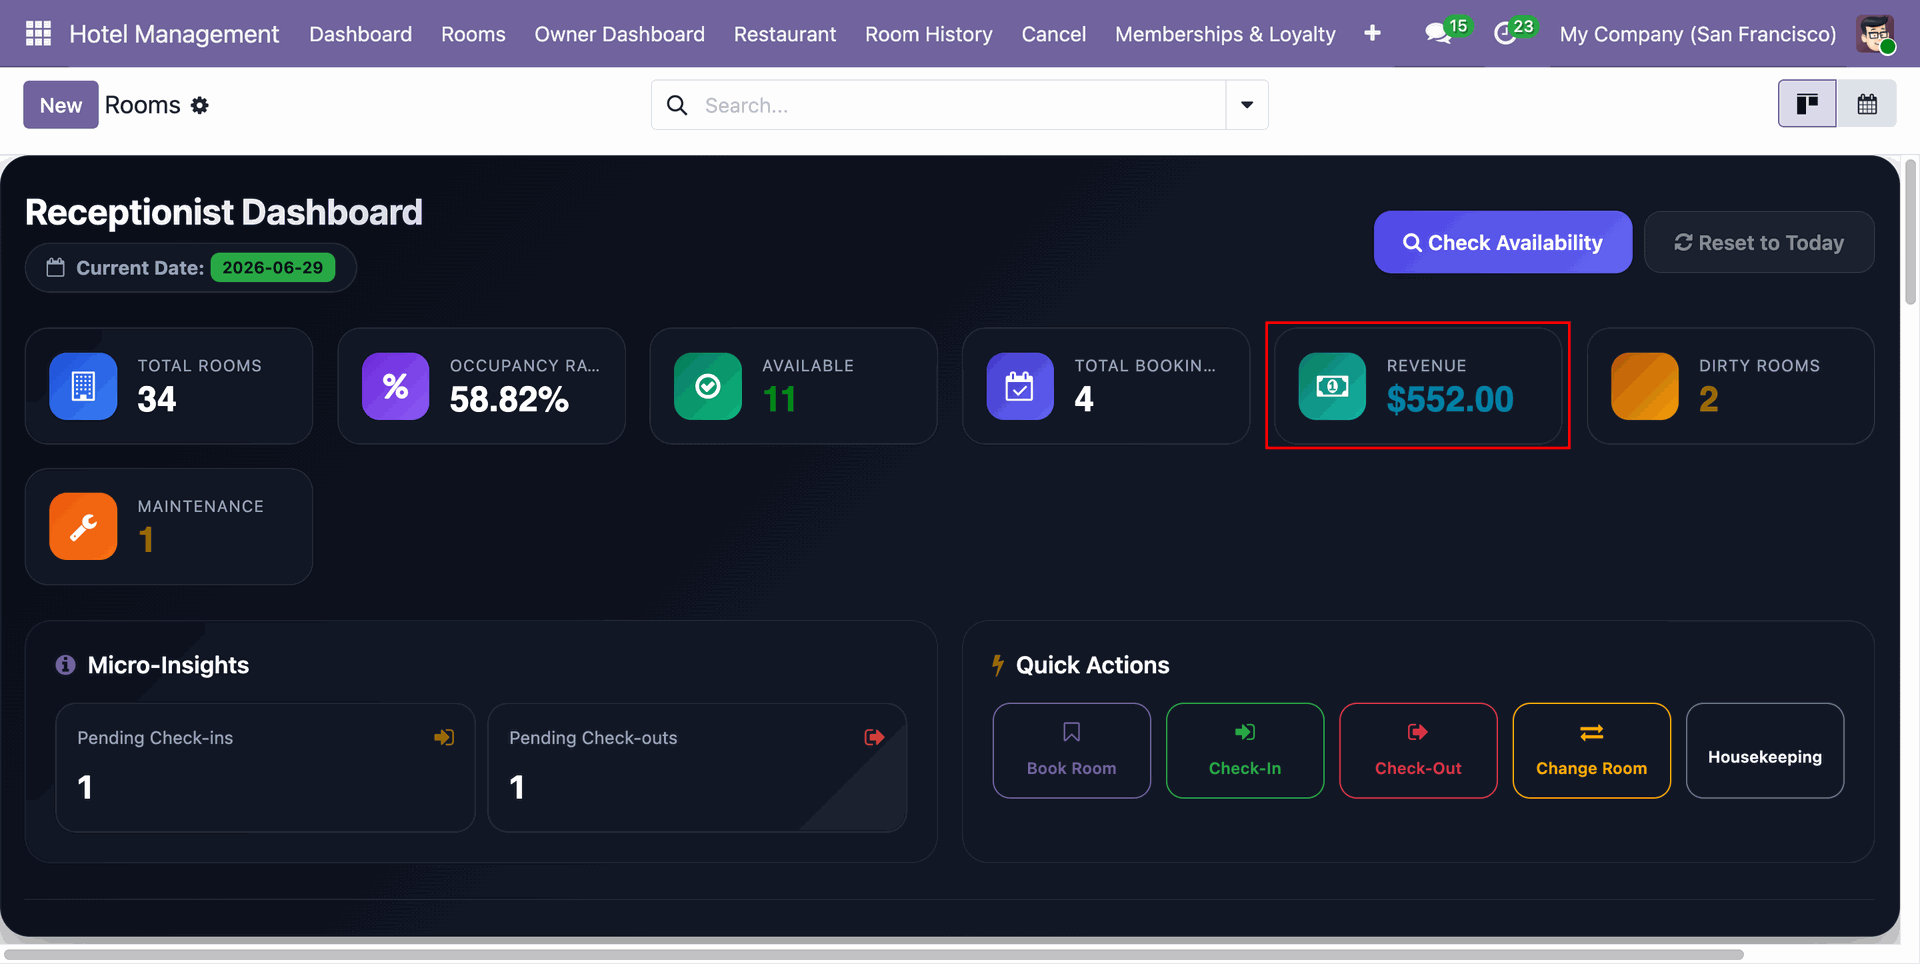
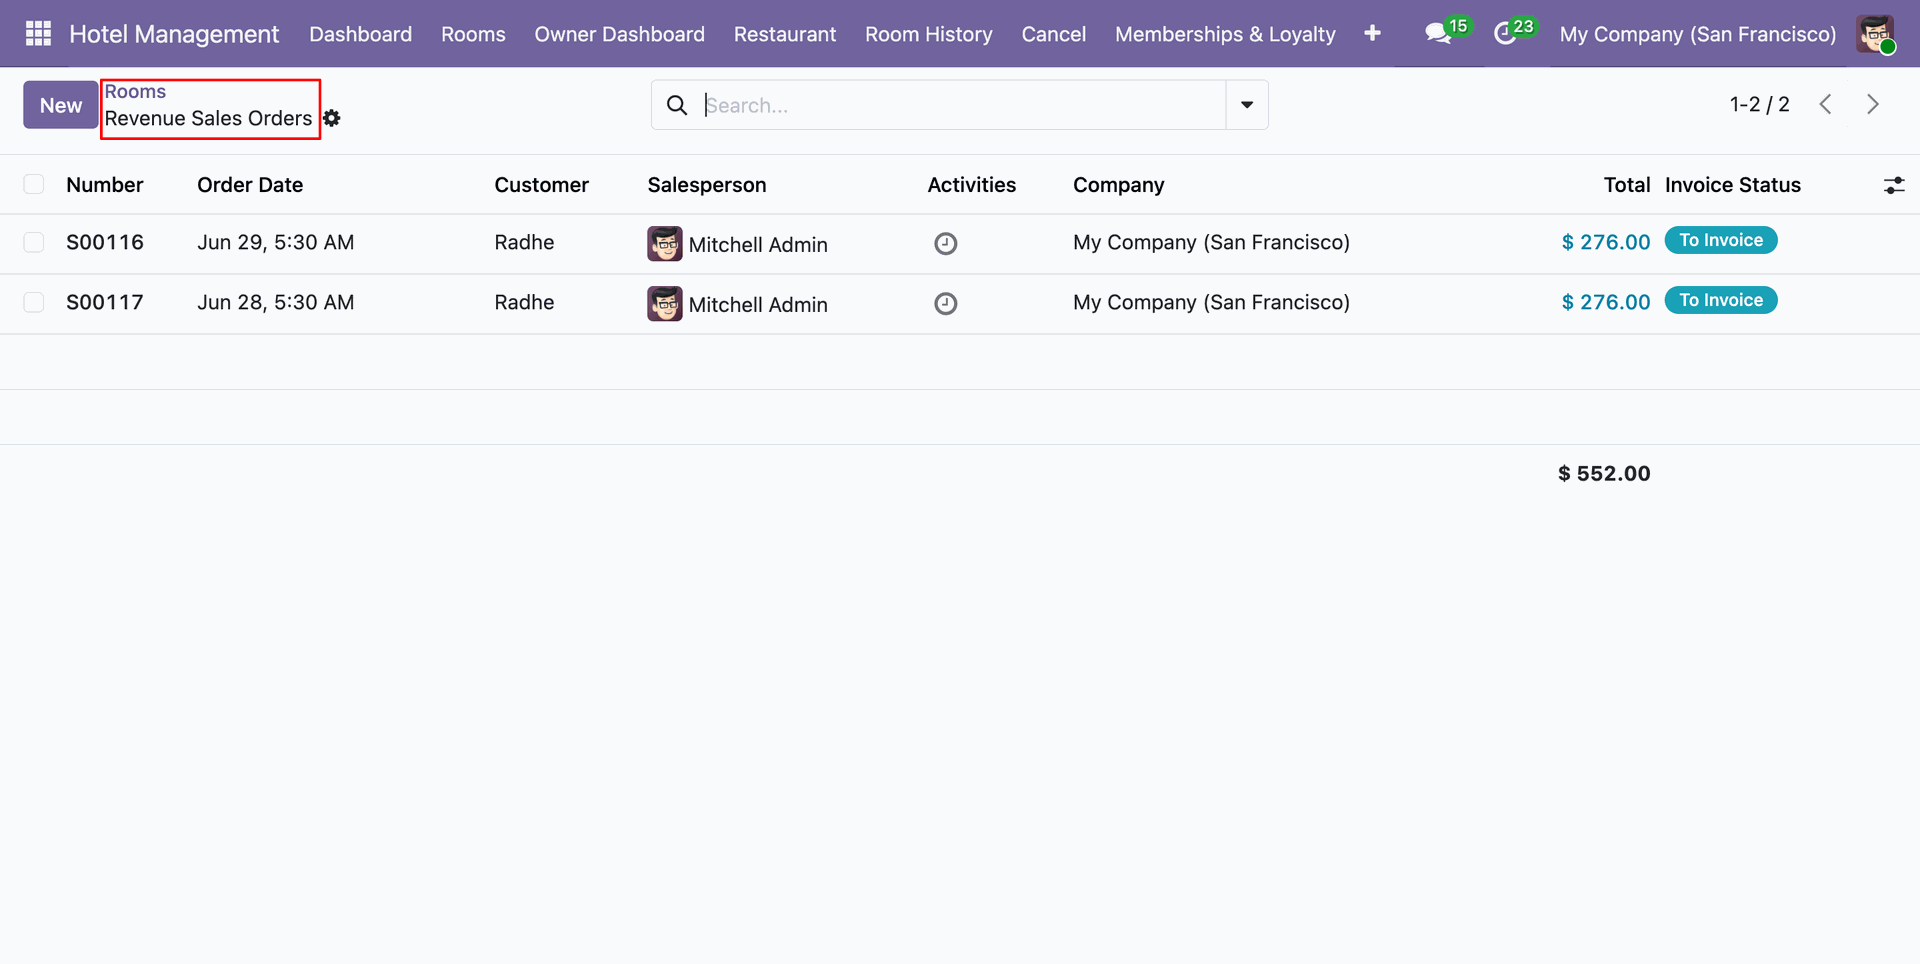
Click on the Revenue tile from the dashboard.
By clicking on the Revenue tile, the Revenue Sales Order list view will open.
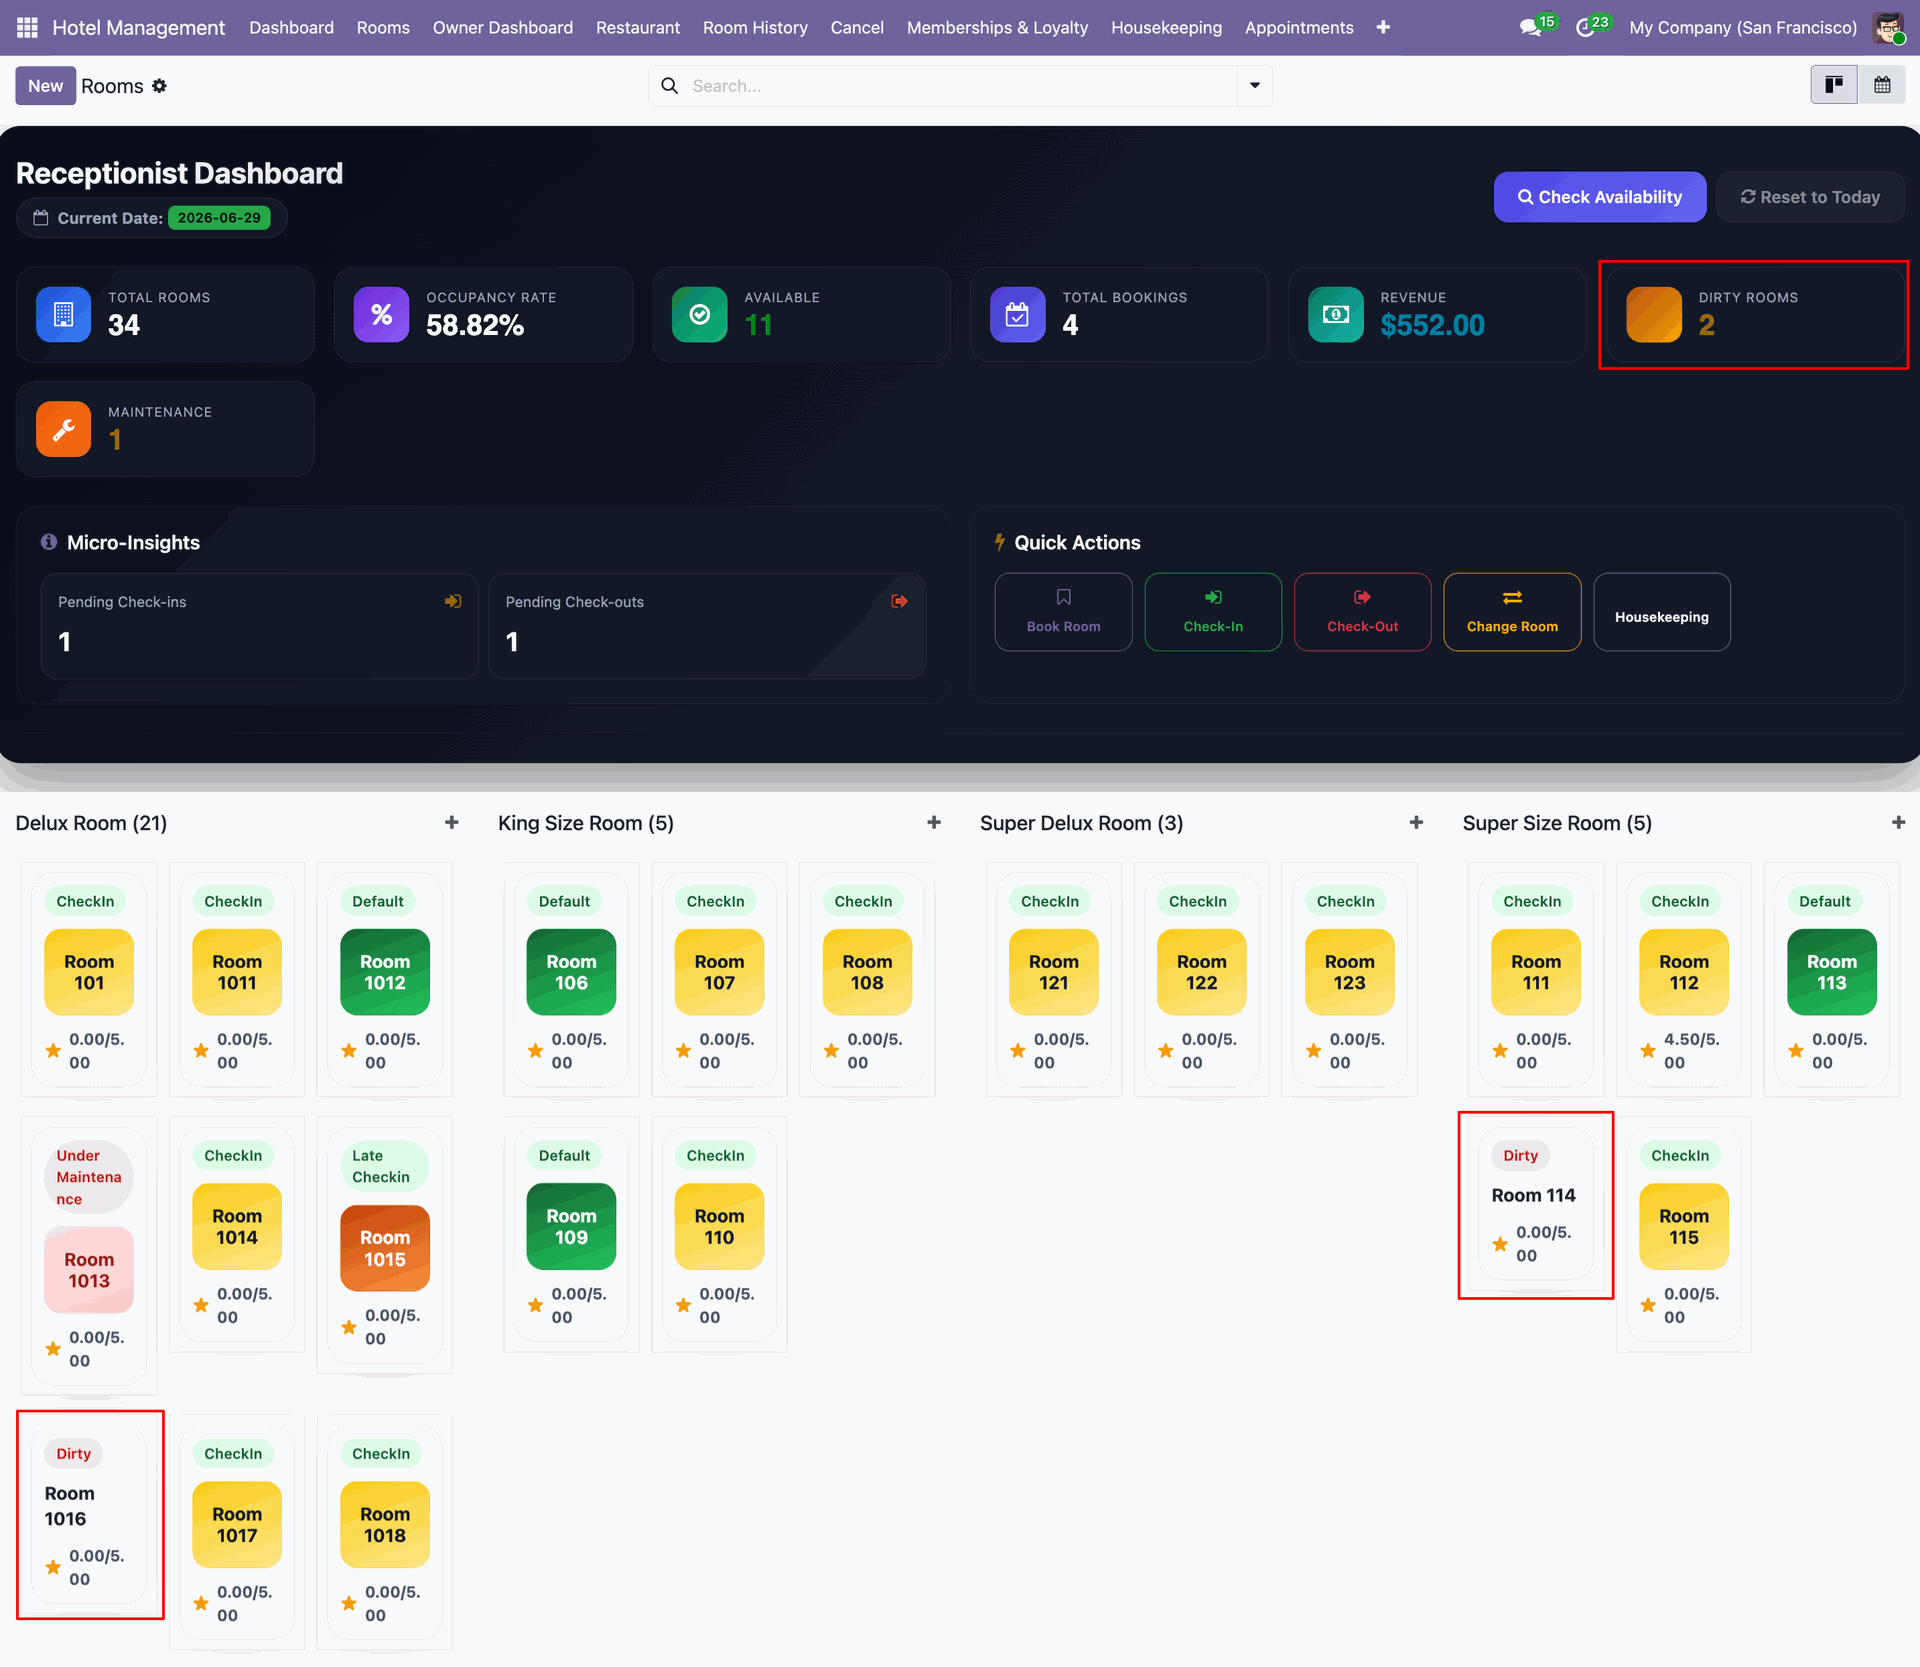
Click on the Dirty Room tile from the dashboard, you will be redirected to the rooms with the Dirty Room tag.
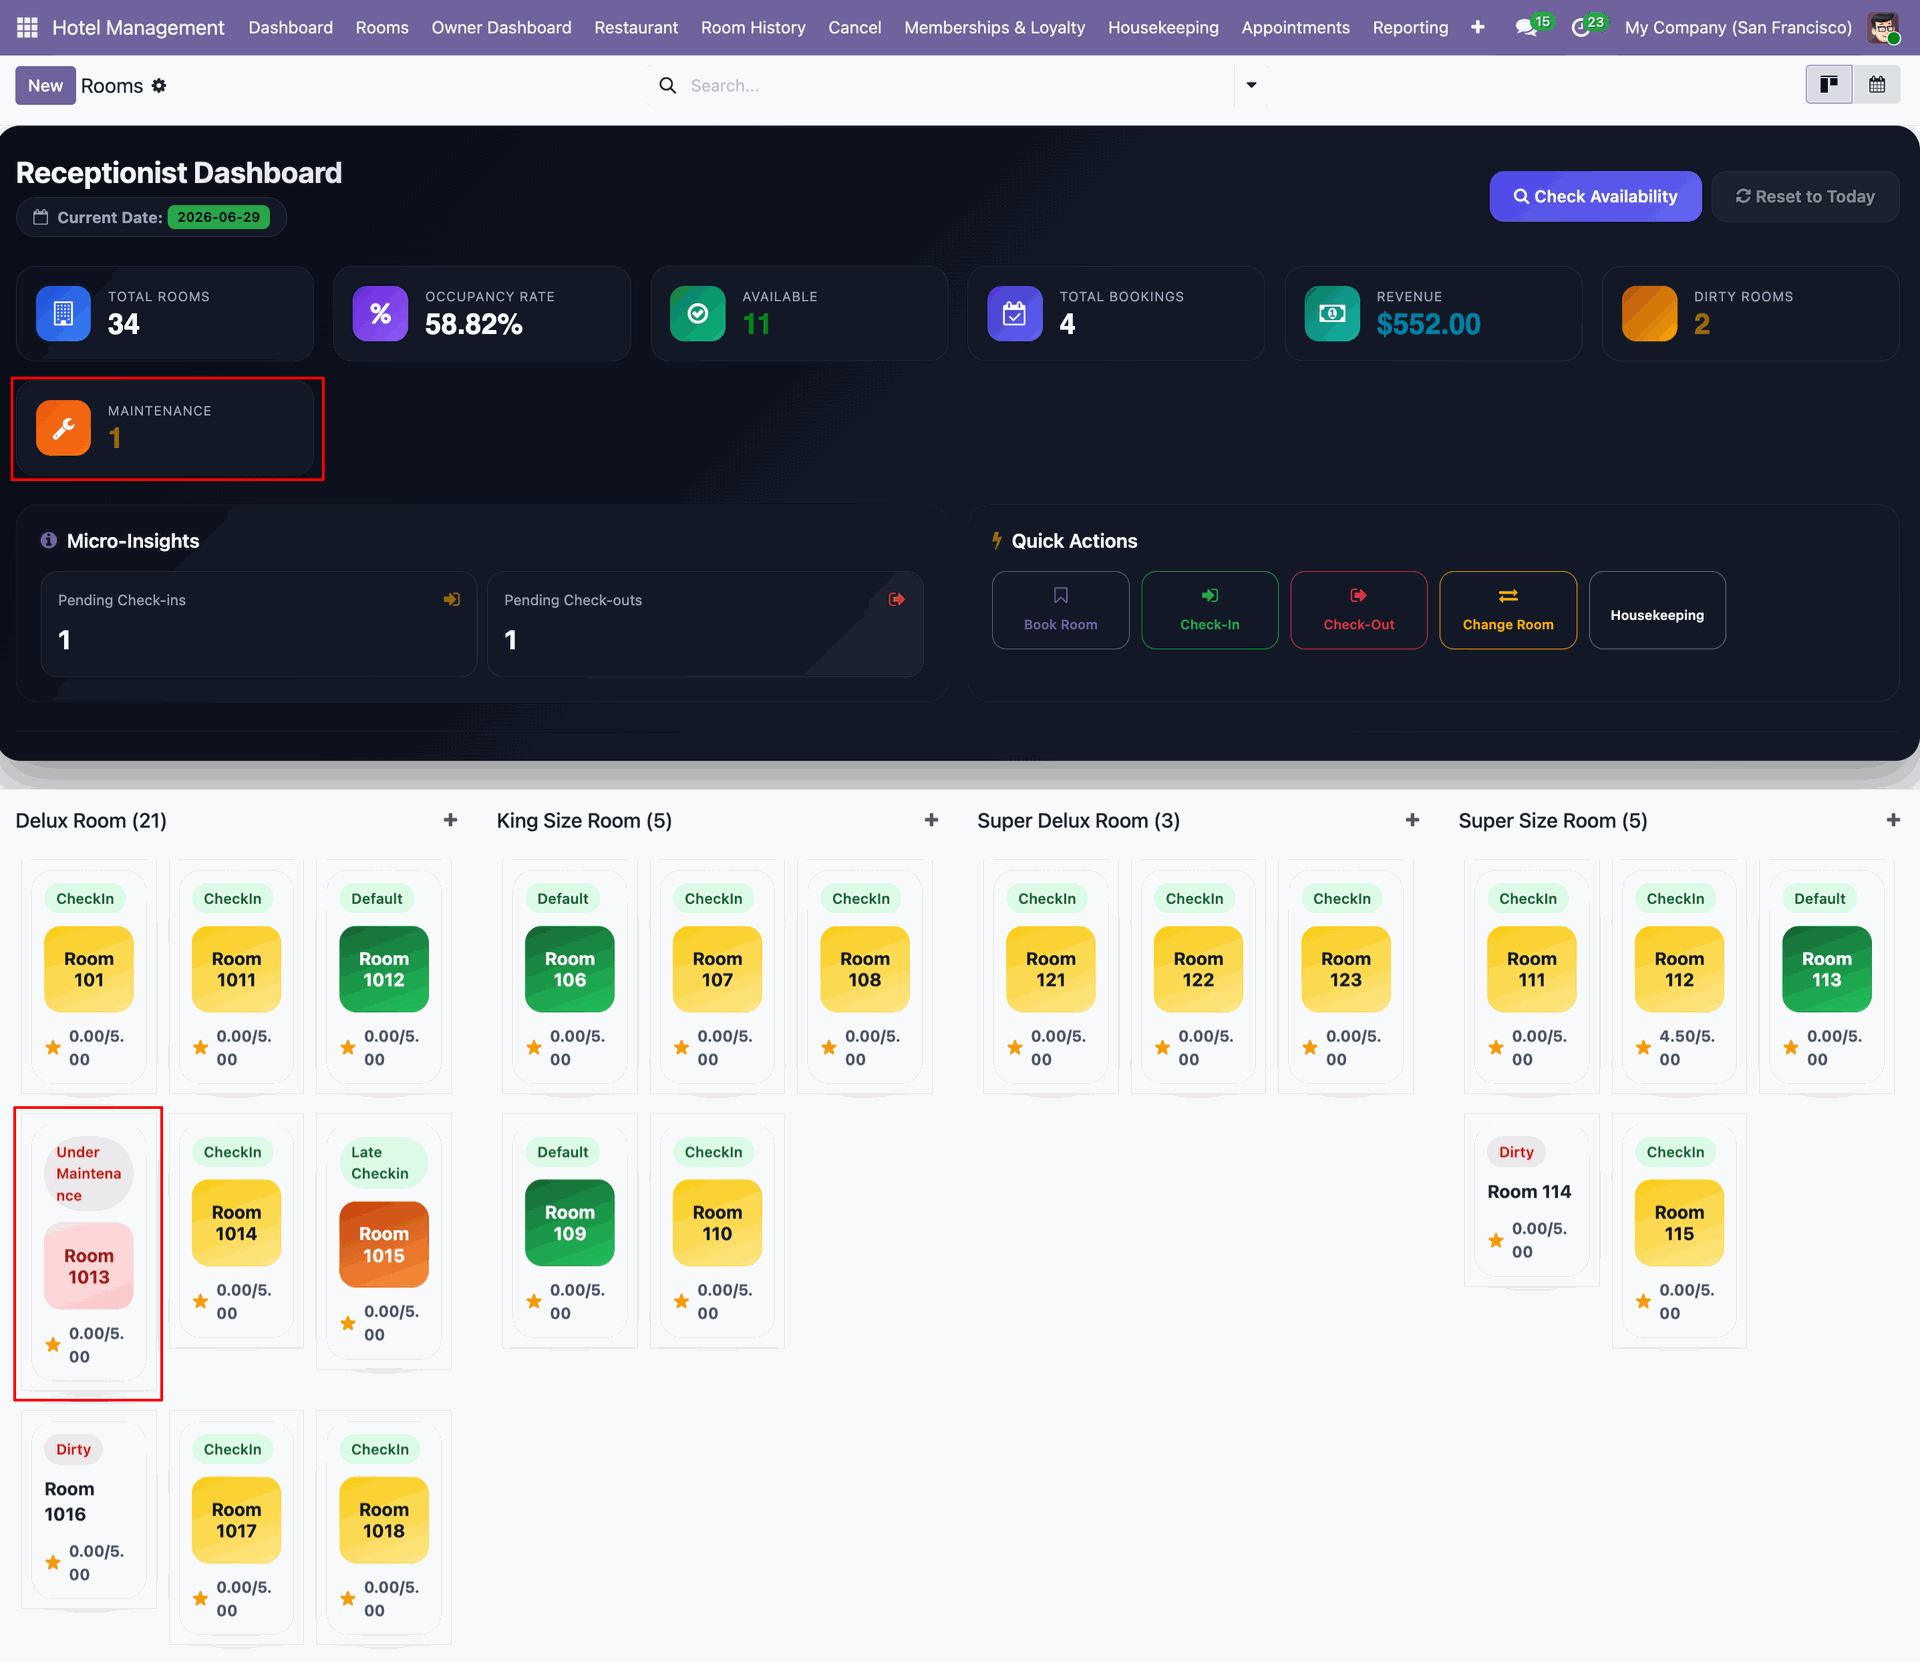
Click on the Maintenance tile from the dashboard, you will be redirected to the rooms with the Under Maintenance tag.
Release Notes
Track every update, enhancement, and new feature across all versions.
Version 18.0.6.0.0 | Released: 14th July 2026
Version 18.0.5.0.0 | Released: 23rd June 2026
Version 18.0.4.0.0 | Released: 06th March 2026
Version 18.0.3.0.0 | Released: 13th November 2025
Version 18.0.2.0.0 | Released: 04th December 2024
Version 18.0.1.0.0 | Released: 03rd September 2024


 Buy Once, Supported Forever


 Scan to email sales


 Your Ideas Shape Our Roadmap
 Got an Idea? We'll Build It
Frequently Asked Questions
Everything you need to know before getting started.
Trusted by Businesses Worldwide


Abdulhamid Abdulwaheed
Best module for our online store. Highly adaptable, exceptional customer service, and very advanced modules.
Factura Venta POS
They have everything you need. Technical support is excellent, responds quickly, and keeps the module updated. 100% recommended!
Mehmet Muhanna
Great company and support team. Had a problem in my local Odoo server - they solved it in 5 minutes. Highly recommend.
Billy Jeffs
Customised an Odoo app for me which works perfectly. Many requirements, got it right every time. Very confident in their ability.
HP
Consistently excellent service over years of working together. Knowledge and commitment to keeping clients informed truly sets them apart.
Michal Kolasinski
Multiple addons + two custom modules. Communication always friendly and precise. Delivered on time, worked out of the box. Highly recommended!

Multi-Language
8 built-in translations


You May Also Like
Discover more Softhealer modules that integrate seamlessly with your Odoo environment.


Most Demanded Apps
The Softhealer modules our customers reach for most — trusted across 100+ countries.
Activities Management
Manage, schedule, and automate Odoo activities across all departments from one view.
View Module
Access Management
Granular access control over menus, fields, buttons, and records for every user role.
View Module
Backdate Advanced
Backdate any transaction across invoices, journals, pickings, and more with full audit.
View Module
All-in-One Helpdesk
Full-featured customer support with tickets, SLA, and customer portal built for Odoo.
View Module
All-in-One Mobile Backend
Access your full Odoo backend from any mobile device with an optimized interface.
View Module
All-in-One Import
Import any Odoo model data from CSV, Excel, and JSON files with mapping and validation.
View Module
Our Services
End-to-end Odoo expertise - from setup to scale.

AI & Business Integration

Odoo Implementation

Odoo Customization

Support & Maintenance

Mobile Apps

Migration Service

Third-Party Integration

Odoo Training
Ready to automate Hotel Management System?
Join 10,000+ businesses - Softhealer, 11+ years of Odoo gold partnership expertise across 100+ countries.

