


 Added Helpdesk Ticket Dashboard Overview.
Added Multi-Company Support for Helpdesk Configuration.
Added Helpdesk Notification Feature.
Added Sticky Notes for Tickets.
Added Customer Hour Packages Feature.
Added Repair Order Integration.
Added Ticket Widgets in List & Kanban Views.
Added Bold Ticket Highlighting Feature.
Added Manual Timesheet Entry in Tickets.
Added Team Head Update Utility Feature.
Added Helpdesk Ticket Dashboard Overview.
Added Multi-Company Support for Helpdesk Configuration.
Added Helpdesk Notification Feature.
Added Sticky Notes for Tickets.
Added Customer Hour Packages Feature.
Added Repair Order Integration.
Added Ticket Widgets in List & Kanban Views.
Added Bold Ticket Highlighting Feature.
Added Manual Timesheet Entry in Tickets.
Added Team Head Update Utility Feature.
Helpdesk Enterprise

Are you looking for fully flexible and customisable helpdesk in odoo? Our this apps almost contain everything you need for Service Desk, Technical Support Team, Issue Ticket System which include service request to be managed in Odoo backend. Support ticket will send by email to customer and admin. This desk is fully customizable clean and flexible.
Key Features


Features

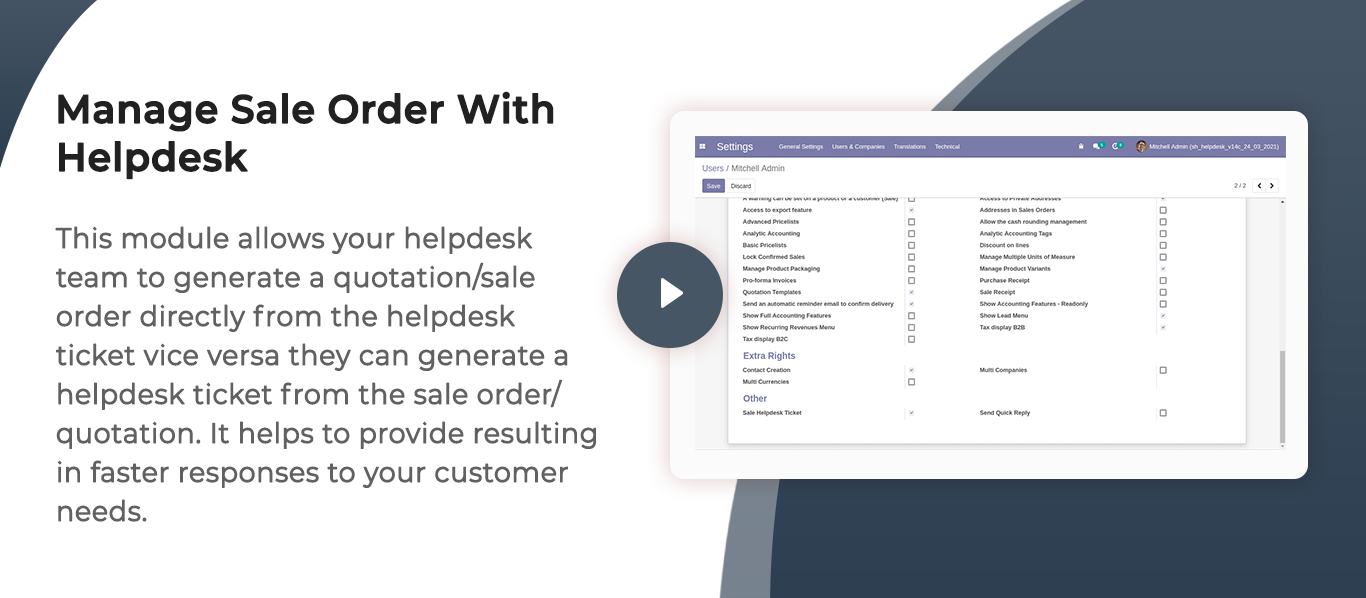
Sales Order & Helpdesk Integration
Create sales orders/quotations from helpdesk tickets and generate helpdesk tickets from sales documents.
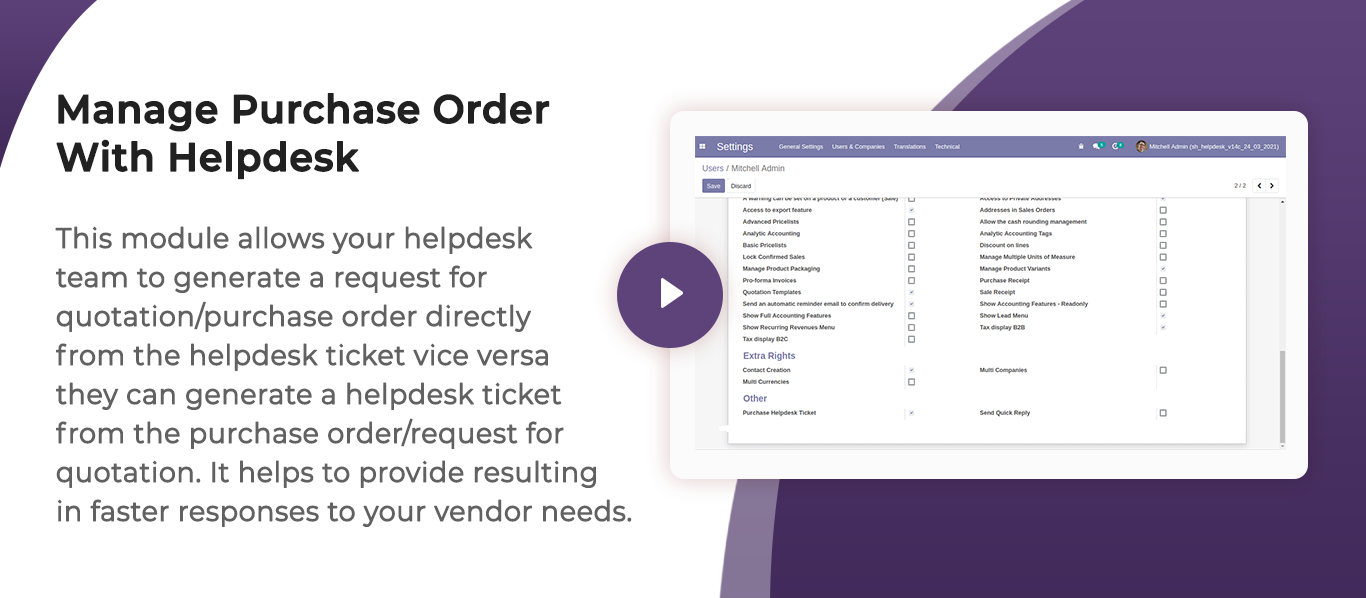
Purchase Order & Helpdesk Integration
Create purchase orders/RFQs from helpdesk tickets and generate tickets from purchase documents.

Mass Ticket Updates
Update multiple helpdesk tickets simultaneously using mass actions.

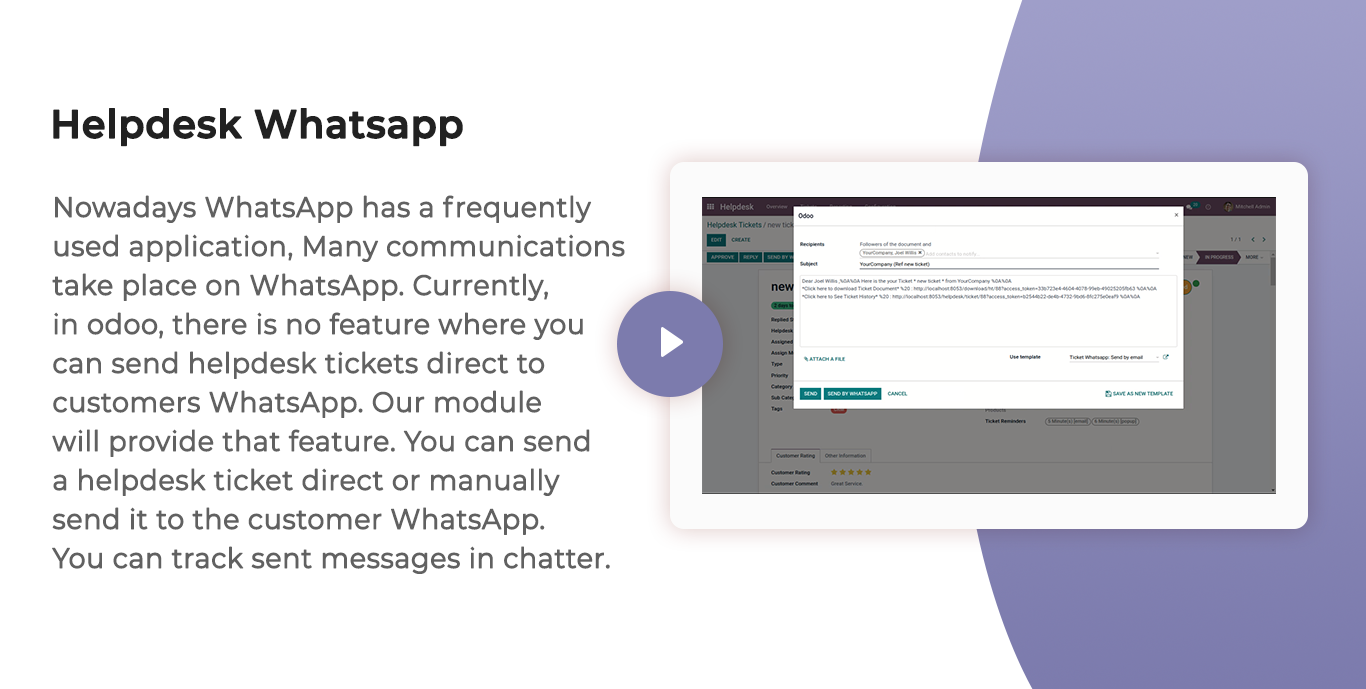
Helpdesk WhatsApp Integration
Send helpdesk ticket details and updates directly to customers via WhatsApp.
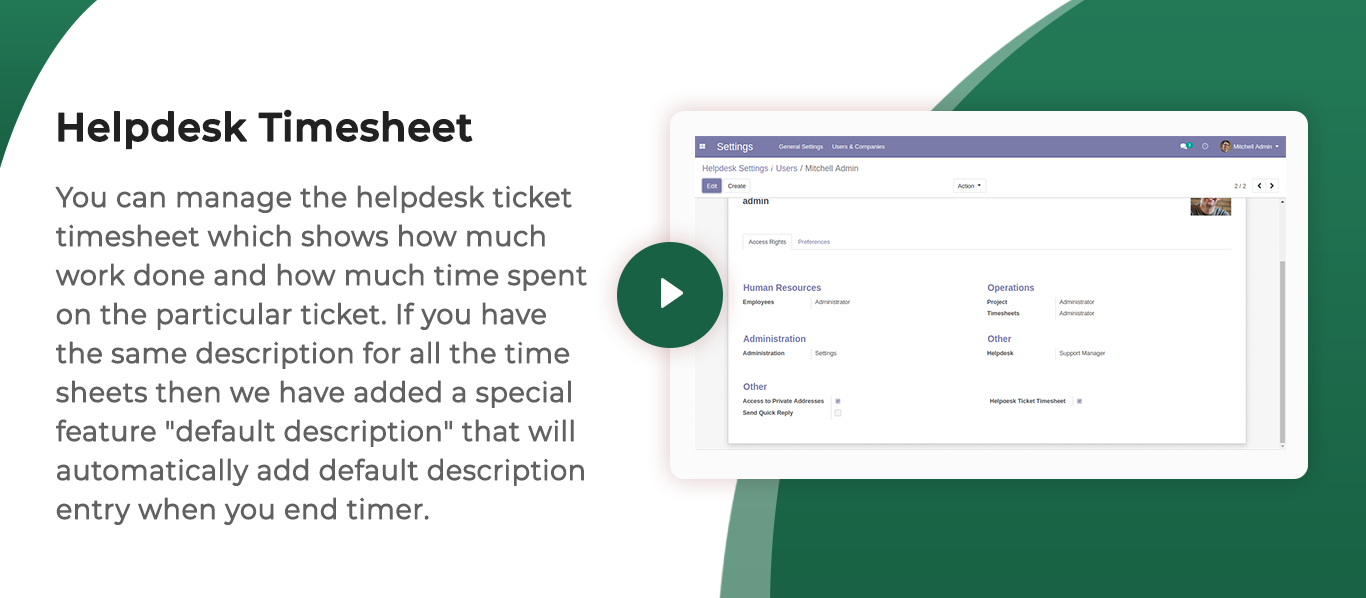
Helpdesk Timesheet Management
Track and manage time spent on support tickets using integrated timesheets.

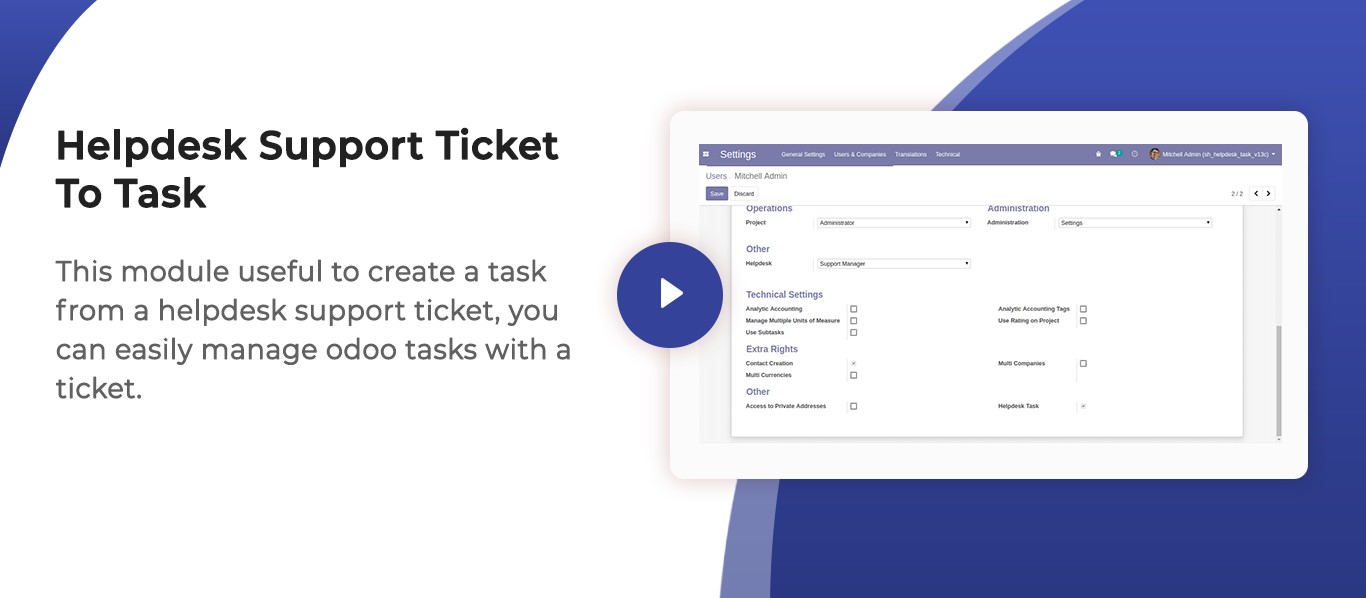
Ticket to Task Conversion
Convert support tickets into project tasks and create tasks directly from tickets.
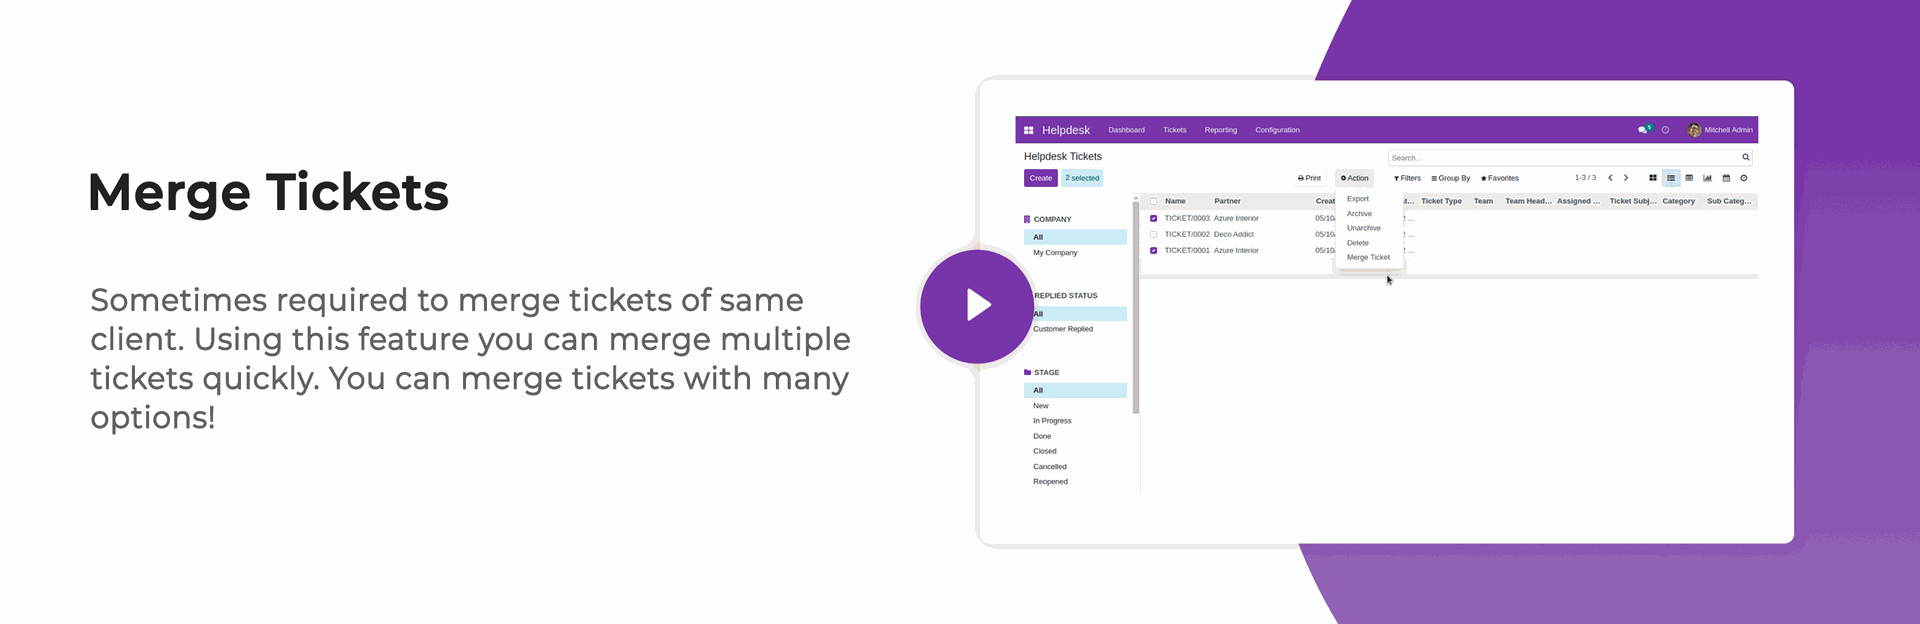
Ticket Merge Management
Merge multiple related tickets into a single ticket for streamlined support management.
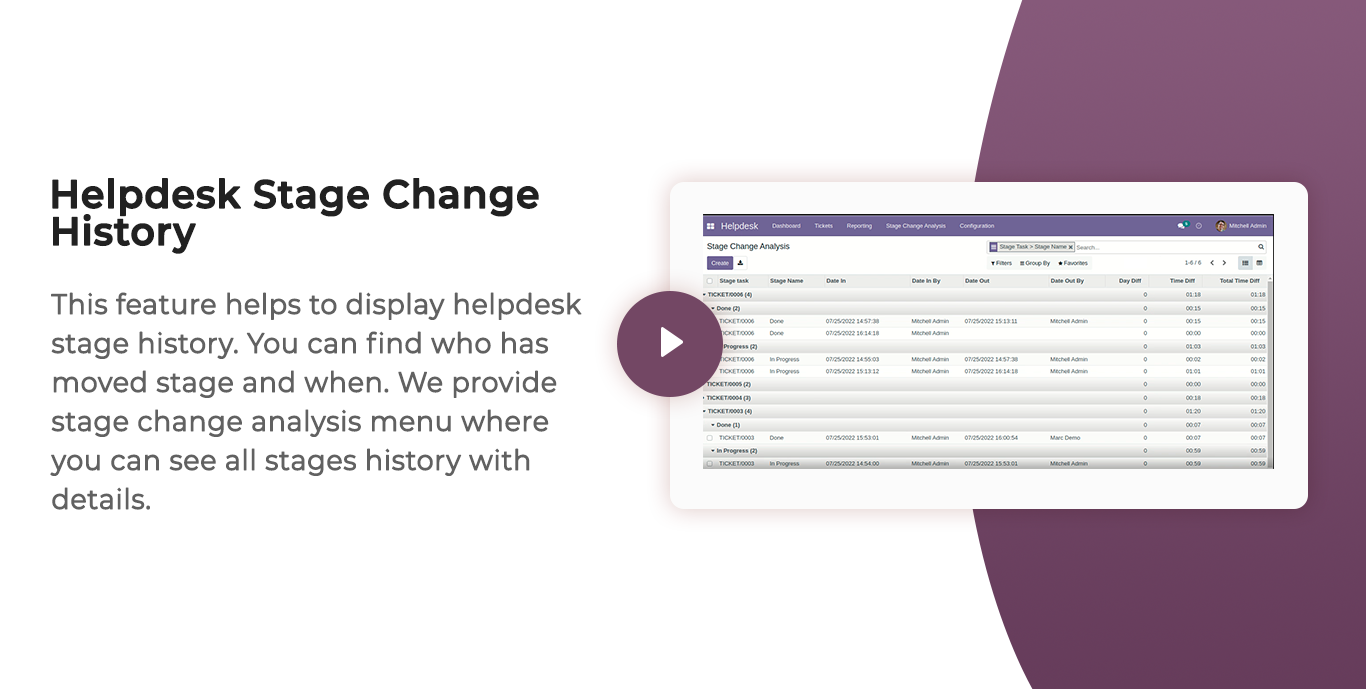
Helpdesk Stage Change History
Track and review complete stage change history for support tickets.

Customer Ticket Email Visibility
Allow customers to view ticket-related email communications.
Auto Stage Change on Reply
Automatically update ticket stages when customers or staff reply to tickets.
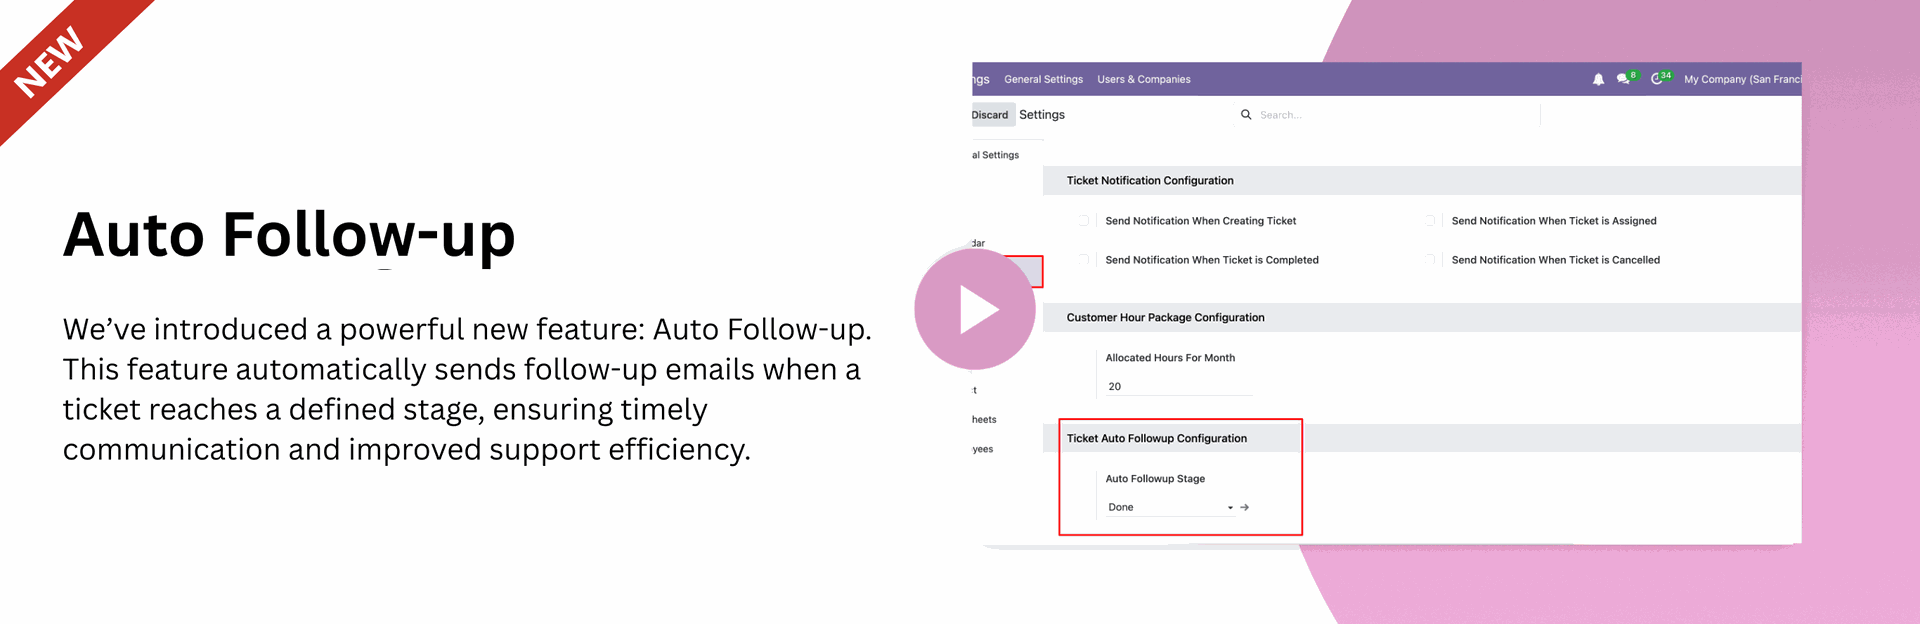
Automatic Ticket Follow-Up
Configure automated follow-up reminders and communications for support tickets.

Multi-Company Helpdesk Configuration
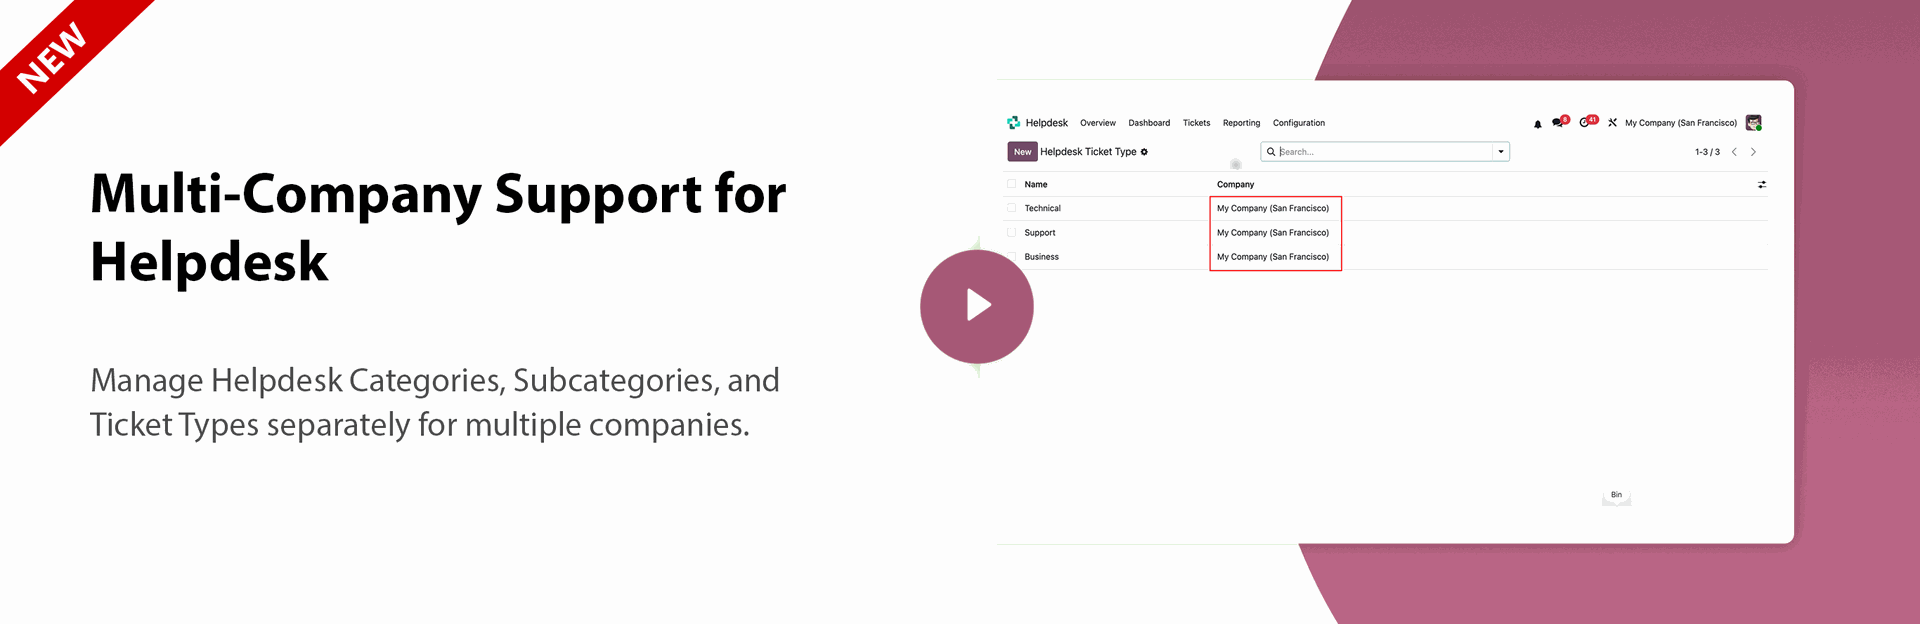
Manage Helpdesk Categories, Subcategories, and Ticket Types separately for multiple companies.

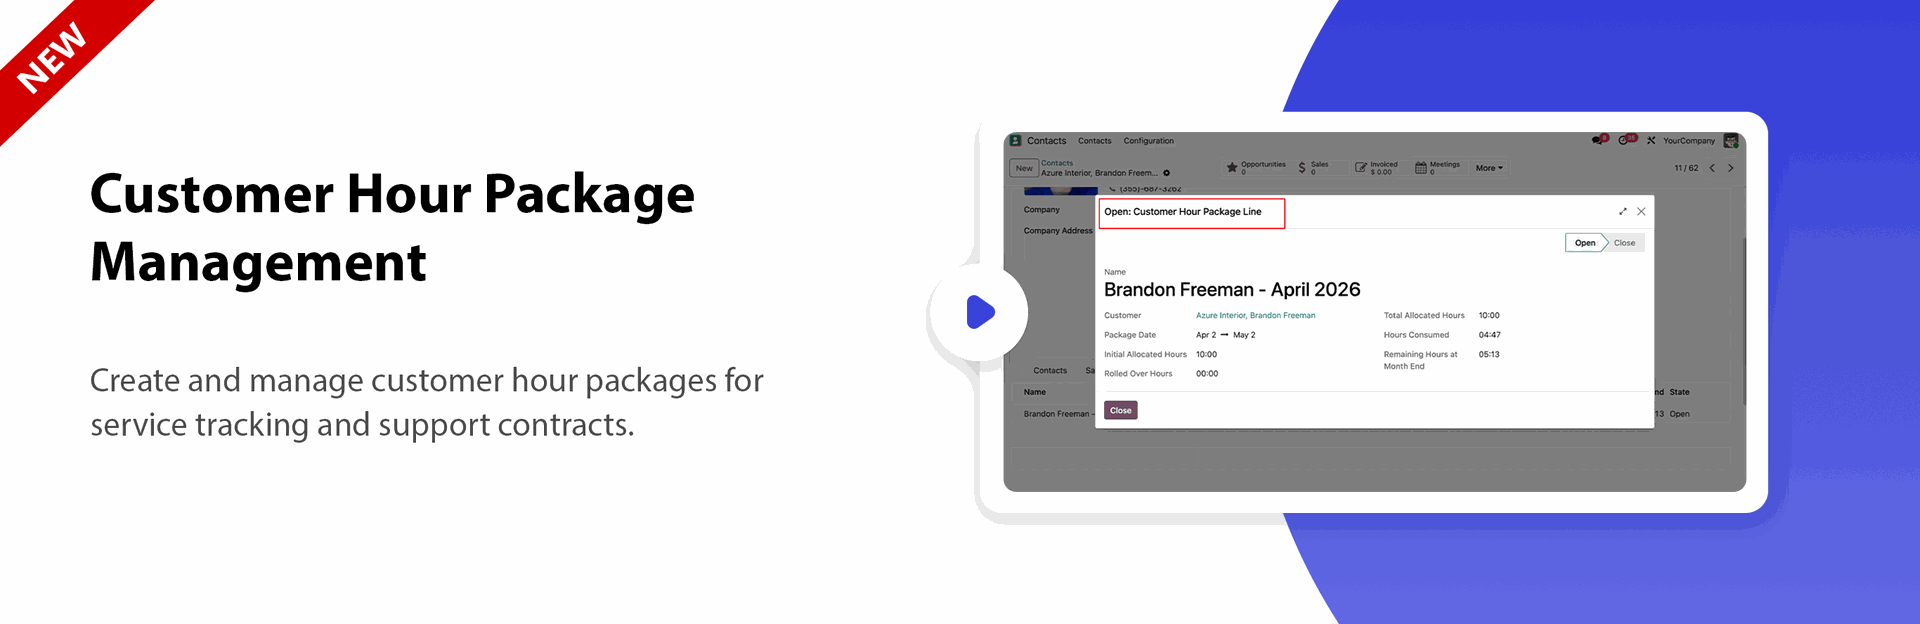
Customer Hour Package Management
Create and manage customer hour packages for service tracking and support contracts.
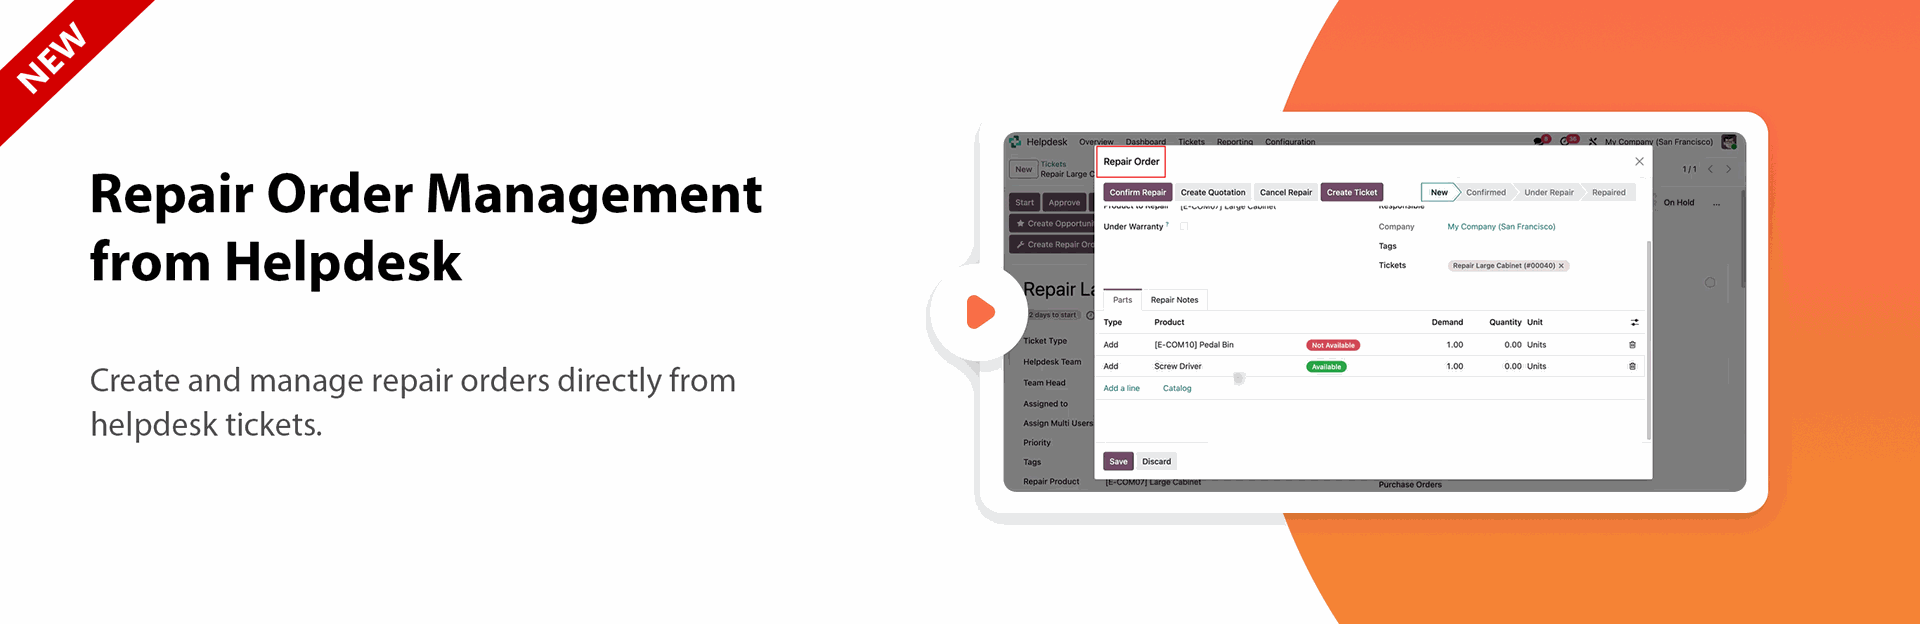
Repair Order Integration
Create and manage repair orders directly from helpdesk tickets.

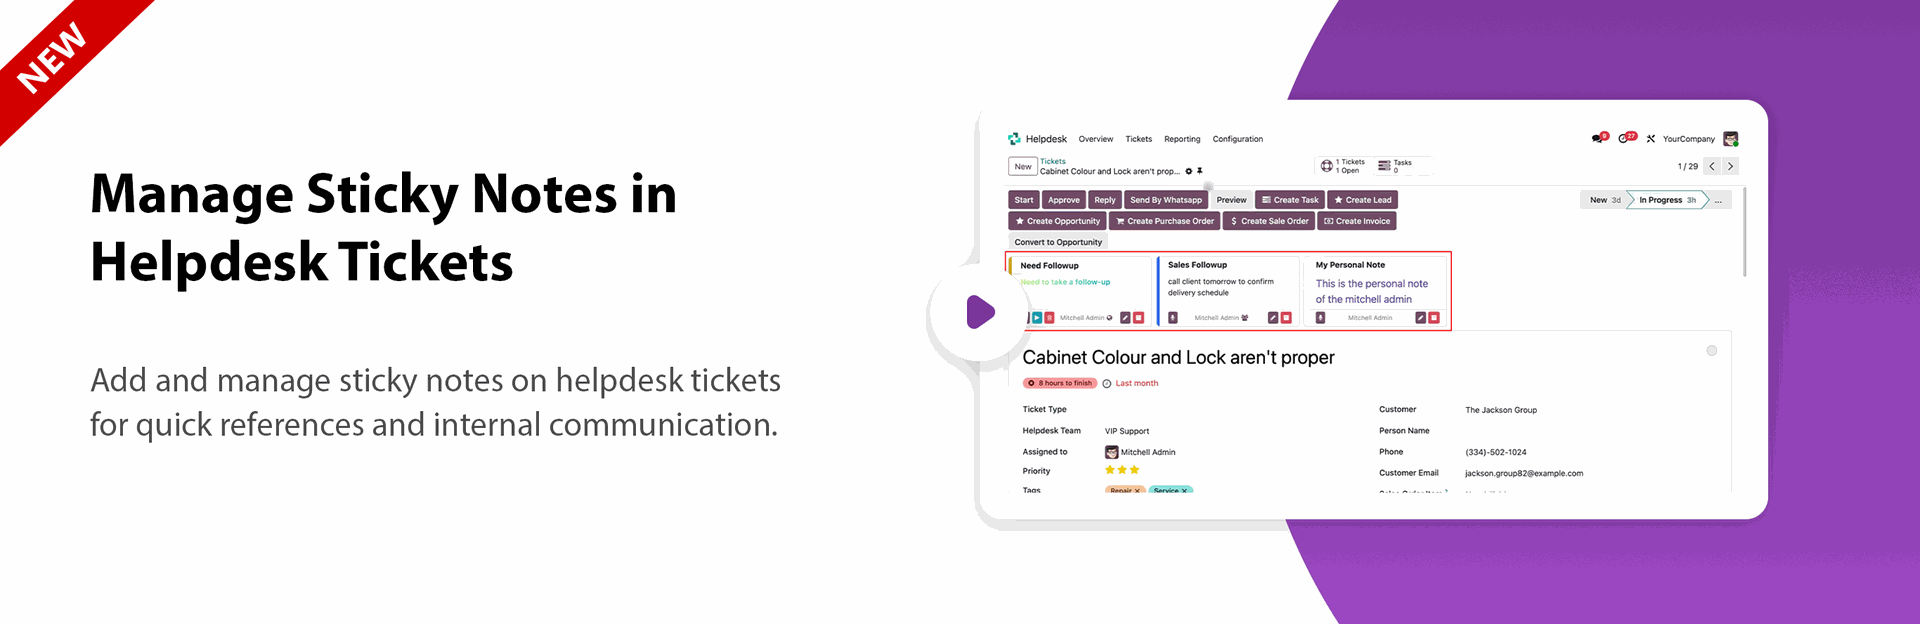
Sticky Notes for Tickets
Add and manage sticky notes on helpdesk tickets for quick references and internal communication.
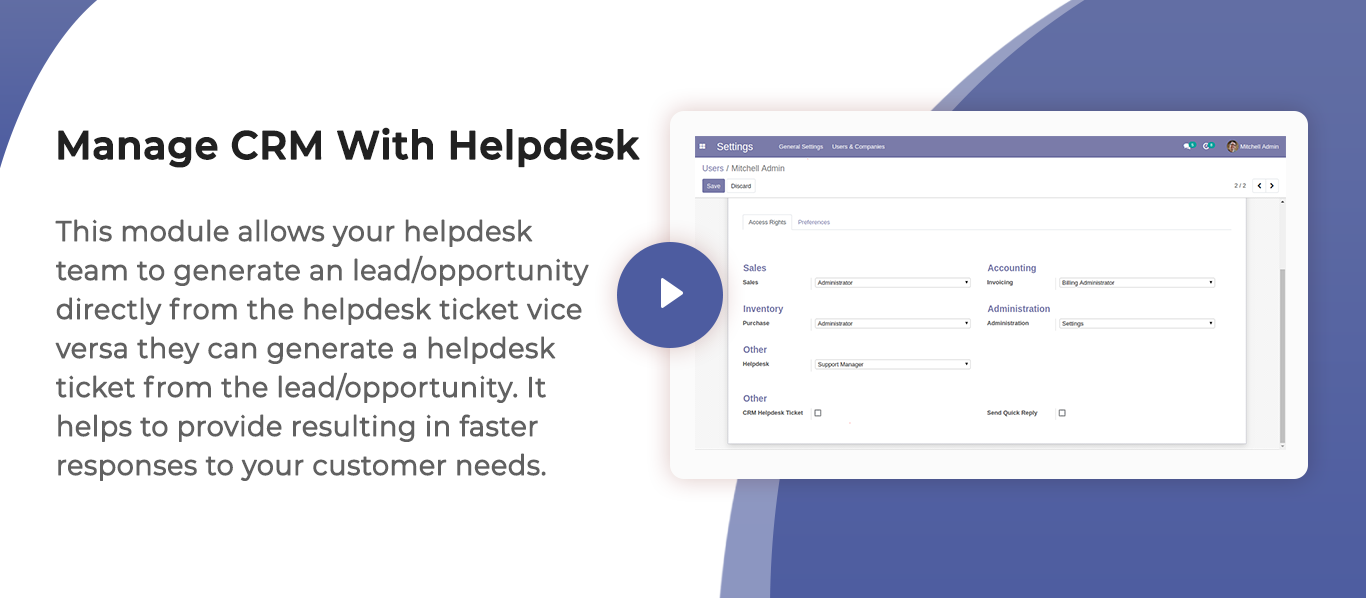
CRM & Helpdesk Integration
Create leads/opportunities from tickets and generate helpdesk tickets from CRM records.
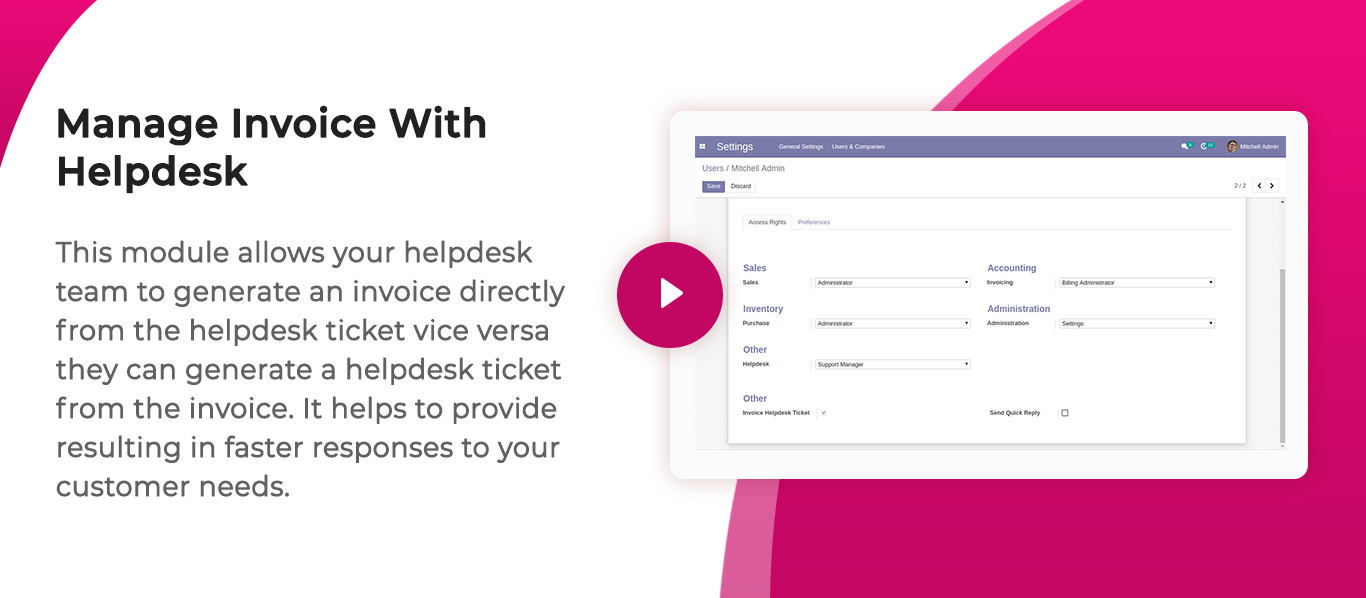
Invoice & Helpdesk Integration
Create invoices from helpdesk tickets and link invoices back to helpdesk records.
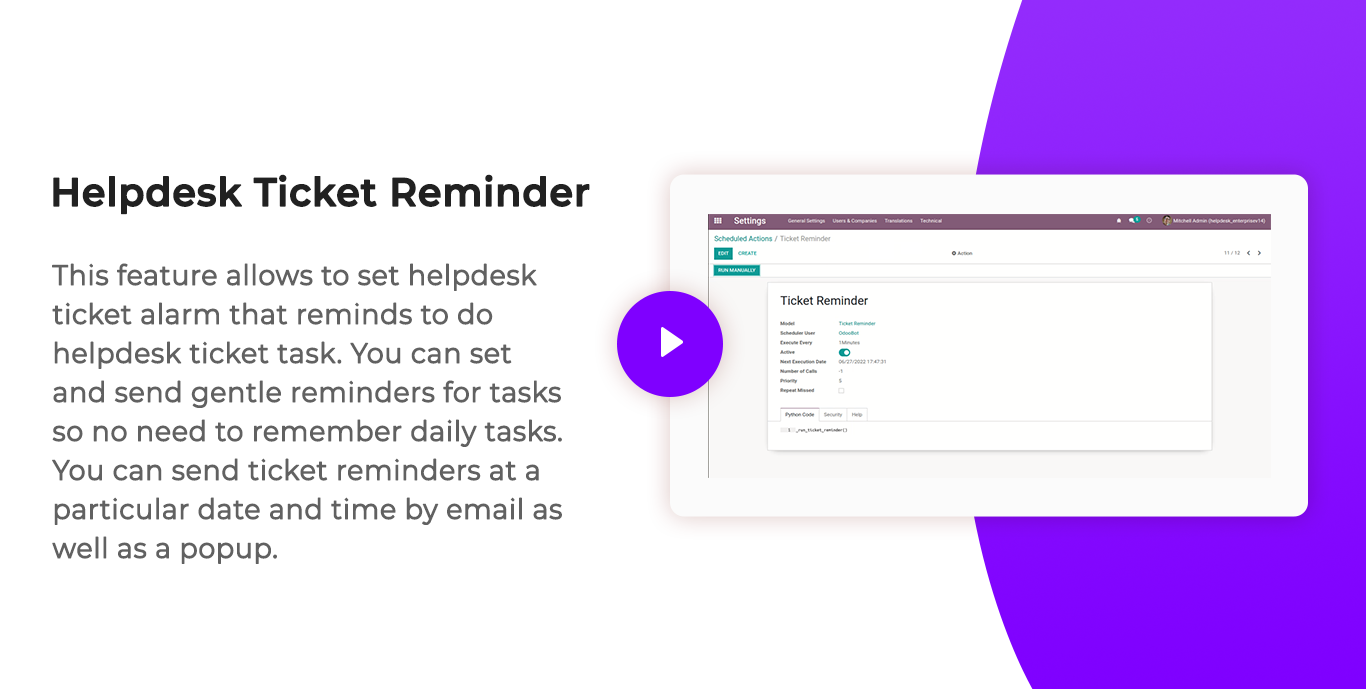
Helpdesk Ticket Alarm
Configure reminders and alarms for ticket follow-ups and activities.
Multi-Product Ticket Management
Associate and manage multiple products within a single helpdesk ticket.
Multiple User Assignment
Assign a single helpdesk ticket to multiple users for collaborative support.

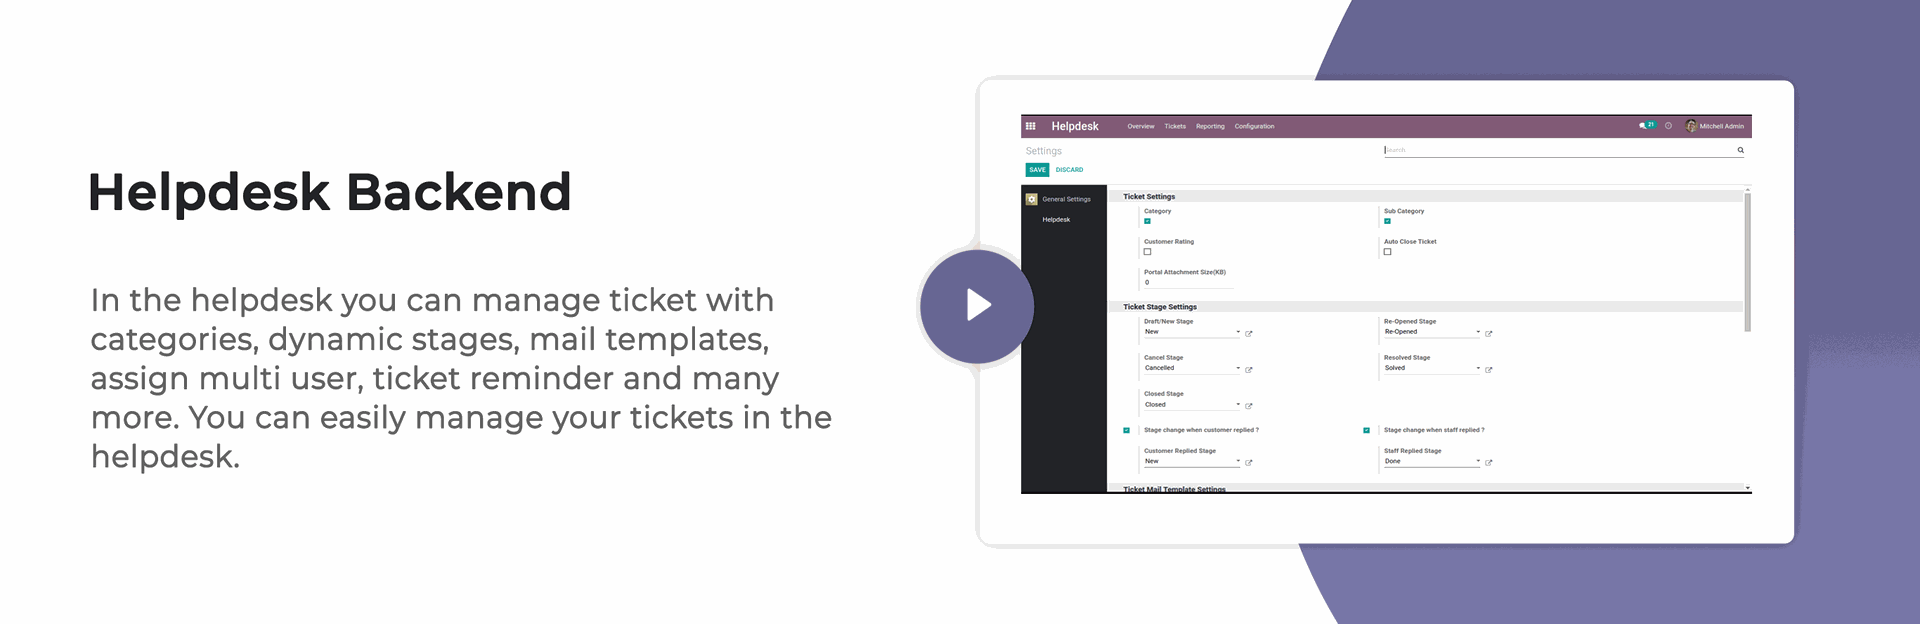
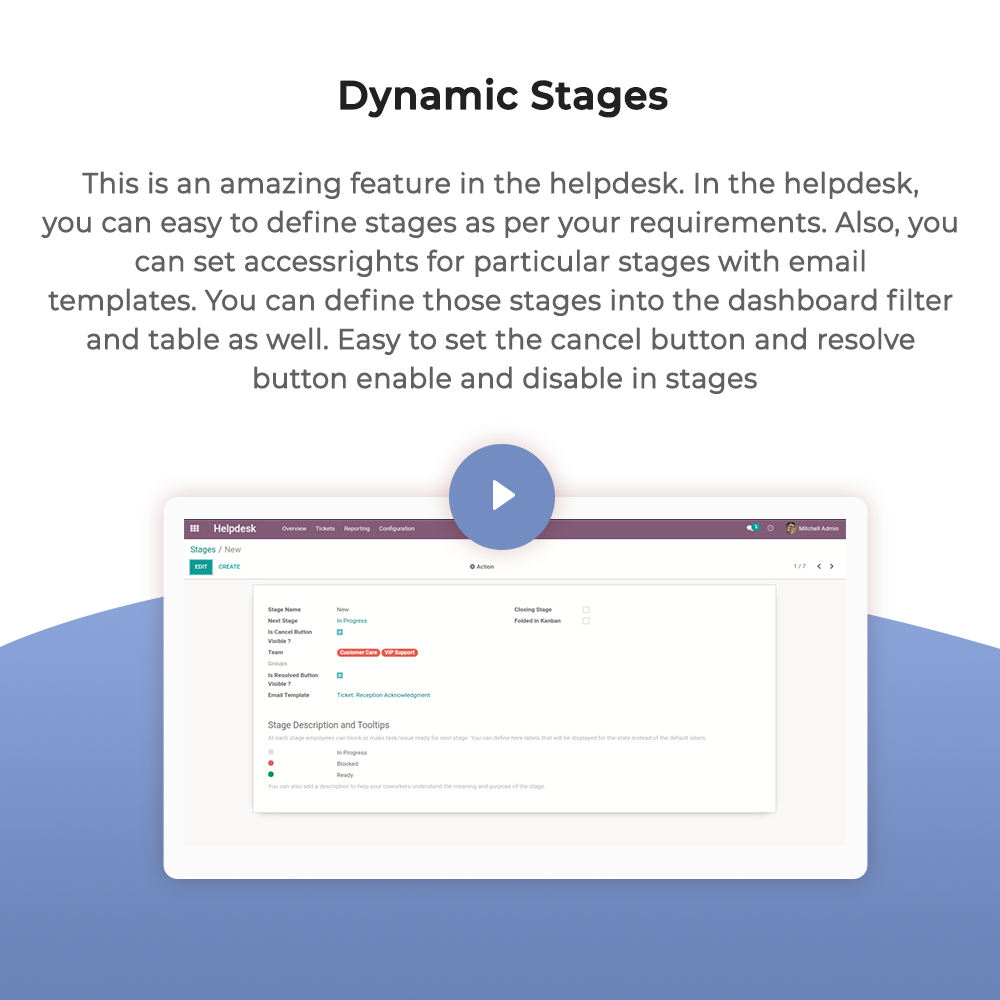
Dynamic Helpdesk Stages
Create and manage custom ticket stages according to business requirements.

Customer Feedback Management
Automatically request and collect customer feedback when tickets are closed.
Helpdesk PDF Reports
Generate detailed PDF reports for helpdesk tickets and related information.
Ready-Made Email Templates
Use preconfigured email templates for common helpdesk communications.

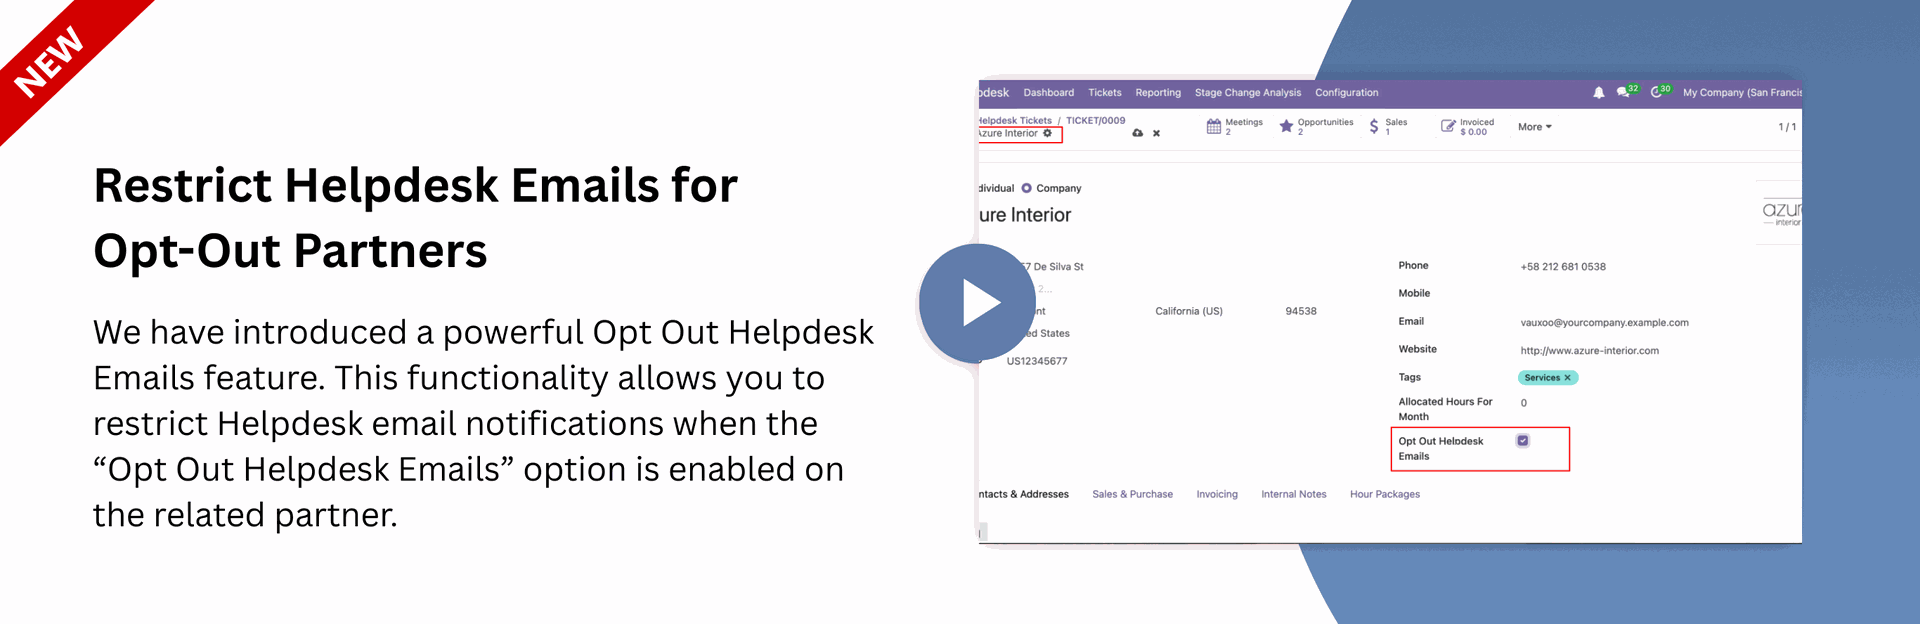
Opt-Out Partner Email Restriction
Prevent helpdesk emails from being sent to partners who have opted out of email communications.
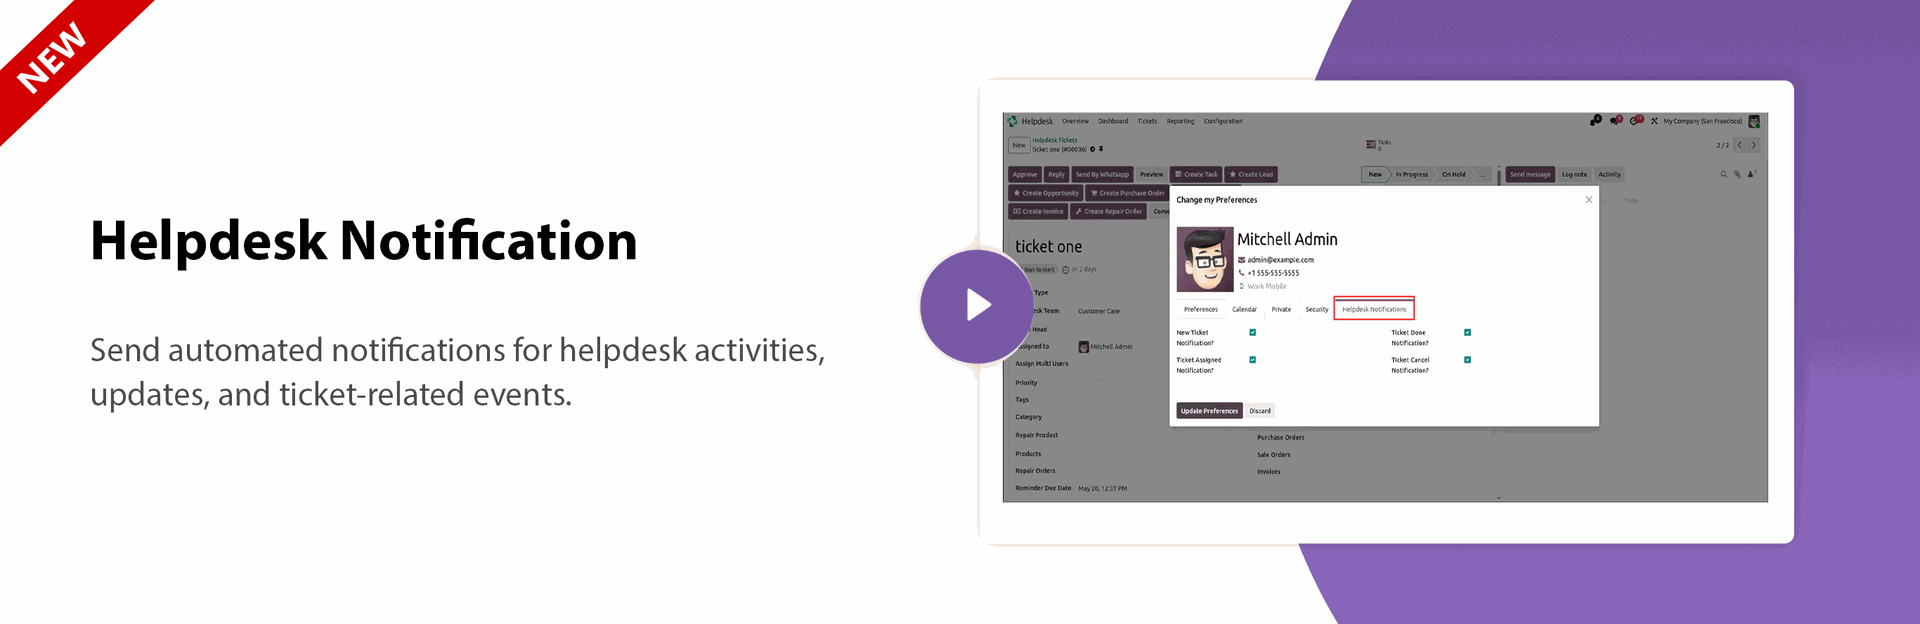
Helpdesk Notification Management
Send automated notifications for ticket activities, assignments, updates, and events.

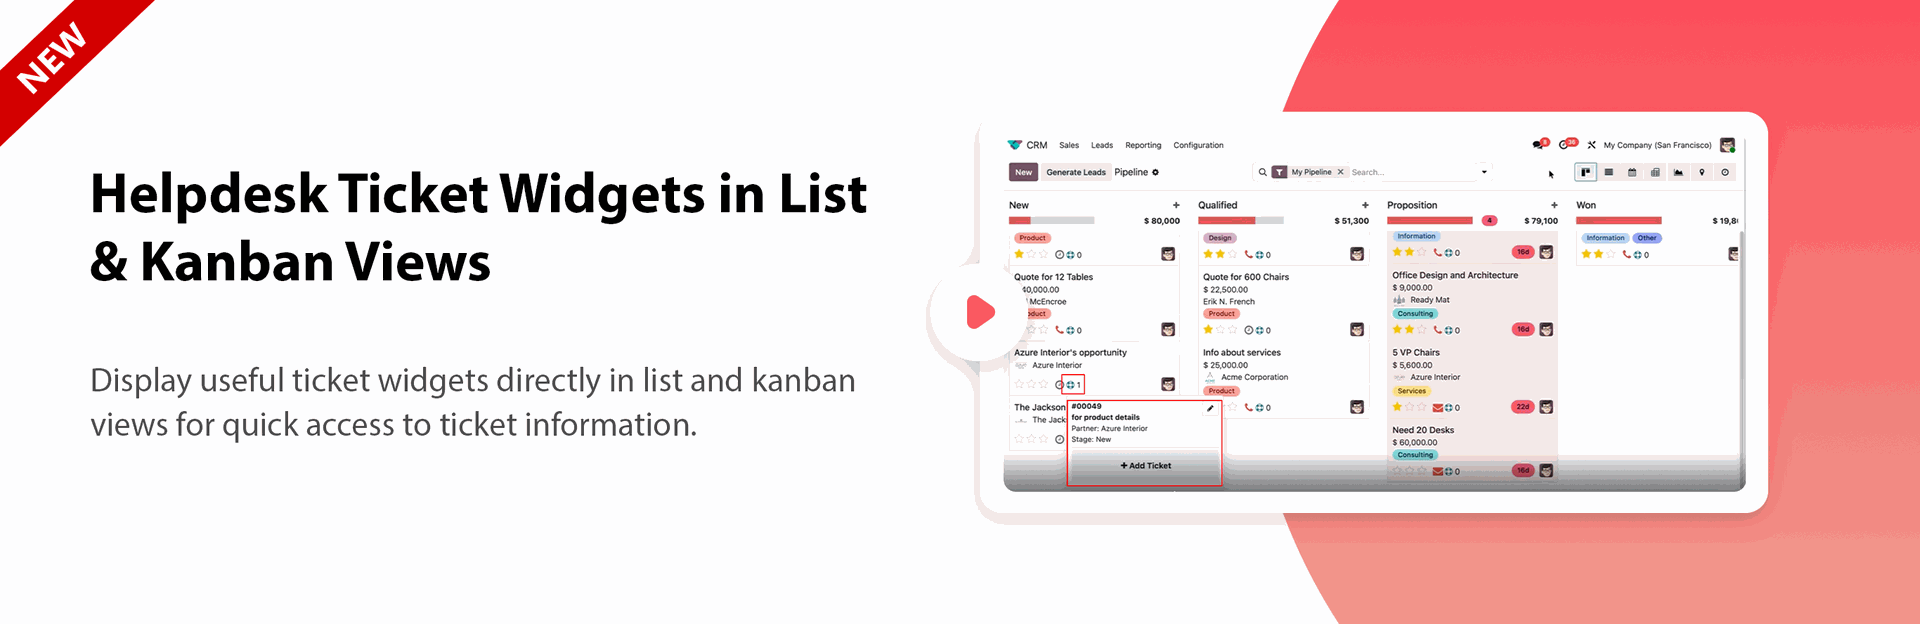
Ticket Widgets in List & Kanban Views
Display useful ticket widgets directly in list and kanban views for quick access to ticket information.
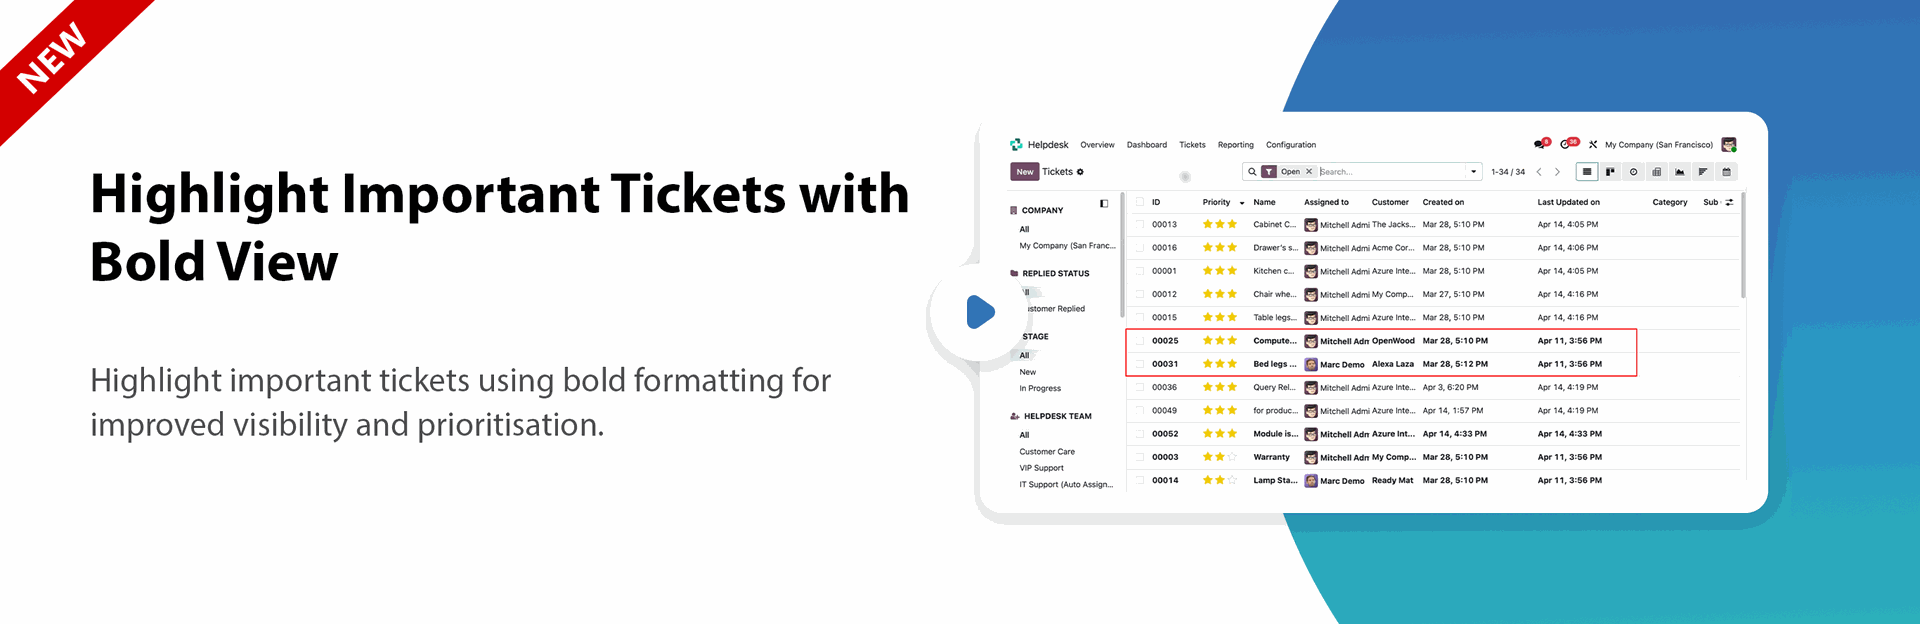
Bold Ticket Highlighting
Highlight important tickets using bold formatting for improved visibility and prioritization.
Manual Timesheet Entry in Tickets
Allow users to manually record timesheet entries directly within helpdesk tickets.
Team Head Update Utility
Update the Team Head for existing helpdesk tickets using a dedicated configuration button.
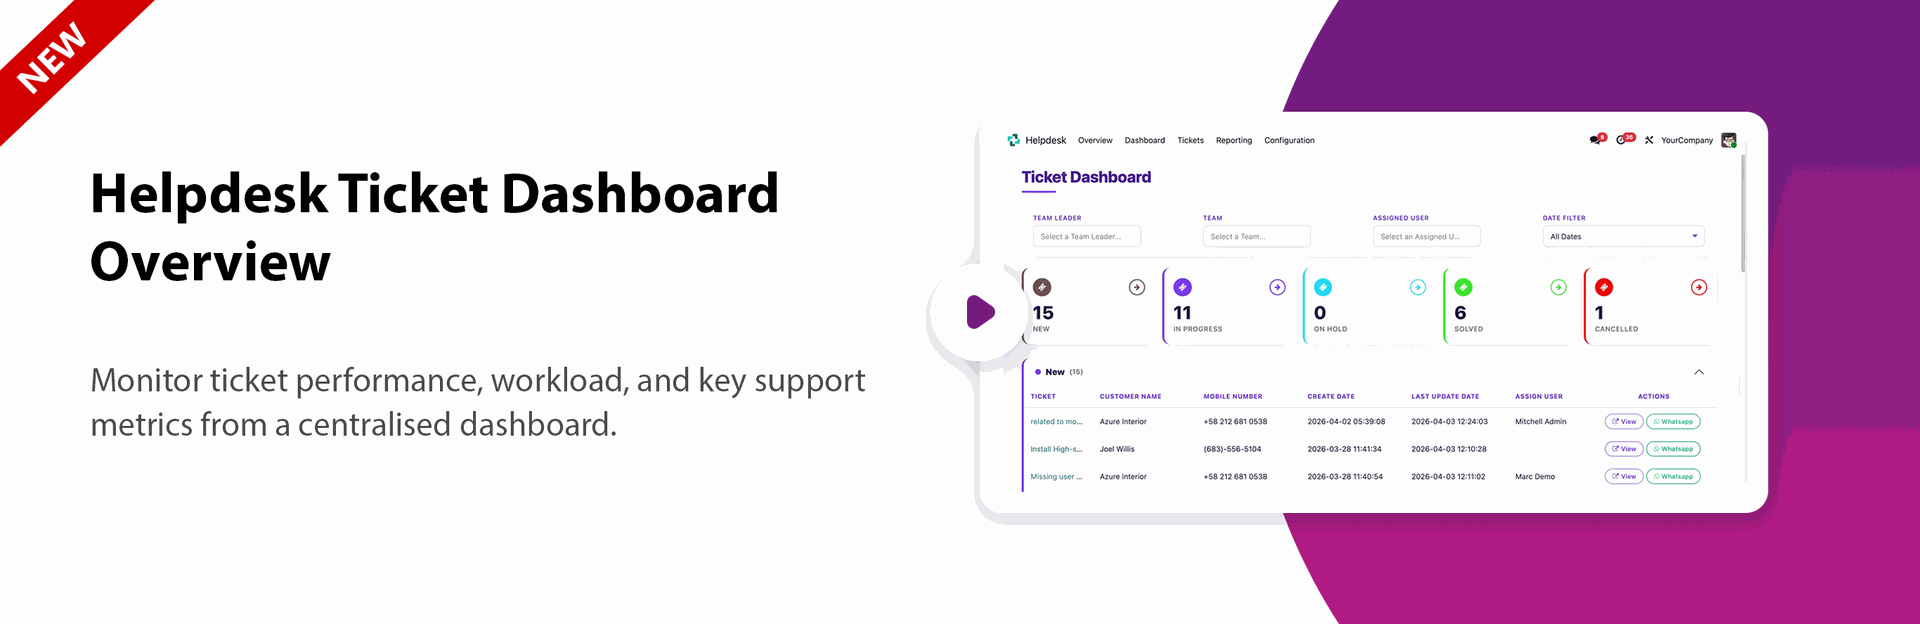
Helpdesk Ticket Dashboard
Monitor ticket performance, workload, and key support metrics from a centralized dashboard.
-
Helpdesk Ticket Dashboard

-
Auto Followup
-
Restrict Helpdesk Emails for Opt-Out Partners
-
Multi-Company Support for Helpdesk Configuration
-
Configure Helpdesk Notifications
-
Sticky Notes for Tickets
-
Customer Hour Package Management
-
Repair Order Integration
-
Ticket Widgets in List & Kanban Views
-
Bold Ticket Highlighting
-
Manual Timesheet Entry in Tickets
-
Team Head Update Utility
Access group for "Helpdesk Manager", "Helpdesk User"
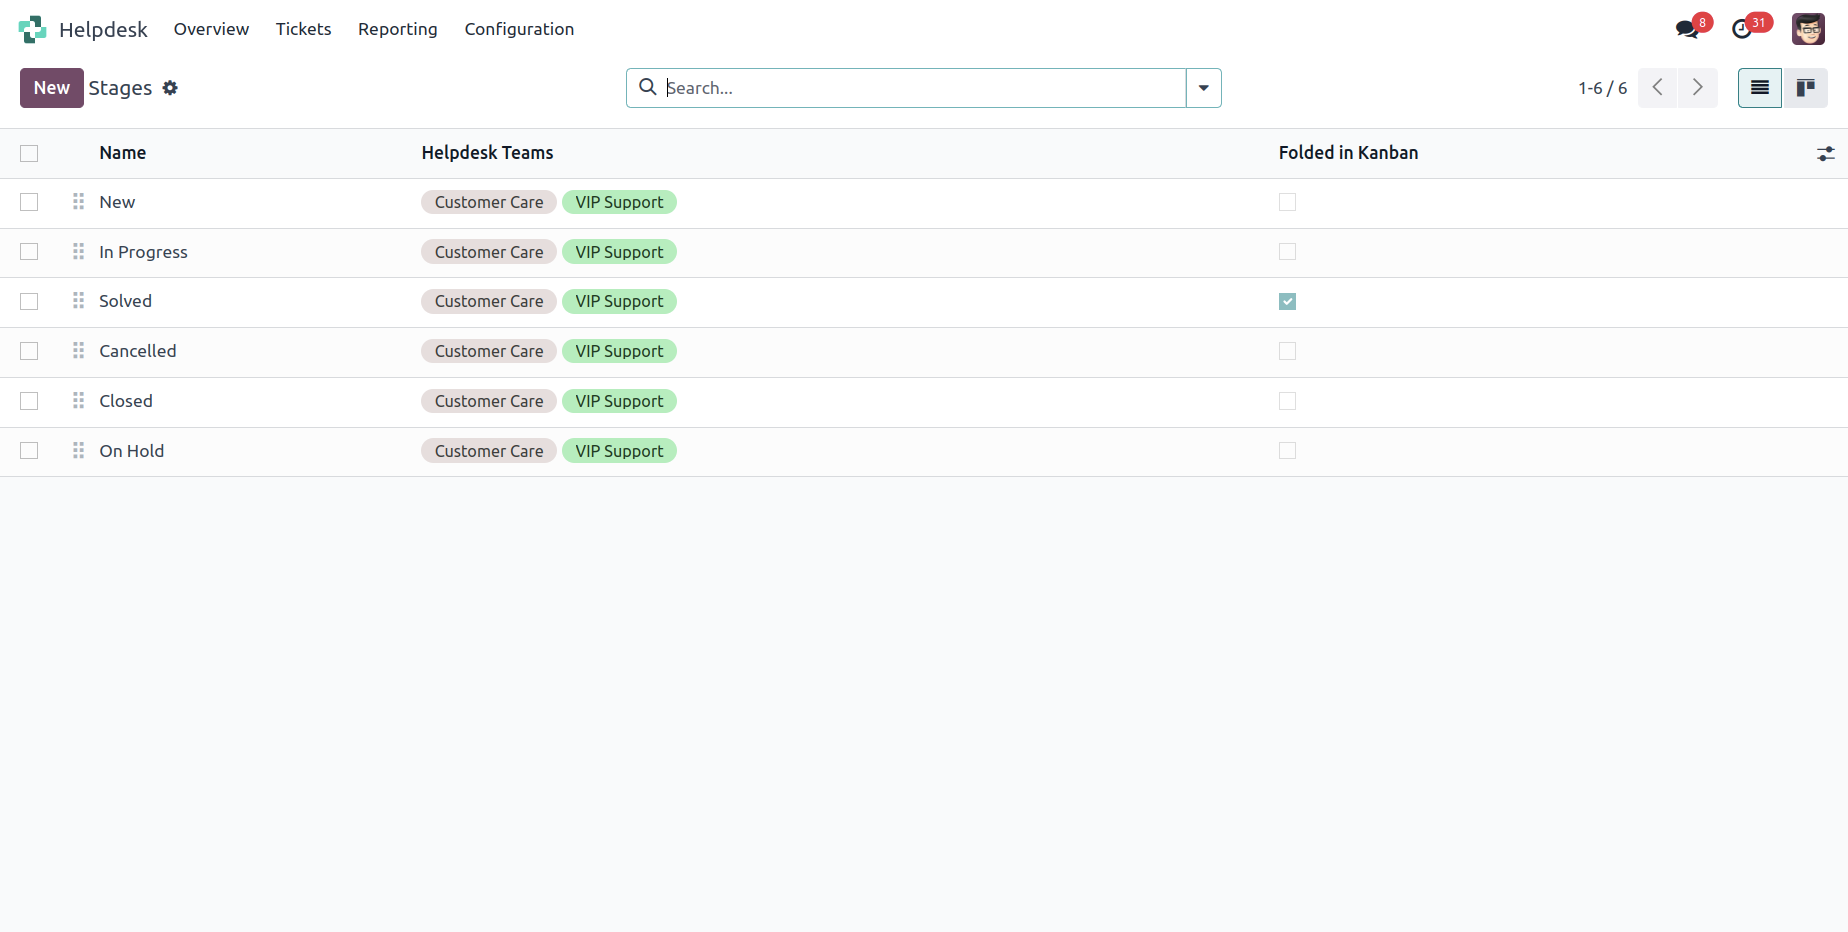
"Helpdesk Stages" menu and list view.
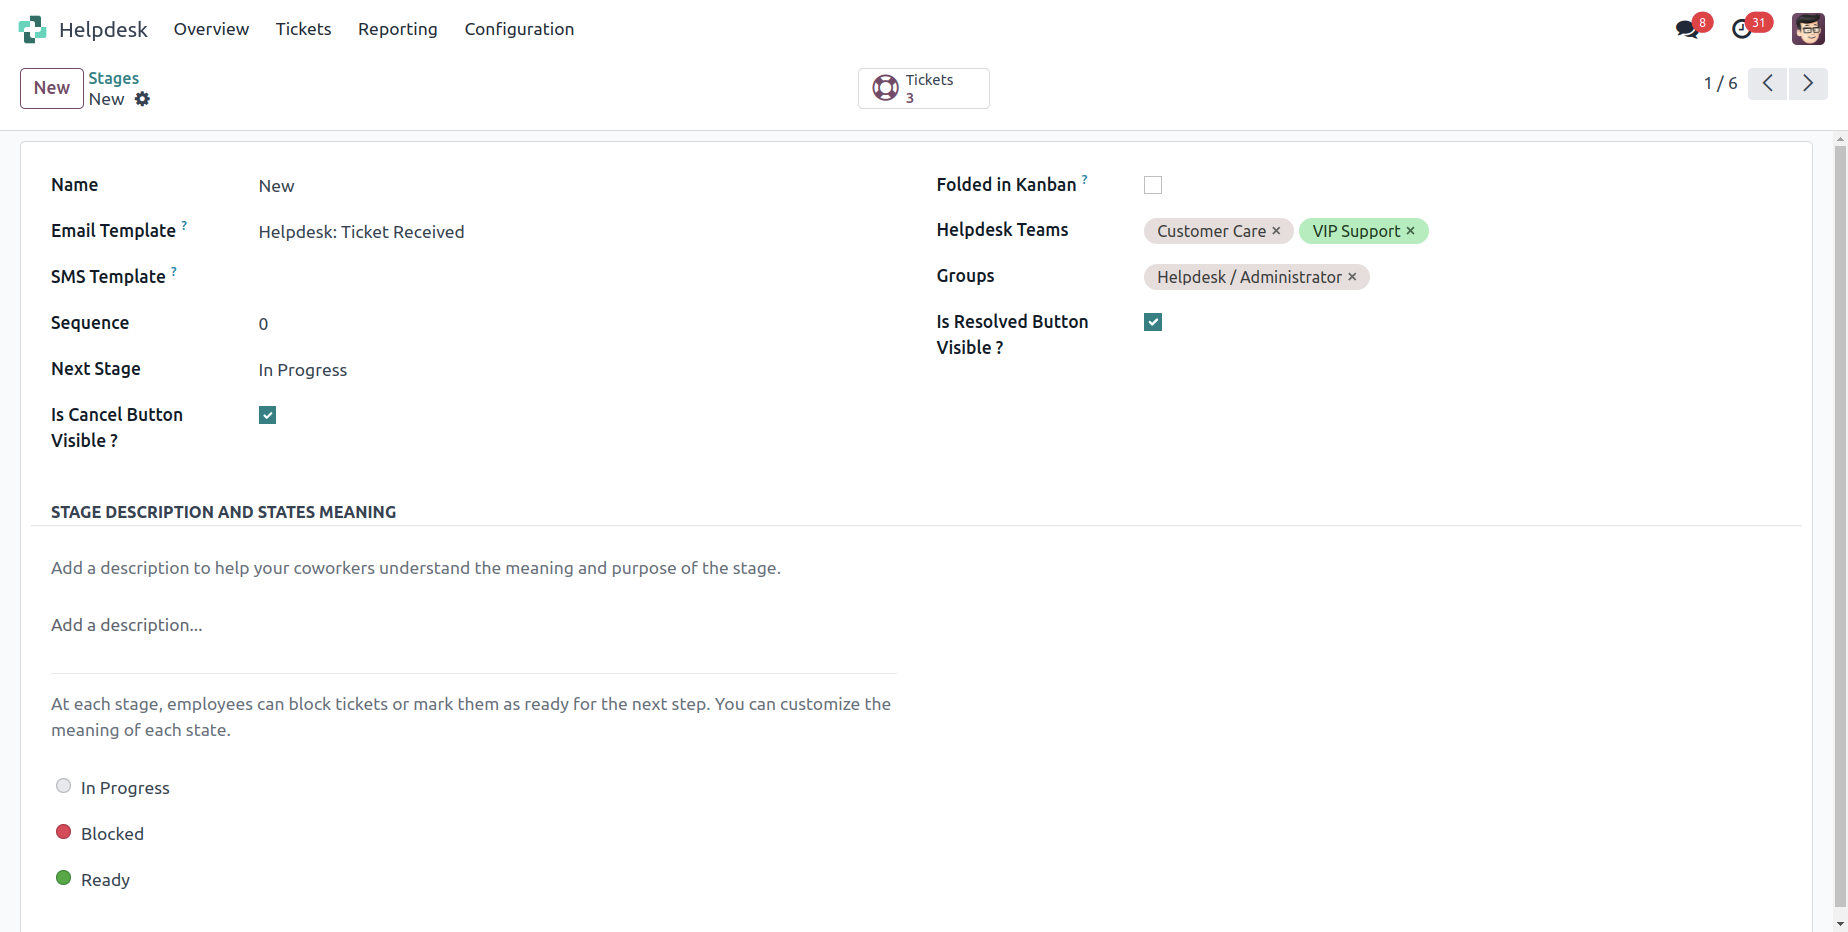
"Helpdesk Stages" form view. Where you can define stages and it's access rights, next stage.
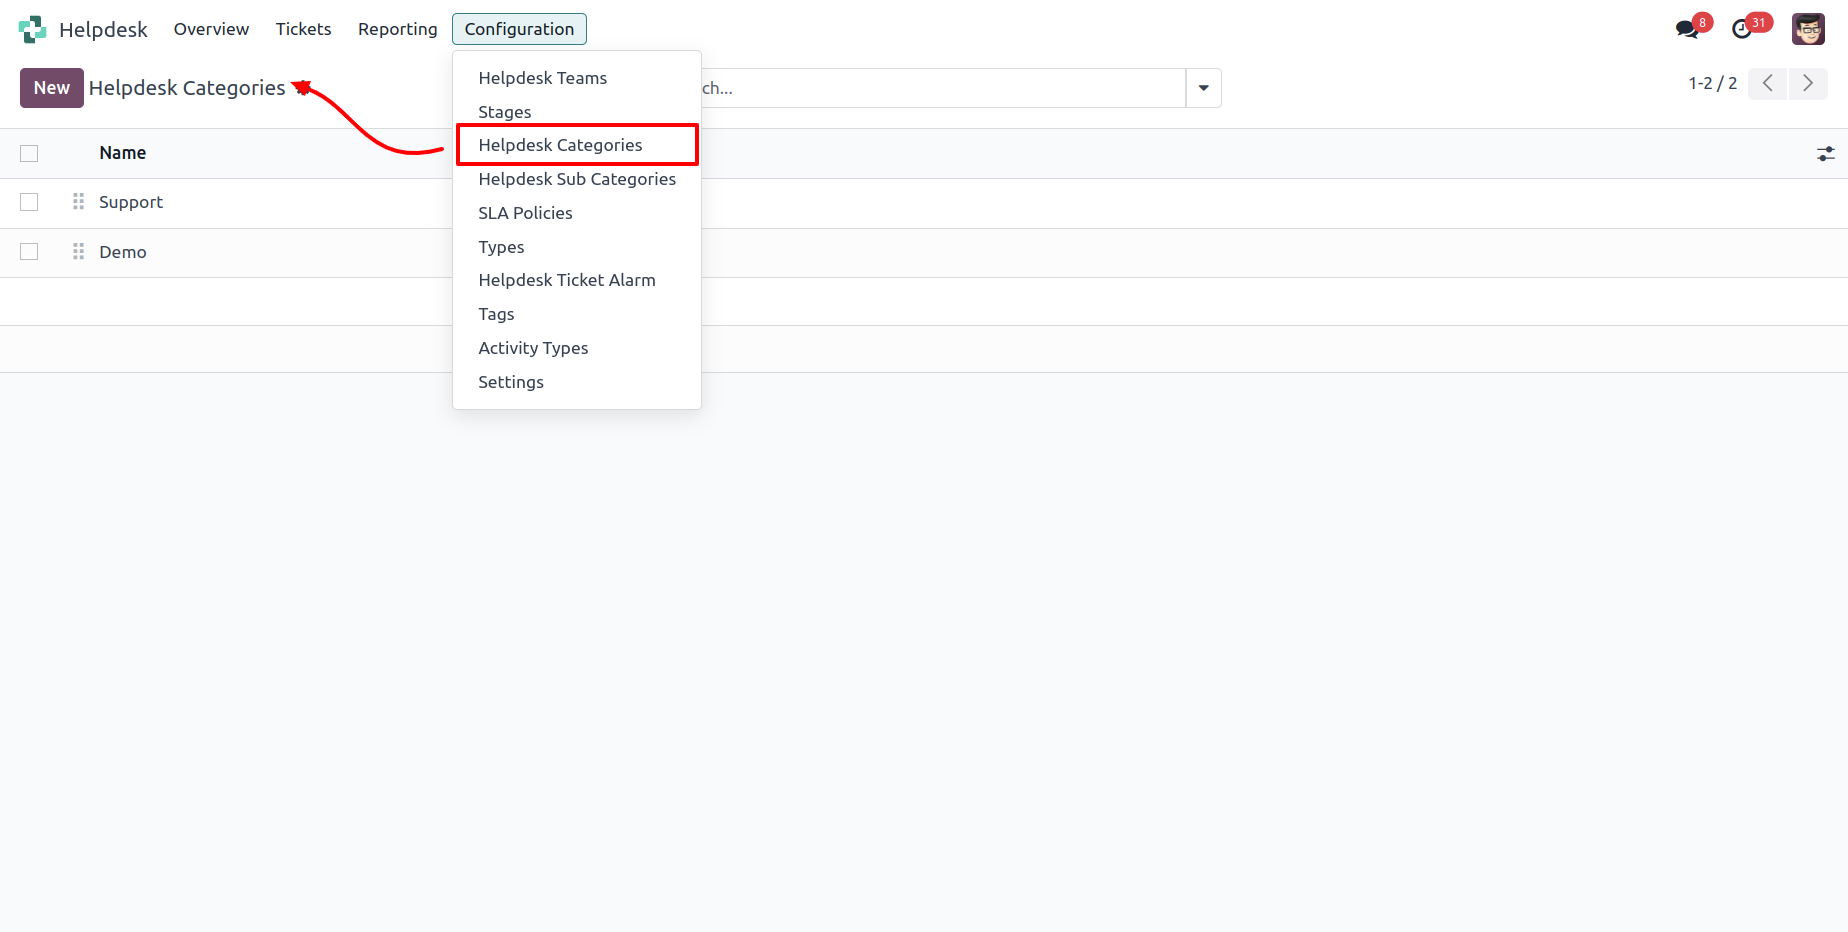
"Helpdesk Categories" menu and list view.
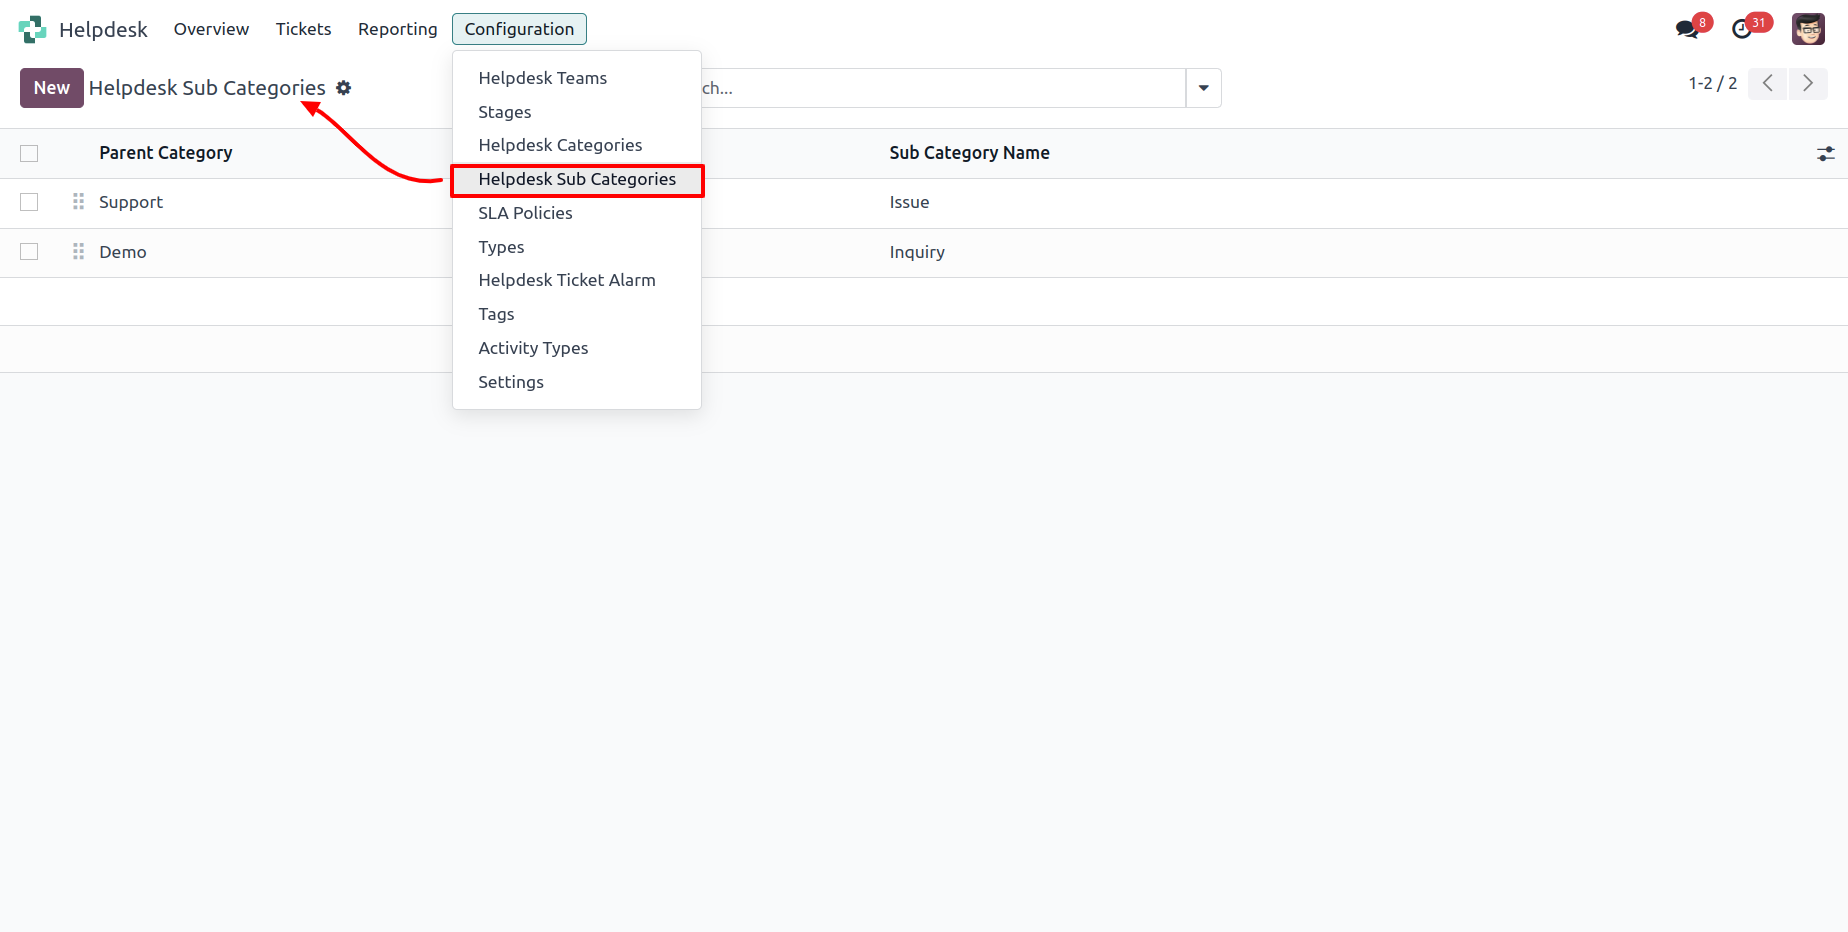
"Helpdesk Sub Categories" menu and list view.
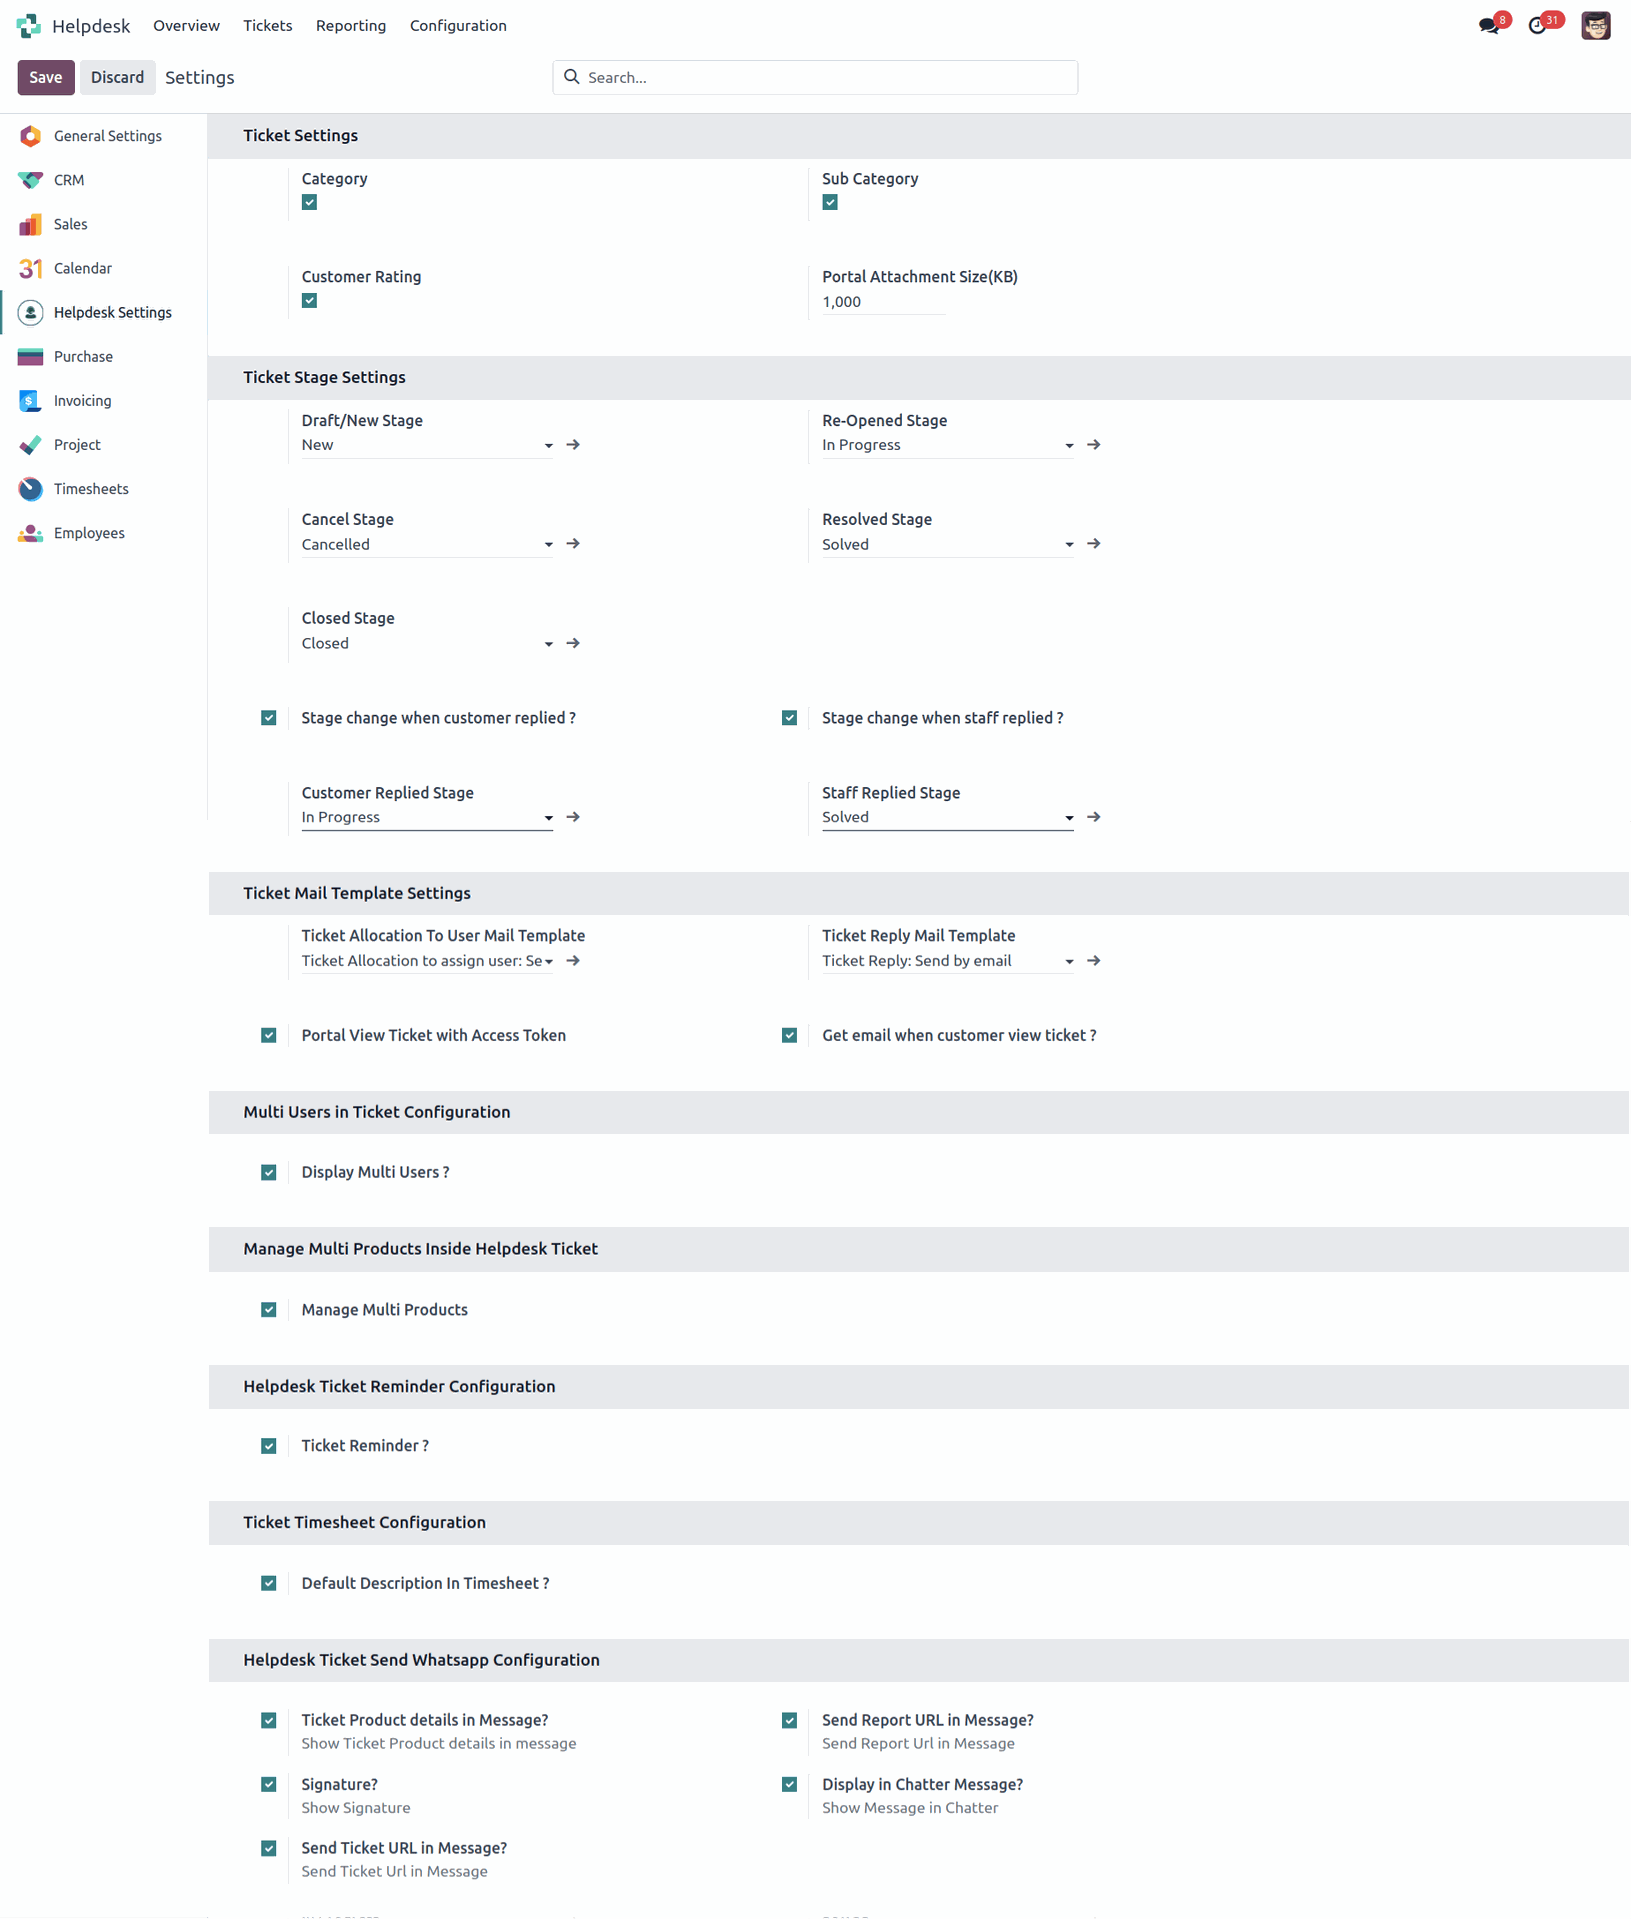
"Helpdesk Setting" View.
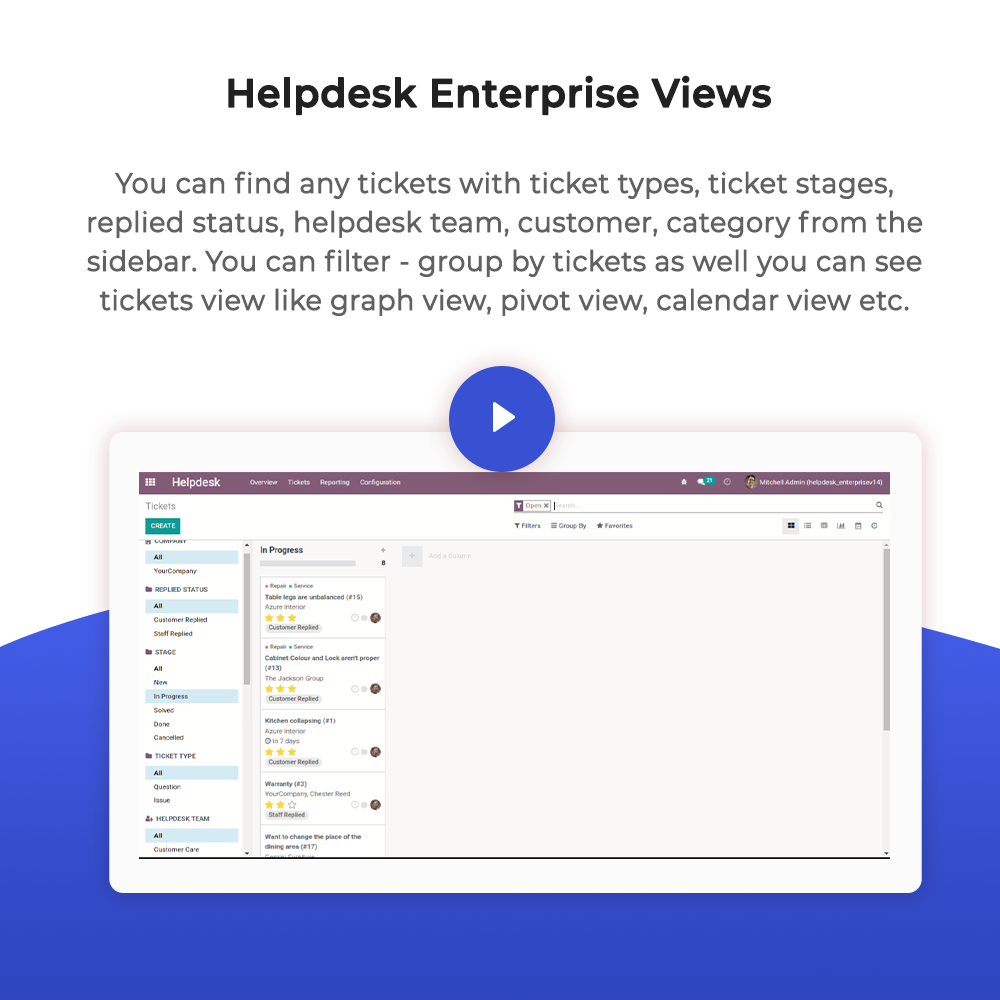
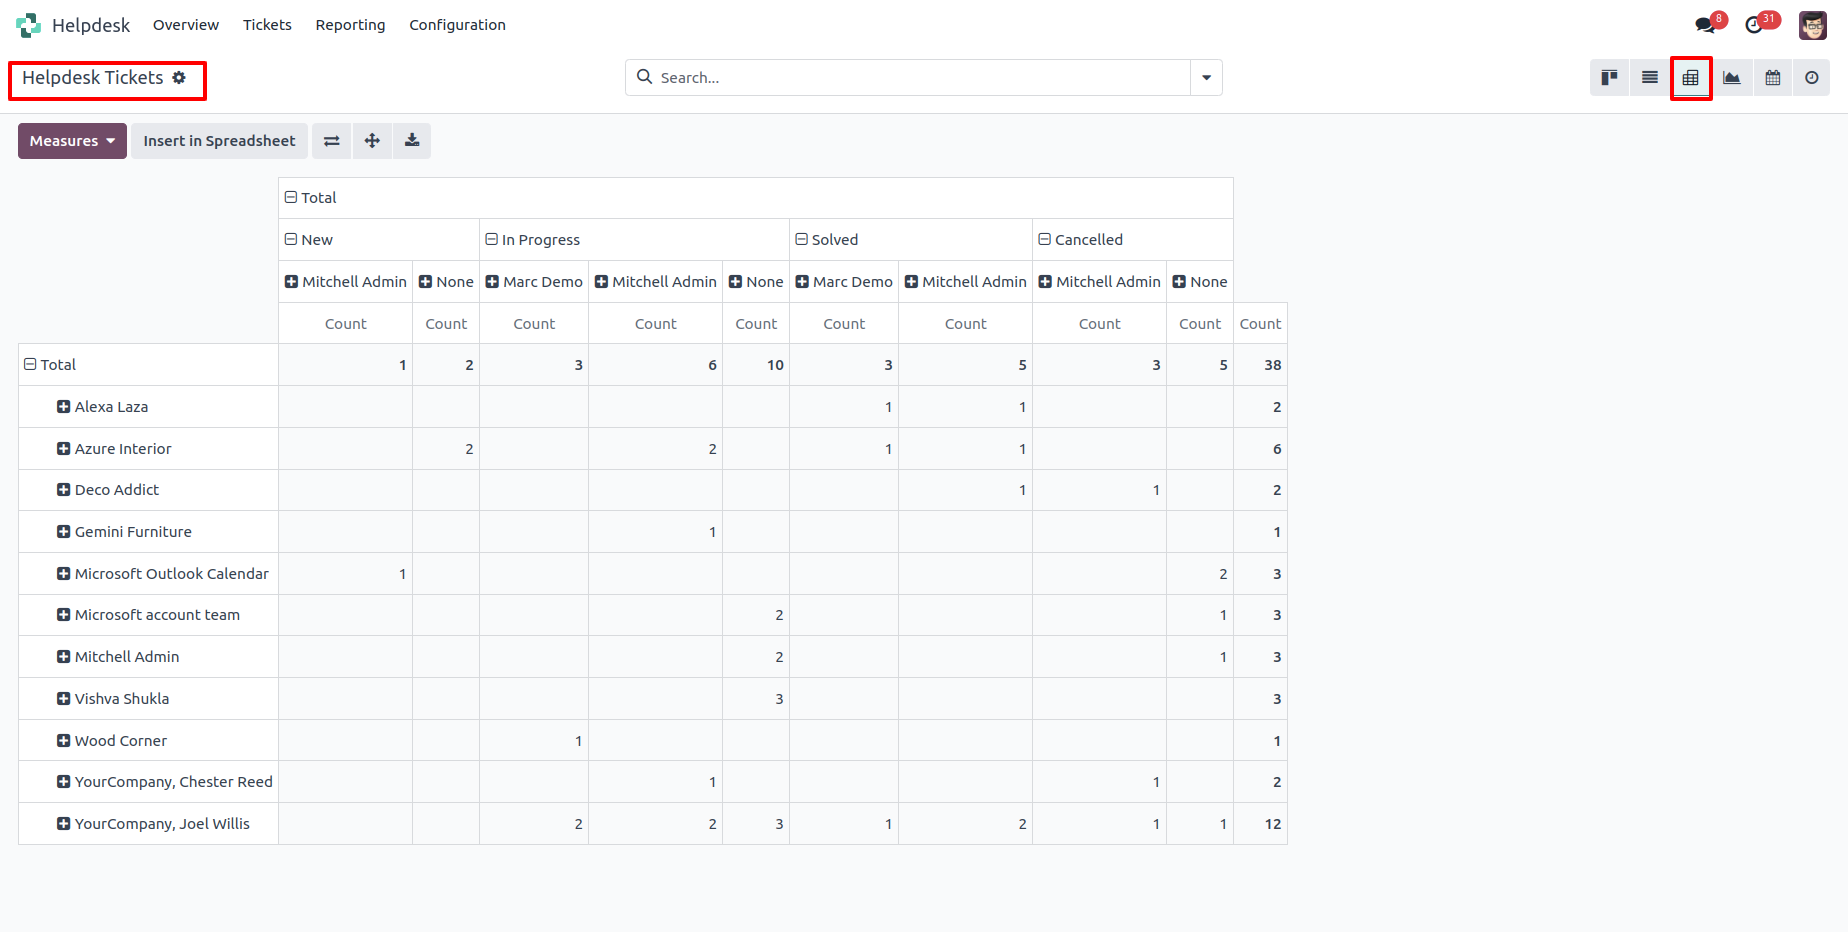
"Helpdesk Ticket" Pivot view.
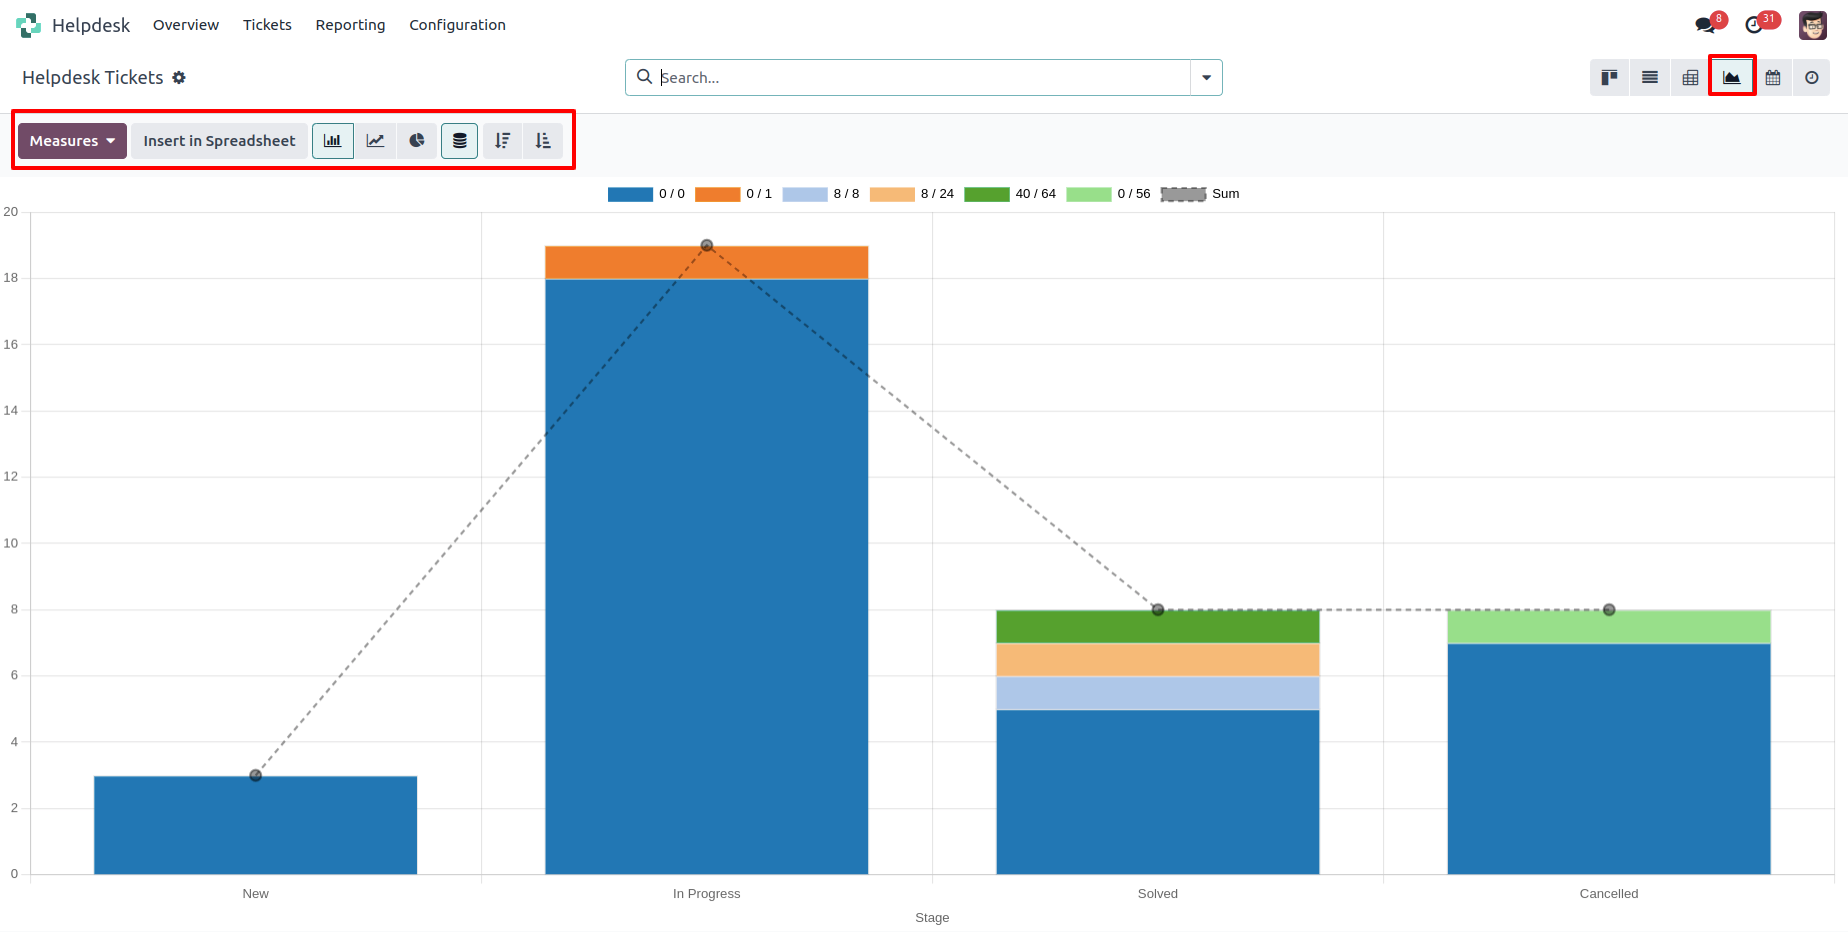
"Helpdesk Ticket" Graph view.
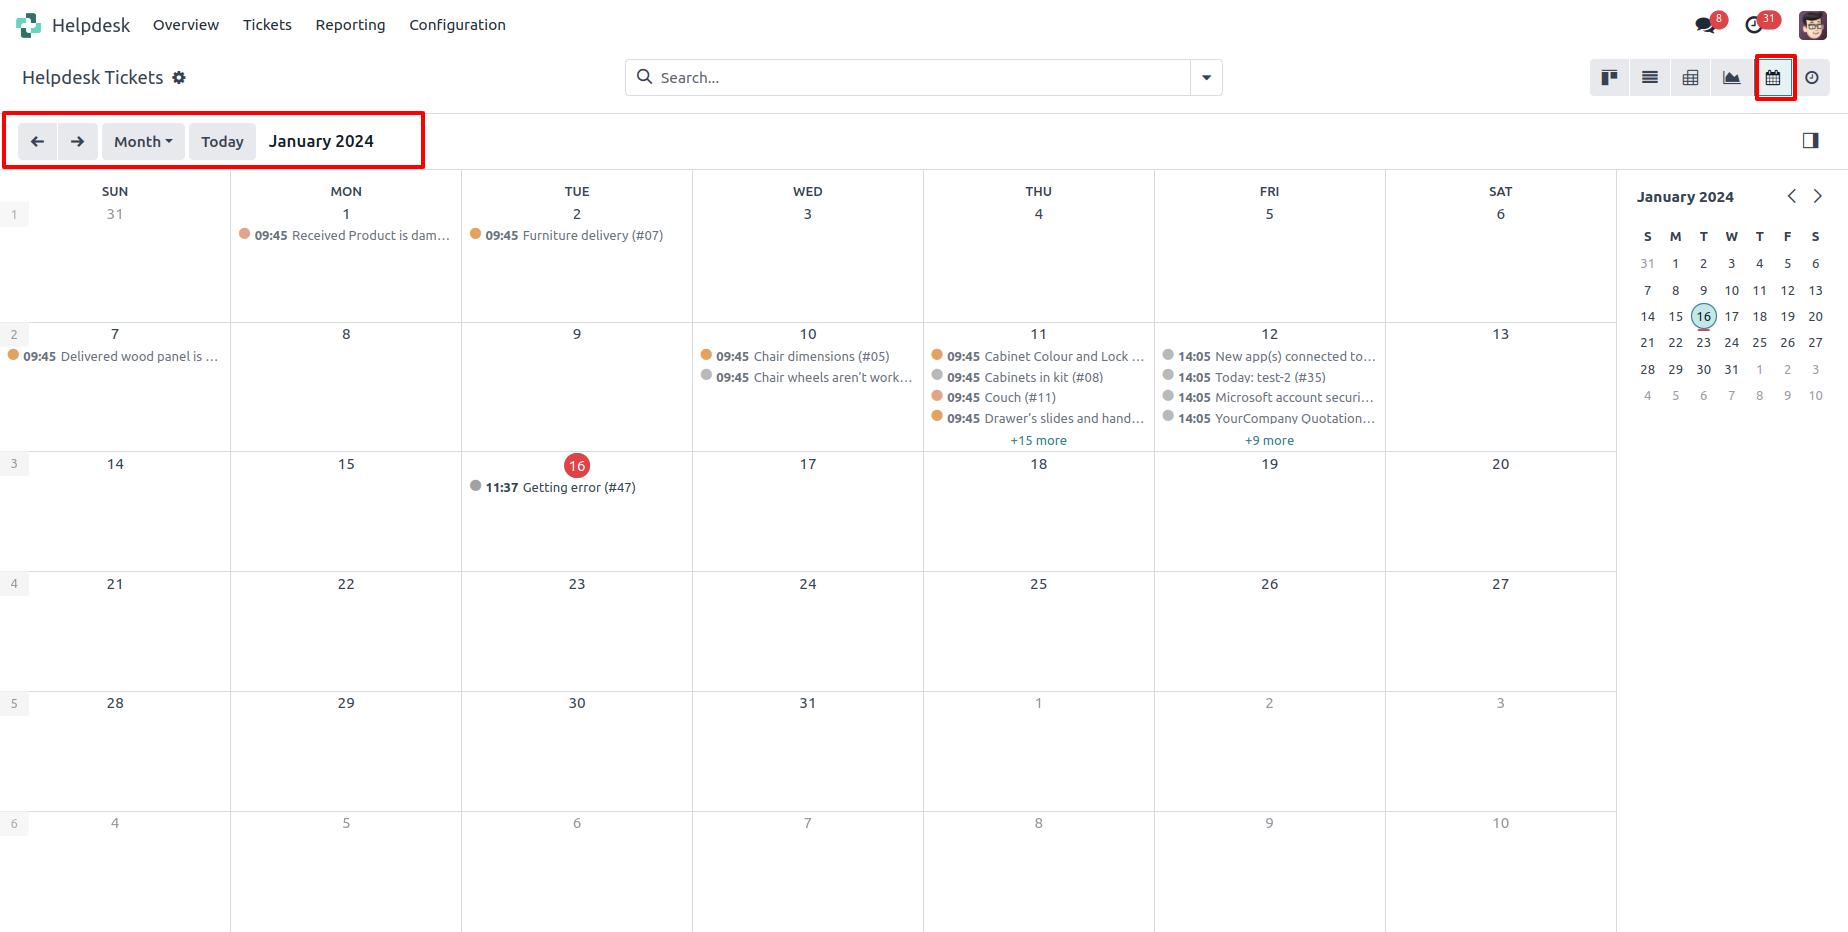
"Helpdesk Ticket" Calender view.
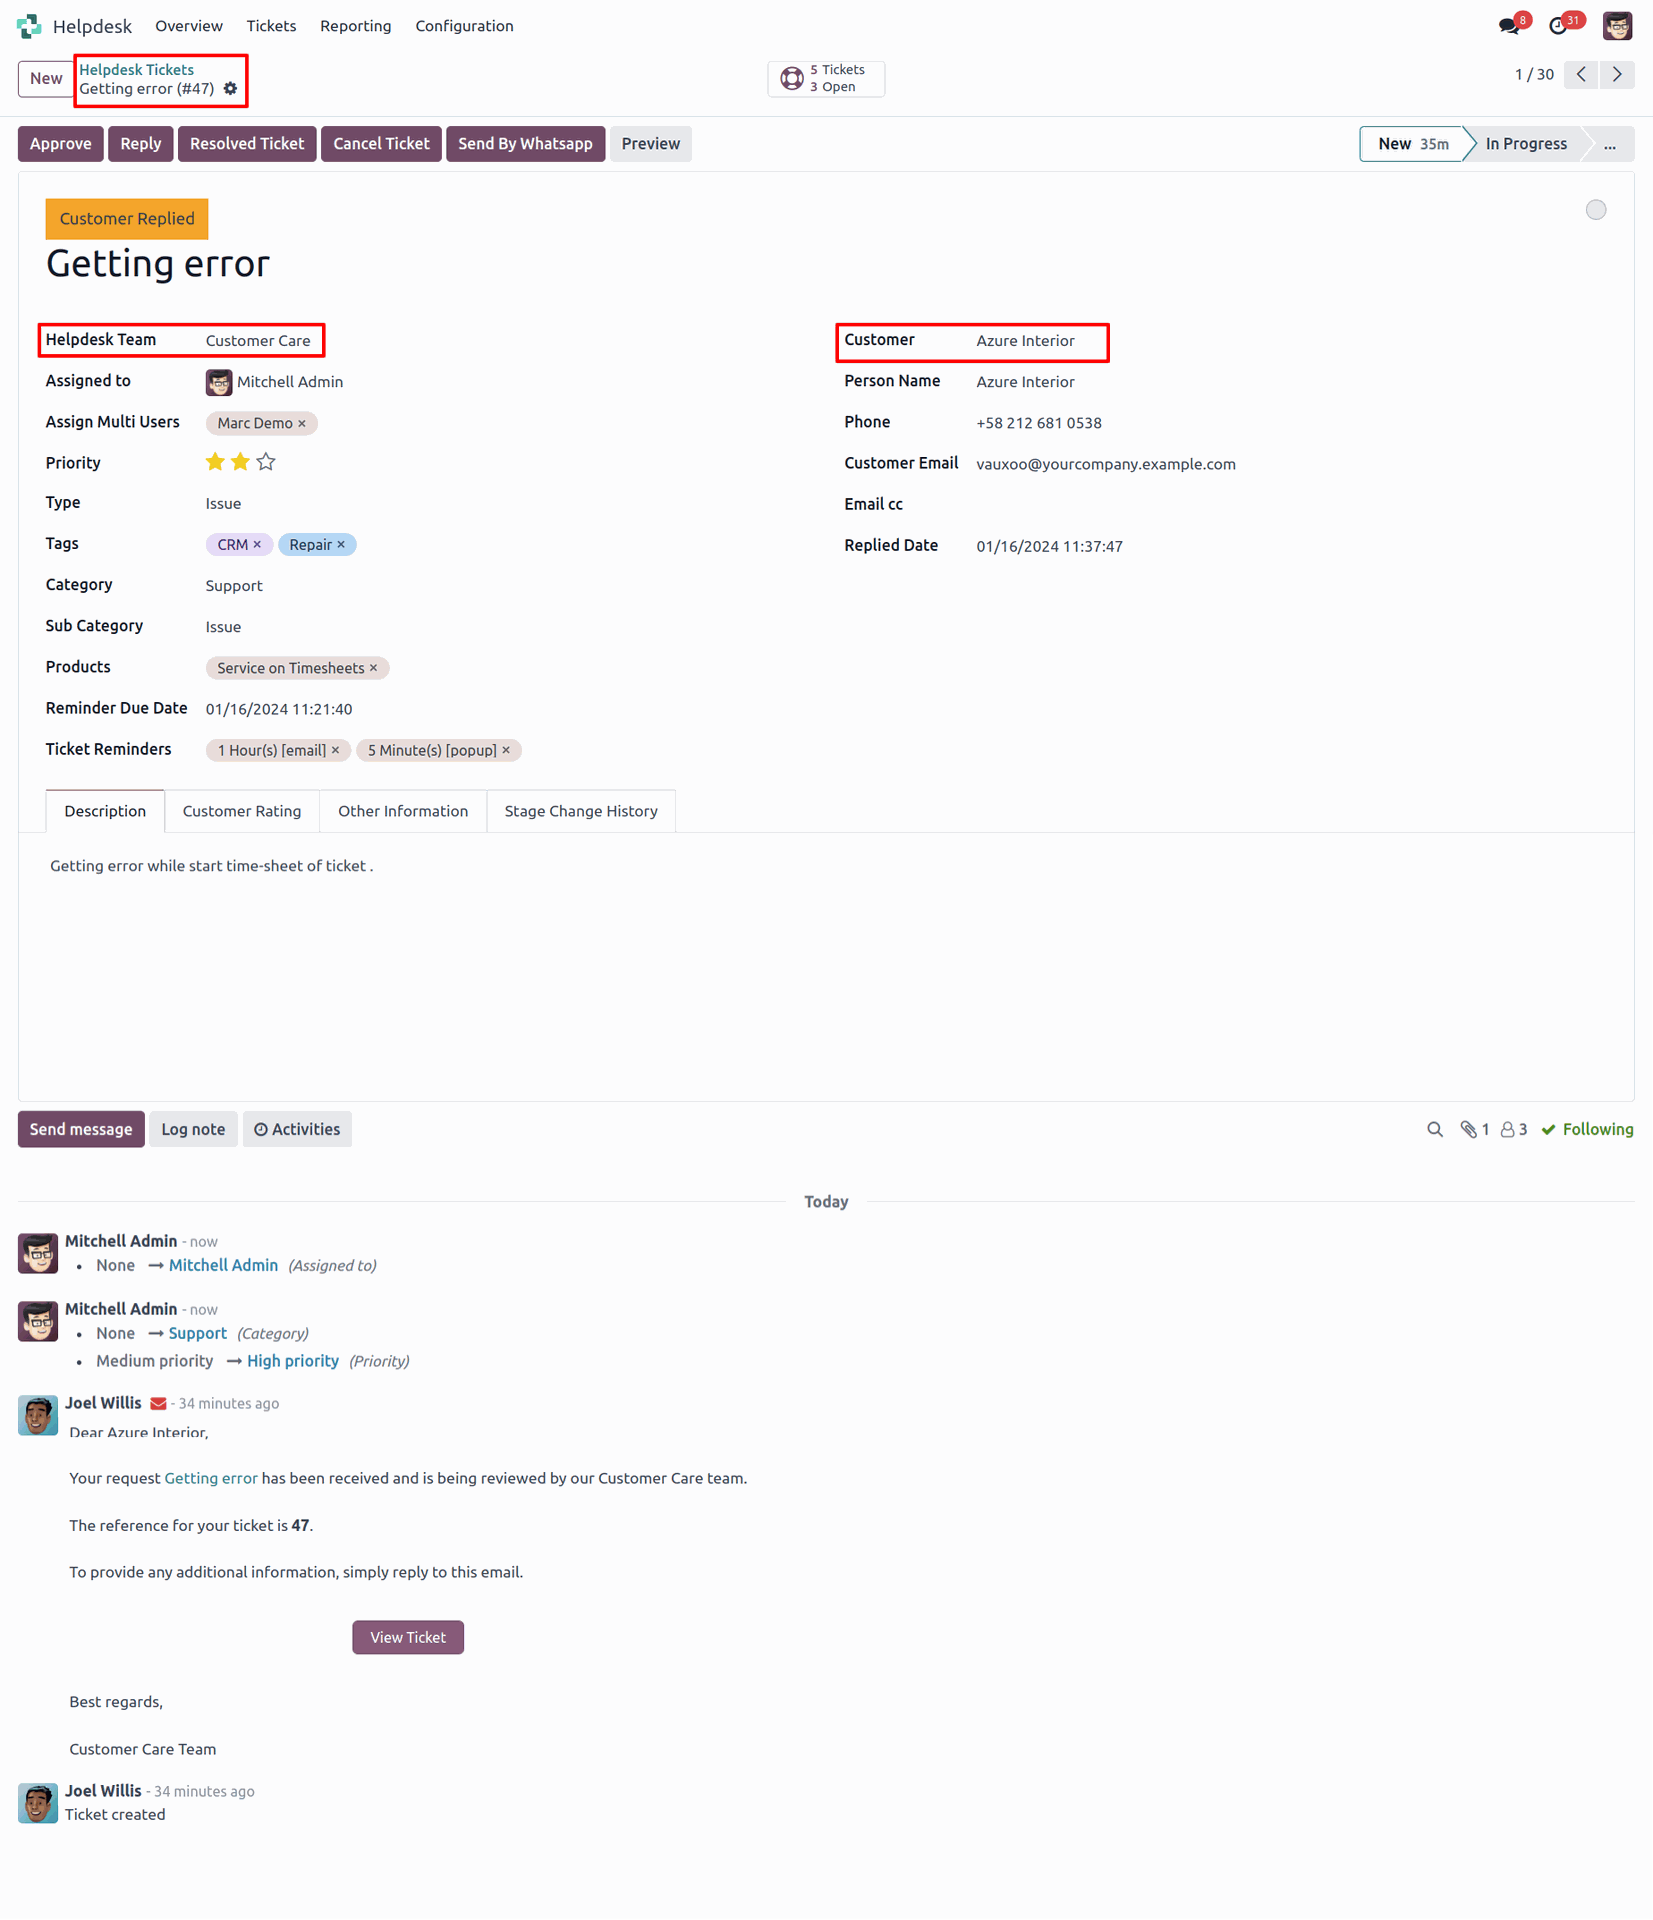
"Helpdesk Ticket" form view.
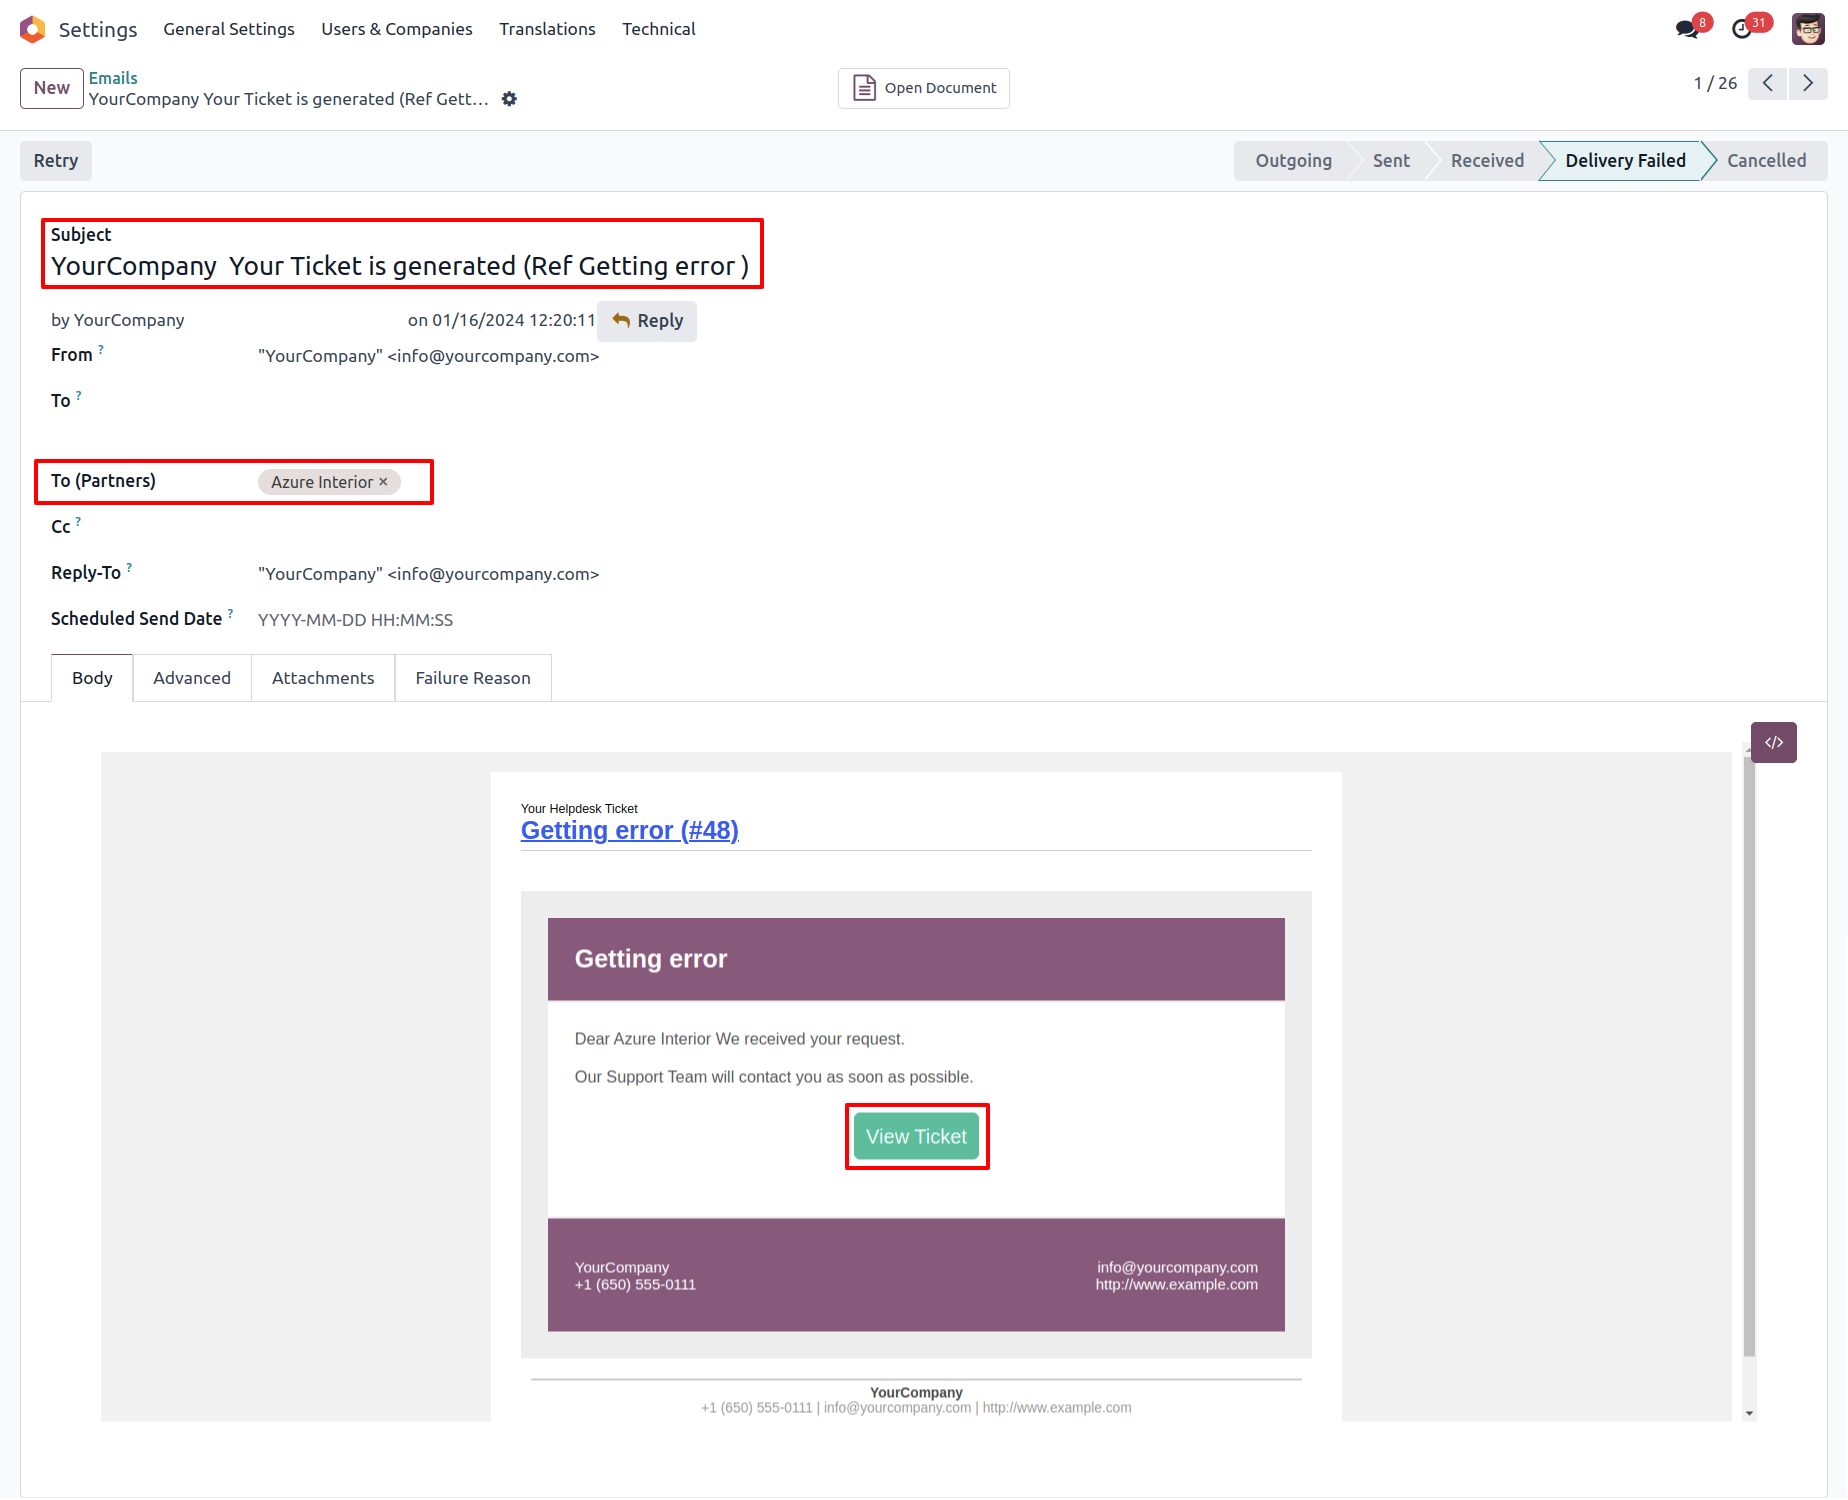
When ticket is created that time customer will notify via email.
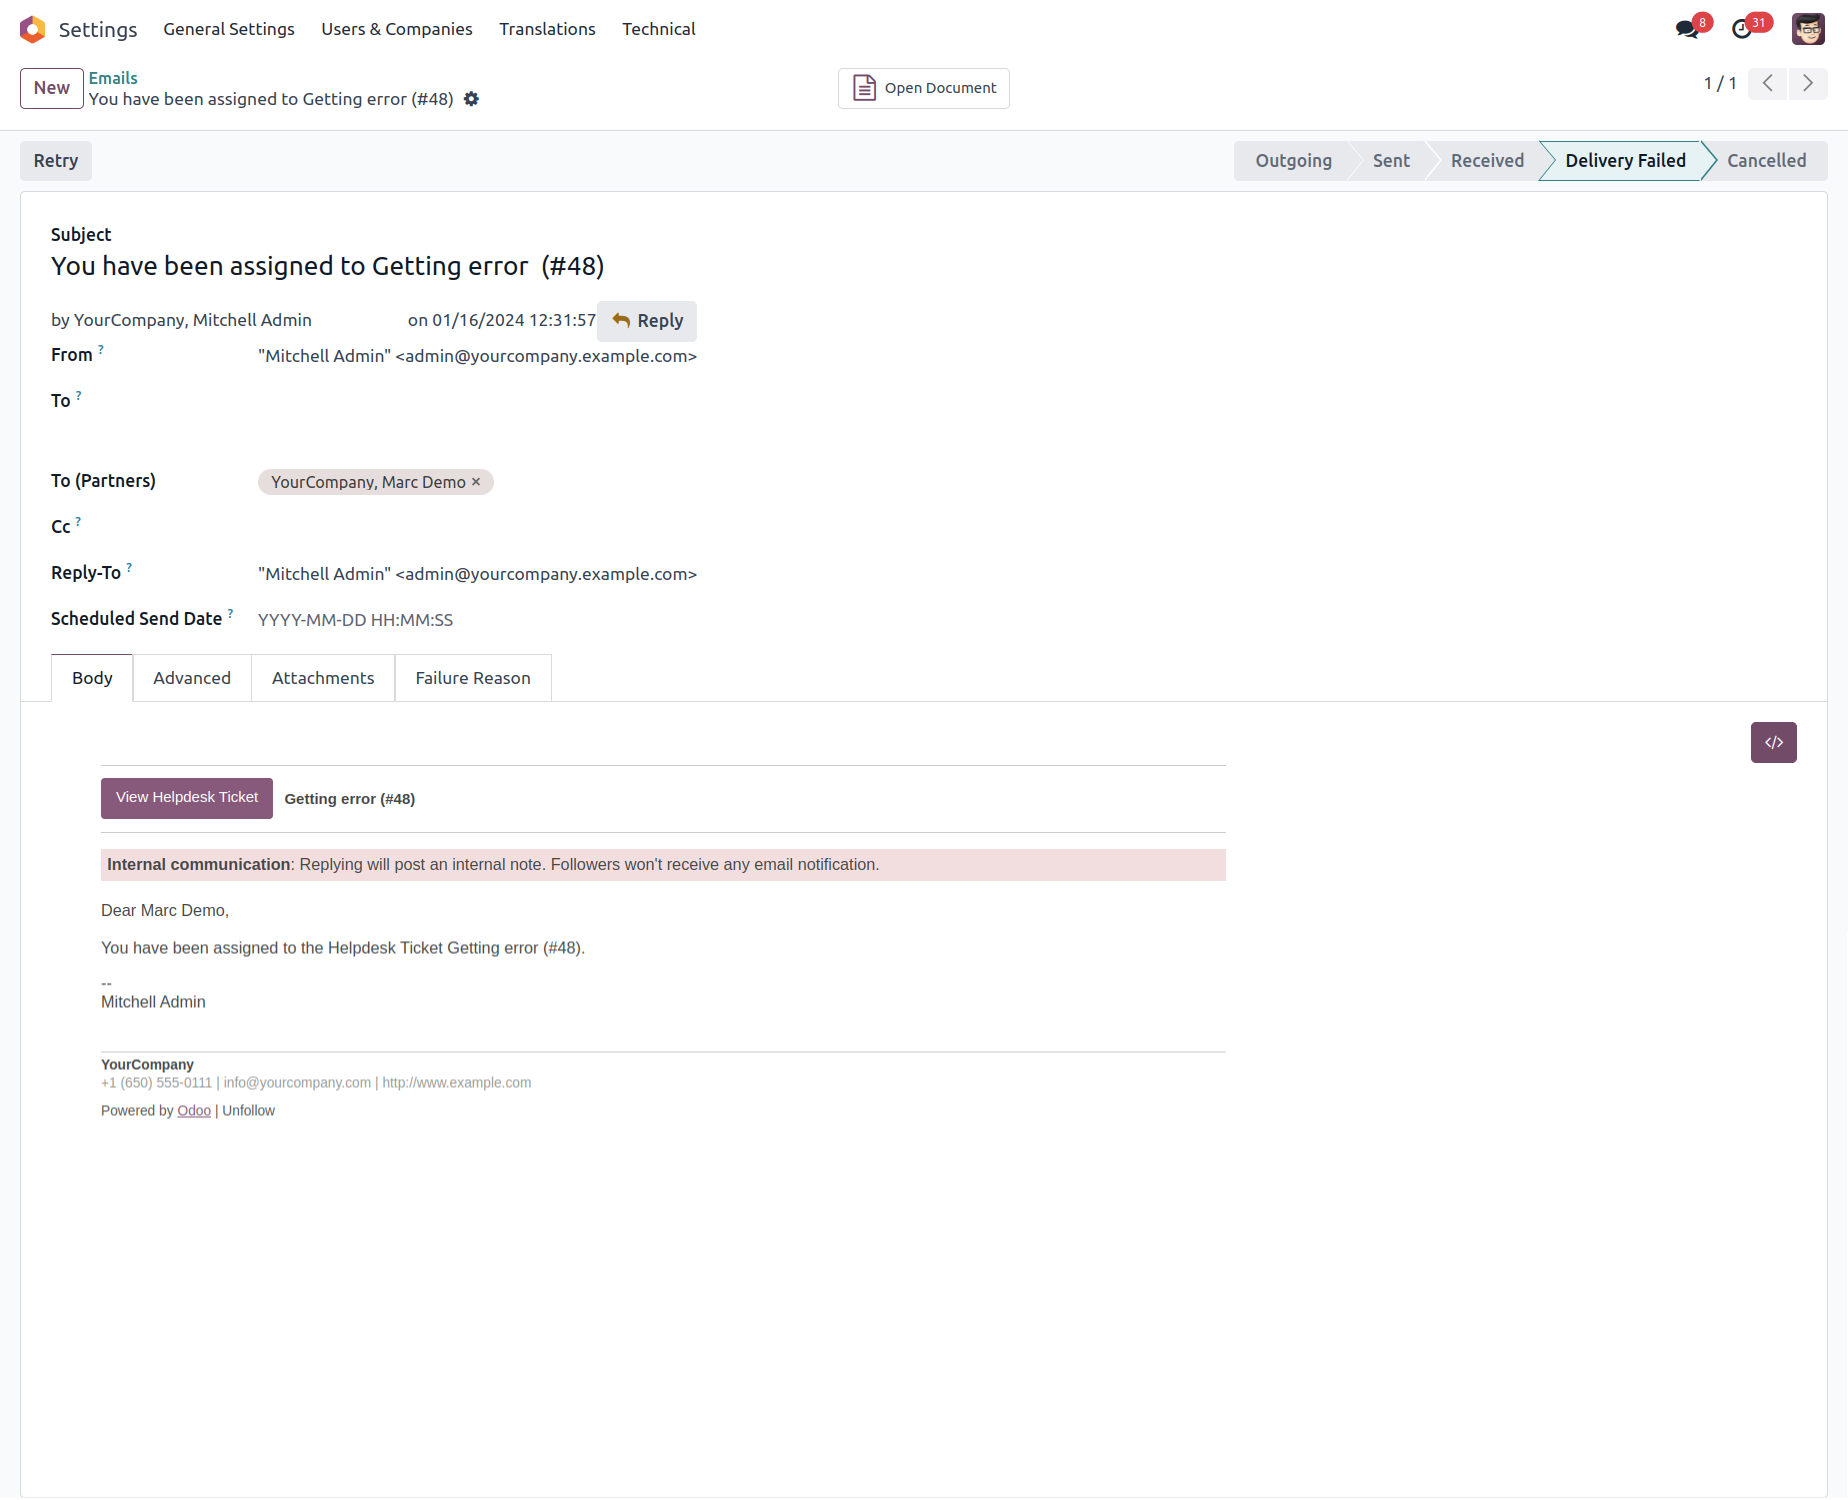
When ticket is created that time assign user will notify via email.
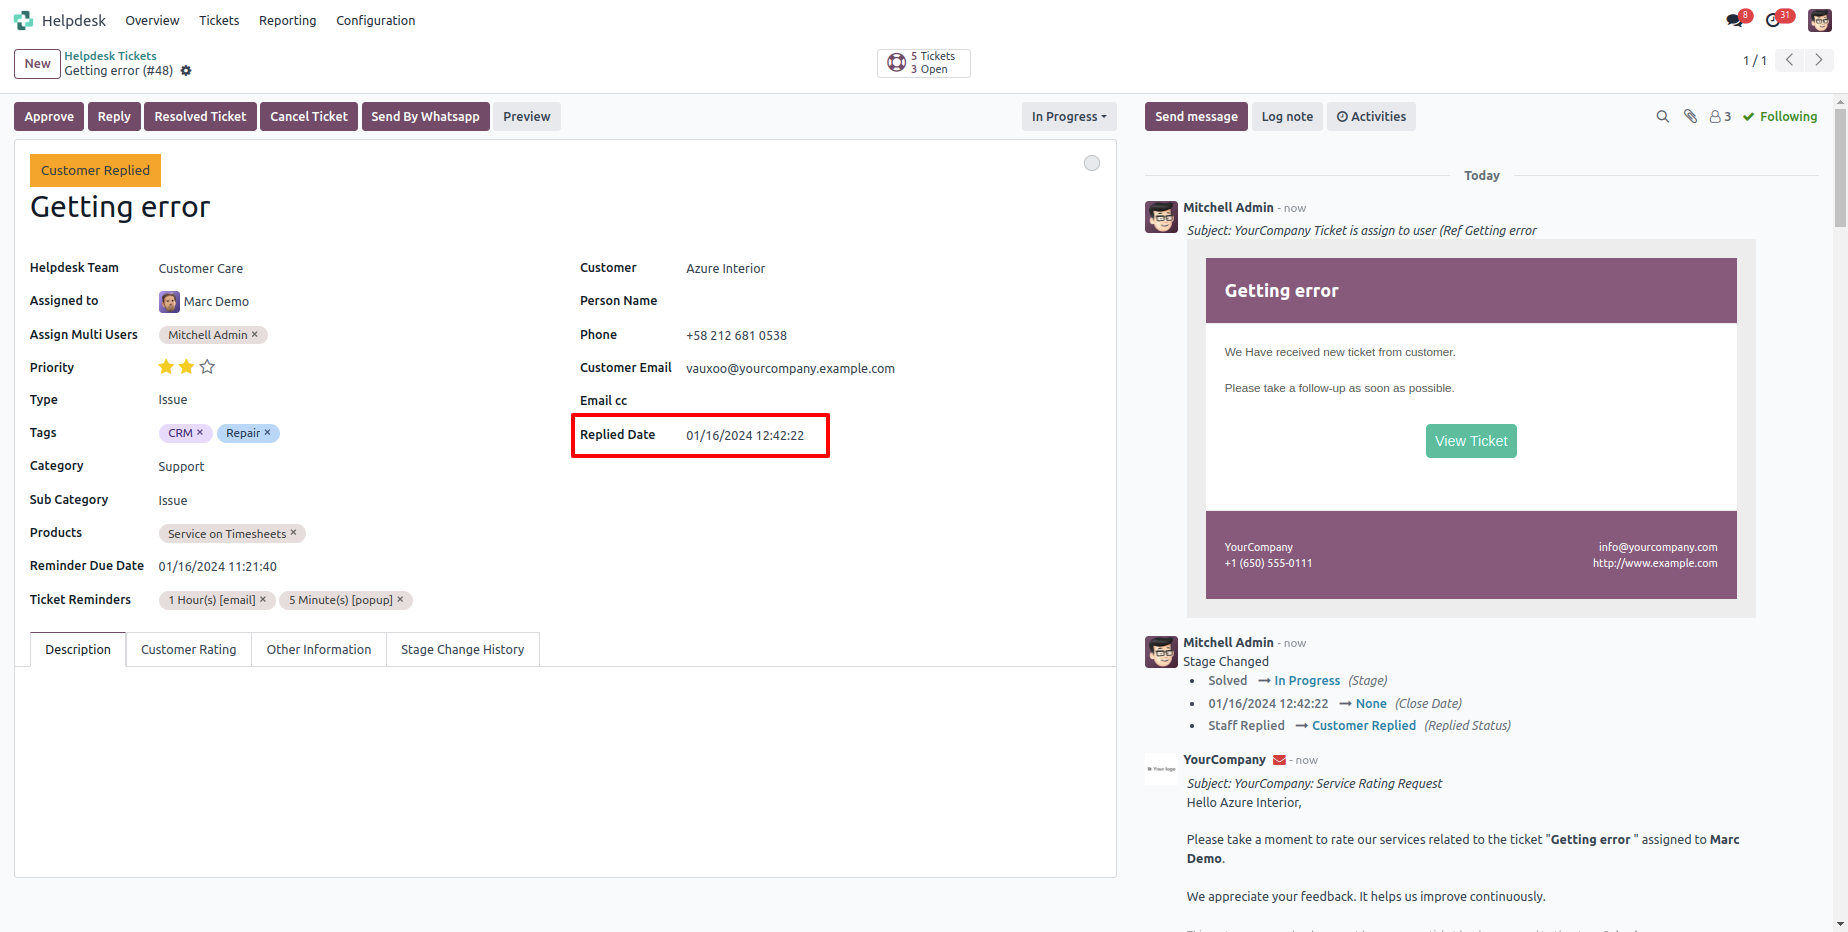
When you click on the 'Reply' button on the form, this wizard will appear where you can set an email template as per reply. In Email, there is one link 'View Ticket', Where customer can see the ticket status.

'Replied Date' added after reply and replied status will change 'Staff Replied'.
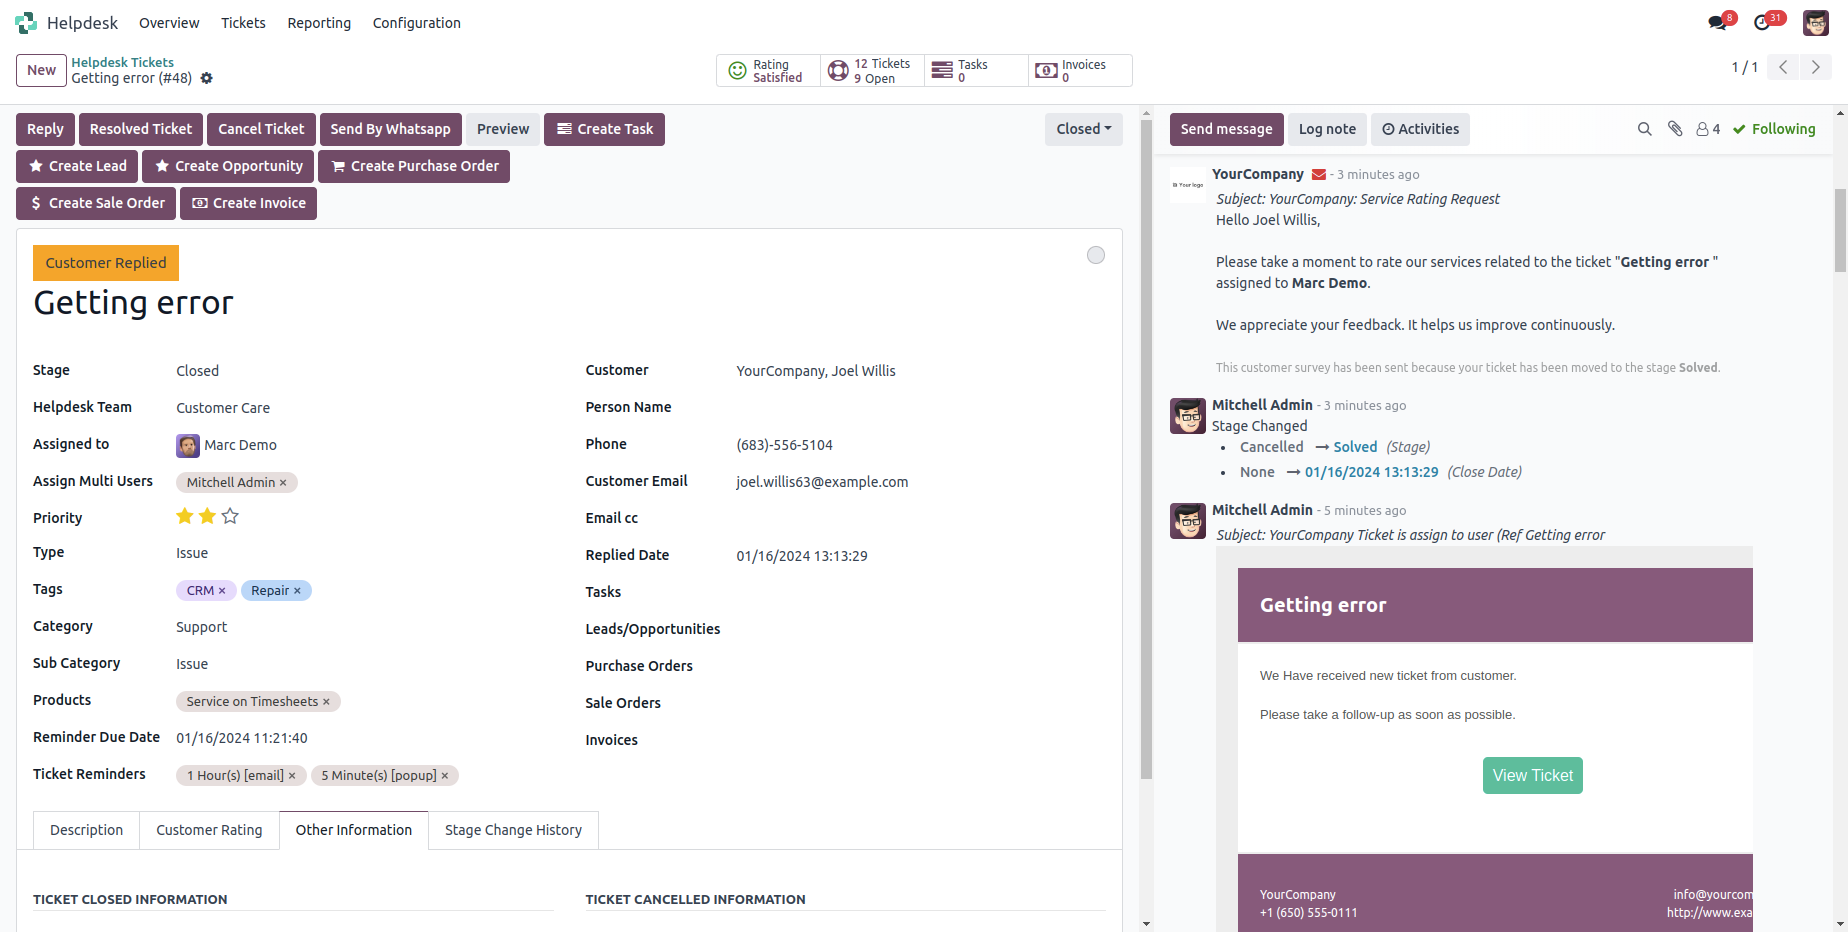
While ticket is closed, customer will notify via email with feedback link. click on link.
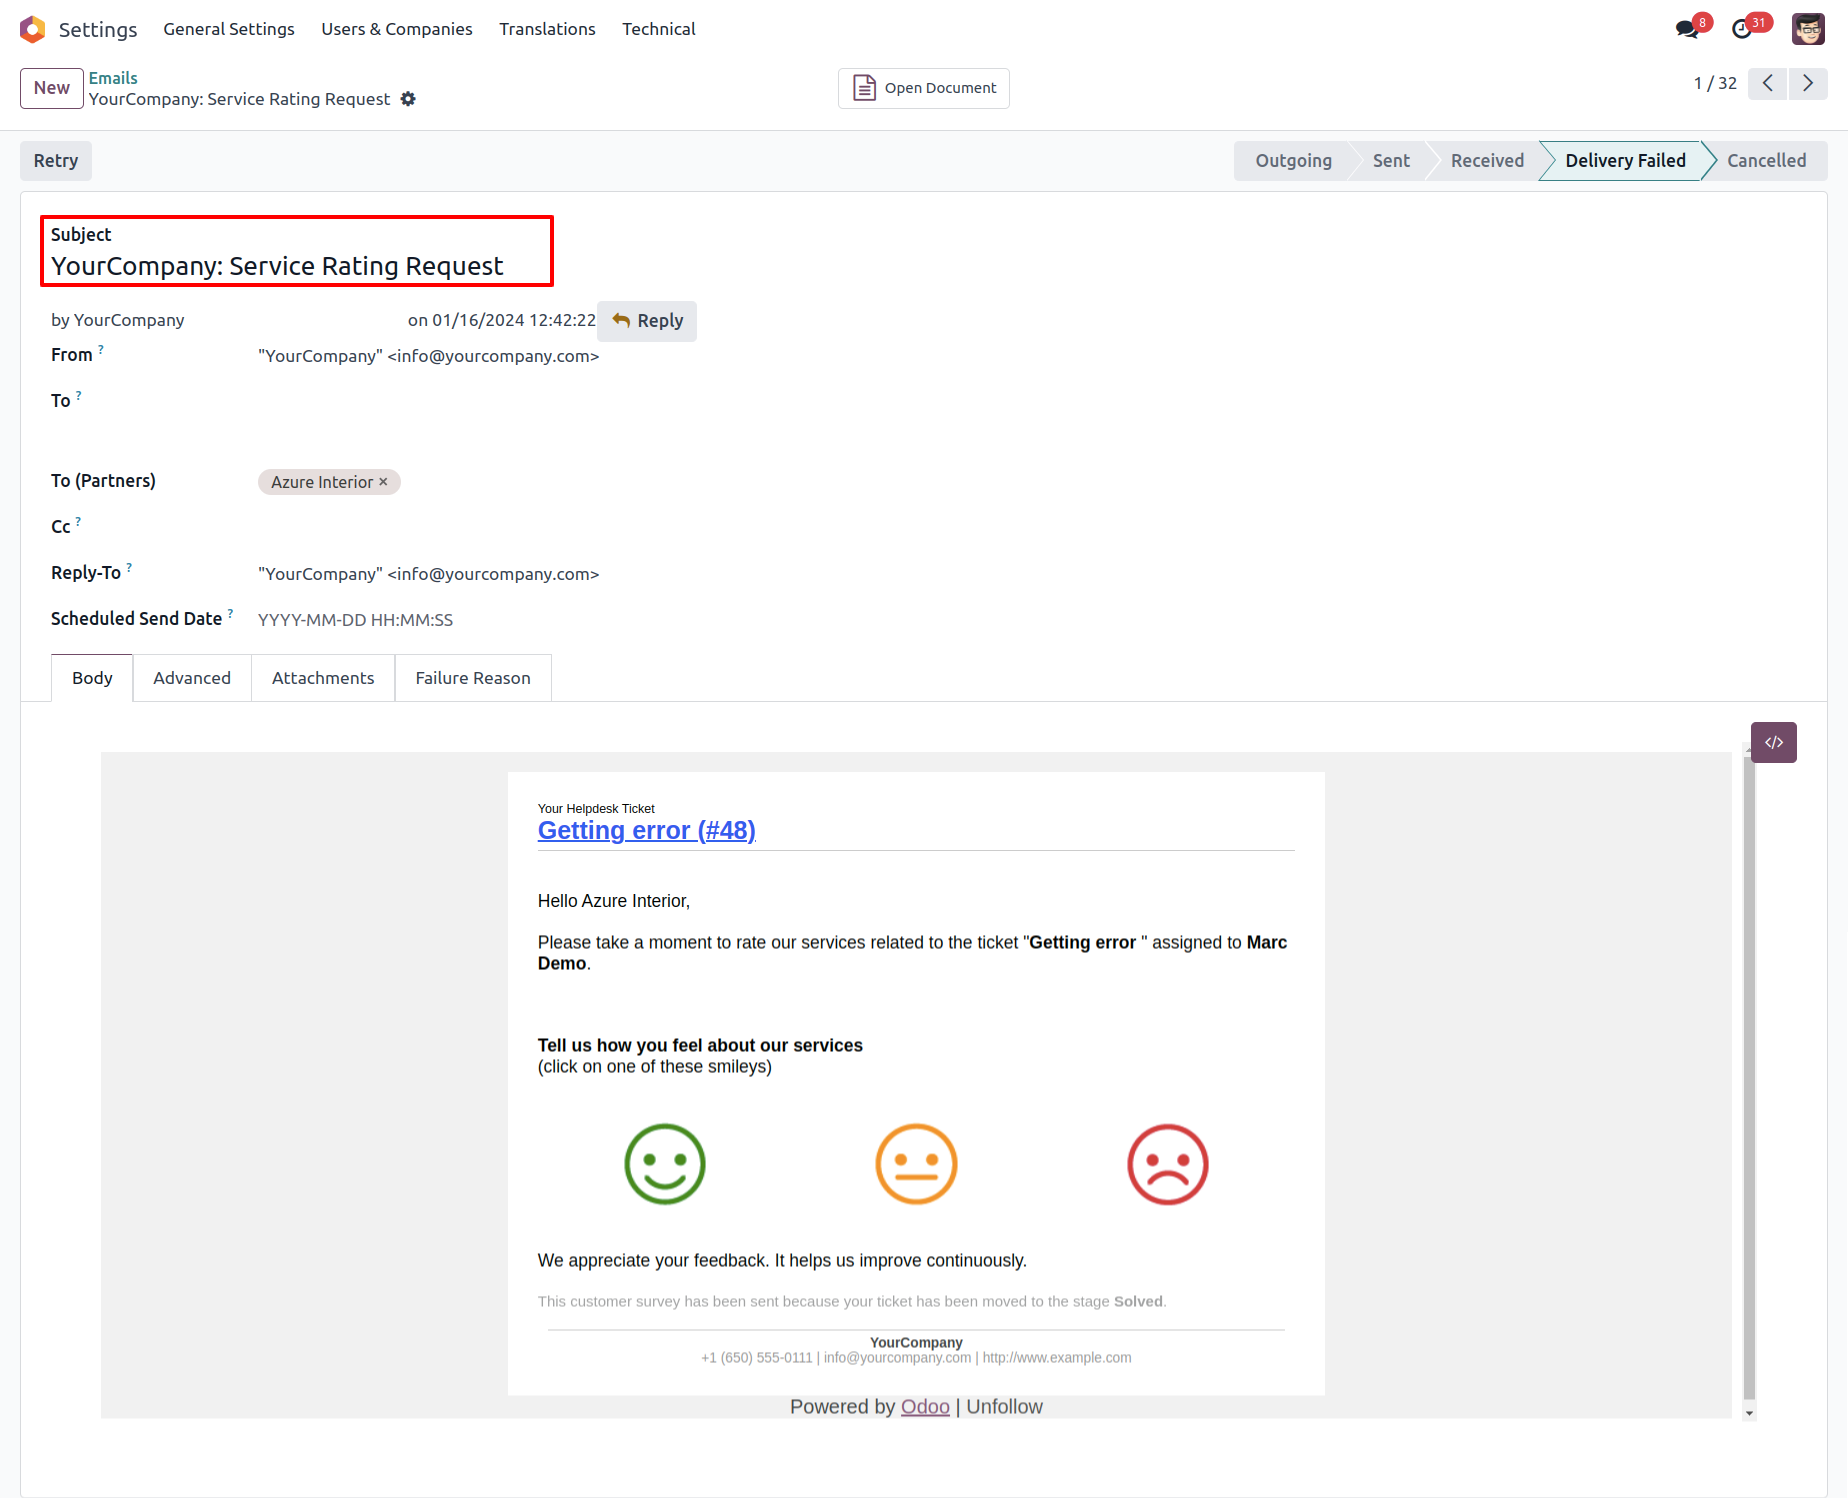
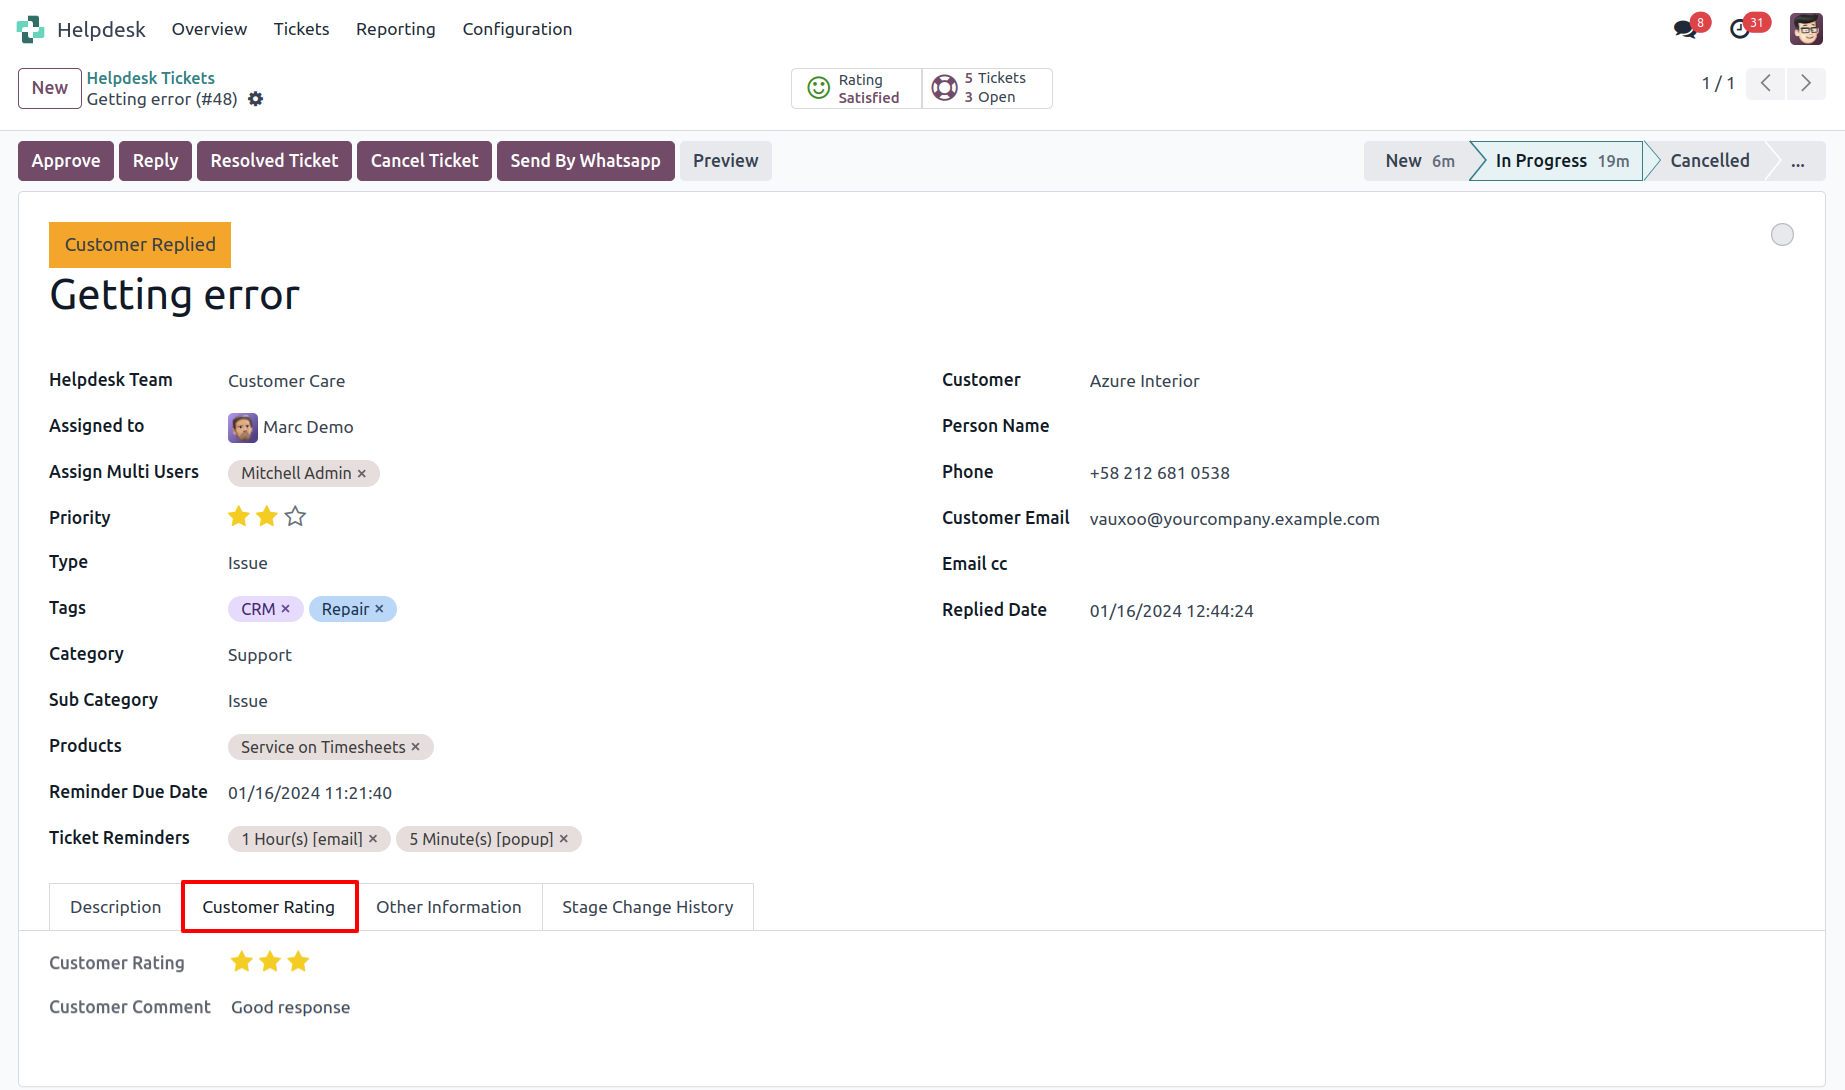
After click on link customer will see this view, where customer give feedback with comment.
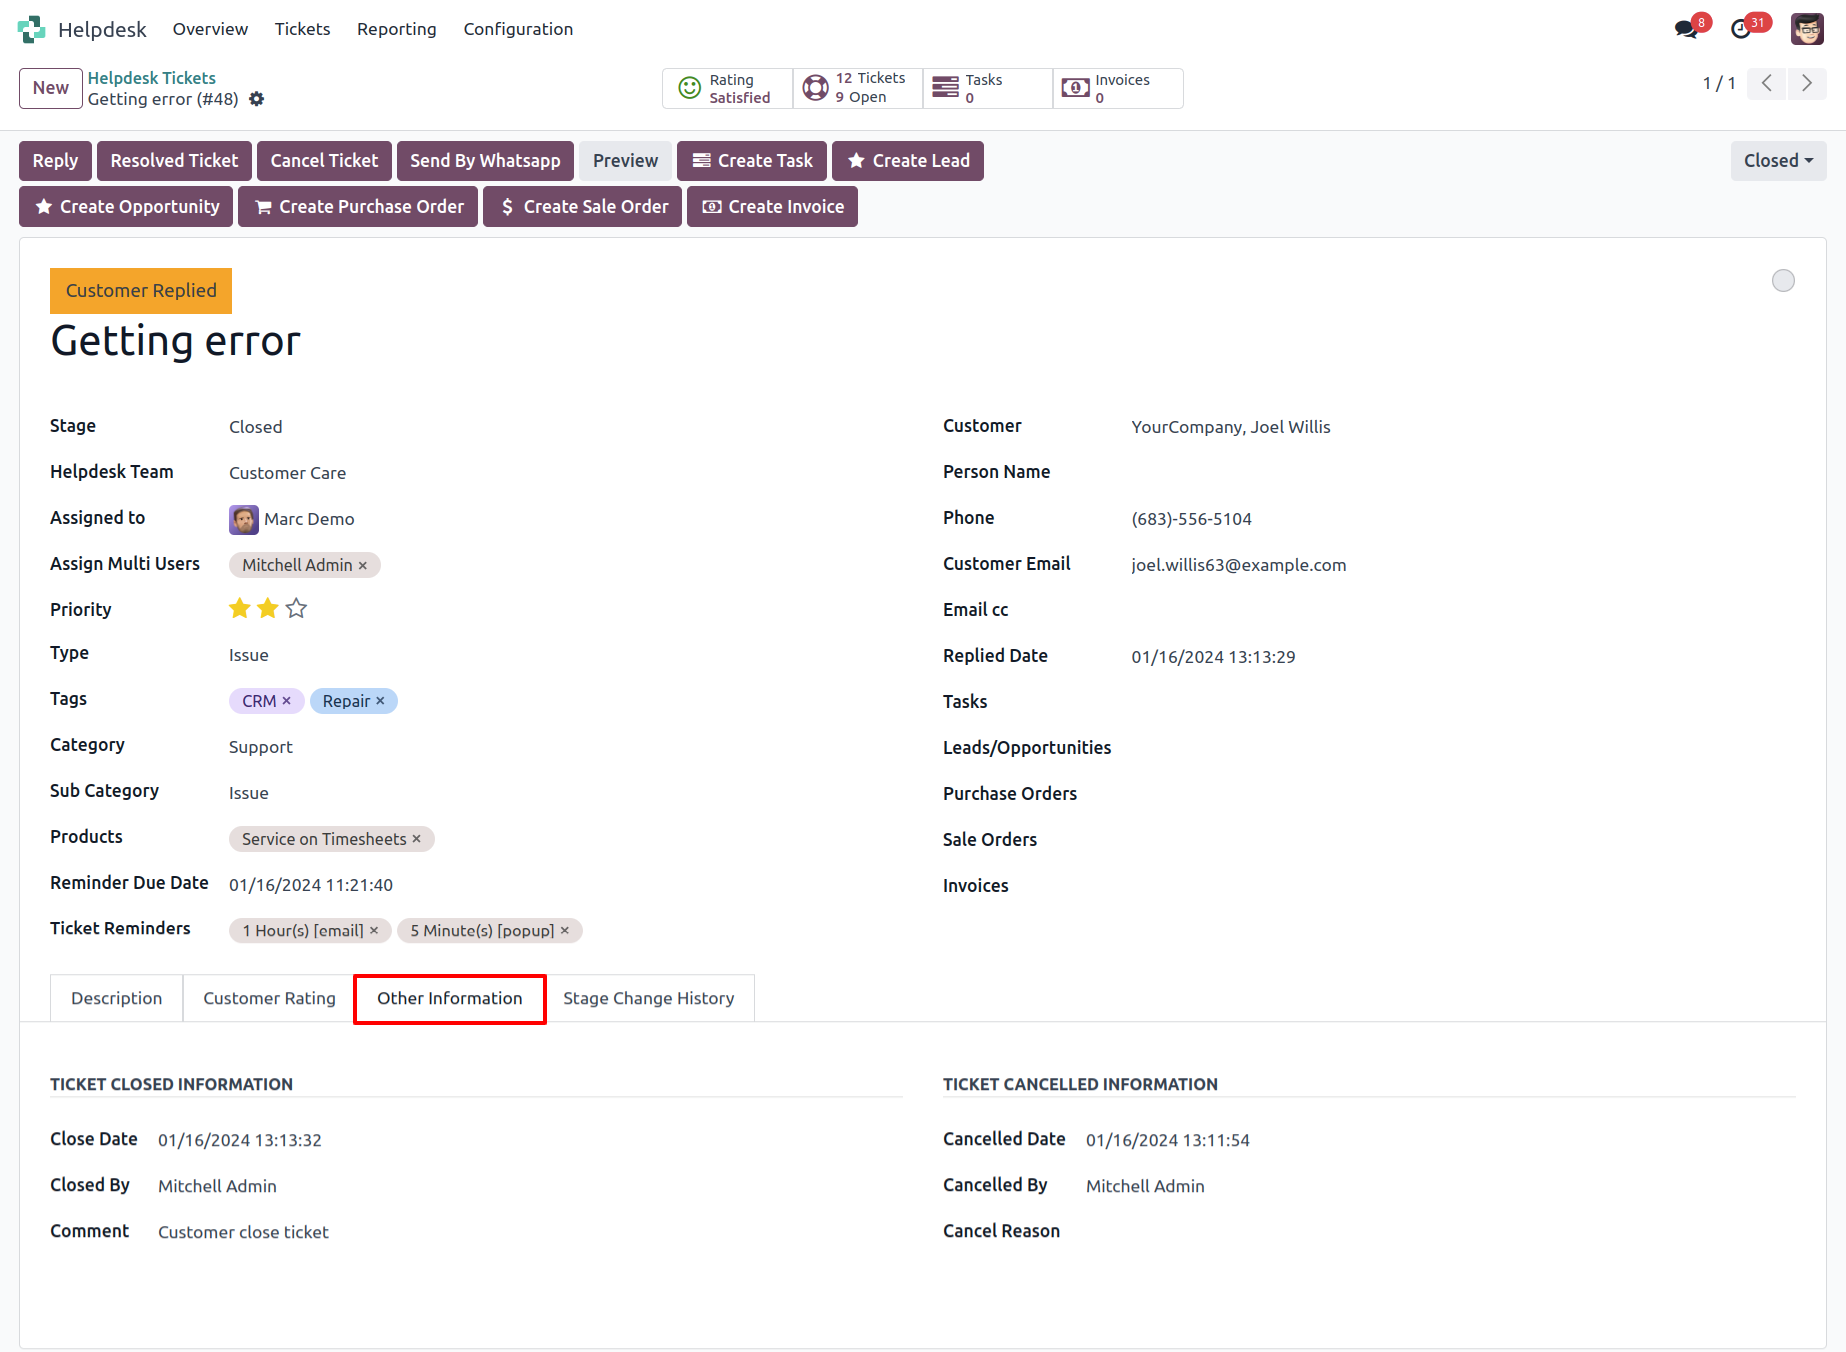
"Ticket Close" information will added here.
Chat with customer in chatter.
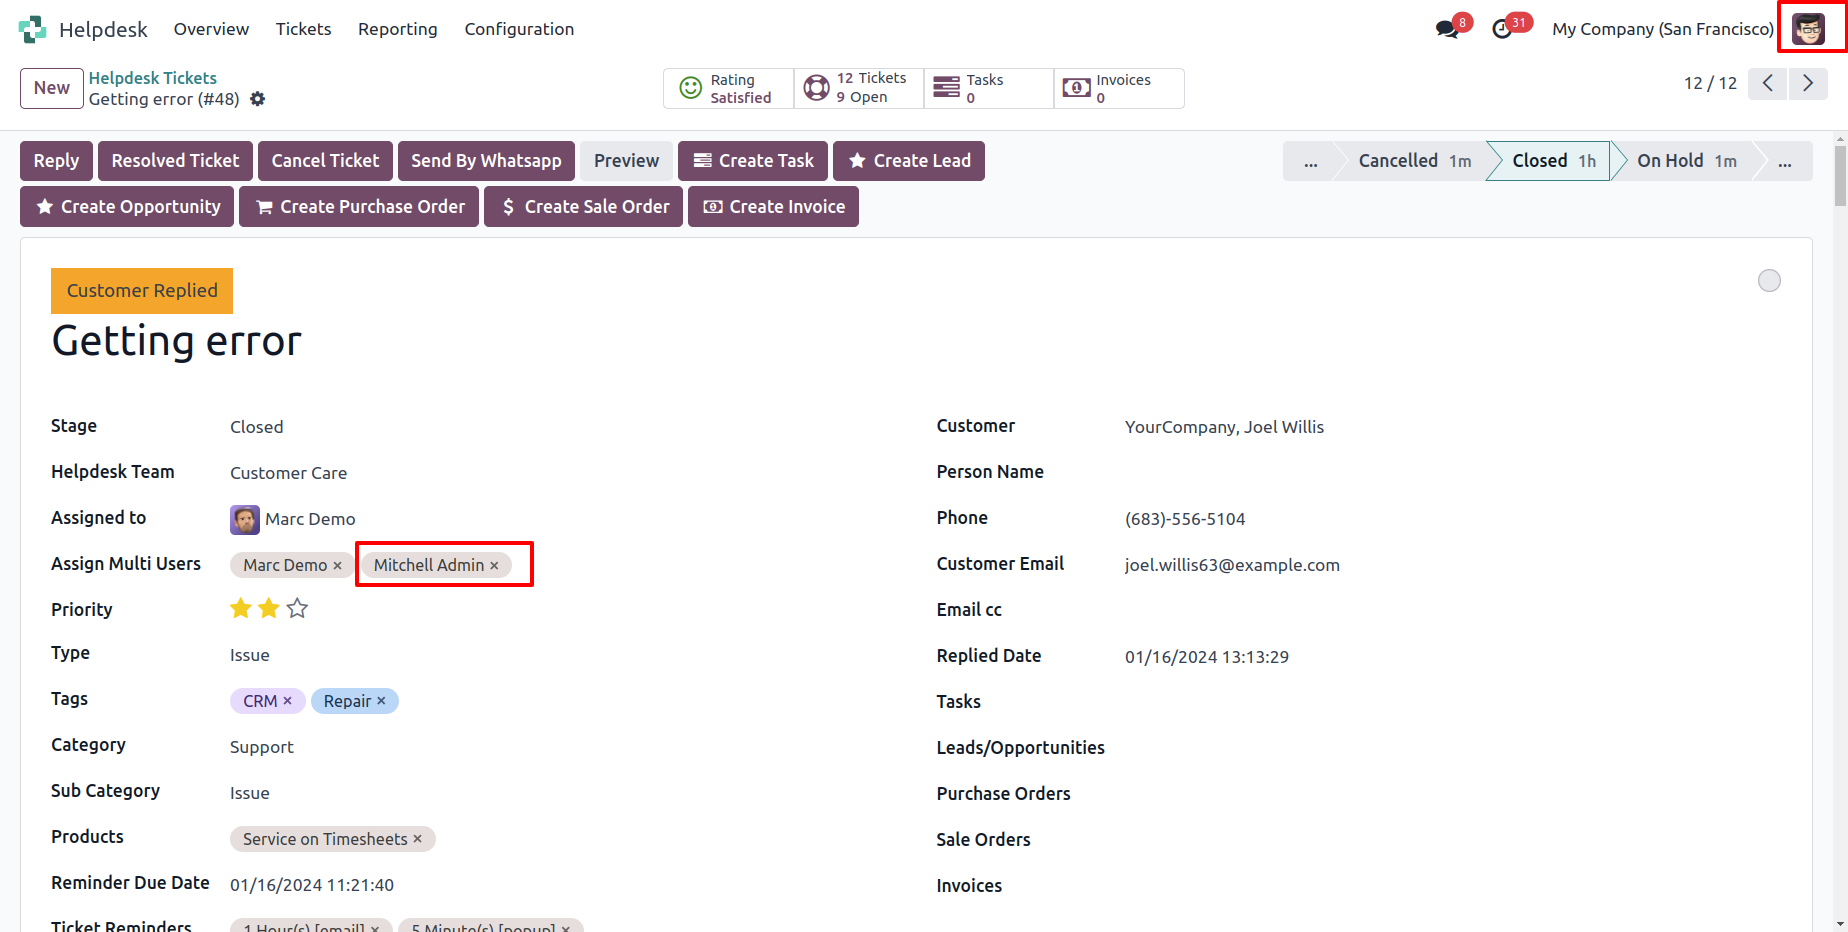
Multi User
Goto user config setting, Enable 'Display Multi User'.
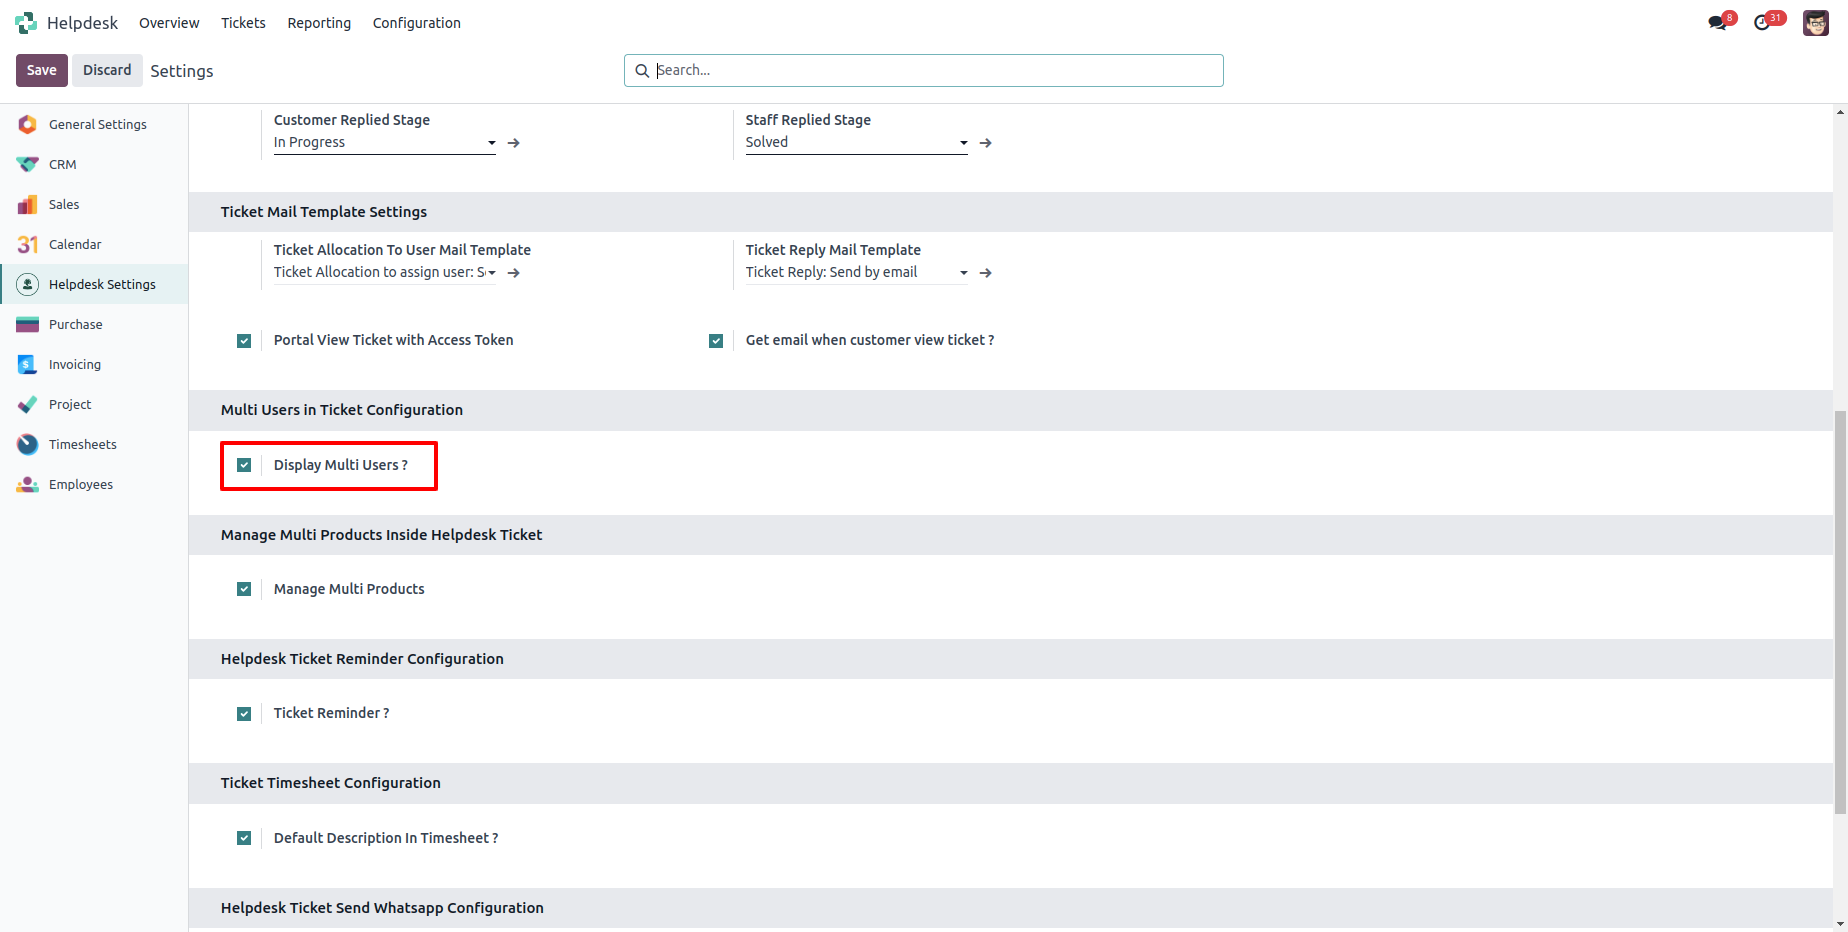
You can select more than one user for each tickets. All assign multi user can see the ticket.
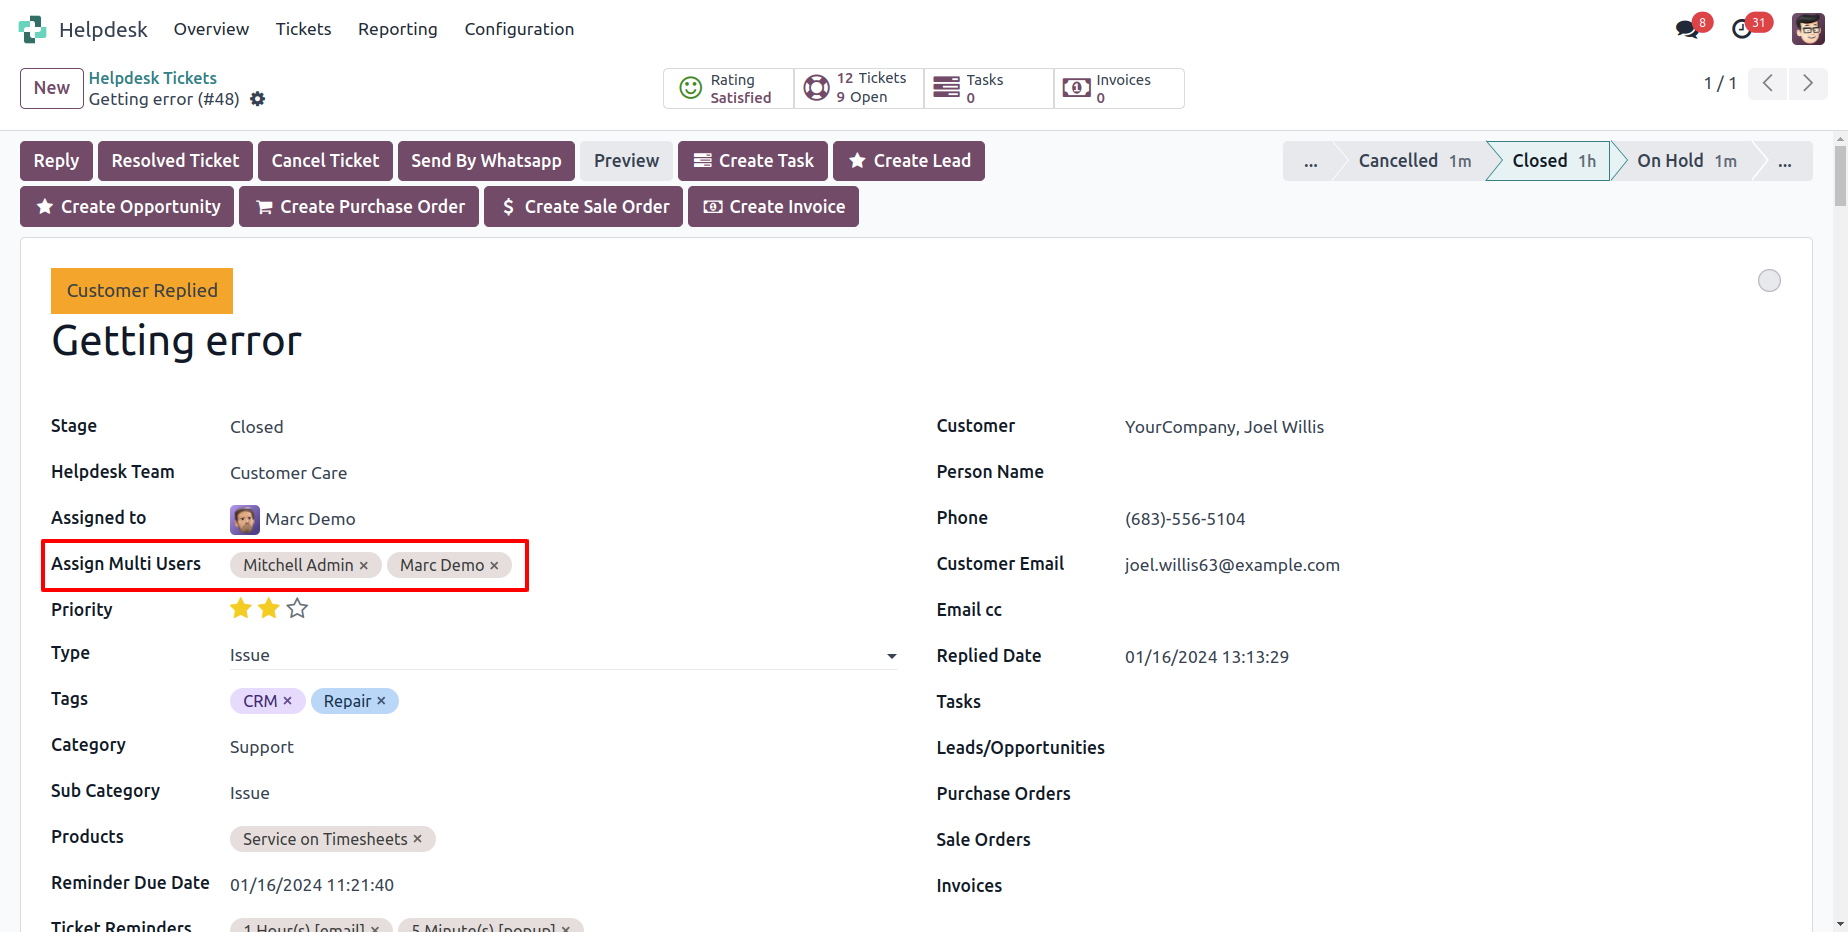
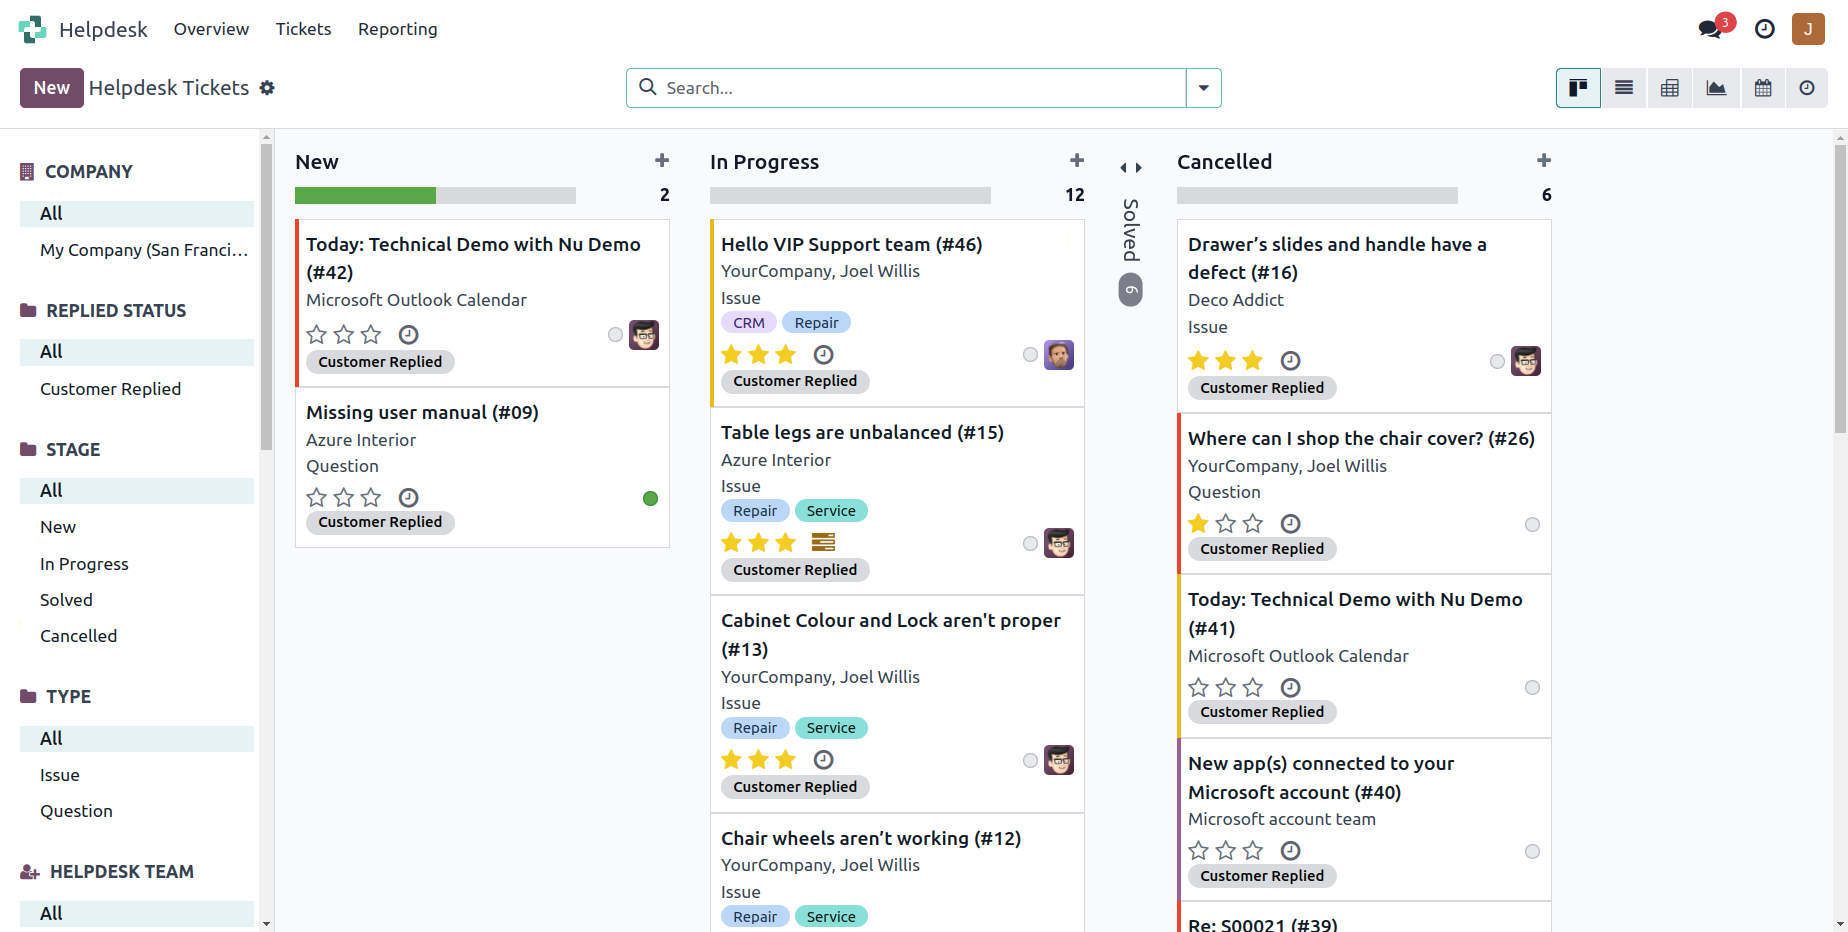
'Demo' user can see the ticket.
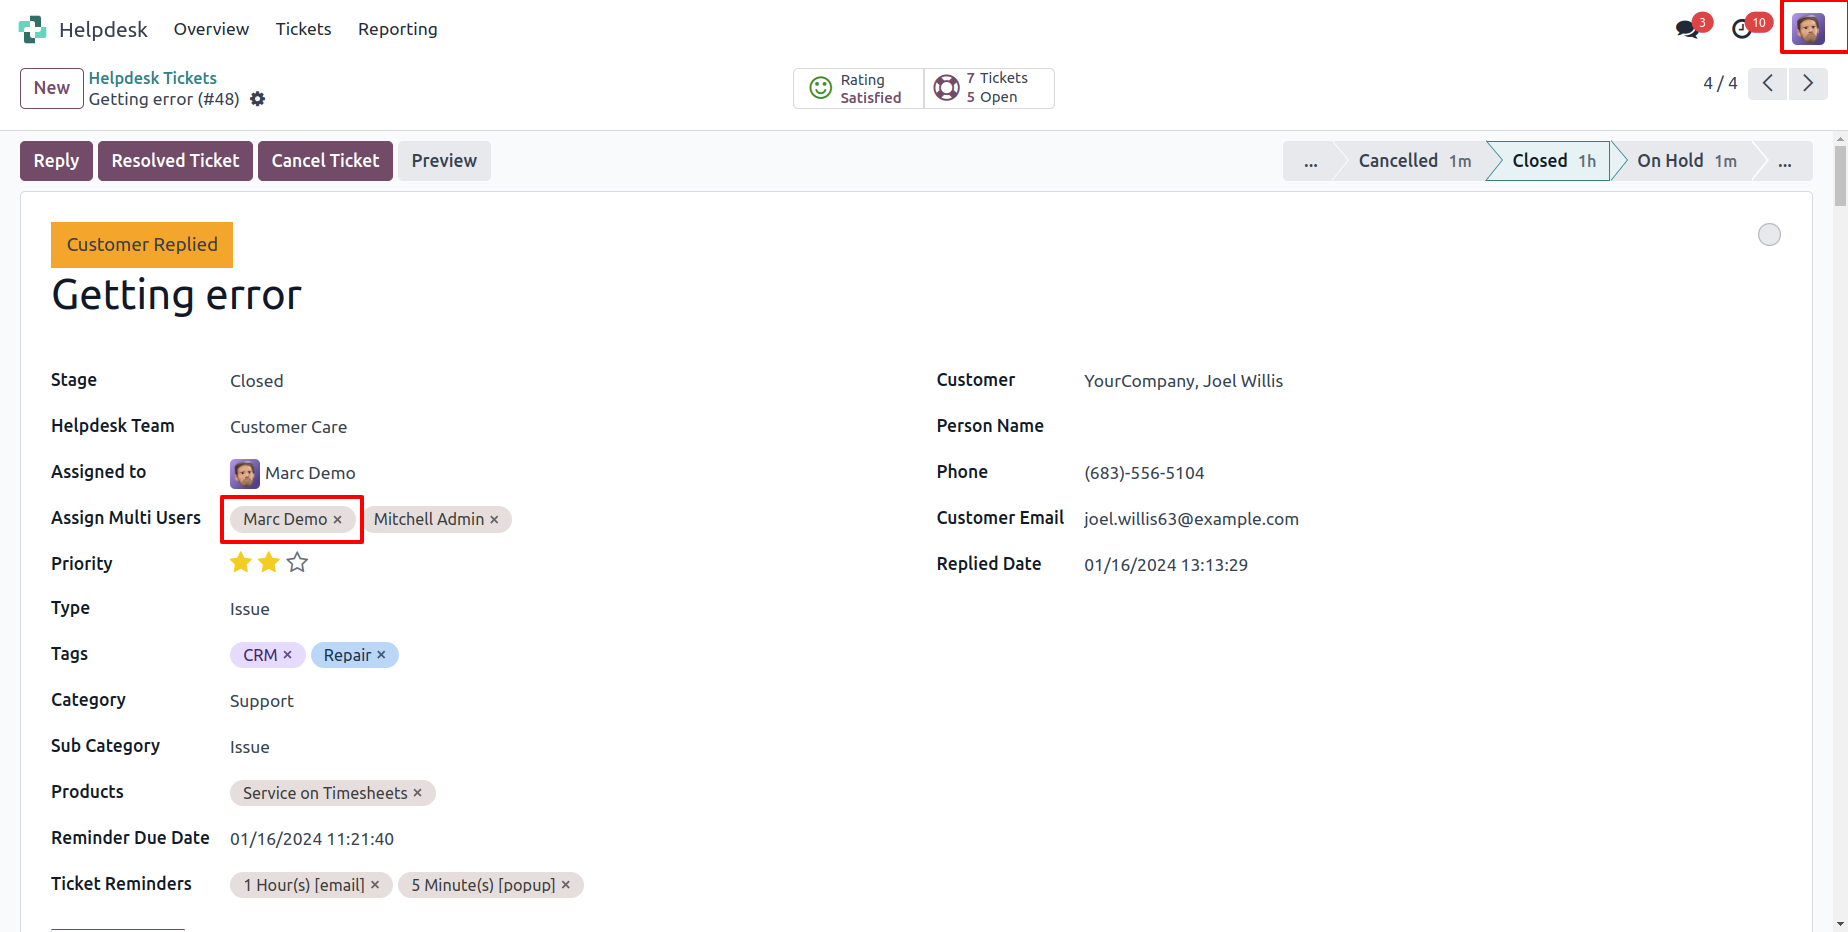
'Admin' user can see the ticket.
'John' user can not see the ticket because ticket was not assigned.
Manage Multi Products
Goto user config setting, Enable 'Manage Multi Products'.
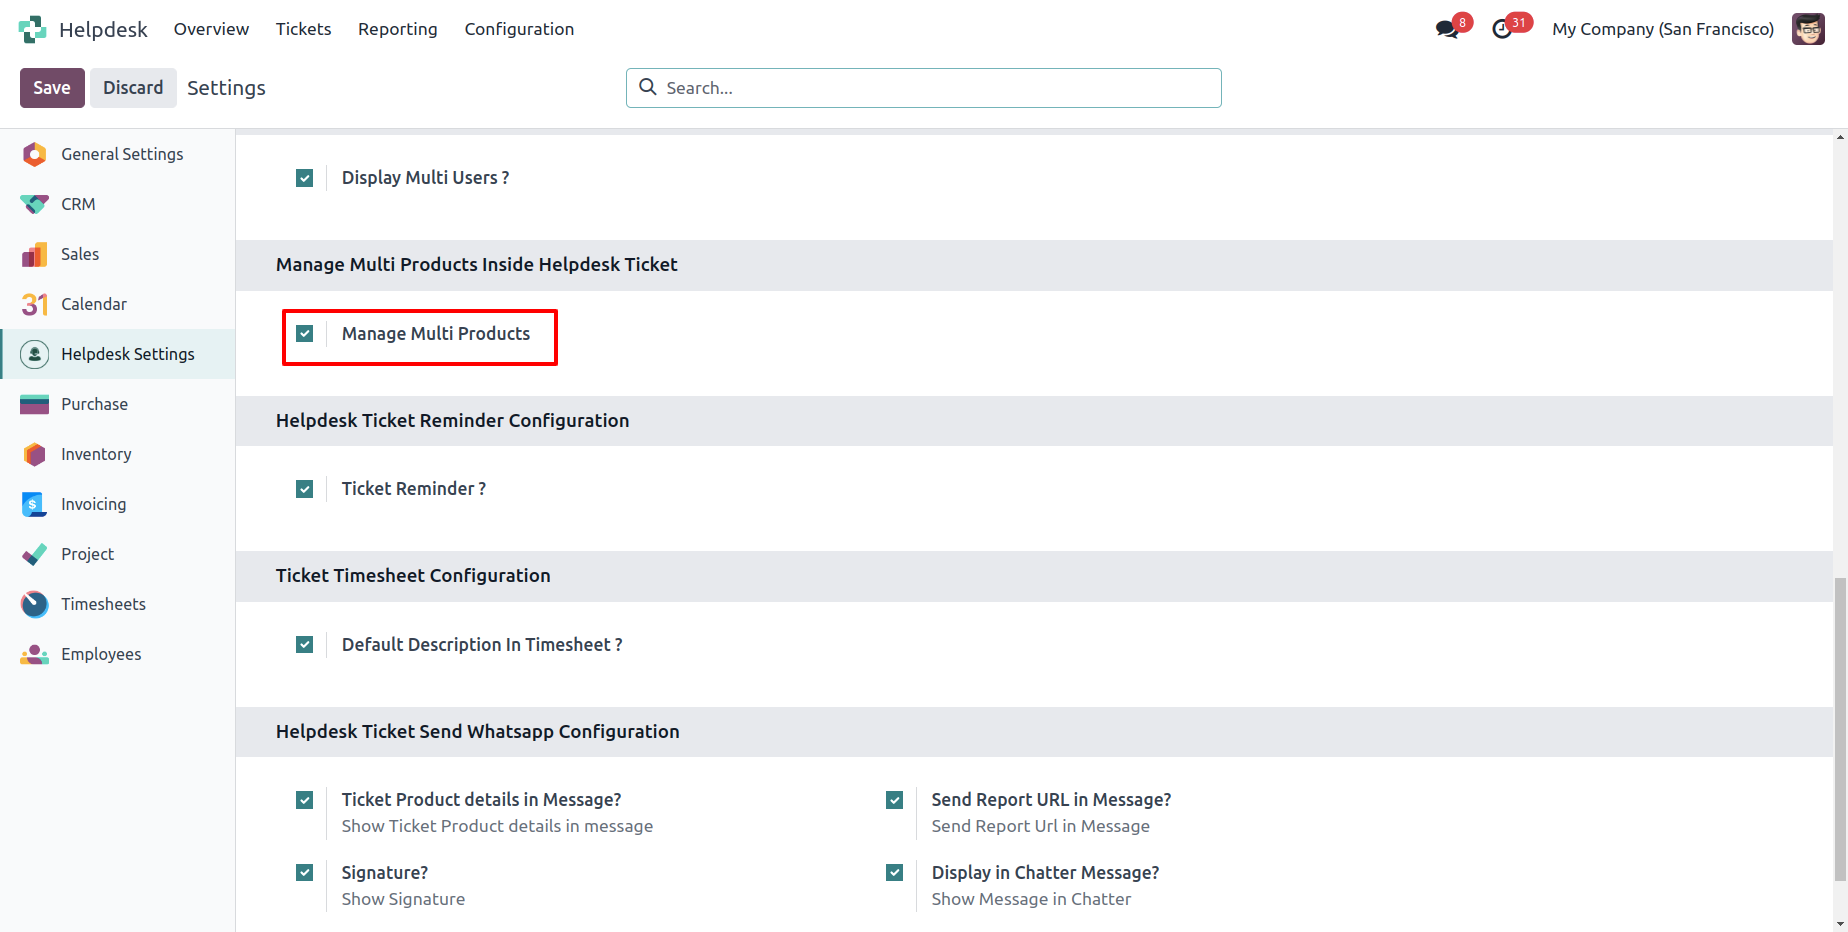
You can select products for each ticket.

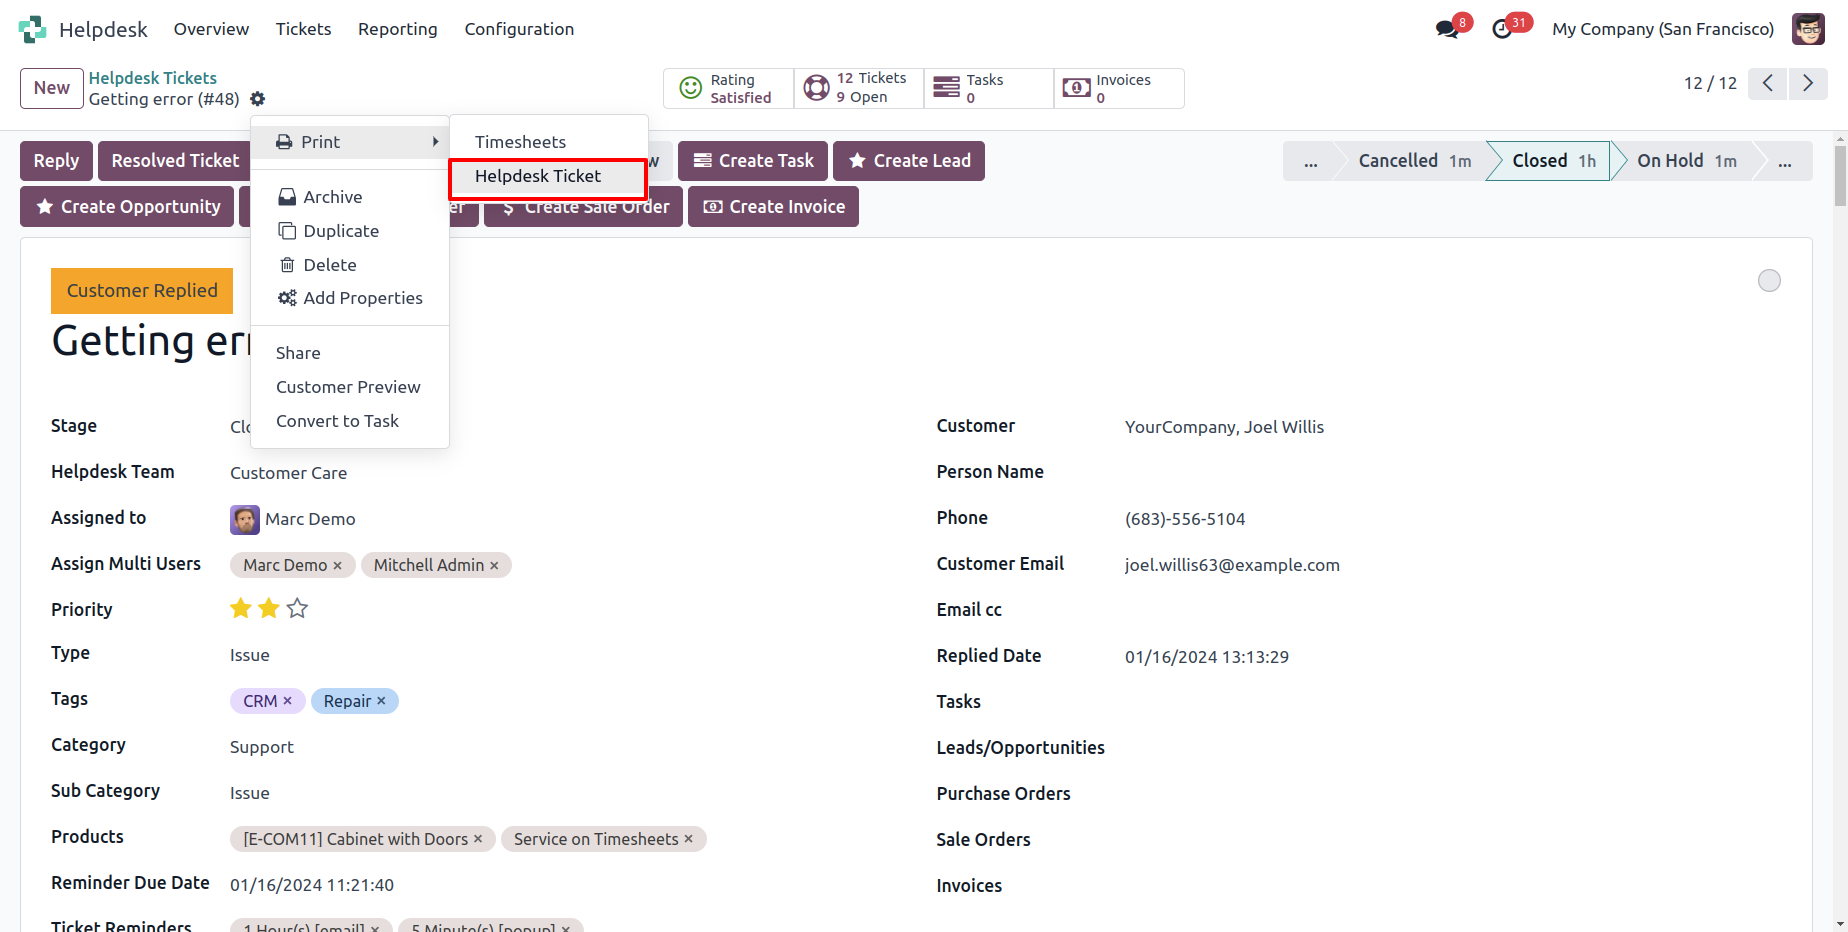
Ticket PDF report with the products.
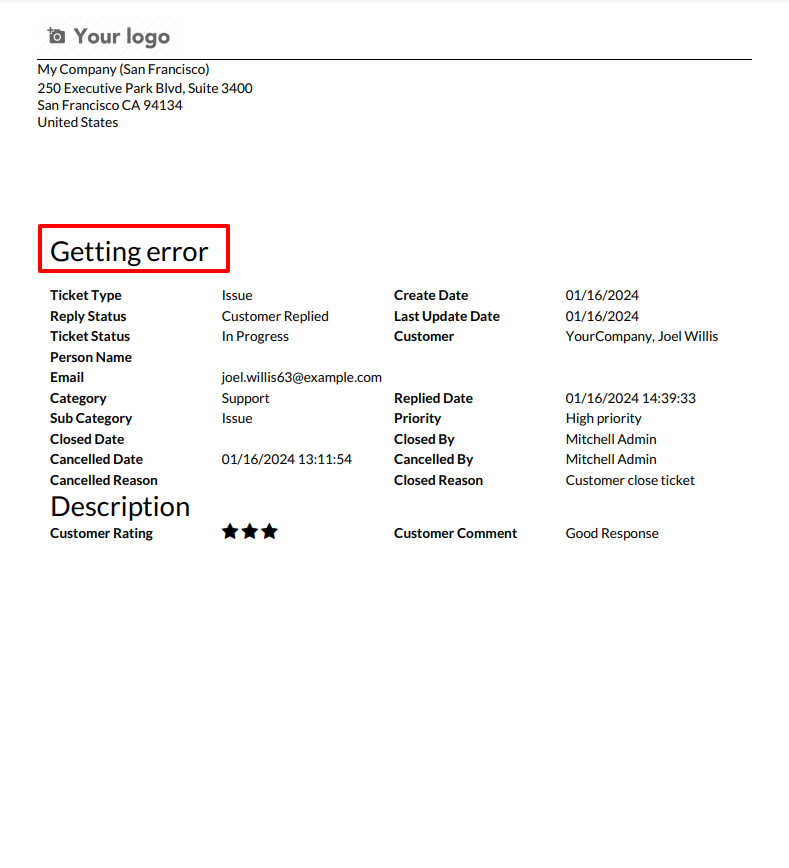
Helpdesk ticket in PDF for backend.
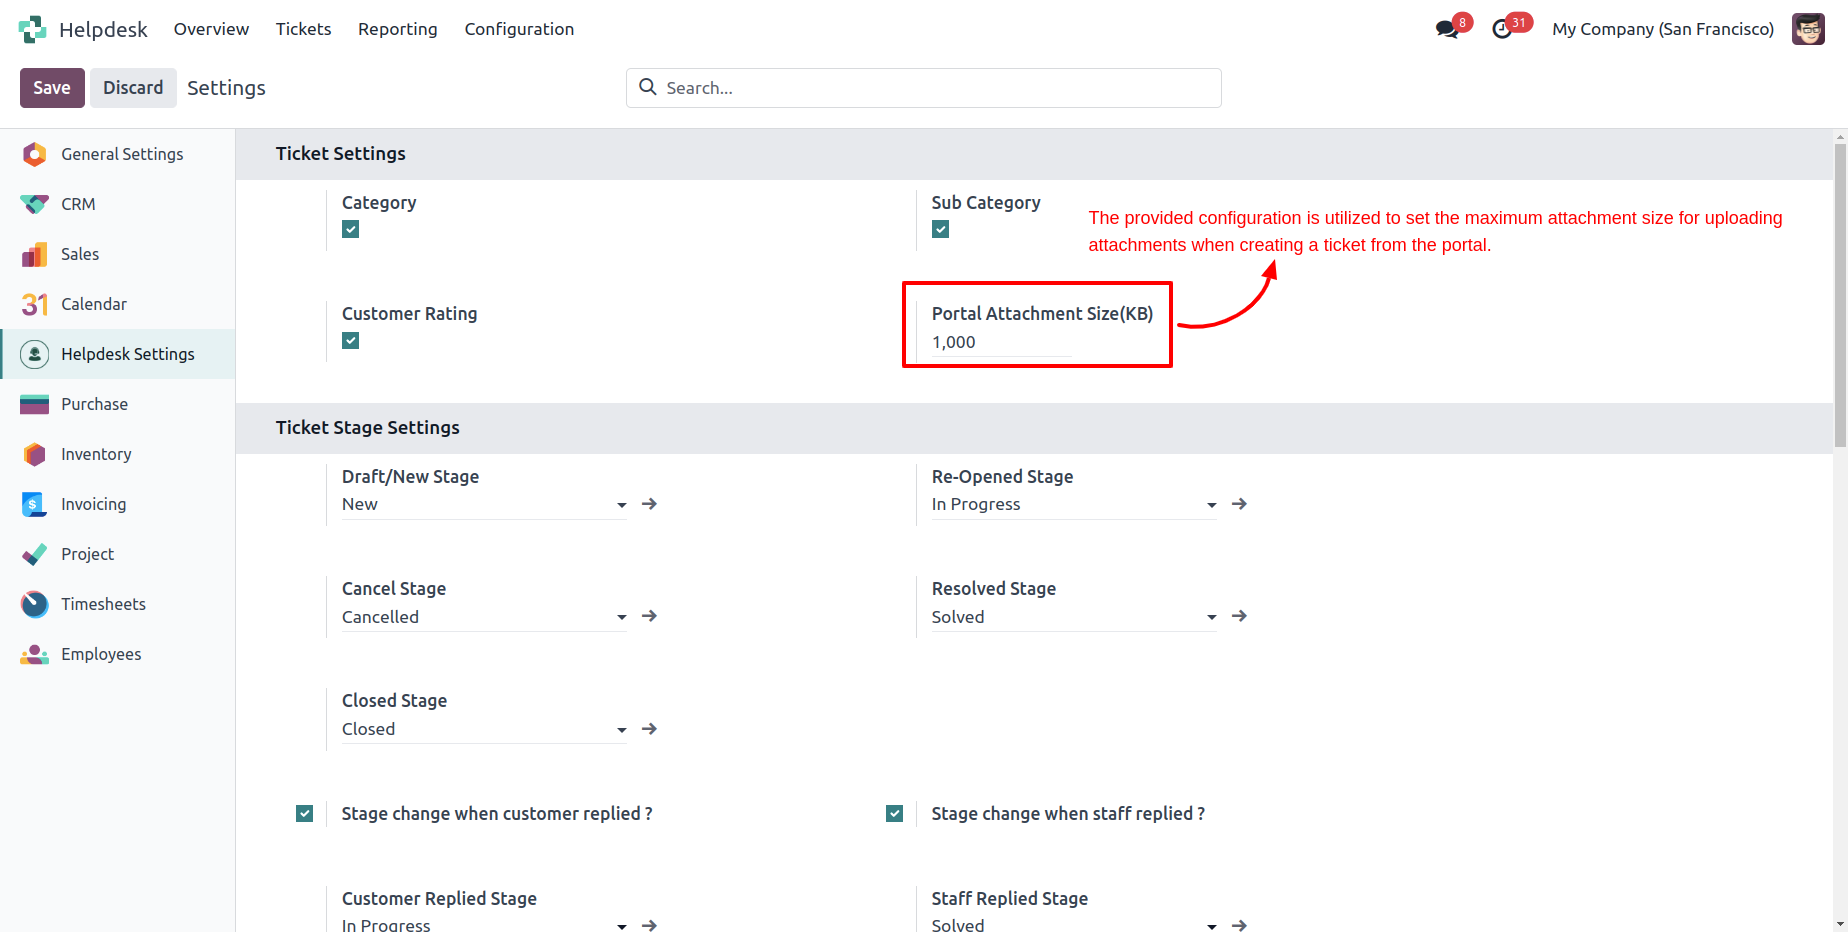
Configuration to give attachment size limit on portal.
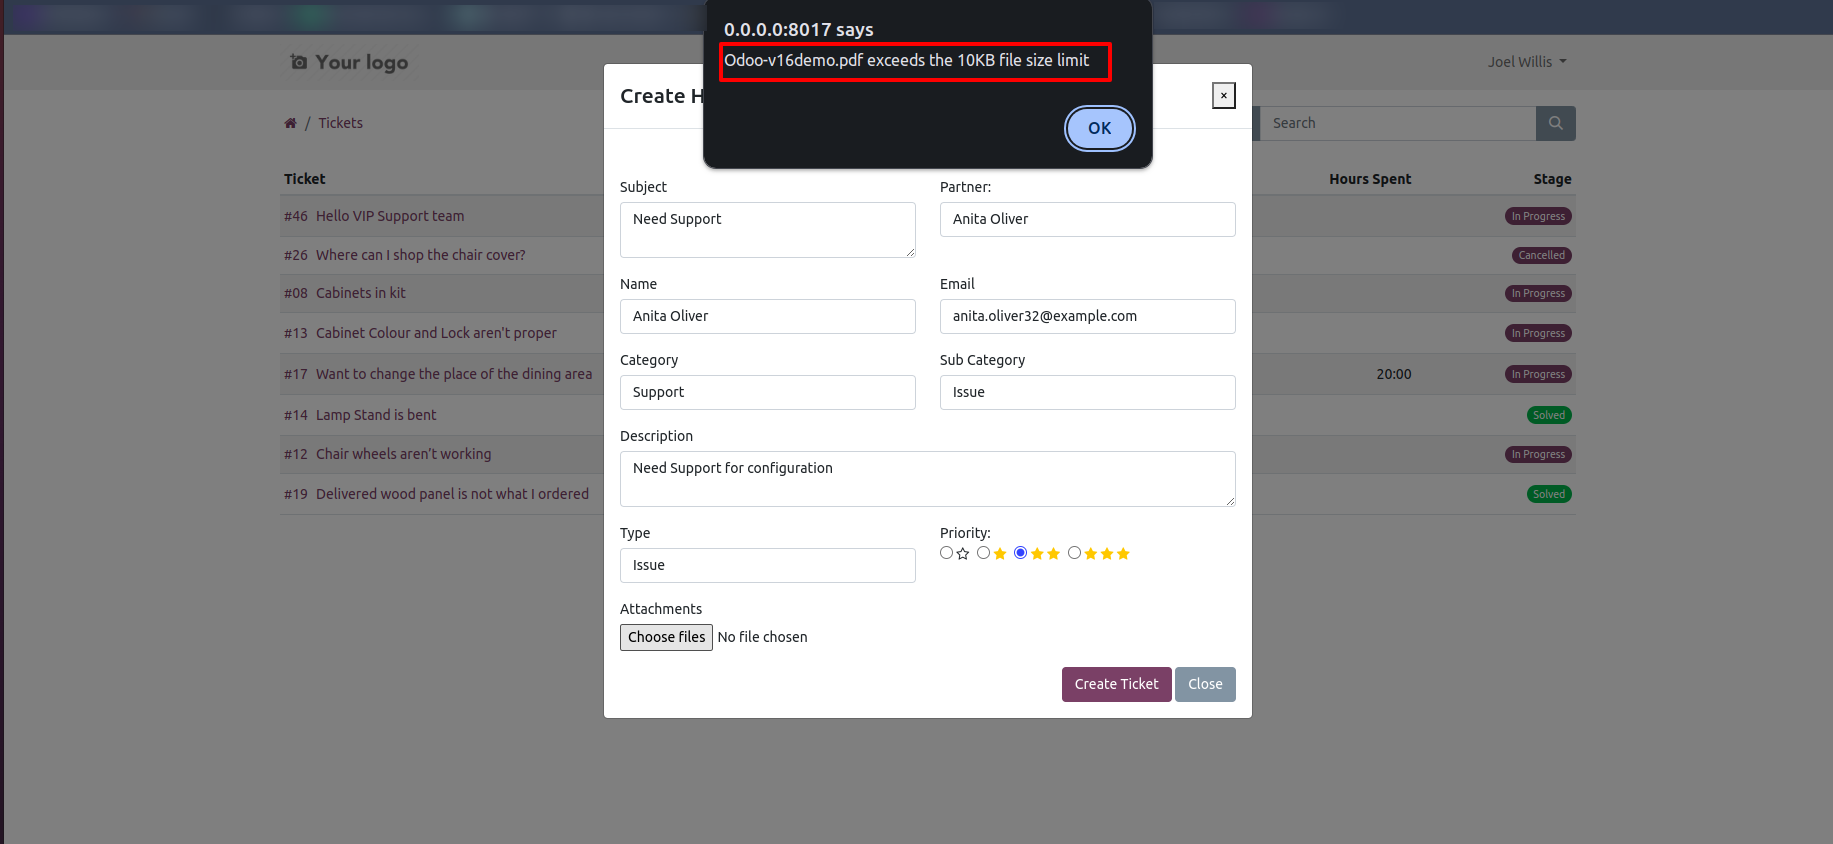
Alert comes when attachment size larger then configuration.
Customer ratings visible to only manager & team leader.
You can update multiple tickets using "Mass-Action". You can update assigned to person, stage, assign multi-user & add/remove followers.
Configuration added to view portal ticket with access token.
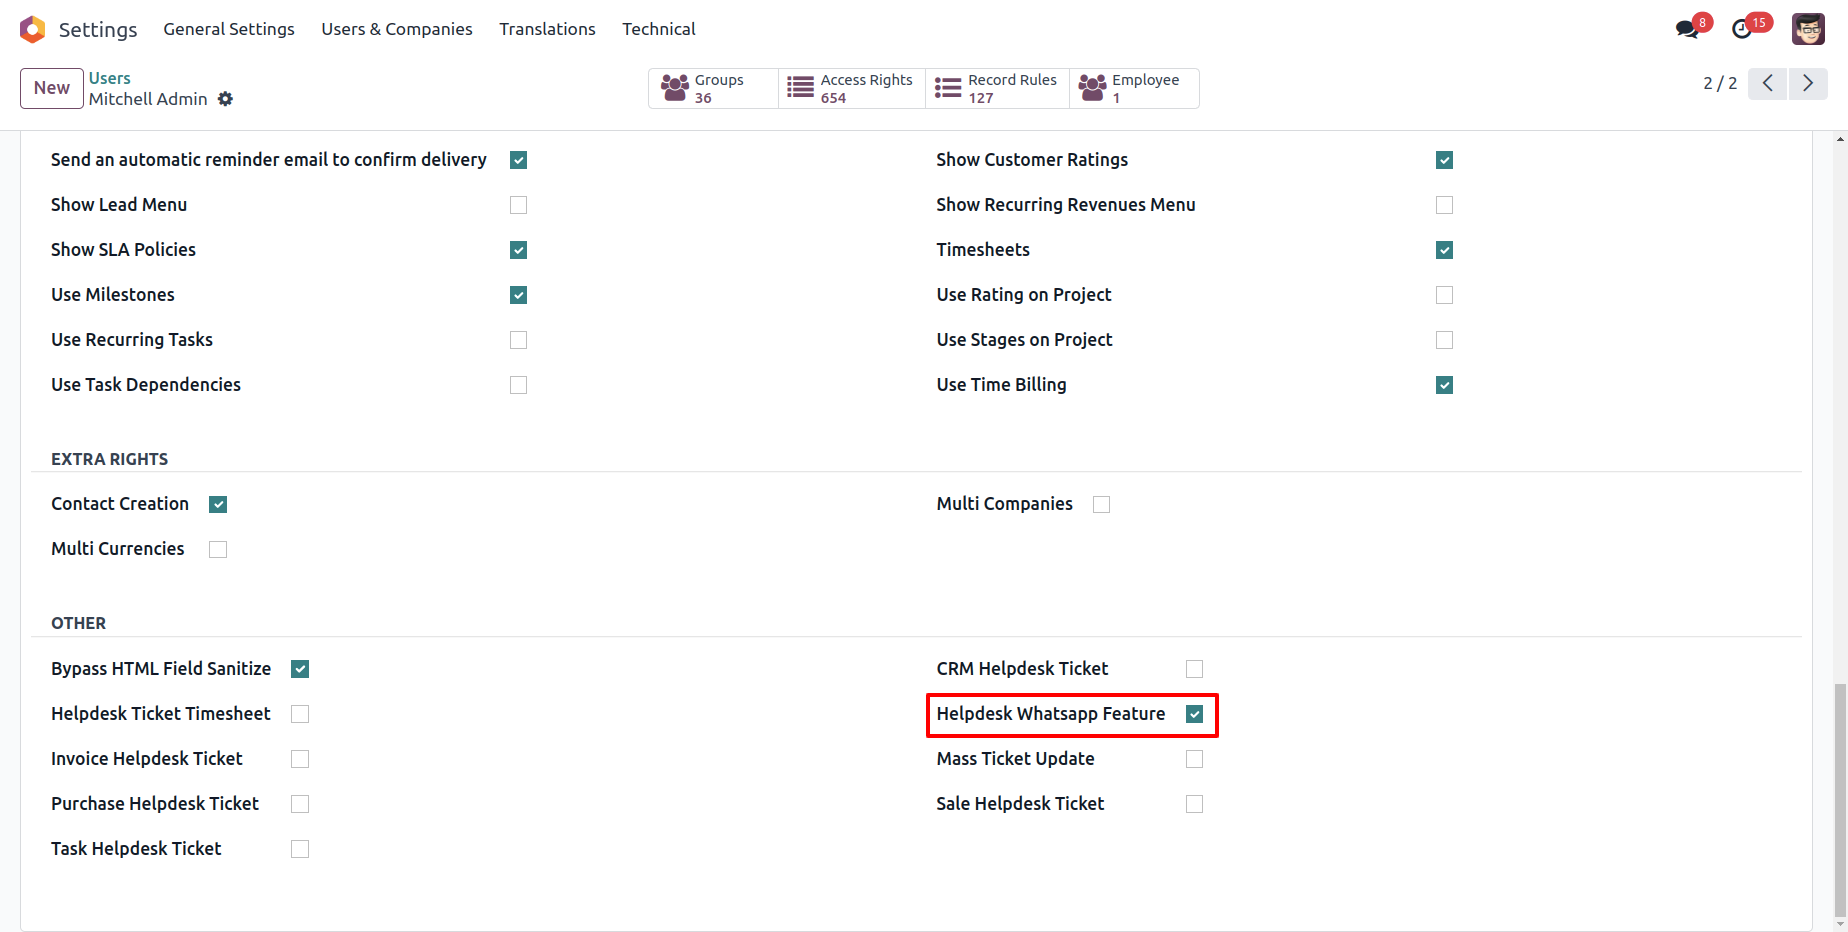
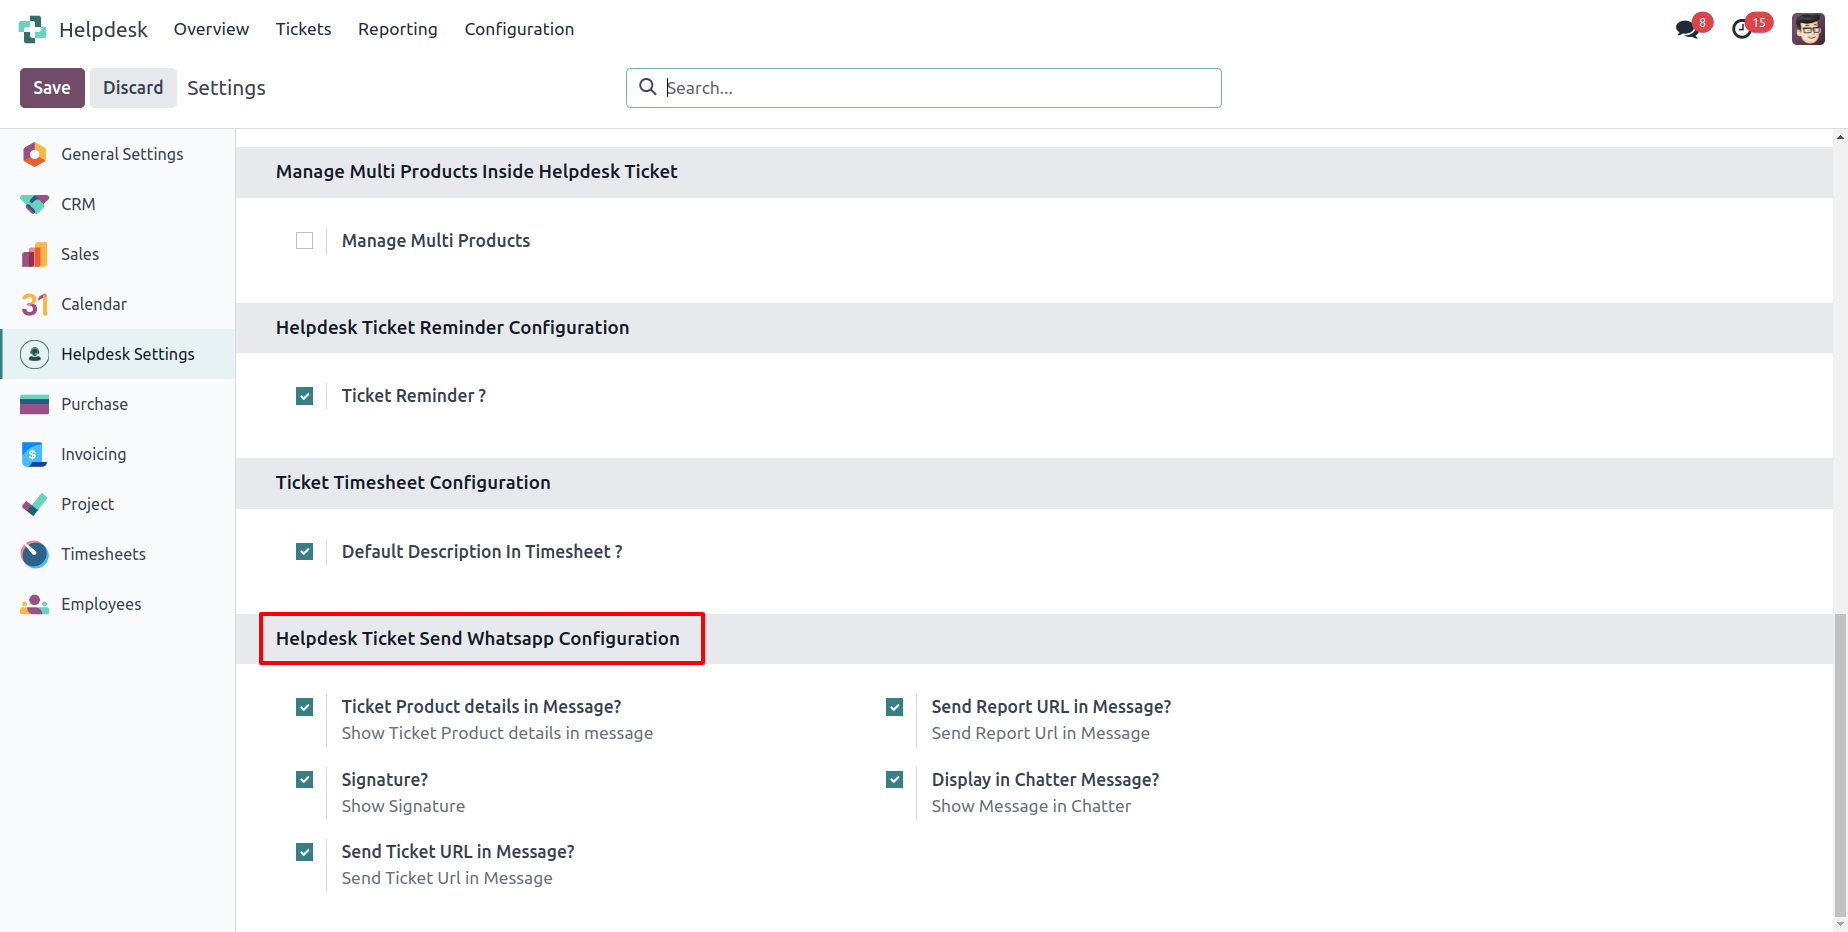
In "User", enable the "Helpdesk Whatsapp Feature" option.
Whatsapp message description with the configuration setting.
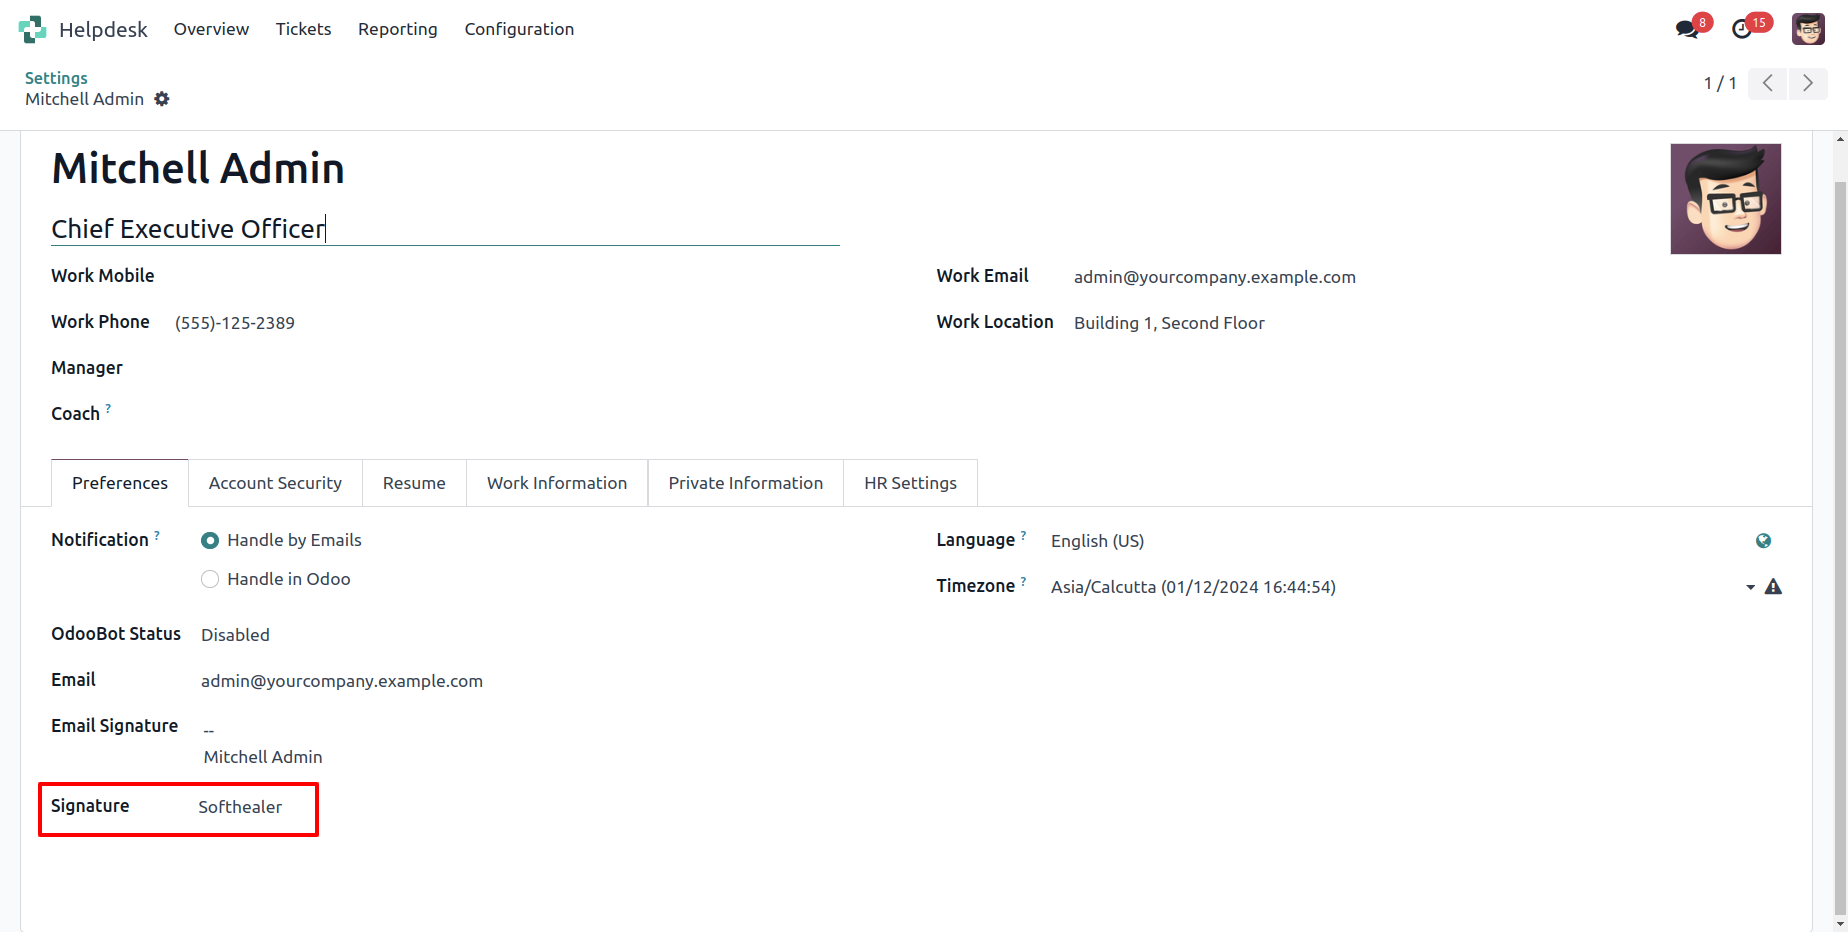
Set the signature in the message,
1) Go to My Profile.
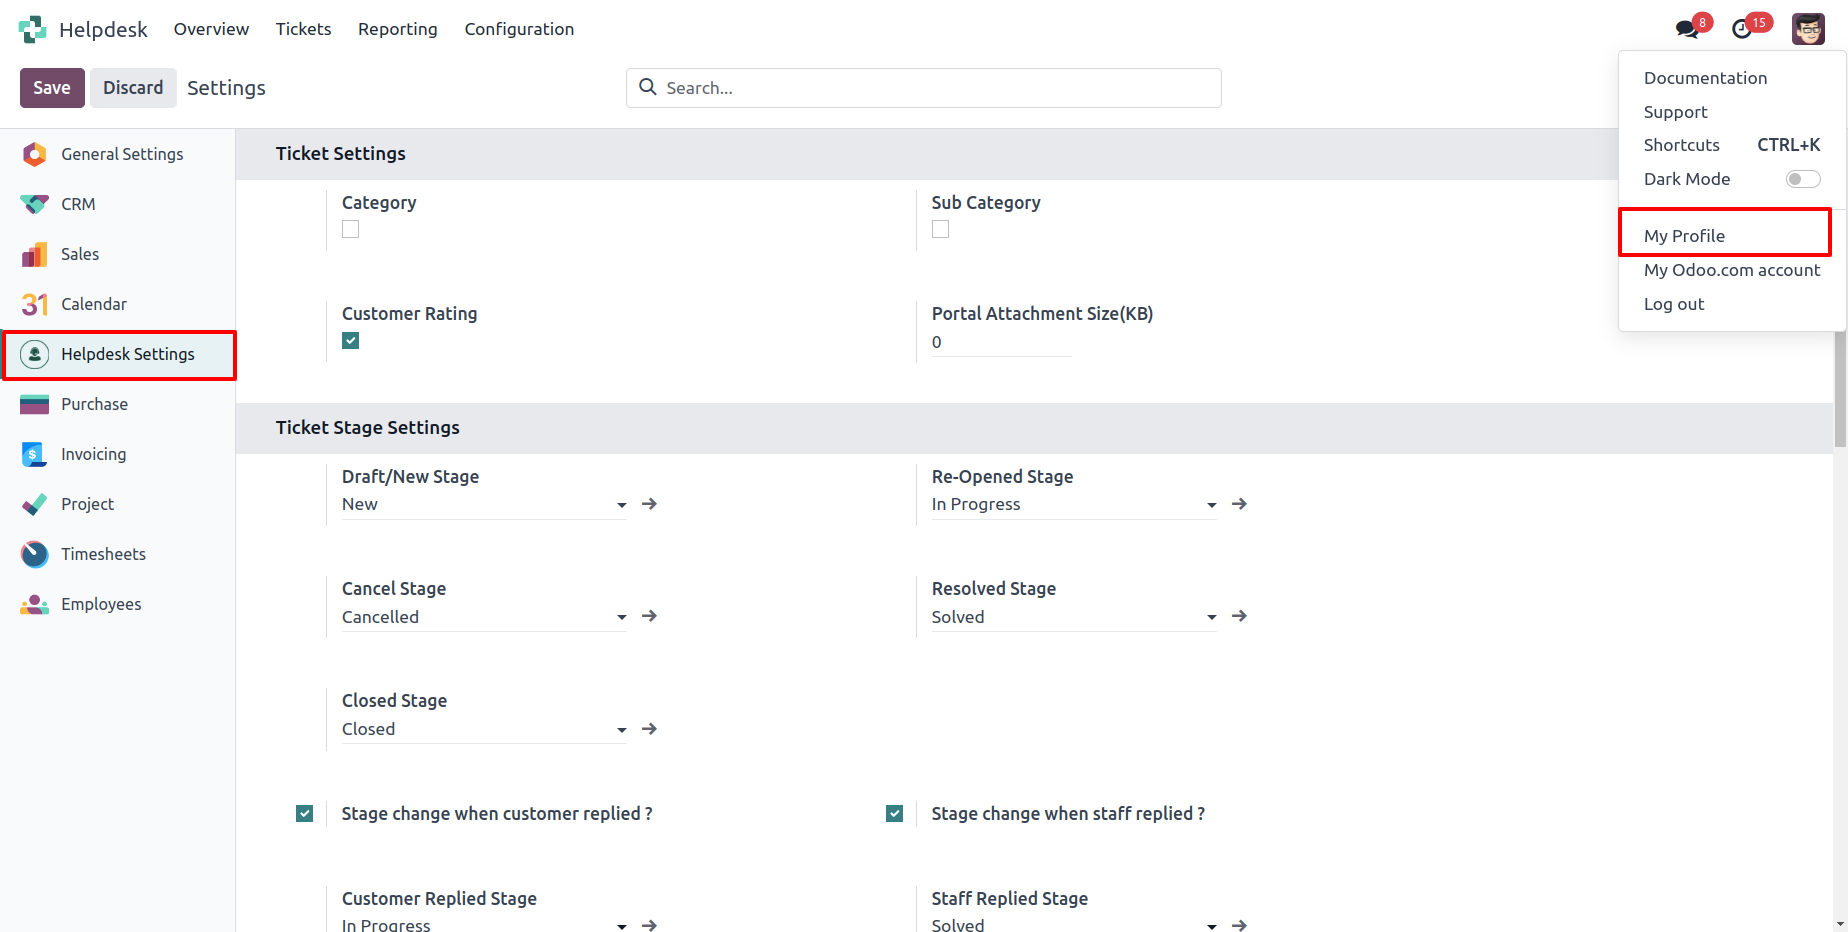
2) Add Signature.
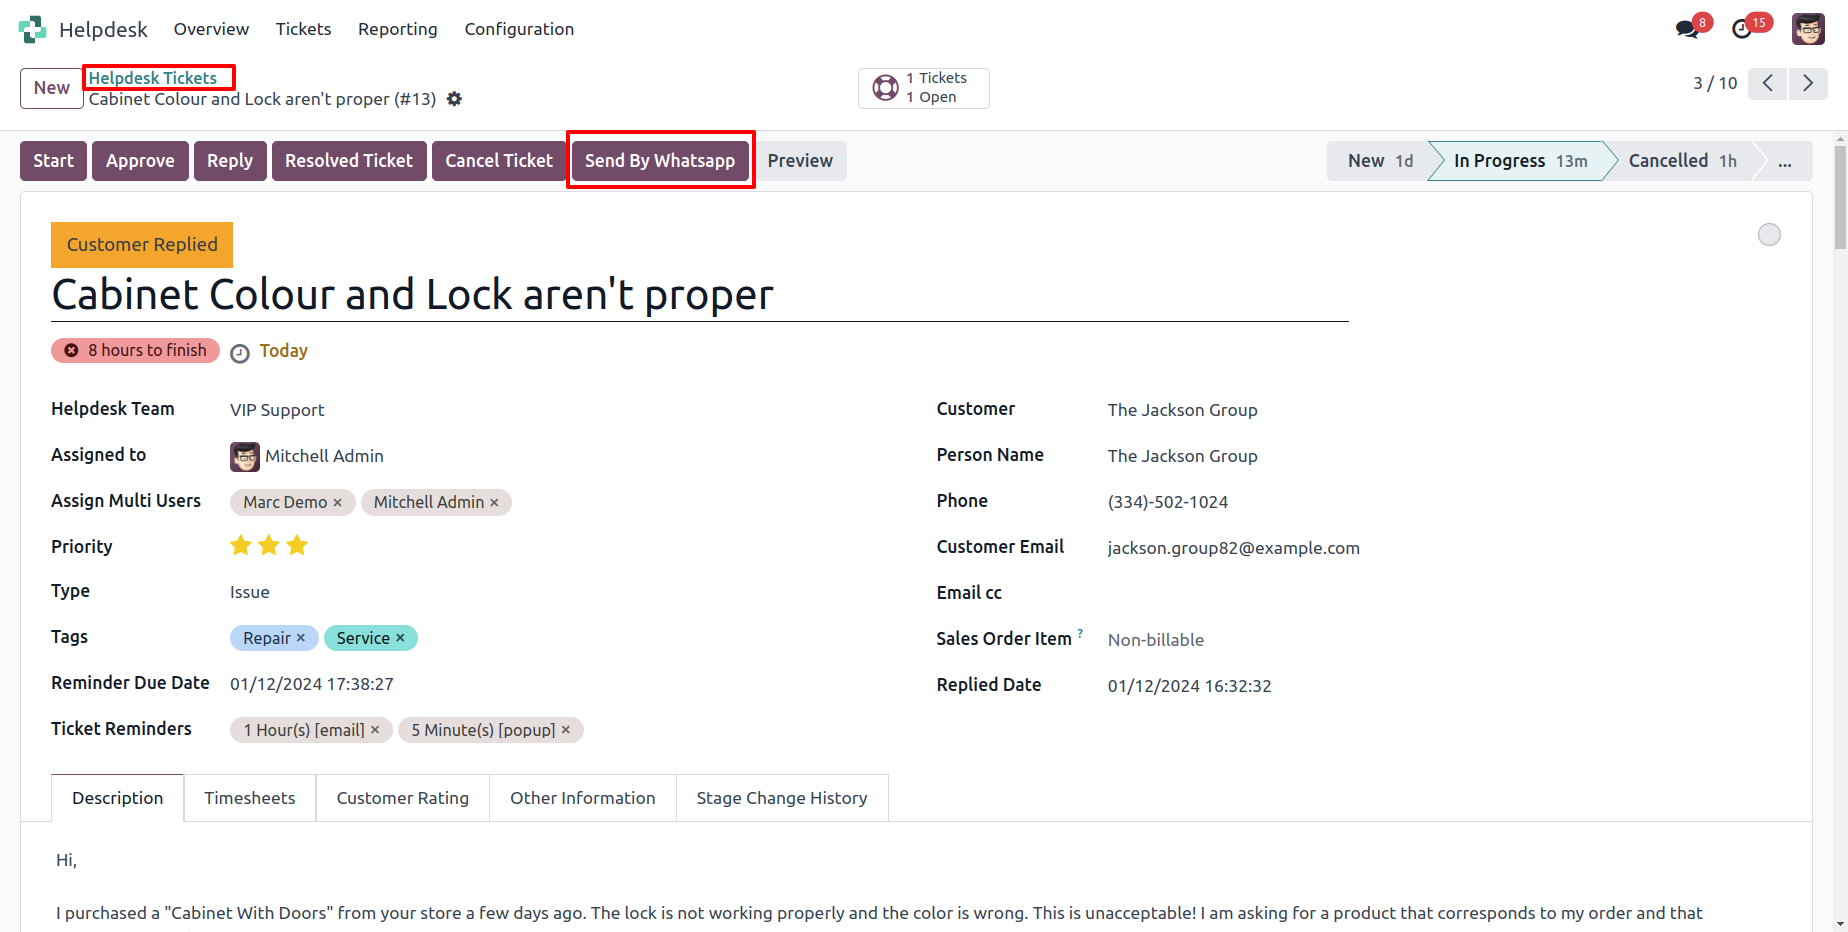
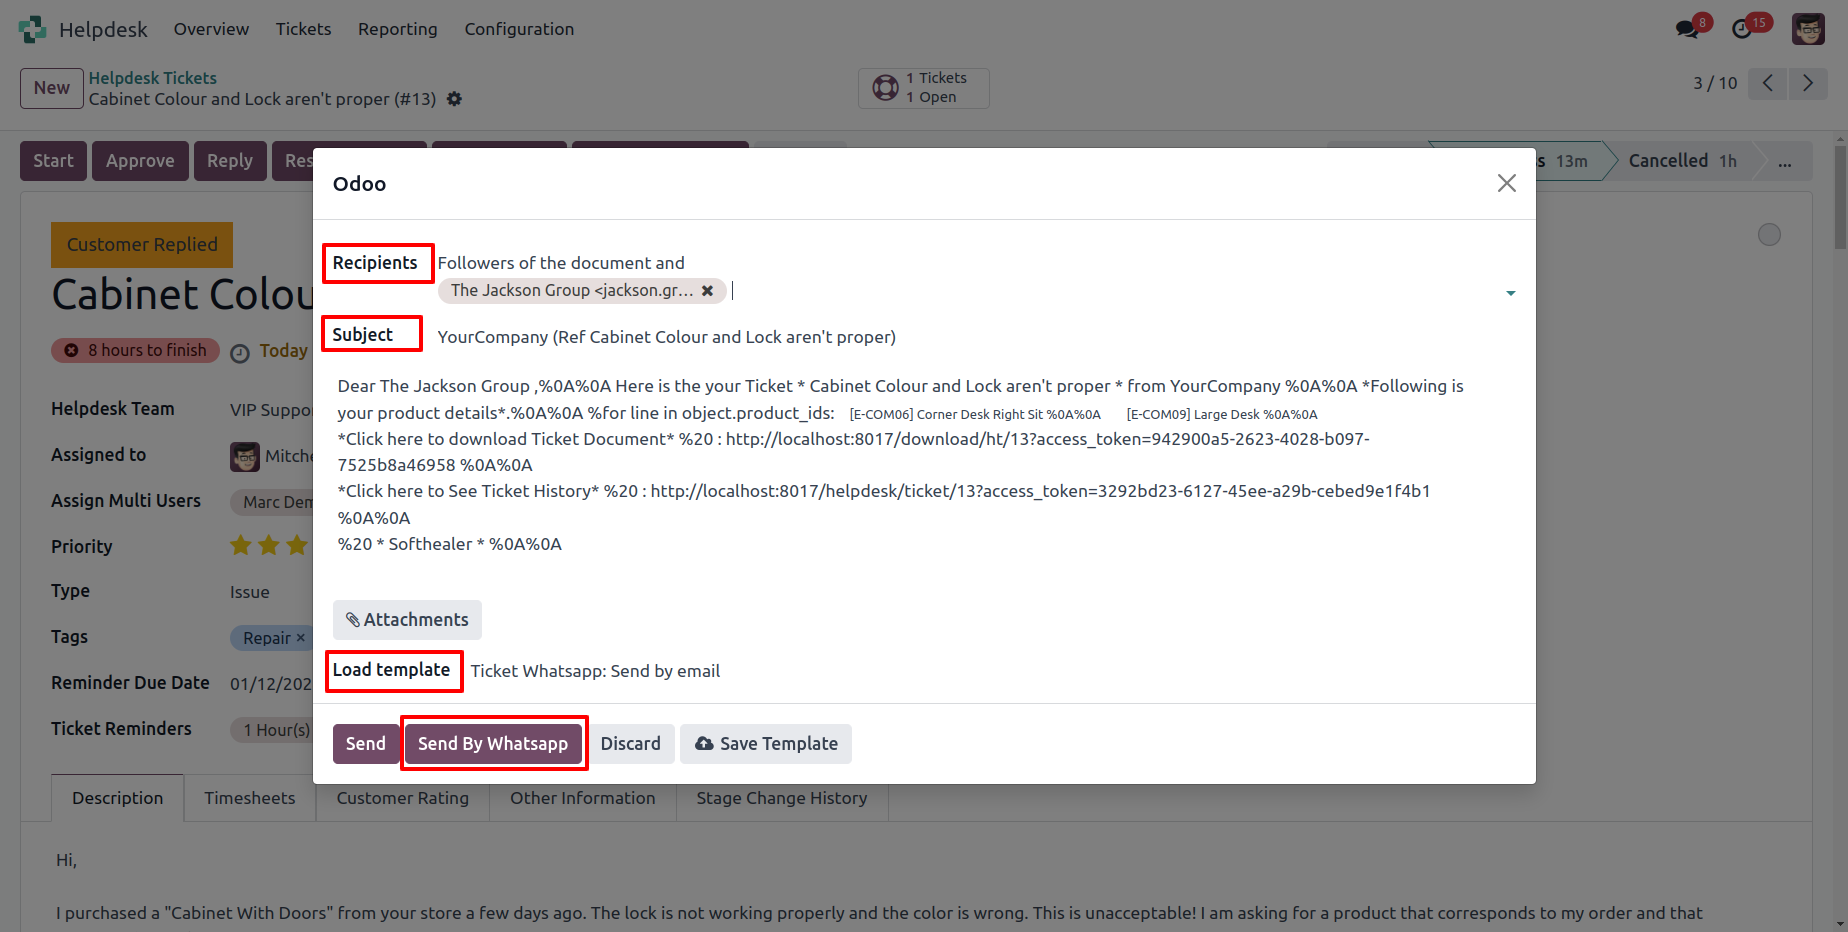
Click "Send By WhatsApp" Button in helpdesk tickets.
Choose recipient, template and edit Message as required and click send by whatsapp.
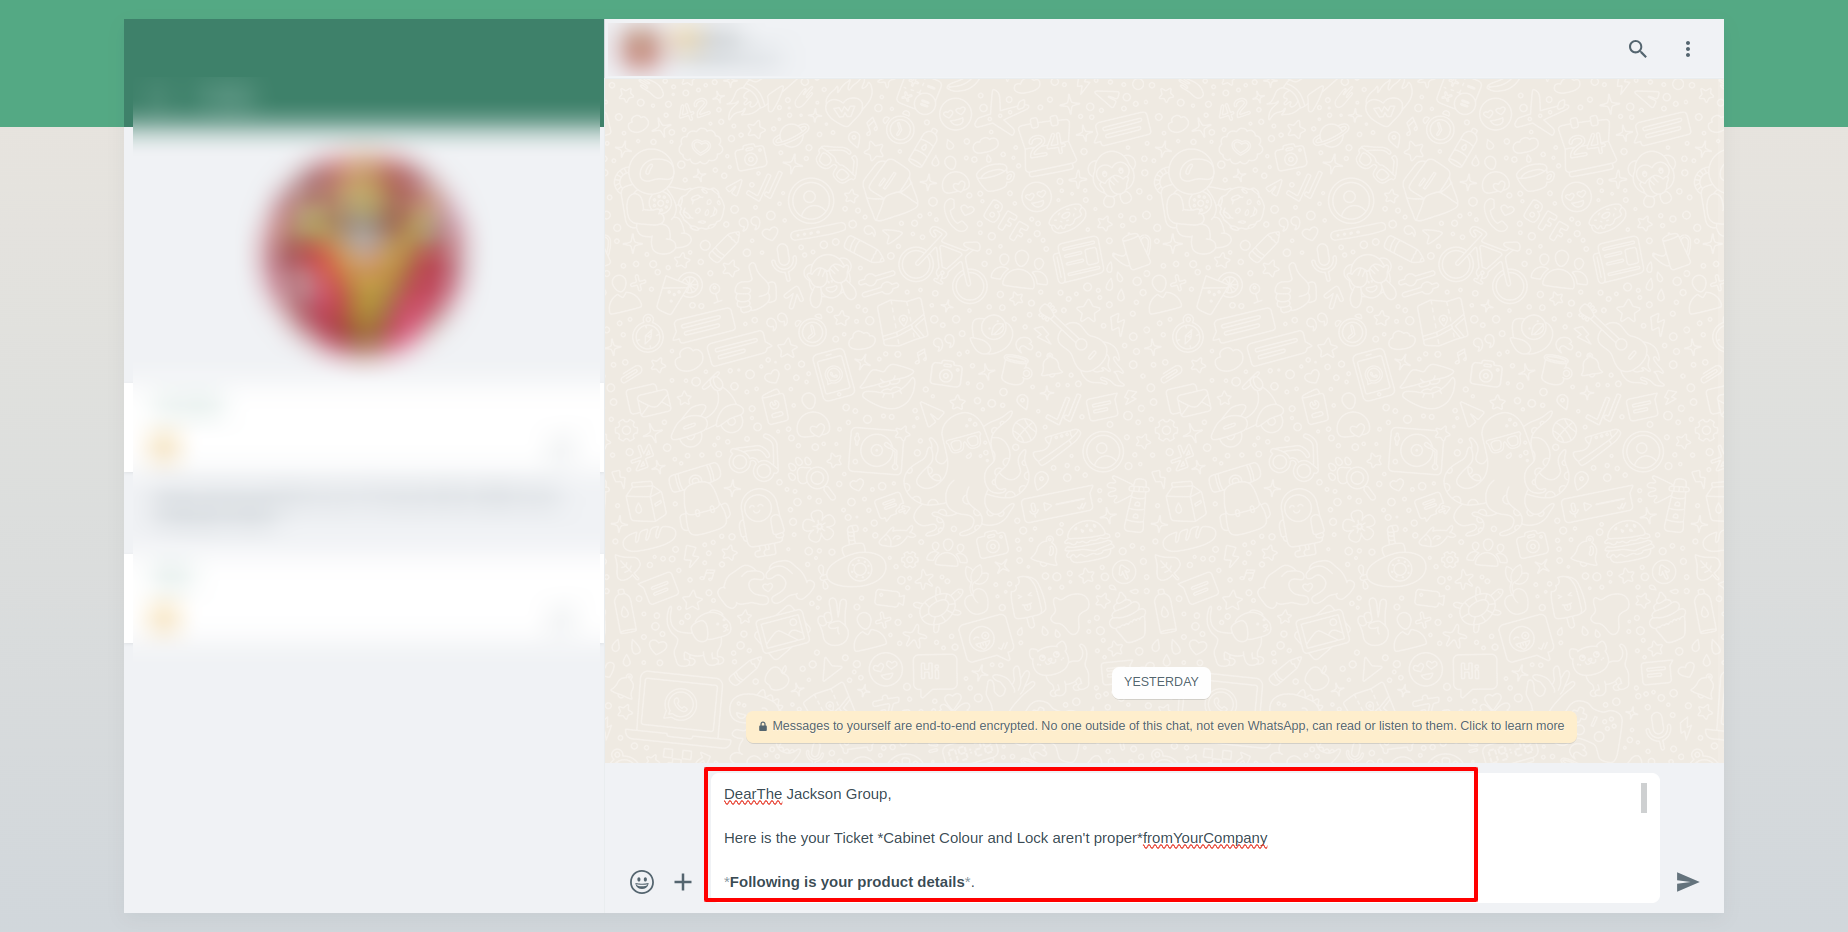
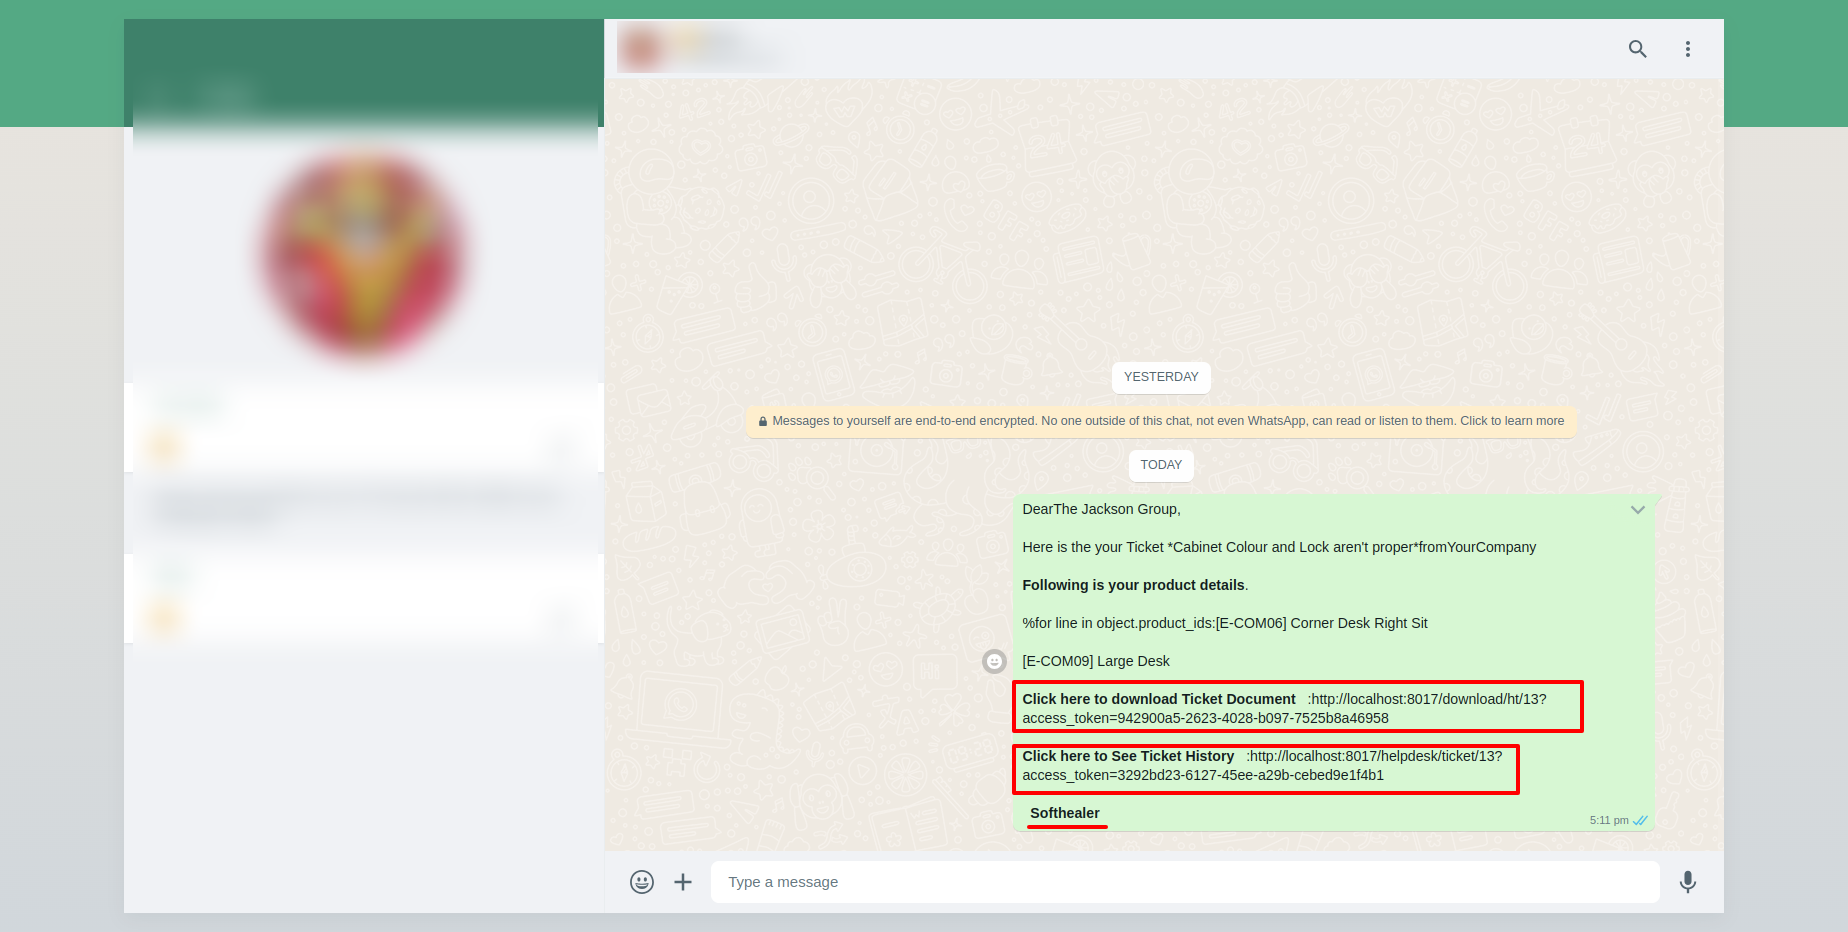
This is the output shown in the WhatsApp messenger.
In helpdesk ticket chatter you can see the message which is sent.

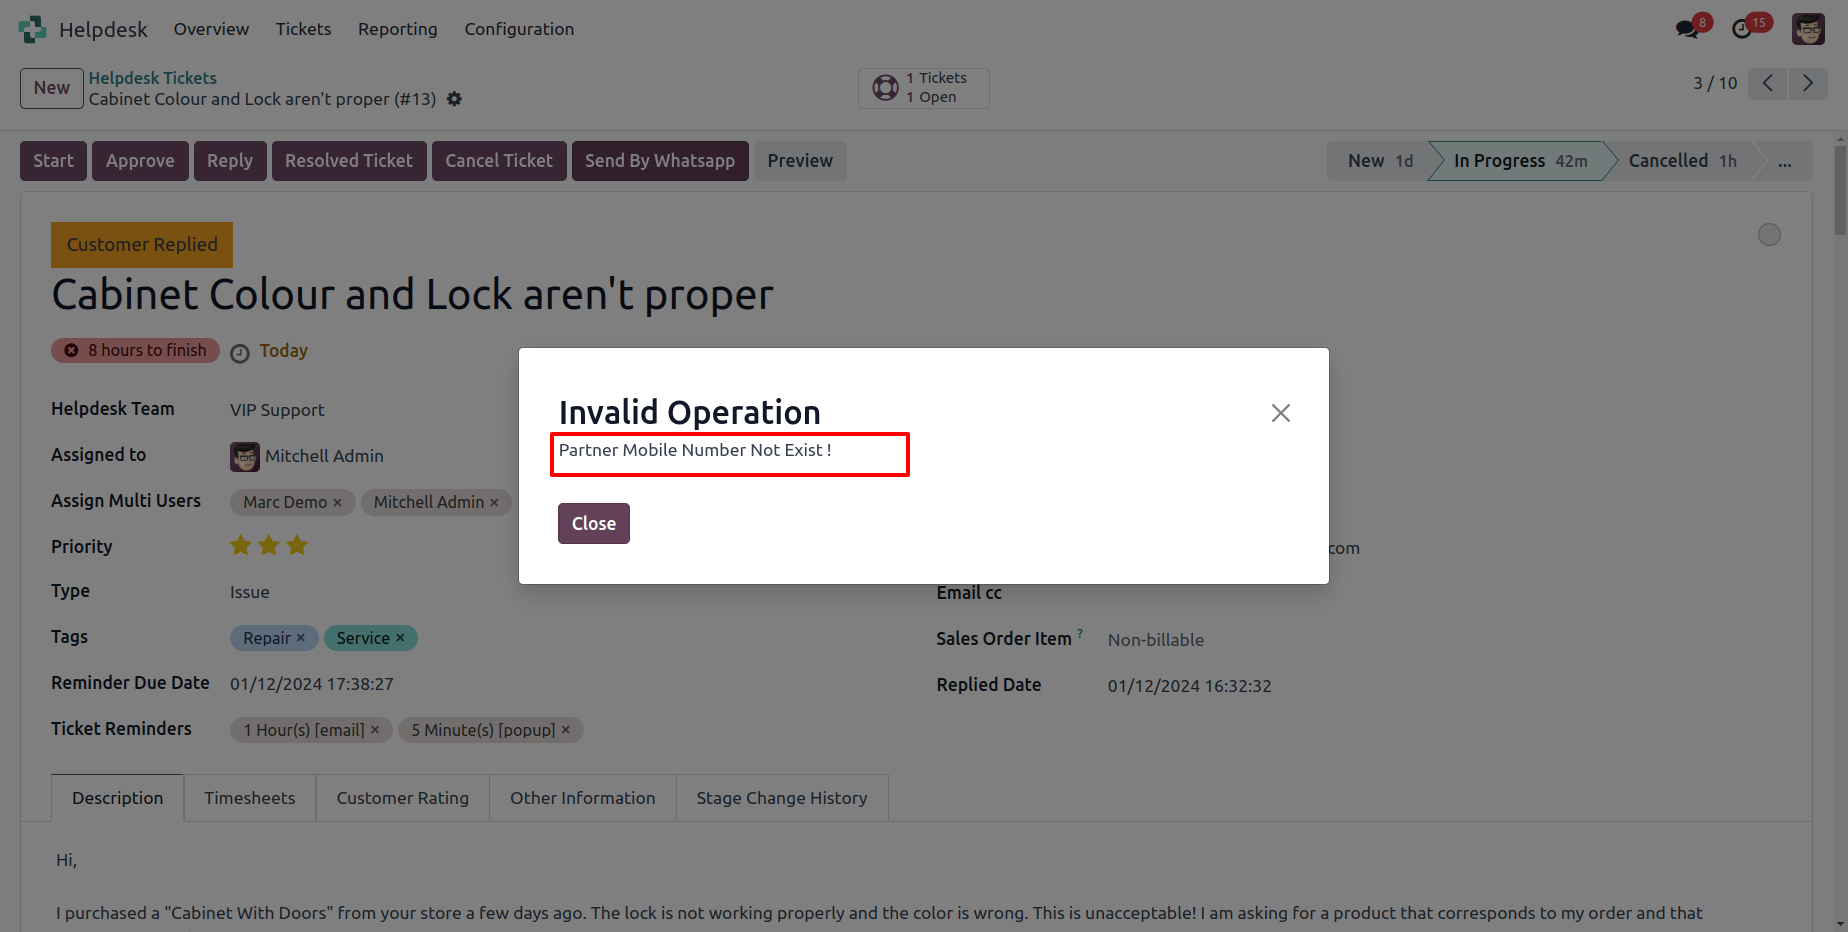
When Partner Mobile no not found then give warraning.
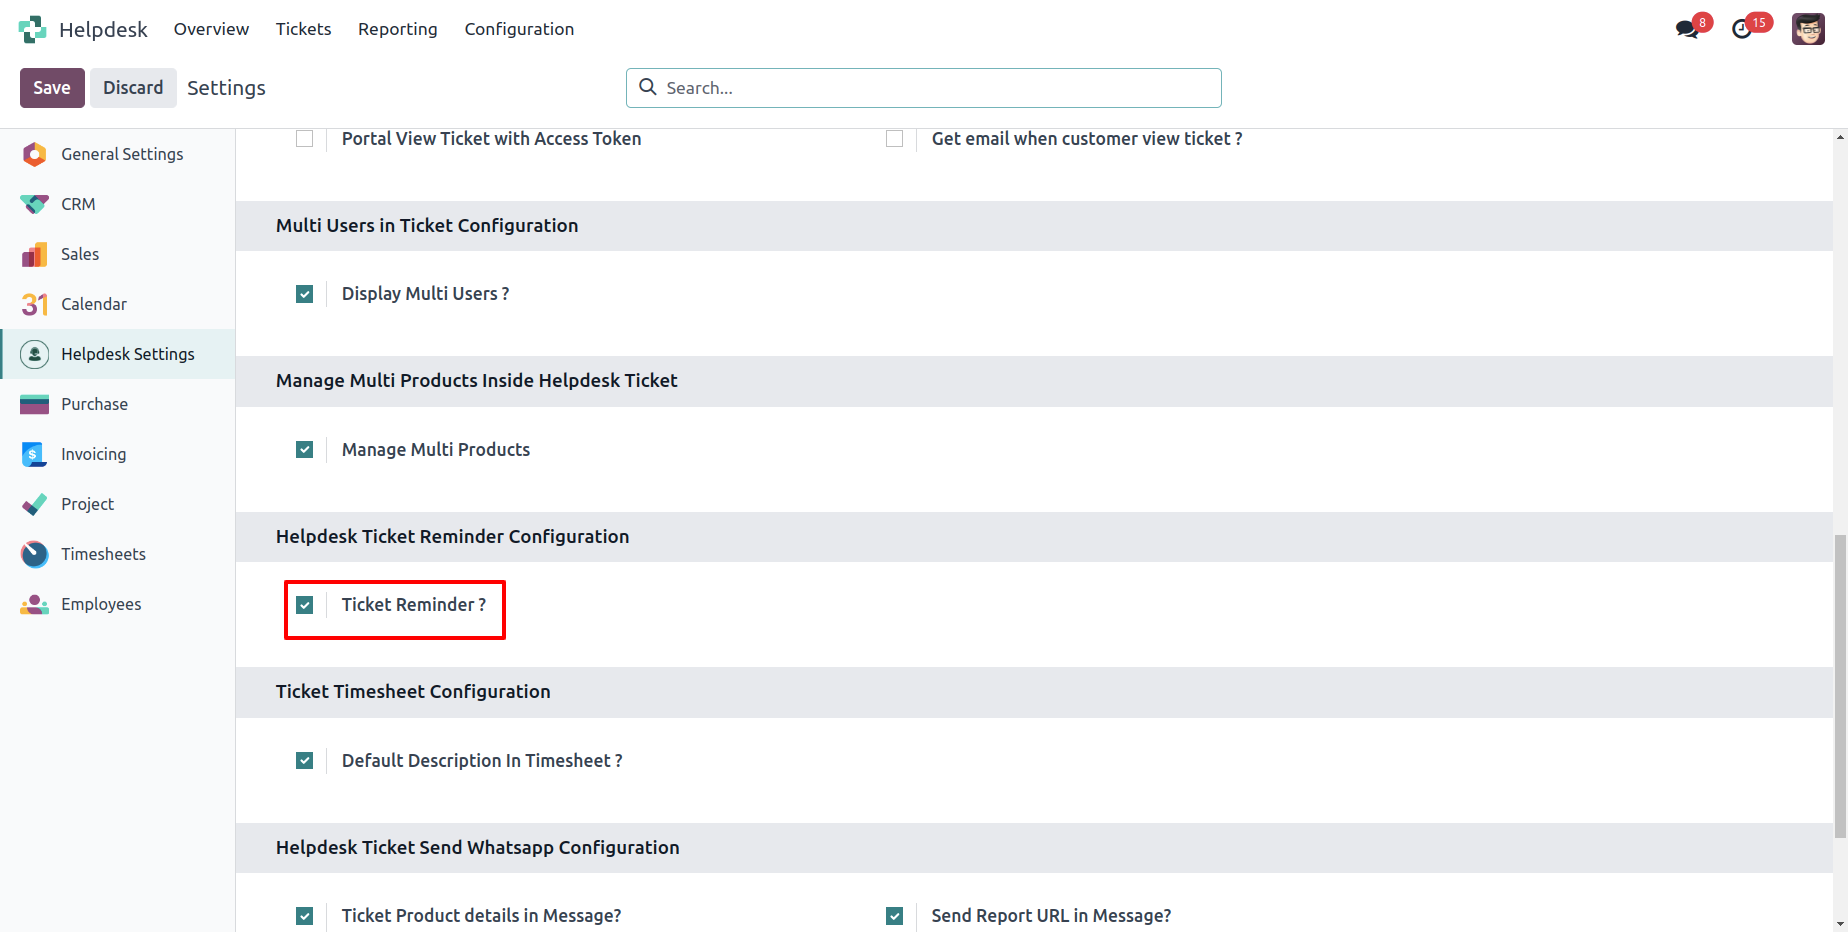
Enable "Ticket Reminder".
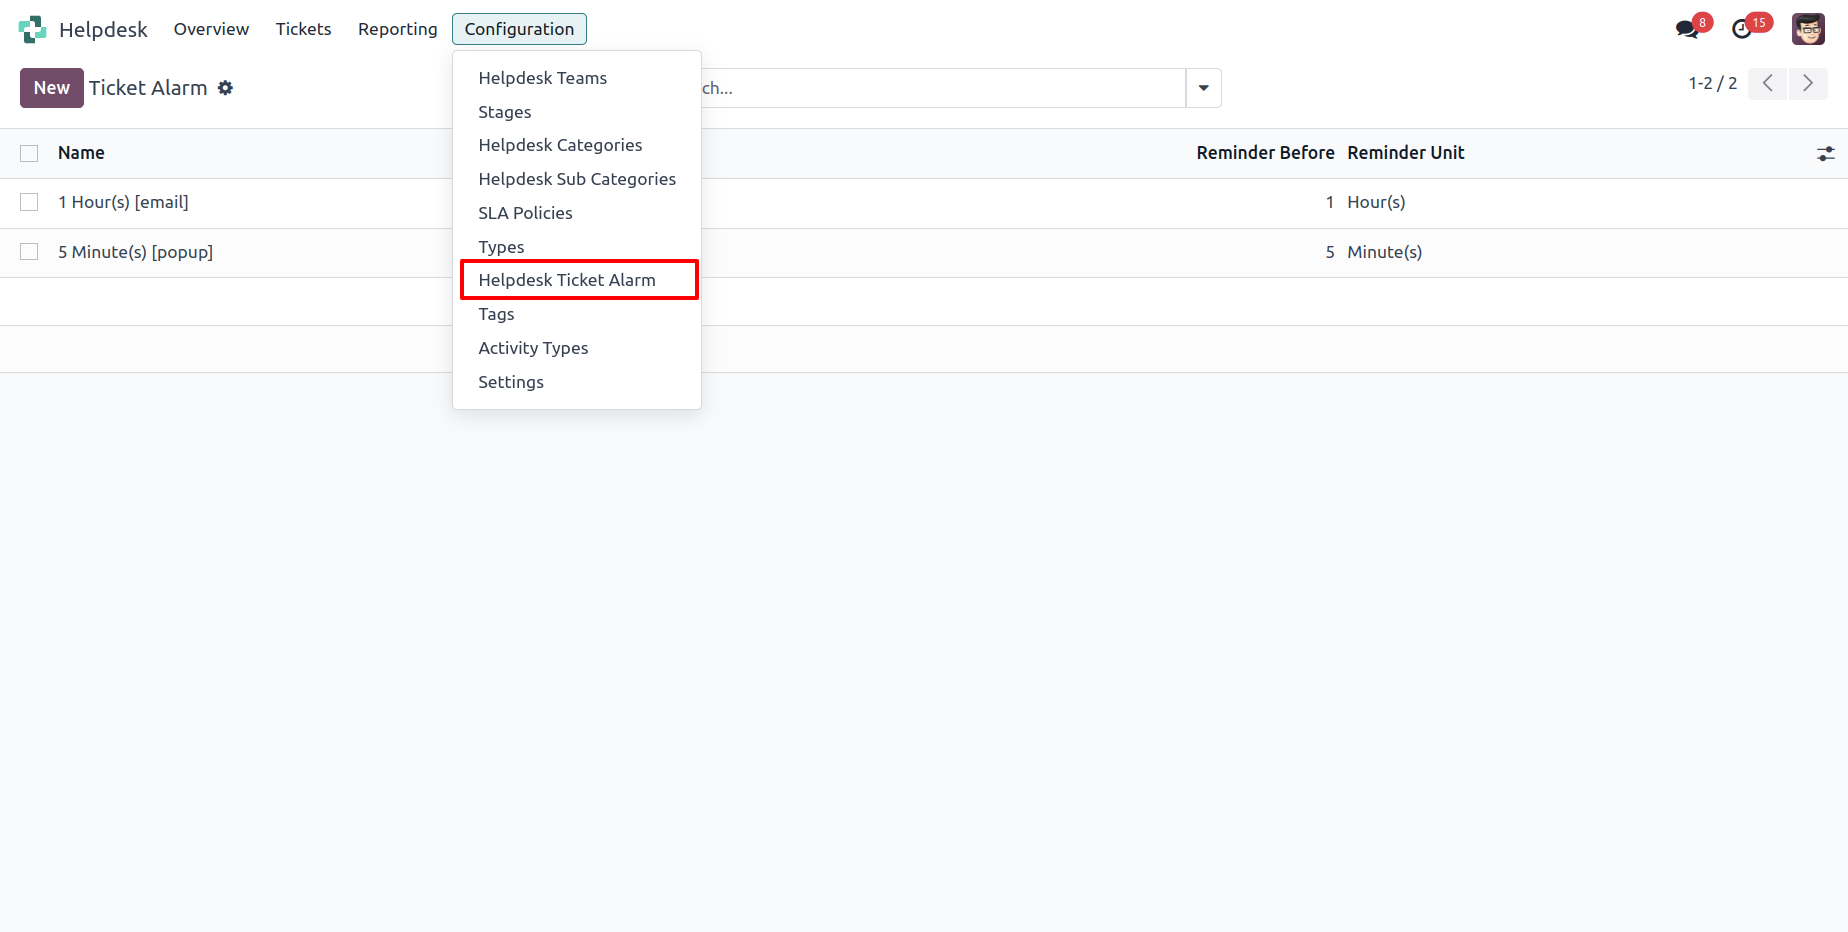
Go to the configuration => "Helpdesk Ticket Alarm".
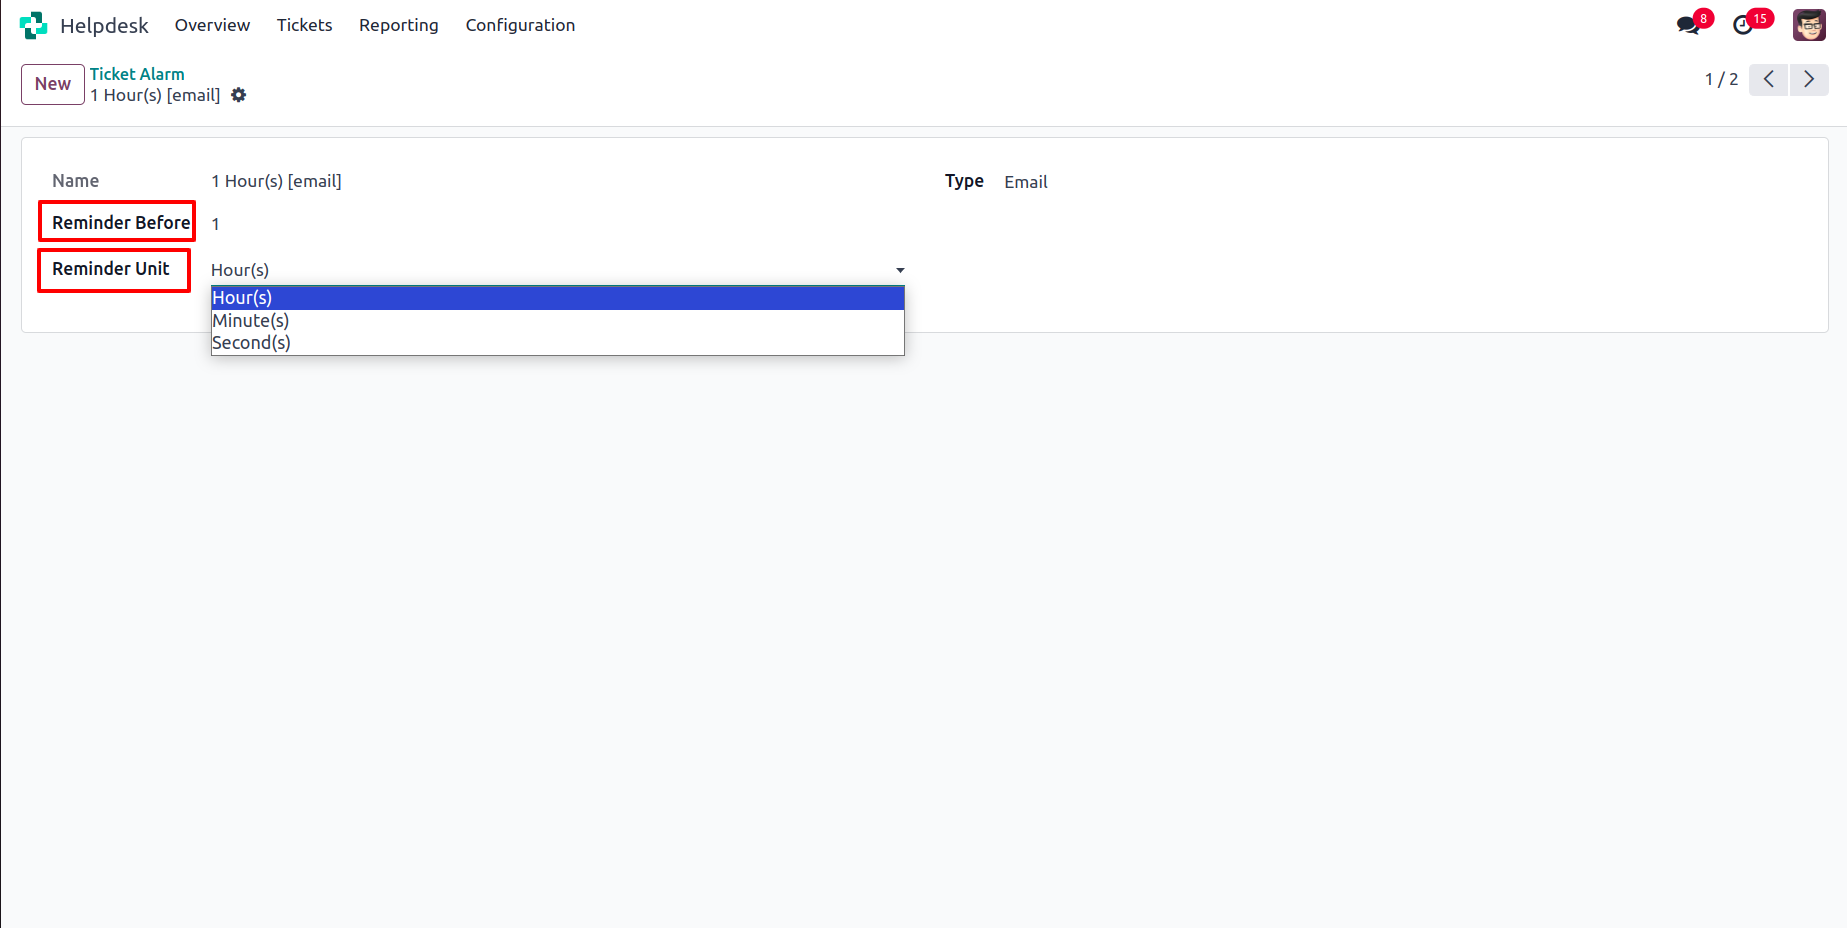
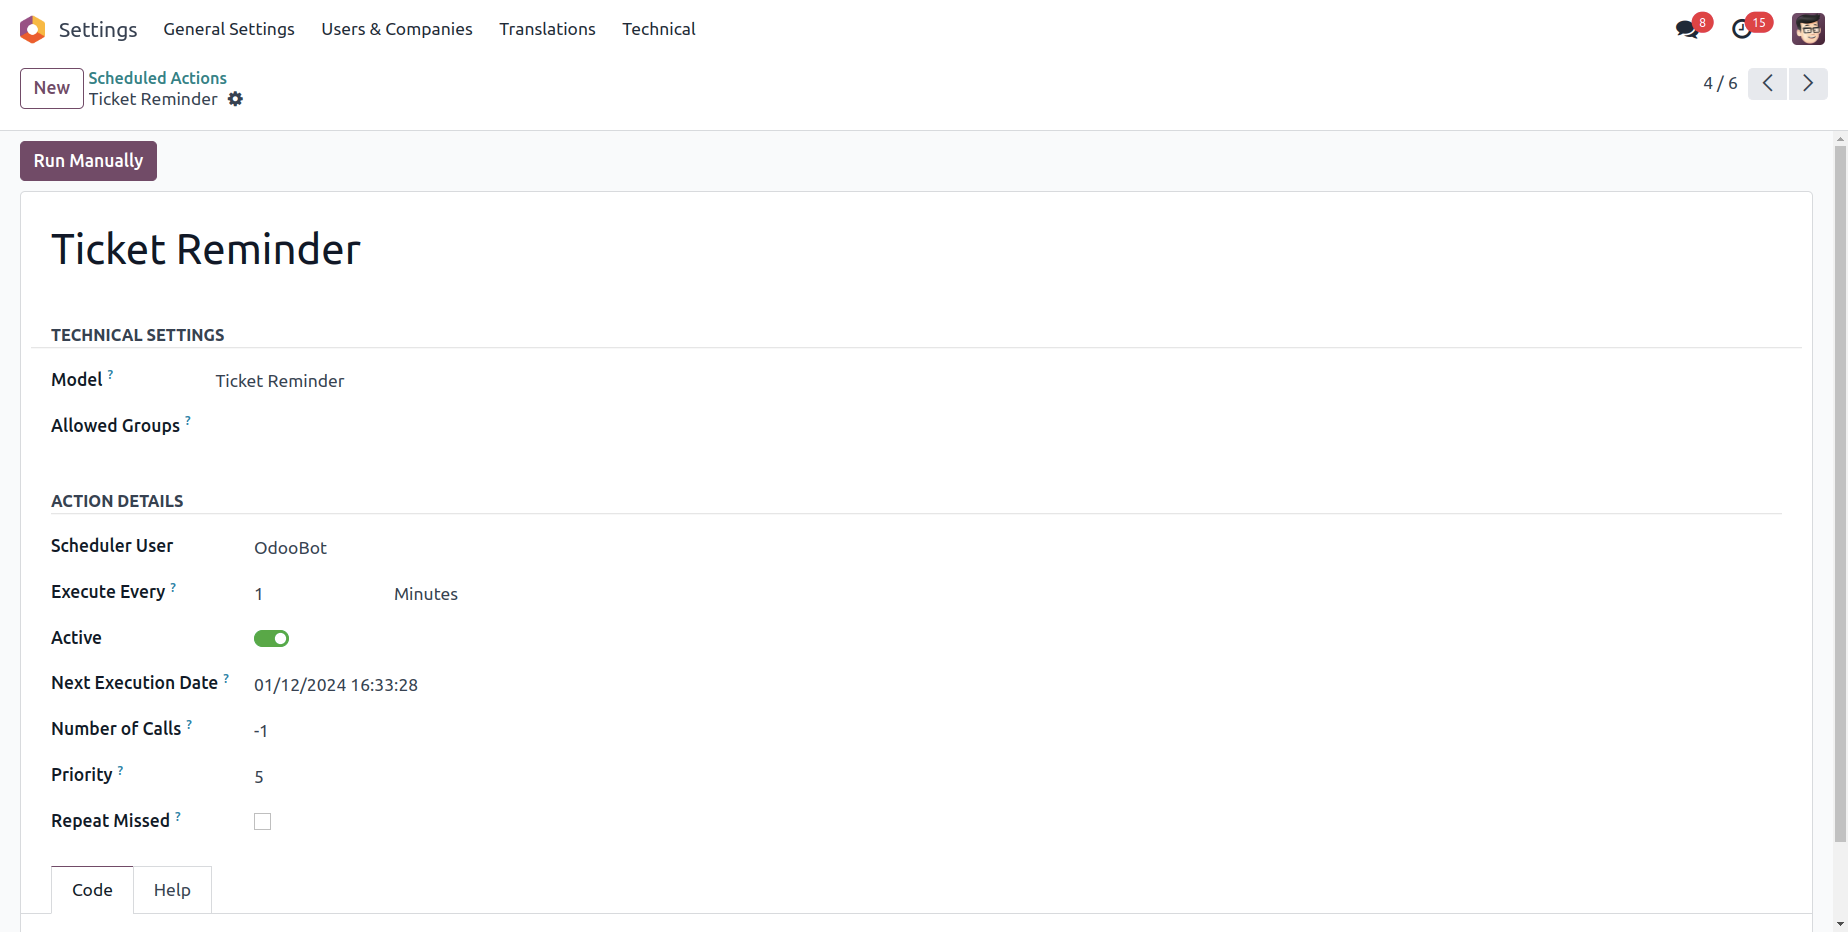
Helpdesk ticket alarm form view looks like this.
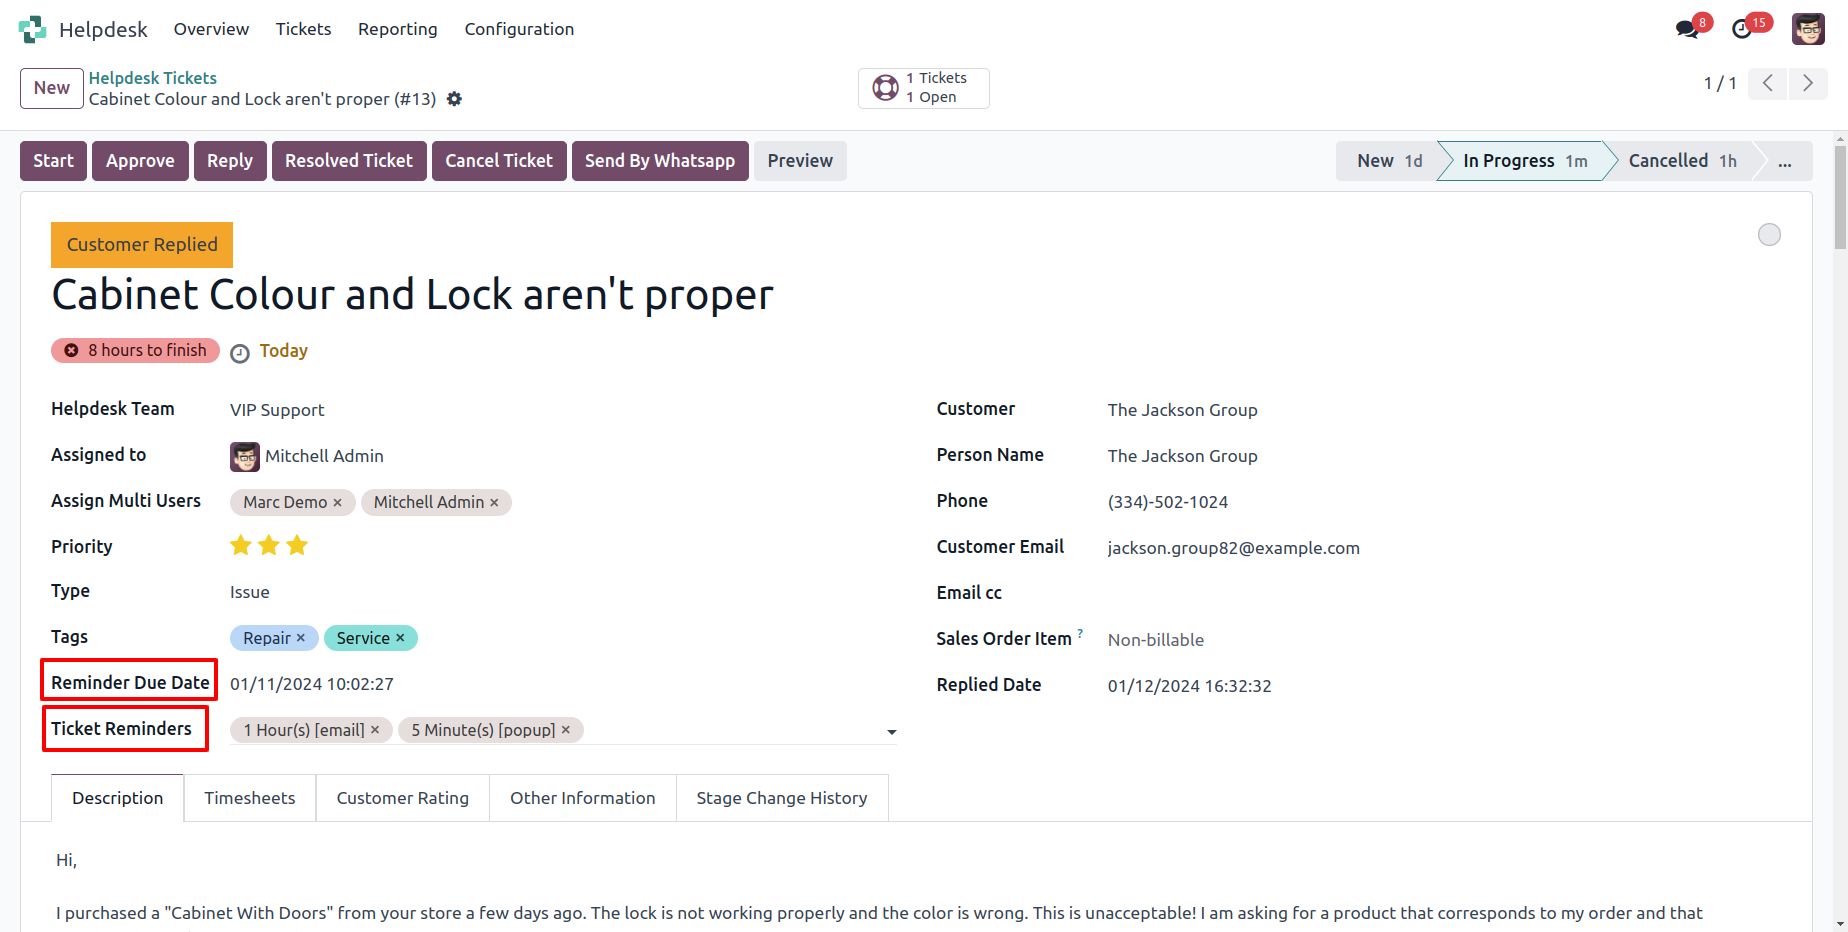
Helpdesk ticket alarm form view with the ticket reminder.
Helpdesk ticket reminders can run using a cron job.
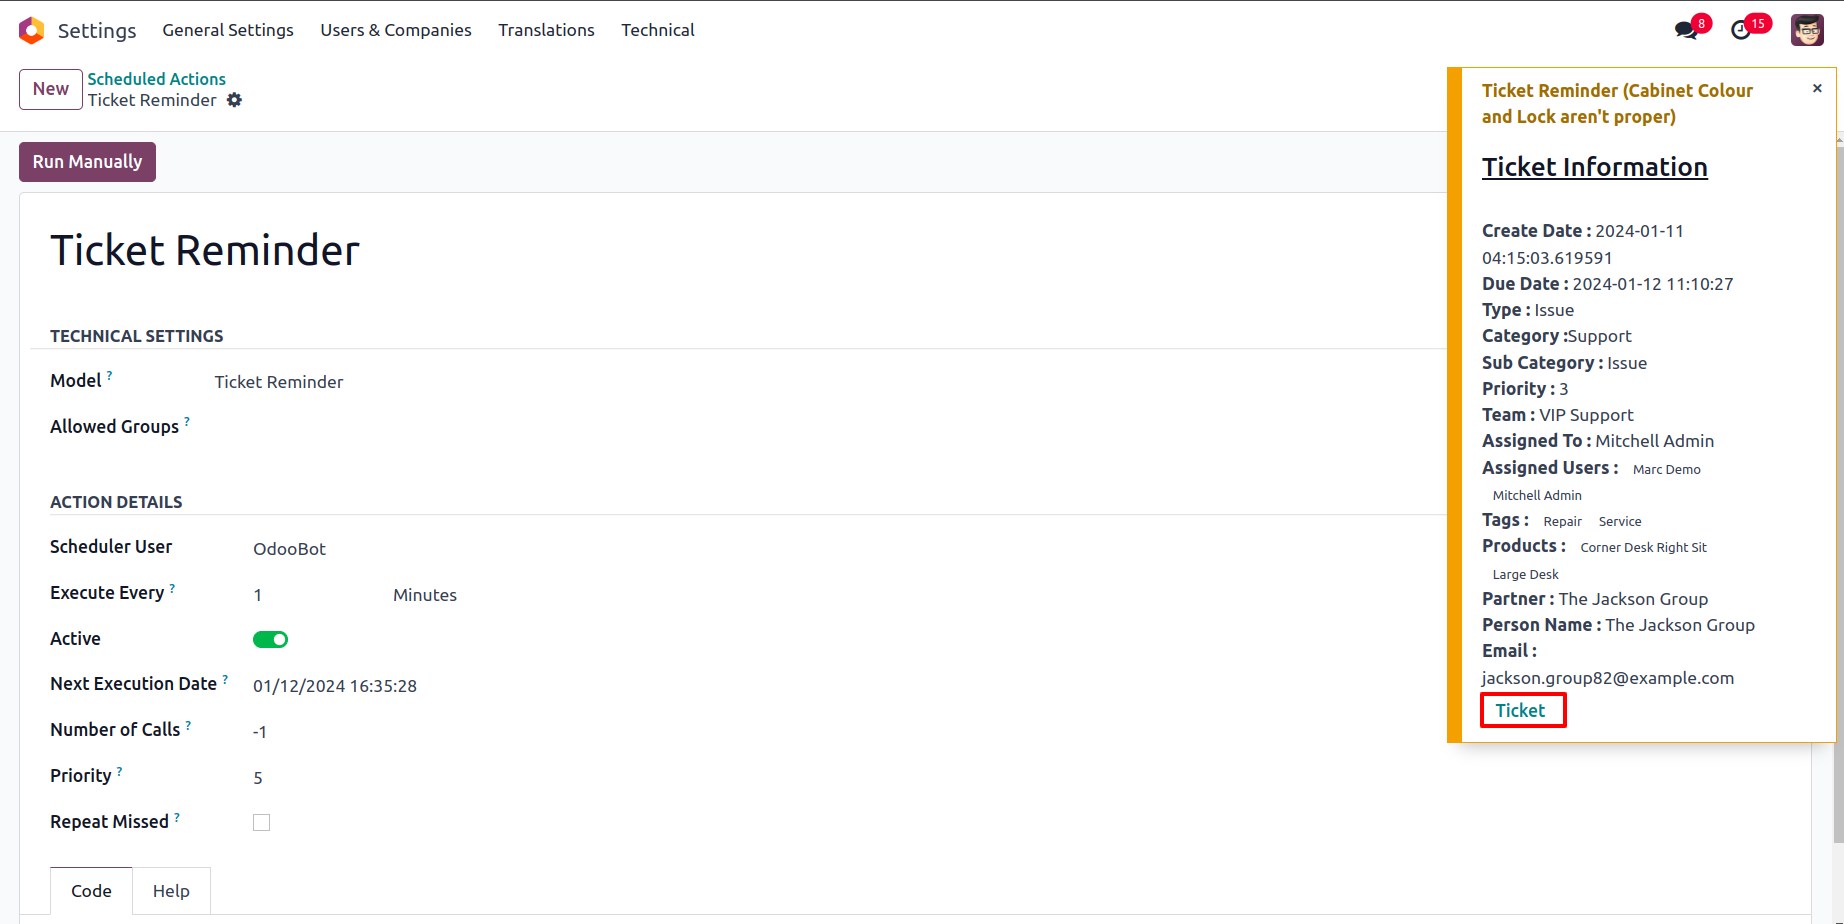
Helpdesk ticket reminders popup looks like this.
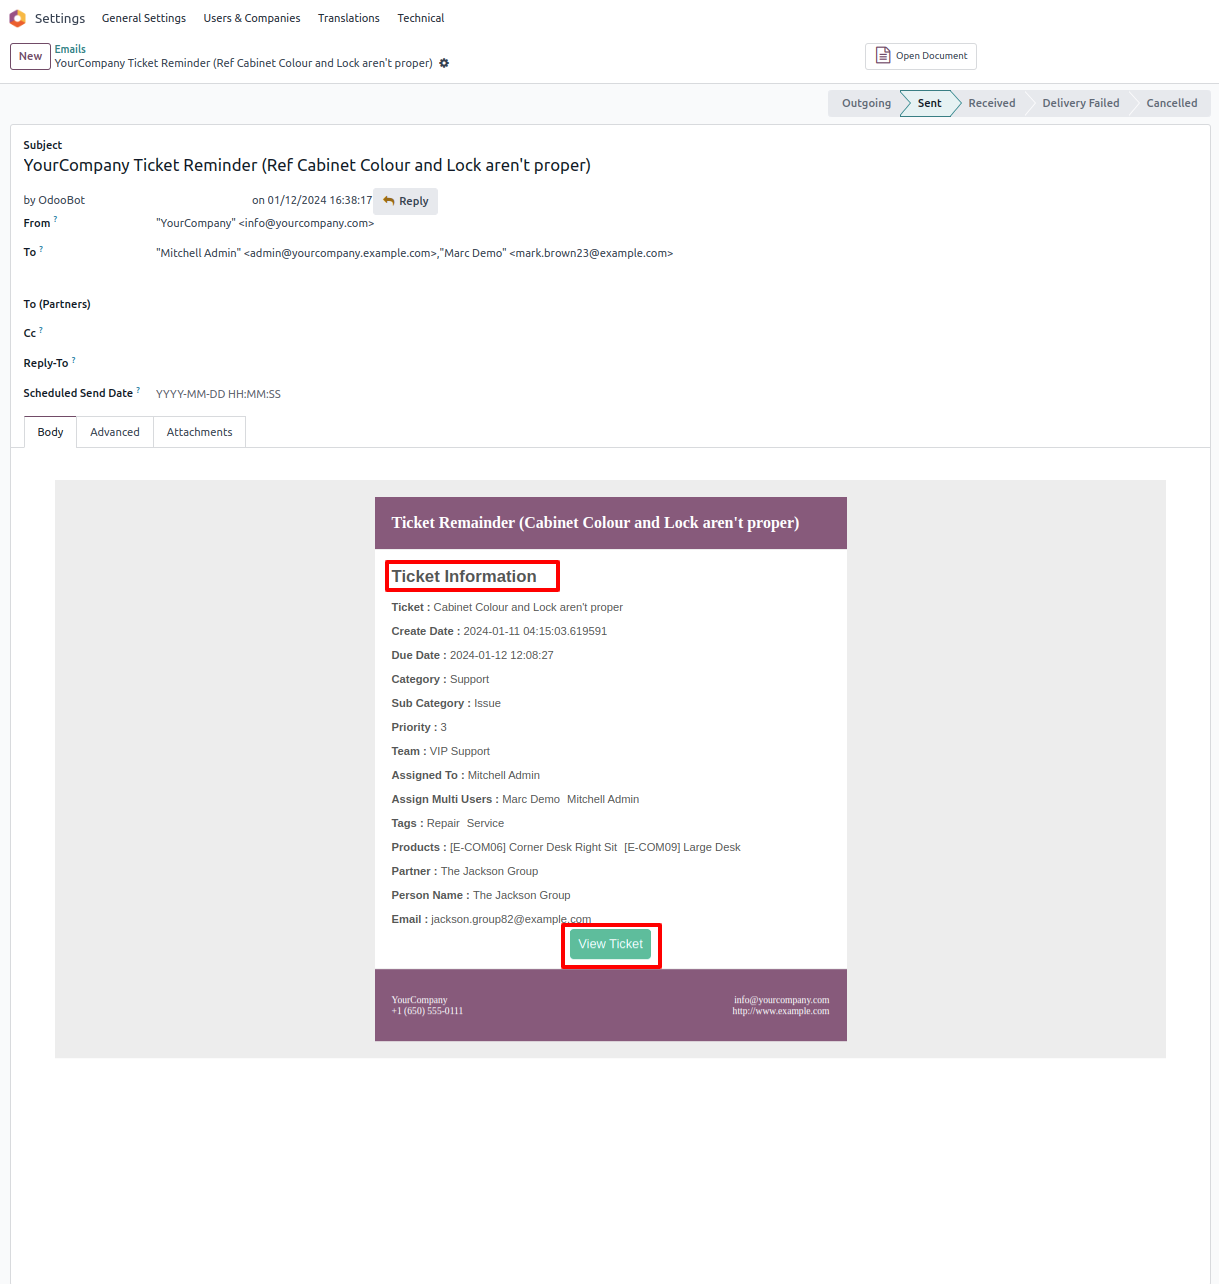
Helpdesk ticket reminders email looks like this.
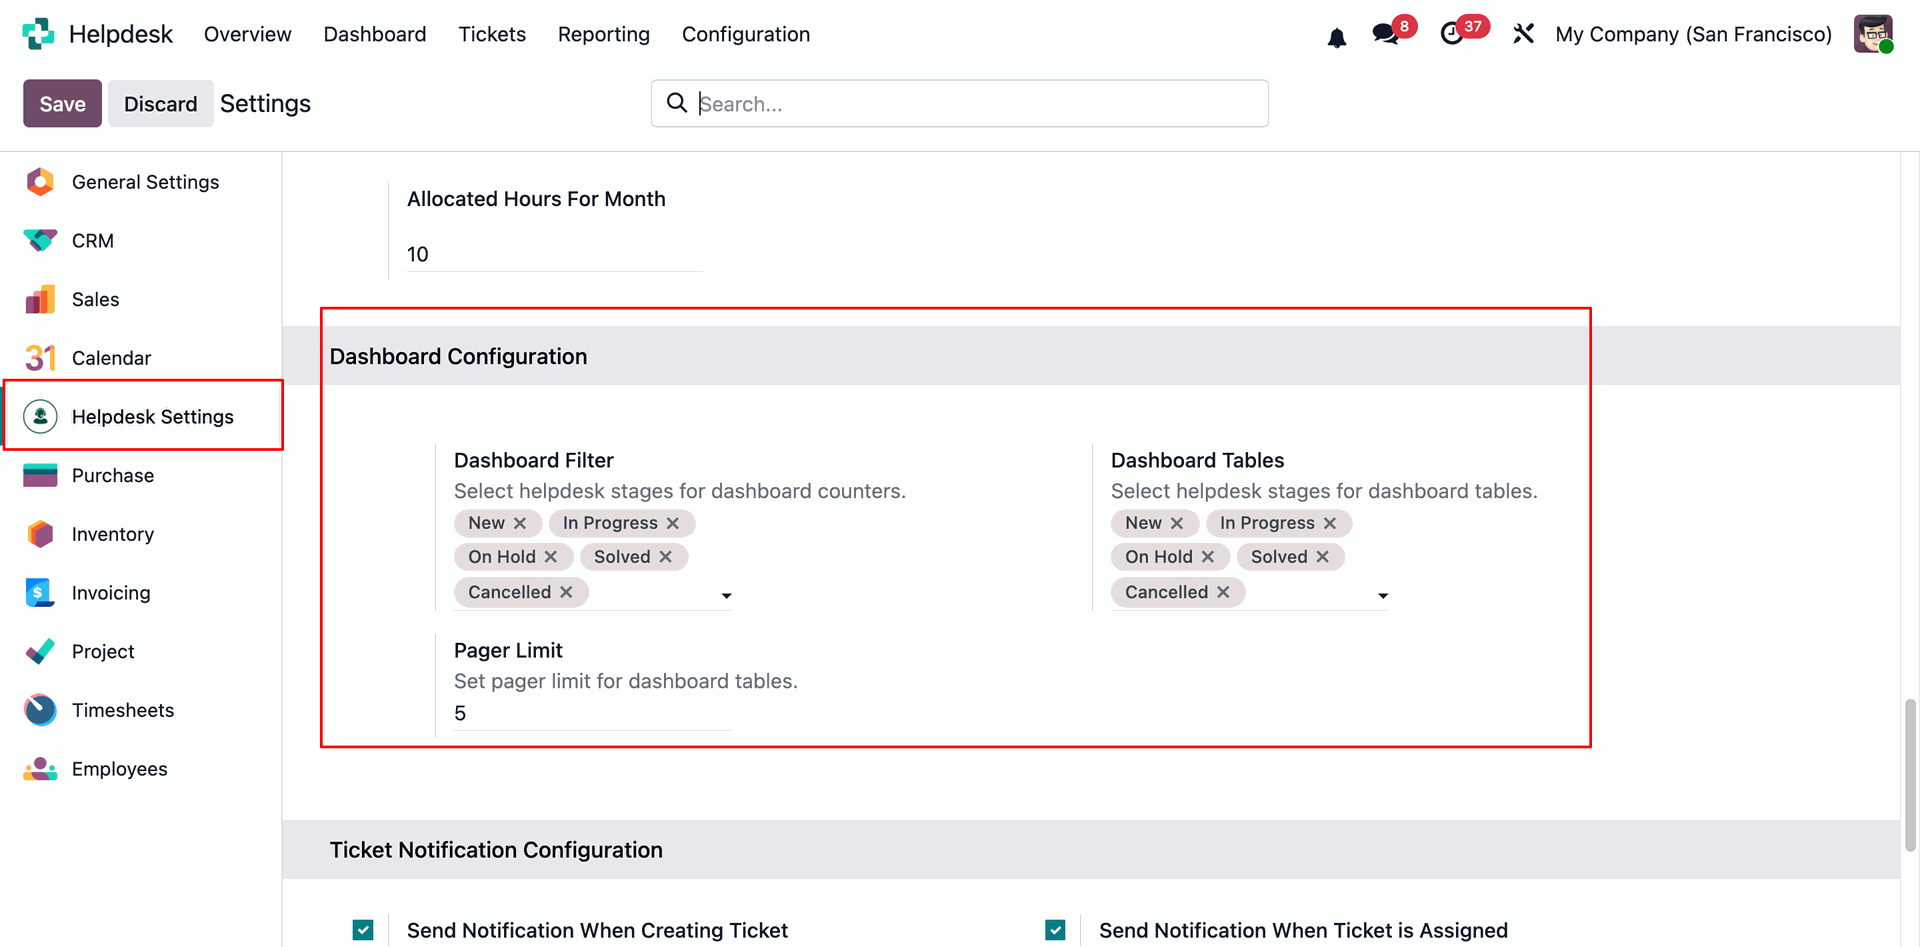
Go to helpdesk general settings and set dashboard configuration for dashboard filters and dashboard tables.
Support Manager can see the Dashboard with configured stages and tables.
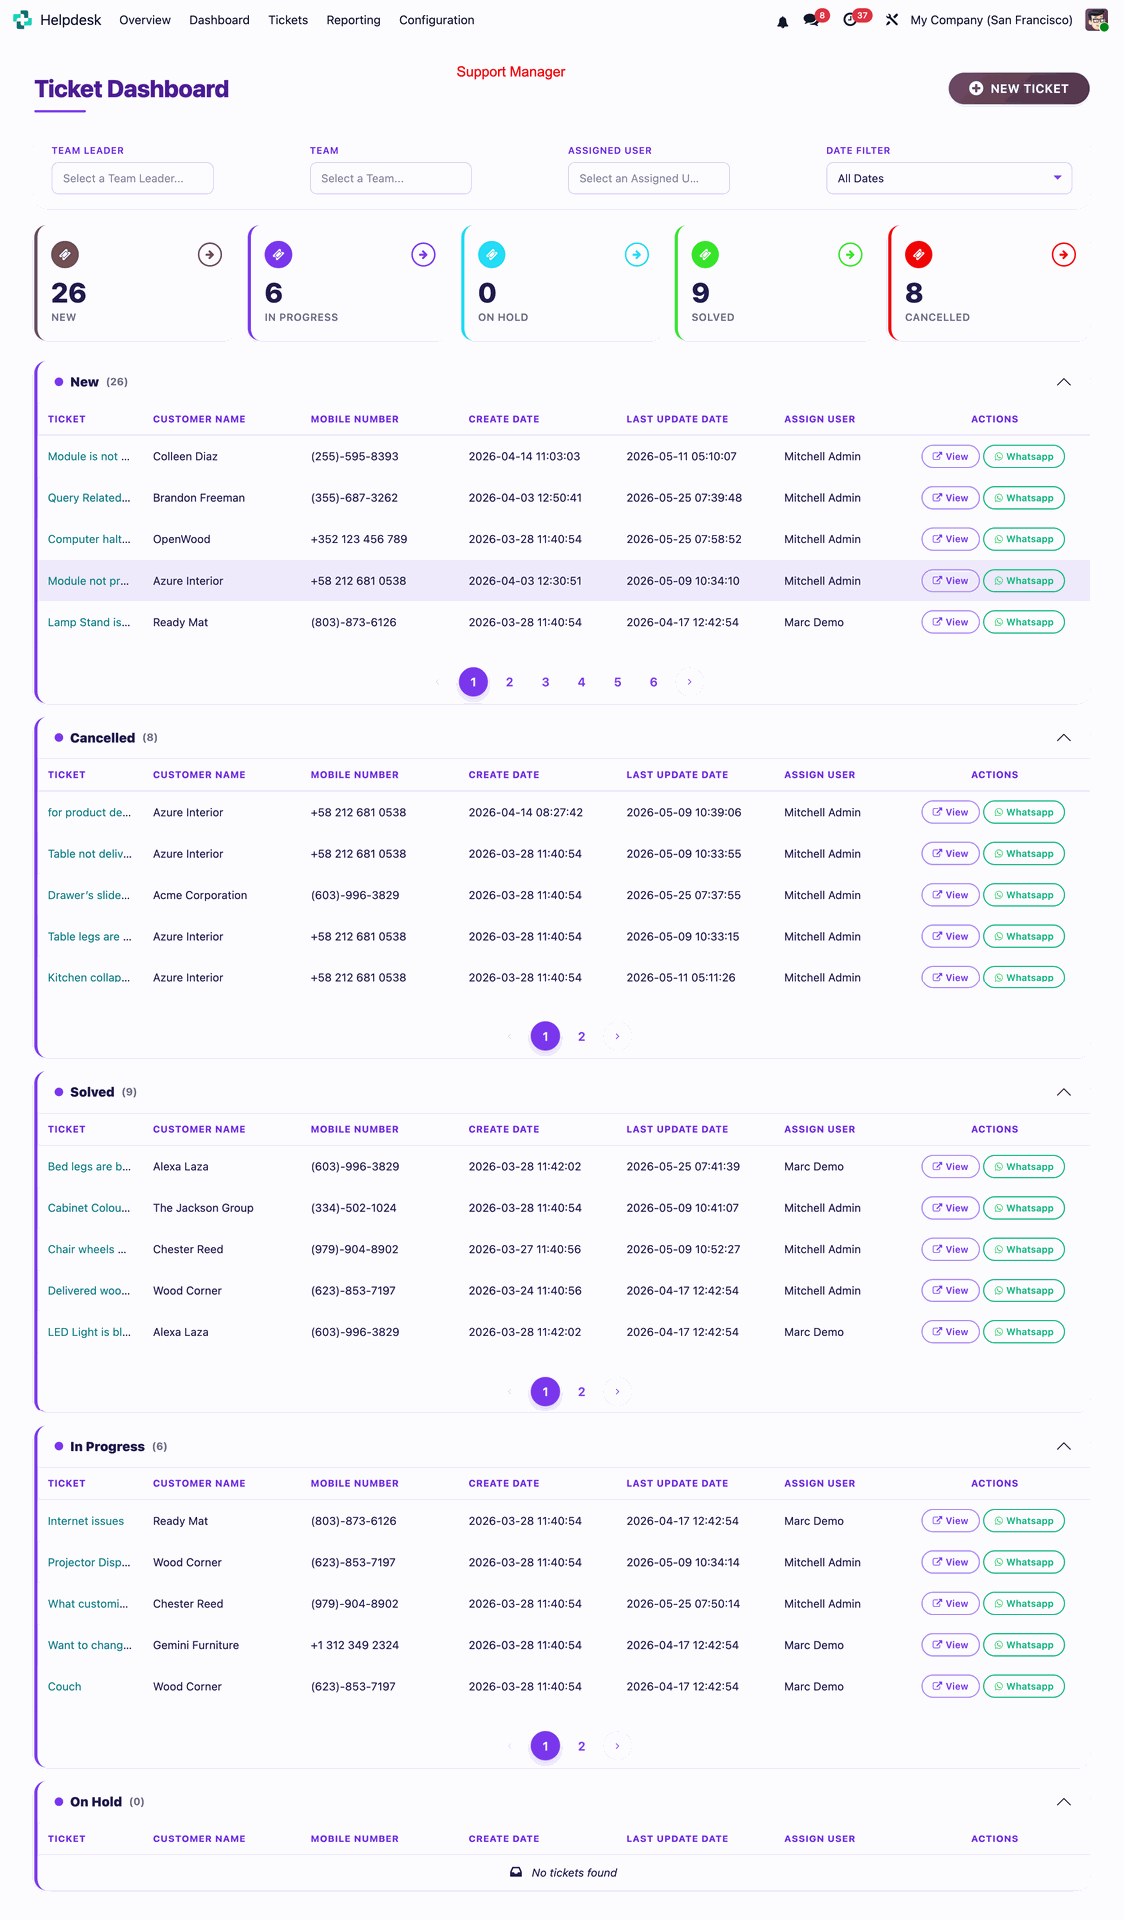
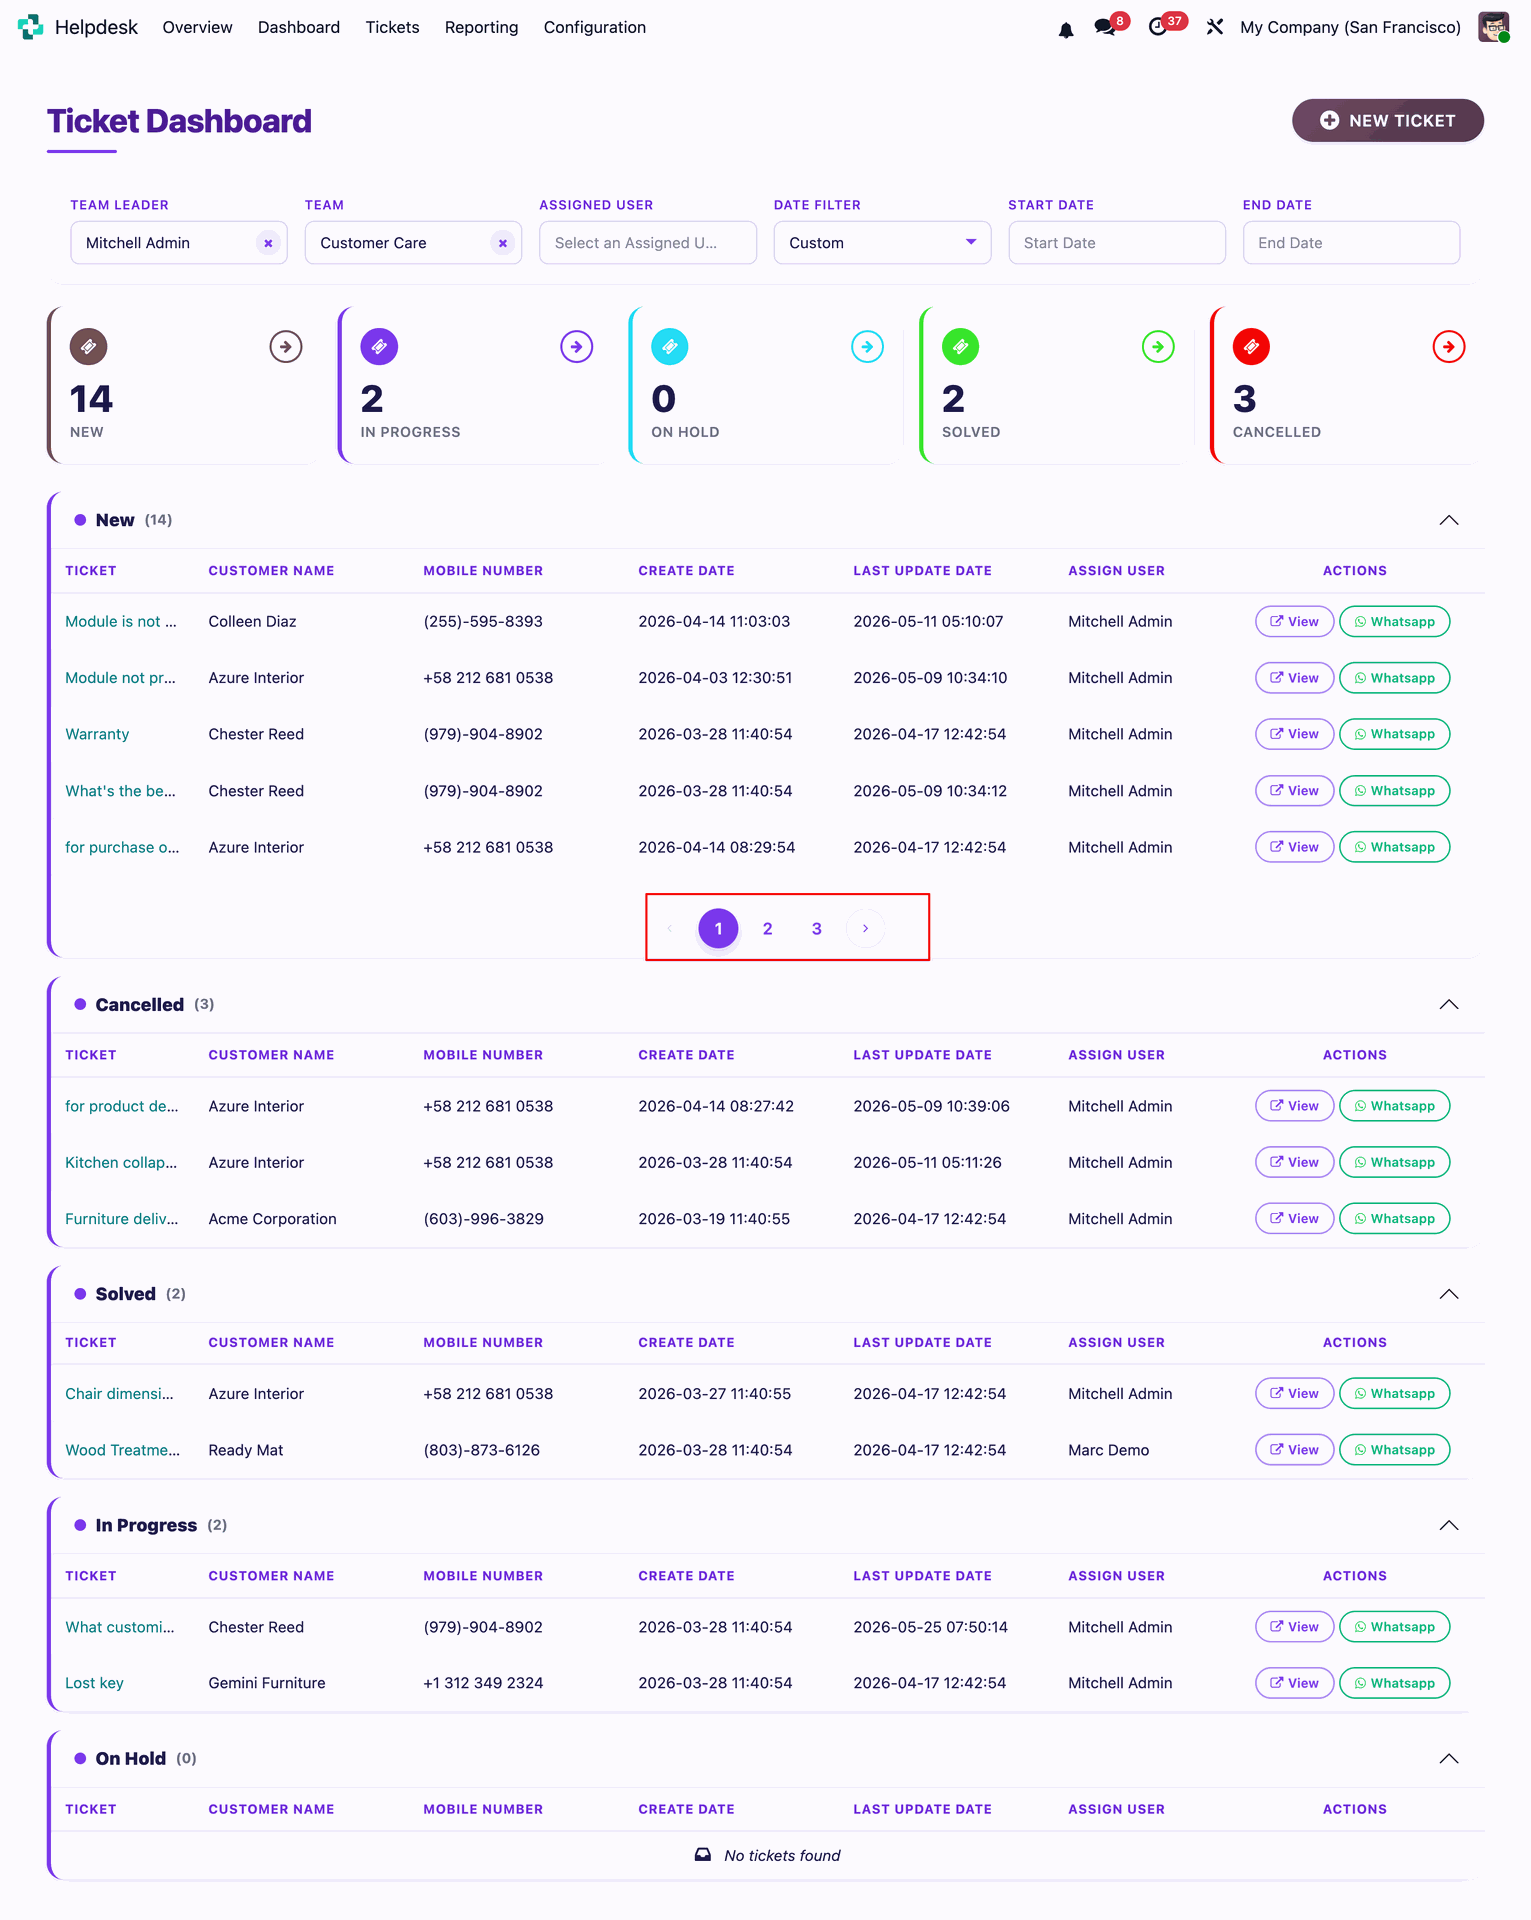
Manager can see data on dashboard with pagination.
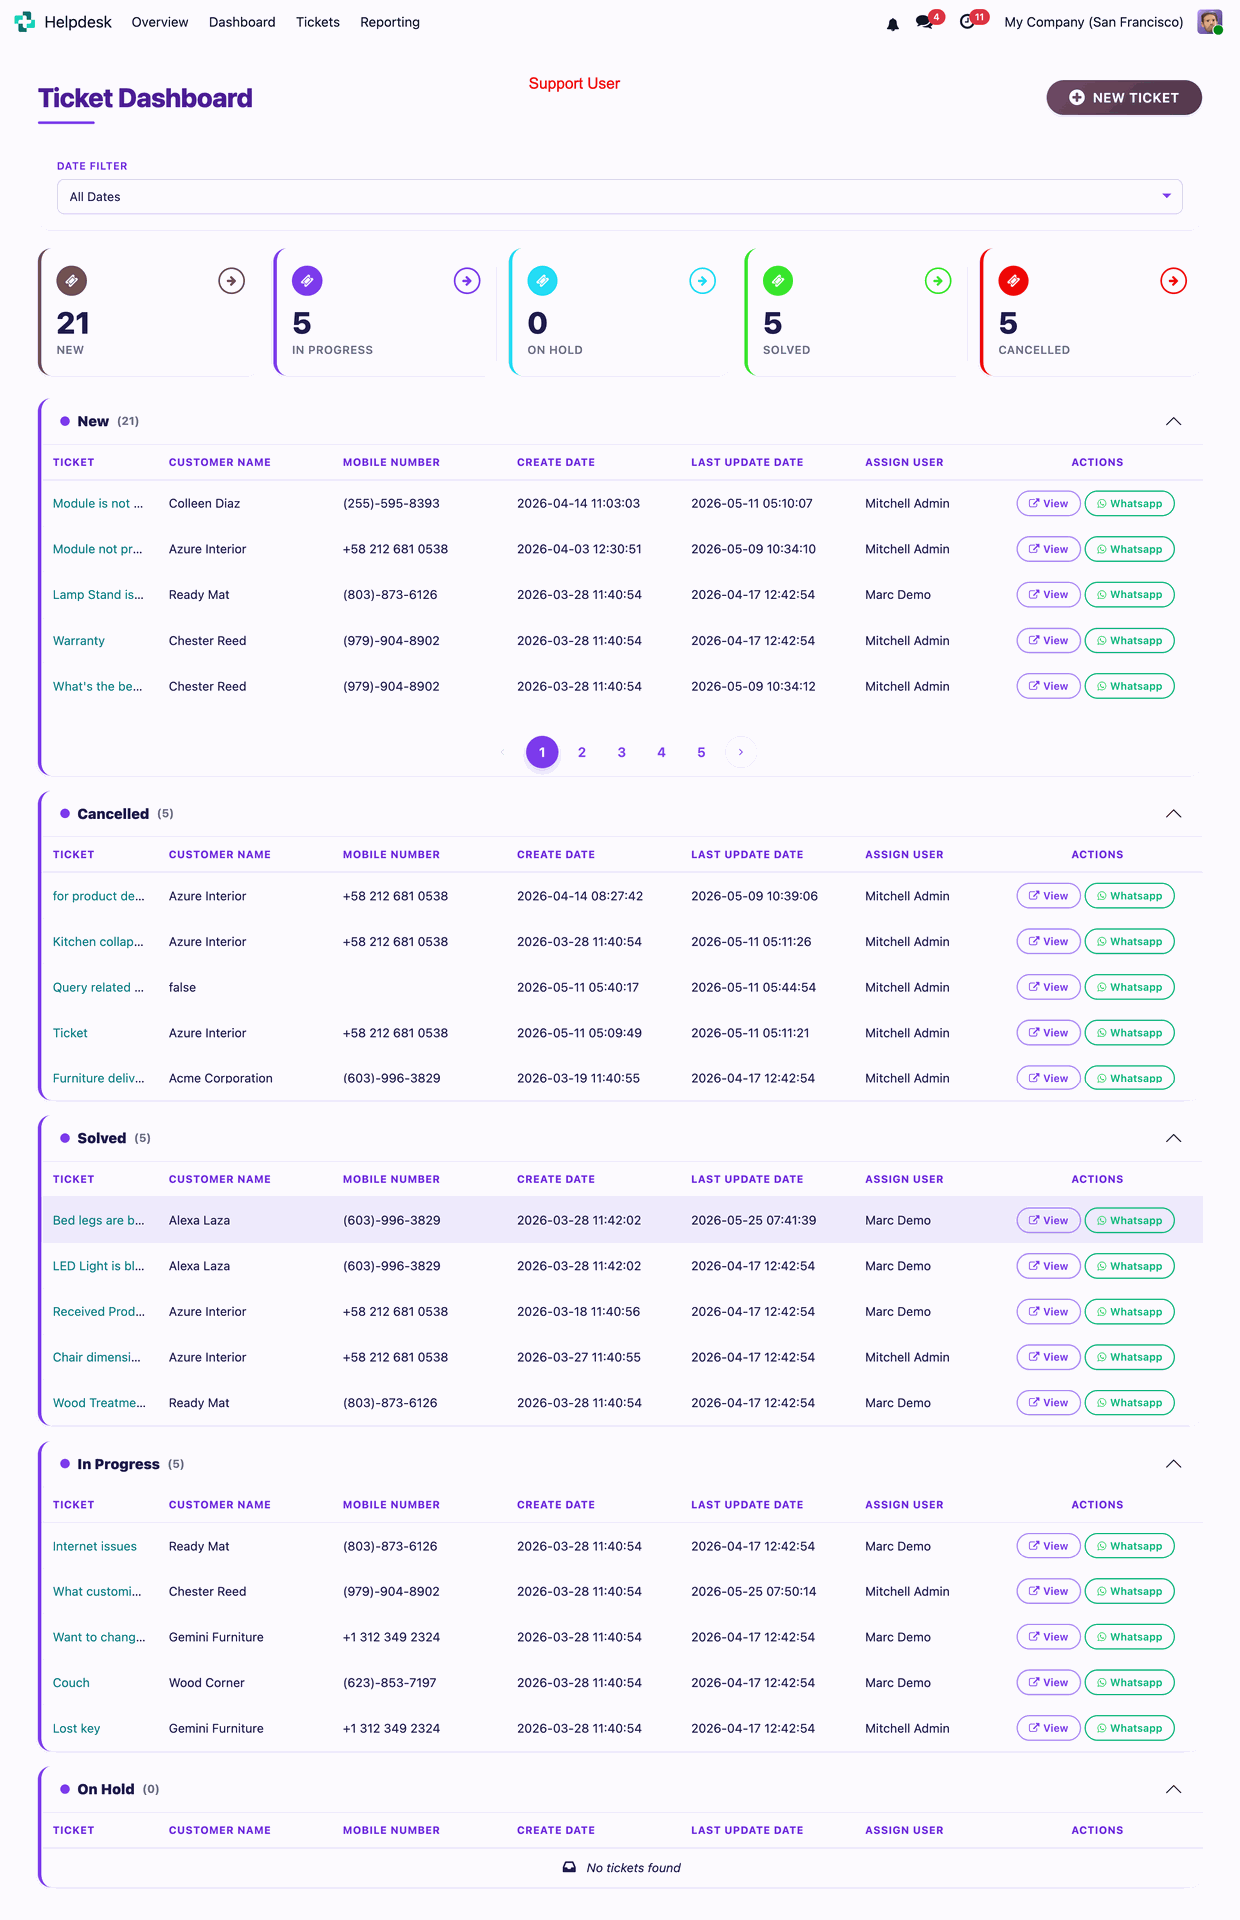
Support User can see the tickets on dashboard only assigned to them.
User can create a new ticket directly from dashboard.

By clicking on the new ticket button from dashboard will open a ticket form view.
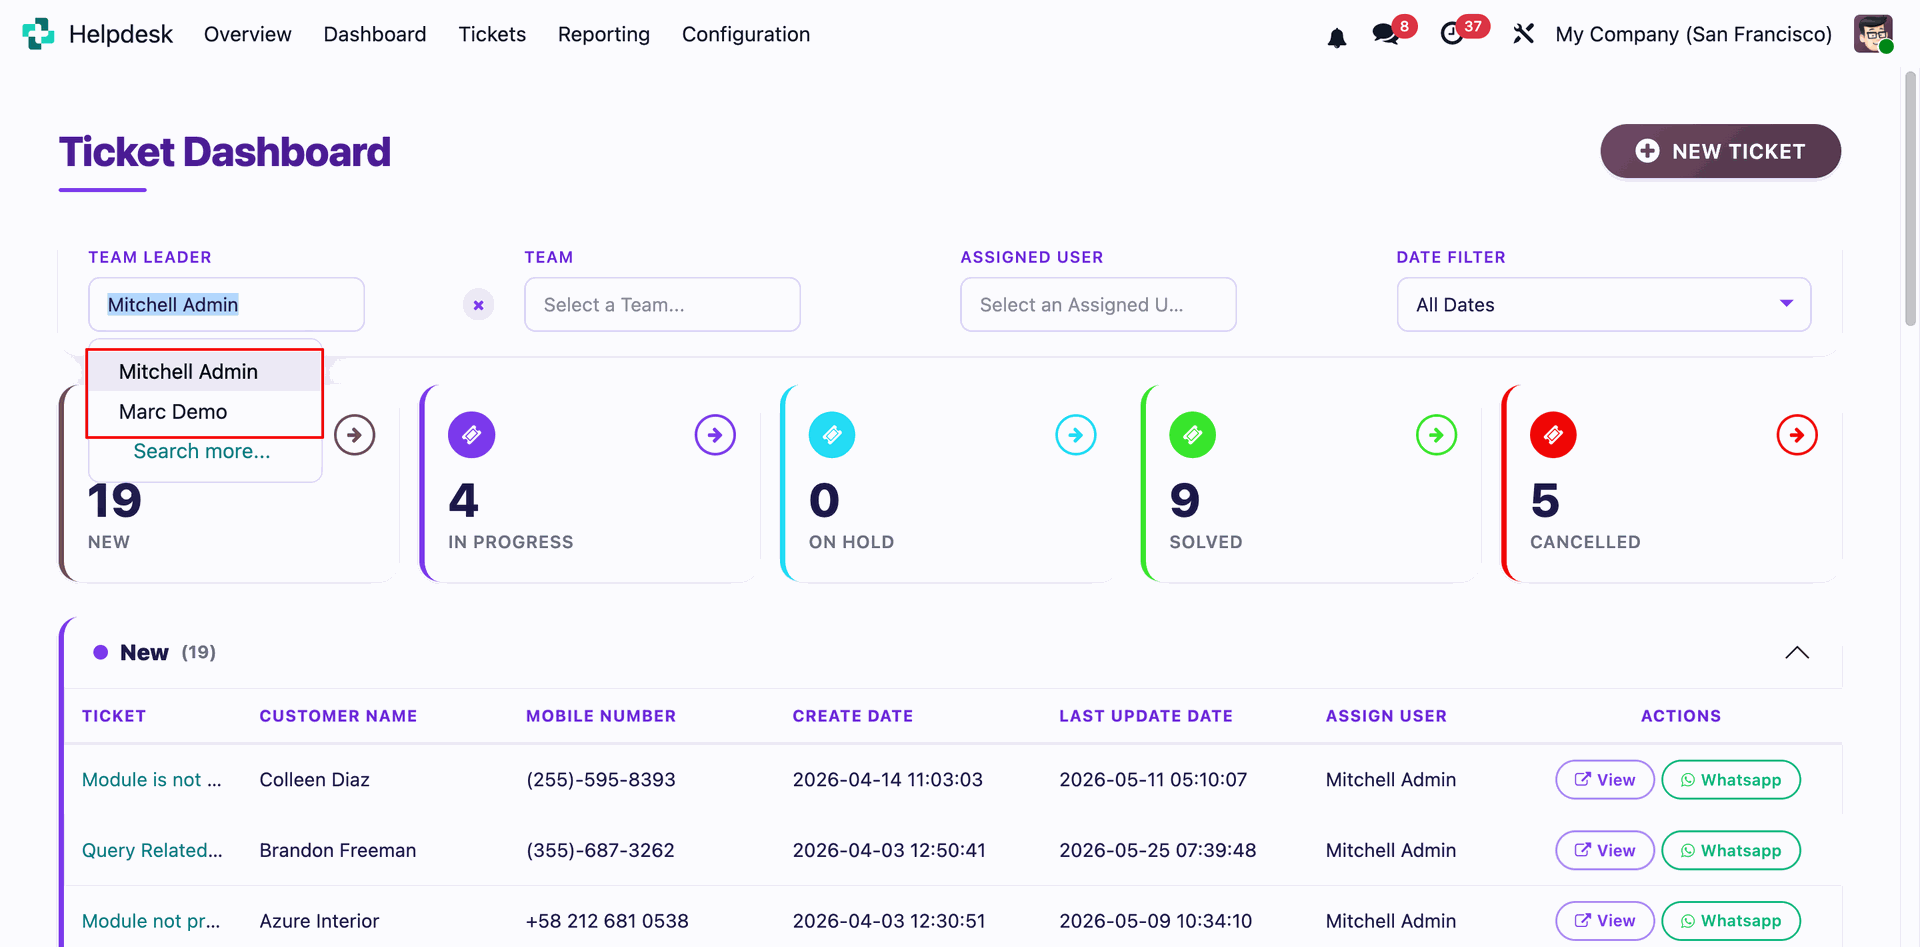
Support manager can filter data by Team Leader.
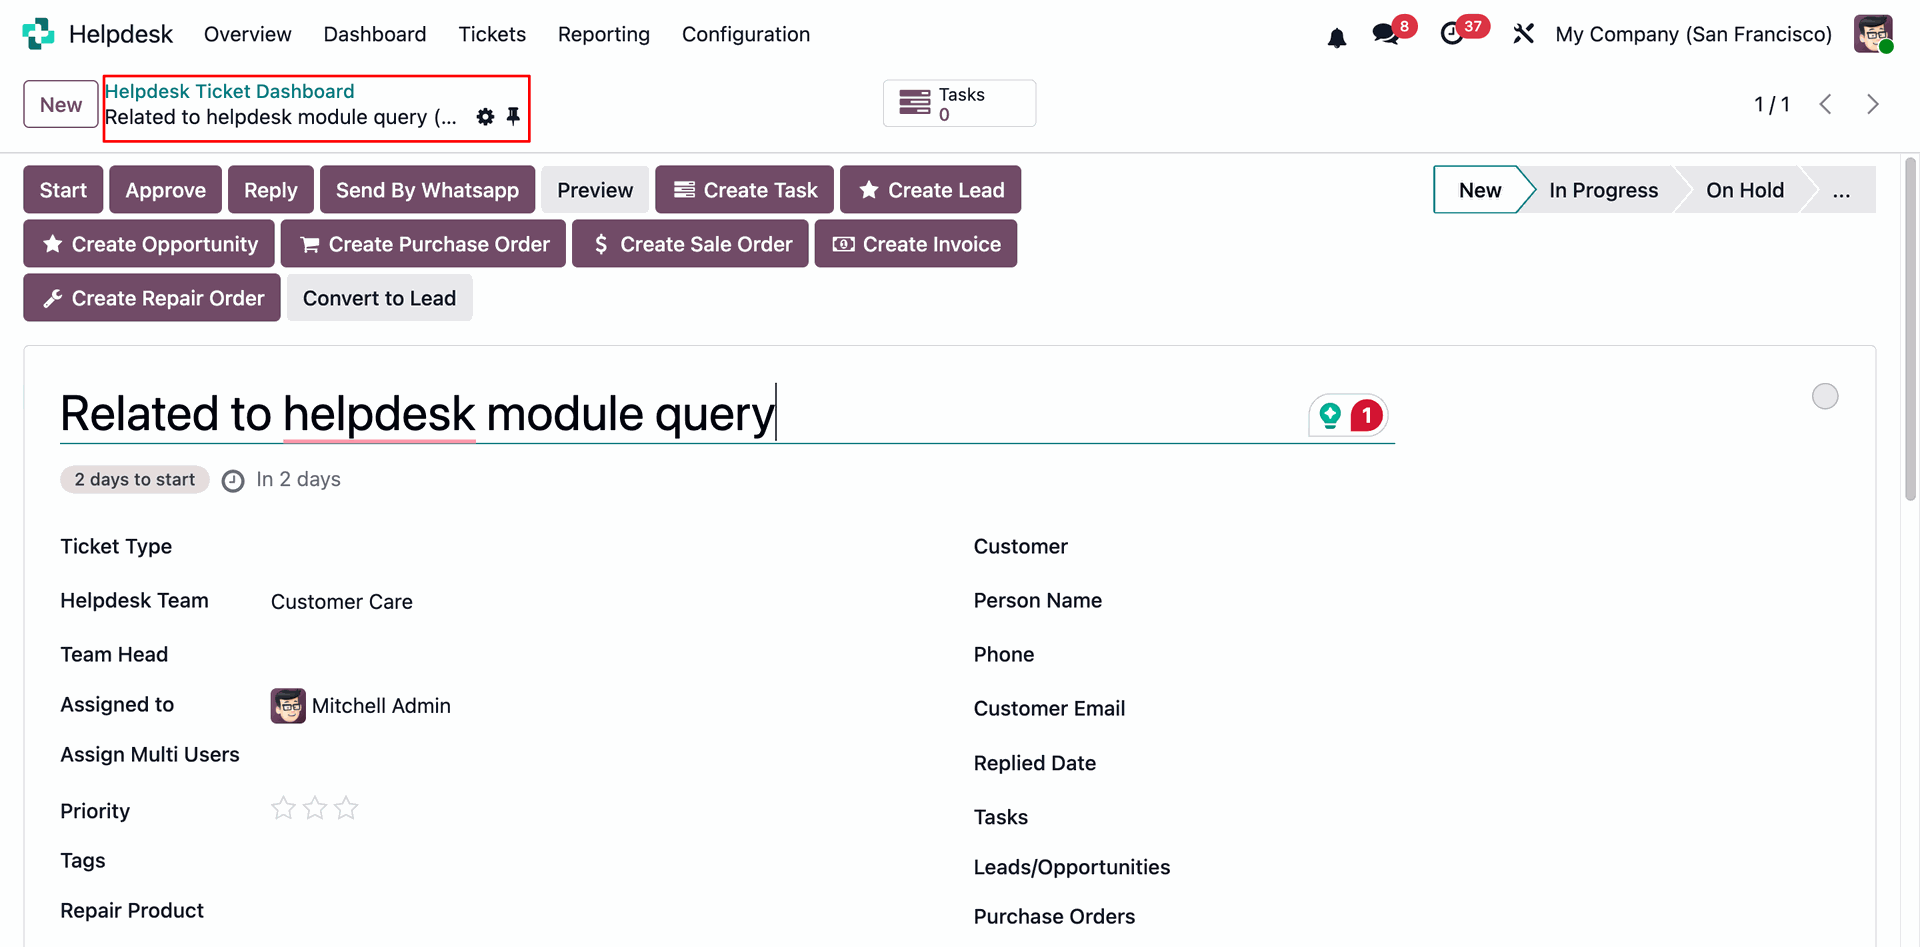
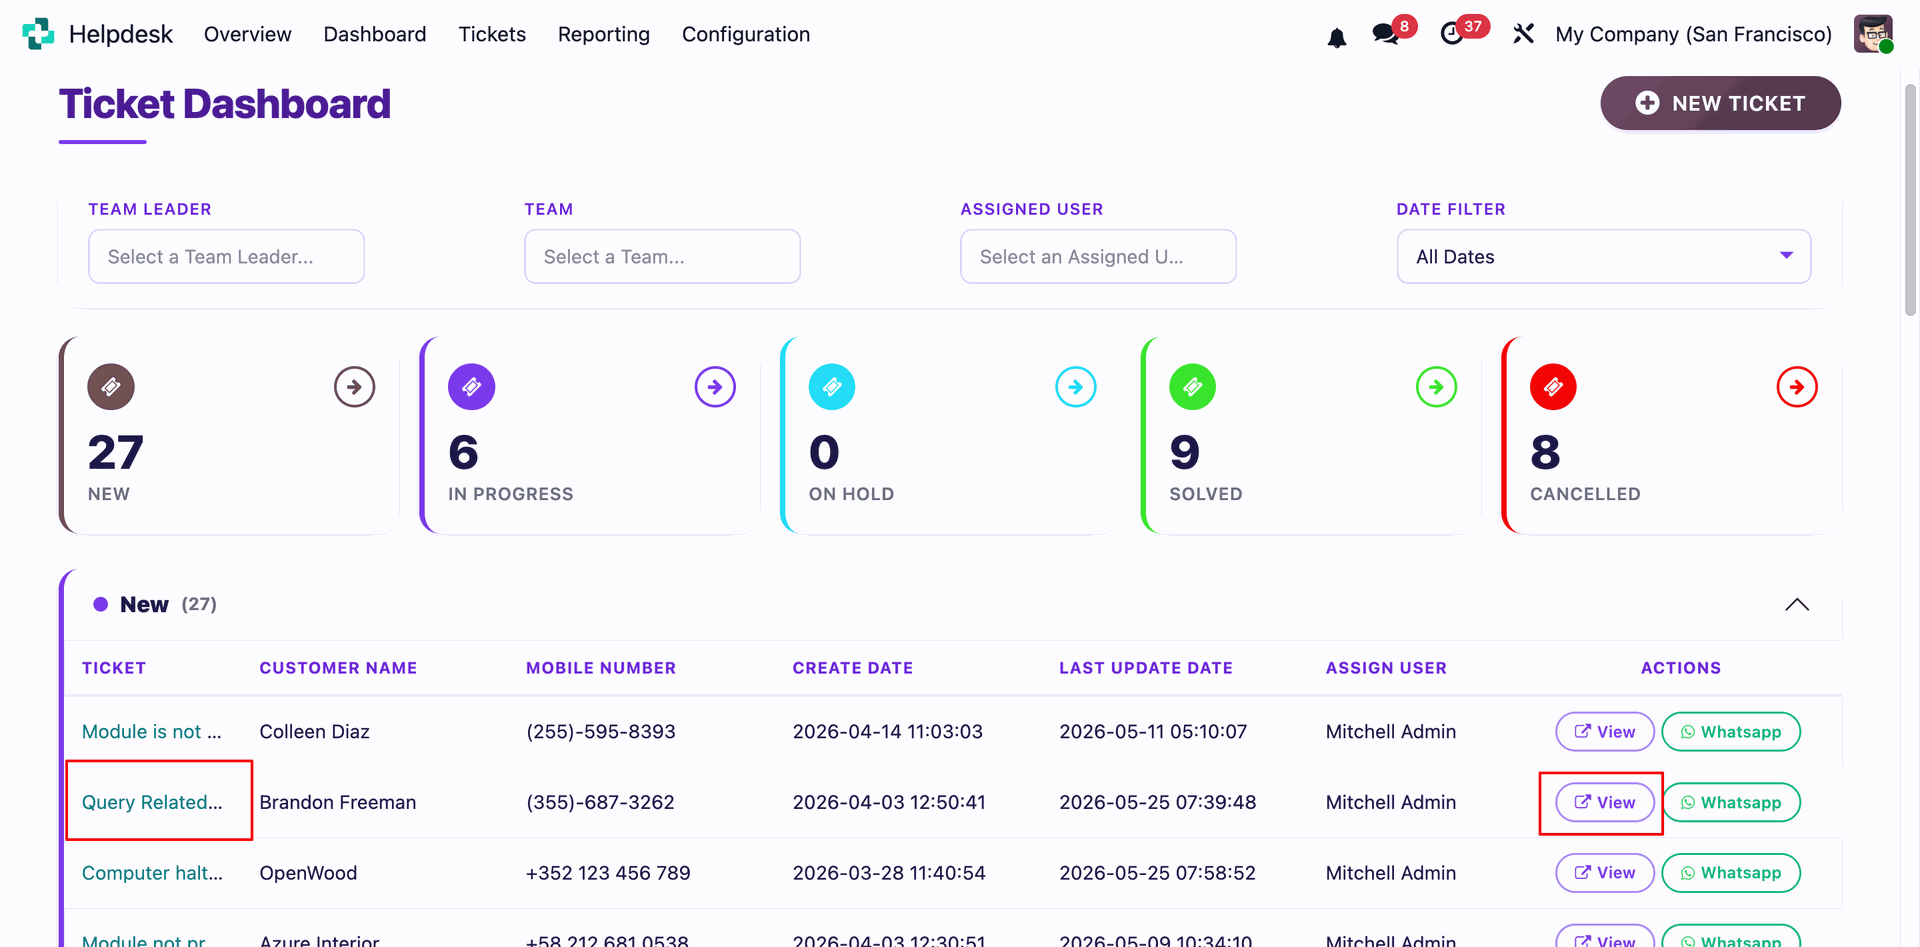
User can see the ticket by clicking on view button from the dashboard.
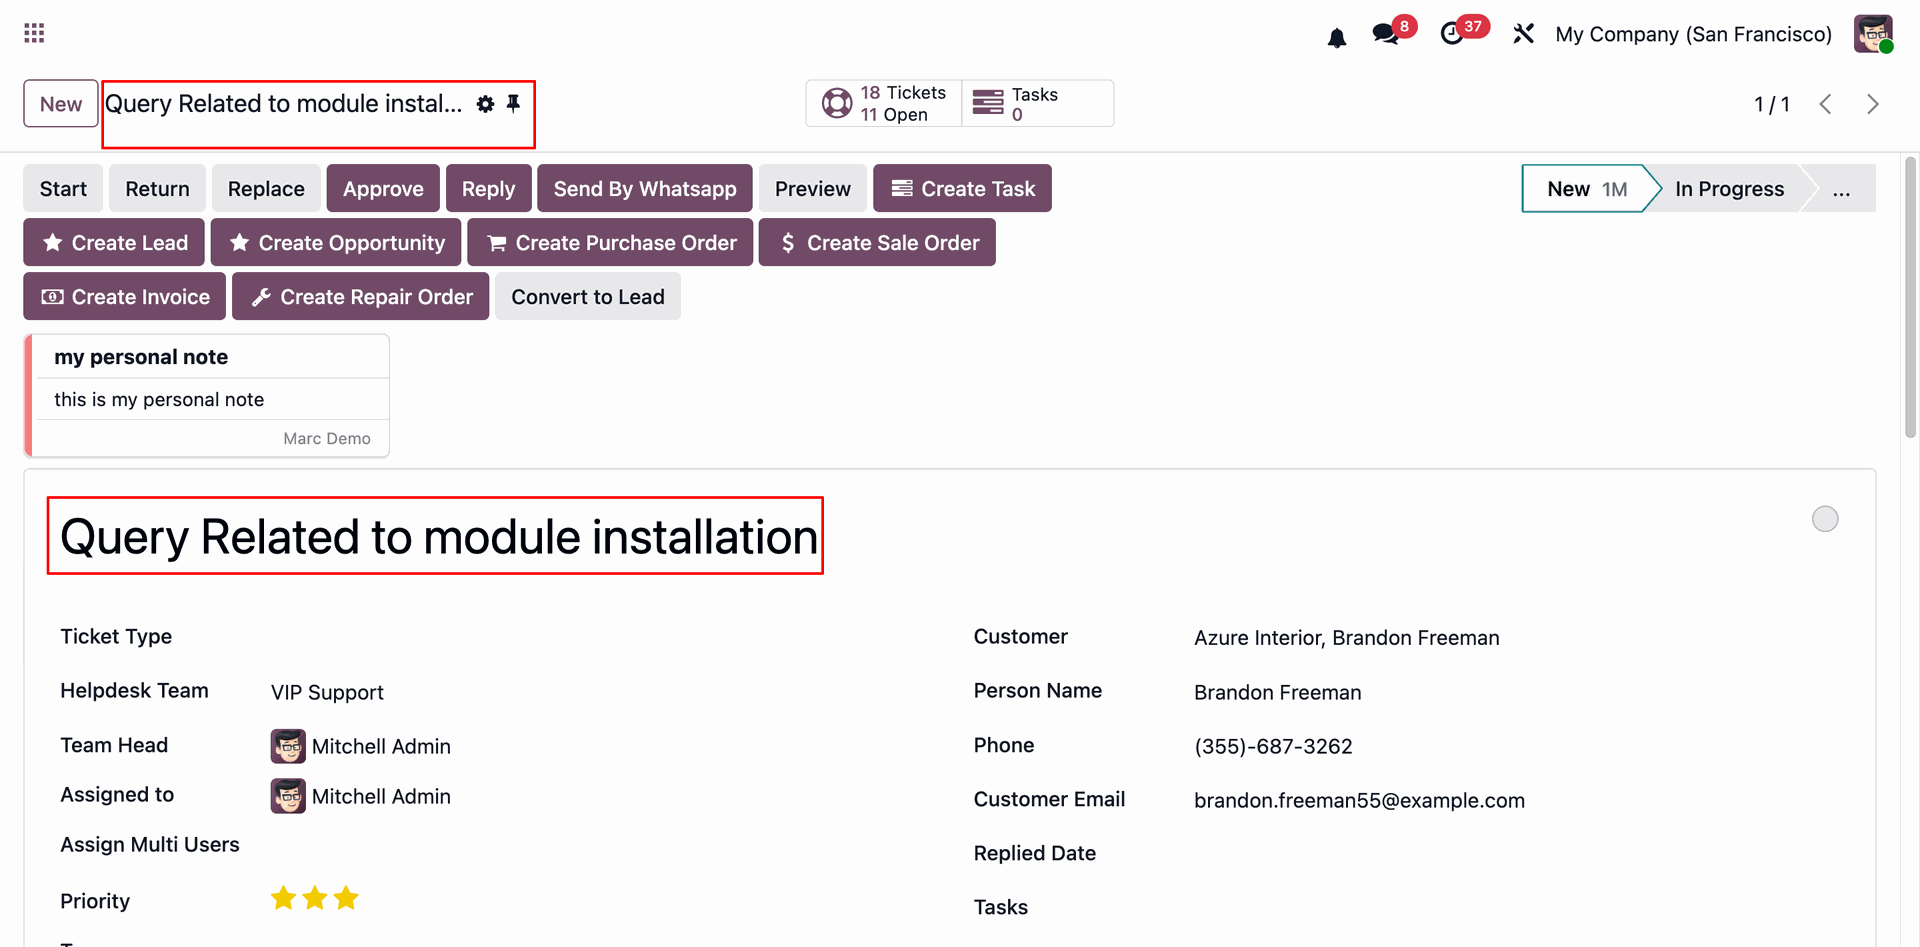
By clicking on the view button will open ticket form view.
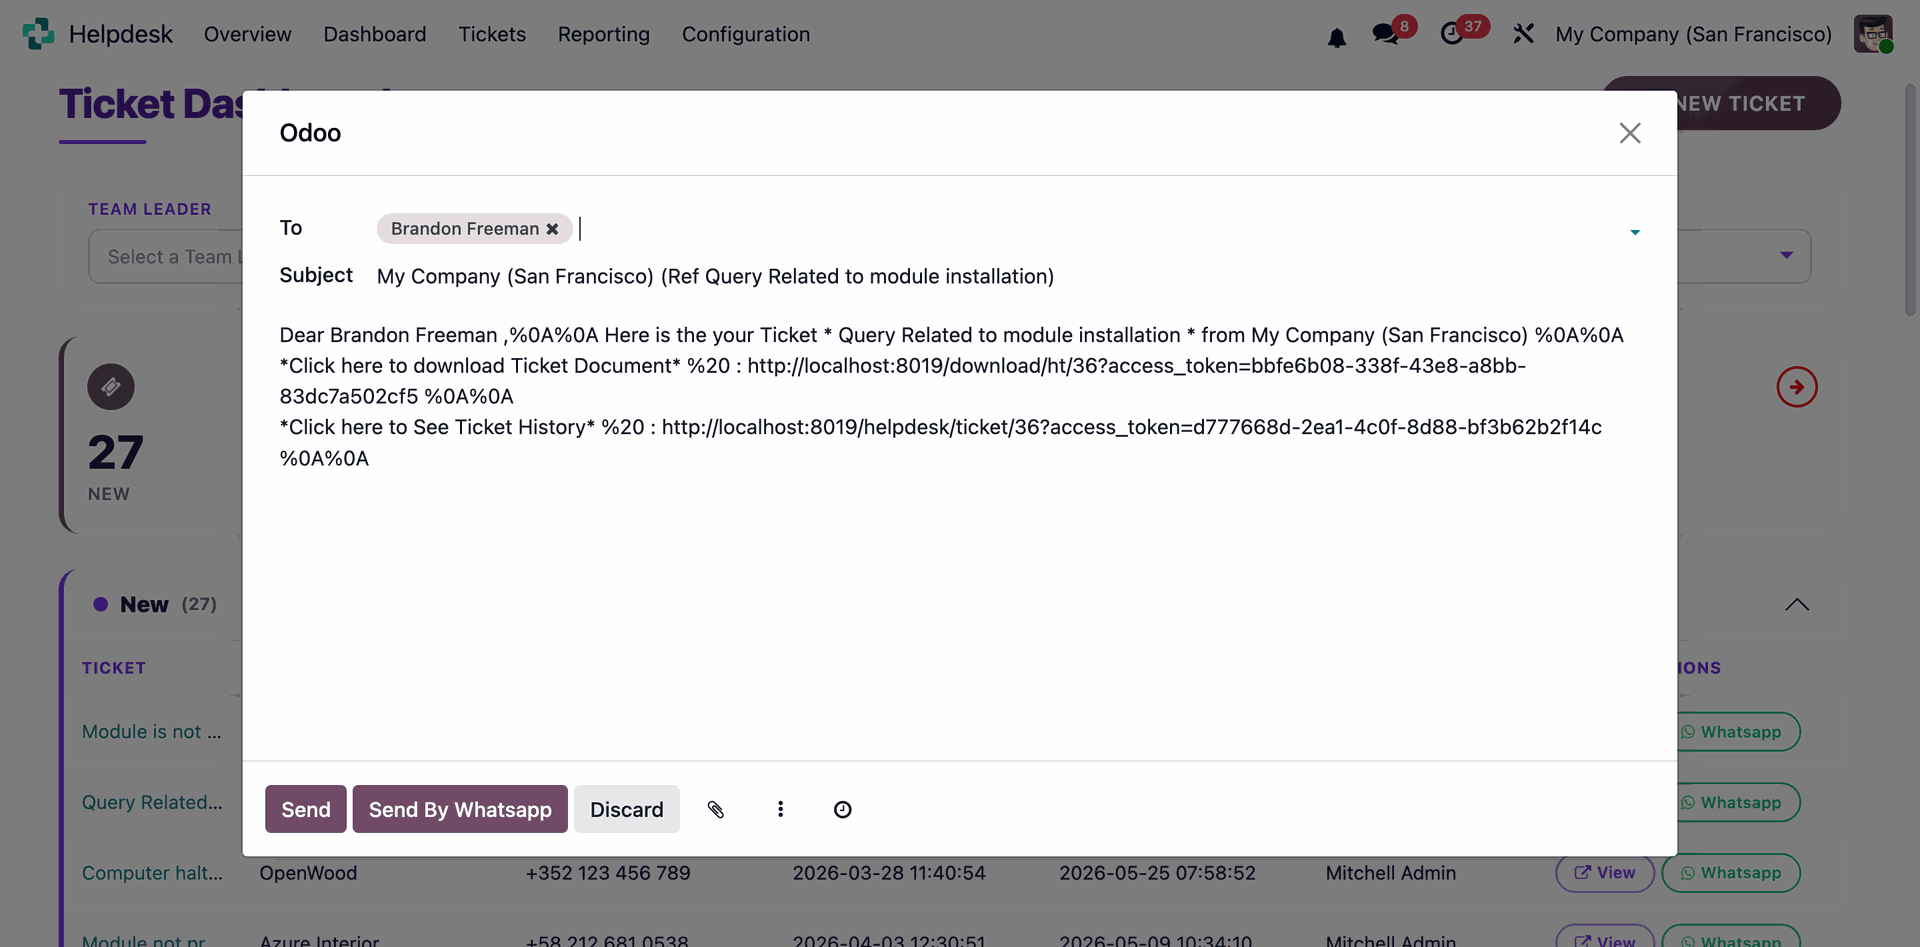
To send the whatsapp to the customer, click on whatsapp button from the dashboard.
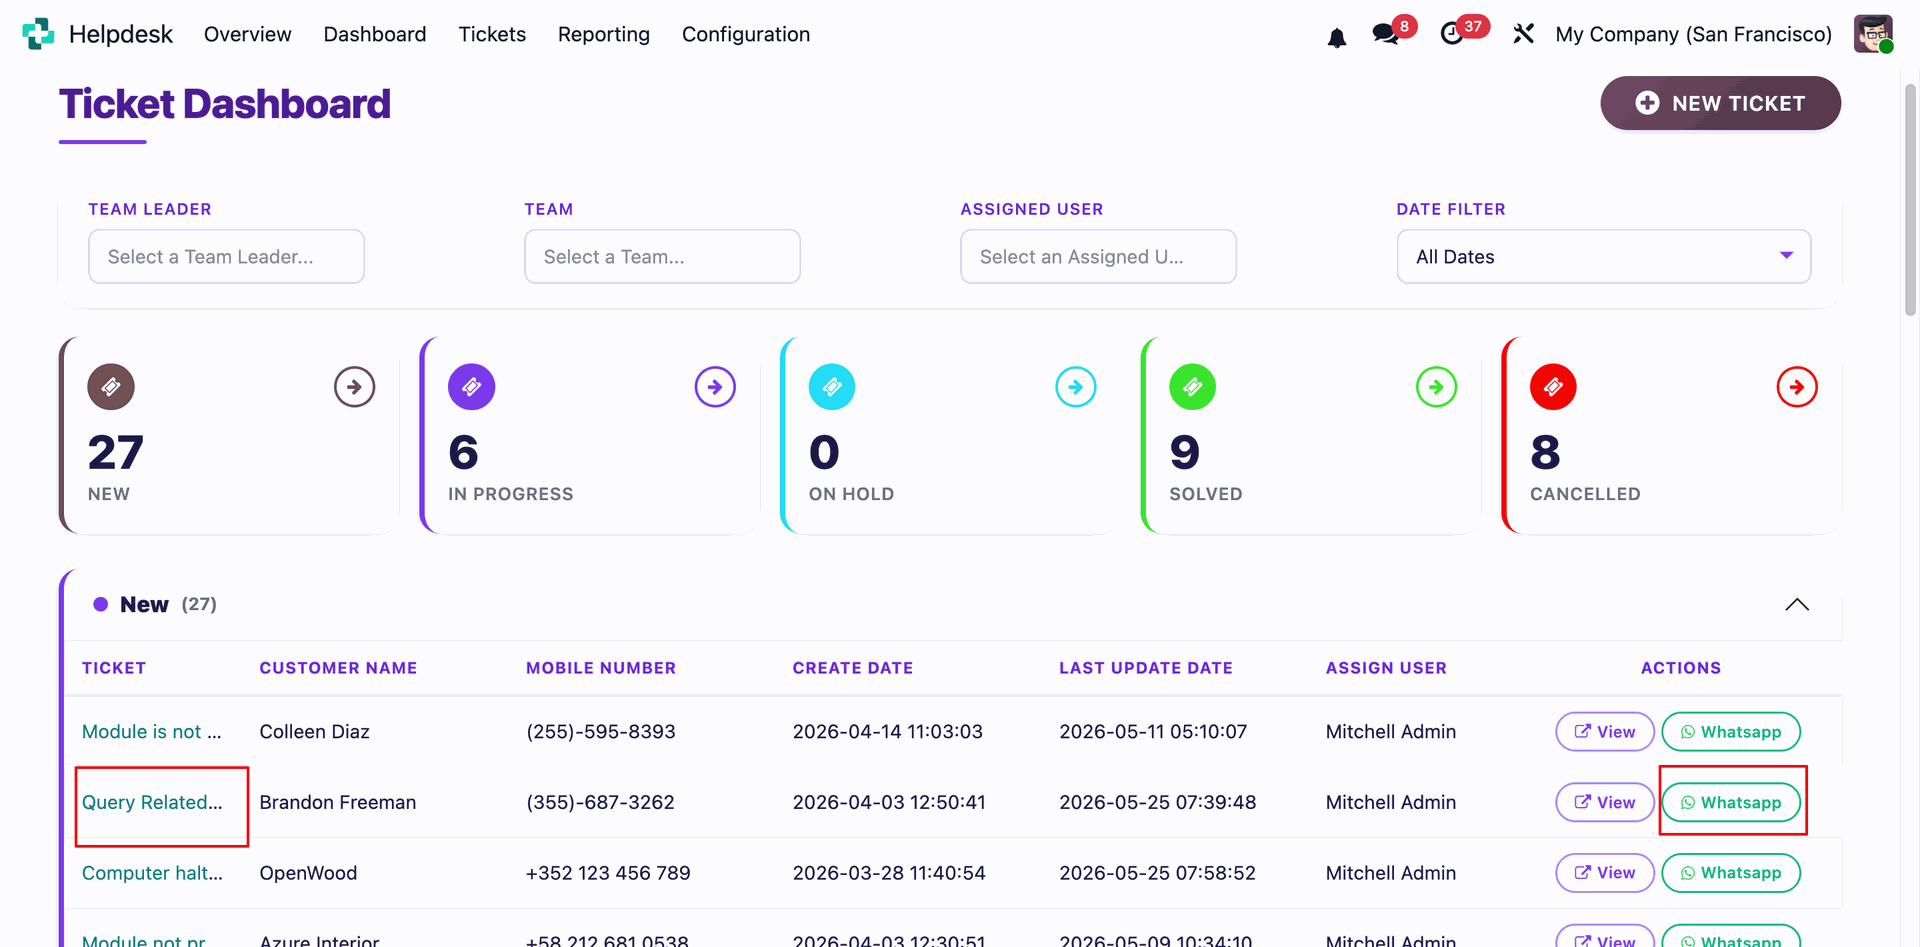
By clicking on the whatsapp button wizard will open to send the whatsapp.
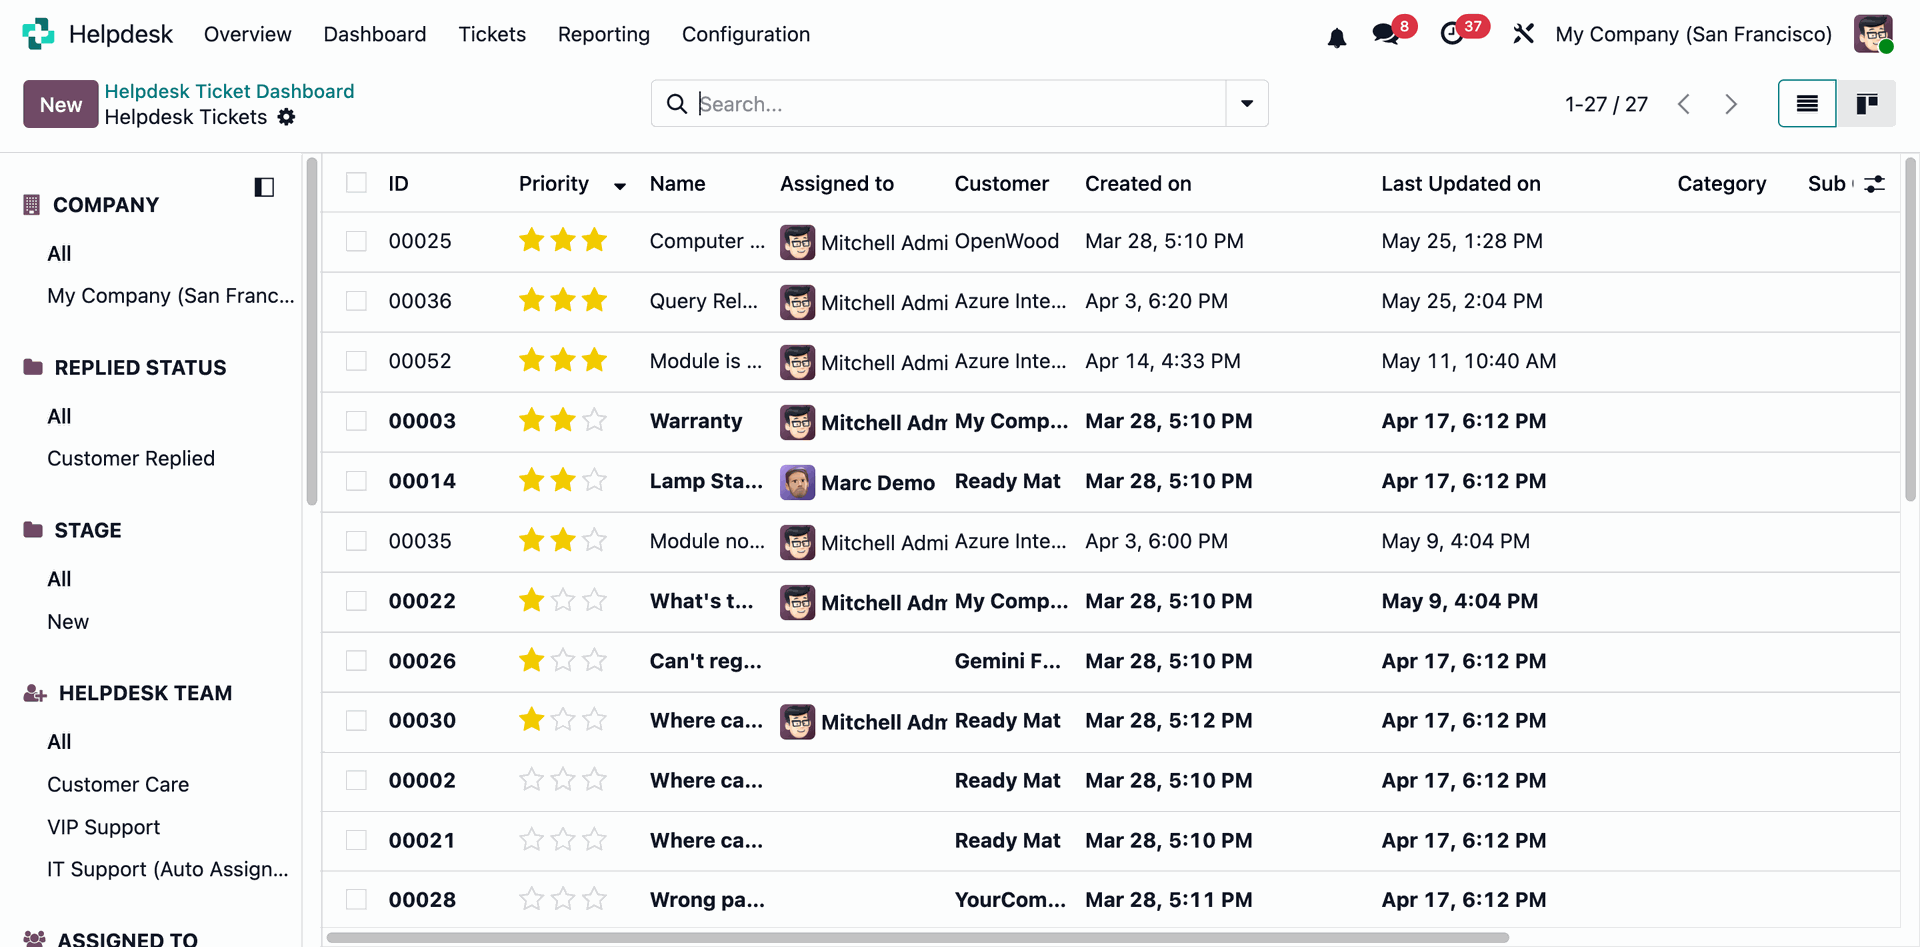
Click on new tile from the dashboard.
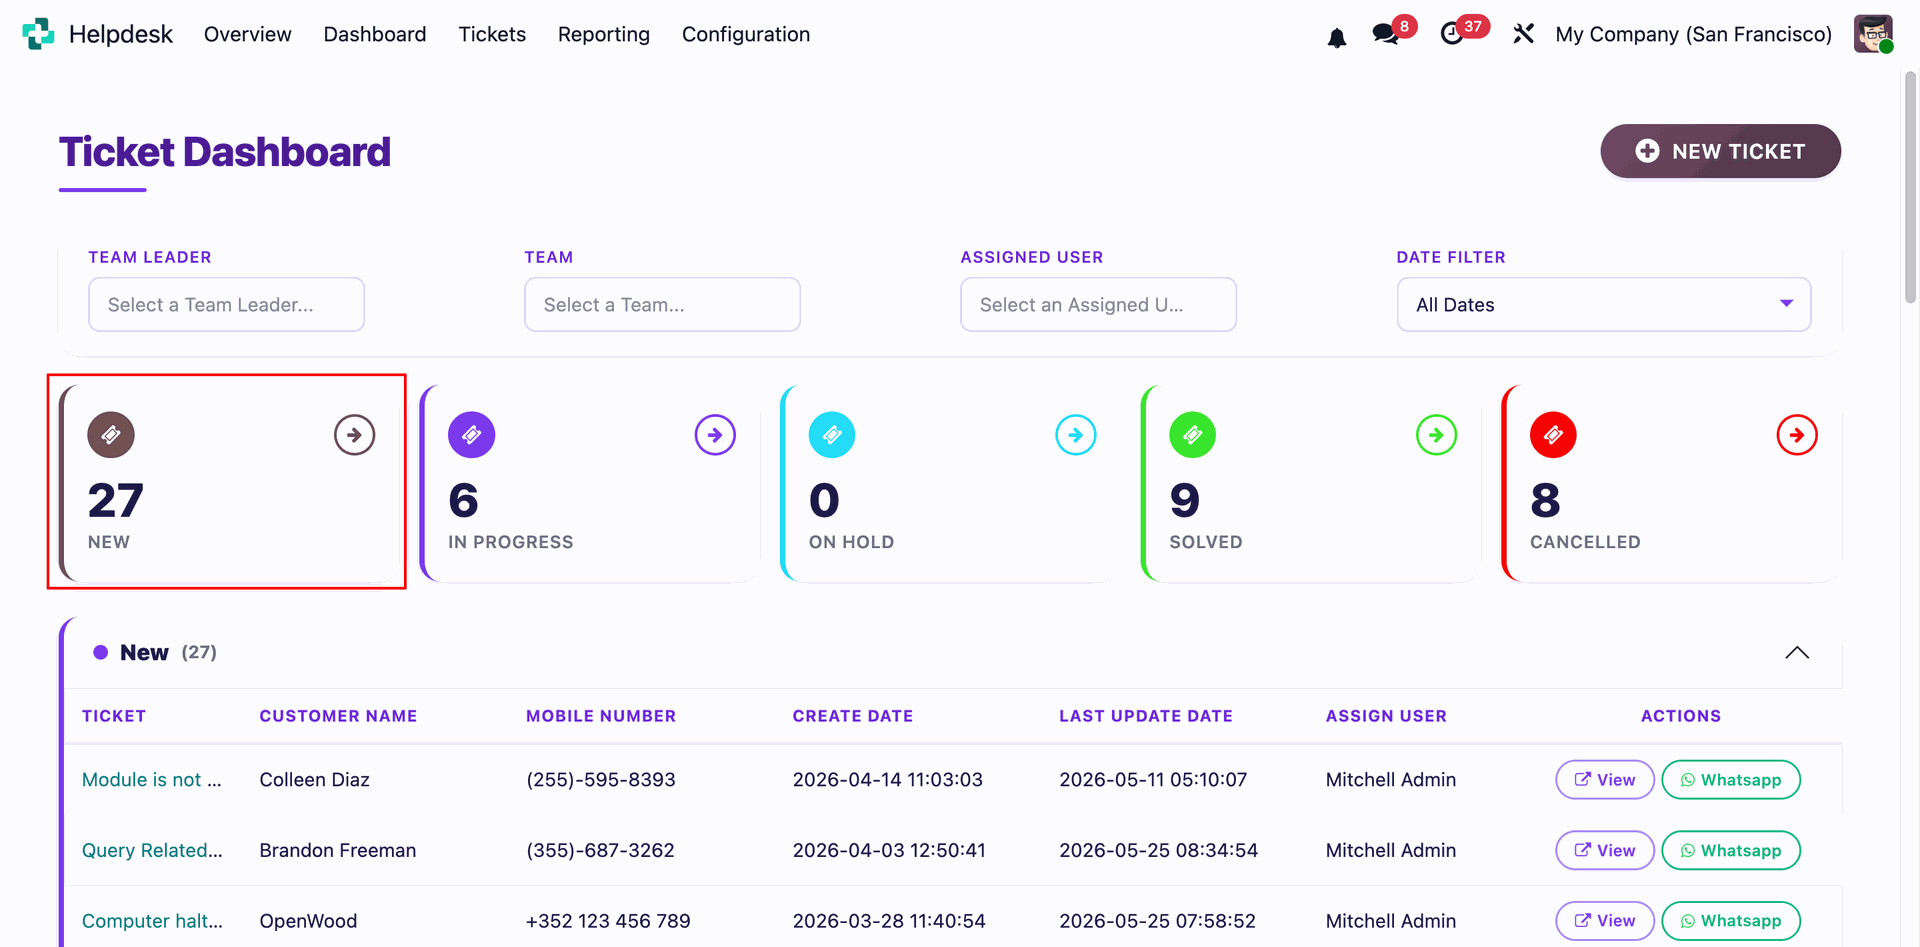
By clicking on new tile, will open all new tickets in list view.
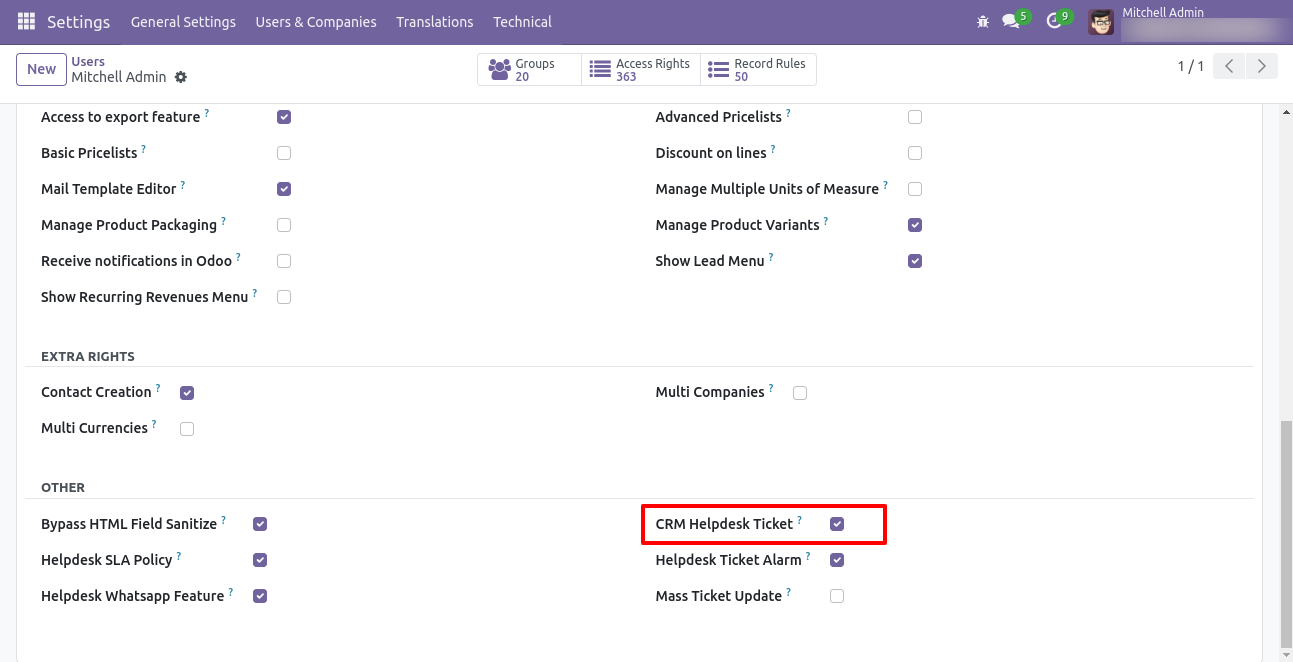
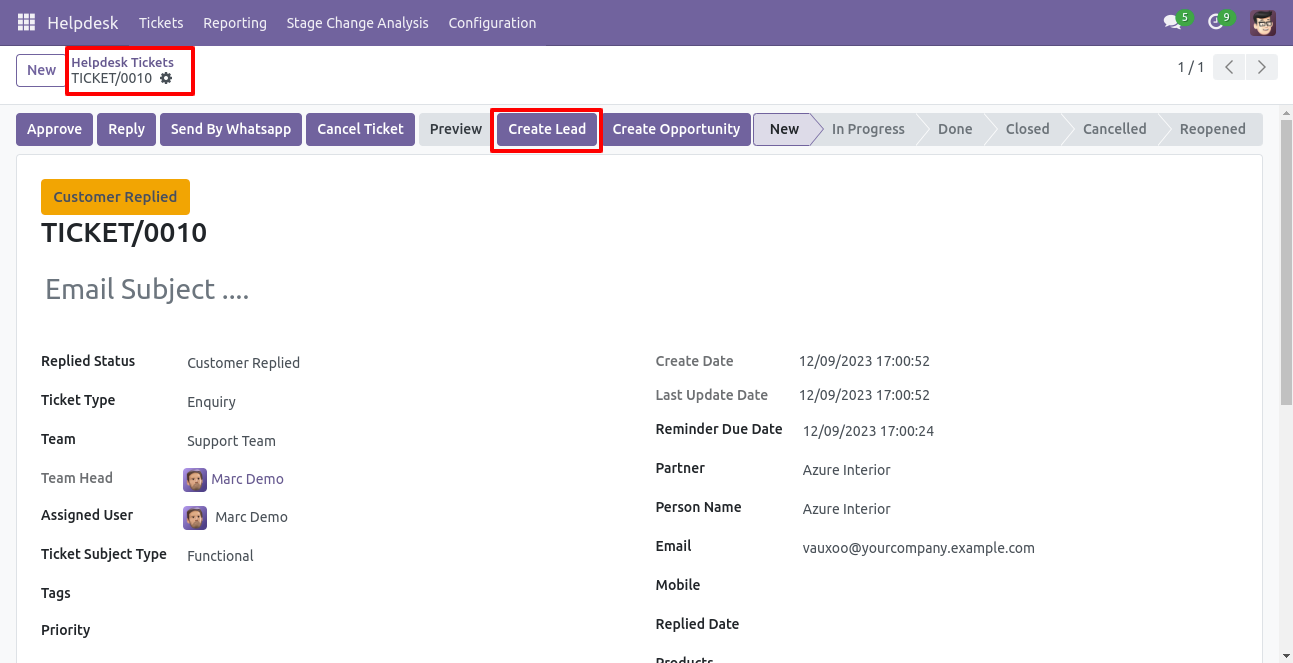
Tick security group "CRM Helpdesk Ticket" to generate lead/opportunity directly from the helpdesk ticket as well generate a helpdesk ticket from the lead/opportunity.
"Helpdesk Ticket" form view, press the "Create Lead" button to create lead directly from the helpdesk ticket.
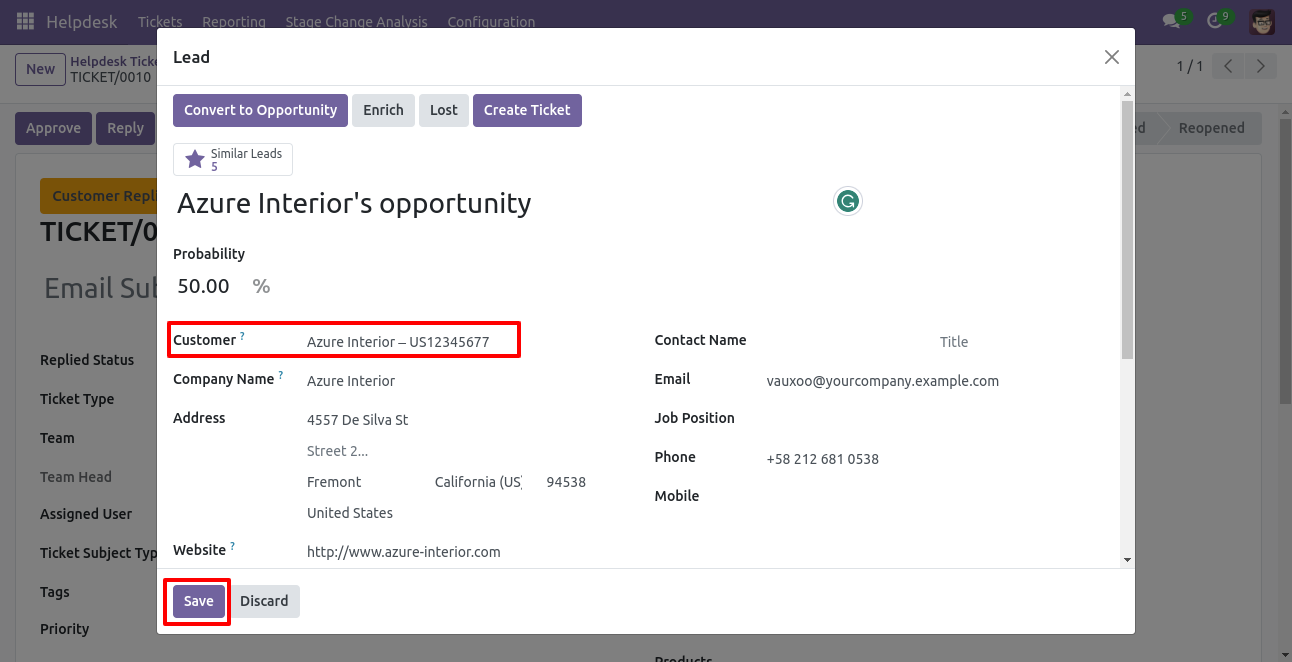
After that one wizard opens, fill the details then press the "Save" button.
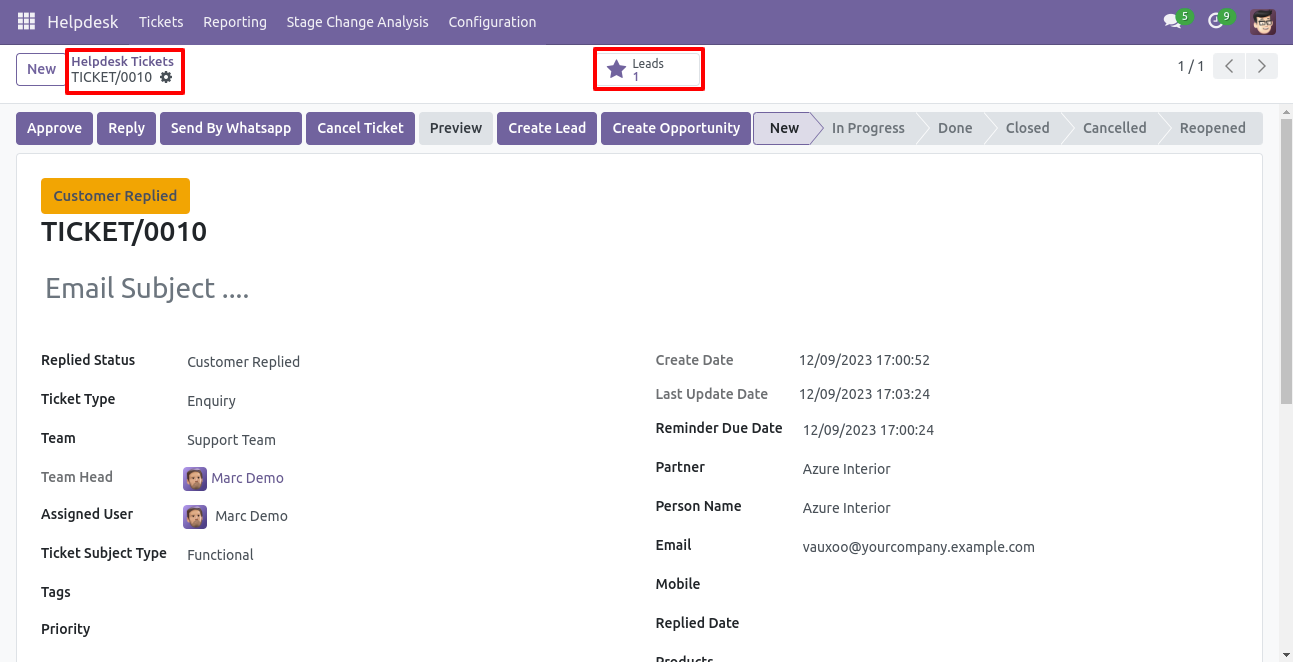
Now, from the ticket, you can see generated leads of that ticket using the "Leads" smart button.
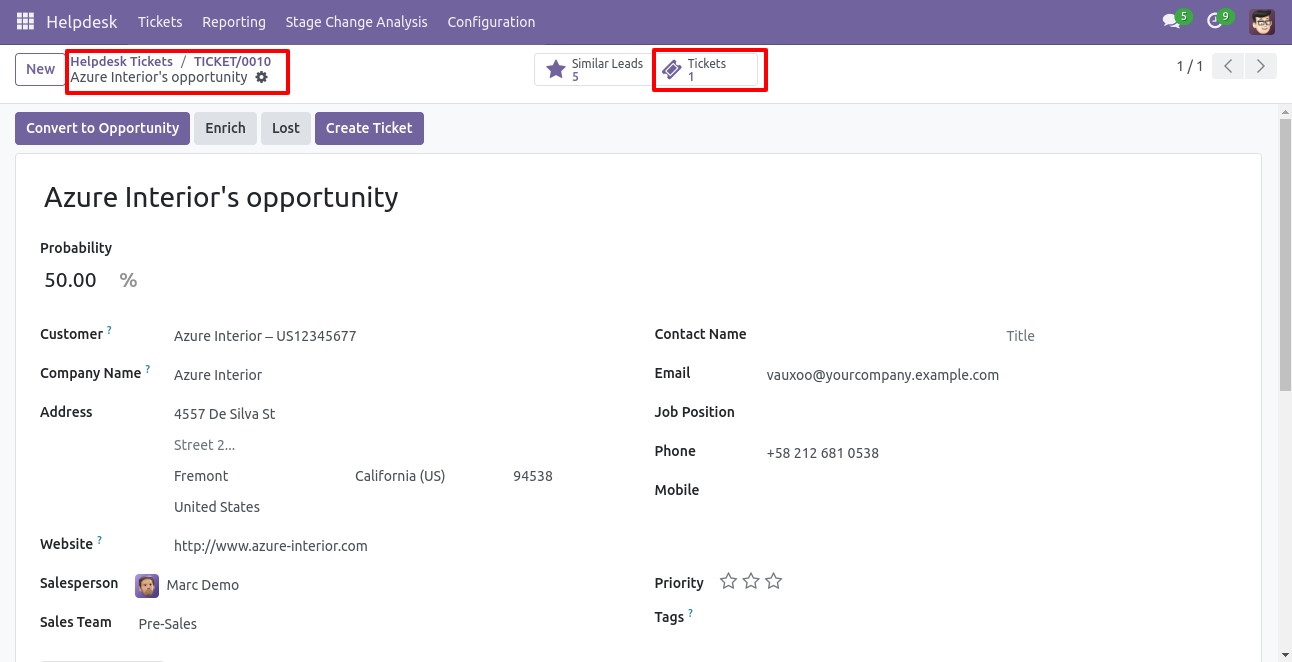
So, from that leads, you can see tickets of that lead using the "Tickets" smart button.
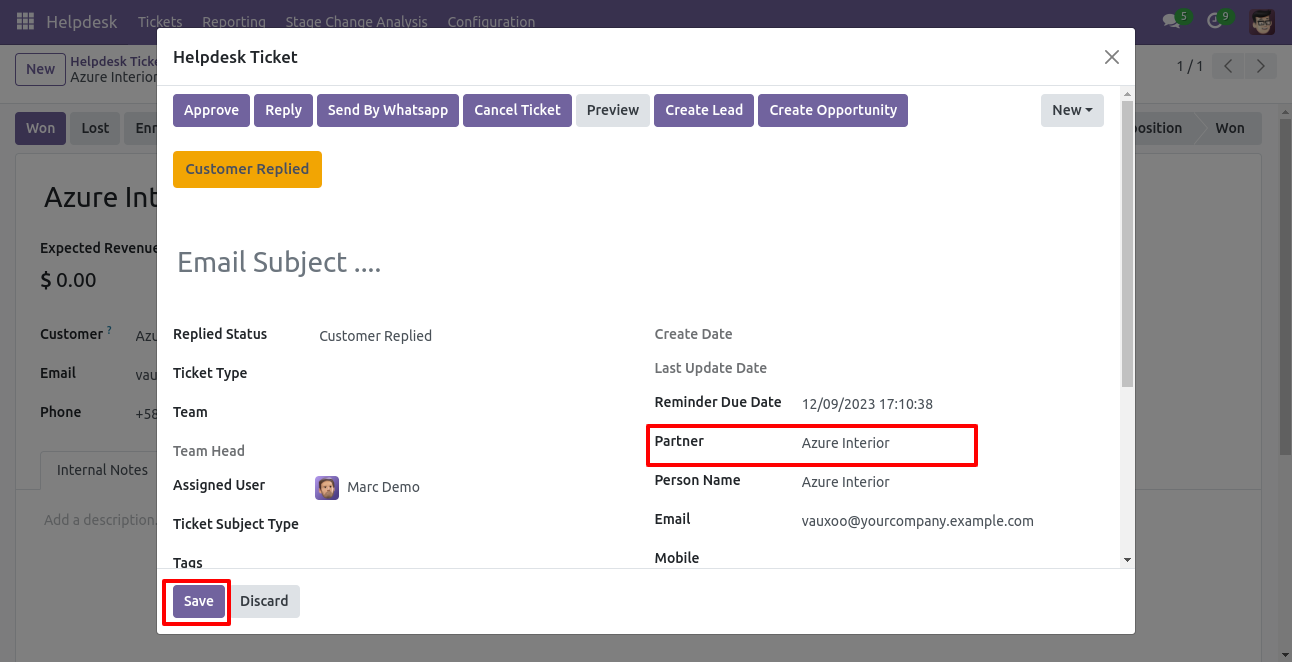
"Helpdesk Ticket" form view, press the "Create Opportunity" button to create an opportunity directly from the helpdesk ticket.
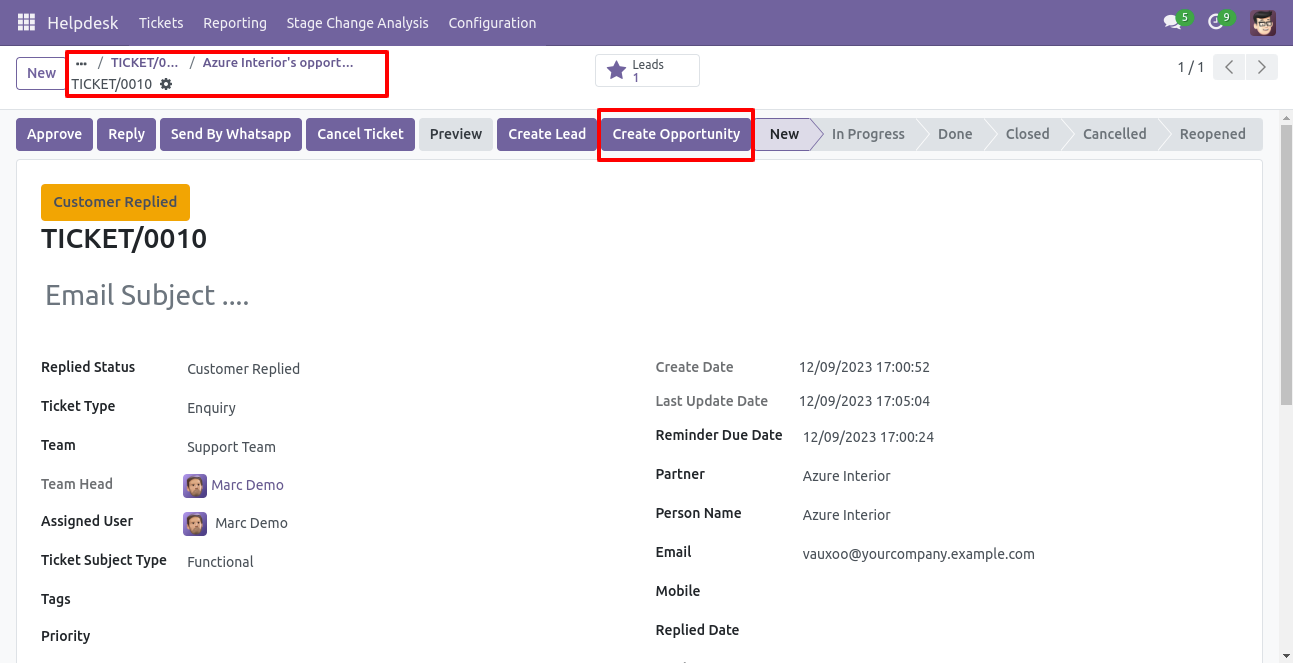
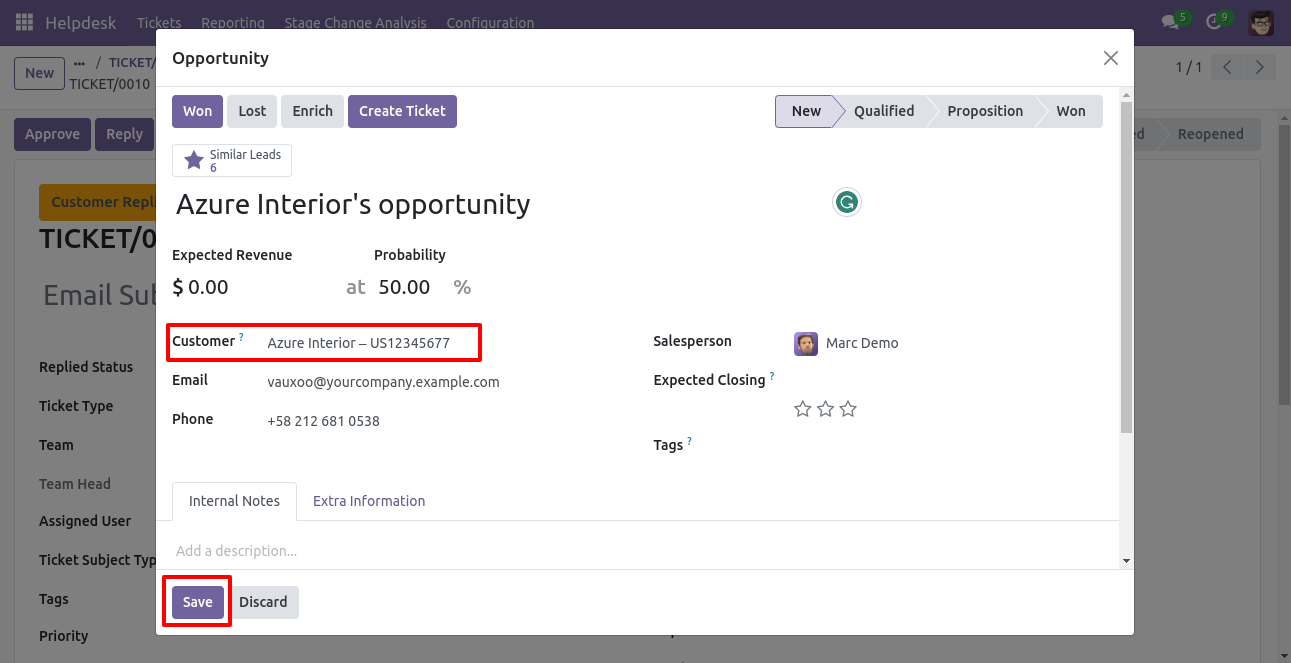
After that one wizard opens, fill the details then press the "Save" button.
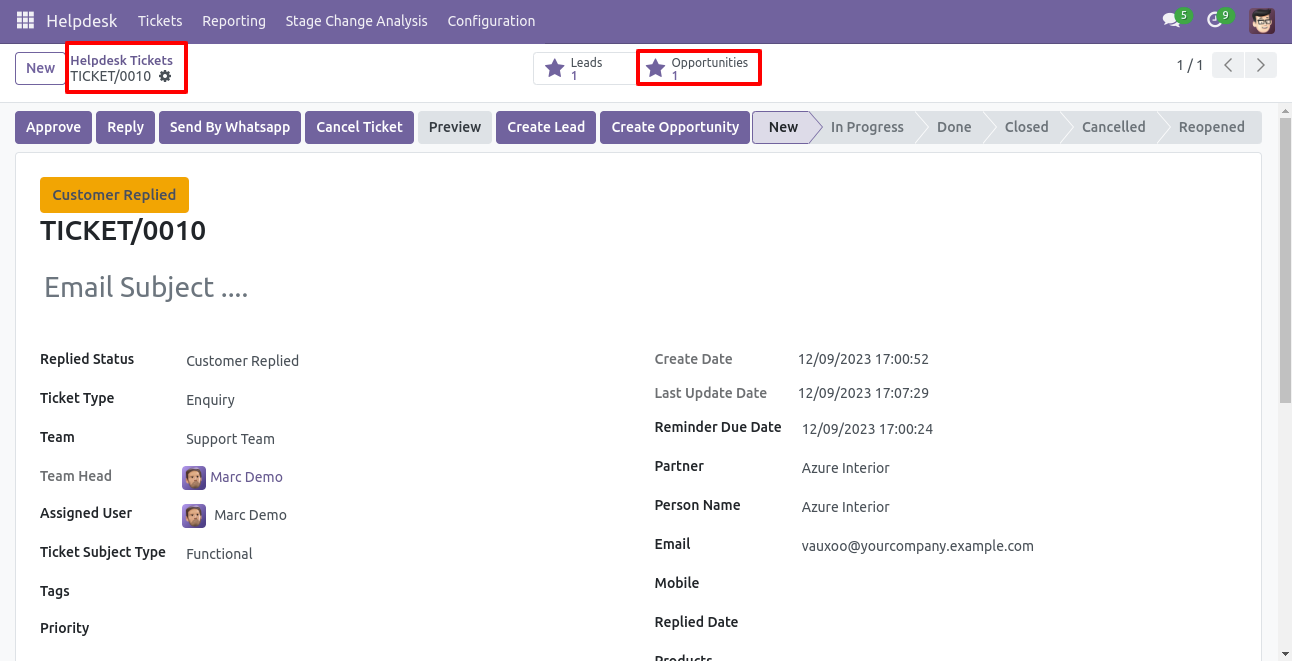
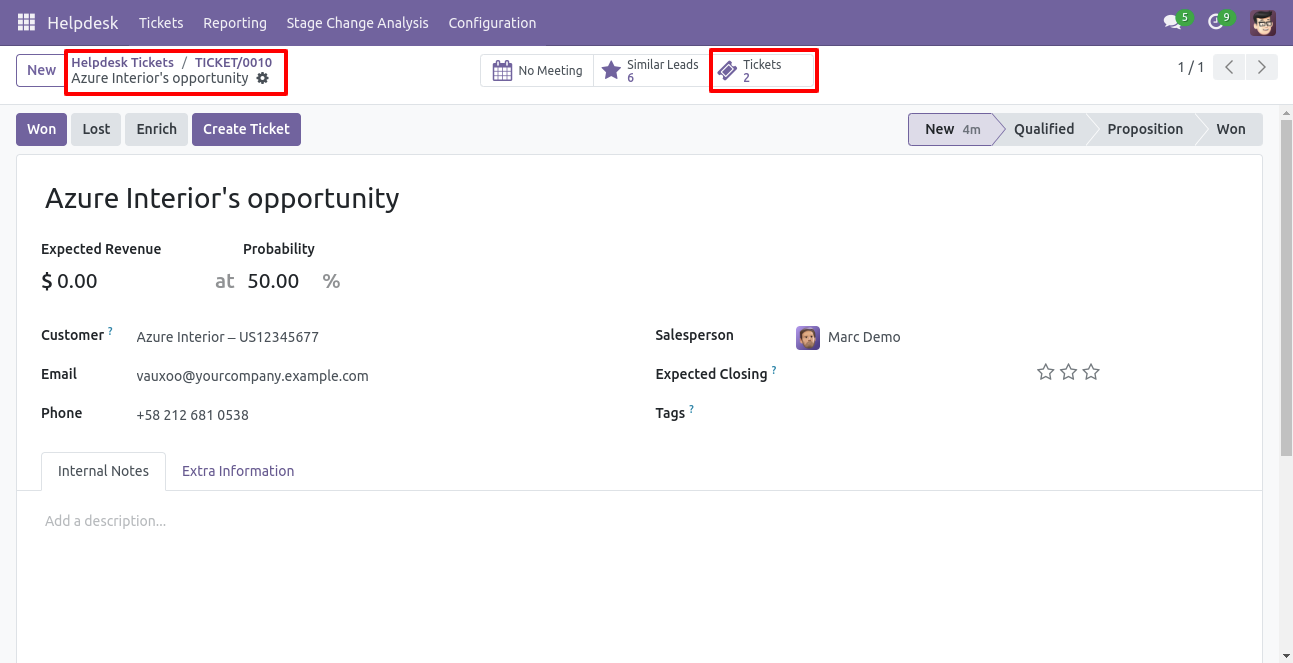
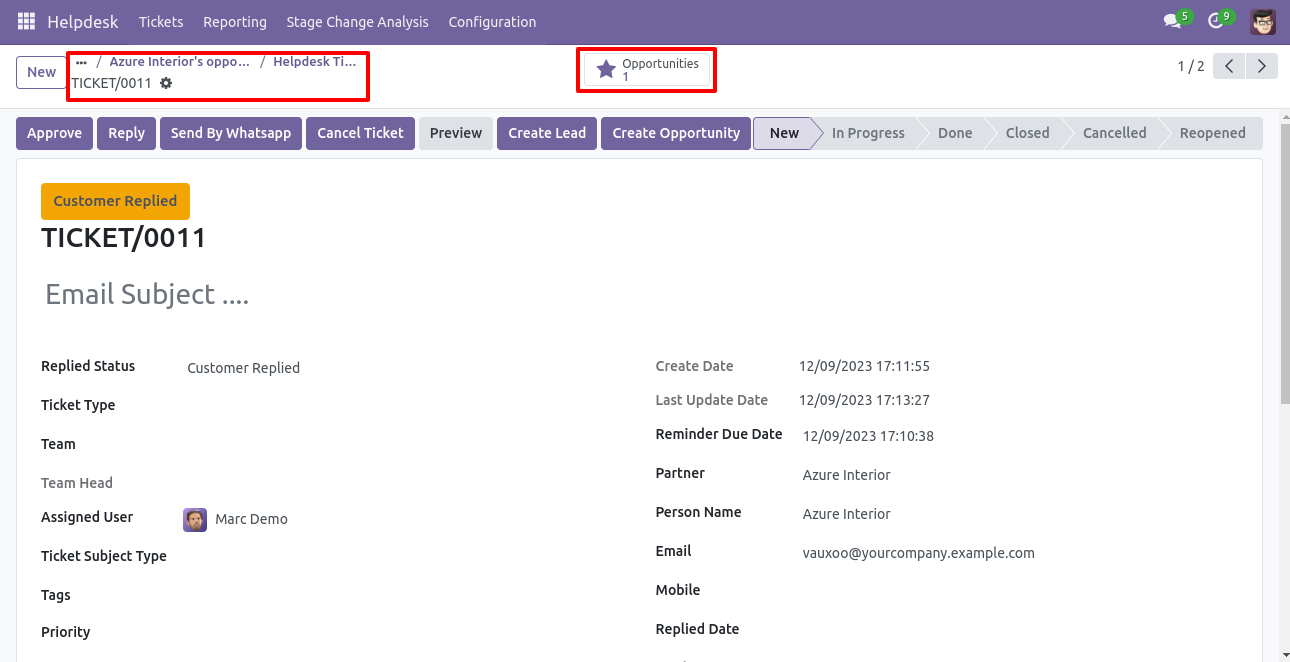
Now, from the ticket, you can see generated opportunities of that ticket using the "Opportunities" smart button.
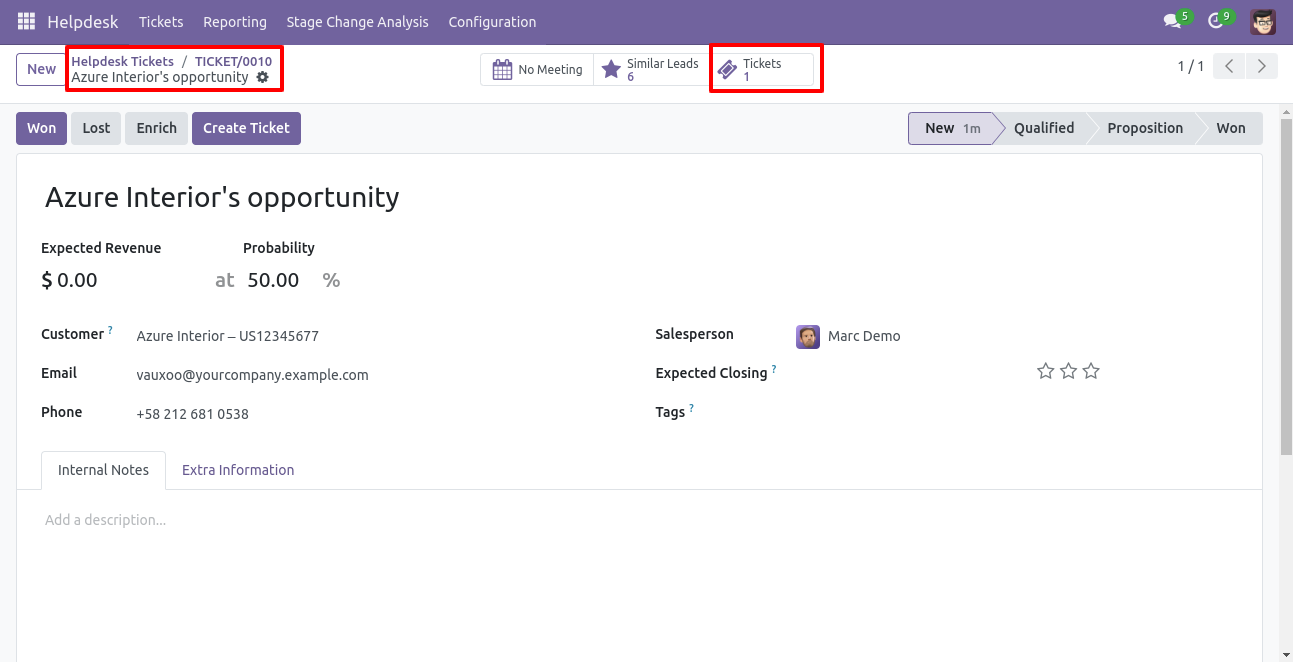
So, from that opportunities, you can see tickets of that opportunity using the "Tickets" smart button.
You can create a helpdesk ticket from the lead/opportunity using the "Create Ticket" button.

After that one wizard opens, fill the details and save it.
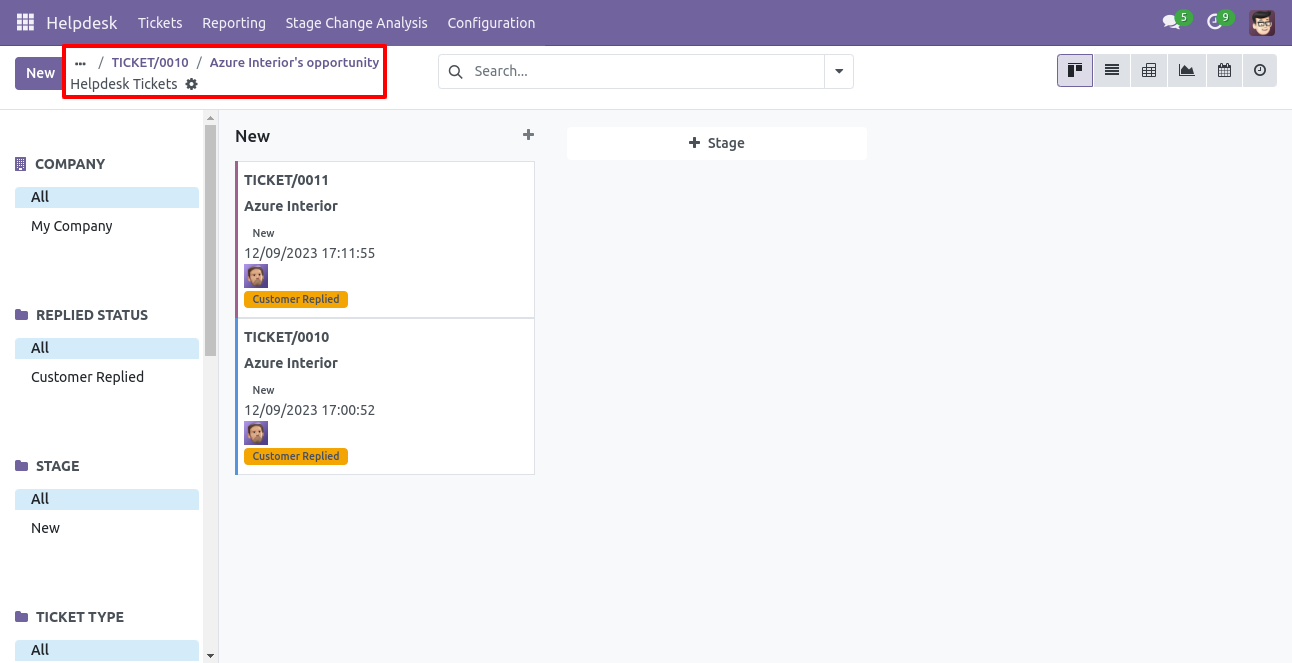
You can see tickets of that lead/opportunity using the "Ticket" smart button.
It opens tickets Kanban view.
Created ticket form view looks like this.
You can filter tickets lead/opportunity wise.
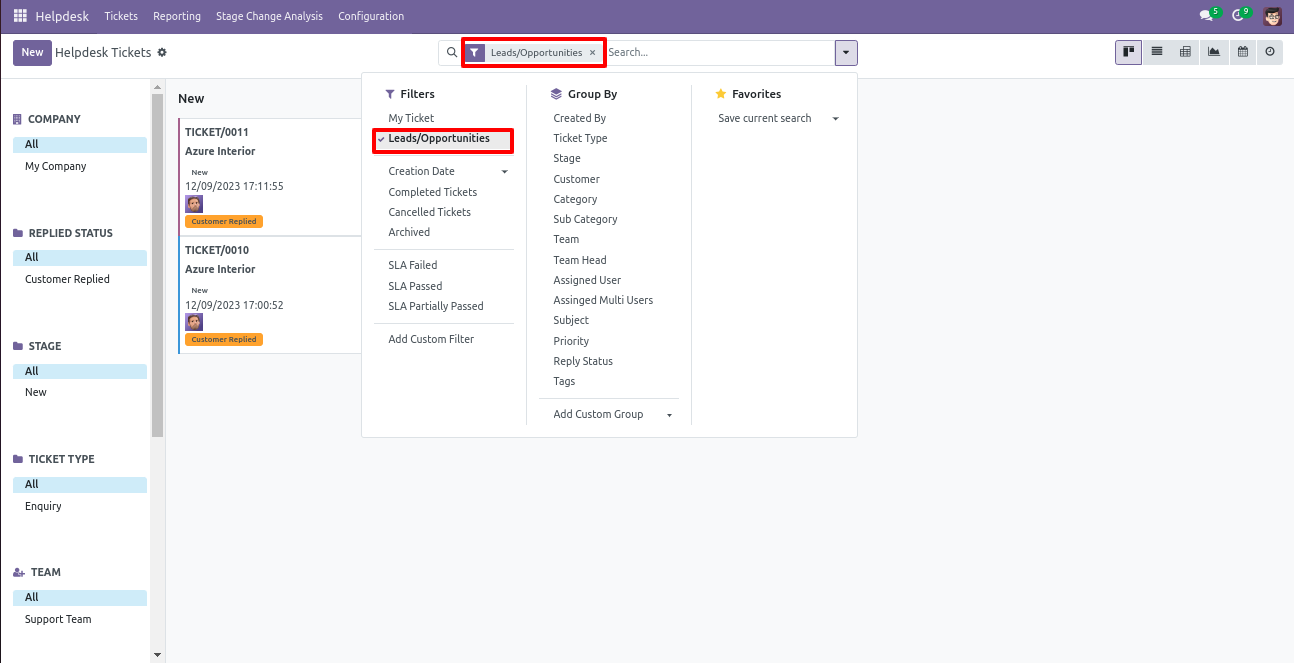
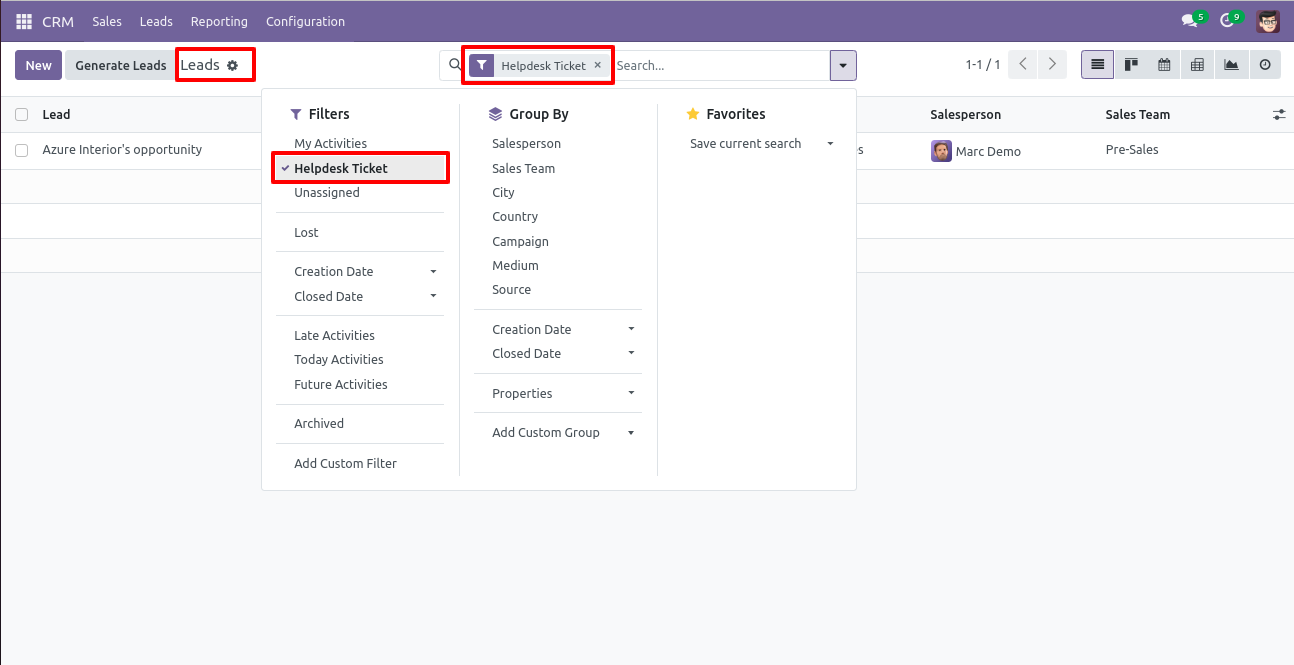
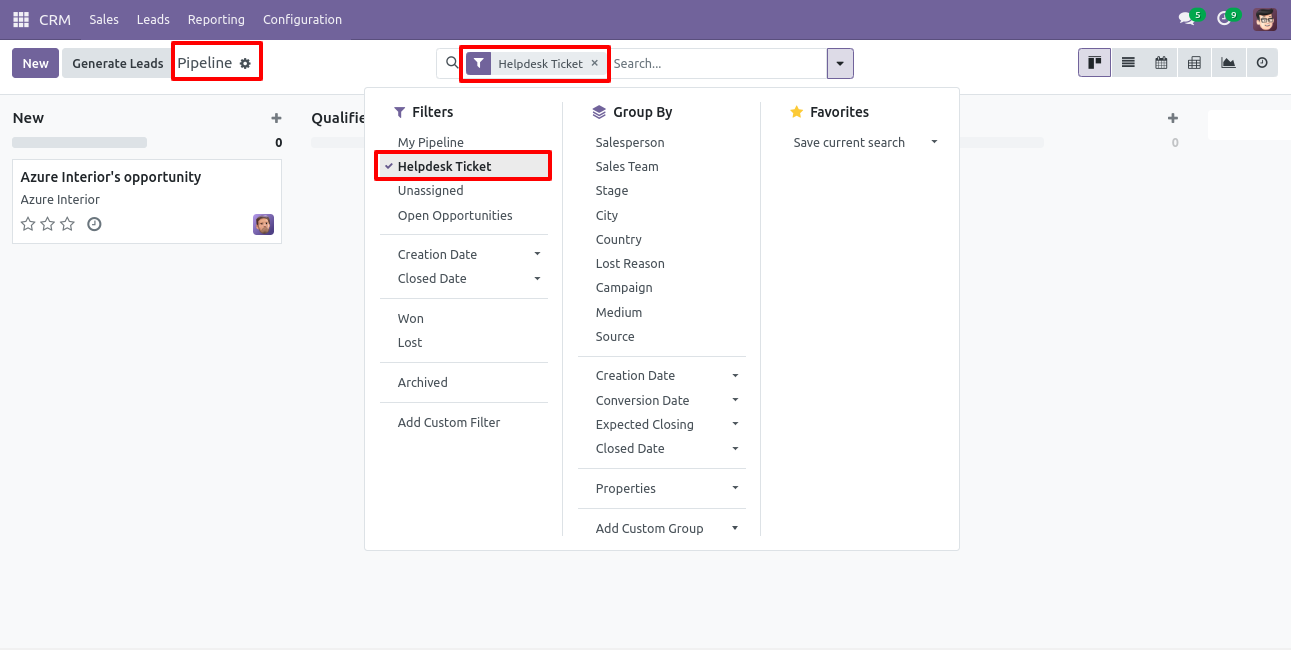
You can filter lead/opportunity ticket wise.
Manage Products
Goto user config setting, Enable 'Manage Products'.

You can select products for each ticket.

Click on the 'Helpdesk Ticket' from the action button to print the tickets PDf report.

Ticket PDF report with the products.

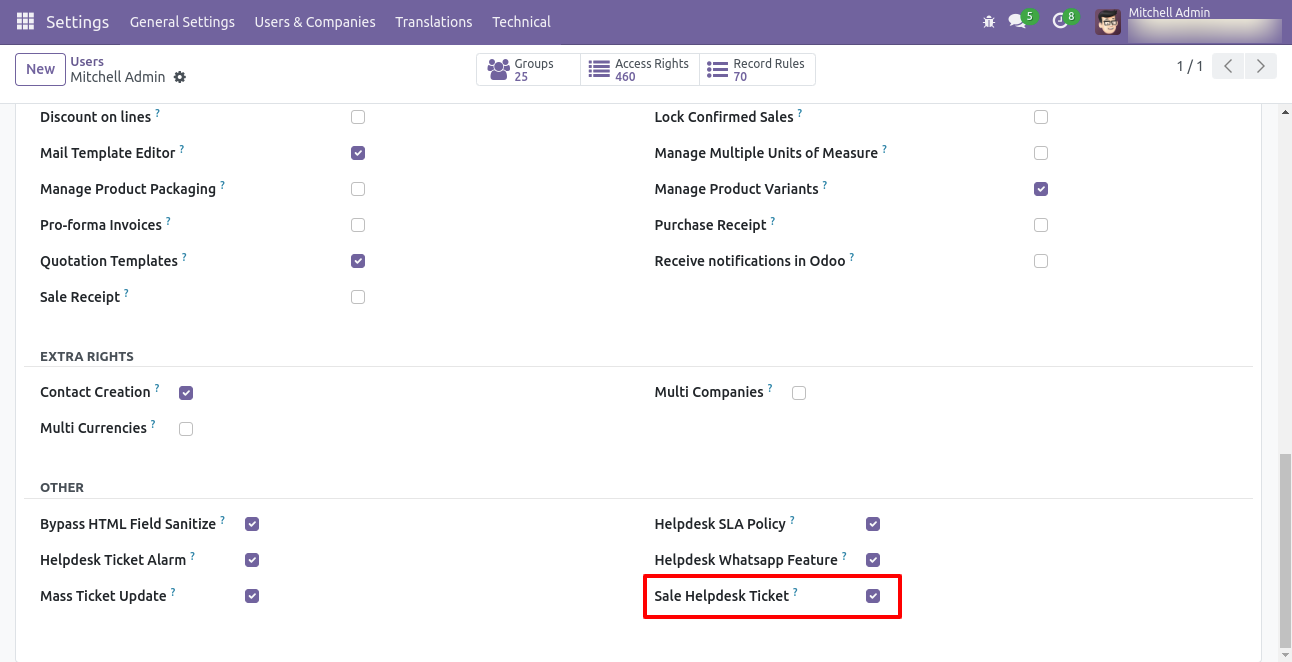
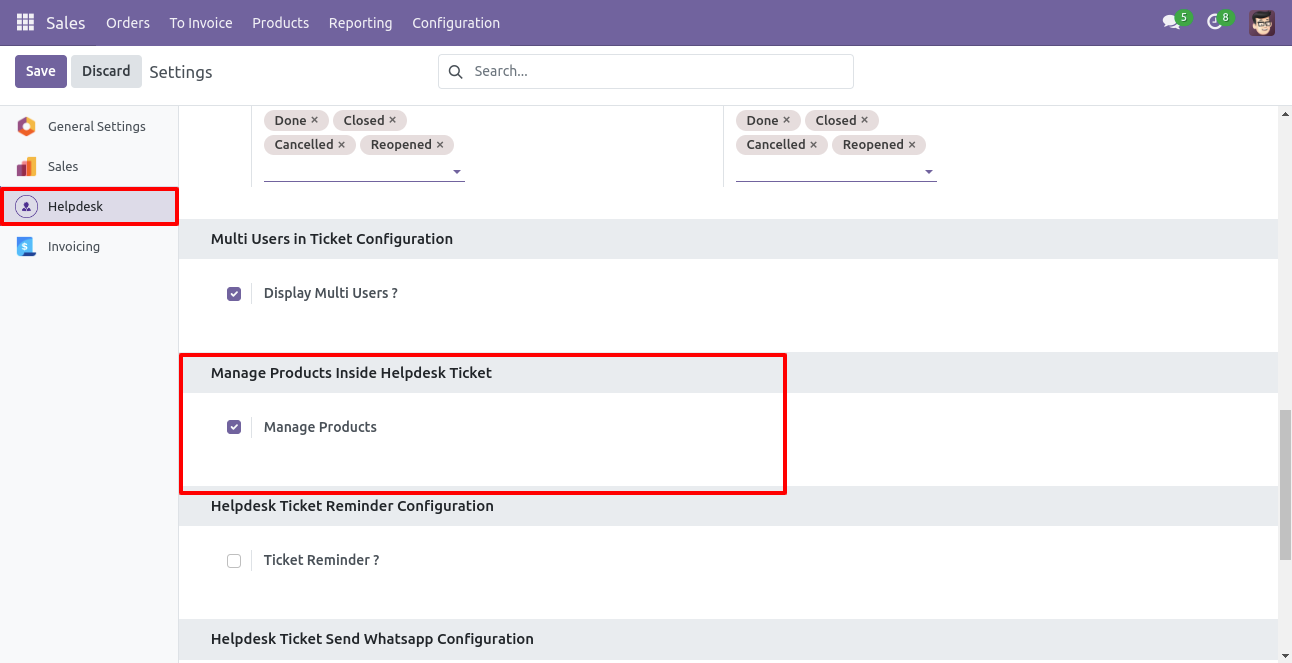
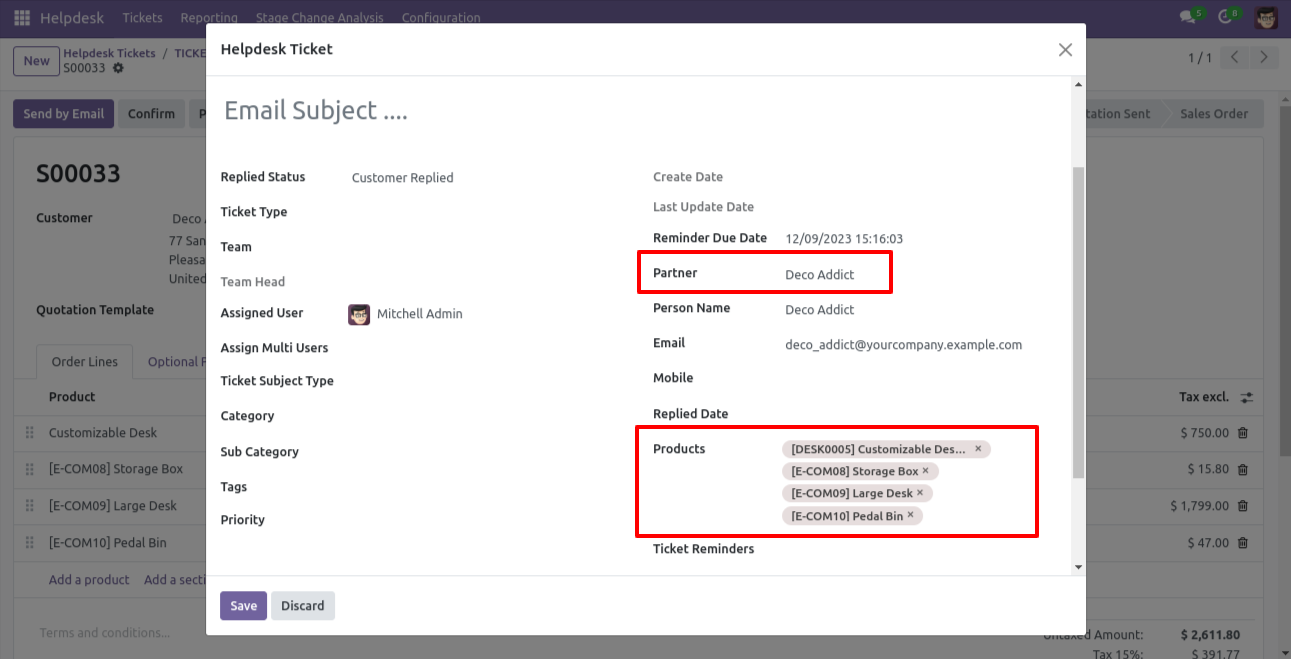
Tick security group 'Sale Helpdesk Ticket' to generate a quotation/sale order directly from the helpdesk ticket as well generate a helpdesk ticket from the sale order/quotation.
Go to the helpdesk settings and tick 'Manage Products'.
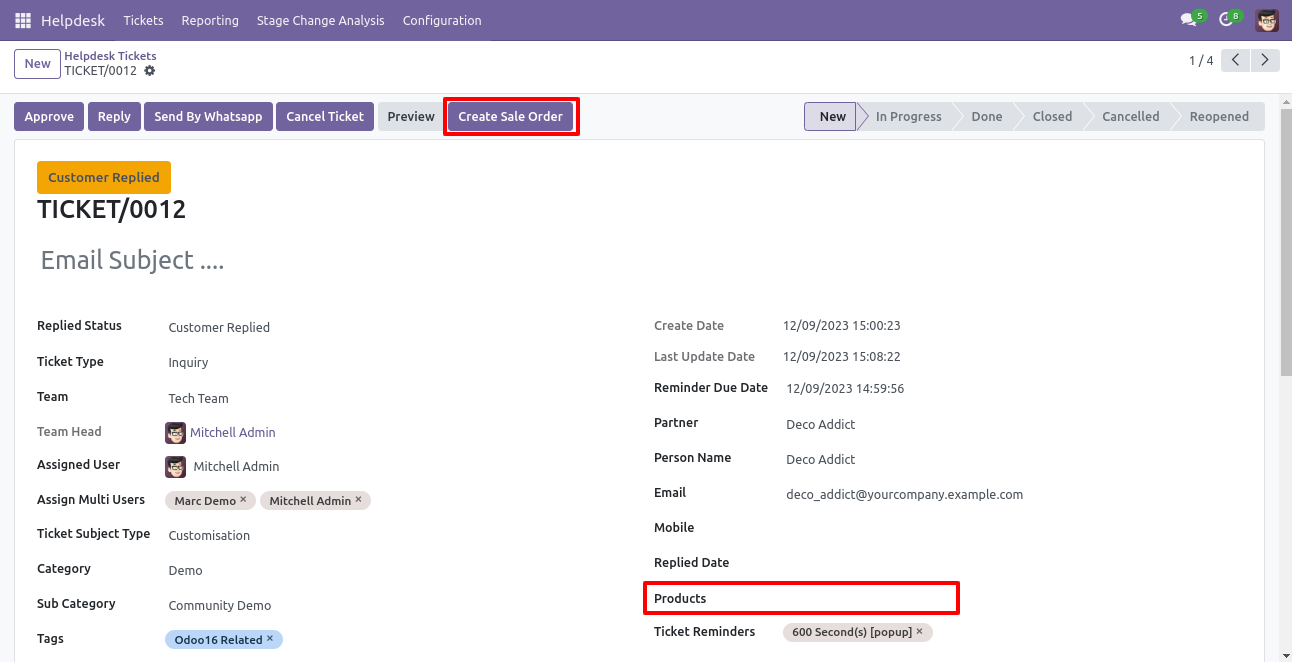
'Helpdesk Ticket' form view, press the 'Create Sale Order' button to create a quotation/sale order directly from the helpdesk ticket.
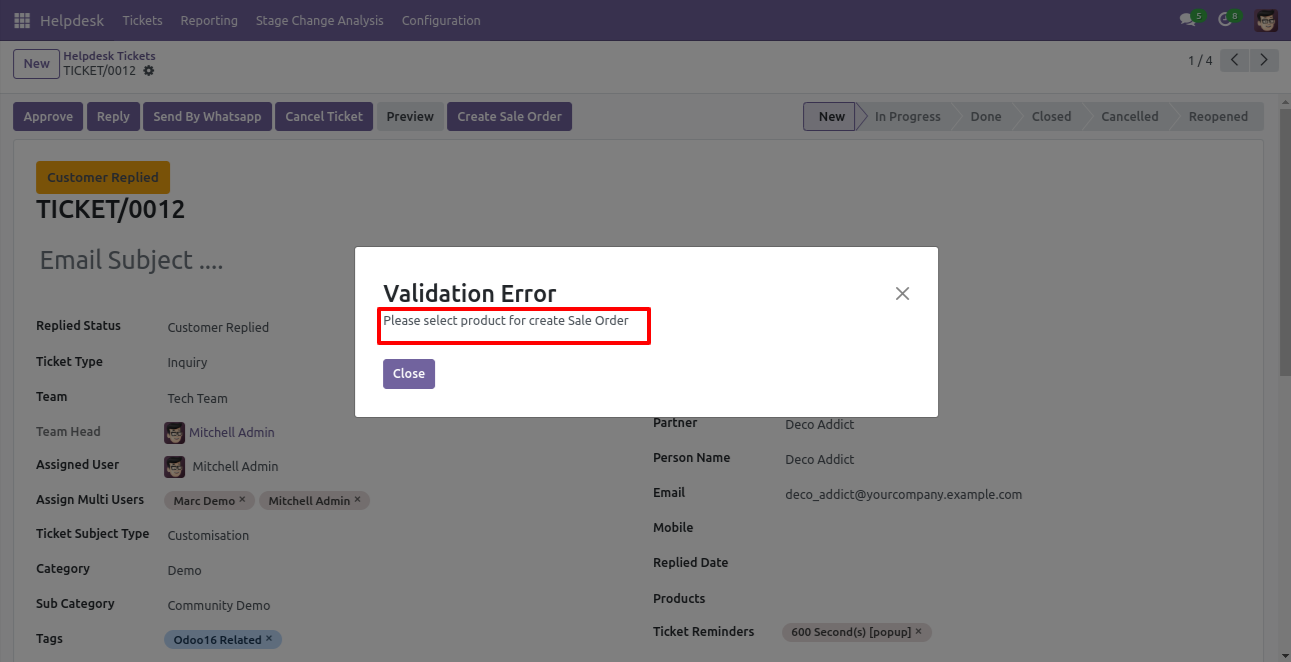
If you you try to create a SO without selecting a product then this error will appears.
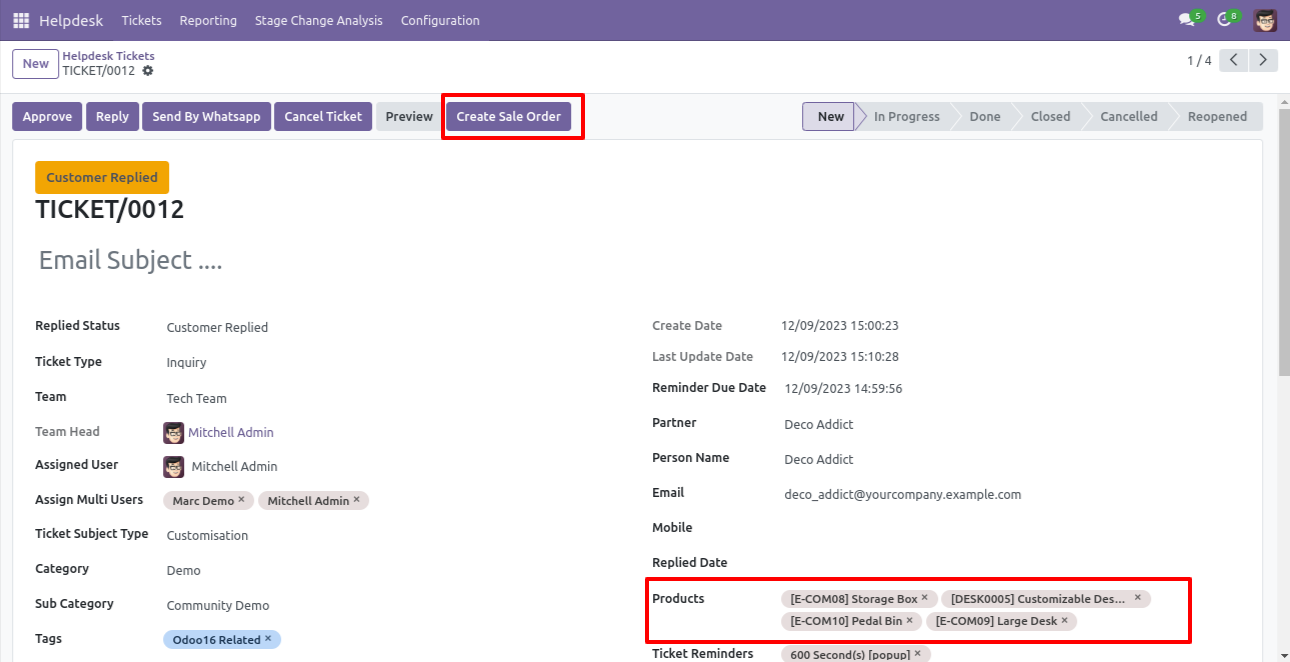
Select products and click on the 'Create Sale Order' button.
After that one wizard opens, fill the details and save it.
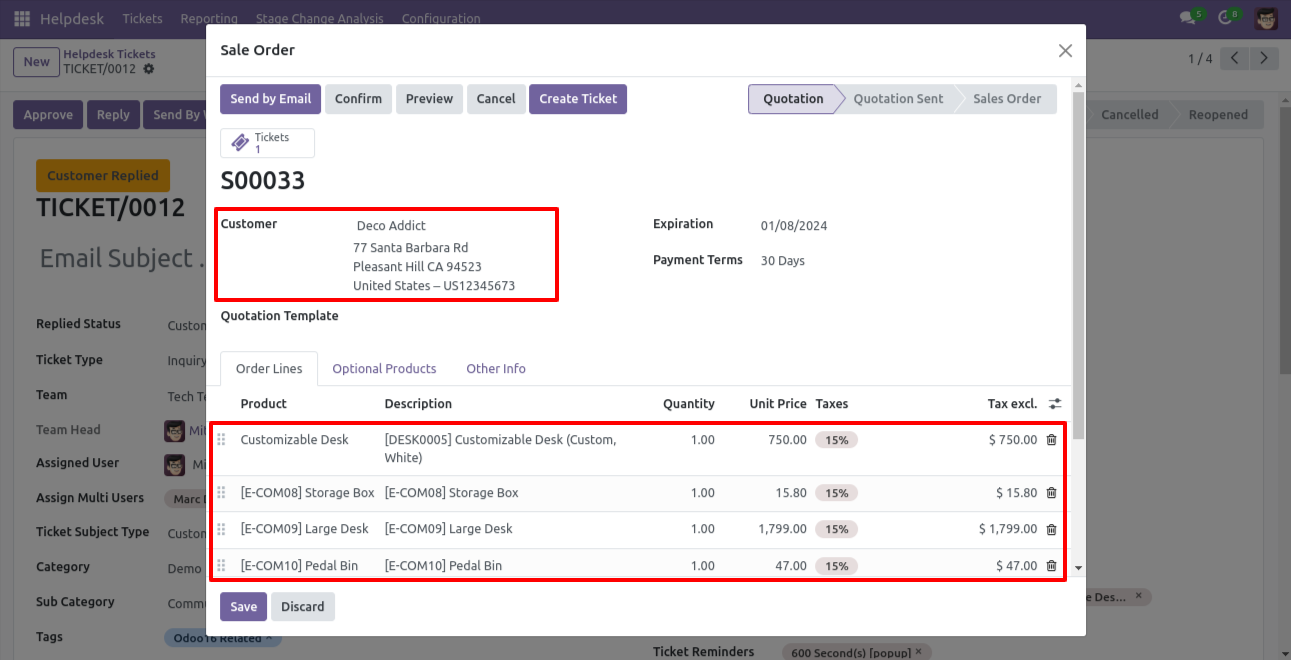
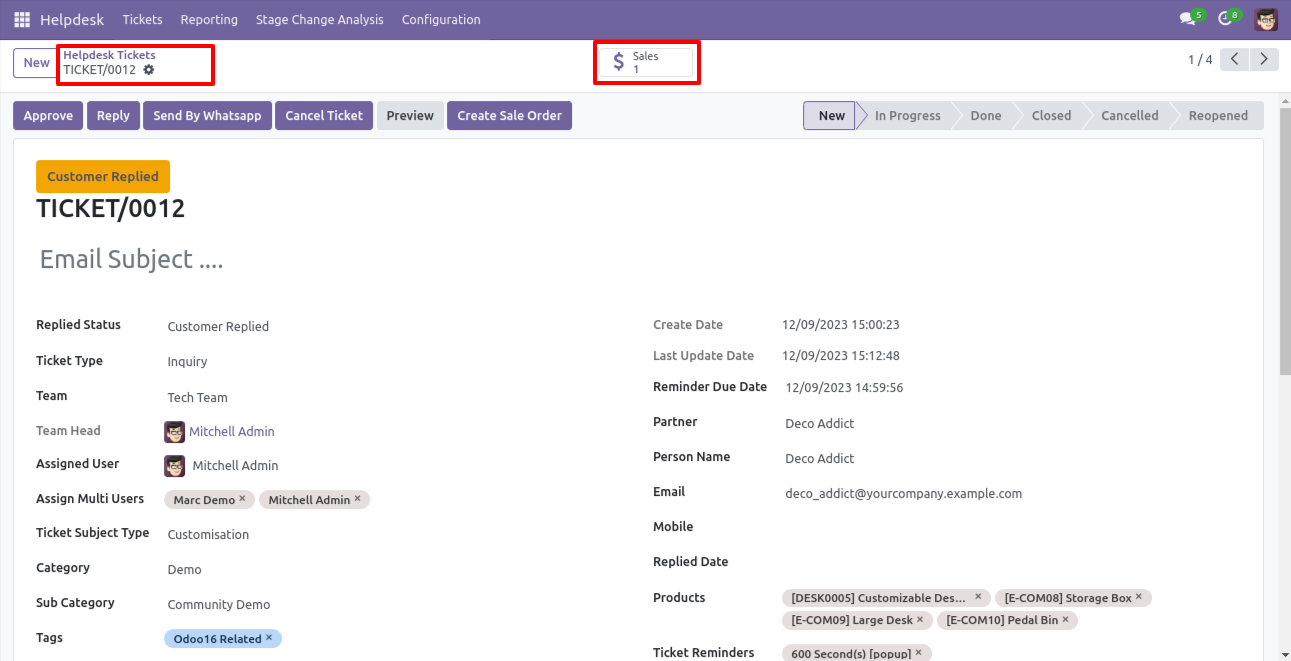
You can see sale order/quotation of that ticket using the 'Sales' smart button.
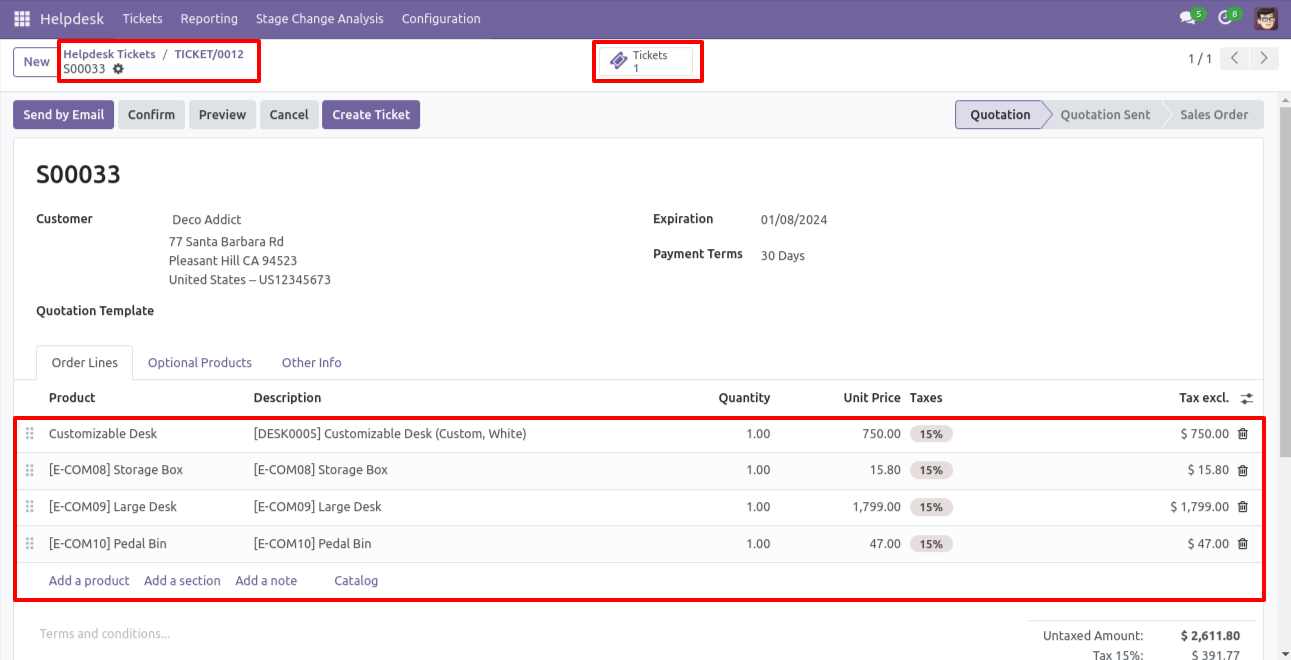
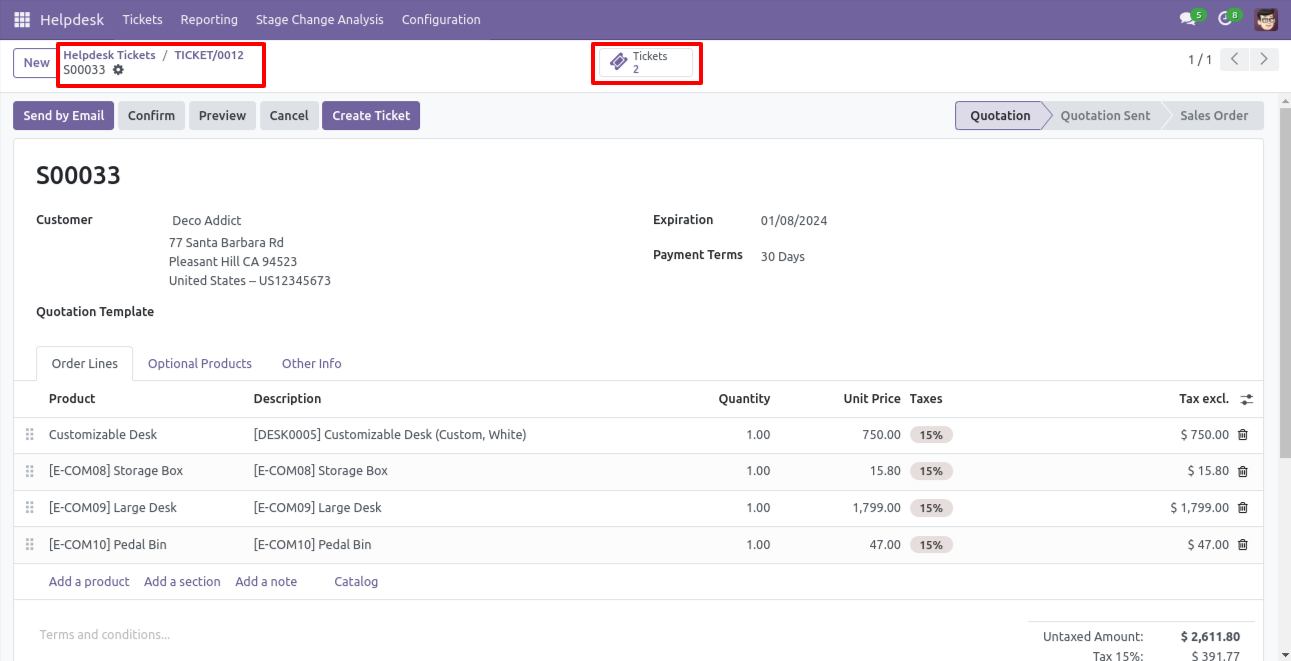
You can see tickets of that sale order/quotation using the 'Tickets' smart button.
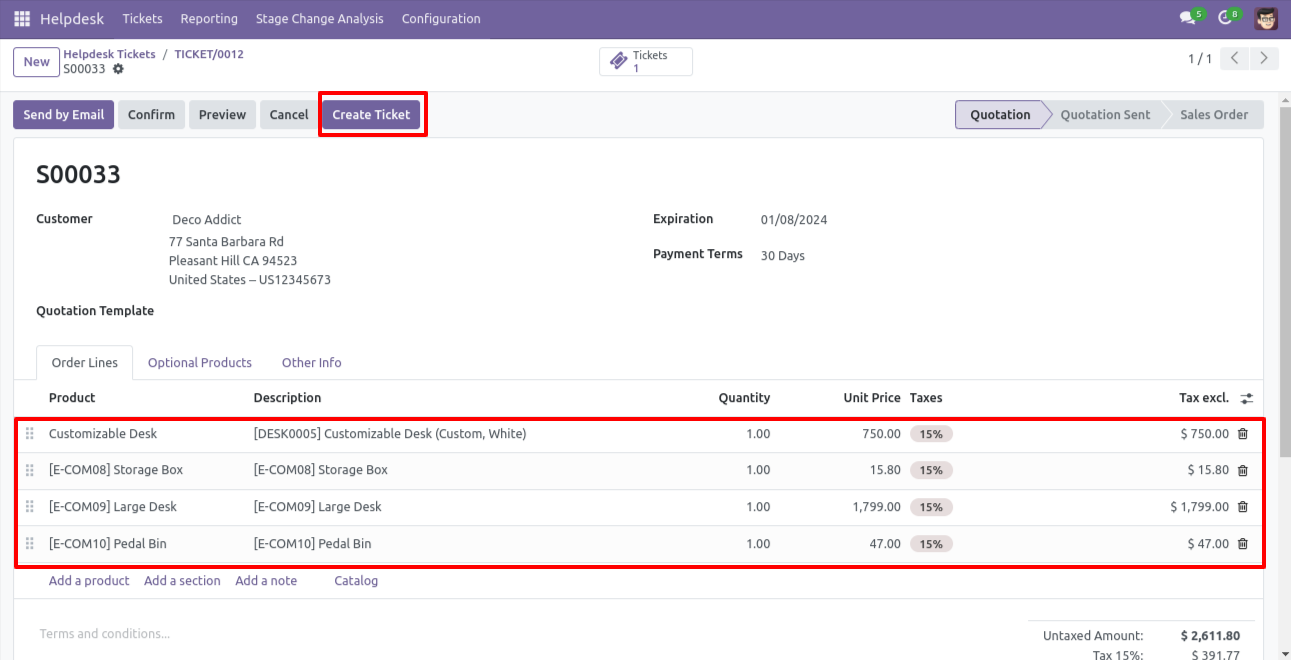
You can create a helpdesk ticket from the sale order/quotation using the 'Create Ticket' button.
After that one wizard opens, fill the details and save it.
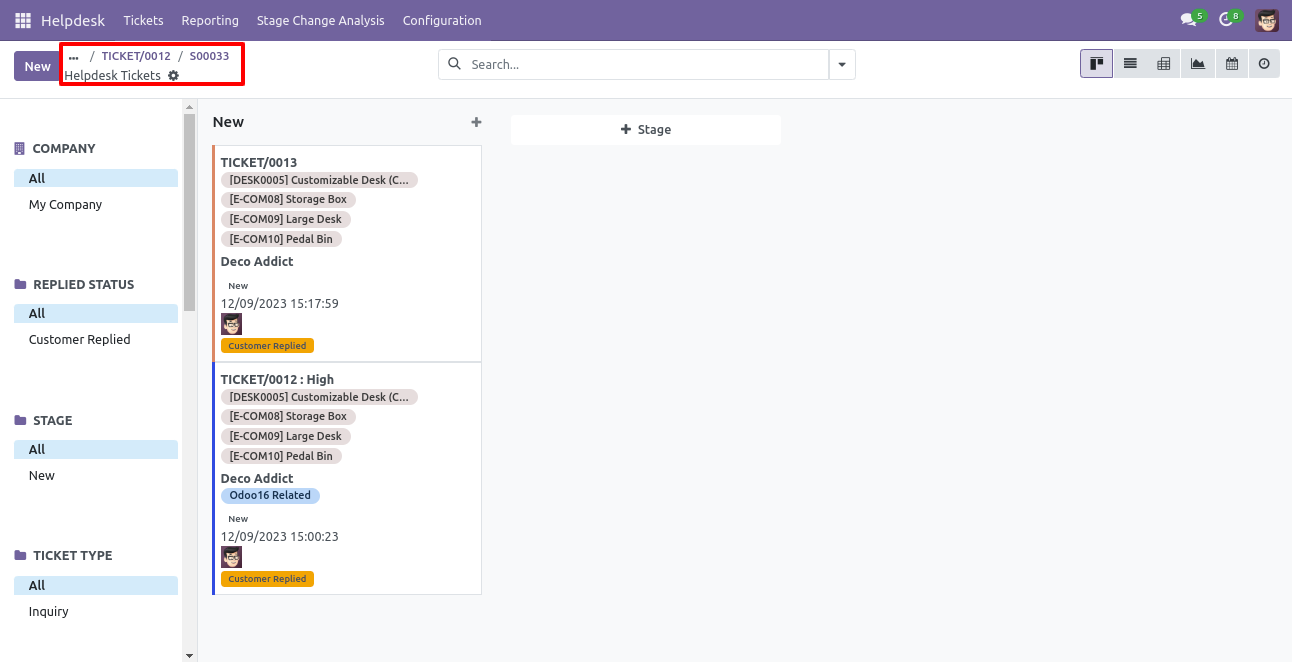
You can see tickets of that sale order/quotation using the 'Tickets' smart button.
It opens tickets Kanban view.
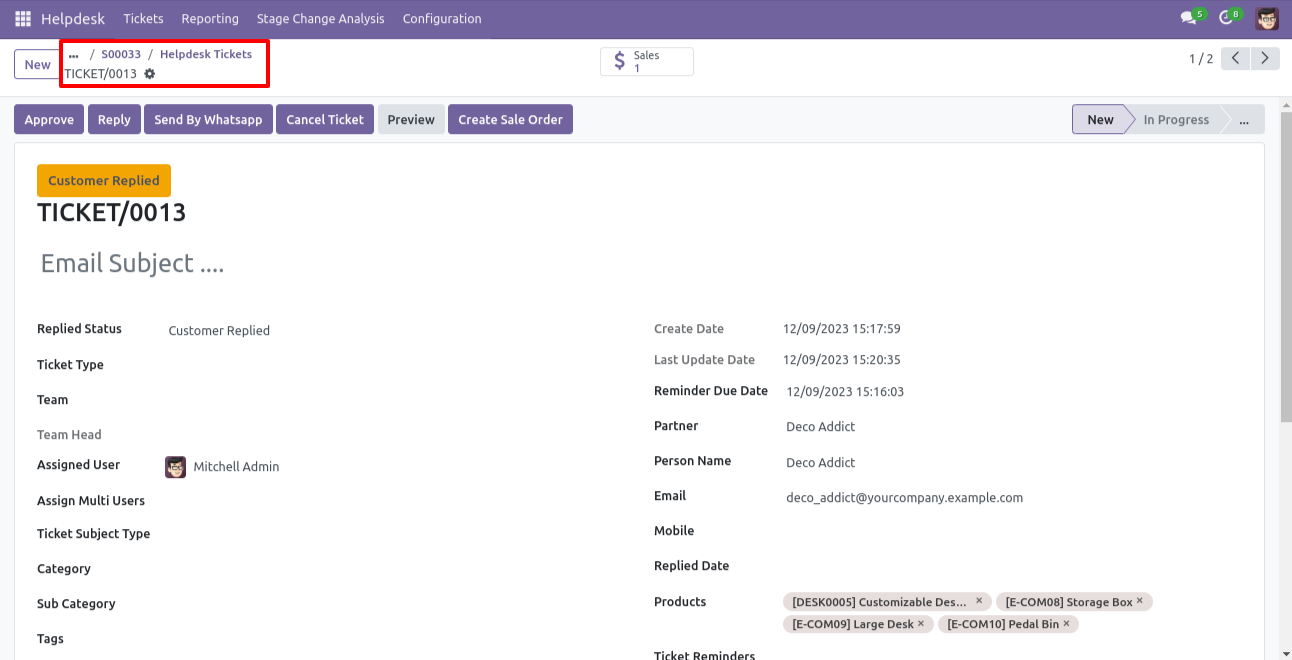
Created ticket form view looks like this.
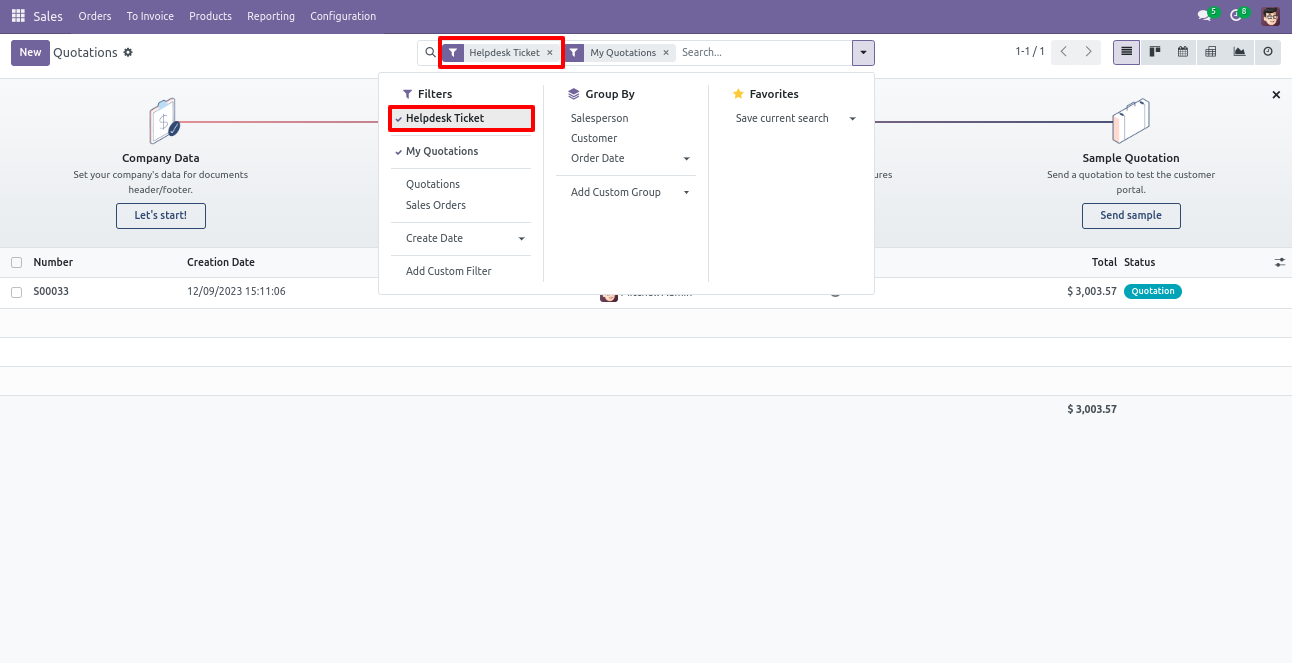
You can filter tickets sale order wise.
You can filter sale order ticket wise.
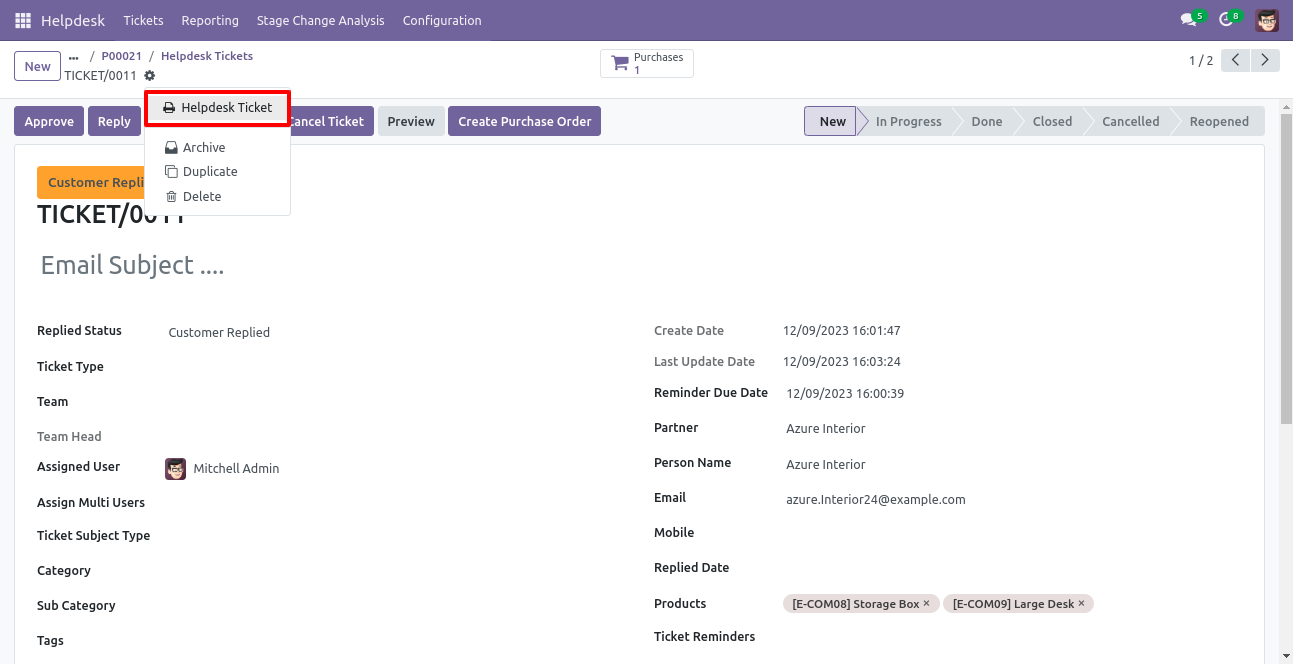
Form view of the helpdesk ticket, Click on the print'Helpdesk ticket' from the action buton.
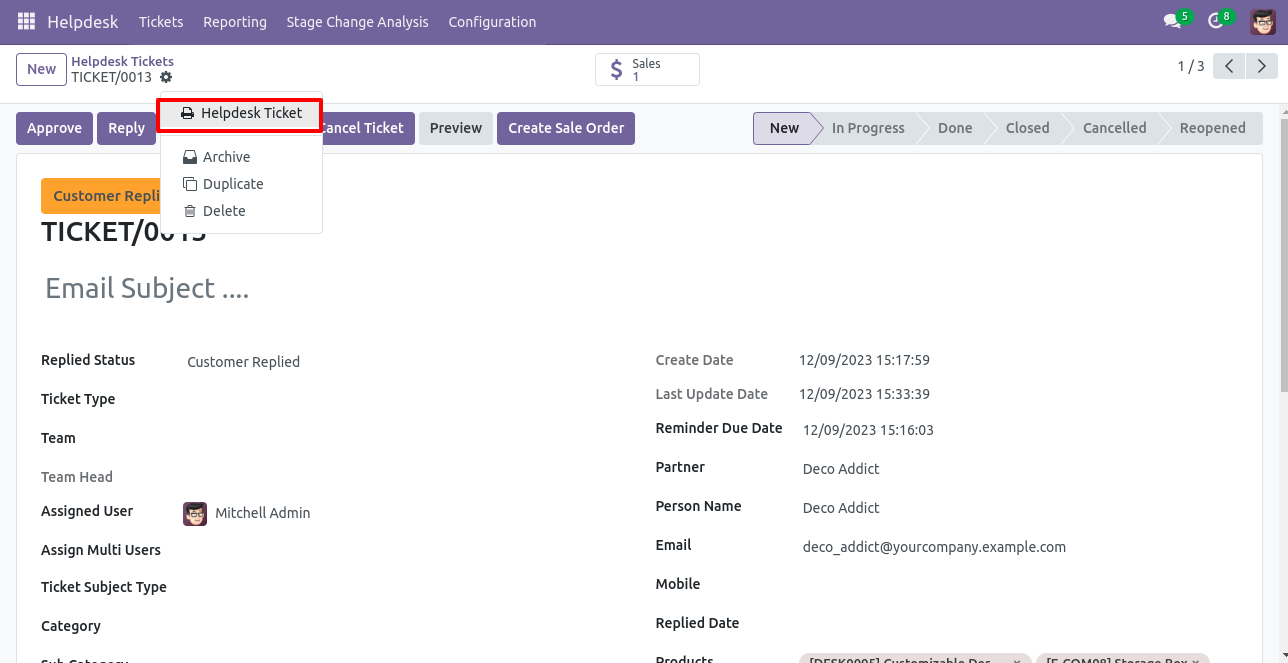
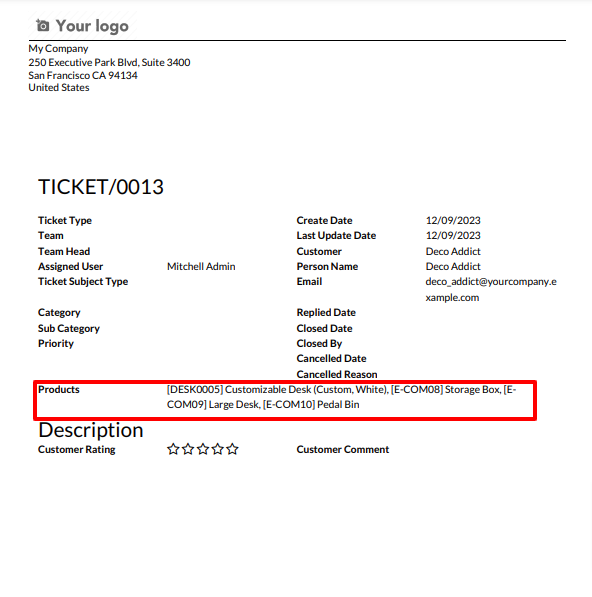
Ticket PDF report with the products.
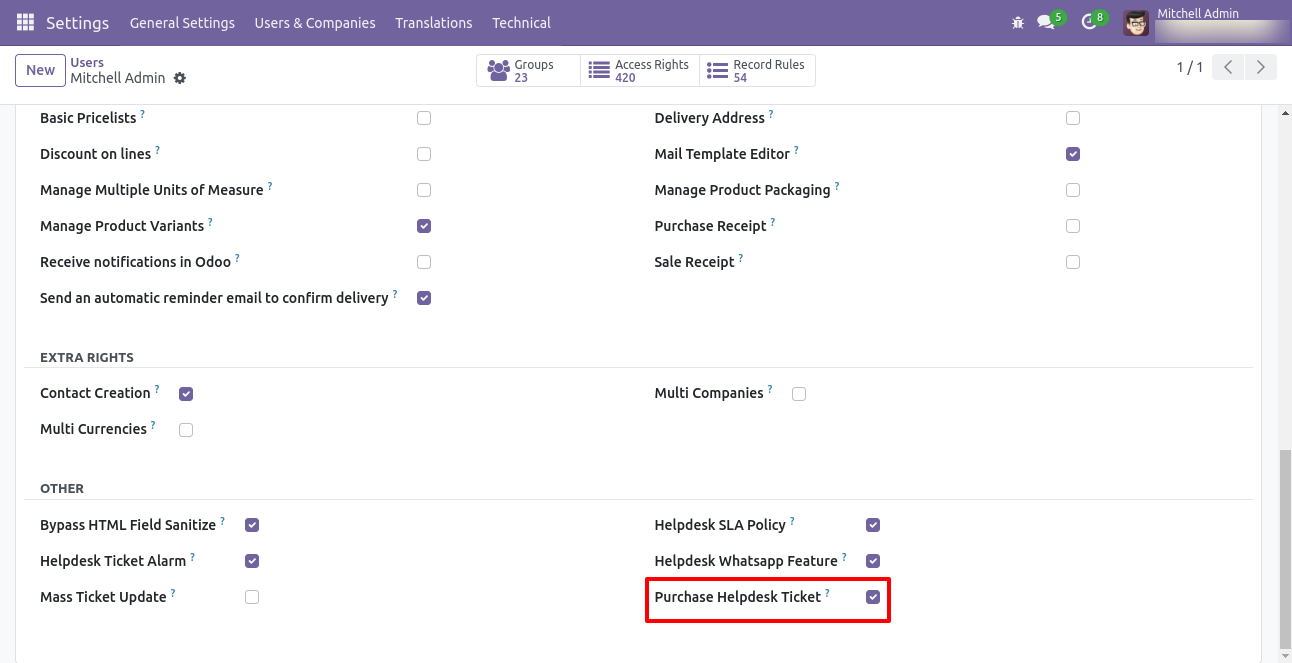
Tick security group 'Purchase Helpdesk Ticket' to generate a request for quotation/purchase order directly from the helpdesk ticket as well generate a helpdesk ticket from the purchase order/request for quotation.
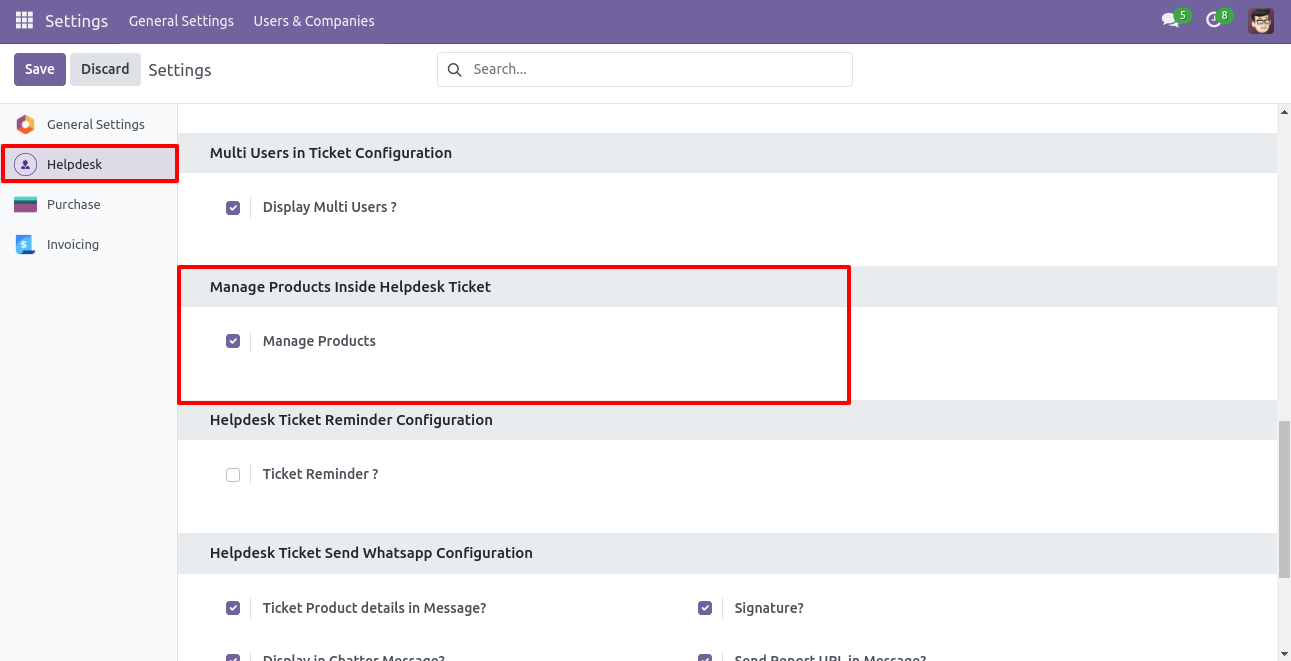
Go to the helpdesk settings and tick 'Manage Products'.
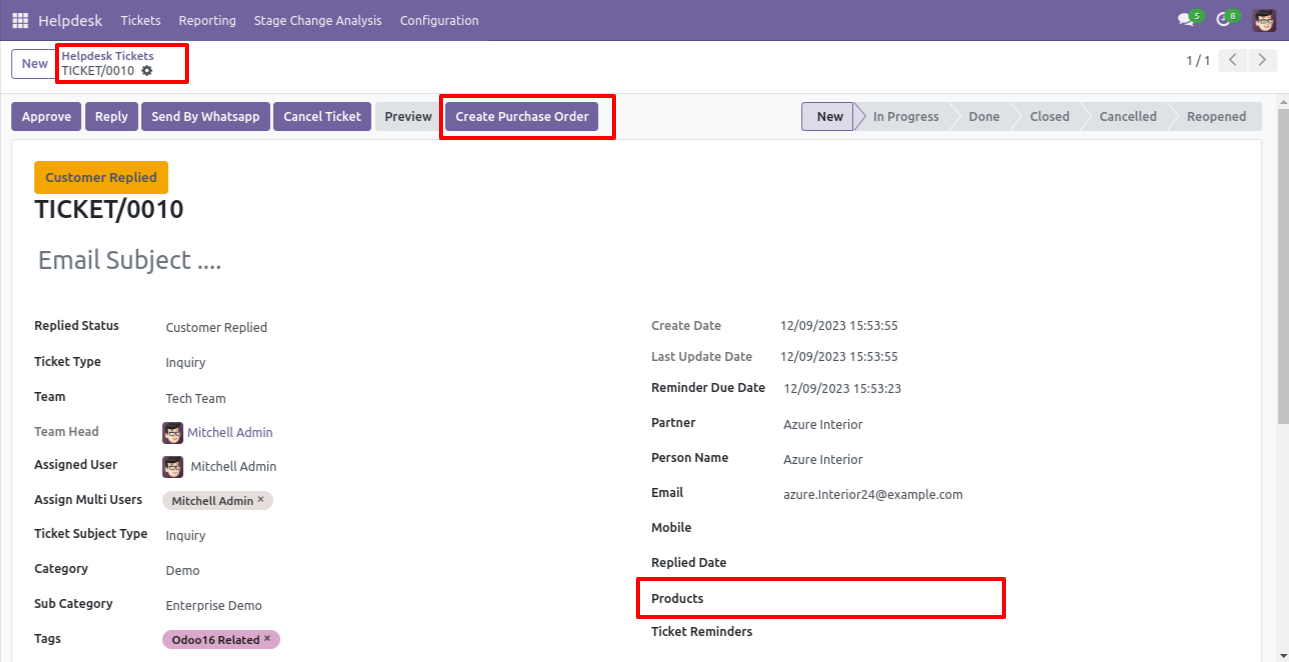
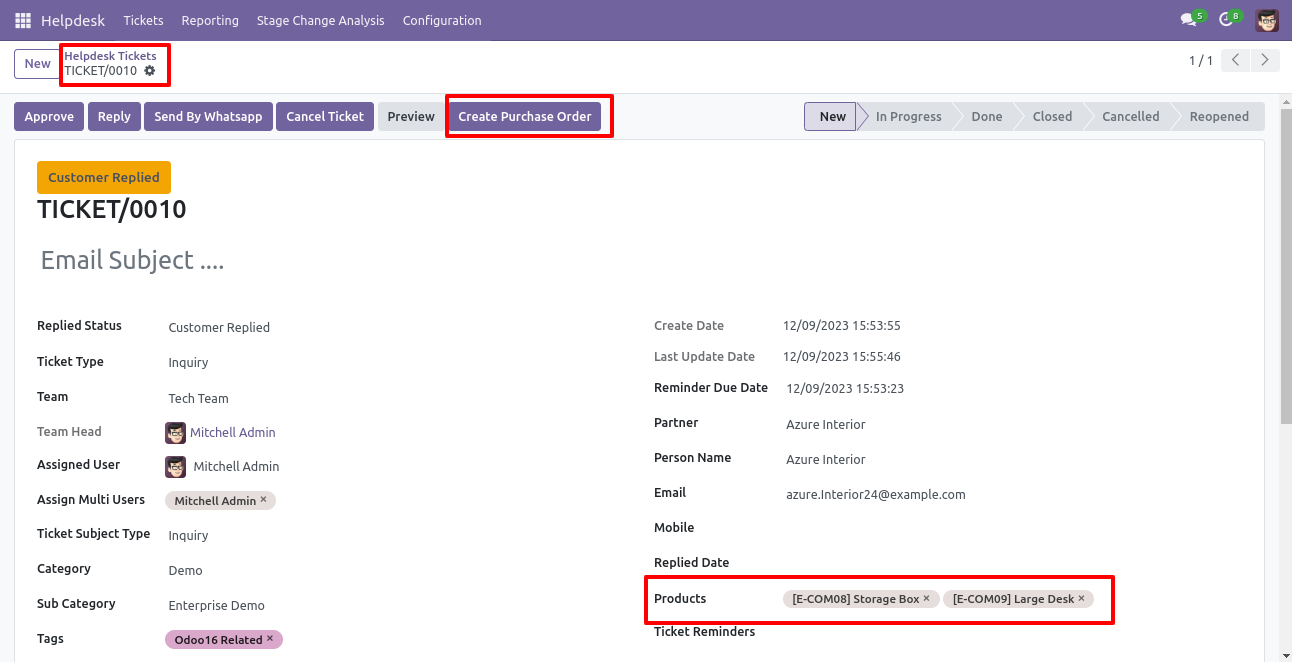
'Helpdesk Ticket' form view, press the 'Create Purchase order' button to create a request for quotation/purchase order directly from the helpdesk ticket.
If you you try to create a PO without selecting a product then this error will appears.
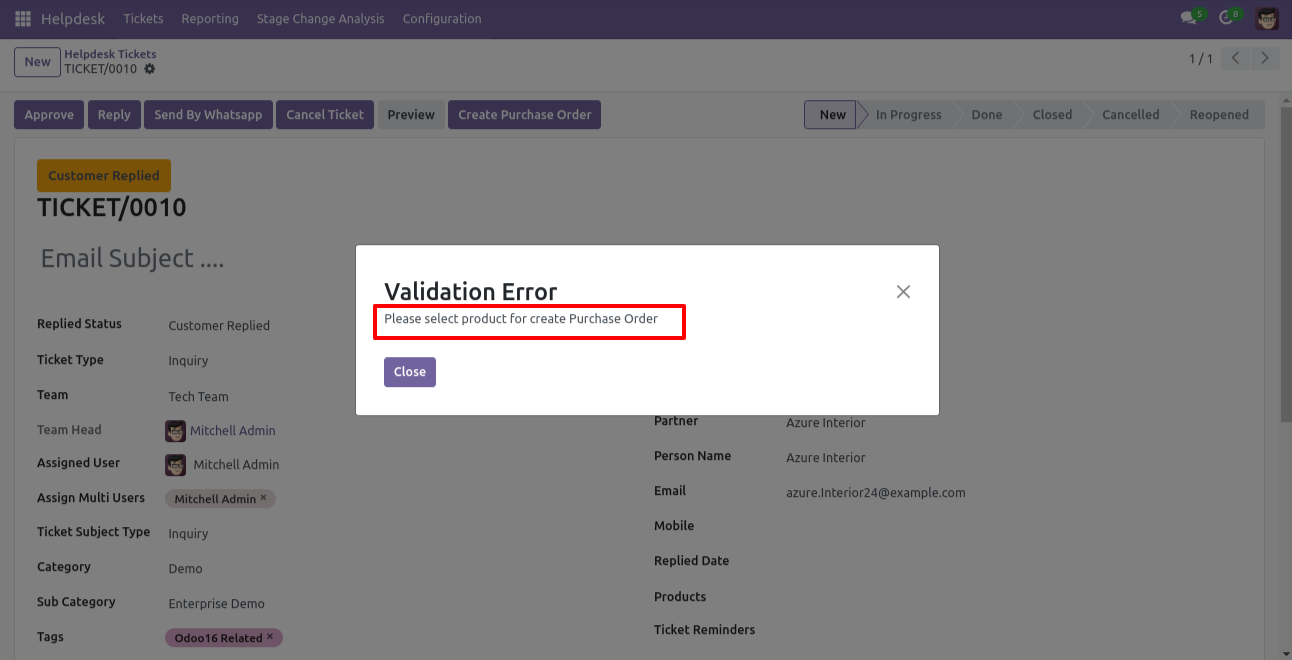
Select products and click on the 'Create Purchase Order' button.
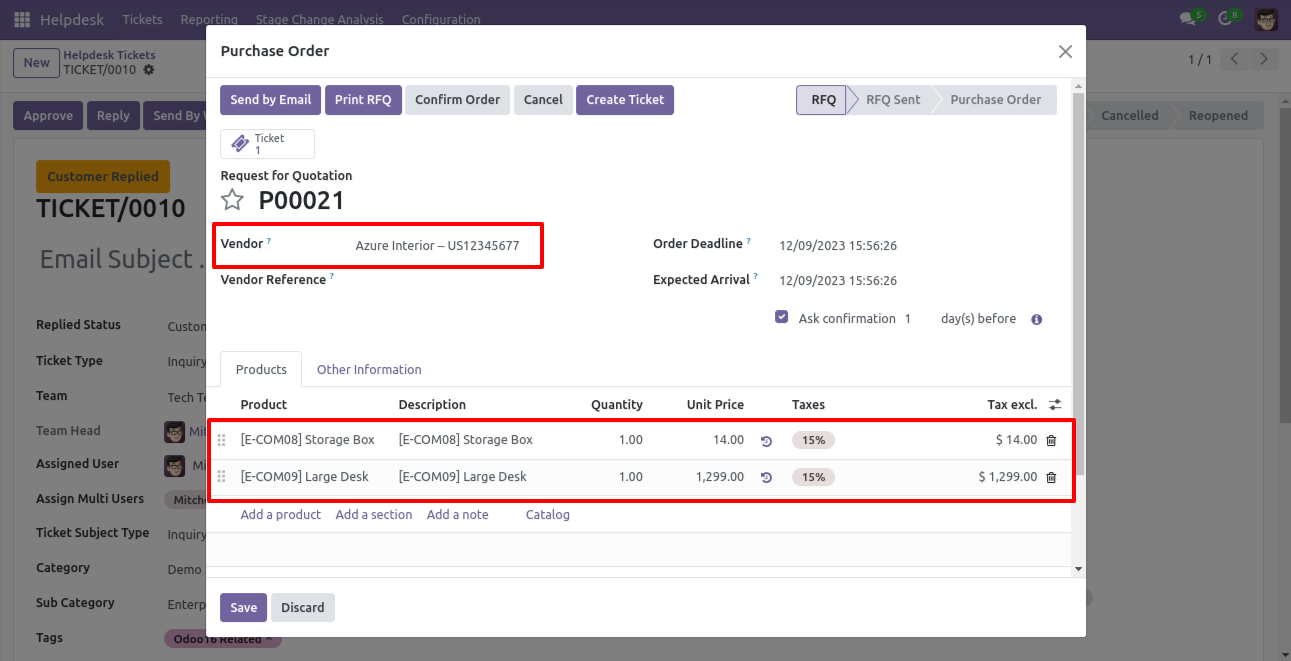
After that one wizard opens, fill the details and save it.
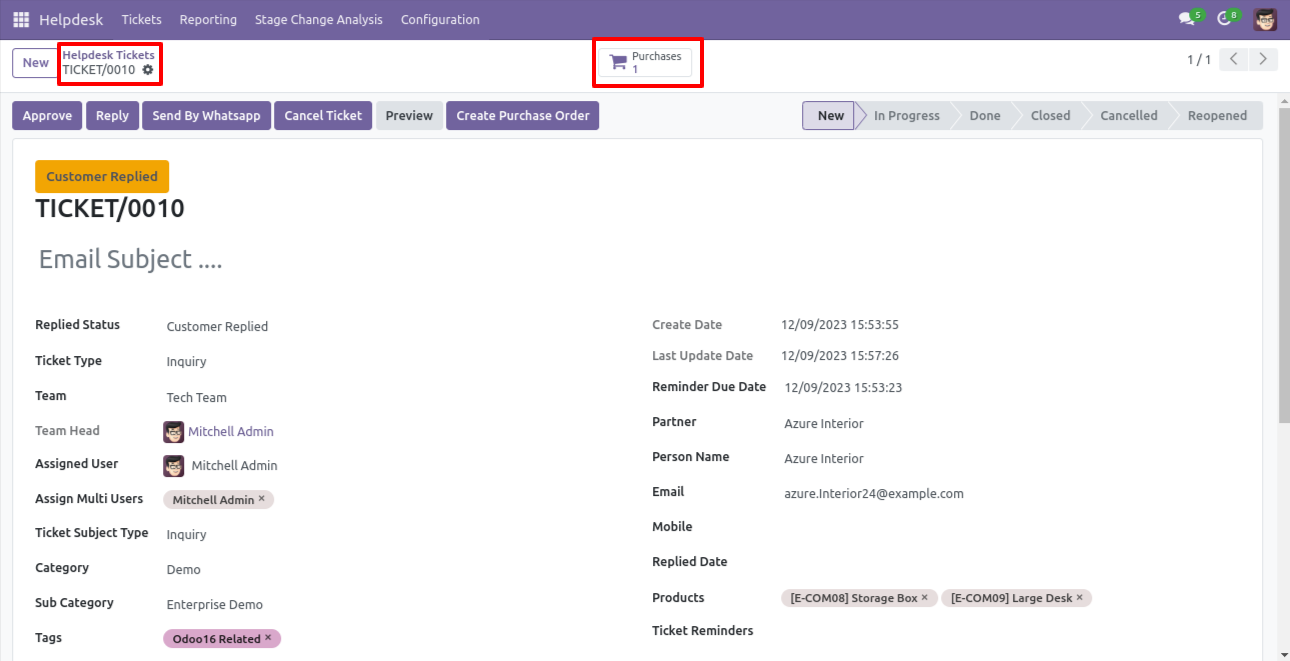
Now, from the ticket, you can see generated purchase orders of that ticket using the 'purchases' smart button.
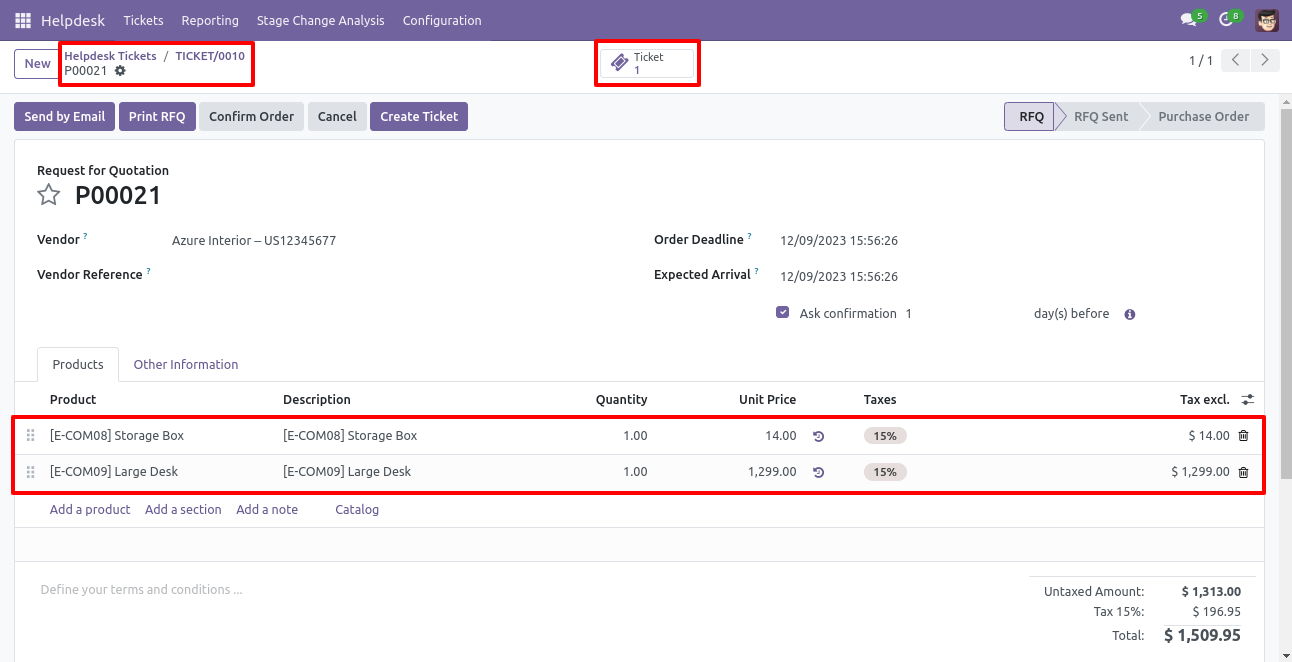
So, from that purchase order, you can see tickets of that purchase order/request for quotation using the 'Tickets' smart button.
You can create a helpdesk ticket from the purchase order/request for quotation using the 'Create Ticket' button.
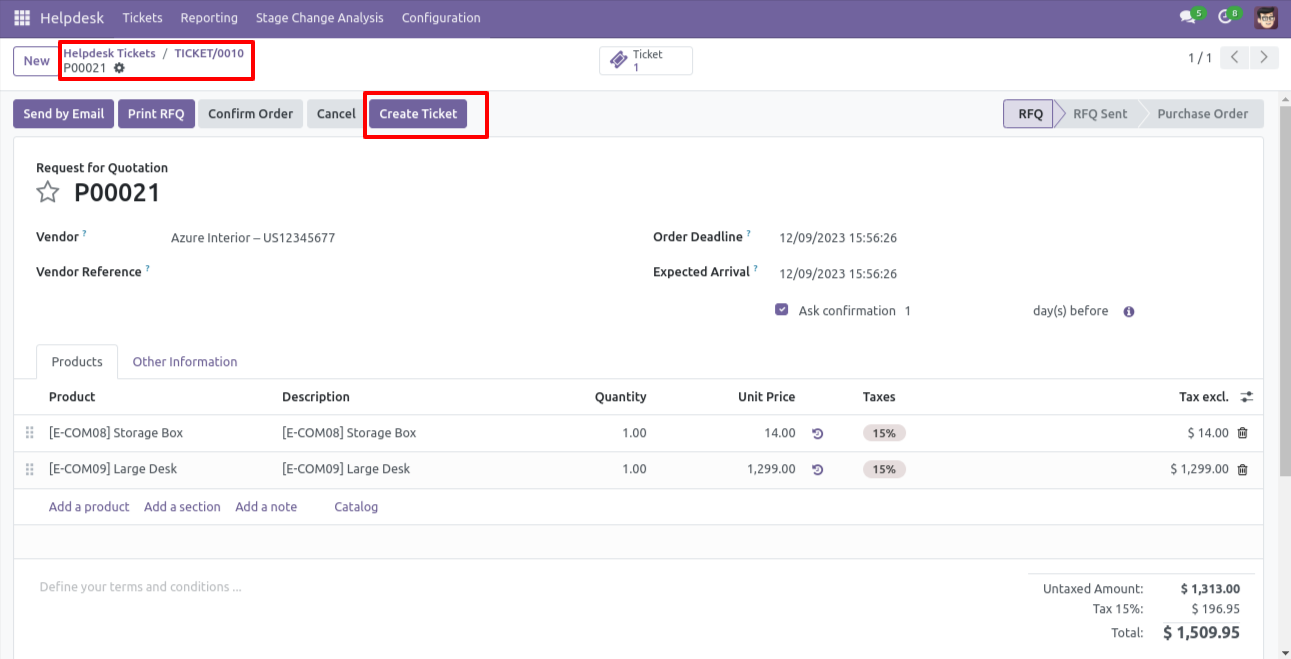
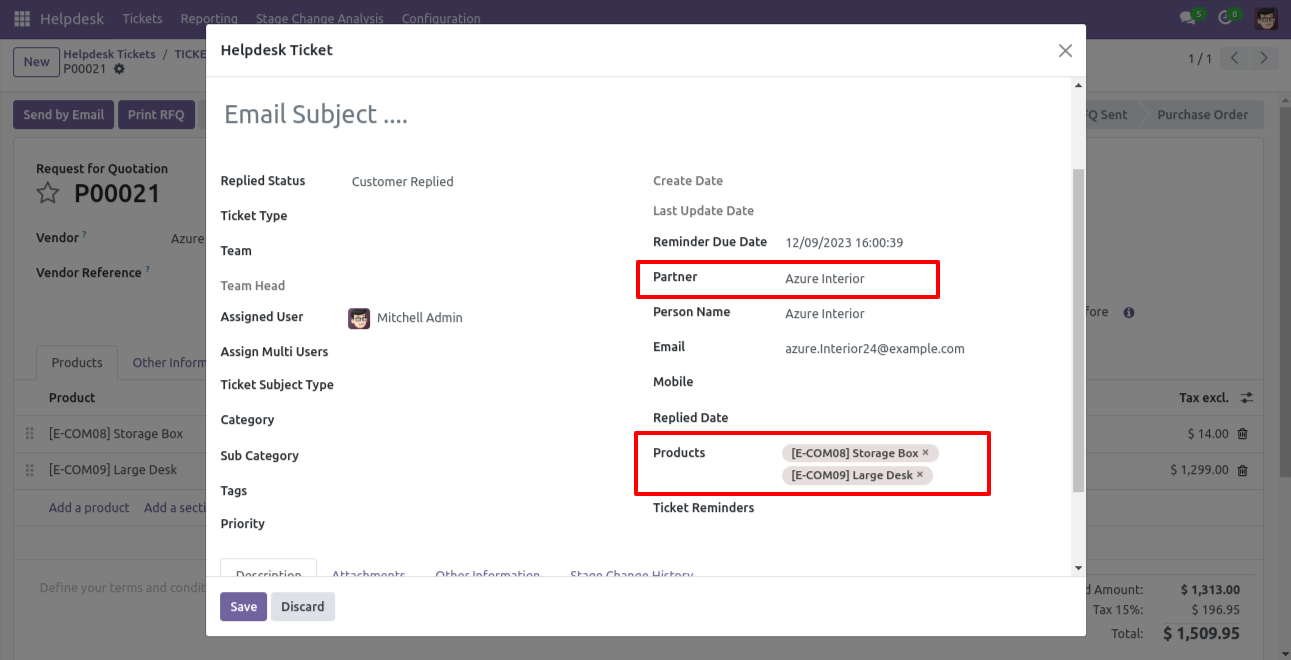
After that one wizard opens, fill the details and save it.
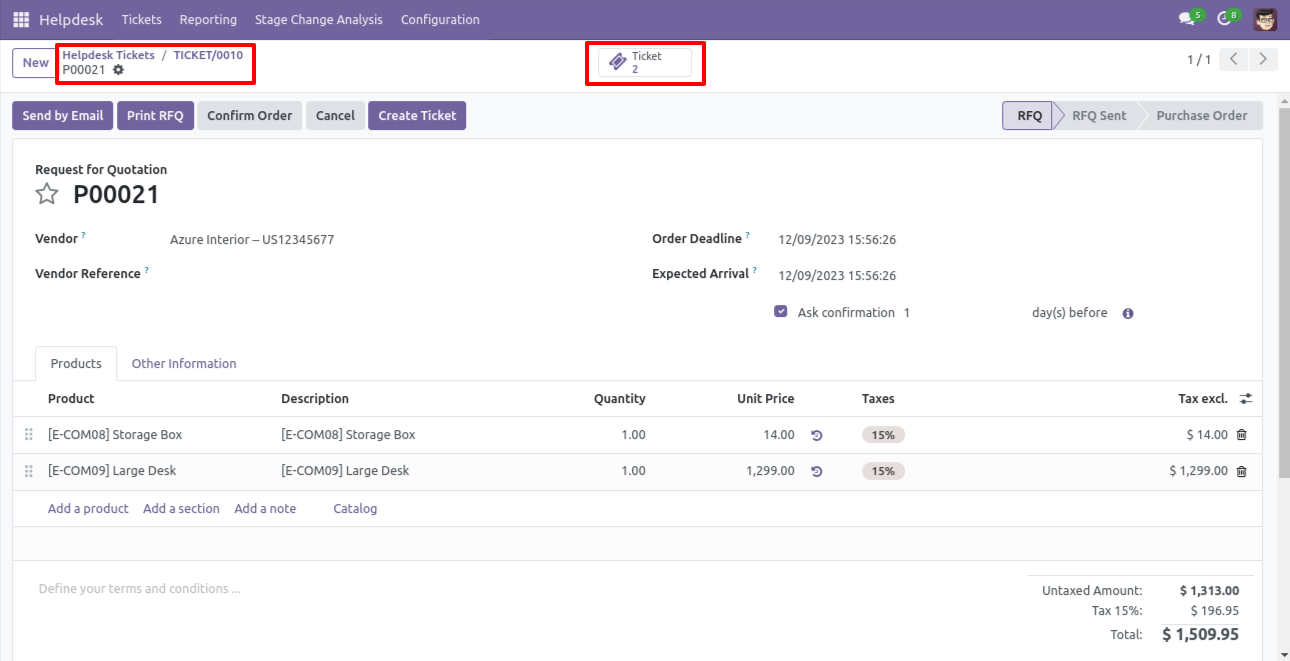
You can see tickets of that purchase order/request for quotation using the 'Ticket' smart button.
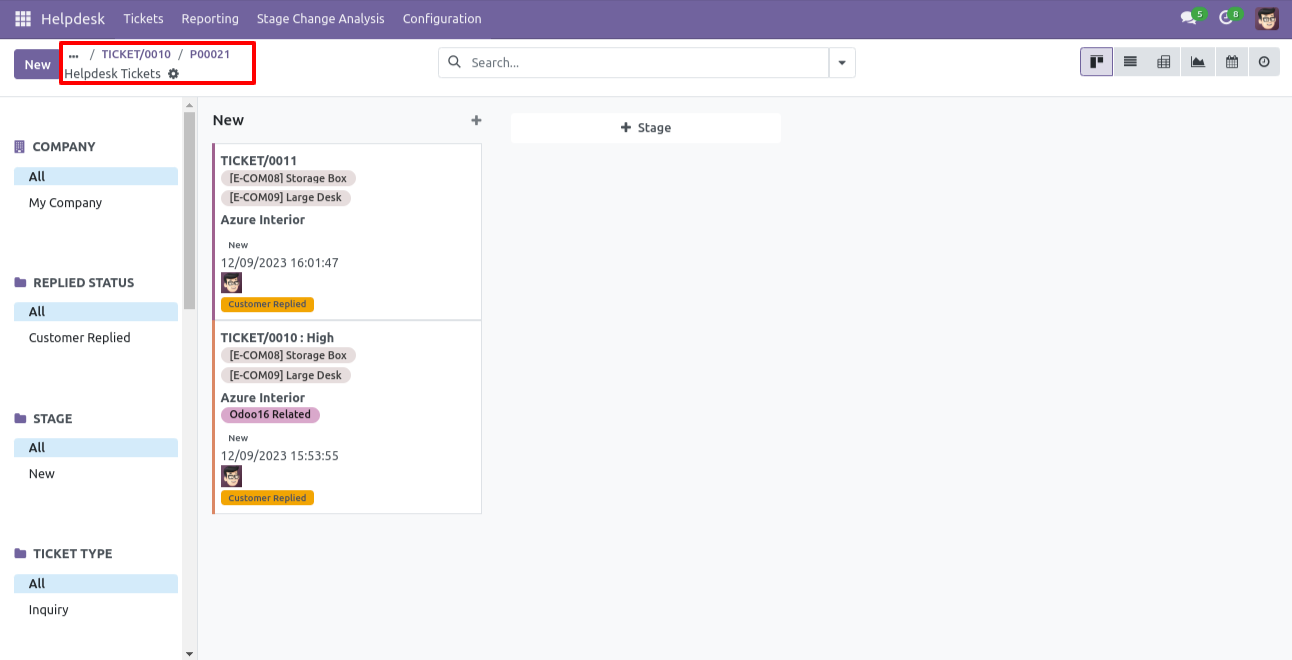
It opens tickets Kanban view.
Created ticket form view looks like this.

Form view of the helpdesk ticket, Click on the print 'Helpdesk ticket' from the action buton.
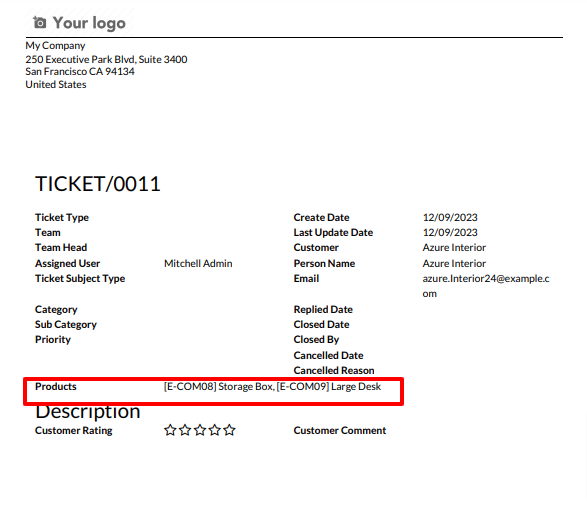
Ticket PDF report with the products.
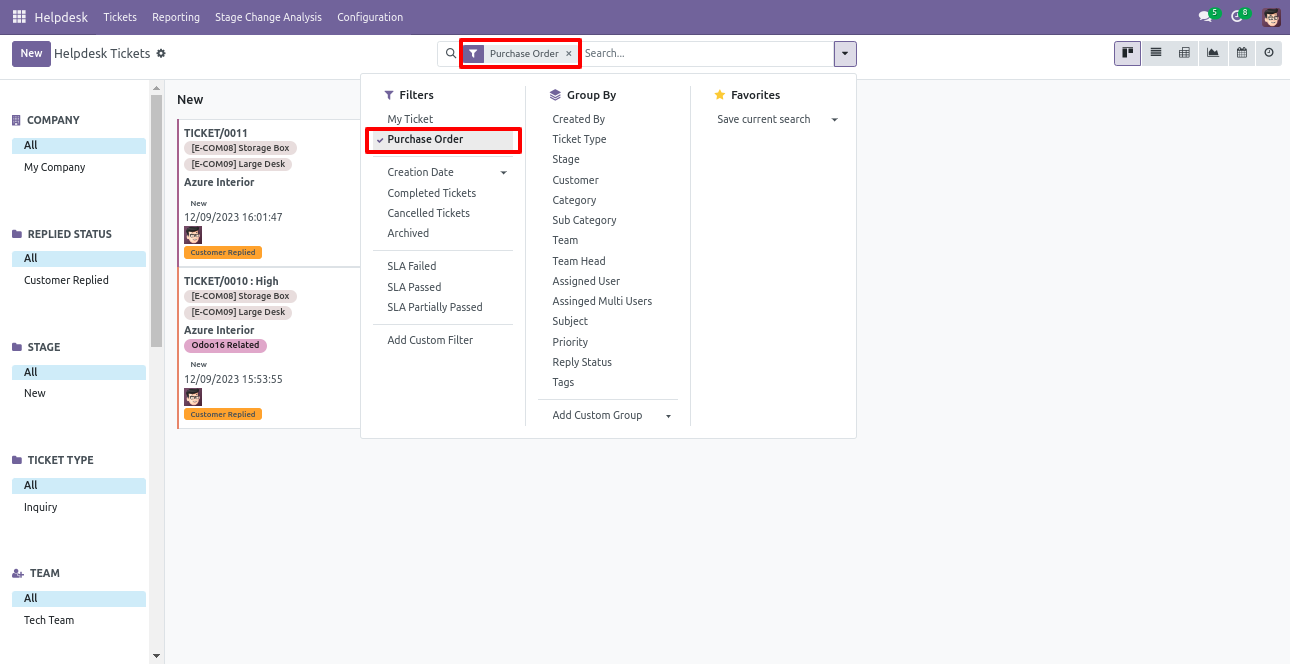
You can filter tickets purchase order wise.
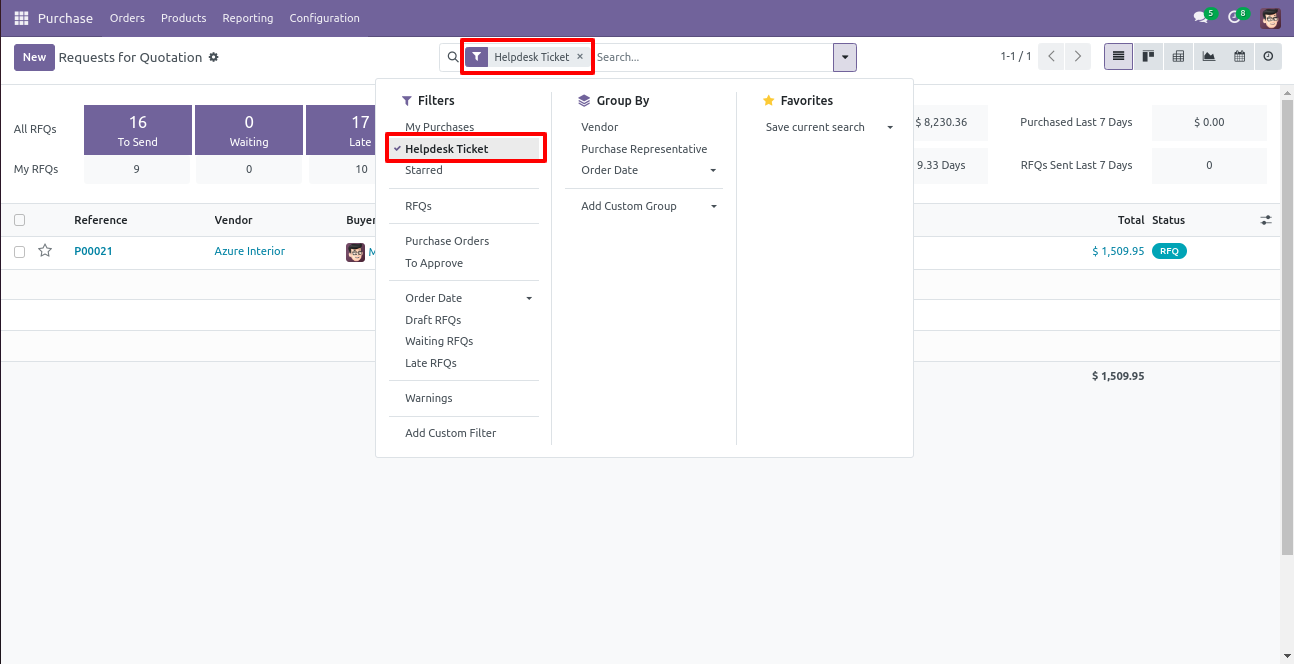
You can filter purchase order ticket wise.
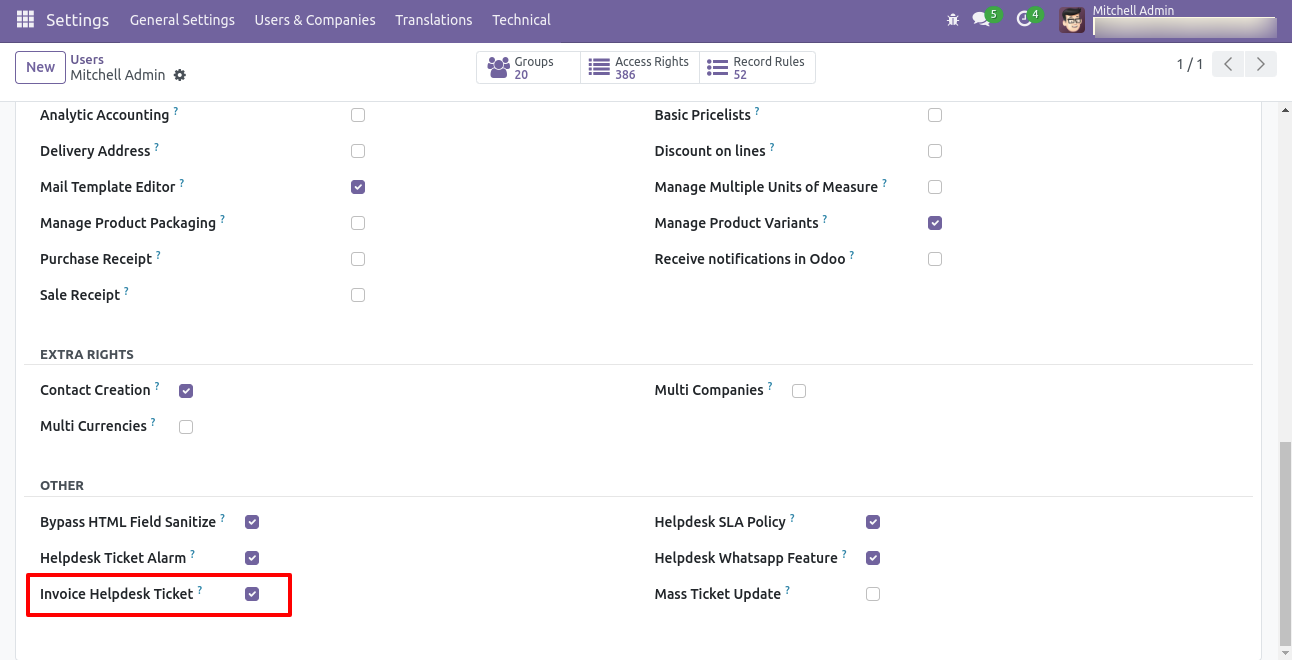
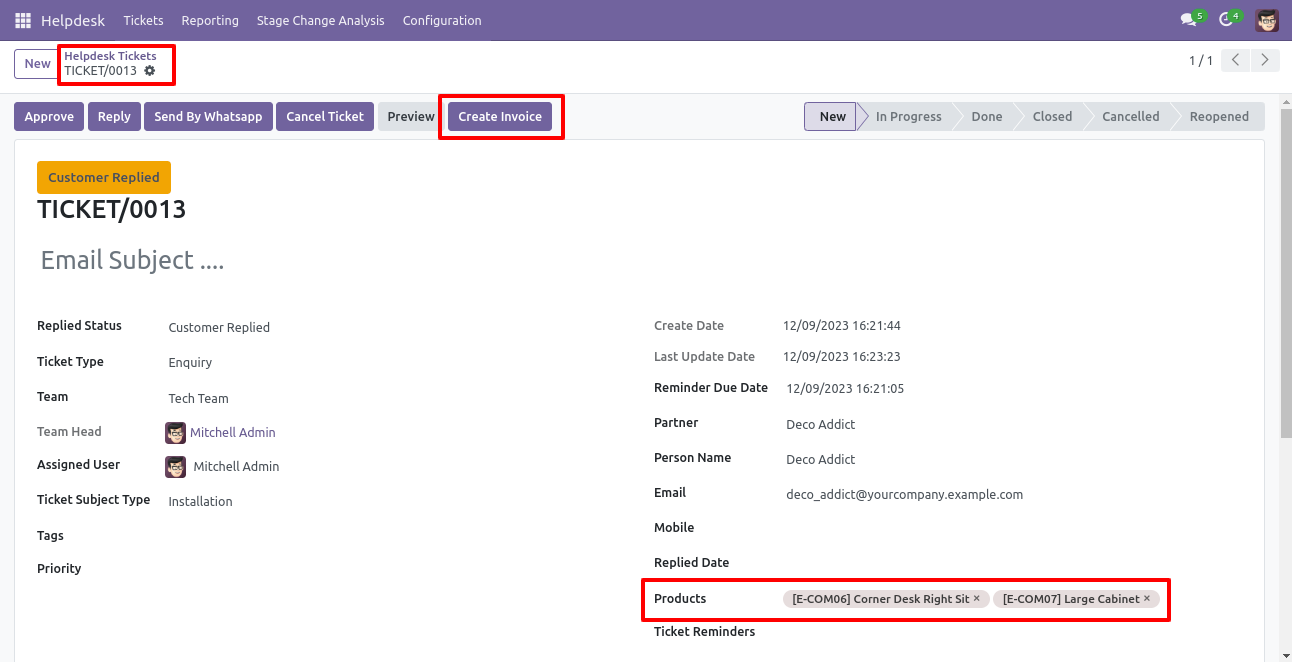
Tick security group 'Invoice Helpdesk Ticket' to generate invoice directly from the helpdesk ticket as well generate a helpdesk ticket from the invoice.
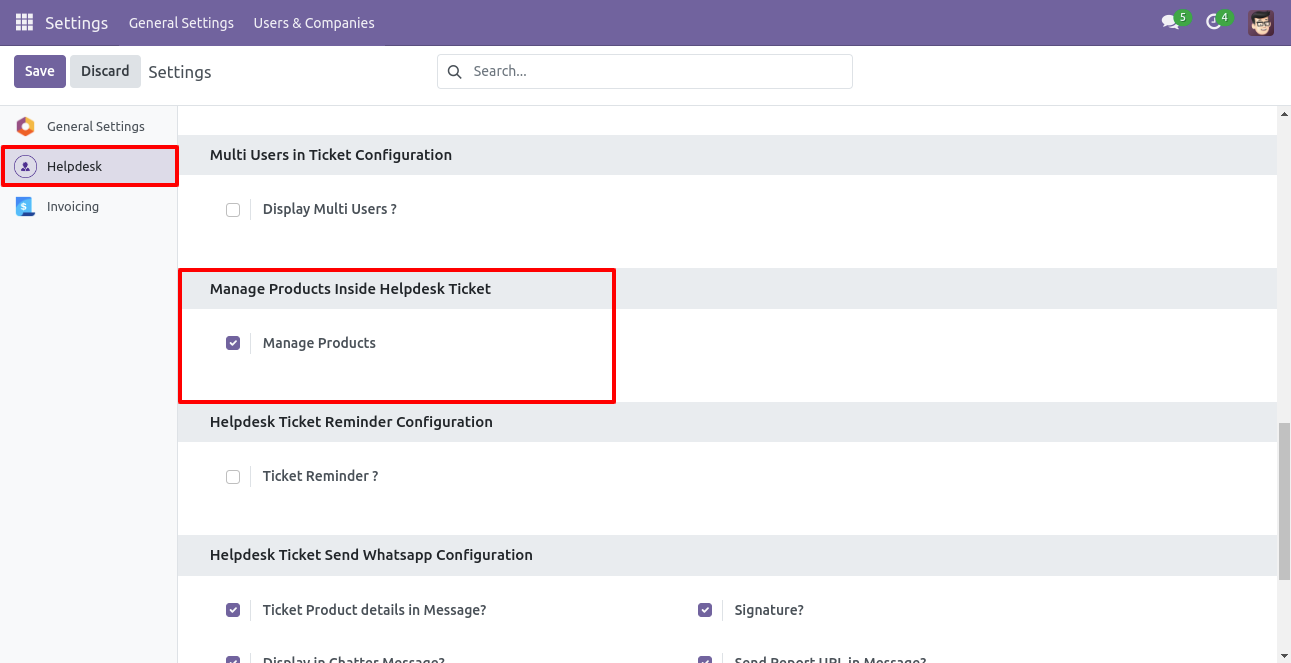
Go to the helpdesk settings and tick 'Manage Products'.
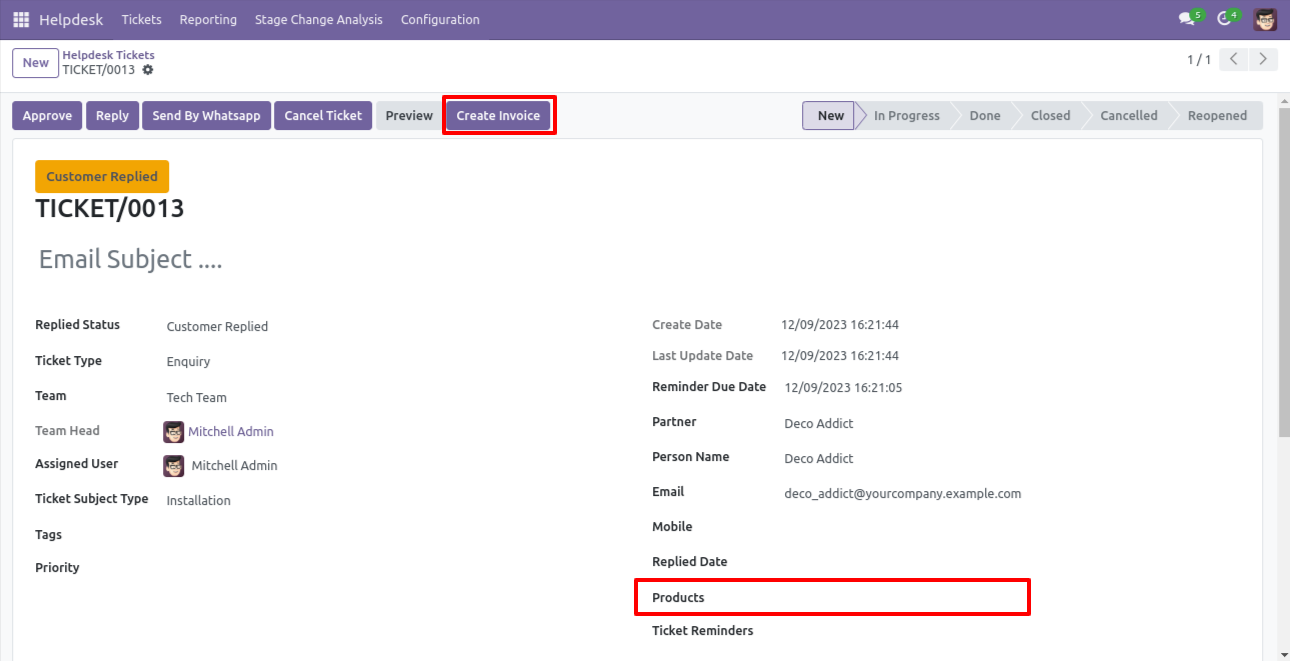
'Helpdesk Ticket' form view, press the "Create Invoice" button to create invoice directly from the helpdesk ticket.
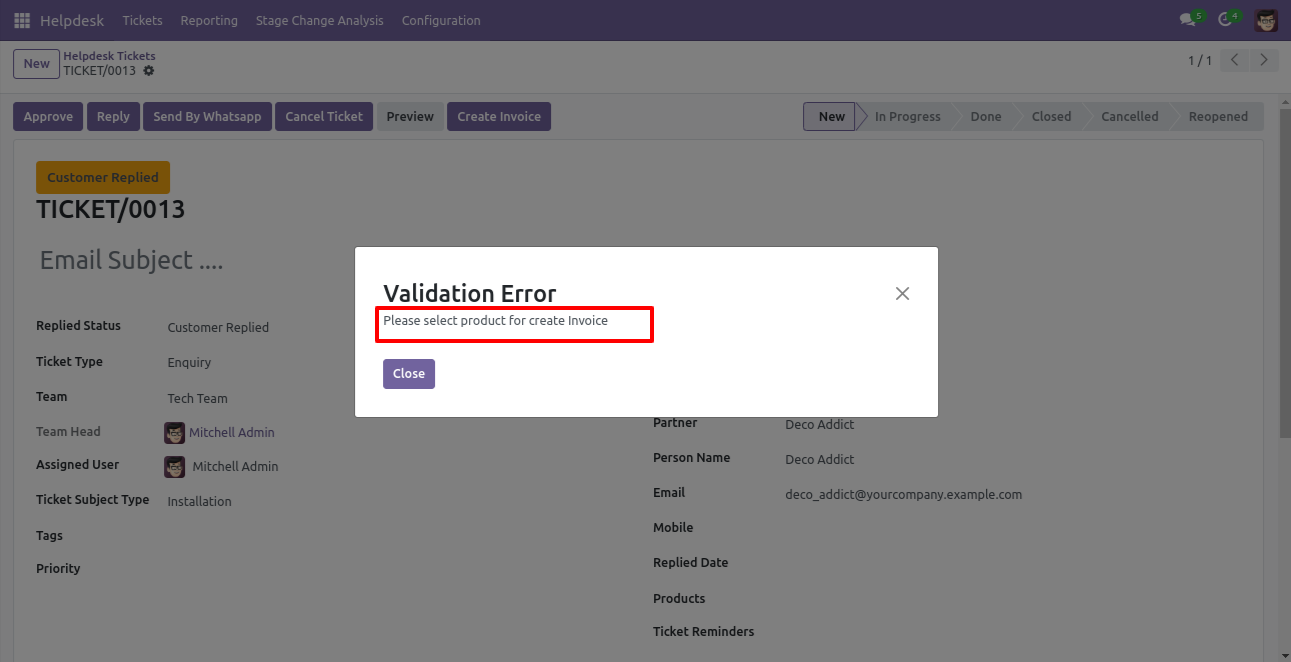
If you you try to create a invoice without selecting a product then this error will appears.
Select products and click on the 'Create Invoice' button.
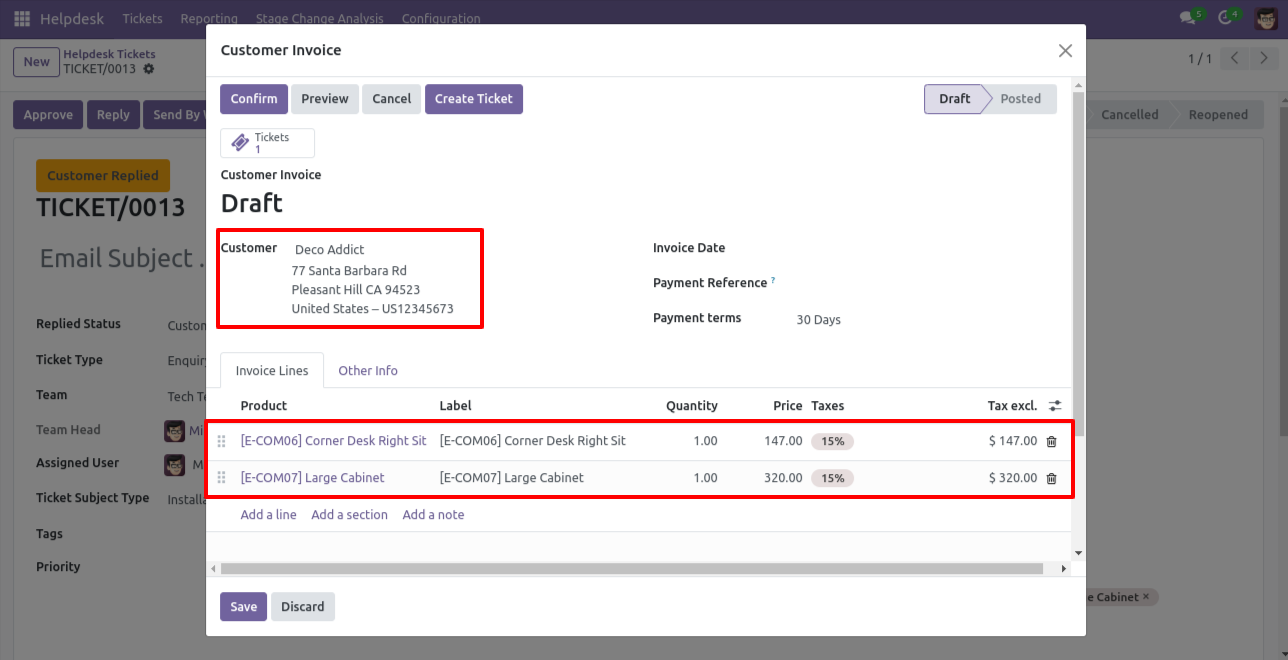
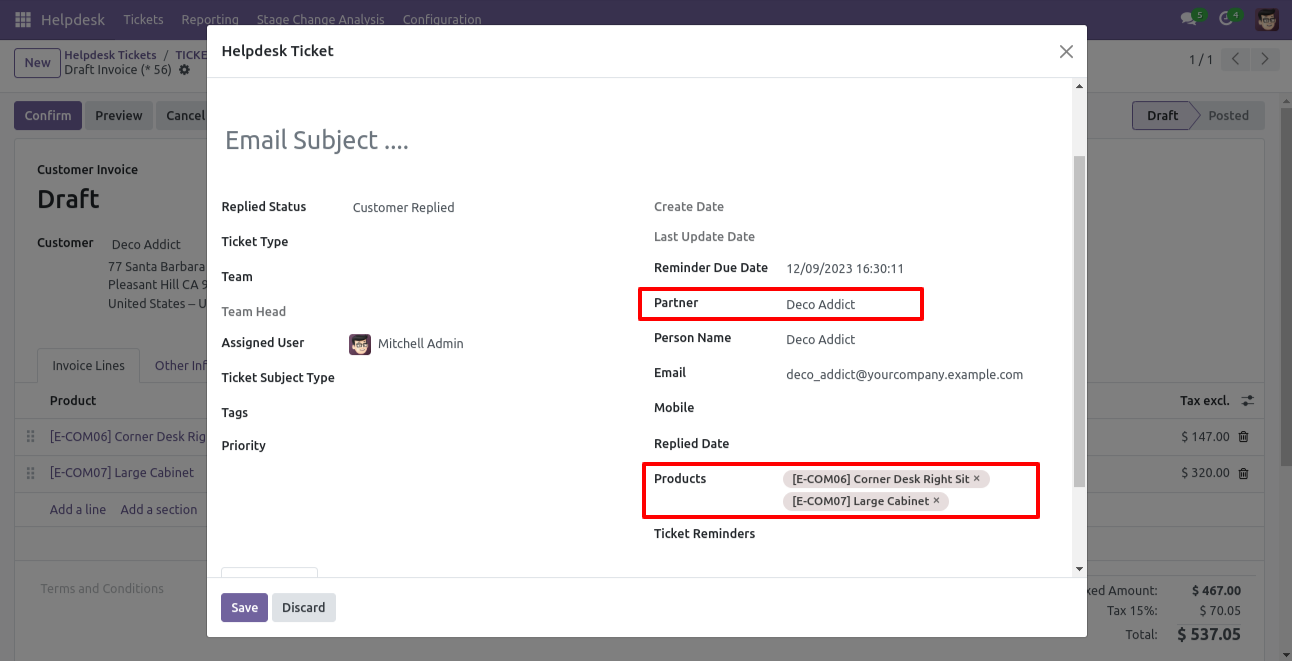
After that one wizard opens, select customer, products, and fill other details then press the 'Save' button.
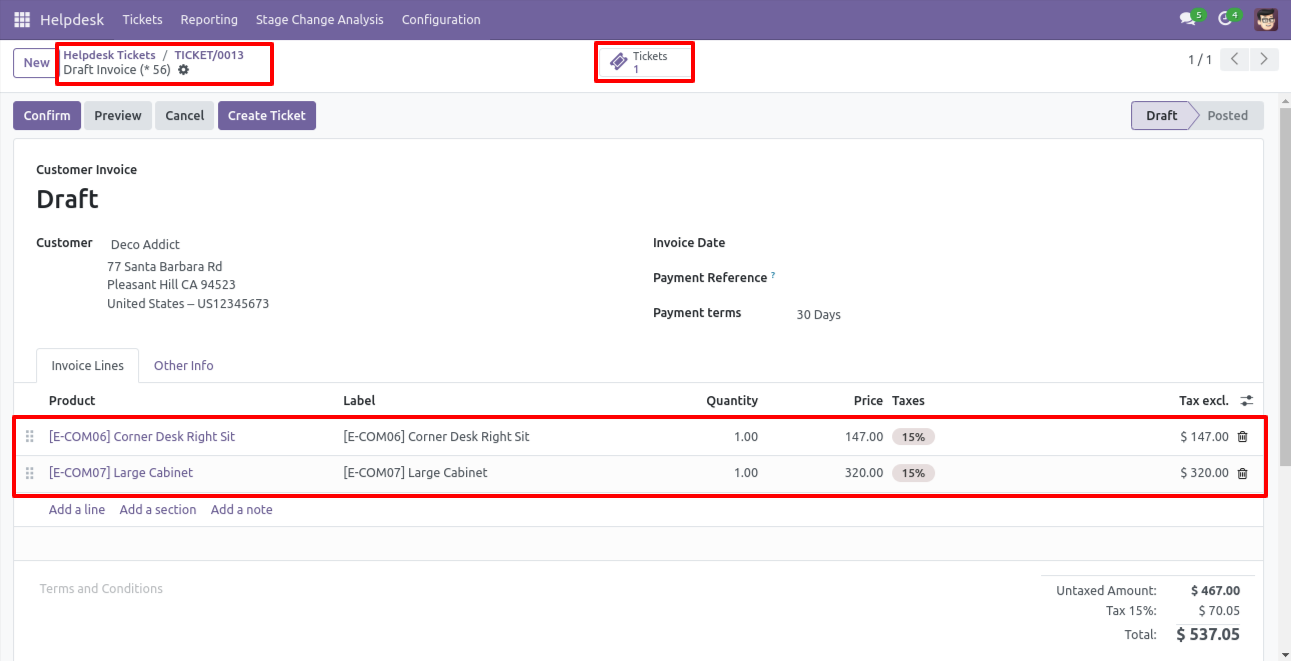
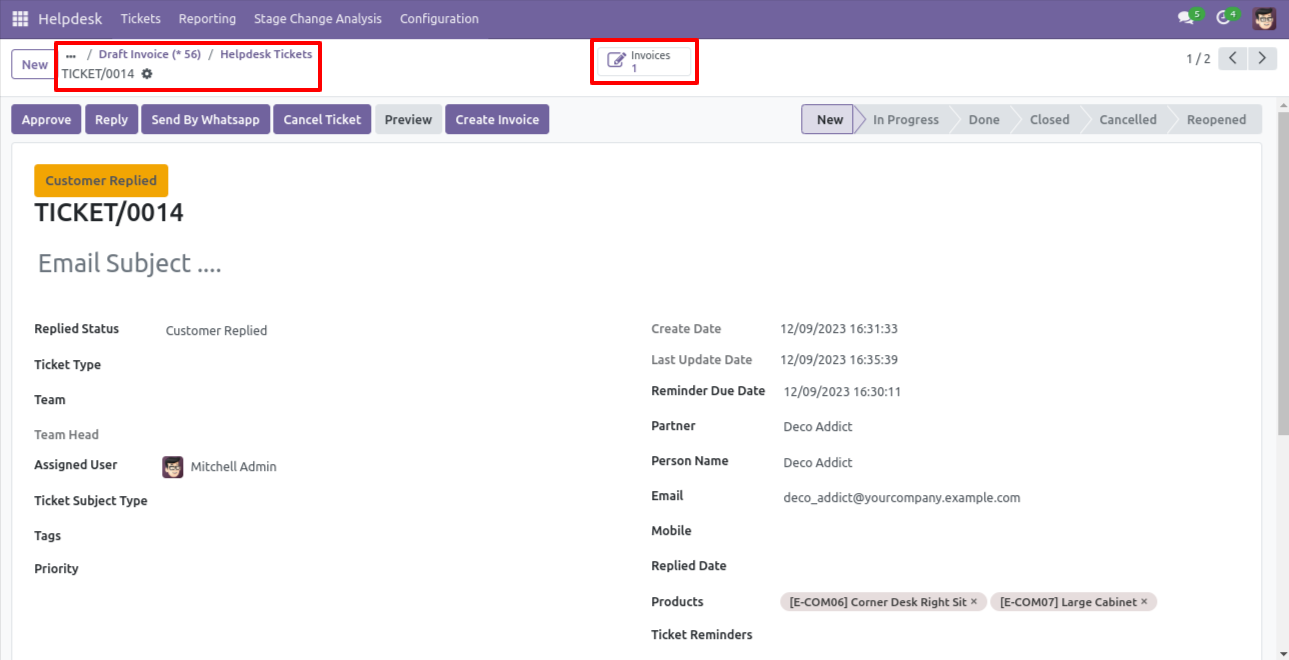
Now, from the ticket, you can see generated invoices of that ticket using the 'Invoices' smart button.

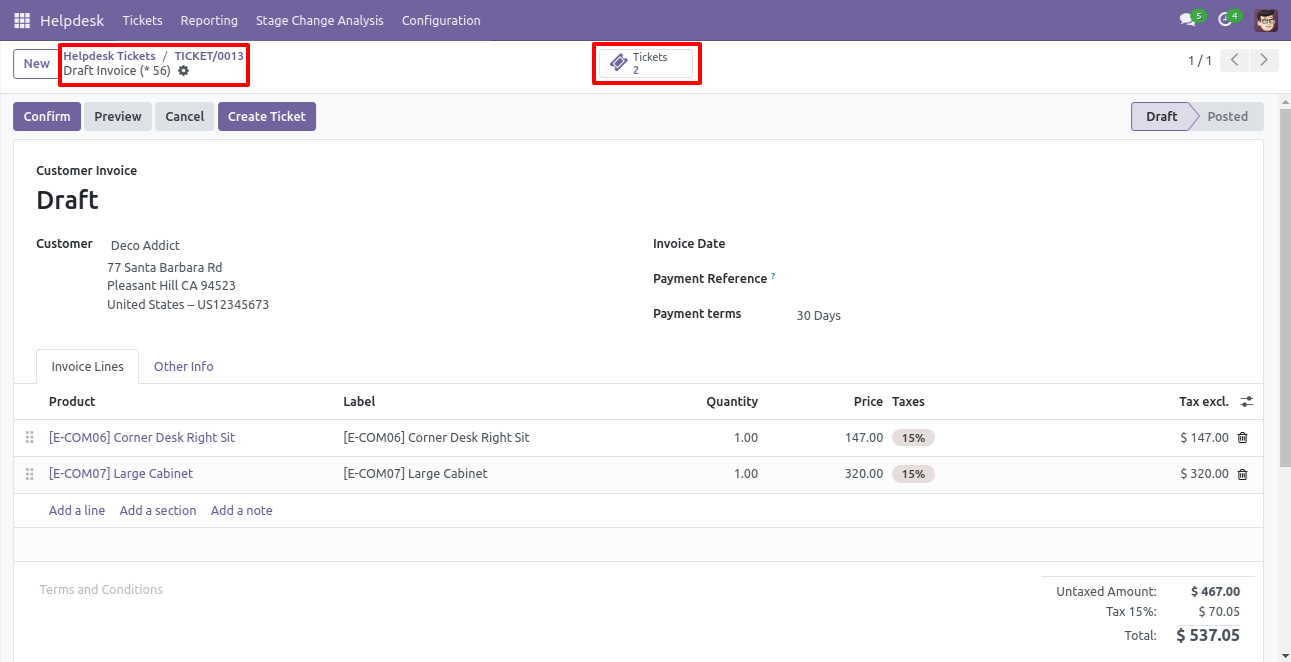
So, from that invoice, you can see tickets of that invoice using the 'Tickets' smart button.
You can create a helpdesk ticket from the invoice using the 'Create Ticket' button.
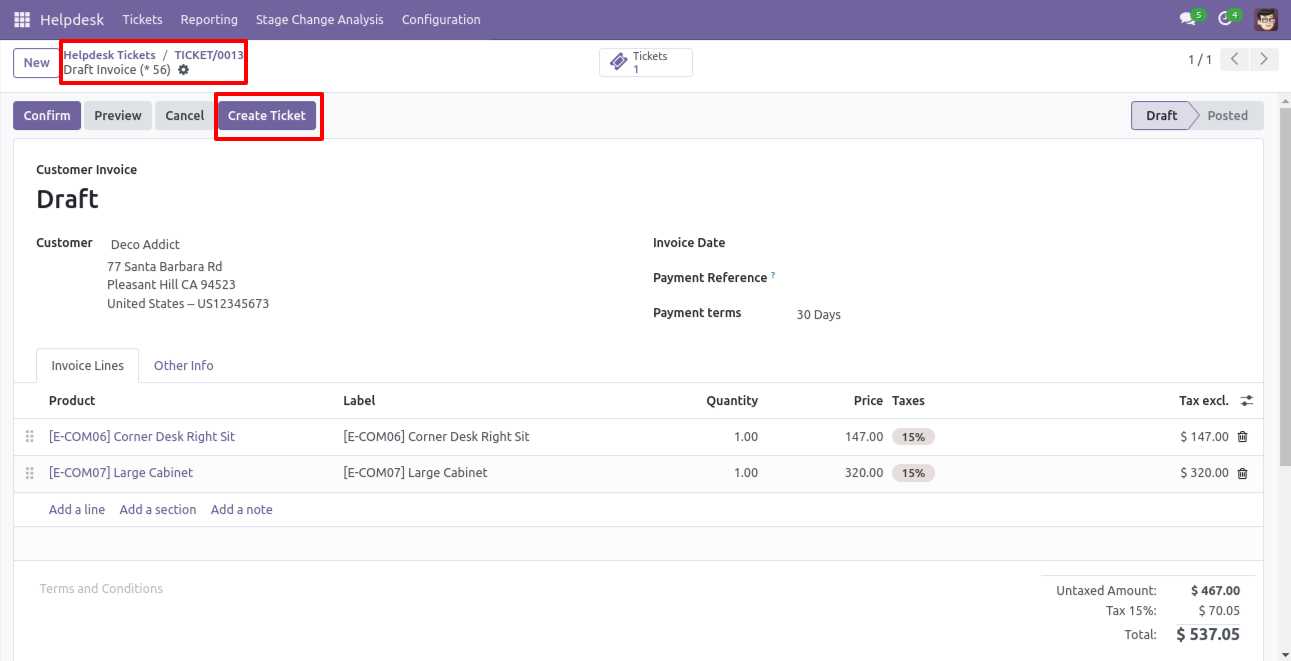
After that one wizard opens, fill the details and save it.
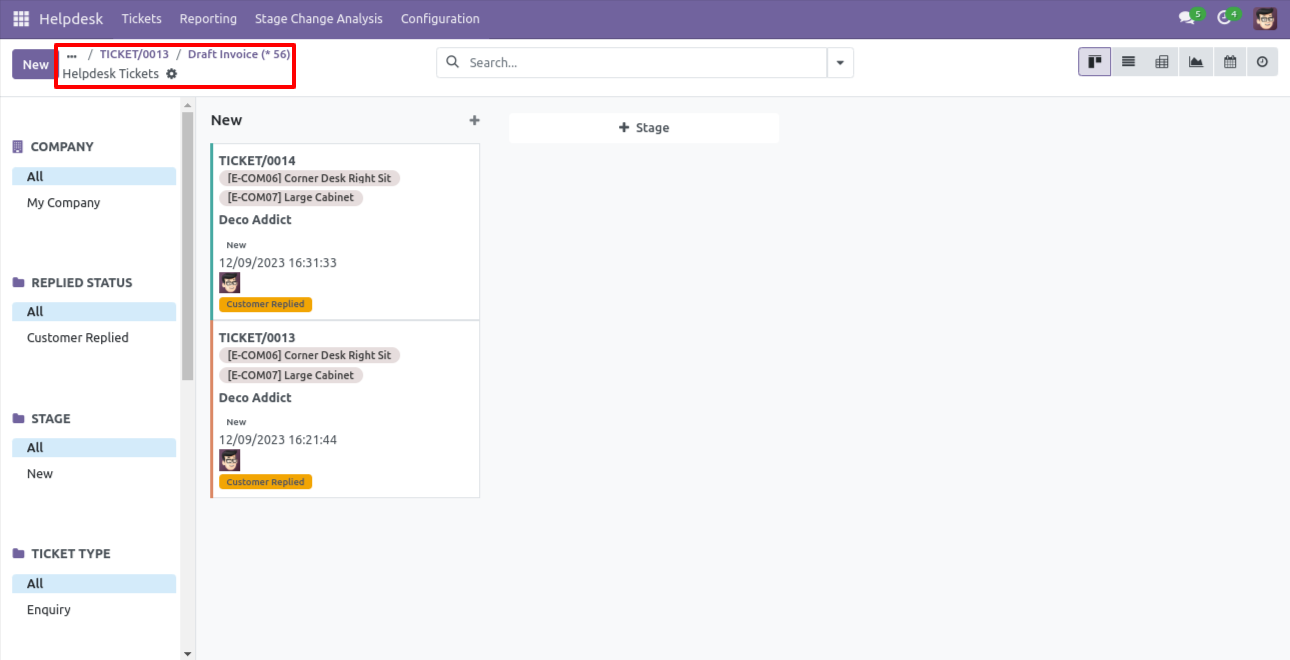
You can see tickets of that invoice using the 'Ticket' smart button.
It opens tickets Kanban view.
Created ticket form view looks like this.
Form view of the helpdesk ticket, Click on the print 'Helpdesk ticket' from the action buton.
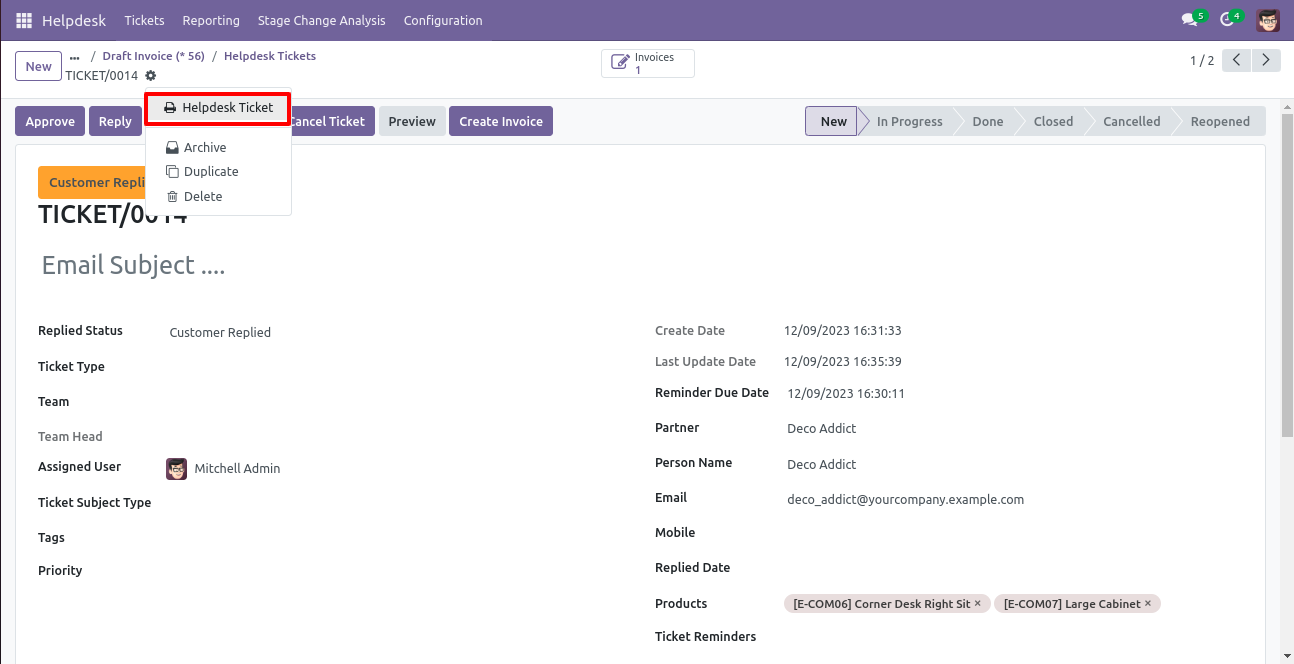
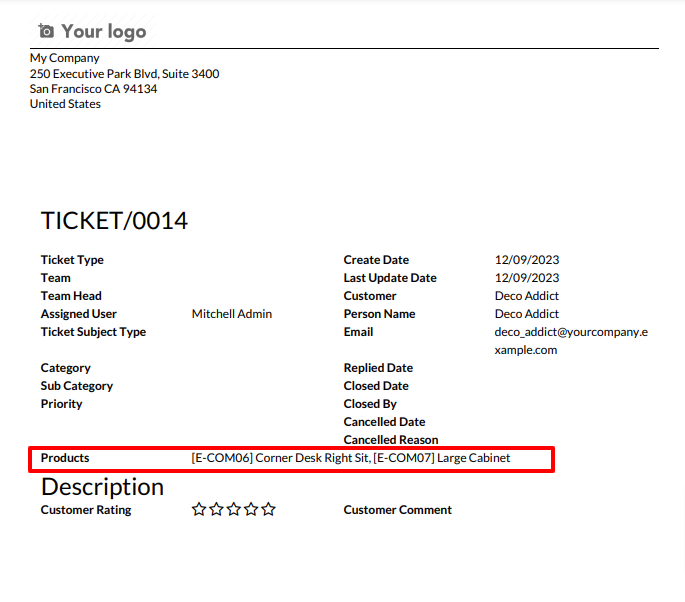
Ticket PDF report with the products.
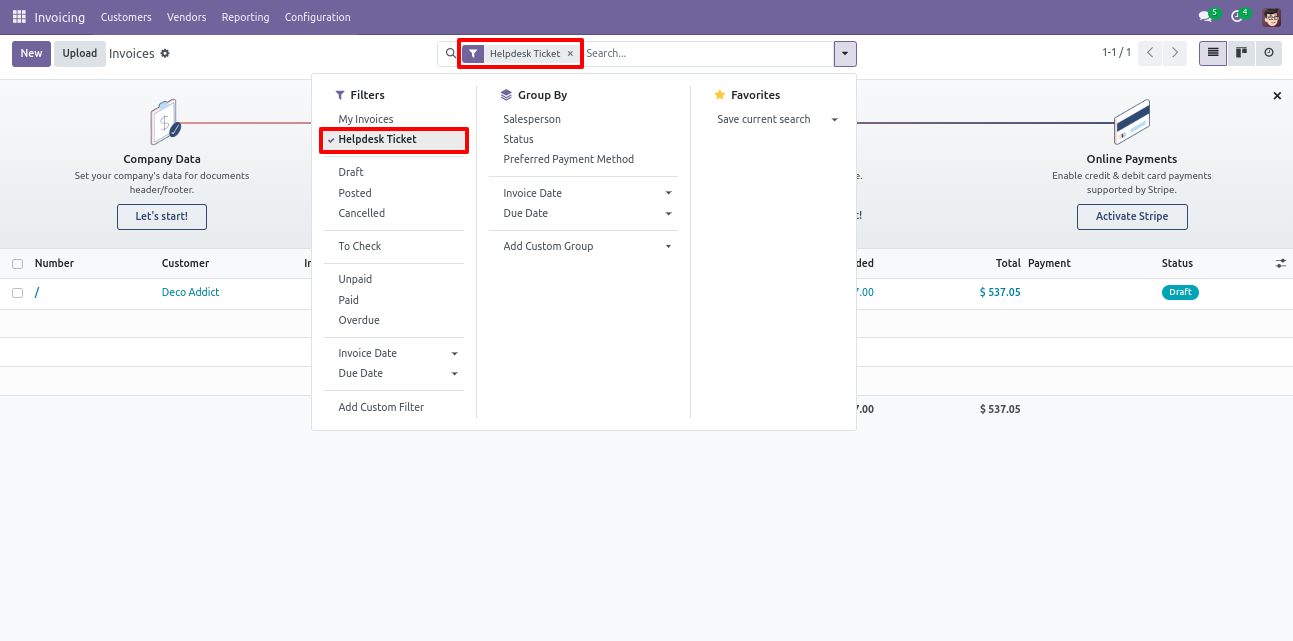
You can filter tickets purchase order wise.
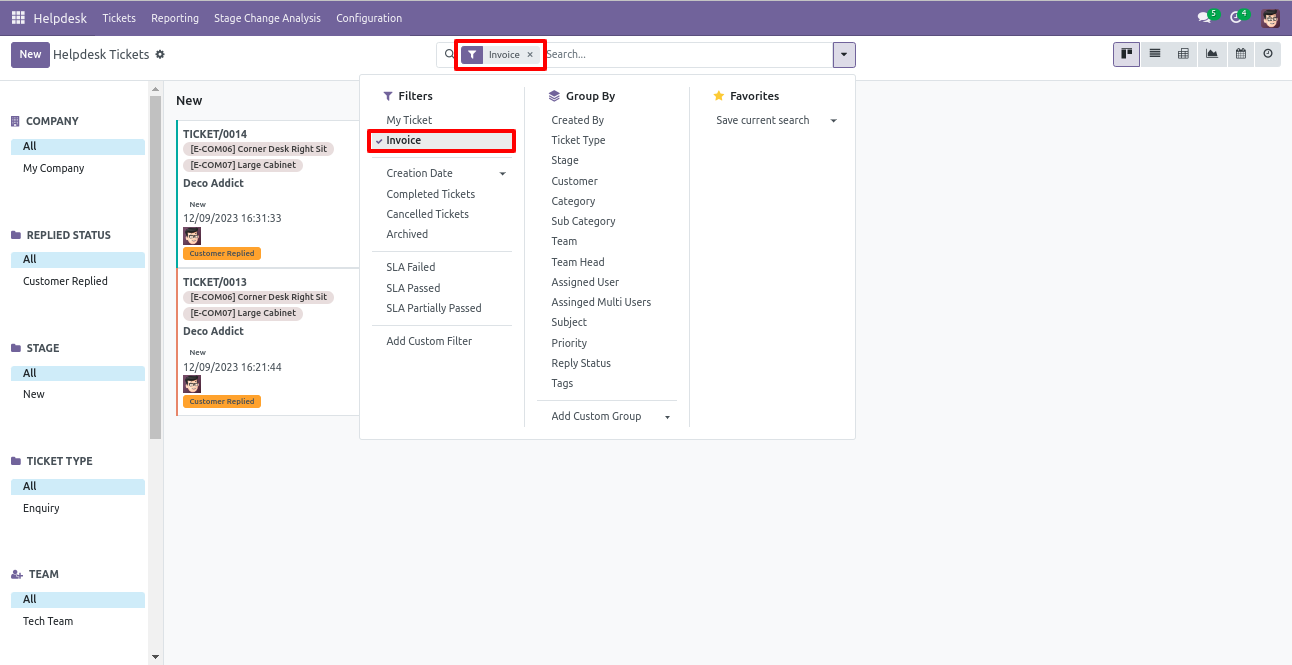
You can filter invoice ticket wise.
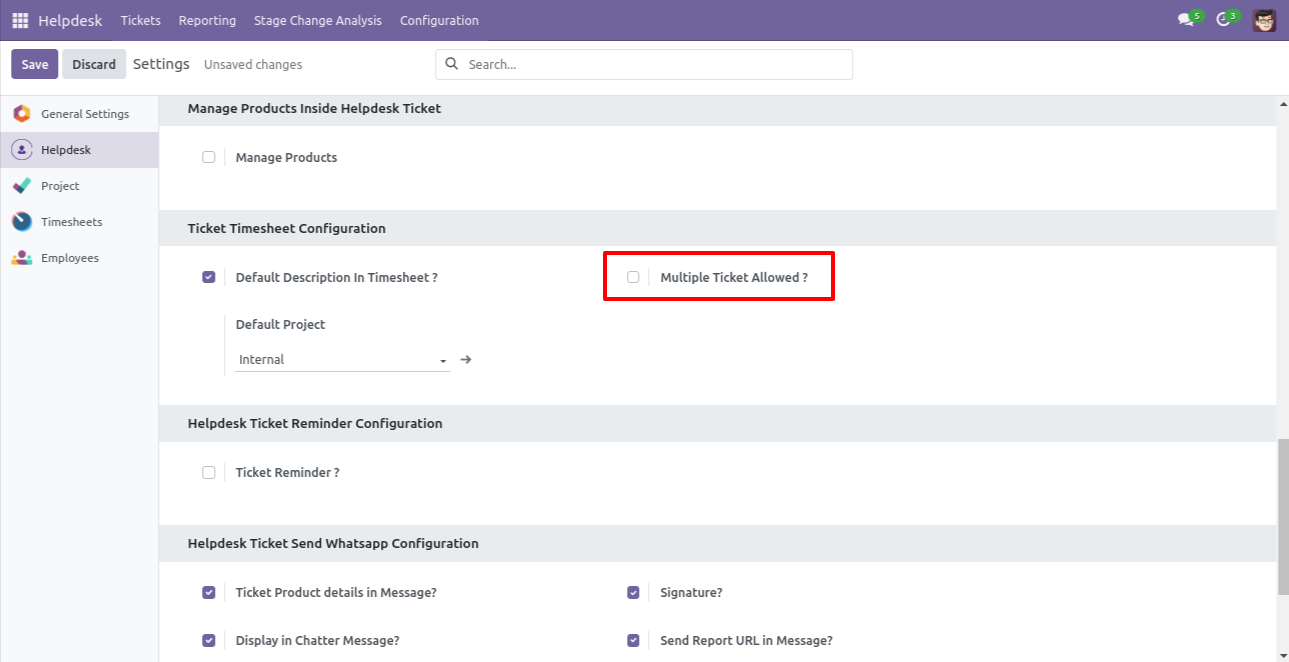
Tick the security group 'Helpdesk Ticket Timesheet'.
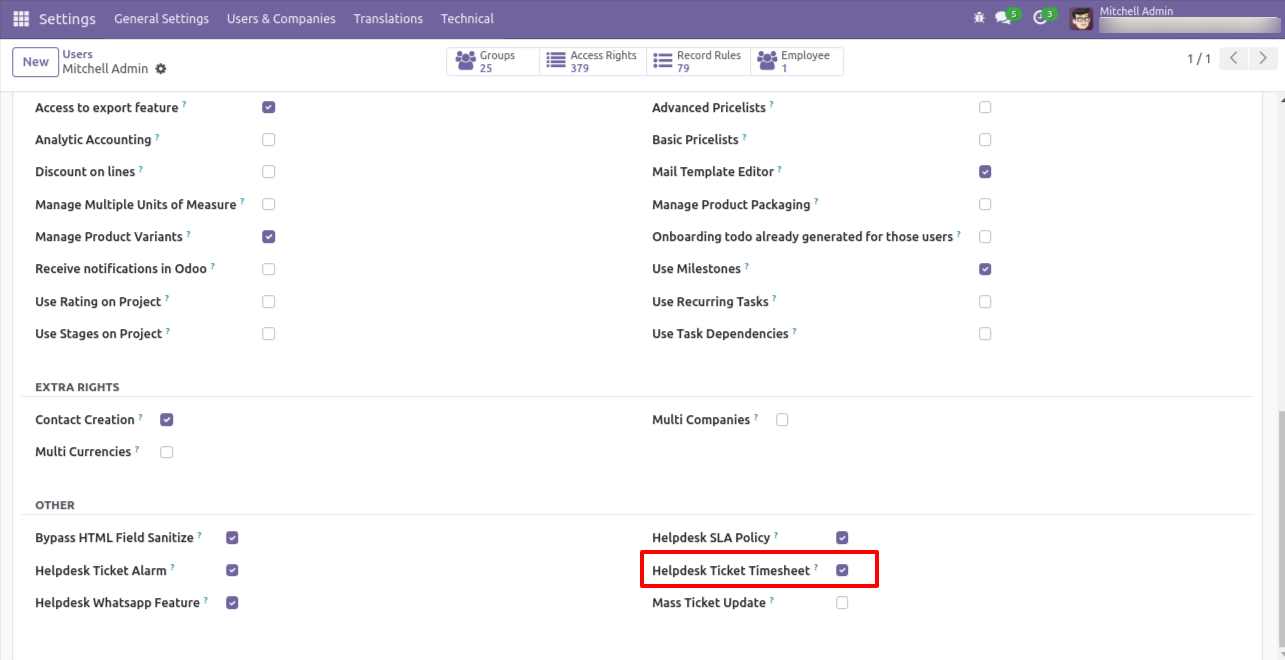
Enable the 'Default Description In Timesheet' to add the default description in the timesheet, and then select default project. Enable 'Multiple Ticket Allowed' to start multiple tickets timer at a time.

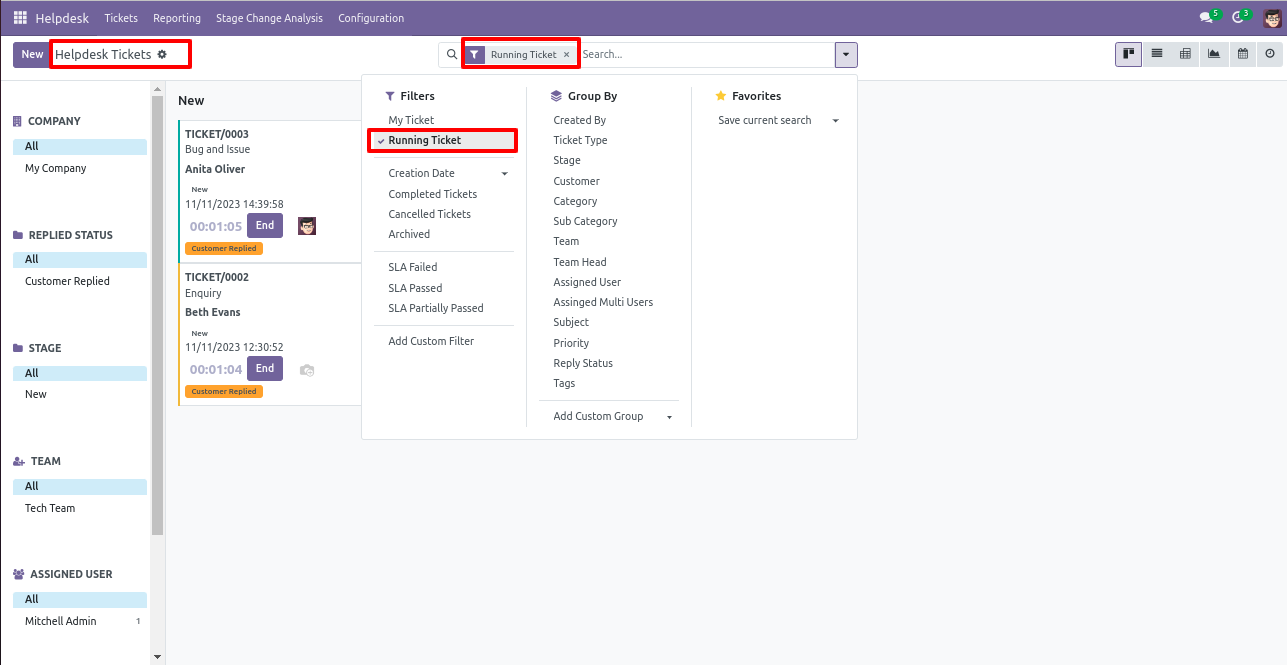
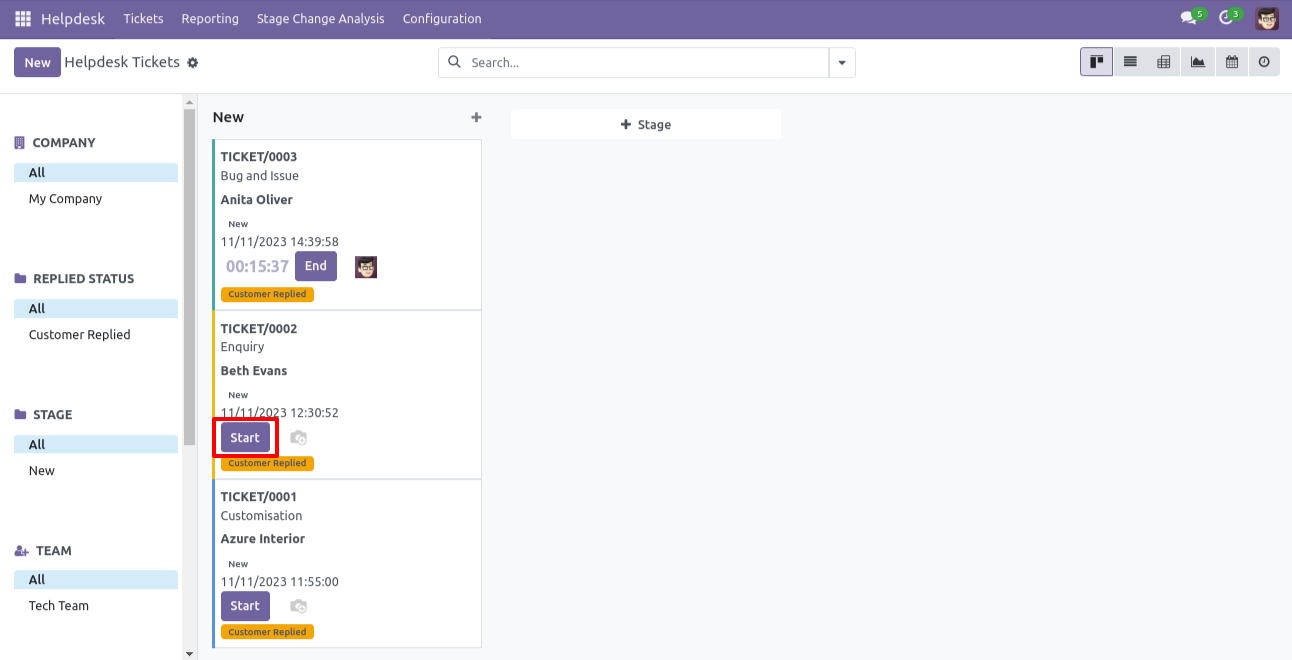
You can filter tickets by 'Running Ticket' which shows which ticket timer is running.
Now we start the timer of the other ticket.
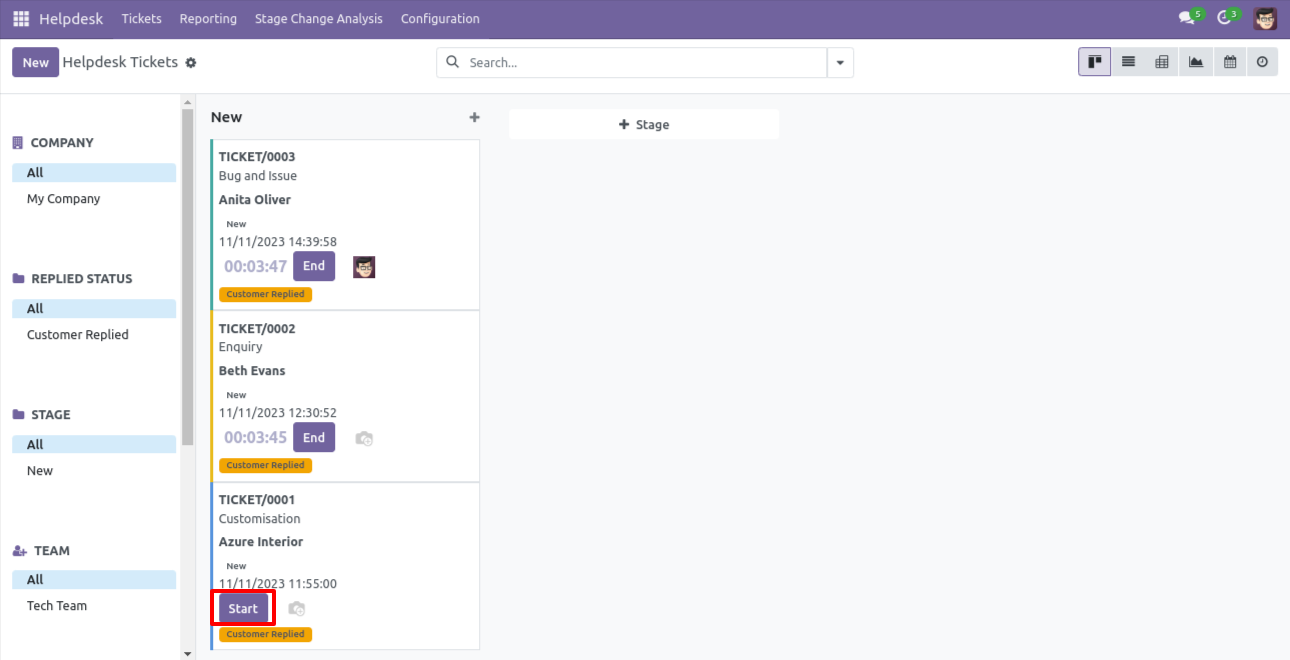
So if you have enabled the 'multiple ticket' group then you can start multiple tickets timer simultaneously.
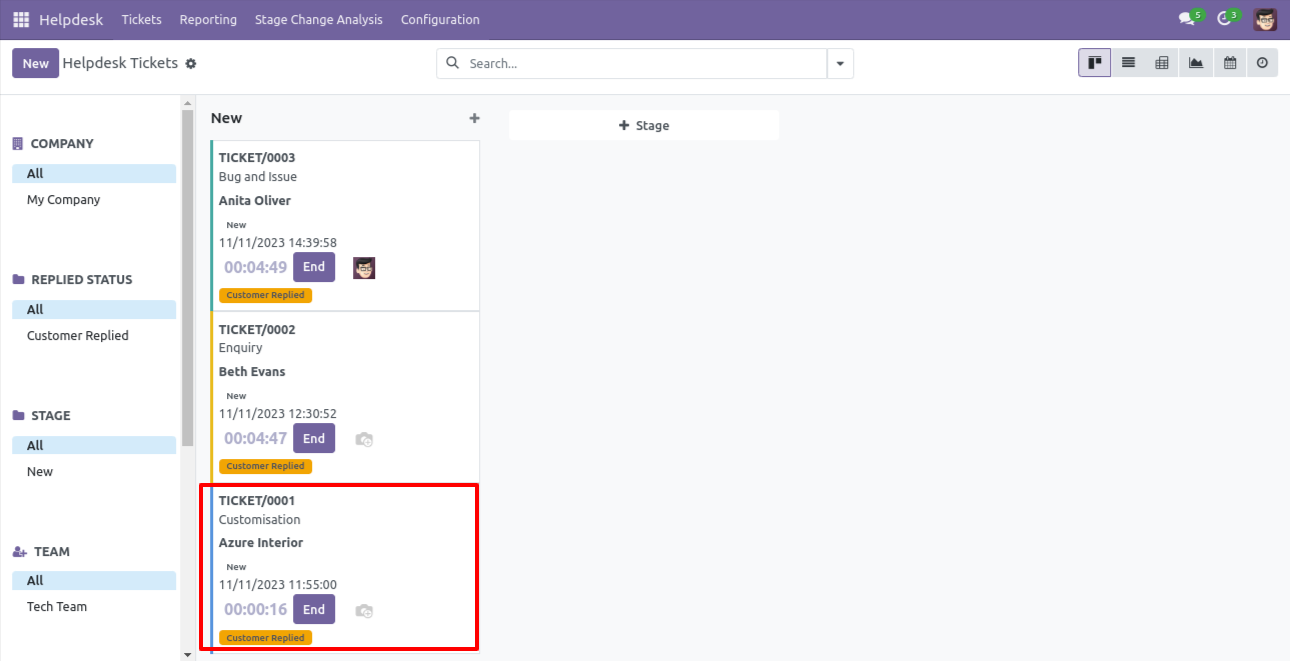
Timesheet entry will look like this, currently one timesheet entry in the ticket.
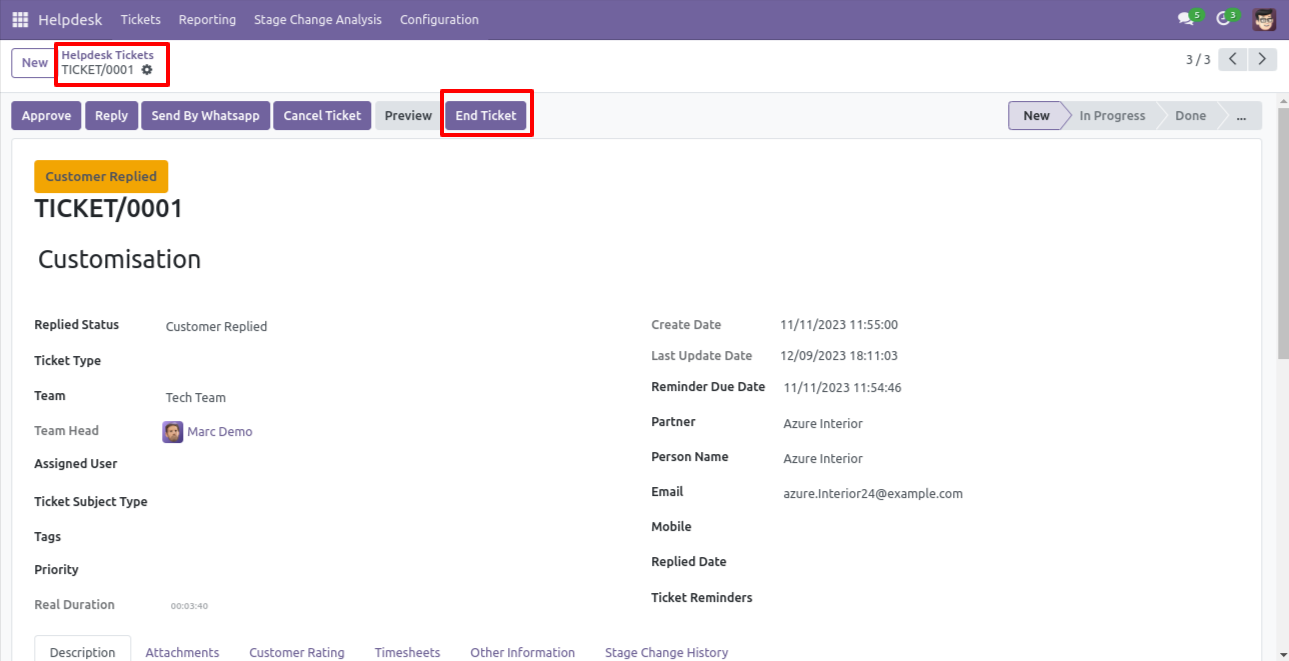
Now we press the 'End Ticket' button to end the timer, you can end the timer as well from the list view using the 'End' button.
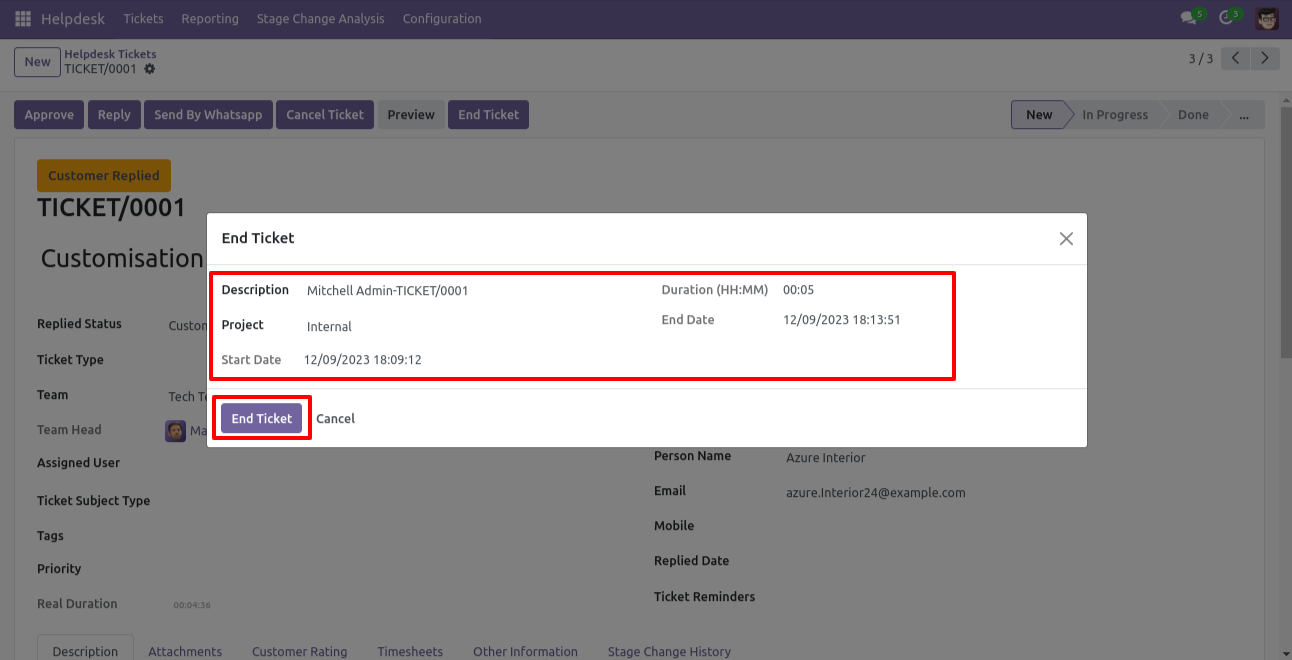
After that one wizard opens, It will automatically add a default description entry when you end the time
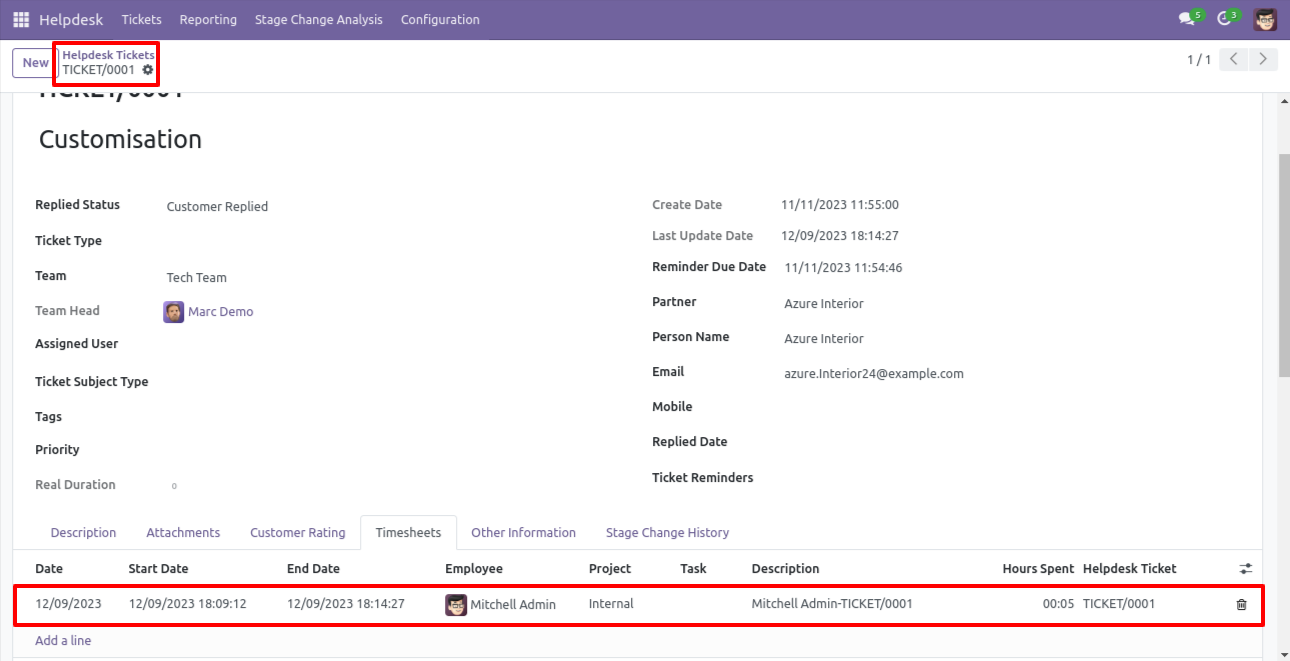
So now after the end timer, our ticket timesheet entry is updated.
Now we disable the 'Multiple Ticket Allowed' group.
Currently, one ticket timer is running, and start the timer of the other ticket.
So it shows a warning because we have disabled the 'Multiple Ticket Allowed' group.

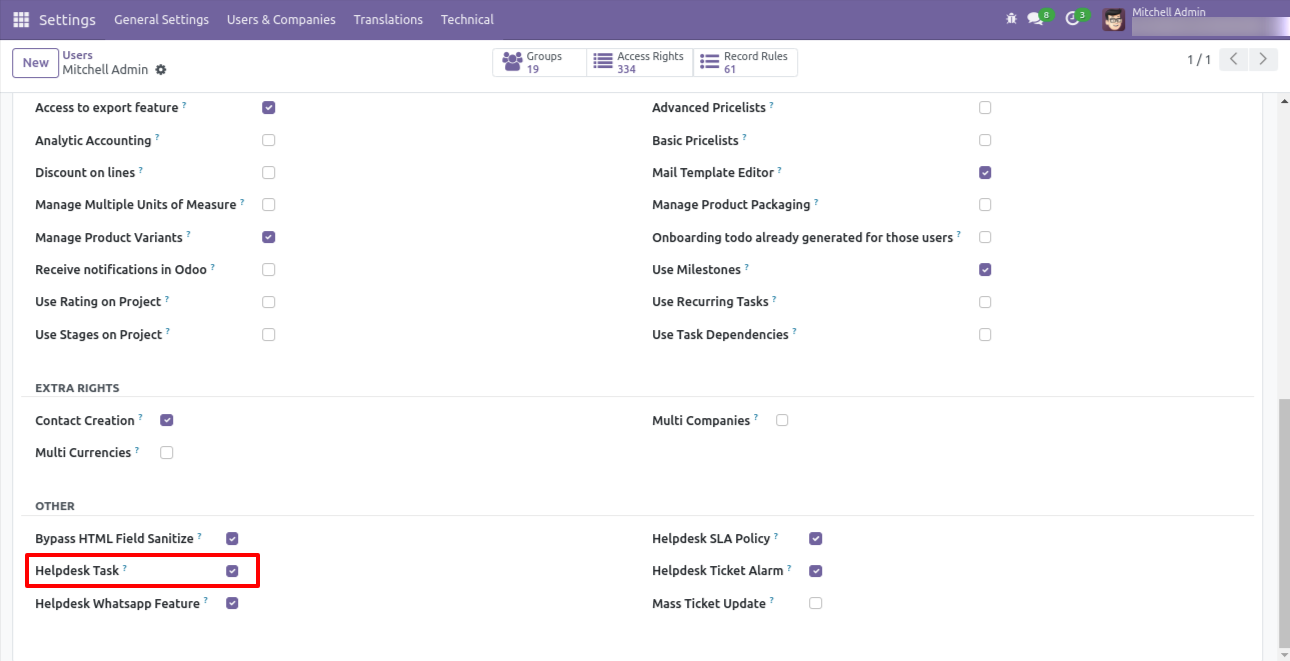
Go to users & companies and tick 'Helpdesk Task'.
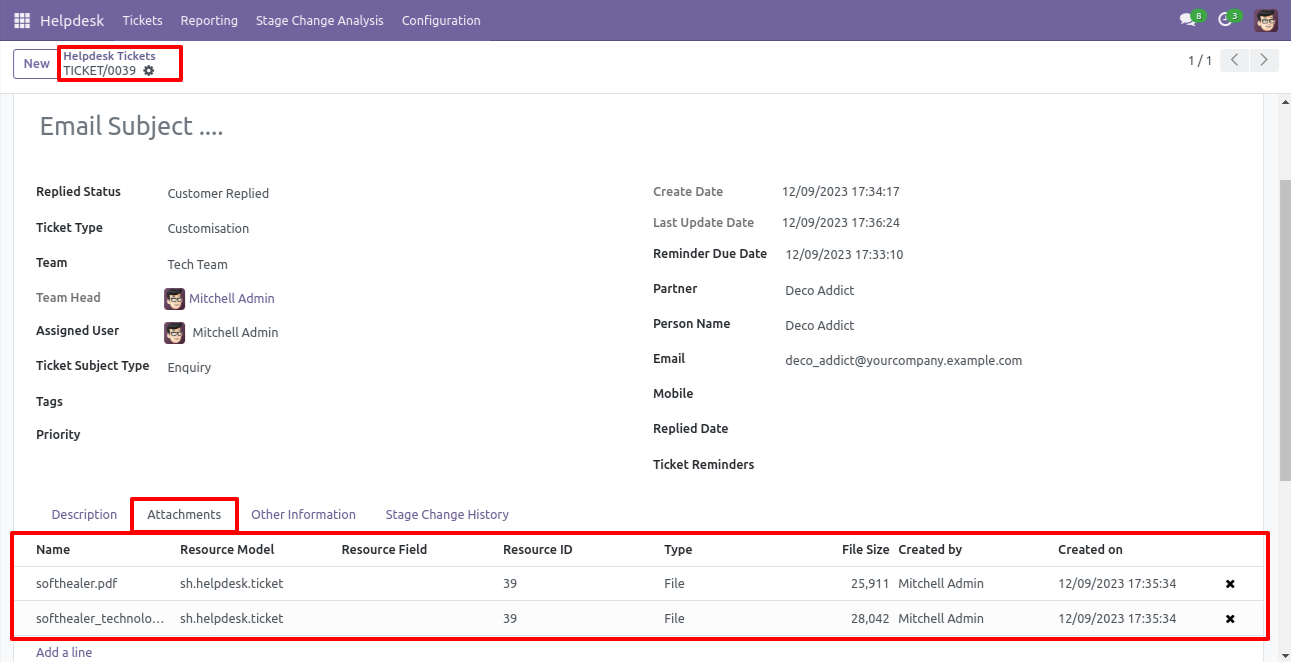
You can attach multiple attachments to the ticket.
Press the 'Create Task' button to create a task from the ticket.
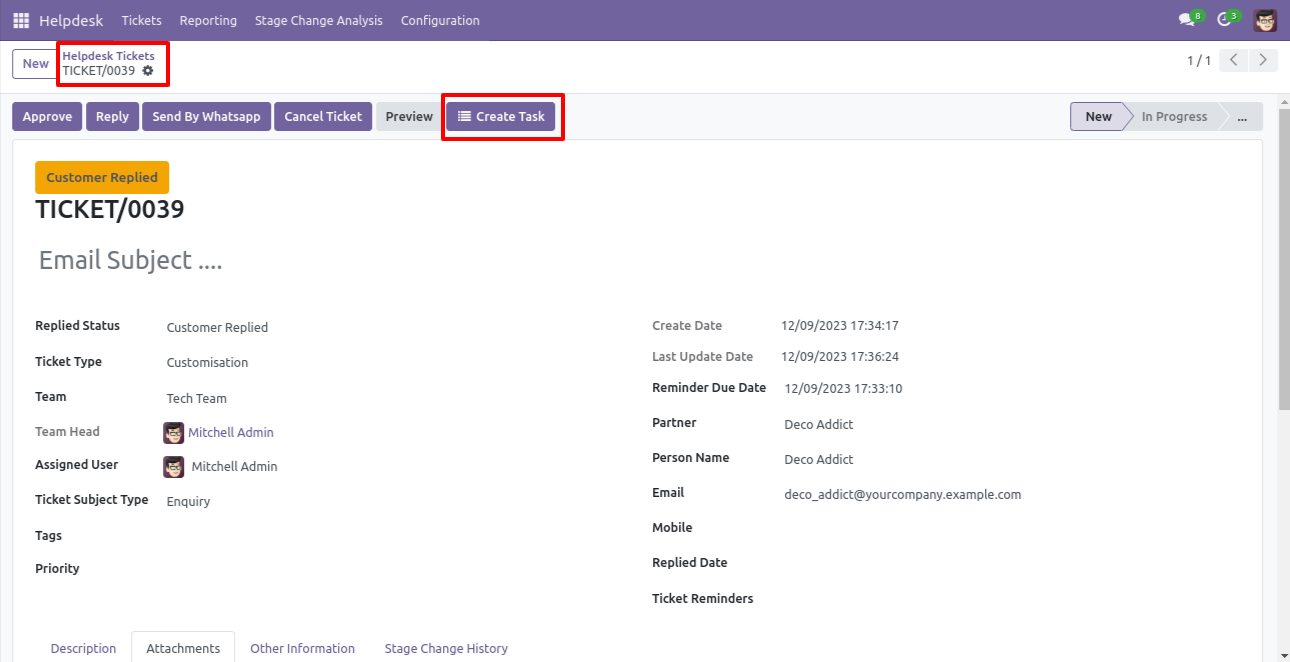
You can assign tasks with responsible persons with the task description.
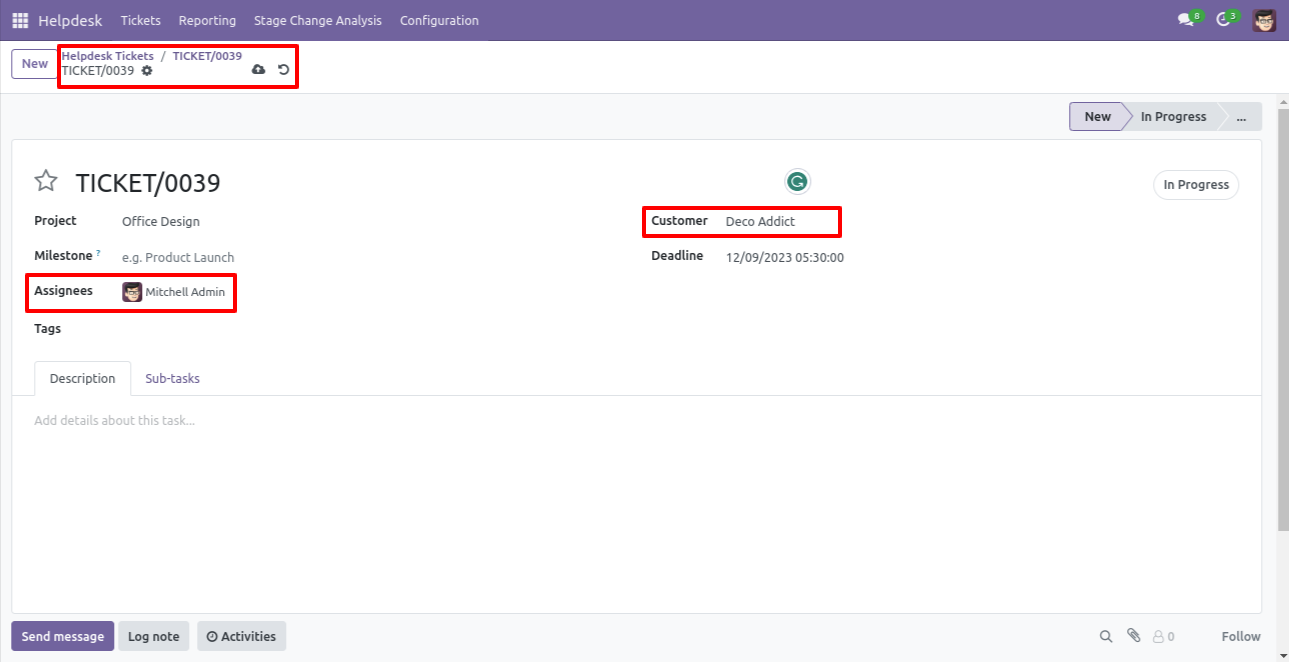
It moves information, attachment, etc of the ticket to the task.
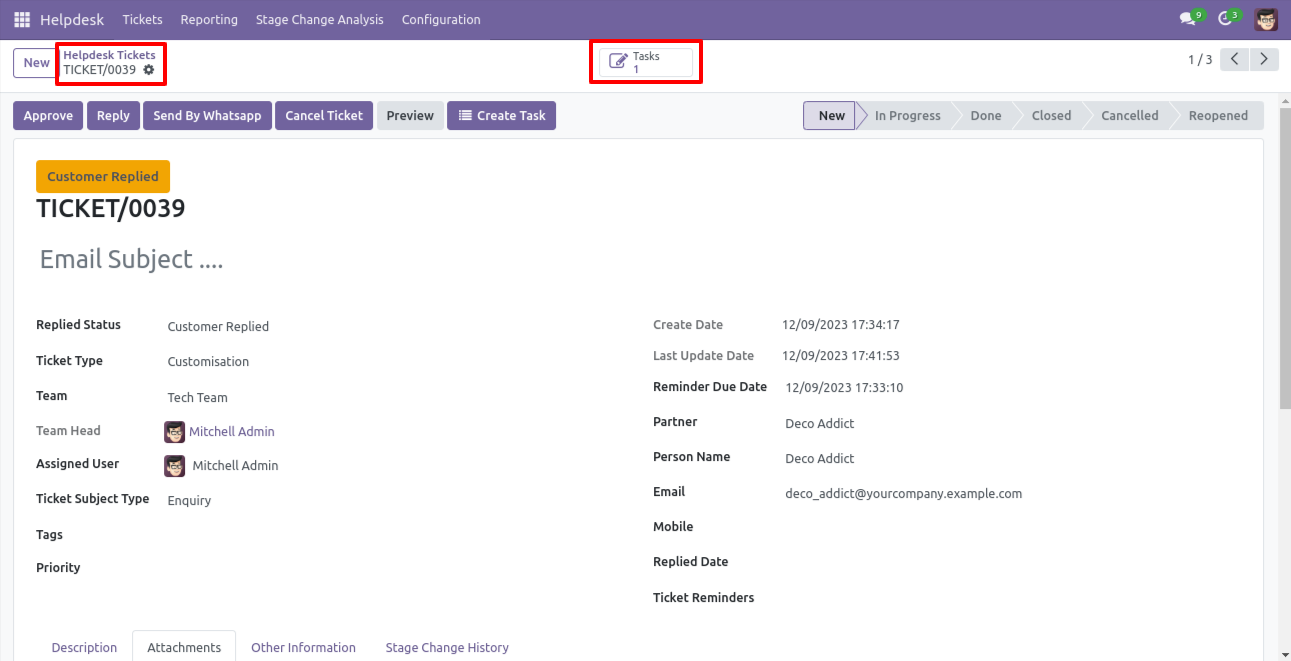
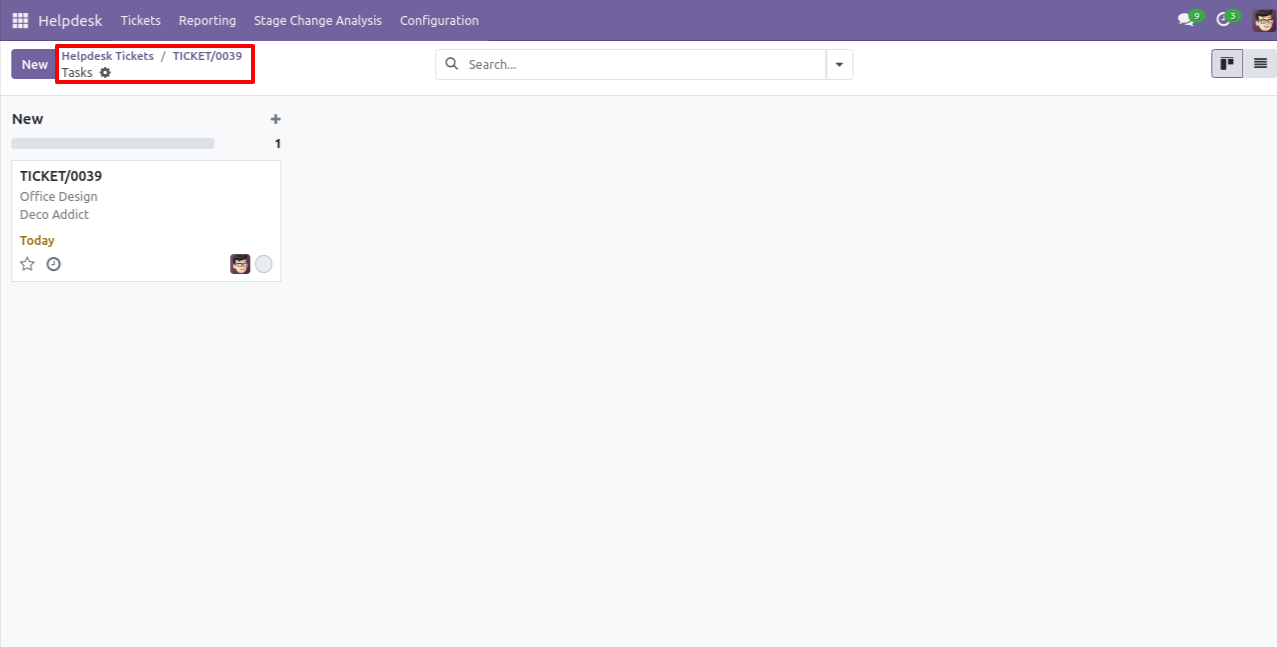
After creating a task, you can see the created task number on the right side of the ticket.
Tasks kanban view.
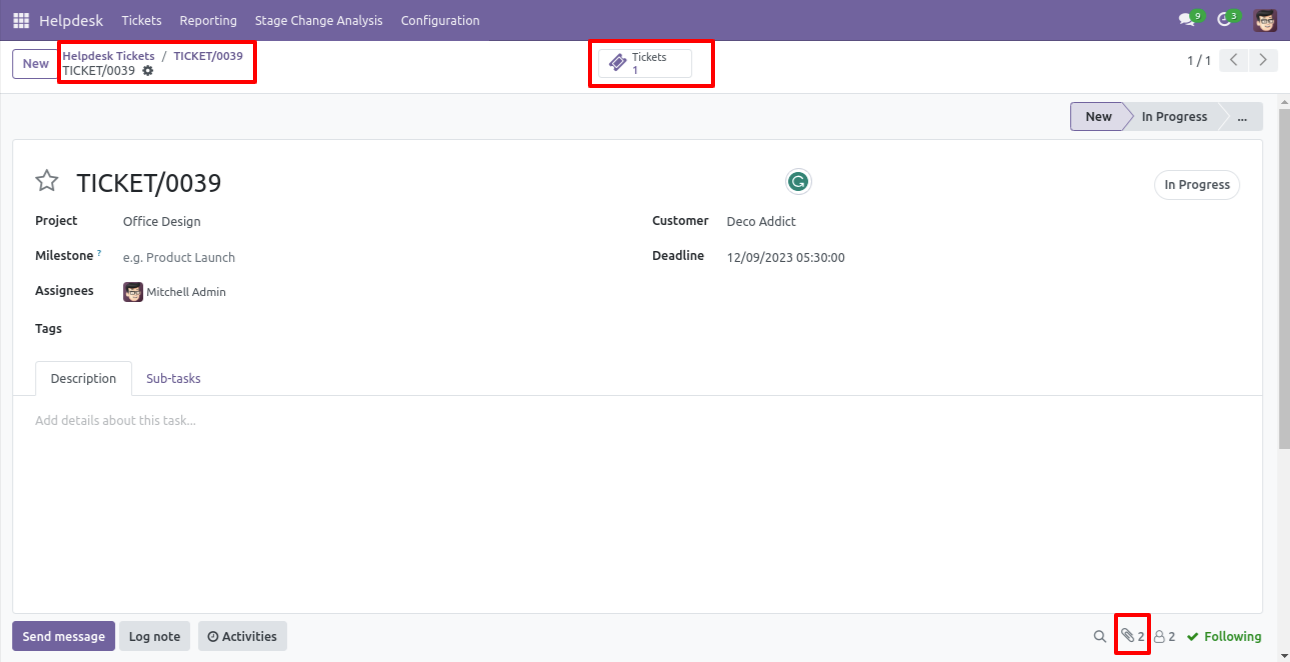
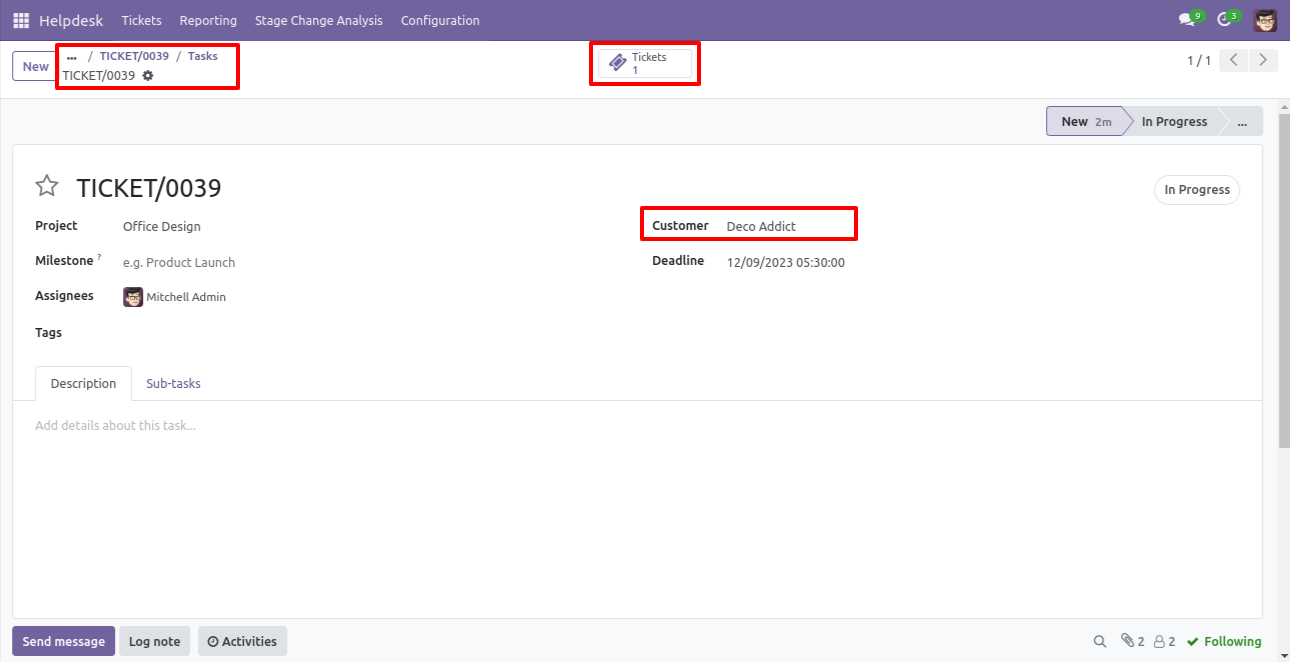
The assigned task with attachments, information & you can see that task ticket at the right side of the task.
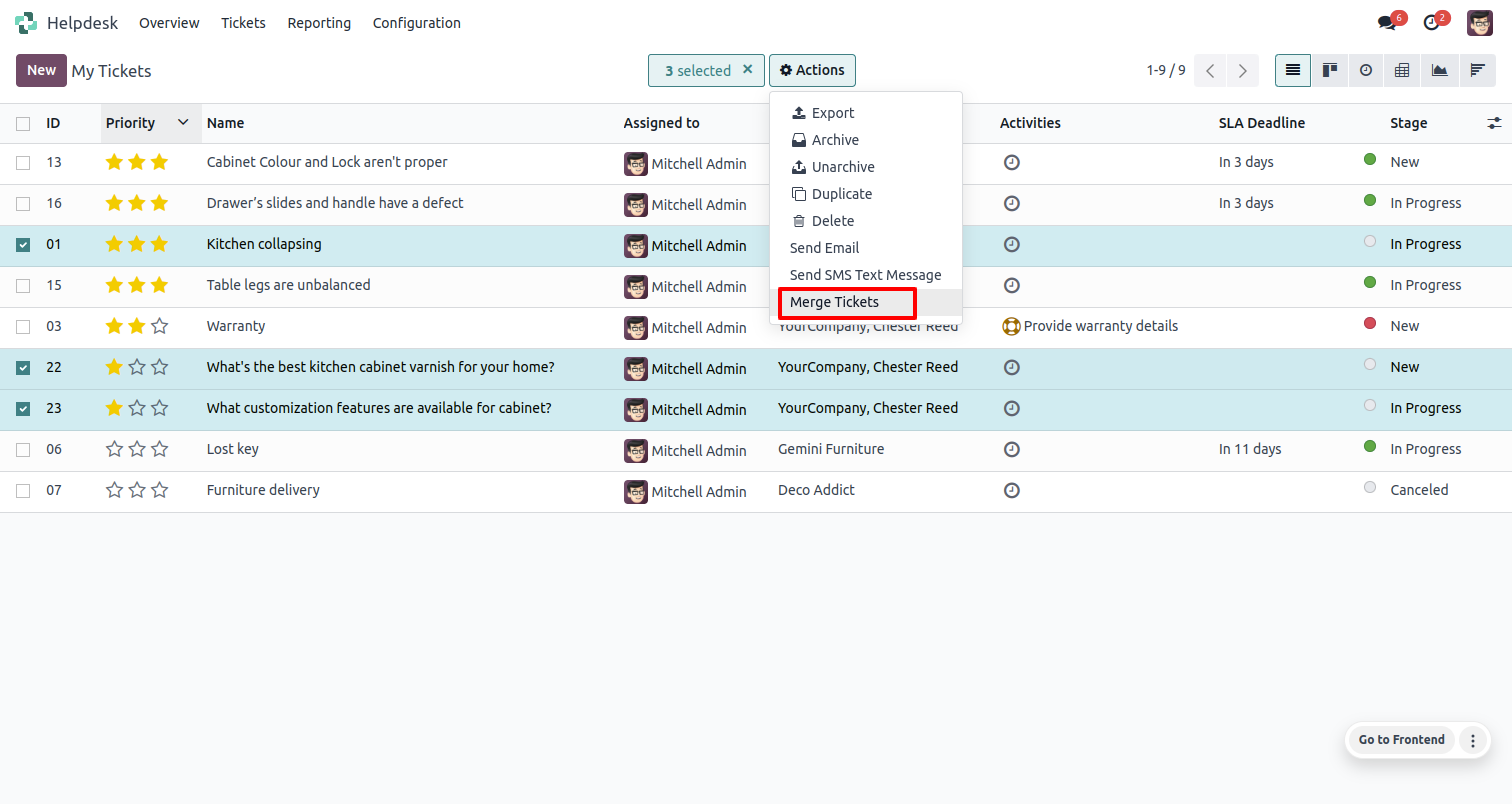
Go to the 'Tickets', Select records, Go to the action and press 'Merge Tickets'.
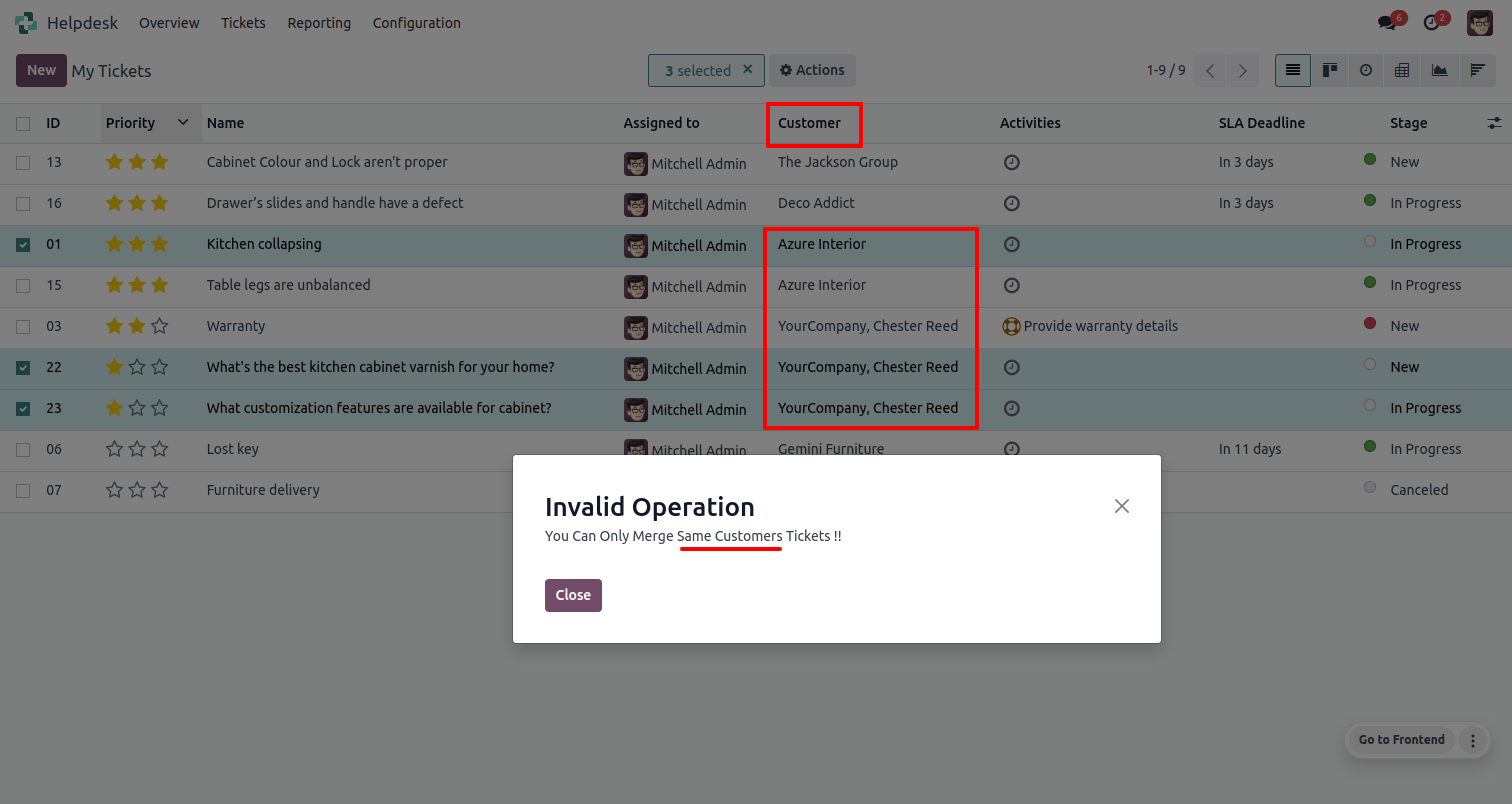
If you try to merge different customers tickets then this error will appears.
Select records, Go to the action and press 'Merge Tickets'.

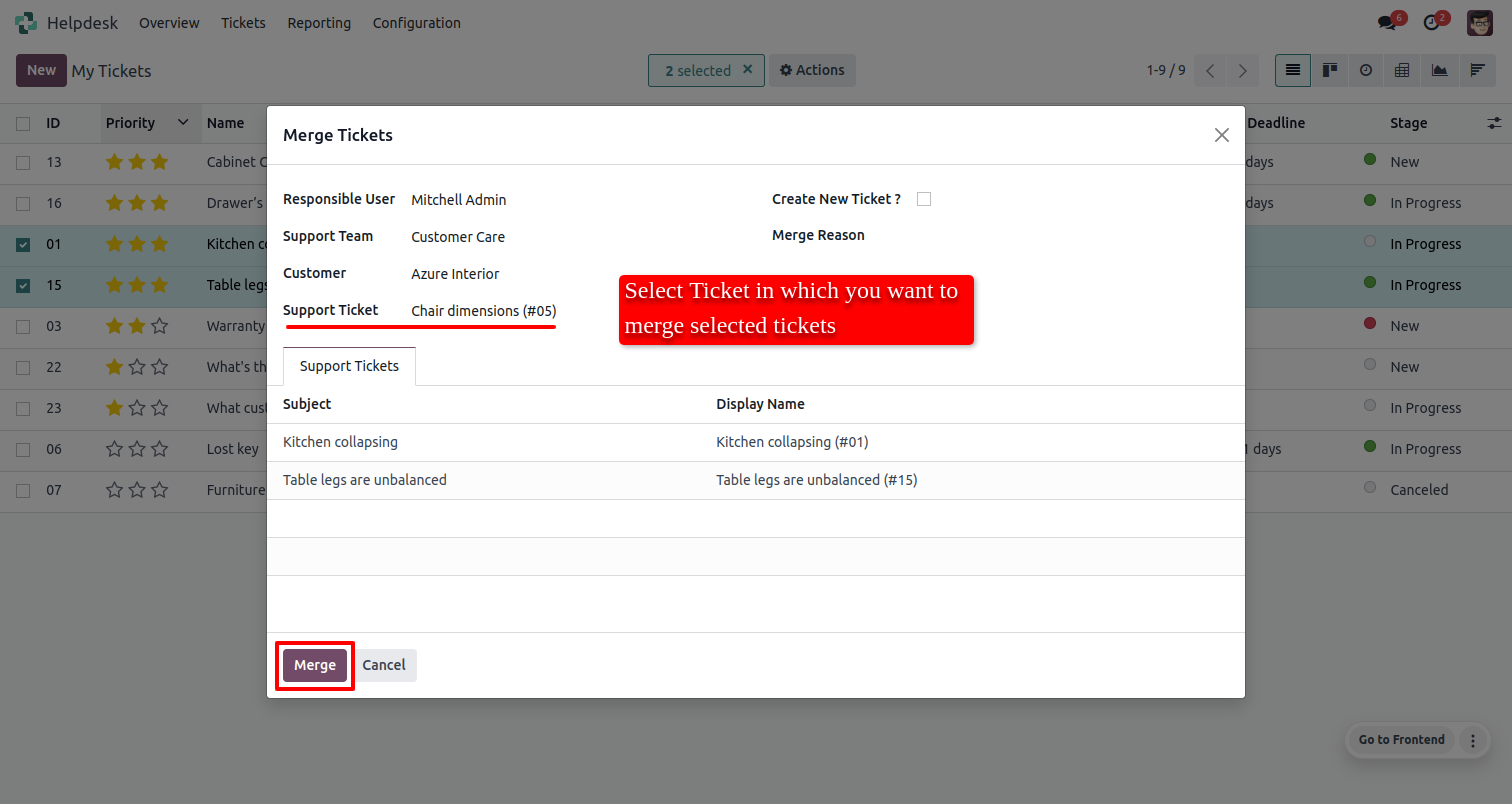
After that one wizard opens, Select ticket in which you want to merge selected tickets.
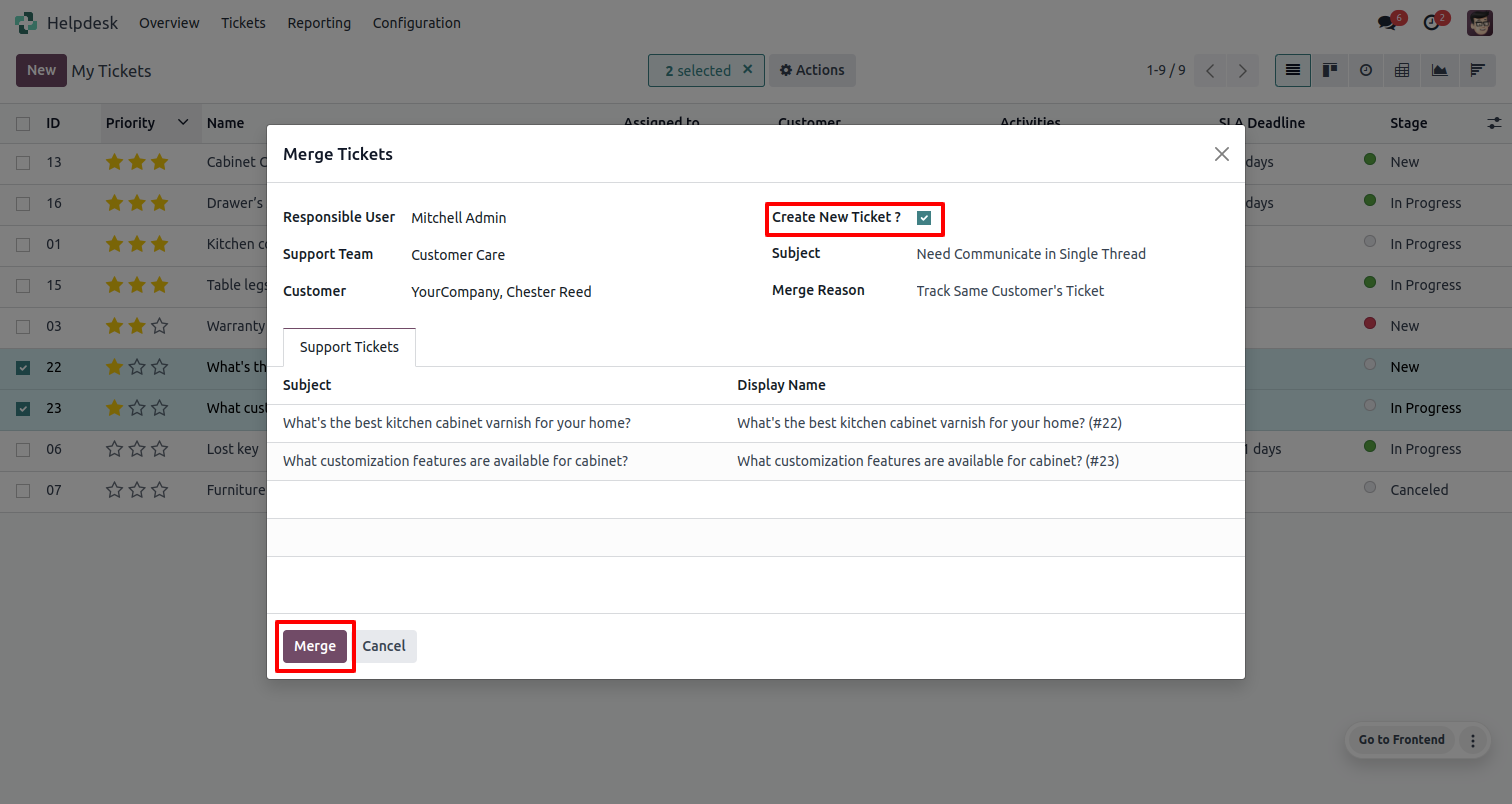
Select a 'Create a New Ticket' if you want to make new ticket & merge.
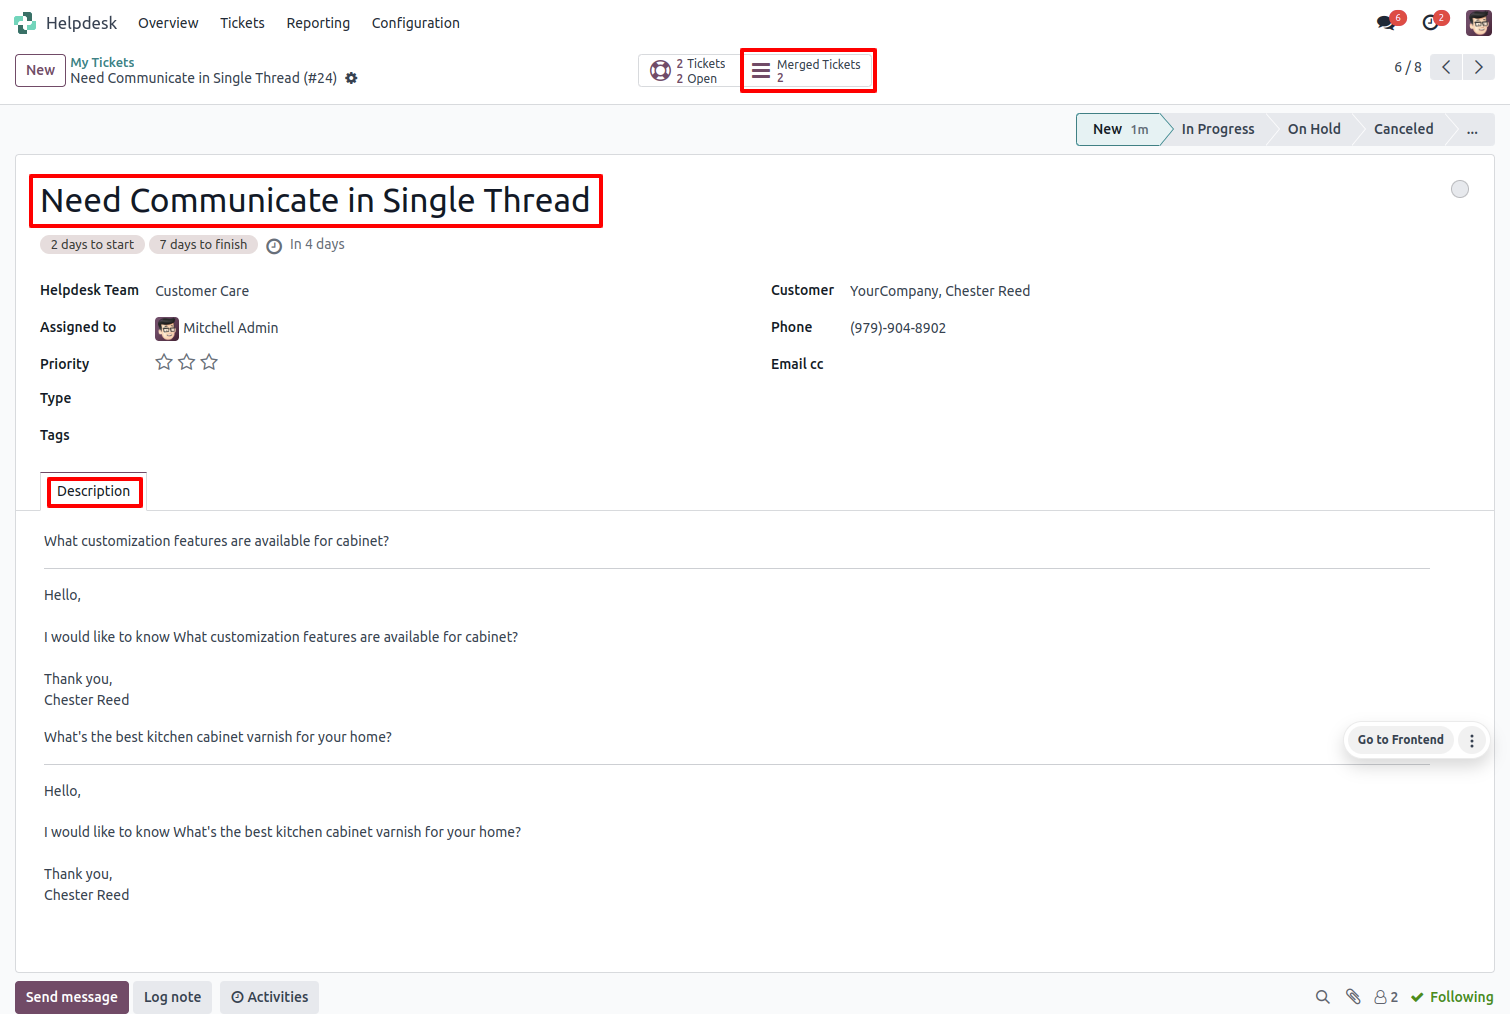
New ticket created with merge ticket, You can see all merged ticket in smart button, Click on that smart button to see all merged ticket.
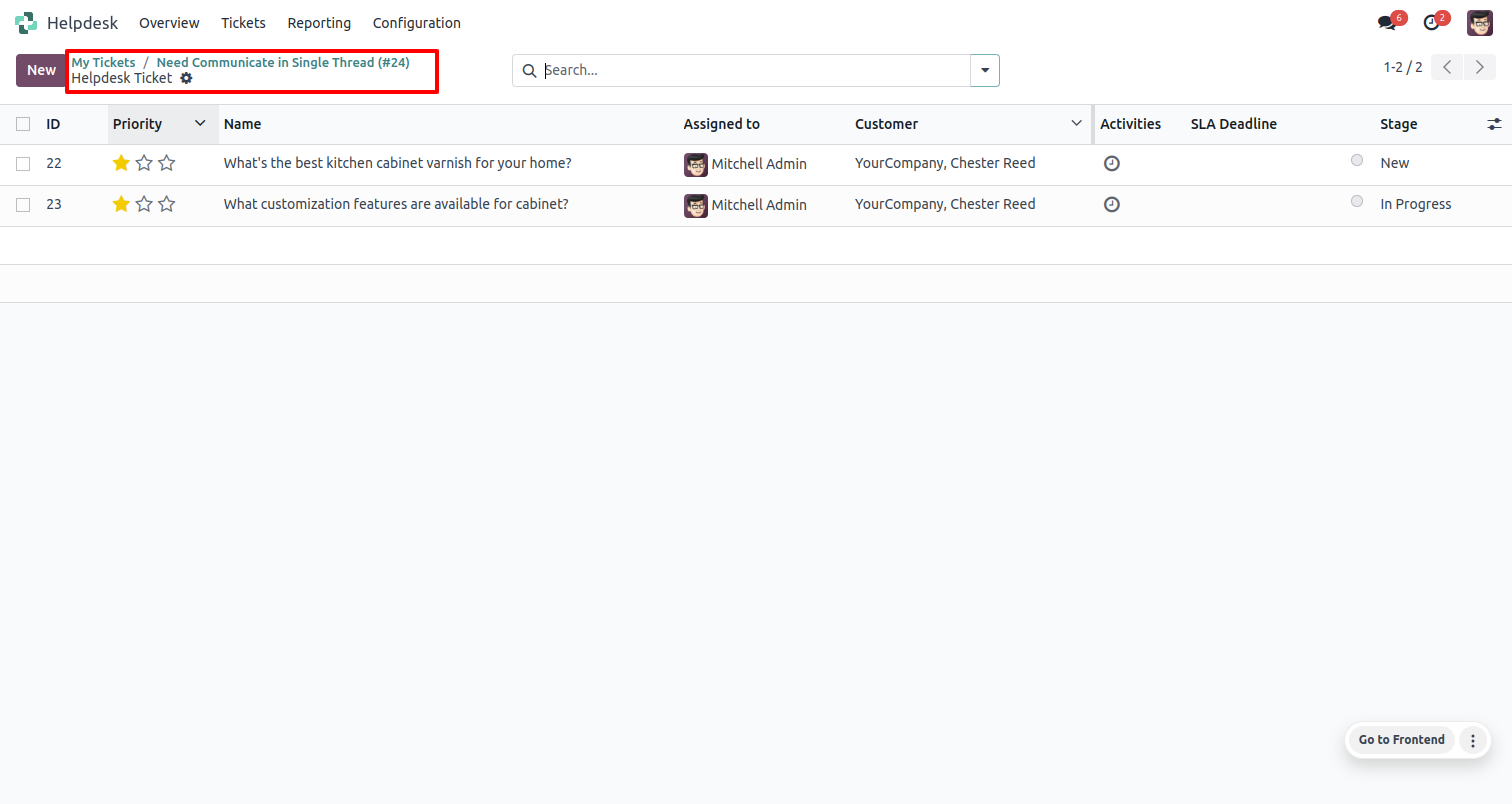
Merged tickets list view.
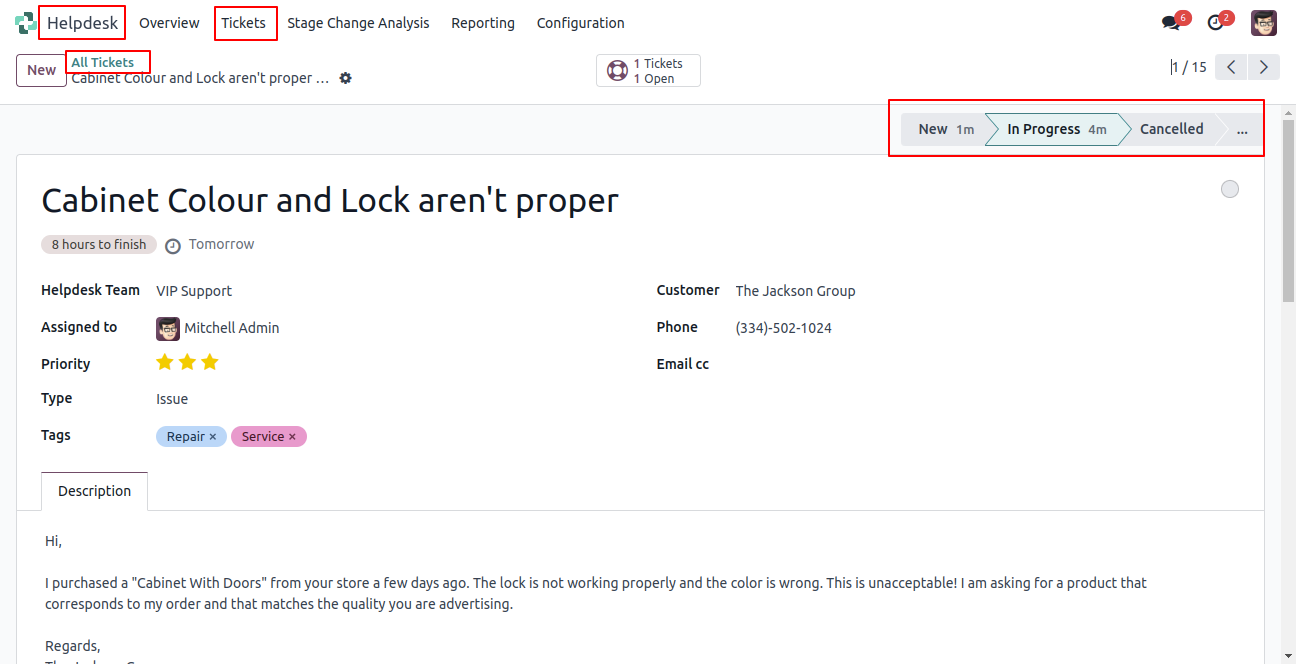
Tick 'Enable Helpdesk Stage Change History'.

Change the stage.
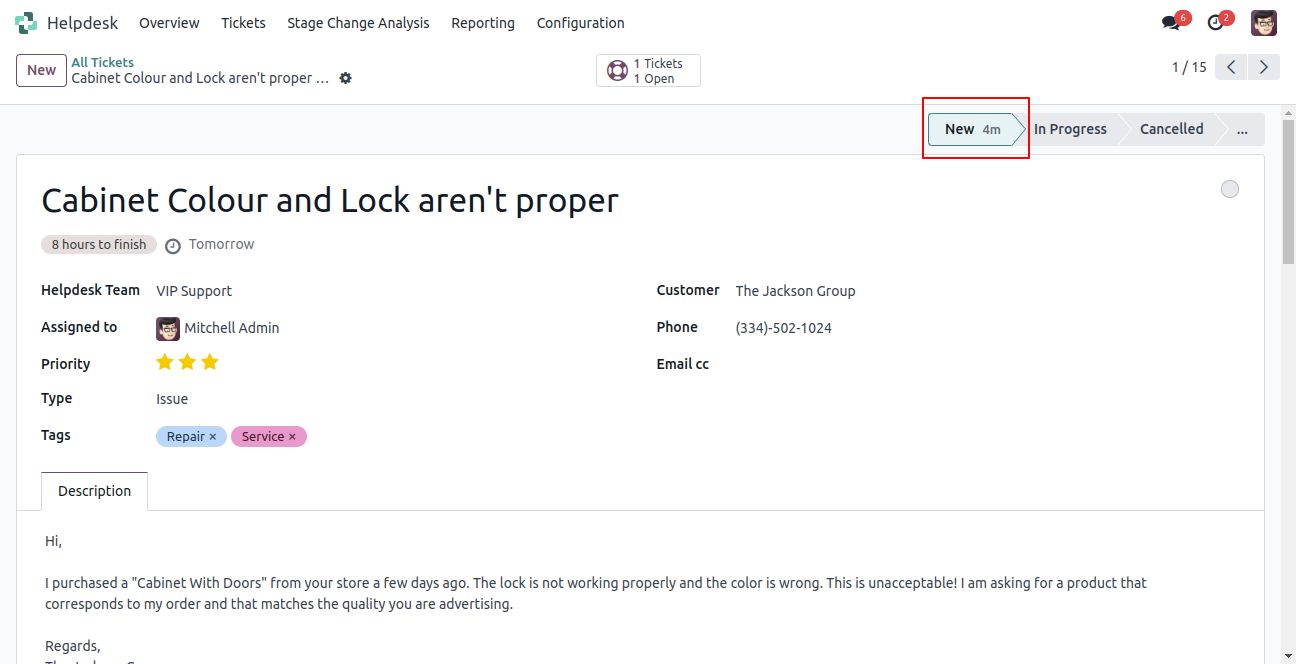
Change the stage to New stage.
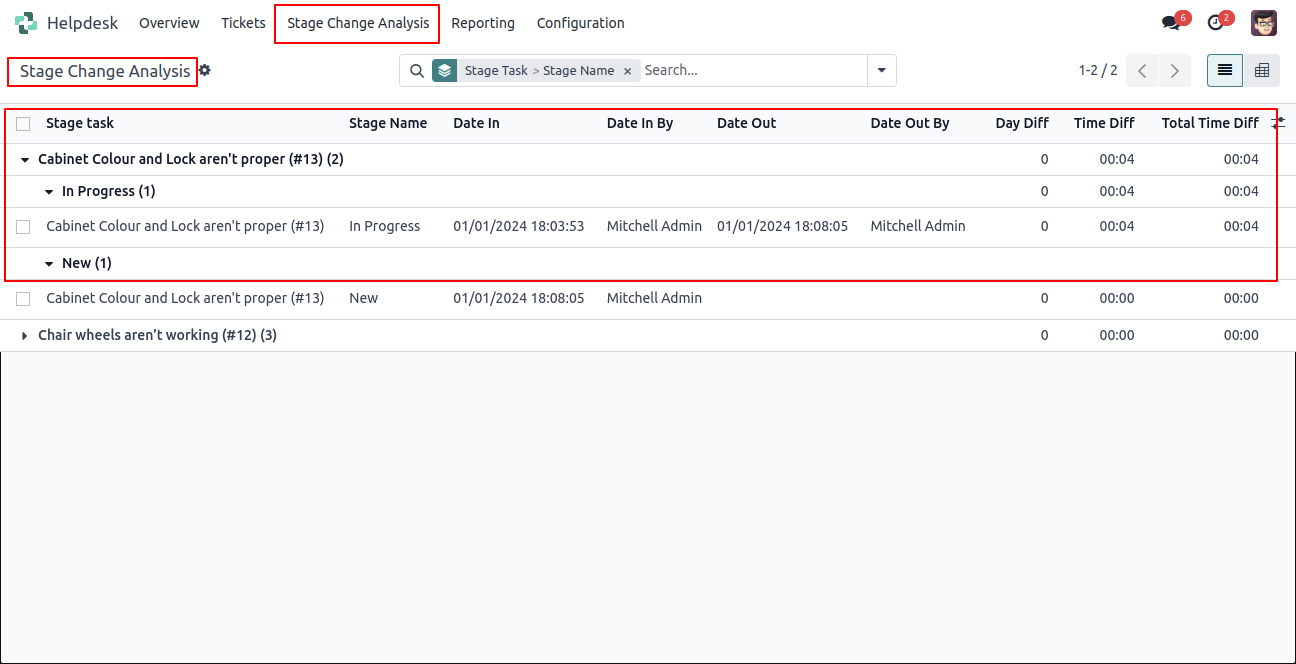
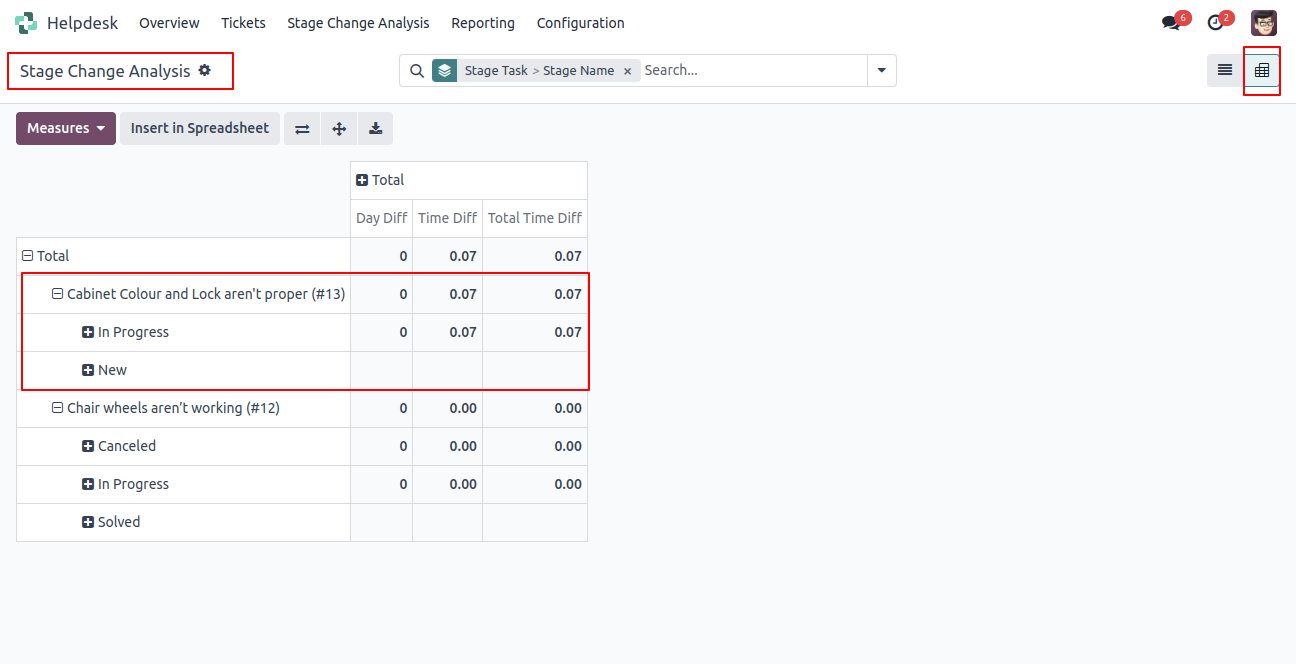
Stage change history with details.

In the stage change analysis menu, you can see all history.
Enable the group.

Customer login & open ticket.
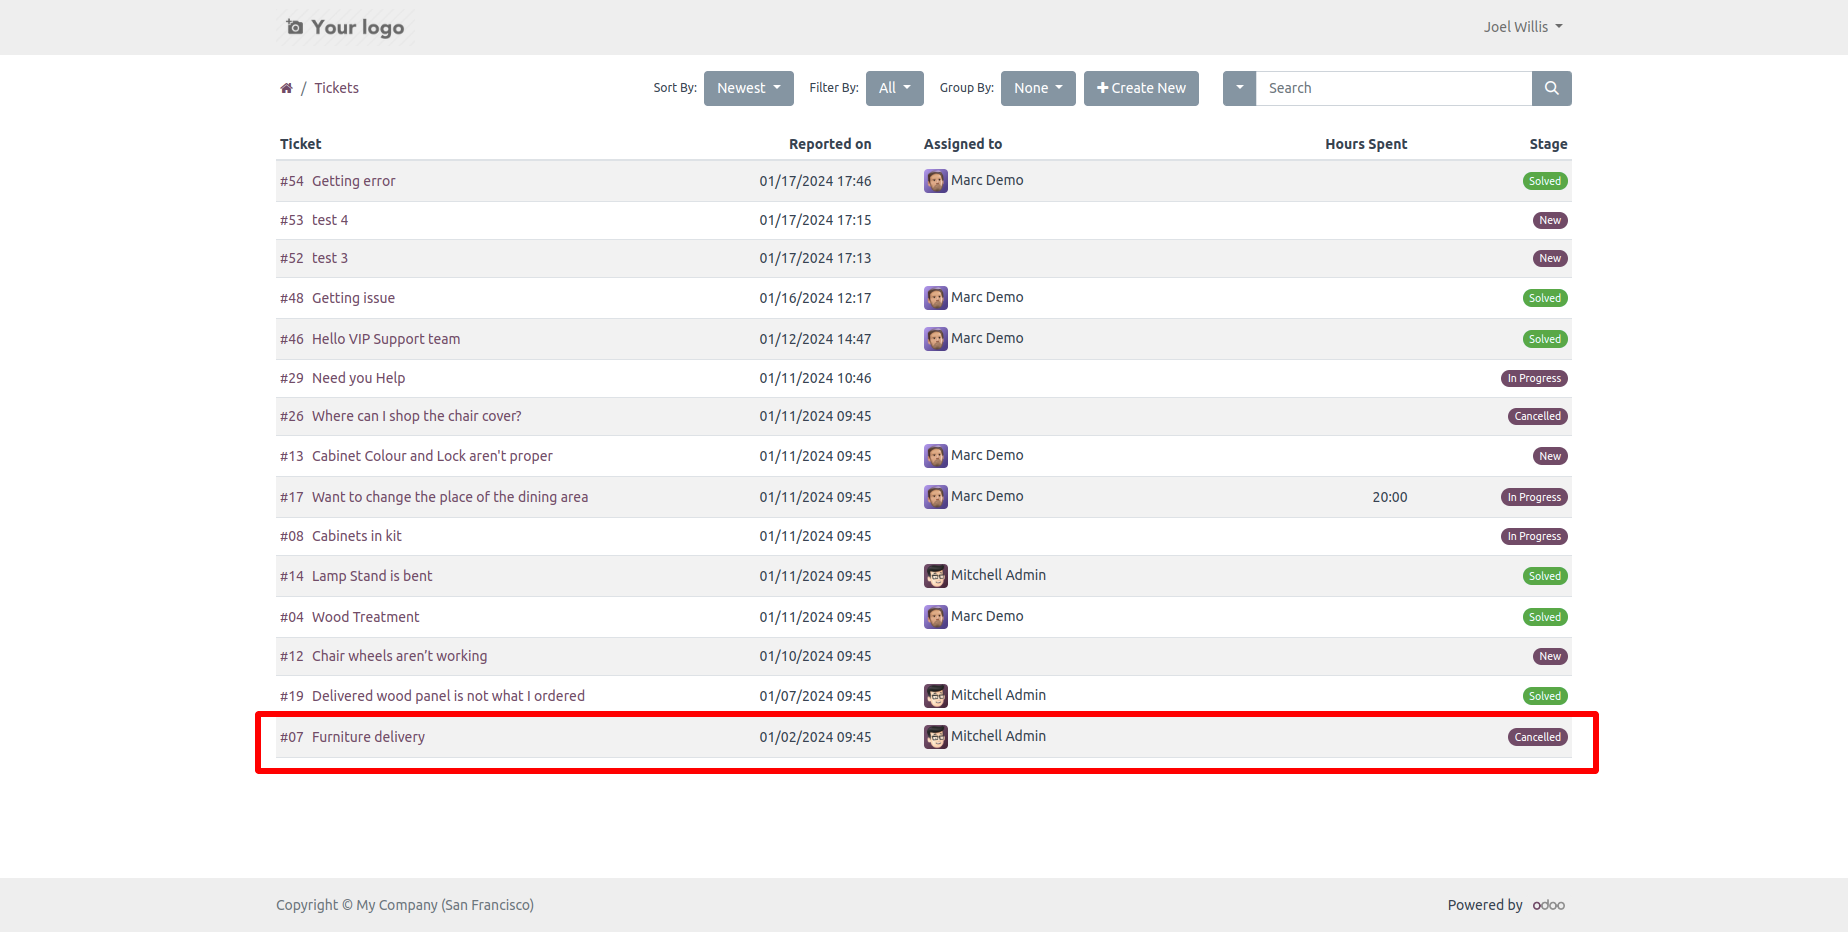
In the portal, download/print ticket using "Download" button.
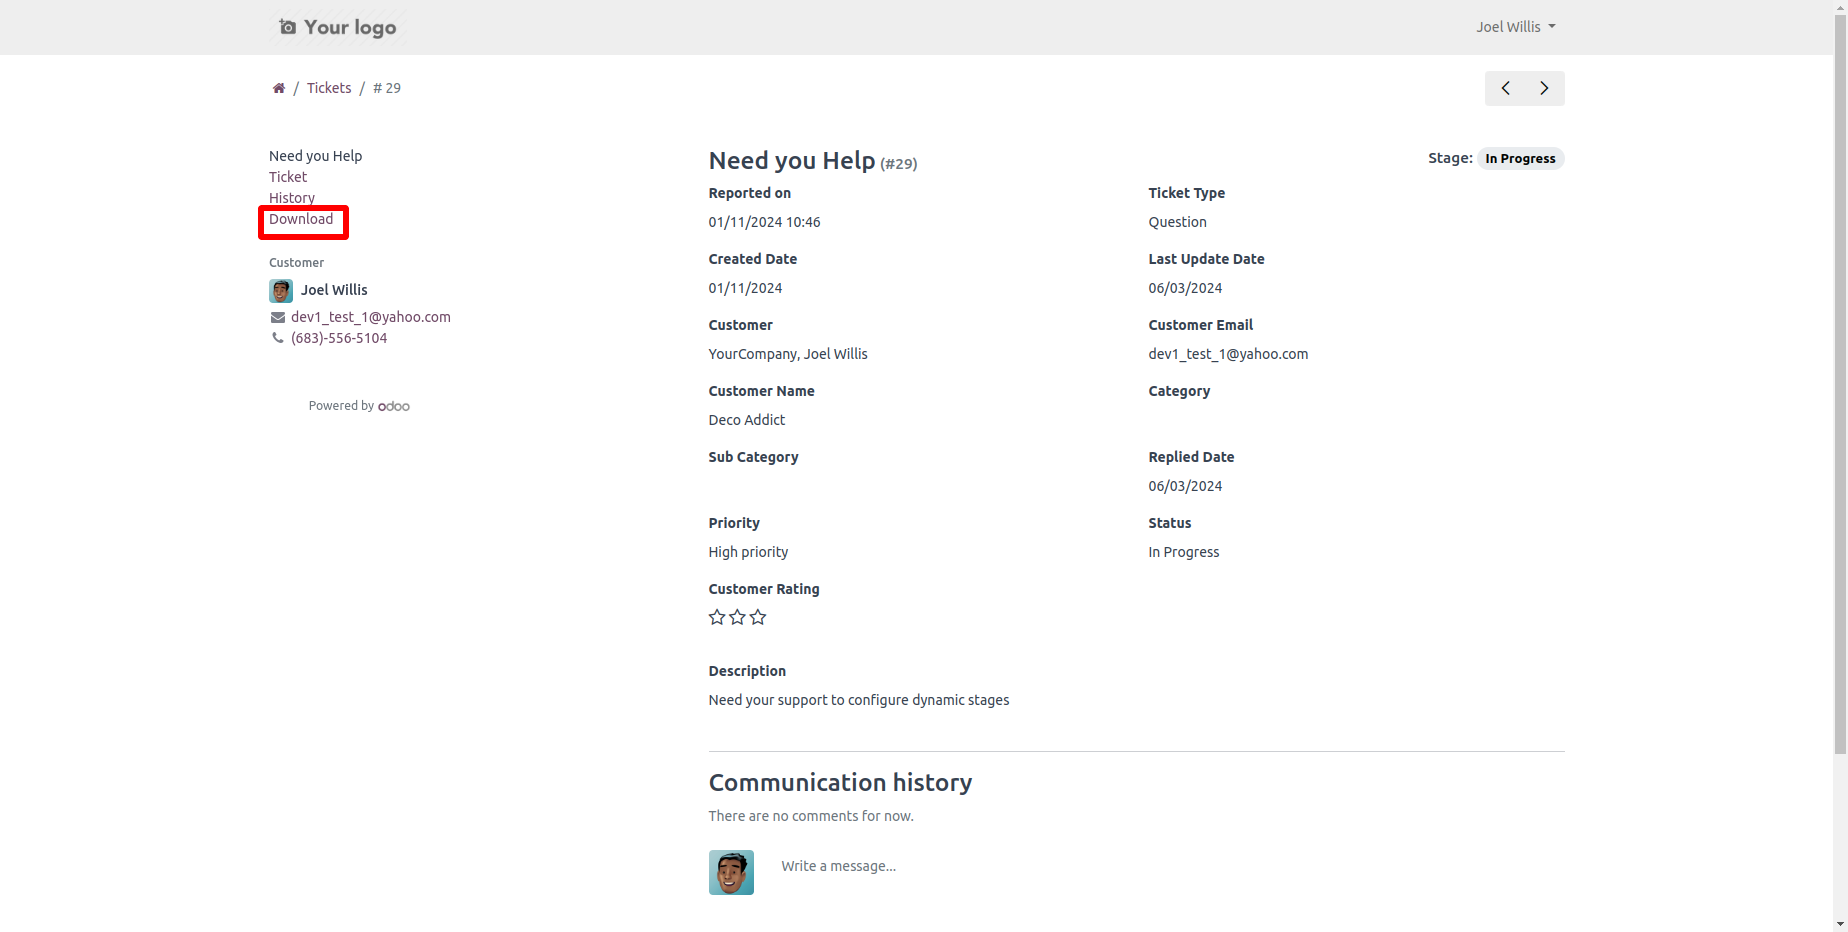
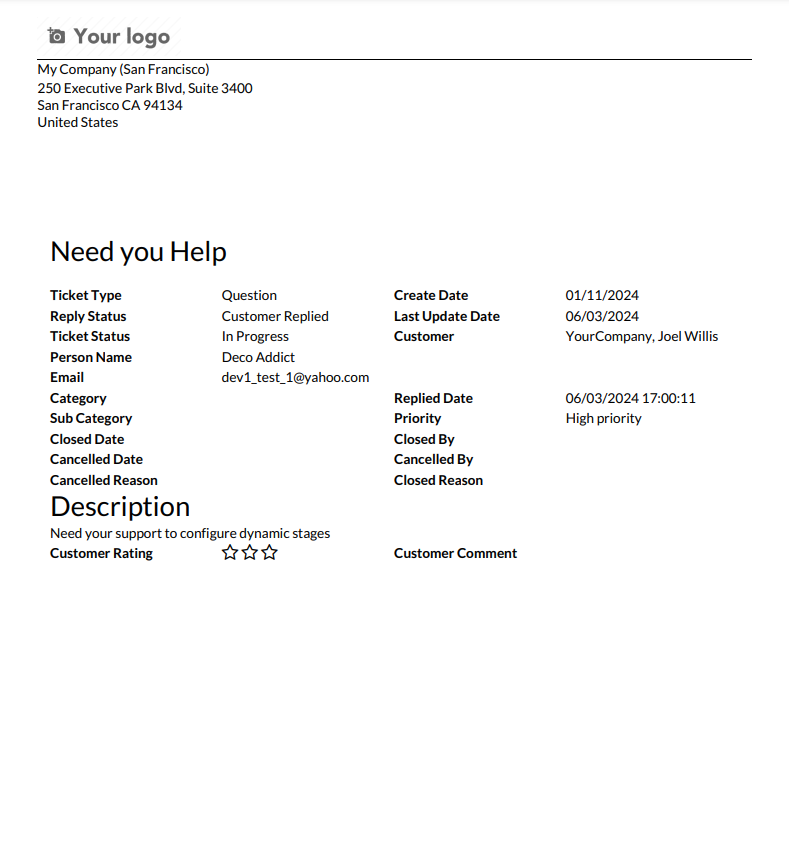
Ticket PDF report looks like below.
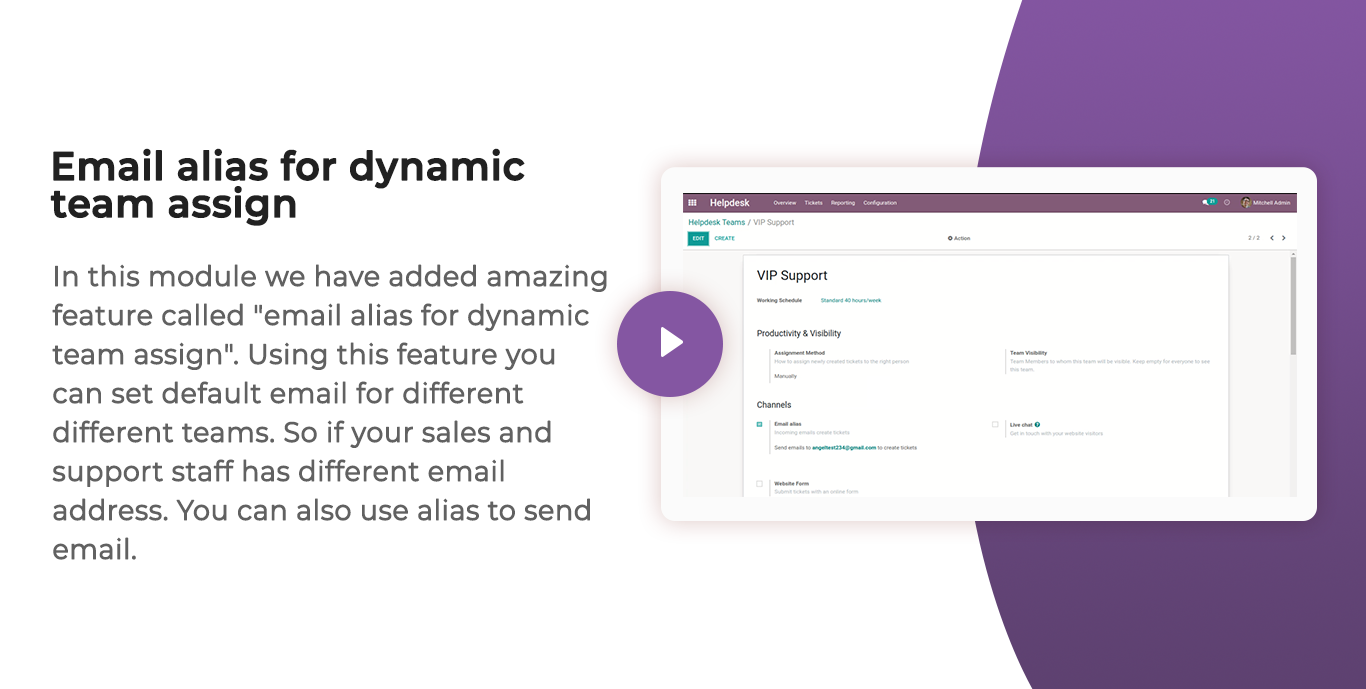
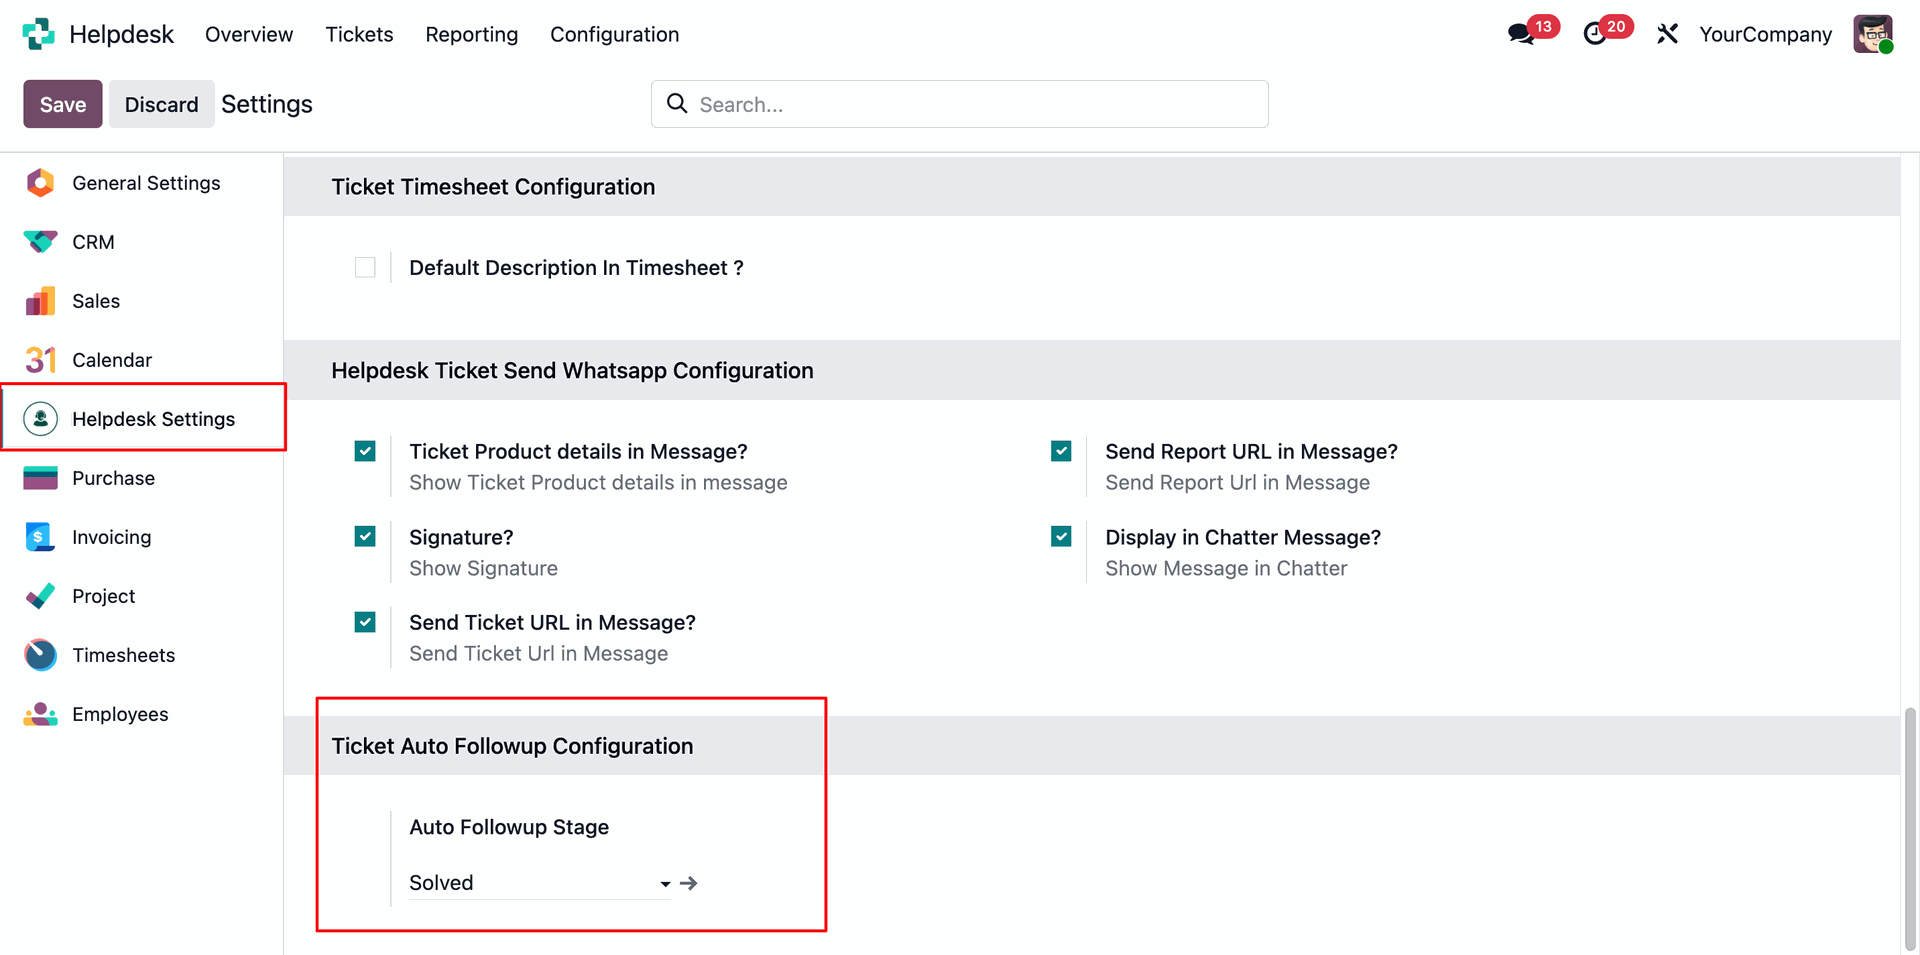
Go to the Helpdesk Settings and select the stage in the 'Auto Followup Stage'.
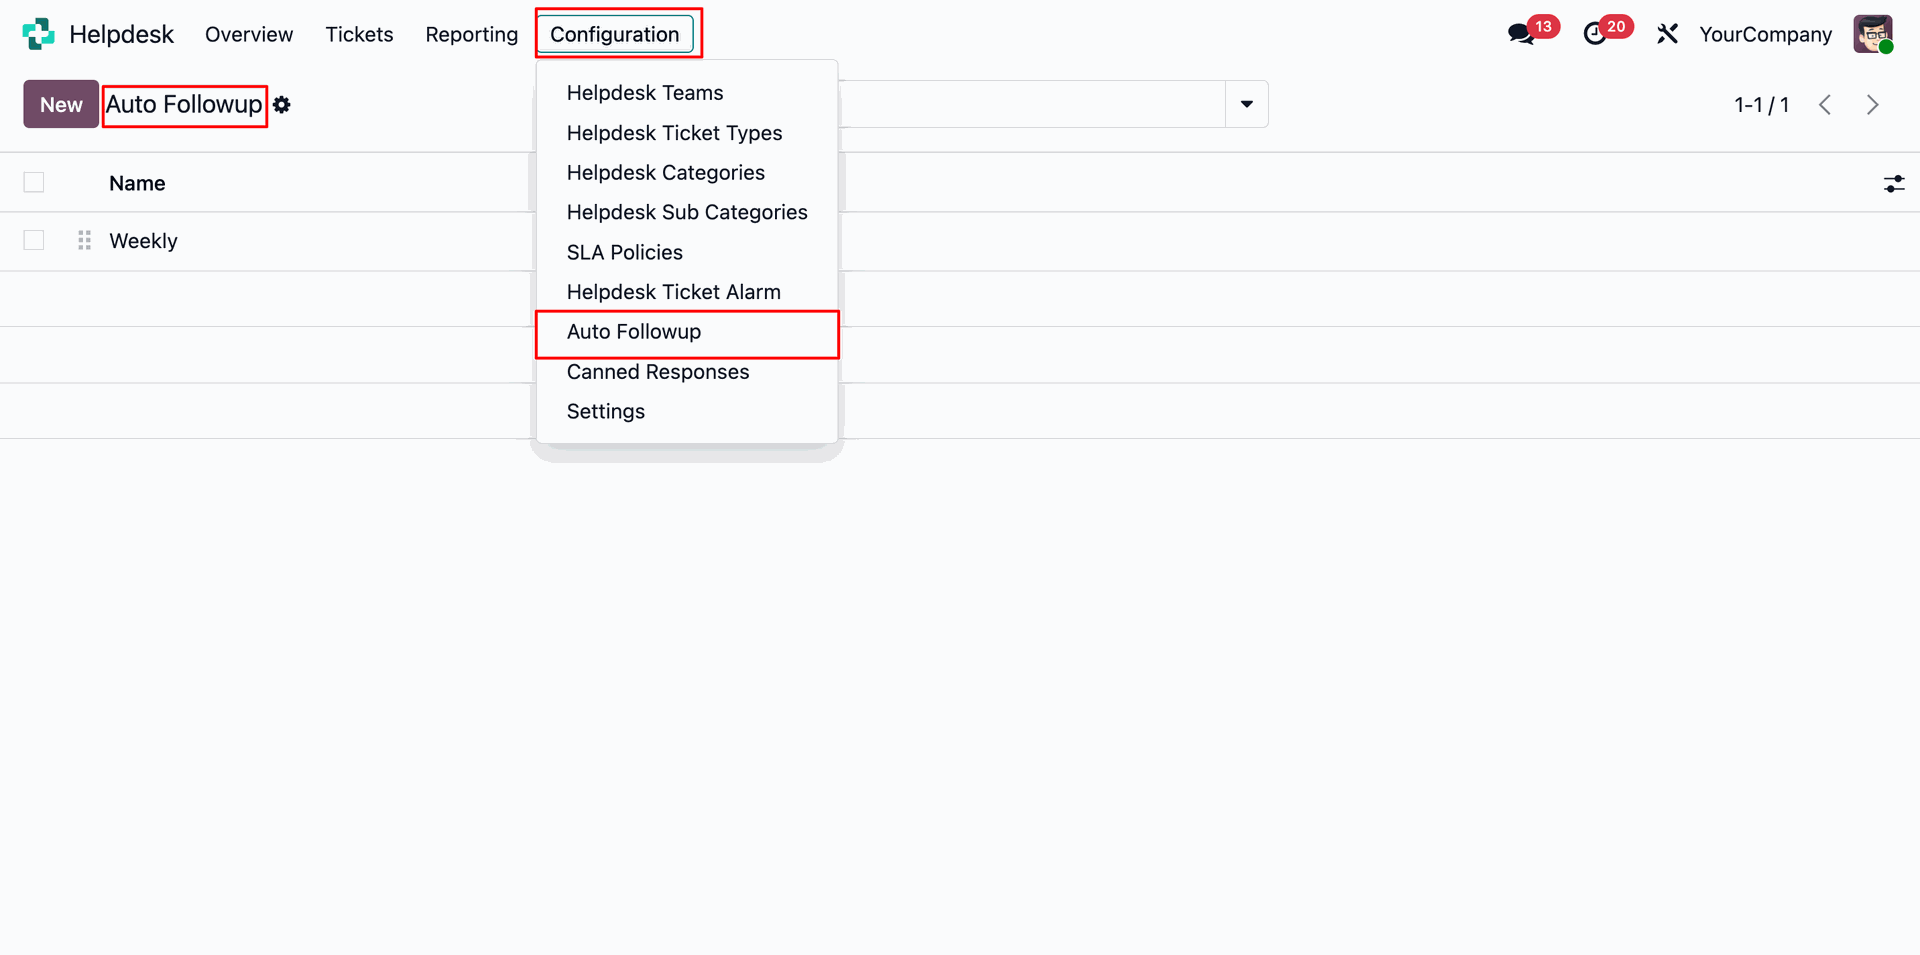
Menu and tree view of the 'Auto Followup'.
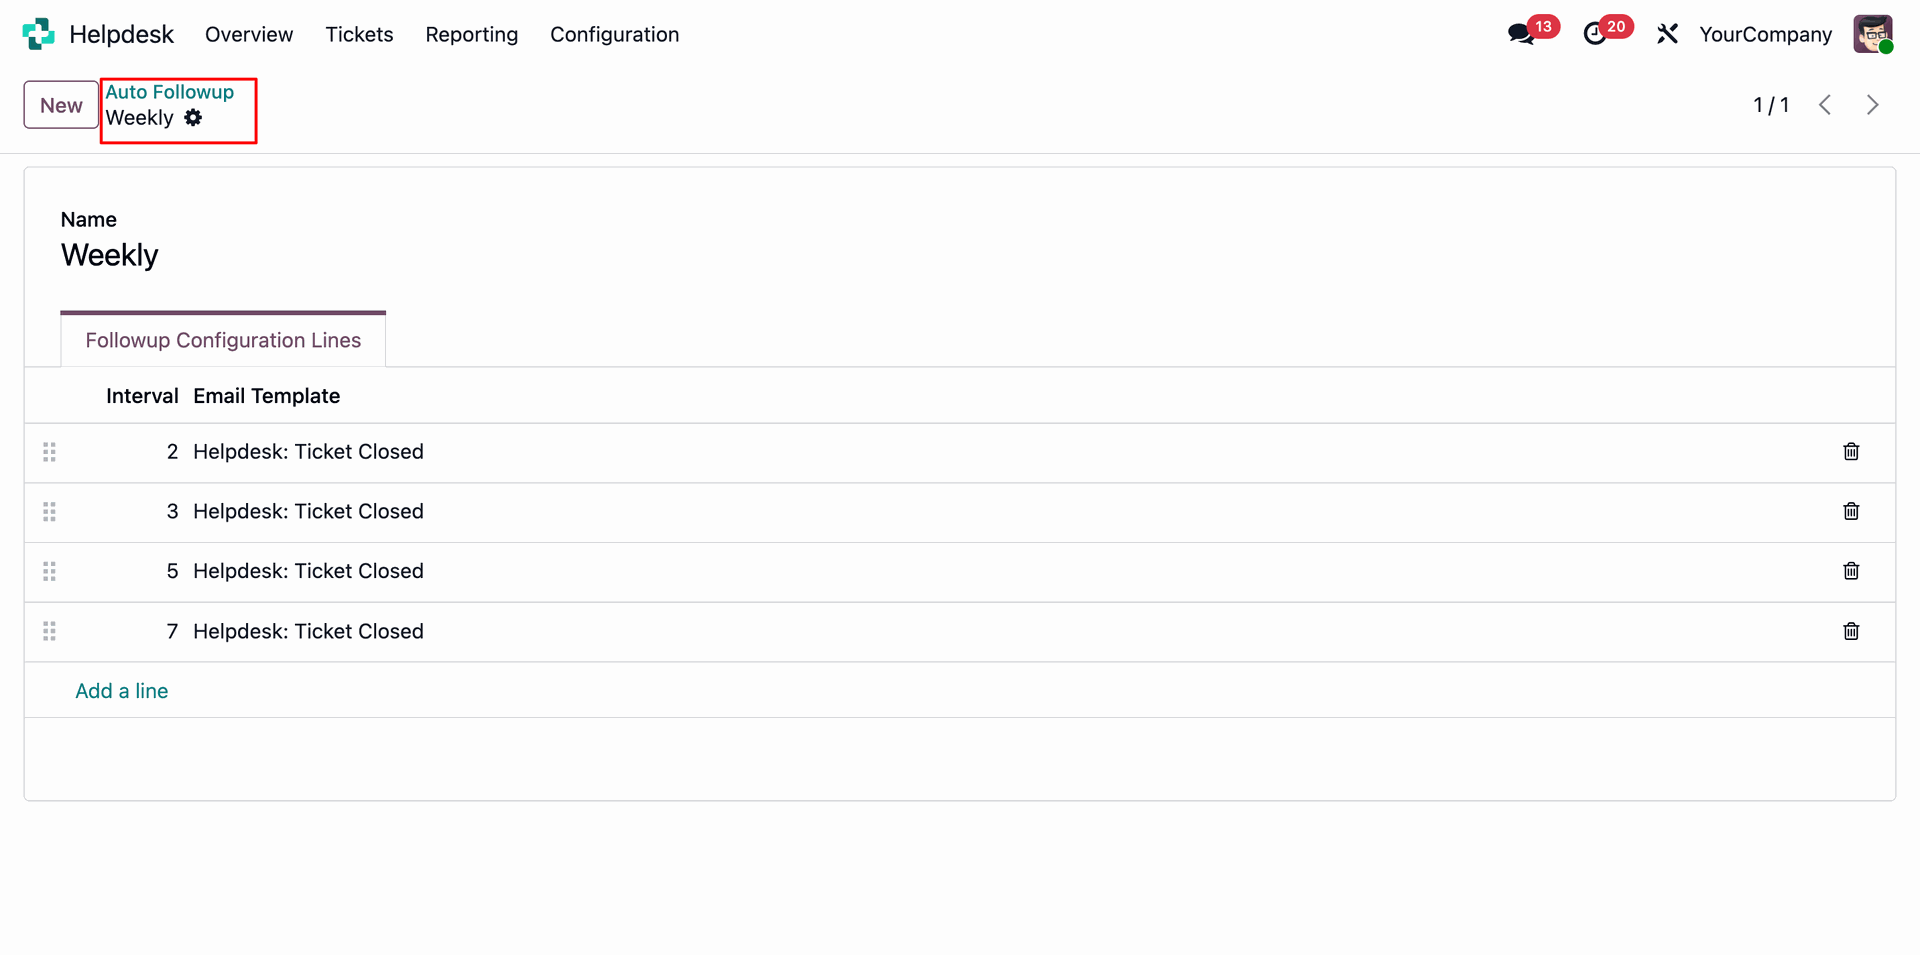
Set the auto email template under Auto Follow-up.
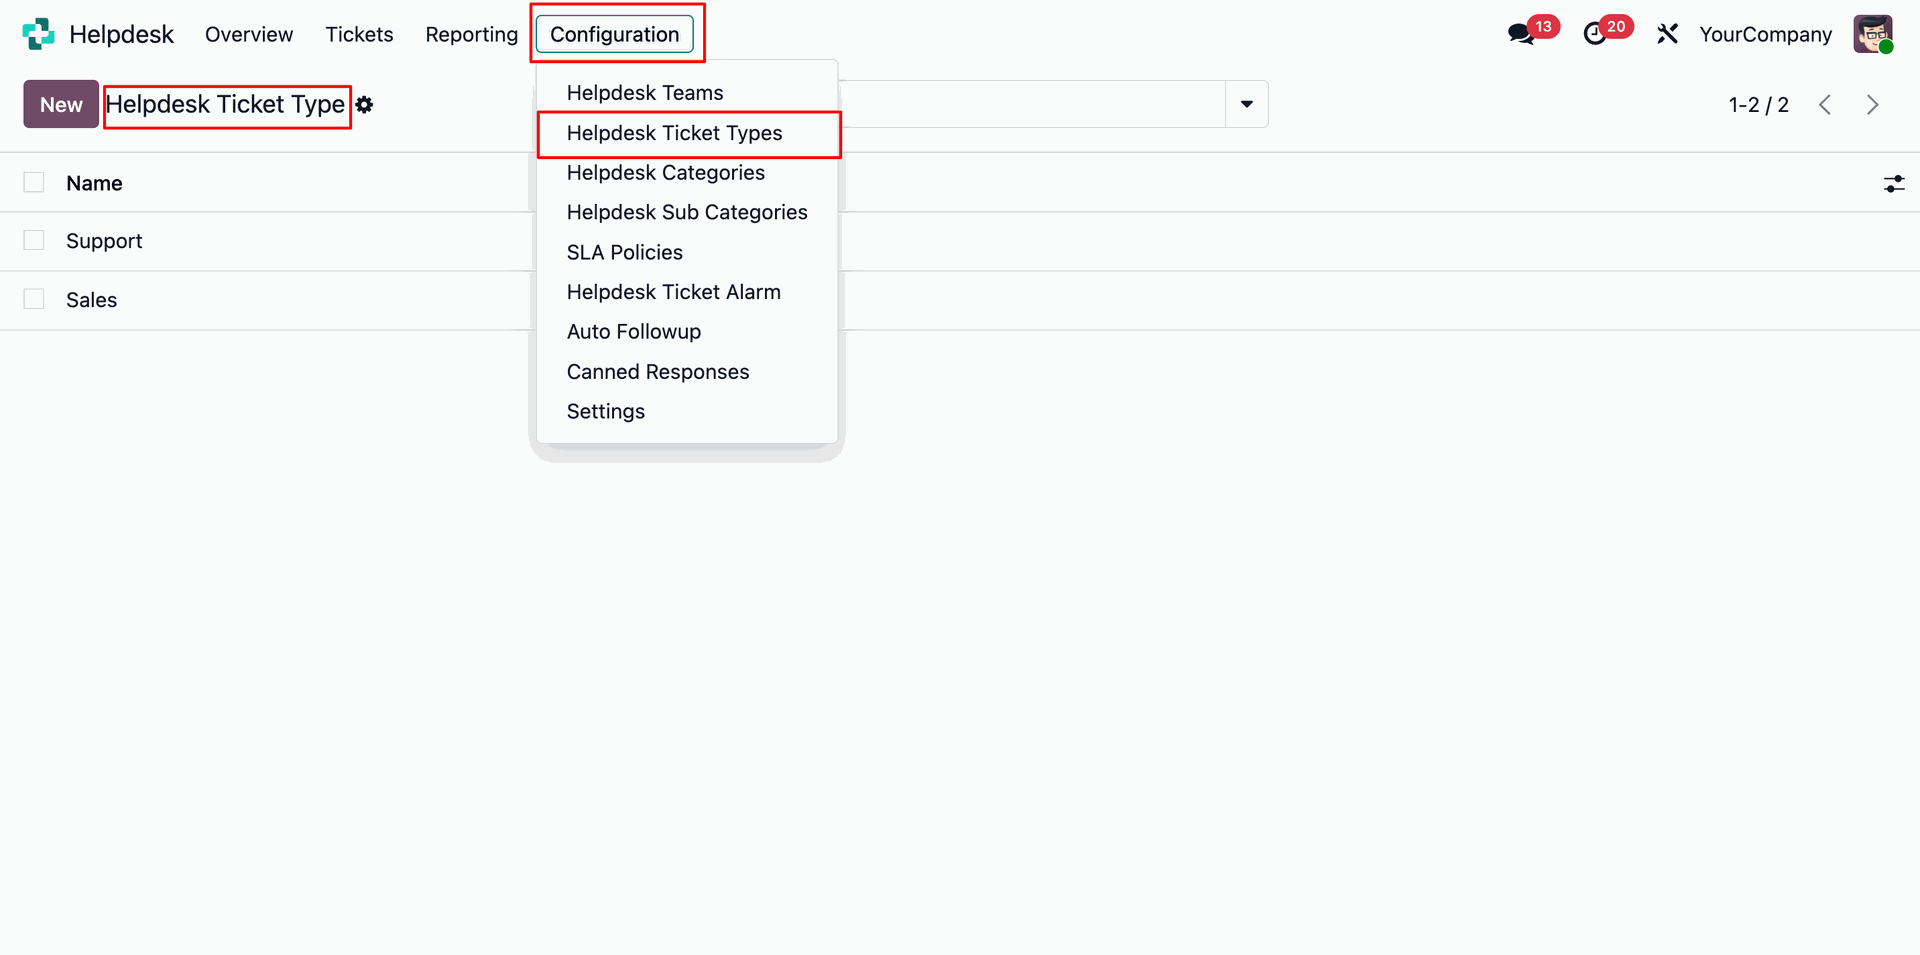
Helpdesk Ticket Types menu and tree view.
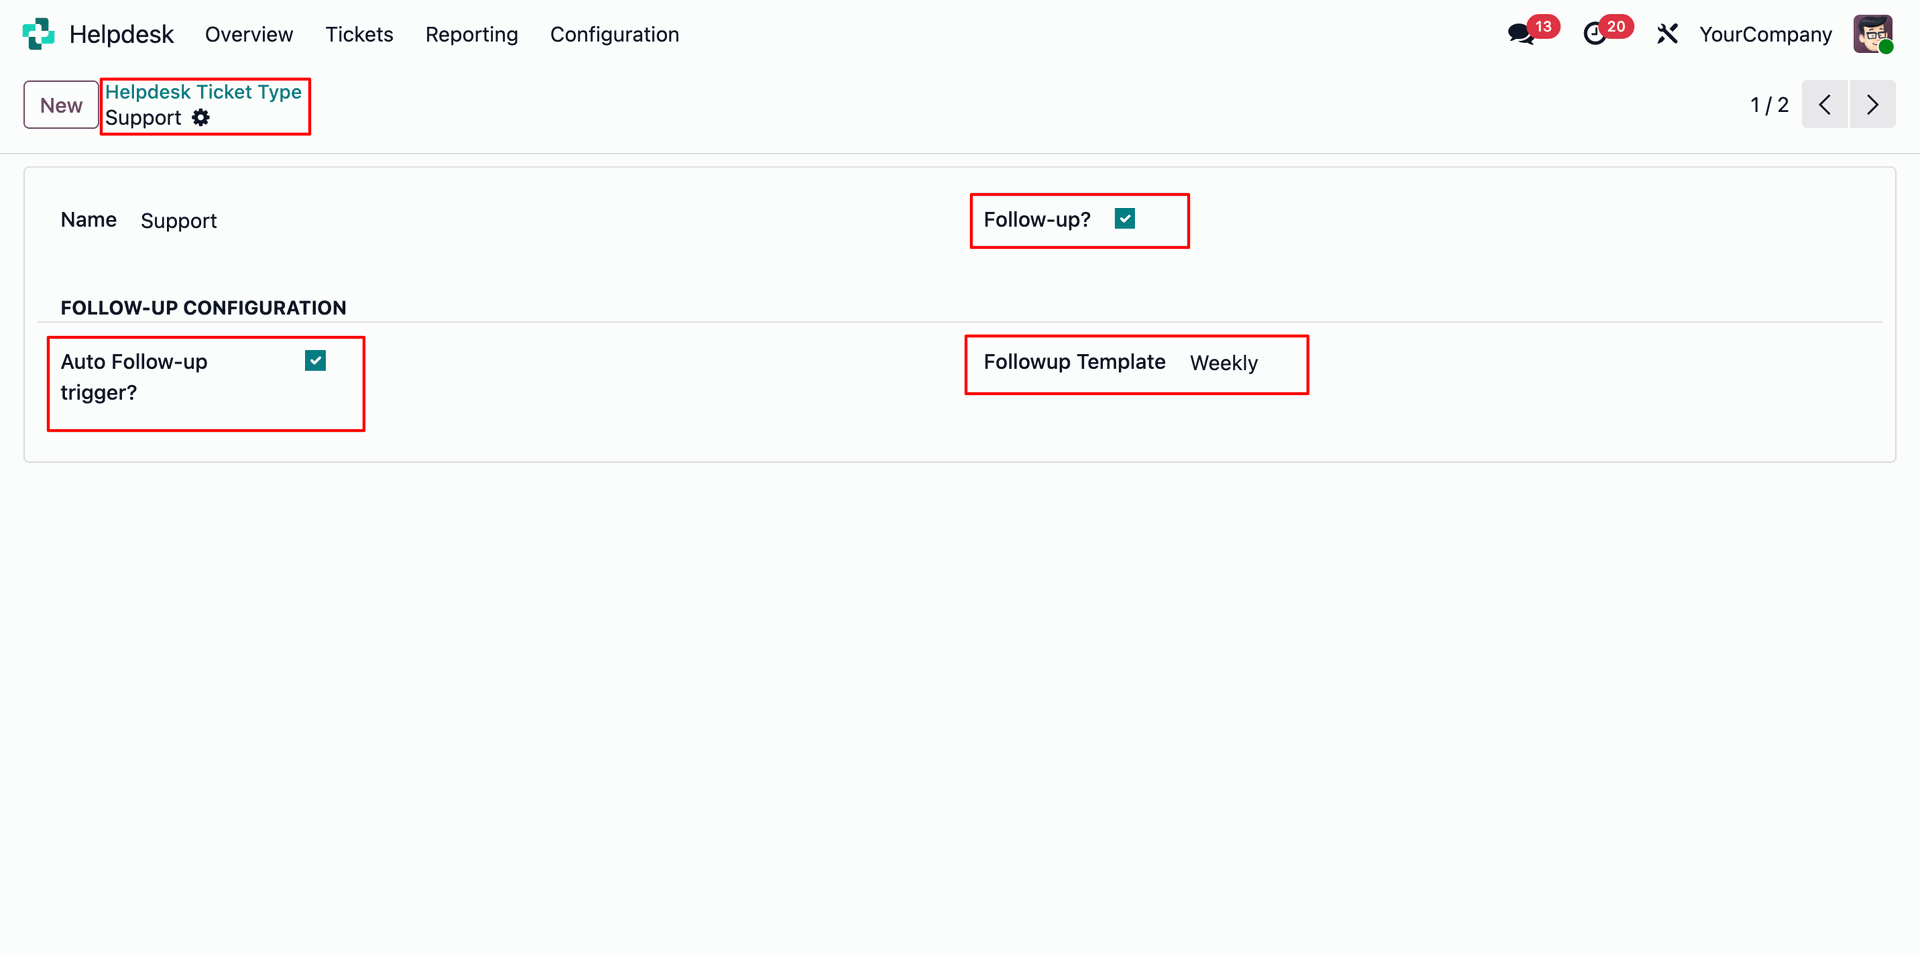
In the Helpdesk Ticket Type form view, enable the 'Follo-up' and 'Auto Follou-up Trigger' options, then select the 'Folloup Template'.
Create a ticket.
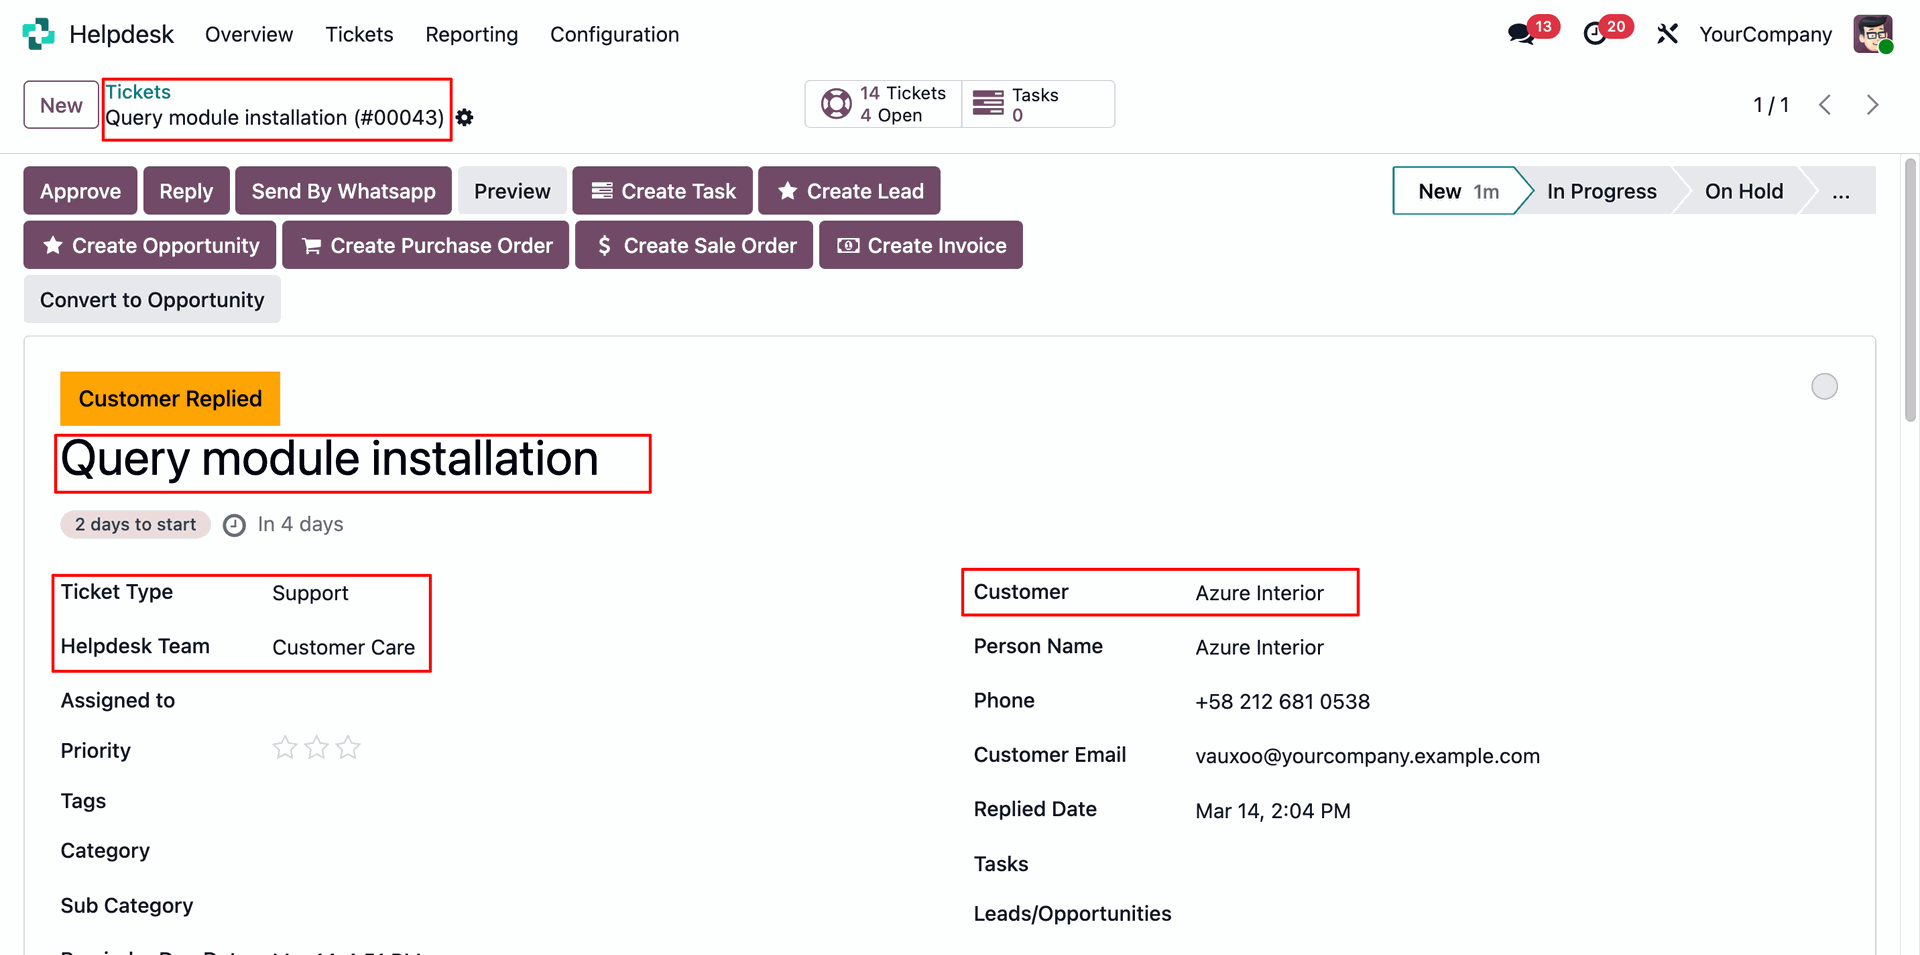
Enable the 'Follo-up' options, then select the 'Folloup Template' under the 'Followuo History' tab.

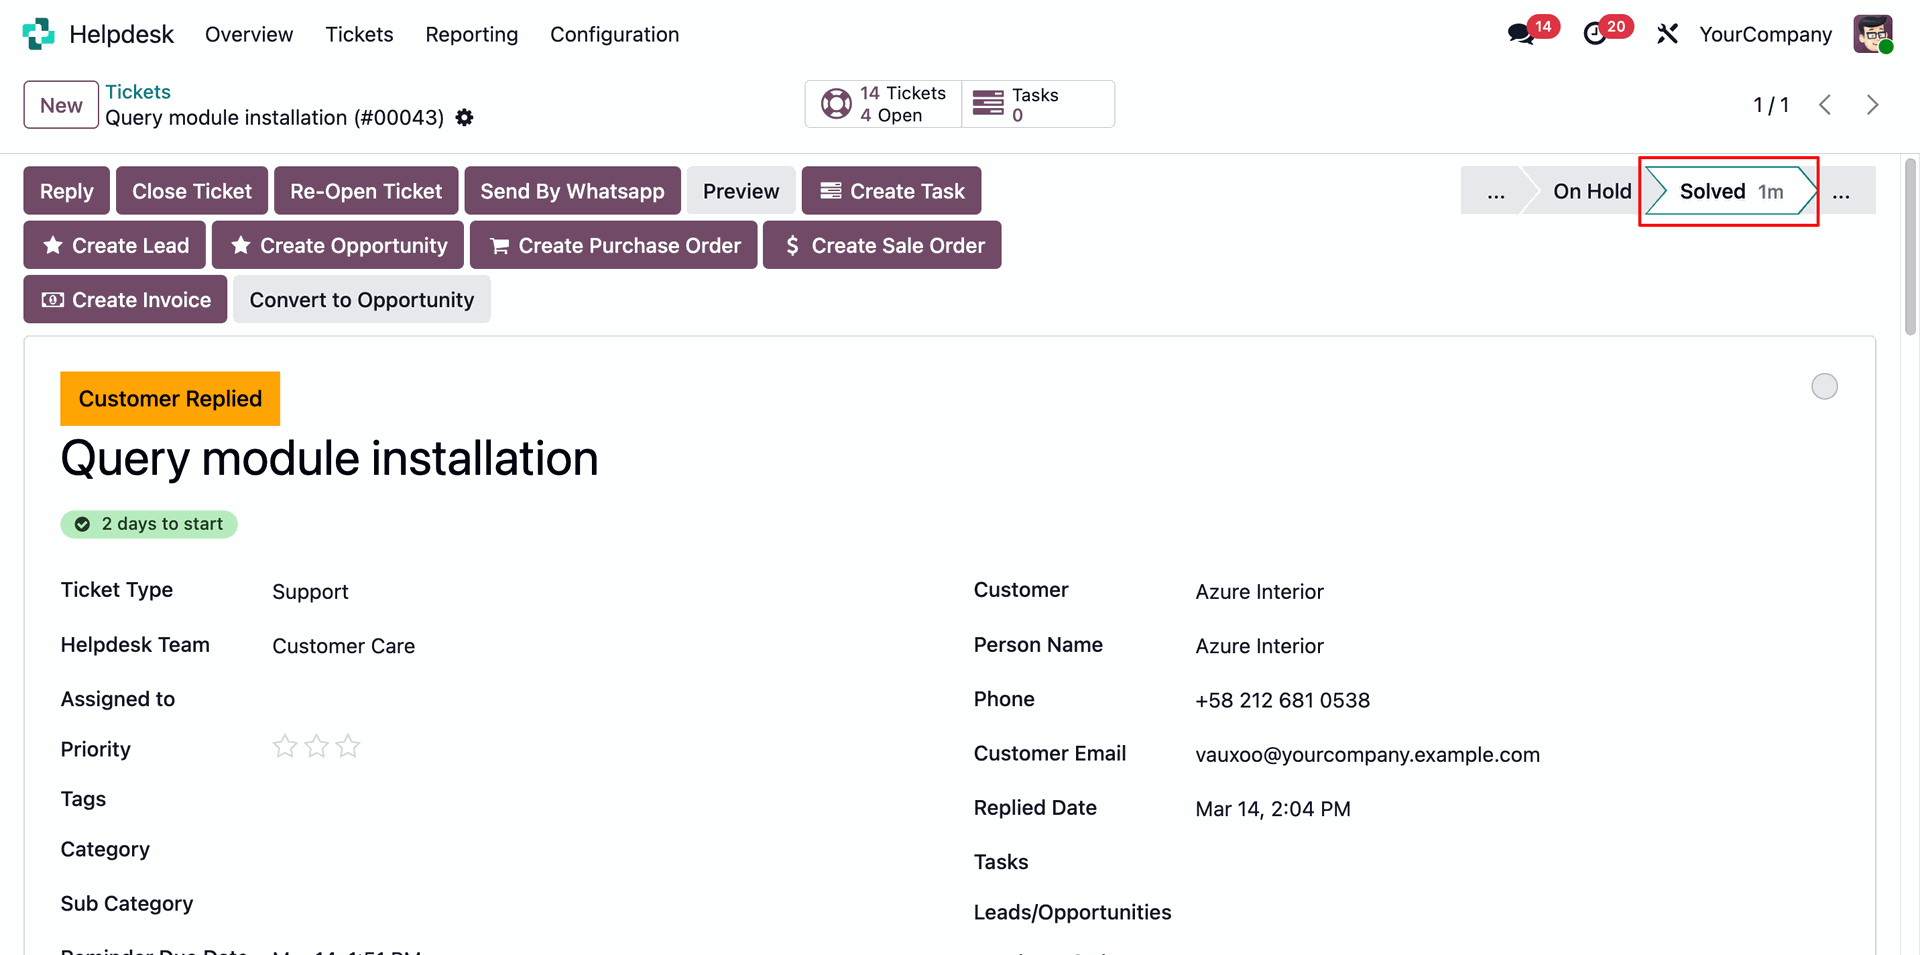
Here you can see the ticket is in the Solved stage.
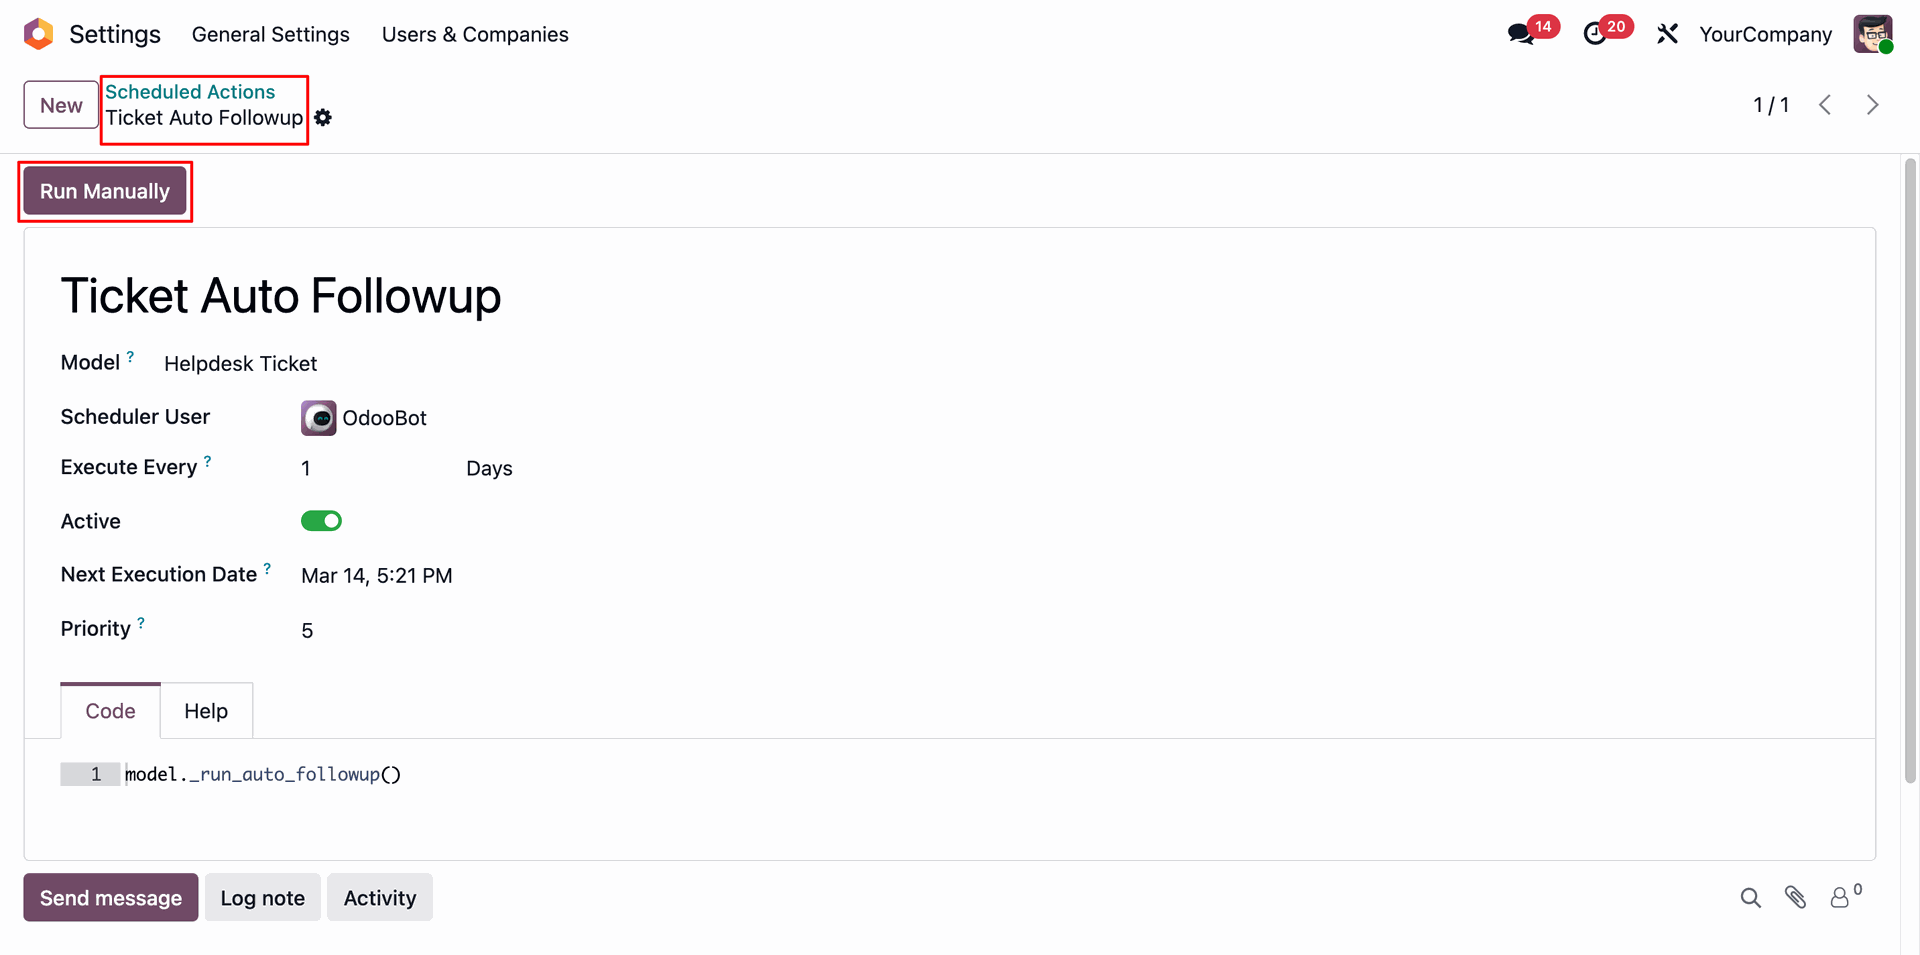
Go to the Scheduled Action (Ticket Auto Followup) and click on the 'Run Manually' button.
Here you can see that the auto follow-up email has been sent.
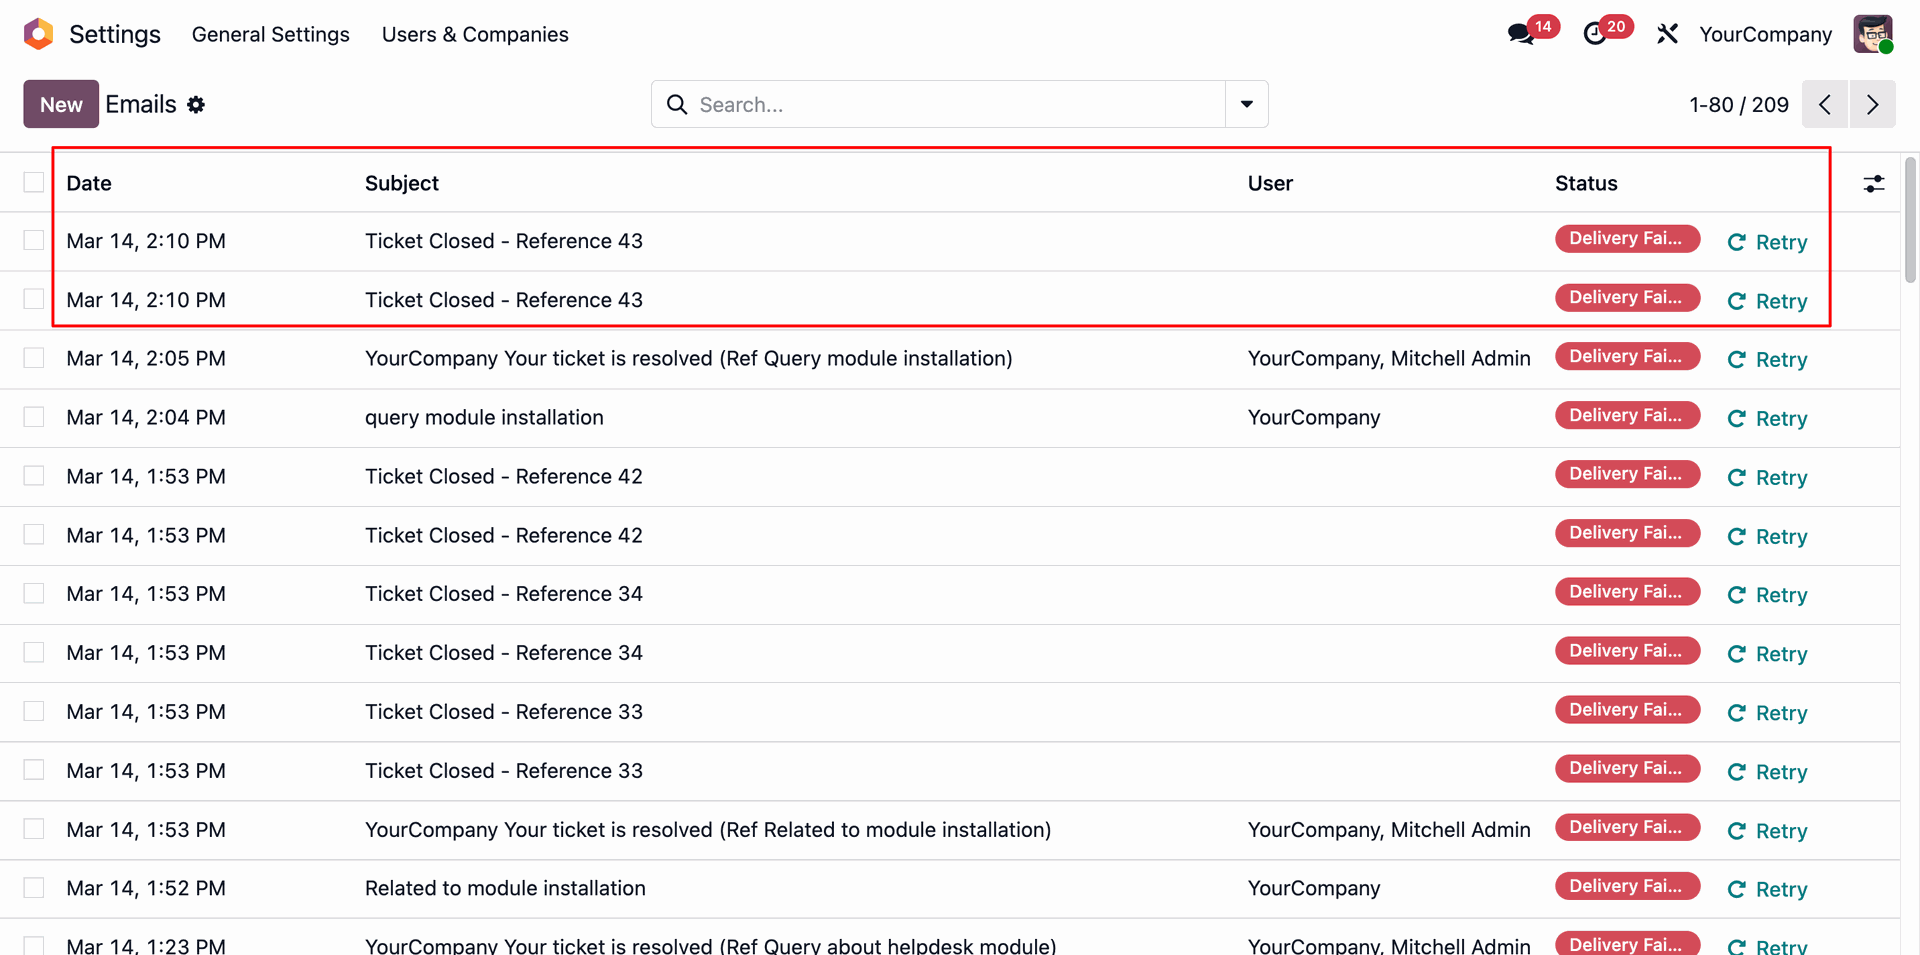
In the helpdesk ticket form view, you can see that the email status has been updated to Success.

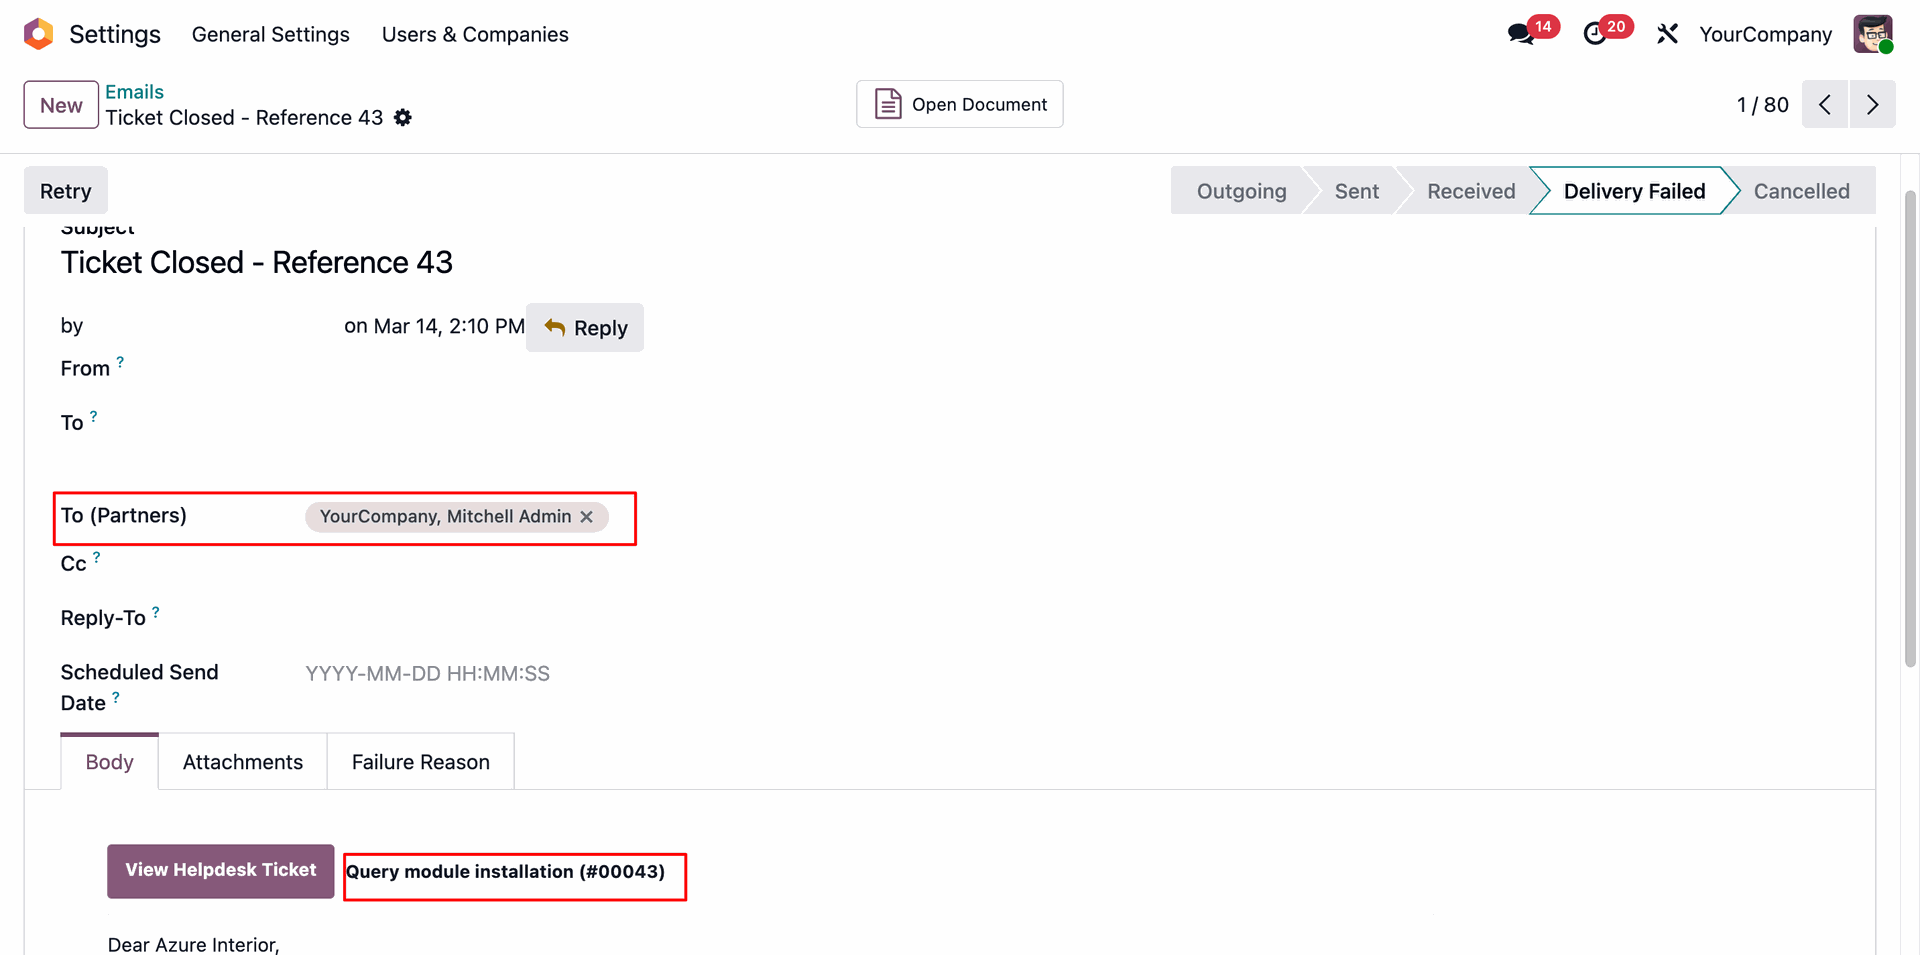
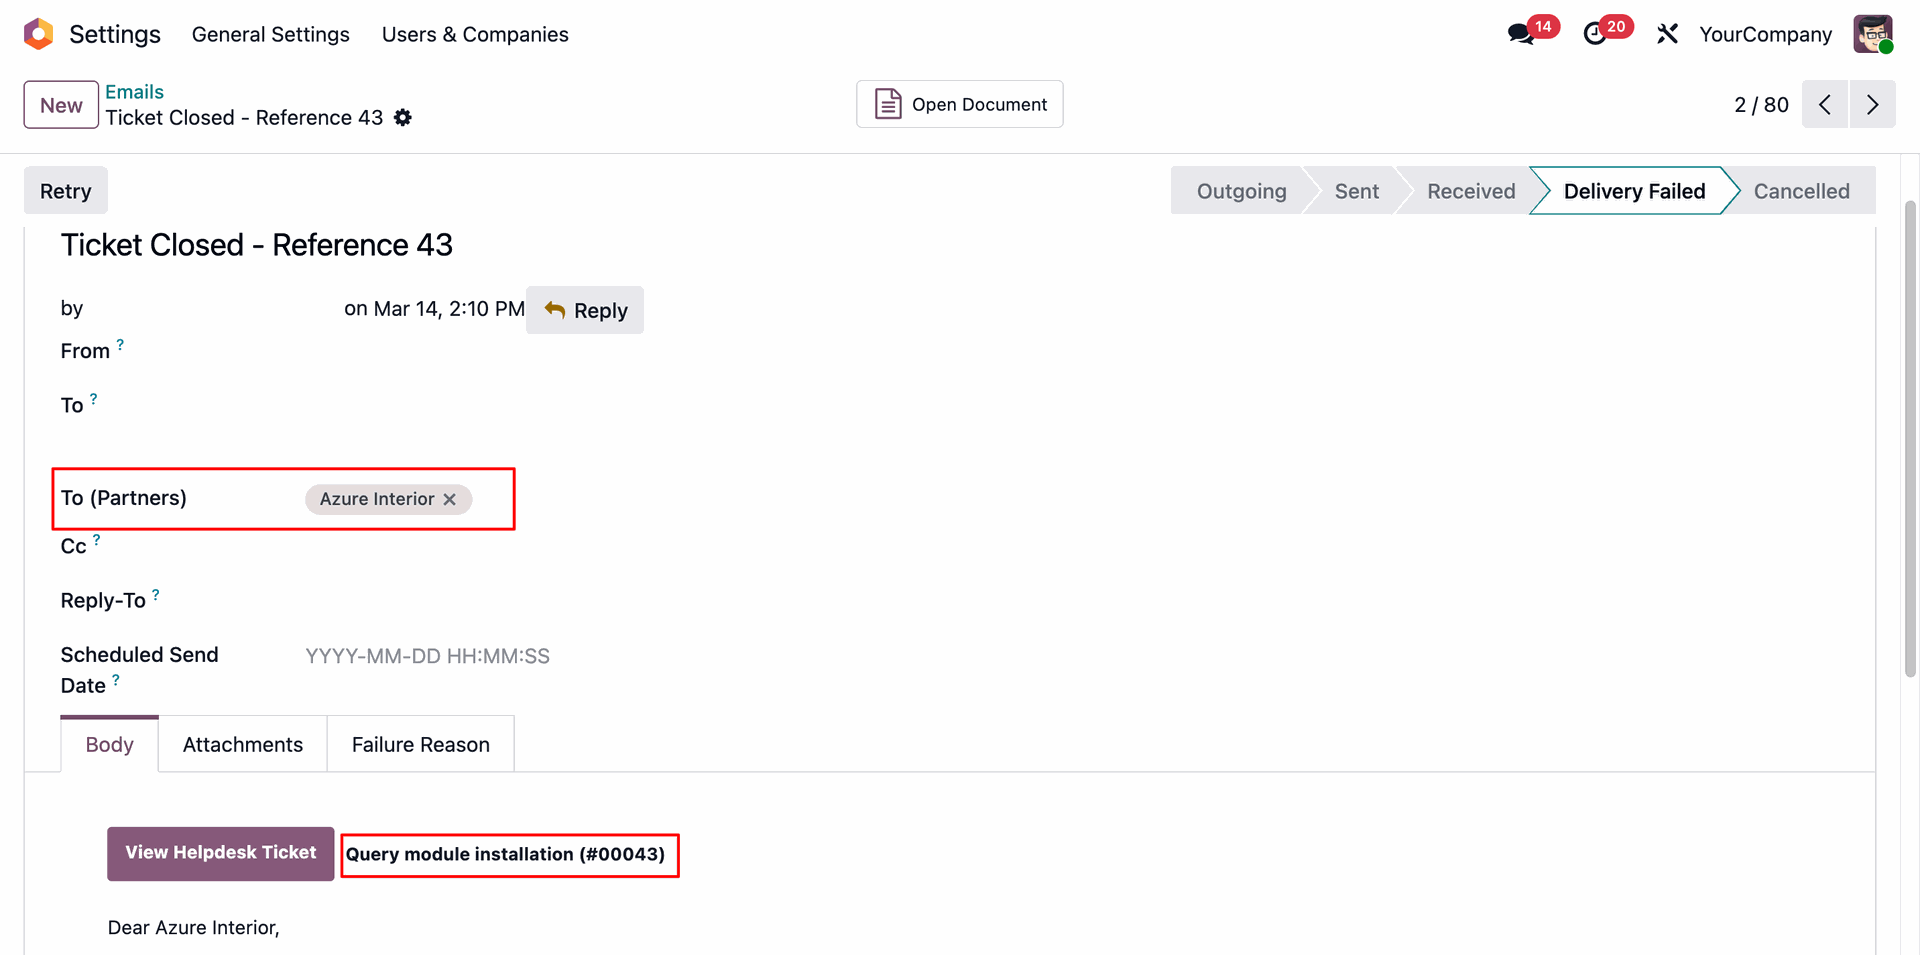
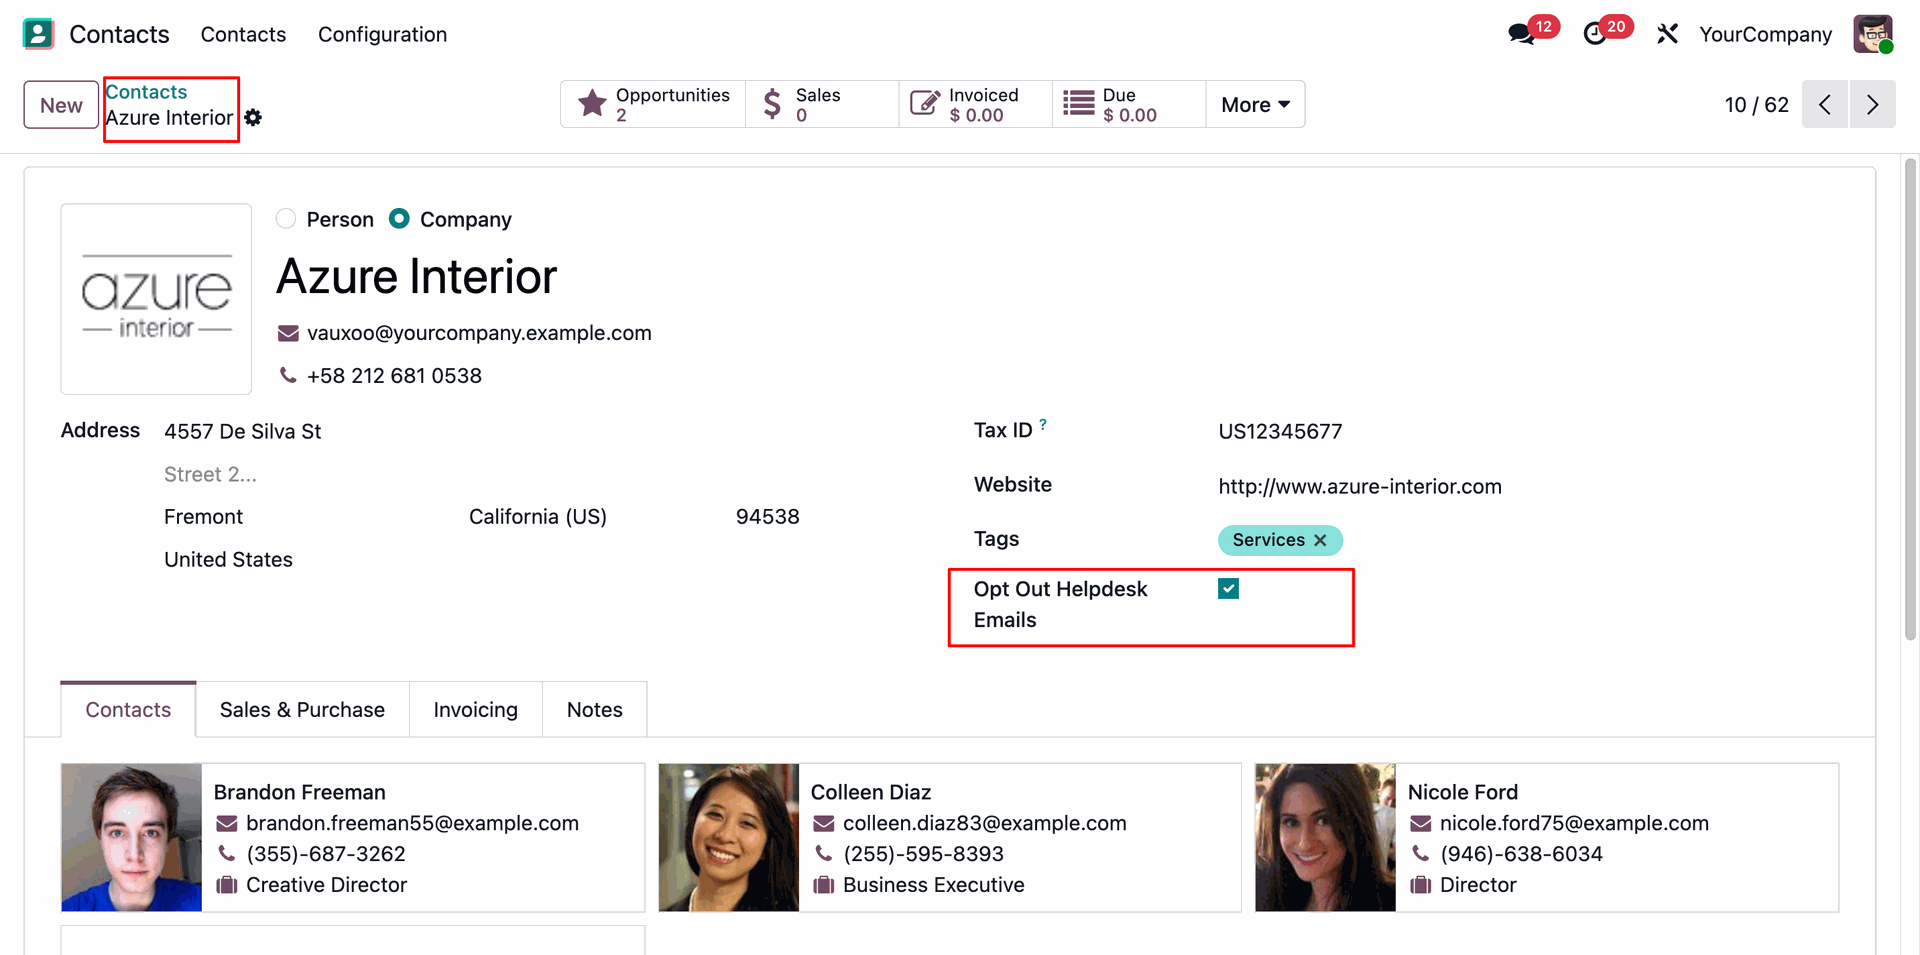
Go to the contact 'Azure Interior' and disable the 'Opt Out Helpdesk Emails' option.

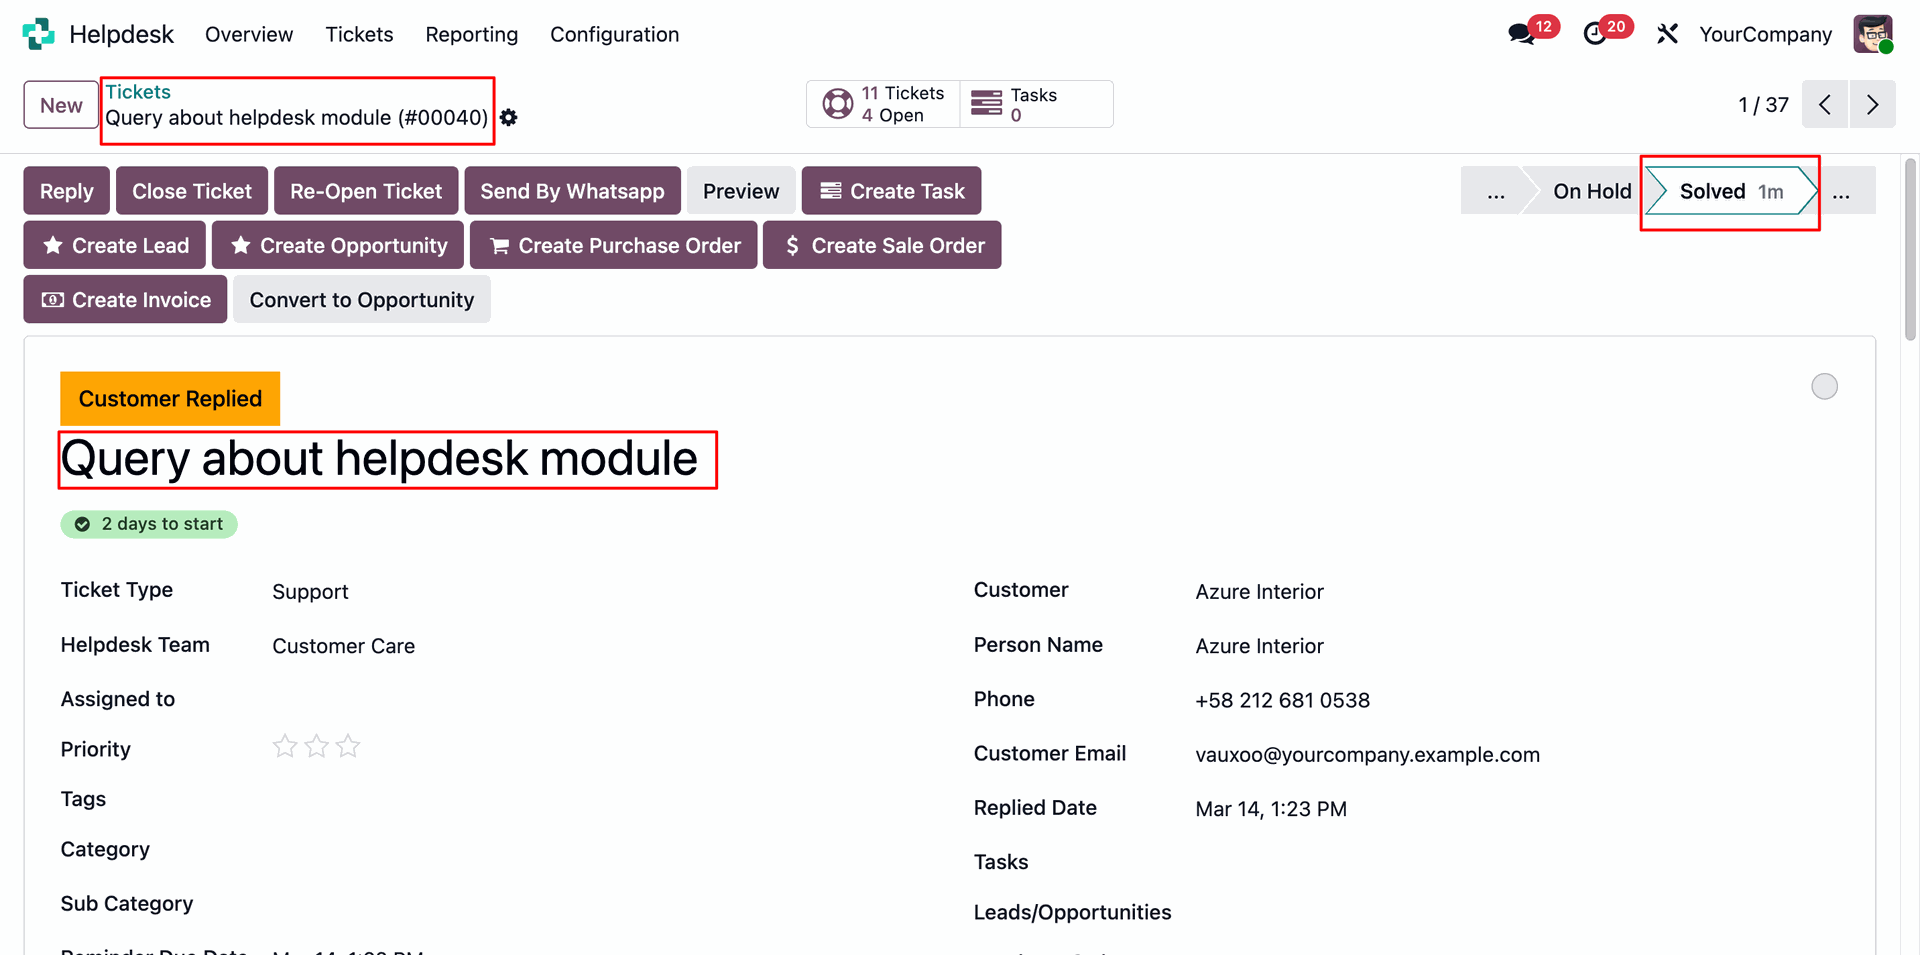
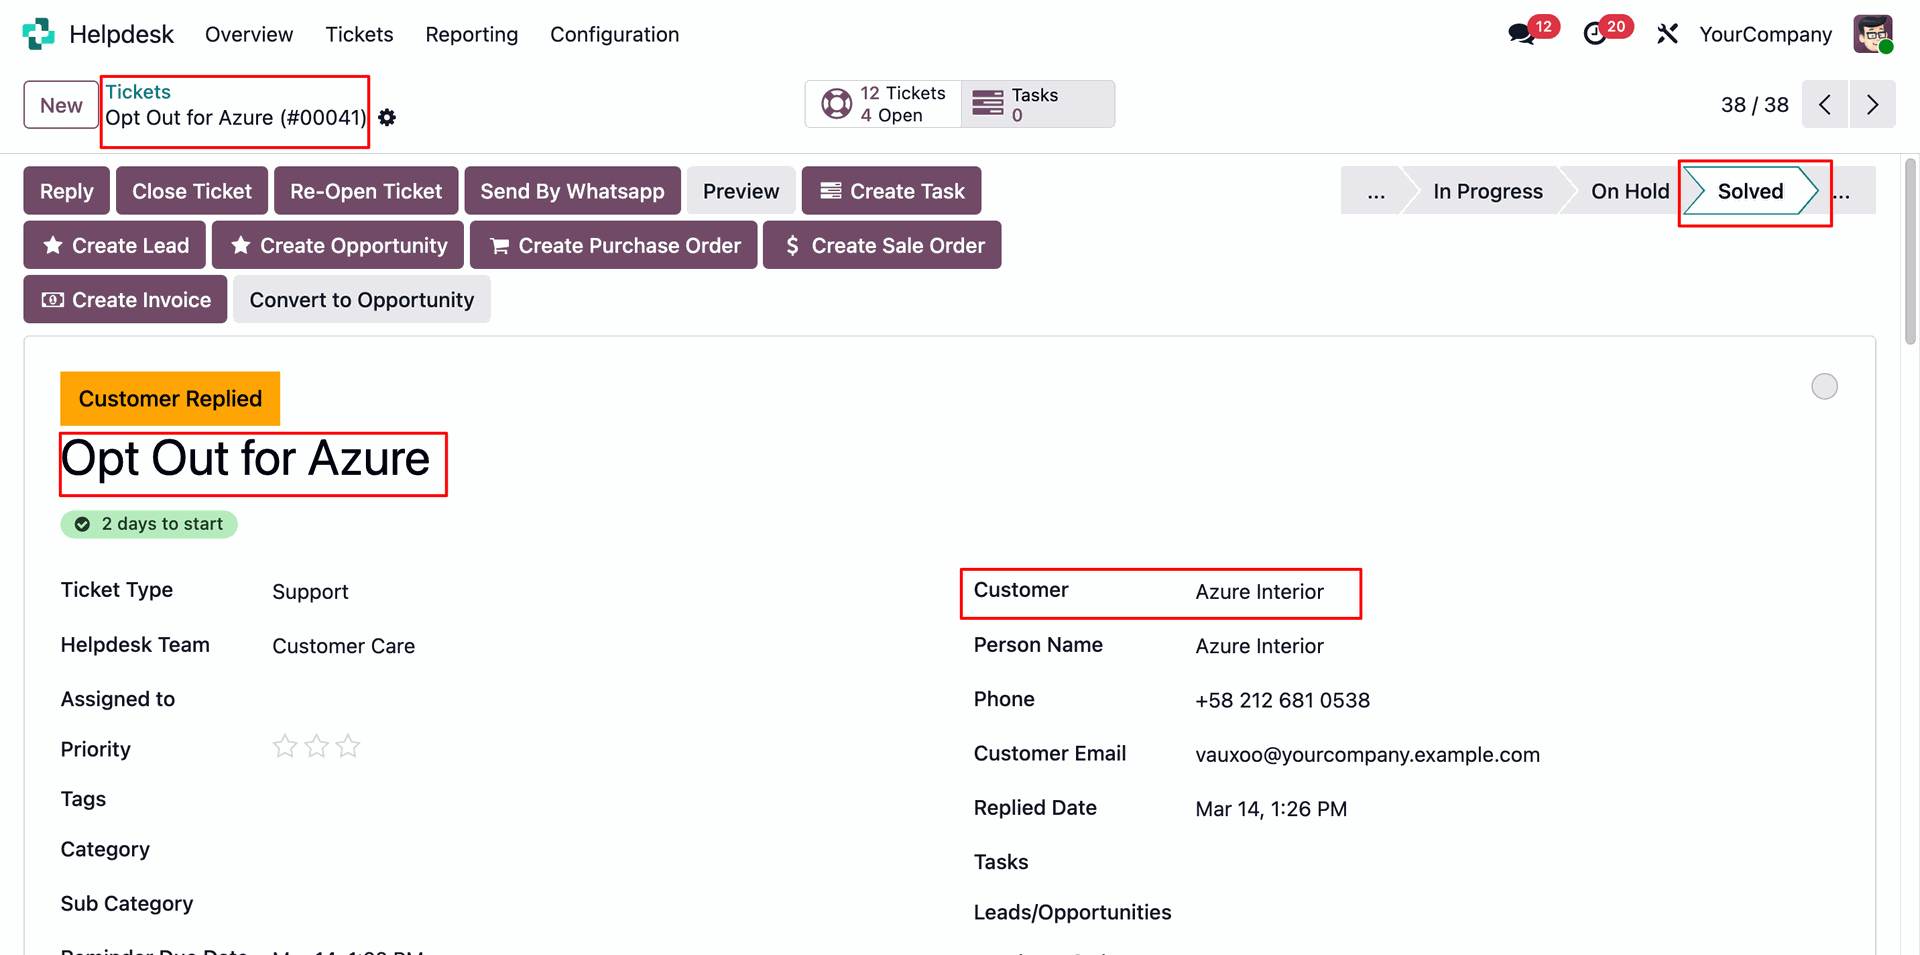
Now we move this ticket to the 'Solved' stage.
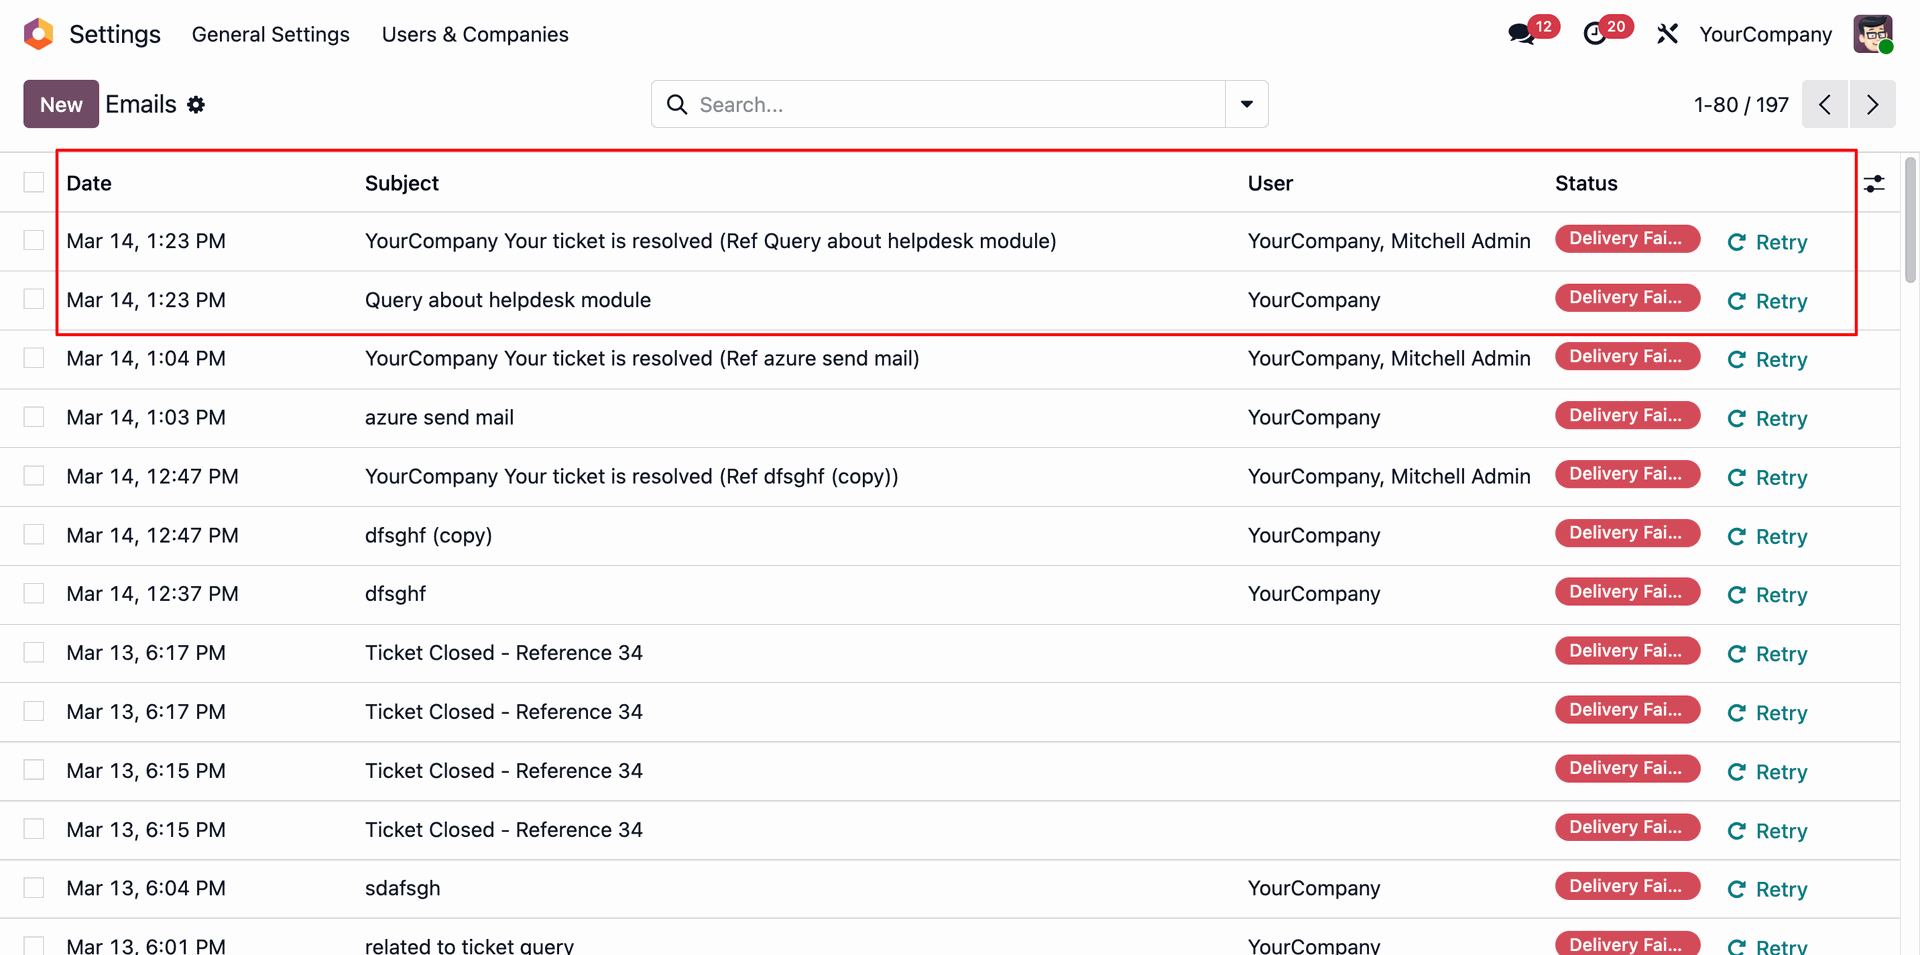
The partner will receive an email notification.
Go to the contact 'Azure Interior' and enable the 'Opt Out Helpdesk Emails' option.
Now we move this ticket to the 'Solved' stage.
The partner will not receive an email notification because the 'Opt Out Helpdesk Emails' option is enabled for this partner.

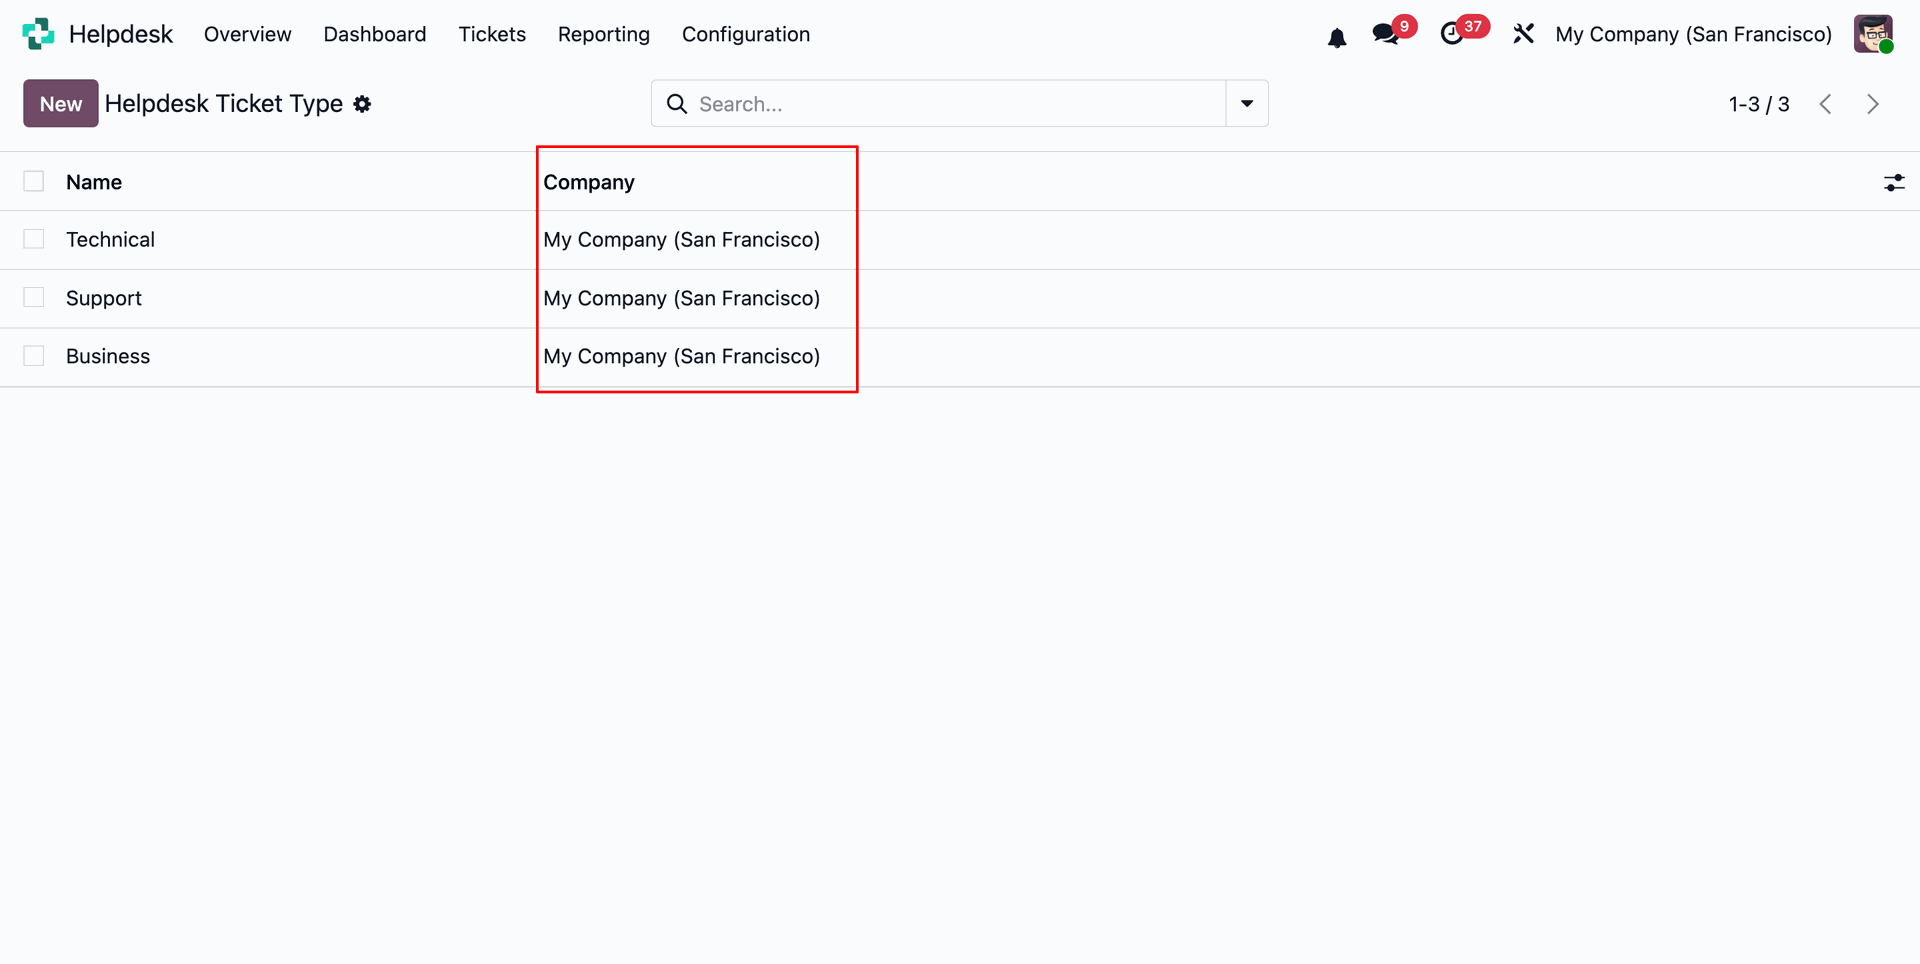
Set a company for the Helpdesk Ticket Type.

Users can view the assigned companies from the Helpdesk Ticket Type list view.
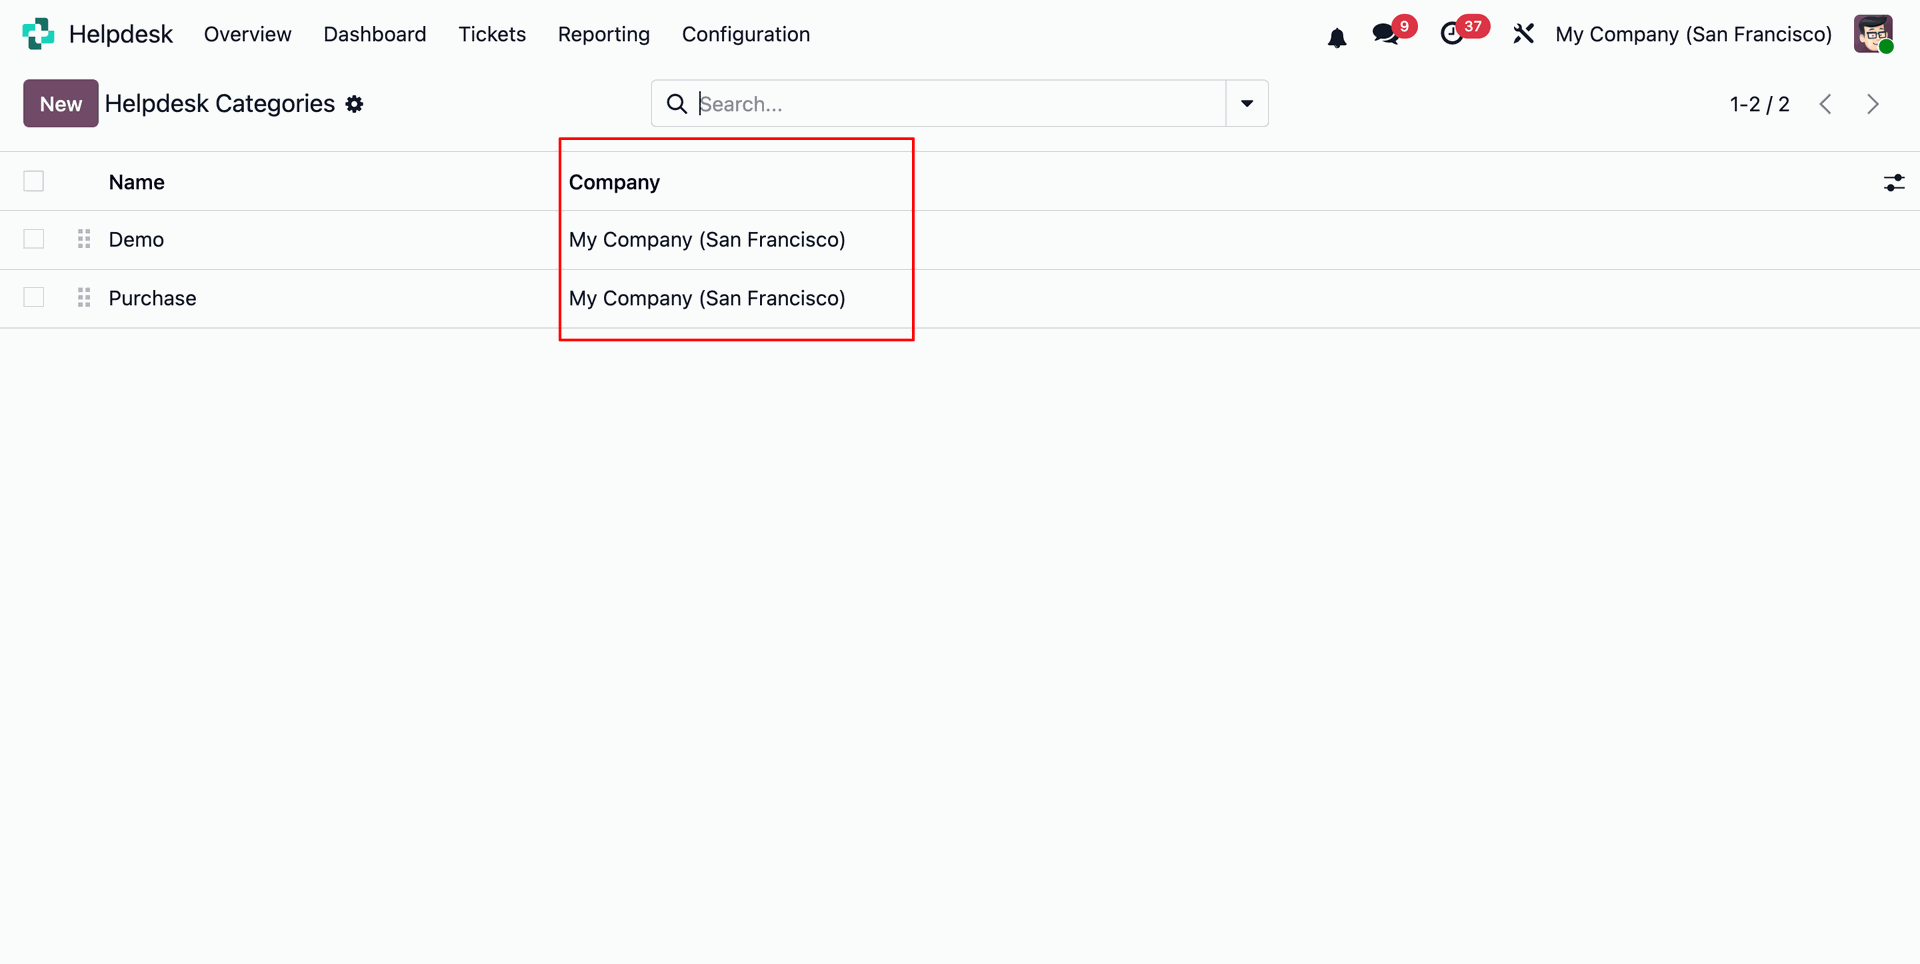
Set a company for the Helpdesk Categories.
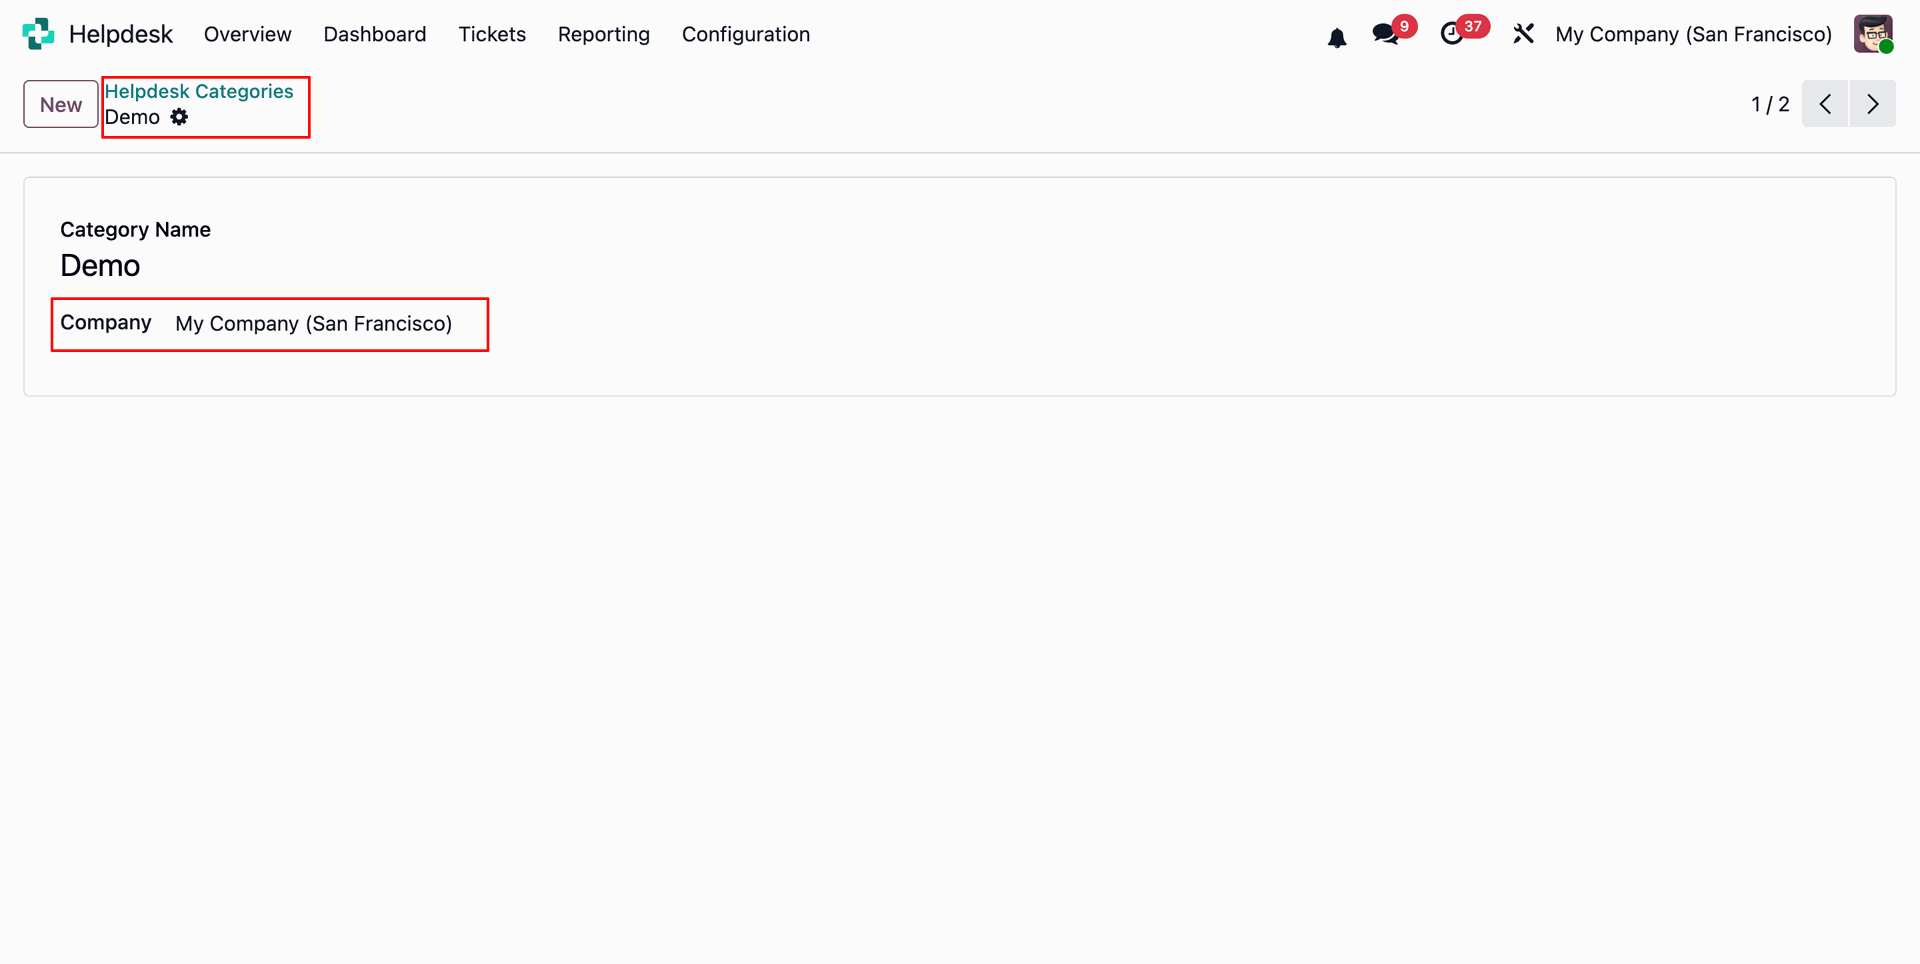
Users can view the assigned companies from the Helpdesk Categories list view.
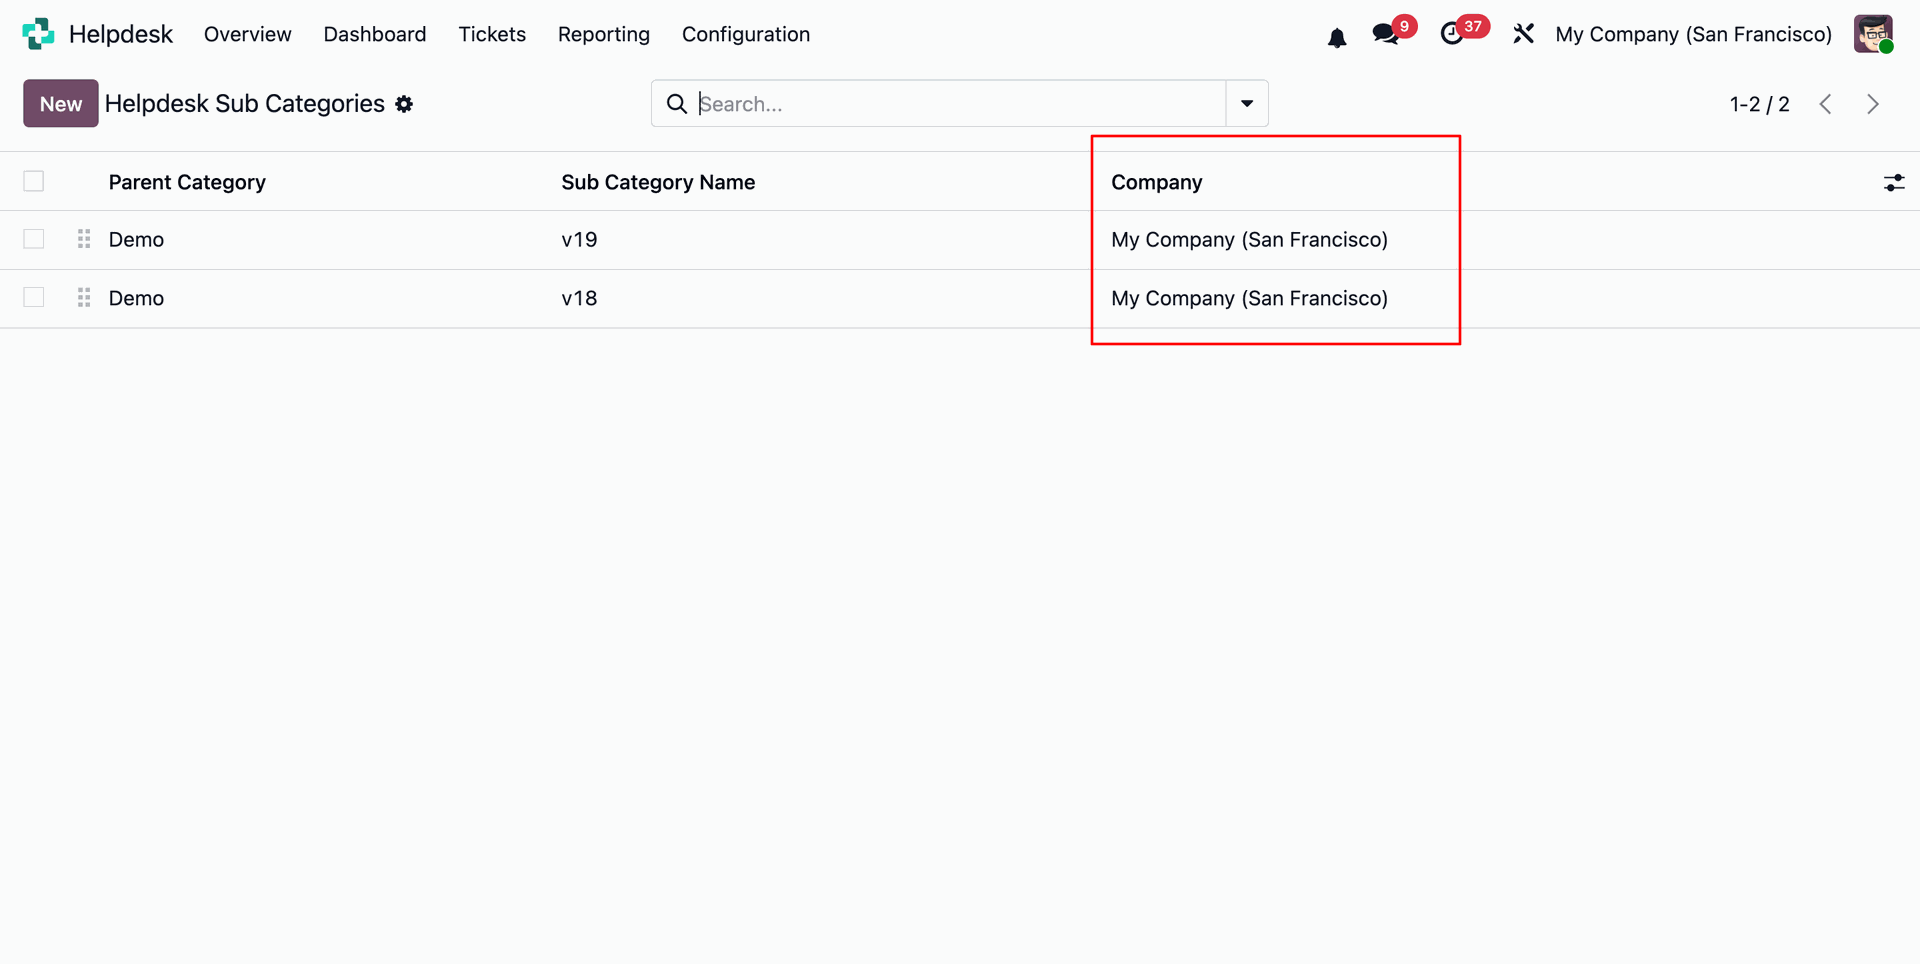
Set a company for the Helpdesk Sub Categories.
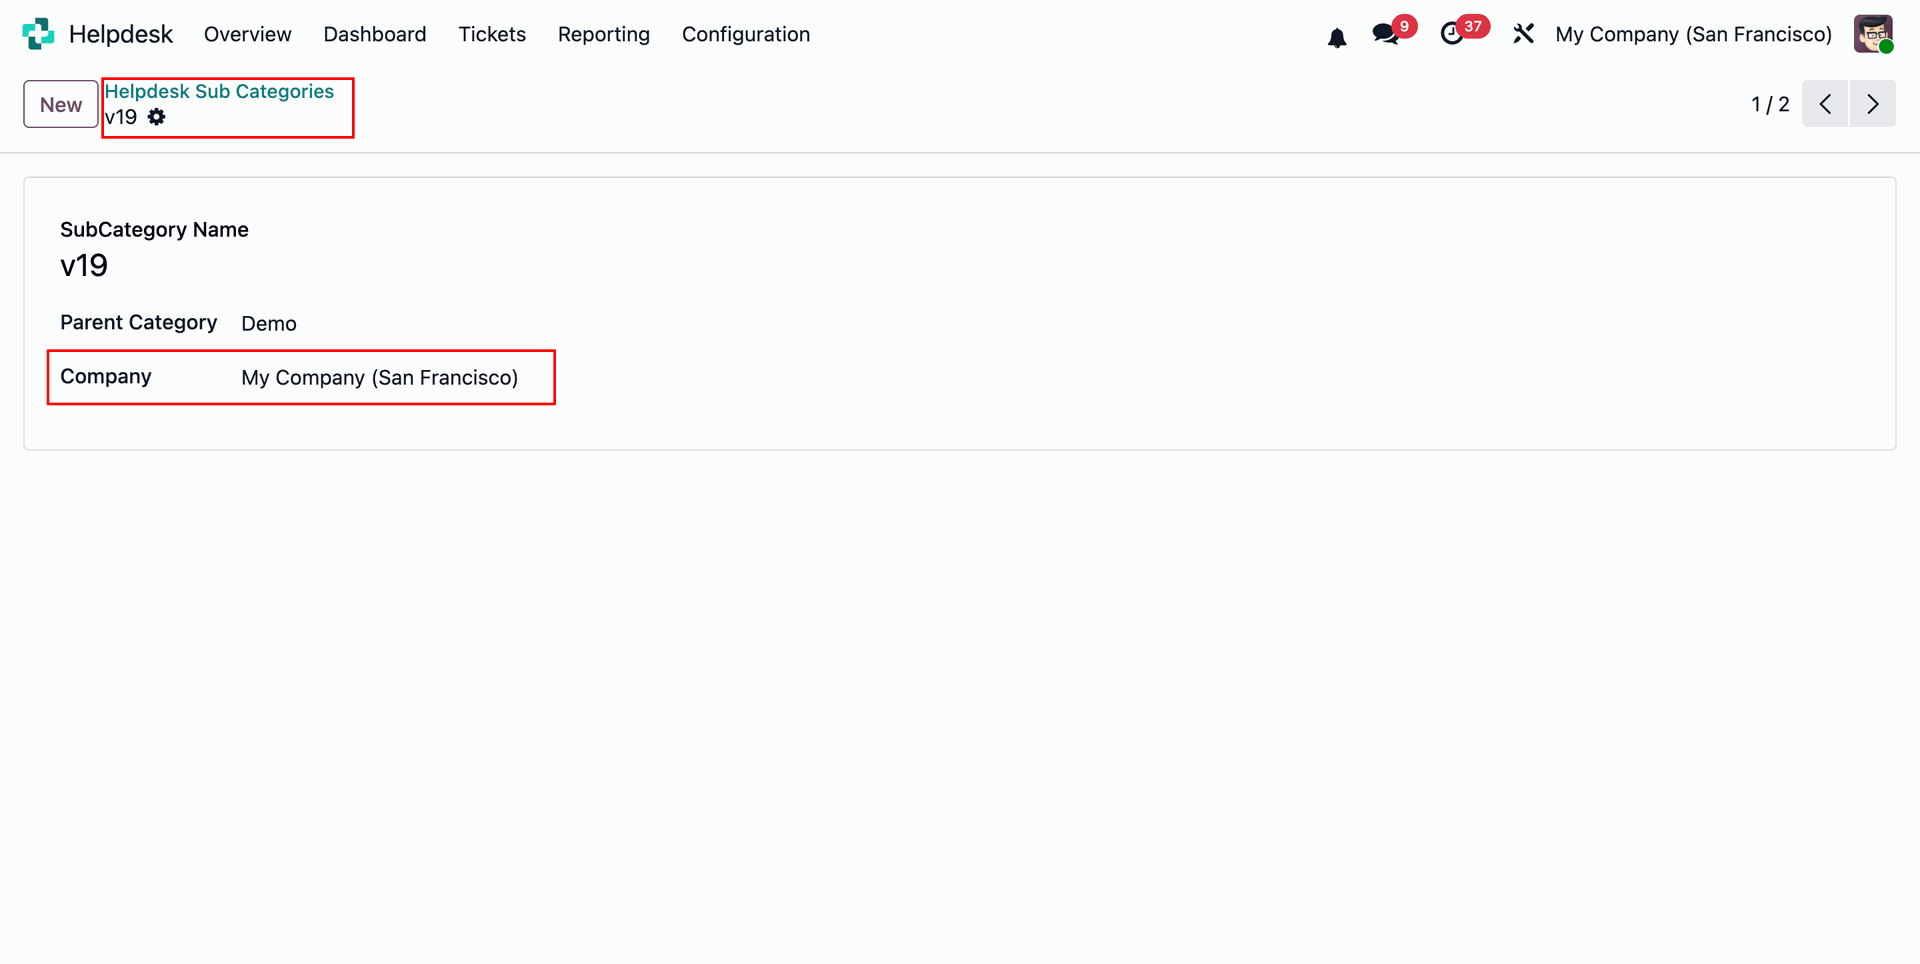
Users can view the assigned companies from the Helpdesk Sub Categories list view.
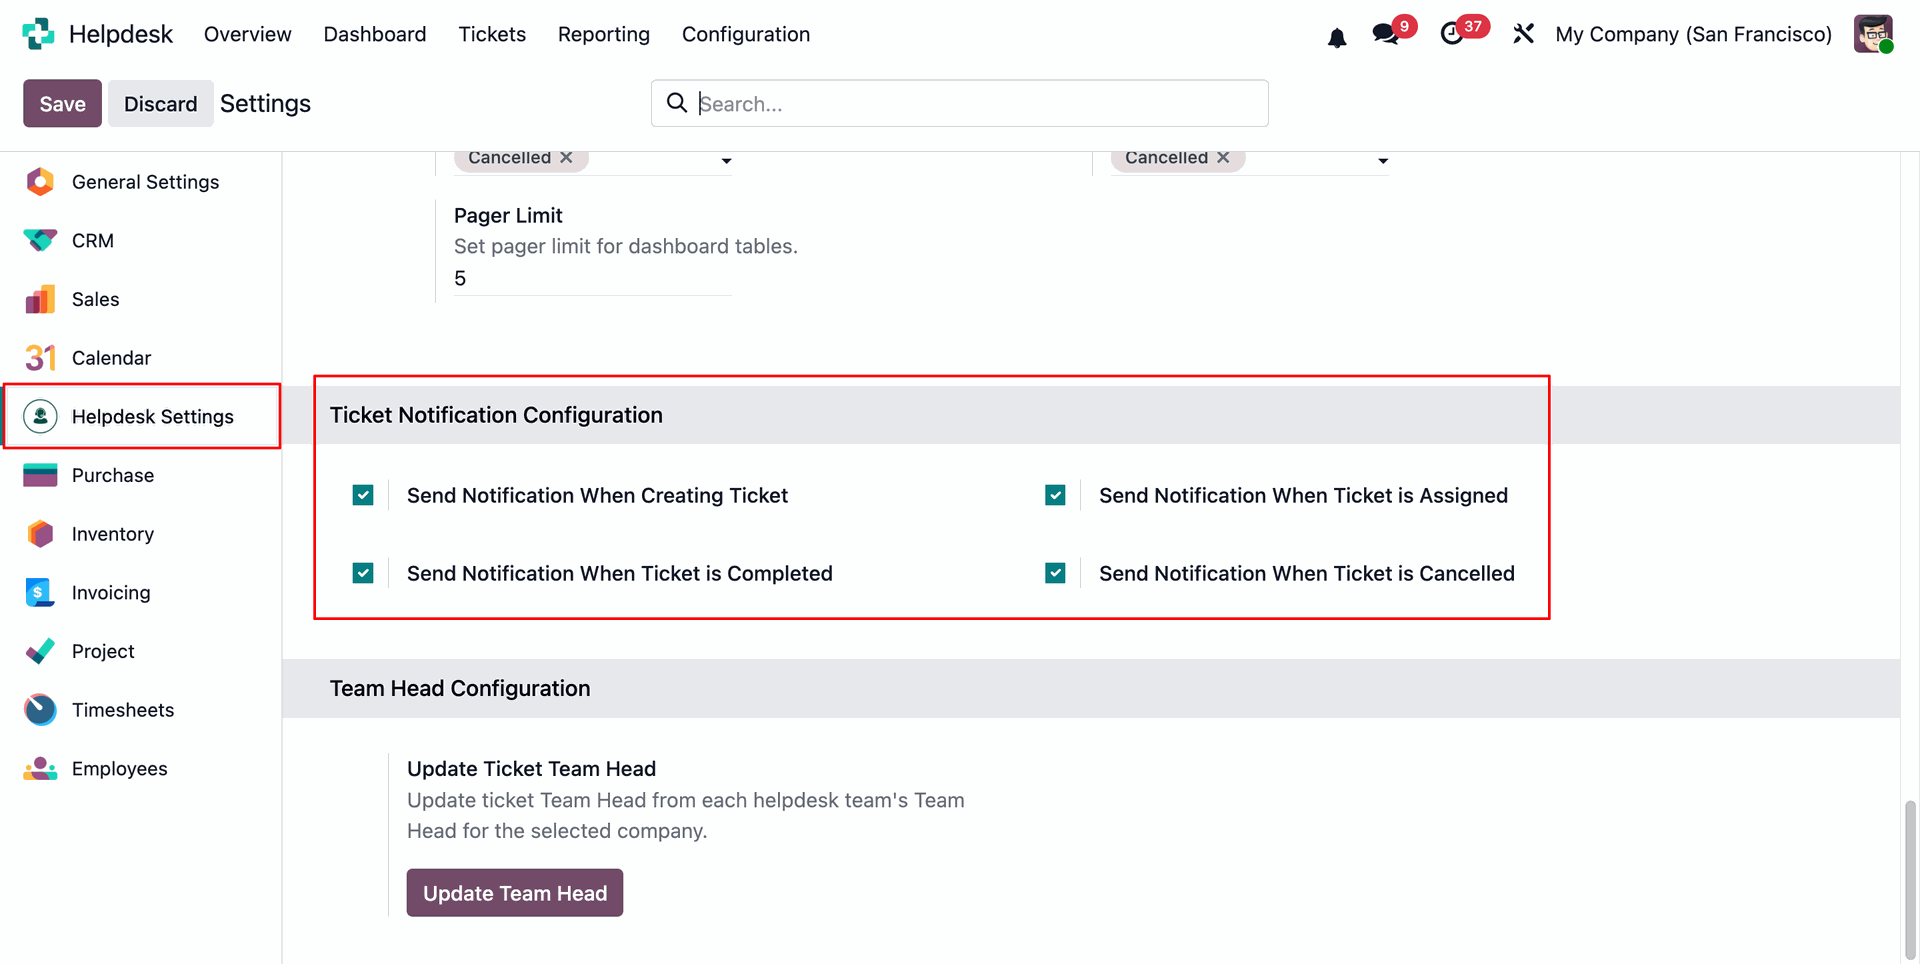
Enable the Helpdesk Ticket Notification options from the Helpdesk Settings.
Enable the notification settings from User Preferences under the Helpdesk Notifications tab.
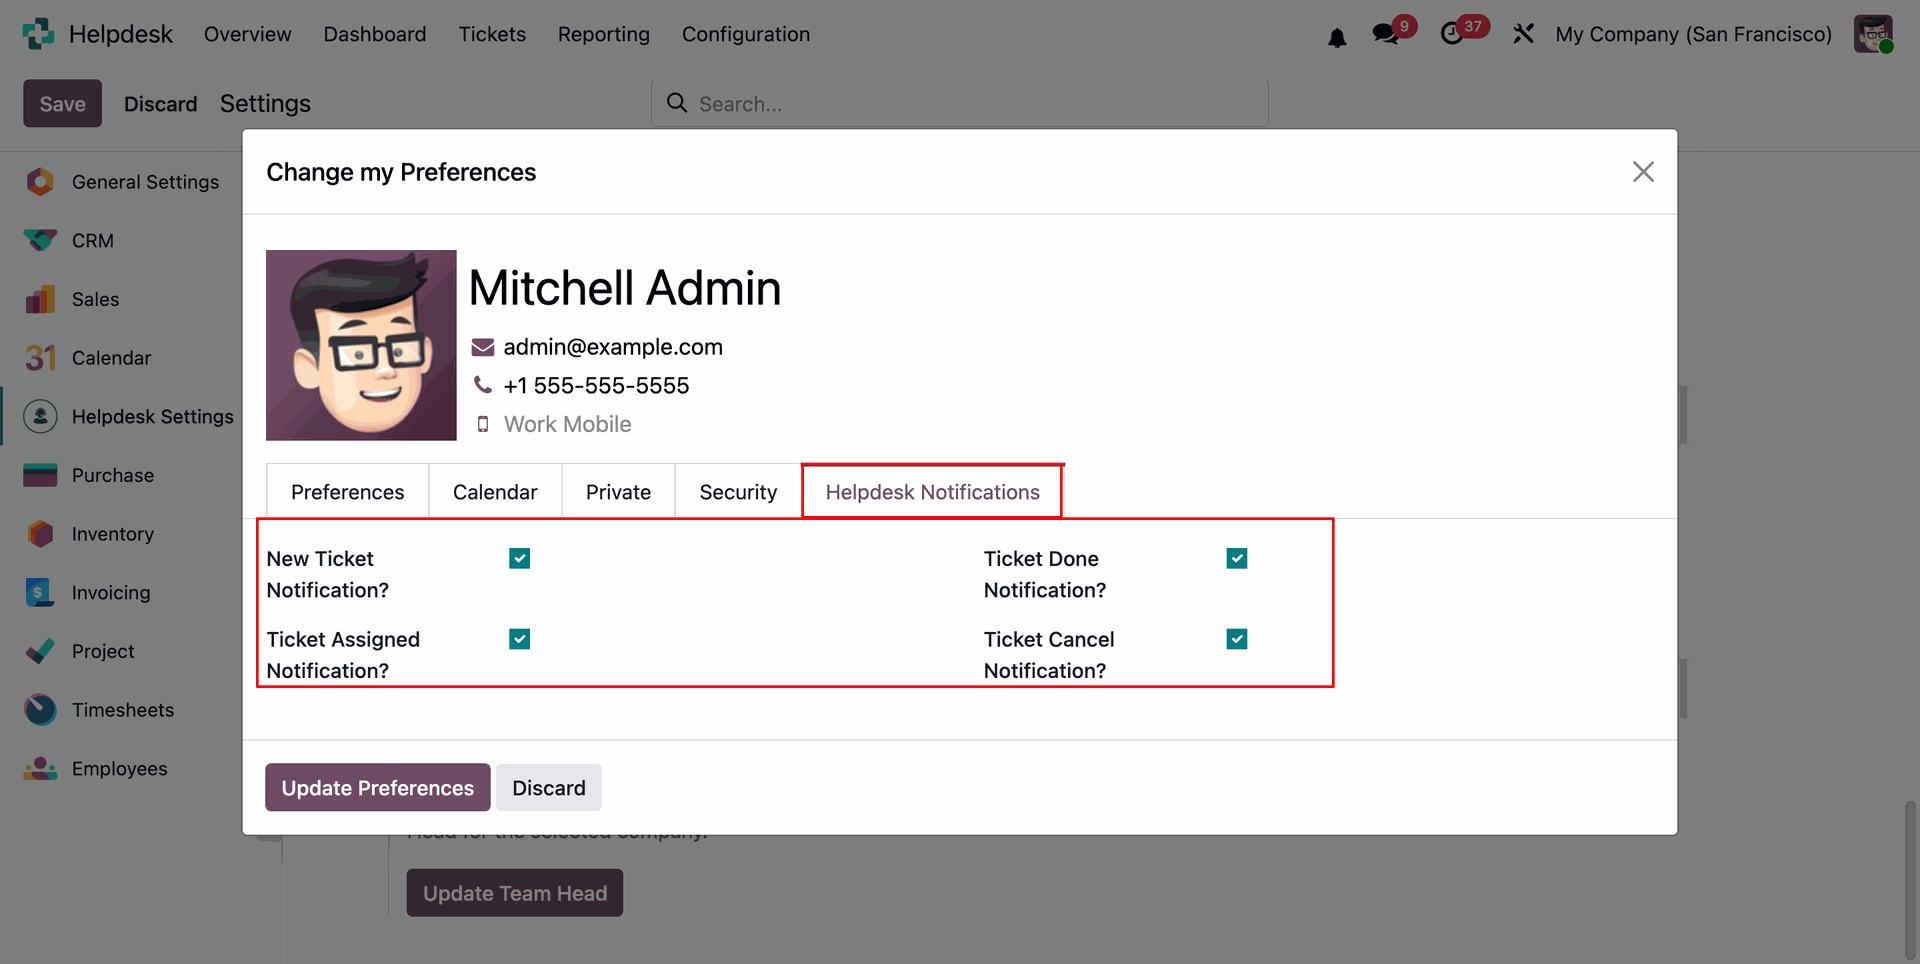
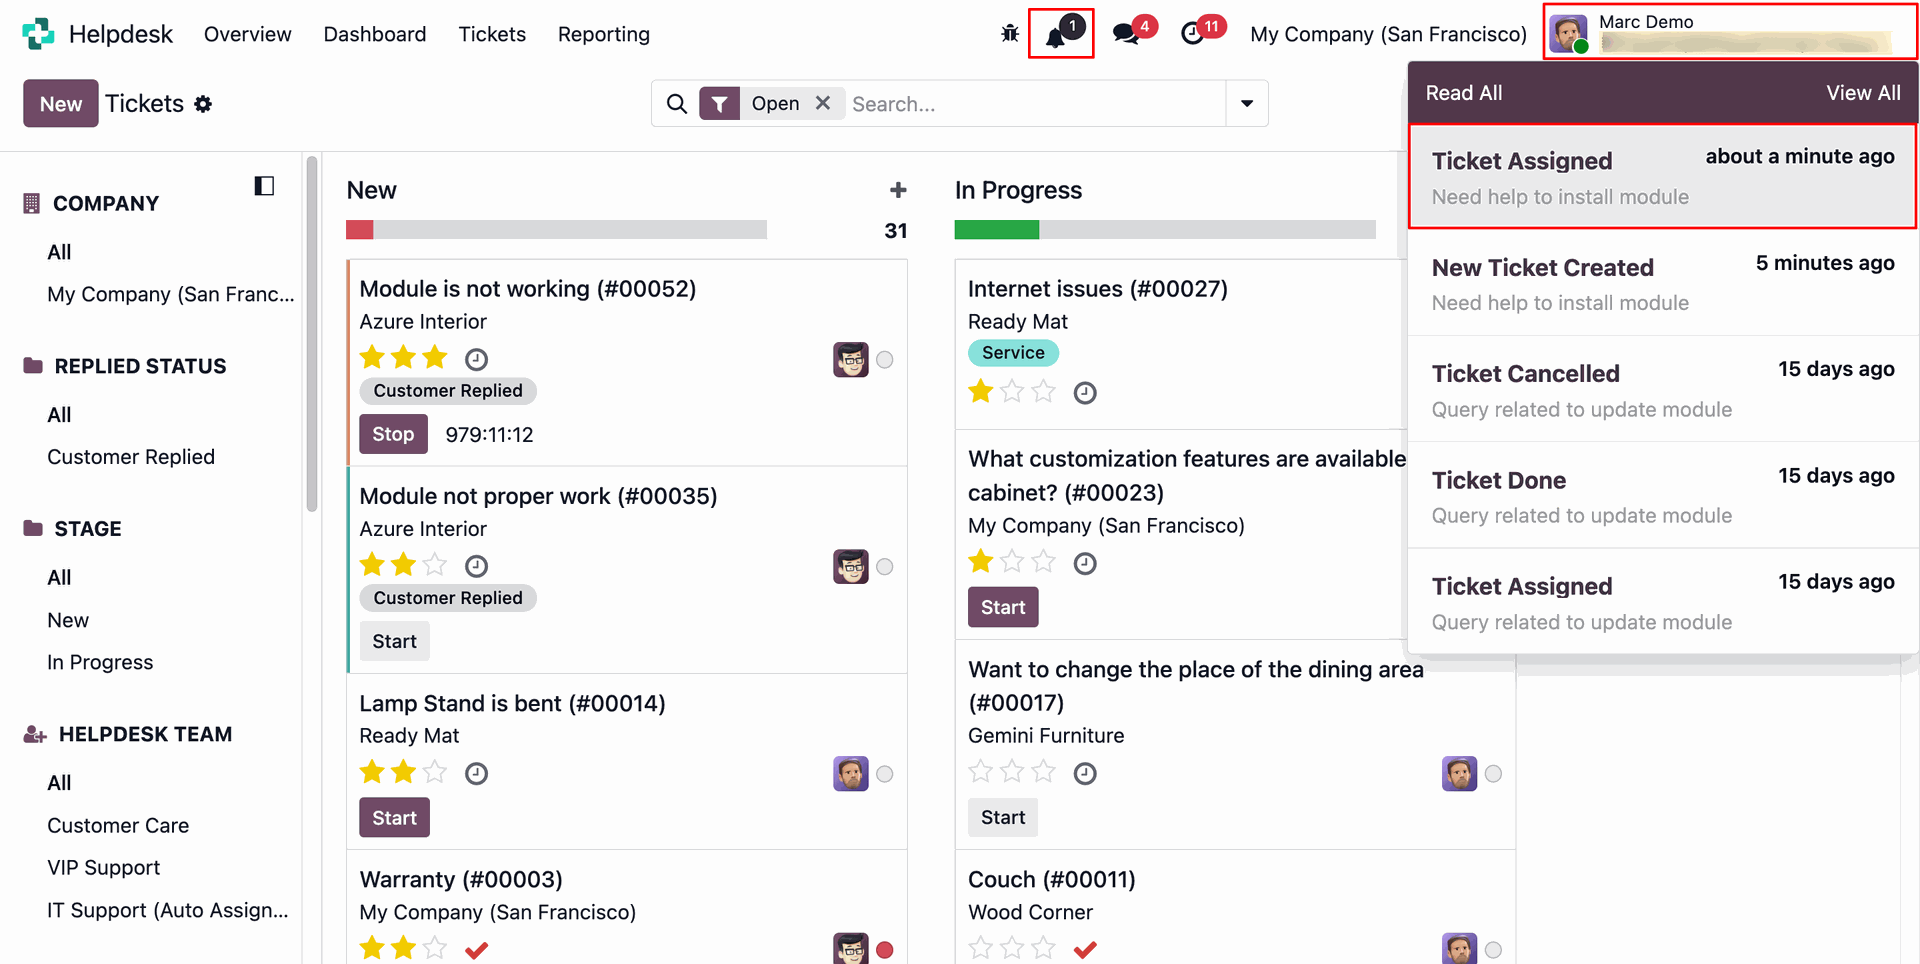
When a new ticket is created, the Team Head, Assigned User, and Multi-Assigned Users will receive notifications according to their preferences configured in the Helpdesk Notifications tab under User Preferences.
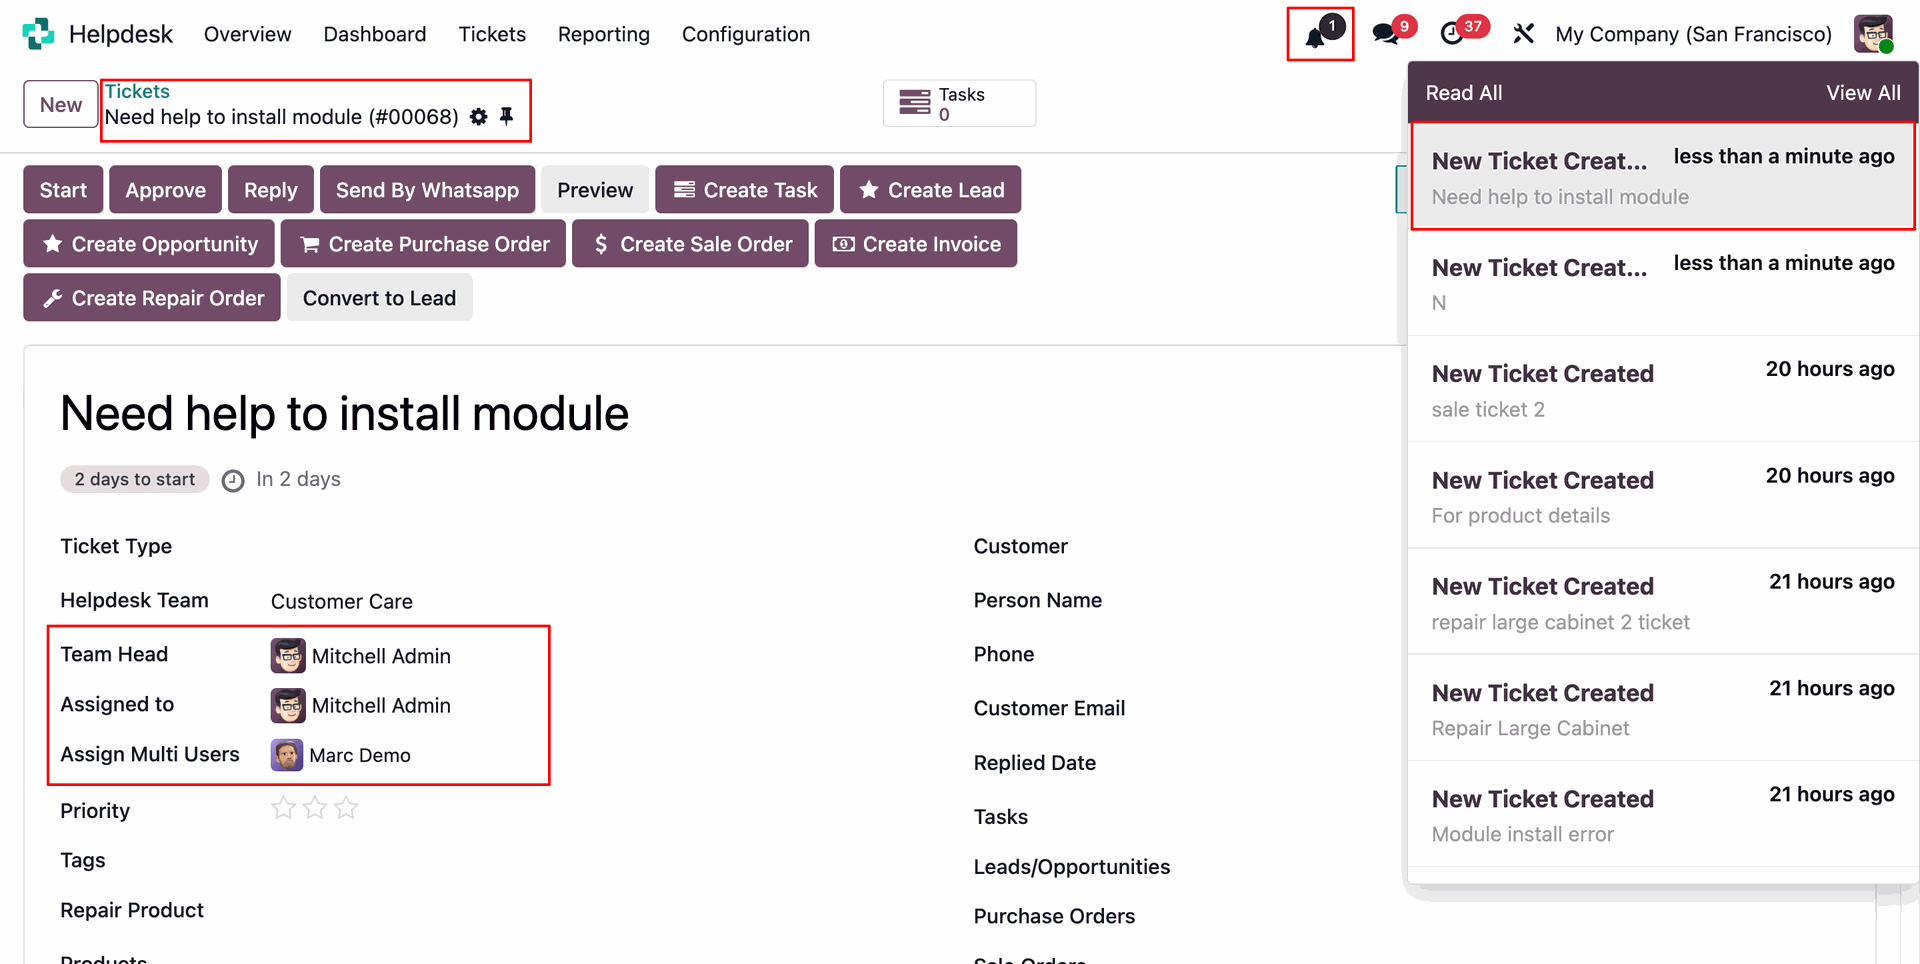
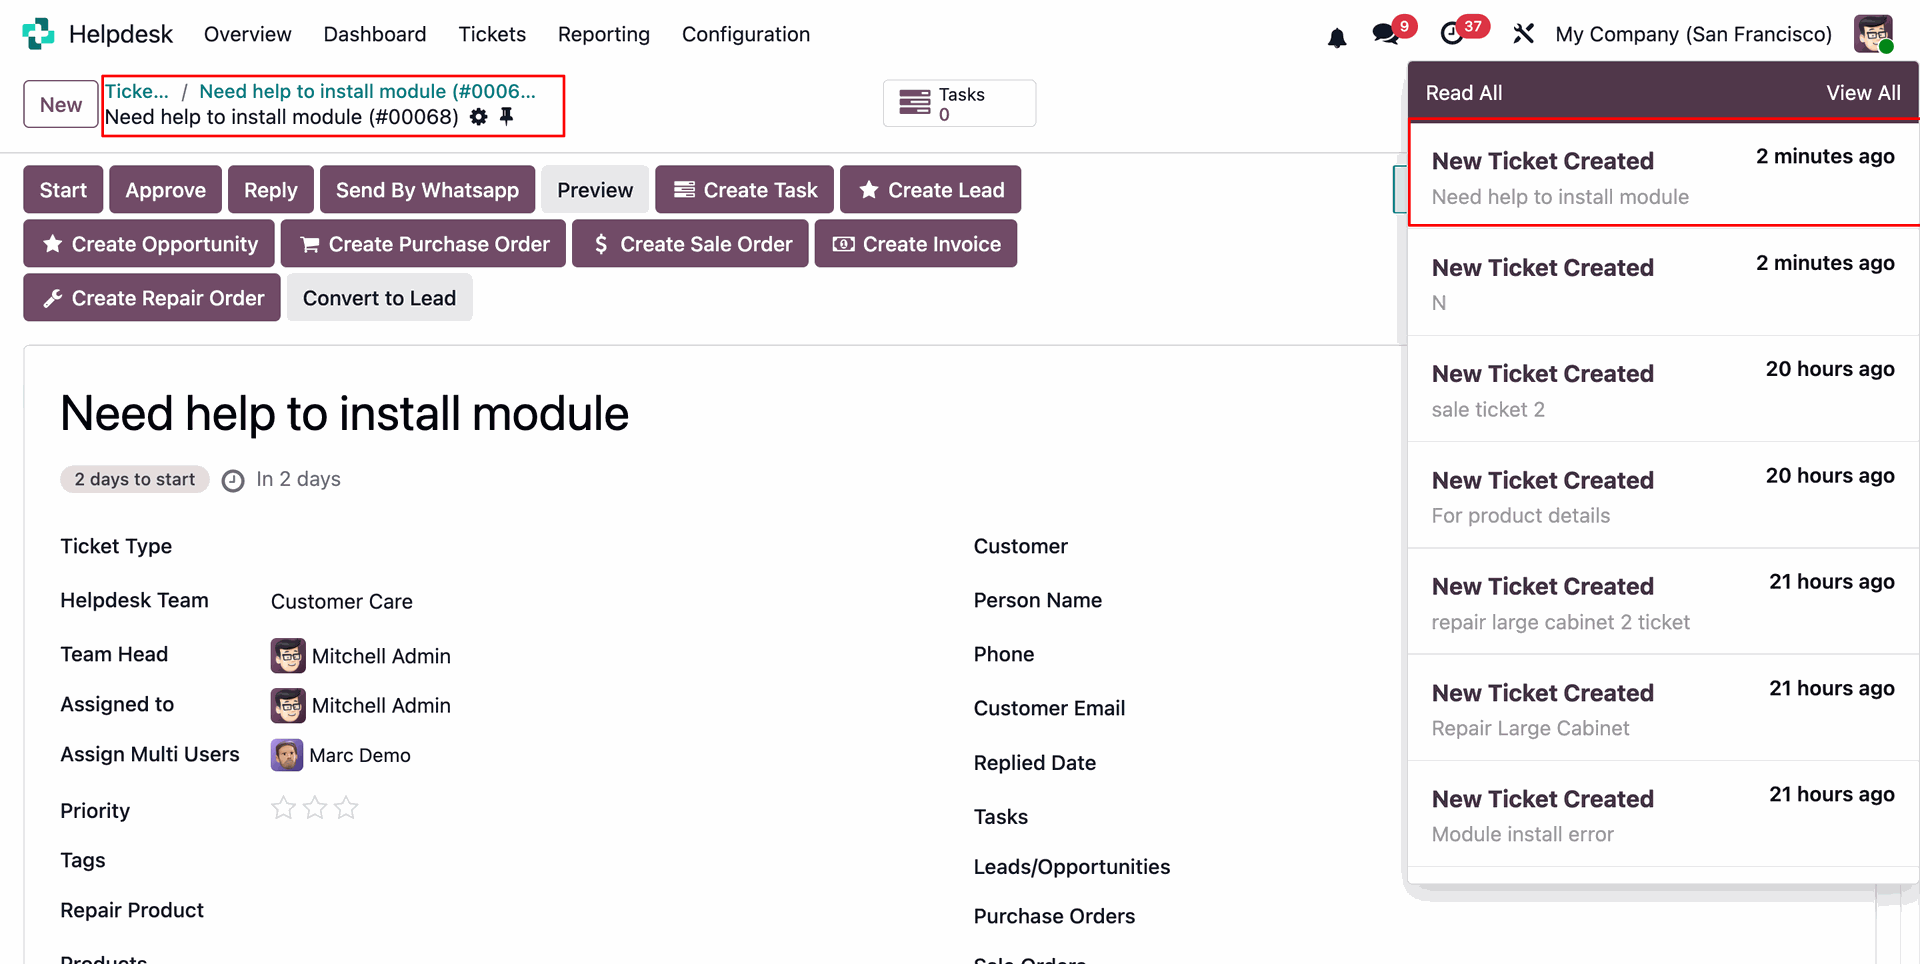
When a new ticket is created, users will receive notifications according to their notification preferences.
Assign multiple users to the ticket.
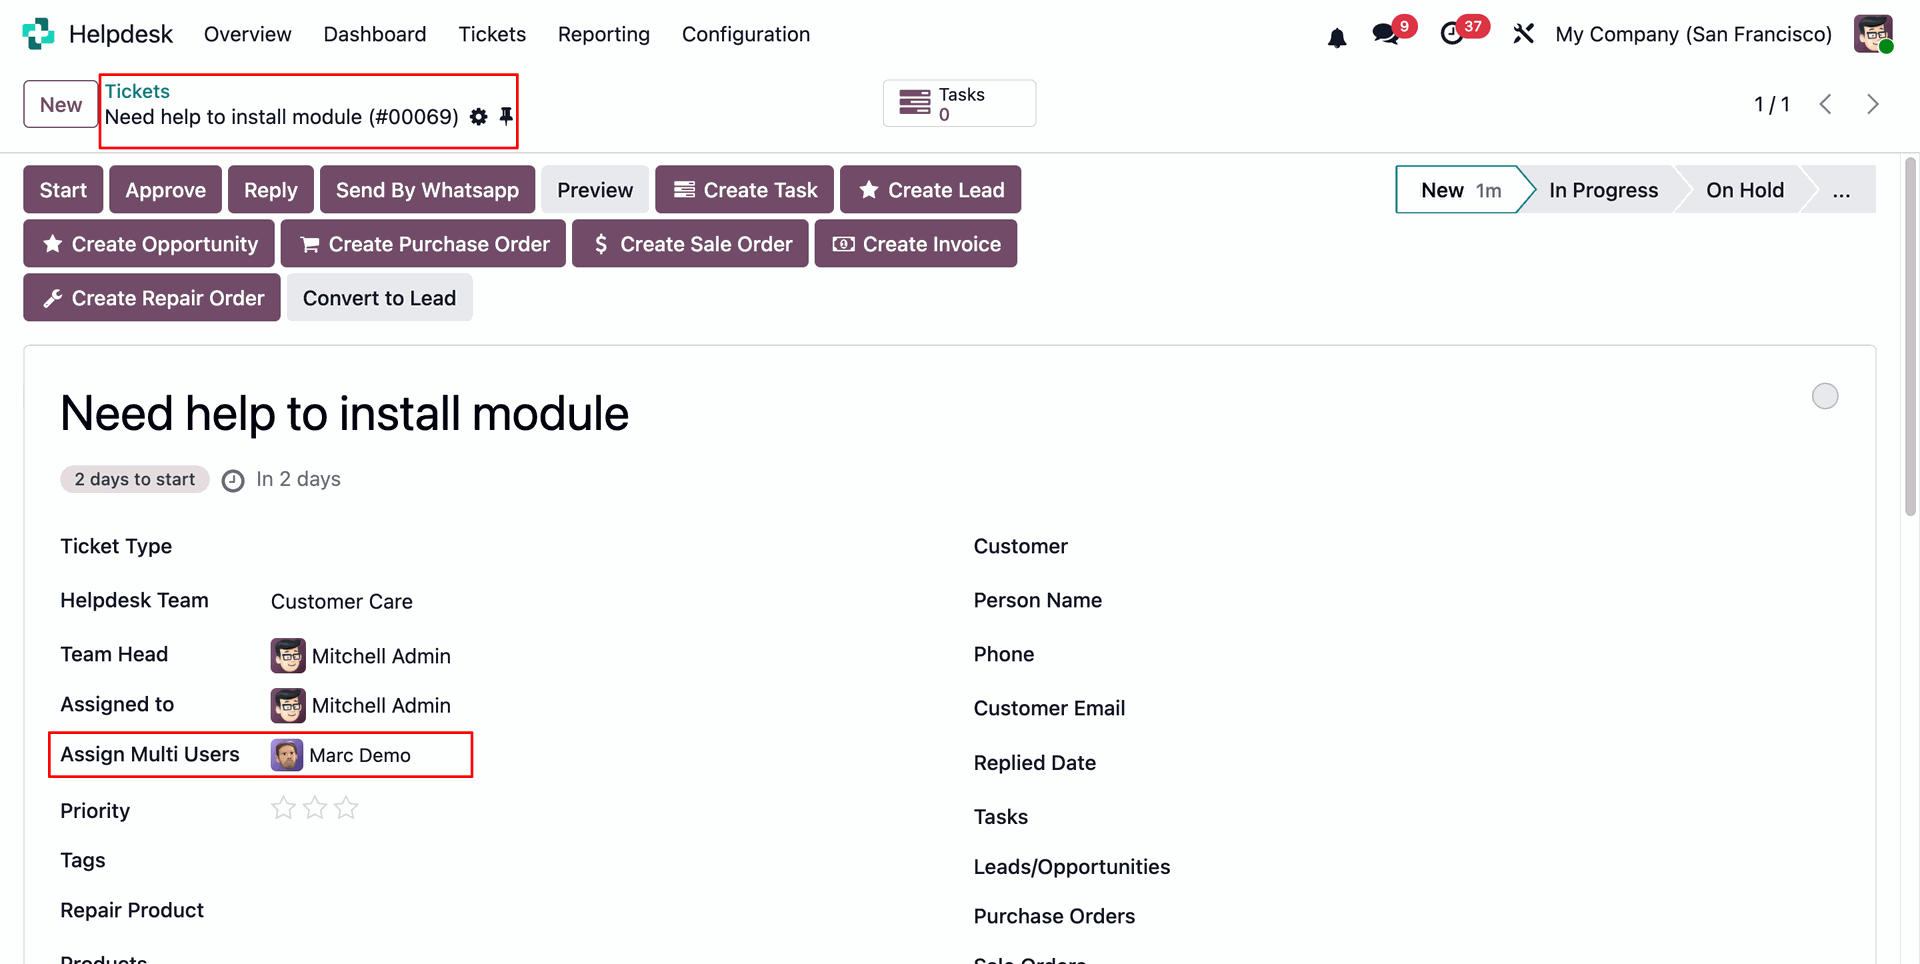
When a ticket is assigned, users will receive notifications according to their notification preferences.
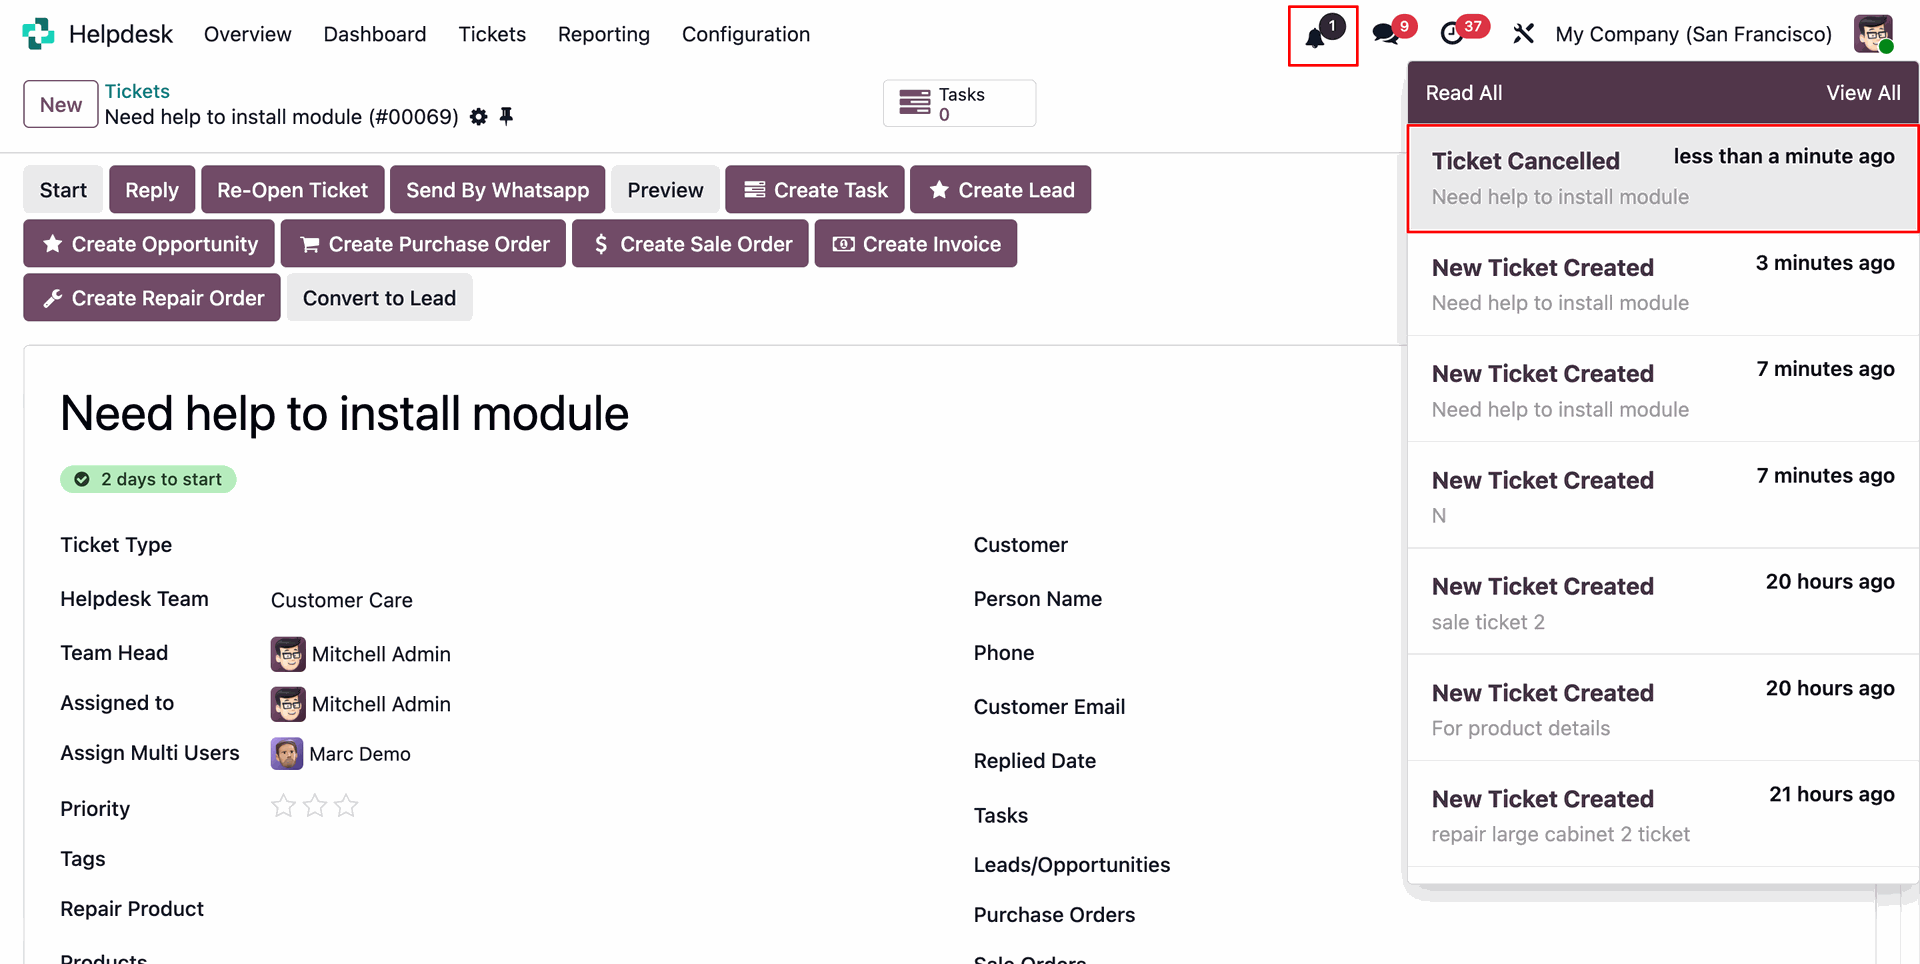
When a ticket is cancelled, users will receive notifications according to their notification preferences.
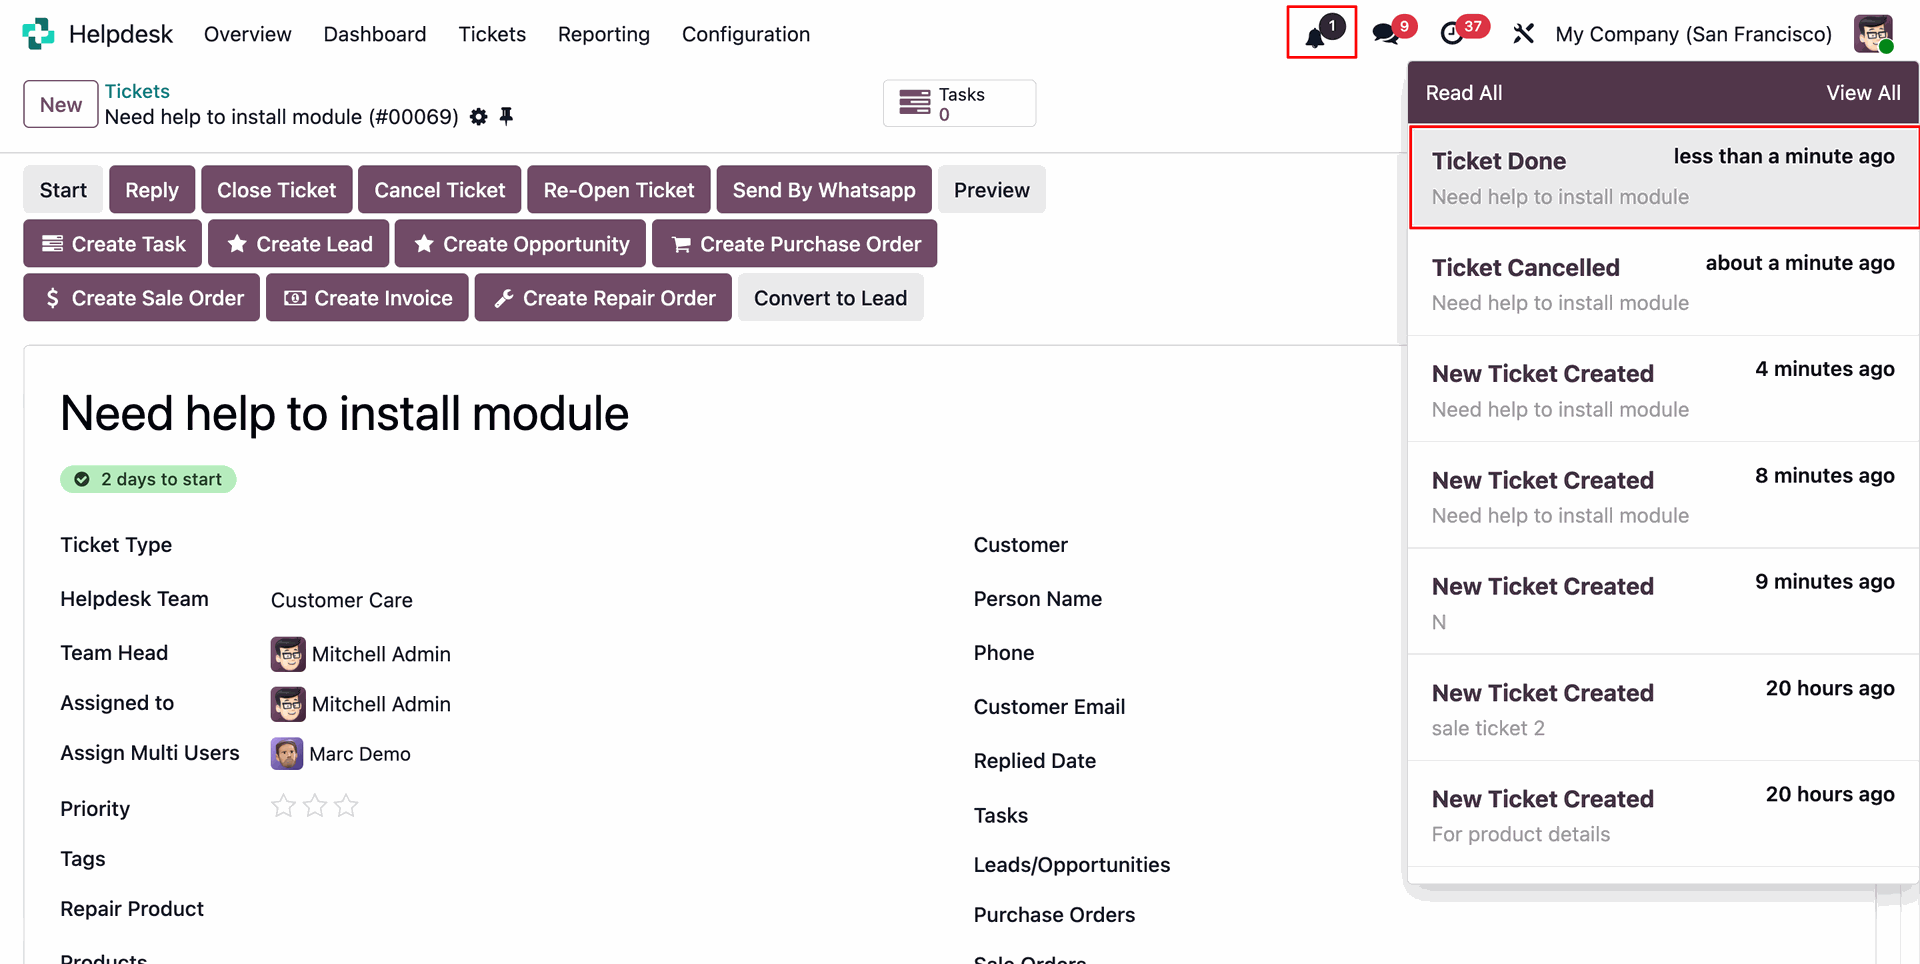
When a ticket is done, users will receive notifications according to their notification preferences.
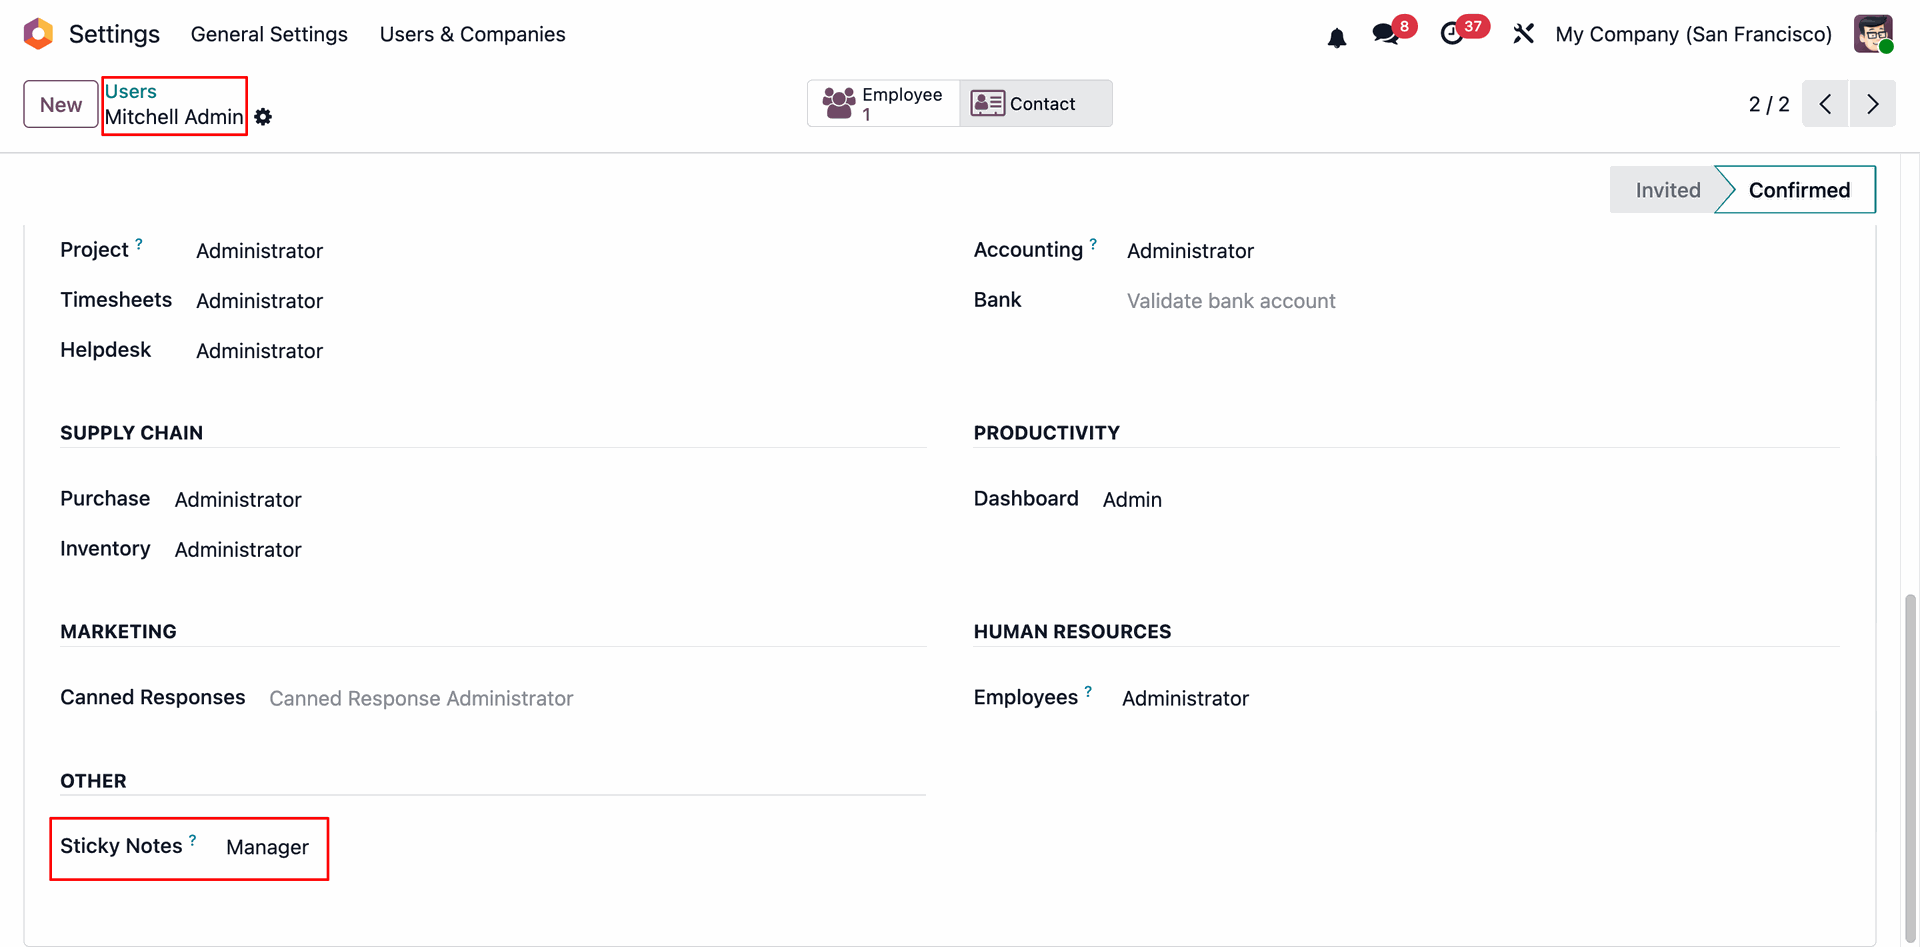
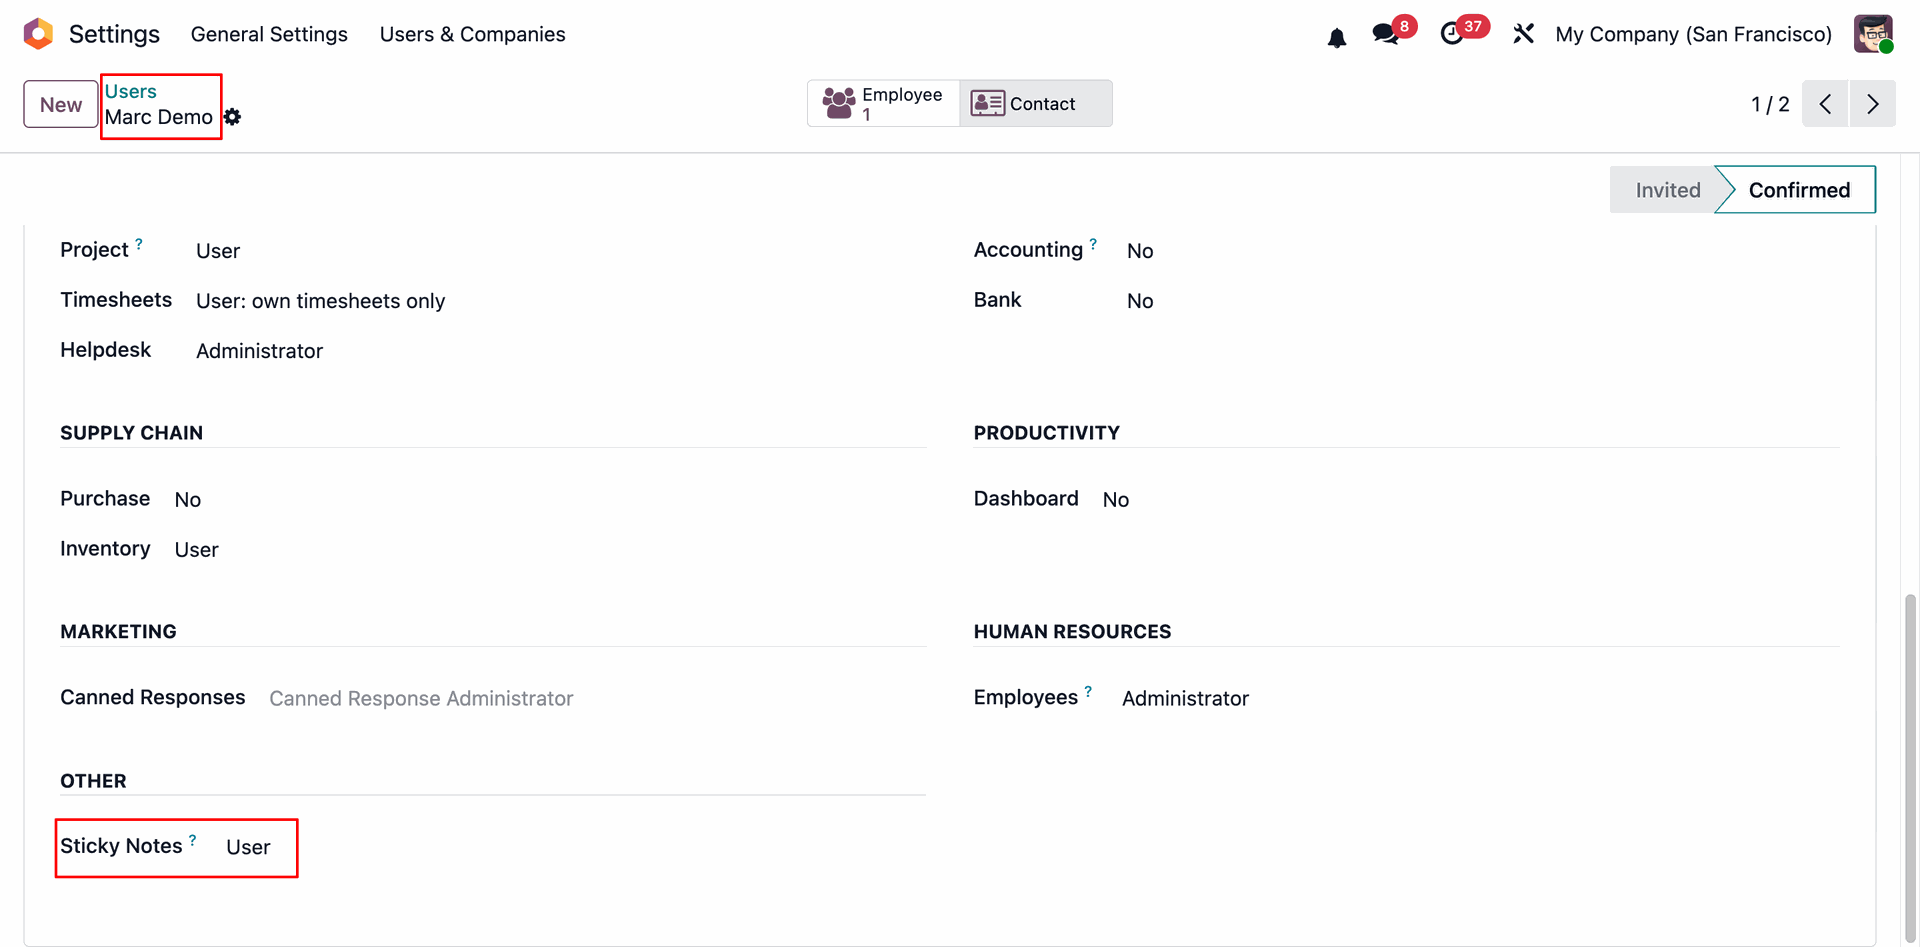
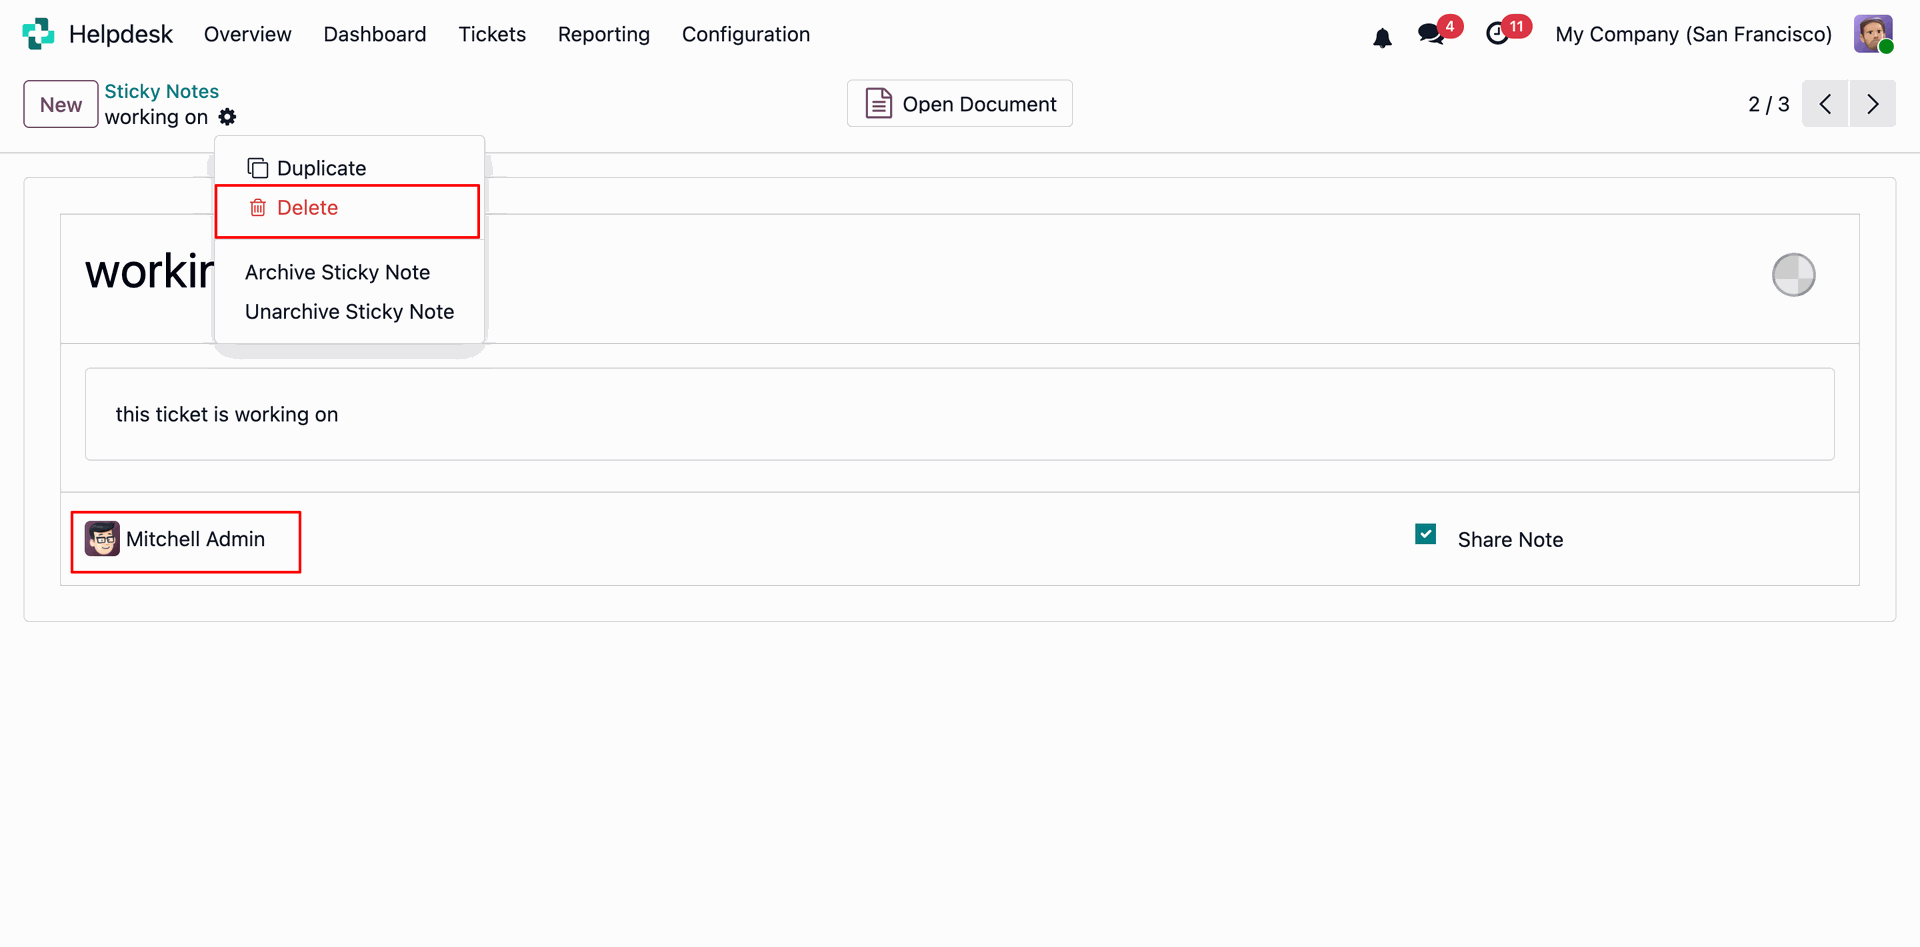
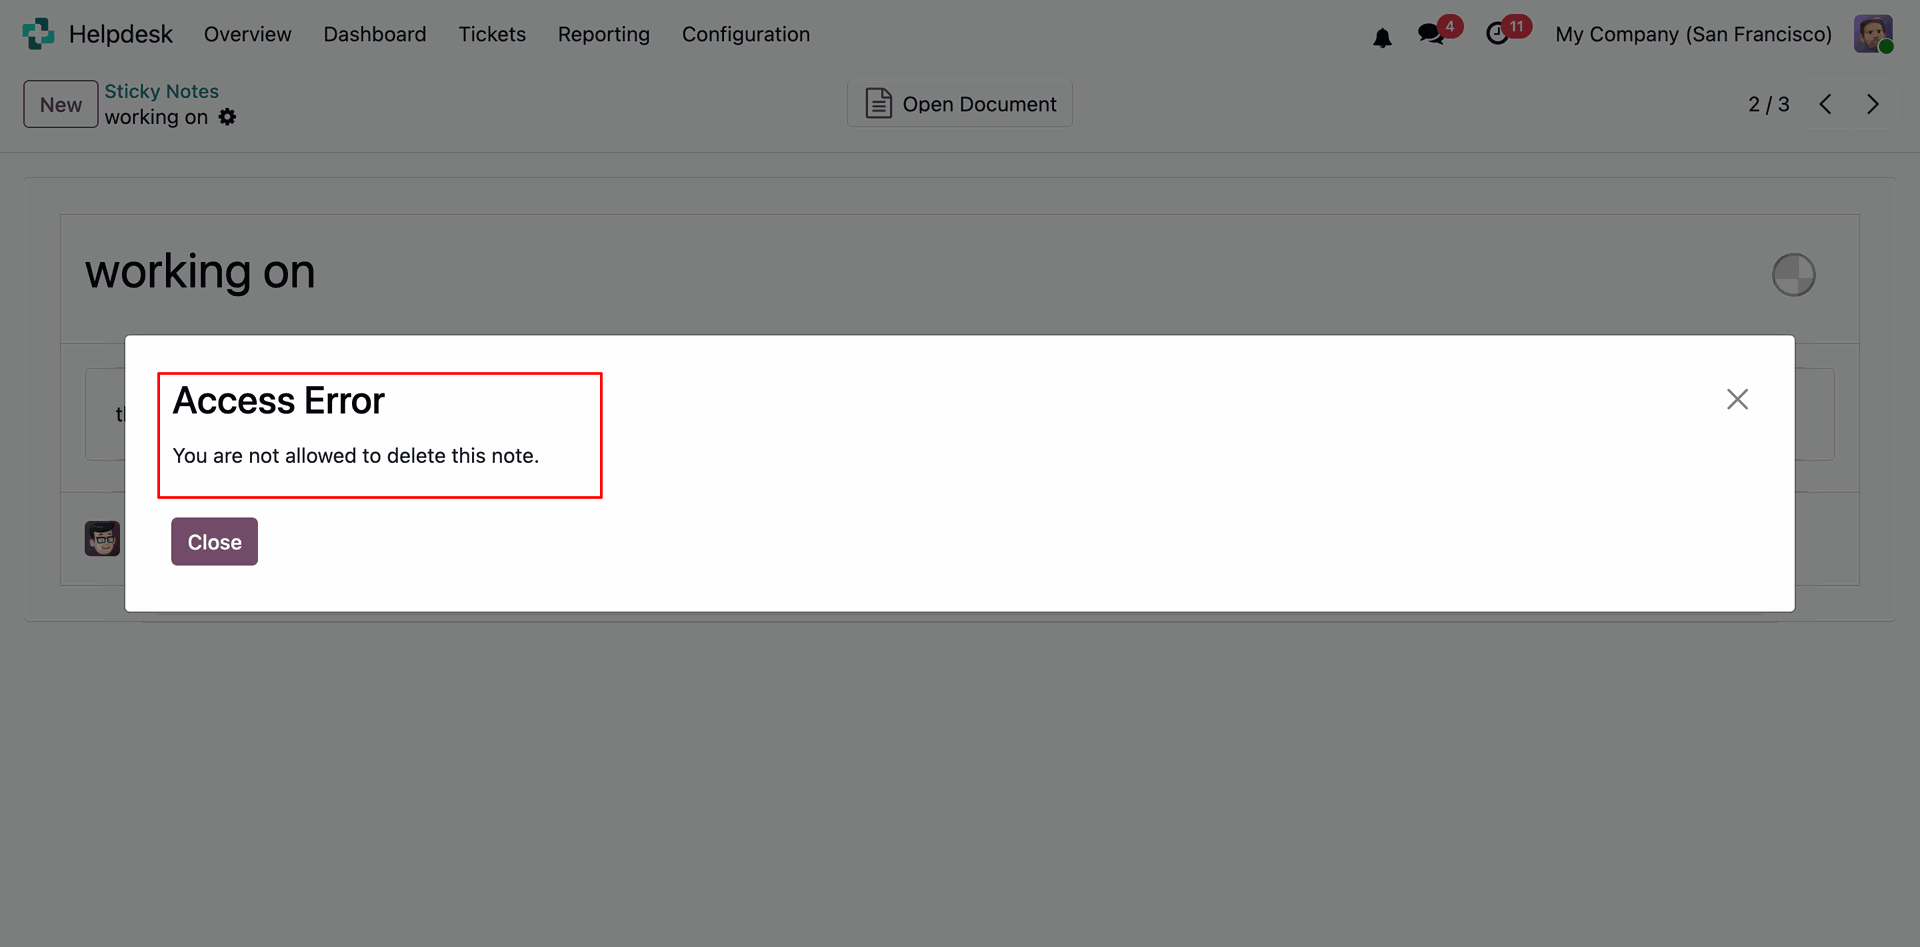
Go to user settings and set sticky Notes Manager.
Go to user settings and set sticky Notes User.
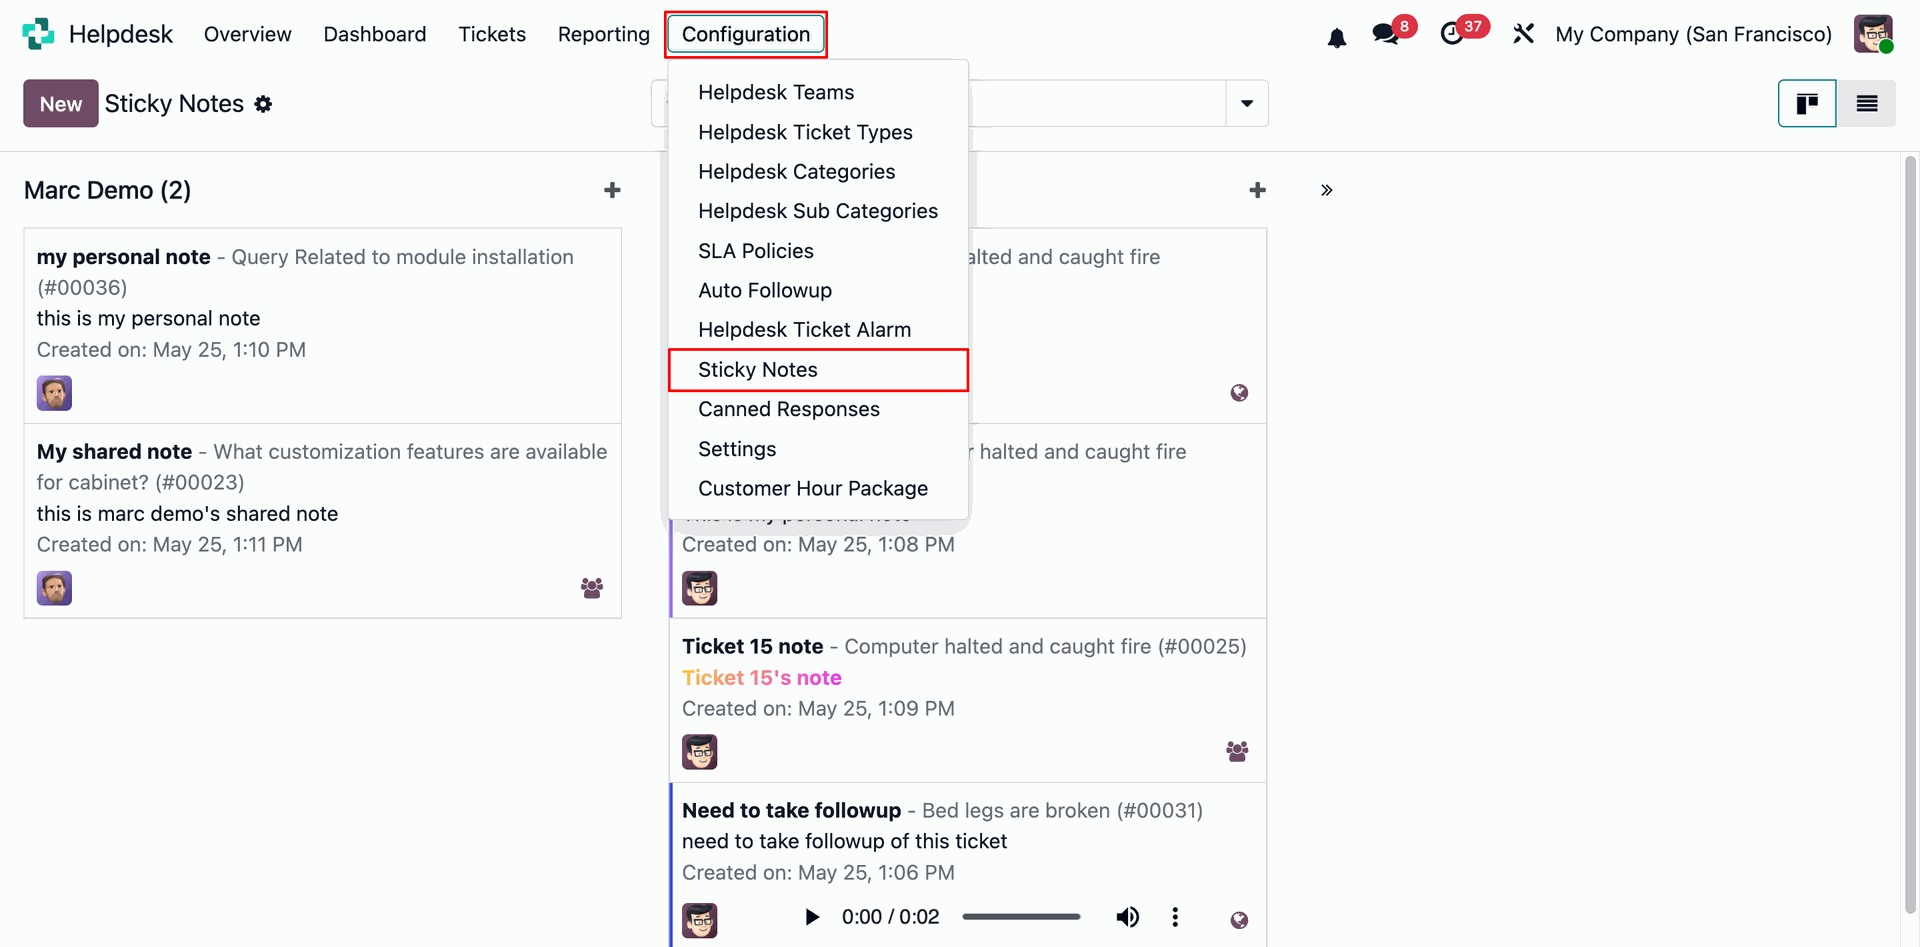
Go to helpdesk configuration meny and select sticky Notes sub menu.
Sticky Notes list view.
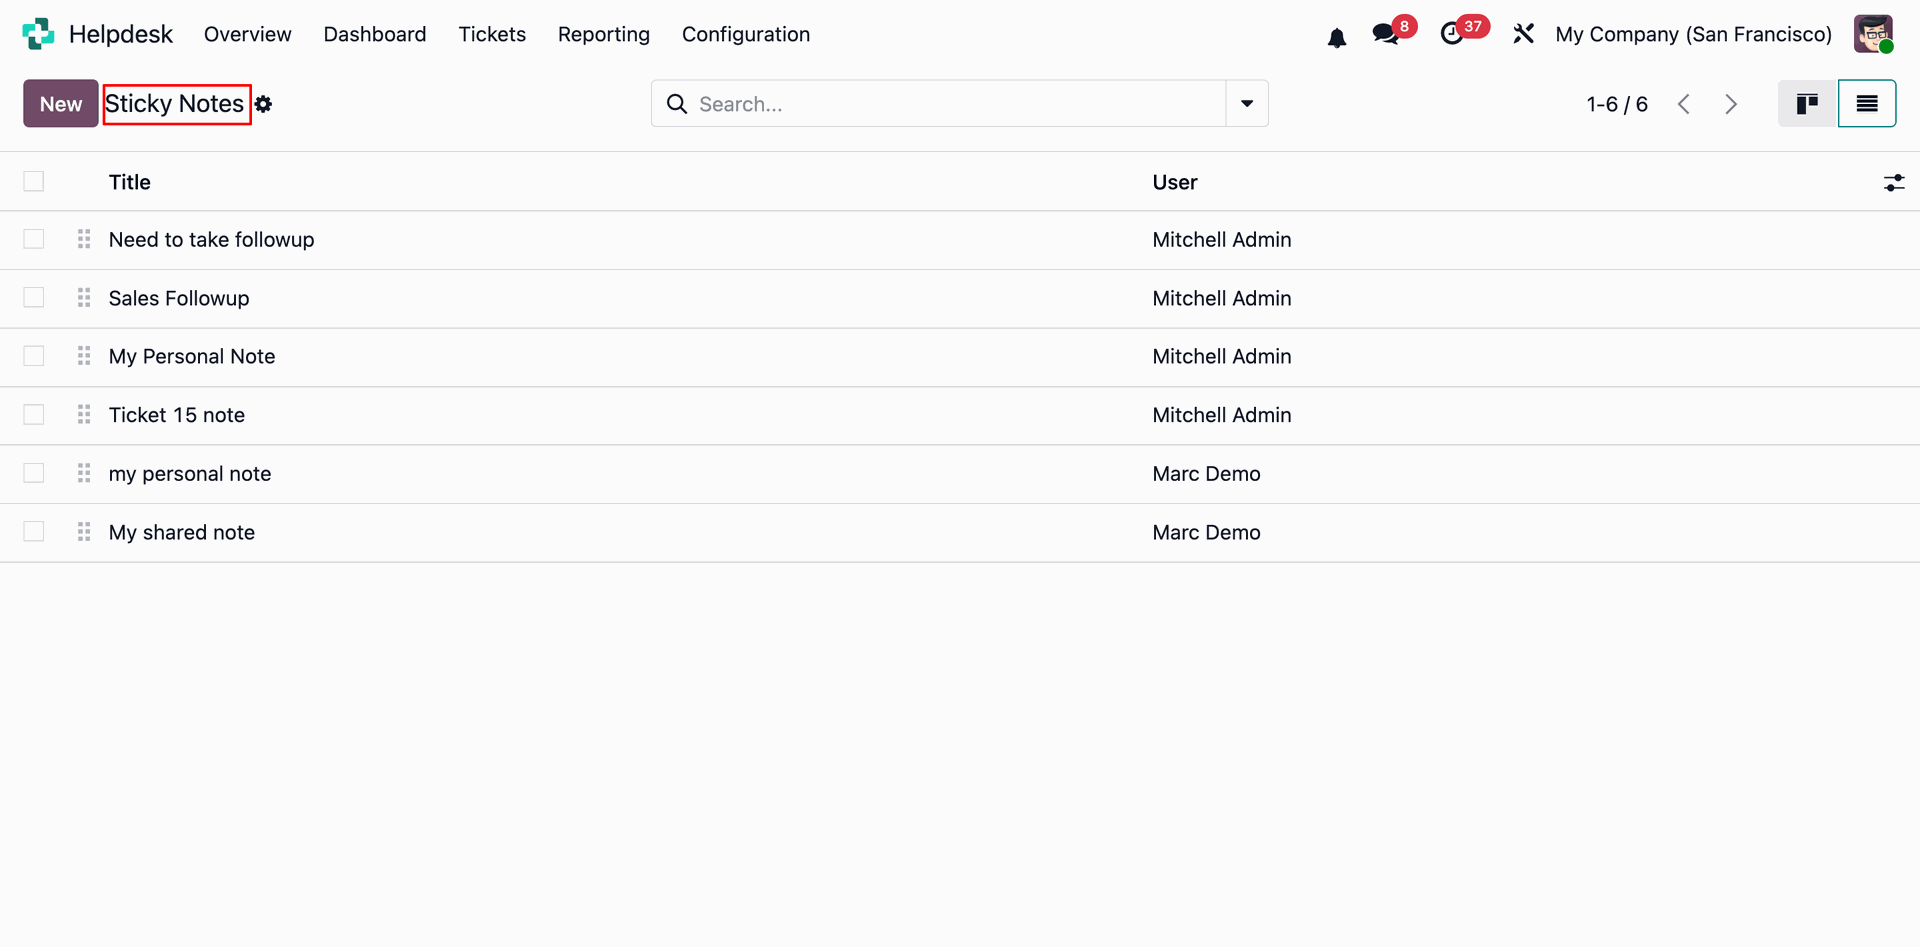
Sticky Notes can be filtered with shared notes, my notes, archived and active.
Sticky Notes can be group by with User, Model, Record, Shared and Active.

Sticky Notes Kanban view.
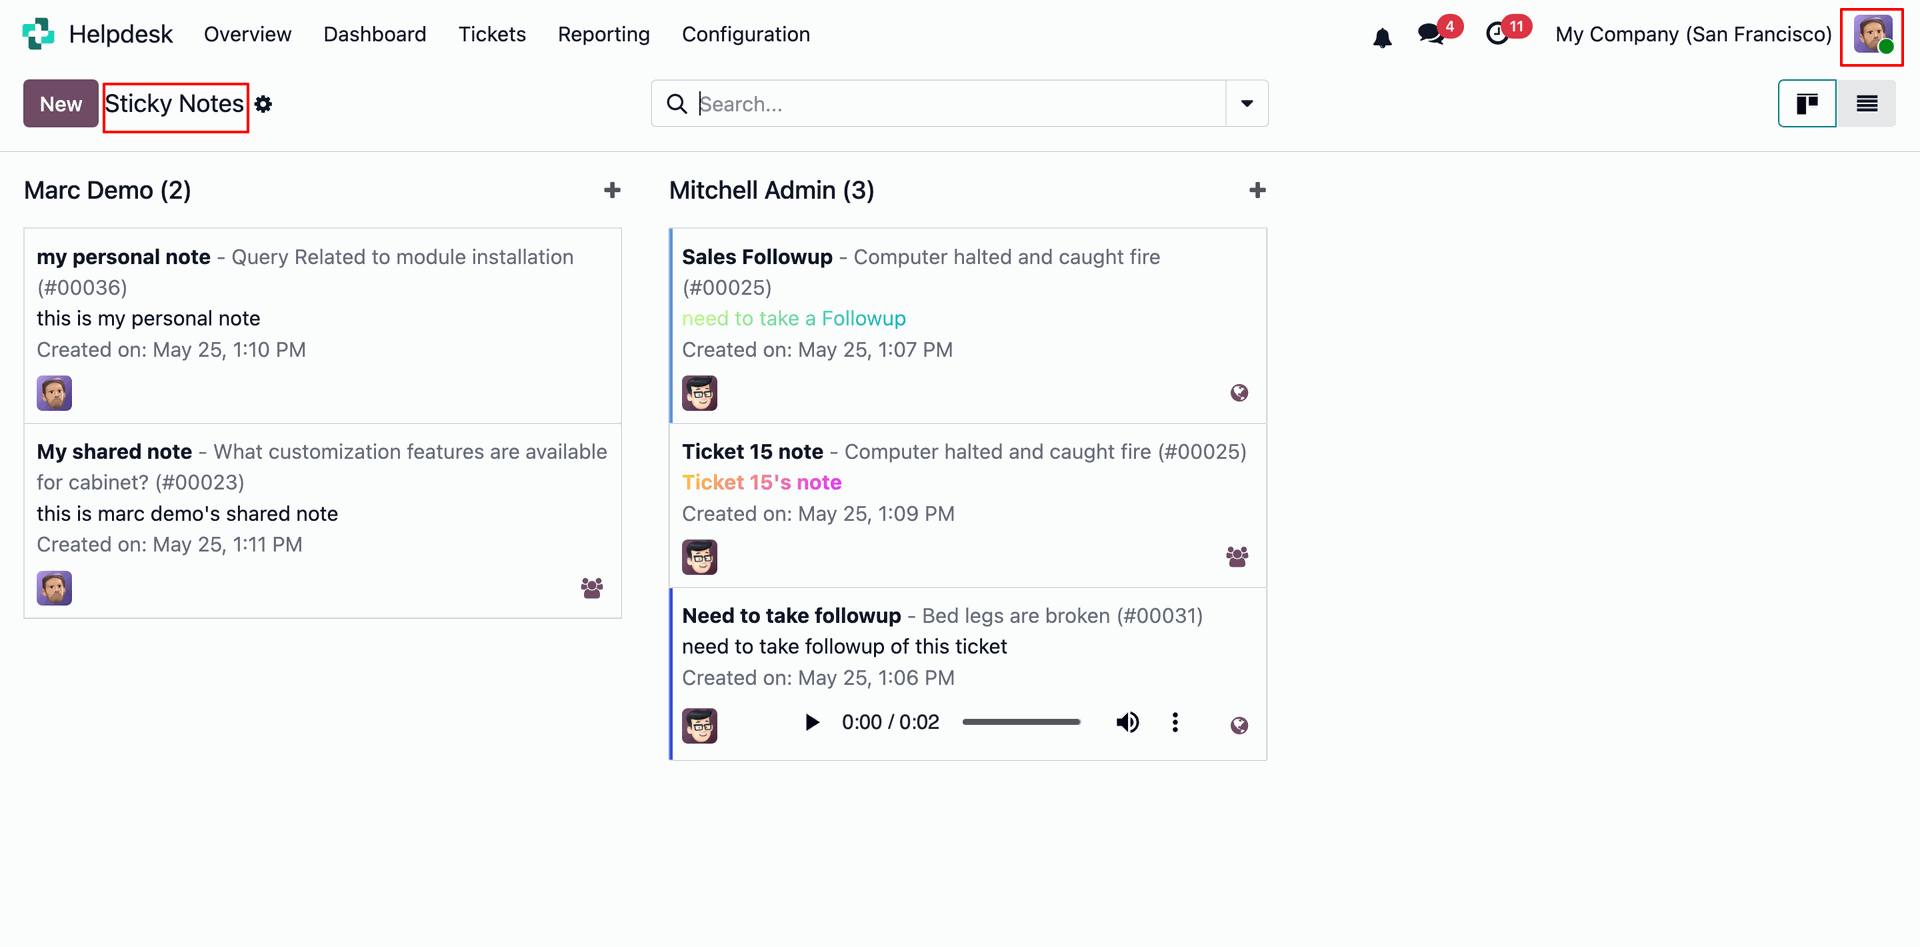
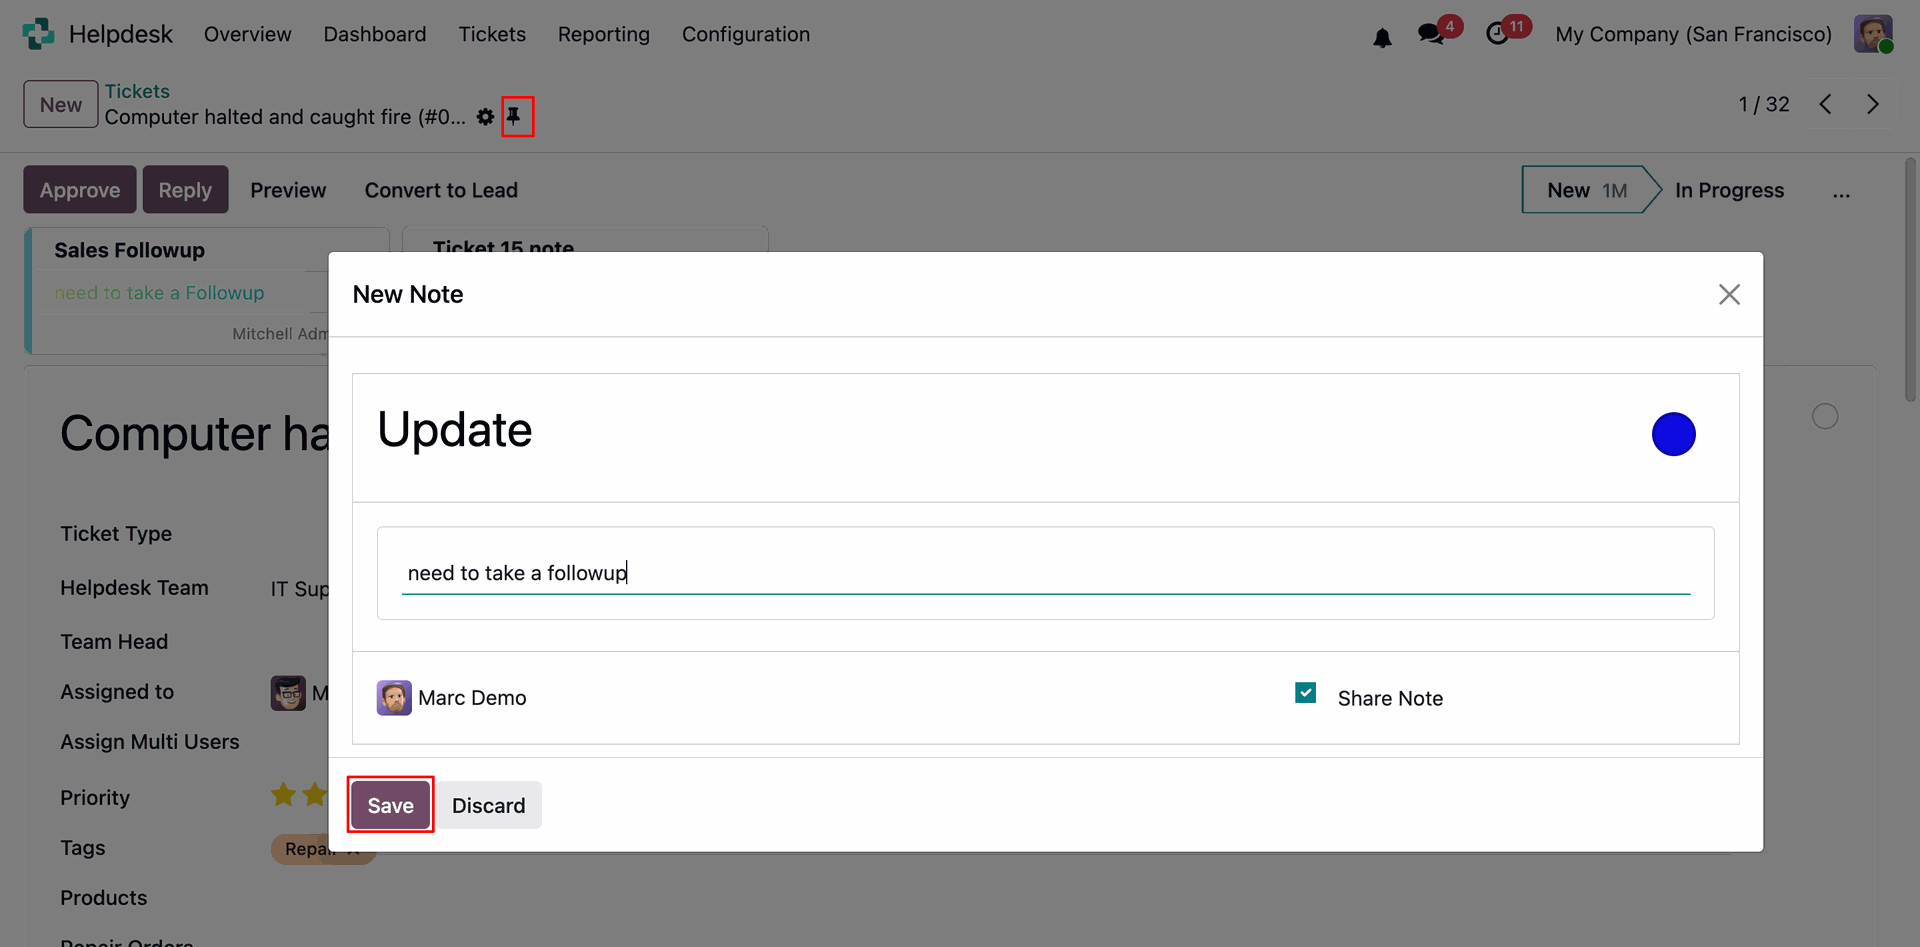
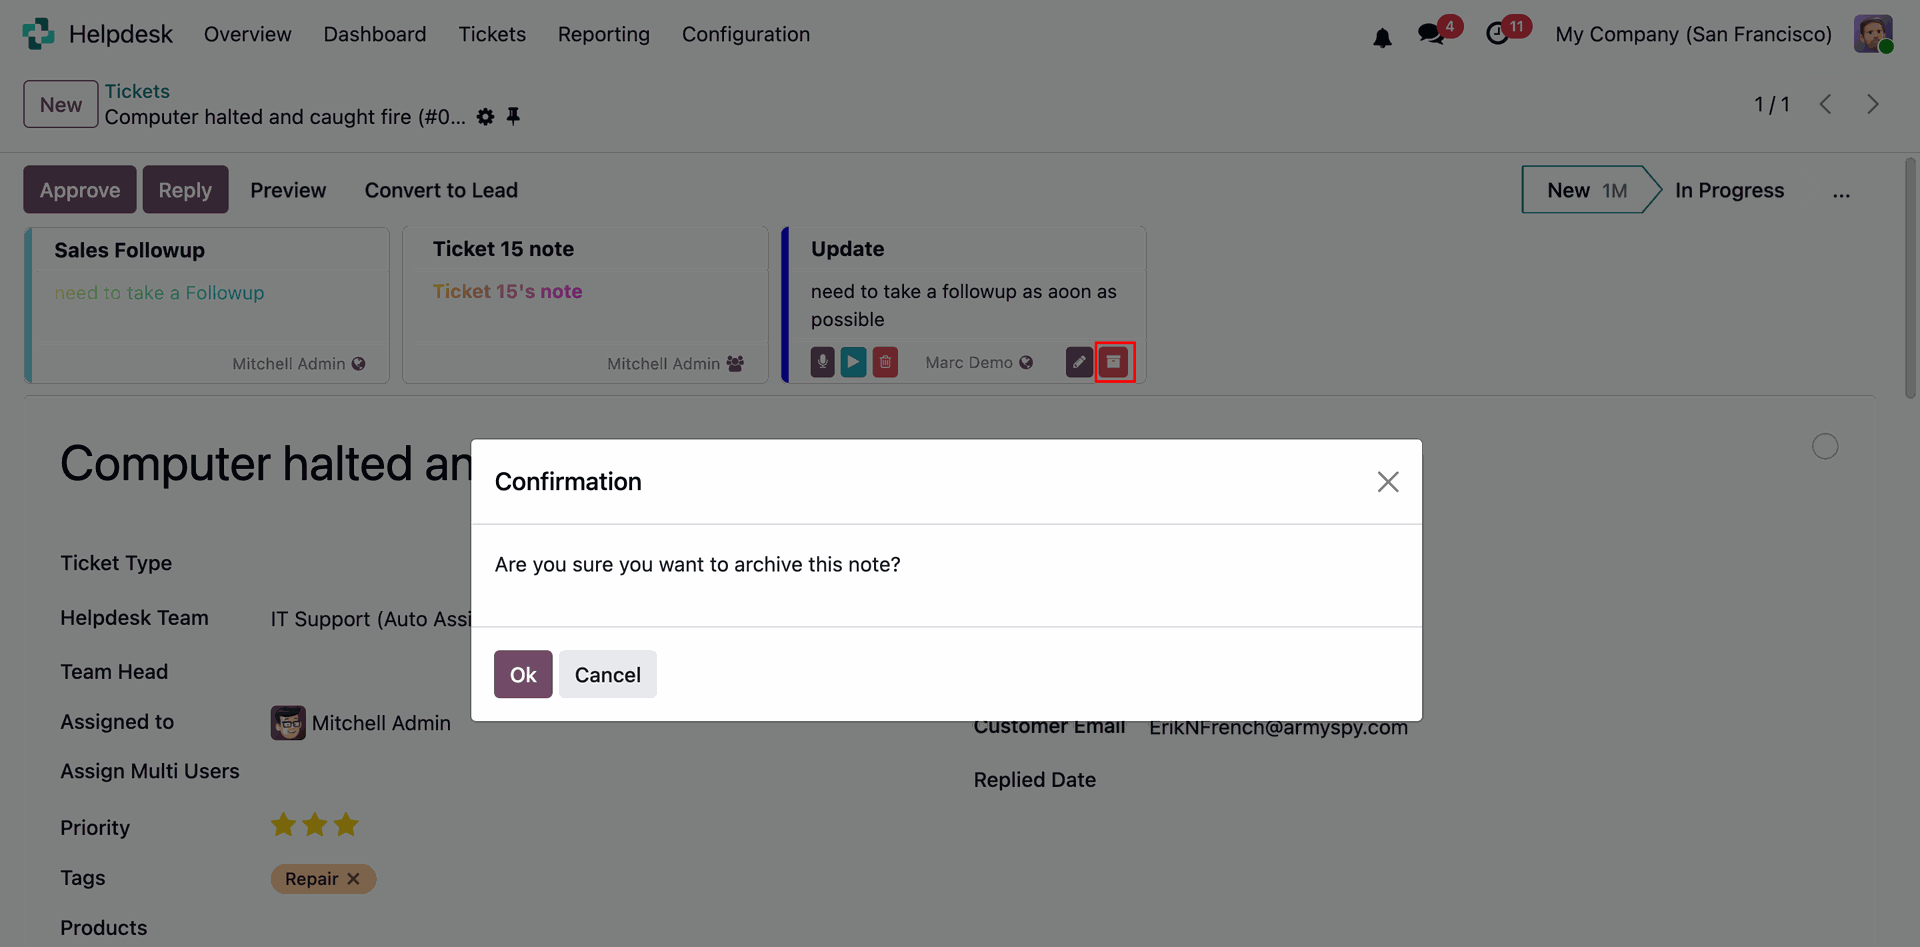
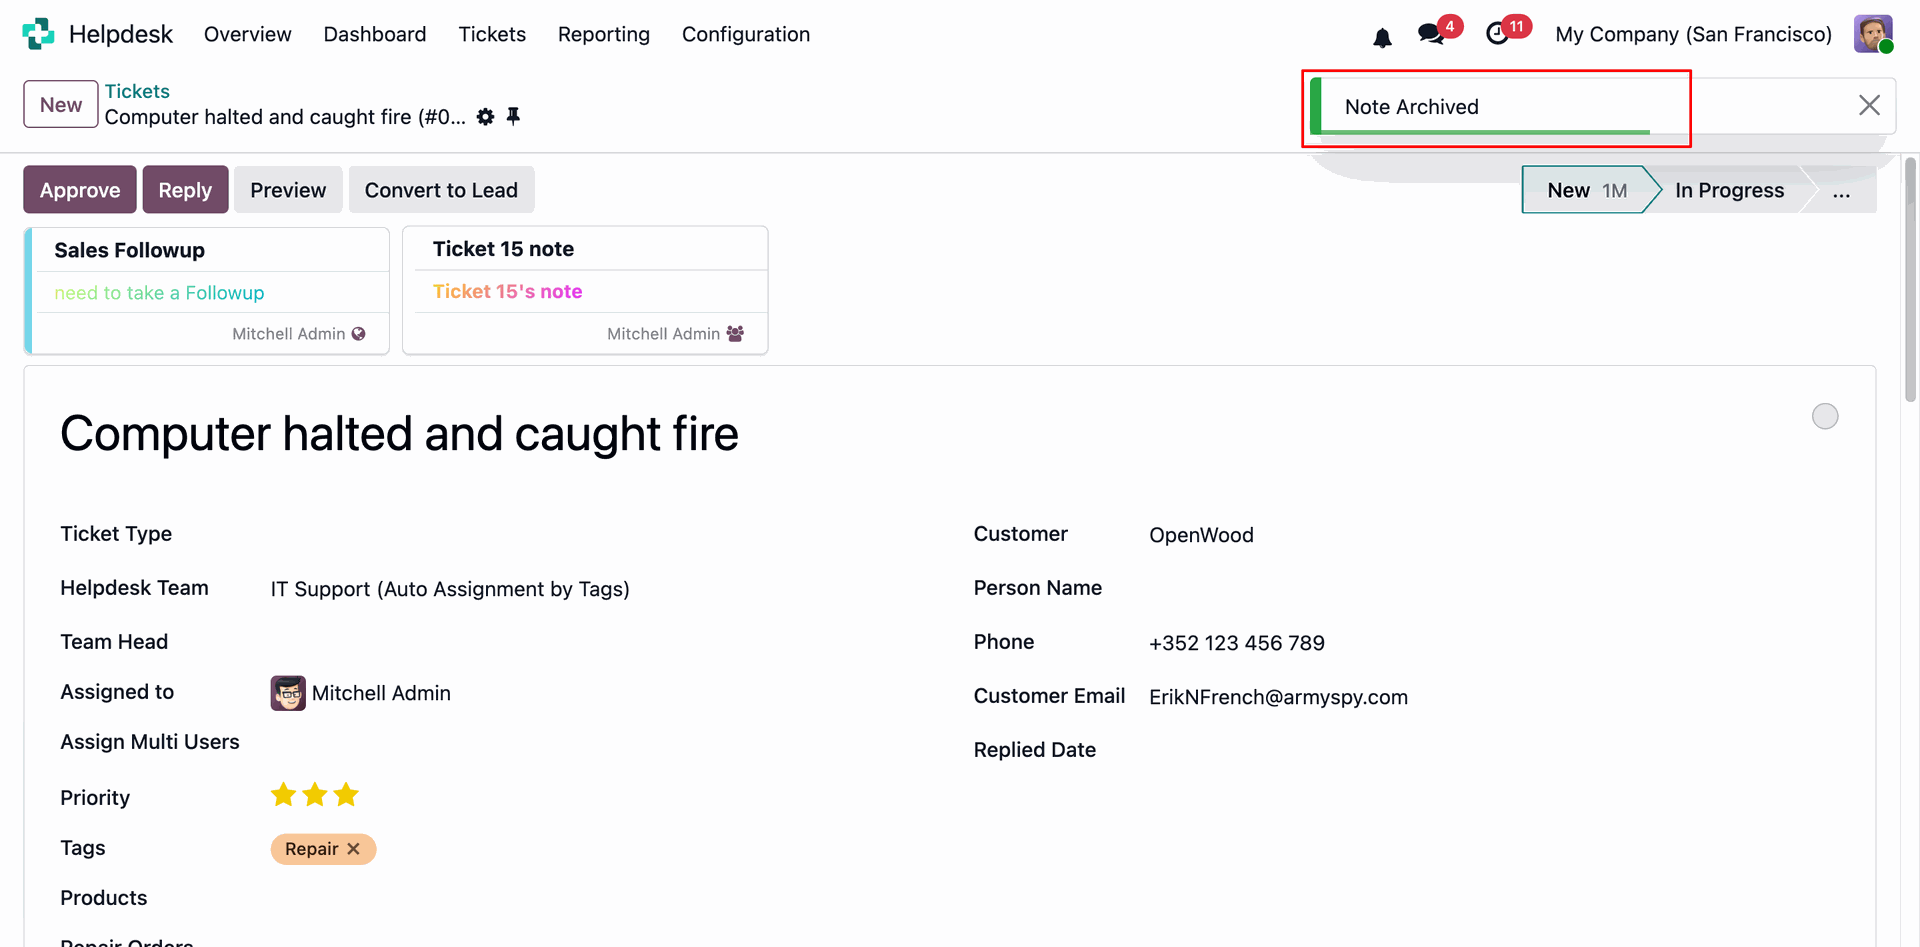
Sticky notes can be created directly from helpdesk ticket by clicking on pin icon.
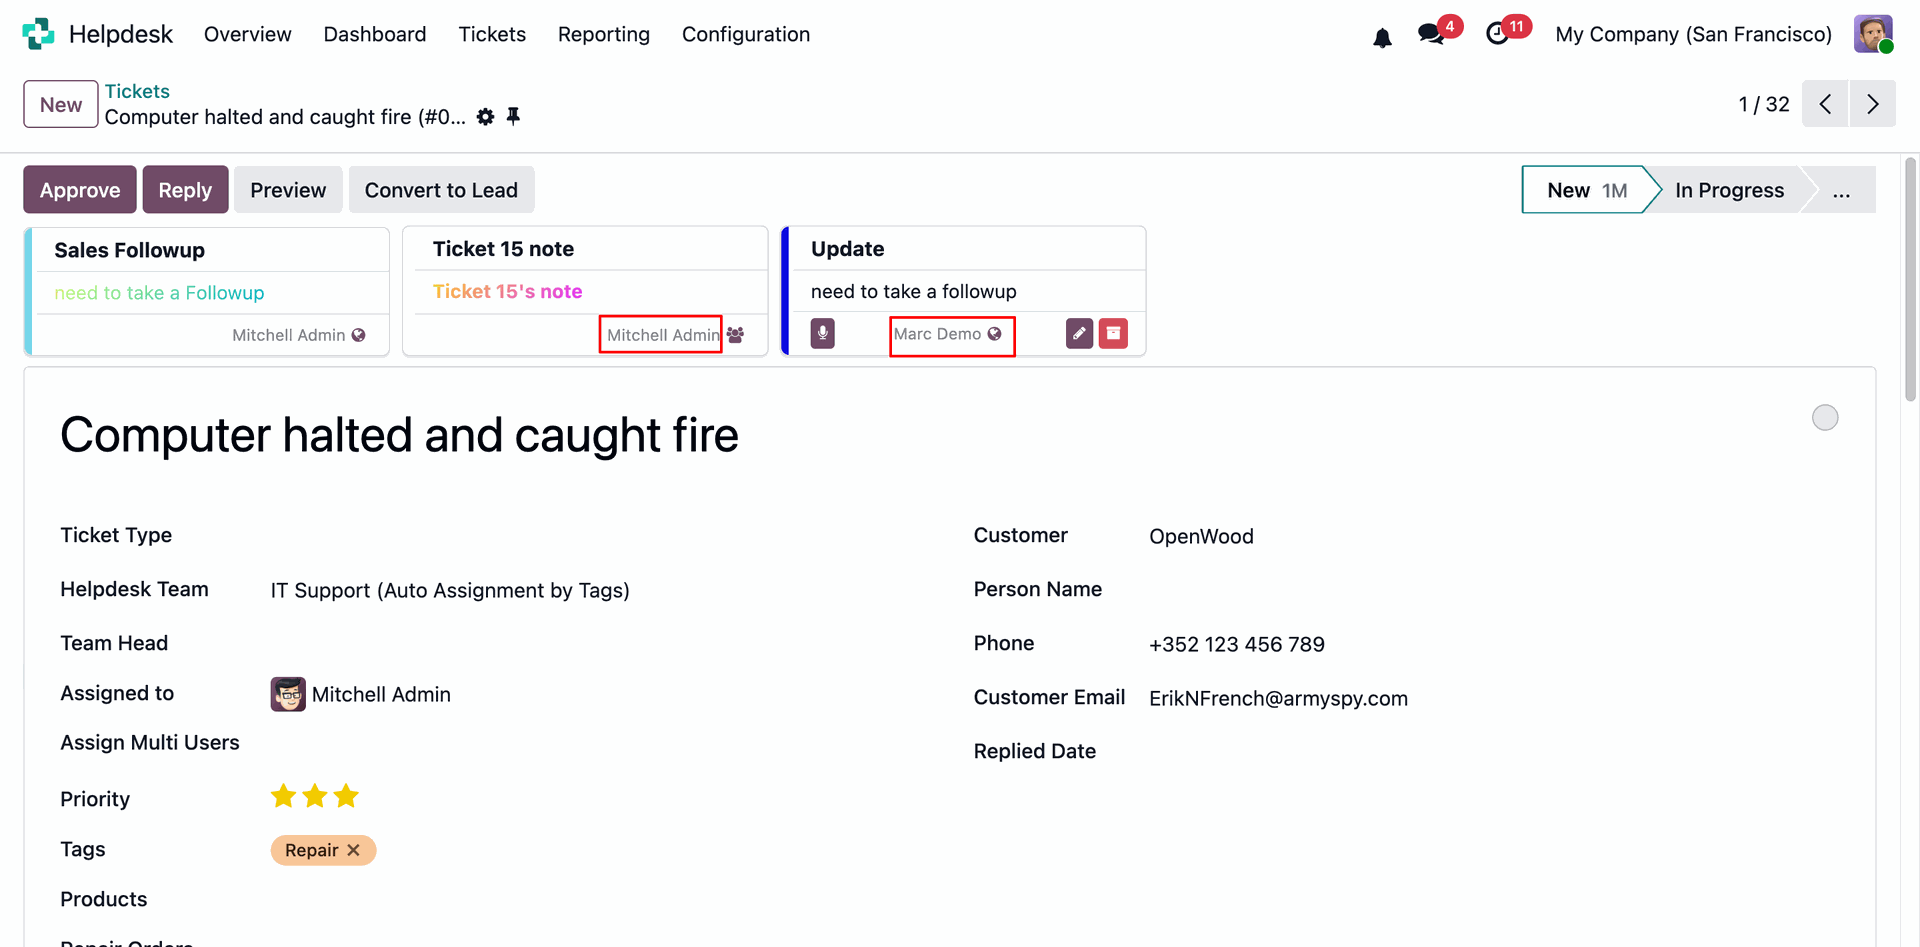
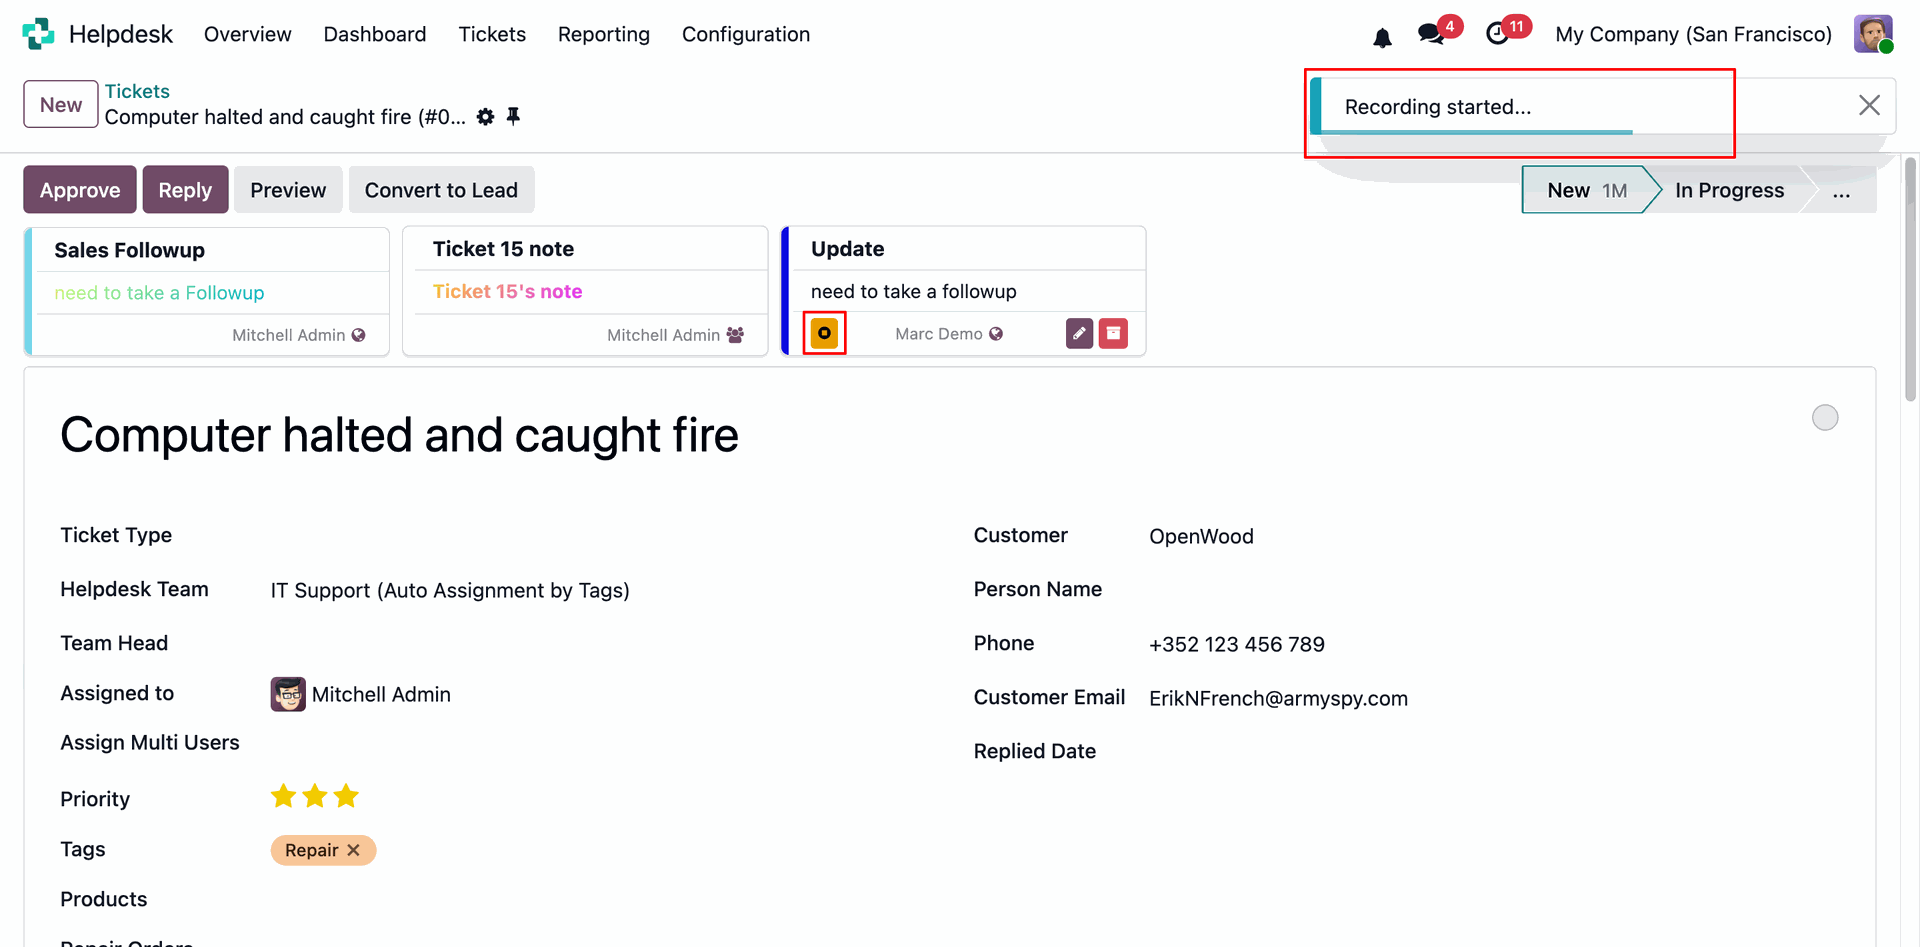
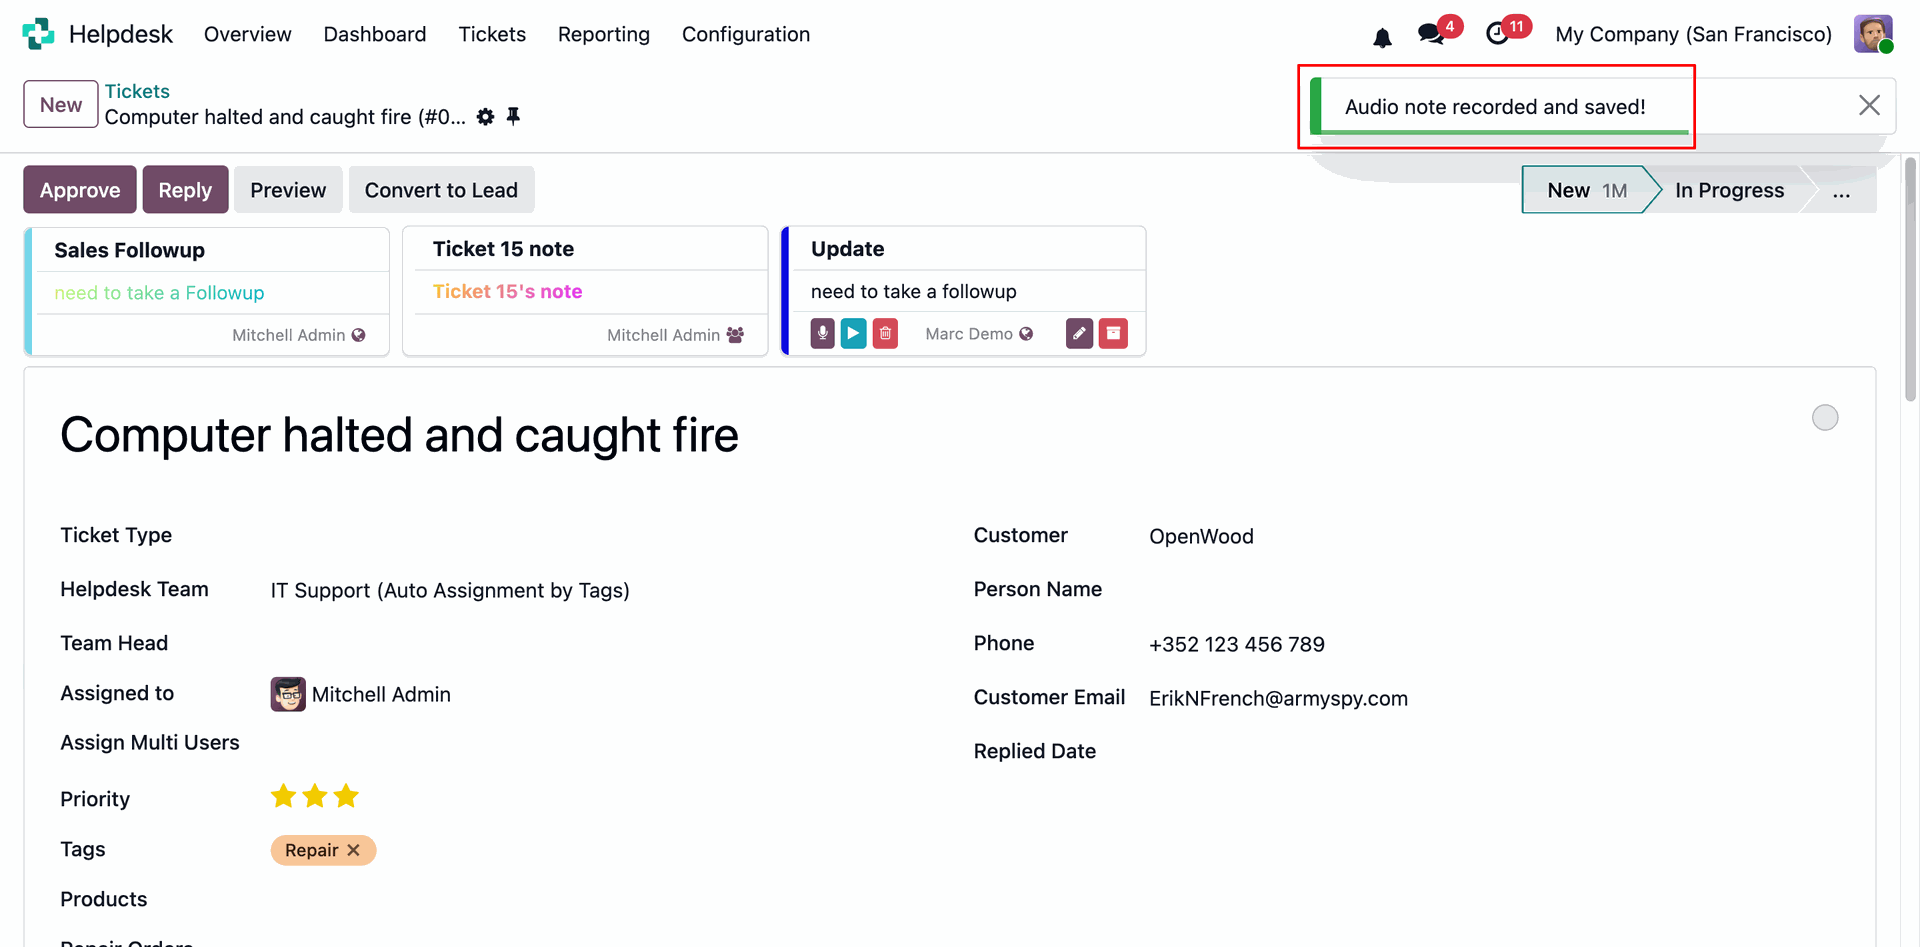
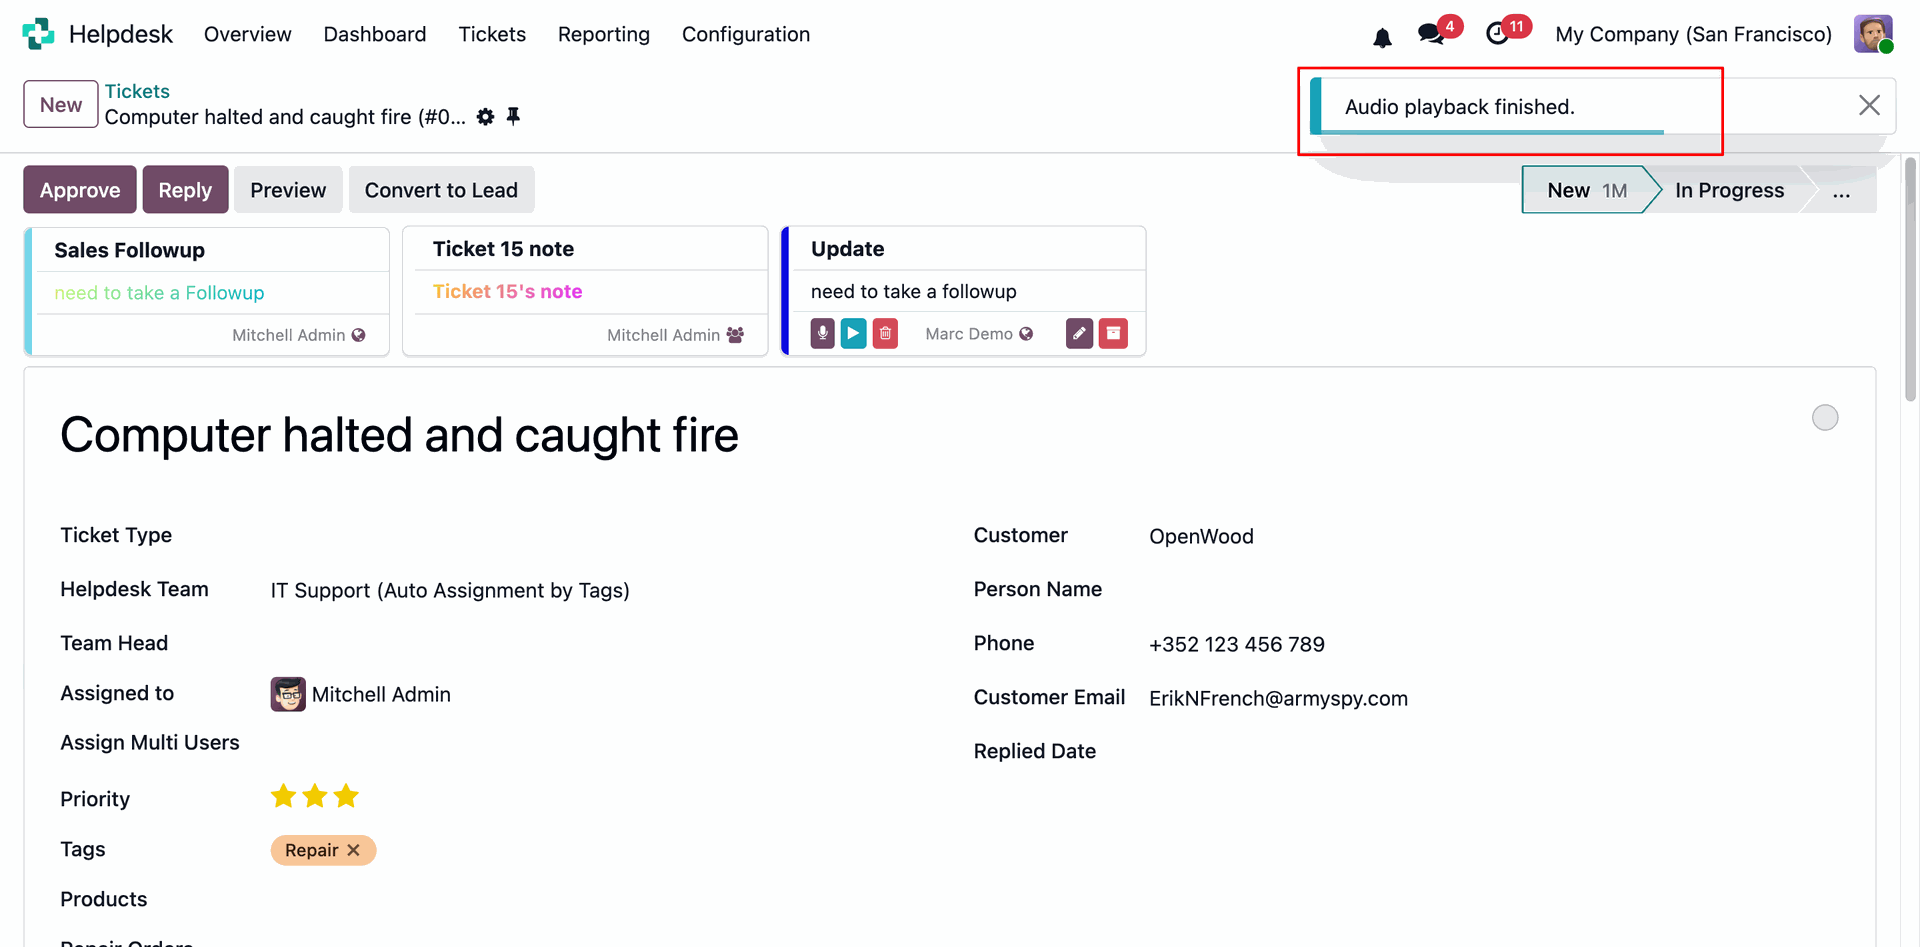
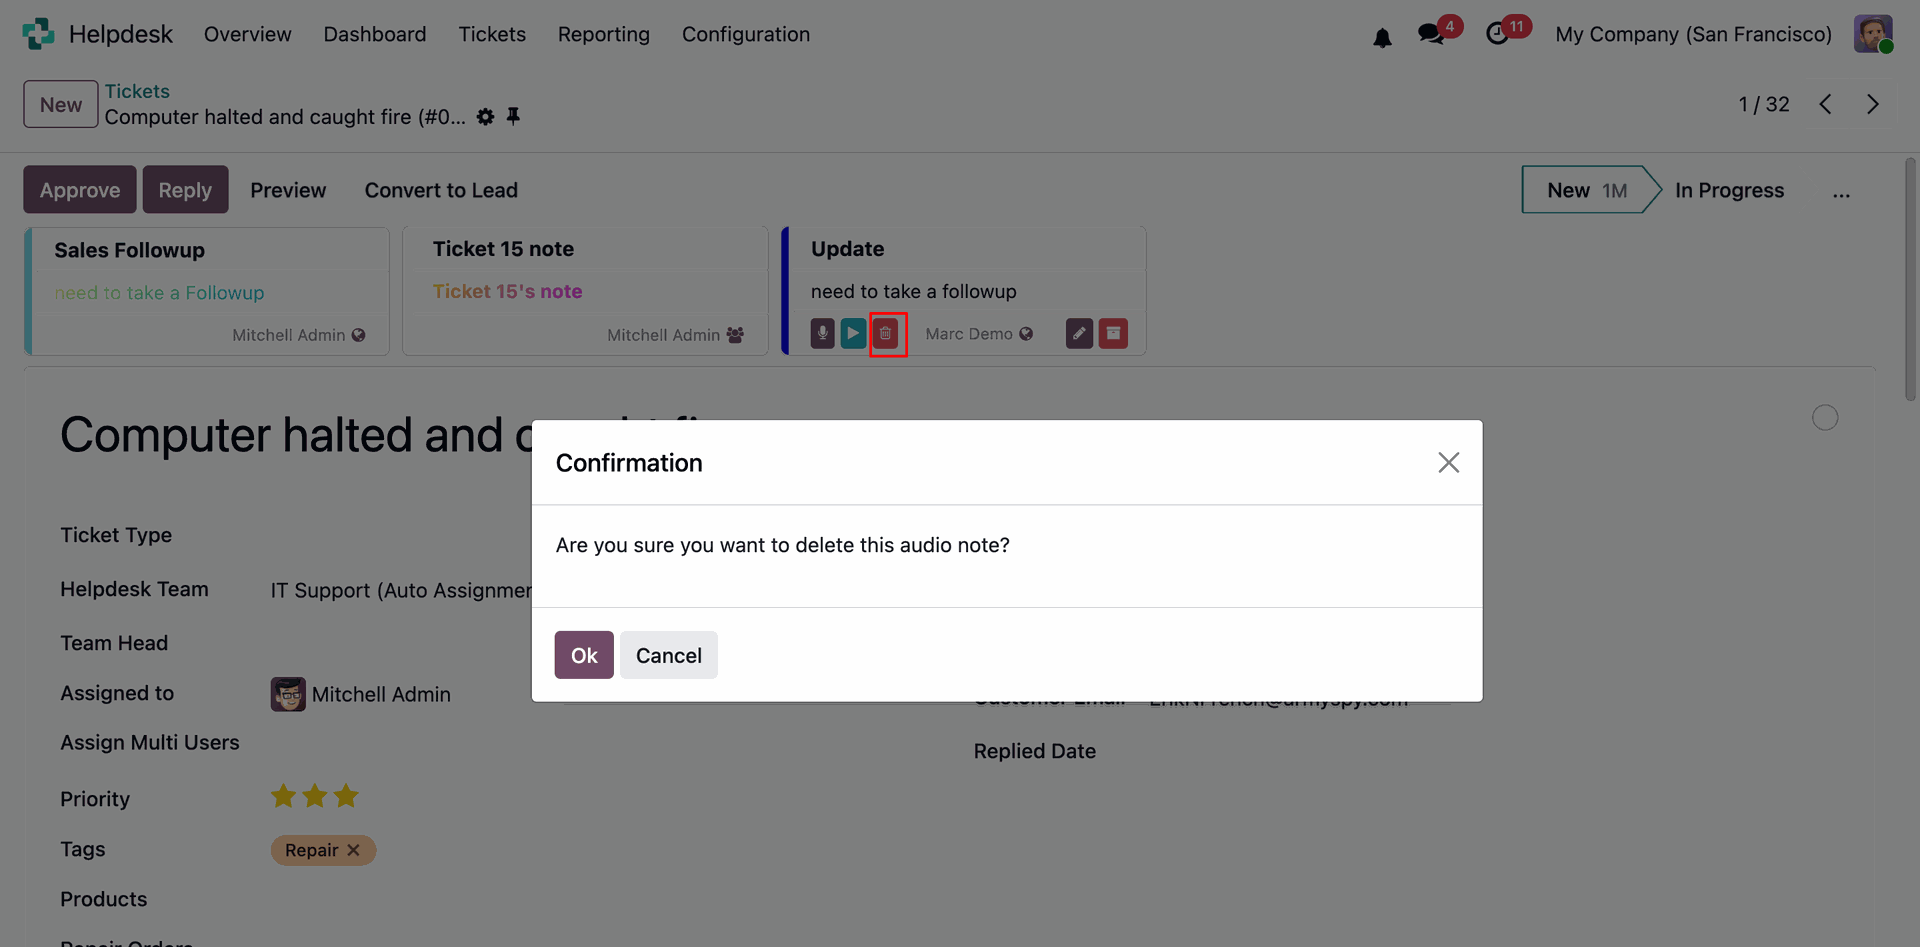
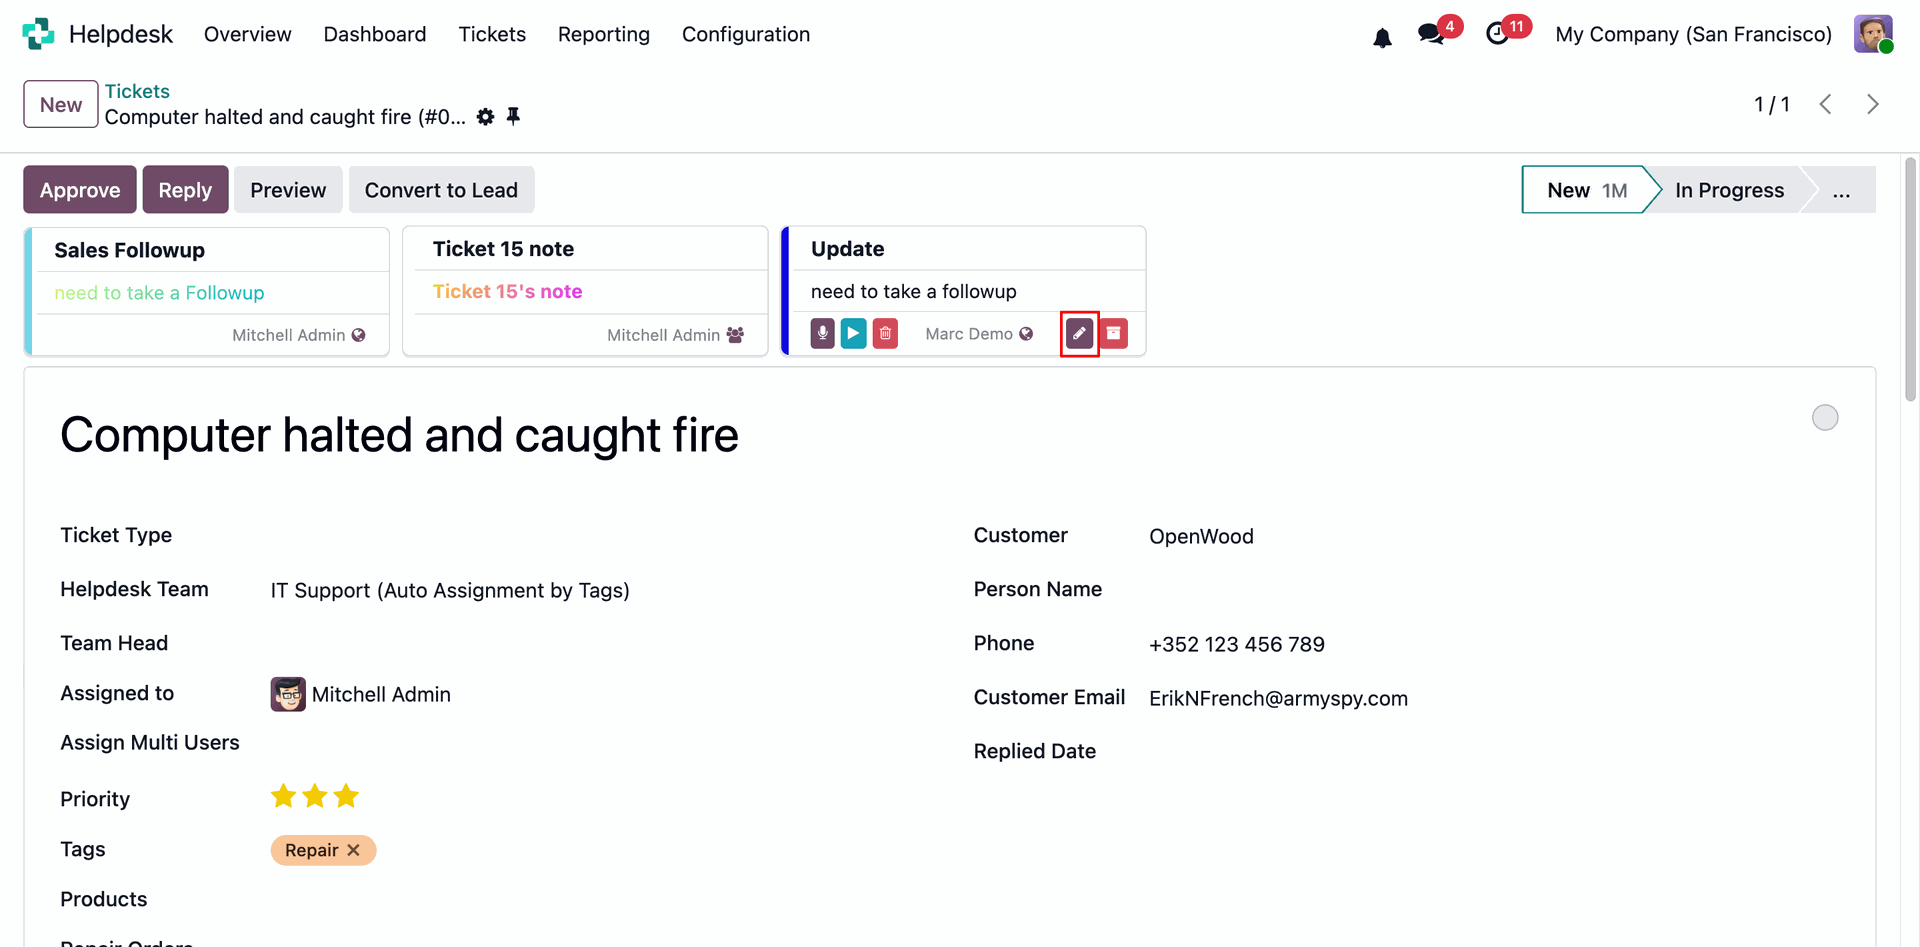
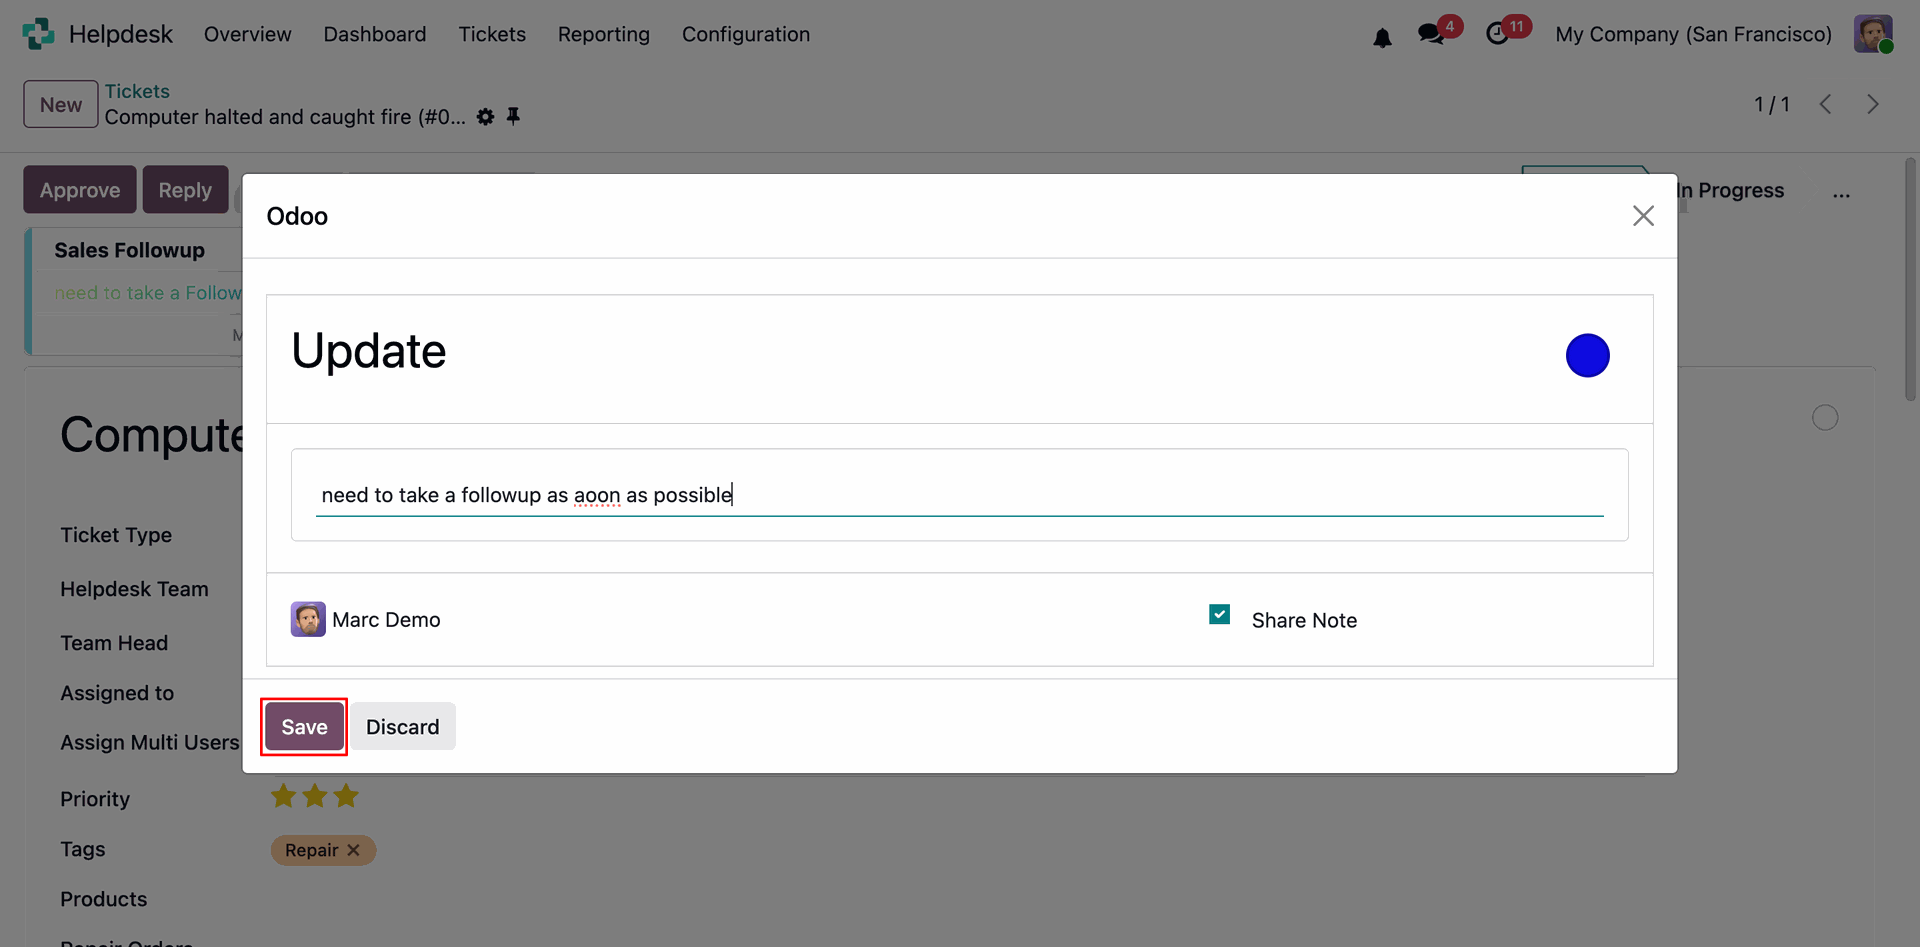
Notes are visible on the tickets with user name.
When a ticket is cancelled, users will receive notifications according to their notification preferences.
When a ticket is done, users will receive notifications according to their notification preferences.
When a ticket is done, users will receive notifications according to their notification preferences.

When a ticket is done, users will receive notifications according to their notification preferences.
When a ticket is done, users will receive notifications according to their notification preferences.
When a ticket is done, users will receive notifications according to their notification preferences.
When a ticket is done, users will receive notifications according to their notification preferences.
When a ticket is done, users will receive notifications according to their notification preferences.
When a ticket is done, users will receive notifications according to their notification preferences.
When a ticket is done, users will receive notifications according to their notification preferences.

When a ticket is done, users will receive notifications according to their notification preferences.
When a ticket is done, users will receive notifications according to their notification preferences.
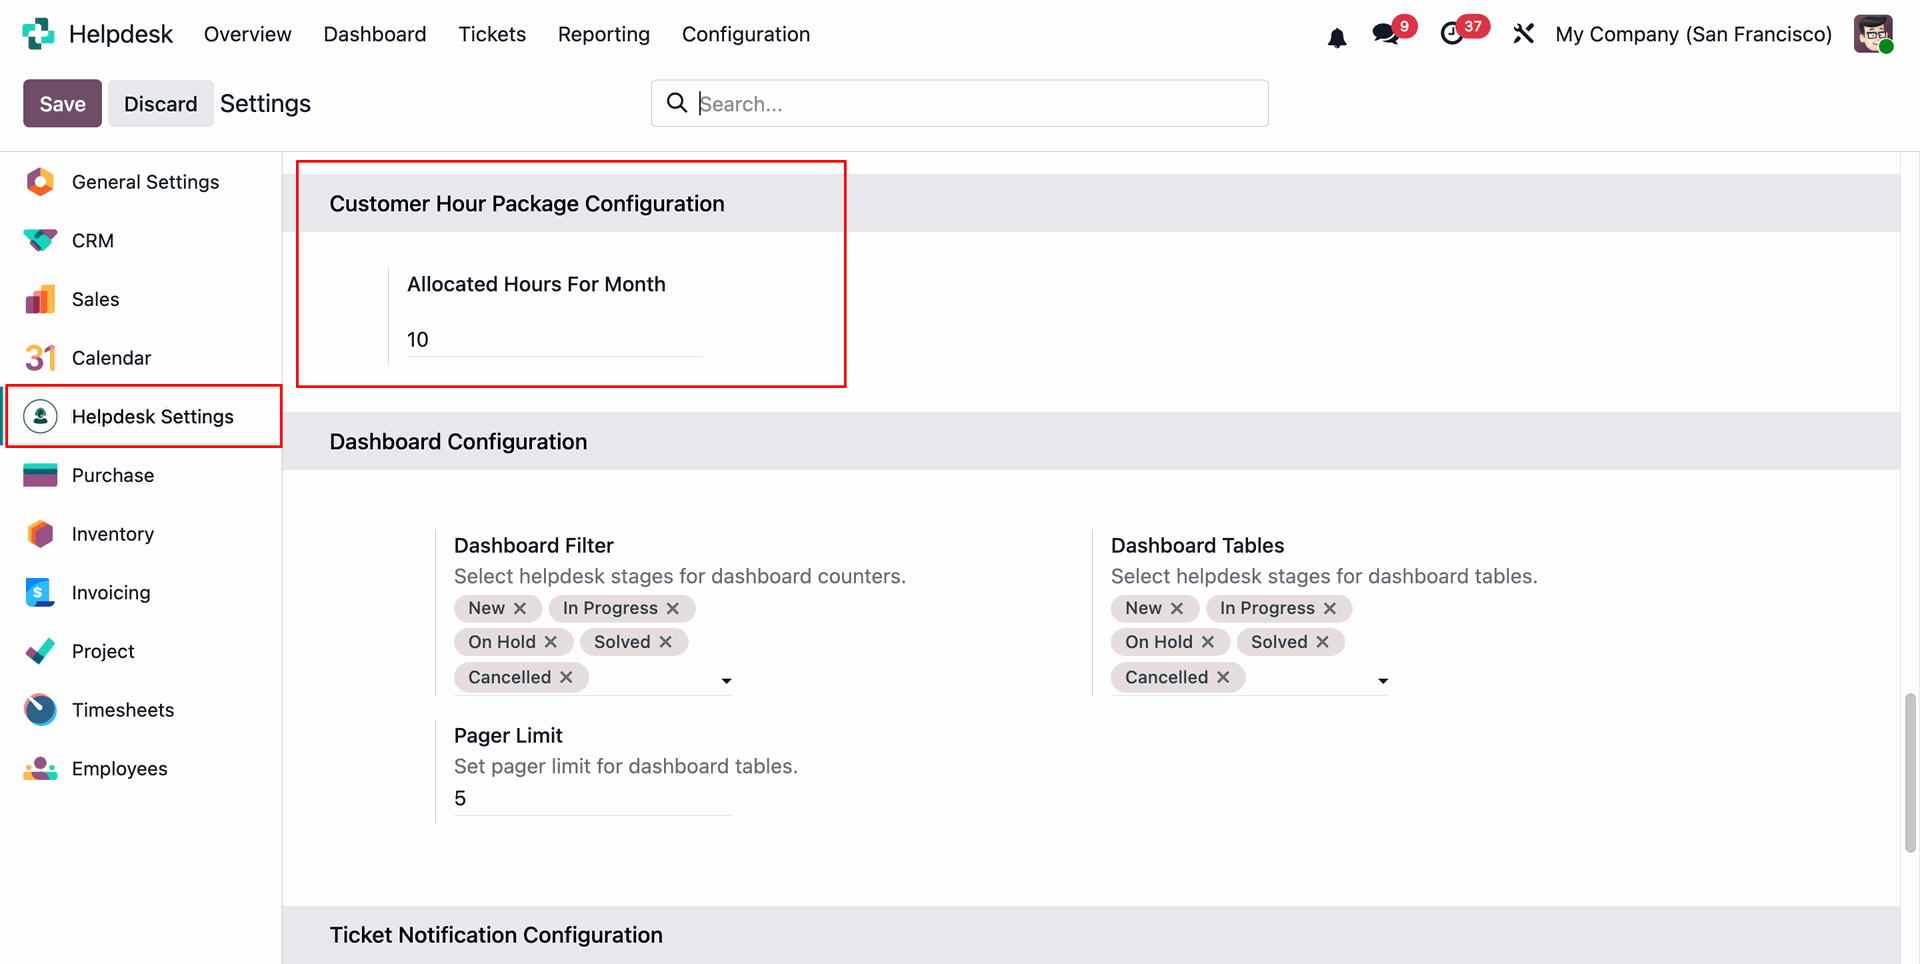
Go to the Helpdesk General Settings and configure the Monthly Allocated Hours under the Customer Hour Package Configuration section.
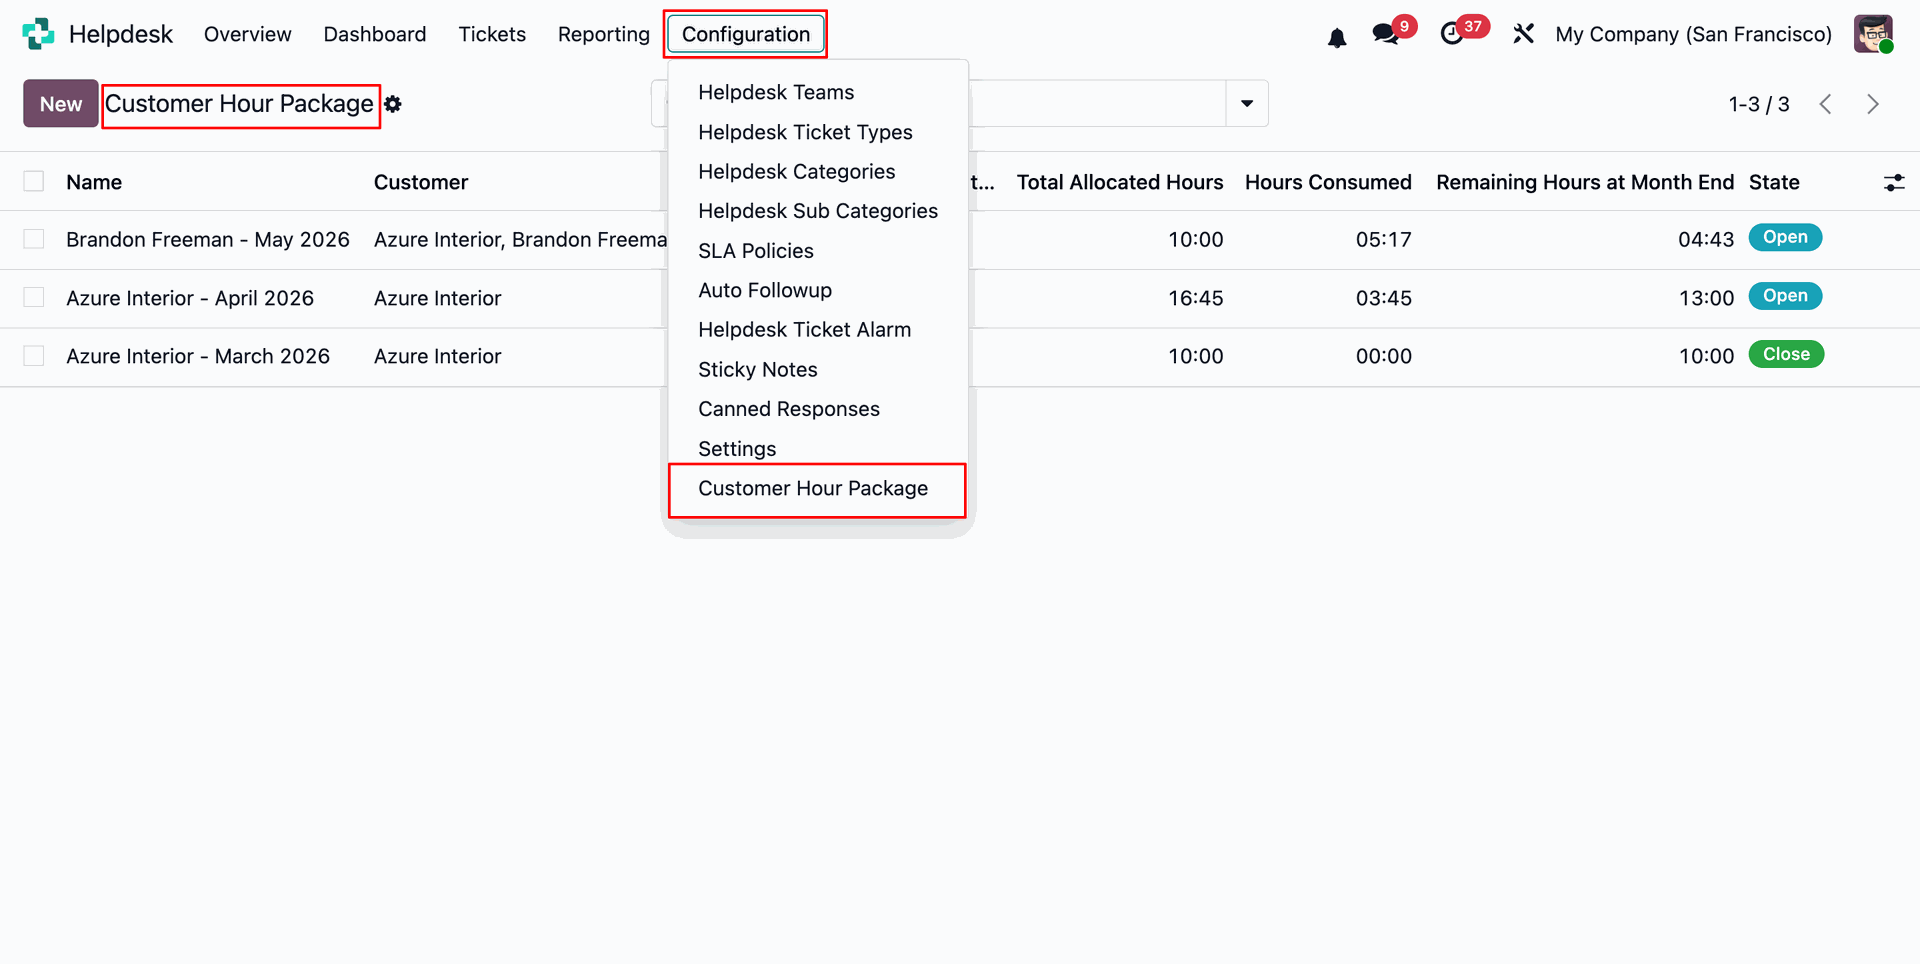
Go to the Helpdesk Configuration menu and select Customer Hour Packages to configure and manage customer-specific hour packages.
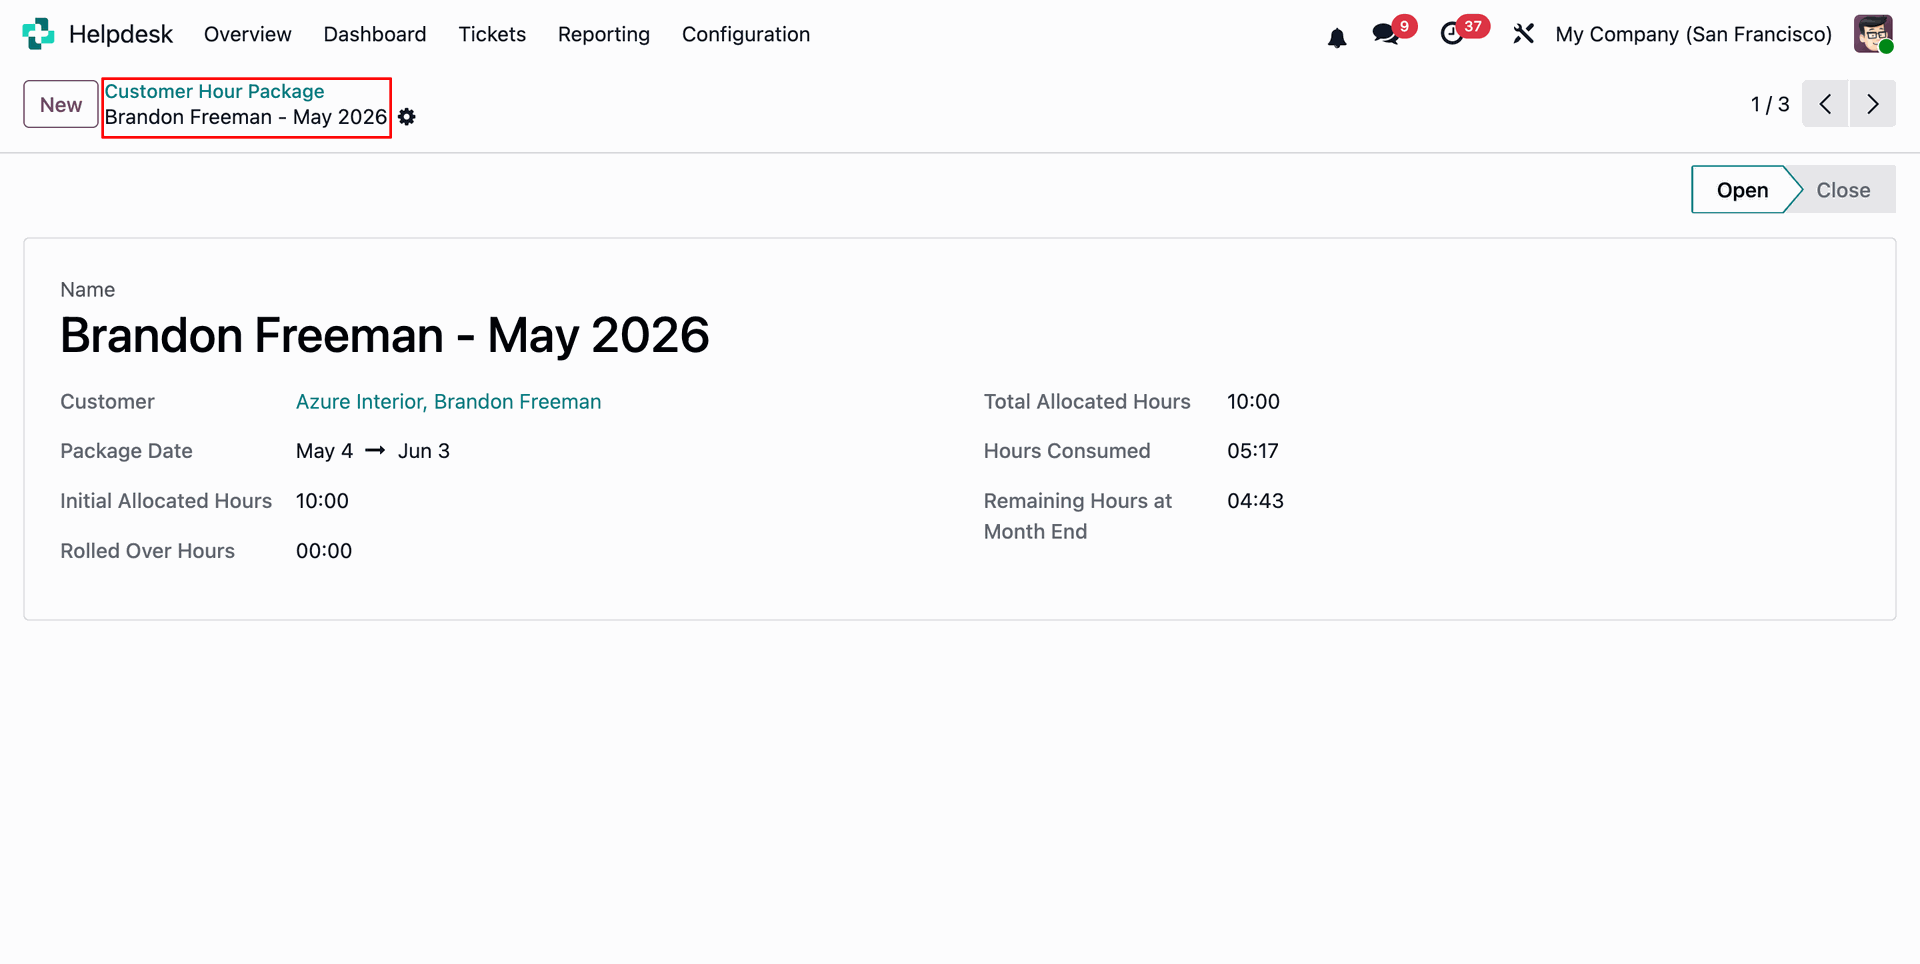
The created Customer Hour Package details can be viewed in the form view.
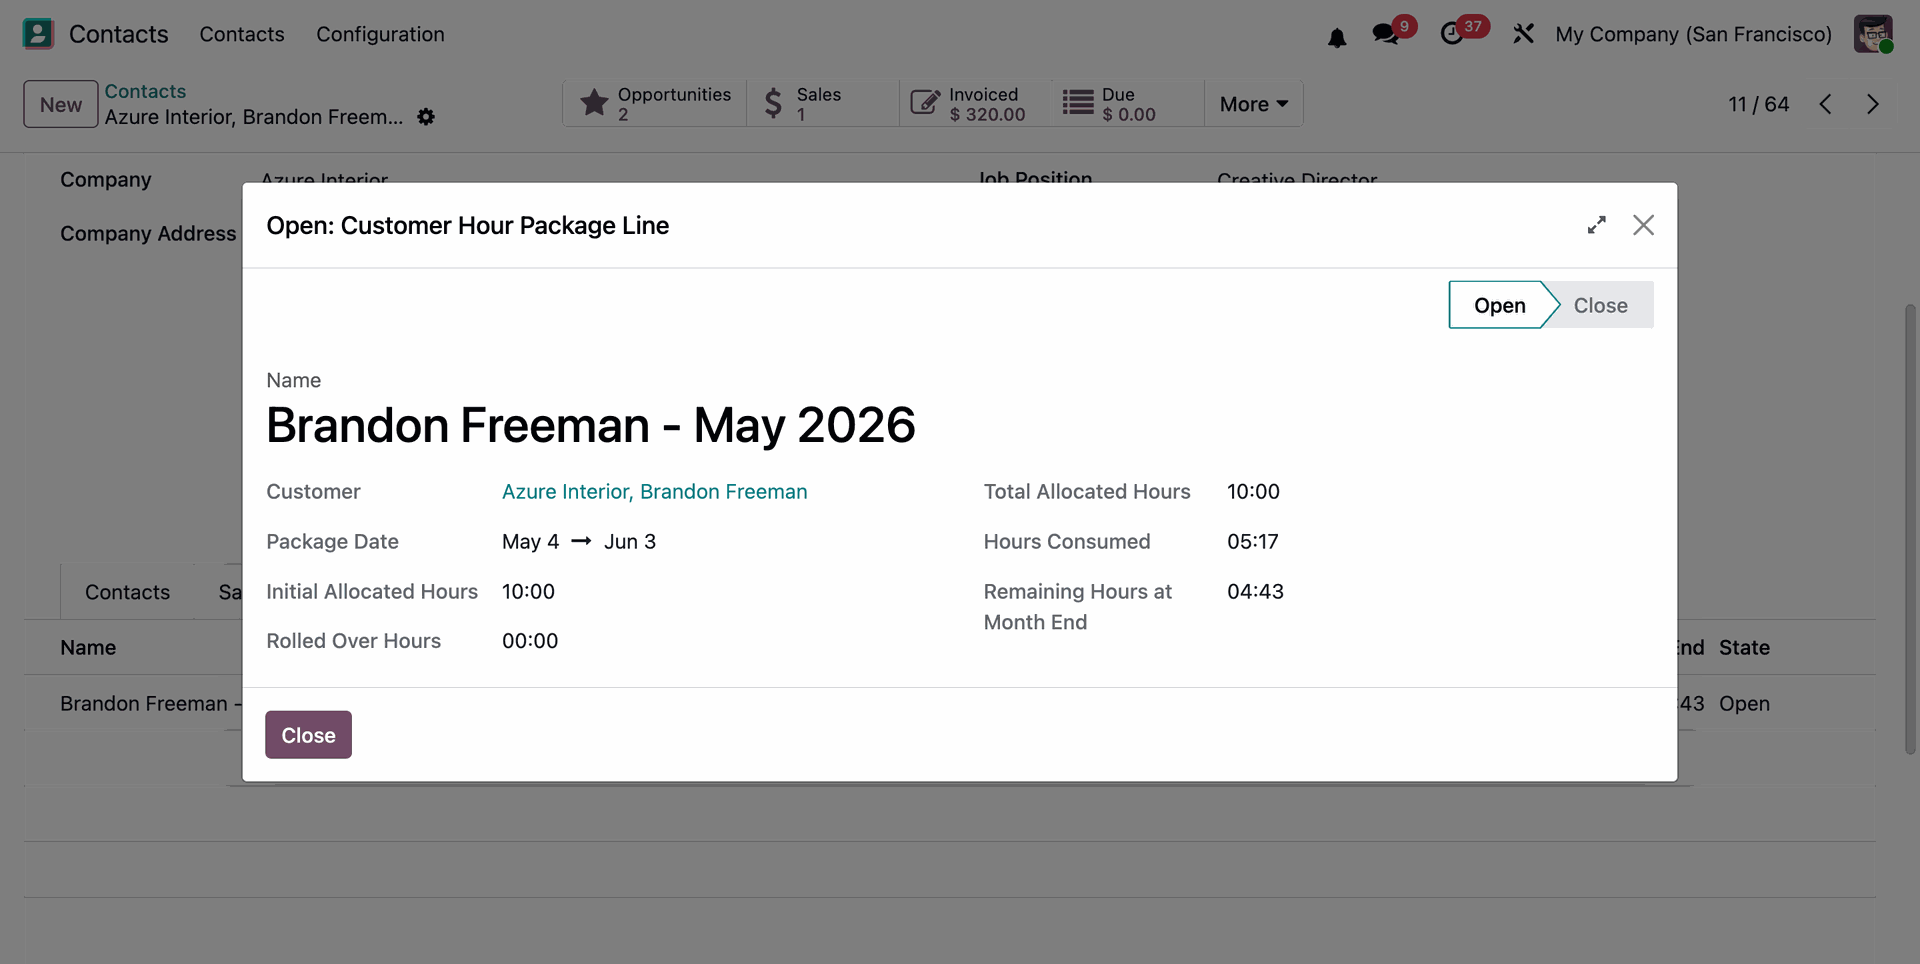
The allocated hours for the month and the Hour Package History can be viewed from the corresponding Contact record.
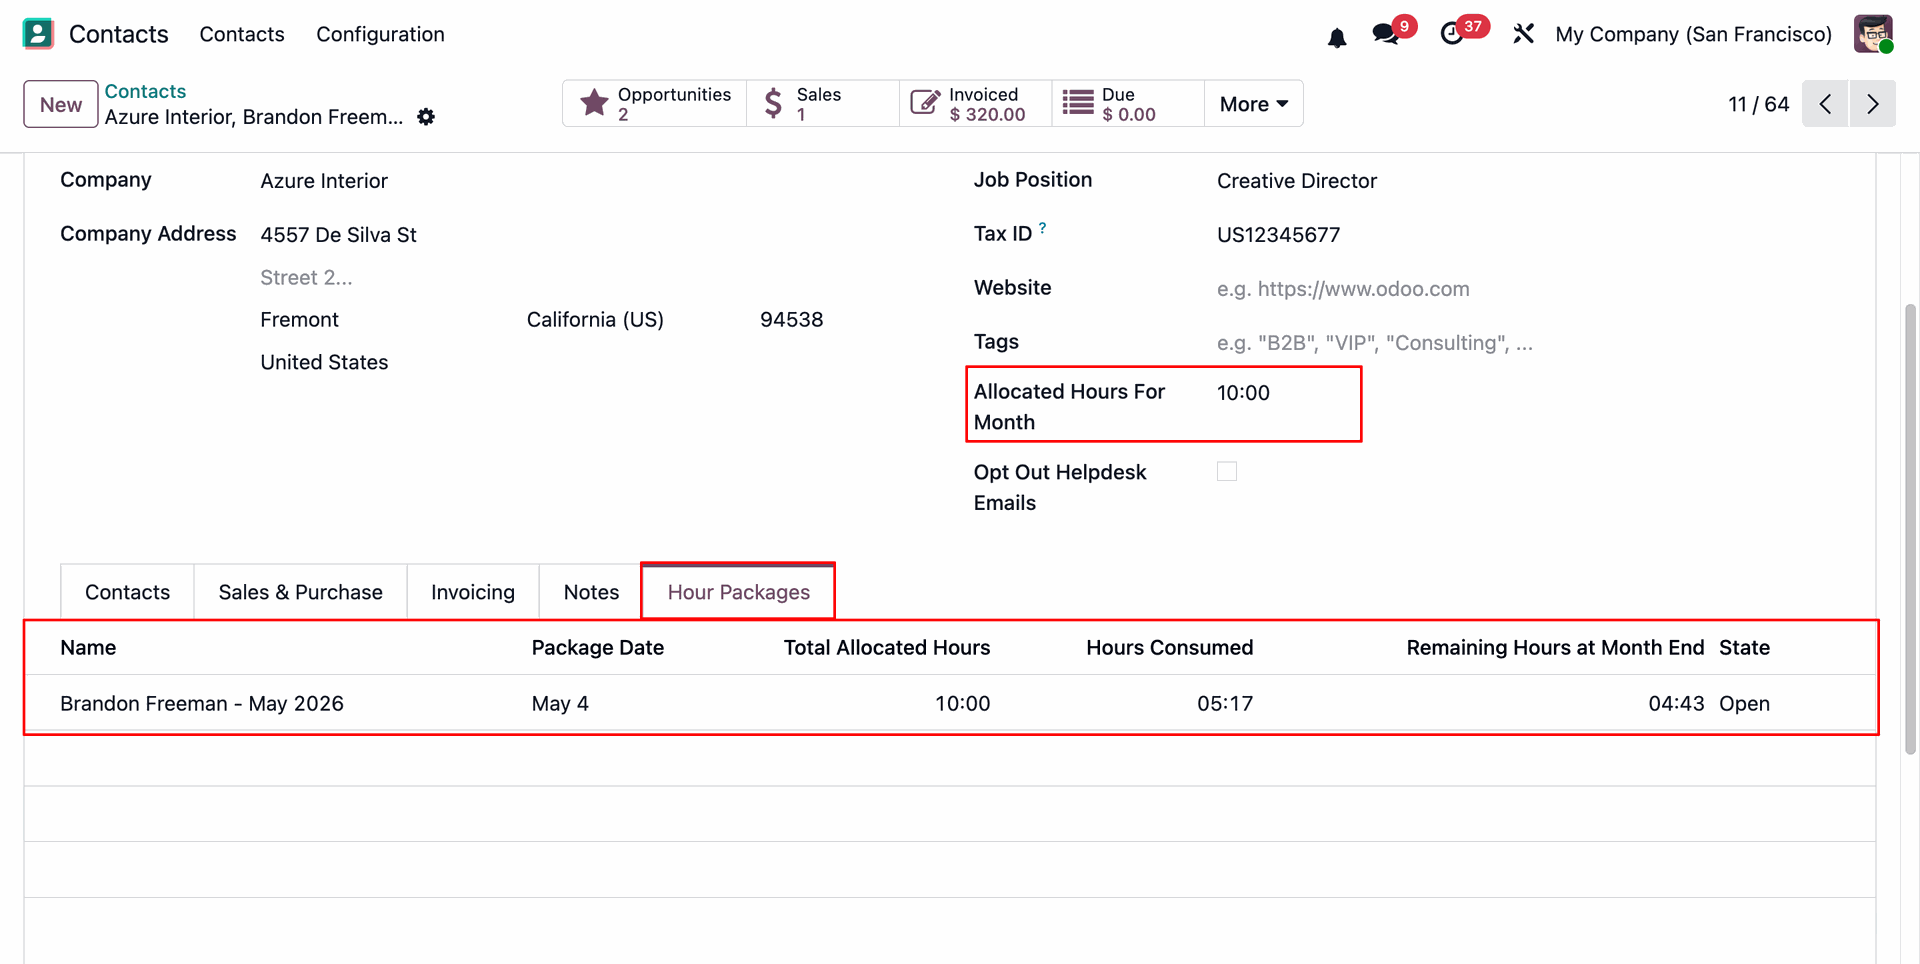
Click on an Hour Package line from the Hour Package tab under the Contact record to view its detailed information and usage history.
Create a Helpdesk Ticket and select the desired Customer from the customer field.
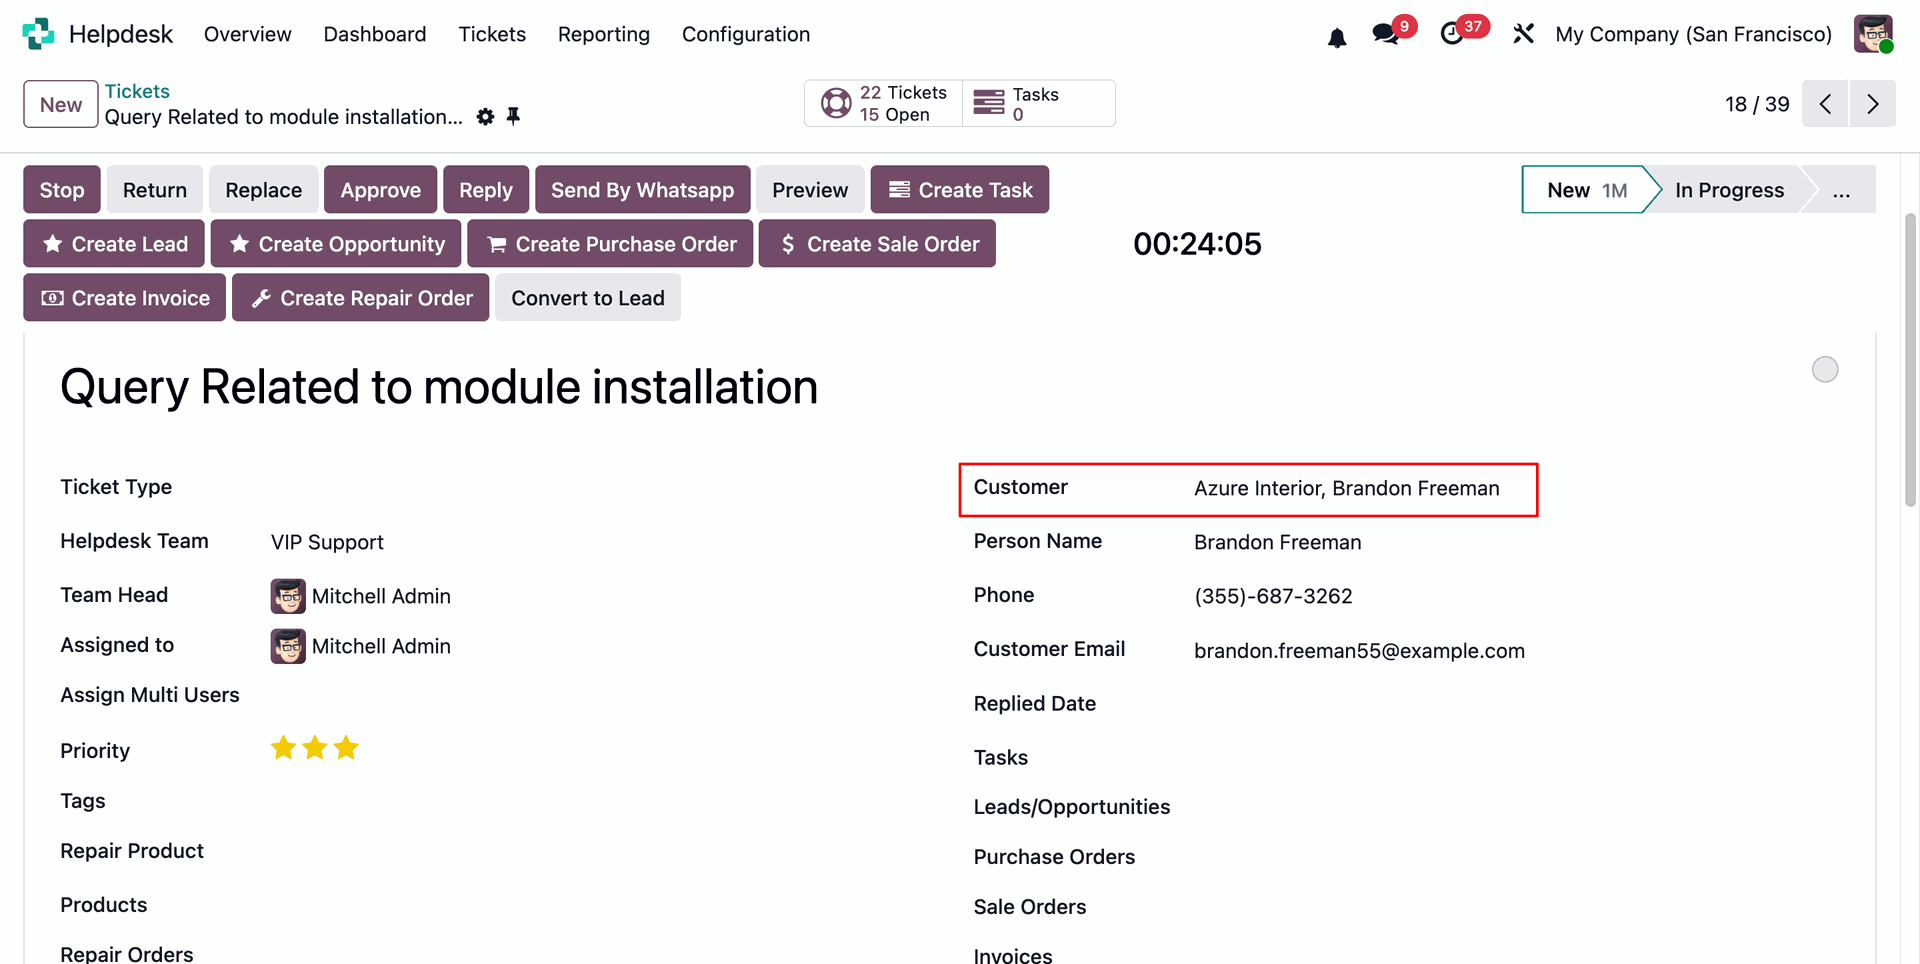
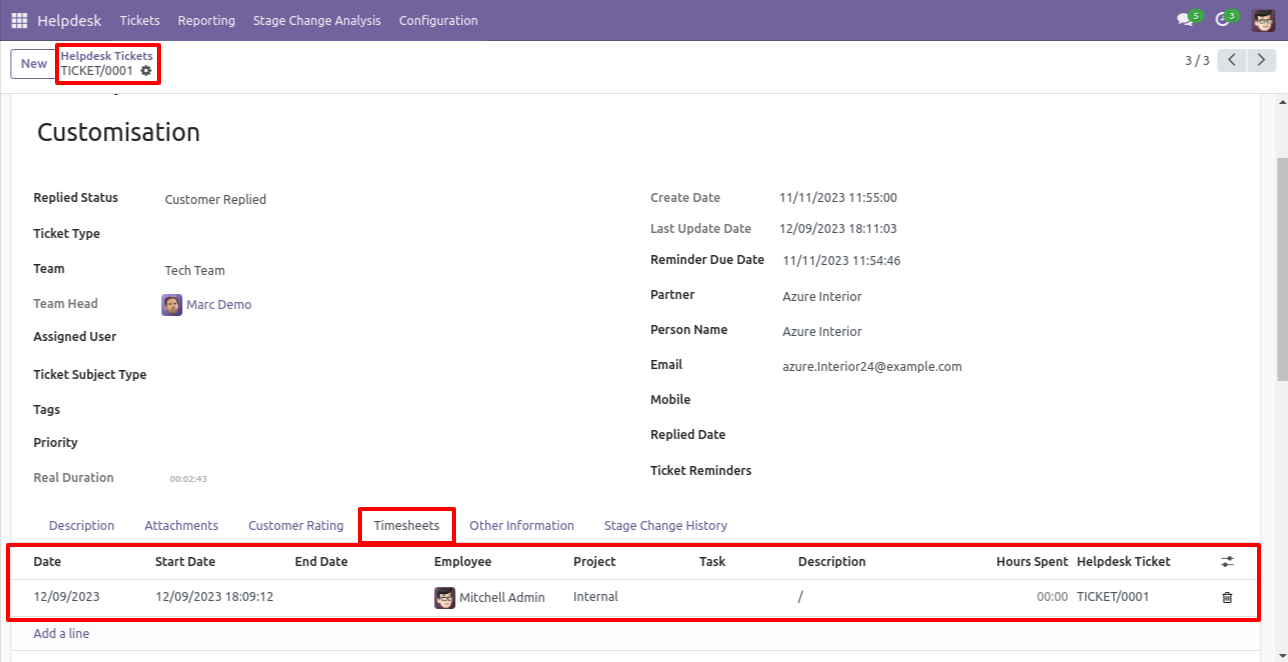
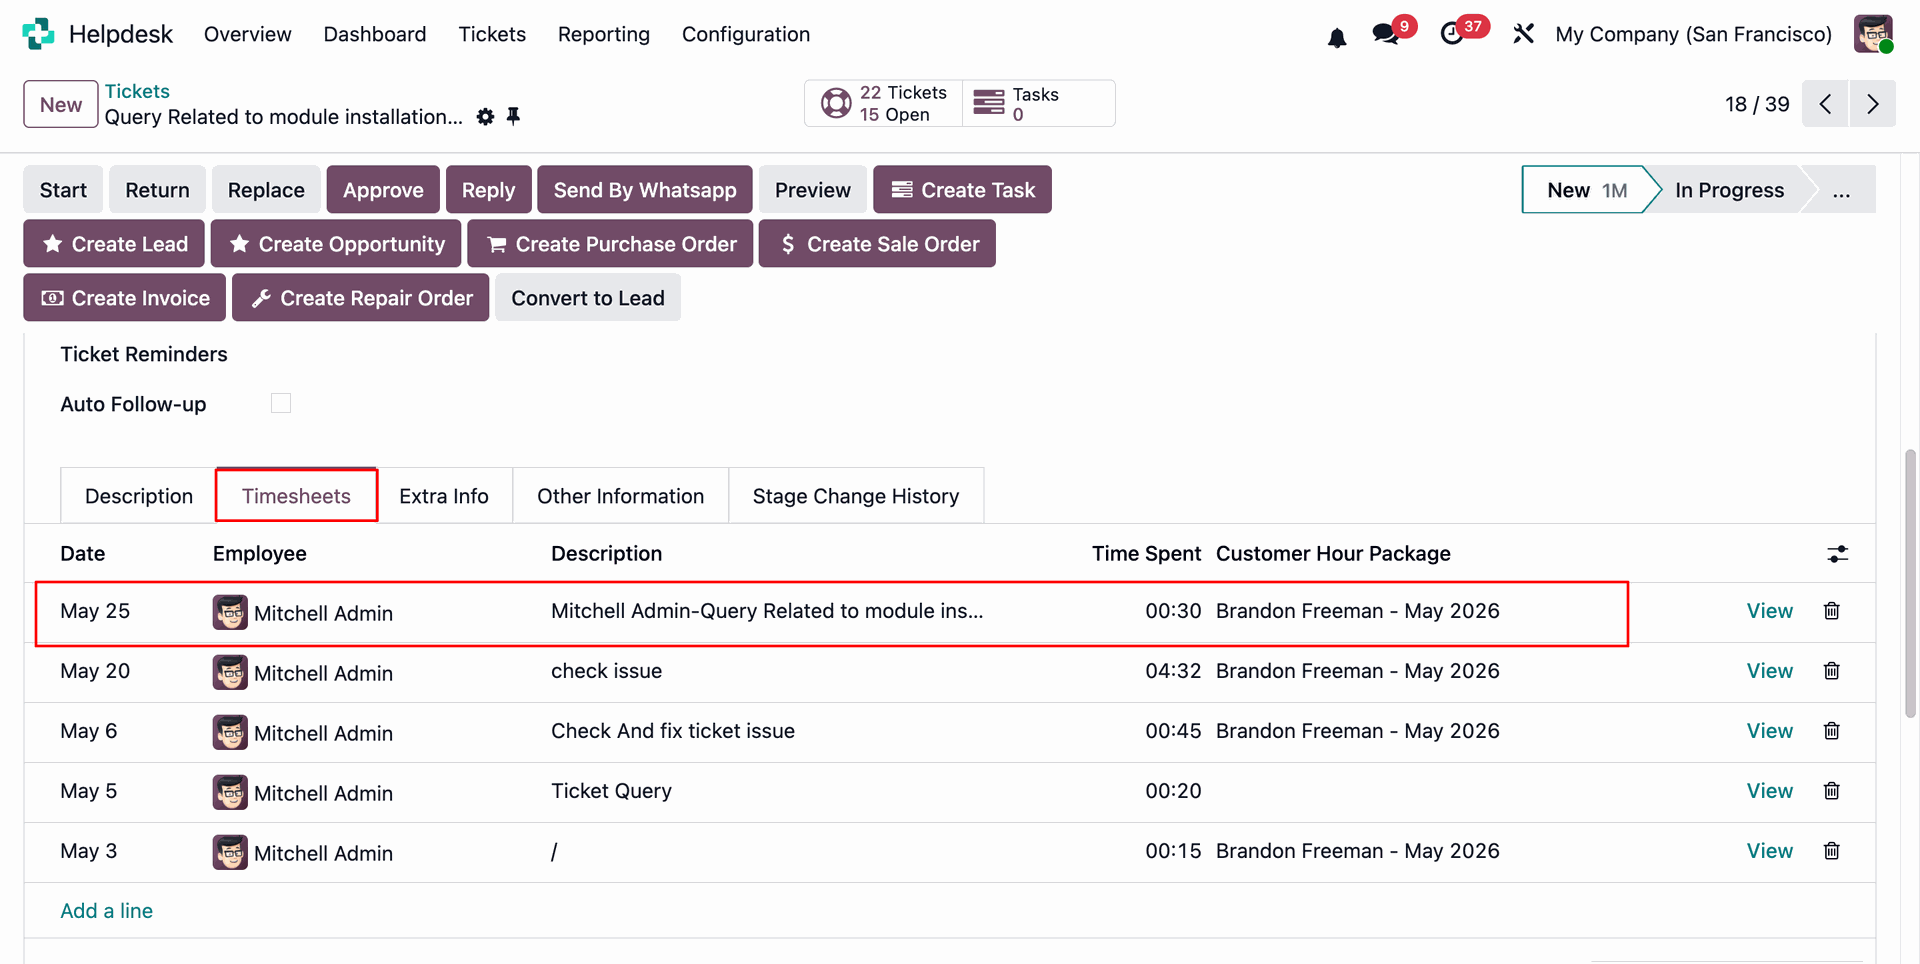
The customer's consumed hour packages can be viewed under the Timesheet tab in the Helpdesk Ticket form view.

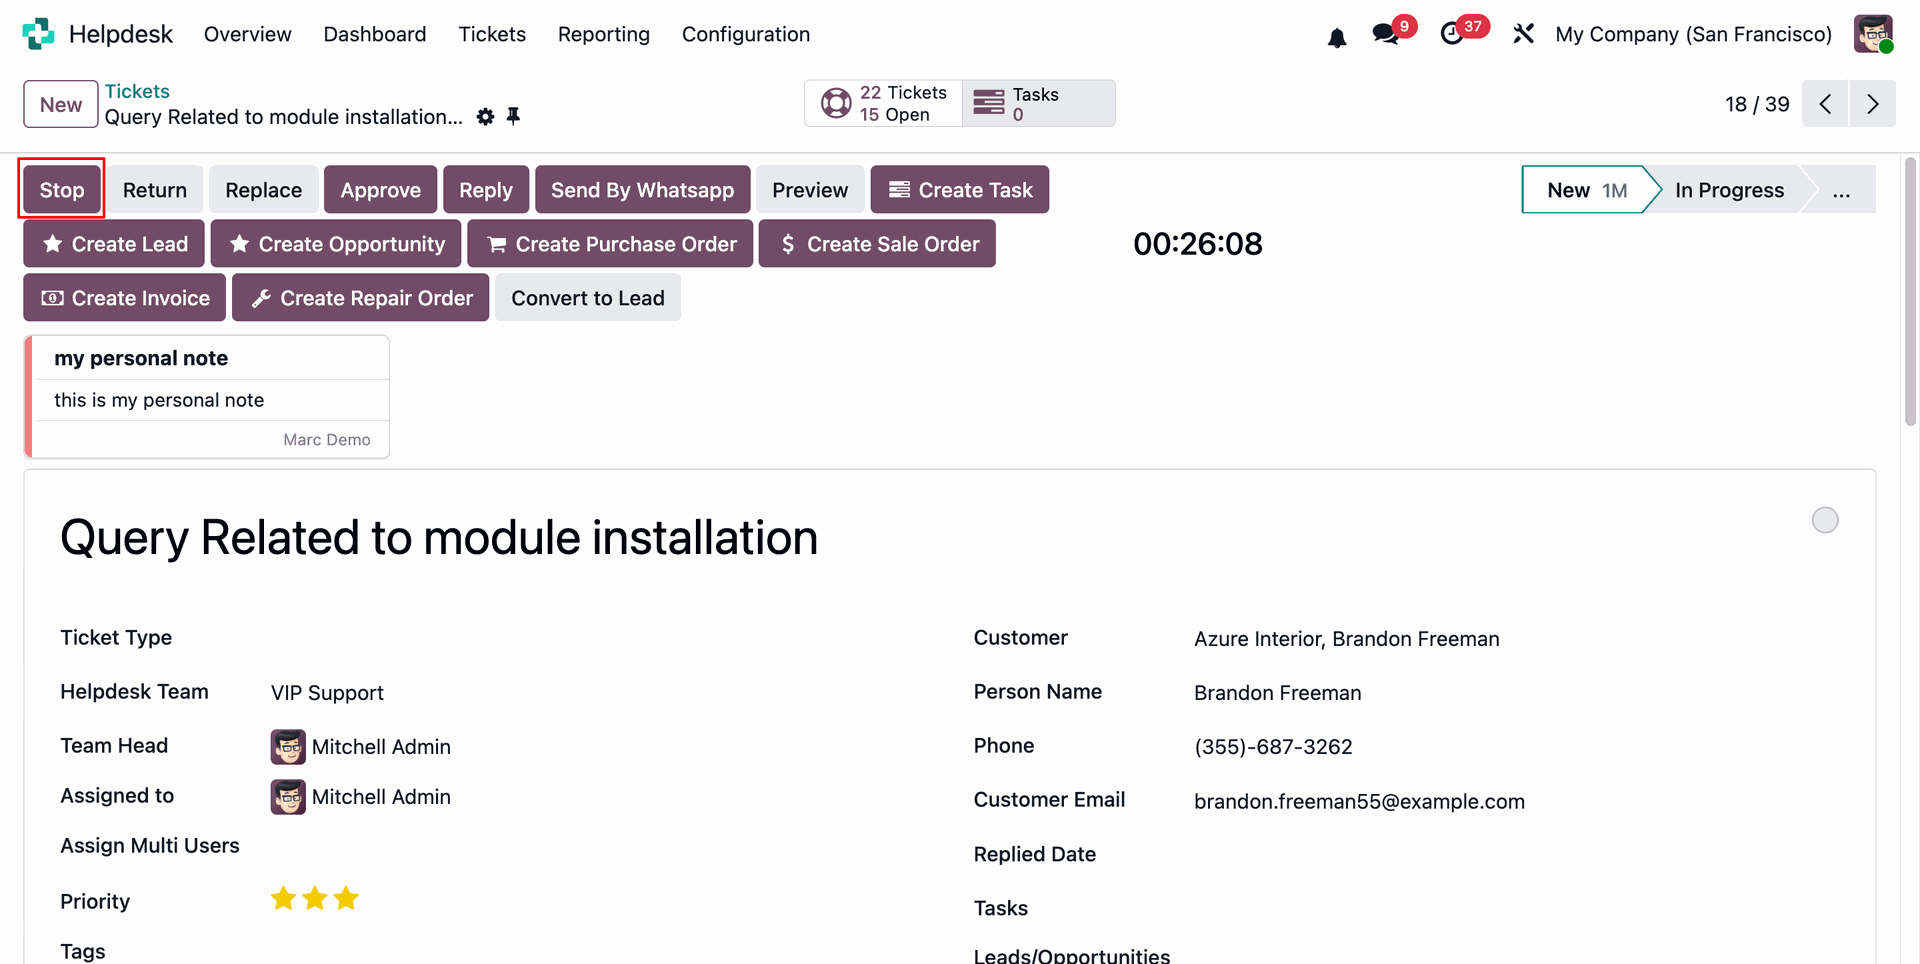
Click the Stop button on the Helpdesk Ticket to stop the timer and record the time spent on the ticket.
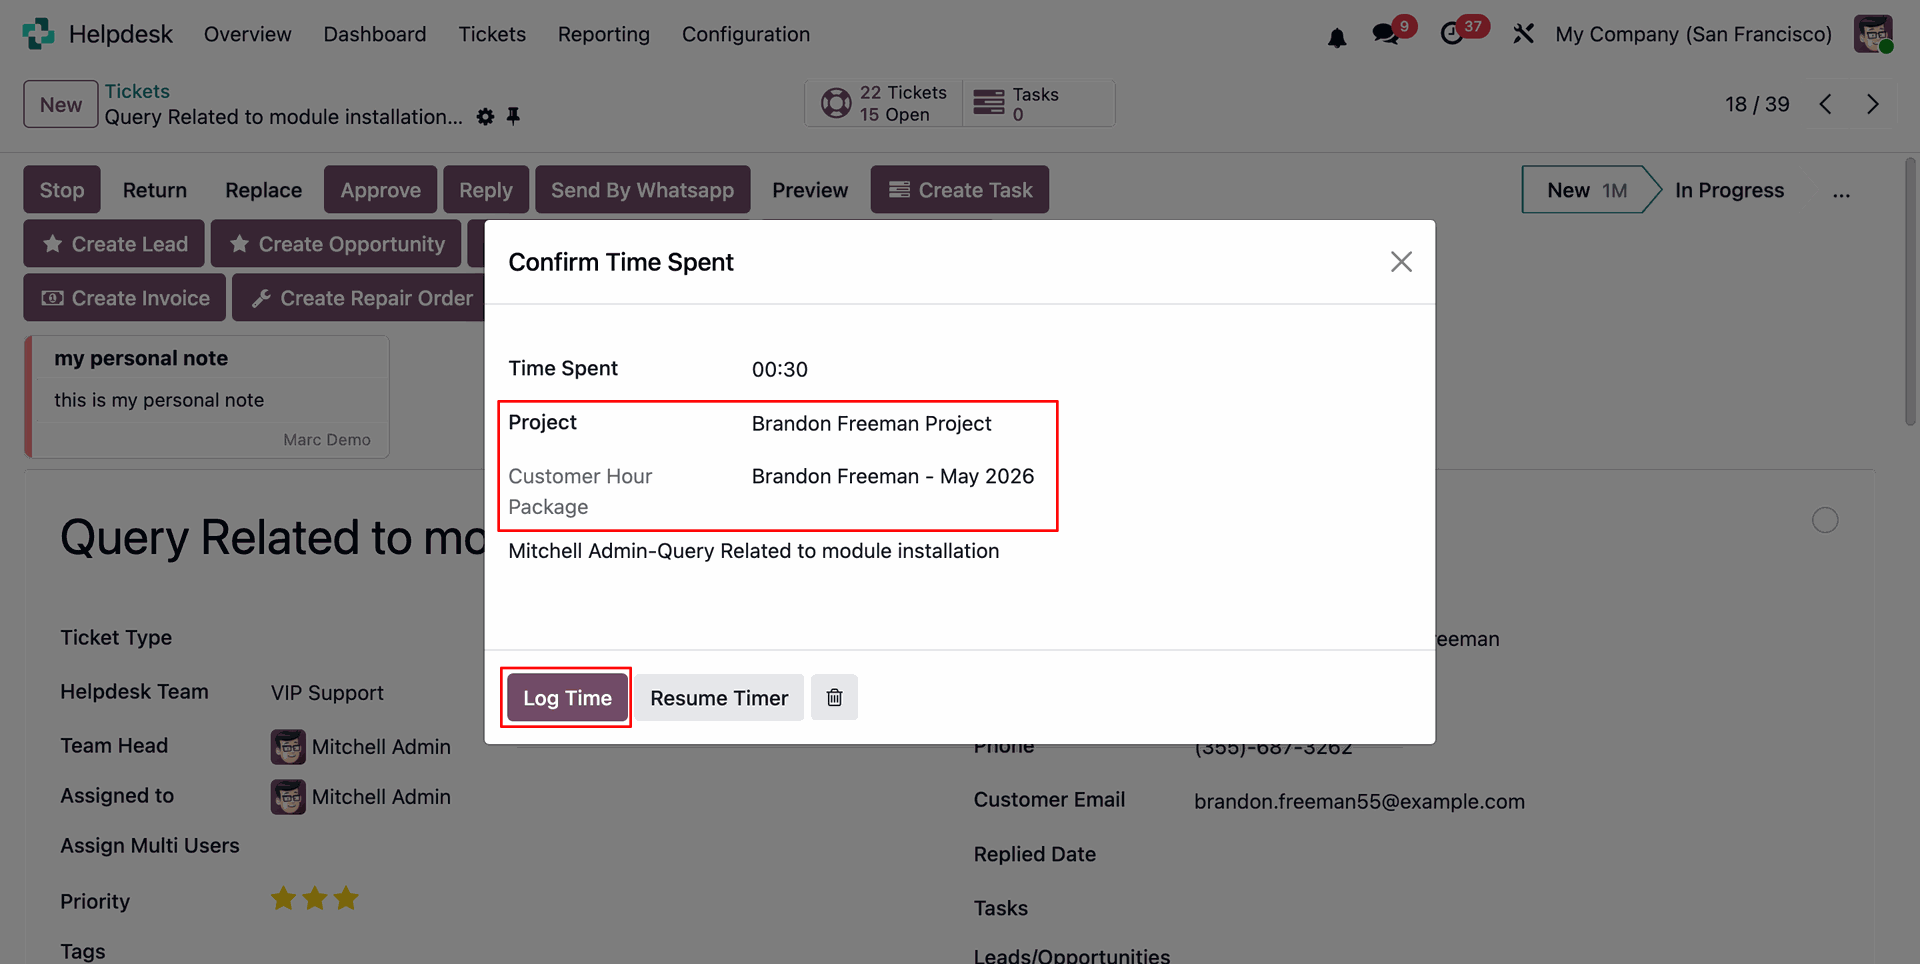
By clicking the Stop button, a Confirm Time Spent wizard will open. Review the recorded time and click Log Time to save the timesheet entry.
The logged time entry will be visible under the Timesheet tab of the Helpdesk Ticket.
Consumed hours can be viewed from the Customer Hour Package form view.

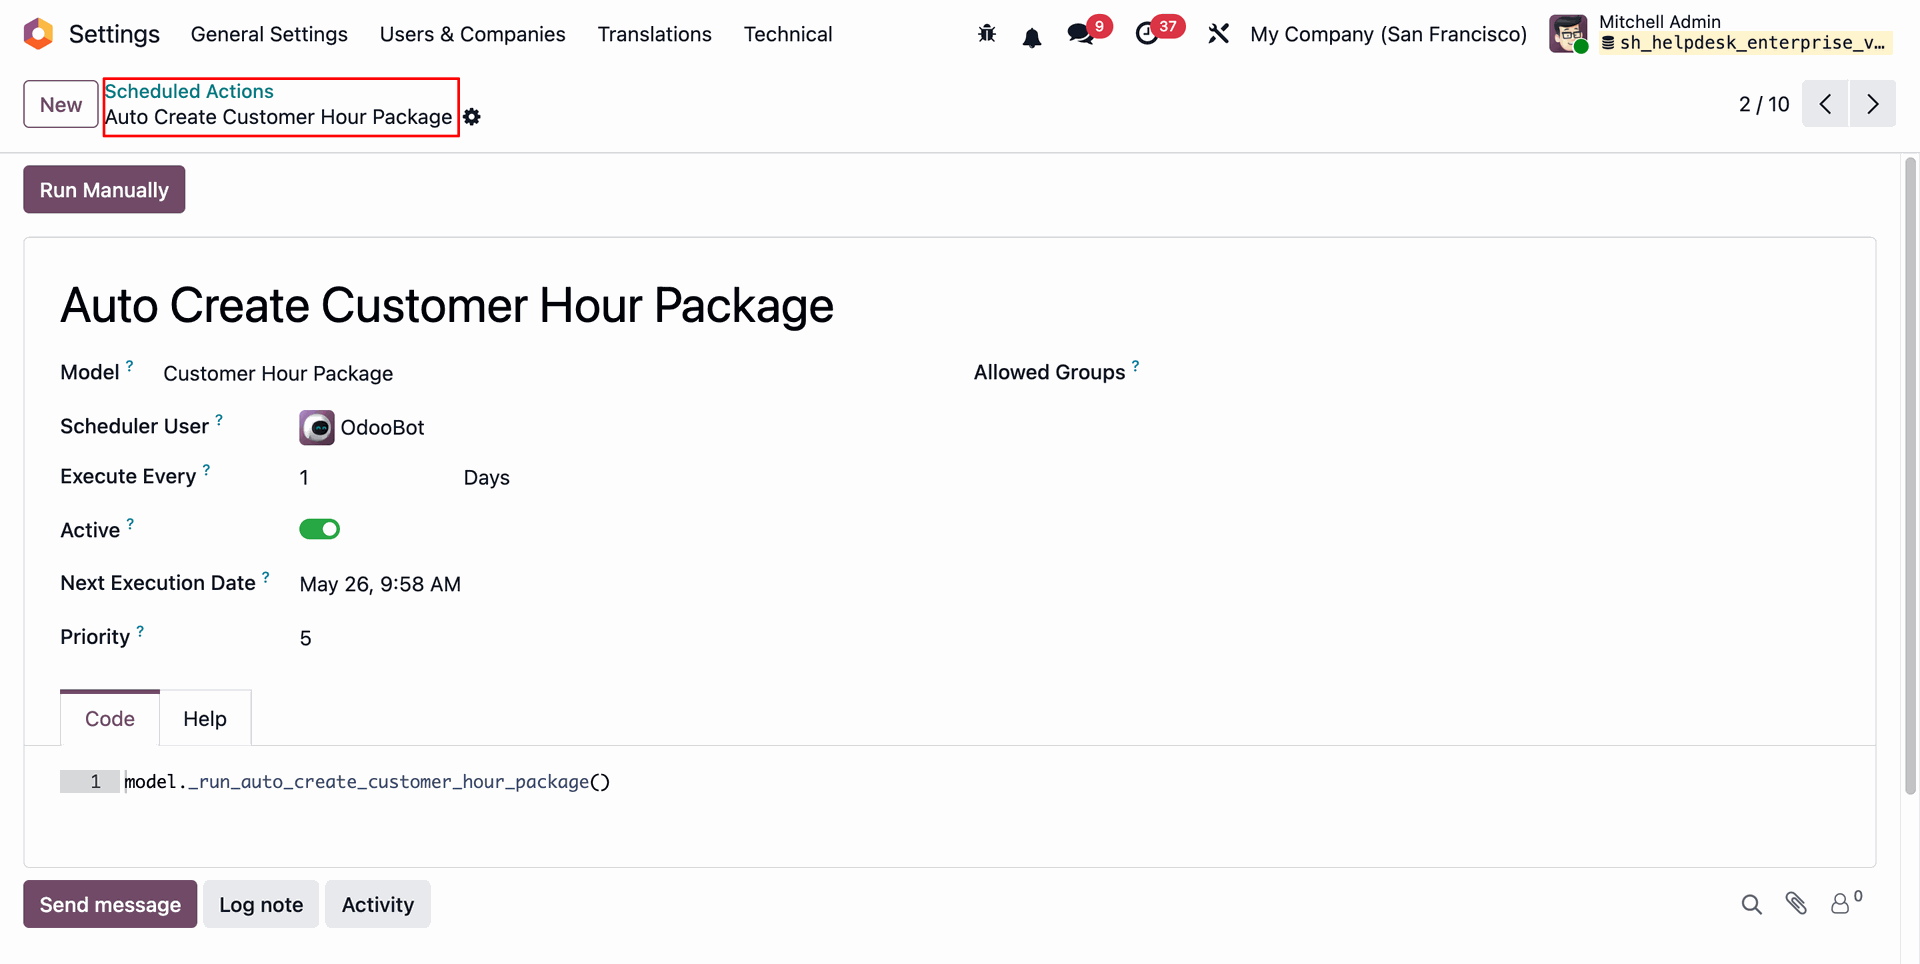
A scheduled action is created to automatically generate Customer Hour Packages based on the configured settings.
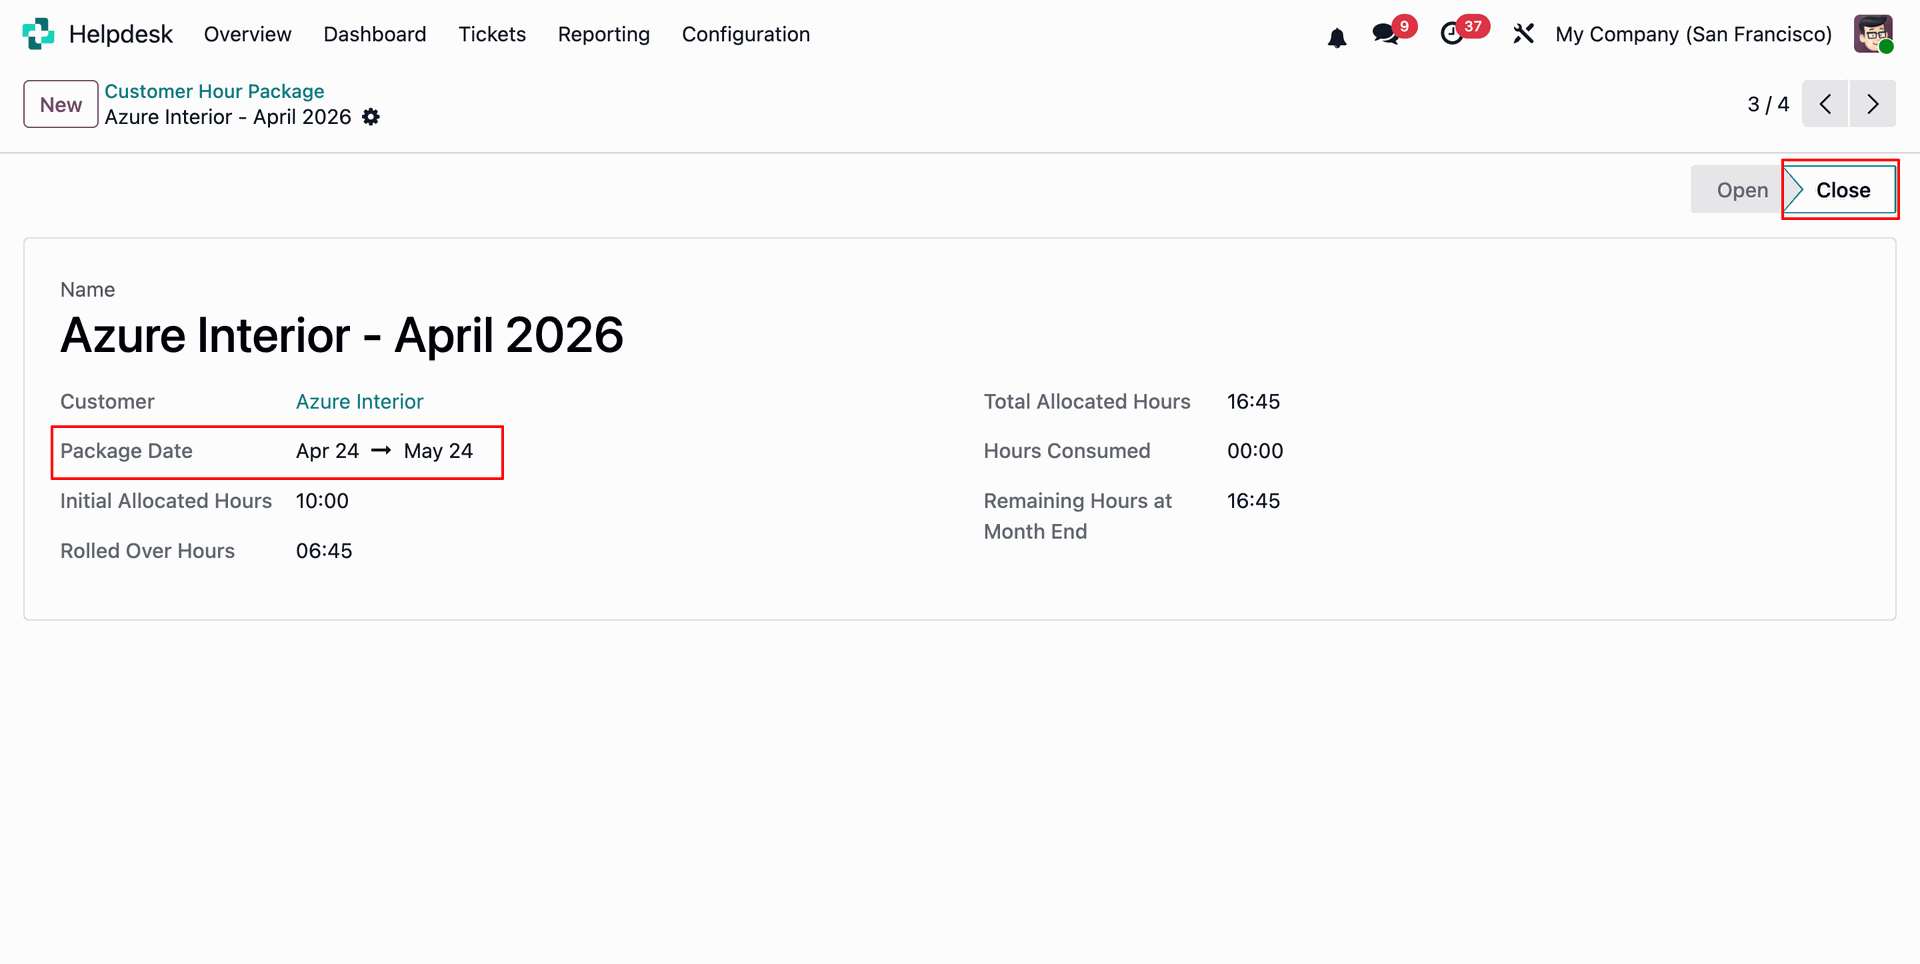
When the scheduled action runs, the existing Customer Hour Package will be automatically closed, and any remaining hours will be rolled over to the new Customer Hour Package.
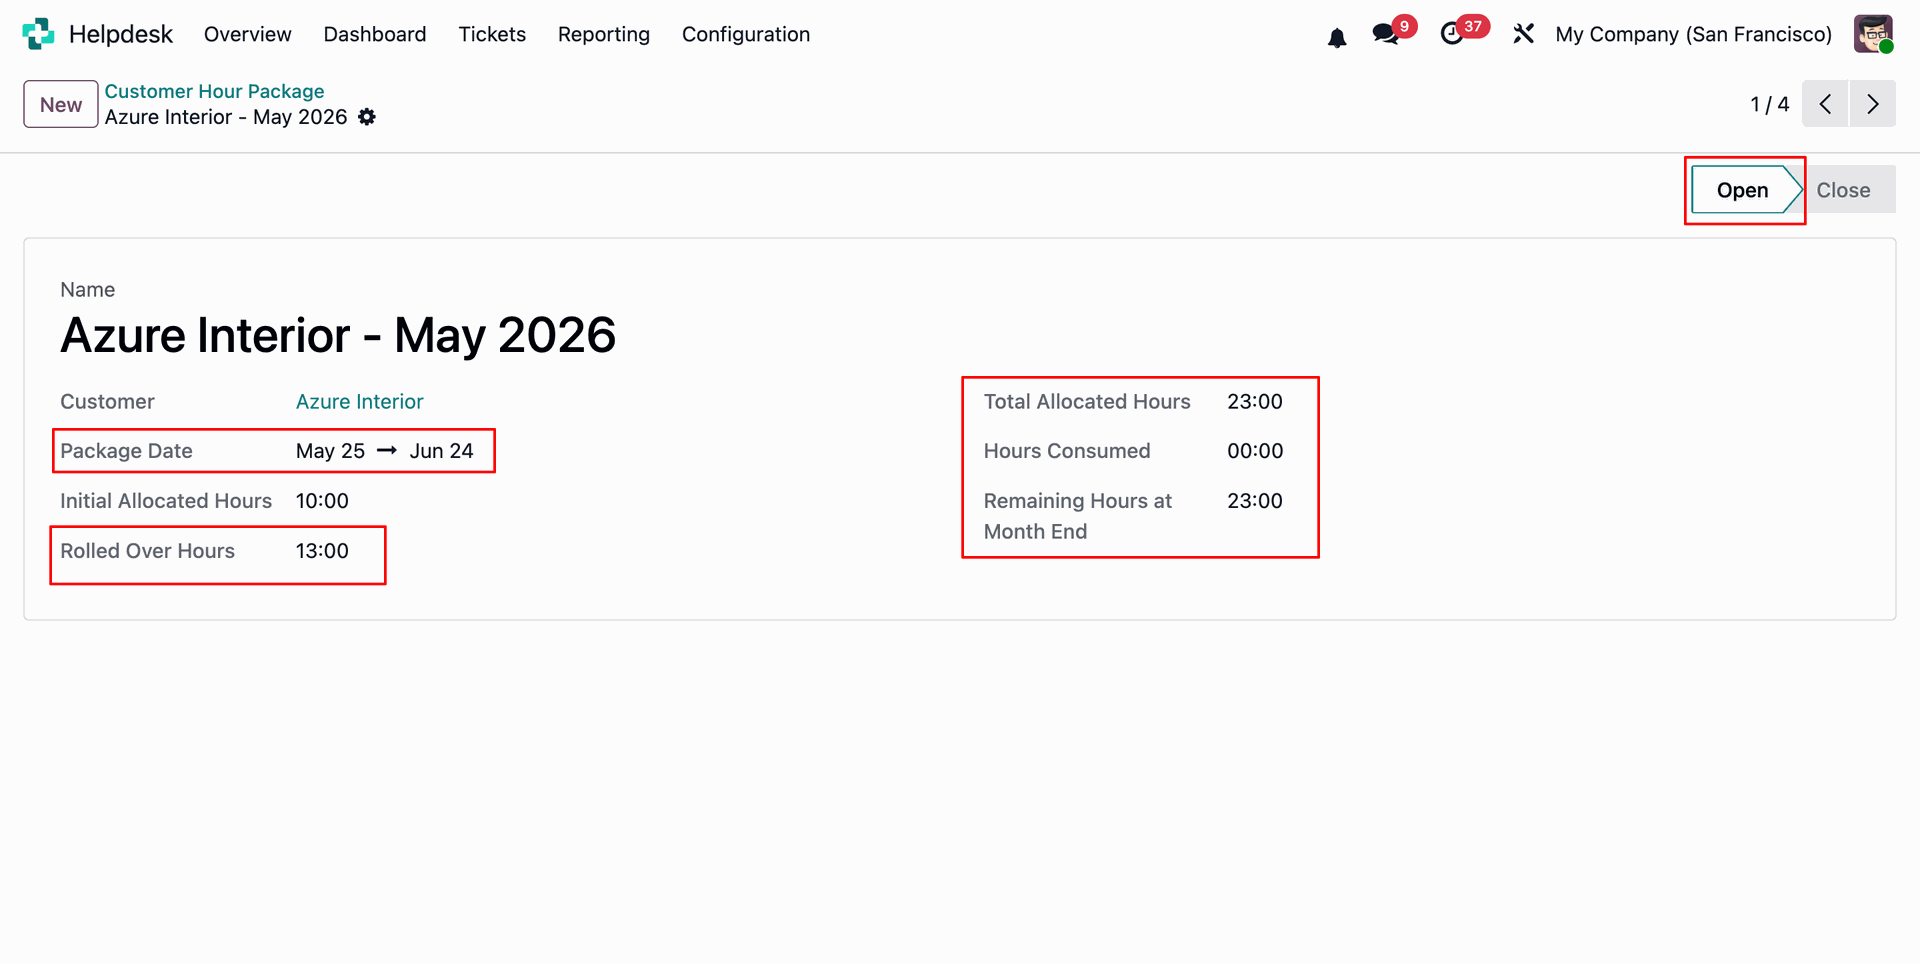
A new Customer Hour Package will then be created for the next period based on the configured settings.
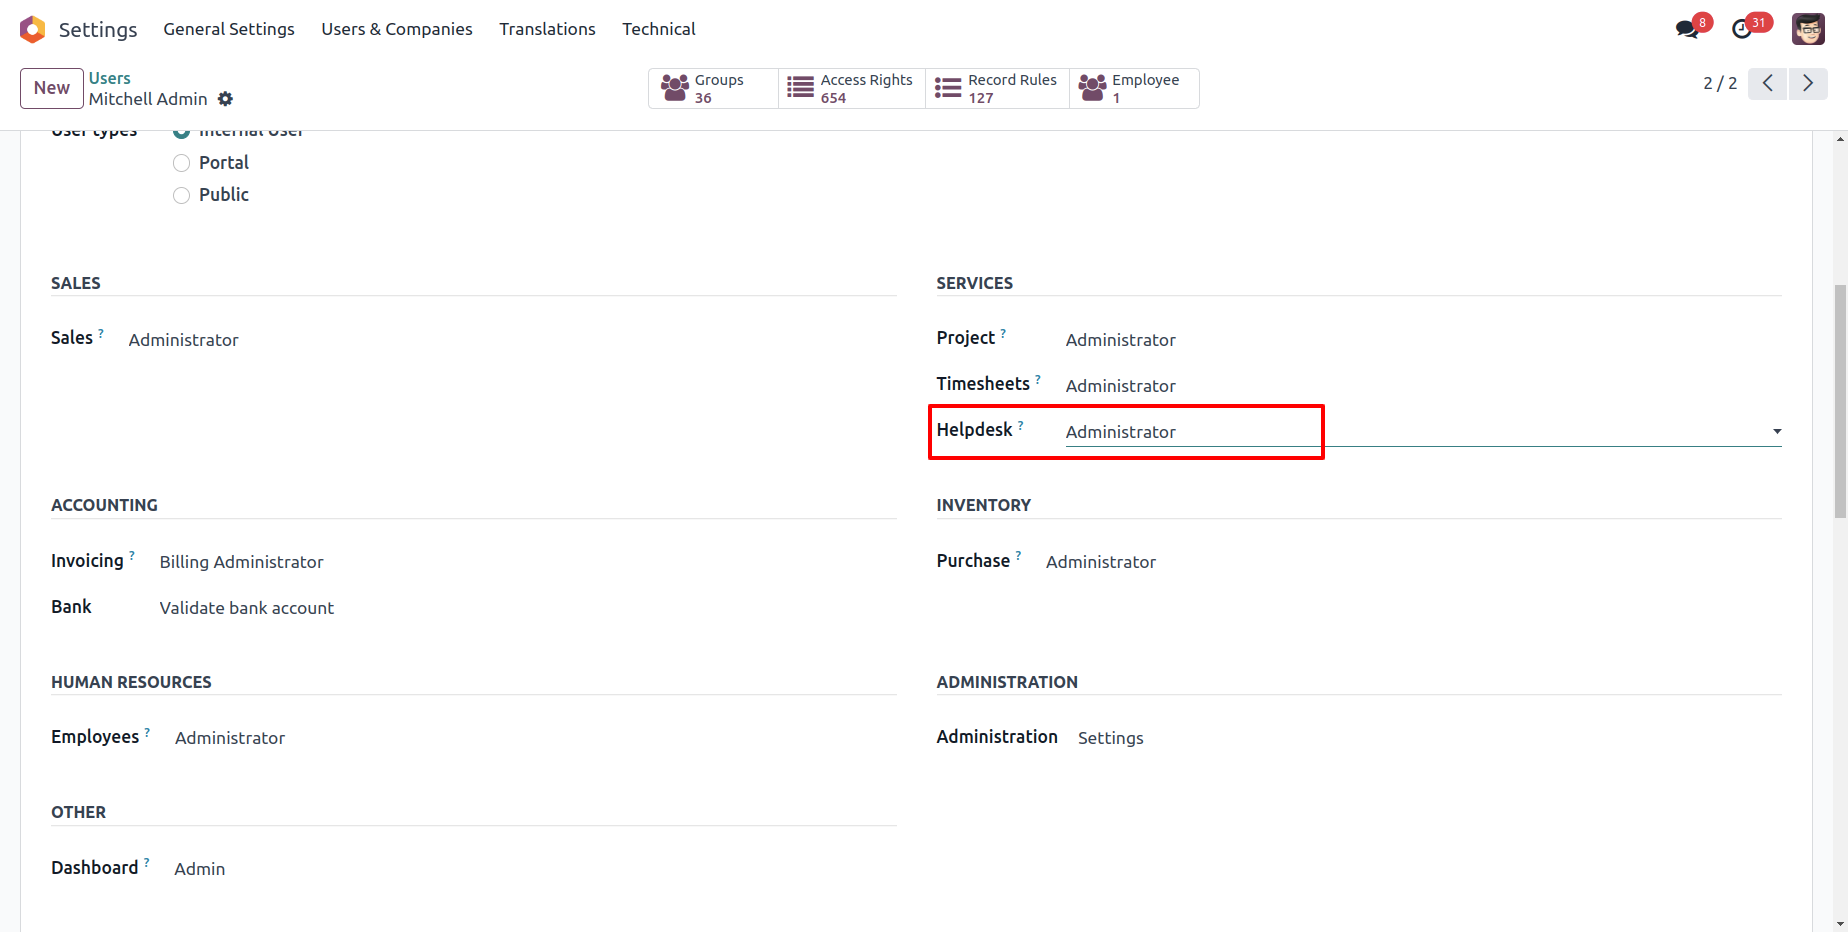
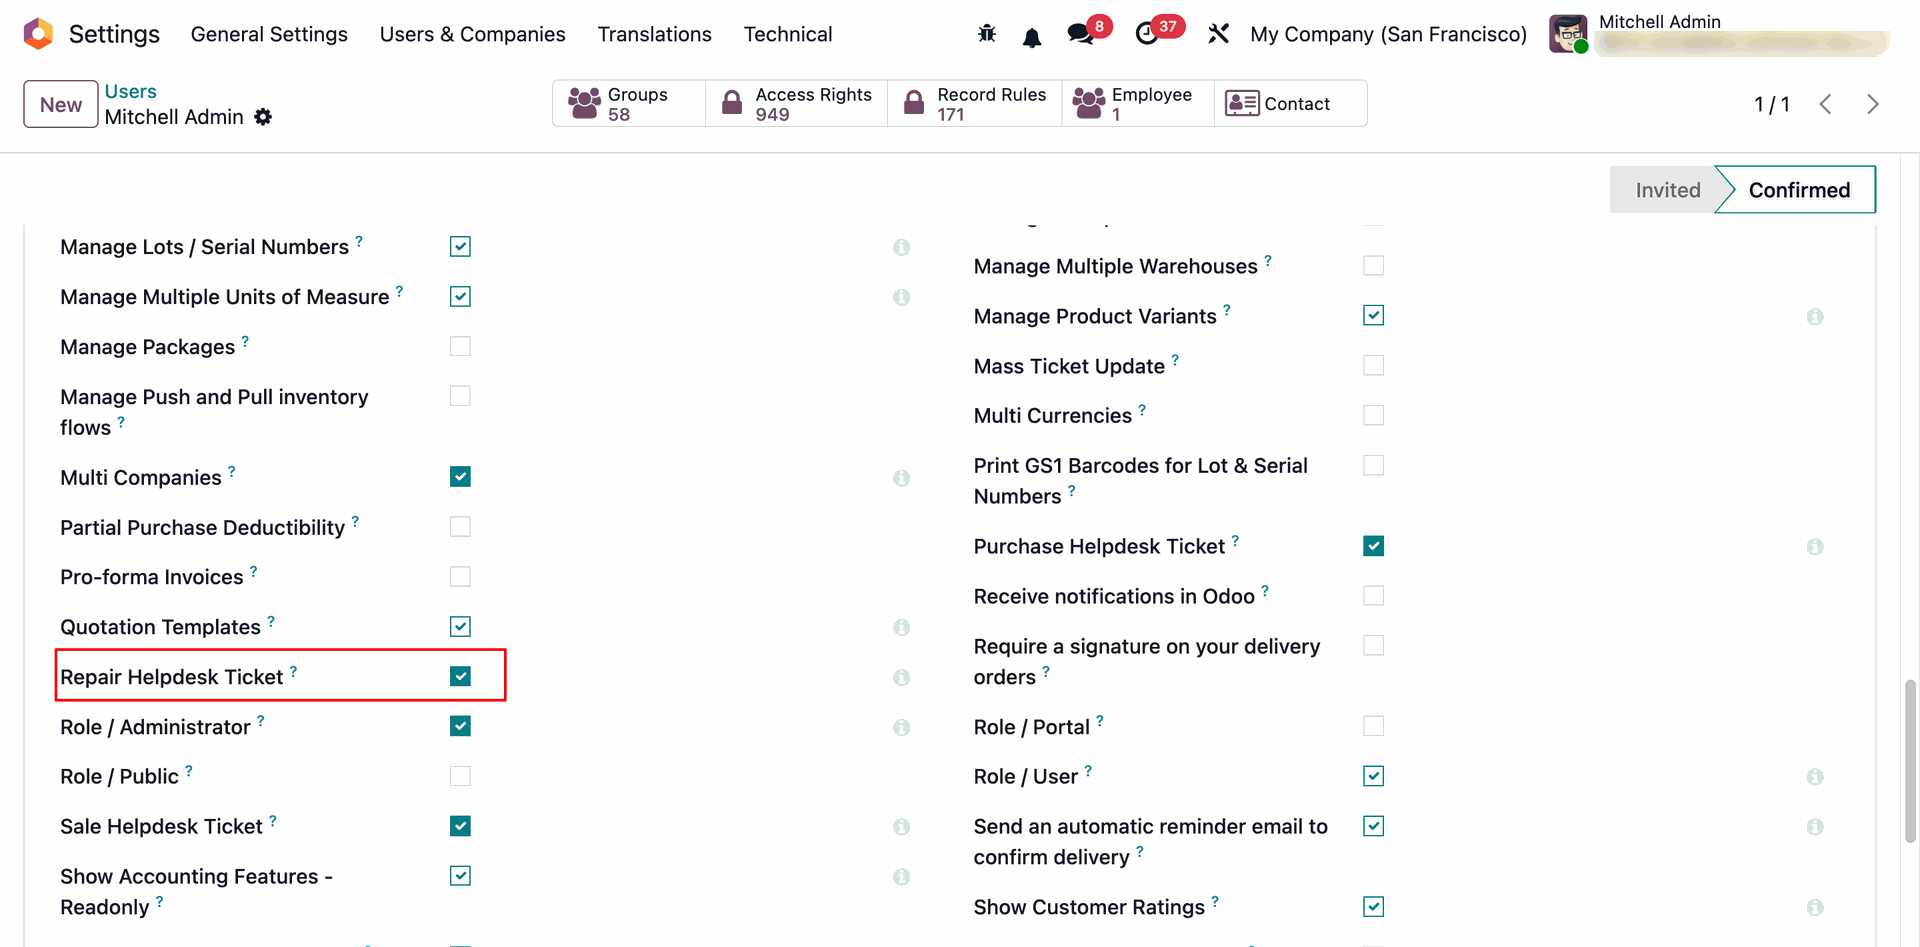
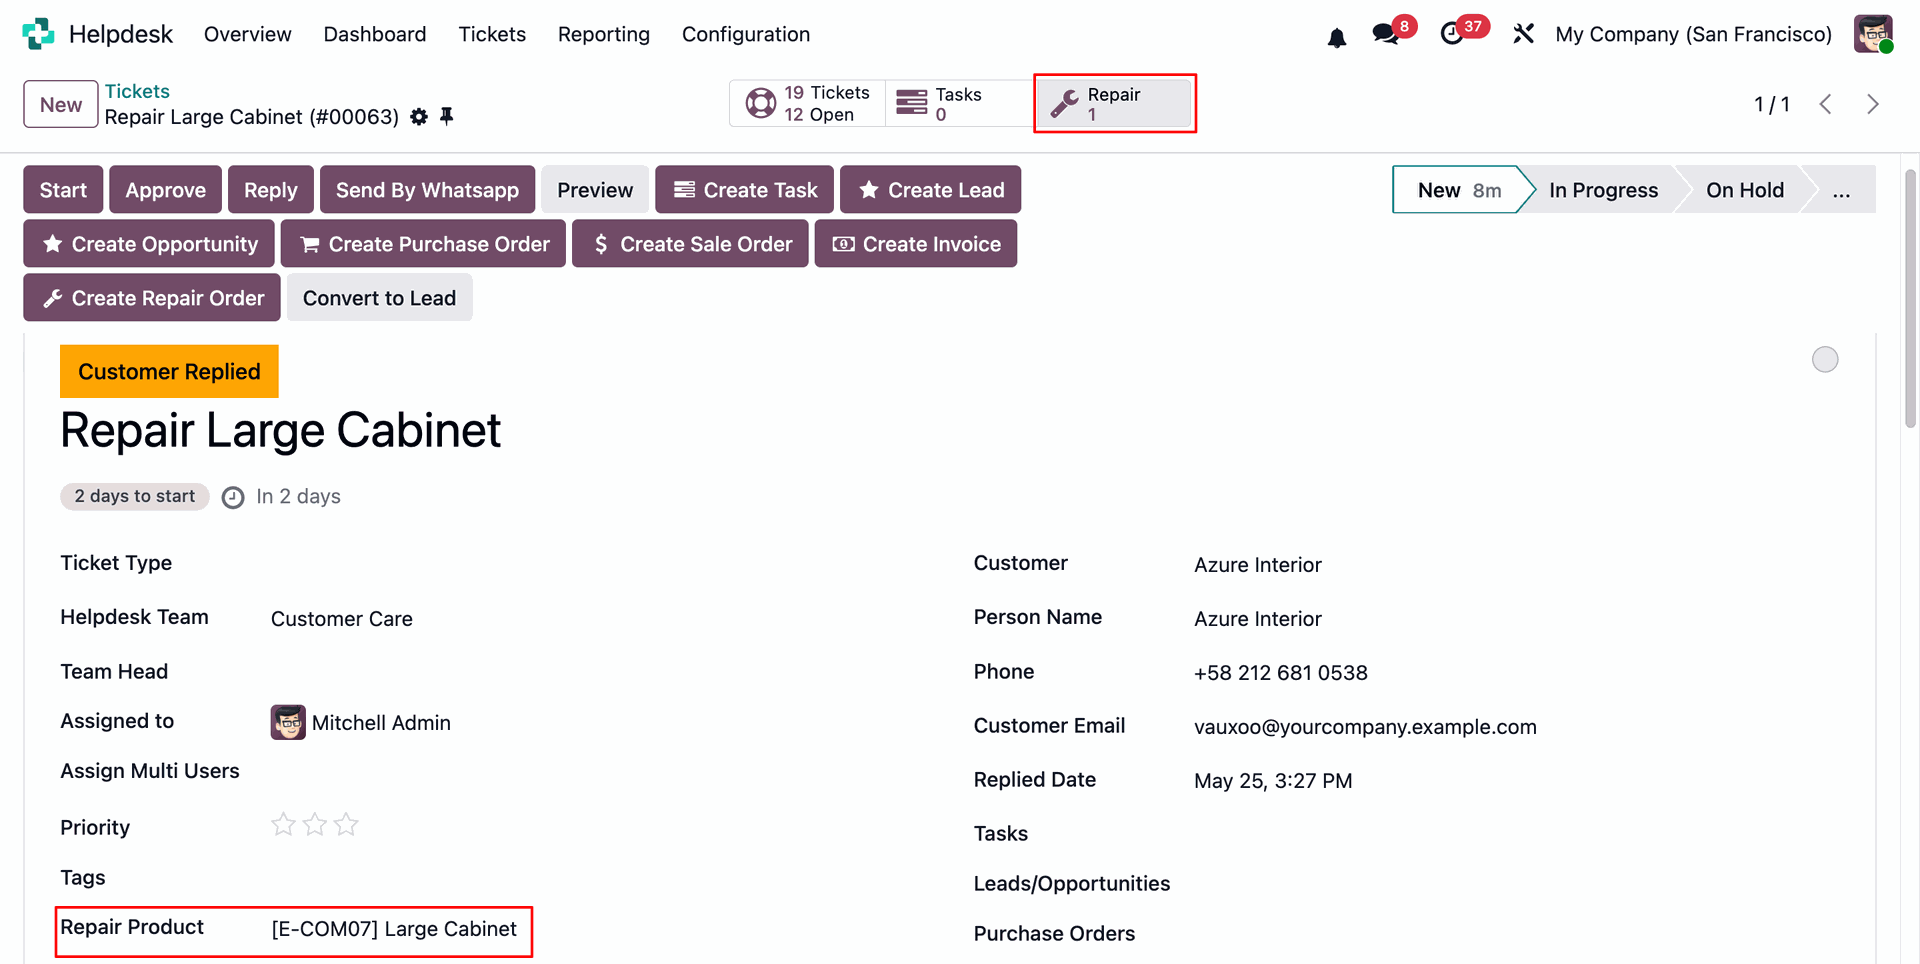
Enable the Repair Helpdesk Ticket option from the User Settings.
Create a Helpdesk Ticket, then select the Repair Product and the corresponding Products for the repair request.
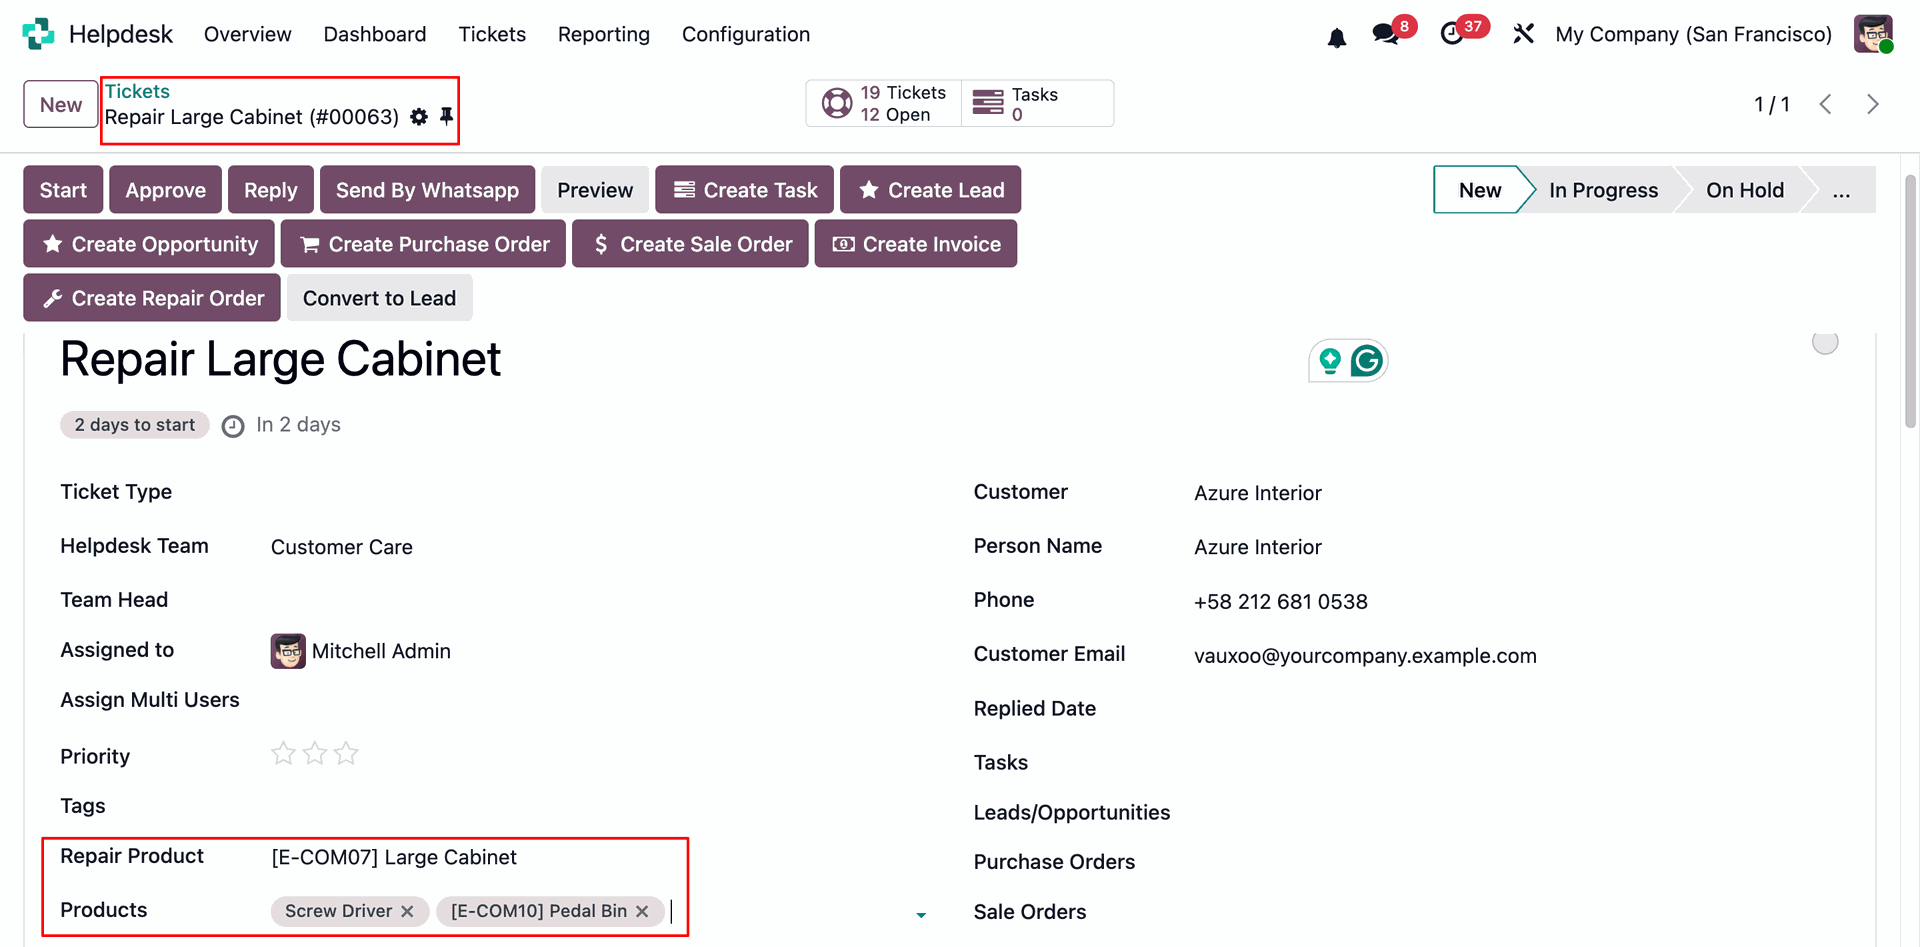
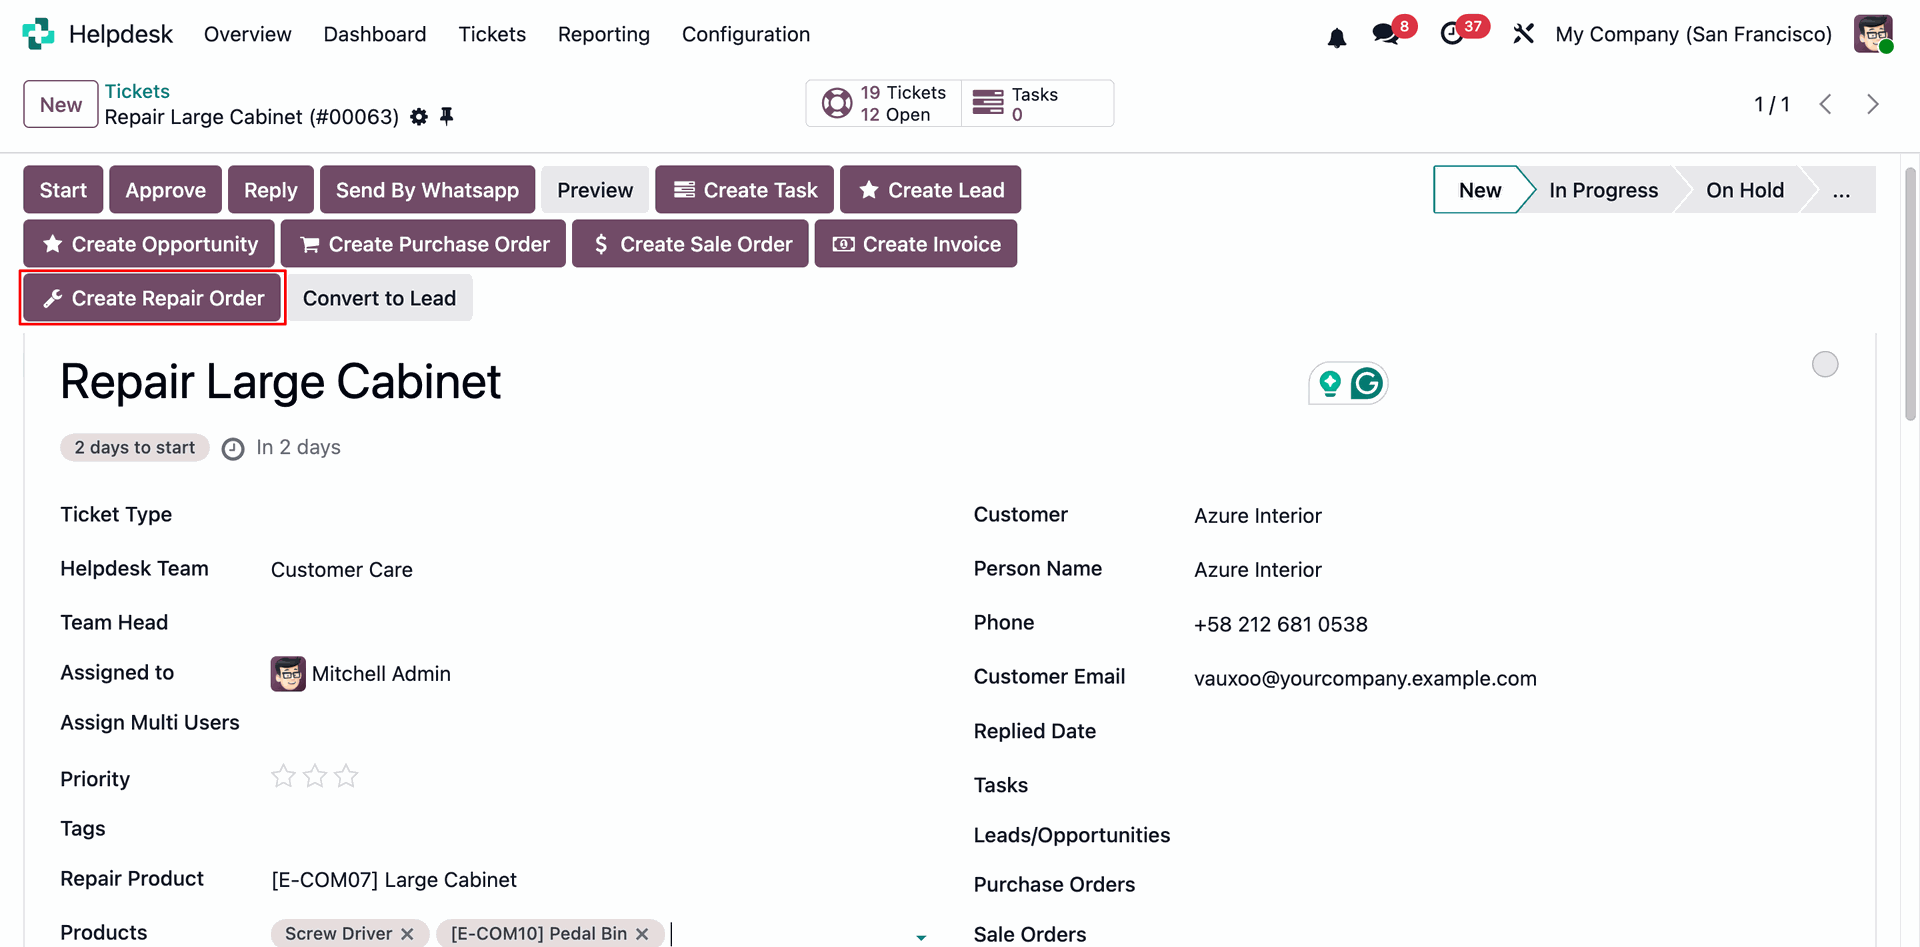
Click the Create Repair Order button from the Helpdesk Ticket to generate a Repair Order for the selected repair product and items.
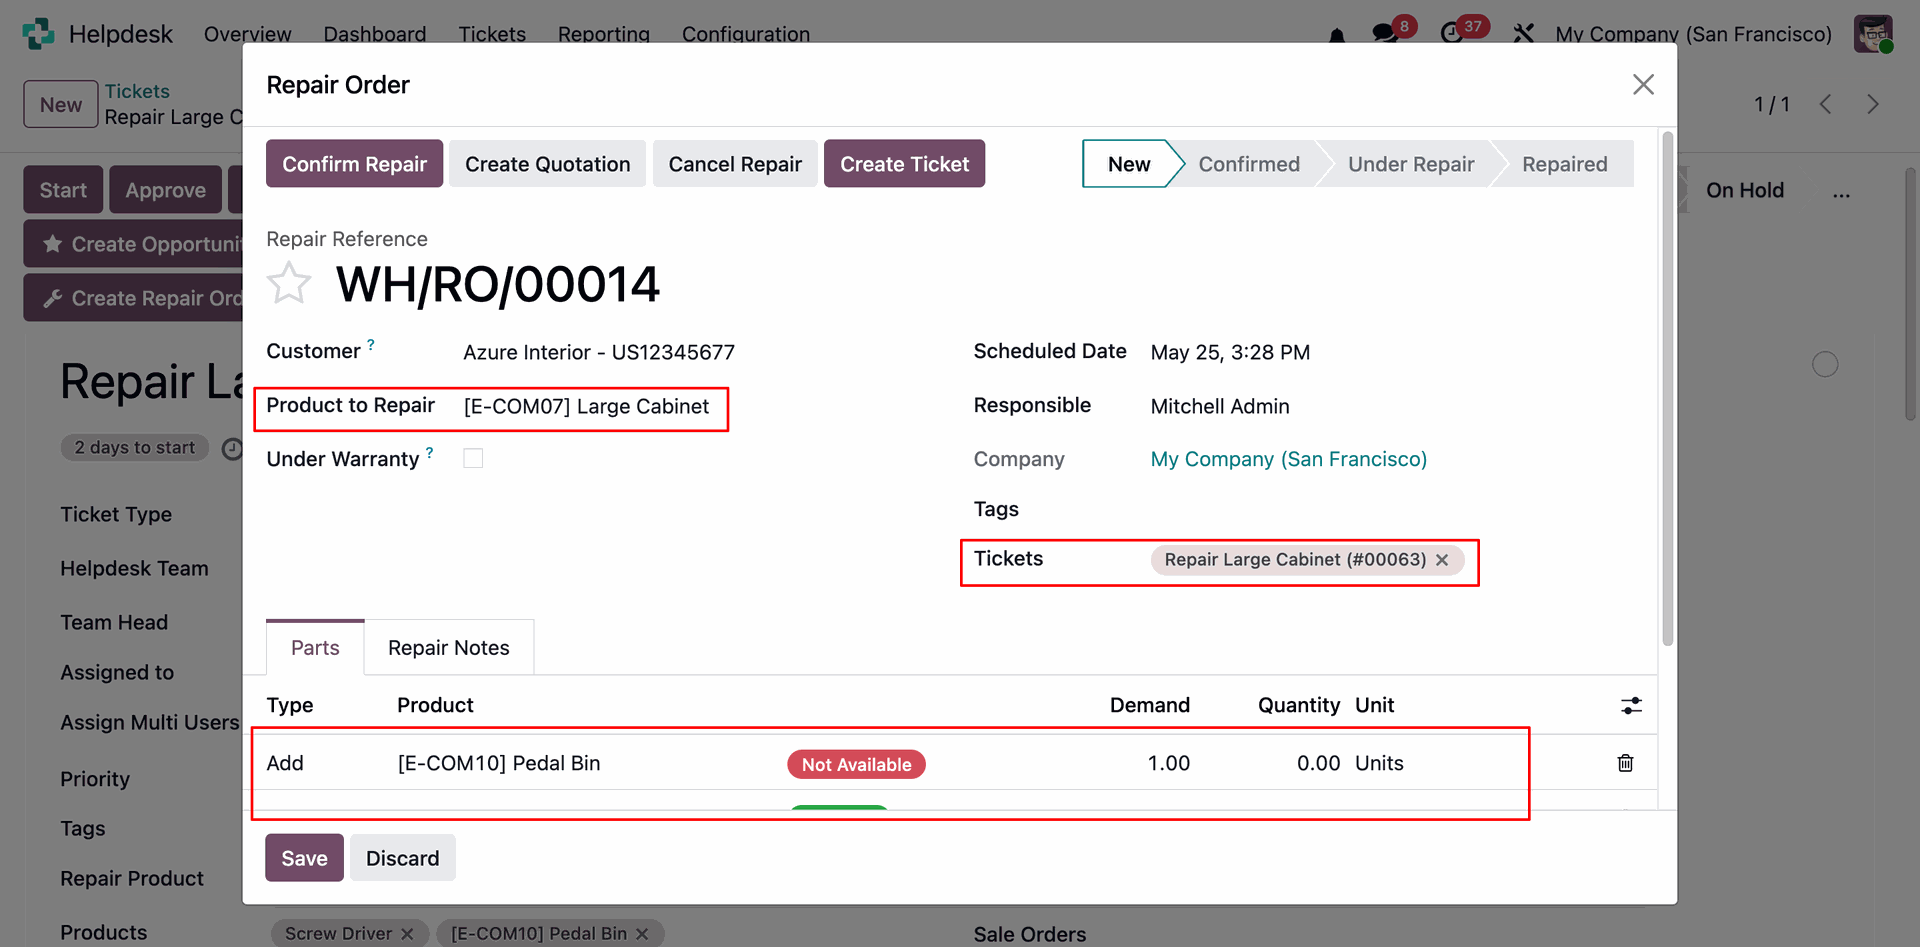
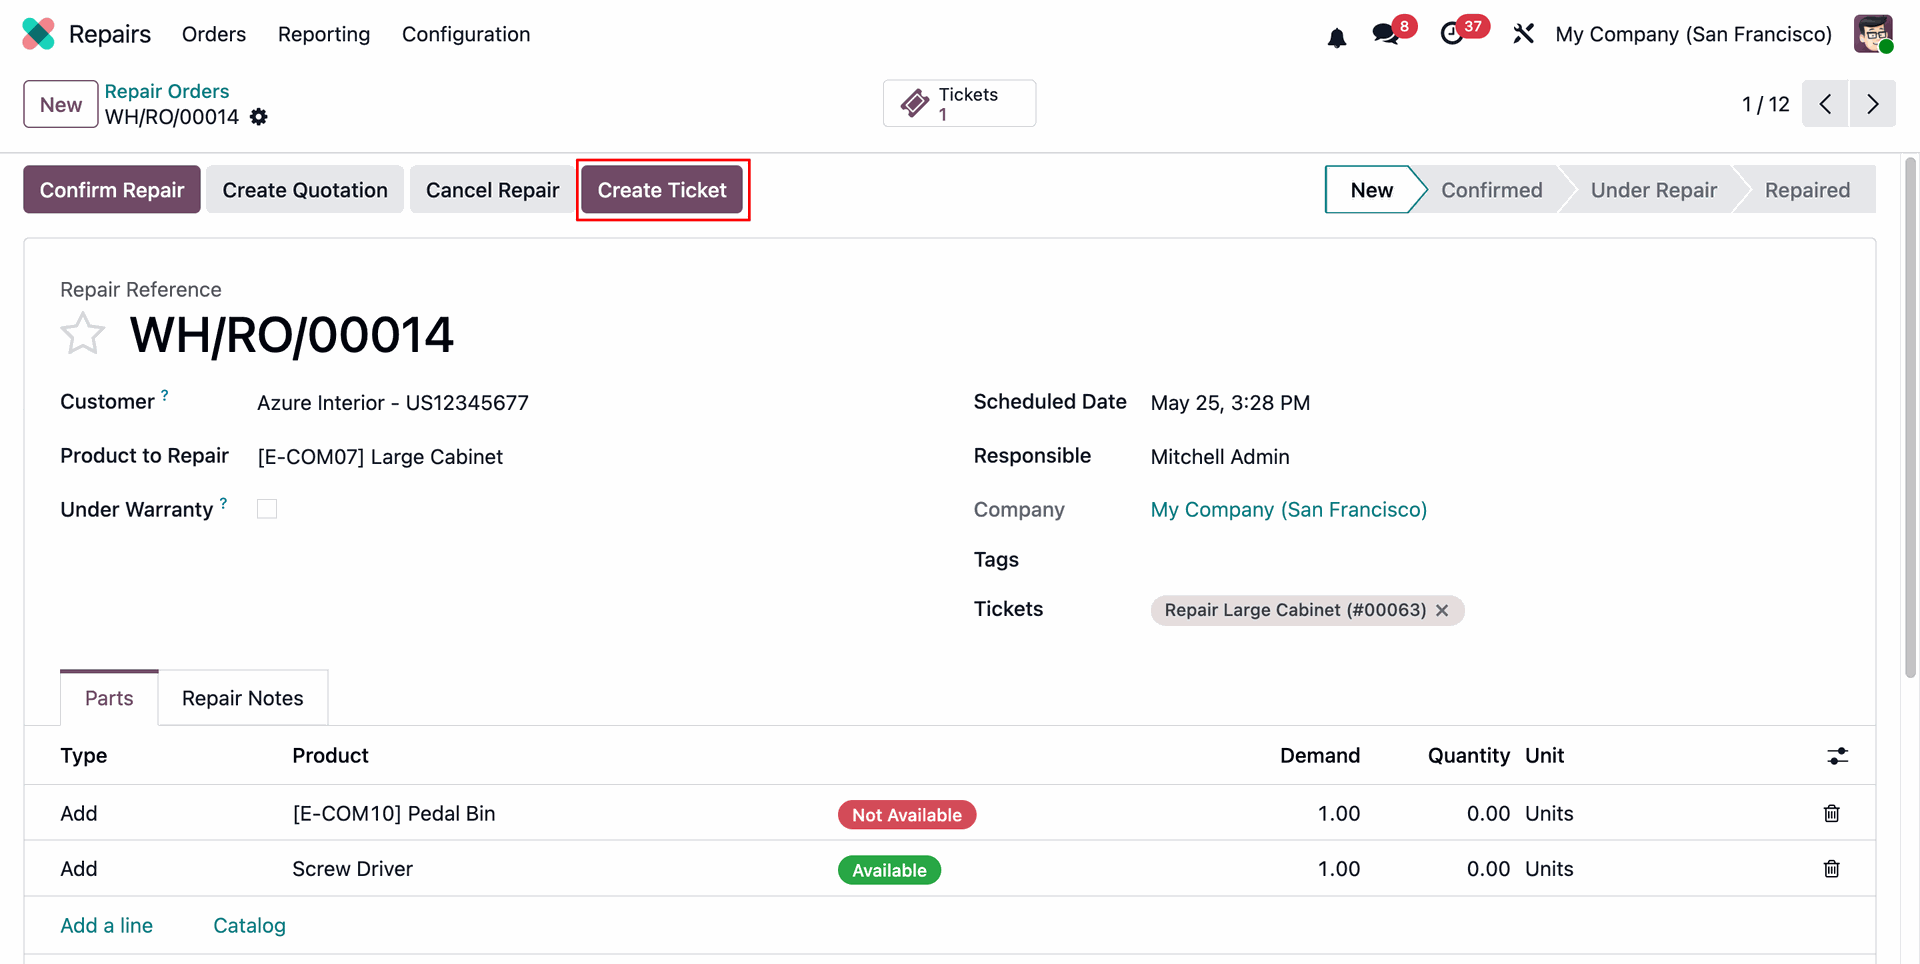
By clicking the Create Repair Order button, a Repair Order Wizard will open, prefilled with all relevant details from the Helpdesk Ticket, including the Ticket Number for reference.
The created Repair Order will be visible through the Repair Orders smart button on the Helpdesk Ticket form.
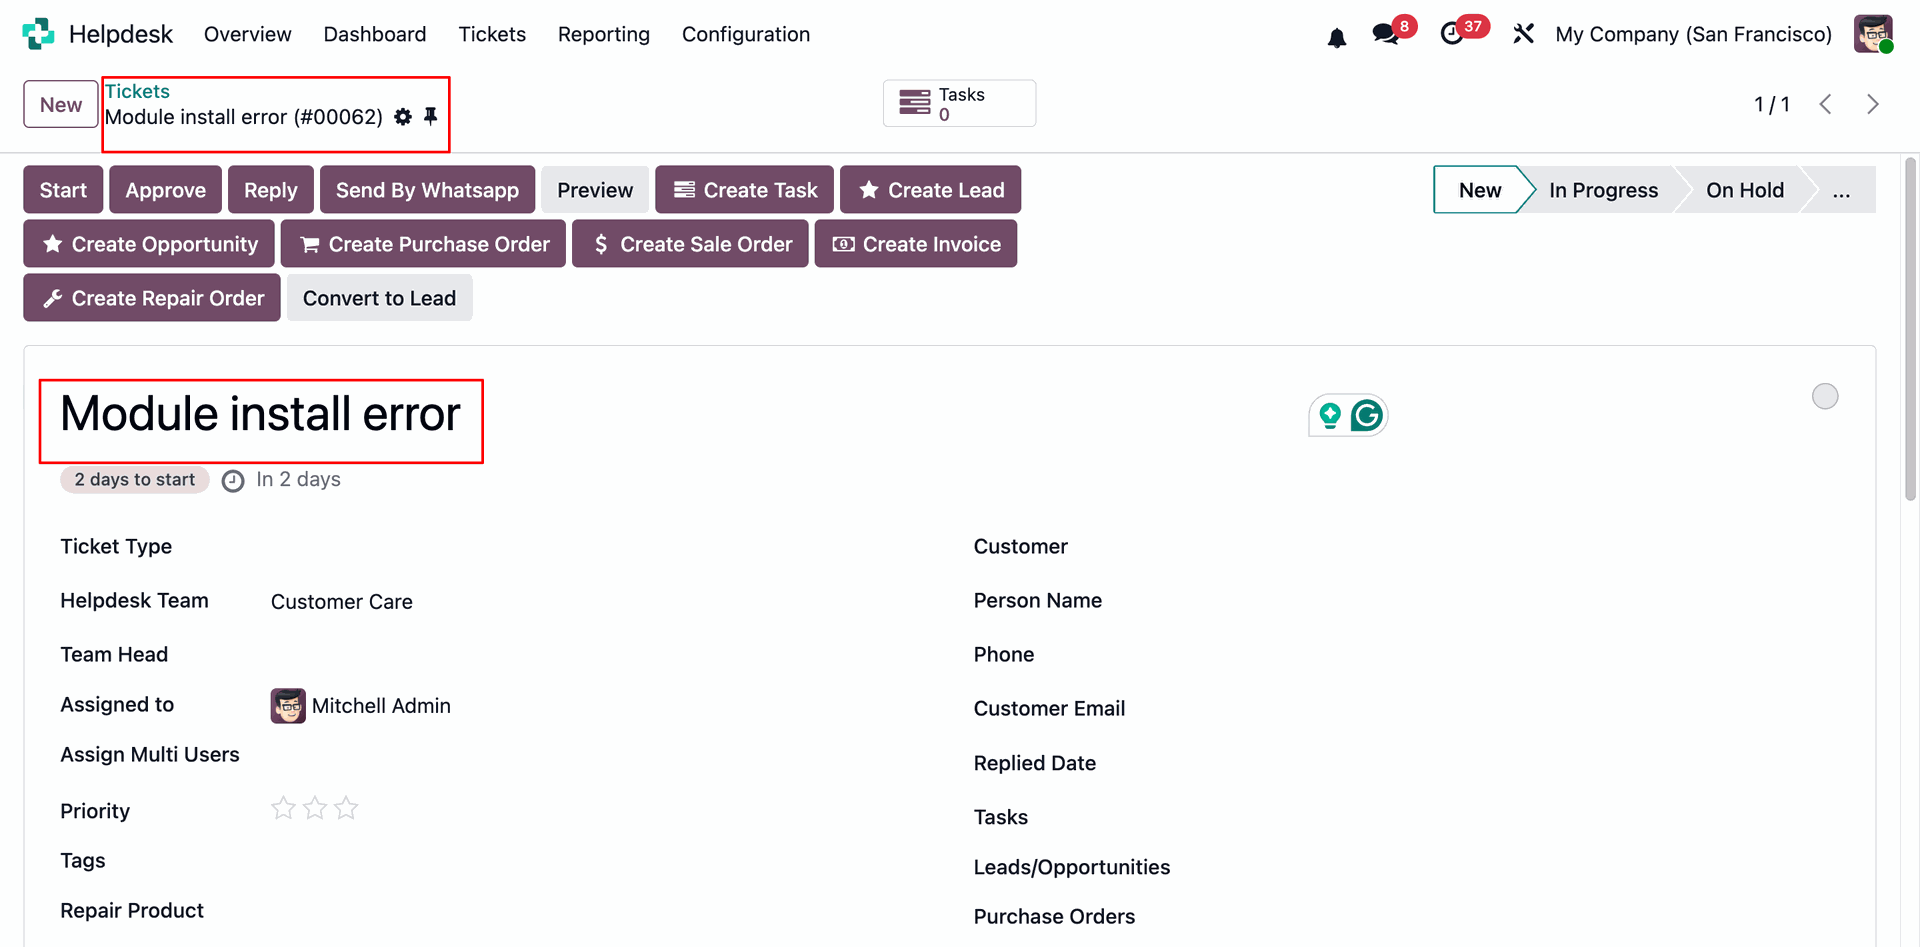
The user can create a Helpdesk Ticket from the Repair Order by clicking the Create Ticket button.
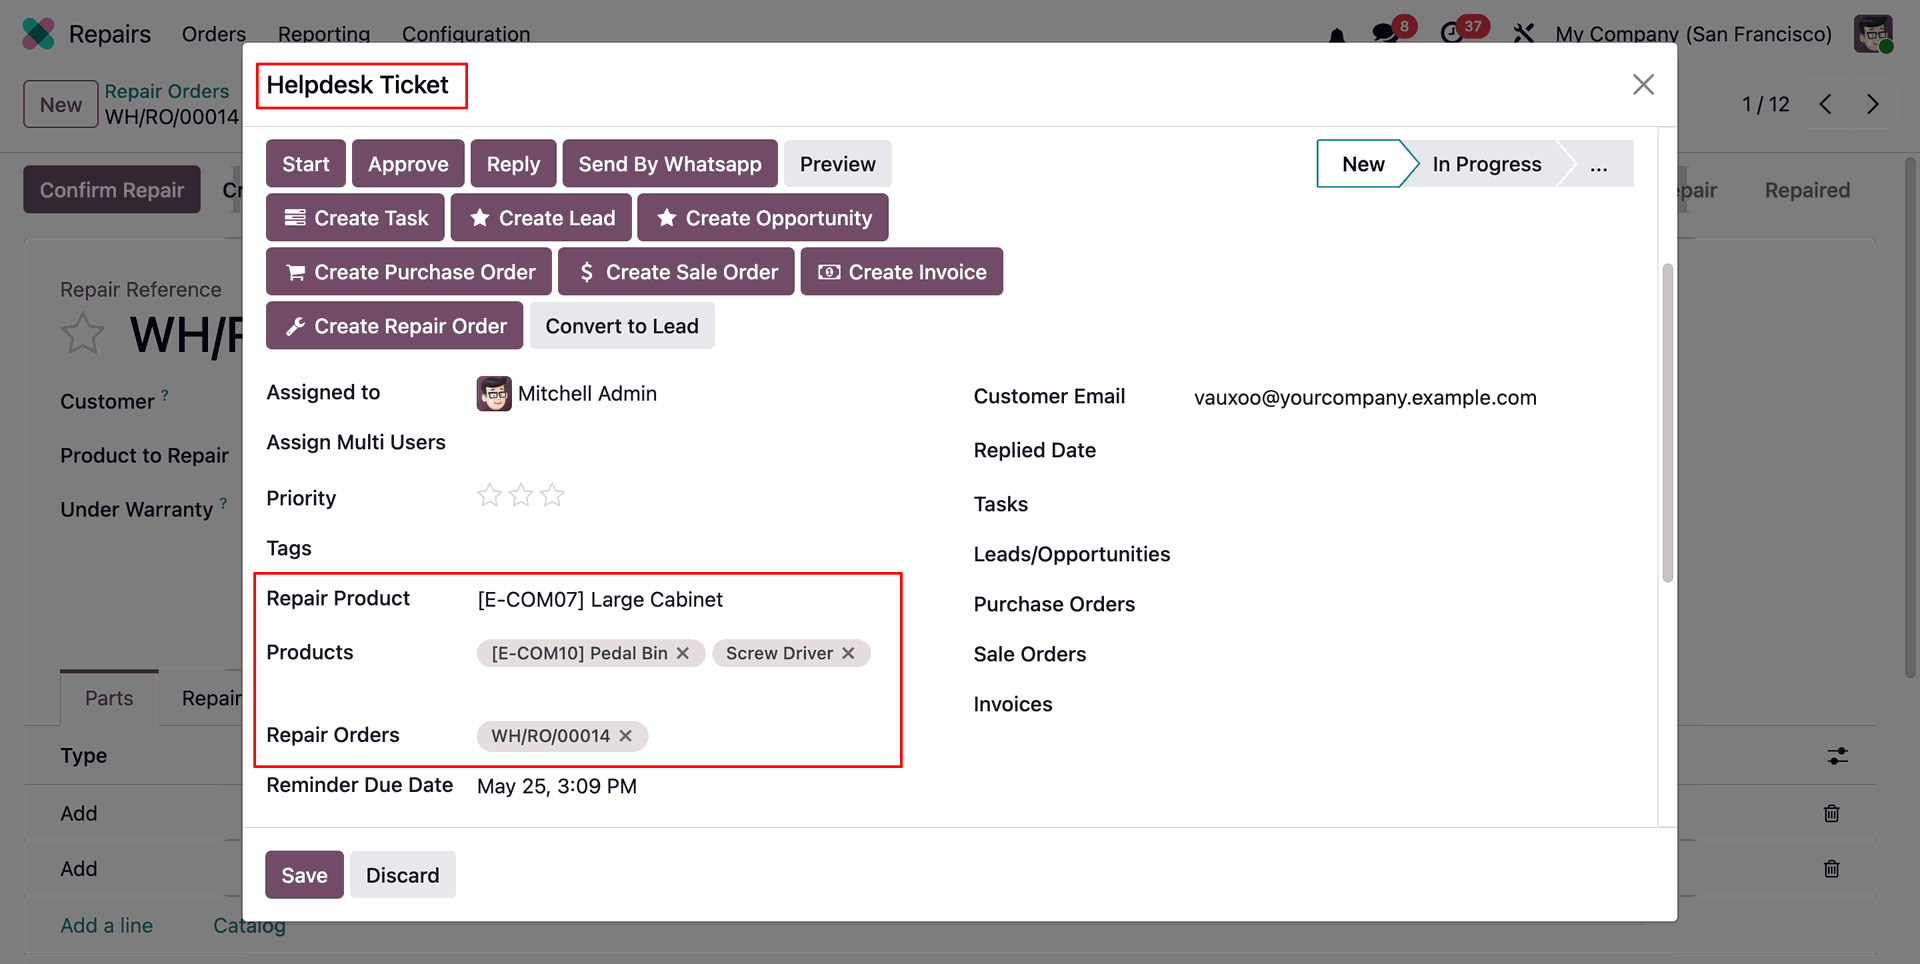
By clicking the Create Ticket button, a Helpdesk Ticket Wizard will open with pre-filled data related to the selected Repair Order. Review the details and click Save to create the Helpdesk Ticket.
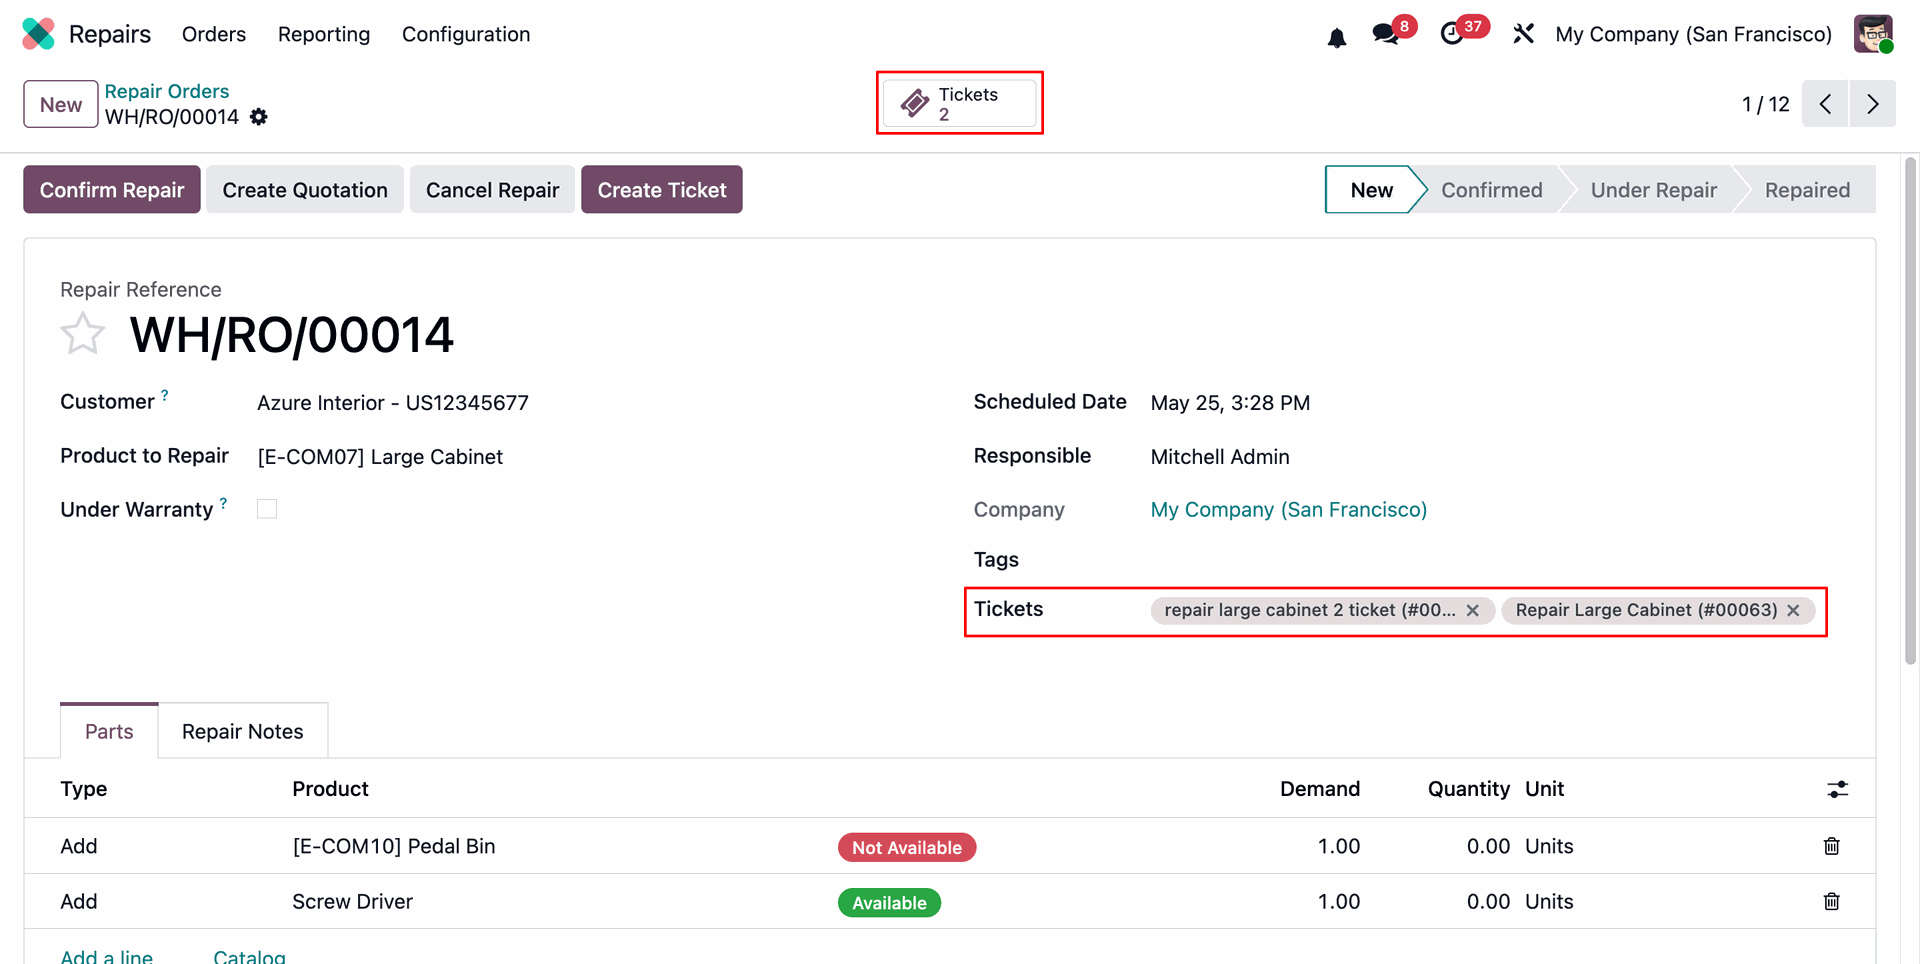
The created Helpdesk Ticket can be accessed through the Tickets smart button on the Repair Order.
Additionally, the Helpdesk Ticket Reference Number is automatically added to the Repair Order for easy tracking and reference.
Helpdesk Tickets can be viewed from the Repair Order list view by applying the appropriate filter to display records linked to Helpdesk Tickets.
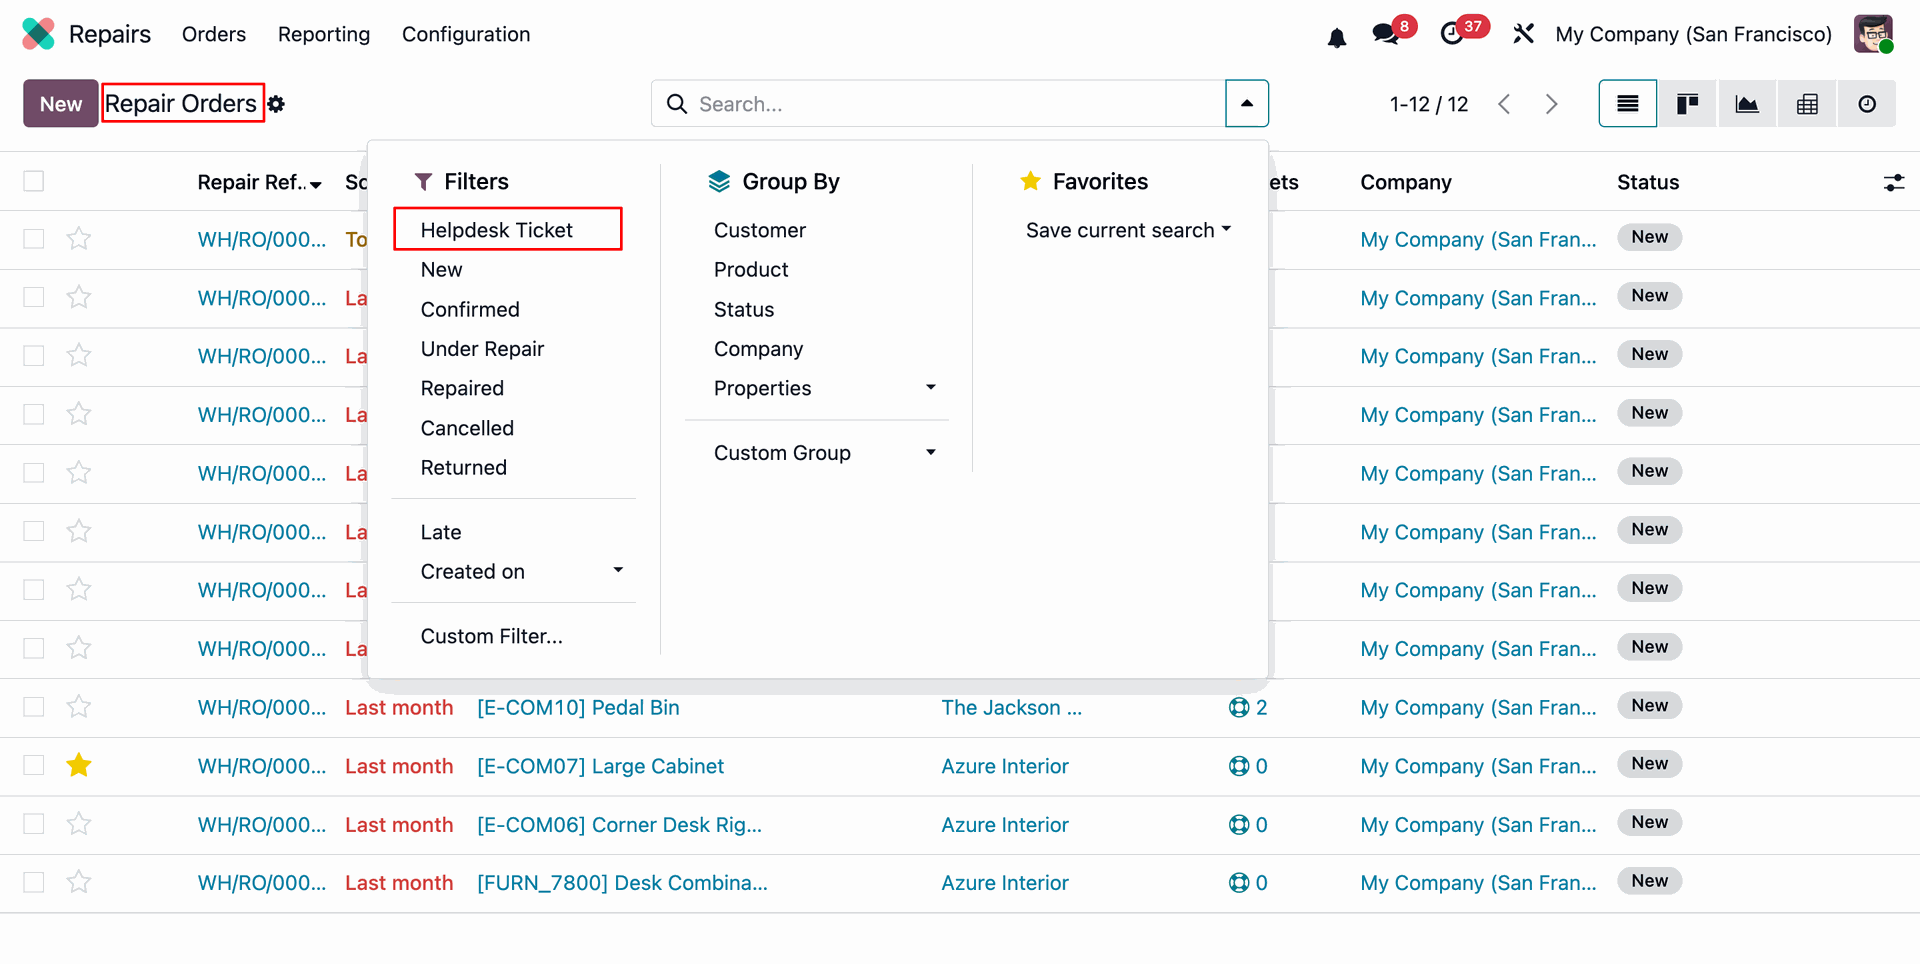
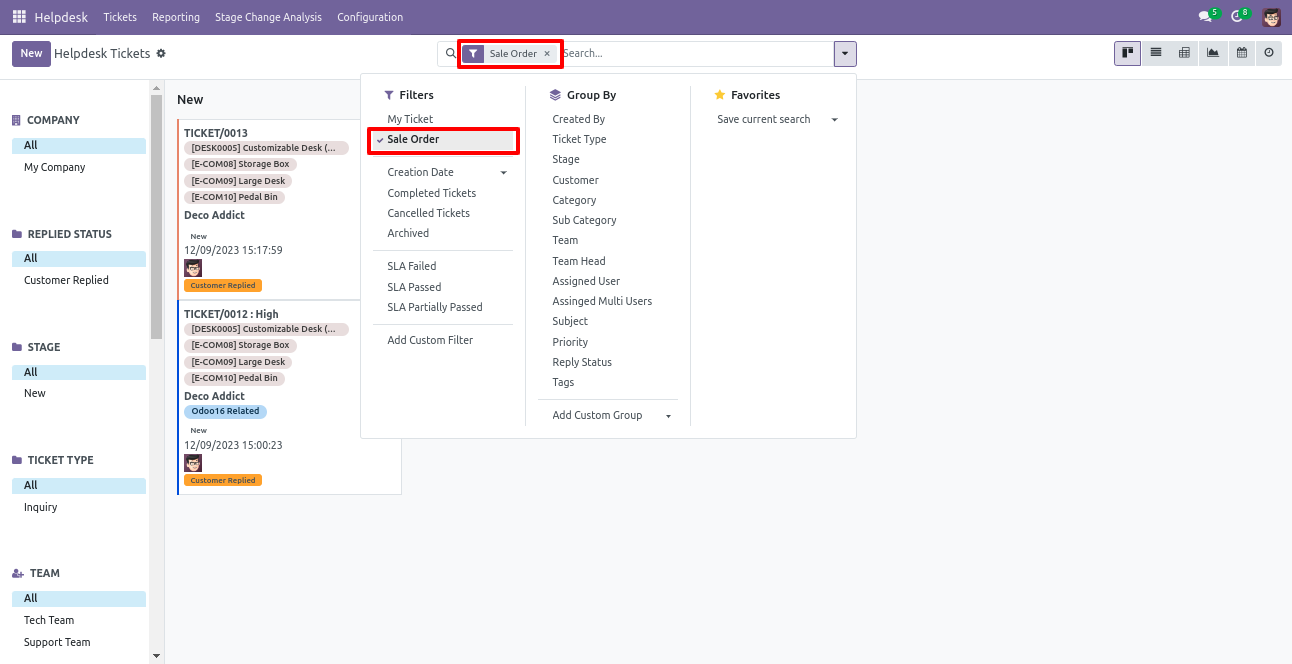
From the Helpdesk Tickets list view, select the Repair Order filter to view all tickets linked to Repair Orders.

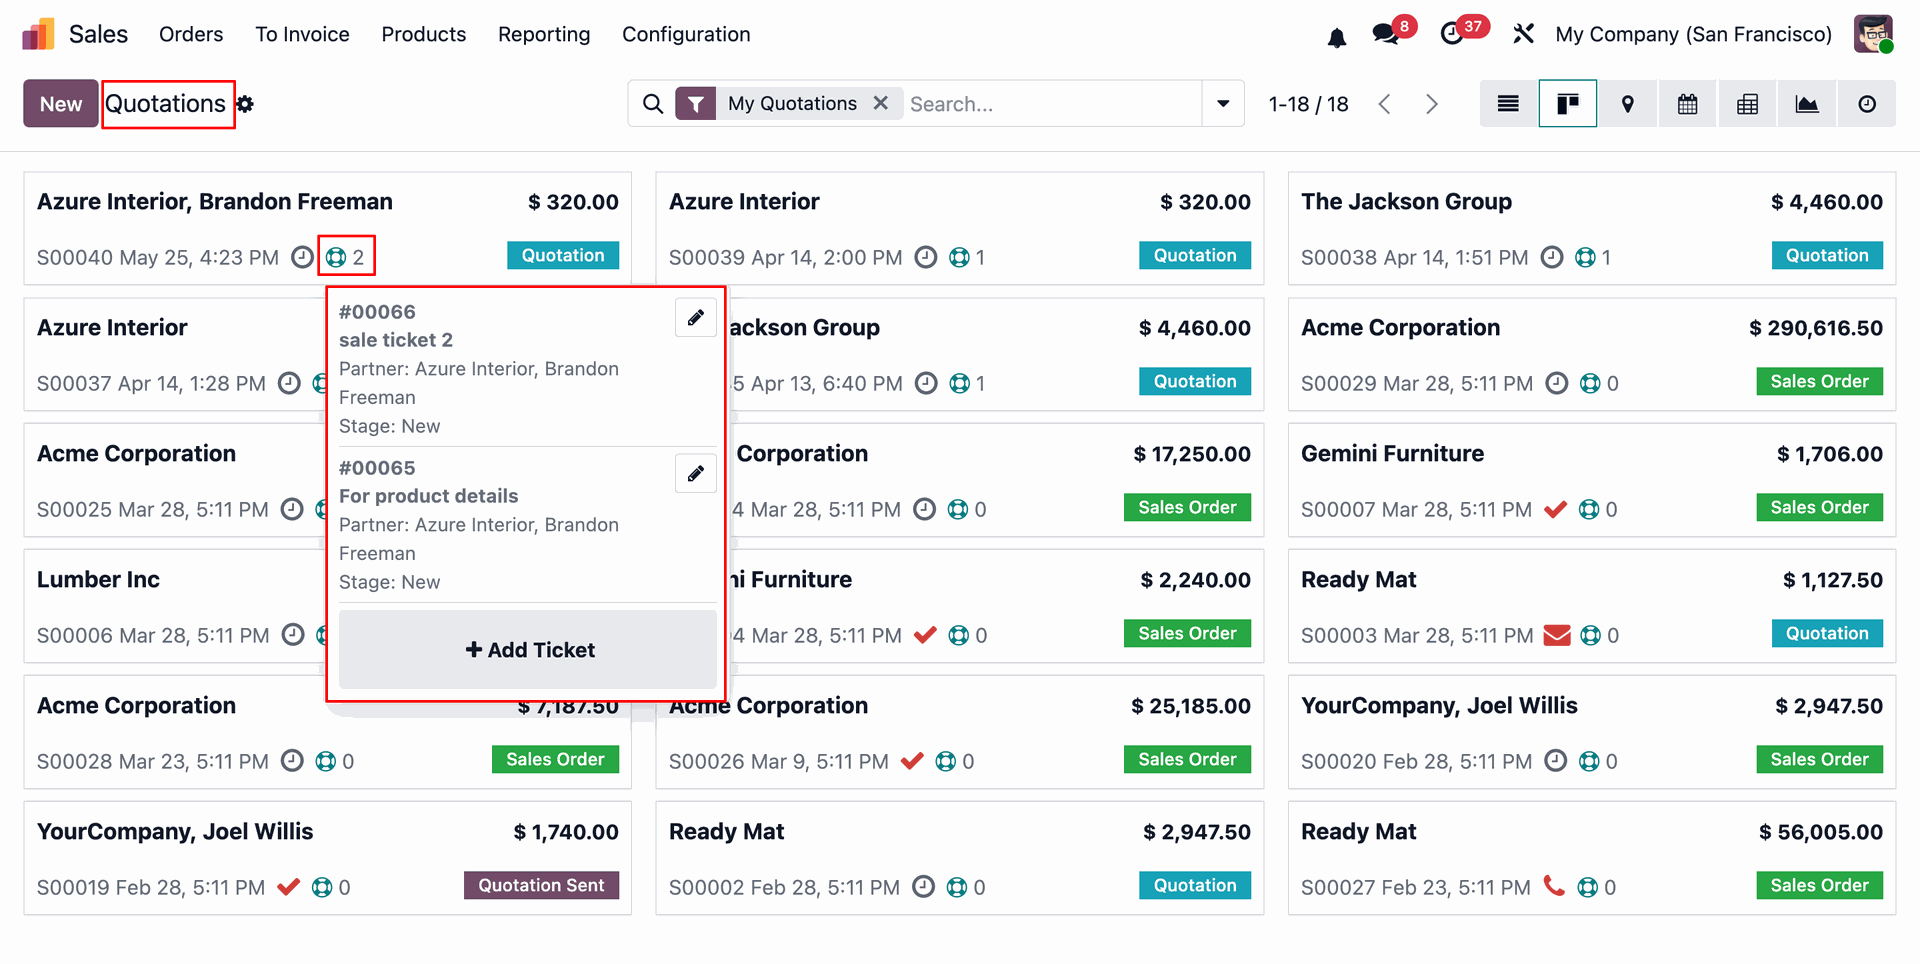
The Ticket Widget can be displayed in the Quotation list view, allowing users to quickly view the number of related Helpdesk Tickets for each quotation.
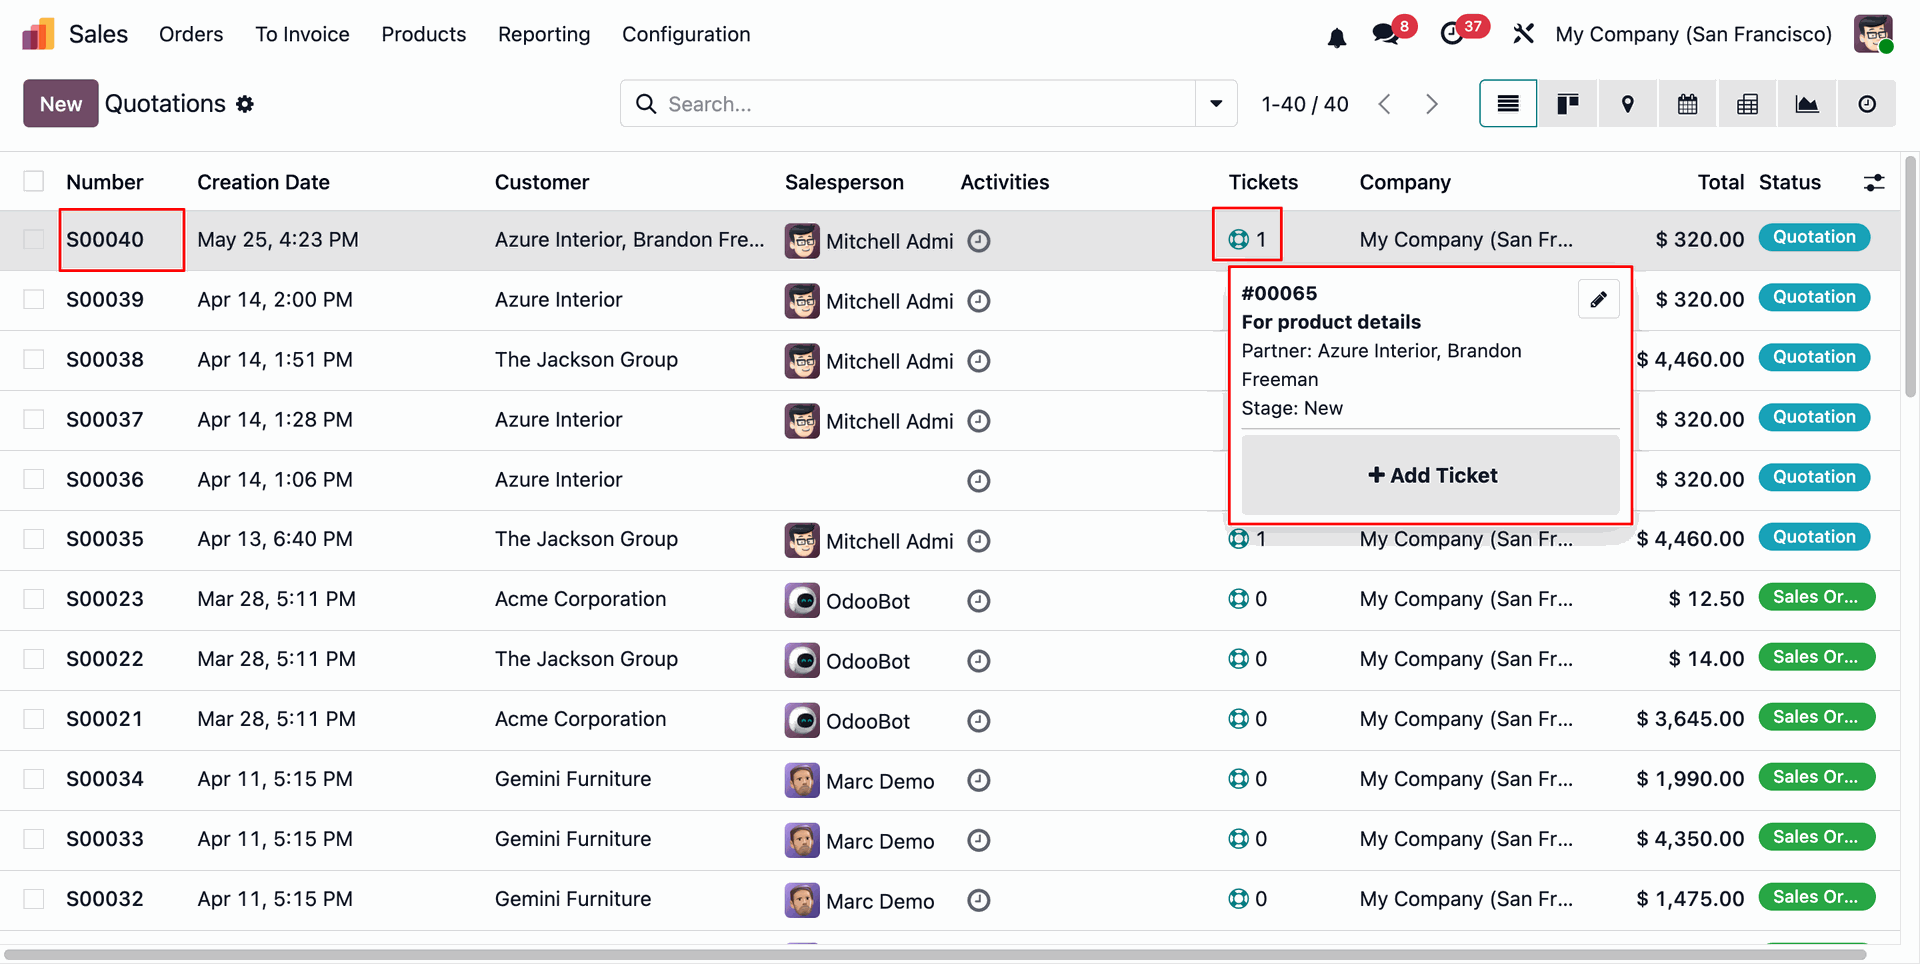
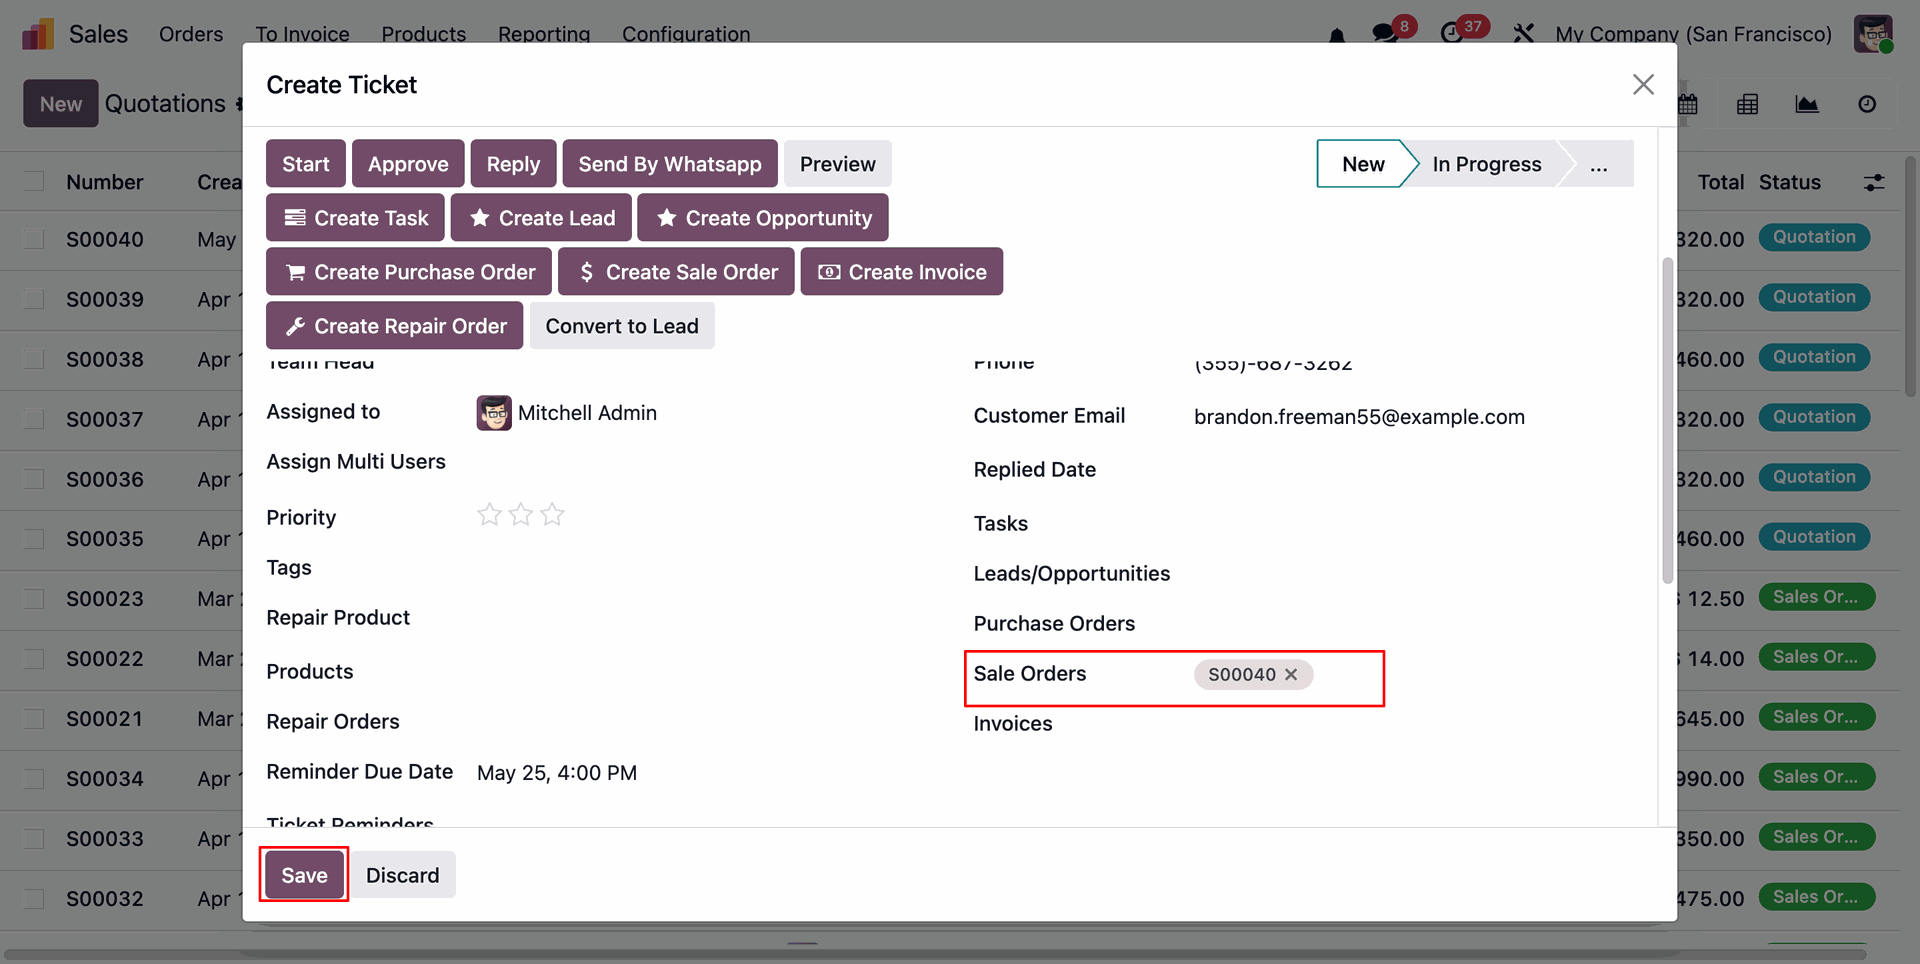
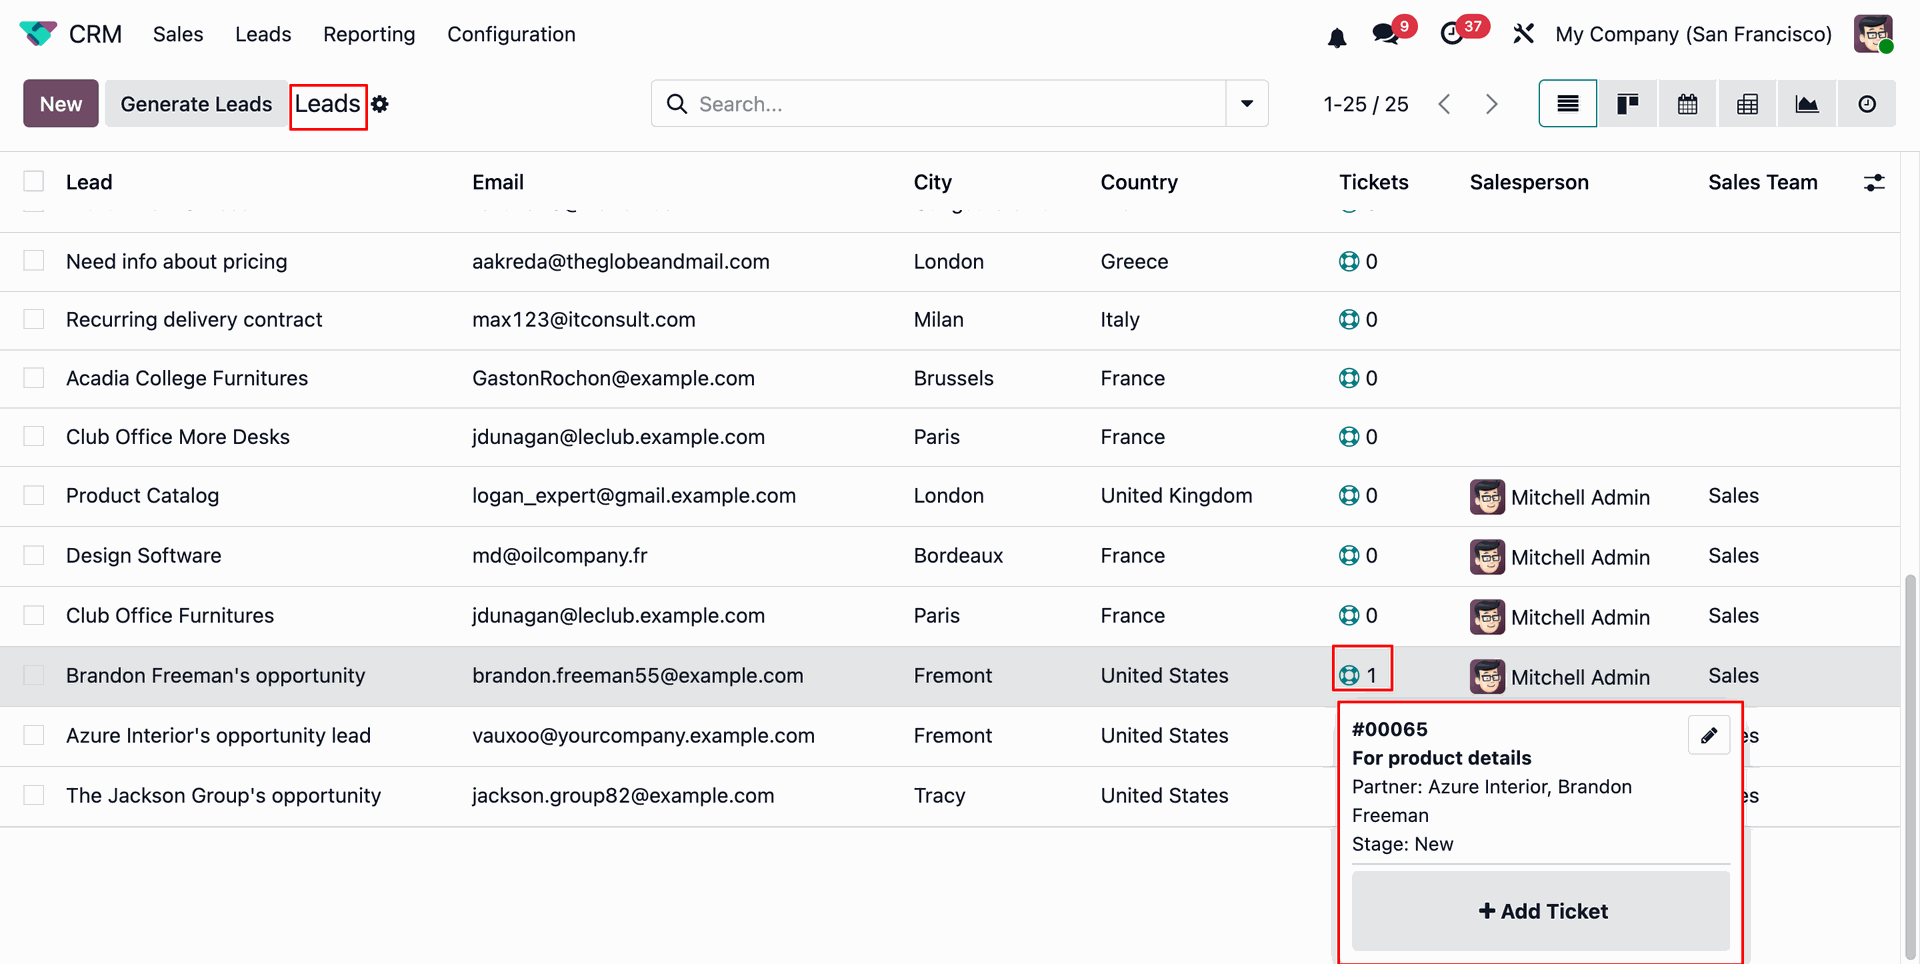
To create a new Helpdesk Ticket directly from the widget, click the Add Ticket button. This will open the ticket creation form, allowing you to enter the required details and create a new ticket.
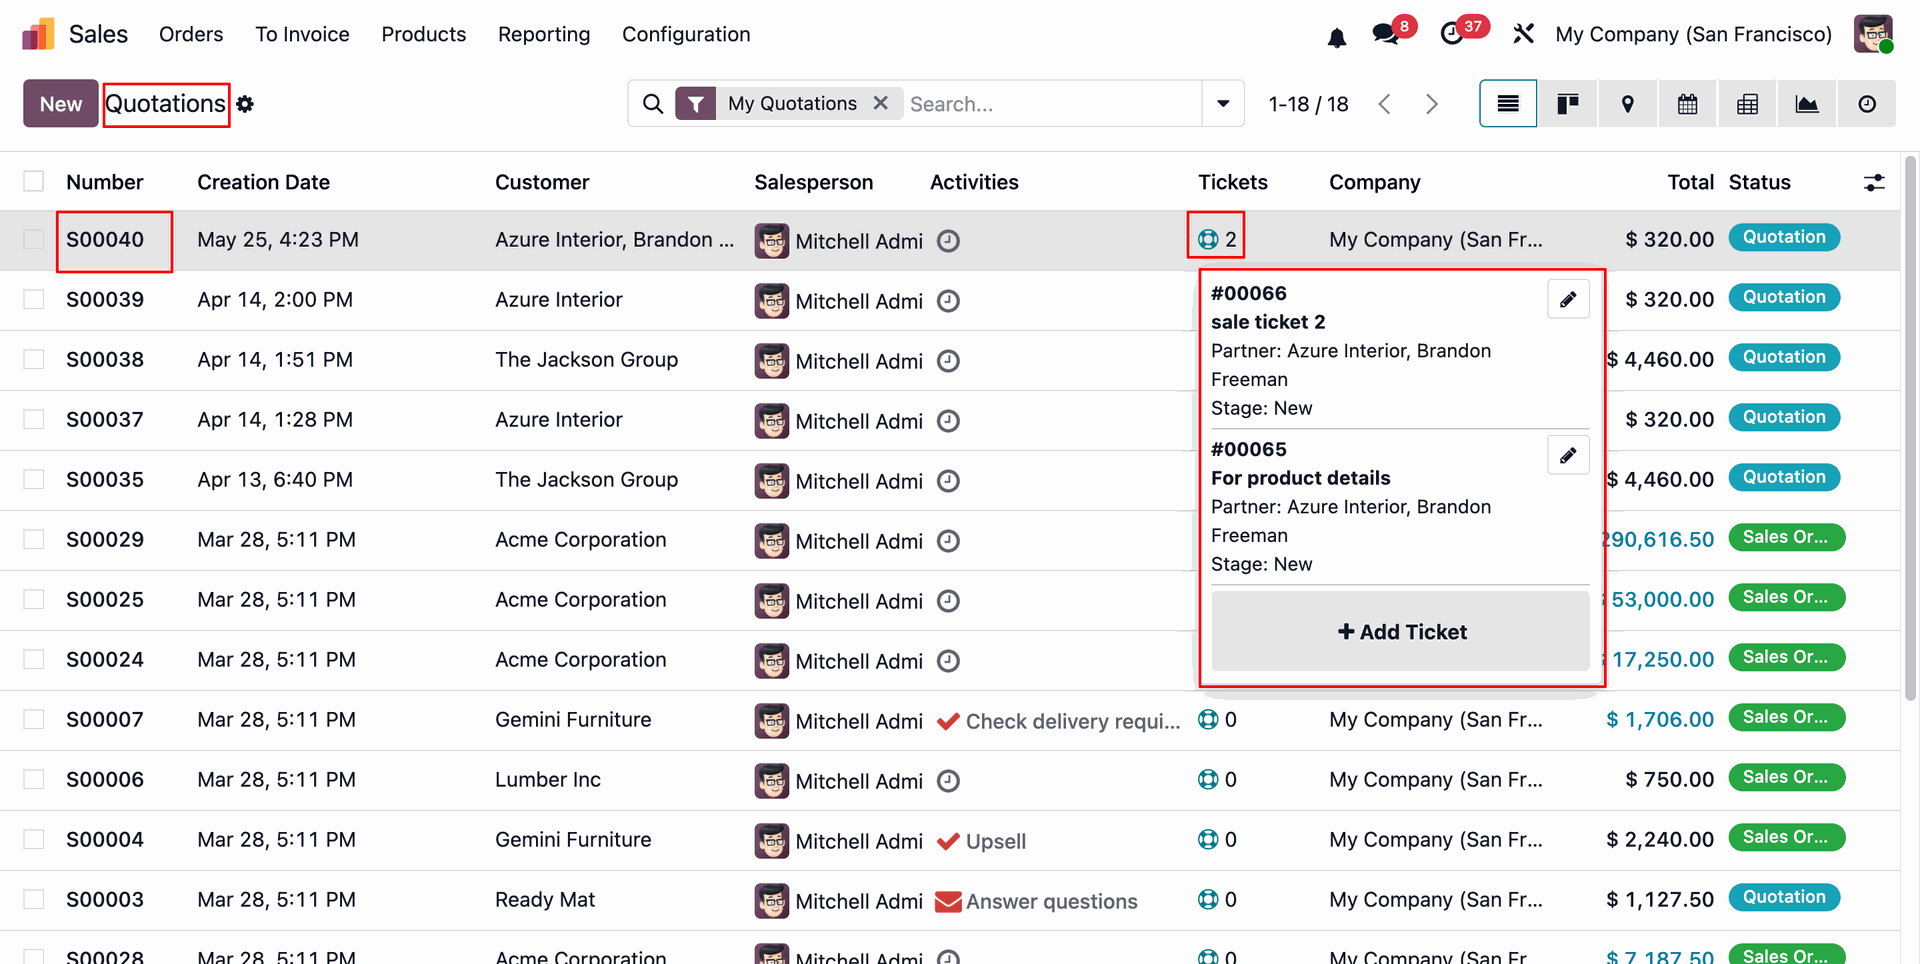
The newly created ticket from the widget will automatically update and display the Ticket Count in the Quotation list view.
The Ticket Widget is also available in the Quotation Kanban View, allowing users to quickly view and manage related Helpdesk Tickets directly from the quotation.
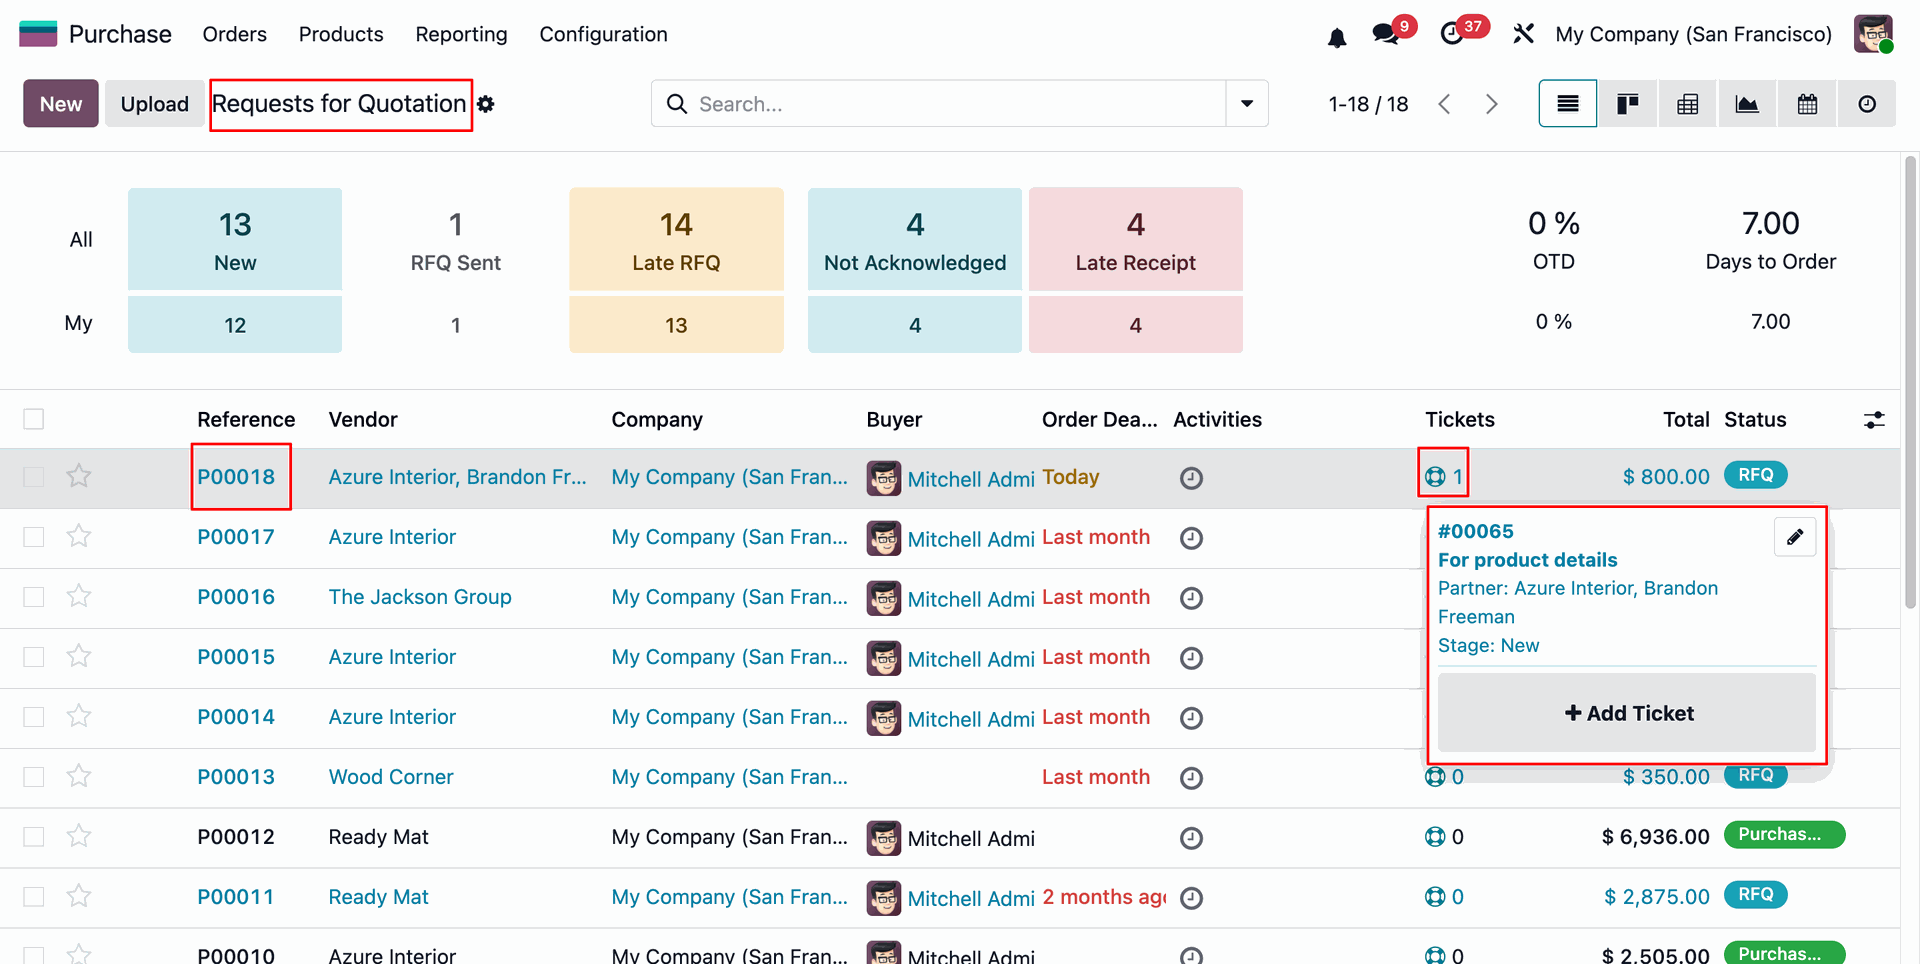
The Ticket Widget can be displayed in the Request for Quotation list view, allowing users to quickly view the number of related Helpdesk Tickets for each RFQ.
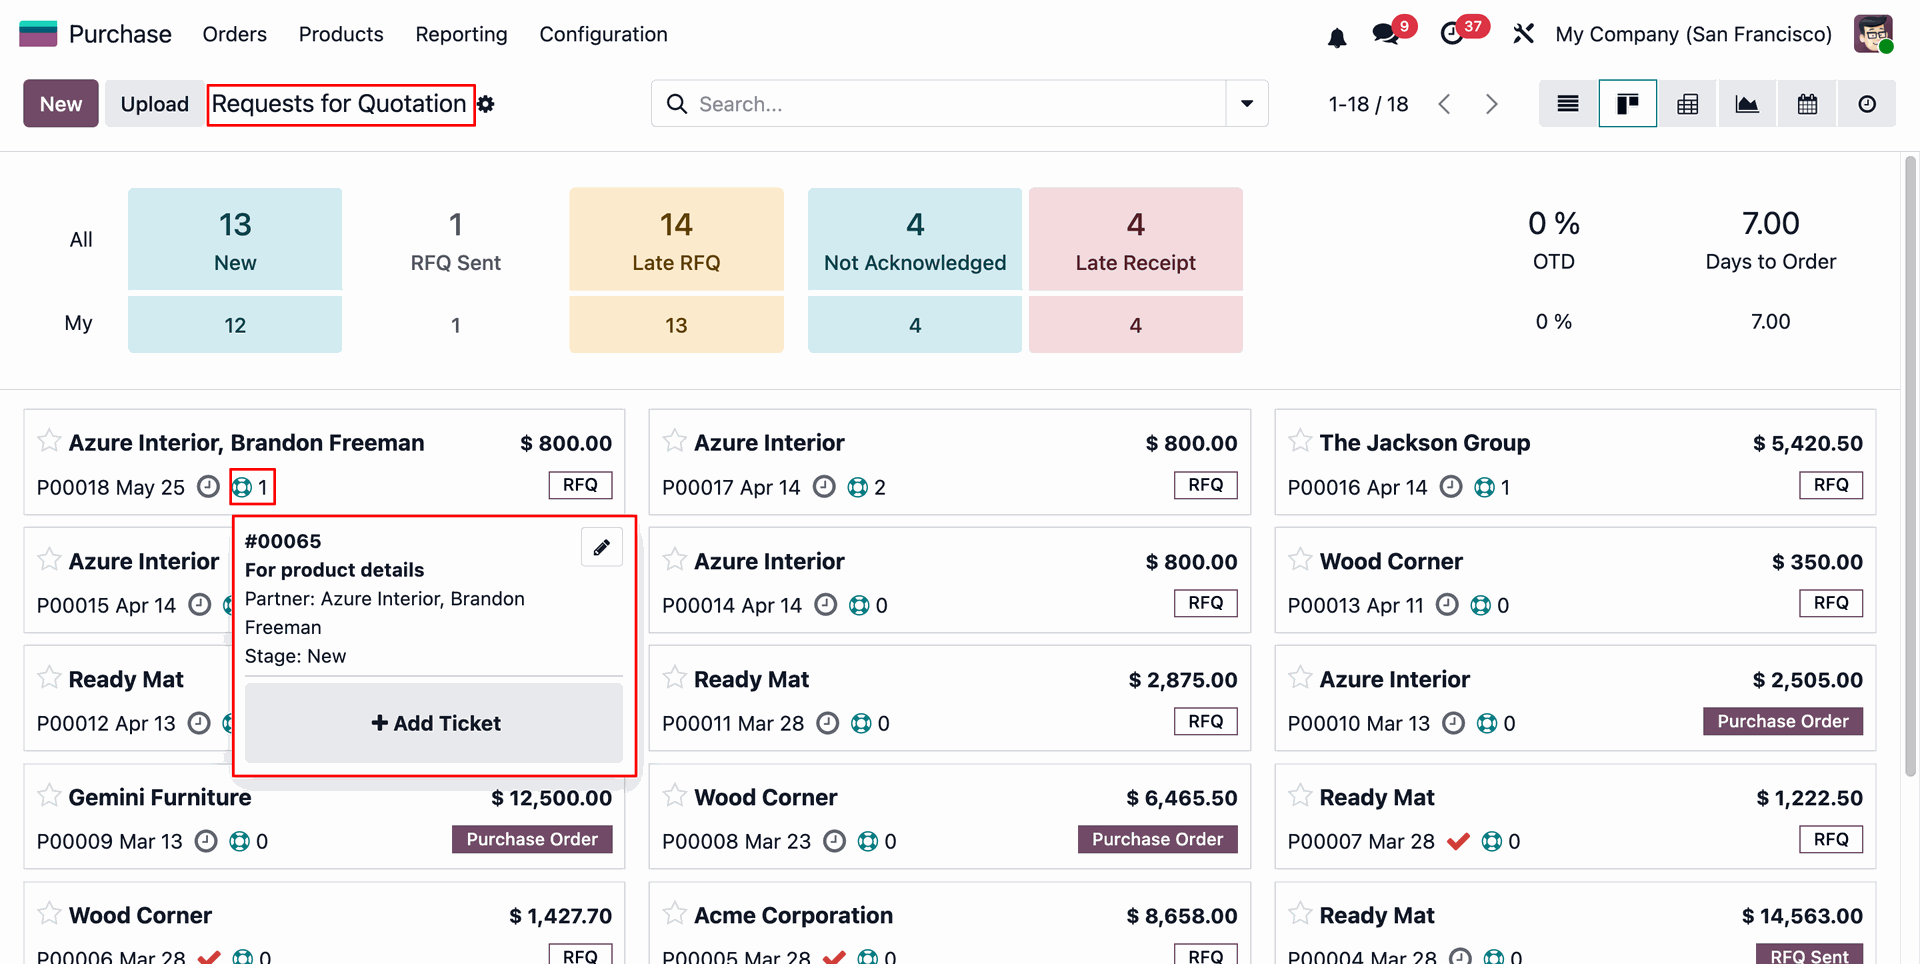
The Ticket Widget is also available in the Request for Quotation Kanban View, allowing users to quickly view and manage related Helpdesk Tickets directly from the RFQ.
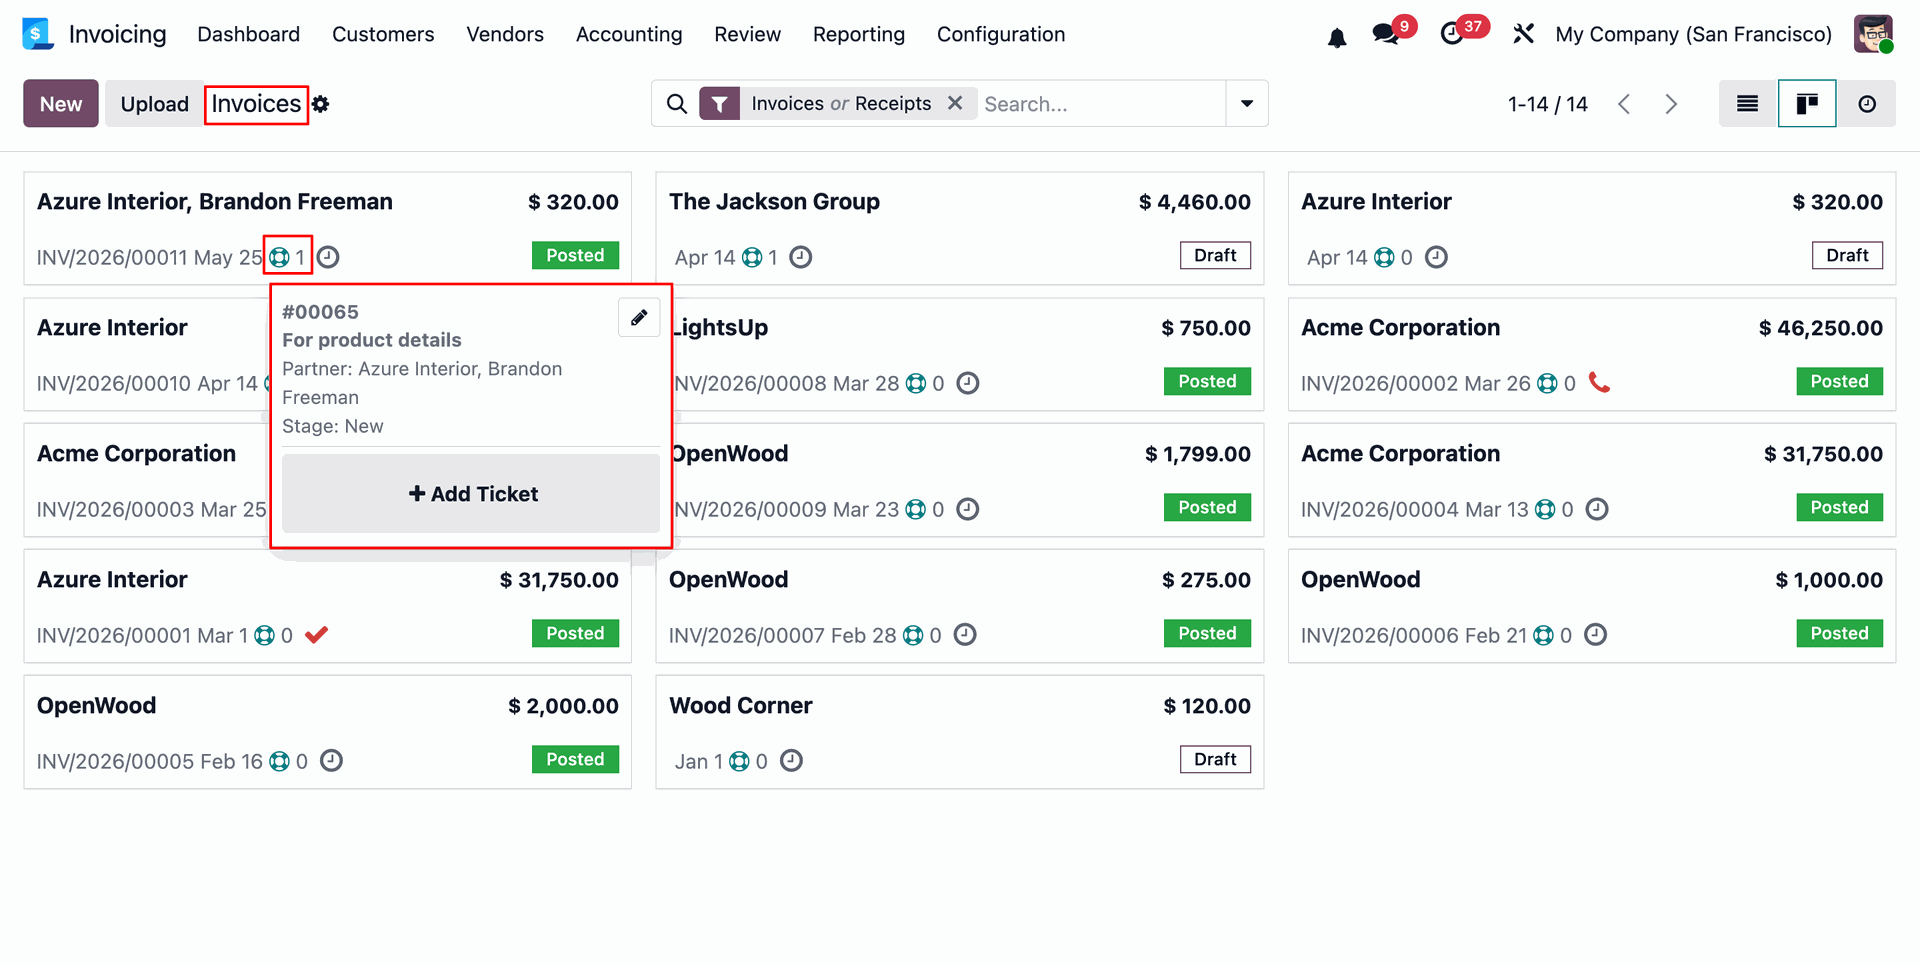
The Ticket Widget can be displayed in the invoice list view, allowing users to quickly view the number of related Helpdesk Tickets for each invoice.
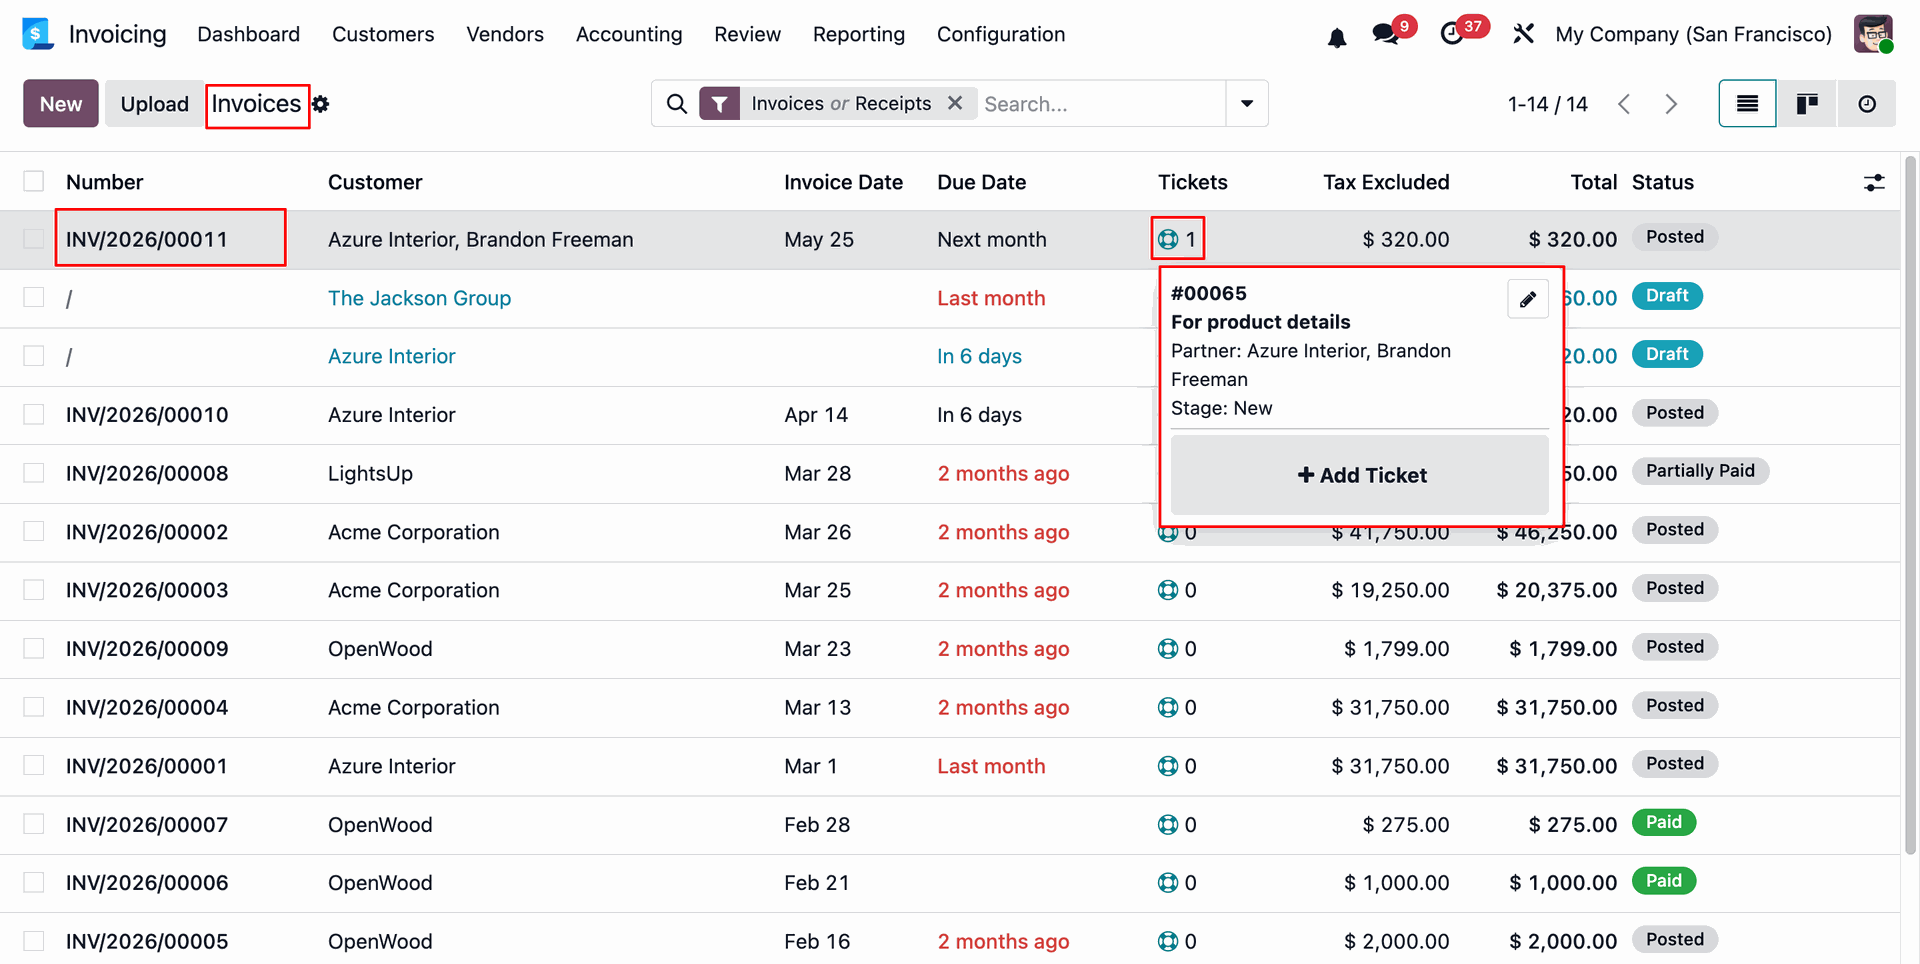
The Ticket Widget is also available in the invoice Kanban View, allowing users to quickly view and manage related Helpdesk Tickets directly from the invoices.
The Ticket Widget can be displayed in the CRM Leads list view, allowing users to quickly view the number of related Helpdesk Tickets for each CRM Leads.
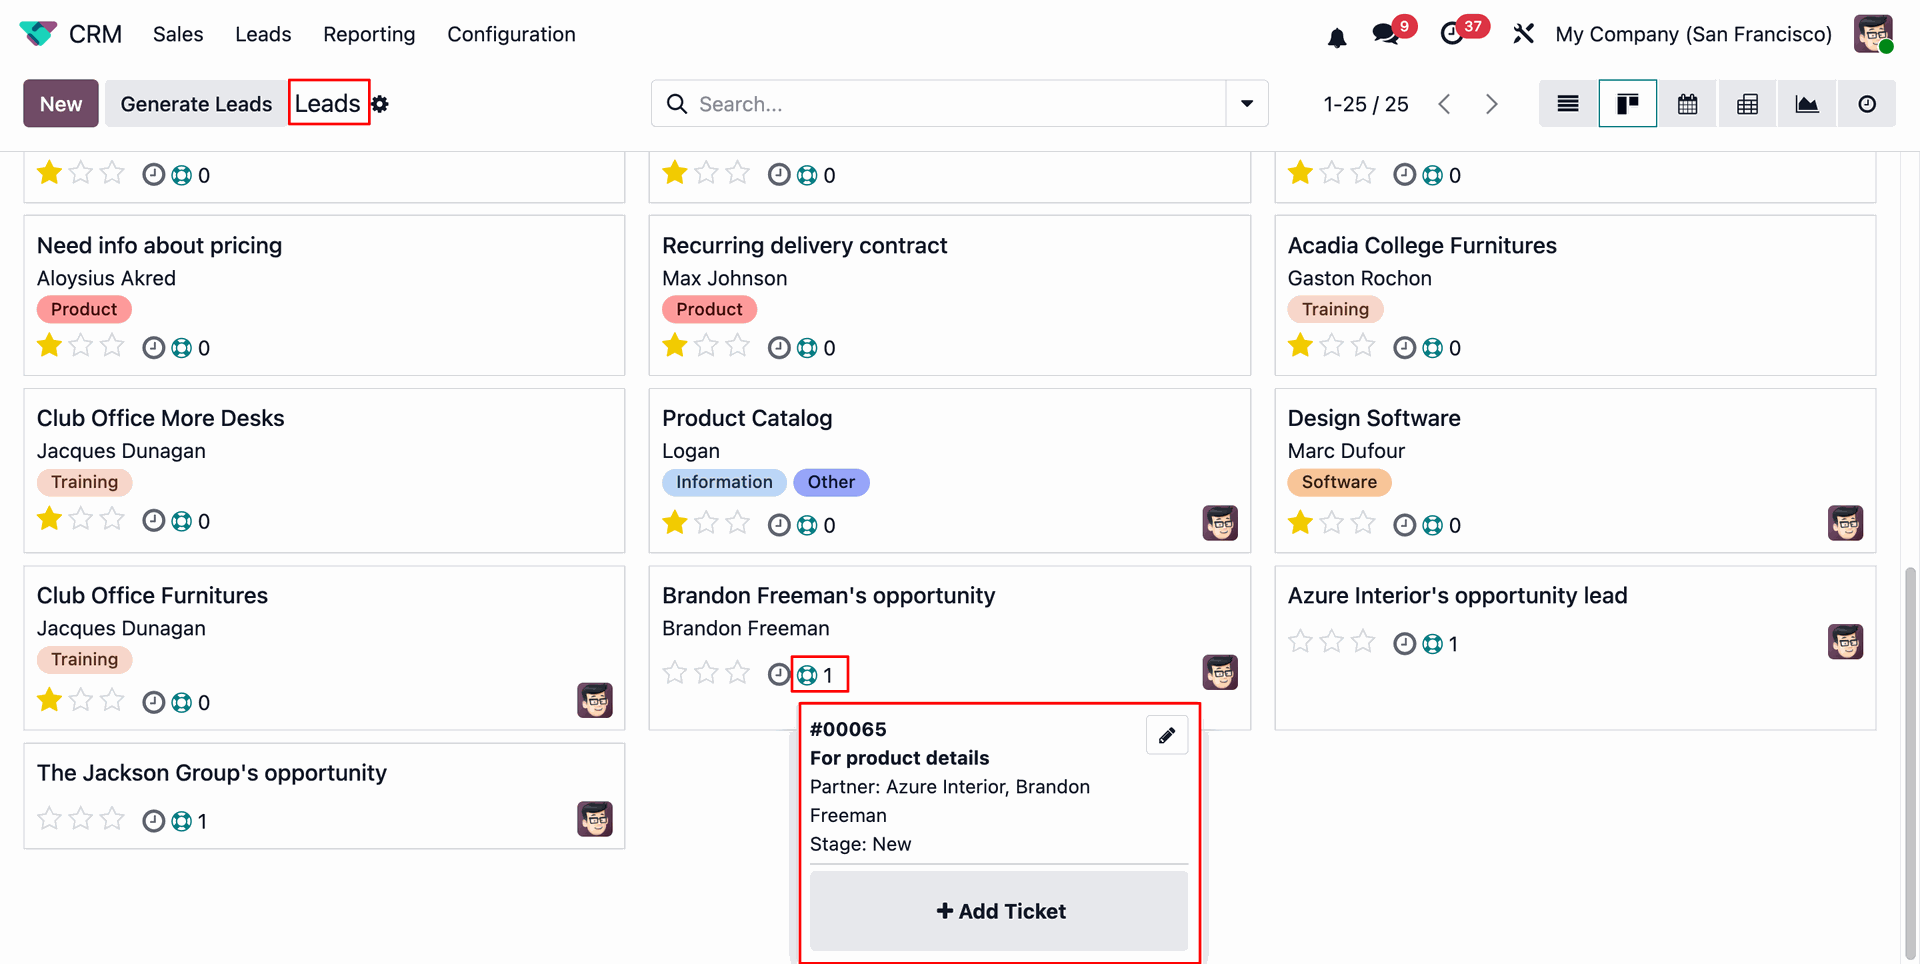
The Ticket Widget is also available in the CRM Leads Kanban View, allowing users to quickly view and manage related Helpdesk Tickets directly from the Leads.
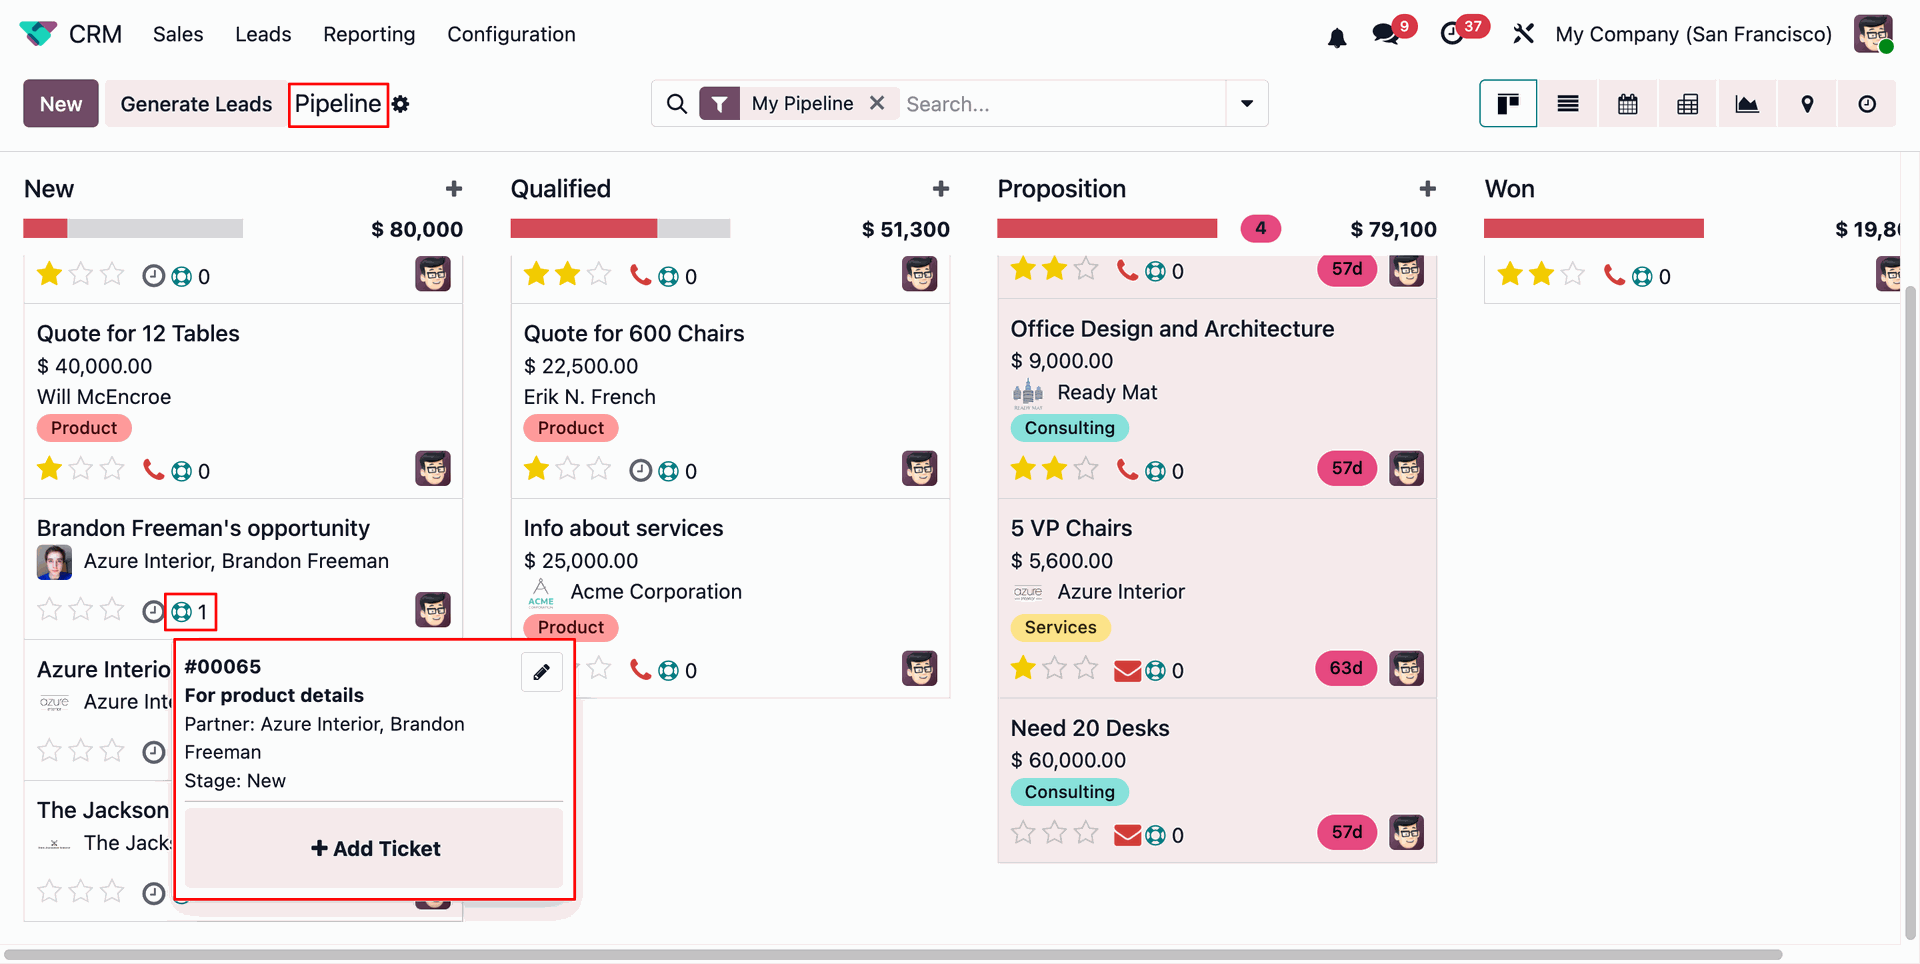
The Ticket Widget can be displayed in the CRM Pipeline list view, allowing users to quickly view the number of related Helpdesk Tickets for each CRM Pipeline.
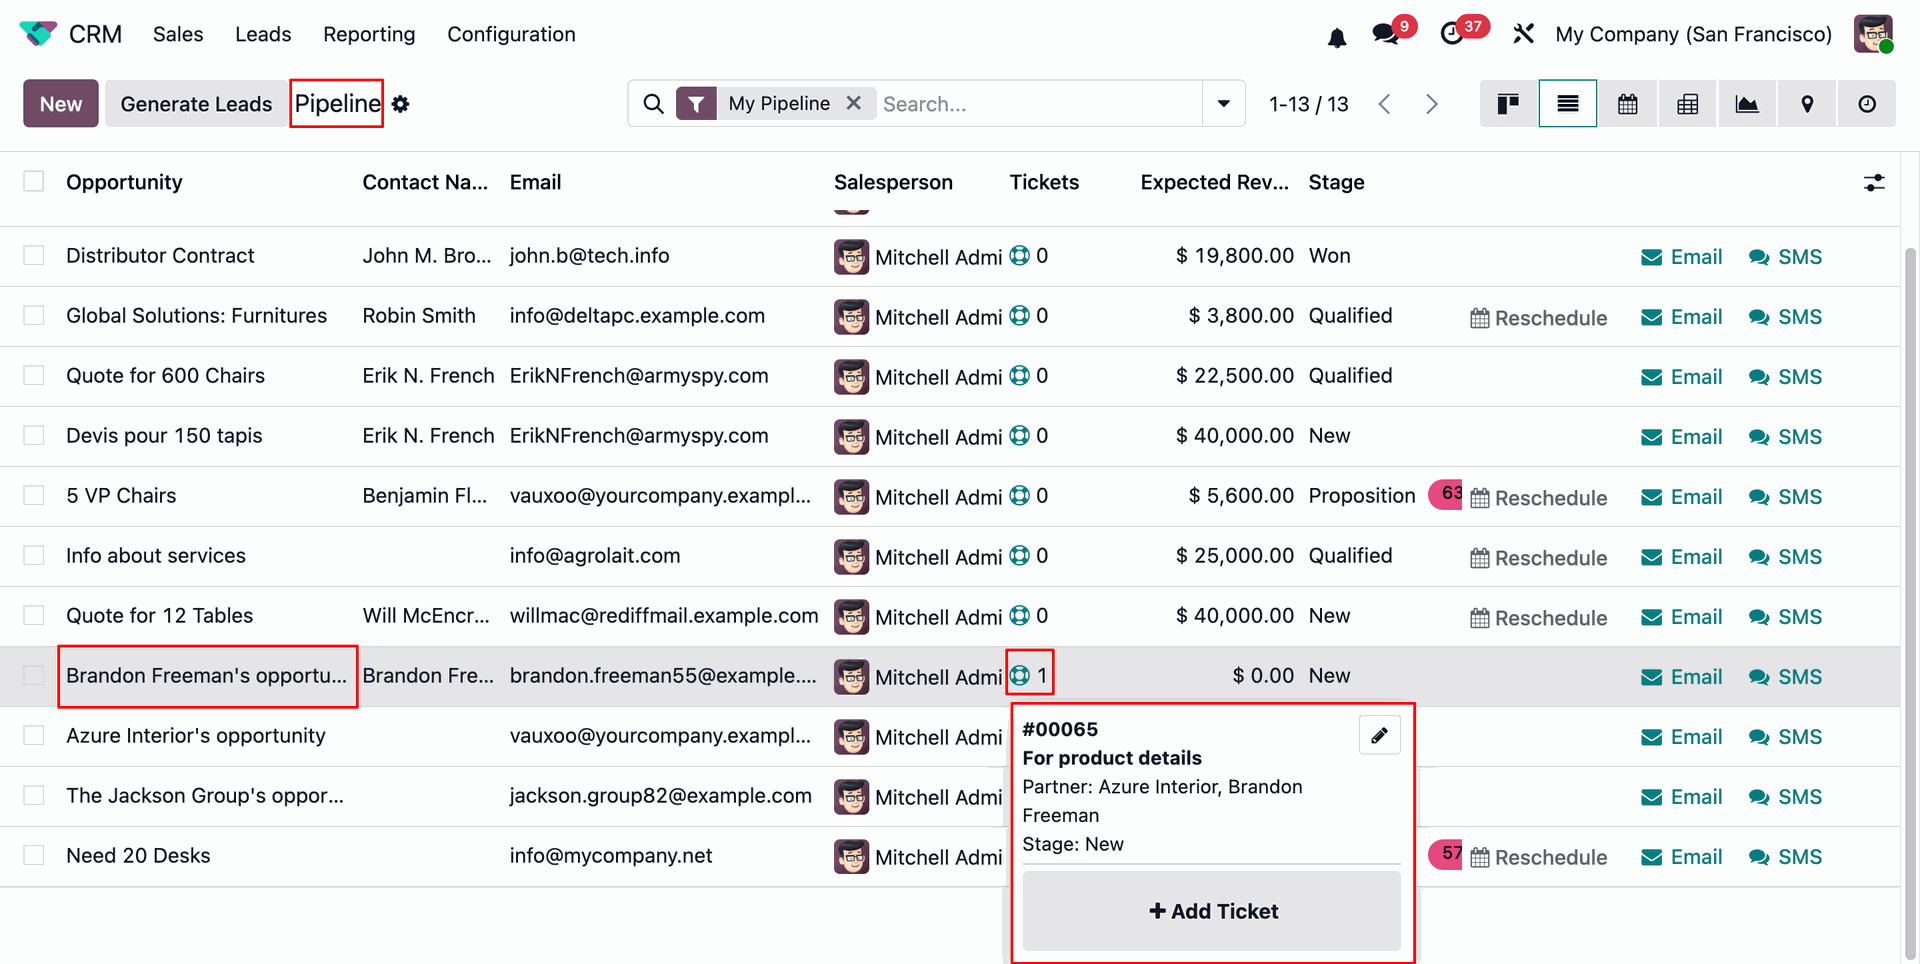
The Ticket Widget is also available in the CRM Pipeline Kanban View, allowing users to quickly view and manage related Helpdesk Tickets directly from the Pipeline.
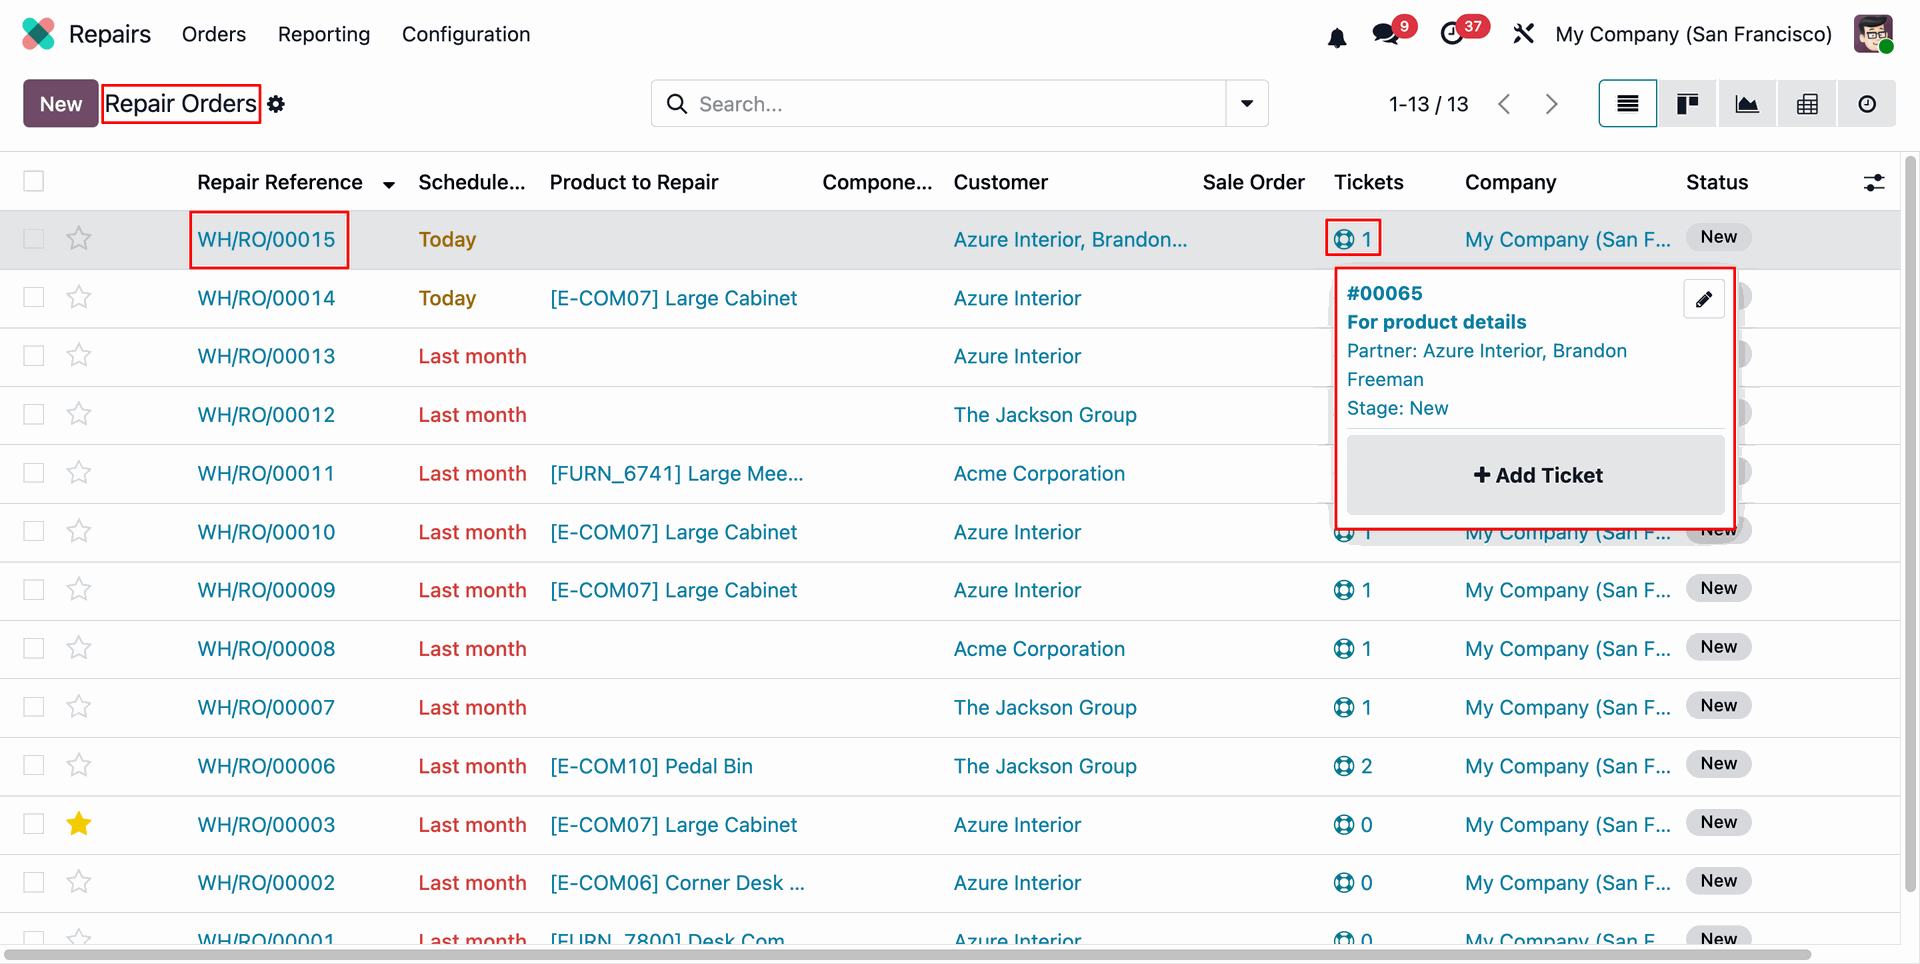
The Ticket Widget can be displayed in the Repair Order list view, allowing users to quickly view the number of related Helpdesk Tickets for each Repair Order.
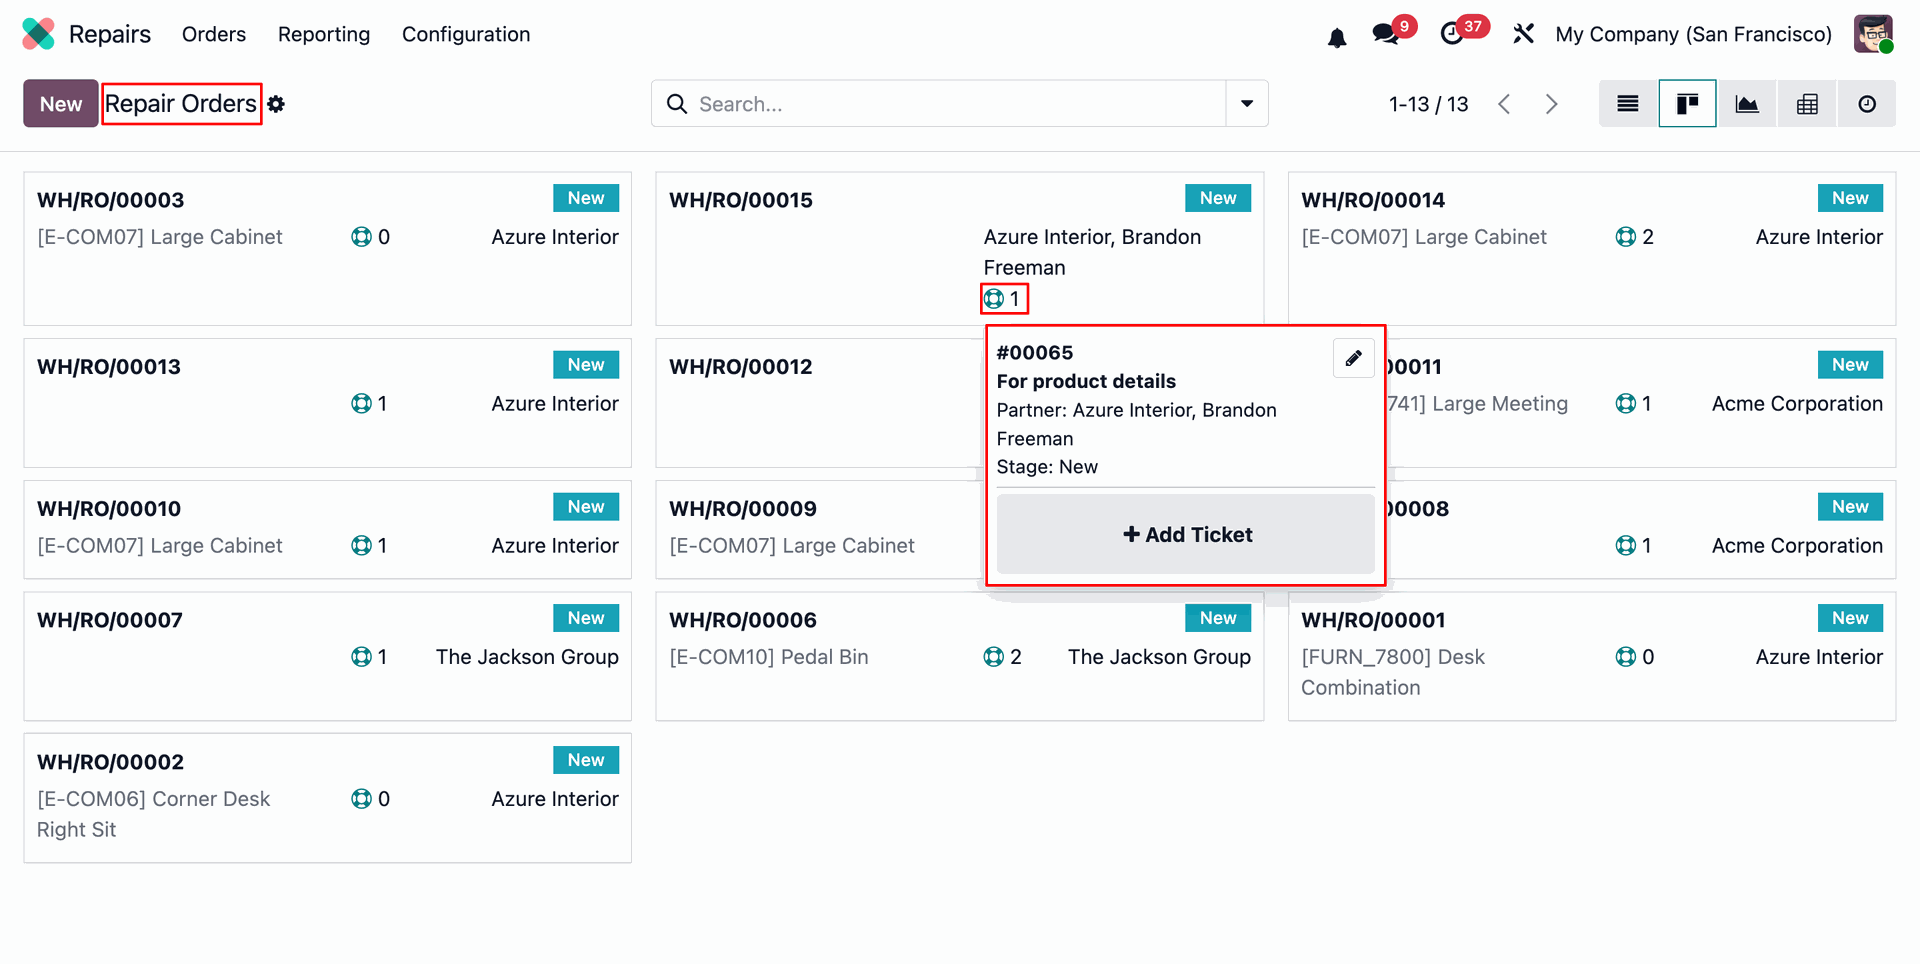
The Ticket Widget is also available in the Repair Order Kanban View, allowing users to quickly view and manage related Helpdesk Tickets directly from the Repair Order.
Create a new Helpdesk Ticket by clicking the New button. Fill in the required details.
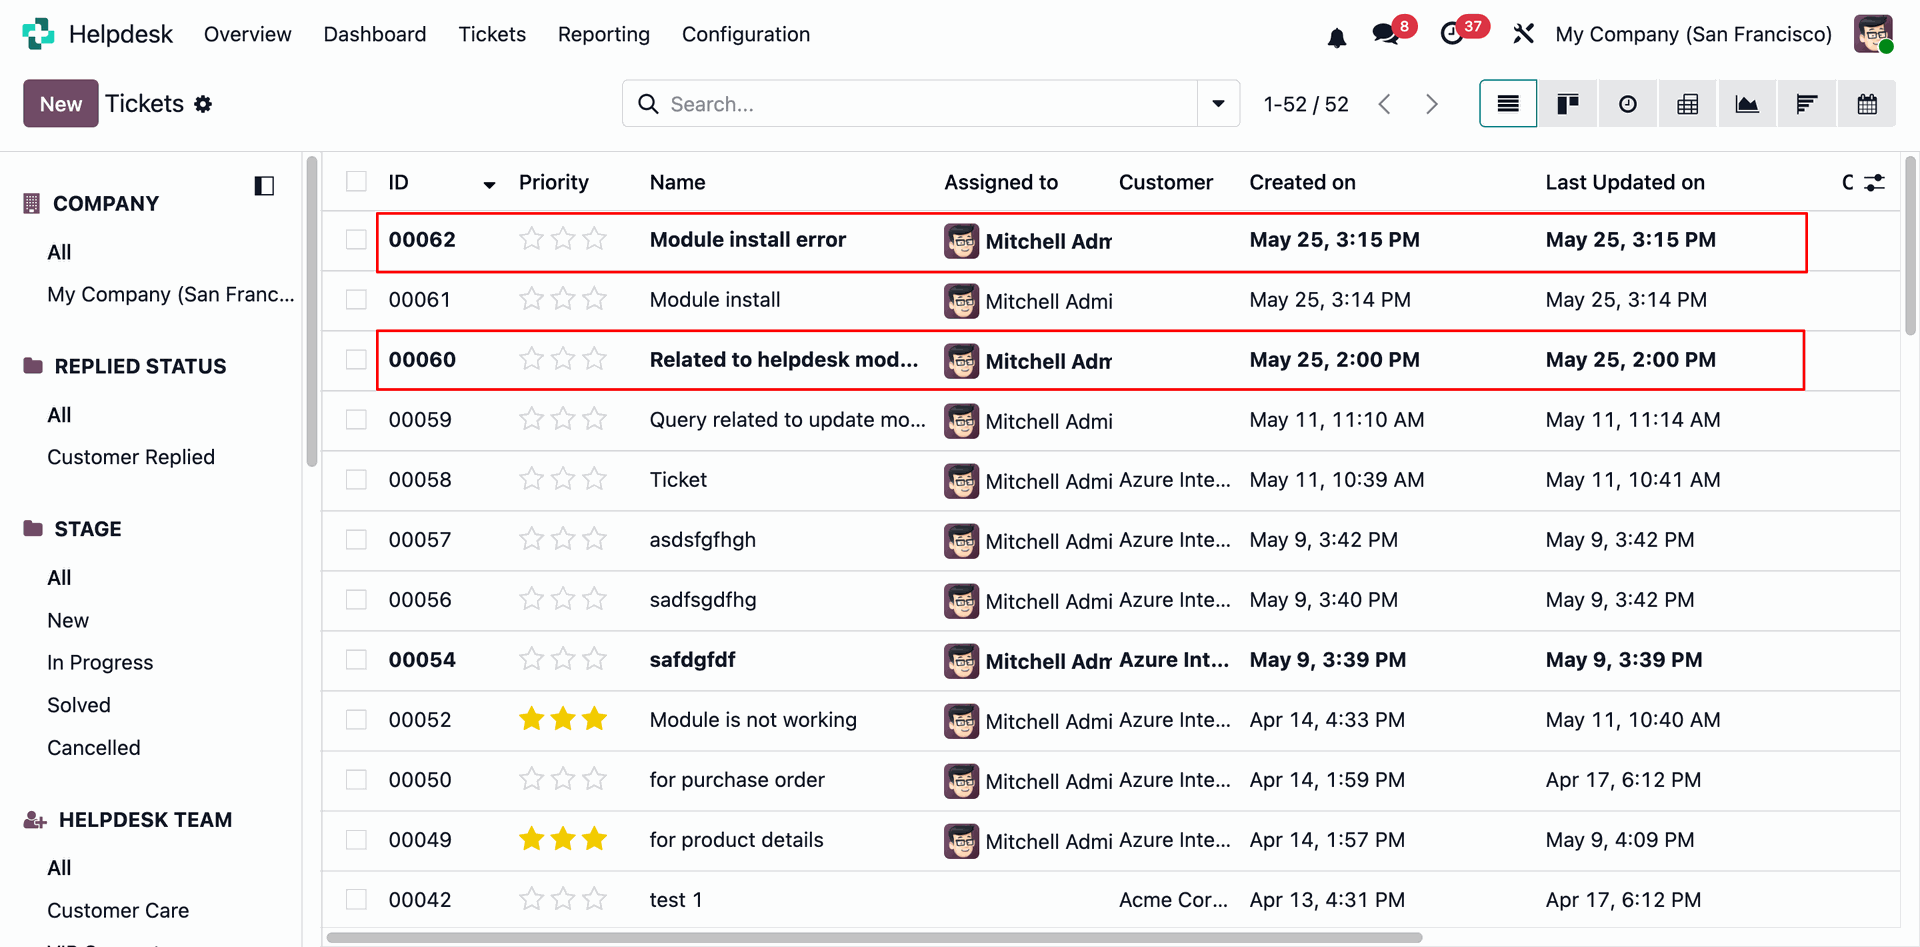
Newly created tickets will be displayed in bold in the Helpdesk Ticket List View, making them easy to identify and track unread New tickets.
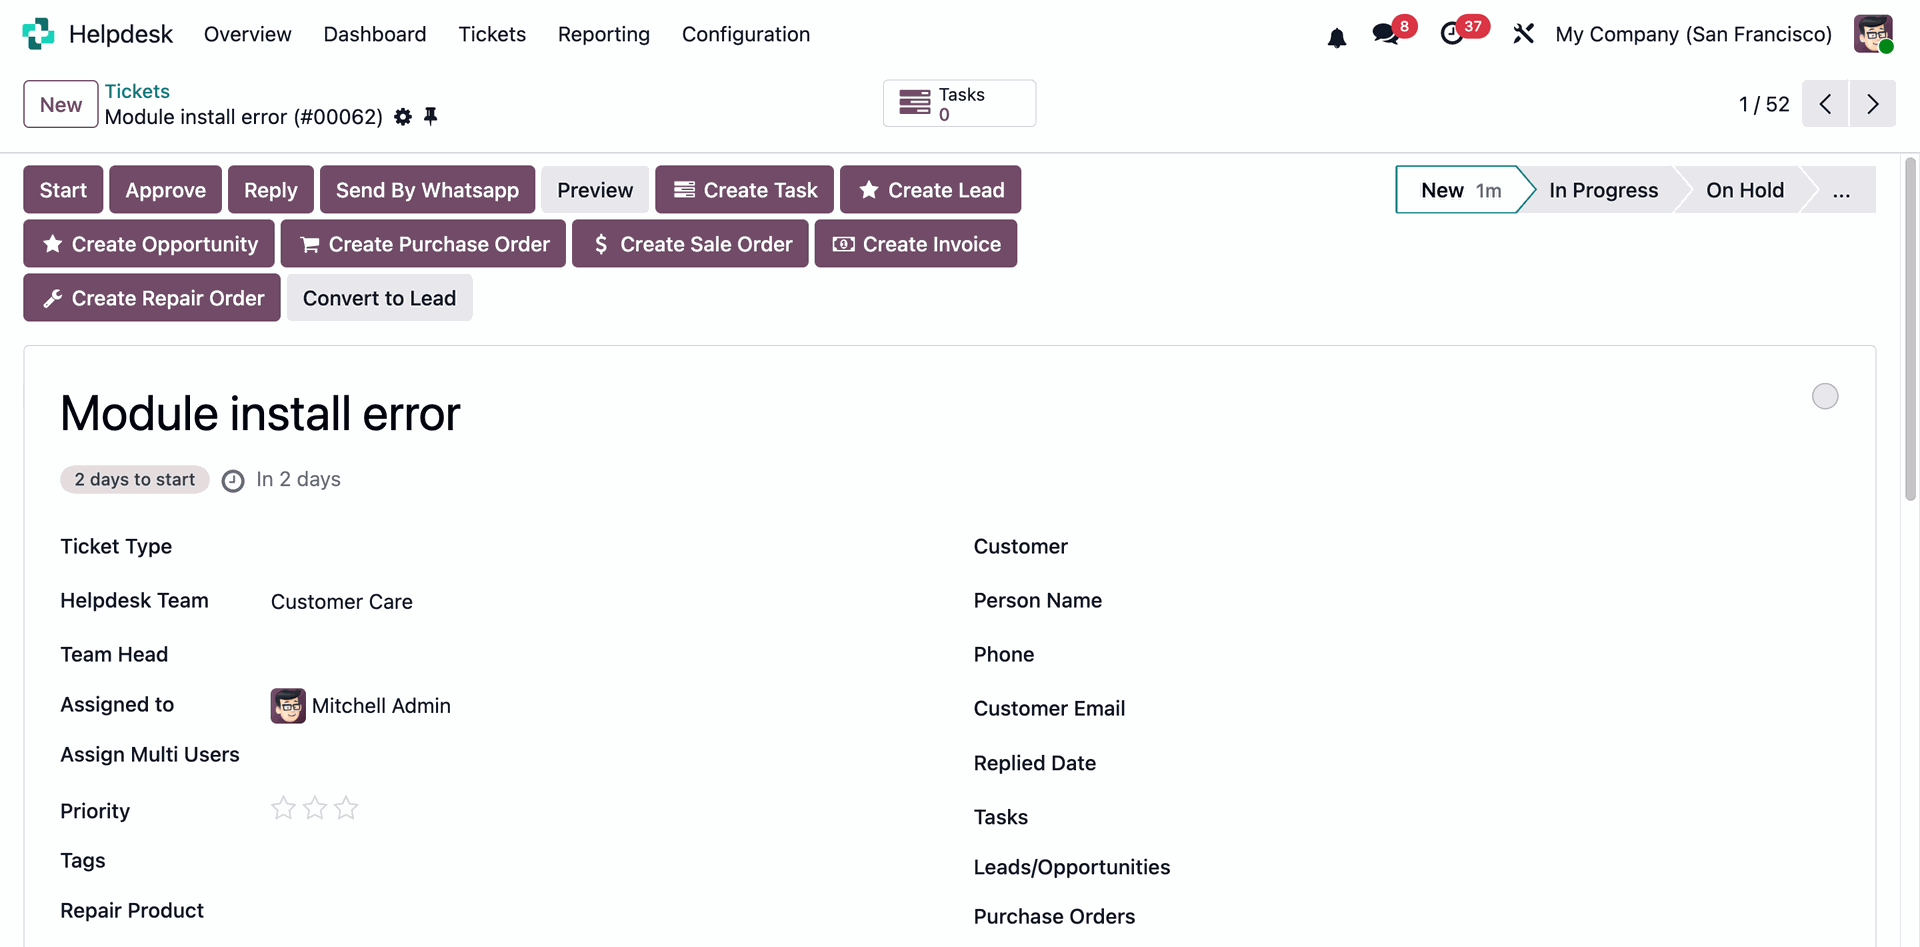
Open a bold ticket from the Helpdesk Ticket List View to mark it as viewed.
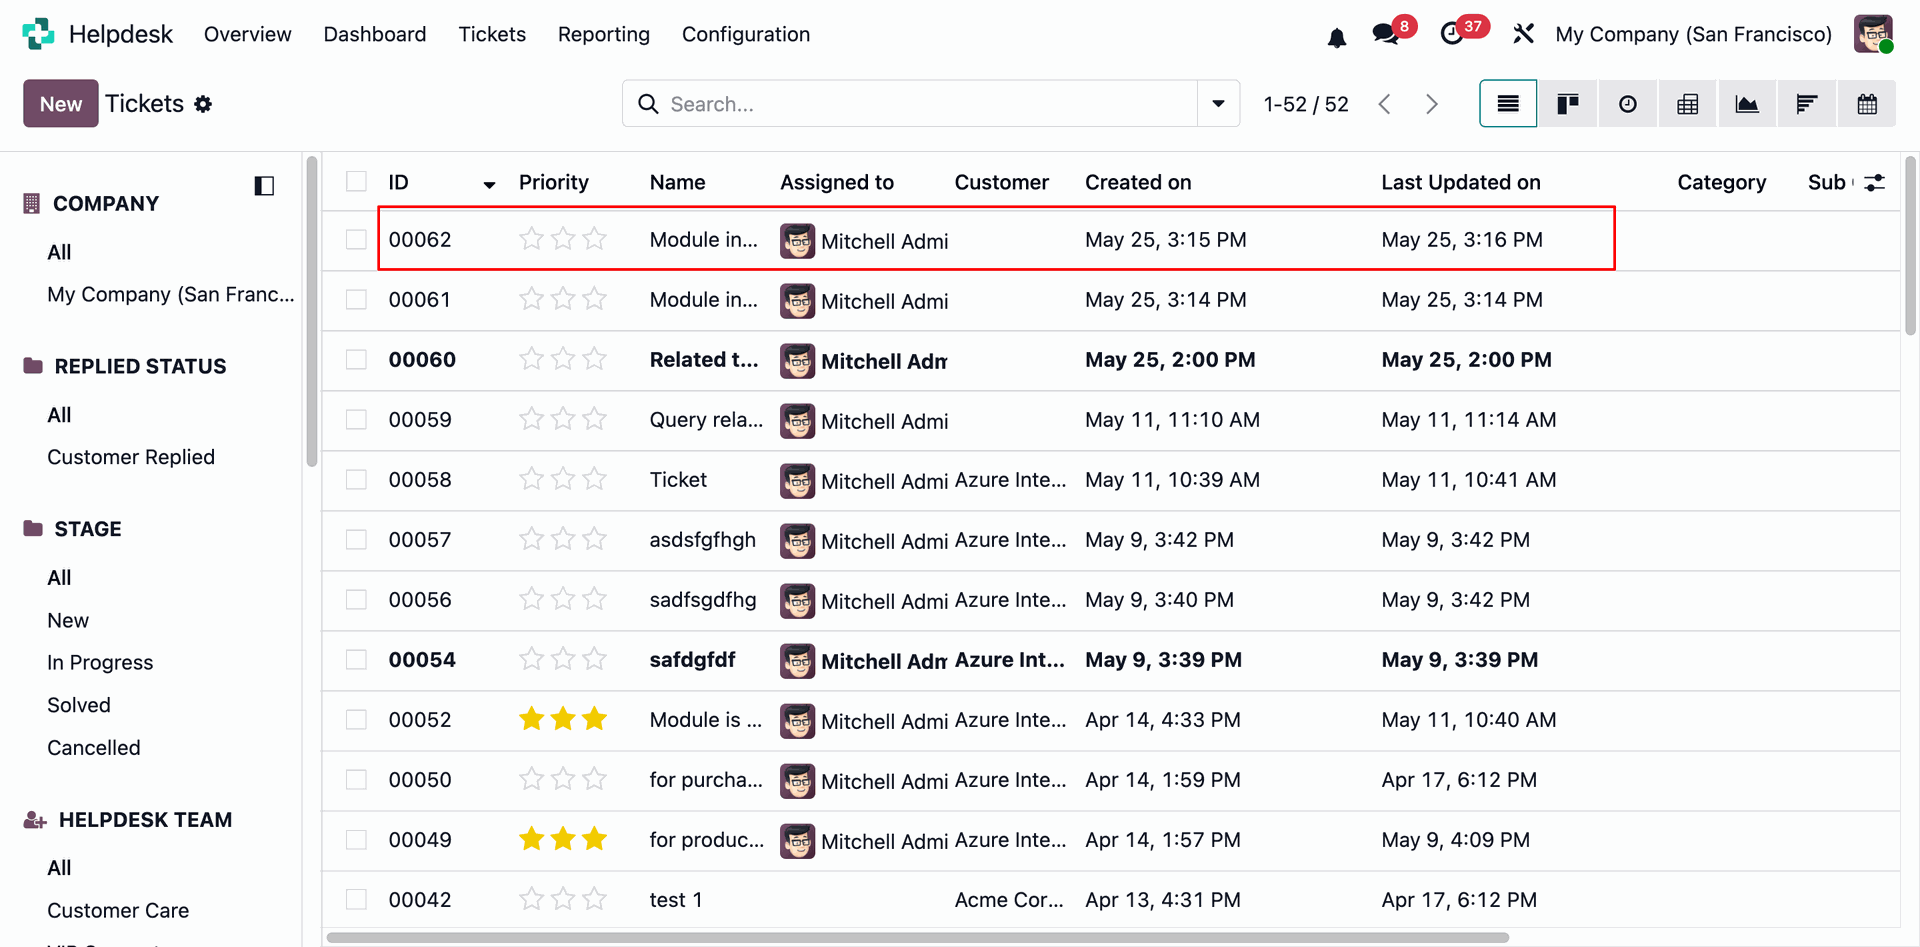
Once a ticket has been viewed or opened, it will no longer be displayed in bold in the Helpdesk Ticket List View.
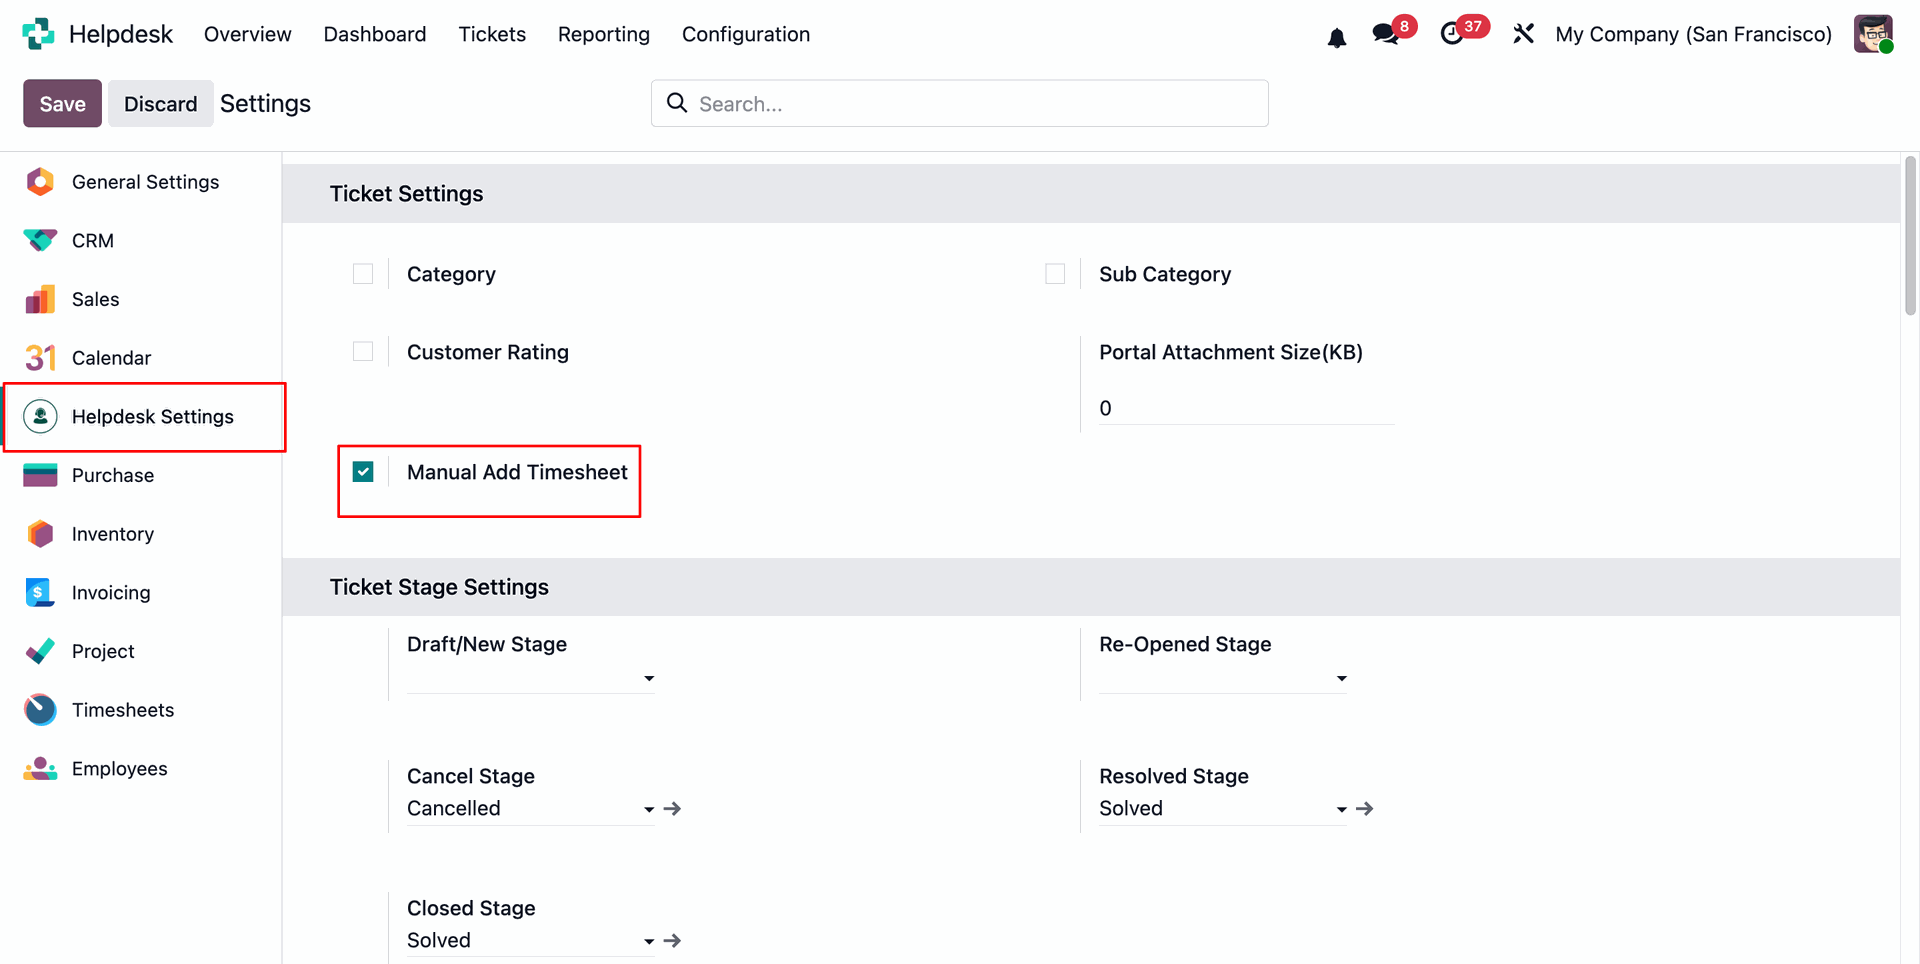
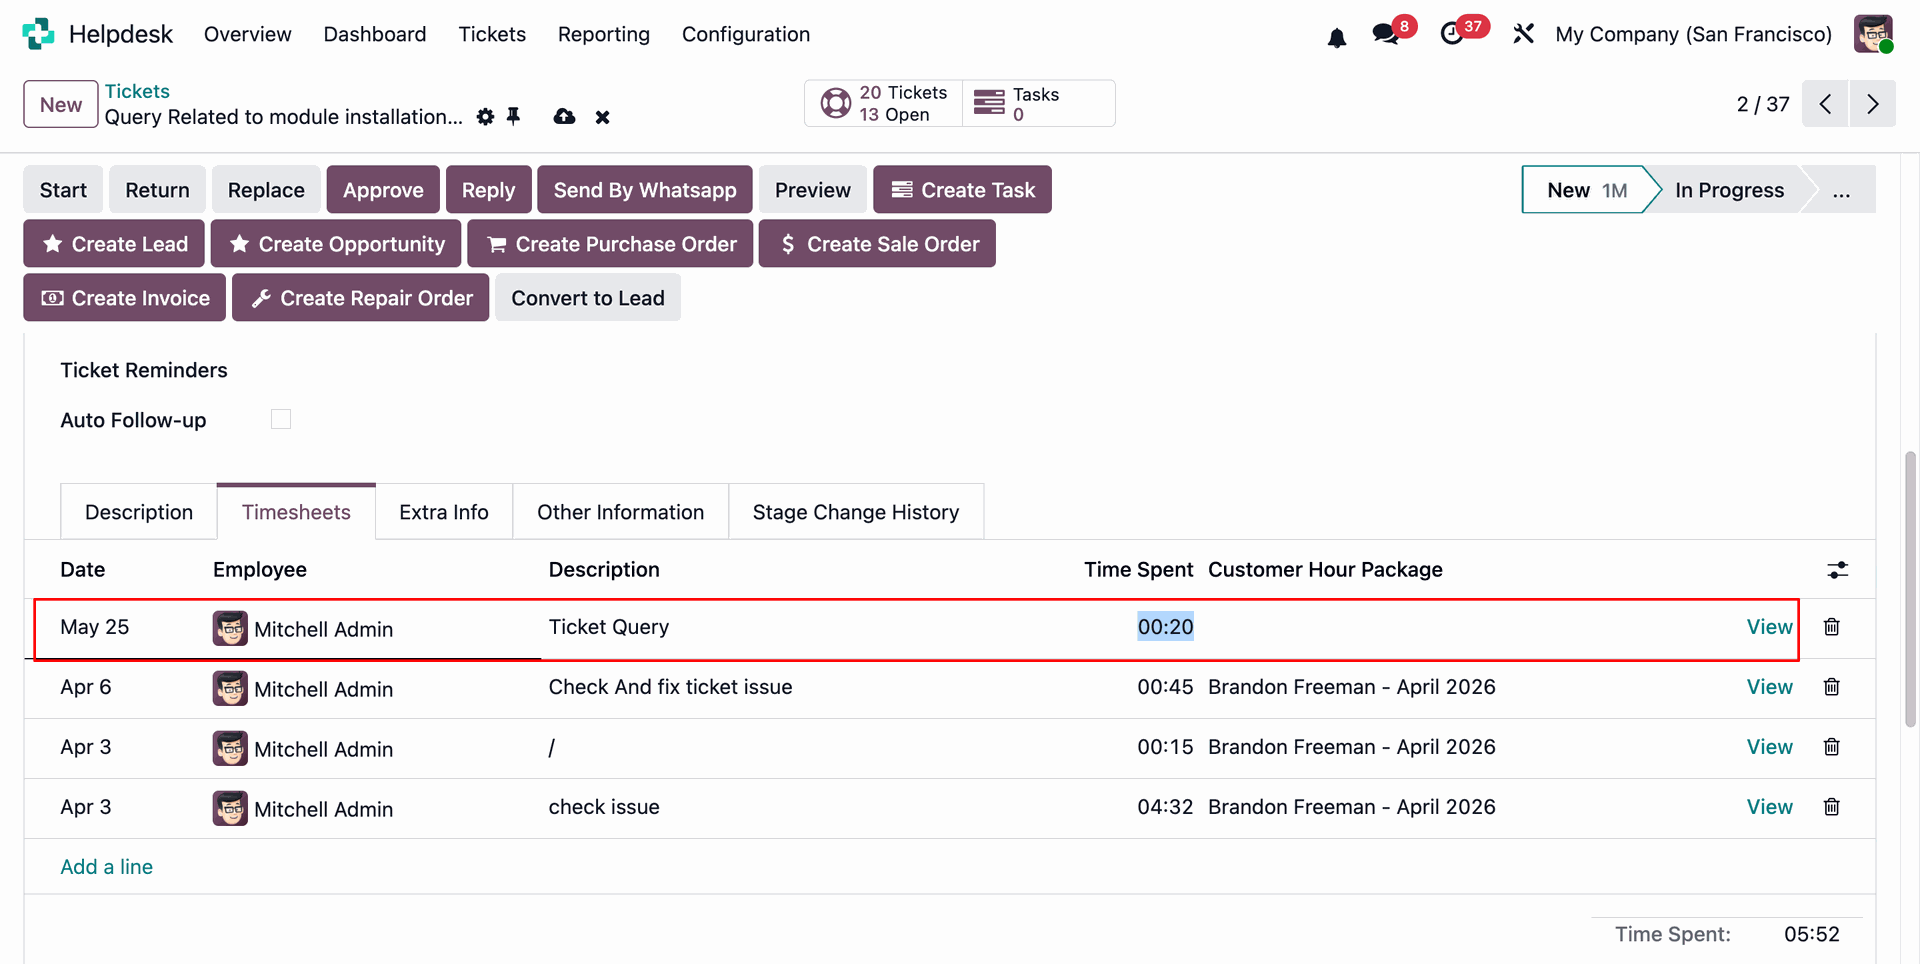
Enable the Manual Timesheet option from the Helpdesk General Settings.
Users can add a Manual Timesheet by clicking Add a Line from the Timesheet tab in the Helpdesk Ticket form view. Fill in the required details and save the entry to record the time manually.
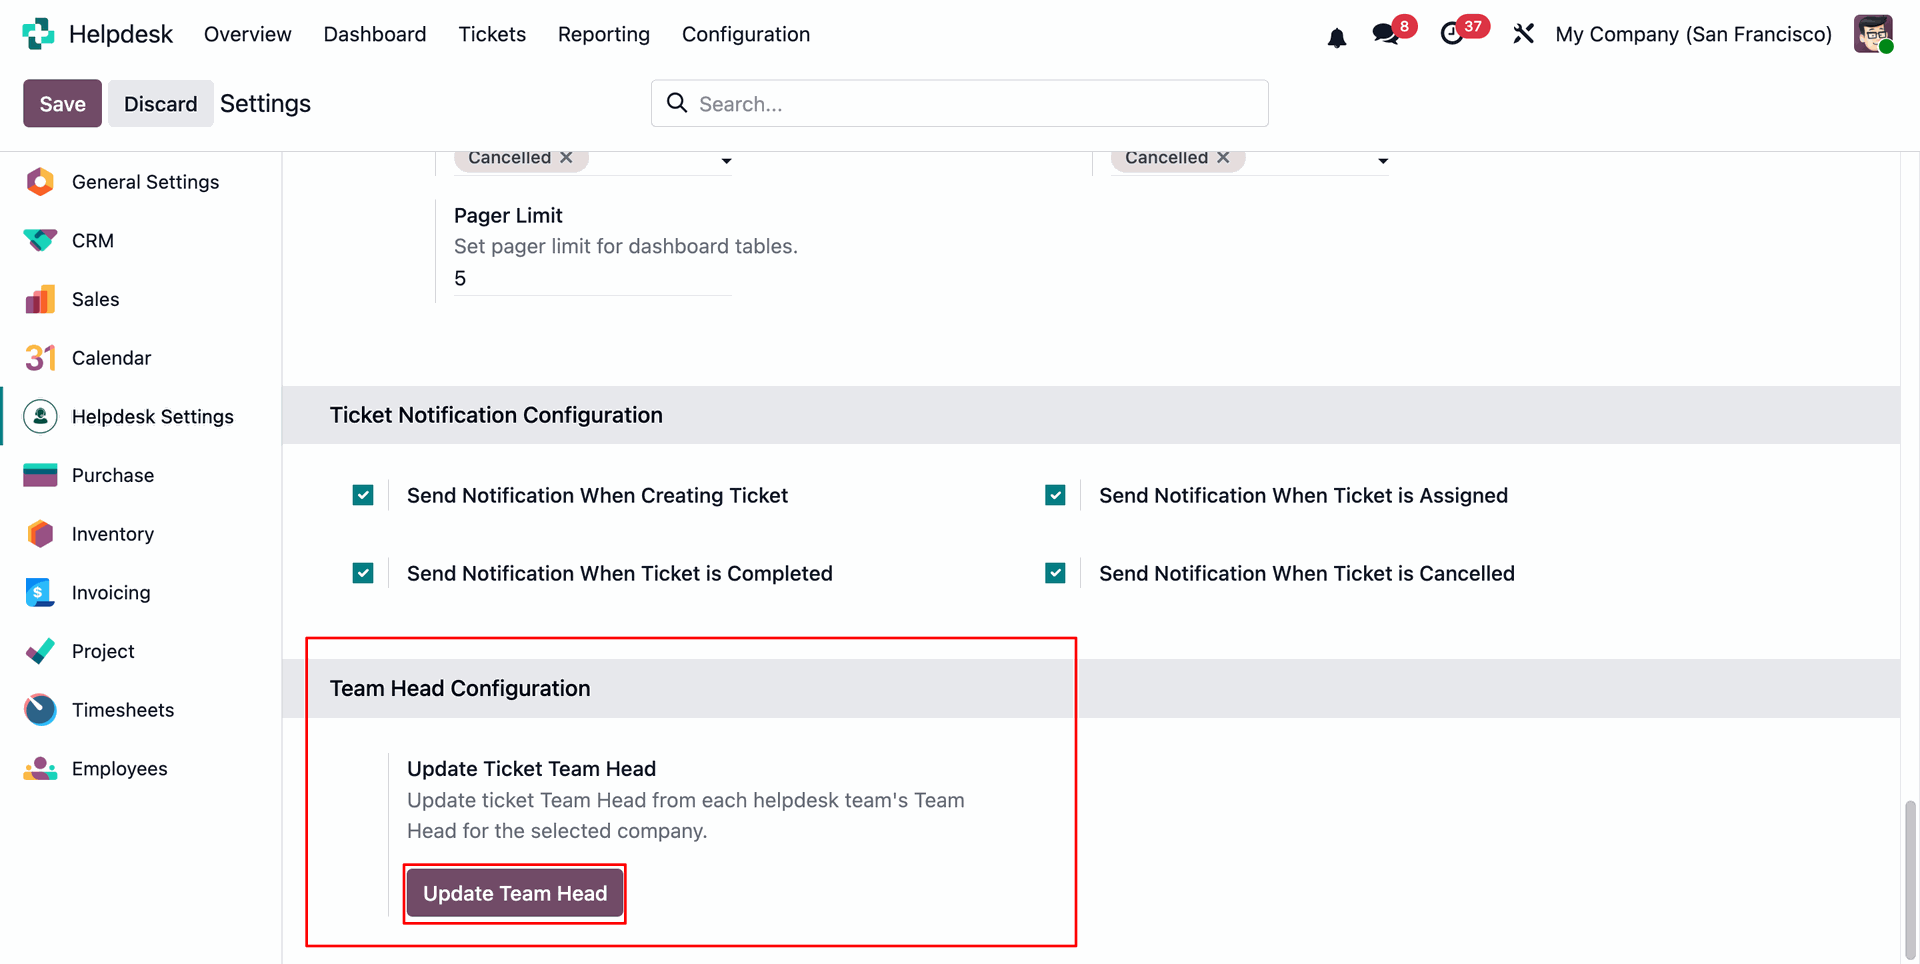
Go to the Helpdesk General Settings and click the Update Team Head button to automatically update the Team Head based on the configured Helpdesk Teams for the selected company.
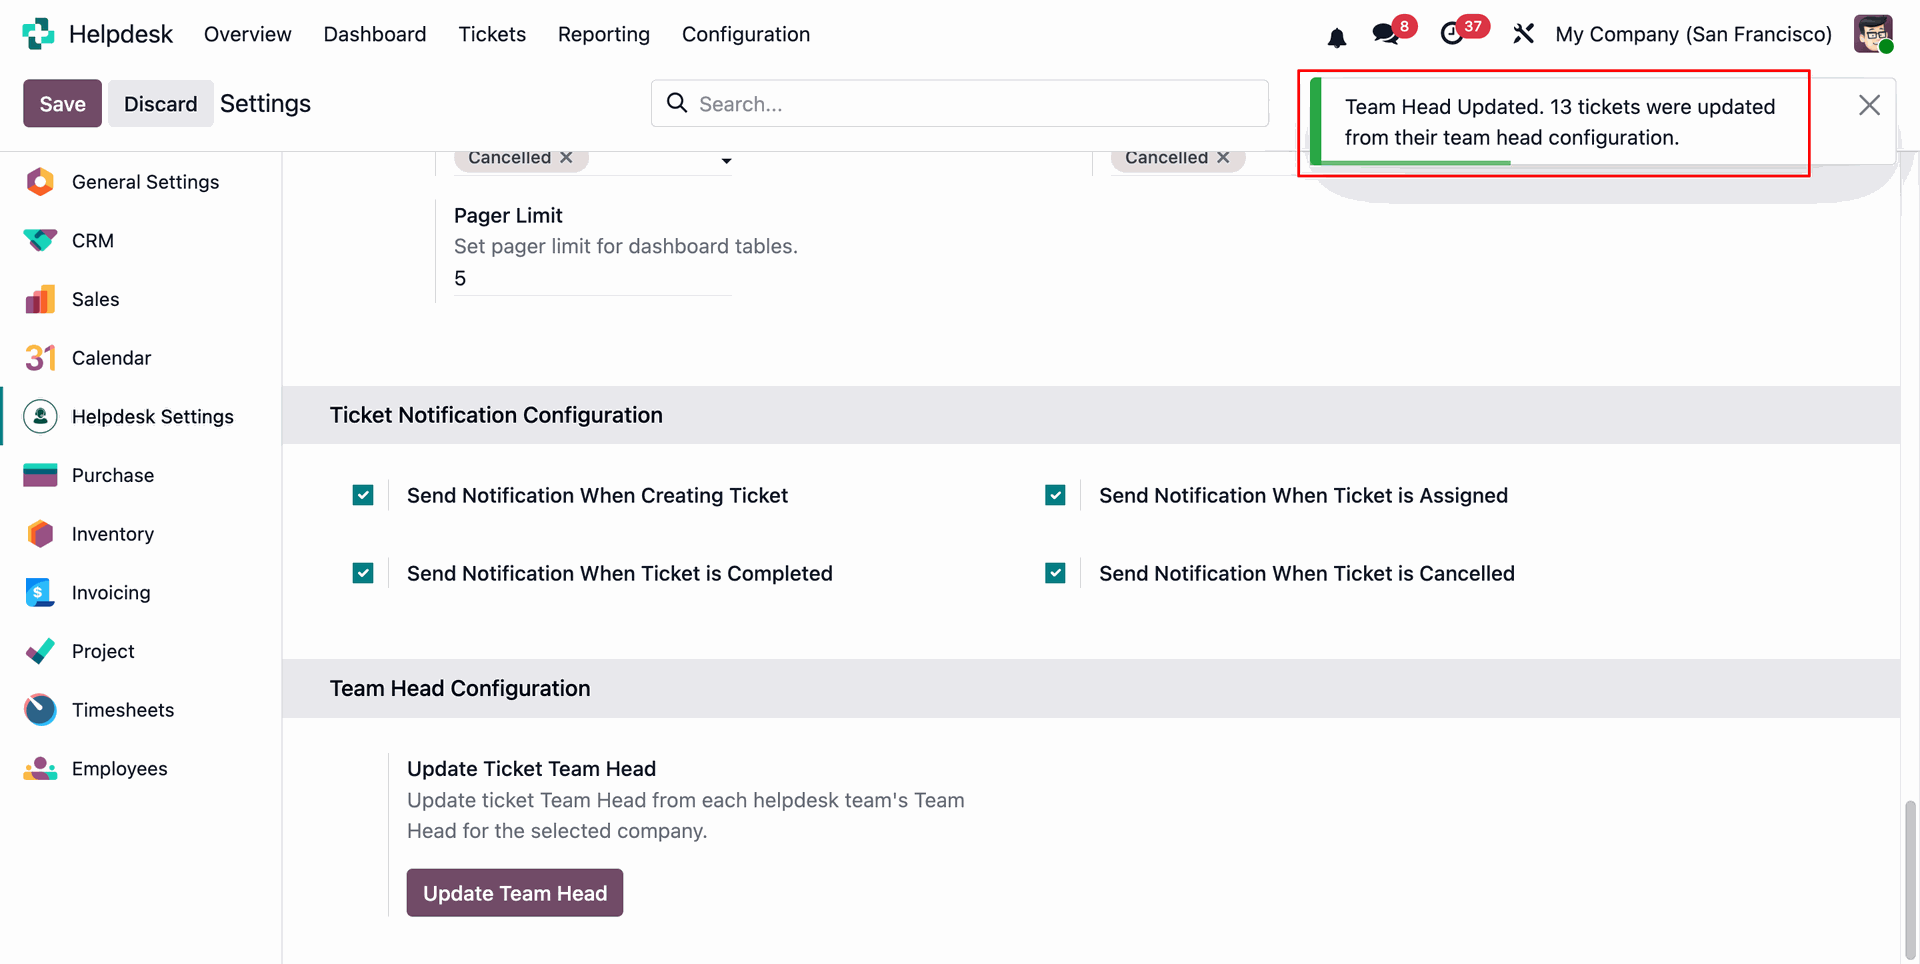
Once the update is completed, the user will receive a notification displaying the number of tickets for which the Team Head has been updated.
Version 18.0.5.0.0 | Released on : 12th June 2026
Version 18.0.4.0.0 | Released on : 17th March 2026
Version 18.0.3.0.0 | Released on : 3rd March 2025
Version 18.0.2.0.0 | Released on : 25th February 2025
Version 18.0.1.0.0 | Released on : 26th October 2024
- No, this app works perfectly with Odoo Enterprise (Odoo.sh & Premise) as only.
- Yes, Our helpdesk app works properly with standard helpdesk app.
- Yes, both helpdesk modules are different.
- Please Contact Us at sales@softhealer.comto request customization.
- Yes, we provide free lifetime support for the version you purchased.
- Yes, you will get free update for lifetime.
- No, you don't need to install addition libraries.
- Yes, You have to download module for each version (13,14,15) except in version 12 or lower.
- No, We do not provide any kind of exchange.
- No, this application is not compatible with odoo.com(odoo saas).
Discover Our Latest Apps