
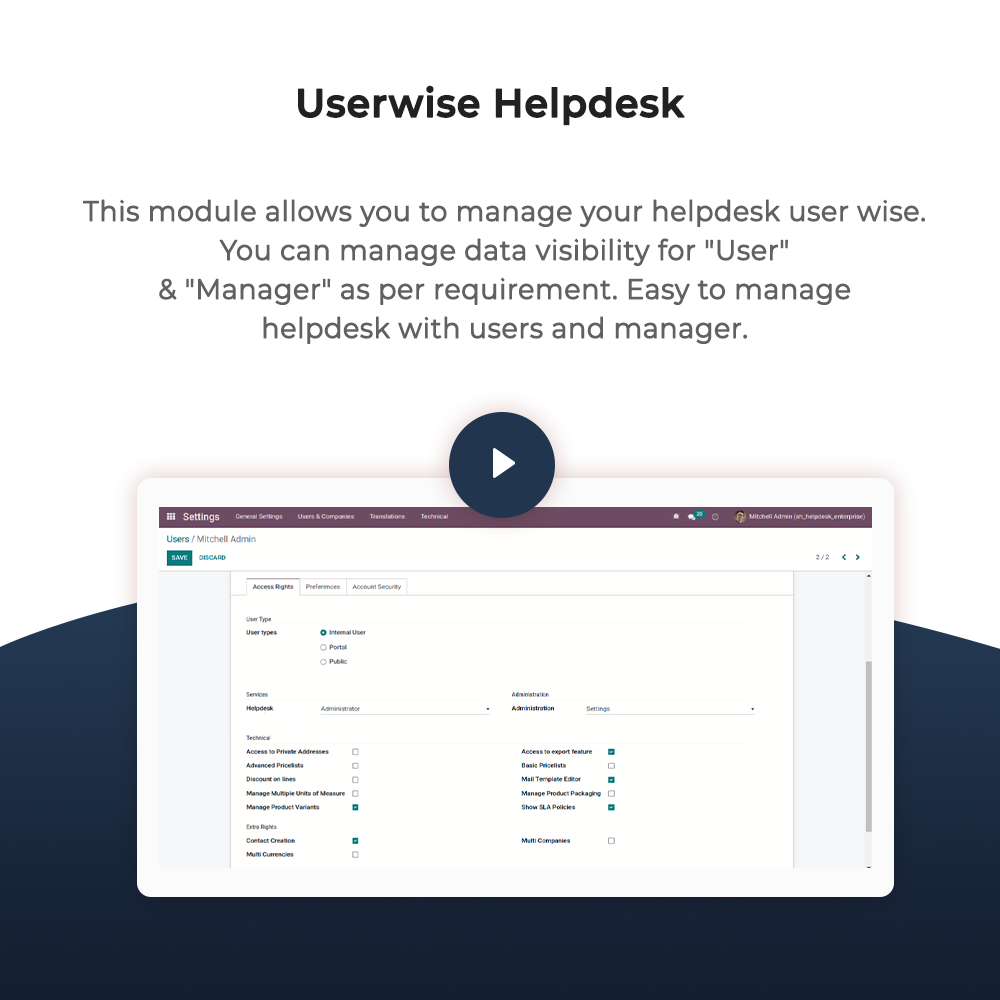
Help Desk

Are you looking for fully flexible and customisable helpdesk in odoo? Our this apps almost contain everything you need for Service Desk, Technical Support Team, Issue Ticket System which include service request to be managed in Odoo backend. Support ticket will send by email to customer and admin. This desk is fully customizable clean and flexible.
Key Features


Hot Features

Features
- Easy to create sale order/quotation from the helpdesk ticket or easy to create helpdesk ticket from the sale order/quotation. New
- Easy to create purchase order/RFQ from the helpdesk ticket or easy to create helpdesk ticket from the purchase order/RFQ. New
- Easy to create invoice from the helpdesk ticket or easy to create helpdesk ticket from the invoice. New
- Easy to create lead/opportunity from the helpdesk ticket or easy to create helpdesk ticket from the lead/opportunity. New
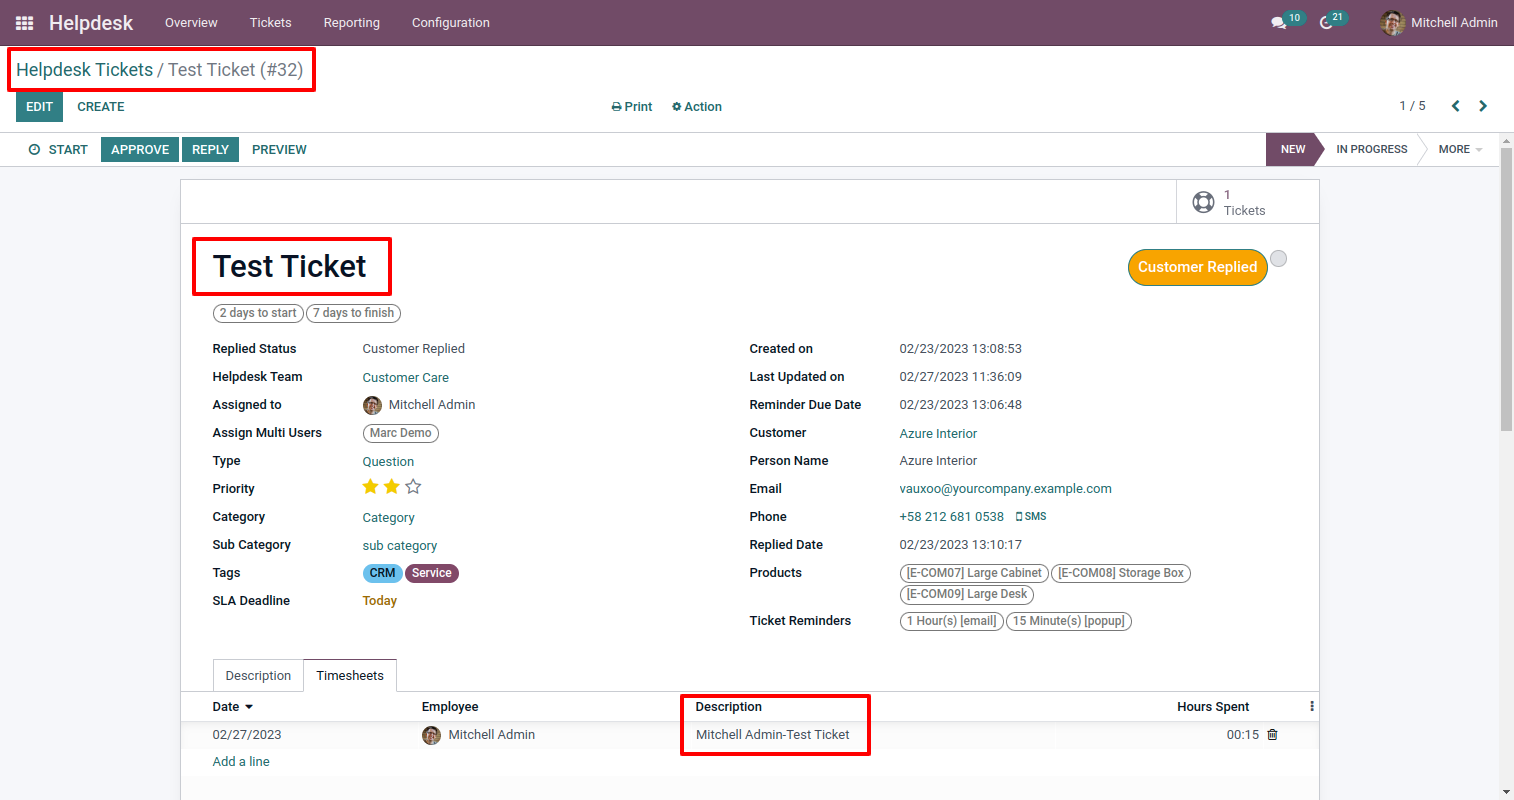
- Easy to manage the helpdesk ticket with the timesheet. New
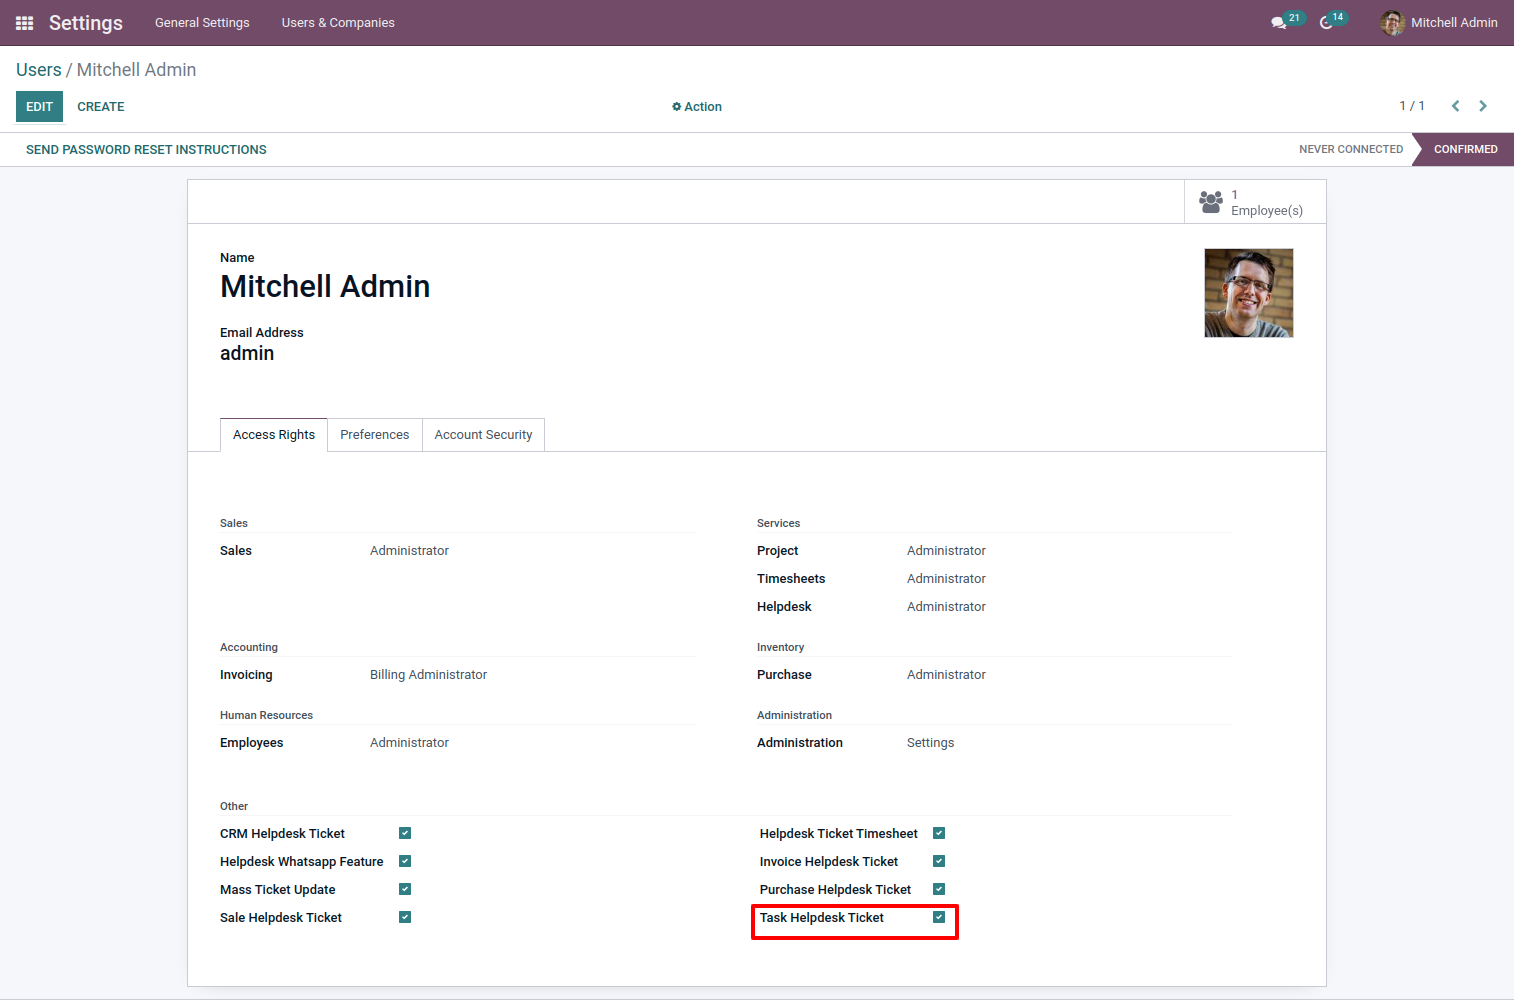
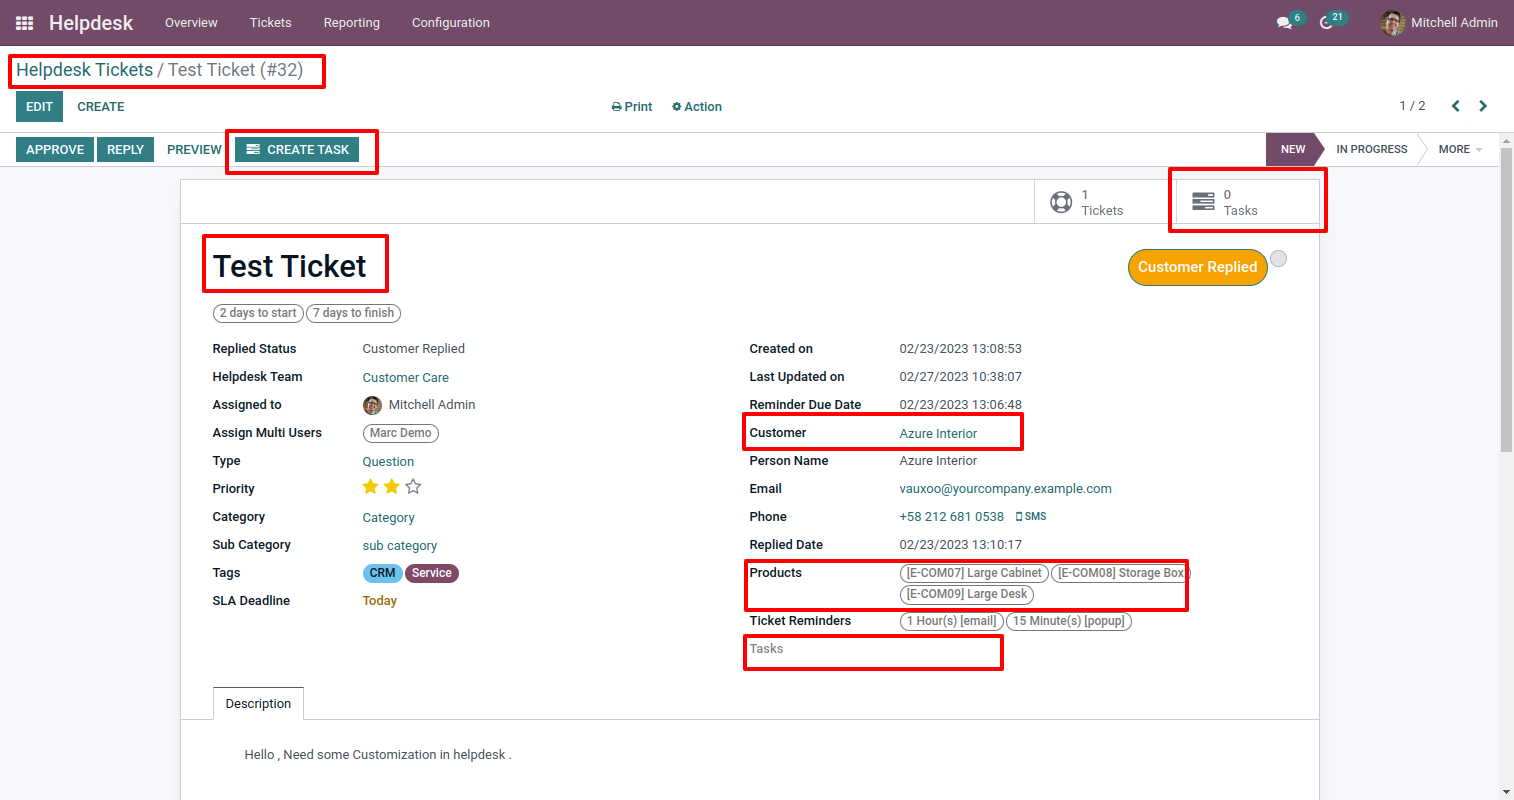
- You can convert the ticket into the task as well easy to create tasks directly from the support ticket. New
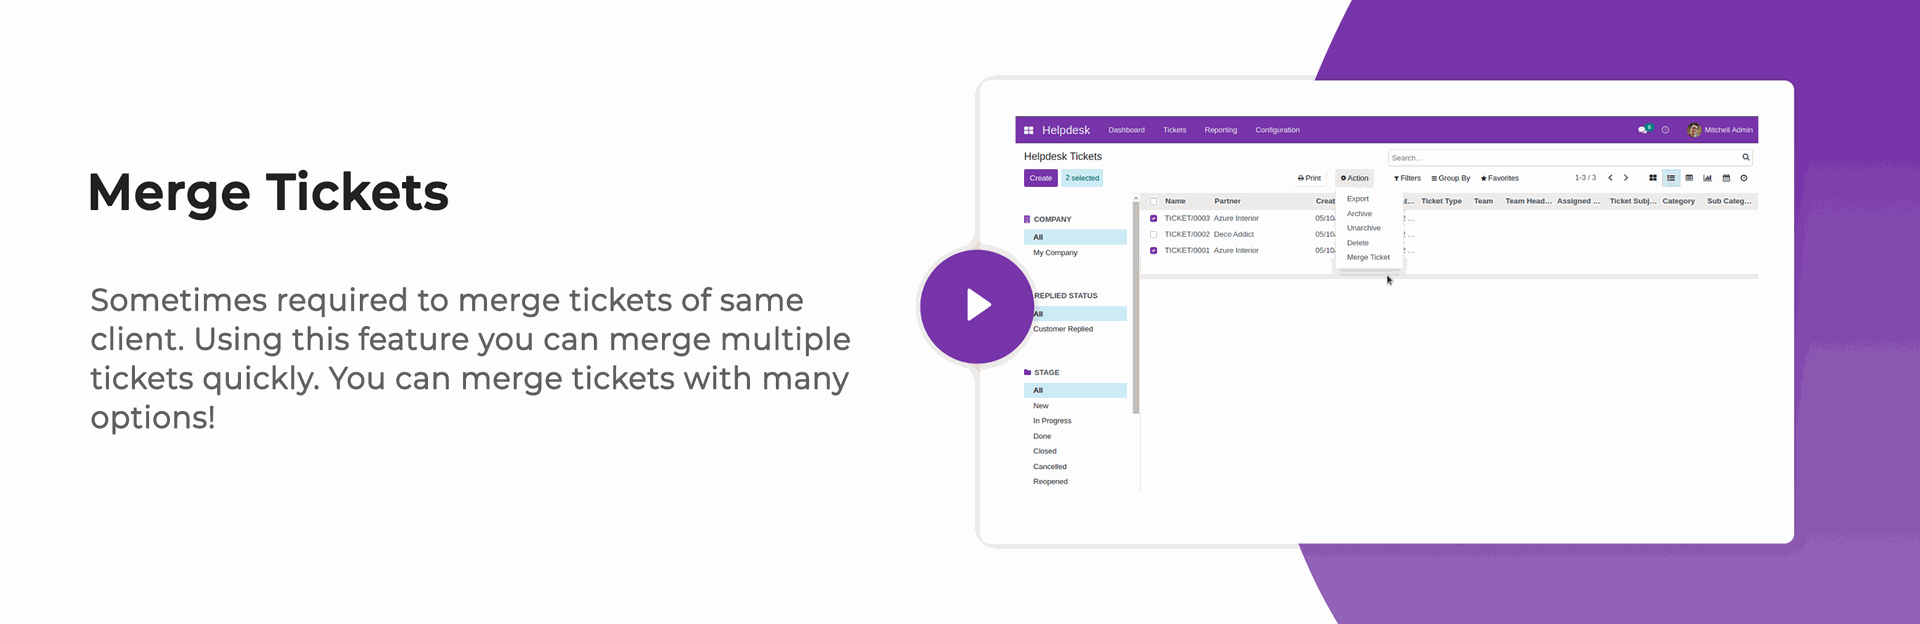
- You can merge multiple tickets quickly. New
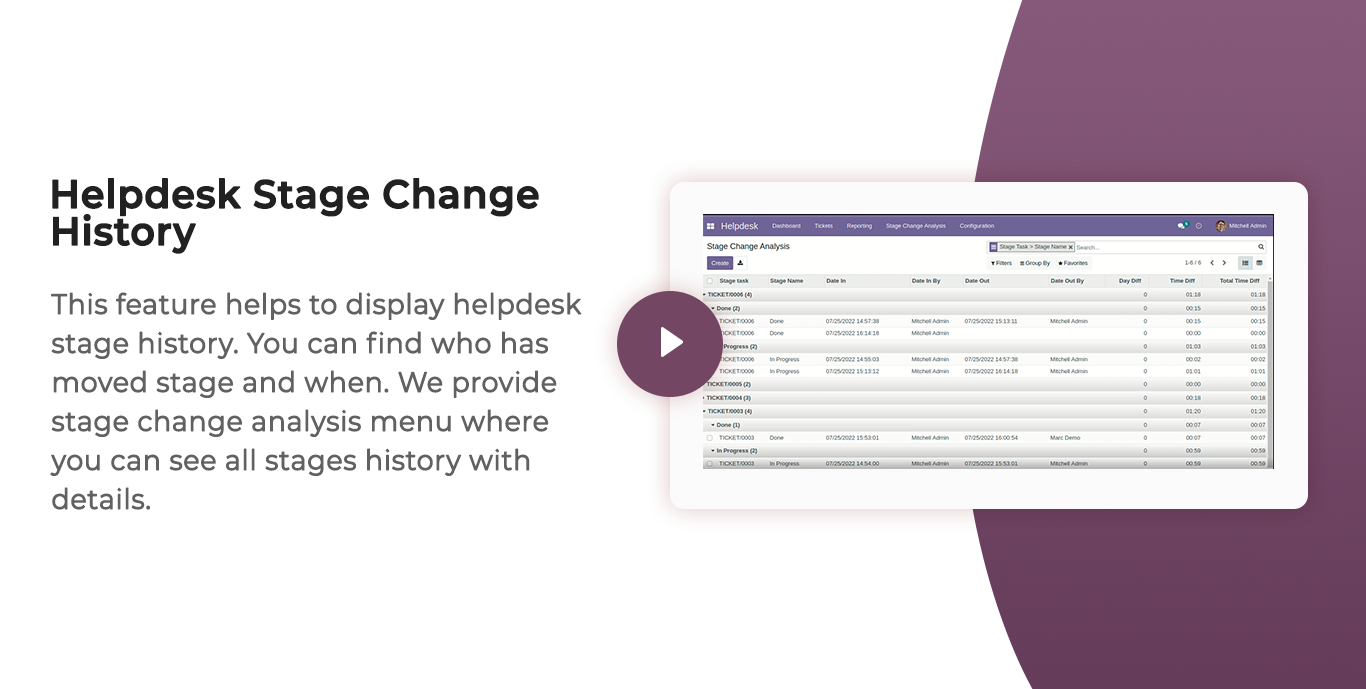
- You can get stage change history in tickets. New
- Easy to change ticket stage automatically when a customer or staff replied.
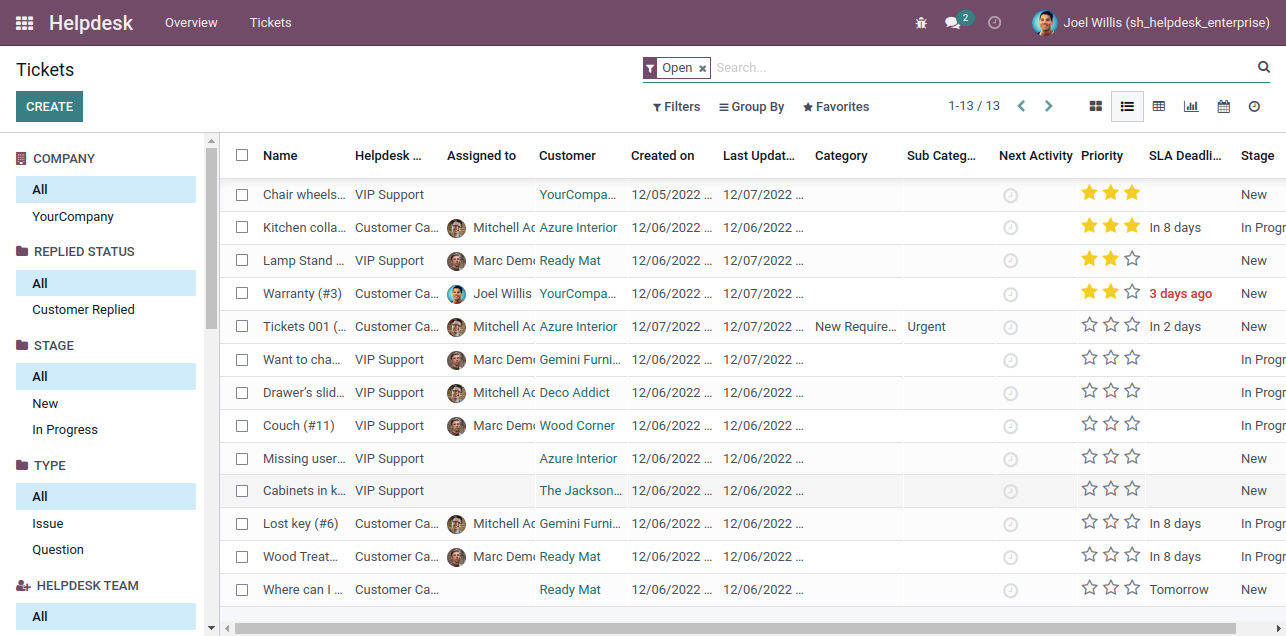
- You can search tickets by product name from the search bar.
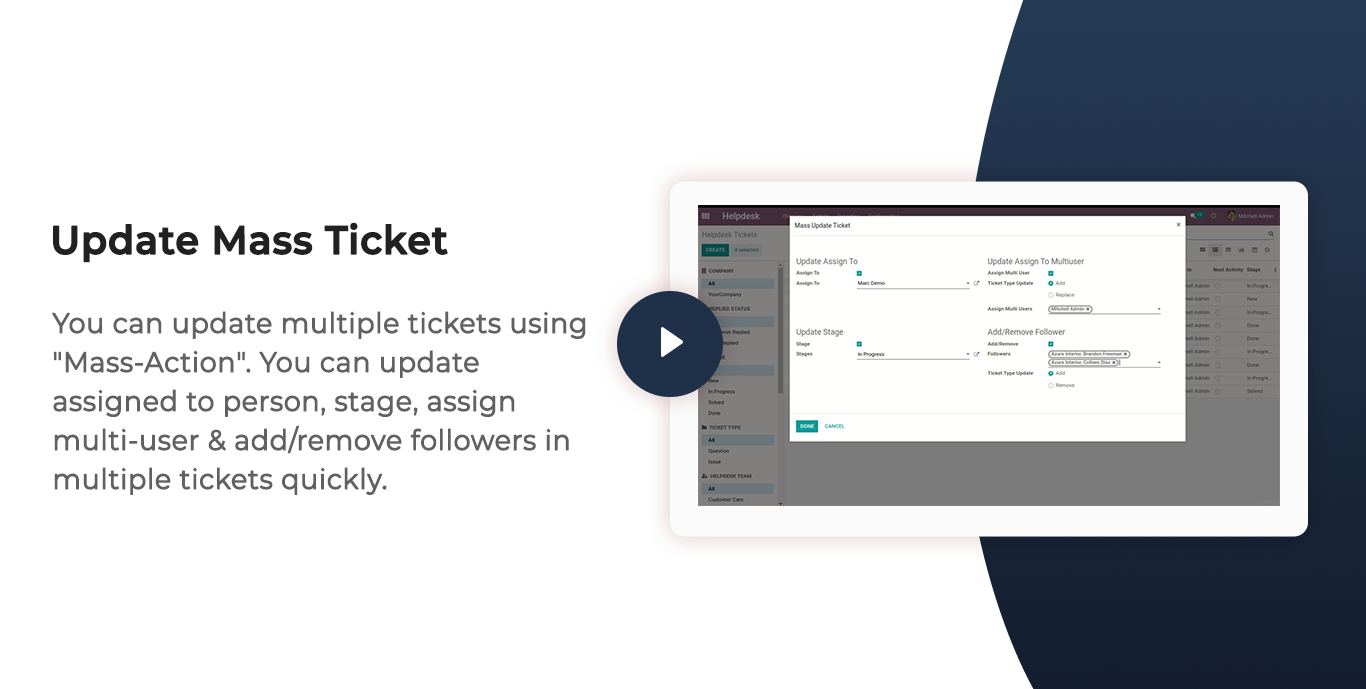
- You can update multiple tickets using "Mass-Action".
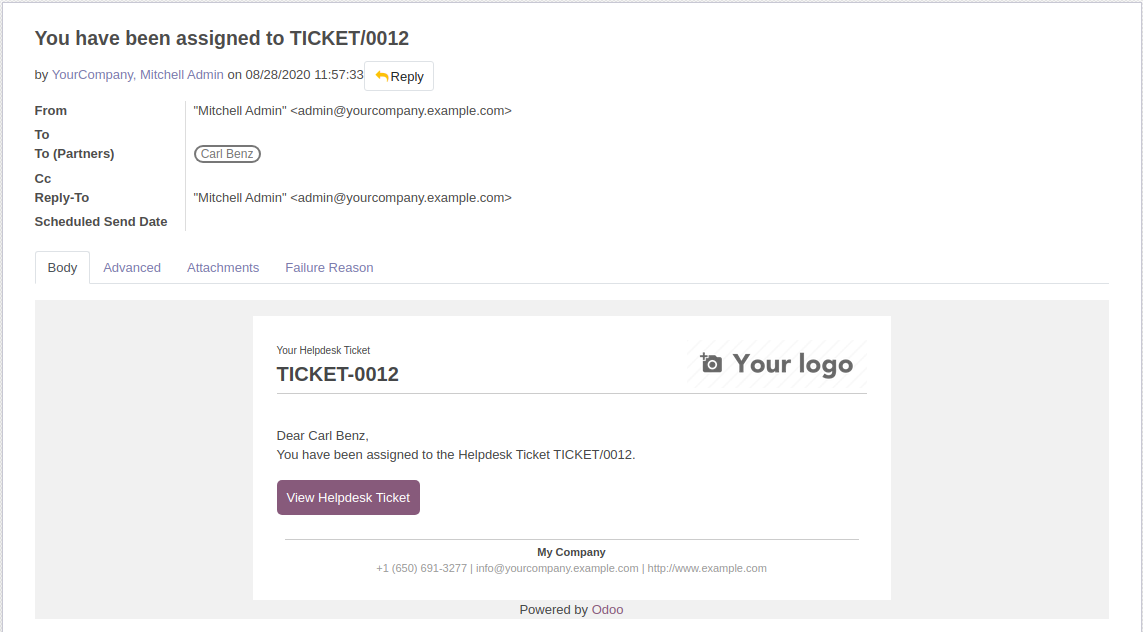
- Email notification goes to the assigned user when tickets assigned.
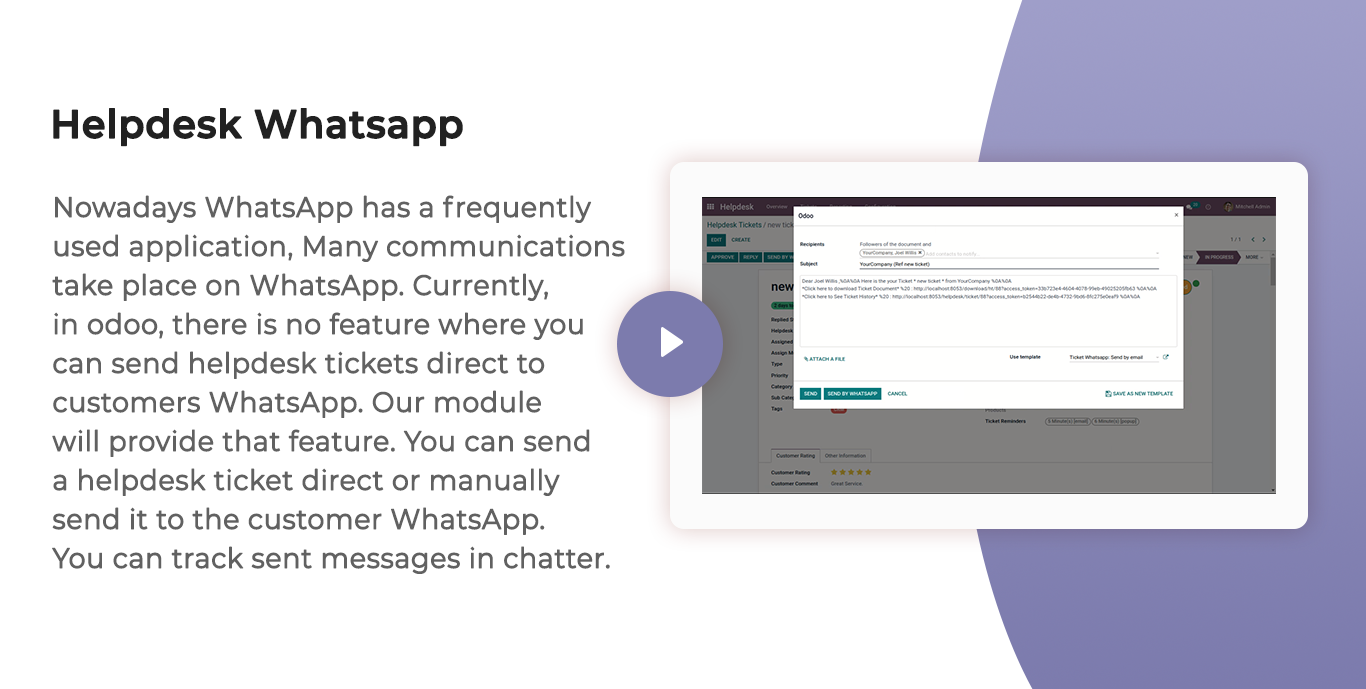
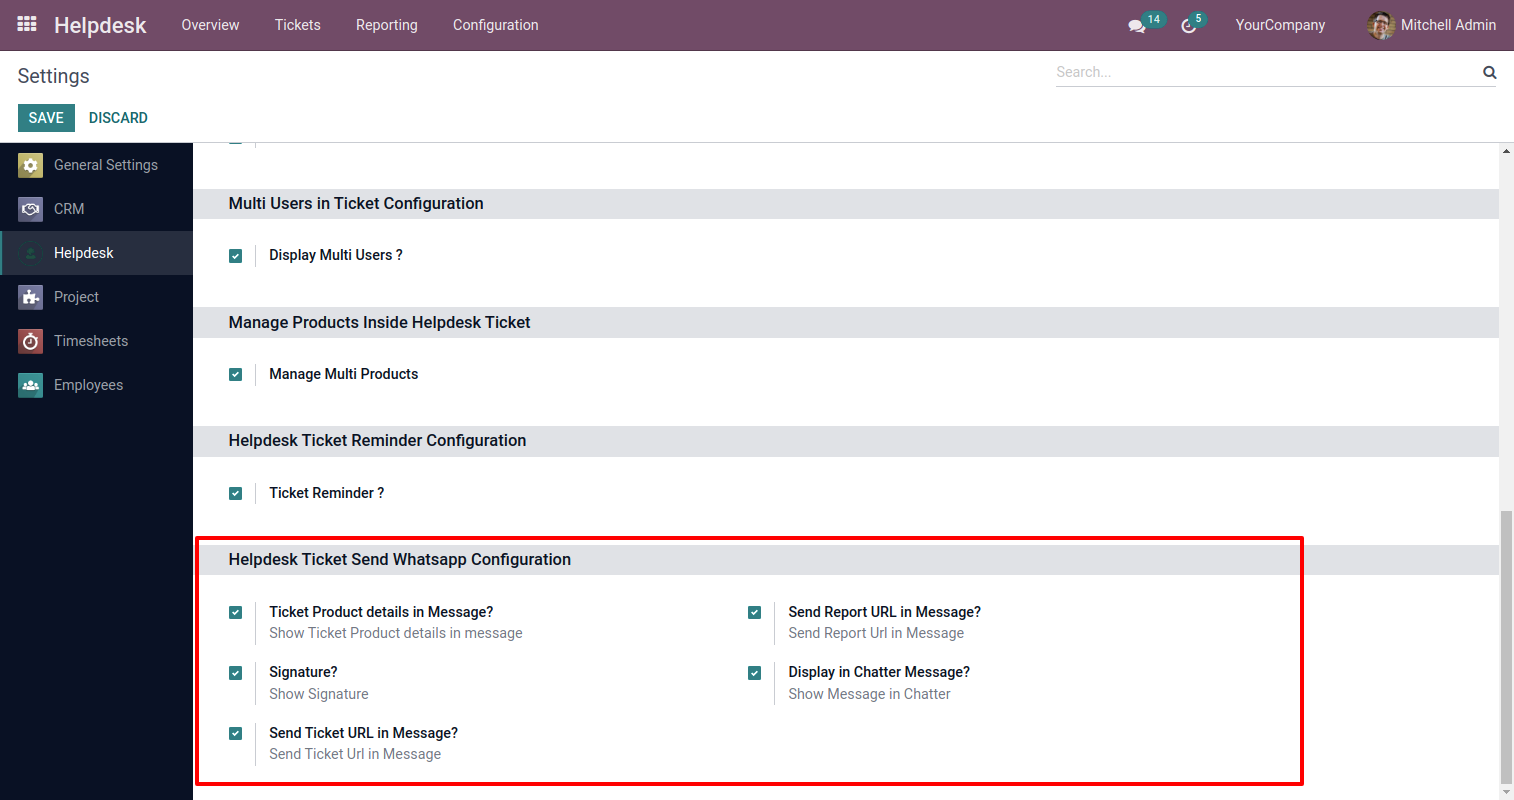
- You can send helpdesk tickets direct to the customer's WhatsApp.
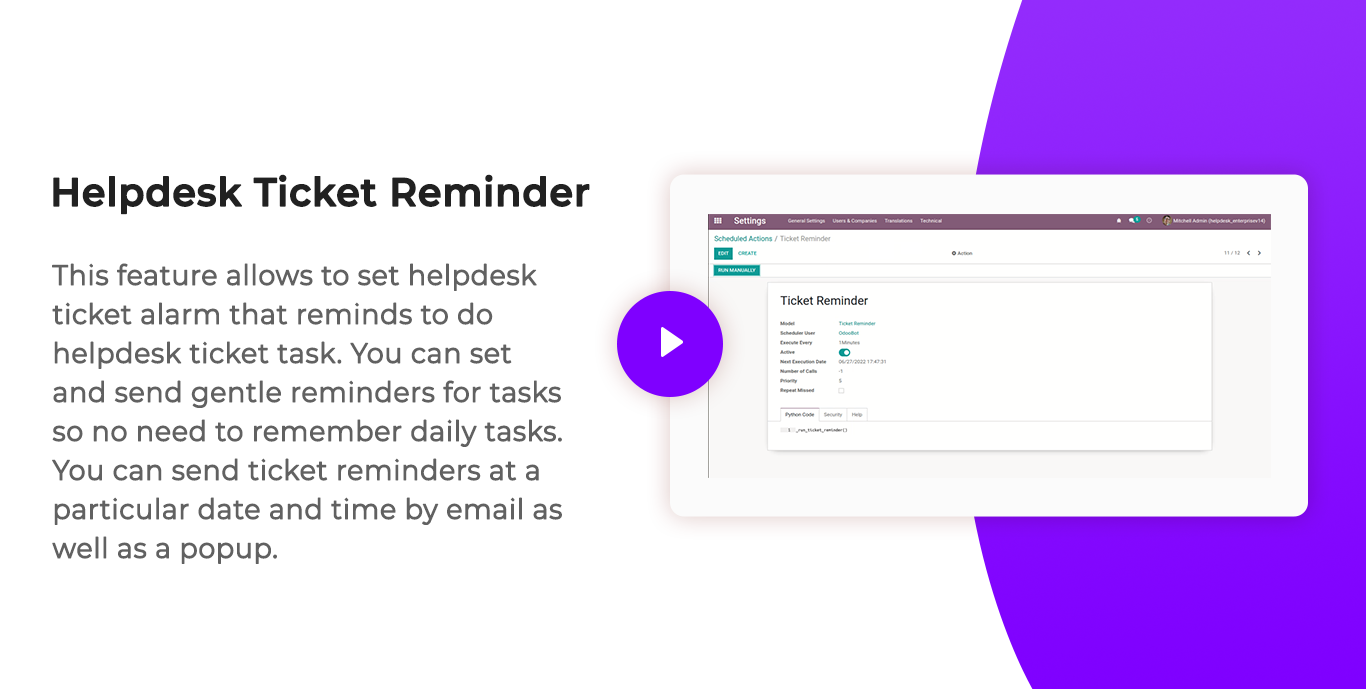
- You can set a helpdesk ticket alarm for different tasks.
- You can edit multiple tickets in the list view.
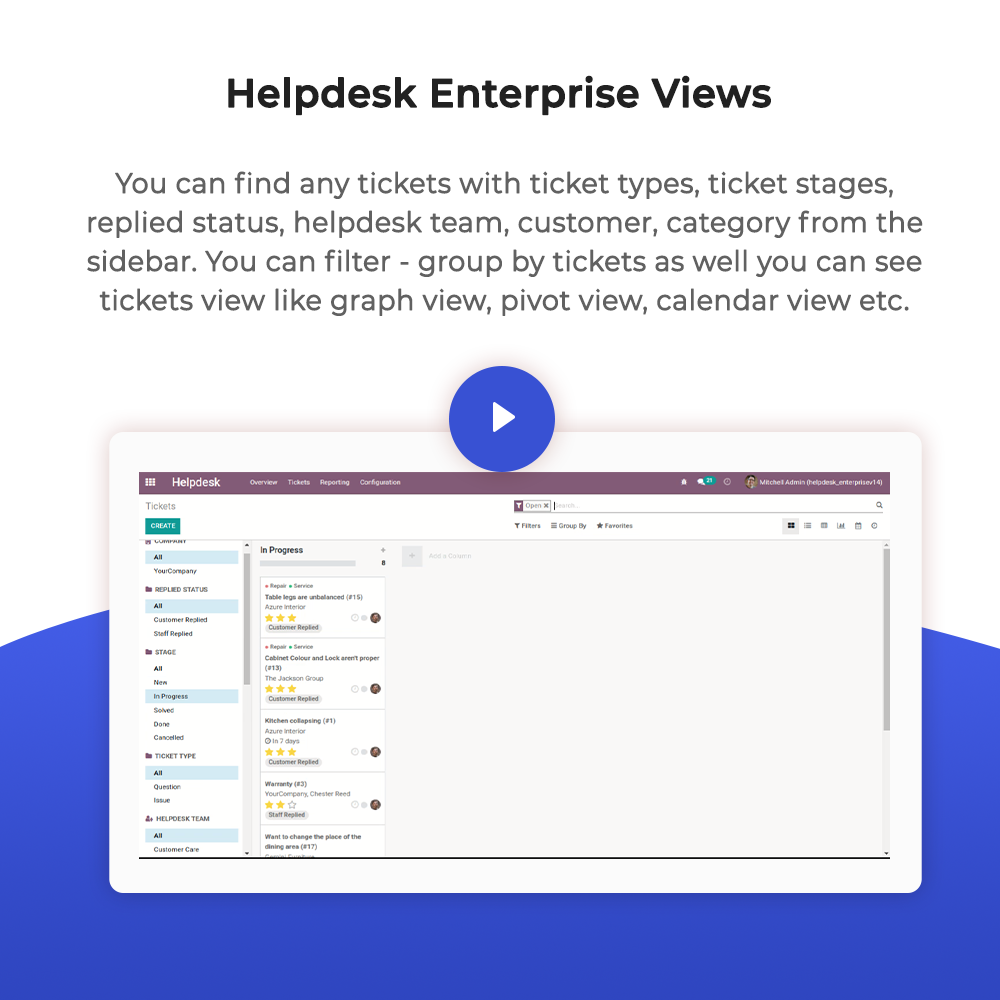
- Easy to use search panel in the list & kanban view.
- You can manage multi products in tickets as well you can display products in the ticket PDF report.
- You can assign a single ticket to more than one user.
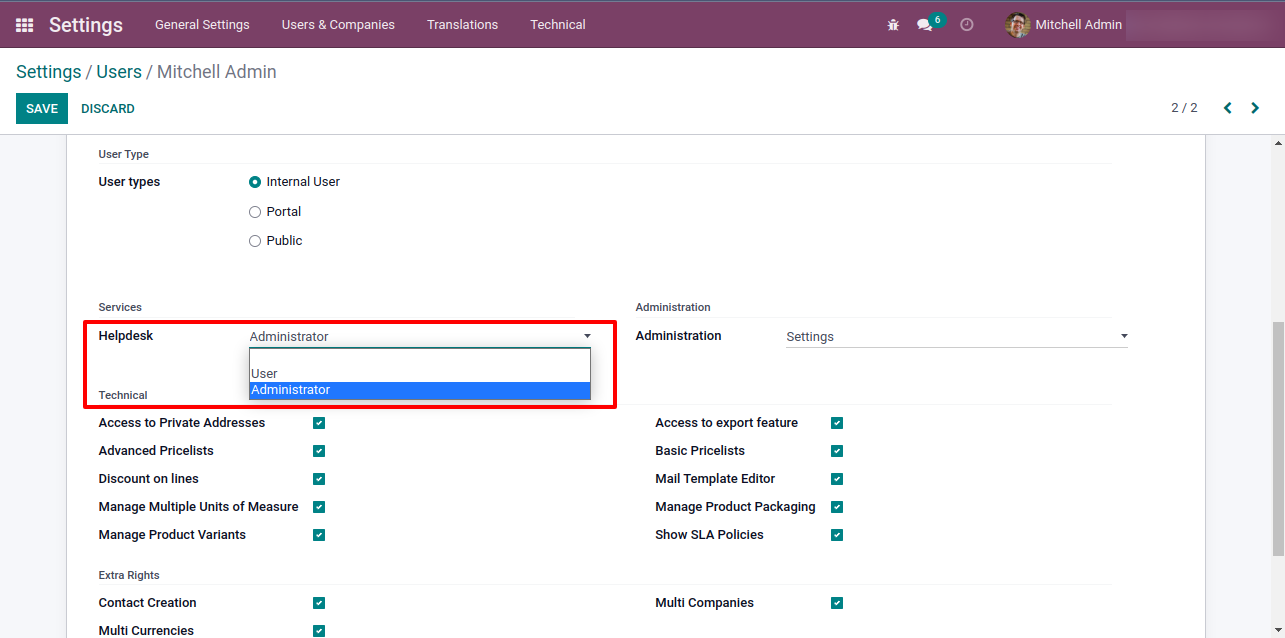
- Access rights for Helpdesk Manager, Helpdesk User.
- Easy to create ticket by helpdesk user.
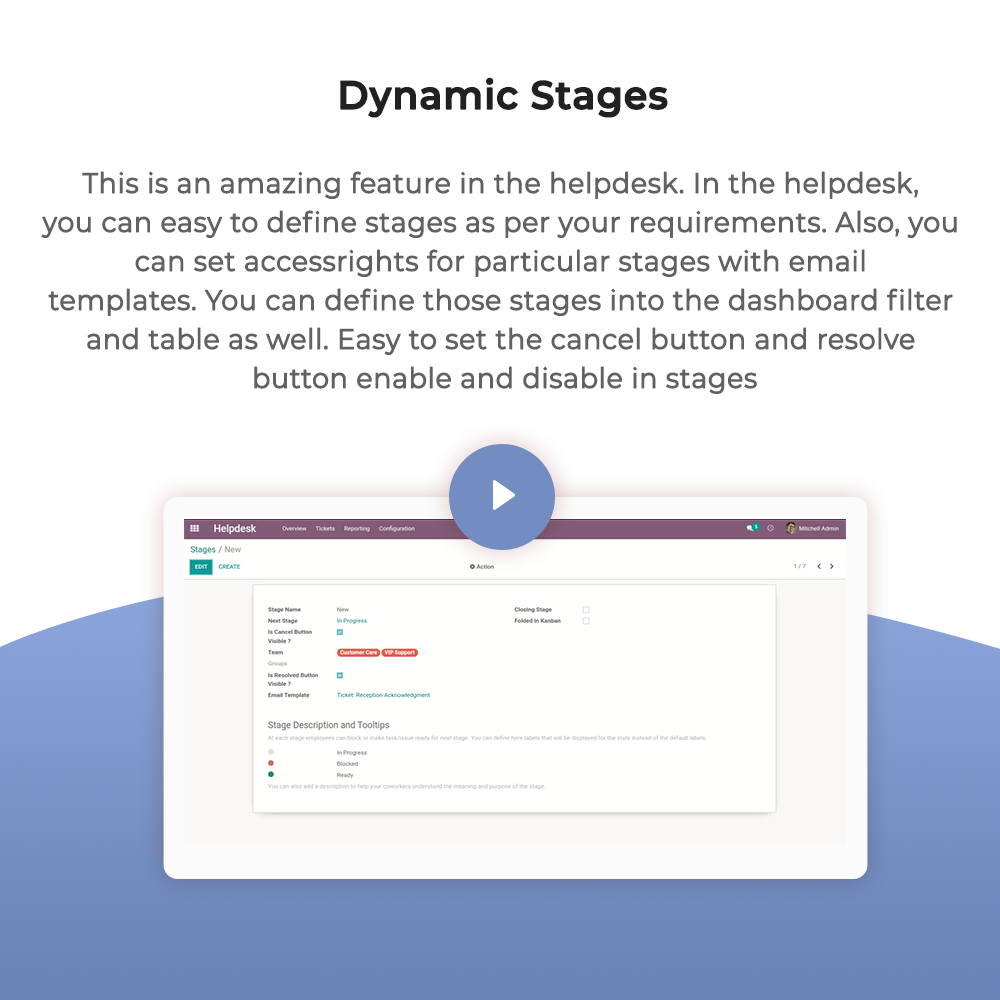
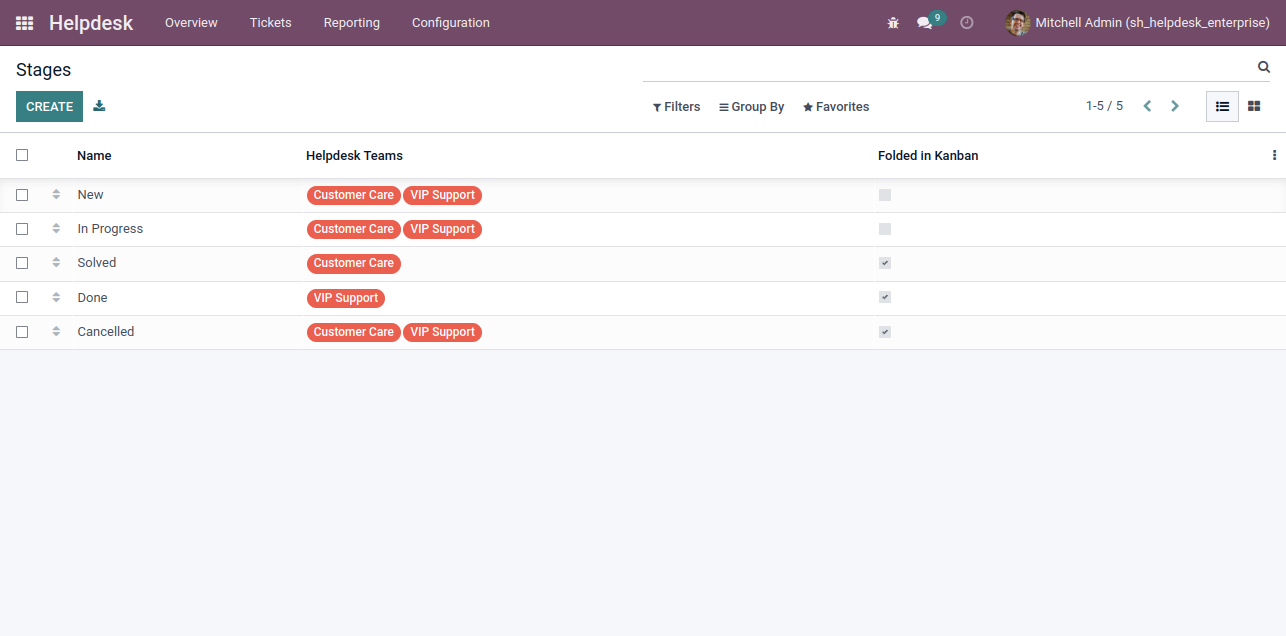
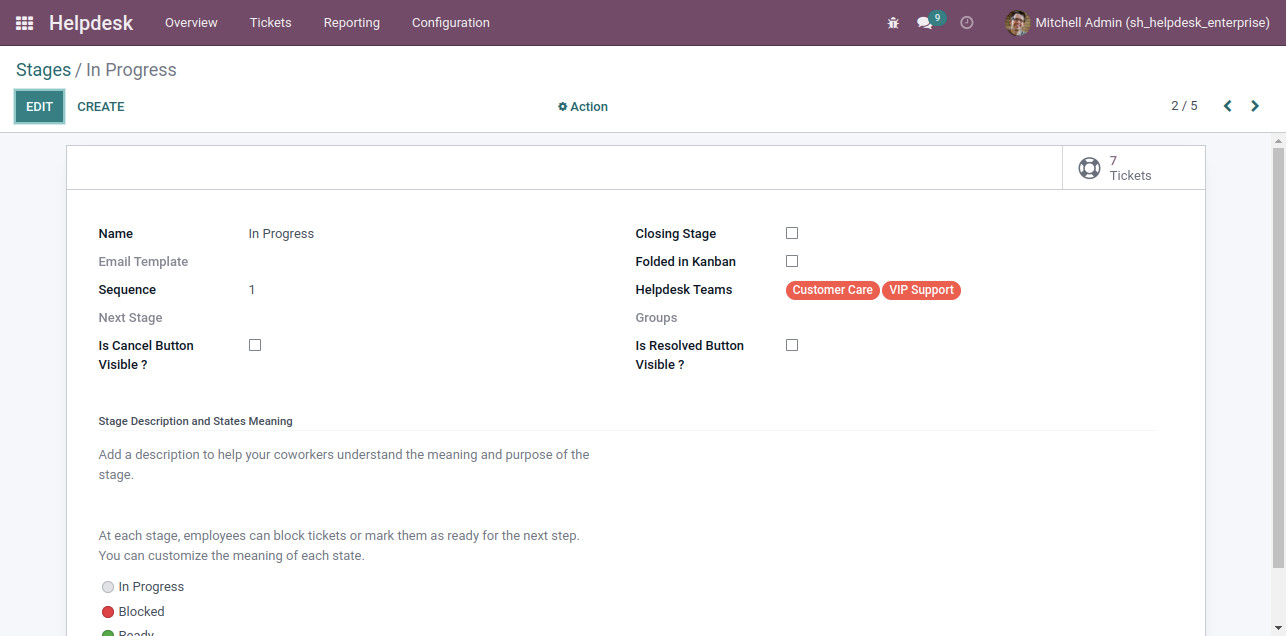
- Easy to define stages as per your requirement.
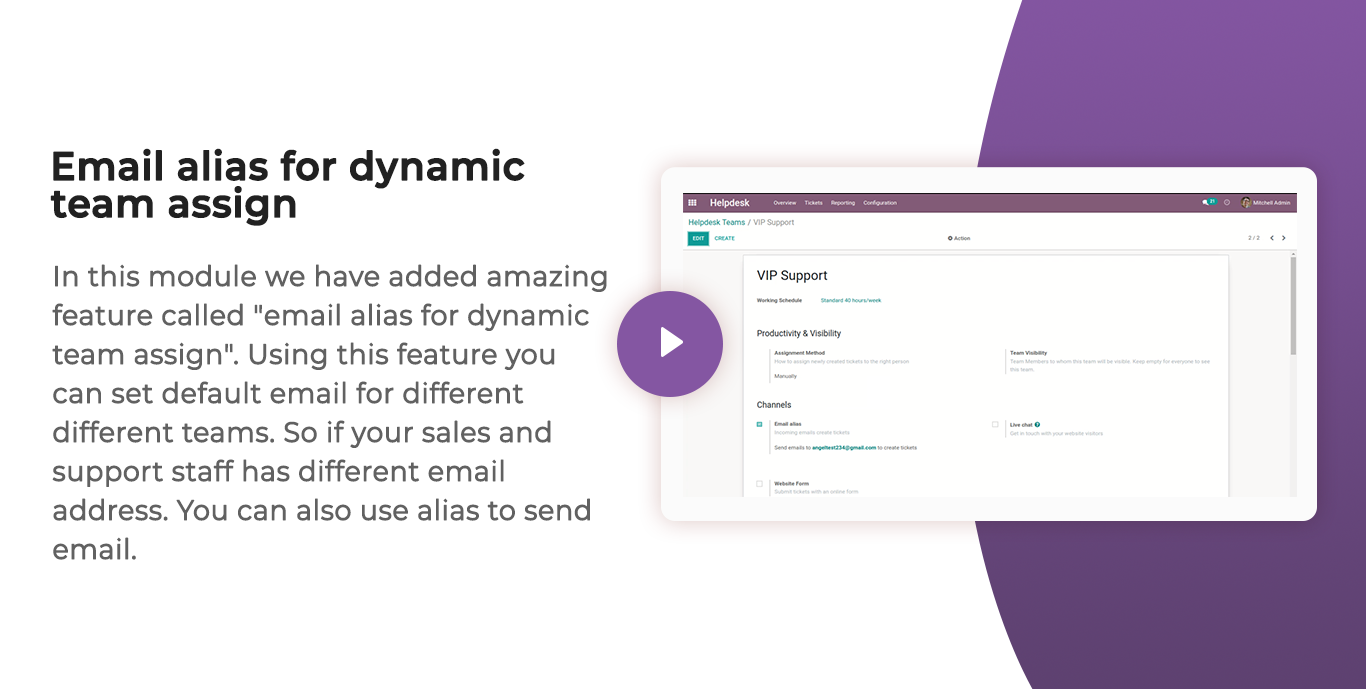
- Easy to set different emails for different teams.
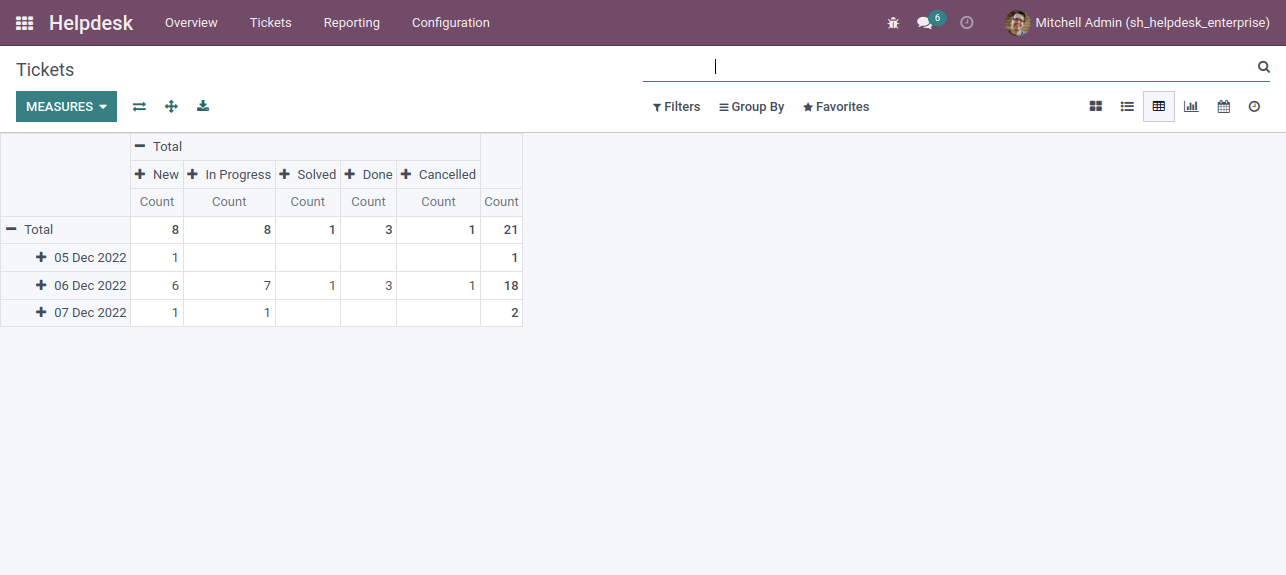
- Well organized calender, pivot, graph, kanban views.
- Easy to chat with customer from chatter.
- Auto share feedback link while ticket is closed.

Access group for "Helpdesk Manager", "Helpdesk User"
"Helpdesk Stages" menu and list view.
"Helpdesk Stages" form view. Where you can define stages and it's access rights, next stage.
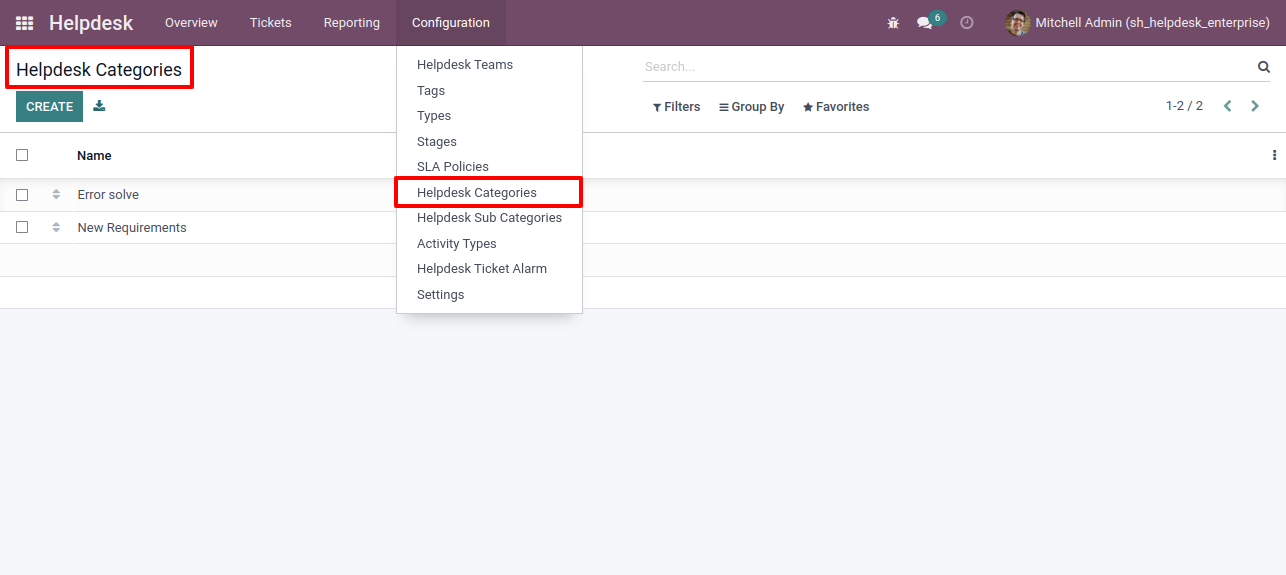
"Helpdesk Categories" menu and list view.
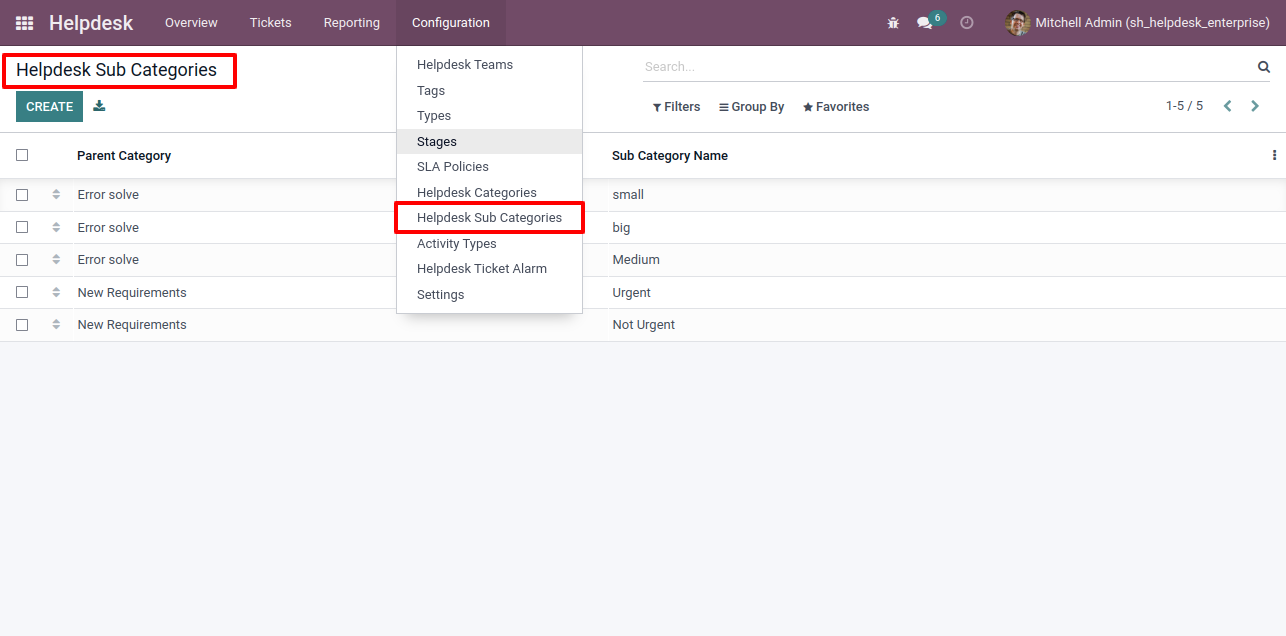
"Helpdesk Sub Categories" menu and list view.
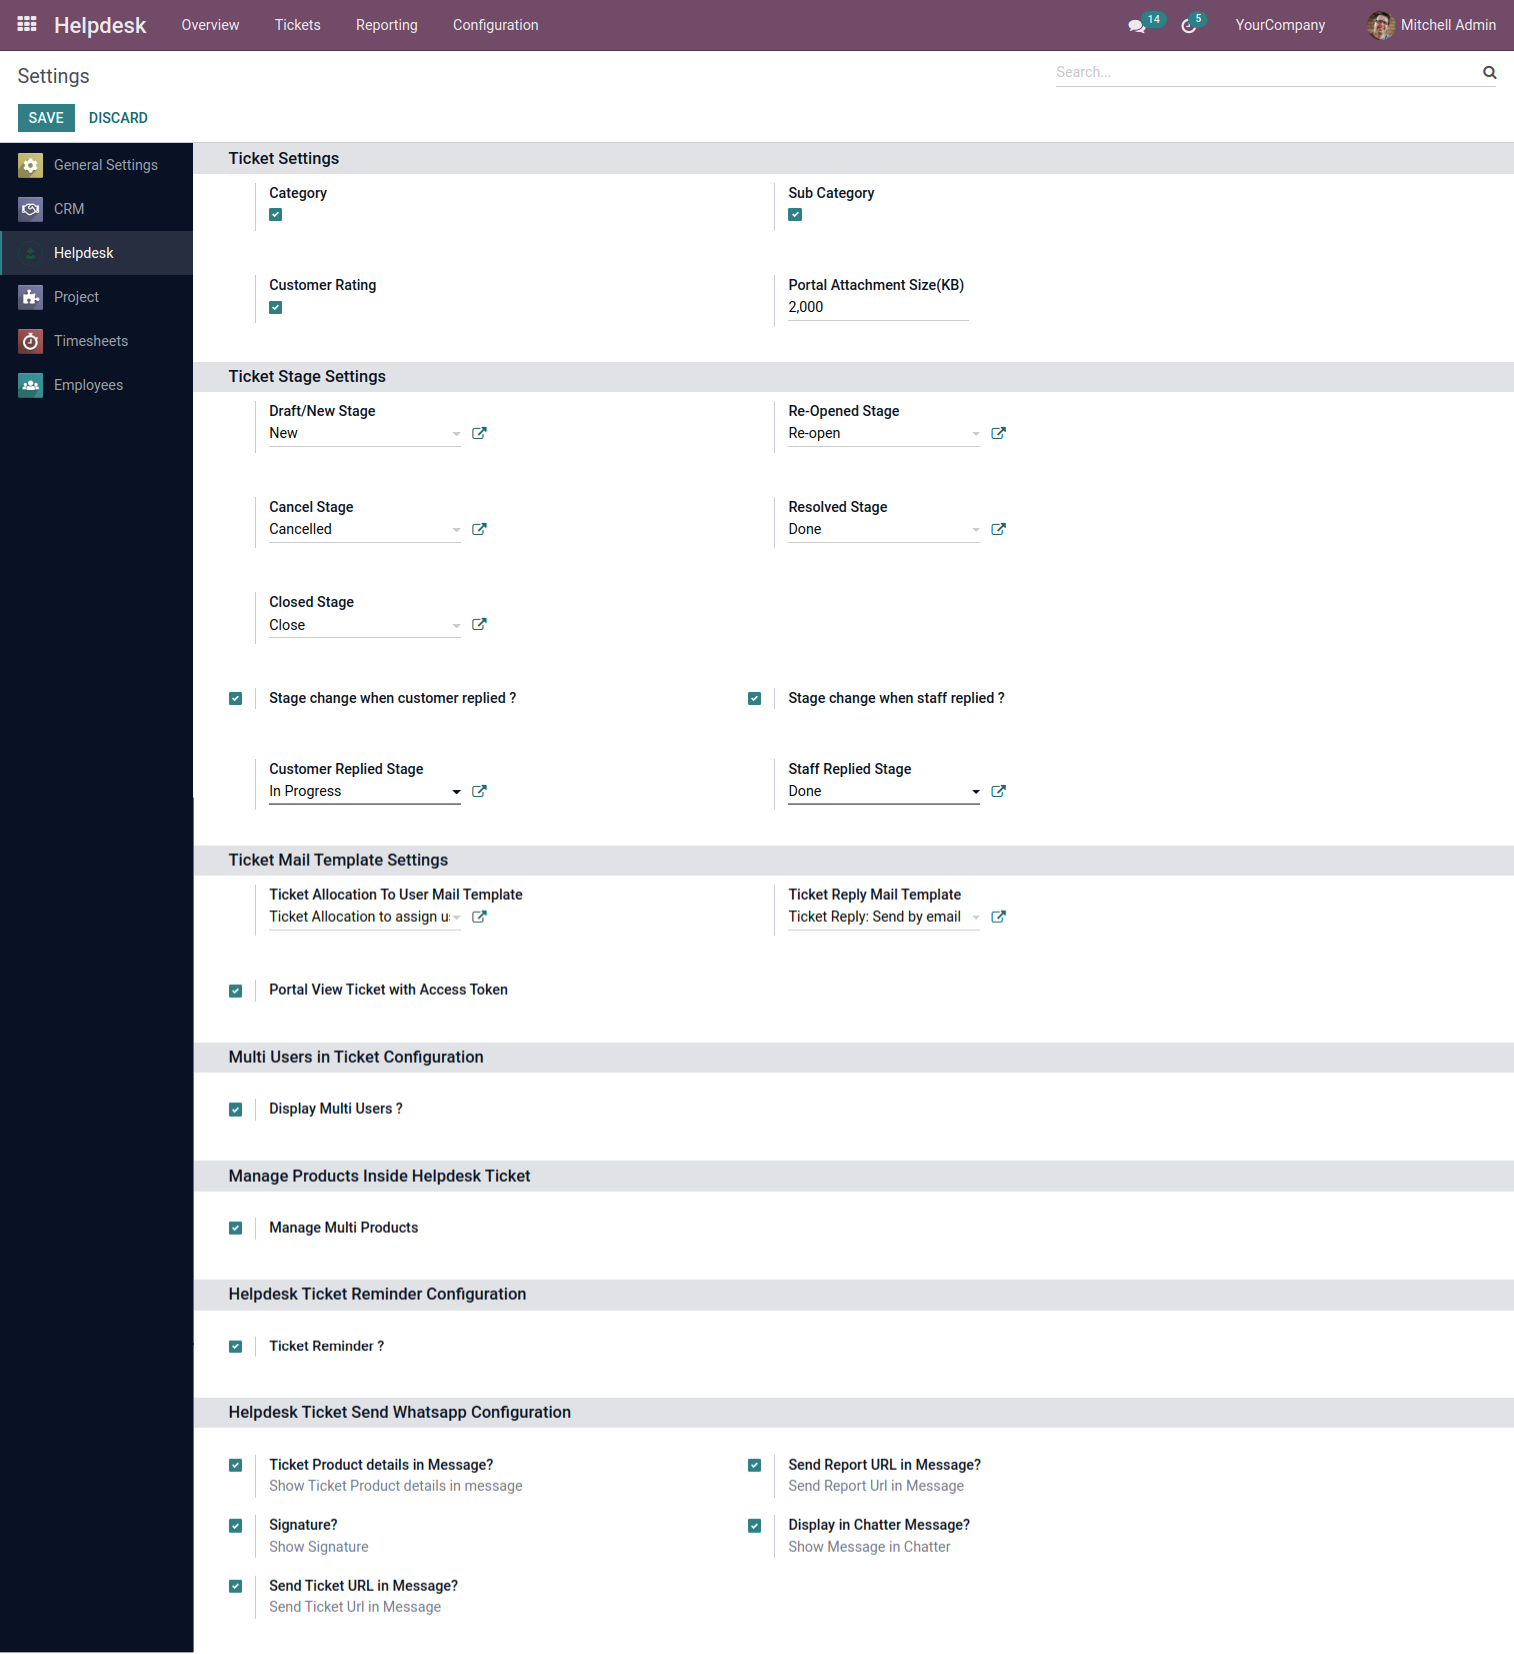
"Helpdesk Setting" View.
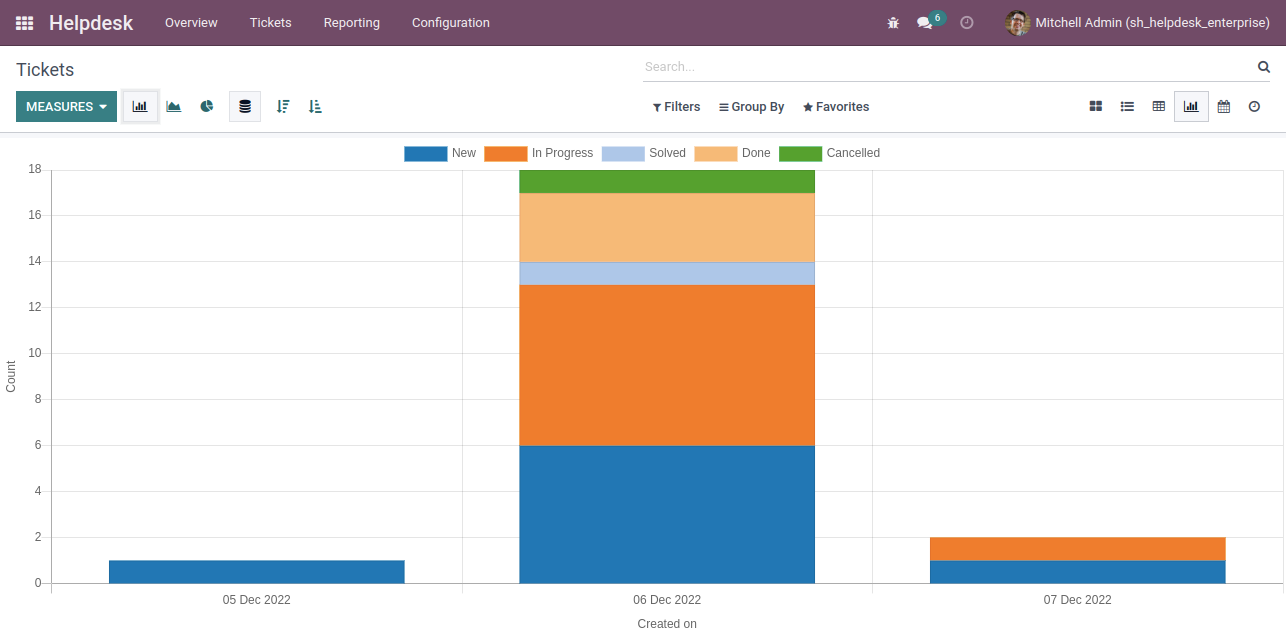
"Helpdesk Ticket" Pivot view.
"Helpdesk Ticket" Graph view.
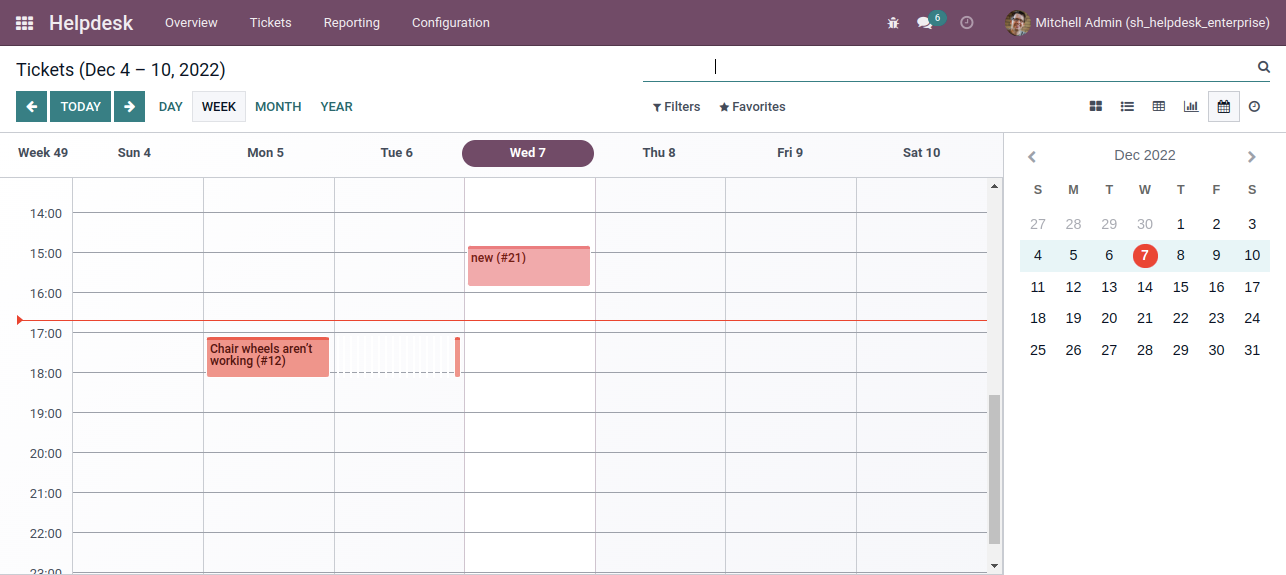
"Helpdesk Ticket" Calender view.
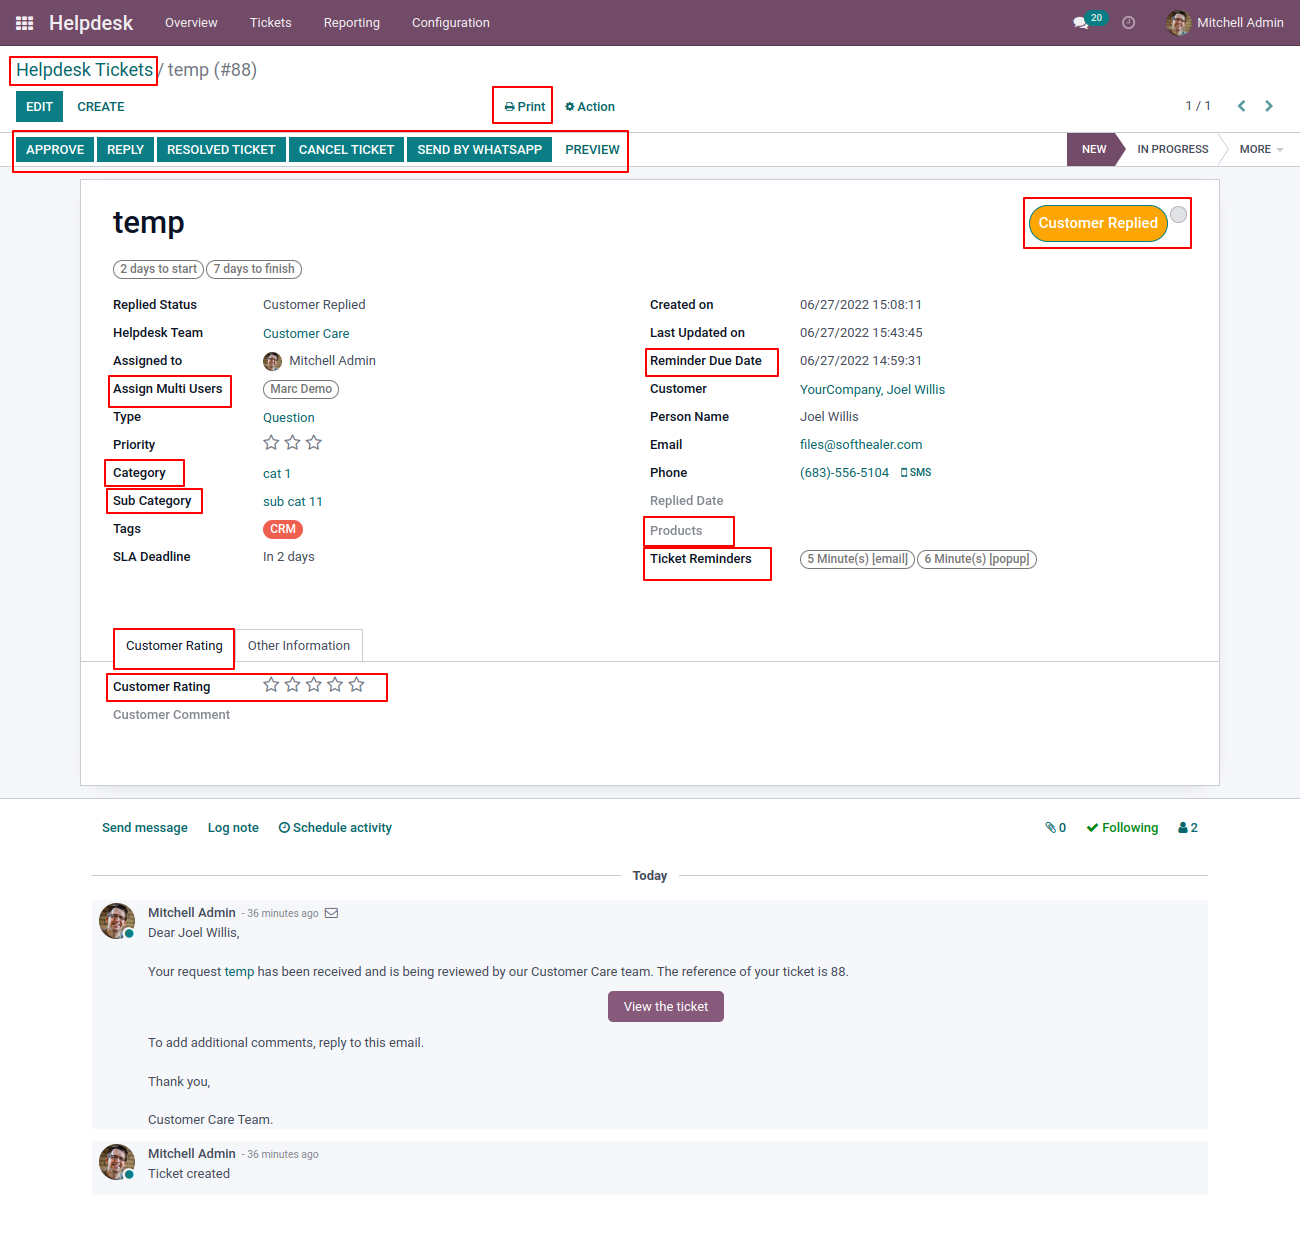
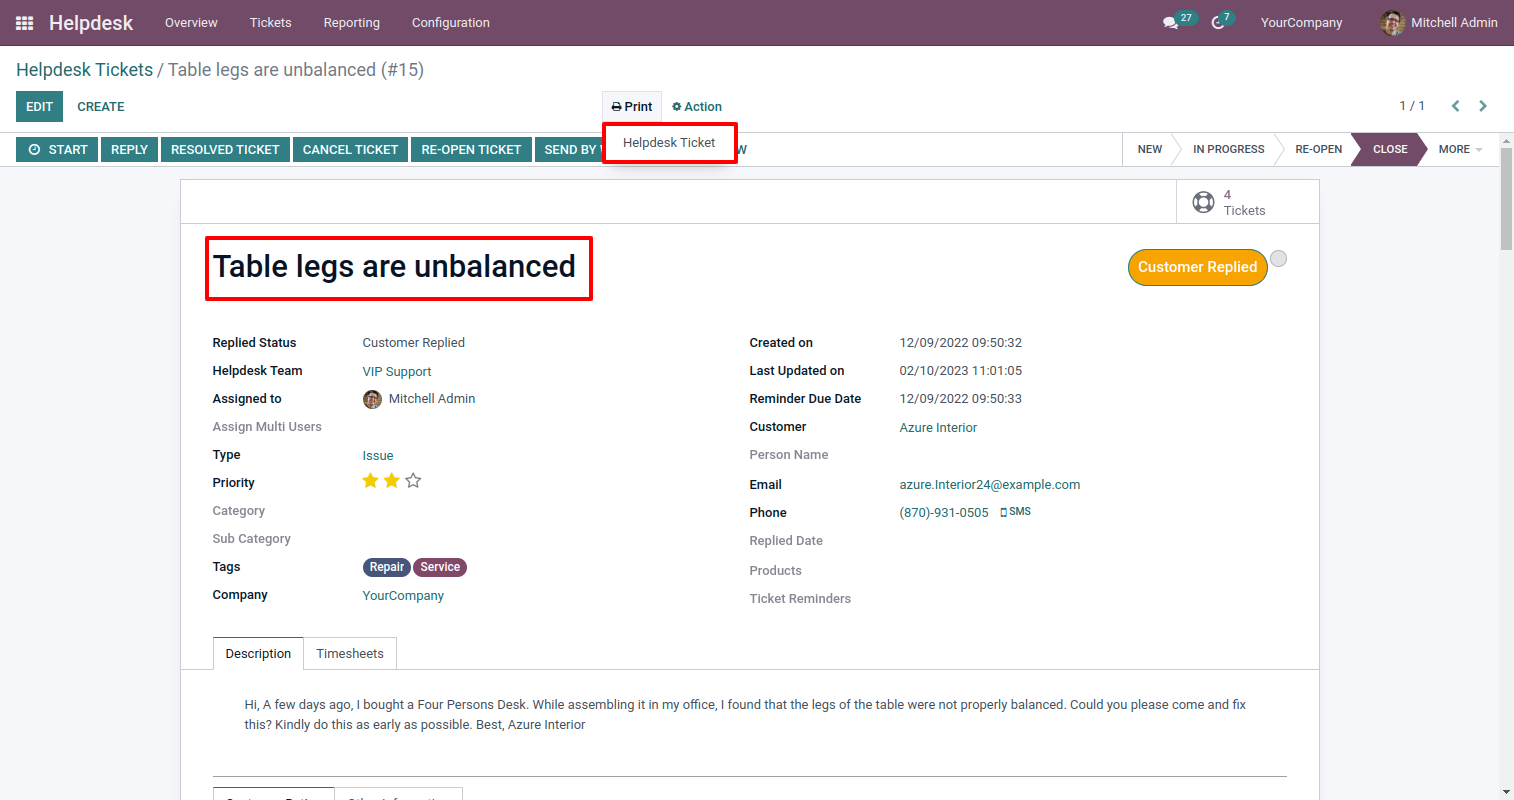
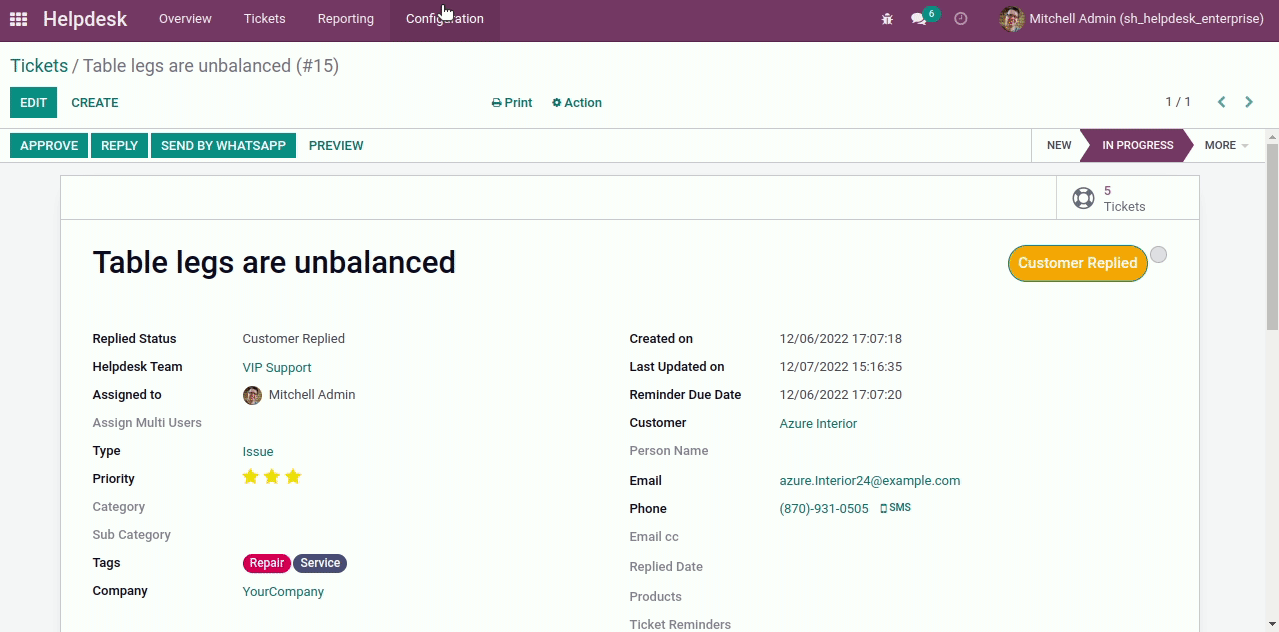
"Helpdesk Ticket" form view.
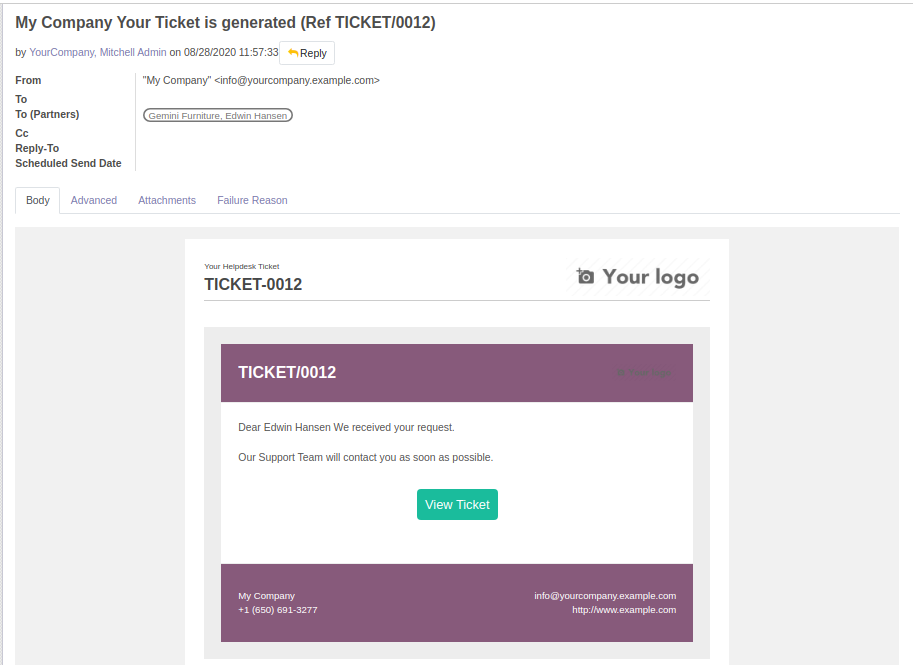
When ticket is created that time customer will notify via email.
When ticket is created that time assign user will notify via email.
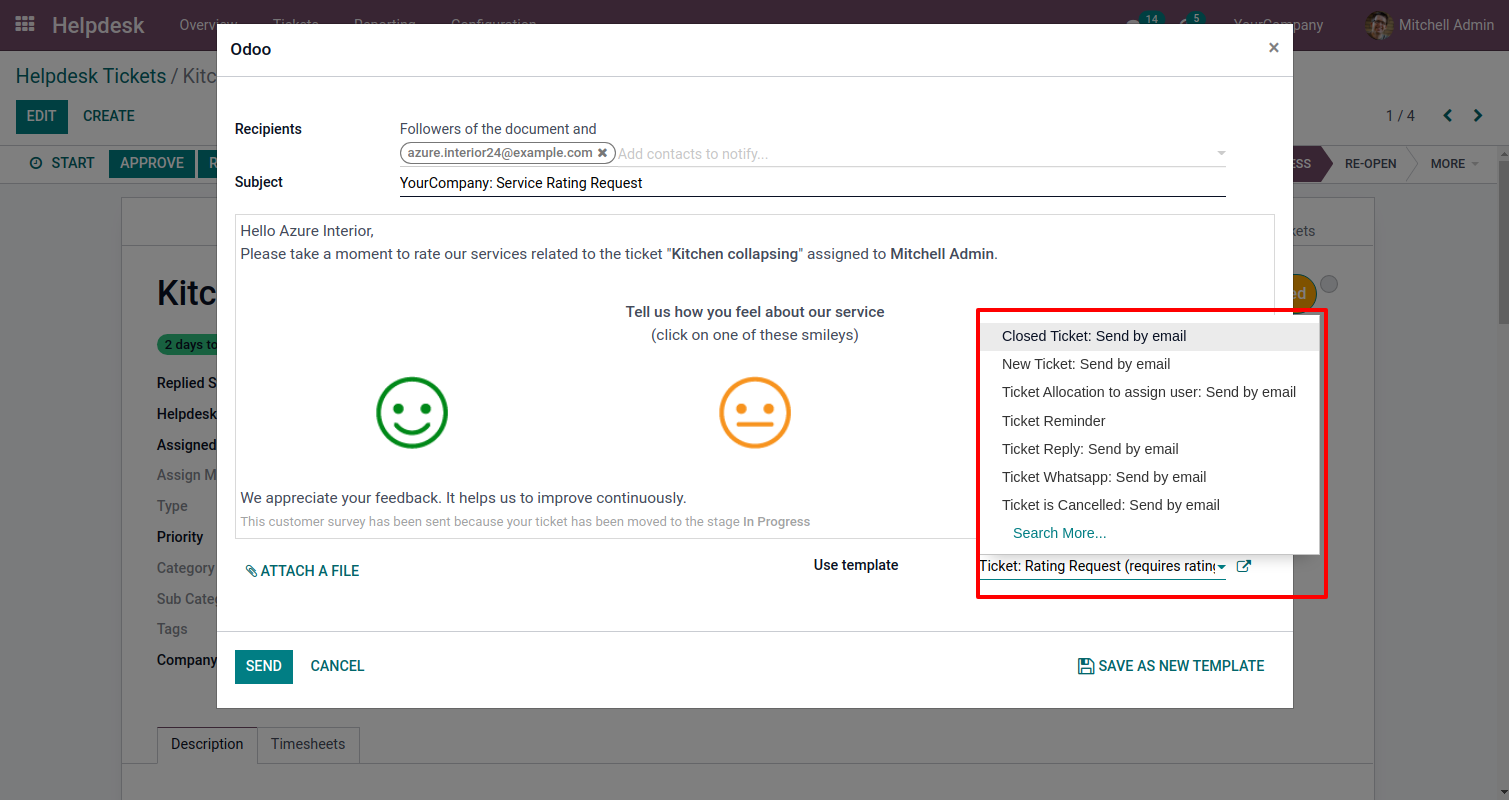
When you click on the 'Reply' button on the form, this wizard will appear where you can set an email template as per reply. In Email, there is one link 'View Ticket', Where customer can see the ticket status.
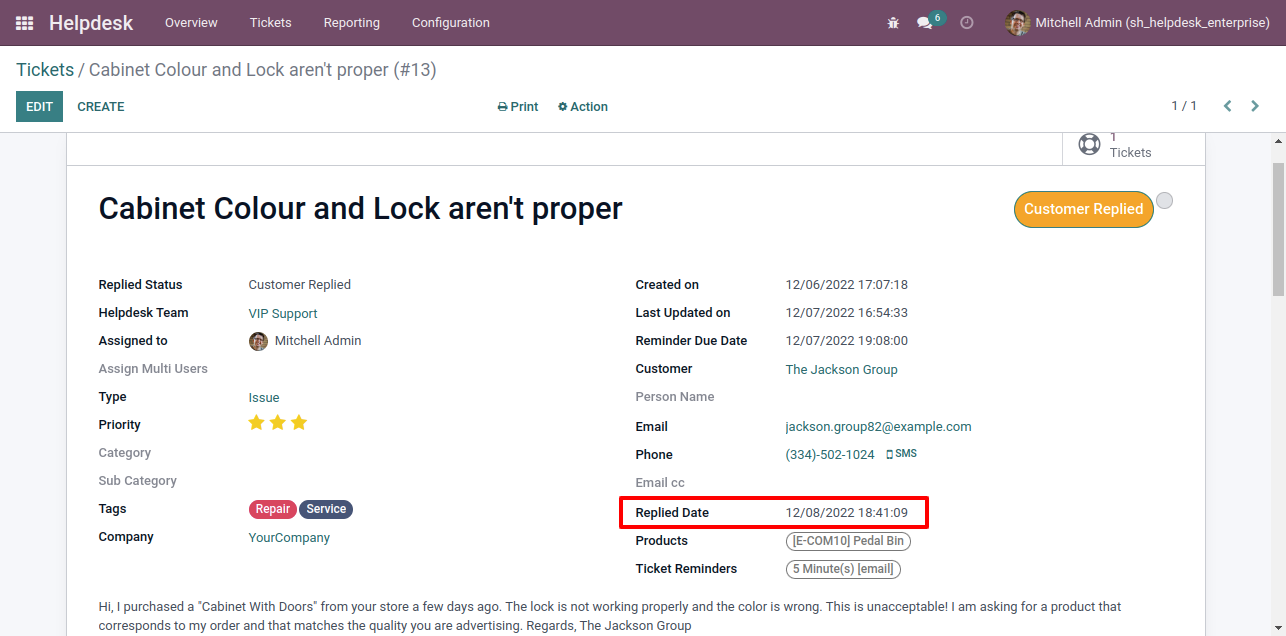
'Replied Date' added after reply and replied status will change 'Staff Replied'.
While ticket is closed, customer will notify via email with feedback link. click on link.
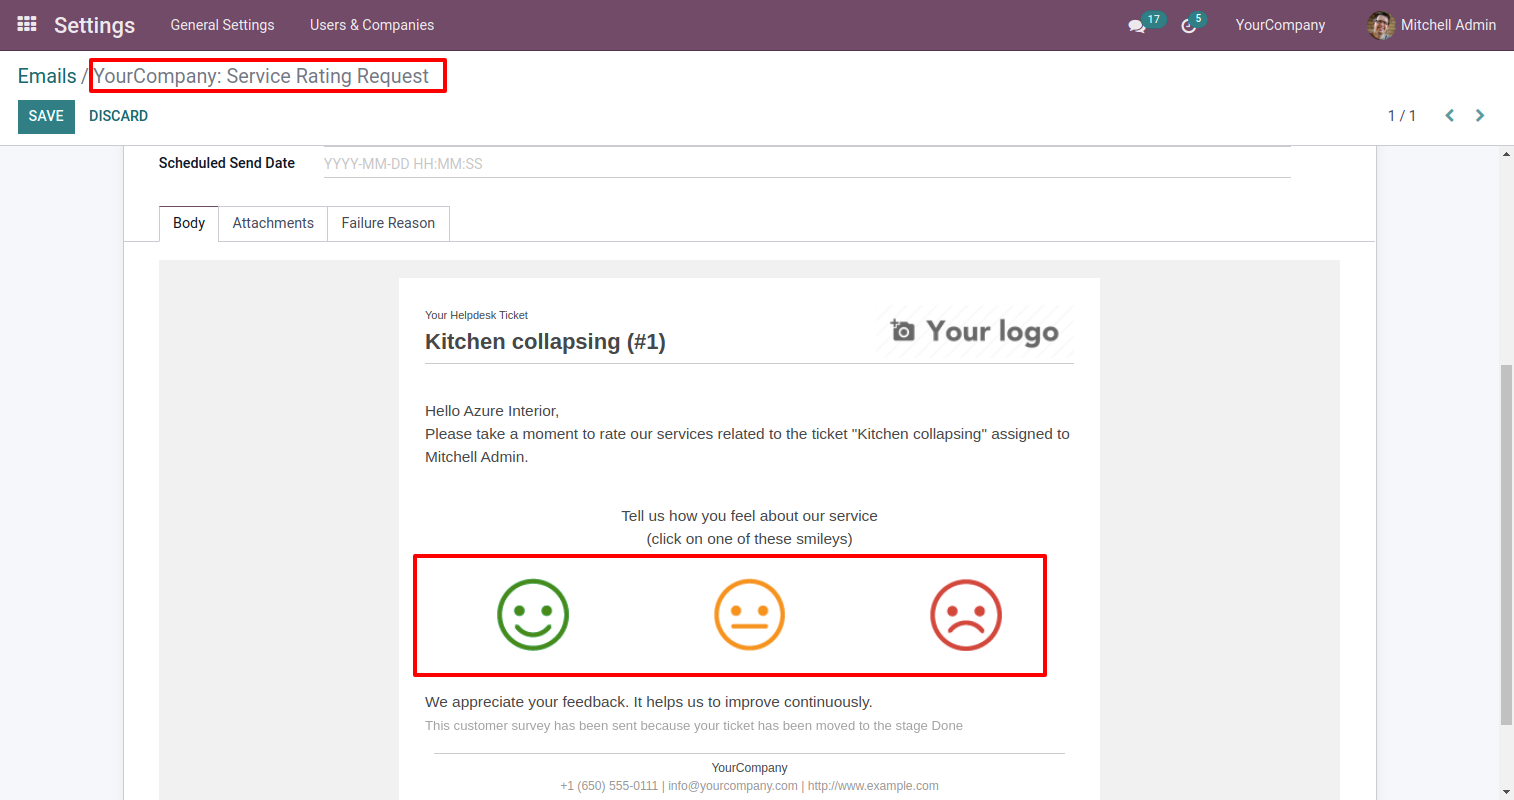
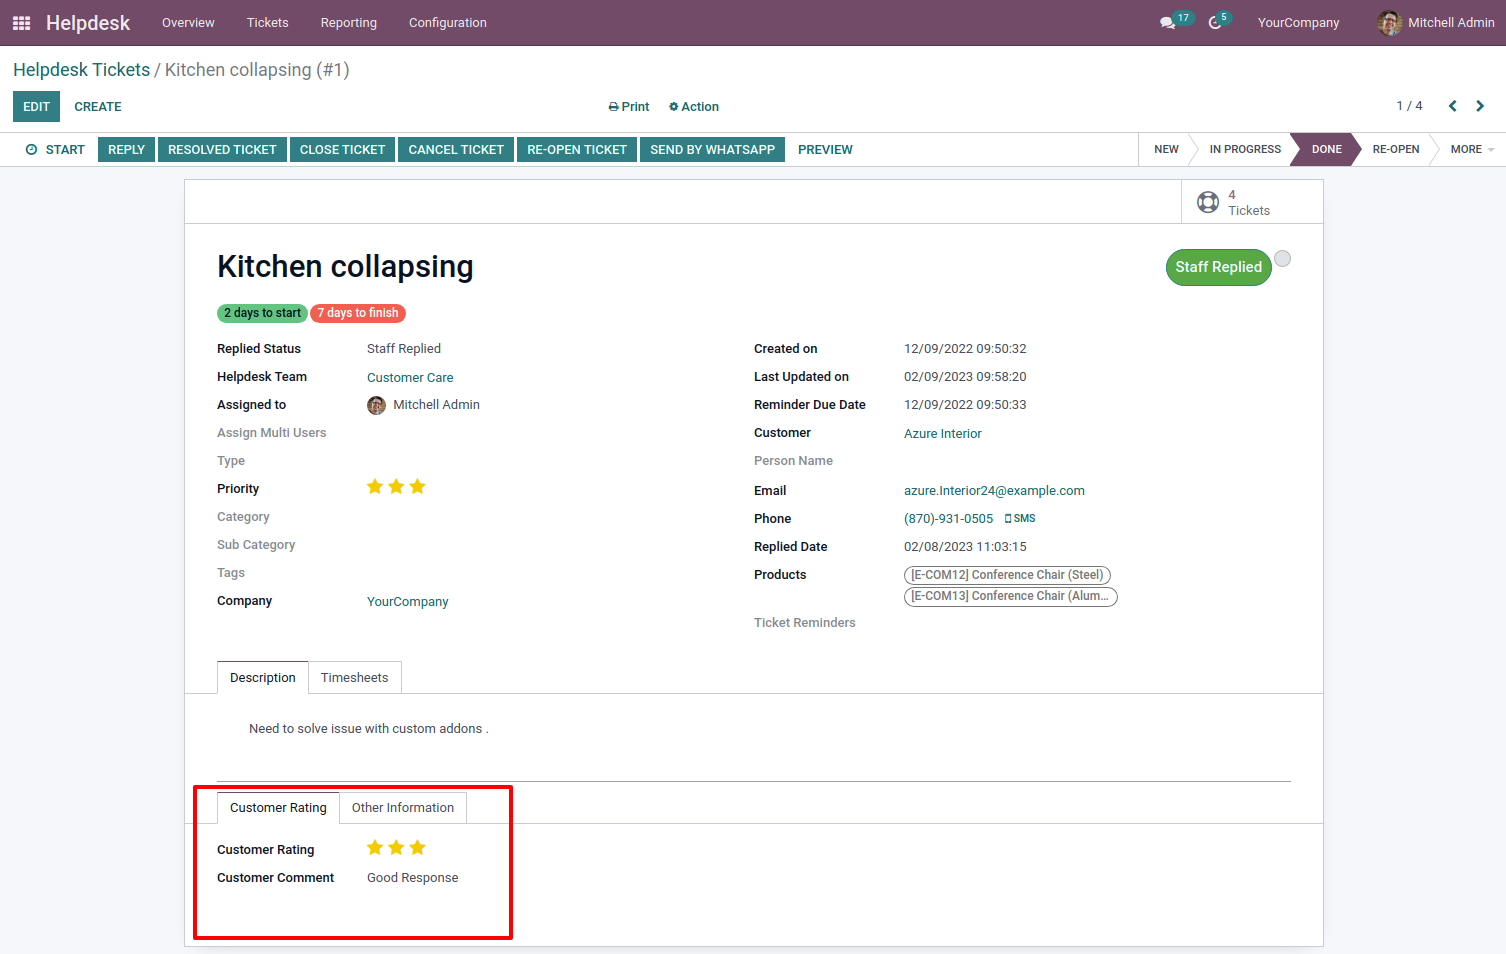
After click on link customer will see this view, where customer give feedback with comment.
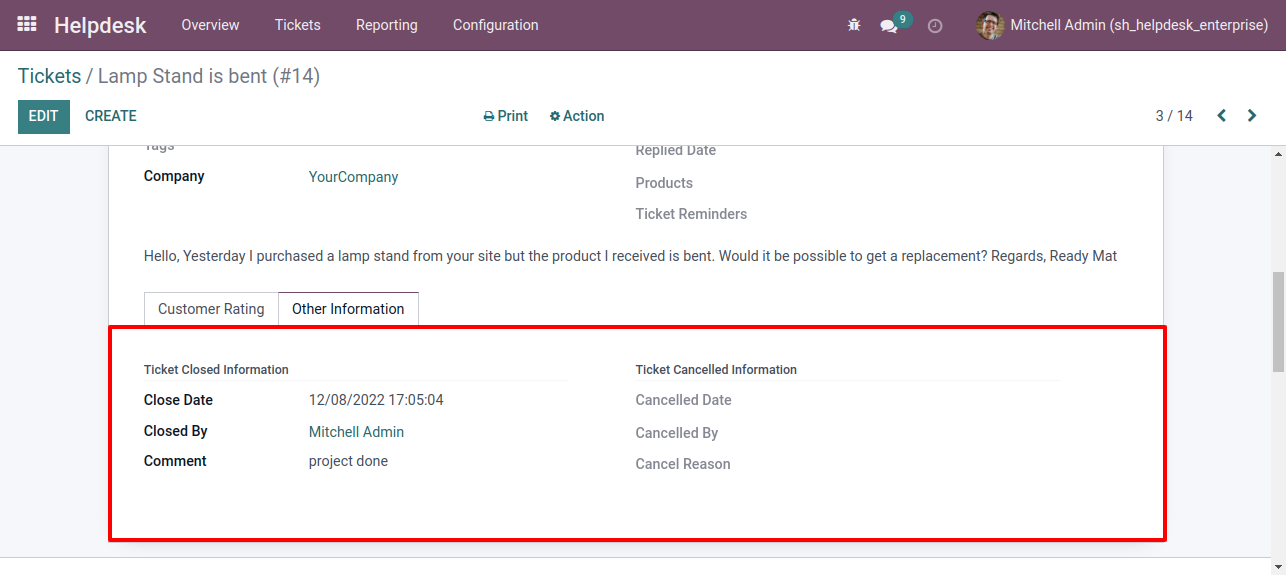
"Ticket Close" information will added here.
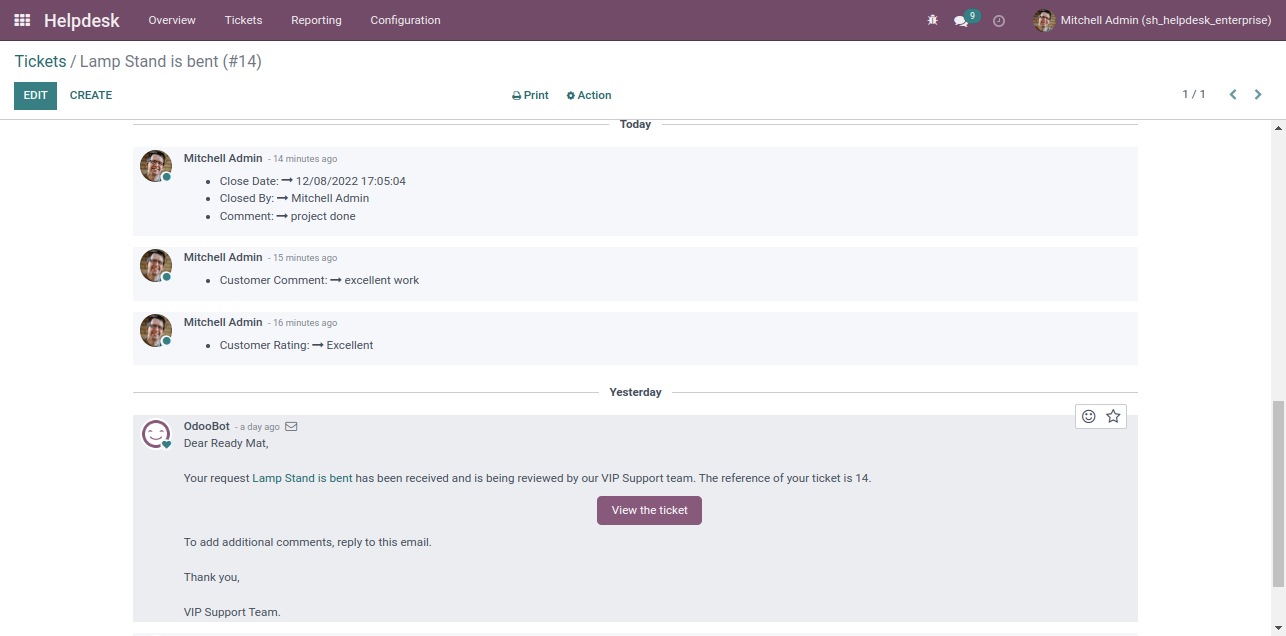
Chat with customer in chatter.
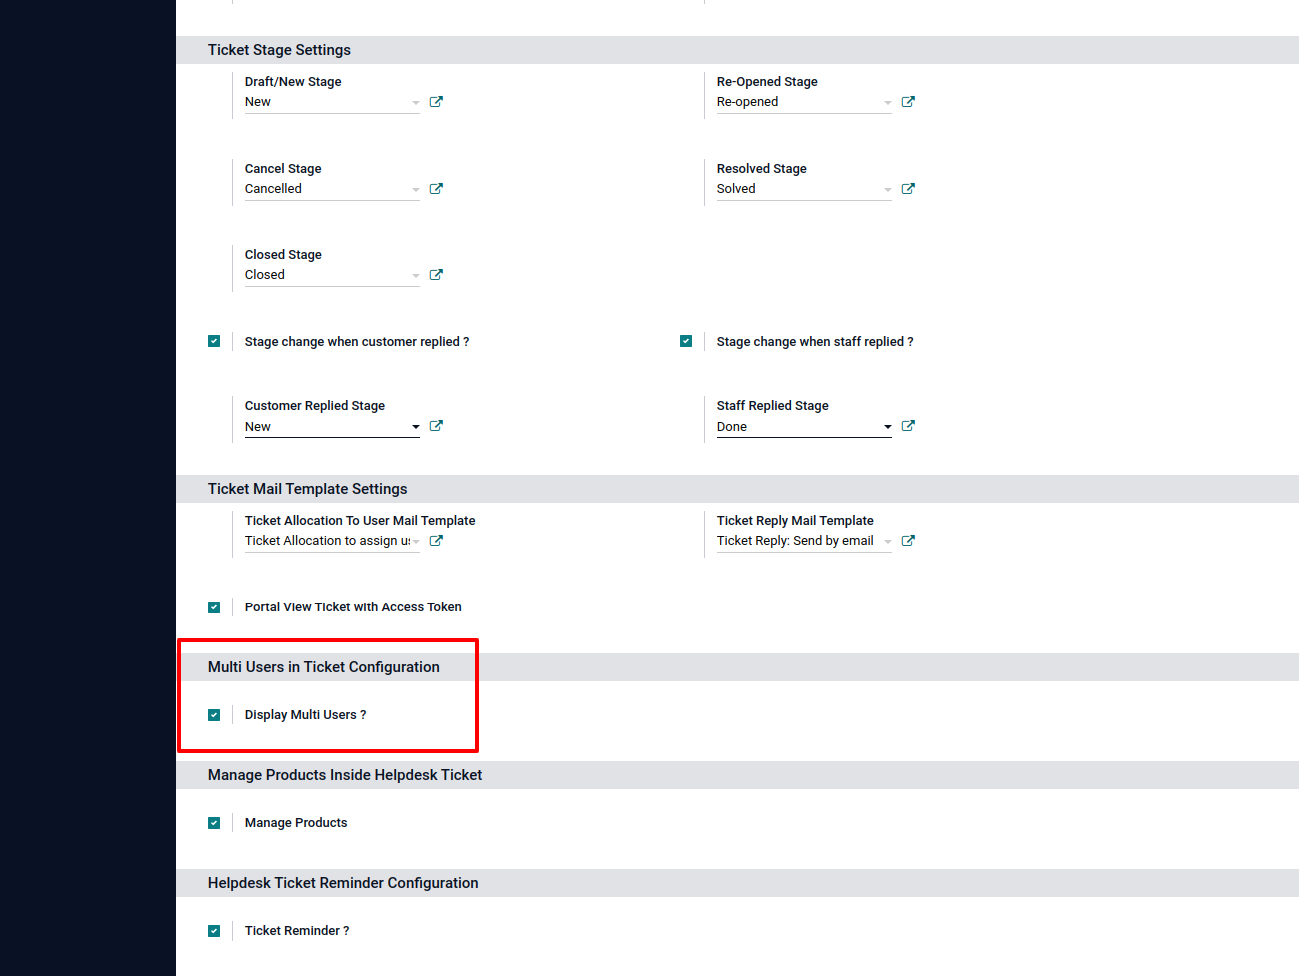
Multi User
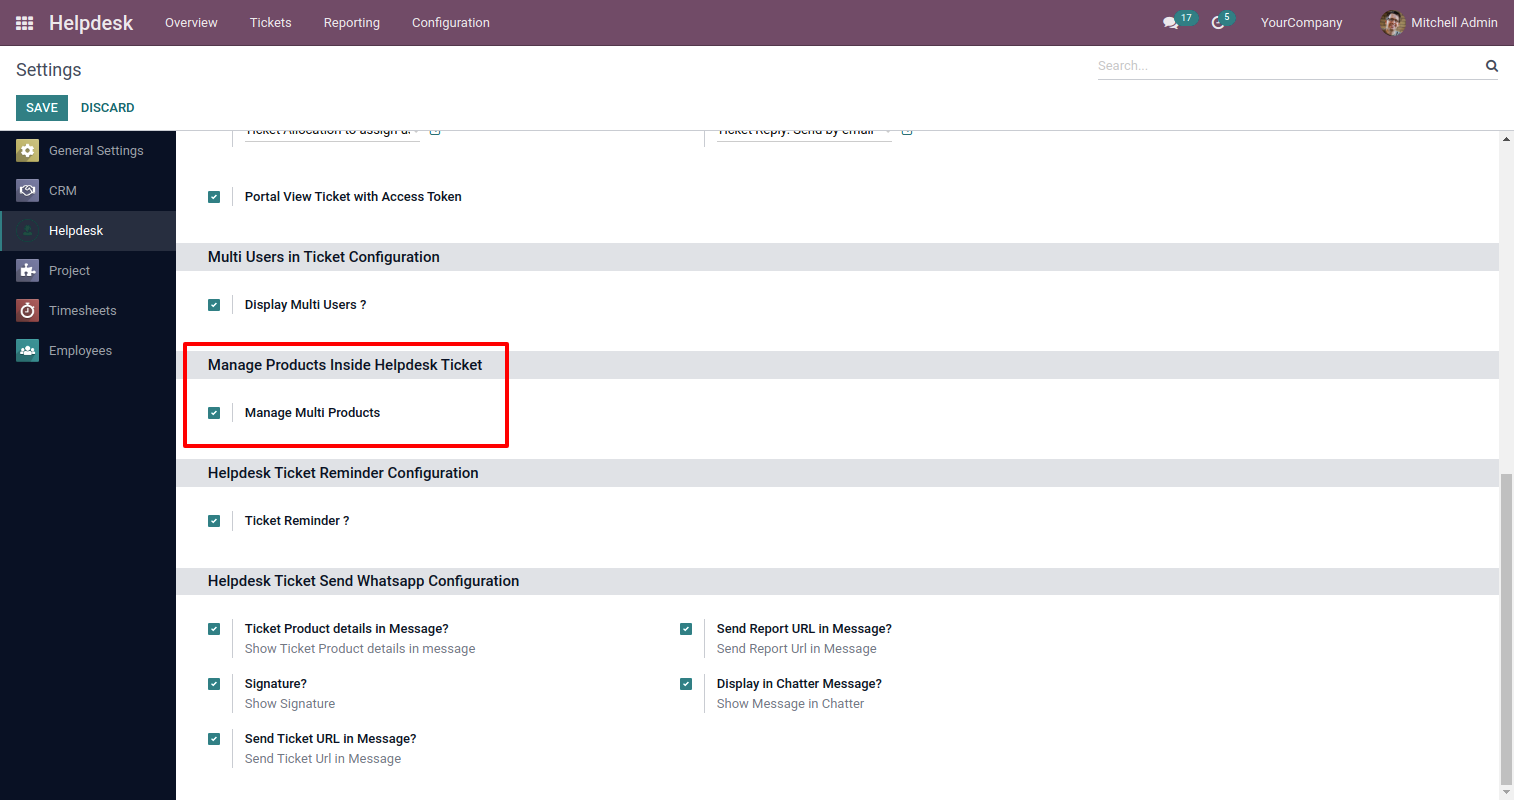
Goto user config setting, Enable 'Display Multi User'.
You can select more than one user for each tickets. All assign multi user can see the ticket.

'Demo' user can see the ticket.
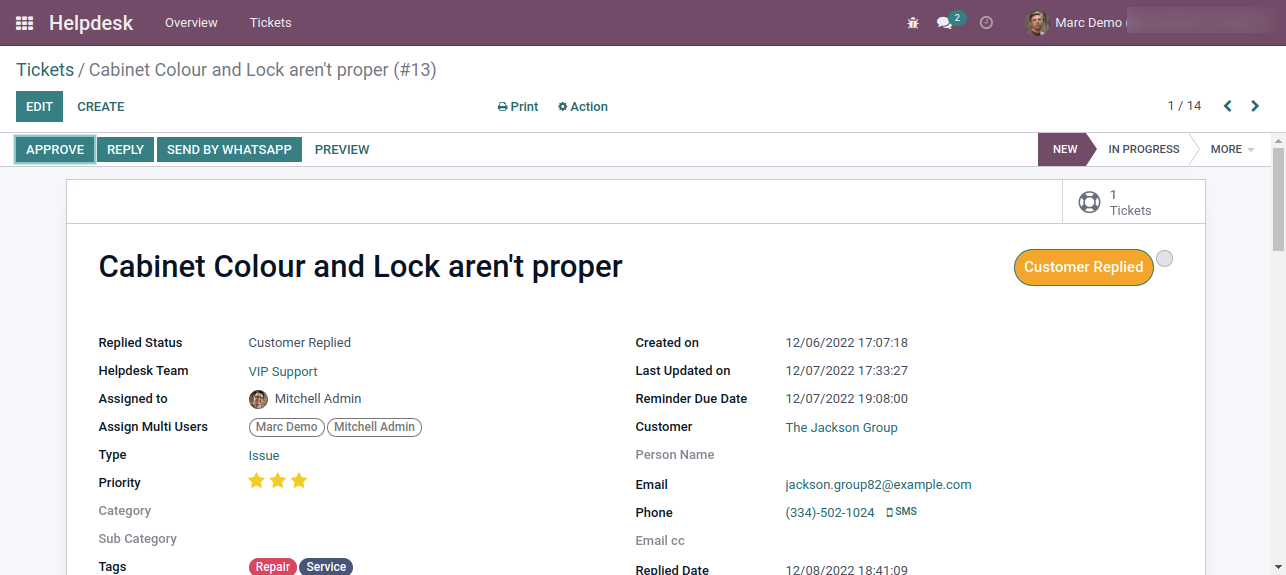
'Admin' user can see the ticket.
'John' user can not see the ticket because ticket was not assigned.
Manage Multi Products
Goto user config setting, Enable 'Manage Multi Products'.
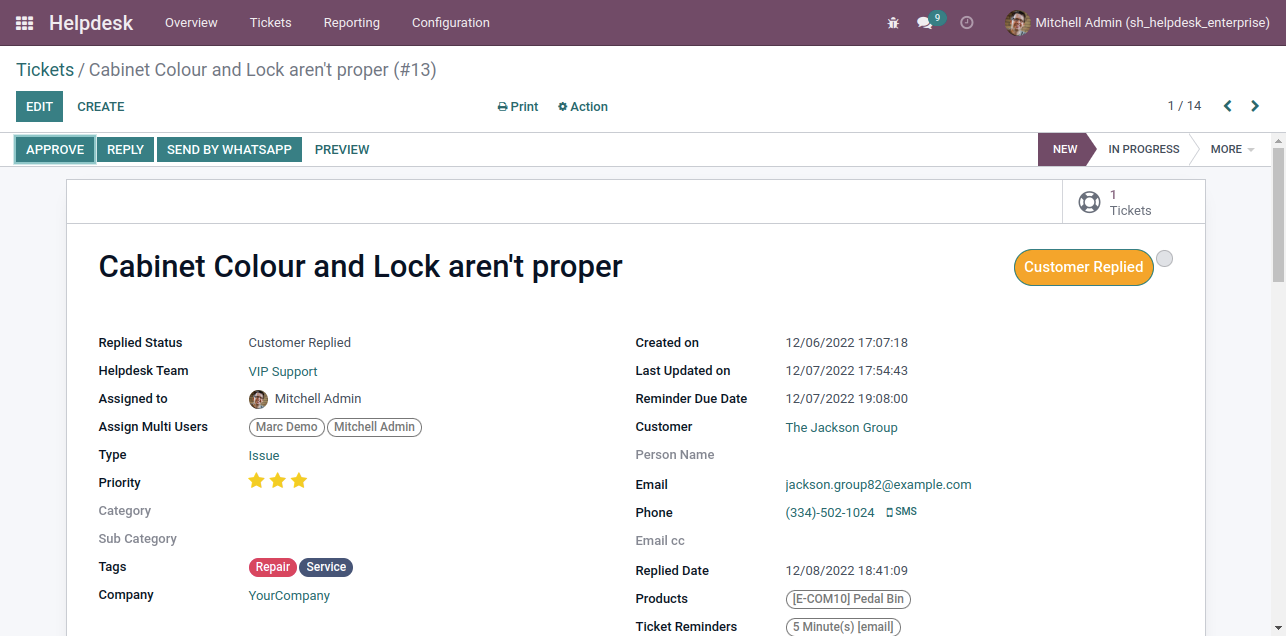
You can select products for each ticket.
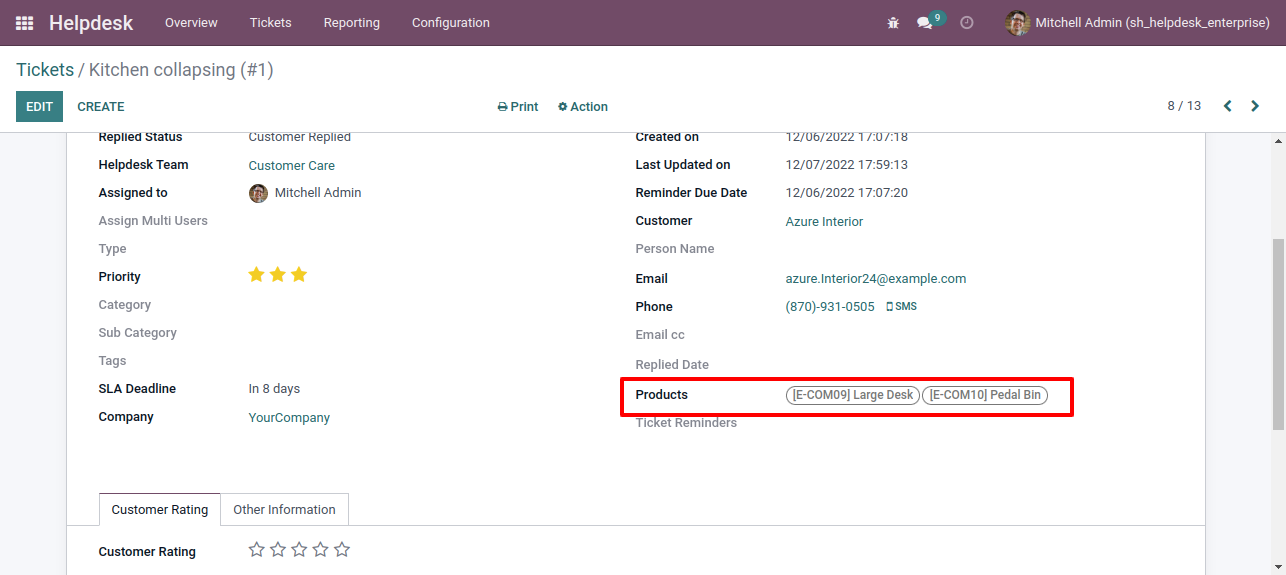
Ticket PDF report with the products.
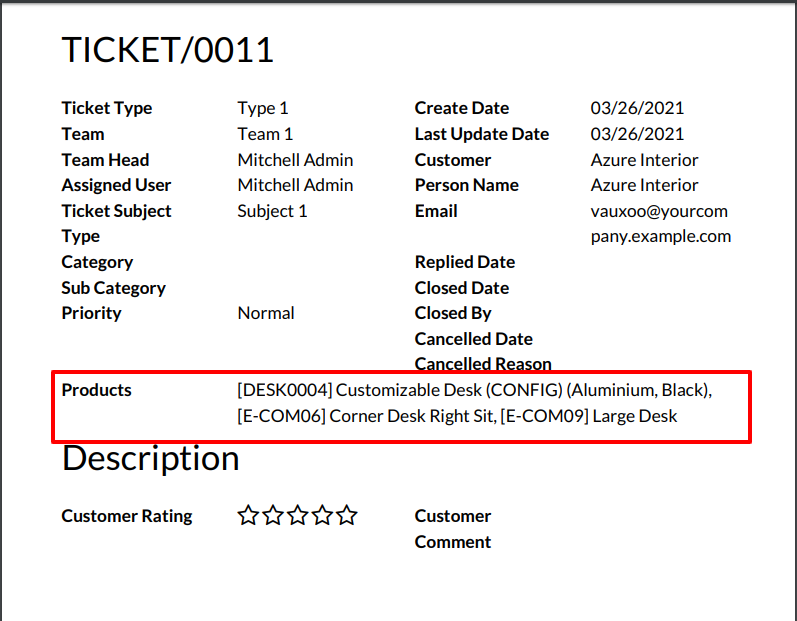
Helpdesk ticket in PDF for backend.
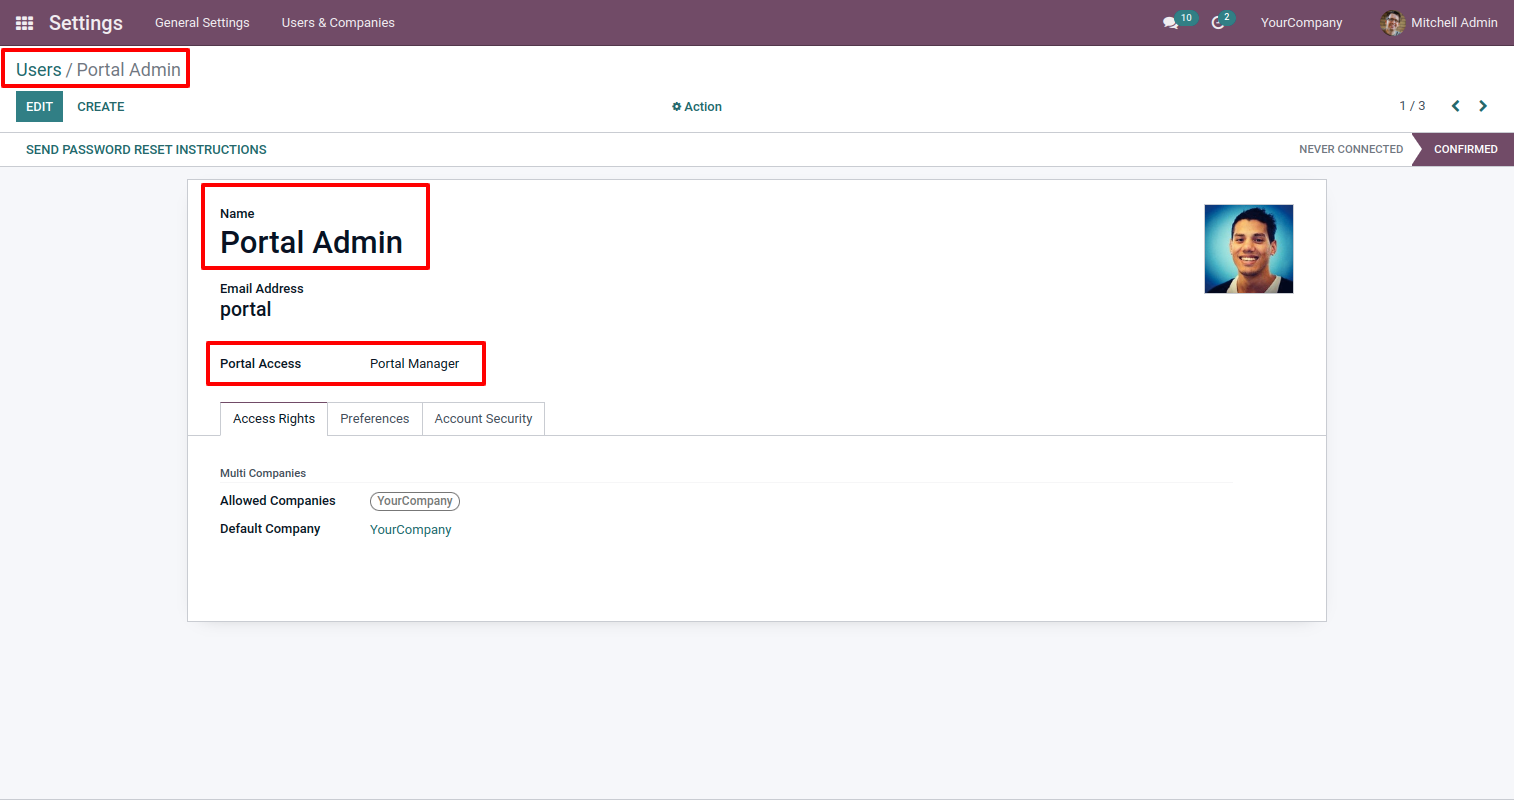
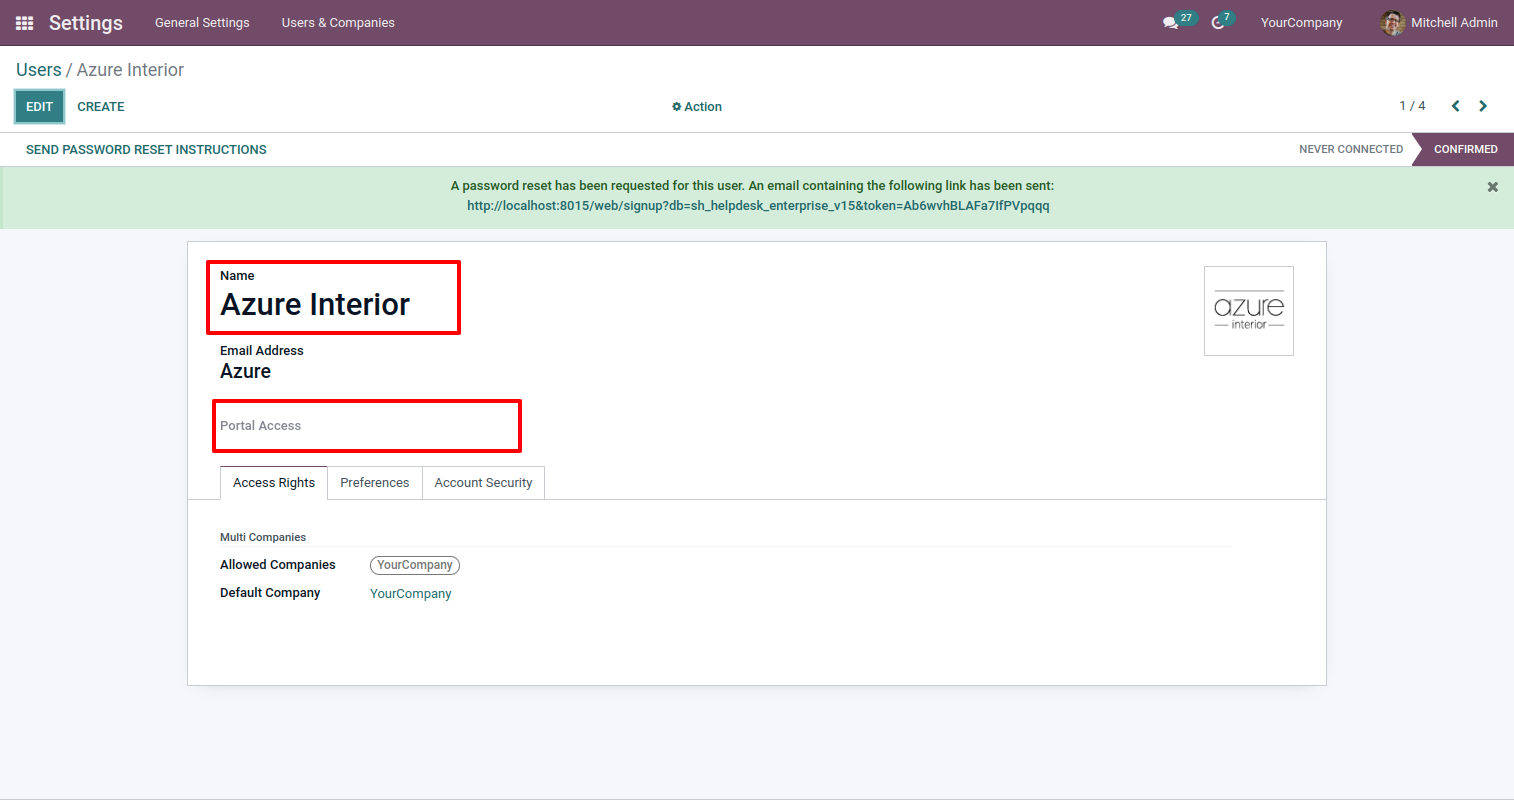
In User configuration there is access rights for only portal users.(Only visible when portal user true)
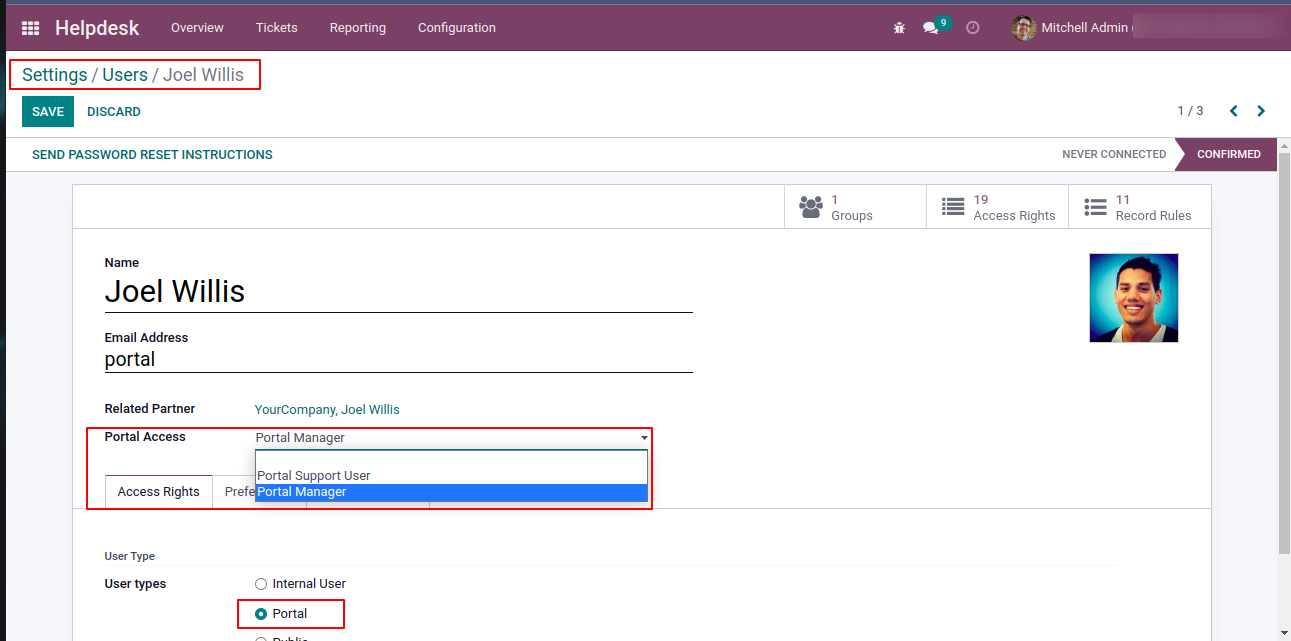
Set as a portal manager. they can create a ticket in behalf of others.
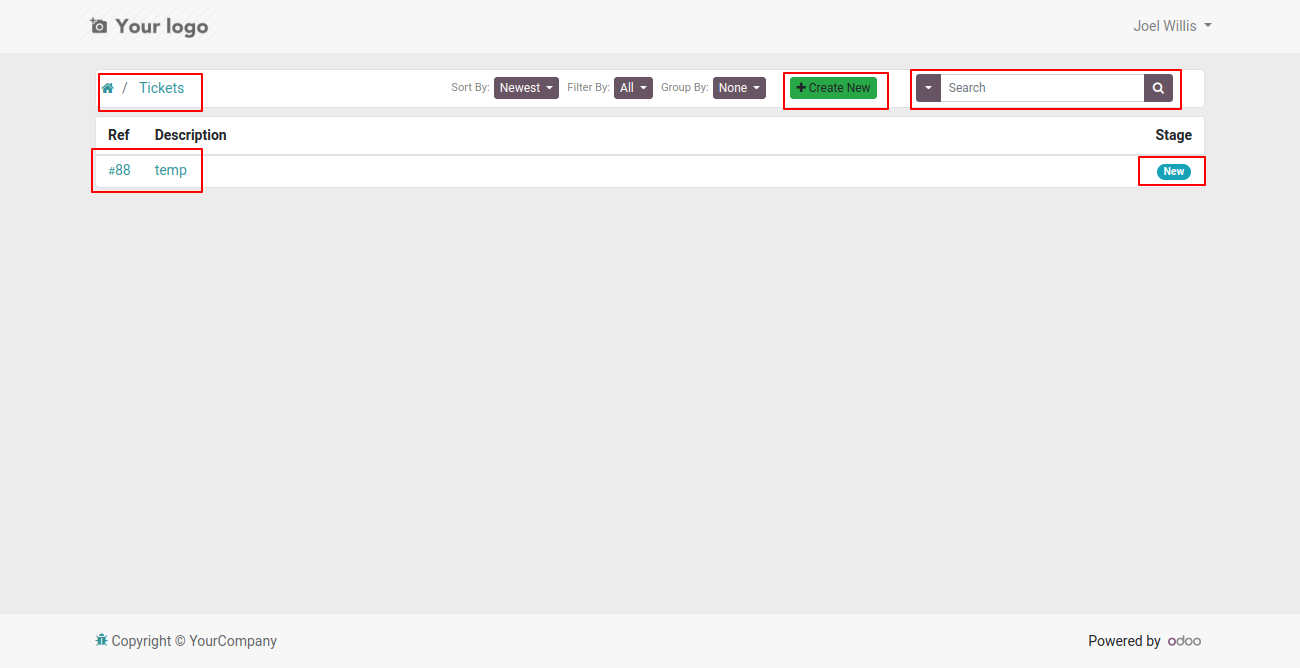
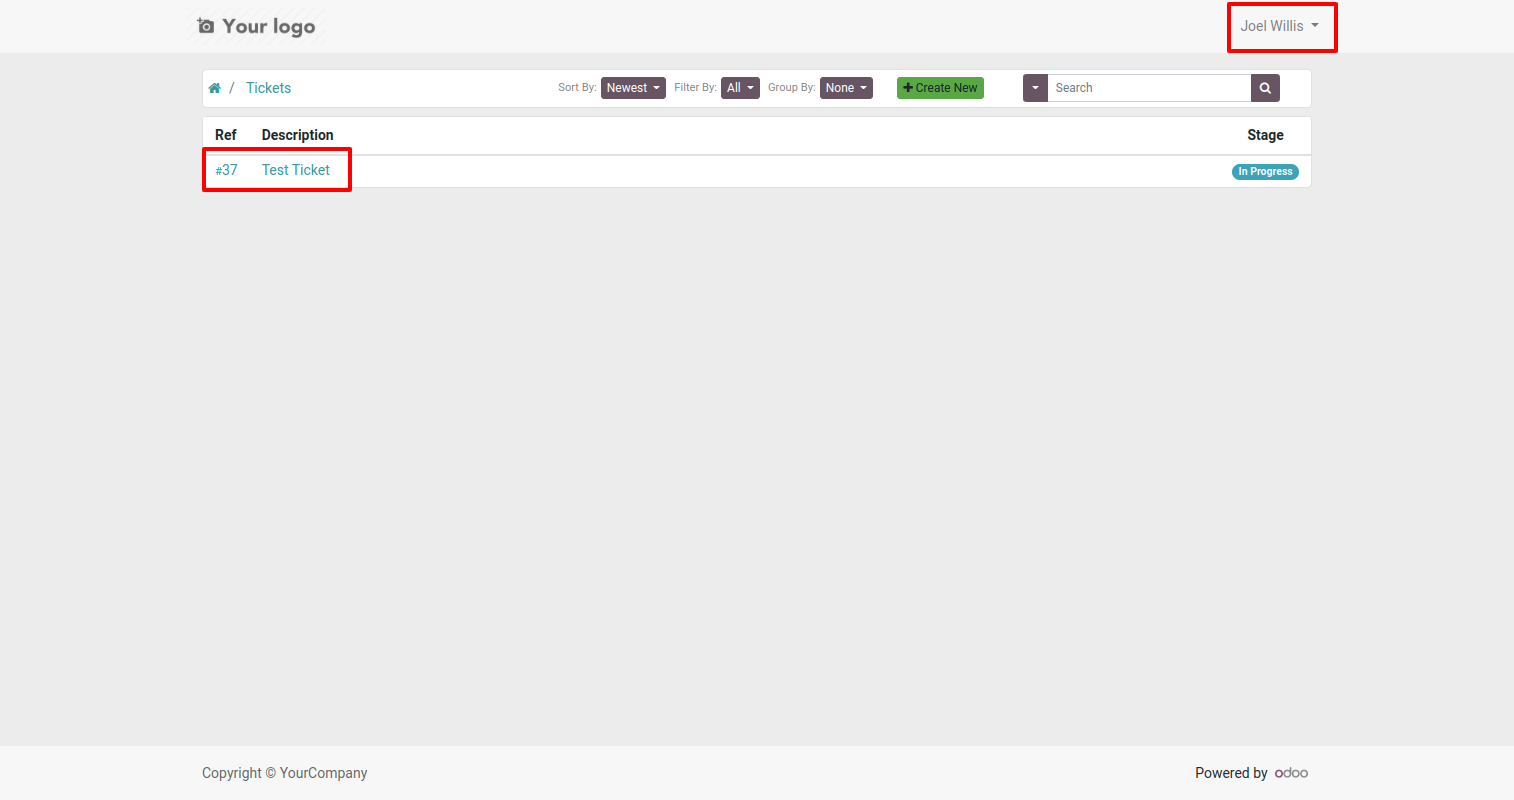
Ticket on Portal.
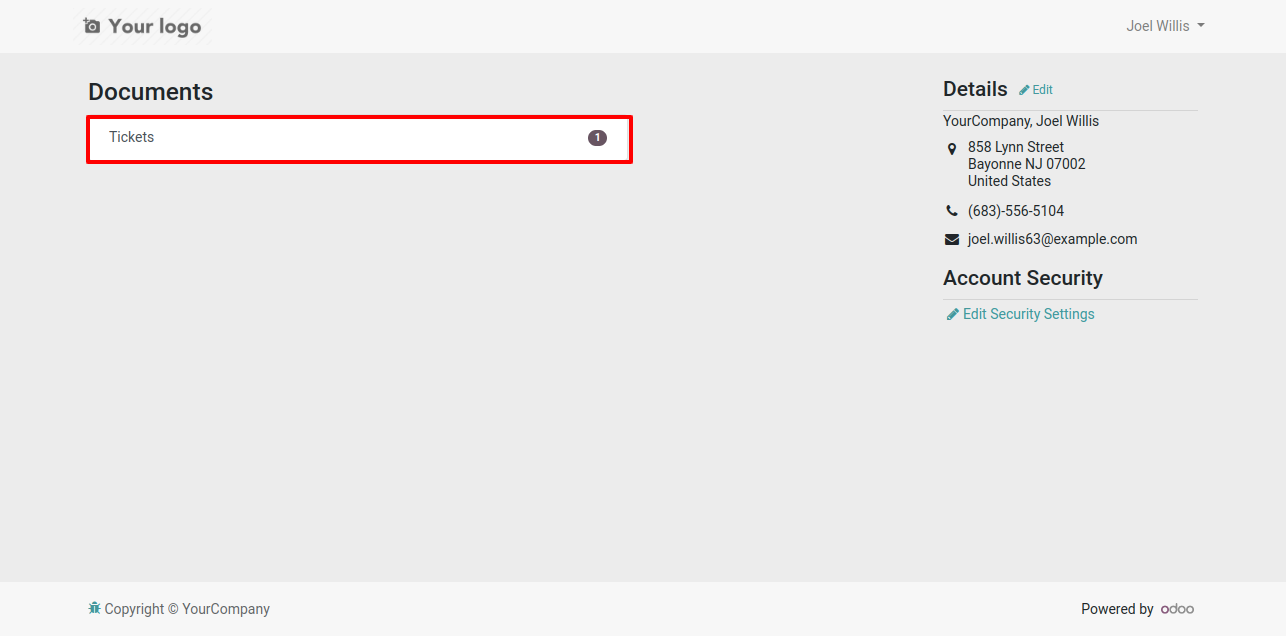
List view on portal. You can group by, create and search tickets. You can create a ticket only if you have the Website Help Desk module installed.
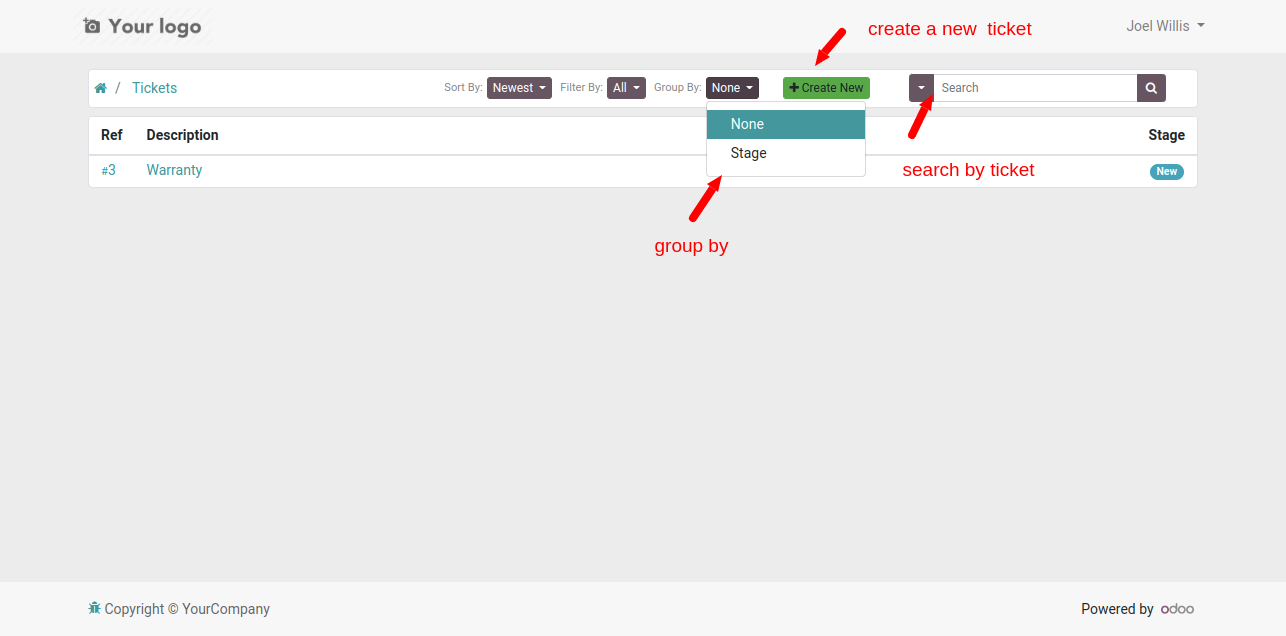
create ticket button is in list view. also search ticket.
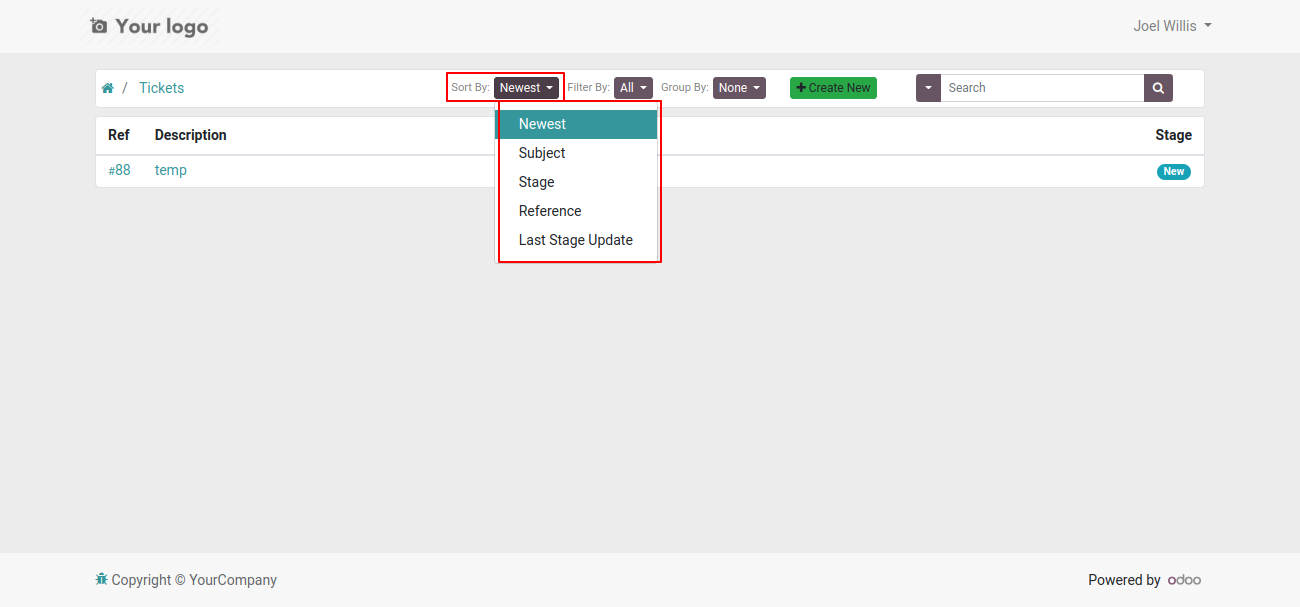
See sort by newest filter in portal.
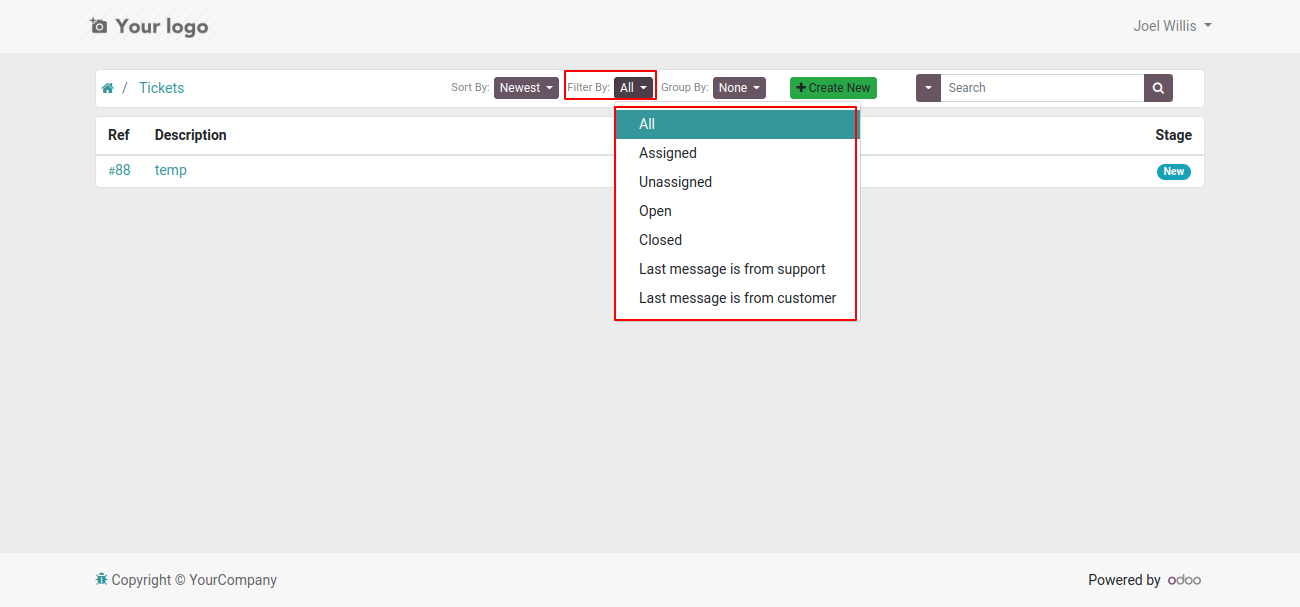
See the filter in portal
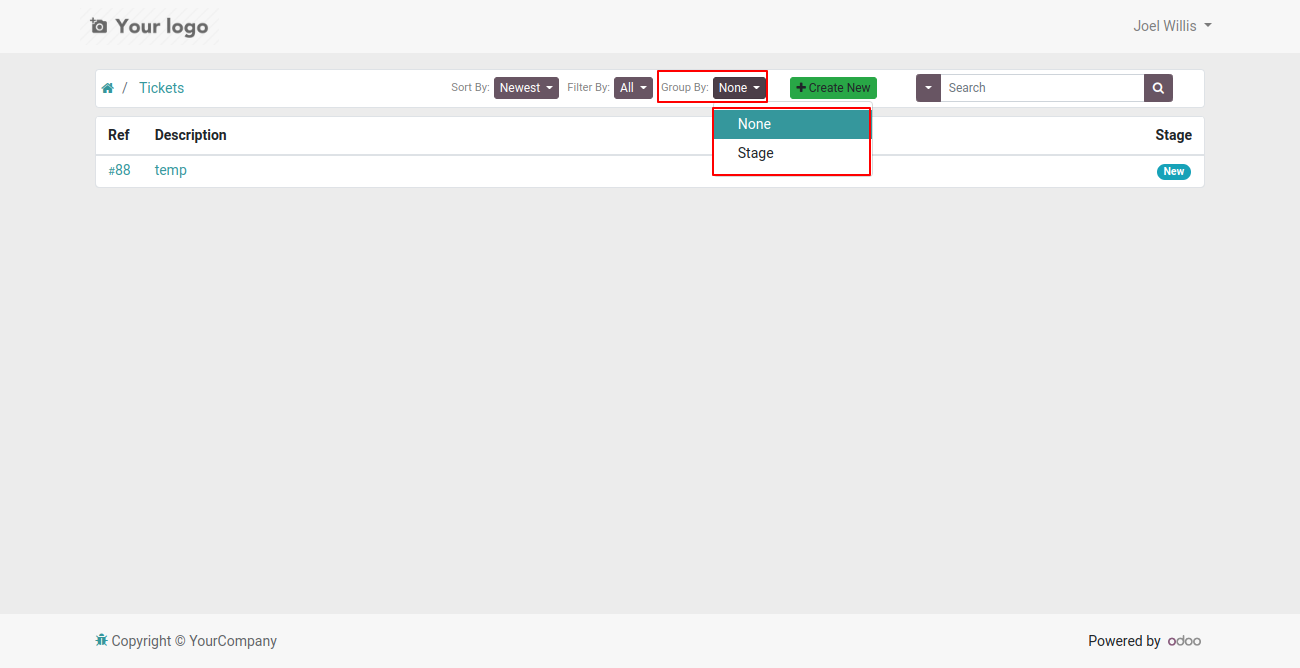
See the Group by in portal
See portal user as "Portal support user".
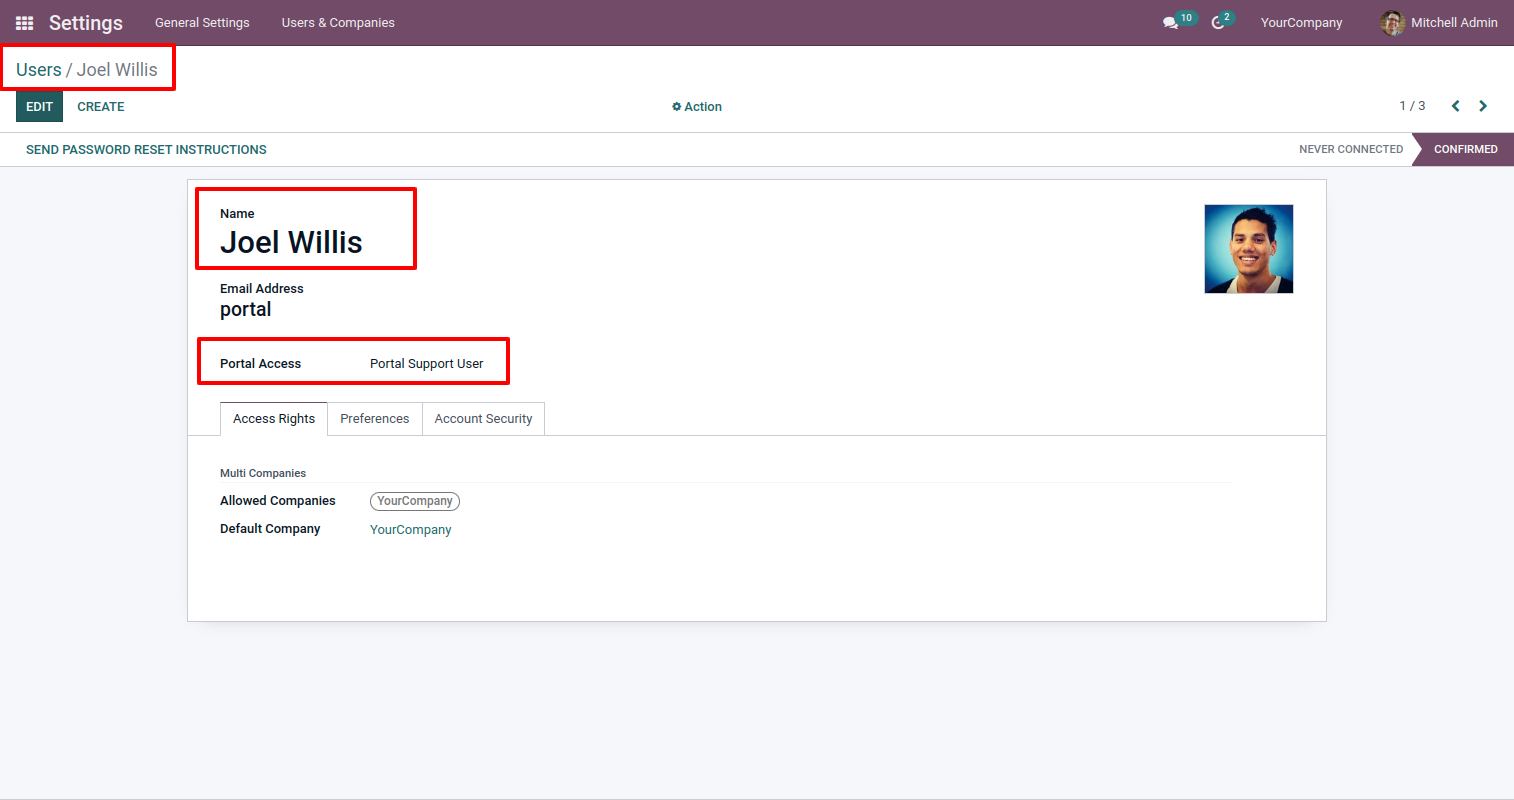
Portal support user not change name and email in ticket they have access only to create
there own ticket only.
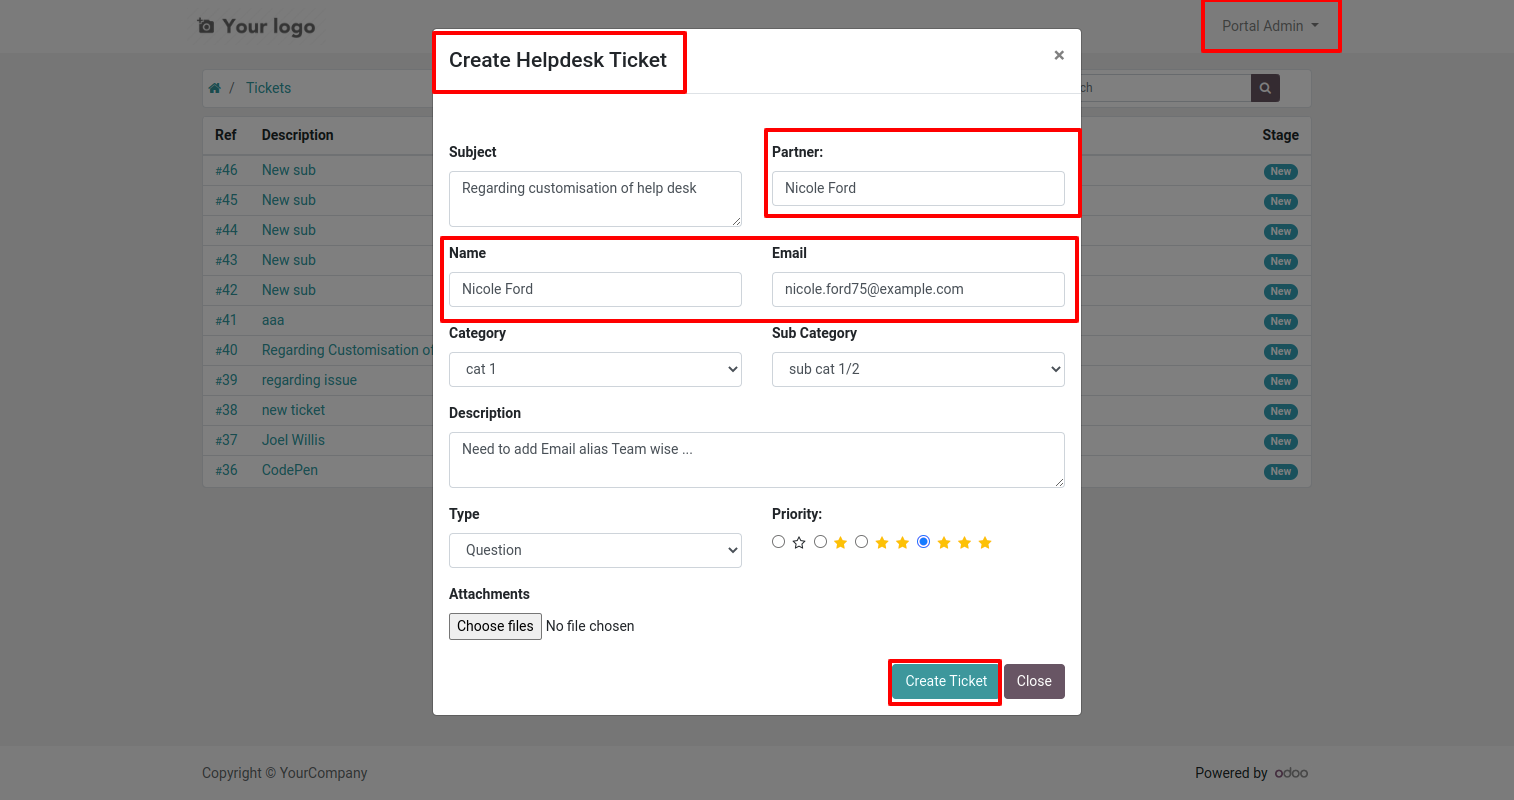
"Portal manager" can create a ticket with partner, name and email.
Portal user as "Portal Customer".
Portal customer can't see the ticket menu in the portal.

Customer ratings visible to only manager & team leader.
Configuration added to view portal ticket with access token.
Configuration to give attachment size limit on portal.
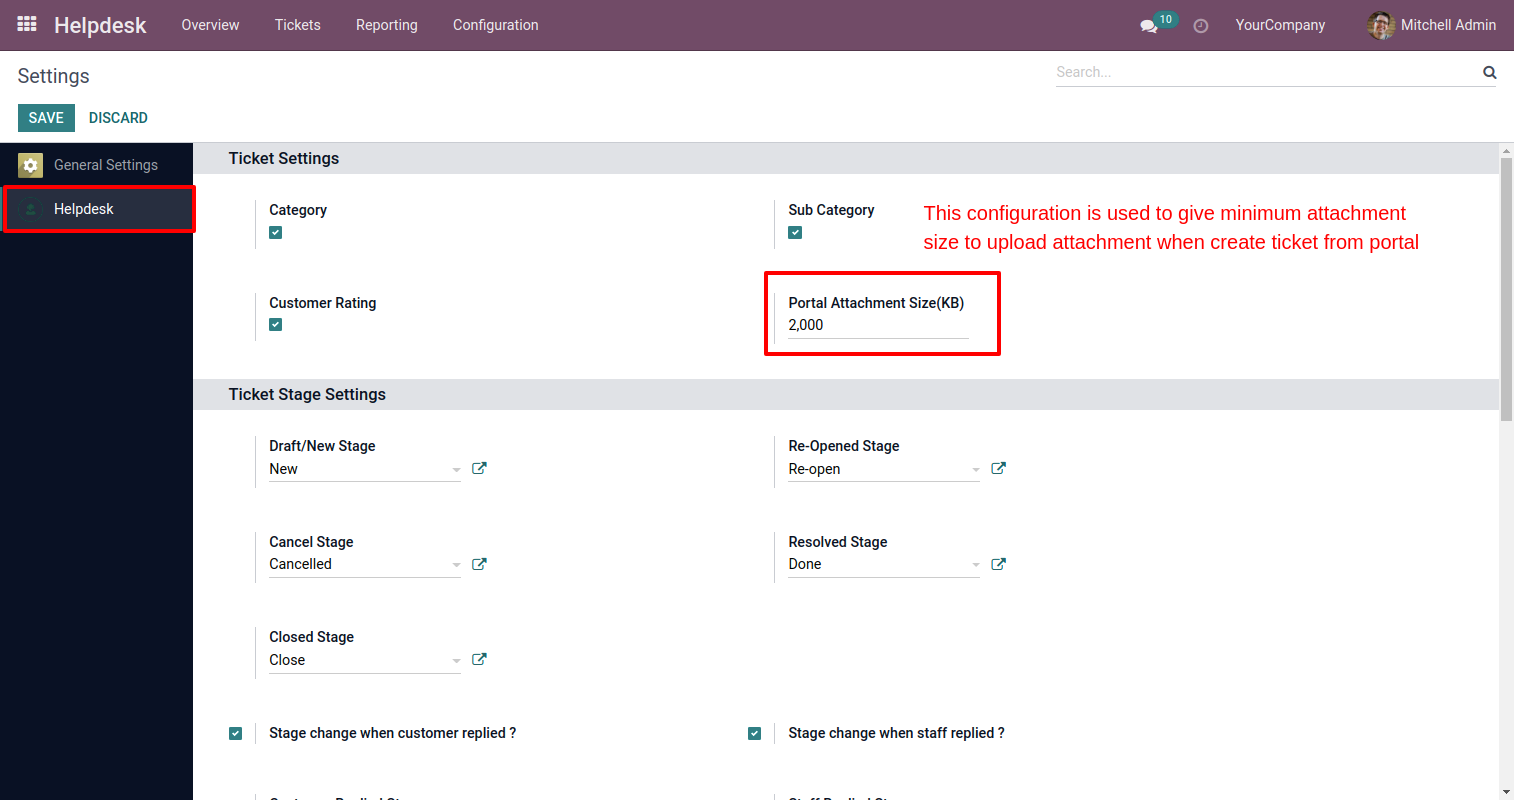
Alert comes when attachment size larger then configuration.

Whenever any customer/staff replied, the stage changes according to configurations. You can find tickets easily by customer/staff reply based on tags.
You can update multiple tickets using "Mass-Action". You can update assigned to person, stage, assign multi-user & add/remove followers.
"Auto Update Replied Status & Replied Date Based On Customer/Staff Replied To Ticket".
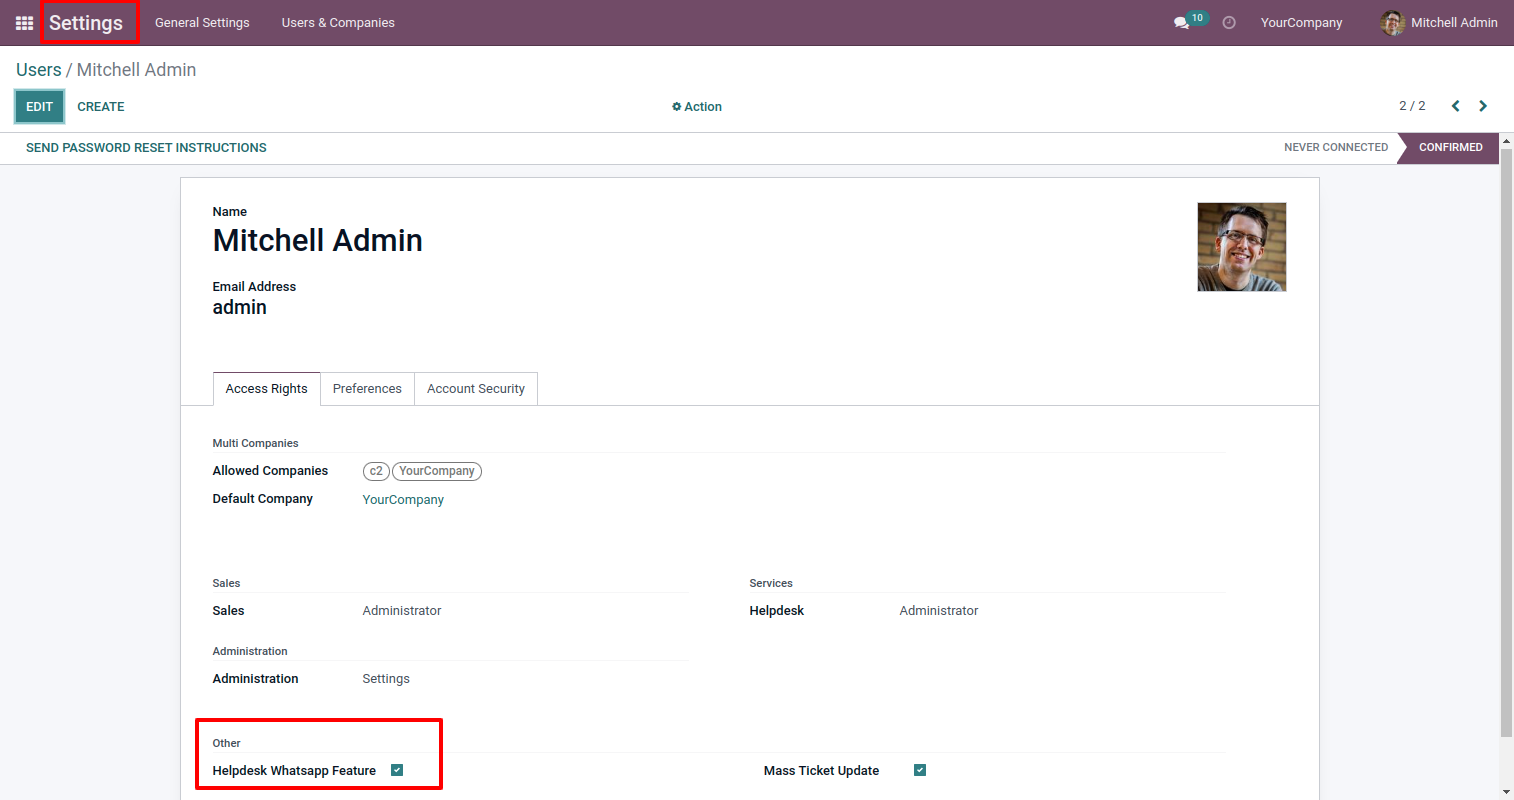
In "User", enable the "Helpdesk Whatsapp Feature" option.
Whatsapp message description with the configuration setting.
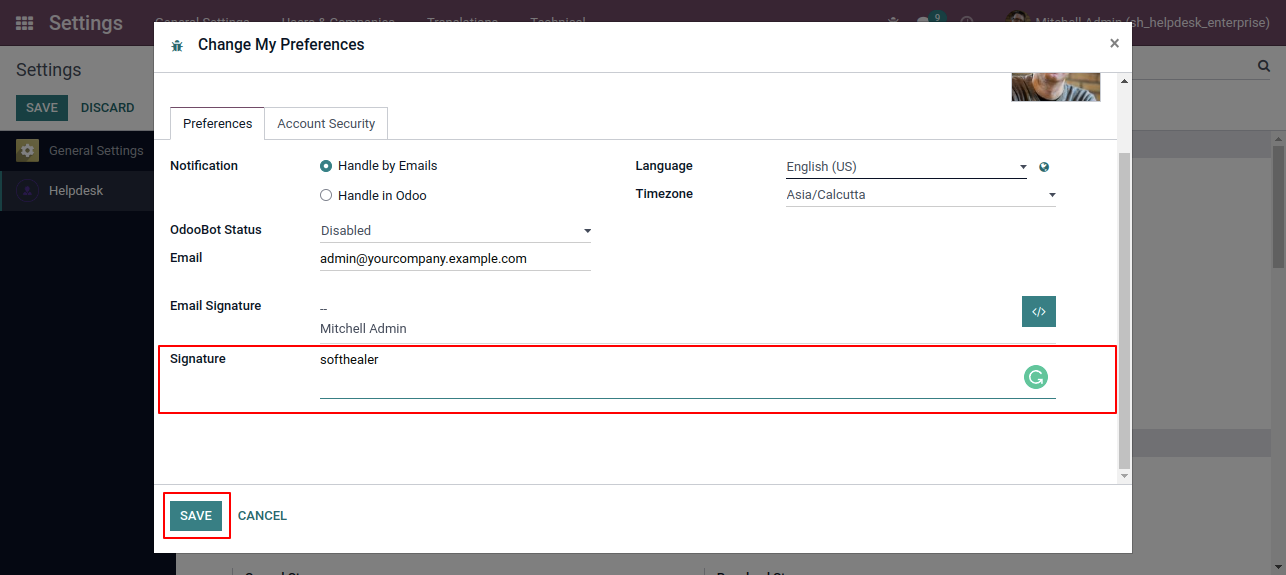
Set the signature in the message,
1) Go to Preferences.
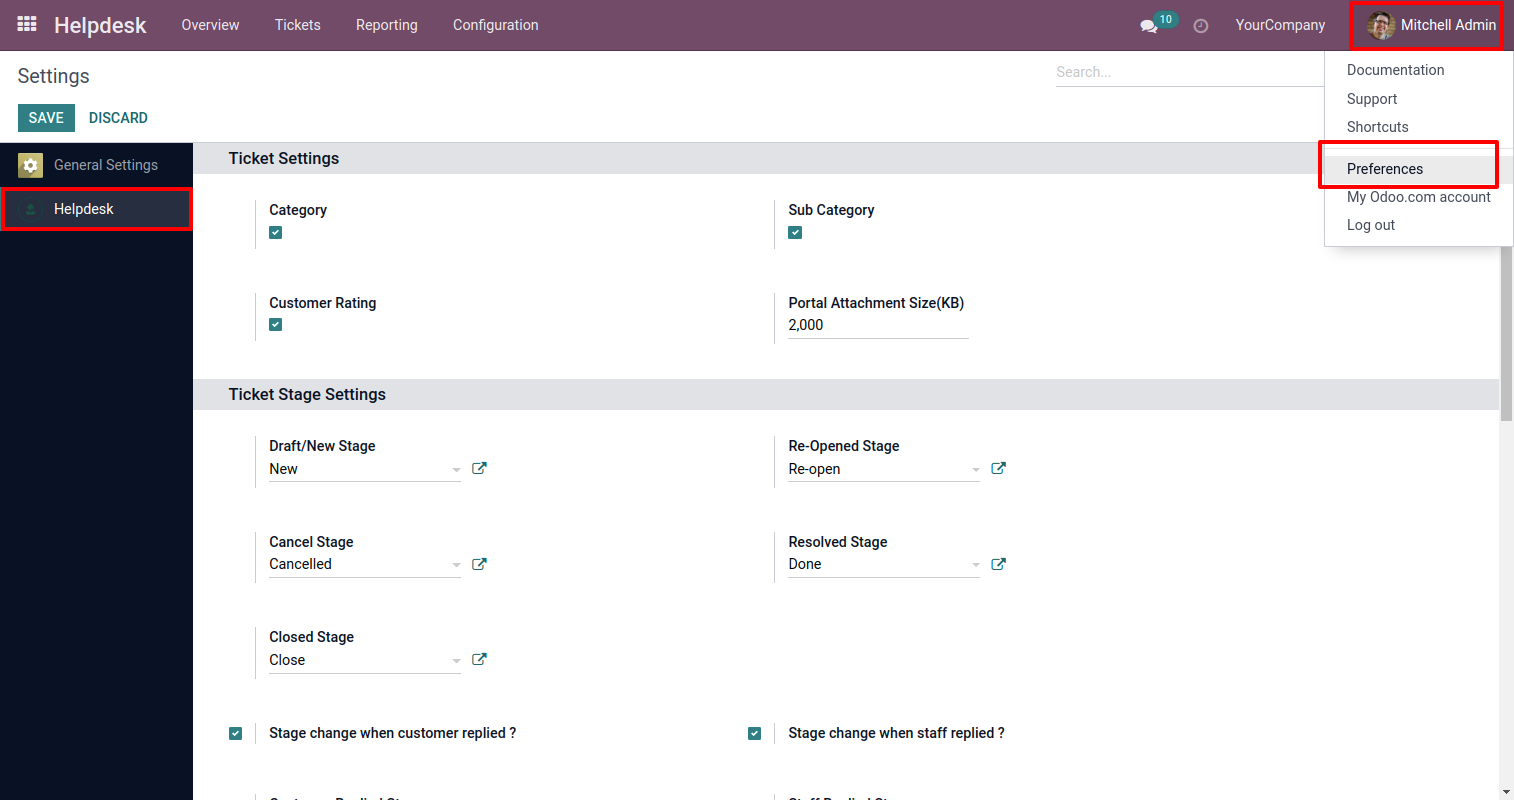
2) Add Signature.
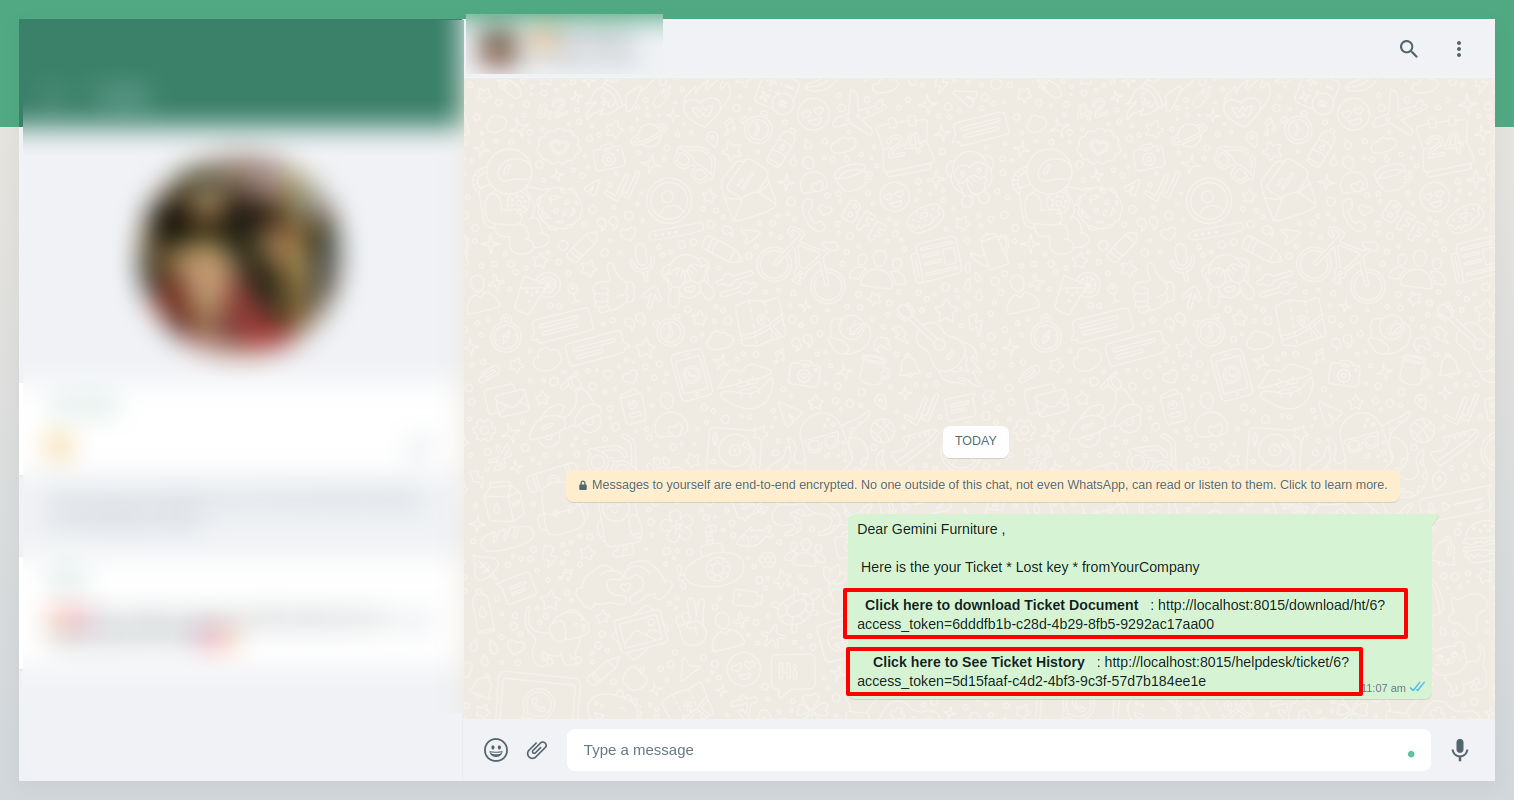
Click "Send By WhatsApp" Button in helpdesk tickets.
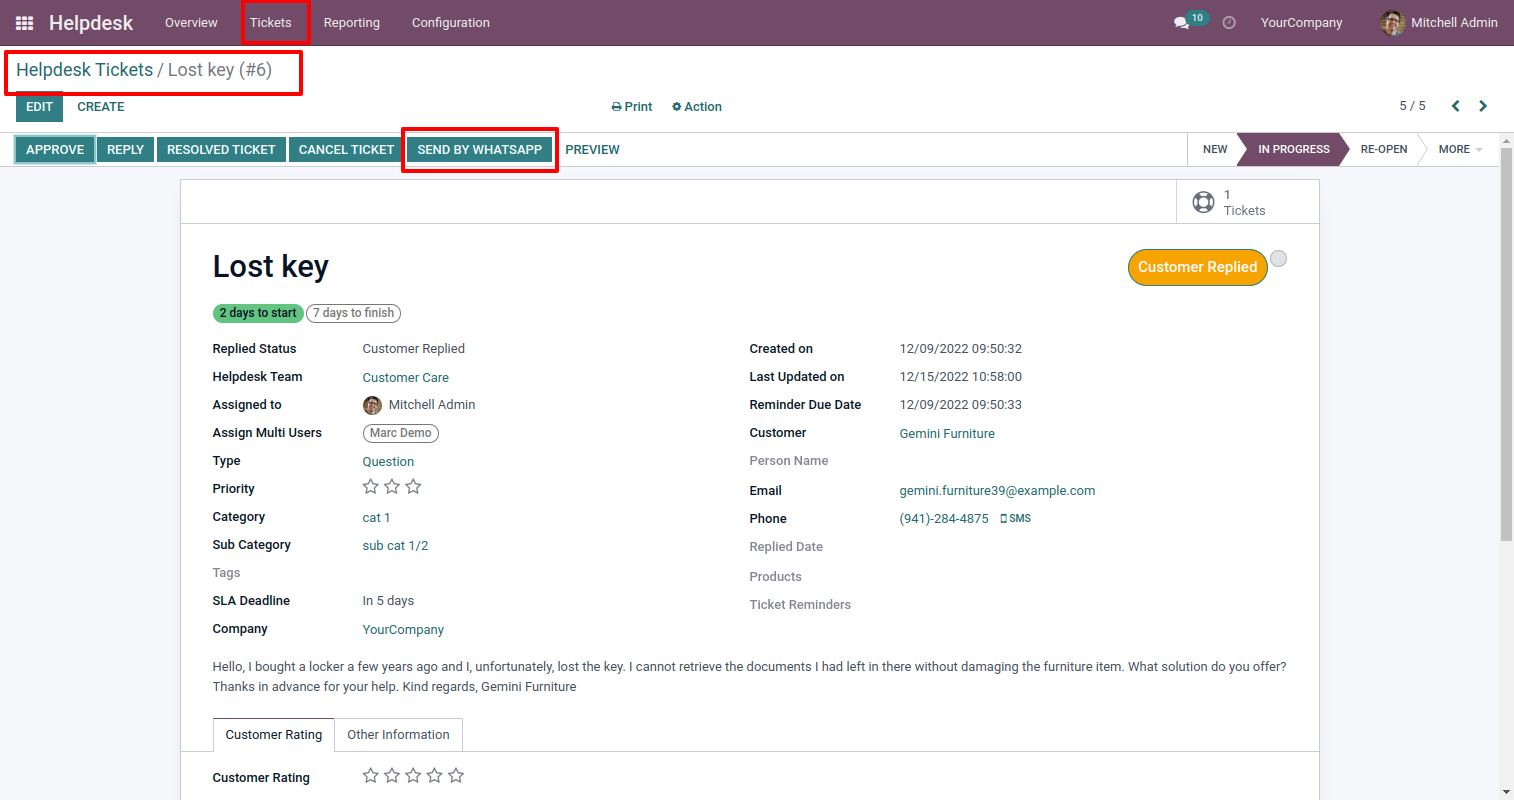
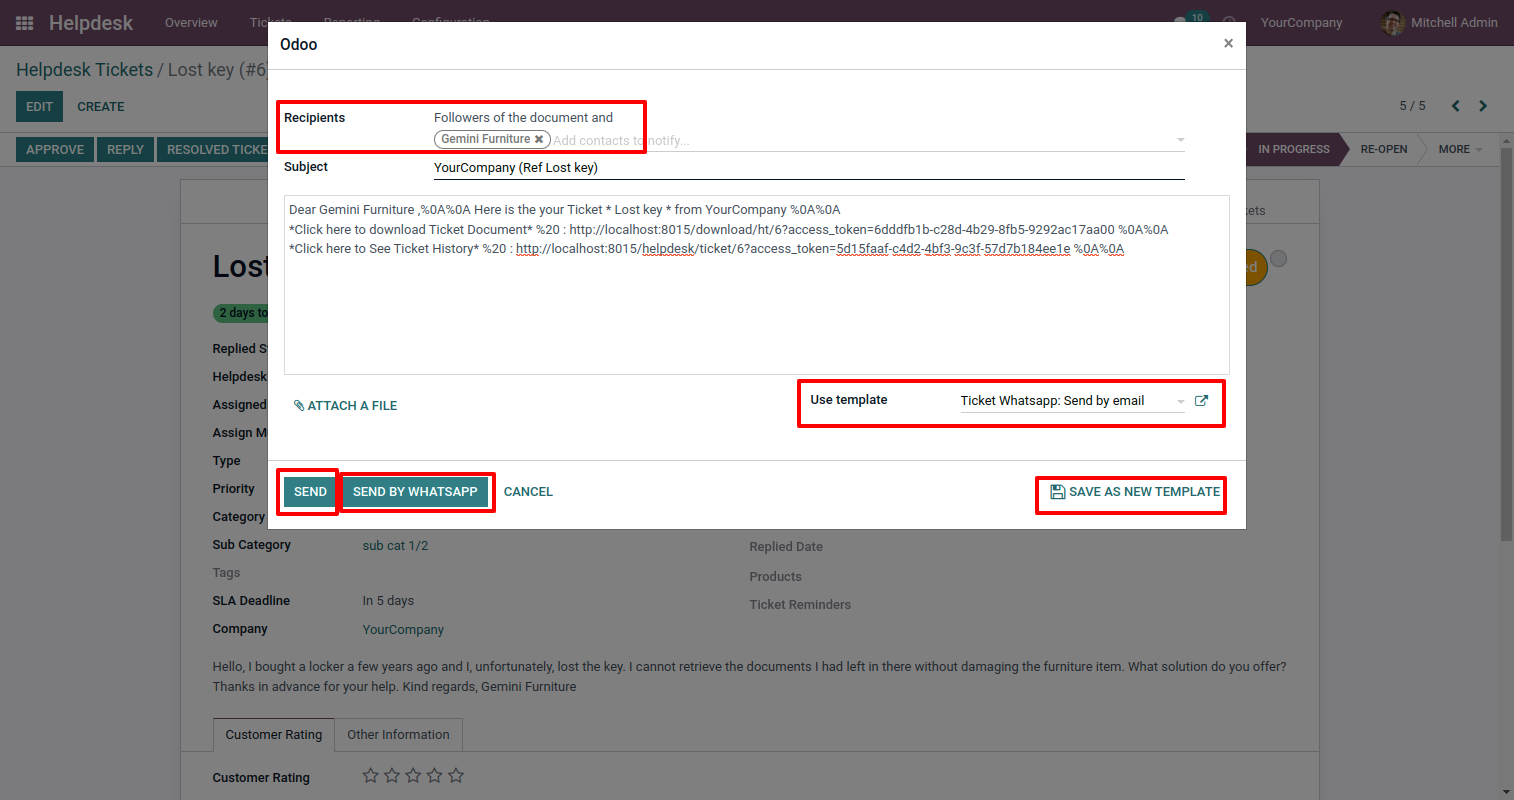
Choose recipient, template and edit Message as required and click send by whatsapp.
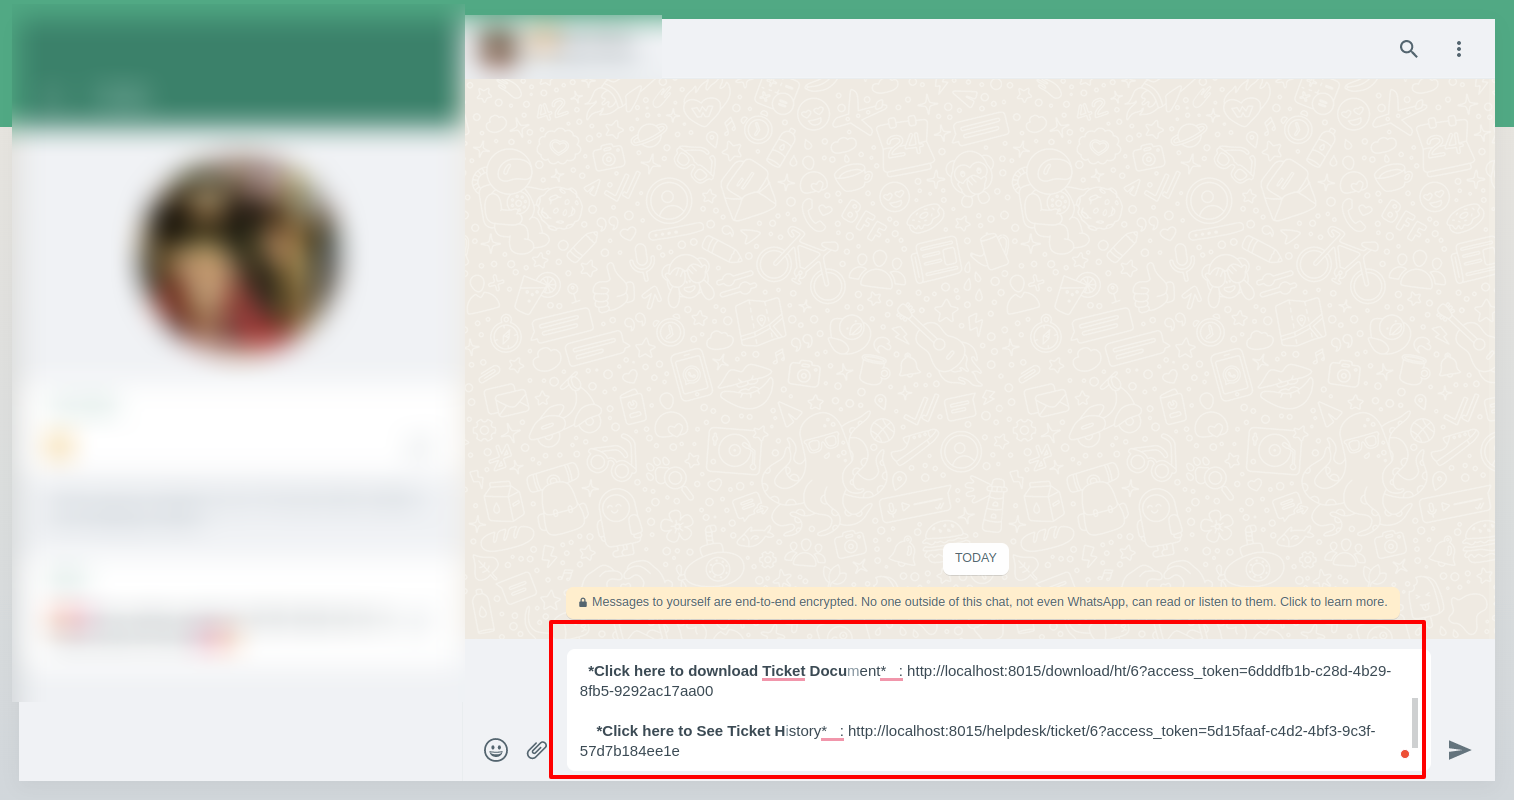
This is the output shown in the WhatsApp messenger.
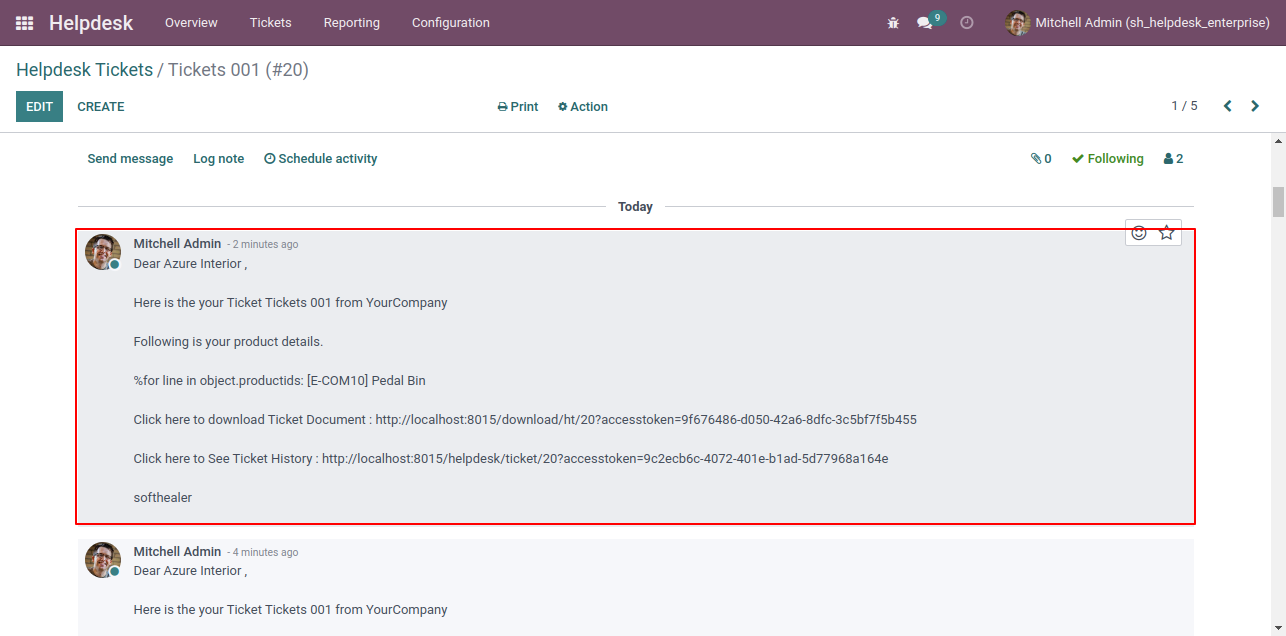
In helpdesk ticket chatter you can see the message which is sent.
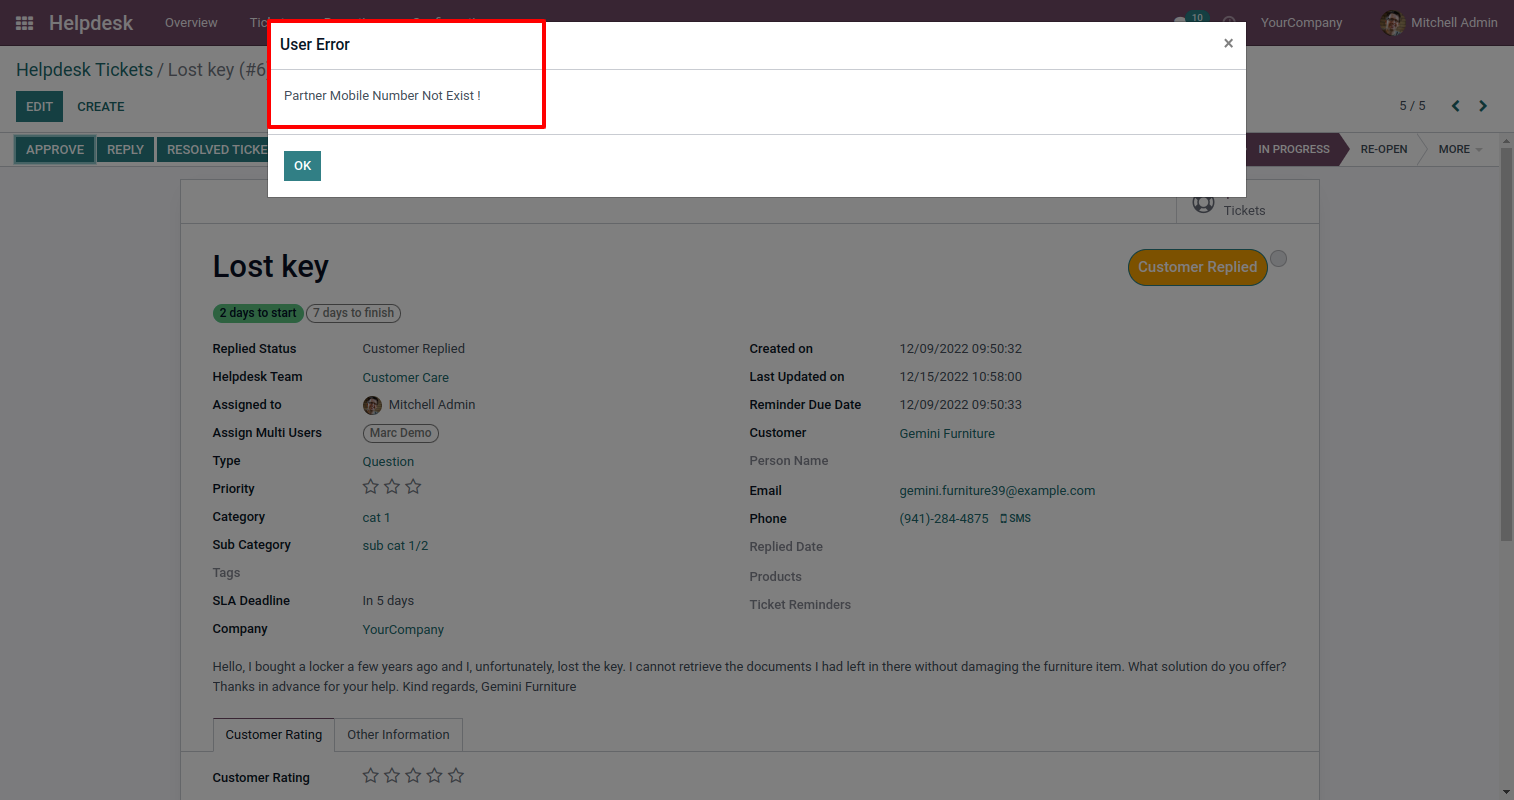
When Partner Mobile no not found then give warraning.
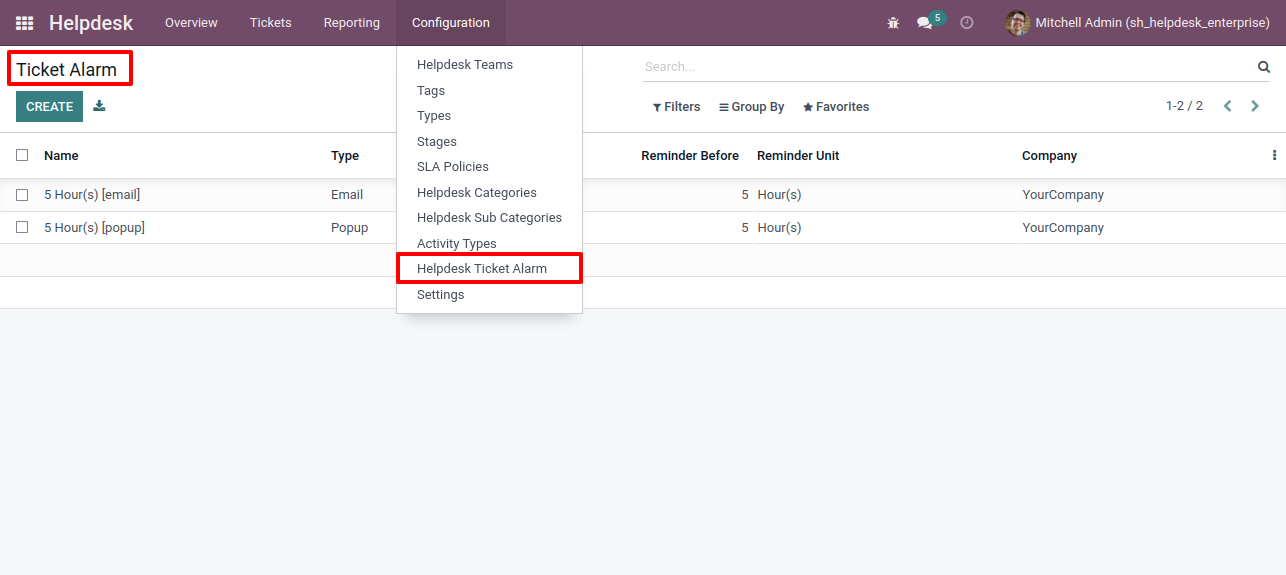
Enable "Ticket Reminder".

Go to the configuration => "Helpdesk Ticket Alarm".
Helpdesk ticket alarm form view looks like this.
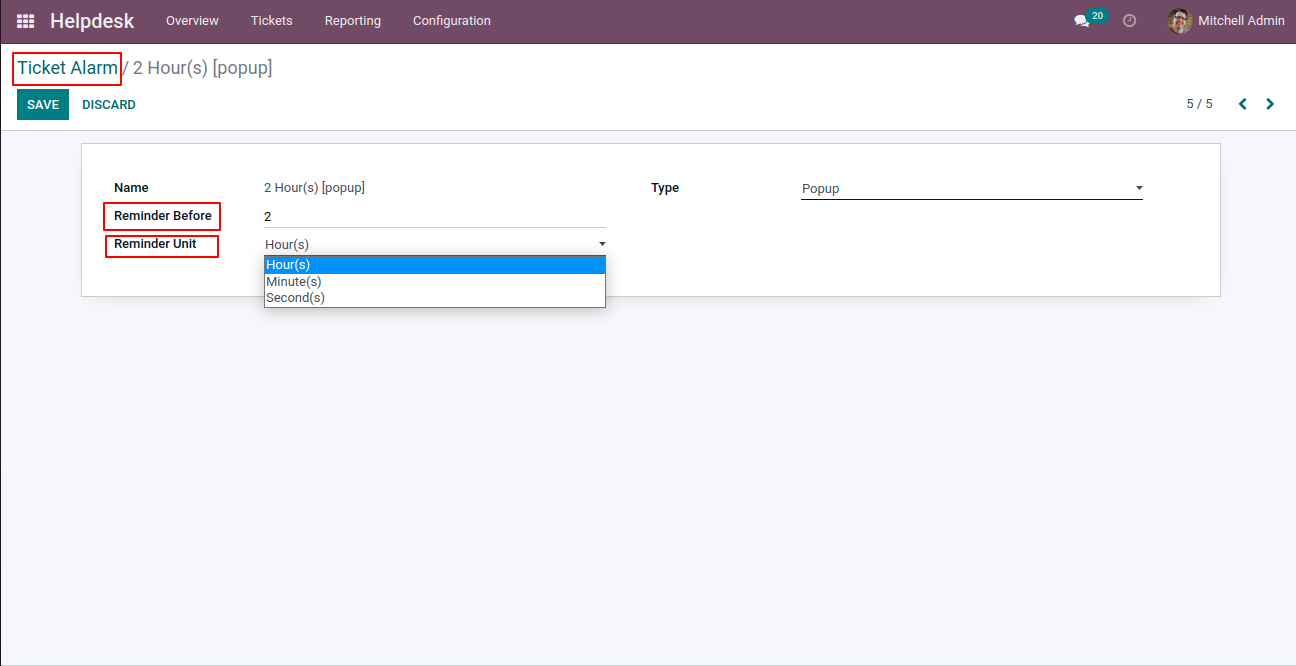
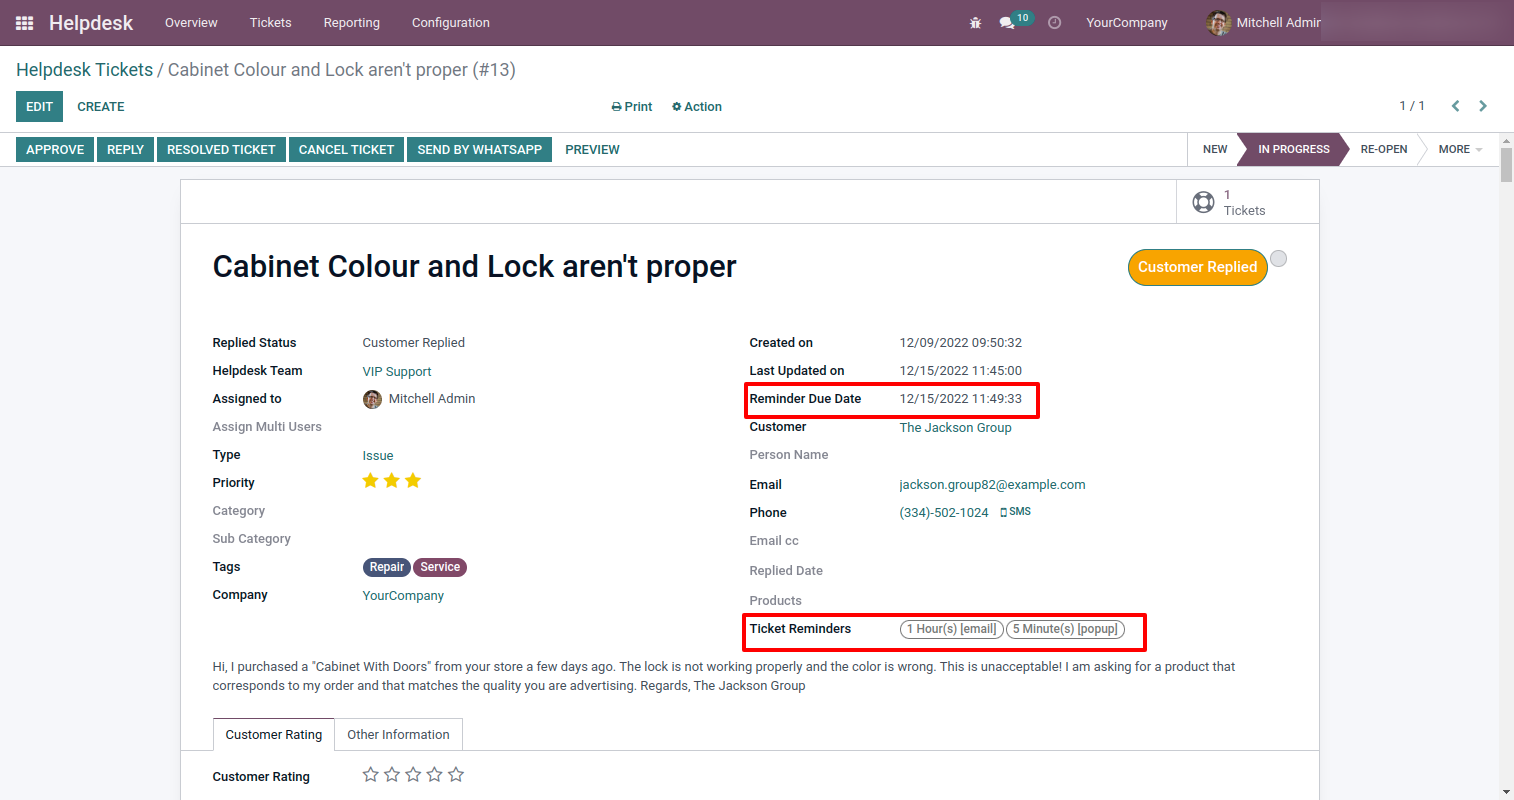
Helpdesk ticket alarm form view with the ticket reminder.
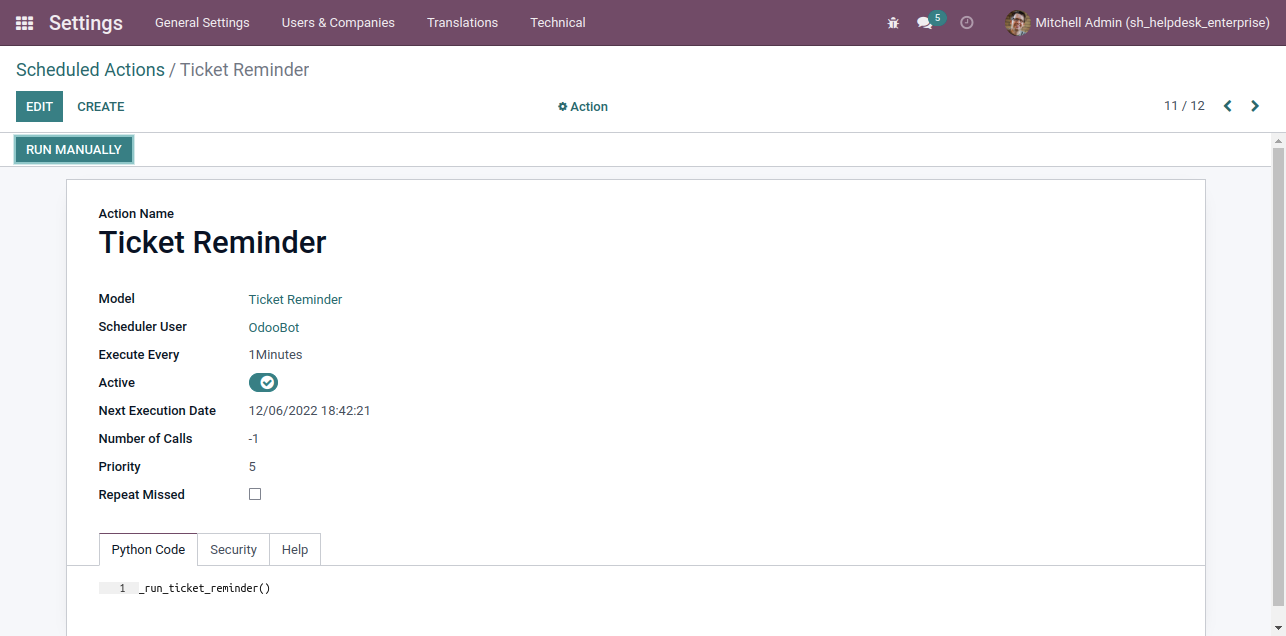
Helpdesk ticket reminders can run using a cron job.
Helpdesk ticket reminders popup looks like this.

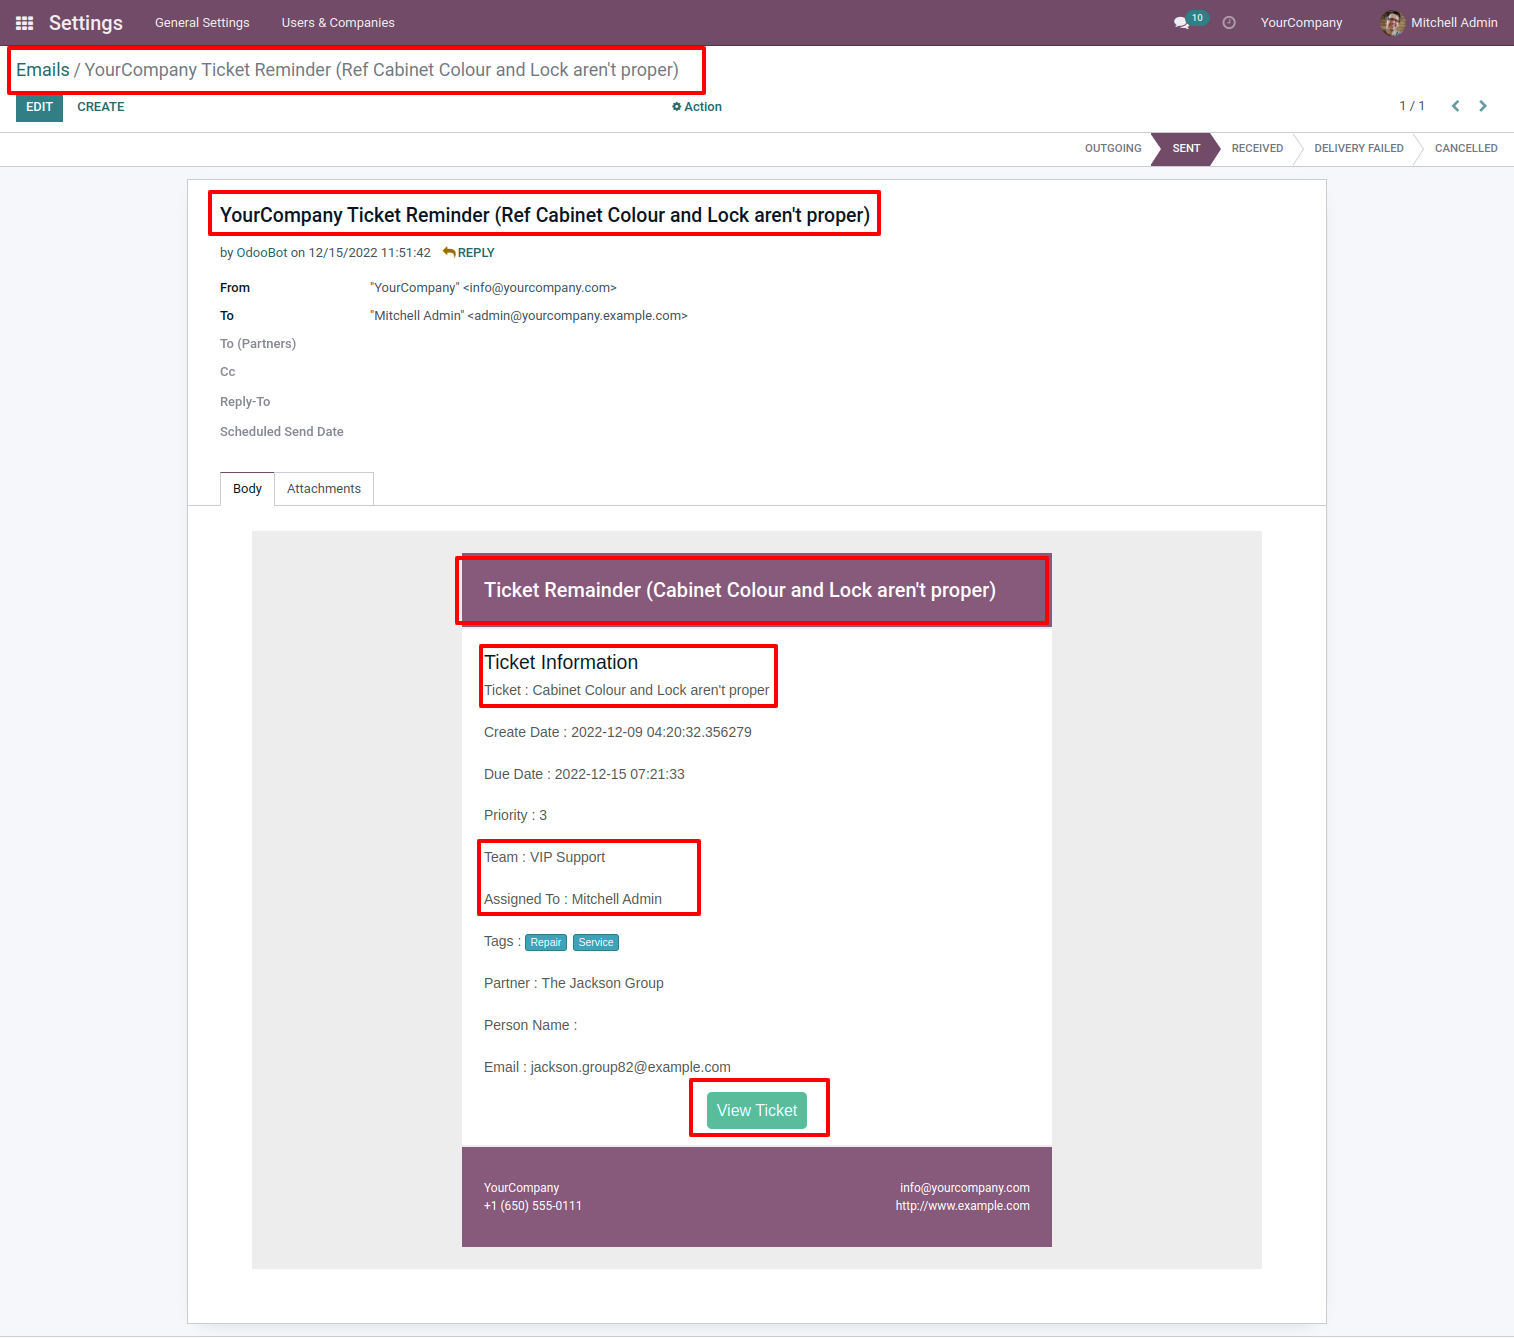
Helpdesk ticket reminders email looks like this.
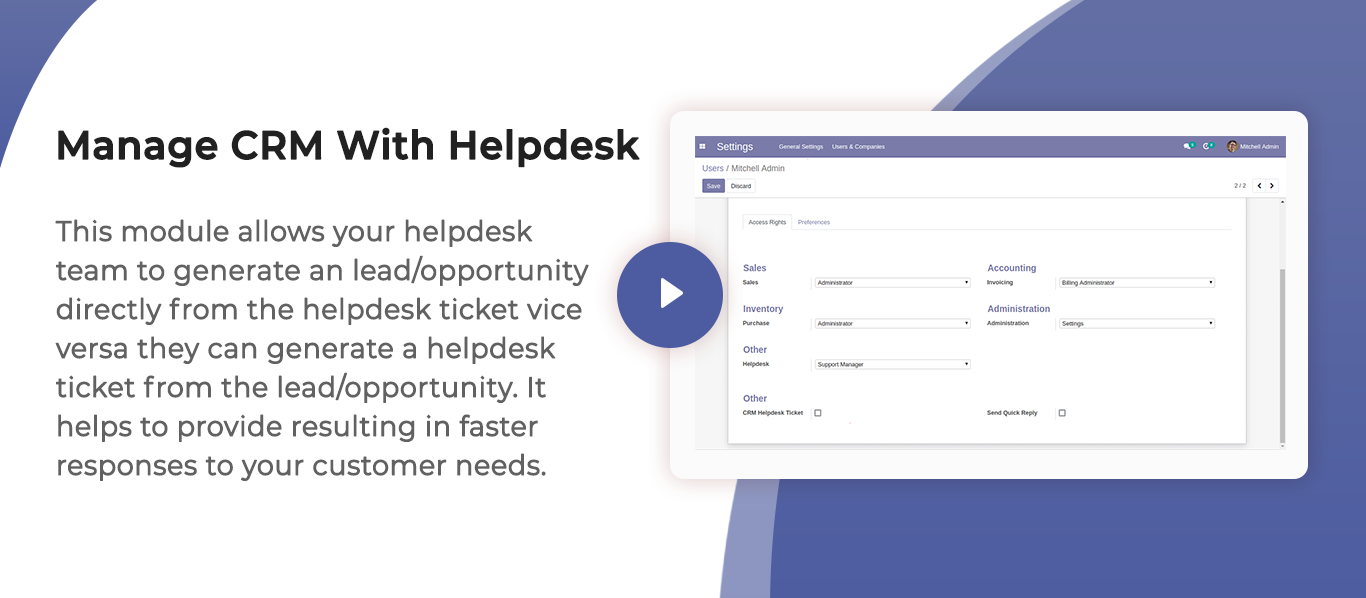
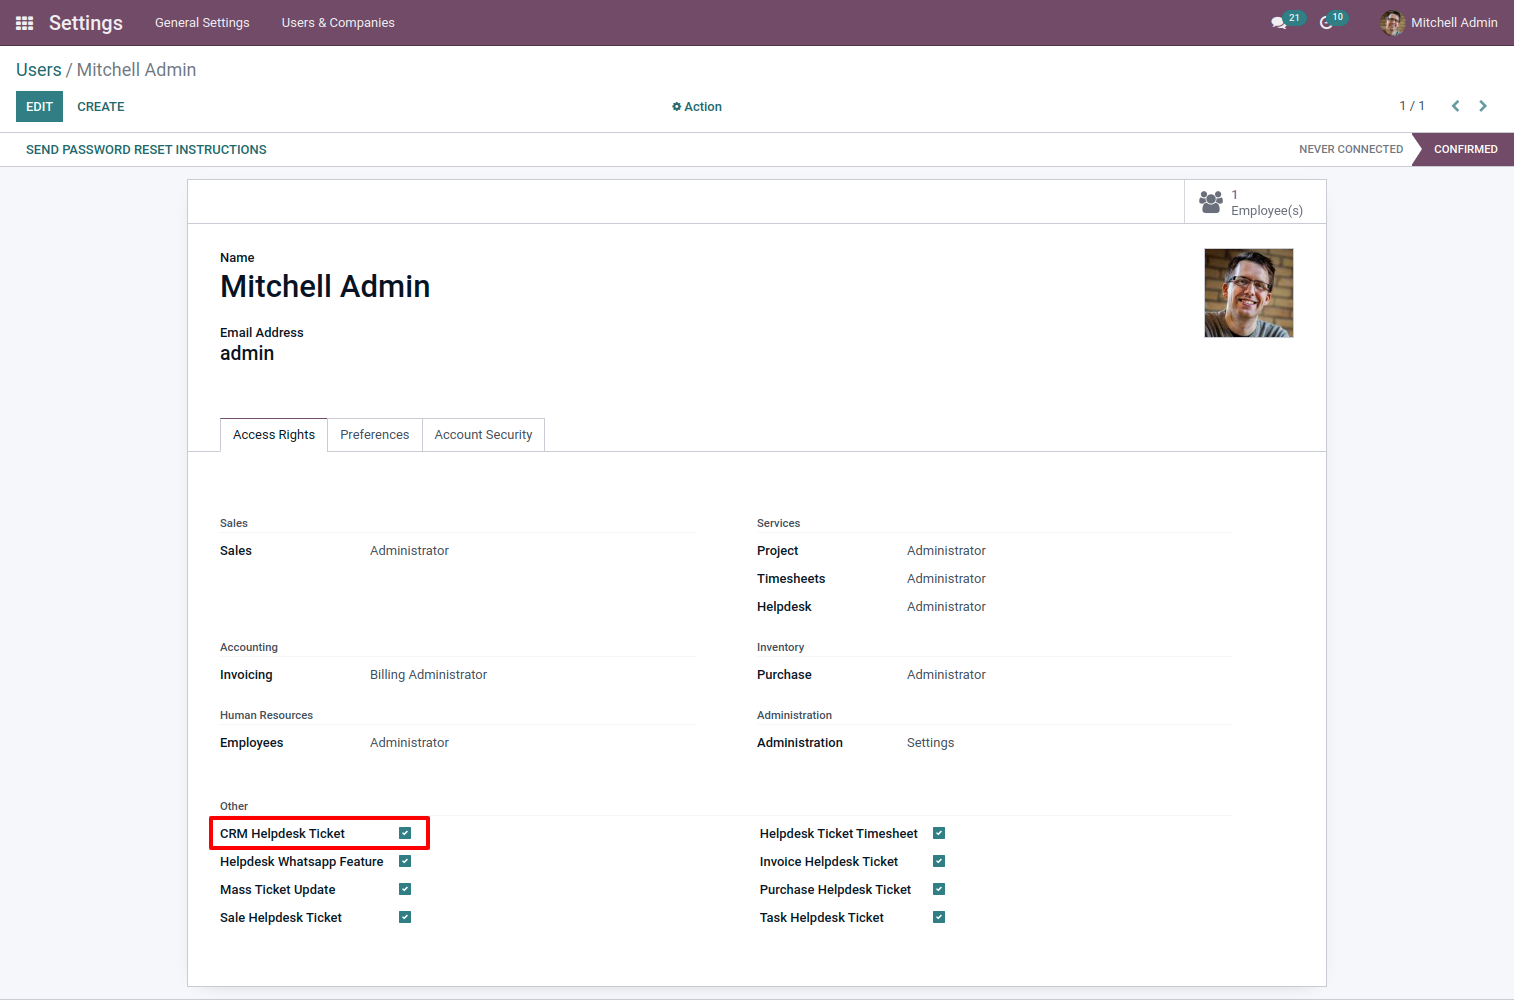
Tick security group "CRM Helpdesk Ticket" to generate lead/opportunity directly from the helpdesk ticket as well generate a helpdesk ticket from the lead/opportunity.
"Helpdesk Ticket" form view, press the "Create Lead" button to create lead directly from the helpdesk ticket.

After that one wizard opens, fill the details then press the "Save" button.
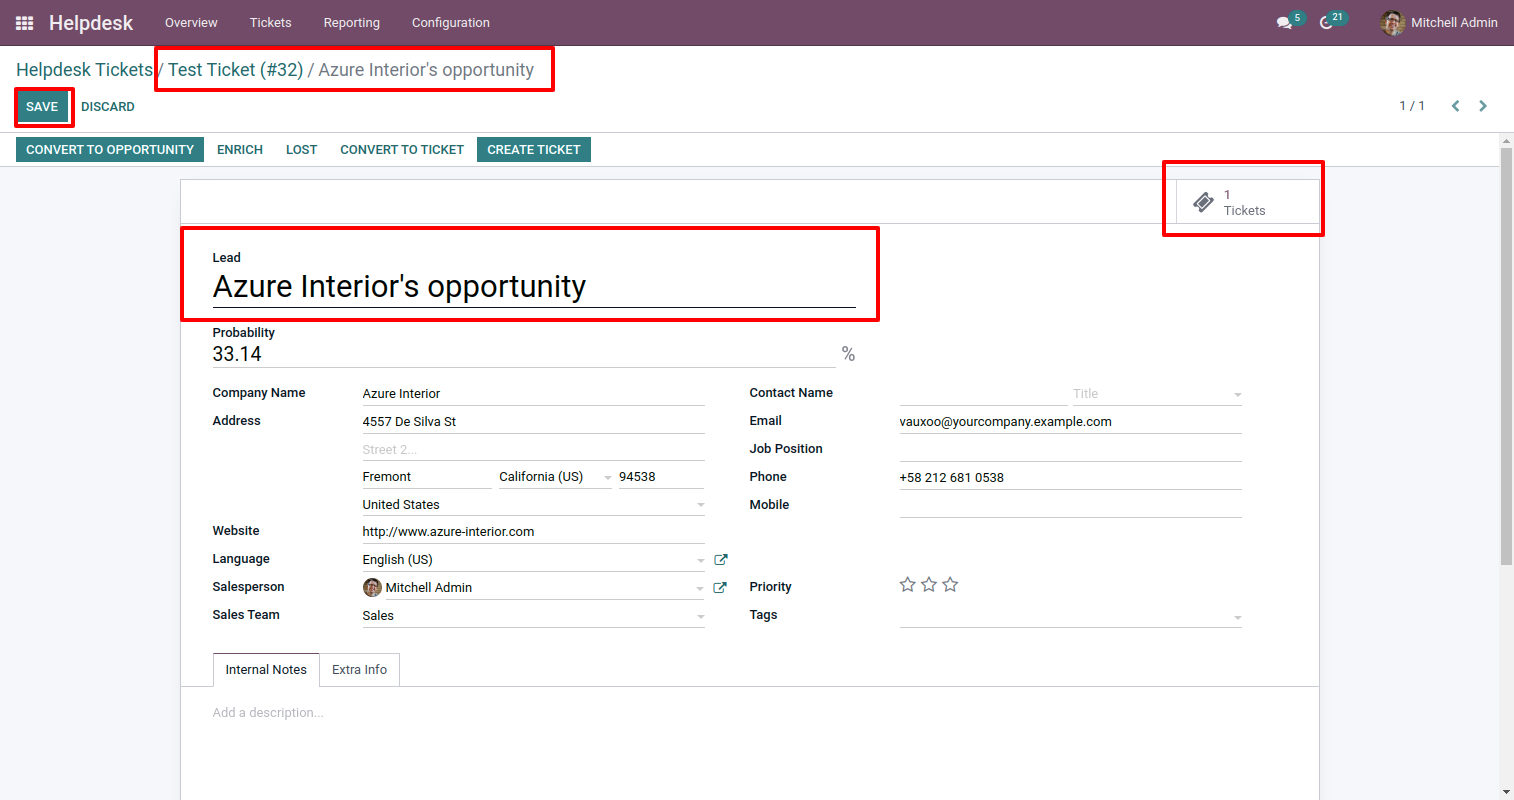
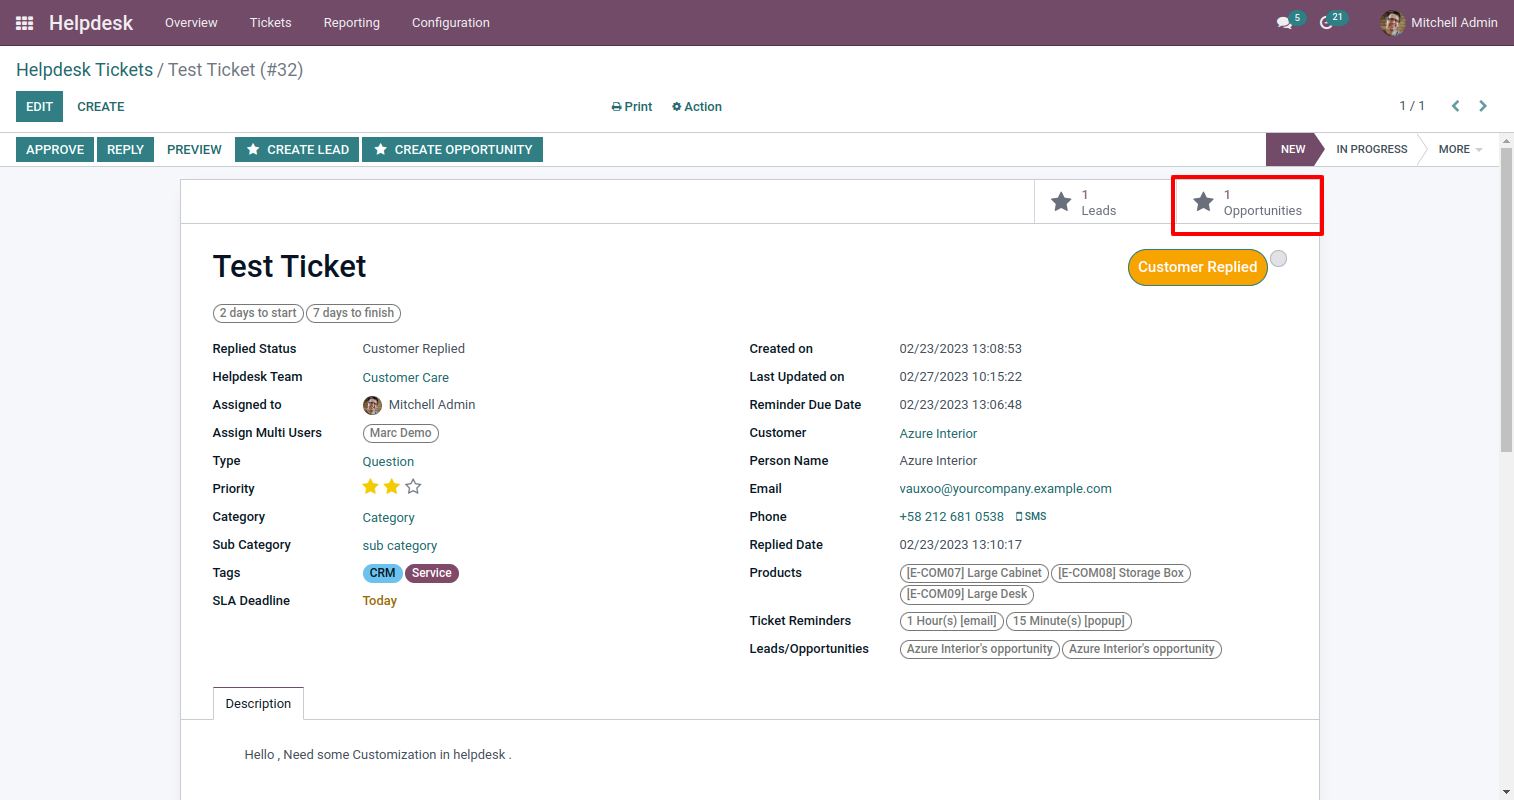
"Helpdesk Ticket" form view, press the "Create Opportunity" button to create an opportunity directly from the helpdesk ticket.
After that one wizard opens, fill the details then press the "Save" button.
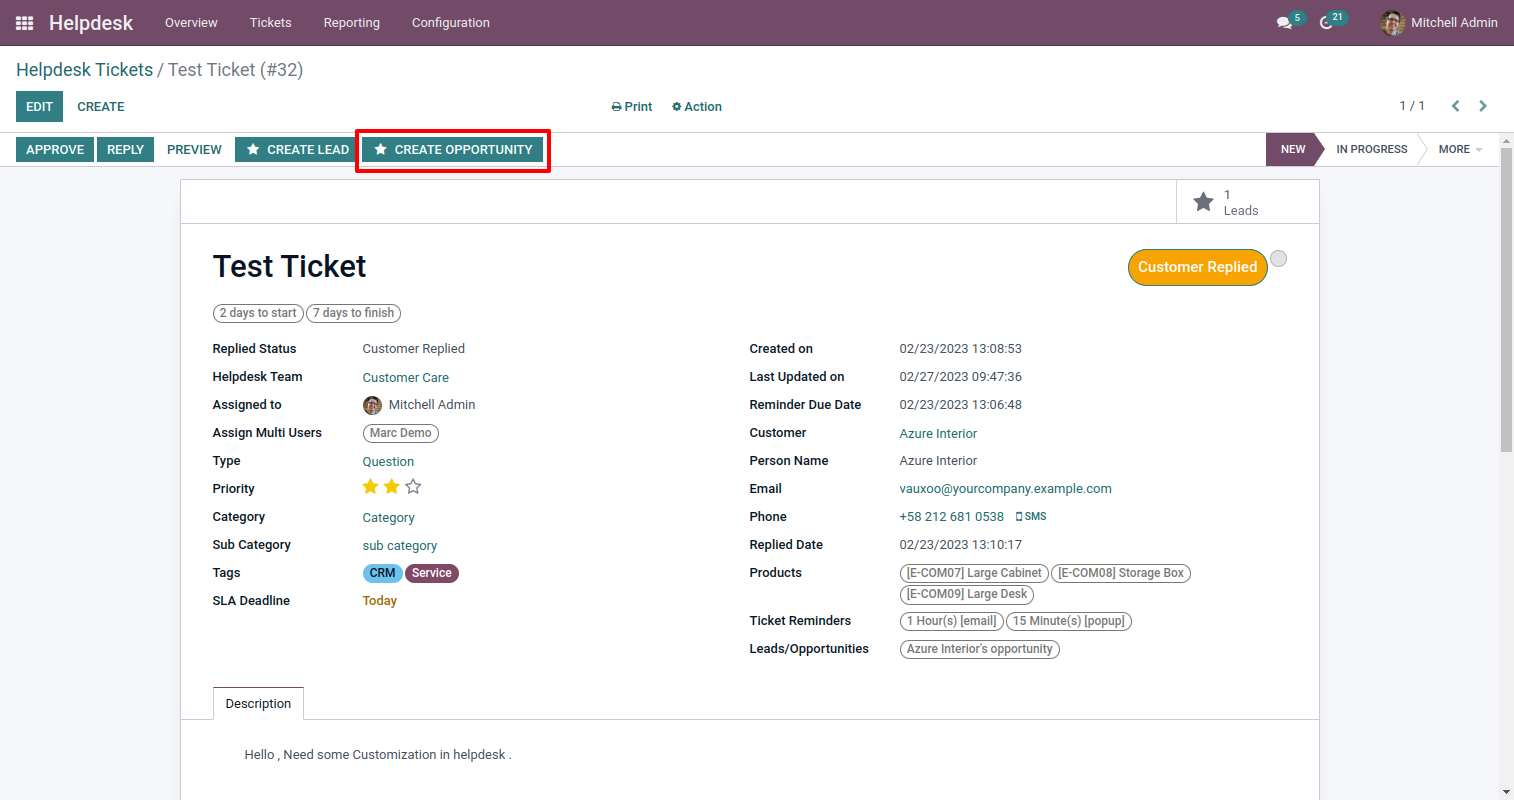
Now, from the ticket, you can see generated leads/ opportunities of that ticket using the smart button.
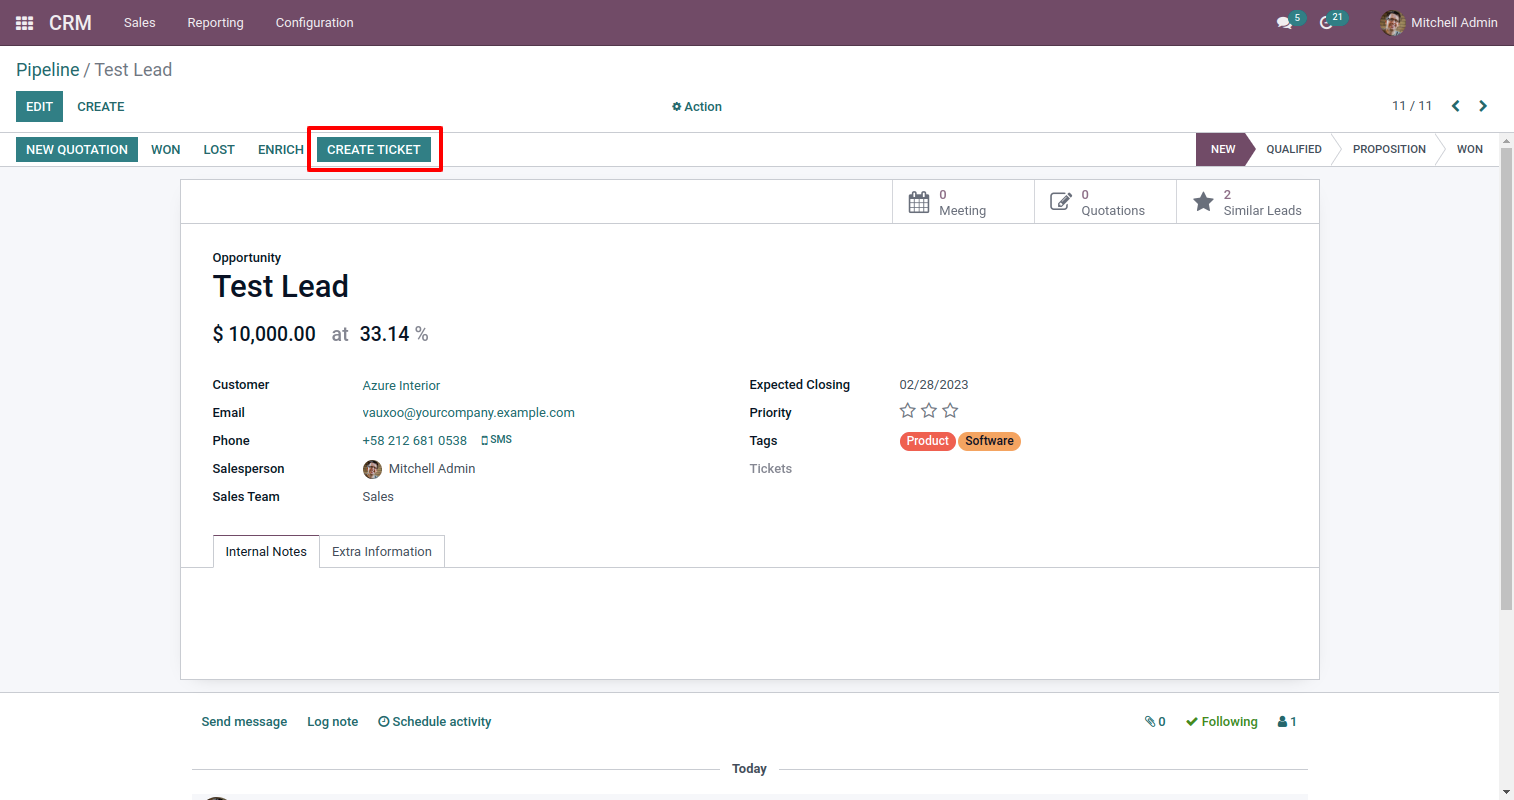
You can create a helpdesk ticket from the lead/opportunity using the "Create Ticket" button.
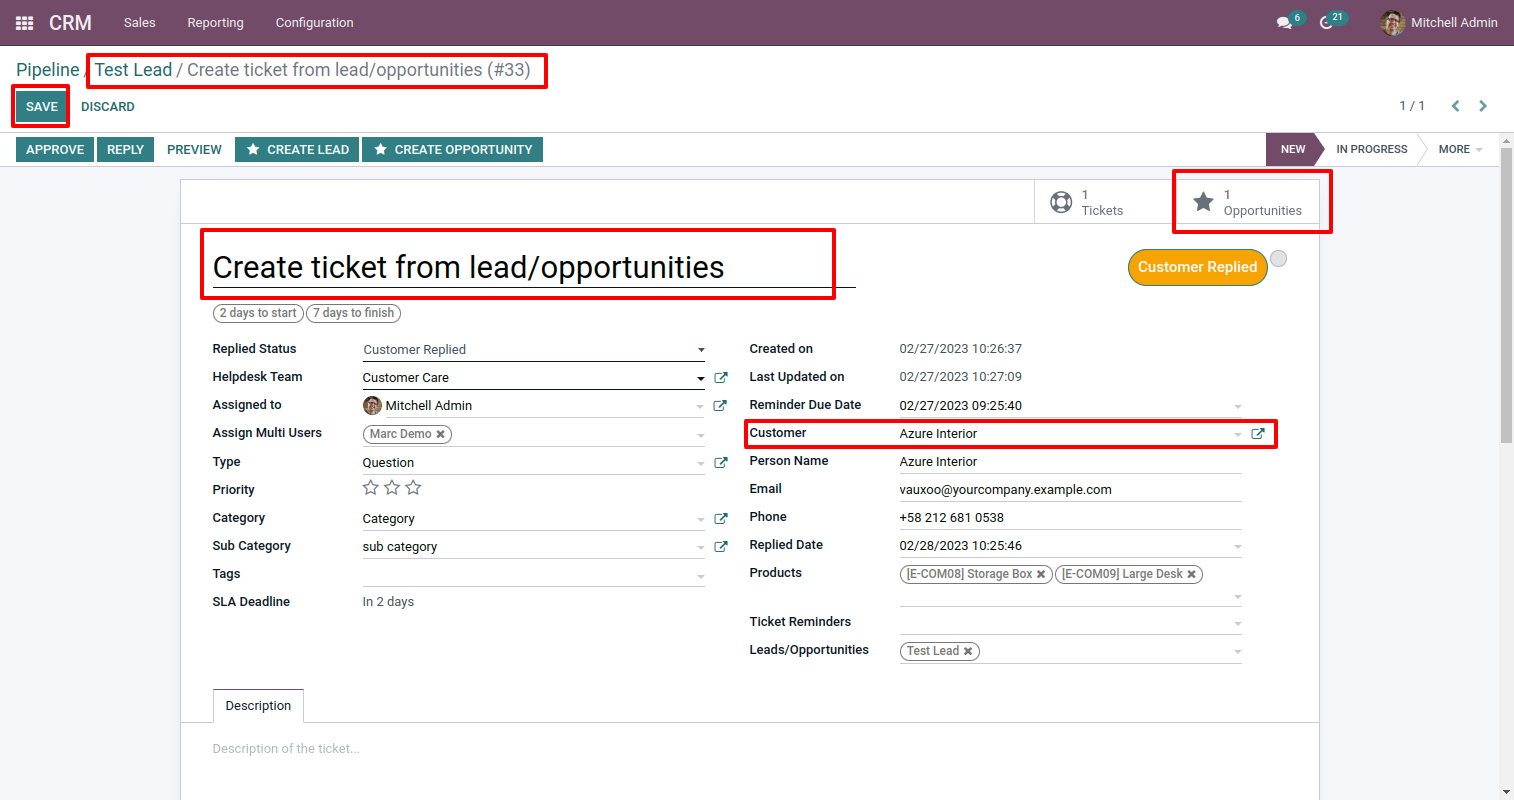
After that one wizard opens, fill the details and save it.
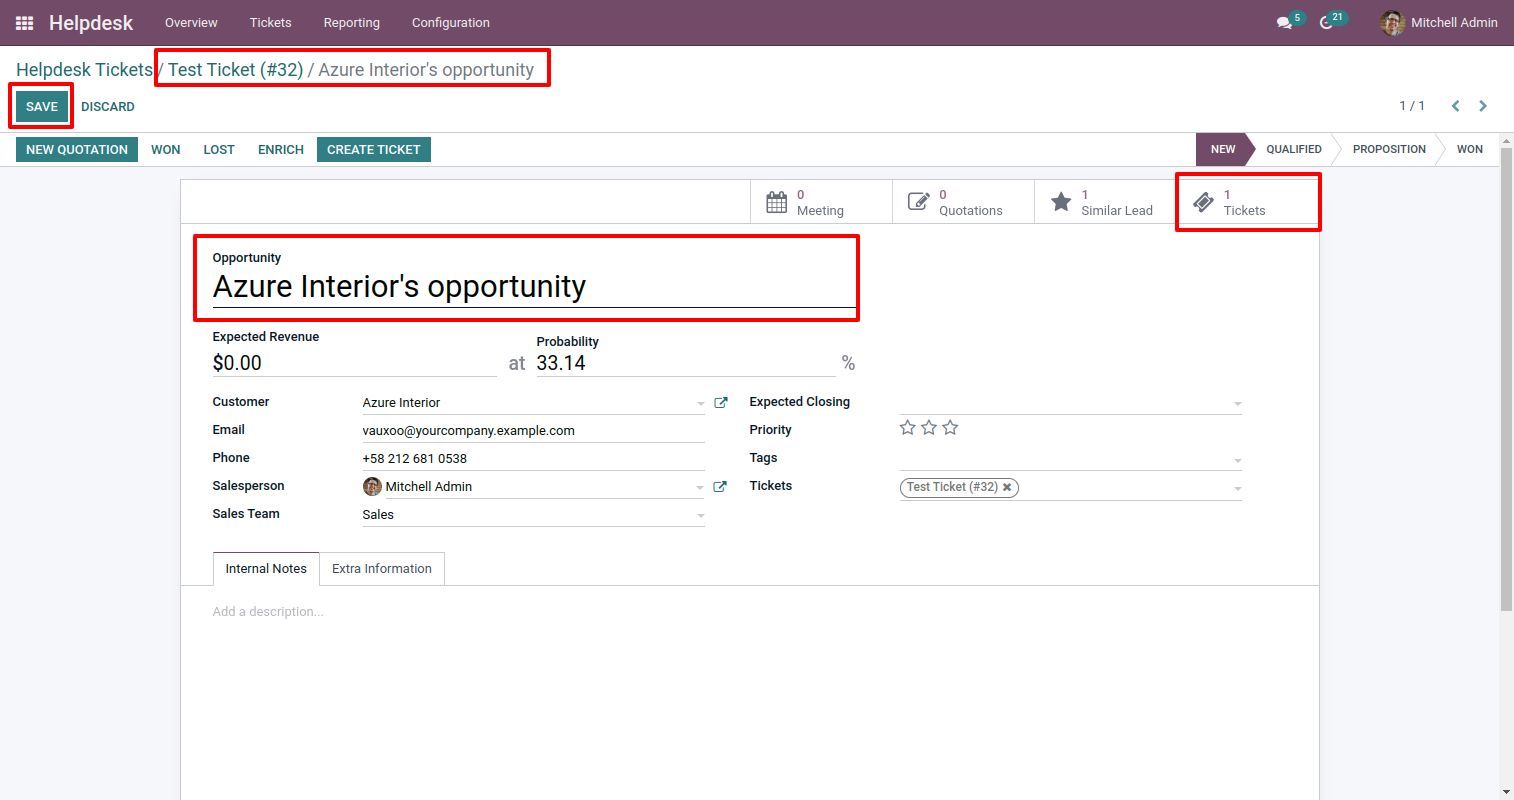
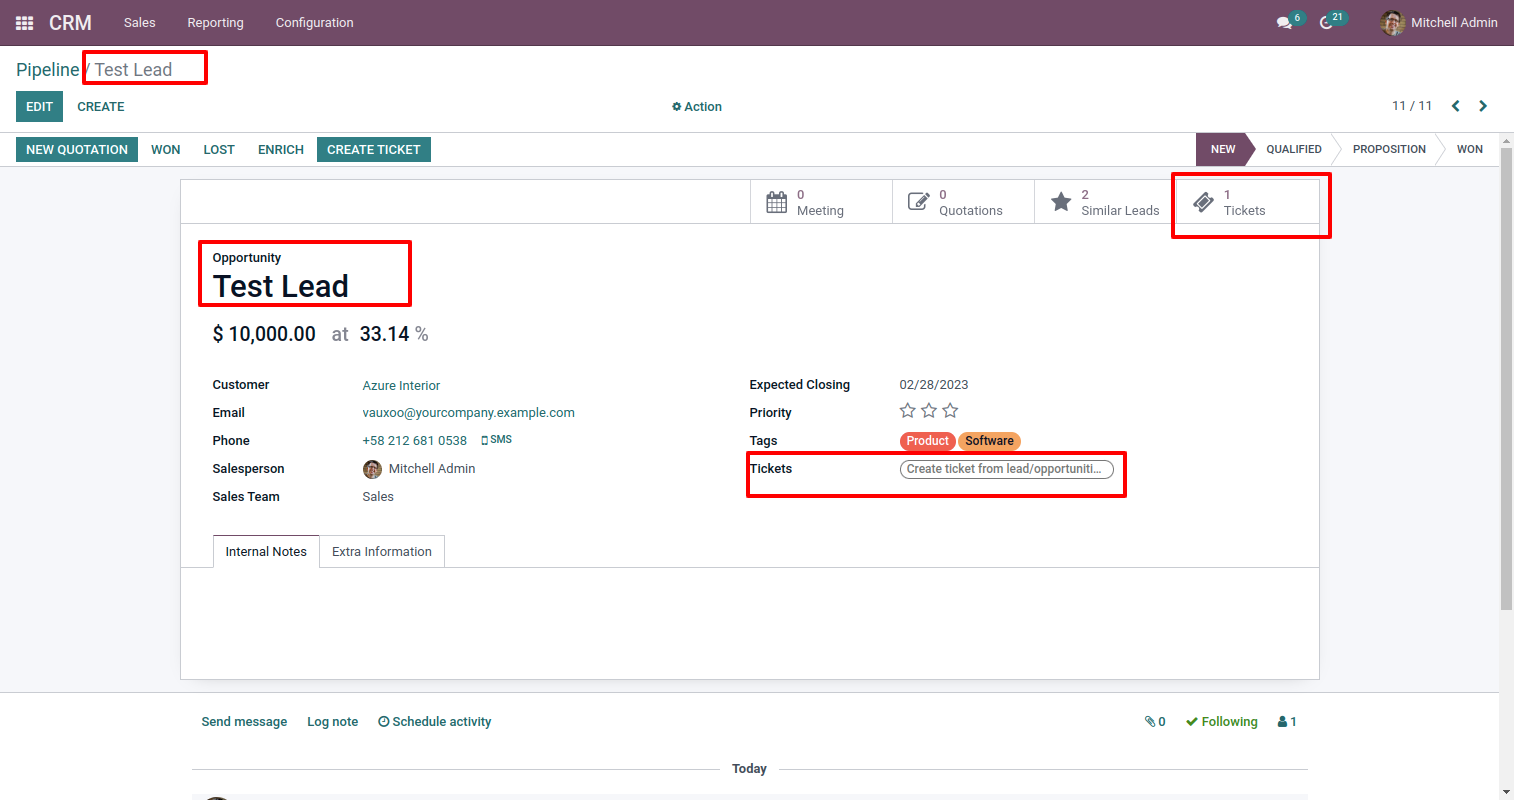
You can see tickets of that lead/opportunity using the "Ticket" smart button.
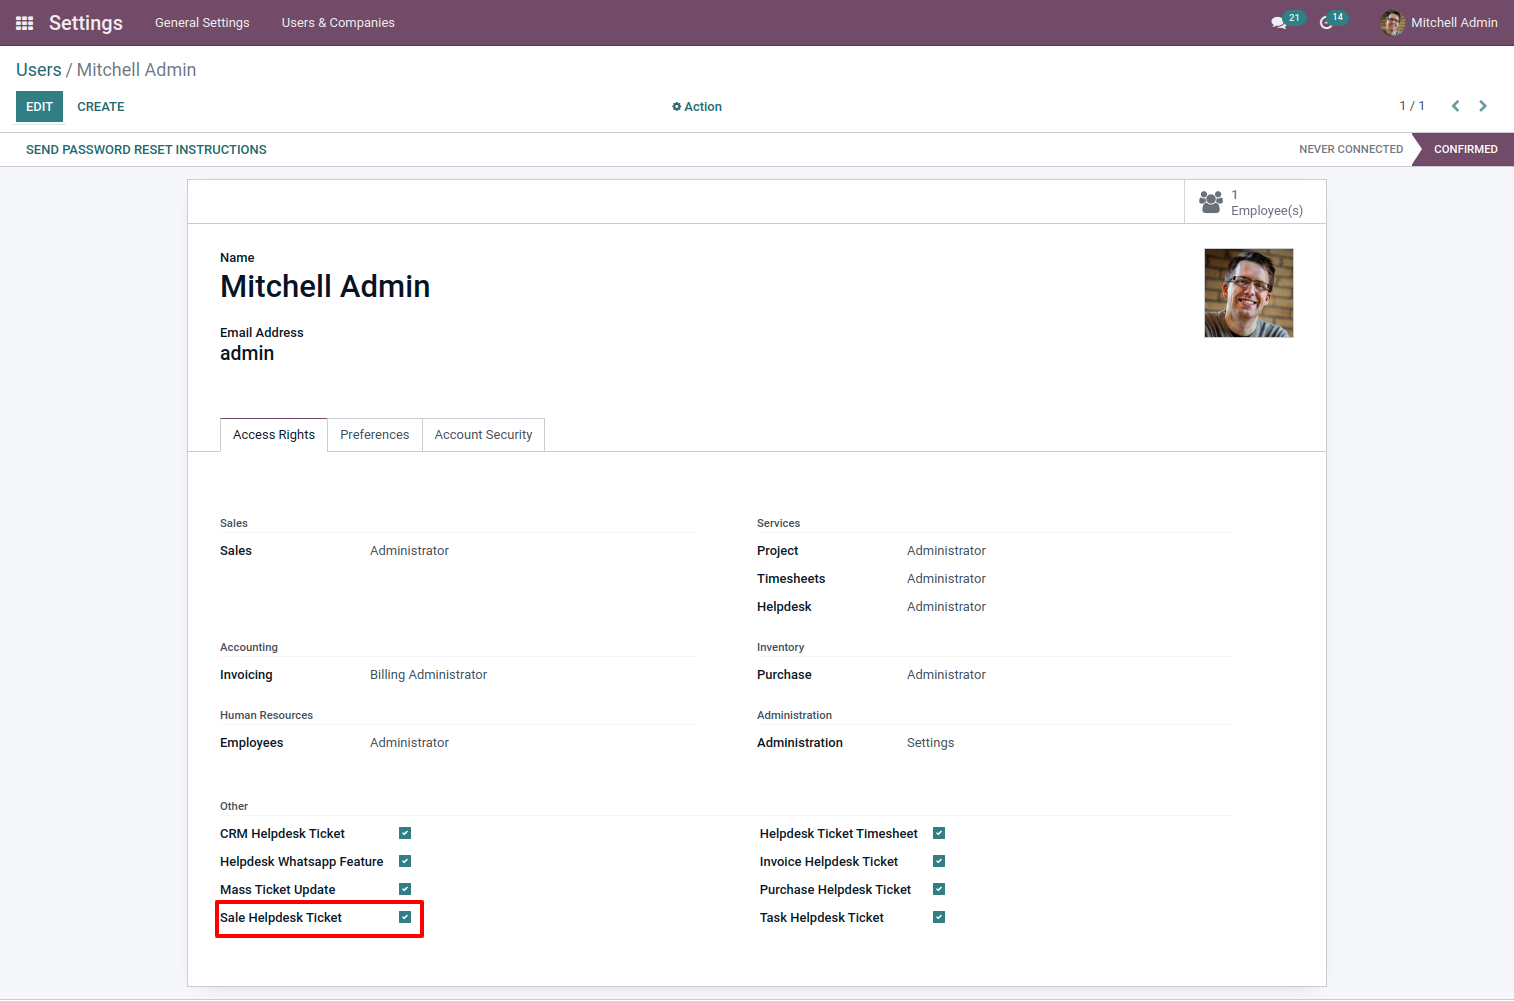
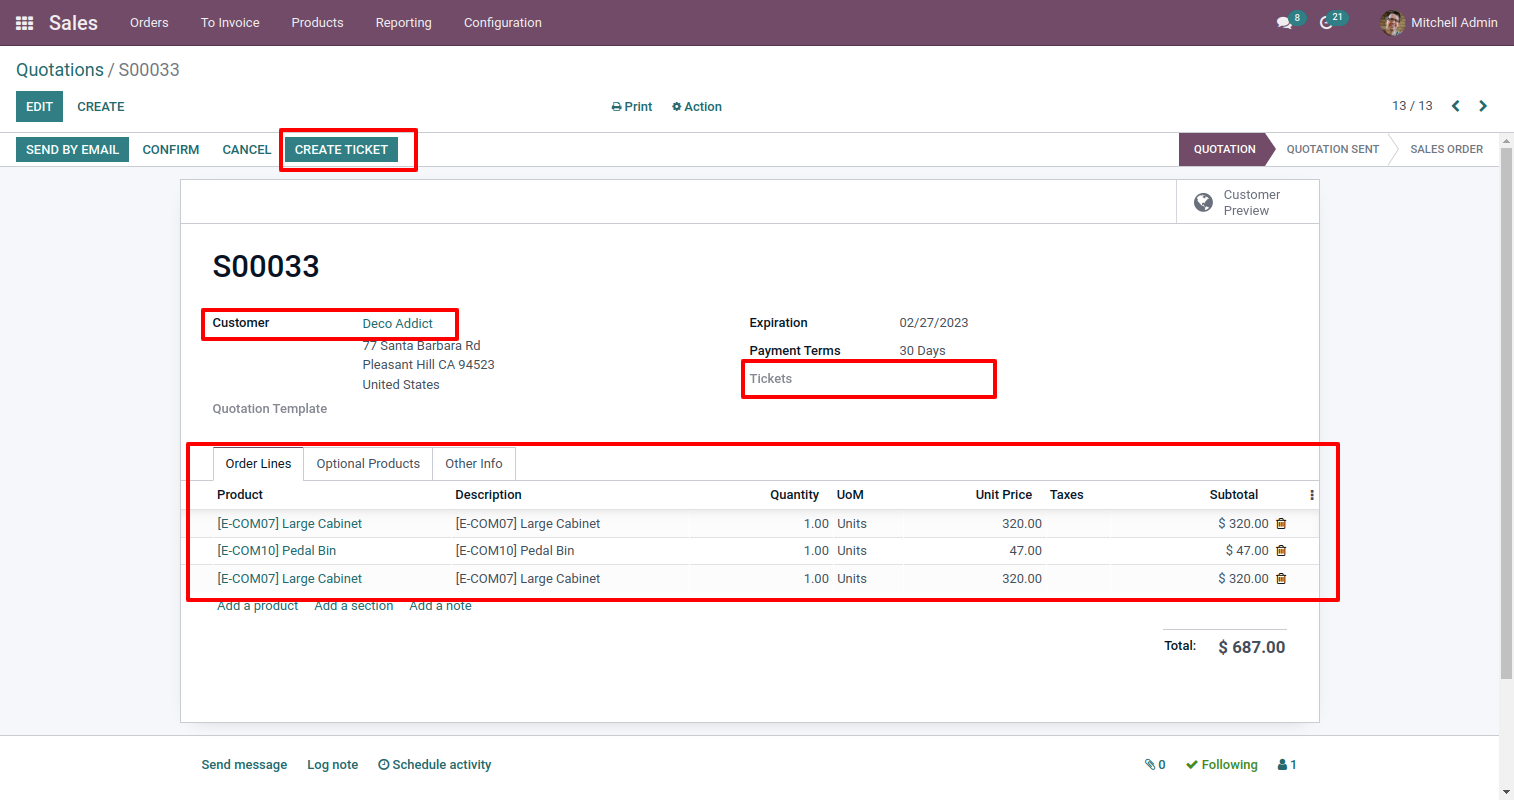
Tick security group "Sale Helpdesk Ticket" to generate a quotation/sale order directly from the helpdesk ticket as well generate a helpdesk ticket from the sale order/quotation.
"Helpdesk Ticket" form view, press the "Create Sale Order" button to create a quotation/sale order directly from the helpdesk ticket.
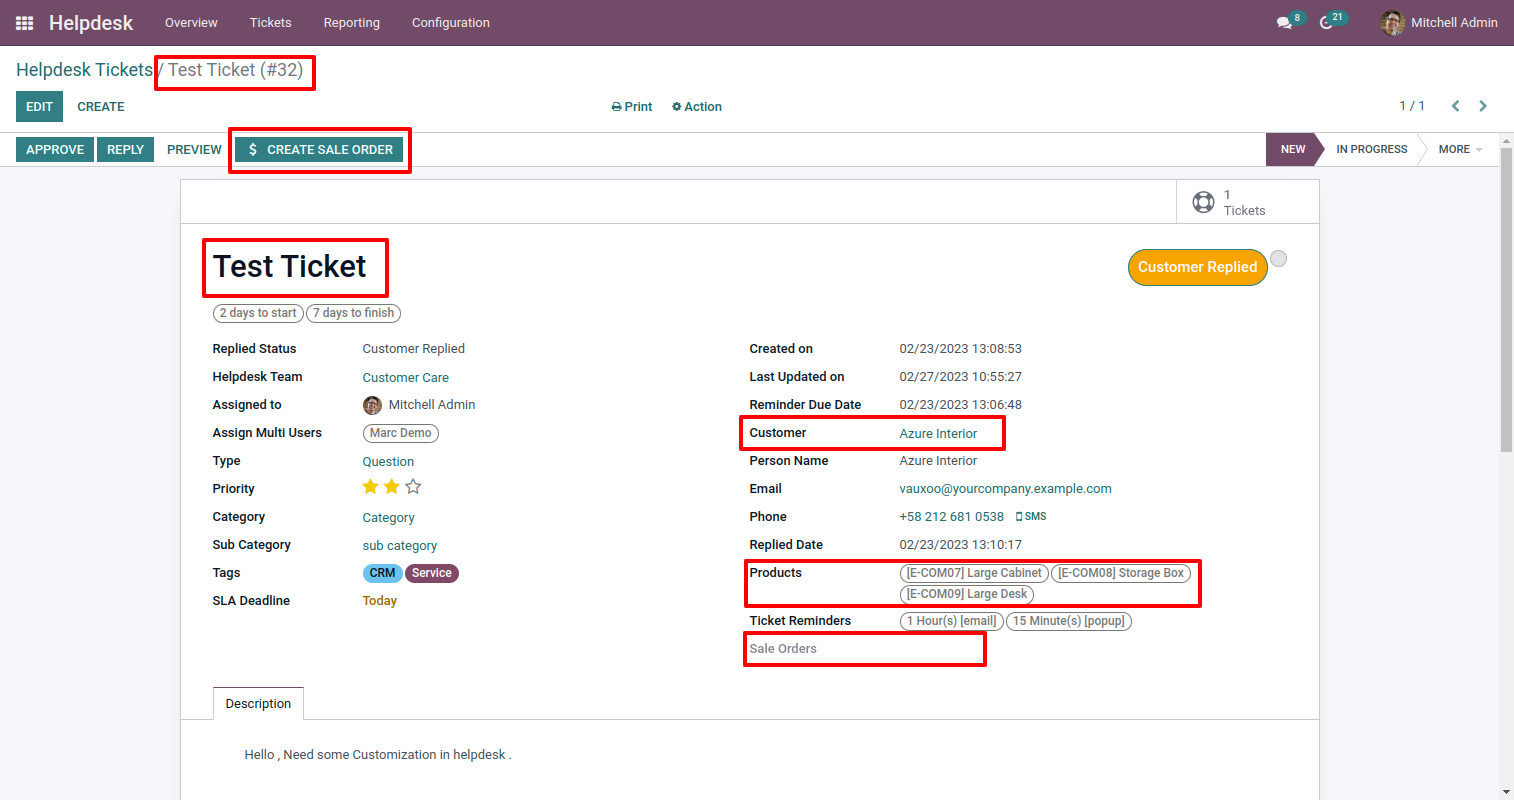
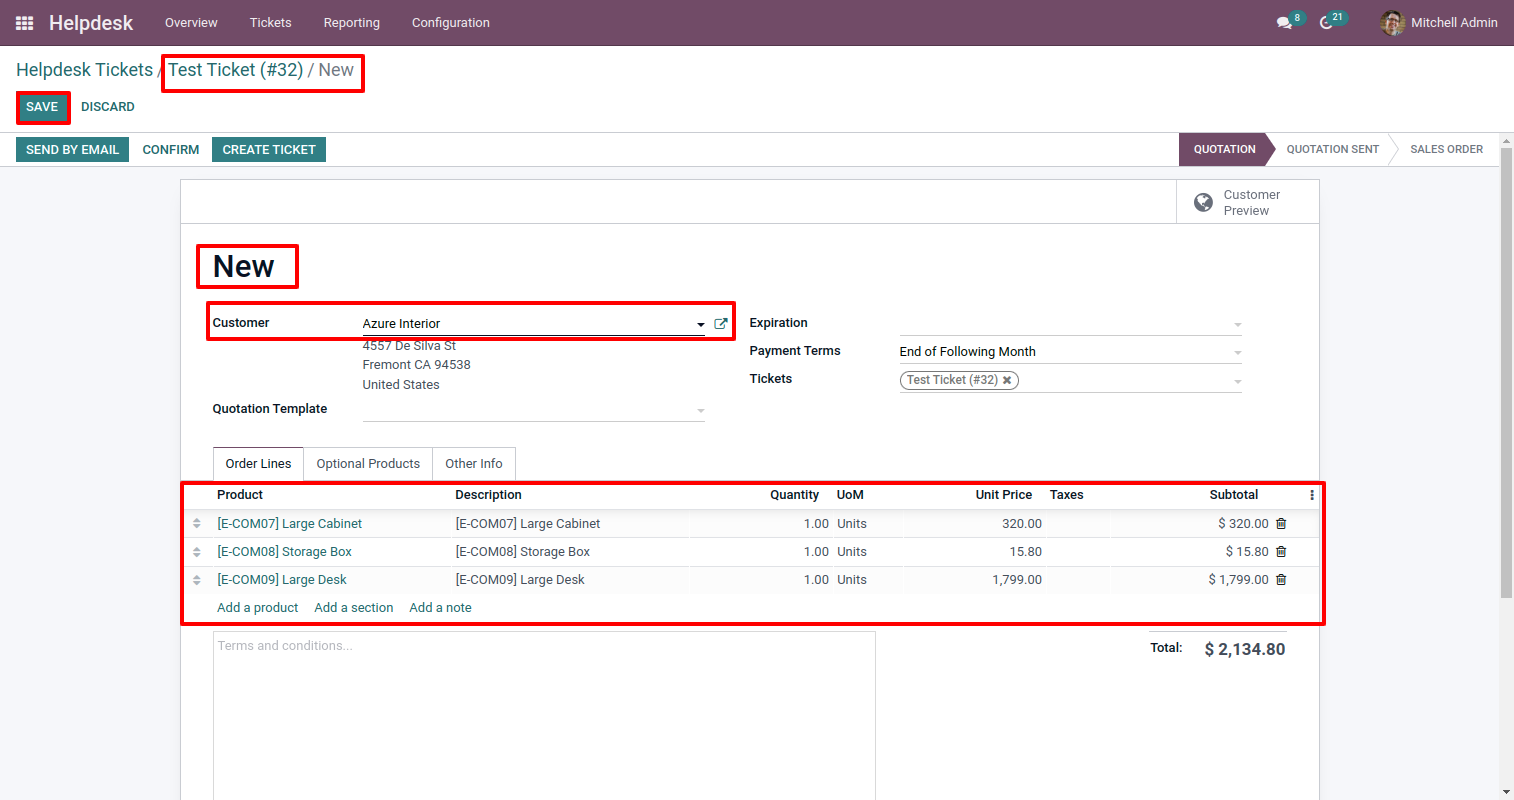
After that one wizard opens, select customer, products, and fill other details then press the "Save" button.
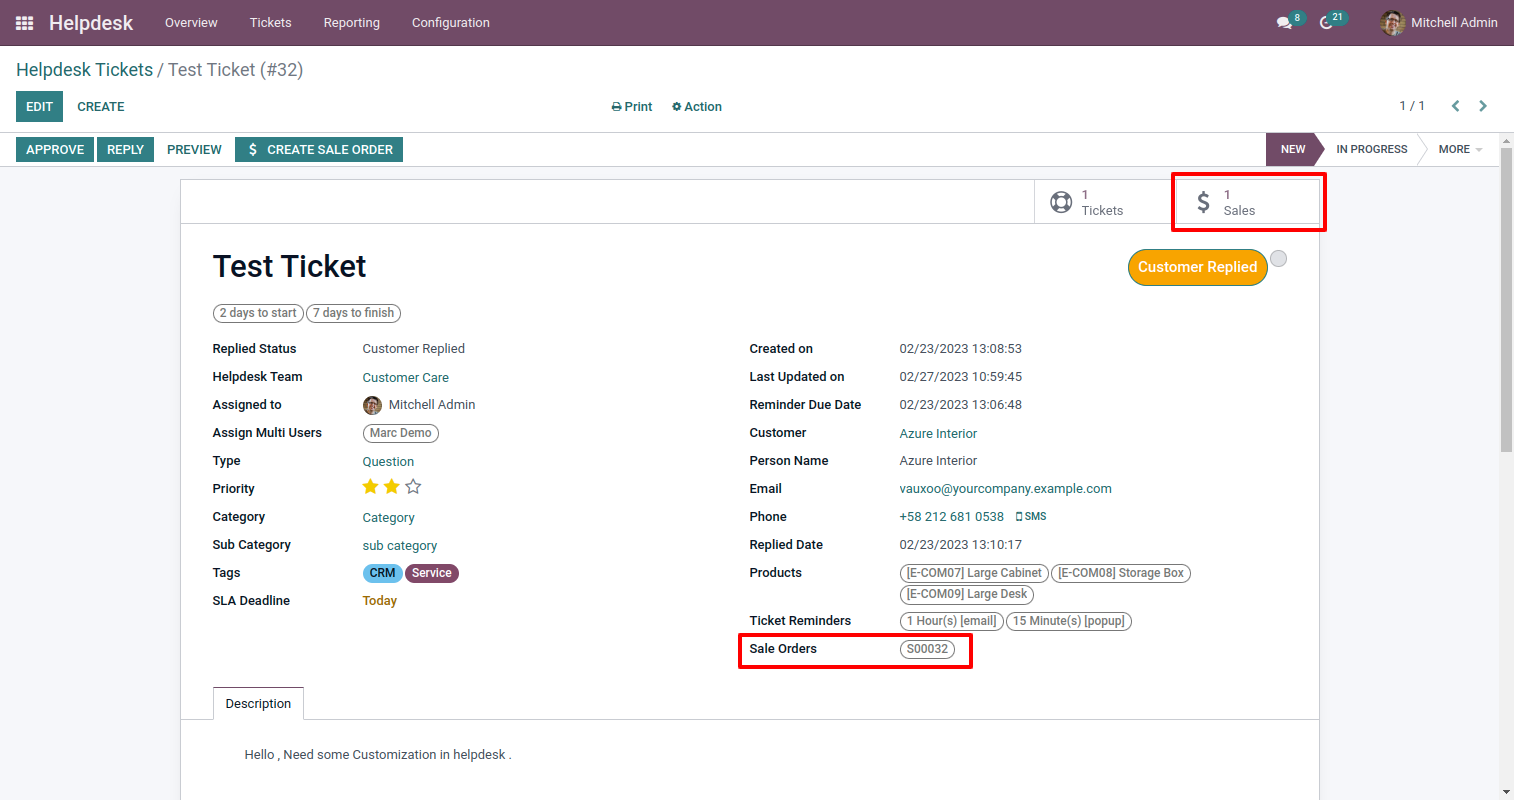
Now, from the ticket, you can see generated sale orders of that ticket using the "sales" smart button.
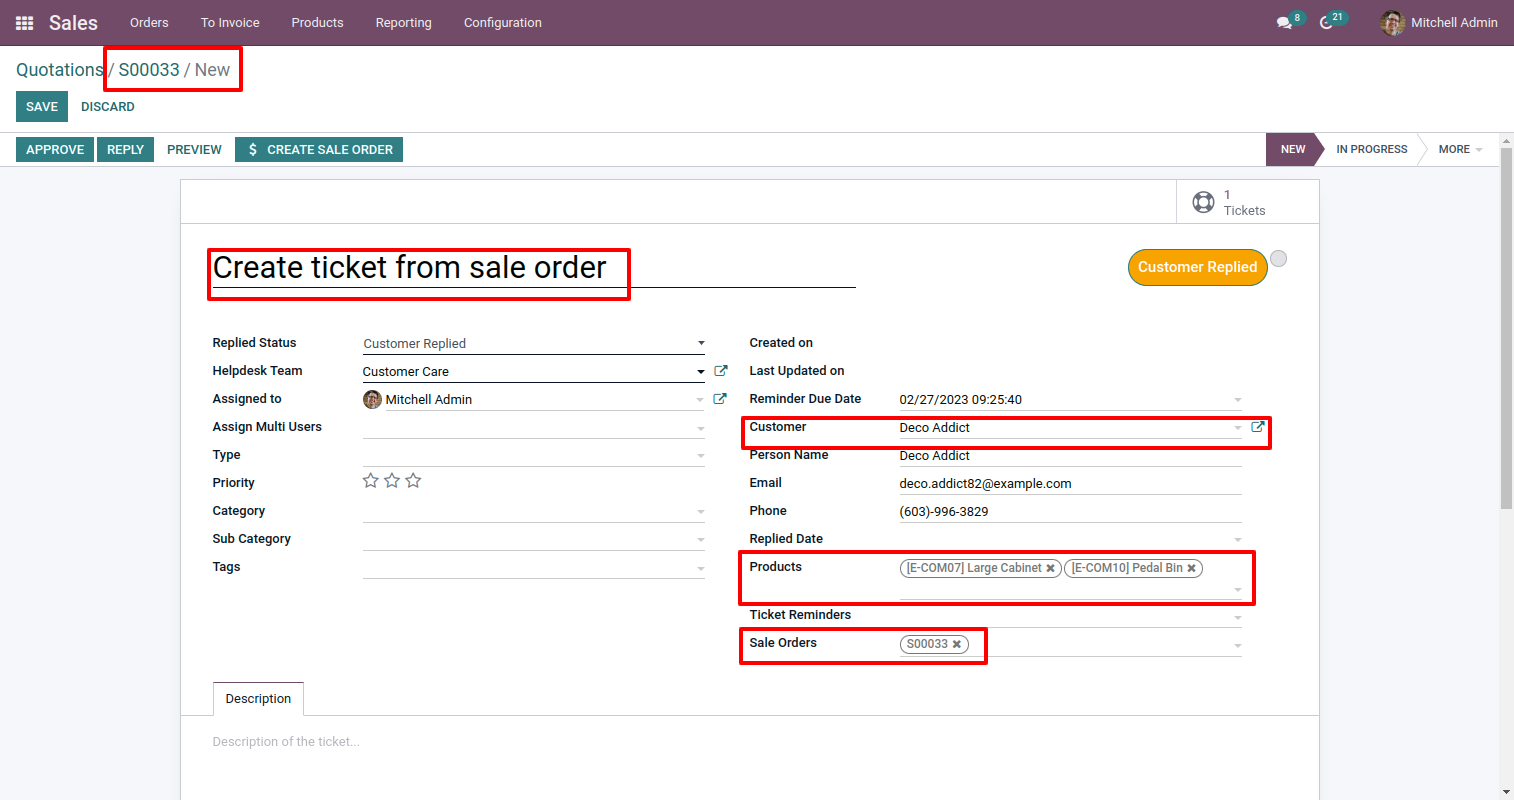
You can create a helpdesk ticket from the sale order/quotation using the "Create Ticket" button.
After that one wizard opens, fill the details and save it.
"Helpdesk Ticket" created.
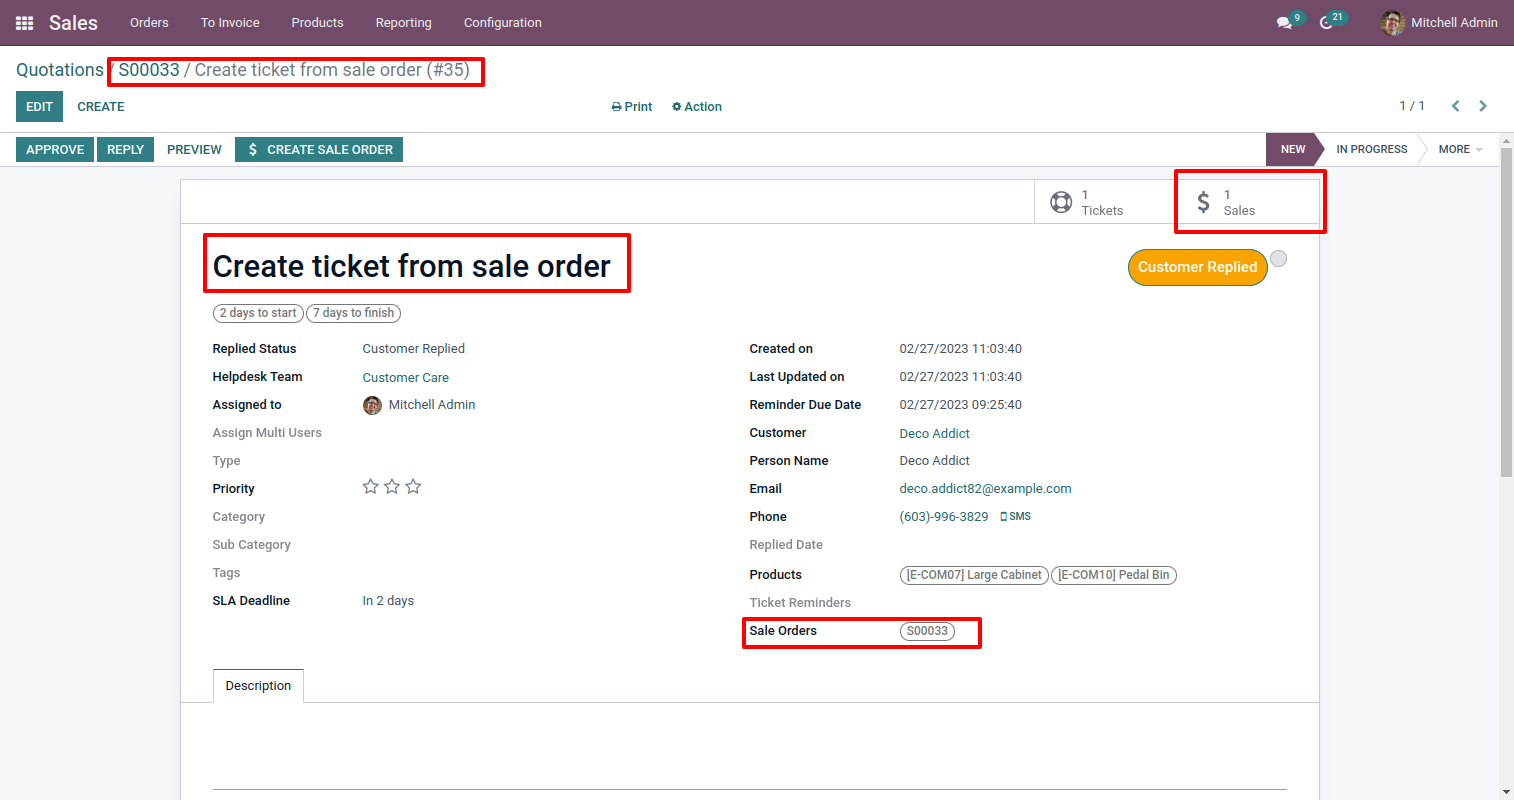
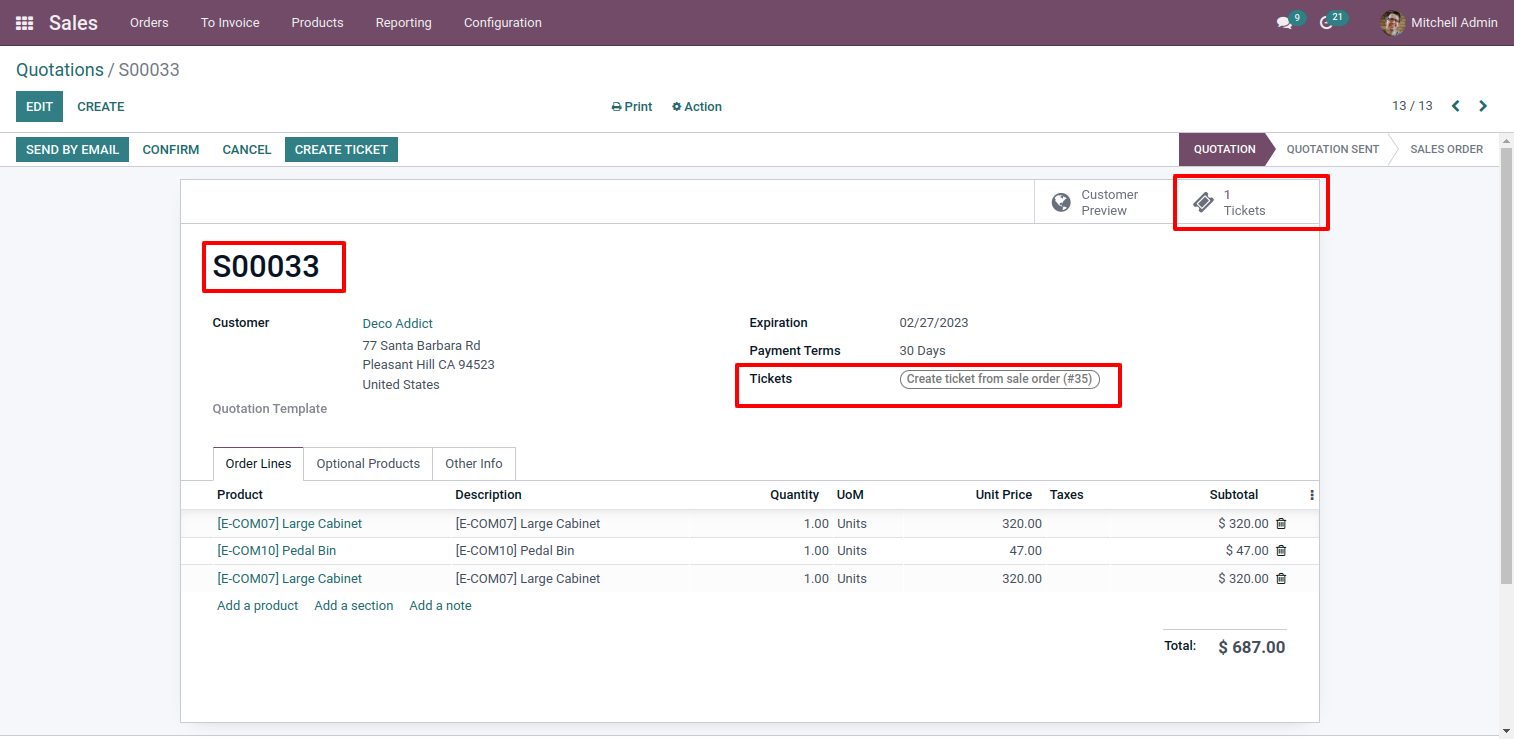
You can see tickets of that sale order/quotation using the "Tickets" smart button.
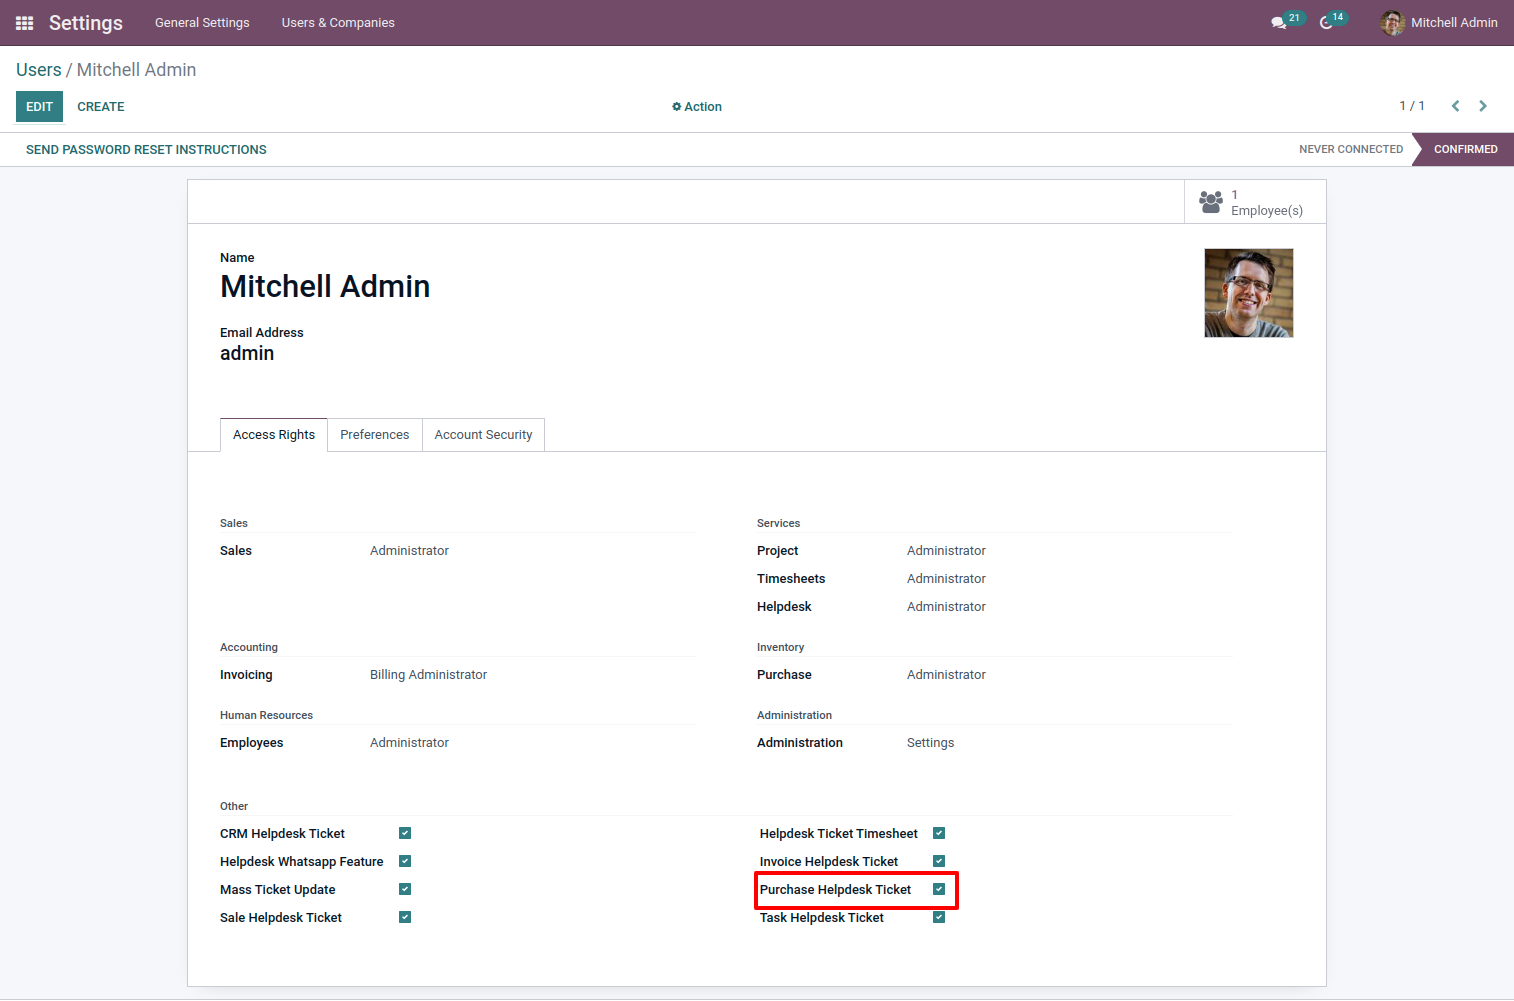
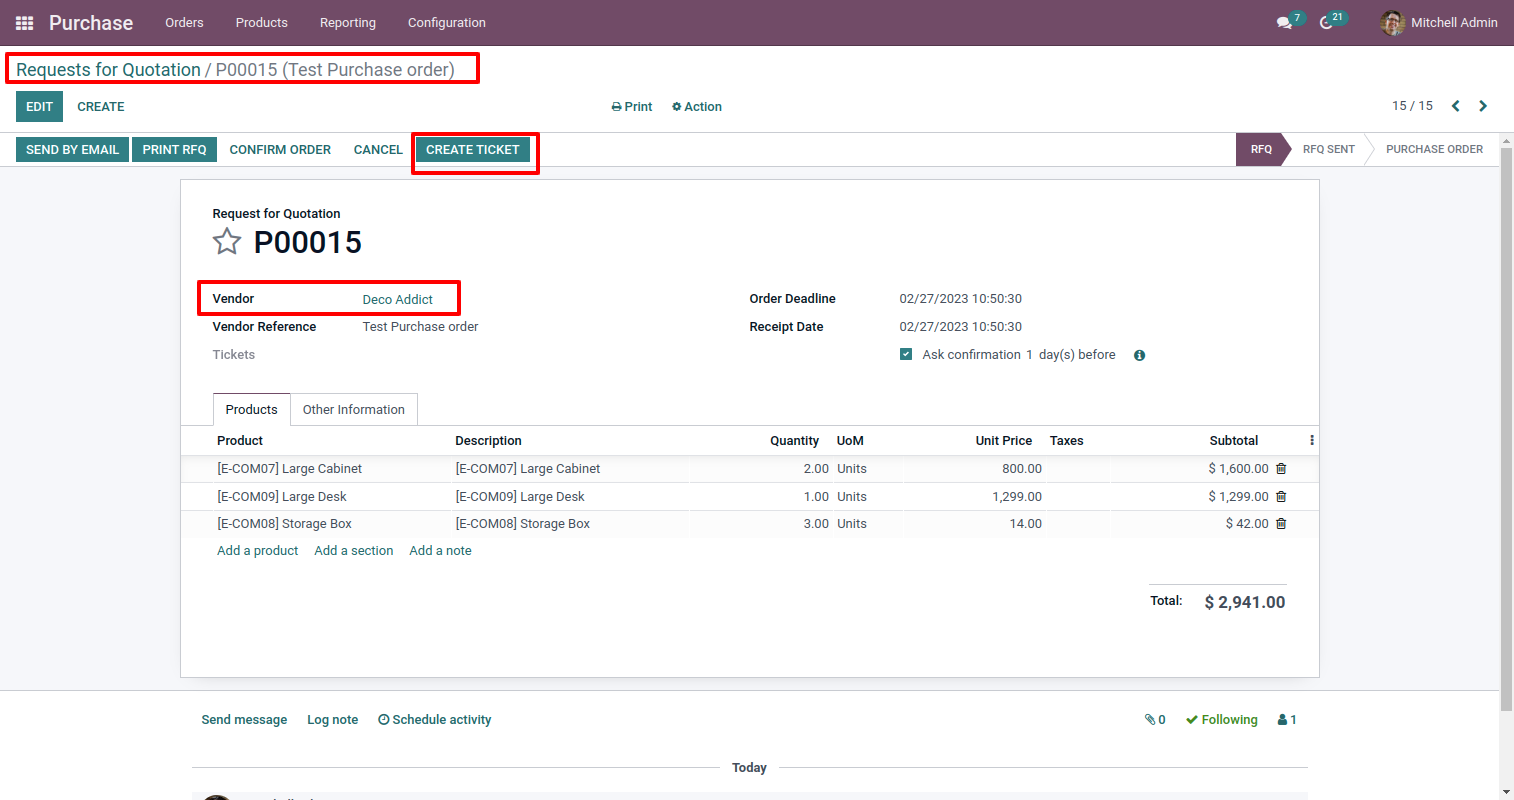
Tick security group "Purchase Helpdesk Ticket" to generate a request for quotation/purchase order directly from the helpdesk ticket as well generate a helpdesk ticket from the purchase order/request for quotation.
"Helpdesk Ticket" form view, press the "Create Purchase order" button to create a request for quotation/purchase order directly from the helpdesk ticket.
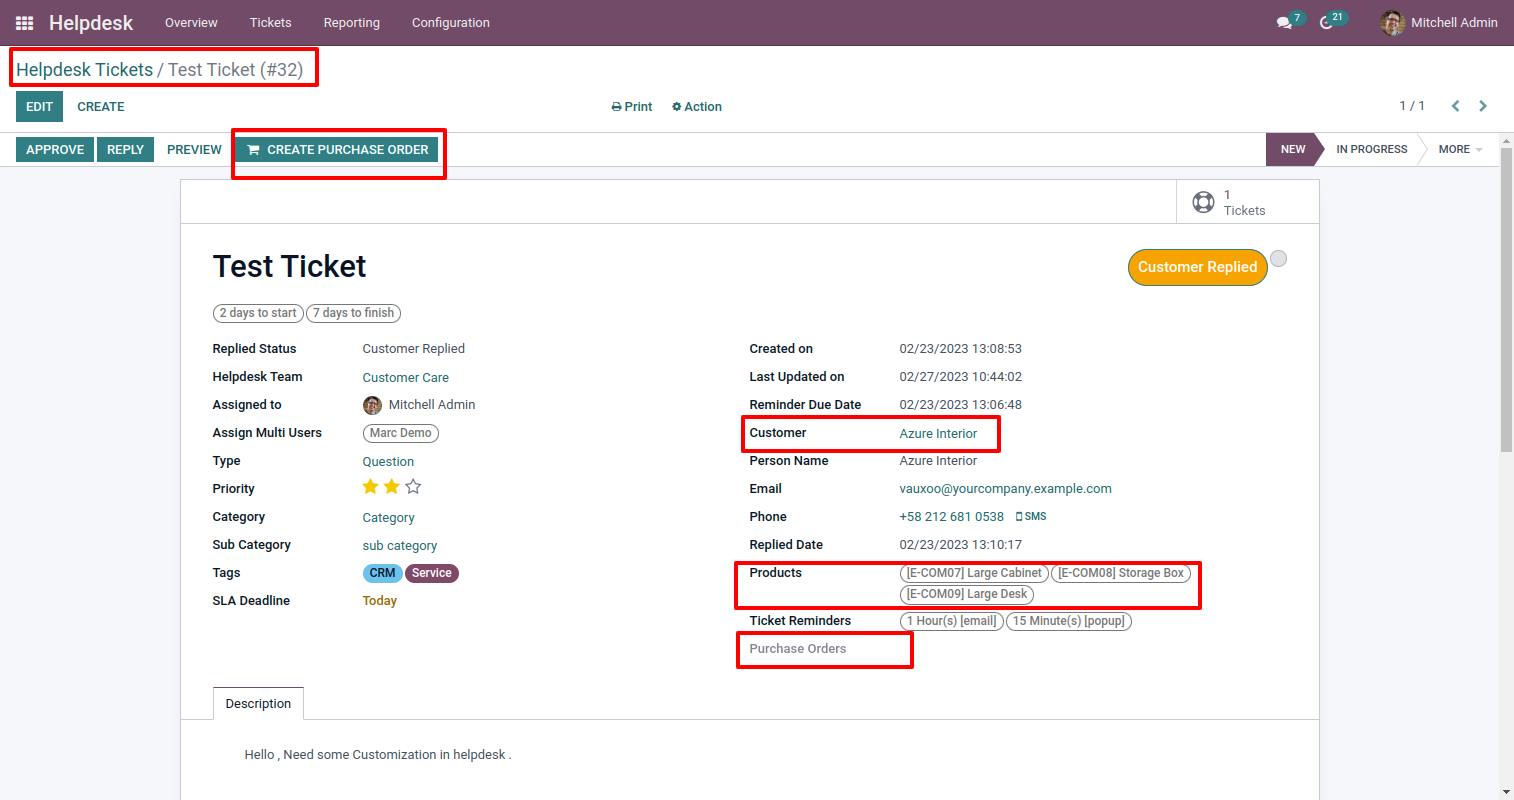
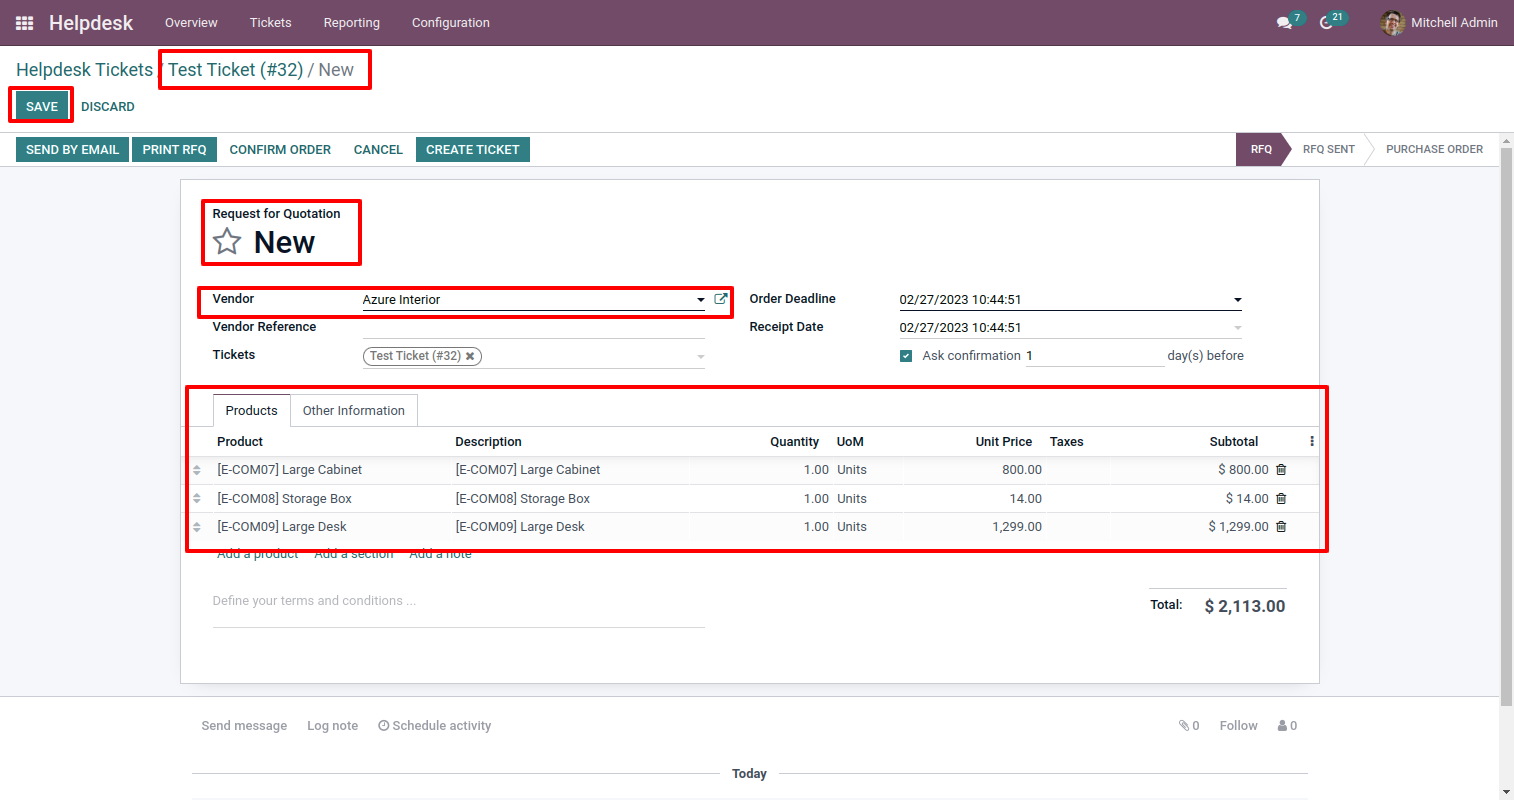
After that one wizard opens, select vendor, products, and fill other details then press the "Save" button.
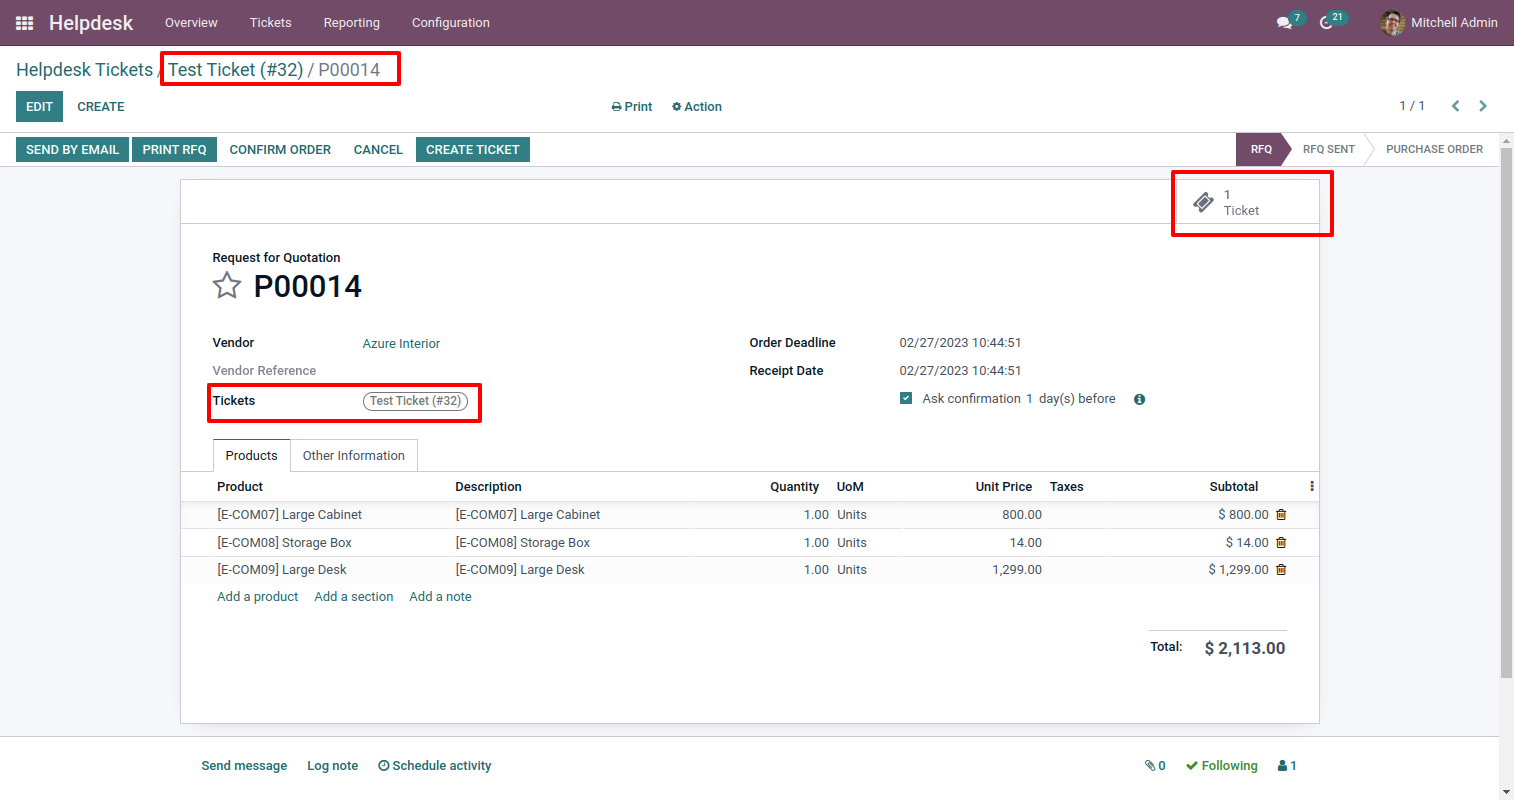
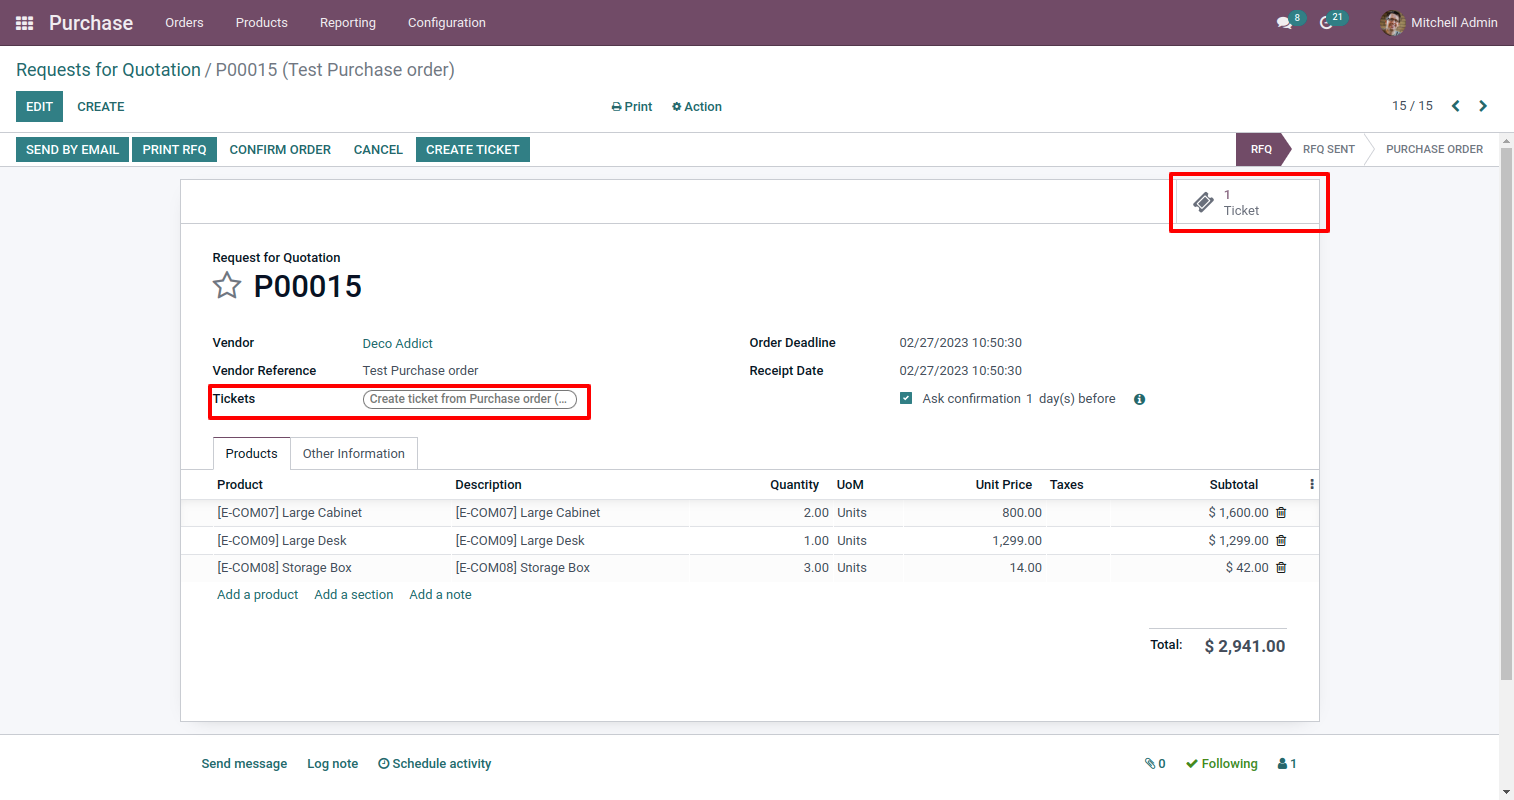
So, from that purchase order, you can see tickets of that purchase order/request for quotation using the "Tickets" smart button.
You can create a helpdesk ticket from the purchase order/request for quotation using the "Create Ticket" button.
After that one wizard opens, fill the details and save it.
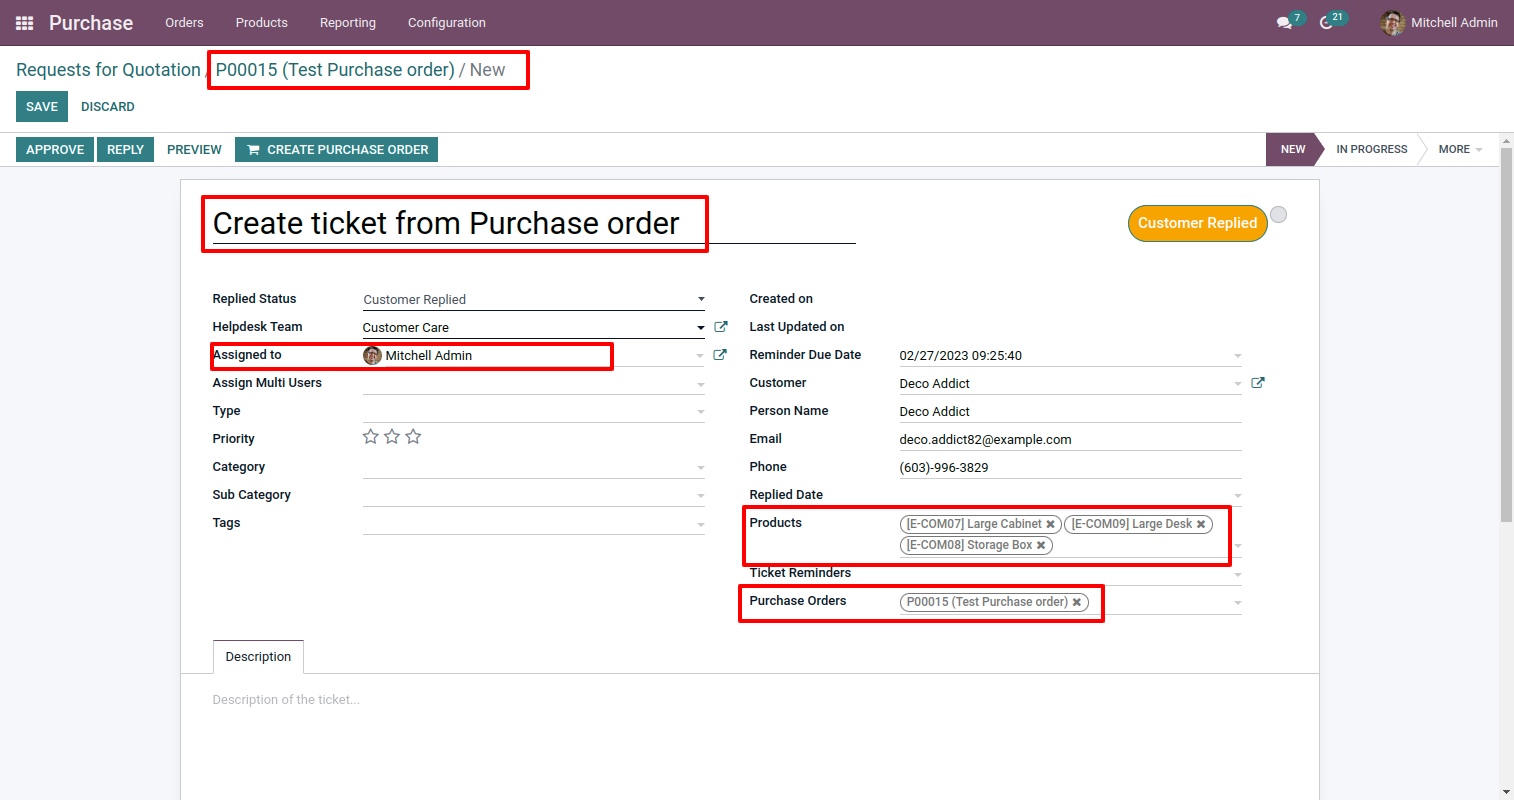
"Helpdesk Ticket" created.
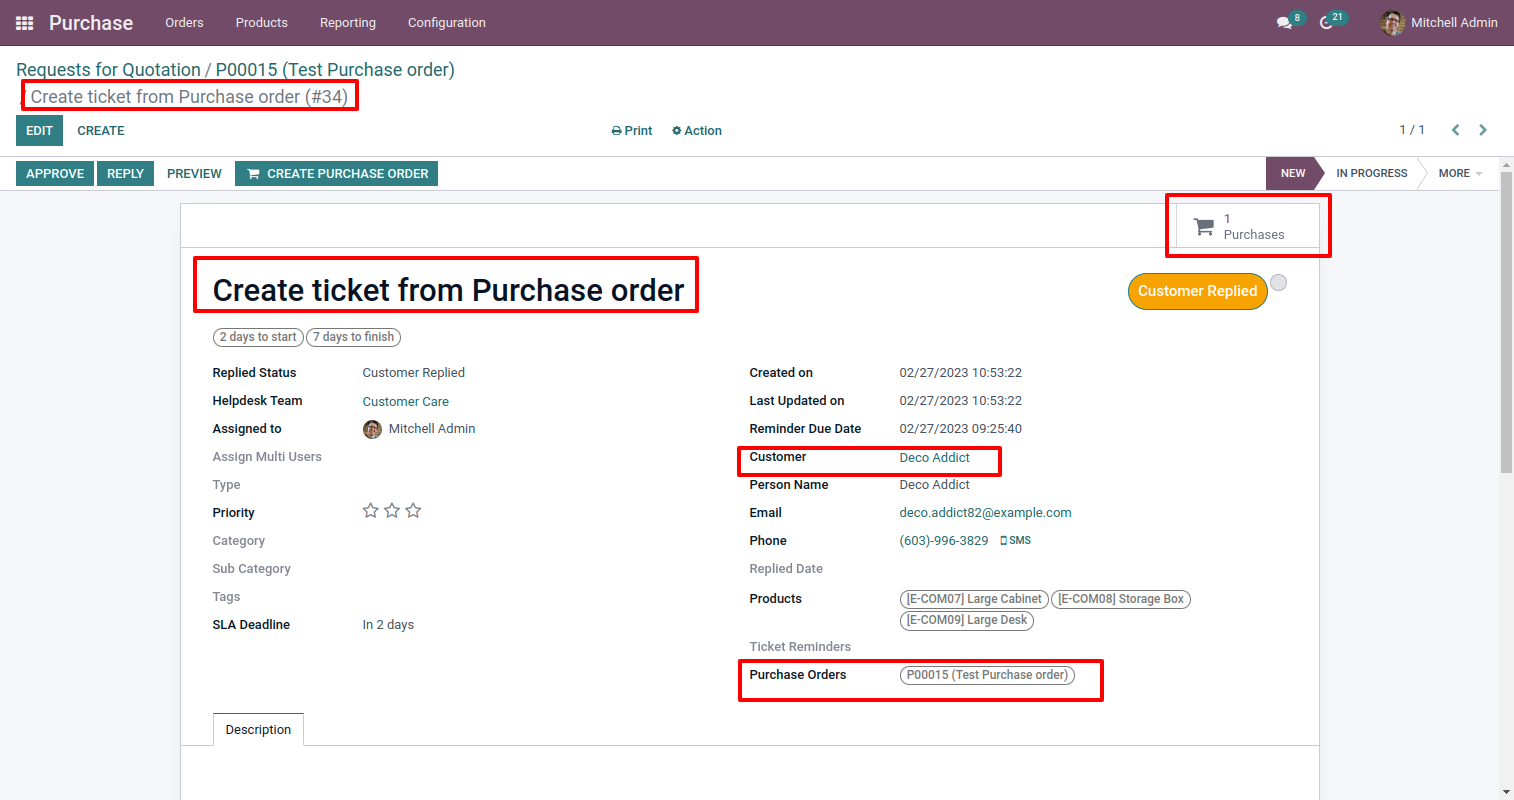
You can see tickets of that purchase order/request for quotation using the "Ticket" smart button.
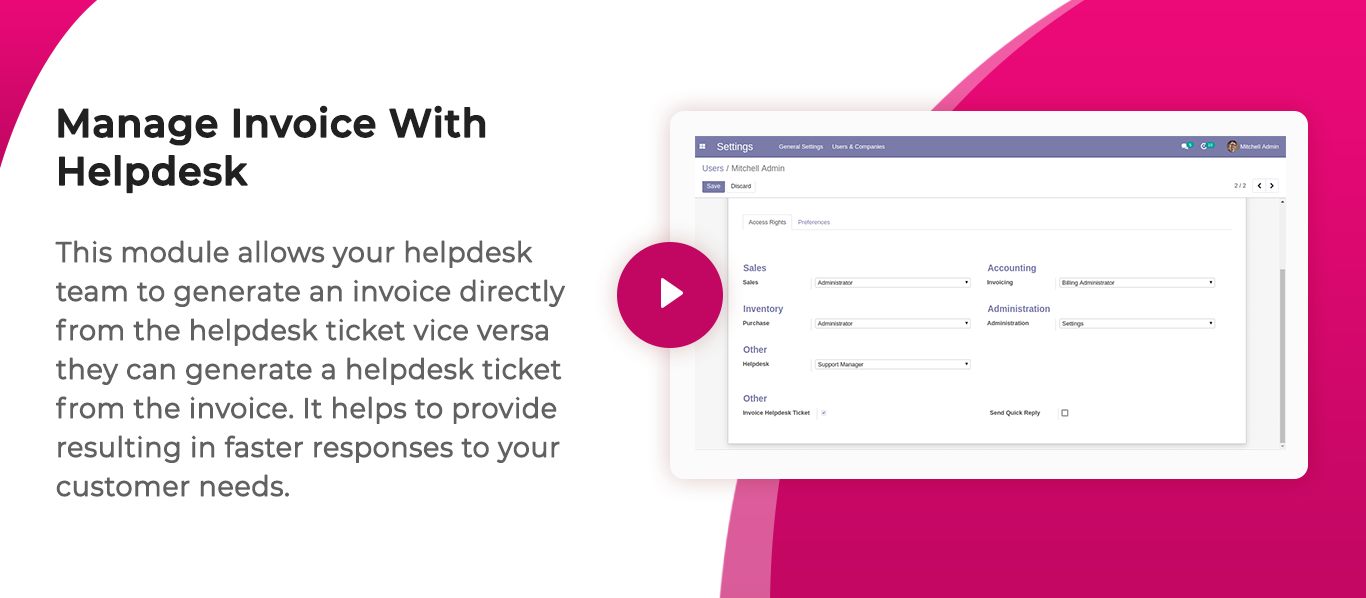
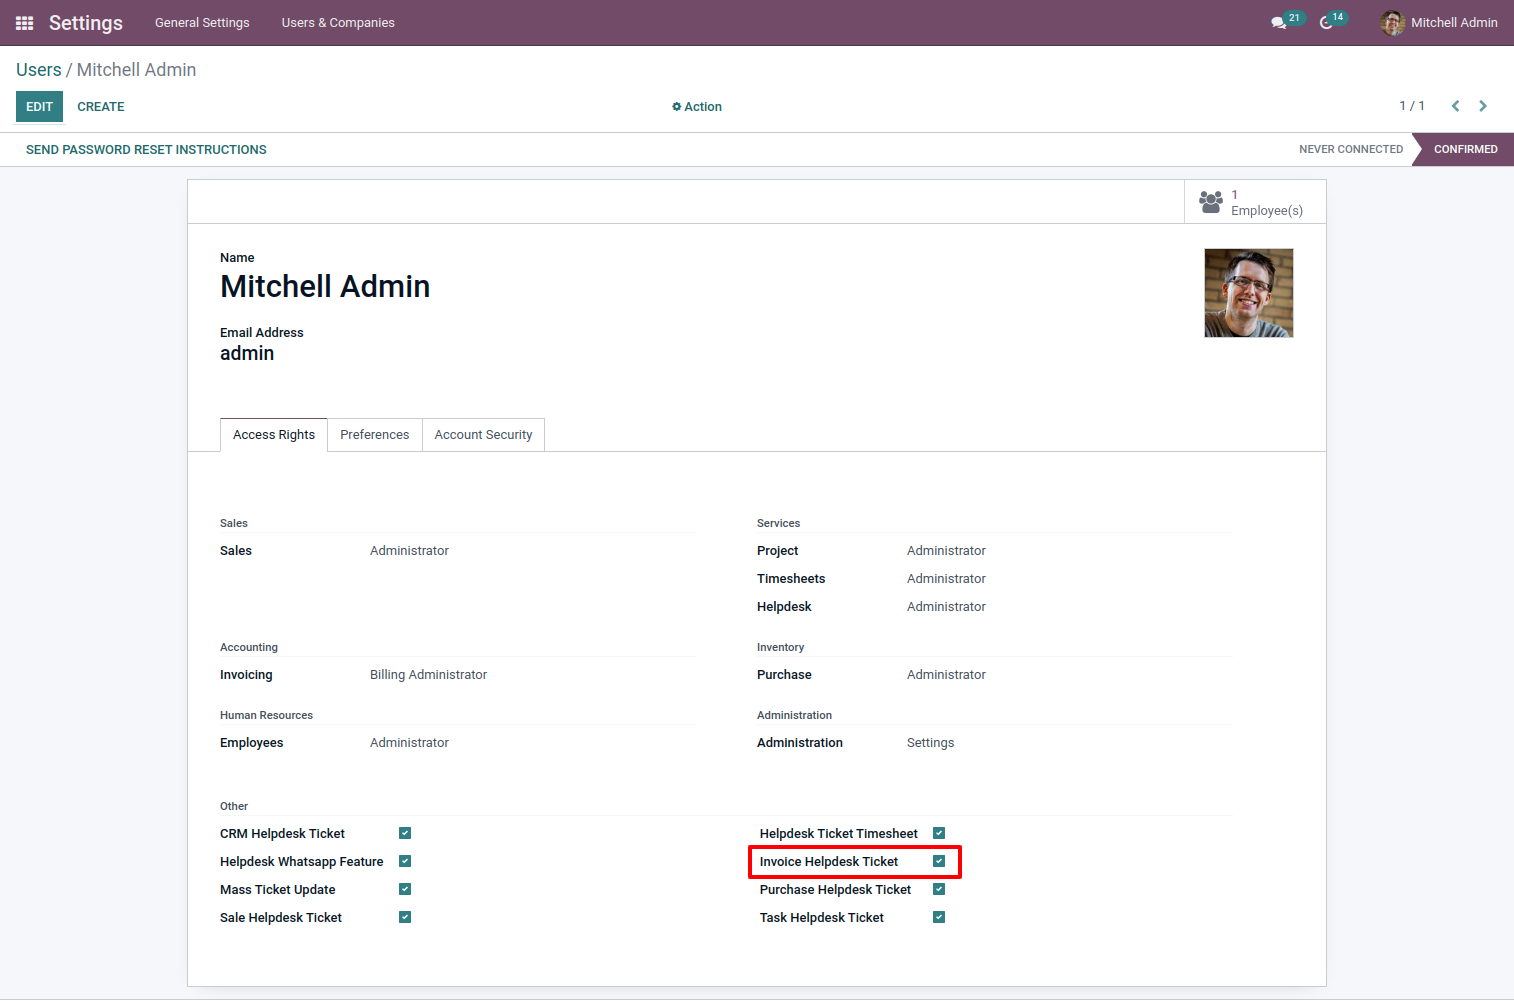
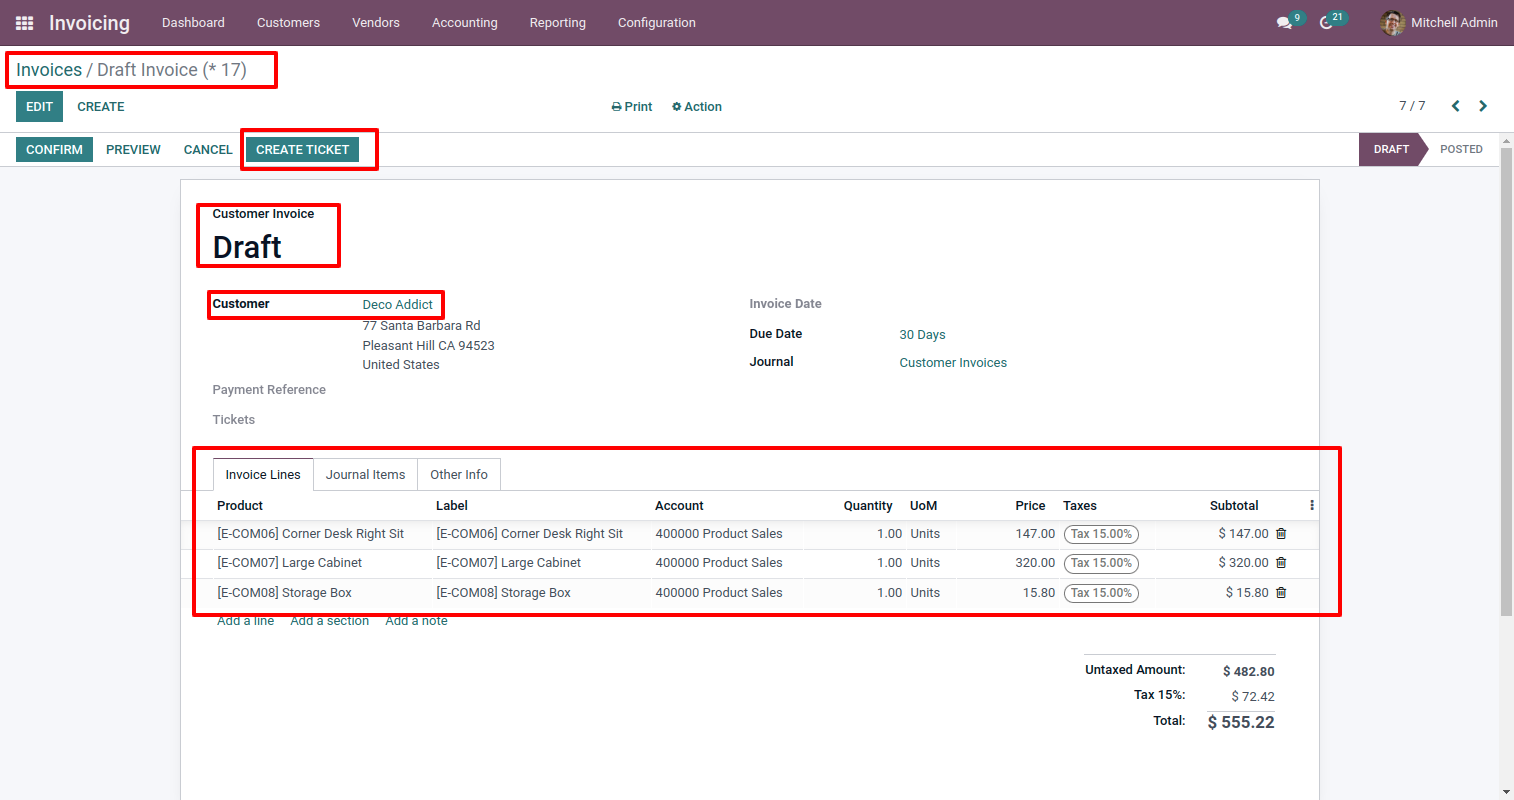
Tick security group "Invoice Helpdesk Ticket" to generate invoice directly from the helpdesk ticket as well generate a helpdesk ticket from the invoice.
"Helpdesk Ticket" form view, press the "Create Invoice" button to create invoice directly from the helpdesk ticket.
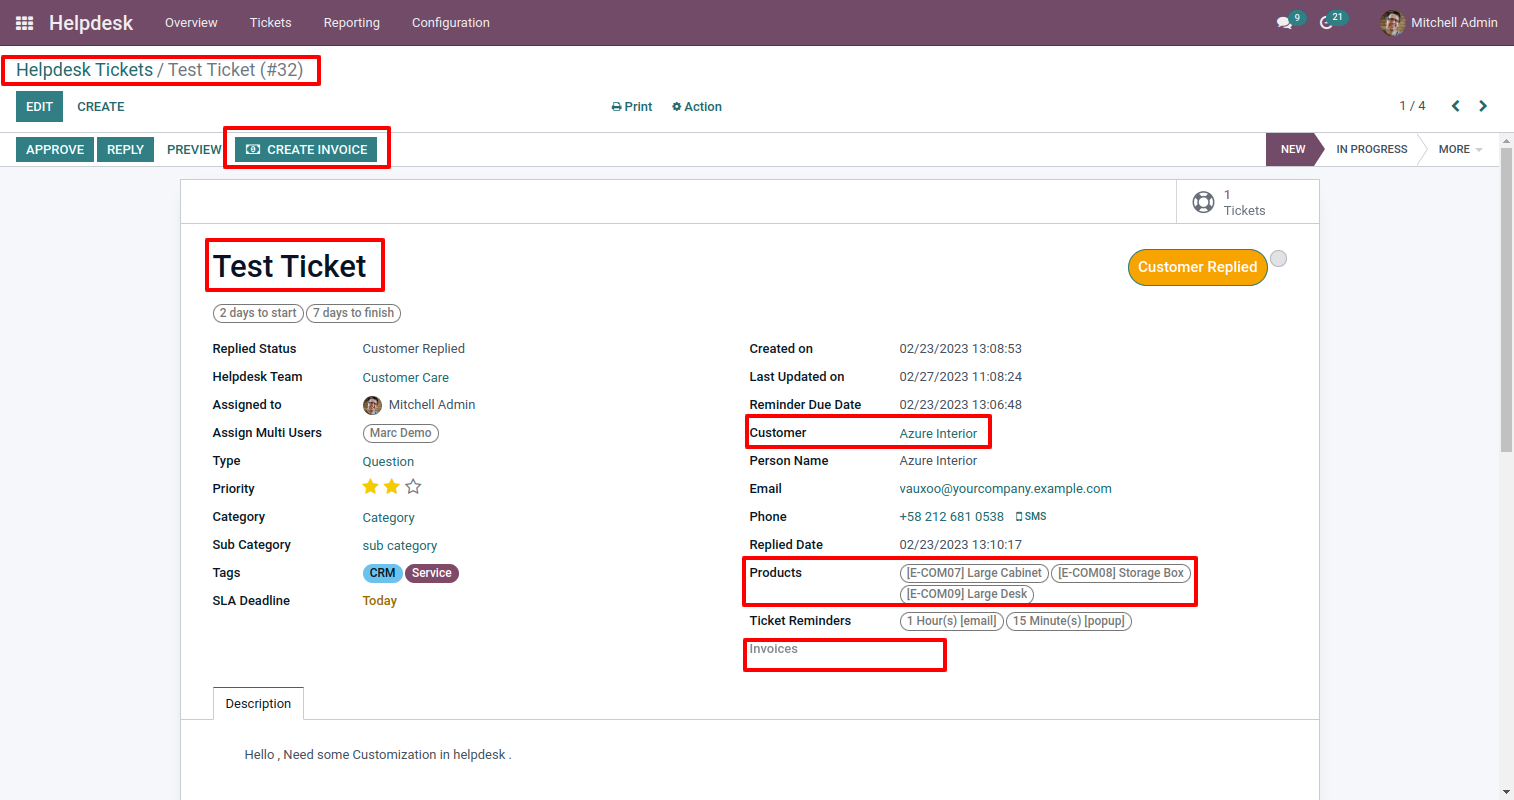
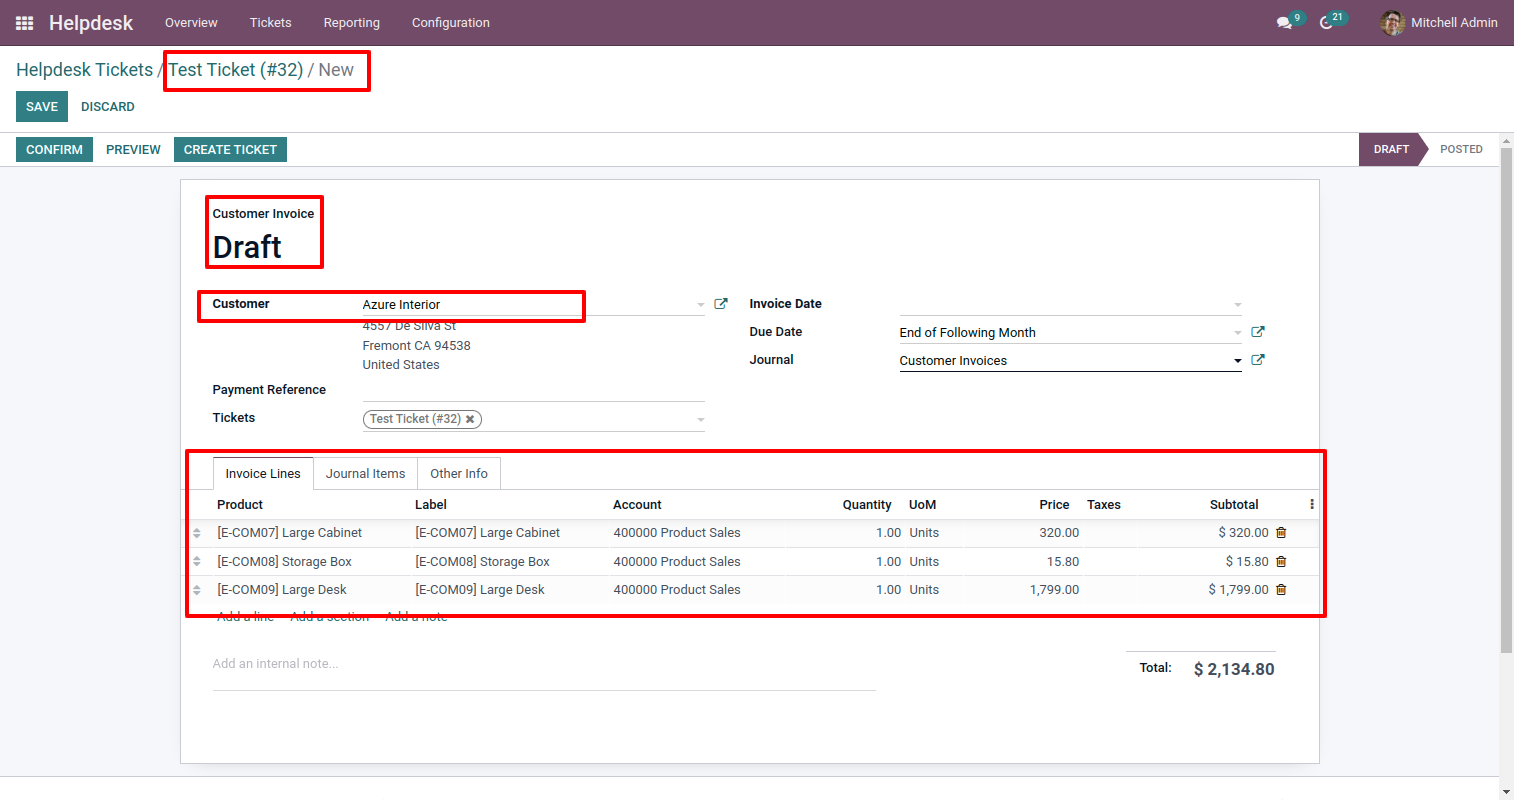
After that one wizard opens, select customer, products, and fill other details then press the "Save" button.
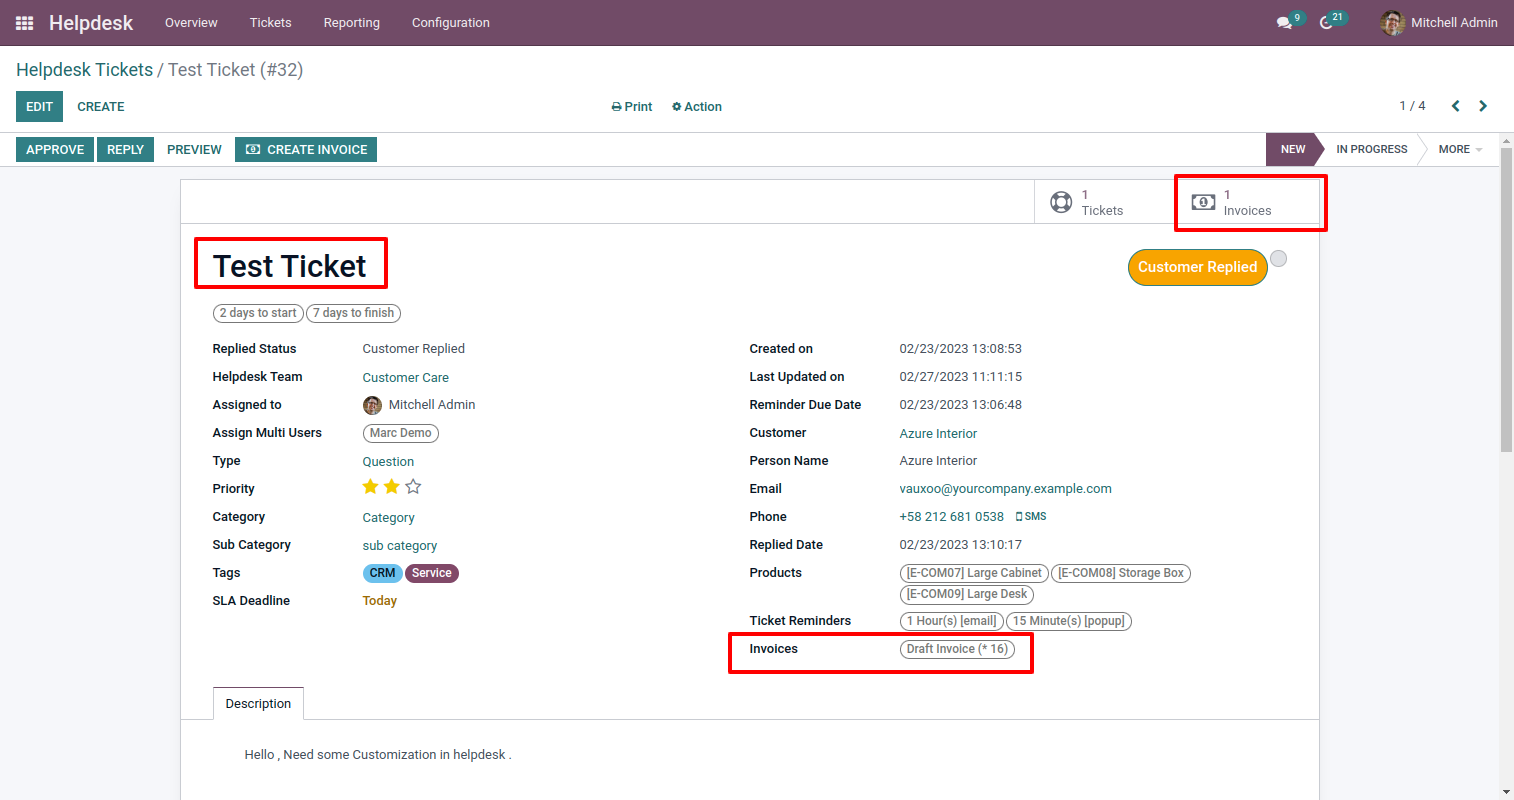
Now, from the ticket, you can see generated invoices of that ticket using the "Invoices" smart button.
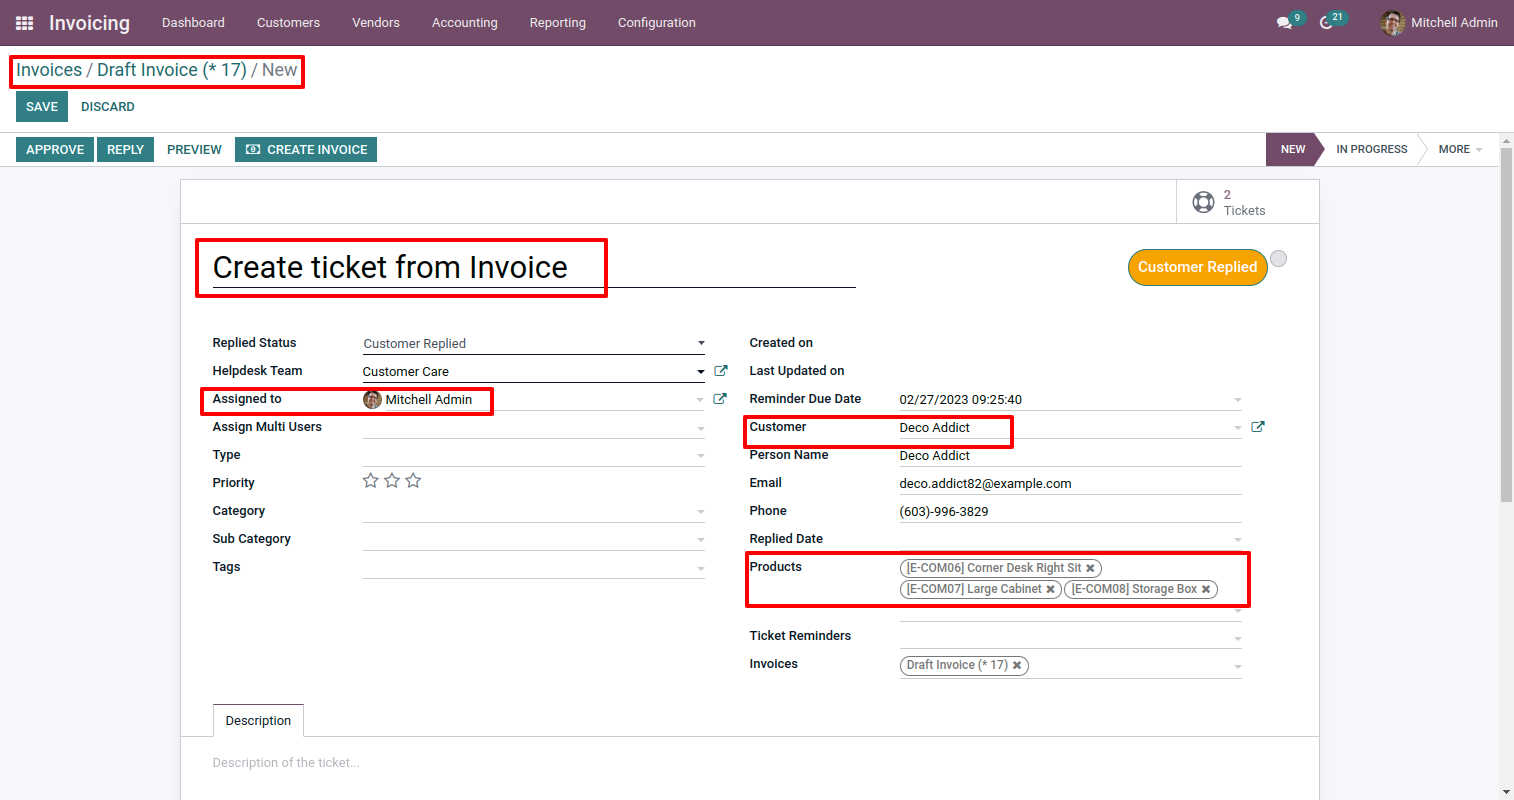
You can create a helpdesk ticket from the invoice using the "Create Ticket" button.
After that one wizard opens, fill the details and save it.
"Helpdesk Ticket" created.
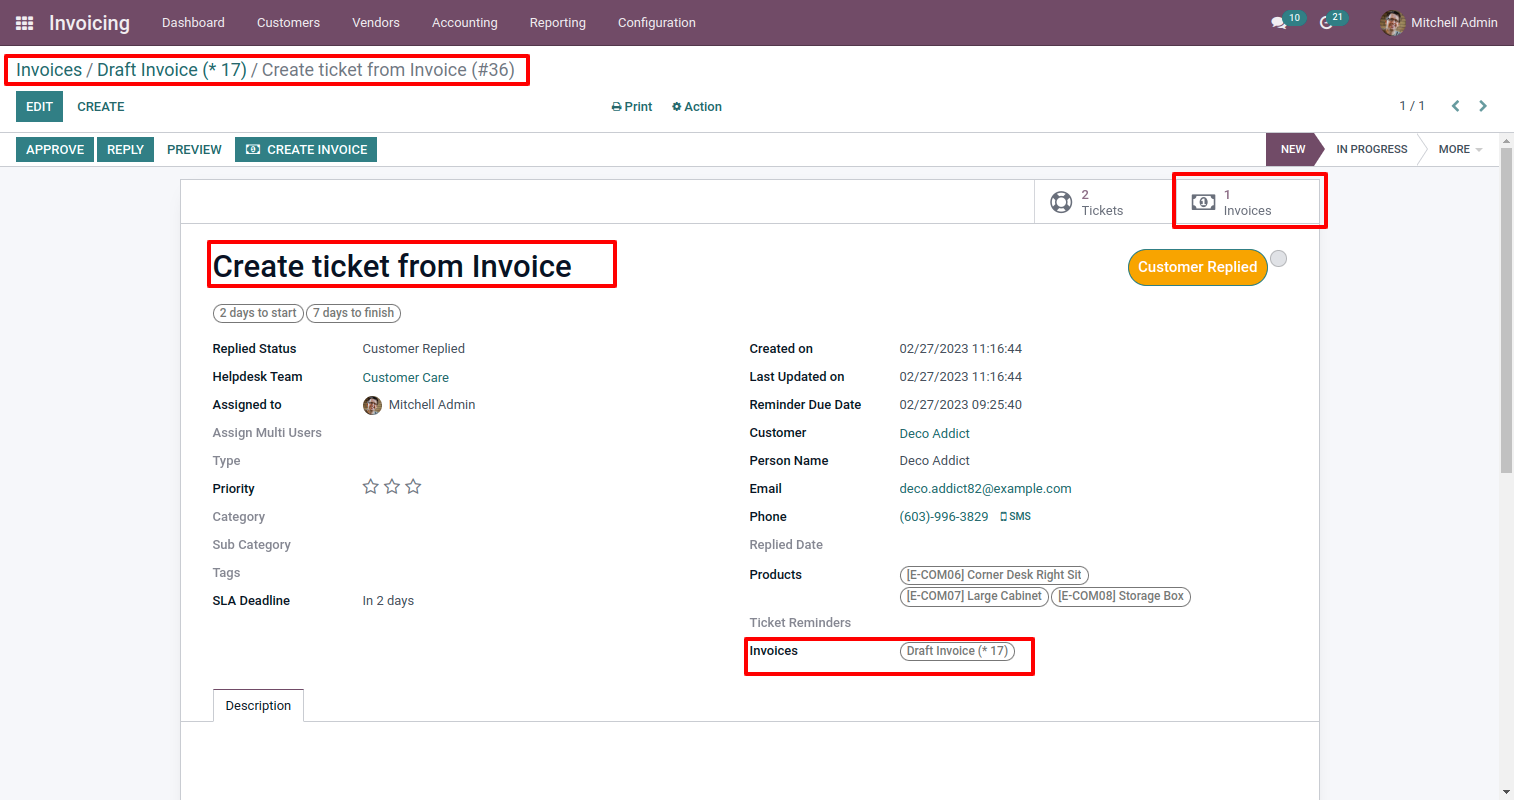
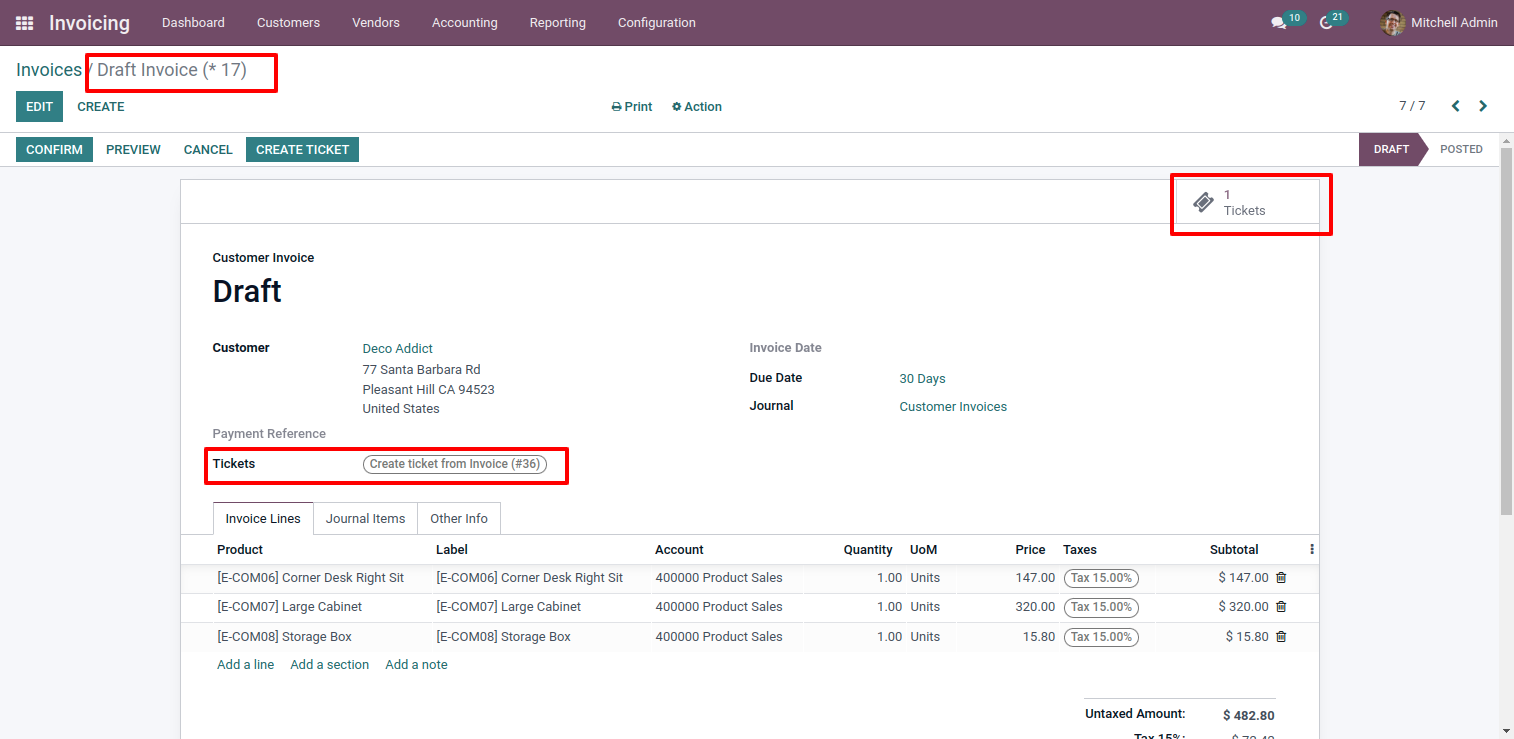
You can see tickets of that invoice using the "Ticket" smart button.
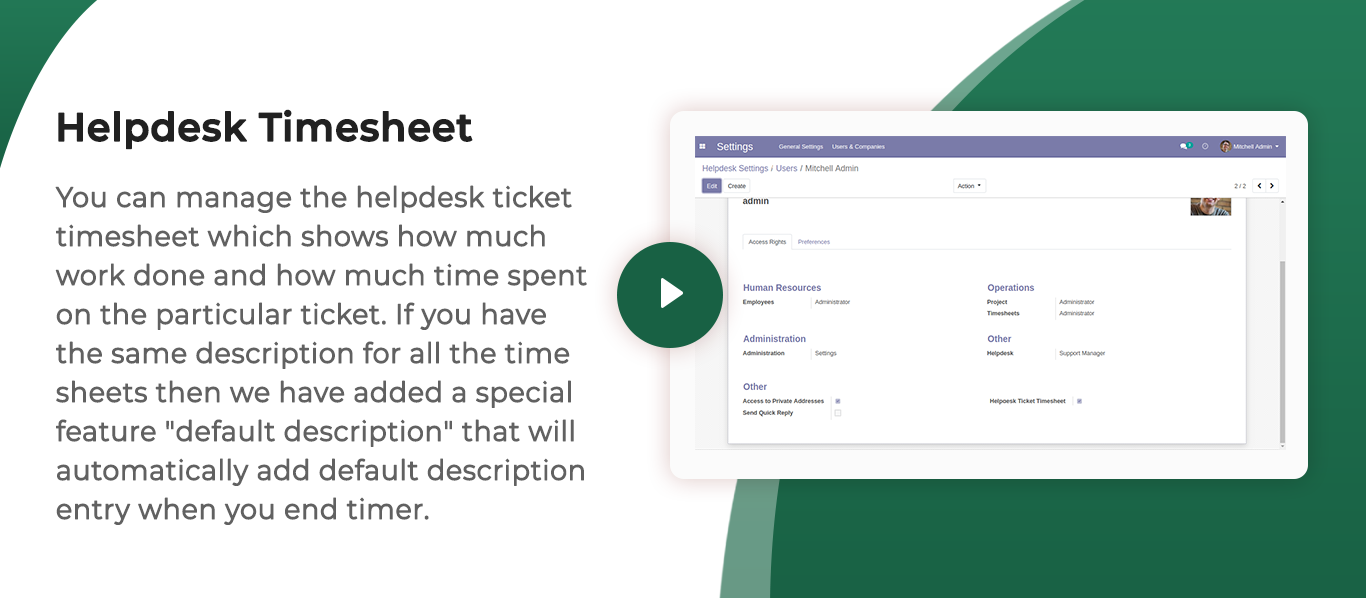
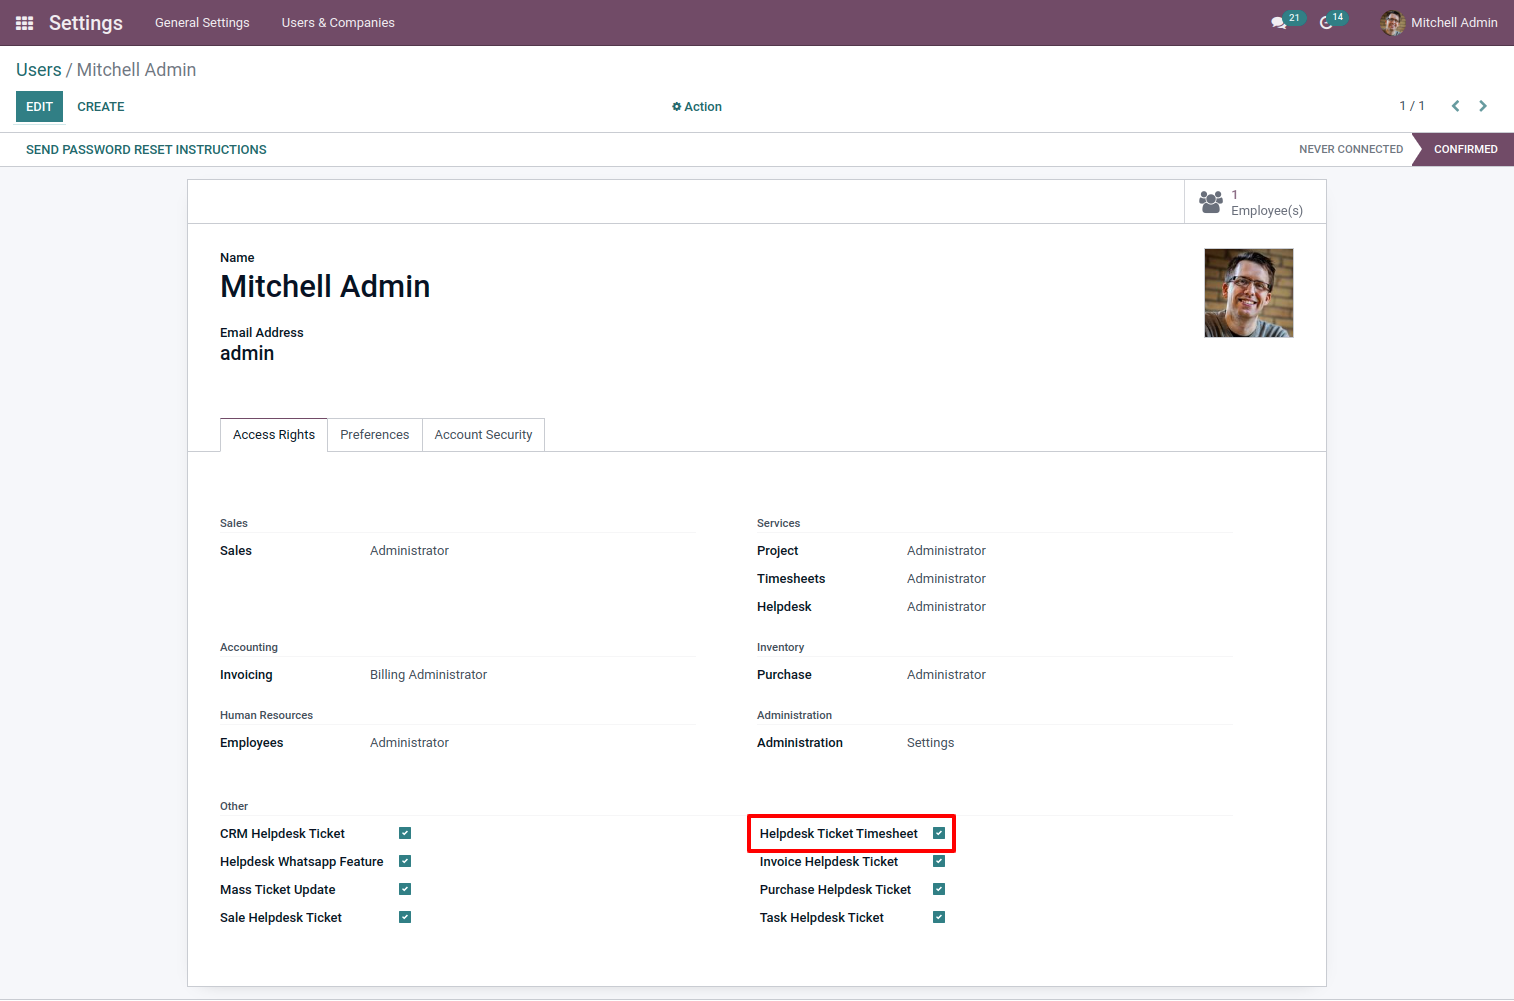
Tick the security group "Helpdesk Ticket Timesheet".
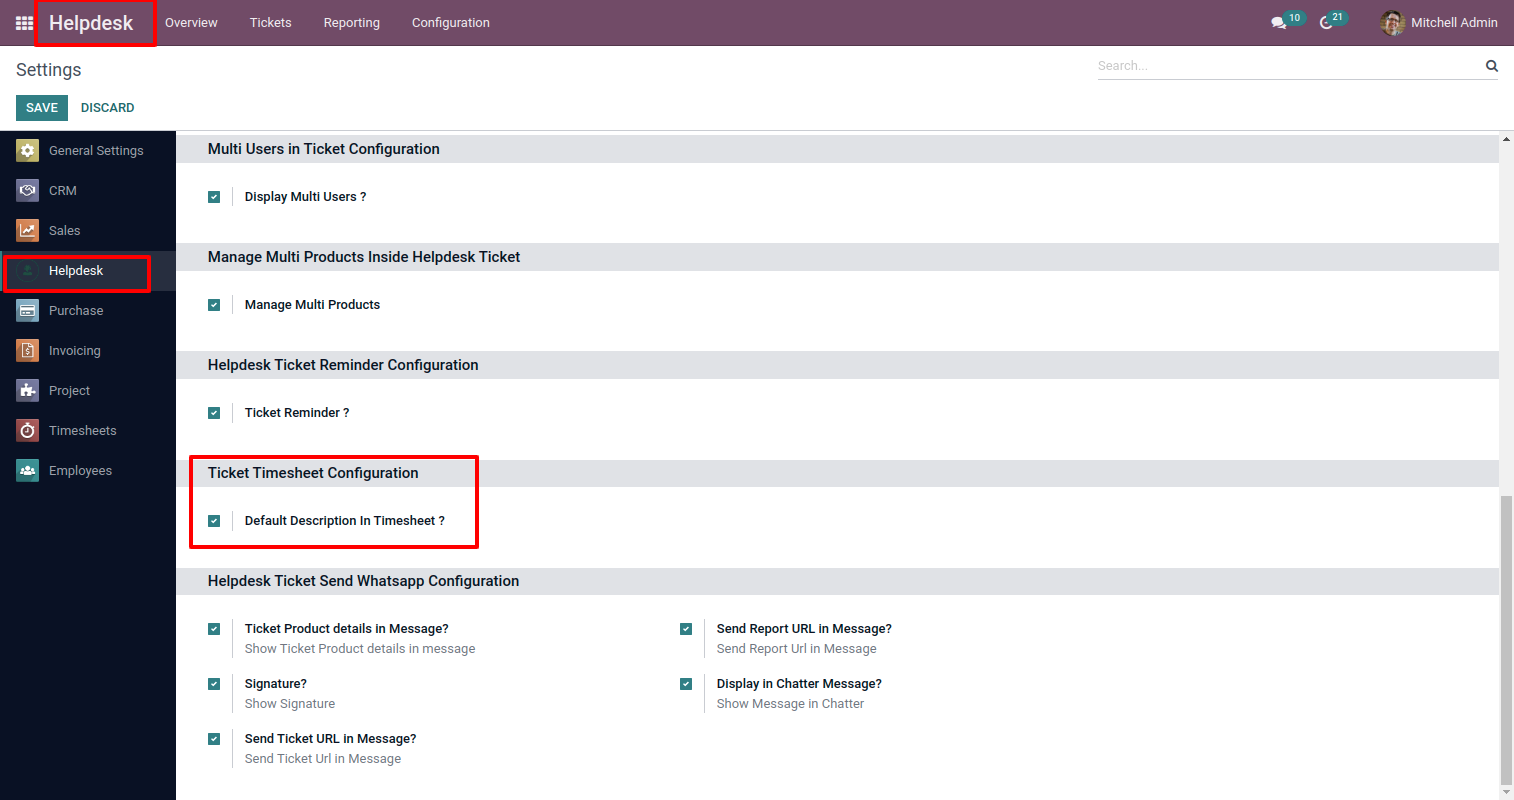
Enable the "Default Description In Timesheet" to add the default description in the timesheet.
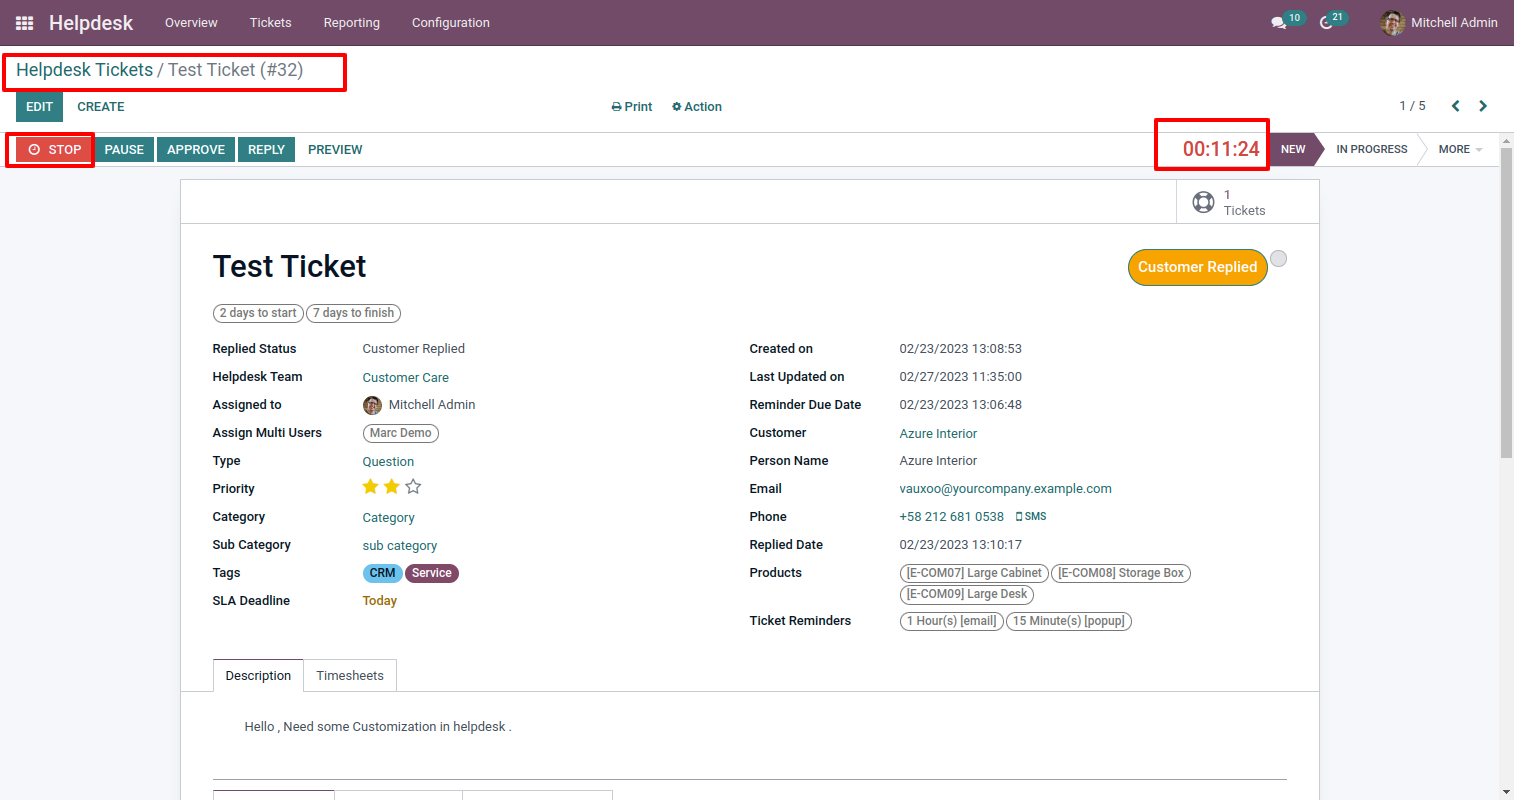
Now we press the "Stop" button to end the timer.
After that one wizard opens, It will automatically add a default description entry when you end the timer.
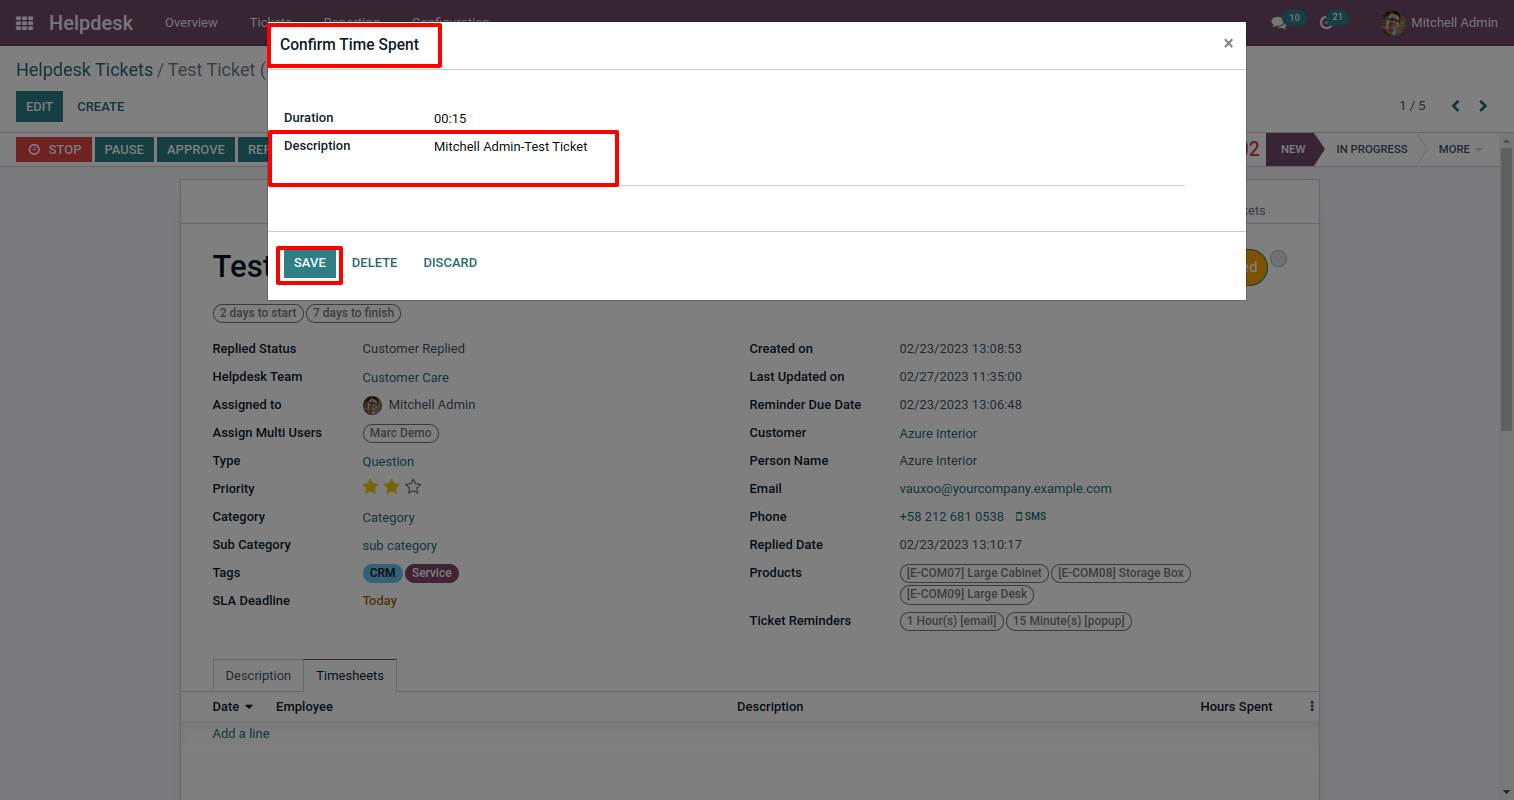
So now after the end timer, our ticket timesheet entry is updated.
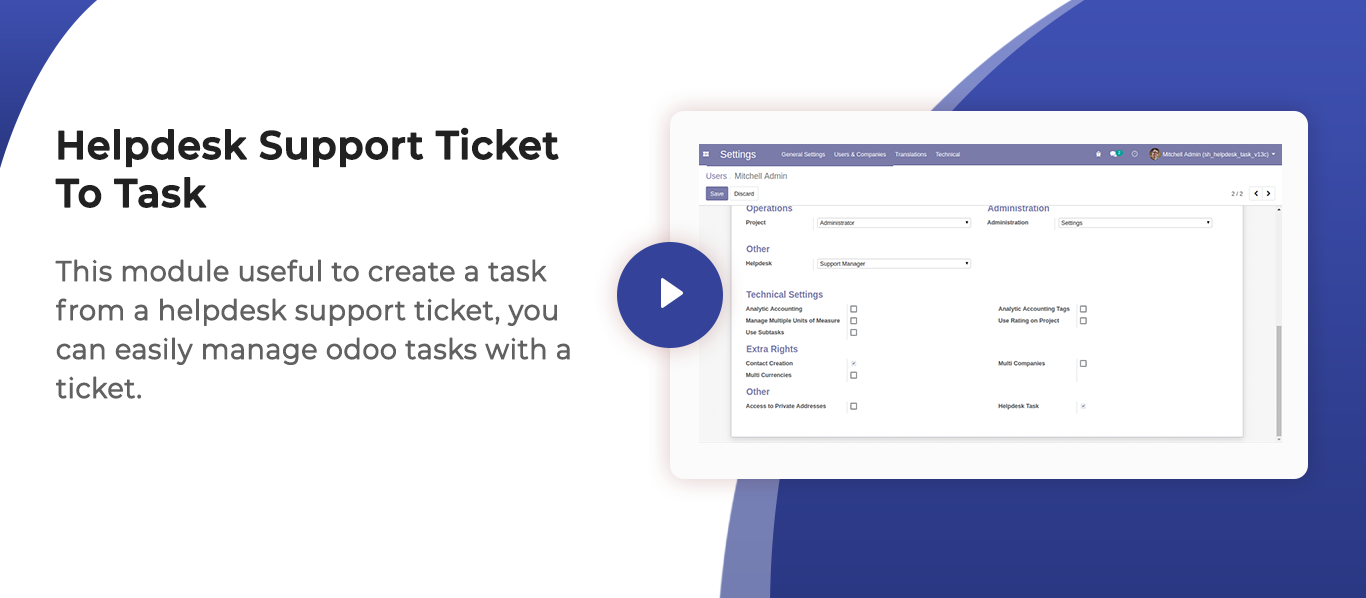
Tick the security group "Task Helpdesk Ticket".
Press the "Create Task" button to create a task from the ticket.
You can assign tasks with responsible persons with the task description.
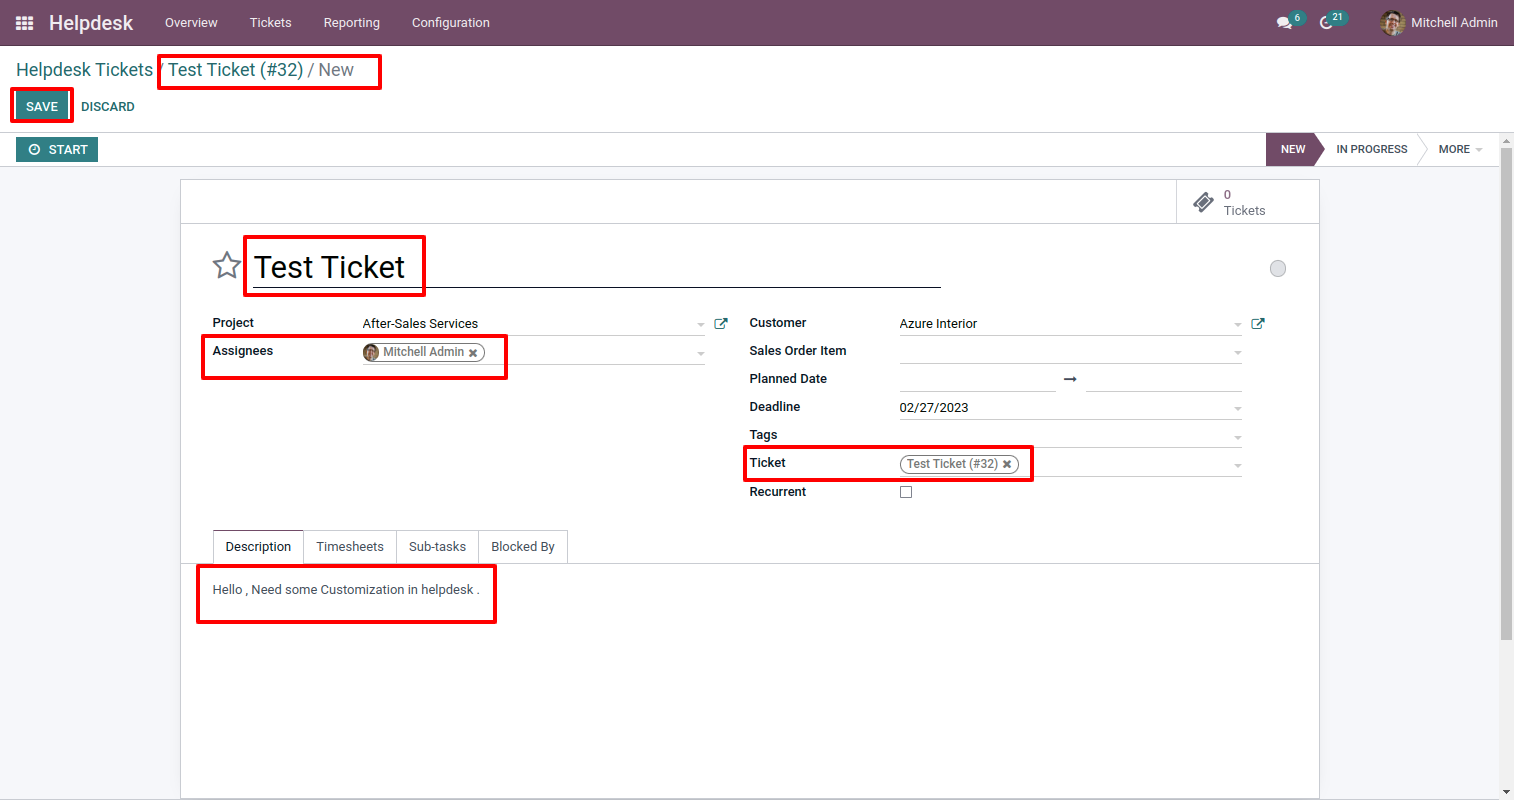
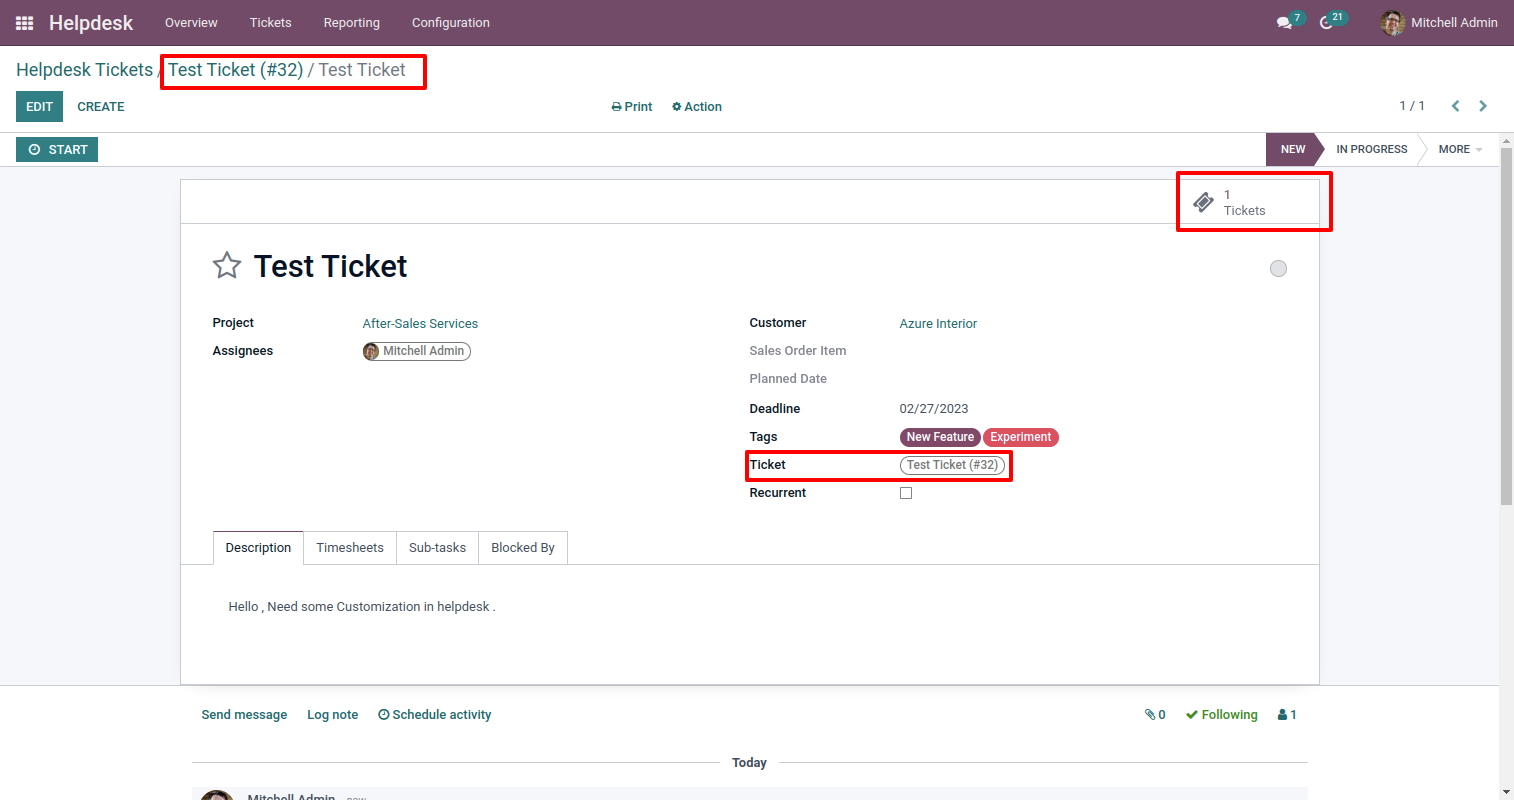
After creating a task, you can see the created task number on the right side of the ticket.
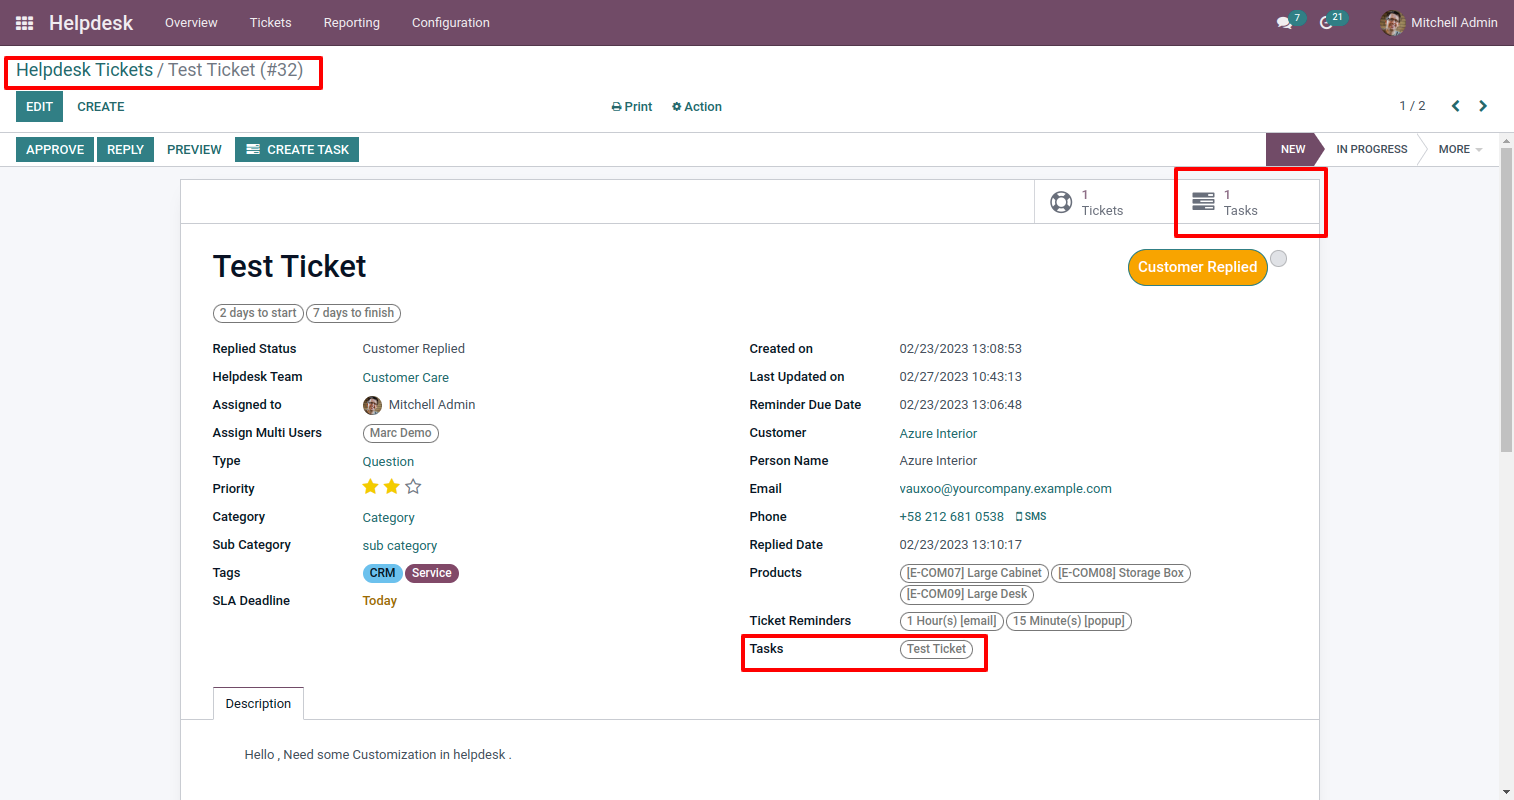
In the task, you can see the ticket from smart button.
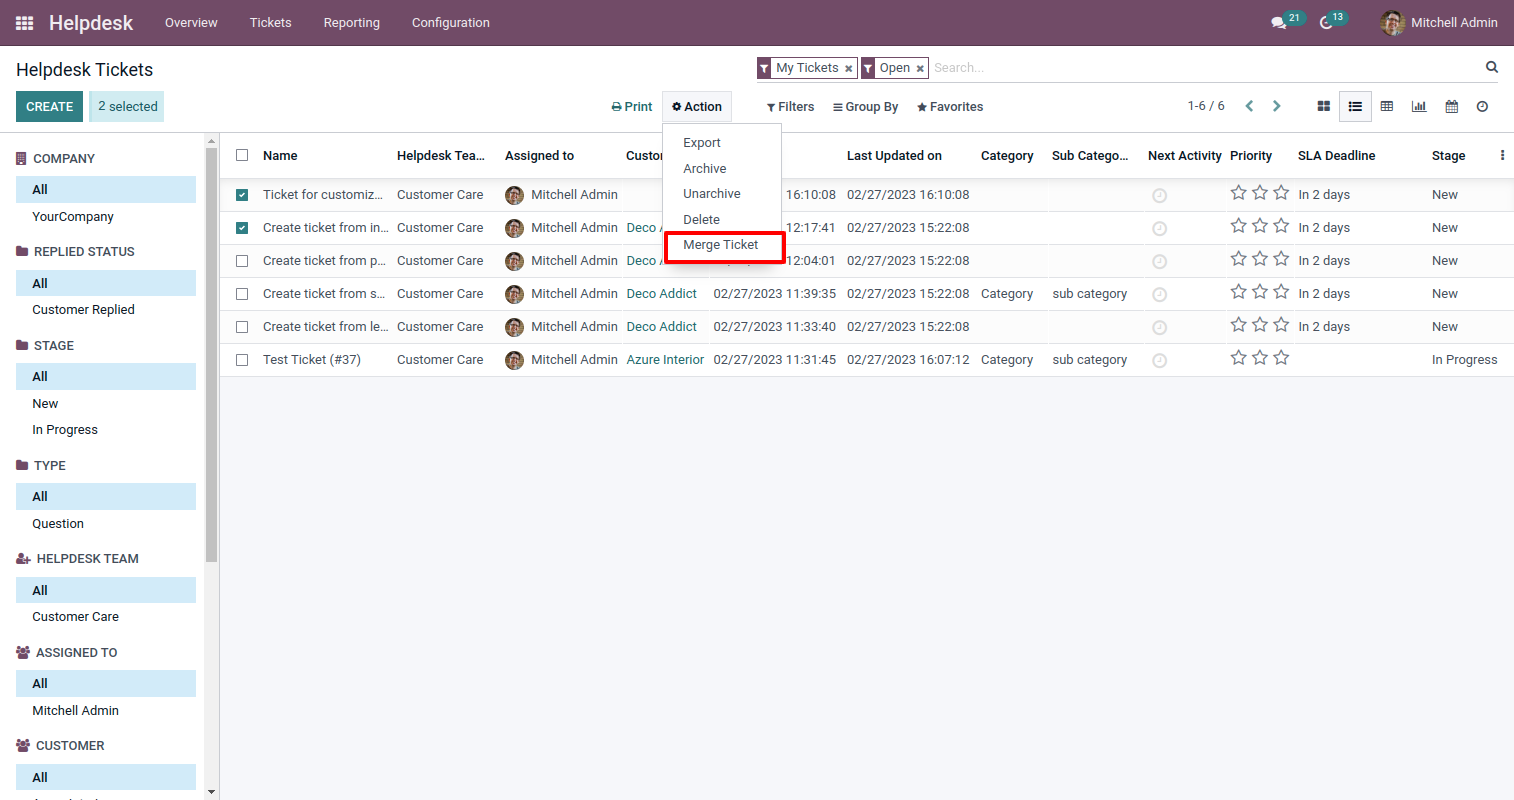
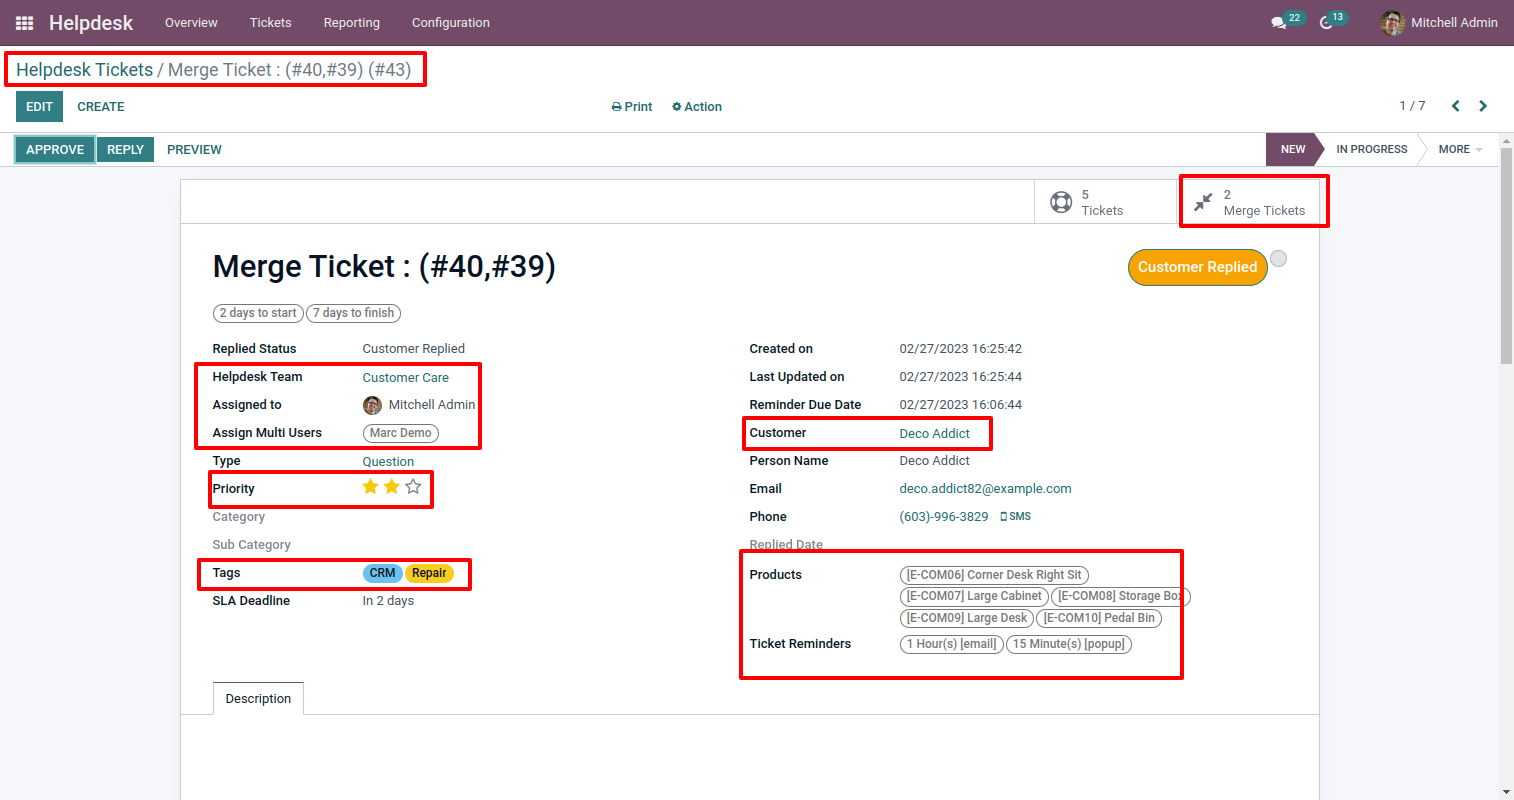
Select two or more tickets from the list view and click "Merge Ticket".
After that, one wizard opens, fill the details and press "Merge".
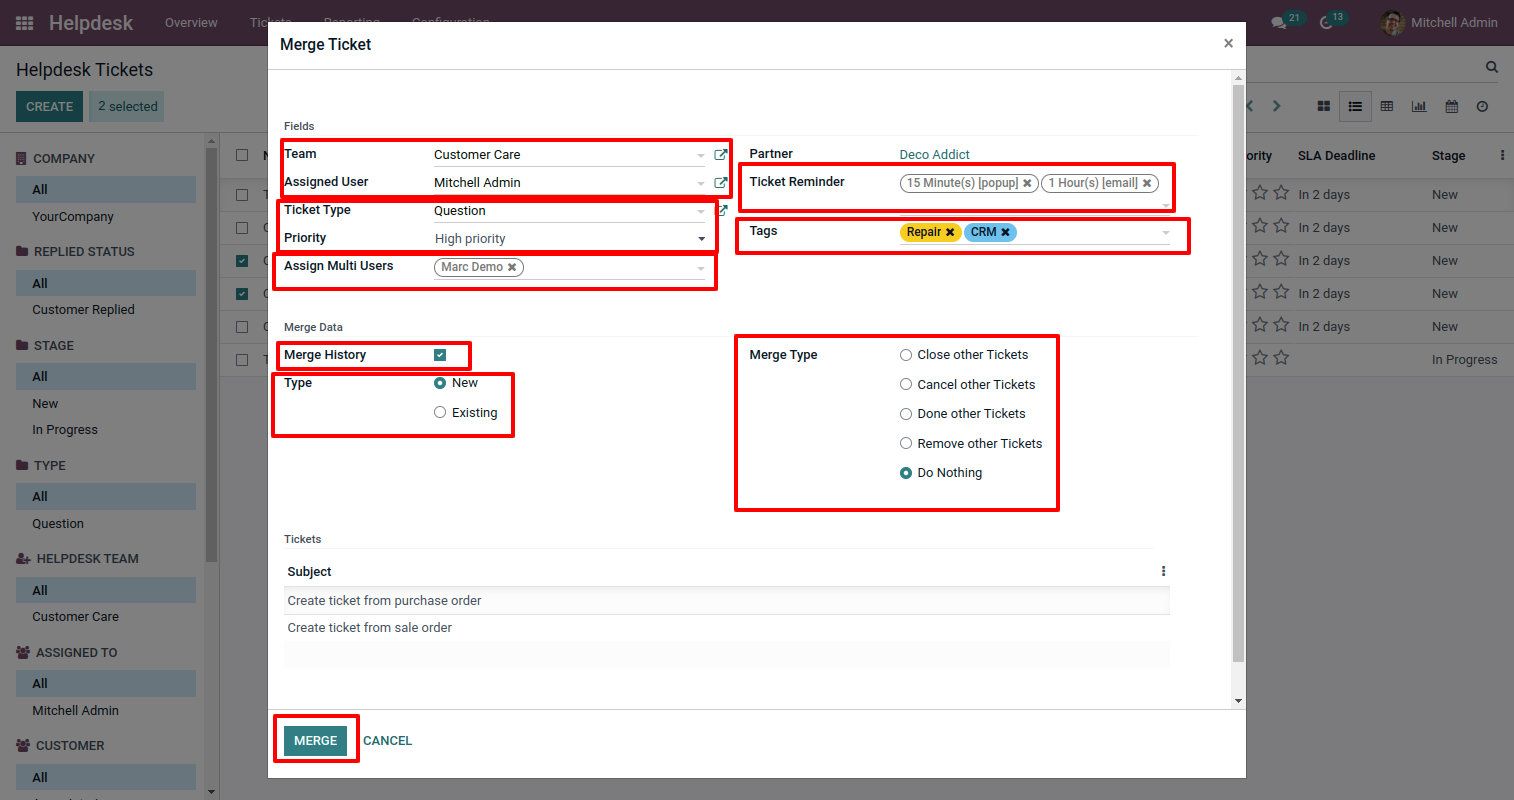
Ticket merged, you can see merge tickets from the smart button "Merge Tickets".
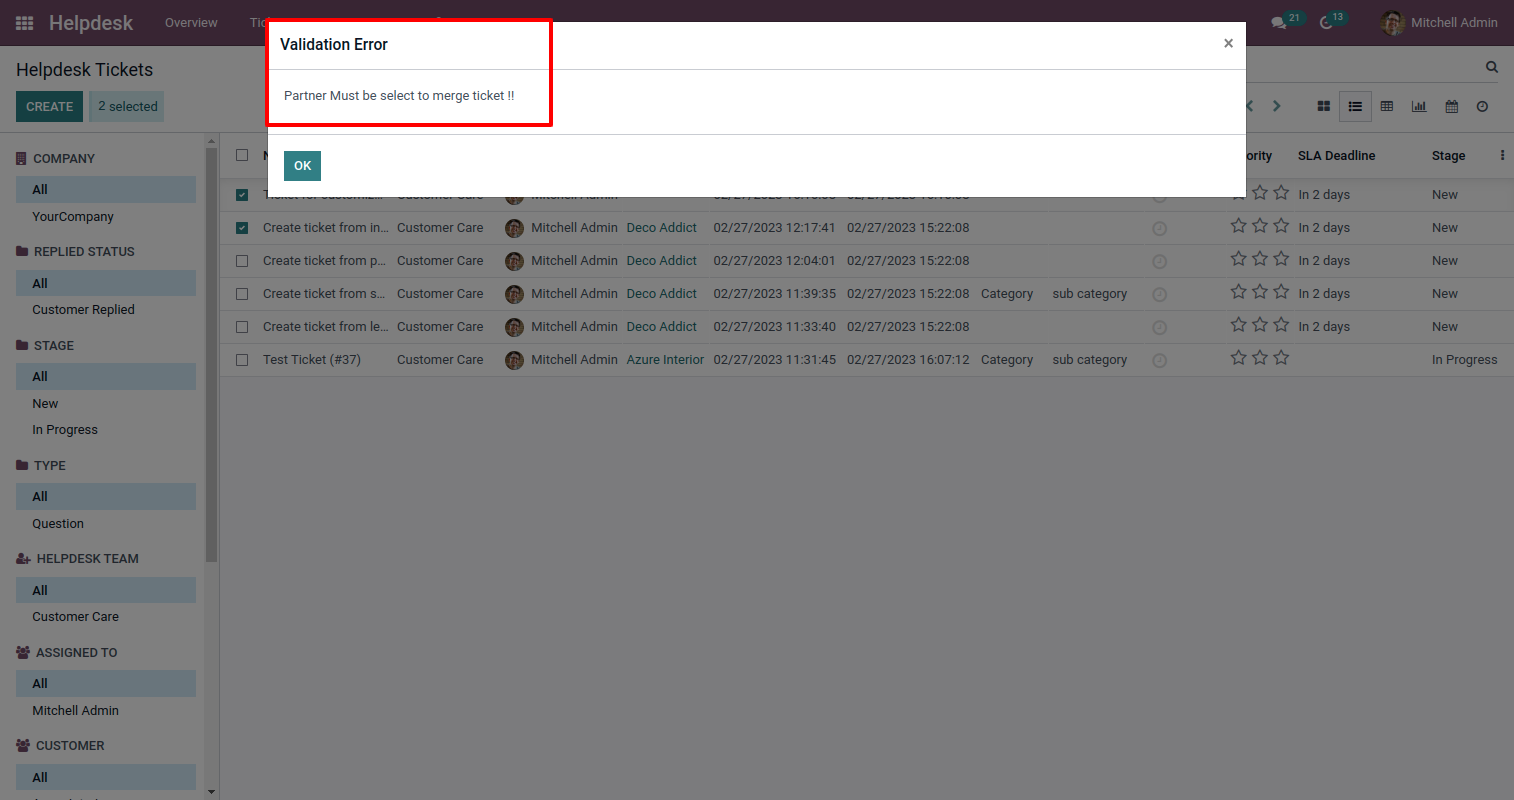
It shows an alert if you have not selected a partner.
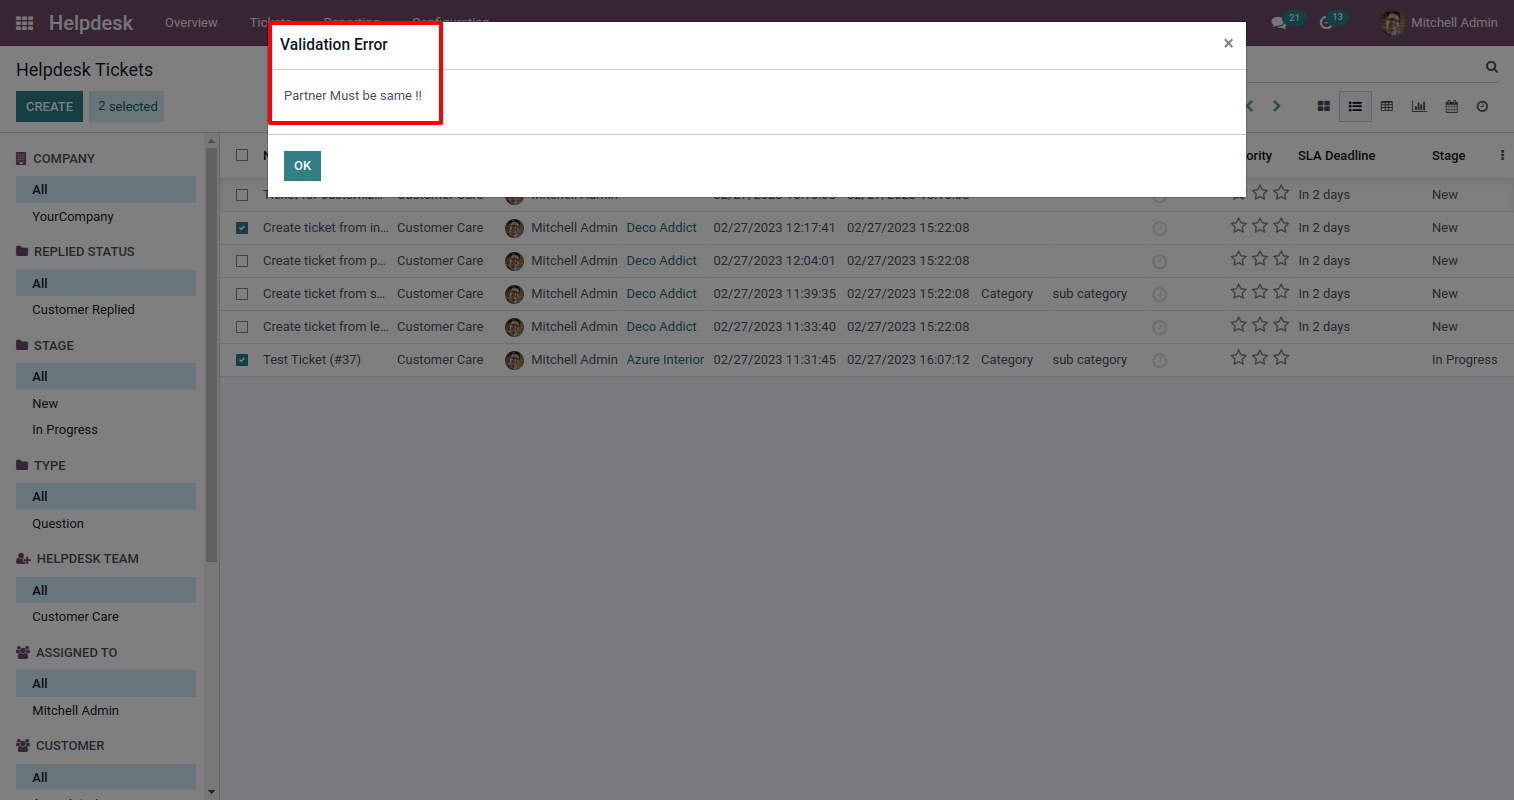
It shows an alert if you merge a ticket of a different partner.
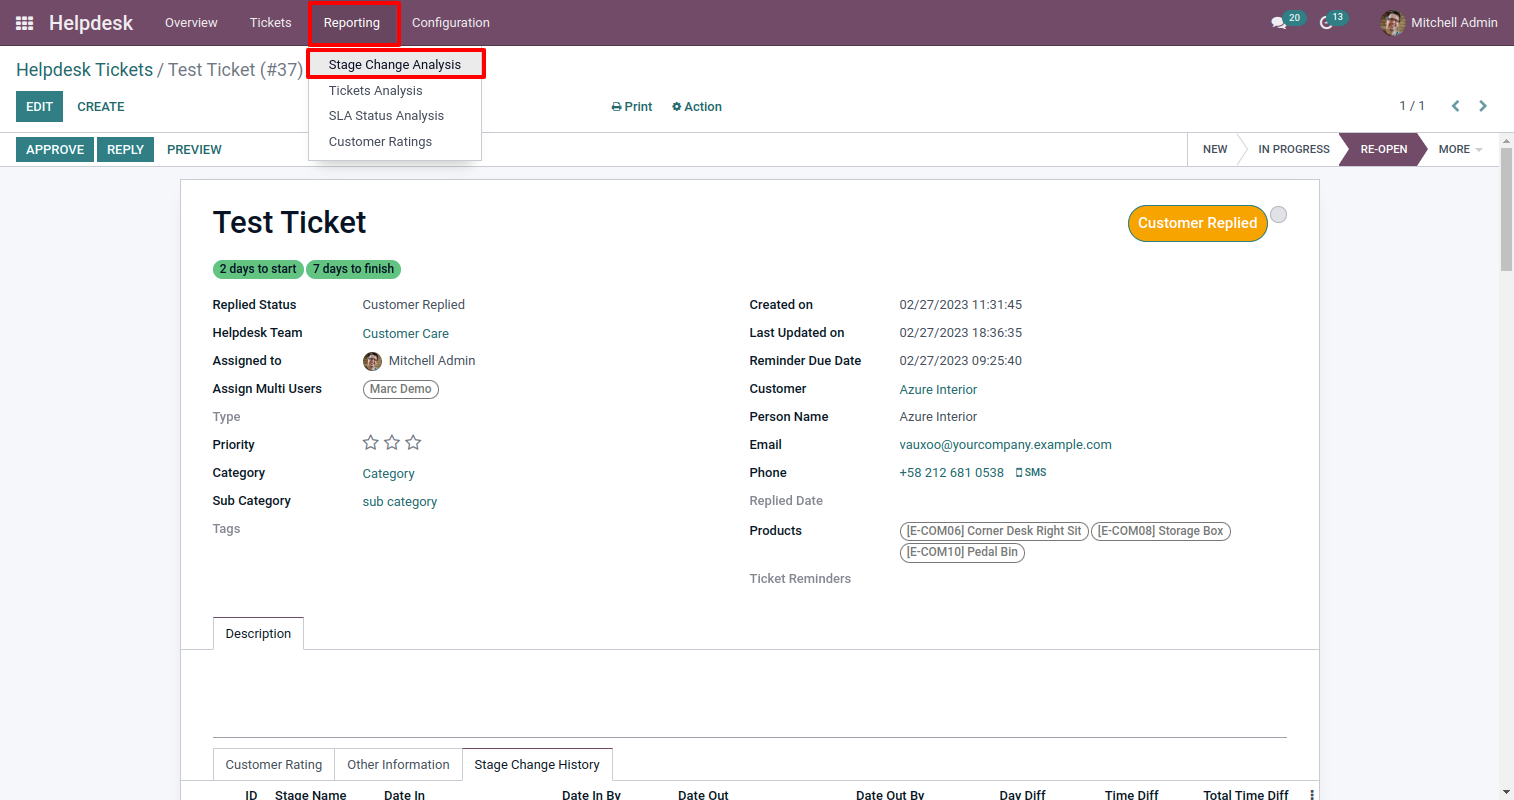
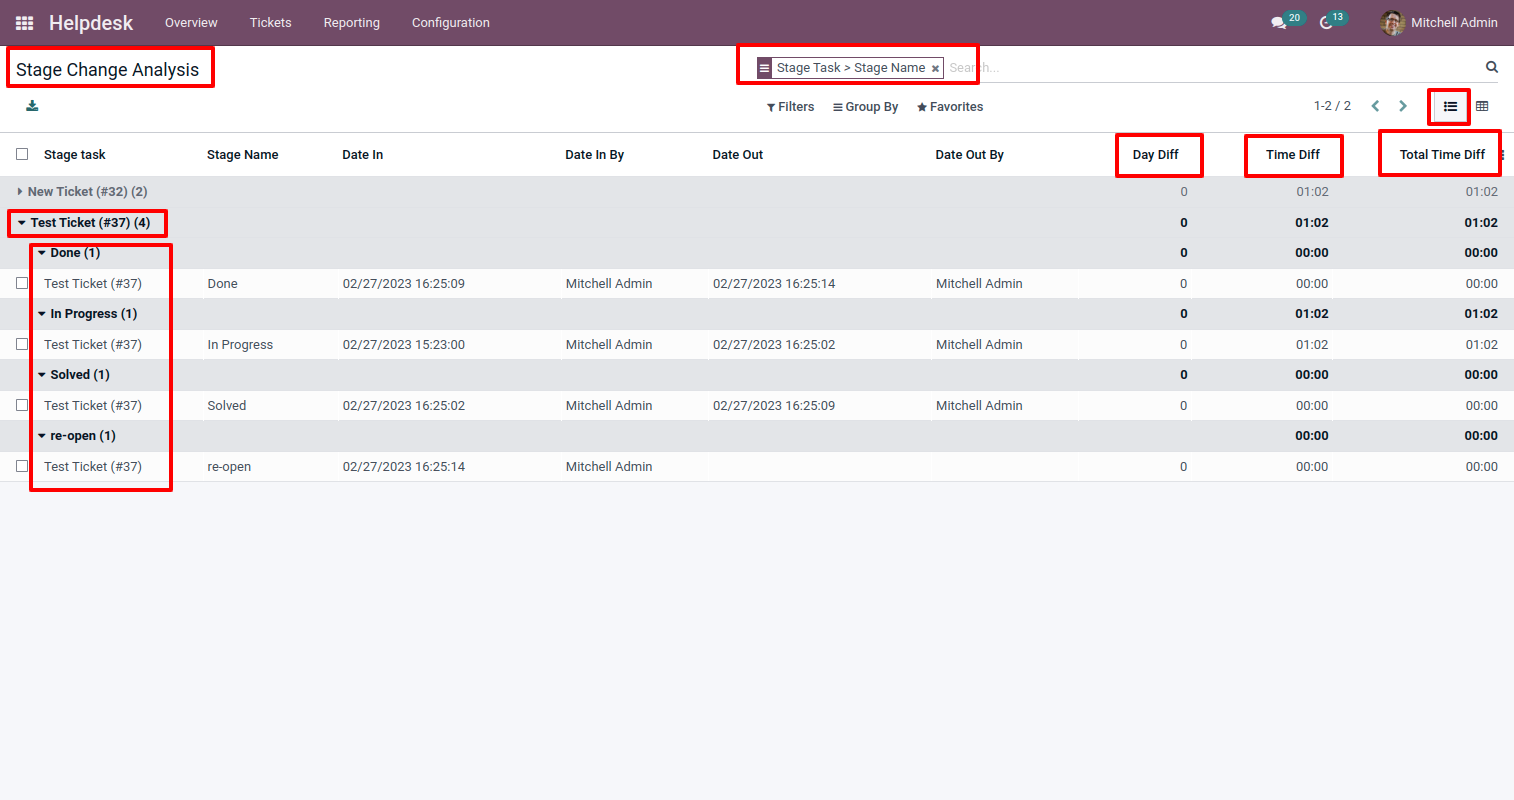
Stage change history with details.

In the stage change analysis menu, you can see all history.
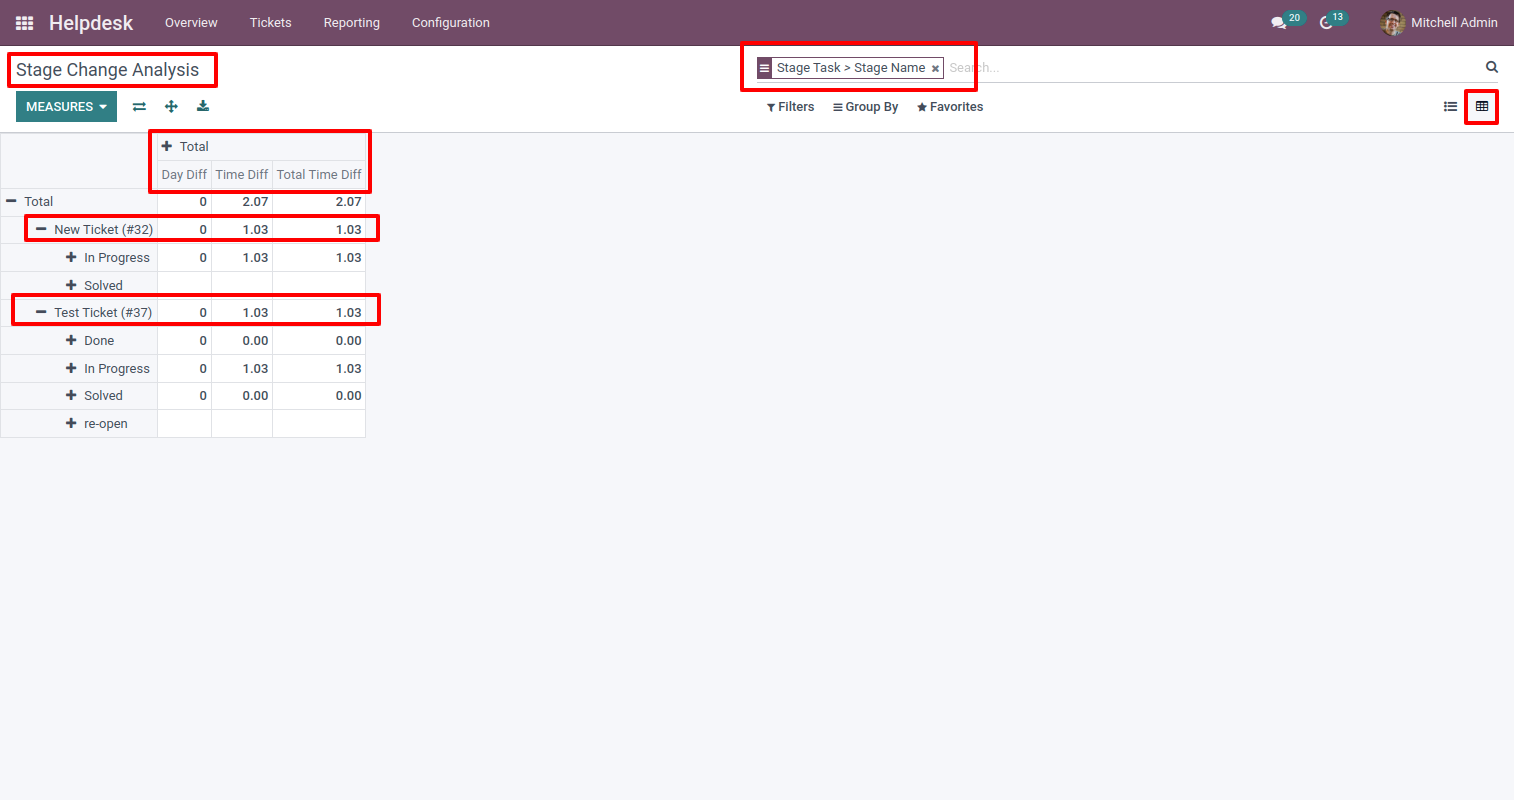
Enable the group.

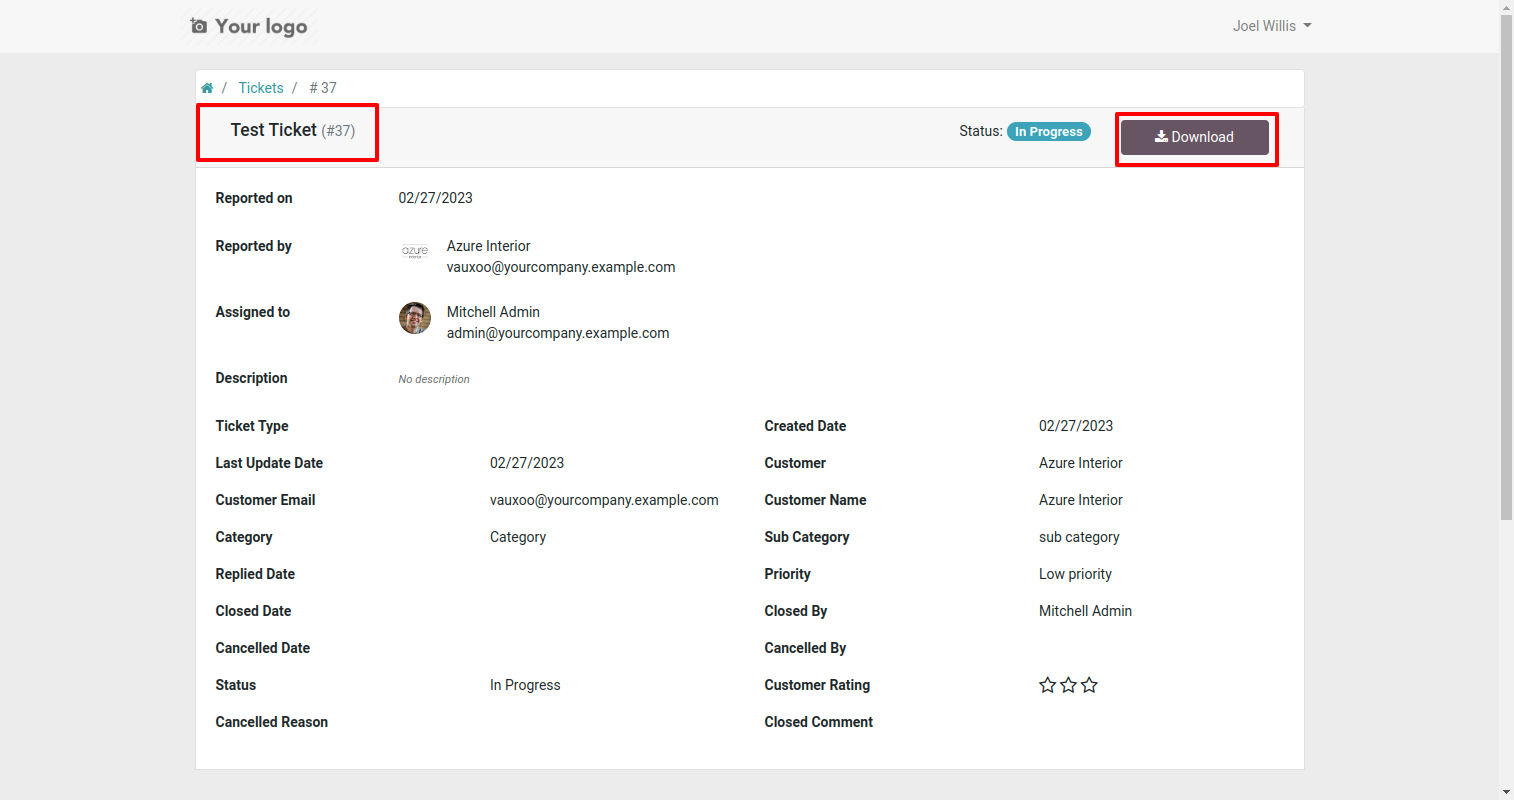
Customer login & open ticket.
In the portal, download/print ticket using "Download" button.
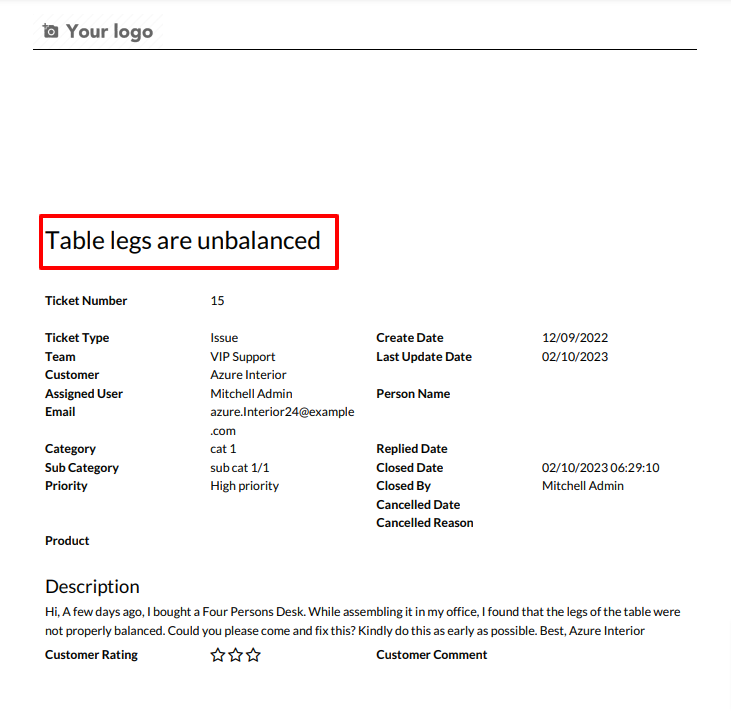
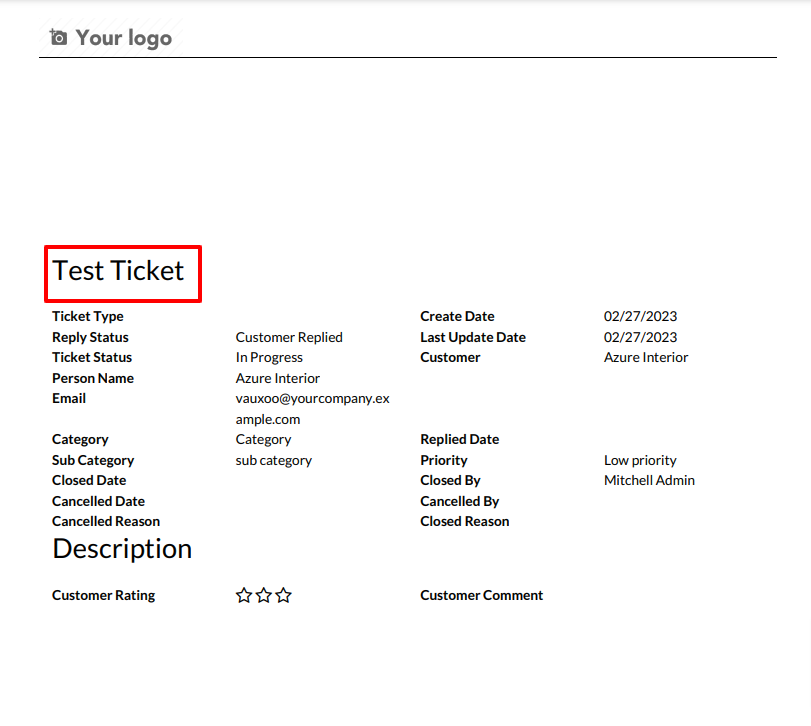
Ticket PDF report looks like below.
Version 15.0.6 | Released on : 24thNovember 2023
Version 15.0.5 | Released on : 20thNovember 2023
Version 15.0.4 | Released on : 10thNovember 2023
Version 15.0.3 | Released on : 21stMarch 2023
Version 15.0.2 | Released on : 14thFebruary 2023
Version 15.0.1 | Released on : 9thJanuary 2023
- No, this app works perfectly with Odoo Enterprise (Odoo.sh & Premise) as only.
- Yes, Our helpdesk app works properly with standard helpdesk app.
- Yes, both helpdesk modules are different.
- Please Contact Us at sales@softhealer.comto request customization.
- Yes, we provide free support for 100 days.
- Yes, you will get free update for lifetime.
- No, you don't need to install addition libraries.
- Yes, You have to download module for each version (13,14,15) except in version 12 or lower.
- No, We do not provide any kind of exchange.
- No, this application is not compatible with odoo.com(odoo saas).
