











Freshdesk Odoo Connector

Integrate Odoo with Freshdesk to seamlessly synchronize contacts and ticket data between both platforms. Manage Freshdesk operations directly from Odoo with manual and automated synchronization and detailed logs. Secure API-based connectivity for efficient customer service management.
Features

Freshdesk Configuration
Connect Odoo with Freshdesk securely using your Freshdesk domain and API key to synchronize data between both platforms.
Two-way Contact Sync
Seamlessly sync contacts between Odoo and Freshdesk in real-time to keep customer information consistent across both platforms.
Two-way Ticket Sync
Manage helpdesk tickets efficiently by syncing them across both platforms for seamless ticket management.
Queue Management
Track and manage synchronization operations through a robust queue system.
Synchronization Logs
Track successful and failed synchronization activities with detailed log history for easy monitoring and troubleshooting.
Webhook Automation
Utilize webhooks for instant data synchronization from Freshdesk to Odoo.
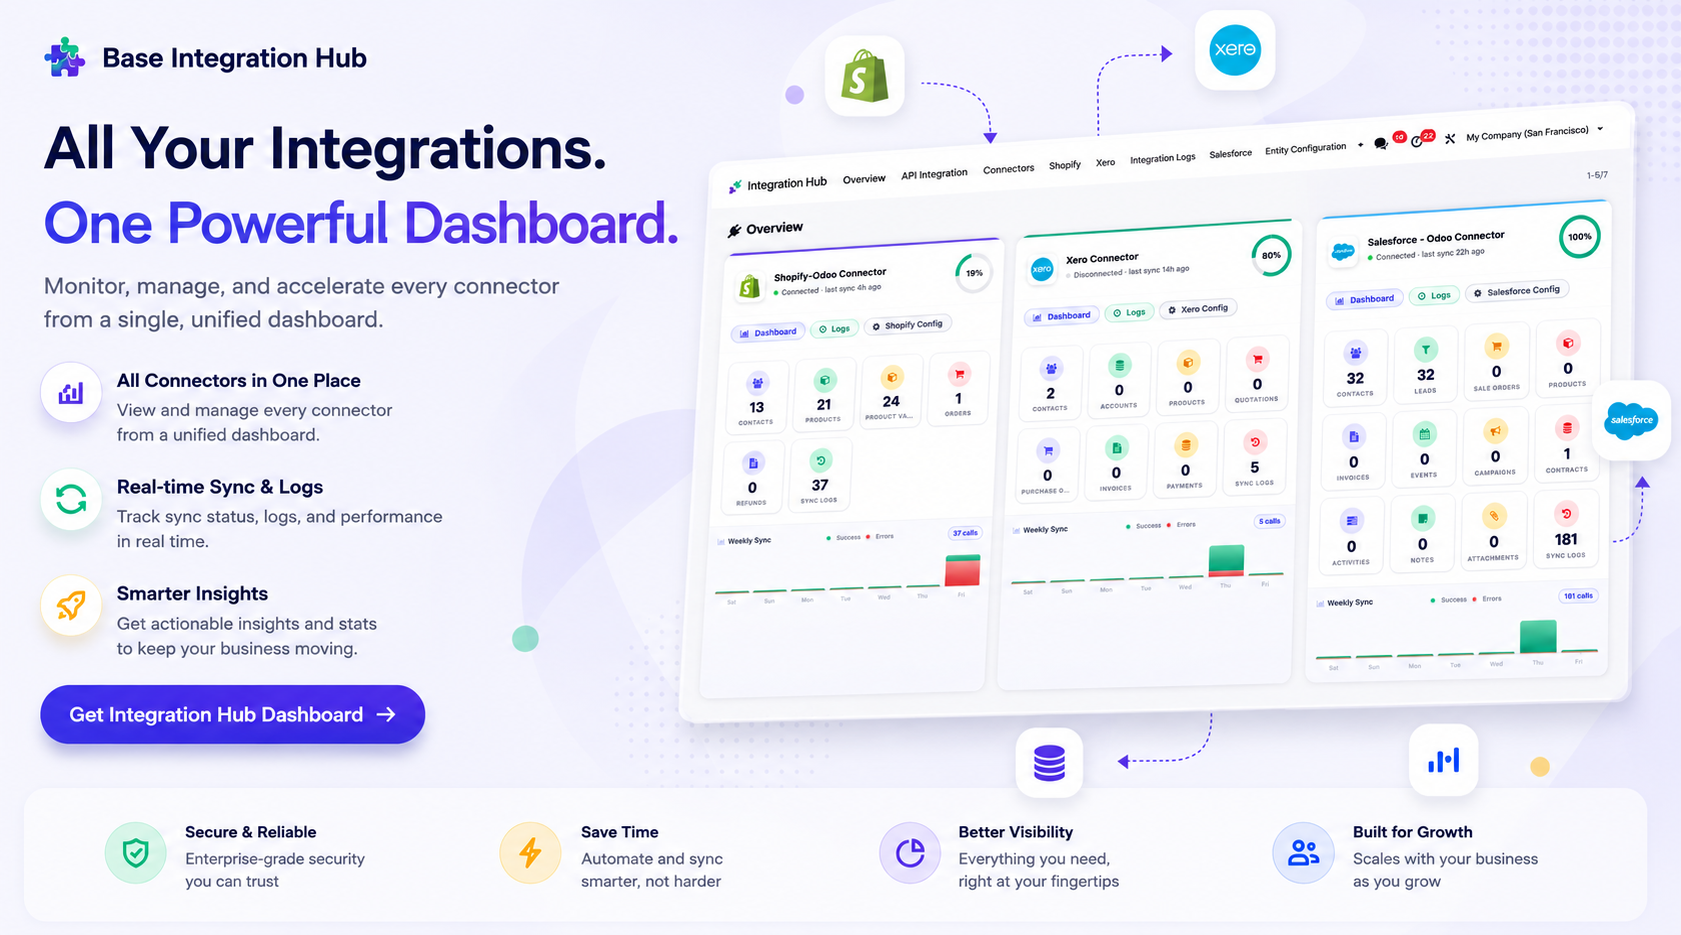
Centralized dashboard to manage and monitor all connectors from one place. Quickly access sync summary, activity logs, and configuration controls with improved visibility.

Workflow
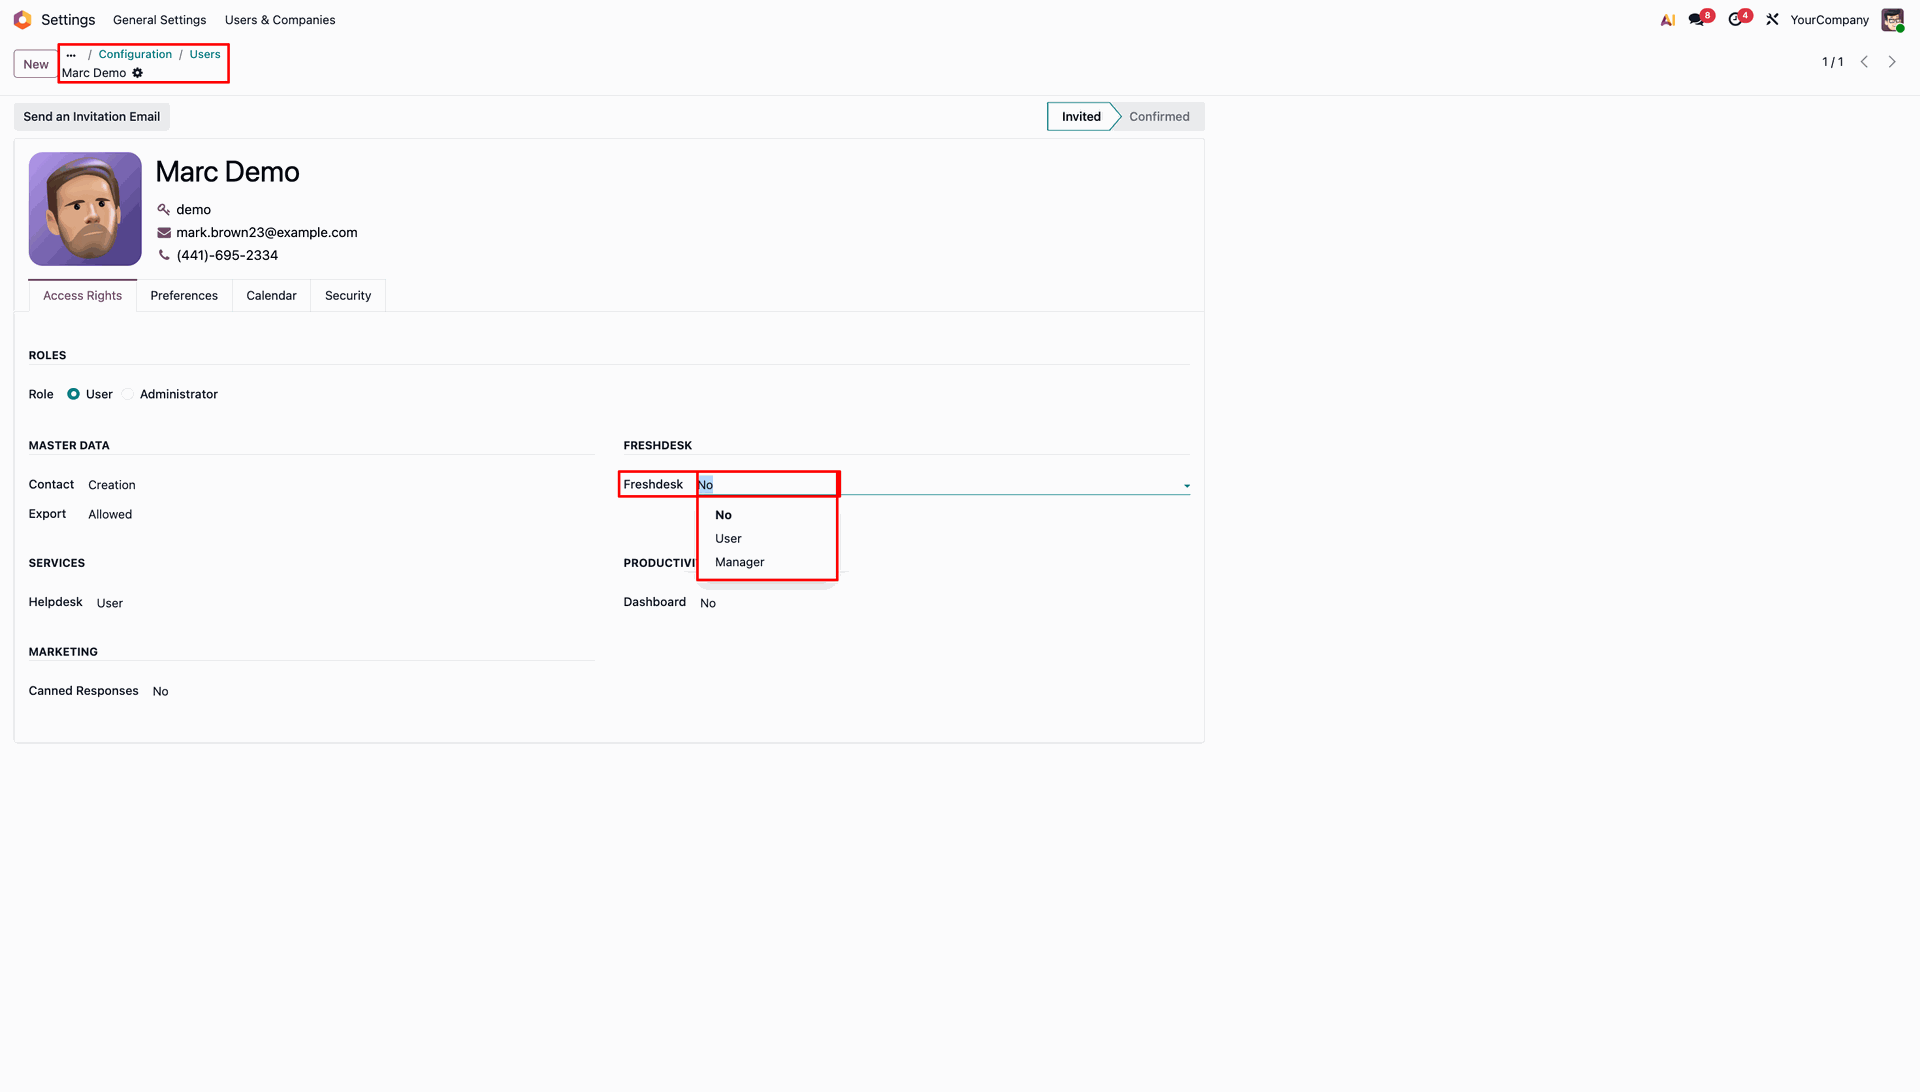
Navigate to Users and grant the 'User' or 'Manager' access rights for Freshdesk to the corresponding users.
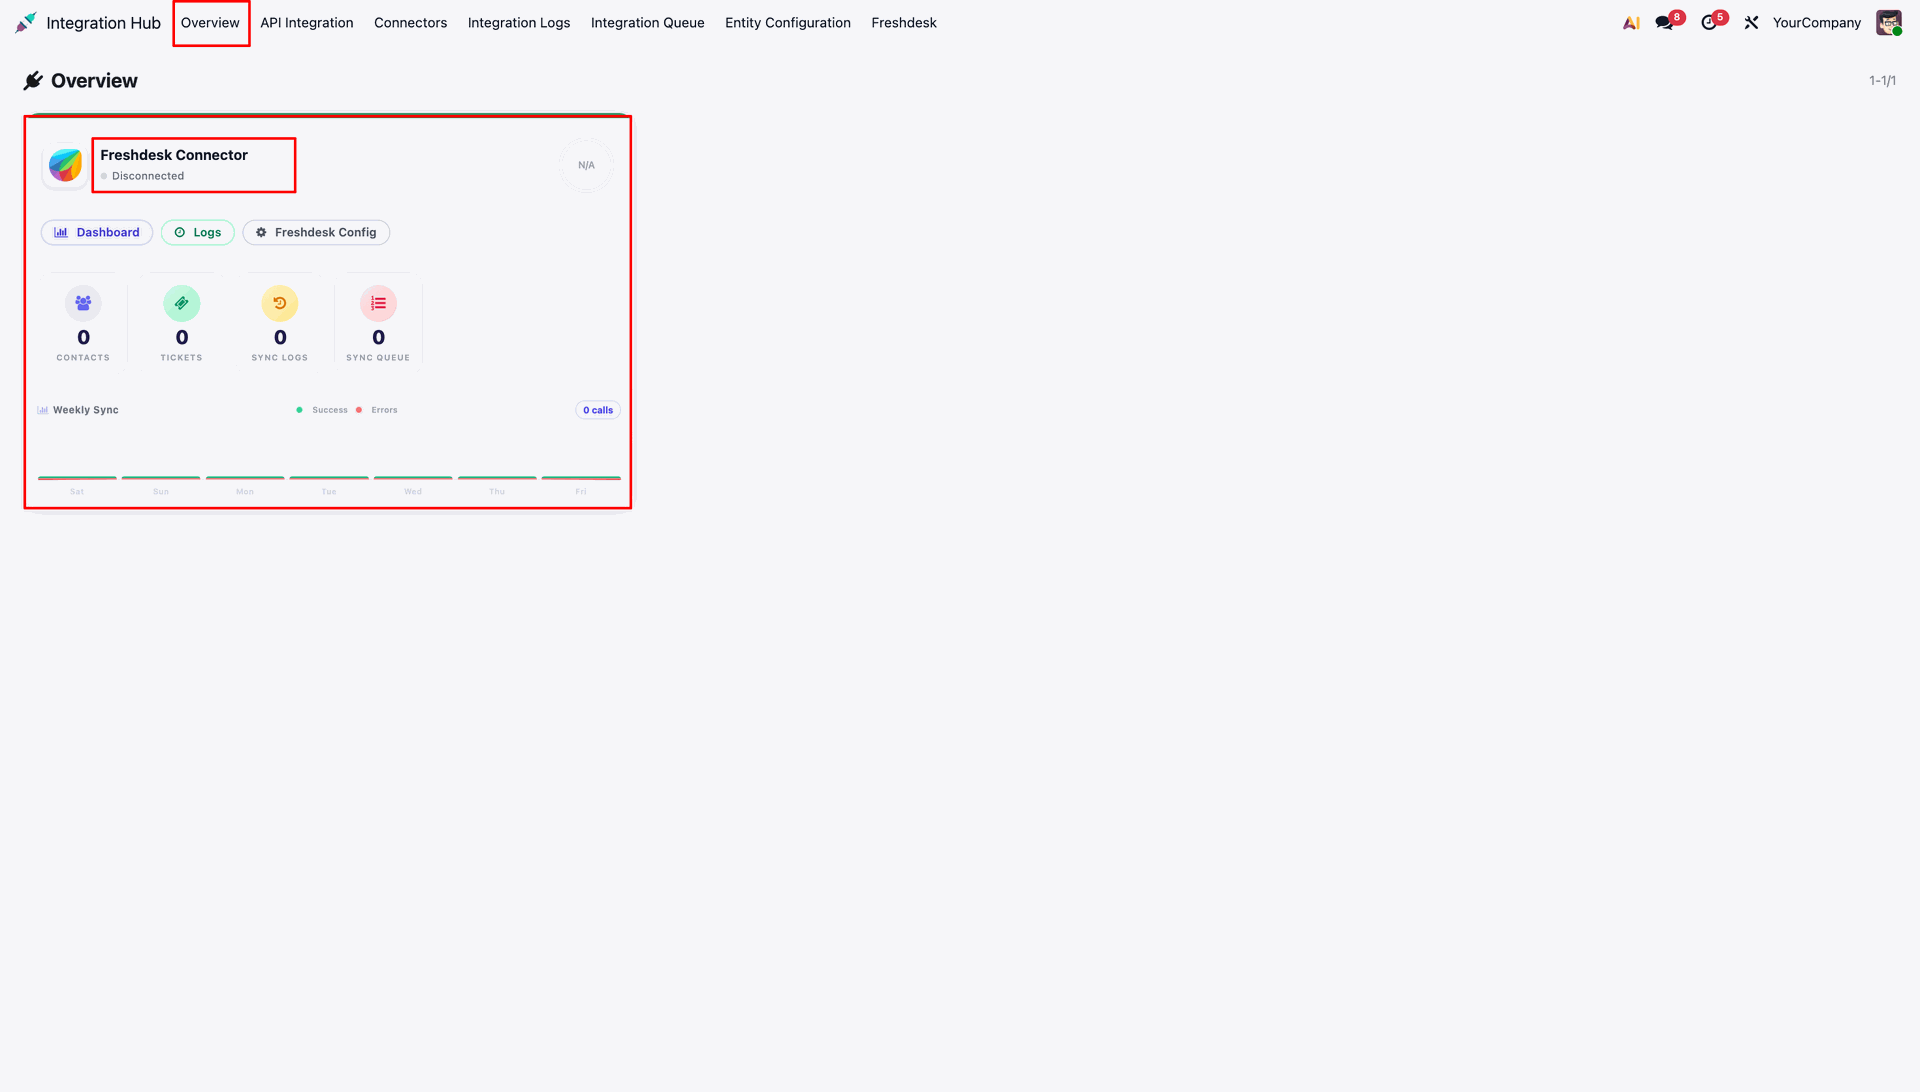
Navigate to the Integration Hub and view the Overview dashboard to check the initial Disconnected status of the Freshdesk Connector.
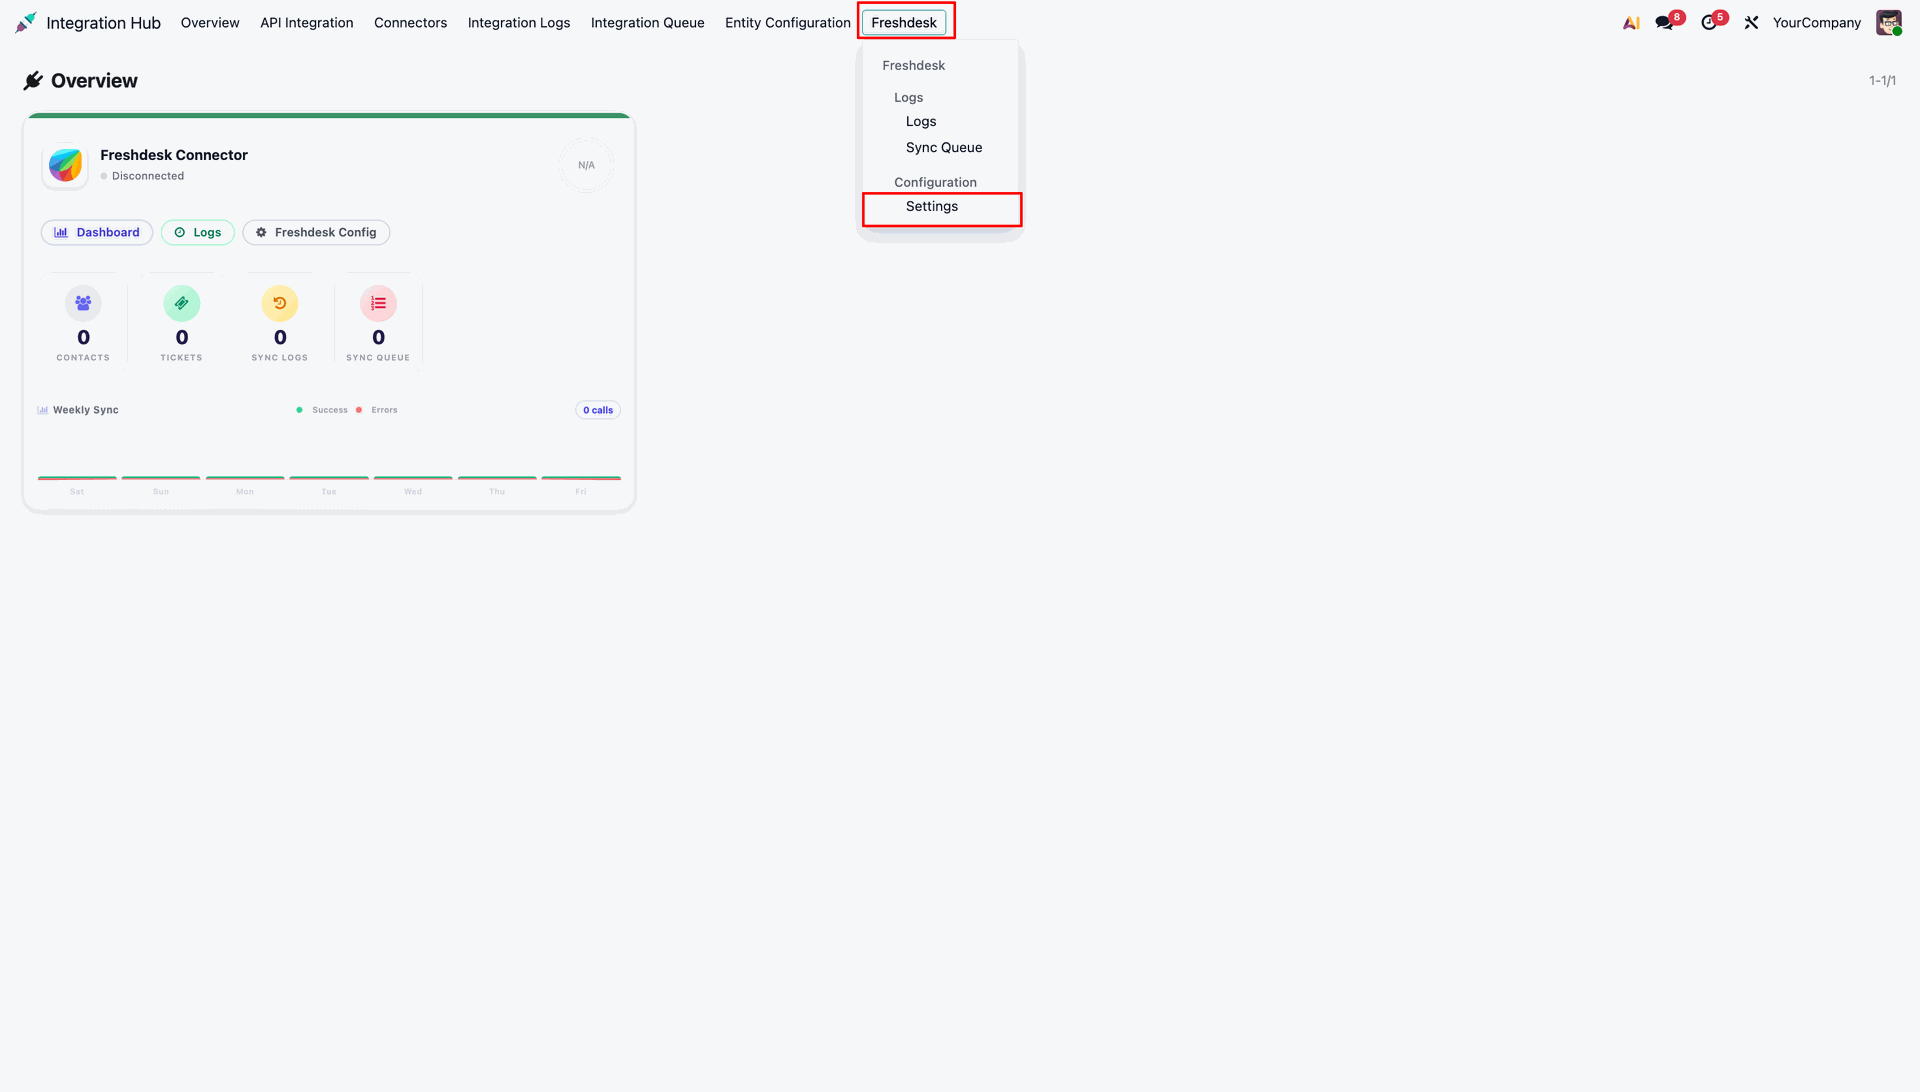
Navigate to Freshdesk > Settings in the Integration Hub to access the Authentication and Sync configuration options.
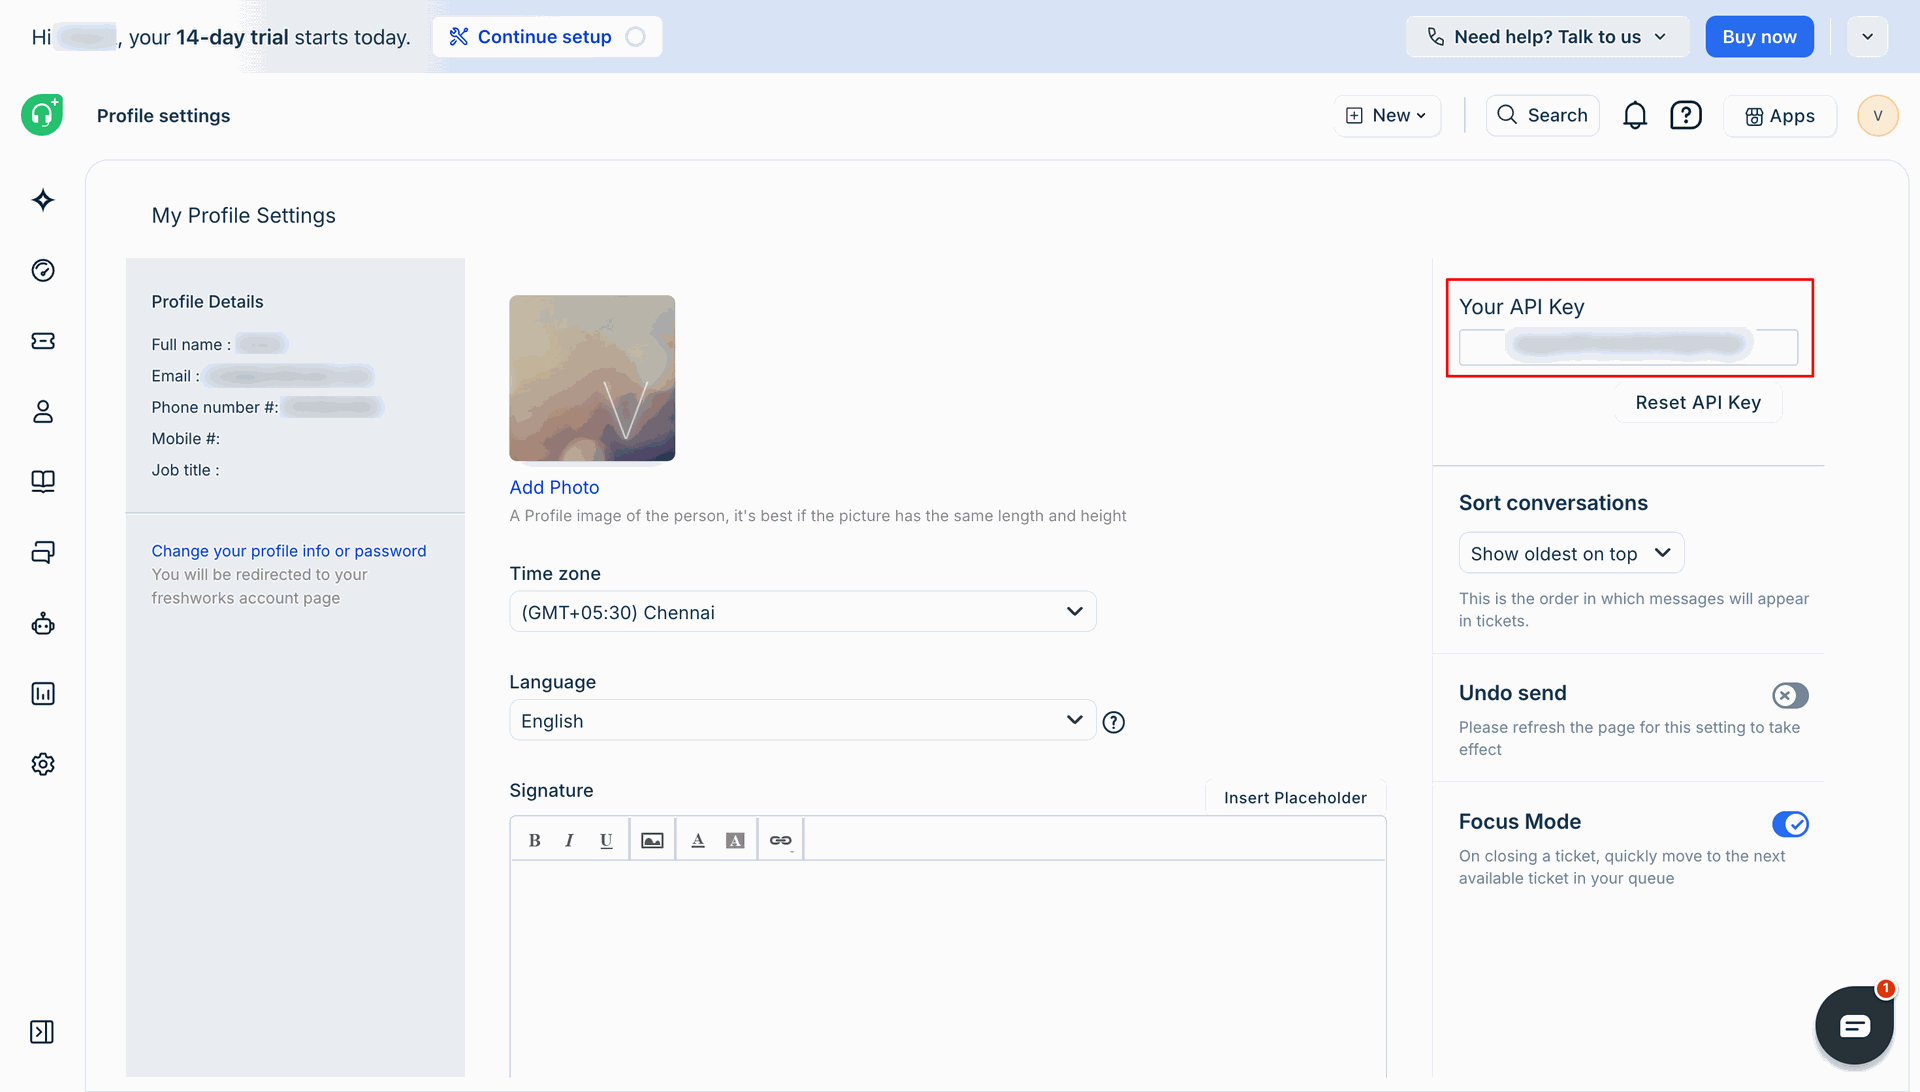
Locate and copy your Freshdesk API Key from your Freshdesk Profile Settings.
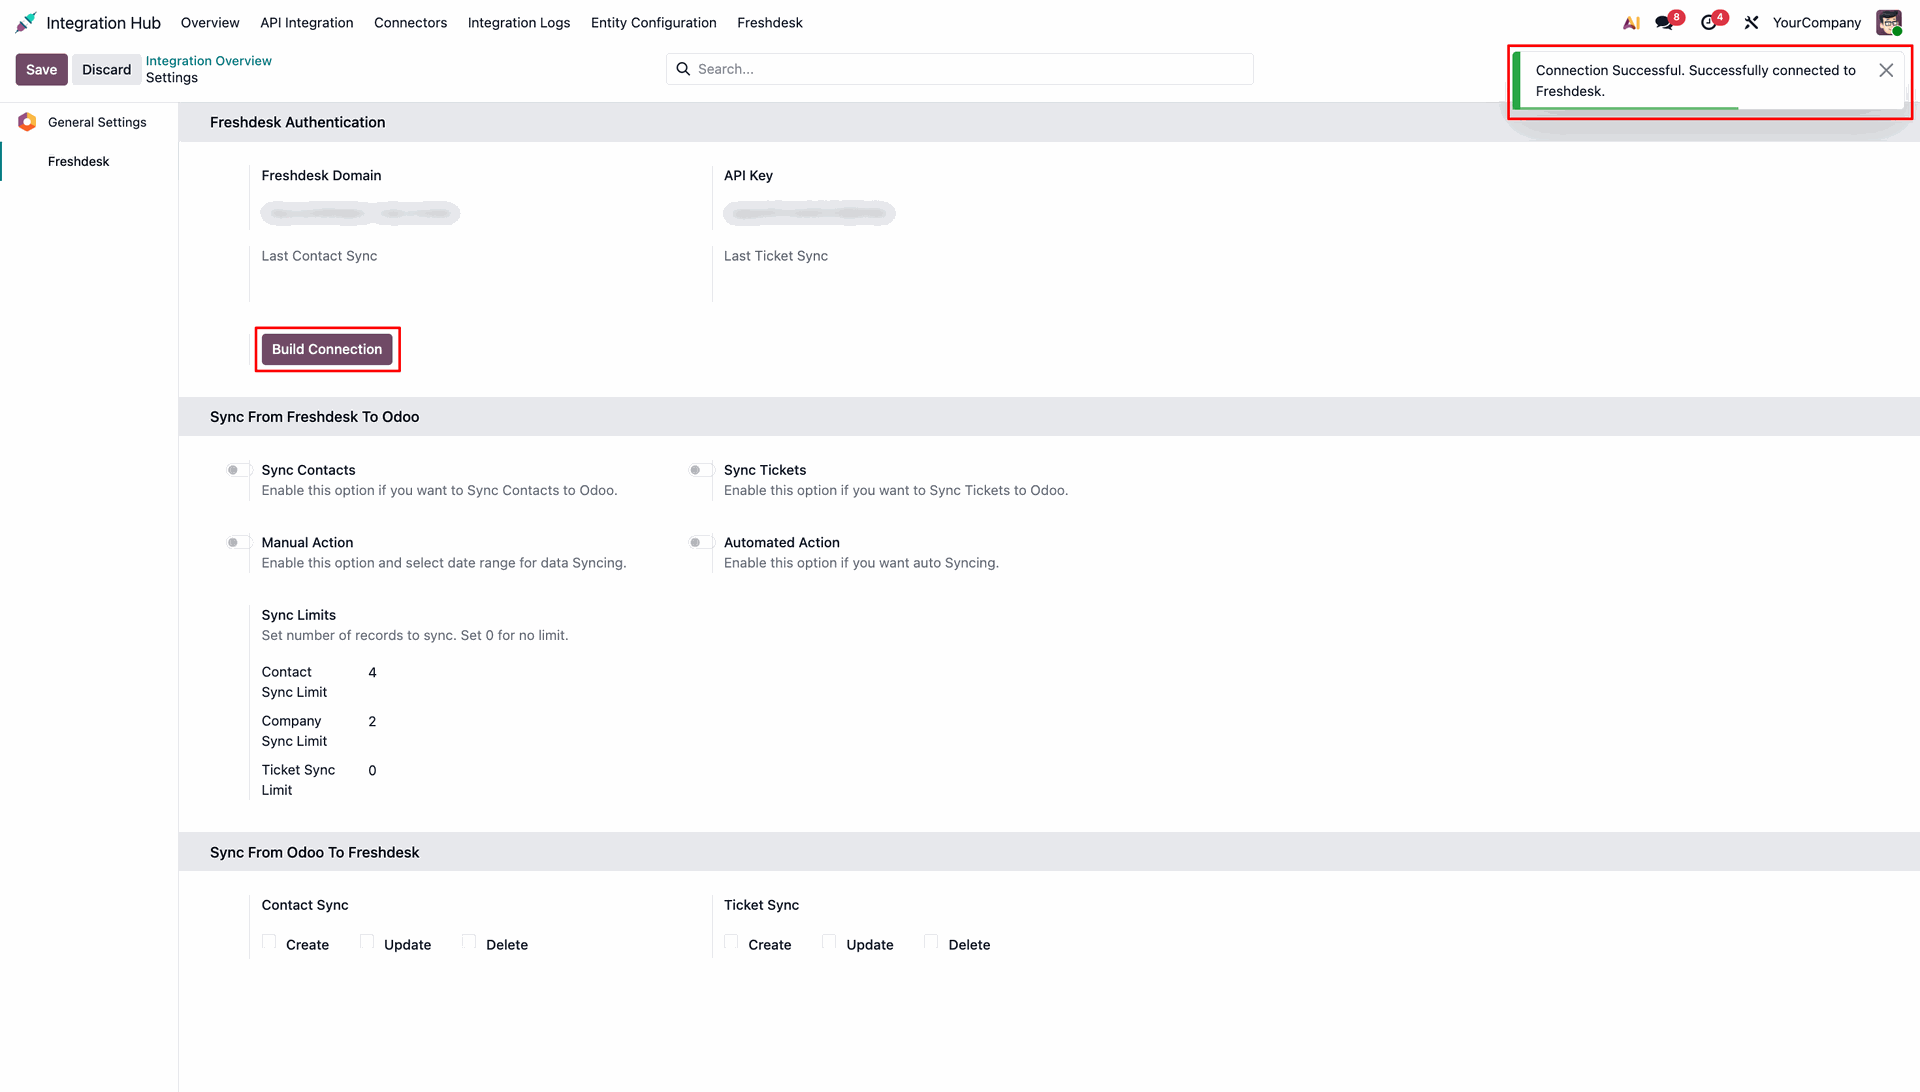
Enter your Freshdesk Domain and API Key in the Authentication settings, then click 'Build Connection' to establish a successful connection.
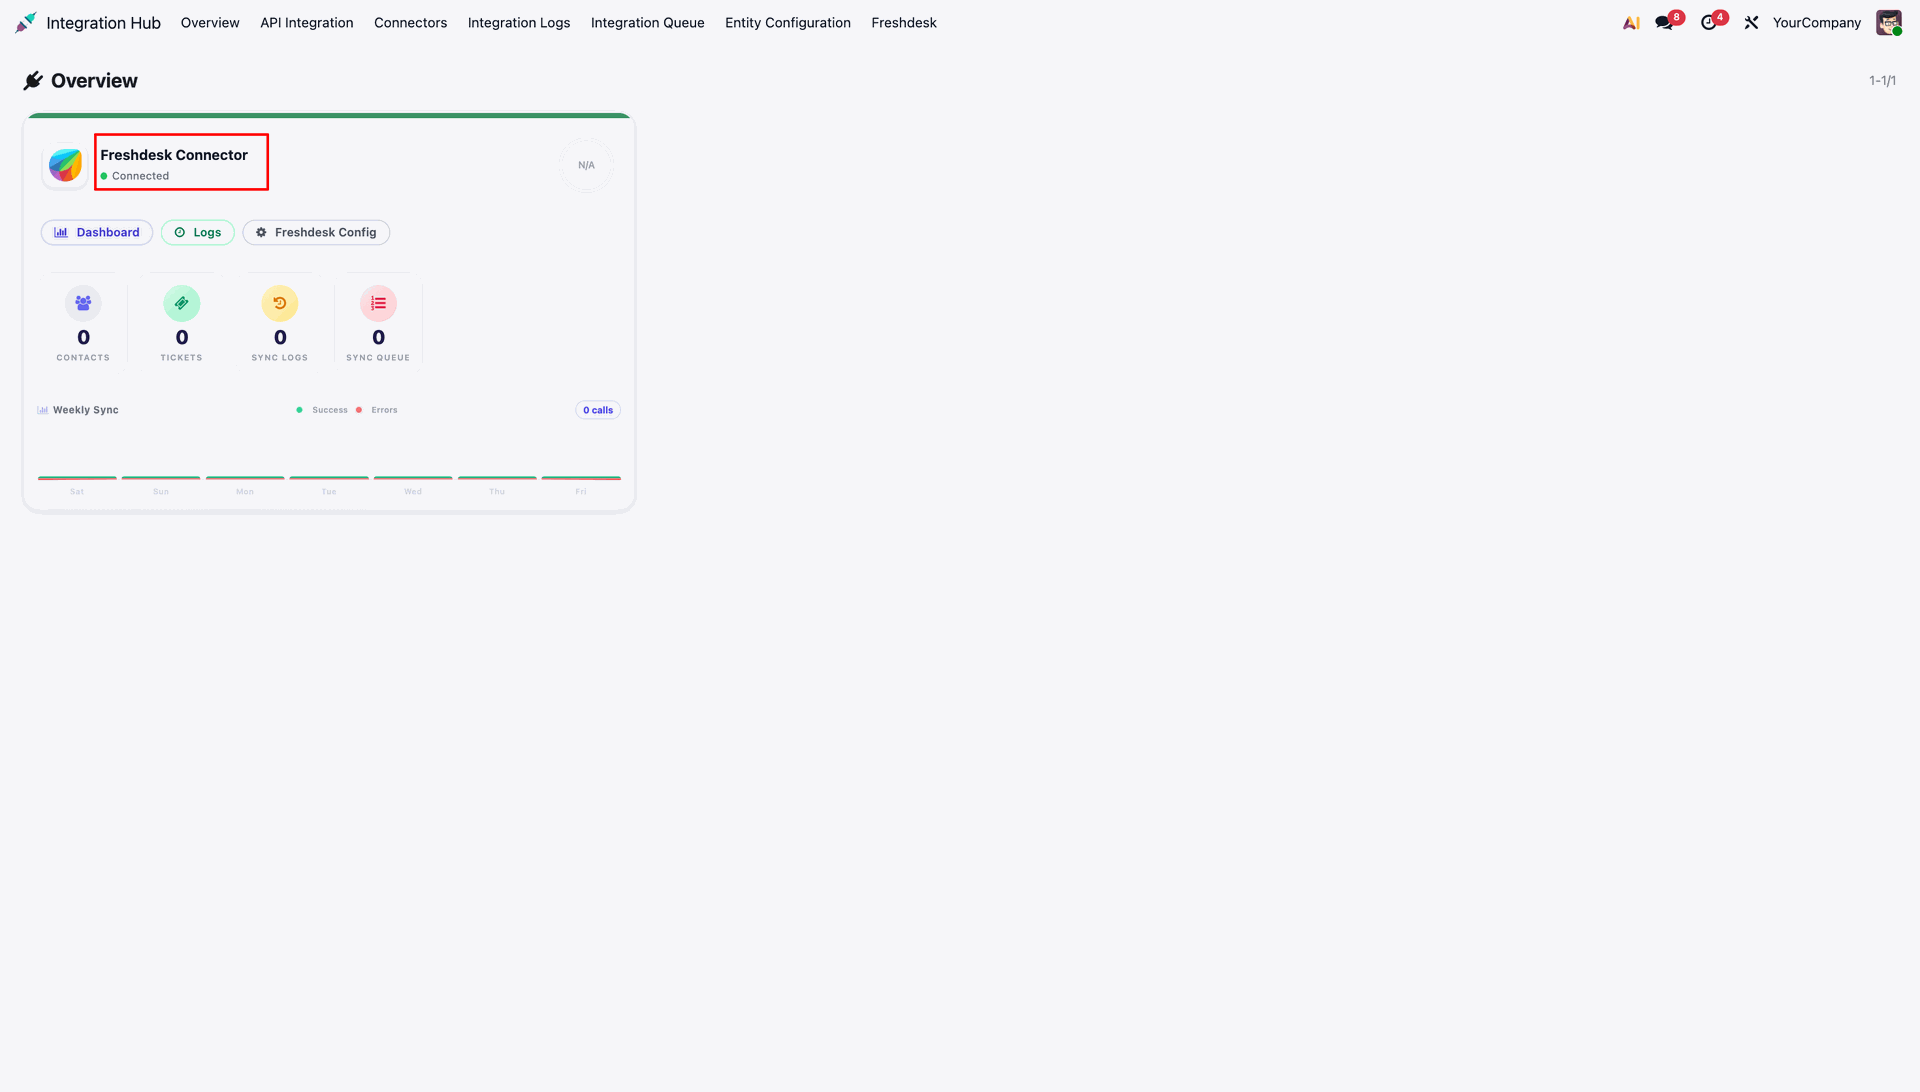
Once successfully connected, the Integration Hub Overview dashboard will display the Freshdesk Connector status as 'Connected'.
Workflow
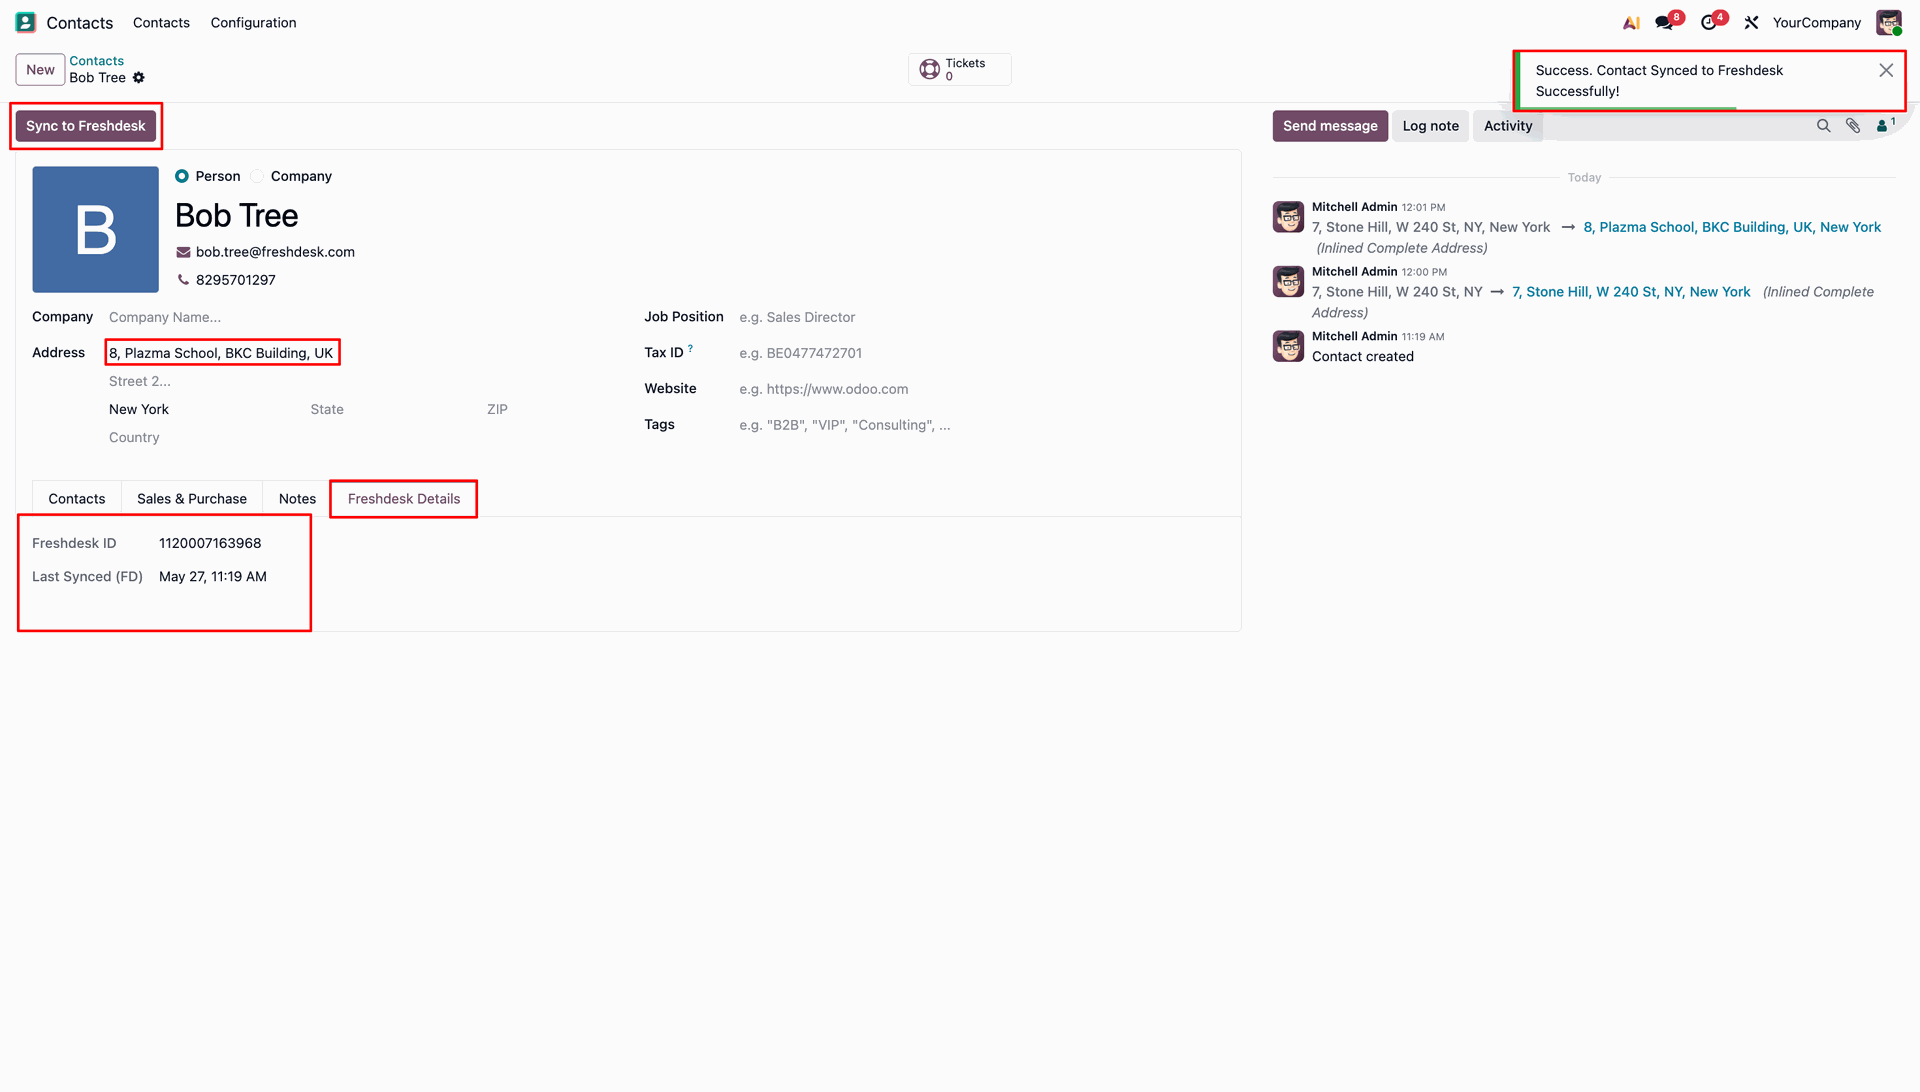
In Odoo, you can update a contact's details, such as their address, and click the 'Sync to Freshdesk' button. A success message confirms the sync.
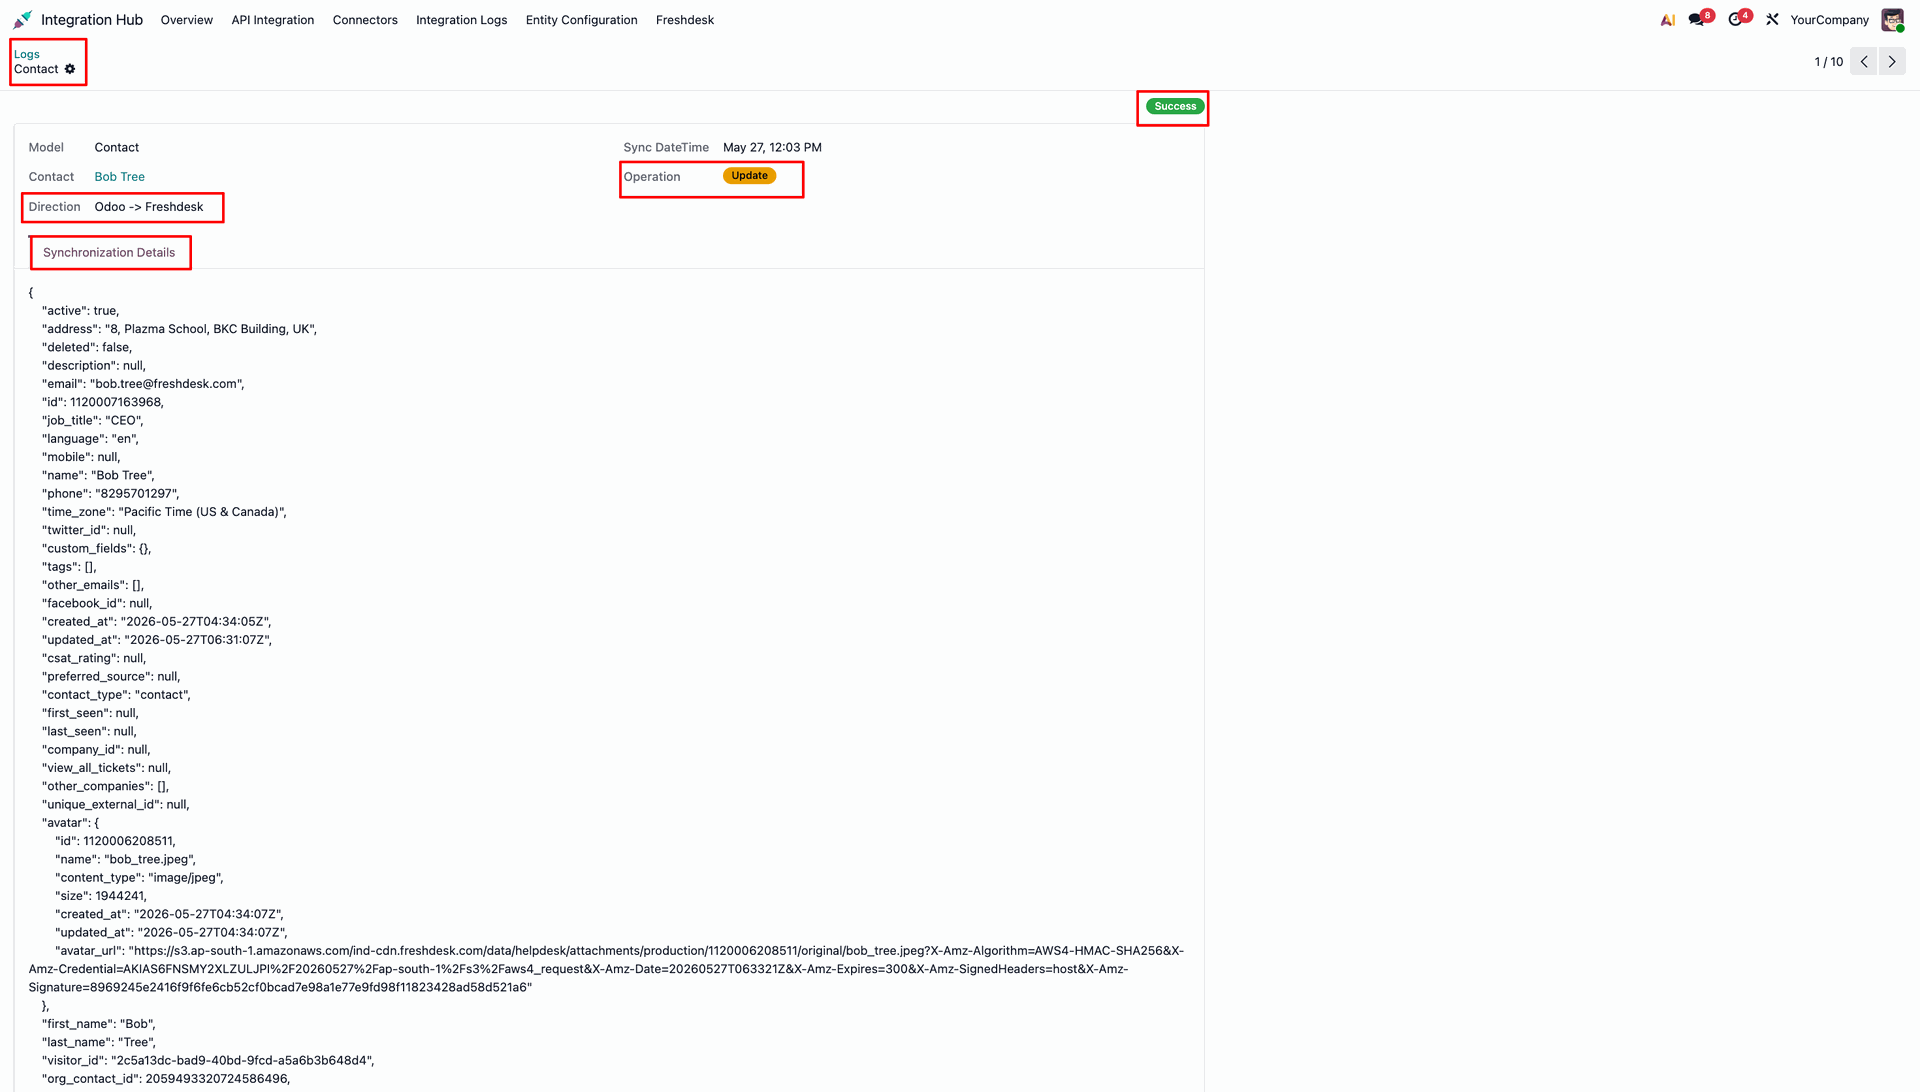
The Integration Logs will record an 'Update' operation with a 'Success' status for the contact sync.
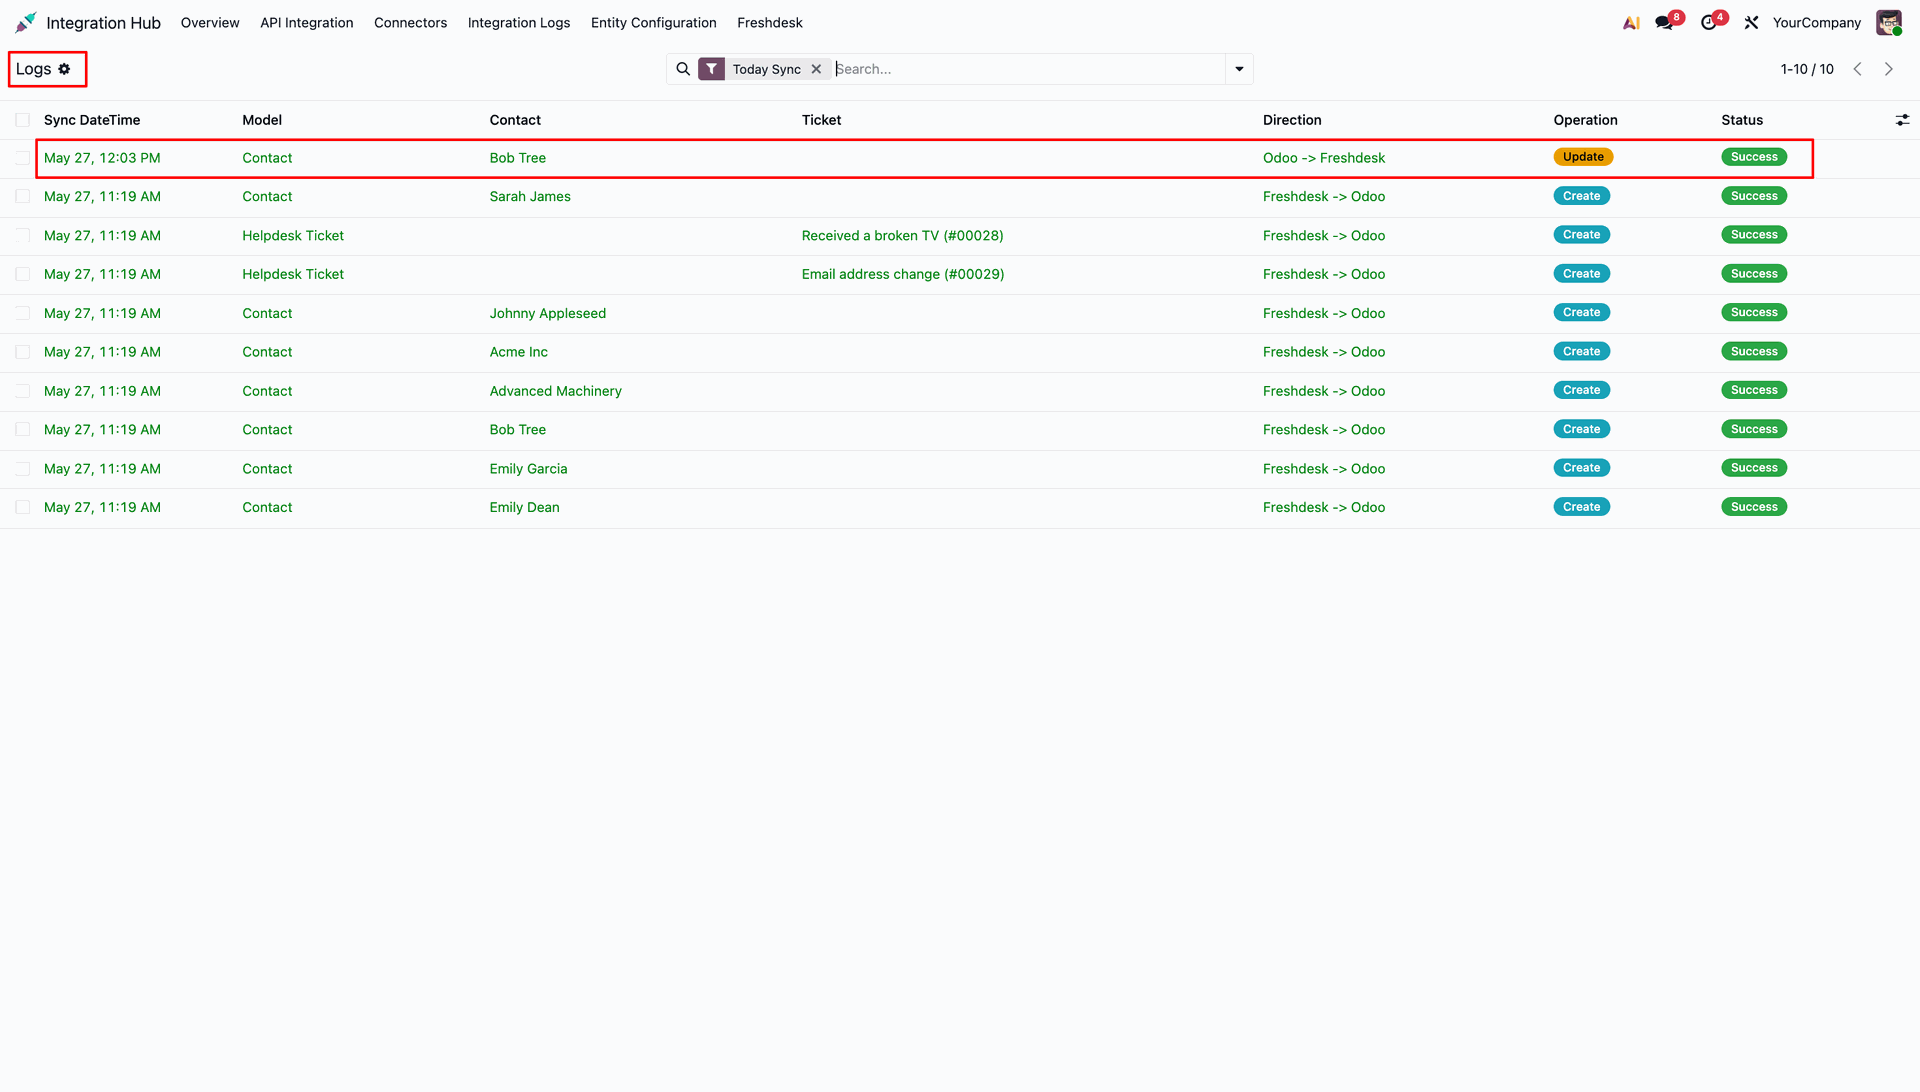
You can view the detailed Logs.
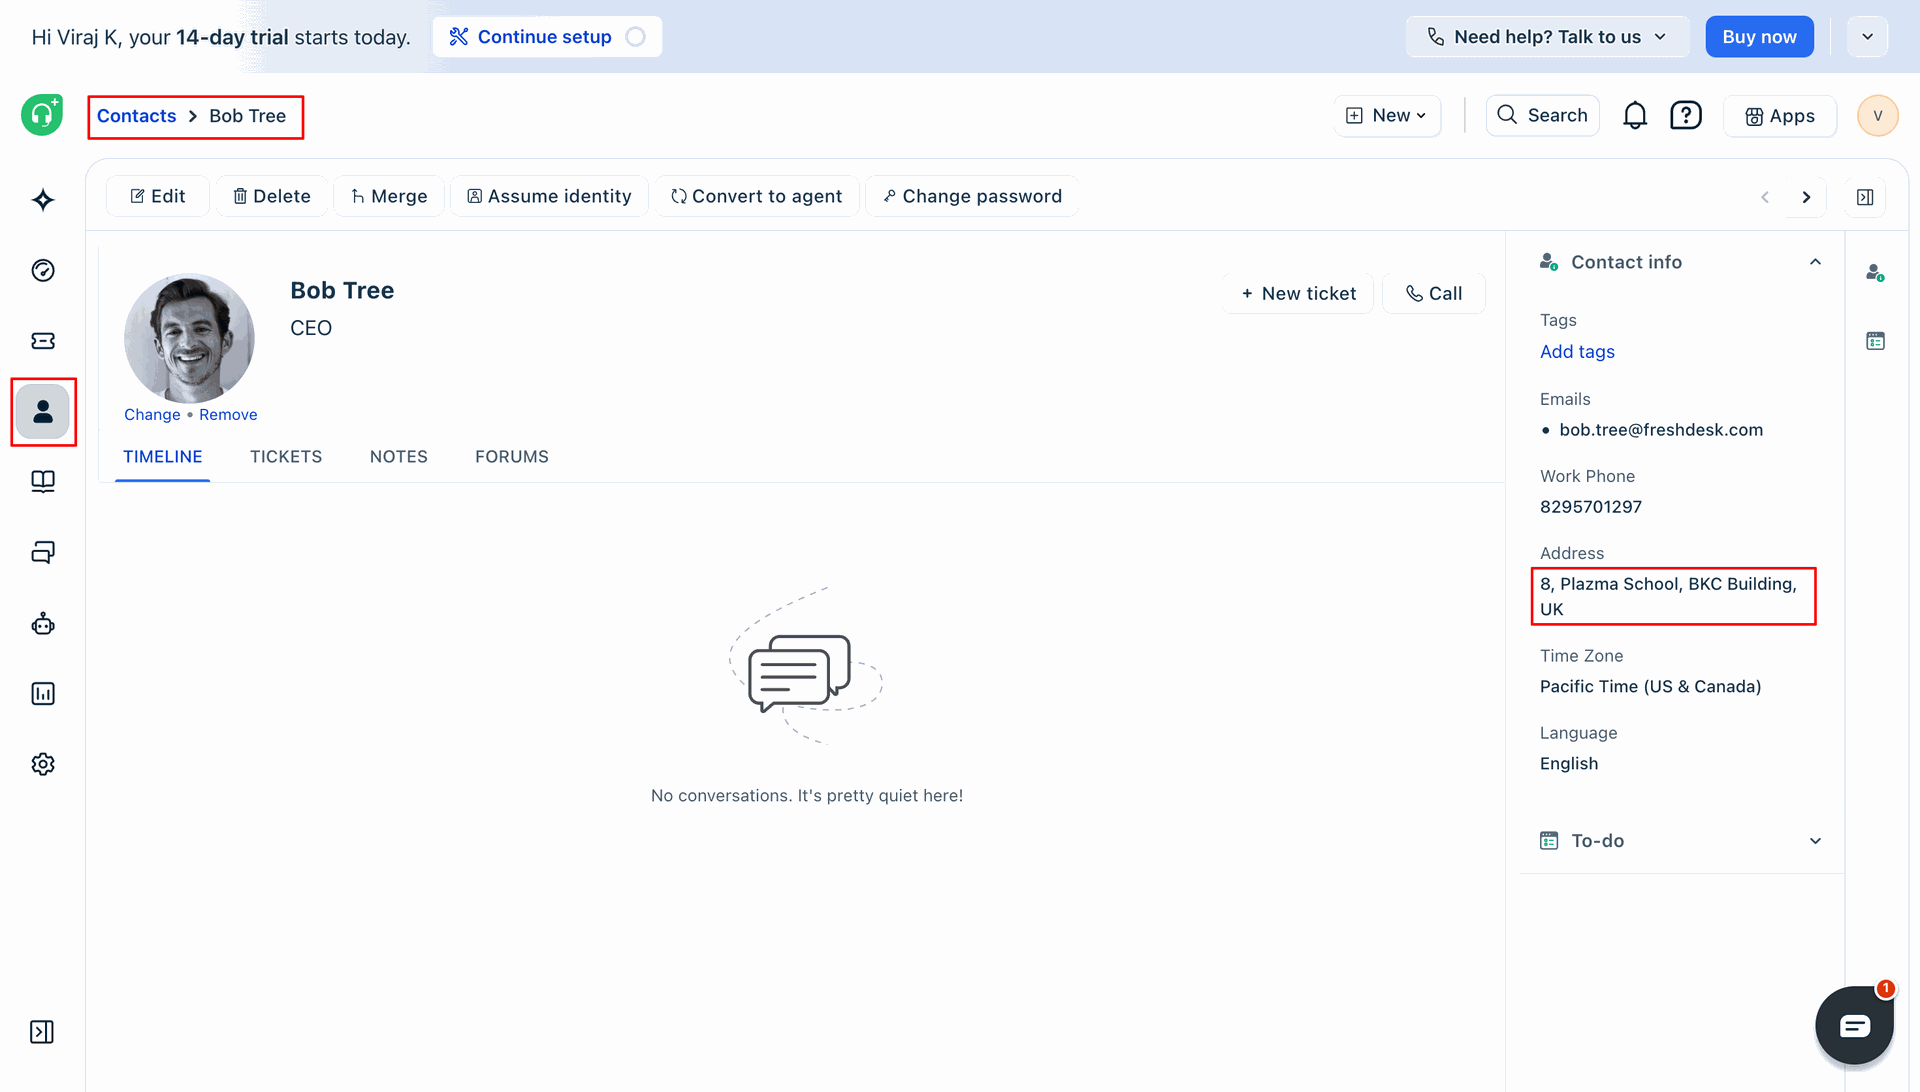
In Freshdesk, verify that the contact's details, such as the highlighted address, have been successfully updated.
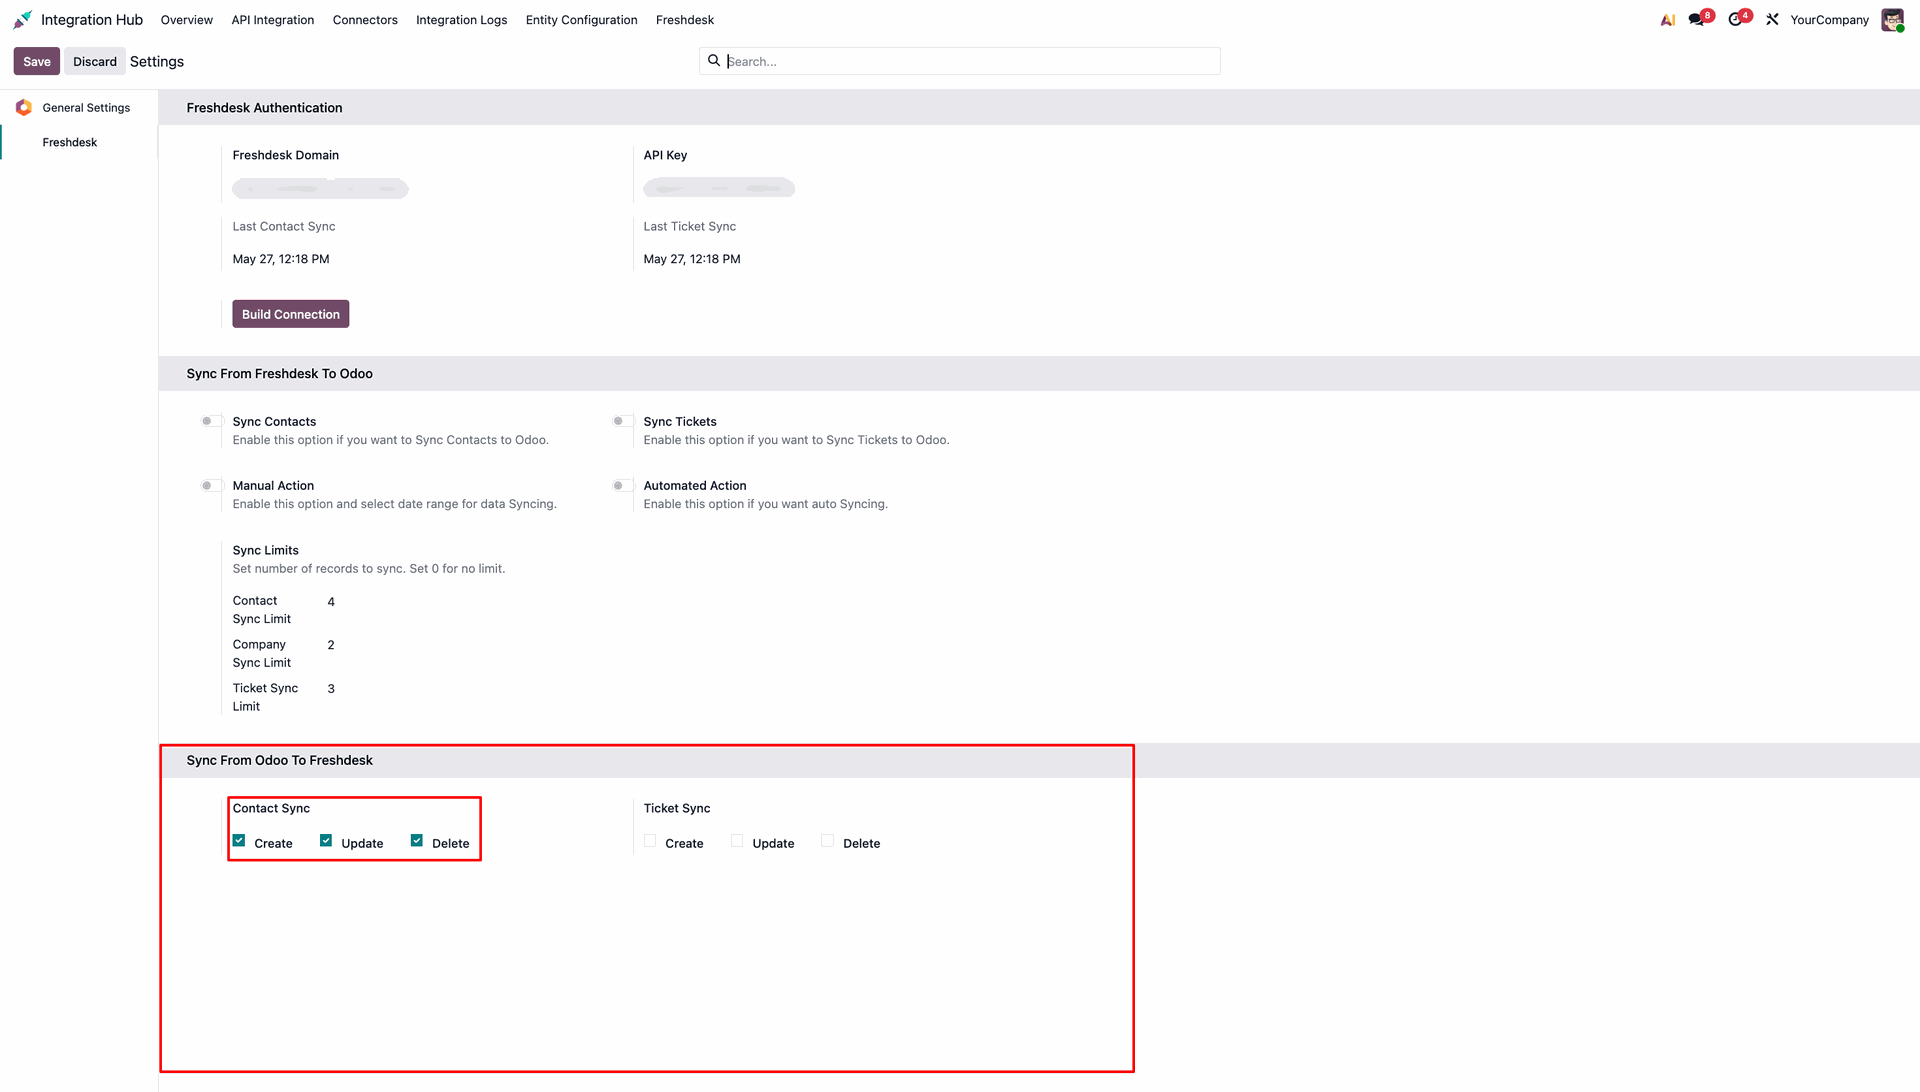
In the settings, ensure that 'Create', 'Update', and 'Delete' are enabled under 'Contact Sync'.
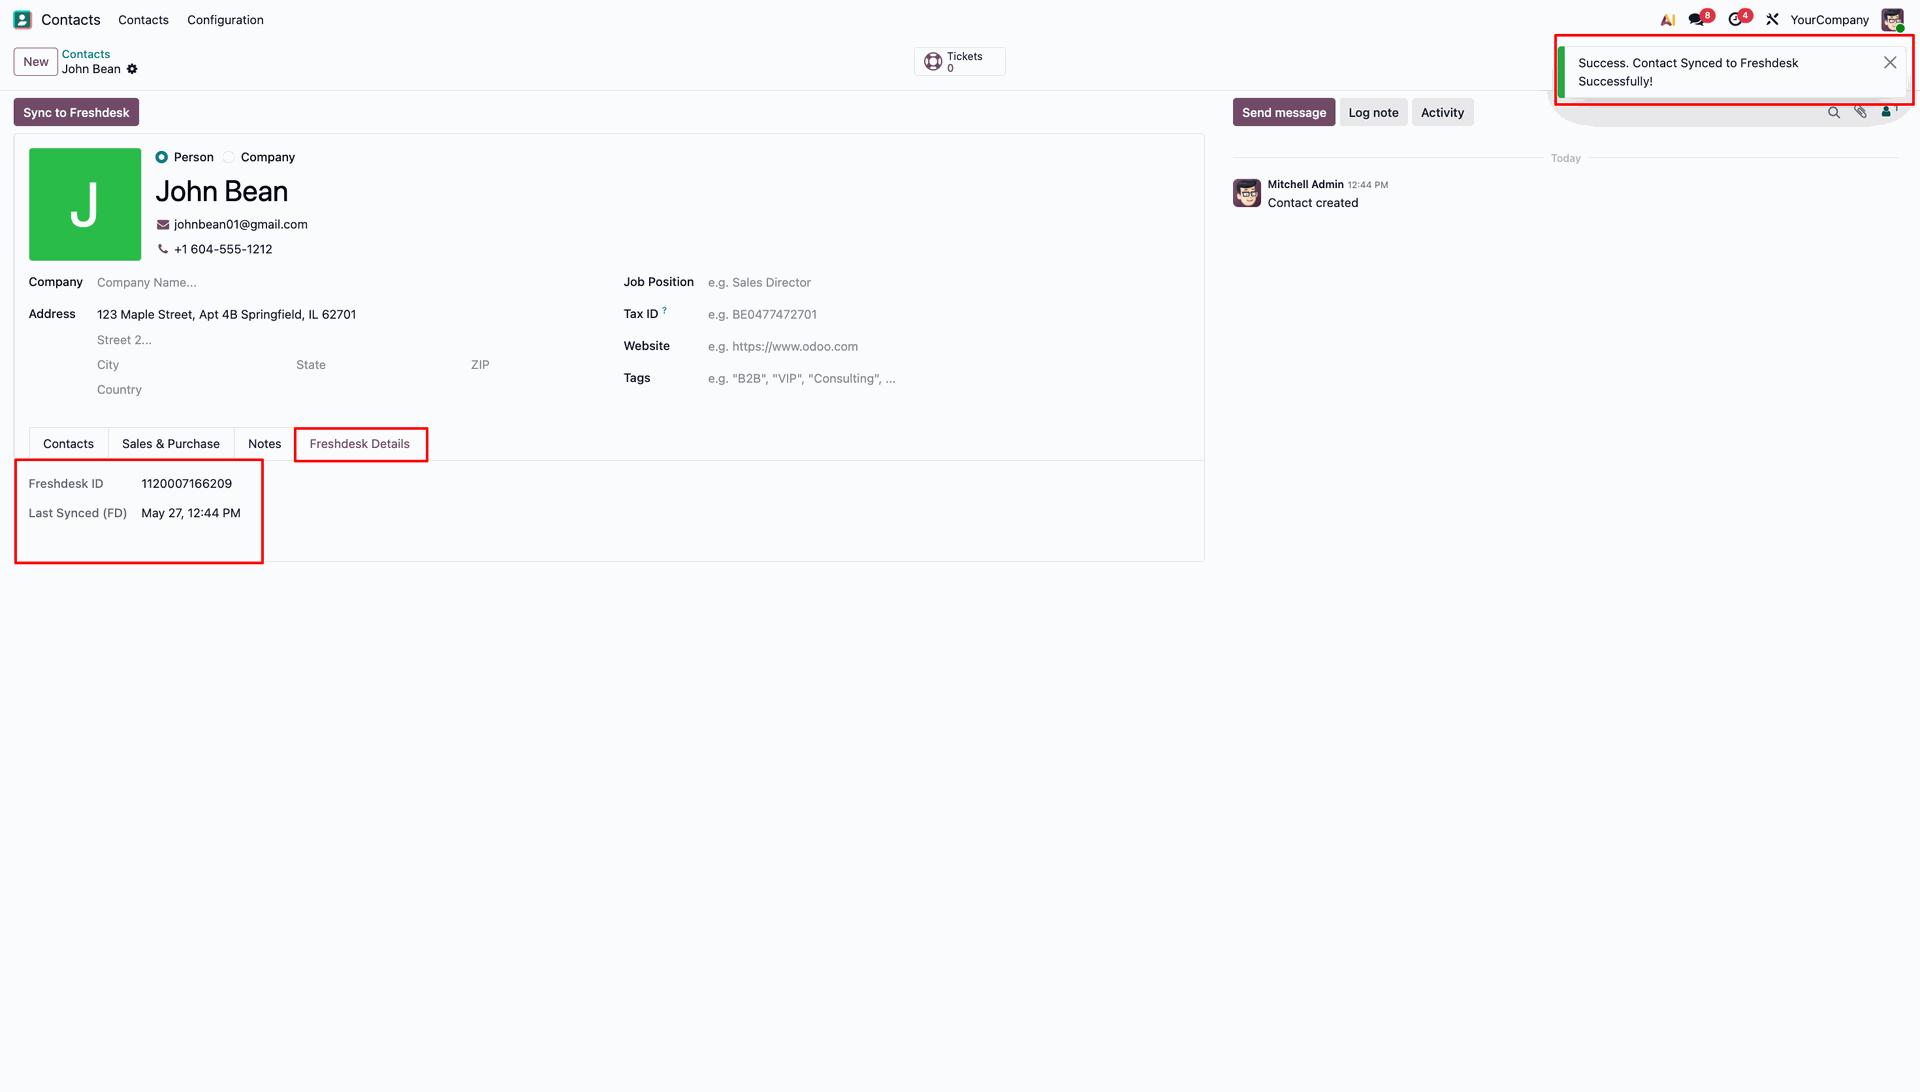
To sync a new contact from Odoo to Freshdesk, click the 'Sync to Freshdesk' button on the contact form. A success message will appear and the Freshdesk Details tab will be populated.
The Integration Logs will record a 'Create' operation with a 'Success' status, confirming the contact was created in Freshdesk.
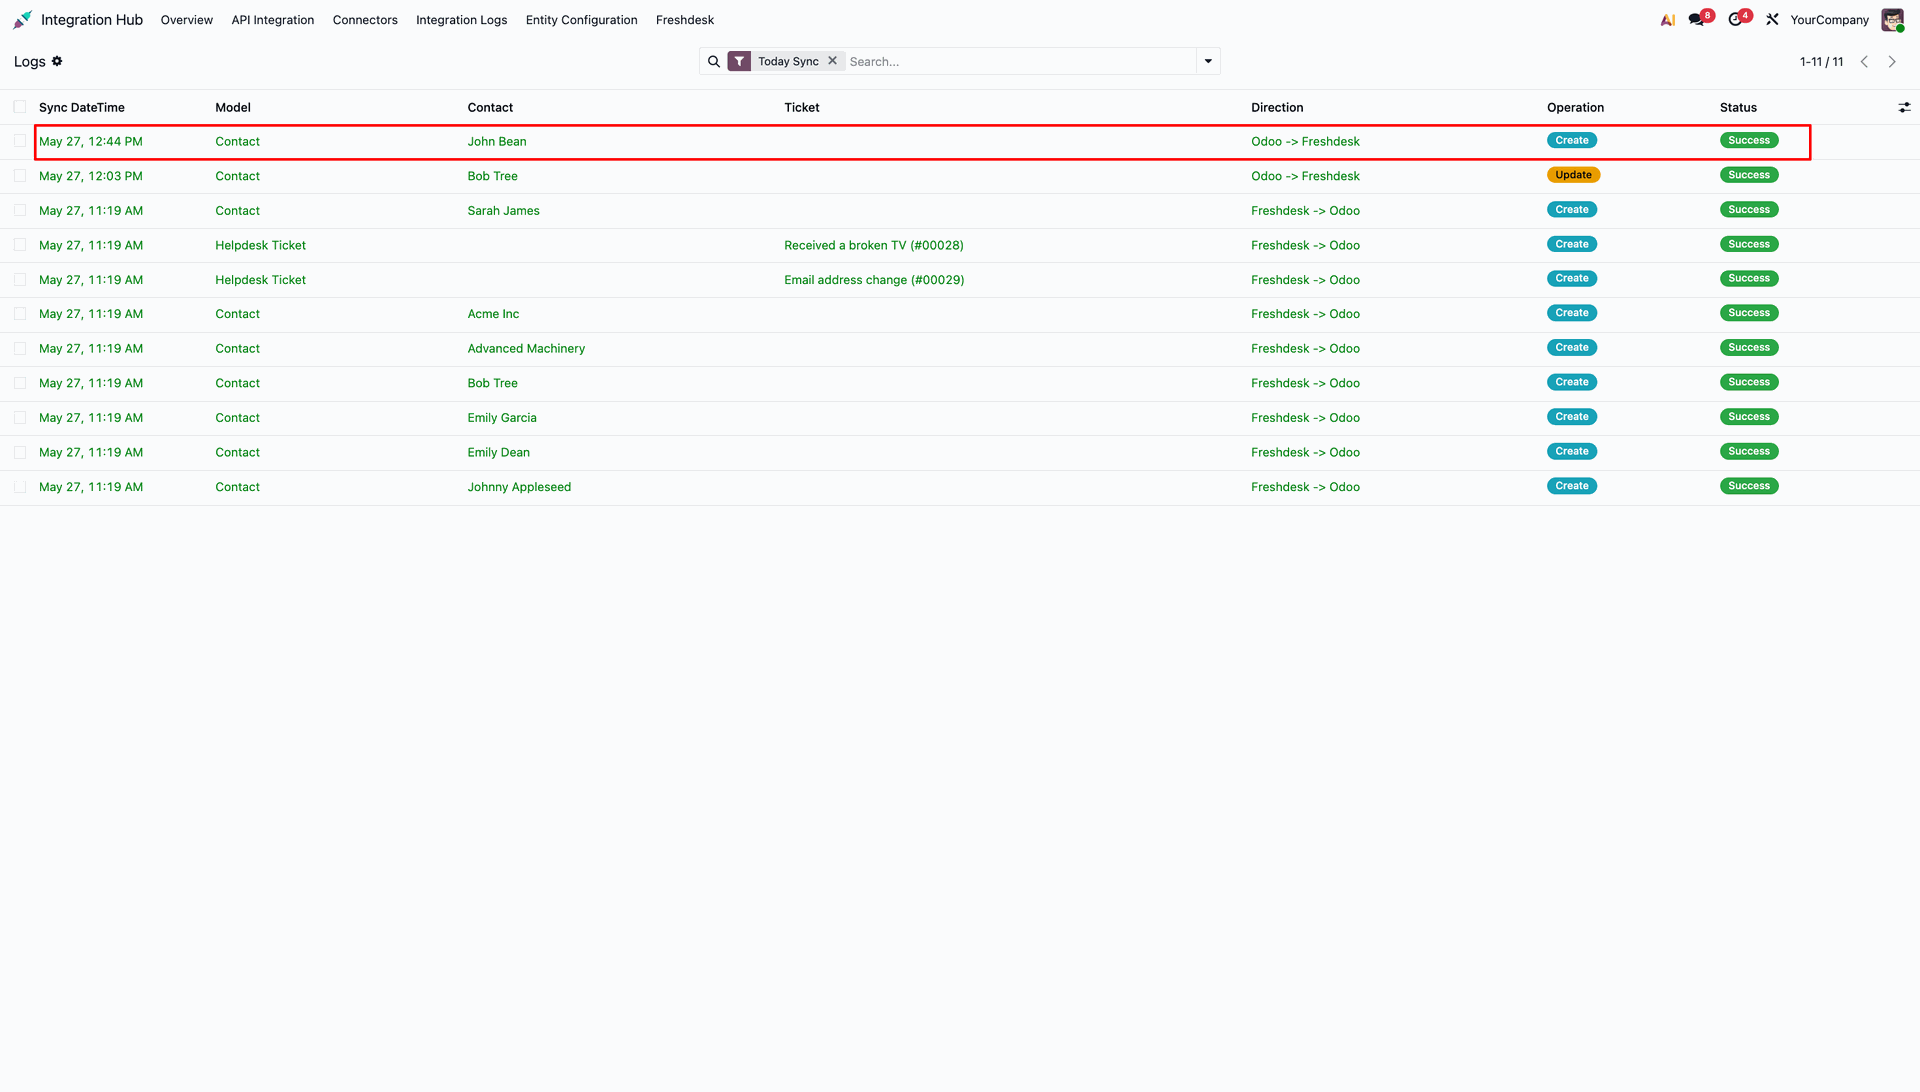
In Freshdesk, verify that the new contact's details have been successfully synced and are visible.
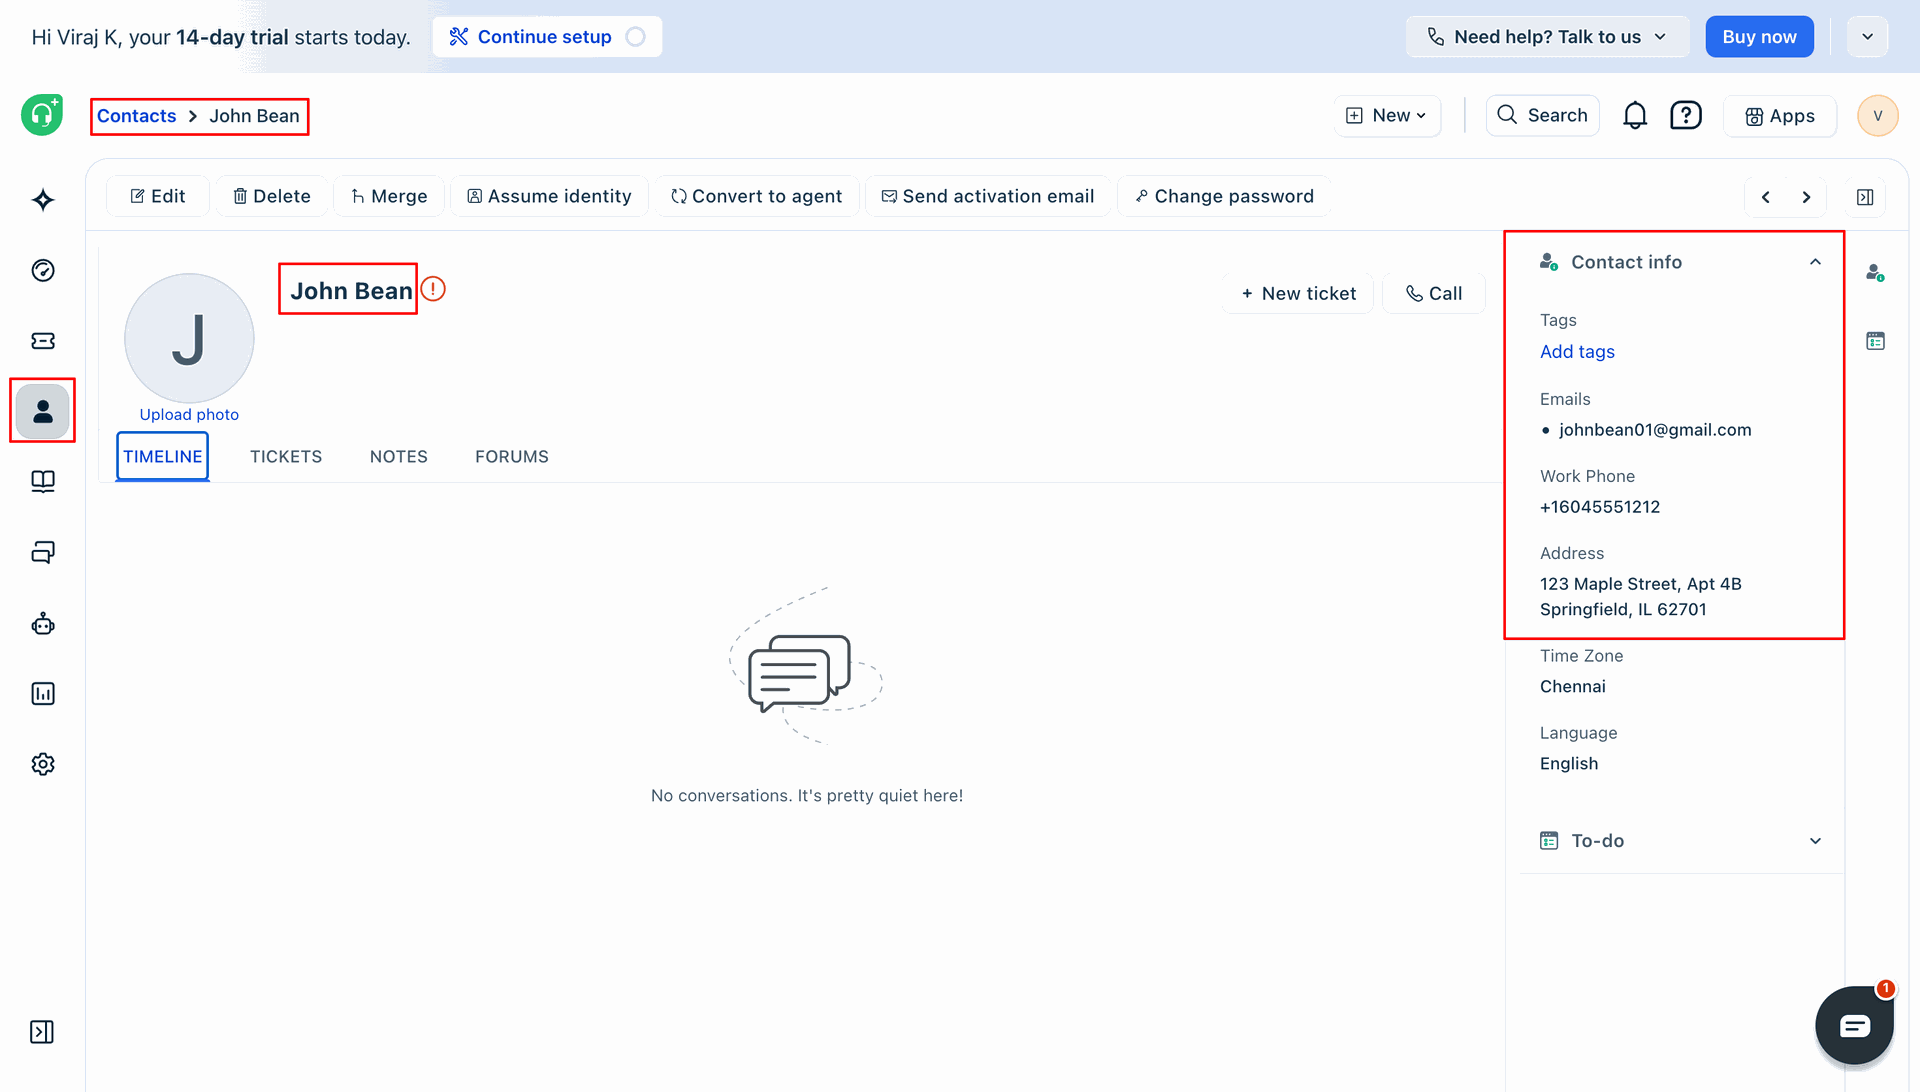
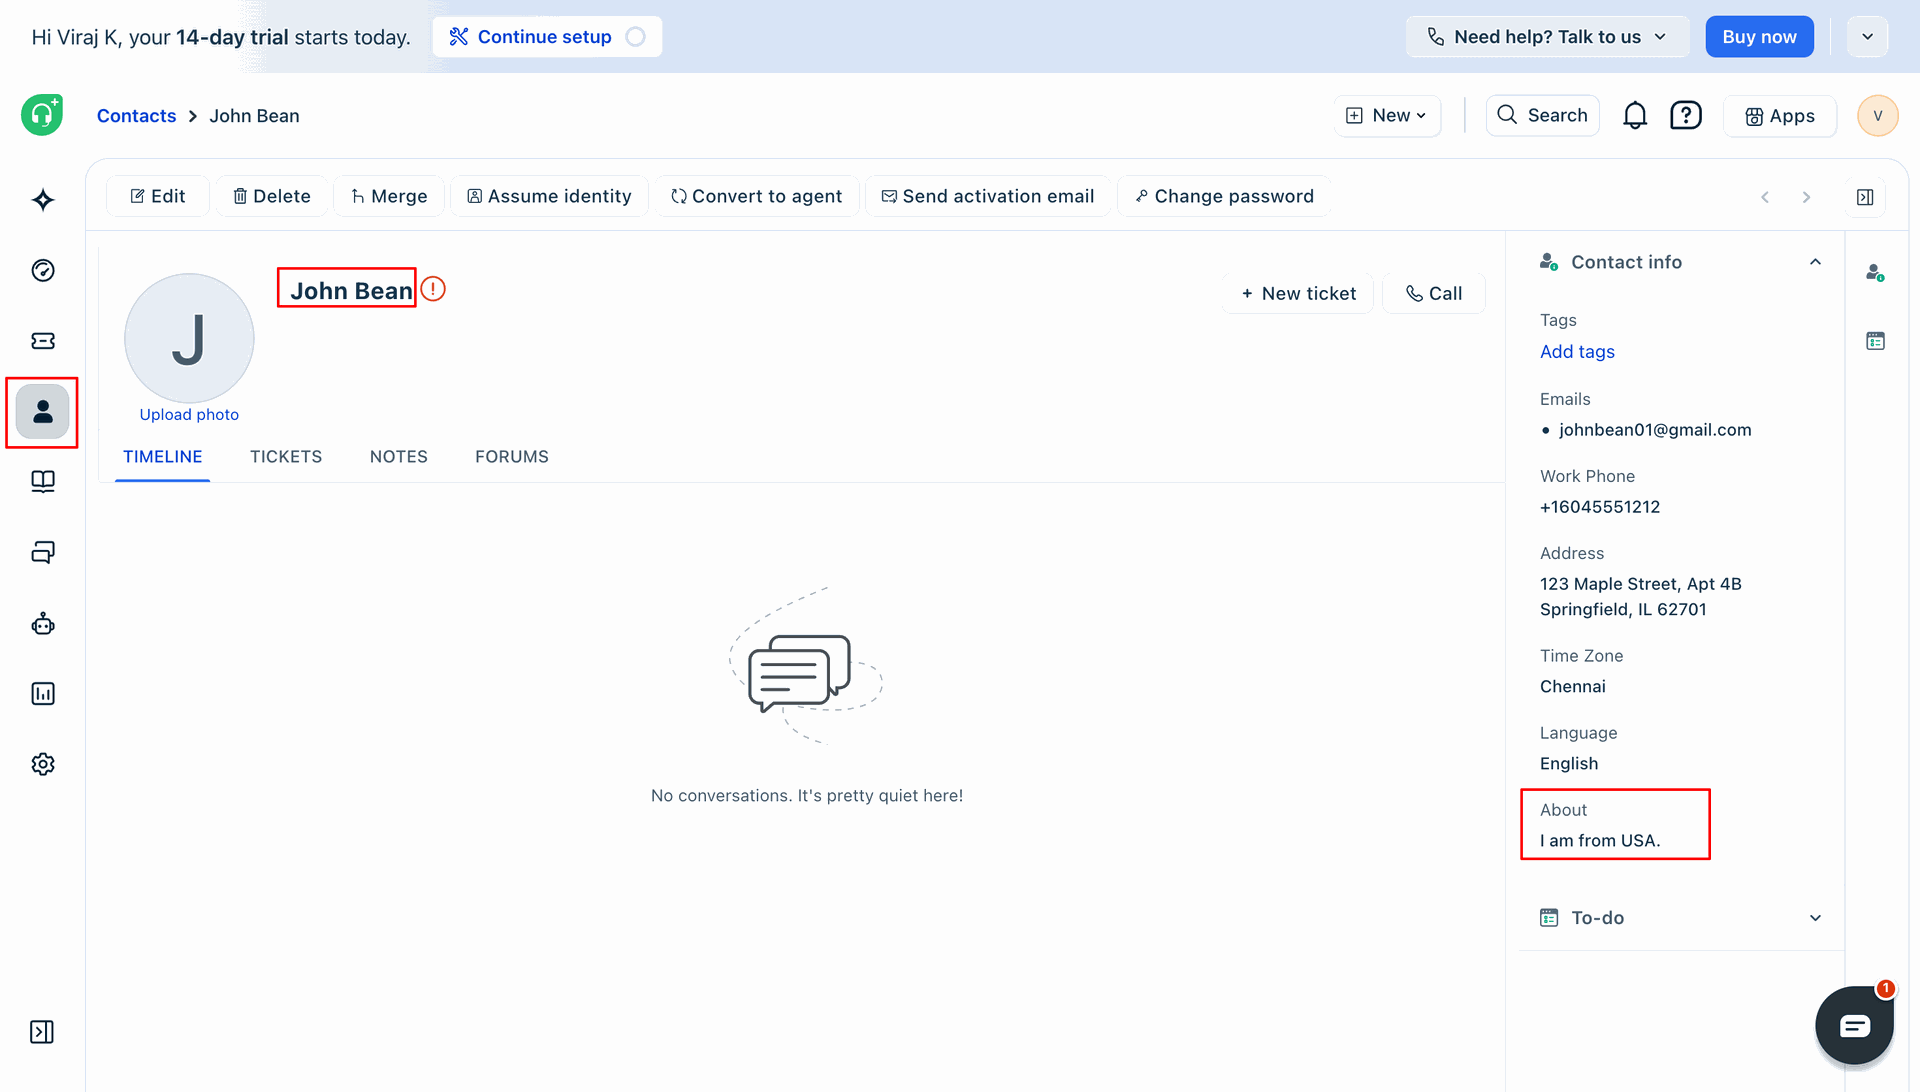
You can also sync internal notes. Add your notes in the 'Notes' tab of the Odoo contact.
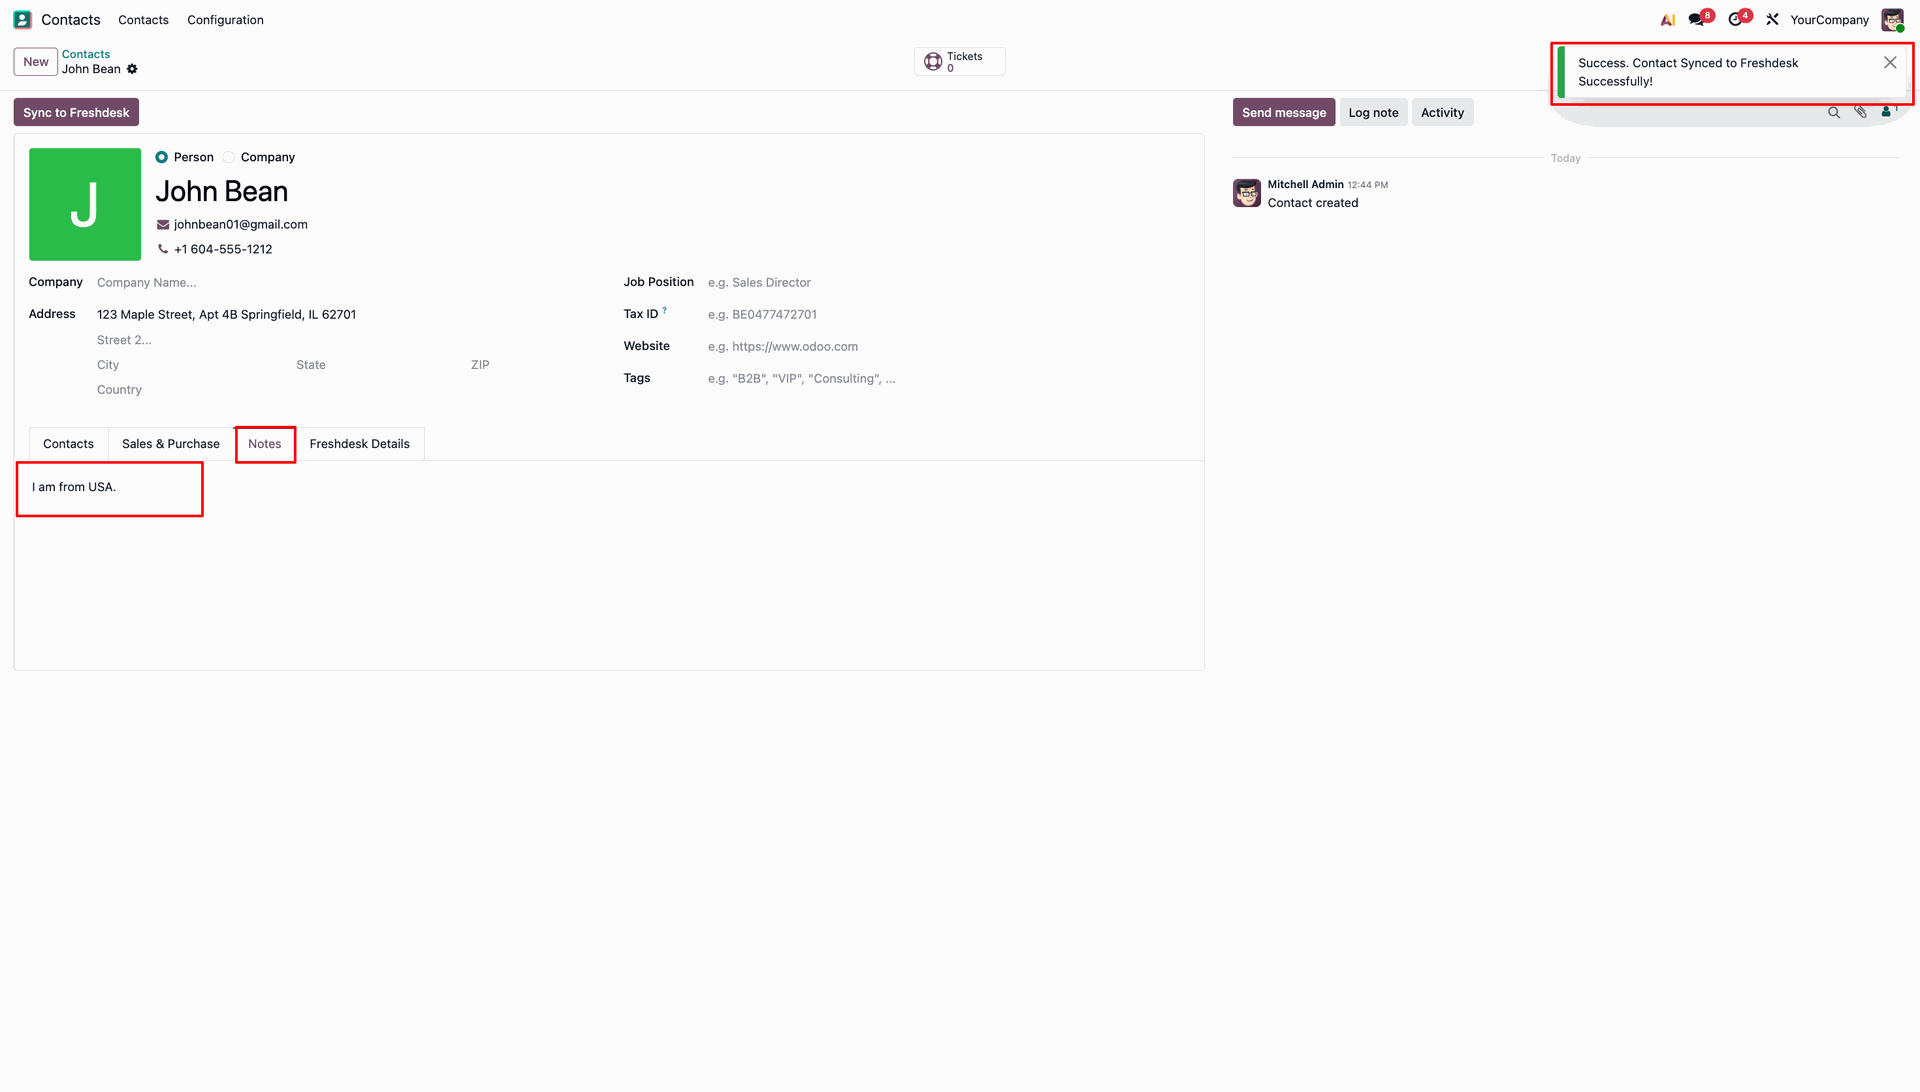
The Integration Logs will record an 'Update' operation reflecting the note synchronization.
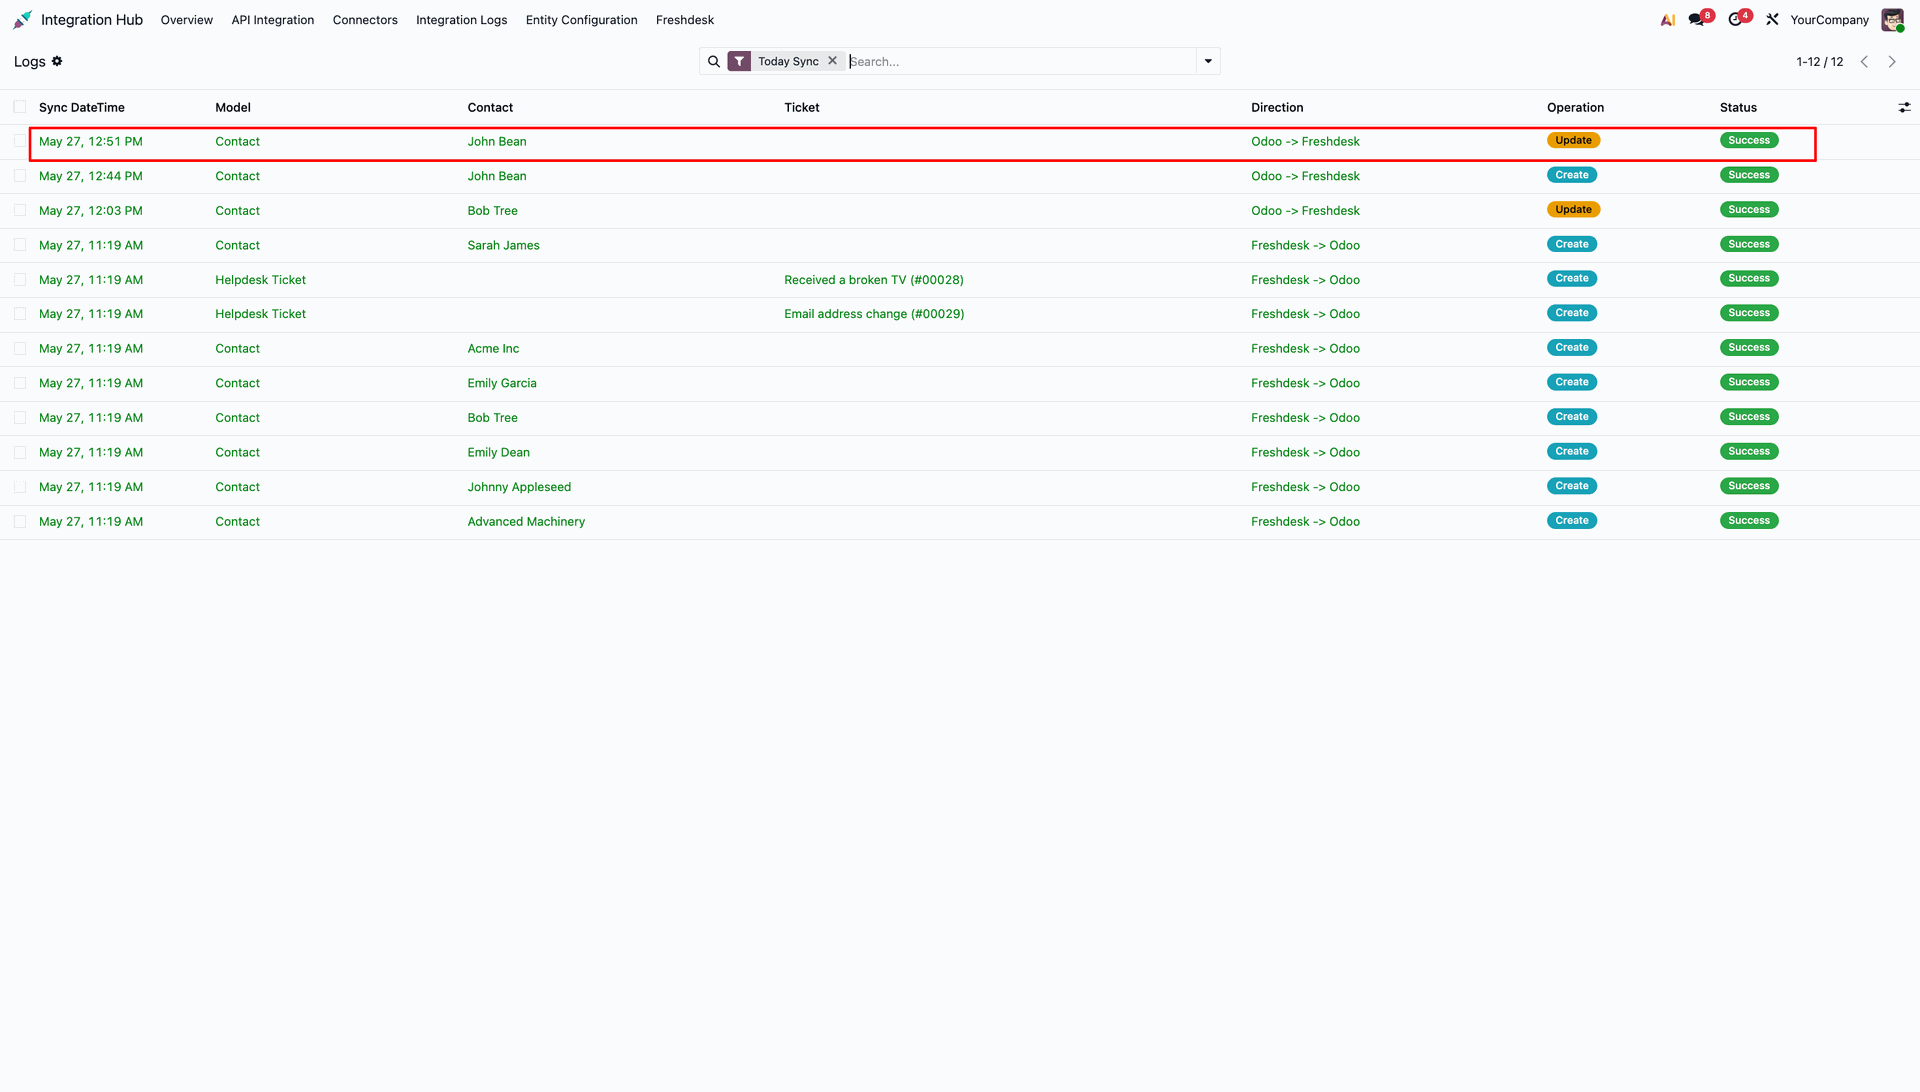
The synced notes will be visible in the 'About' section of the contact's details in Freshdesk.
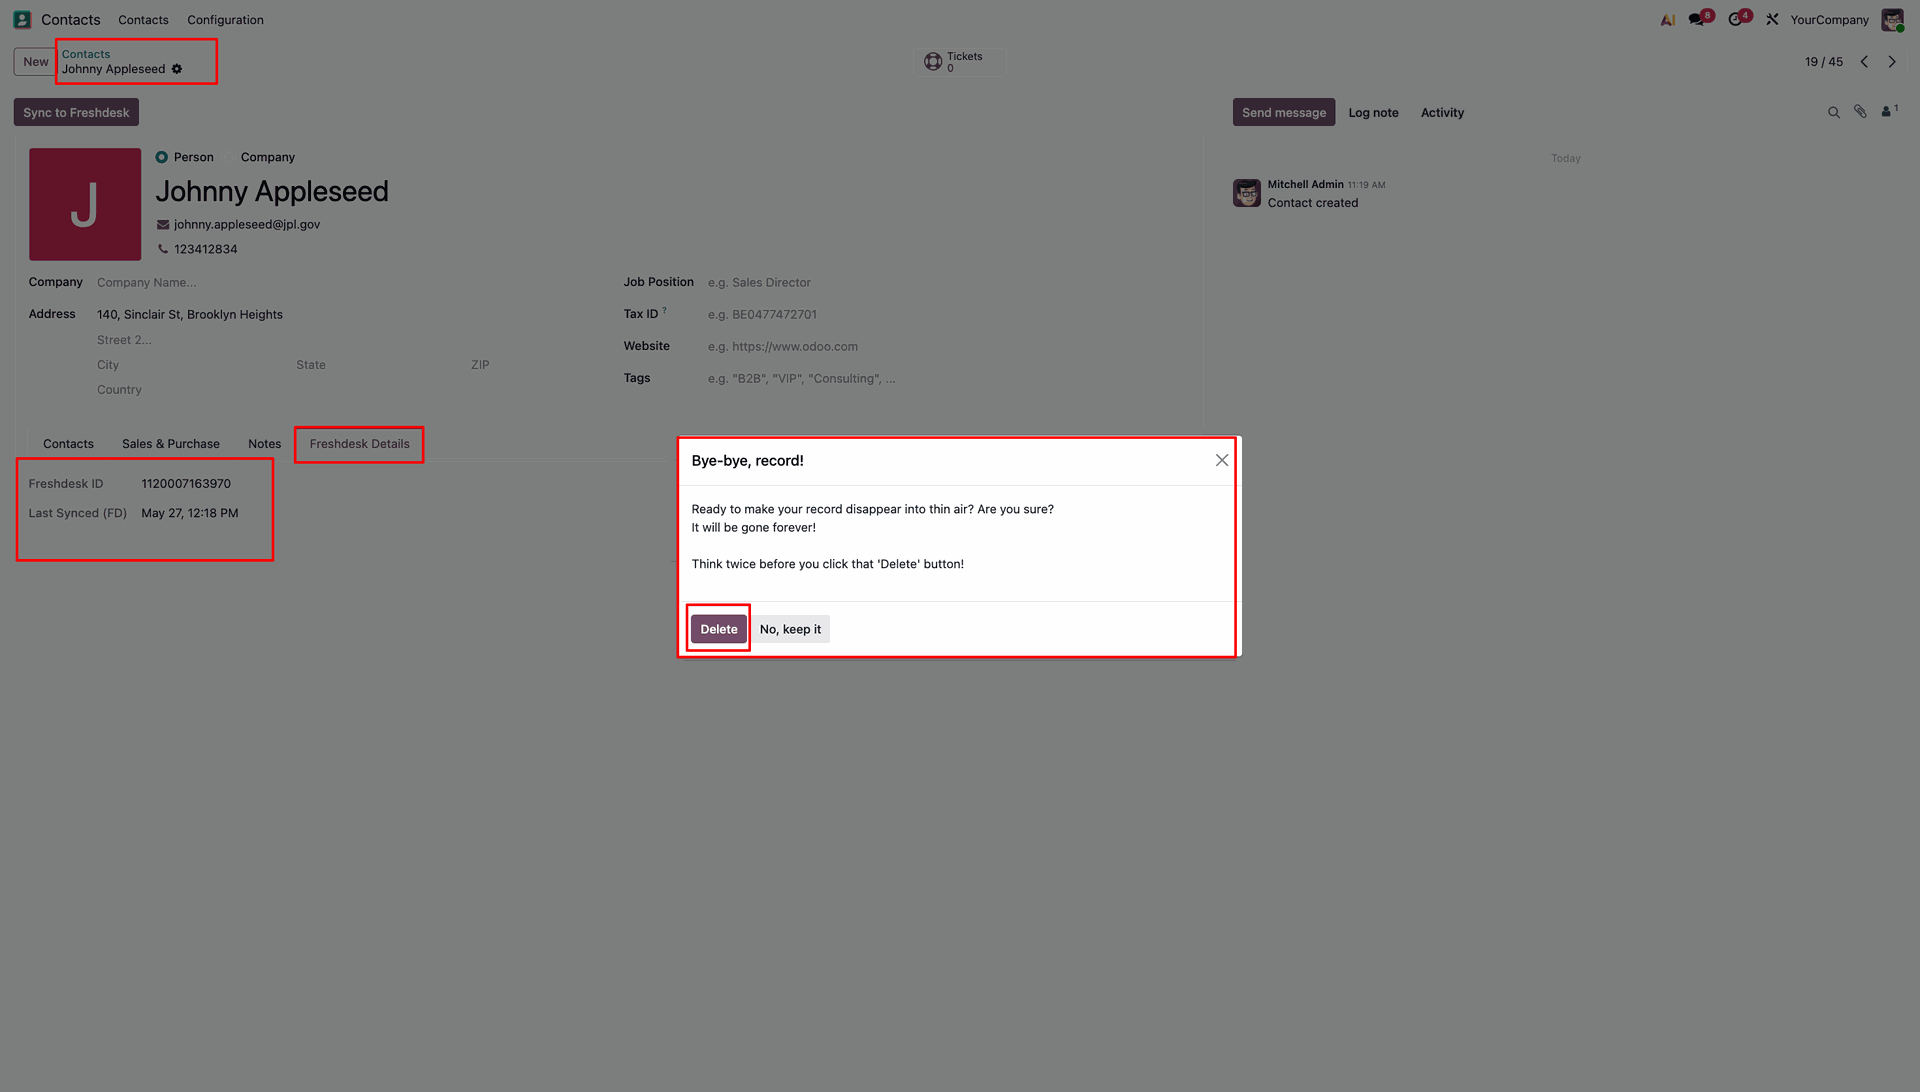
To delete a synced contact, use the Action menu in Odoo and select Delete. Confirm the deletion in the popup wizard.
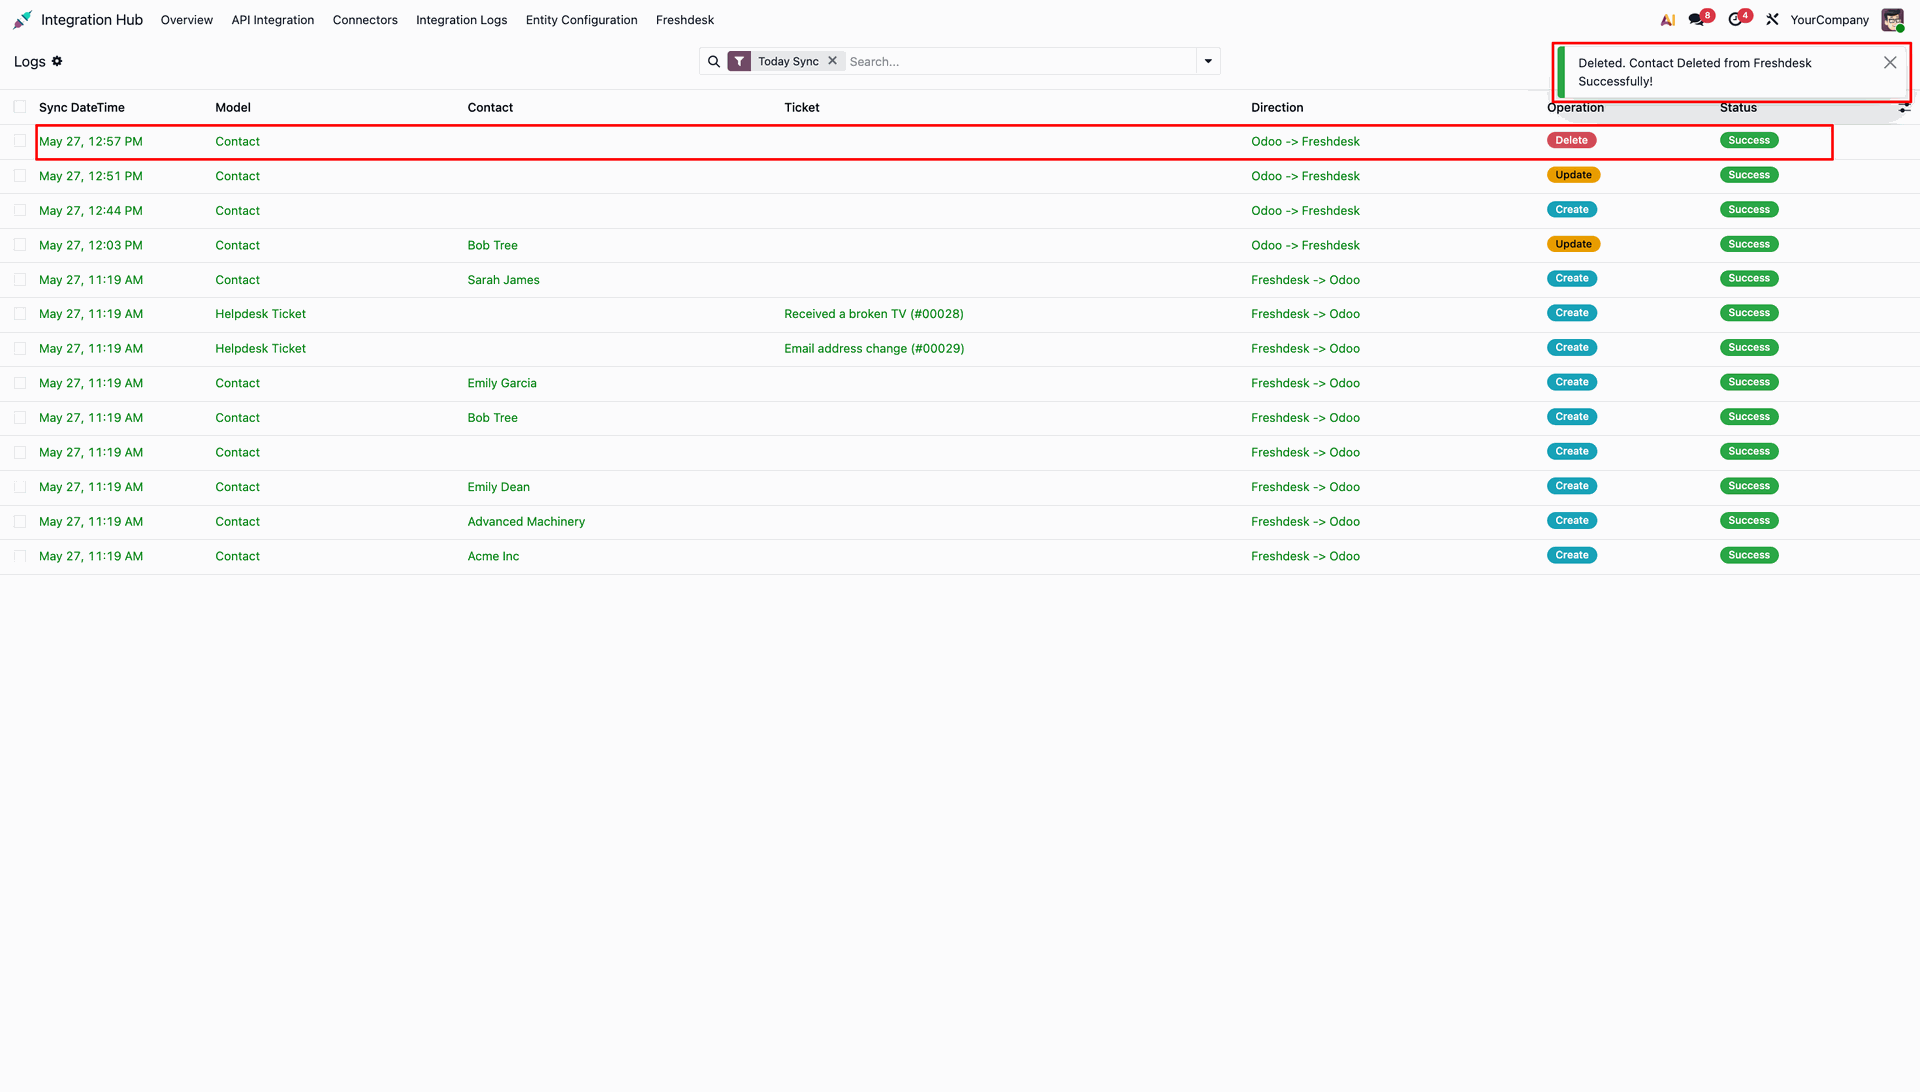
The Integration Logs will record a 'Delete' operation with a 'Success' status, and a notification confirms the contact was removed from Freshdesk.
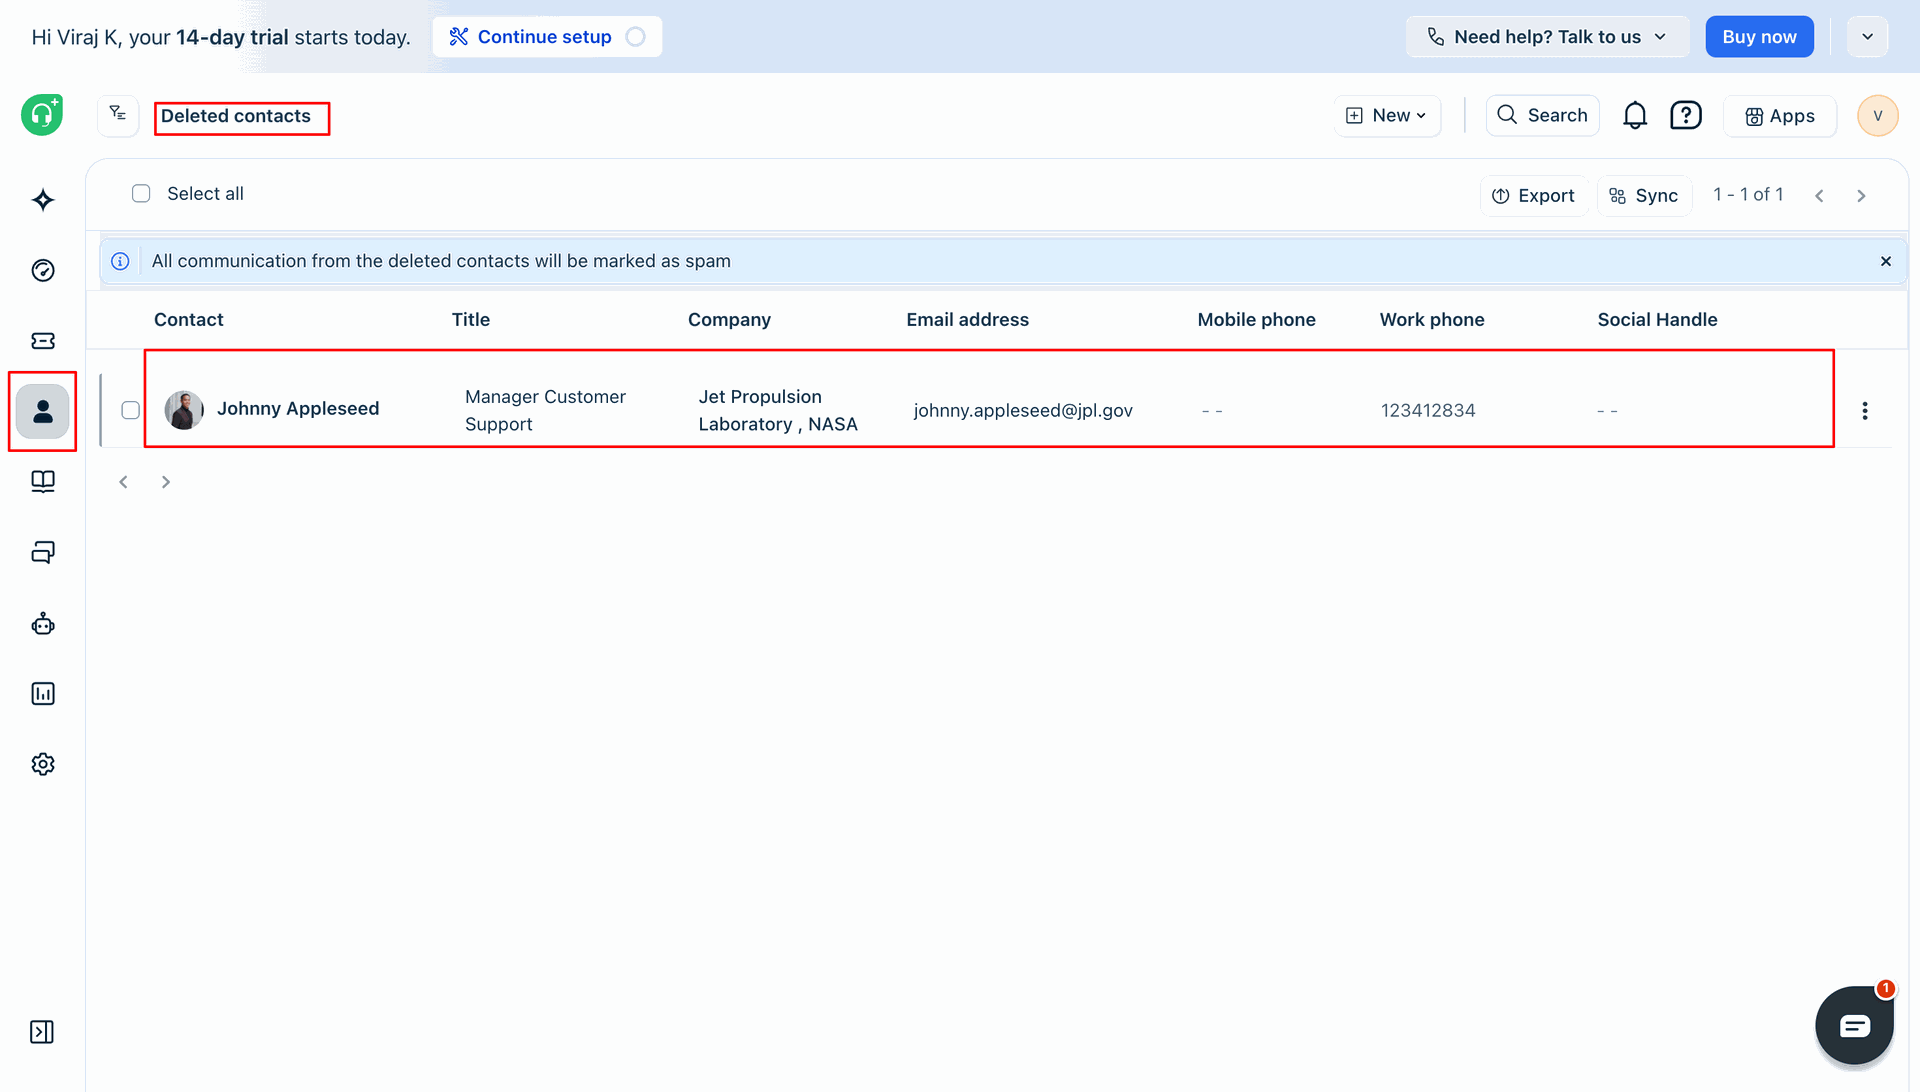
In Freshdesk, navigate to the 'Deleted contacts' view to confirm that the contact has been successfully moved to the deleted list.
Workflow
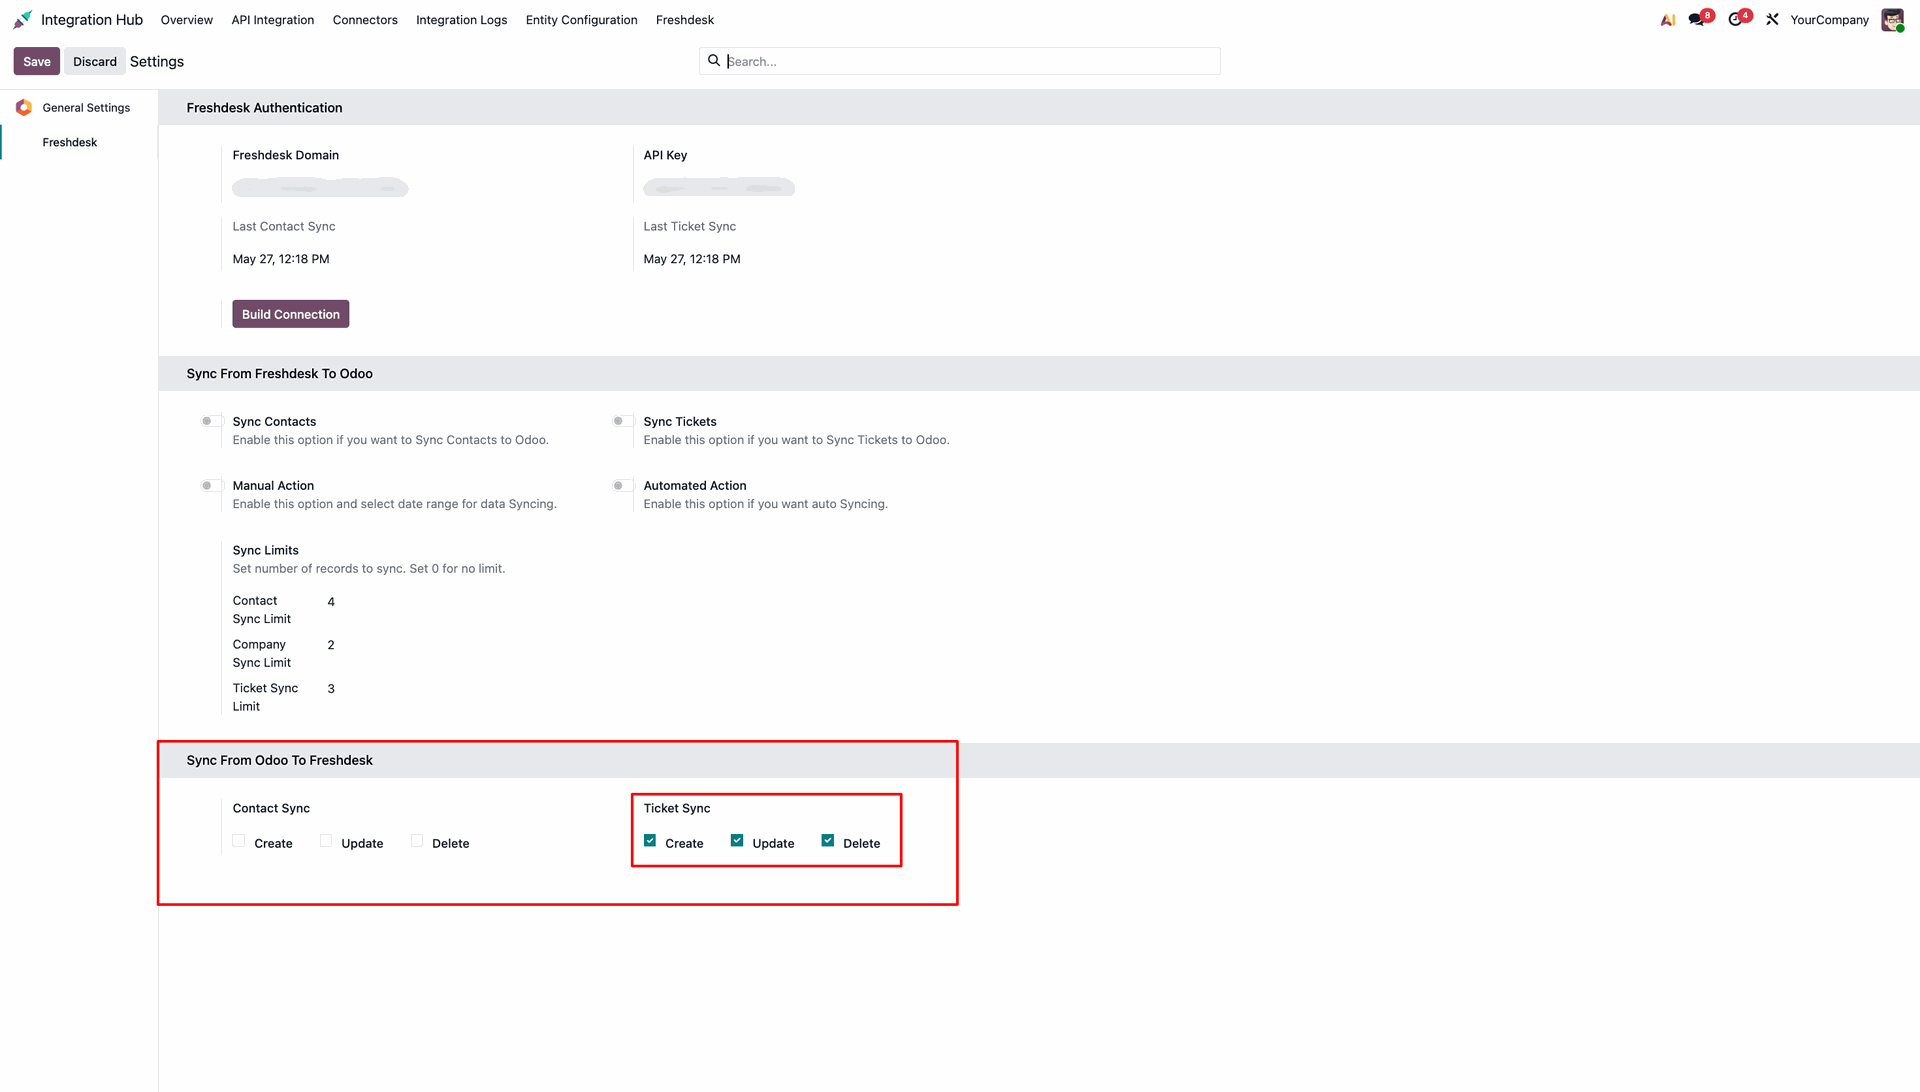
In the Settings, under 'Sync From Odoo To Freshdesk', enable Create, Update, and Delete options for 'Ticket Sync'.
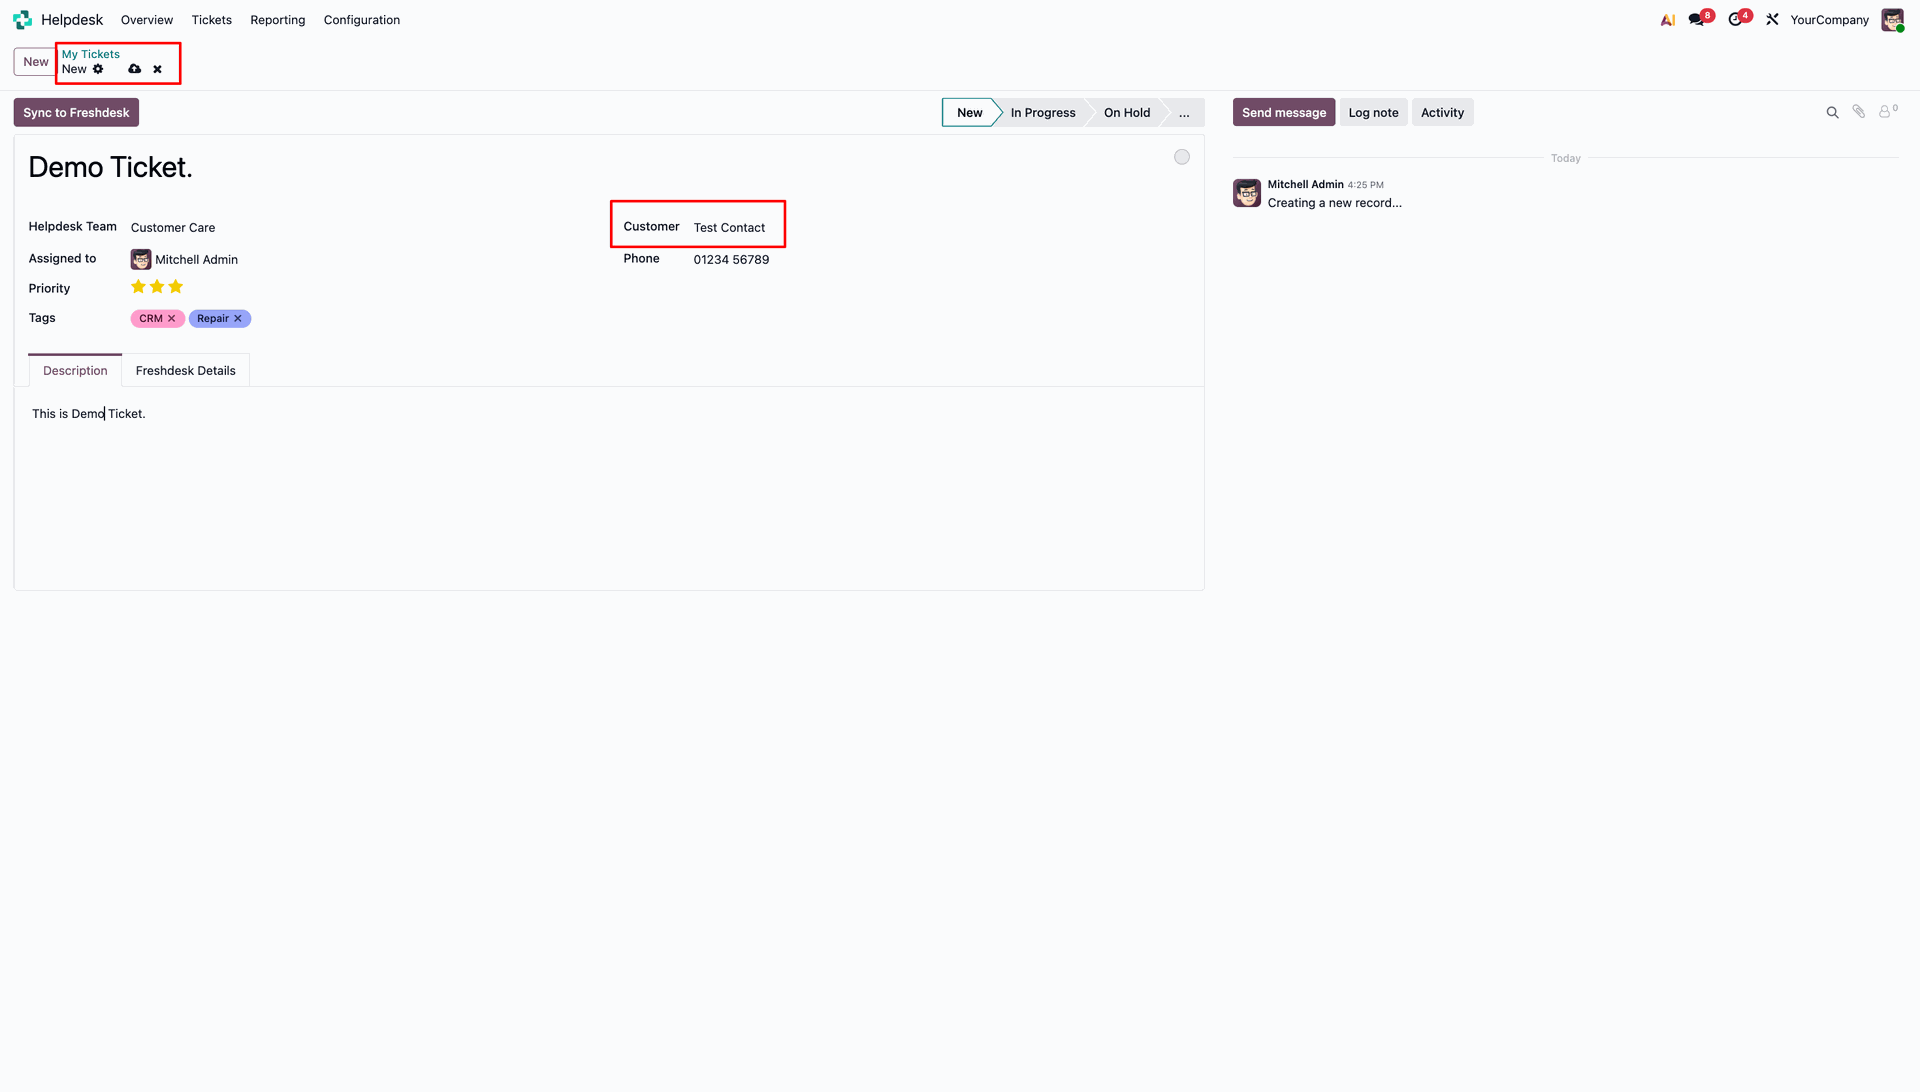
In Odoo Helpdesk, create or open a ticket. Make sure a customer is assigned.
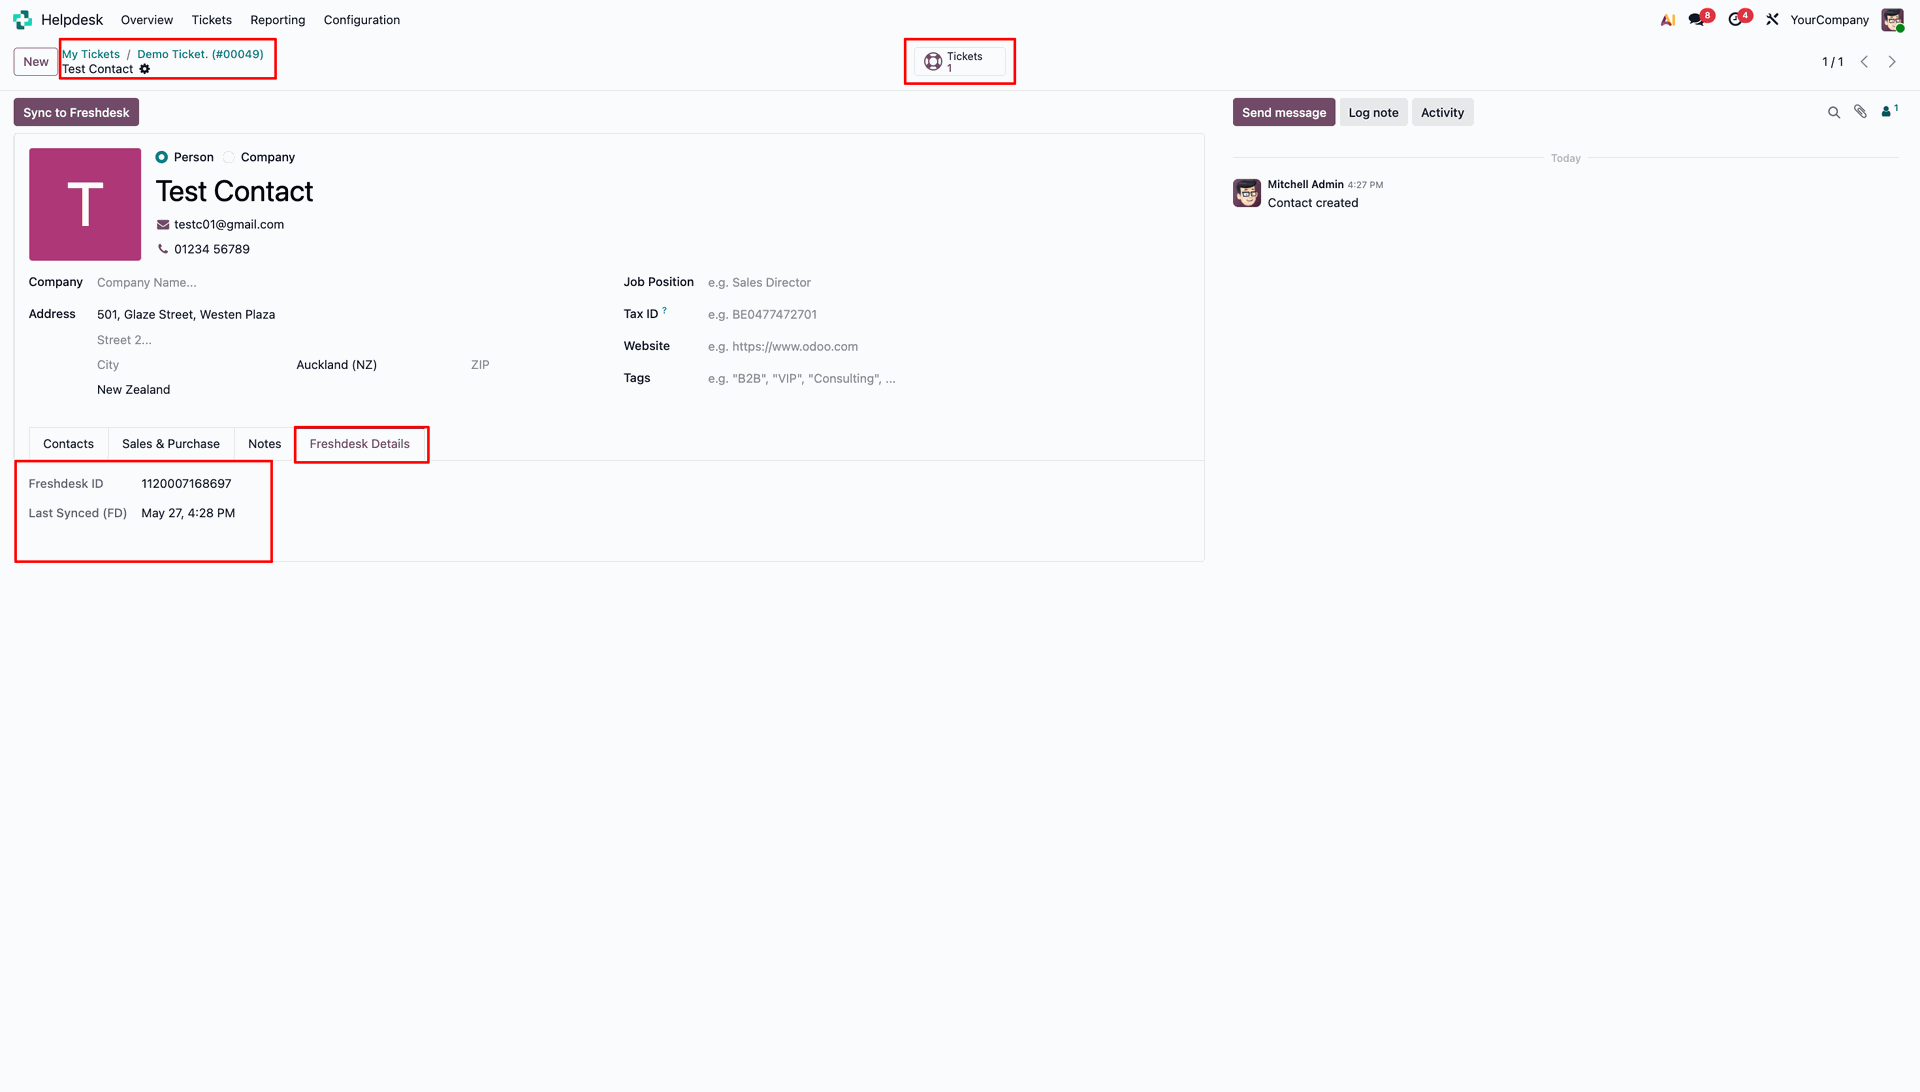
You can view the related tickets for a contact in Odoo using the Tickets smart button.
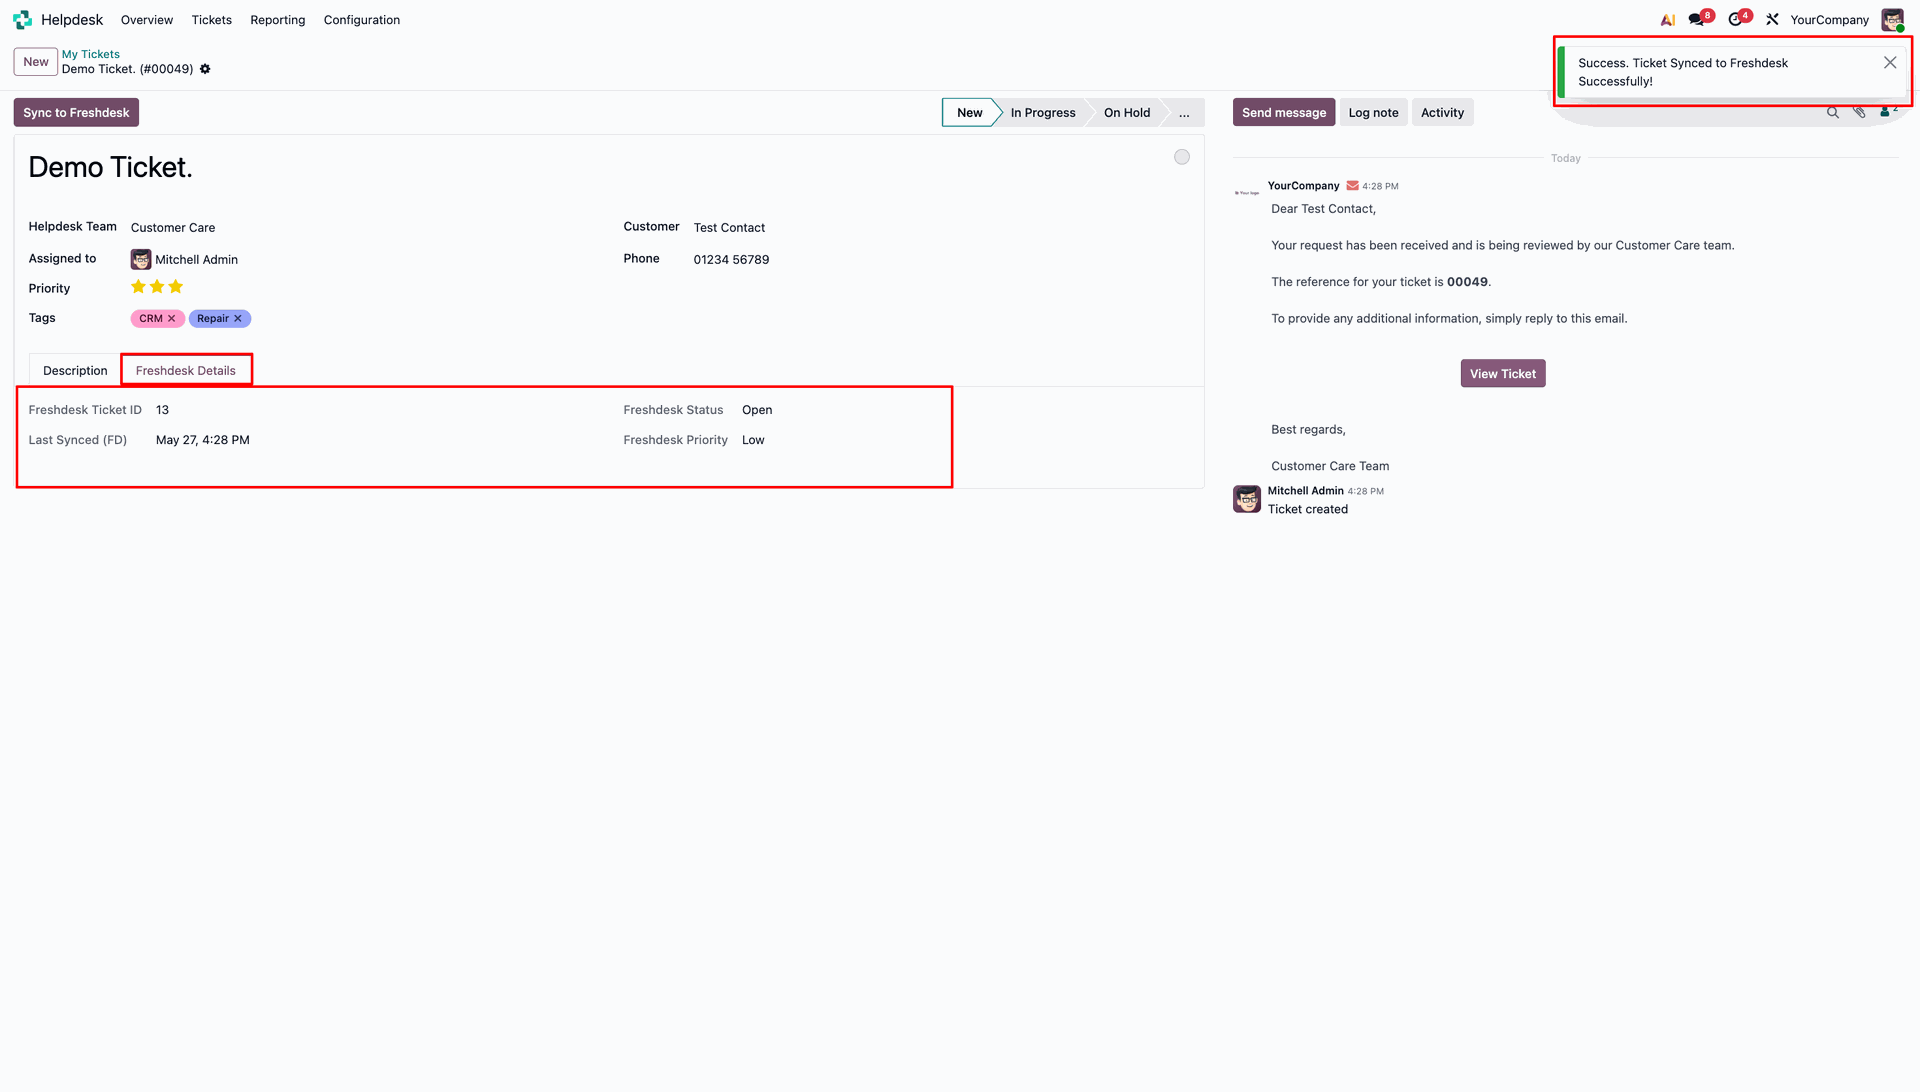
Click on the 'Sync to Freshdesk' button on the ticket. A success message will appear once synced.
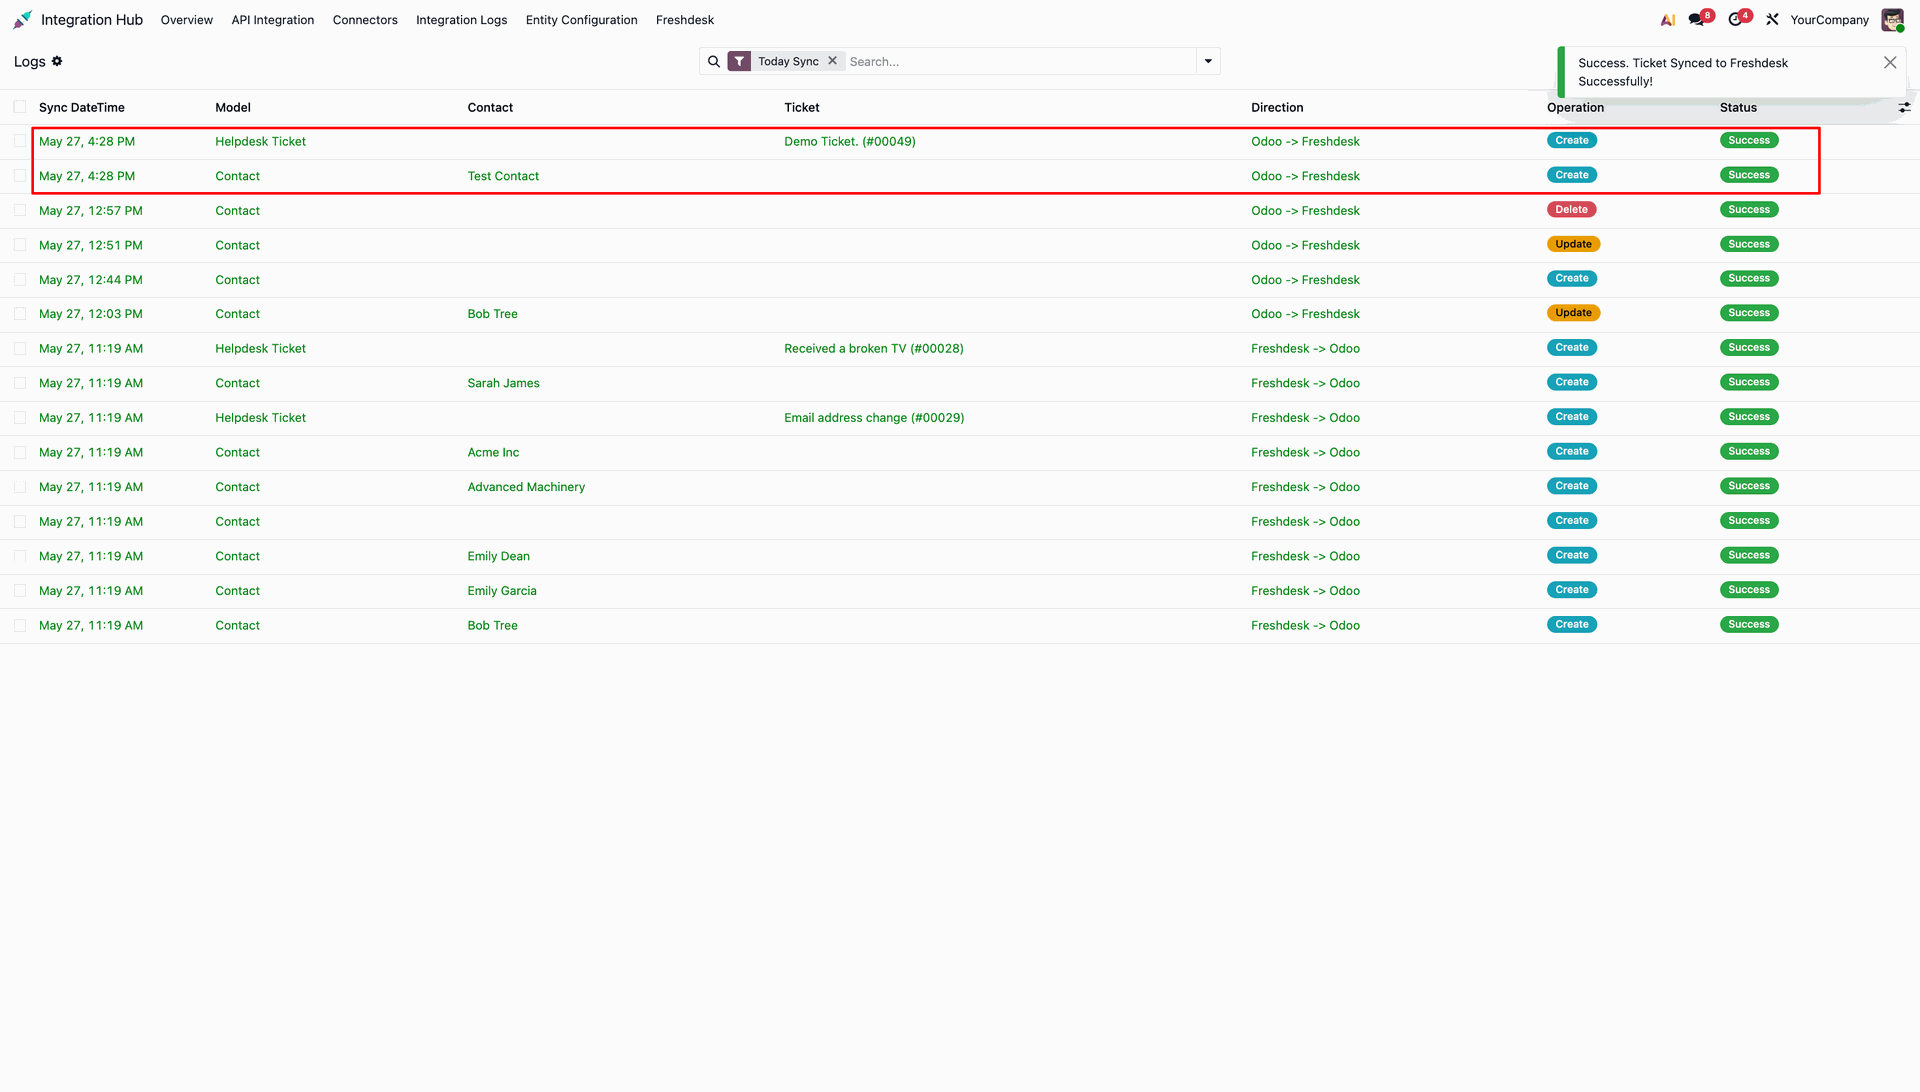
Navigate to Integration Hub > Integration Logs to view the successful 'Create' operation for the Helpdesk Ticket.
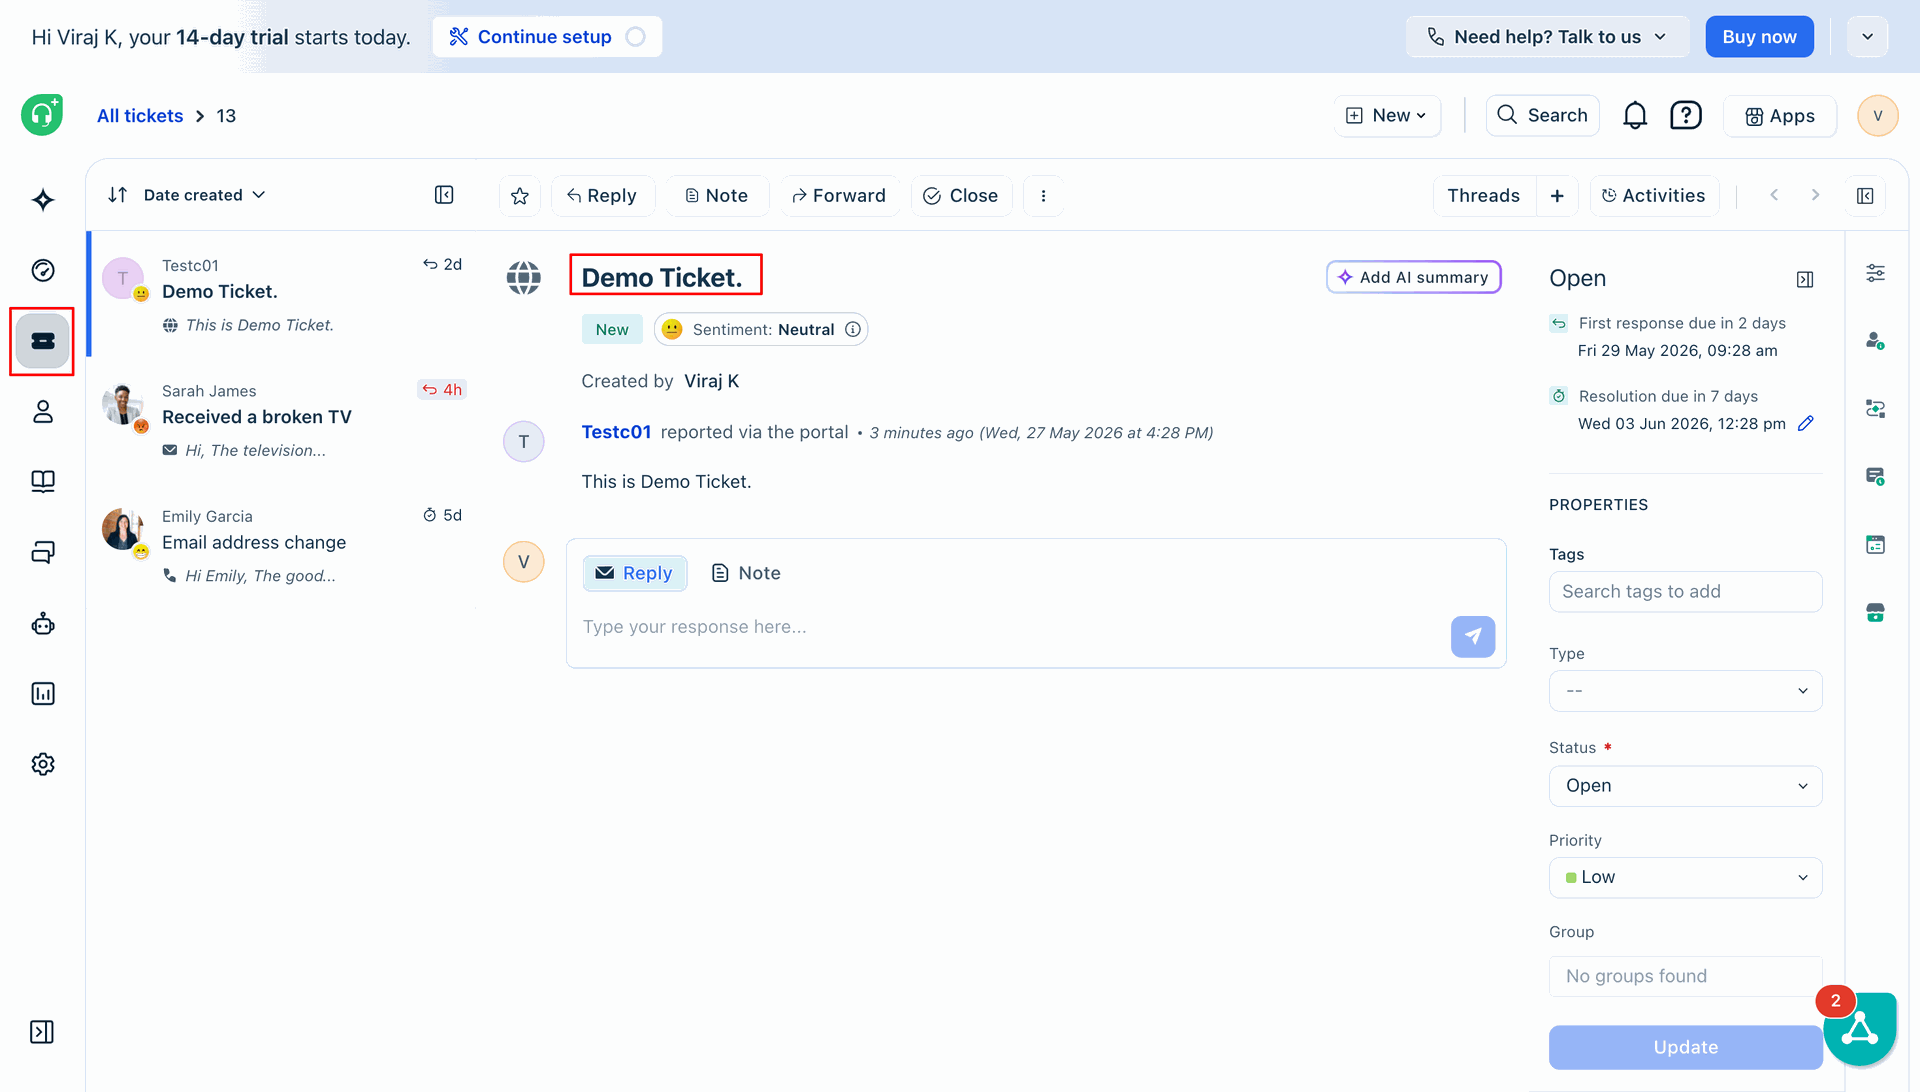
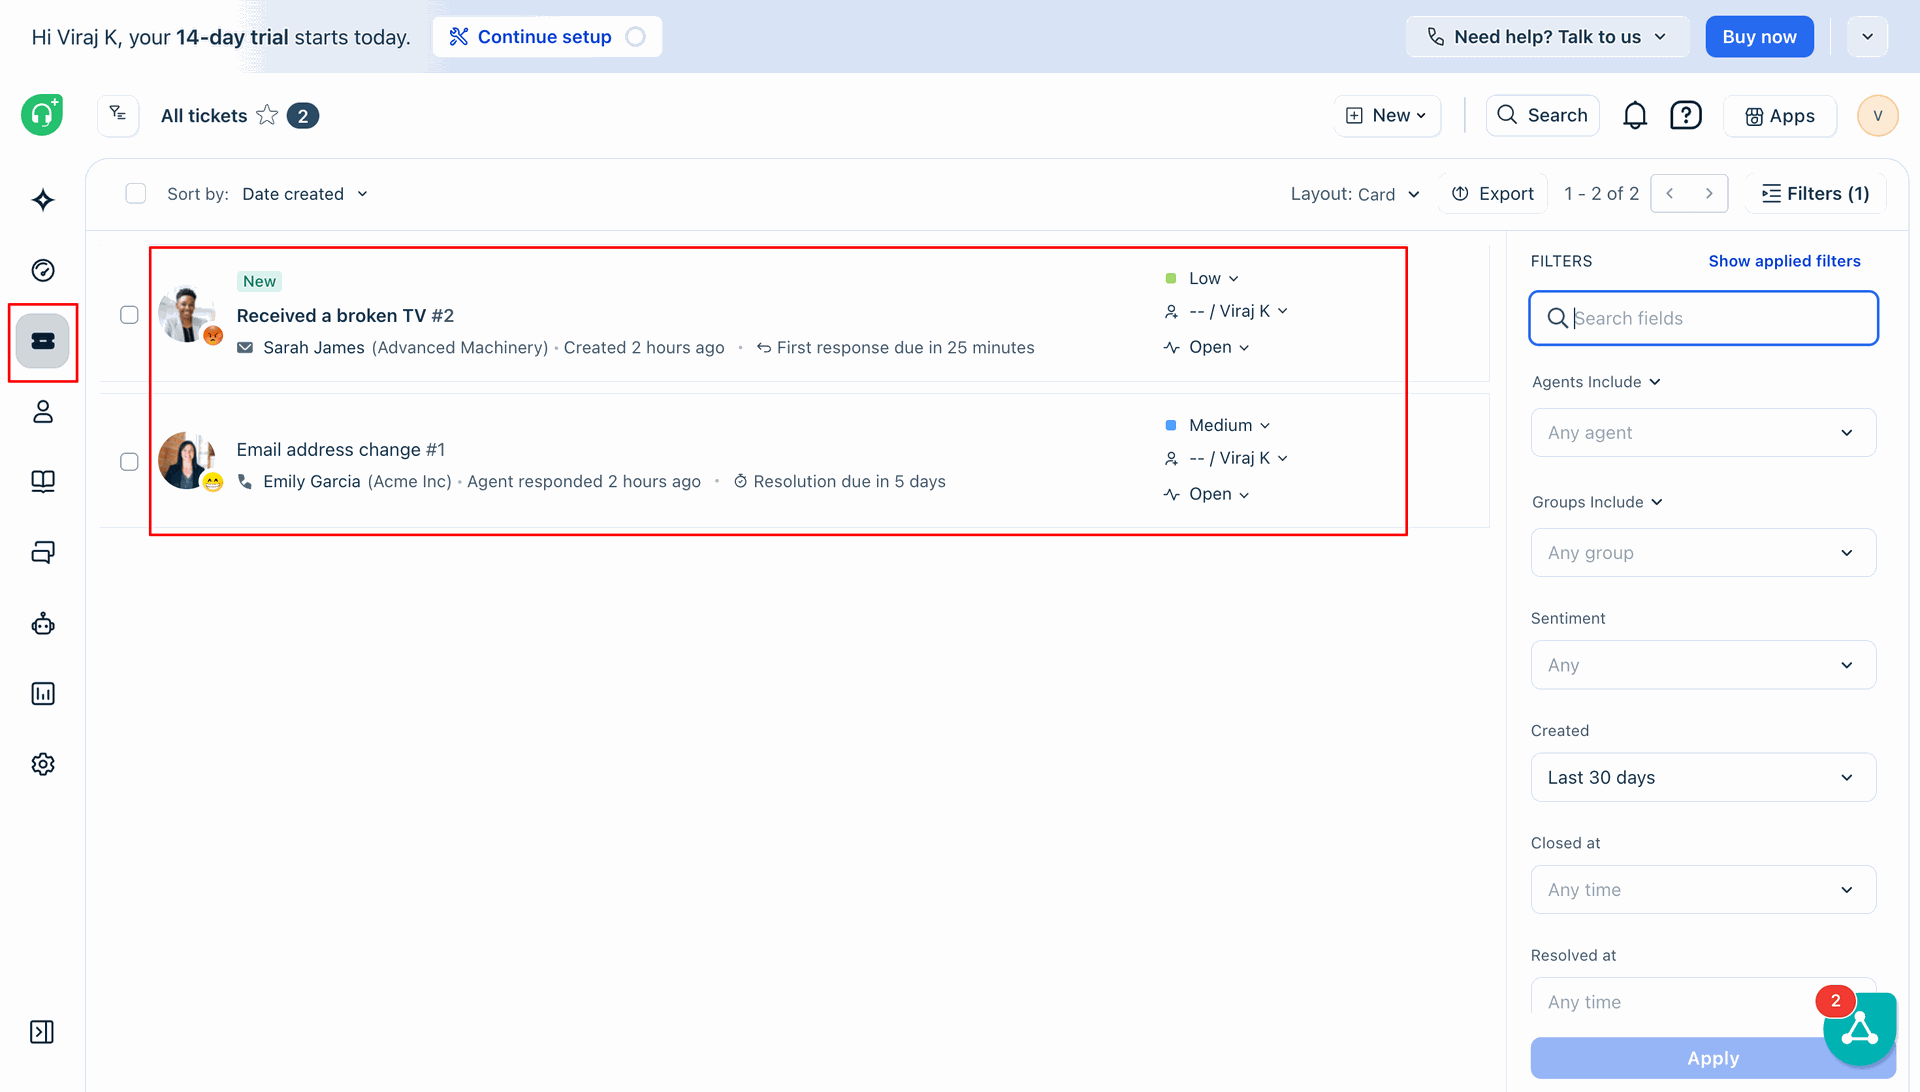
In Freshdesk, go to the Tickets view to see the newly synced ticket from Odoo.
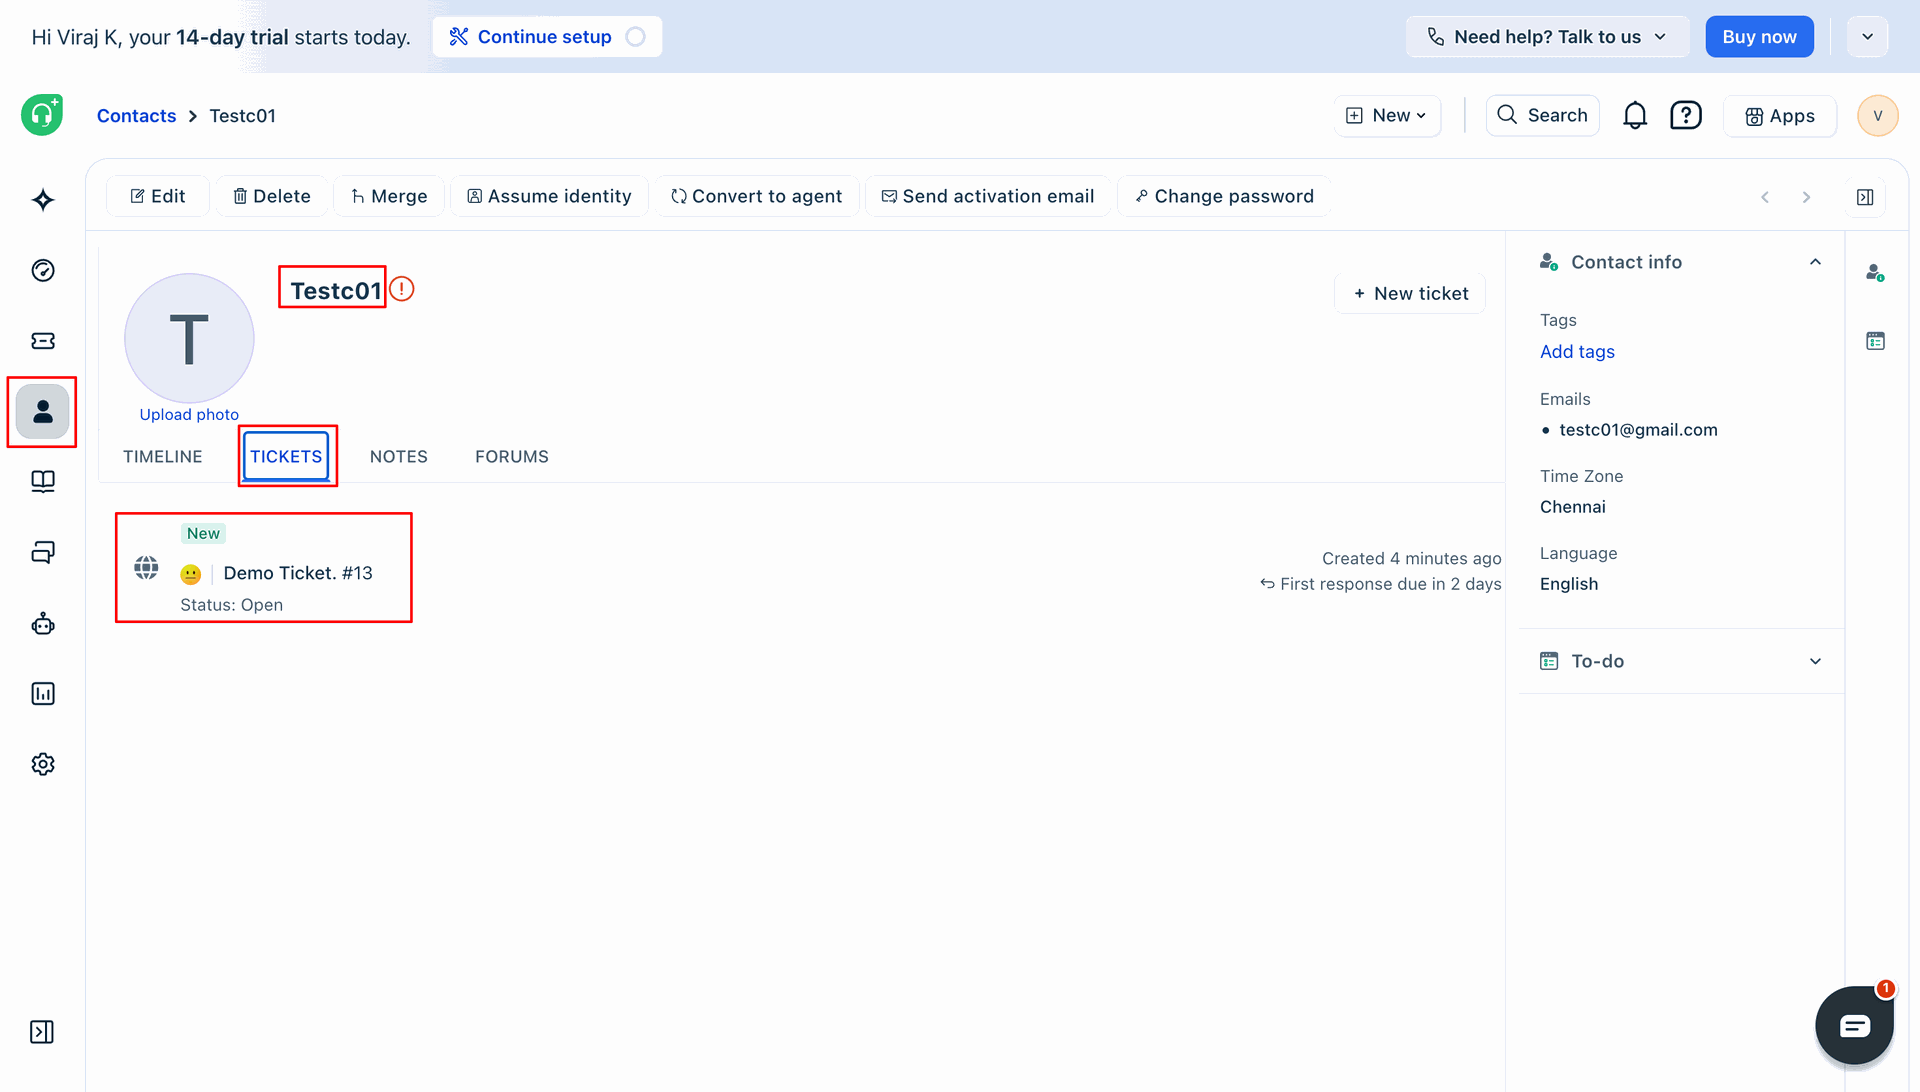
In Freshdesk, you can also see the related ticket under the Tickets tab of the corresponding contact.
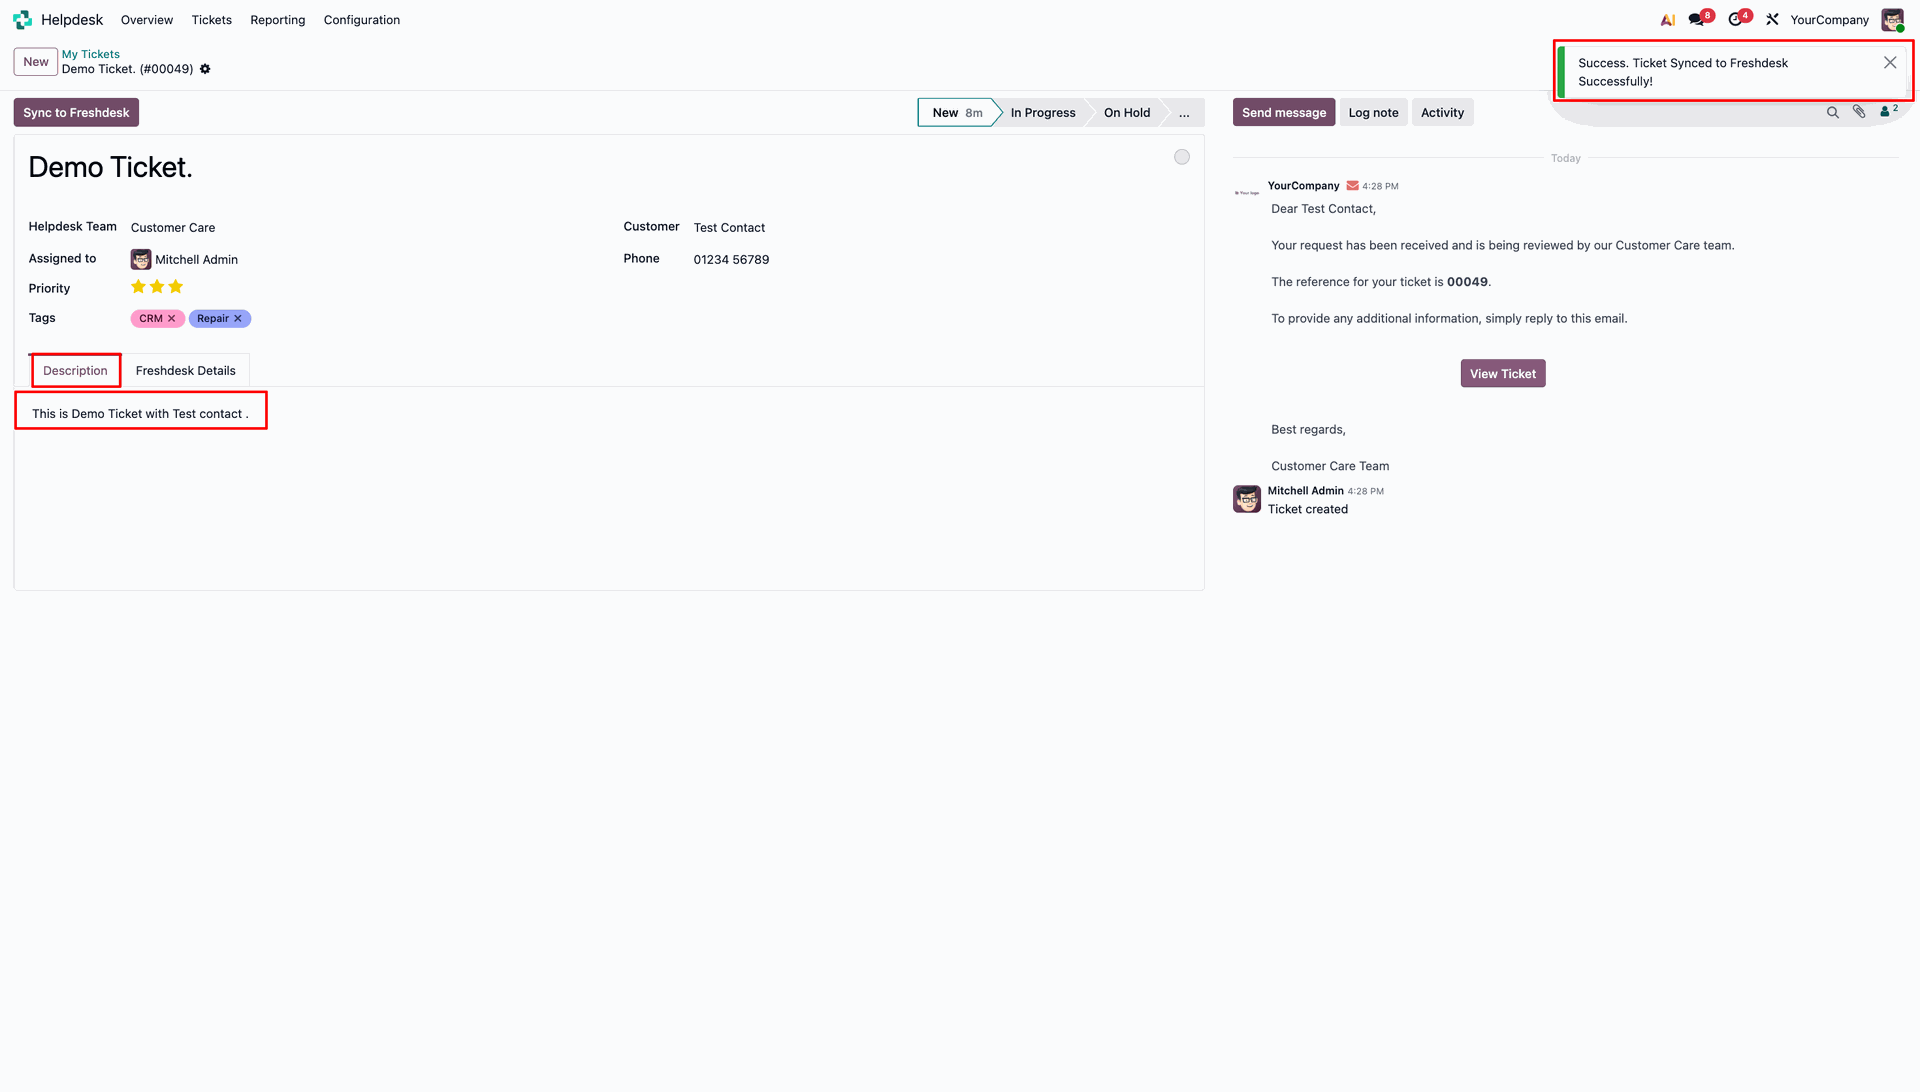
Update the ticket details in Odoo, such as the description, and click 'Sync to Freshdesk' again. A success message will confirm the sync.
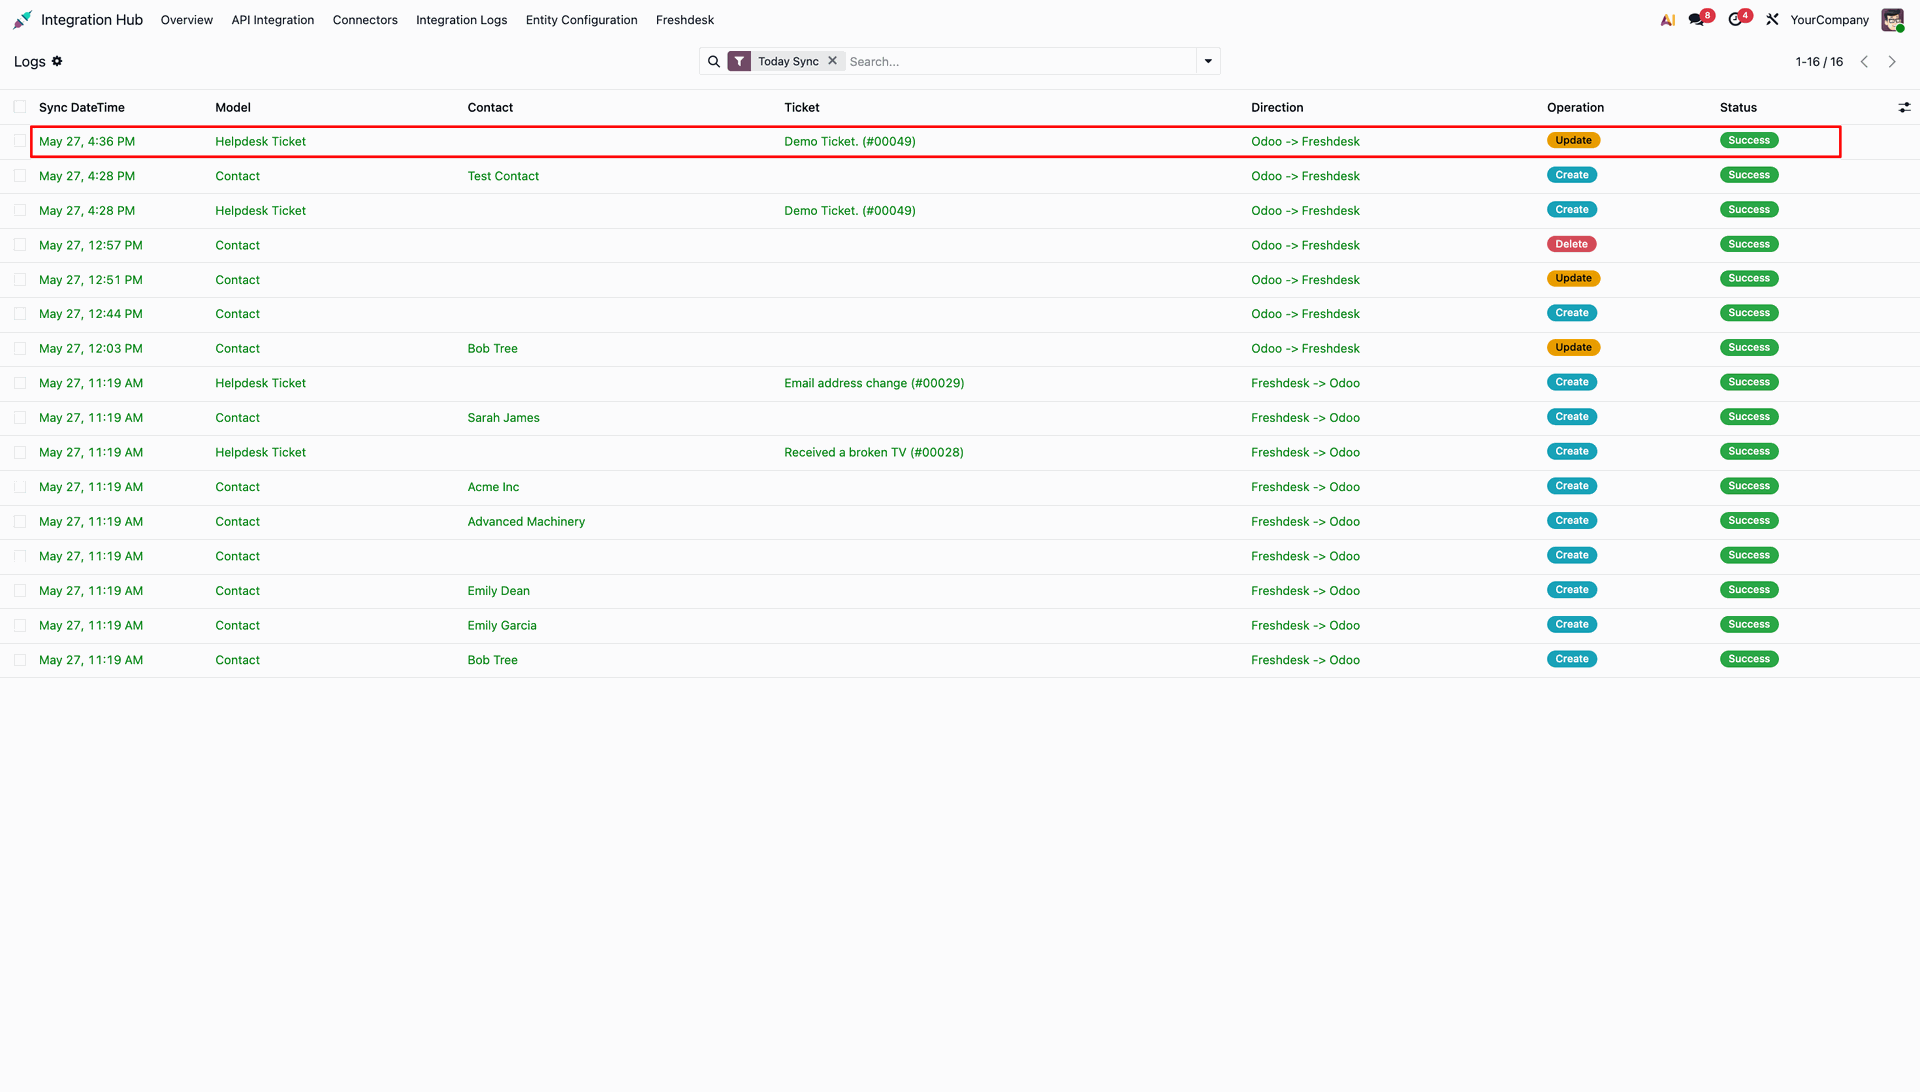
The Integration Logs will record an 'Update' operation with a 'Success' status for the ticket.
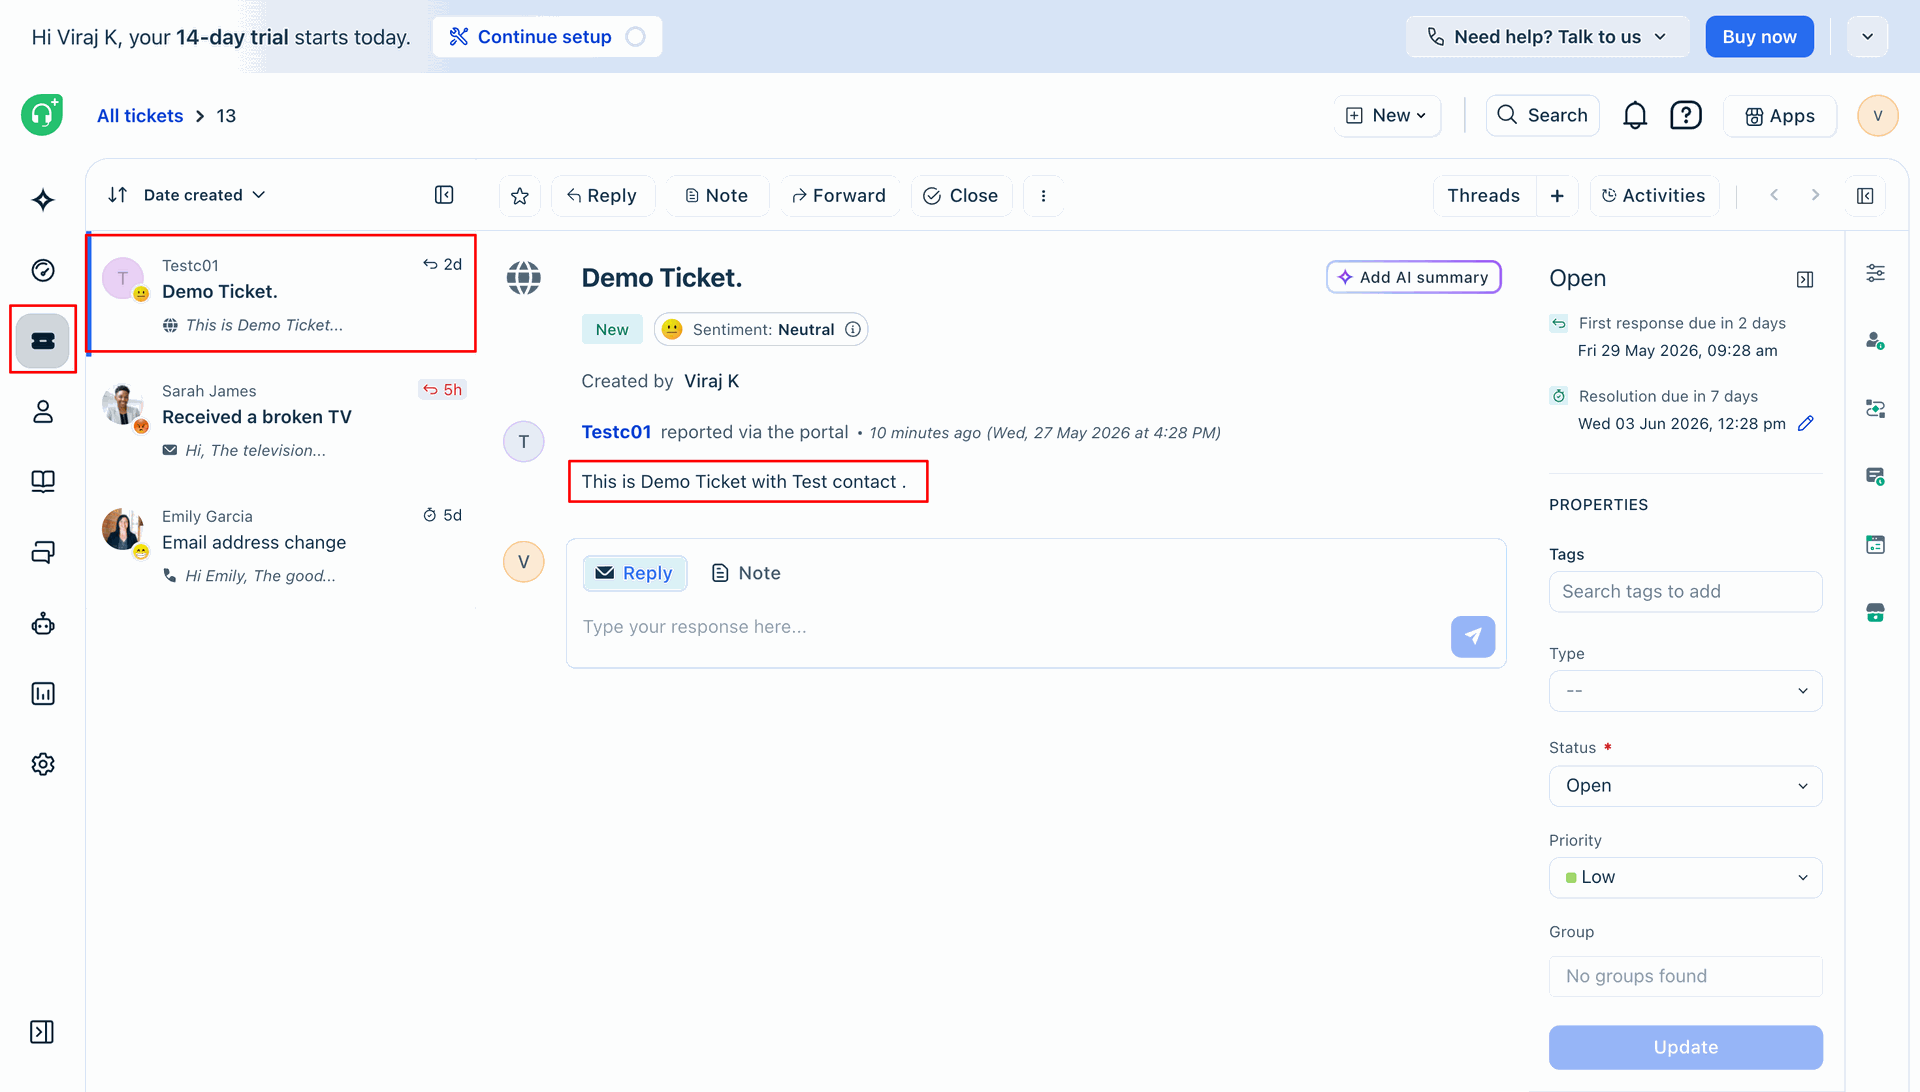
In Freshdesk, open the ticket to confirm that the details have been successfully updated.
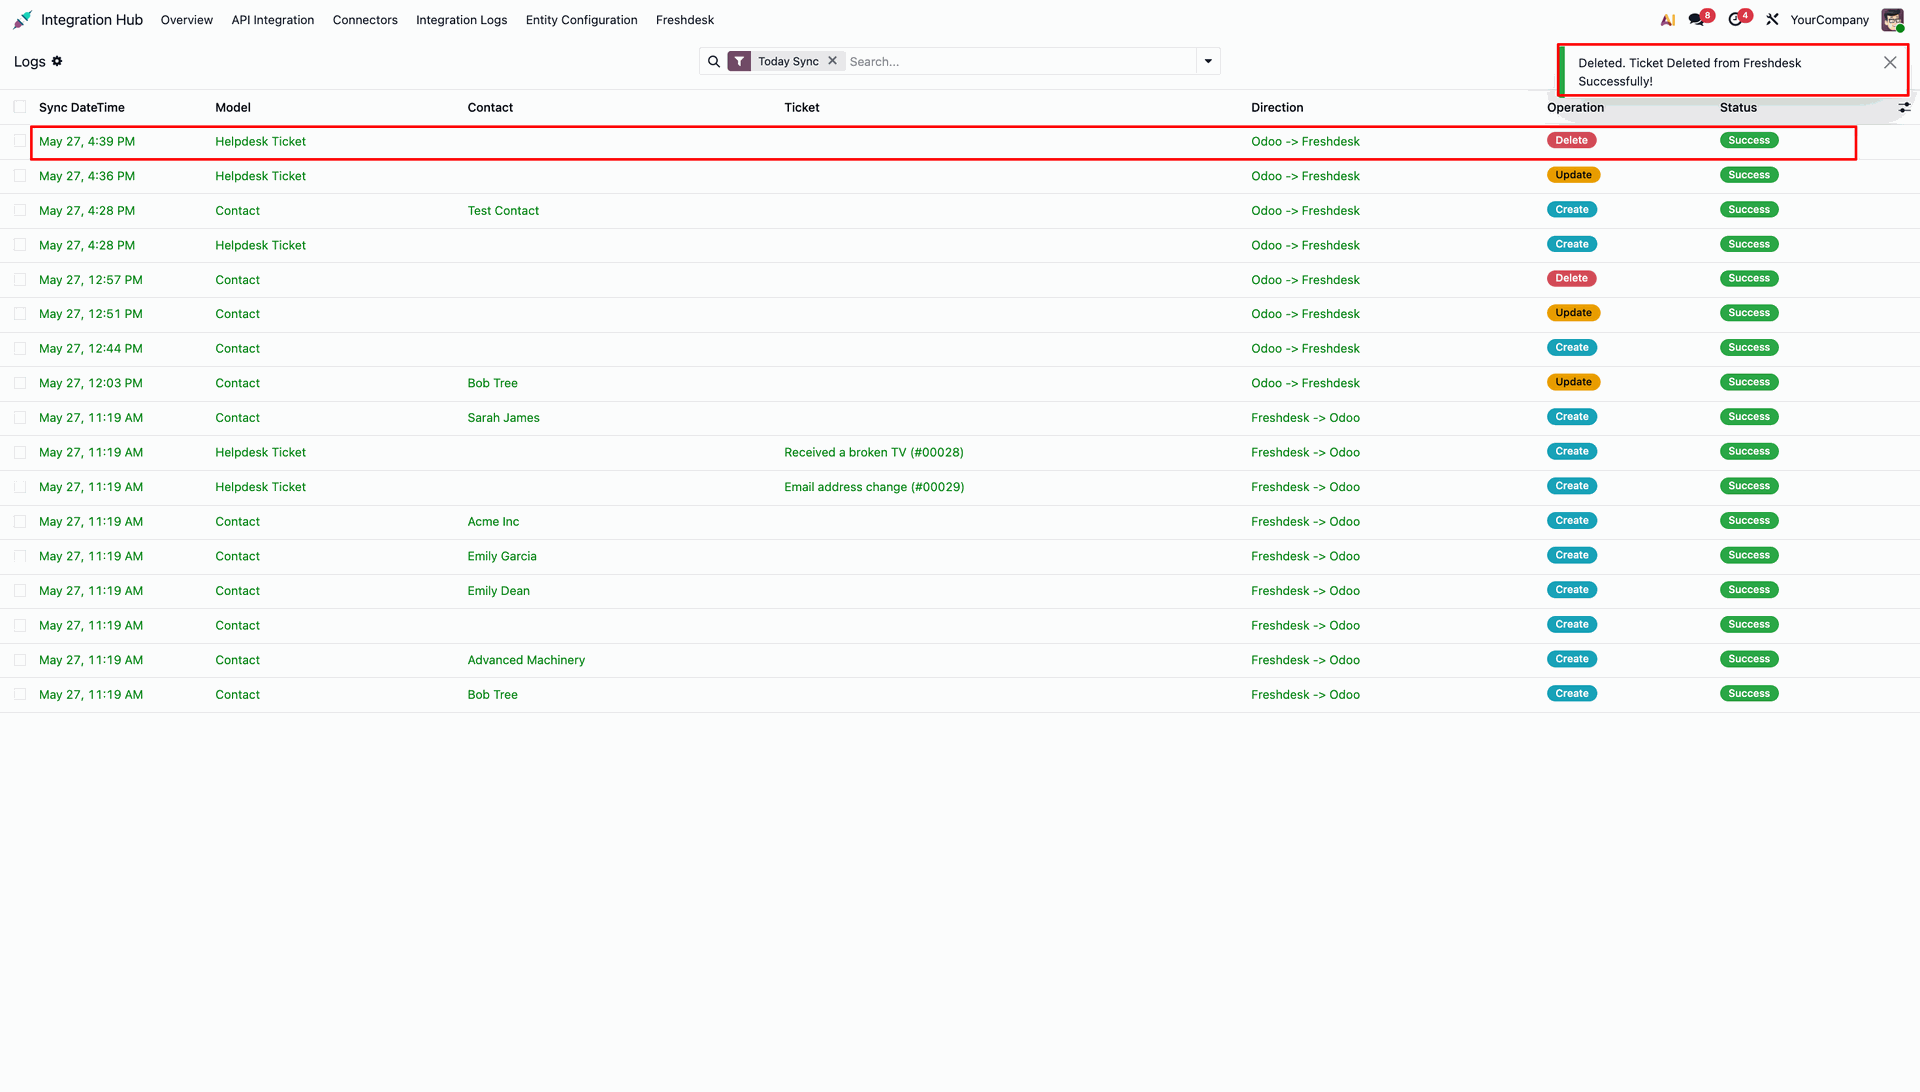
If you delete the ticket in Odoo, the Integration Logs will record a 'Delete' operation with a 'Success' status.
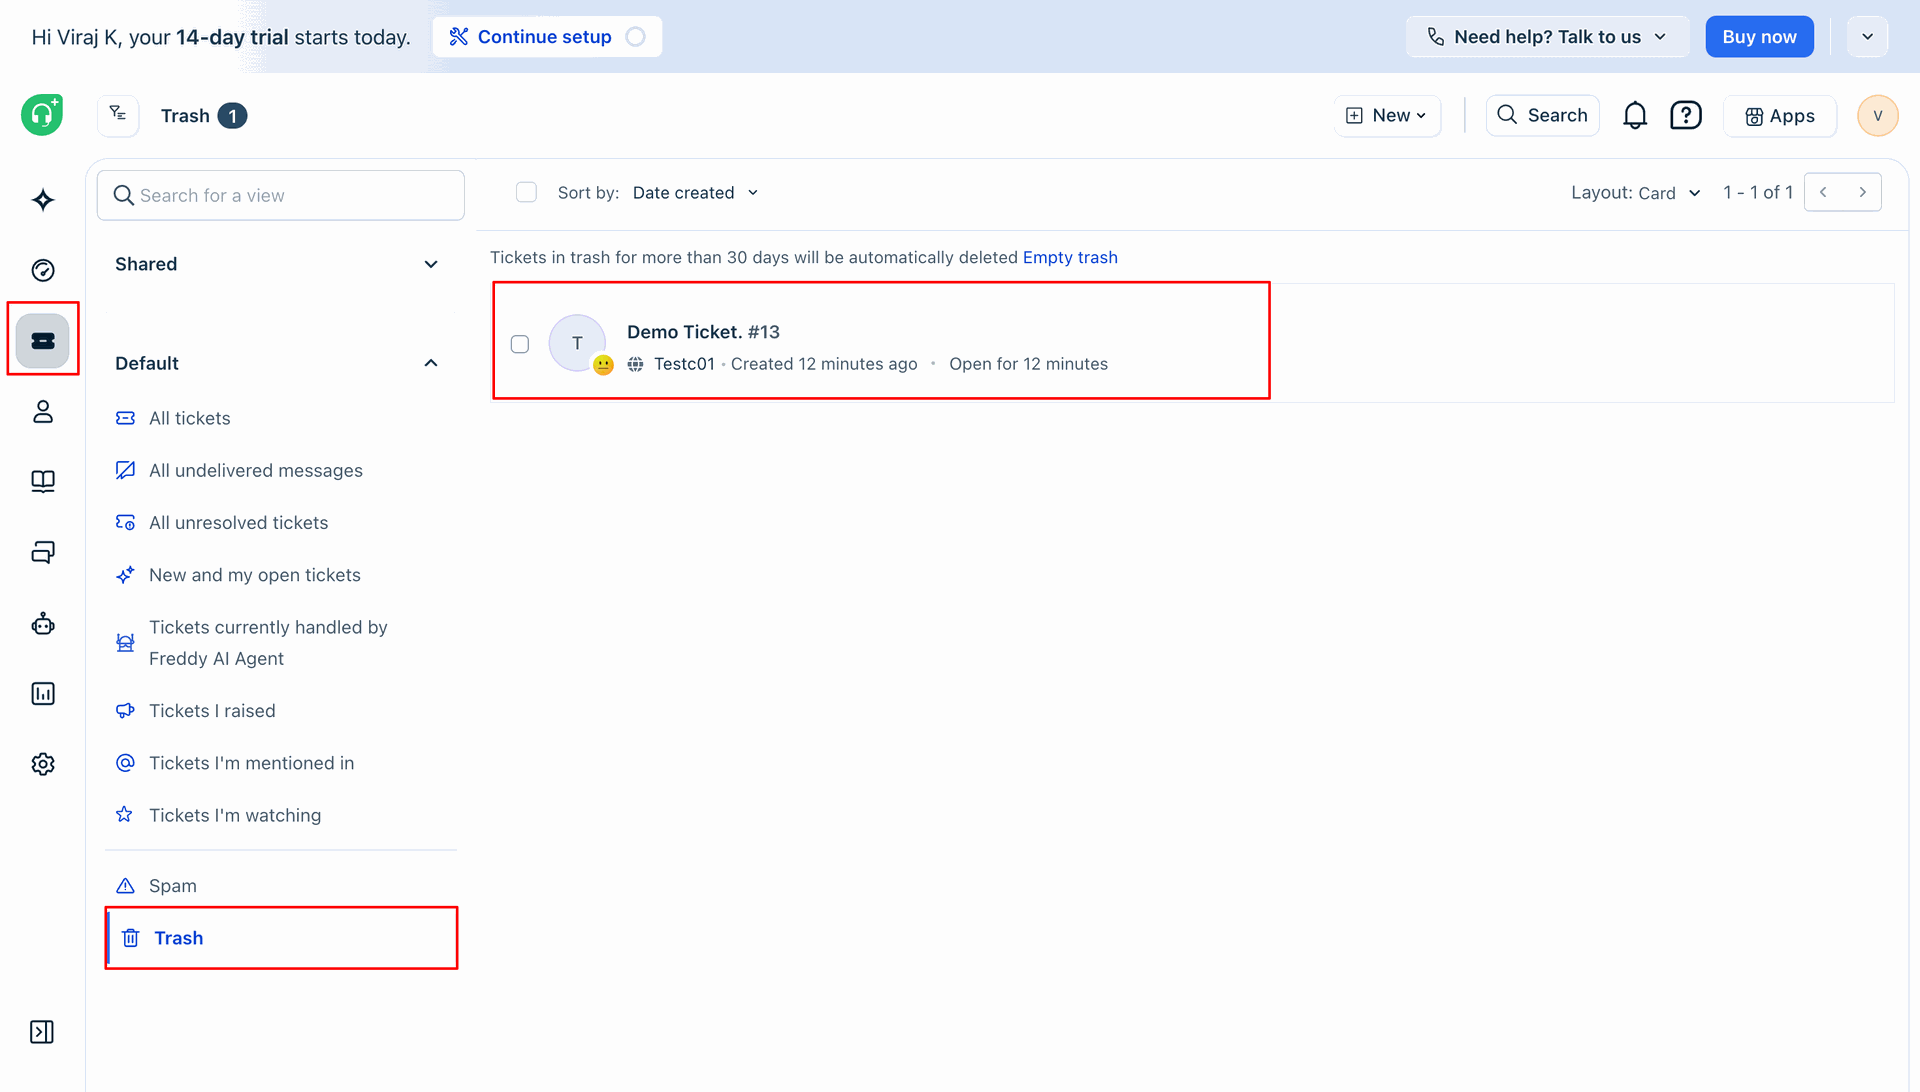
In Freshdesk, navigate to the 'Trash' view to confirm that the ticket has been successfully deleted.
Workflow
In Freshdesk, Enable options.
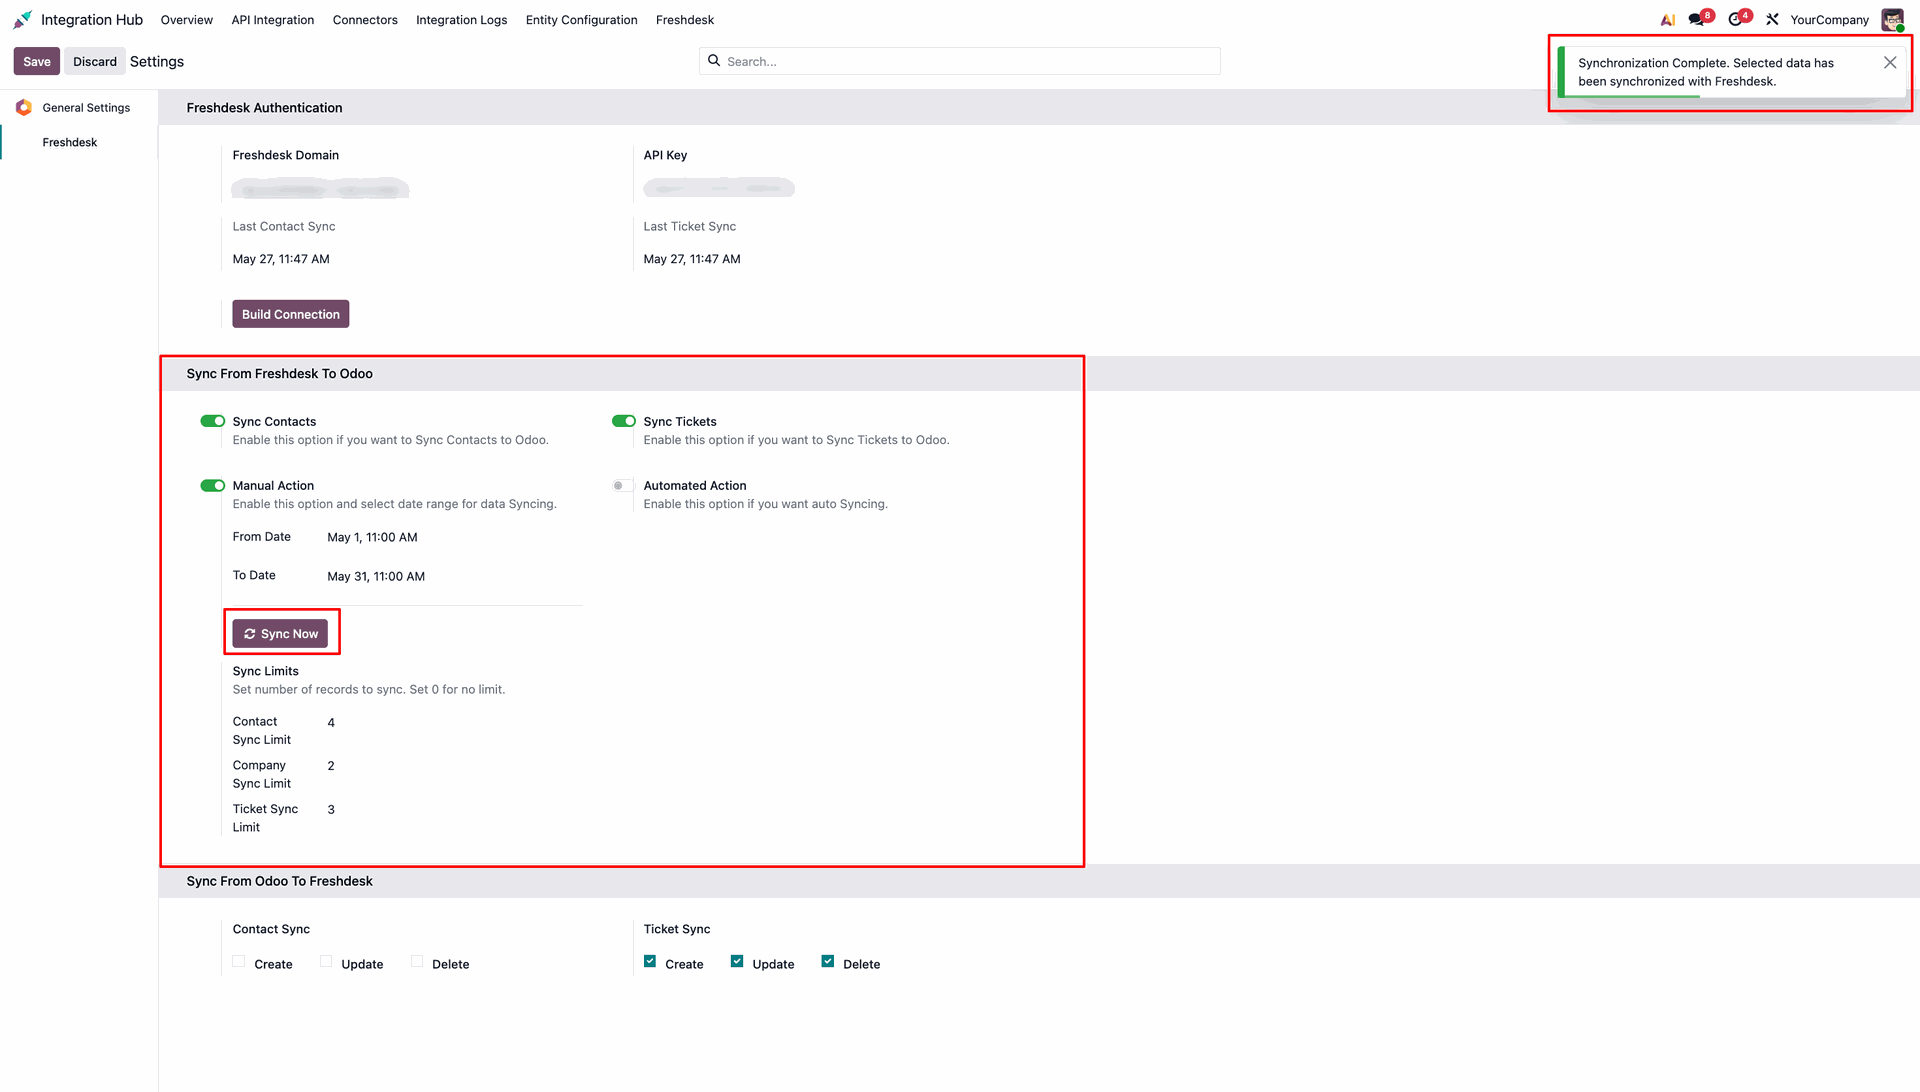
Sync logs.
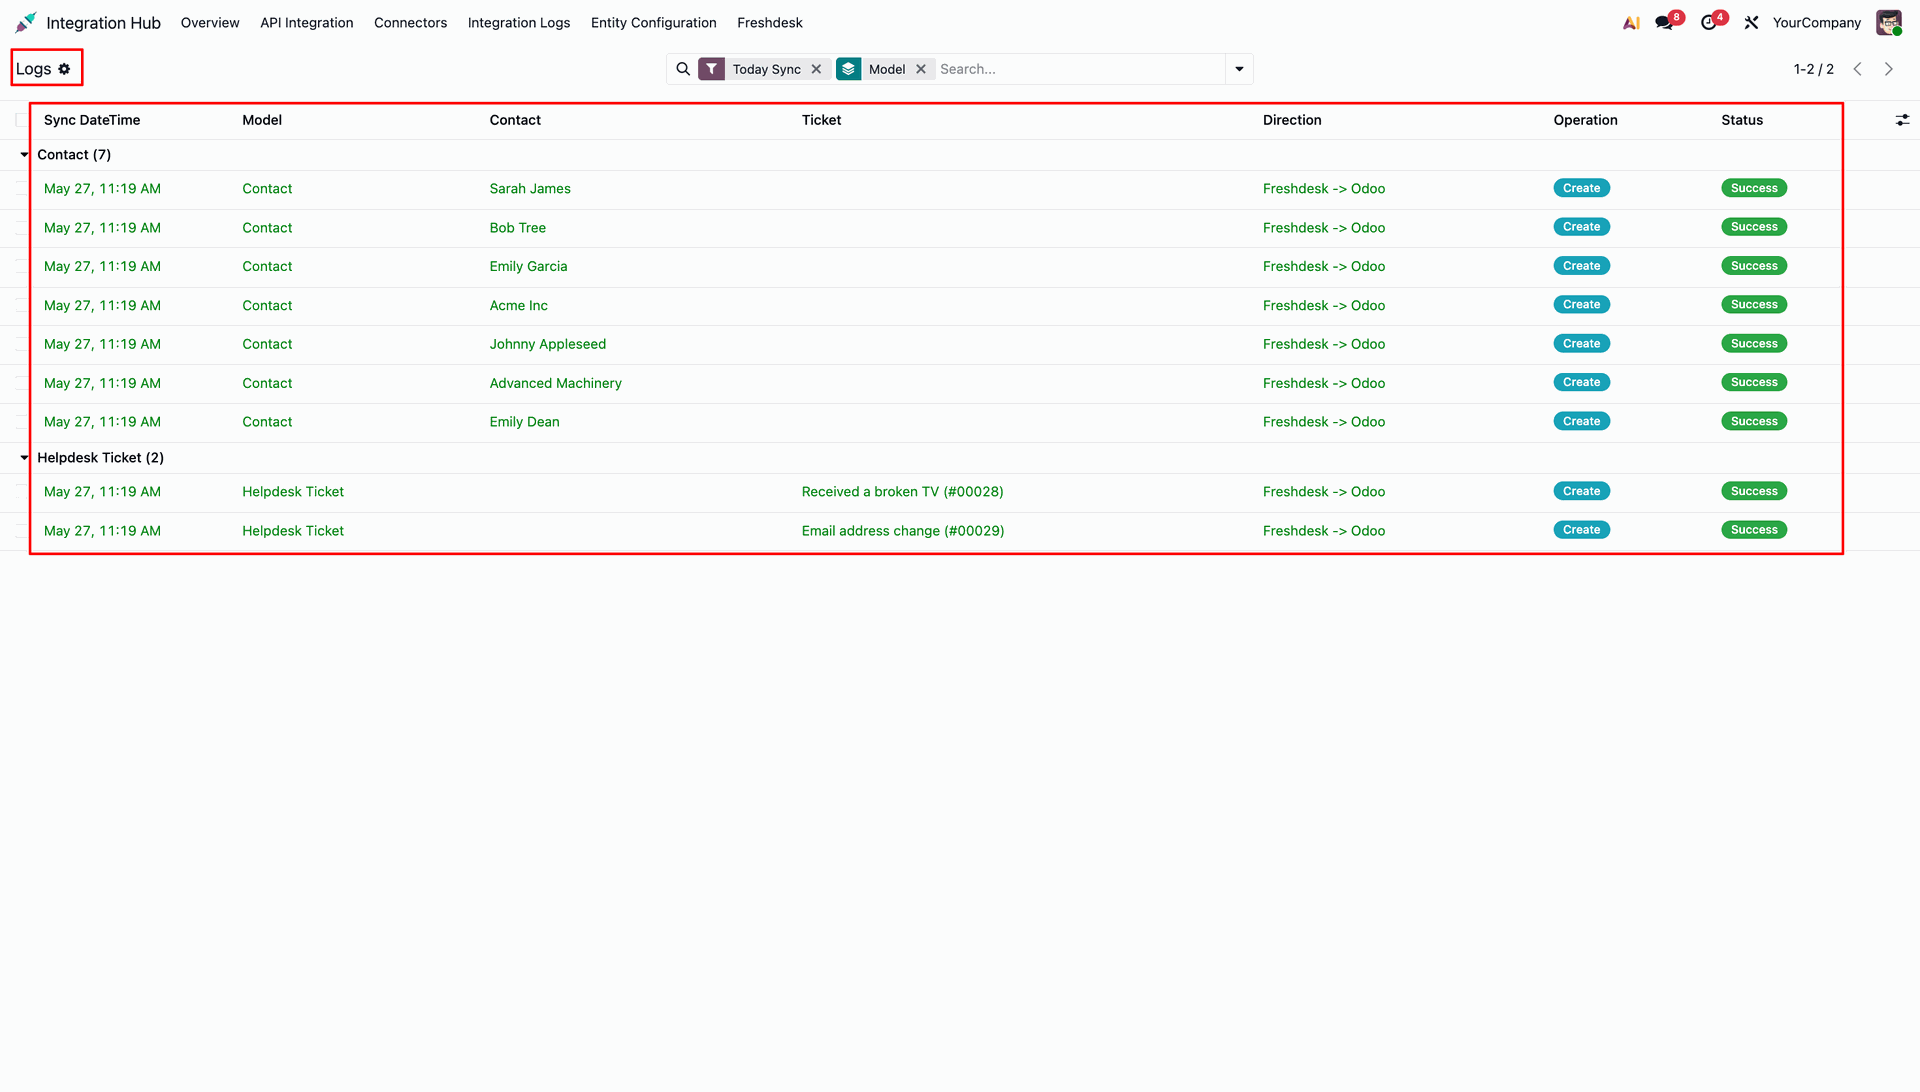
Odoo will fetch the newly created or updated records from Freshdesk.
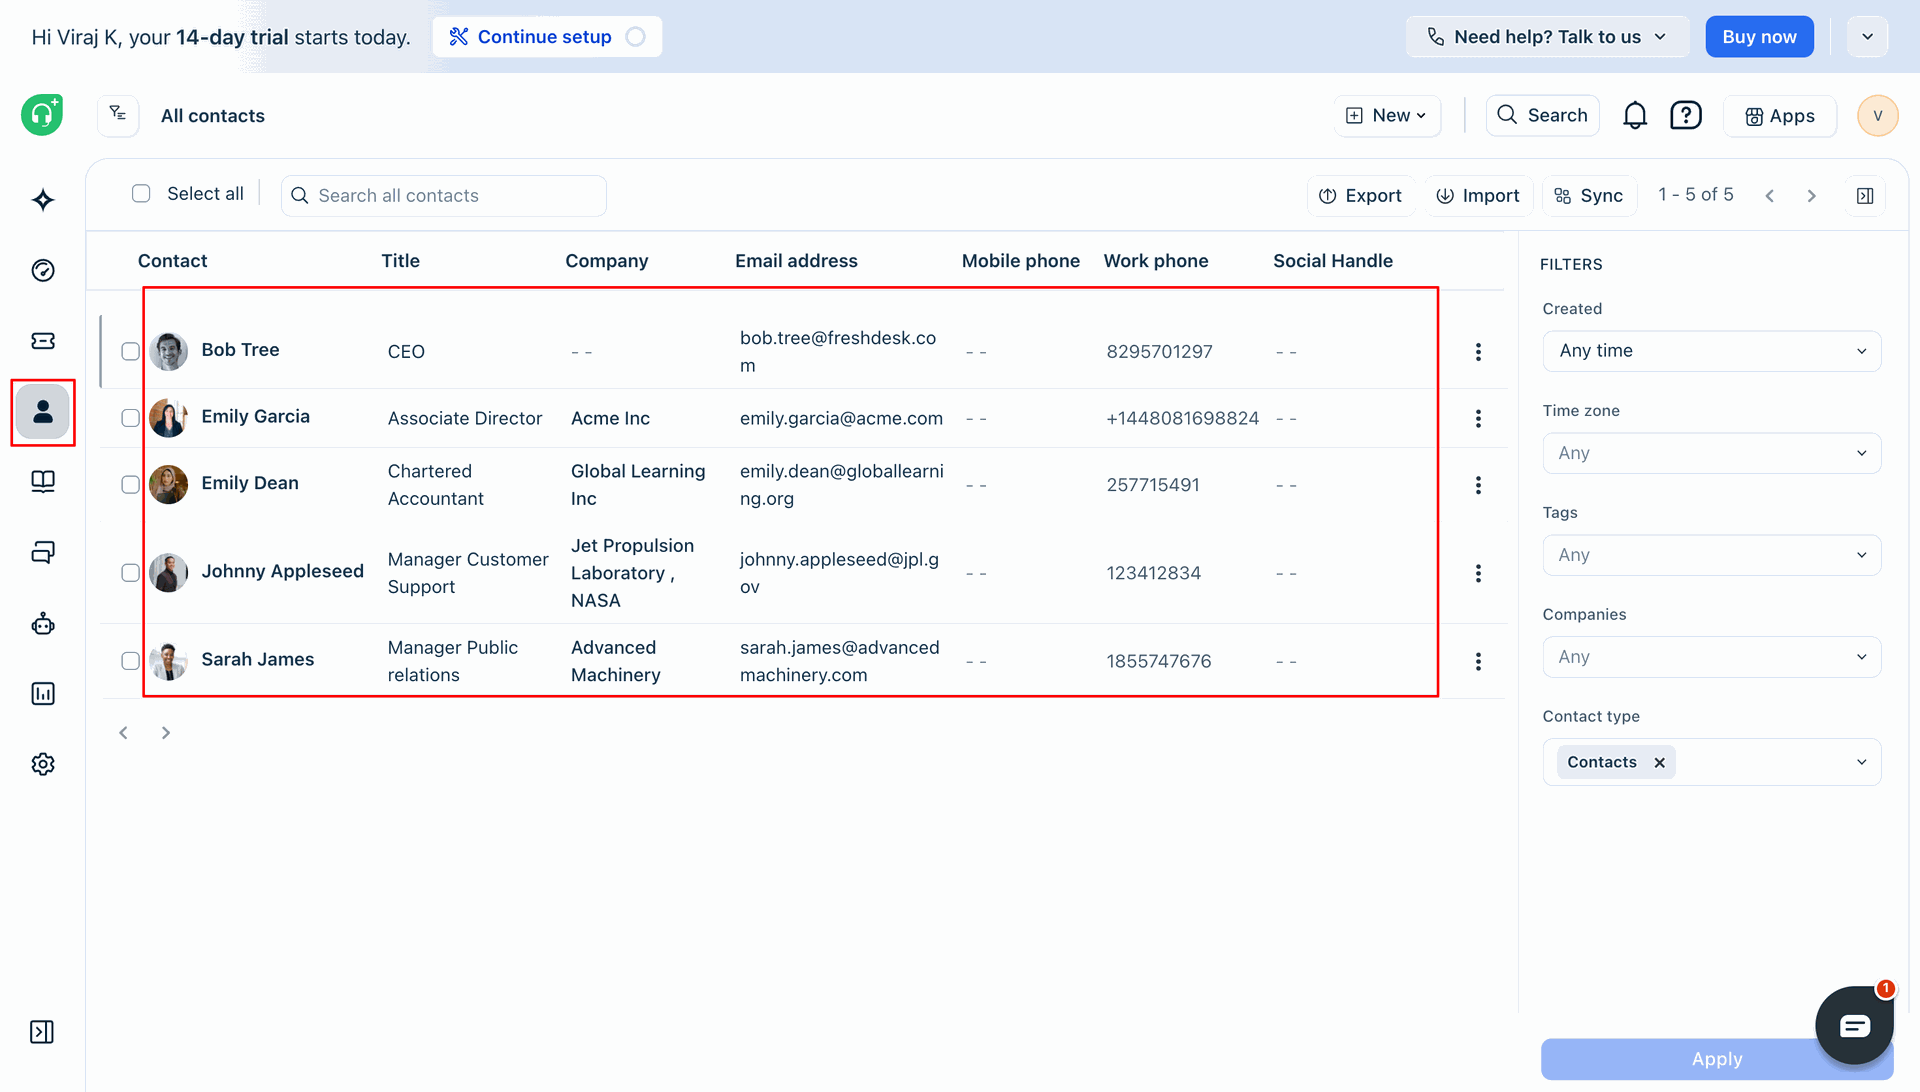
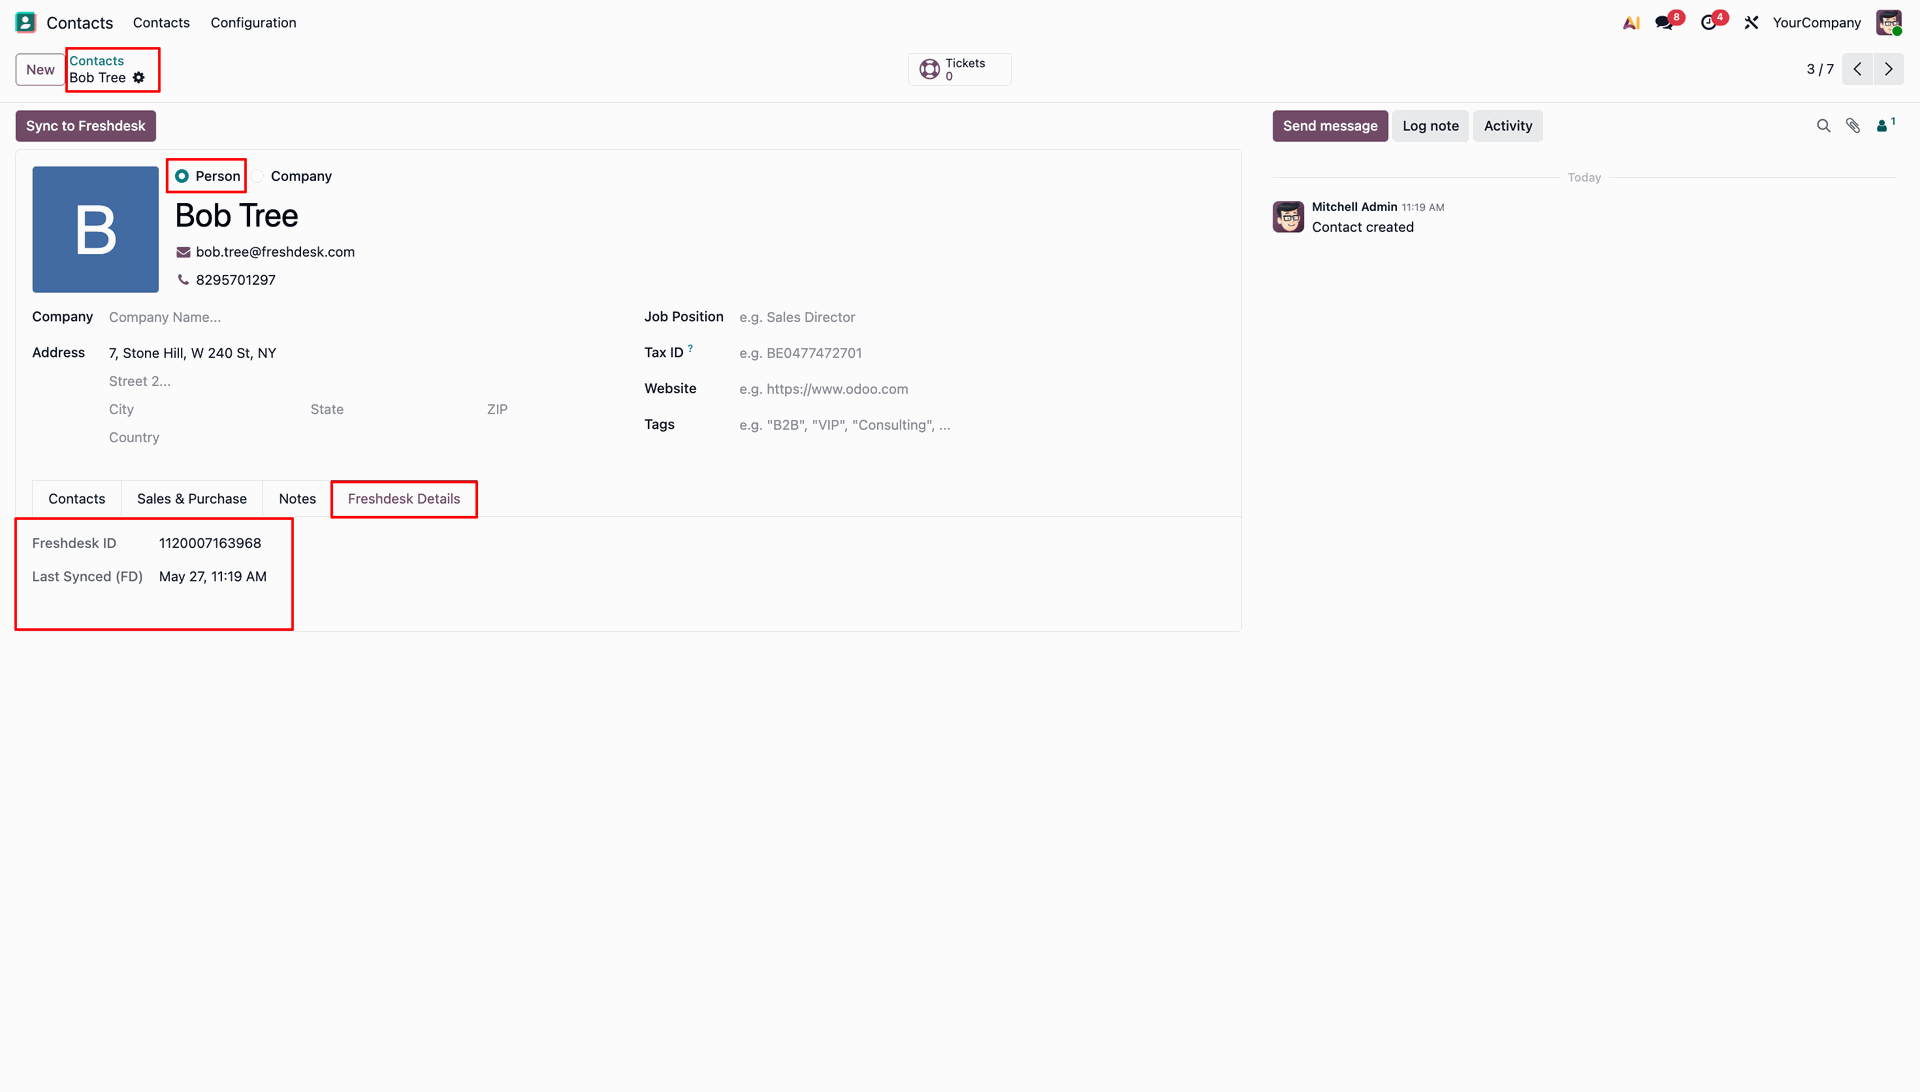
Verify the imported contacts in the Odoo Contacts app.
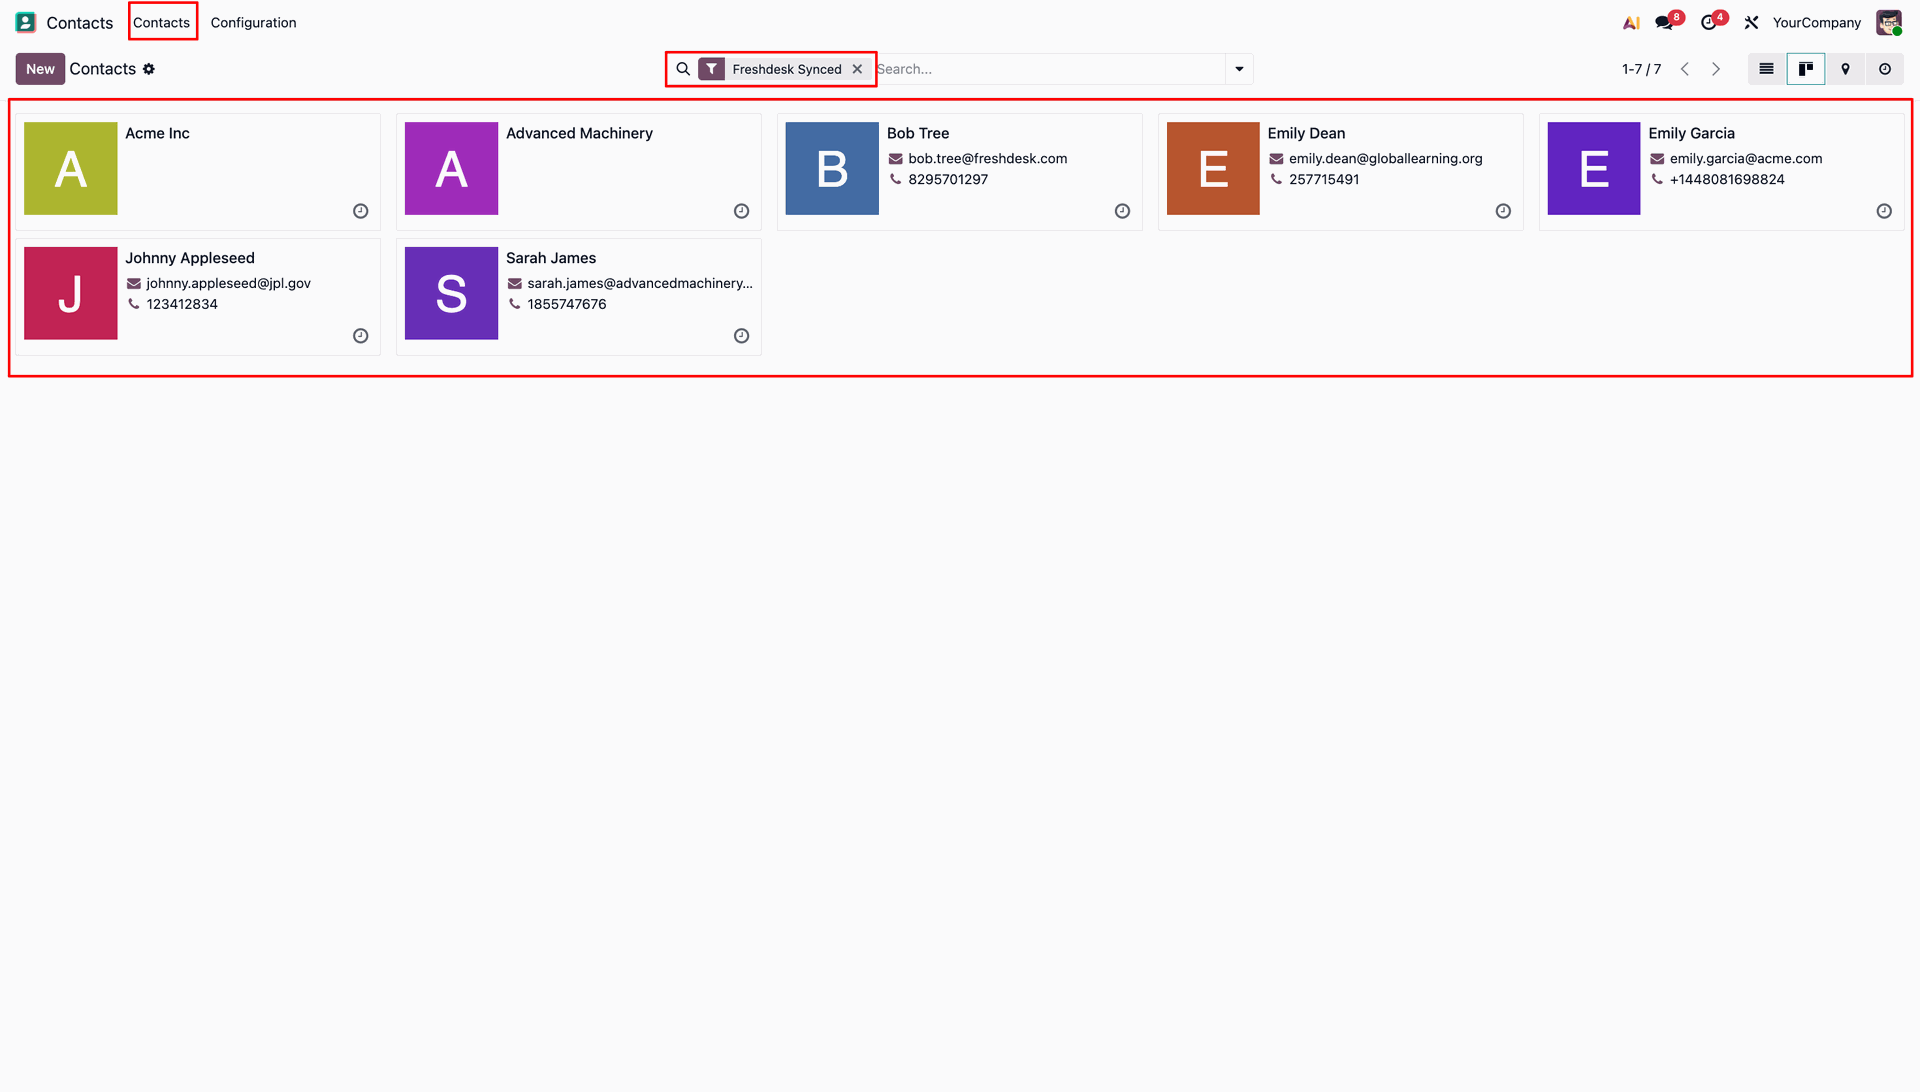
The Freshdesk ID is stored in the Odoo for future updates.
Odoo will fetch the newly created or updated tickets from Freshdesk.
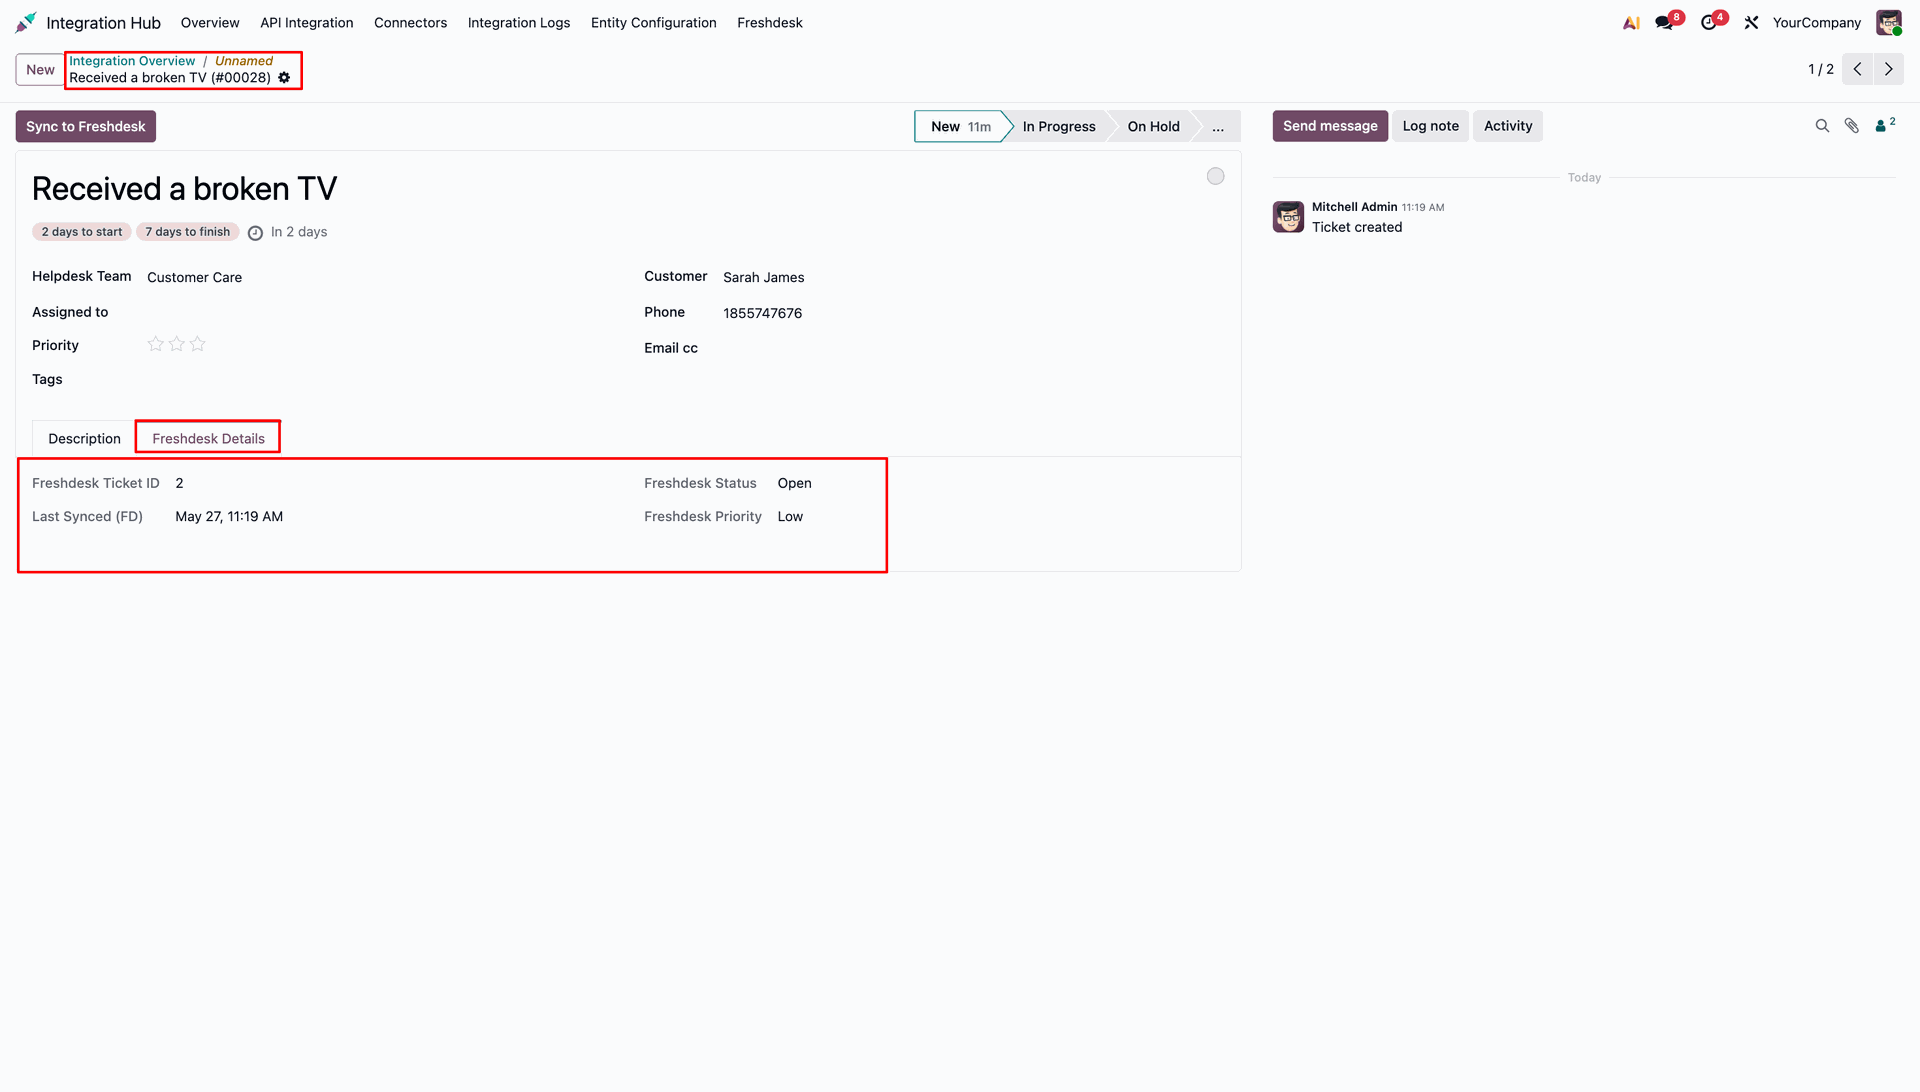
The Freshdesk ID is stored in Odoo.
You can schedule the automatic fetch operation using the Odoo scheduled actions.
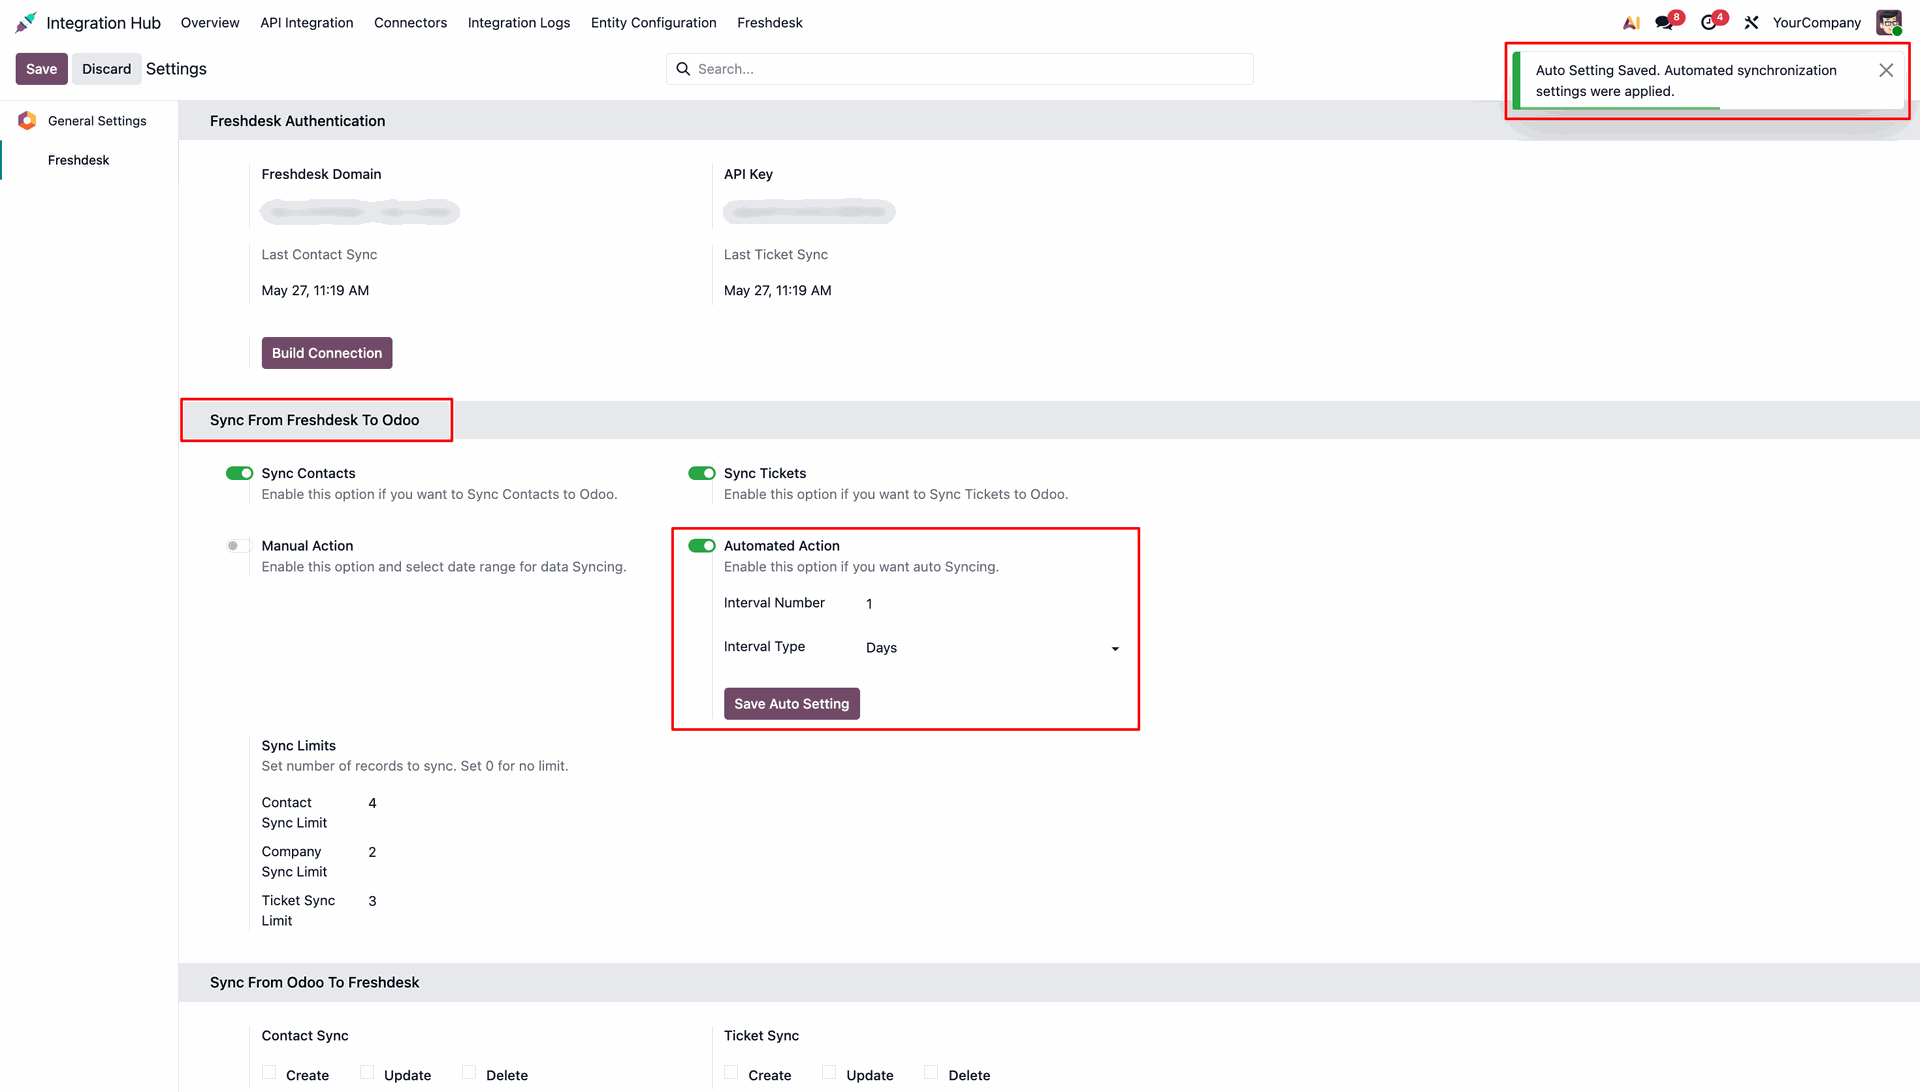
Sync Freshdesk to Odoo.
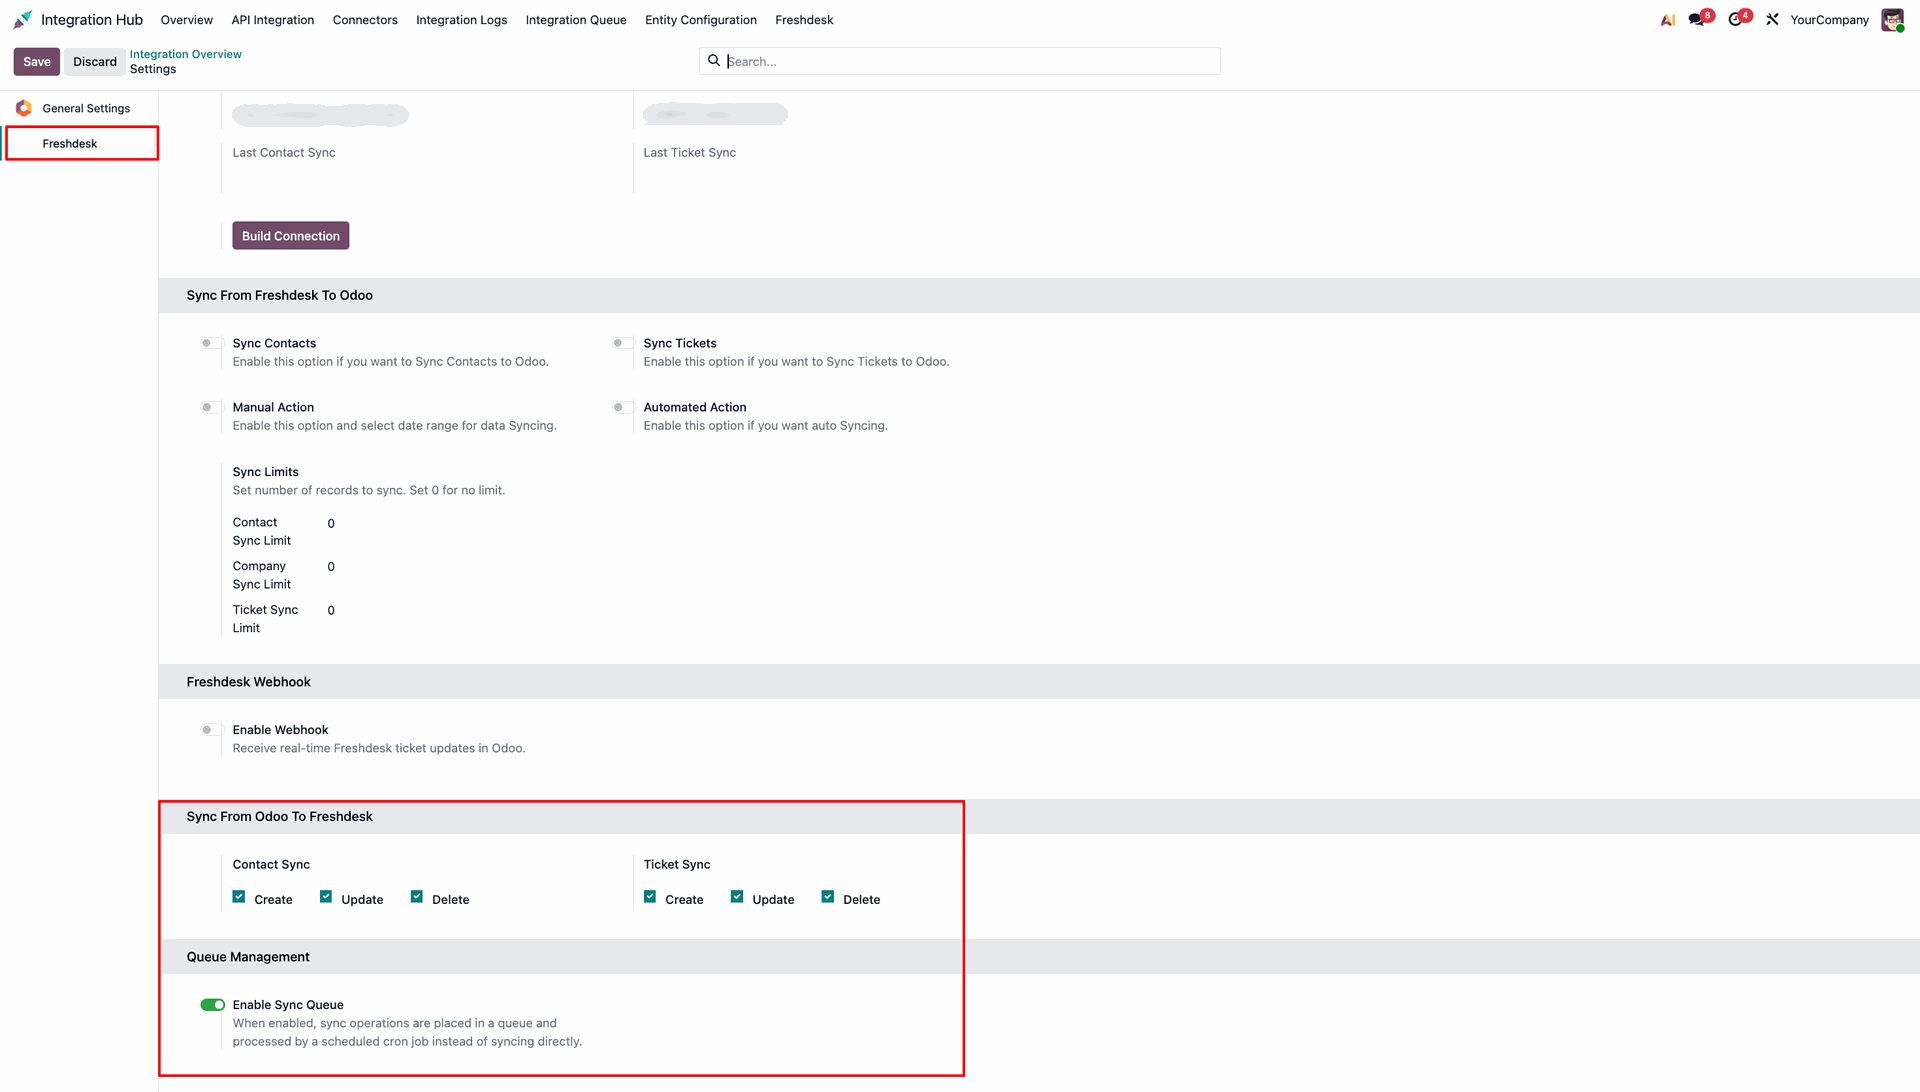
Navigate to Integration Hub > Freshdesk Settings and enable the "Enable Sync Queue" option under the Queue Management section.
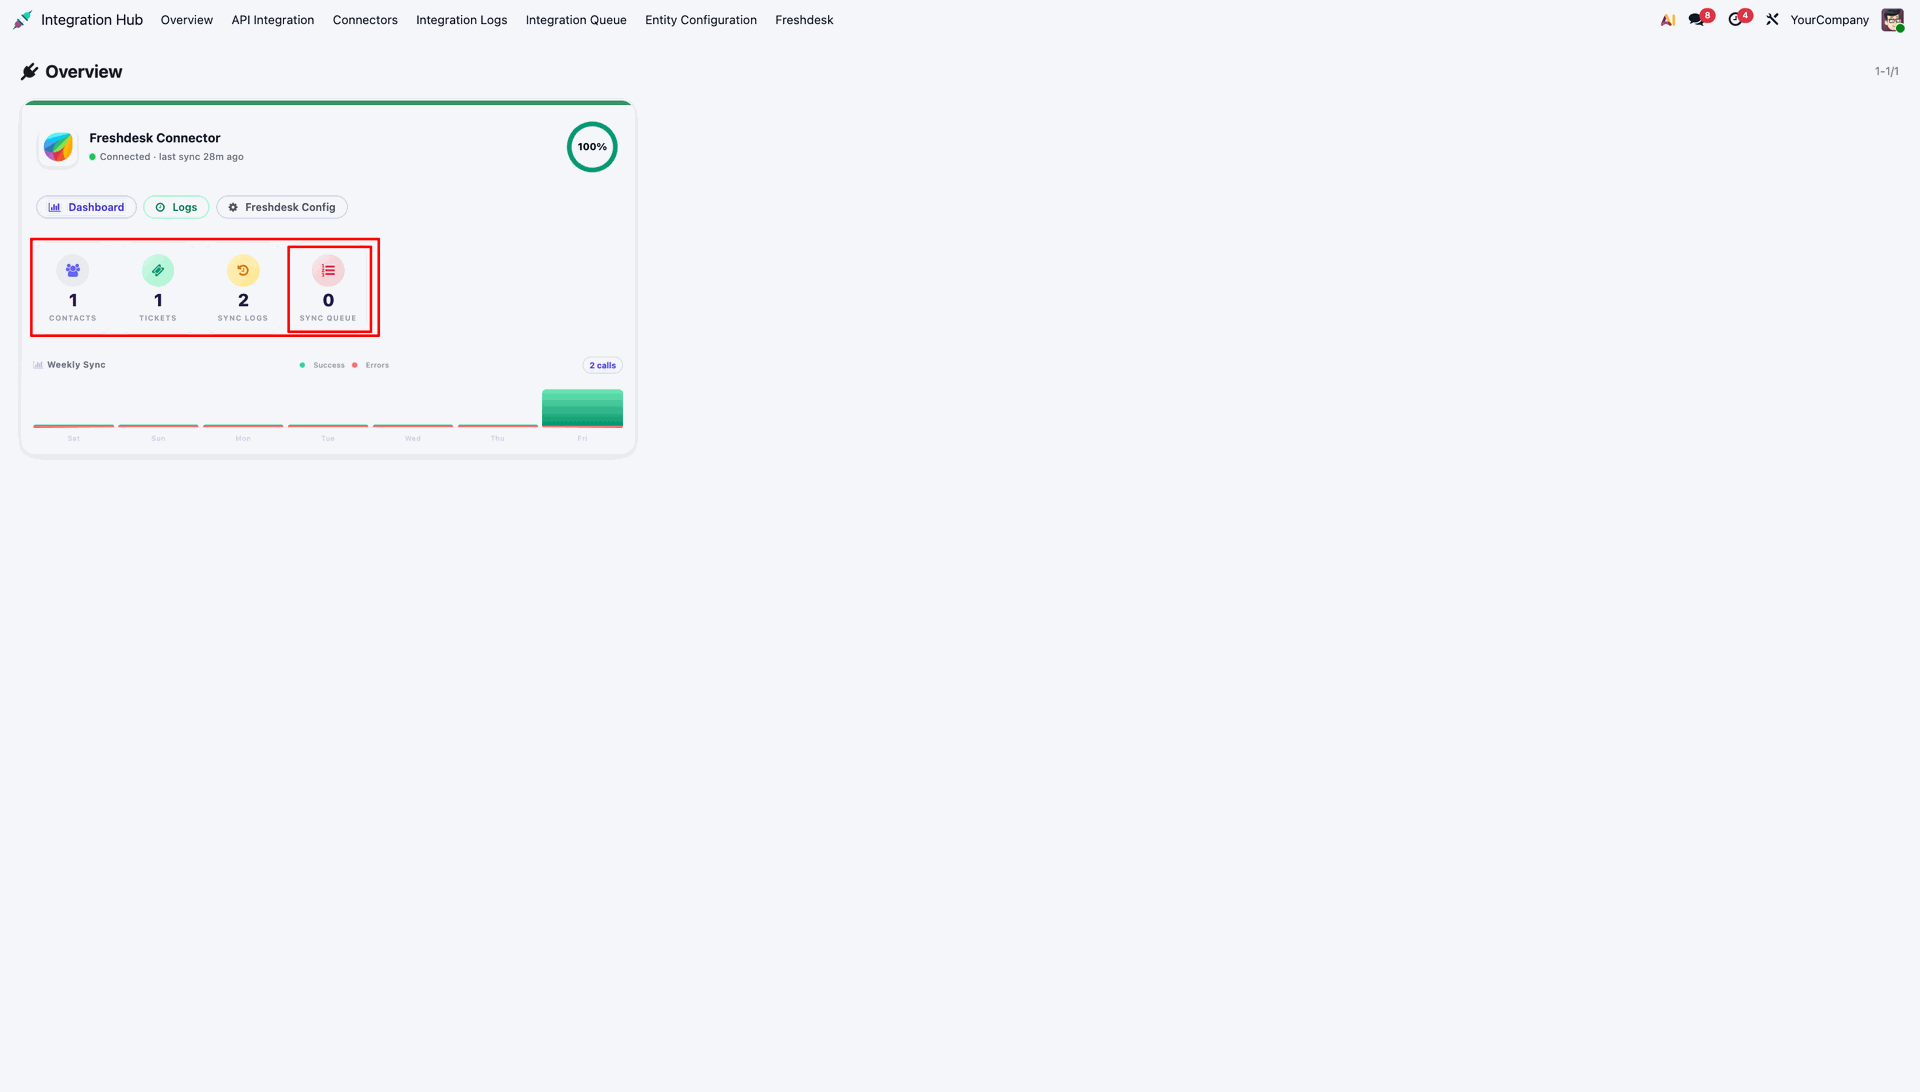
The Integration Hub Overview dashboard will now display the number of pending items in the Sync Queue, initially showing 0.
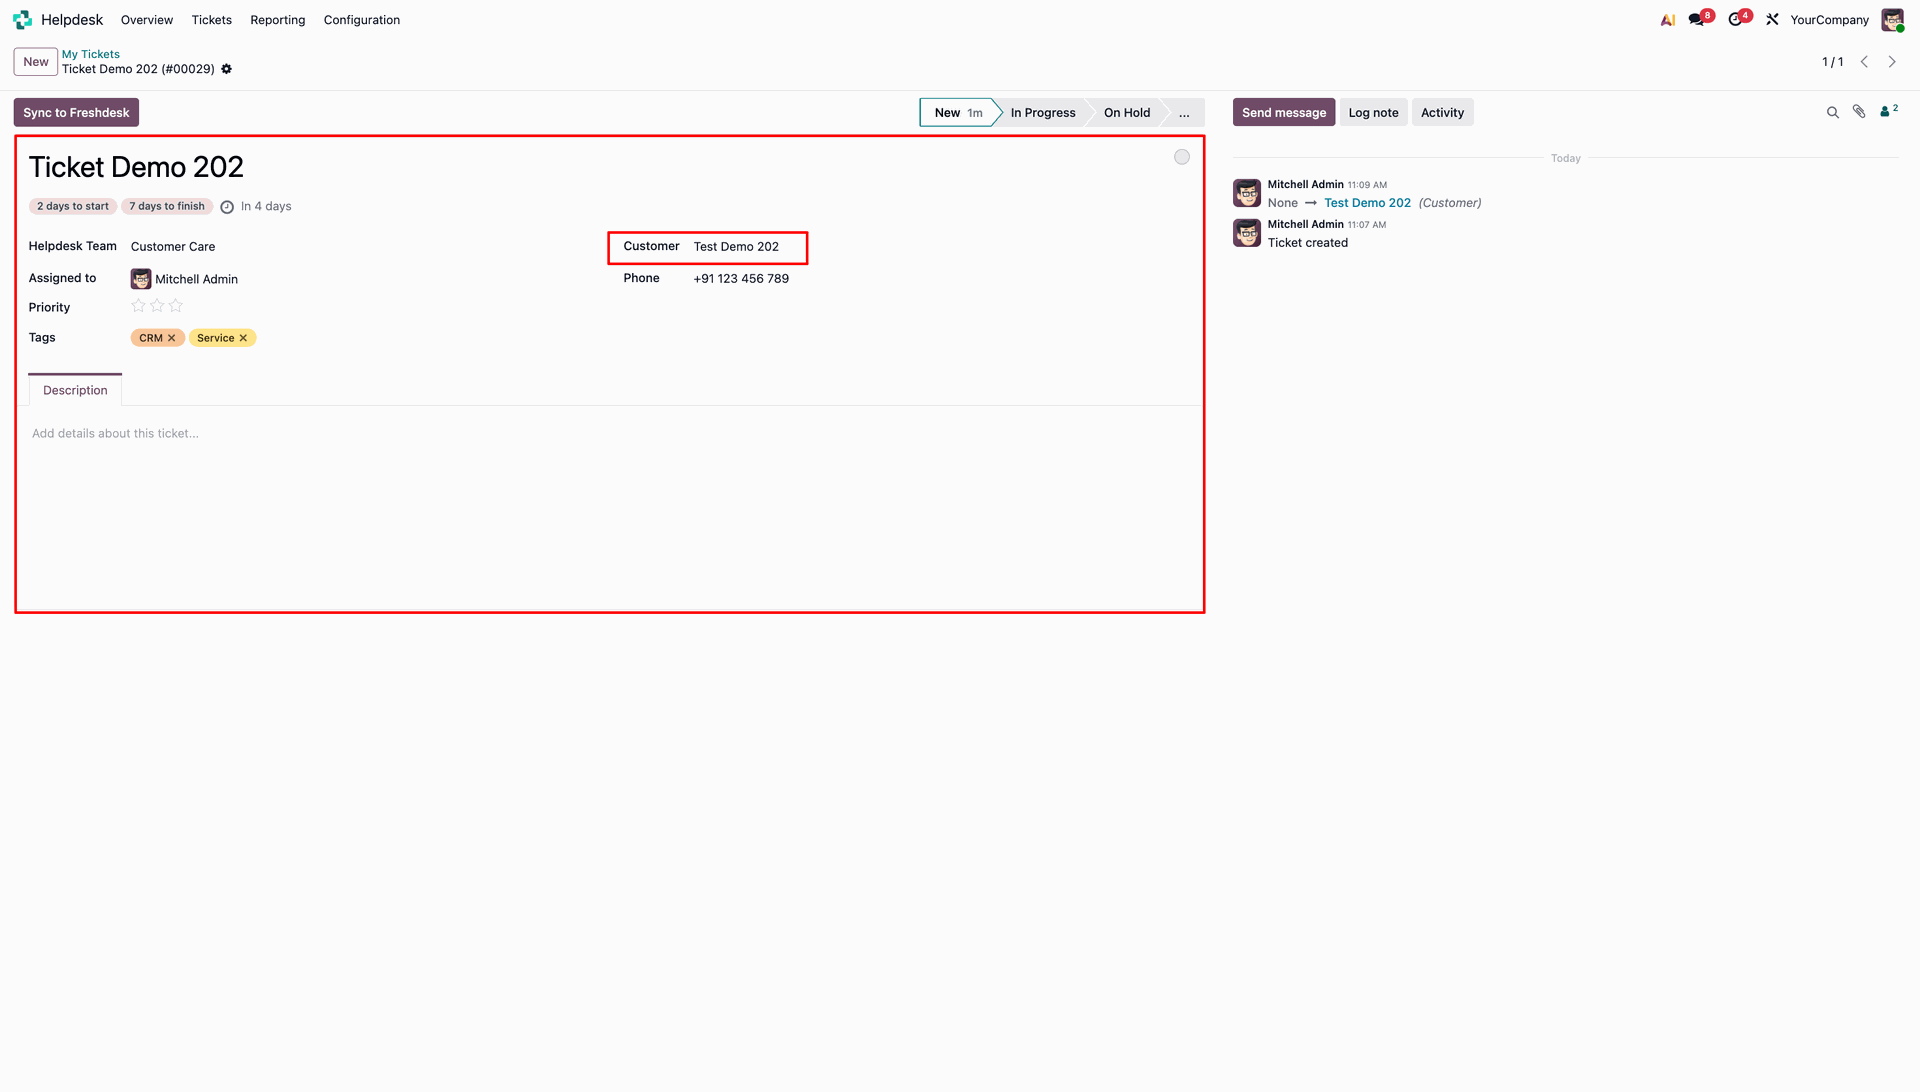
Create or update a record in Odoo, such as a Helpdesk Ticket named "Ticket Demo 202".
The Integration Hub Overview dashboard will now reflect the newly added records in the Sync Queue count, such as 2 pending items.
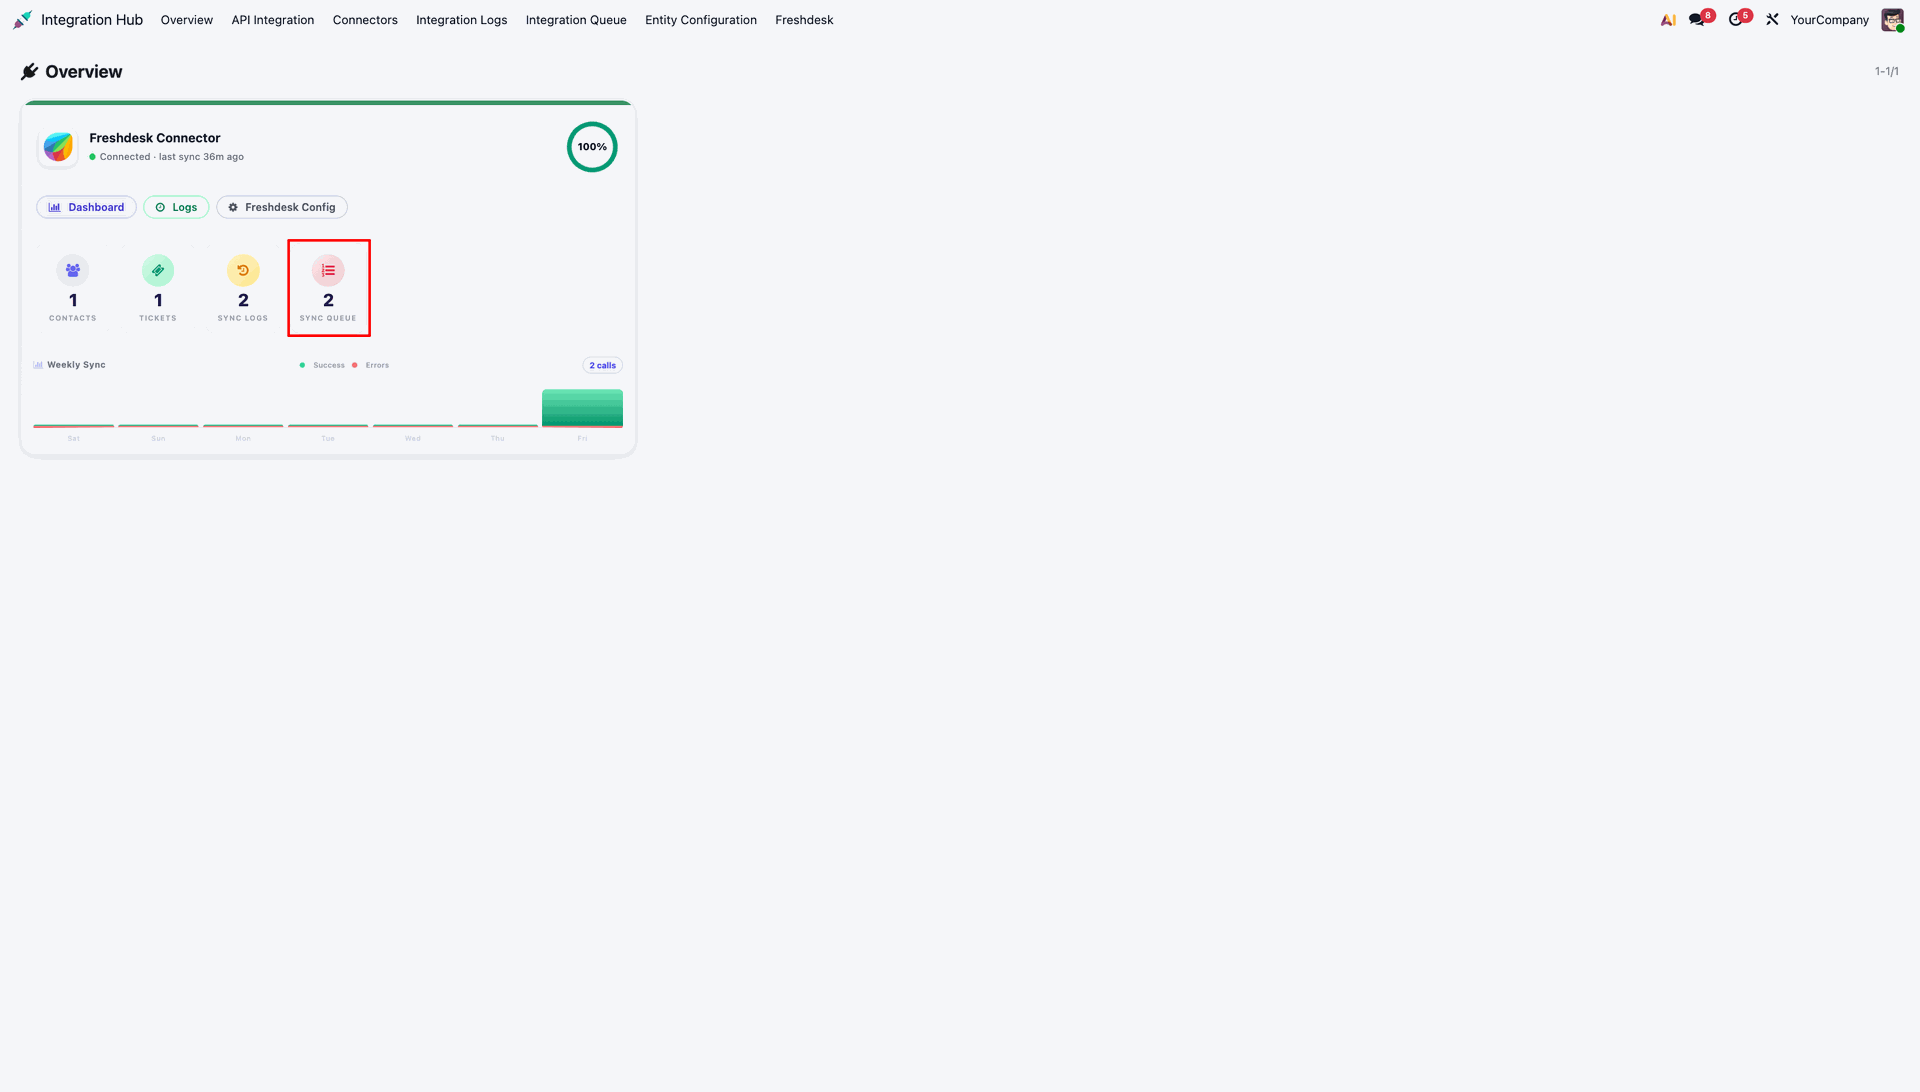
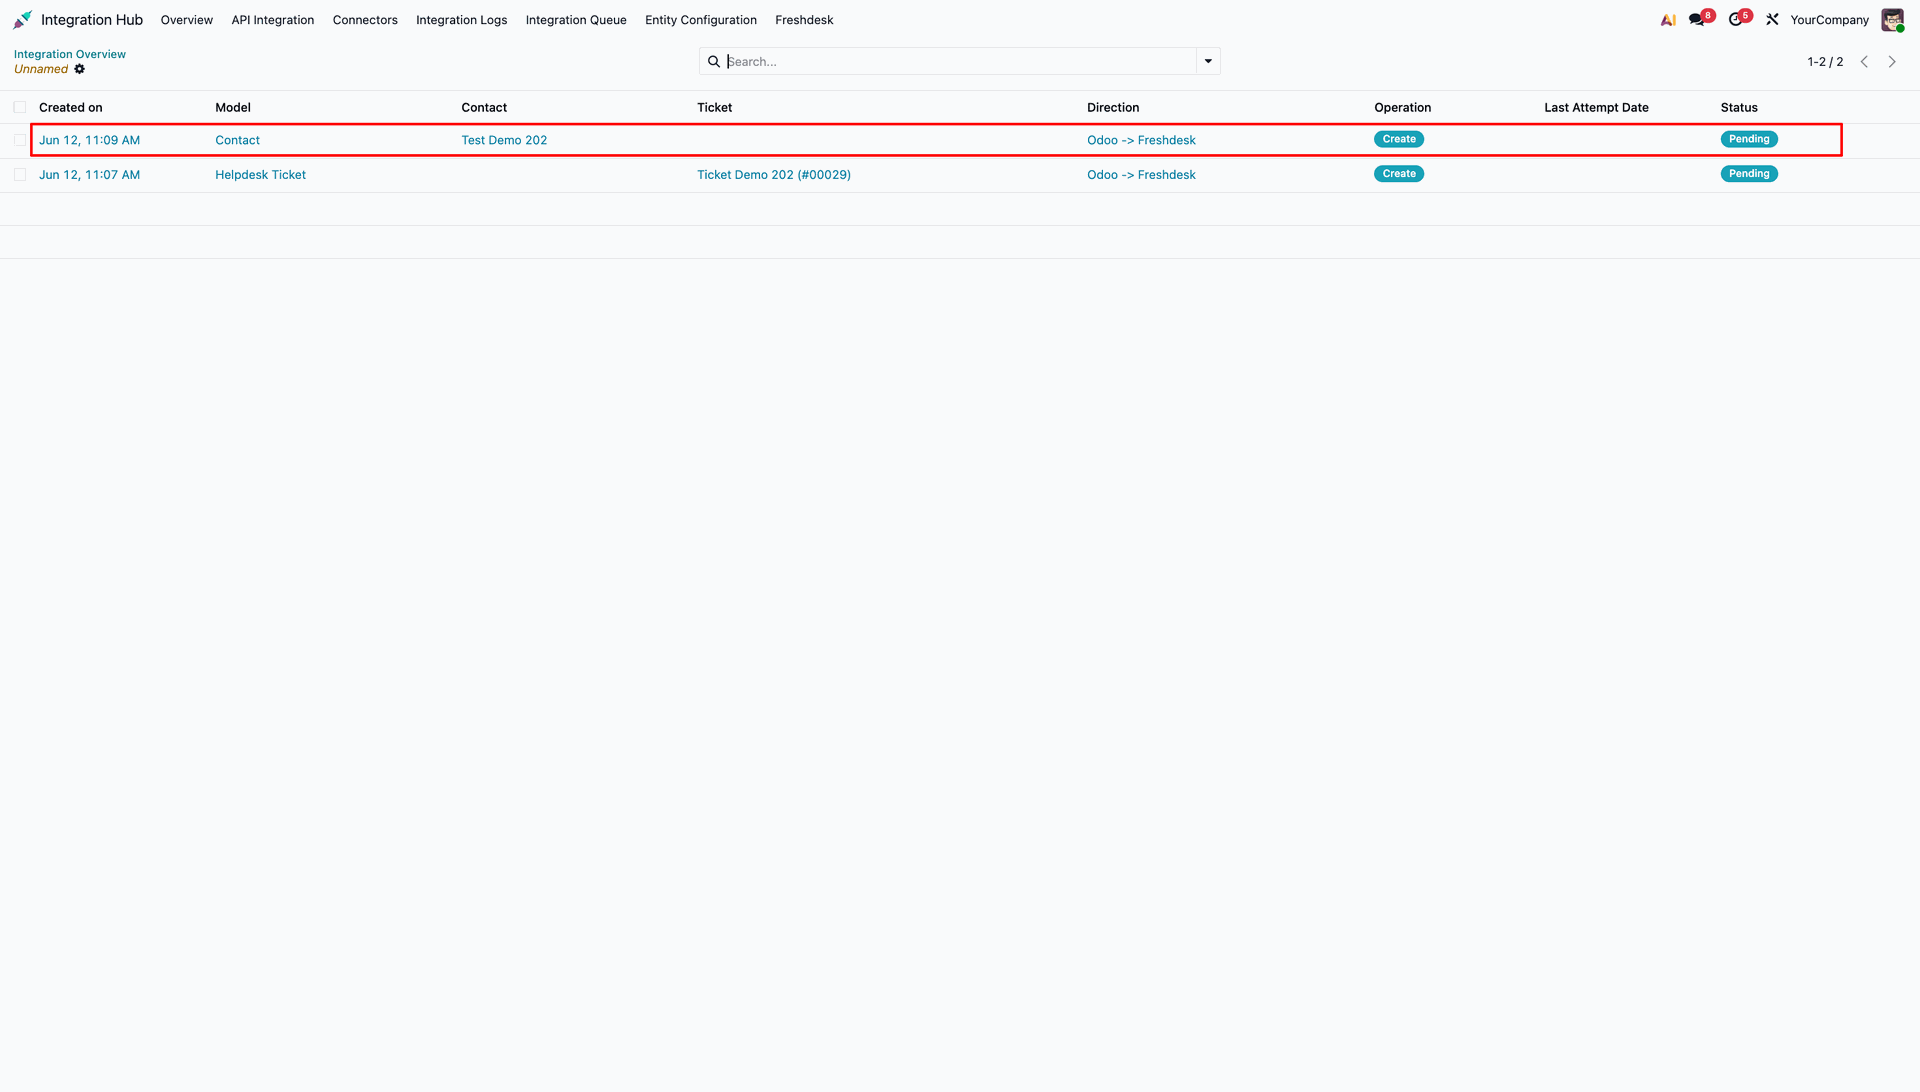
Navigate to Integration Hub > Integration Queue to view the list of pending synchronization tasks, displaying their Model, Contact, Ticket, Direction, Operation, and Status.
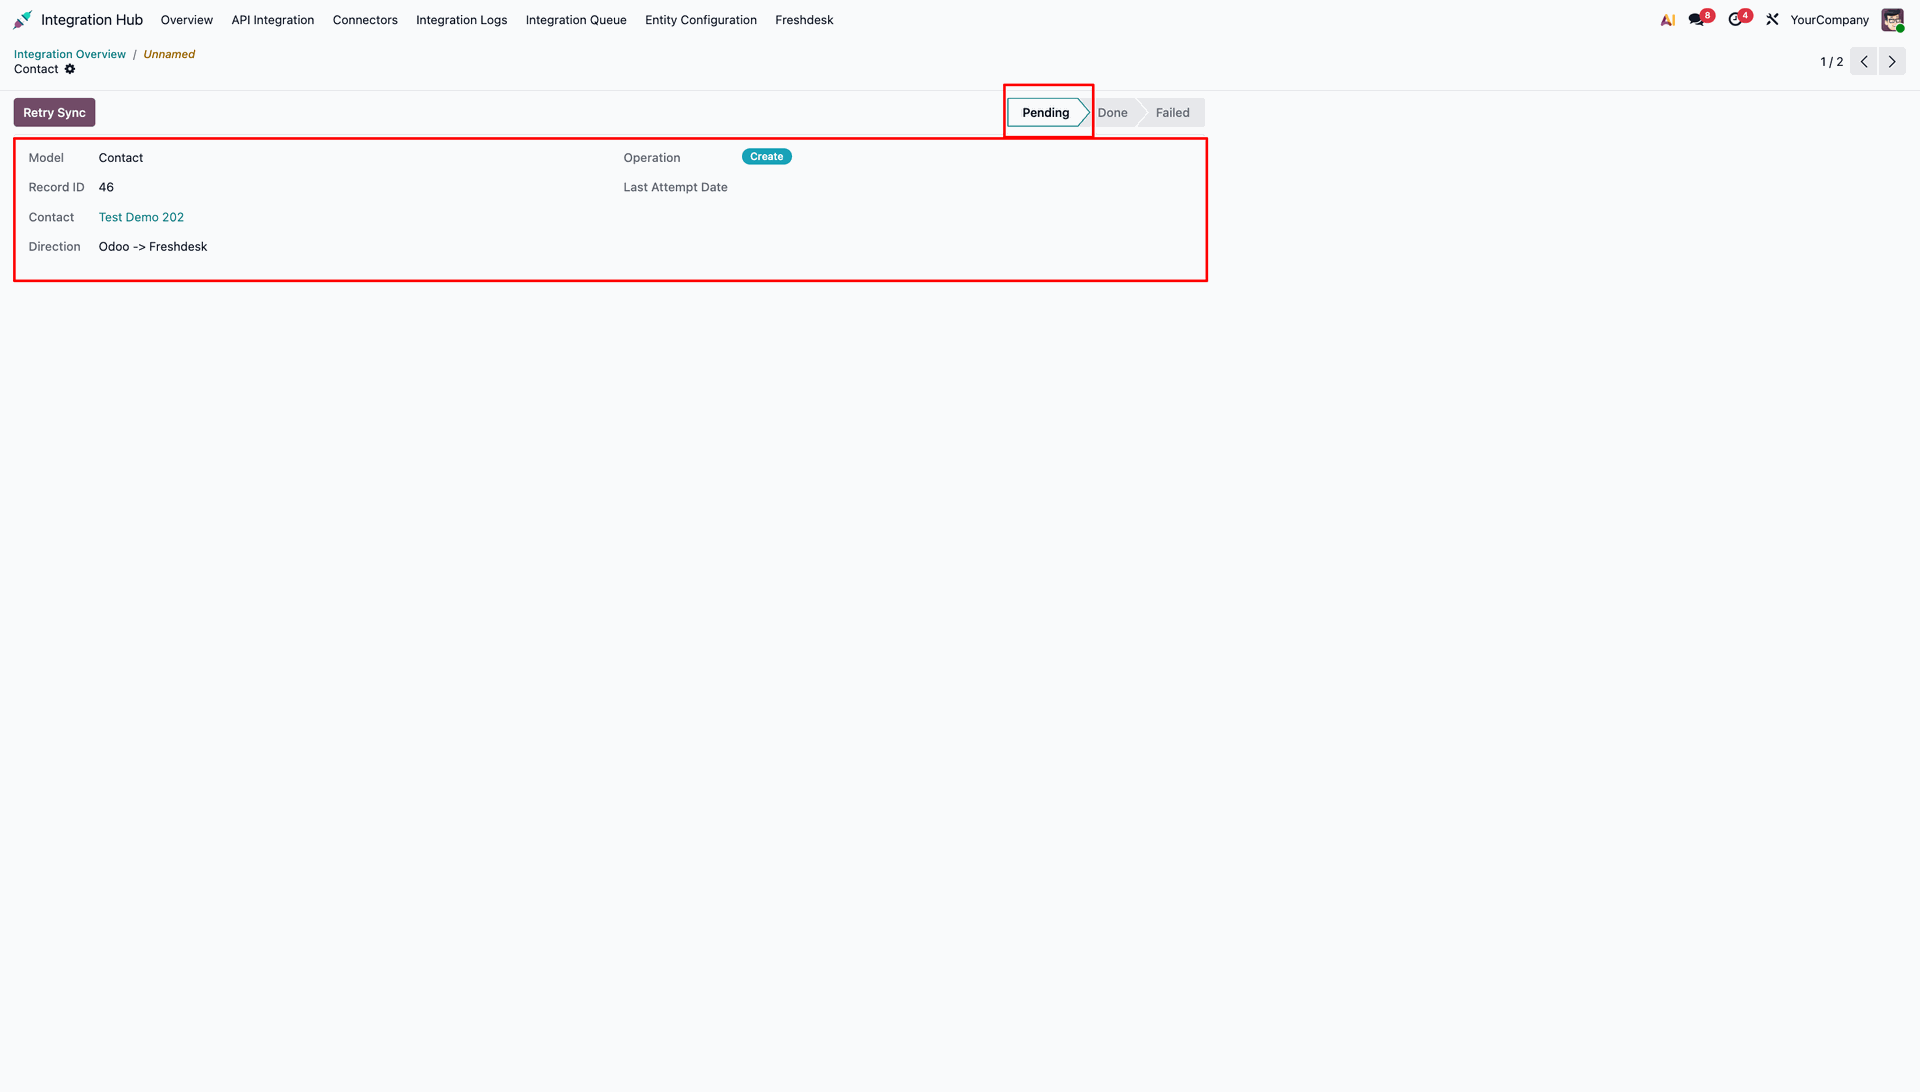
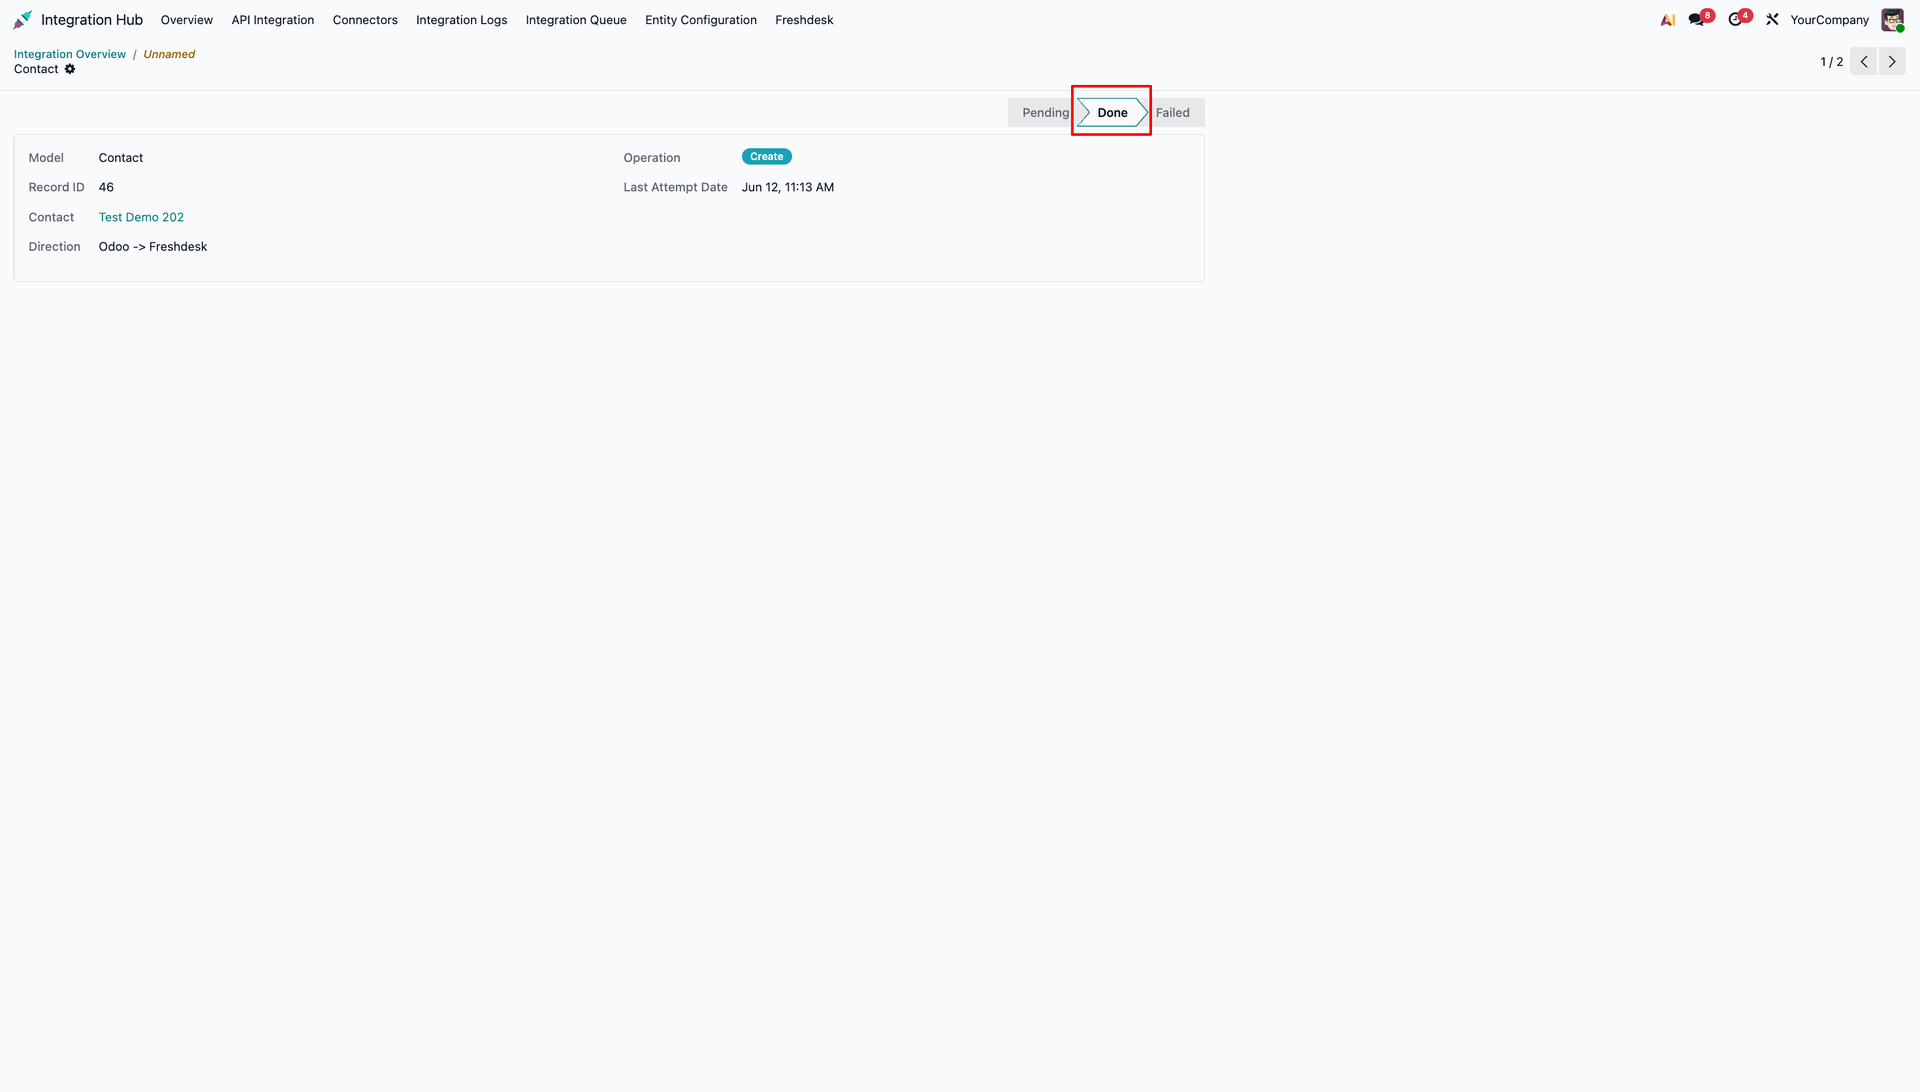
Click on a specific queue item to view its details, showing the Pending status and record information.
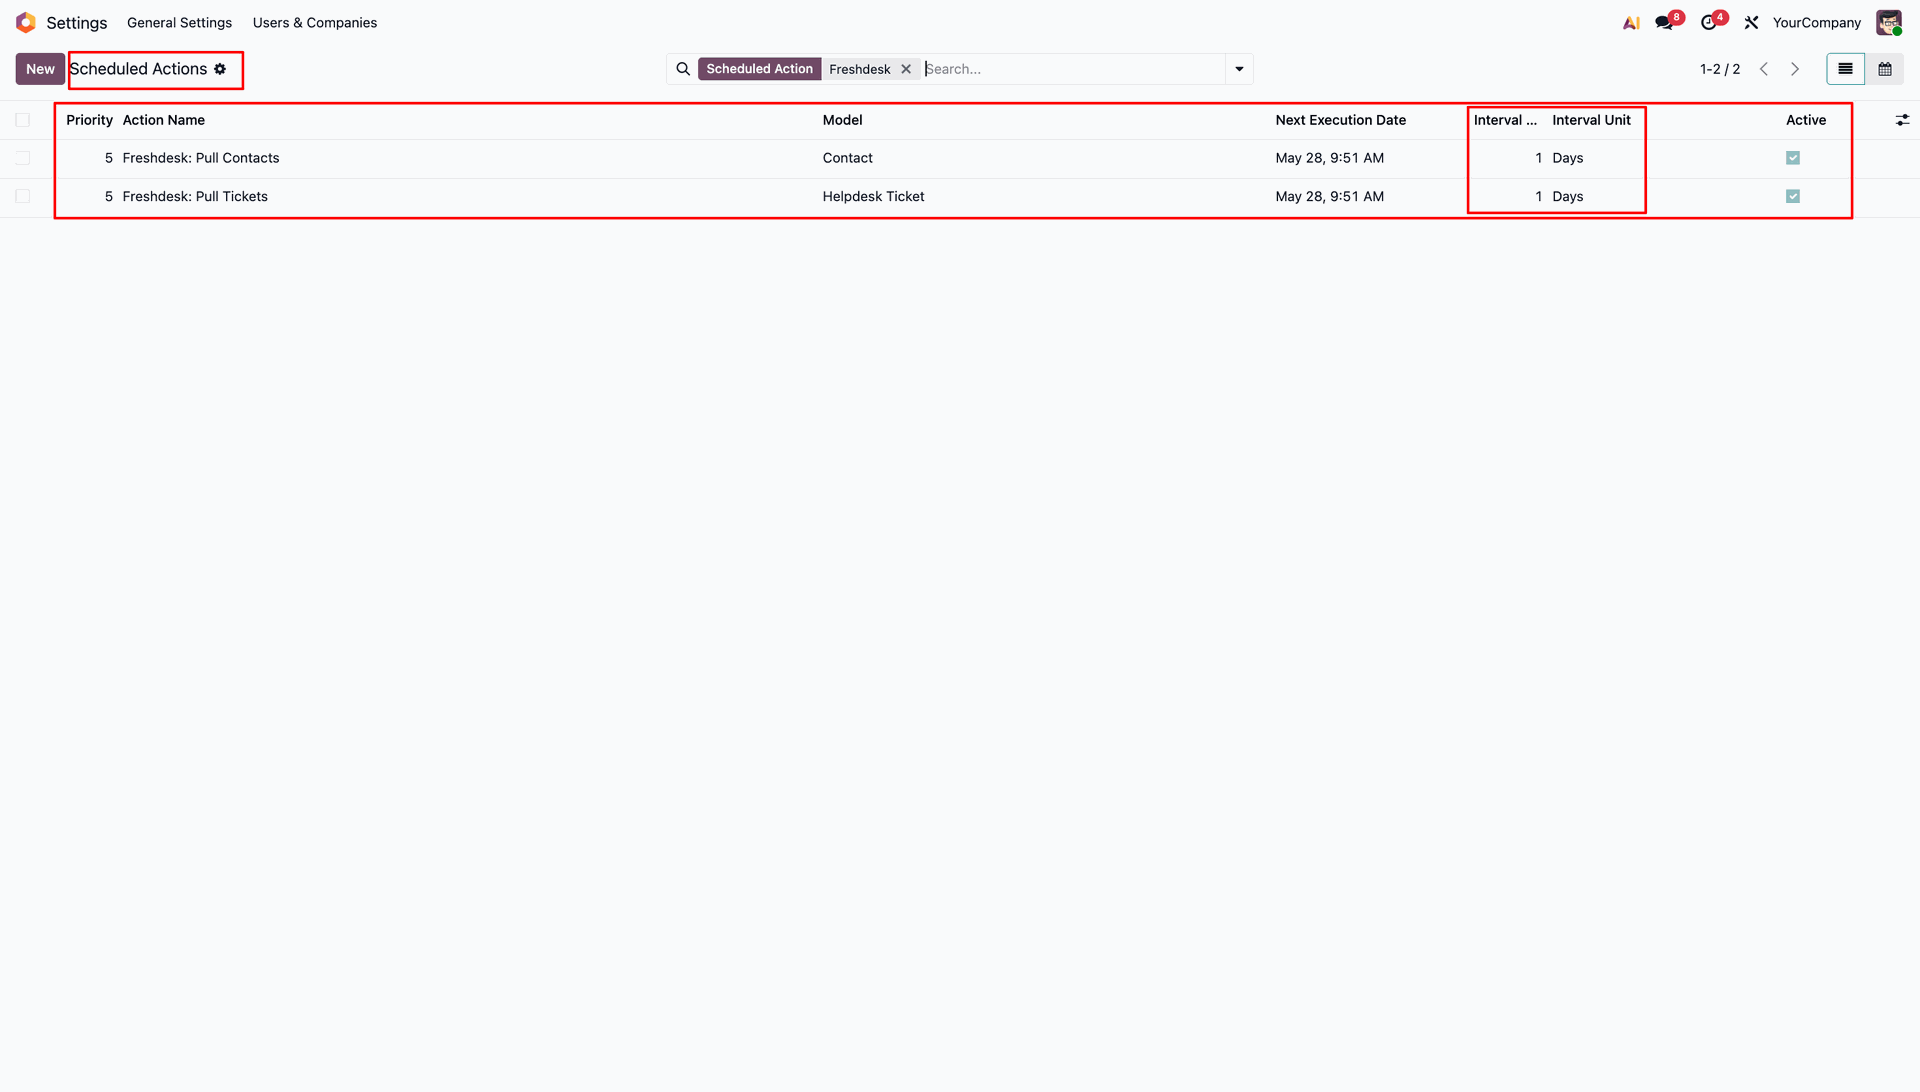
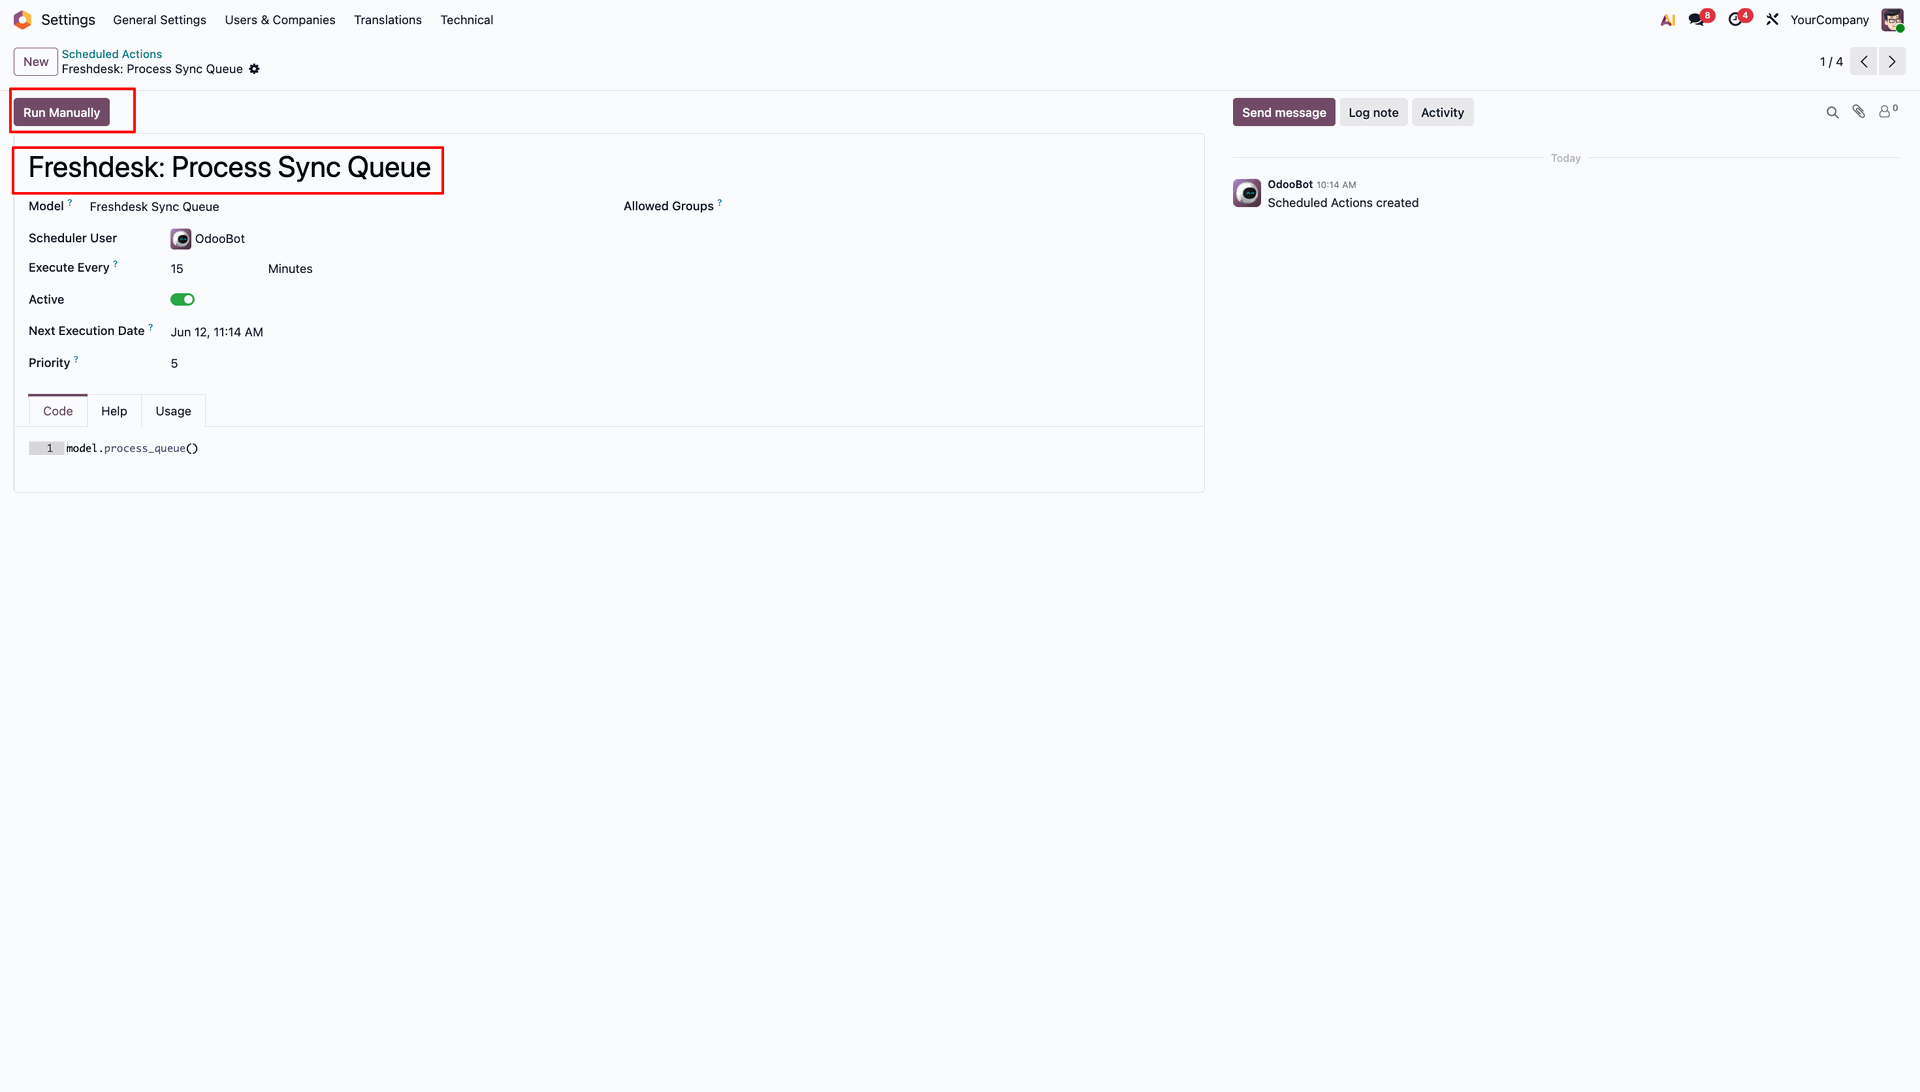
Navigate to Settings > Technical > Scheduled Actions and select the "Freshdesk: Process Sync Queue" action. Click "Run Manually" to process the queue.
Once processed, the queue item's status will update to "Done".
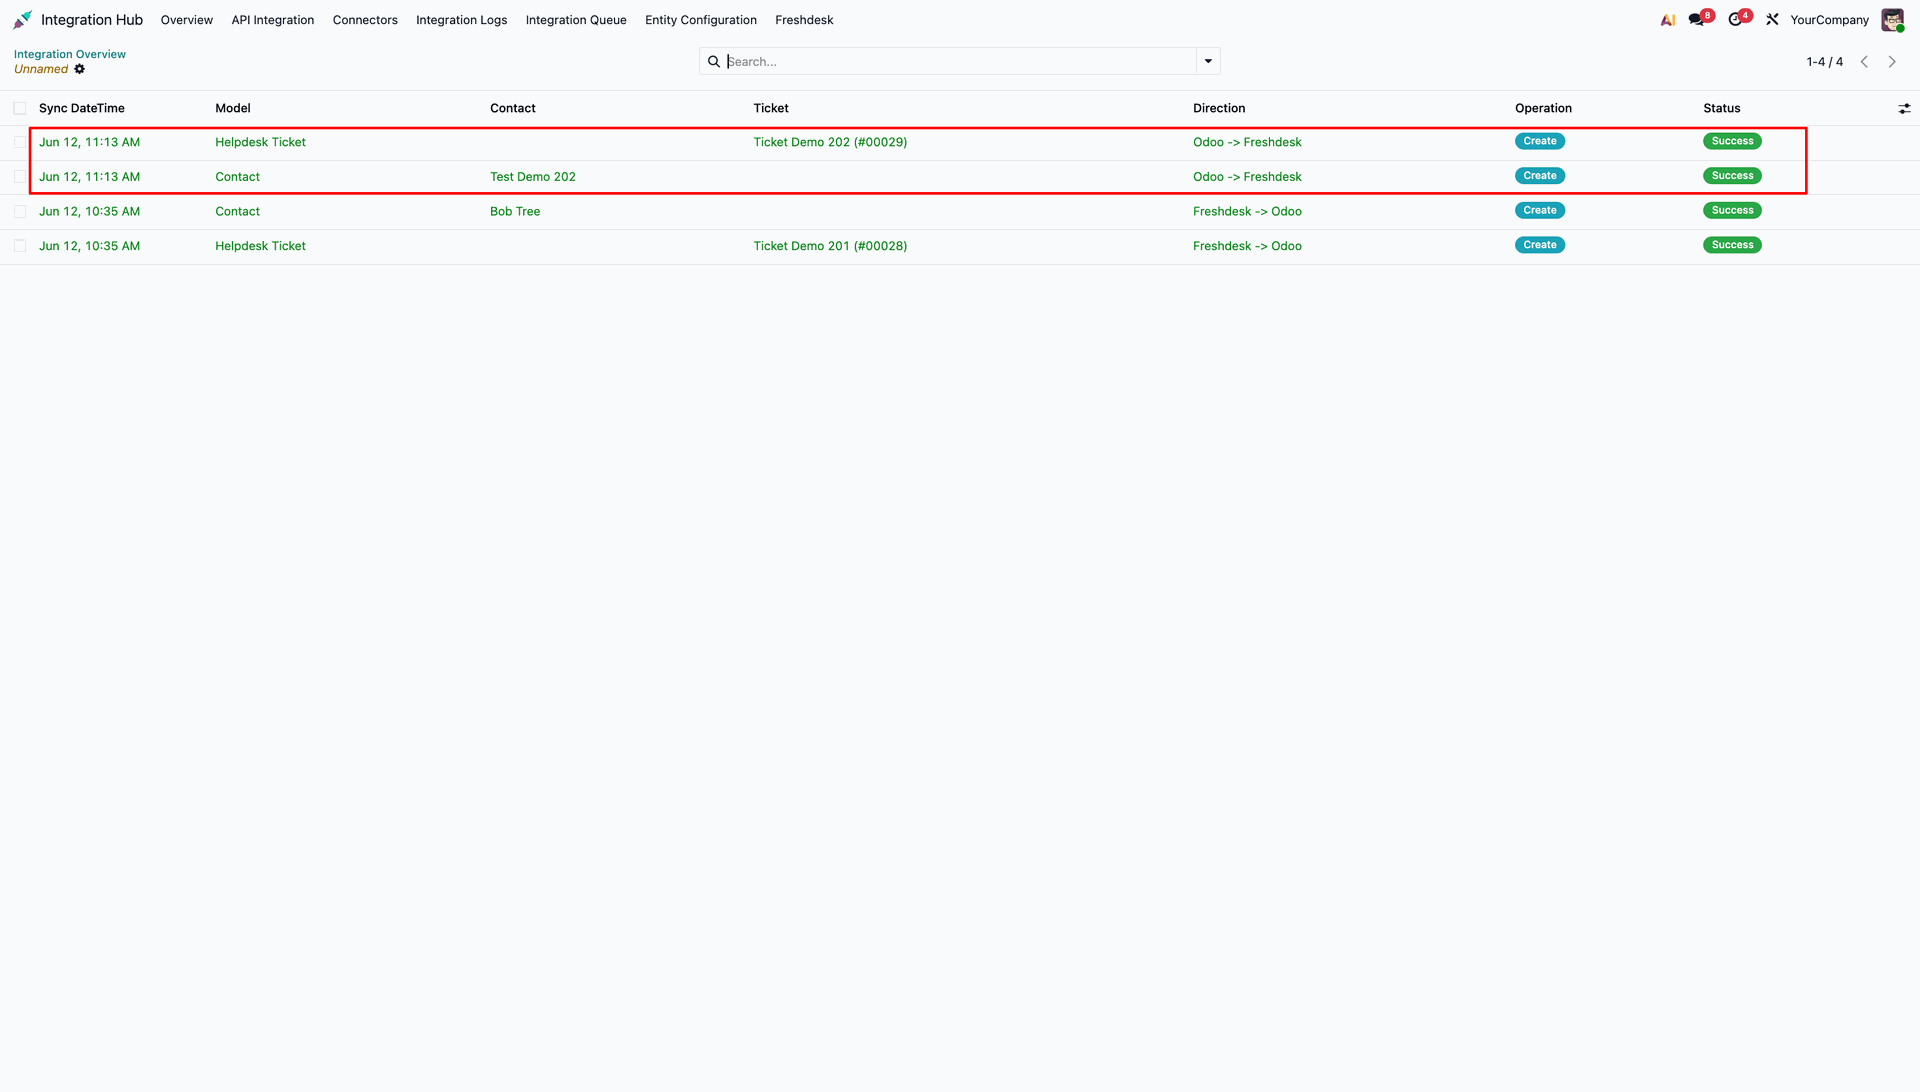
The Integration Queue list will now display the processed records with a "Success" status.
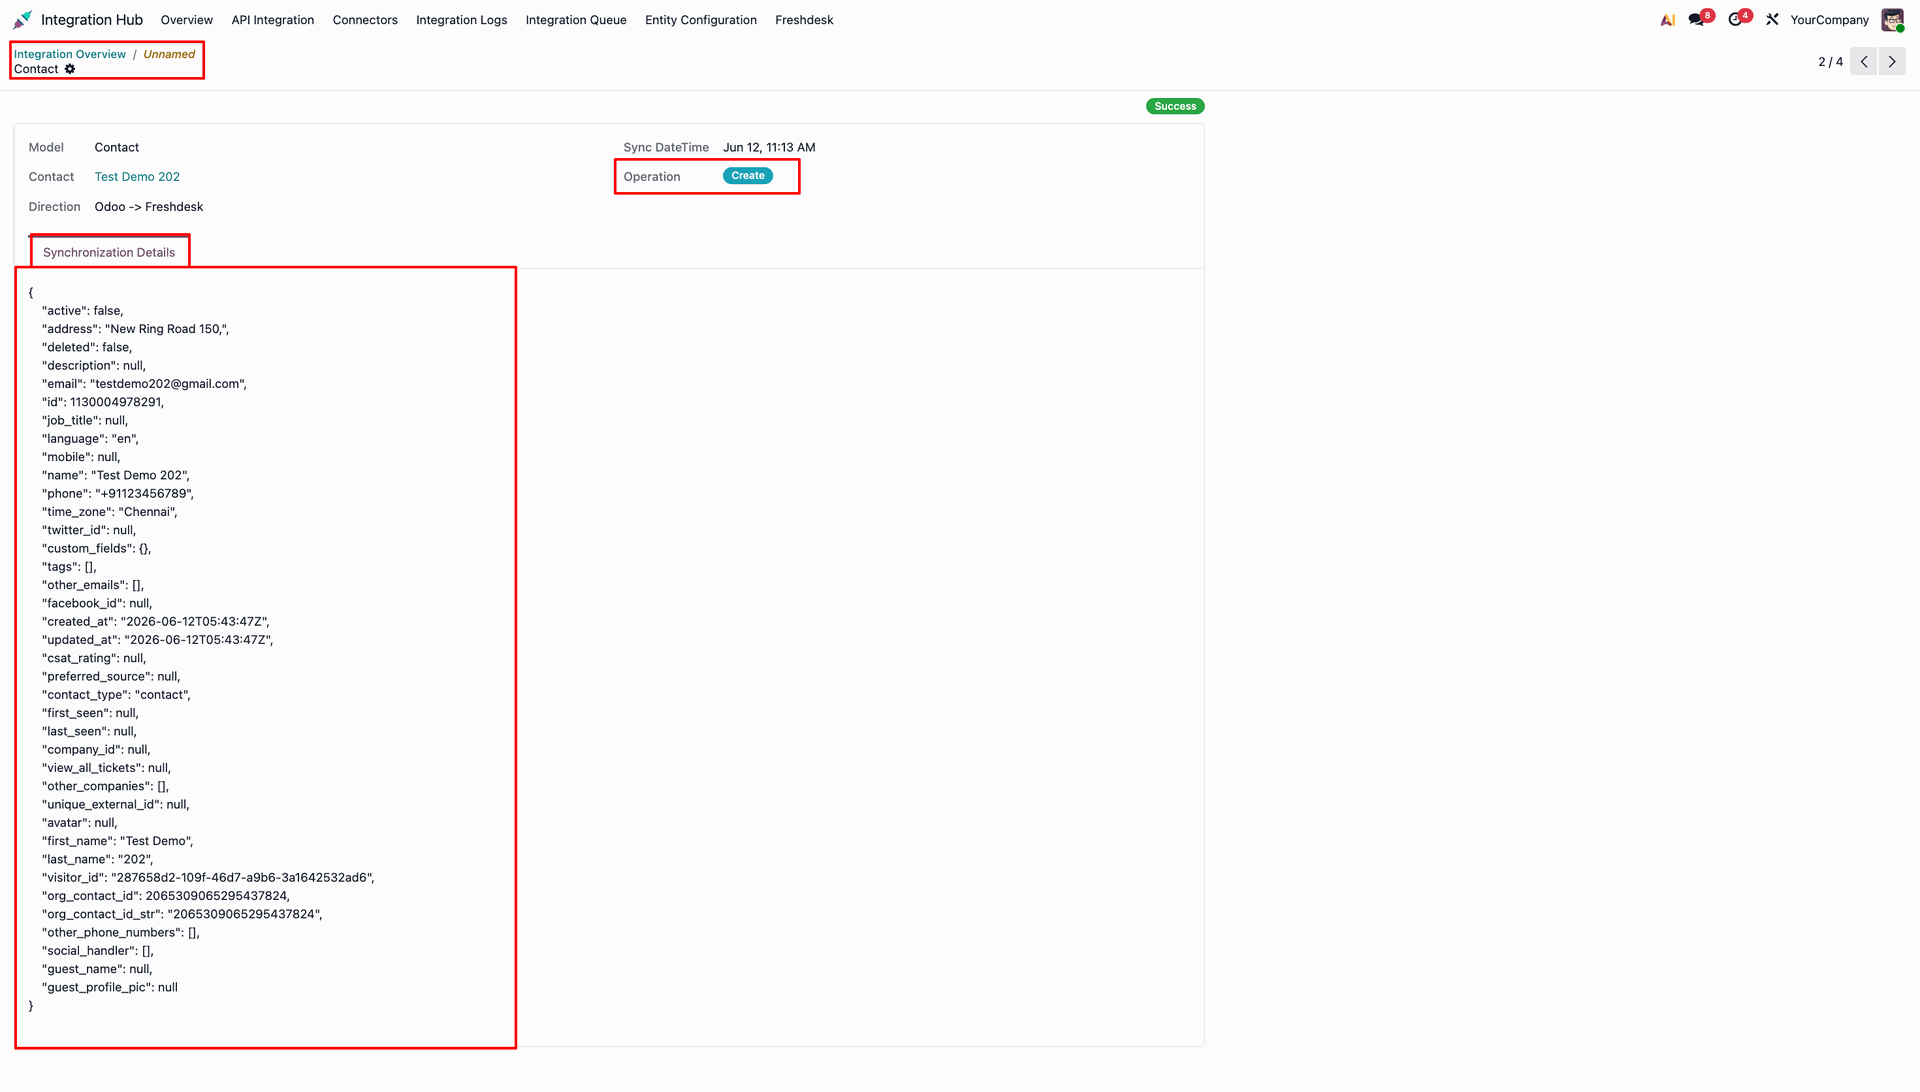
You can view the detailed logs.
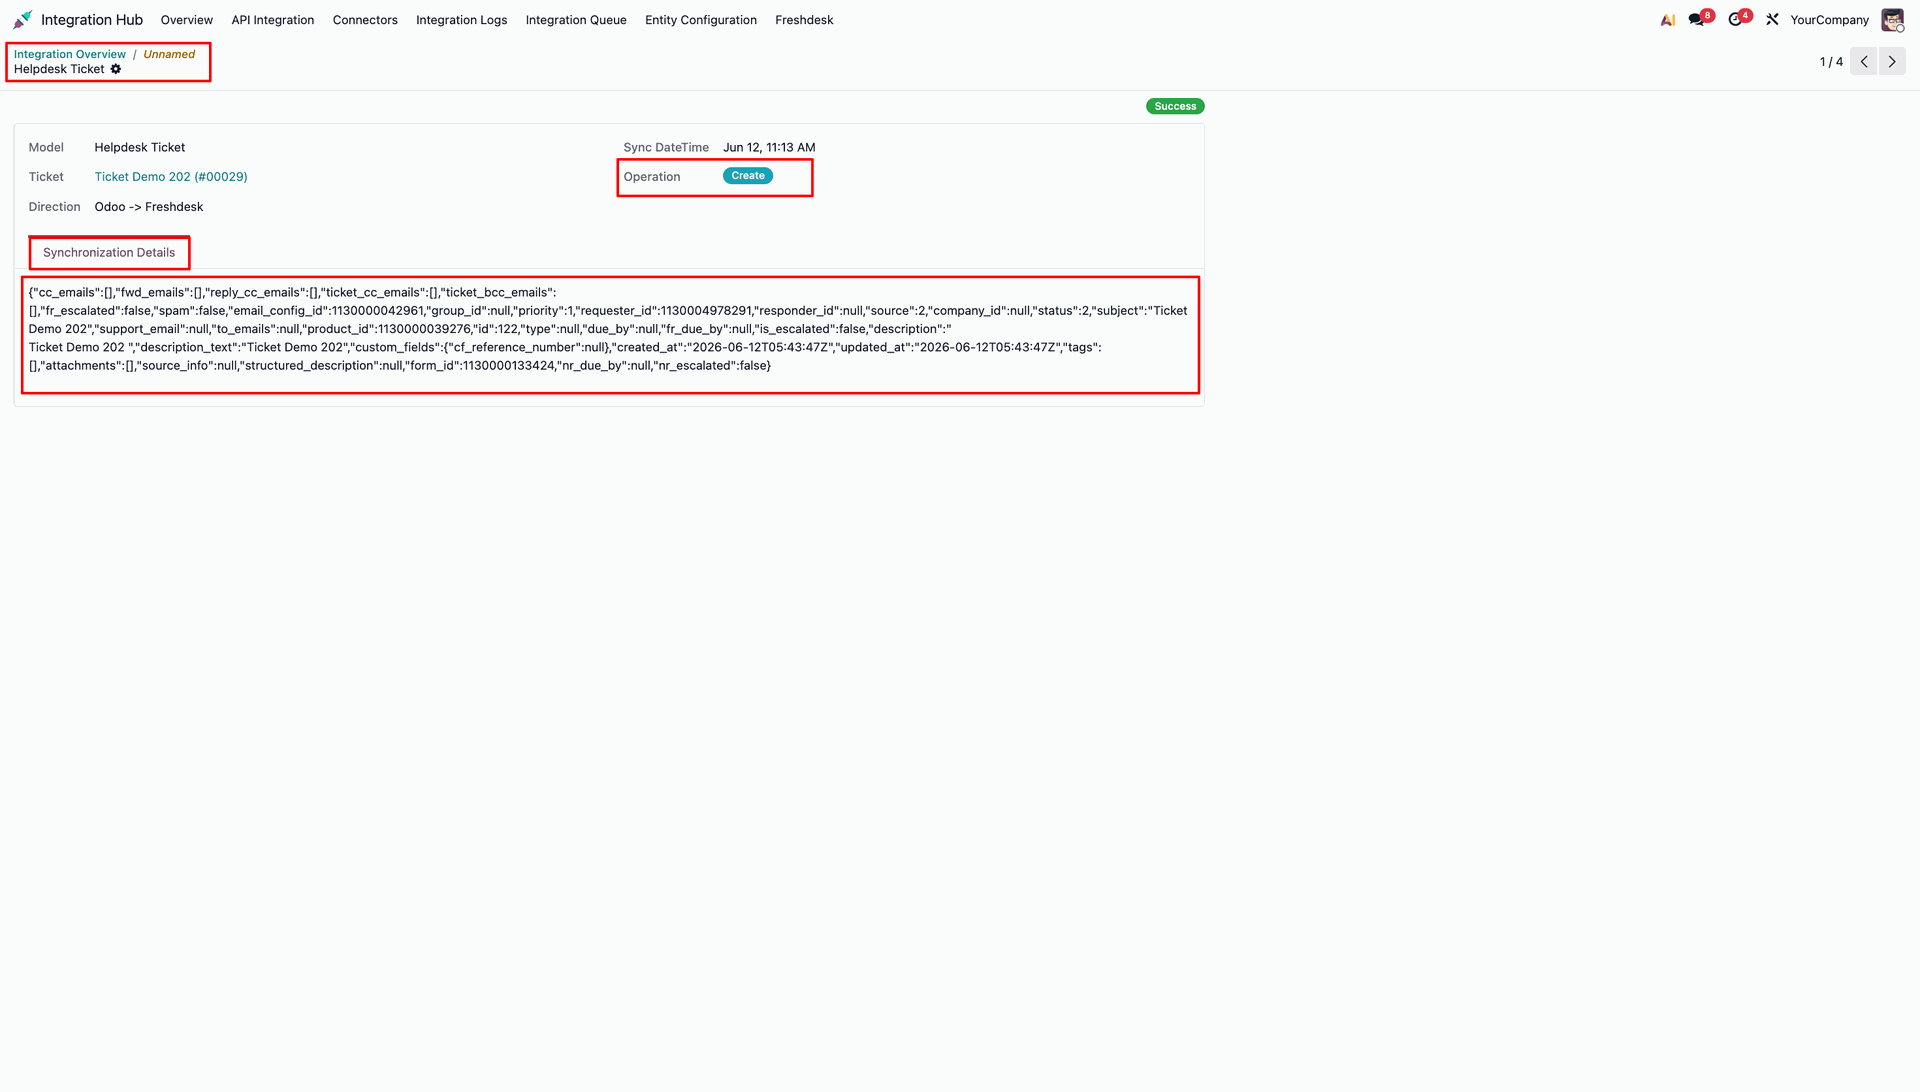
Similarly, you can view the synchronization details for the ticket.
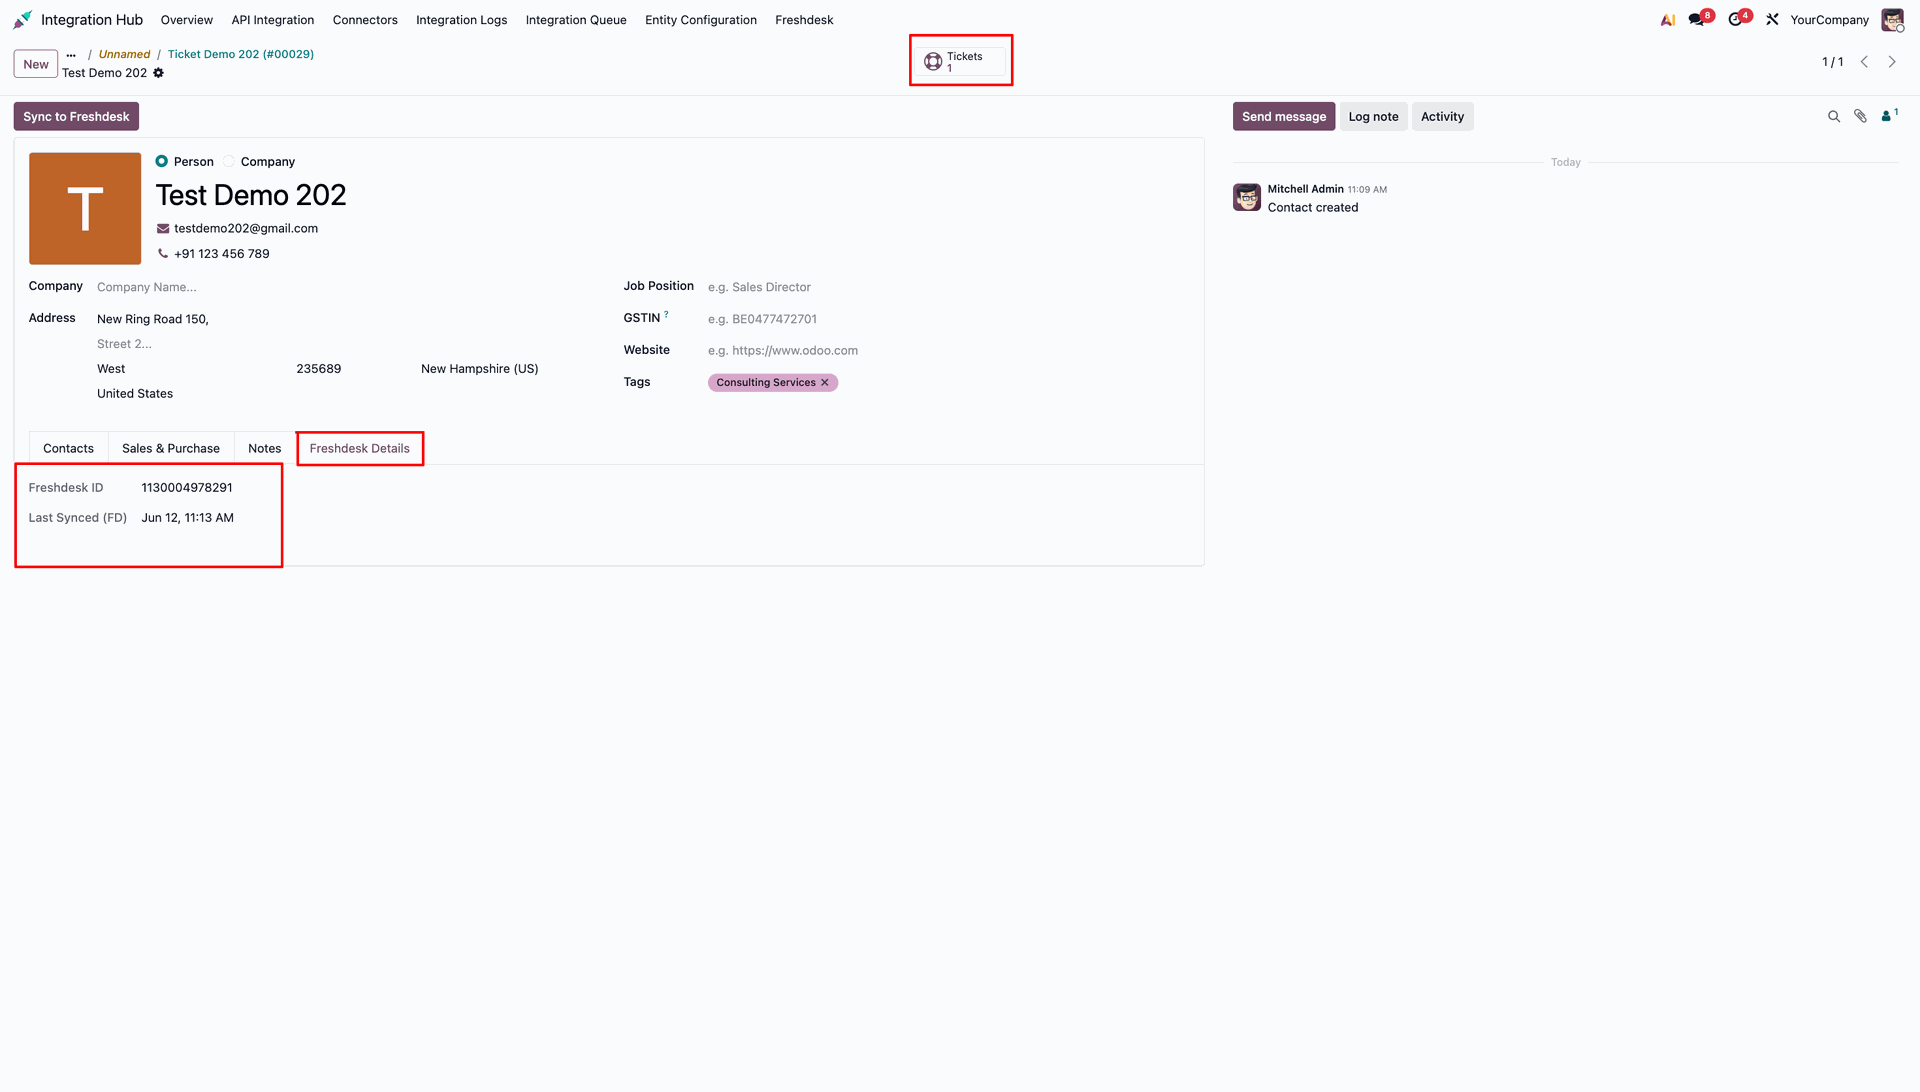
On the Contact form, the "Freshdesk Details" tab will now populate with the corresponding "Freshdesk ID" and "Last Synced (FD)" timestamp.
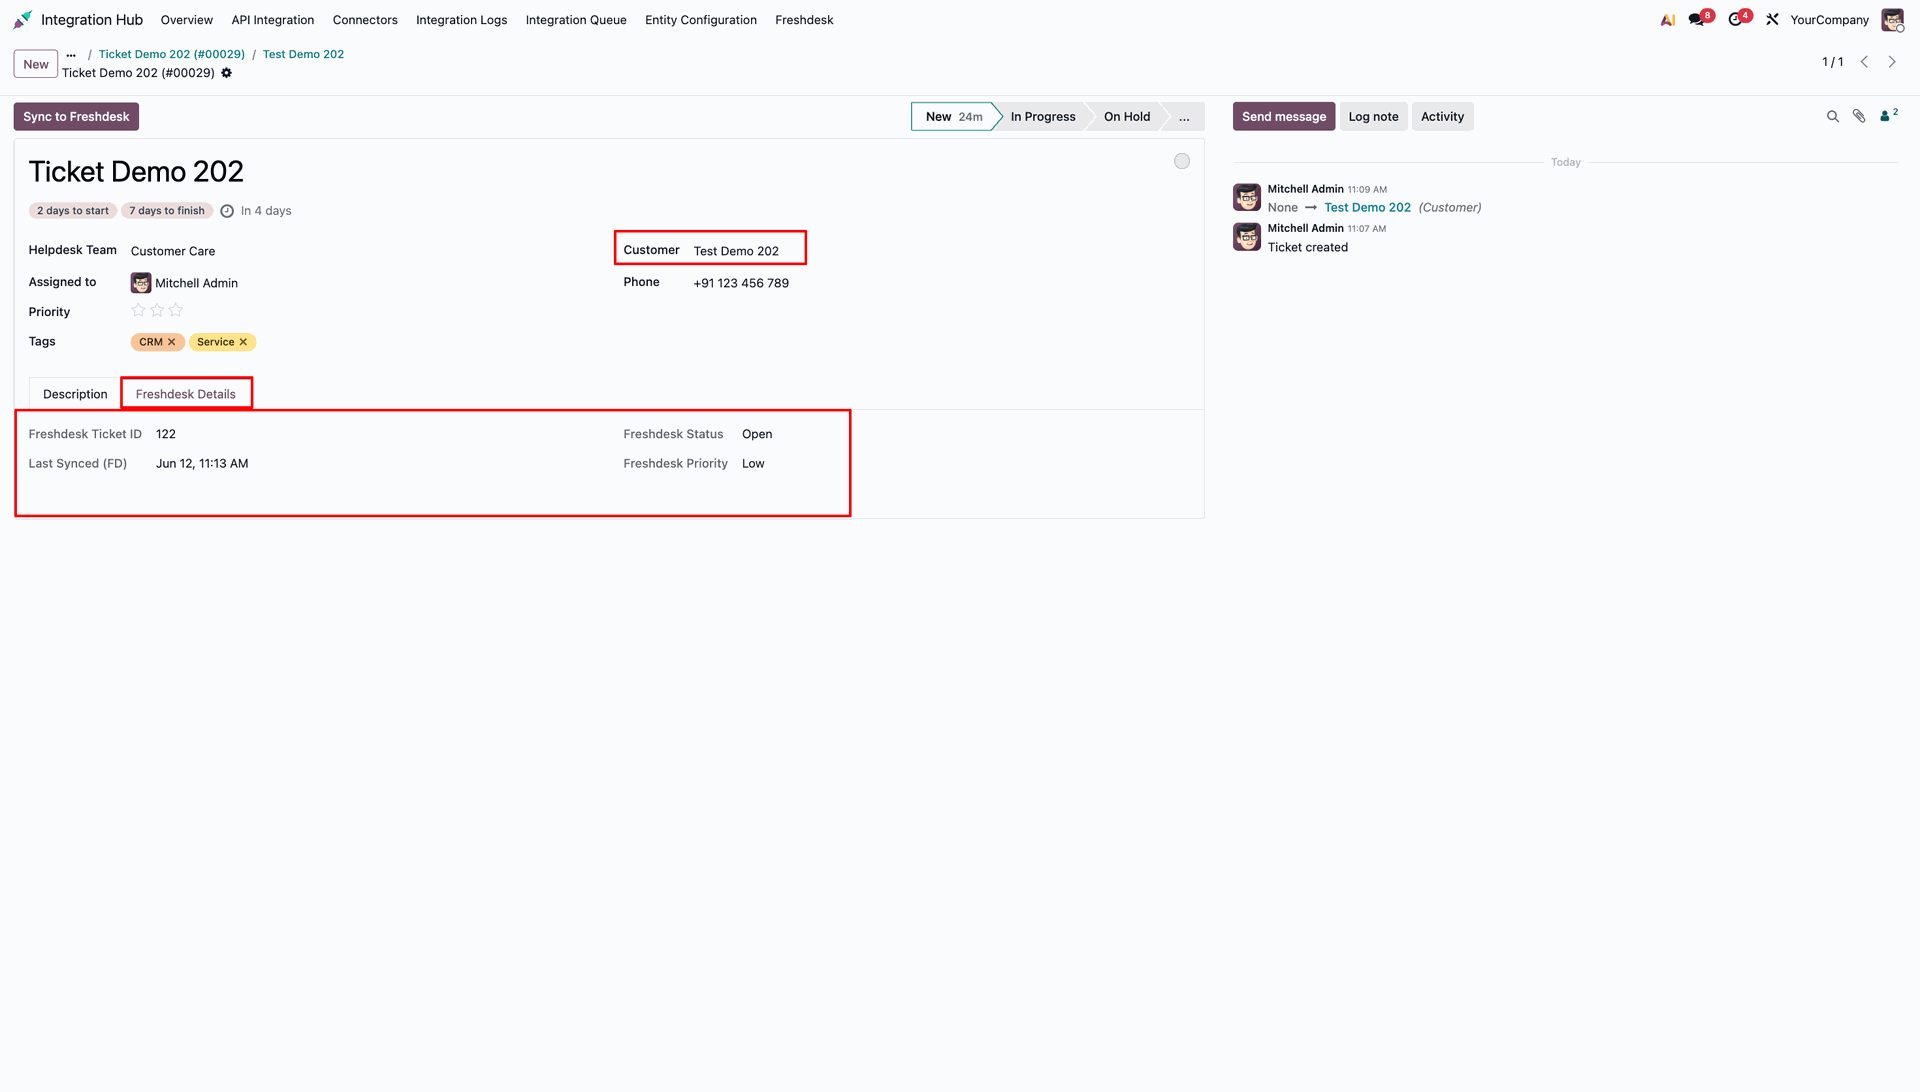
On the Helpdesk Ticket form, the "Freshdesk Details" tab will display the "Freshdesk Ticket ID", "Last Synced (FD)" timestamp, along with Freshdesk Status and Priority.
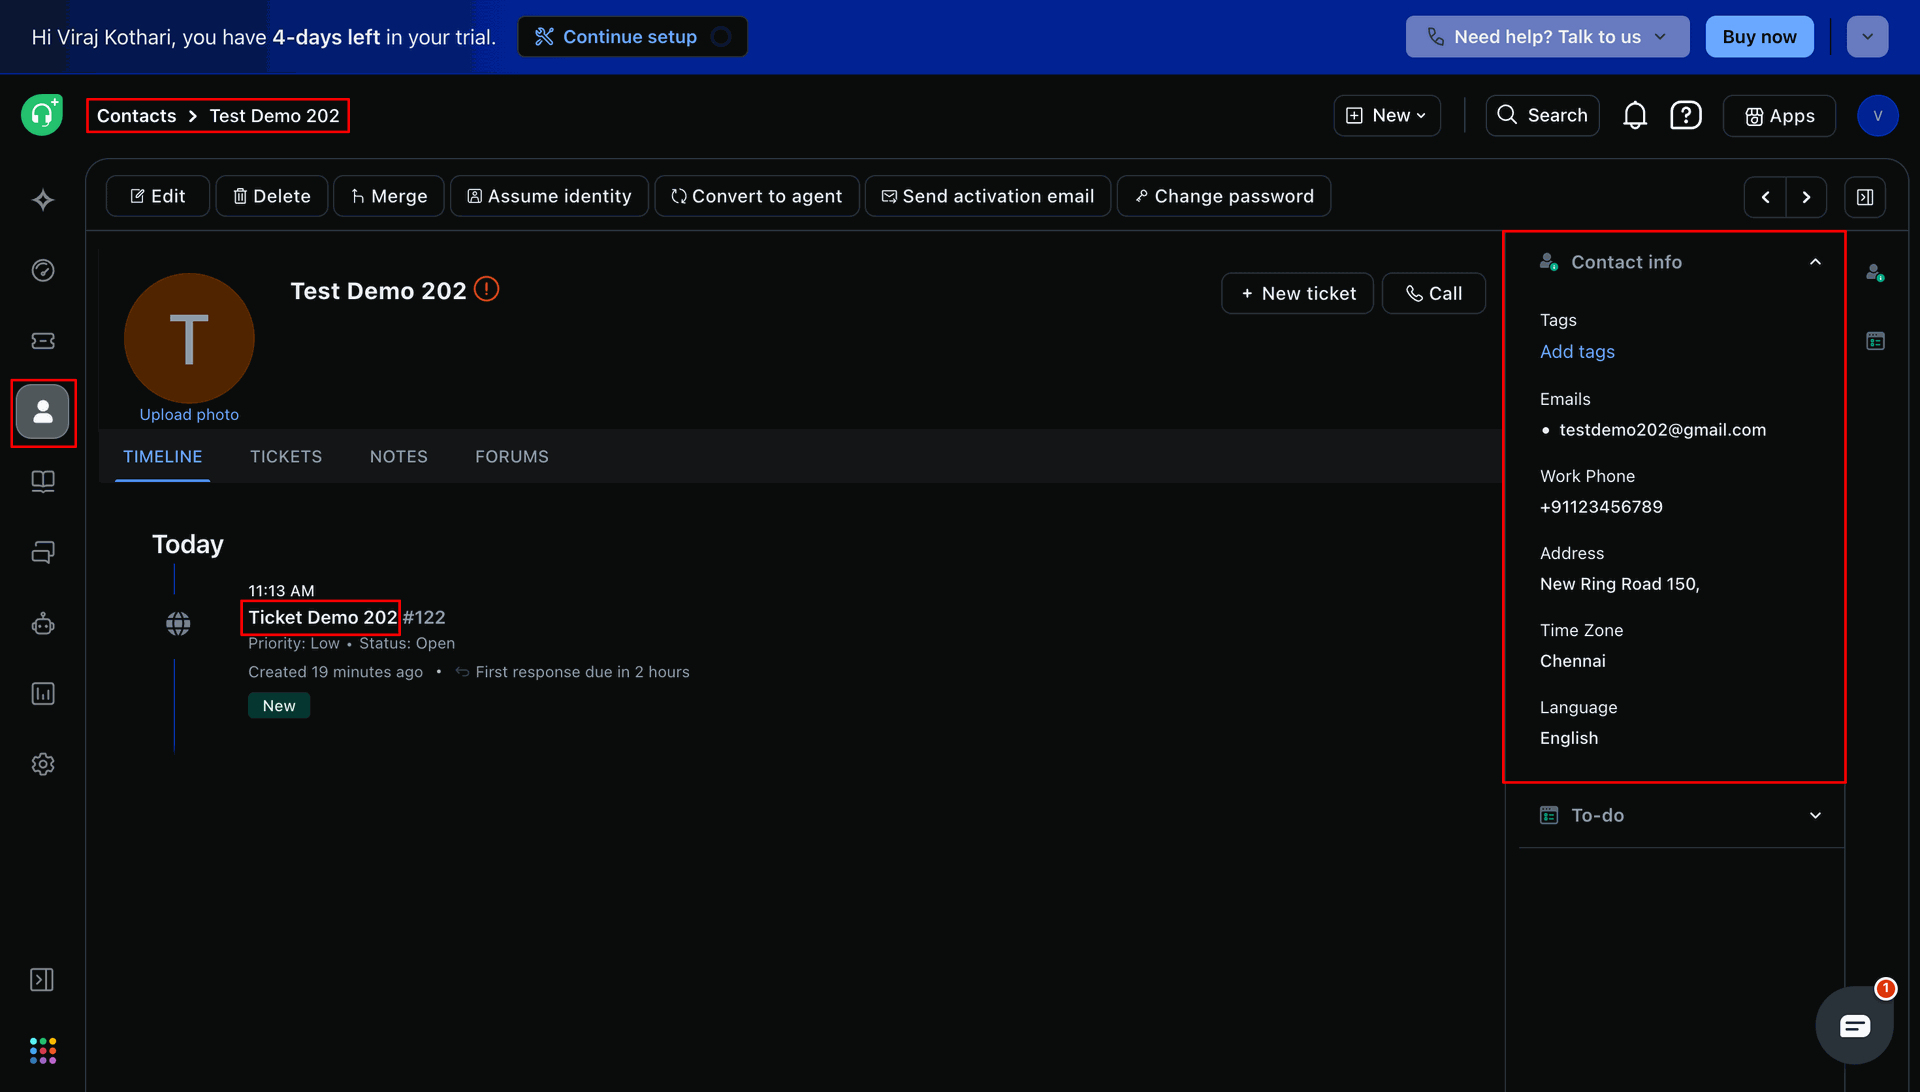
In your Freshdesk portal, the synchronized Contact will appear under the Contacts section with the exported details.
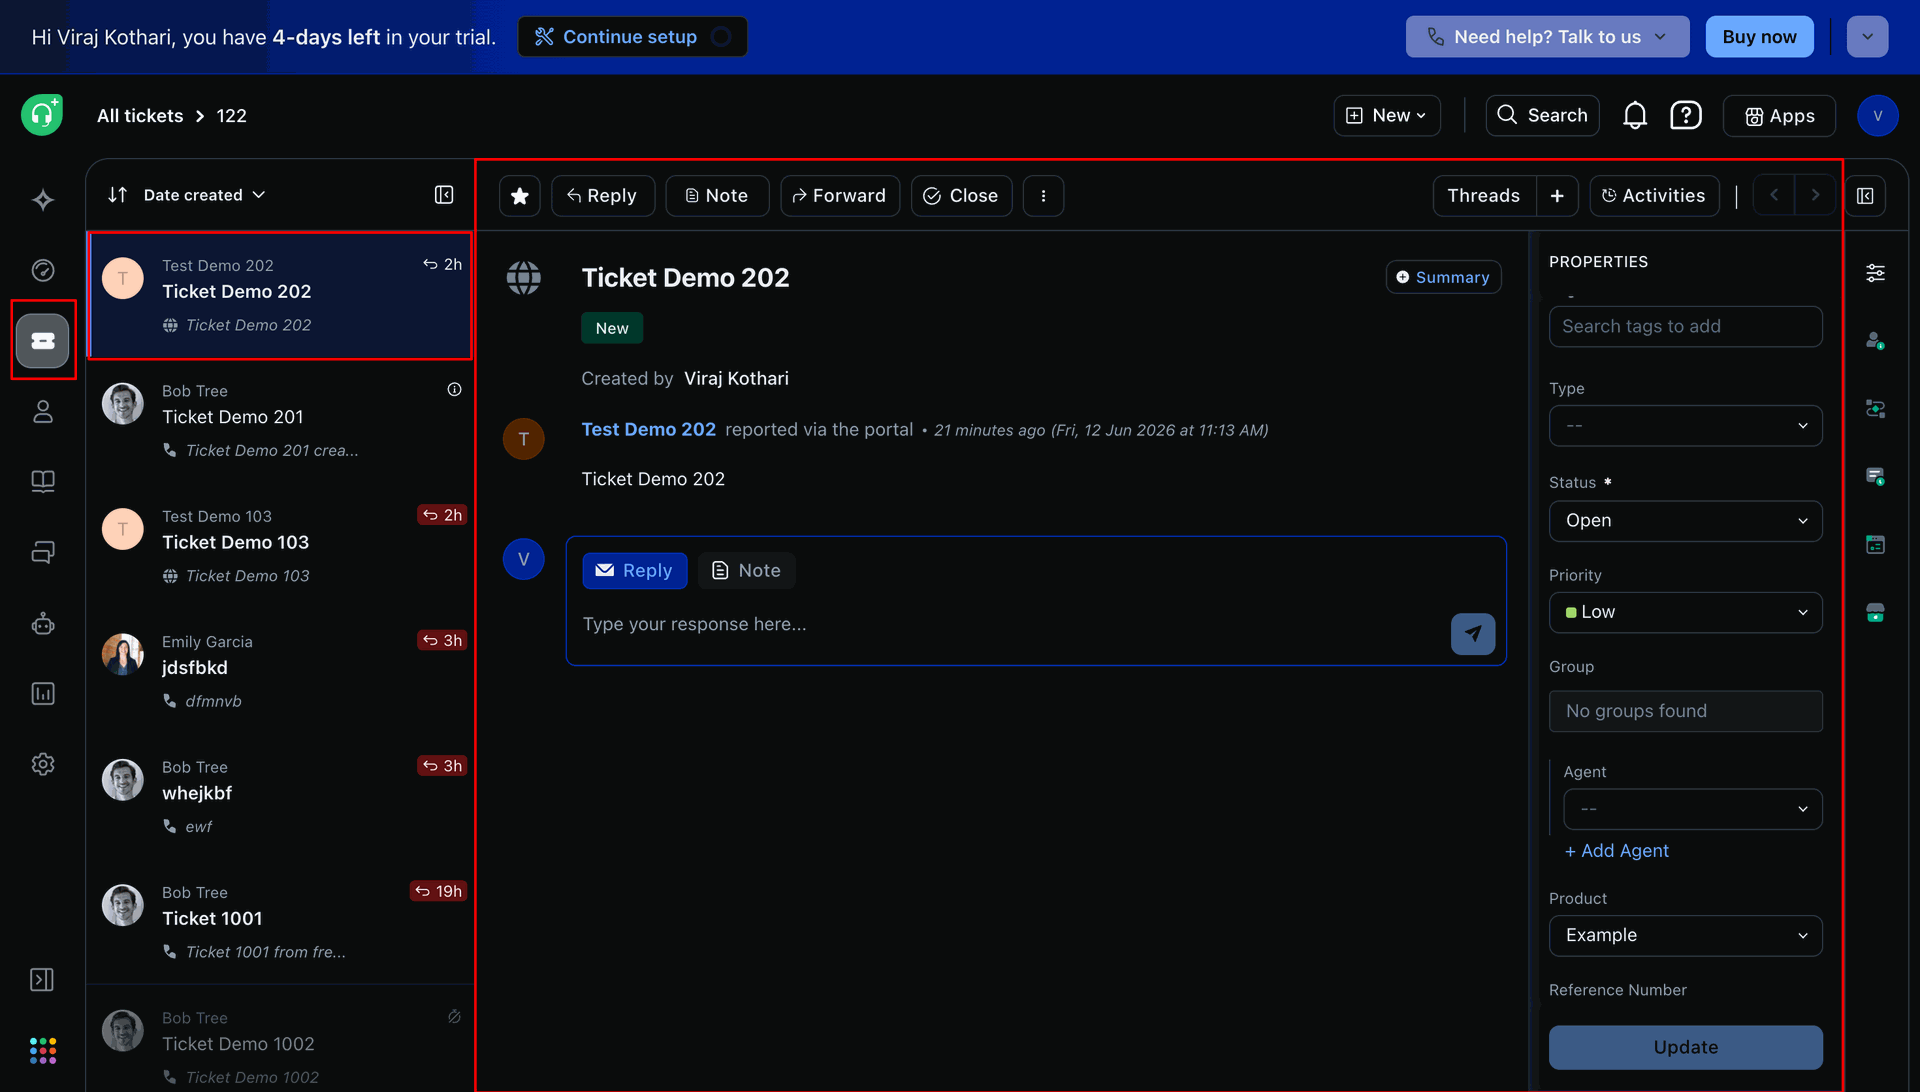
Similarly, the synchronized Ticket will appear under the Tickets section in Freshdesk, linked to the corresponding contact.
Workflow
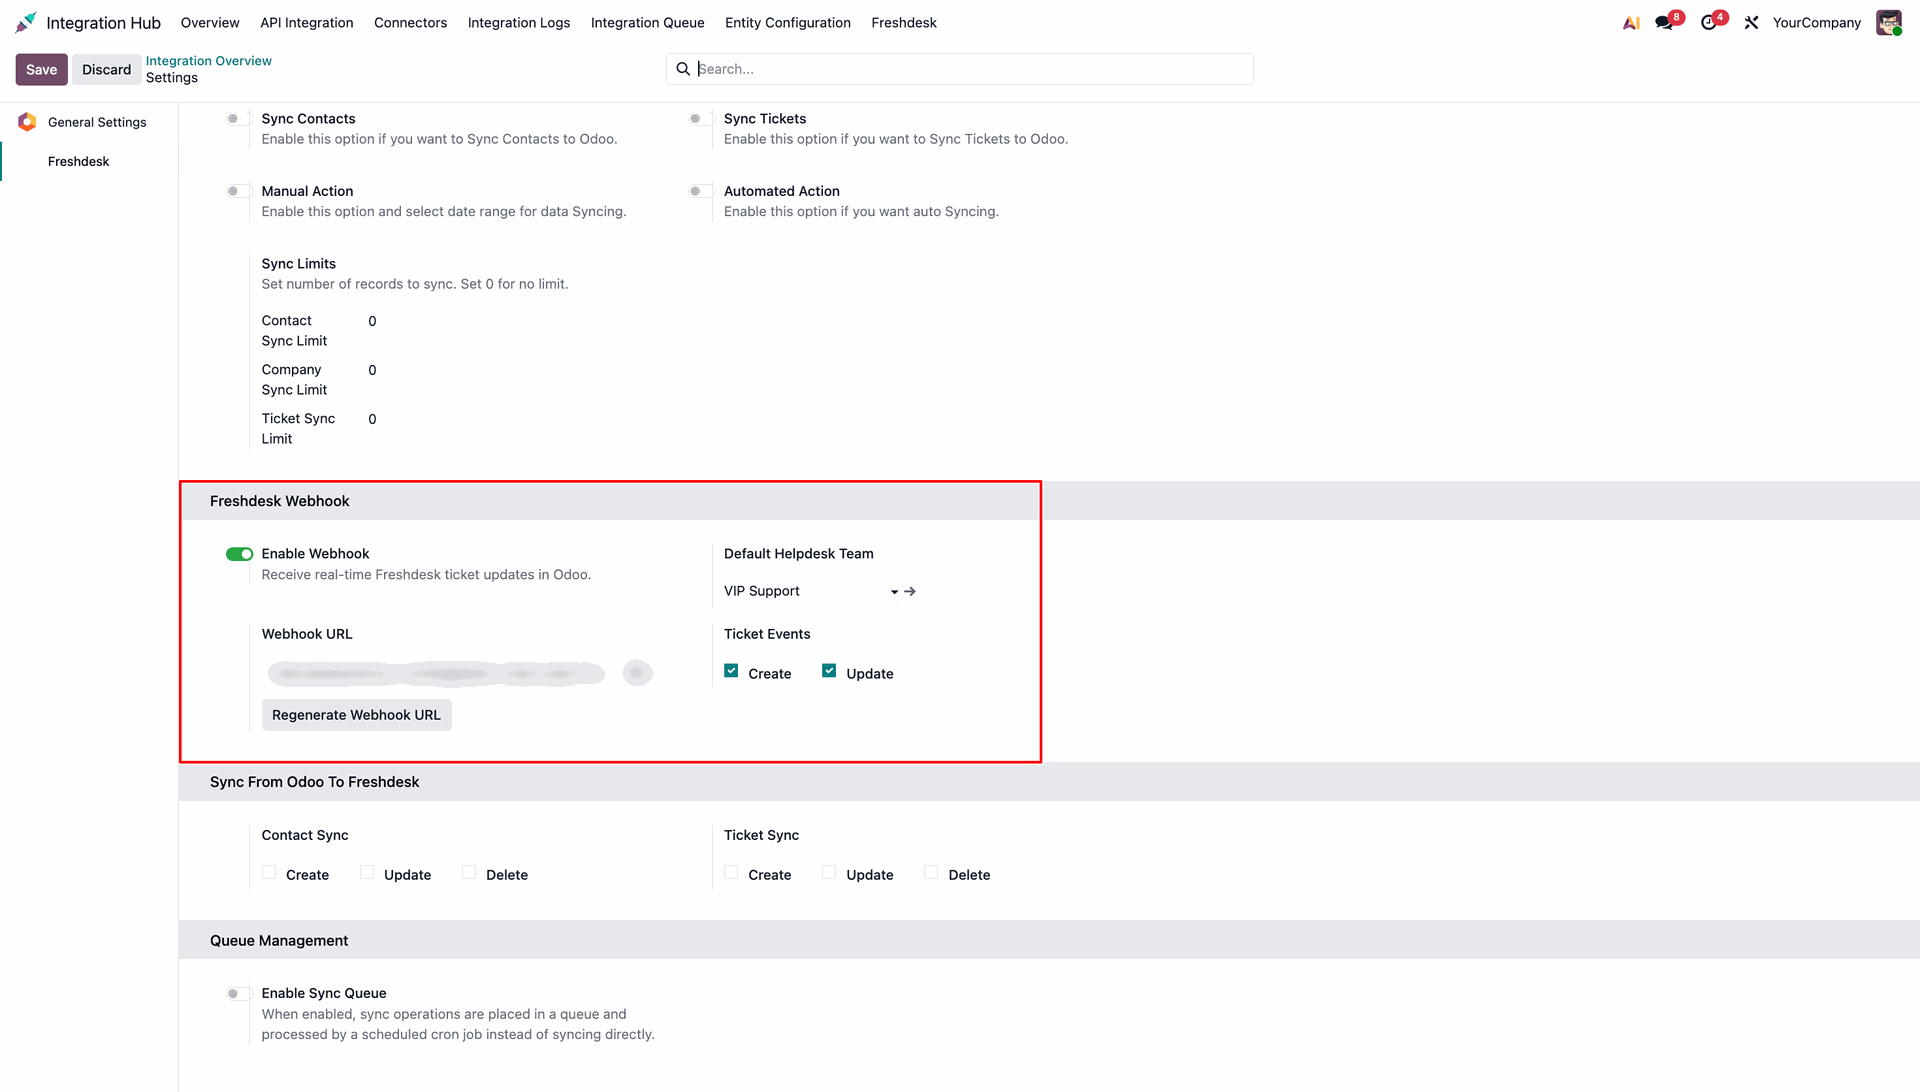
Navigate to Integration Hub > Freshdesk Settings and enable the "Enable Webhook" option to receive real-time updates from Freshdesk.
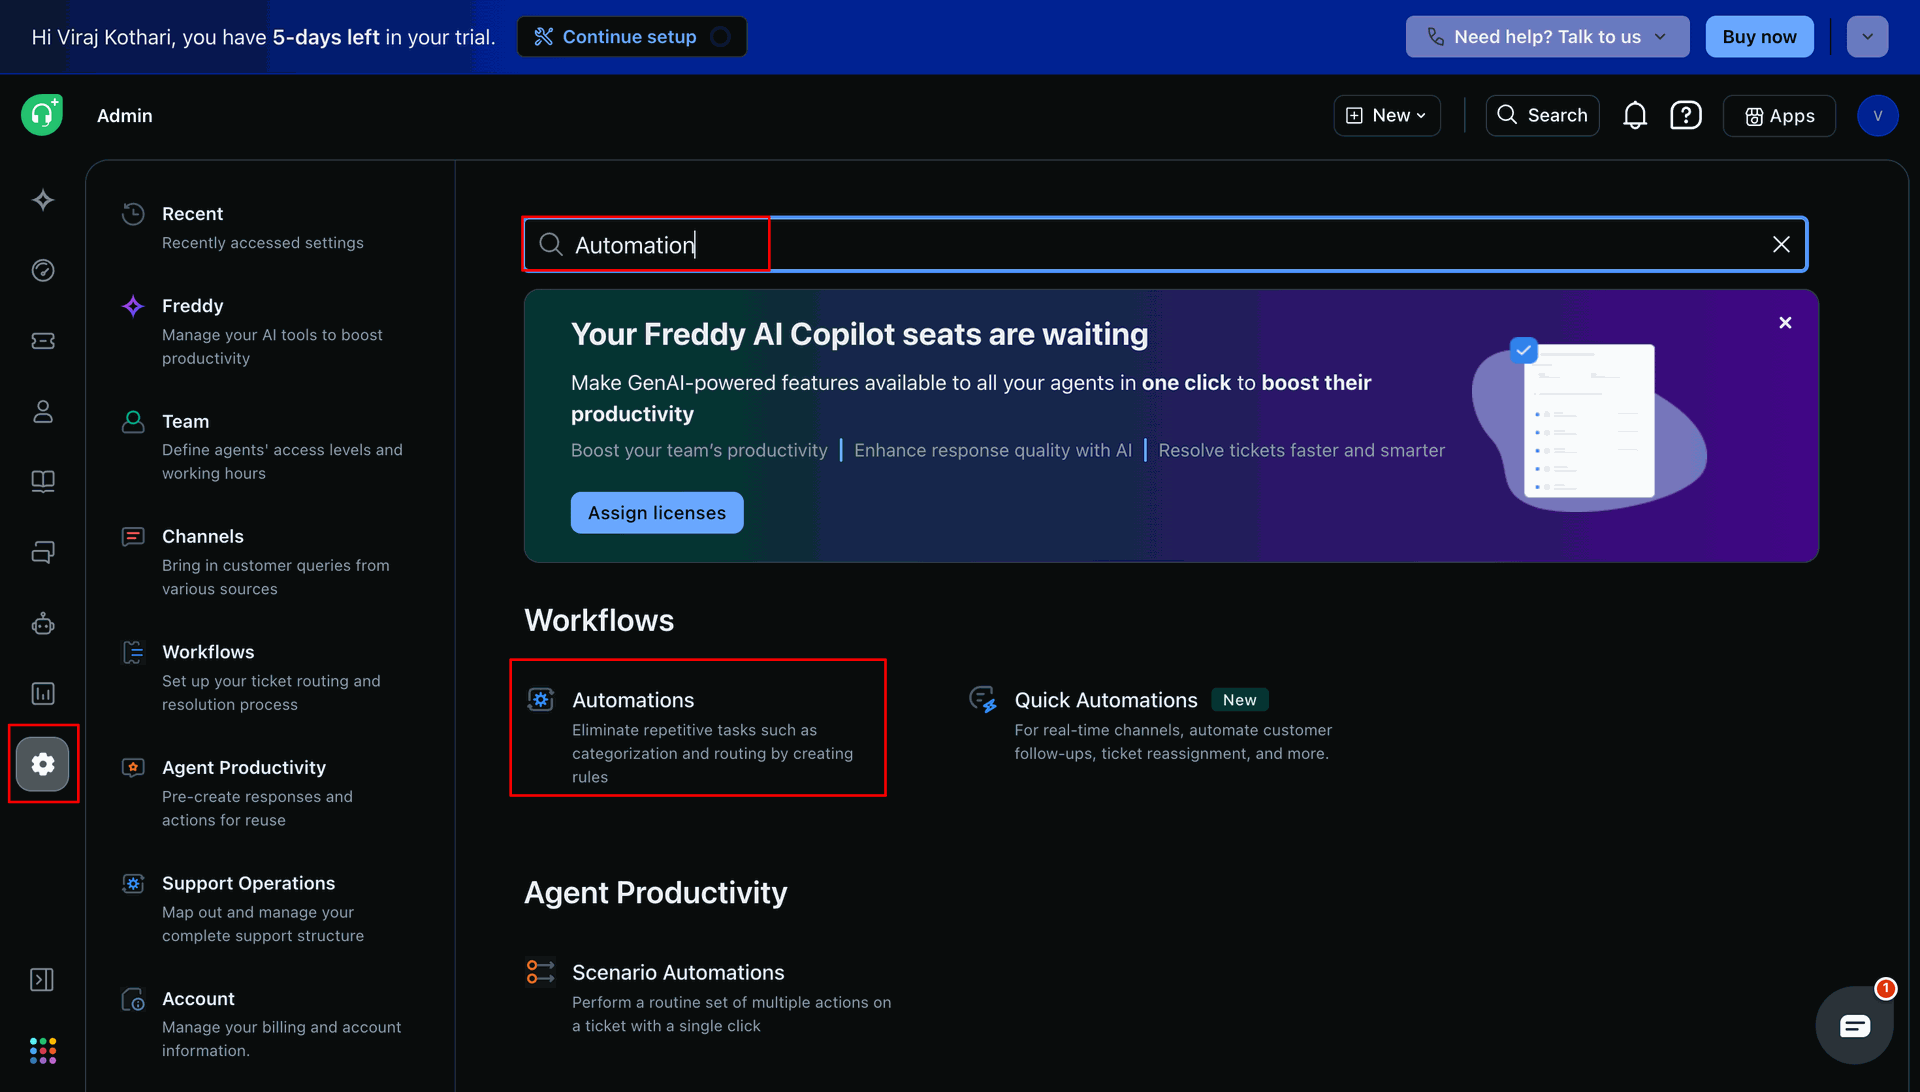
In Freshdesk, navigate to Admin > Workflows > Automations.
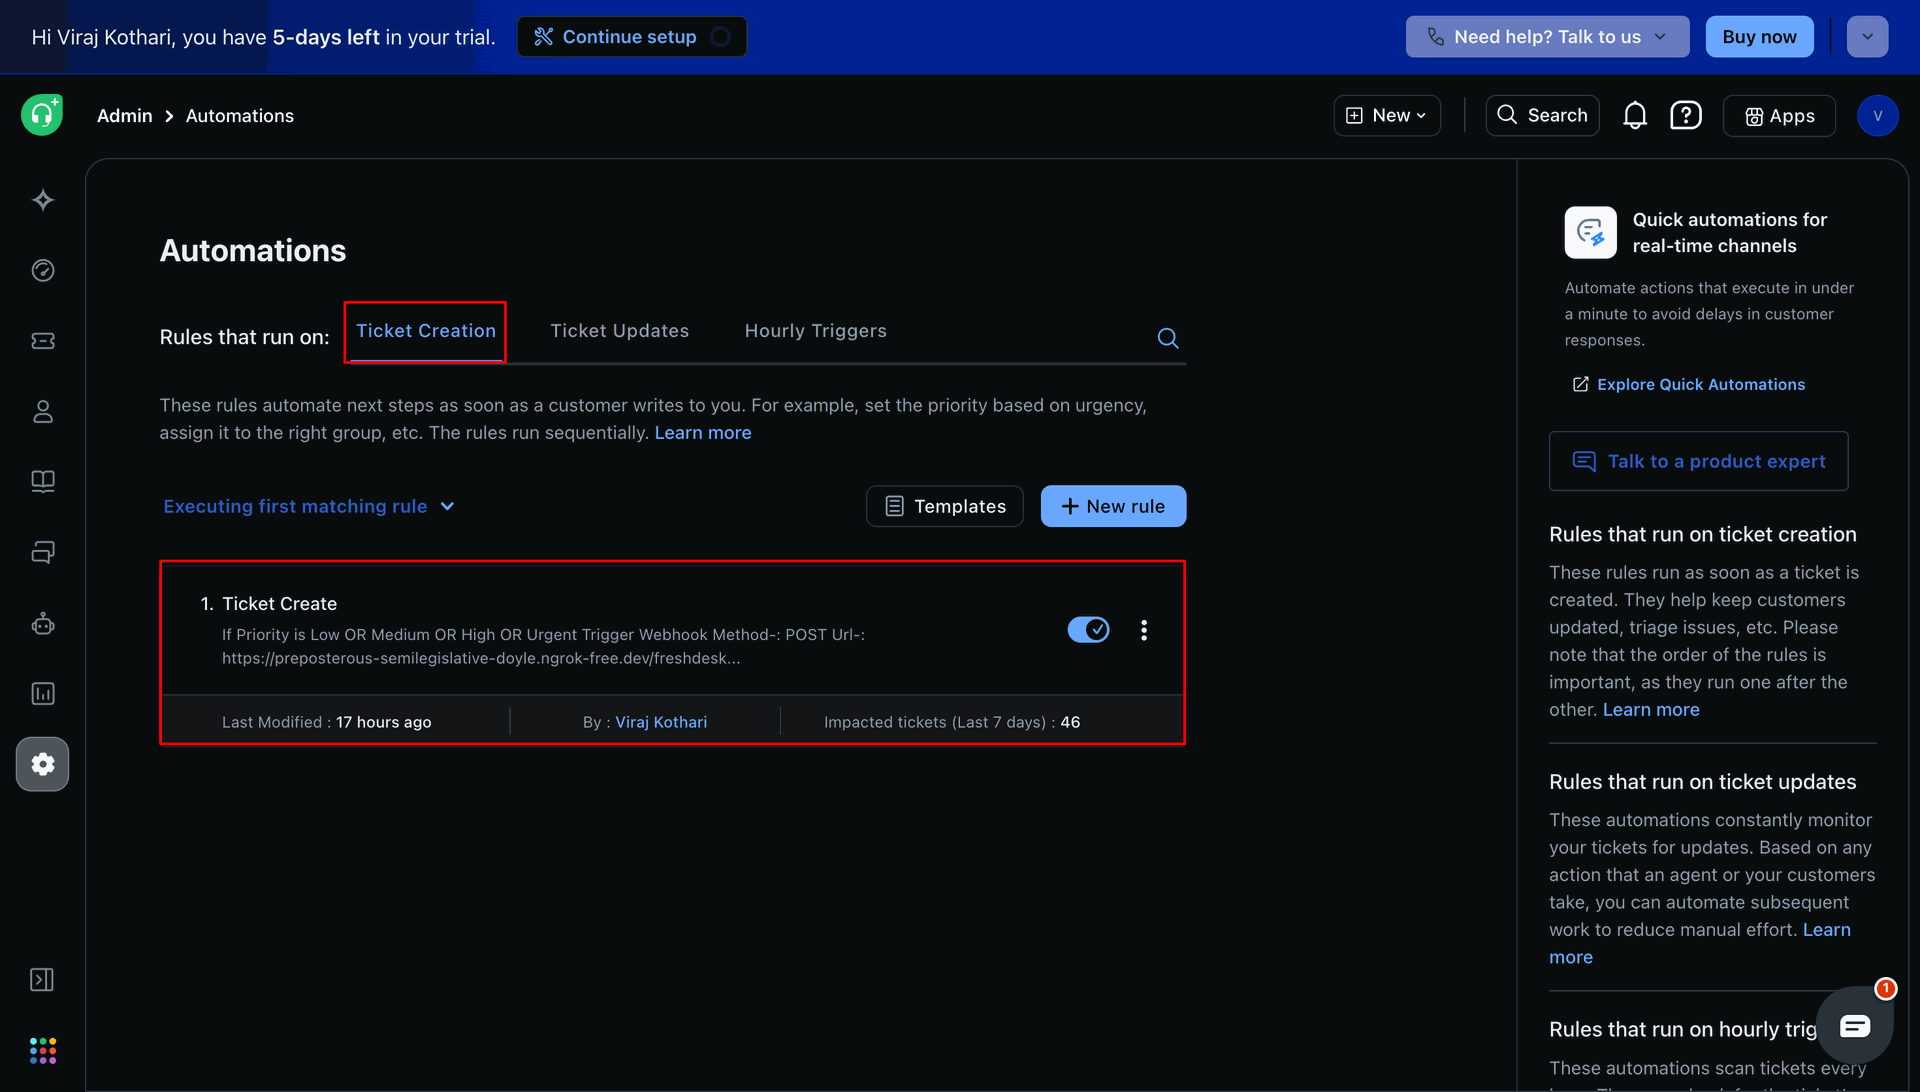
Under the Automations settings, go to the "Ticket Creation" tab to configure rules for new tickets.
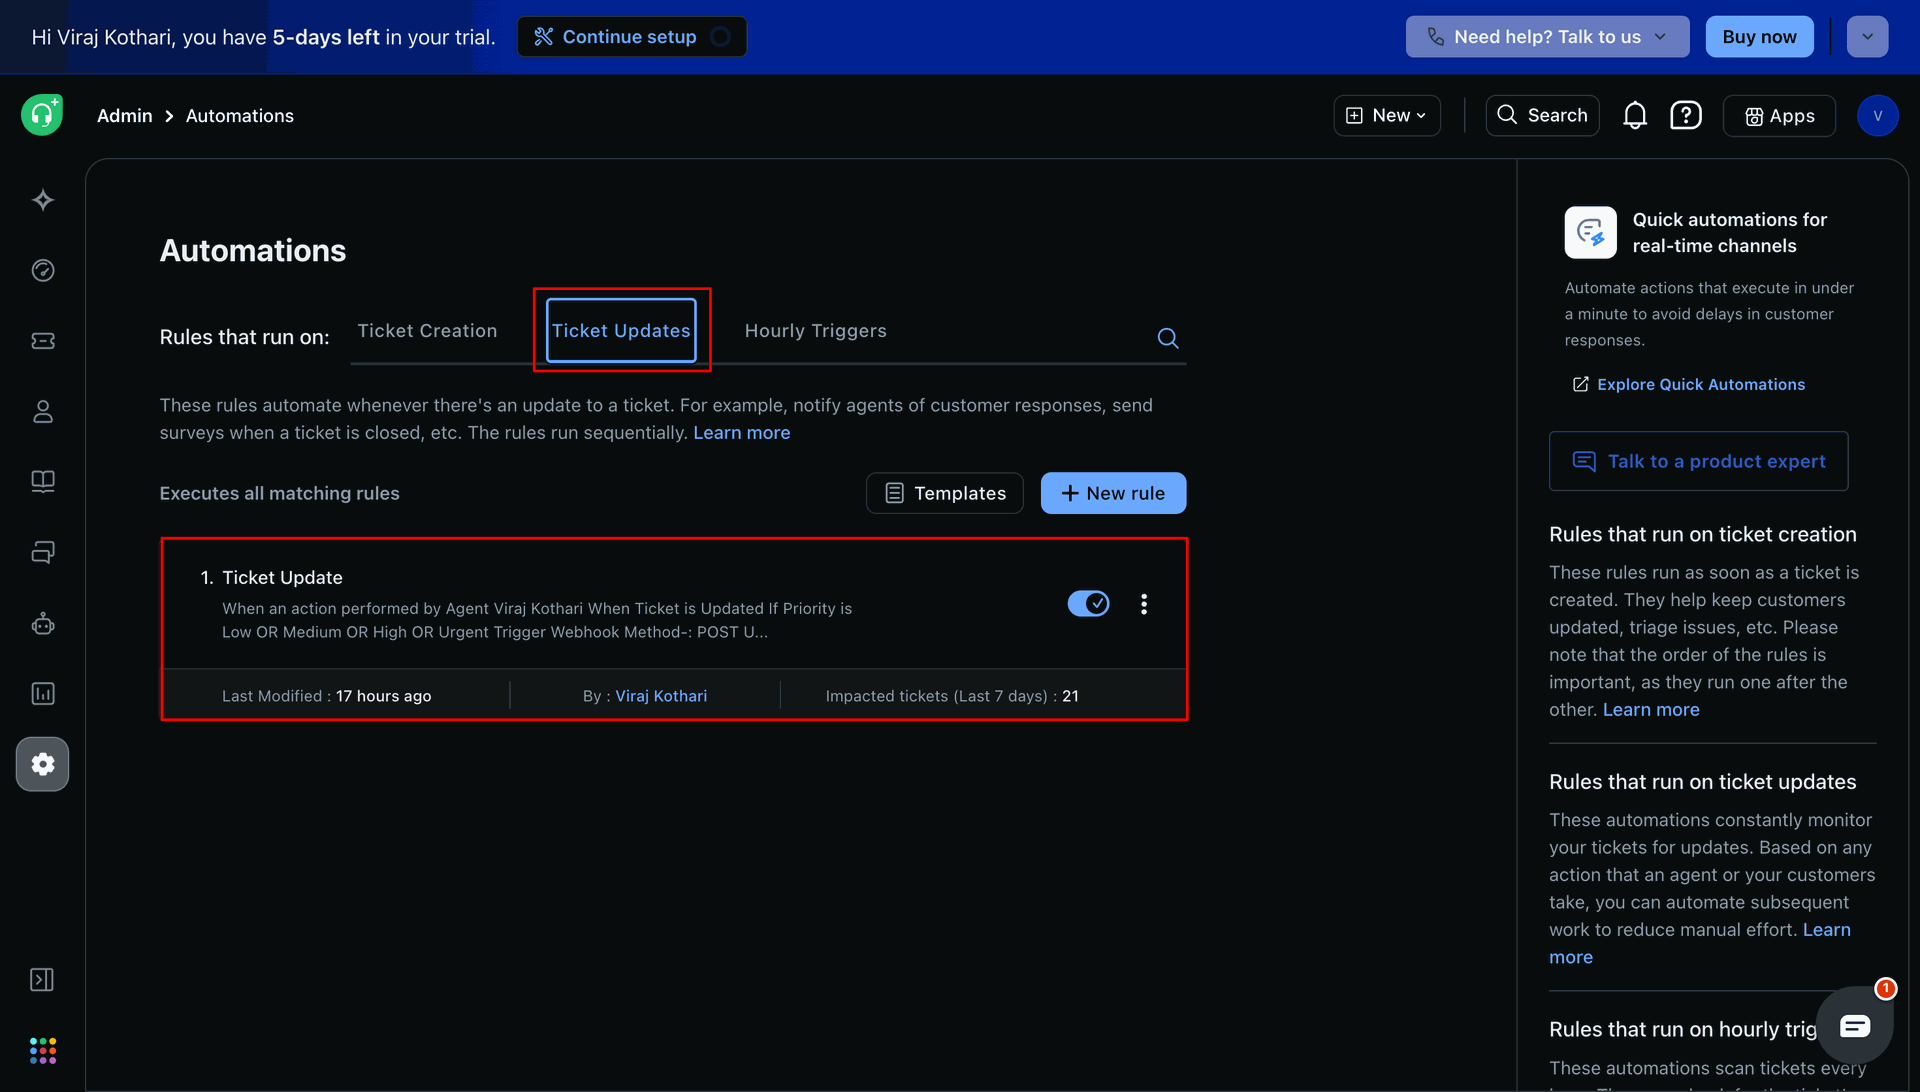
Under the Automations settings, go to the "Ticket Updates" tab to configure rules for updating tickets.
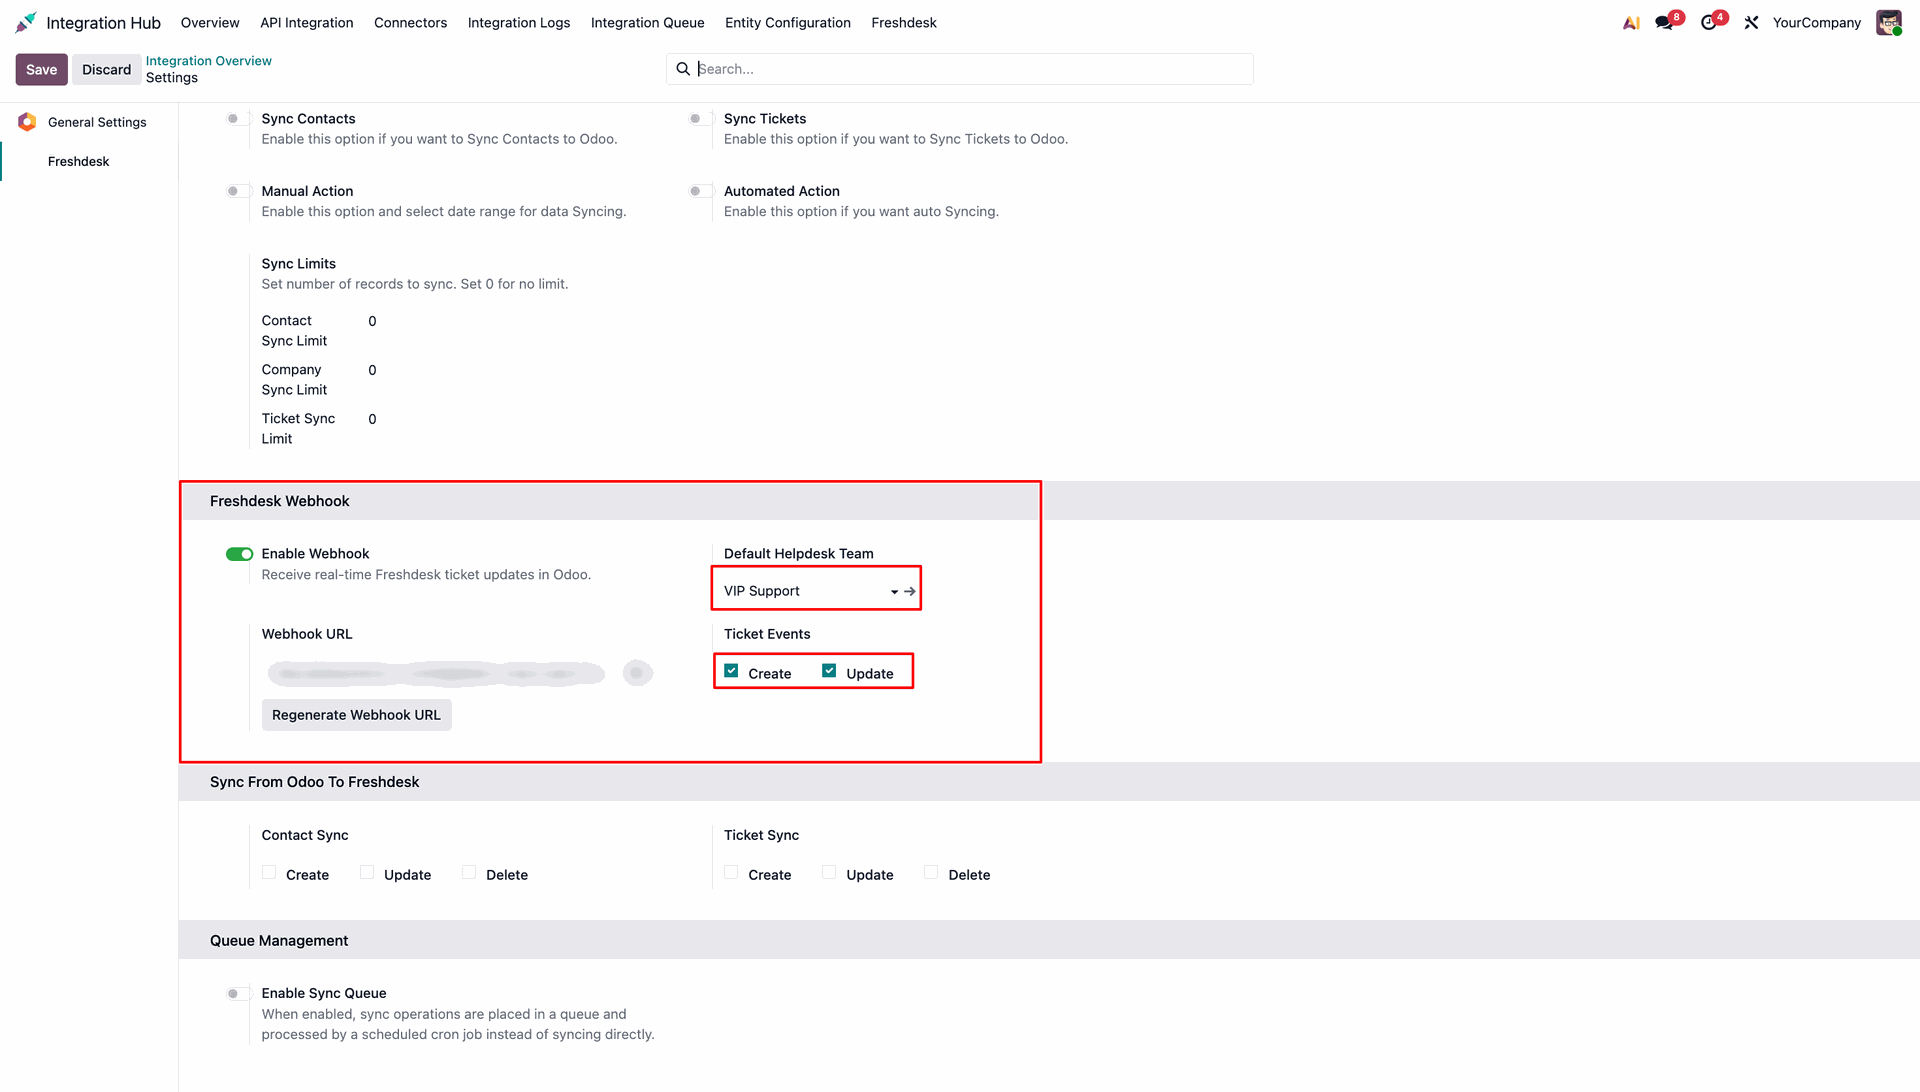
Back in Odoo, under the Freshdesk Webhook settings, select a Default Helpdesk Team and select Ticket Events for Create and Update.
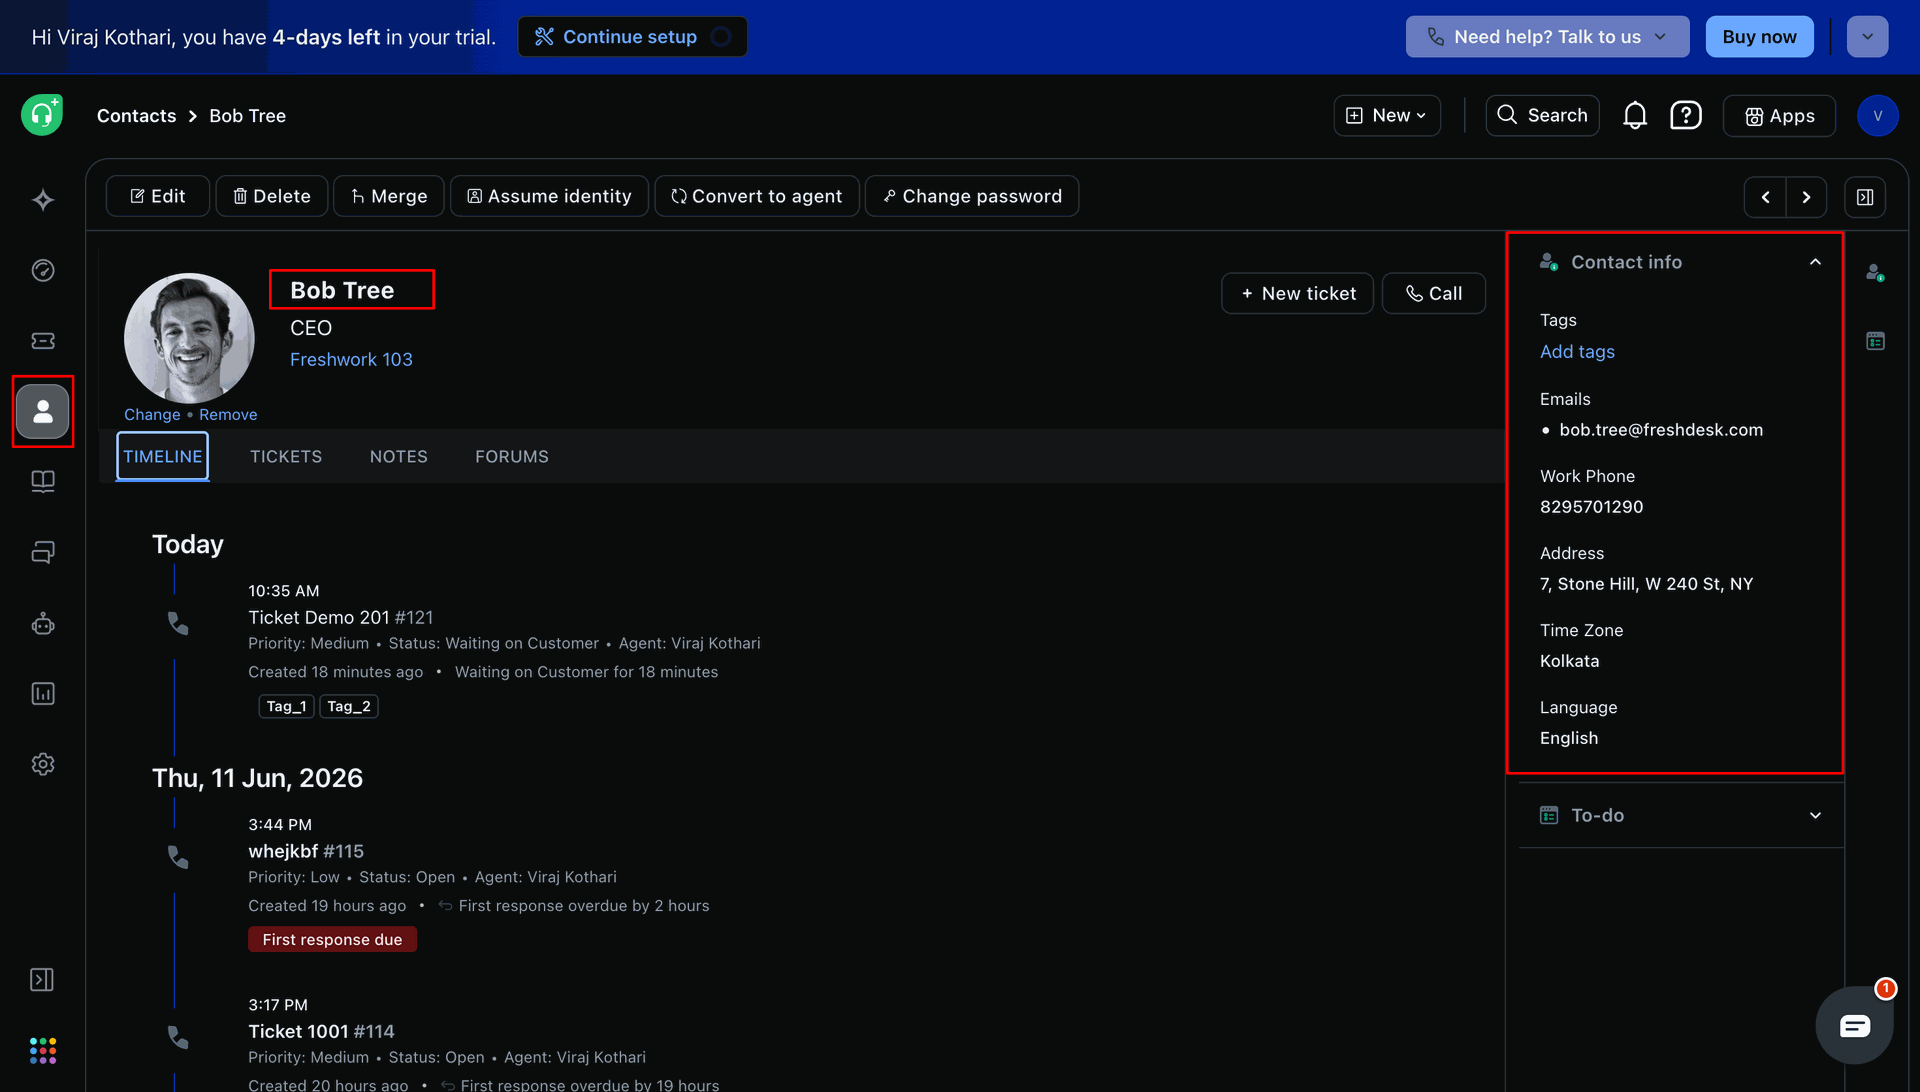
In Freshdesk, create a new contact (e.g., Bob Tree) and provide the necessary contact information.
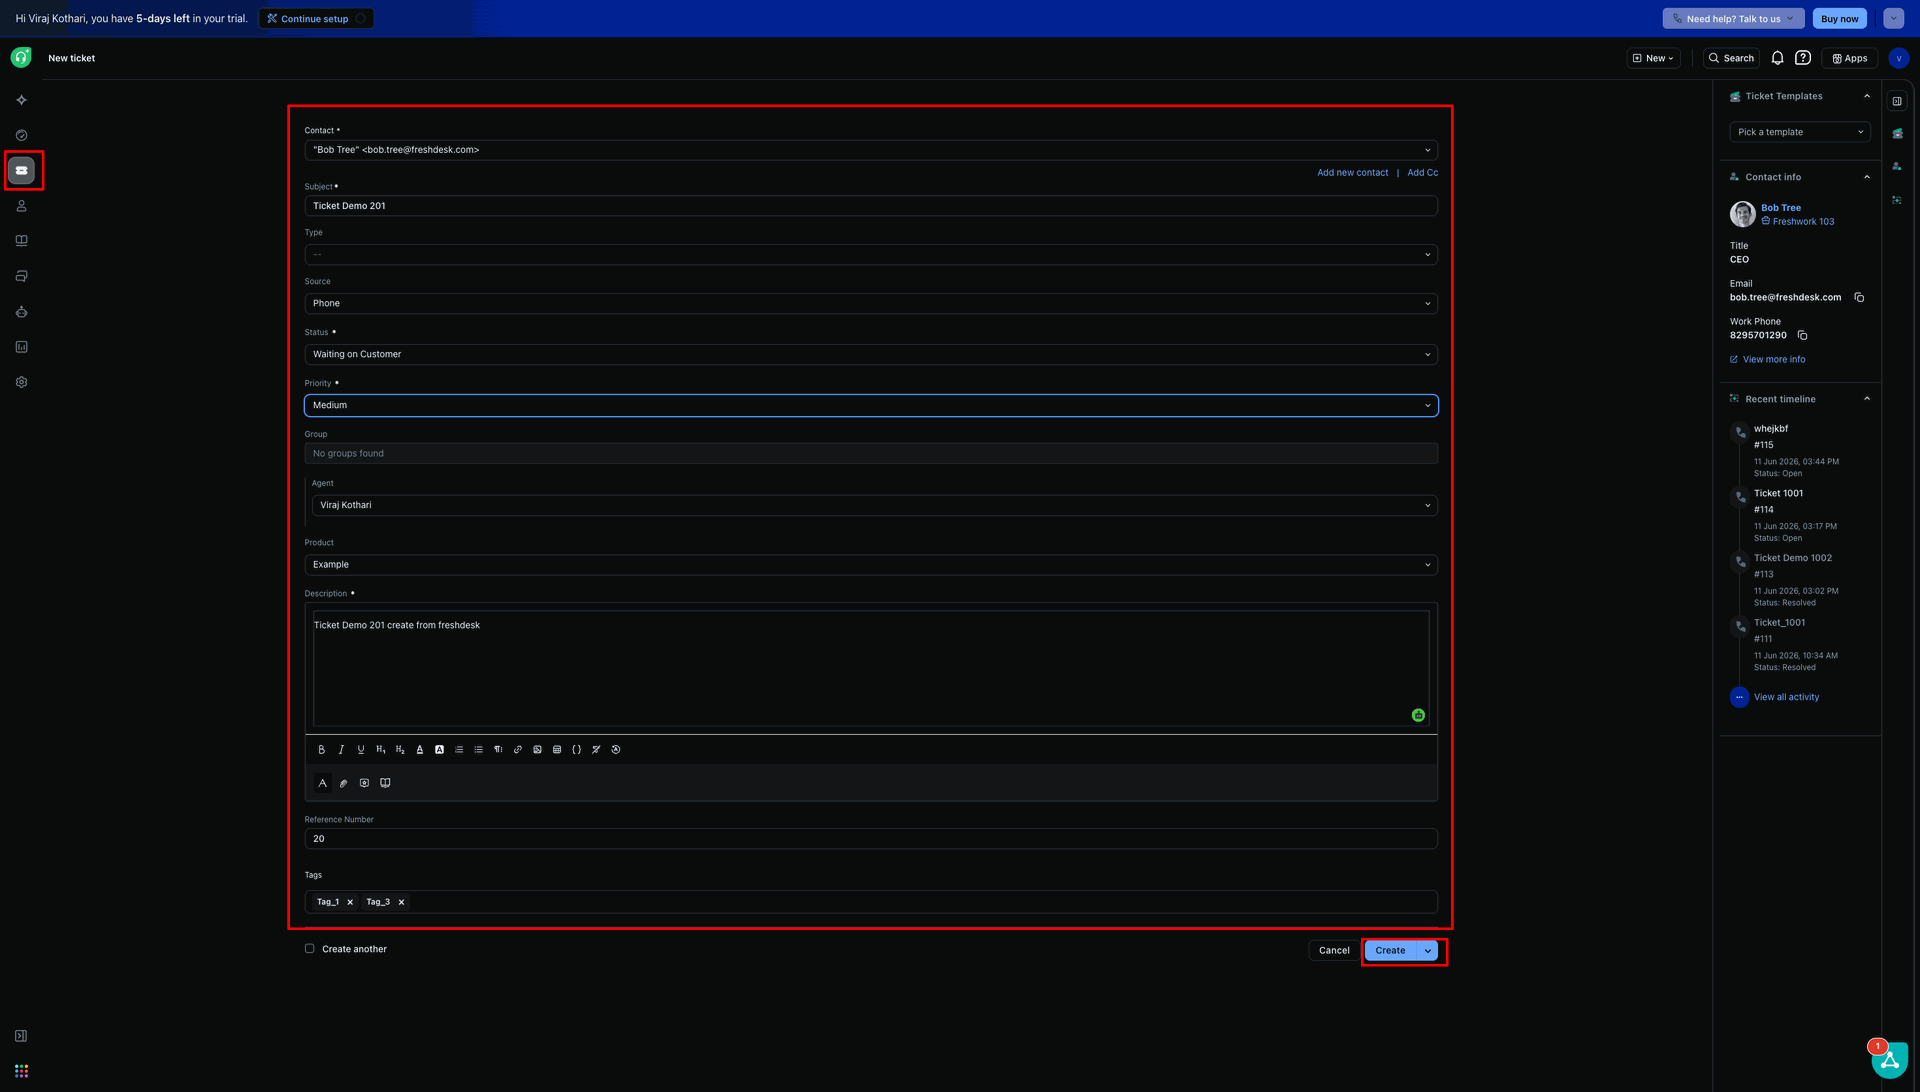
In Freshdesk, create a new ticket associated with the contact (e.g., Ticket Demo 201).
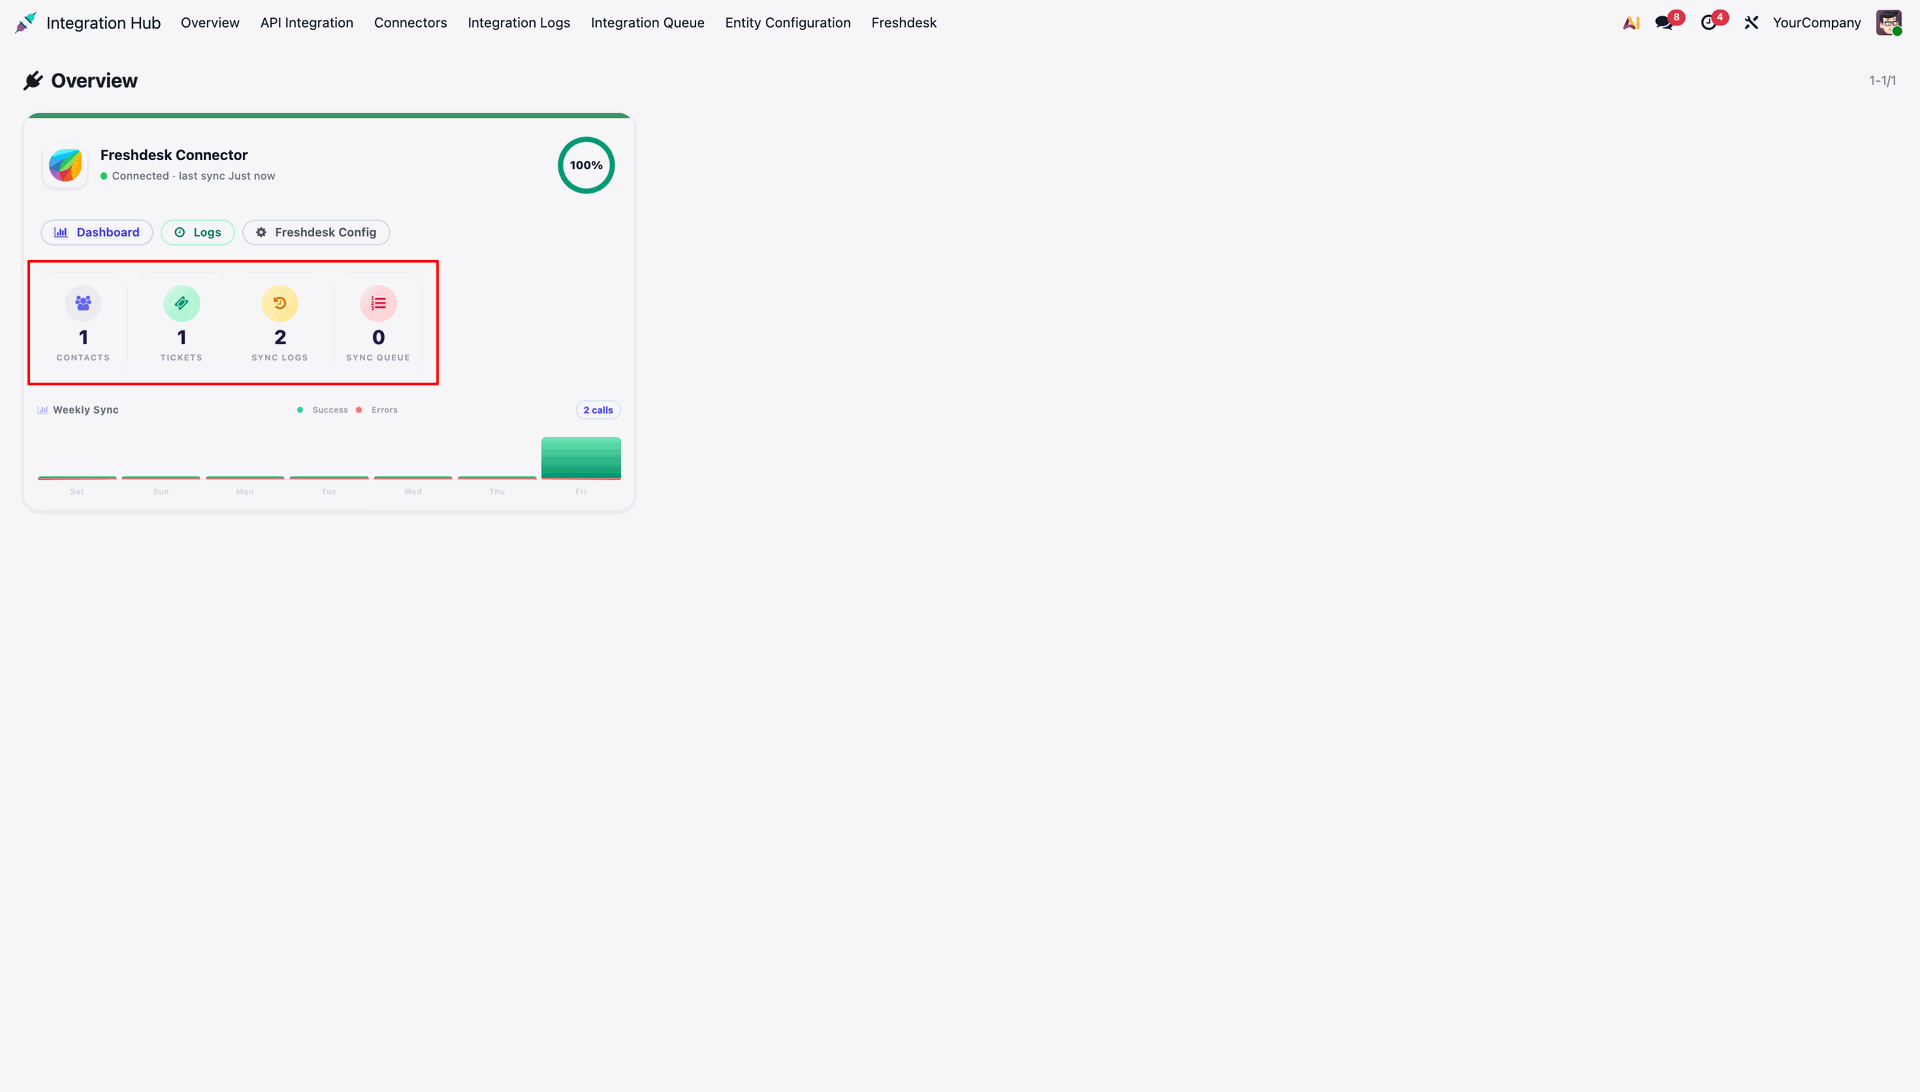
Navigate to the Integration Hub Overview dashboard to see the connected status and synchronization counts for Contacts and Tickets.
View the updated Sync Logs and Sync Queue counts in the Integration Hub Overview to verify synchronization operations.
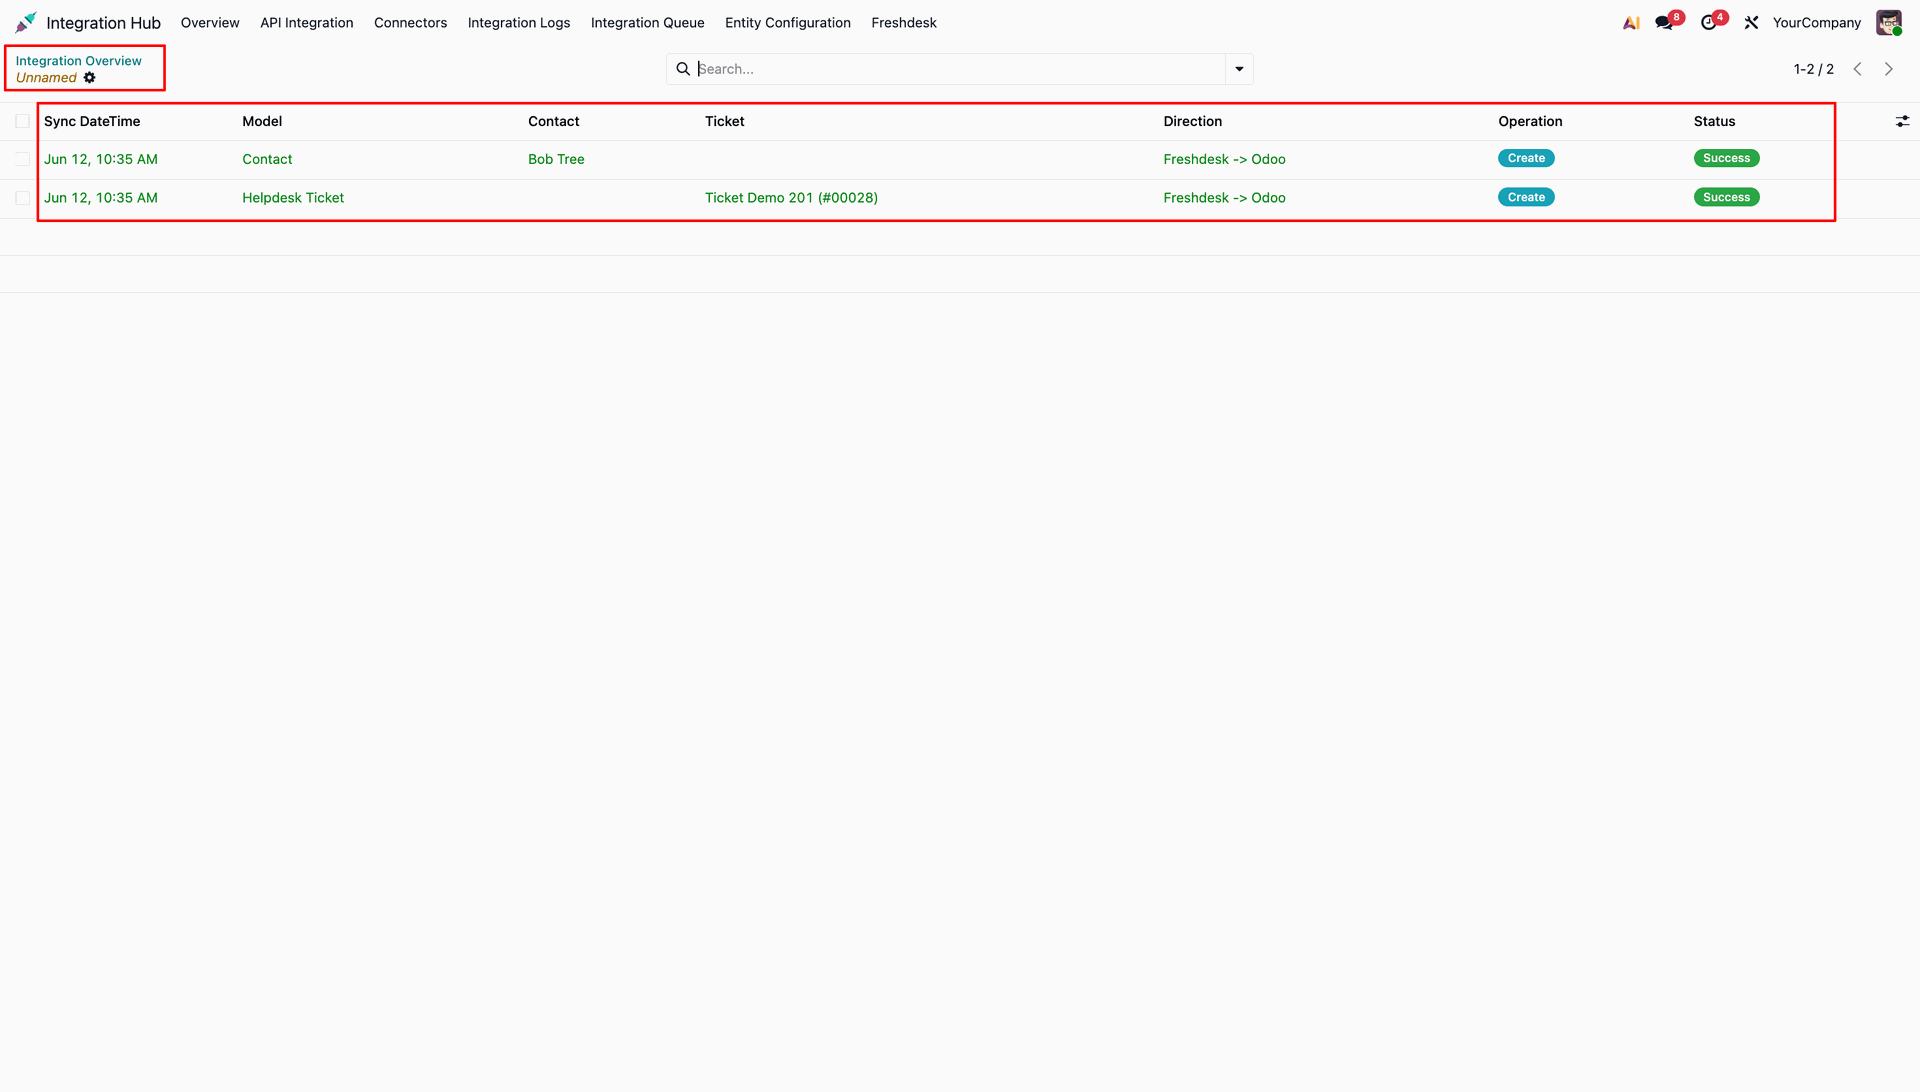
Navigate to Integration Logs to view the contact synchronization details.
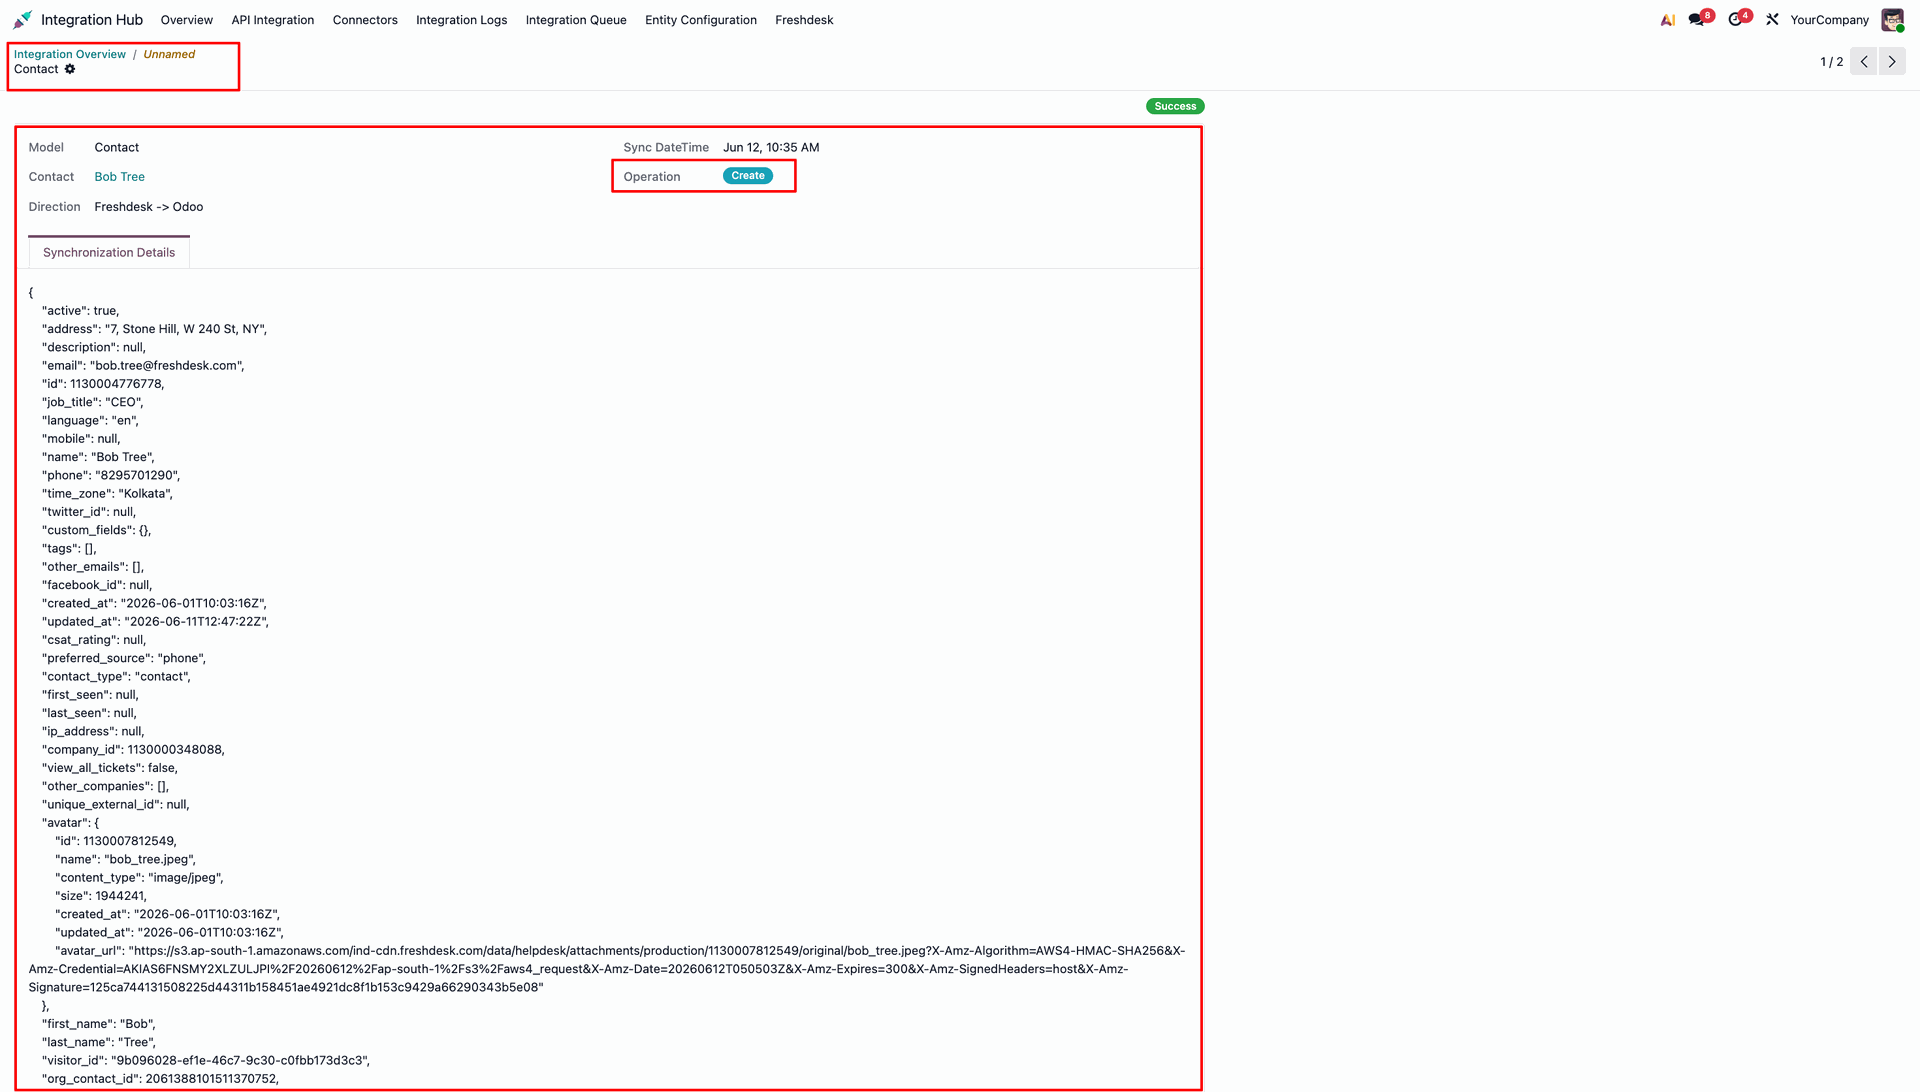
Navigate to Integration Logs to view the ticket synchronization details.
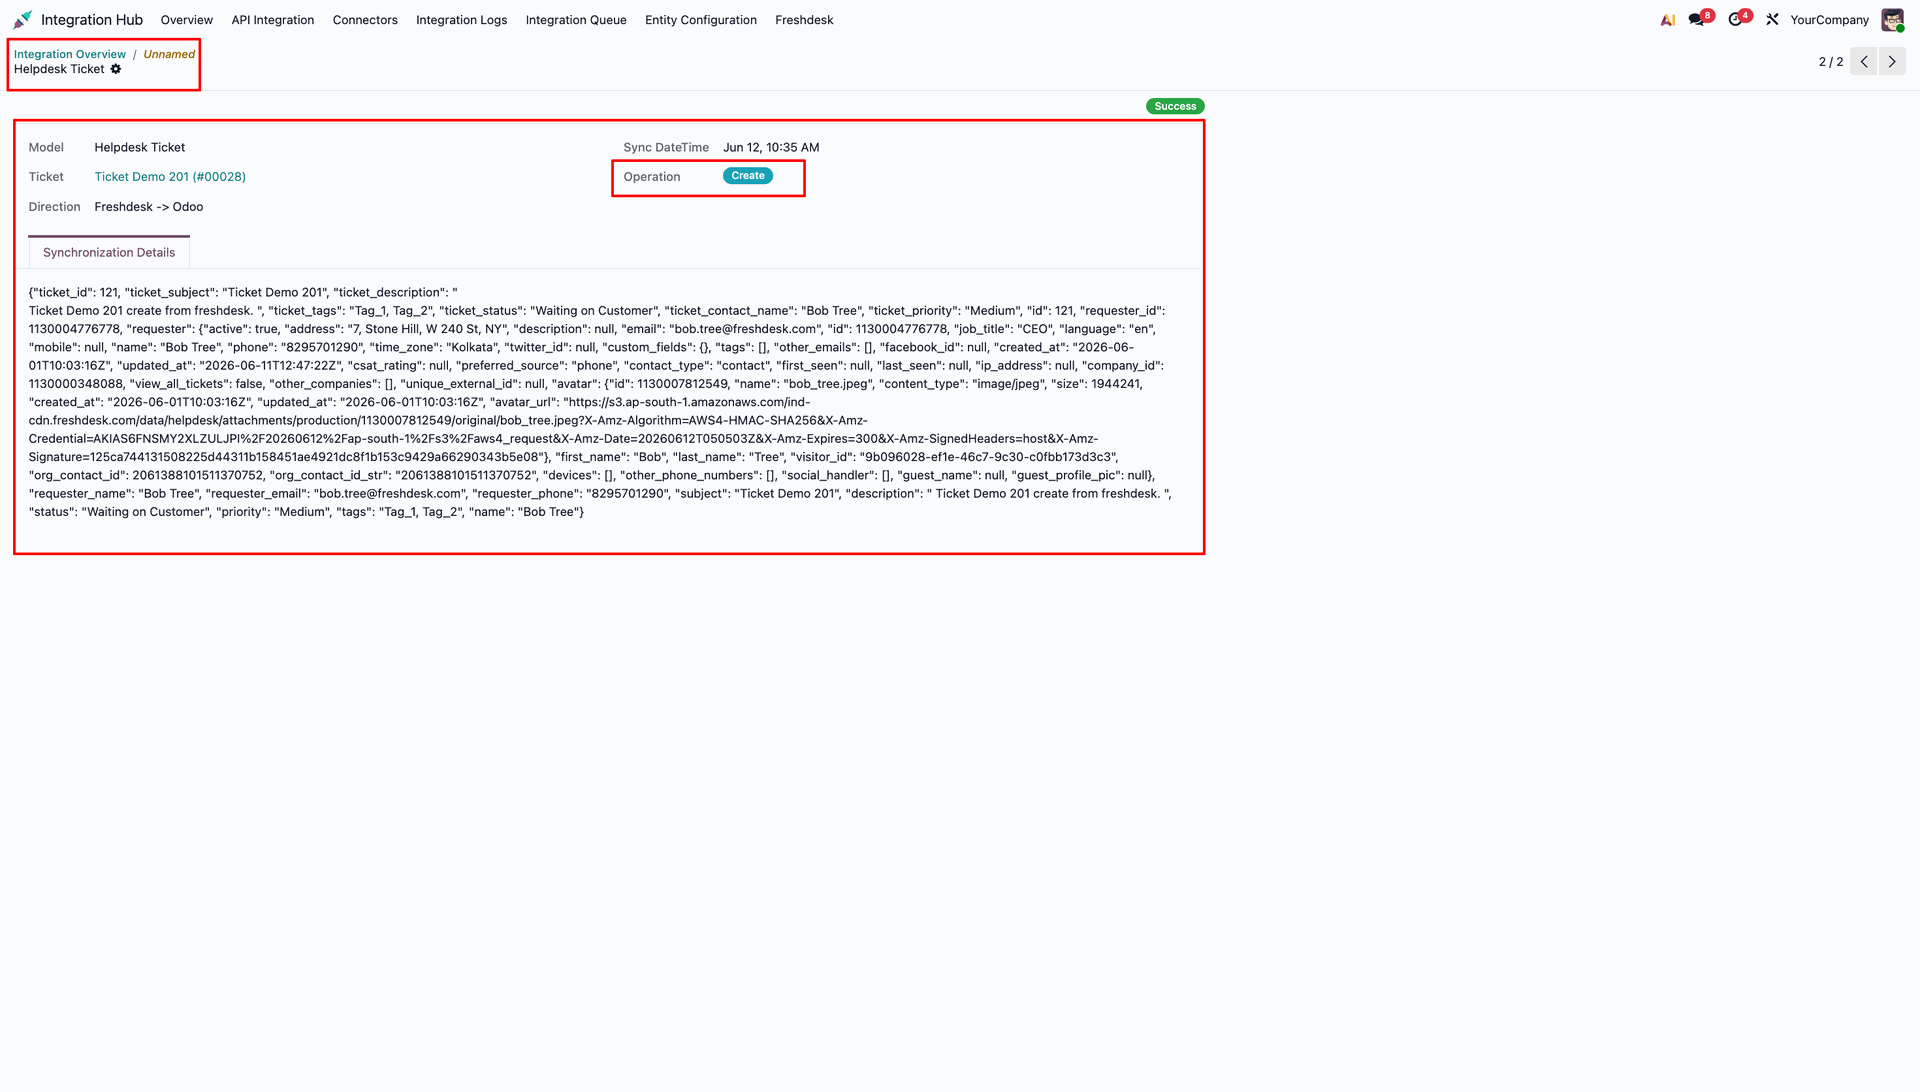
In Odoo, open the synced Contact to view the associated Tickets and verify the Freshdesk Details tab with the synced ID.
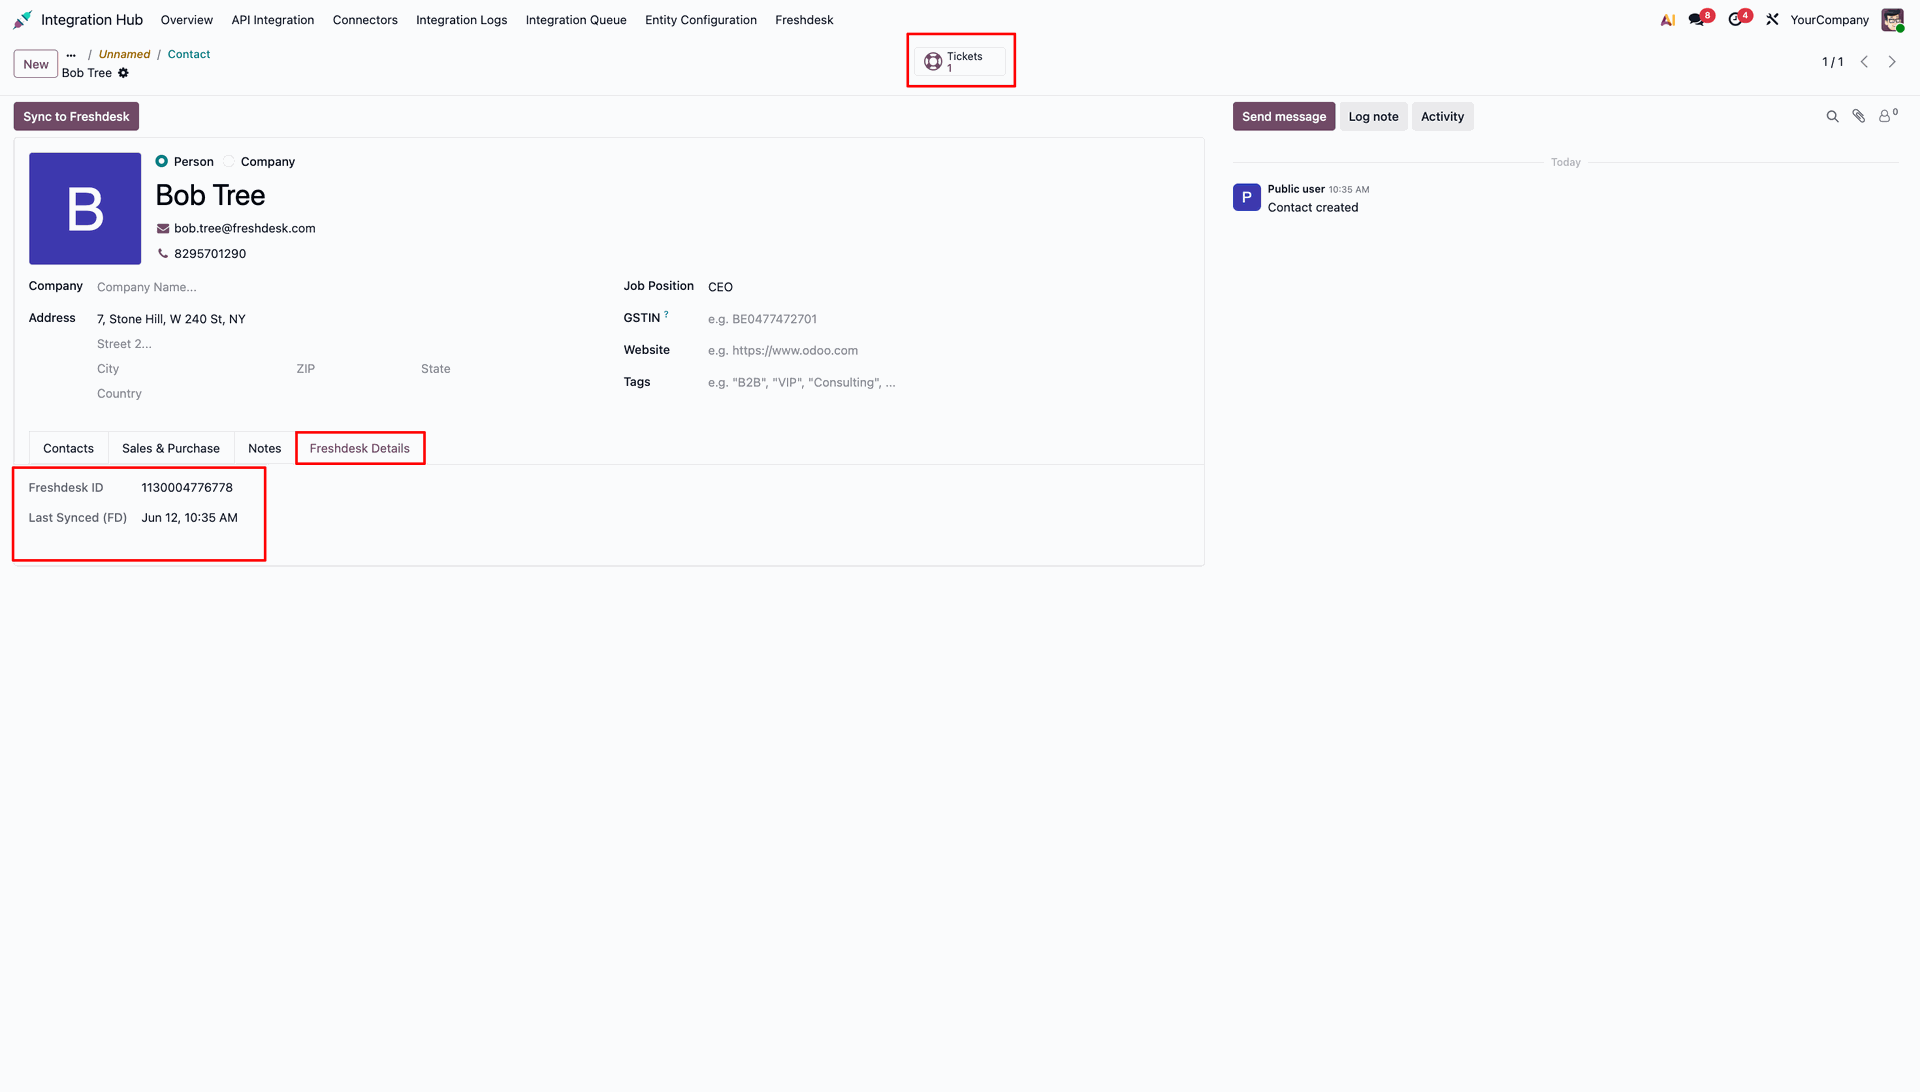
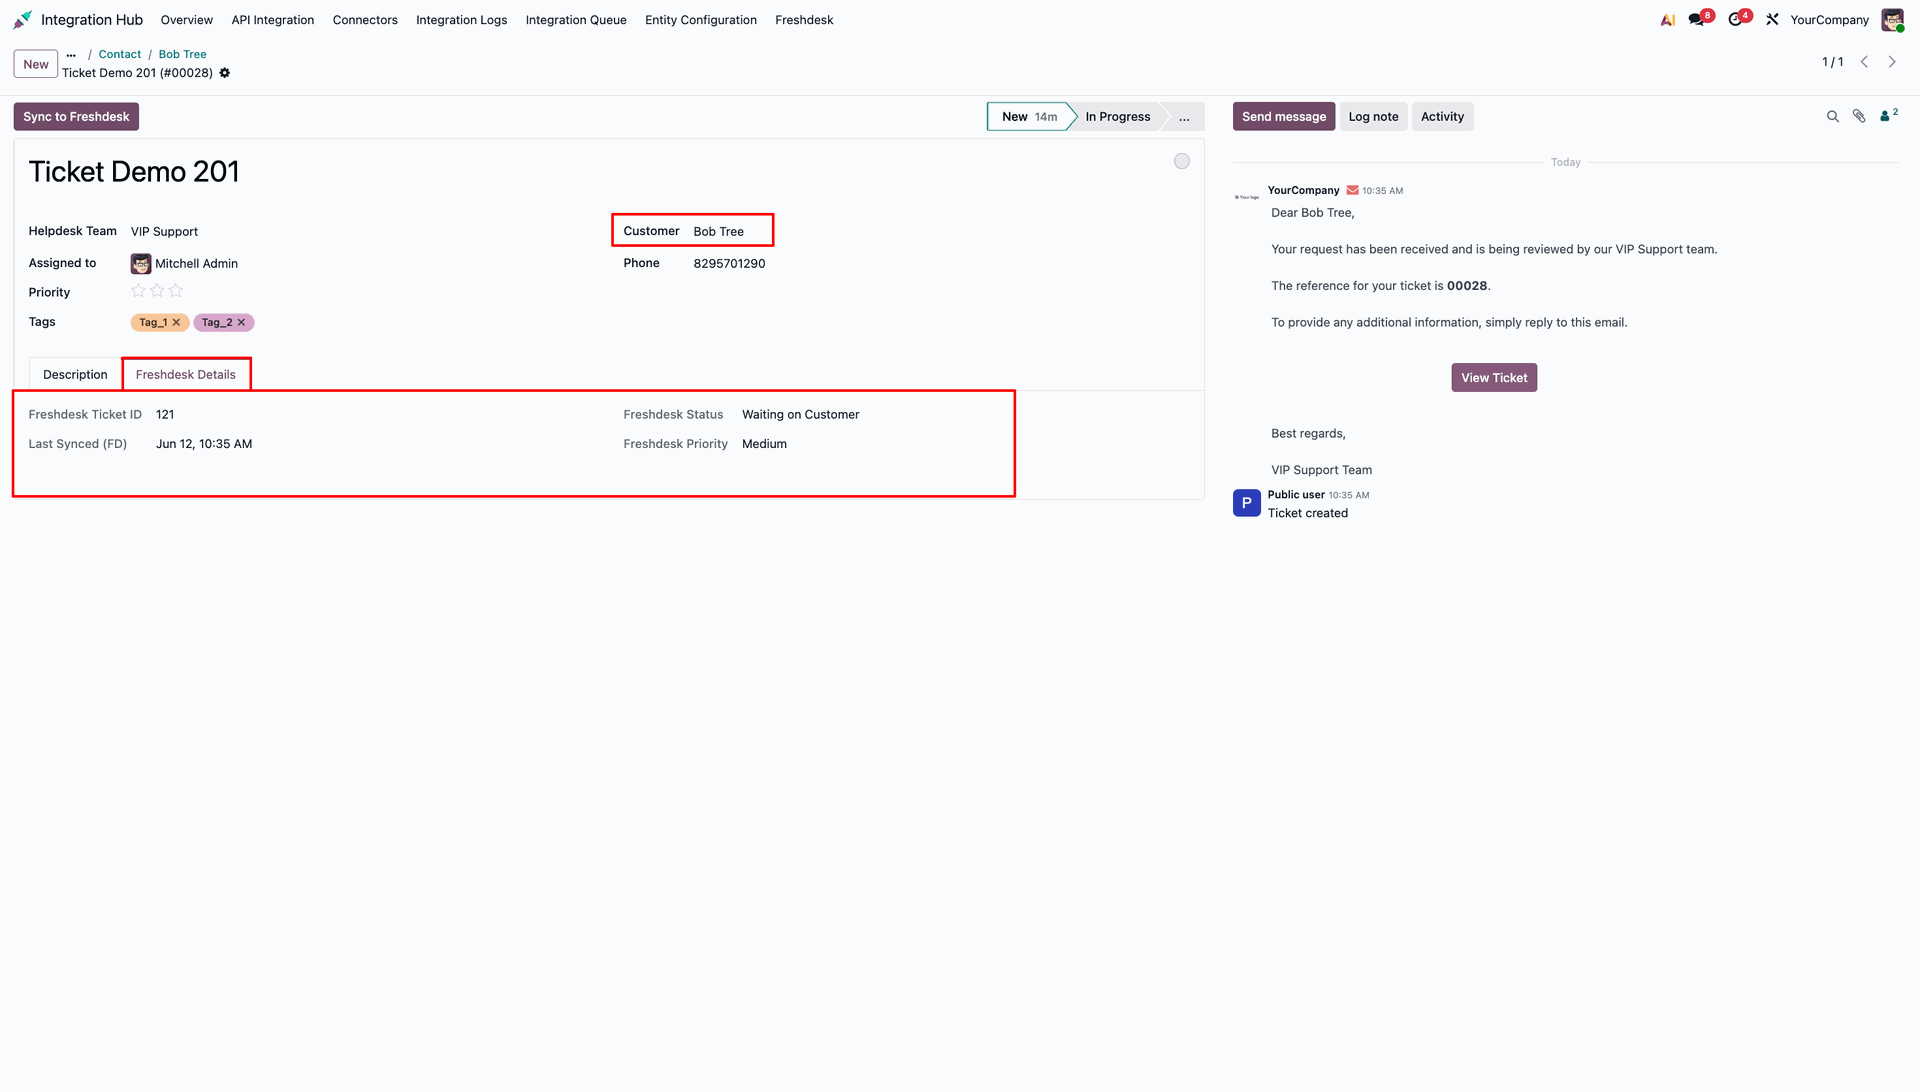
In Odoo, open the synced Helpdesk Ticket to verify the Customer assignment and the Freshdesk Details tab with synced status and ID.
Version 19.0.1.0.0 | Released on : 27th July 2026
- Yes, this app works perfectly with Odoo Enterprise (Odoo.sh & Premise) as well as Community.
- No, this application is not compatible with odoo.com(odoo saas/Odoo Online)
- Yes, to test this module, please contact us at sales@softhealer.com.
- Please contact us at sales@softhealer.com to request customization.
- Yes, we provide free support for 365 days from the date of purchase.
- Yes, you will receive lifetime free updates for the version of the module you purchased.
- No, there is no need to install any additional libraries.
- Yes, for version 12 and above, you need to purchase the module separately for each version you intend to use.
- No, exchanges or refunds are not allowed. Please make sure to select the correct version before purchasing.
- You can contact us at support@softhealer.com for language translation support. We use Google Translator tools to provide translations in multiple languages, so the accuracy may vary. We welcome your suggestions to help improve translations.
Discover Our Latest Apps