












Event Seat Booking

Online event ticket helps to execute the events properly and efficiently. Online ticket booking reduces double bookings & mismanagement. This module helps you to book events such as seminars, conferences, formal parties, concerts, appointments & conventions. The event manager can add different types of tickets/screens in the backend for any event. The event manager can arrange the seat as per need and they can know the name of every participant with full details. You can add event questionary before attending the event. An event manager can switch seats before registration confirmation. The attendances have to select just seats with the total price. After that, registration and last is payment. Hurray!
"Event Seat Booking System" Simple Workflow
-
Step 1:
Select seats from the different groups of tickets.
-
Step 2: Register Attendees- Give attendees information of the selected seats.
- Step 3: Do the payment & You're done.
Key Features
Features
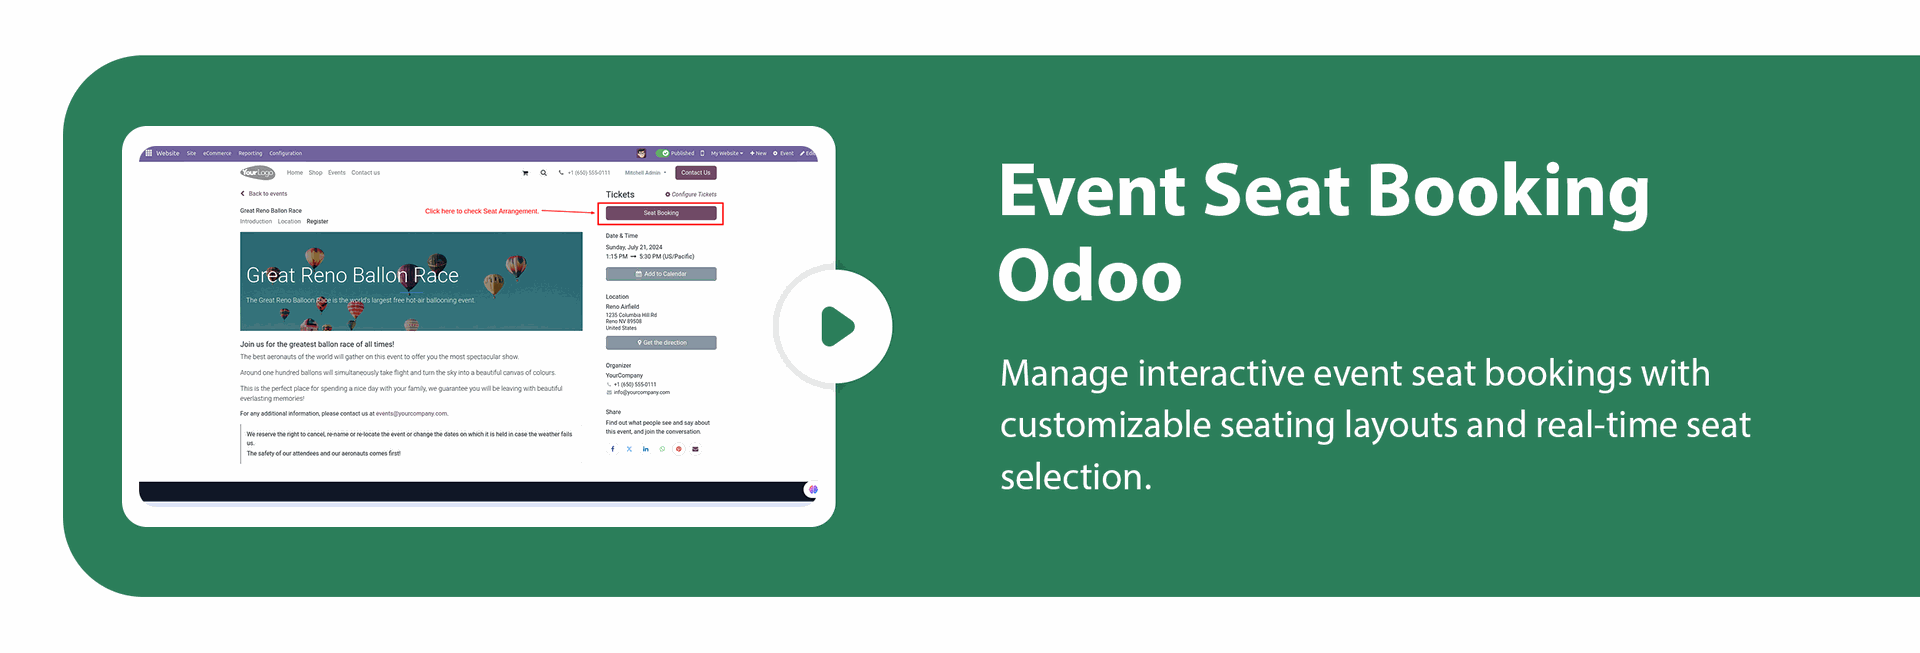
Online Event Seat Booking
Manage online event bookings with an interactive seat selection interface.
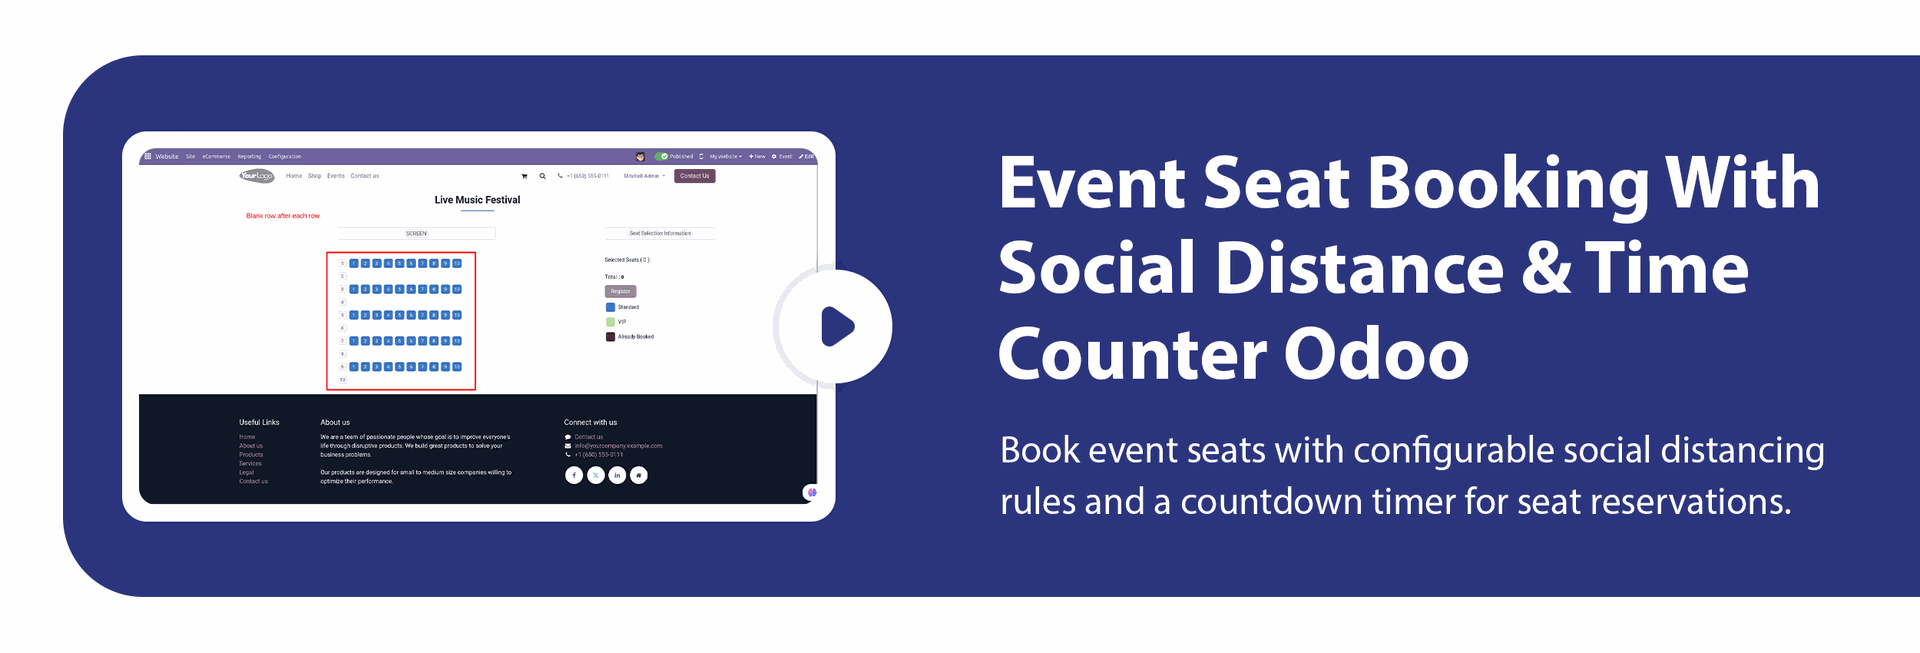
Configurable Booking Cooling Period
Set a configurable cooling period to temporarily hold seats during ticket booking.
Event Ticket PDF Reports
Generate full-page tickets and foldable badge PDF reports for event attendees.
Flexible Seat Layout Design
Create custom seat layouts with blank spaces between rows and columns for flexible venue arrangements.

Event Questionnaire
Collect attendee information by adding customizable questionnaires before event registration.

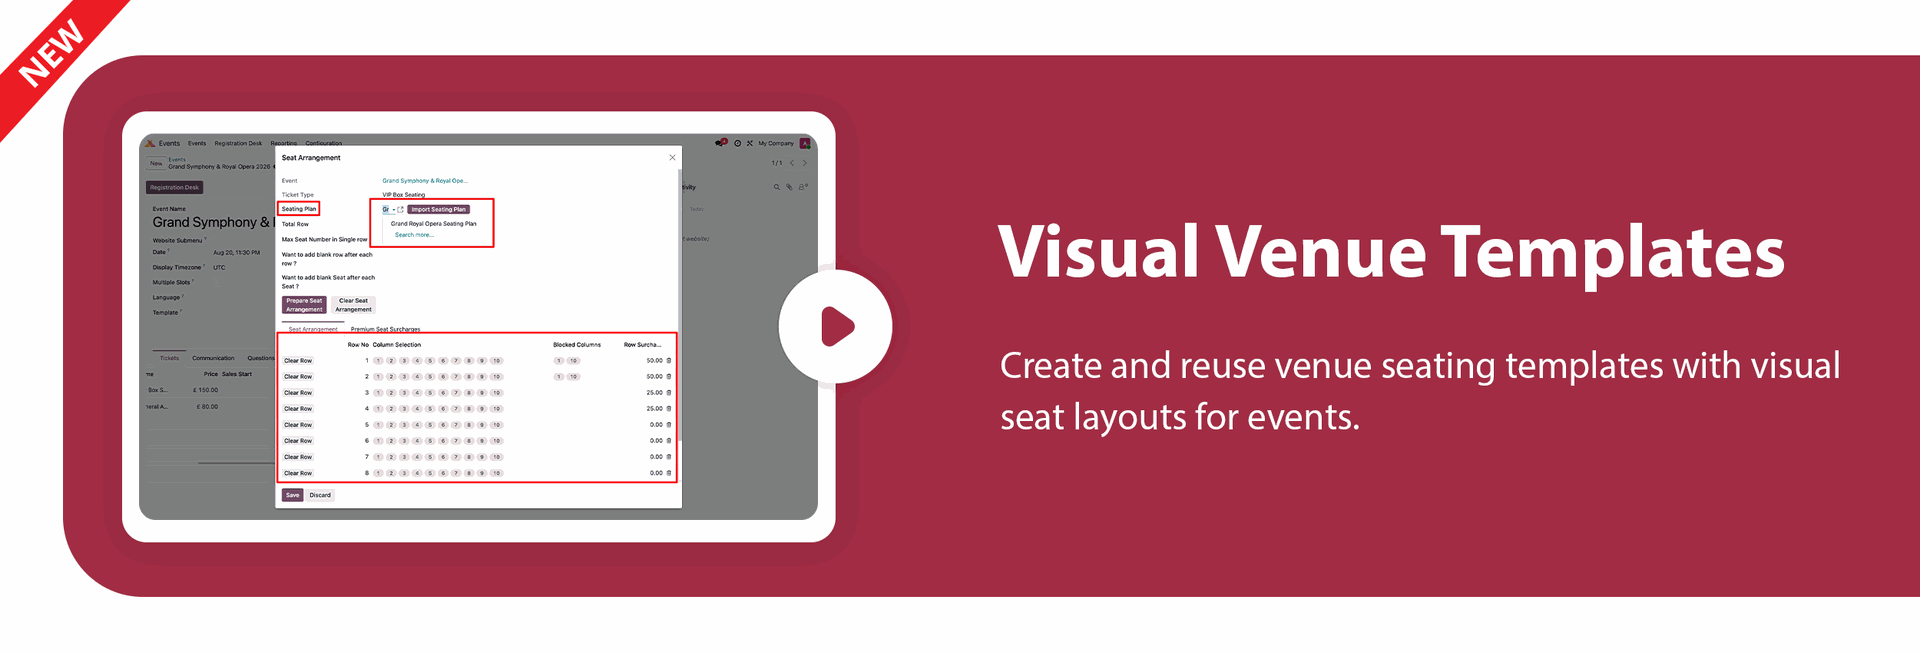
Visual Venue Seating Templates

Arrange and customize seat layouts based on the requirements of each event.

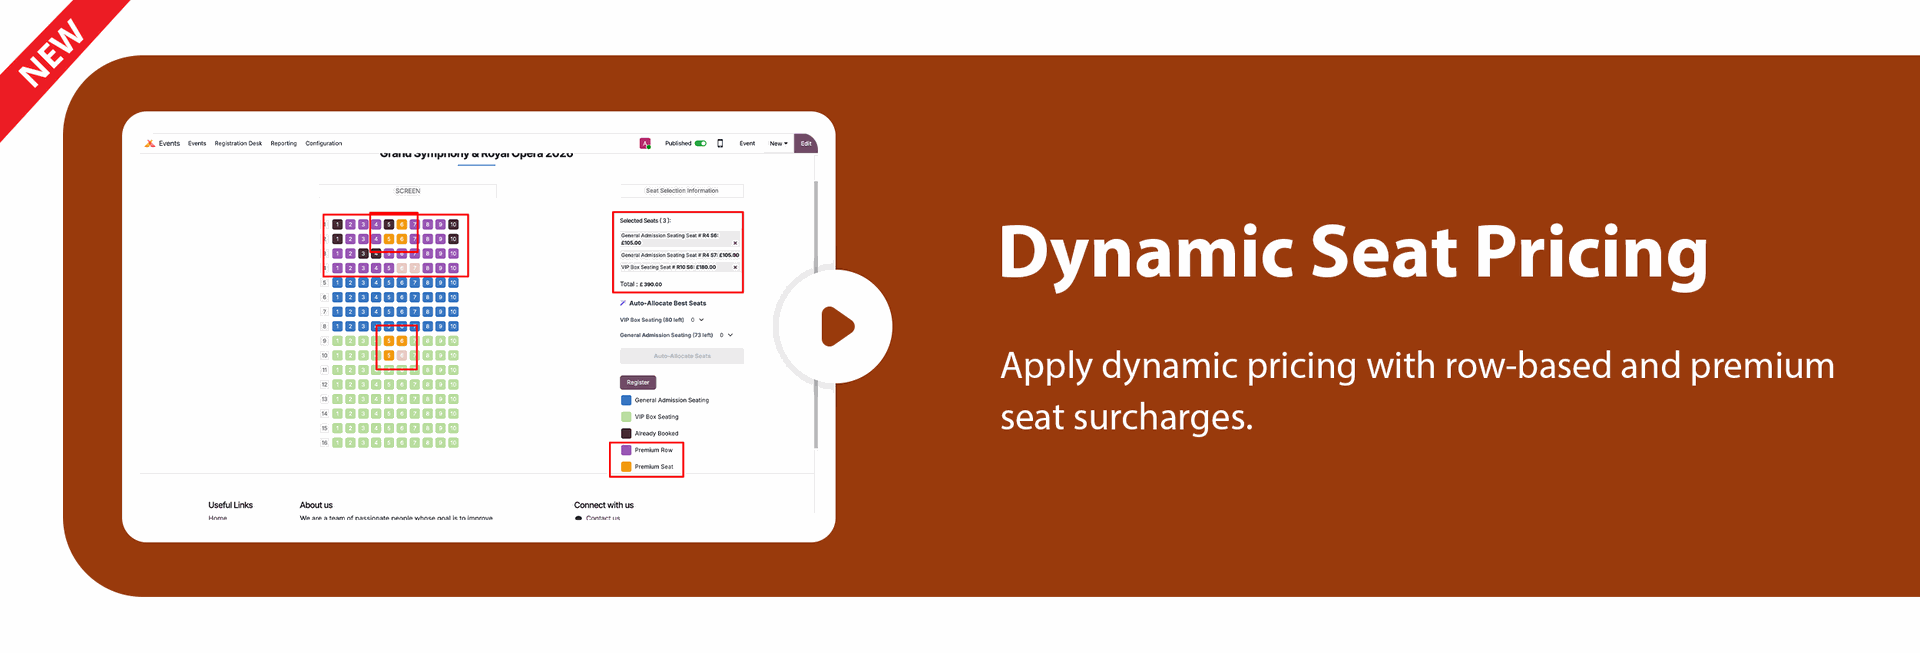
Dynamic Seat Pricing
Arrange and customize seat layouts based on the requirements of each event.
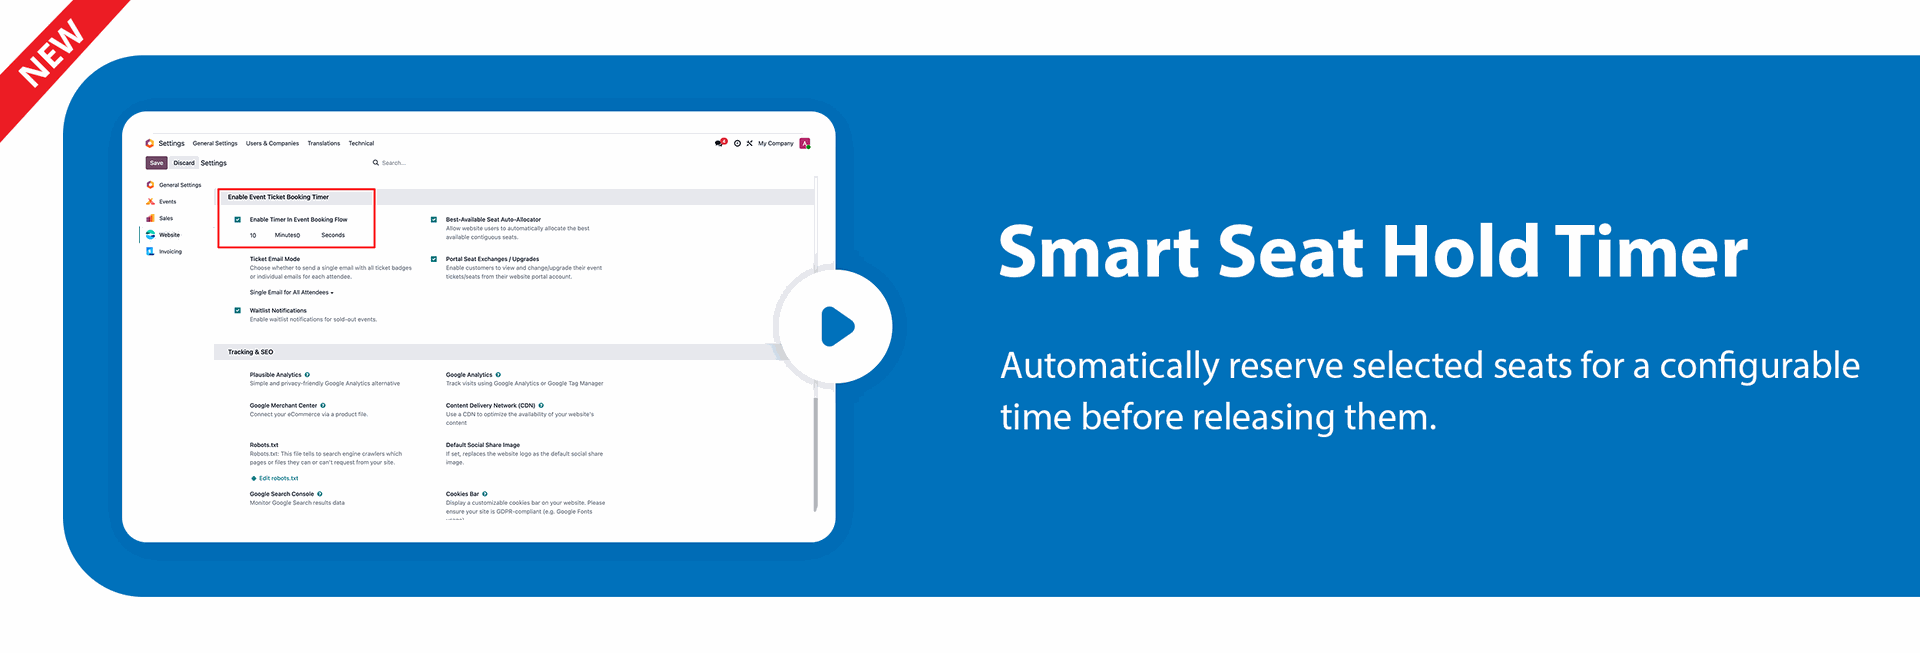
Smart Seat Hold Timer
Automatically reserve selected seats for a configurable time before releasing them.
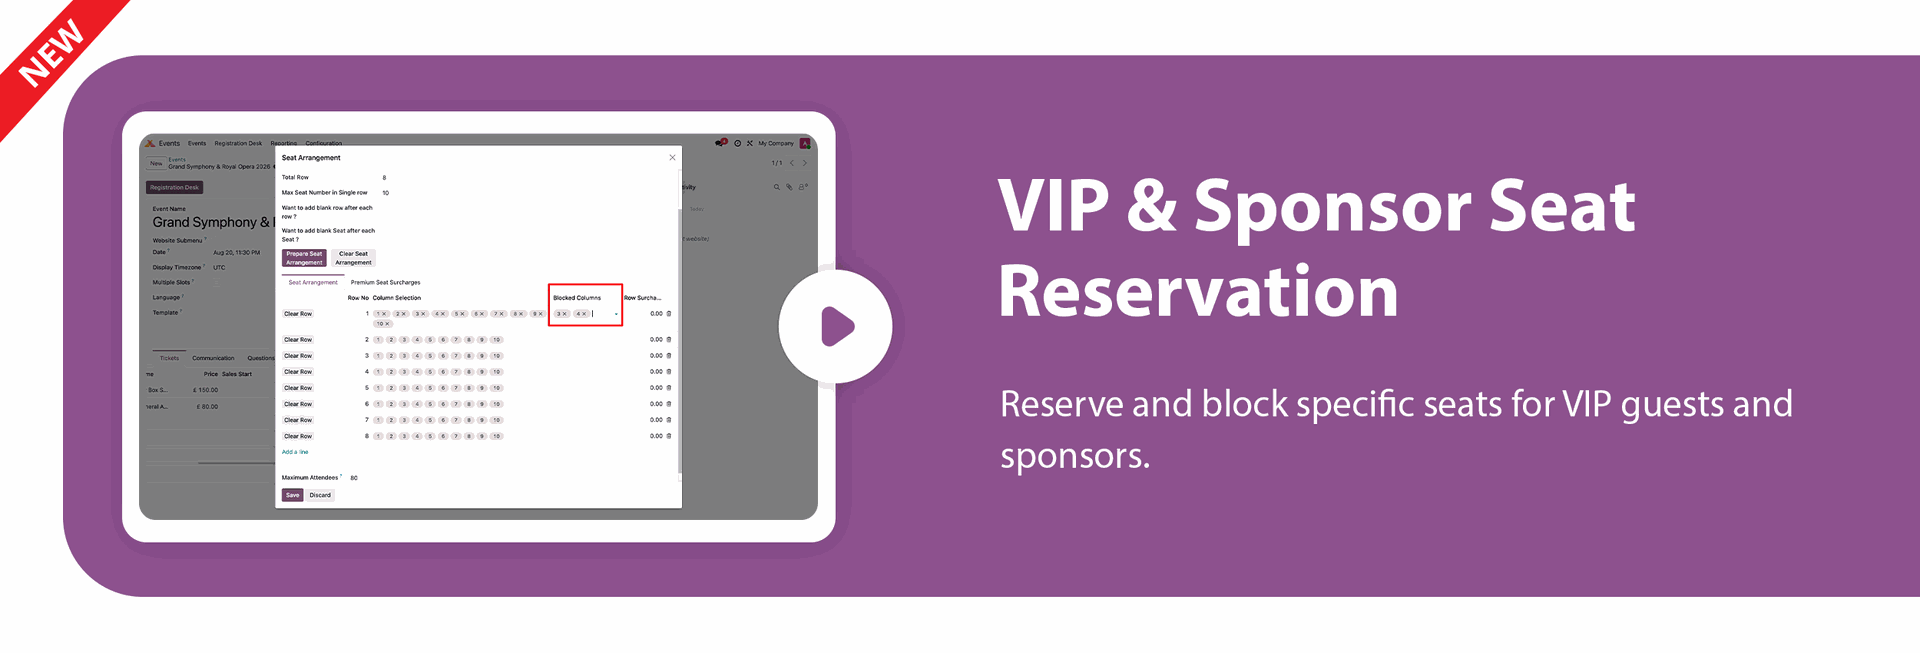
Seat Blocked
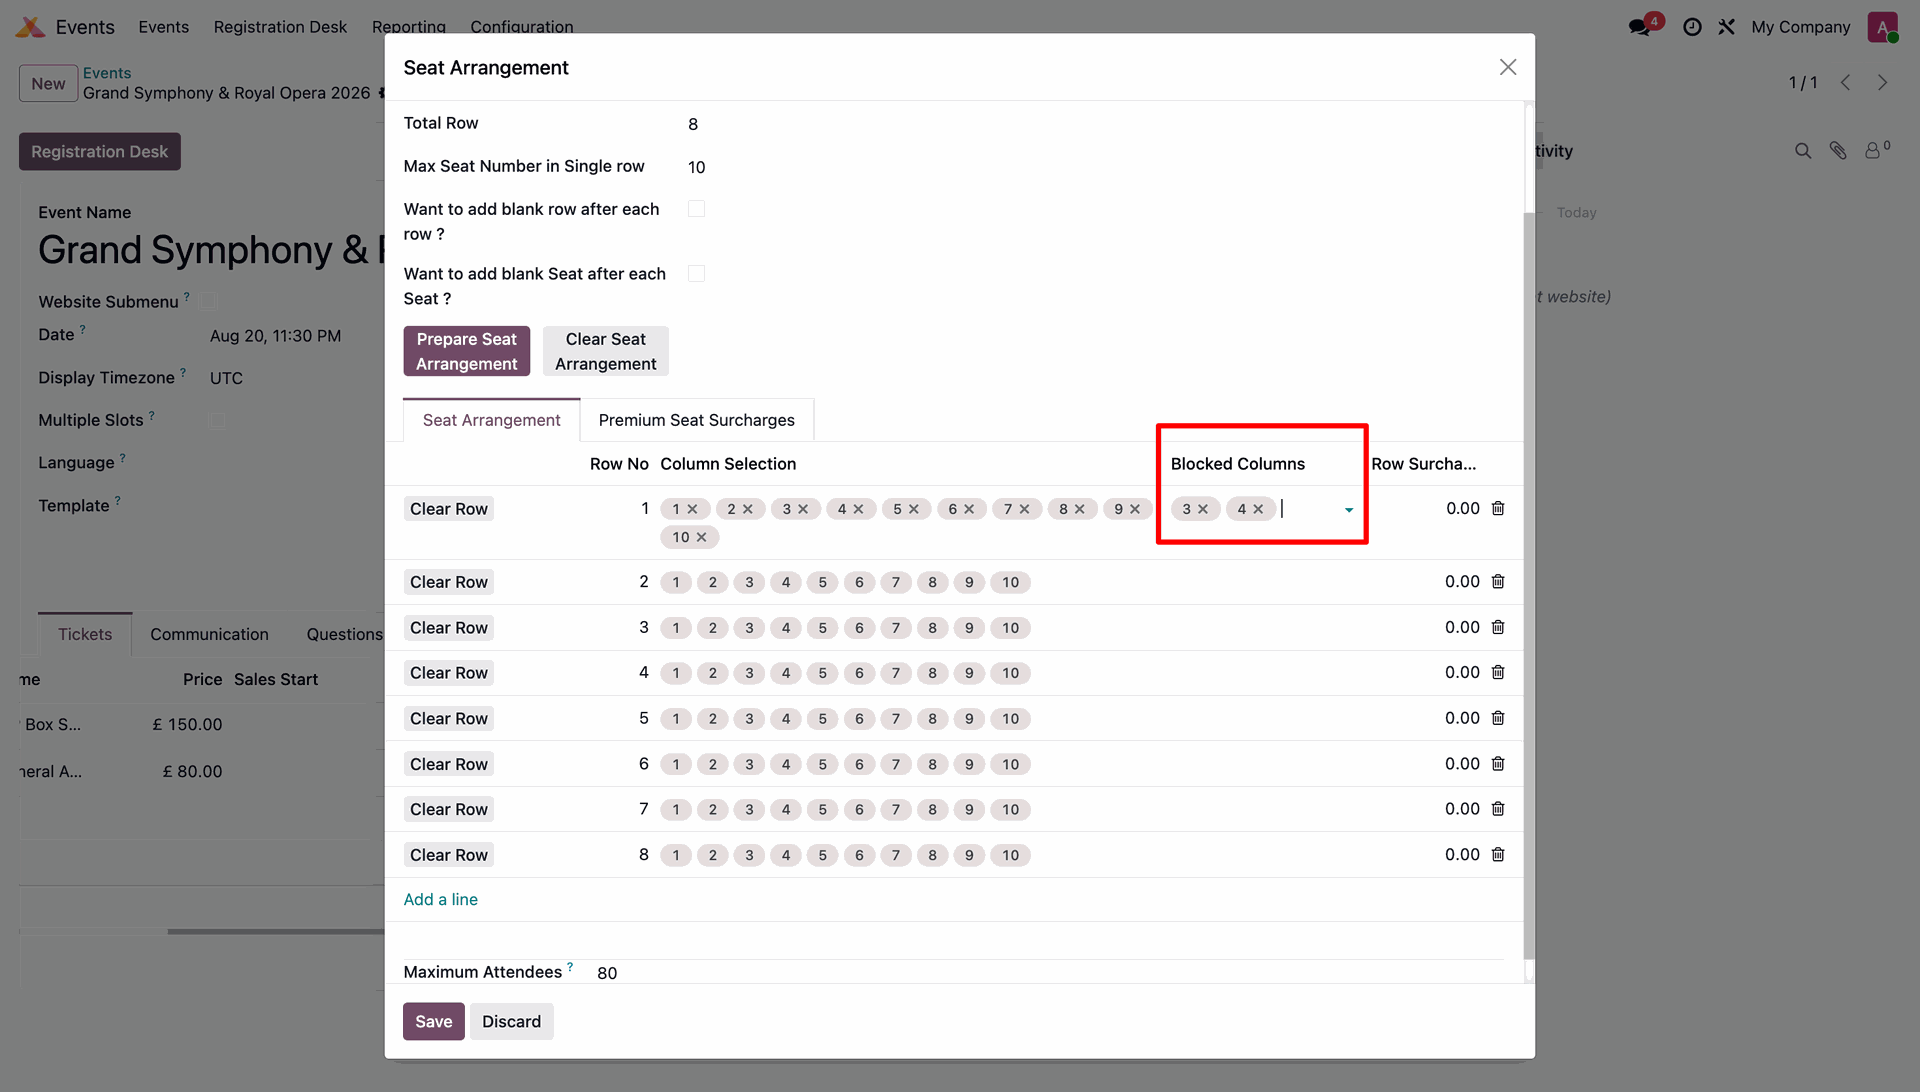
Set the blocked seat numbers under the Blocked Columns section to mark specific seats as unavailable for booking.
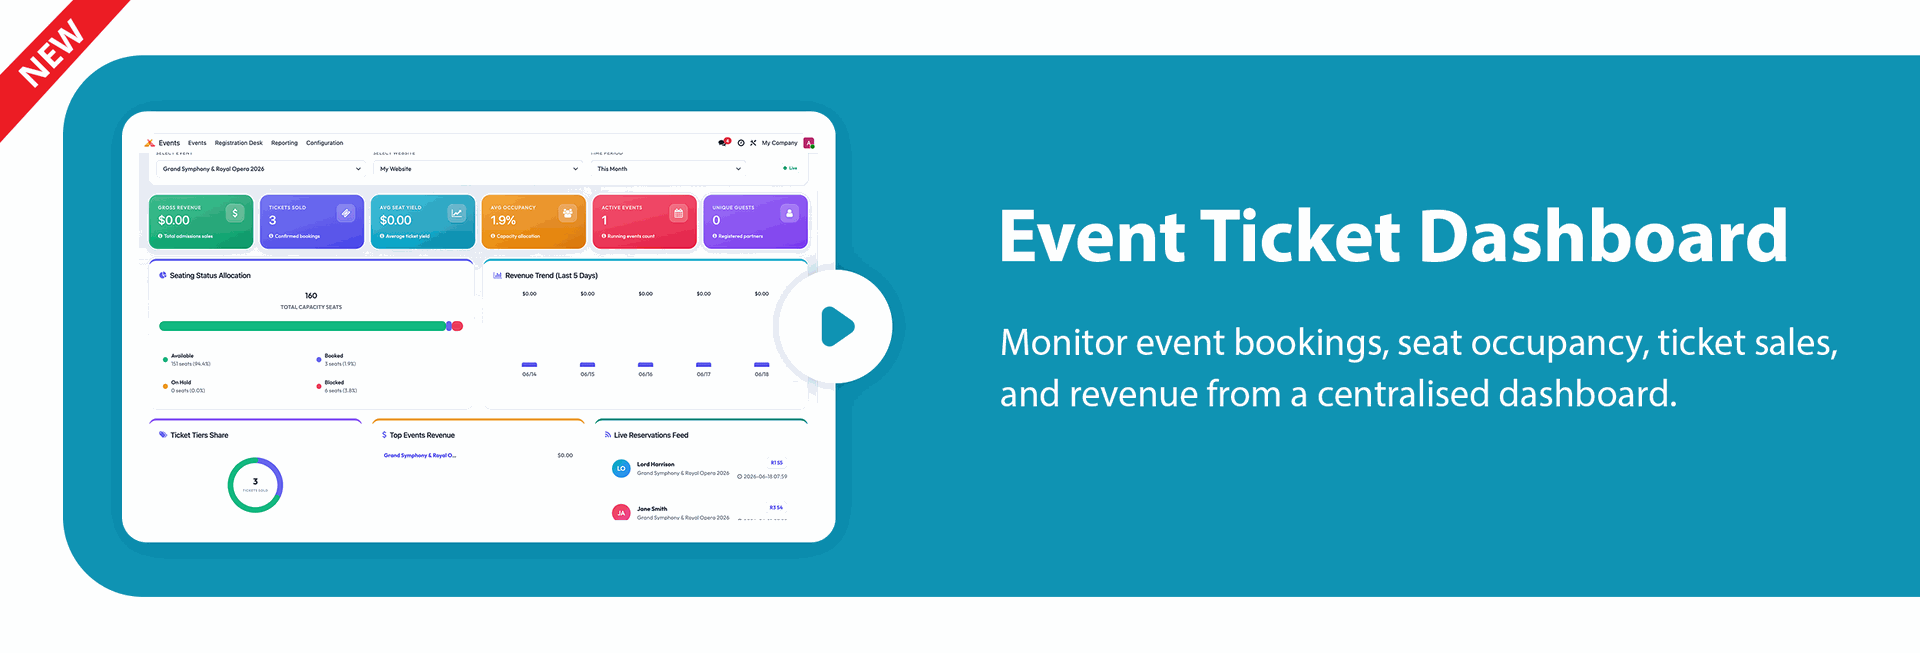
Seating Occupancy & Revenue Dashboard
Monitor real-time seat occupancy, bookings, and event revenue from a centralized dashboard.
Dynamic Seat Arrangement
Design and manage unlimited event seating layouts for different venue types.

Responsive Booking Interface
Access and manage event seat bookings seamlessly on mobile, tablet, and desktop devices.

Double Booking Prevention
Prevent duplicate seat bookings and improve event management accuracy.

Blank Row & Column Support
Add blank rows and columns to create flexible seating layouts and aisle spacing.
Event-Based Seat Arrangement
Arrange and customize seat layouts based on the requirements of each event.

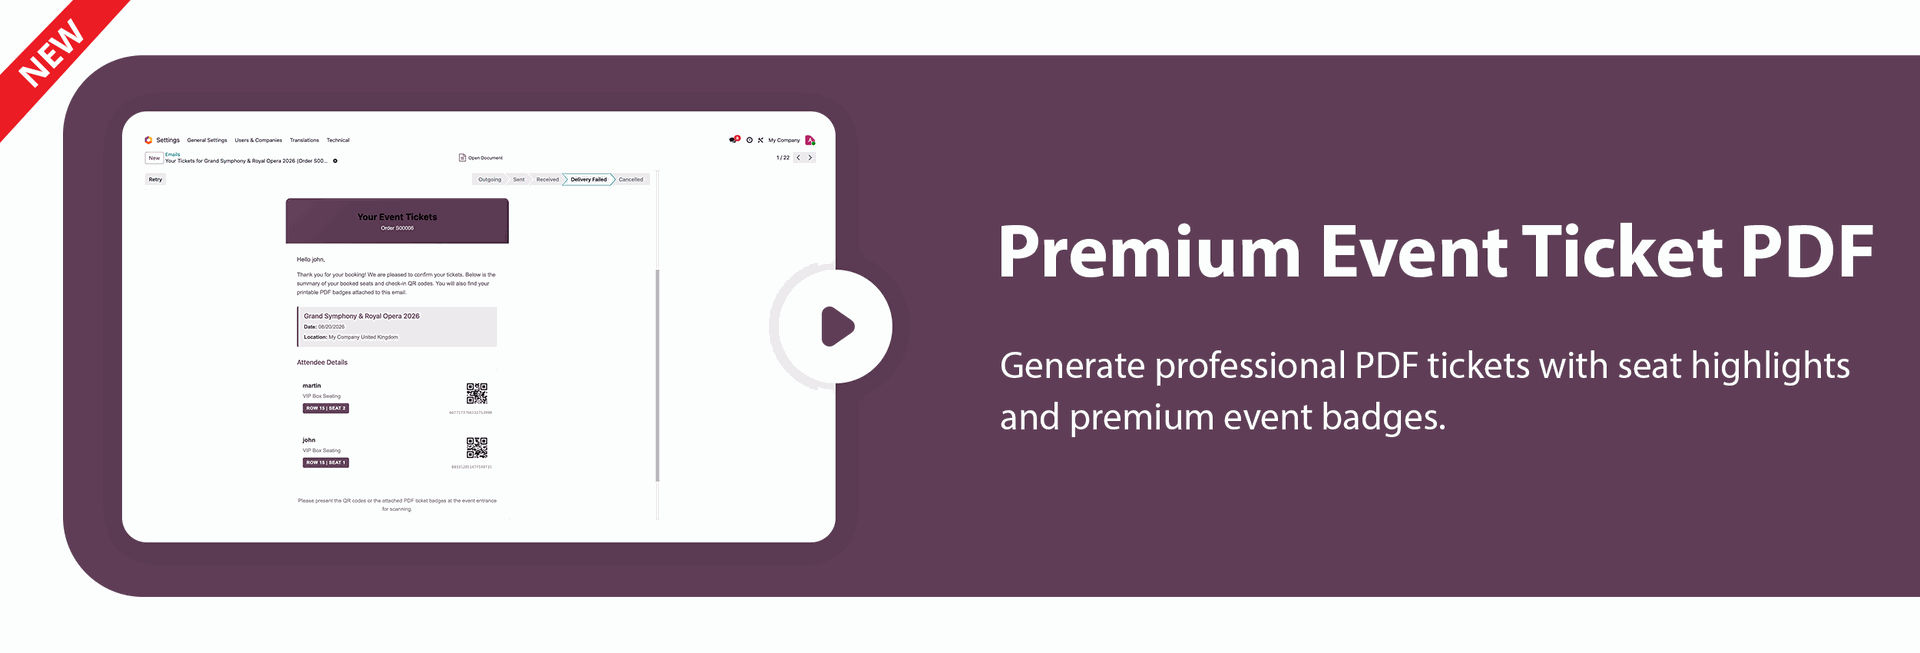
Premium Event Ticket PDF
Generate professional PDF tickets with seat highlights and premium event badges.

Multi-Company VIP Seat Security
Isolate VIP and sponsor seat management securely across multiple companies.
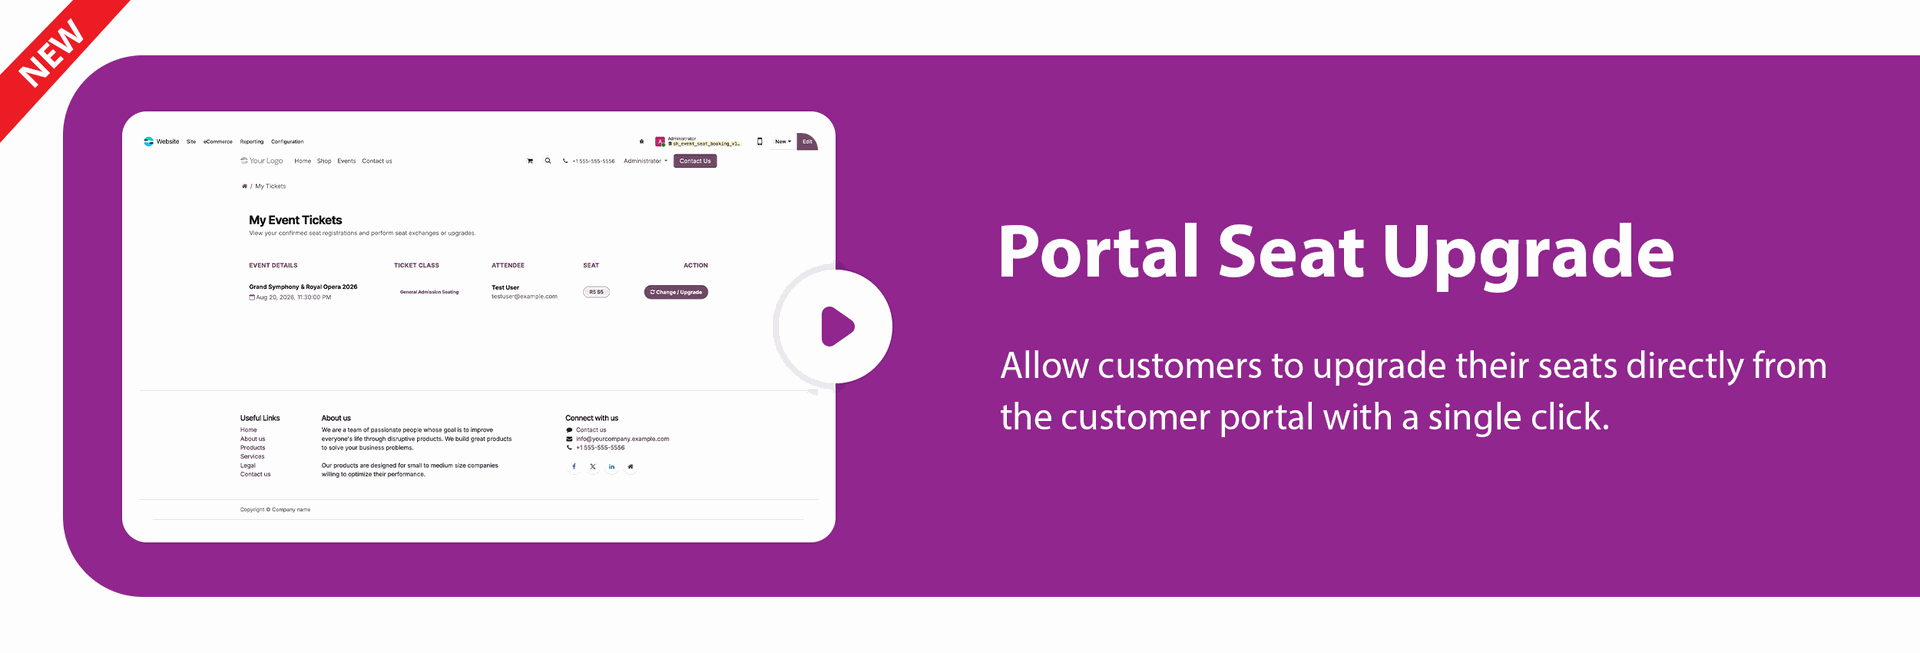
Portal Seat Upgrade
Allow customers to upgrade their seats directly from the customer portal with a single click.
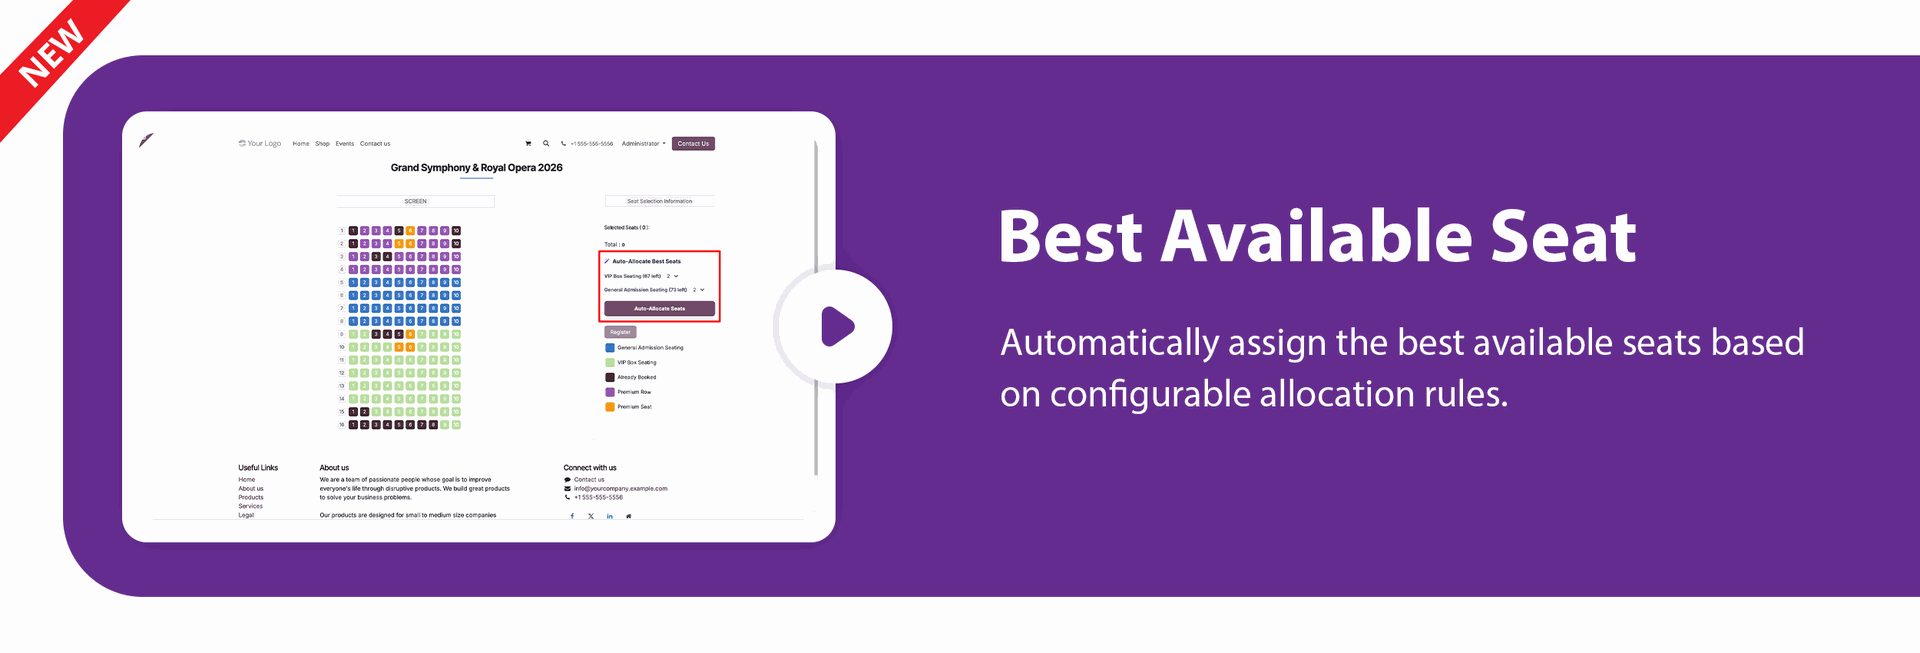
Best Available Seat Allocation
Automatically assign the best available seats based on configurable allocation rules.
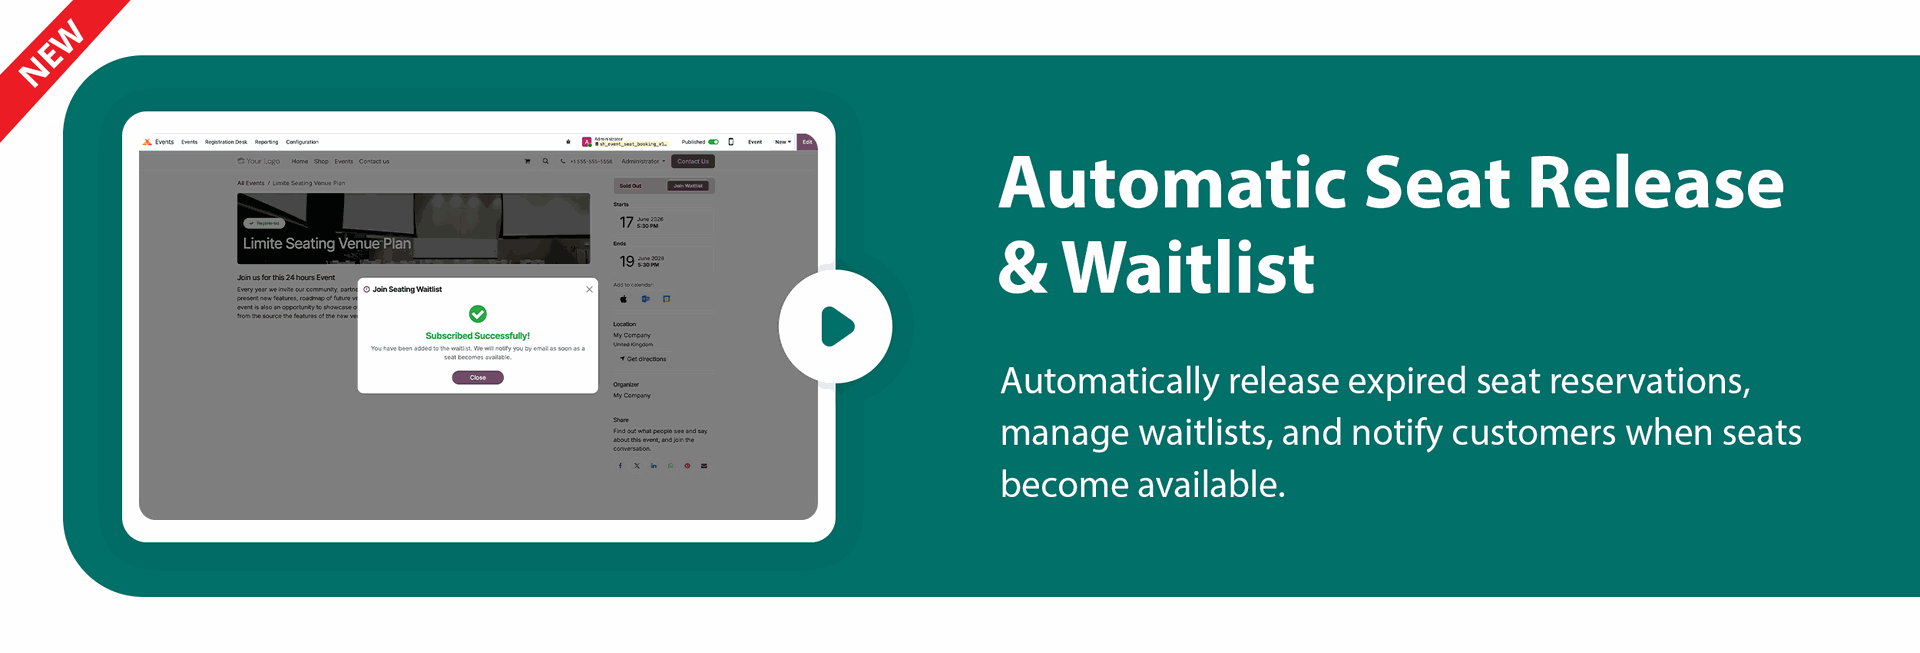
Automatic Seat Release & Waitlist
Automatically release expired seat reservations, manage waitlists, and notify customers when seats become available.
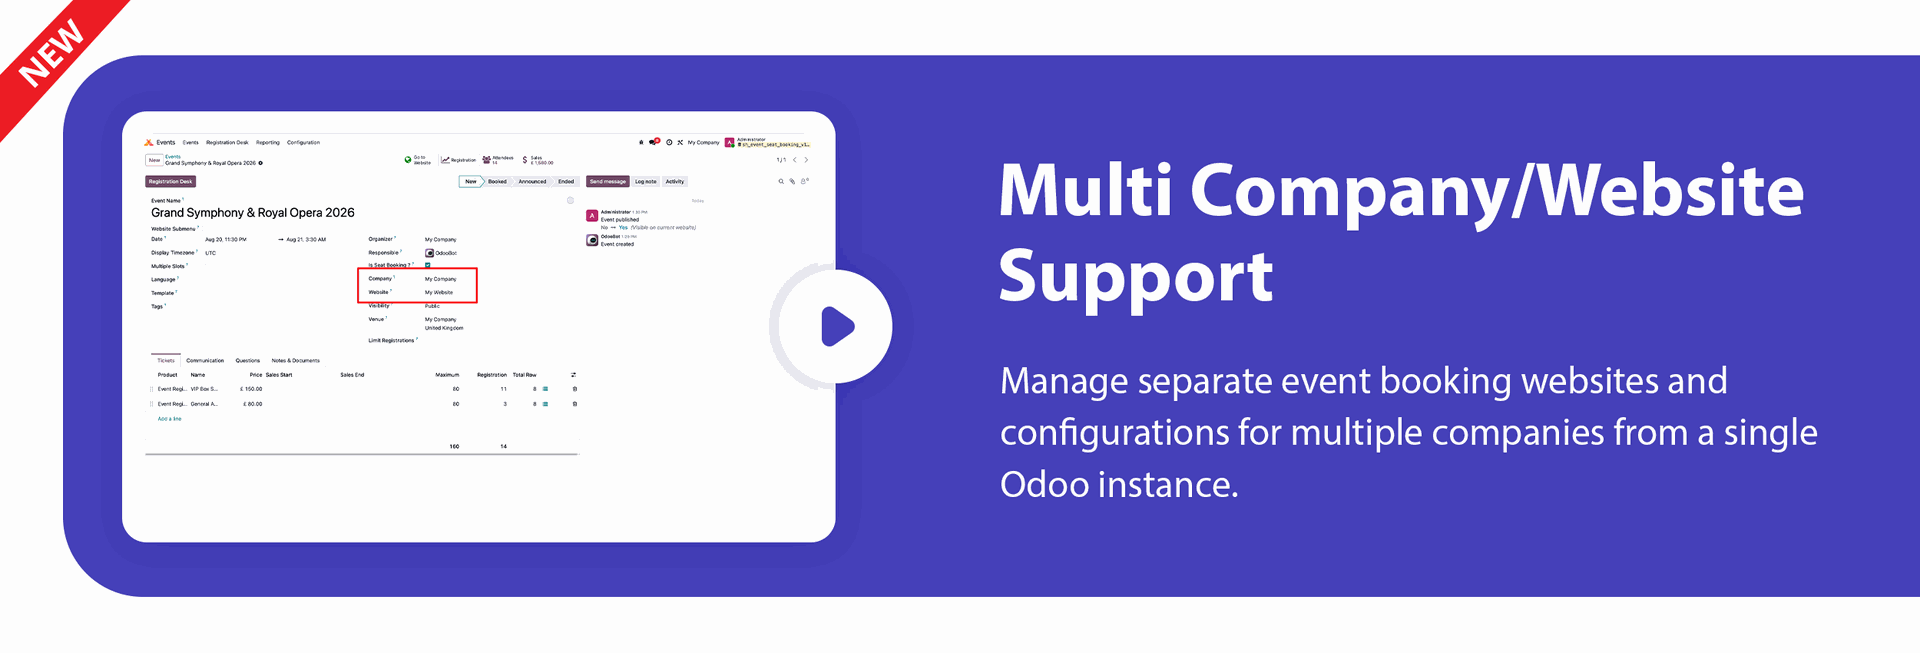
Multi-Company Website Support
Manage separate event booking websites and configurations for multiple companies from a single Odoo instance.

Go to the Events app, open the Reporting menu, and select the Seating Dashboard submenu to view seating analytics and event seating insights.
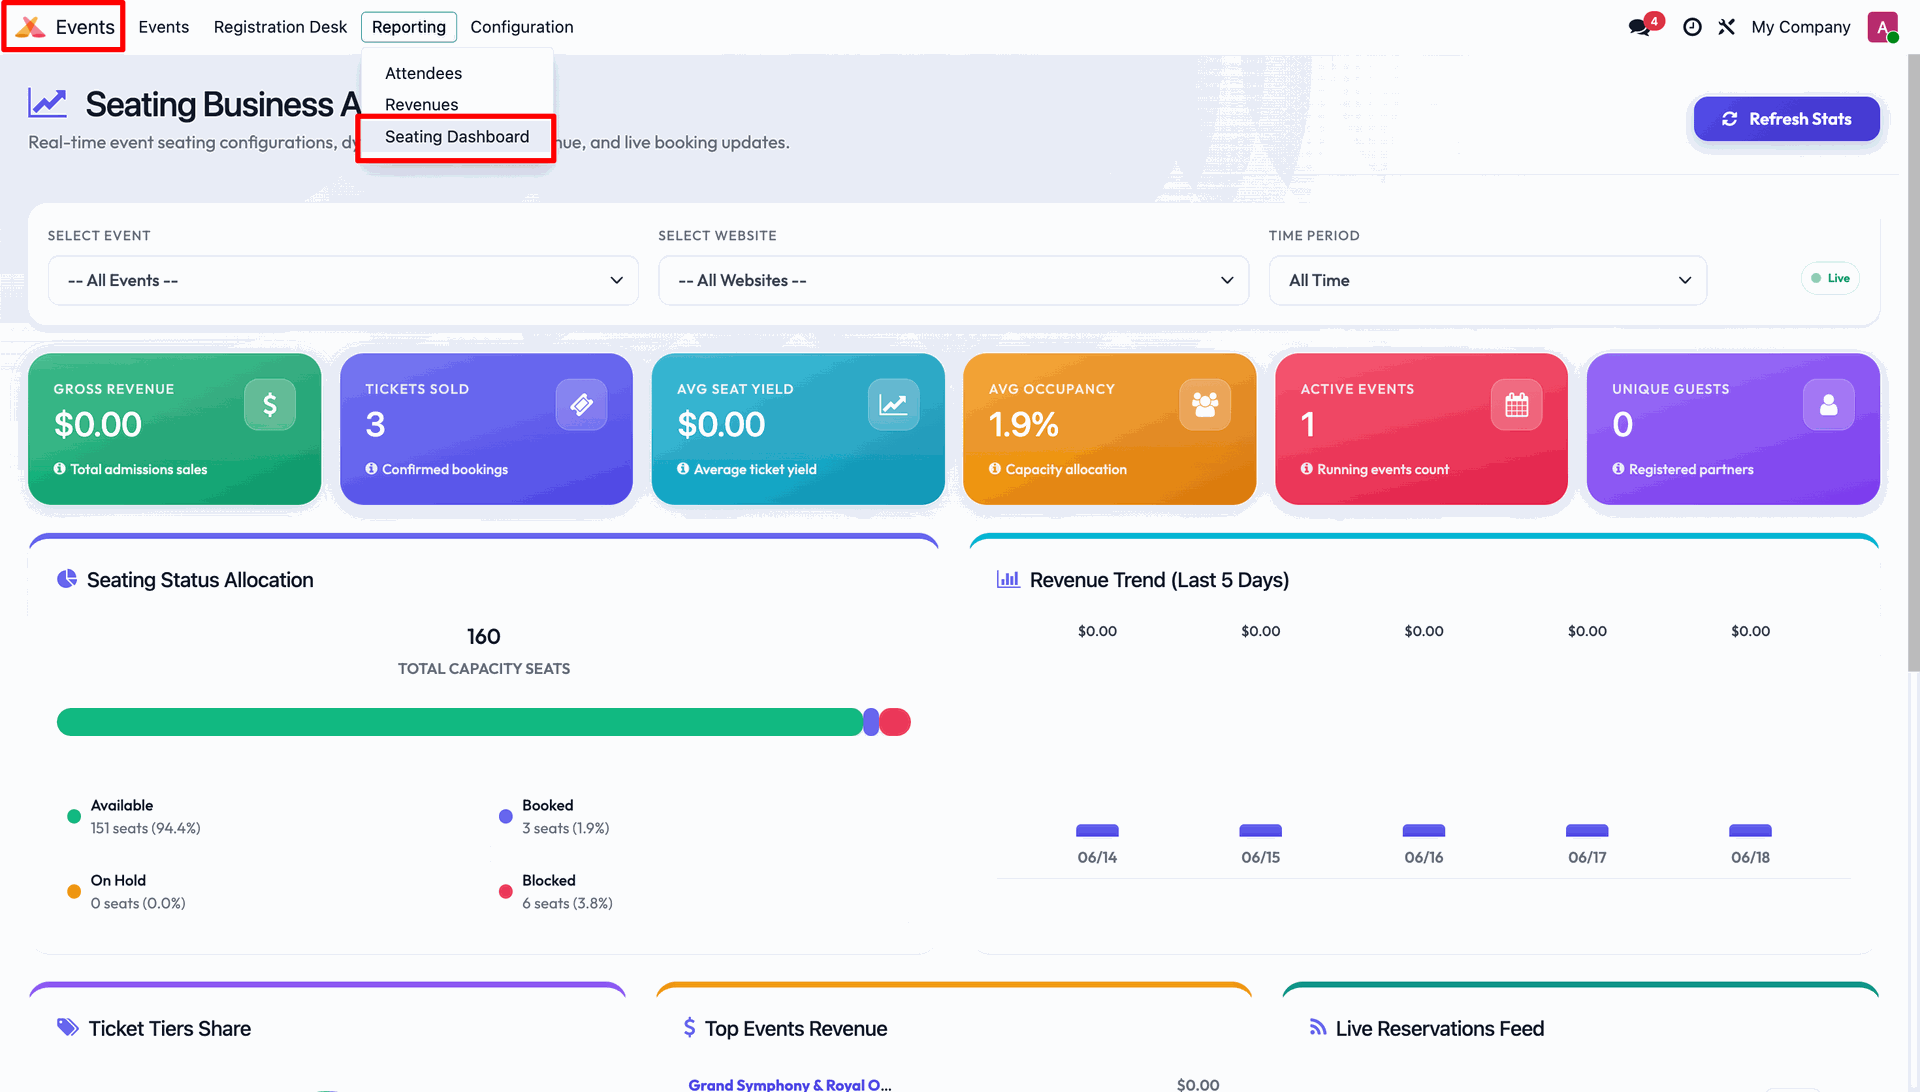
The Seating Dashboard displays key metrics including Gross Revenue, Tickets Sold, Average Seat Yield, Average Occupancy, Active Events, and Unique Guests.
It also provides Seating Status Allocation and a Revenue Trend (Last 5 Days) chart for quick performance analysis.
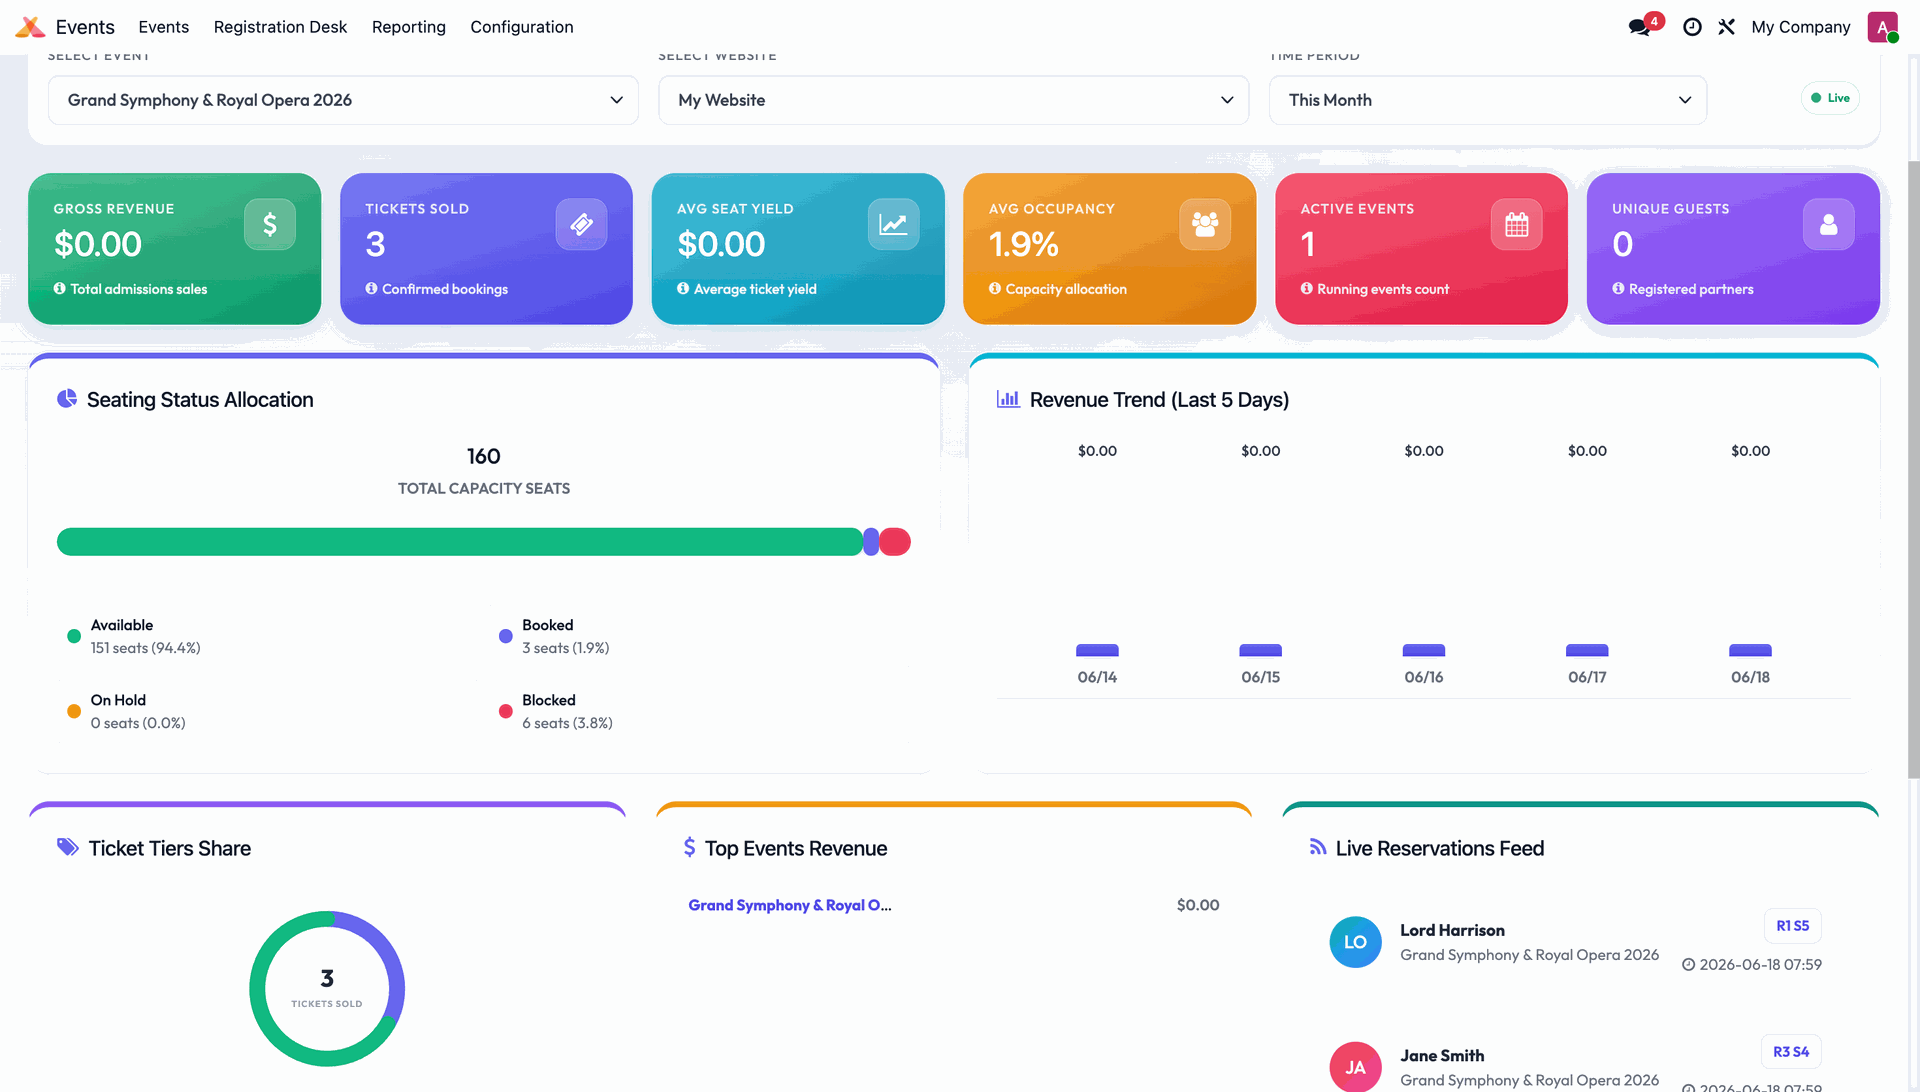
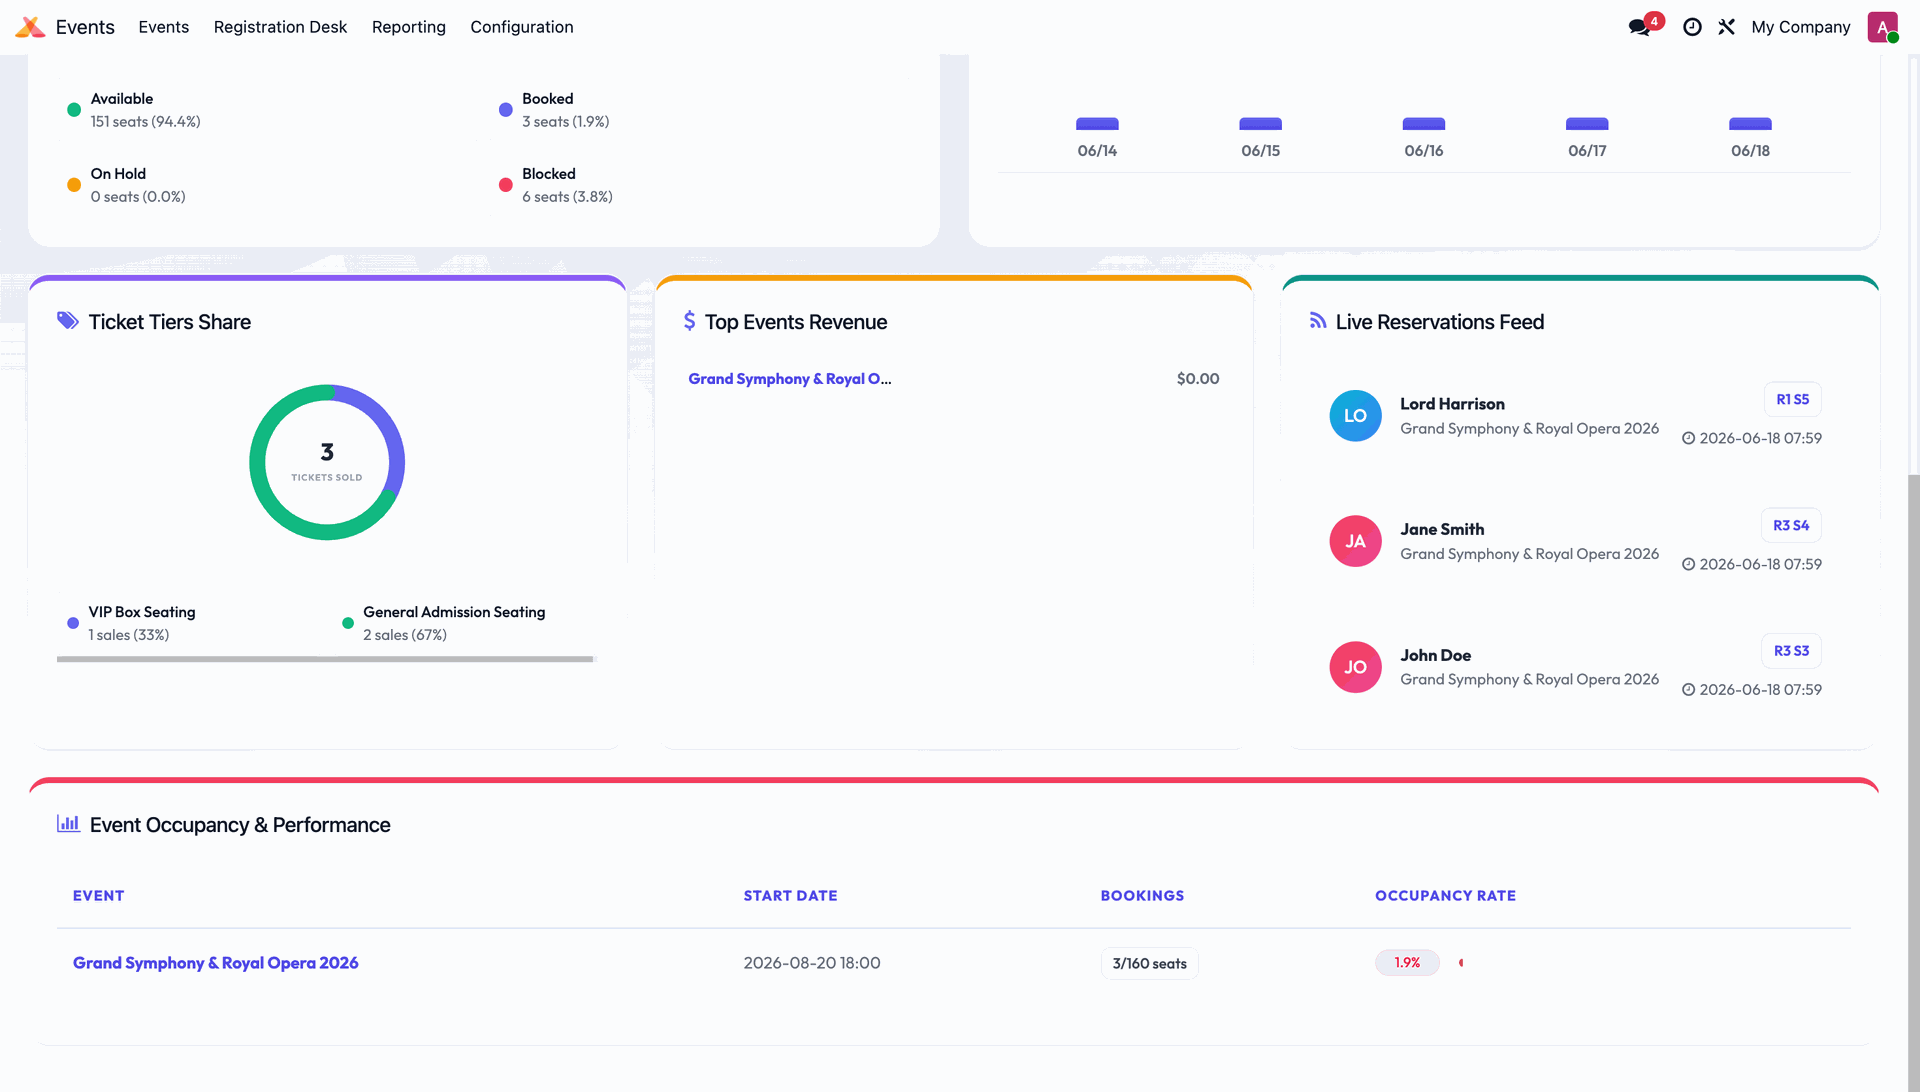
The Seating Dashboard also includes Ticket Tier Share, Top Events by Revenue, and Live Reservation Feed charts, along with an Event Occupancy & Performance table for comprehensive event performance analysis.
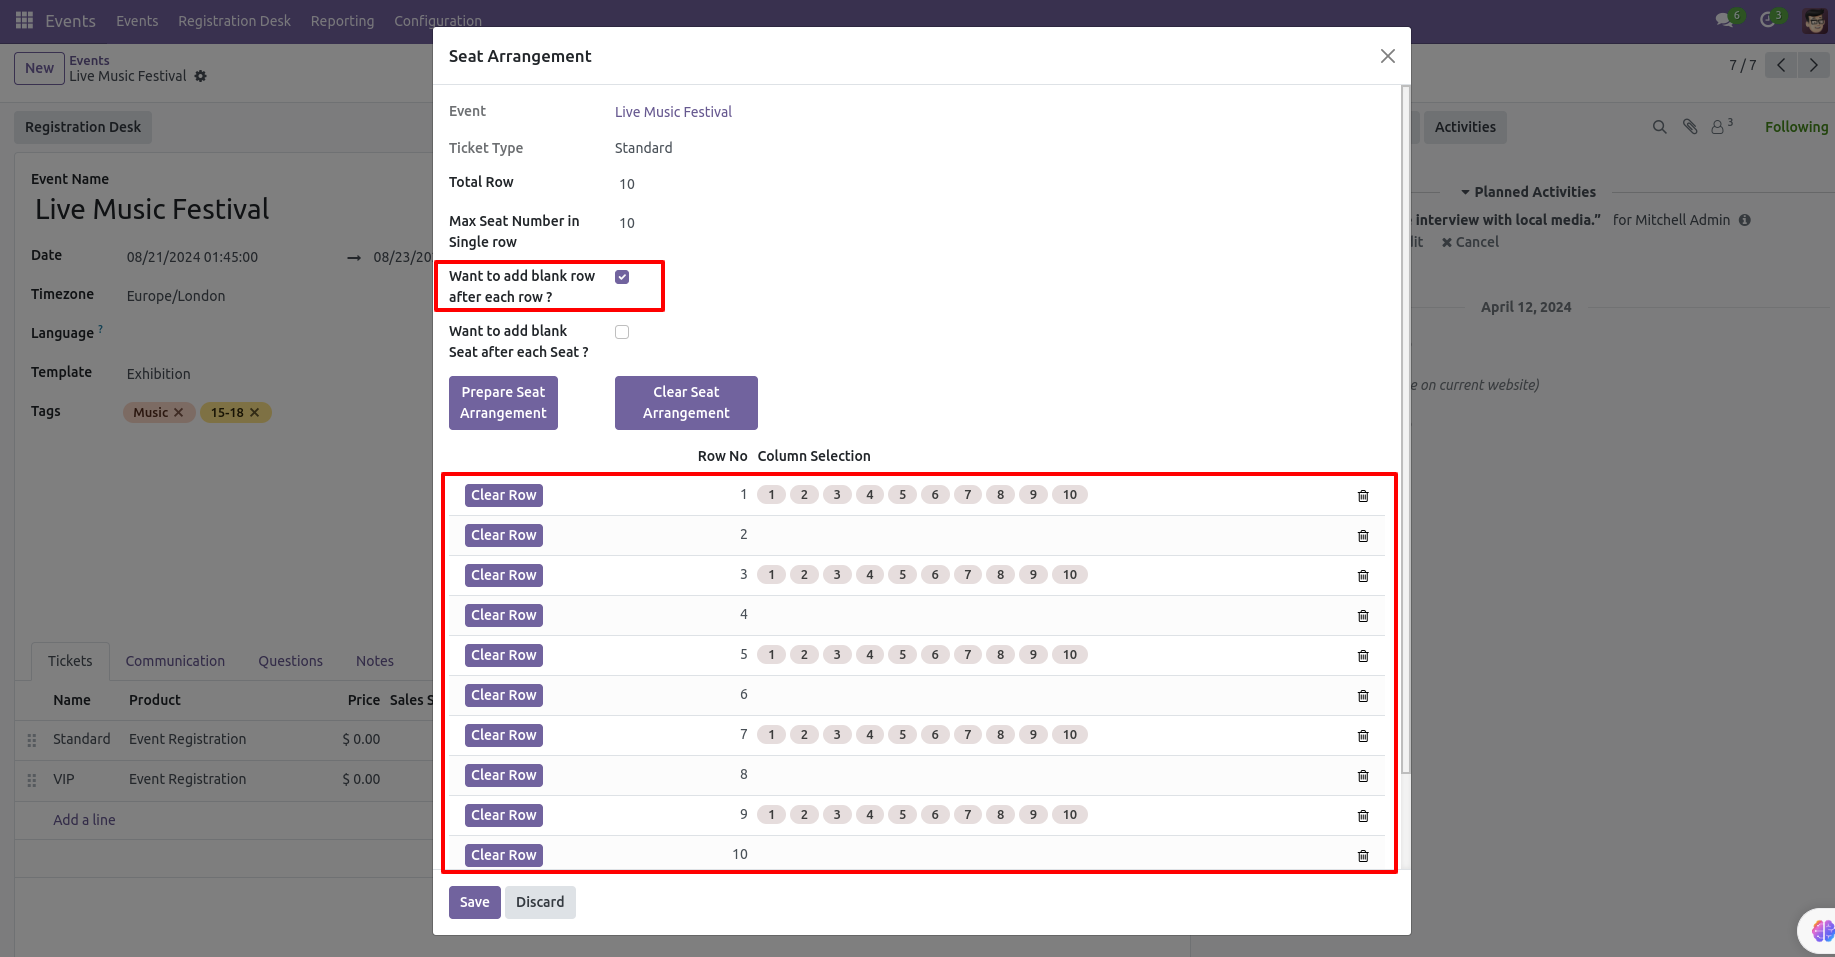
Row wise clear button added for full empty row.

If you want to add the blank seat after each row then tick that checkbox and press "Prepare Seat Arrangement".
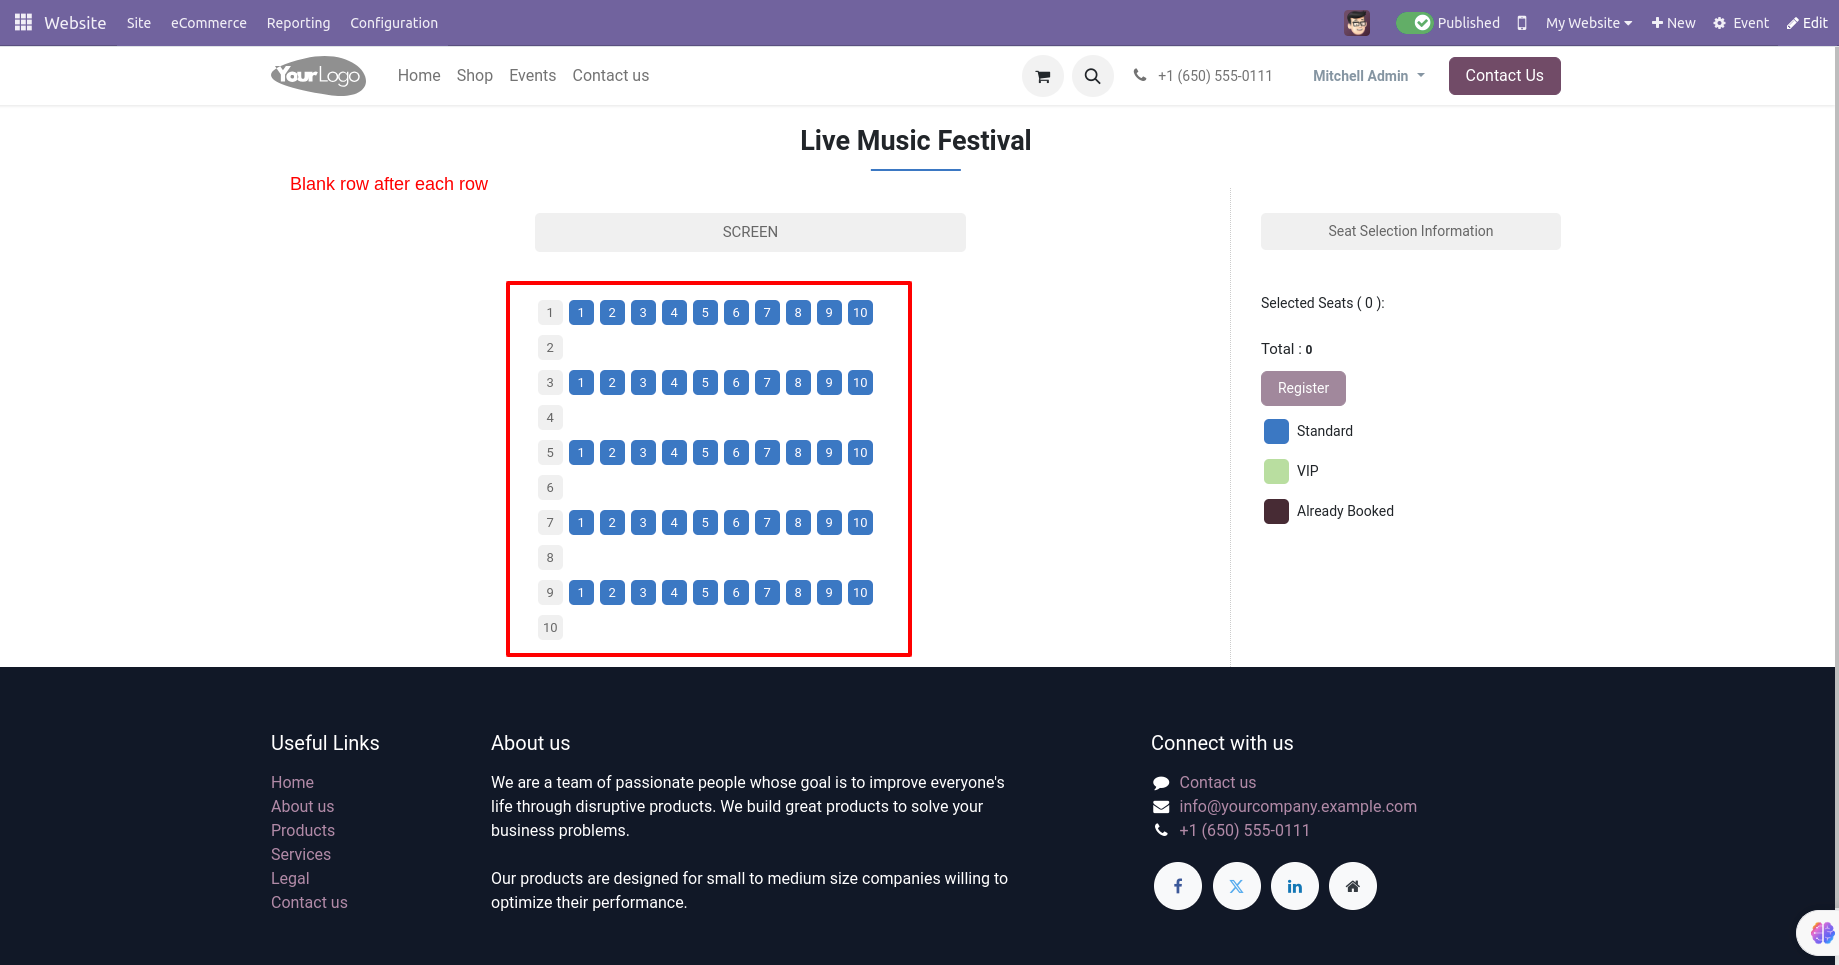
The empty seat after each row at the website looks like this.
If you want to add the blank seat after each column then tick that checkbox and press "Prepare Seat Arrangement".
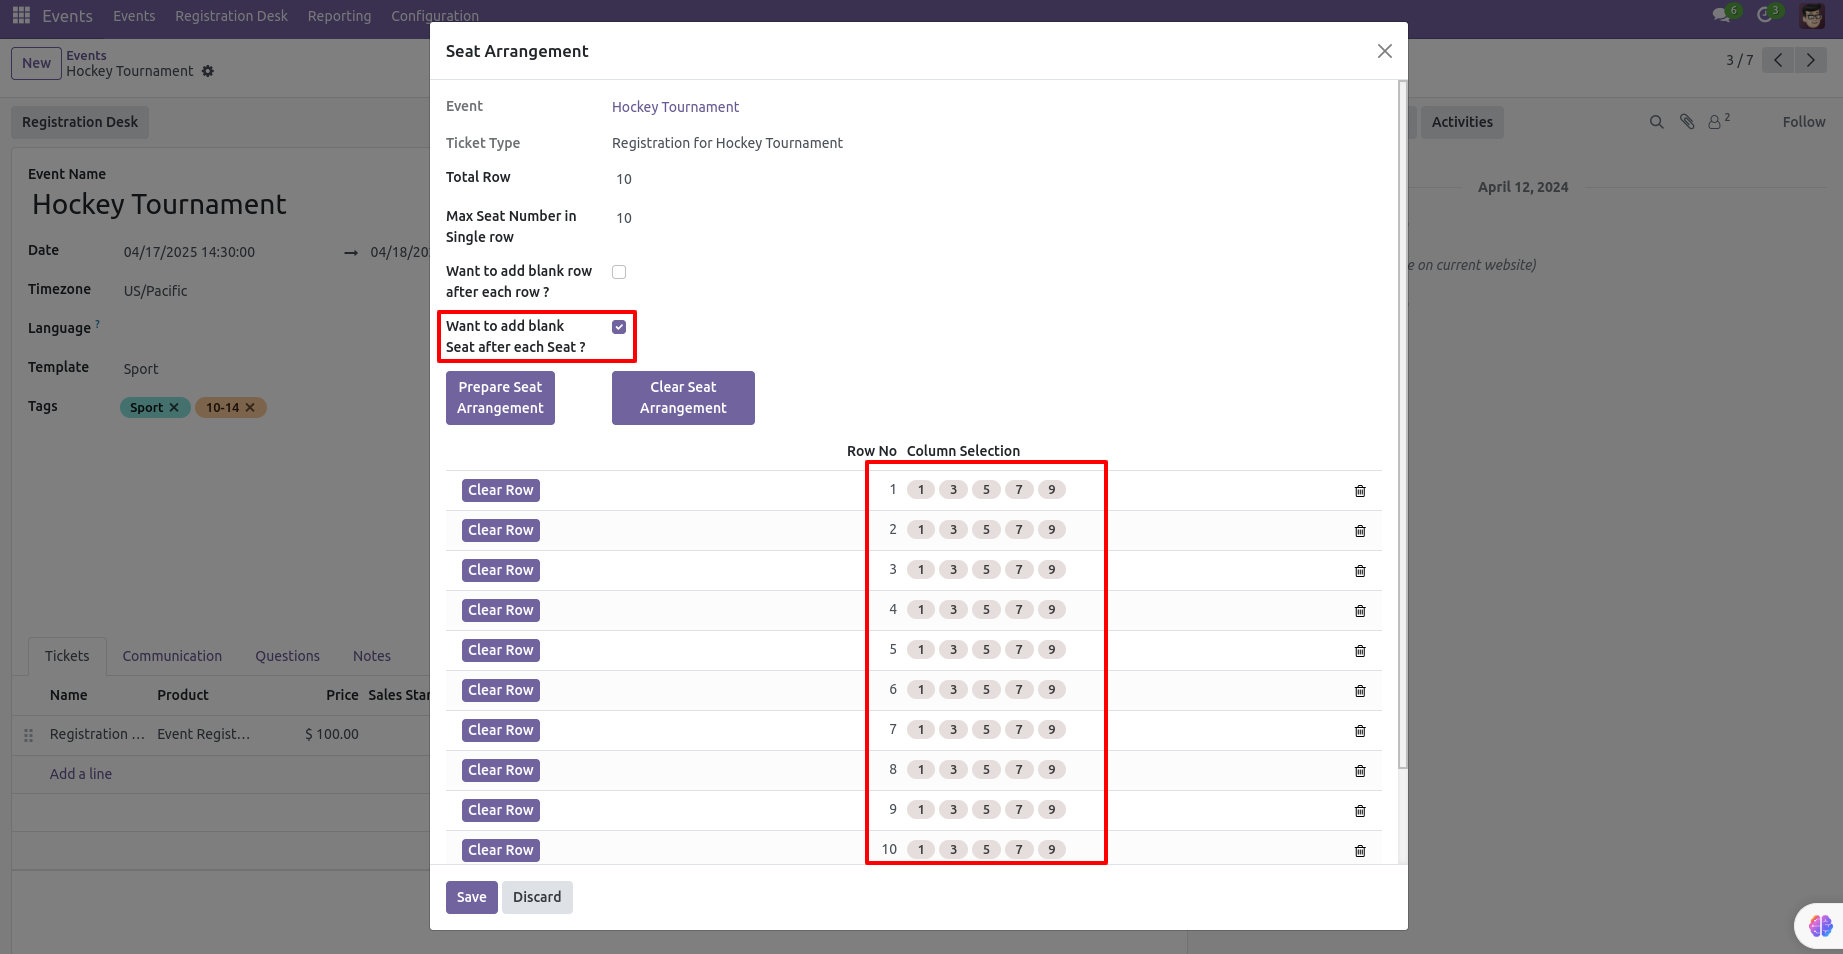
The empty seat after each column at the website looks like this.
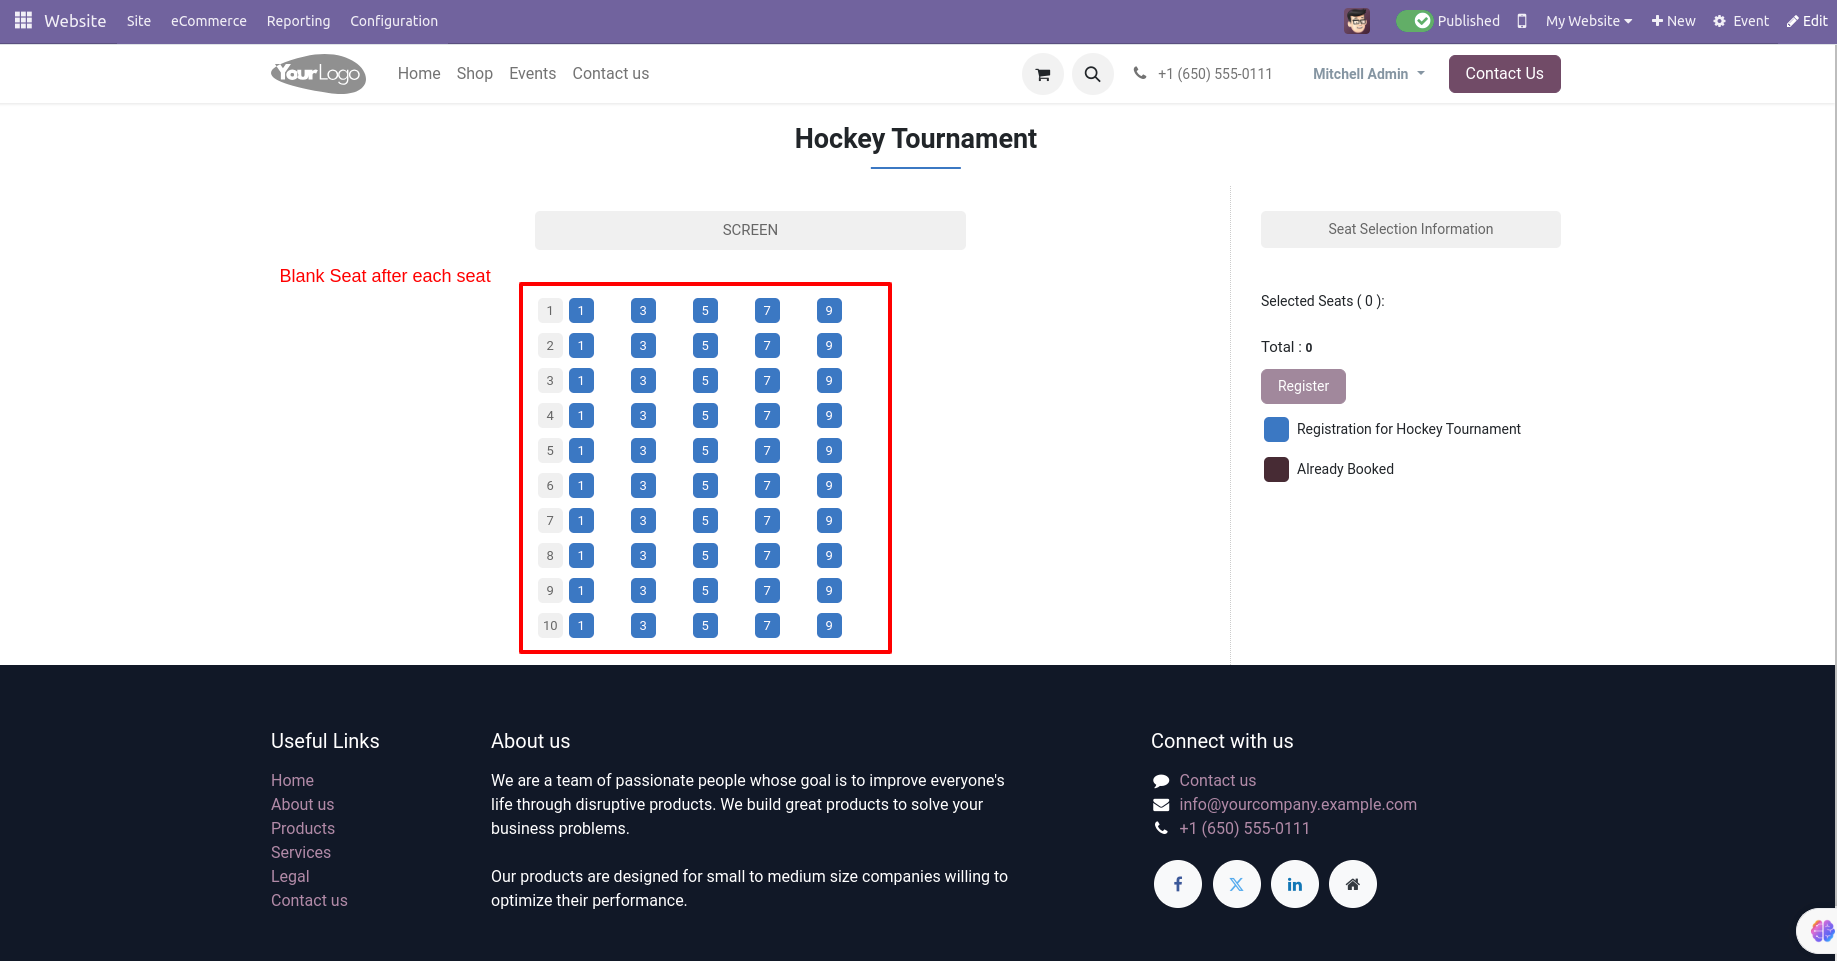
If you want to add the blank seat after each row & column then tick that both checkboxes and press "Prepare Seat Arrangement".
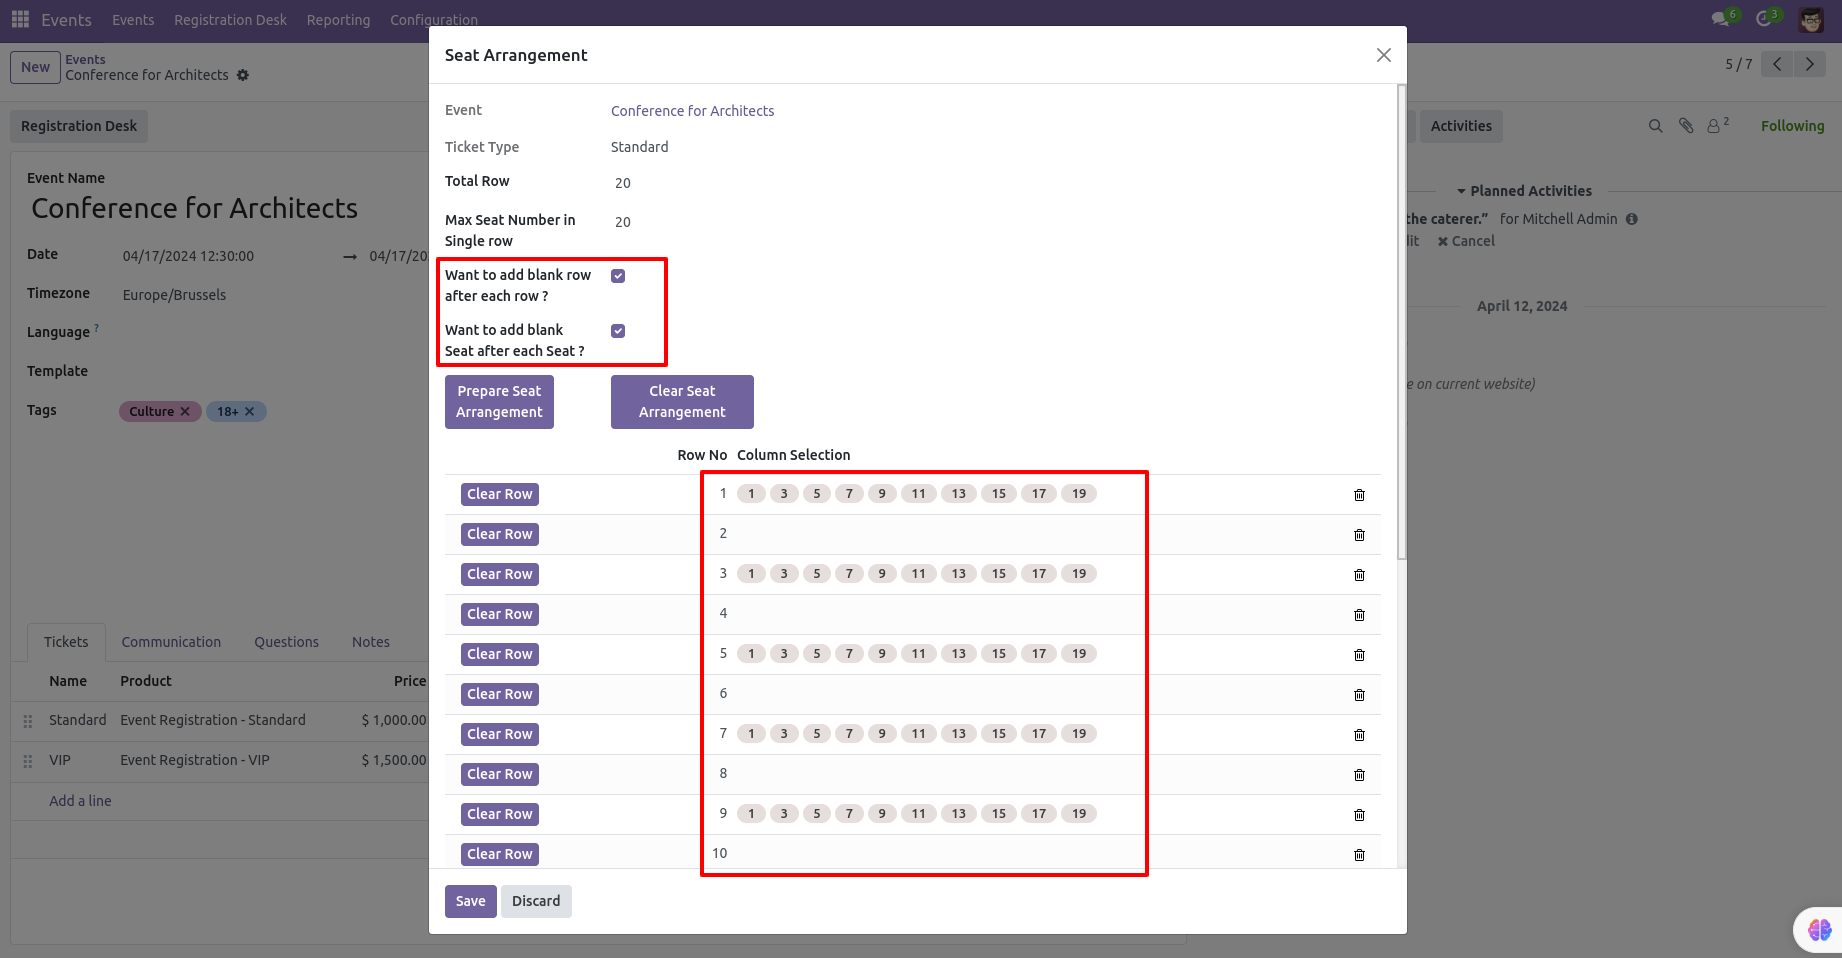
The empty seat after each row & column at the website looks like this.
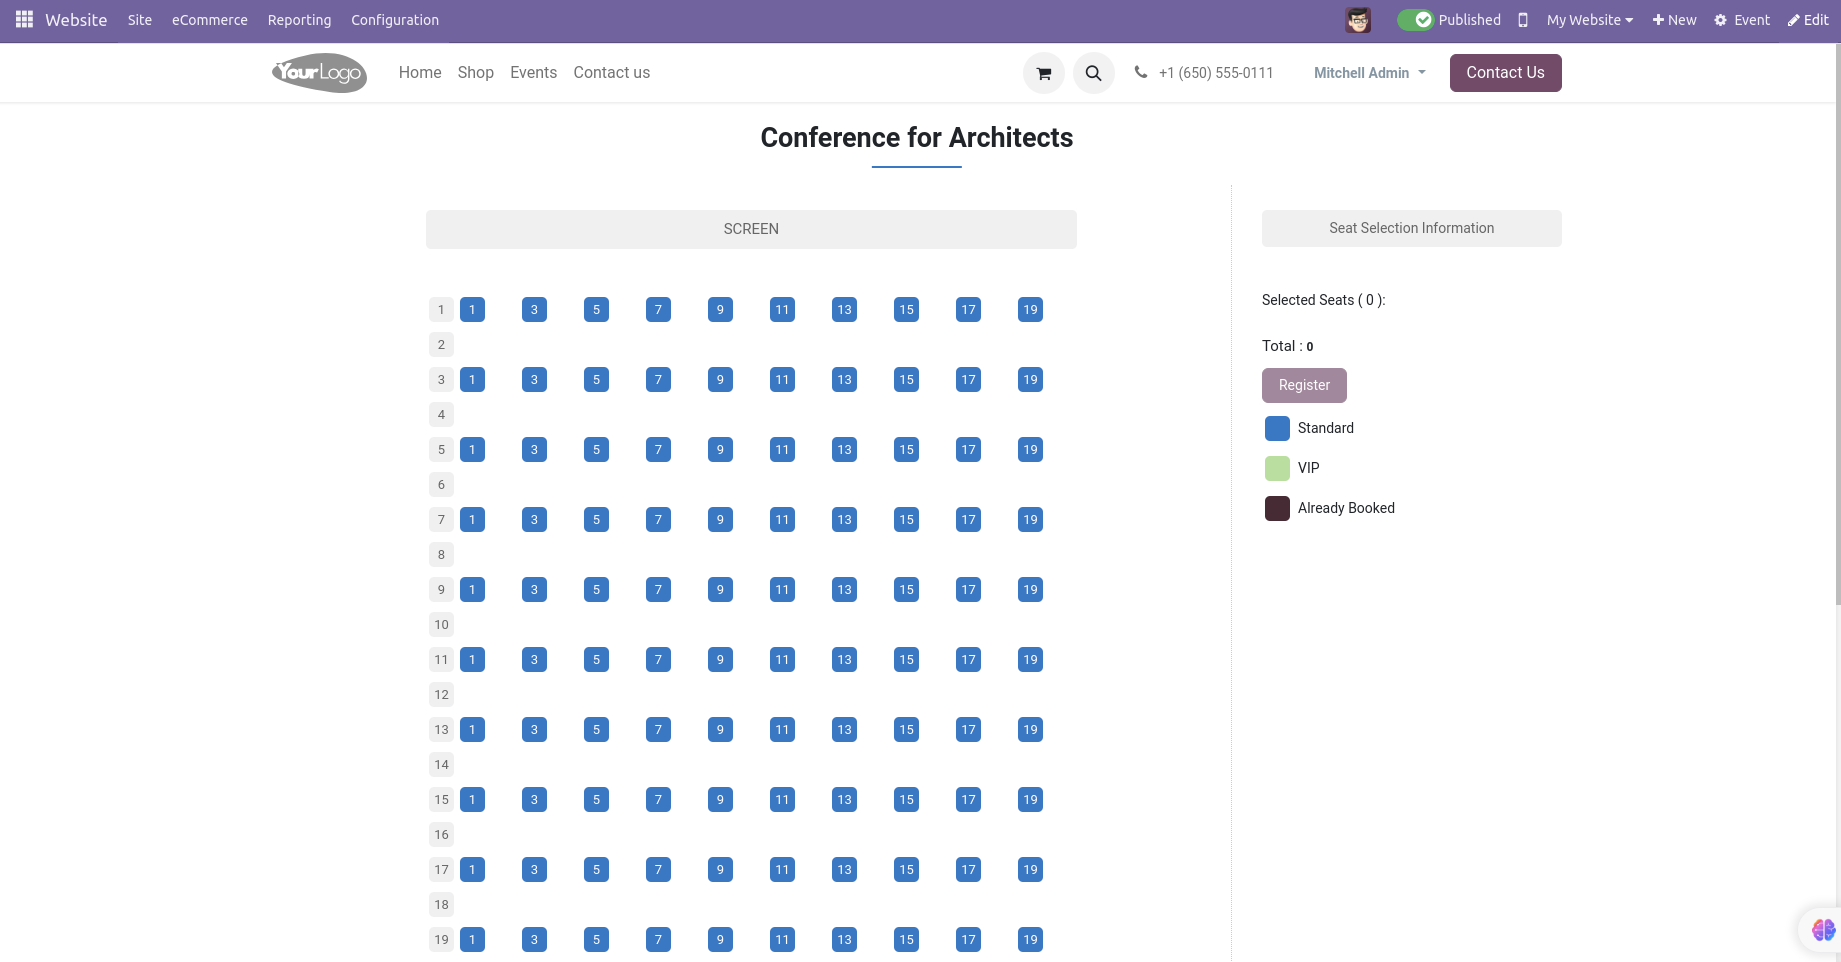
Go to "Events" and enable "Is Seat Booking?" for seat booking.
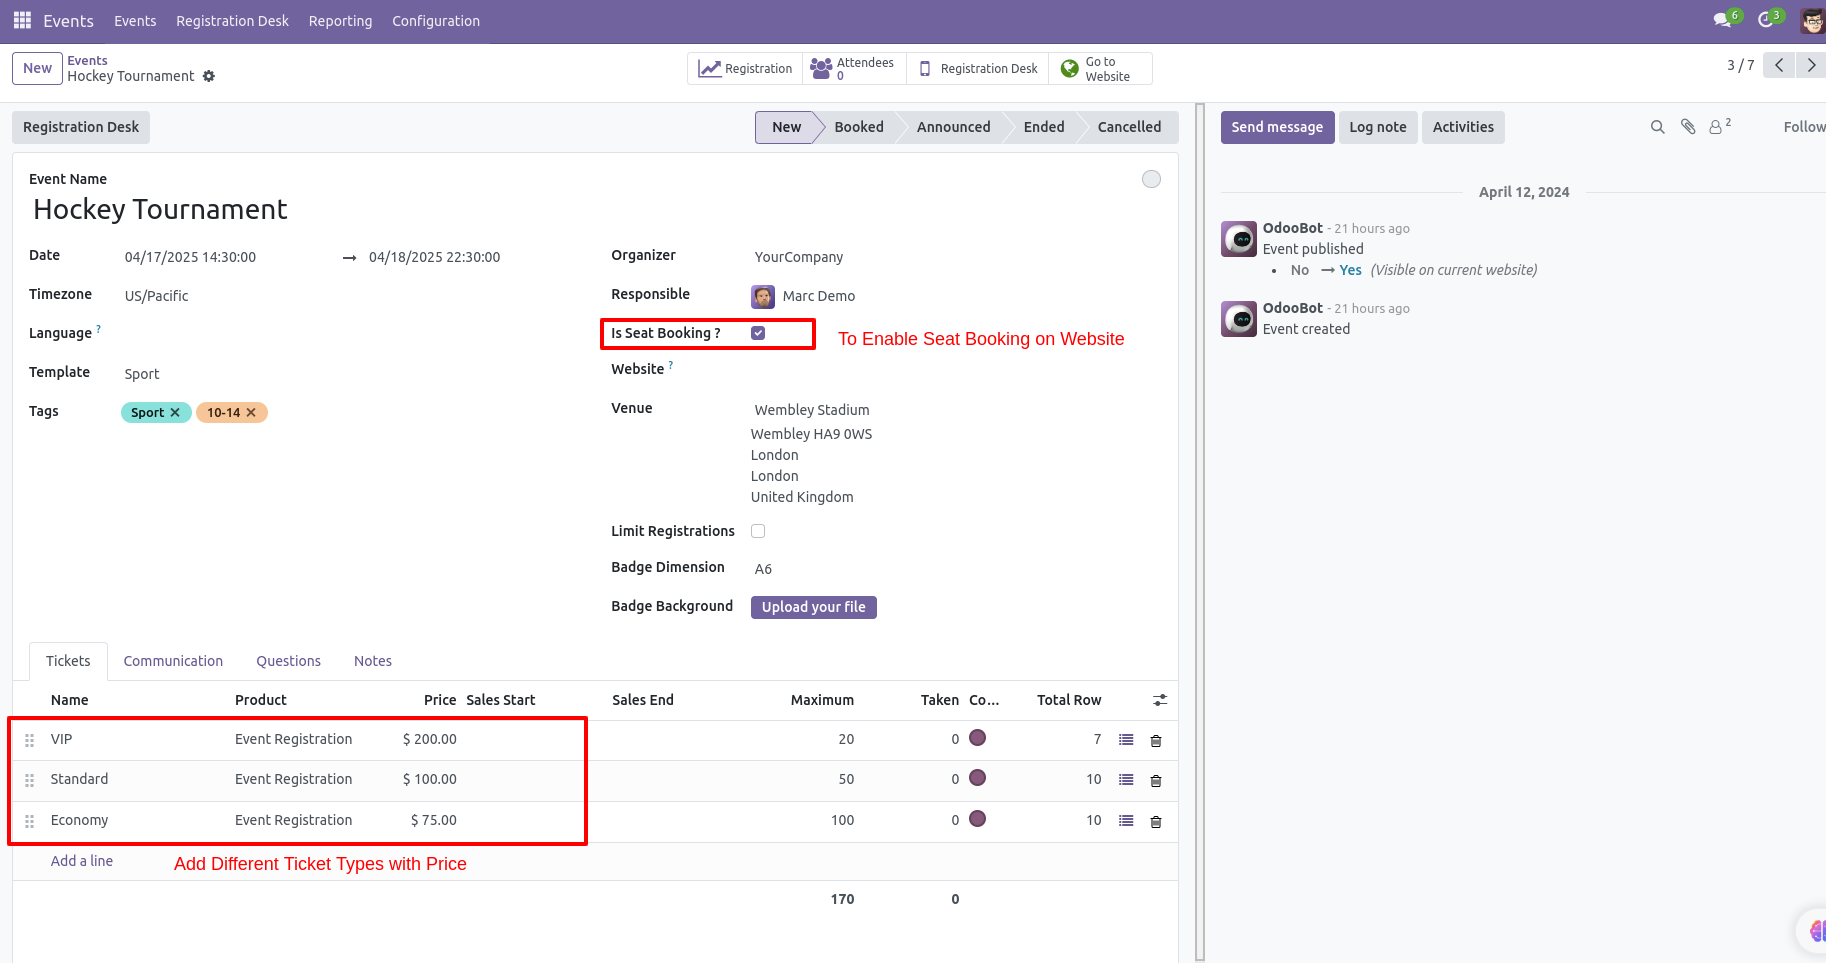
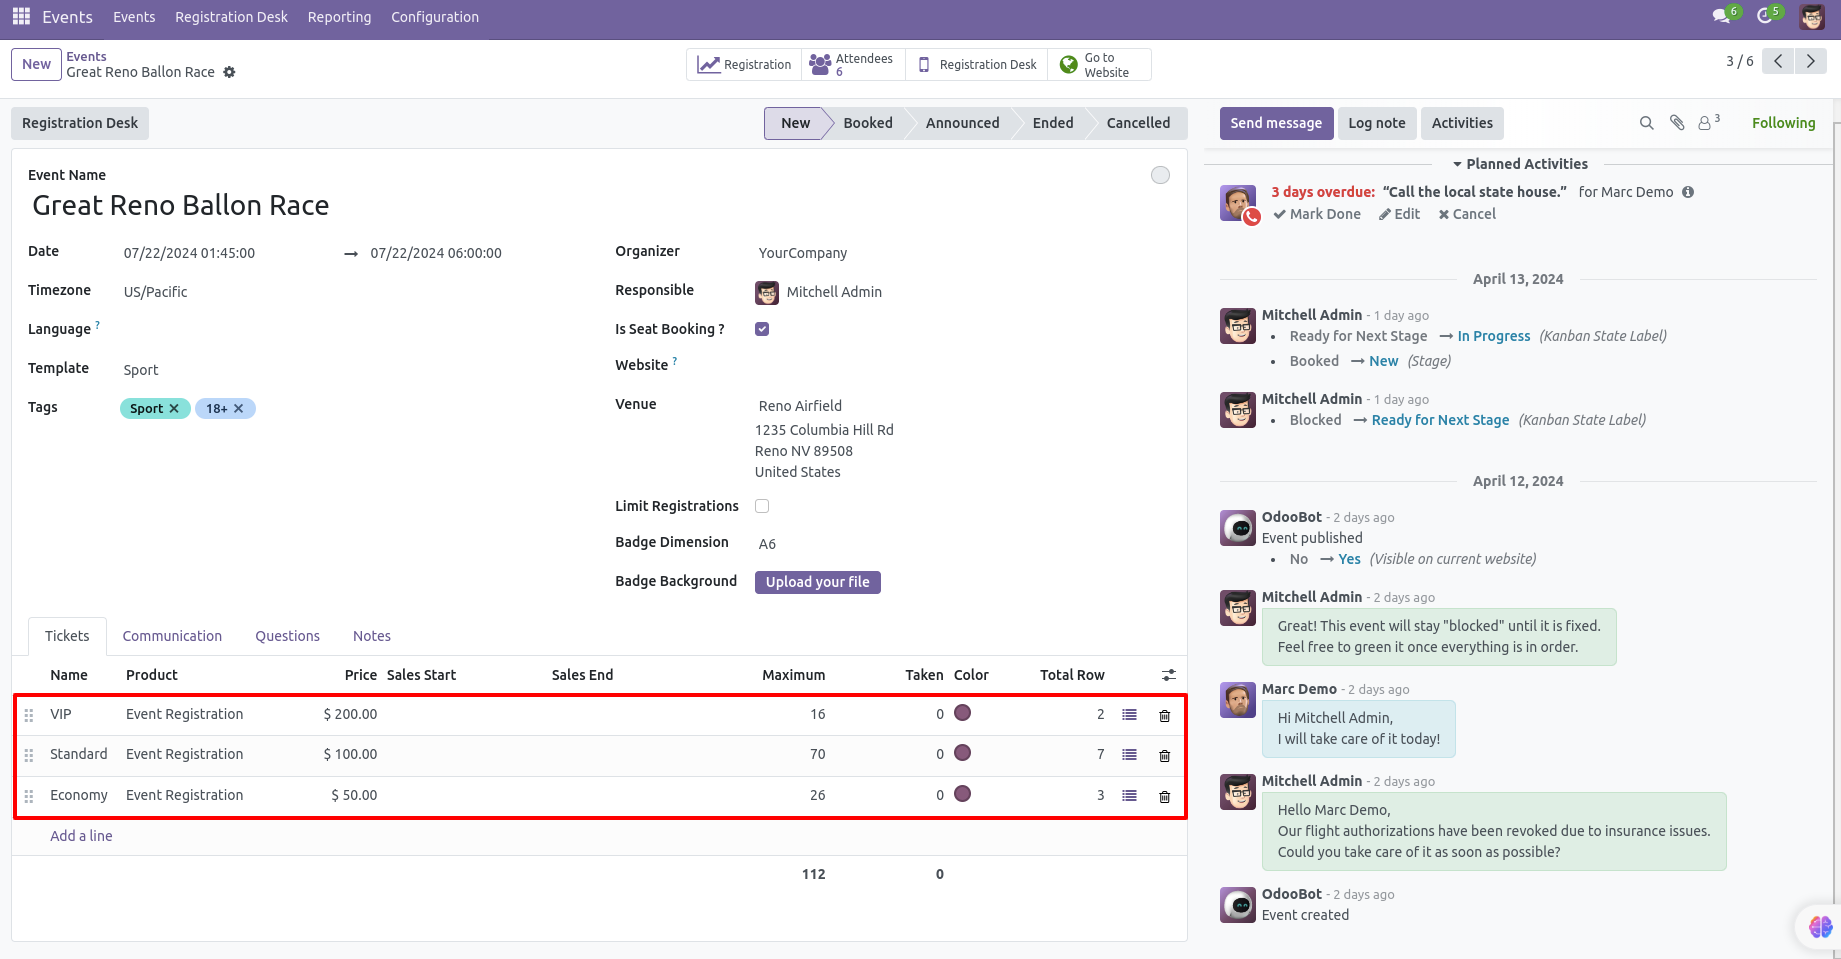
In the tickets tab, you can add different types of Tickets.
For ex: VIP, Standard, etc. You can add any number of tickets/screens.
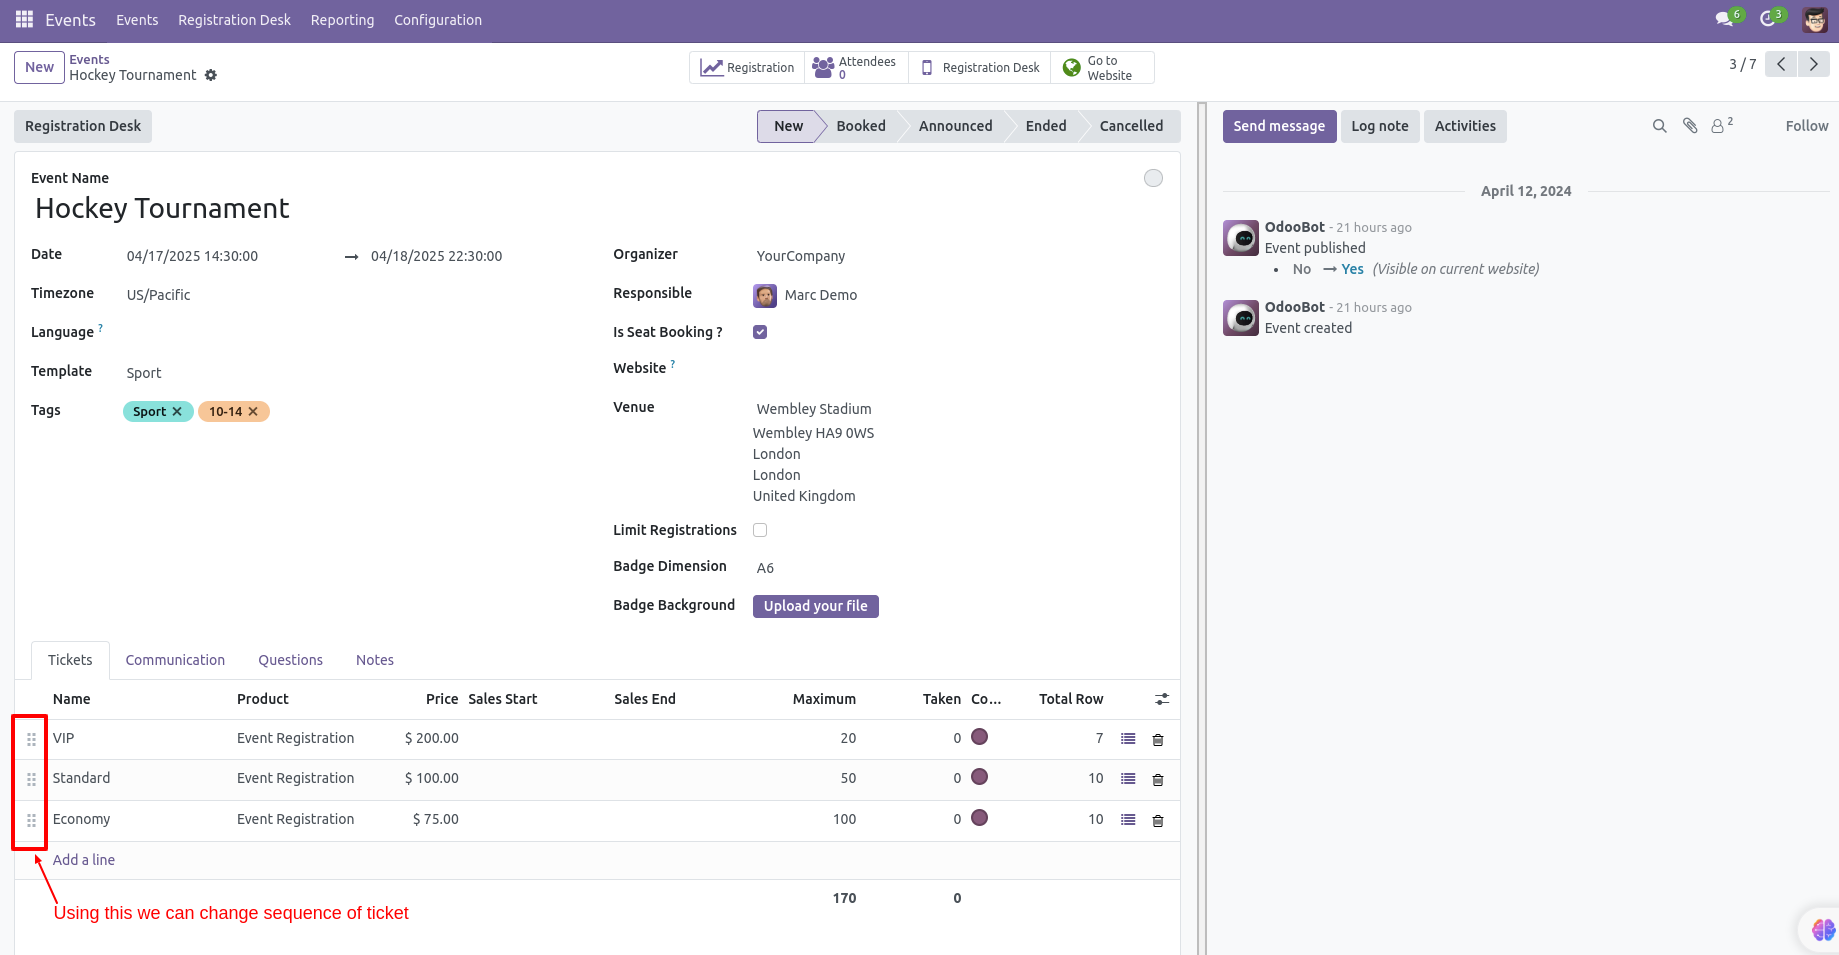
On the website, these sequences will be followed on-screen. You can edit or change this
ticket sequence.
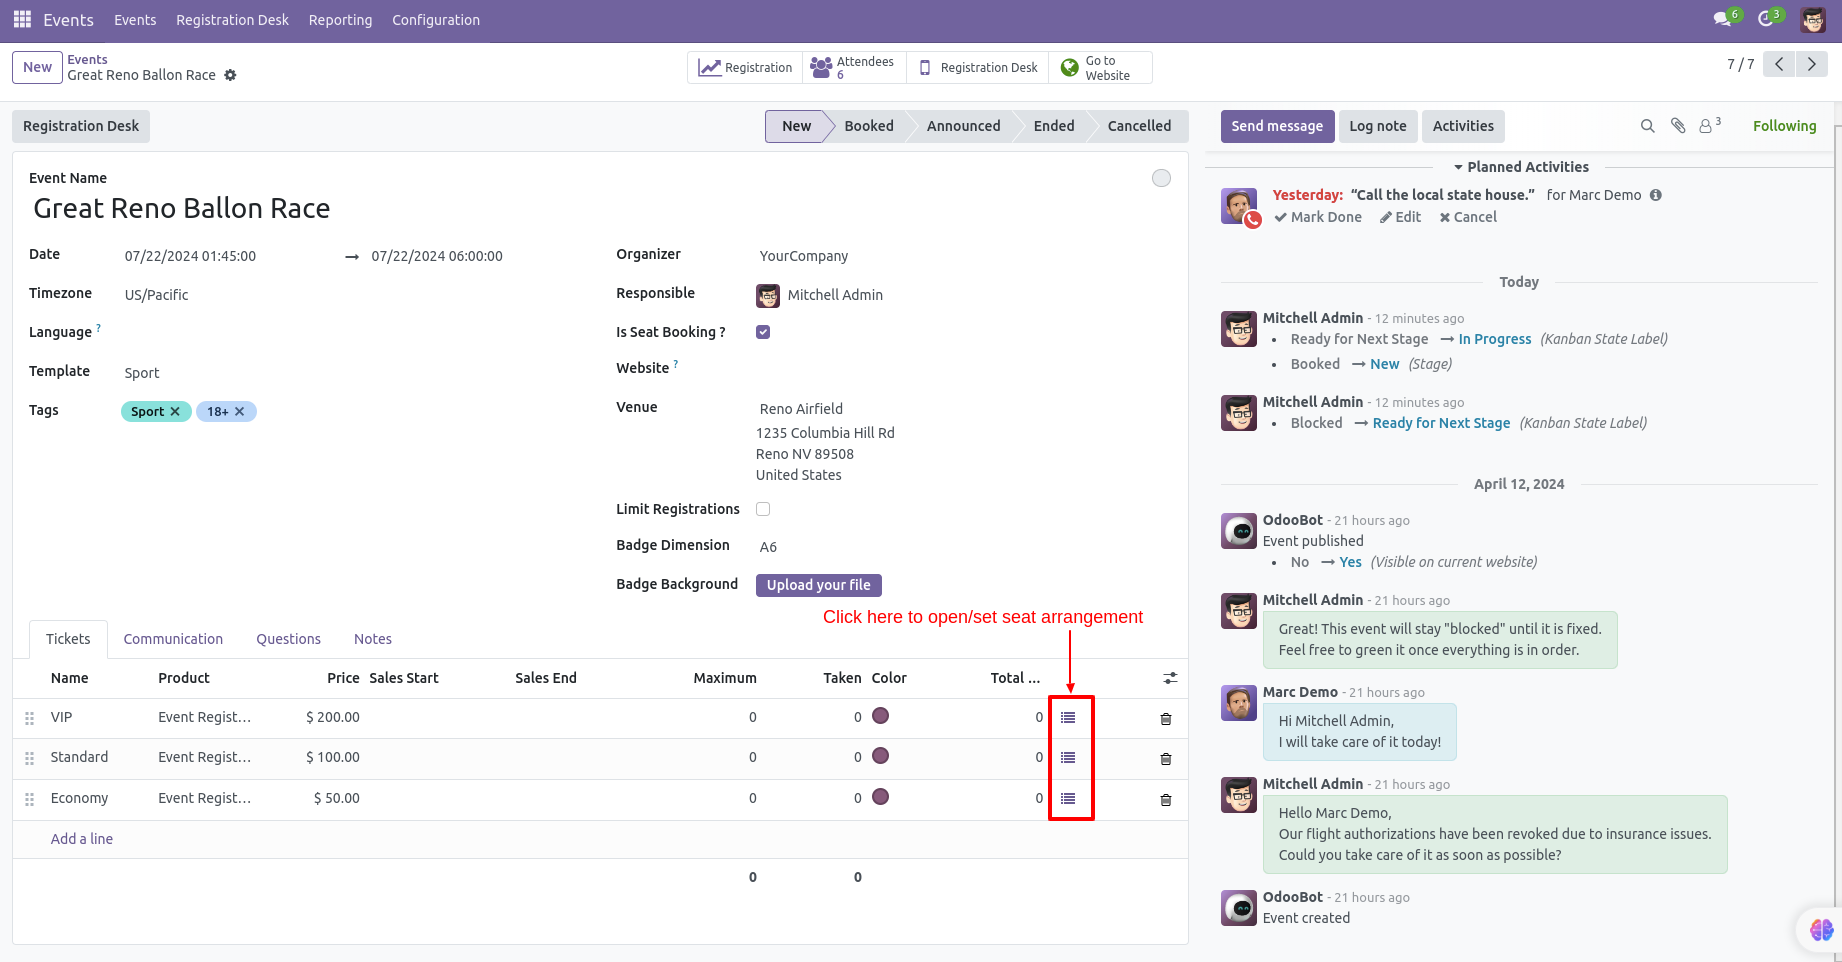
For Seating Arrangement click the smart button that given beside each ticket.
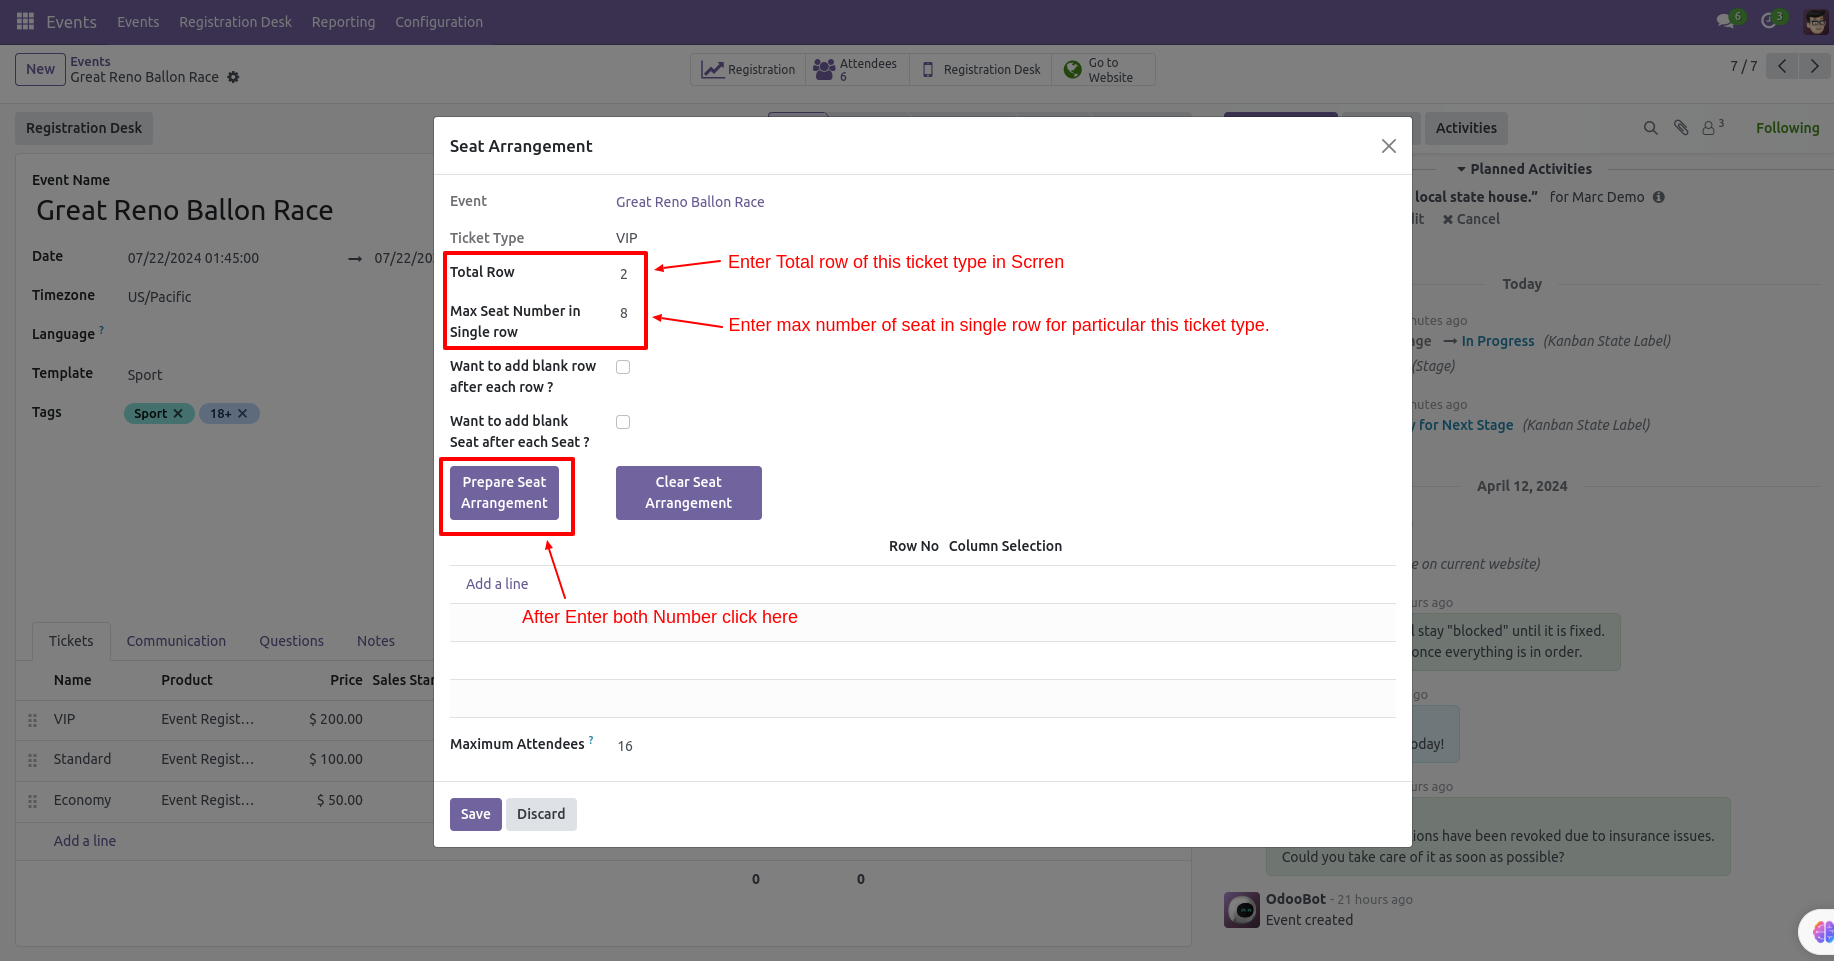
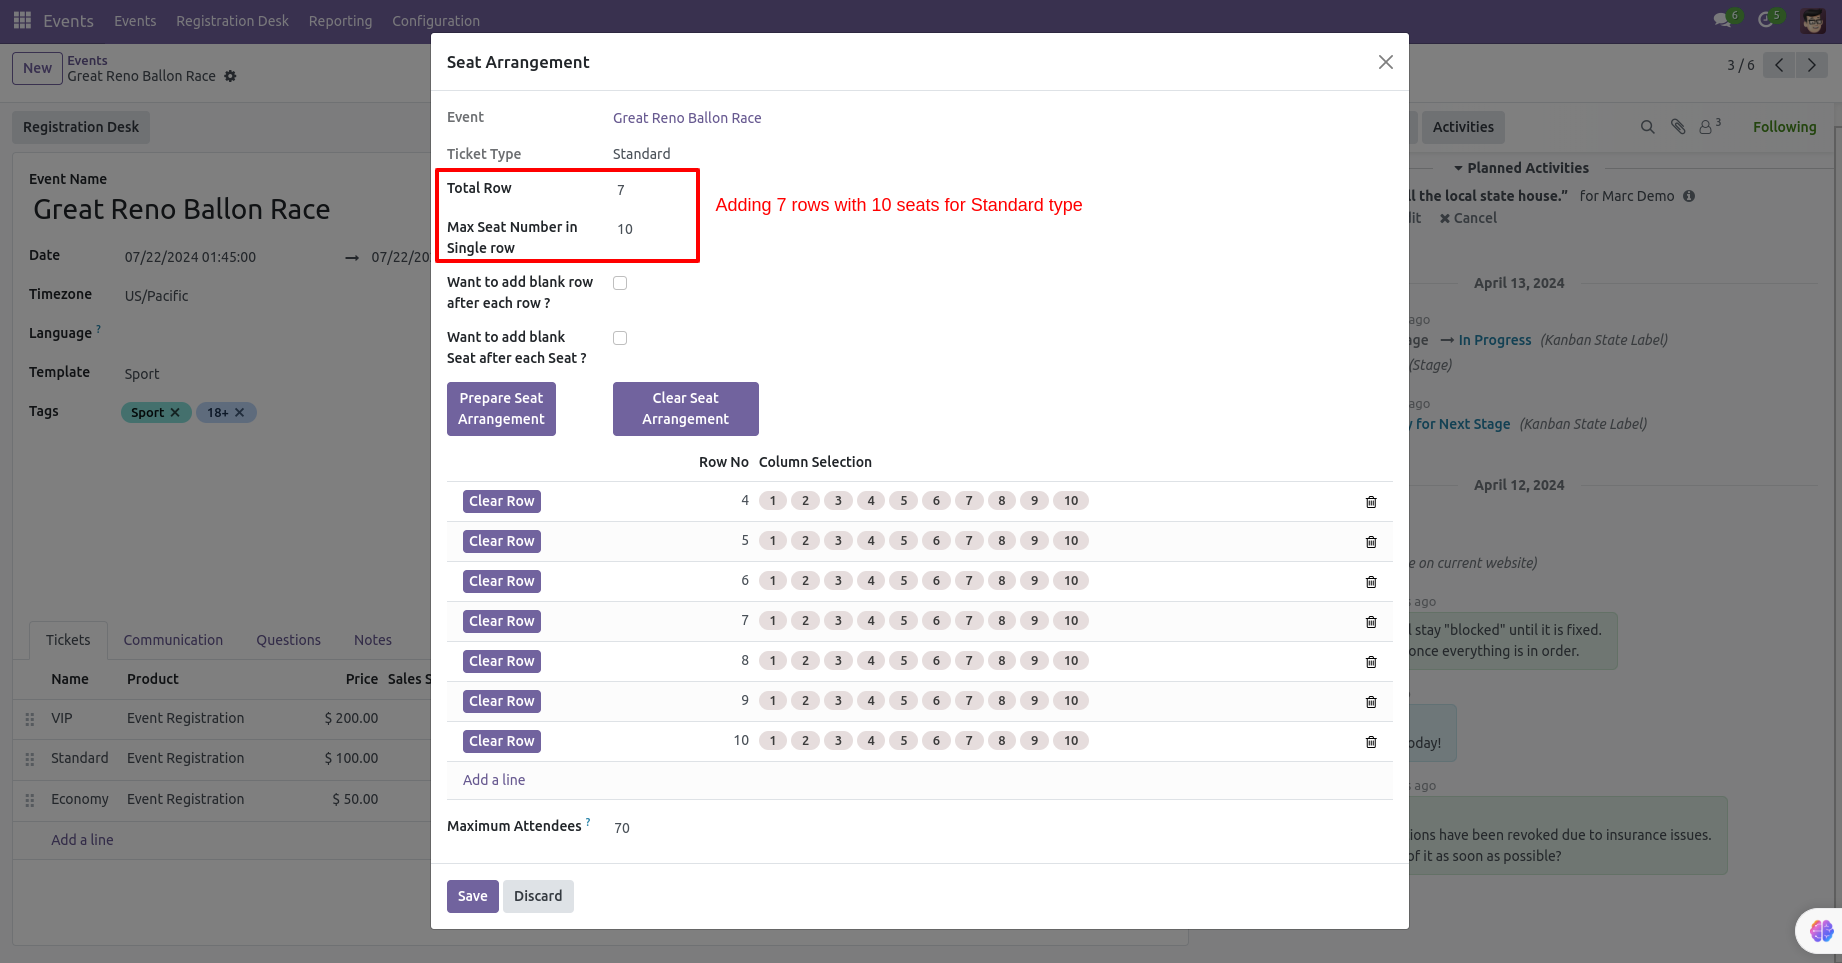
It will open this dialogue box, enter the total row of ticket type, and enter the maximum number of seats in a single row for particular this ticket type after that press button "Prepare Seat Arrangement".
The related seat arrangement looks like below.
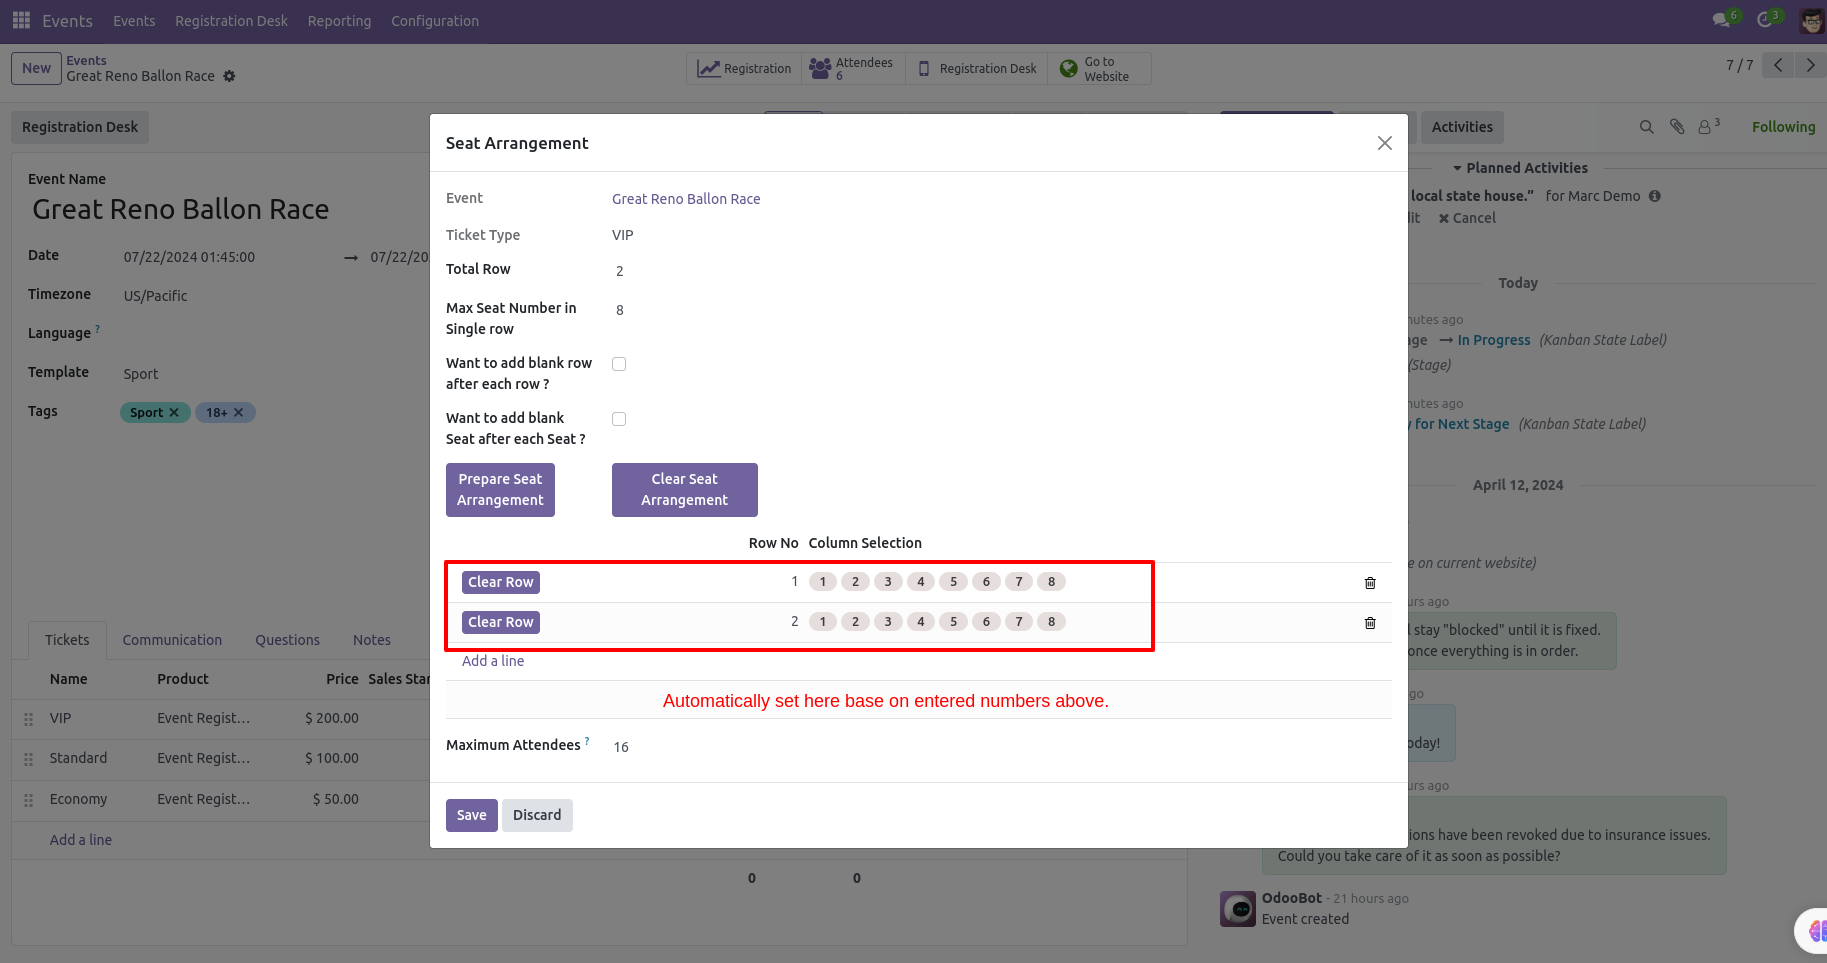
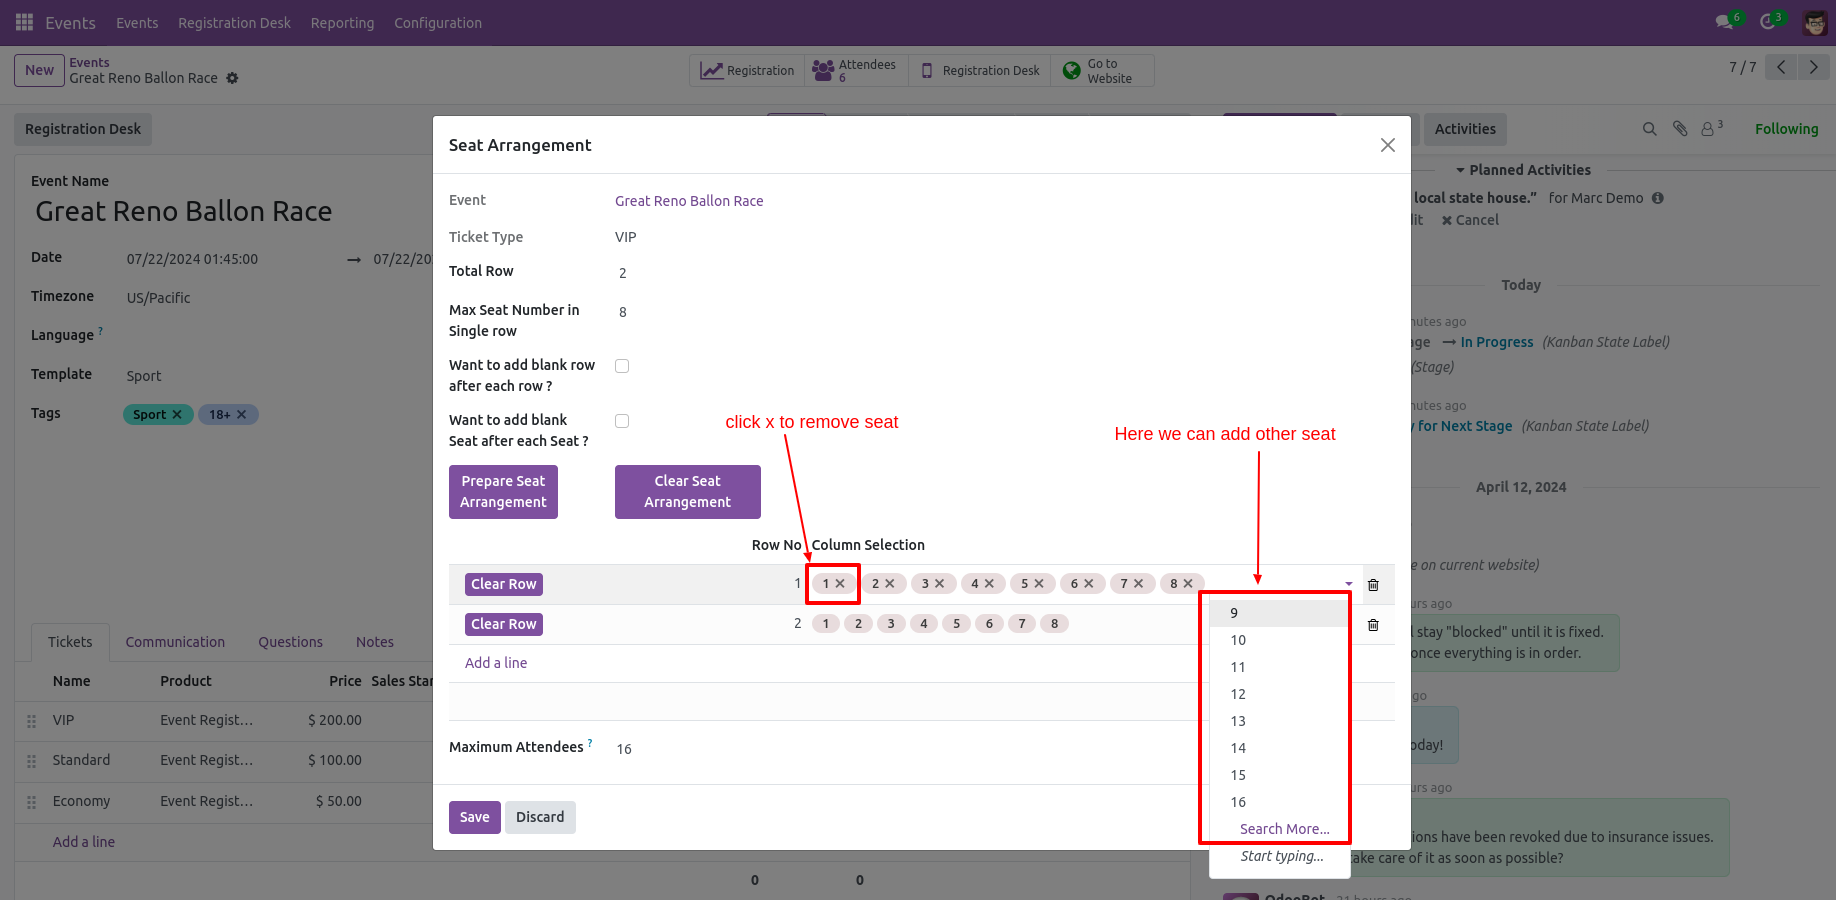
If you want to change the structure of the seat then click on the seat row.
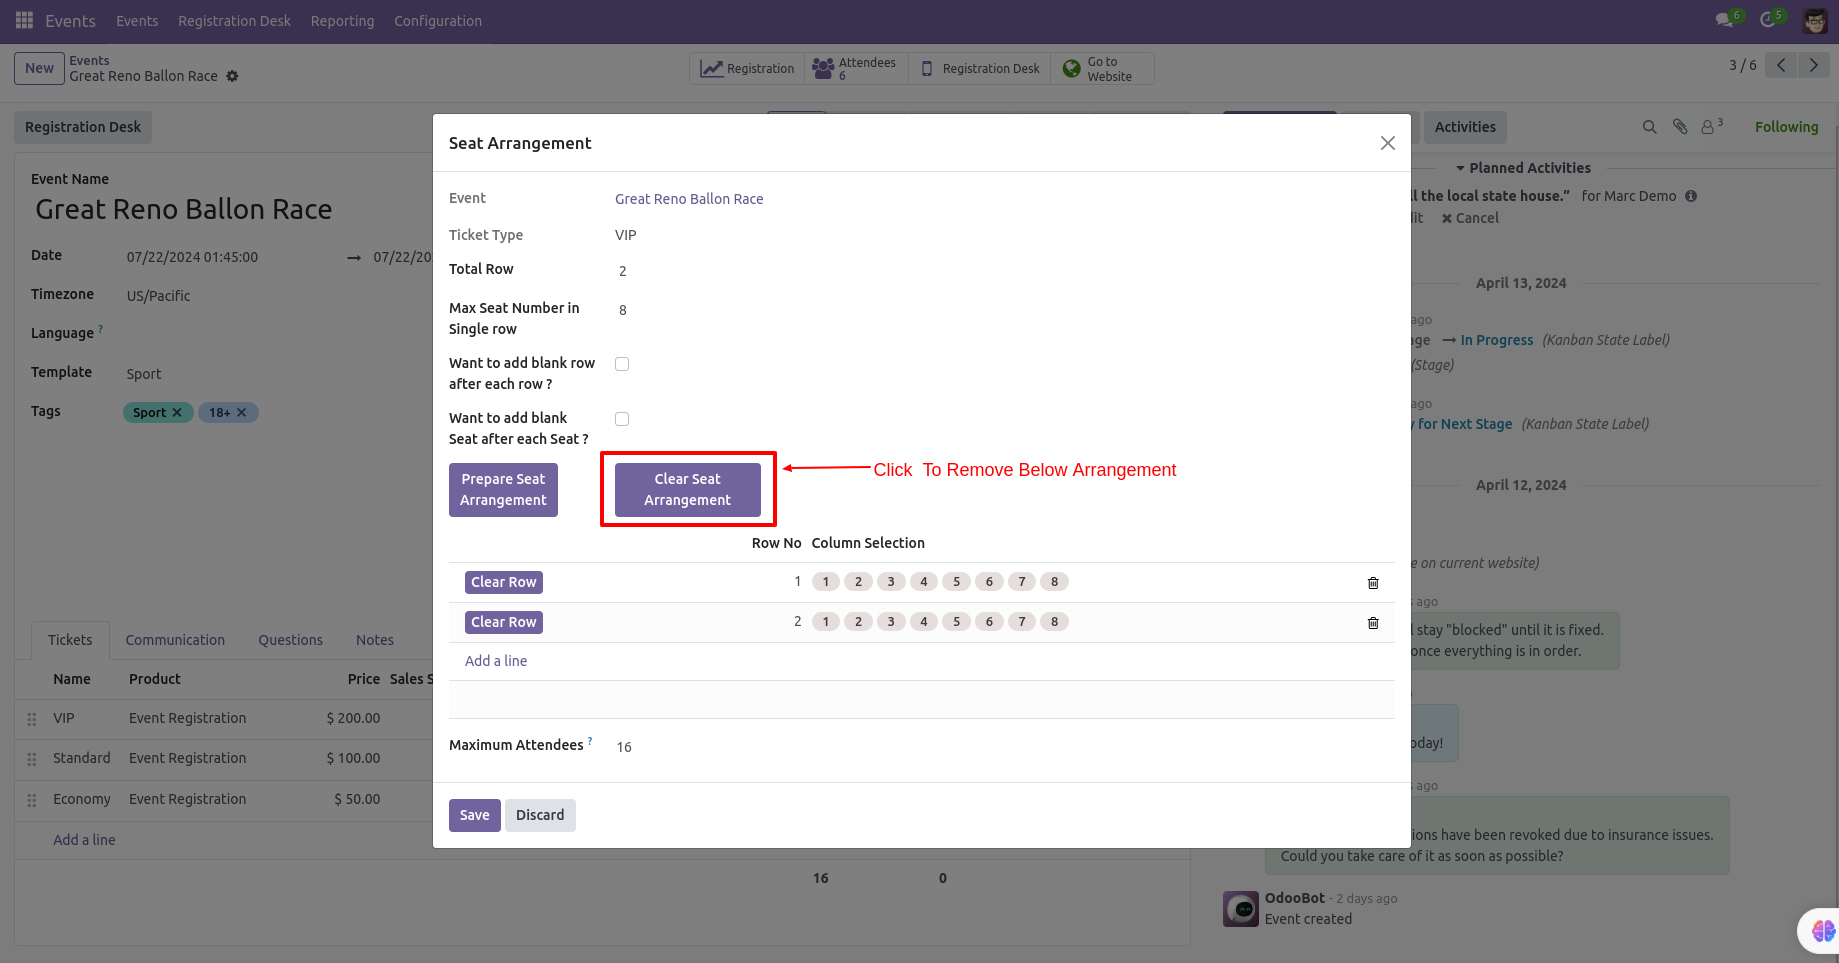
If you want to remove arrangement then click "Clear Seat Arrangement".
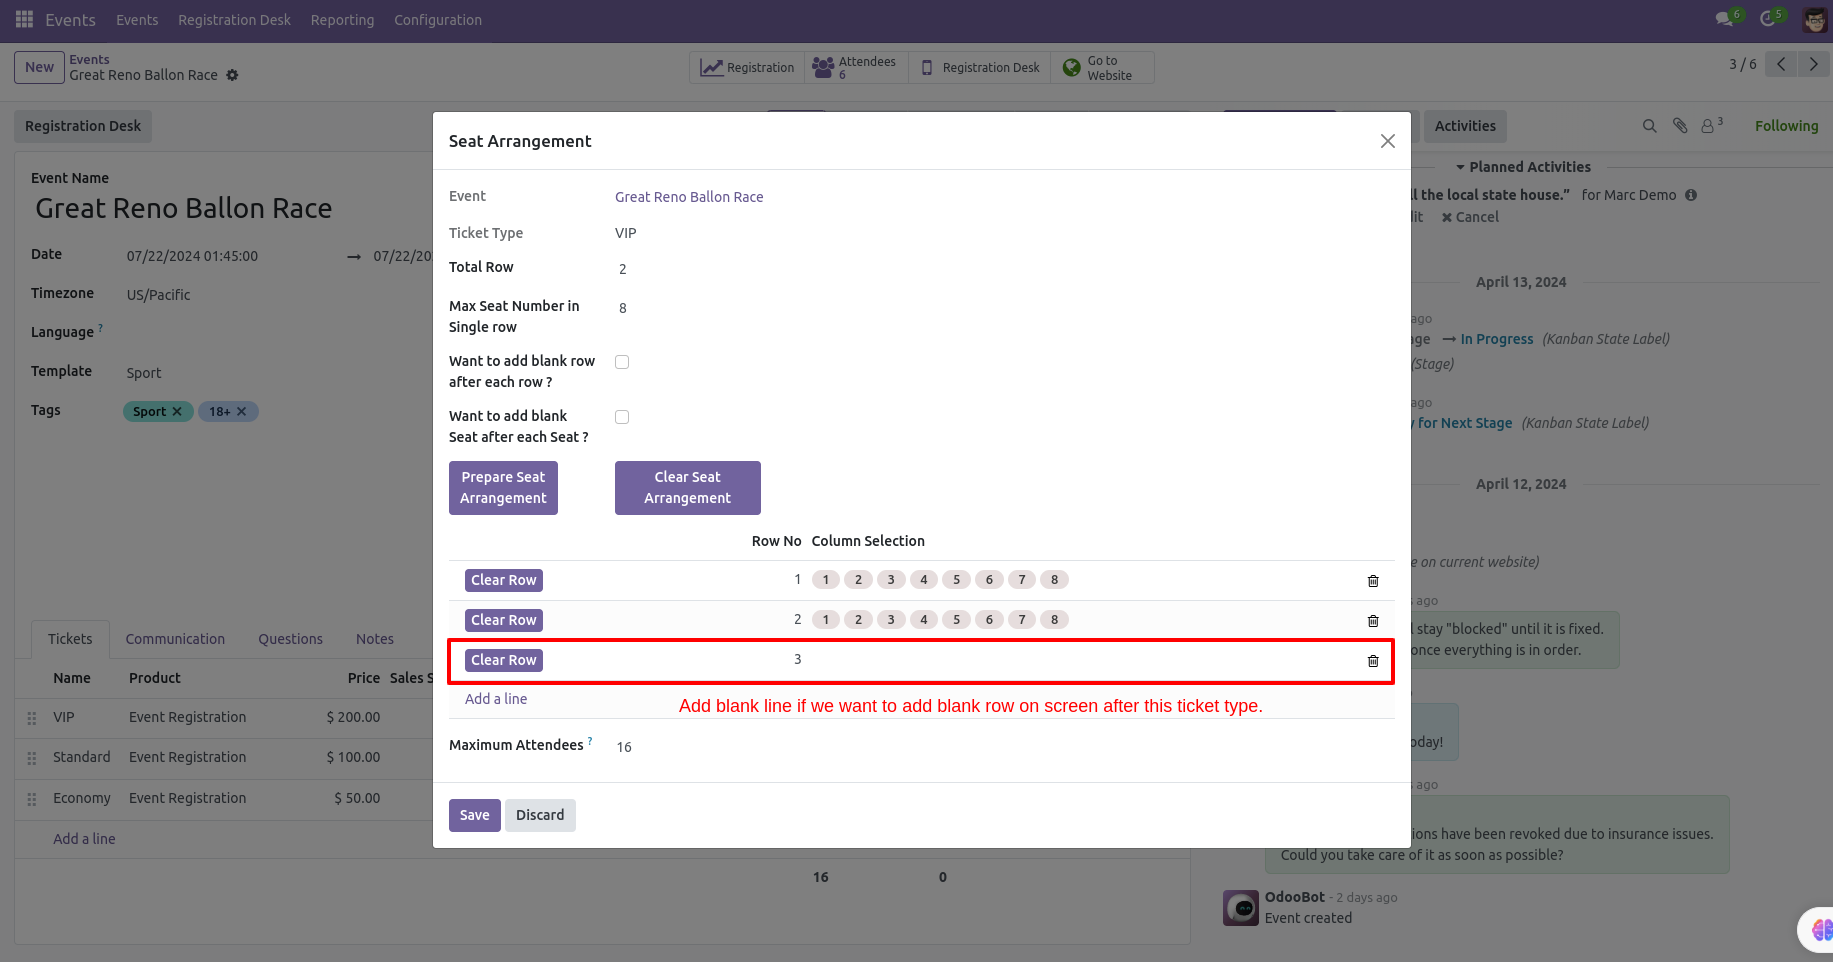
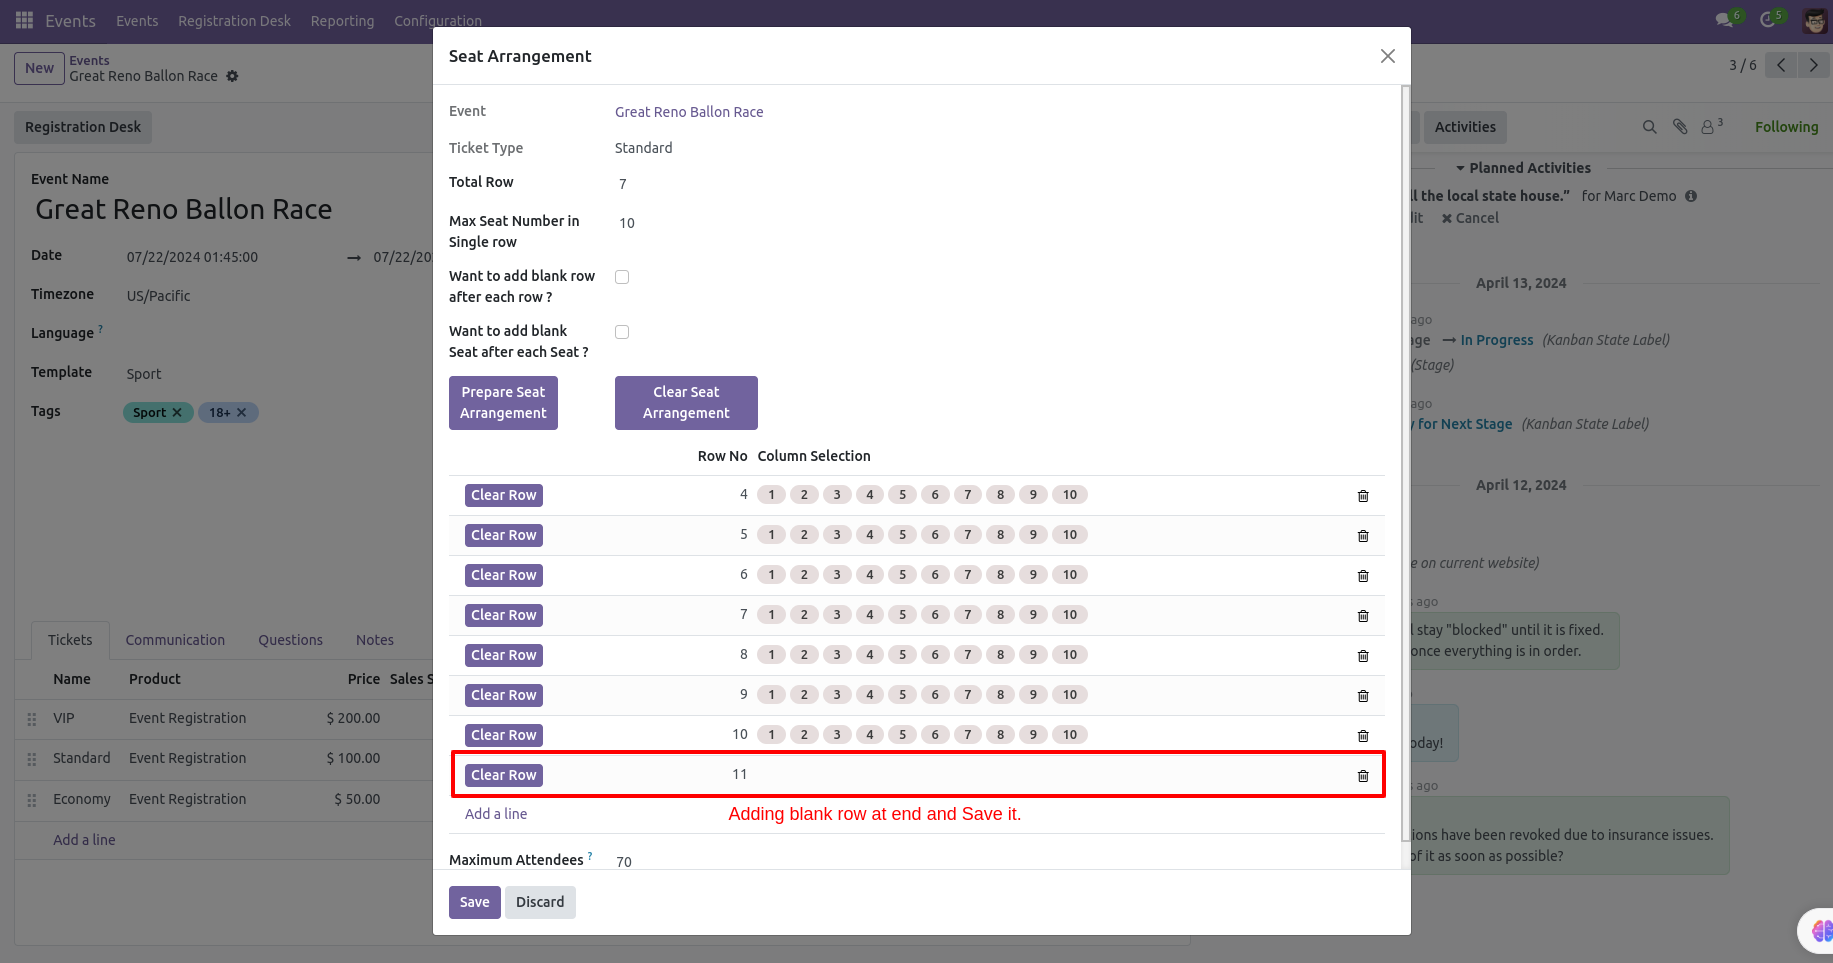
If you want to add a blank row after the screen/ticket type then click on 'Add a line' and leave it blank and 'Save' it.
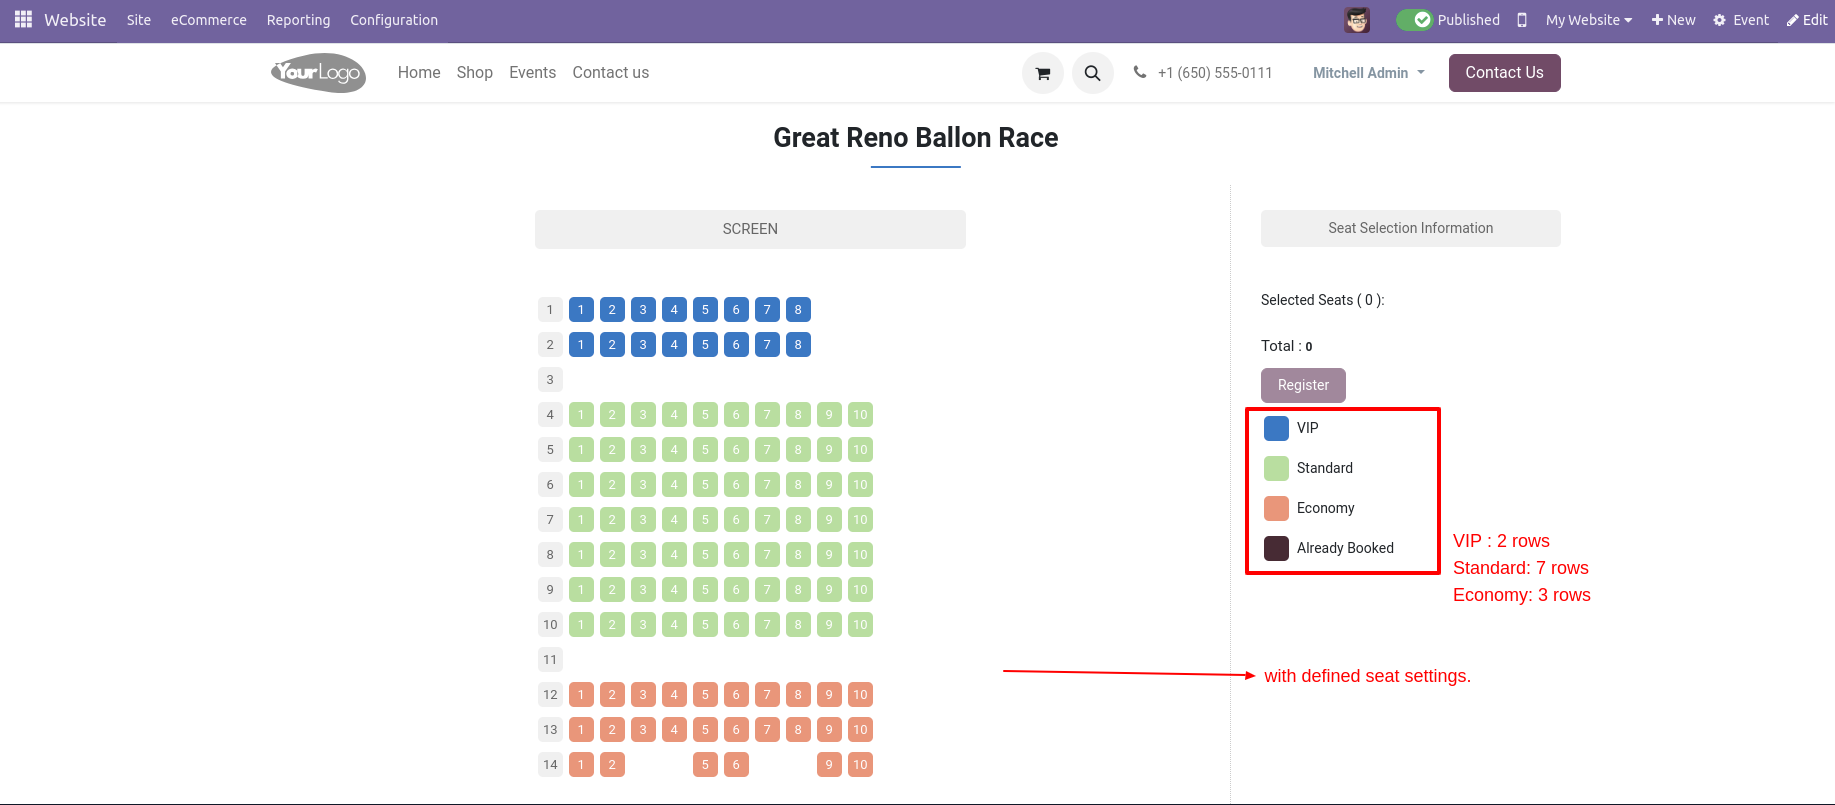
Here we add 7 rows with 10 seats.
Now we add a blank row and leave it and 'Save' it.
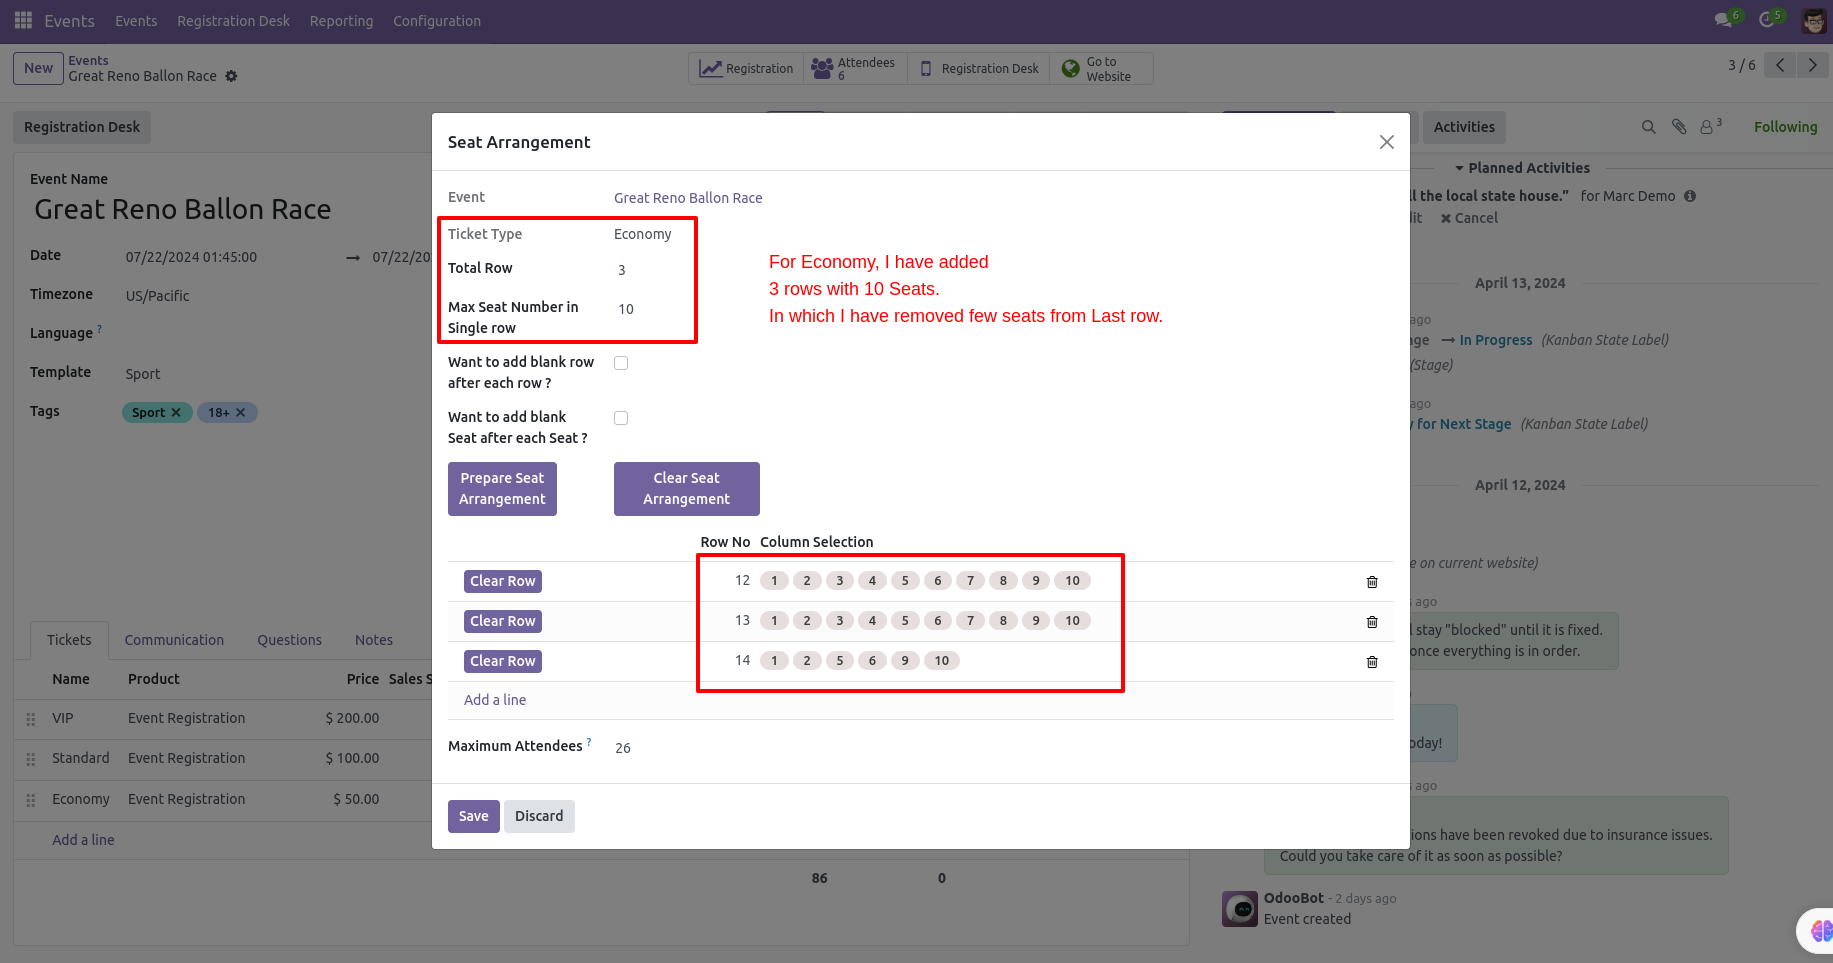
For the "Economy" ticket type we added 3 rows with 10 seats and removed some seats from the last row.
Backend view of the seat arrangement.
Now we go to the website to check Screen, so go to the website → Events → Select your event.
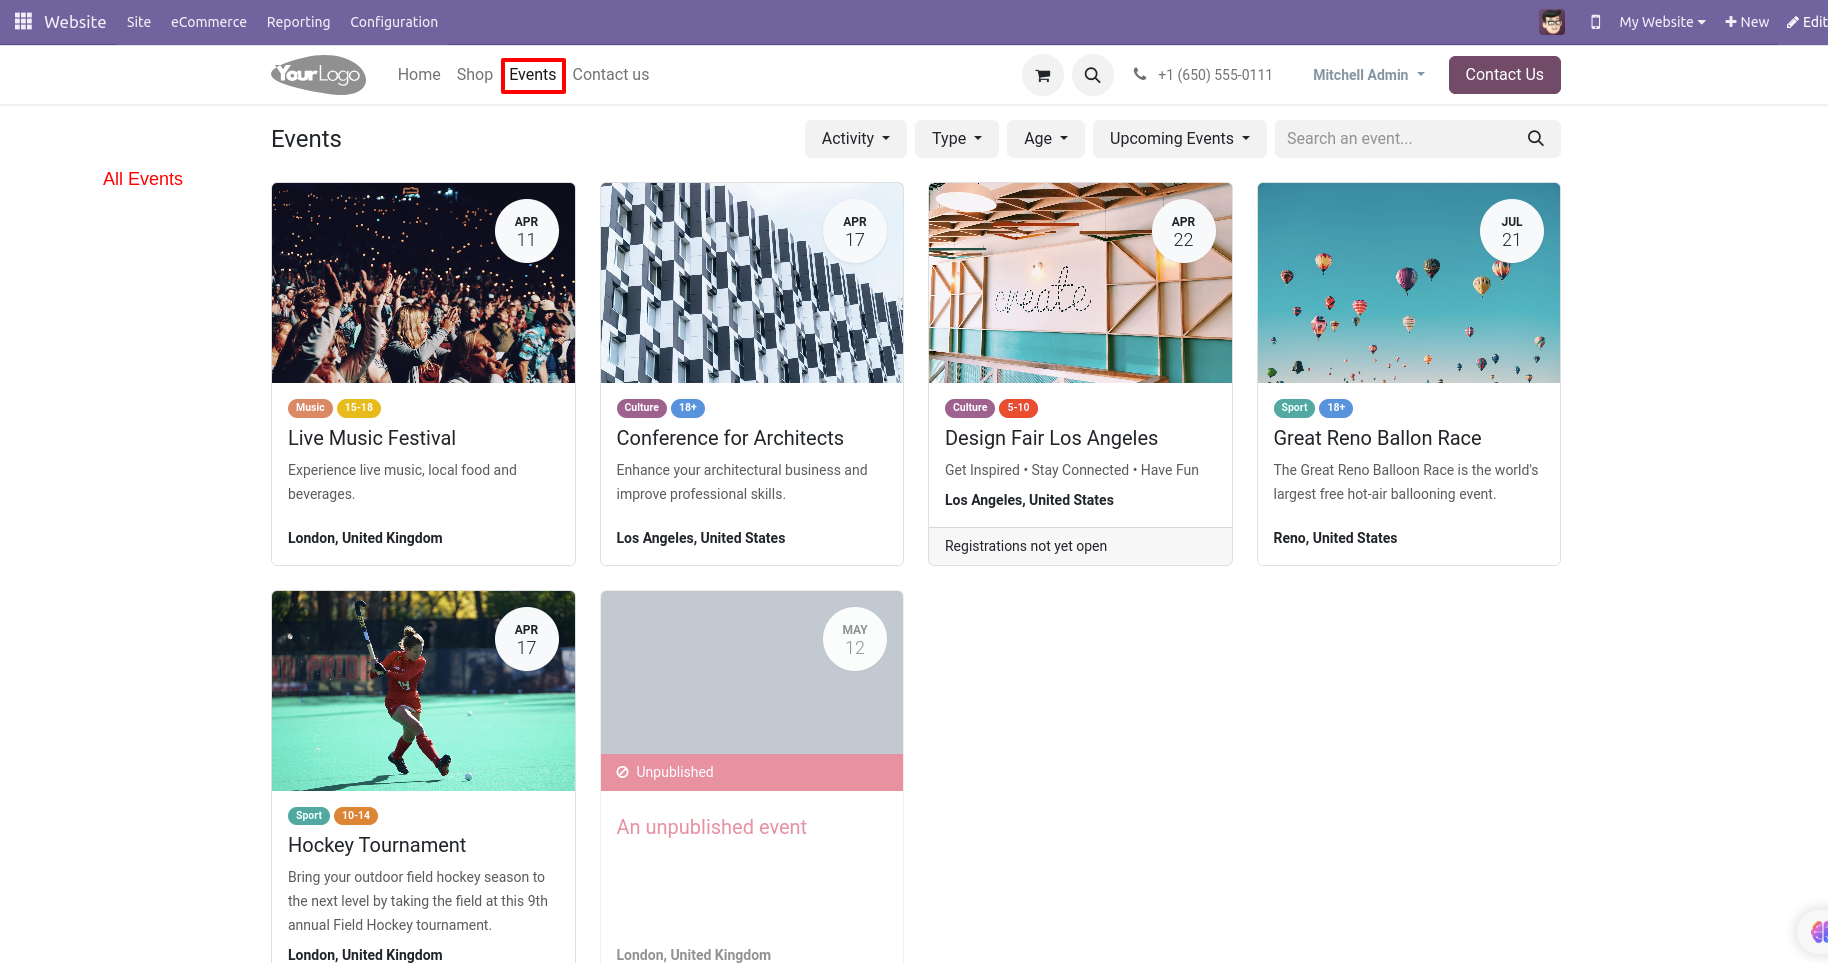
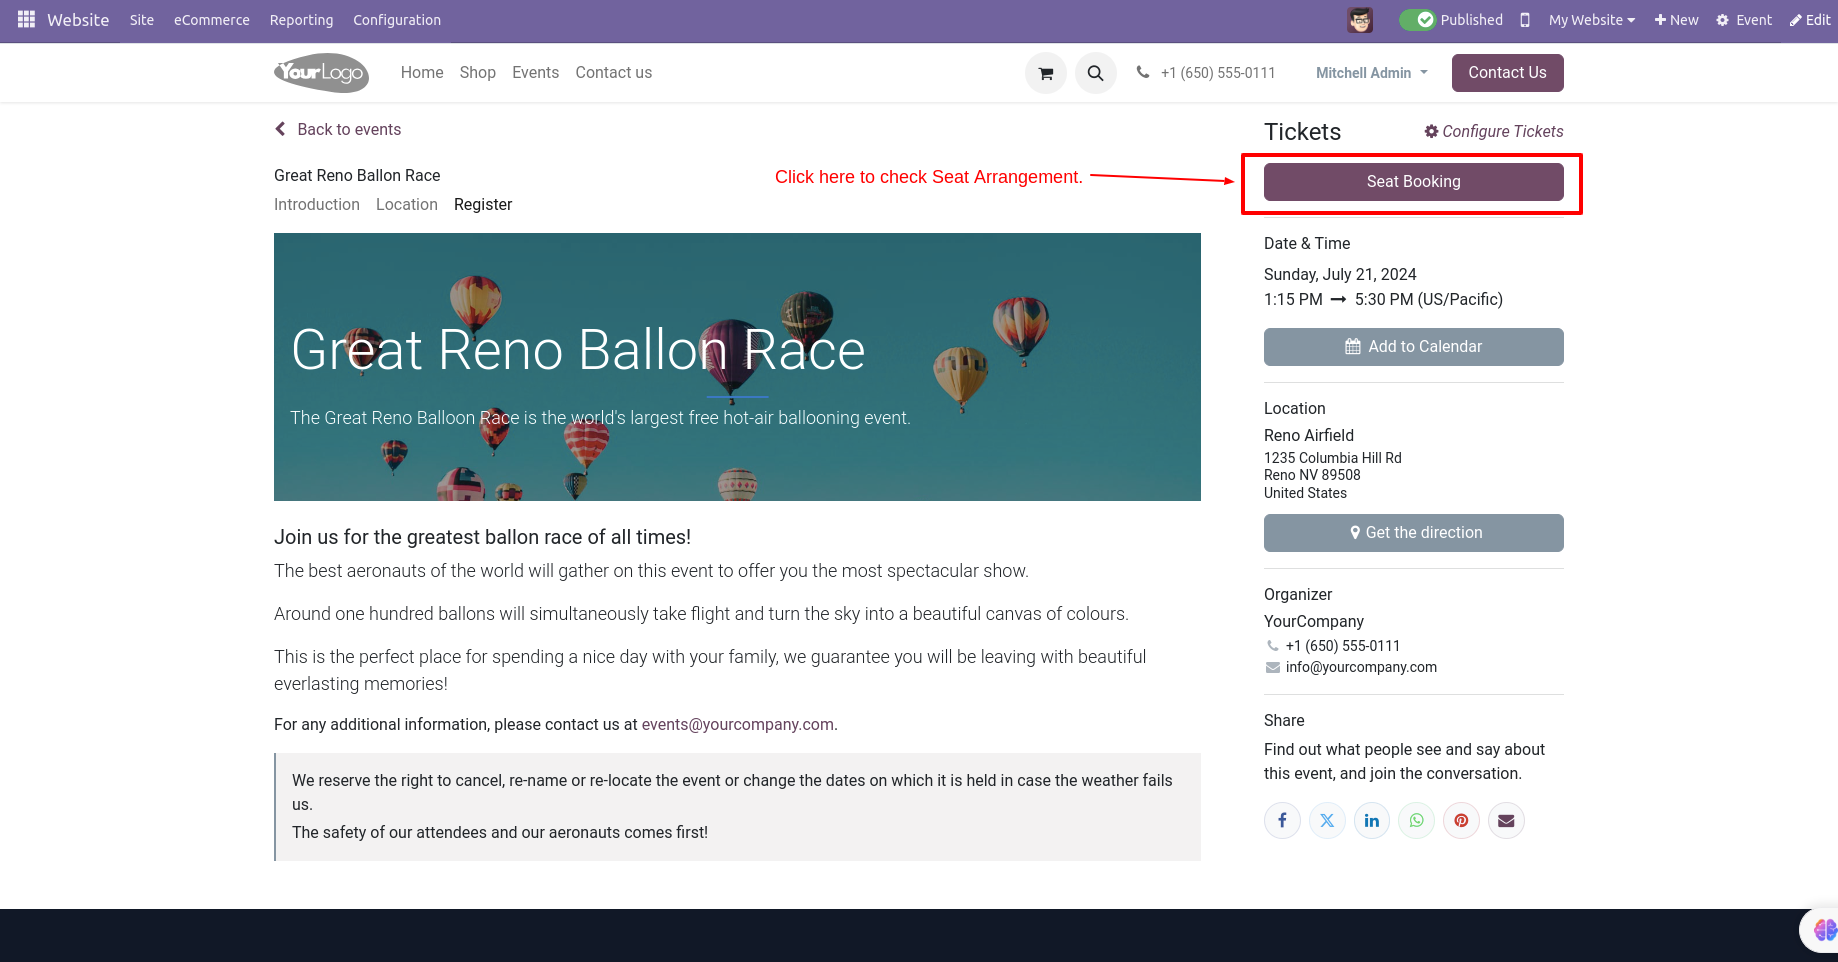
You can check the seat arrangement from the "Seat Booking" button.
The seat arrangement looks like below.
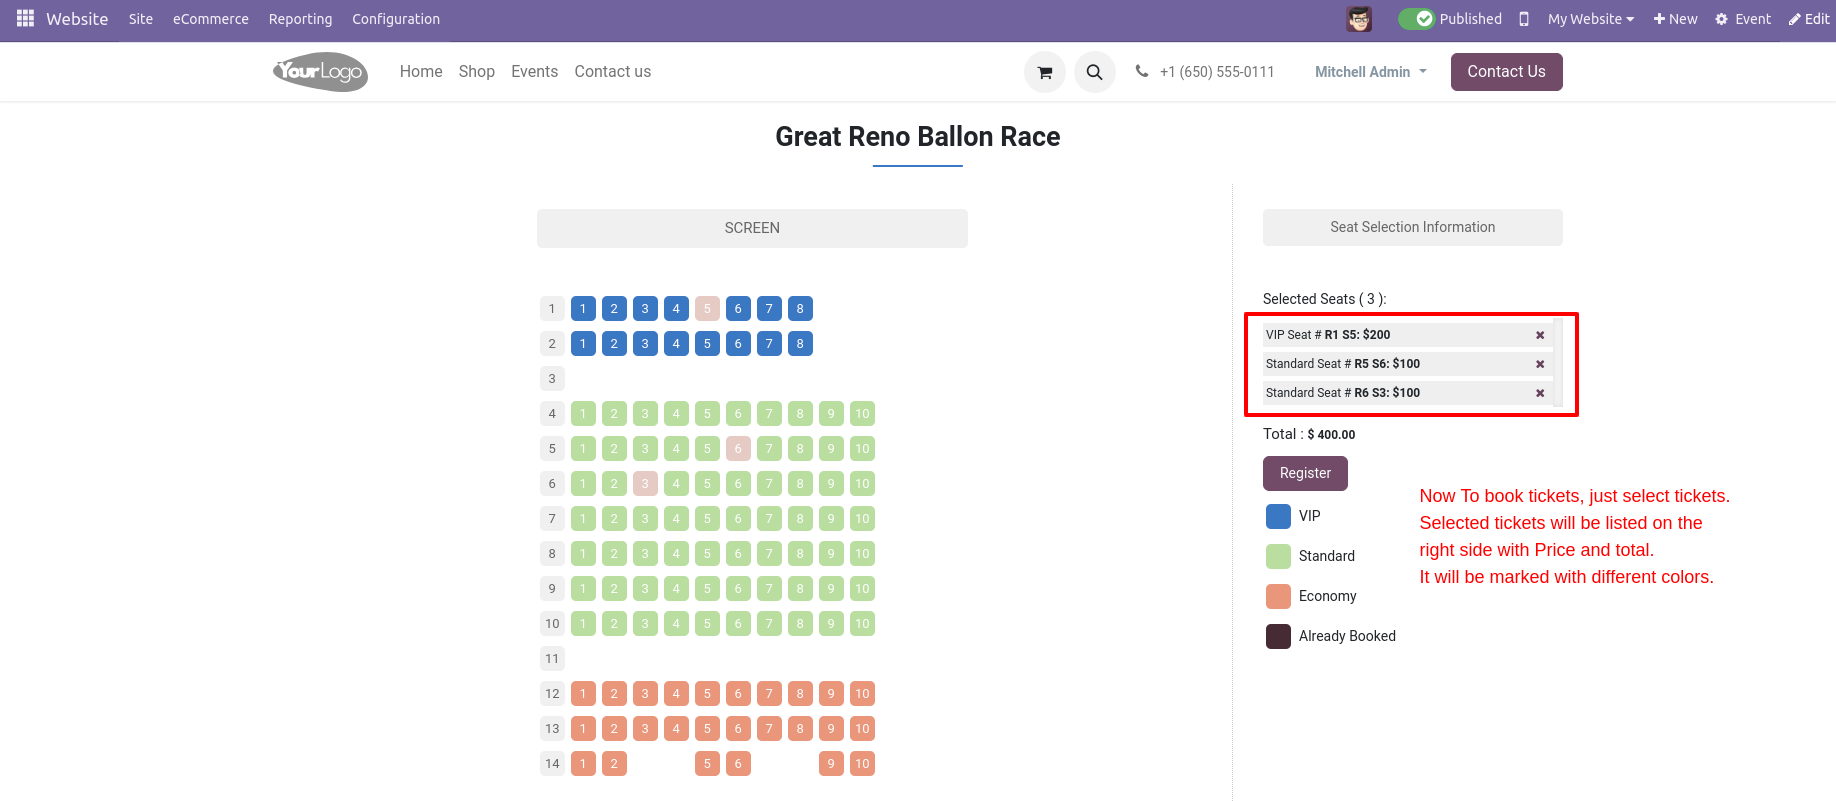
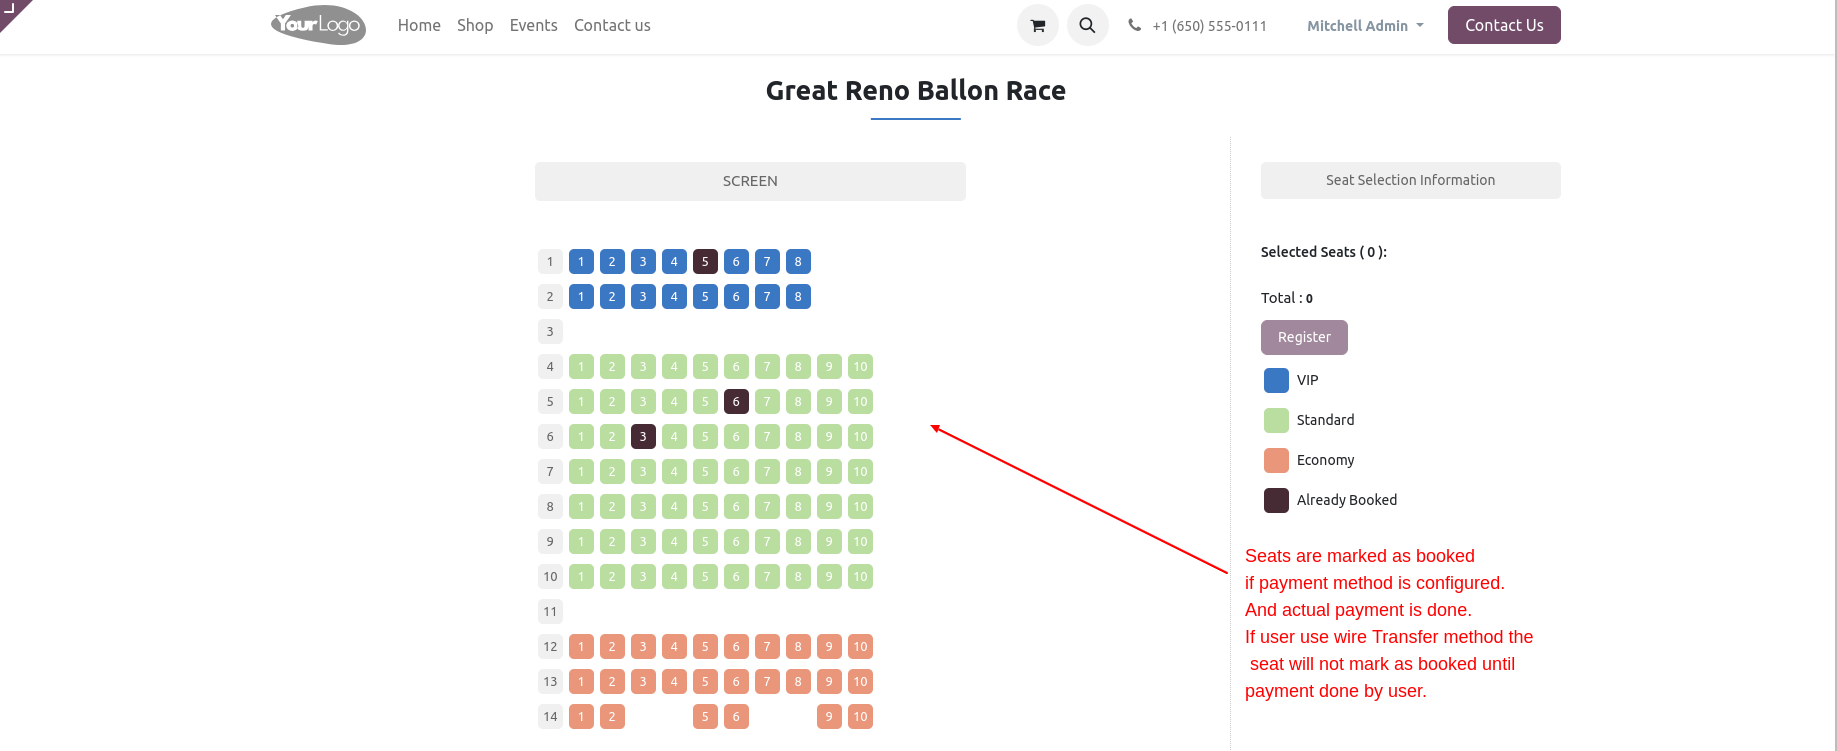
For ticket booking select seats, selected ticket/seat listed on the right side of the screen with a total price, booked seat marked with different colors.
Select the seat and click the "Register" button.
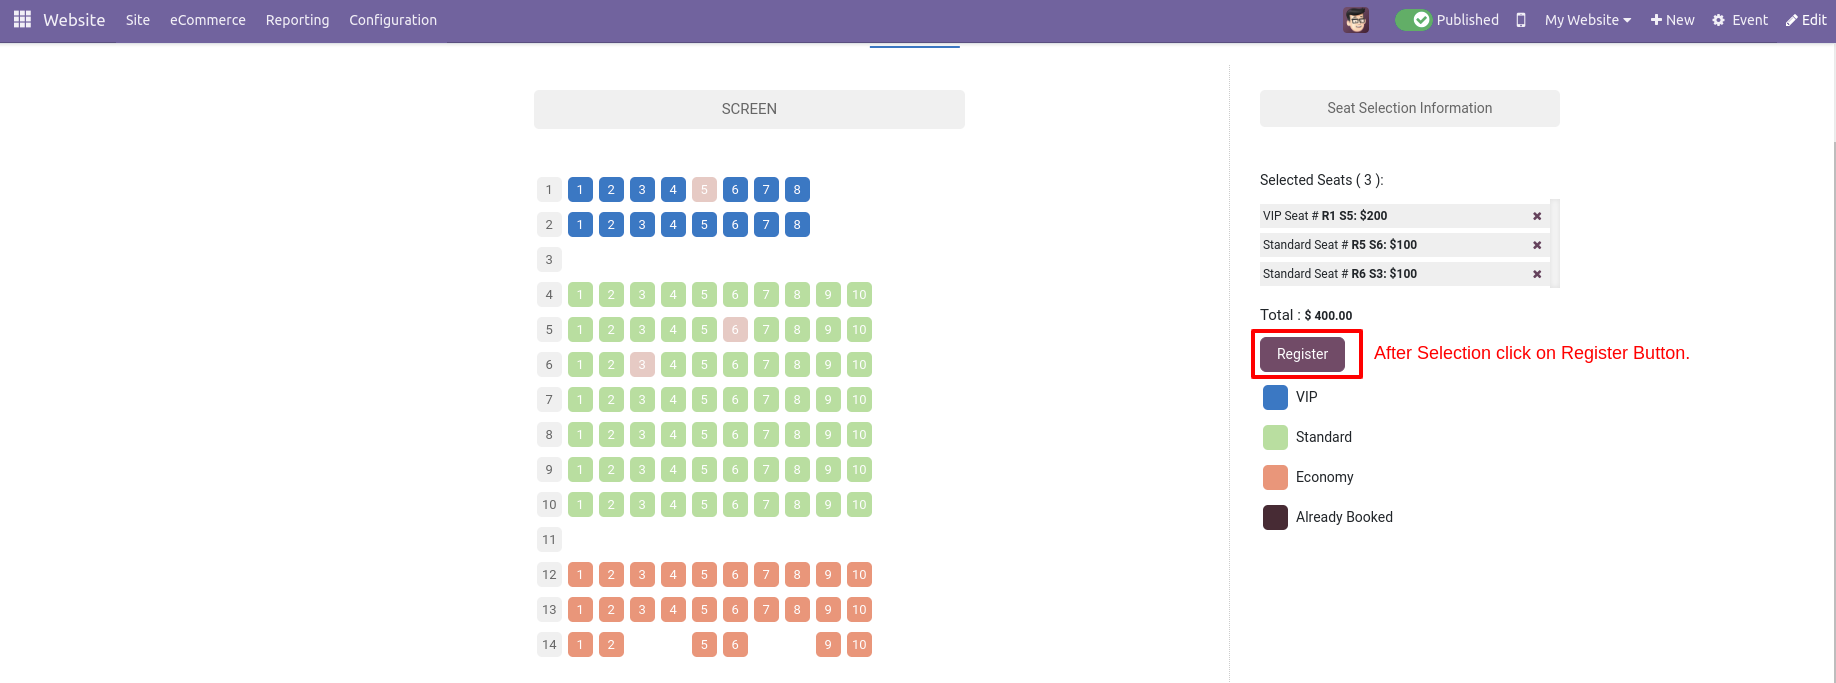
After that, it opens the wizard, enter participants/attendees details, and press the "Go to payment" button.
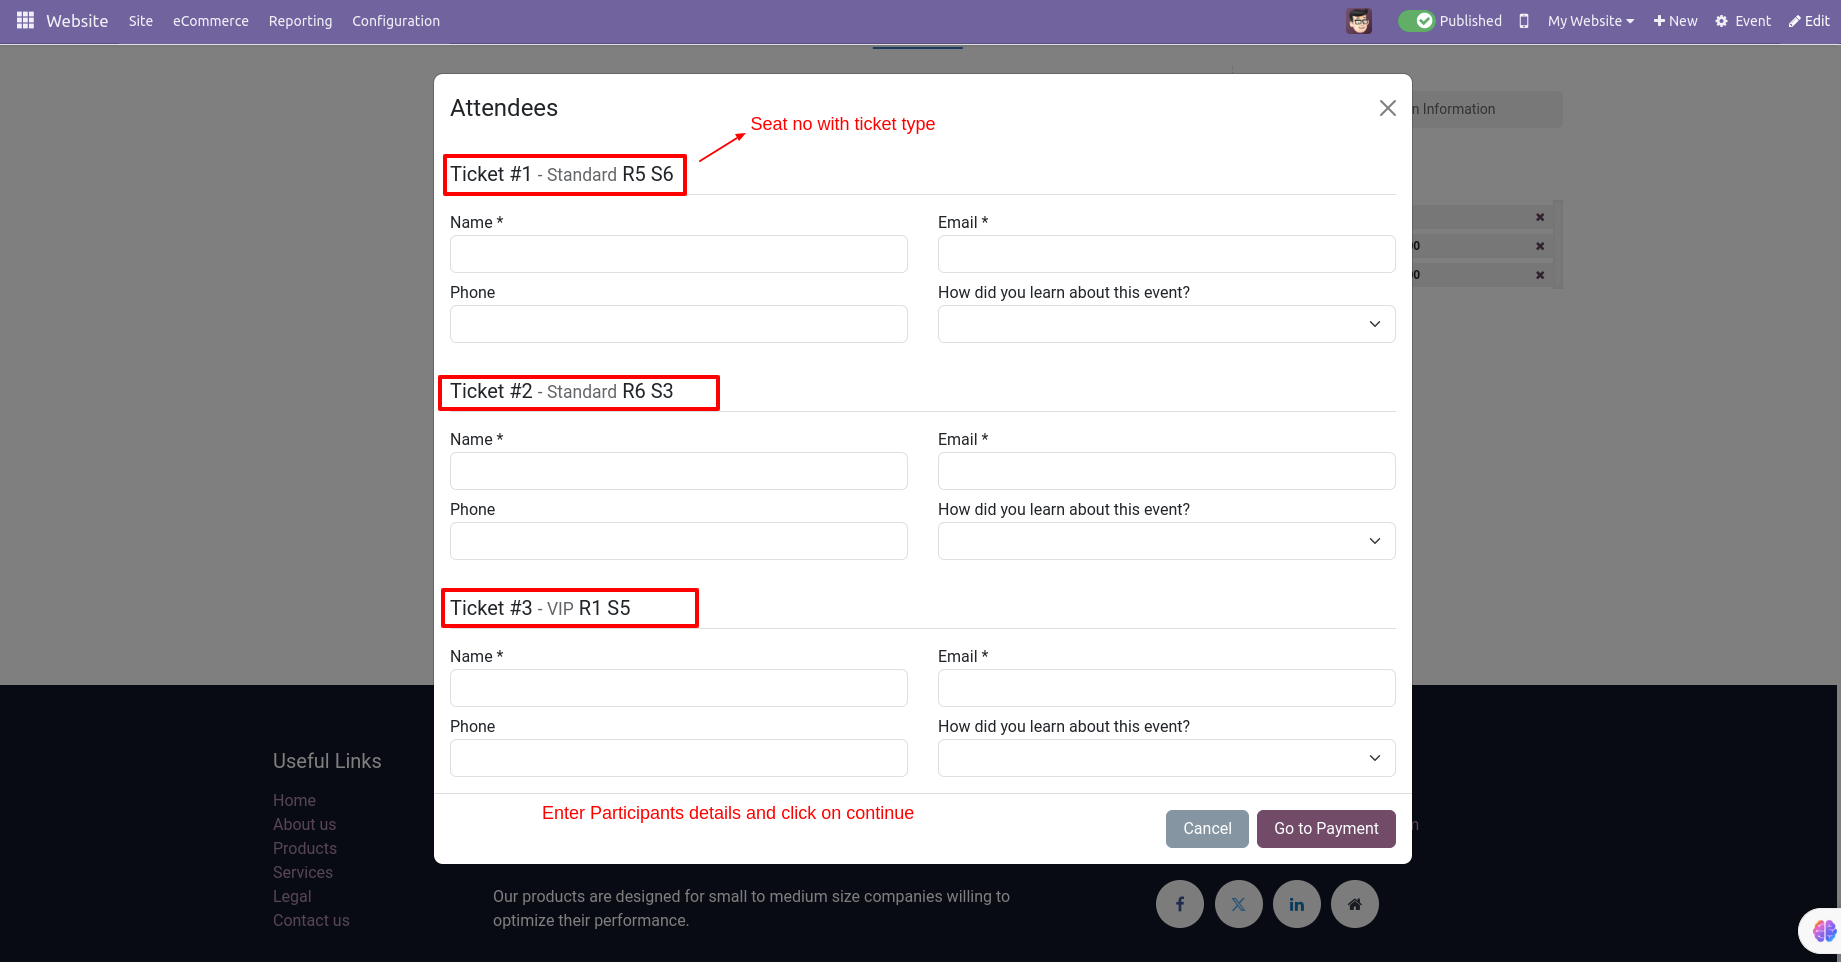
Add details and press the "Go to payment" button..
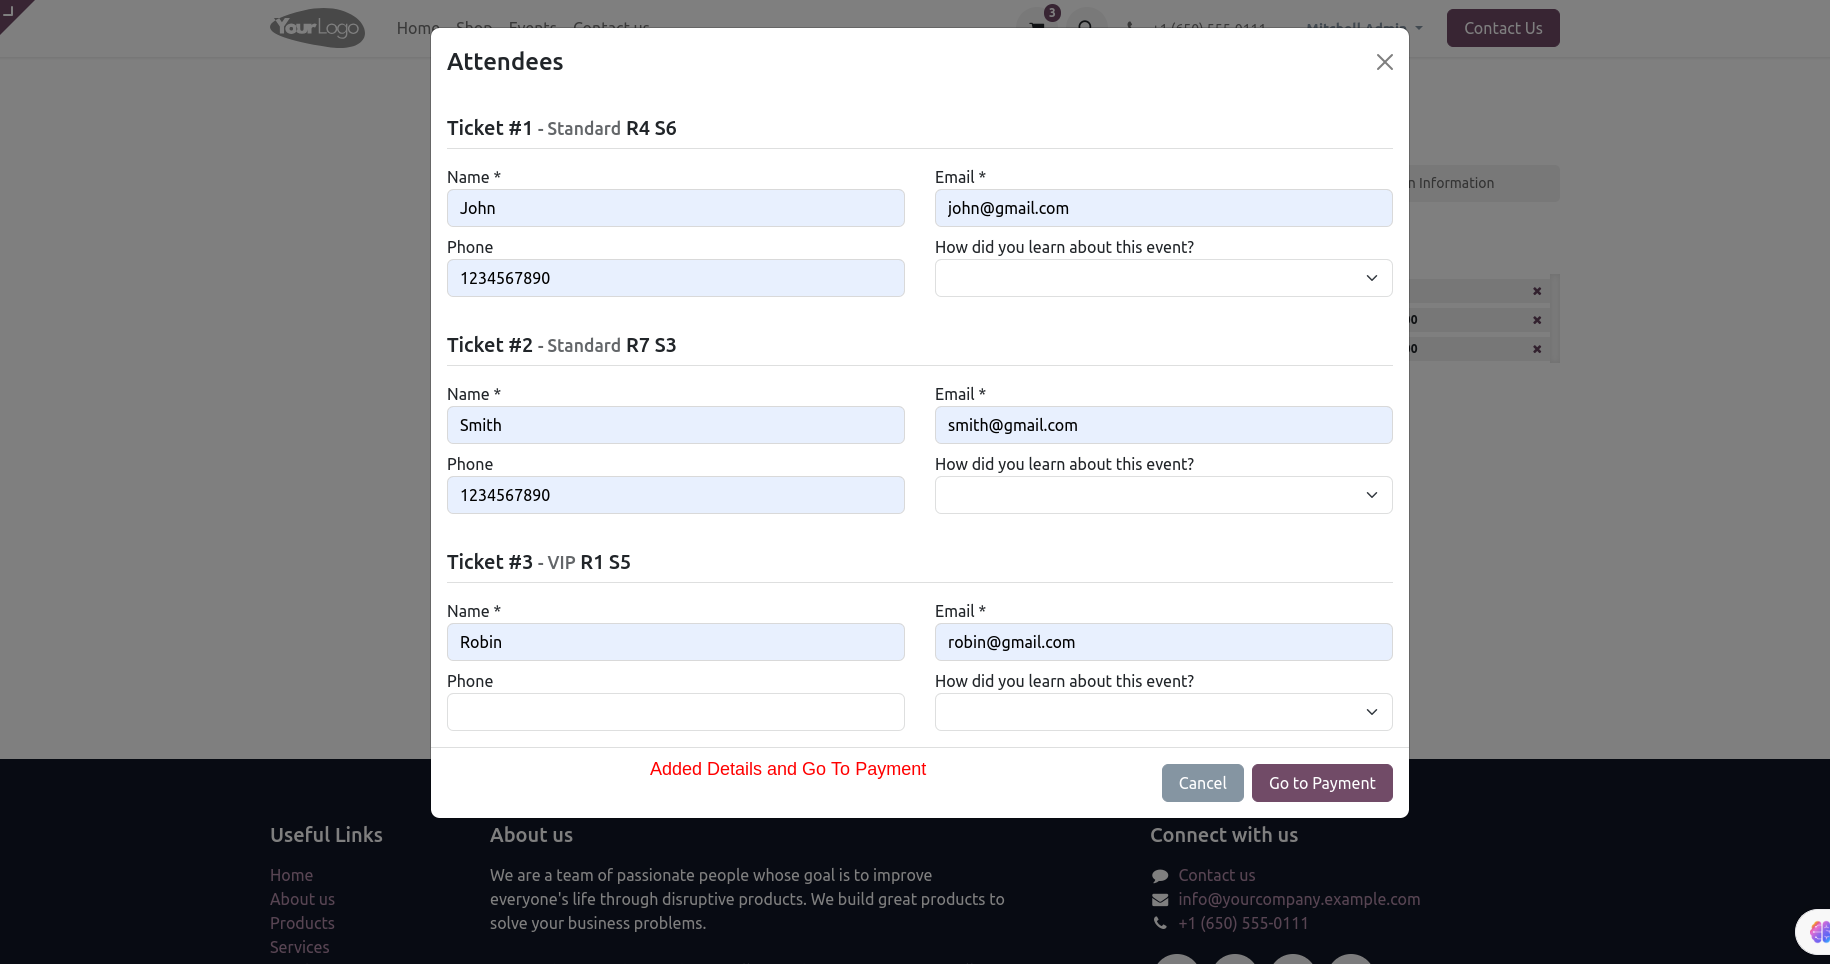
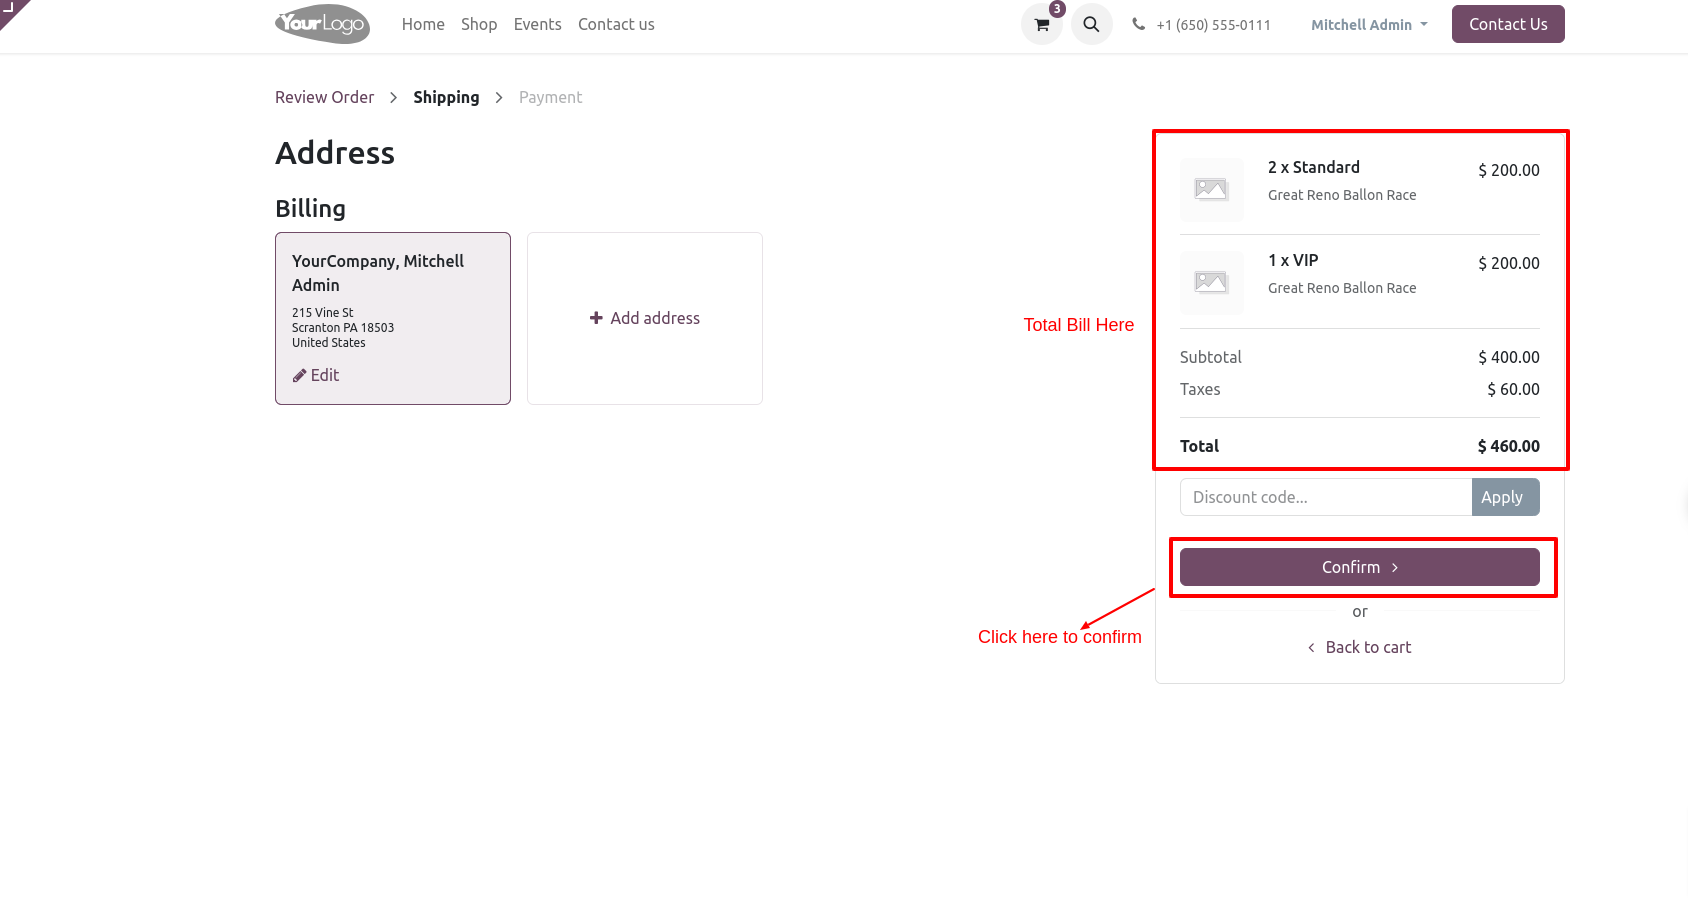
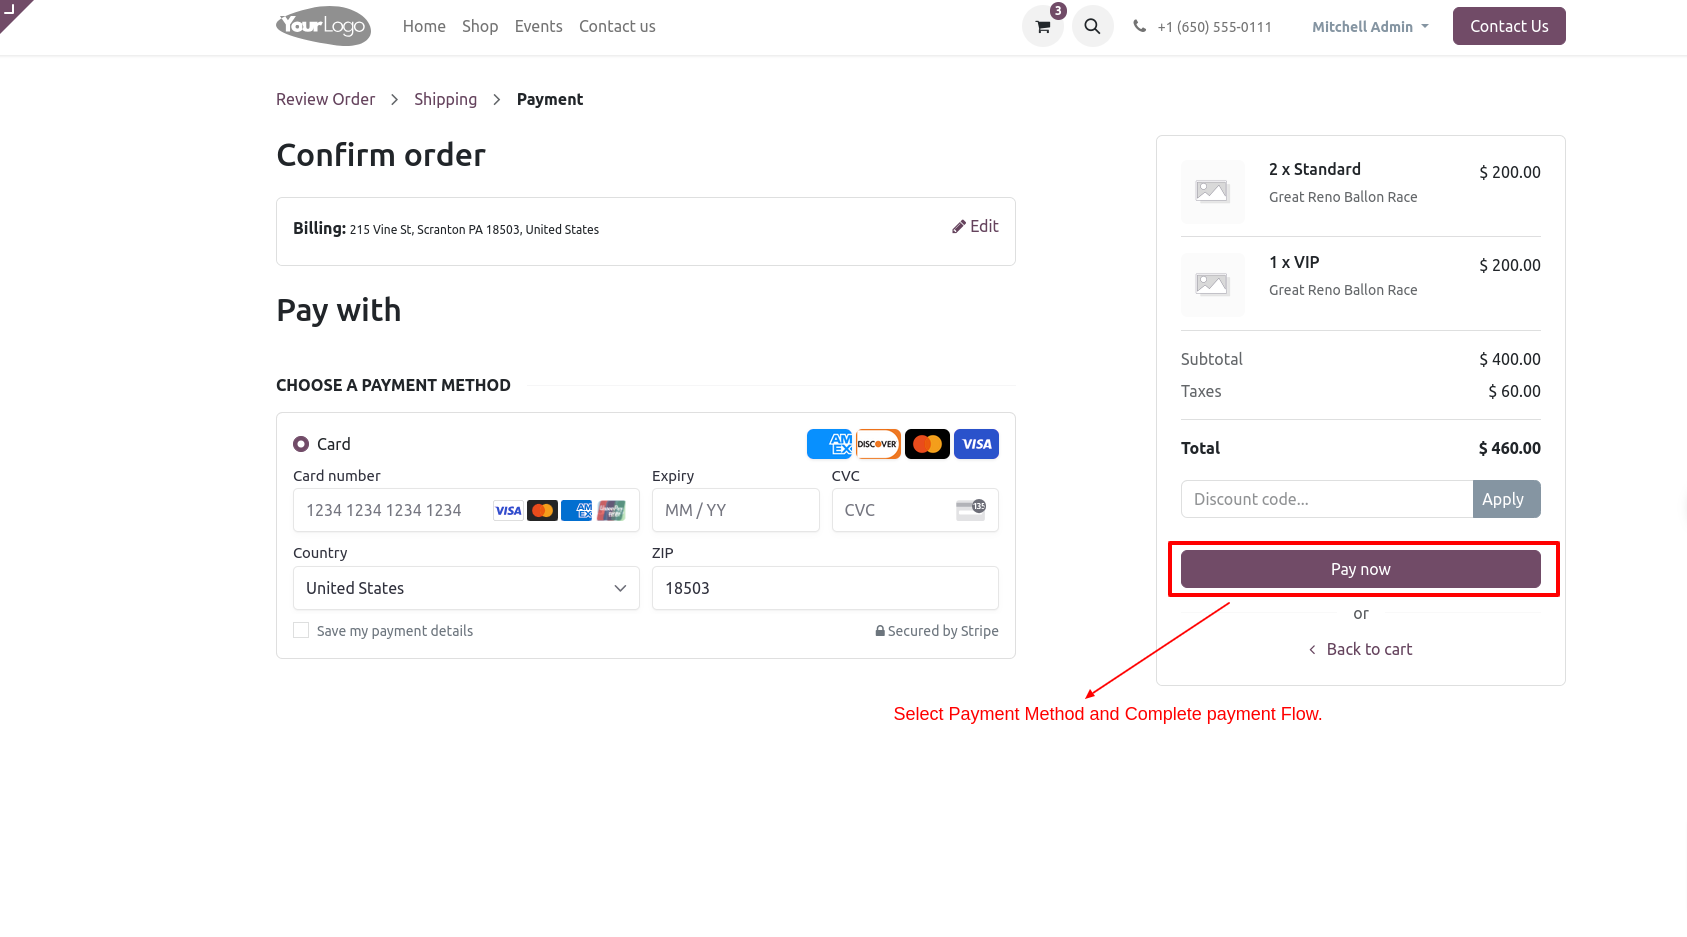
Now press the "confirm" button, total bill displayed on the screen.
Select the payment method and complete the seat booking with the payment, so press the "Pay Now" button.
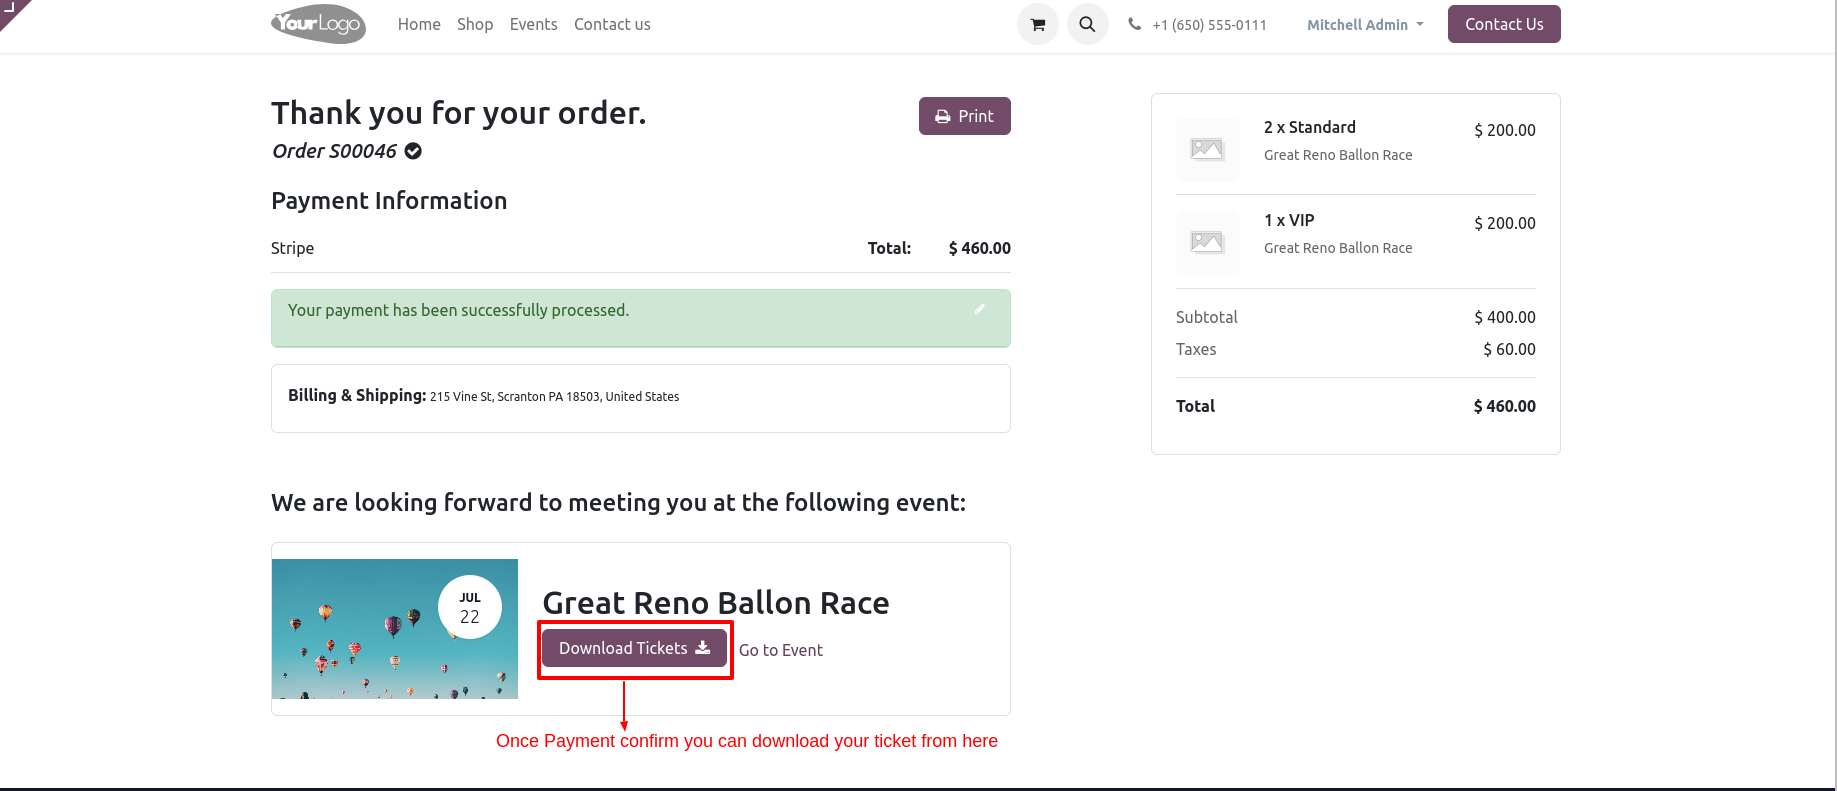
You can download your ticket from here once the payment has been completed.
Booked seats marked with different colors, if payment not done then the seat will not be marked as the book.
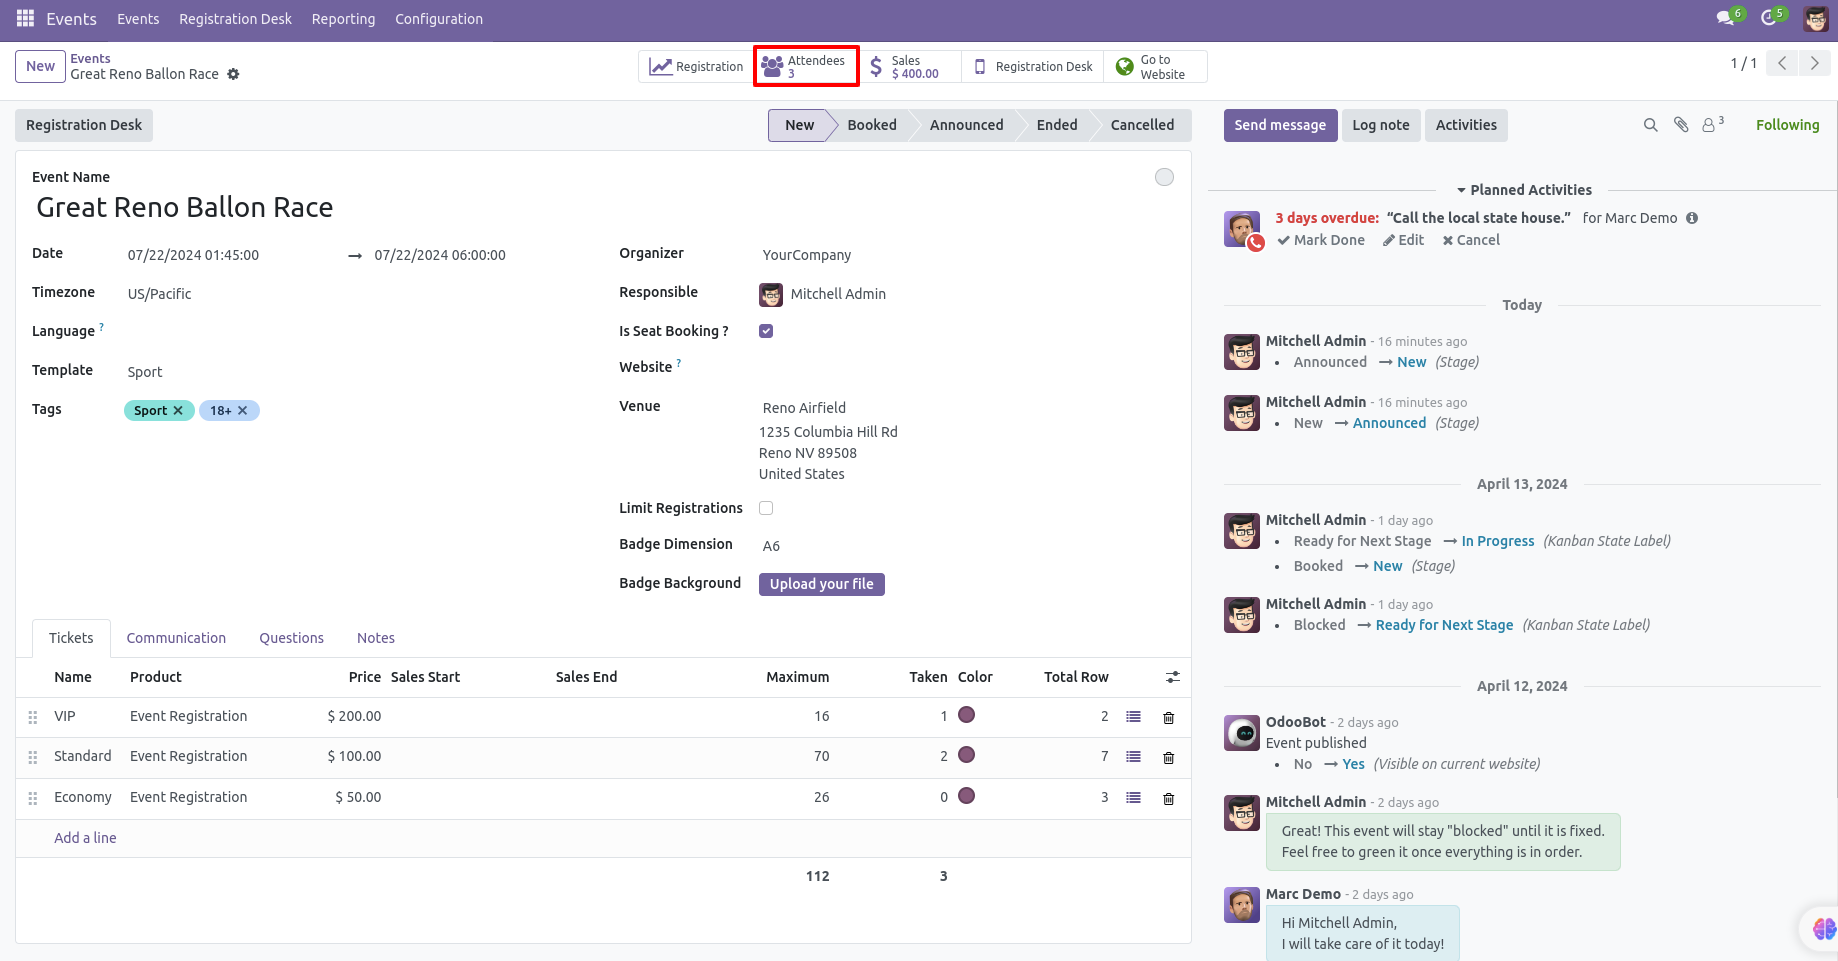
Now go to the event Backend and check seat booking, to see the attendee's detail press the smart button "Attendees" button.
The Participant's details kanban view looks like below.

The Participant's details list view looks like below.
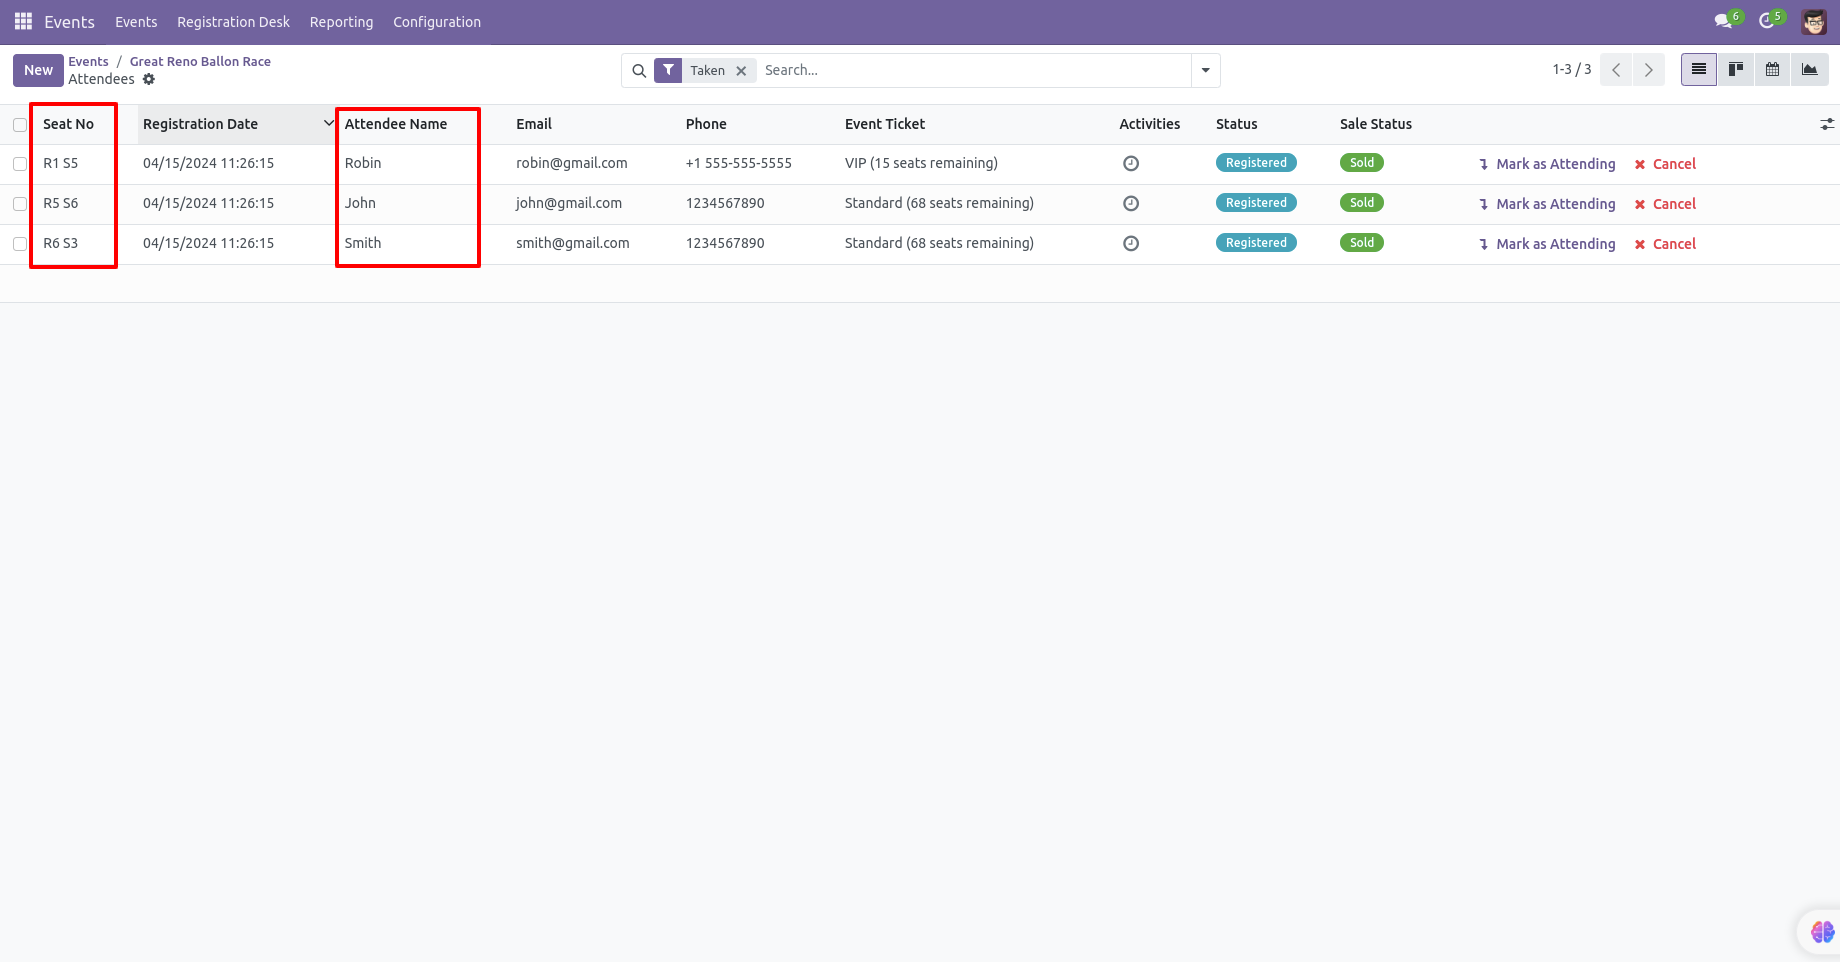
The Participant's details form view looks like below.
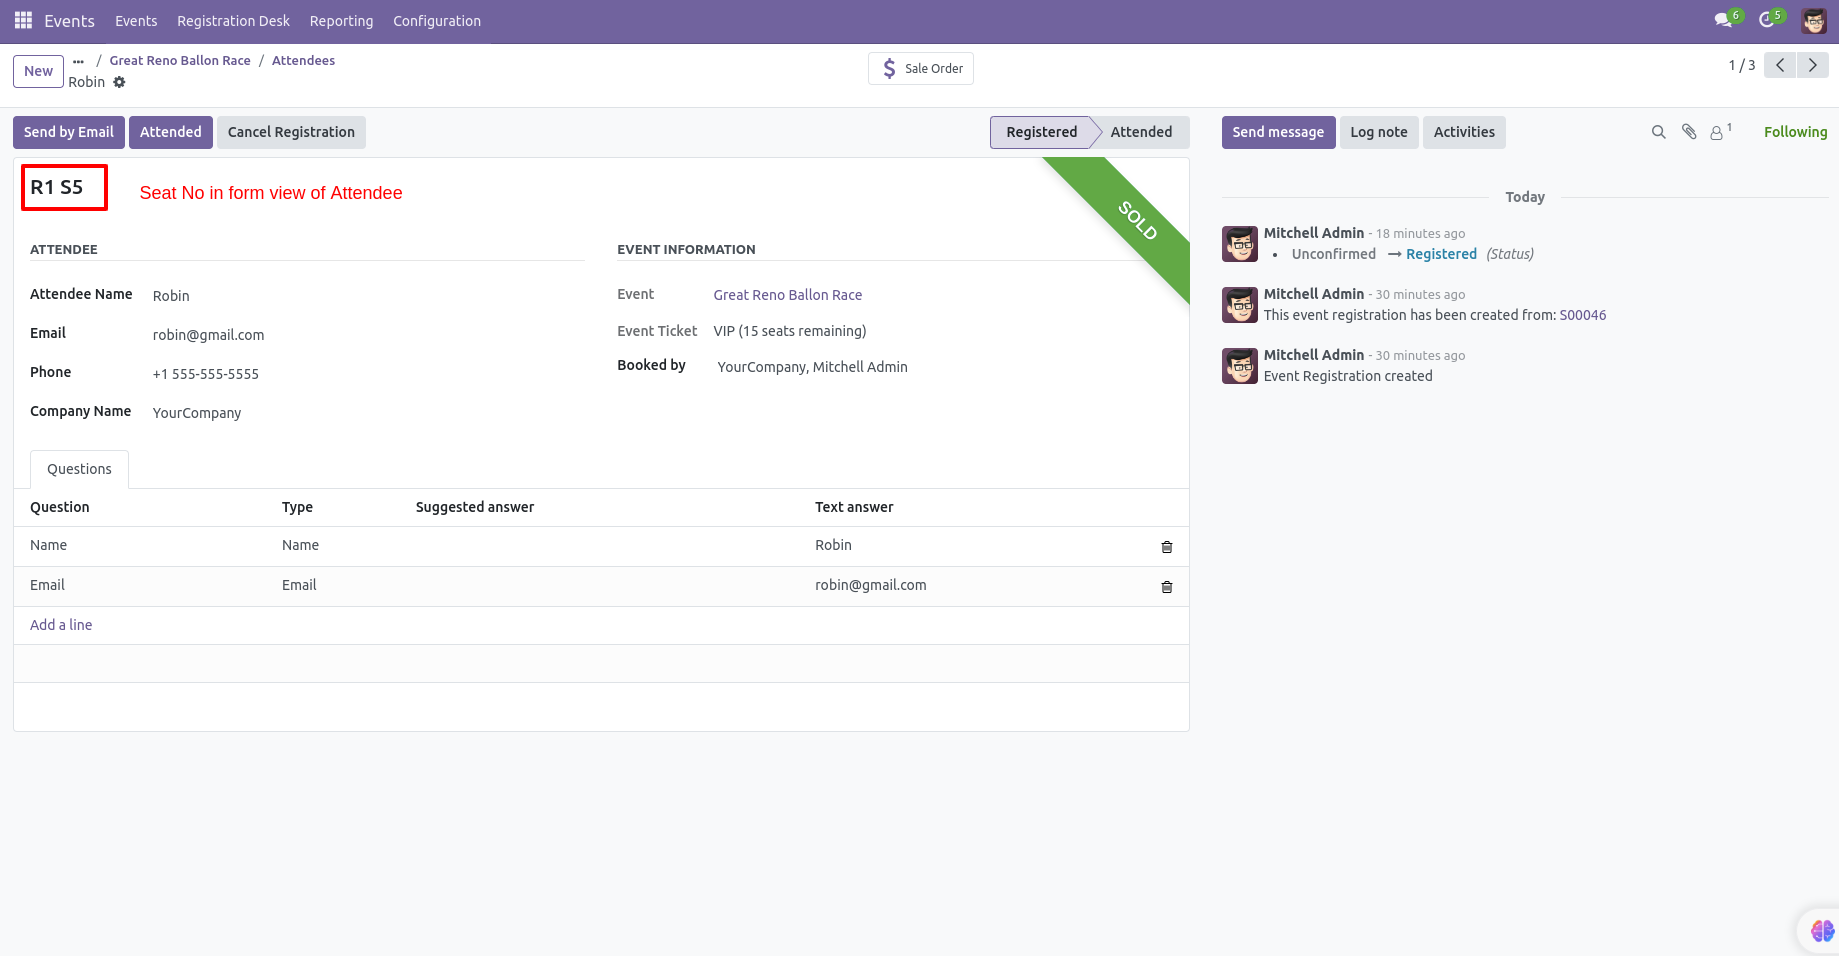
An event manager can switch seats before registration confirmation.
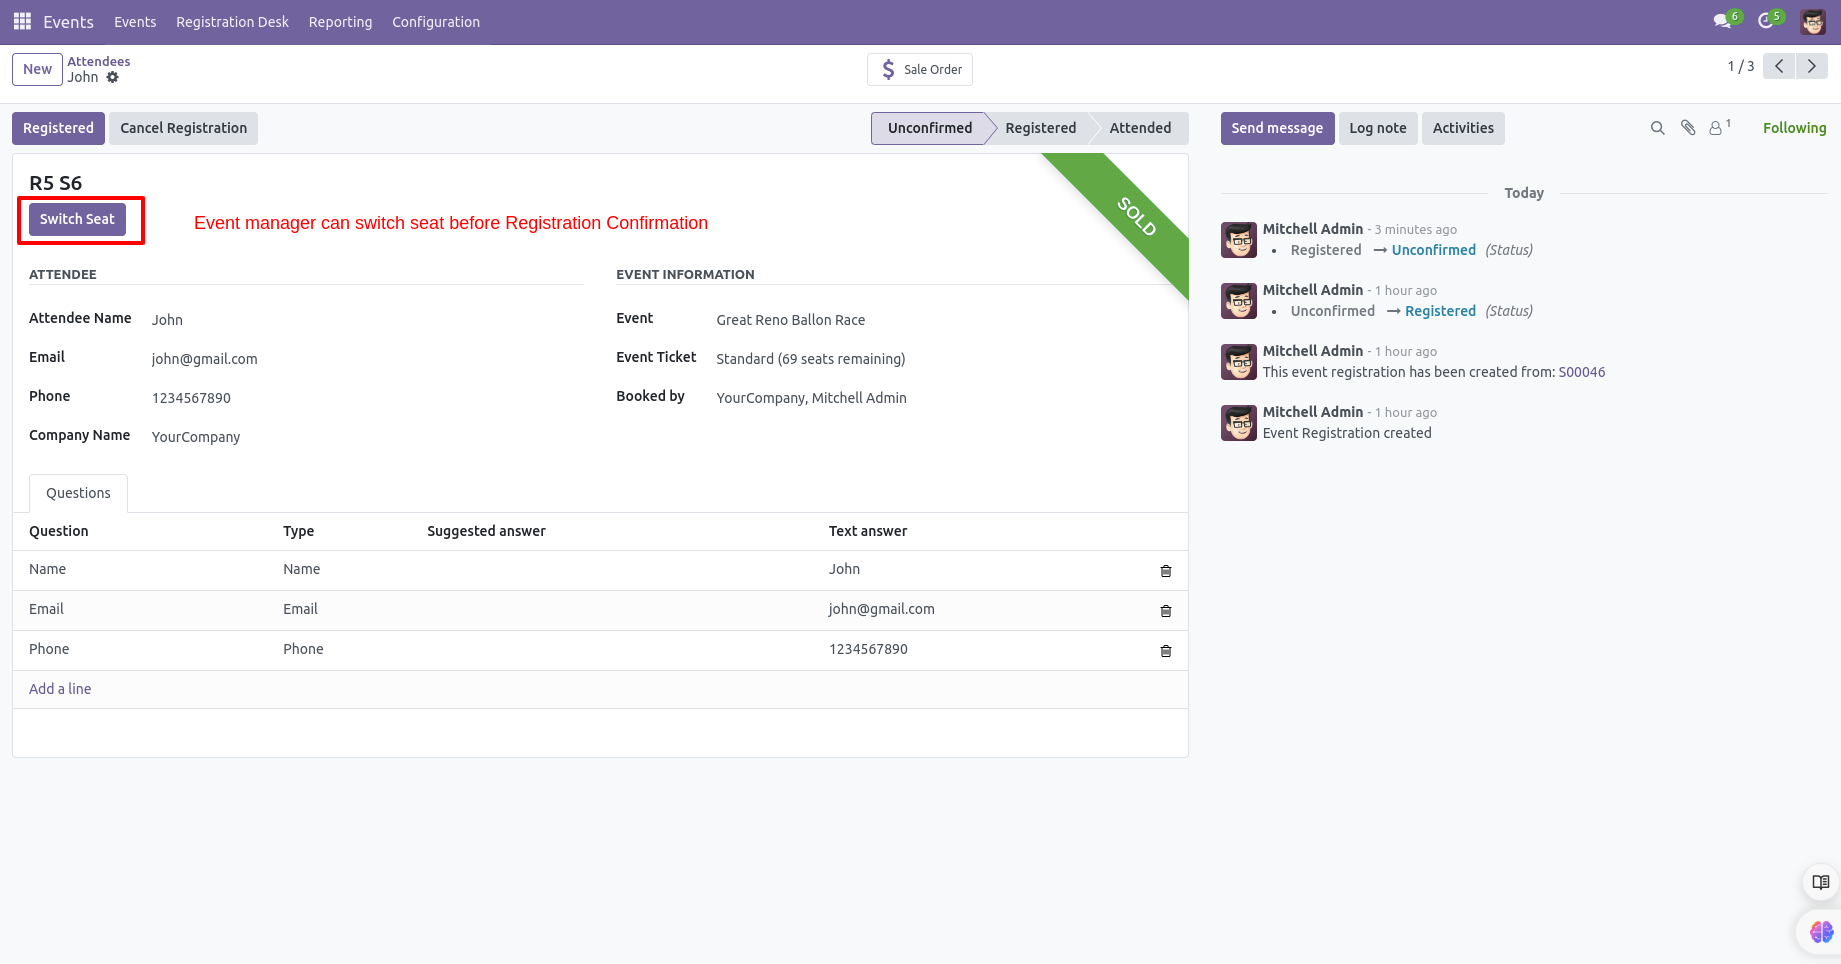
If the event manager press "Switch Seat" button, it opens a wizard, switch seats and press "Change Seat" button.

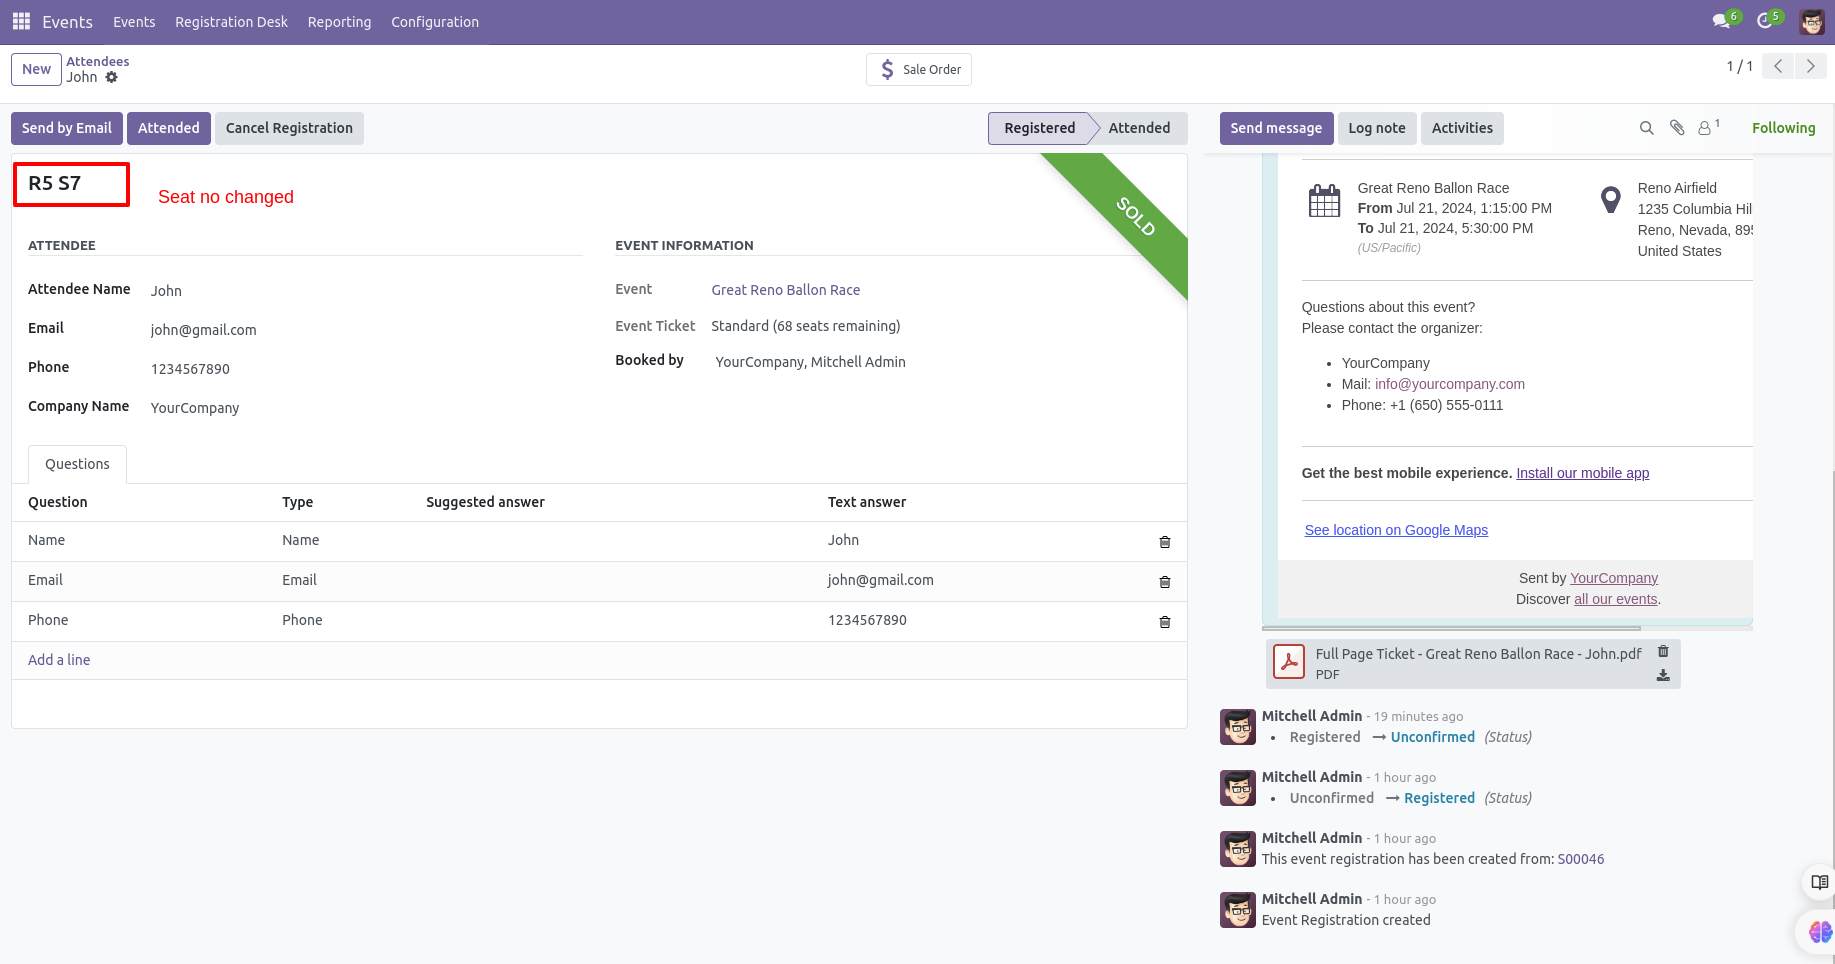
The event manager has done switch seats so now seat number is changed.
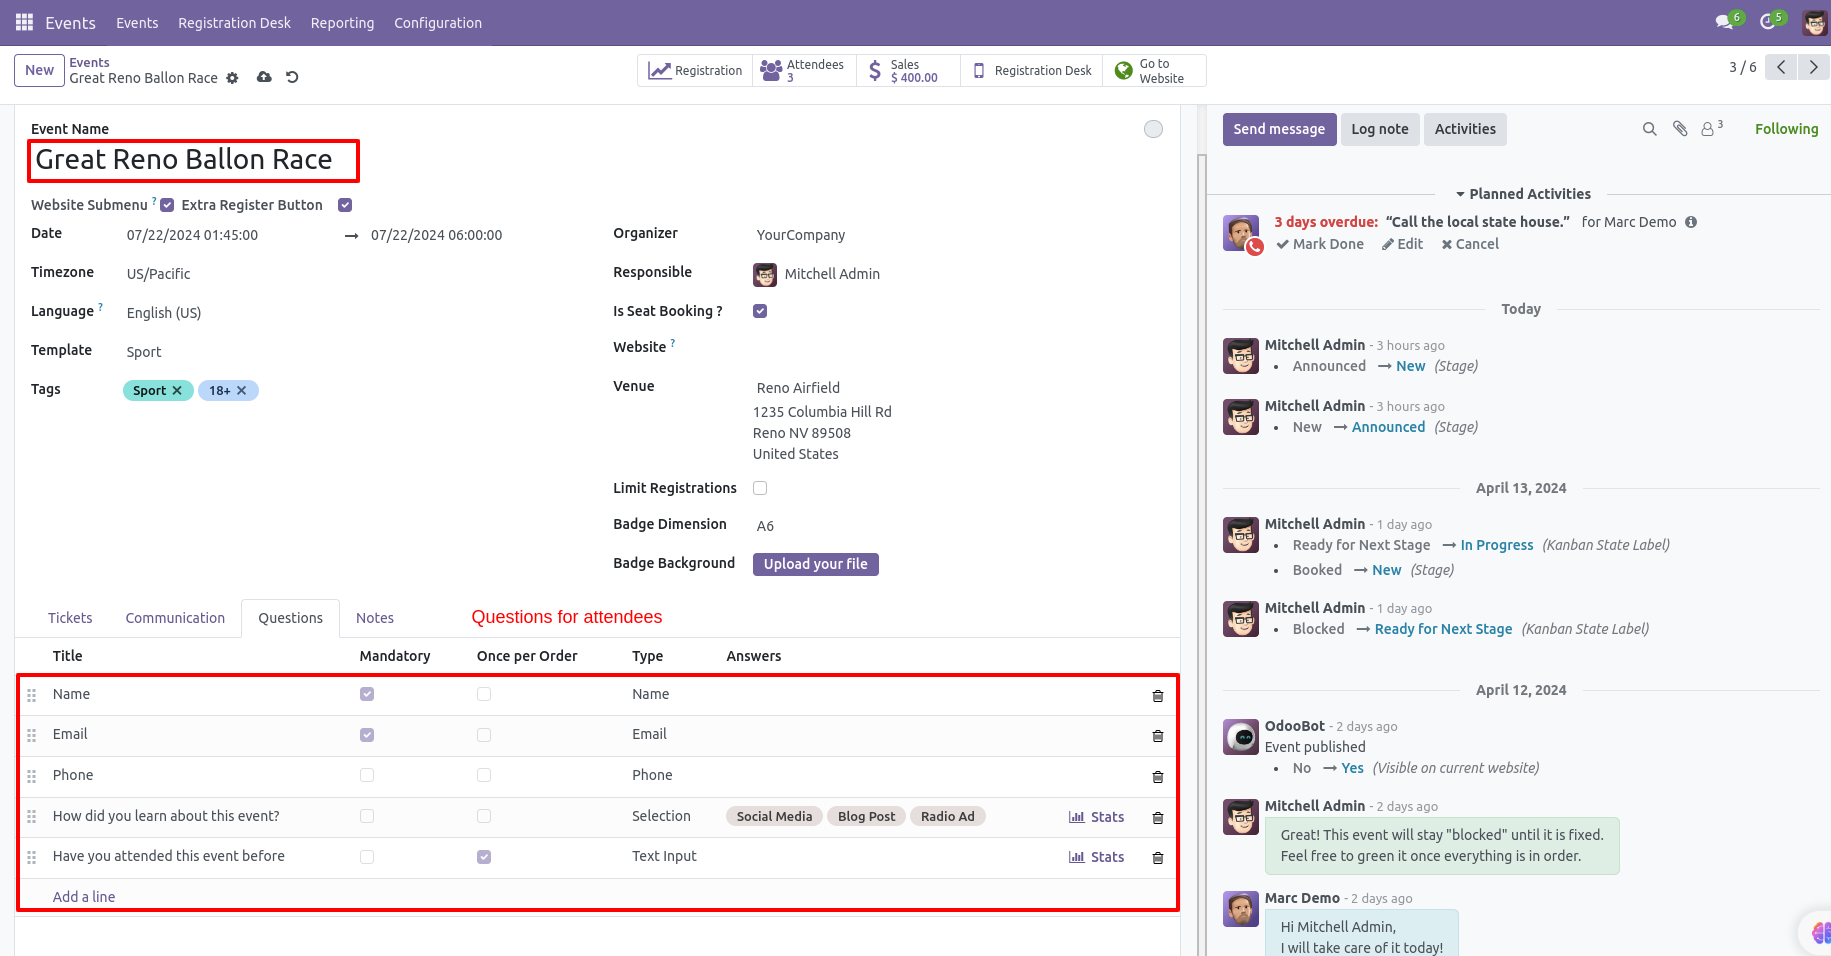
In the questions tab, you can add a questionary for any event.
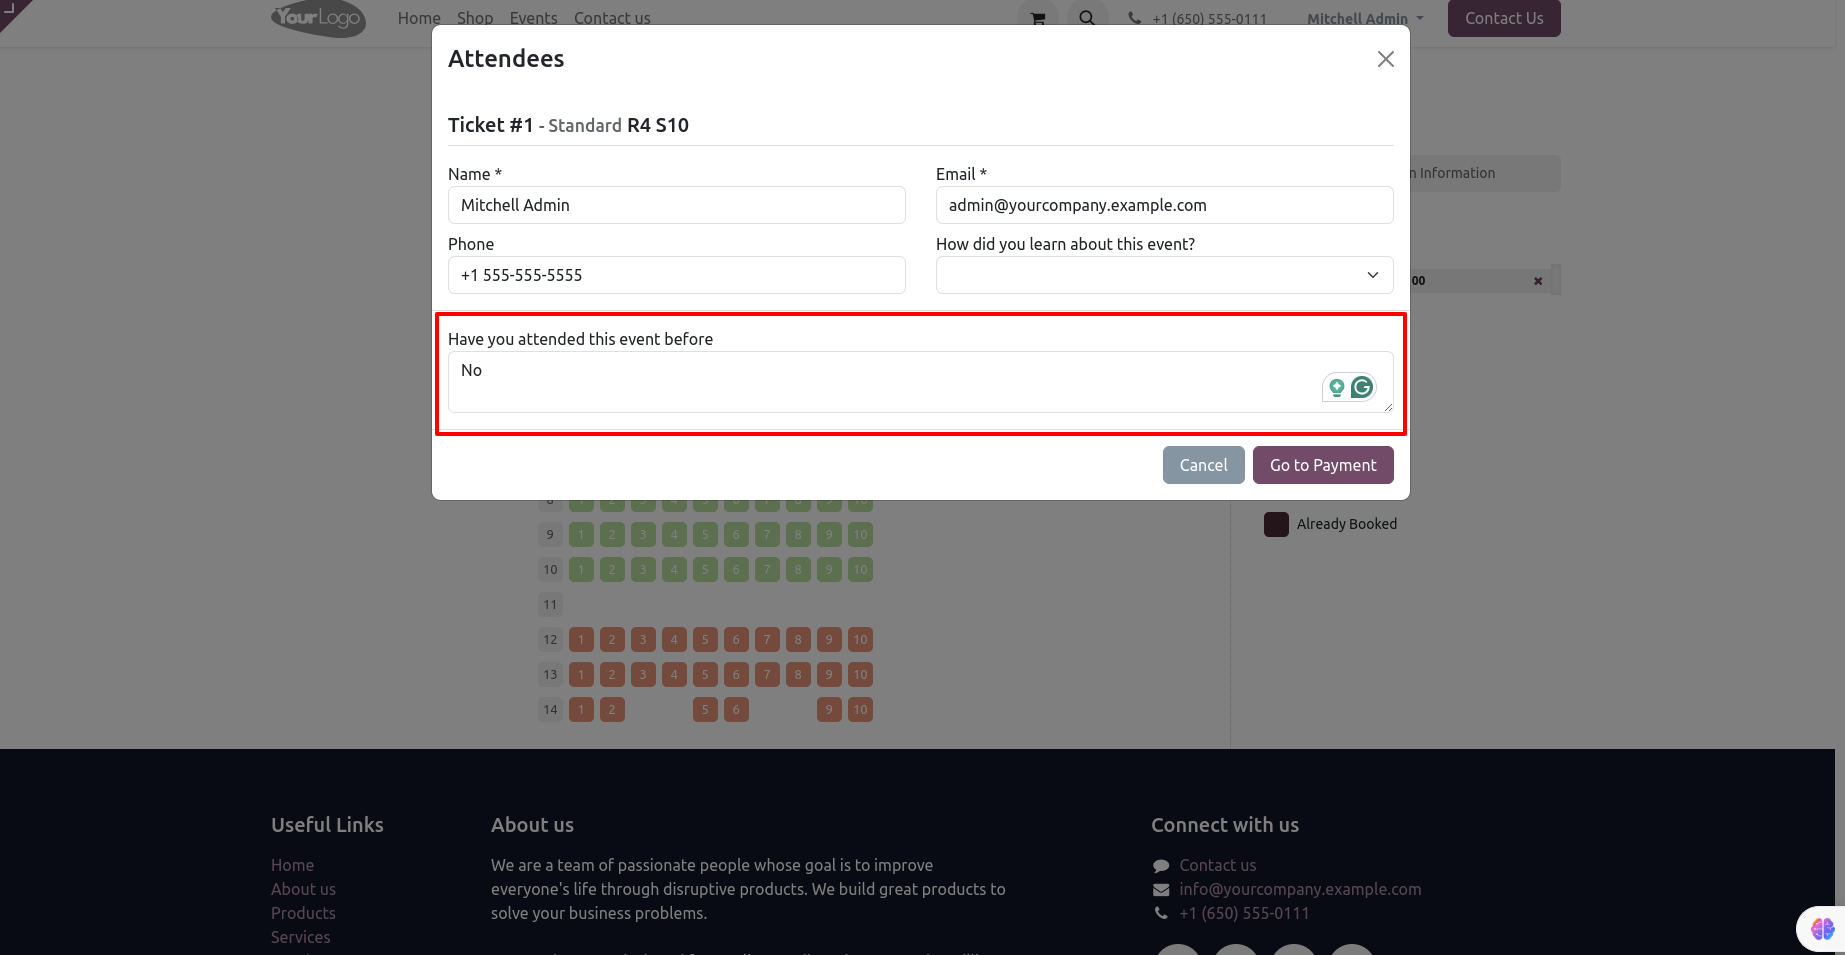
Questions look like below on the website.
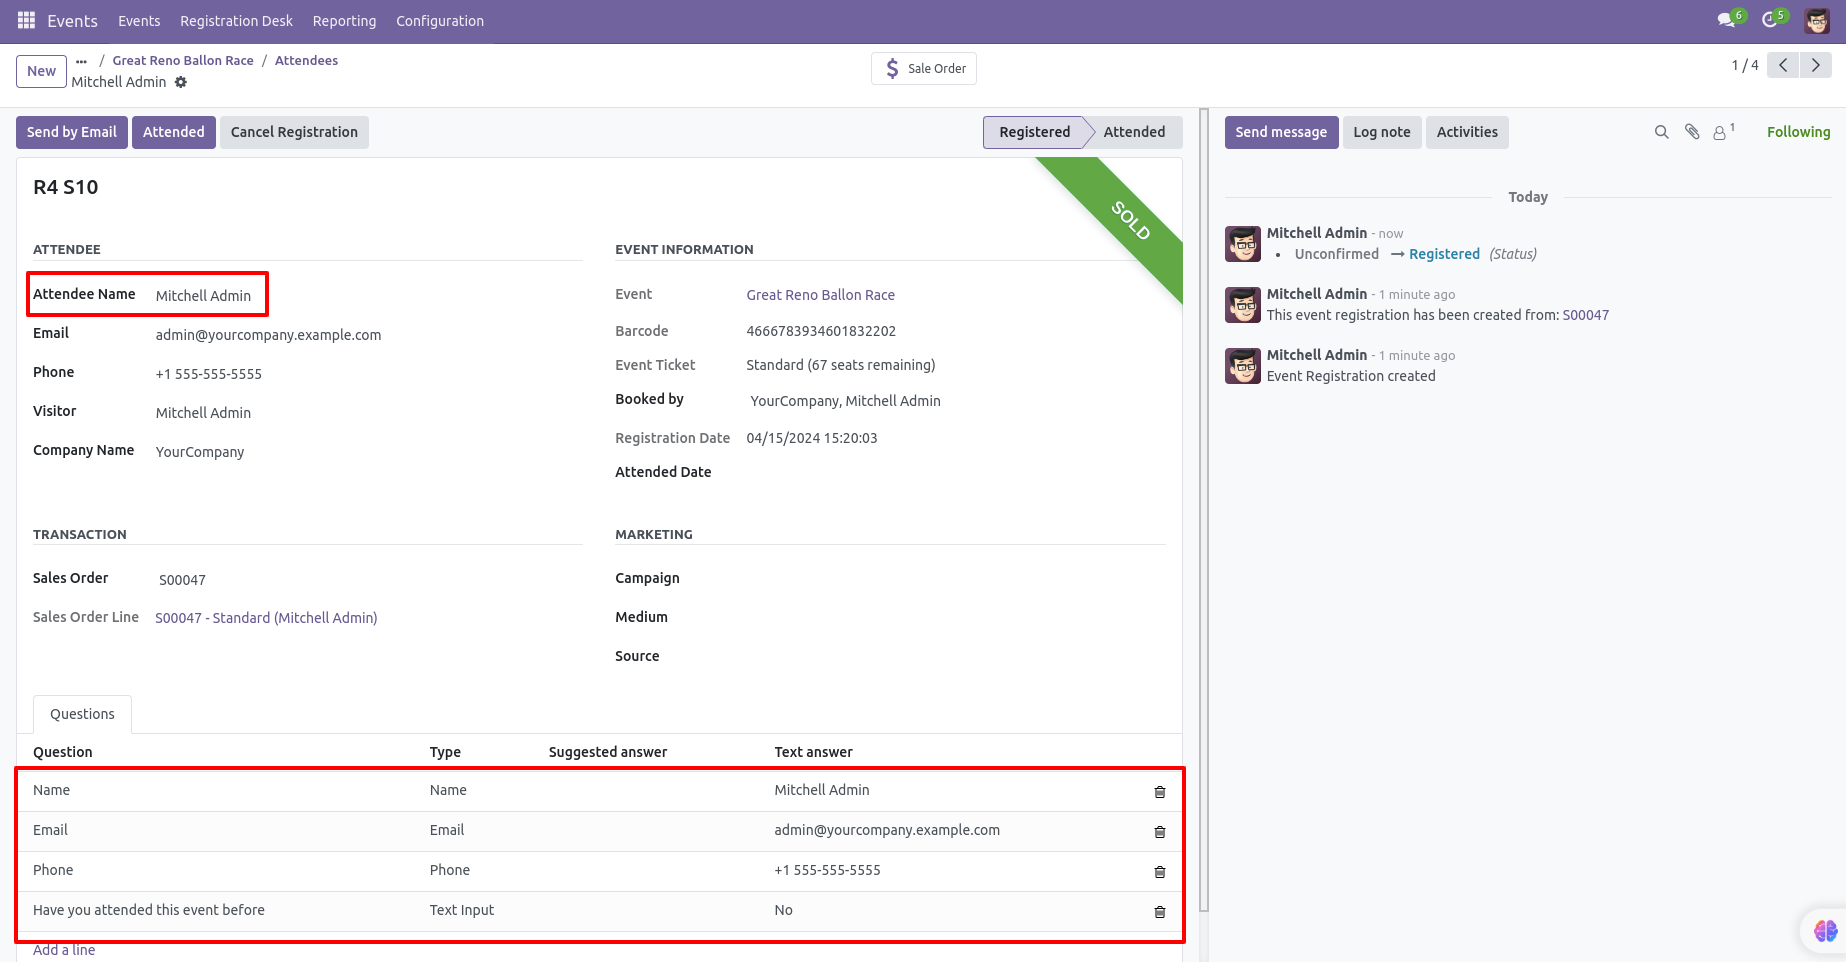
Attendees answer backend form view with details.
The tablet view looks like this.
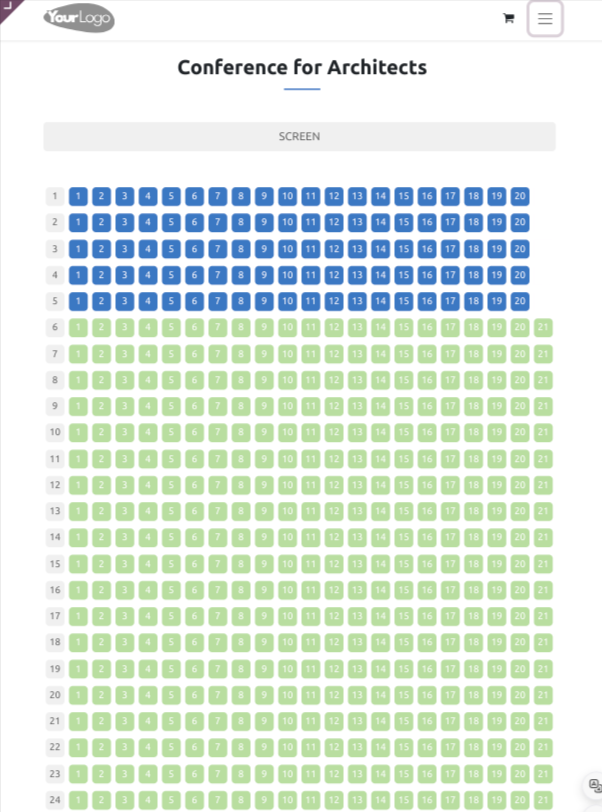
The tablet view looks like this.
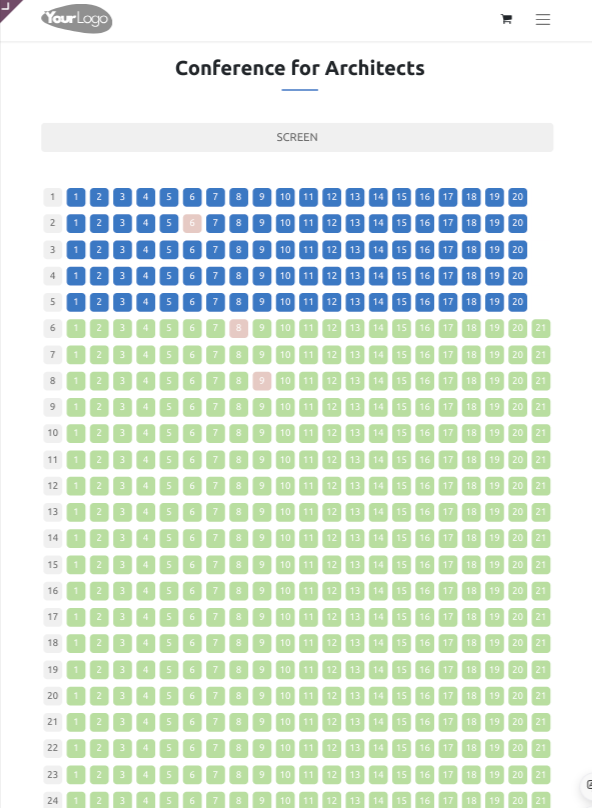
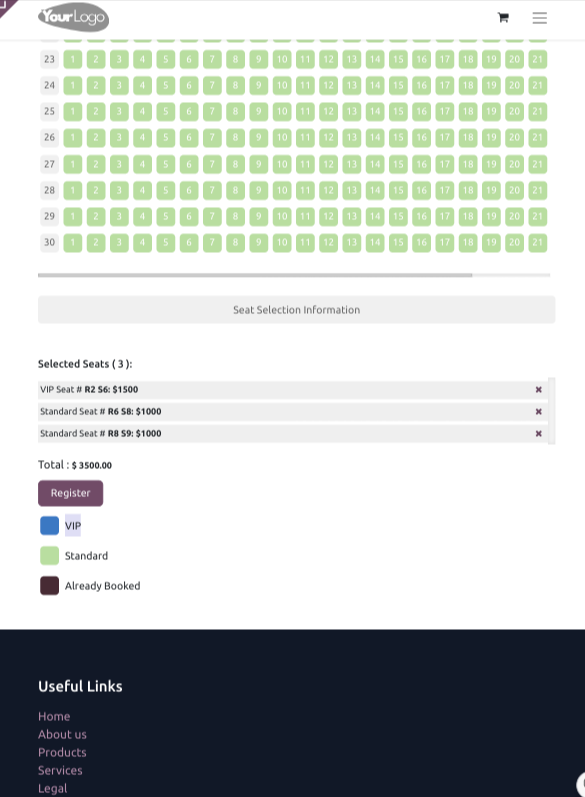
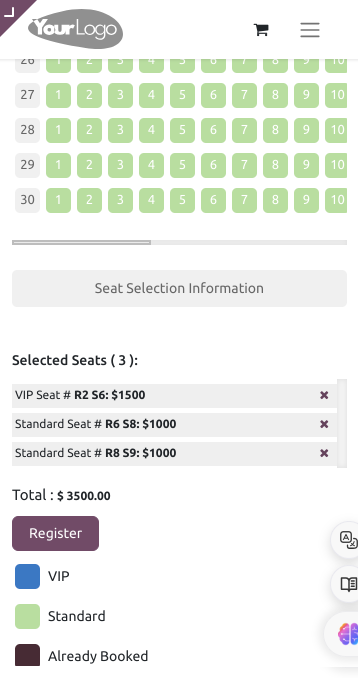
The mobile view looks like this.

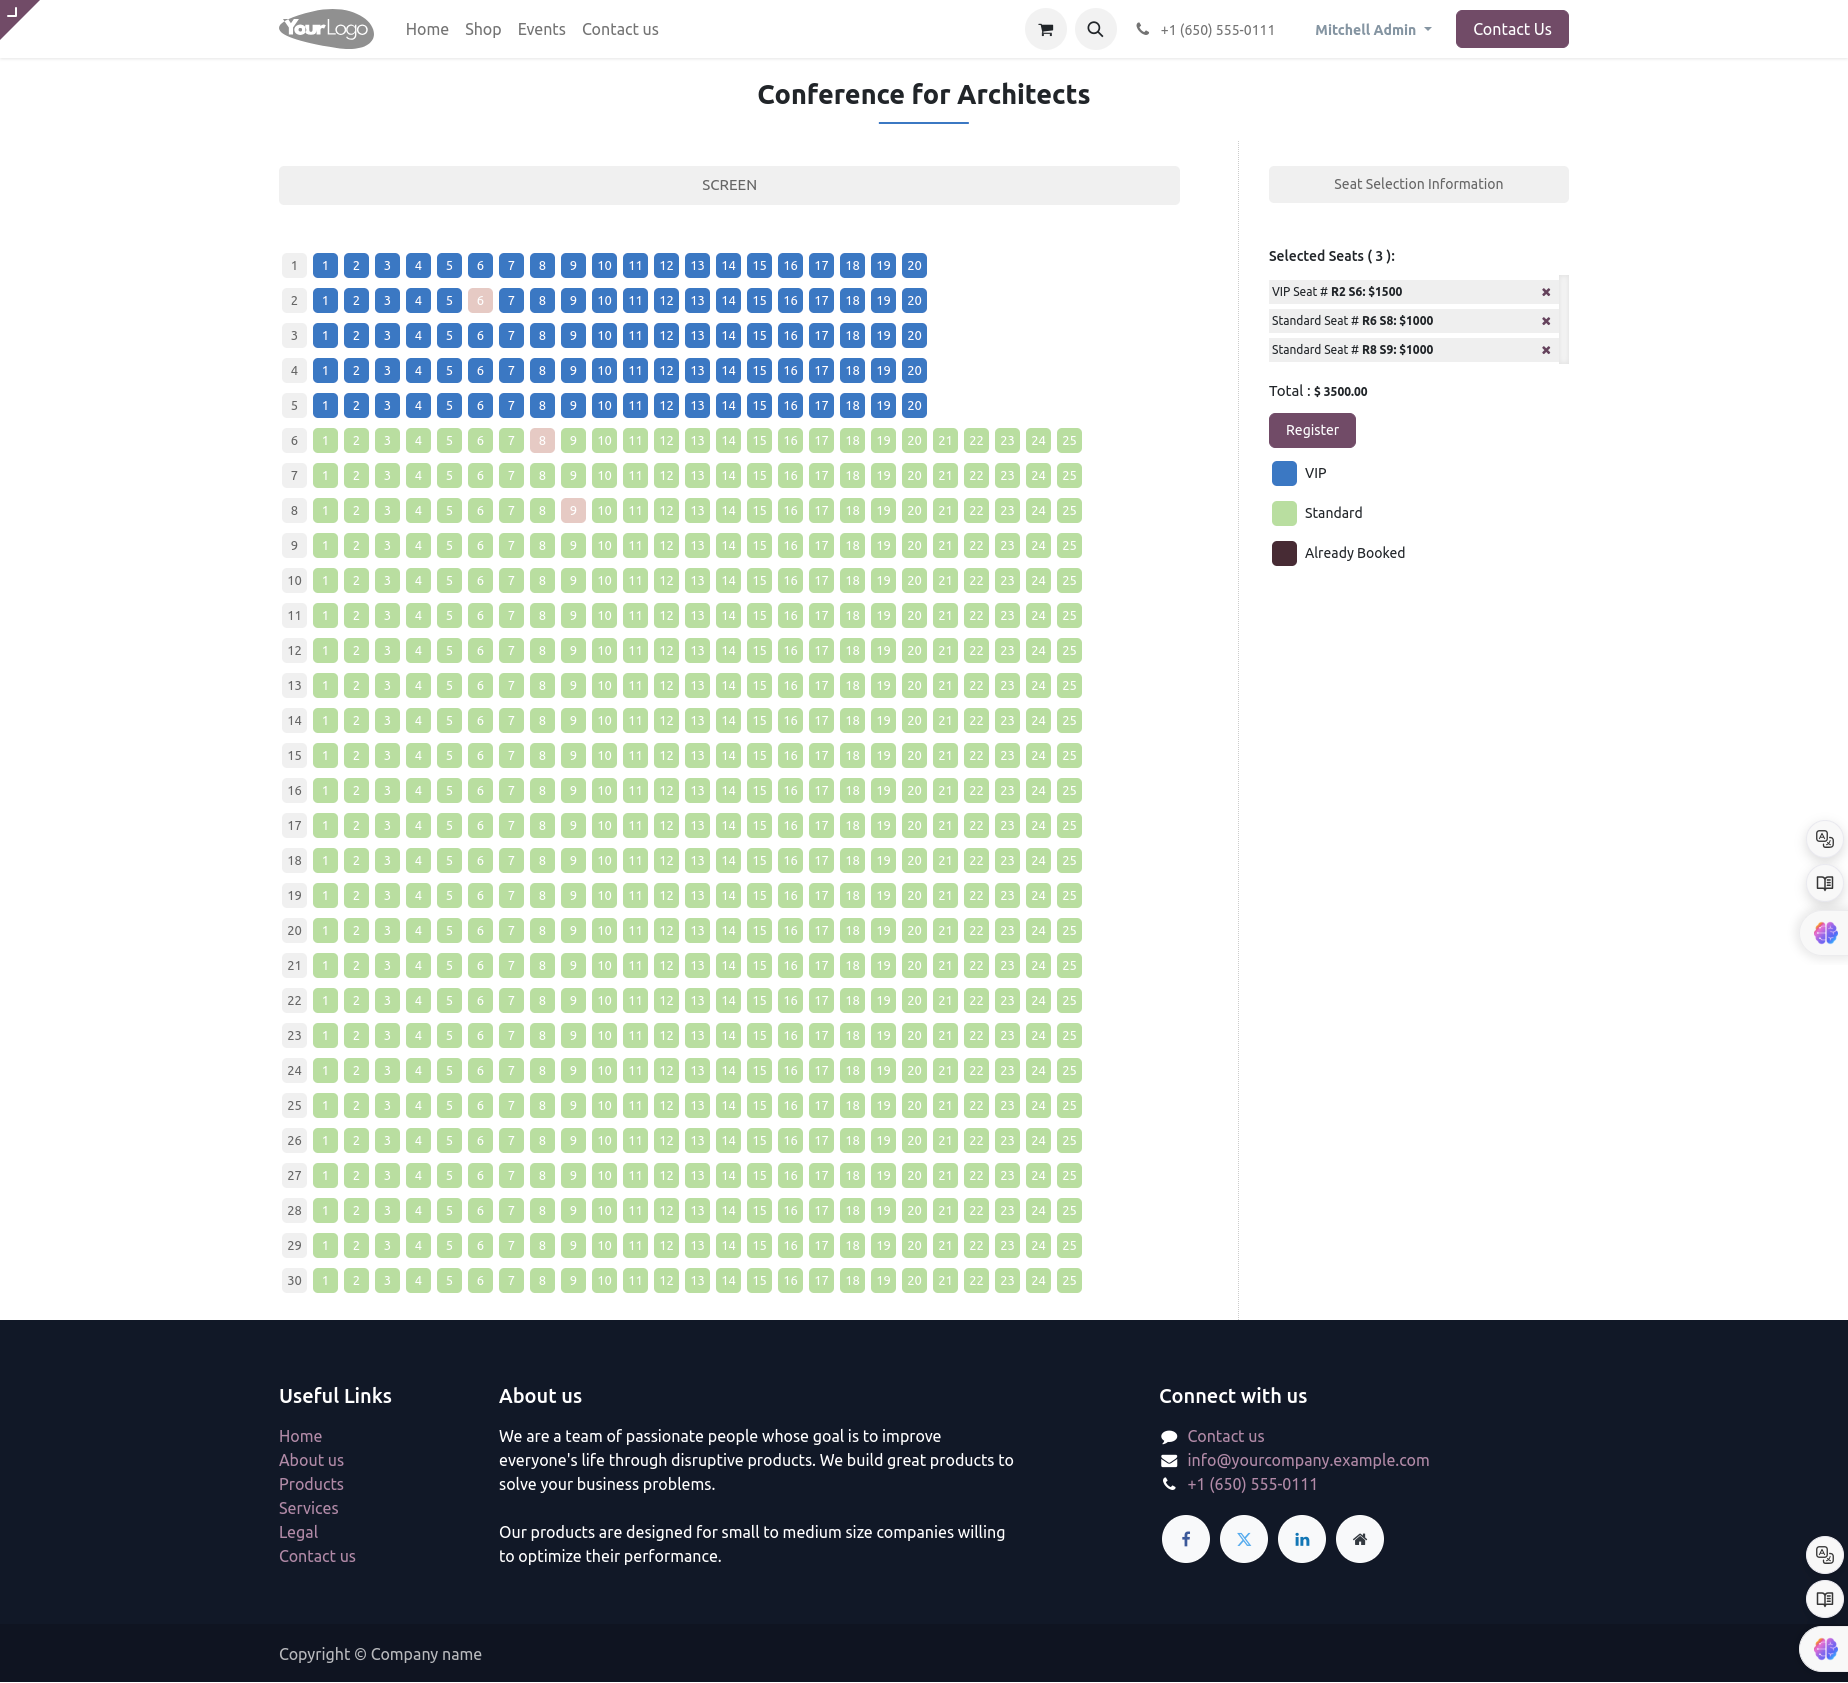
The desktop view looks like this.
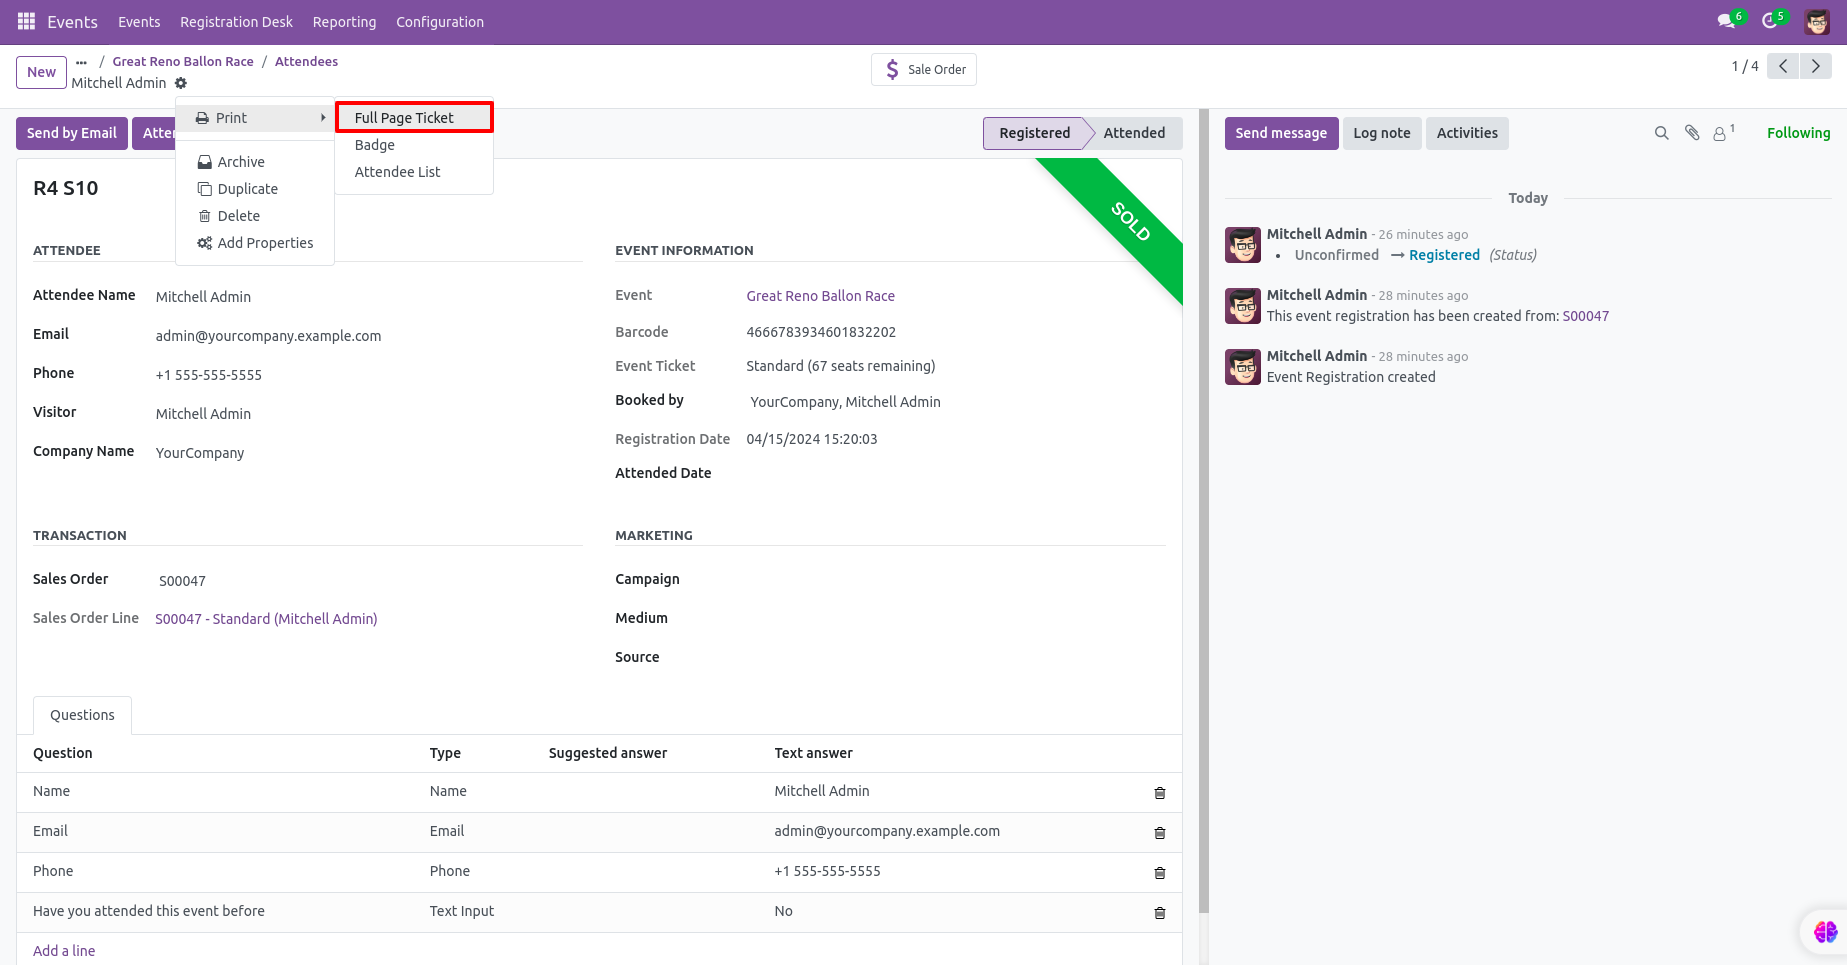
You can print full page ticket from "Print".
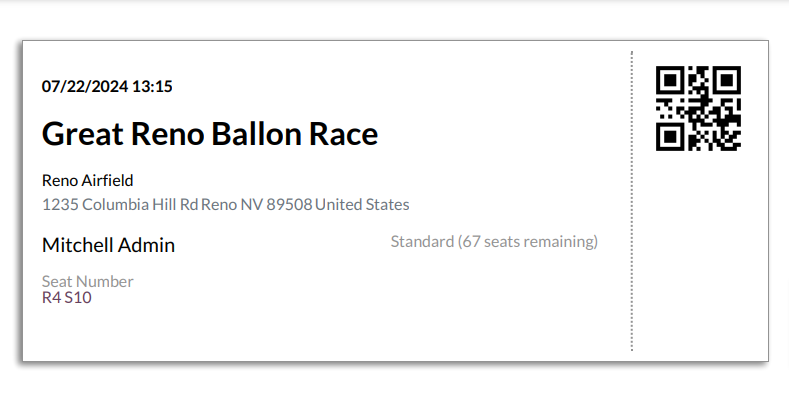
Full page ticket looks like this.
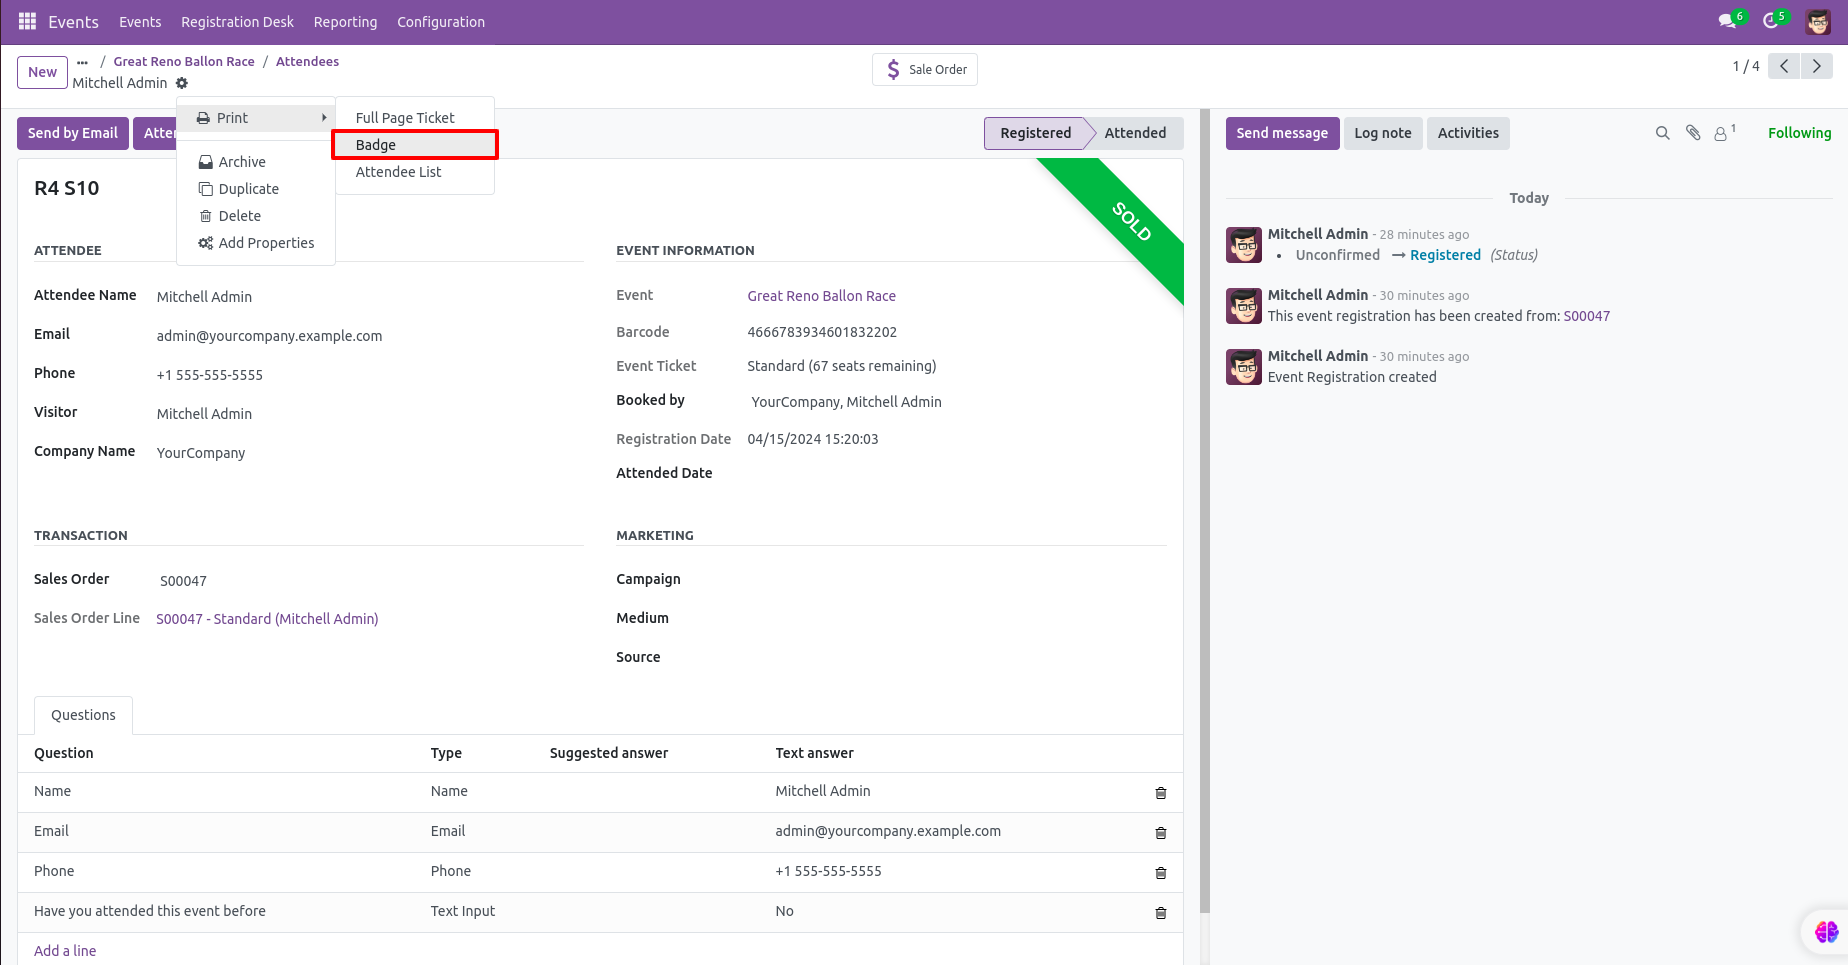
You can print badge from "Print".
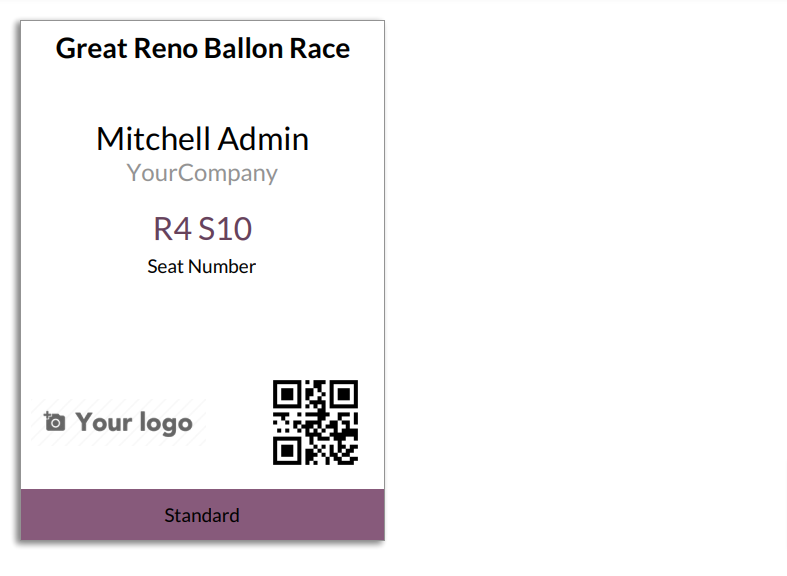
The badge report looks like this.
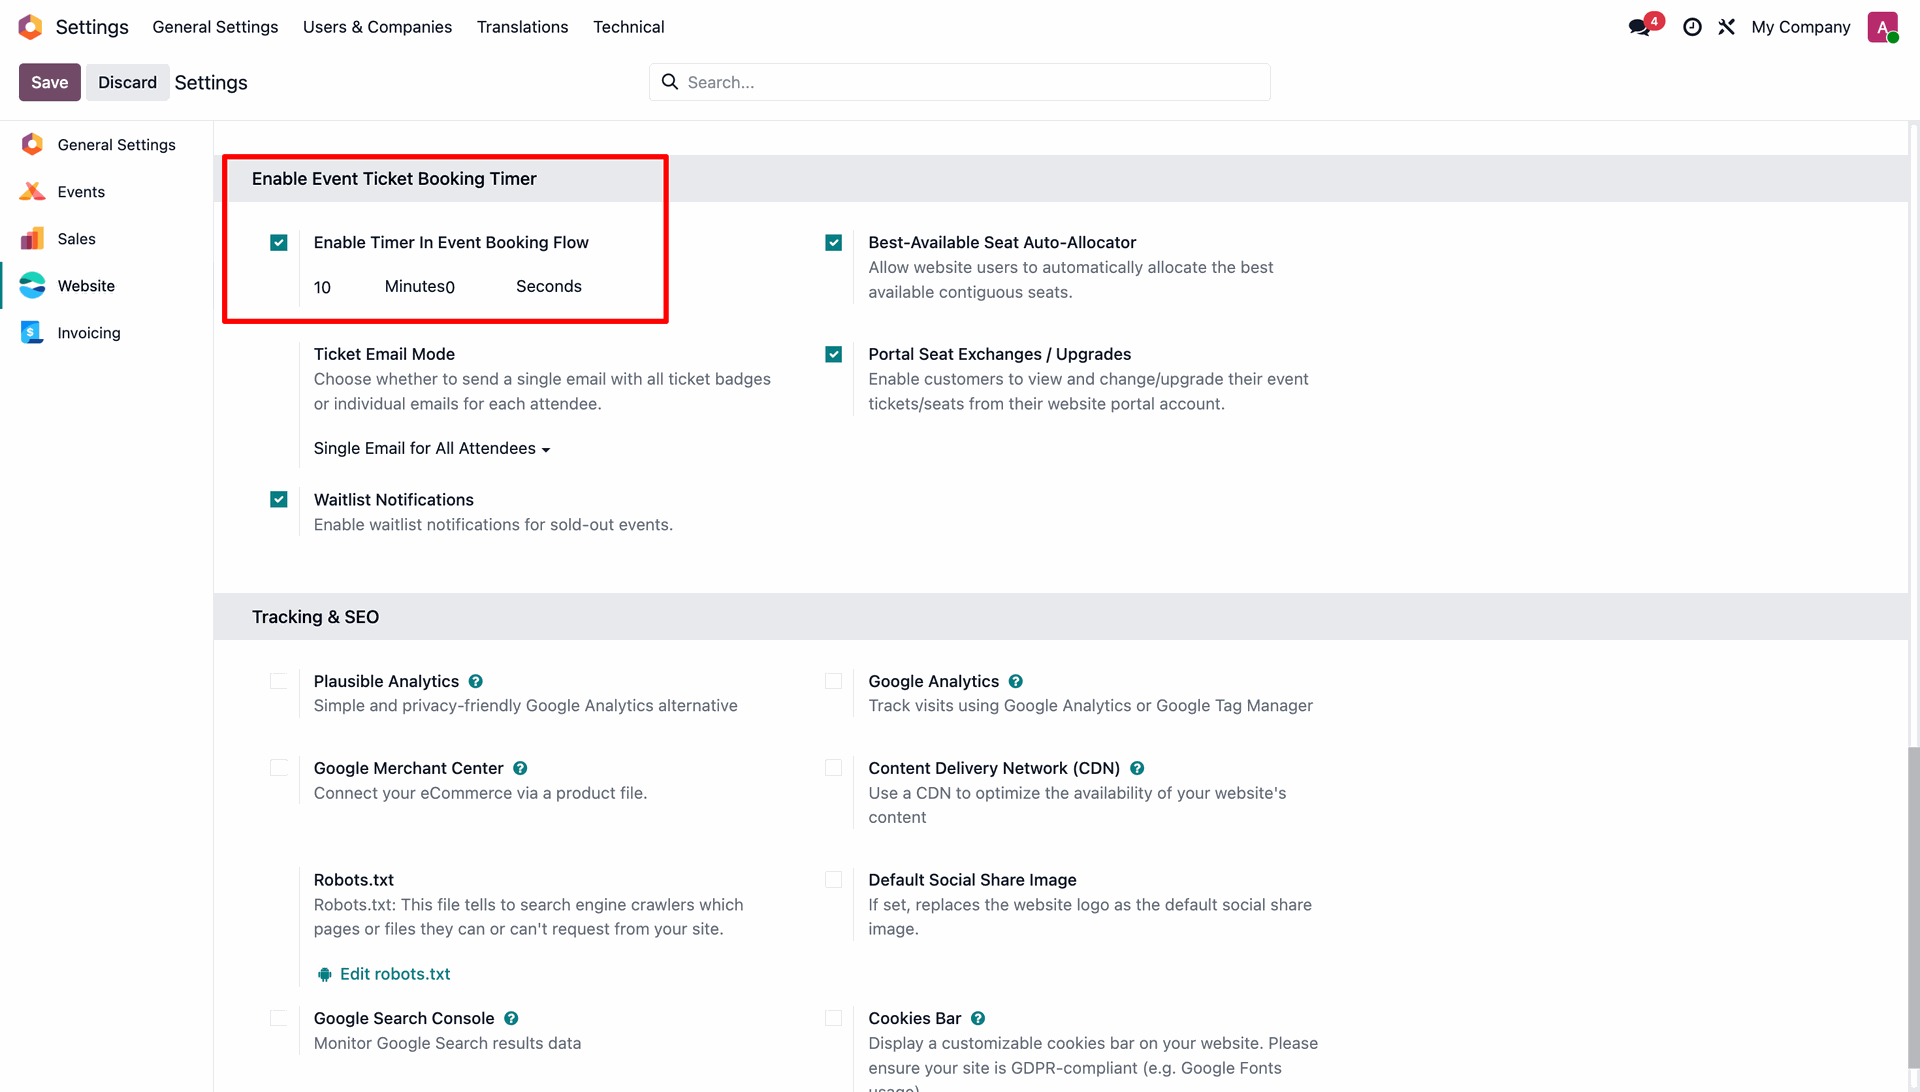
Configuration for event ticket booking timer.

Cooling period displays like below.
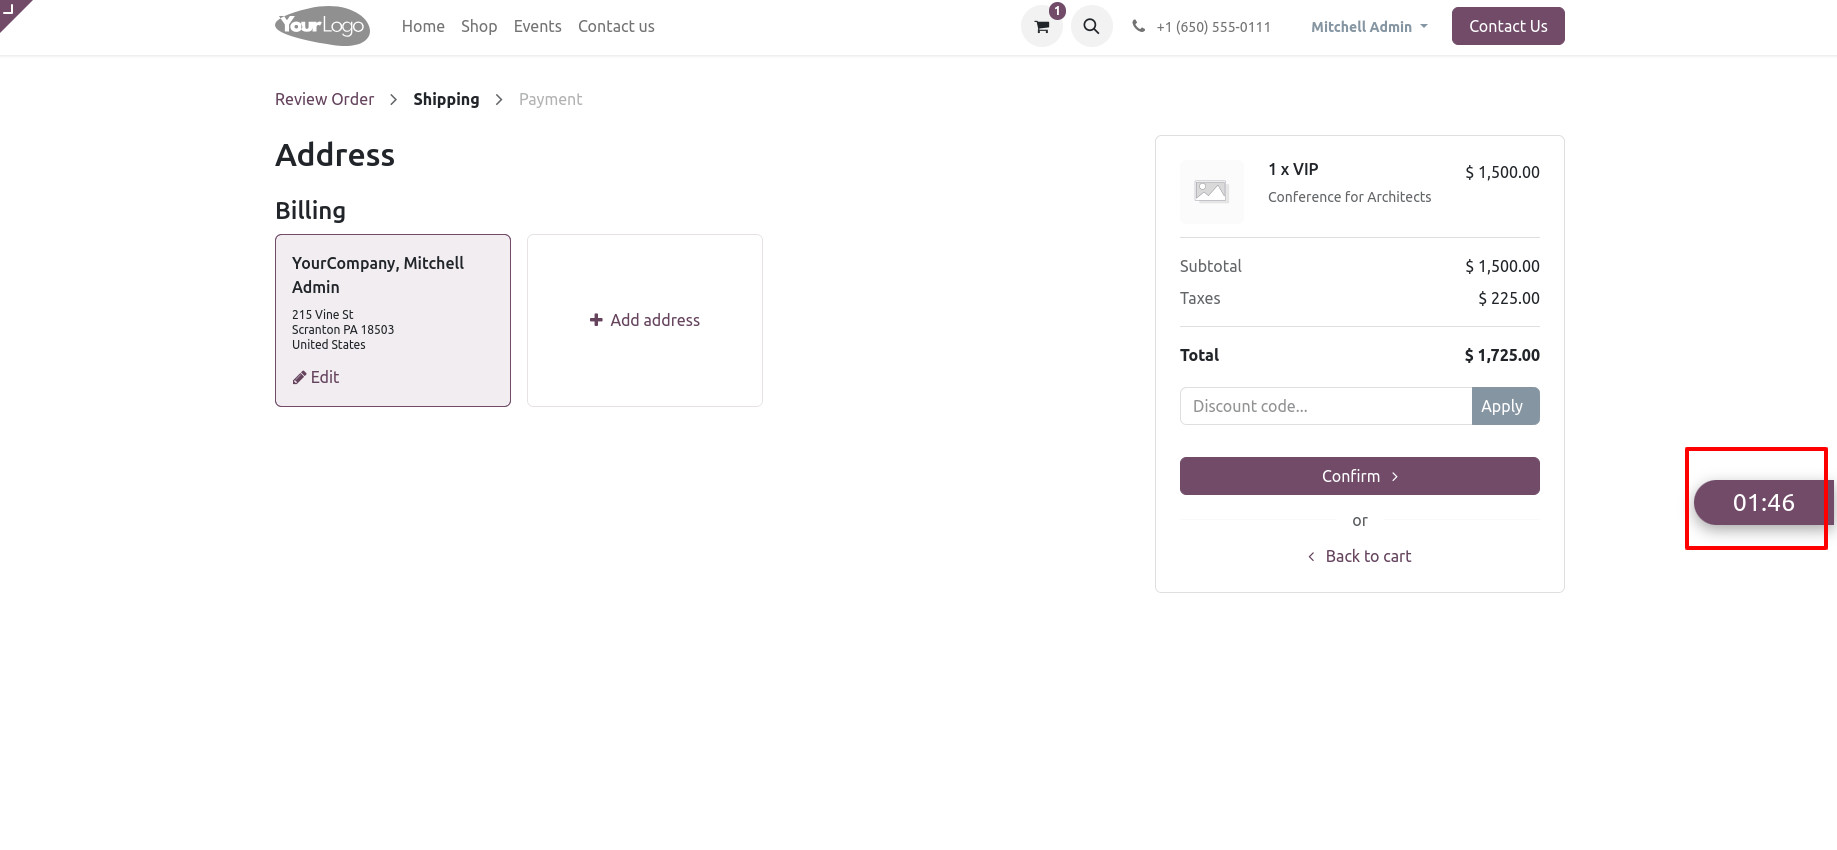
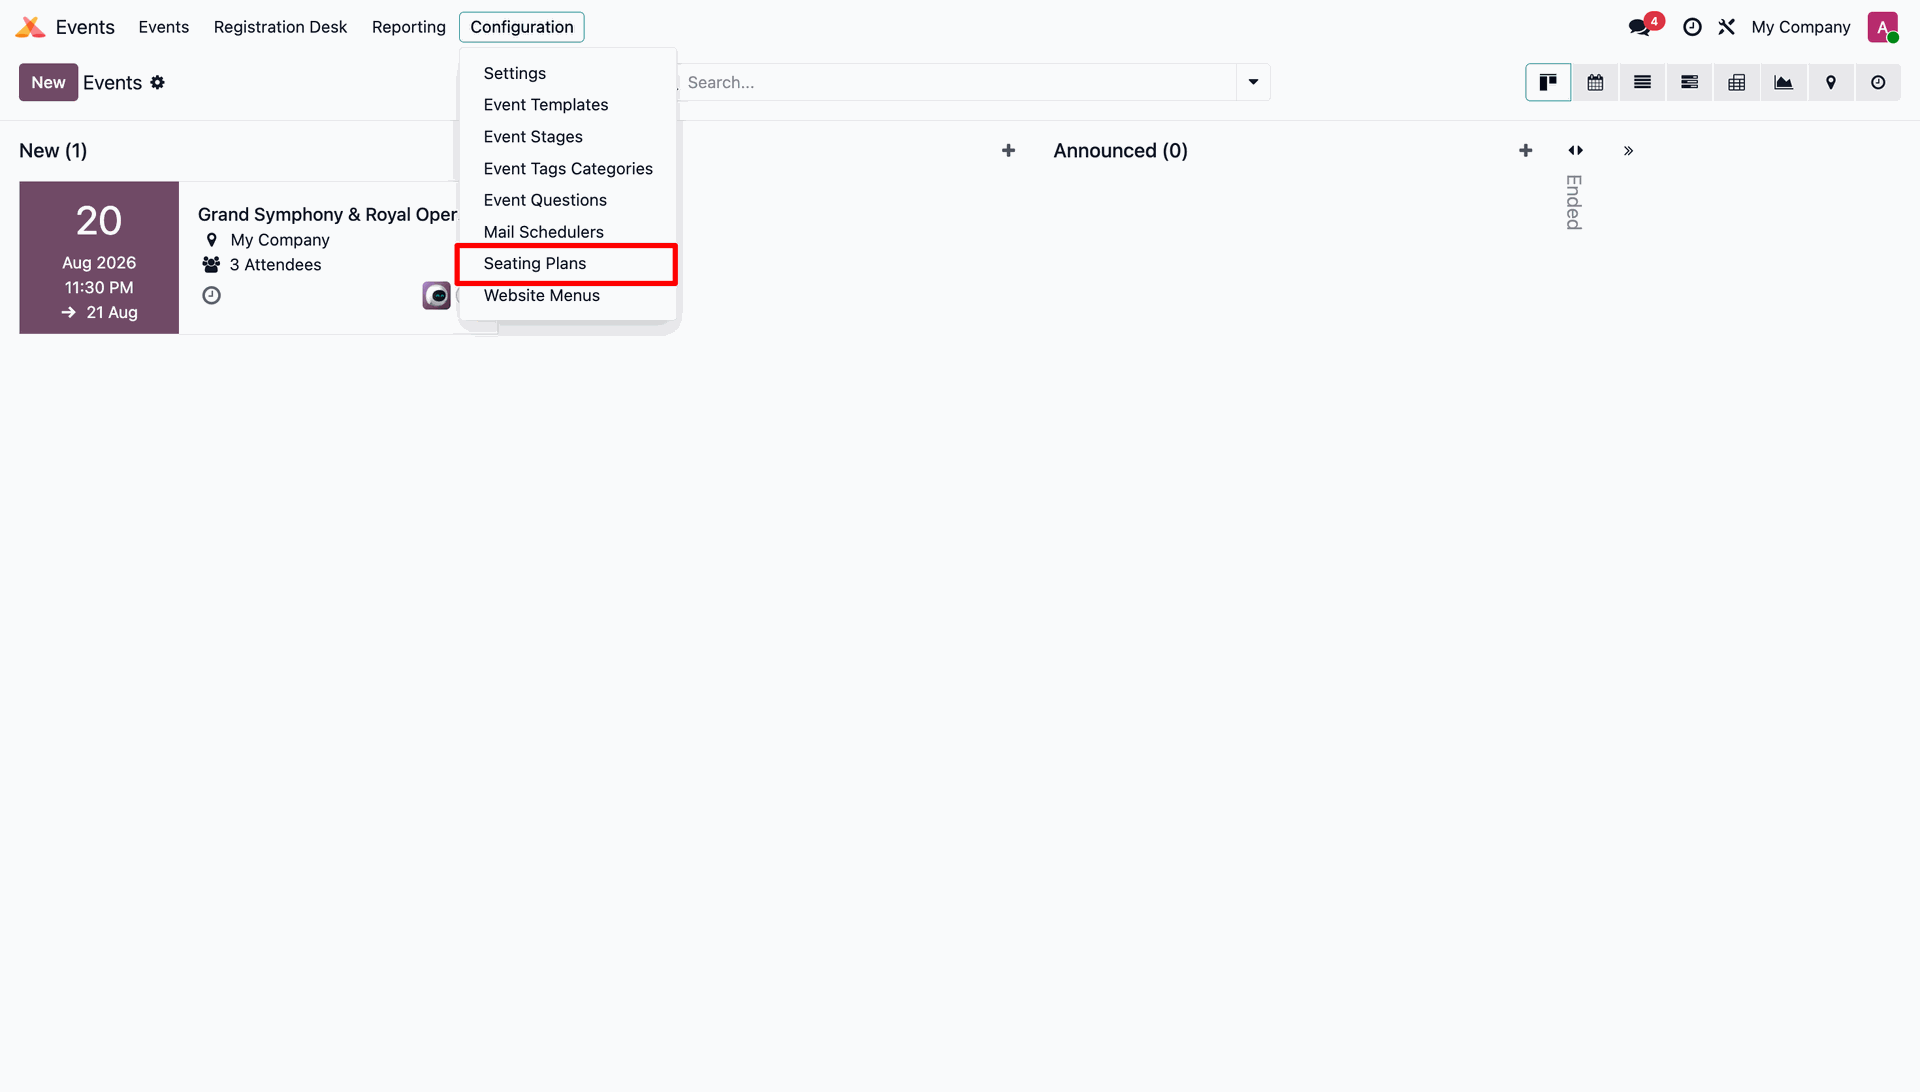
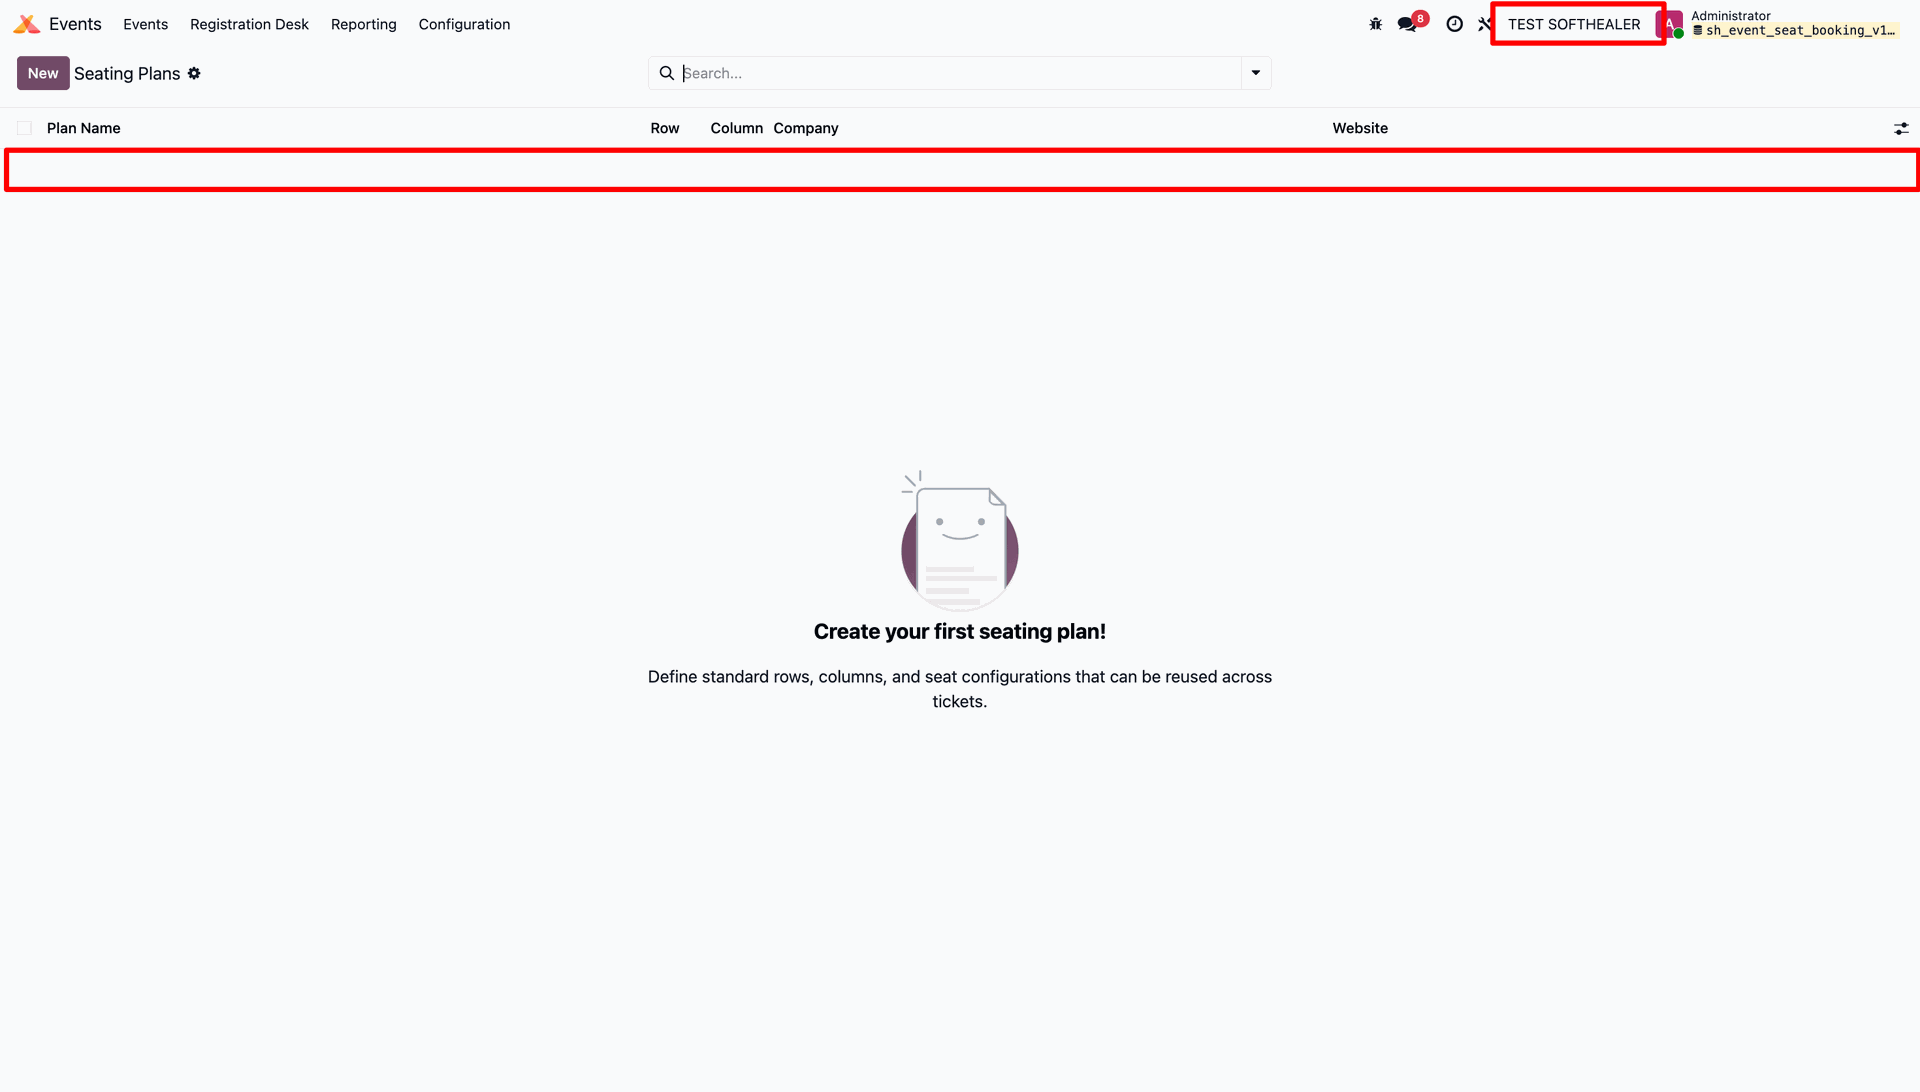
Go to the Events app, open the Configuration menu, and select Seating Plans to manage and configure event seating layouts.
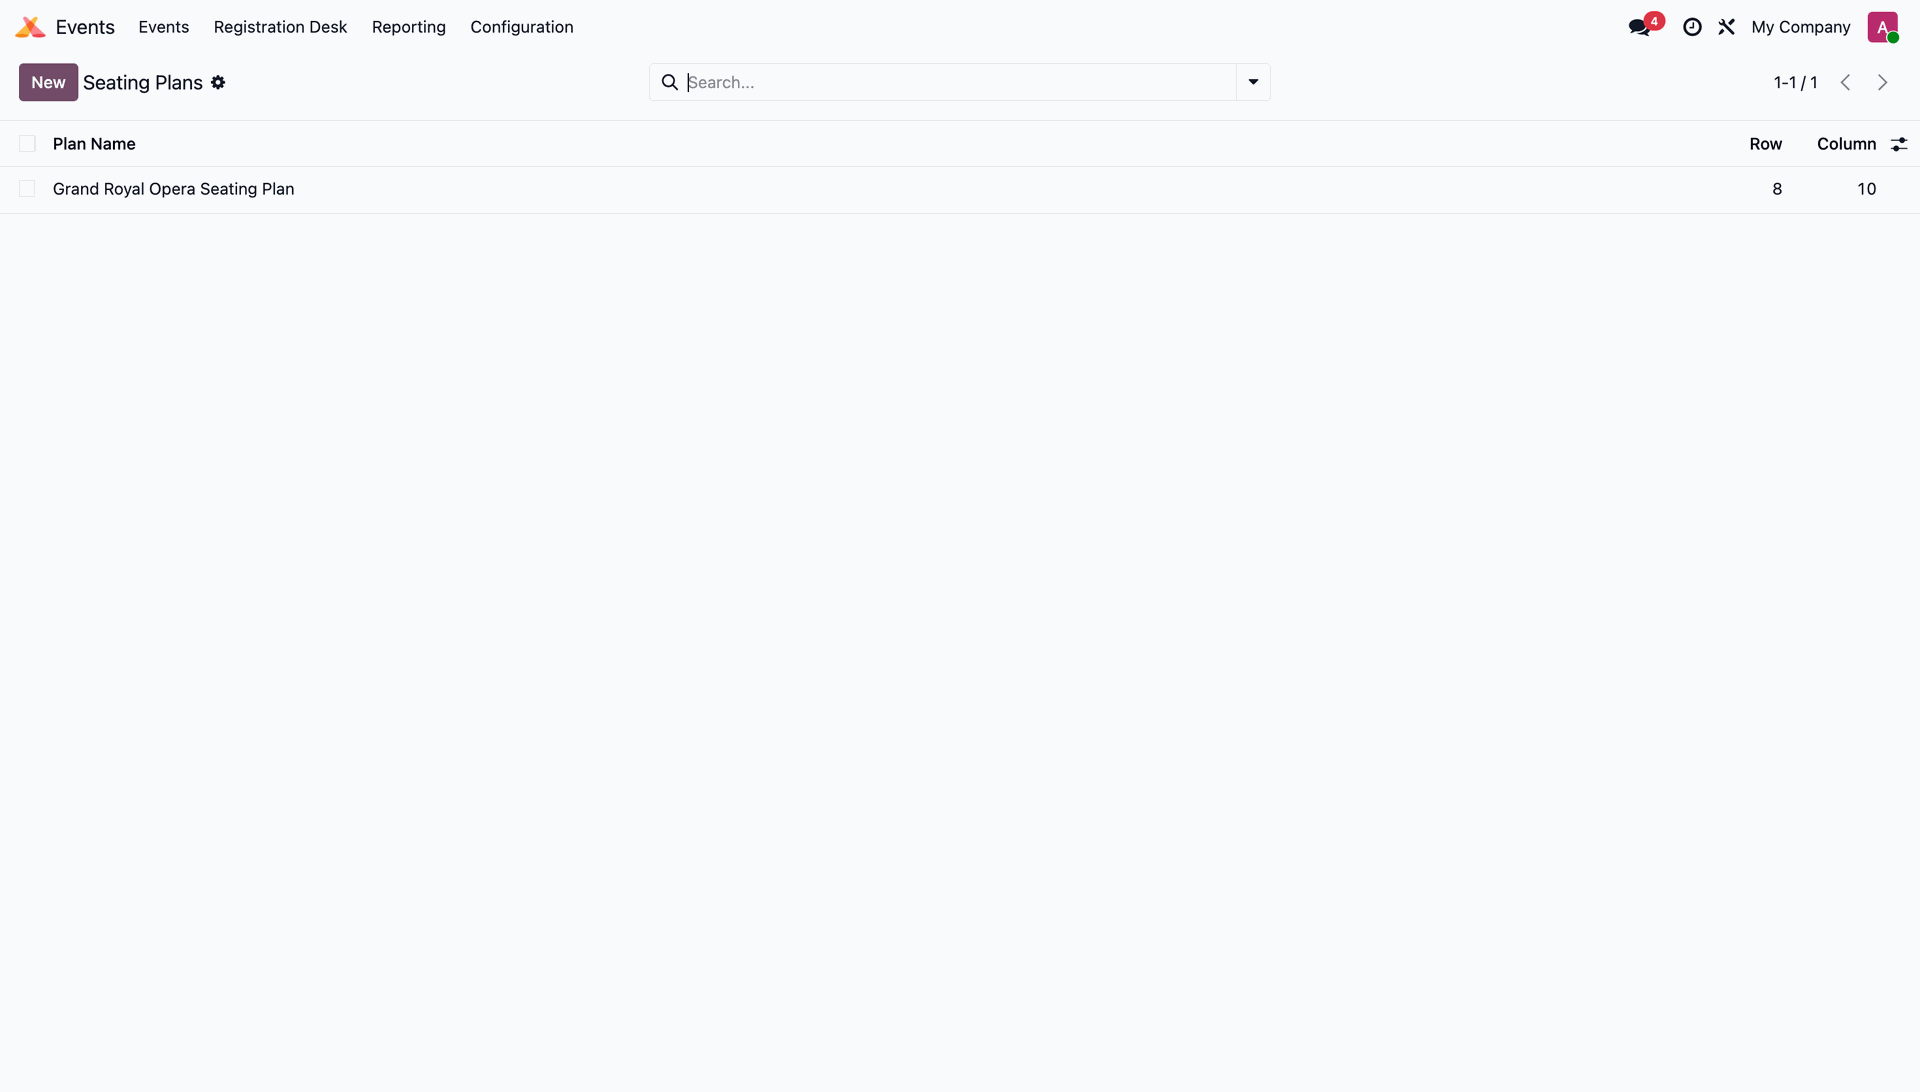
The Seating Plans List View displays all configured seating plans.
Open the Seating Plan Form View and configure the Row Count and Column Count to define the seating layout for the event.
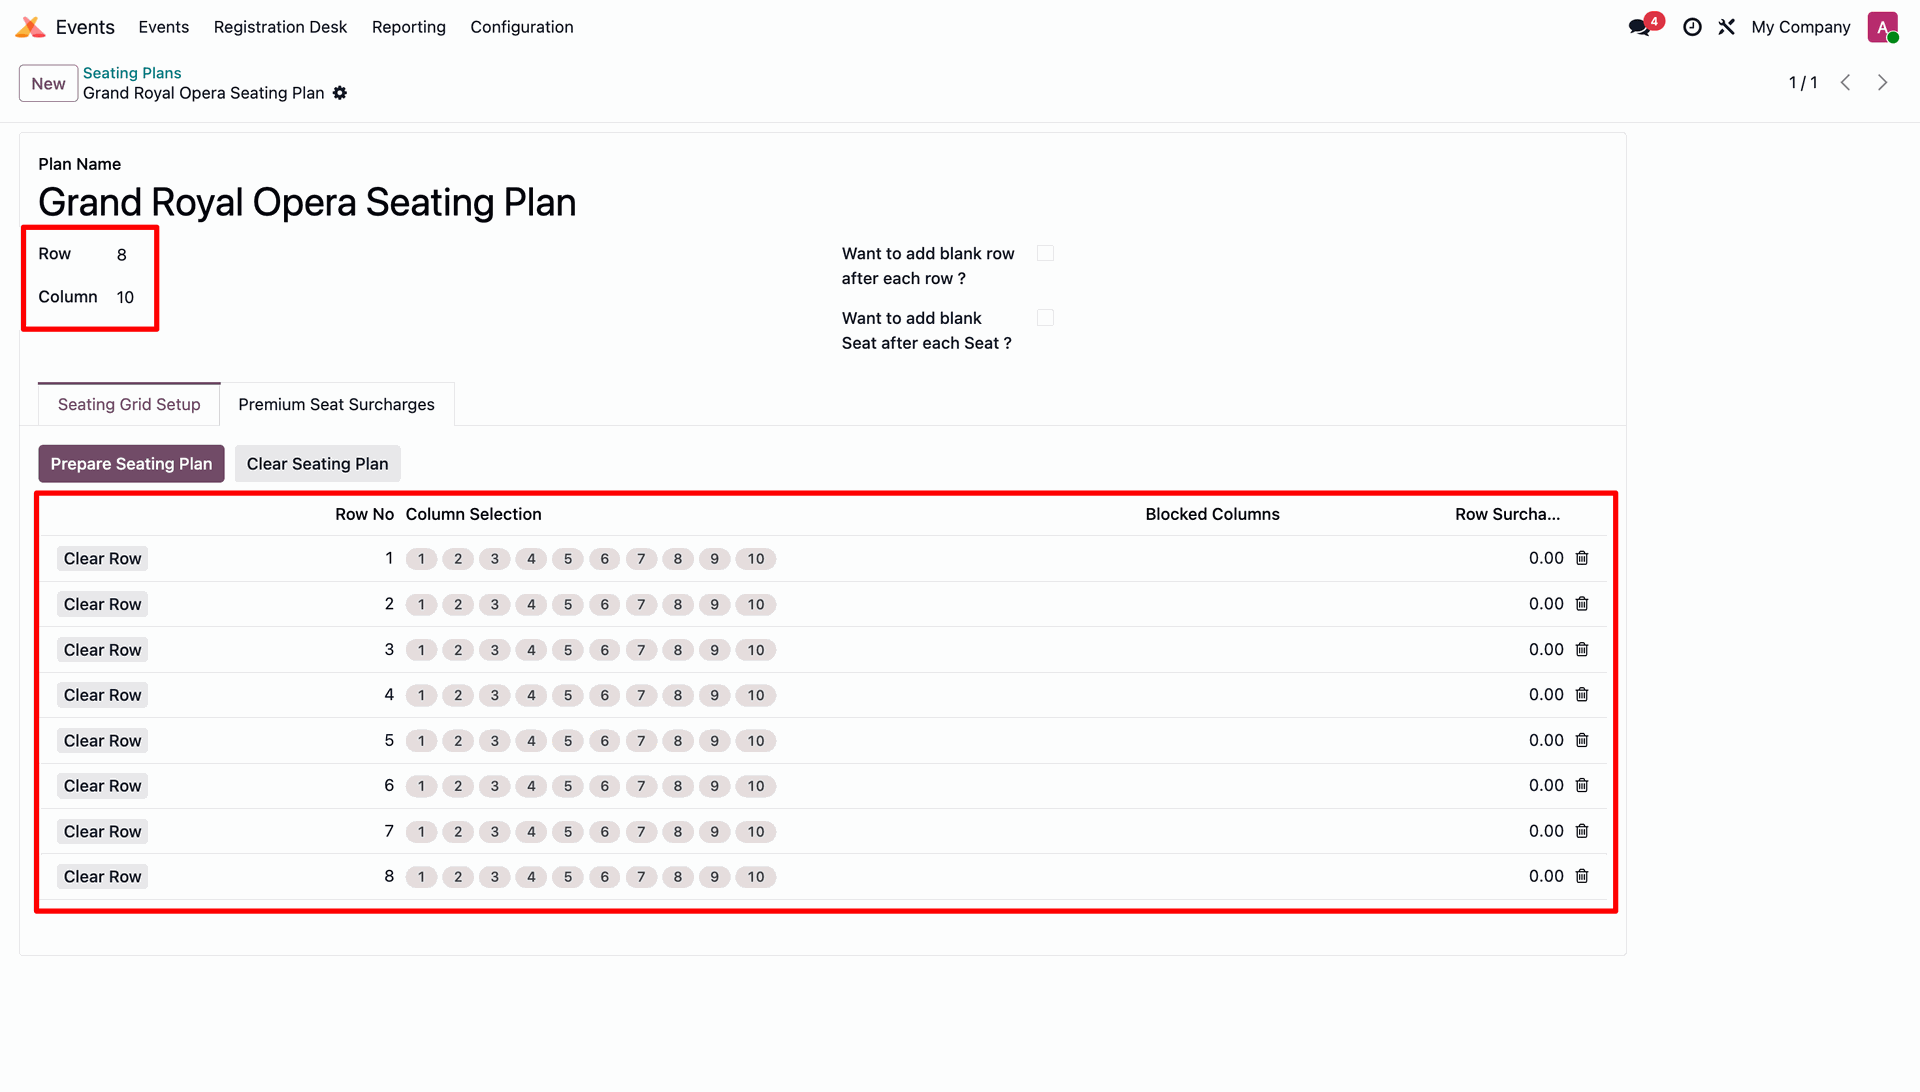
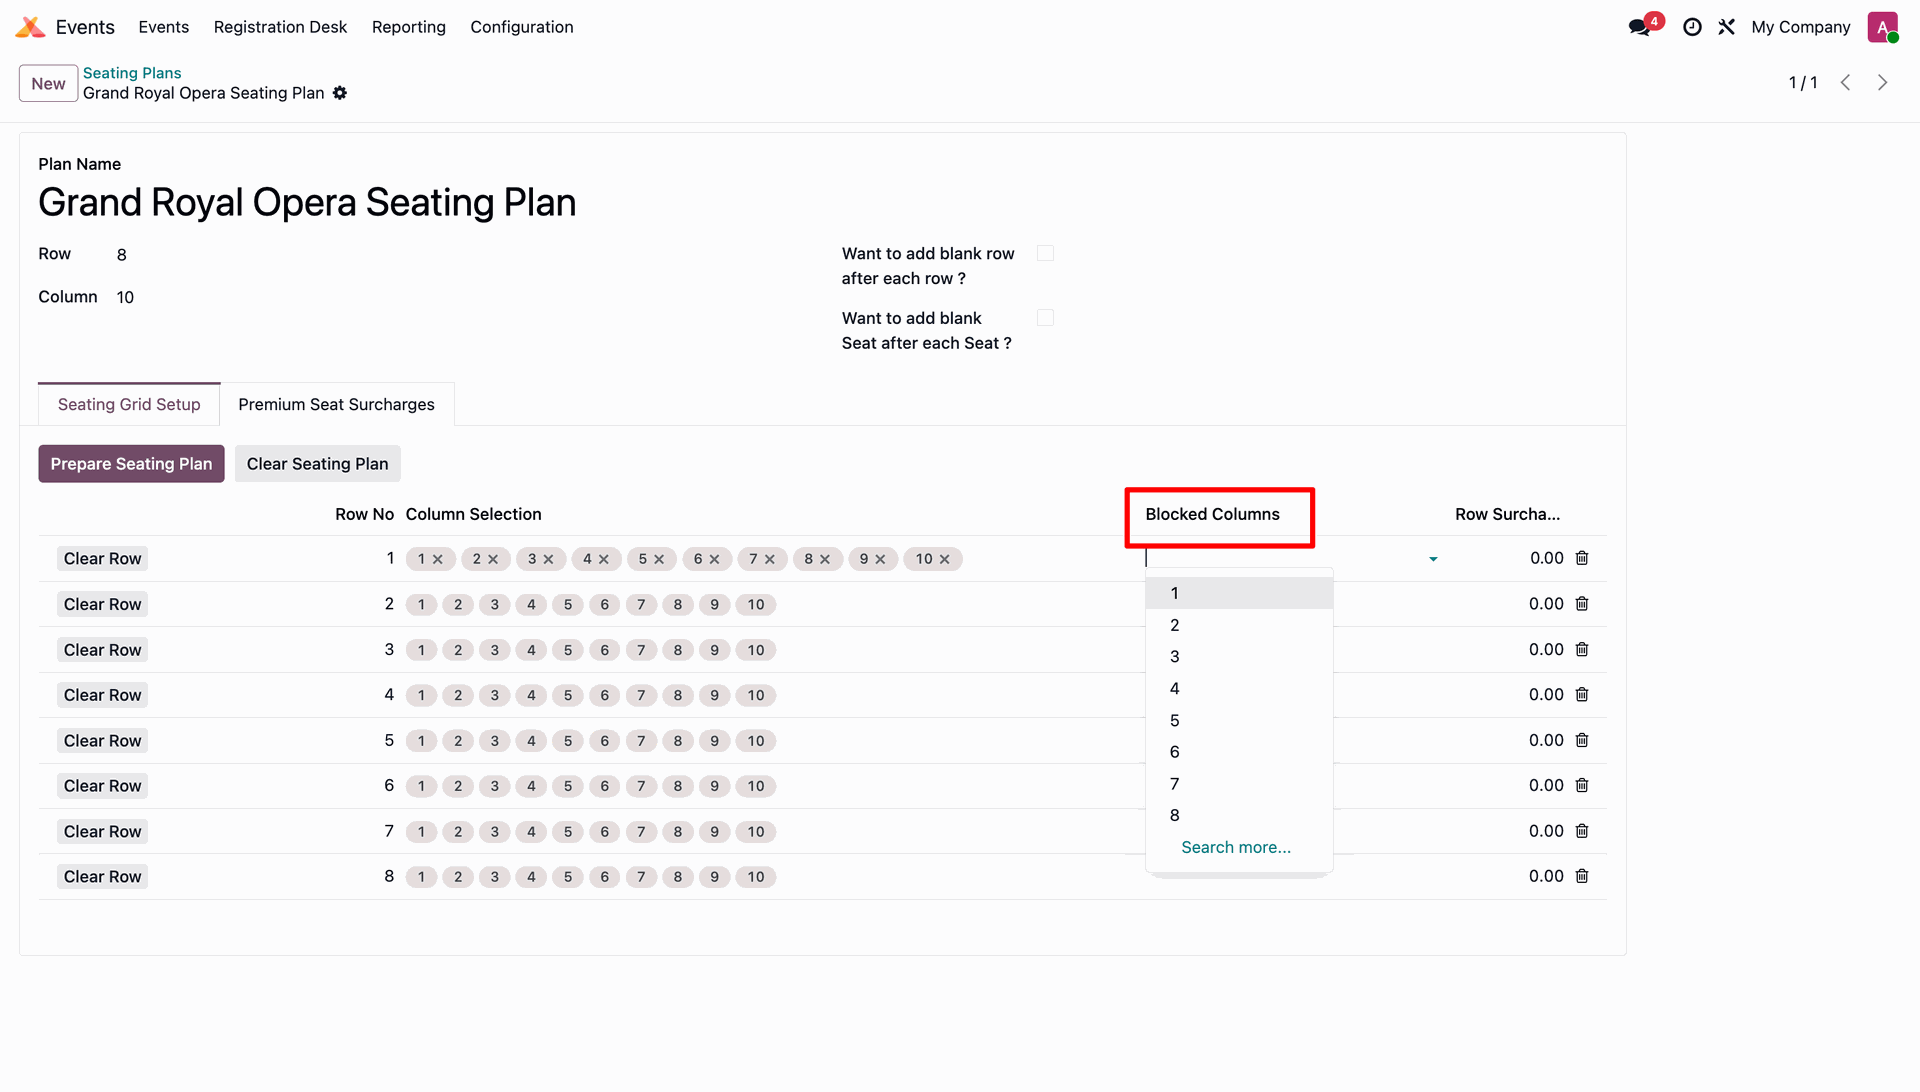
Under the Seating Grid Setup tab, define the Blocked Columns to mark specific columns as unavailable for seat allocation.
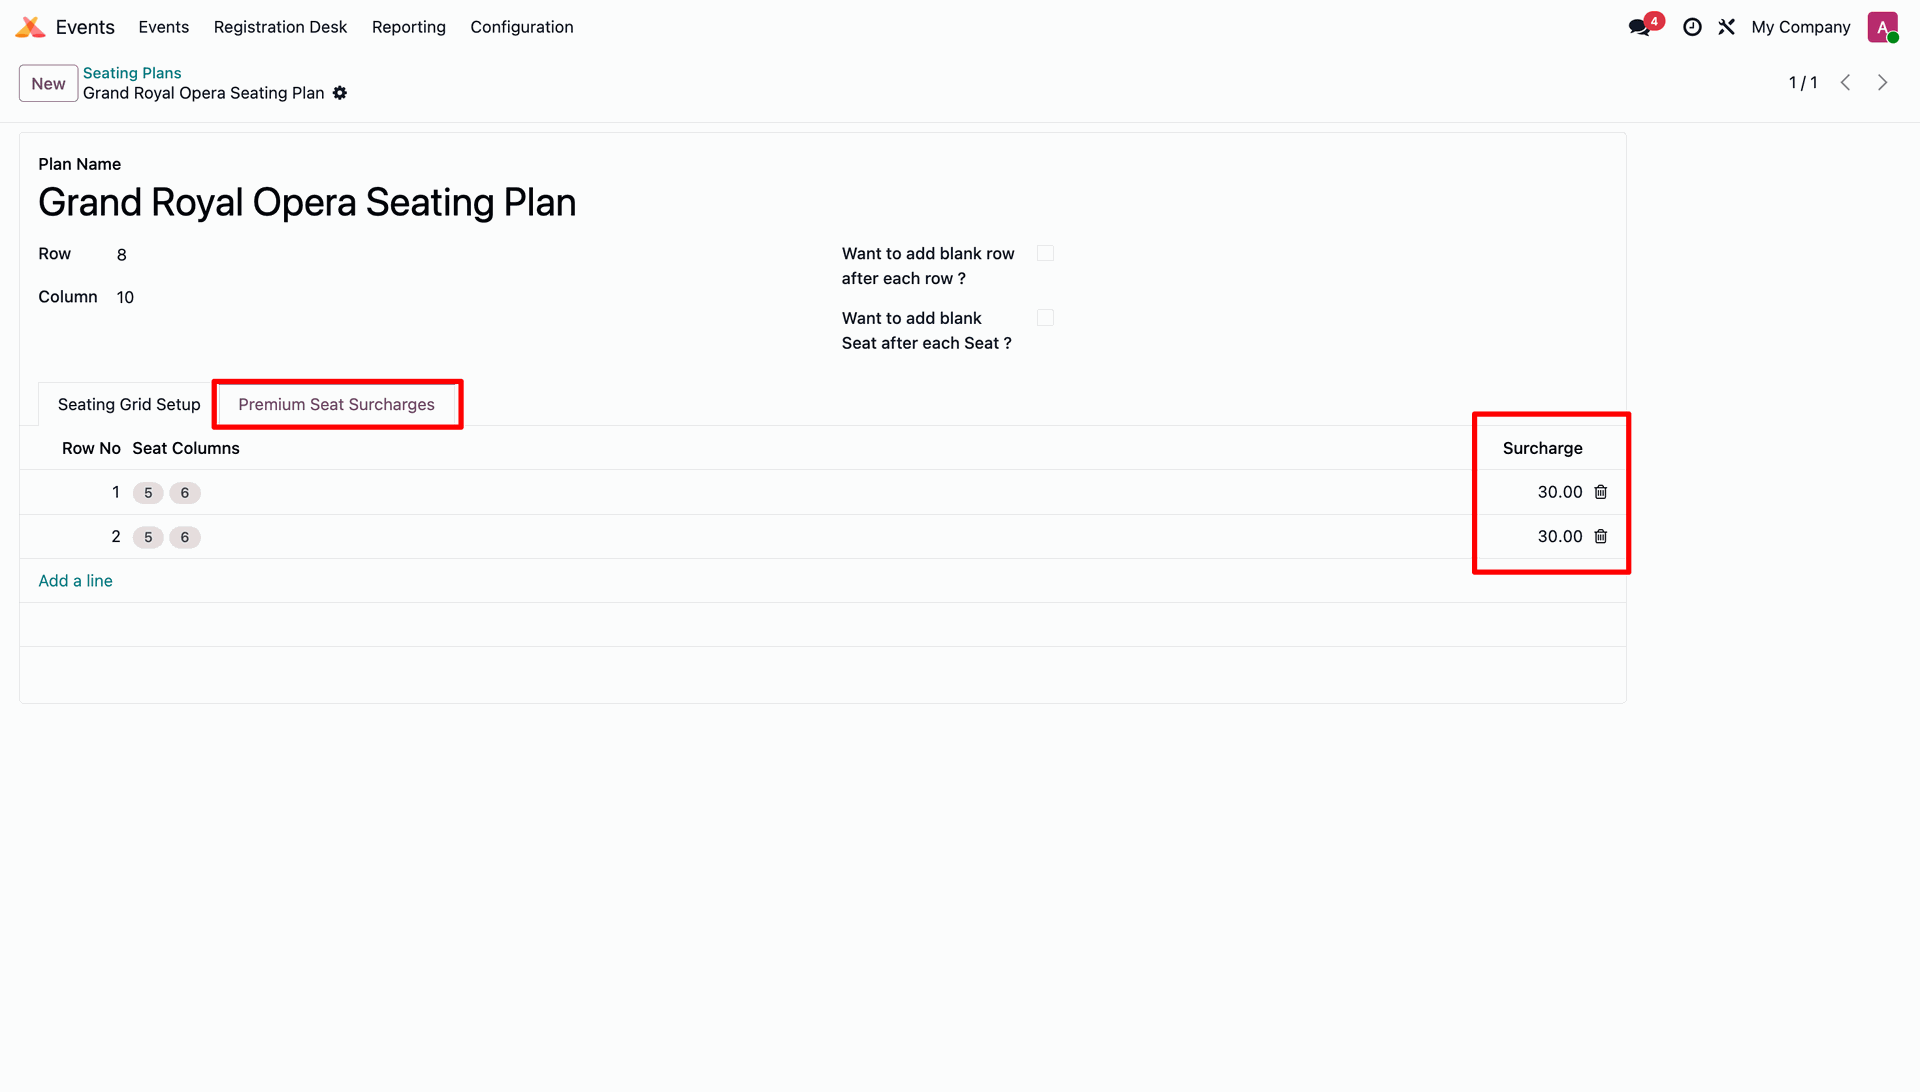
Under the Premium Seat Surcharges tab, configure the seat surcharge charges for premium seating areas.
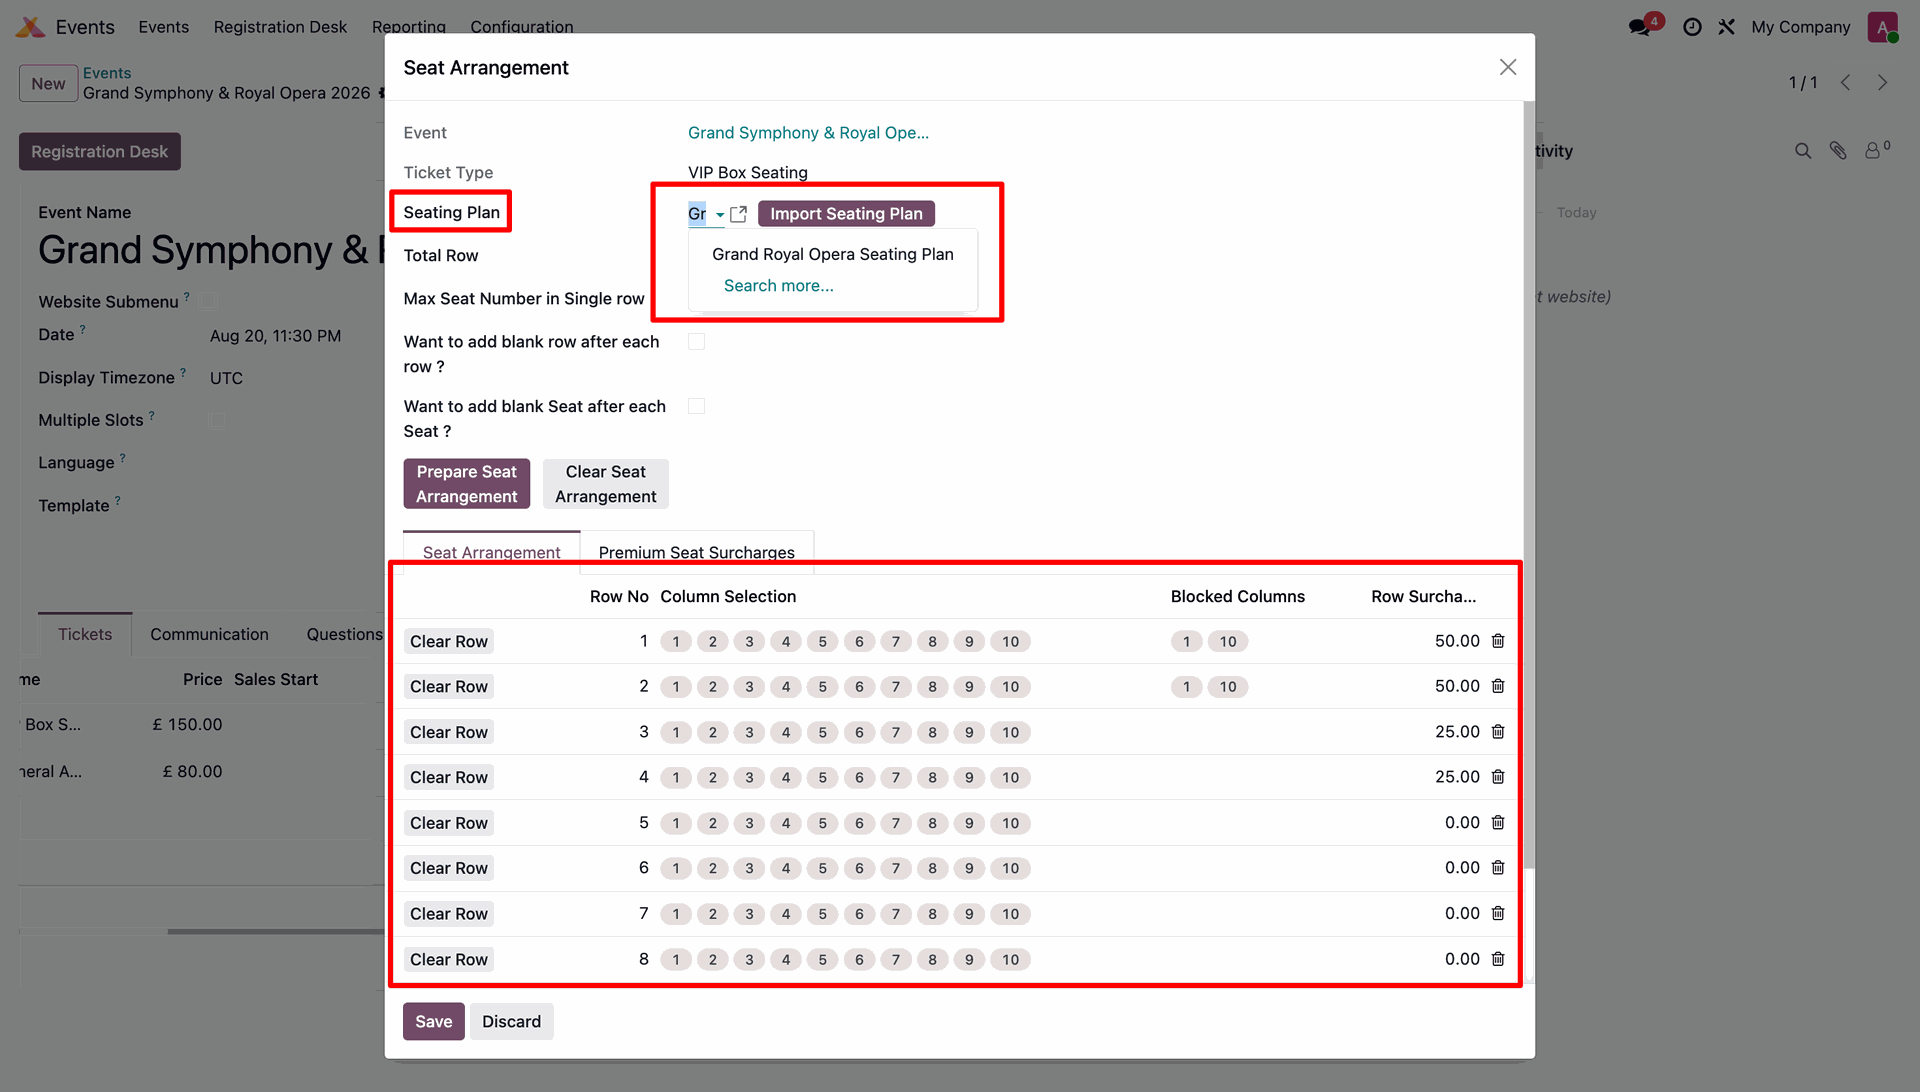
Go to the Event Form, open the Seat Arrangement tab, and select the desired Seating Plan for the event.
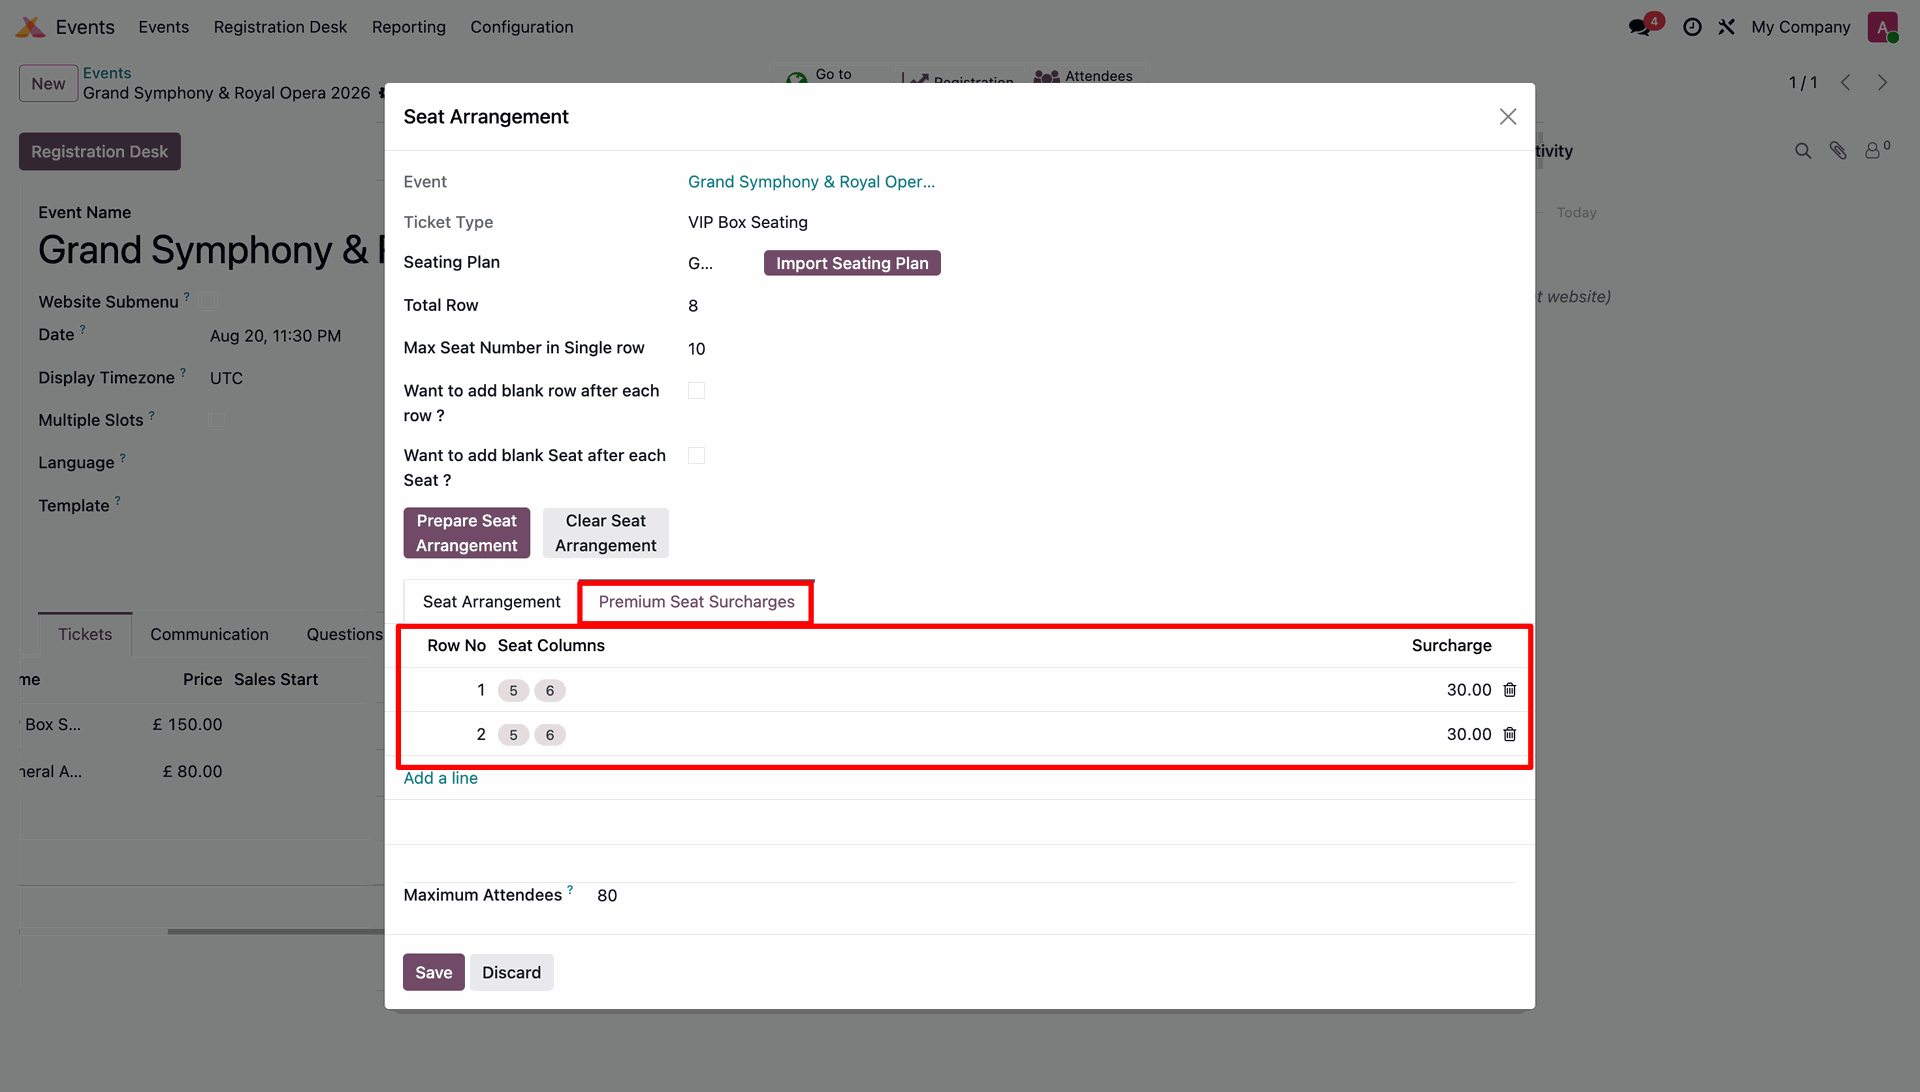
Users can also configure and add Premium Seat Surcharges directly from the Seat Arrangement wizard of the event.
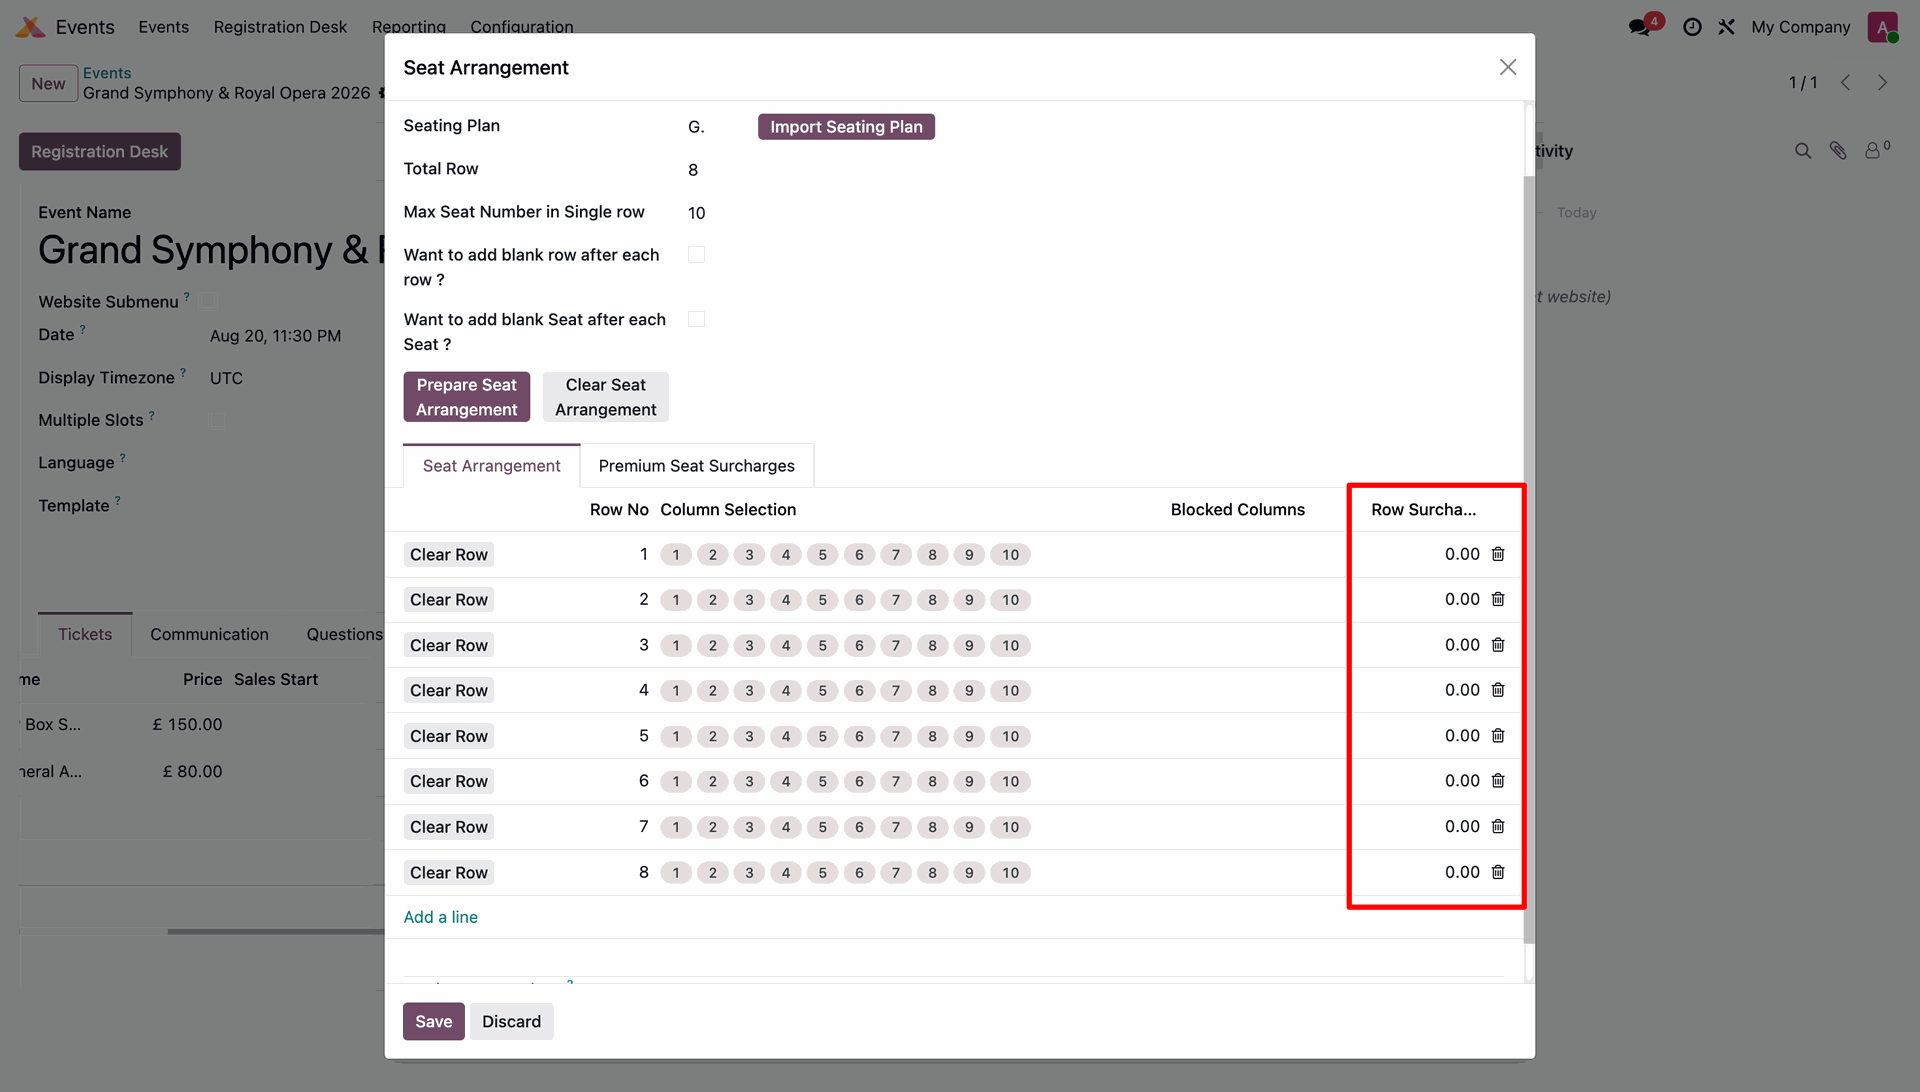
Users can configure seat charges for each row directly from the Seat Arrangement tab, allowing row-wise pricing for the event.
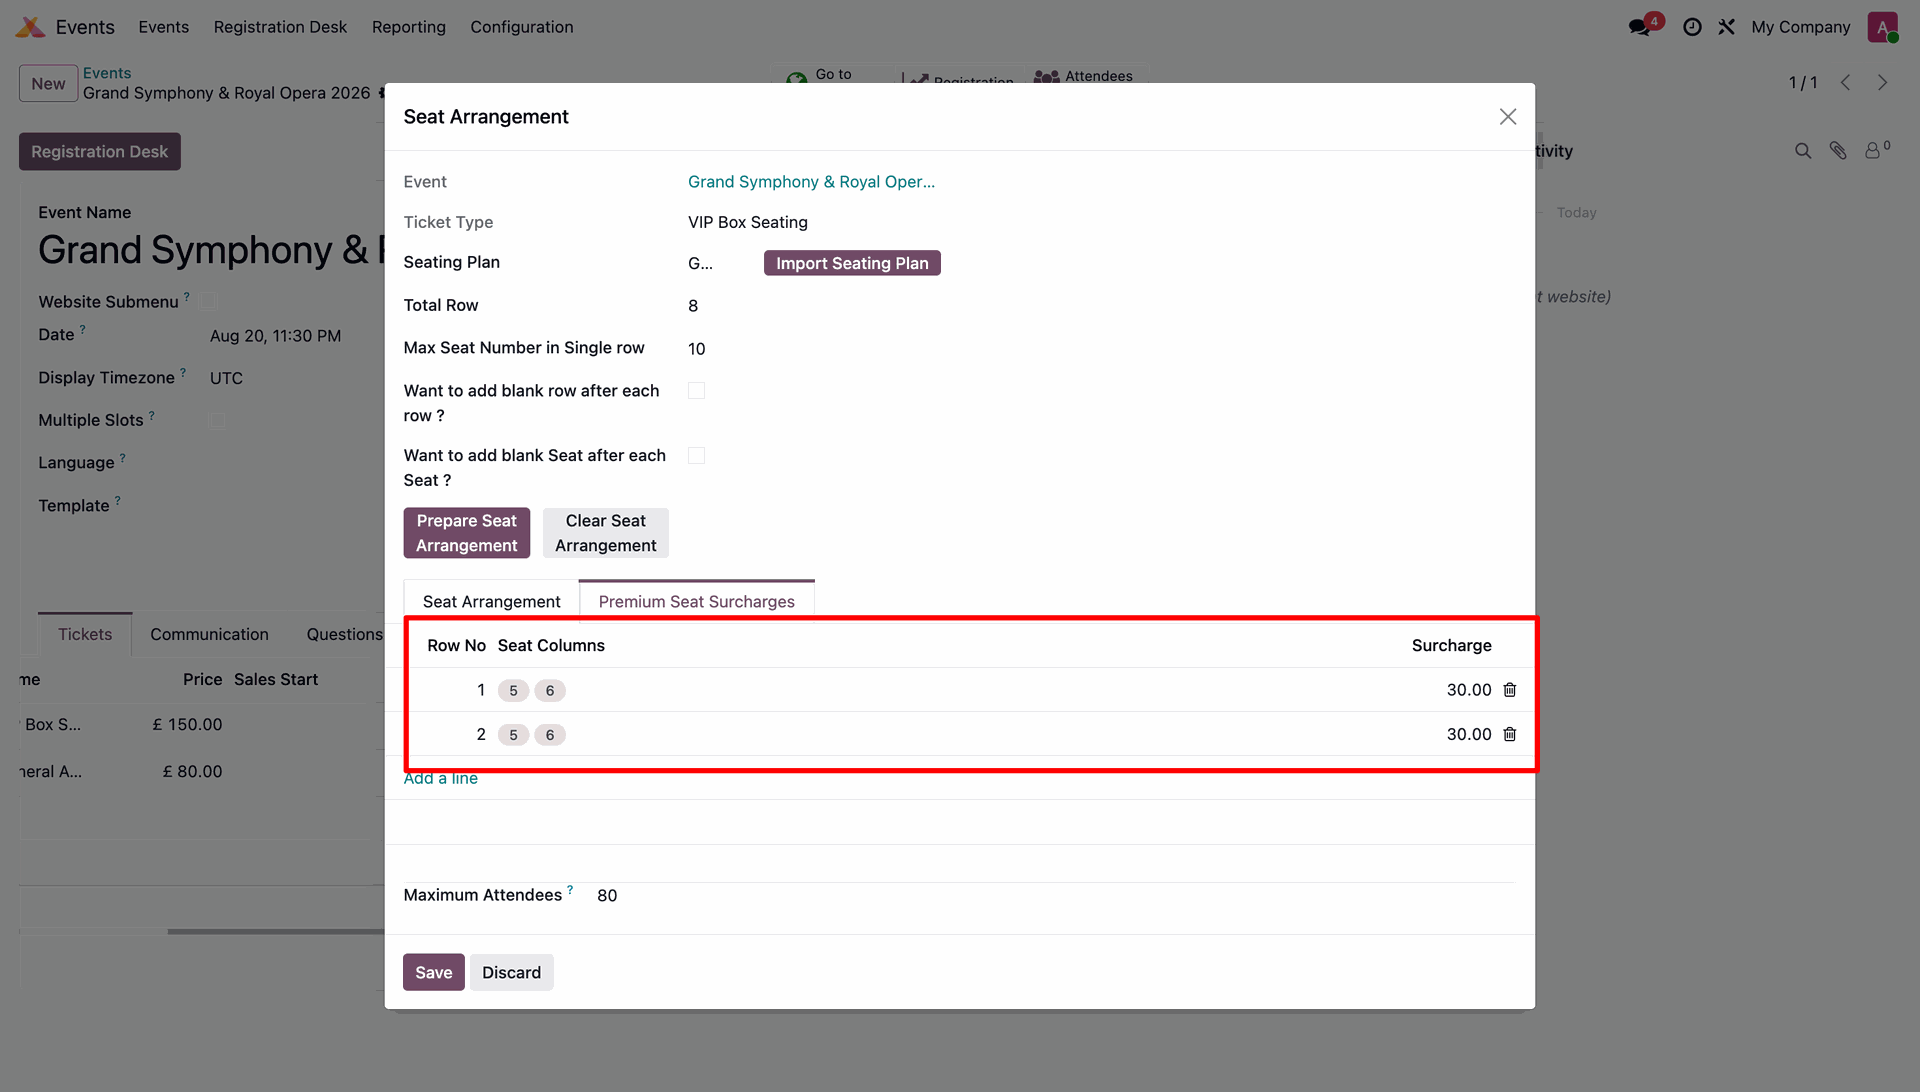
Users can configure Premium Seat Surcharges from the Premium Seat Surcharges tab within the Seat Arrangement, allowing surcharges for premium seating.
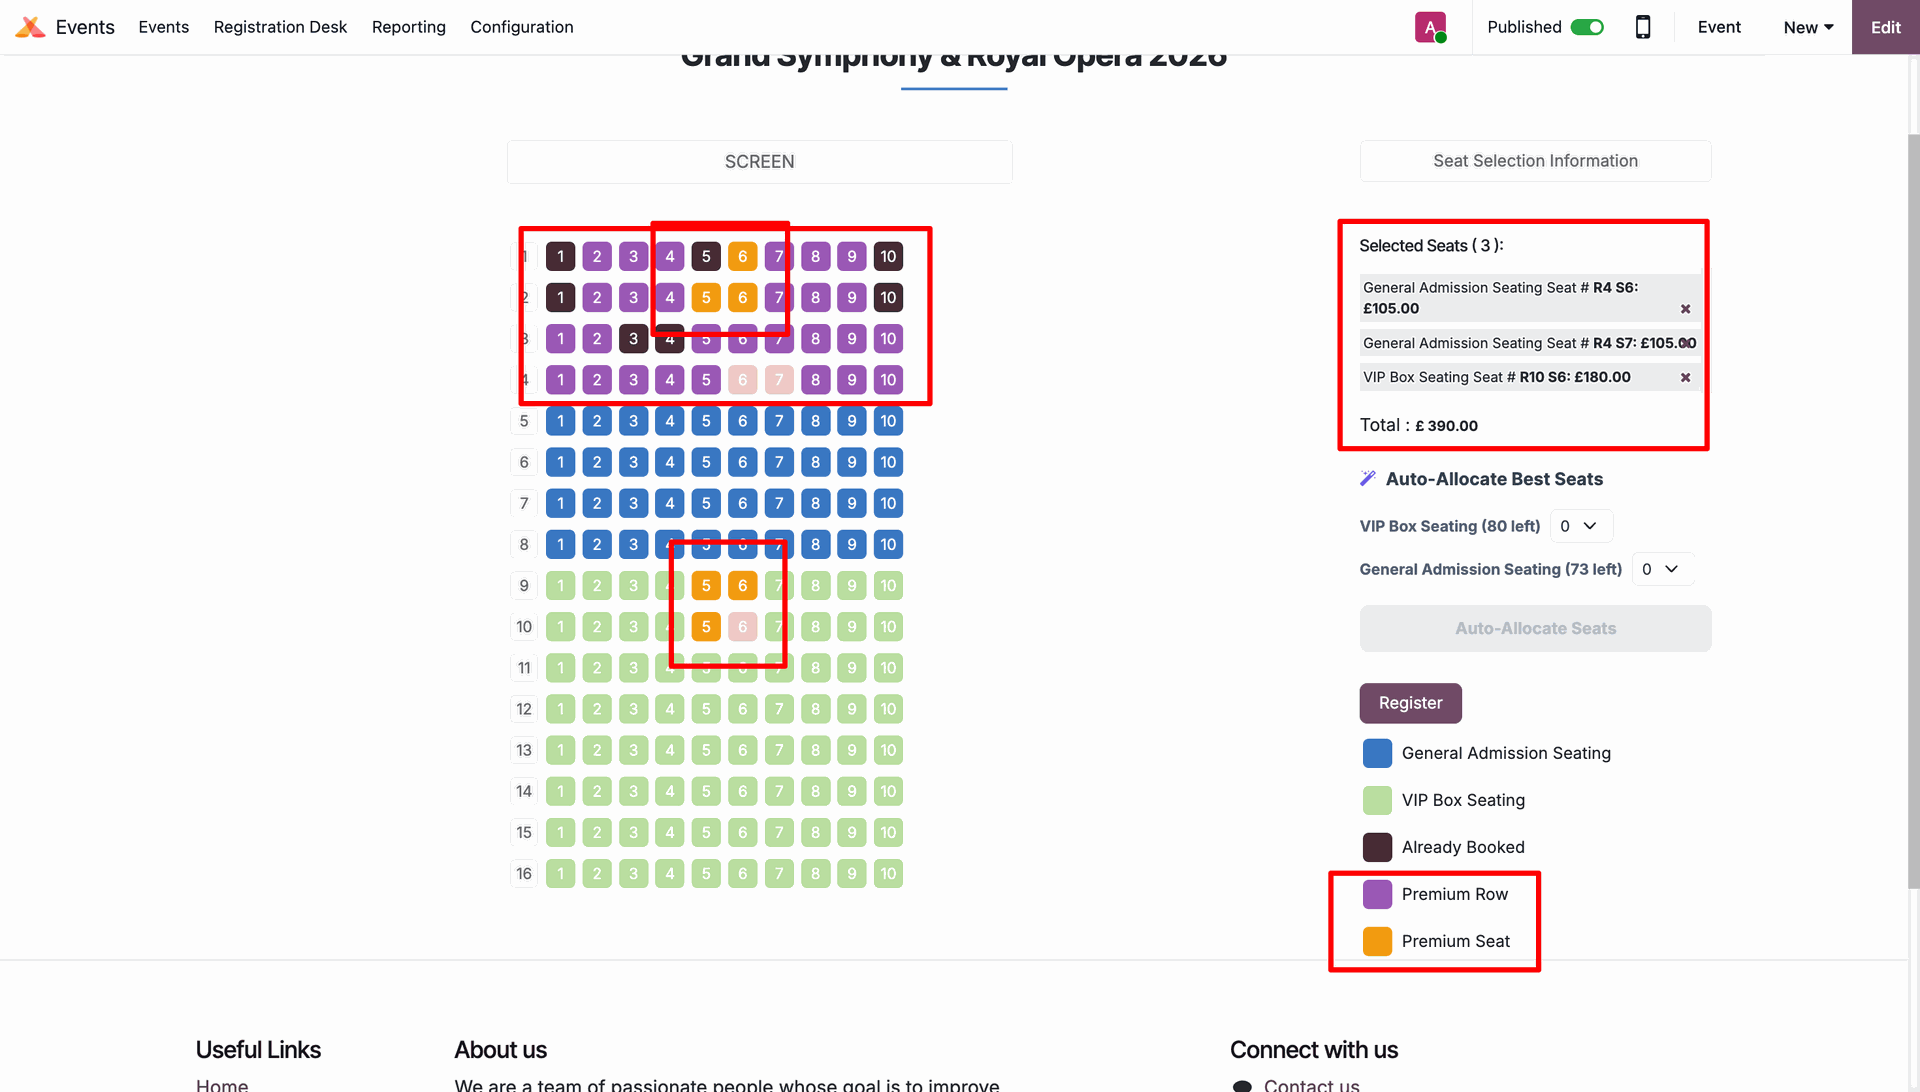
On the website, the booking amount is automatically calculated based on the selected seat(s), including any applicable Premium Seat Surcharges.
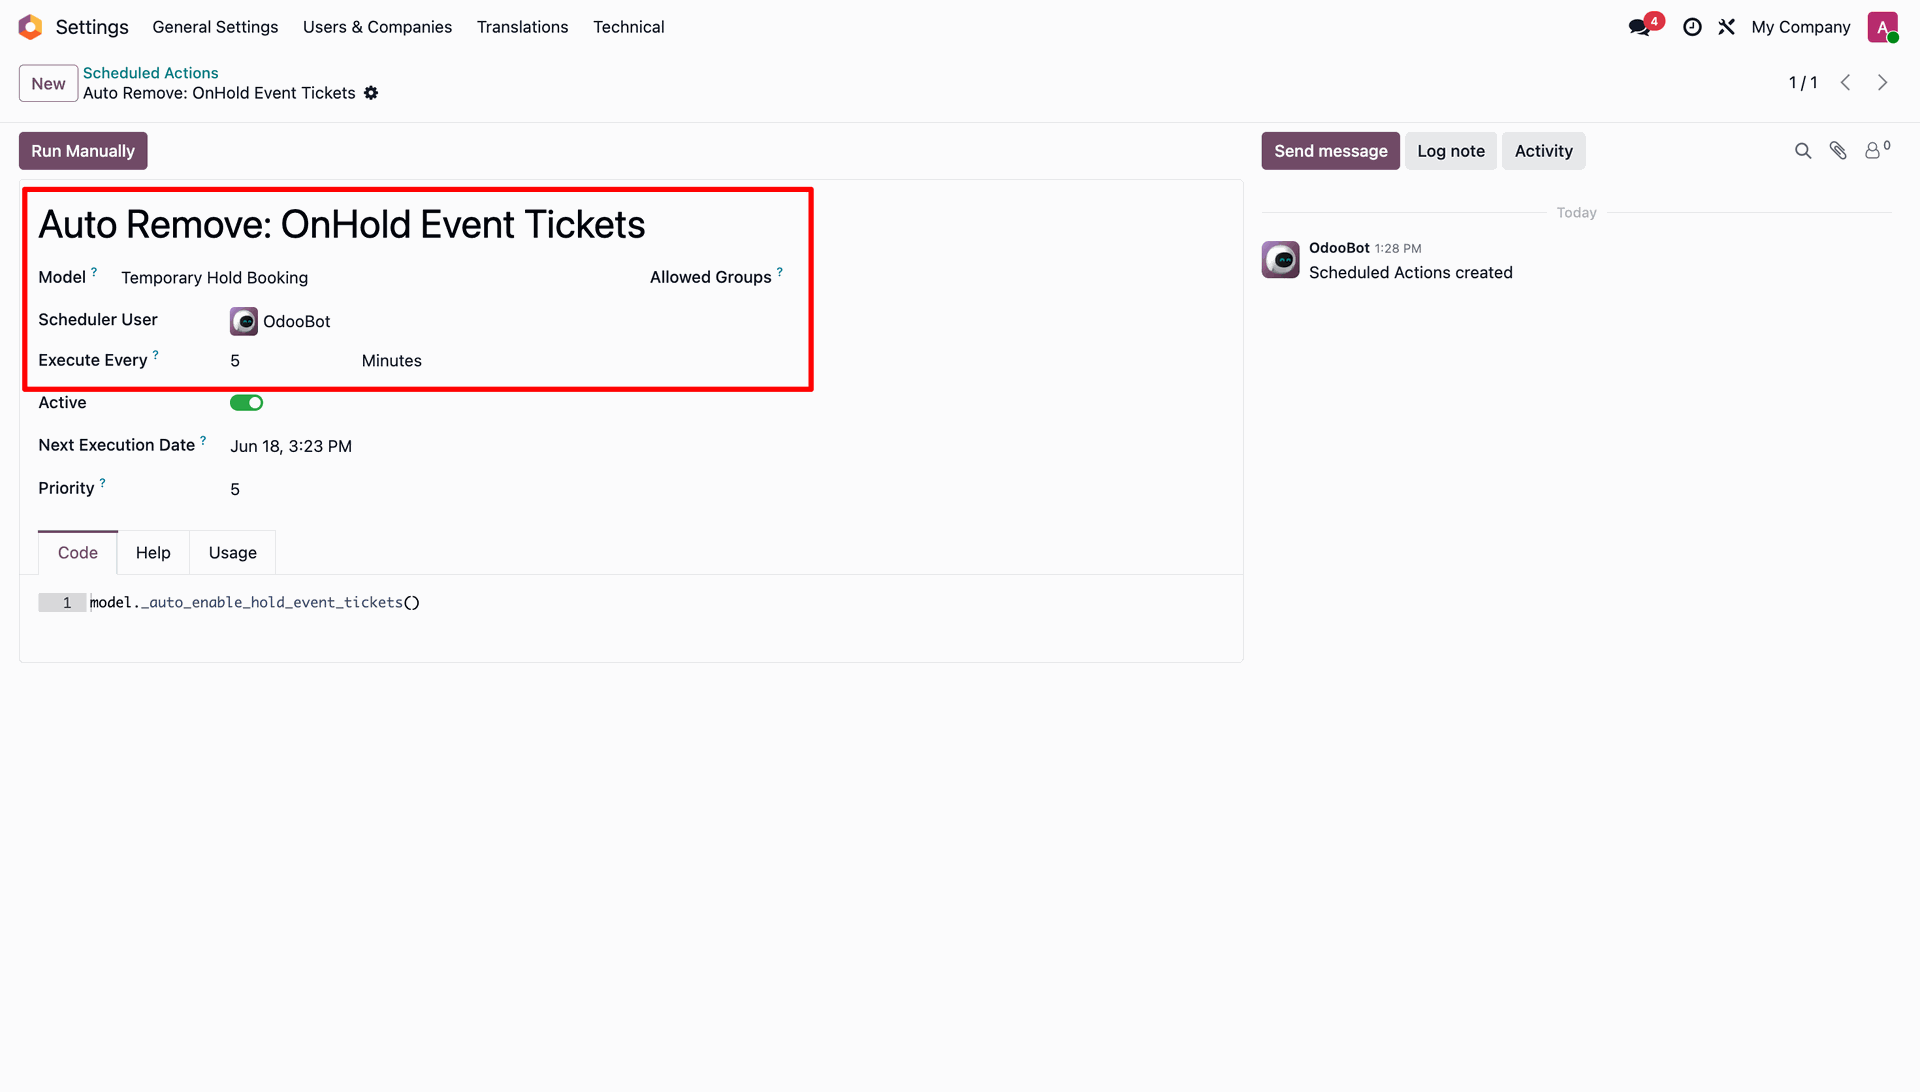
The Auto Remove On-Hold Event Tickets scheduled action automatically releases on-hold tickets after the configured time, making them available for booking again.
Configure the Time from the Website General Settings to automatically remove on-hold tickets after the specified duration.
Set the blocked seat numbers under the Blocked Columns section to mark specific seats as unavailable for booking.
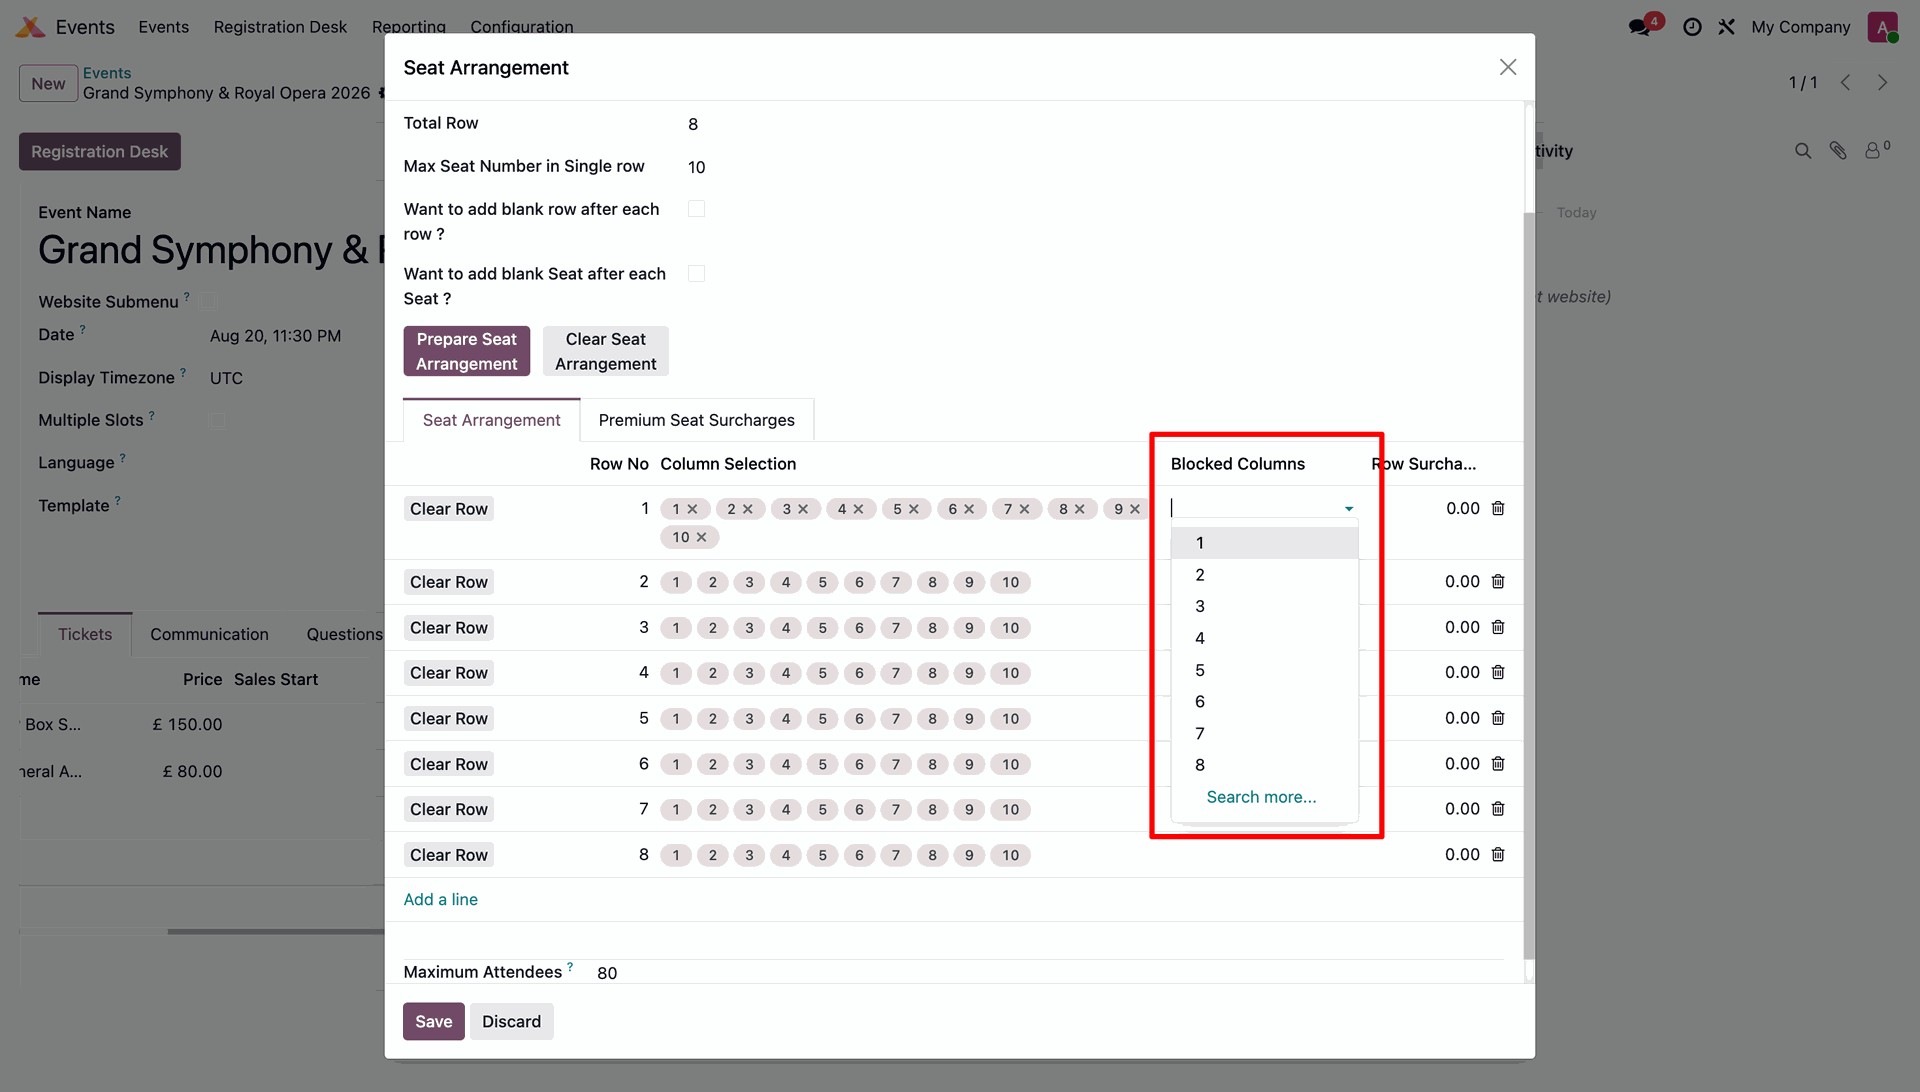
Configure the seat numbers to be blocked under the Blocked Columns section to prevent those seats from being selected during booking.
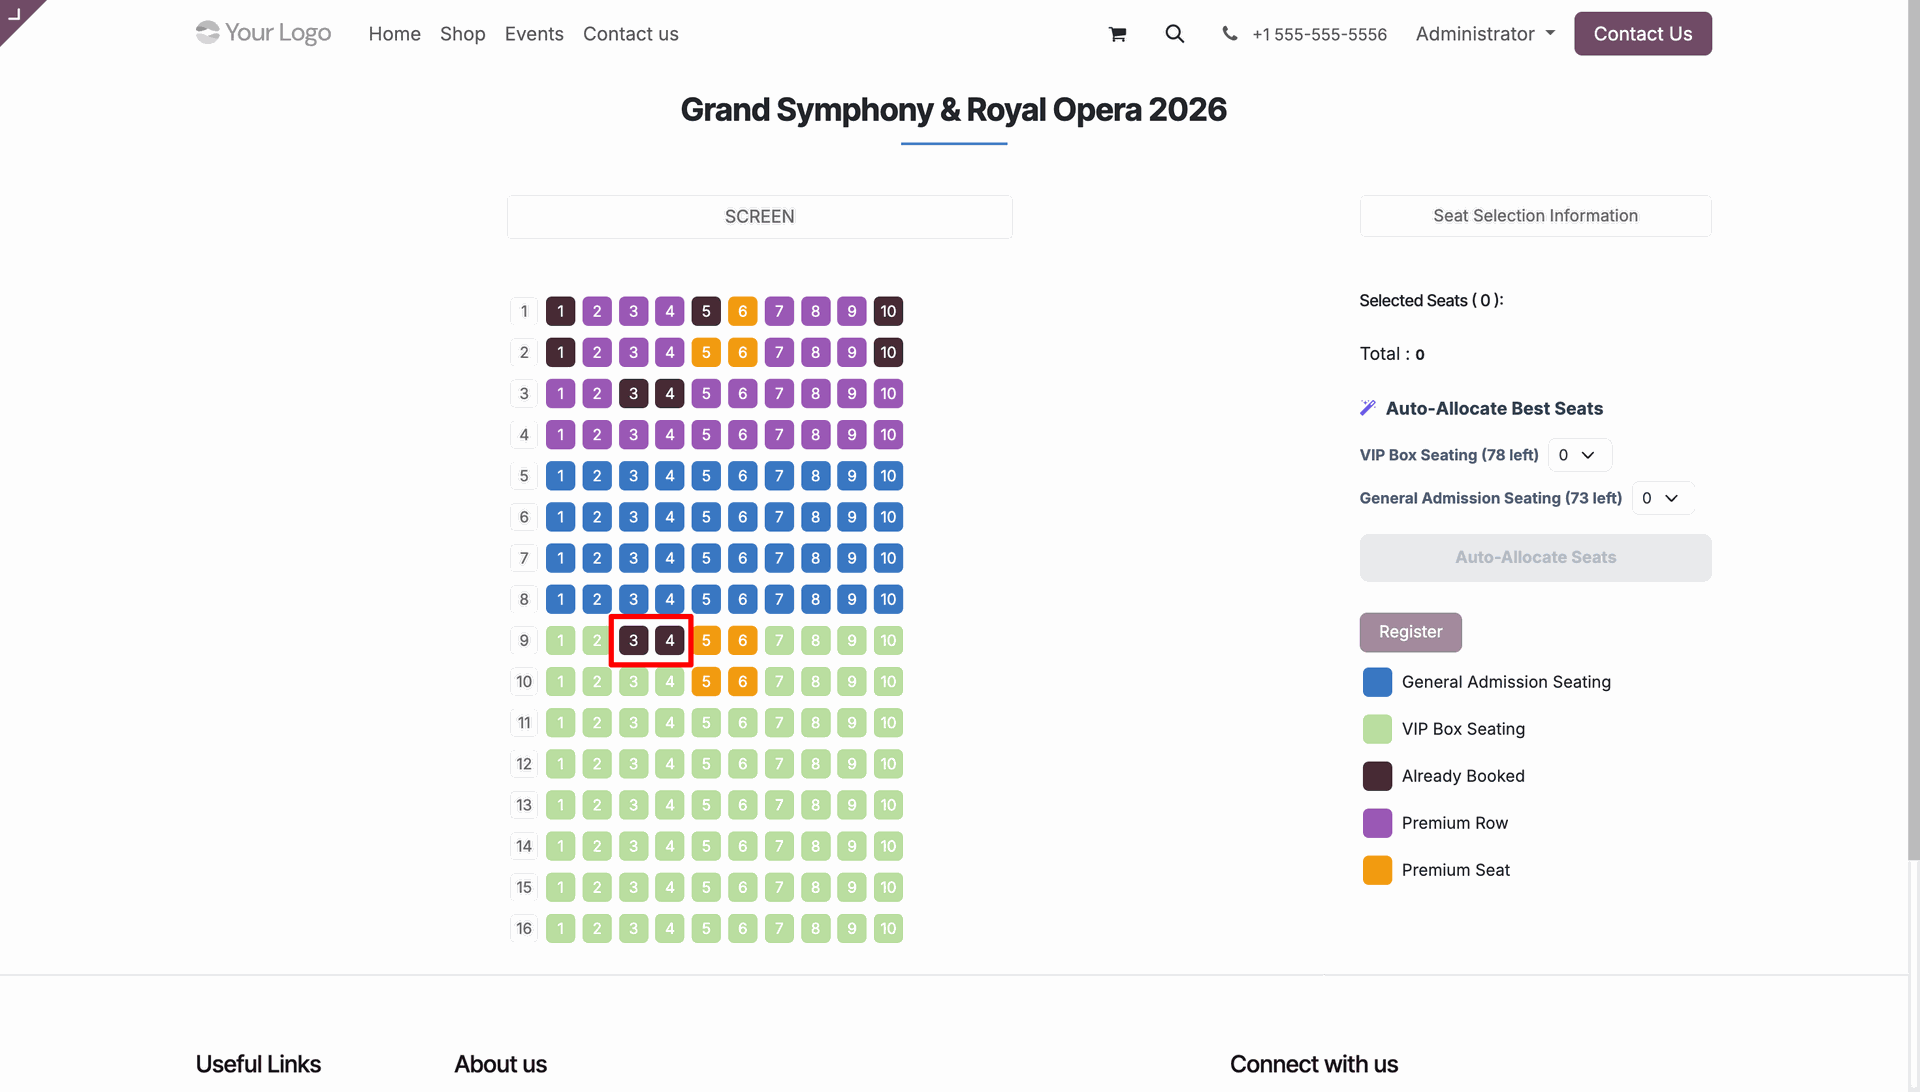
The configured blocked seats will appear as Already Booked on the website ticket booking page, preventing customers from selecting them.
After the booking is completed, the ticket receipt is automatically sent to the customer.
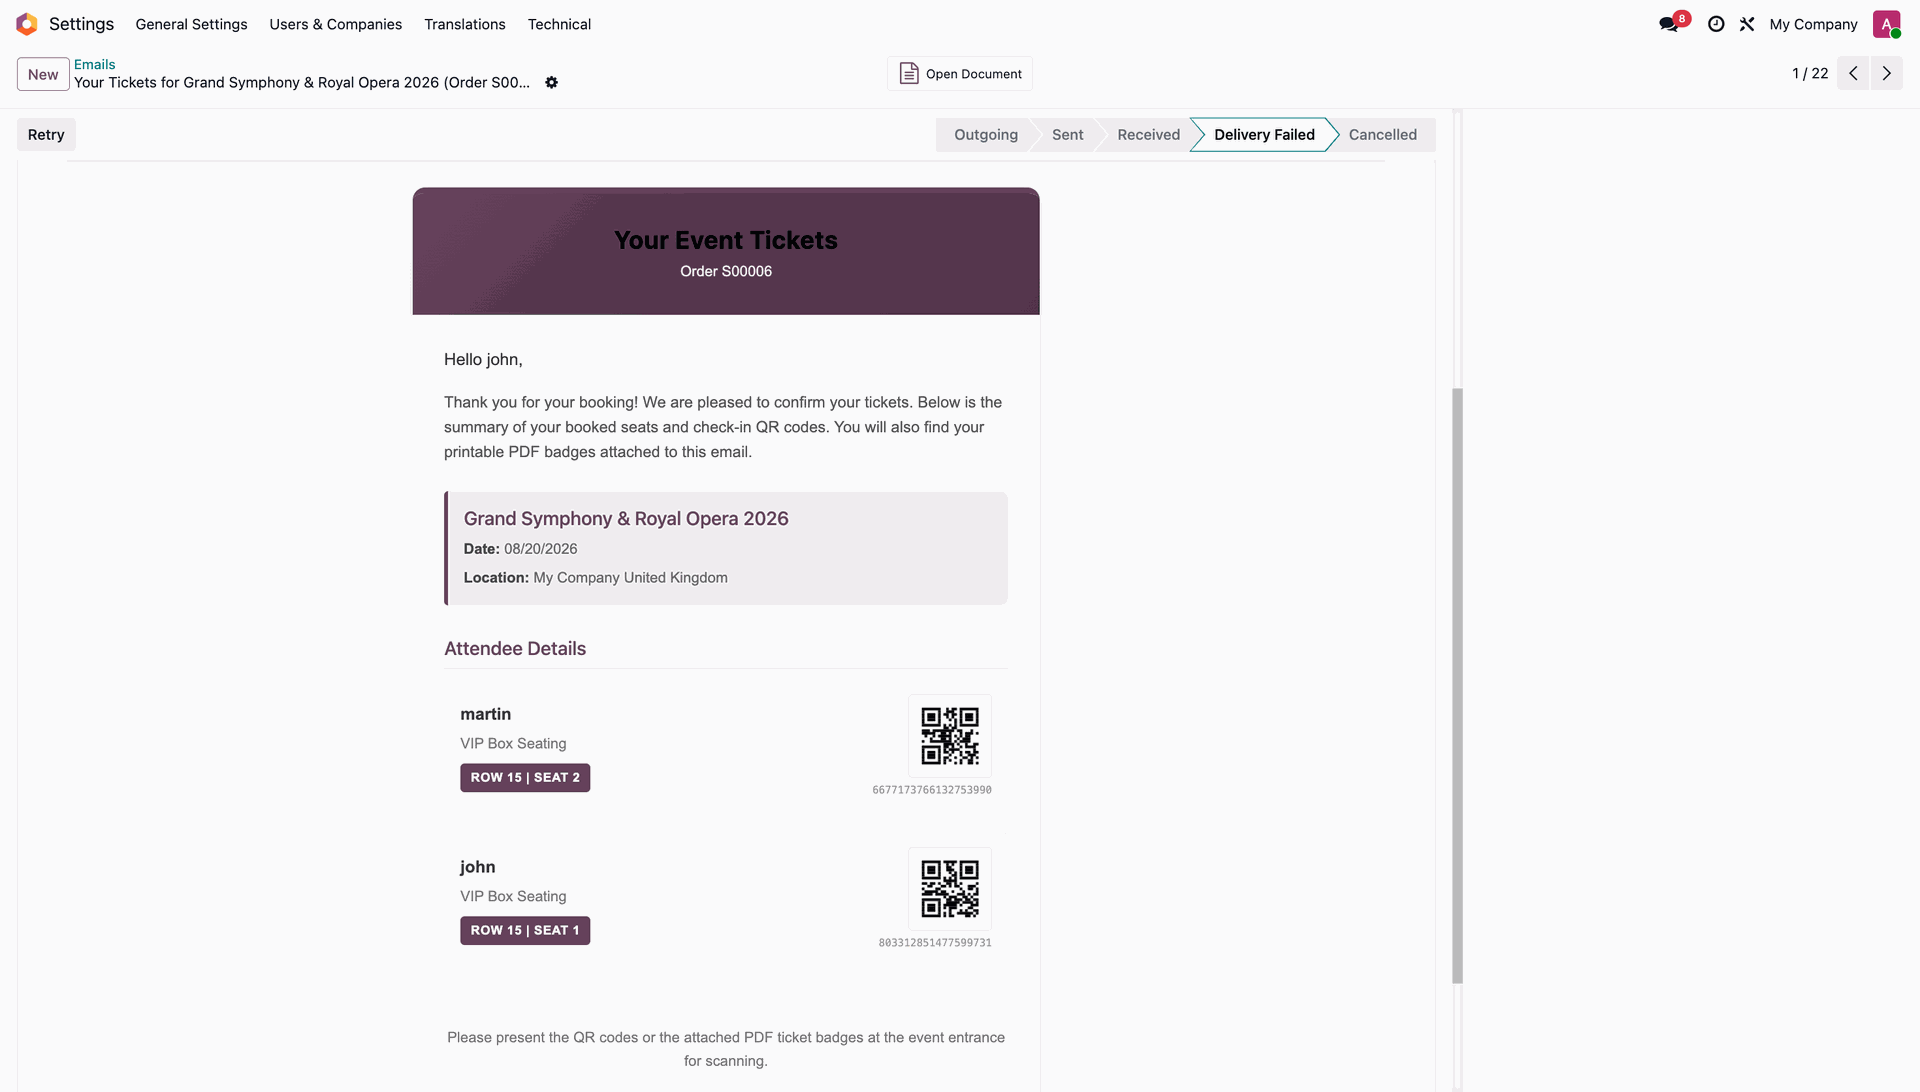
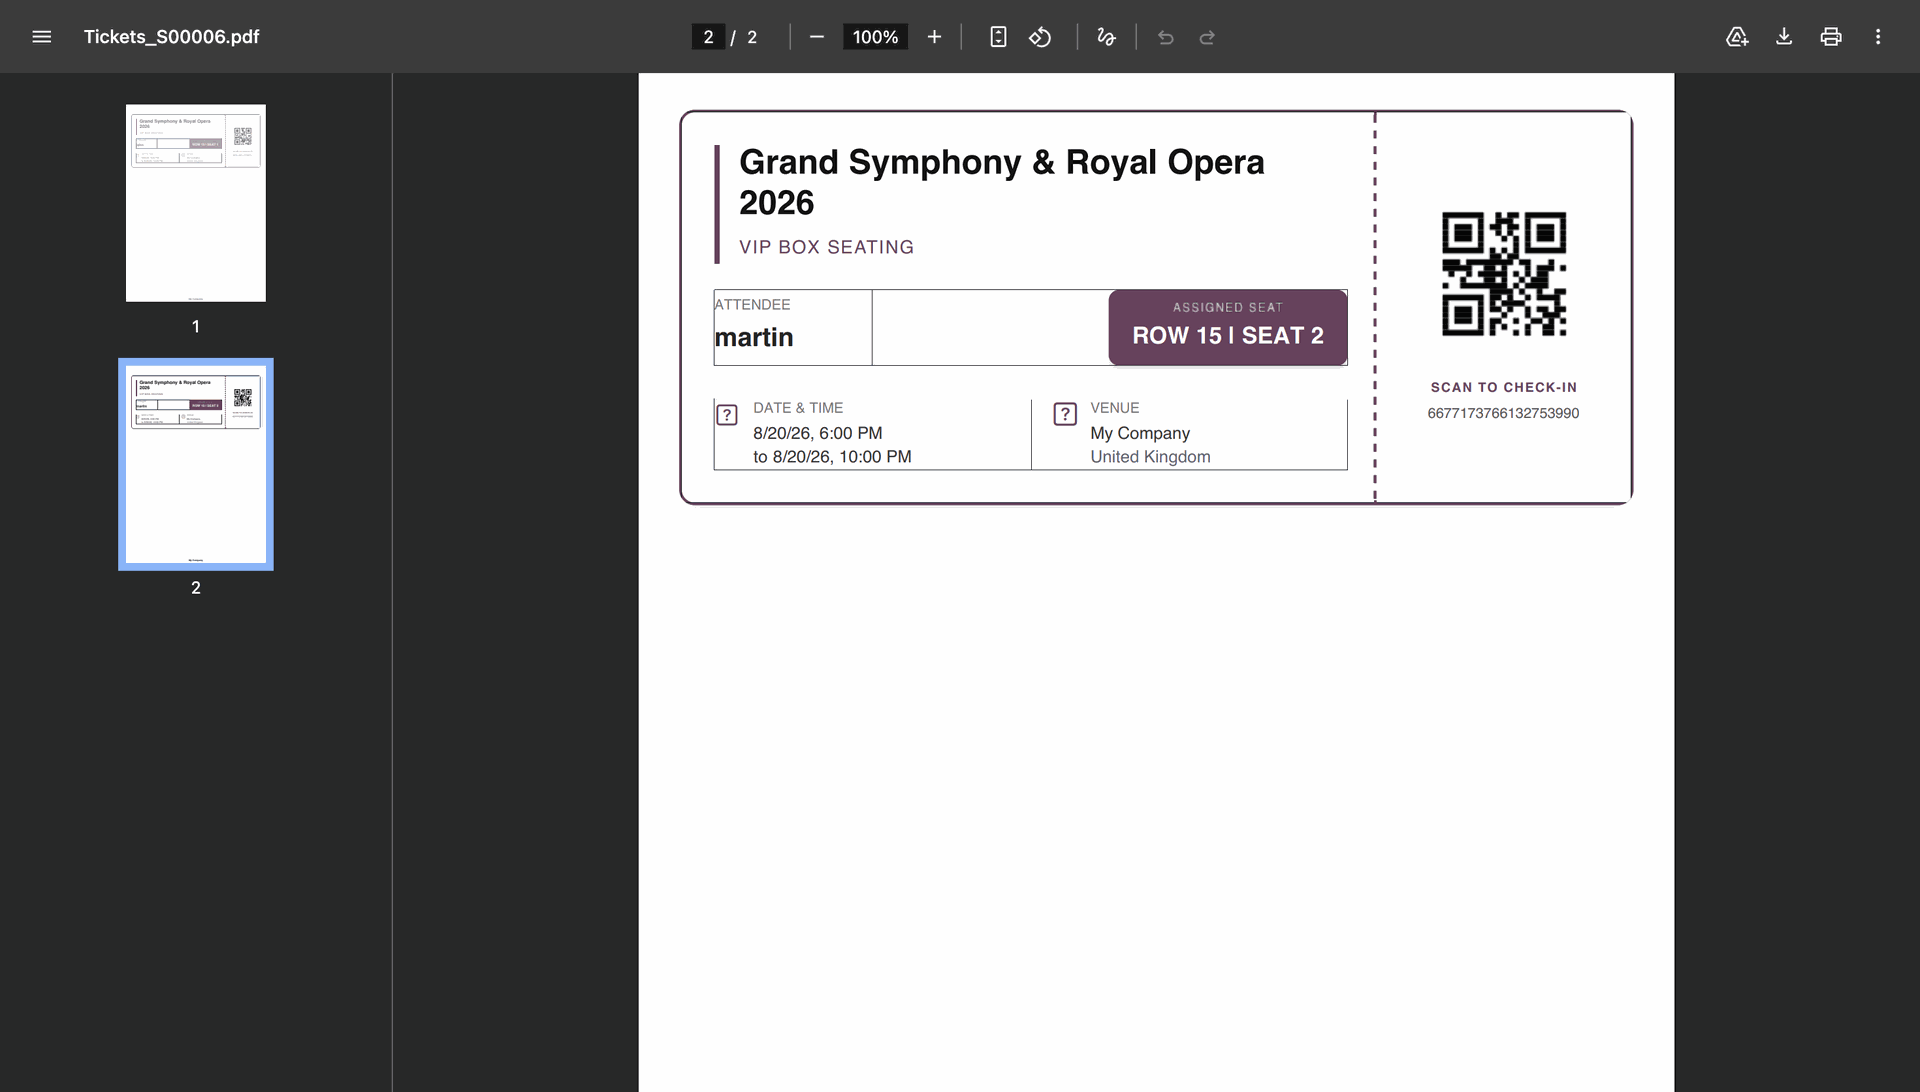
A separate ticket PDF is generated for each booked seat, with each ticket containing a unique QR code for validation and entry.
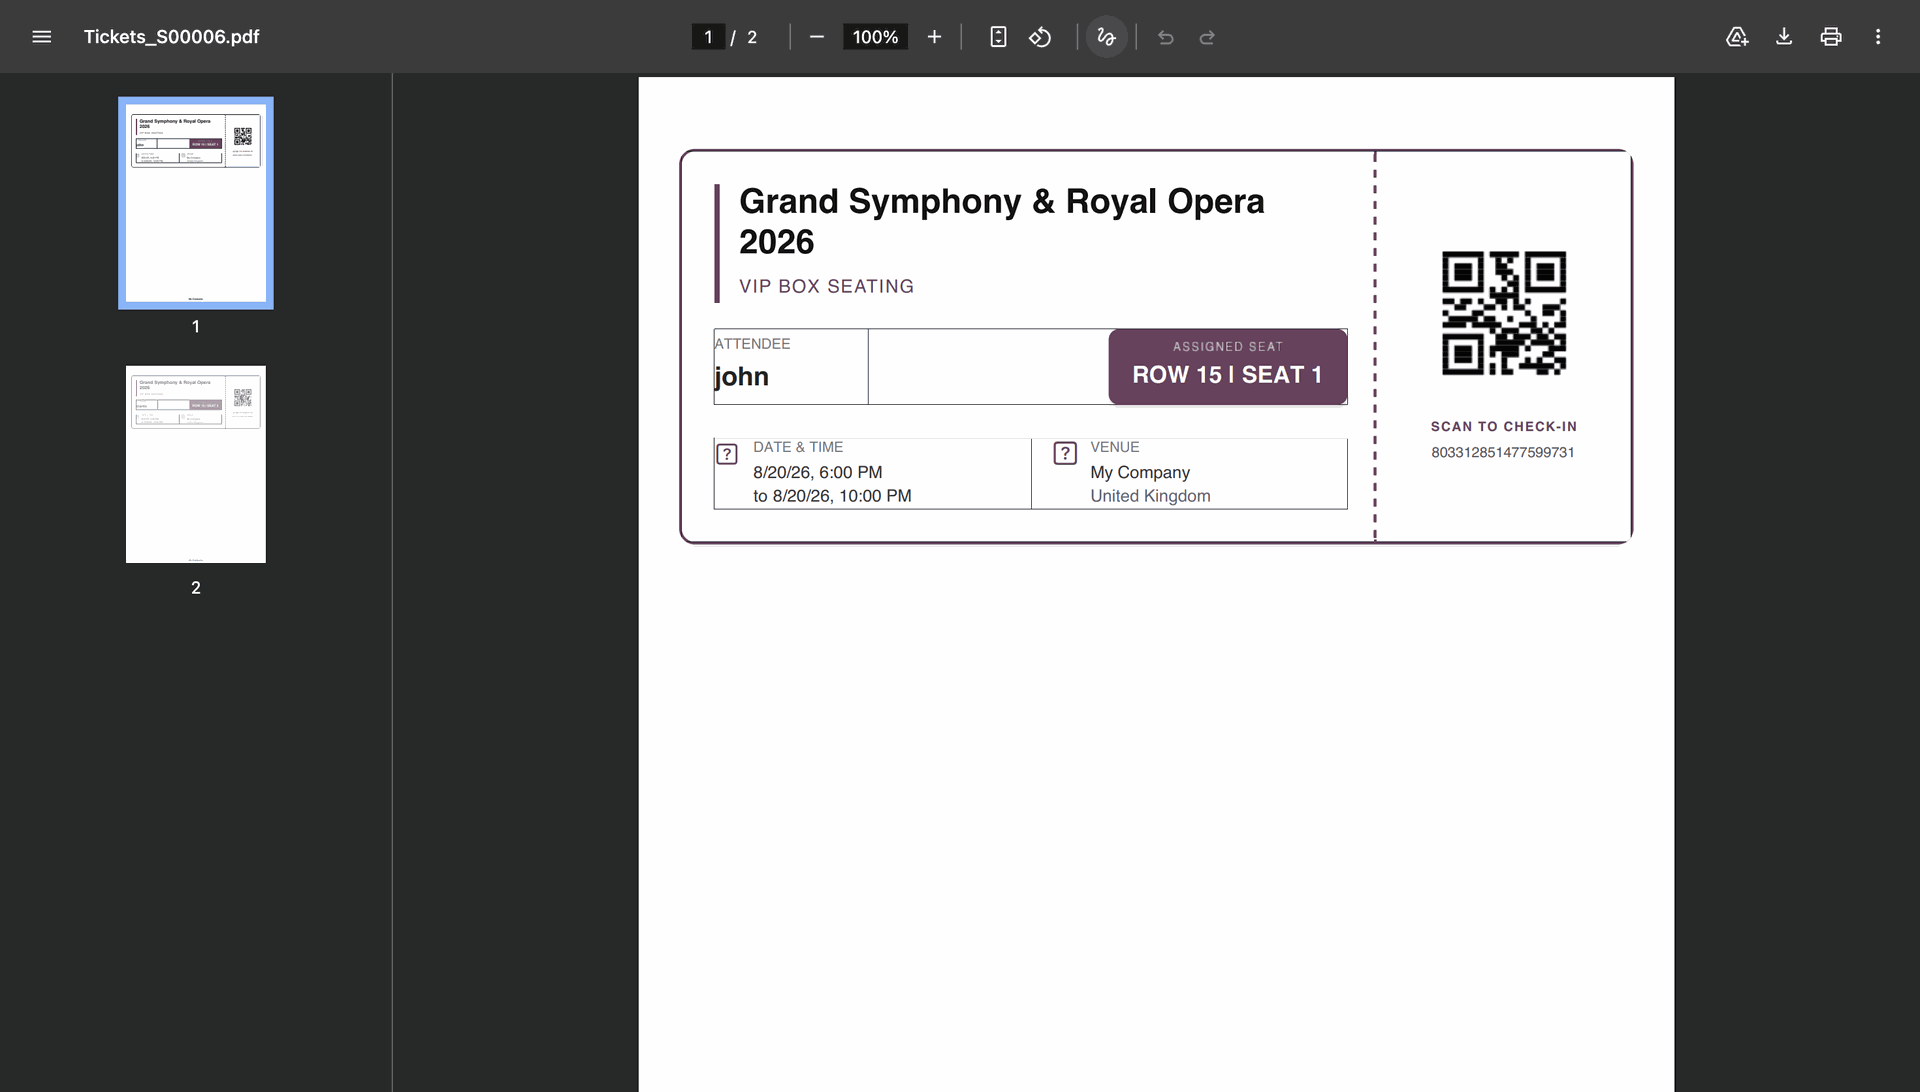
Users can download and print the generated ticket PDF for each booked seat.
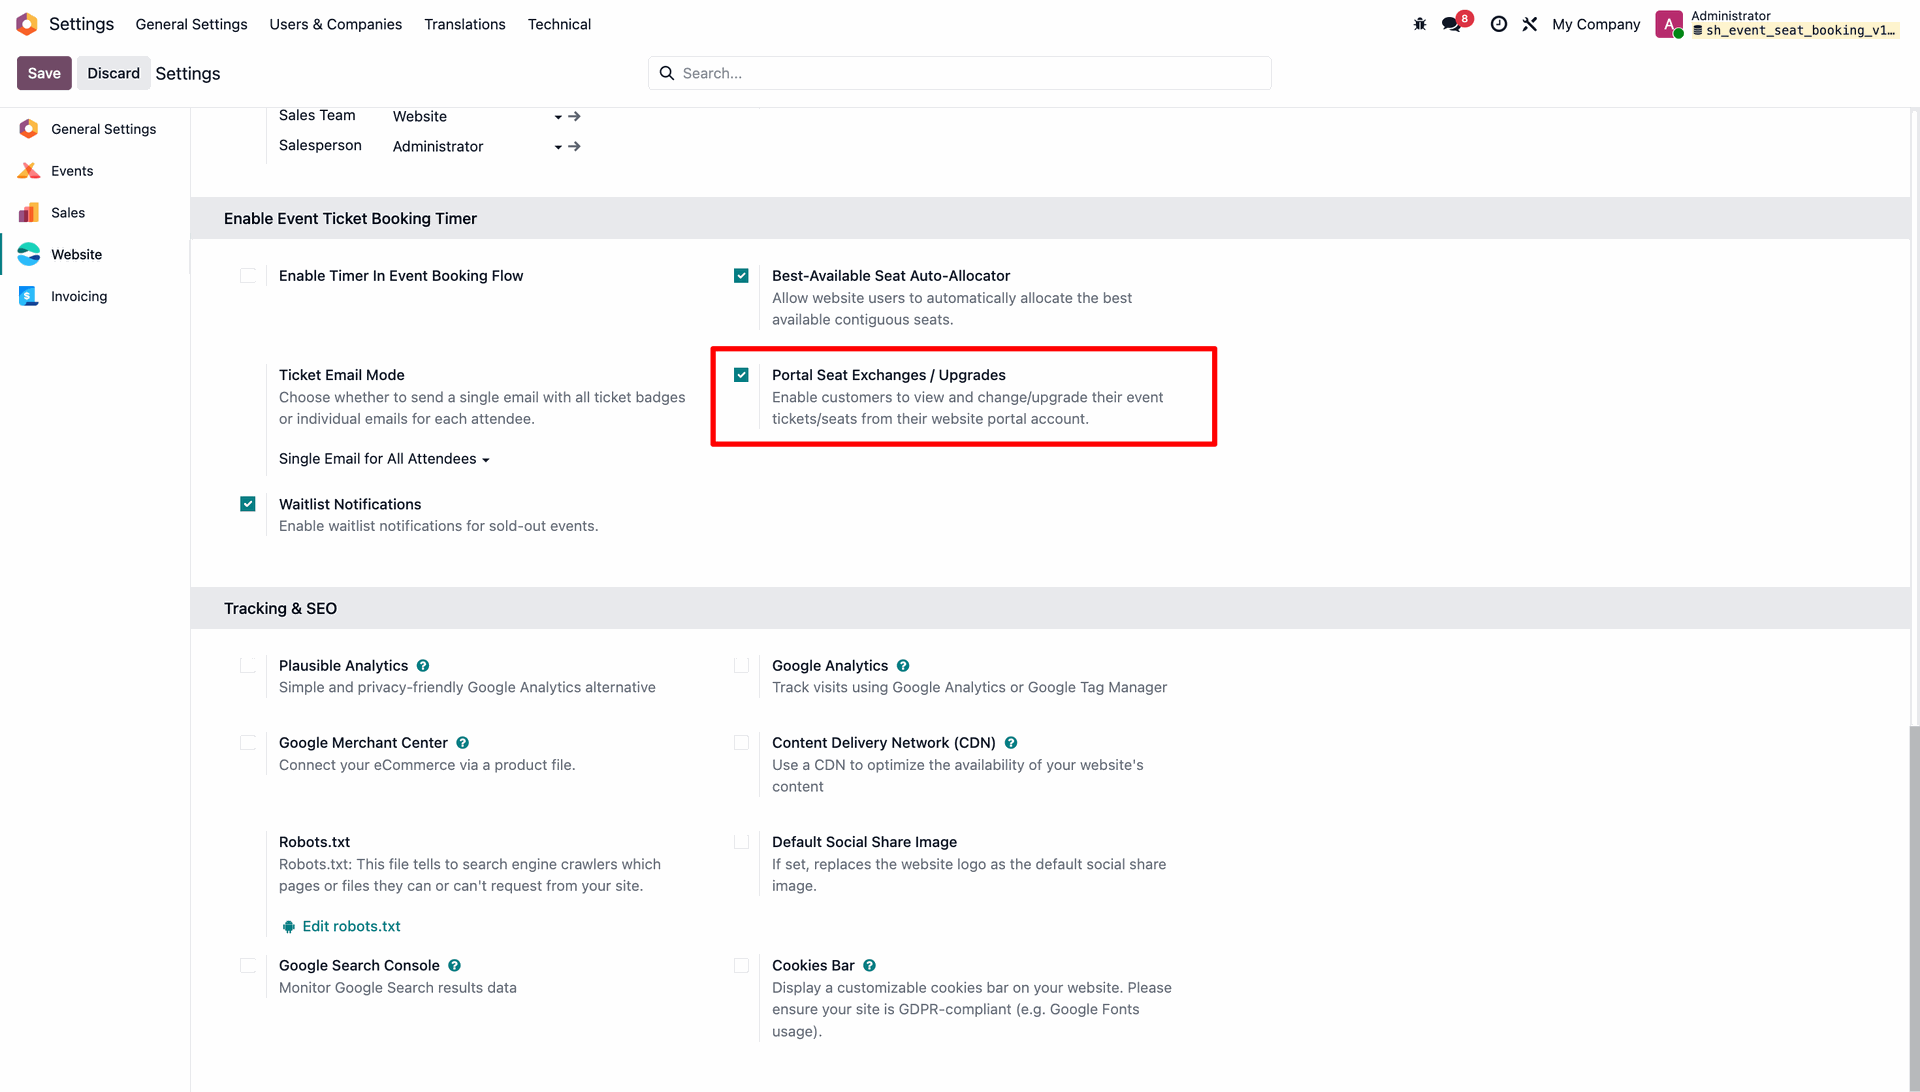
Enable the Portal Seat Exchanges/Upgrades option from the Website General Settings to allow customers to exchange or upgrade their seats through the customer portal.
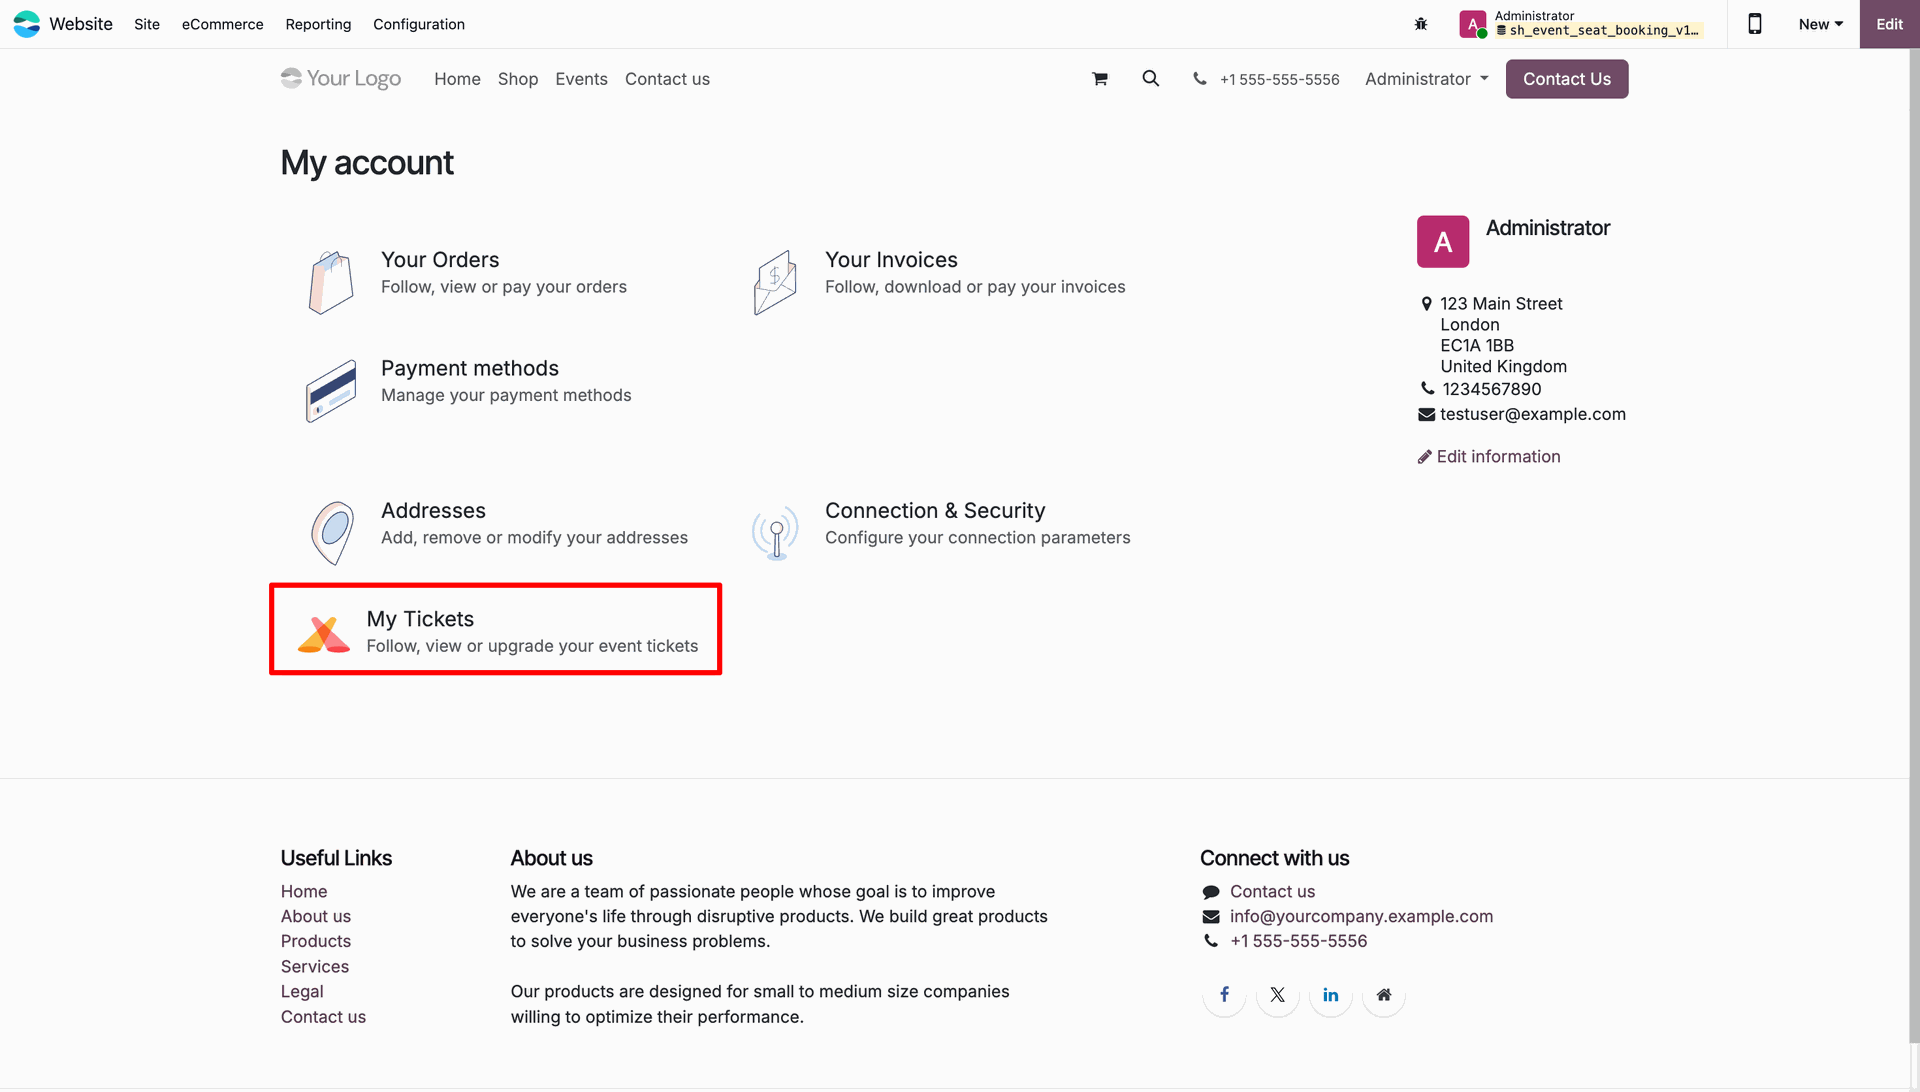
Select My Tickets from My Account to view and manage all your booked event tickets.
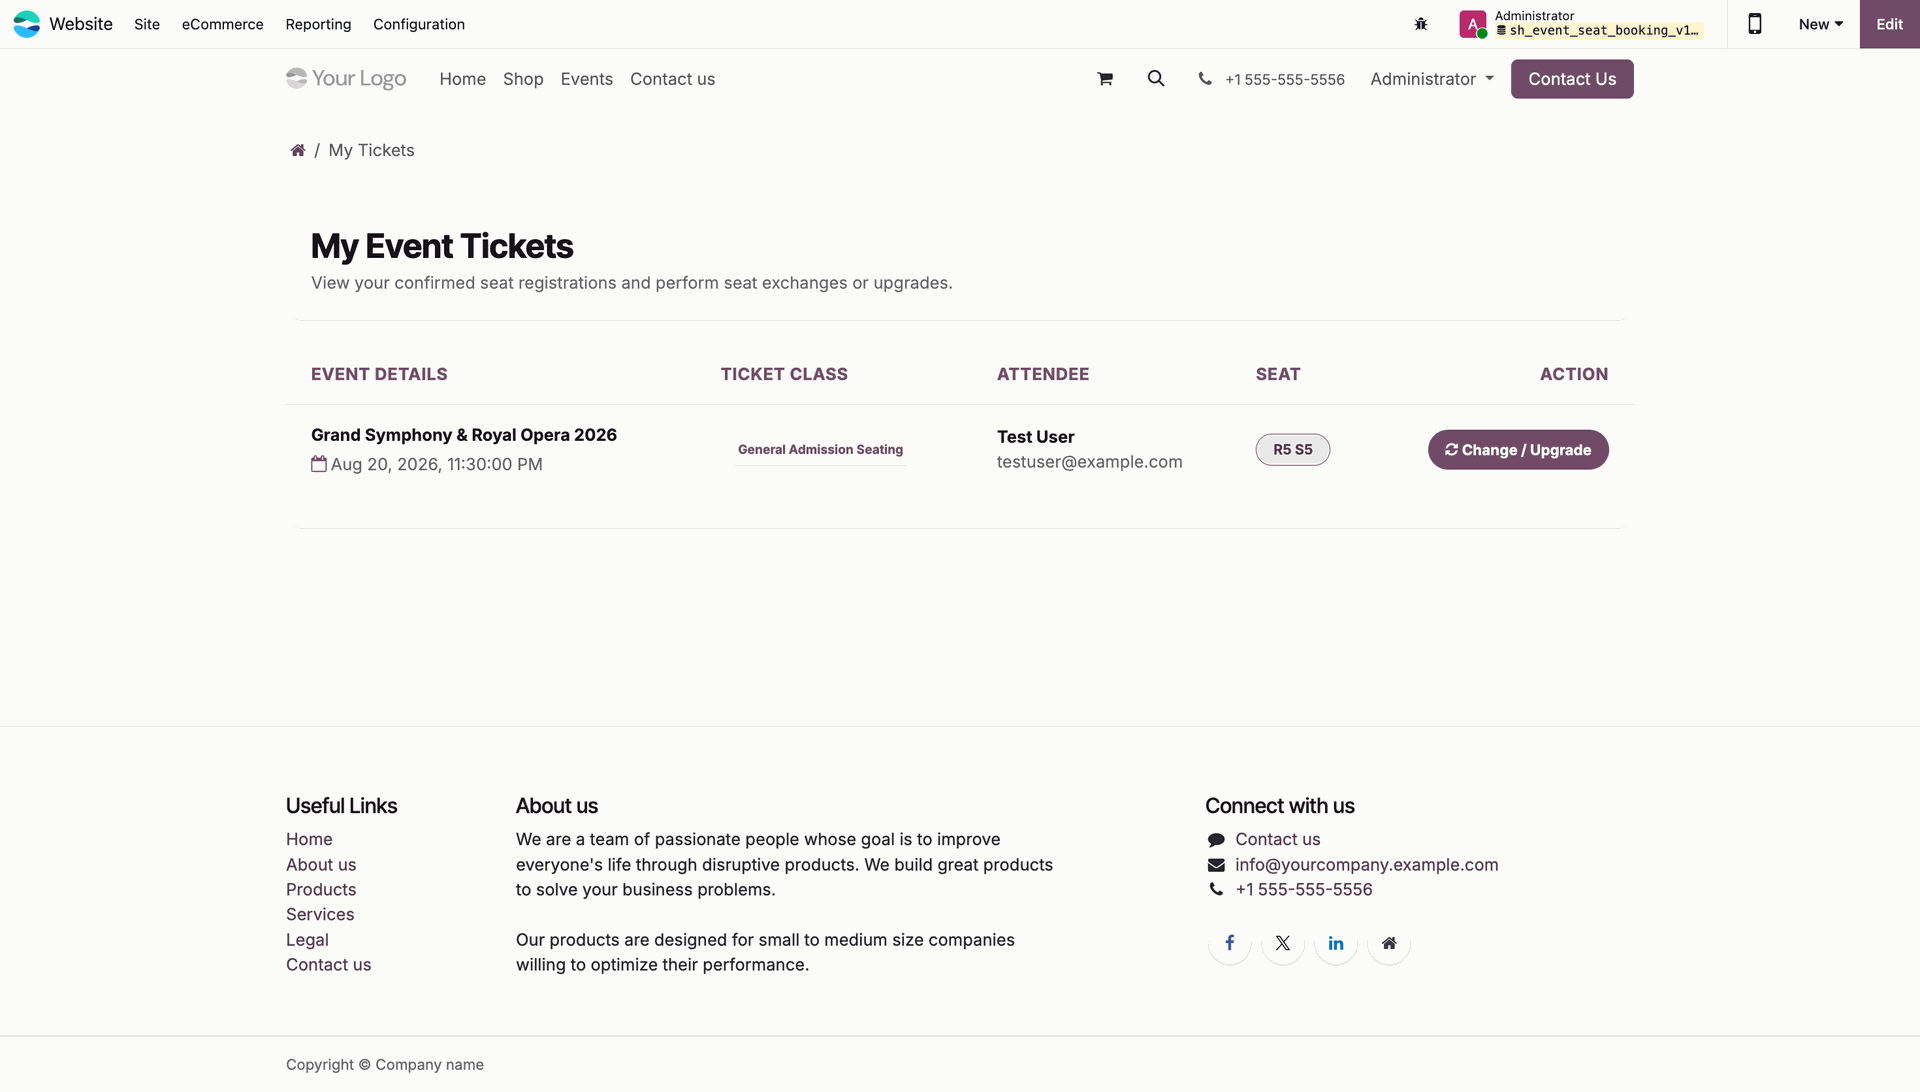
Open the Ticket List View in the customer portal and click the Change/Upgrade button to modify or upgrade the selected event ticket.
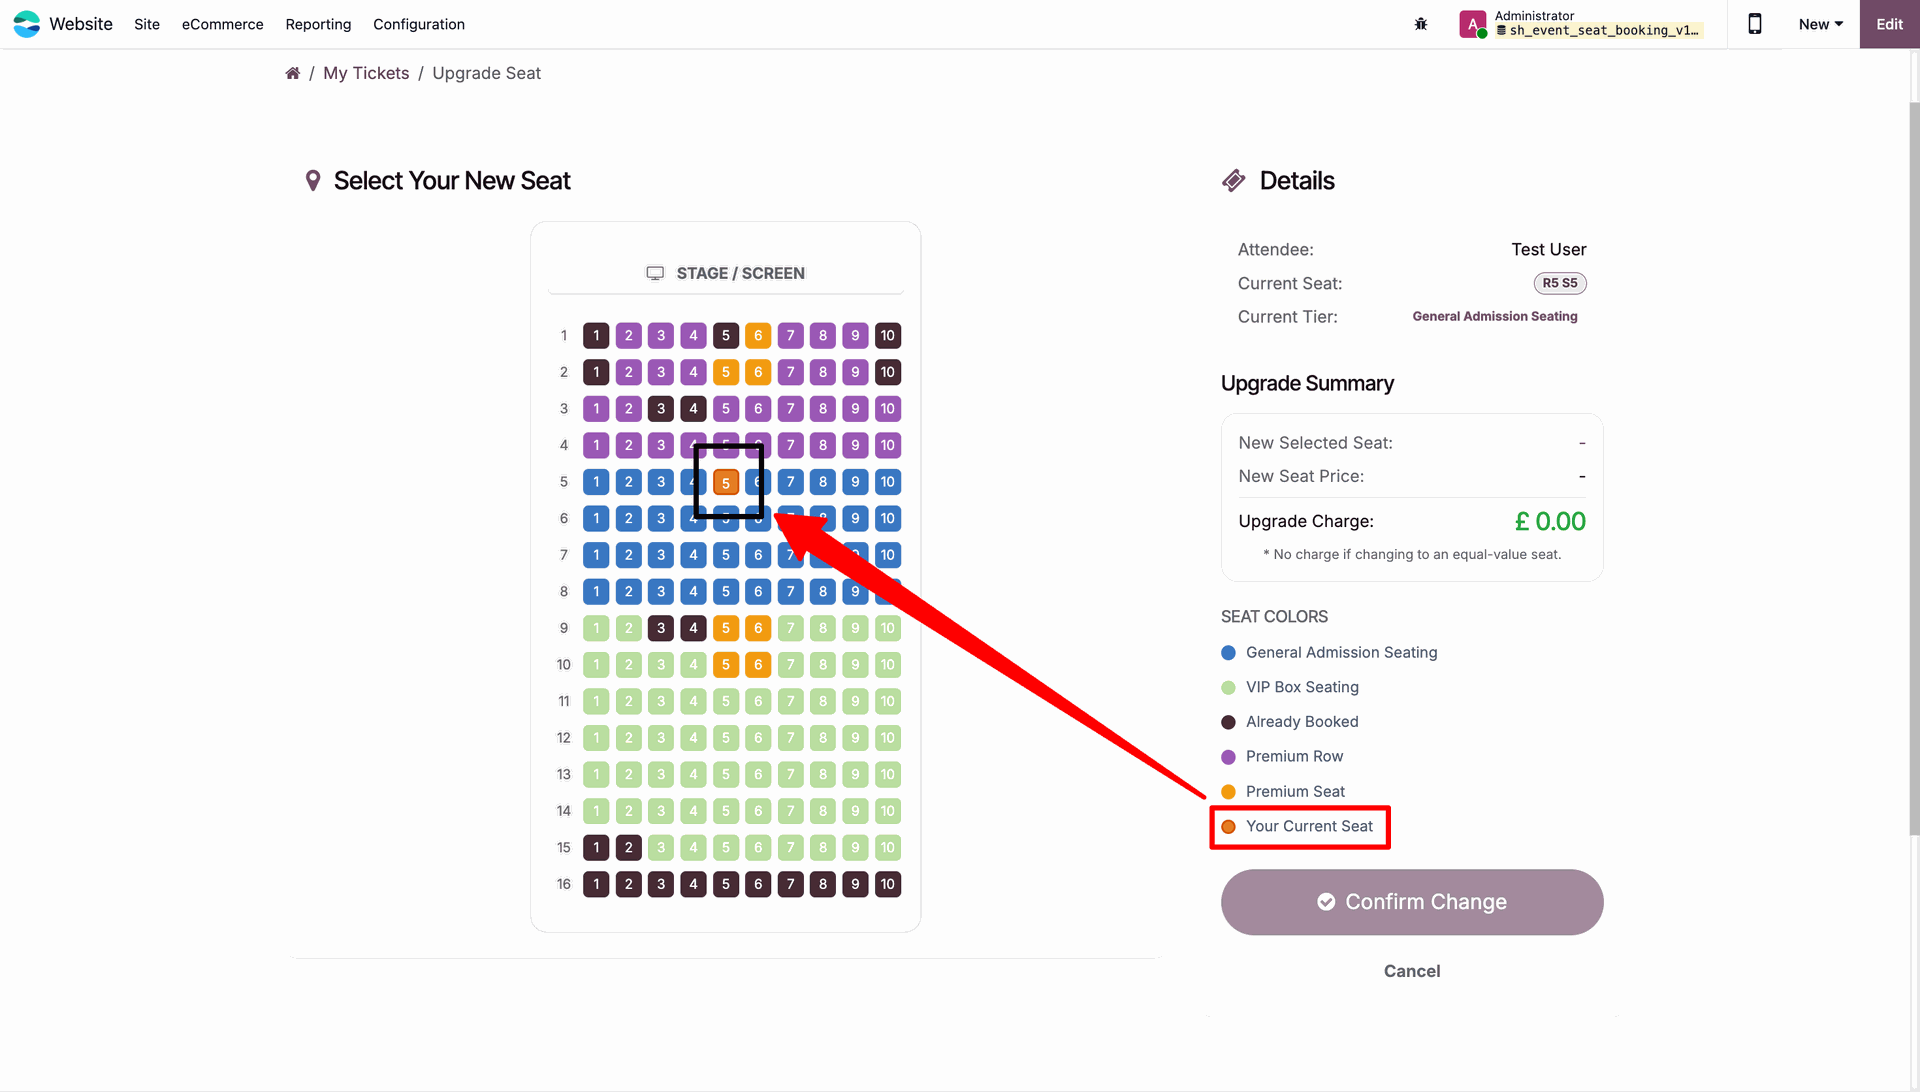
A Change/Upgrade Seat wizard will open, displaying the currently booked seat and allowing the user to select a new available seat for exchange or upgrade.
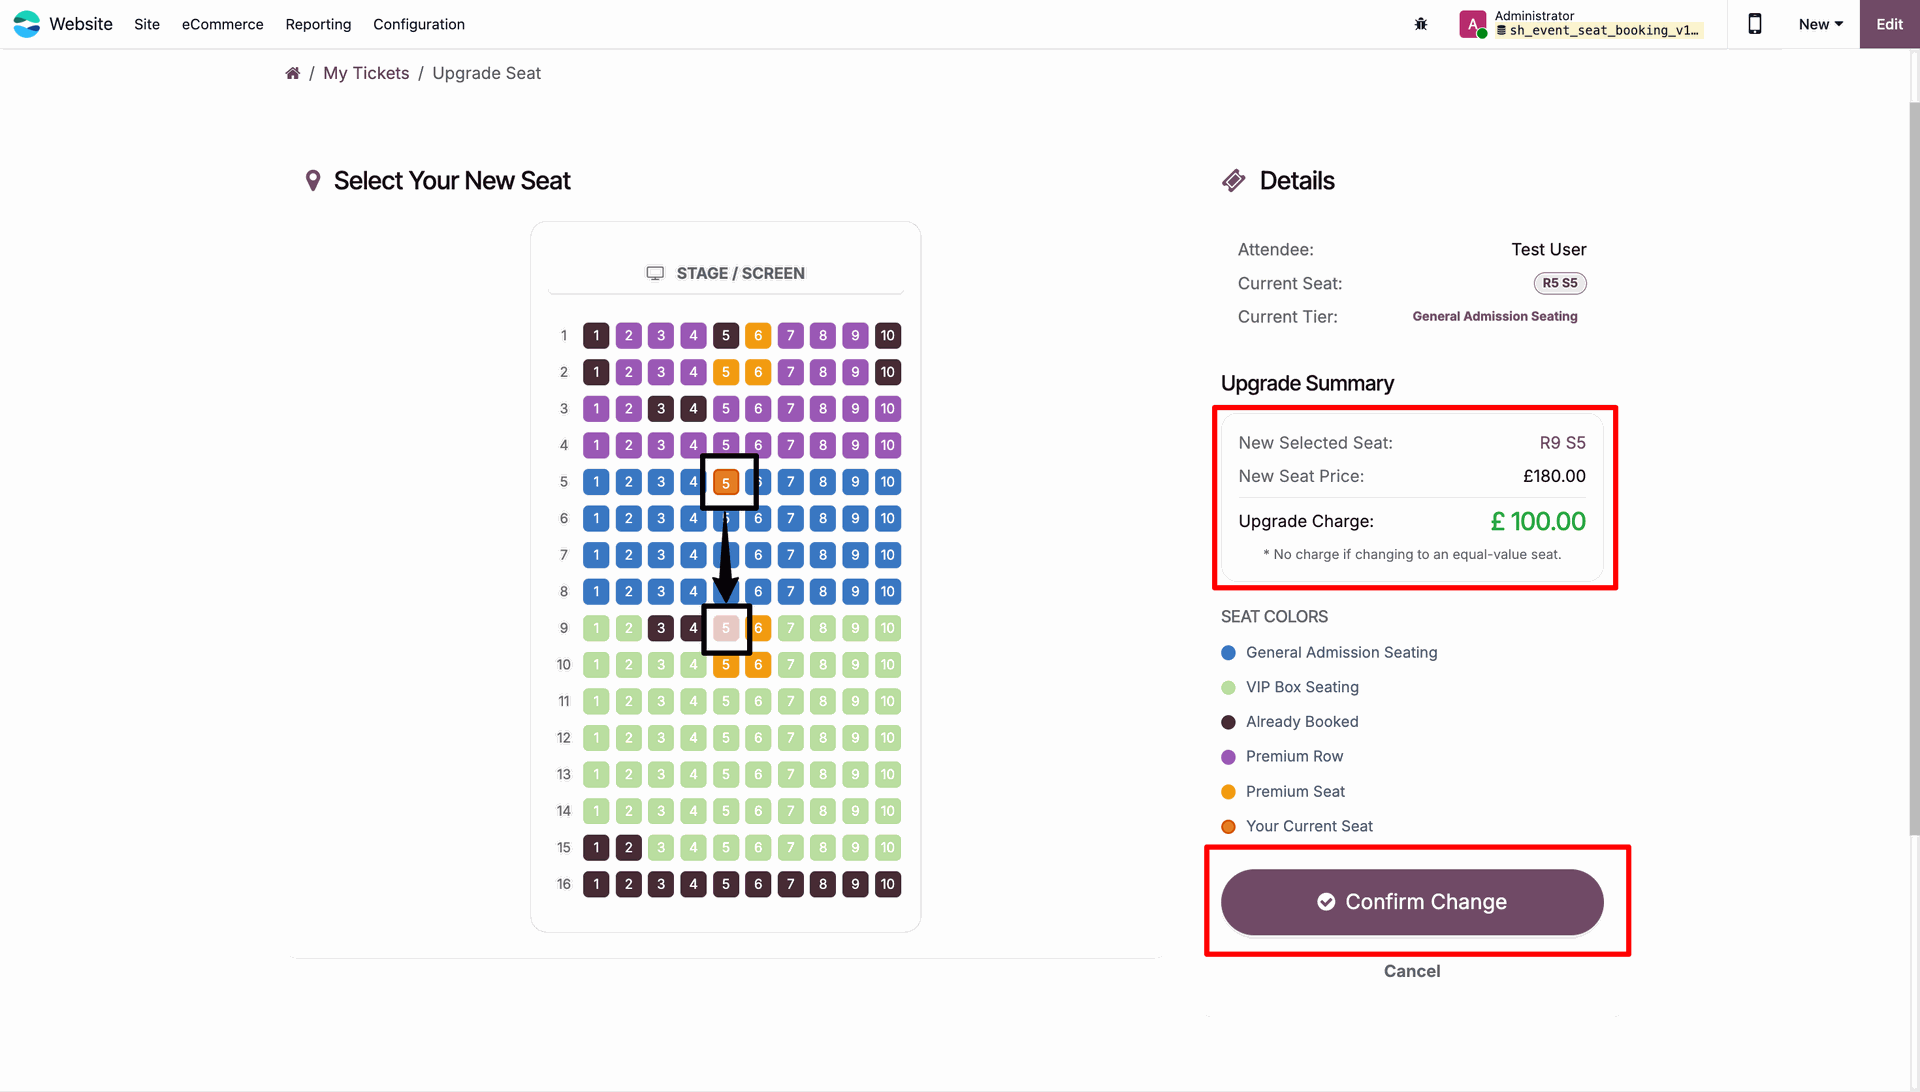
Select the desired new seat. If the new seat price is higher than the originally booked ticket, the system displays the additional amount to be paid. Click Confirm to proceed with the seat upgrade.
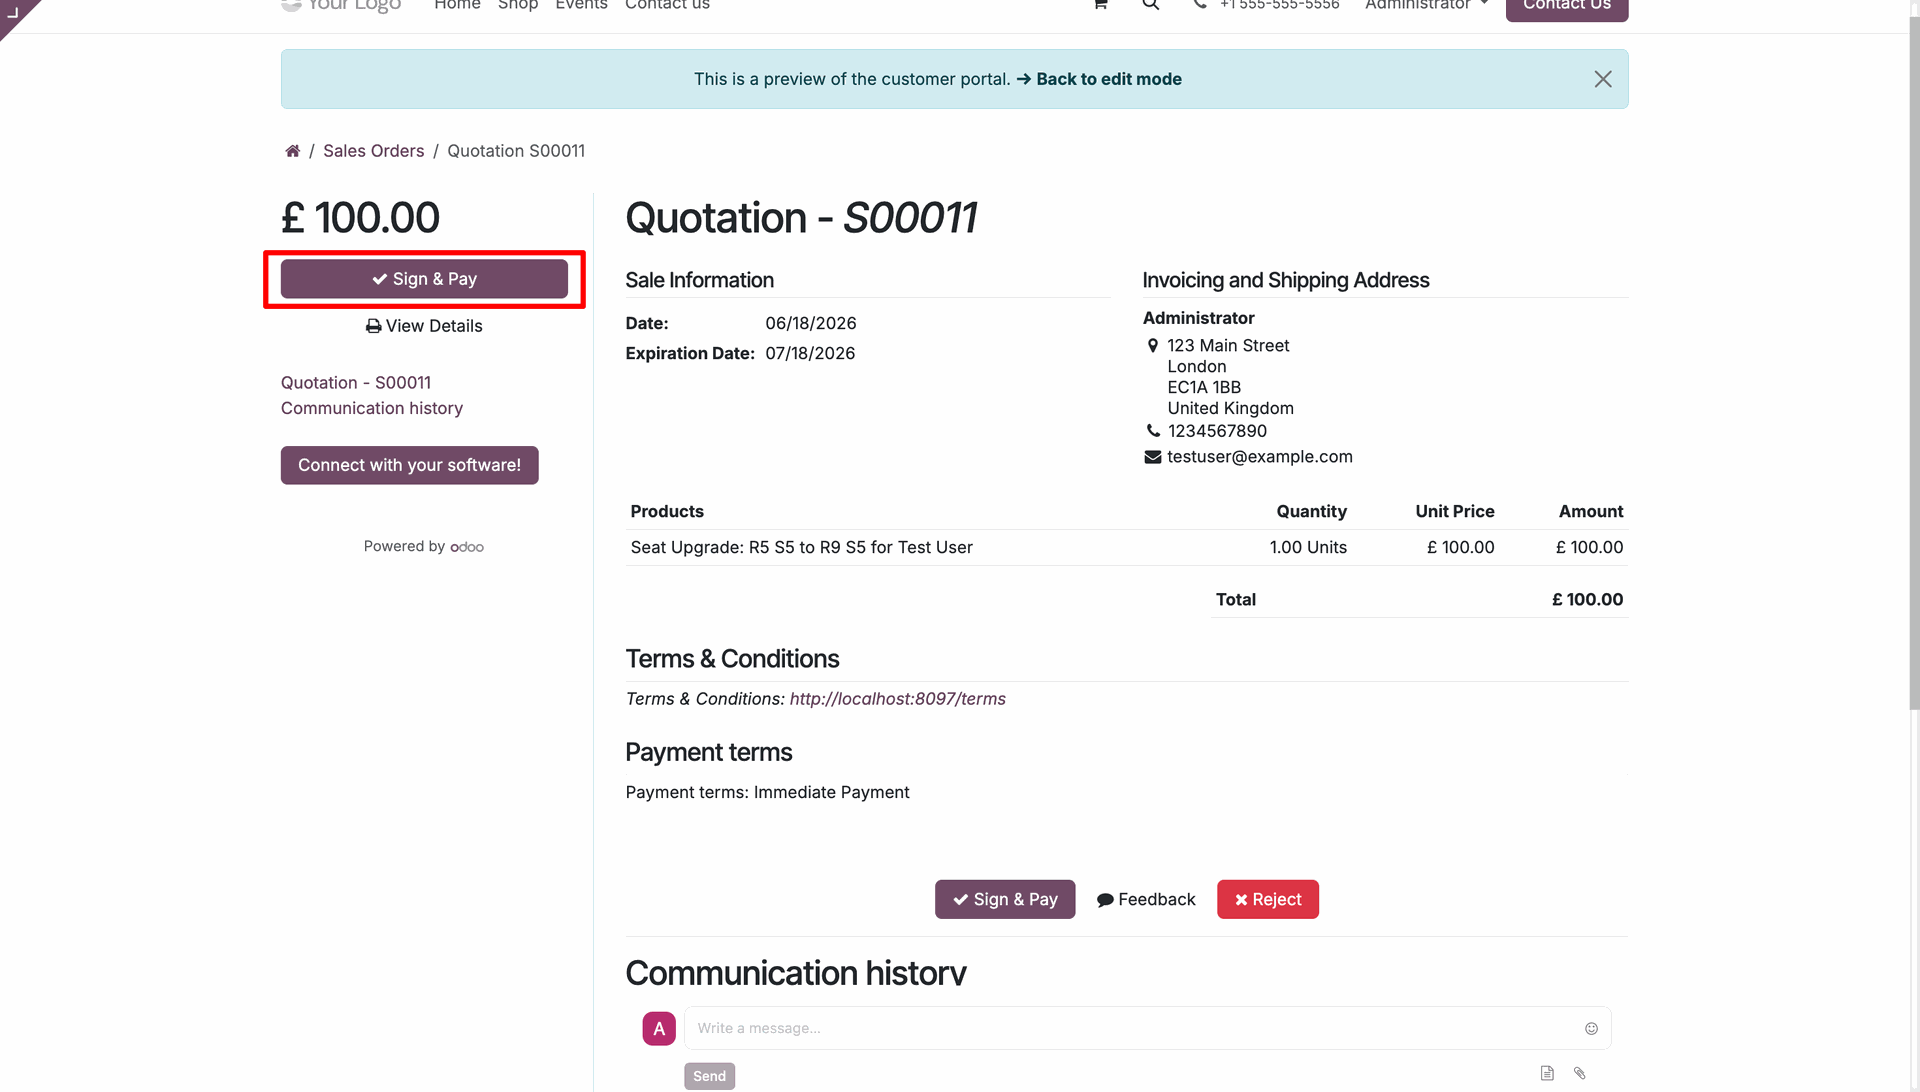
A new quotation will be generated for the additional amount. Click Sign & Pay to complete the payment and confirm the seat upgrade.
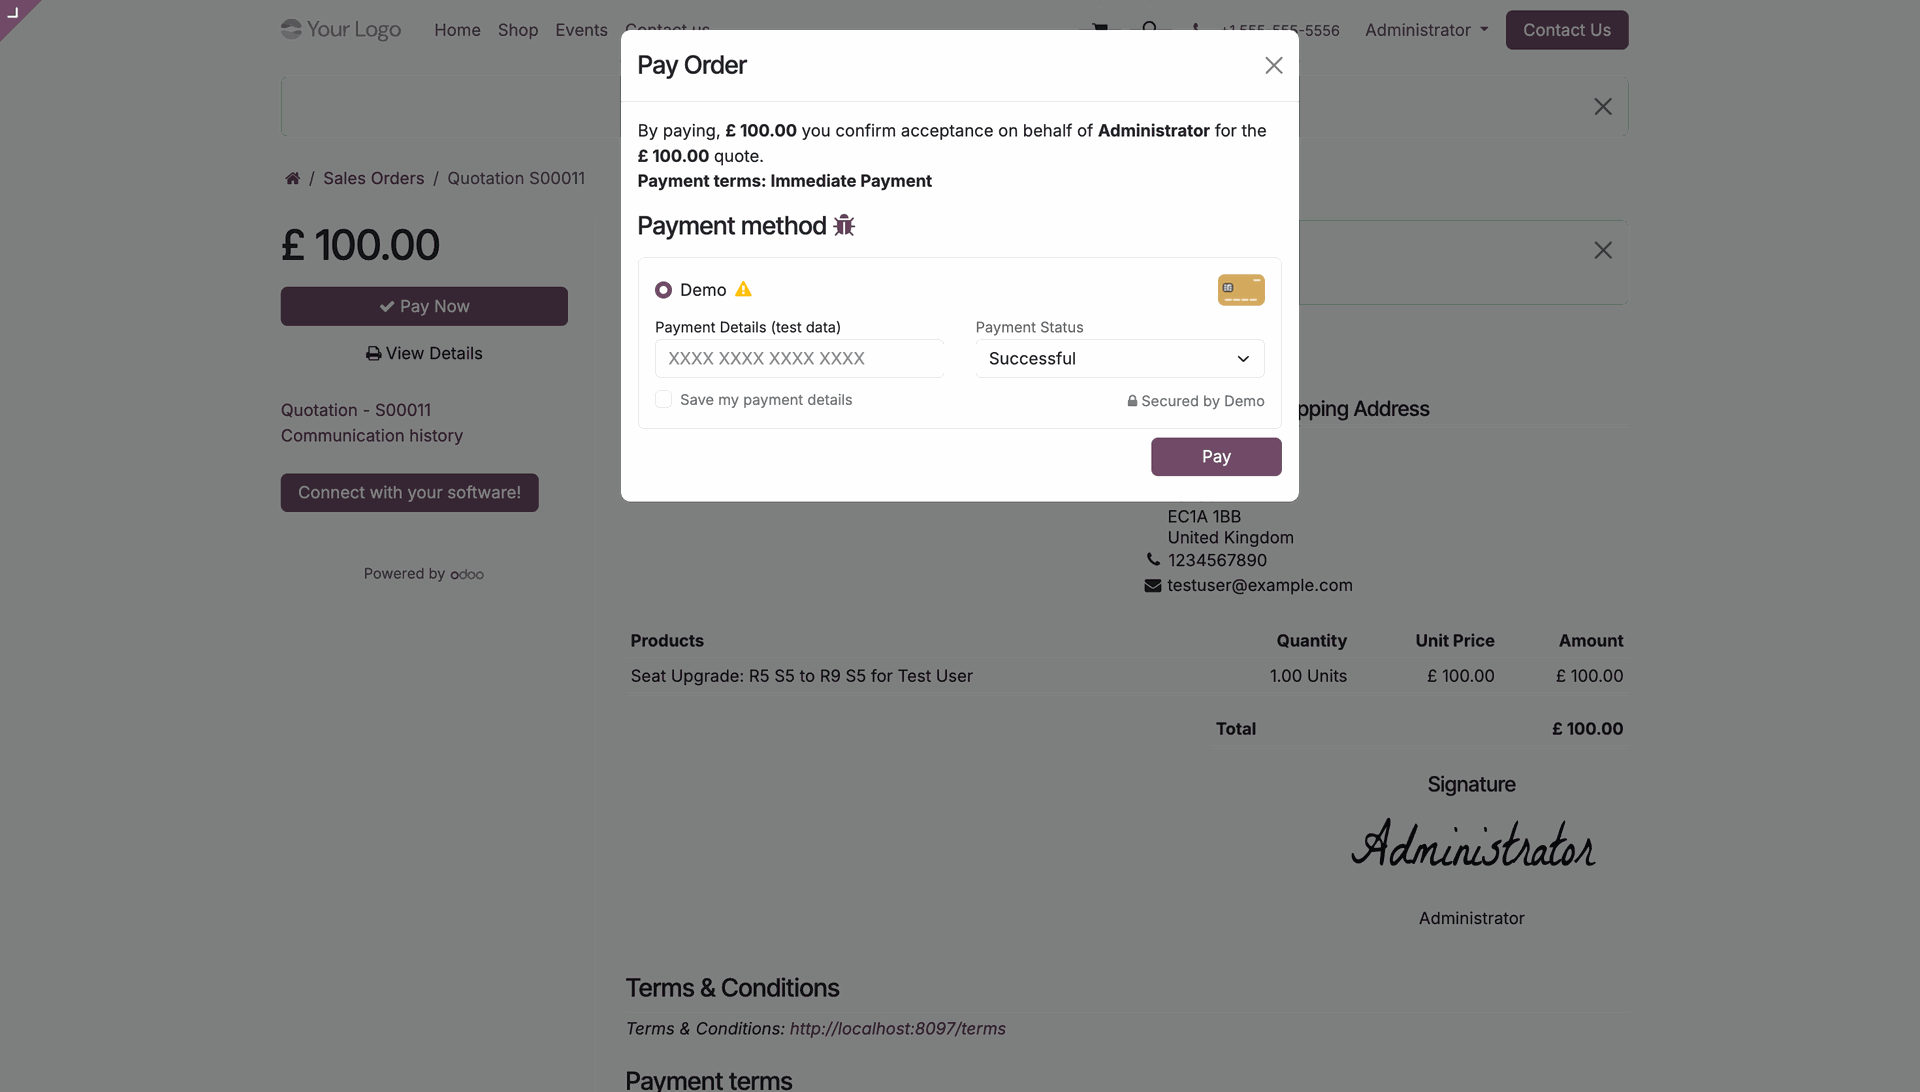
Enter the required payment details and click the Pay button to complete the payment for the seat upgrade.
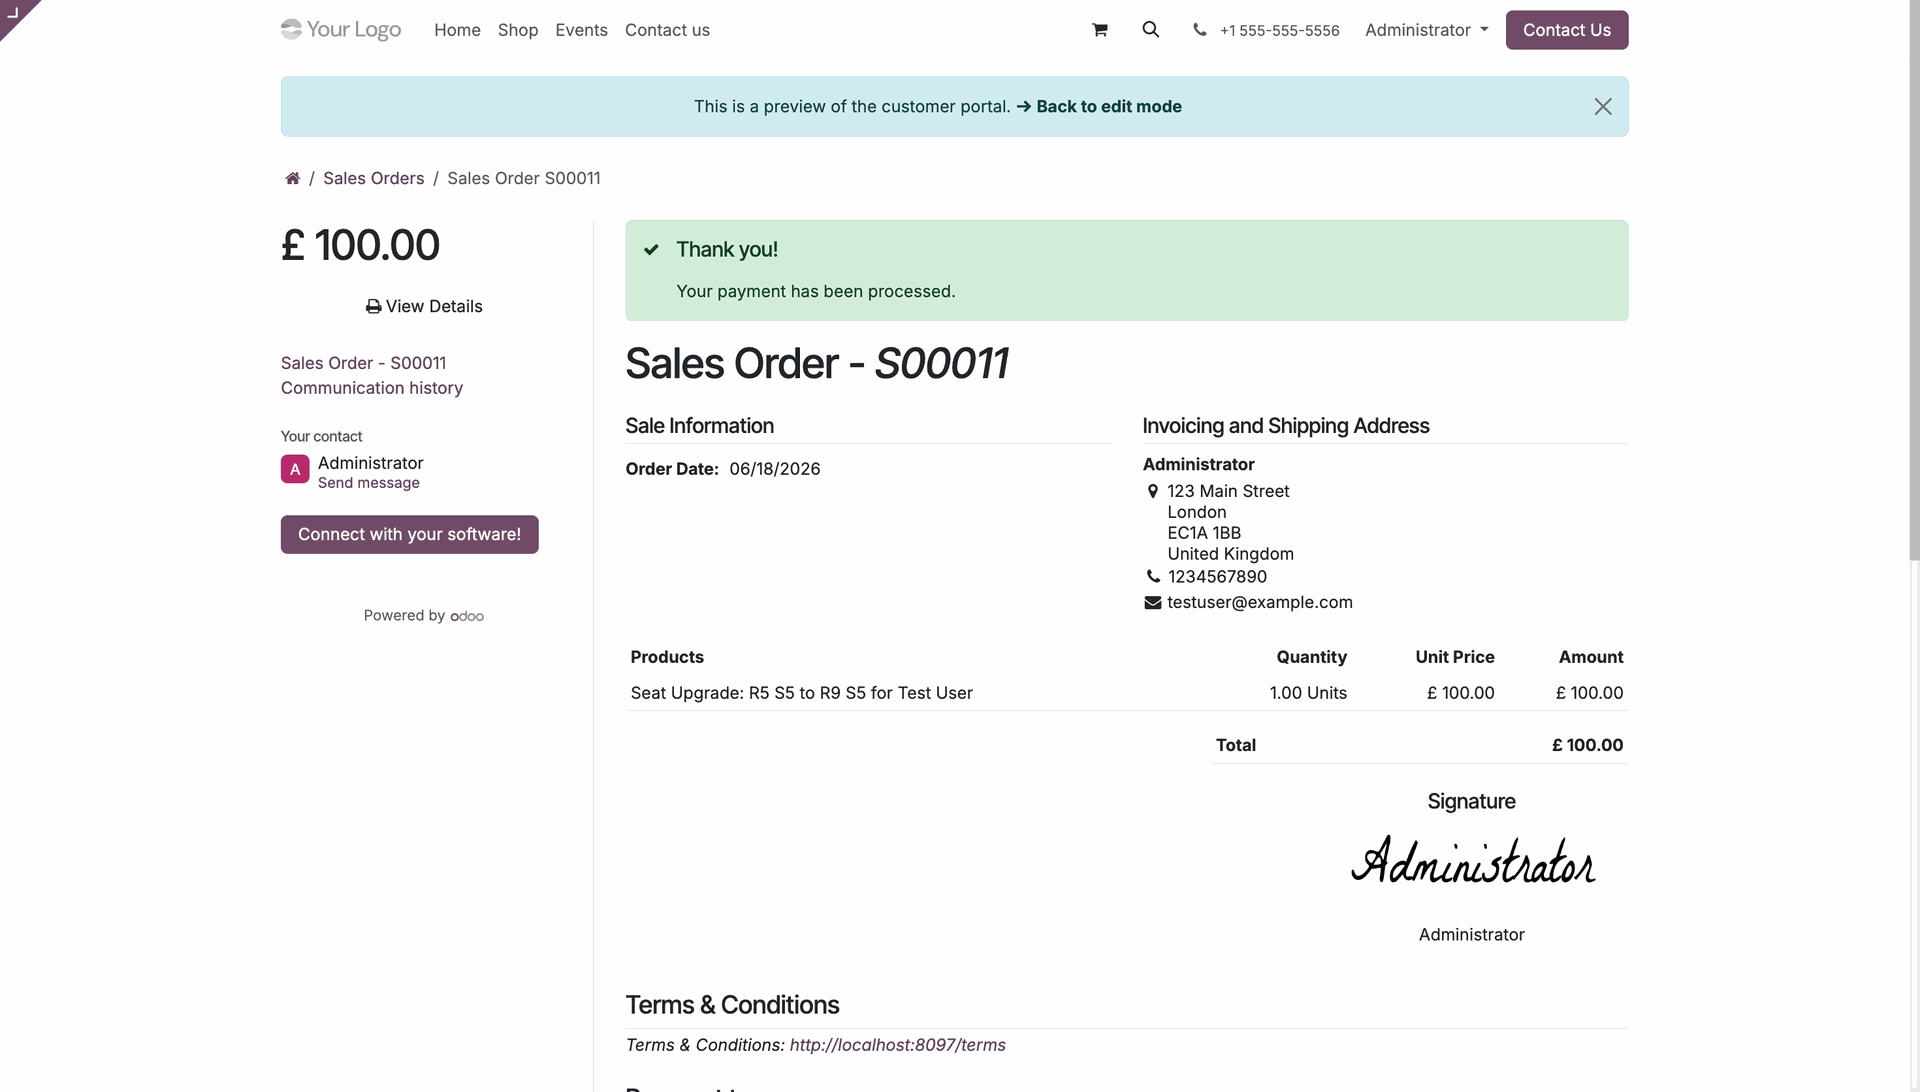
The payment has been processed successfully, and the seat upgrade is confirmed.
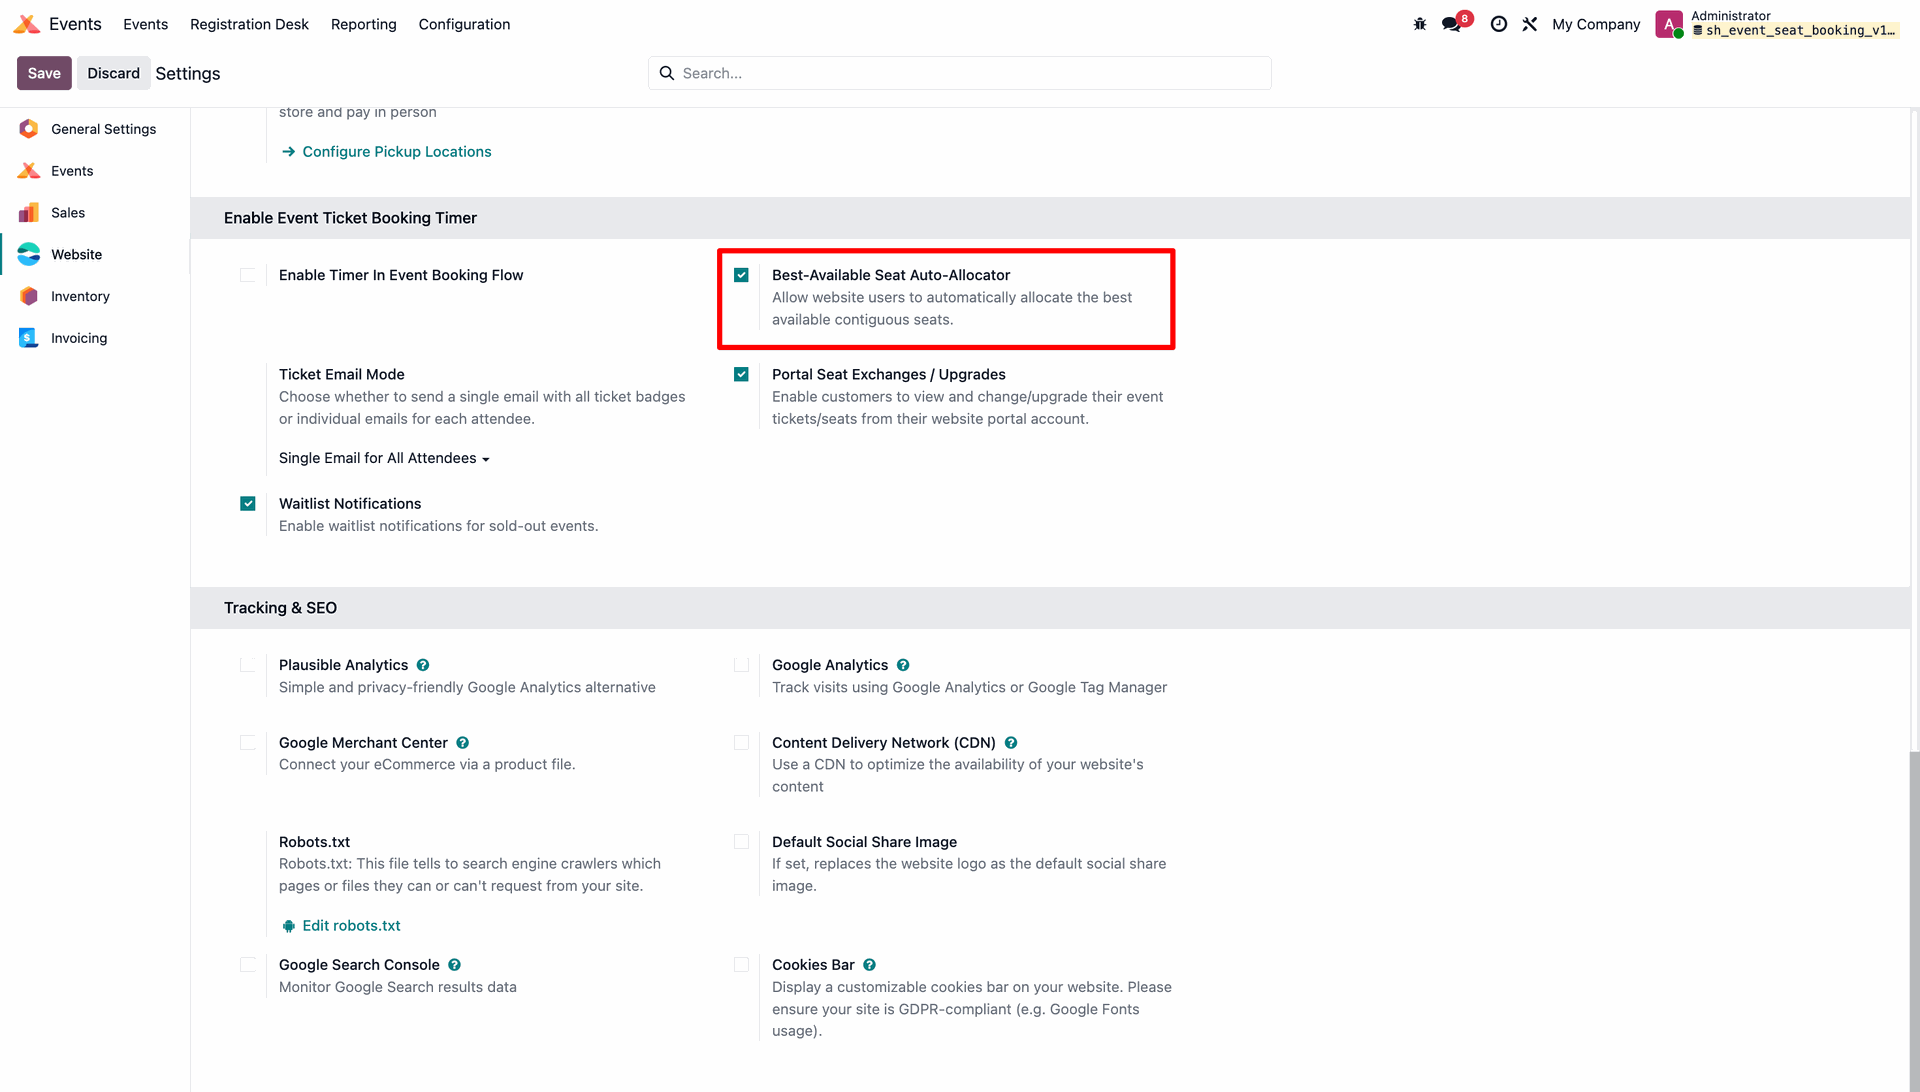
Enable the Best Available Seat Auto Allocator option from the Website General Settings to automatically assign the best available seats.
On the website, the Auto Allocate Best Seats option is displayed. Click the Auto Allocate Seat button to automatically assign and confirm the best available seats for the booking.
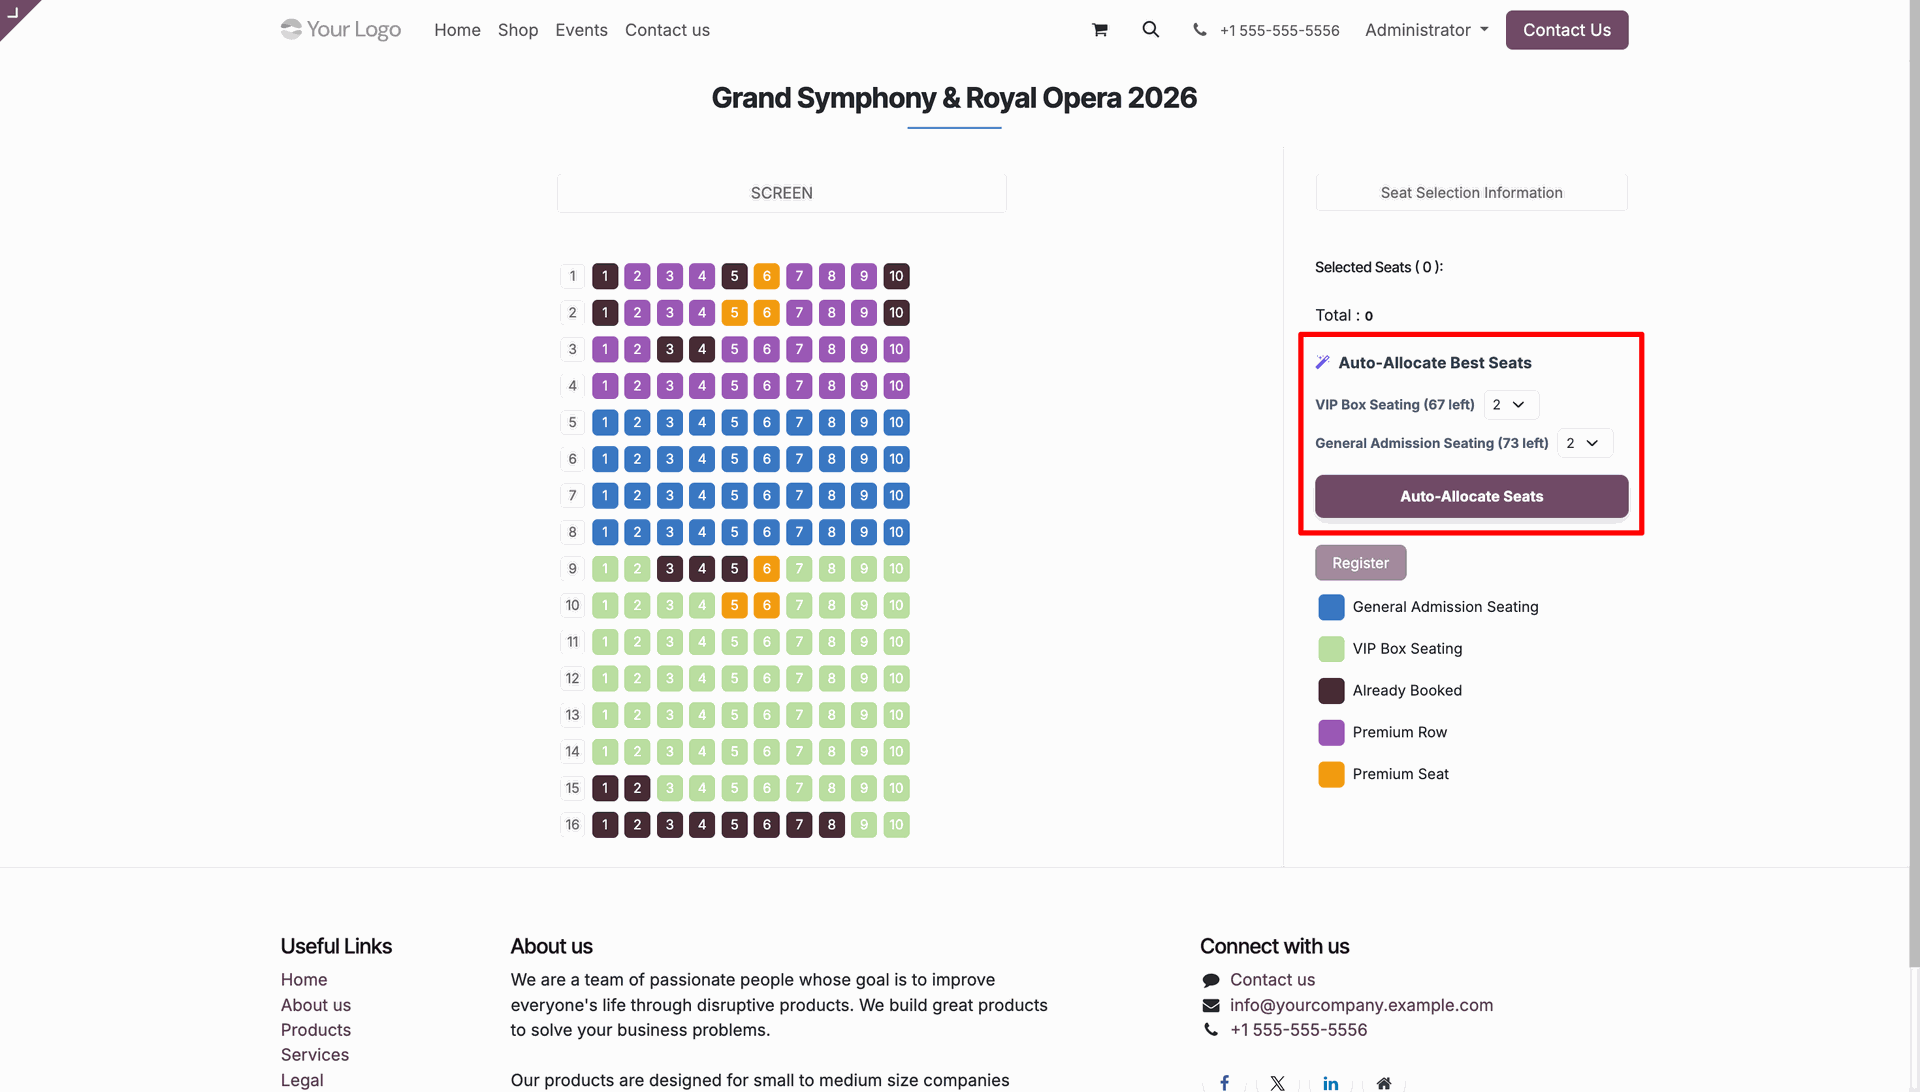
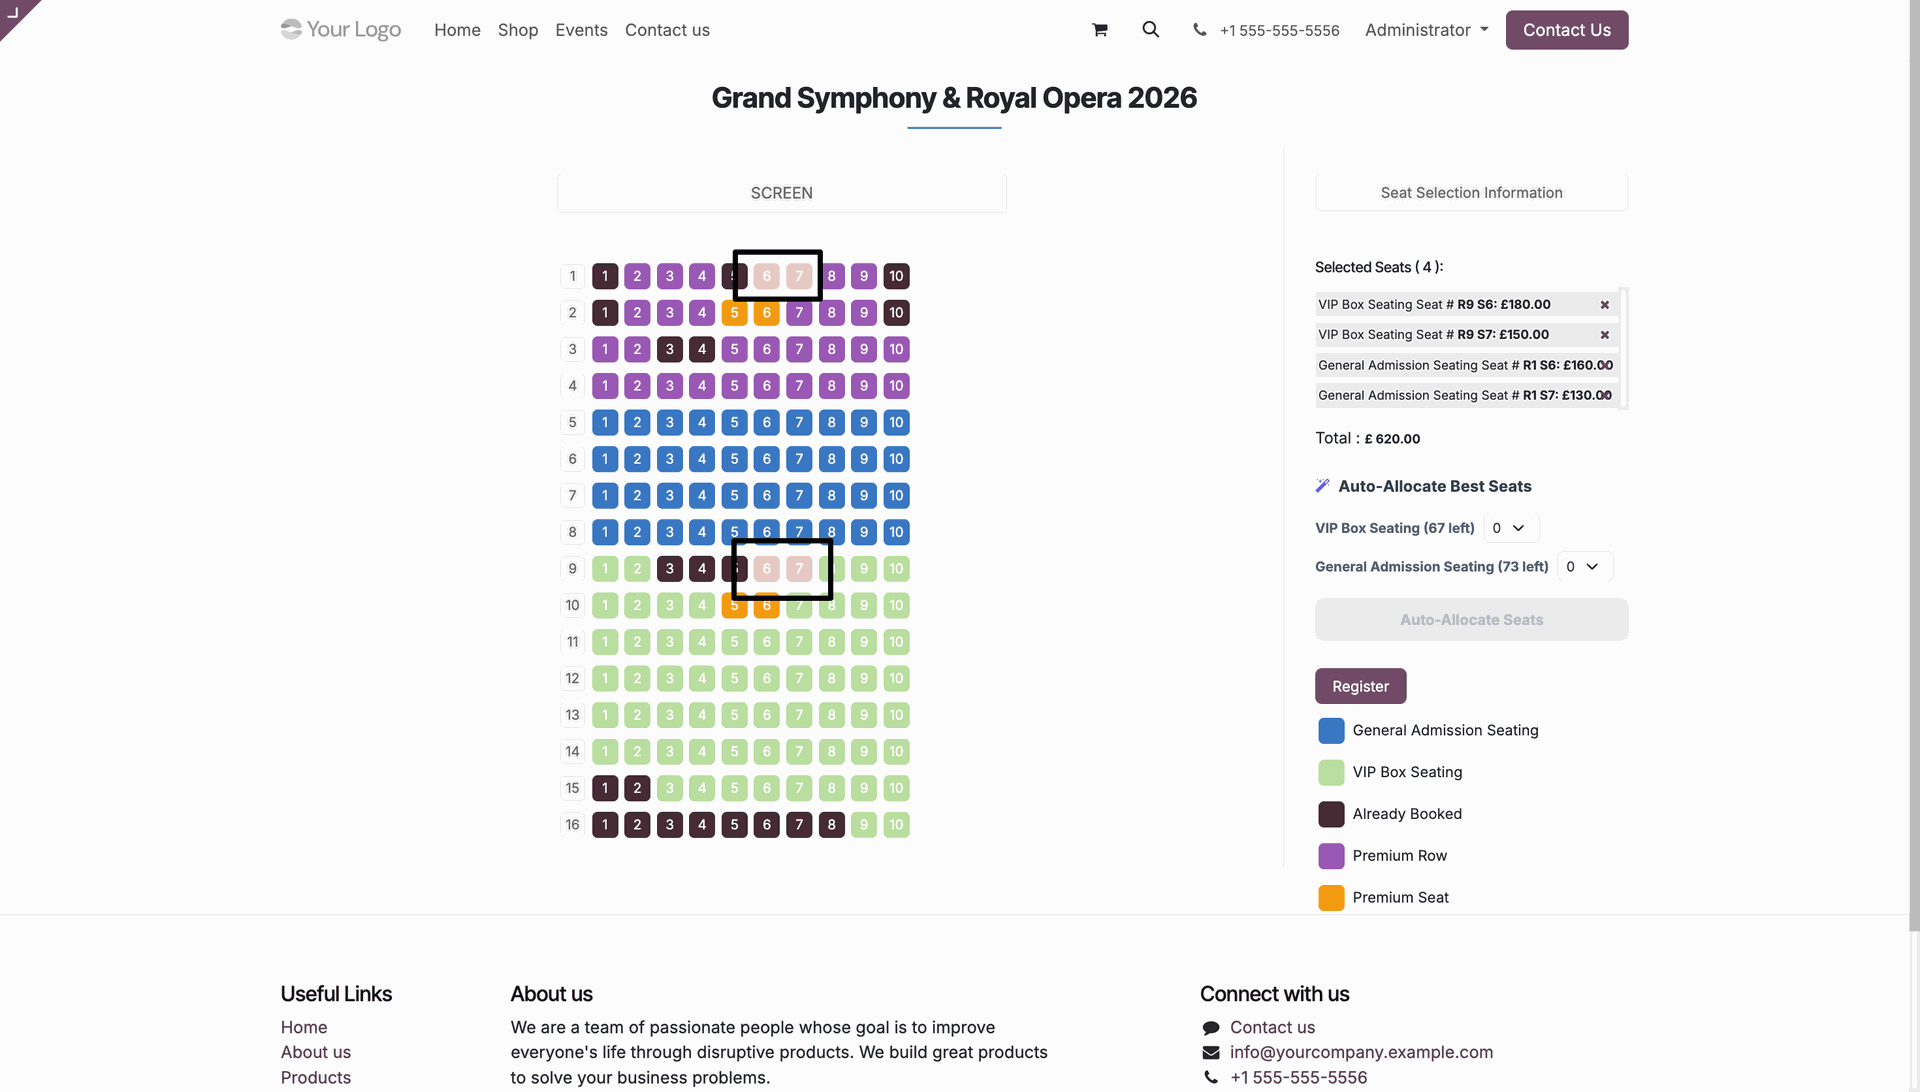
By clicking the Auto Allocate Seat button, the best available seats are automatically selected and reserved for the ticket booking.
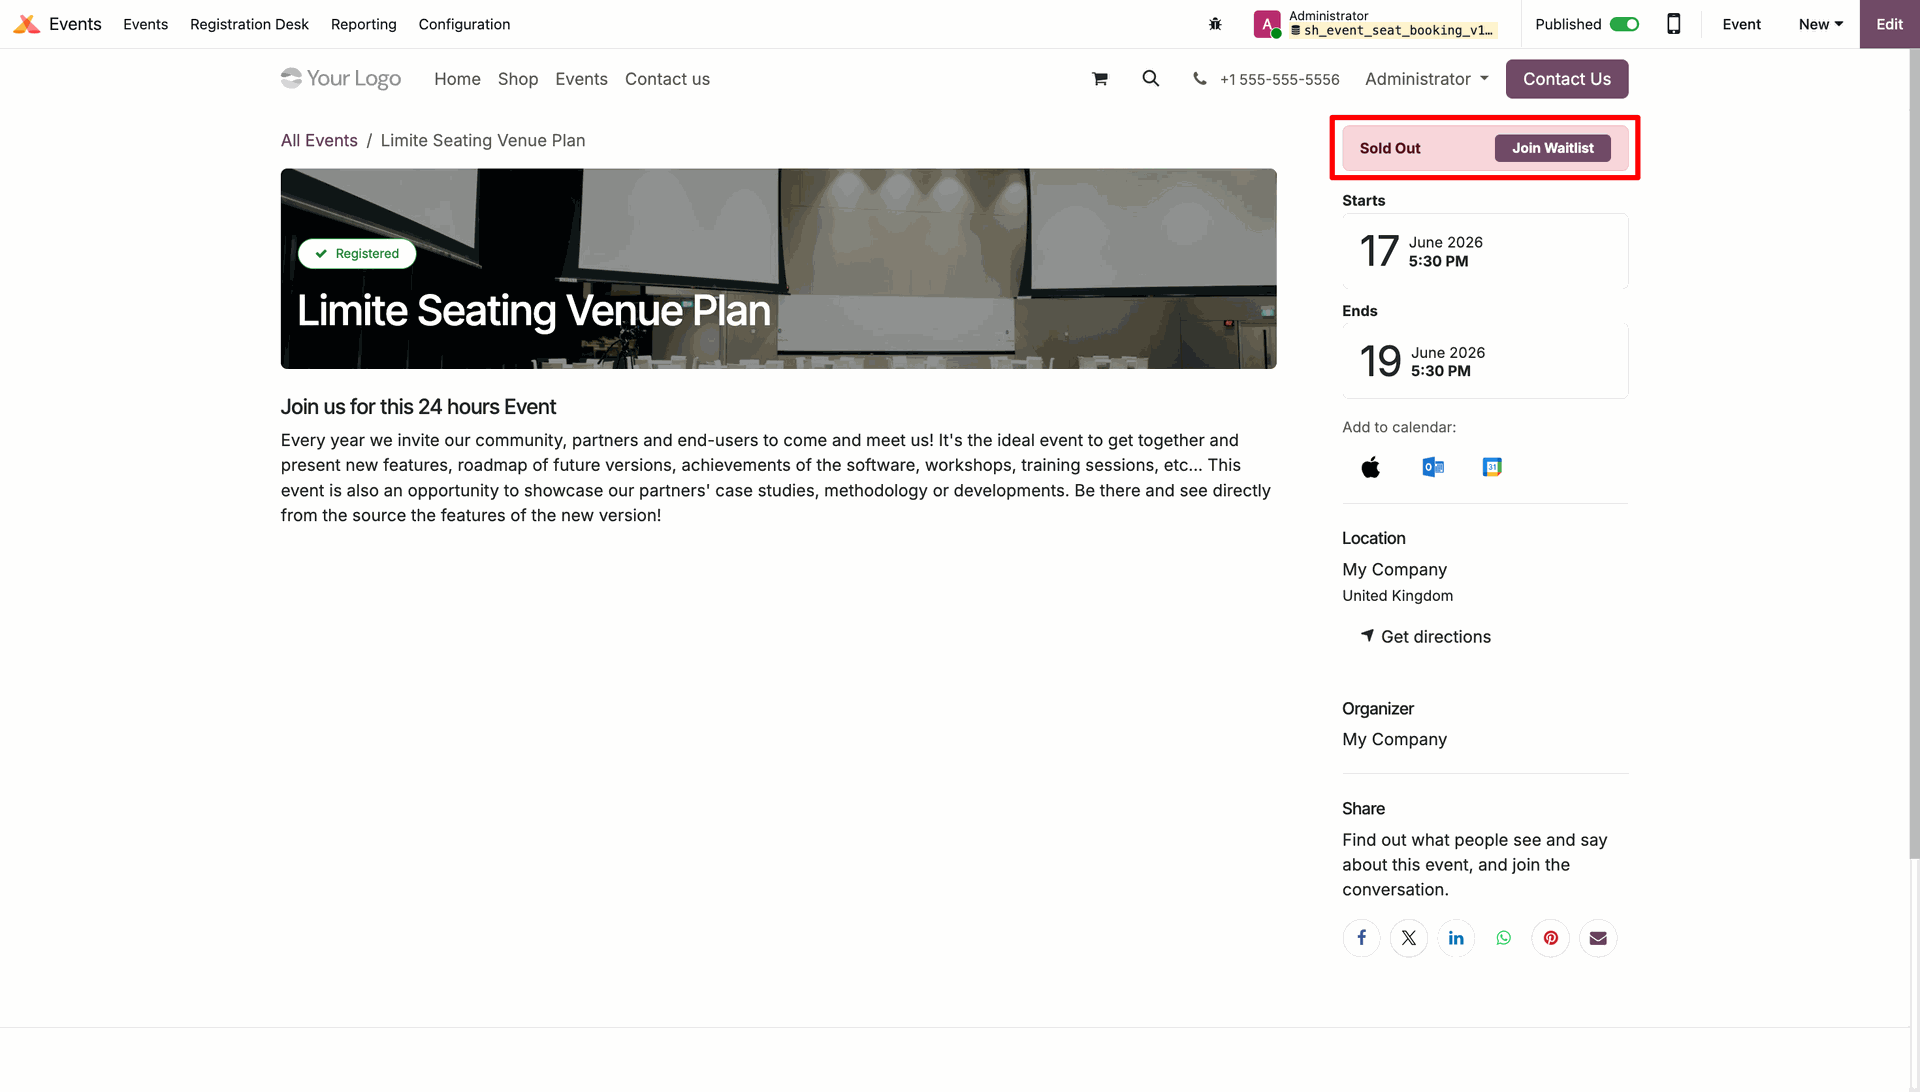
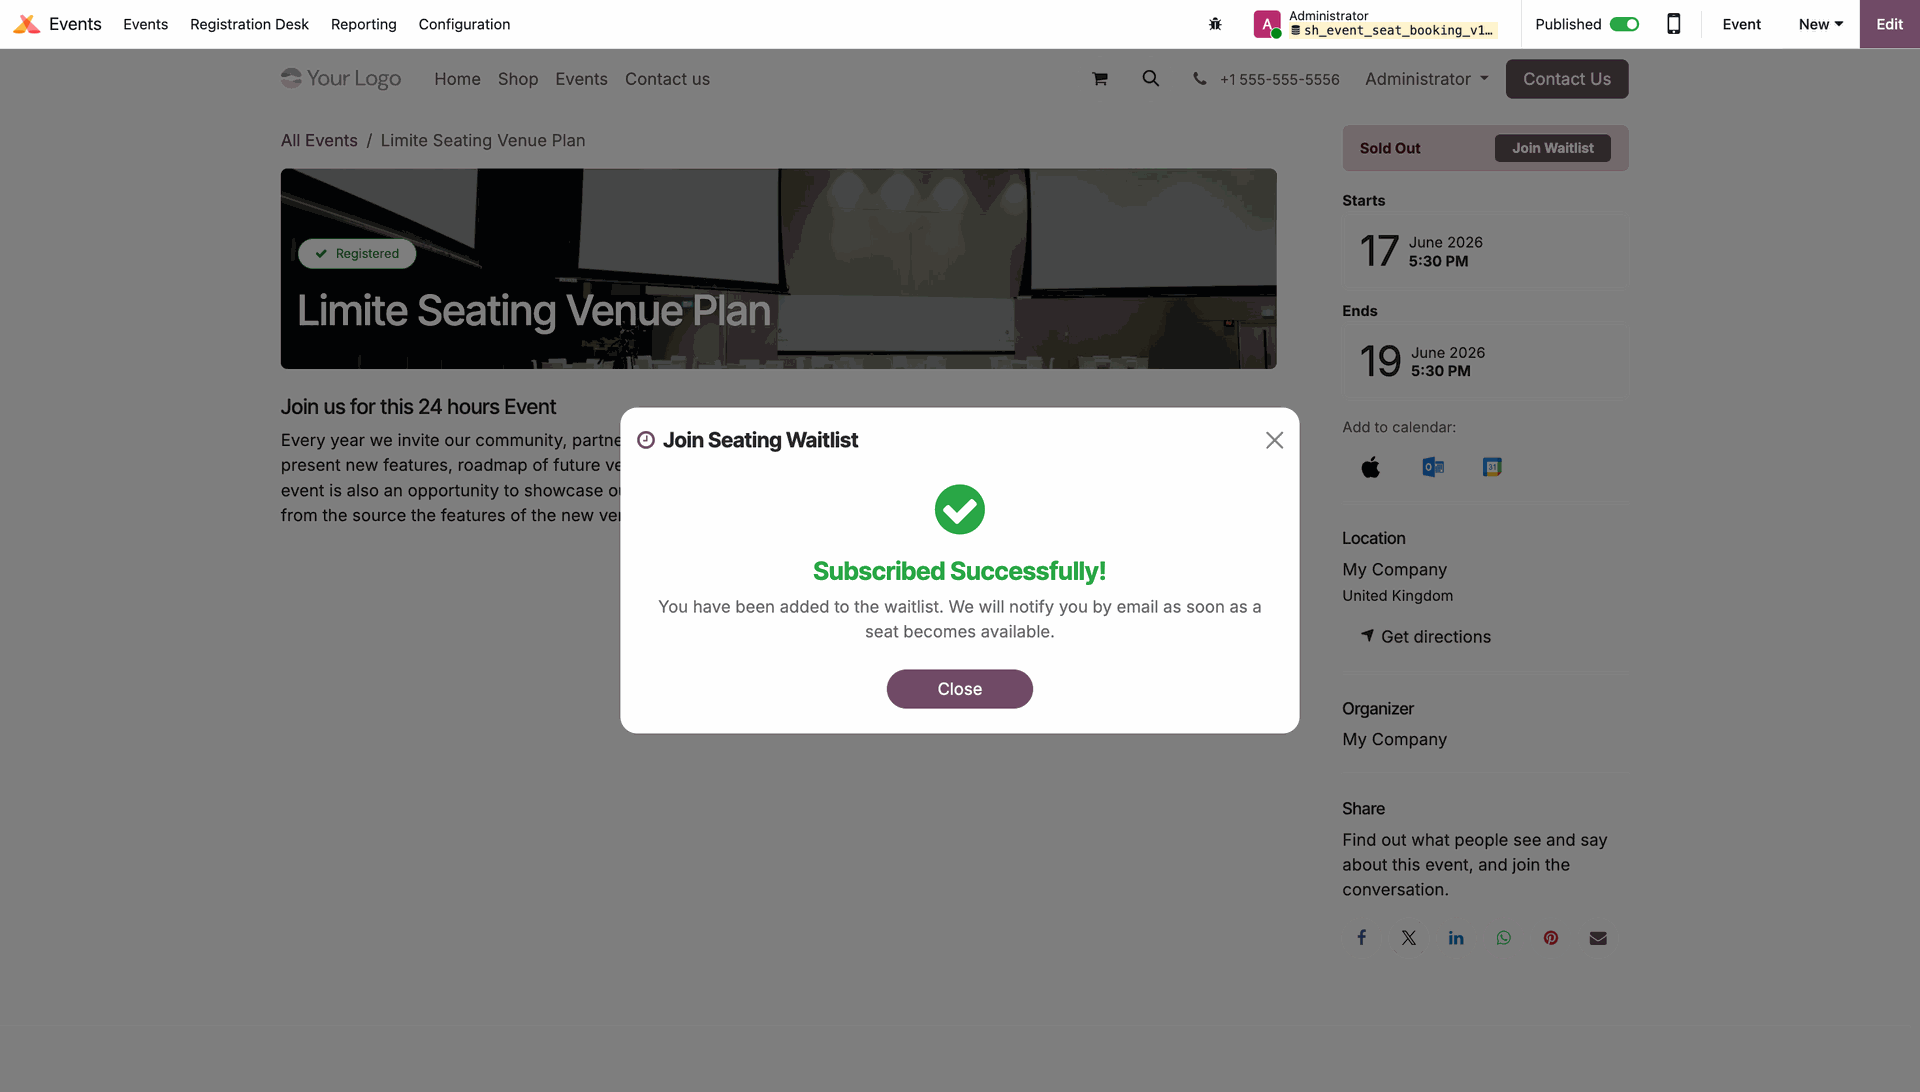
Go to the Events page on the website. If the event is sold out, users can click the Join Waitlist button to register for the event waitlist.
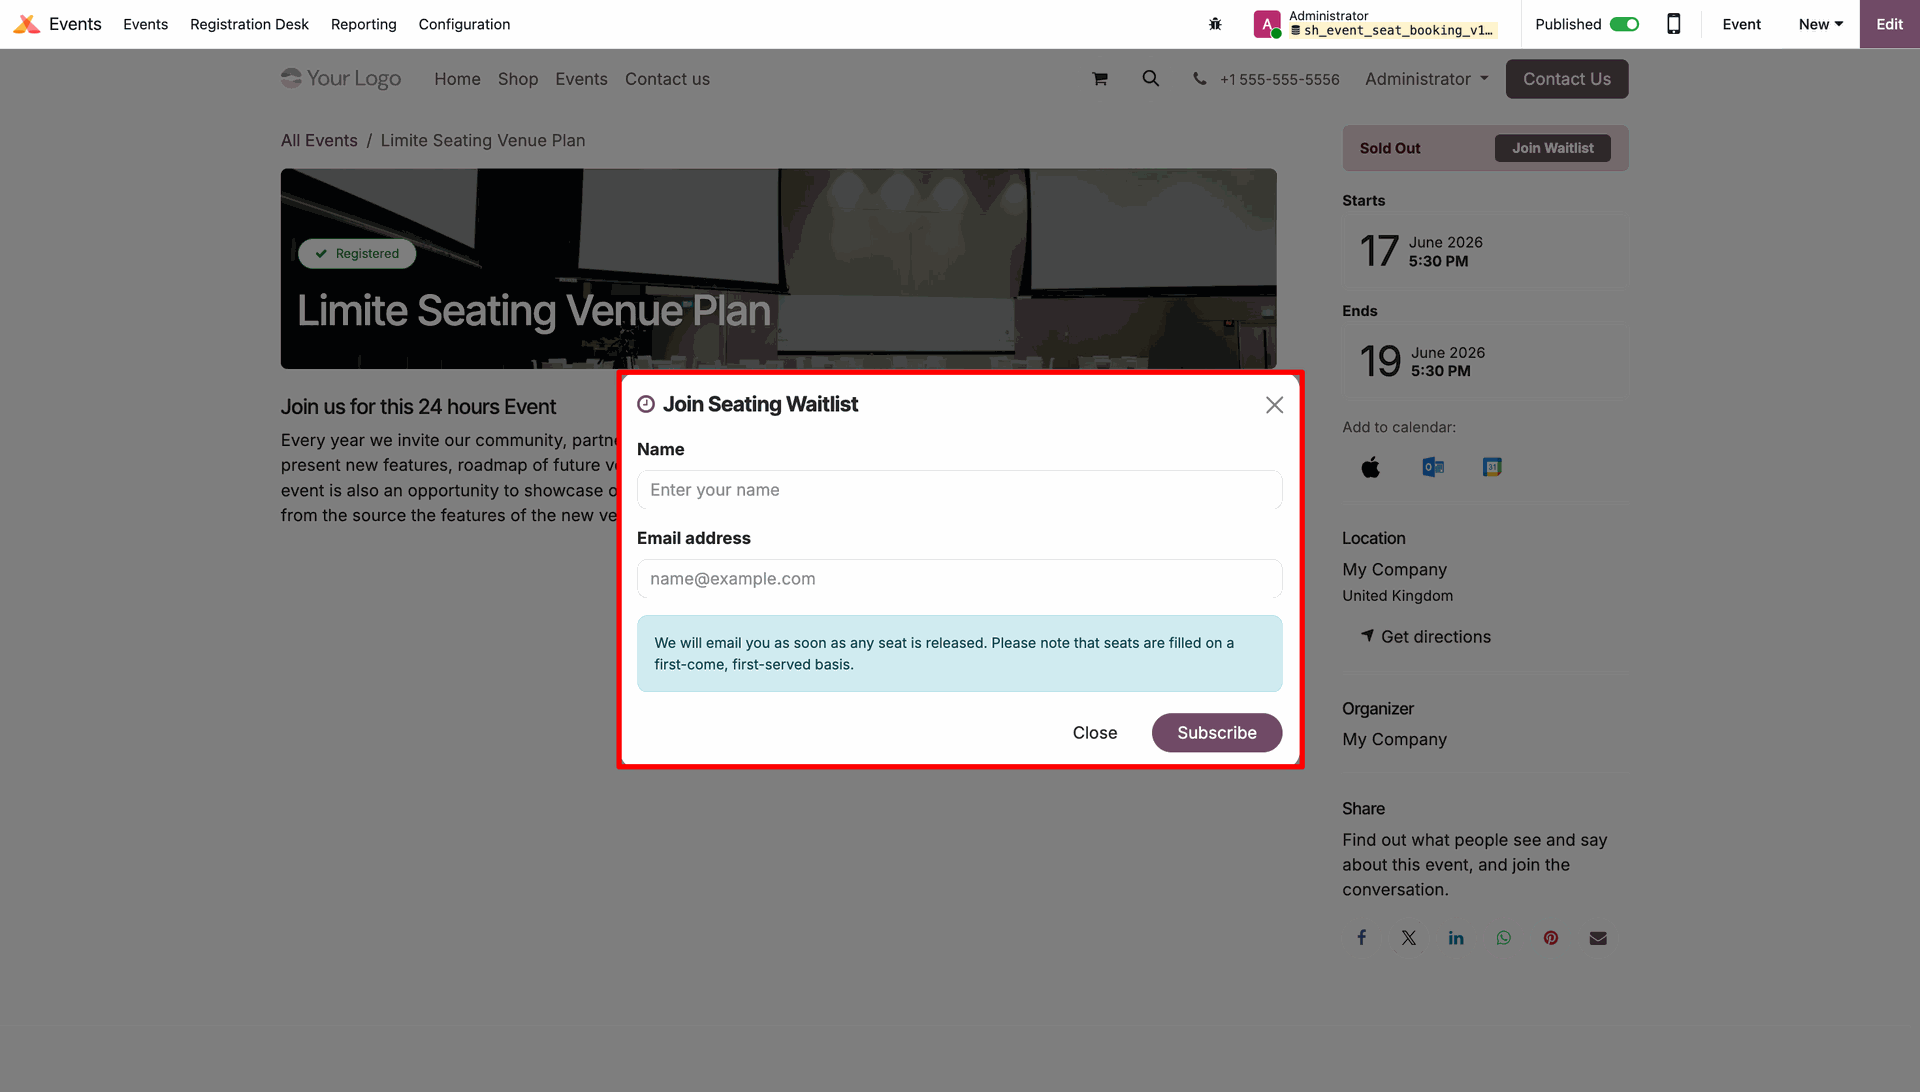
A Join Waitlist wizard will open. Enter your Name and Email Address, then submit the form to join the event waitlist, click the Subscribe button.
A 'Subscribed Successfully' message will be displayed, confirming that the user has been added to the event waitlist.
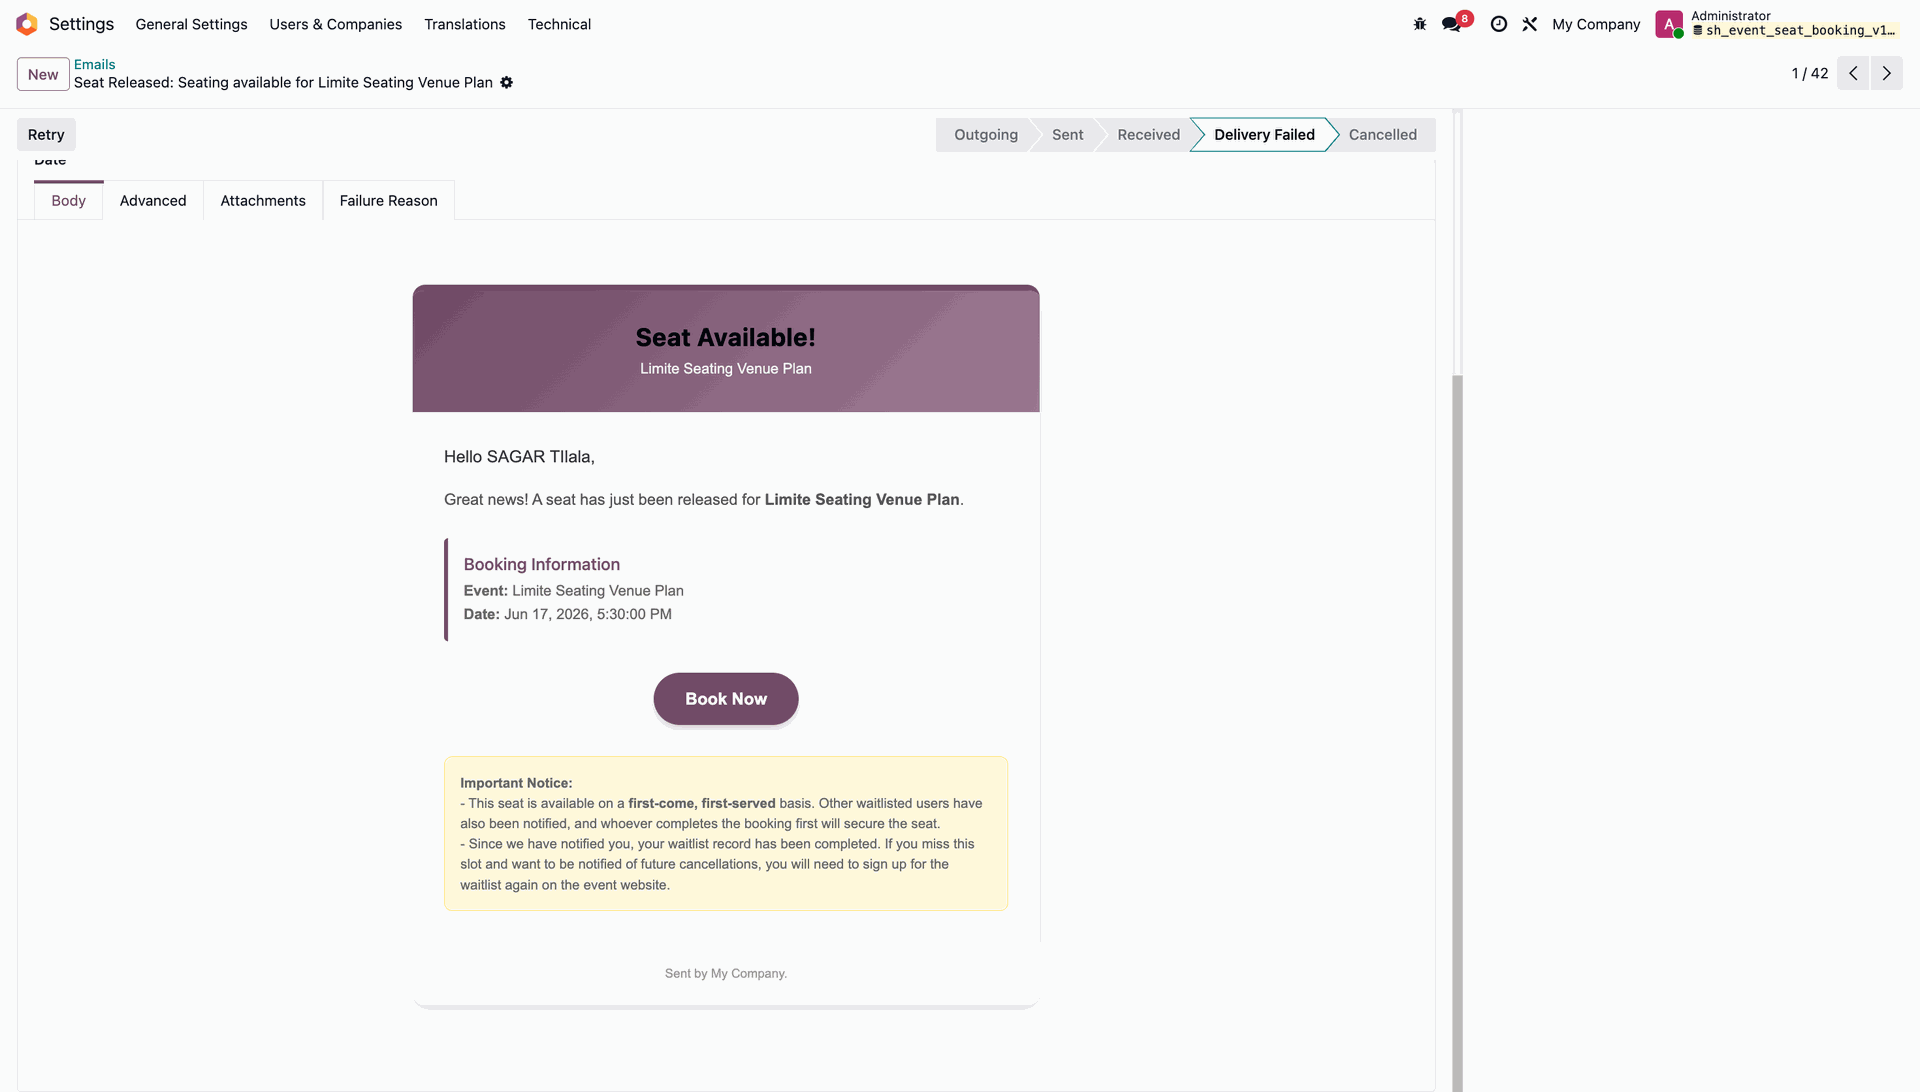
Once a seat becomes available, the user will automatically receive a notification email informing them that tickets are available for booking.
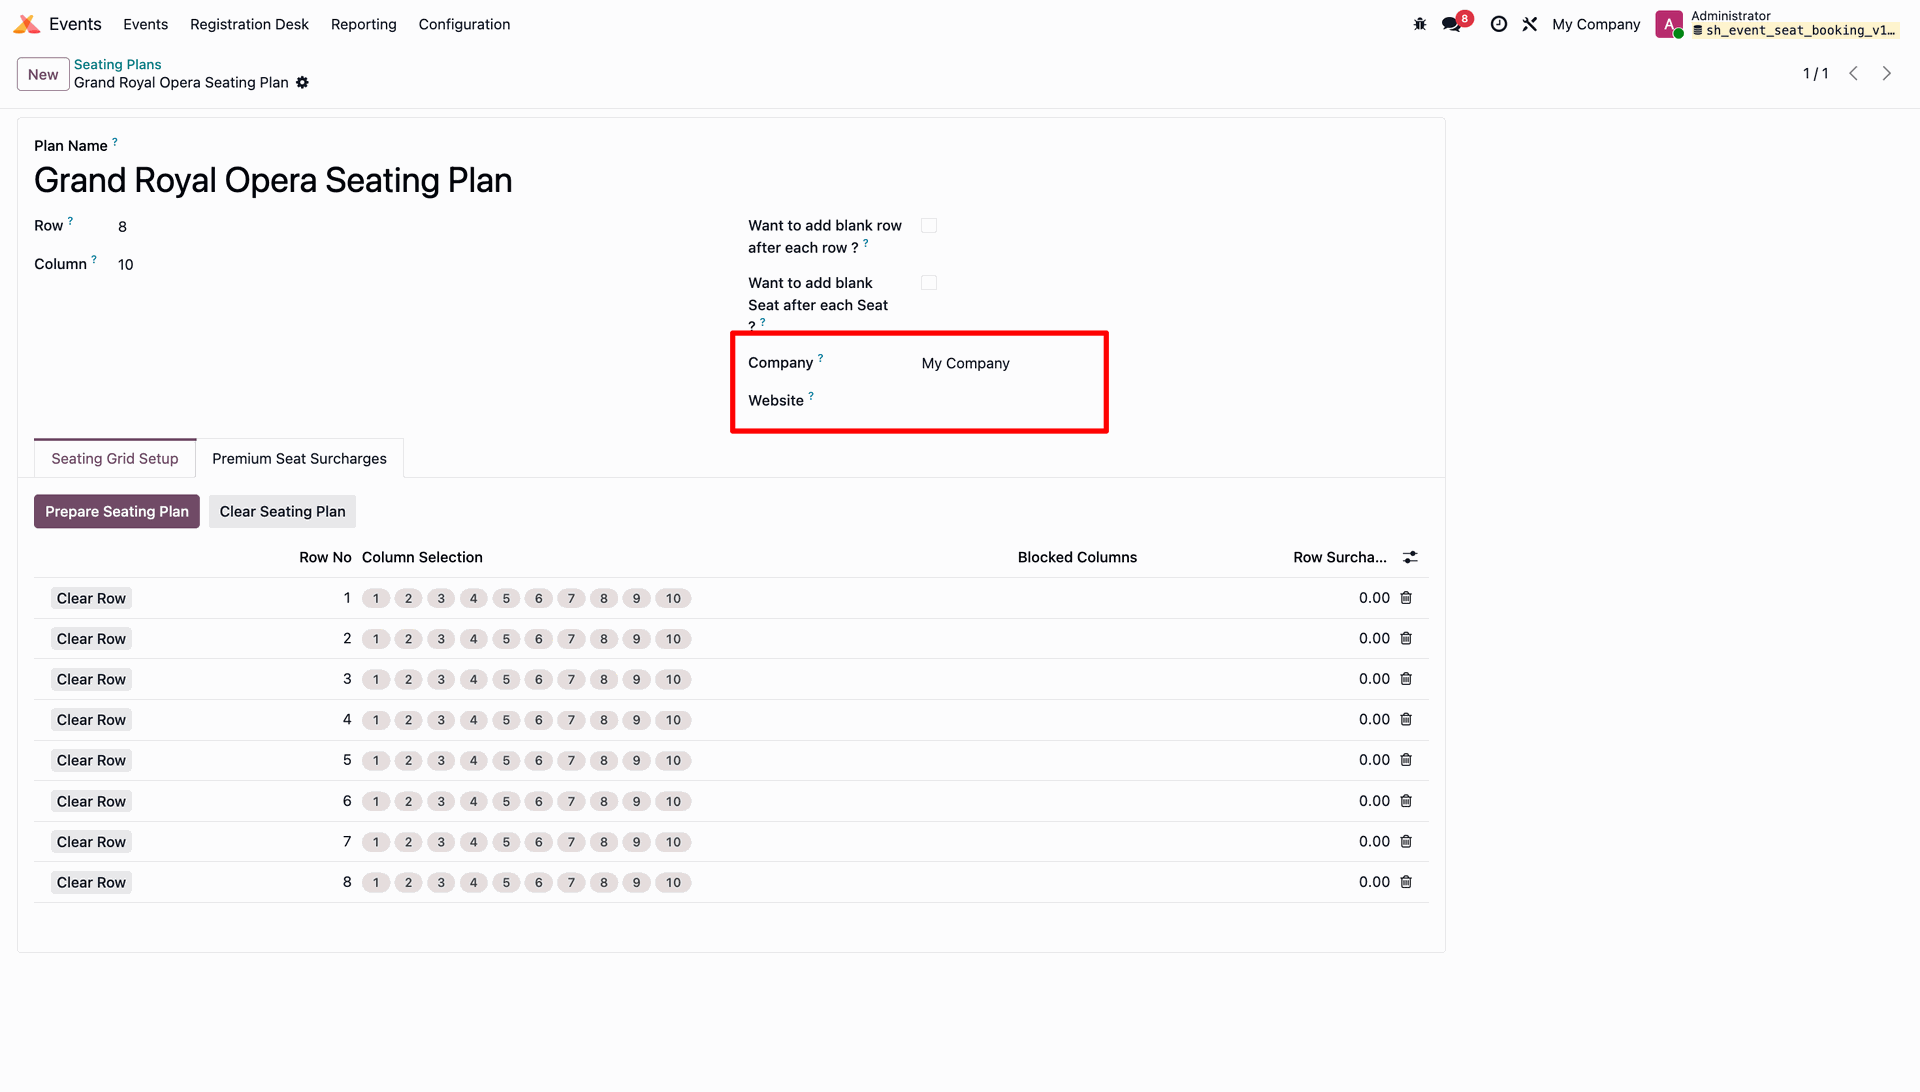
Assign the appropriate Company to the Seating Plan to make it available for use within that specific company.
Assign the appropriate Website to the Seating Plan to make it available for ticket bookings on the selected website.
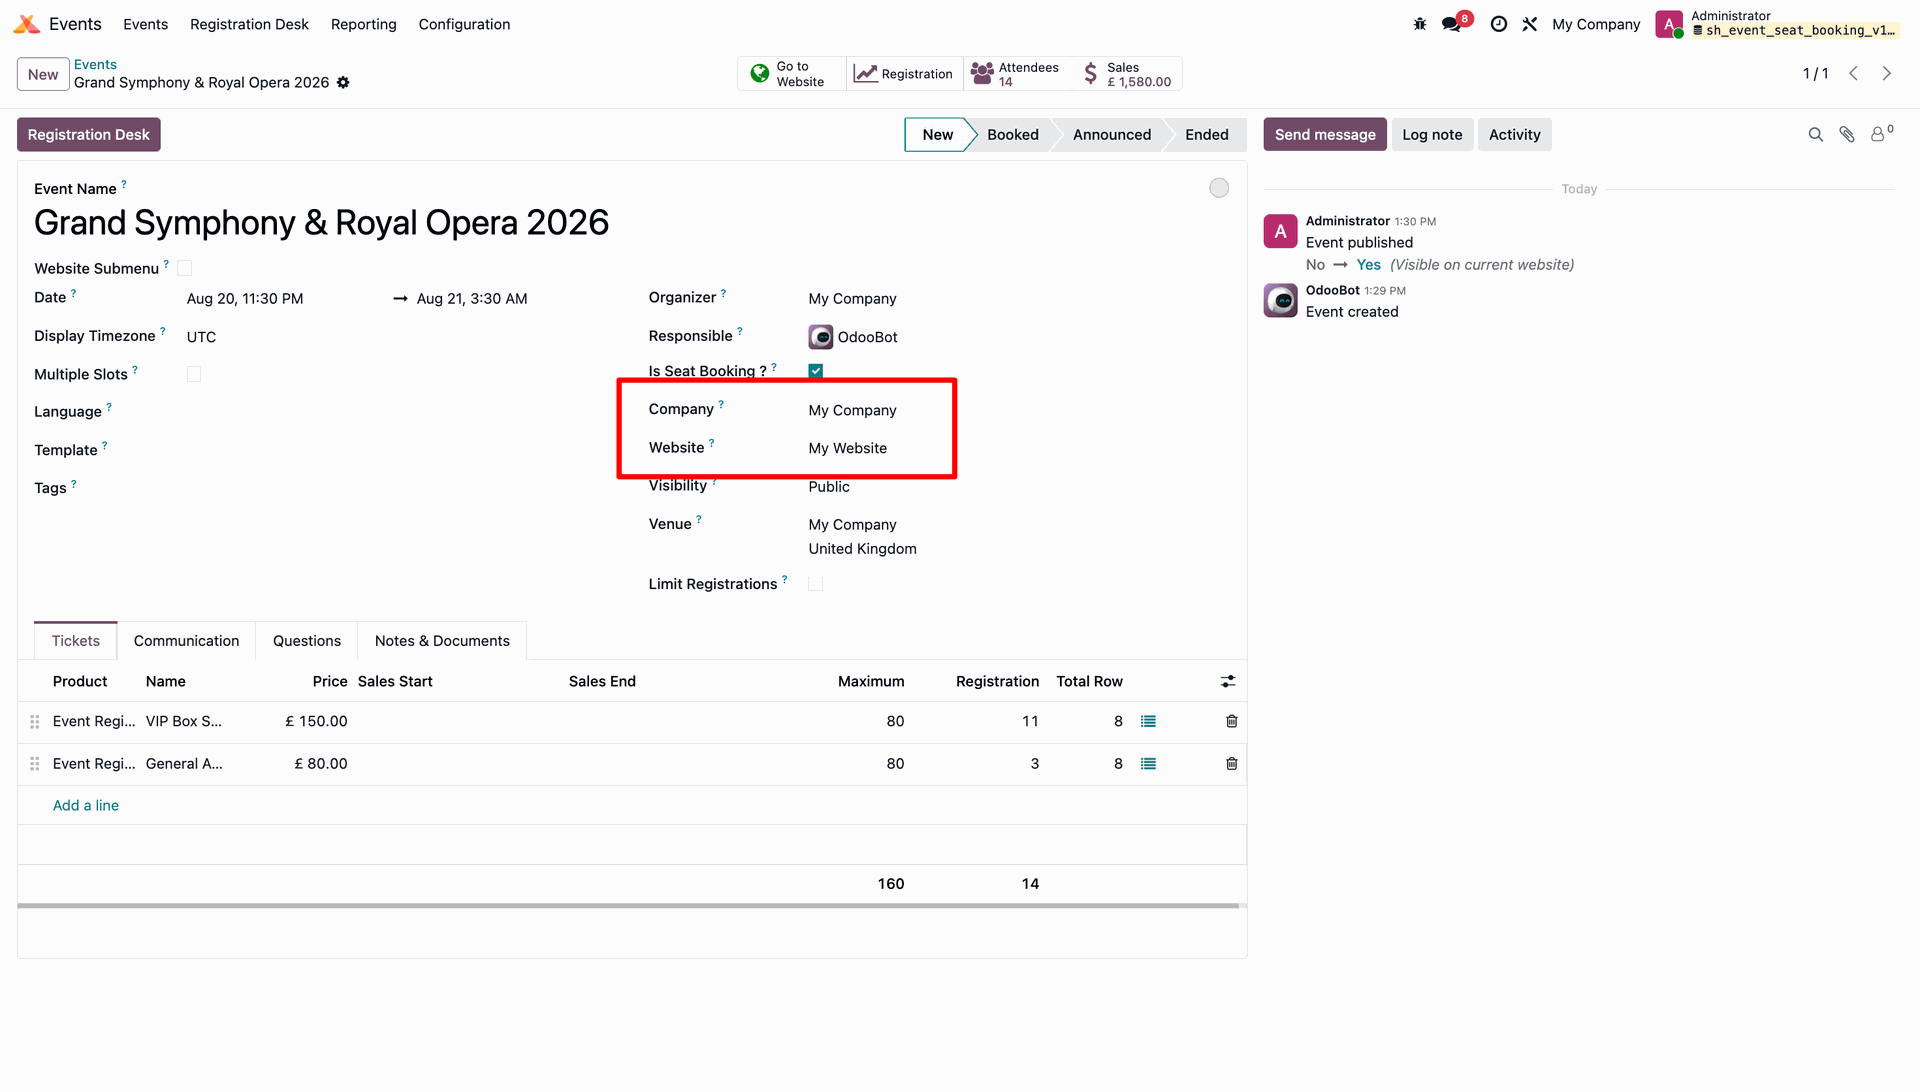
The Seating Plan will only be available for the assigned Company. It will not be displayed to any other company that has not been configured for that seating plan.
Version 18.0.10.0.0 | Released on : 03rd July 2026
Version 18.0.9.0.0 | Released on : 18th July 2025
Version 18.0.8.0.0 | Released on : 10th May 2025
Version 18.0.7.0.0 | Released on : 1st May 2025
Version 18.0.6.0.0 | Released on : 26th April 2025
Version 18.0.5.0.0 | Released on : 17th April 2025
Version 18.0.4.0.0 | Released on : 14th April 2025
Version 18.0.3.0.0 | Released on : 20th March 2025
Version 18.0.2.0.0 | Released on : 22nd February 2025
Version 18.0.1.0.0 | Released on : 1st January 2025
- Yes, this app works perfectly with Odoo Enterprise (Odoo.sh & Premise) as well as Community.
- No, this application is not compatible with odoo.com(odoo saas).
- Please Contact Us at sales@softhealer.comto request customization.
- Yes, we provide free lifetime support for the version you purchased.
- Yes, you will get free update for lifetime.
- No, you don't need to install addition libraries.
- Yes, You have to download module for each version (13,14,15) except in version 12 or lower.
- No, We do not provide any kind of exchange.
Discover Our Latest Apps