
Event Seat Booking

Online event ticket helps to execute the events properly and efficiently. Online ticket booking reduces double bookings & mismanagement. This module helps you to book events such as seminars, conferences, formal parties, concerts, appointments & conventions. The event manager can add different types of tickets/screens in the backend for any event. The event manager can arrange the seat as per need and they can know the name of every participant with full details. You can add event questionary before attending the event. An event manager can switch seats before registration confirmation. The attendances have to select just seats with the total price. After that, registration and last is payment. Hurray!

"Event Seat Booking System" Simple Workflow
-
Step 1:
Select seats from the different groups of tickets.
-
Step 2: Register Attendees- Give attendees information of the selected seats.
- Step 3: Do the payment & You're done.
Hot Features
Features
- You can set cooling period for ticket booking.
- You can generate full page ticket report & foldable badge report.
- We have added a blank or empty seat facility in the seat booking.
- You can add the blank seat after each row & column.
- Empty space very useful feature during a pandemic time like COVID.
- We provide responsive design in mobile, tablet & desktop.
- You can add event questionary before attending the event.
- Easy to manage online event ticket booking.
- The event manager can arrange the seat as per the event.
- You can execute the events properly.
- Reduces double bookings & mismanagement.
- Easy to book events such as seminars, conferences, formal parties, concerts, appointments & conventions.
- Dynamic & Easy Seat Arrangement Flow.
- No limitation in seat arrangement & seat booking.
- No more need for book tickets manually.
- Easy to install and use it, no more configuration required.
- This module saves your important time.
- It reduces human efforts.
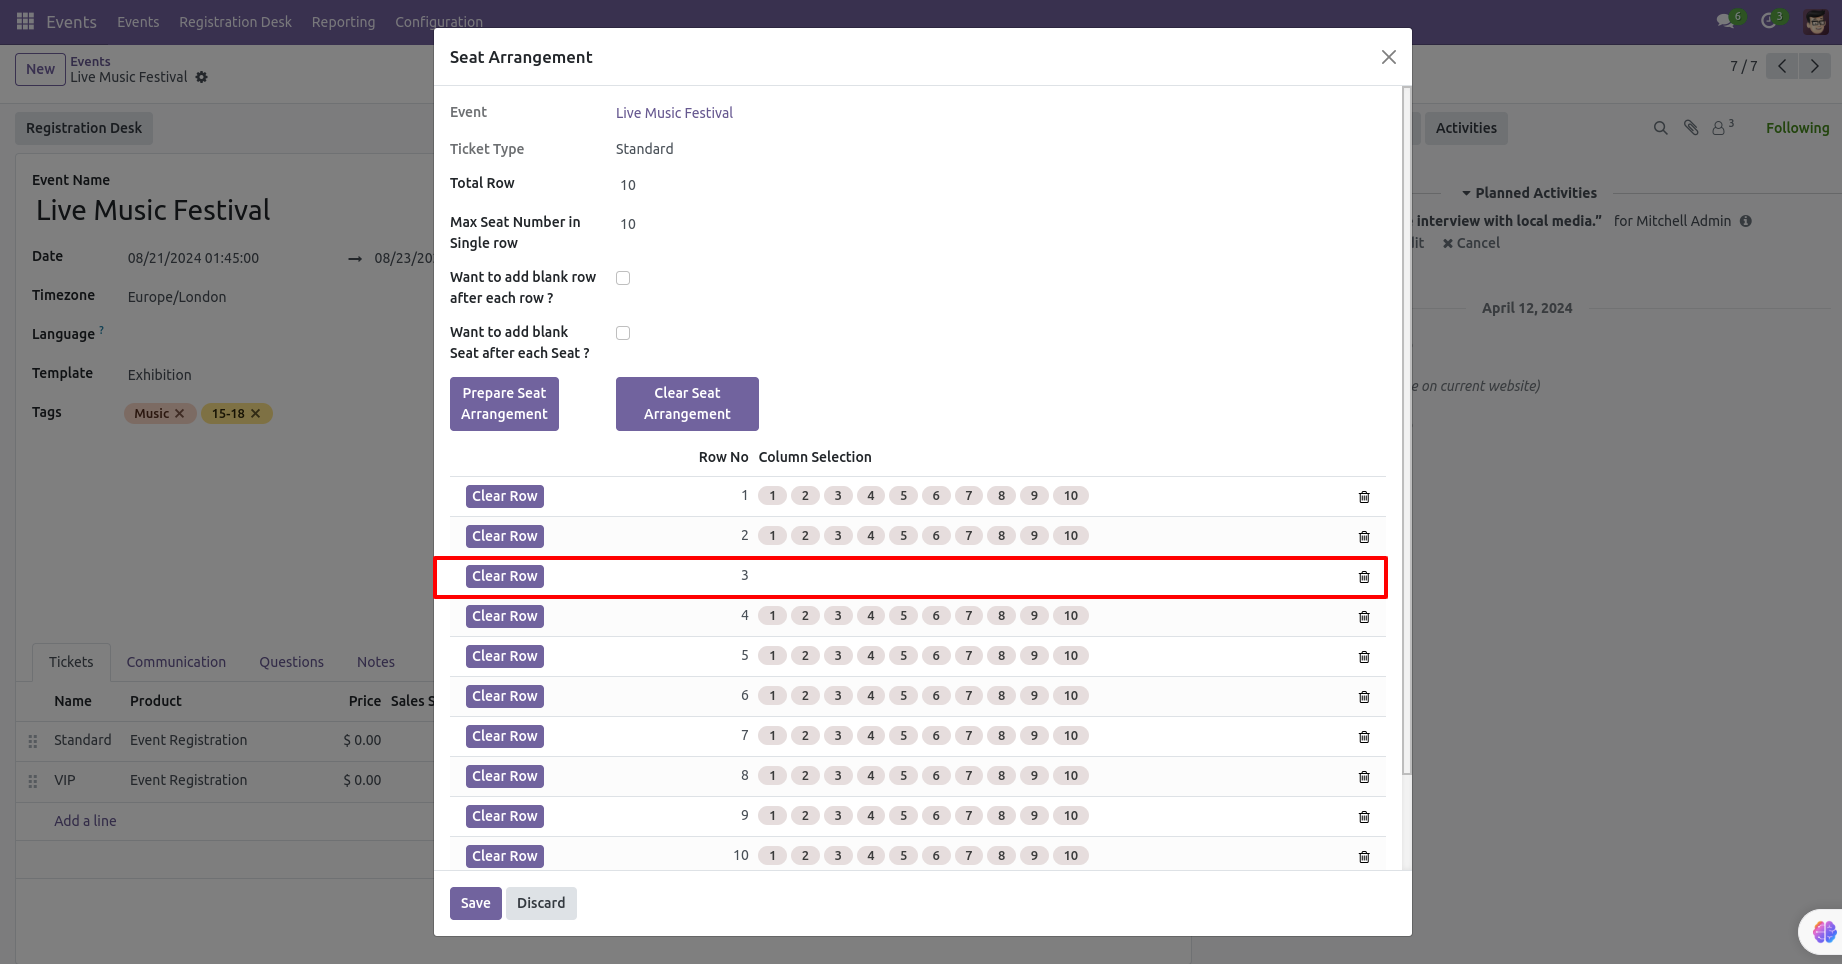
Row wise clear button added for full empty row.
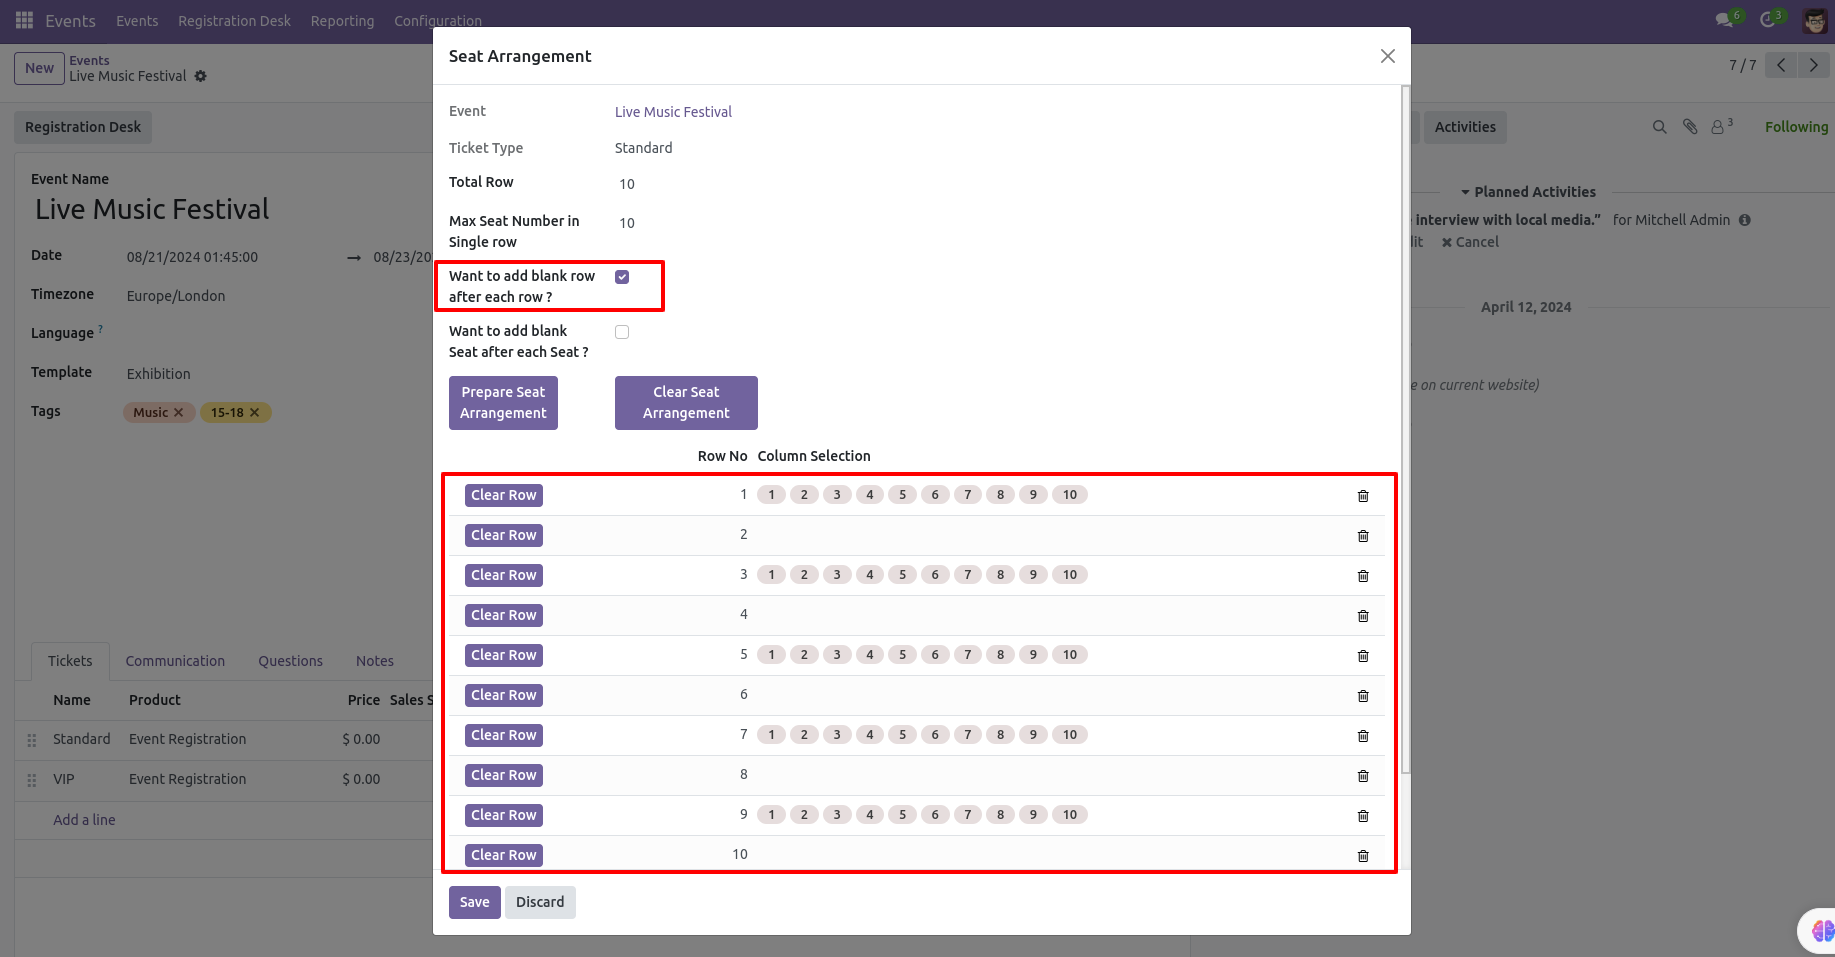
If you want to add the blank seat after each row then tick that checkbox and press "Prepare Seat Arrangement".
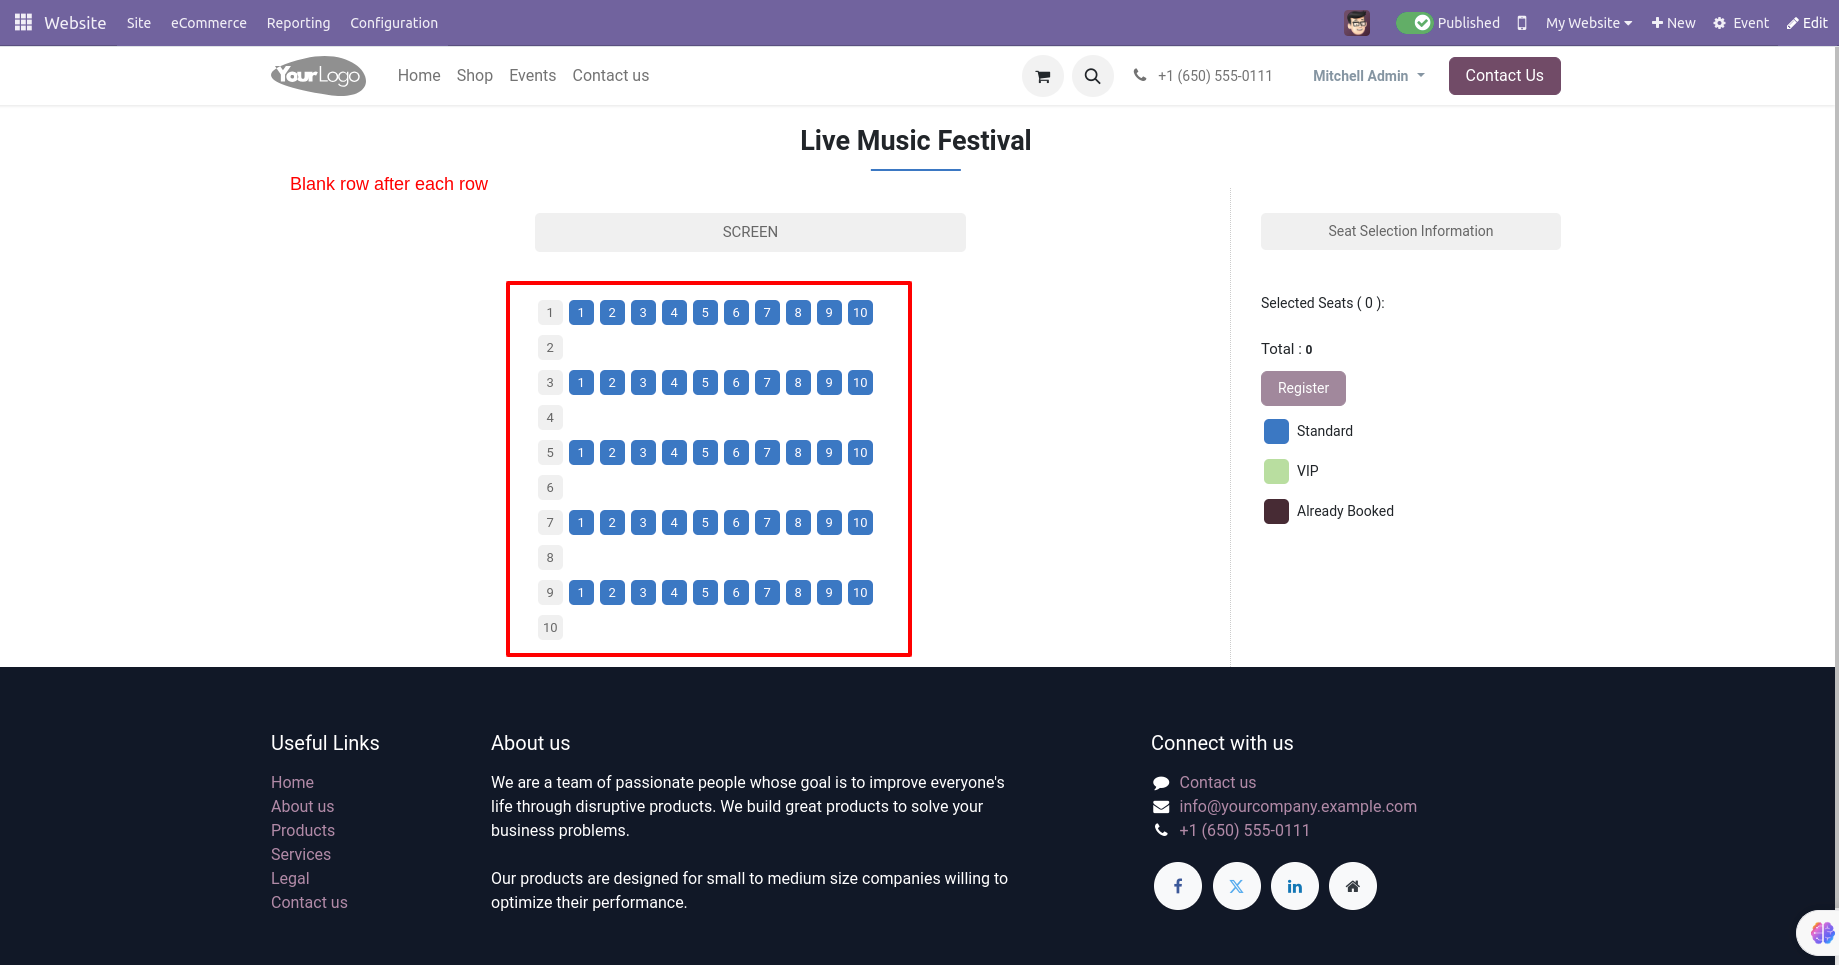
The empty seat after each row at the website looks like this.
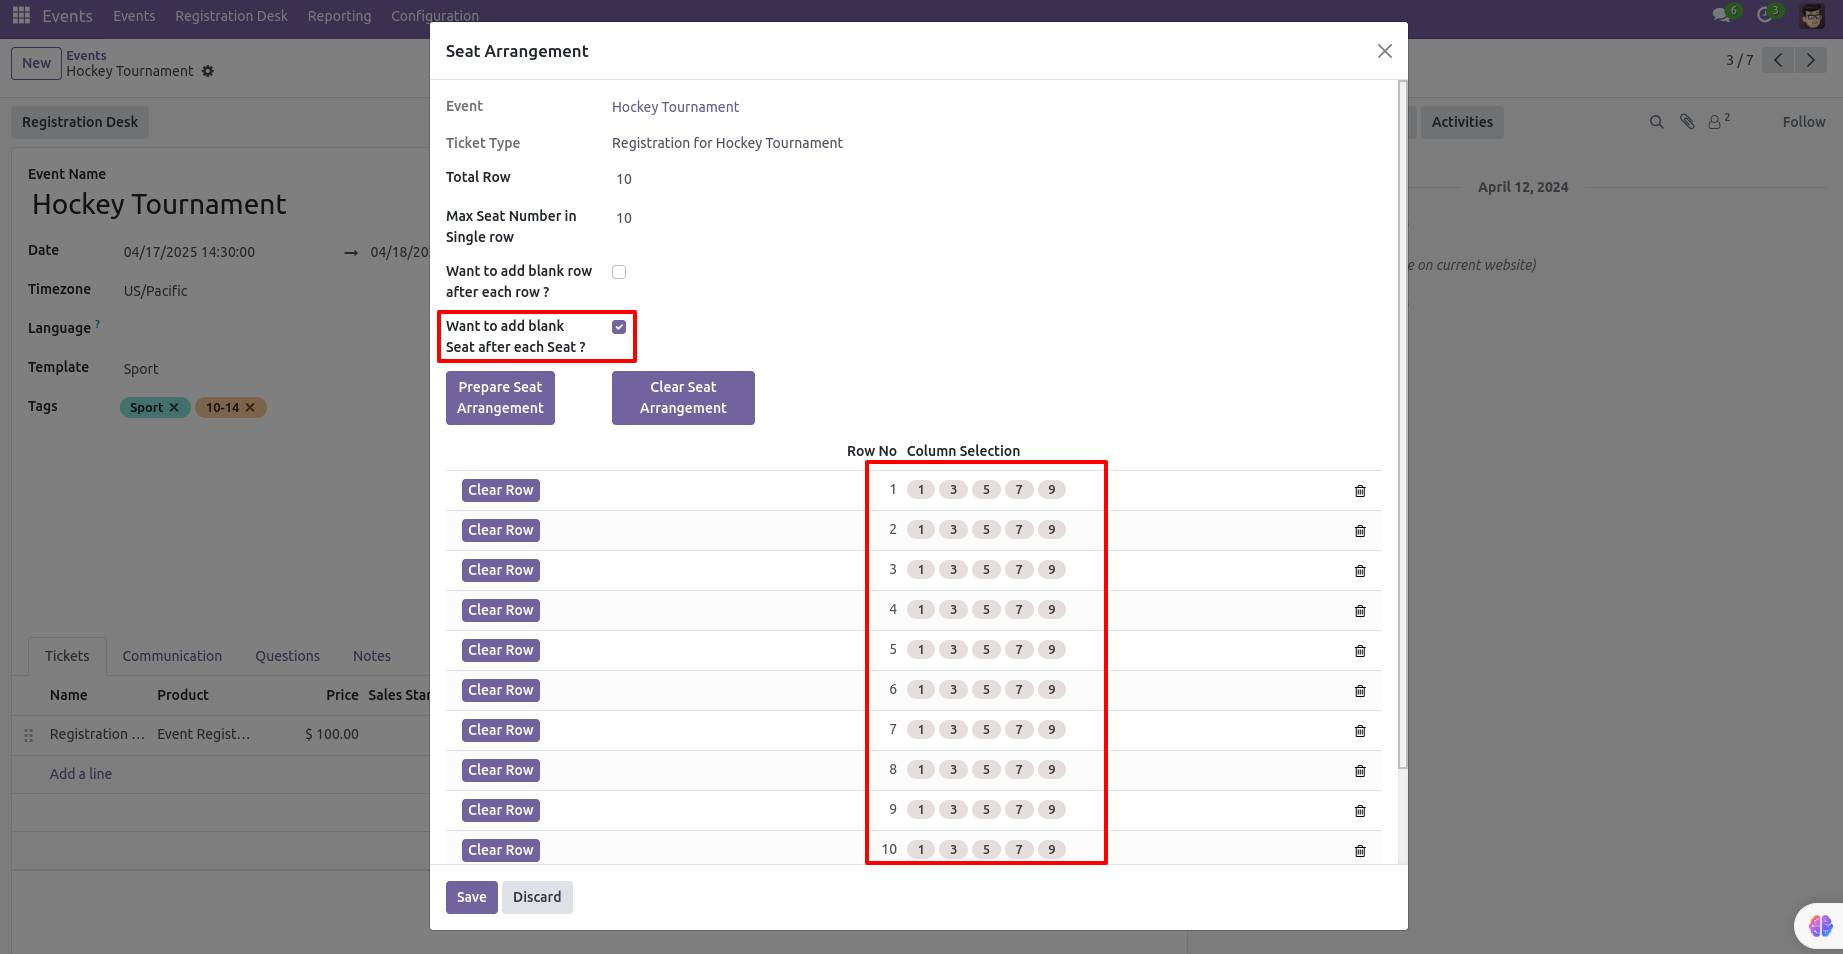
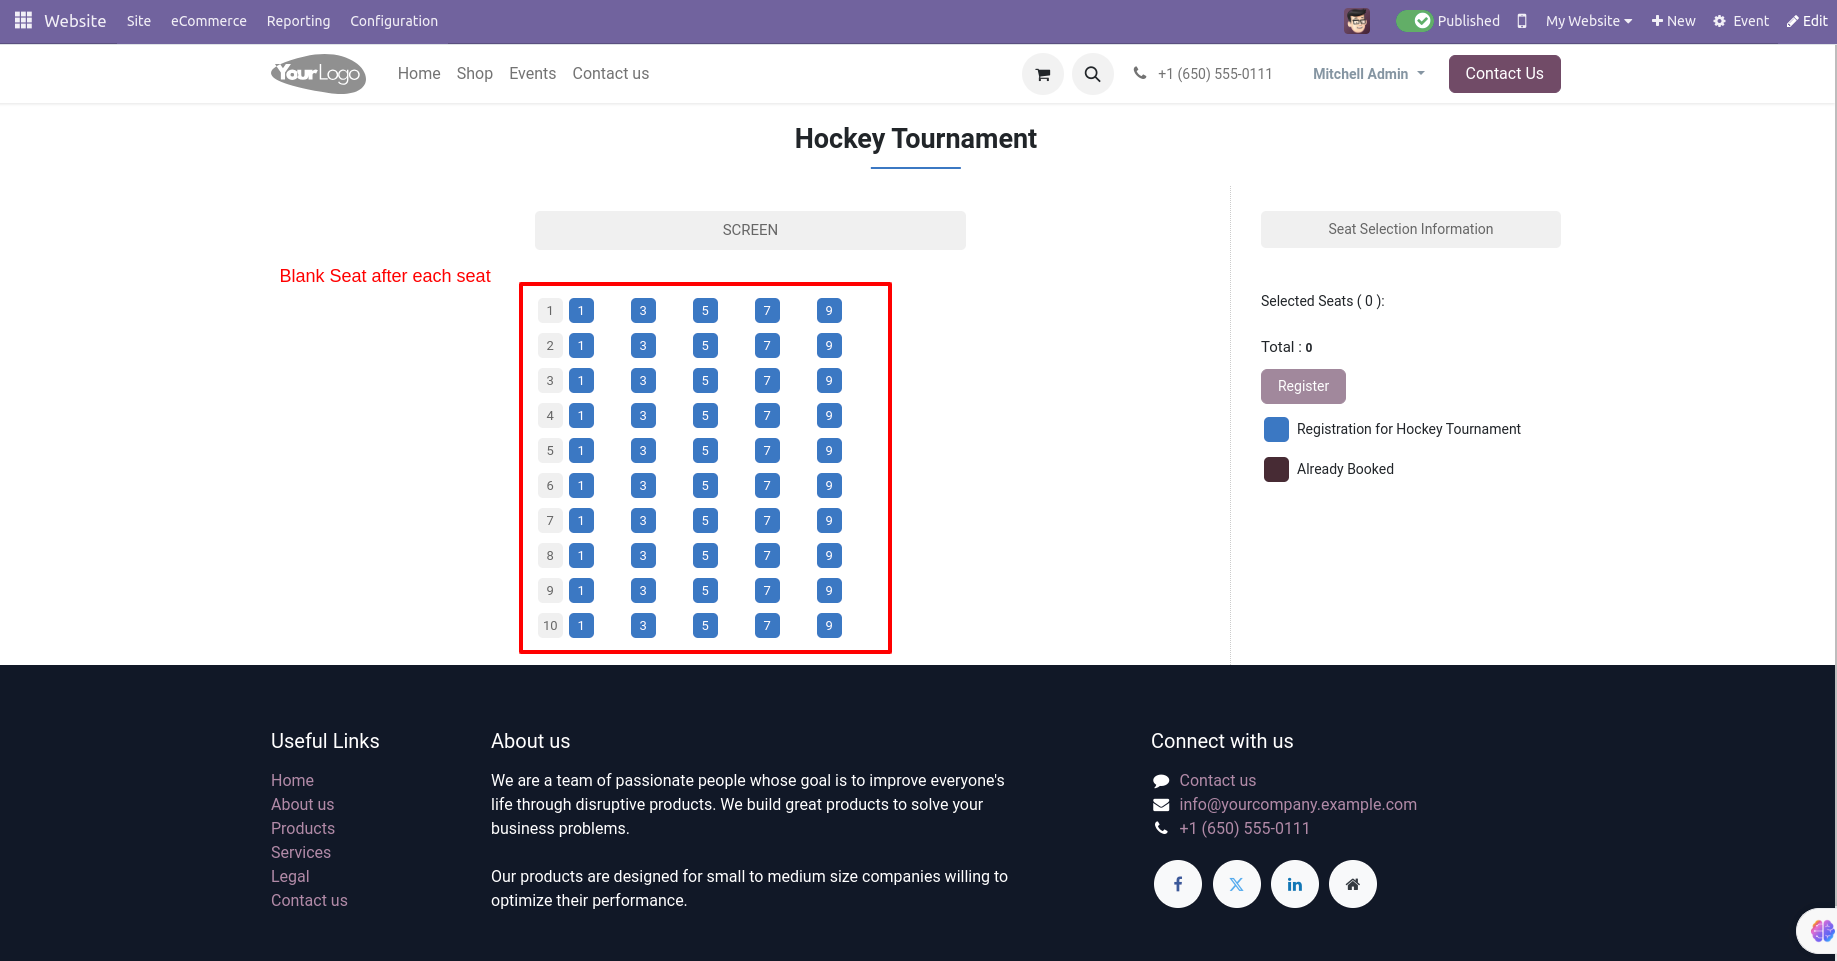
If you want to add the blank seat after each column then tick that checkbox and press "Prepare Seat Arrangement".
The empty seat after each column at the website looks like this.
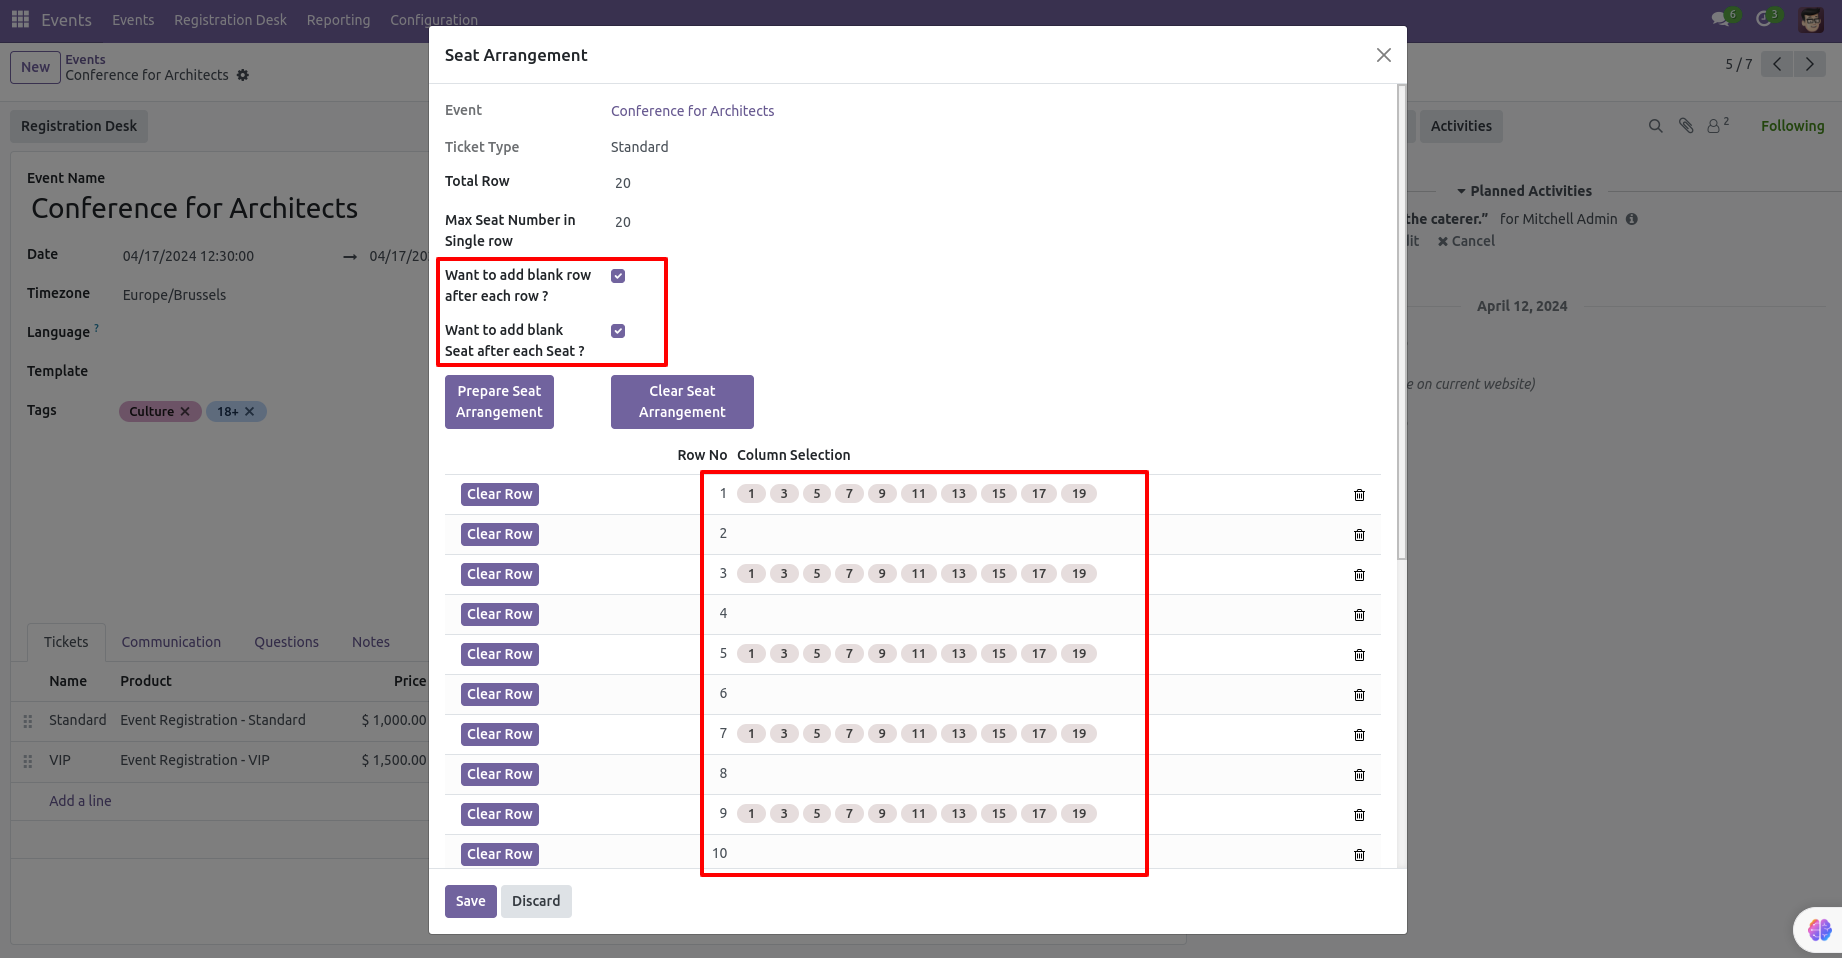
If you want to add the blank seat after each row & column then tick that both checkboxes and press "Prepare Seat Arrangement".
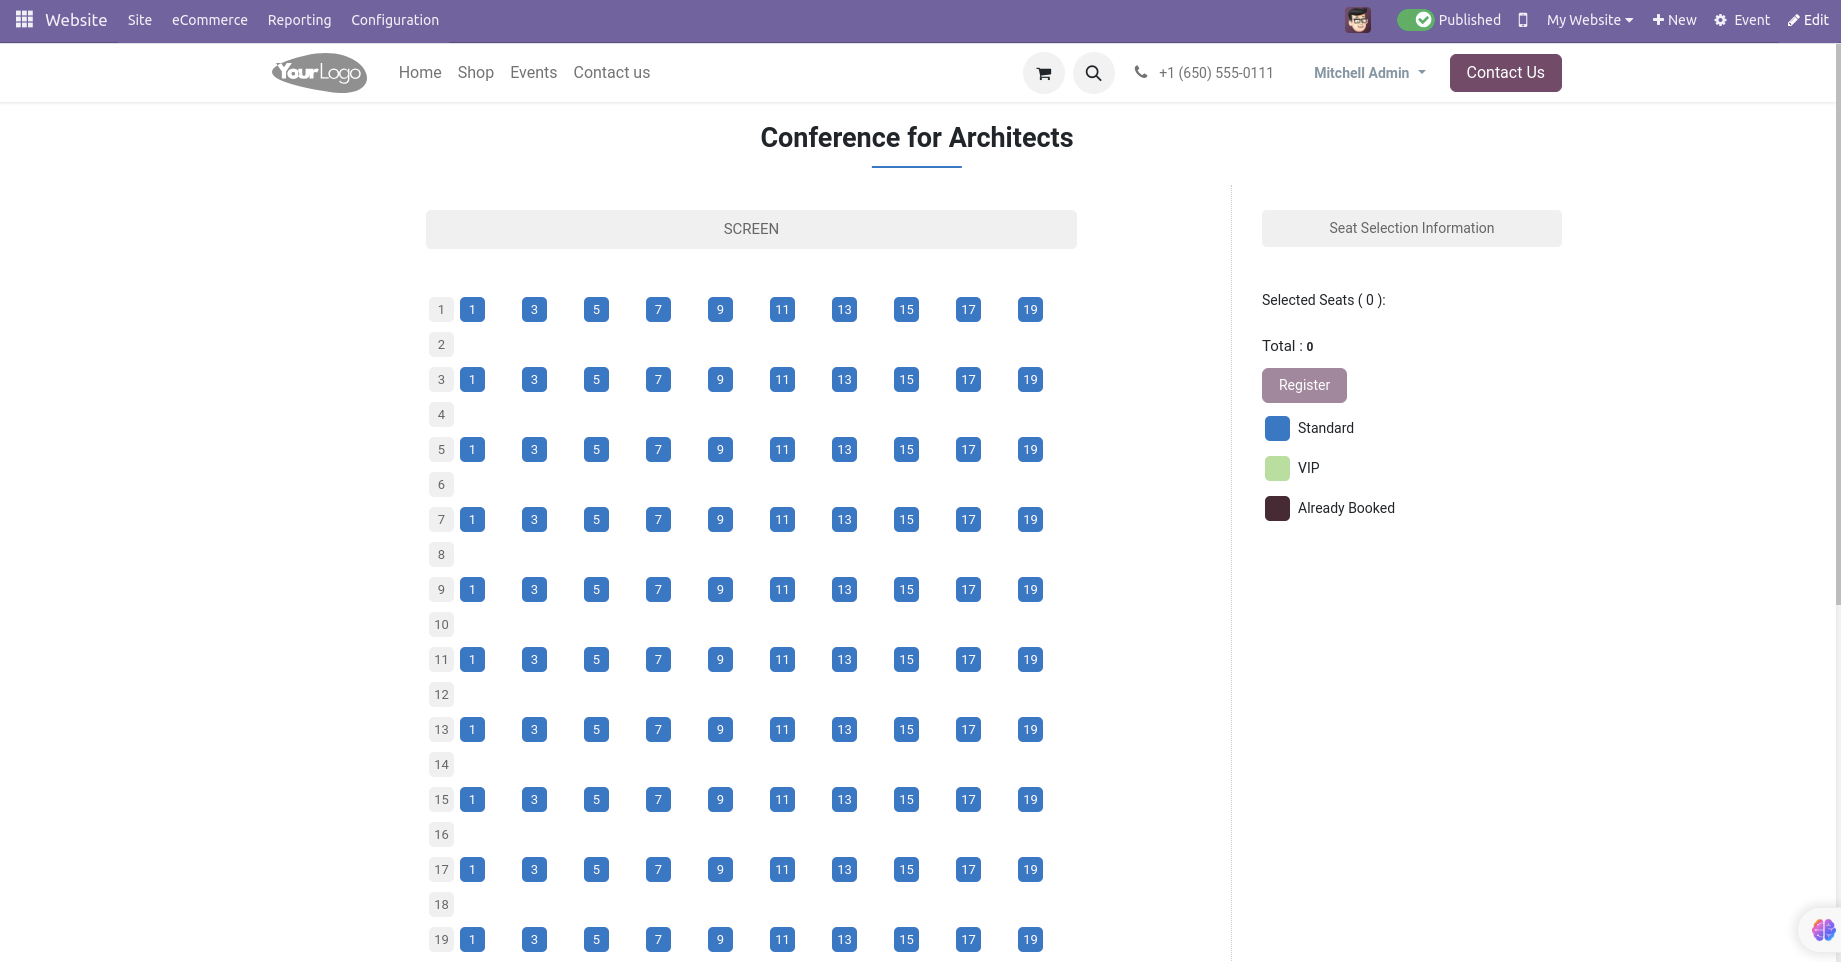
The empty seat after each row & column at the website looks like this.
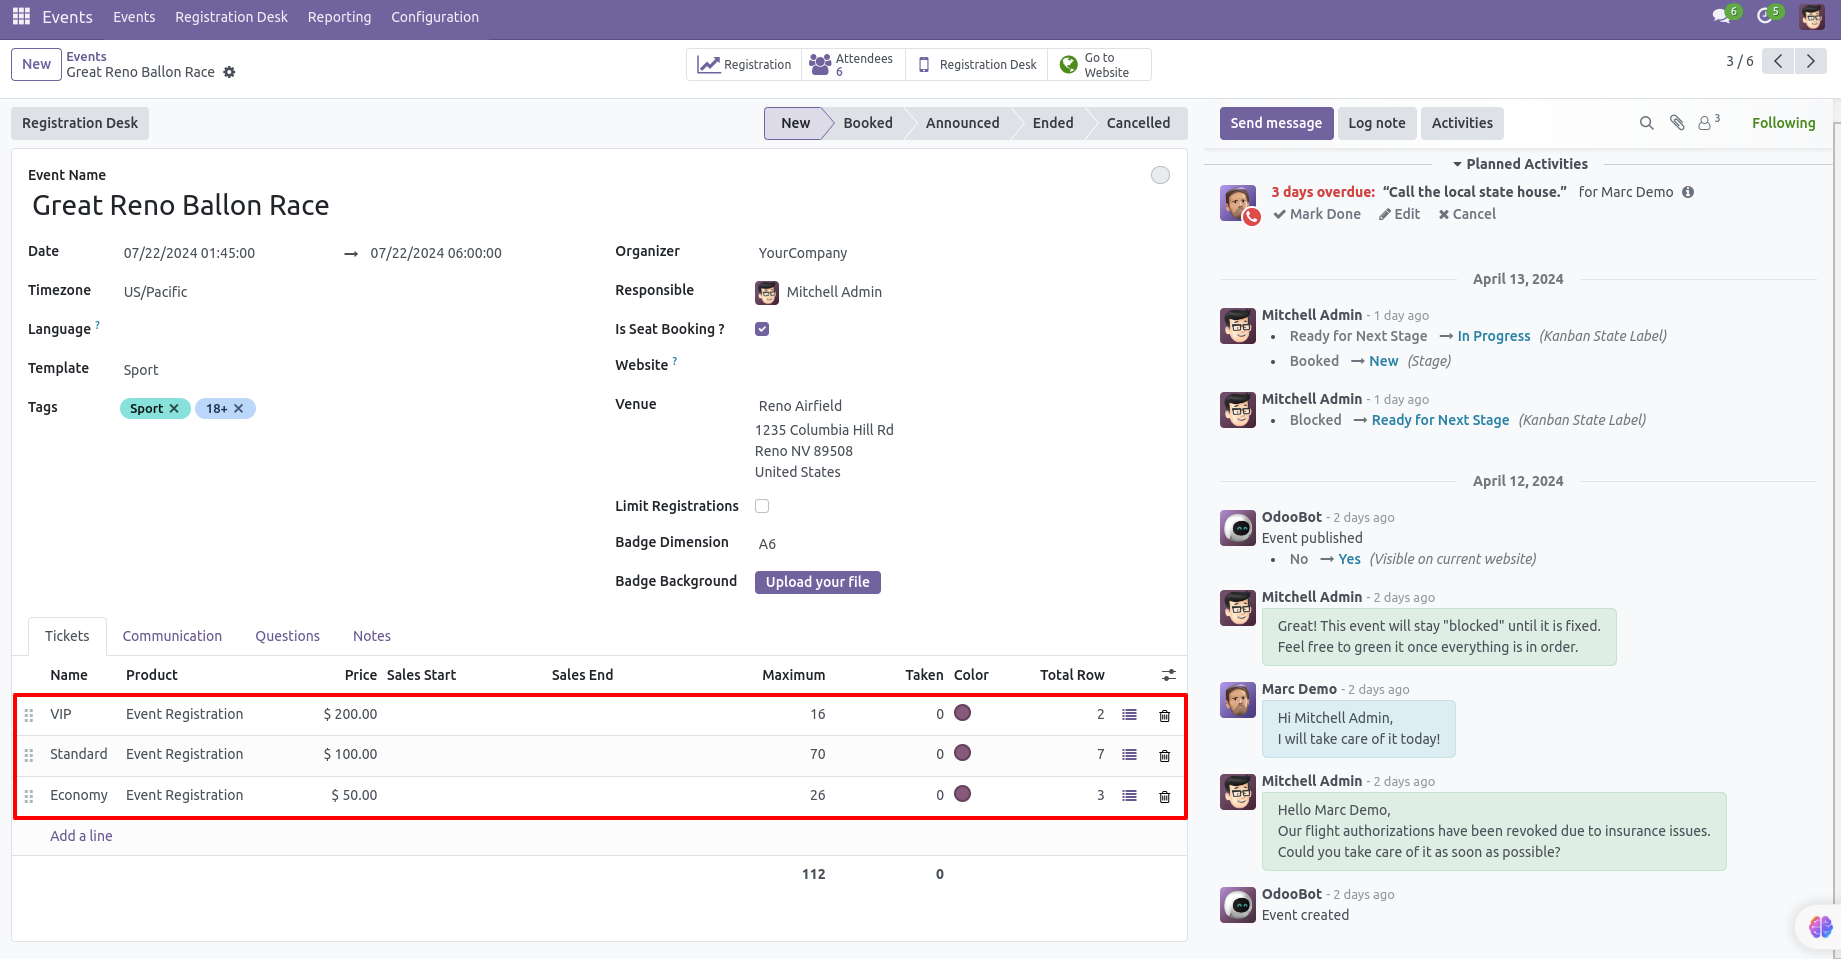
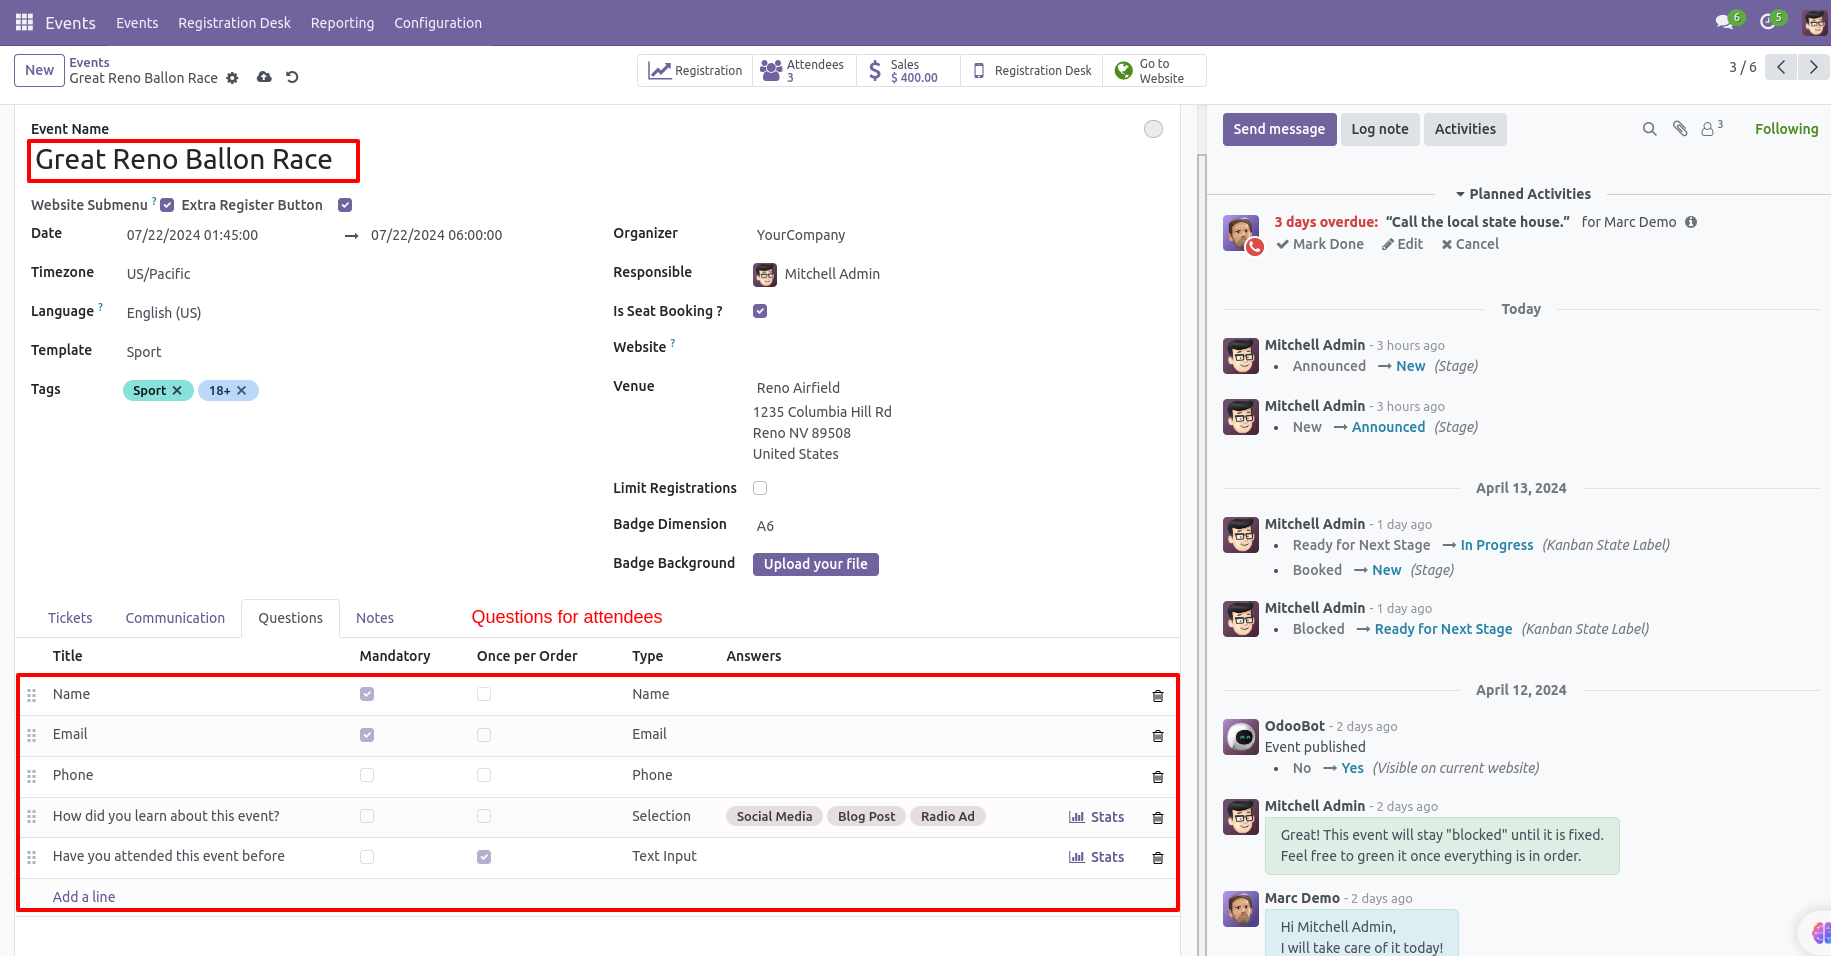
Go to "Events" and enable "Is Seat Booking?" for seat booking.
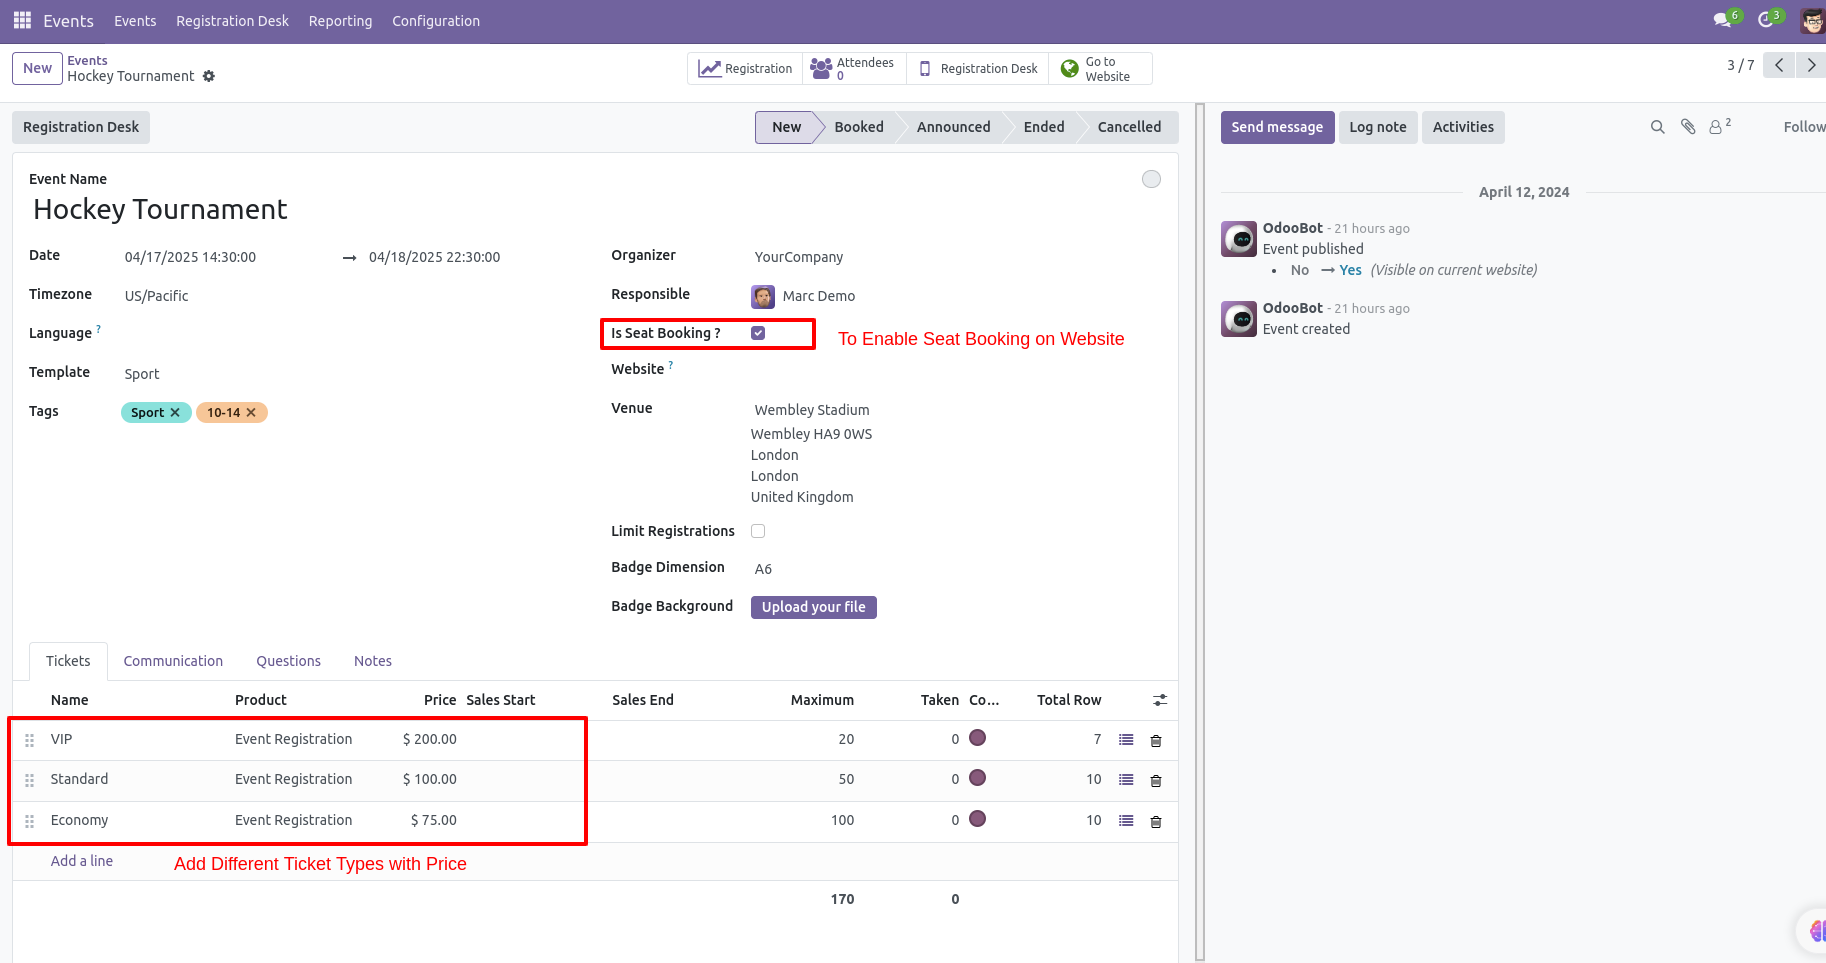
In the tickets tab, you can add different types of Tickets.
For ex: VIP, Standard, etc. You can add any number of tickets/screens.
On the website, these sequences will be followed on-screen. You can edit or change this ticket sequence.
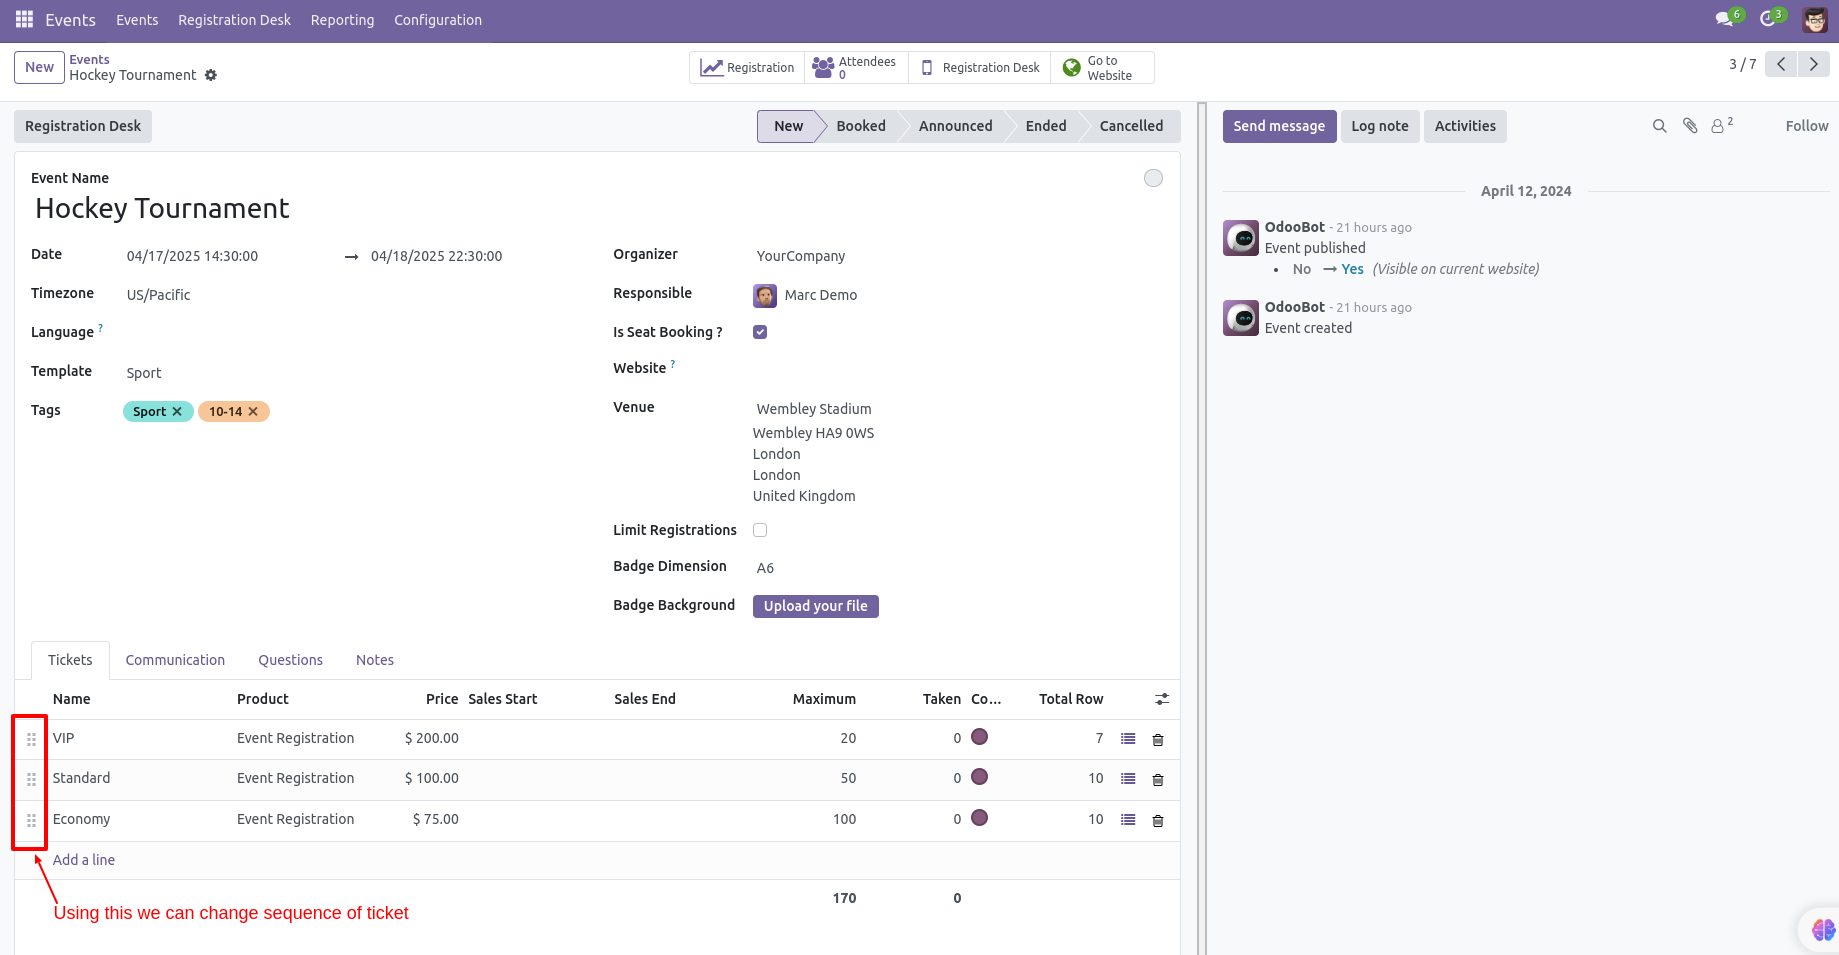
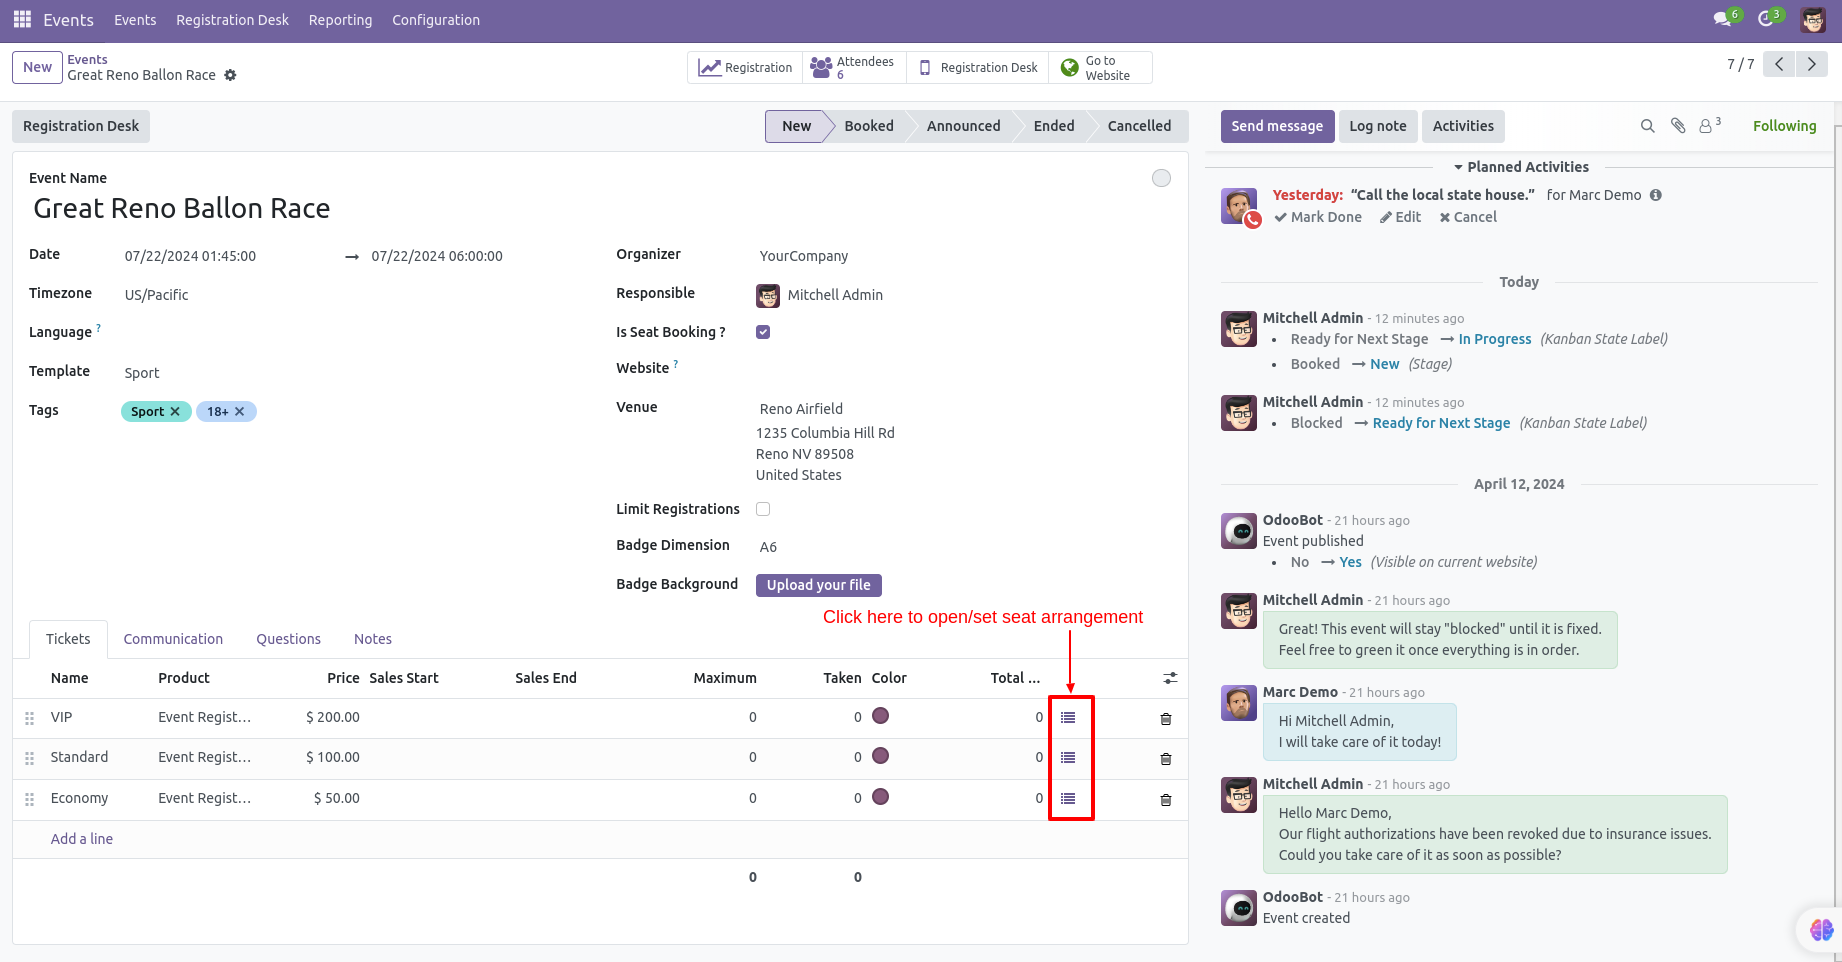
For Seating Arrangement click the smart button that given beside each ticket.
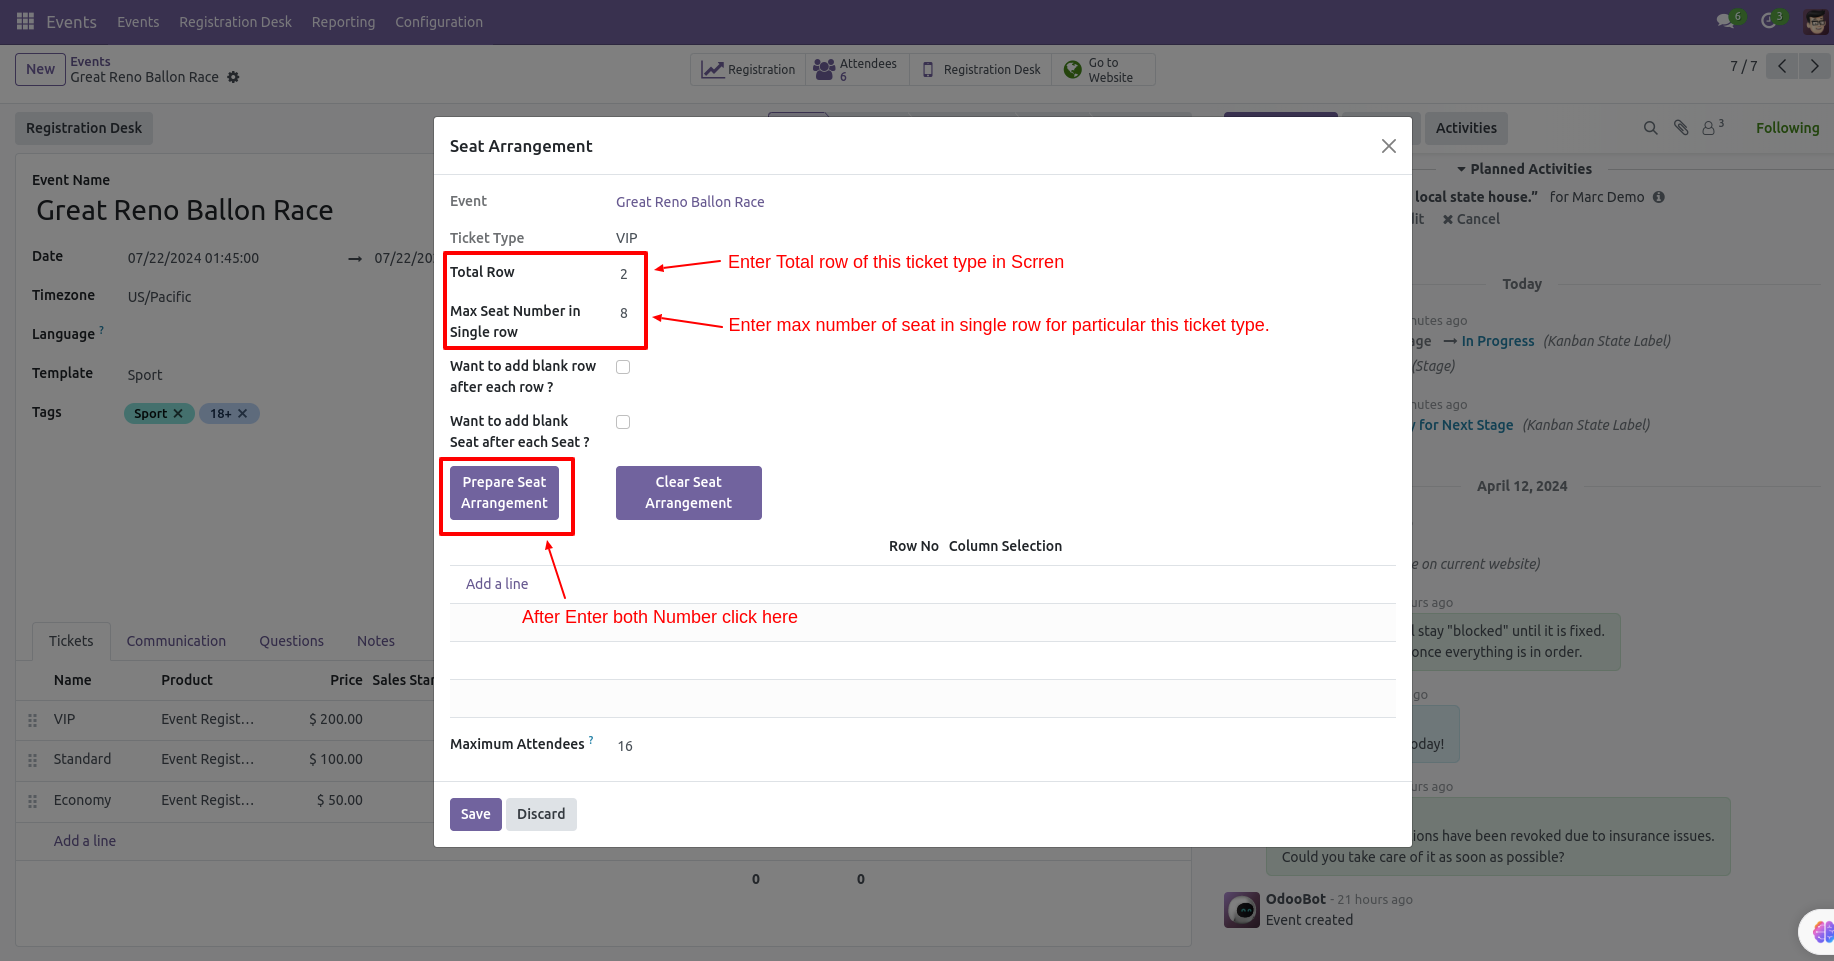
It will open this dialogue box, enter the total row of ticket type, and enter the maximum number of seats in a single row for particular this ticket type after that press button "Prepare Seat Arrangement".
The related seat arrangement looks like below.
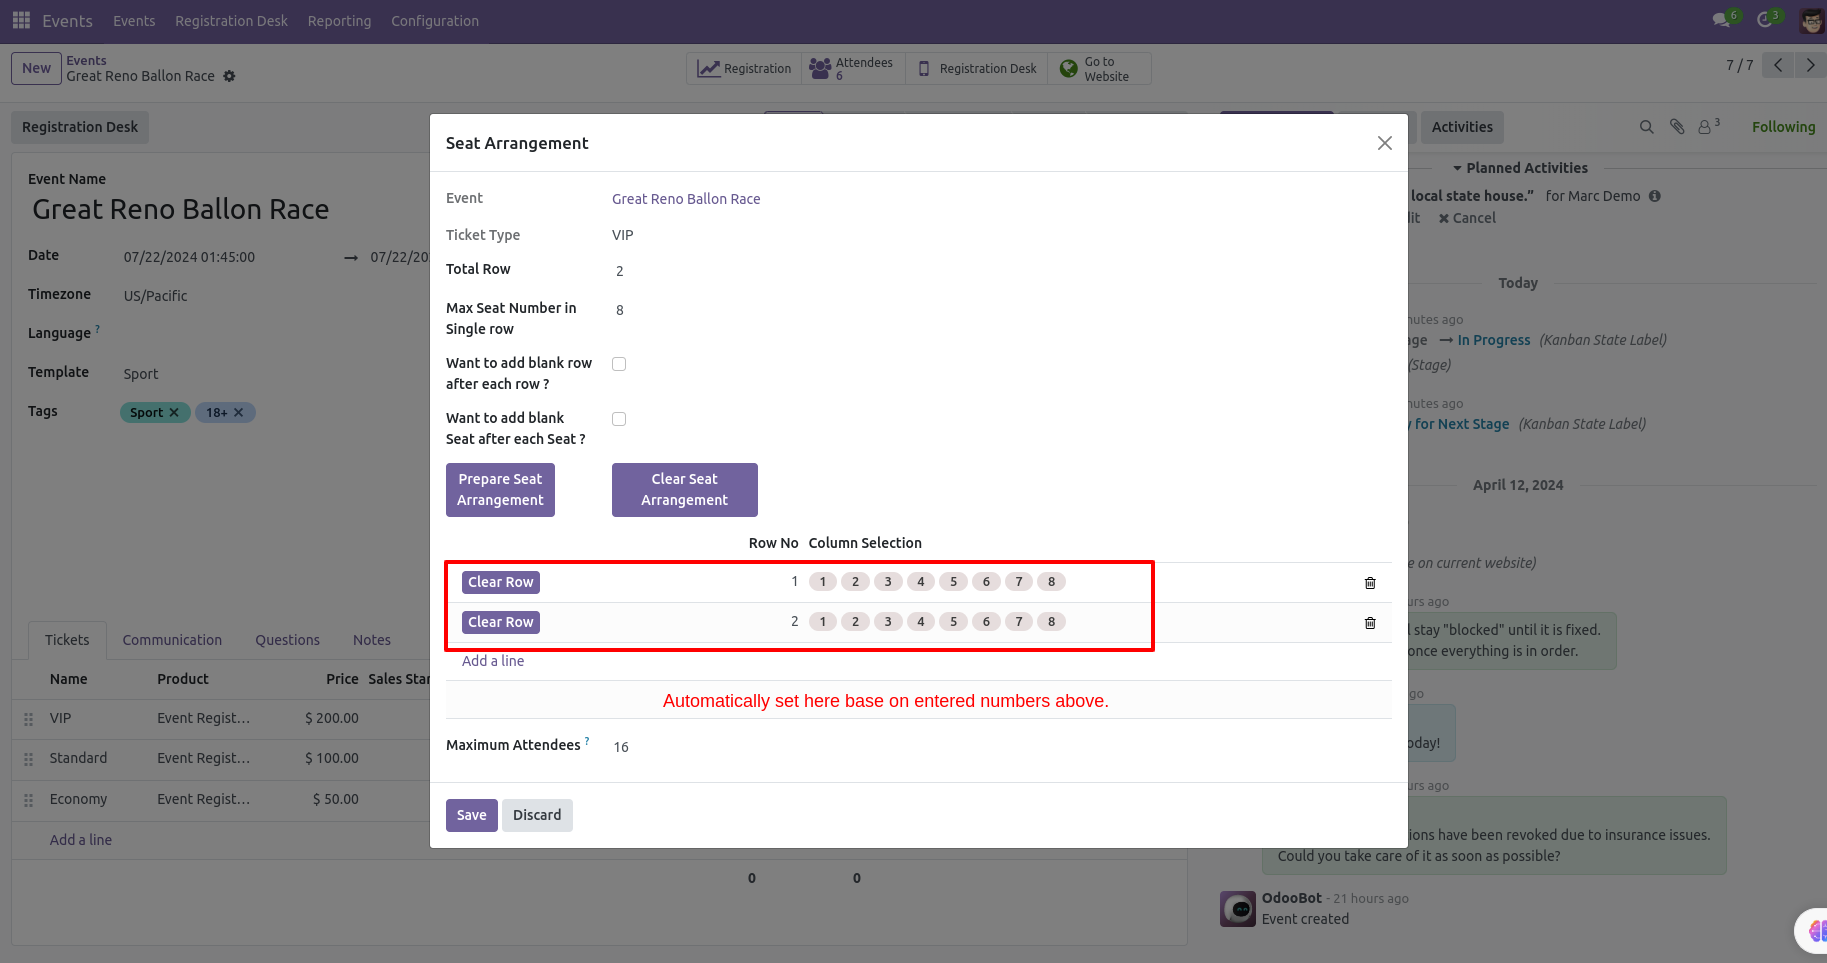
If you want to change the structure of the seat then click on the seat row.
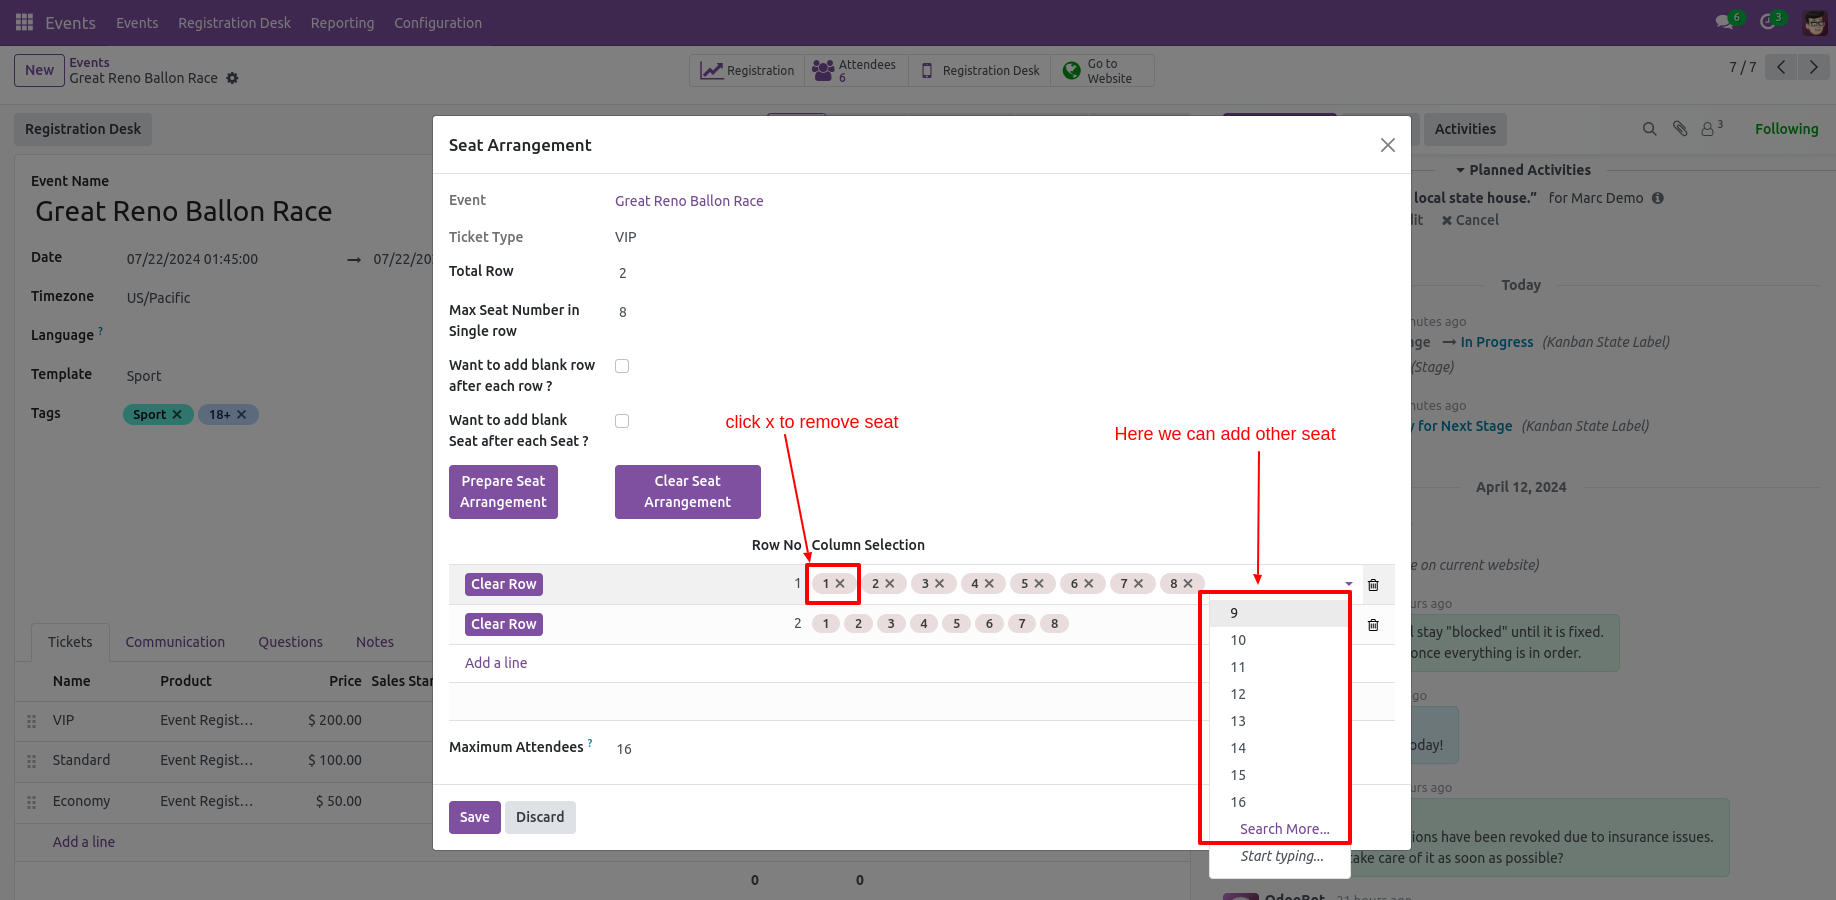
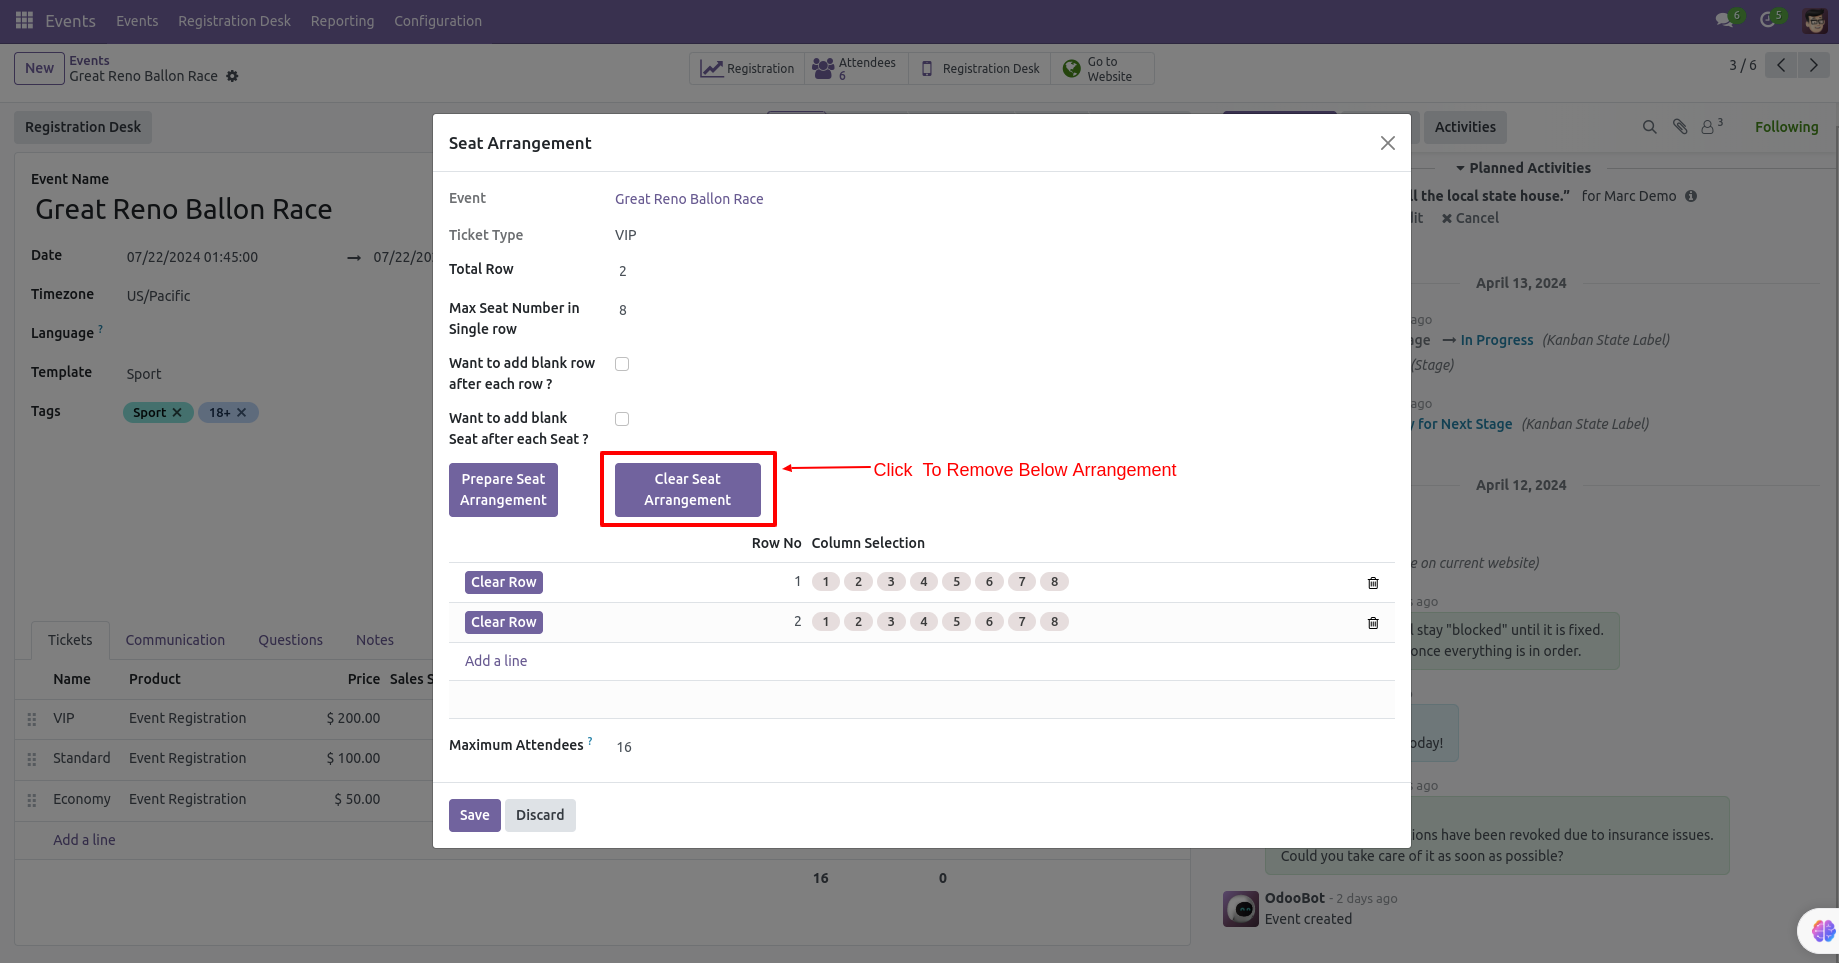
If you want to remove arrangement then click "Clear Seat Arrangement".
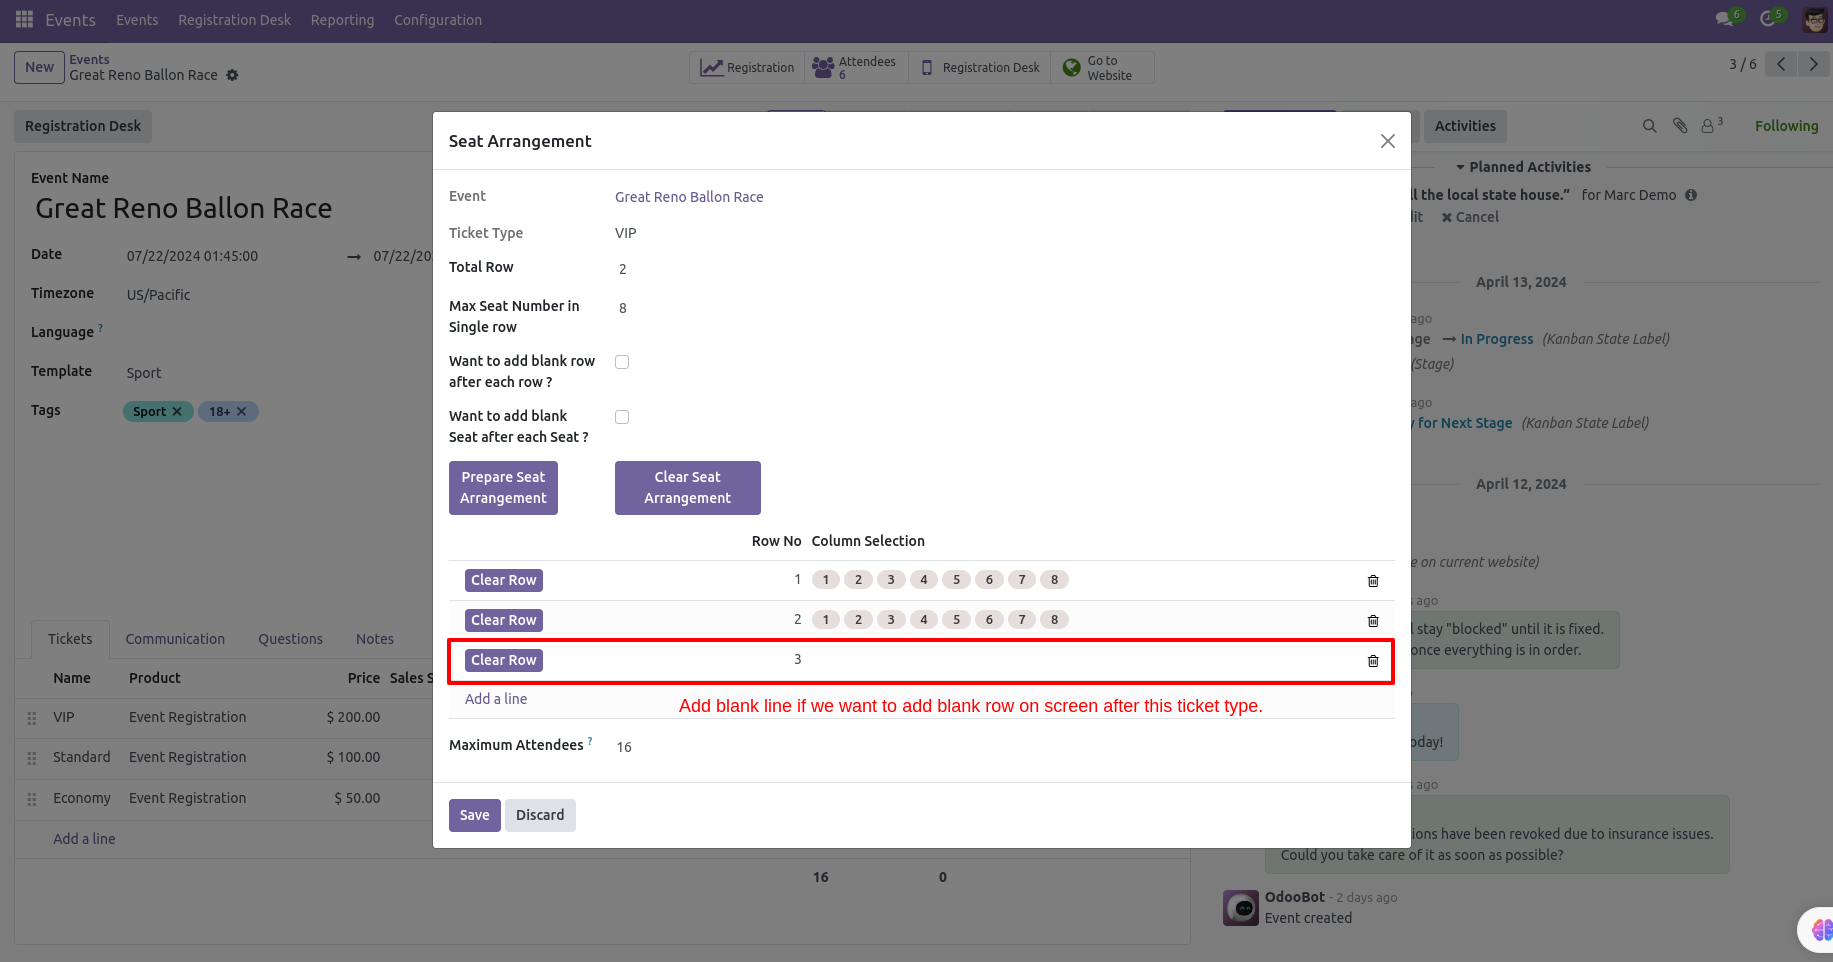
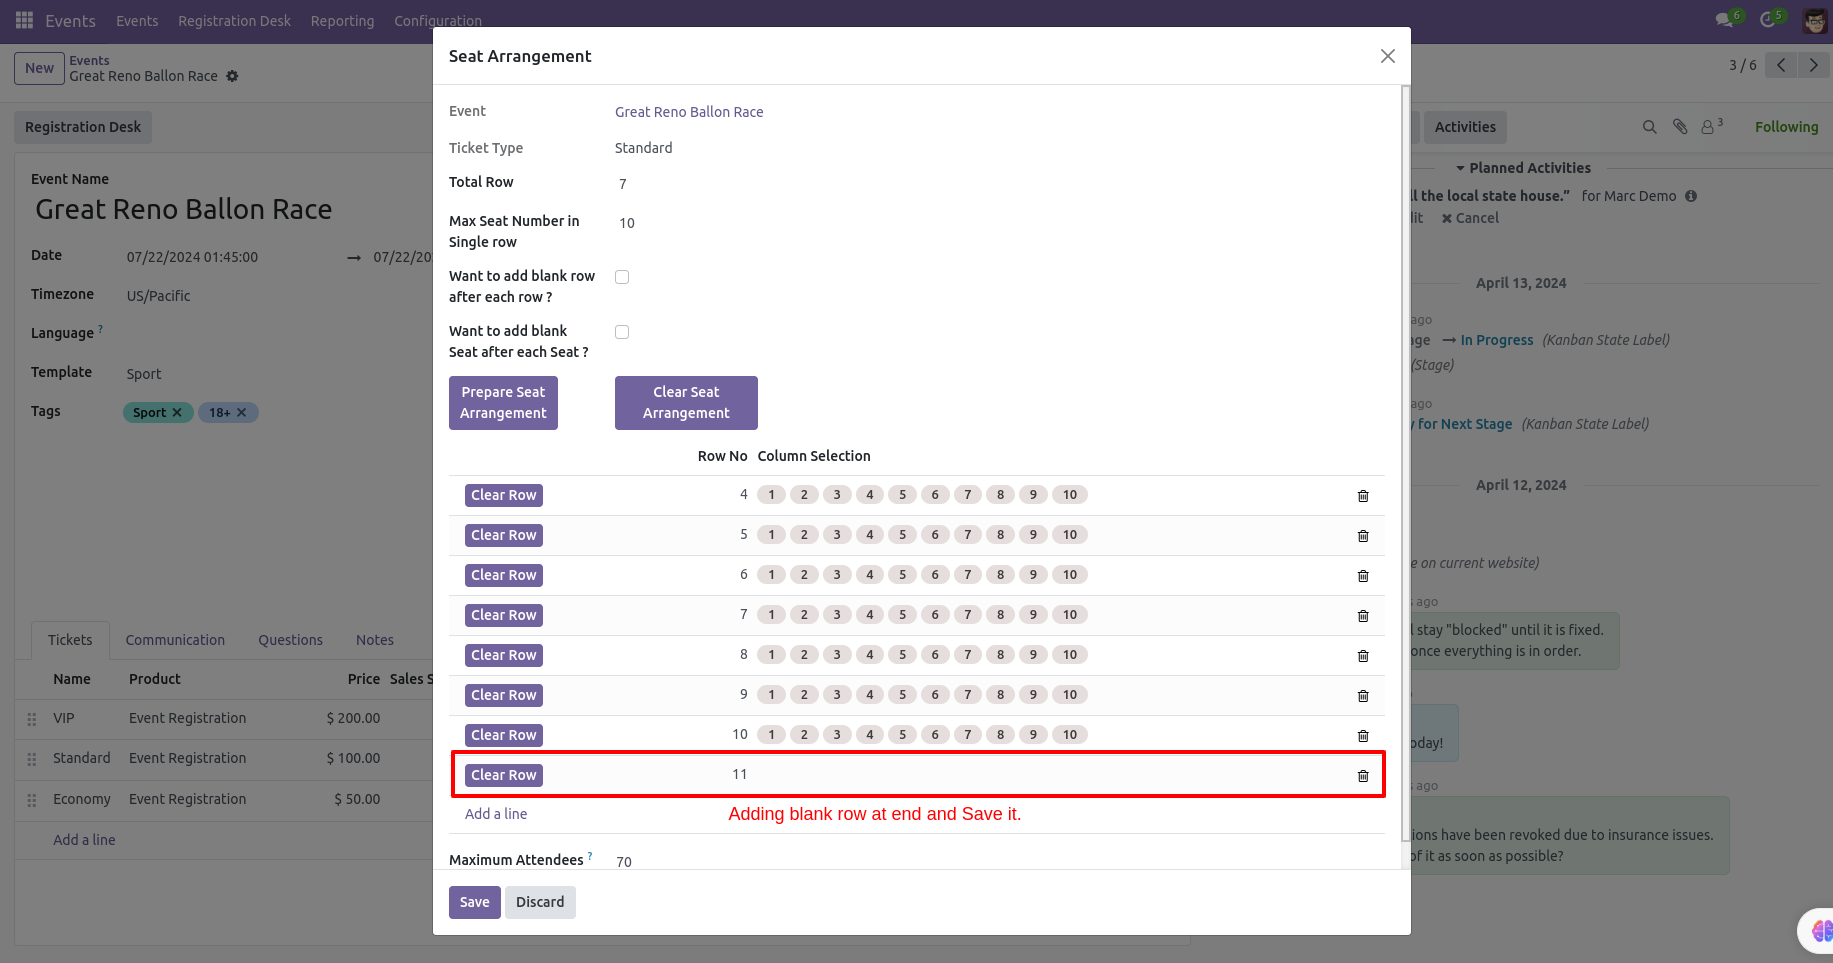
If you want to add a blank row after the screen/ticket type then click on 'Add a line' and leave it blank and 'Save' it.
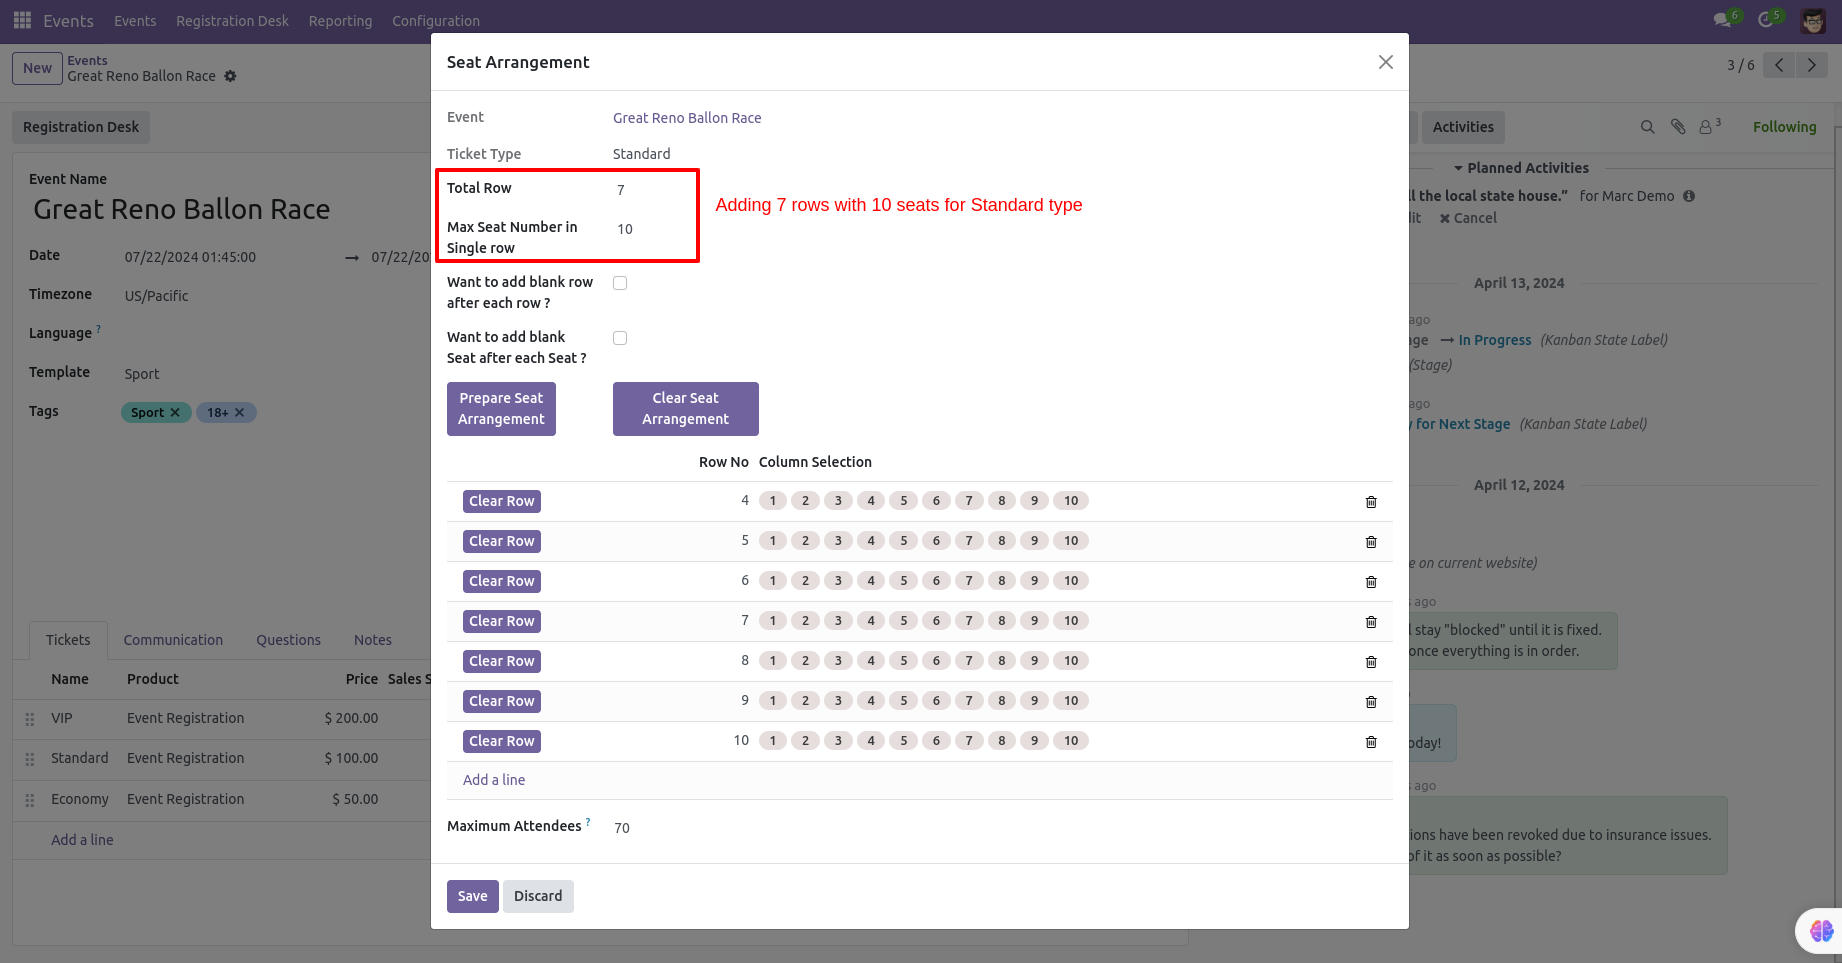
Here we add 7 rows with 10 seats.
Now we add a blank row and leave it and 'Save' it.
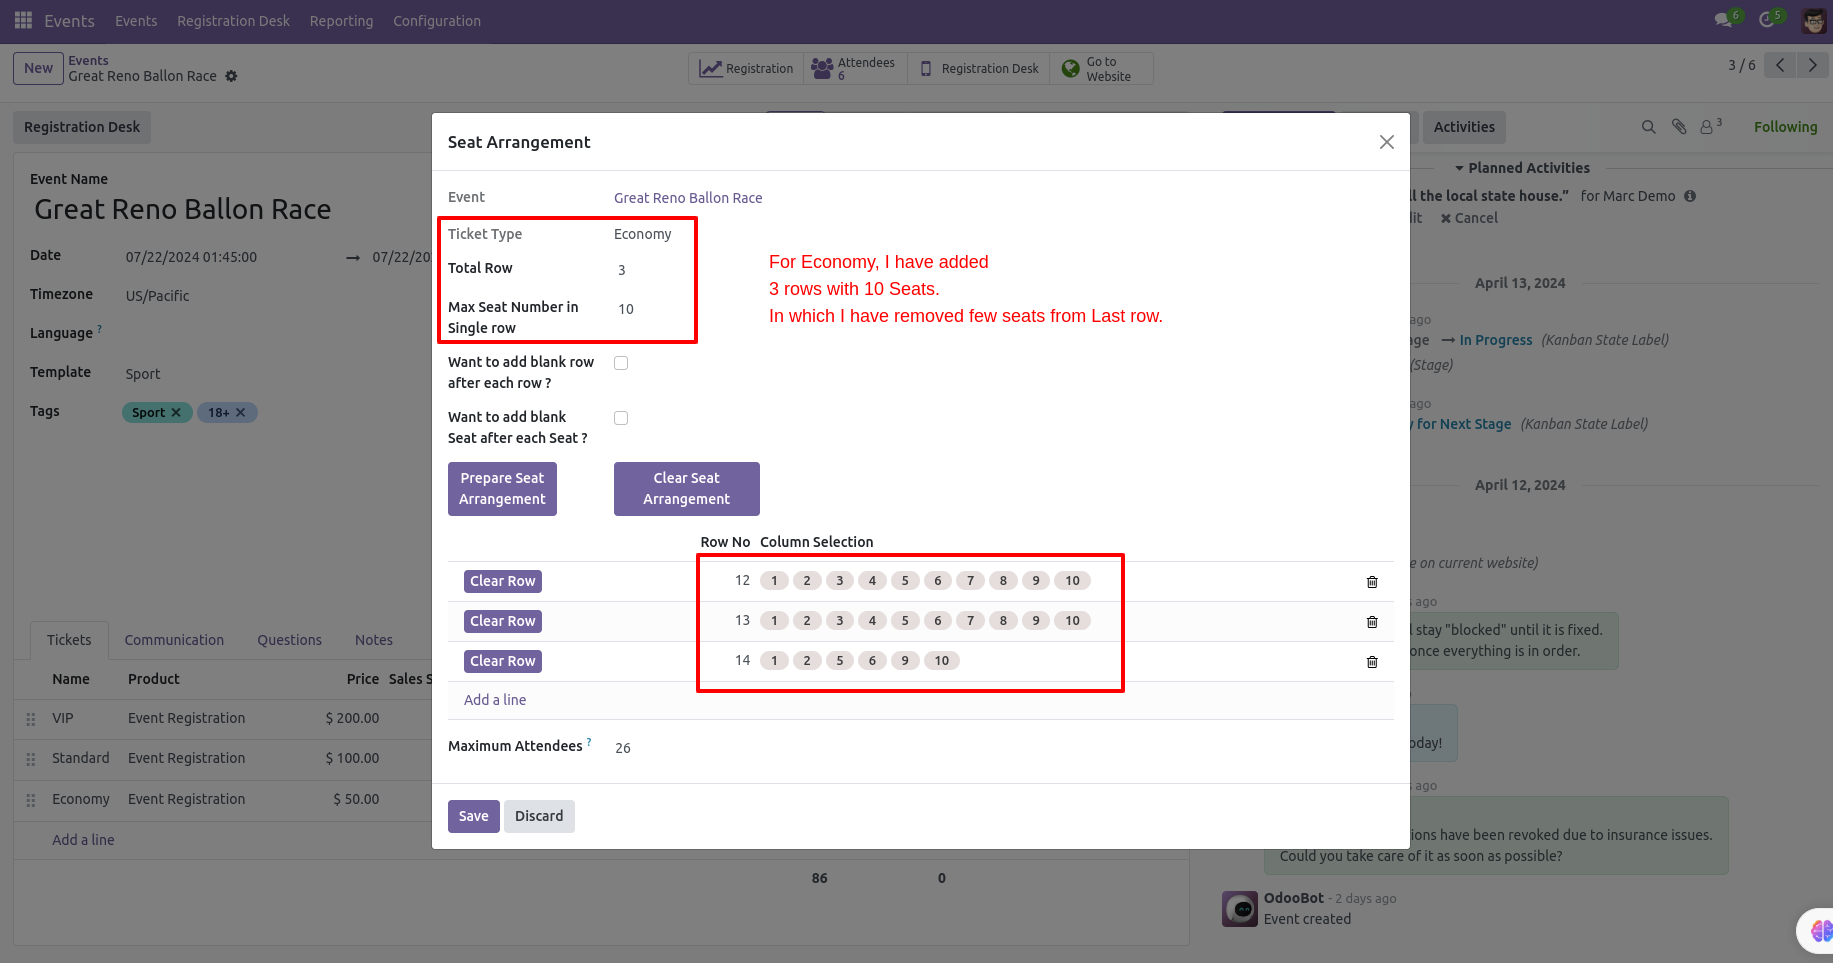
For the "Economy" ticket type we added 3 rows with 10 seats and removed some seats from the last row.
Backend view of the seat arrangement.
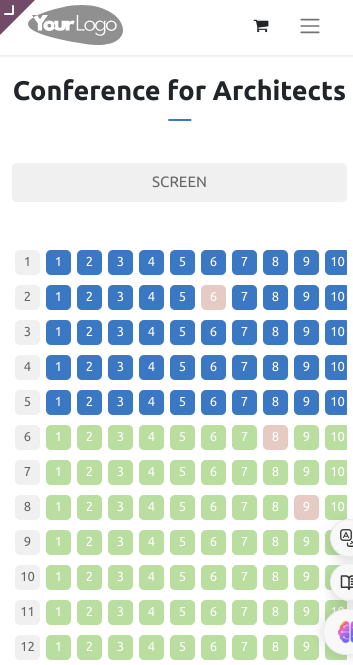
Now we go to the website to check Screen, so go to the website → Events → Select your event.
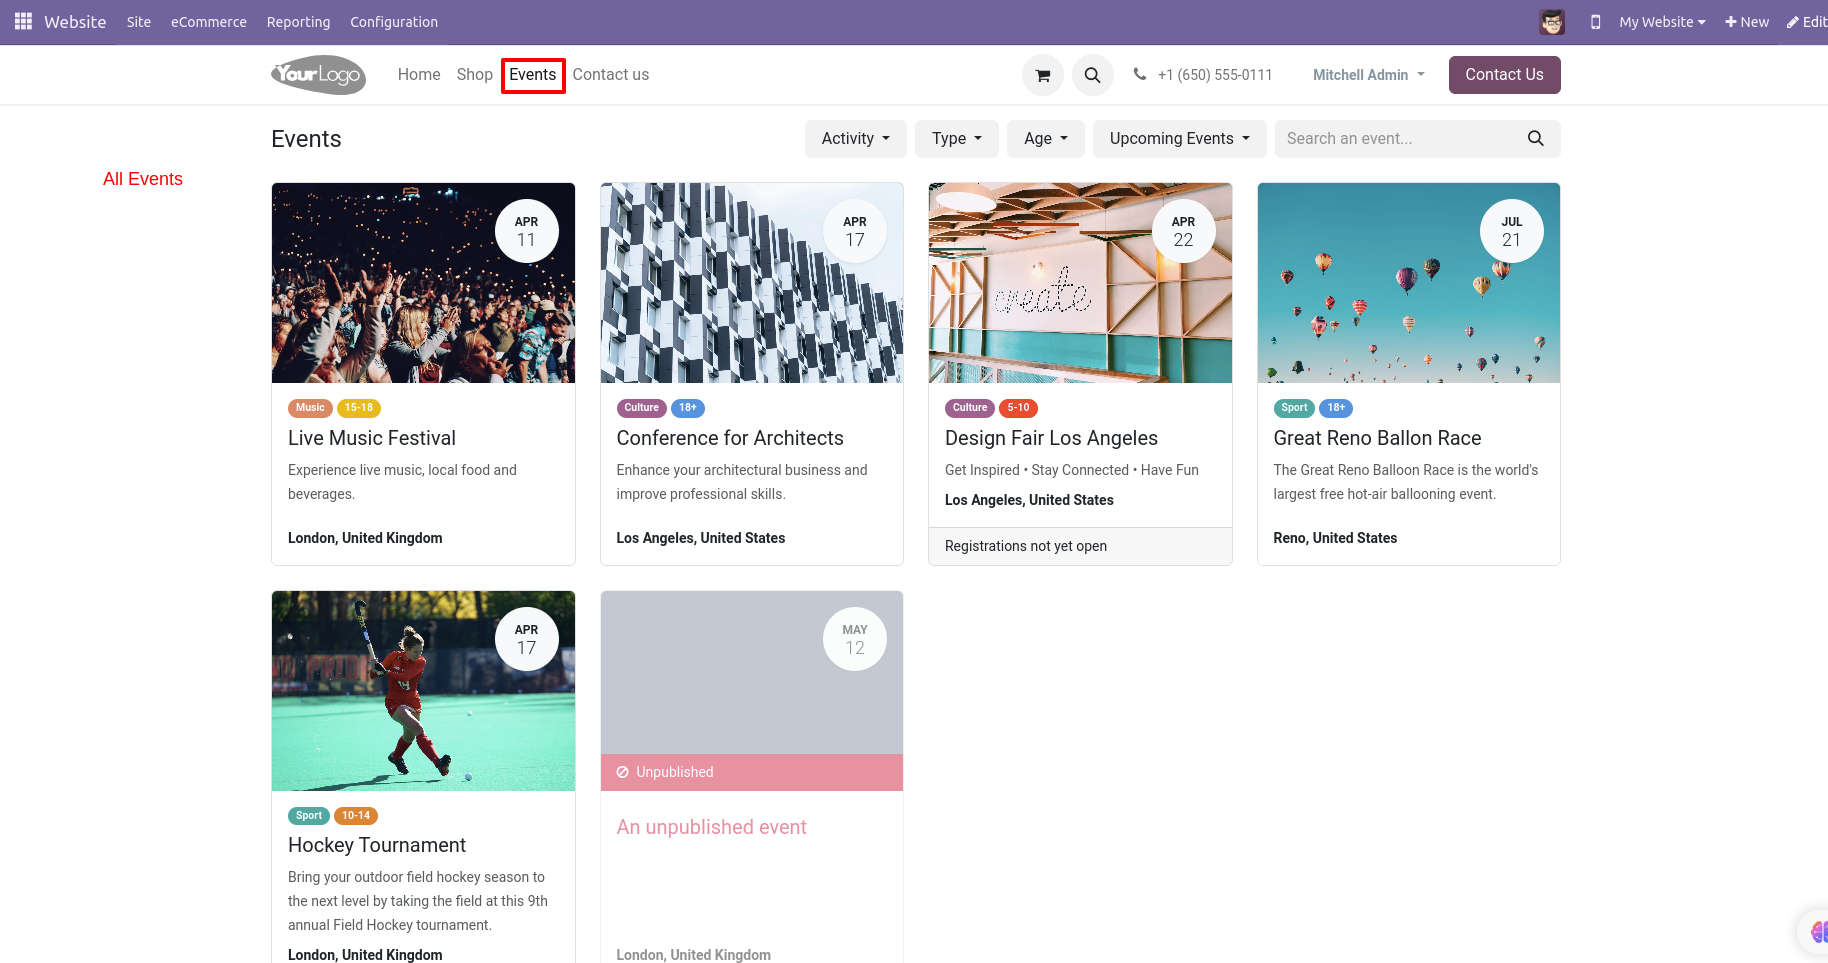
You can check the seat arrangement from the "Seat Booking" button.
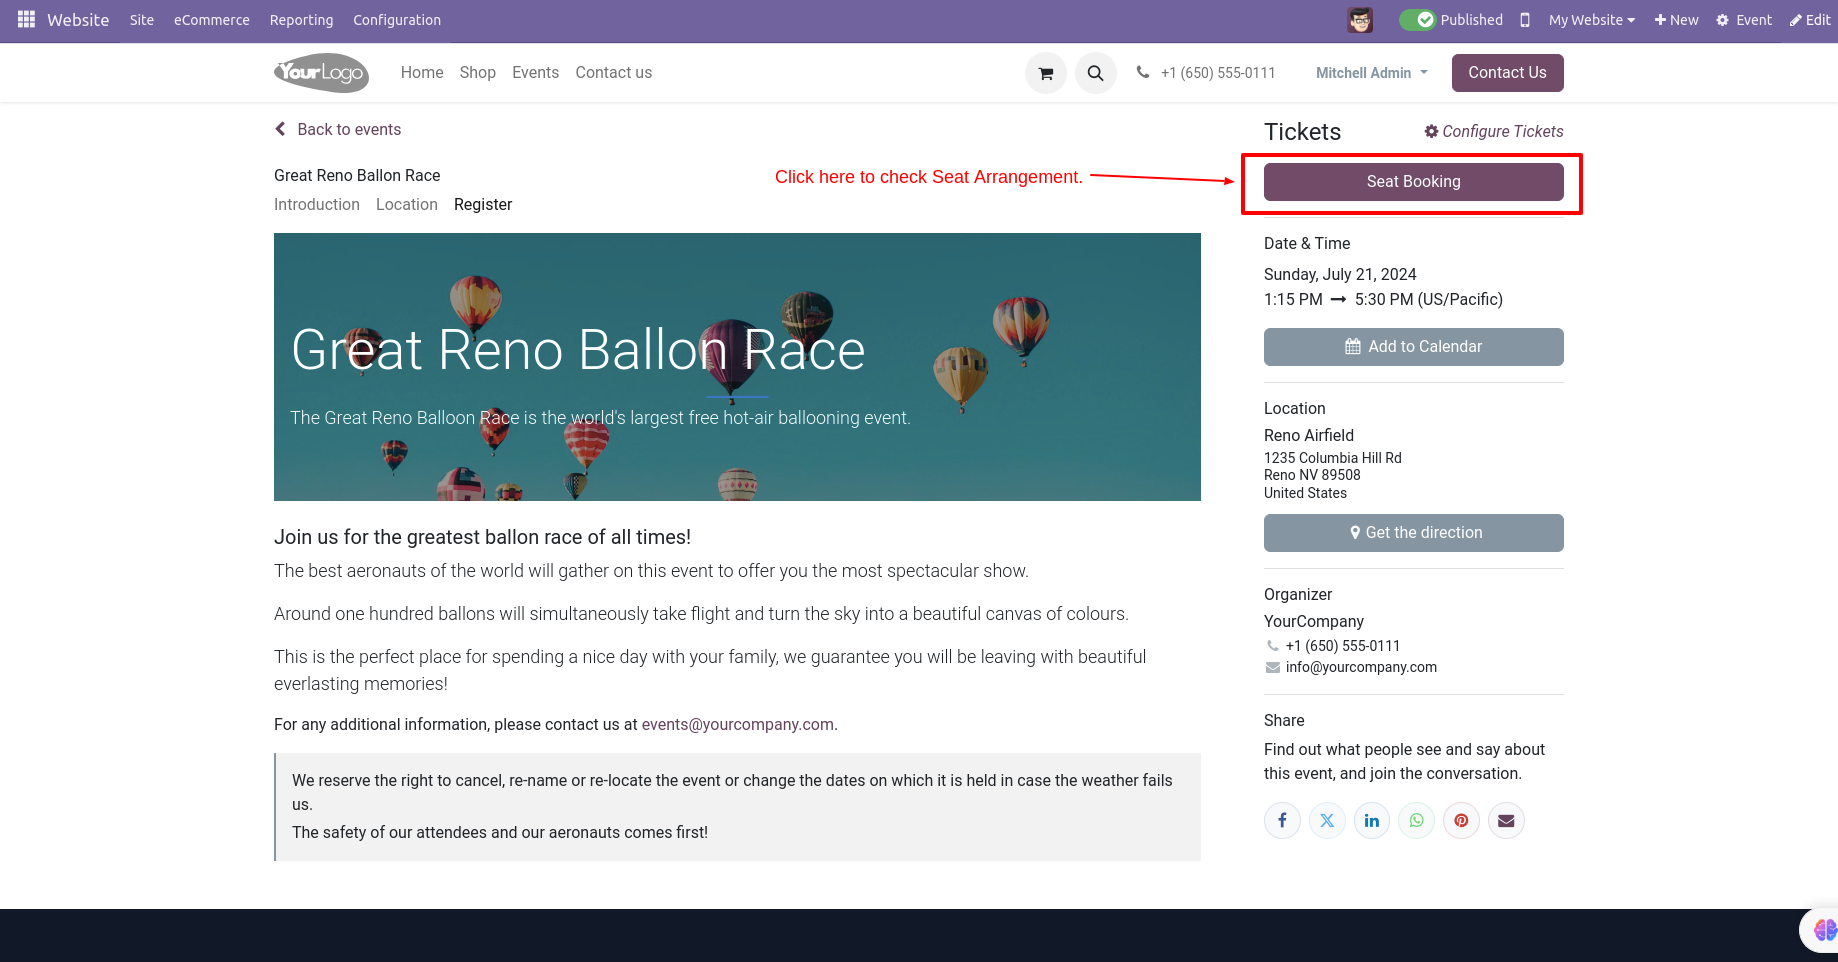
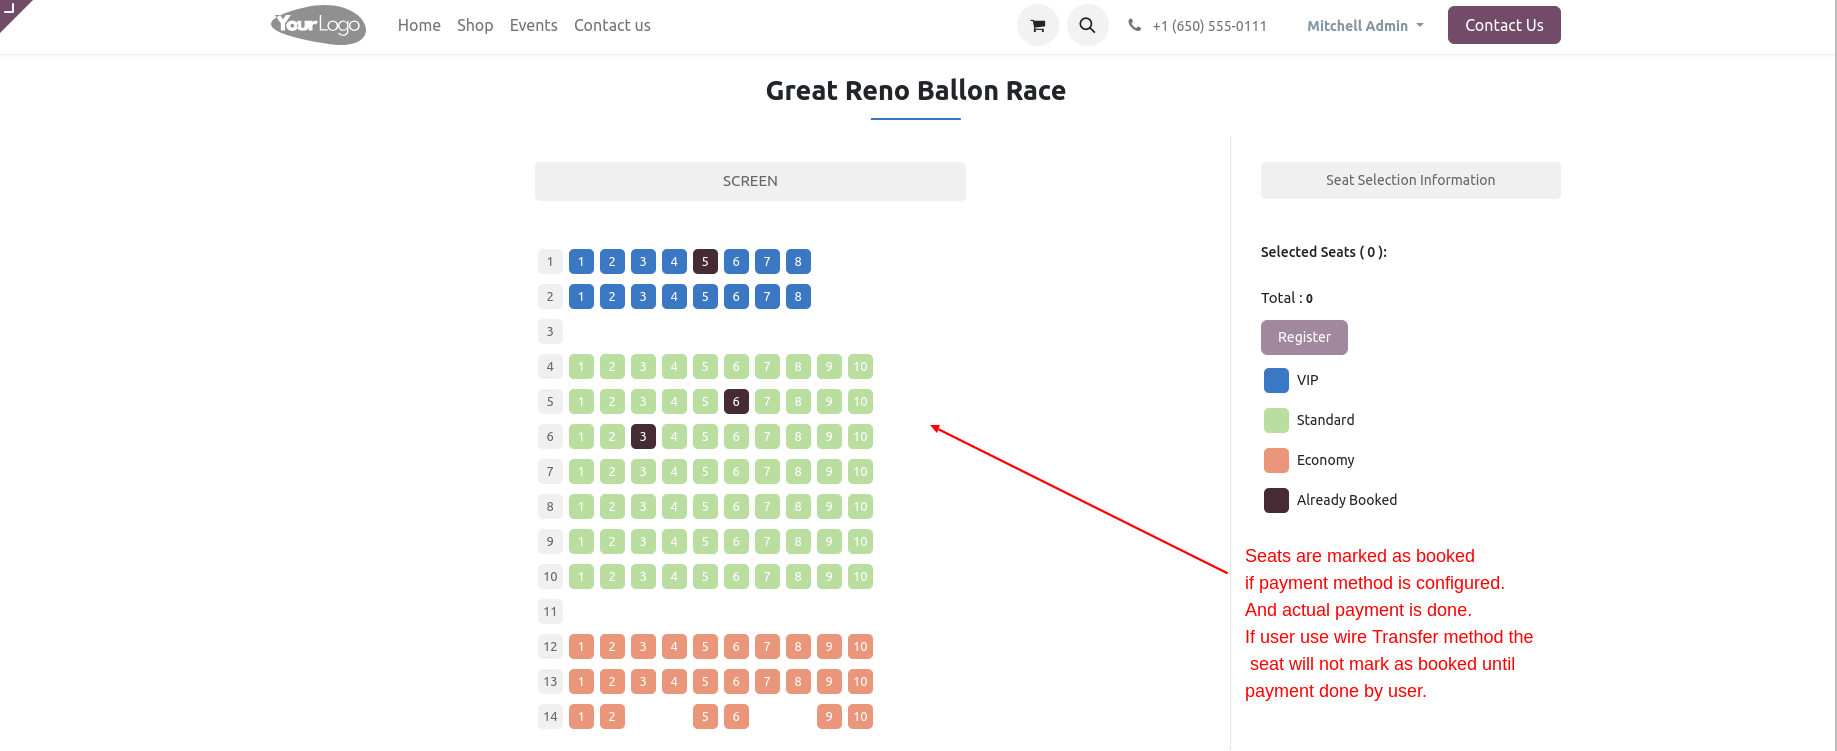
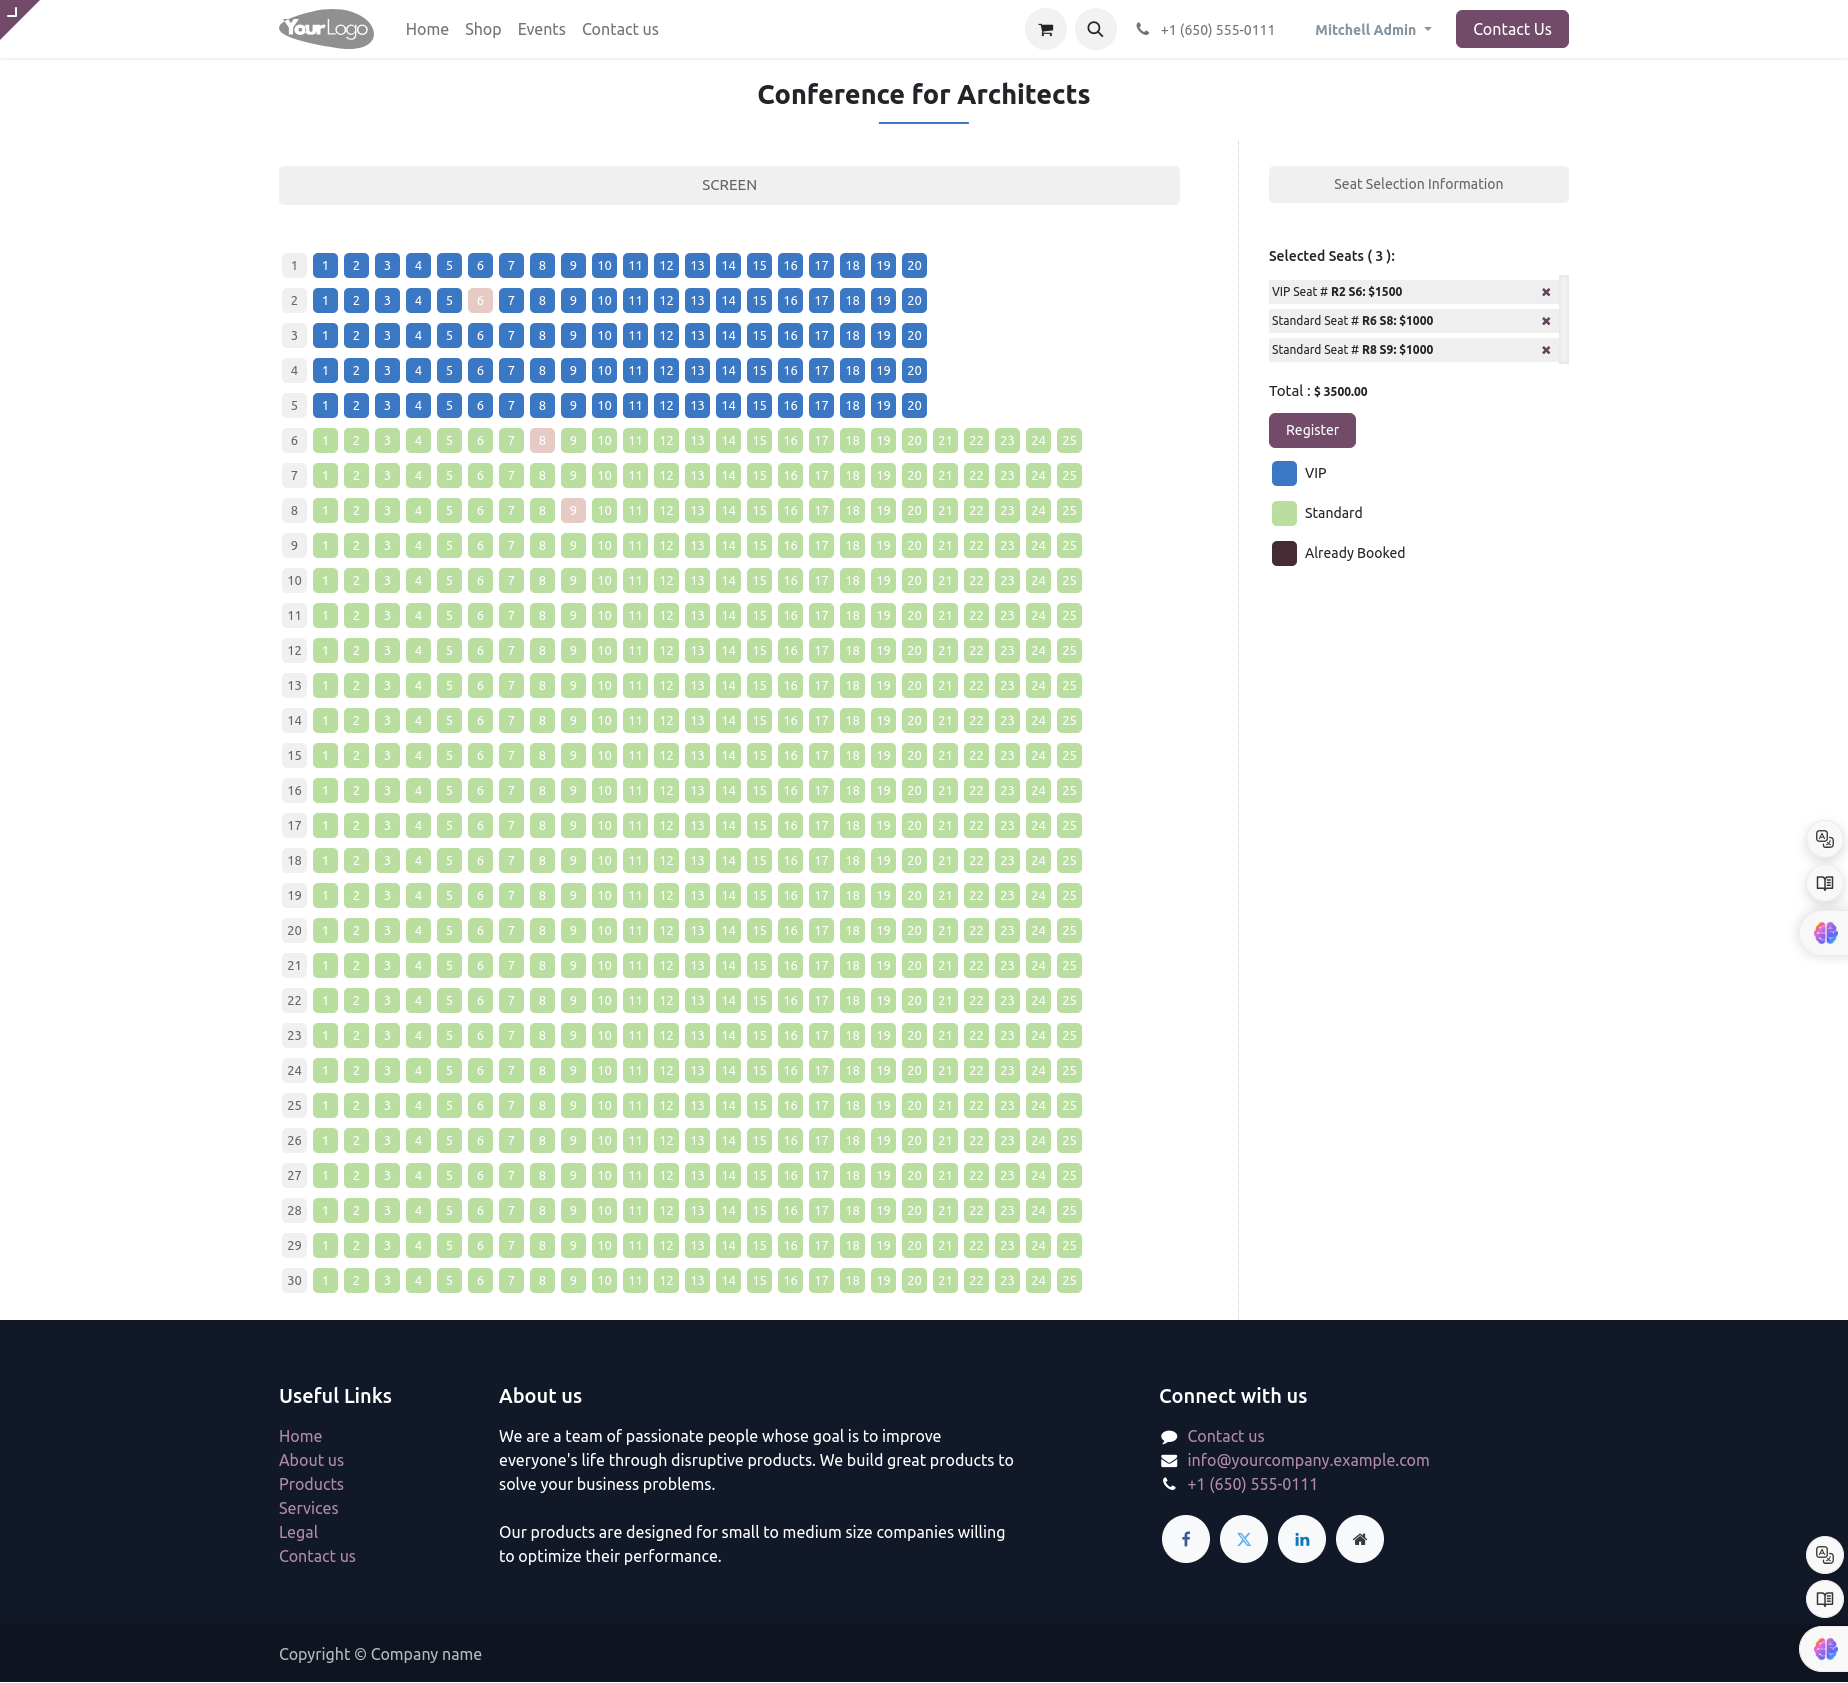
The seat arrangement looks like below.
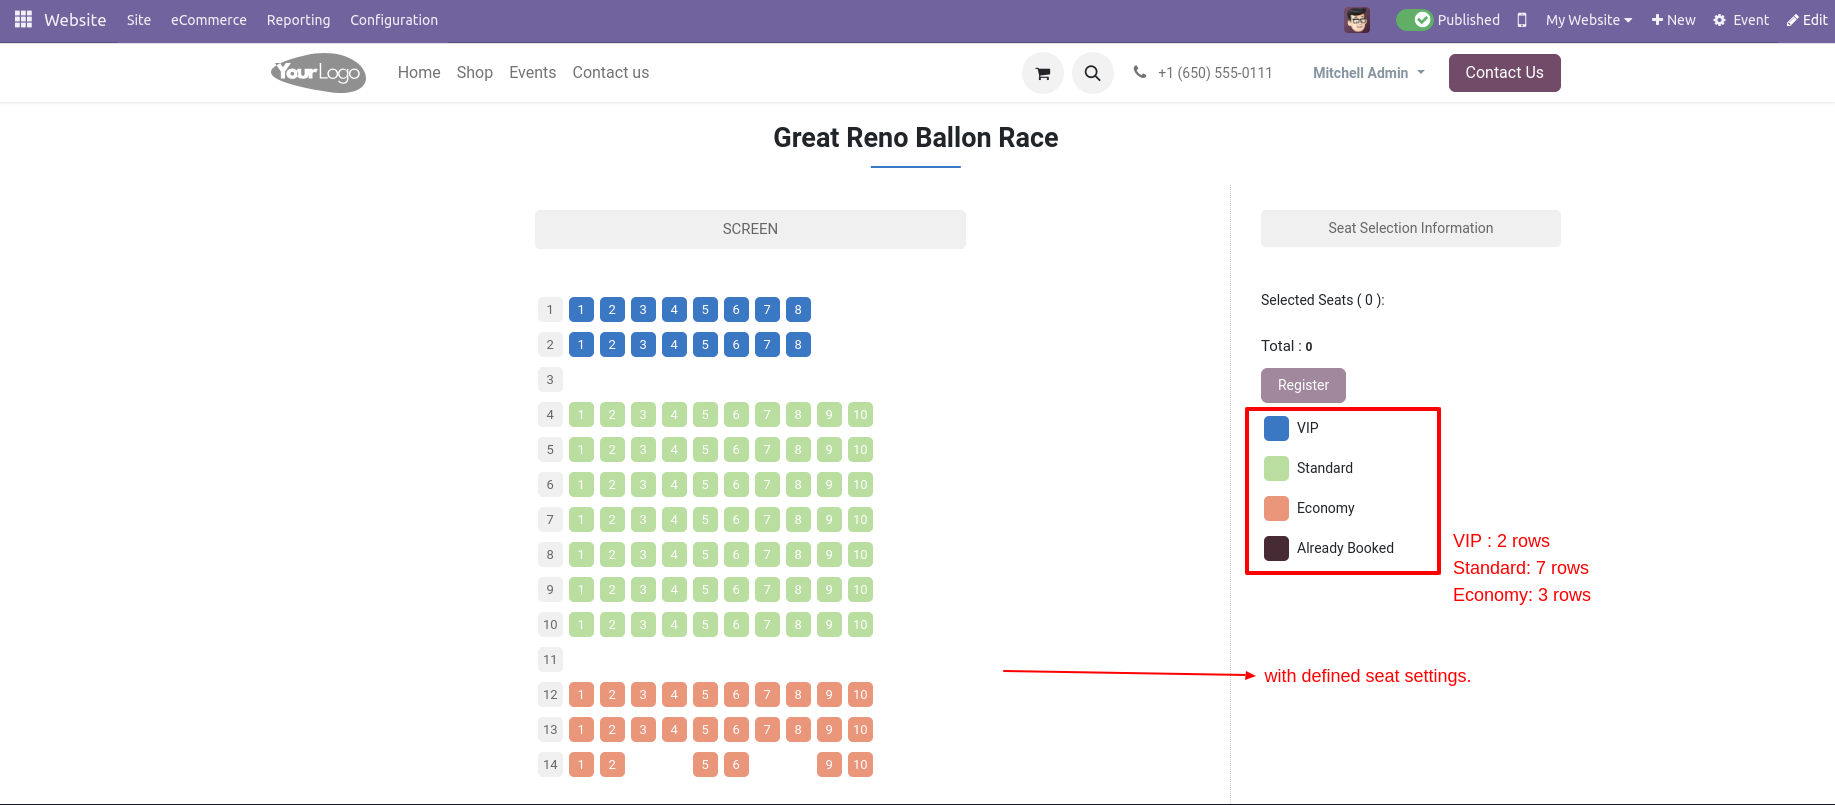
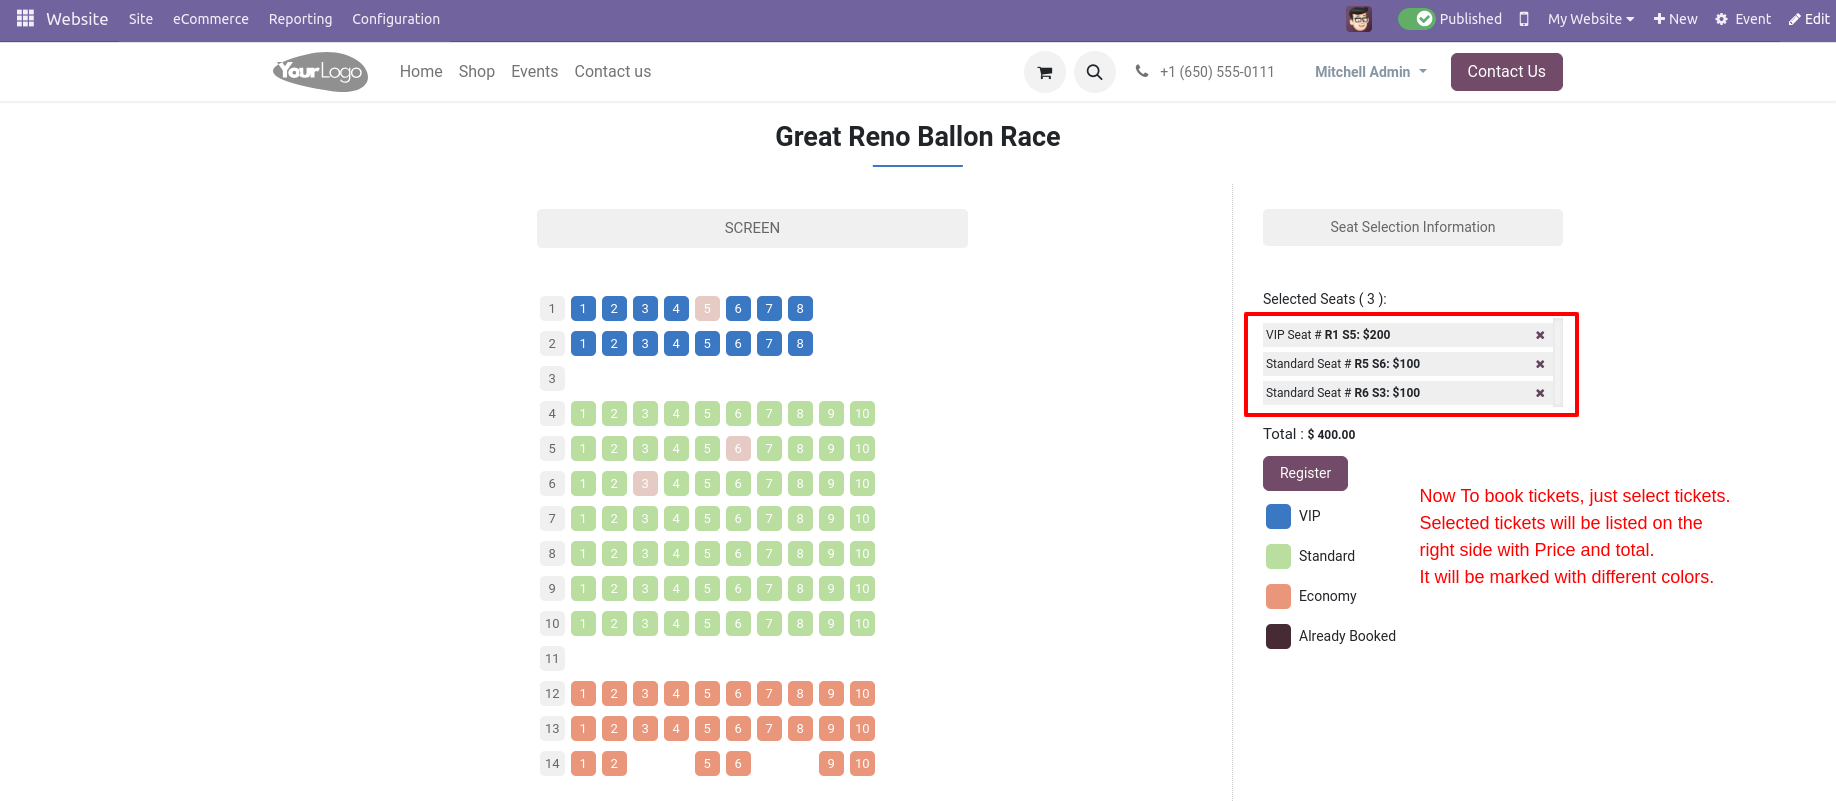
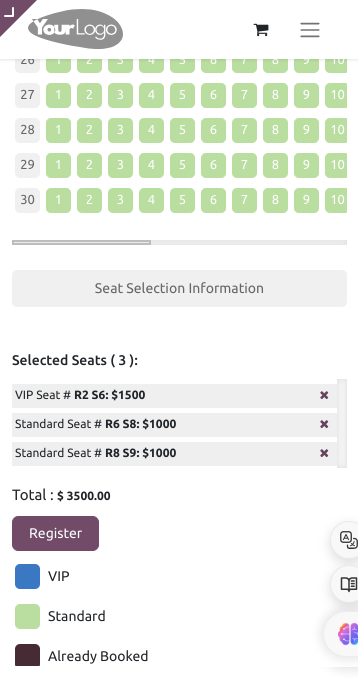
For ticket booking select seats, selected ticket/seat listed on the right side of the screen with a total price, booked seat marked with different colors.
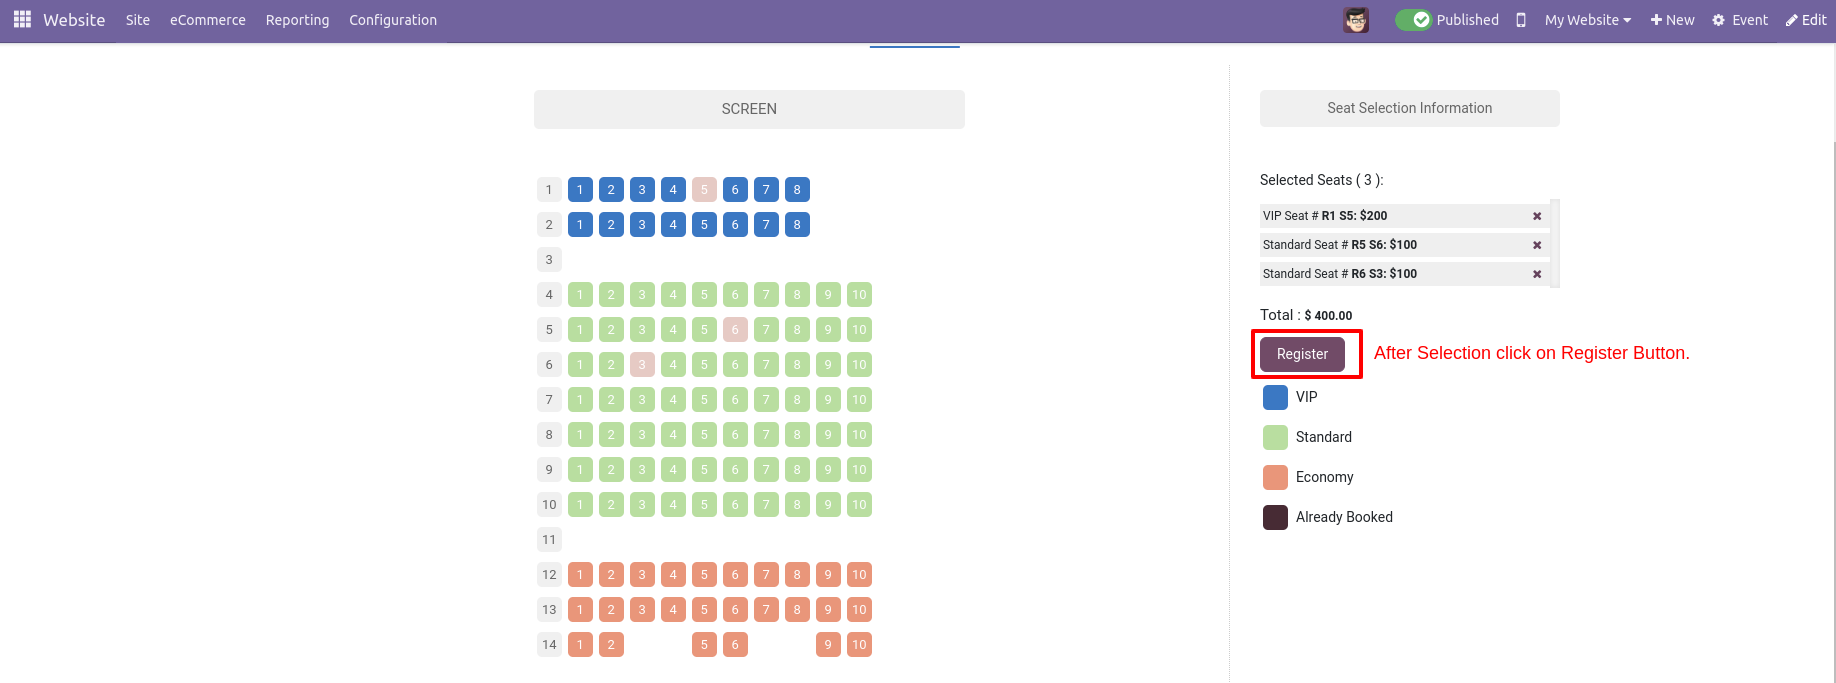
Select the seat and click the "Register" button.
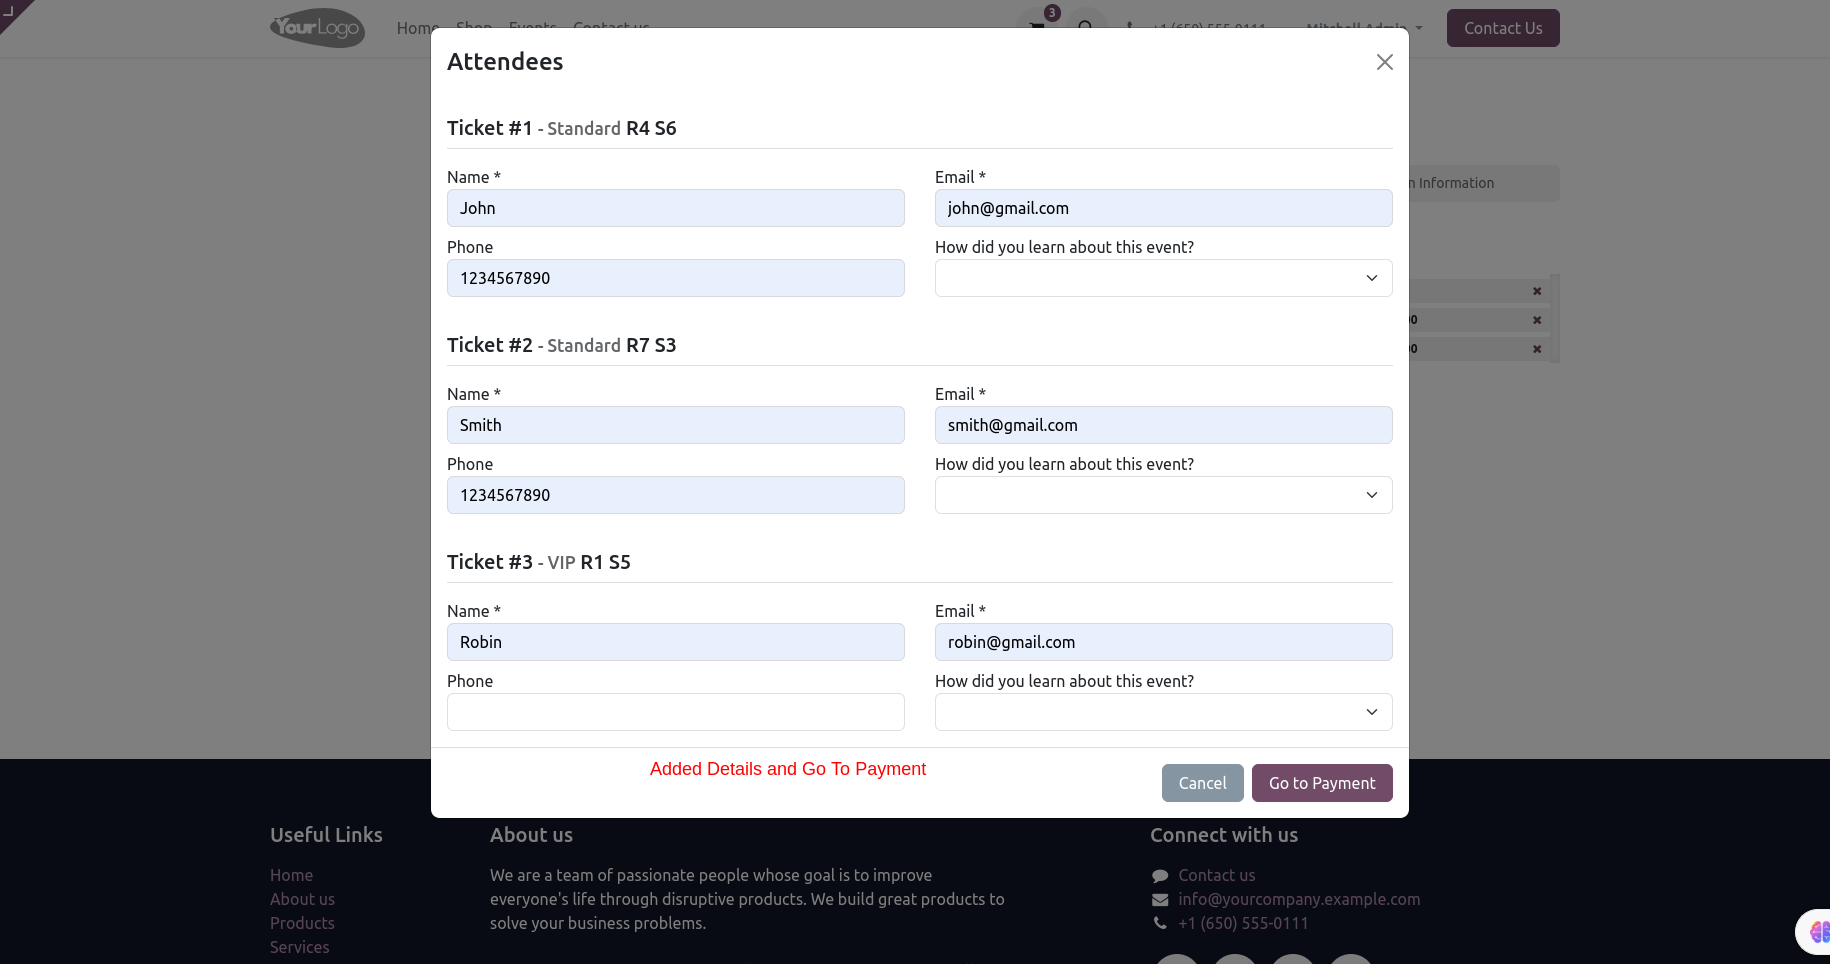
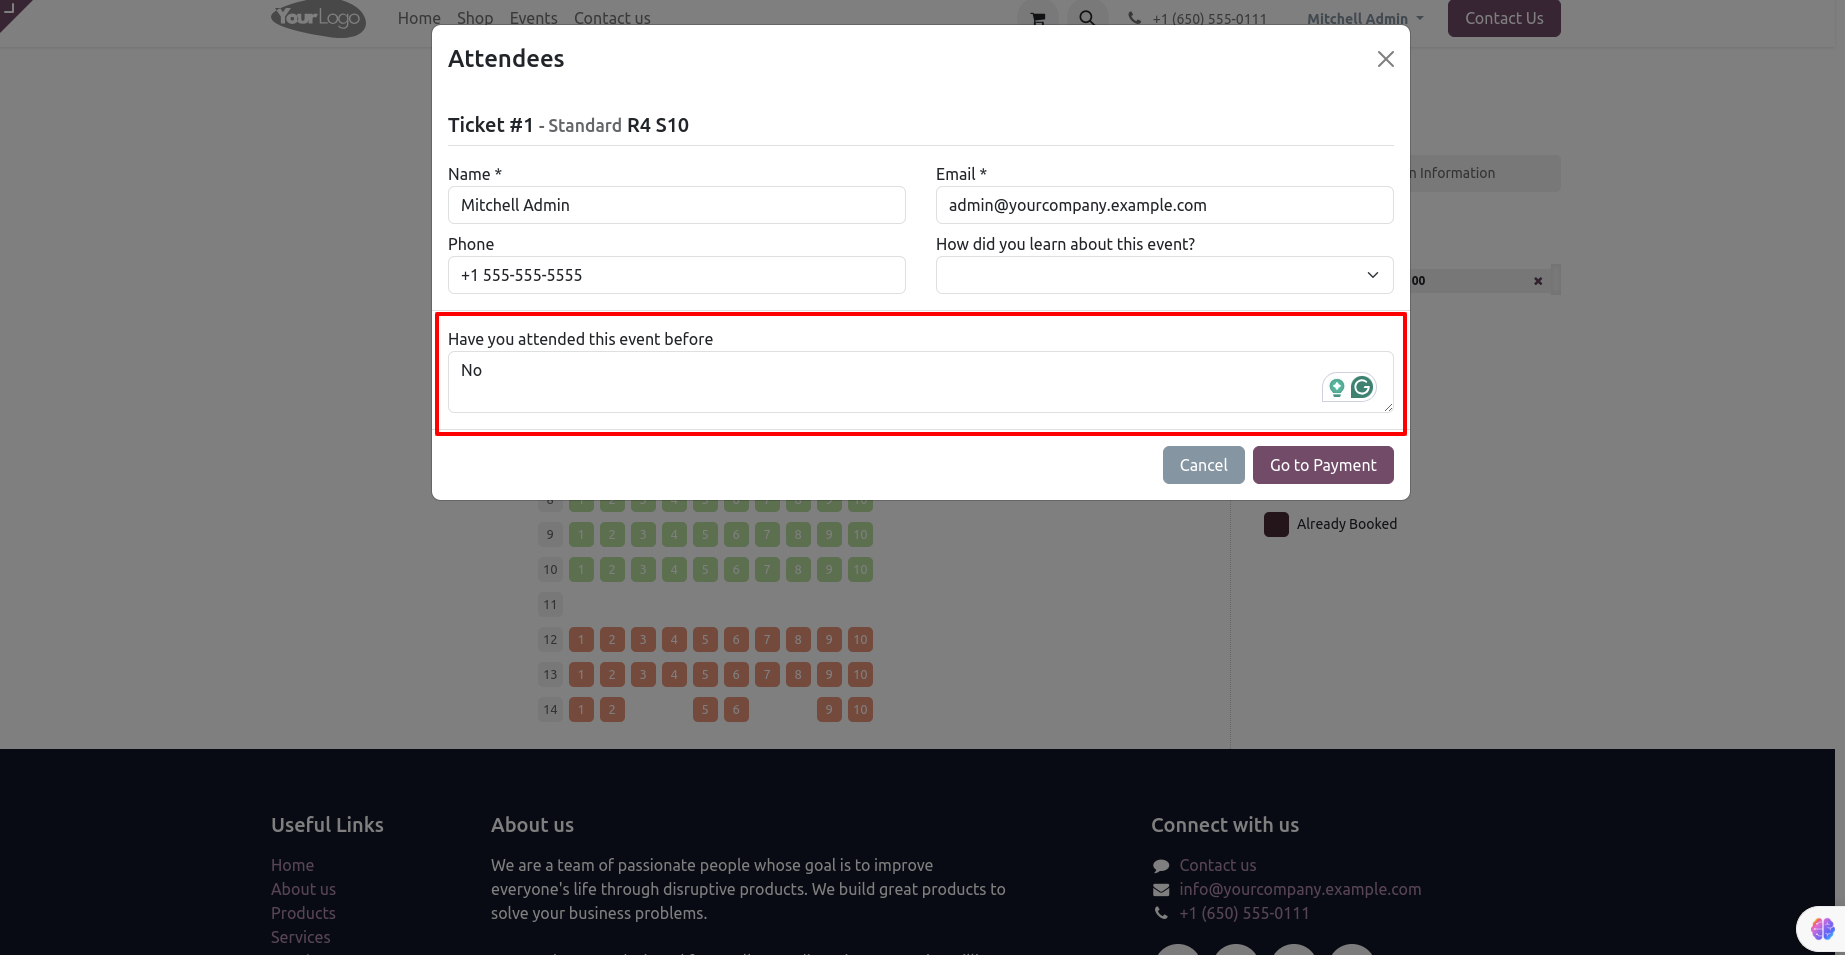
After that, it opens the wizard, enter participants/attendees details, and press the "Go to payment" button.
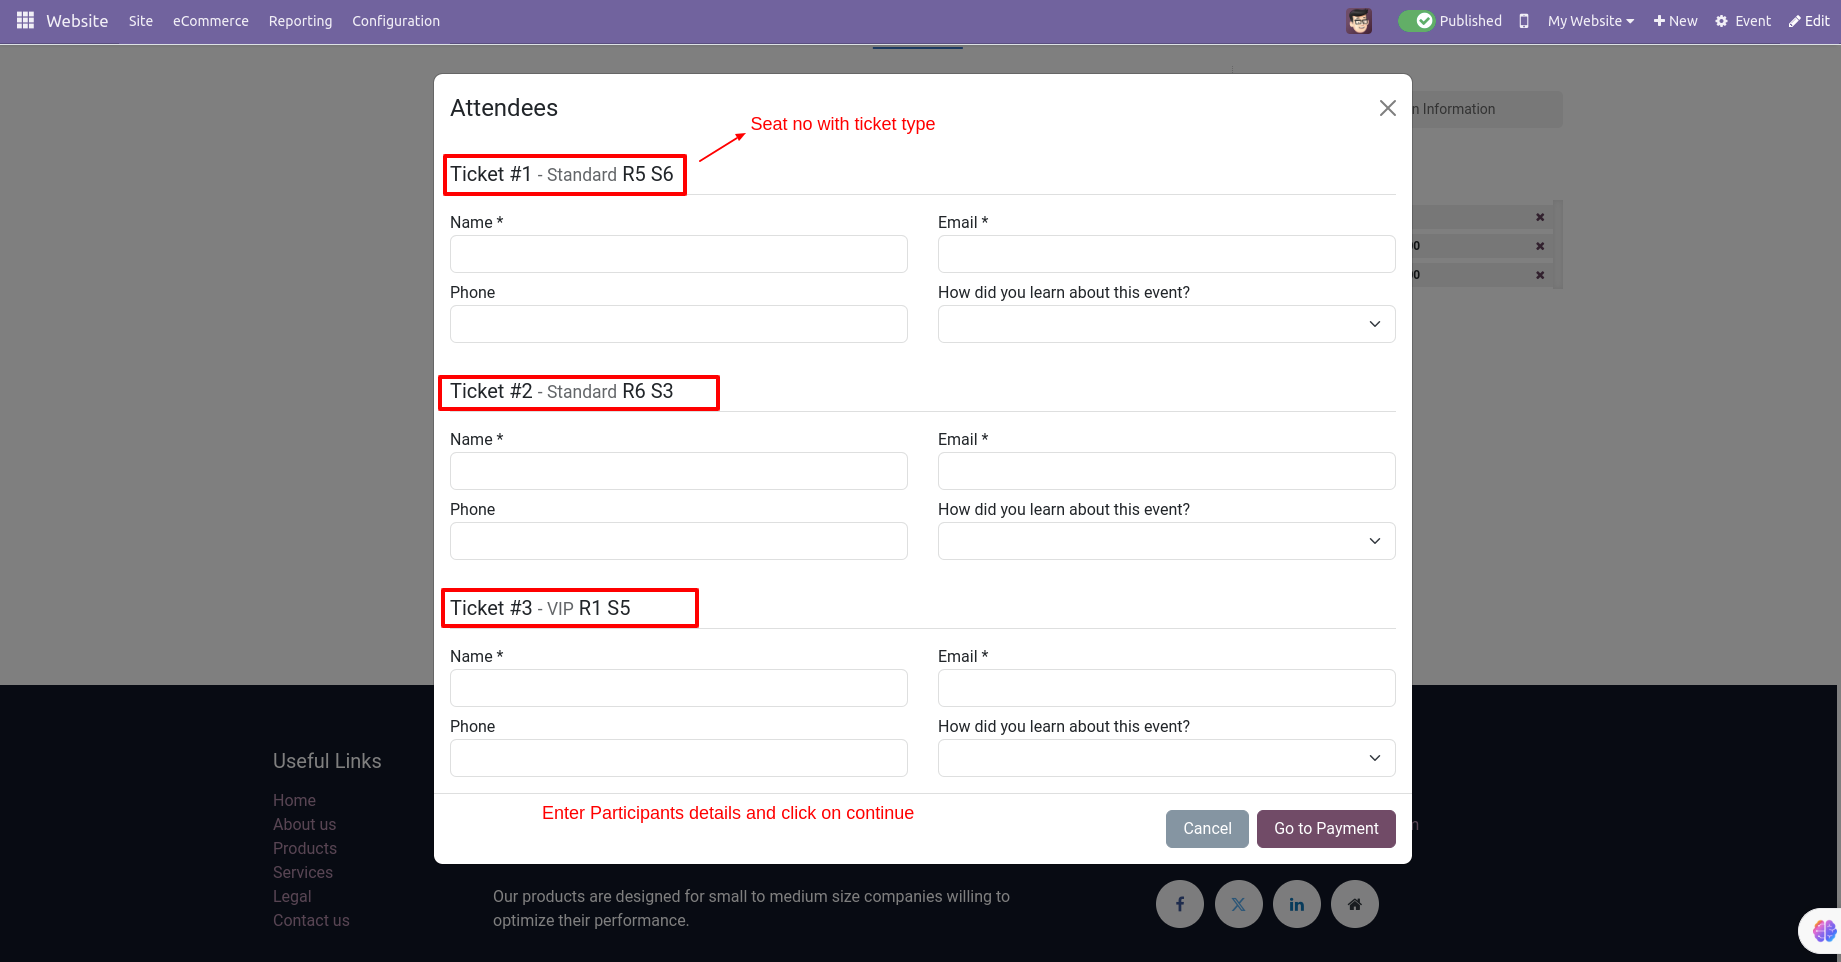
Add details and press the "Go to payment" button..
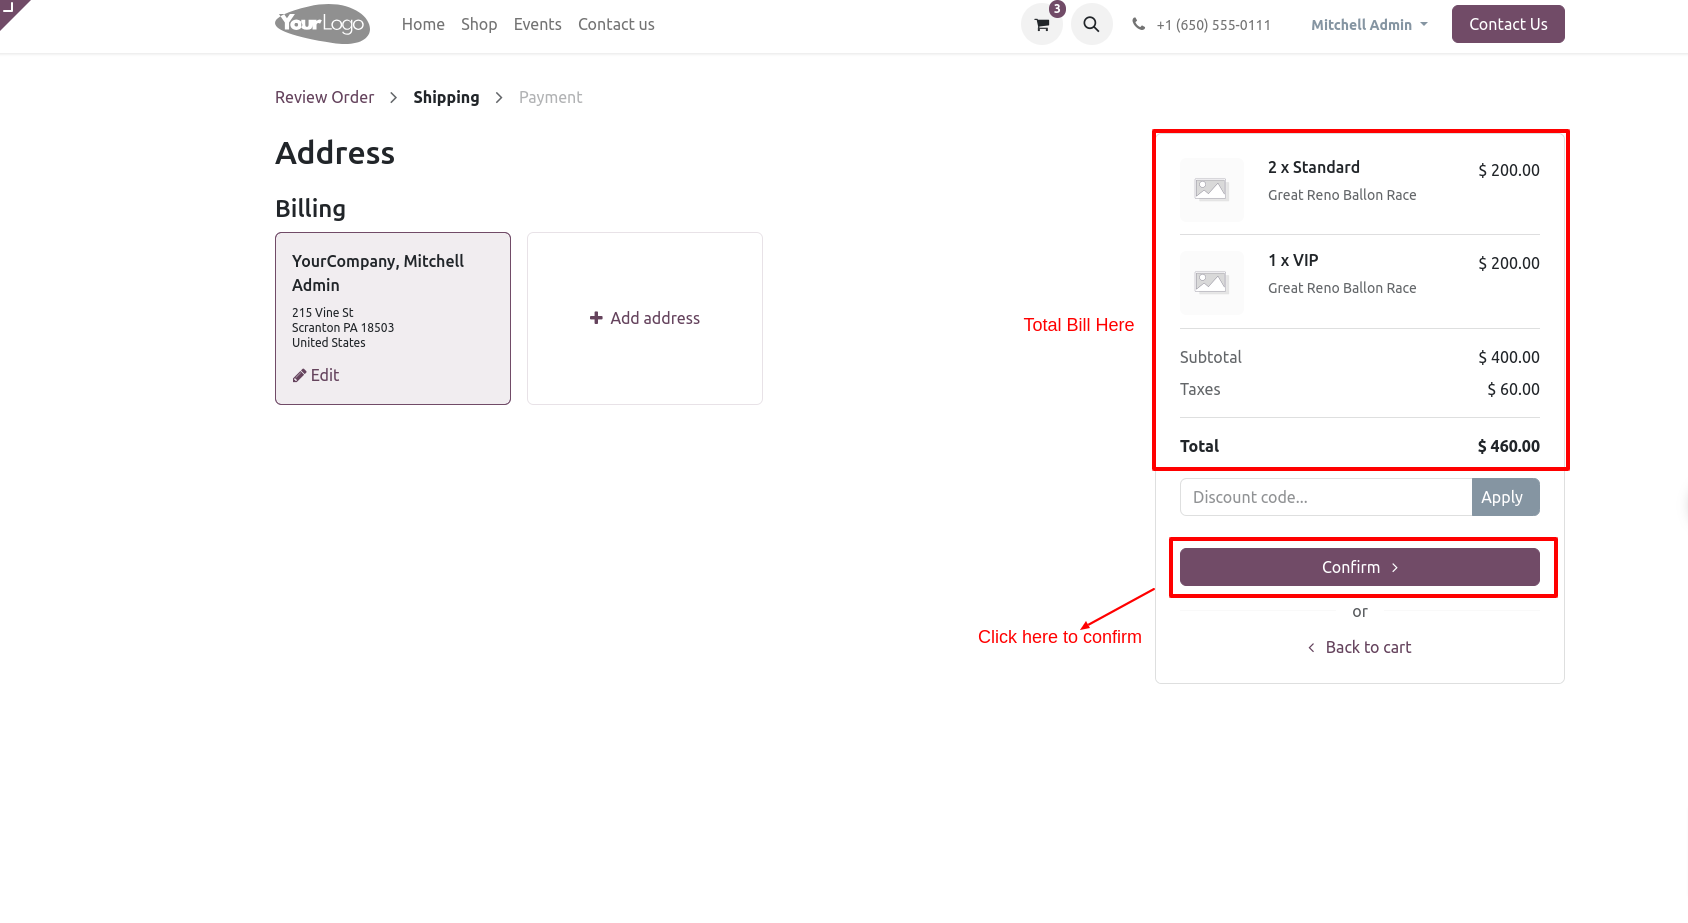
Now press the "confirm" button, total bill displayed on the screen.
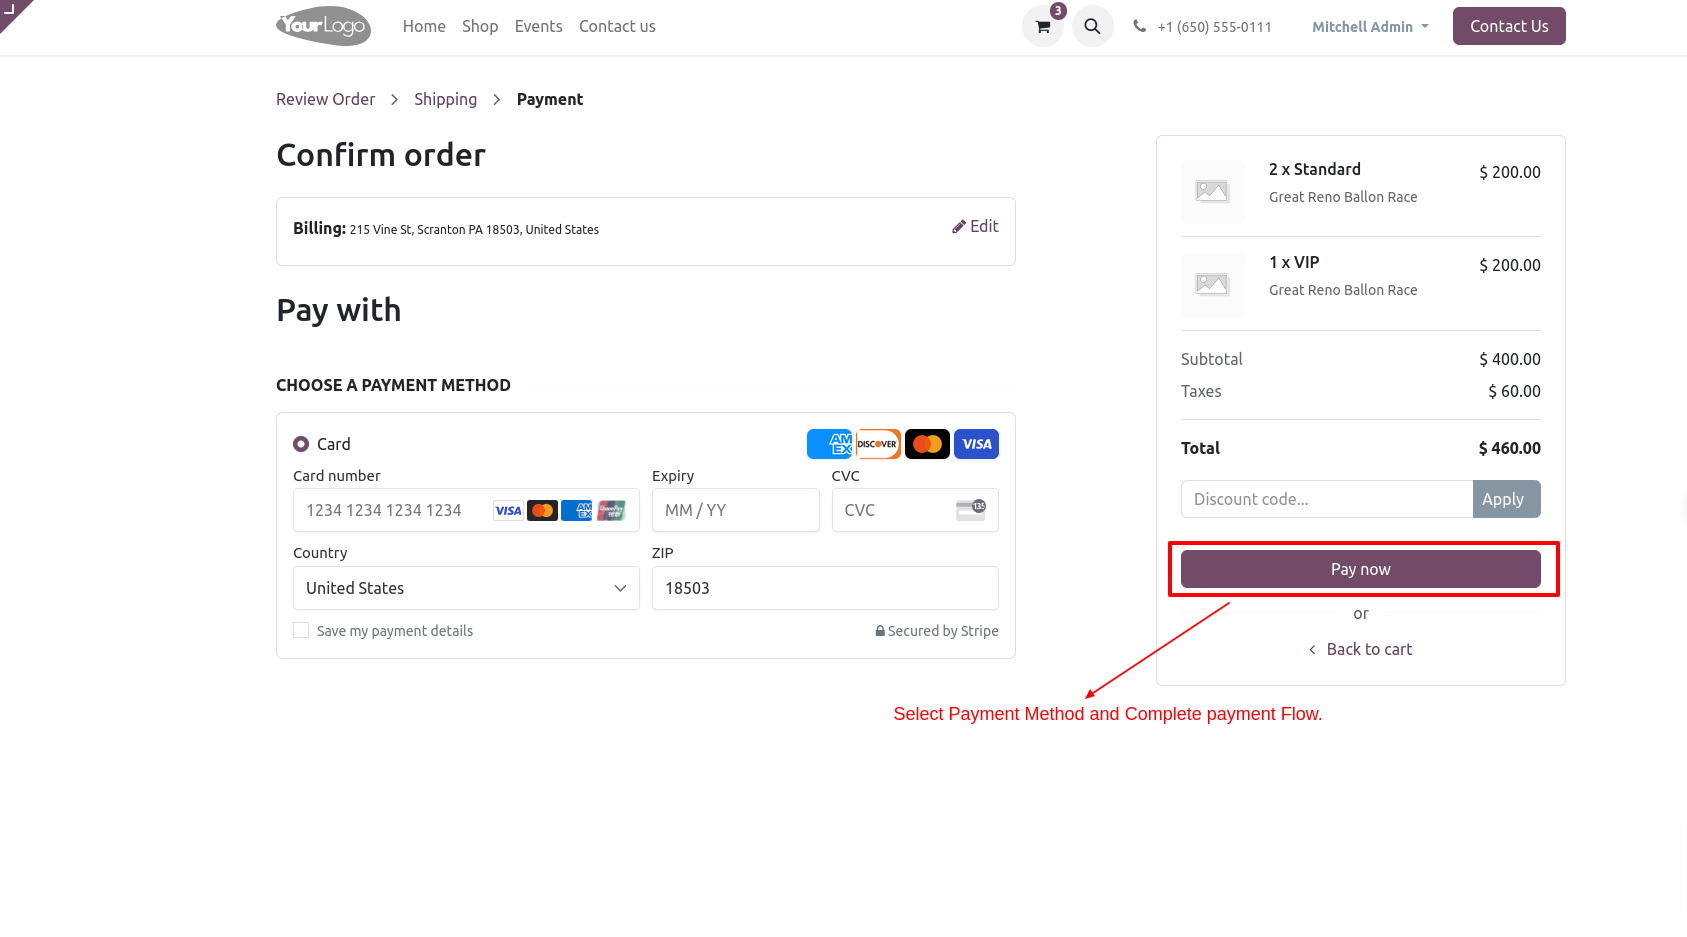
Select the payment method and complete the seat booking with the payment, so press the "Pay Now" button.
You can download your ticket from here once the payment has been completed.

Booked seats marked with different colors, if payment not done then the seat will not be marked as the book.
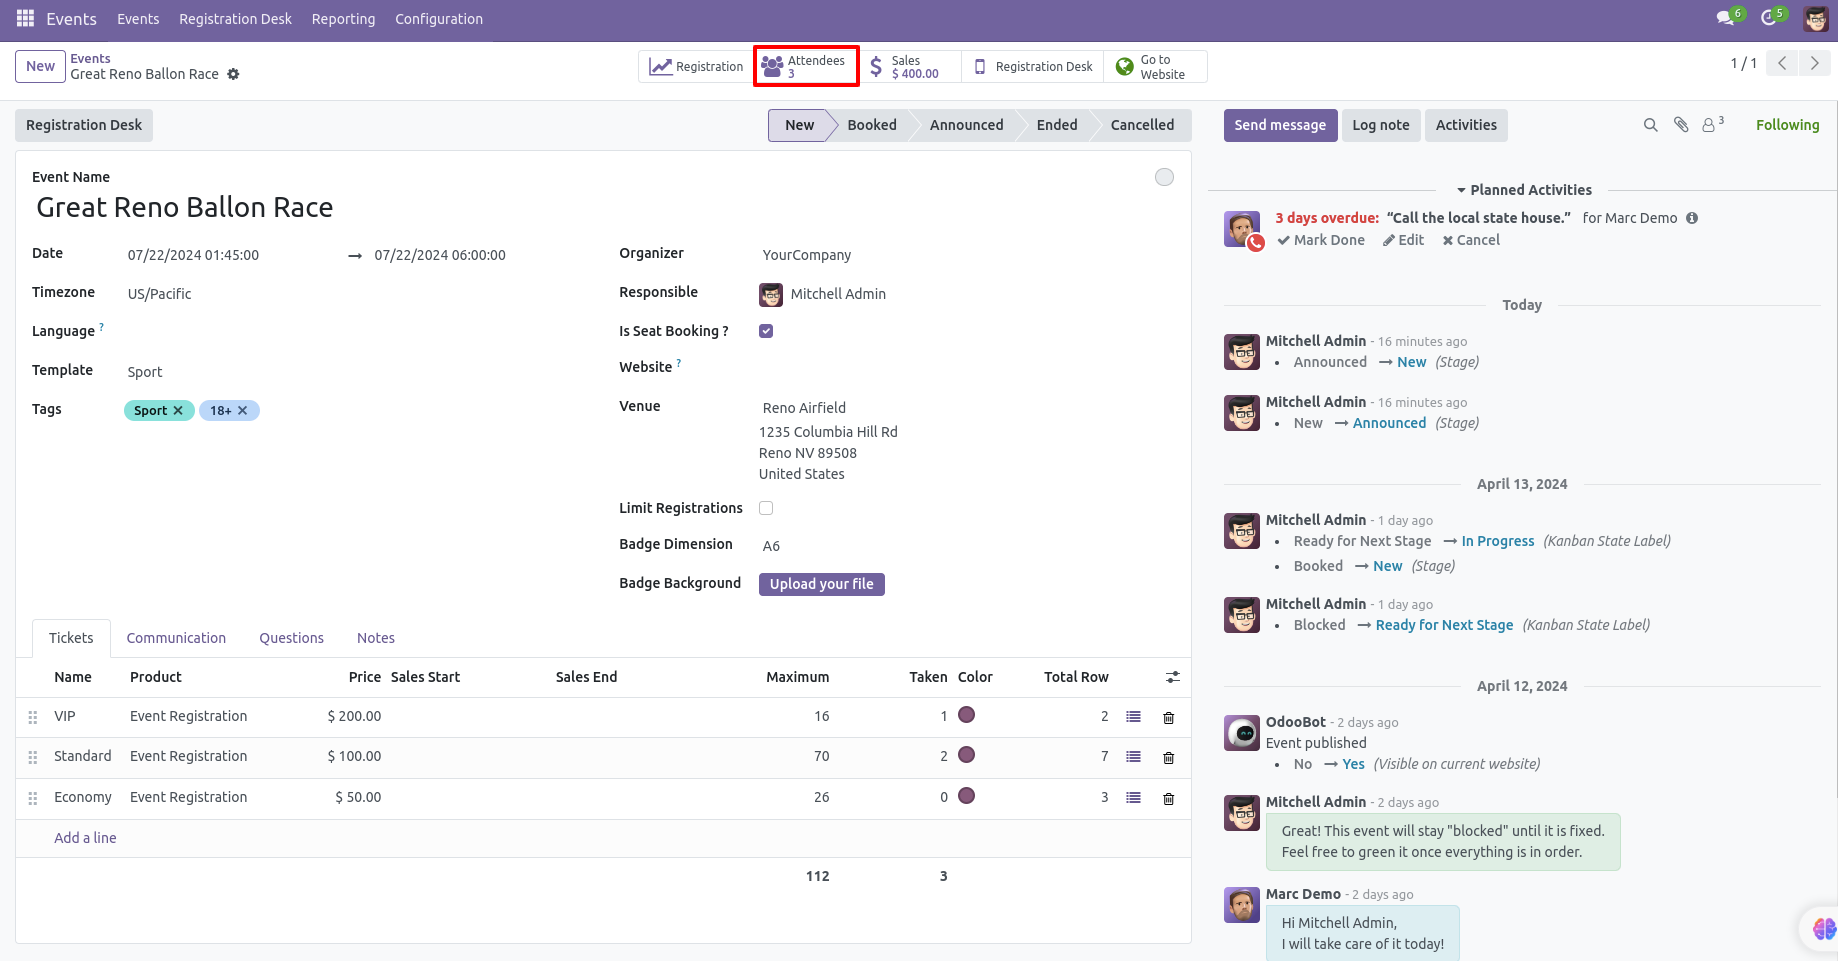
Now go to the event Backend and check seat booking, to see the attendee's detail press the smart button "Attendees" button.
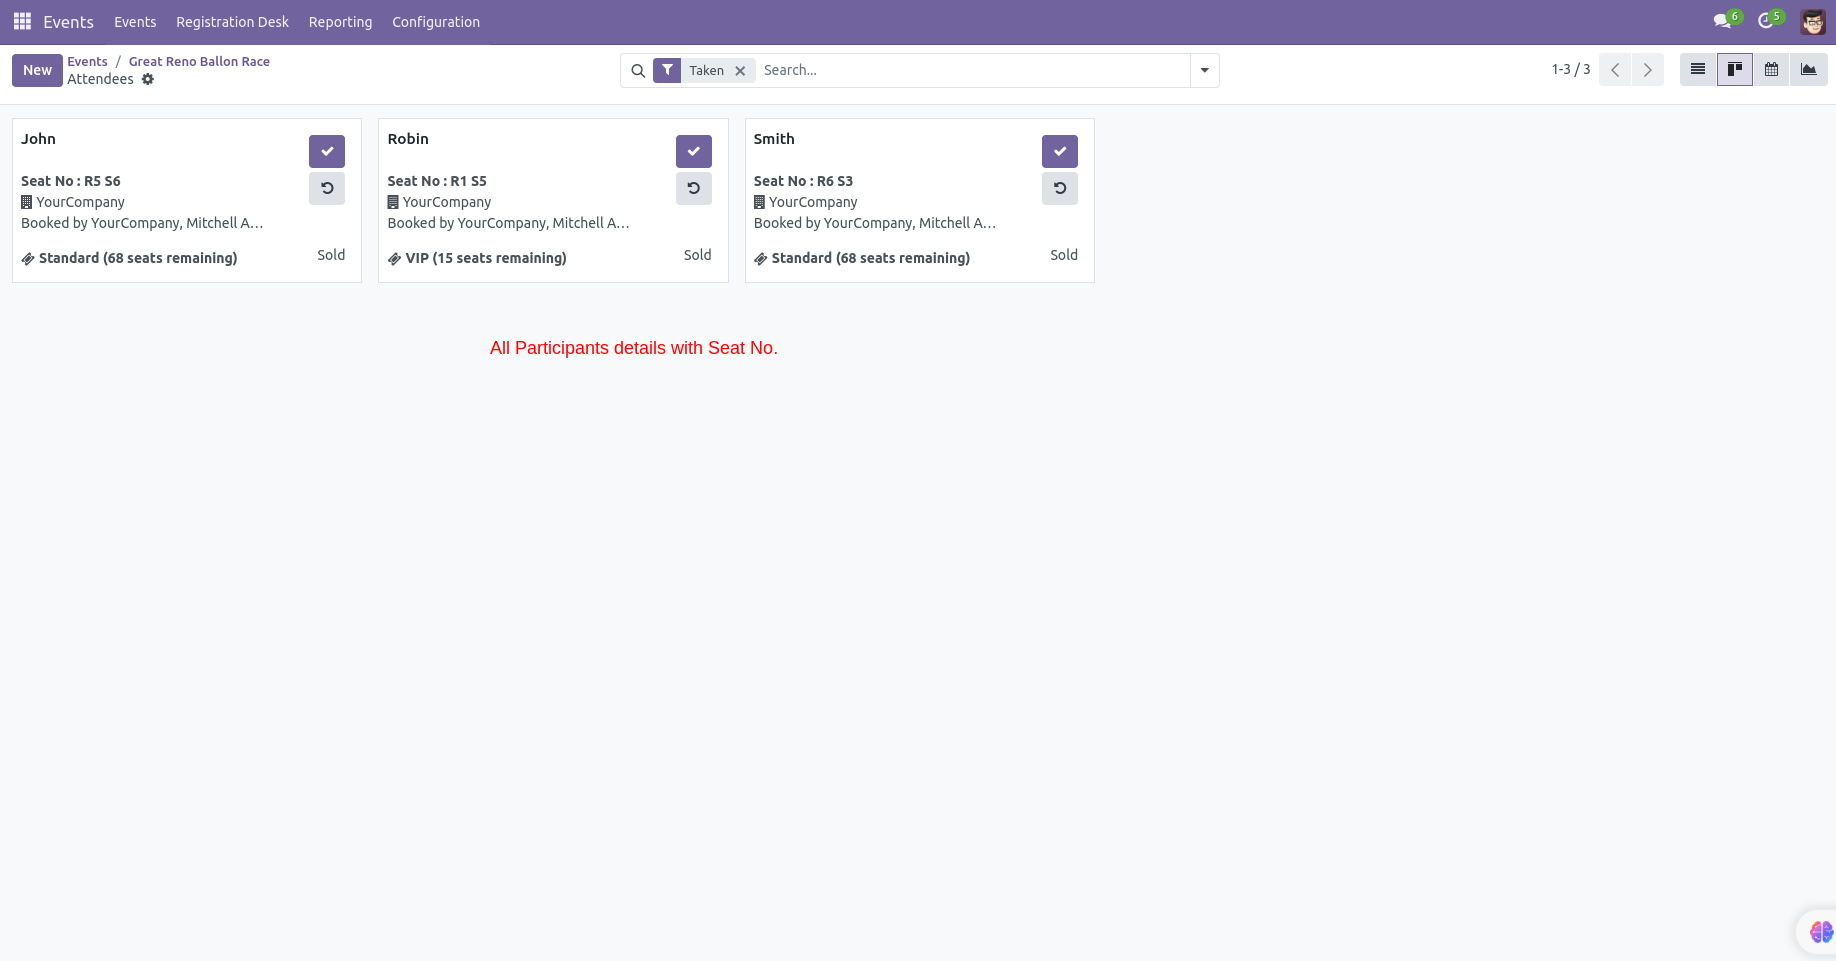
The Participant's details kanban view looks like below.
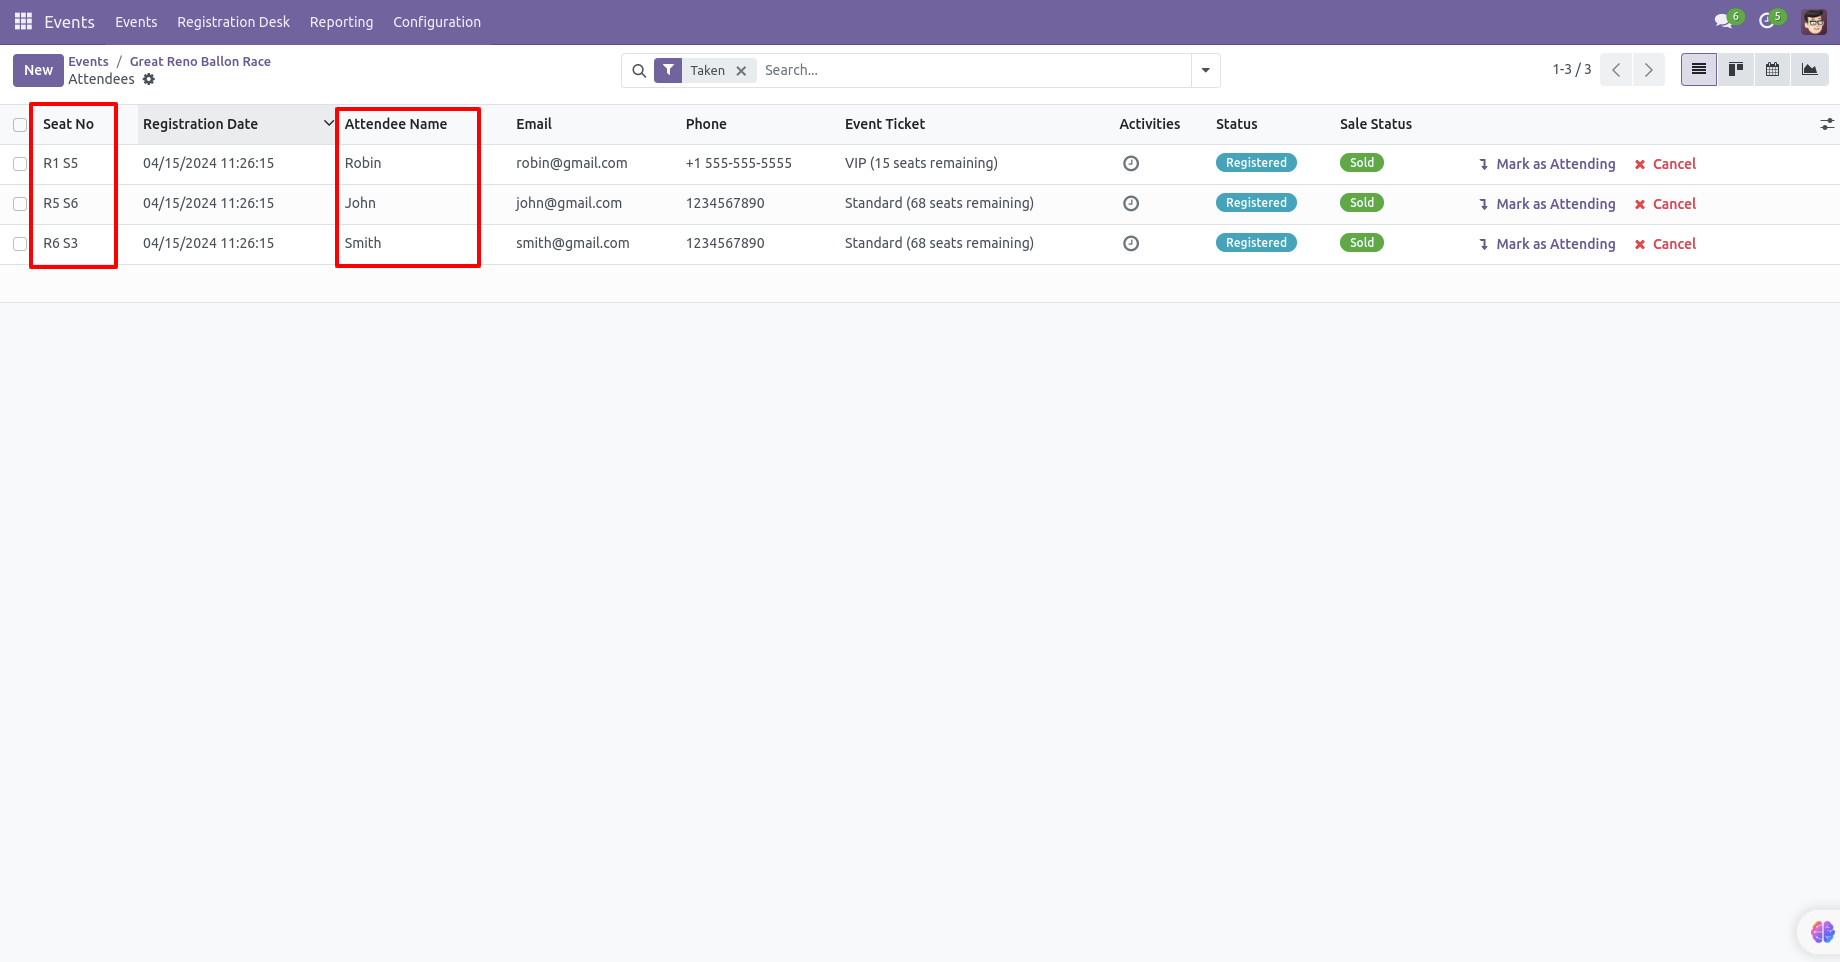
The Participant's details list view looks like below.
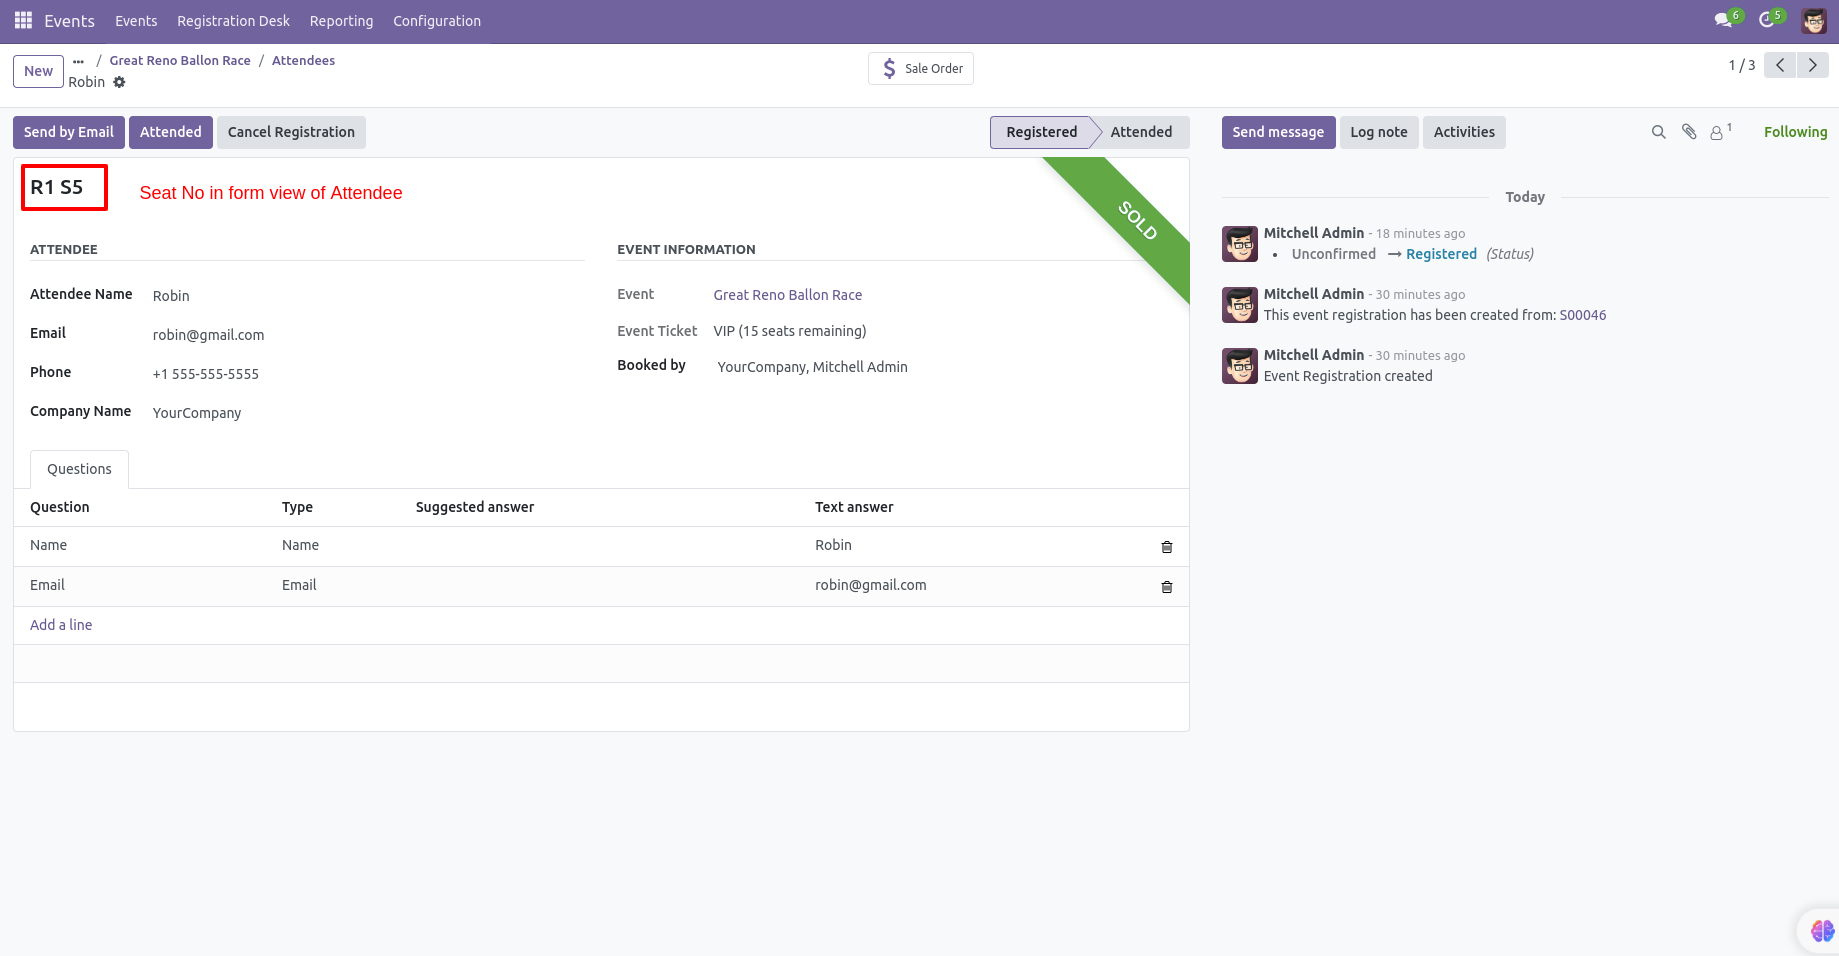
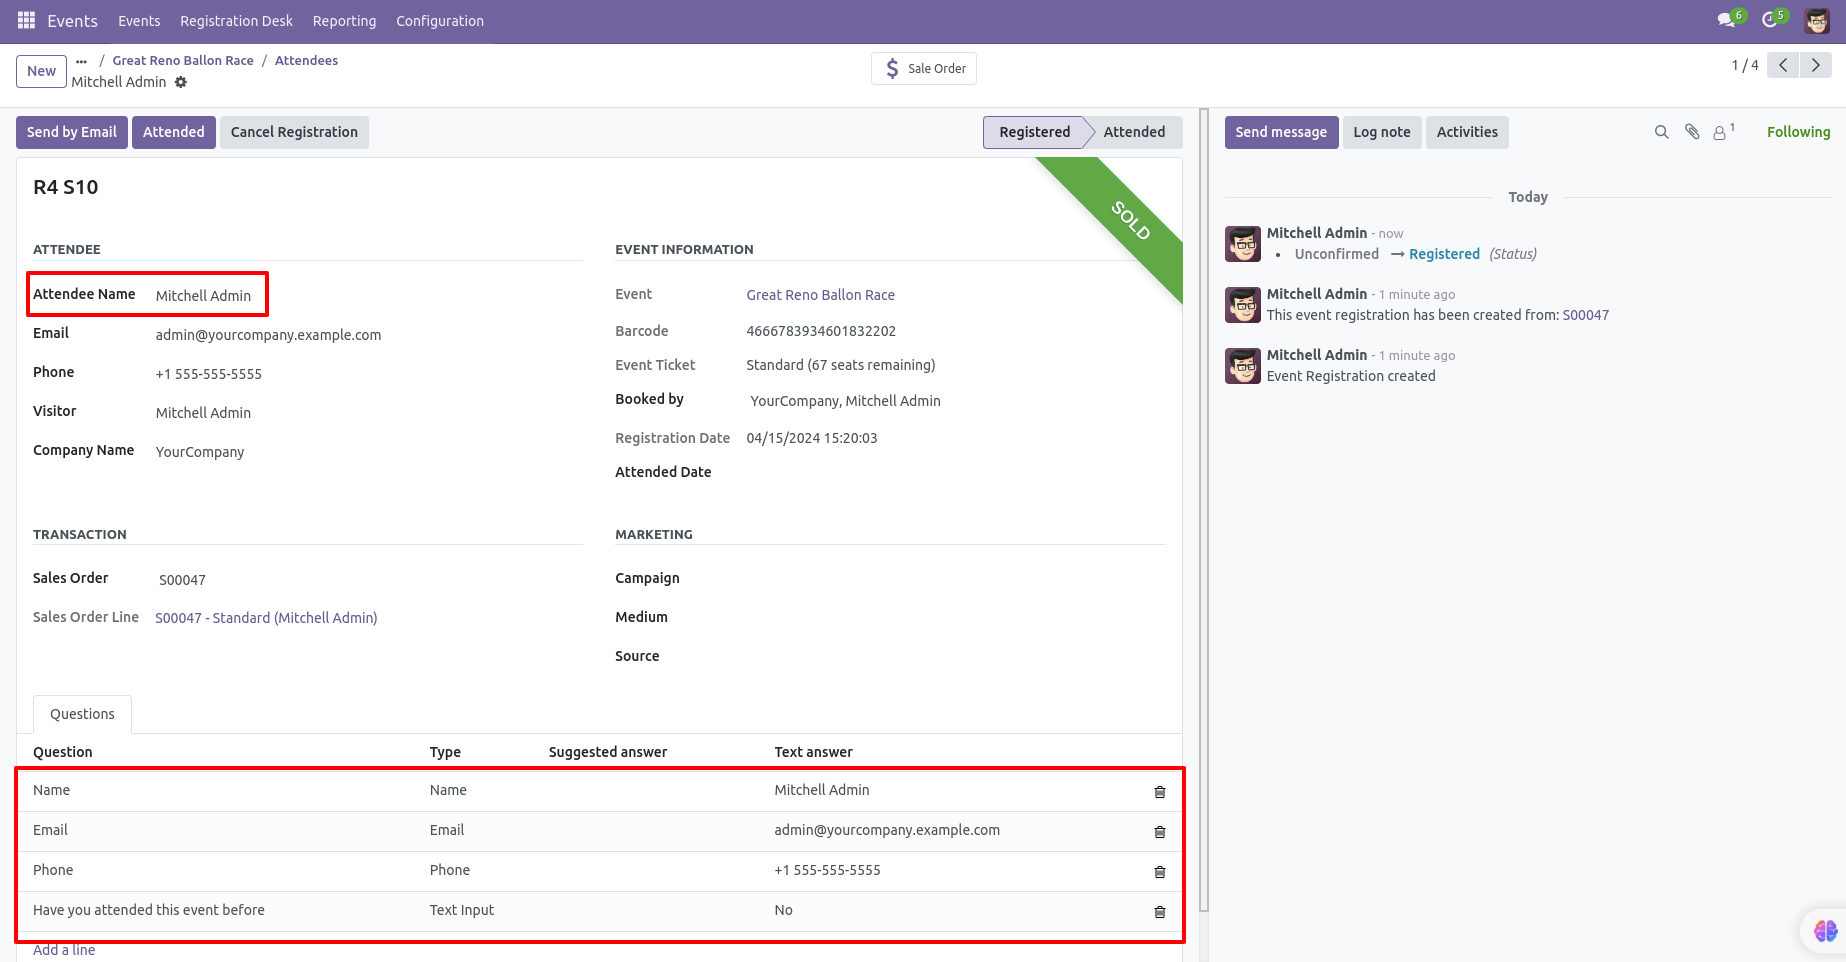
The Participant's details form view looks like below.
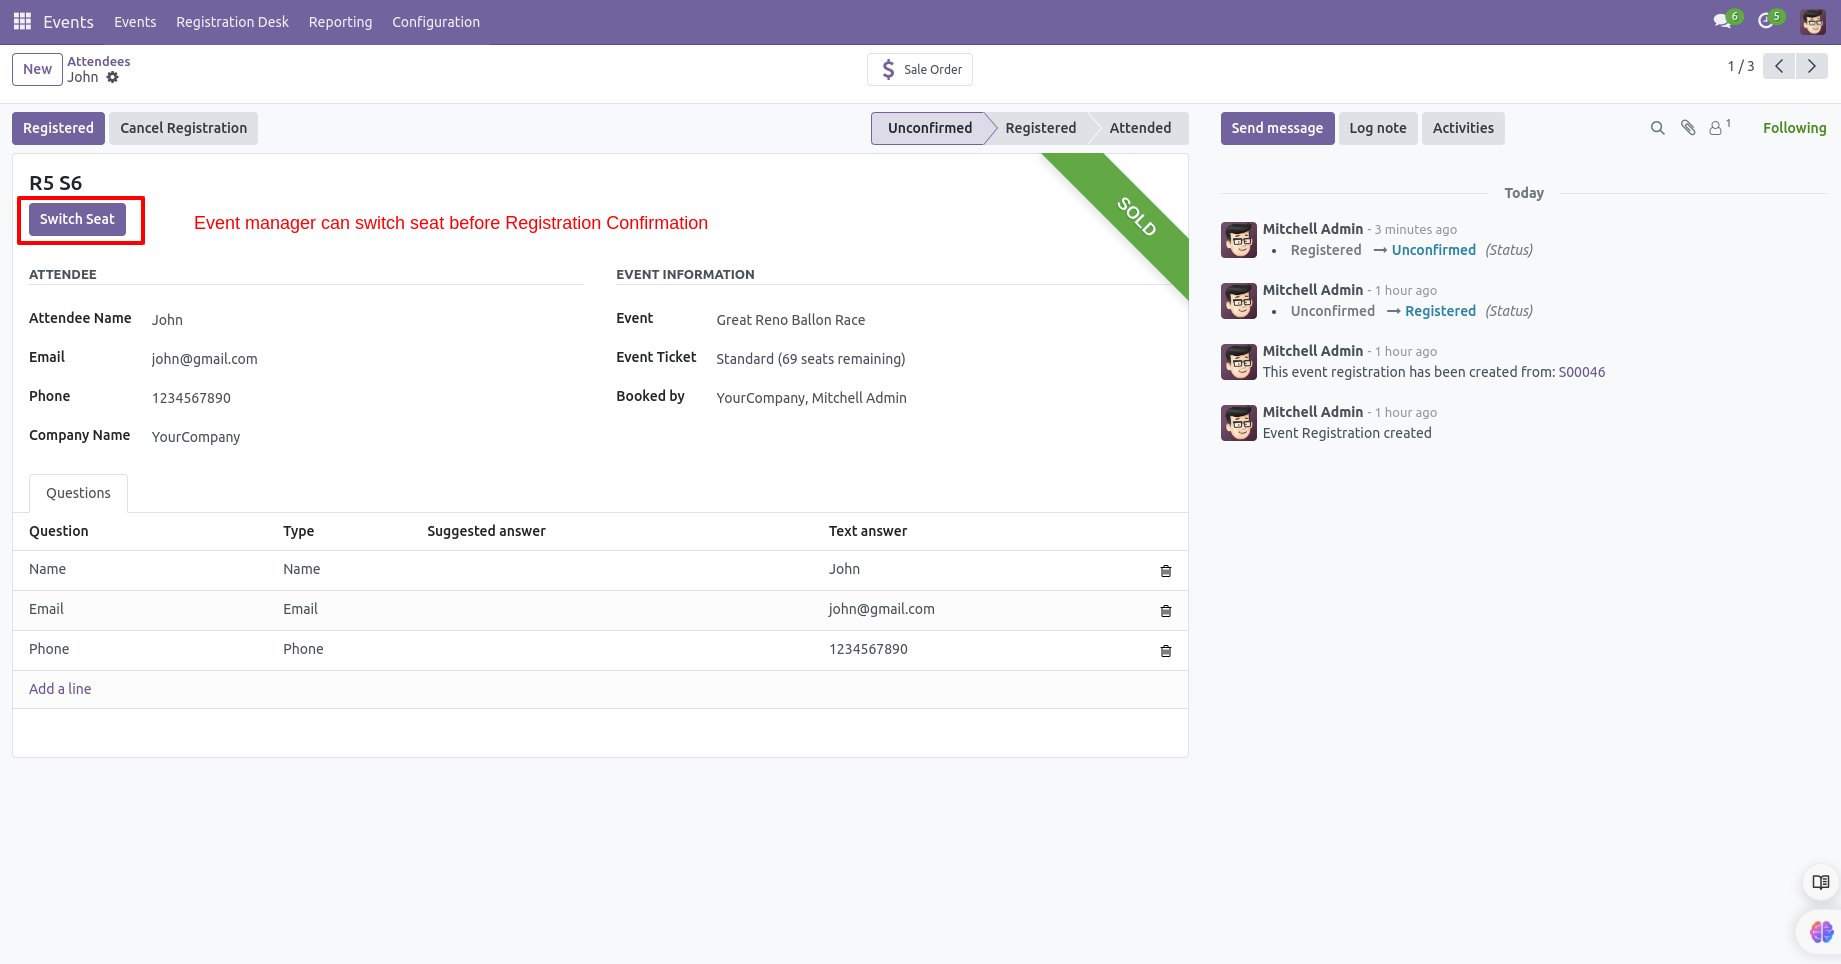
An event manager can switch seats before registration confirmation.
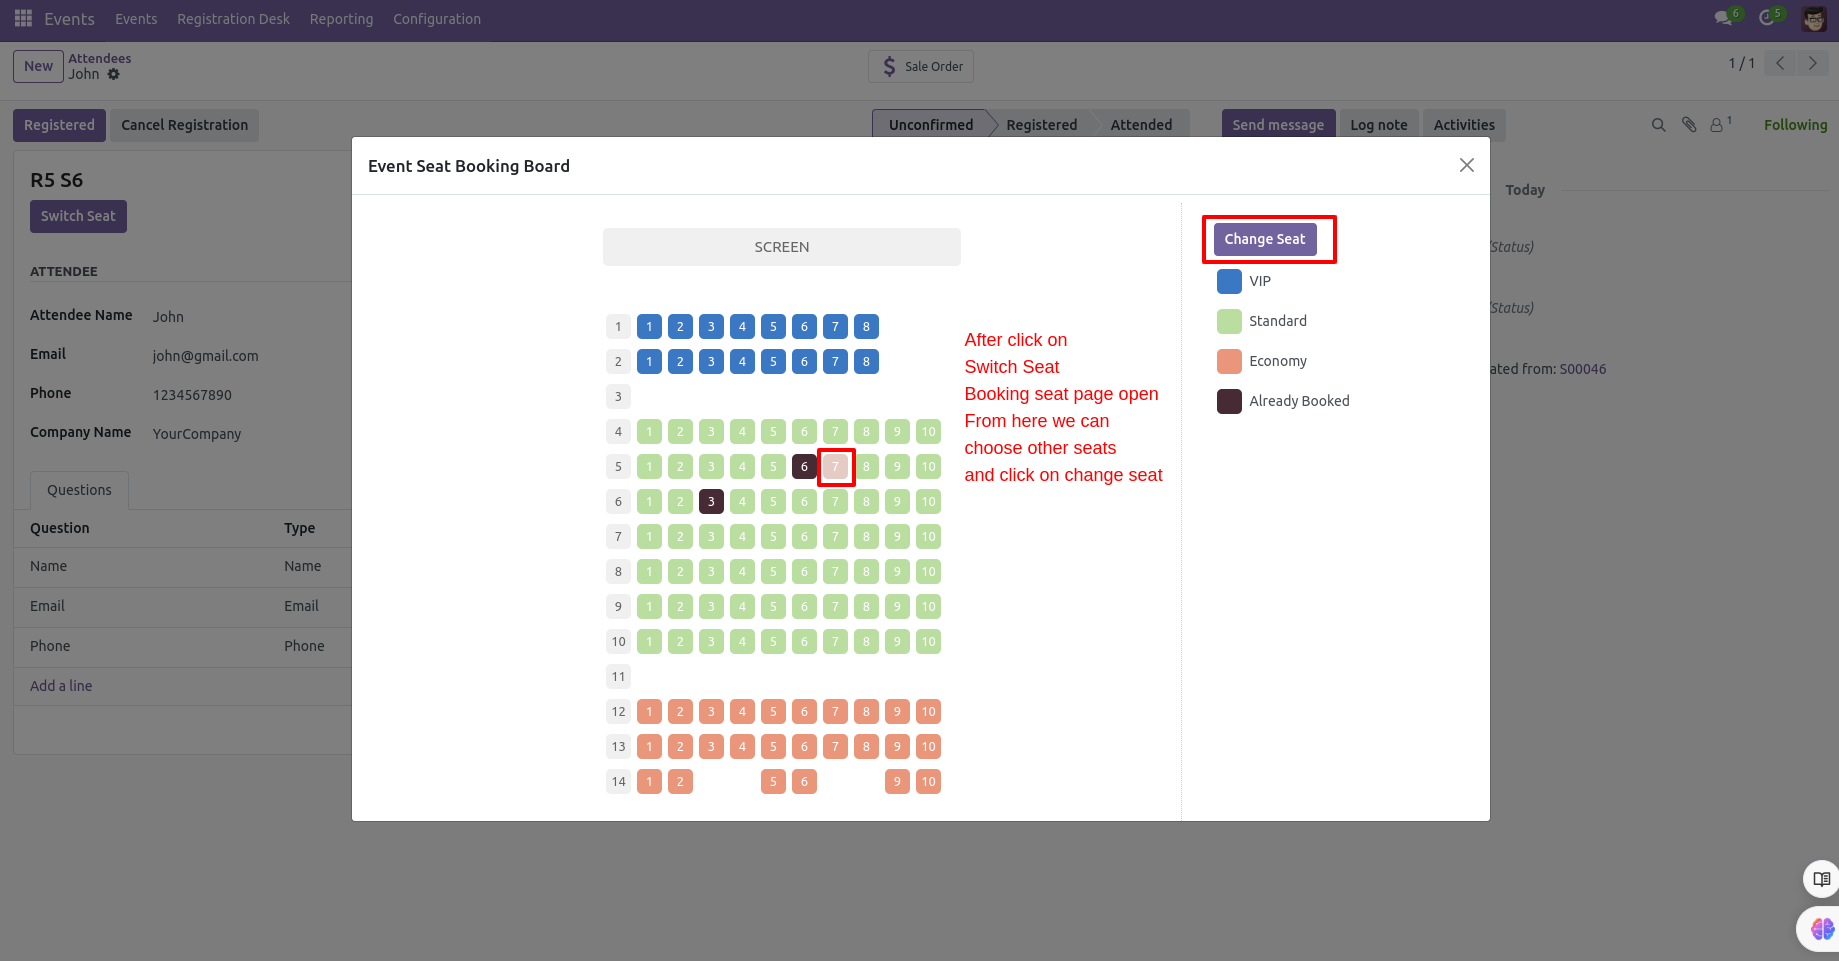
If the event manager press "Switch Seat" button, it opens a wizard, switch seats and press "Change Seat" button.
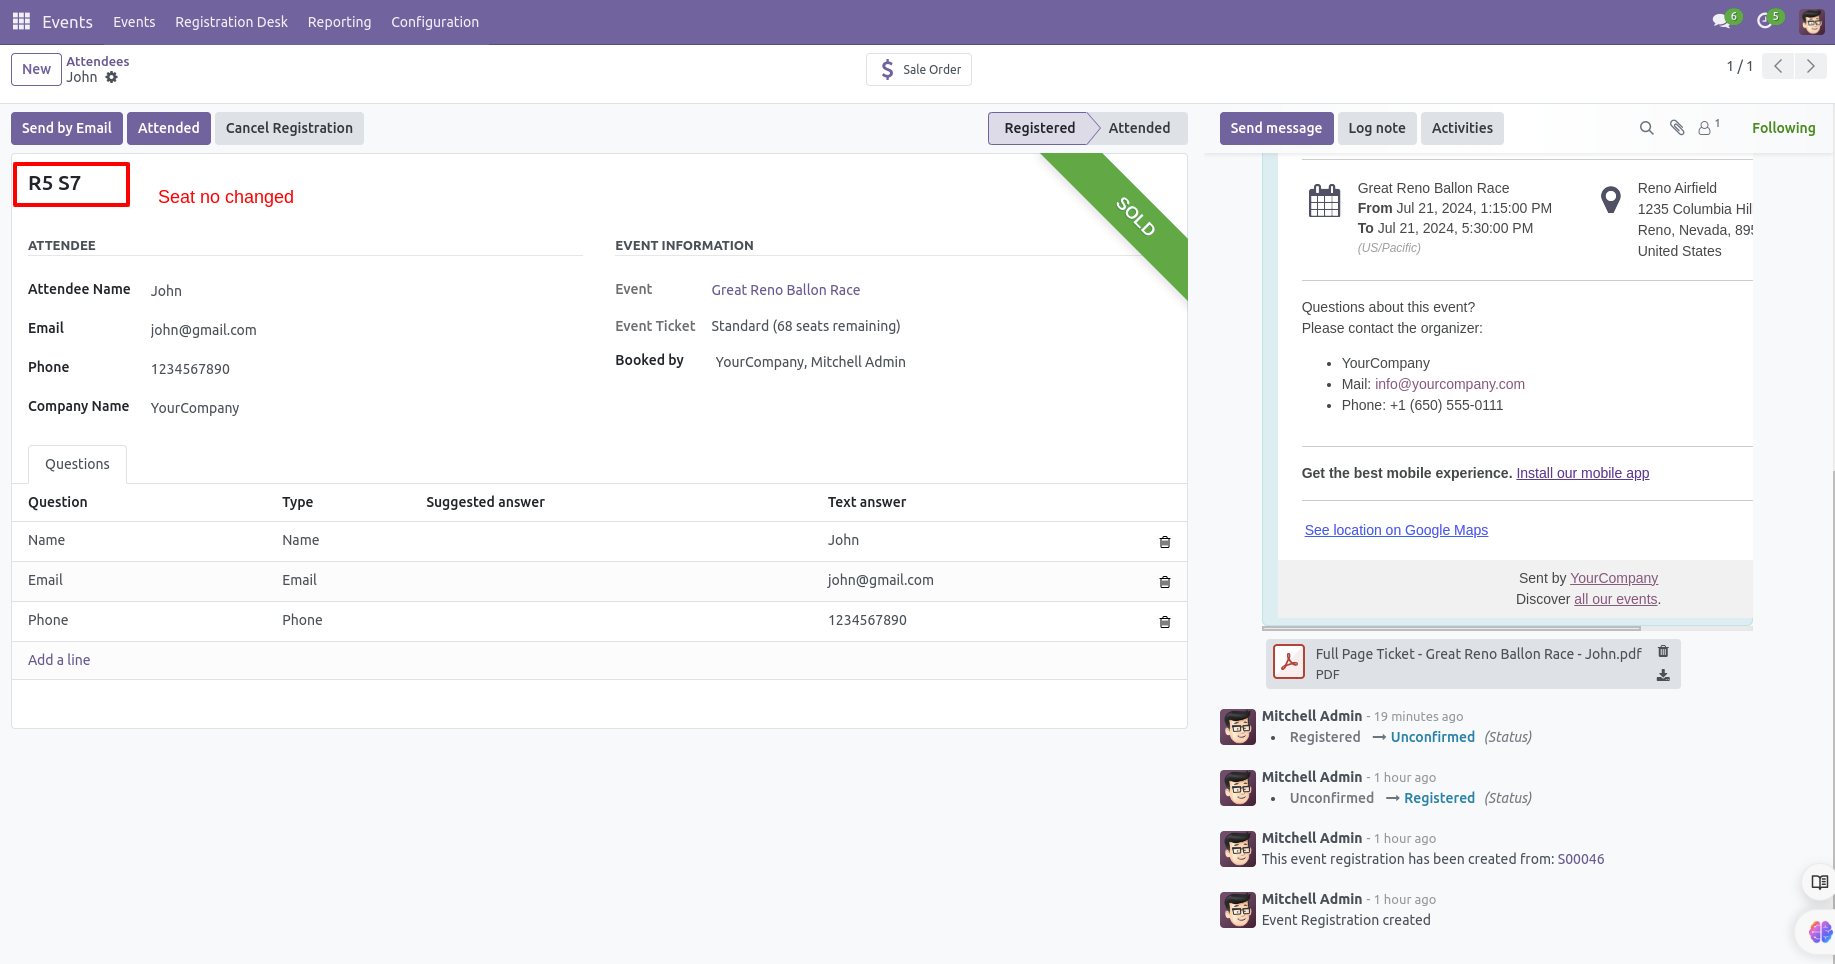
The event manager has done switch seats so now seat number is changed.
In the questions tab, you can add a questionary for any event.
Questions look like below on the website.
Attendees answer backend form view with details.
The tablet view looks like this.
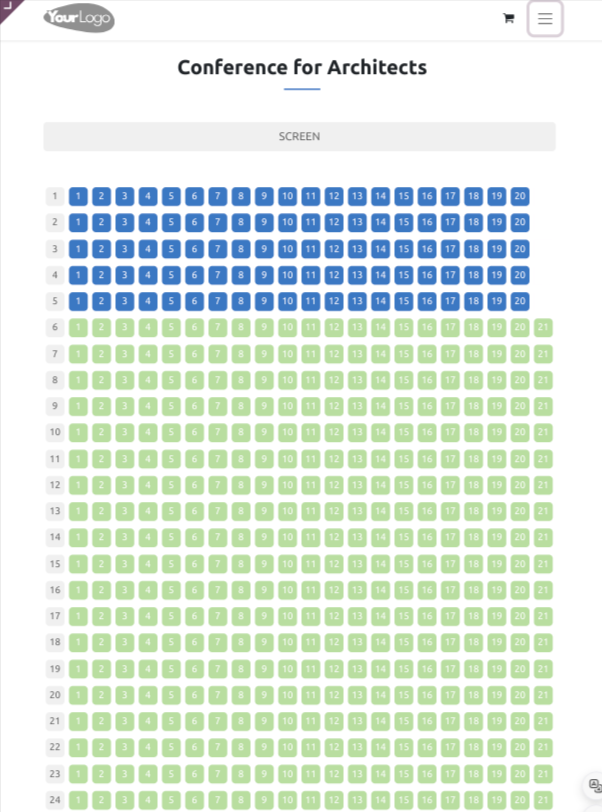
The tablet view looks like this.

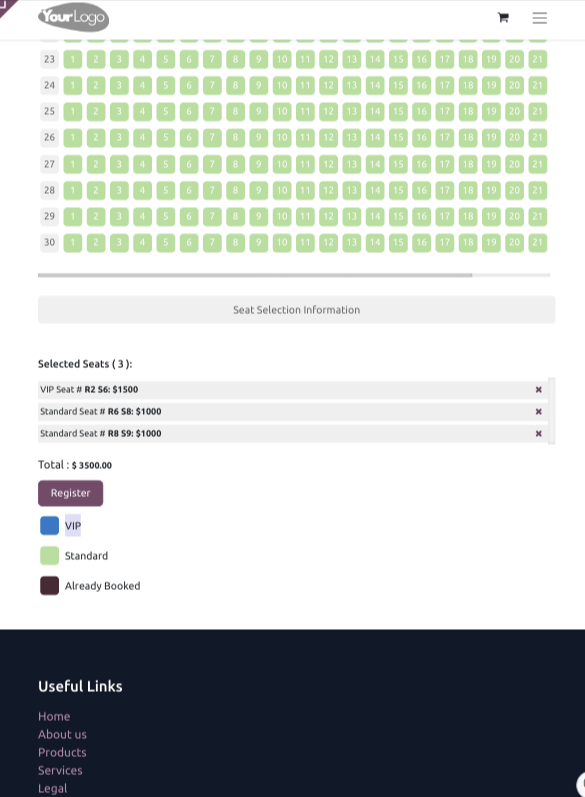
The mobile view looks like this.
The desktop view looks like this.
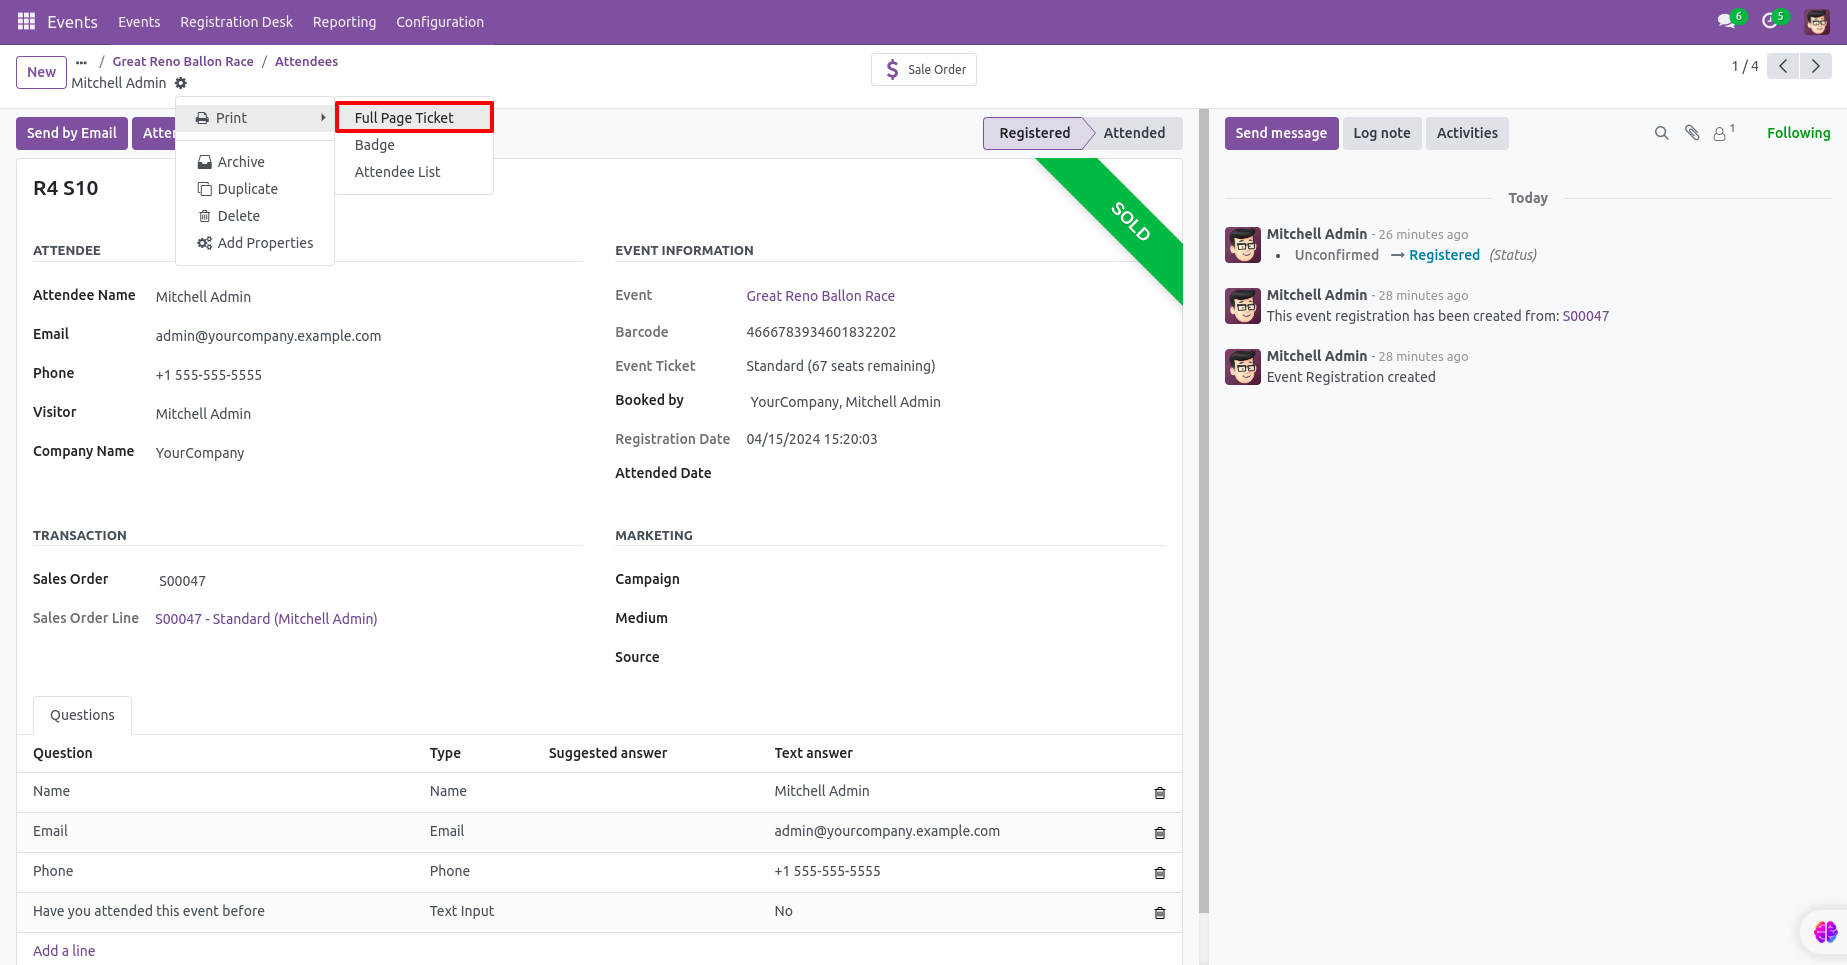
You can print full page ticket from "Print".
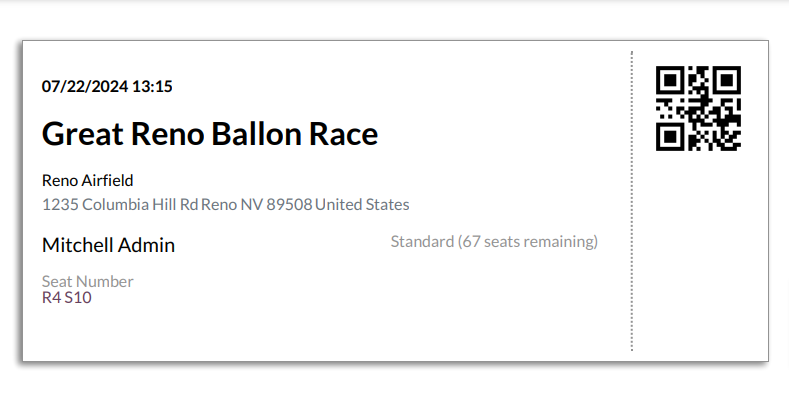
Full page ticket looks like this.
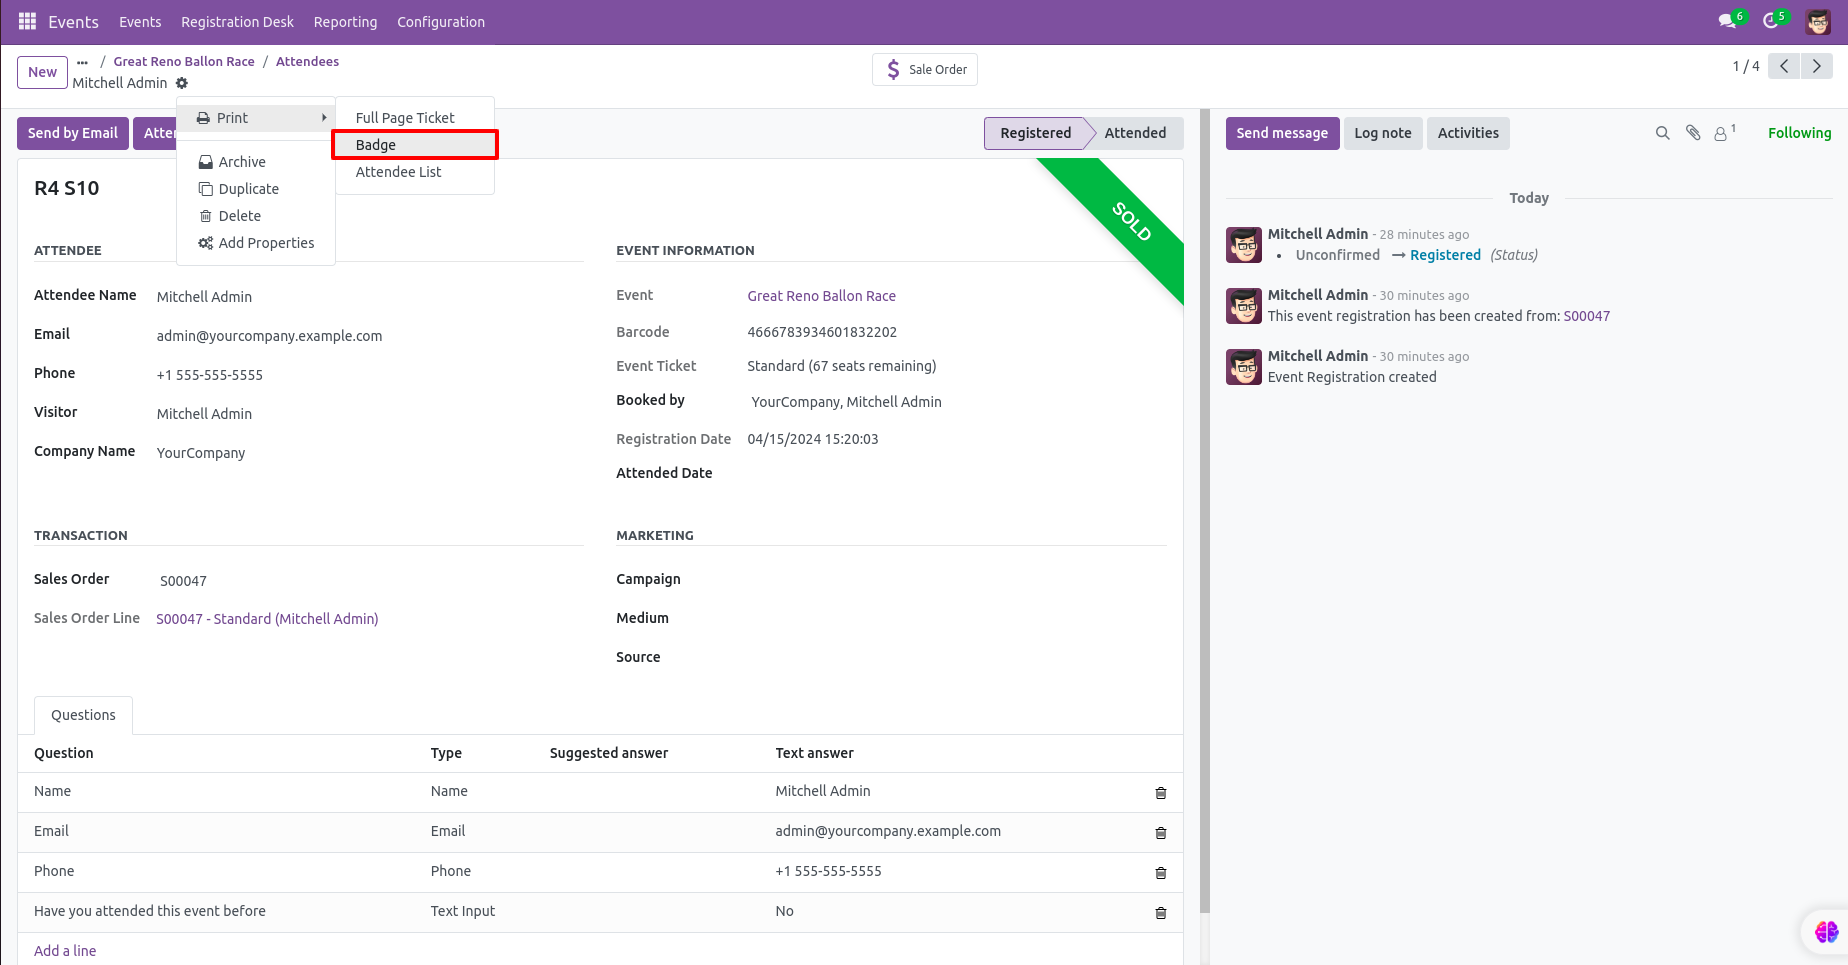
You can print badge from "Print".
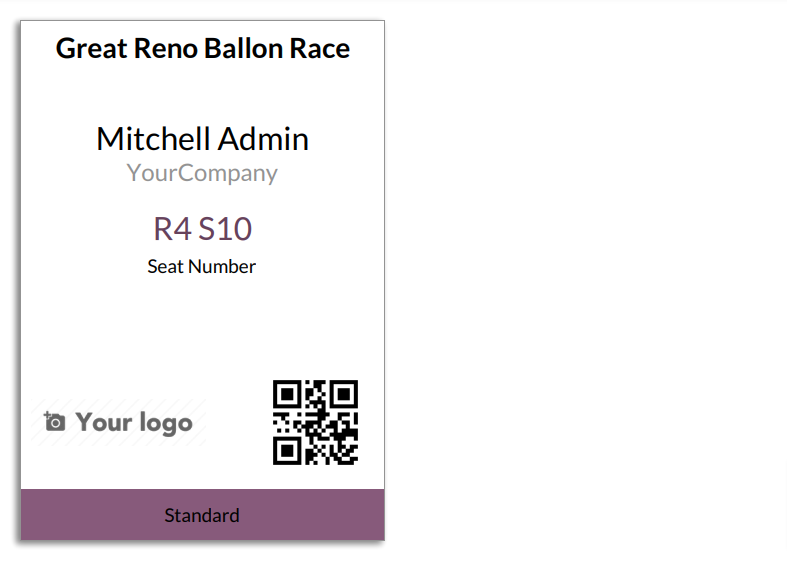
The badge report looks like this.
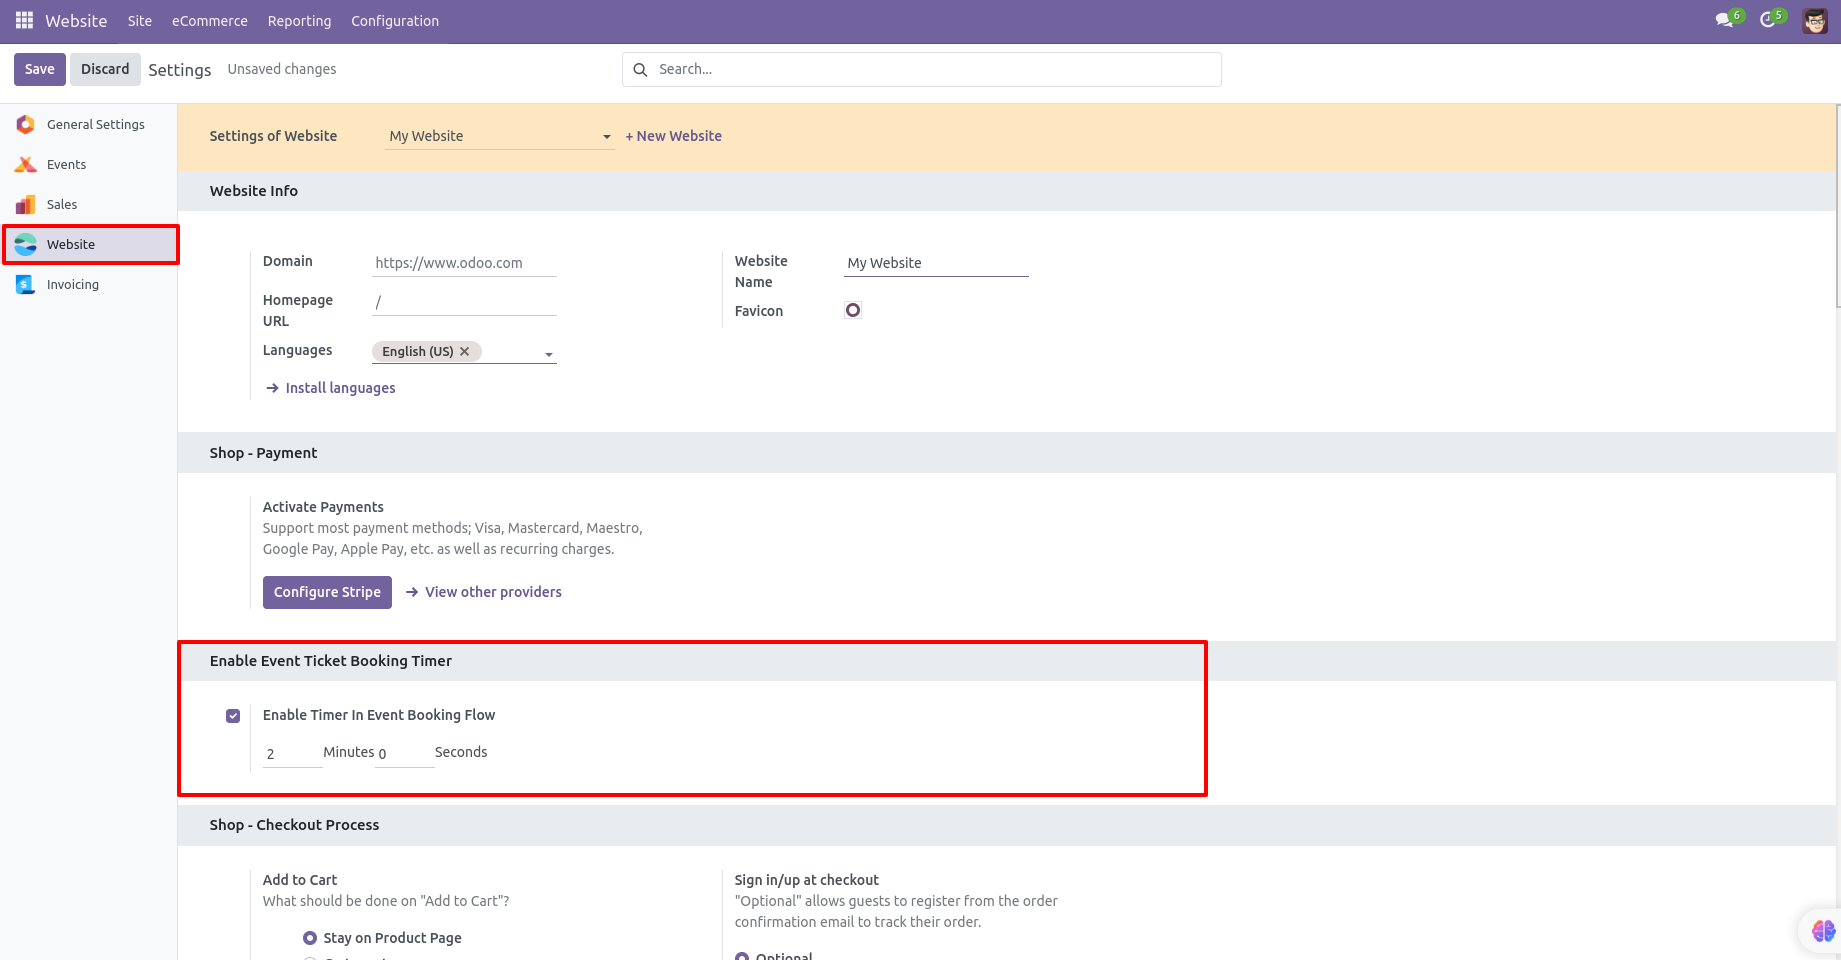
Configuration for event ticket booking timer.
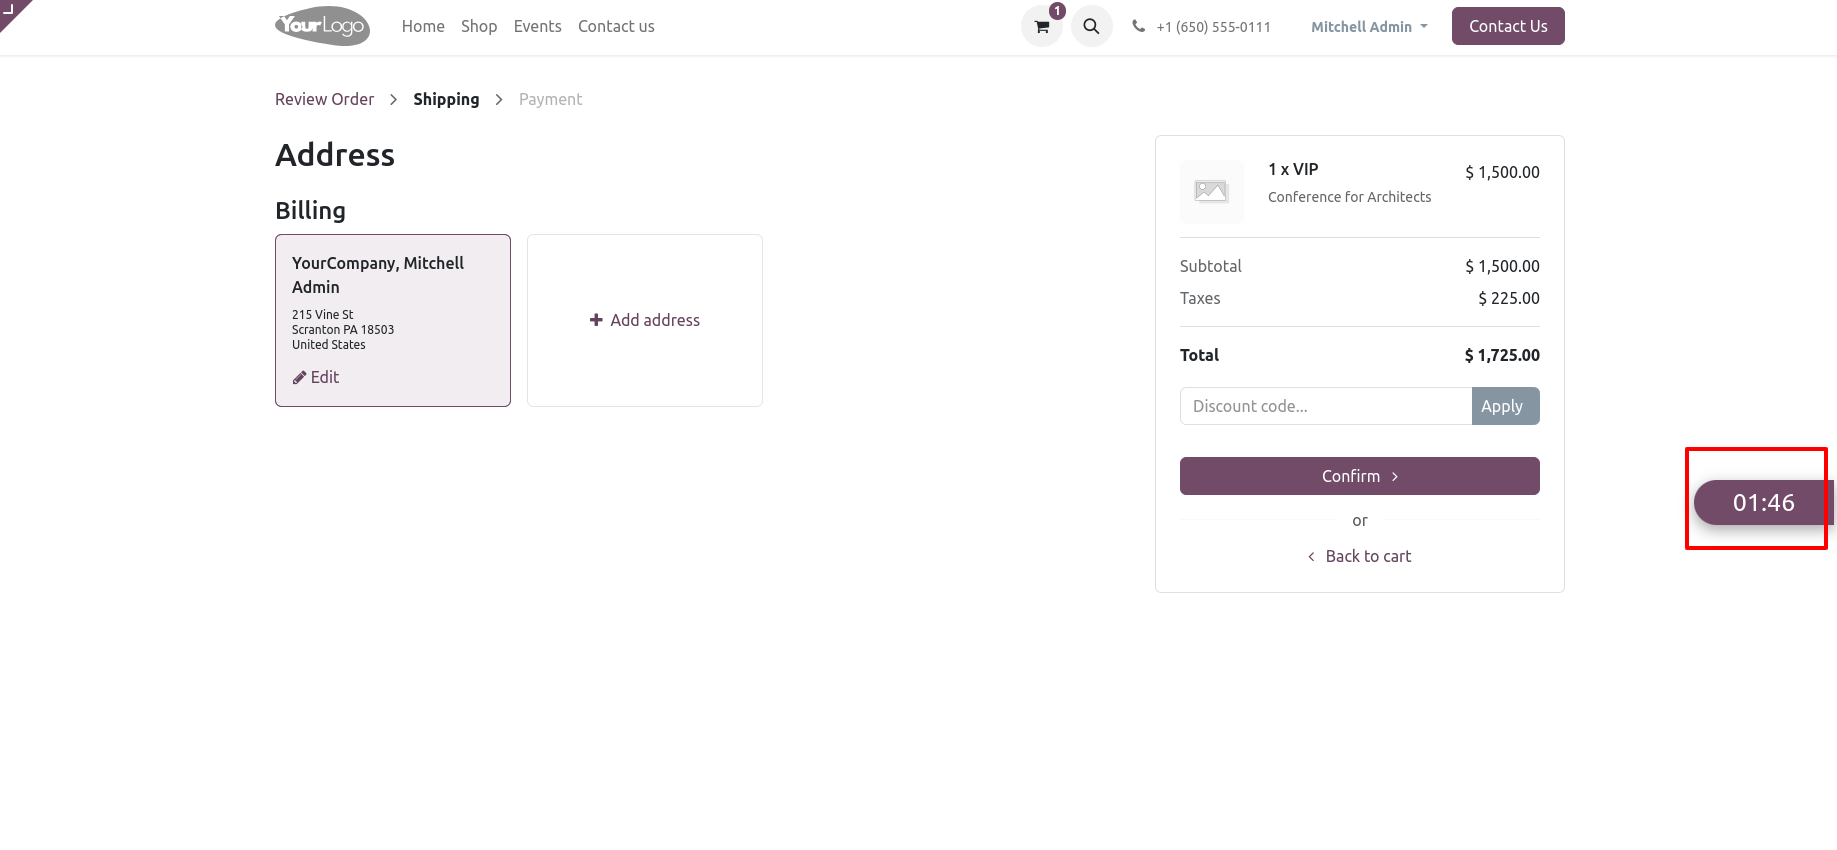
Cooling period displays like below.
Version 17.0.7 | Released on : 17th December 2025
Version 17.0.6 | Released on : 10th September 2024
Version 17.0.5 | Released on : 27th June 2024
Version 17.0.4 | Released on : 28rd March 2024
Version 17.0.3 | Released on : 29rd January 2024
Version 17.0.2 | Released on : 24th January 2024
Version 17.0.1 | Released on : 7th November 2023
- Yes, this app works perfectly with Odoo Enterprise (Odoo.sh & Premise) as well as Community.
- No, this application is not compatible with odoo.com(odoo saas).
- Please Contact Us at sales@softhealer.comto request customization.
- Yes, we provide free support for 100 days.
- Yes, you will get free update for lifetime.
- No, you don't need to install addition libraries.
- Yes, You have to download module for each version (13,14,15) except in version 12 or lower.
- No, We do not provide any kind of exchange.
