













Customer KYC Management - Advance

Are you looking for a smarter, automated, and compliant way to manage your customer KYC process? We have the best solution for you. Using the Advanced KYC Flow with Approval and Expiry provides an easy process for managing the entire KYC lifecycle. It features dynamic approval levels, expiry tracking, renewal workflows, and automated reminders. This ensures customer information remains accurate, compliant, and up to date before any transaction is approved or reject. With this system, businesses can enhance operational efficiency, reduce compliance risks, and maintain complete control over KYC validations.

Related Modules
Features
Dynamic Approval Levels
Configure multi-level approval flows based on customer risk rating or internal policies.

Automated KYC Expiry Tracking
User can tracks KYC expiry dates and notifies users when kyc are about to expire.
KYC Renewal Workflow
Allows customers to renew their KYC with updated details and signatures when the current KYC expires or requires renewal.
KYC Status Tracking
Monitor real-time statuses such as Onboarding, Waiting for Approval, Approved, Odoo Sign Pending, Re-New, or Expired.
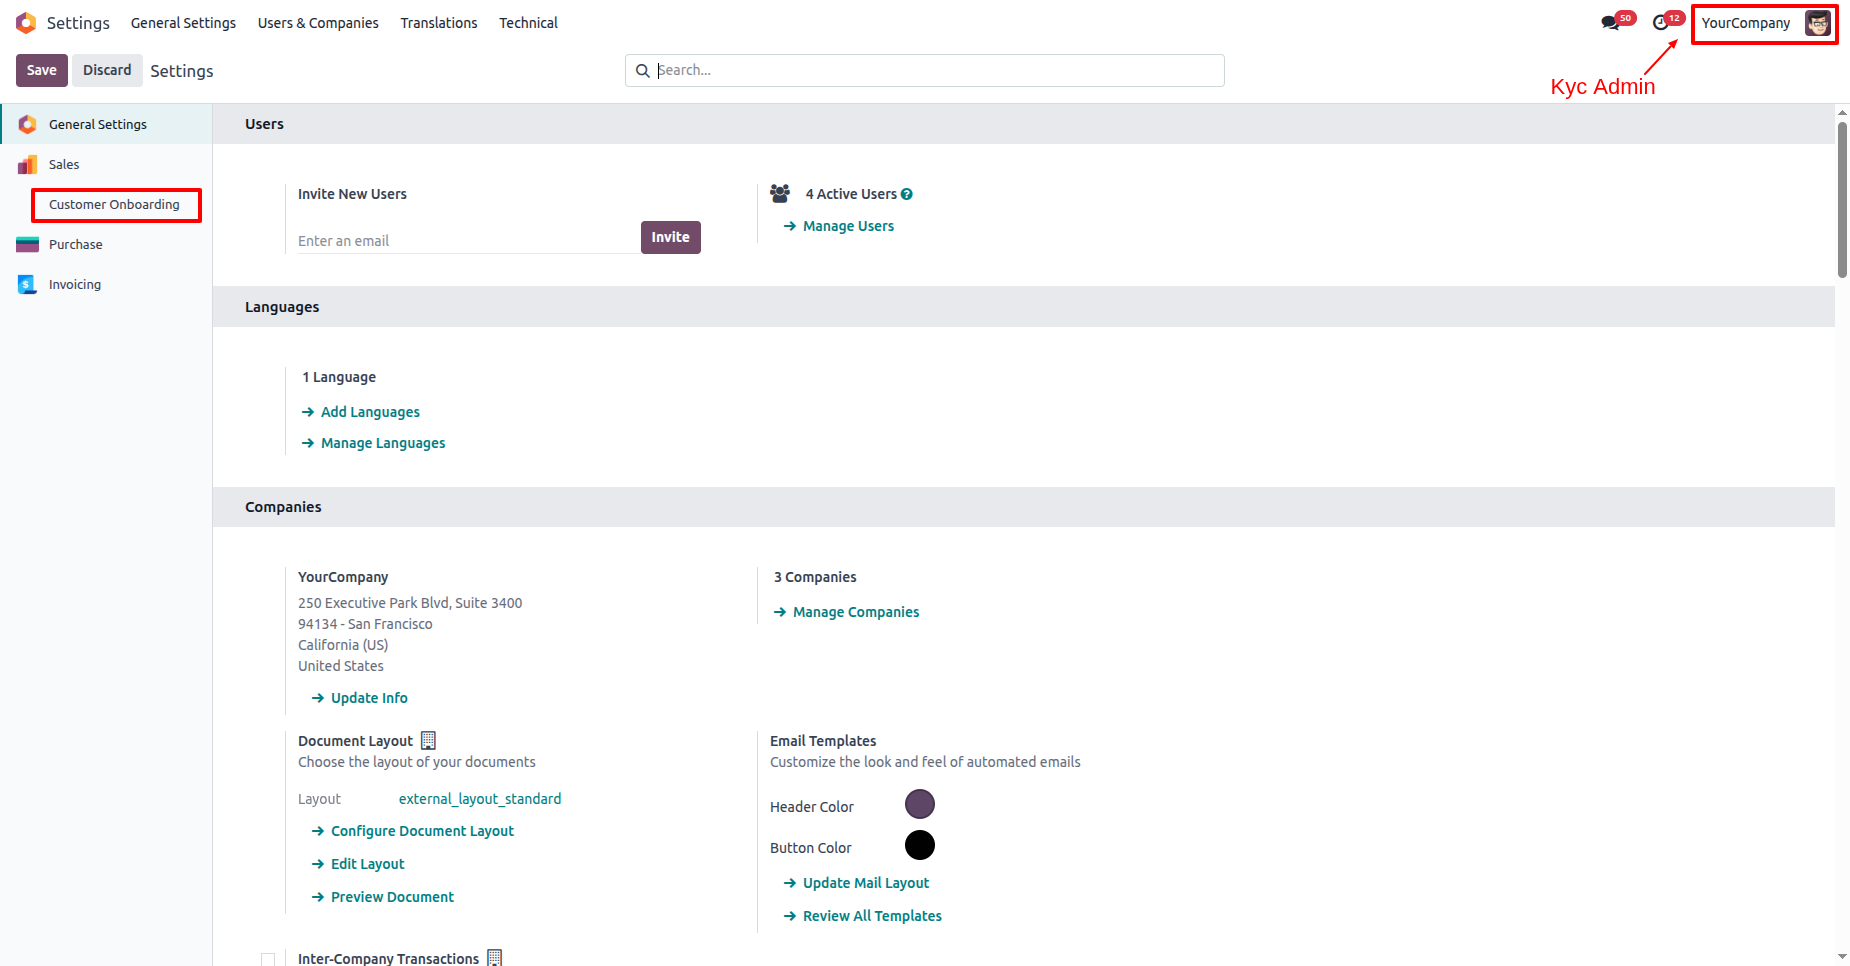
Go to the user settings ==> Enable the "KYC Admin" option.
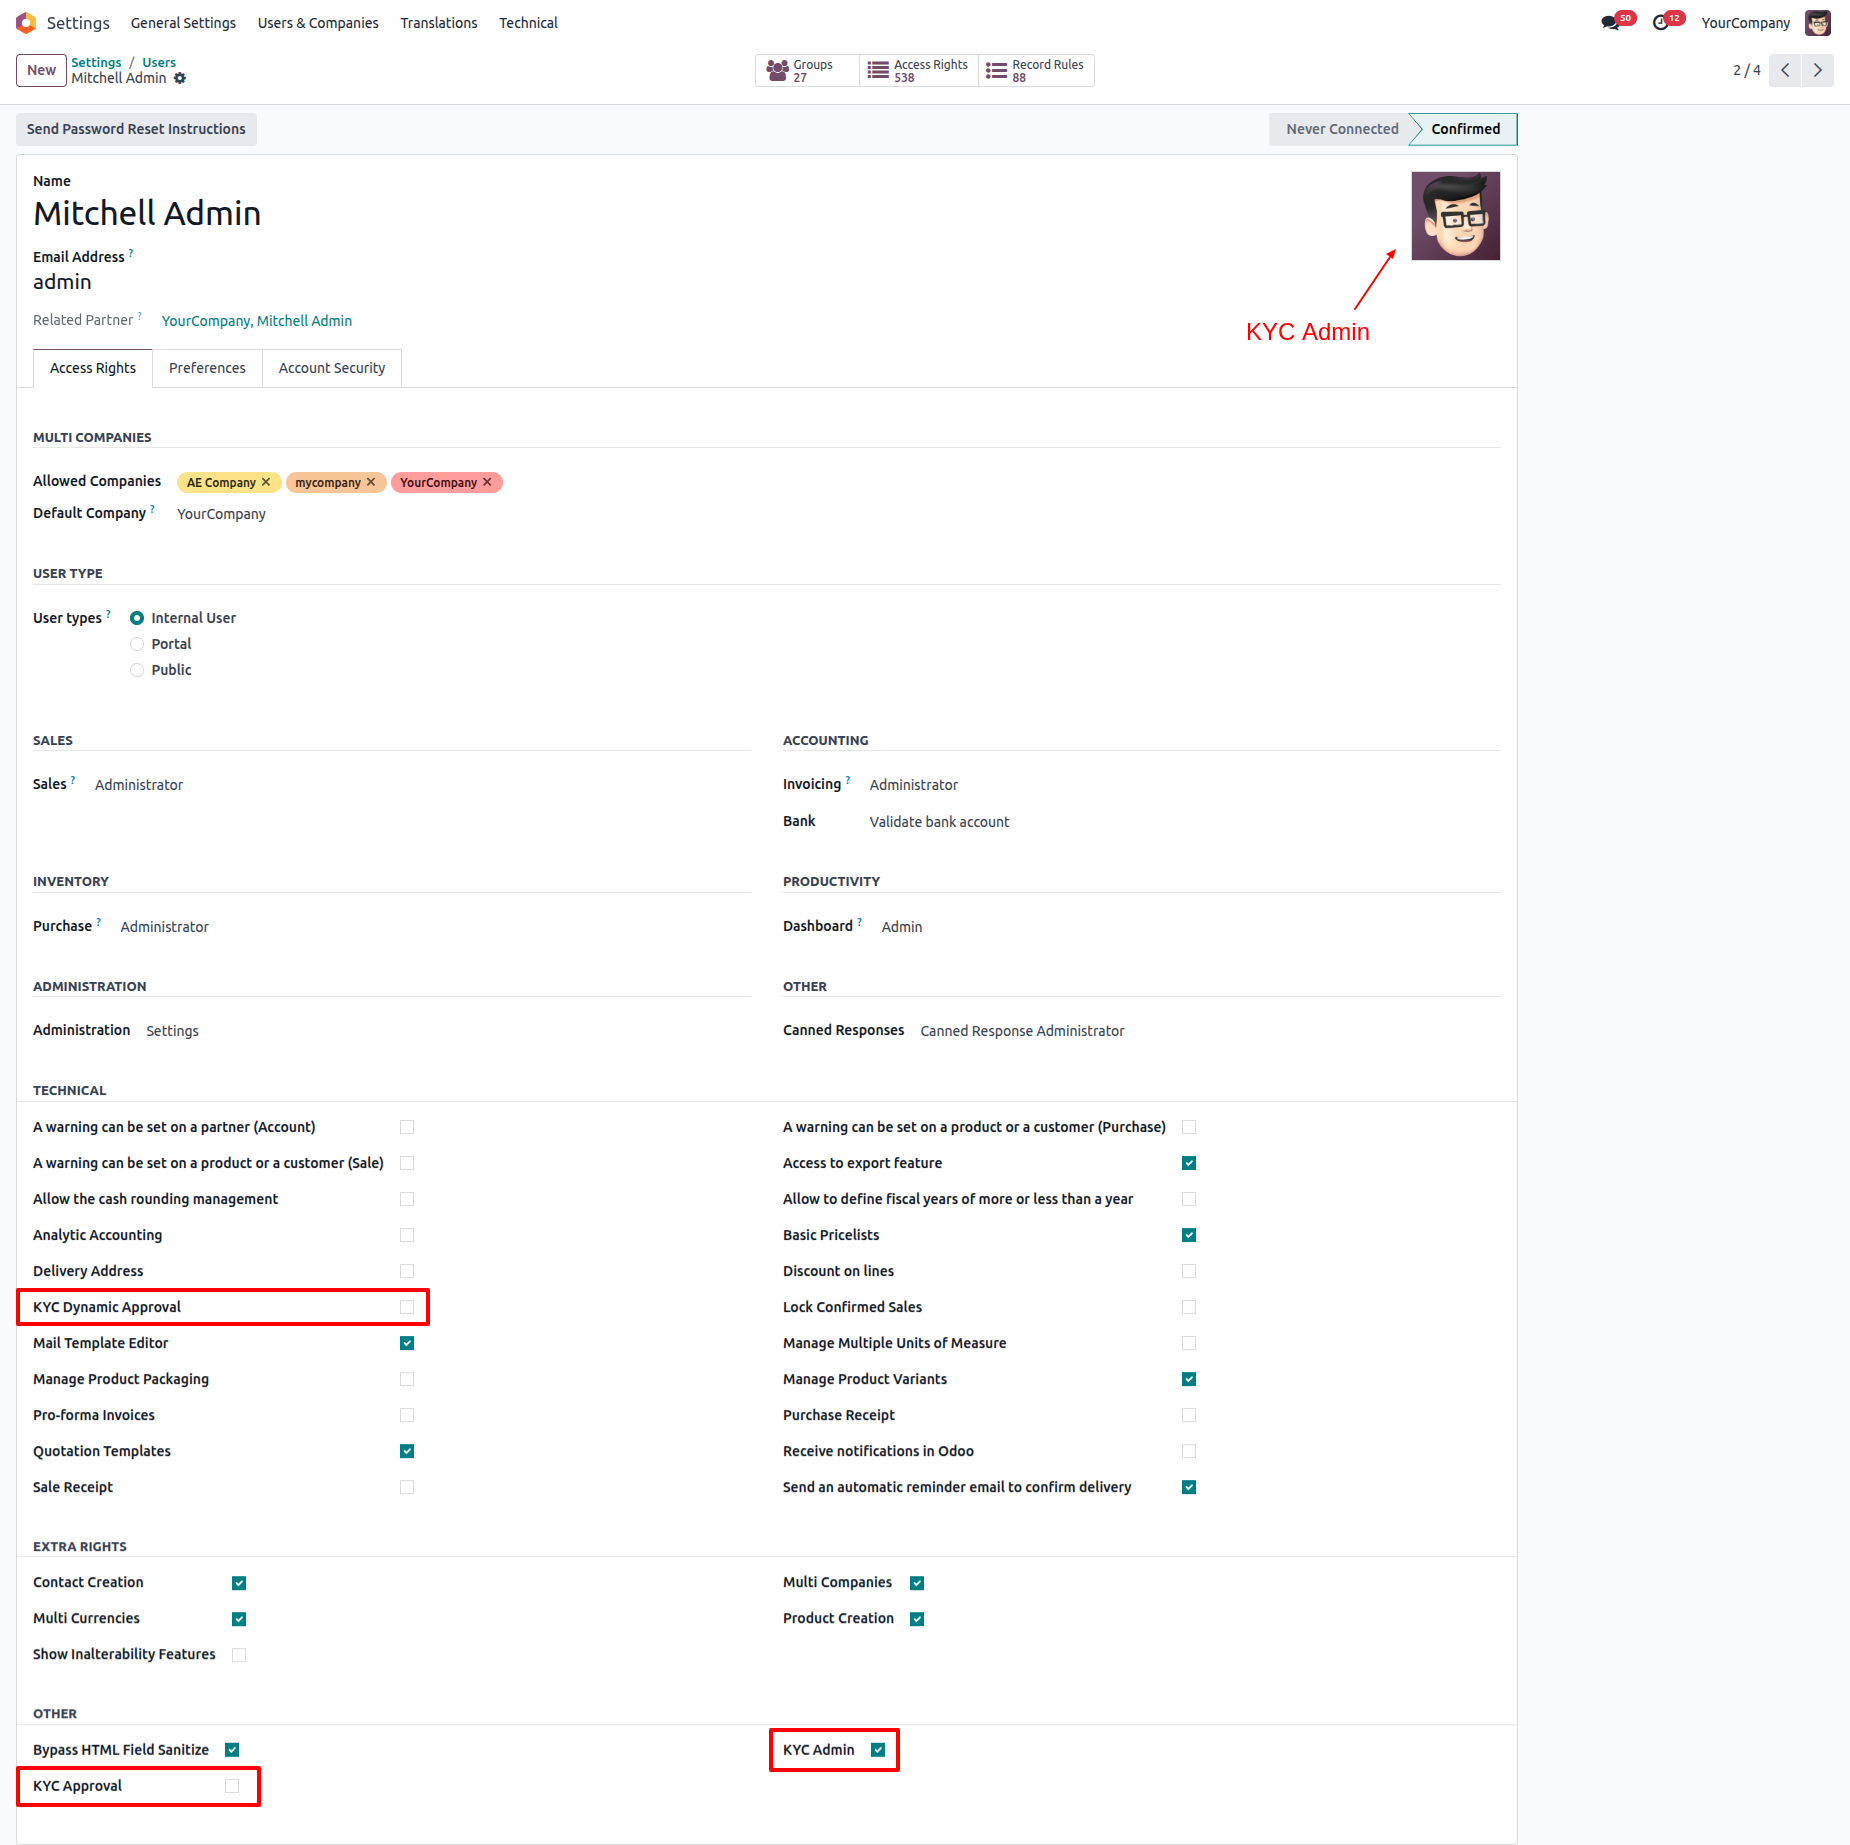
Login as a admin user and go to the Customer Onboarding.
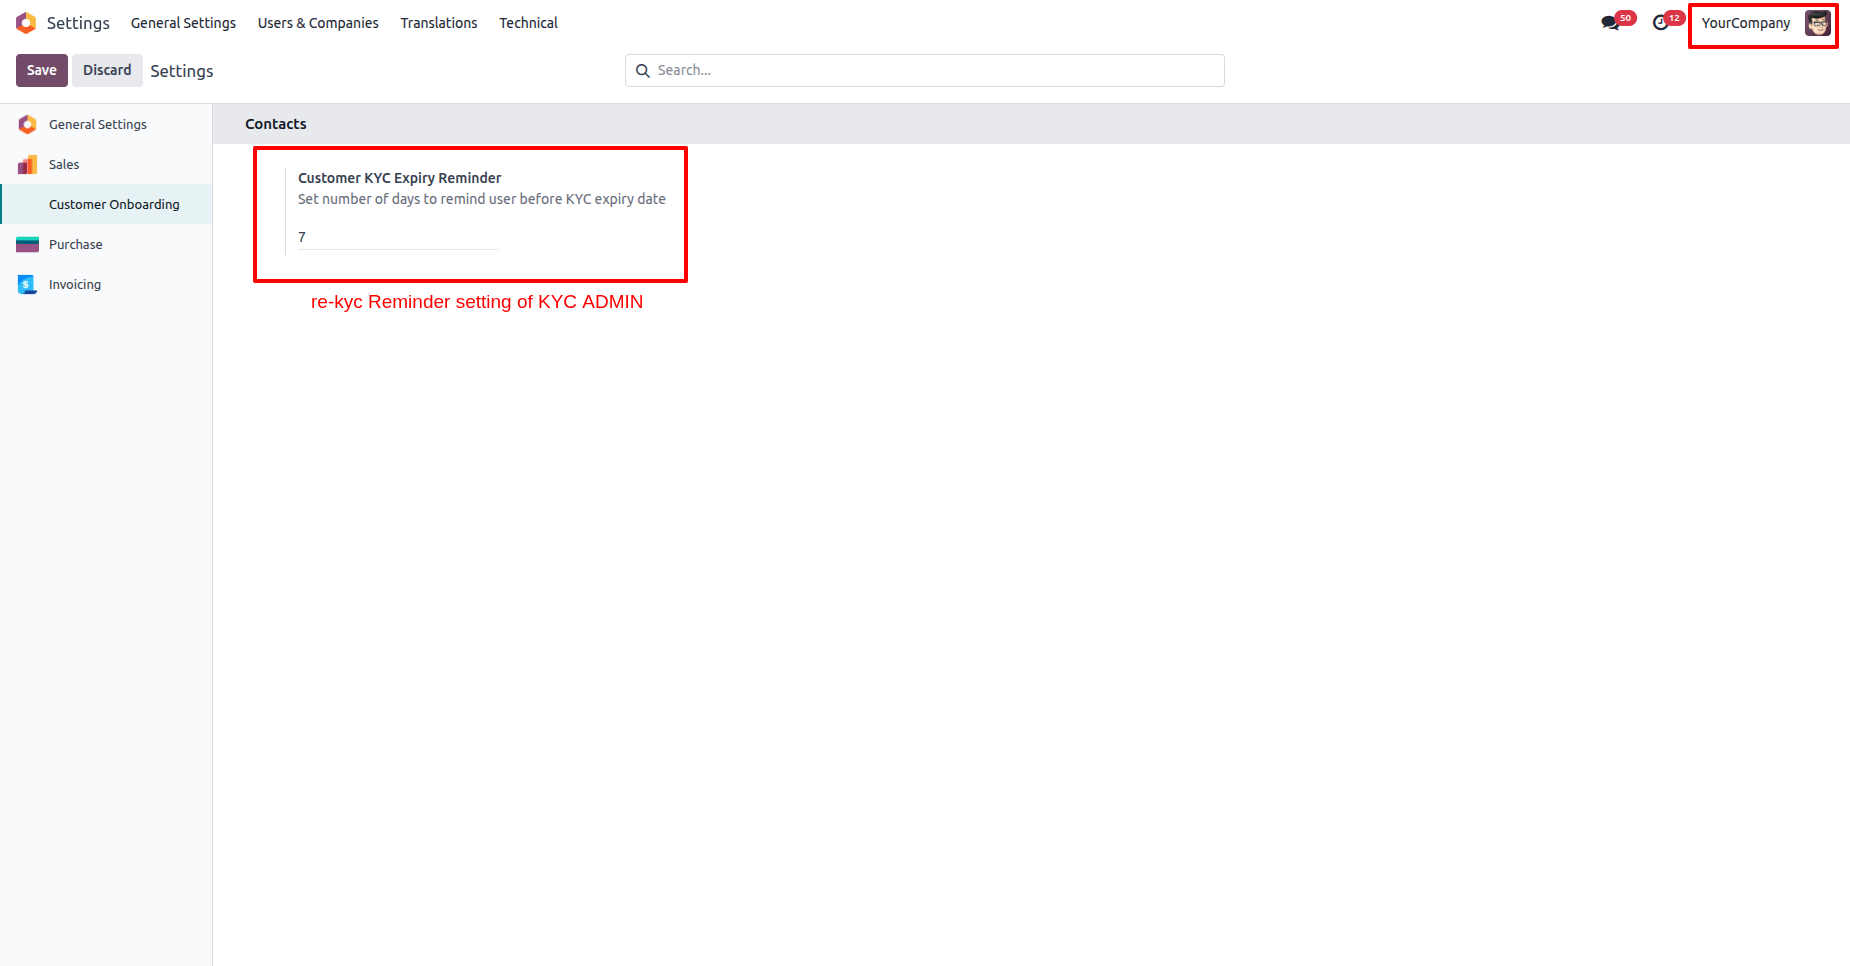
Set up the Re-KYC reminder settings in the KYC Admin.
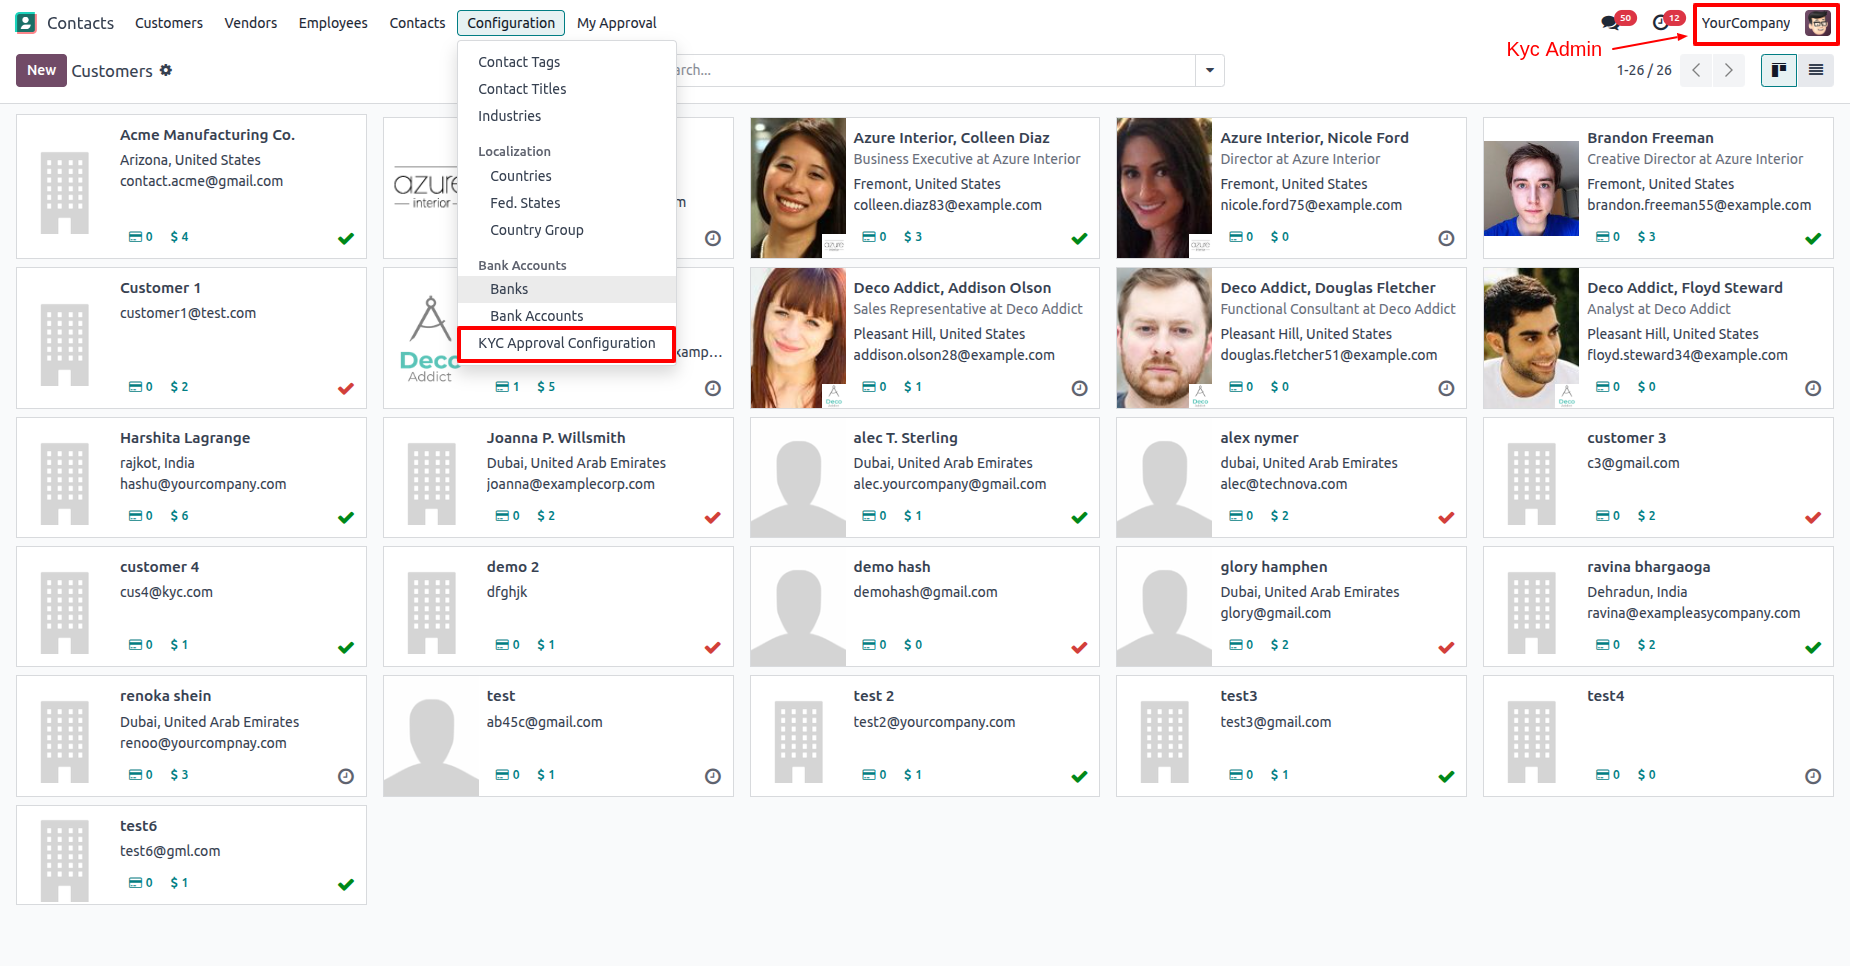
Go to the Configuration ==> KYC Approval Configuration.
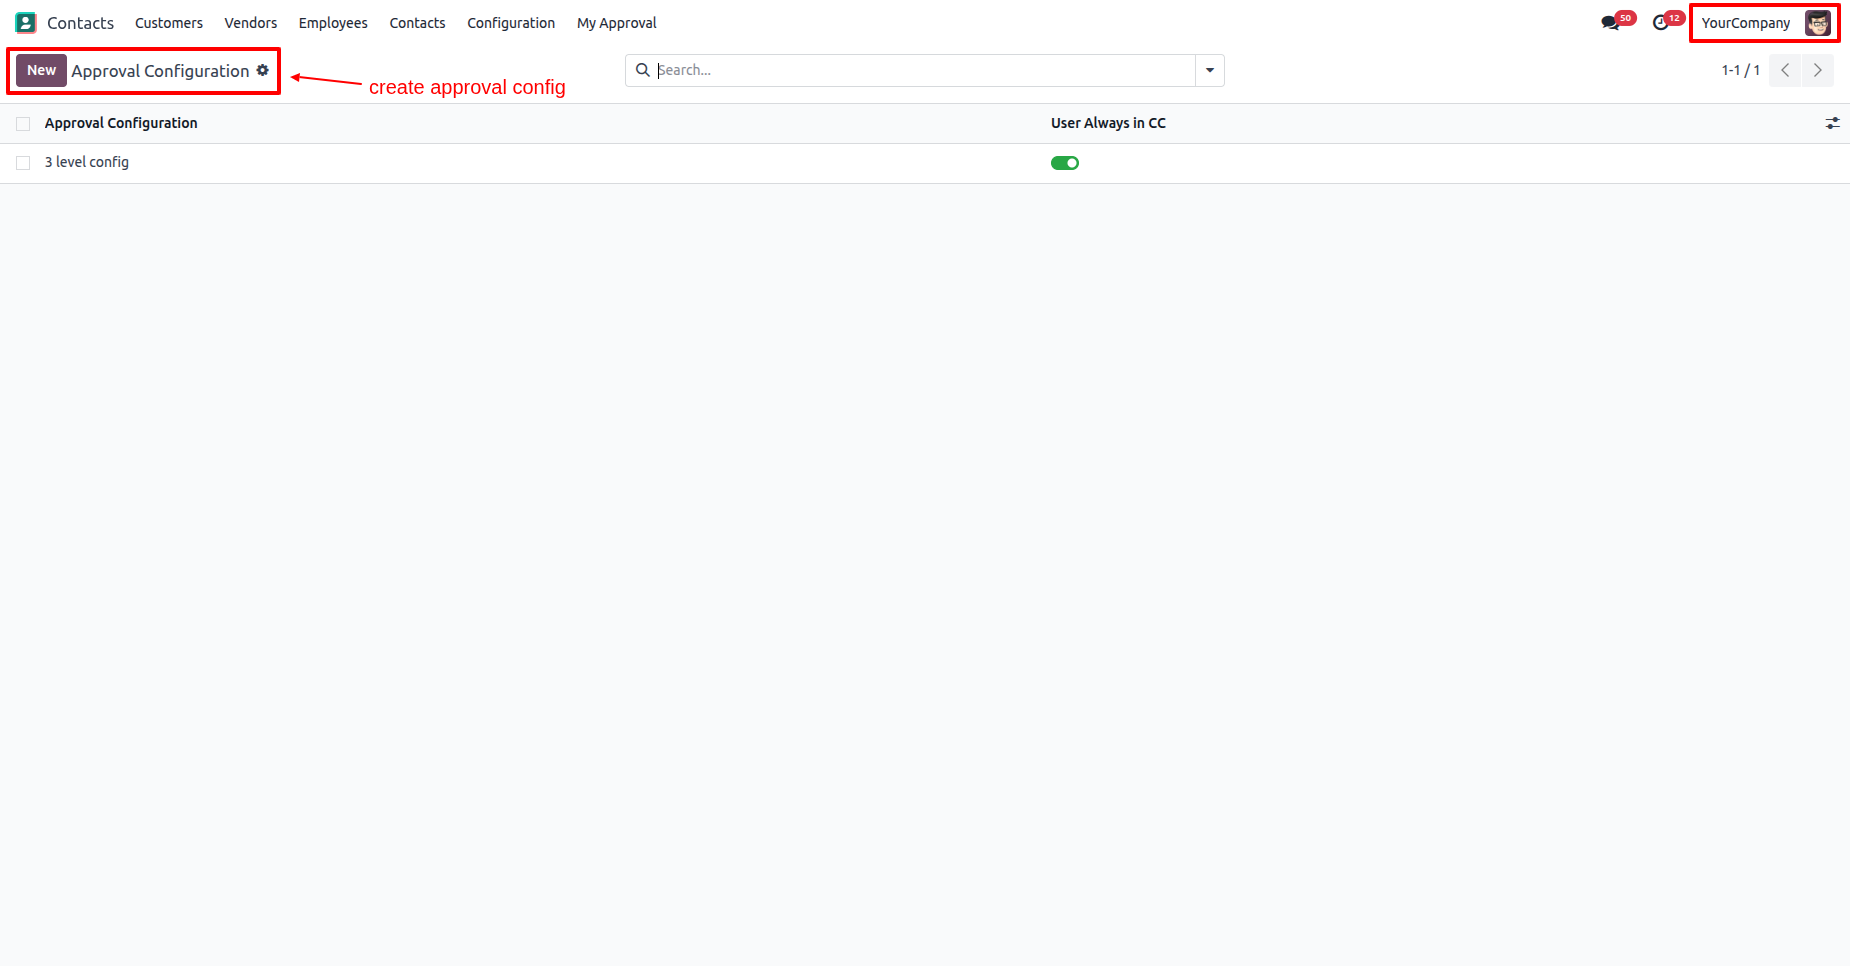
Tree view of the "Approval Configuration". Click on the "New" button.
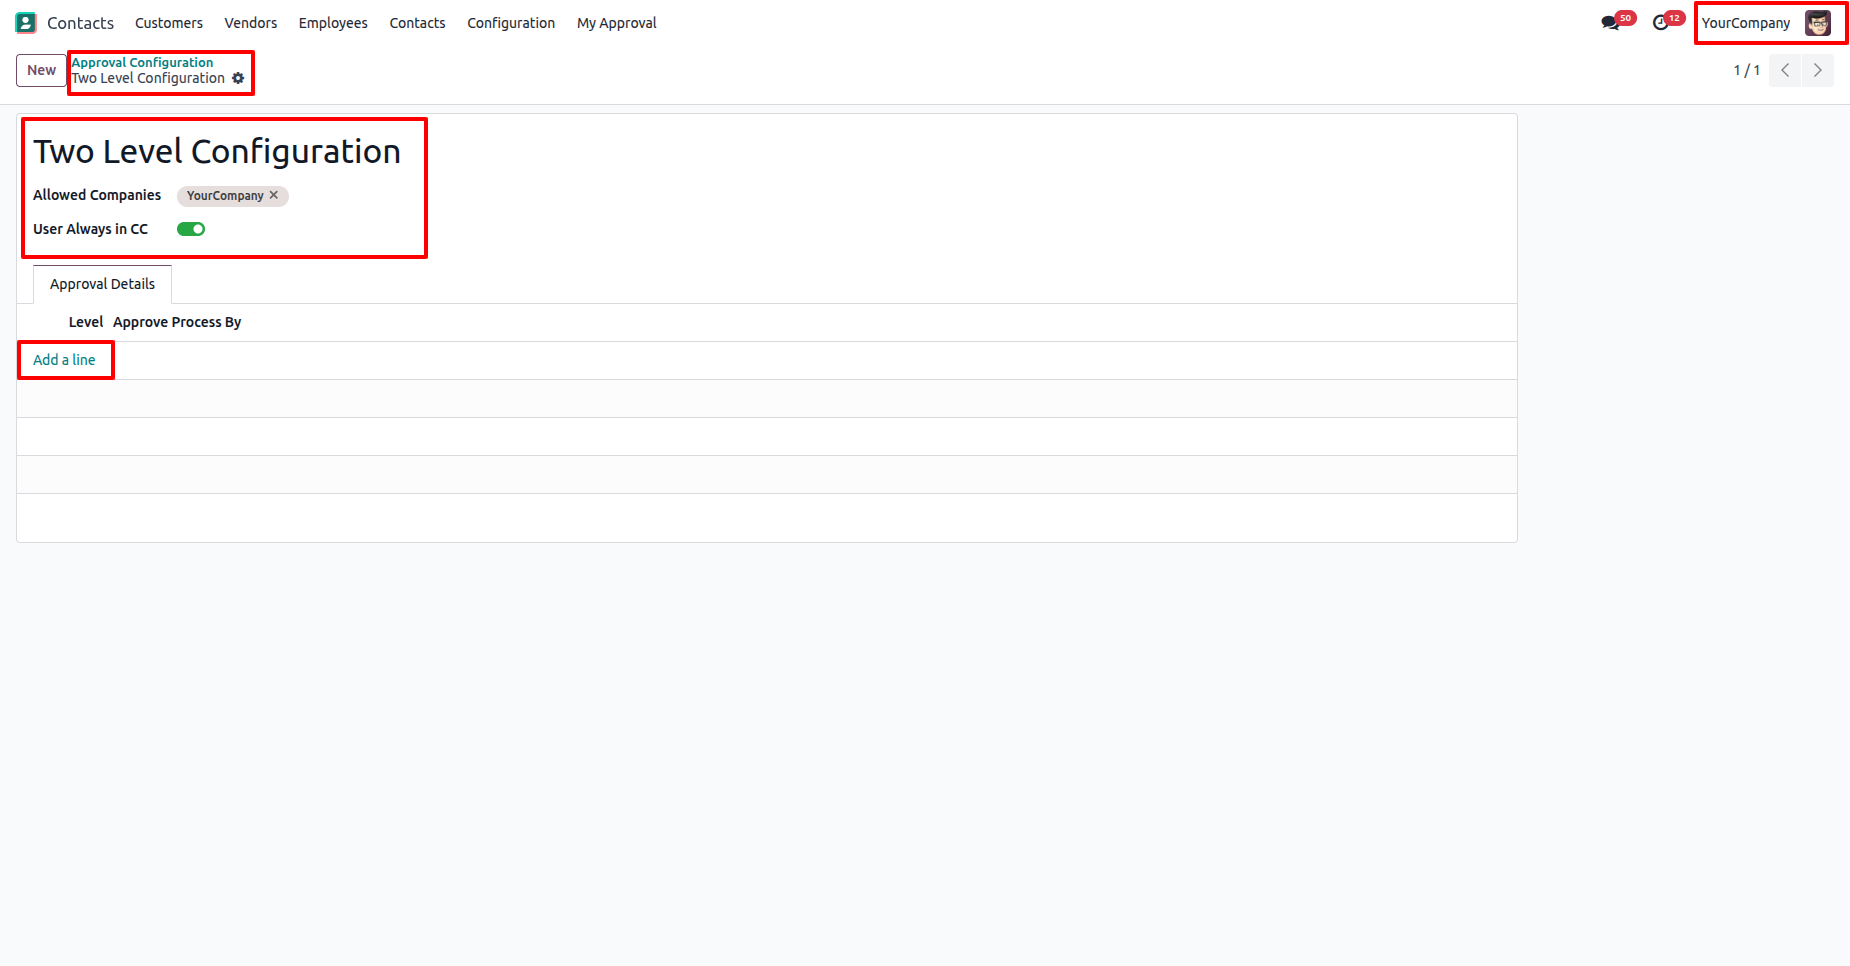
Add details and click on the "Add a line".
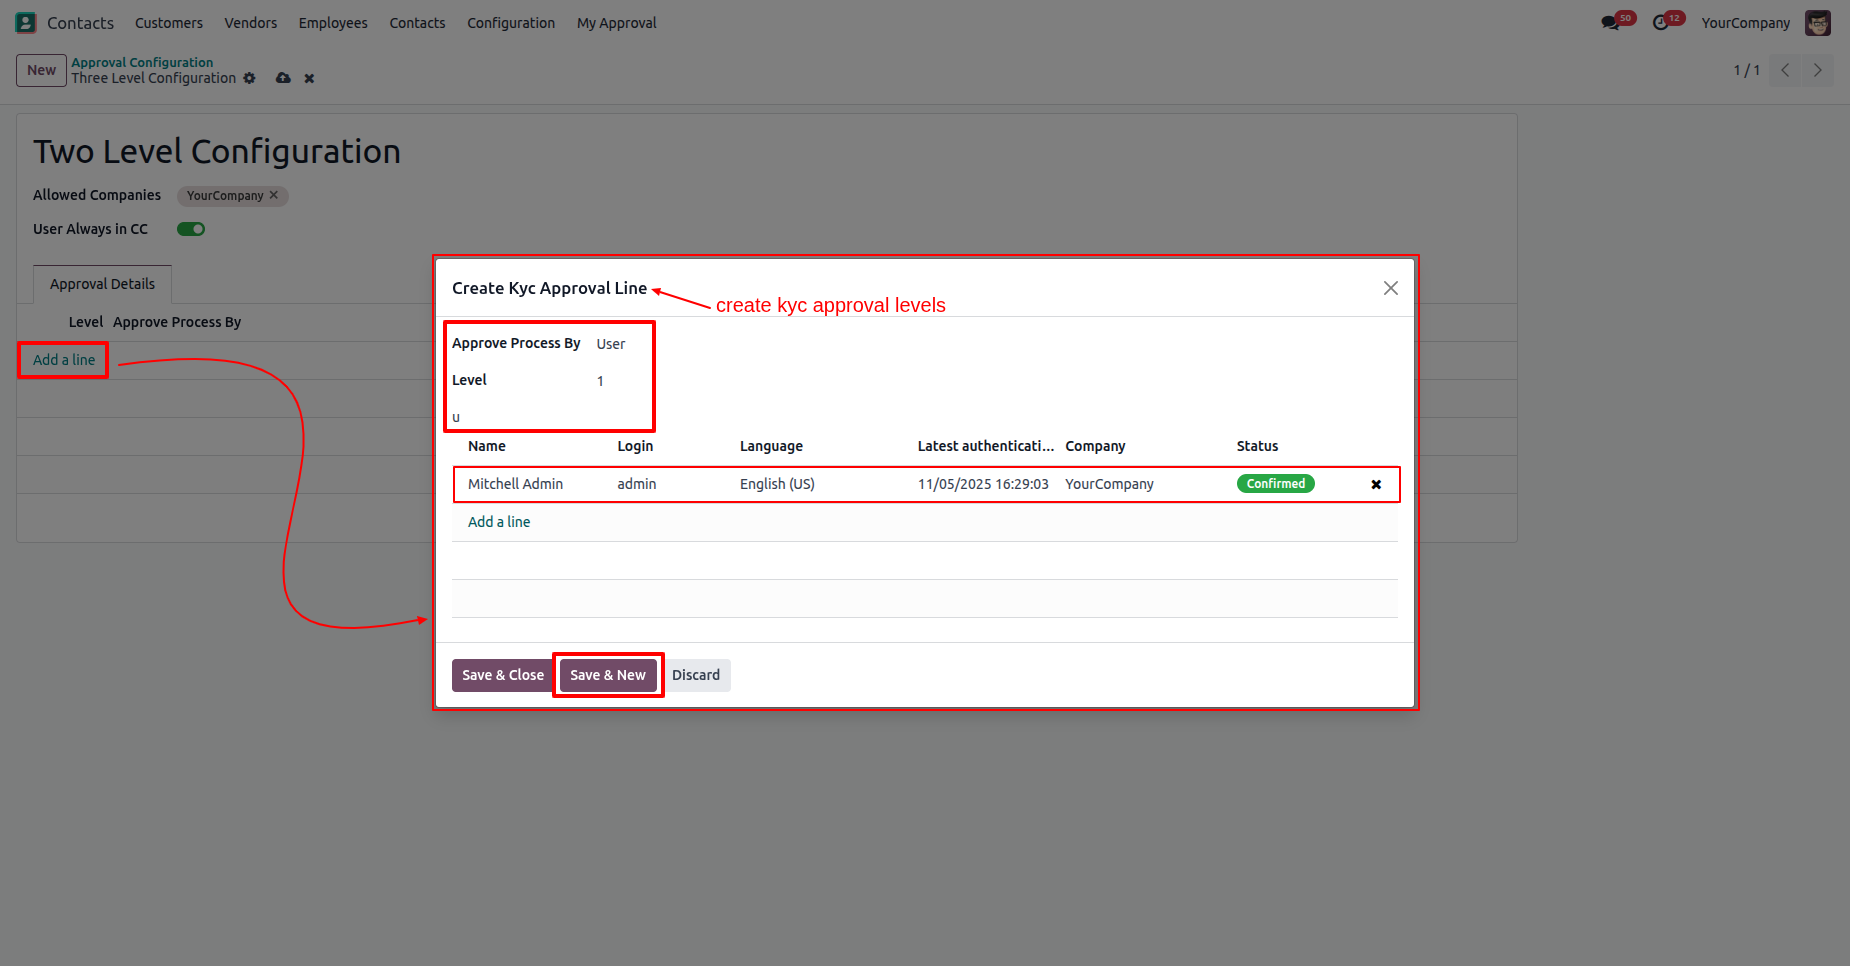
Add approval 1st level and click on the "Save & New" button.
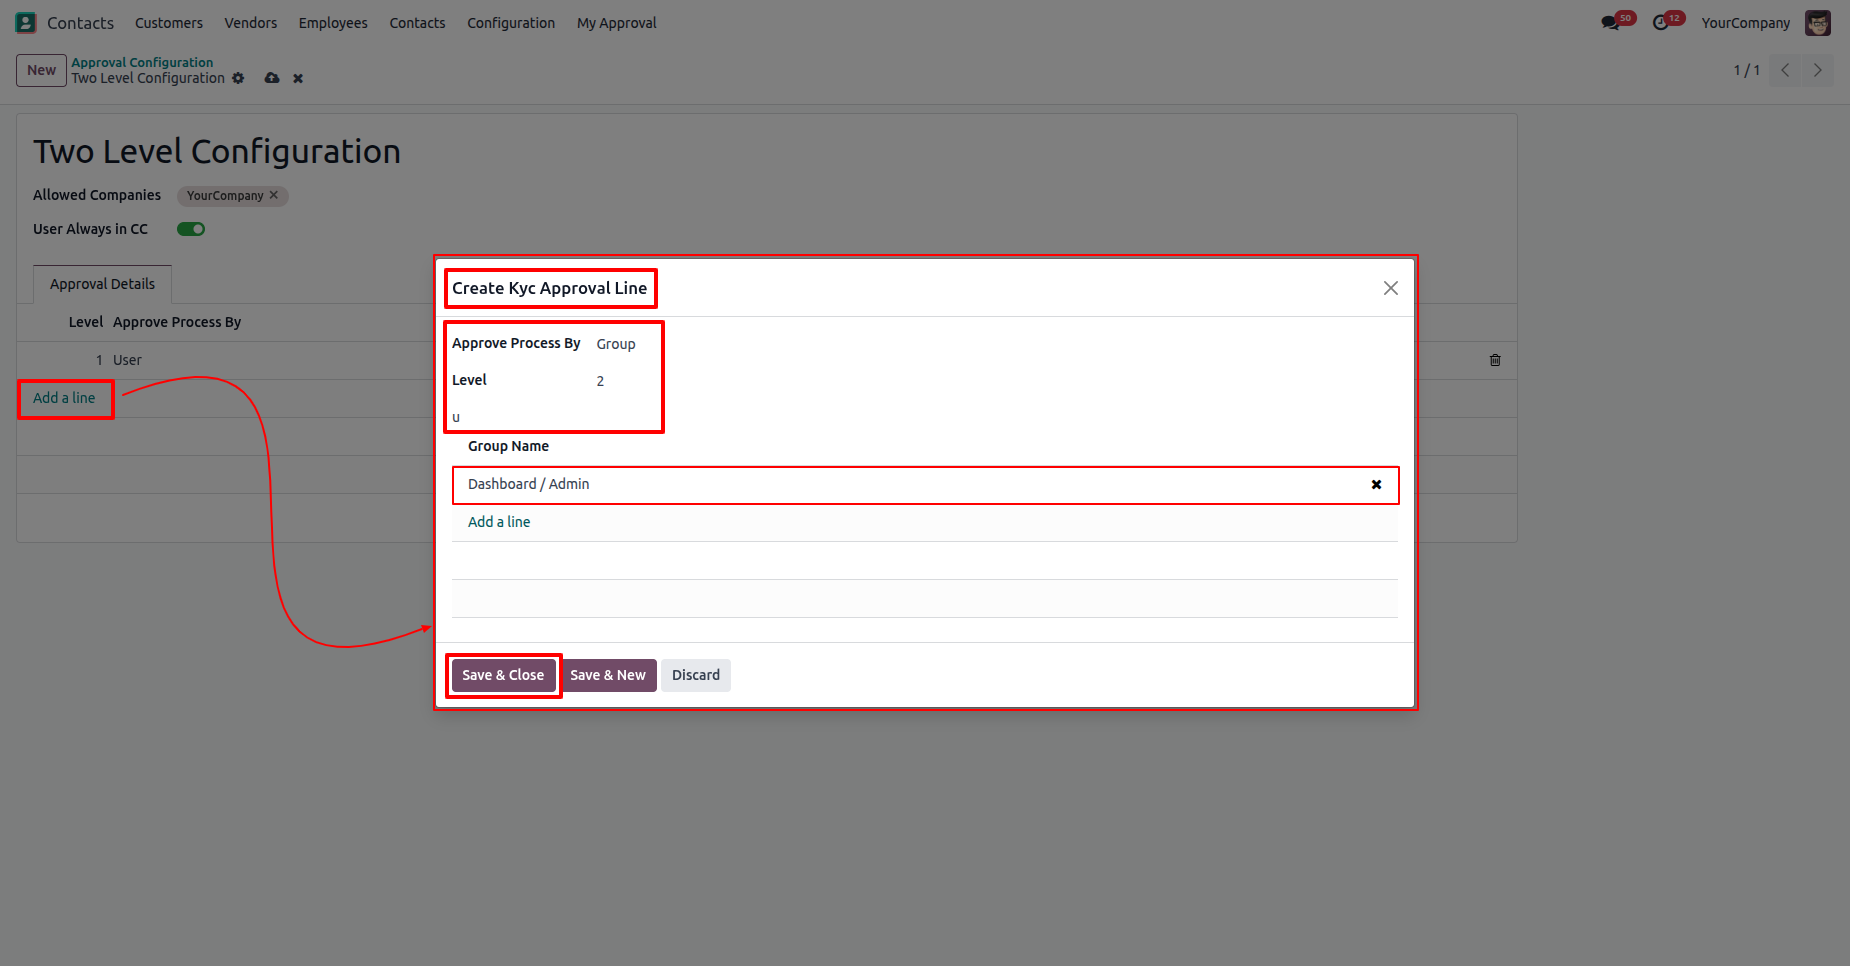
Add approval 2nd level and click on the "Save & Close" button.
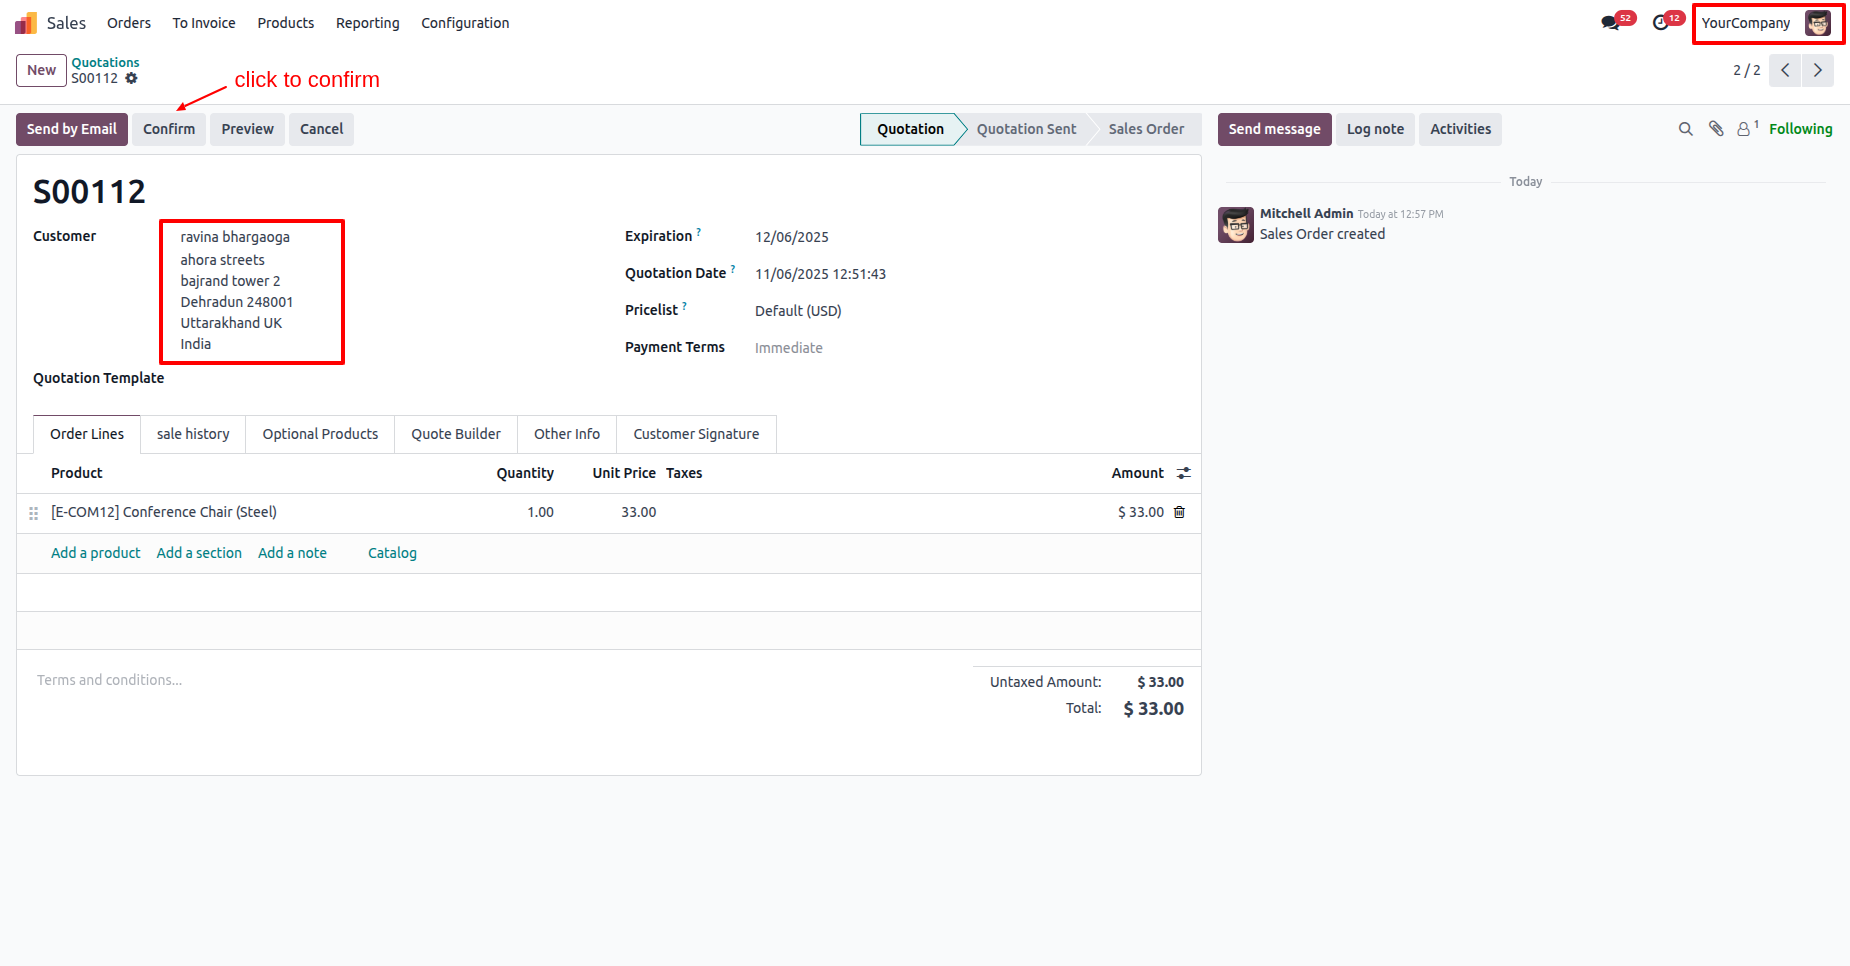
To create a quotation, click on the "New" button.

Select the customer who is in the "Onboarding" KYC stage.

Confirm the quotation.

The customers KYC status is "Onboarding".

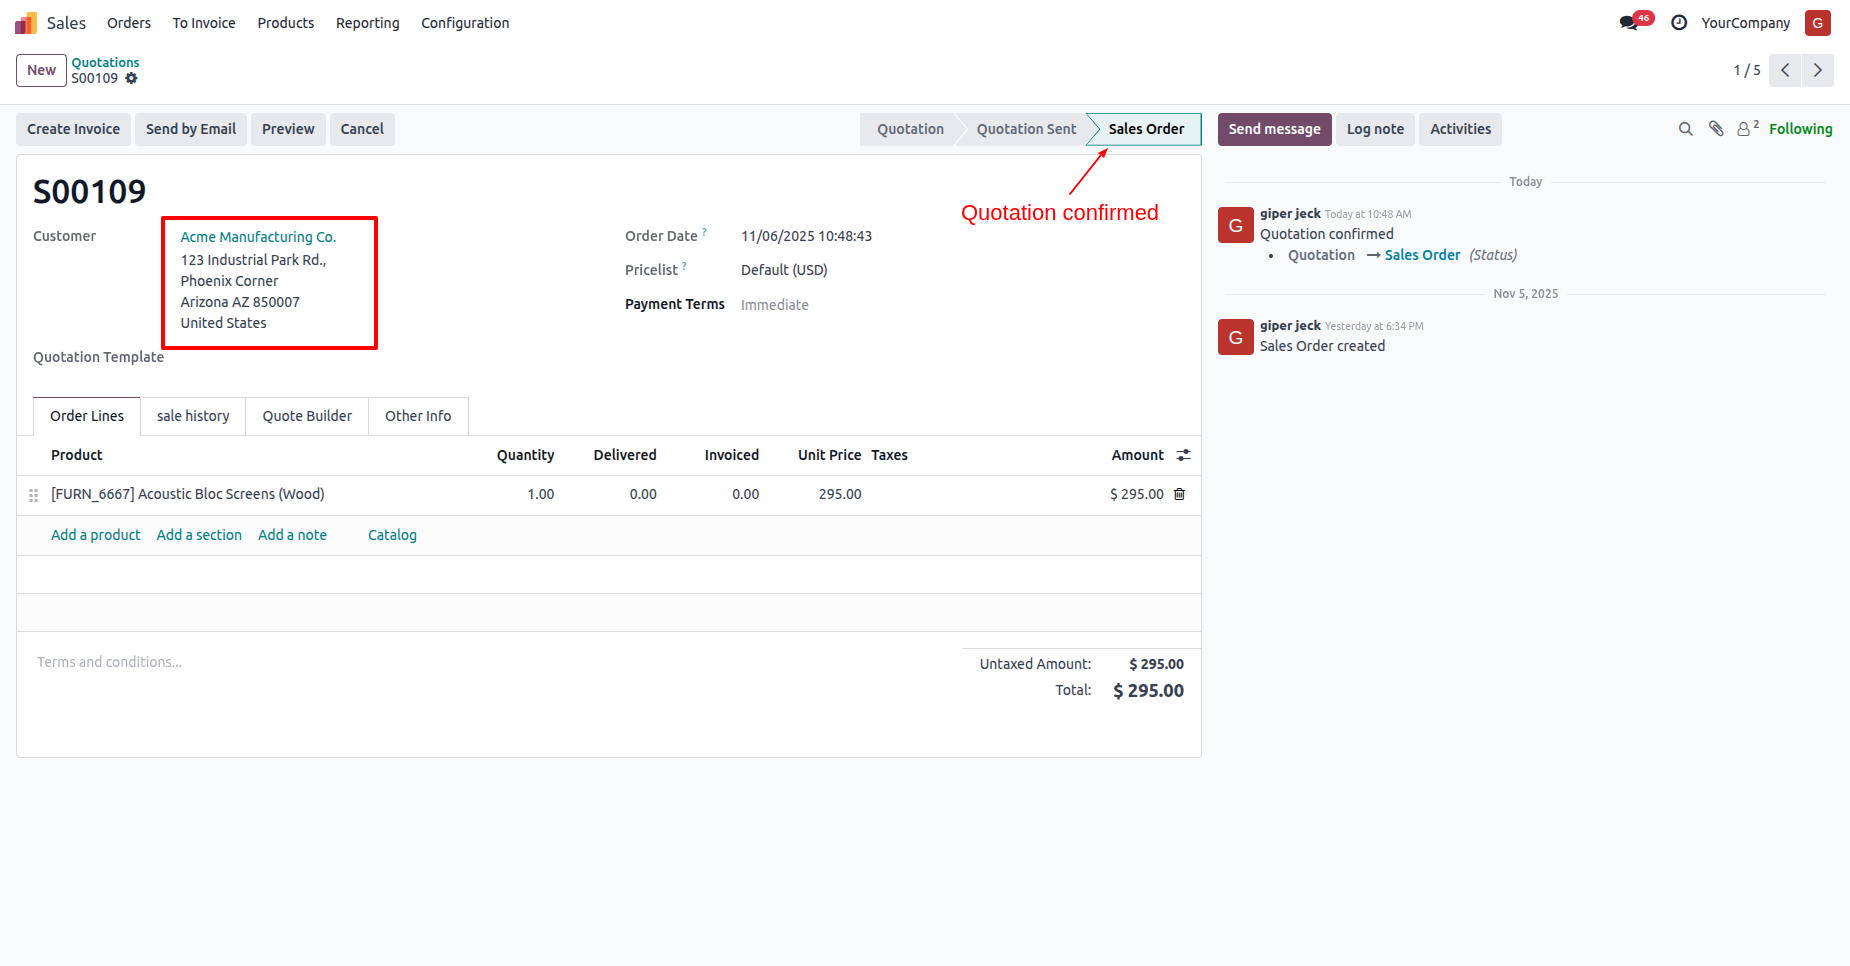
Here you can see the quotation is confirmed now.

Select the customer.

Confirm the quotation.
The customers KYC status is "Odoo Sign".
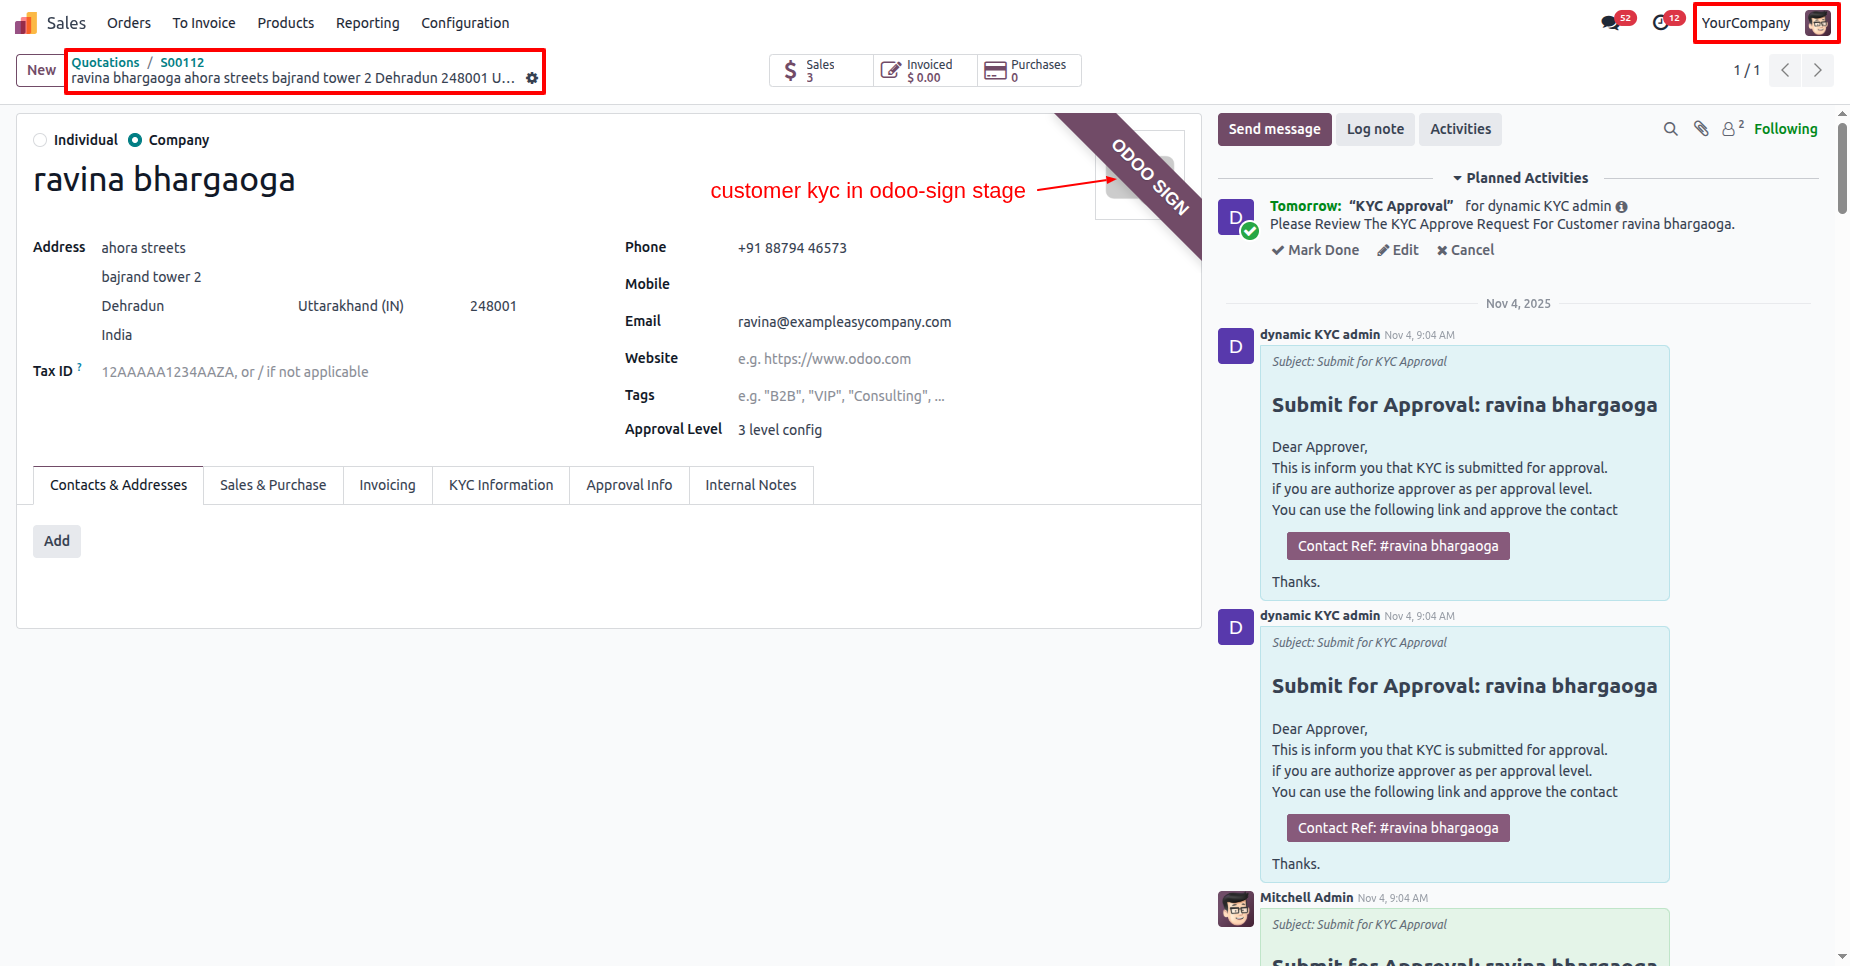
Here you can see the quotation is confirmed now.

Select the customer from the "Re-KYC" list.

In the customer form view, you can see the Re-KYC warning.
Confirm the quotation.

The customers KYC status is "Re-KYC".

Here you can see the quotation is confirmed now.

Select the customer from the "Expired" list.

In the customer form view, you can see the Expired KYC warning.
Confirm the quotation.

The customers KYC status is "Expired".

Here you can see the quotation is confirmed now.

Go to the user settings ==> Enable the "KYC Approval" and "KYC Dynamic Approval" options.
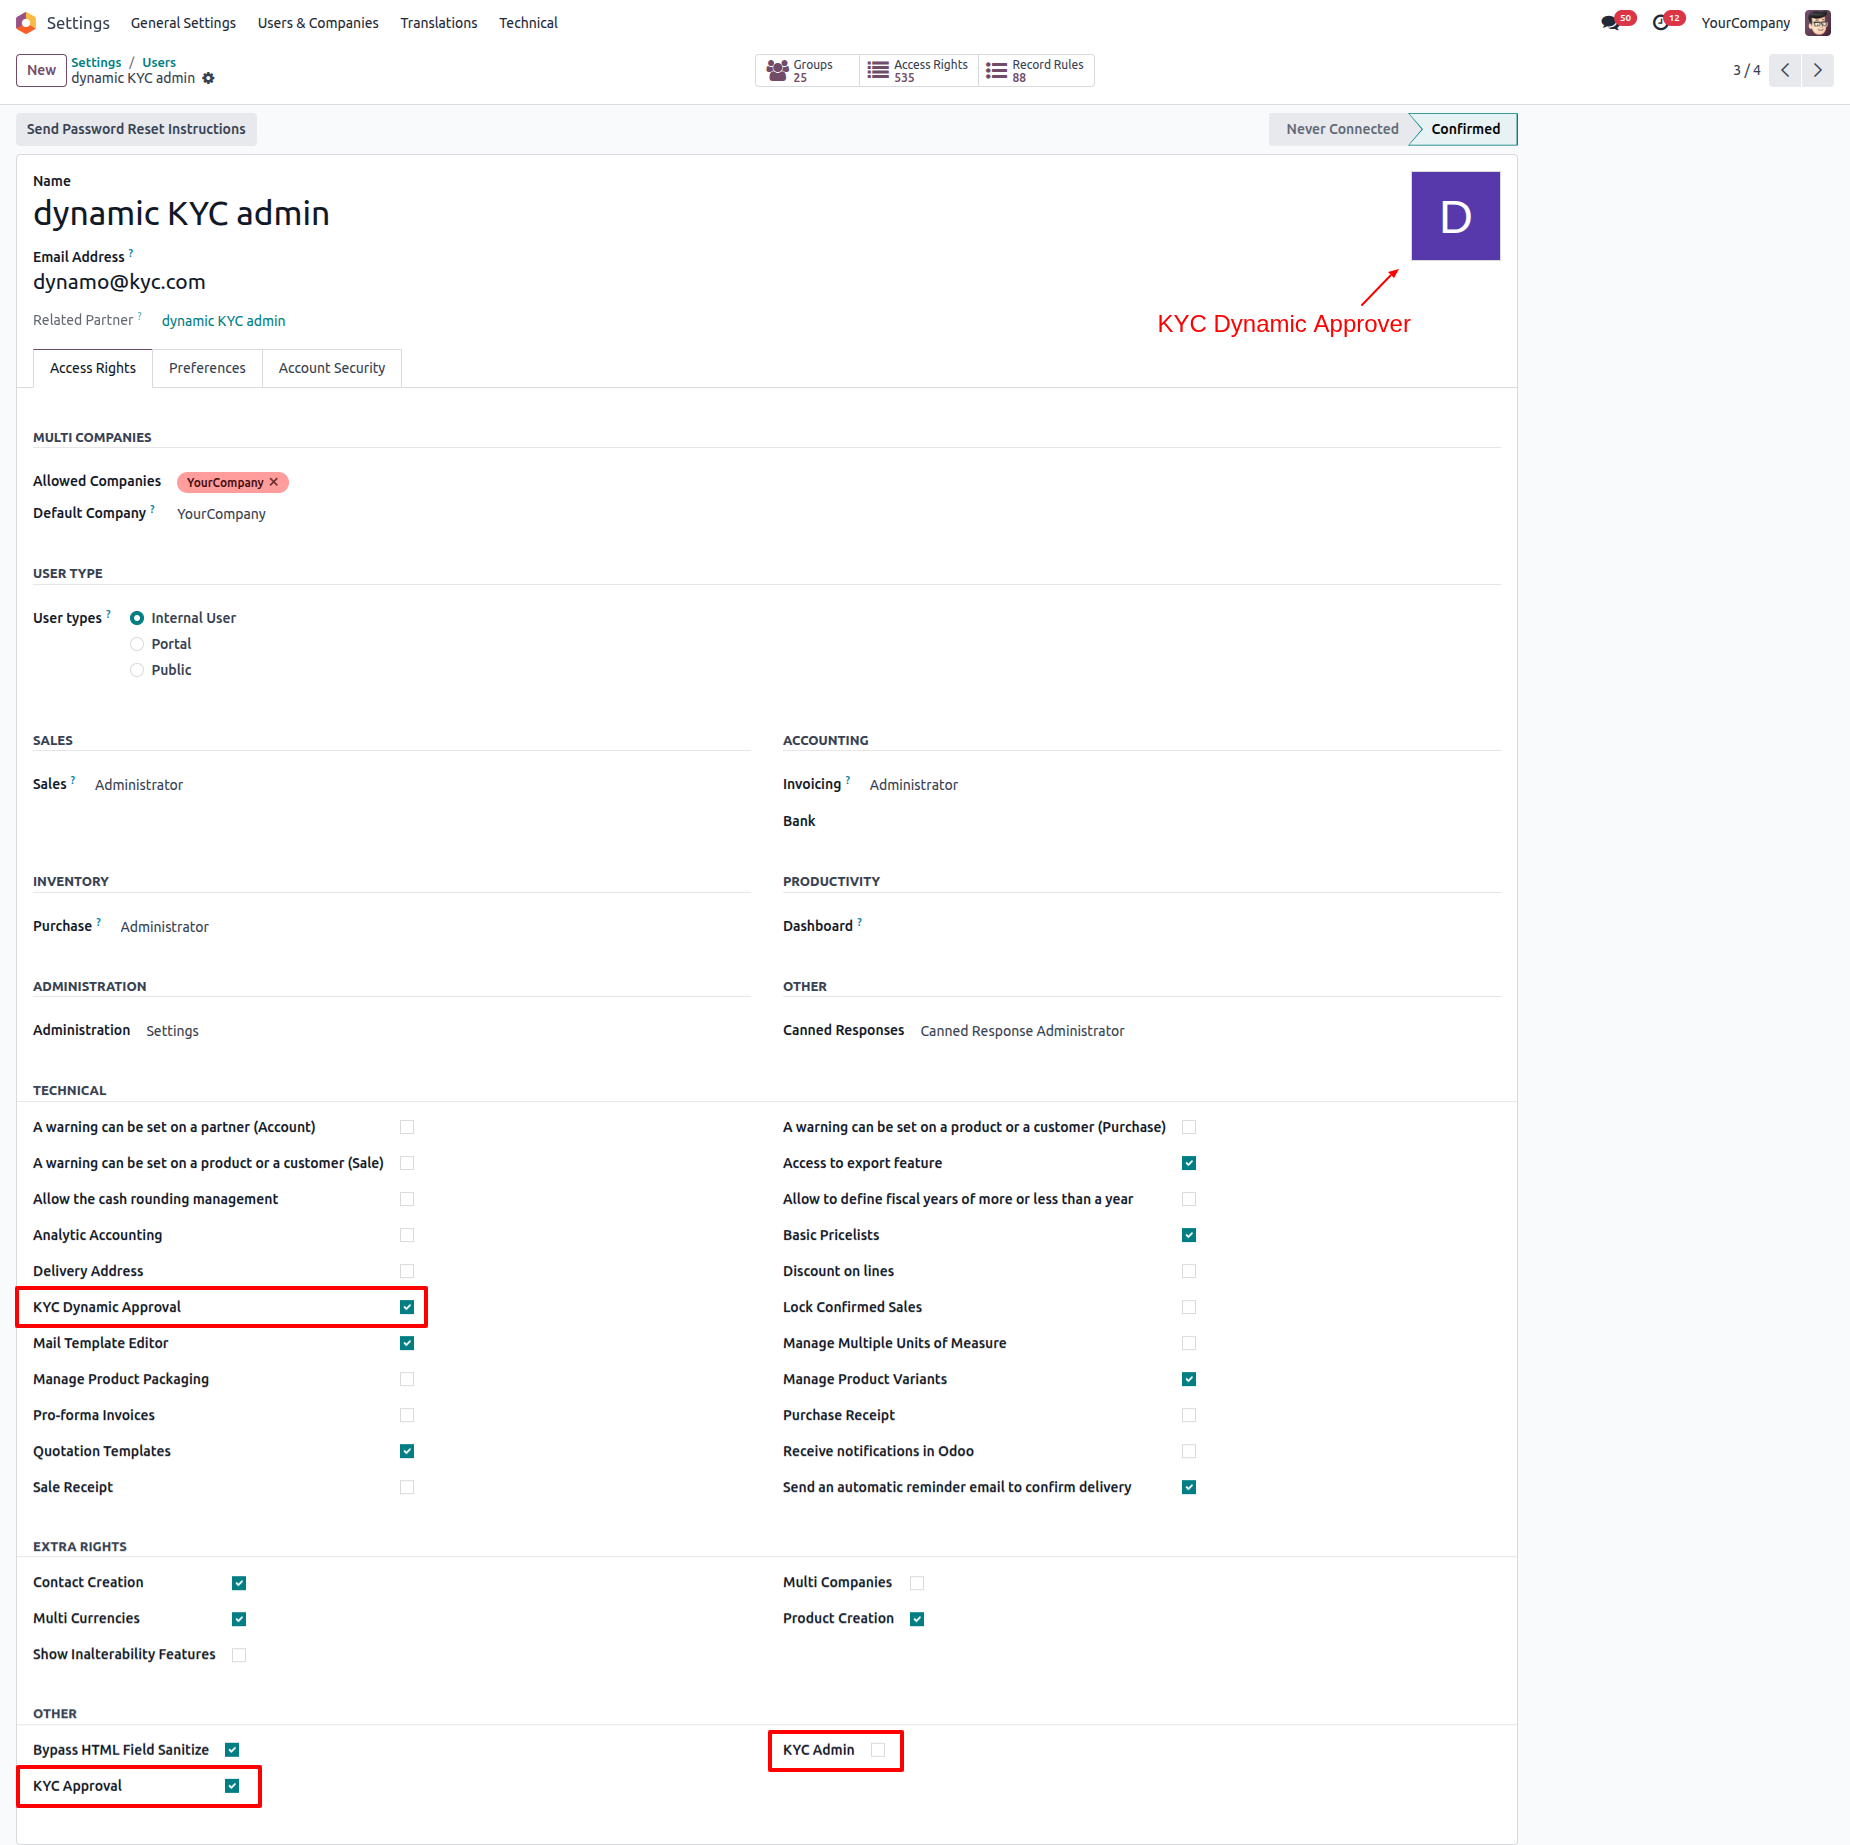
Login as a kyc dynamic approval user and go to the Customer Onboarding.
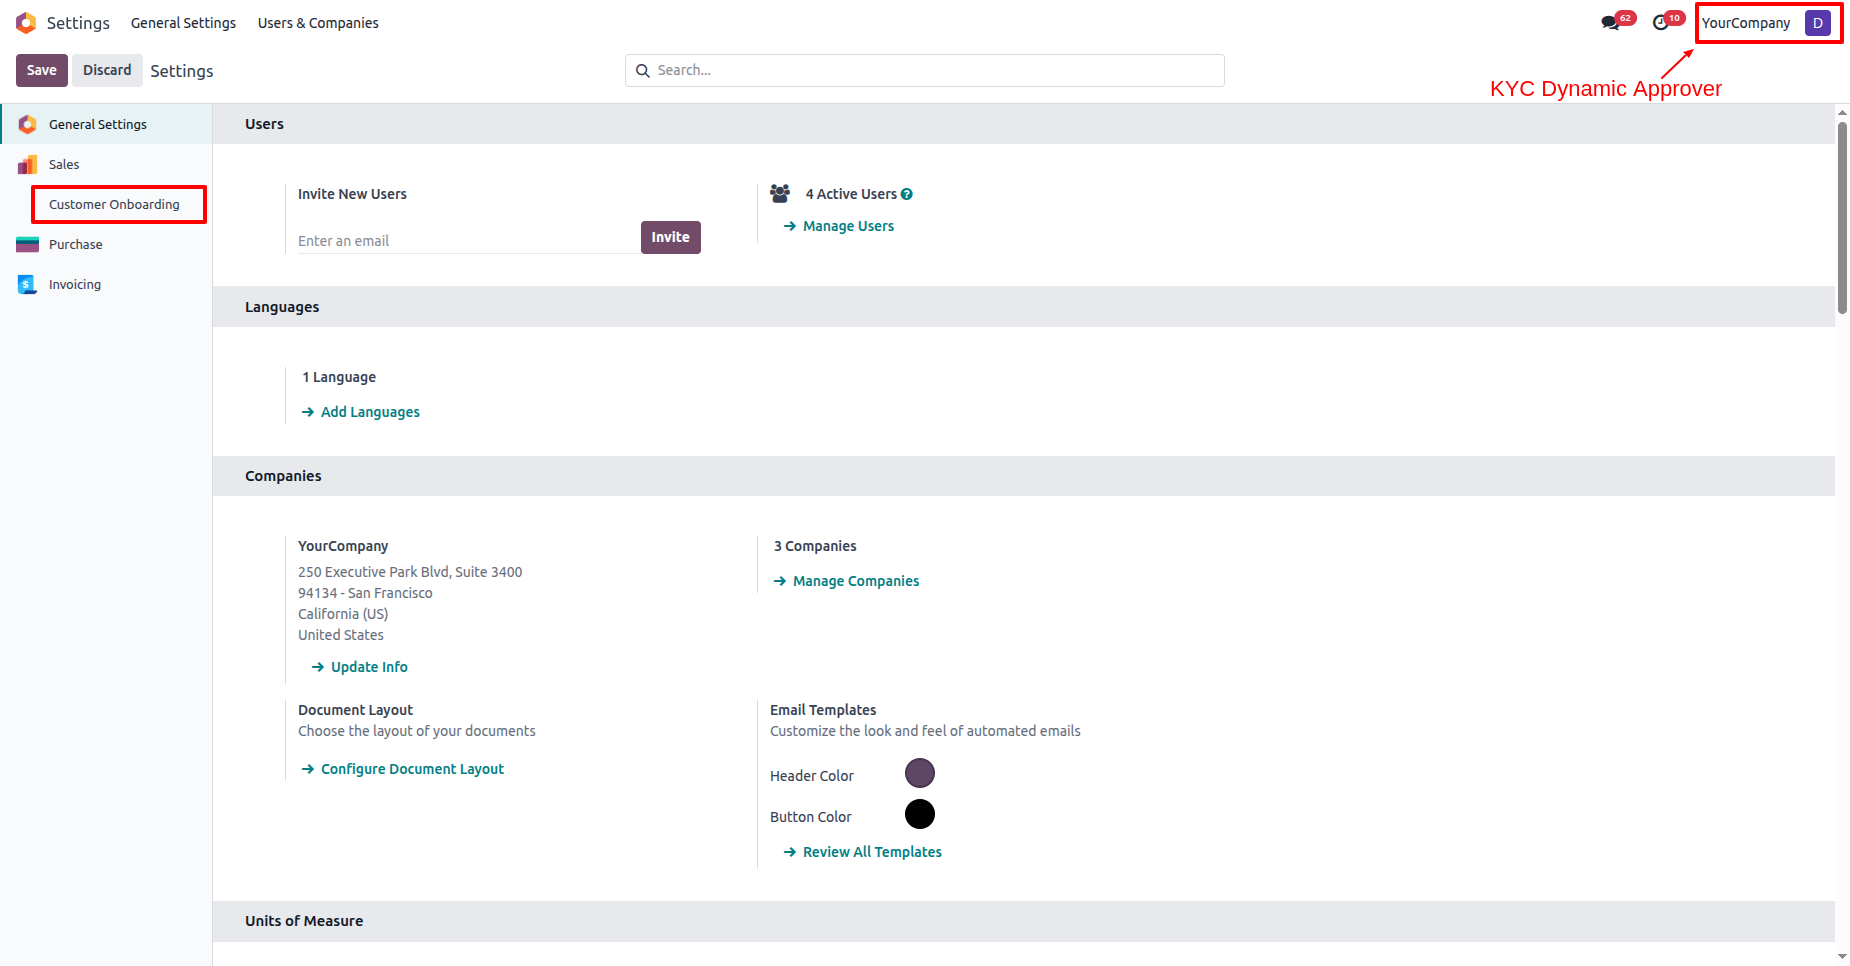
Enable the "KYC Dynamic Approval" boolean.
Set the default dynamic approval level for new records.
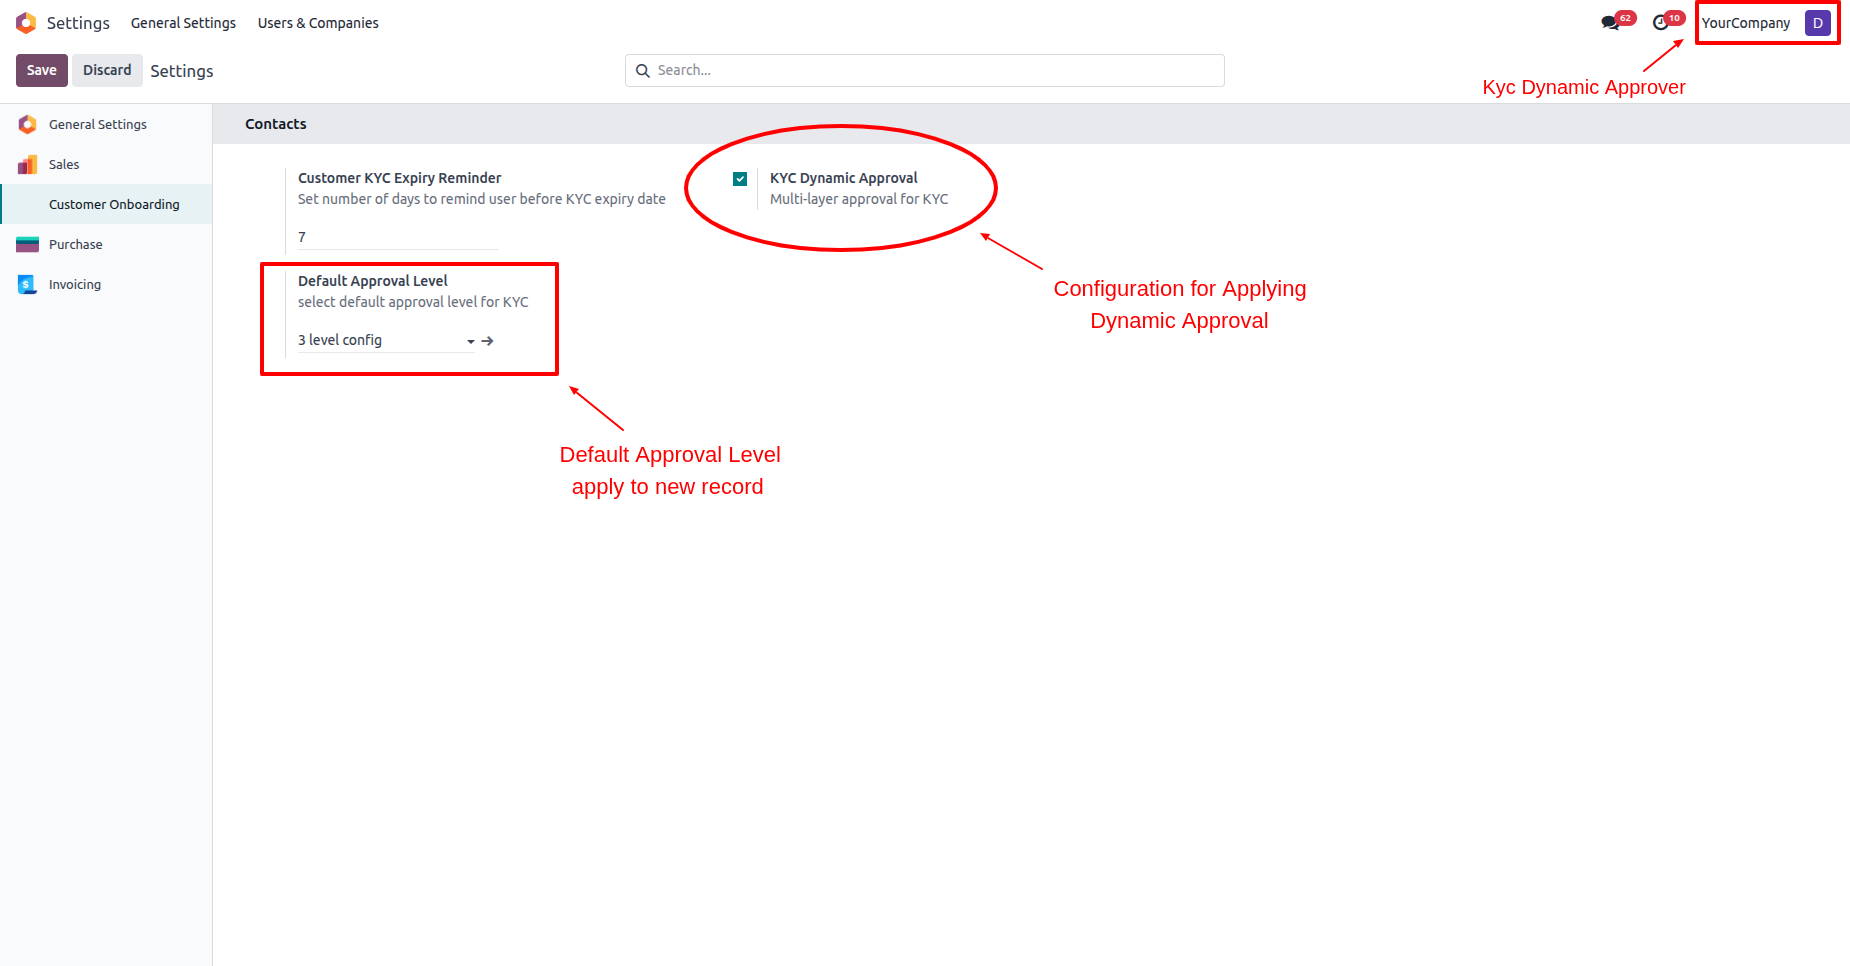
Go to the Configuration ==> KYC Approval Configuration.
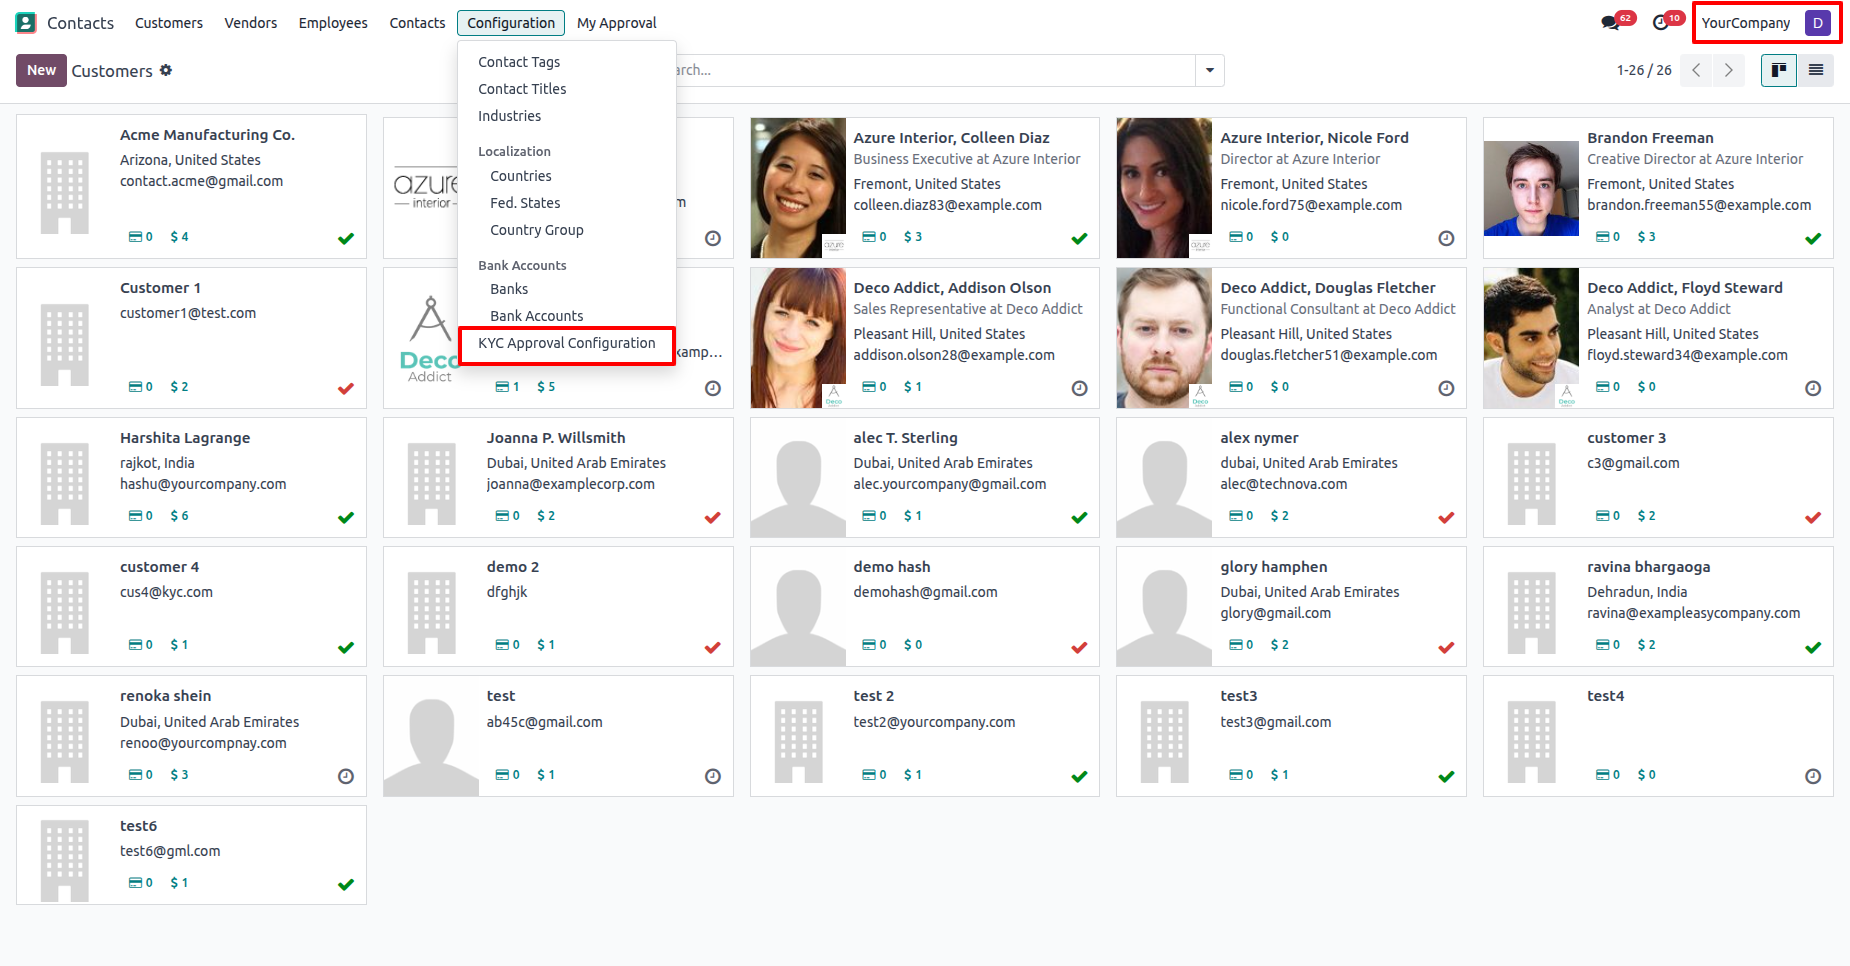
Tree view of the "Approval Configuration".
Note: The KYC dynamic approver can only read the approval
configuration.
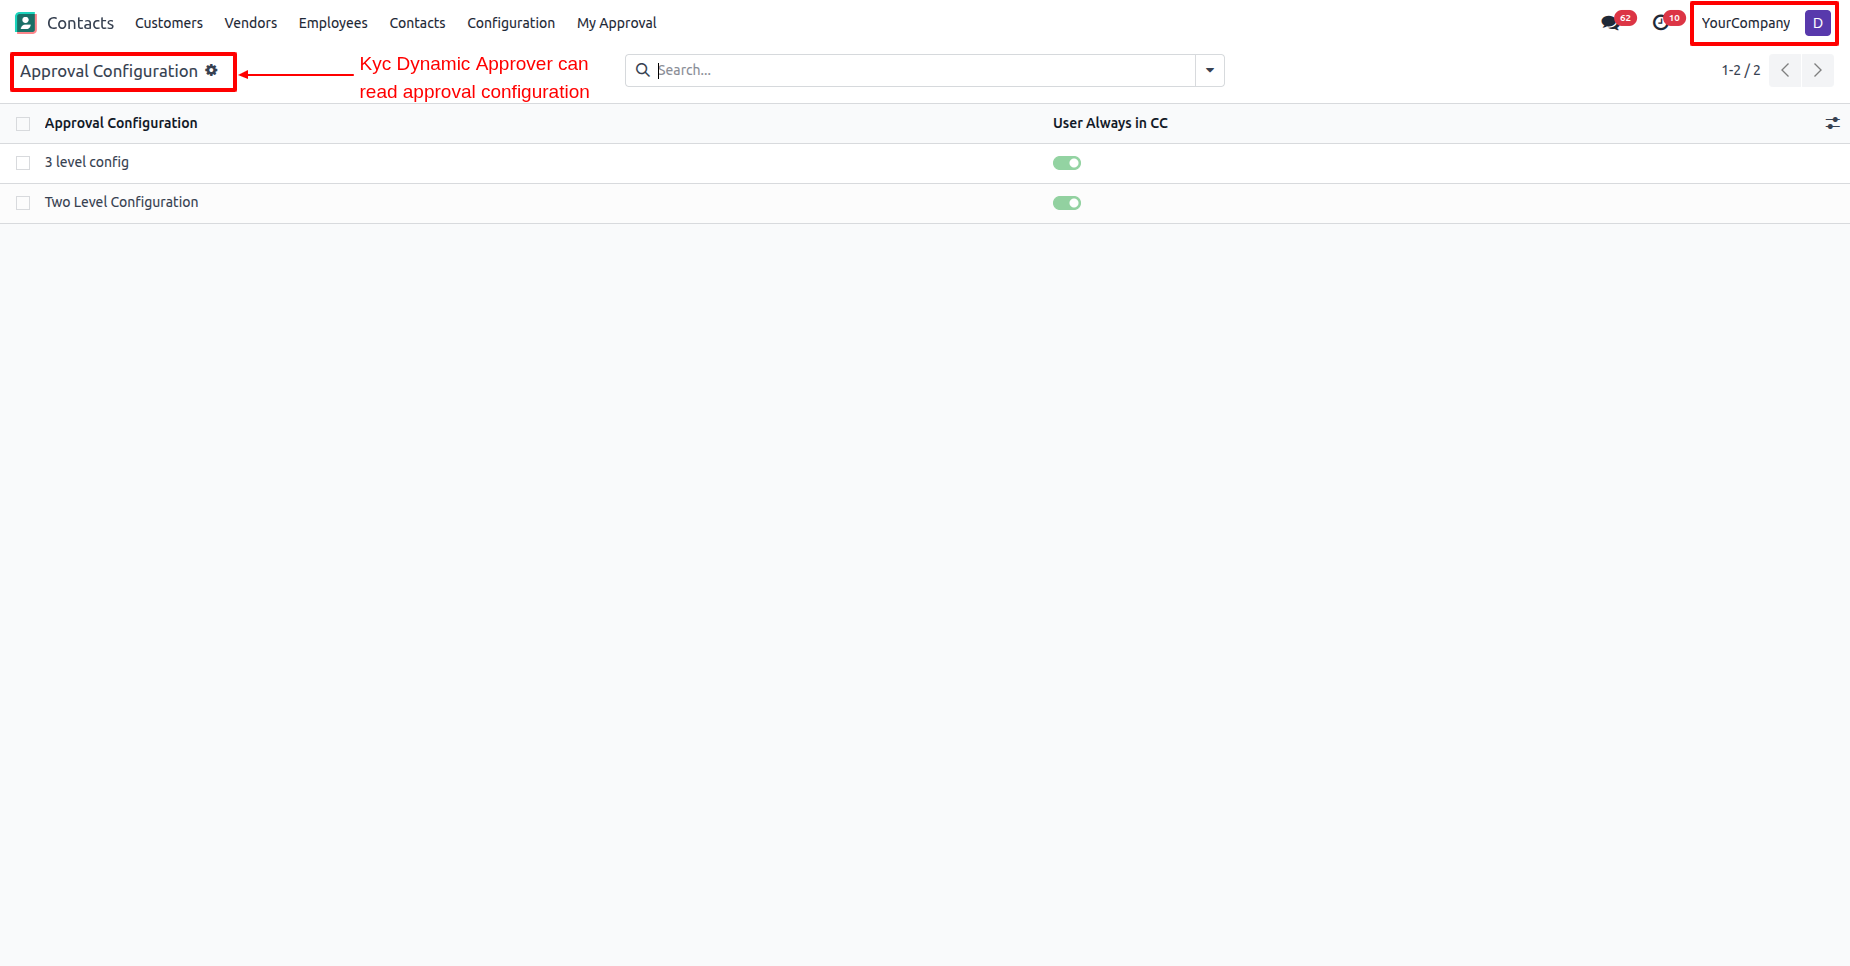
Form view of the configuration.
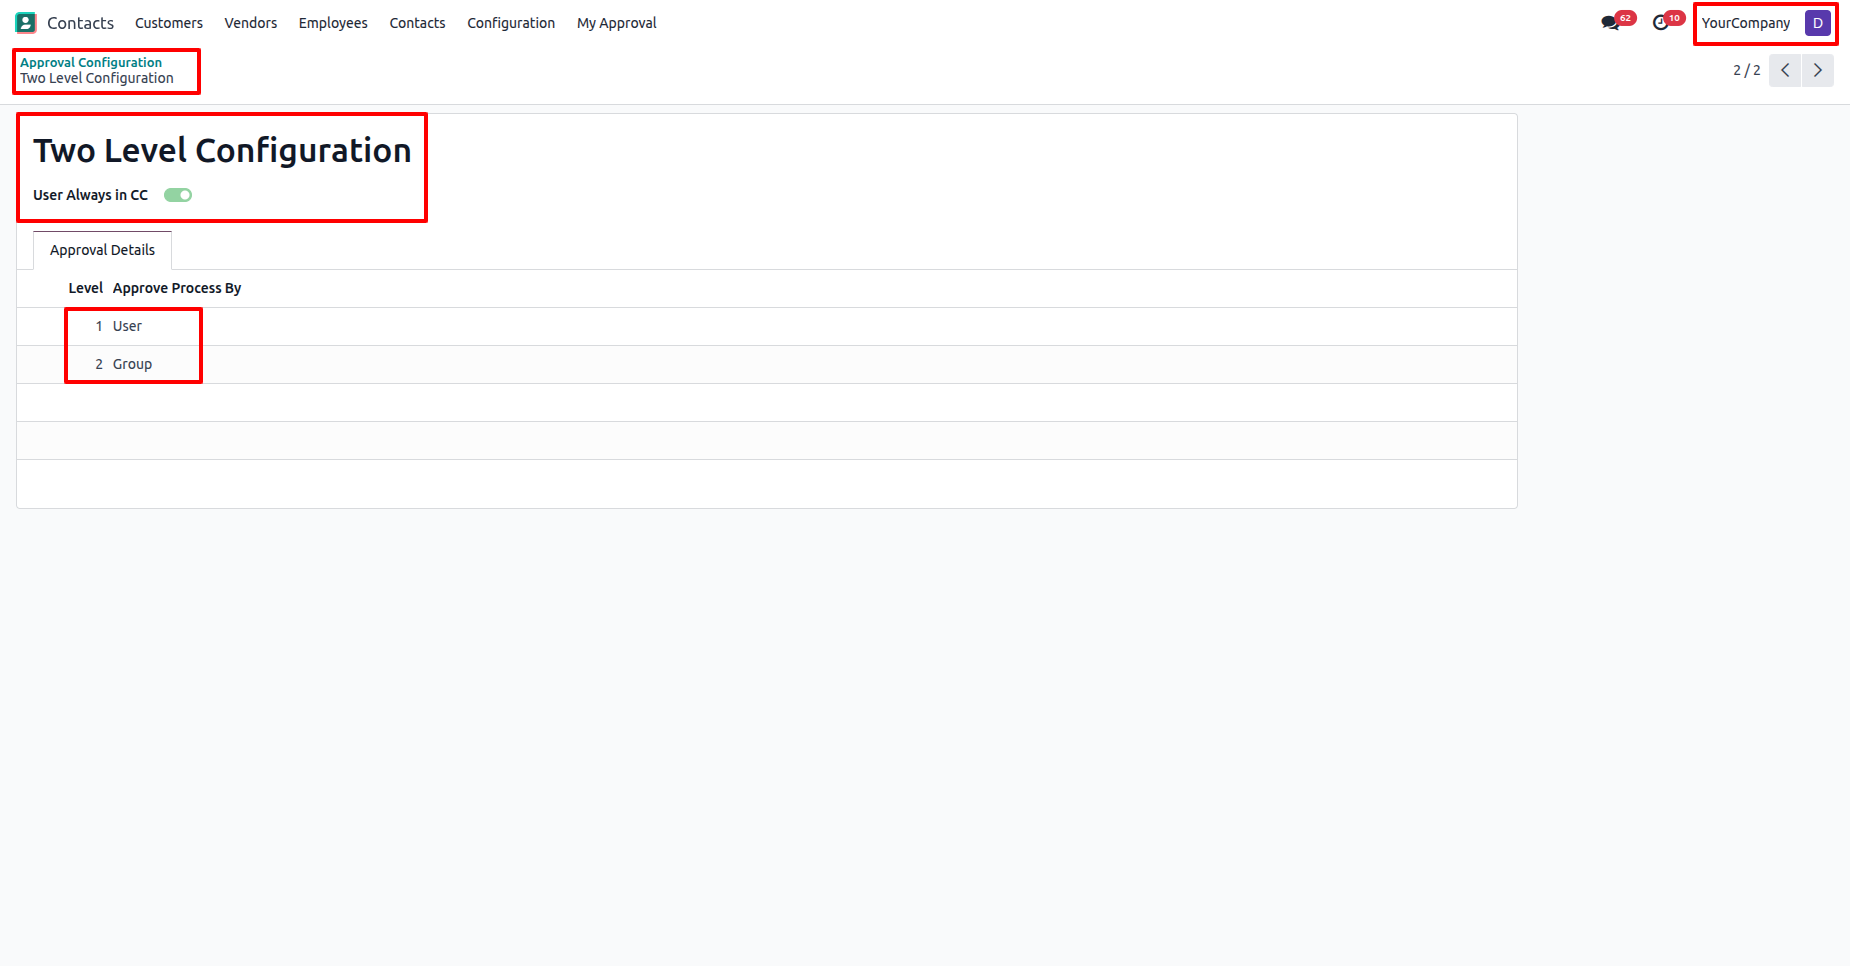
Clikc on the user to see the details.
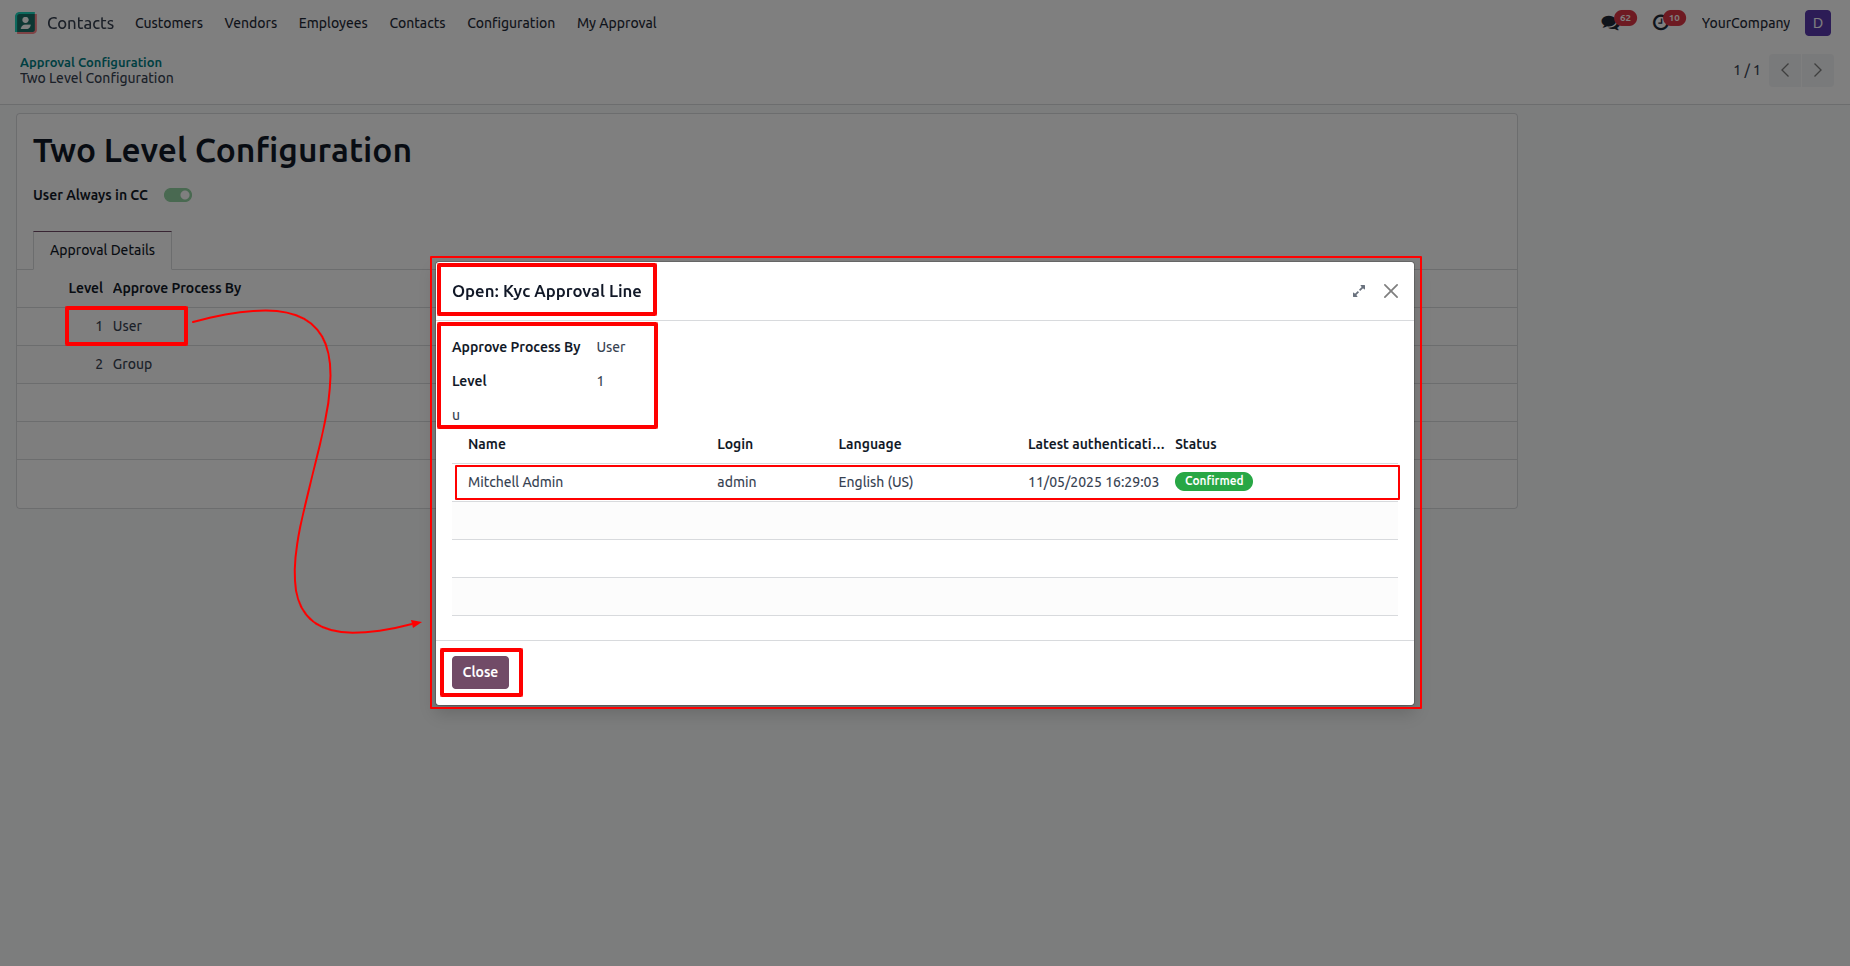
Go to the user settings ==> untick the "KYC Approval" and "KYC Dynamic Approval" options.
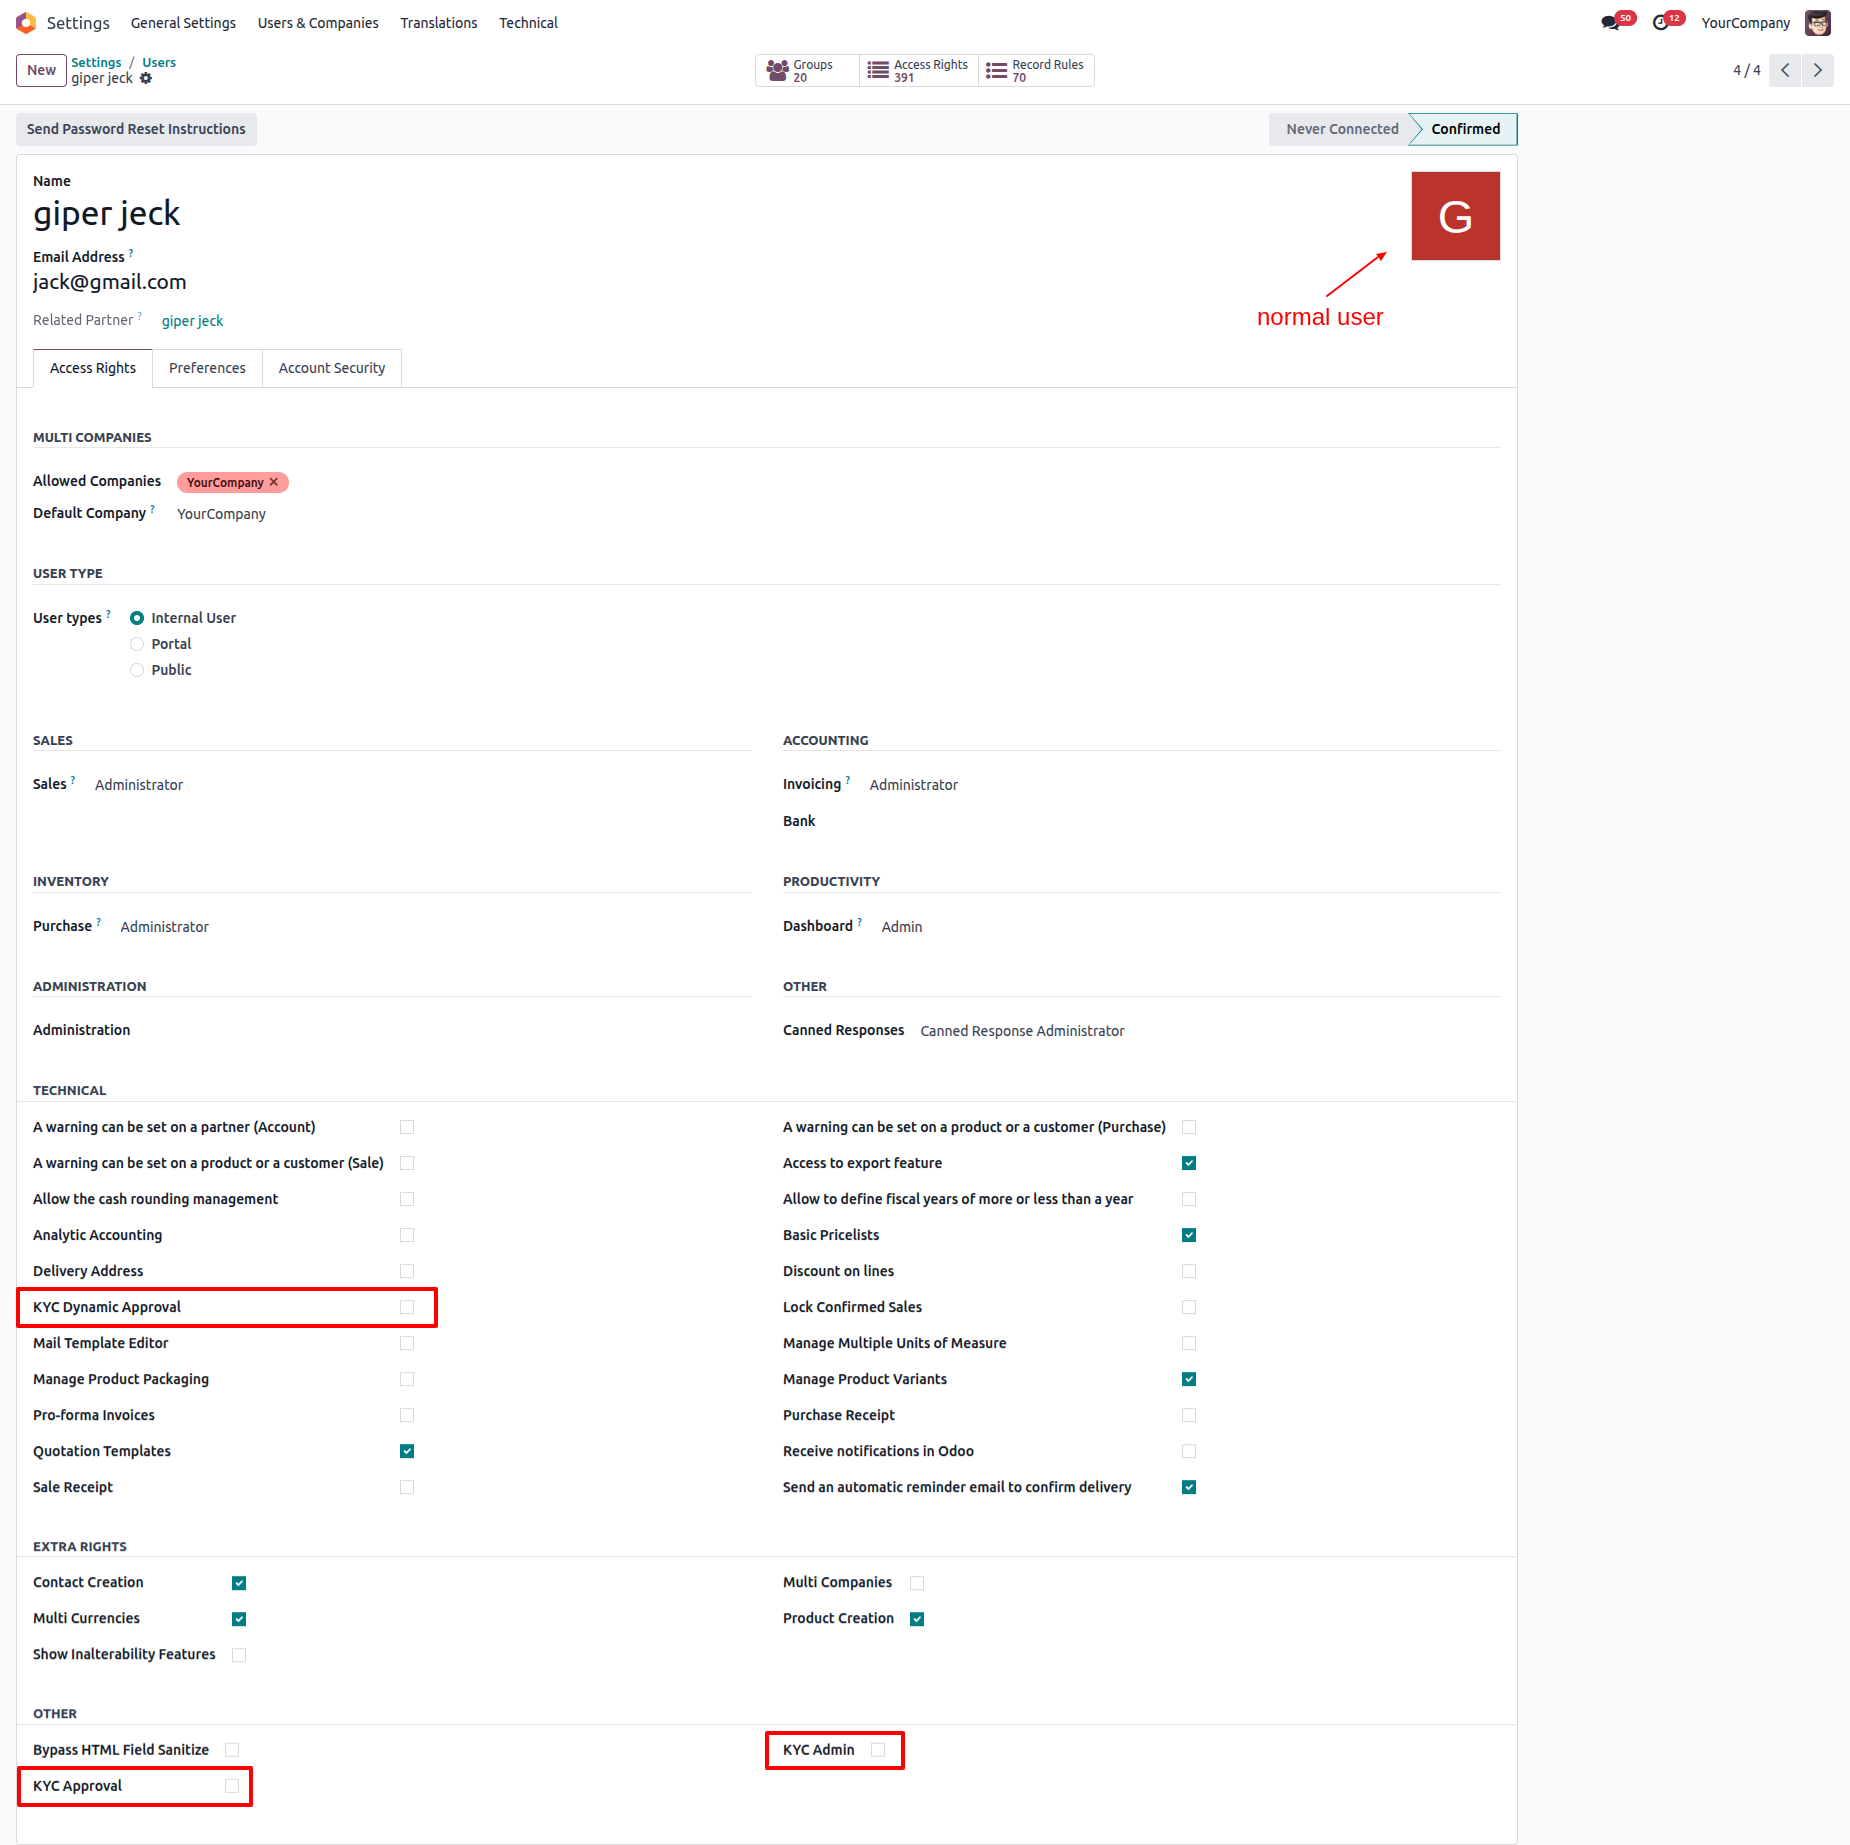
Login as a normal user.
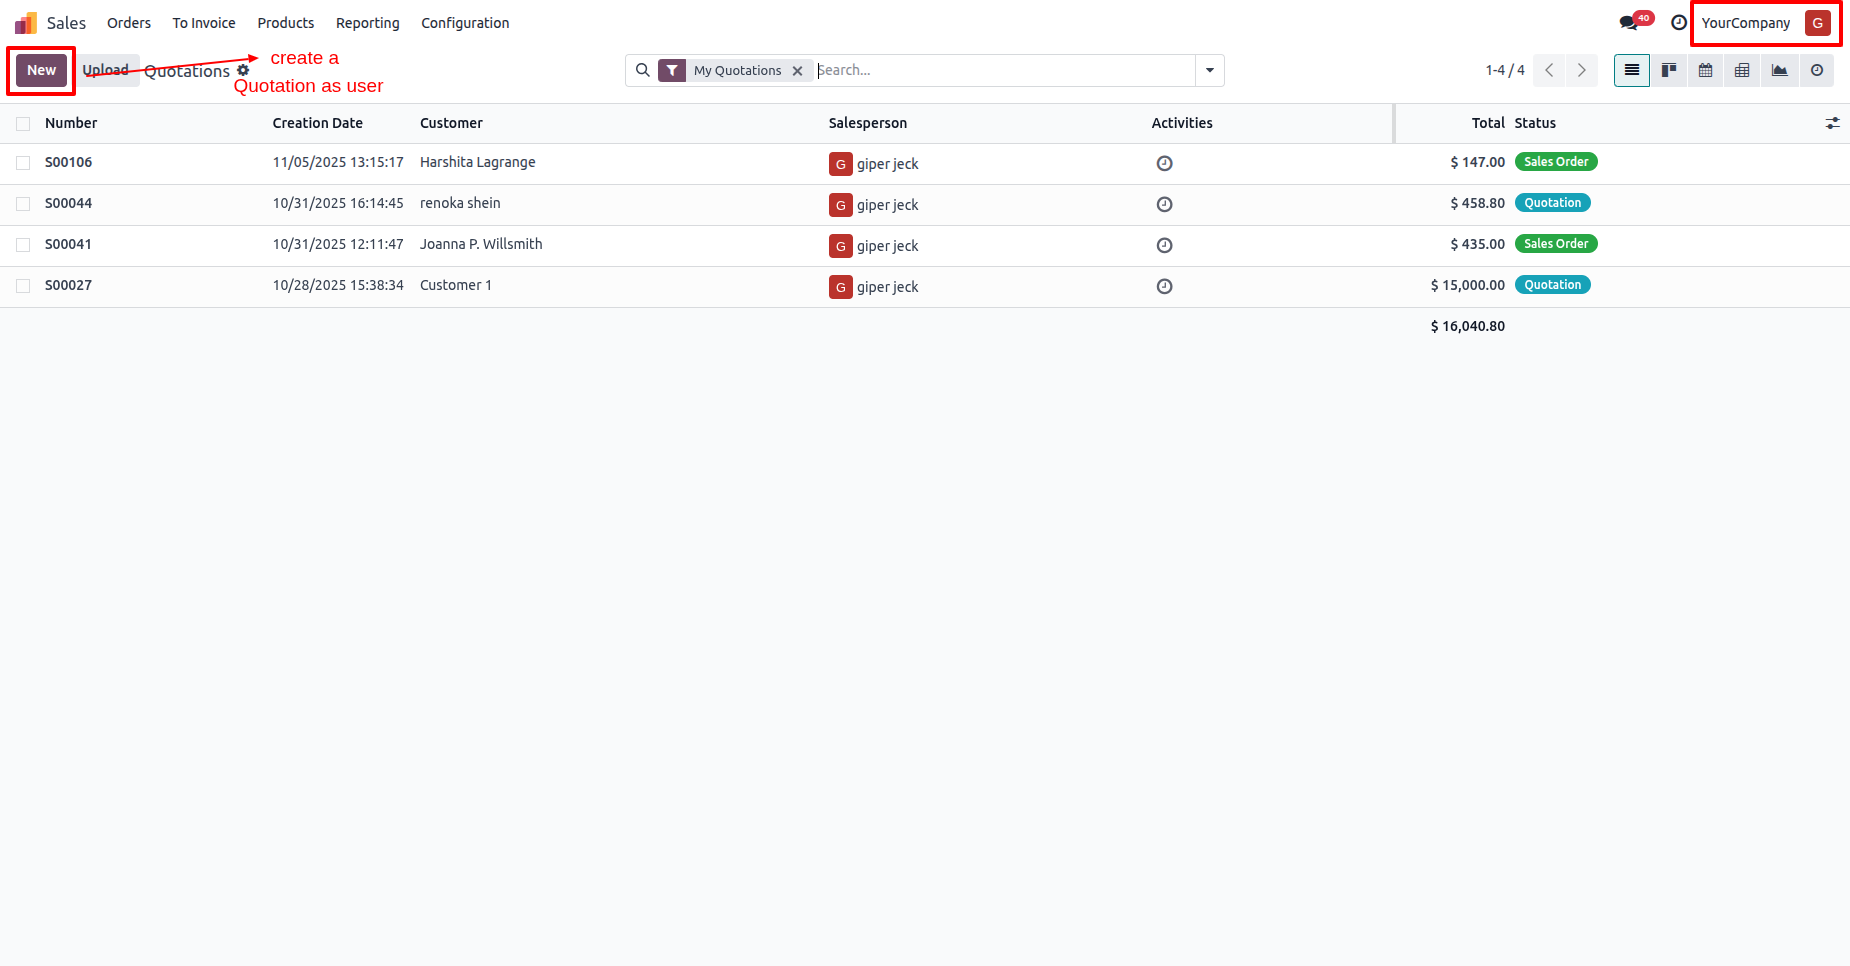
Create a new quotation.
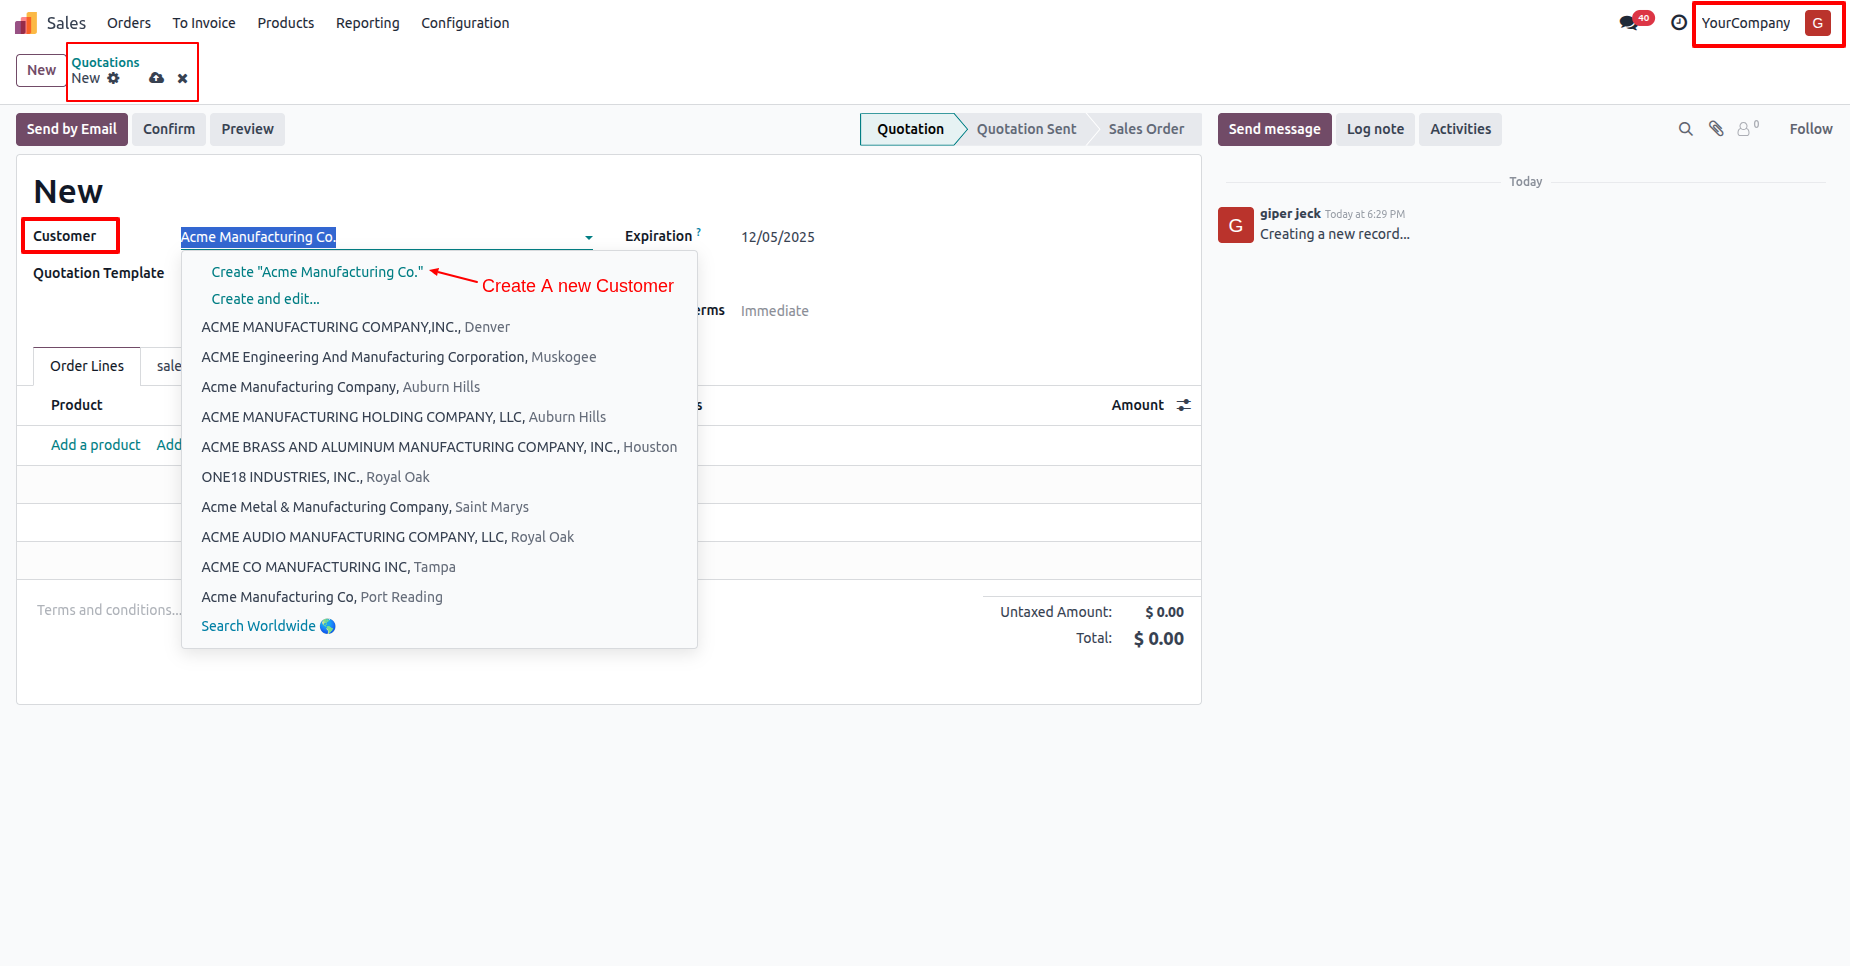
Create a new customer.
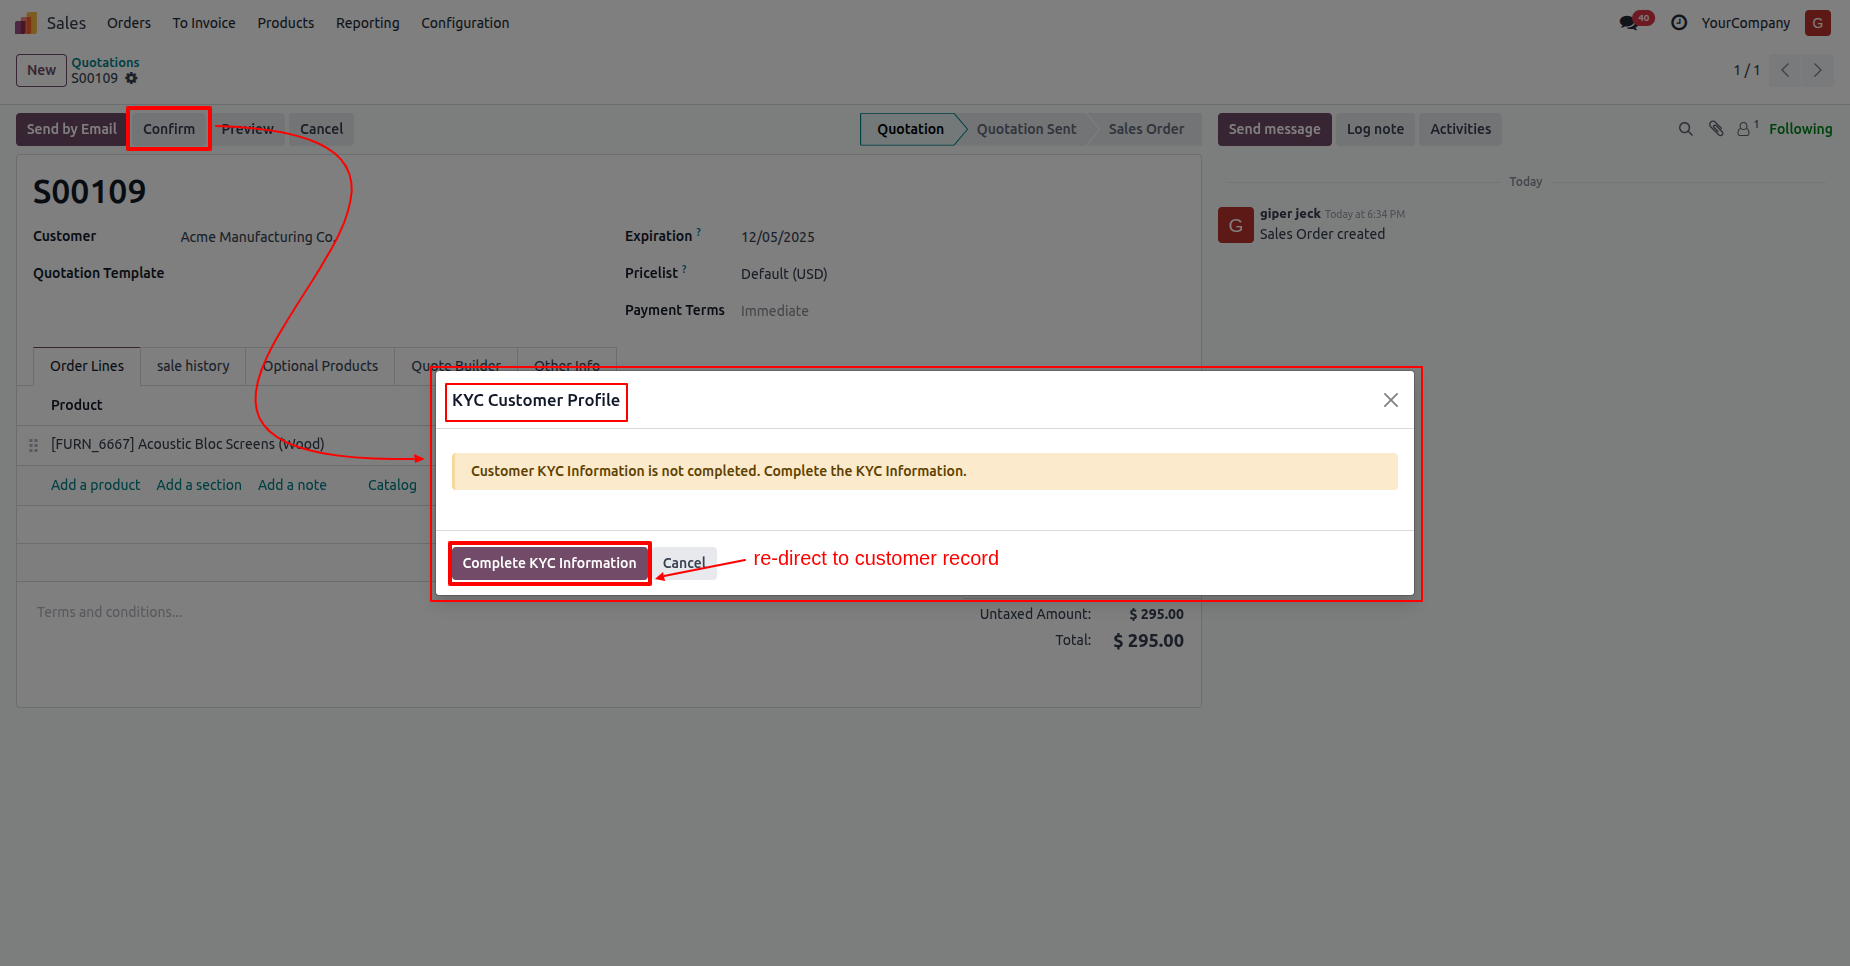
Confirm the quotation.
If the customers KYC detail are completed, the following warning
popup will appear.
Click on the "Complete KYC Information" button.
In the customer form view, you can see the customer KYC status is
"Onboarding".
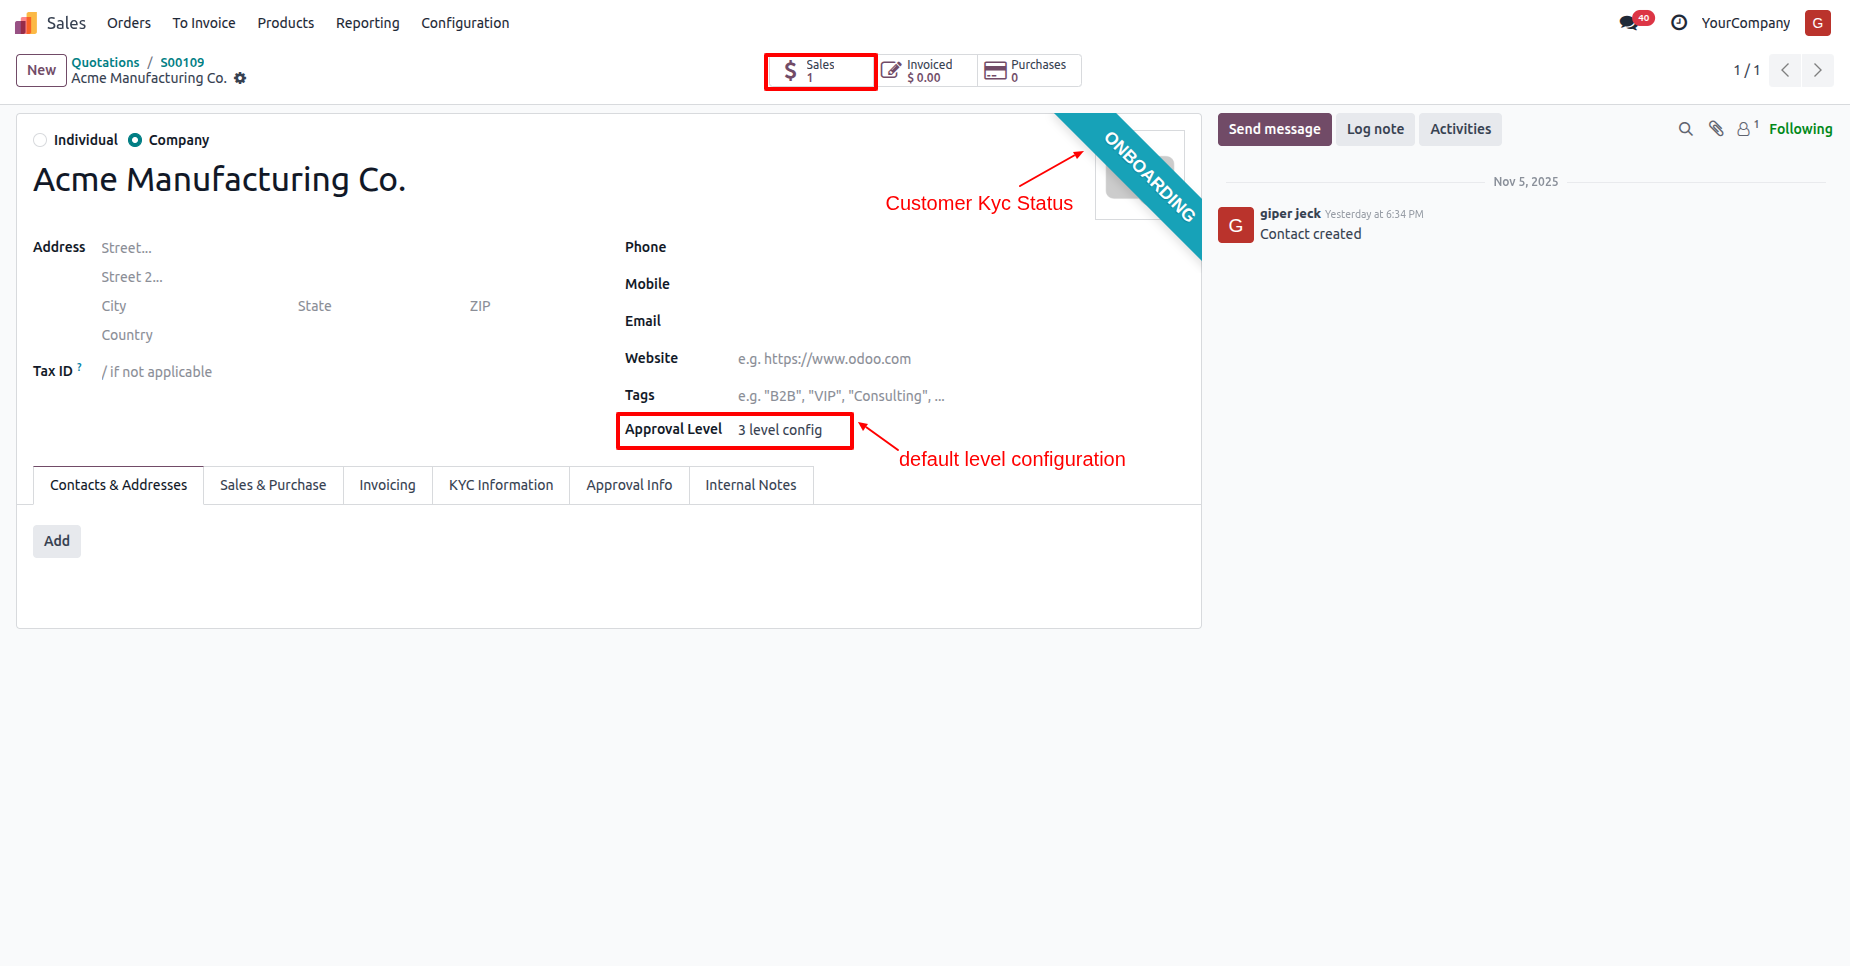
Here you can see that the default approval configuration is
automatically set.
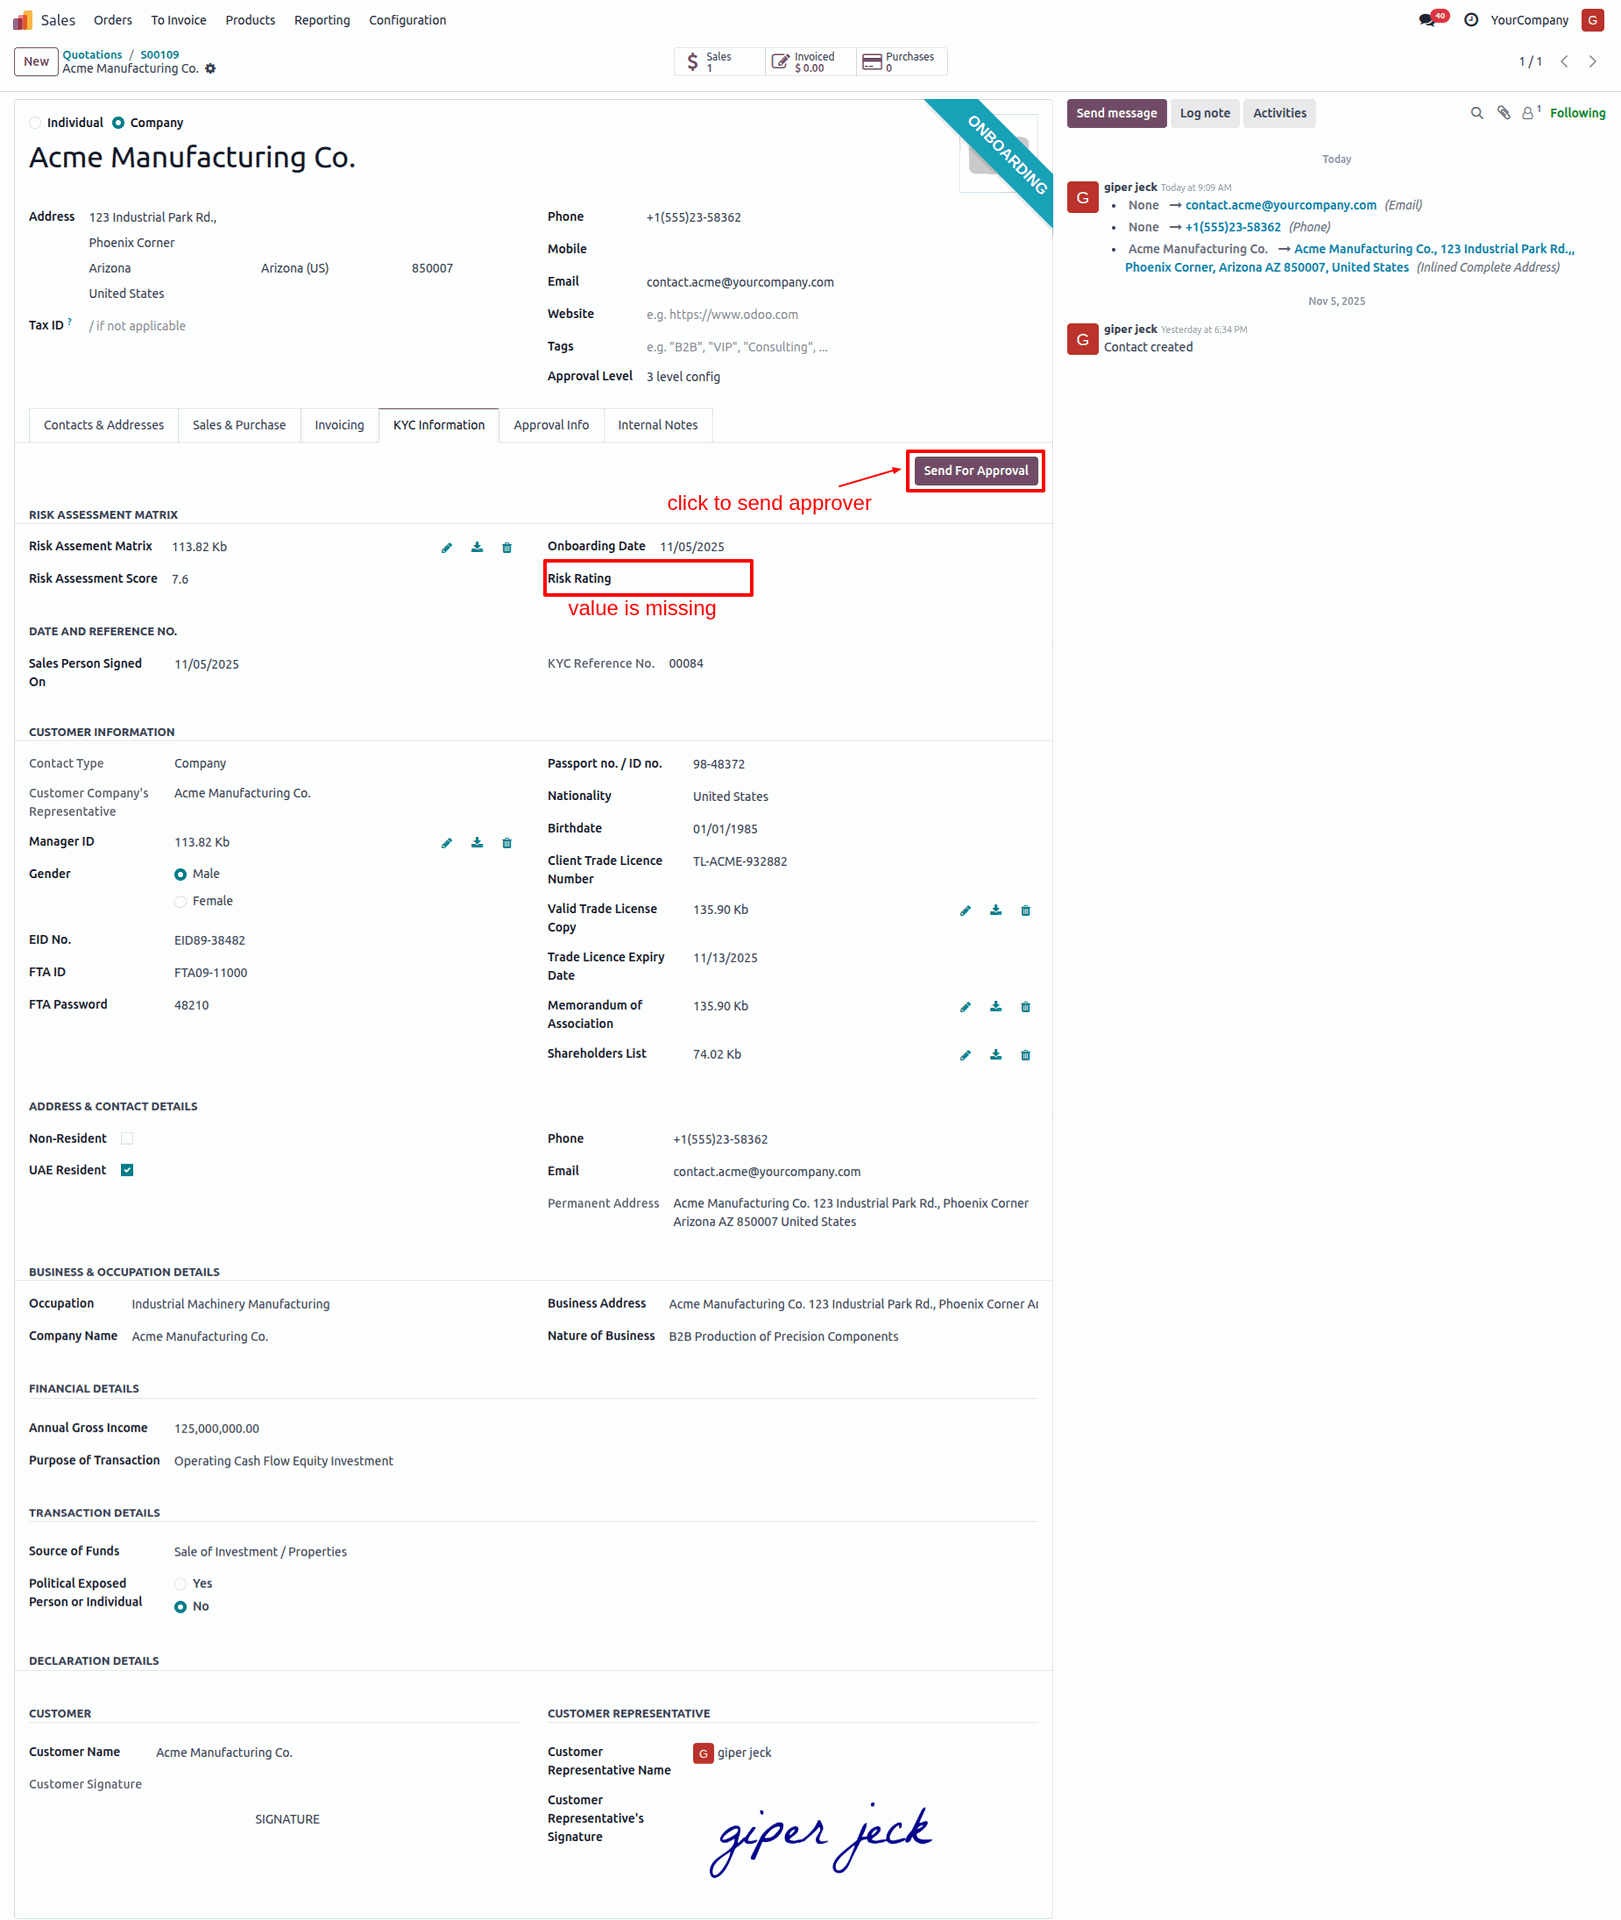
In the "KYC Information" tab, click on the "Send For Approval" button.
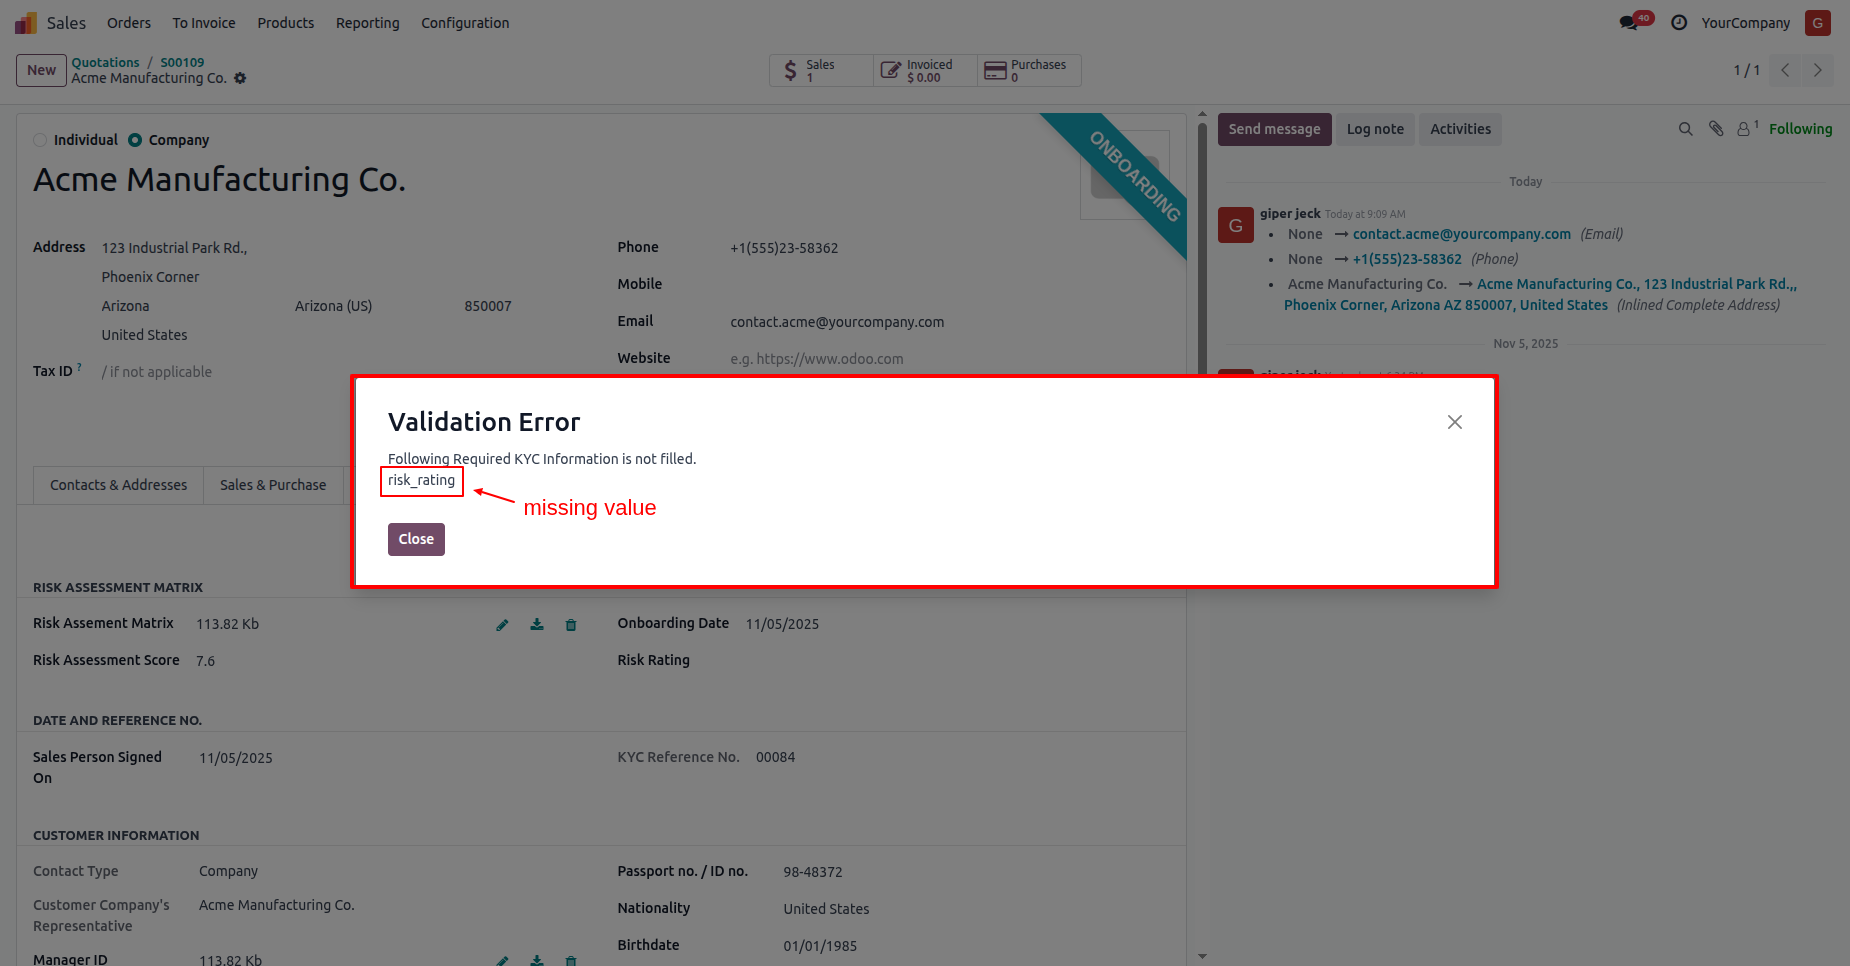
If the "Risk Rating" value is missing in the customer's KYC, this validation error will occur.
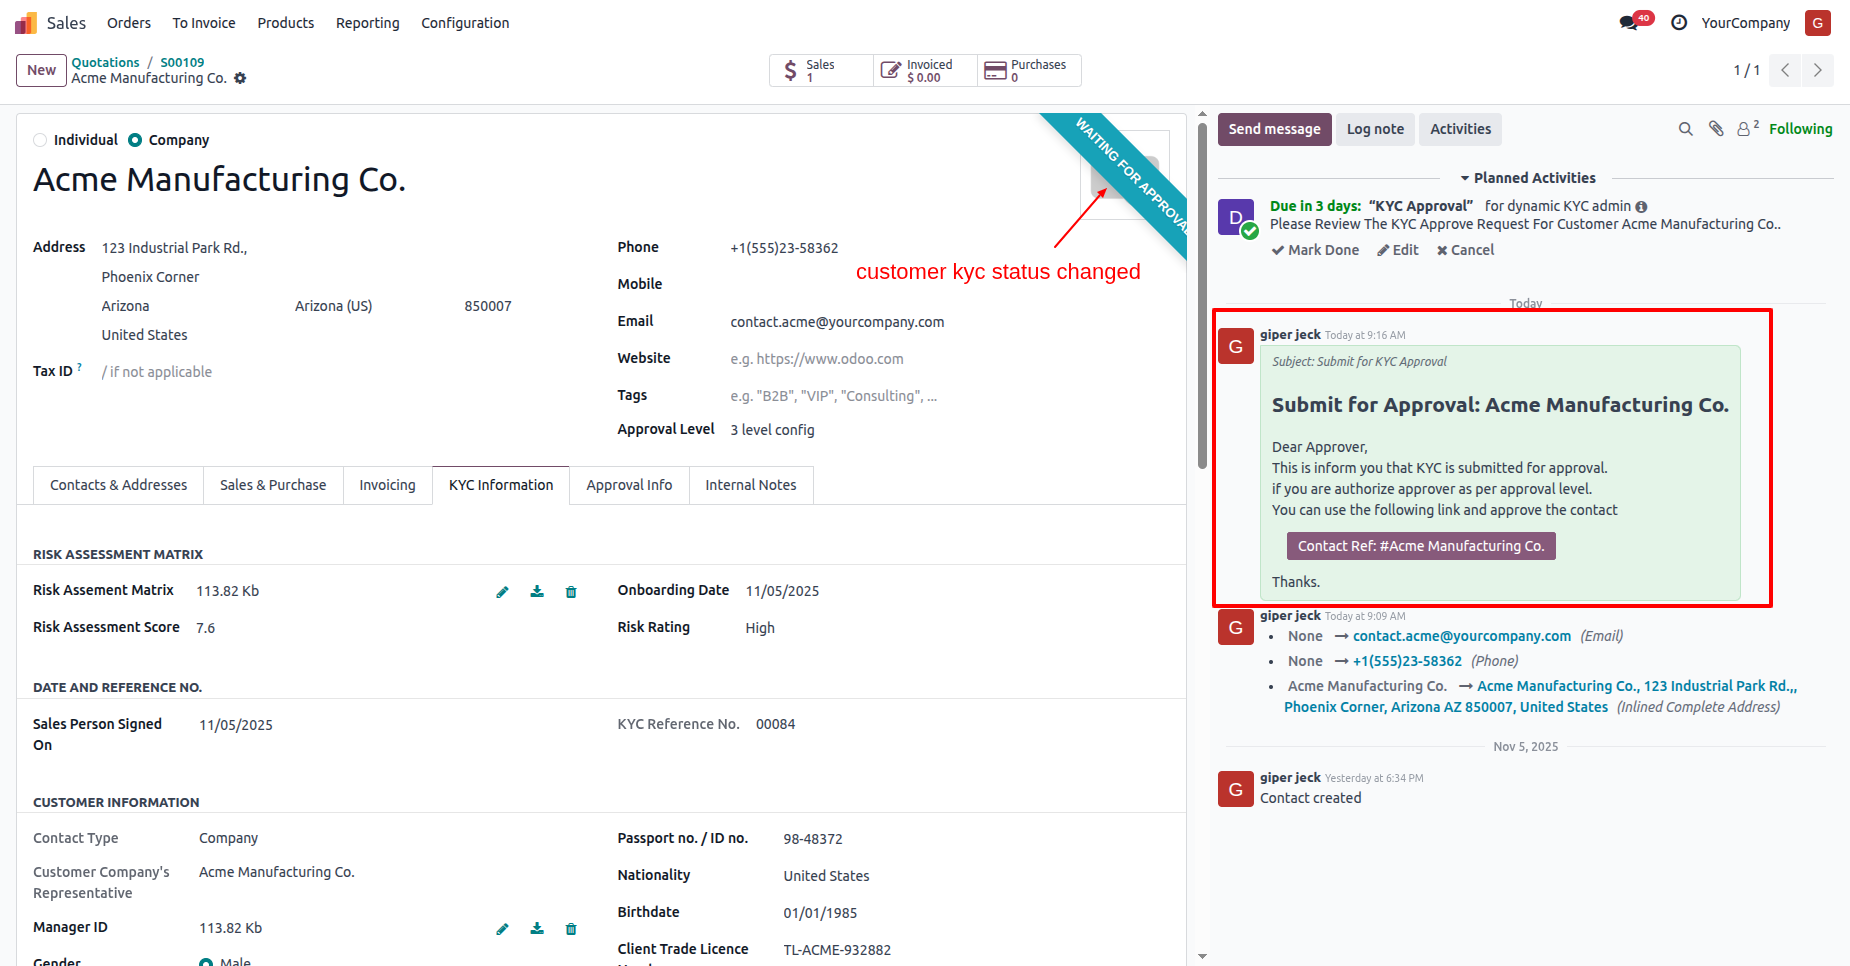
Here you can see that the customers KYC status has changed to "Waiting for Approval".
In the "Approval Info" tab, you can see the approval details.
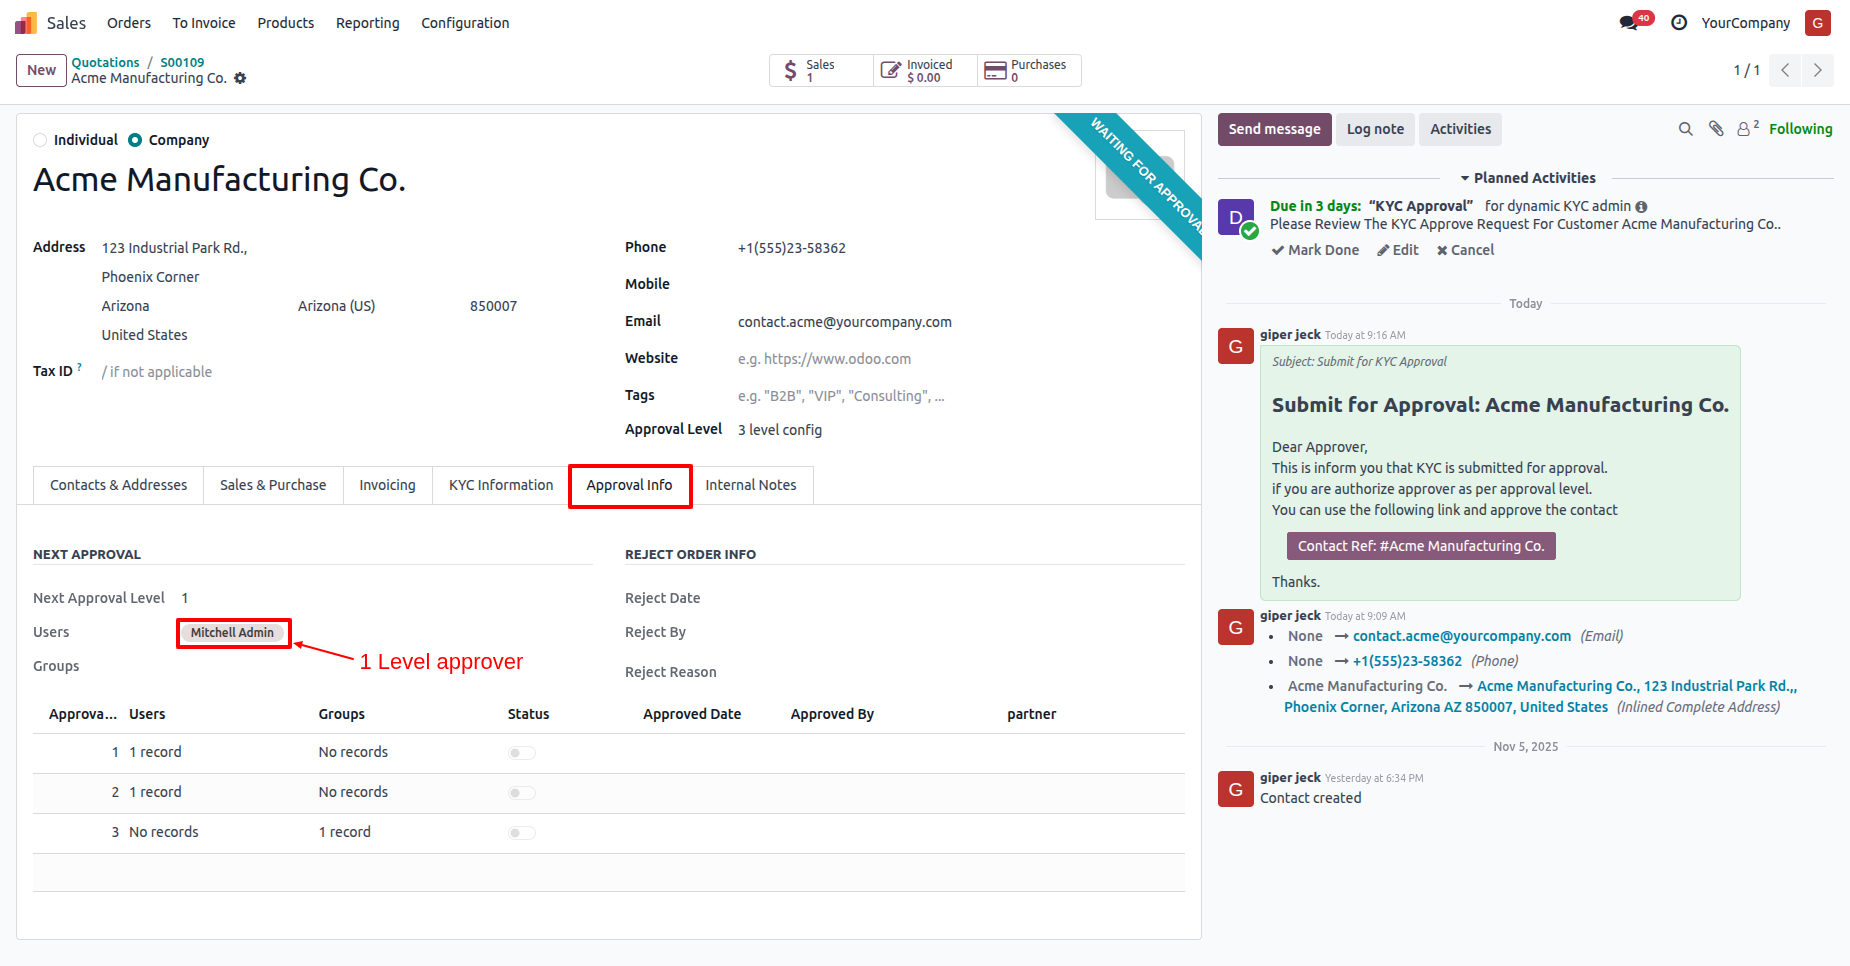
Log in as a 1st approval user (Mitchel Admin).
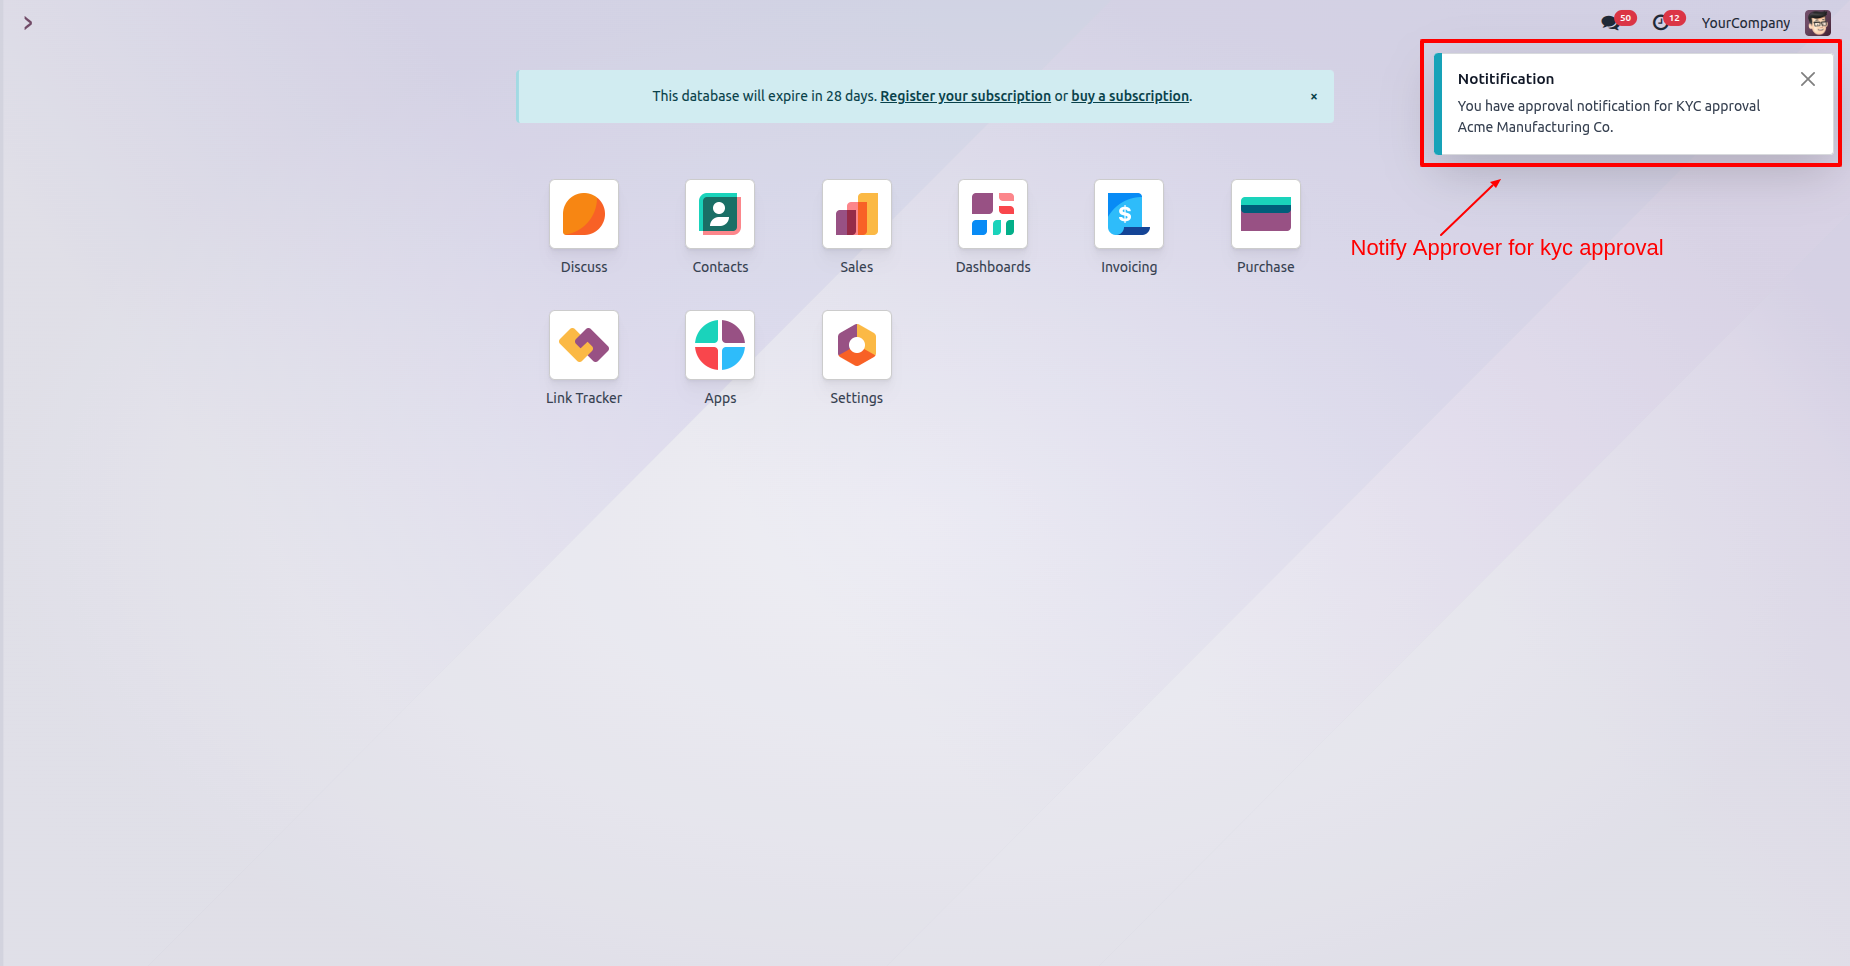
The approval
user will receive an approval notification popup.
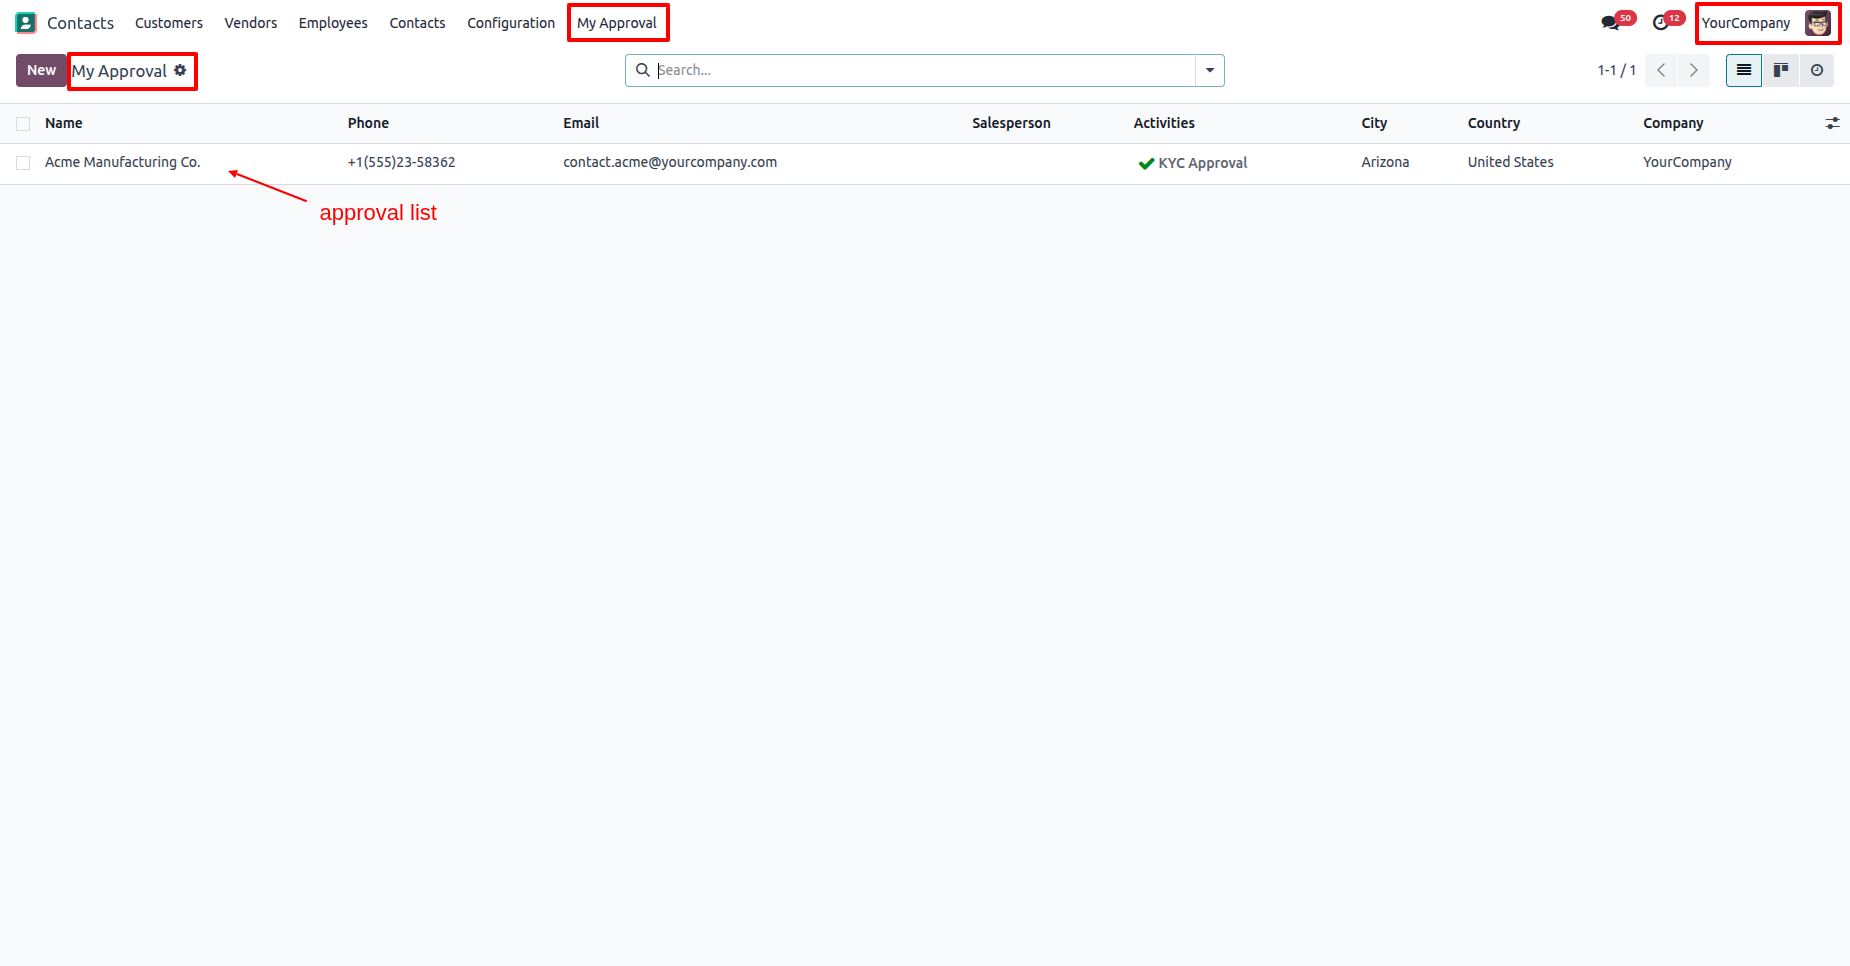
"My Approval" menu and list view.
In the "KYC Information" tab, click on the "Approve" button.
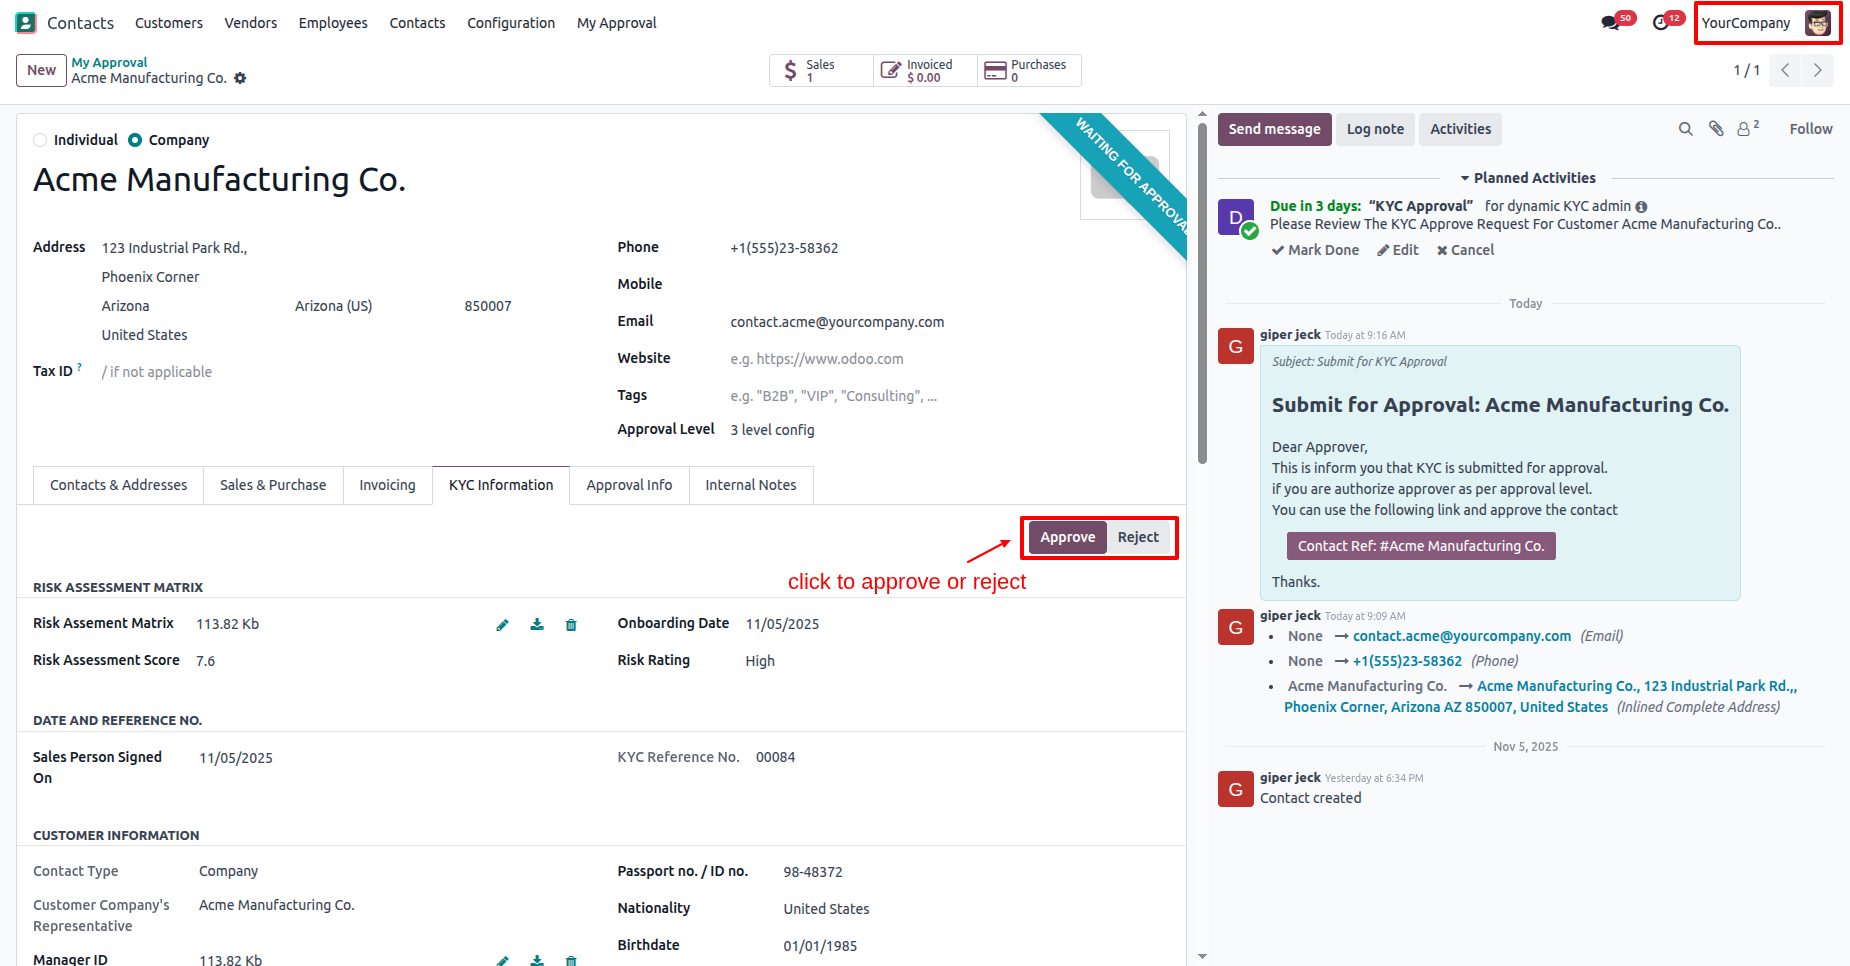
In the "Approval Info" tab, you can see that the approval information has been updated to the 2nd-level approval.
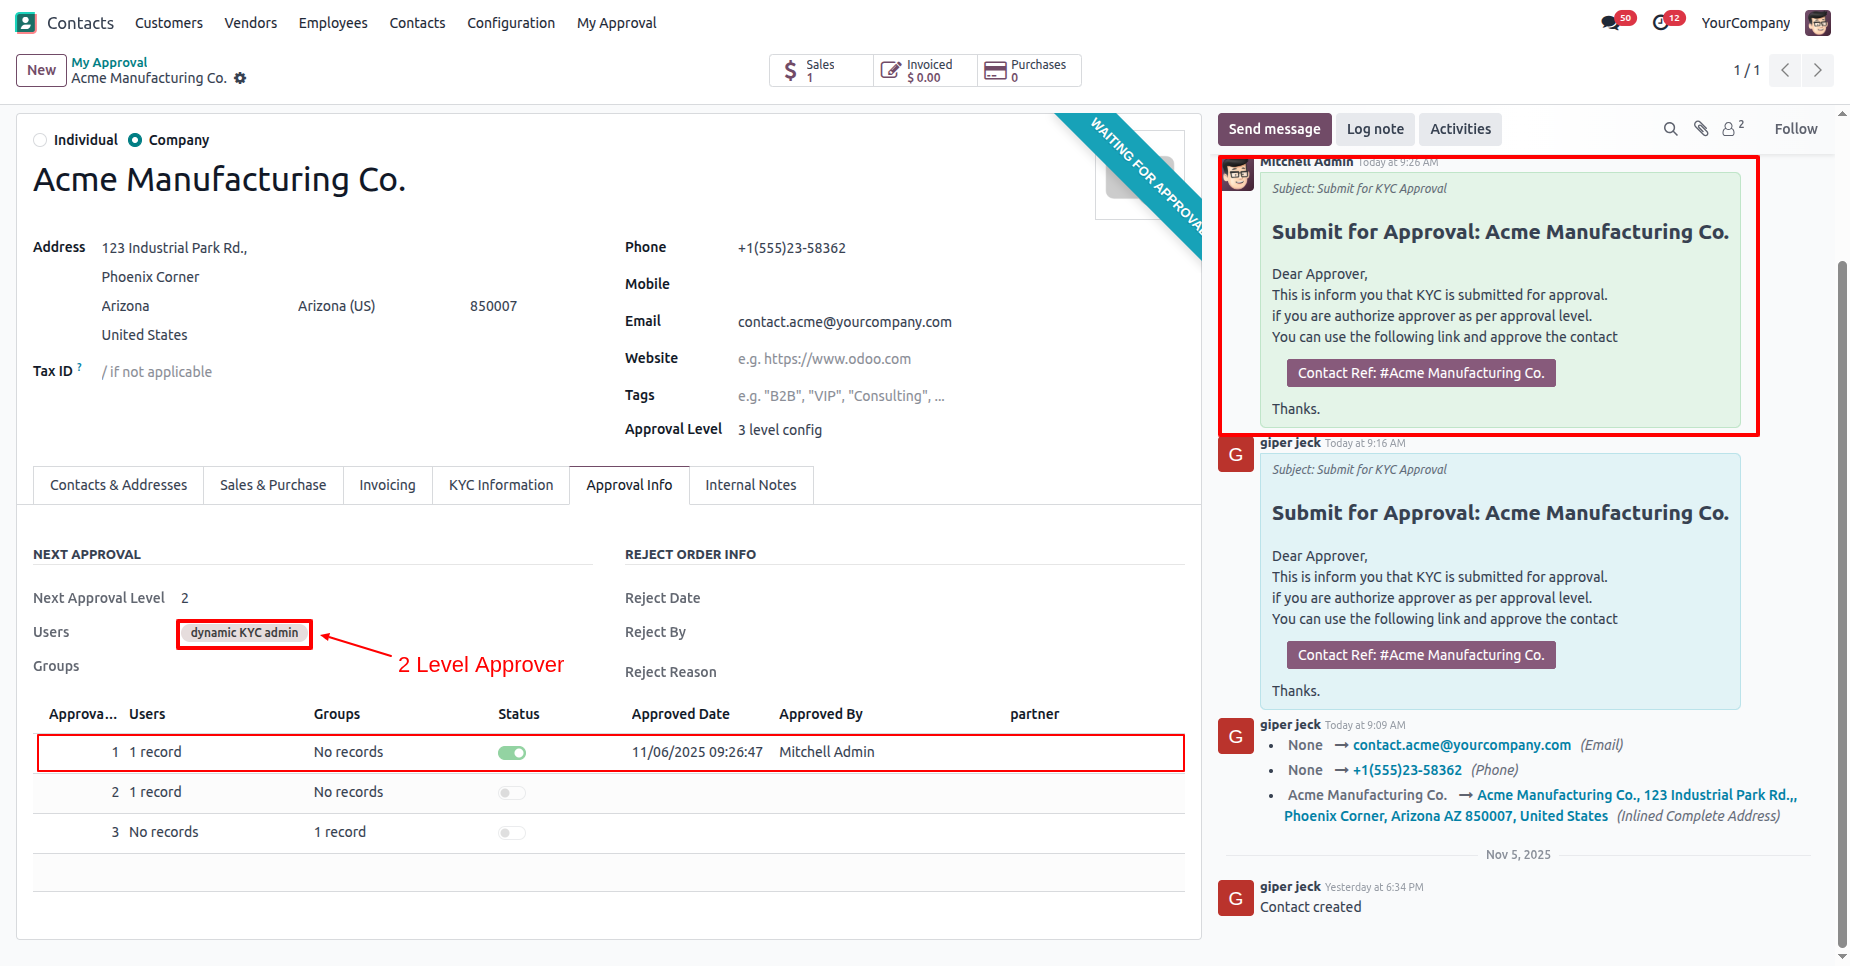
Log in as a 2nd approval user (dynamic kyc admin).
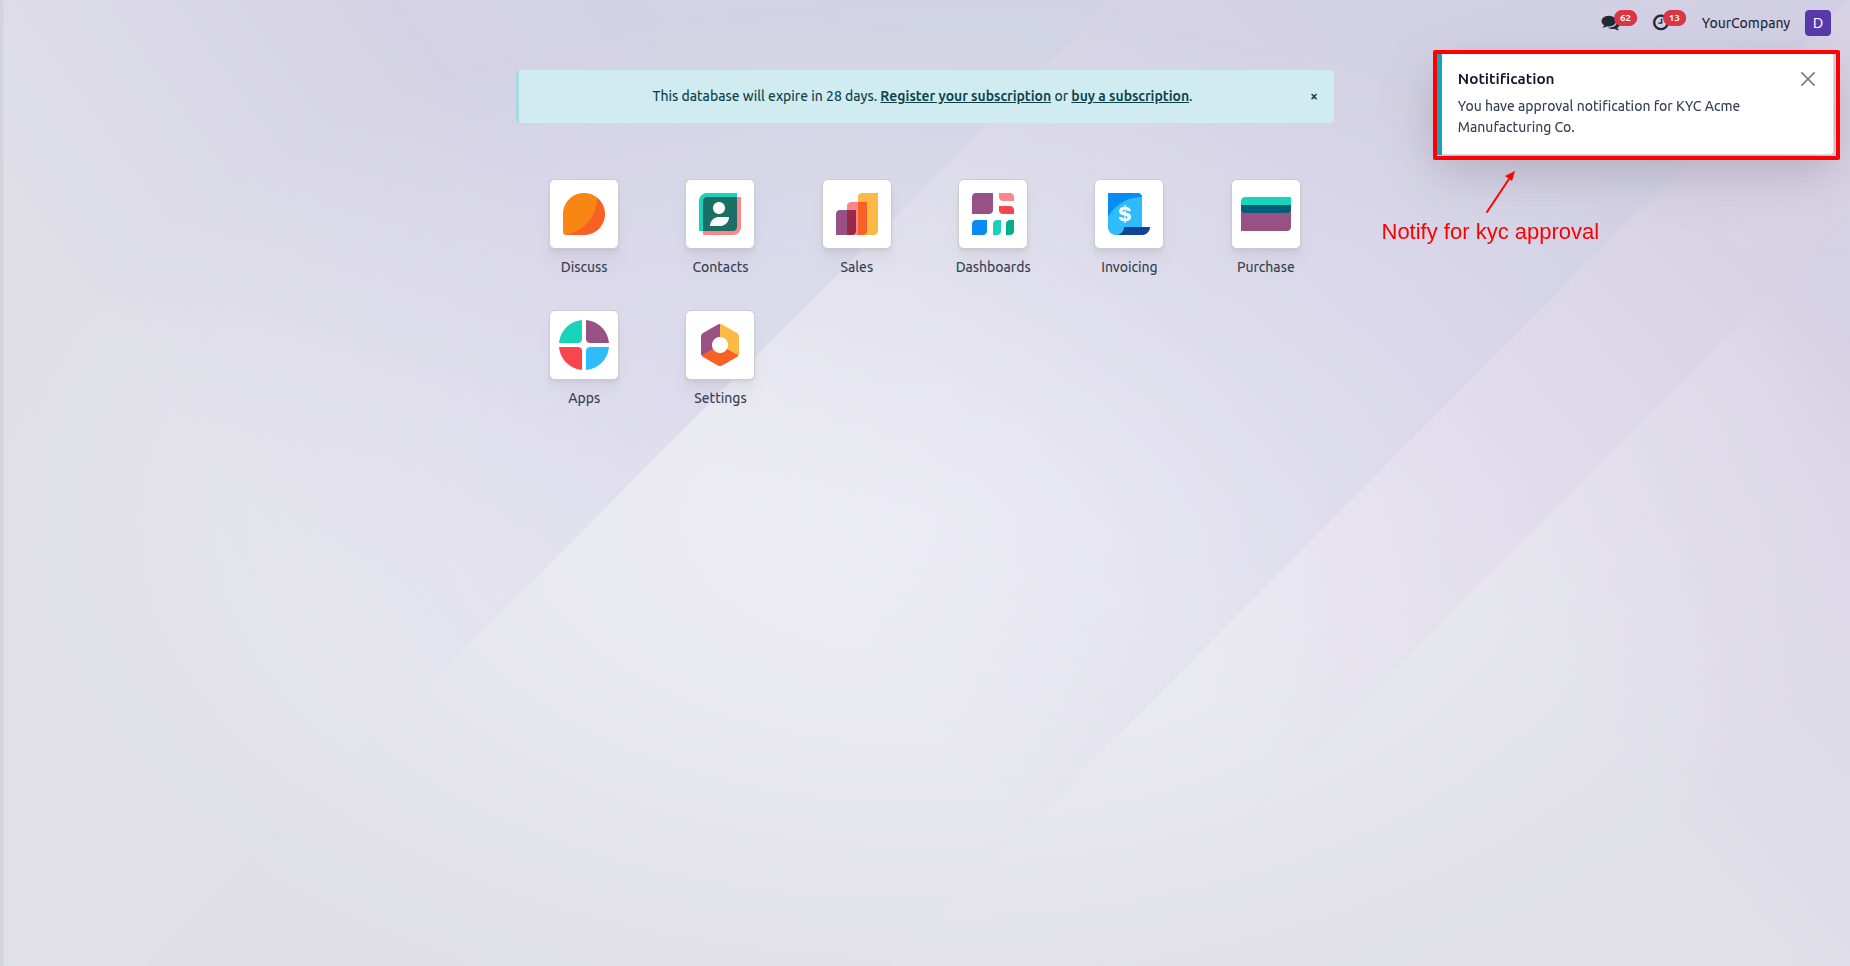
The
approval user will receive an approval notification popup.
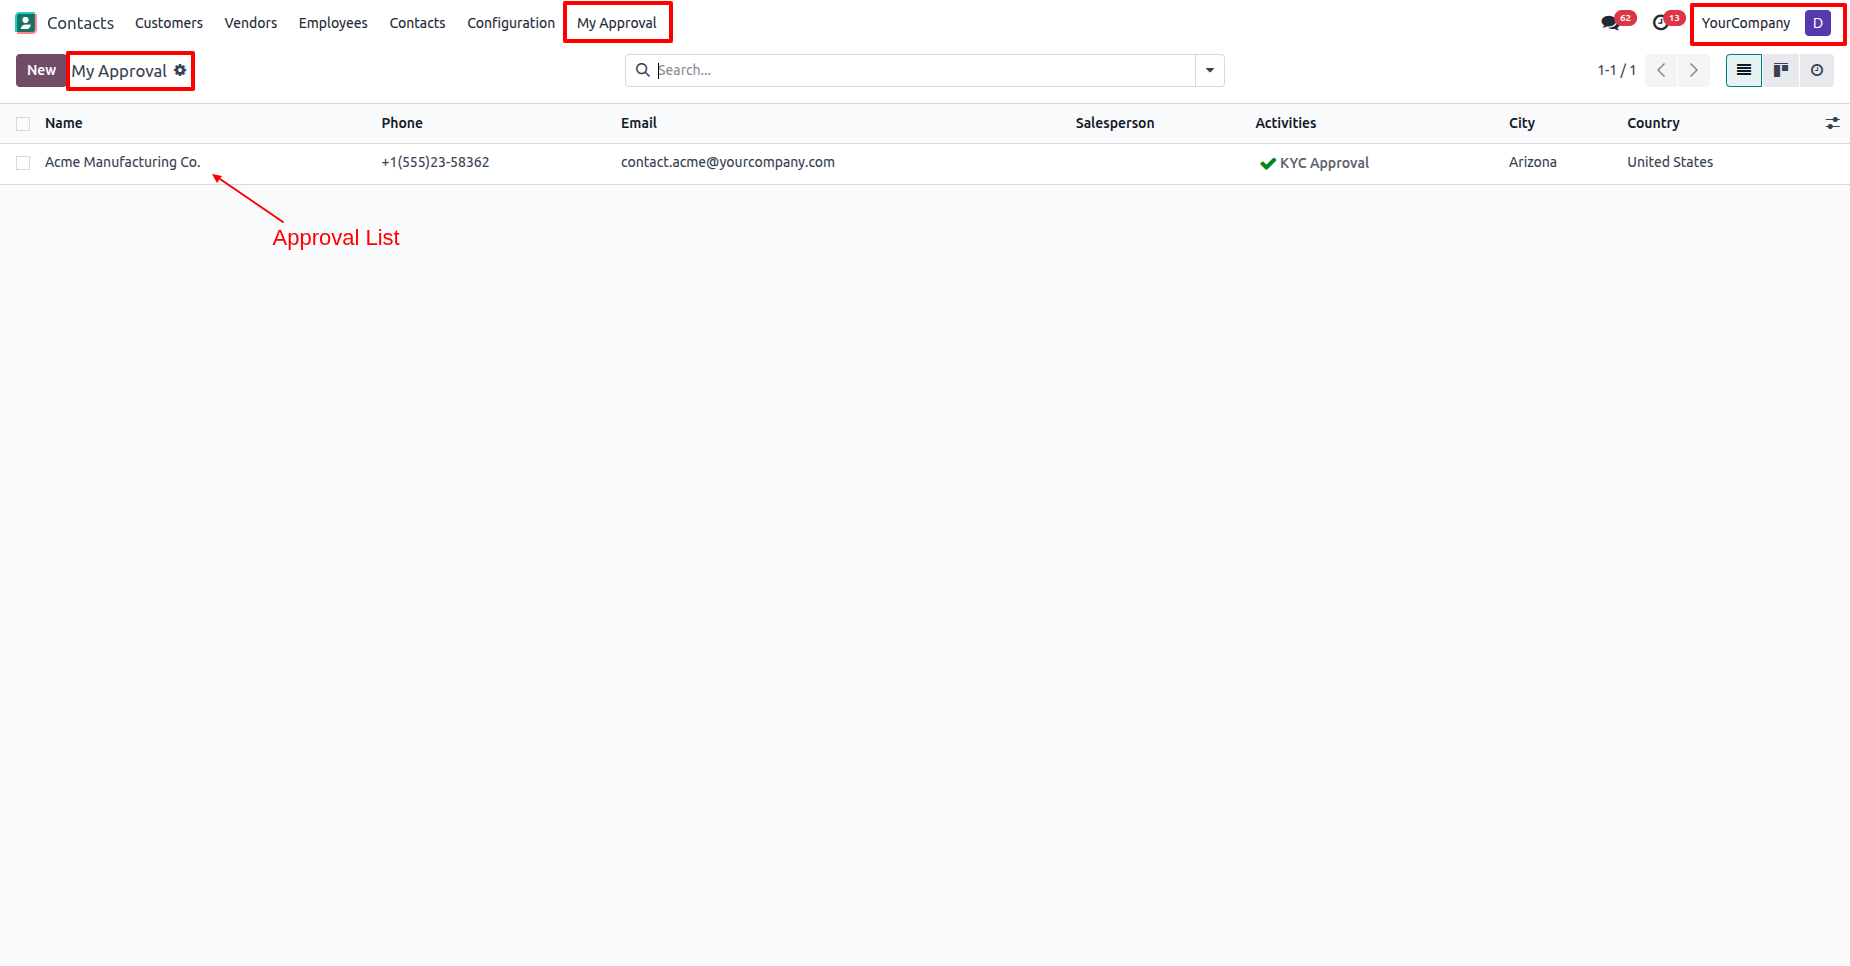
"My Approval" menu and list view.
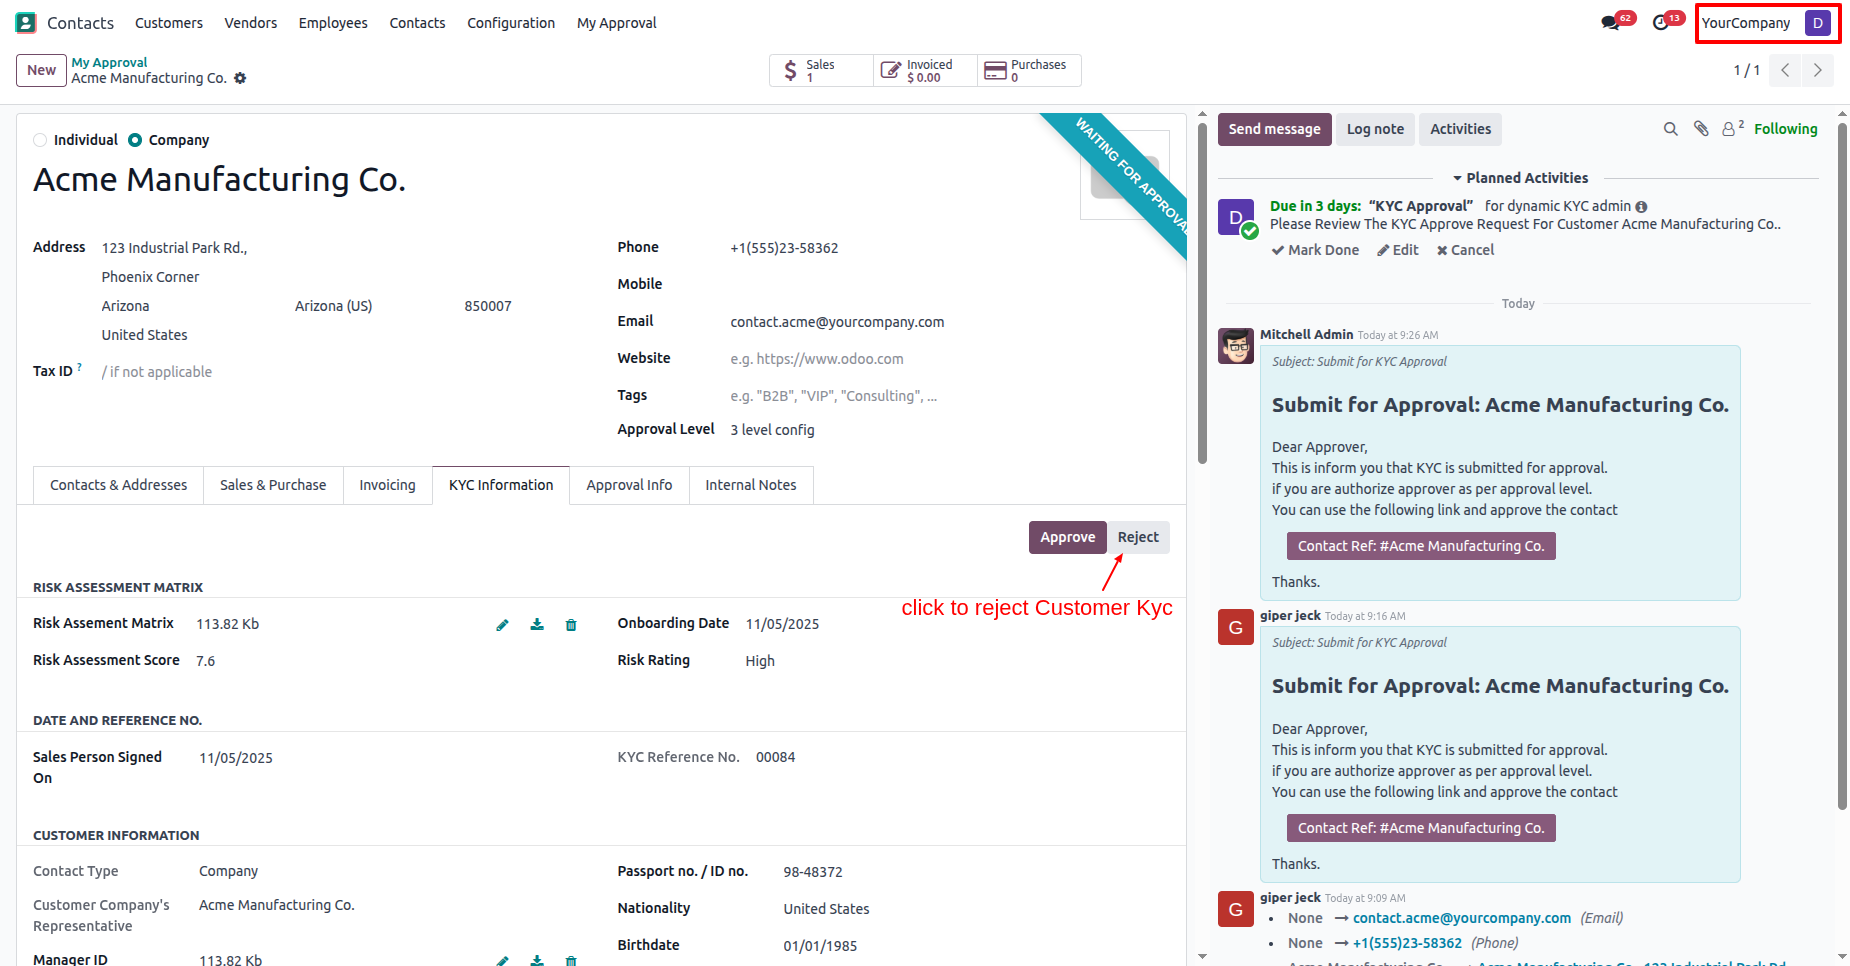
In the "KYC Information" tab, click on the "Reject" button.
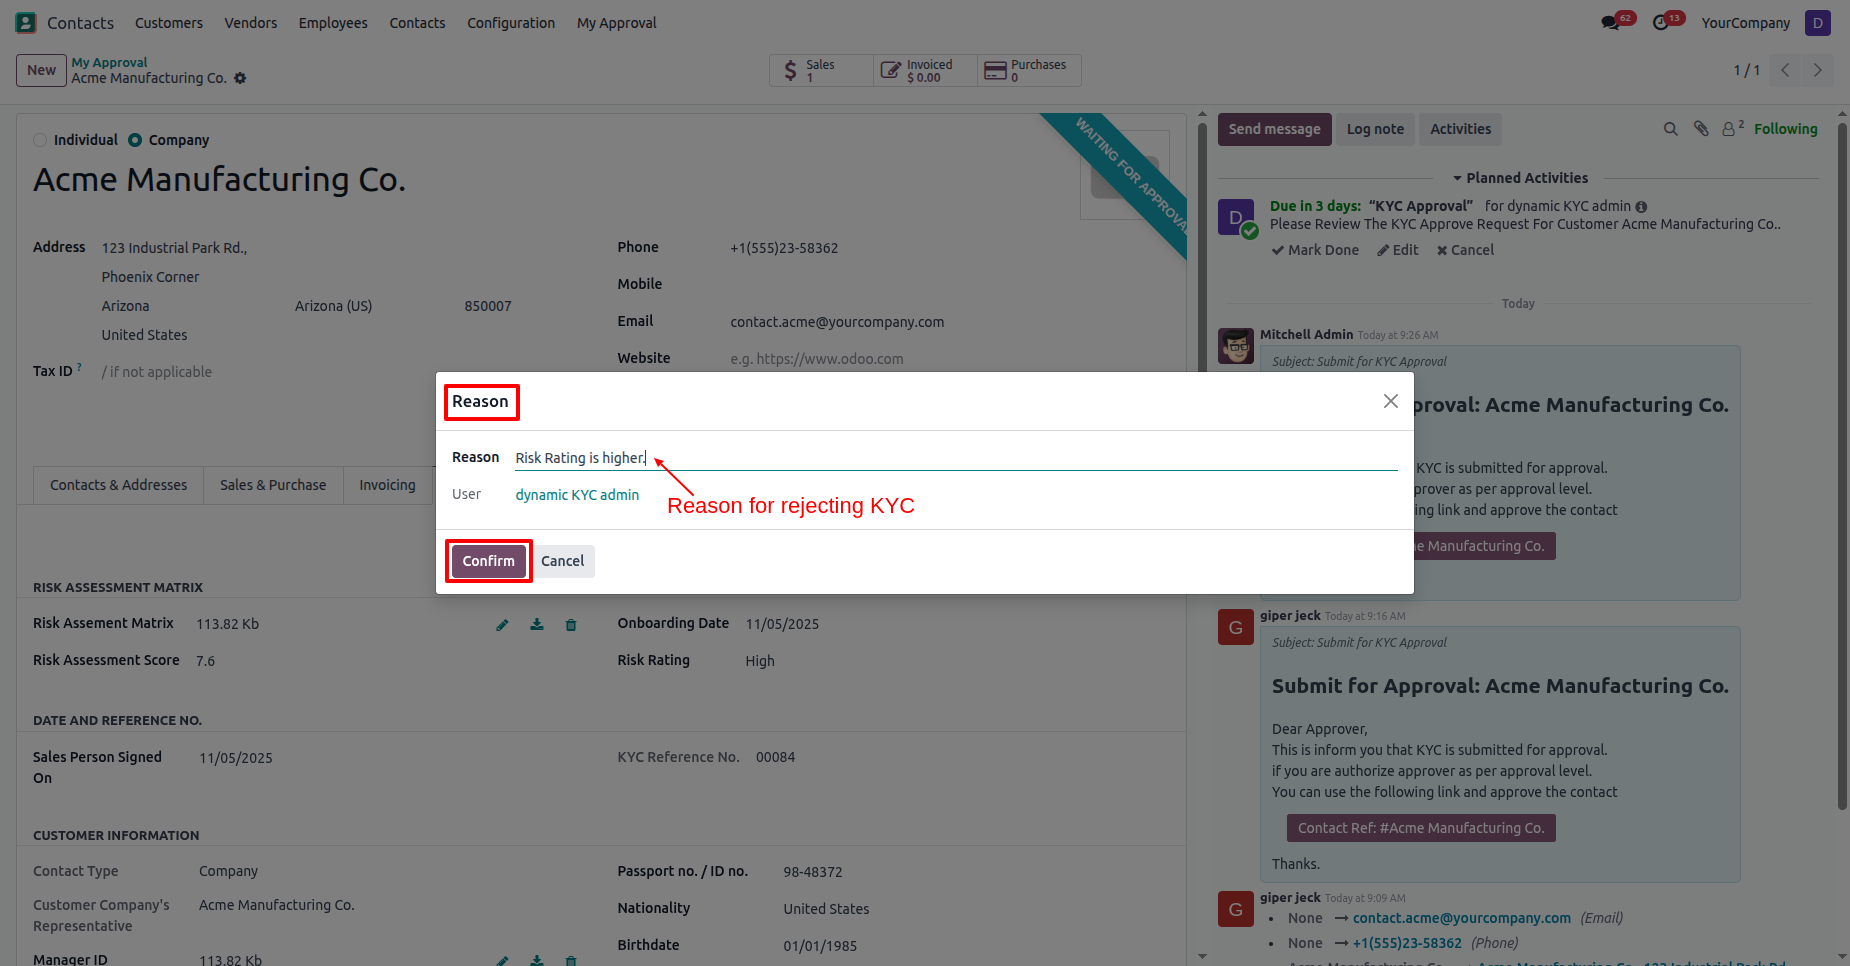
Add a reason for rejecting the approval and click on the "Confirm" button.
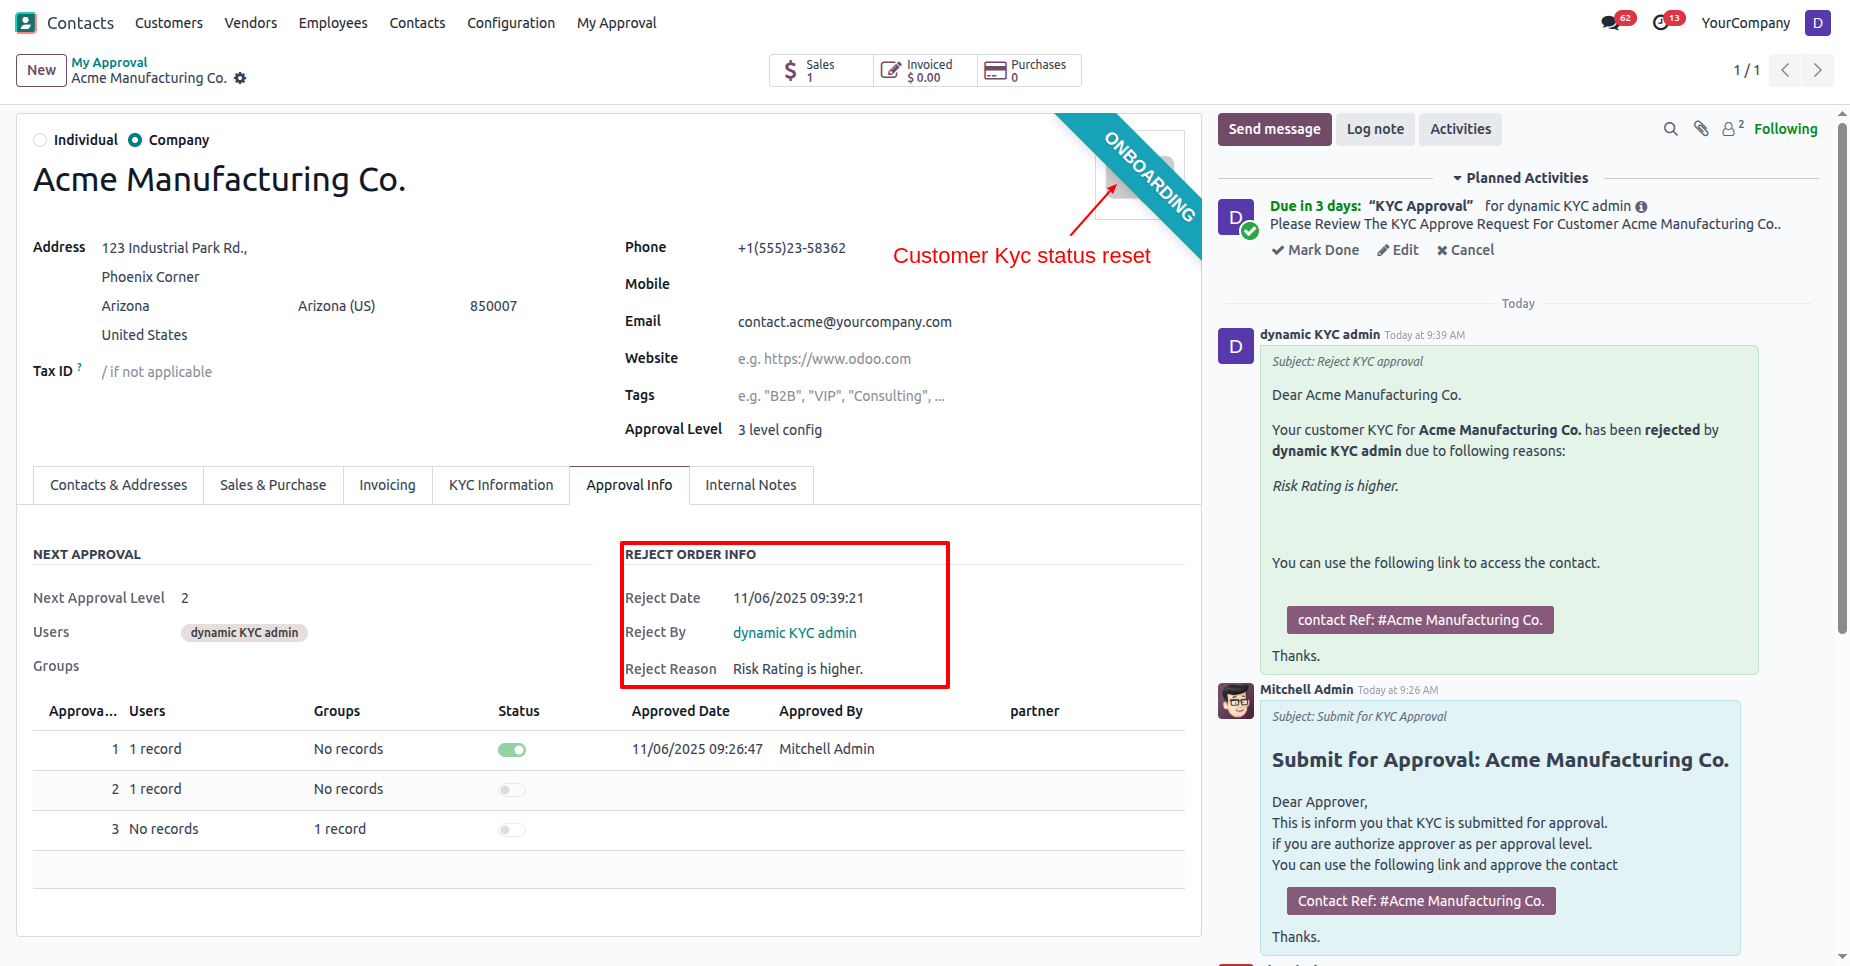
In the "Approval Info" tab, you can see that the reject order iformation.
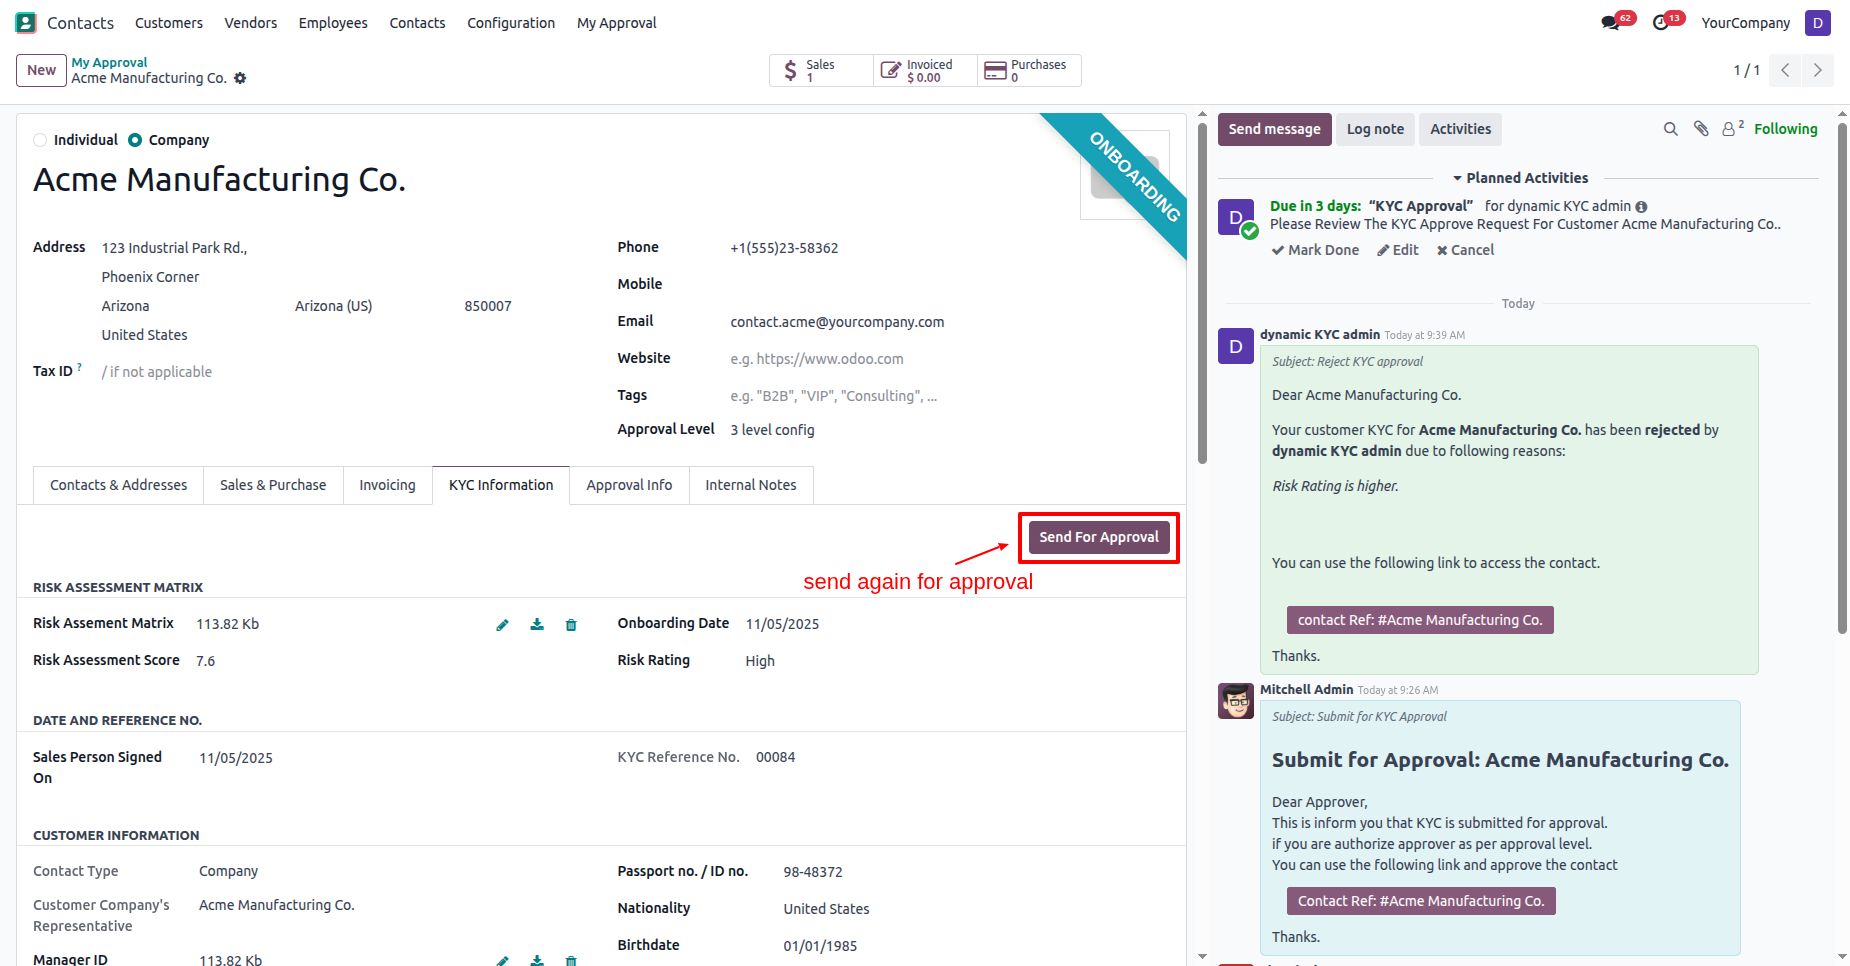
In the "KYC Information" tab, click on the "Send For Approval" button.
Here you can see that the customers KYC status has changed to
"Waiting for Approval".
In the "Approval Info" tab, you can see the approval details.
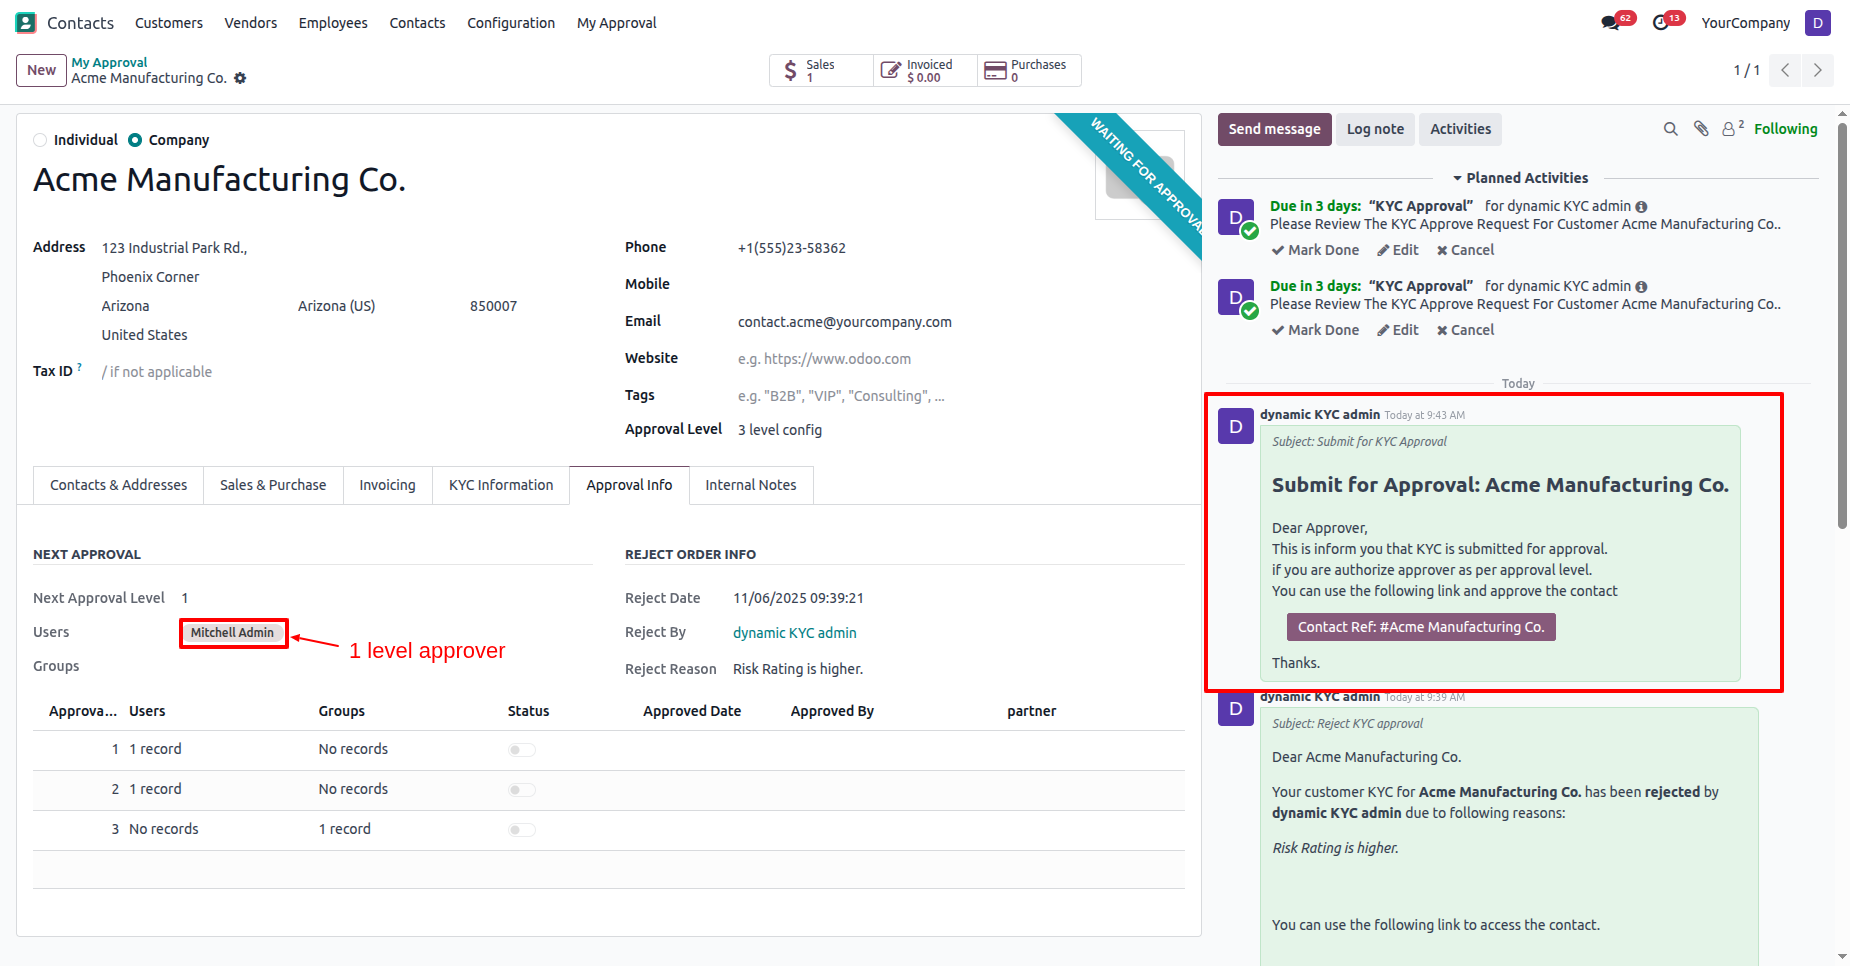
Log in as a 1st approval user (Mitchel Admin).
The approval user will receive an approval notification popup.
"My Approval" menu and list view.
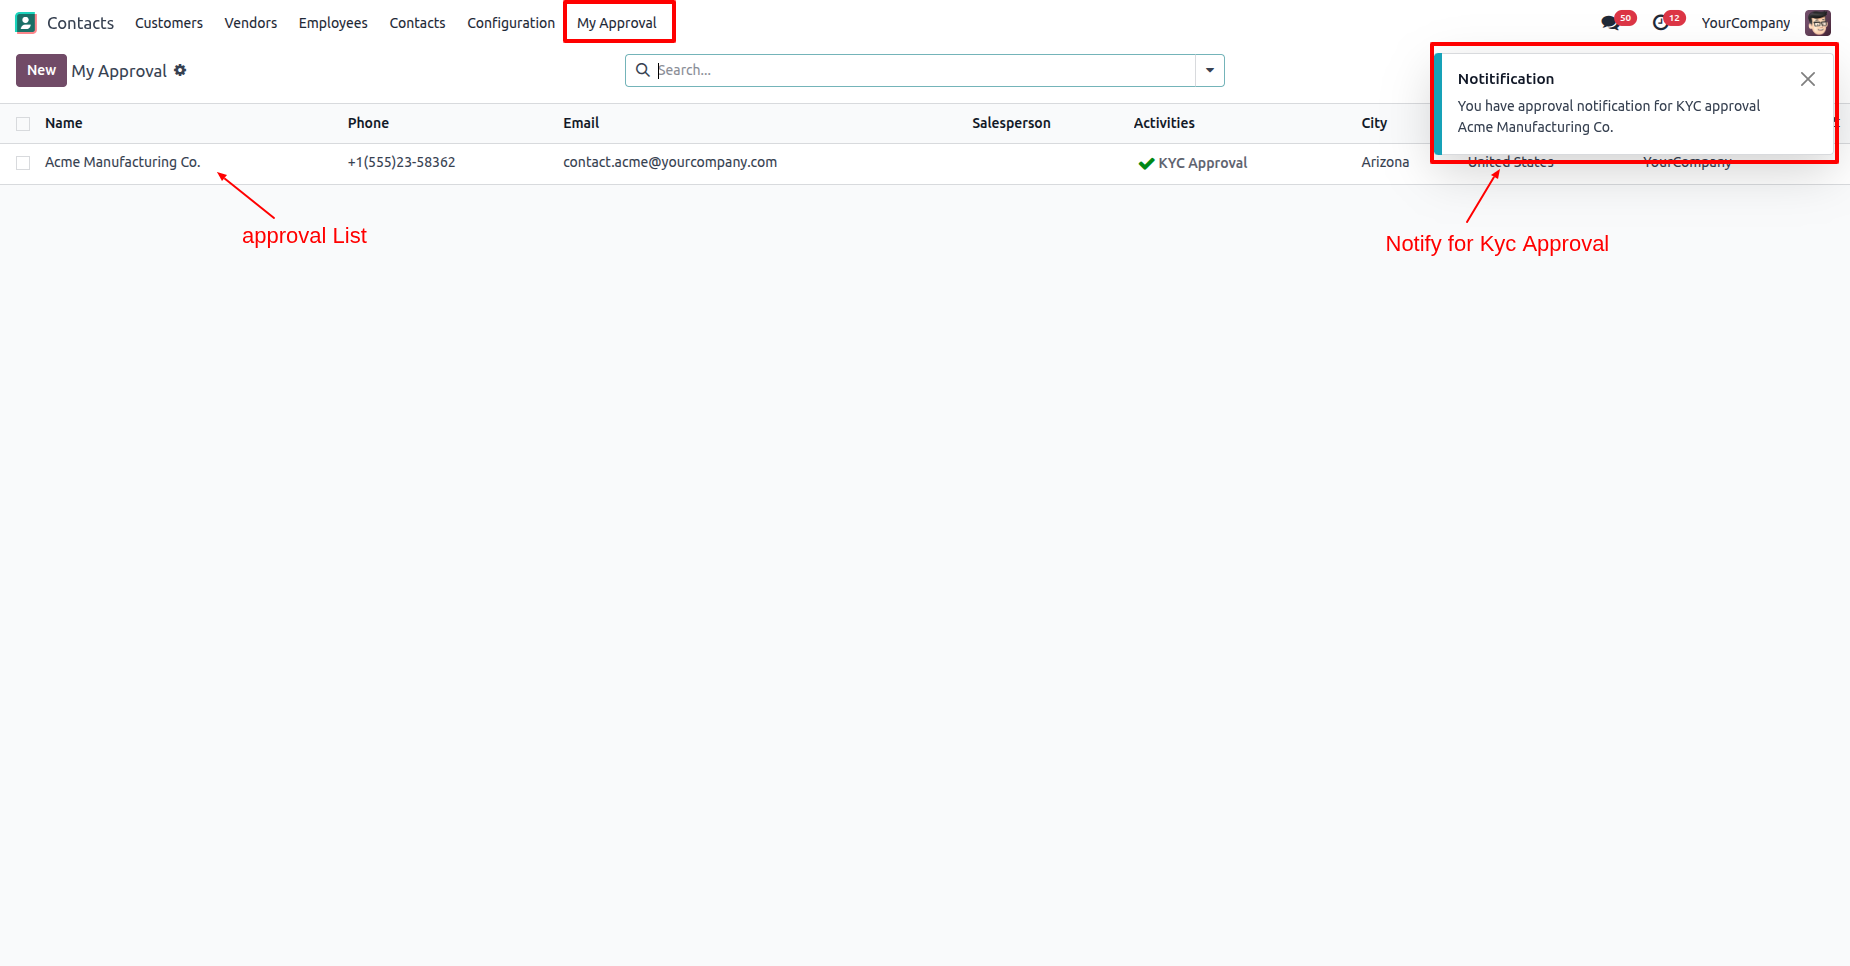
In the "KYC Information" tab, click on the "Approve" button.
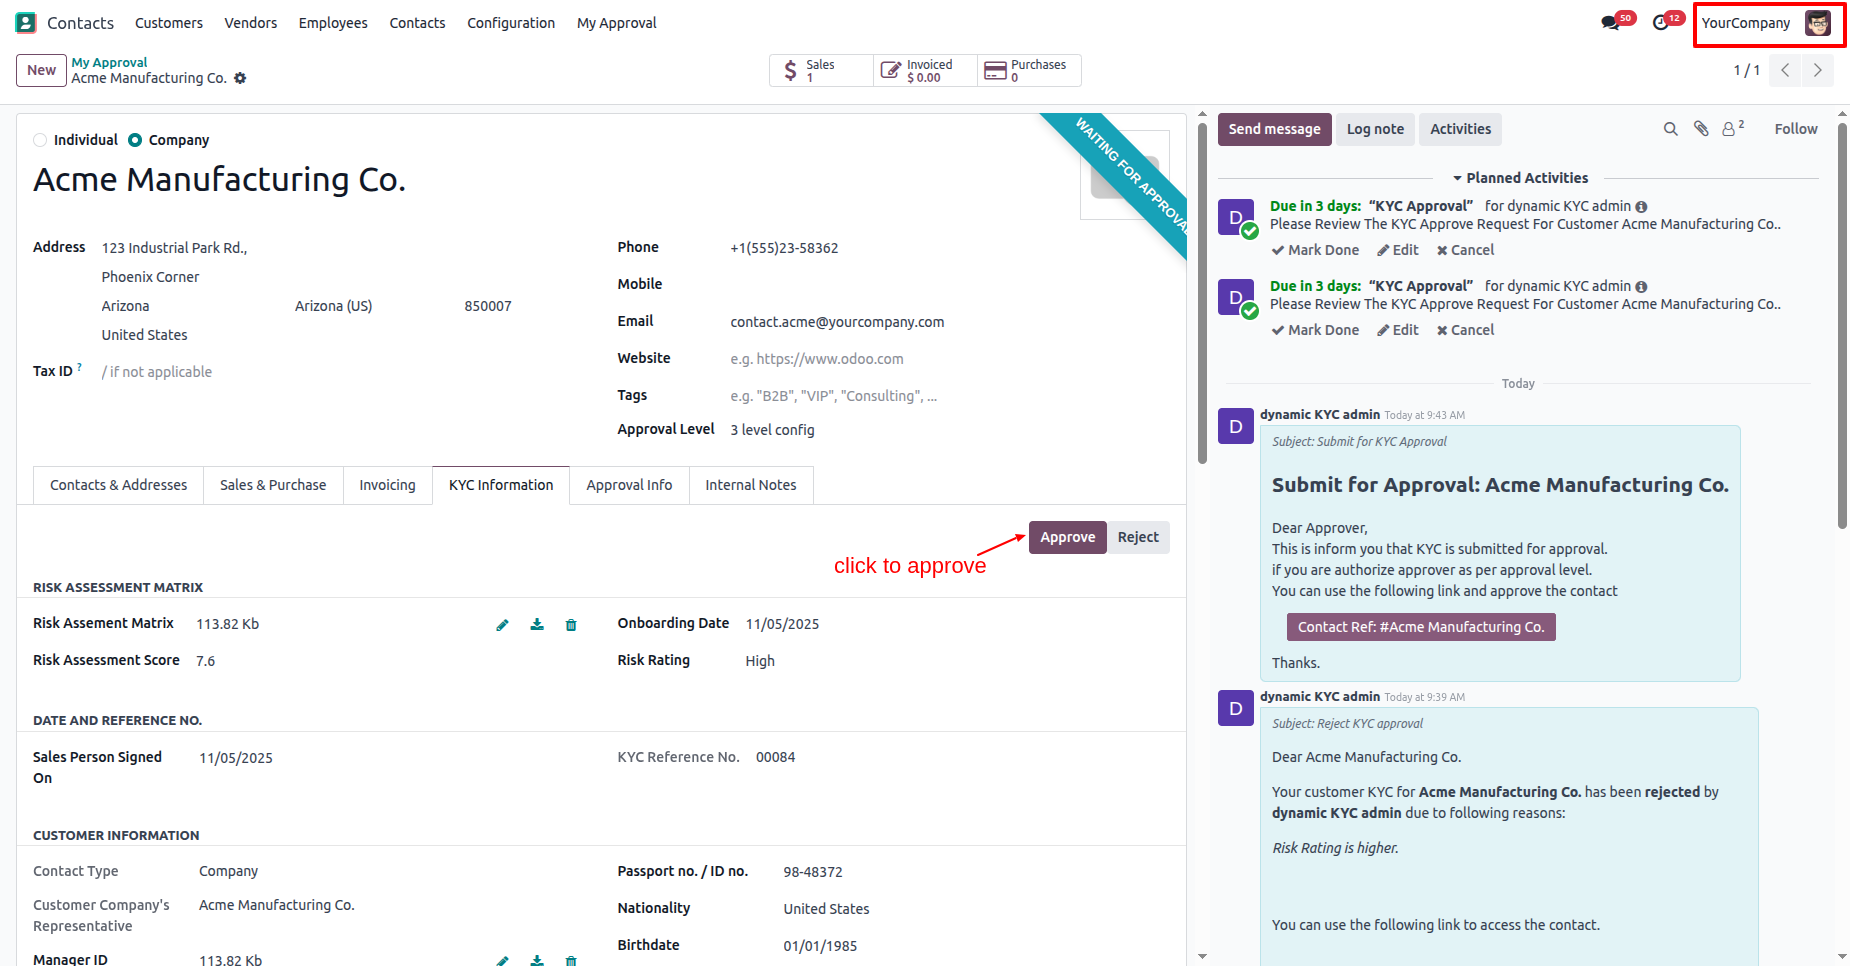
In the "Approval Info" tab, you can see that the approval information has been updated to the 2nd-level approval.
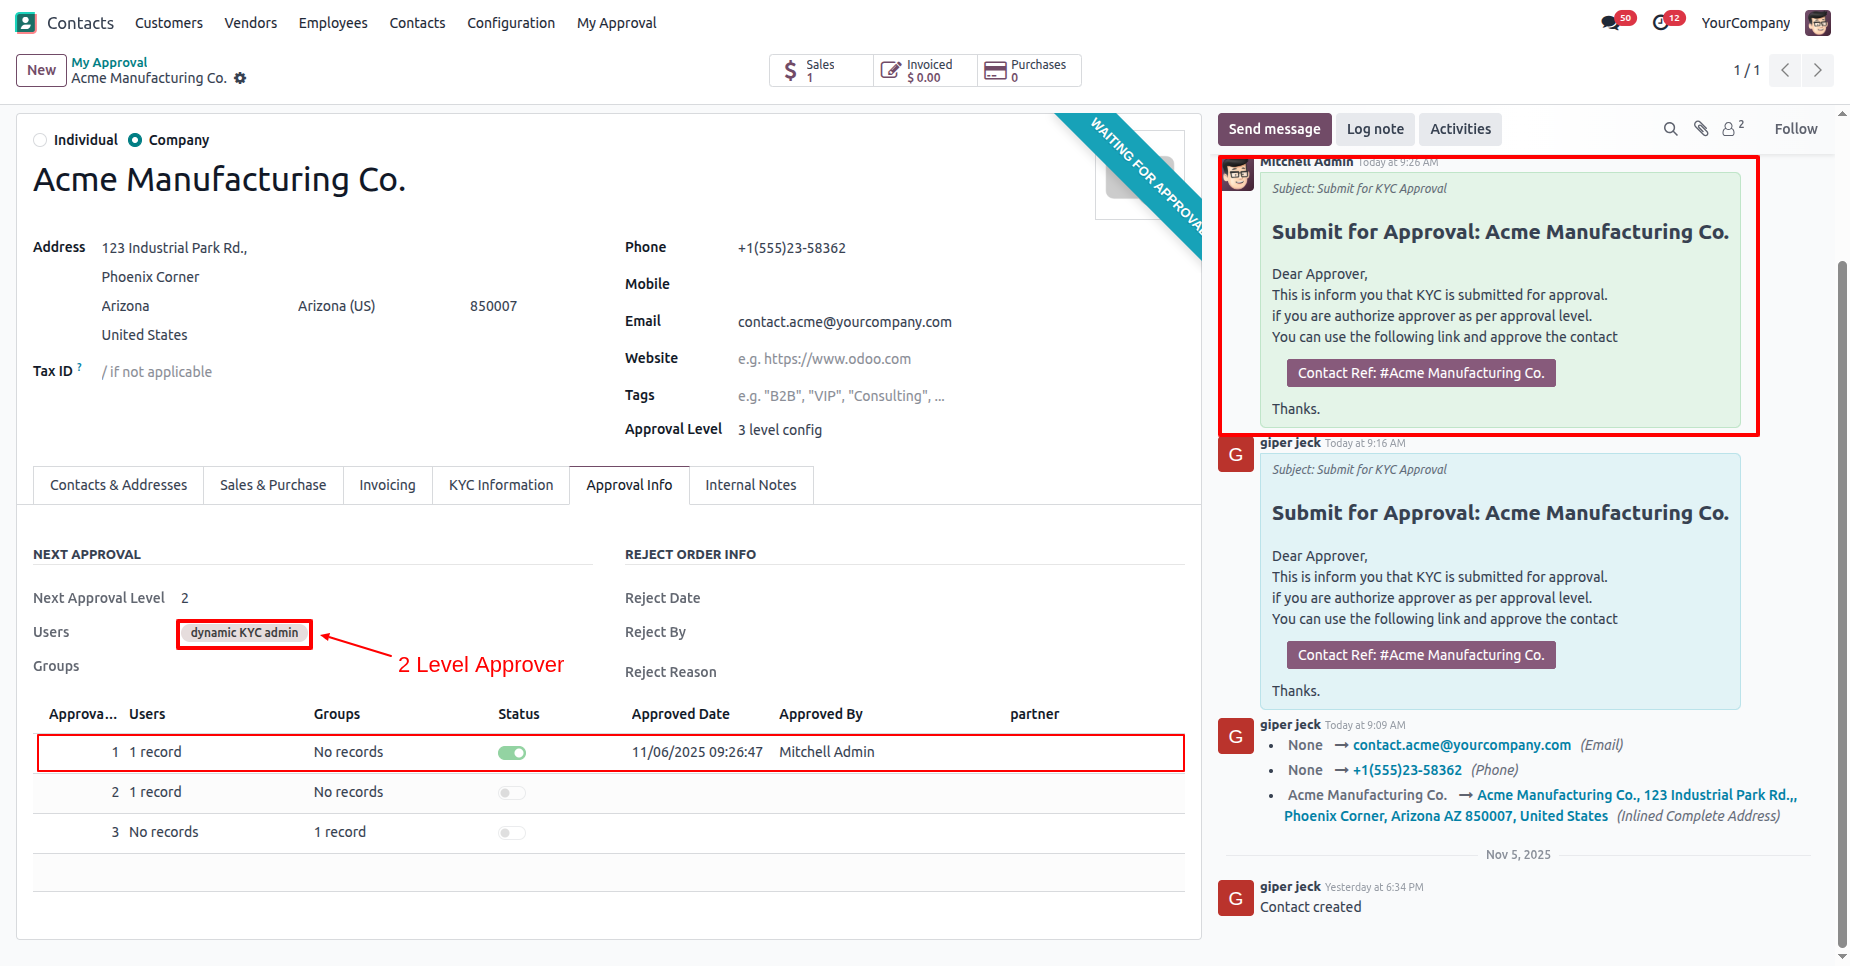
Log in as a 2nd approval user (dynamic kyc admin).
The approval user will receive an approval notification popup.
"My Approval" menu and list view.
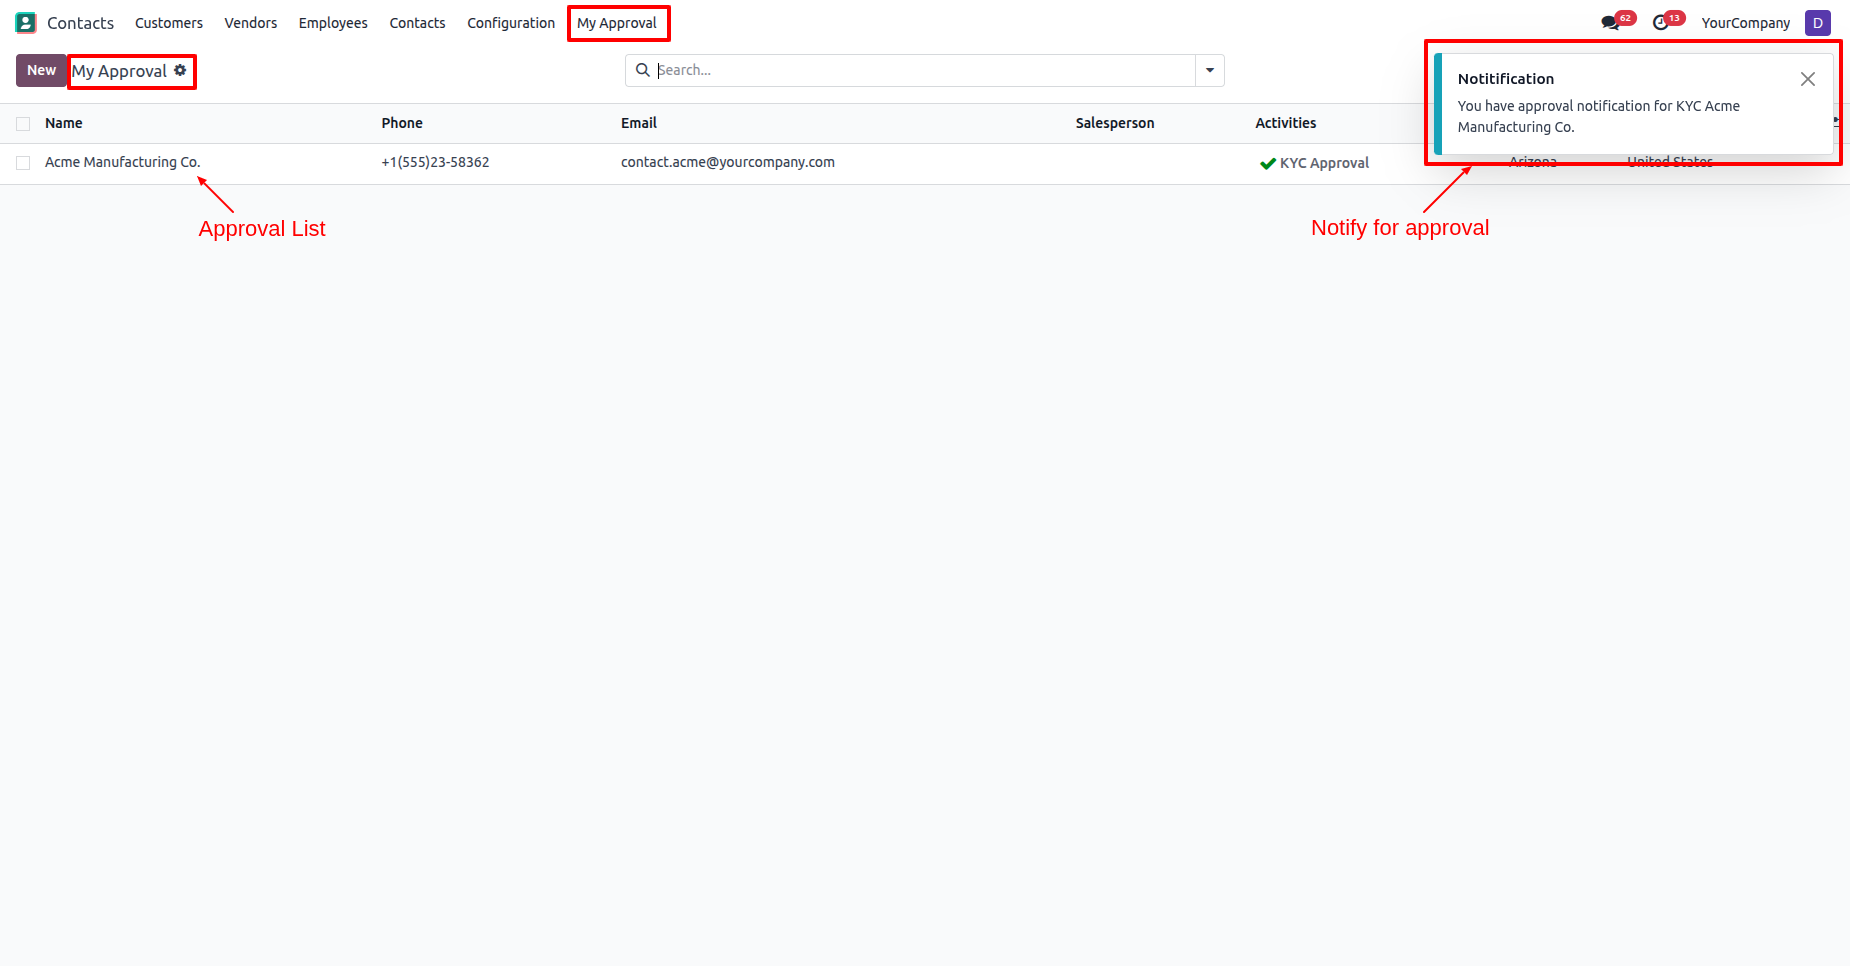
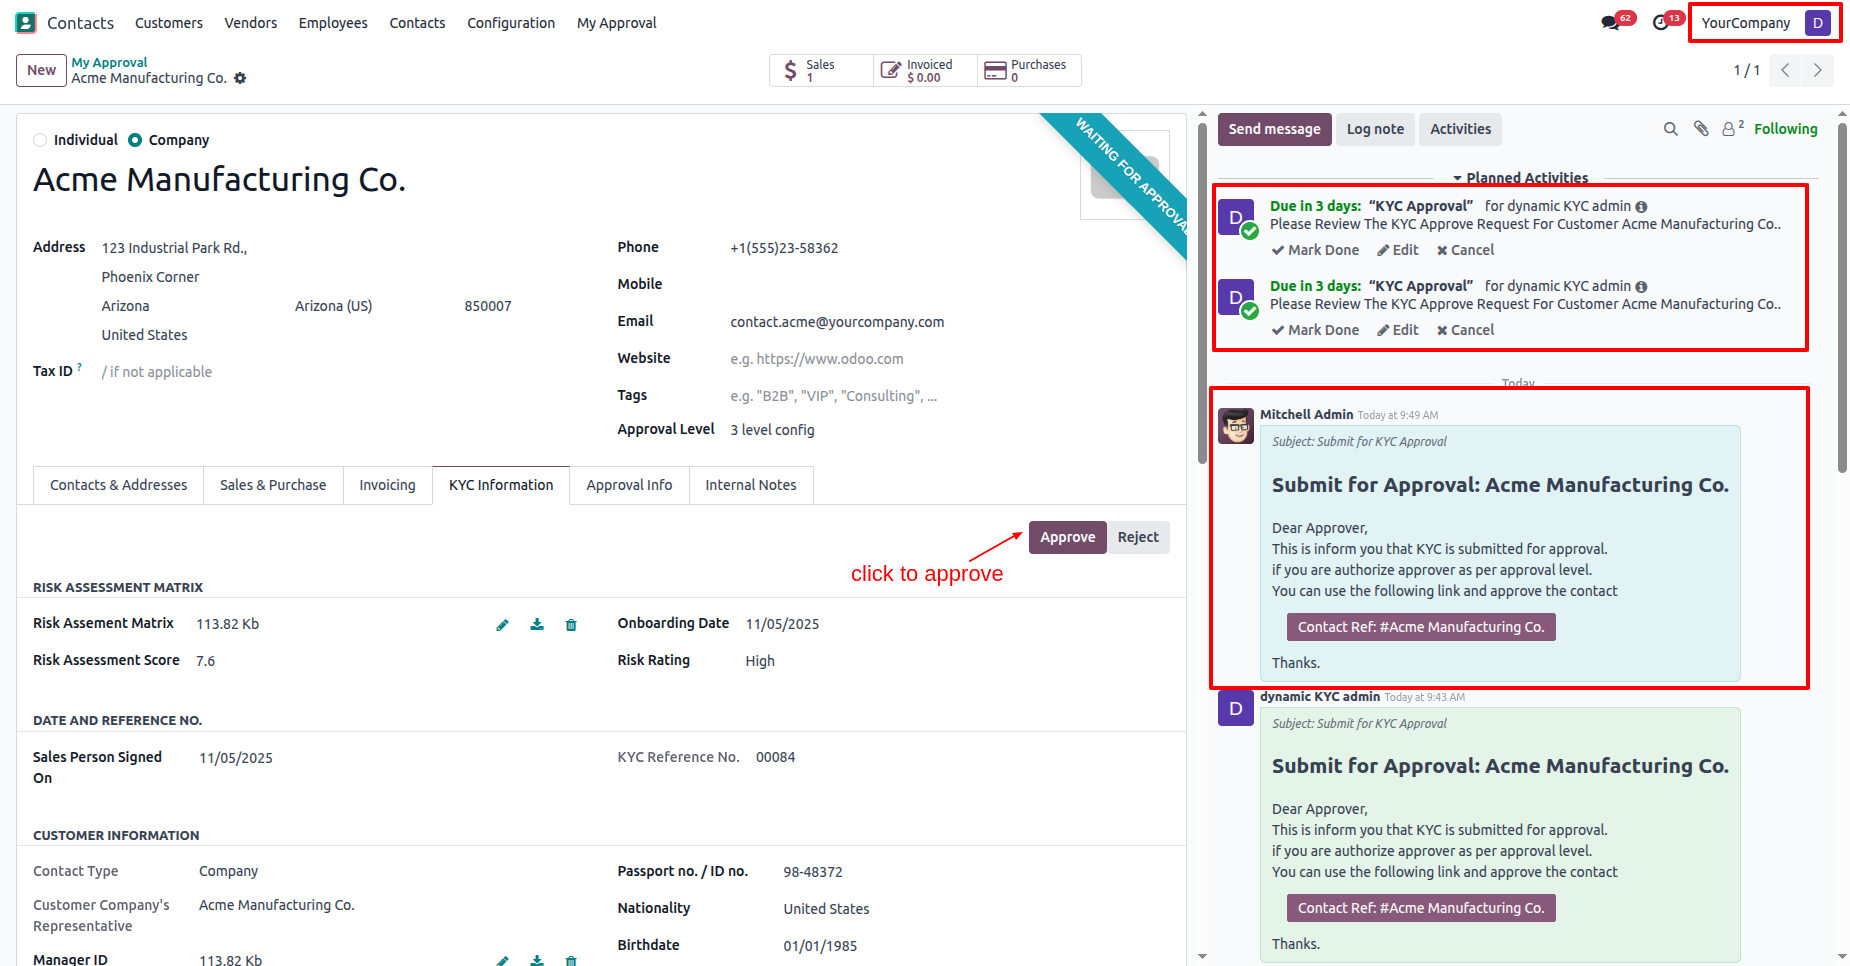
In the "KYC Information" tab, click on the "Approve" button.
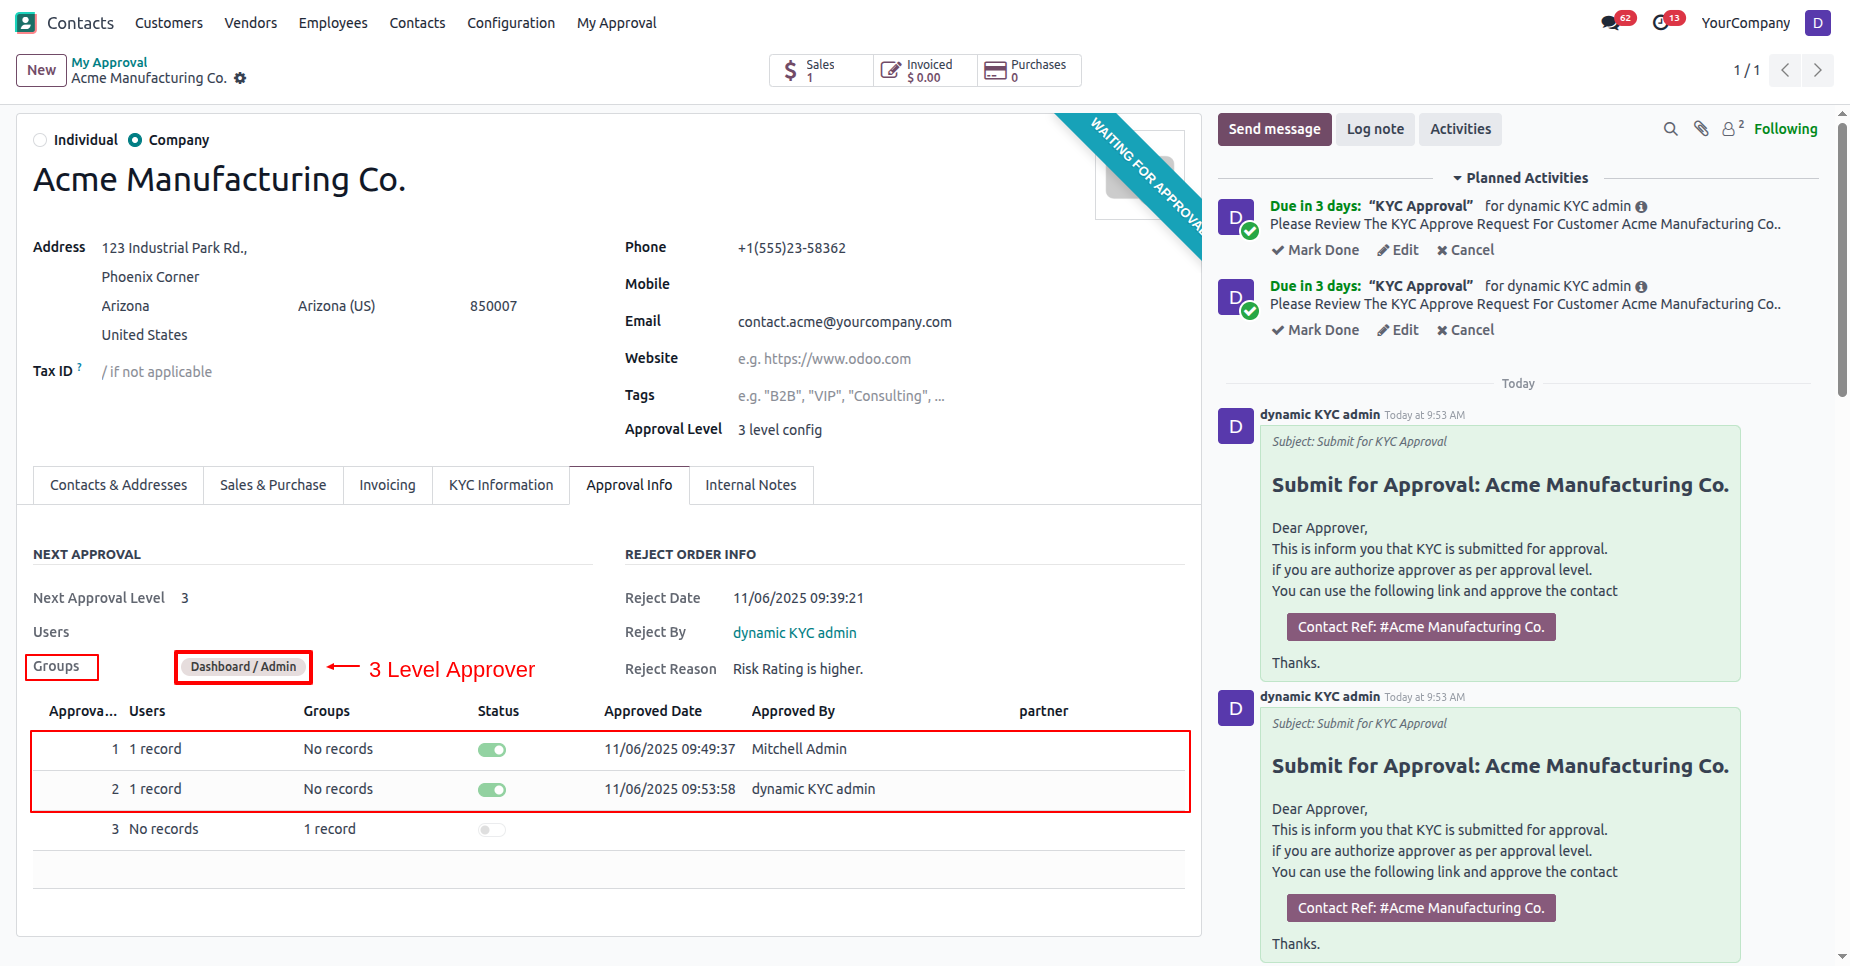
In the "Approval Info" tab, you can see that the approval information has been updated to the 3rd-level approval.
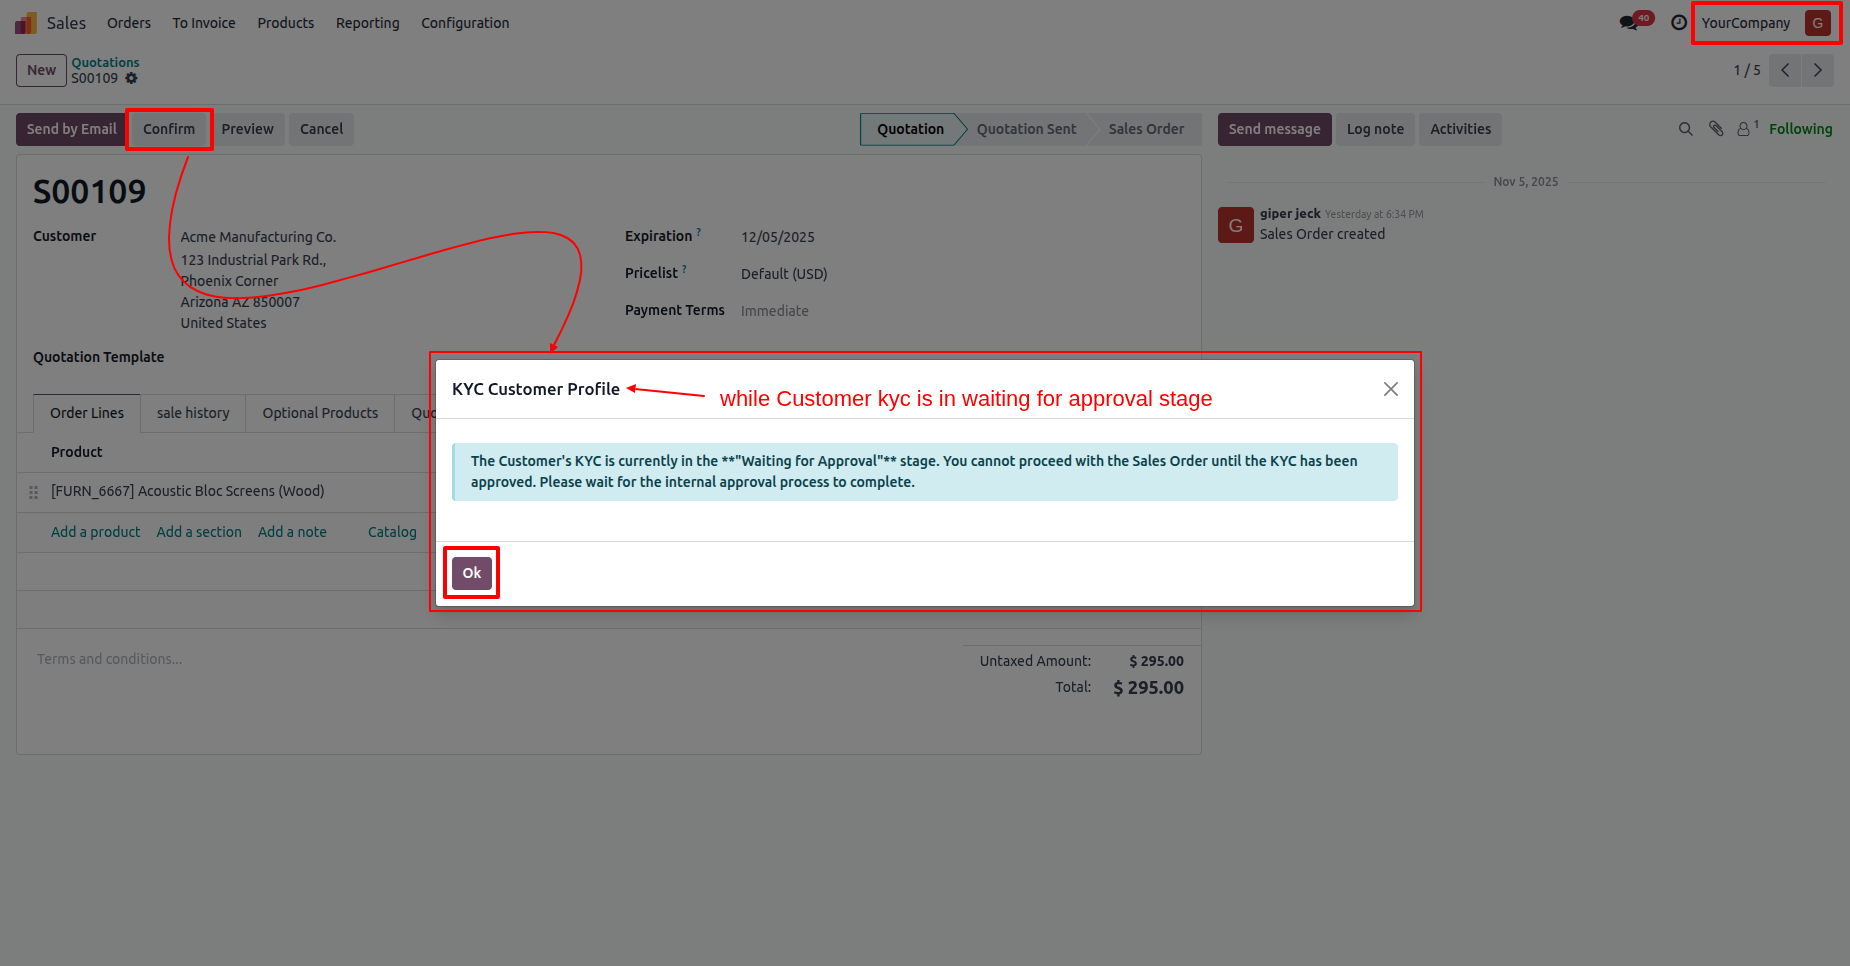
If the user tries to confirm the quotation while the customers KYC is in the "Waiting for Approval" stage, this warning popup will appear.
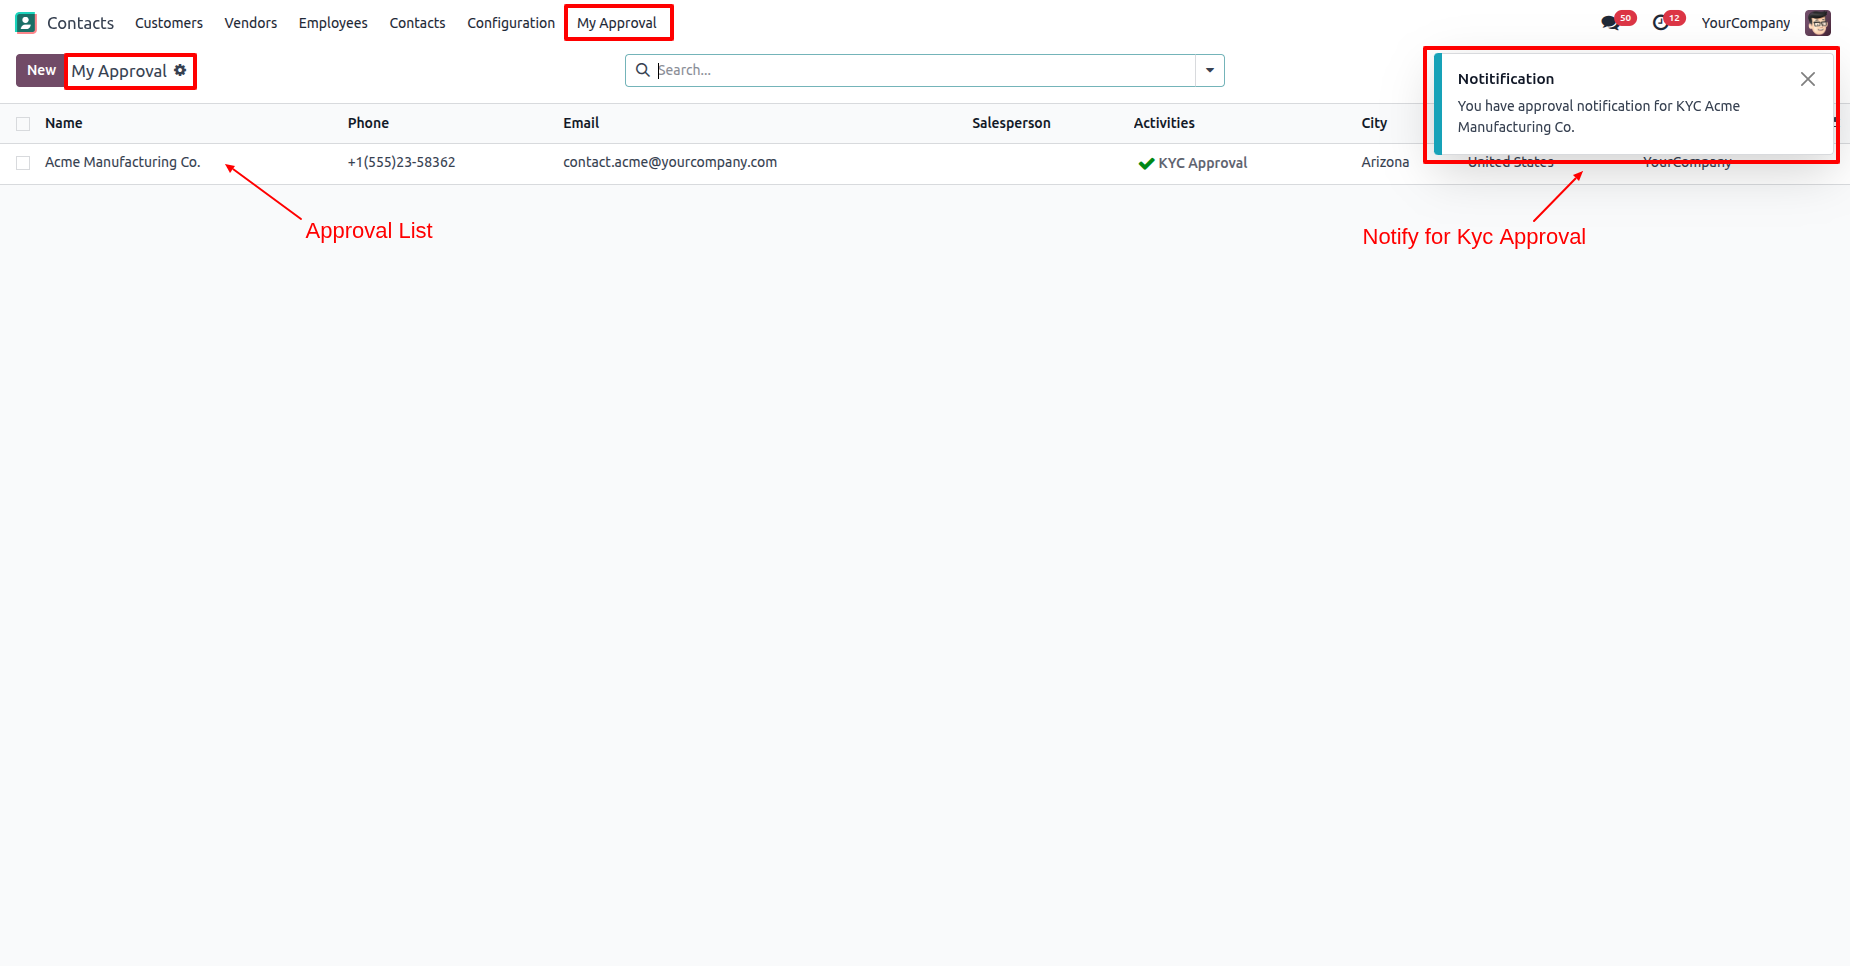
Log in as a 3rd approval user (dynamic kyc admin).
The approval user will receive an approval notification popup.
"My Approval" menu and list view.
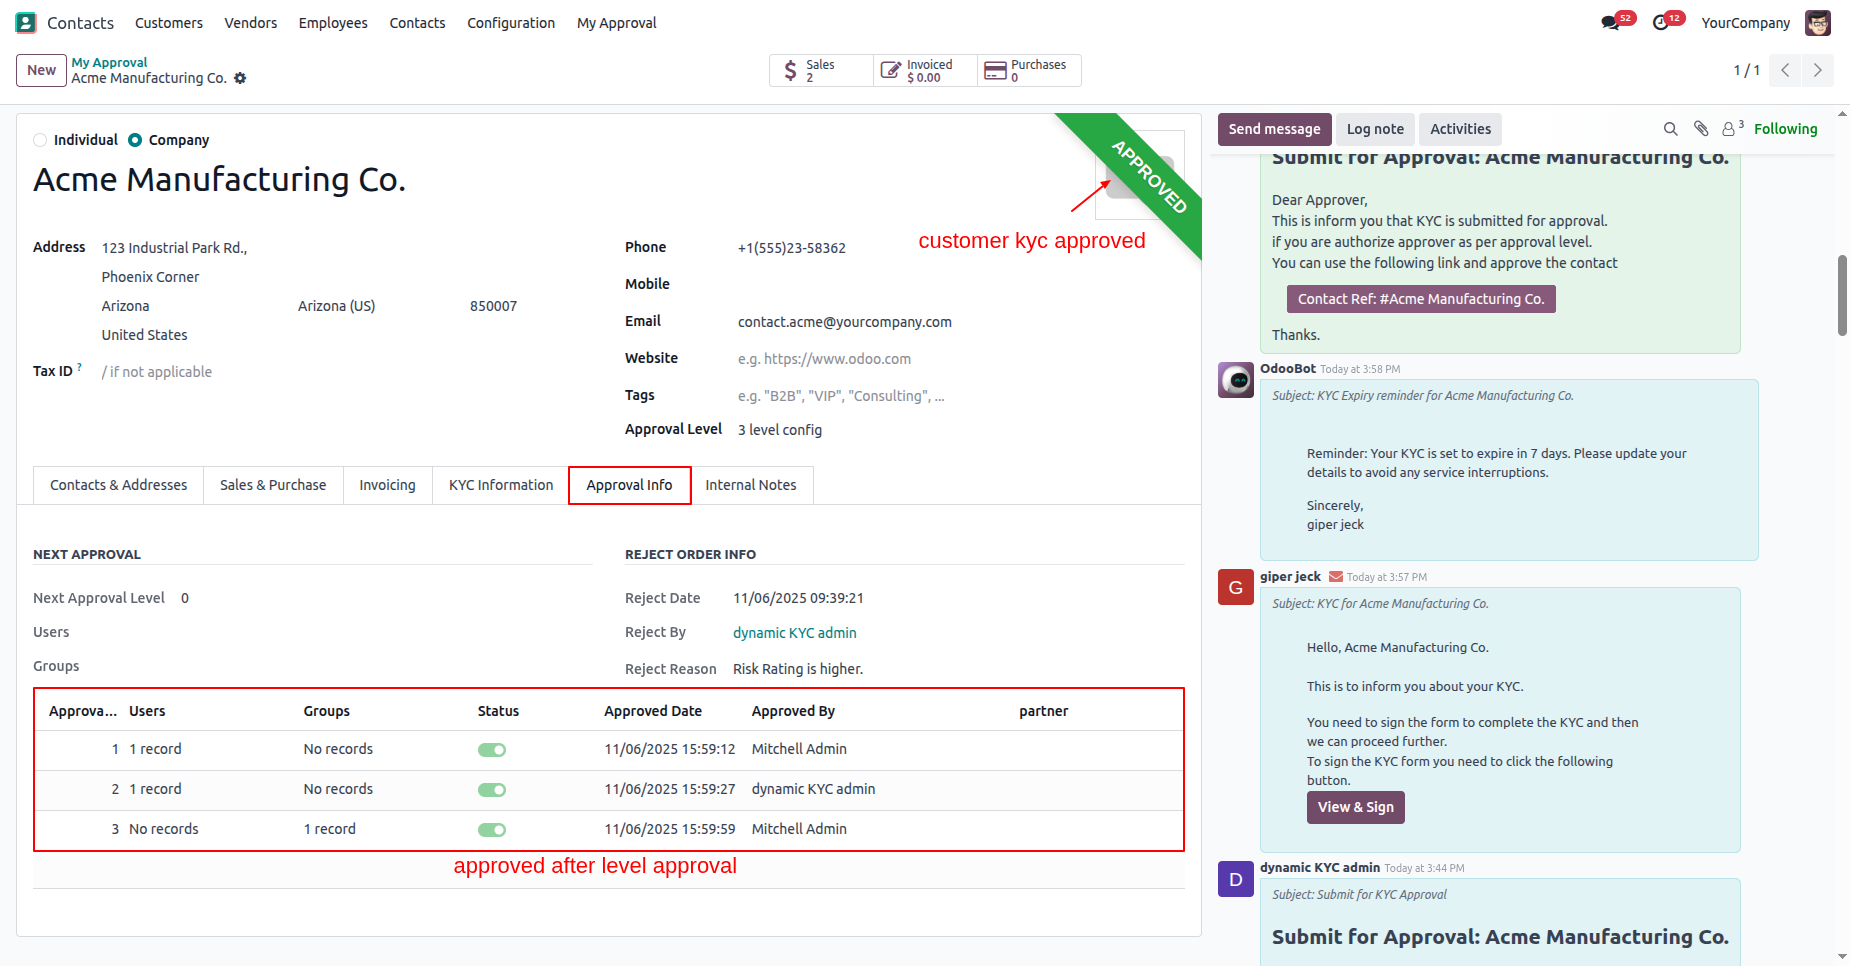
In the "Approval Info" tab, you can see all the approval iformation.
The customers KYC status has changed to "Approved".
In the quotation form view, click on the "Confirm" button.
This popup will appear if the customers KYC has not been sent.
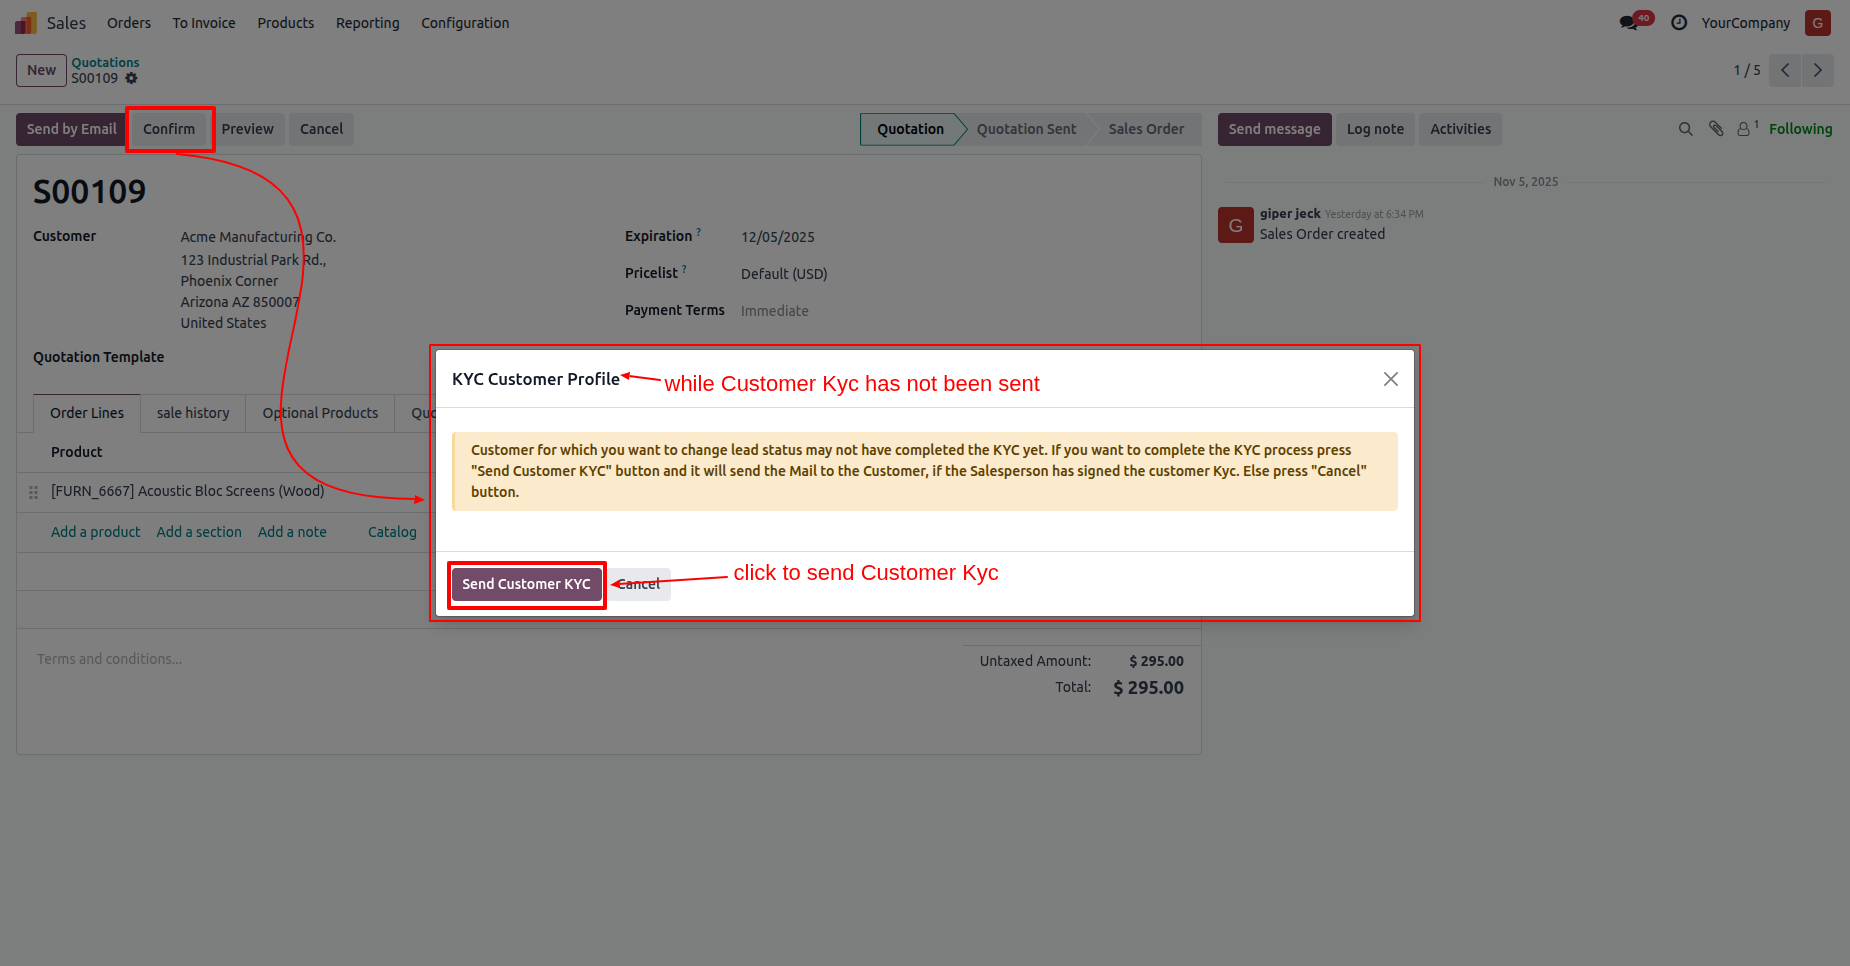
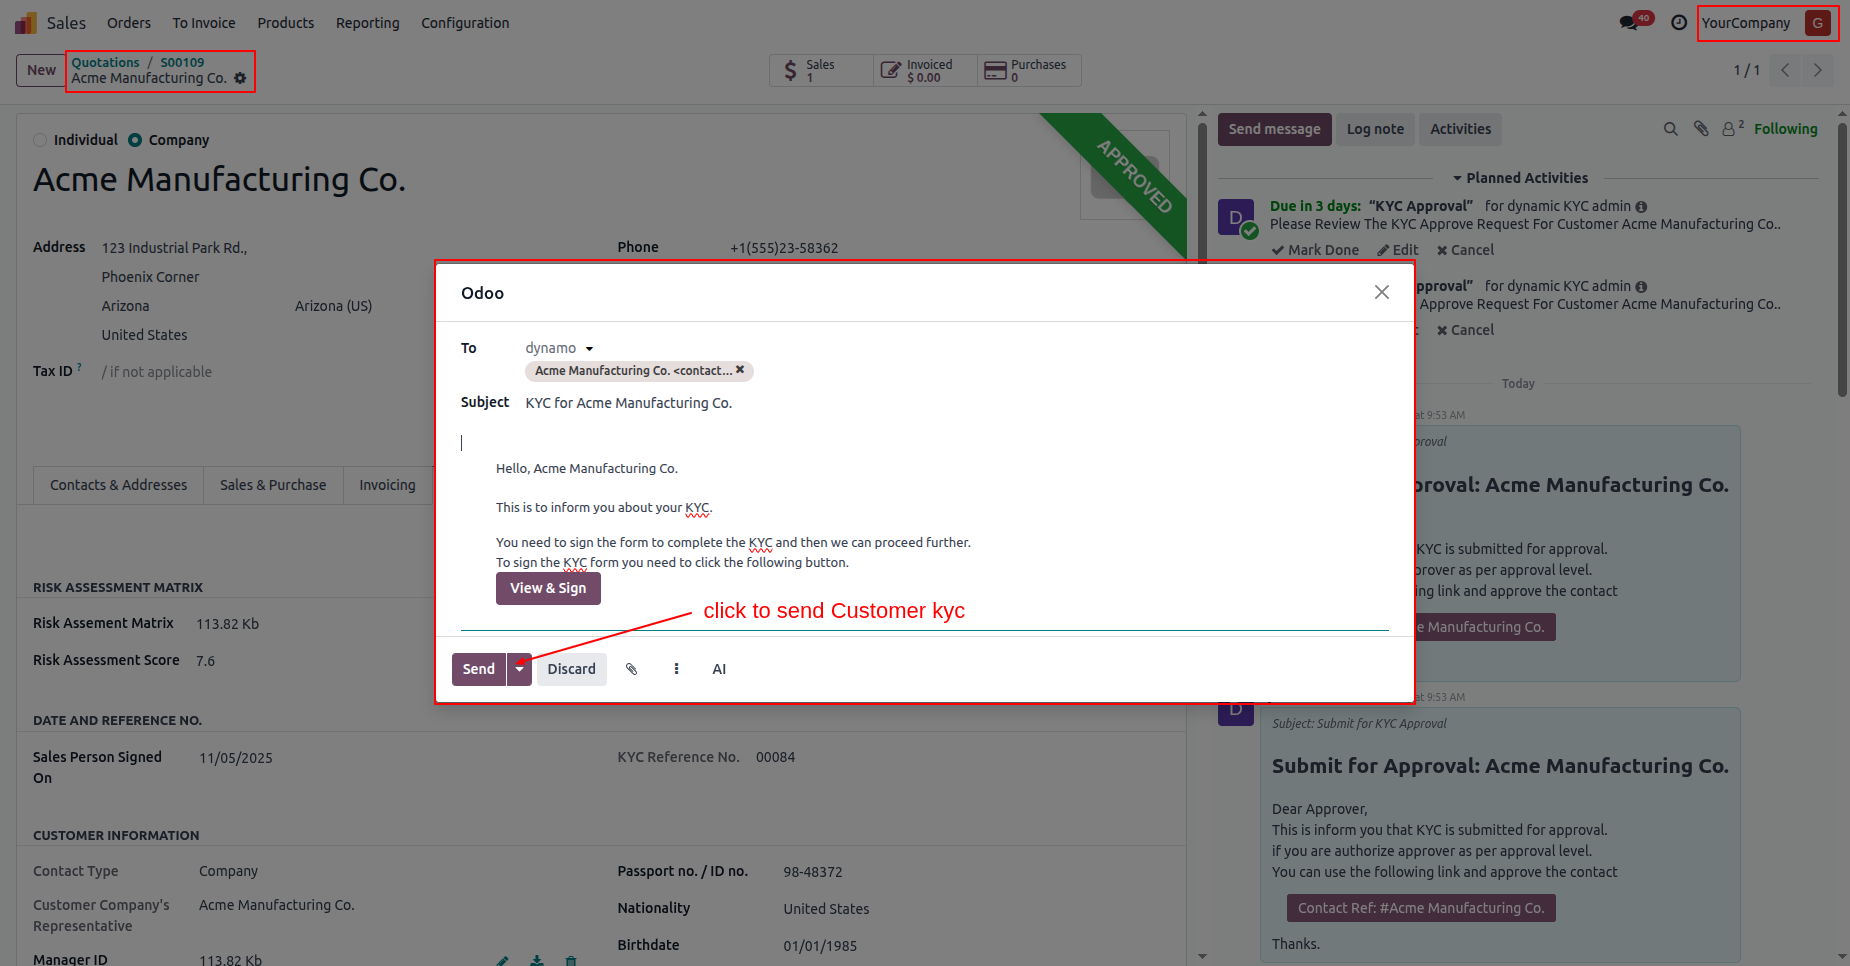
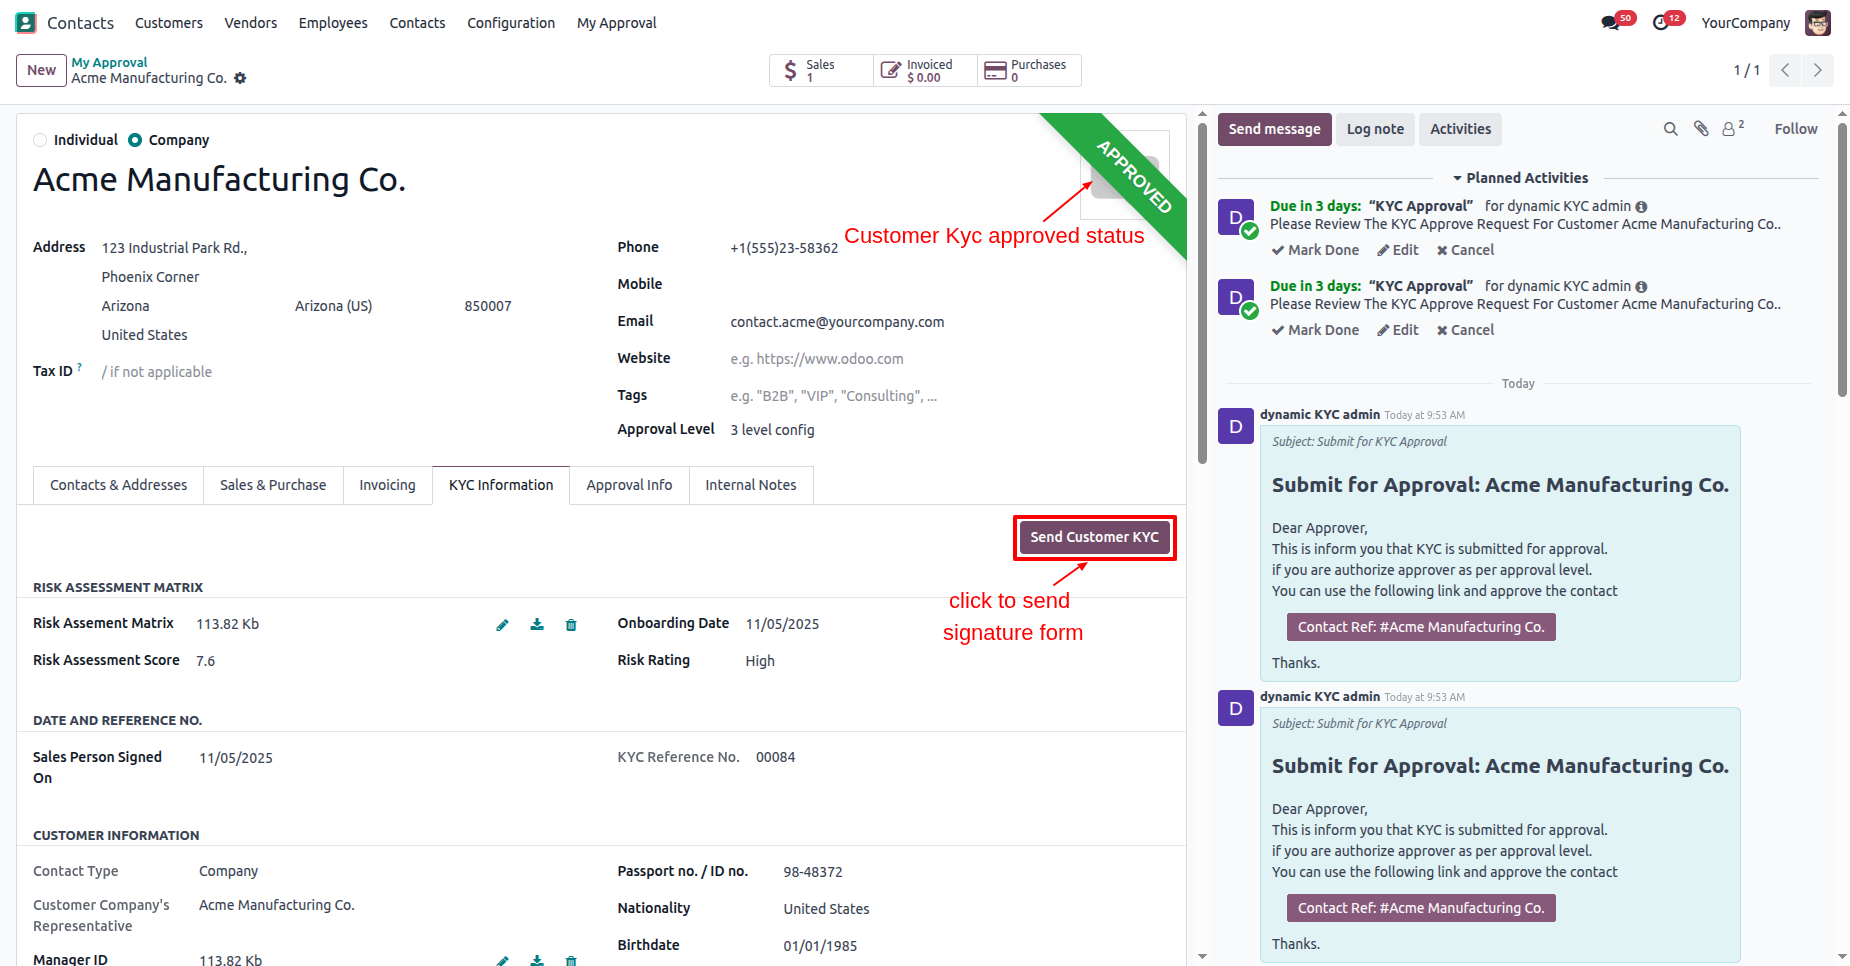
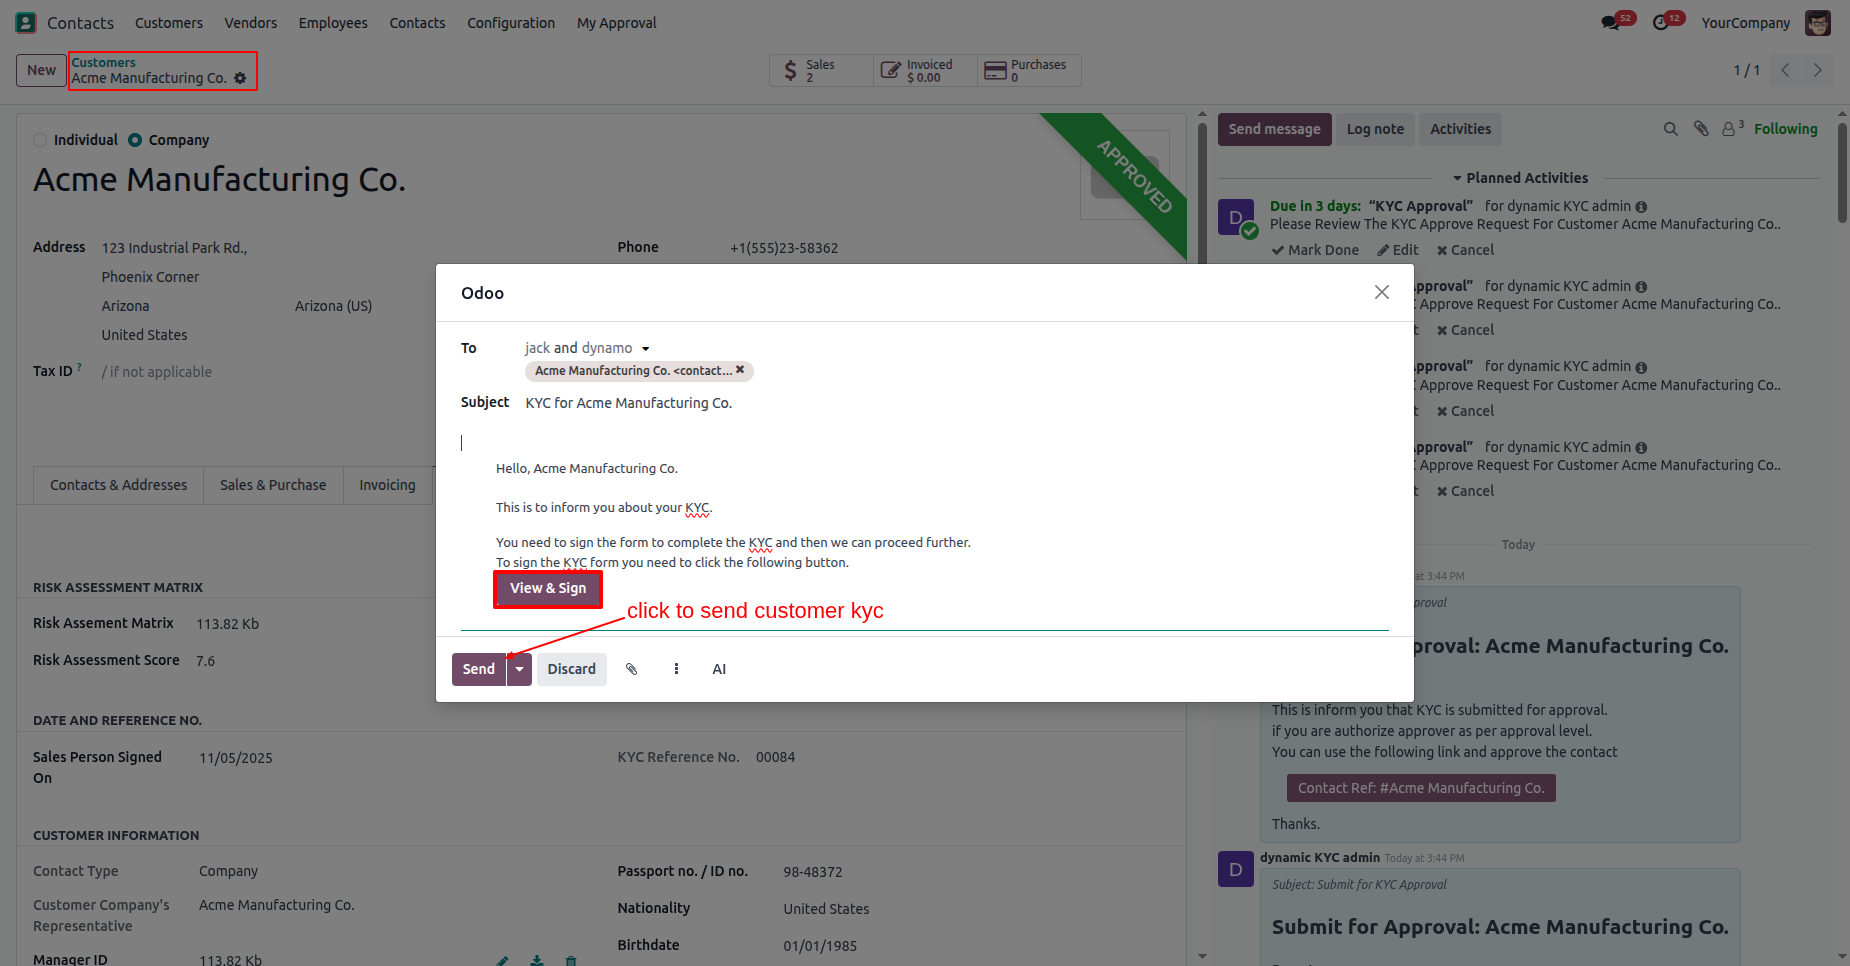
Click on the "Send" button to send the Customer KYC.
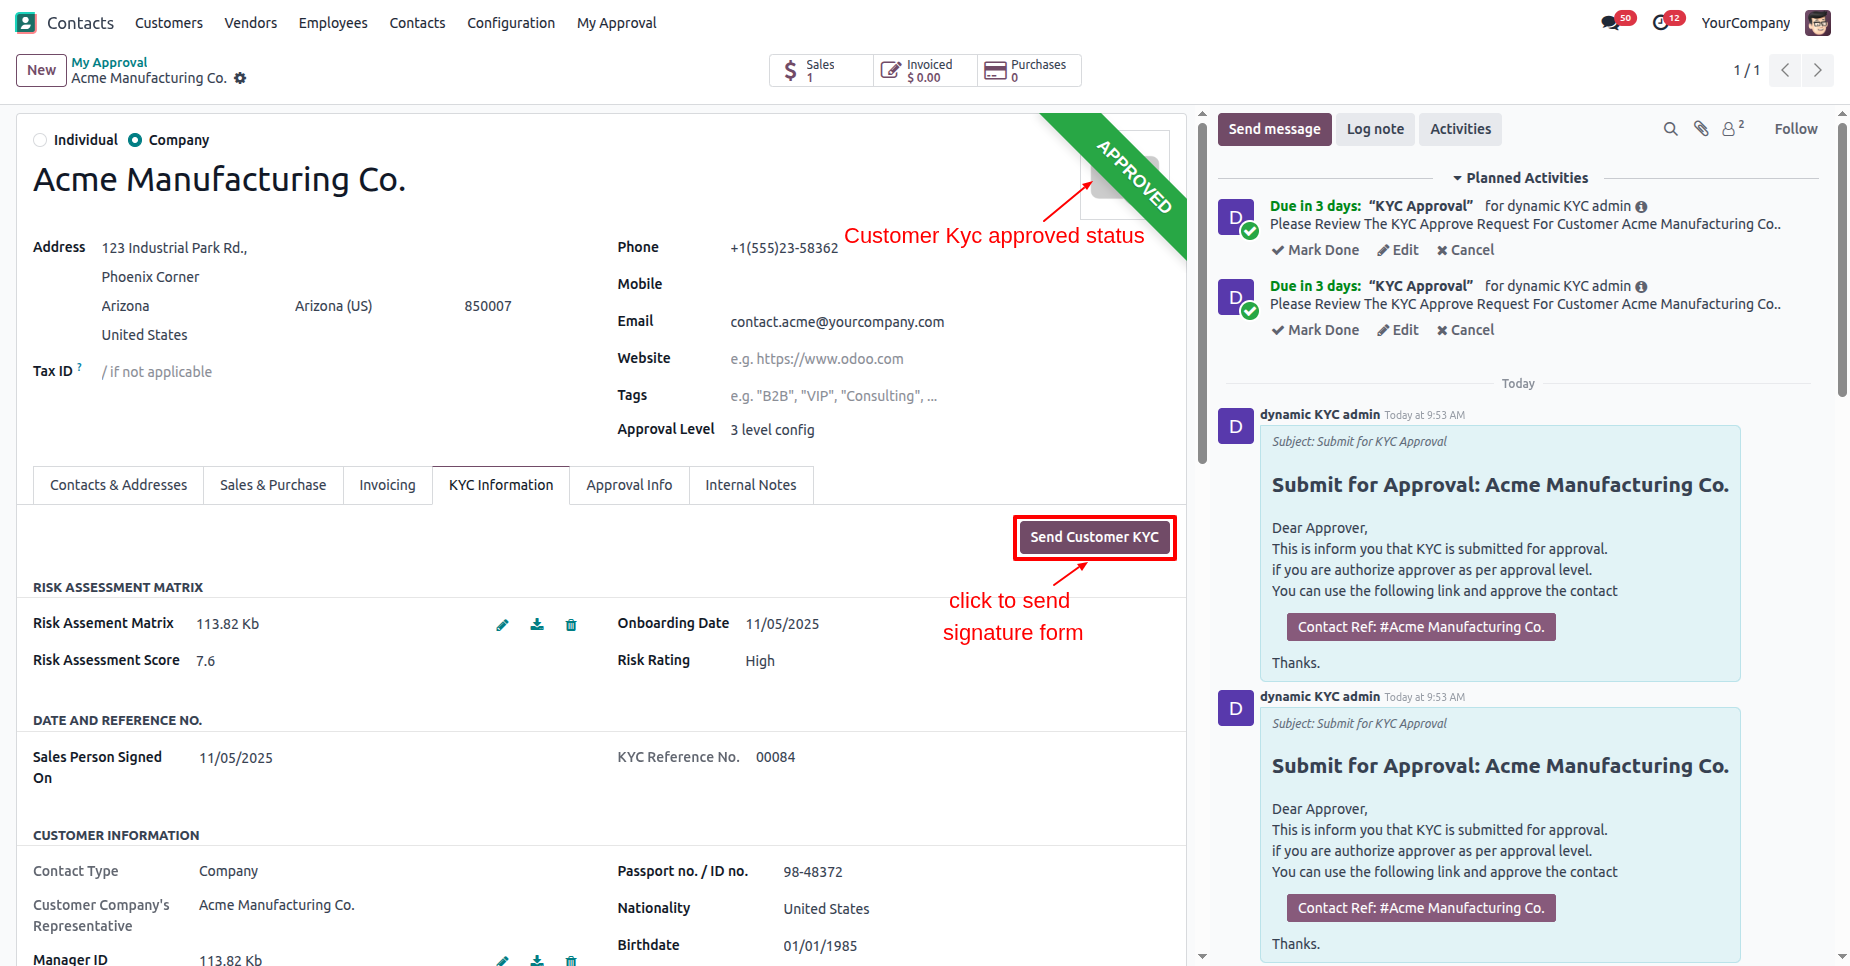
In the "KYC Information" tab, click on the "Send Customer KYC" button to send it for signature.
In the customer form view, you can see the kyc status is "Odoo Sign".
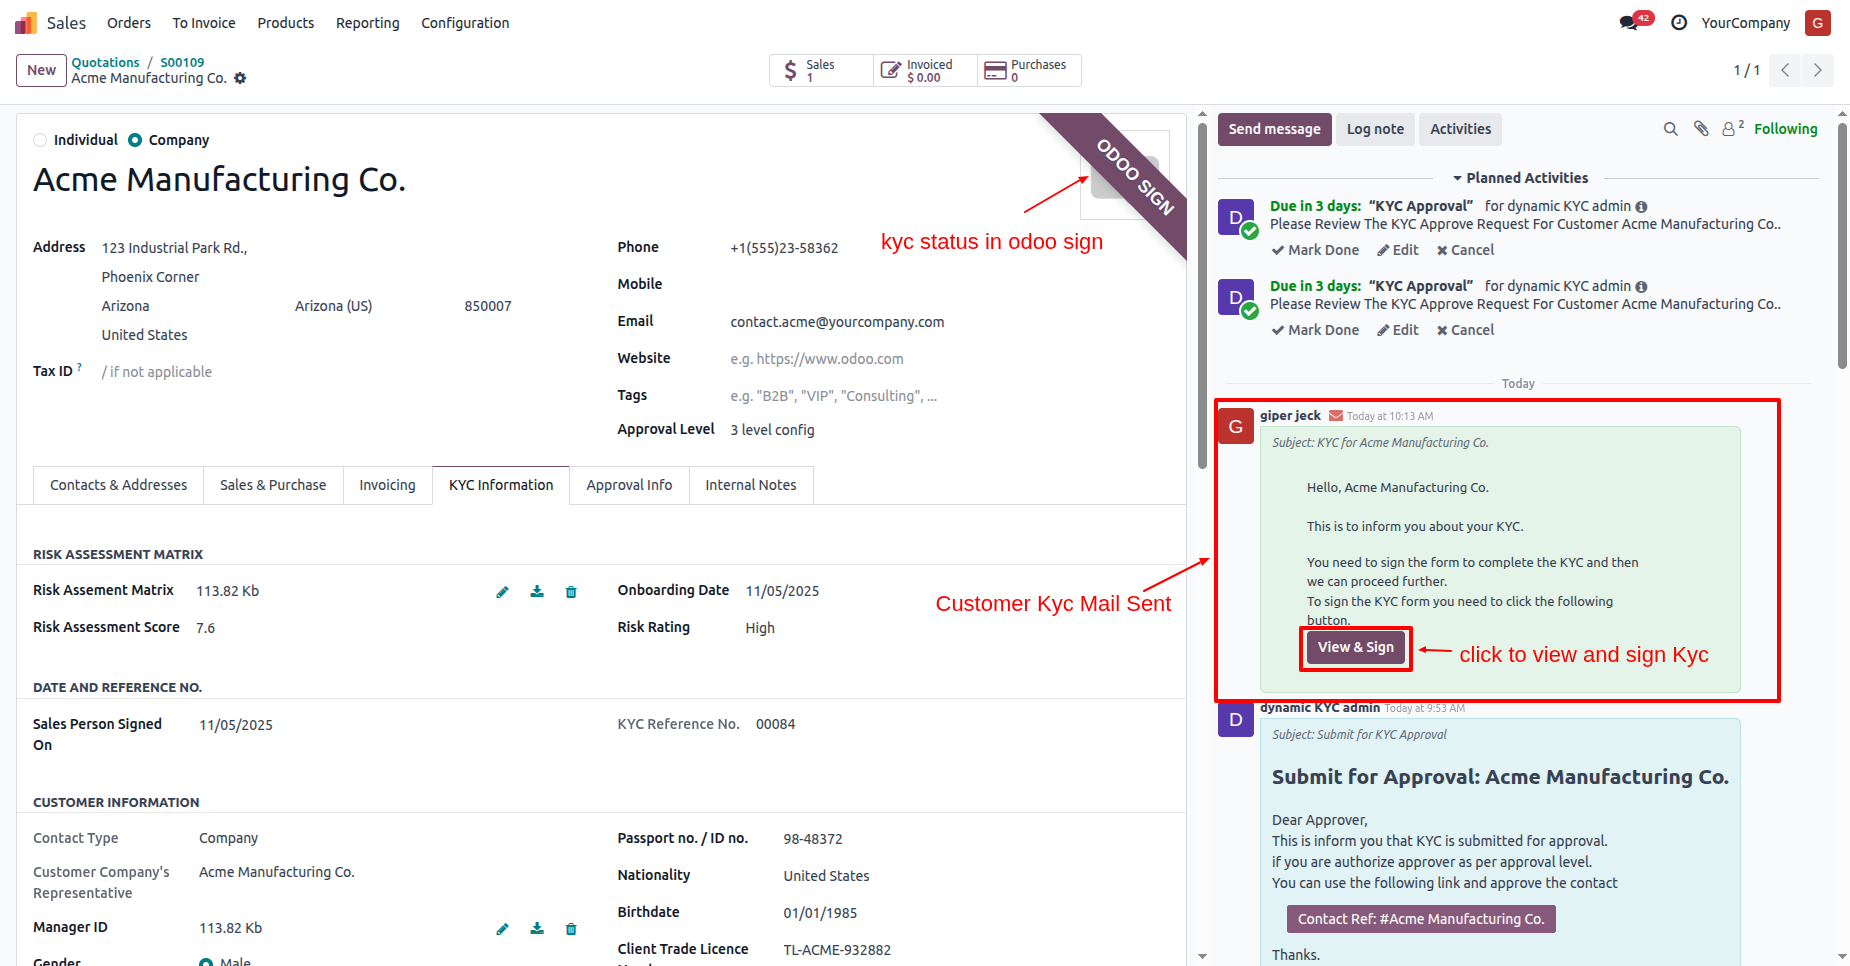
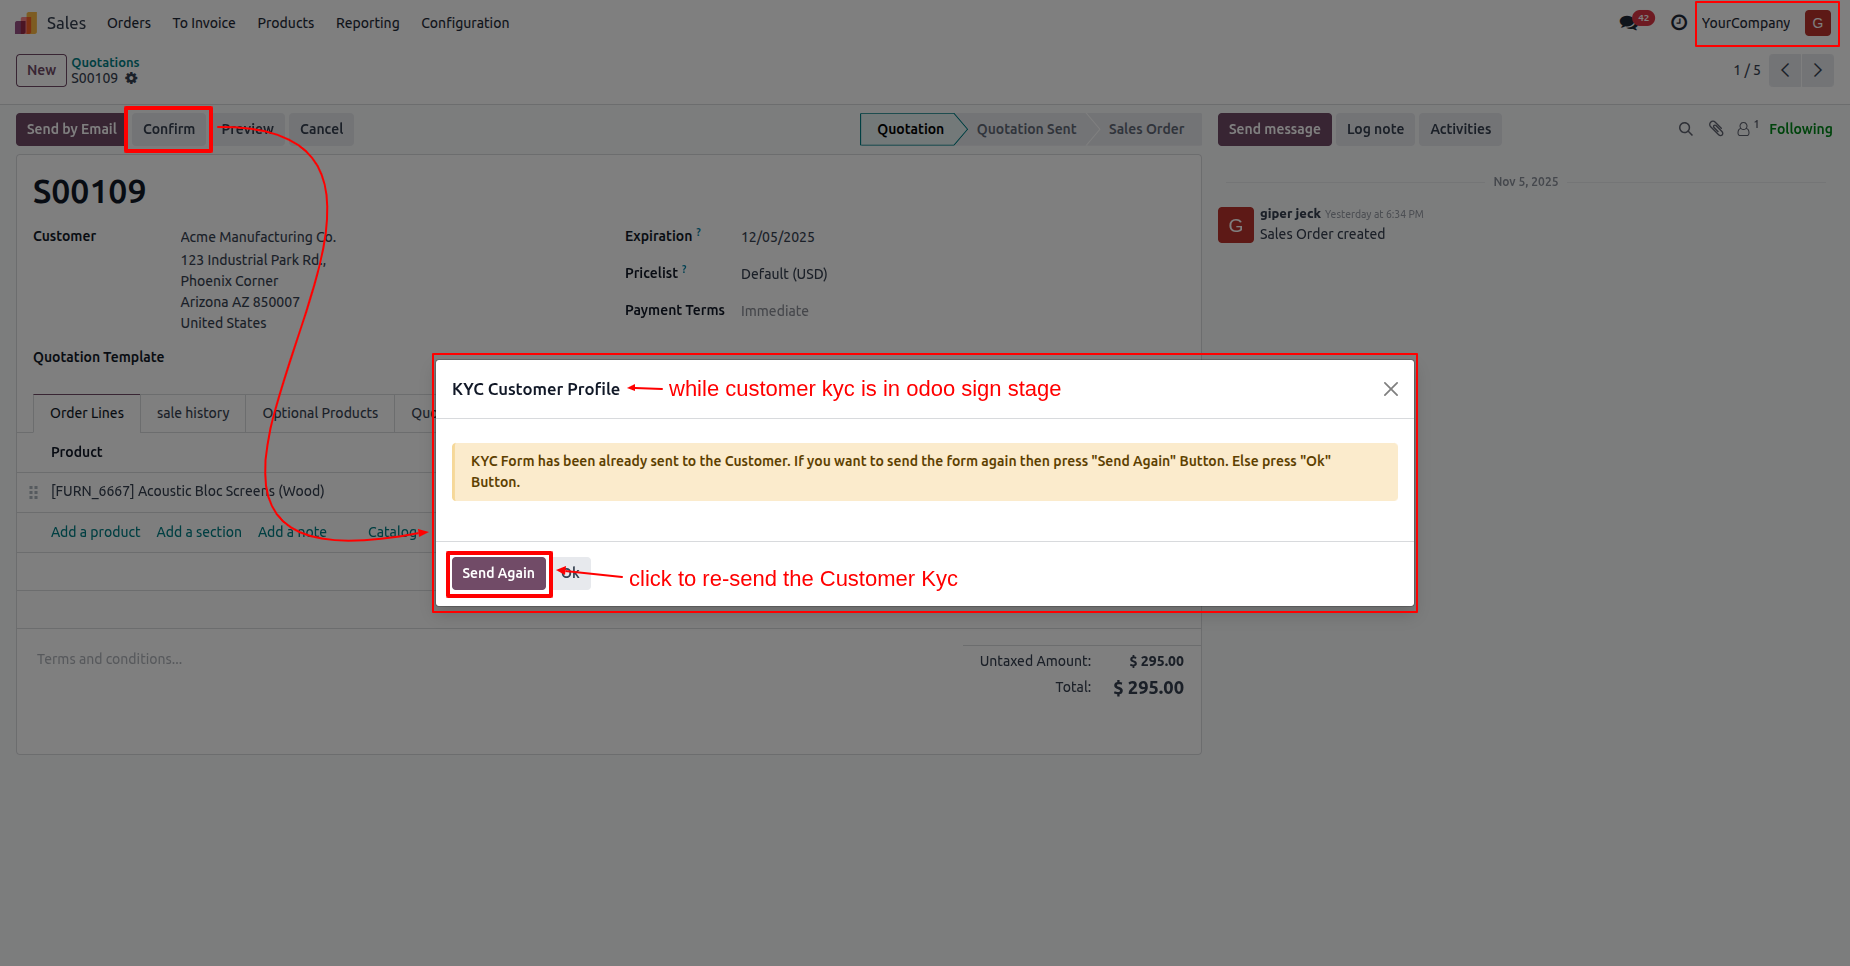
If the user tries to confirm the quotation while the customers KYC is
in the "Odoo Sign" stage, this warning will appear.
Click on the "Send Again" button.
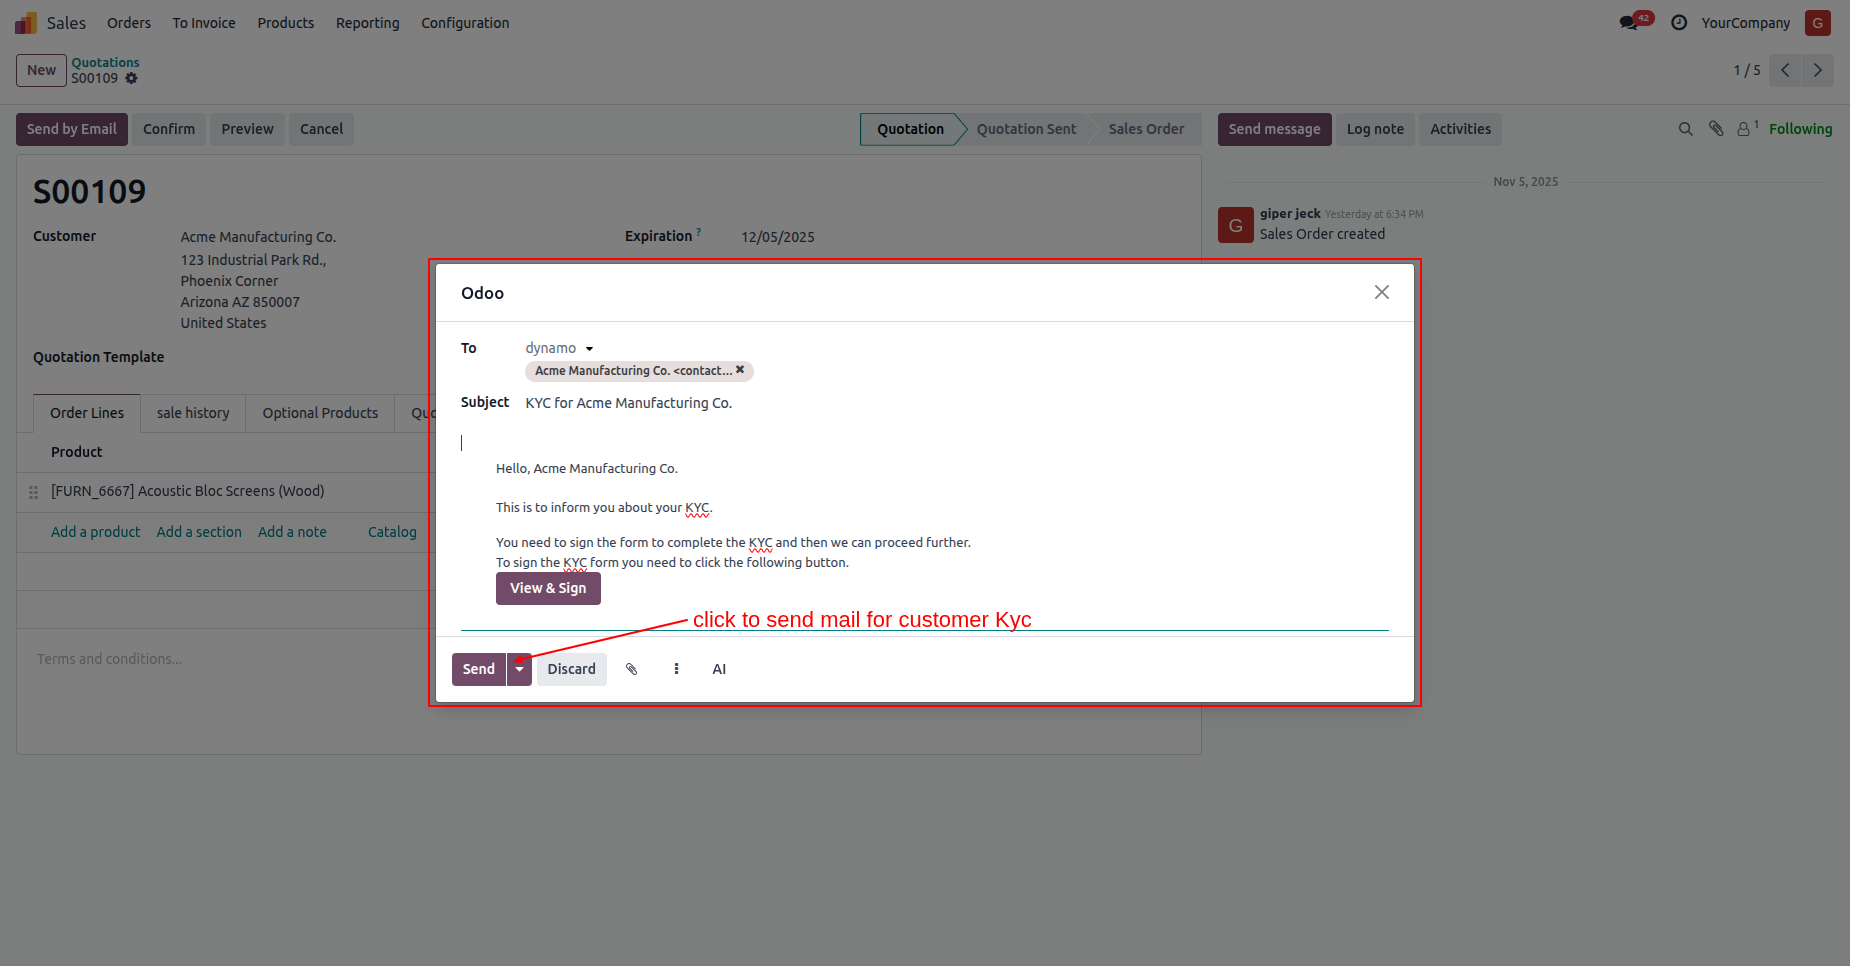
Click on the "Send" button.
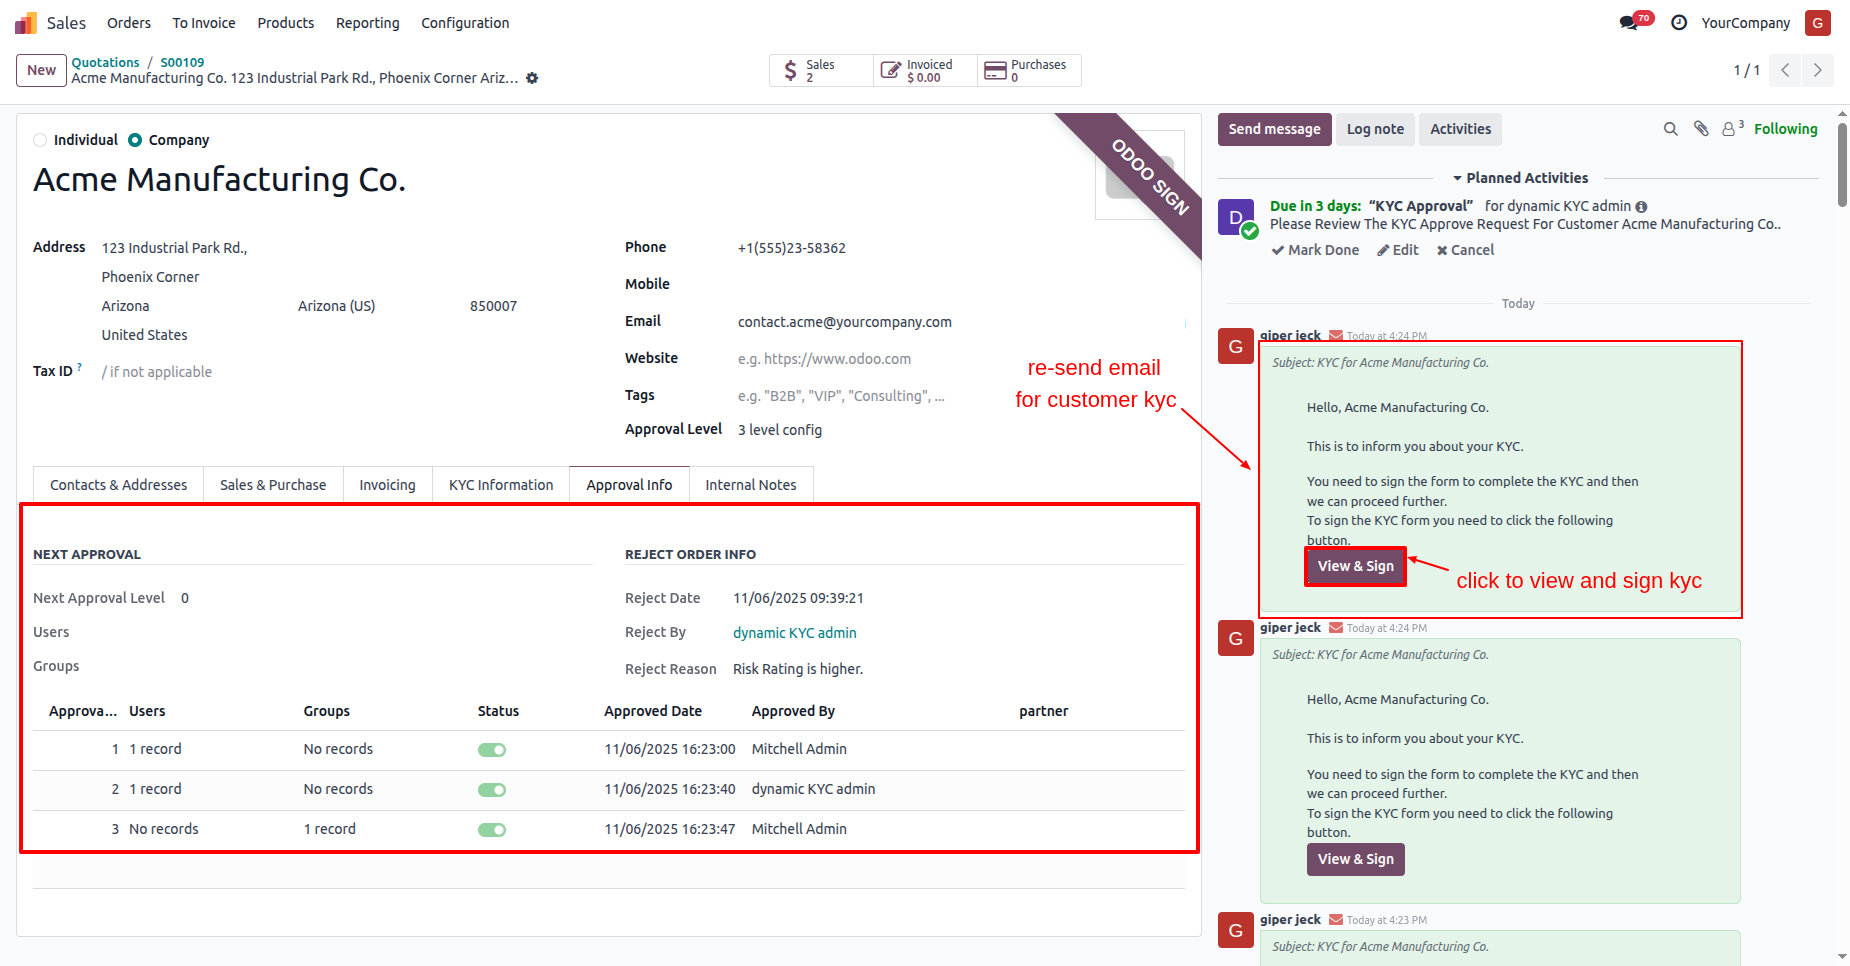
Here you can see that the KYC has been resent to the customer.
Click on the "View & Sign" button.
Click on the "Accept & Sign" button.
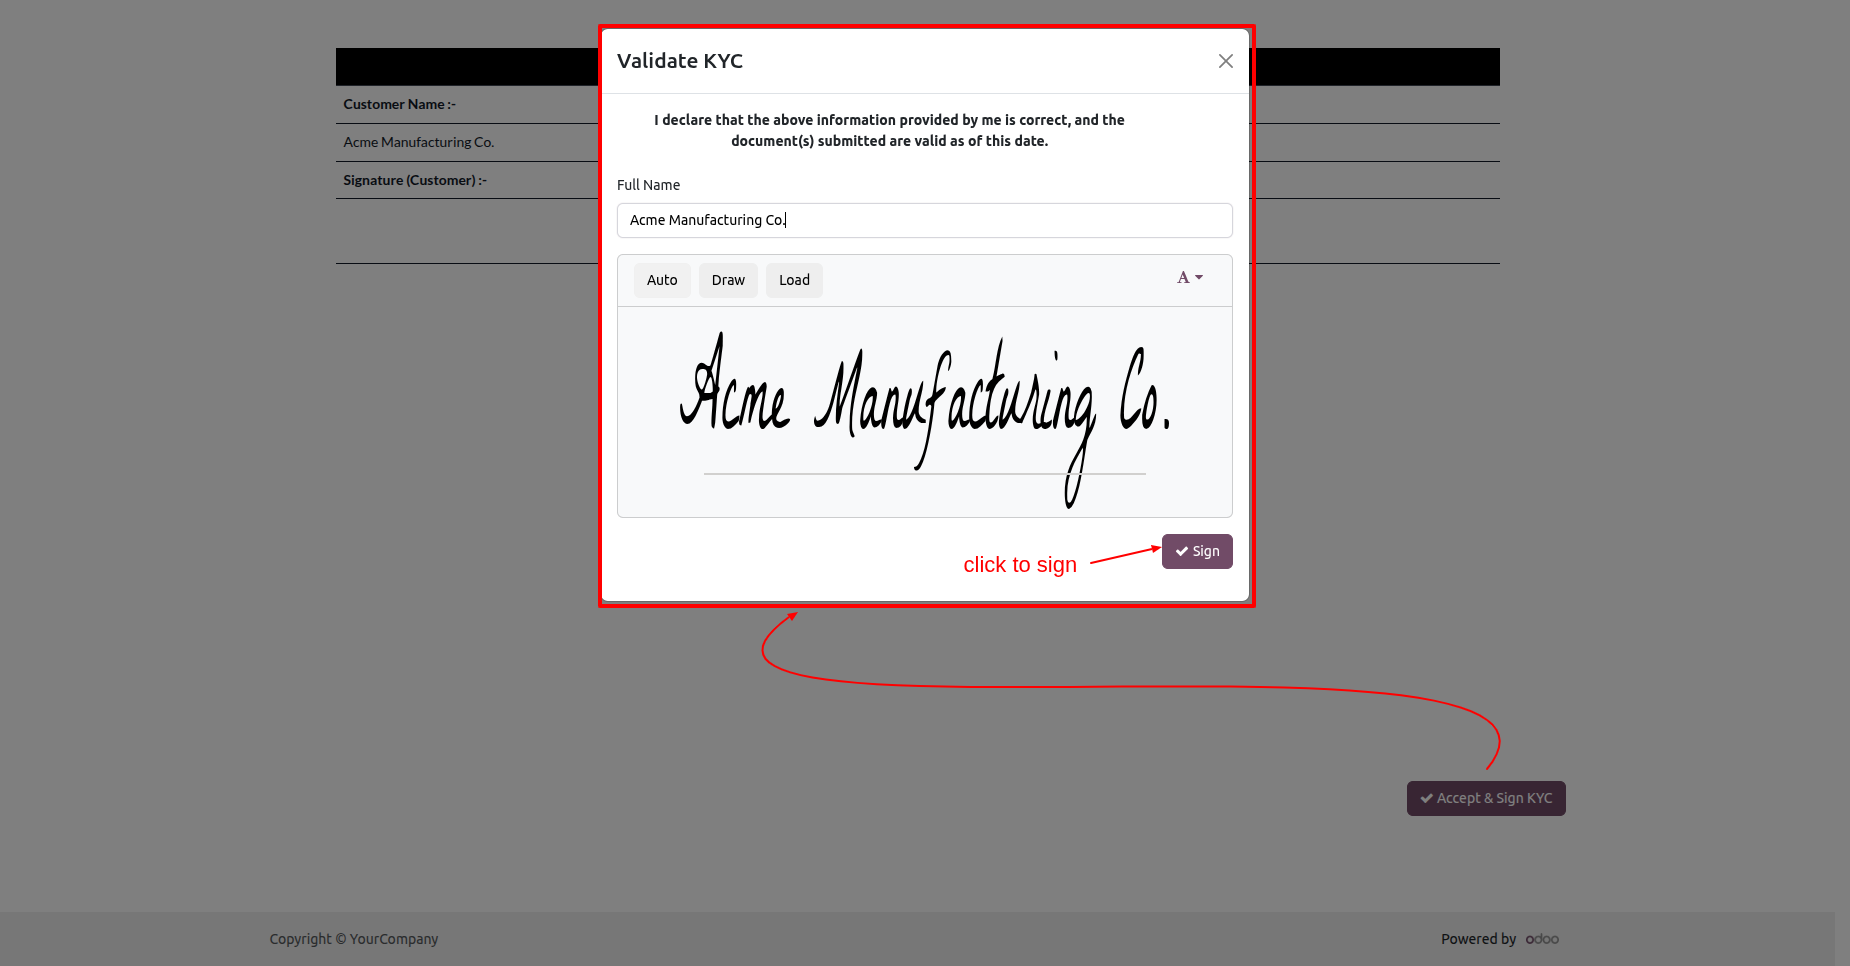
After that, the "Validate KYC" wizard will appear. Add a signature
and click on the "Sign" button.
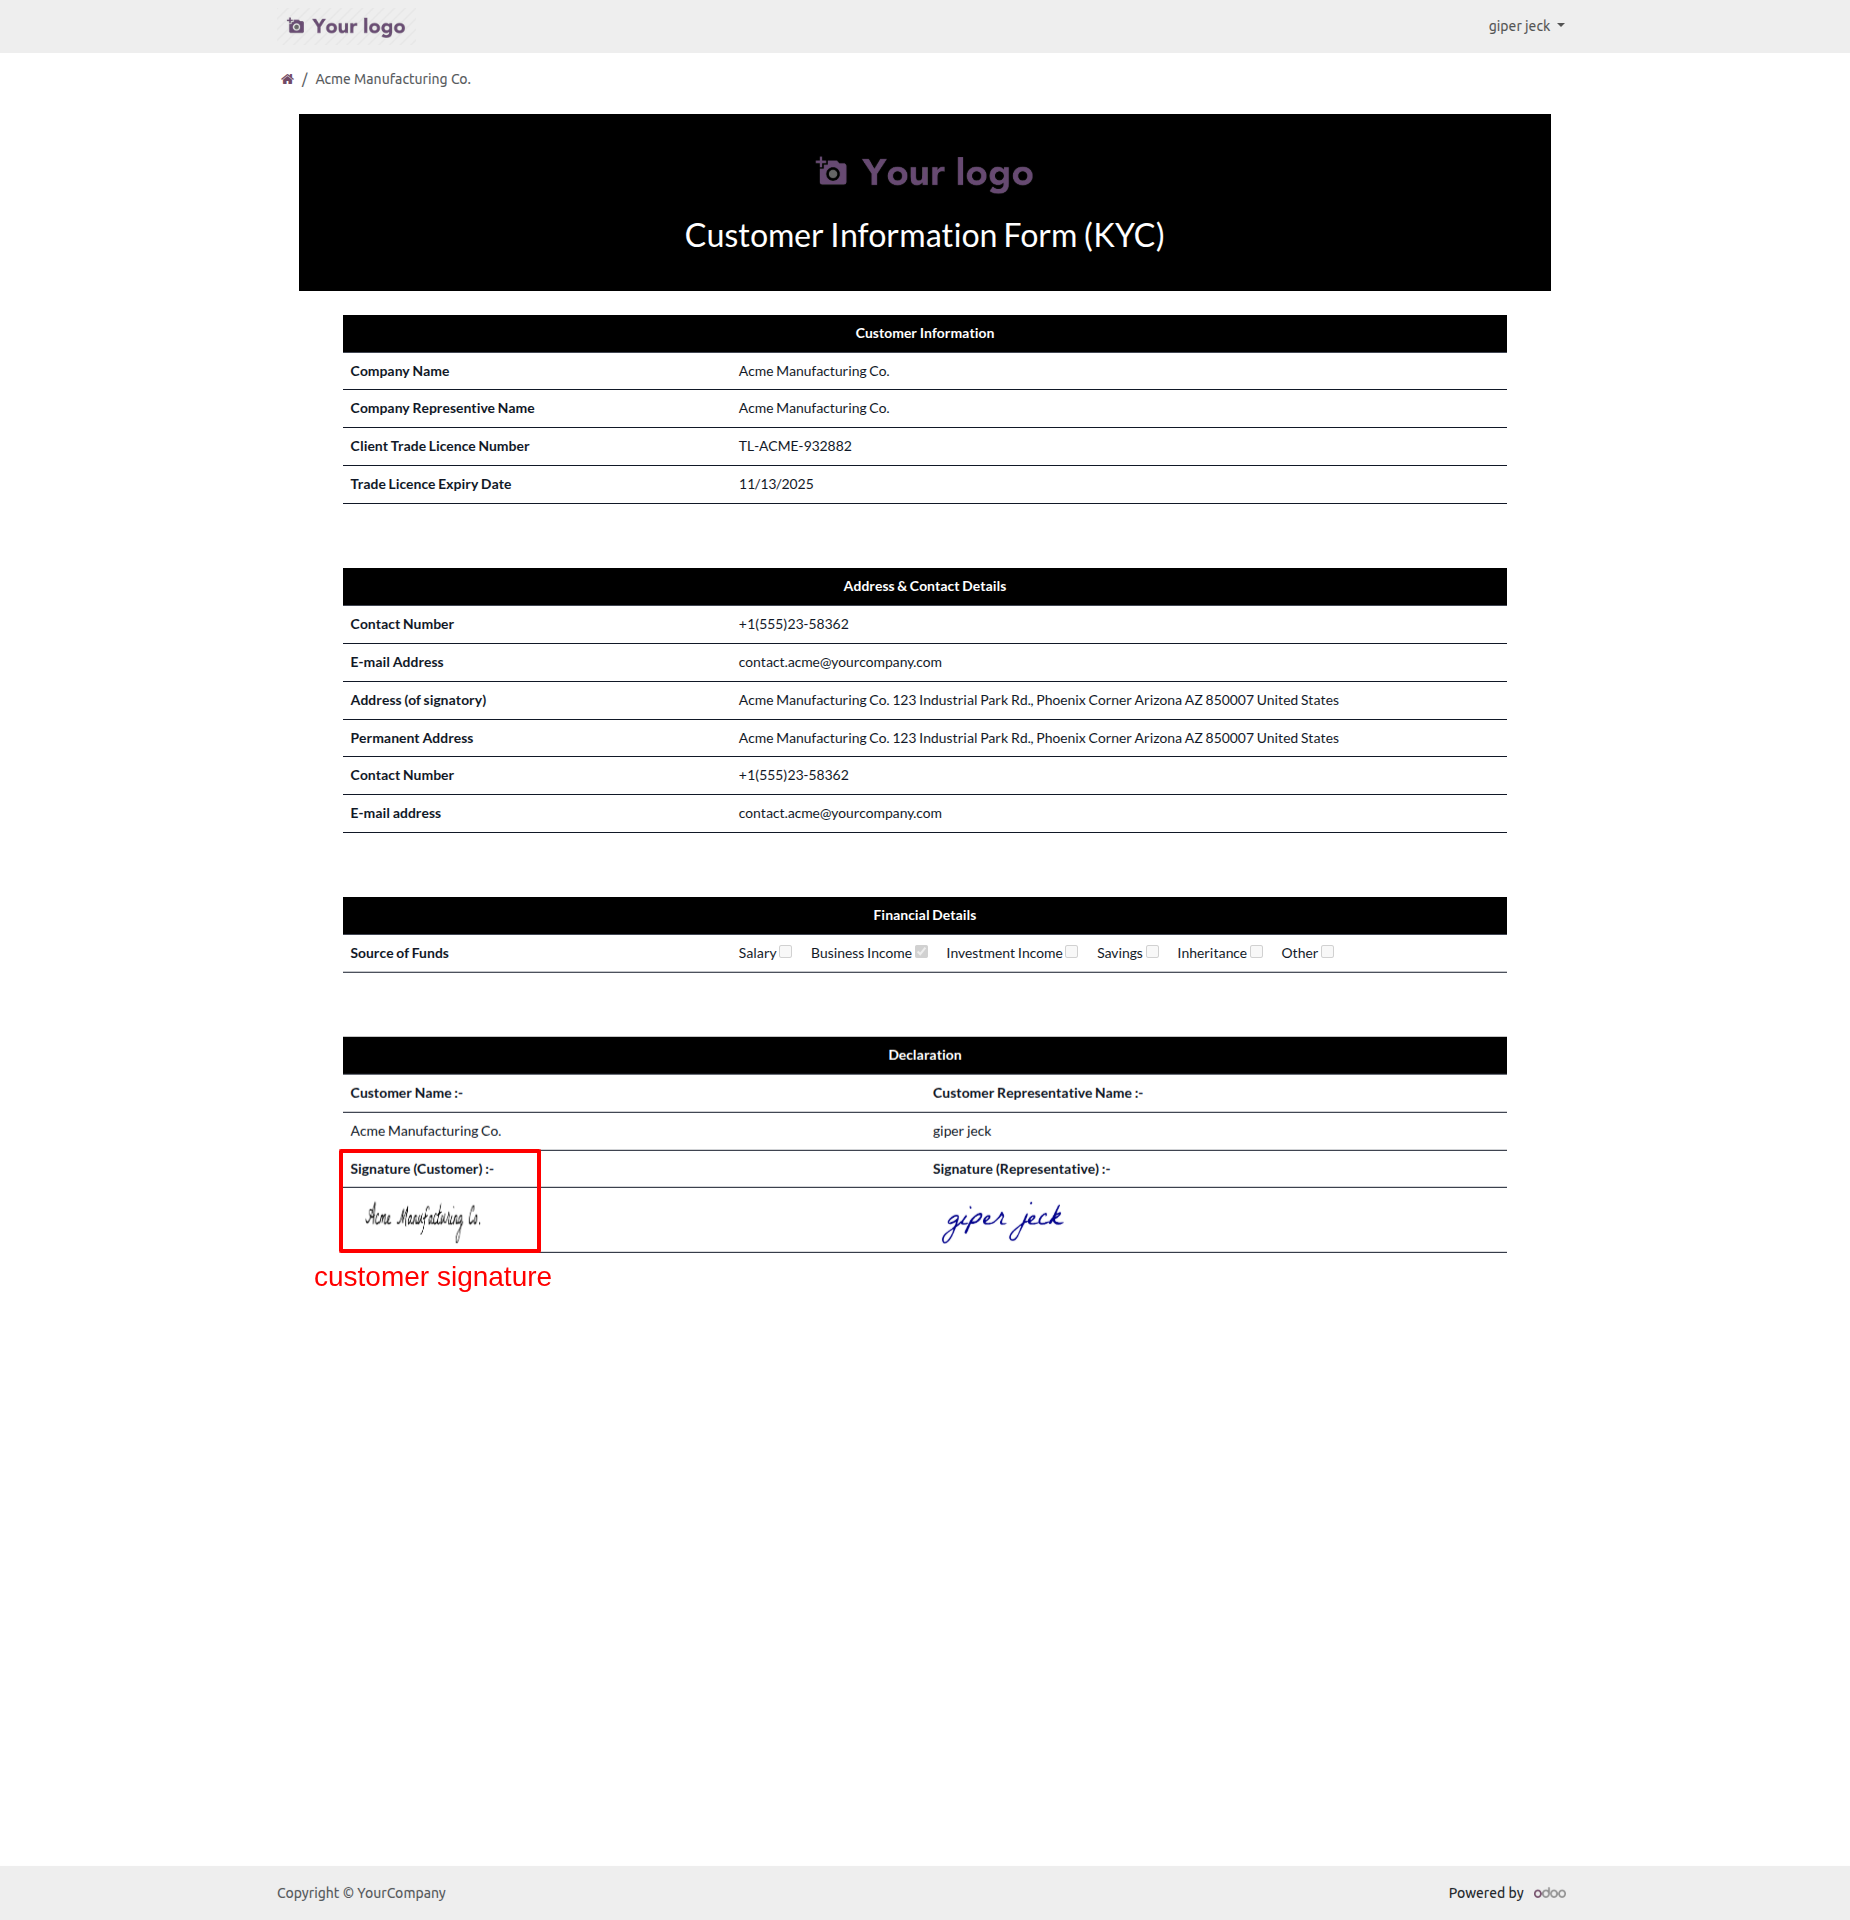
You can view the customers signature in the customer KYC.
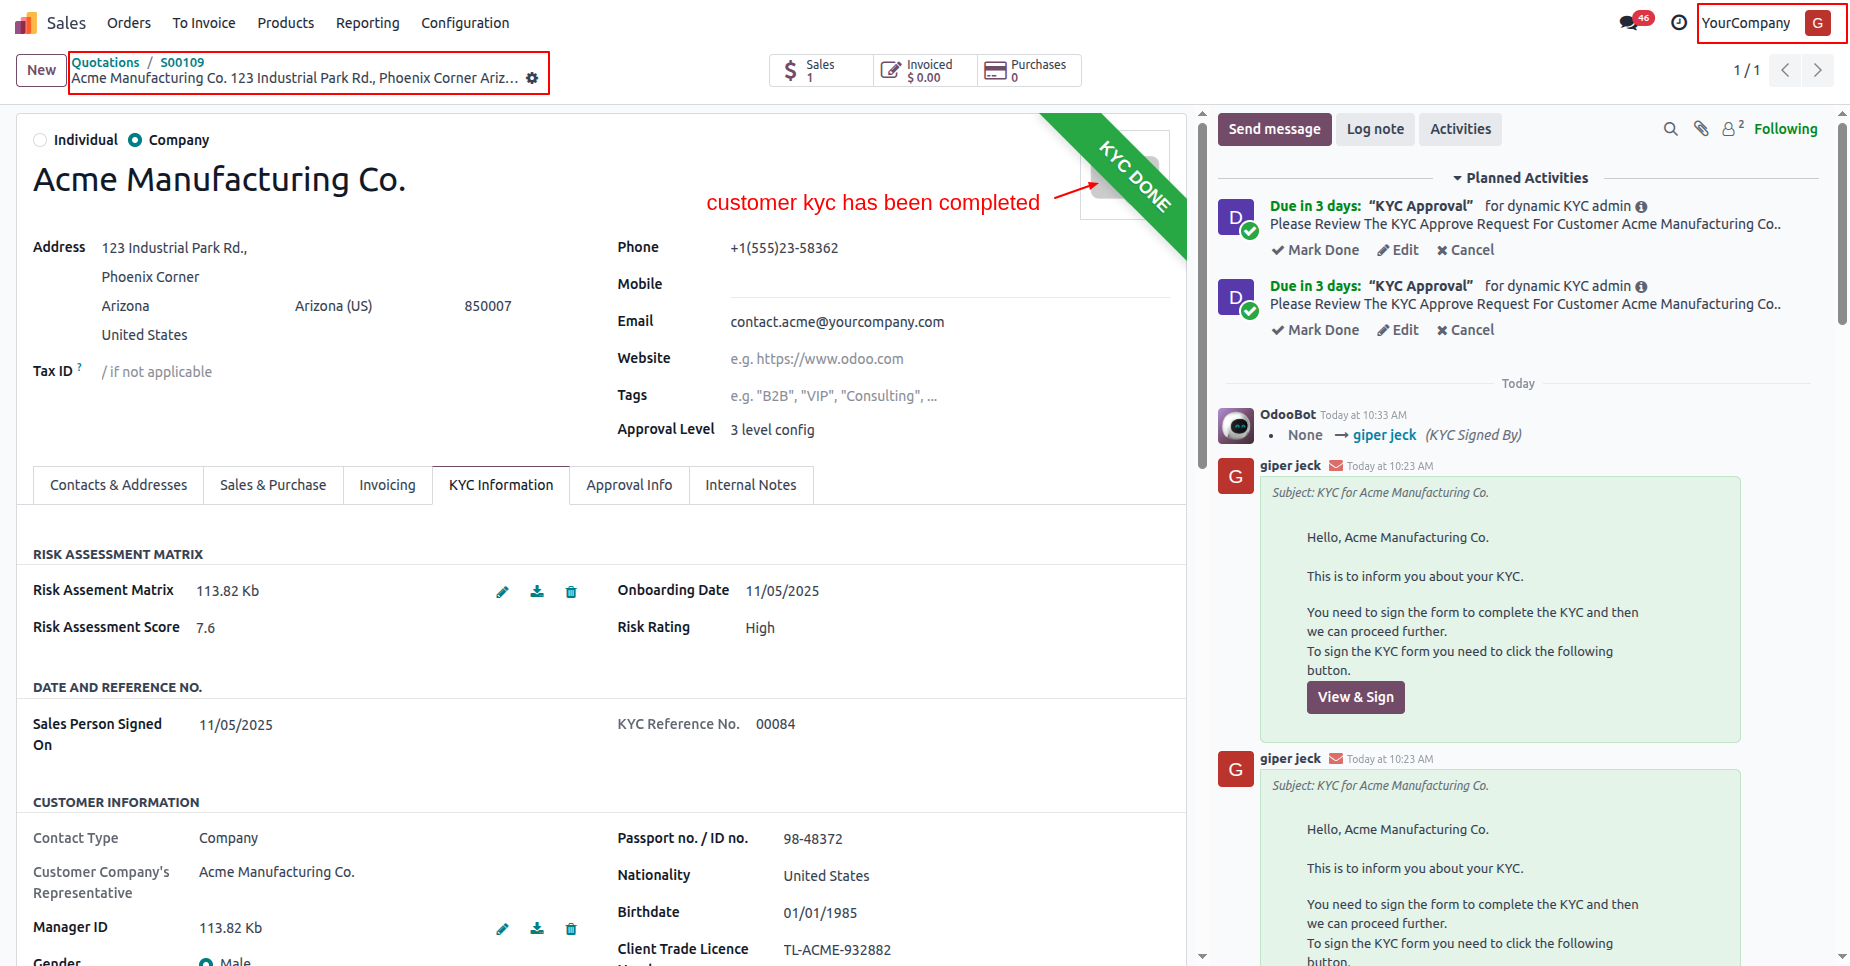
In the "KYC Infomation" tab, you can see all the approval
information.
The customers KYC status has changed to "KYC Done".
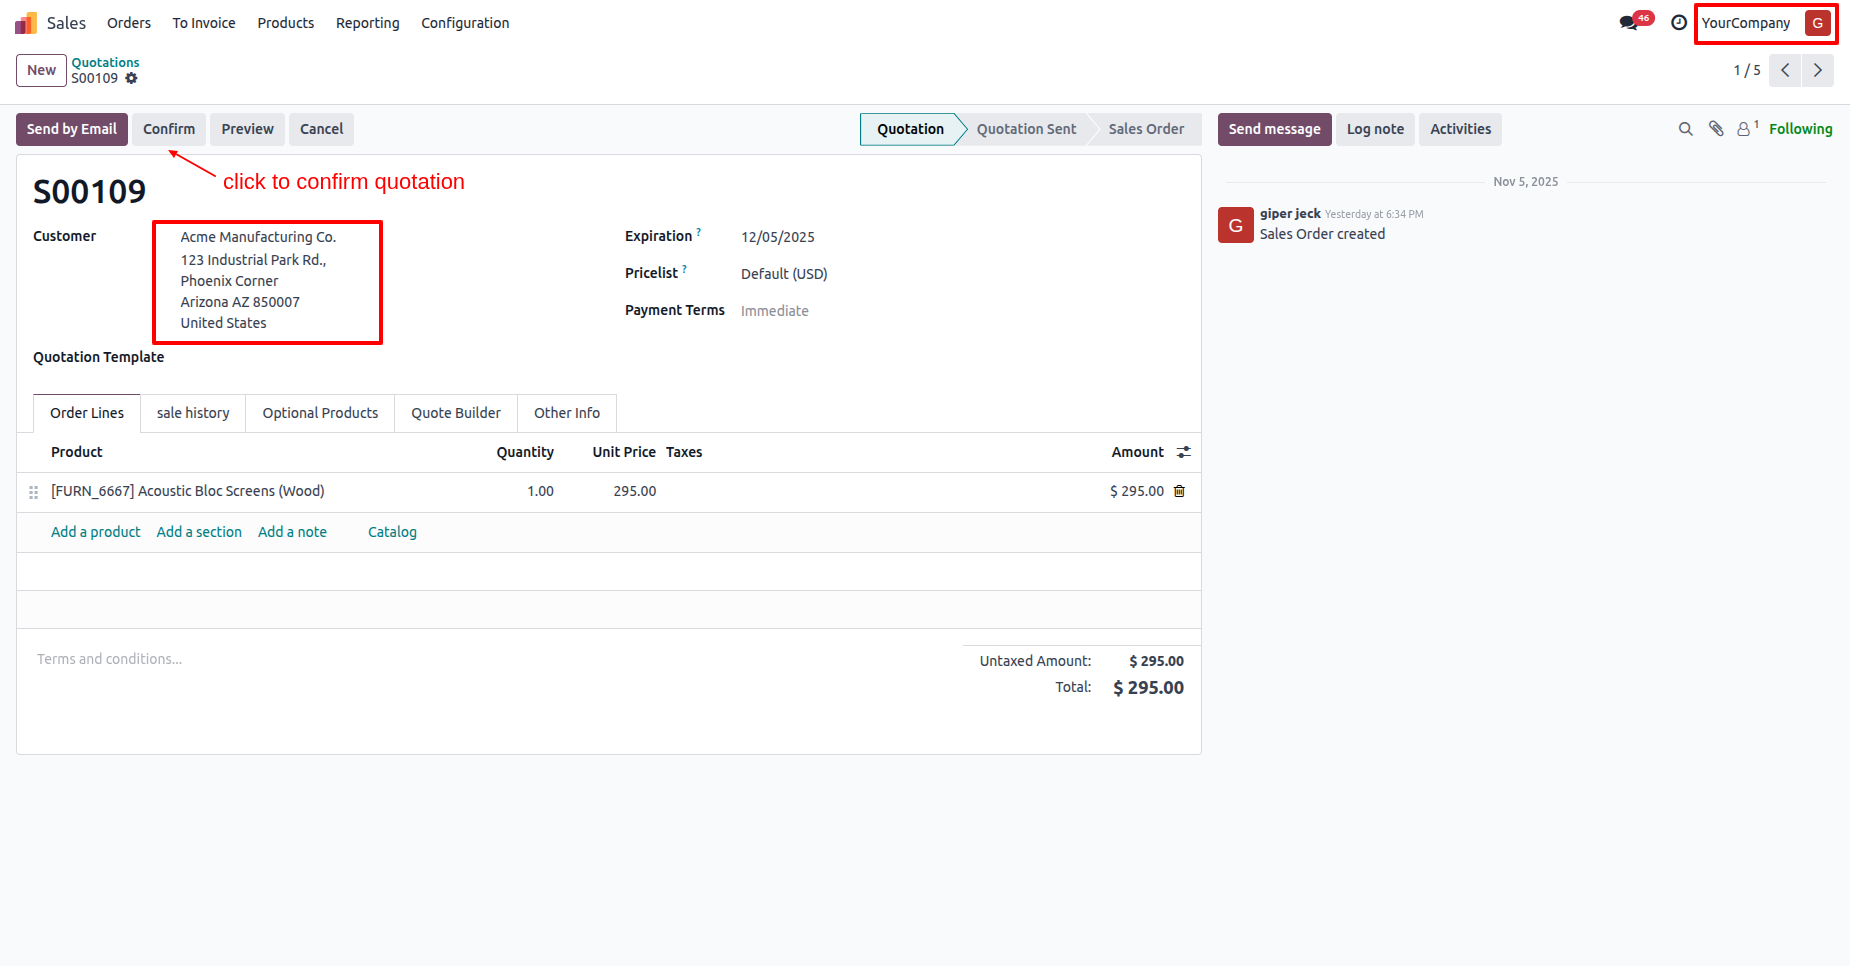
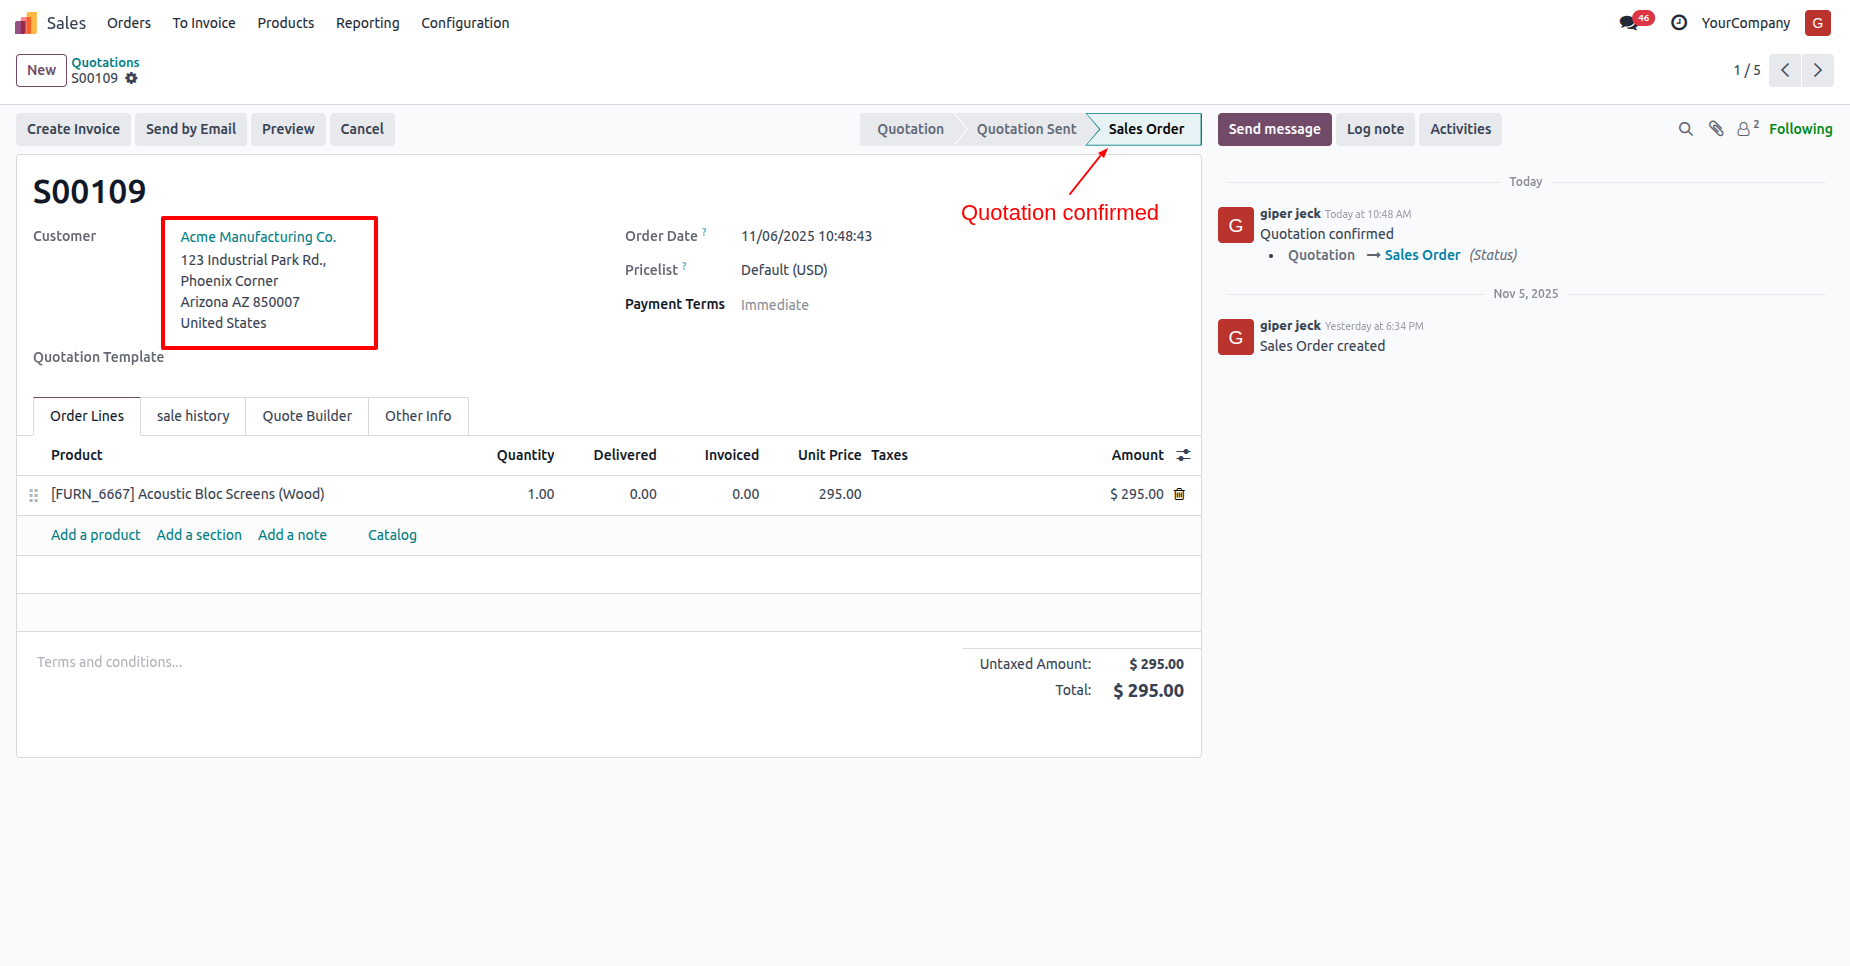
Confirm the quotation.
The quotation is now confirmed.
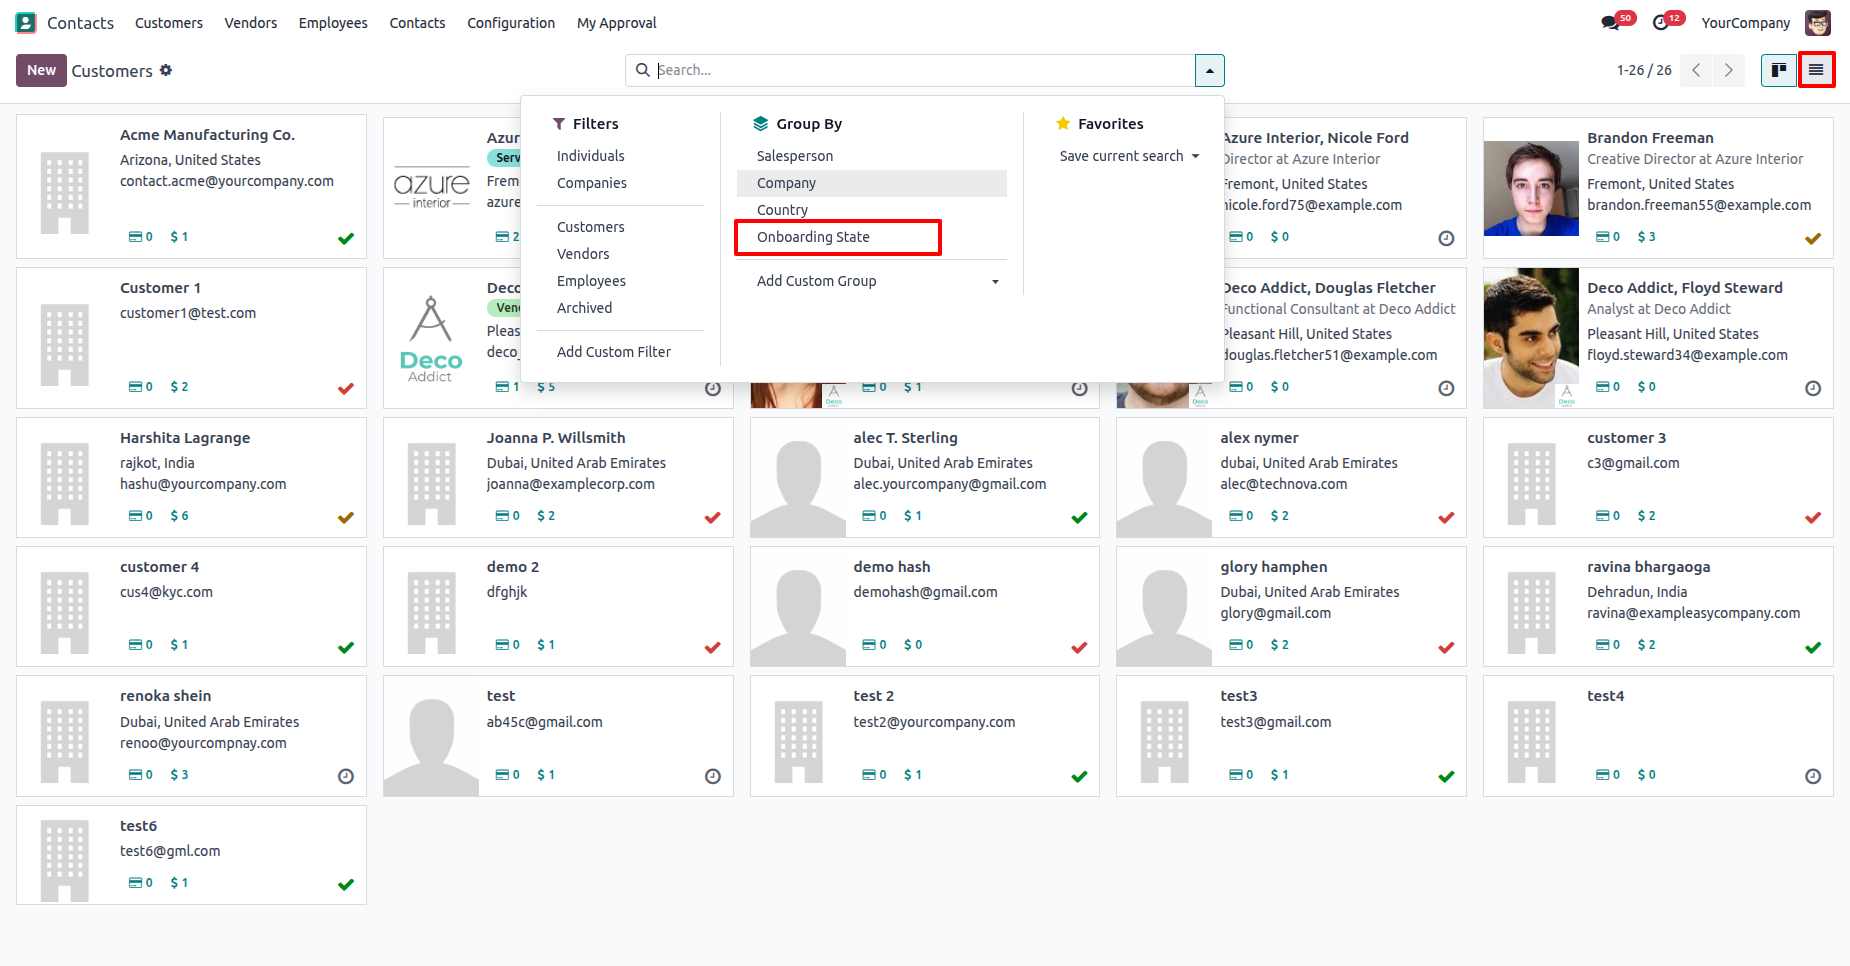
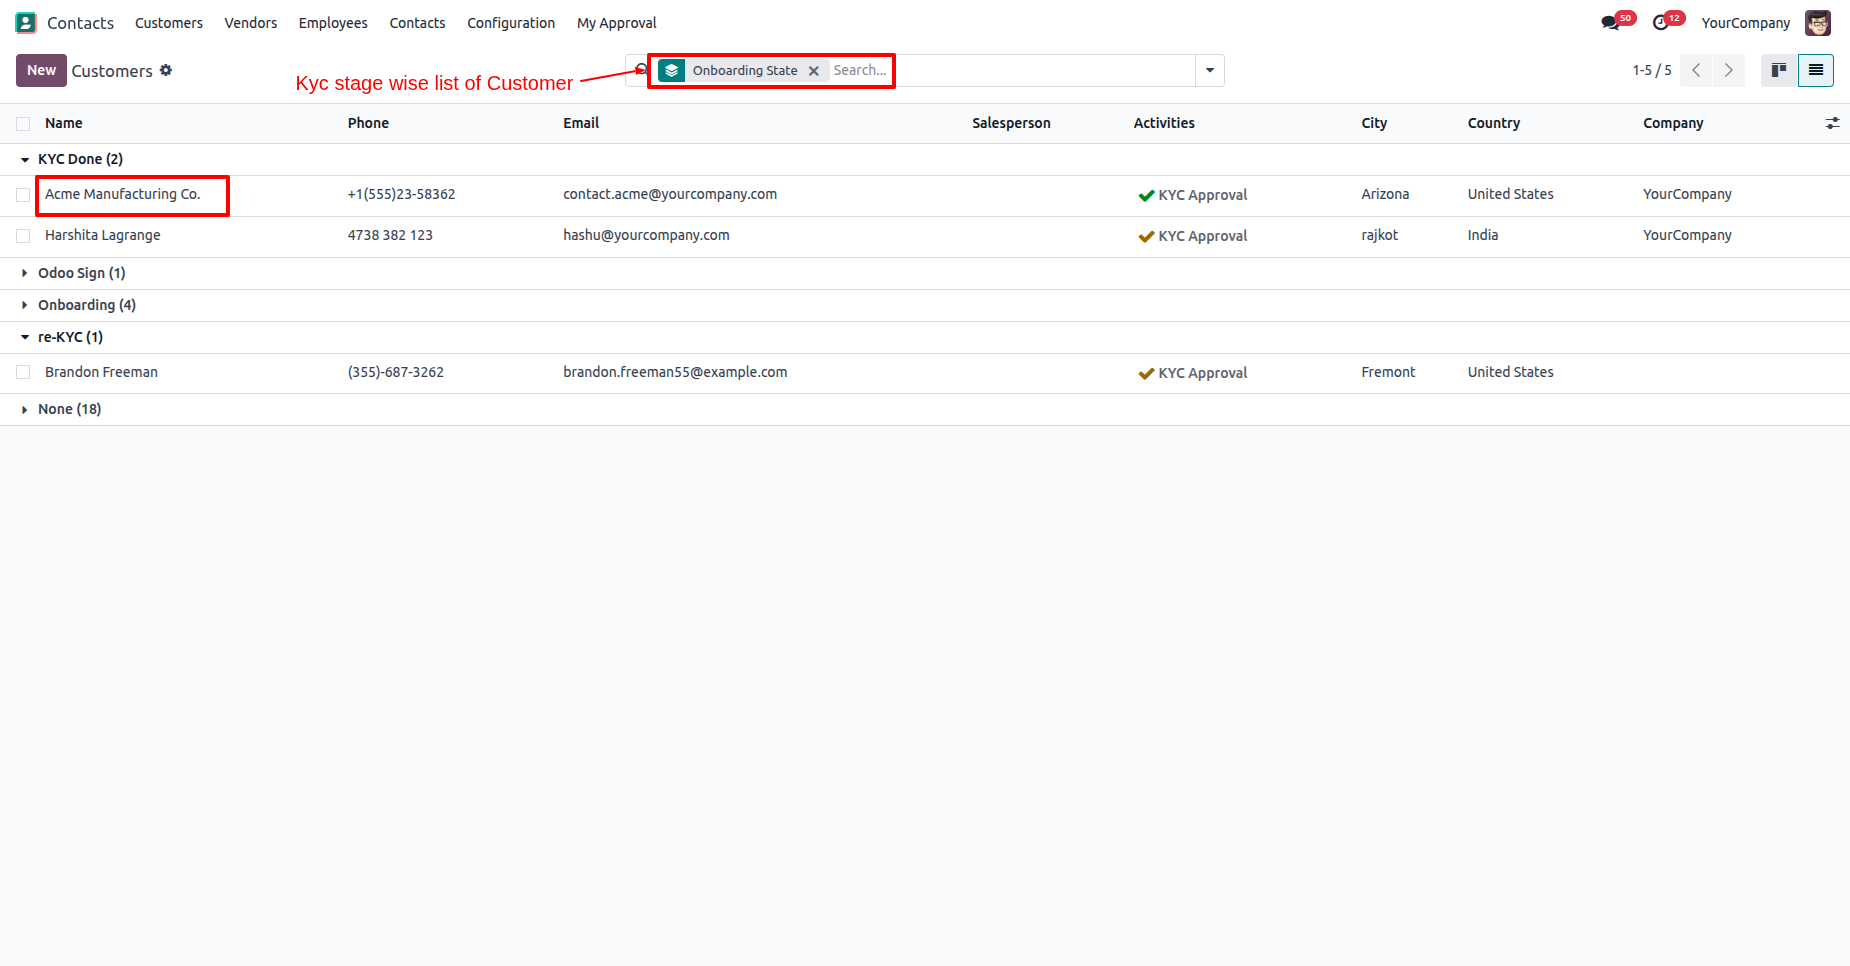
You can group by customers by "Onboarding State".
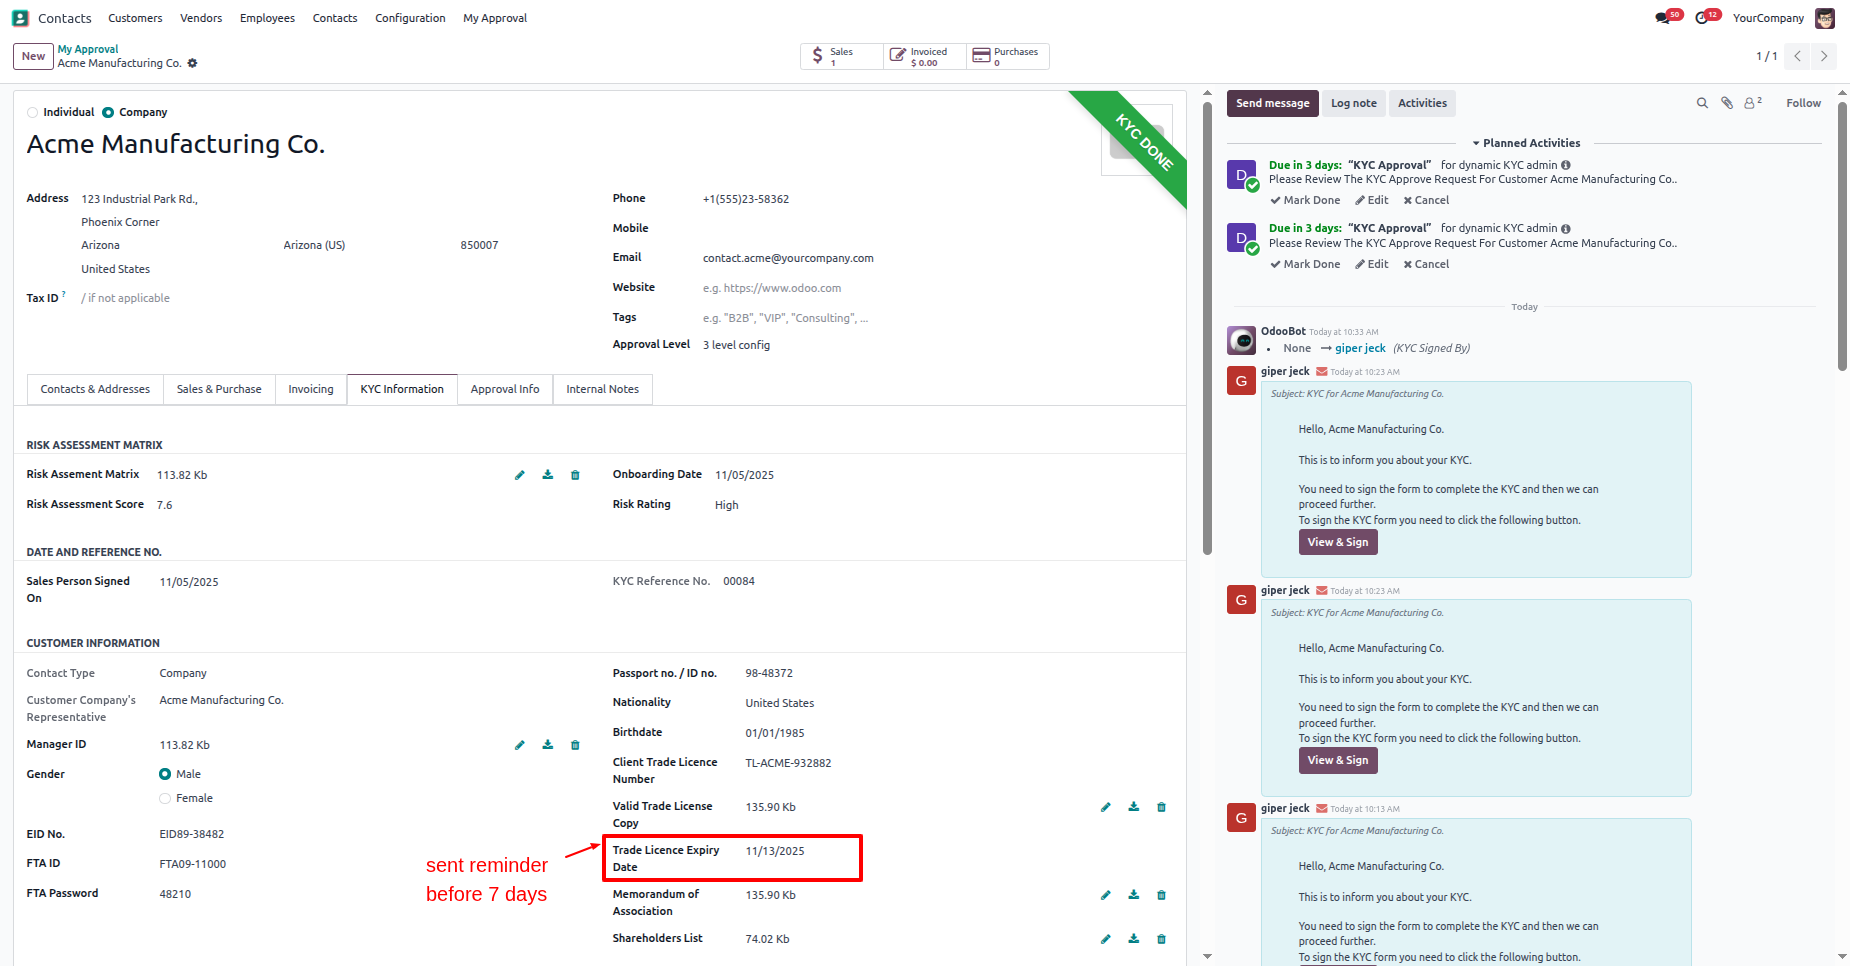
In the "KYC Information" tab, you can view the "Trade License Expiry
Date".
The expiry reminder will be sent before 7 days, as per the
configuration.
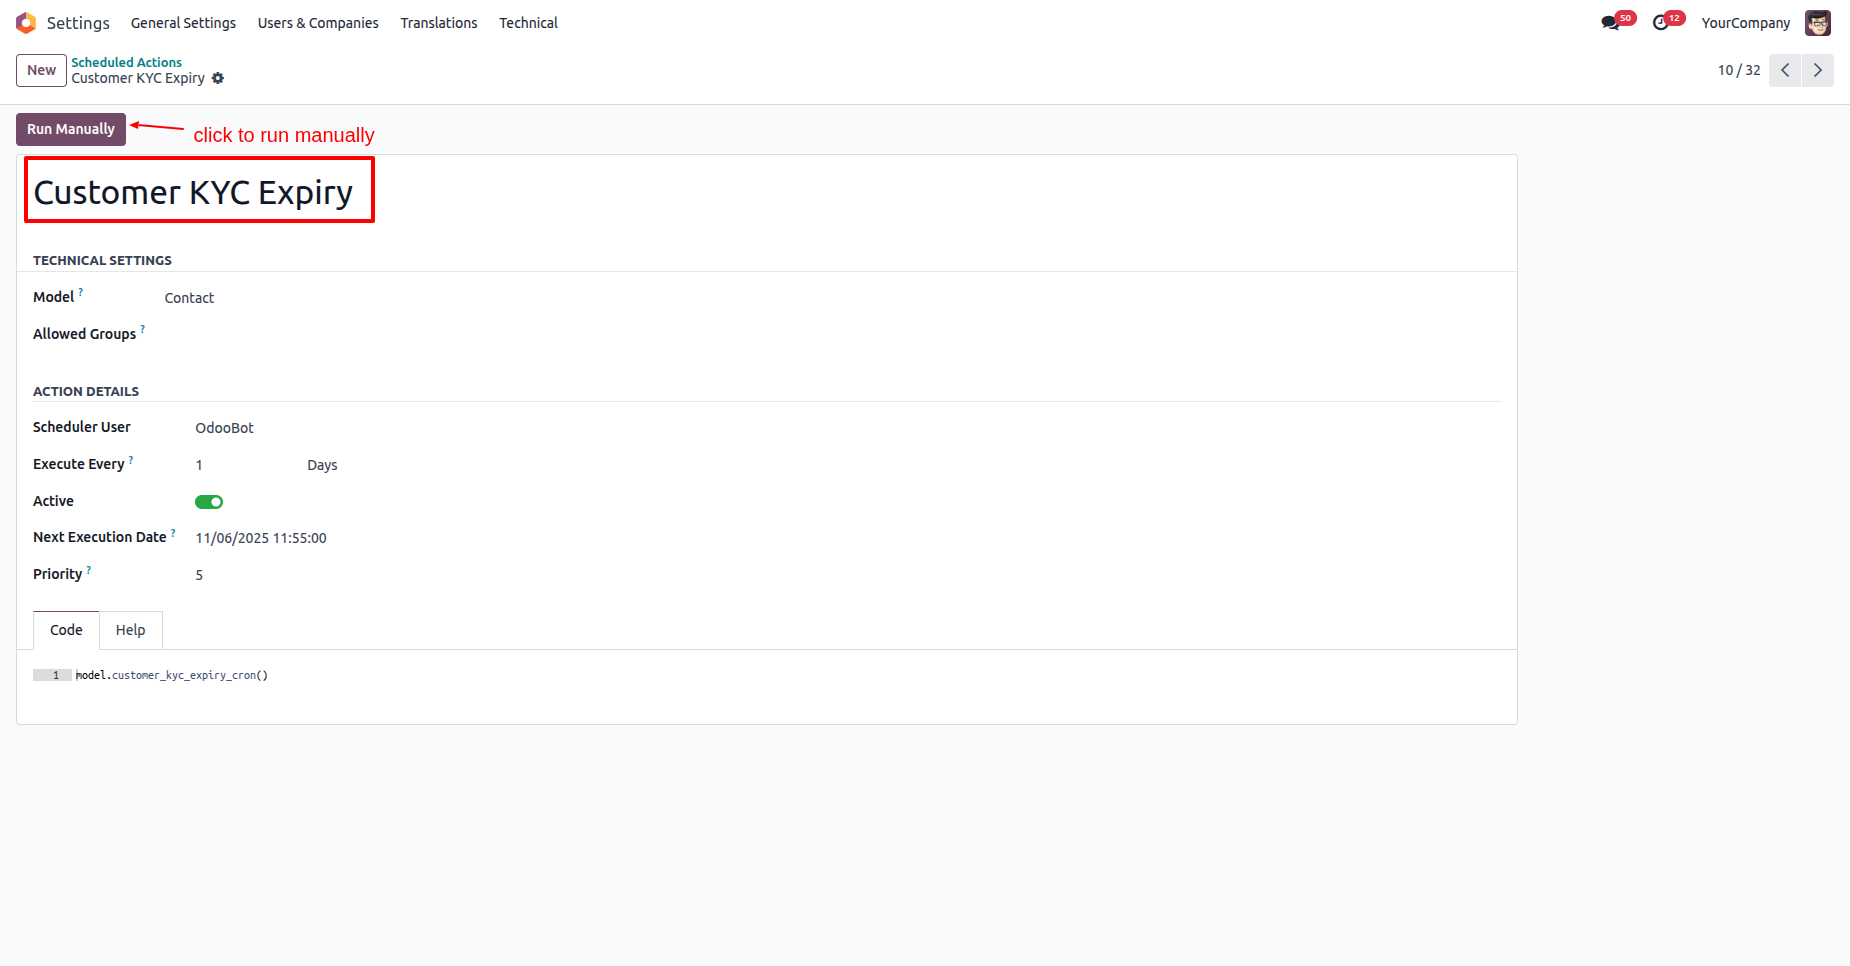
Go to the Schedule Actions ==> Customer KYC Expiry
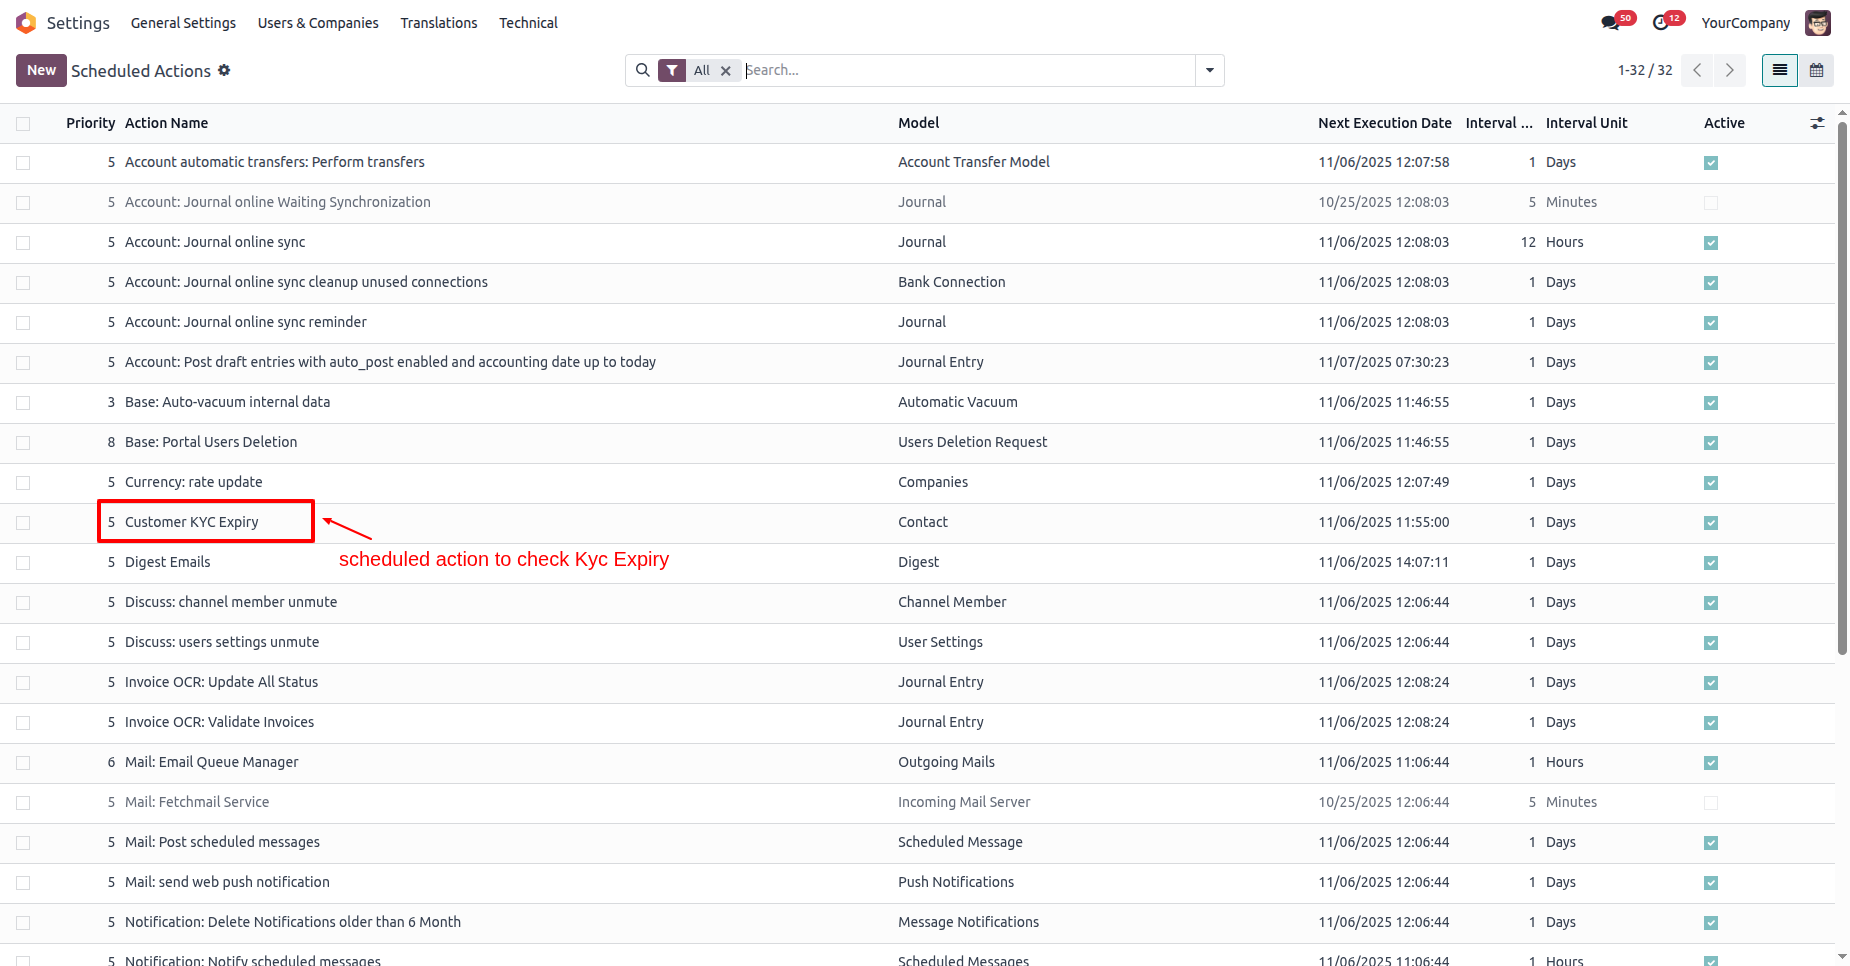
Click on the "Run Manually" button.
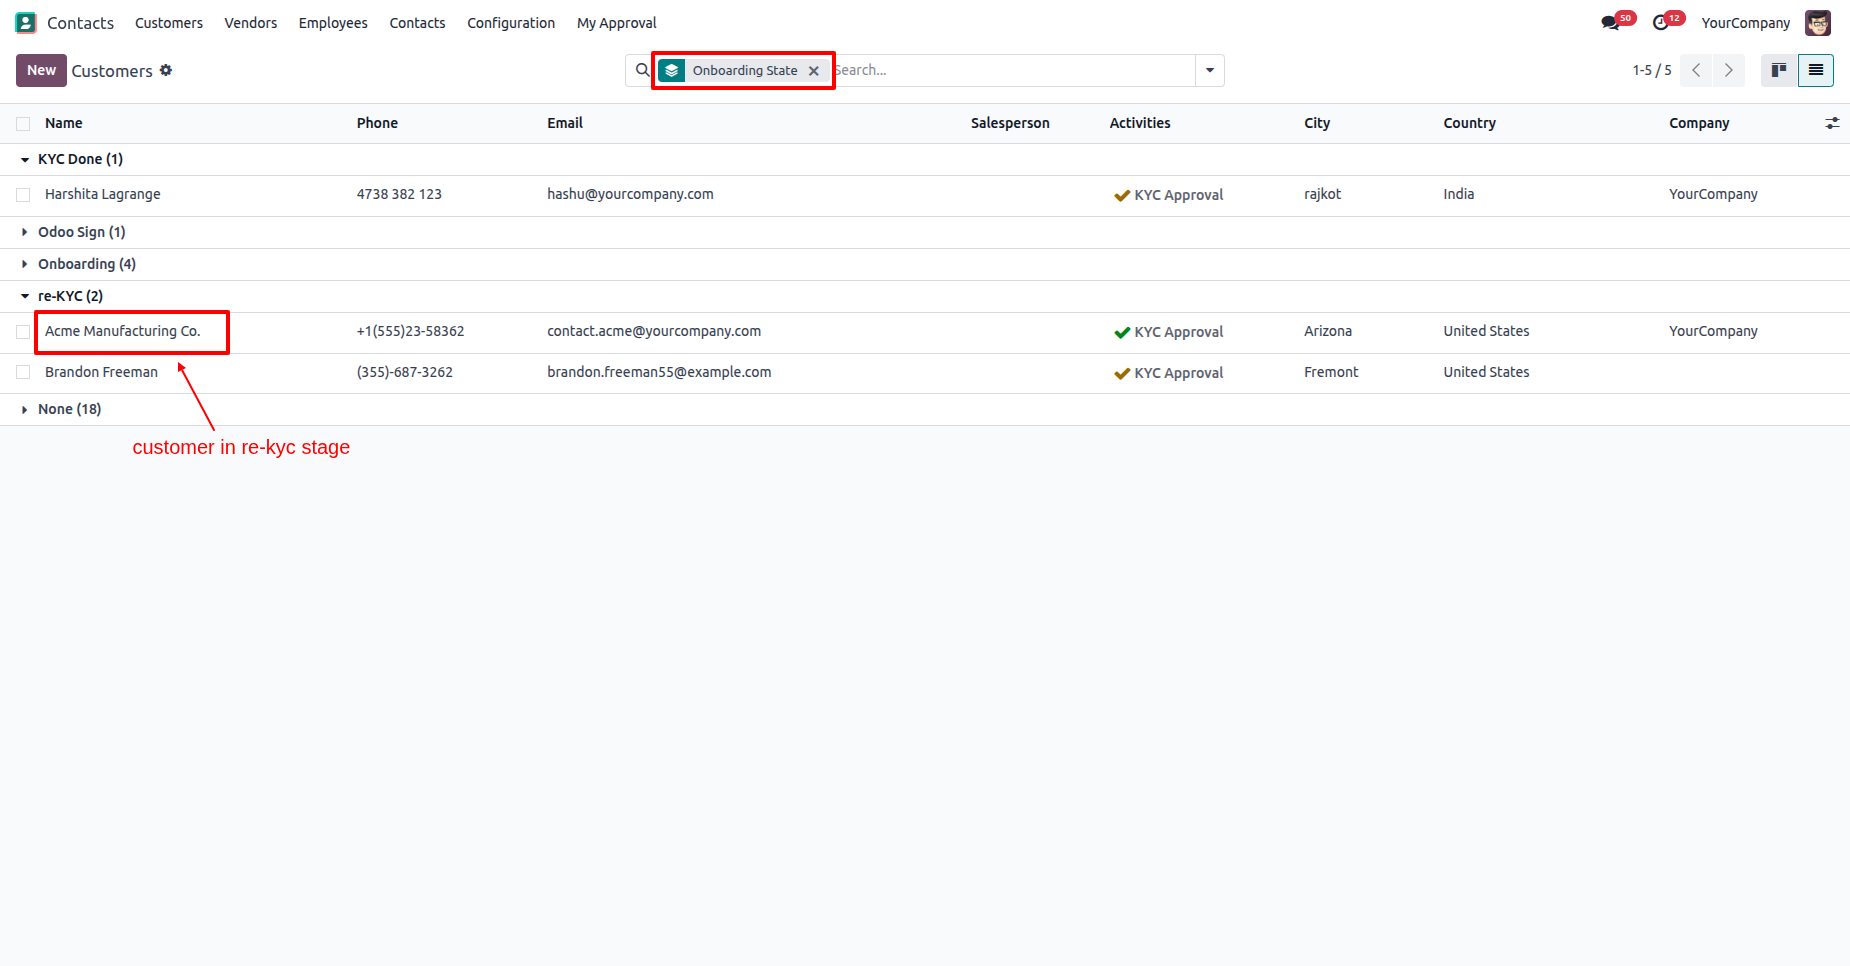
Open the customer who is in the "Re-New" KYC stage.
Here you can see the KYC re-new warning.
Proceed to confirm the quotation.
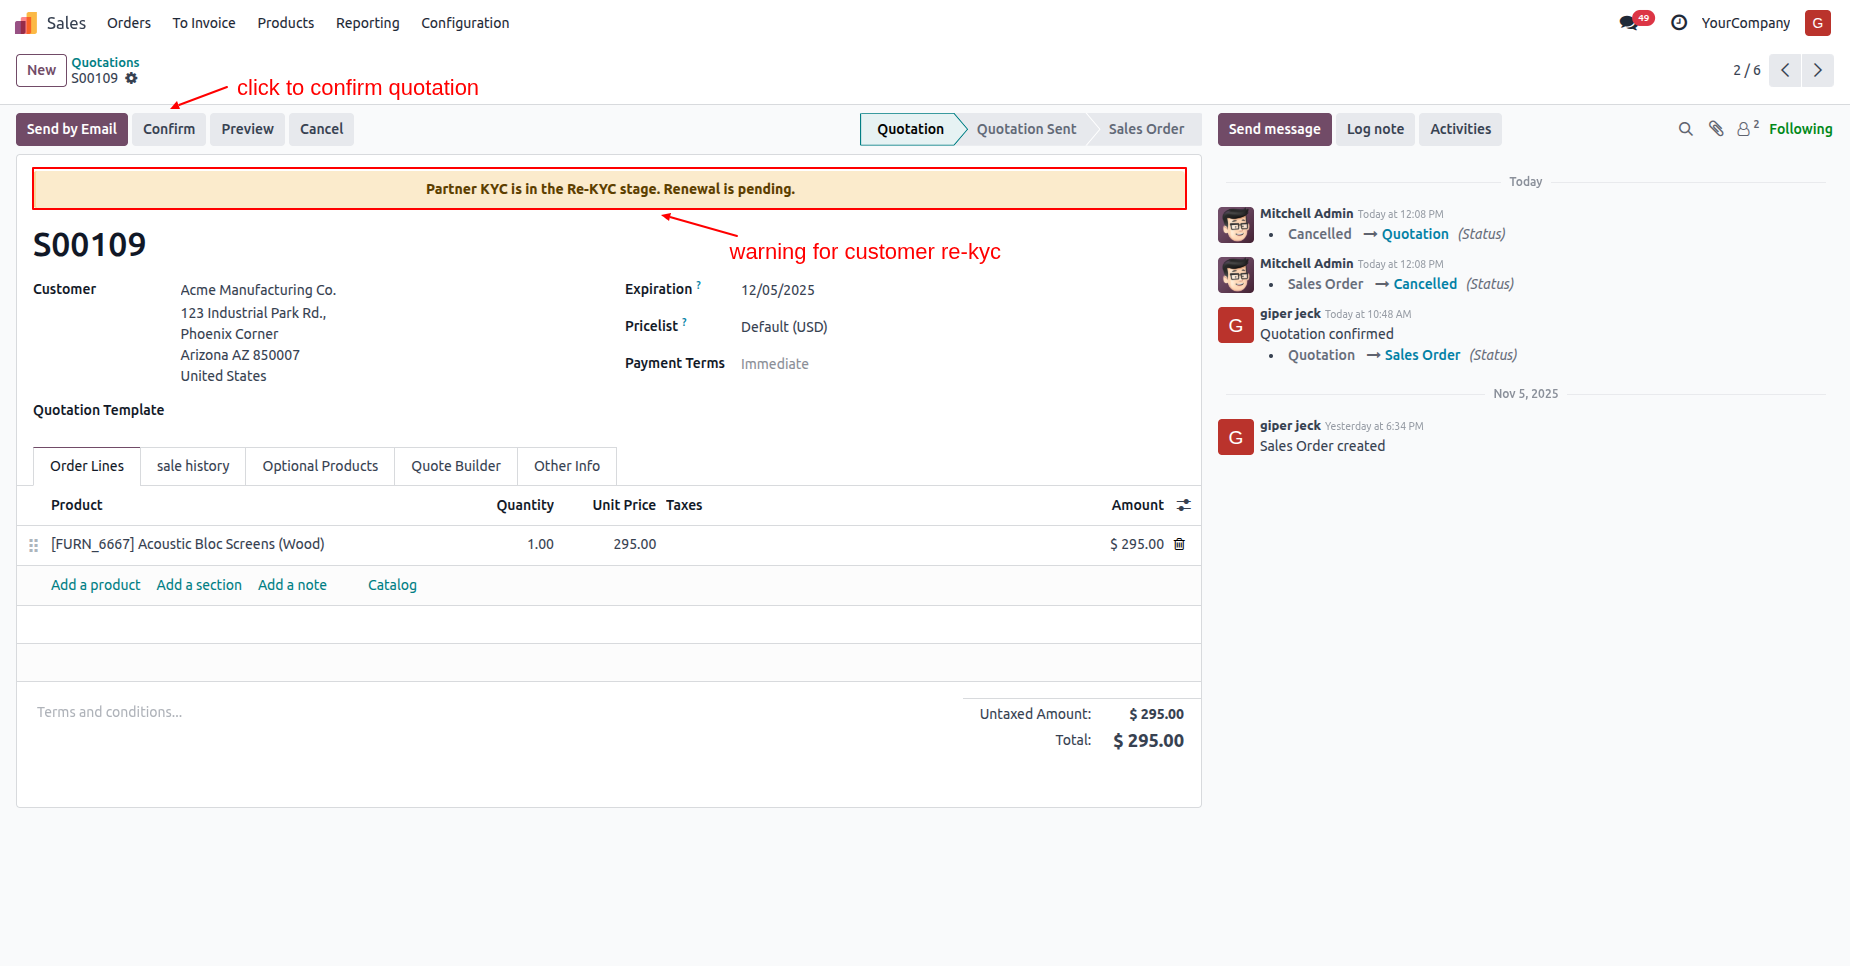
The quotation is now confirmed.
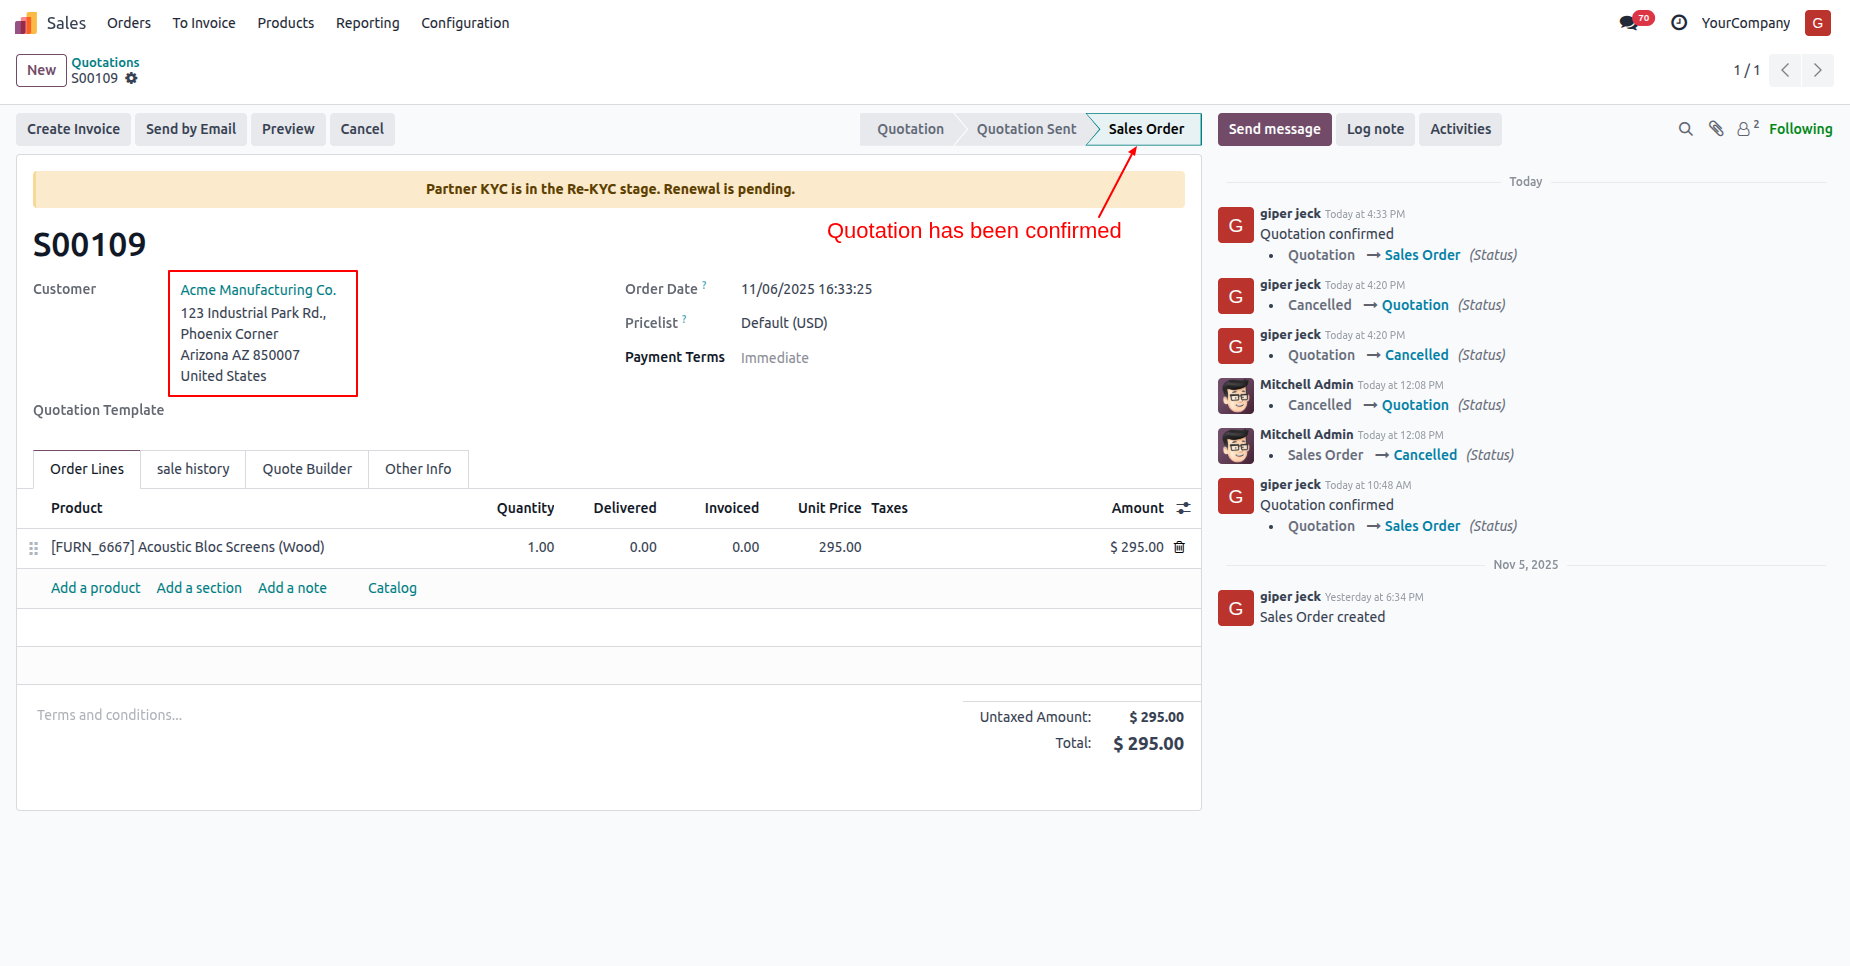
In the "KYC Info" tab, click on the "Renew KYC" button.
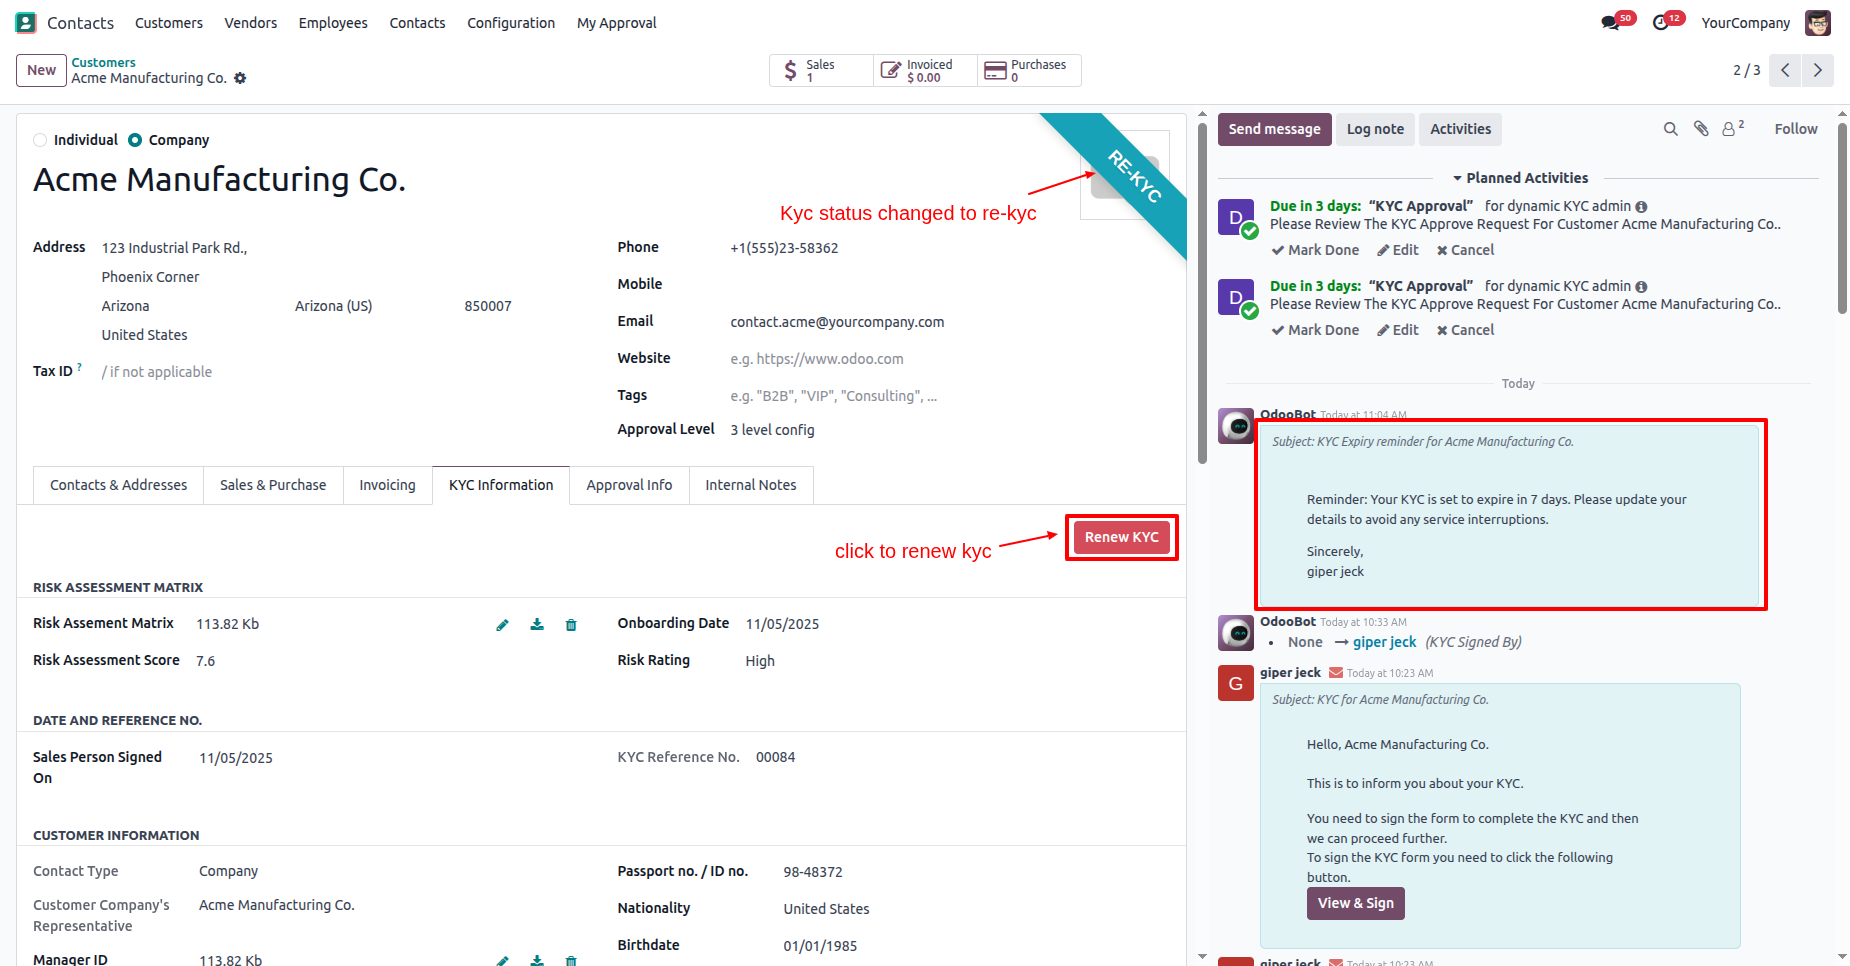
Here you can see that the customers KYC status is "Onboarding".
In the "KYC Information" tab, click on the "Send For Approval"
button.
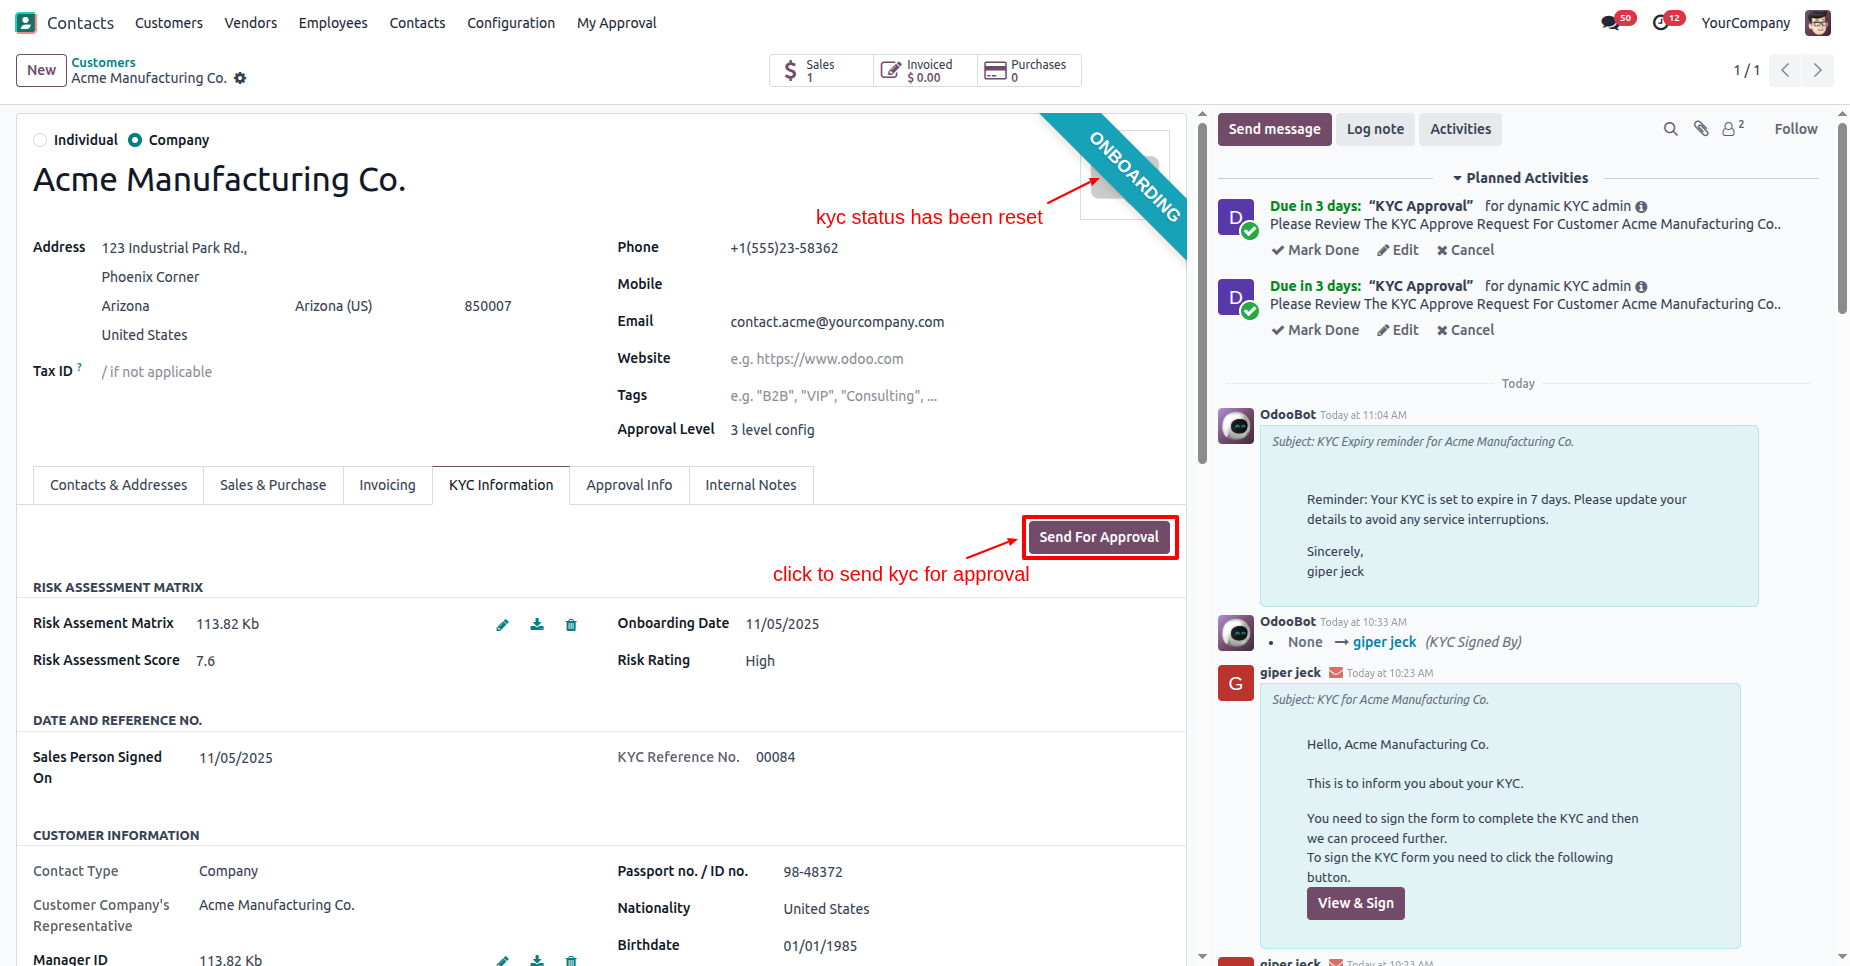
Here you can see that the old signature has been removed.
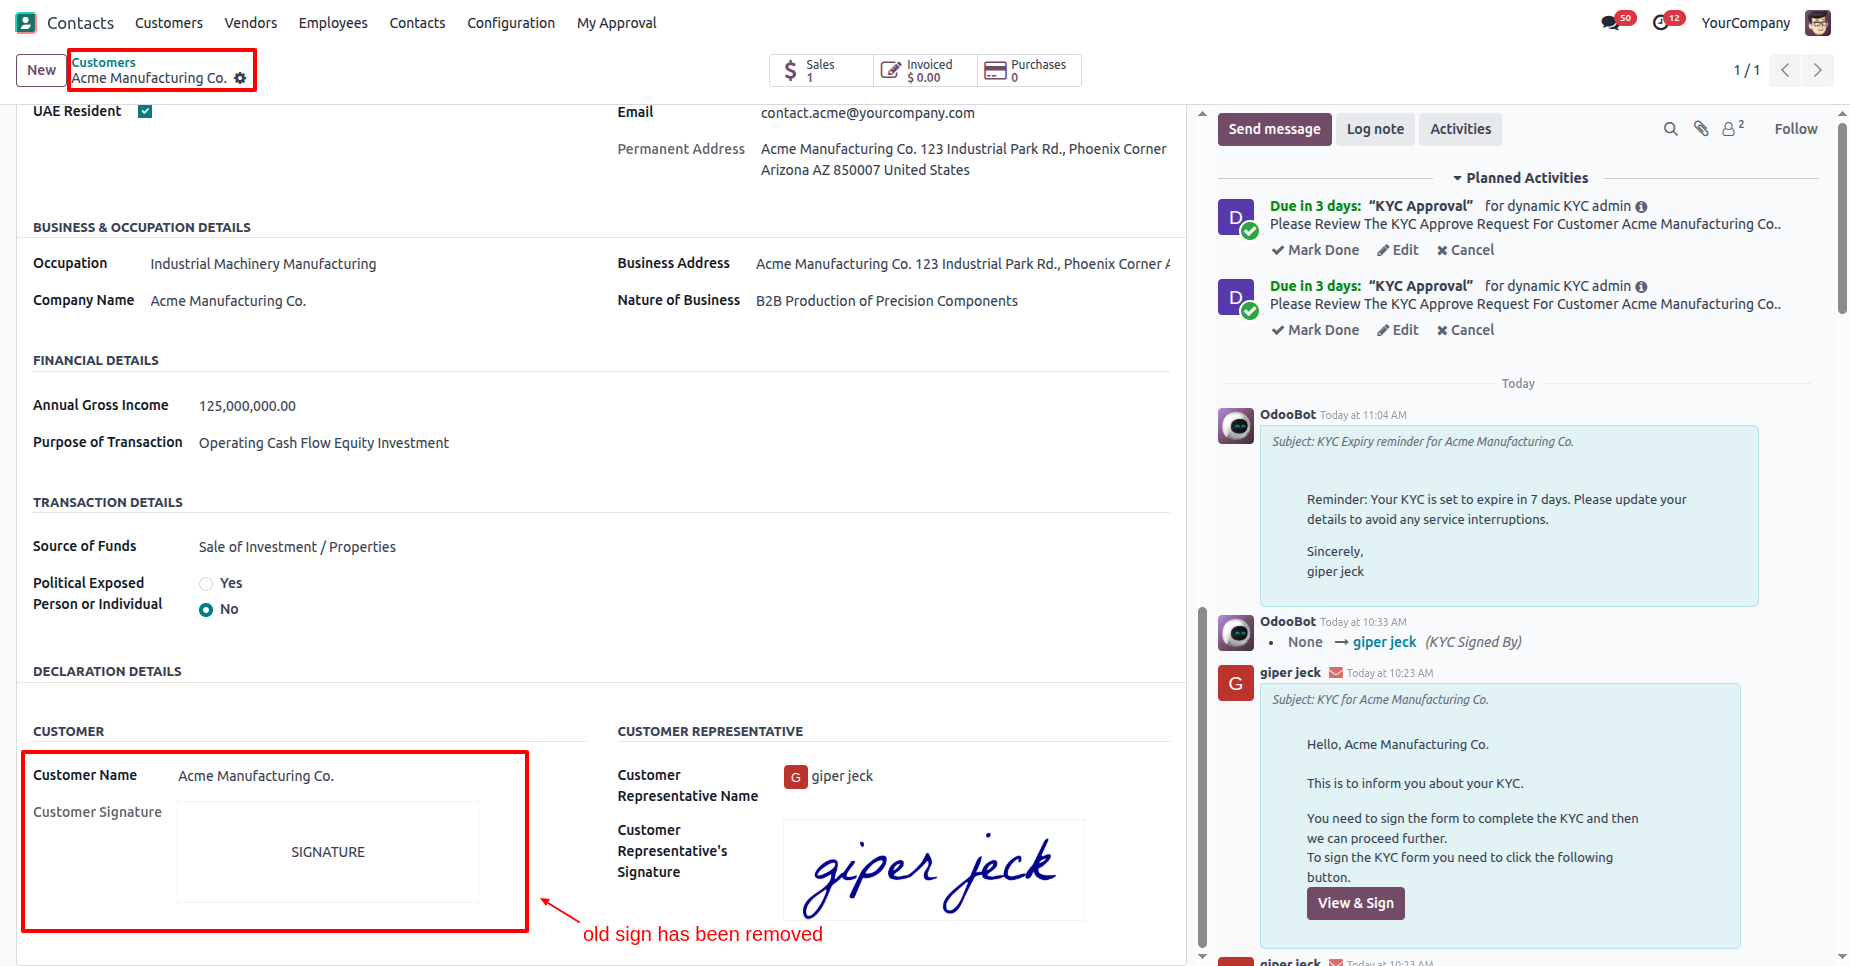
In the "Approval Info" tab, the KYC approval level has been reset.
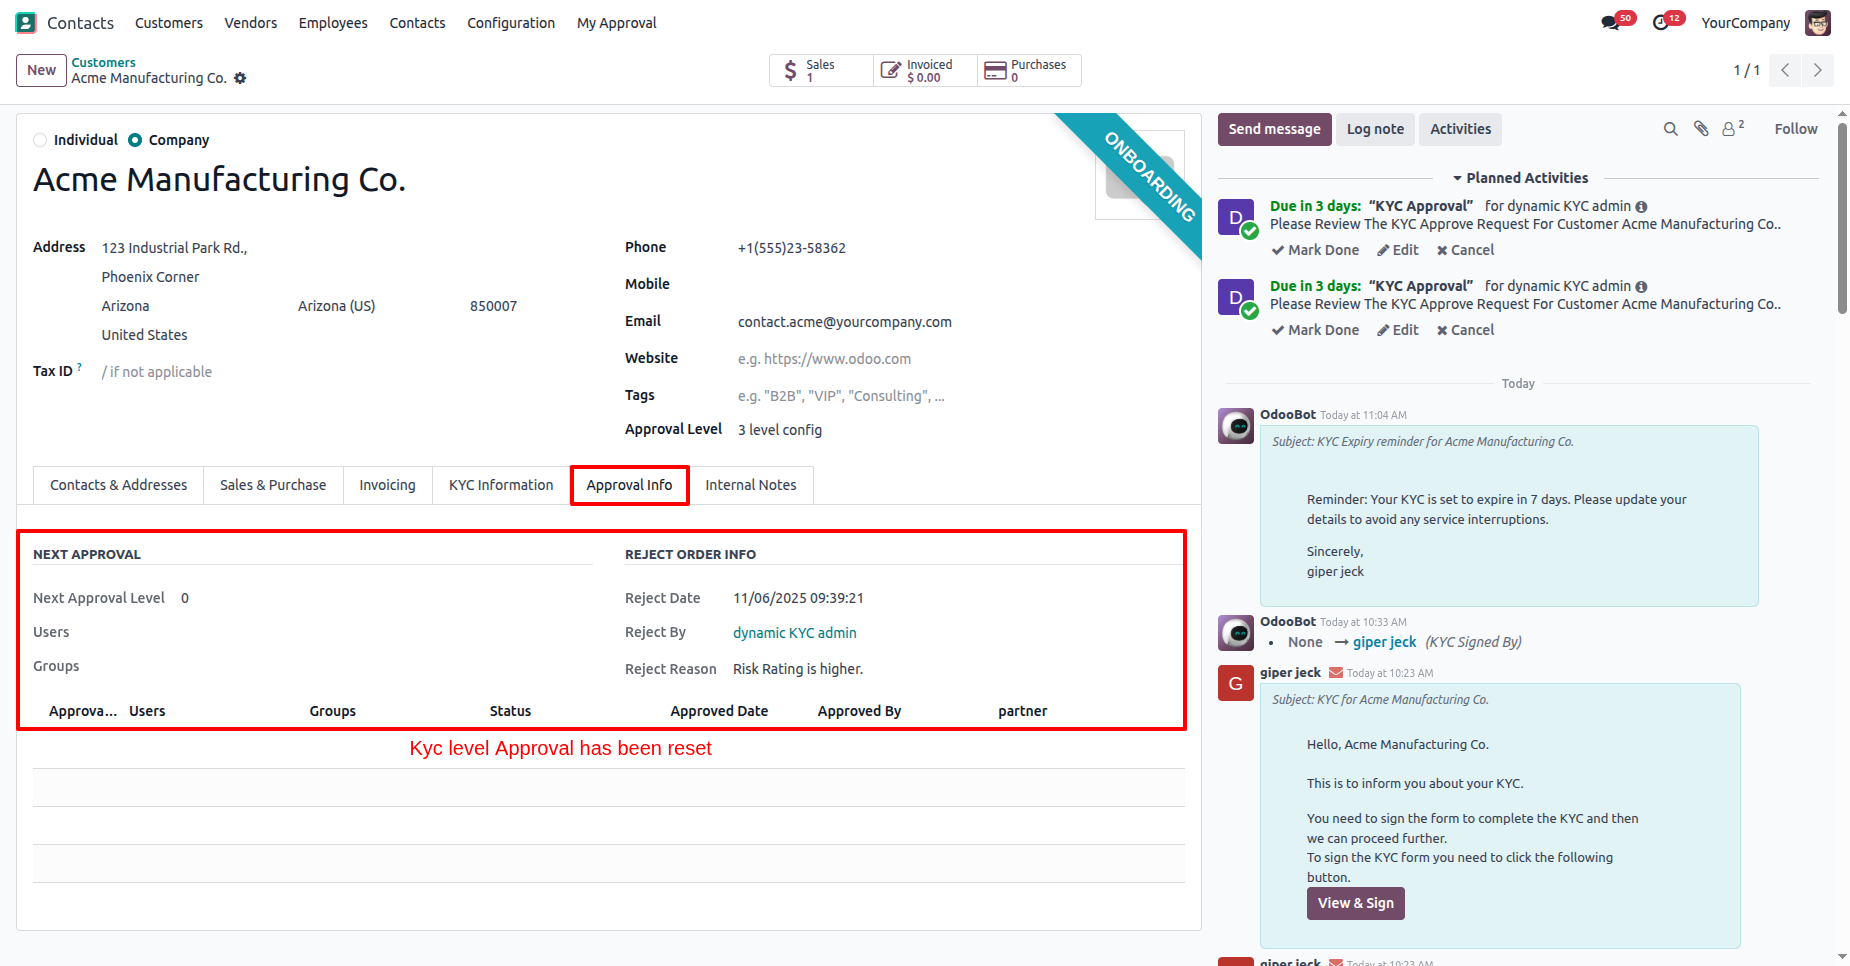
Here you can see that the customers KYC status has changed to
"Waiting for Approval".
The approval user will receive an approval notification popup.
In the "KYC Information" tab, click on the "Approve" button.
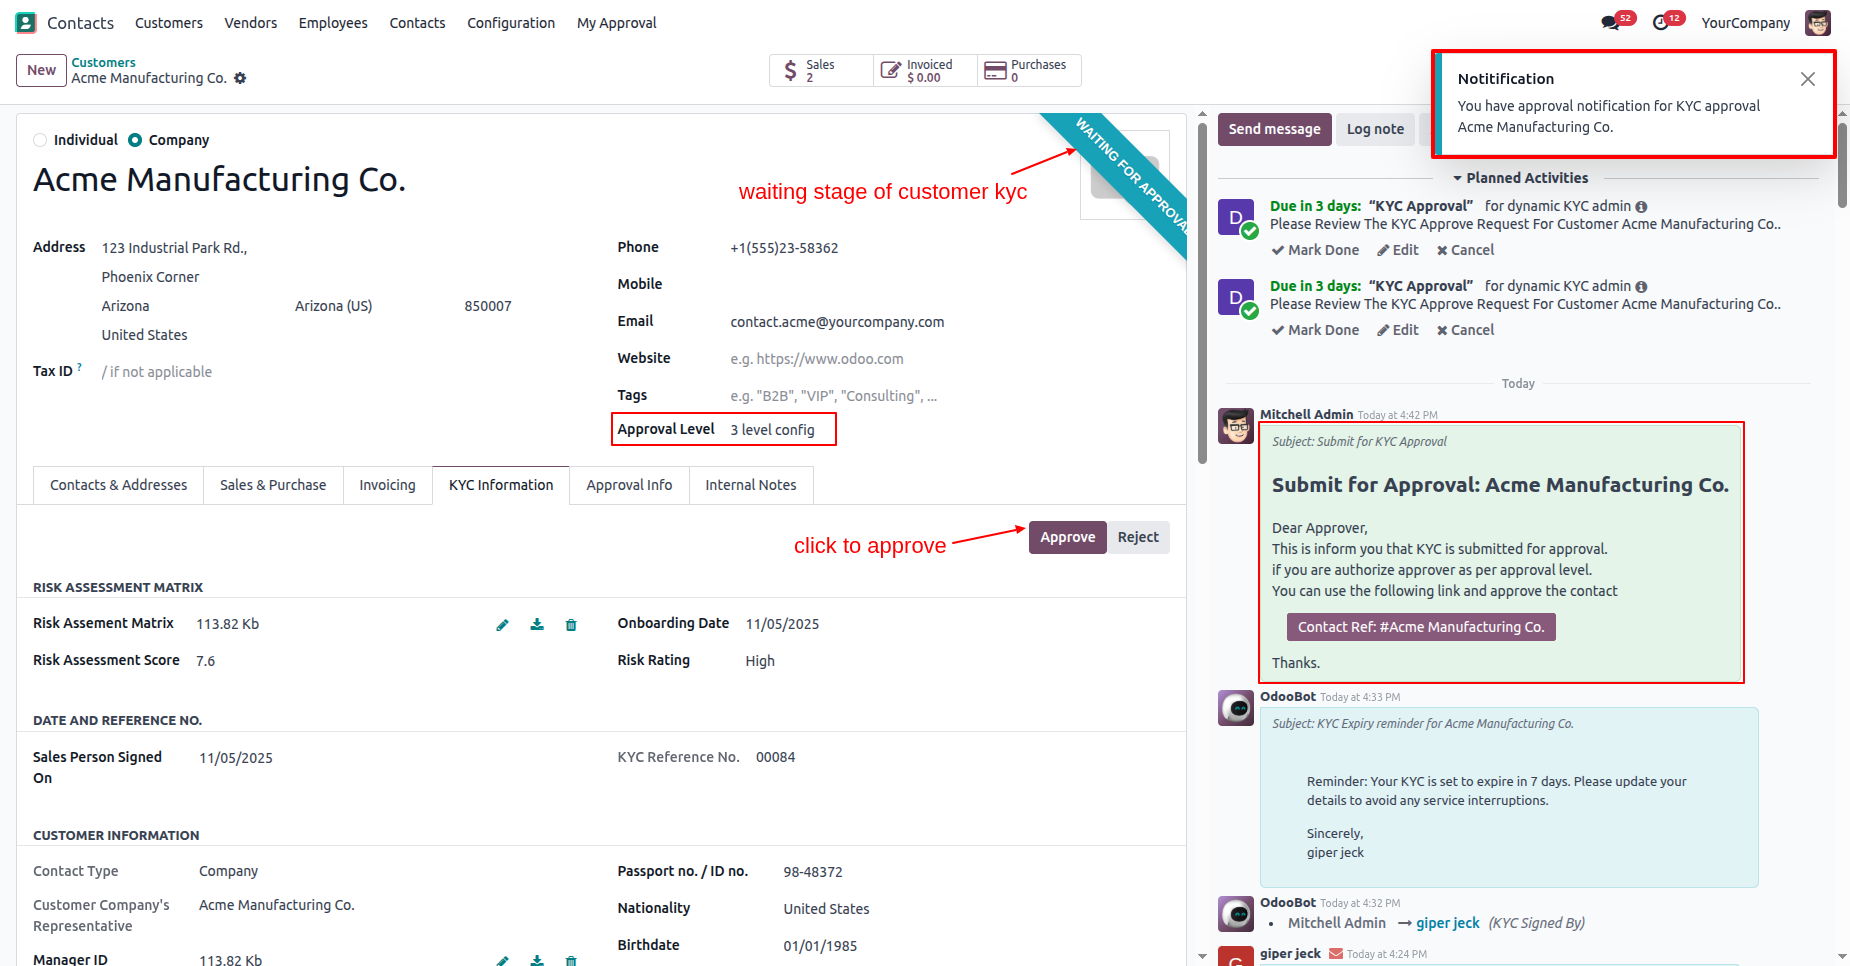
In the "Approval Info" tab, you can see that the approval information has been updated to the 2nd-level approval.
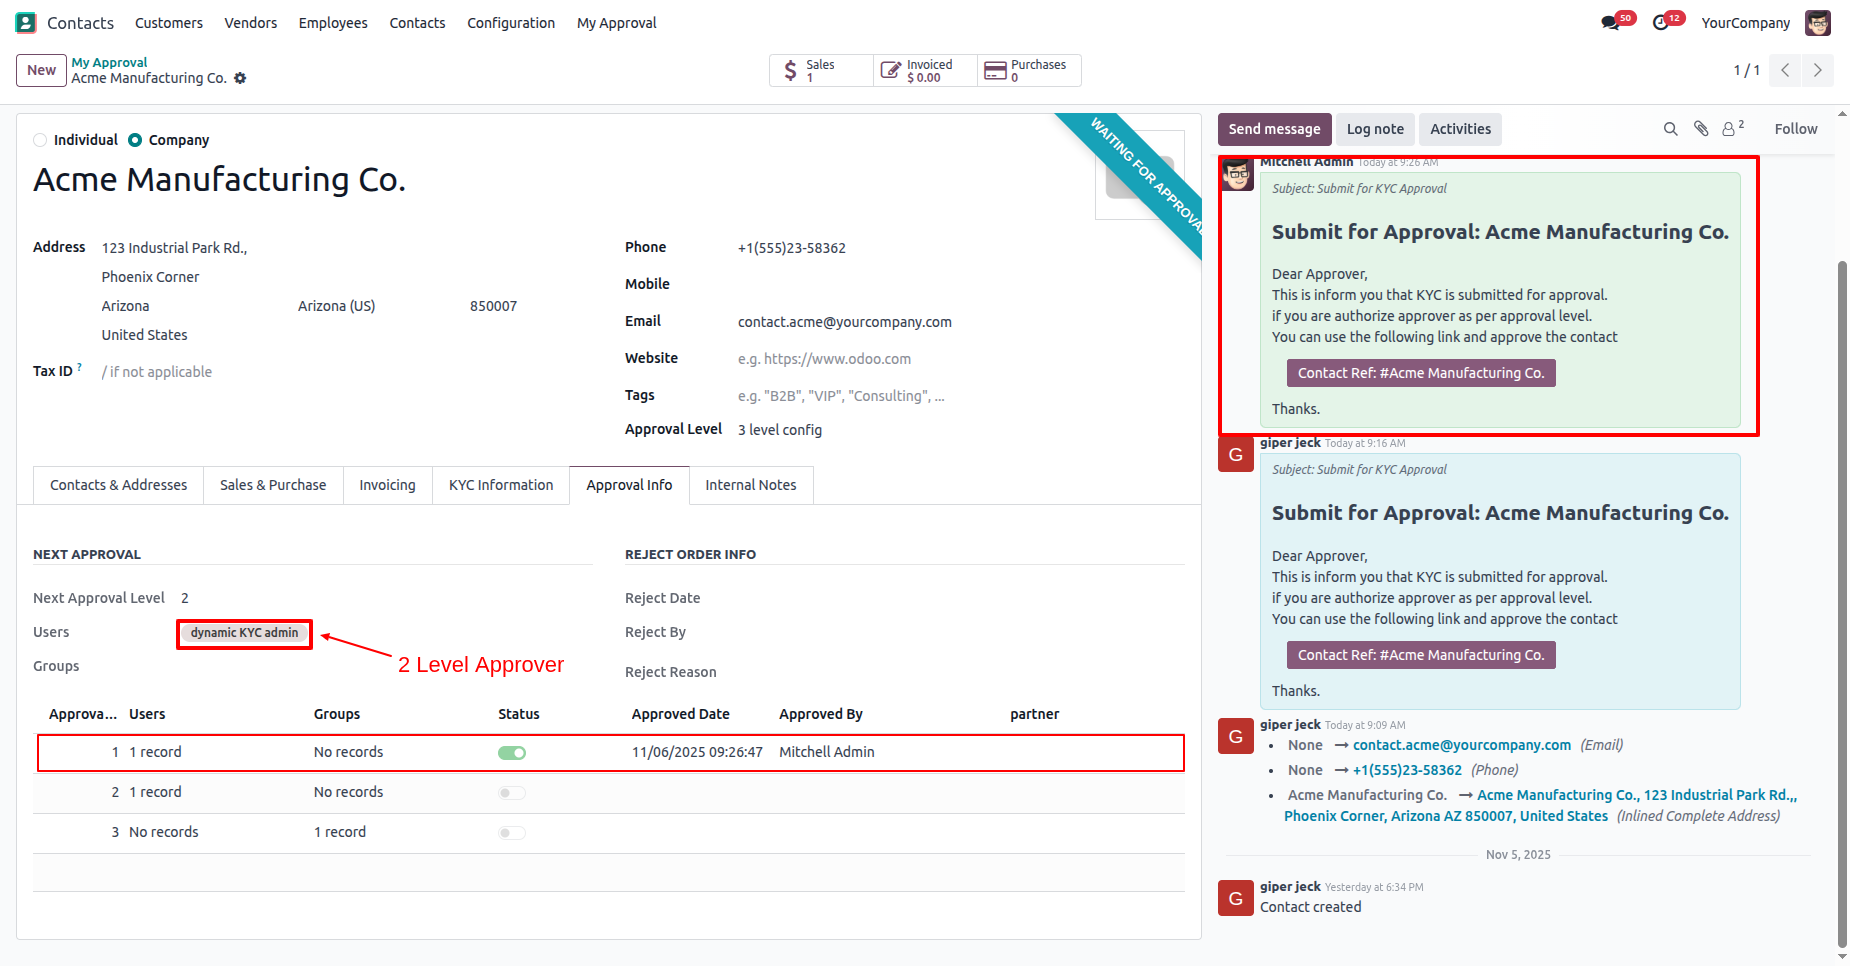
The approval user will receive an approval notification popup.
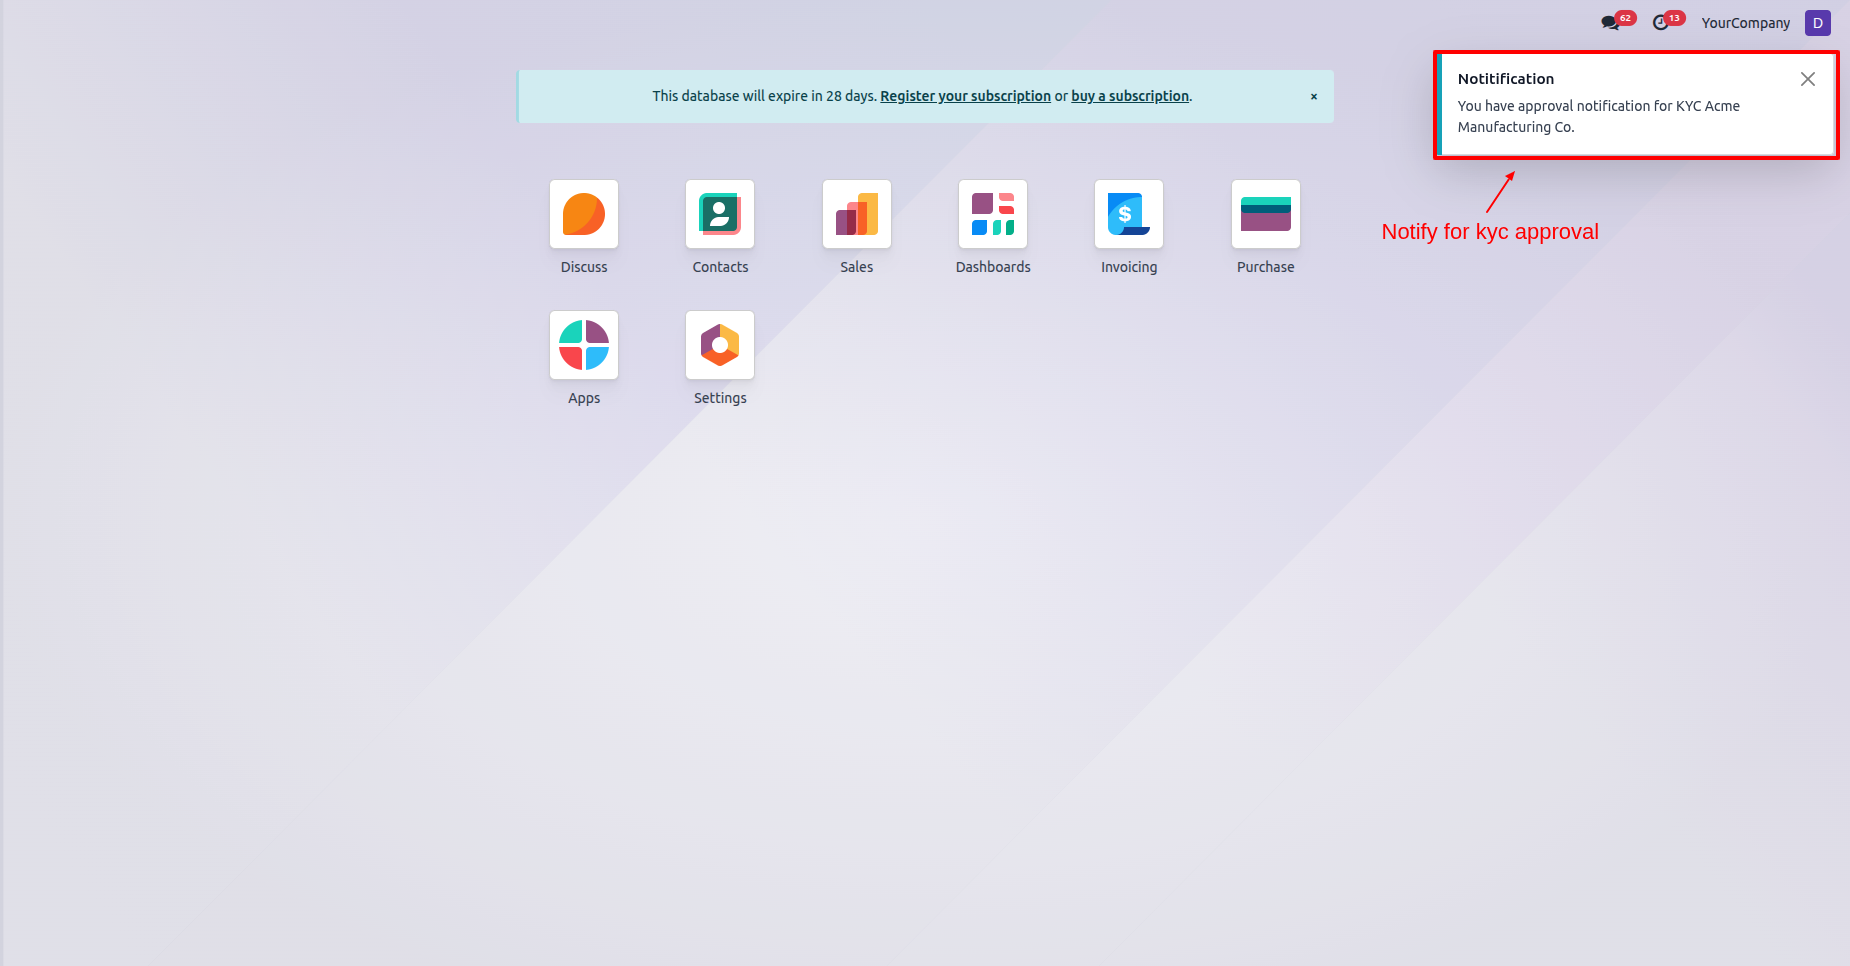
"My Approval" menu and list view.
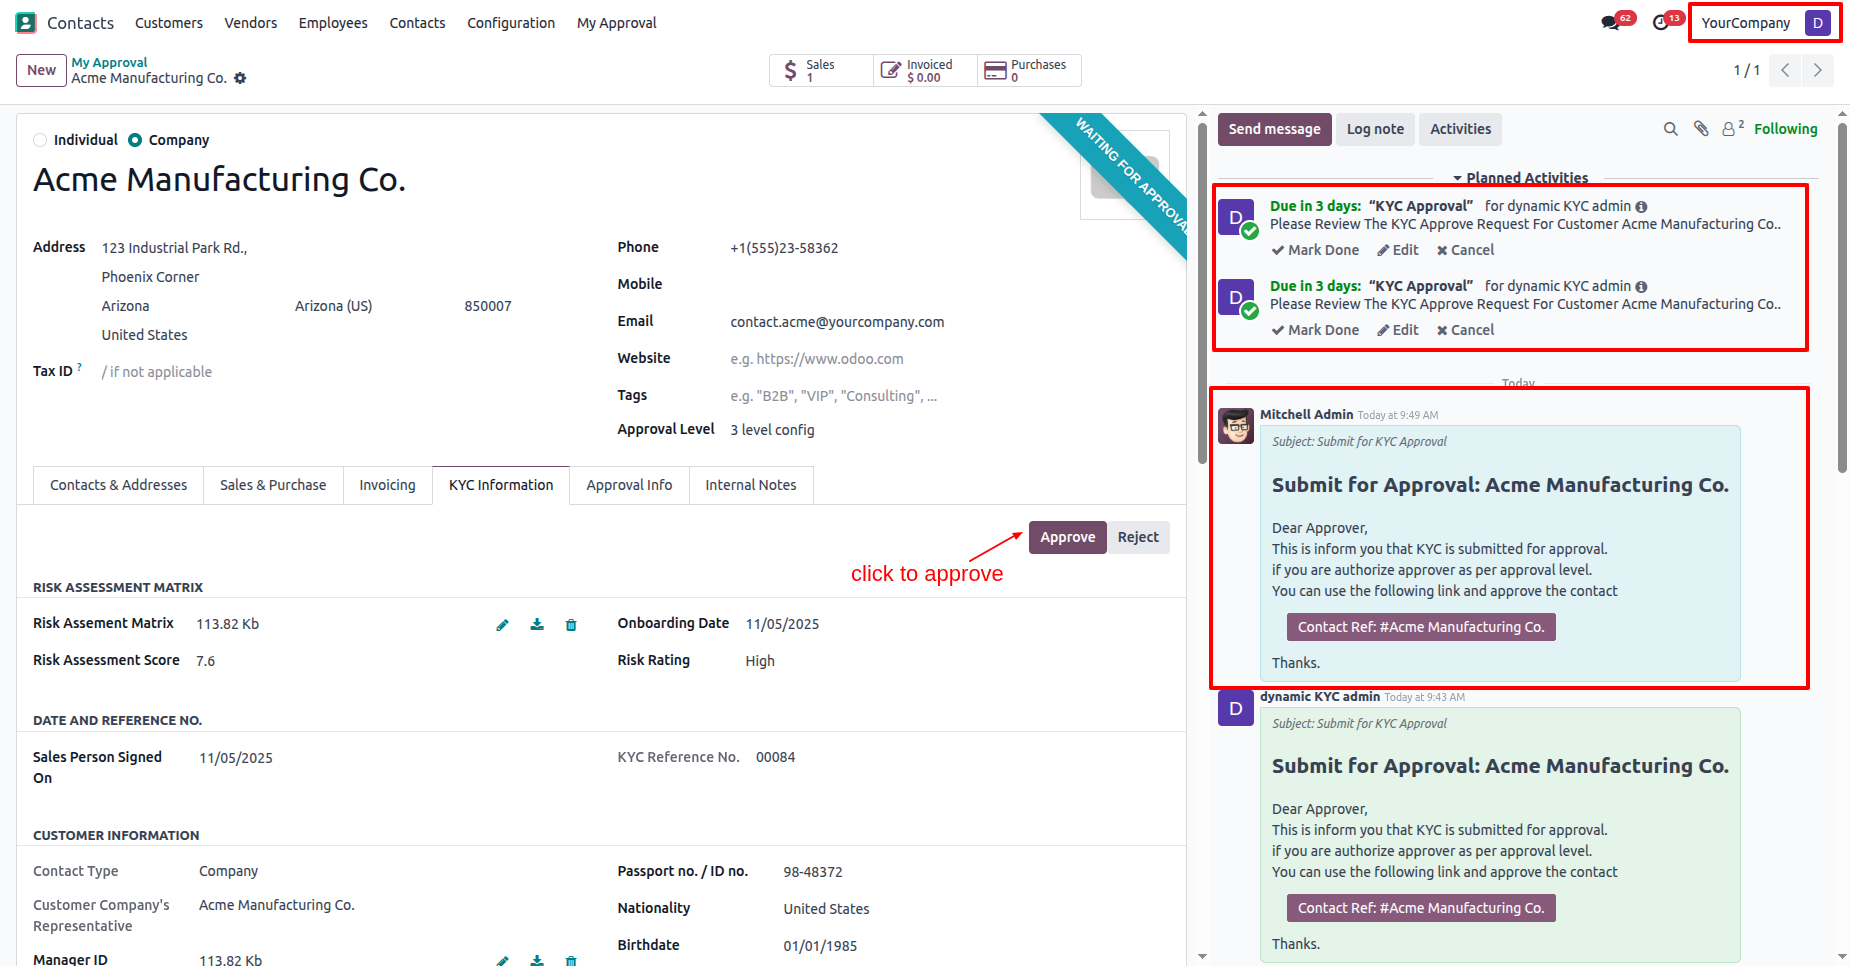
In the "KYC Information" tab, click on the "Approve" button.
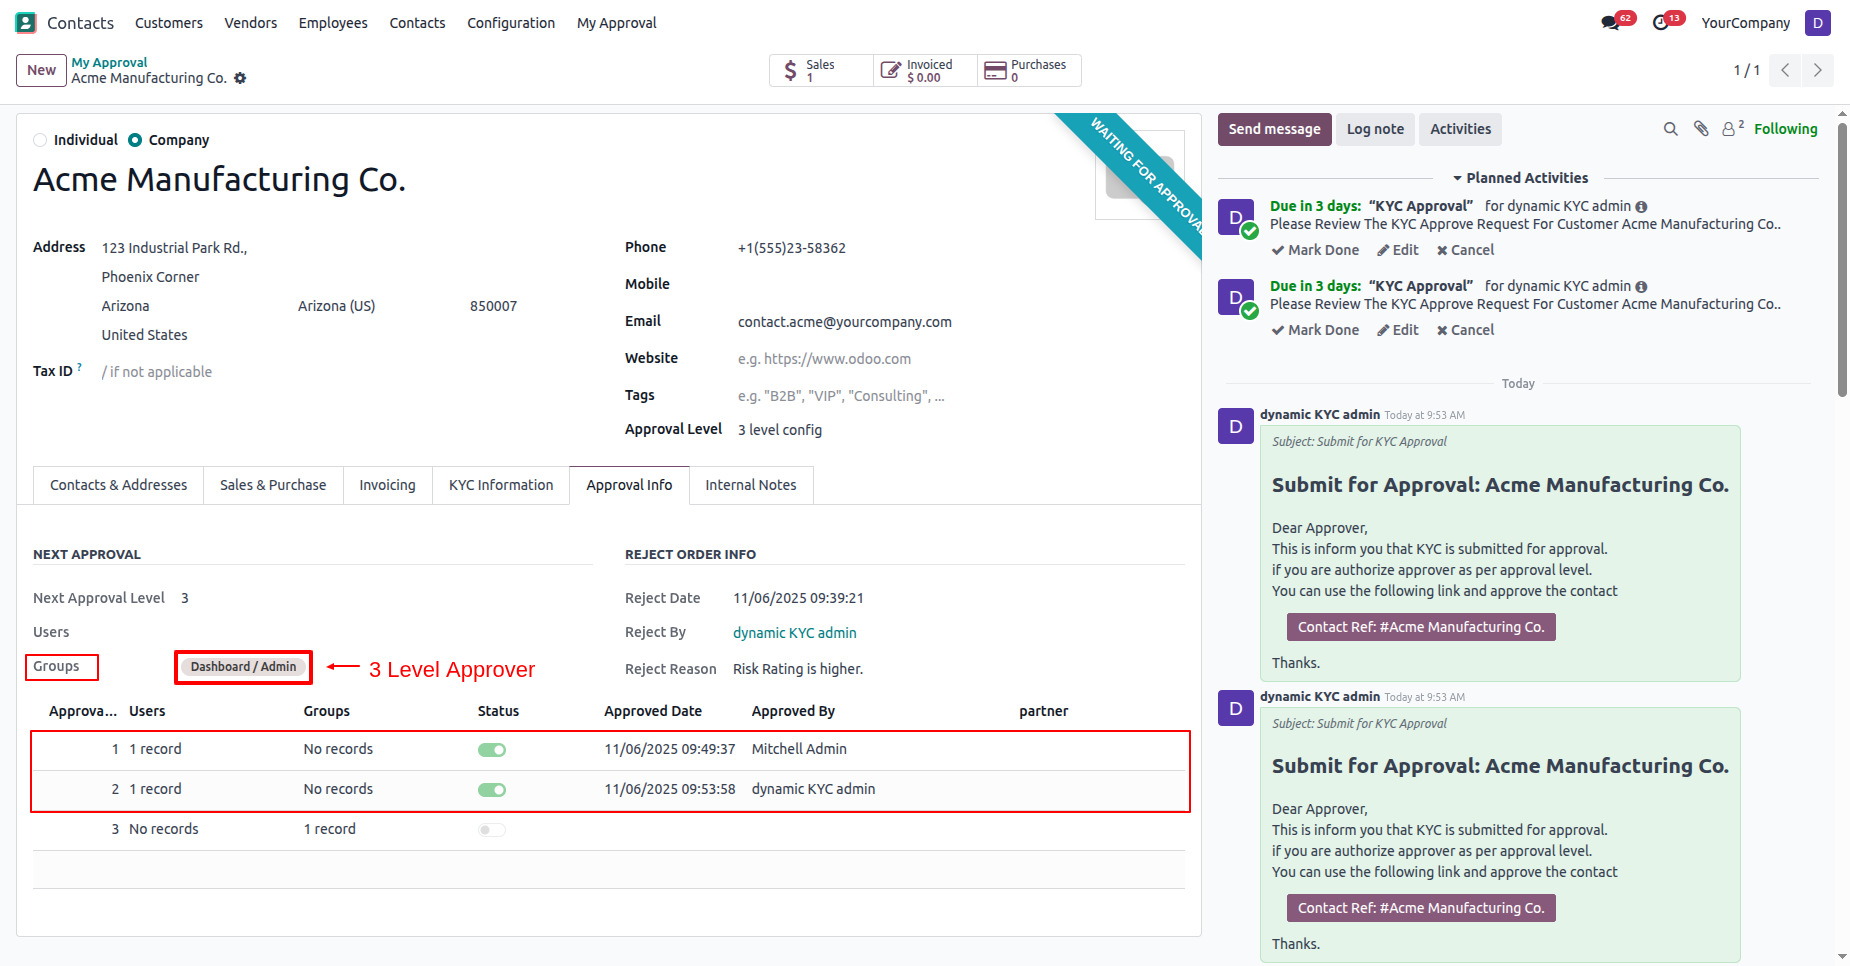
In the "Approval Info" tab, you can see that the approval information has been updated to the 3rd-level approval.
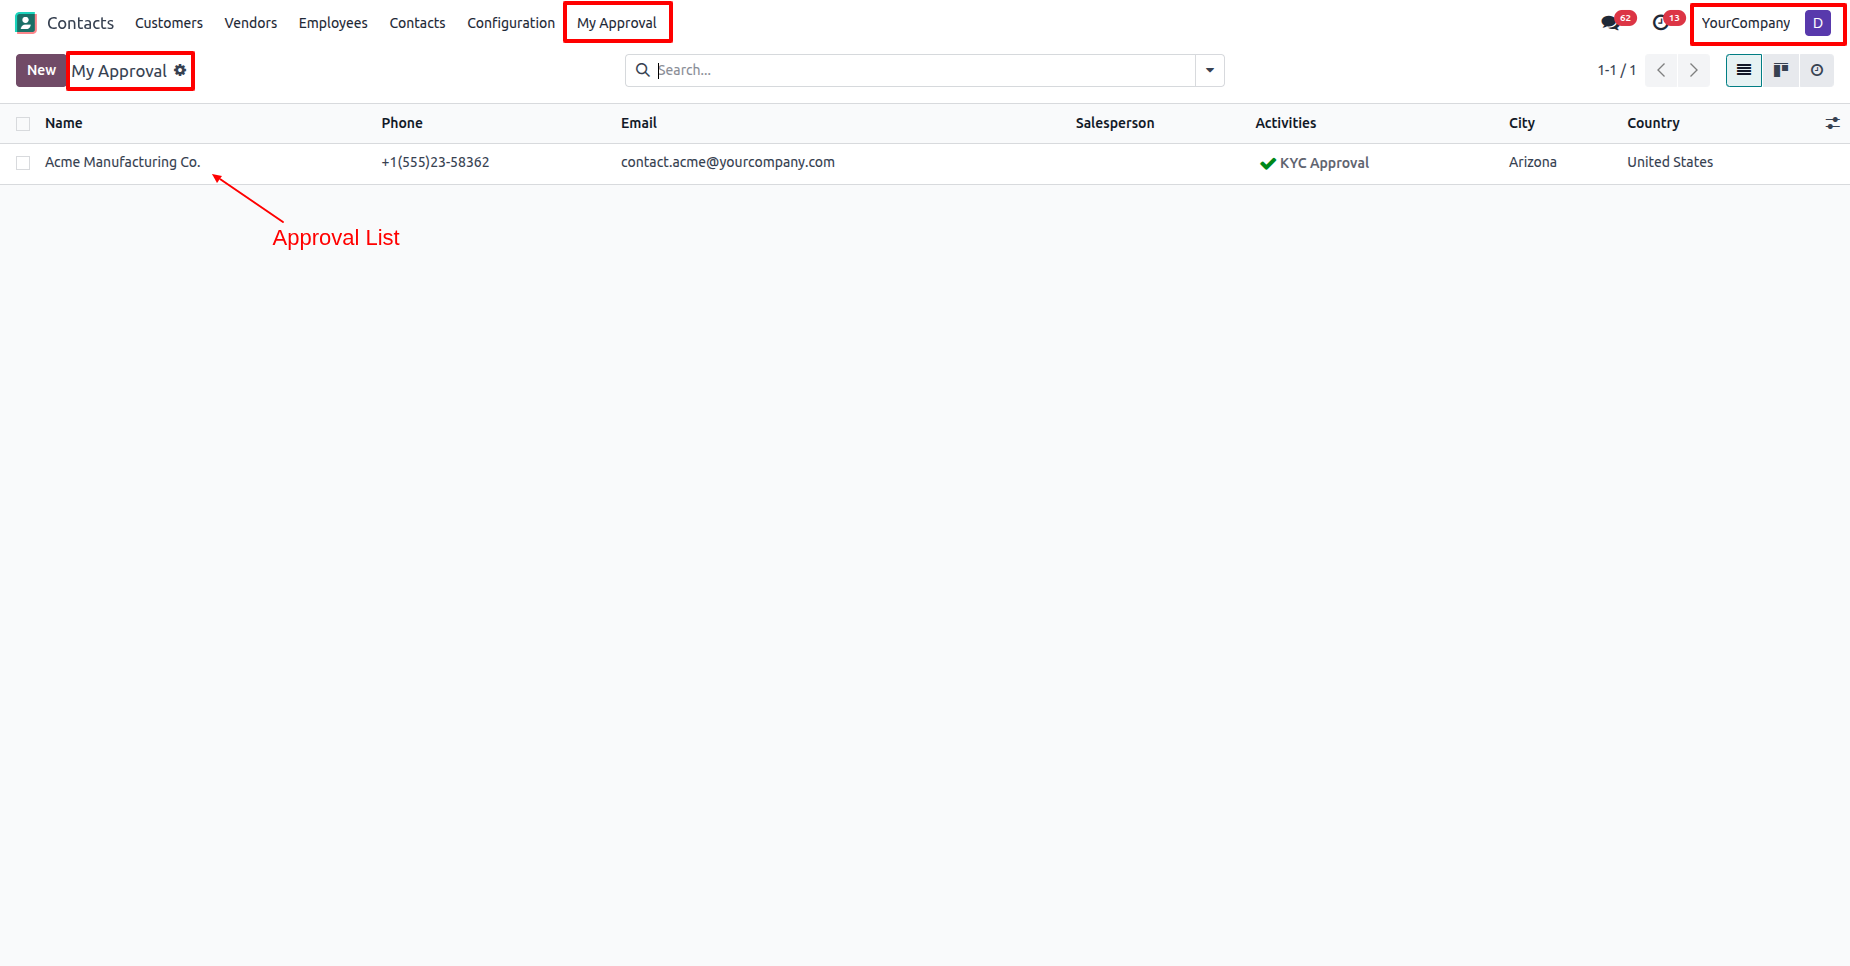
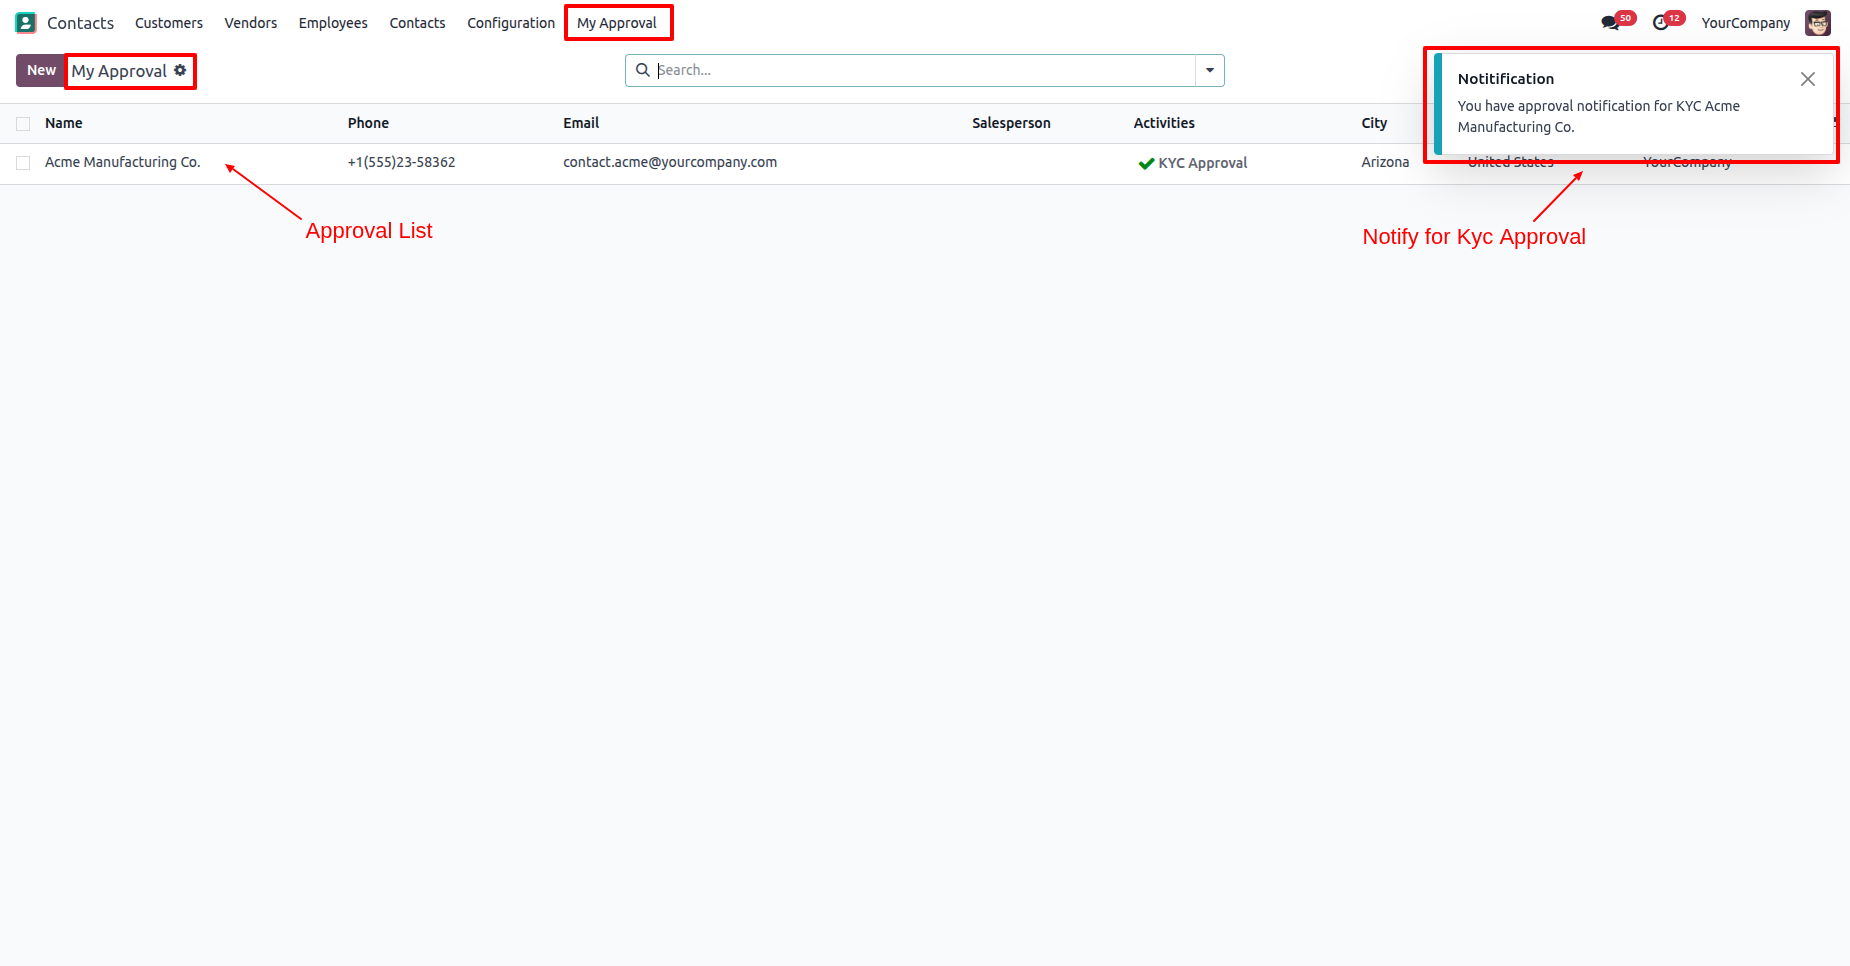
The approval user will receive an approval notification popup.
"My Approval" menu and list view.
In the "Approval Info" tab, you can see all the approval iformation.
The customers KYC status has changed to "Approved"
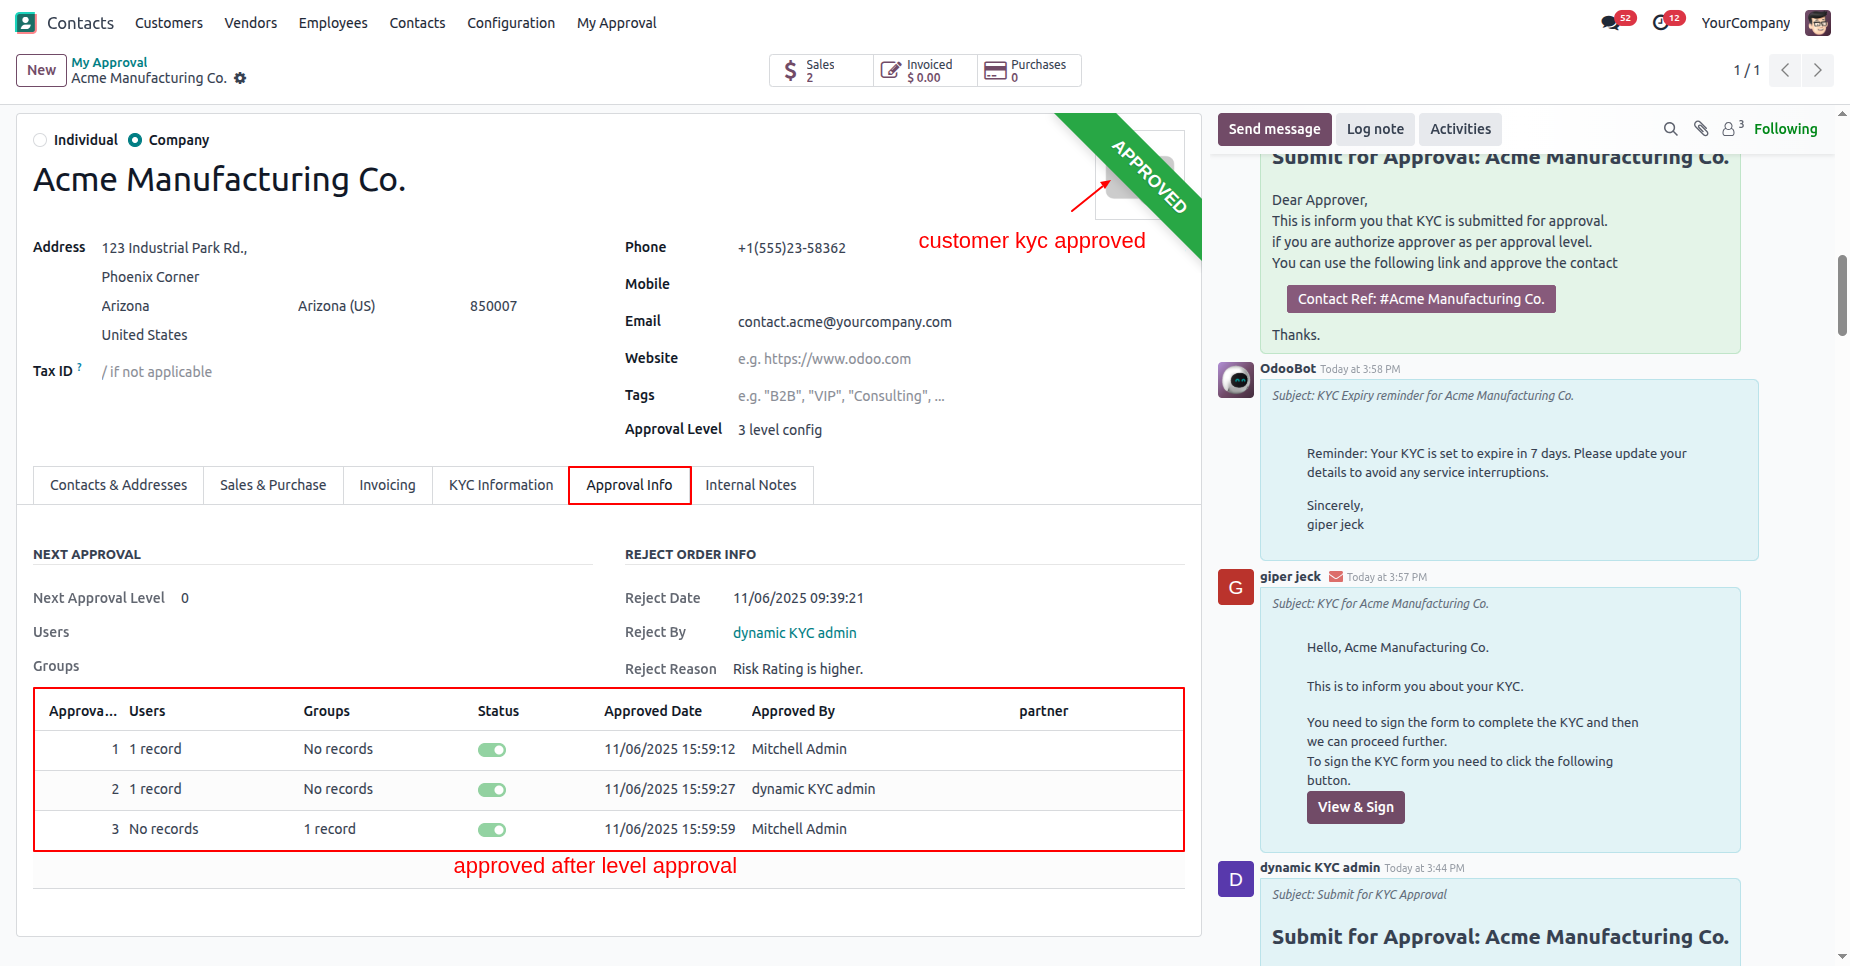
In the "KYC Information" tab, click on the "Send Customer KYC" button to send it for signature.
Click on the "Send" button.
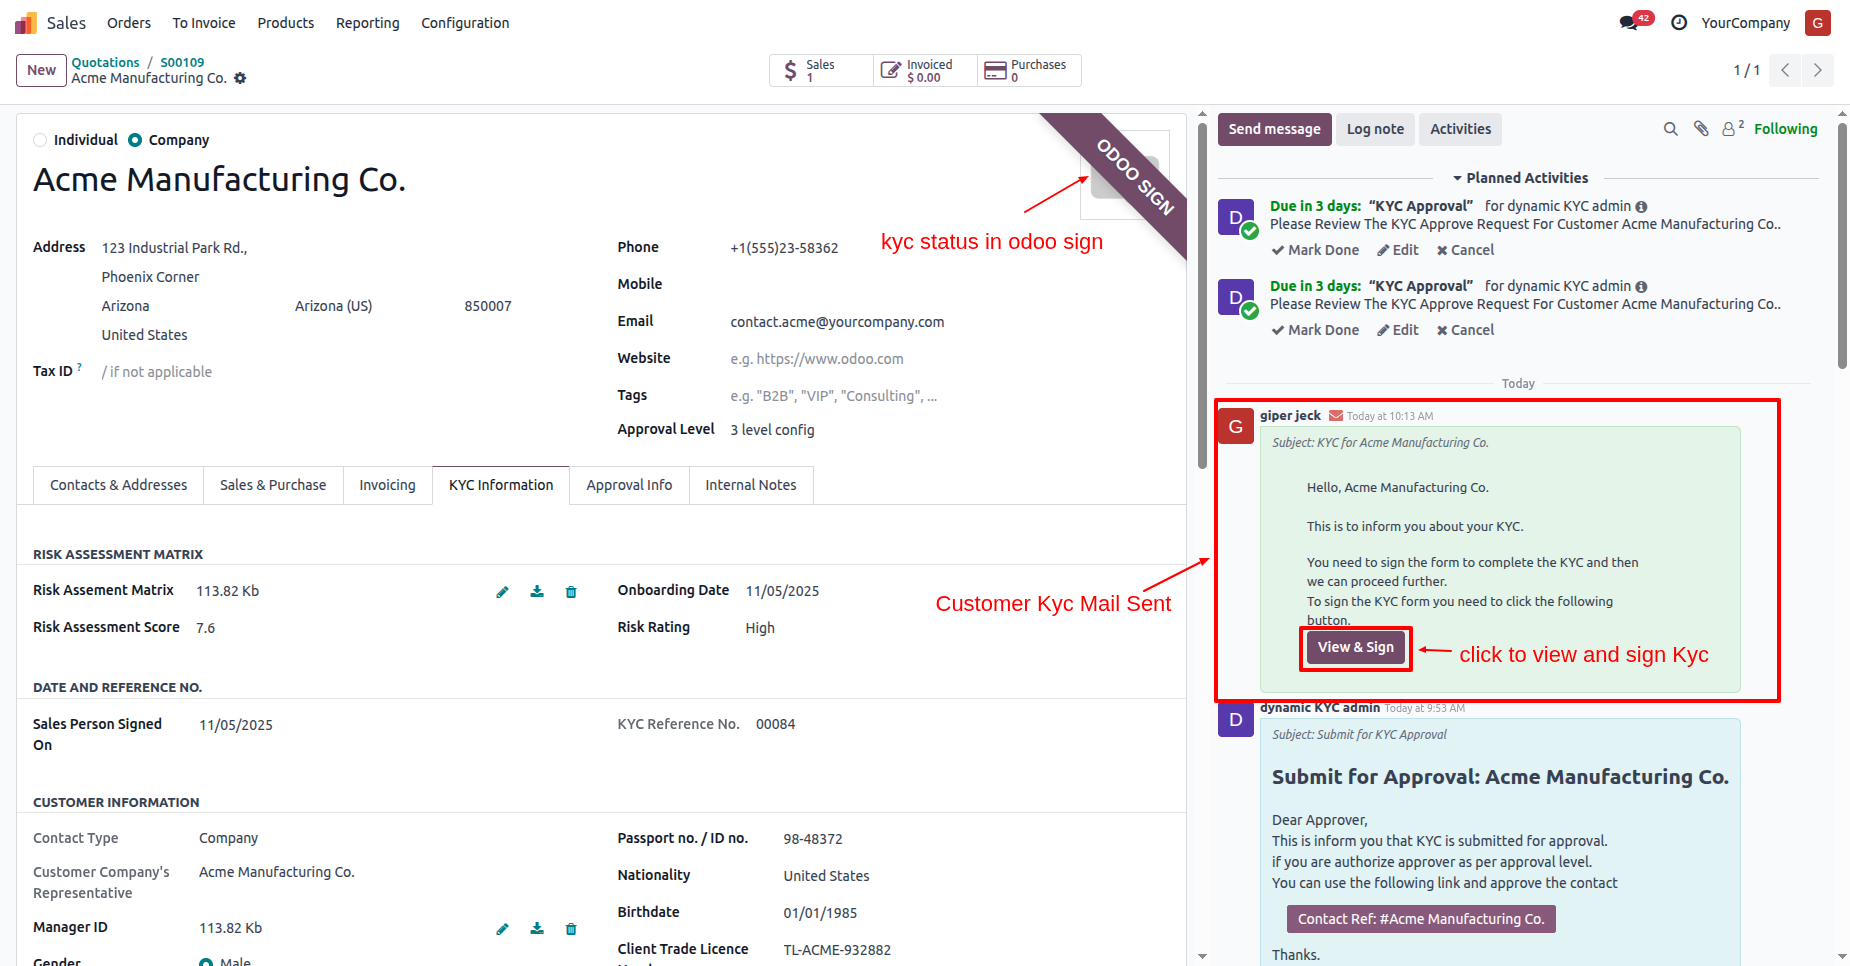
In the customer form view, you can see the kyc status is "Odoo
Sign".
Here you can see that the KYC has been resent to the customer.
Click on the "View & Sign" button.
Click on the "Accept & Sign" button.
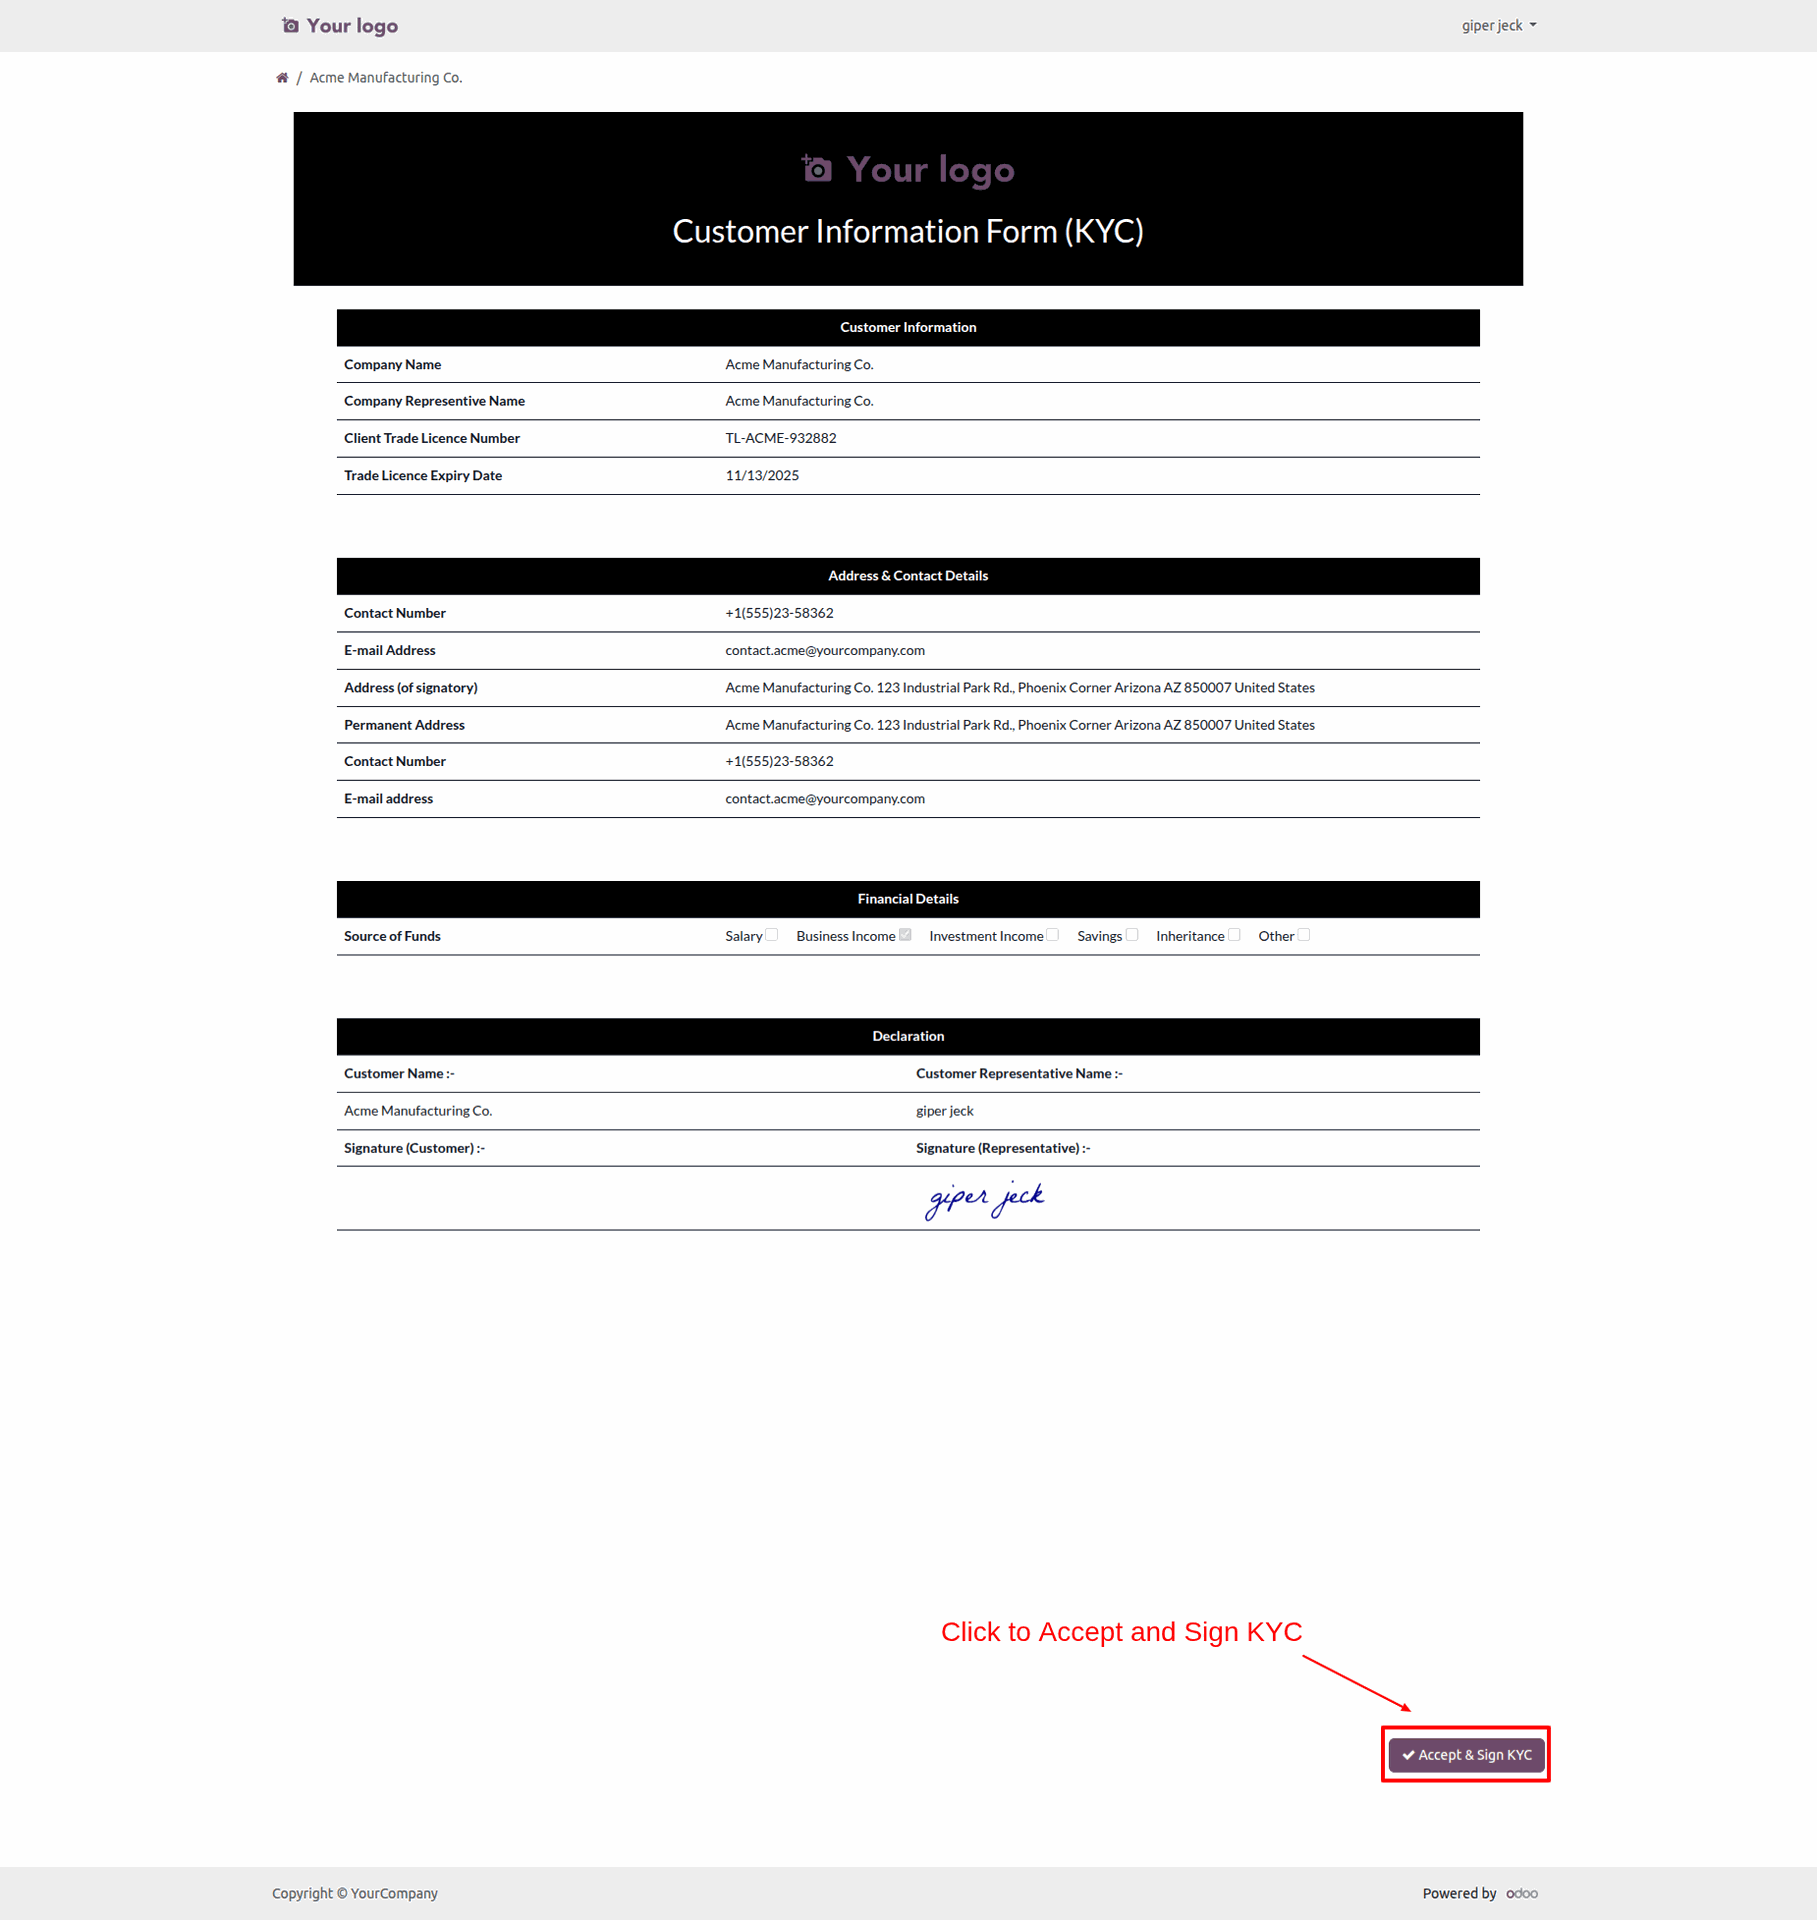
After that, the "Validate KYC" wizard will appear. Add a signature and click on the "Sign" button.
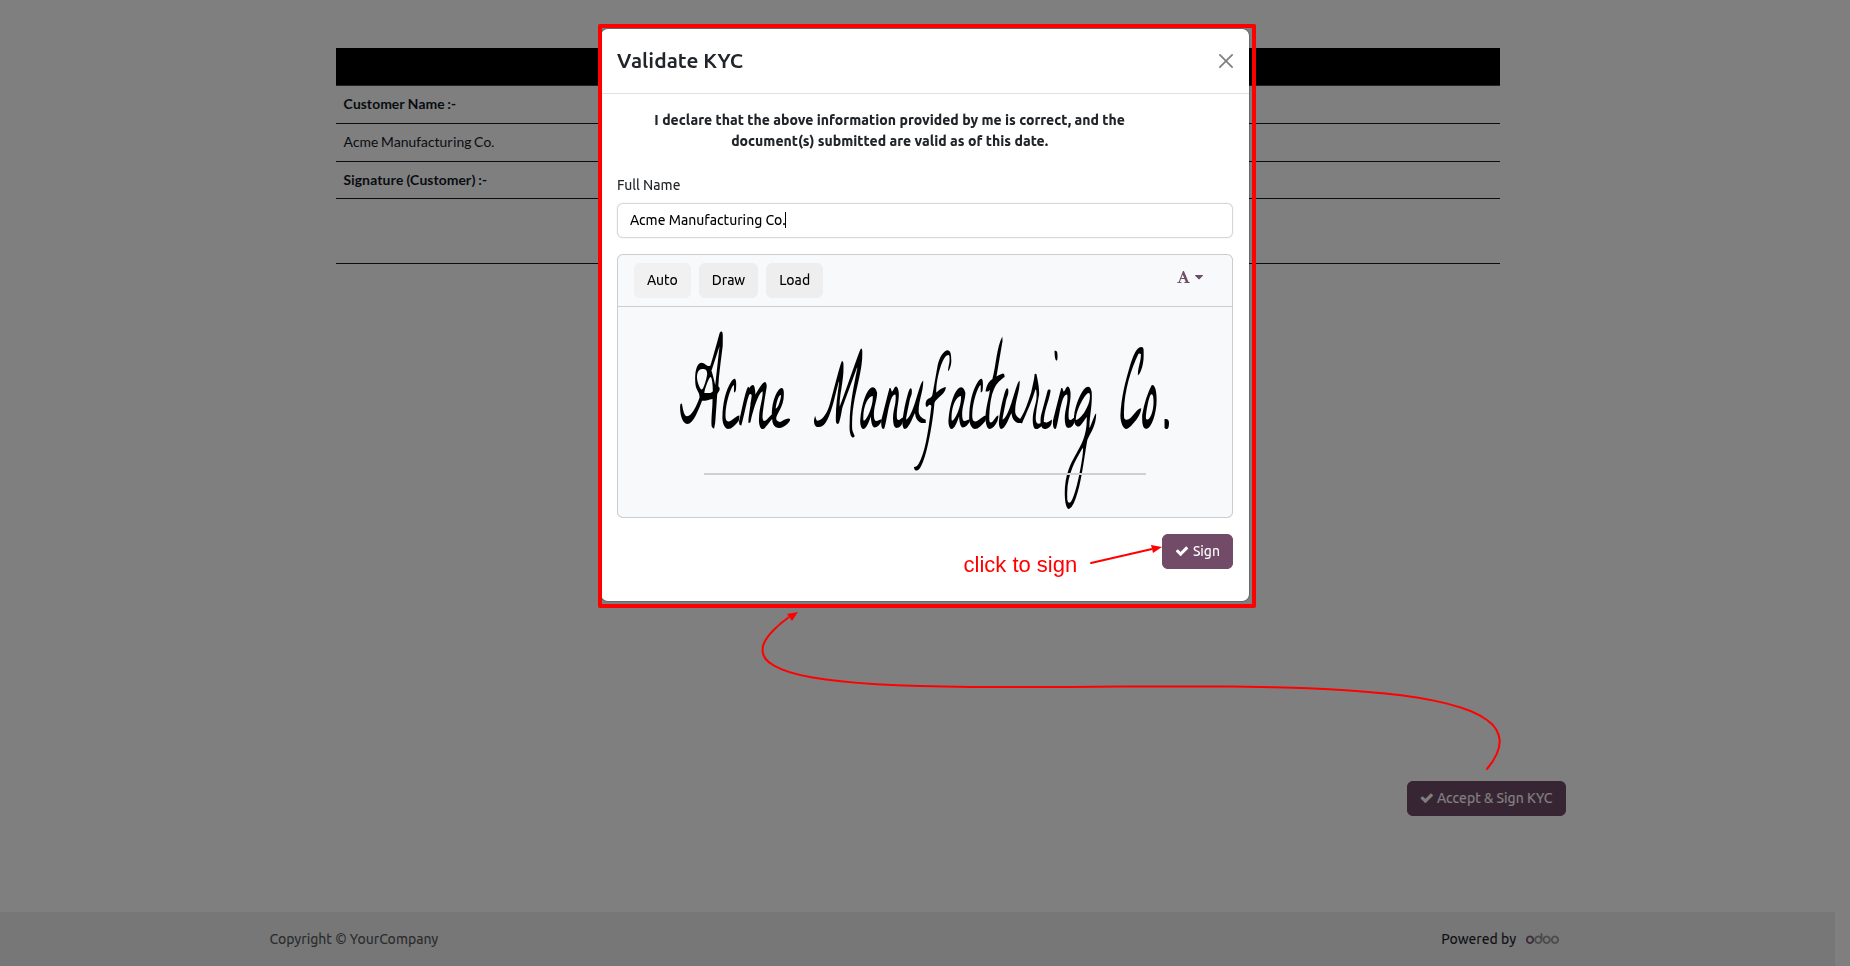
You can view the customers signature in the customer KYC.
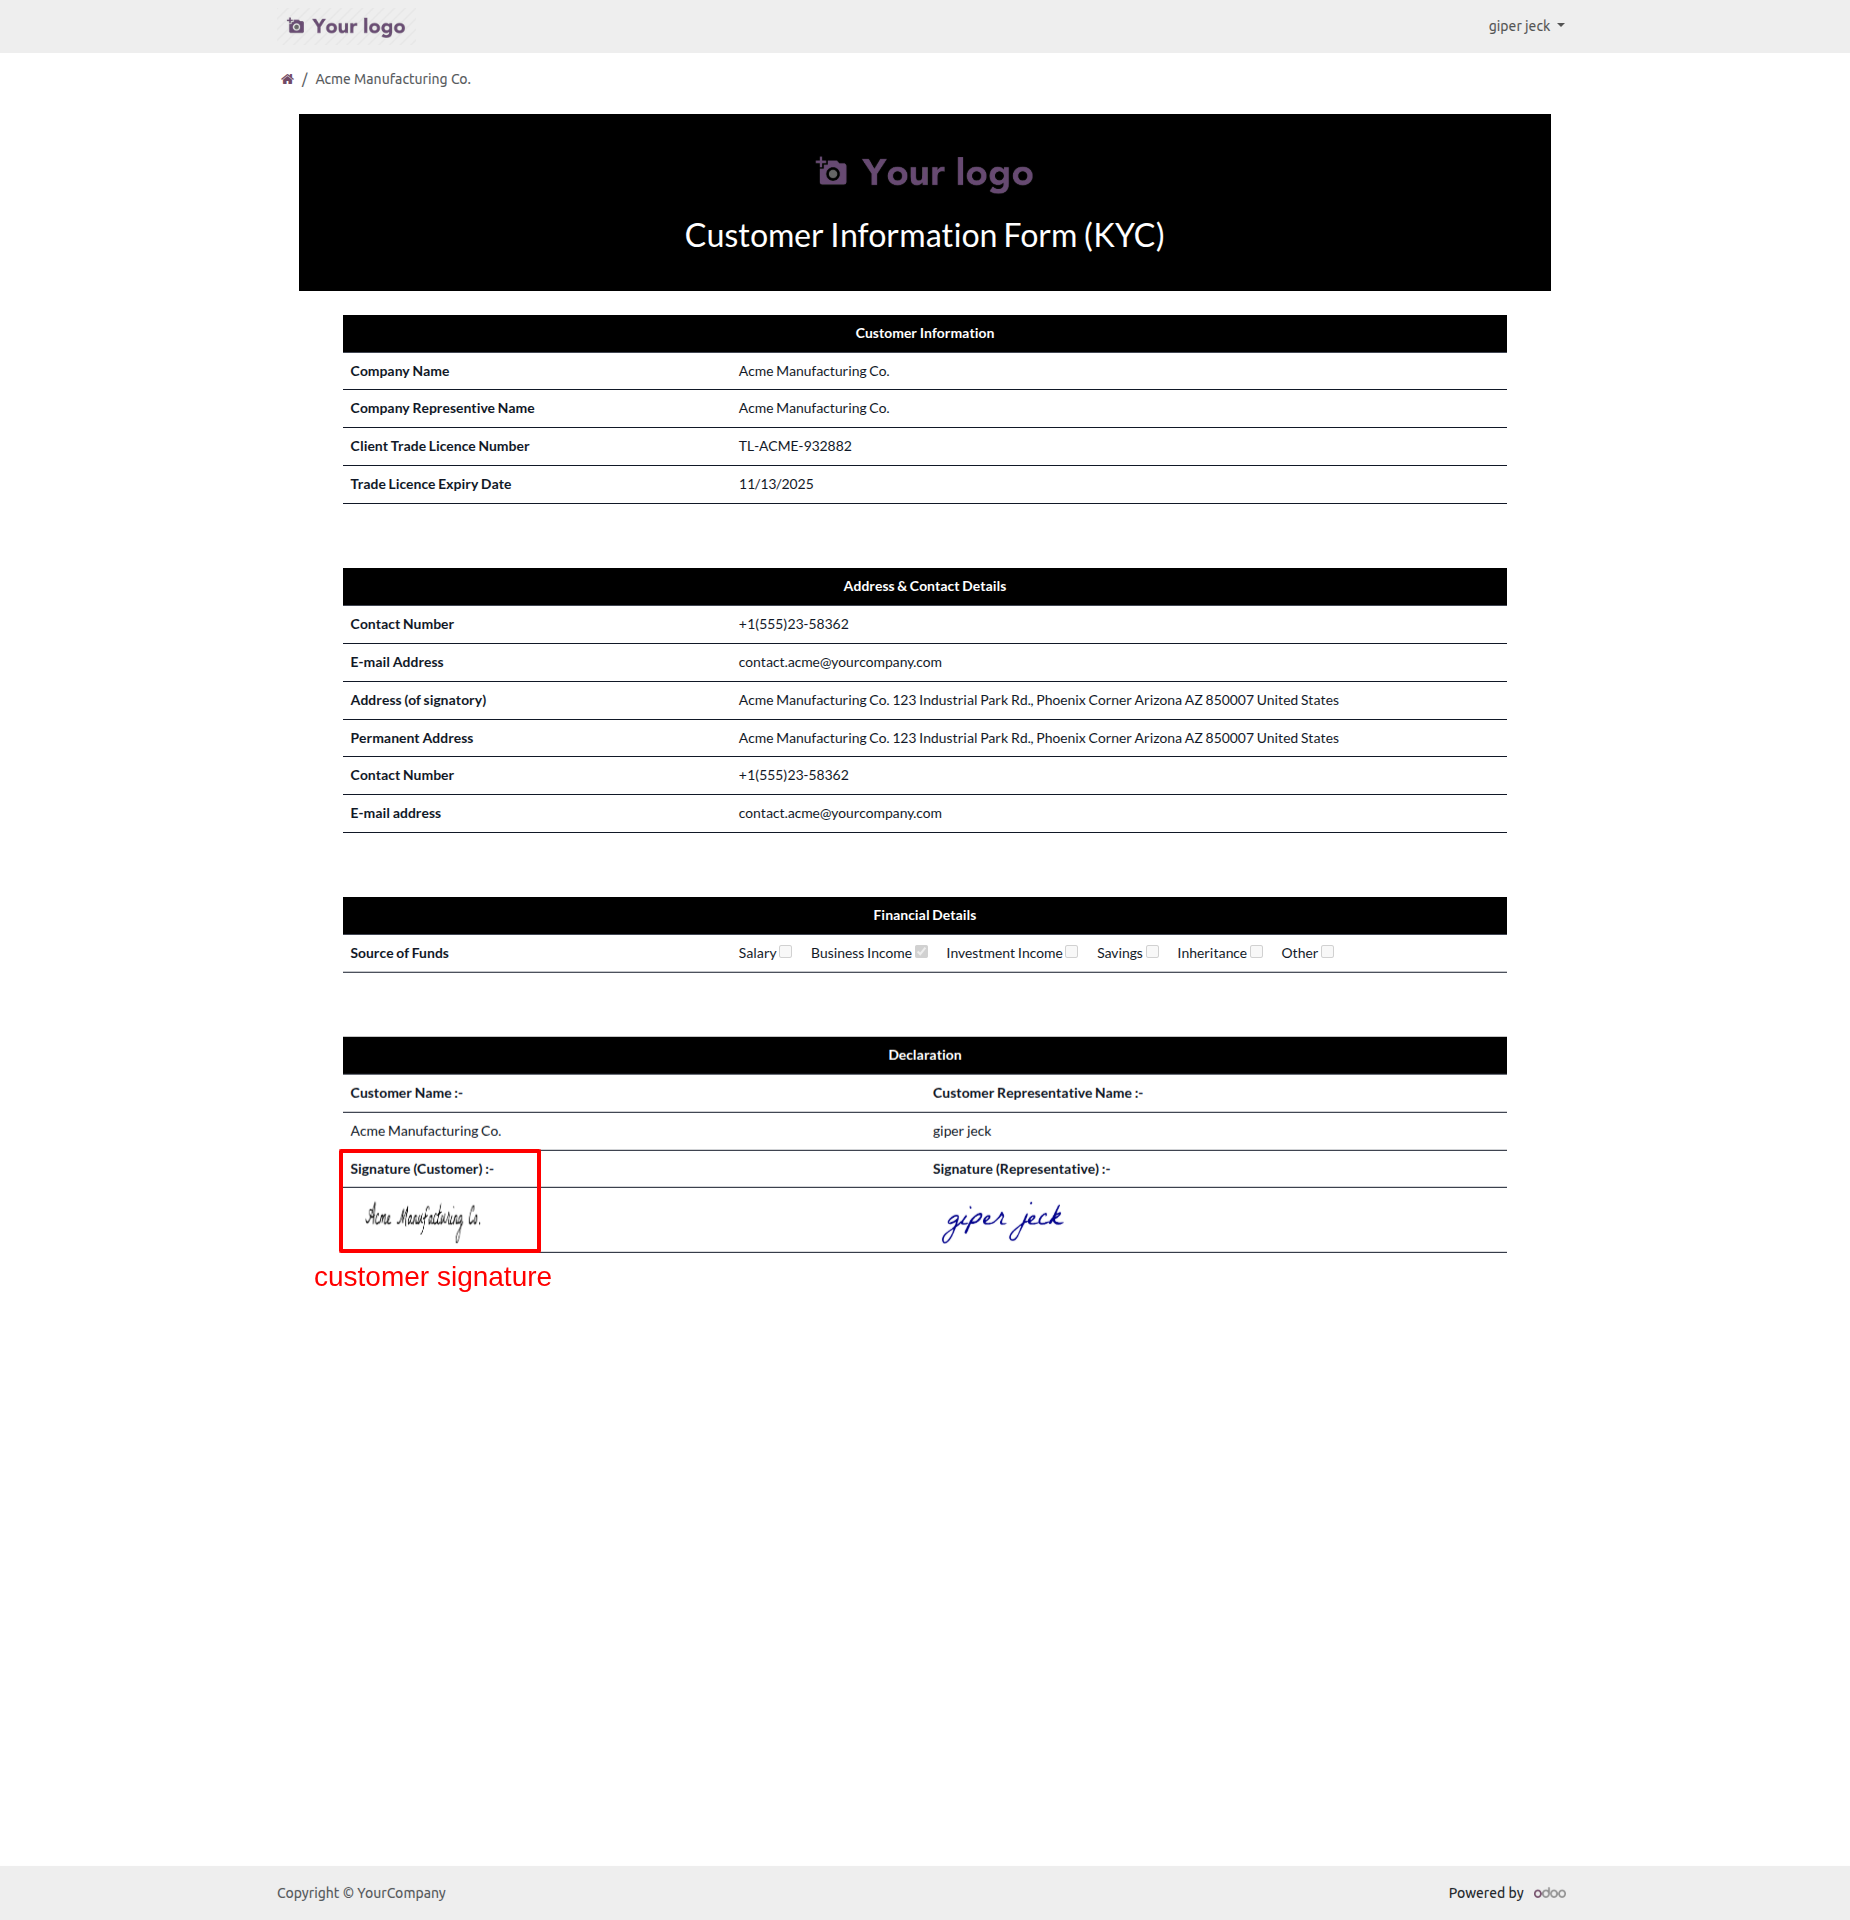
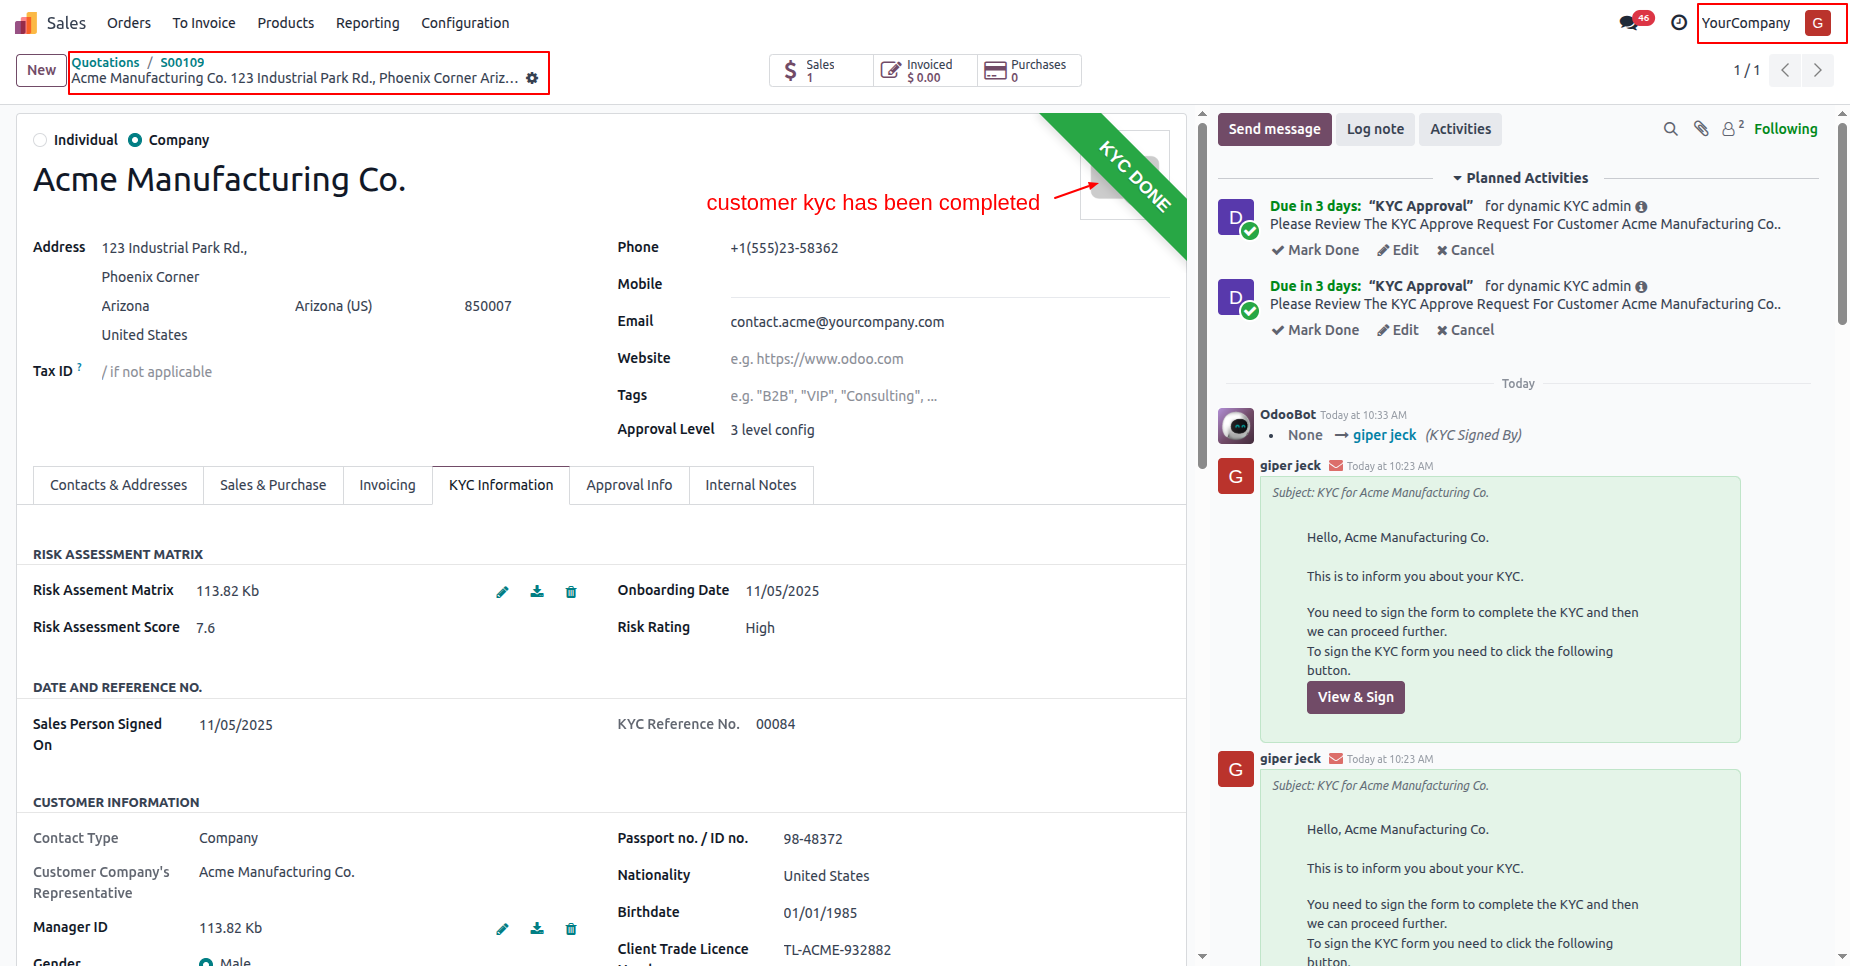
In the "KYC Infomation" tab, you can see all the approval
information.
The customers KYC status has changed to "KYC Done".
Confirm the quotation.
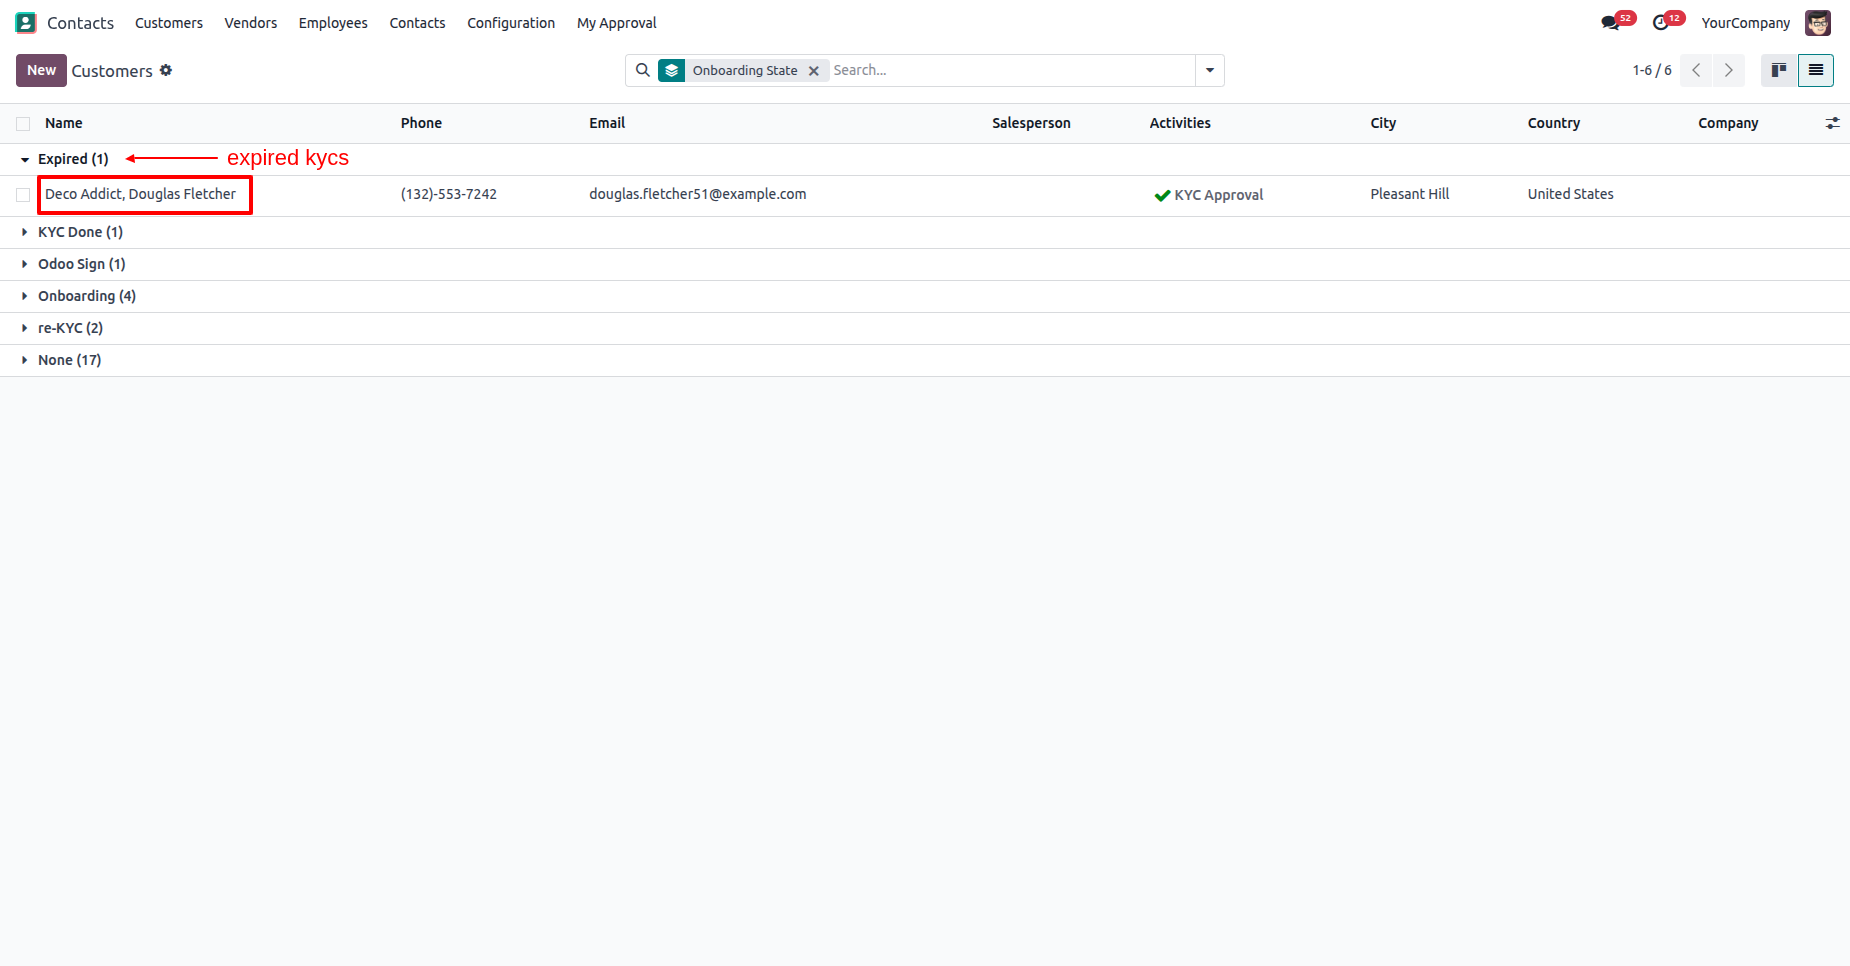
Here you can see the list of expired KYC.
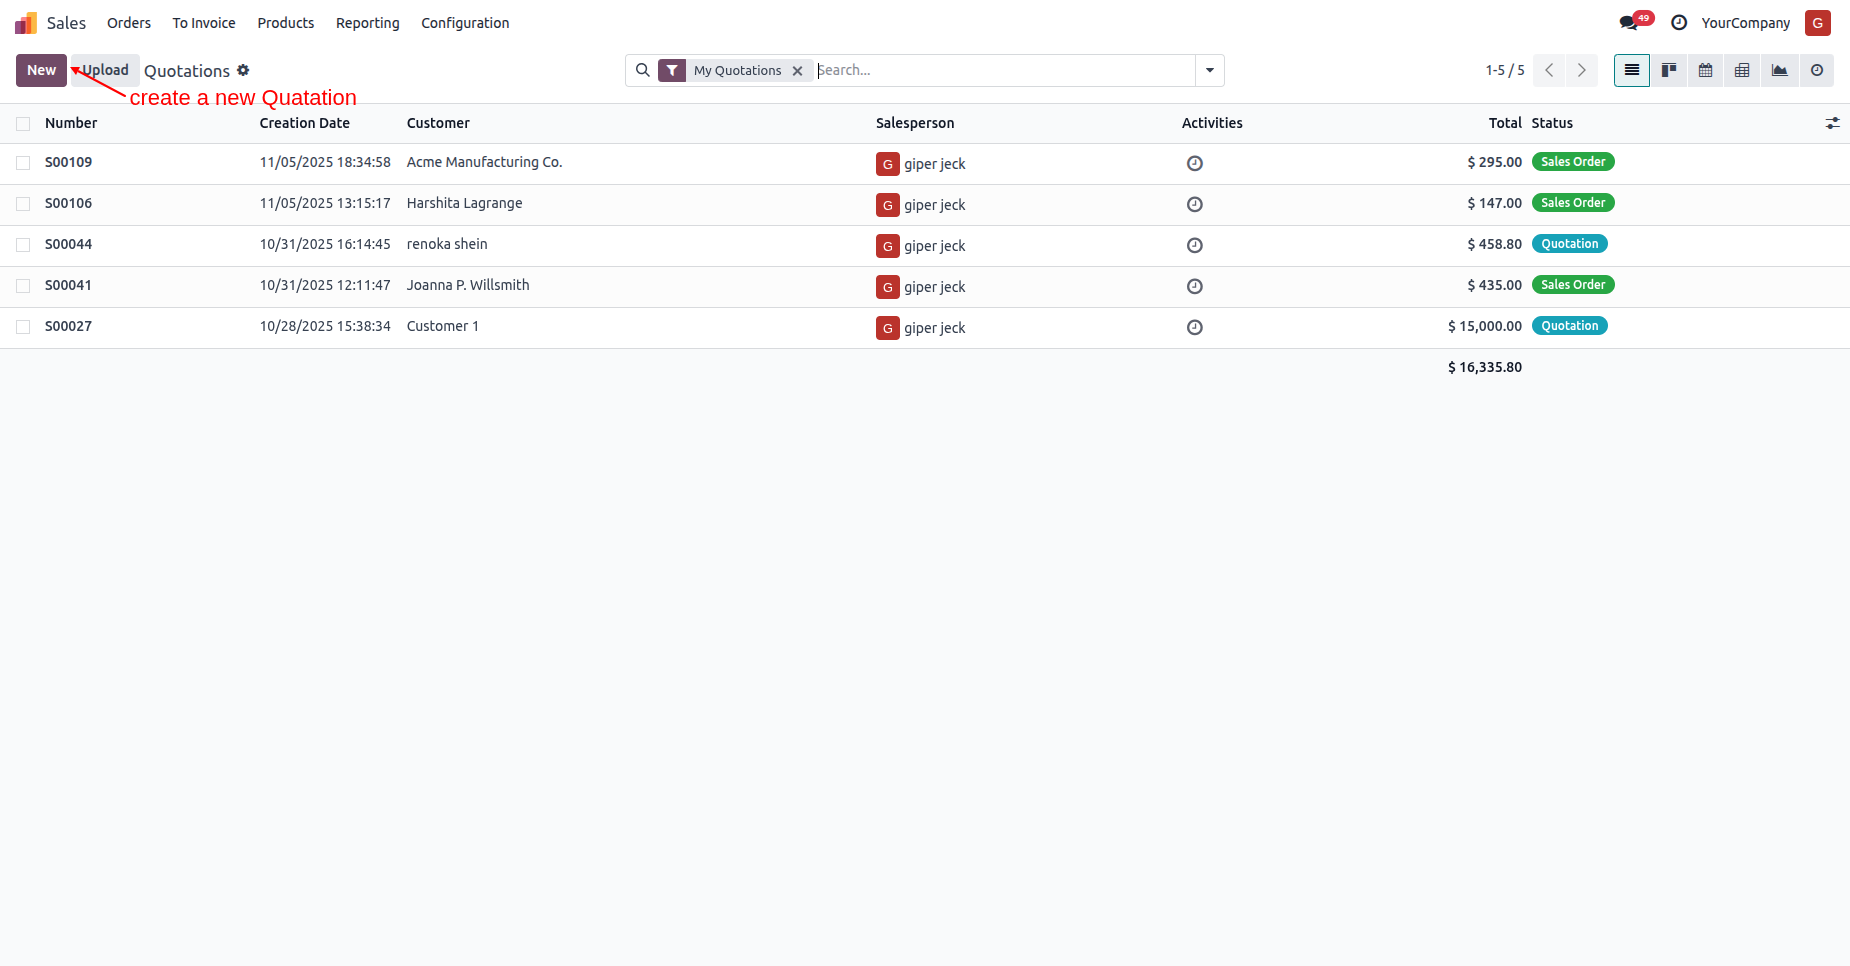
Create a quotation.
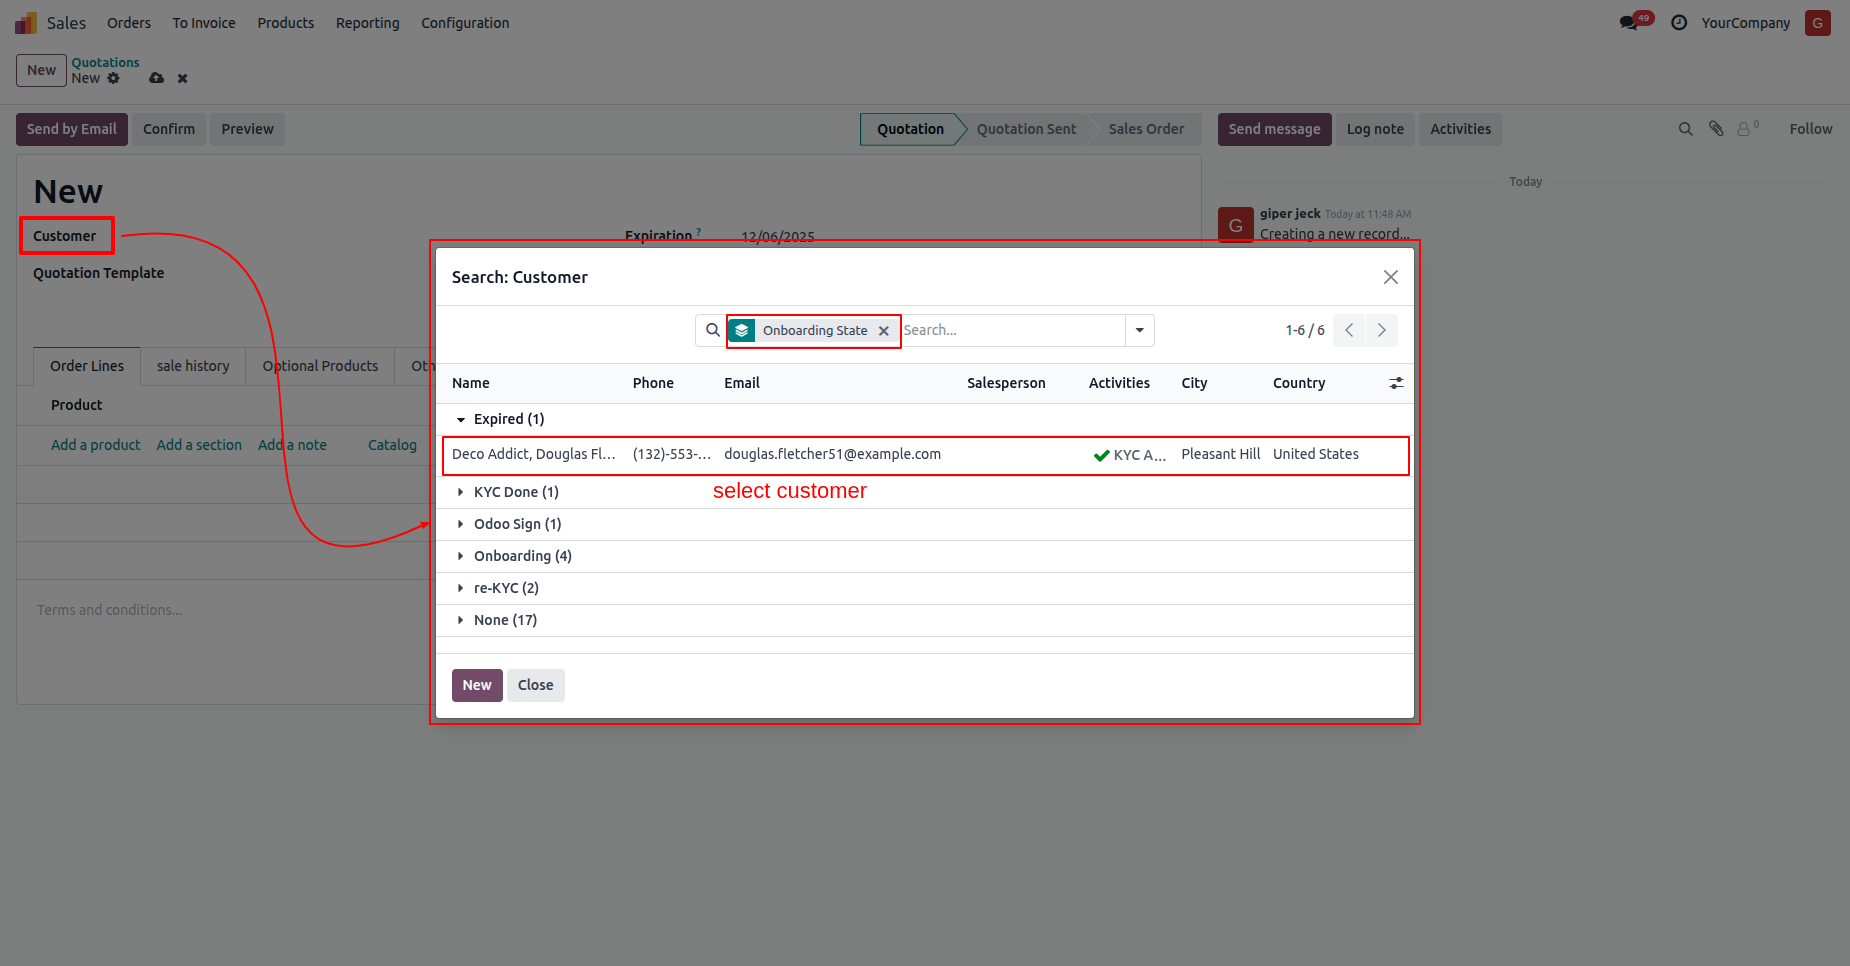
Select the customer who is in the "Expired" KYC stage.
Here you can see the KYC expired alert.
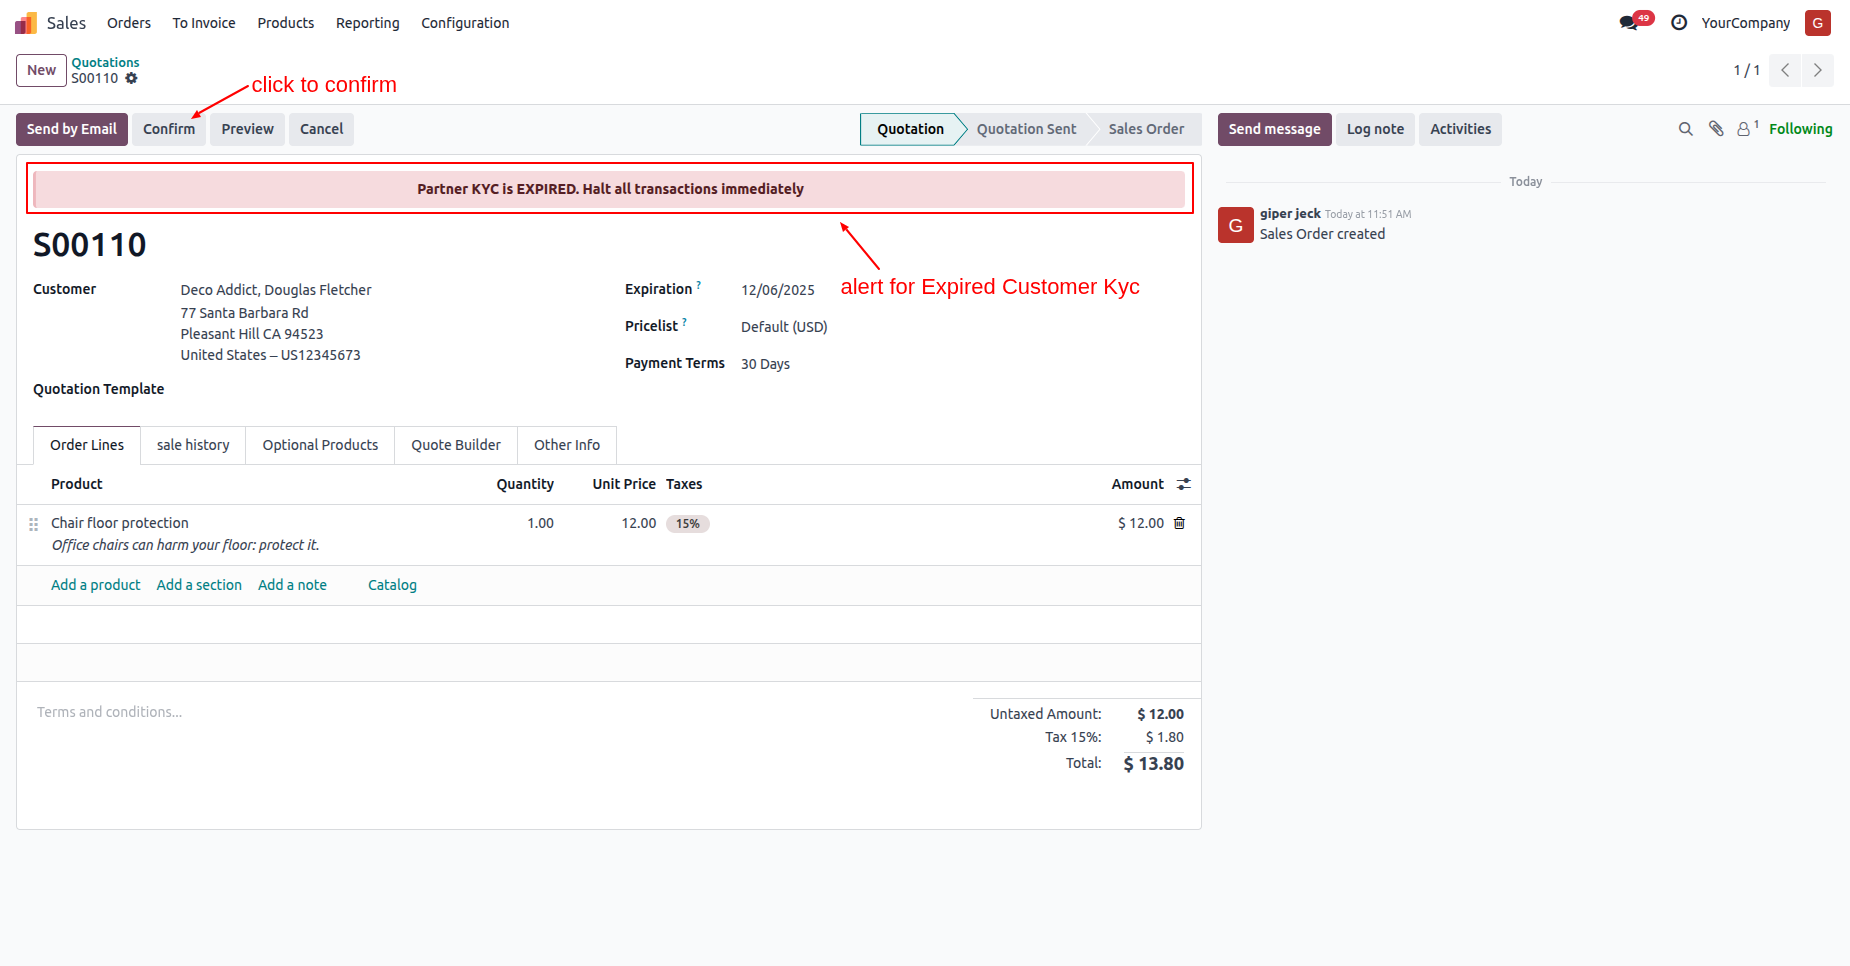
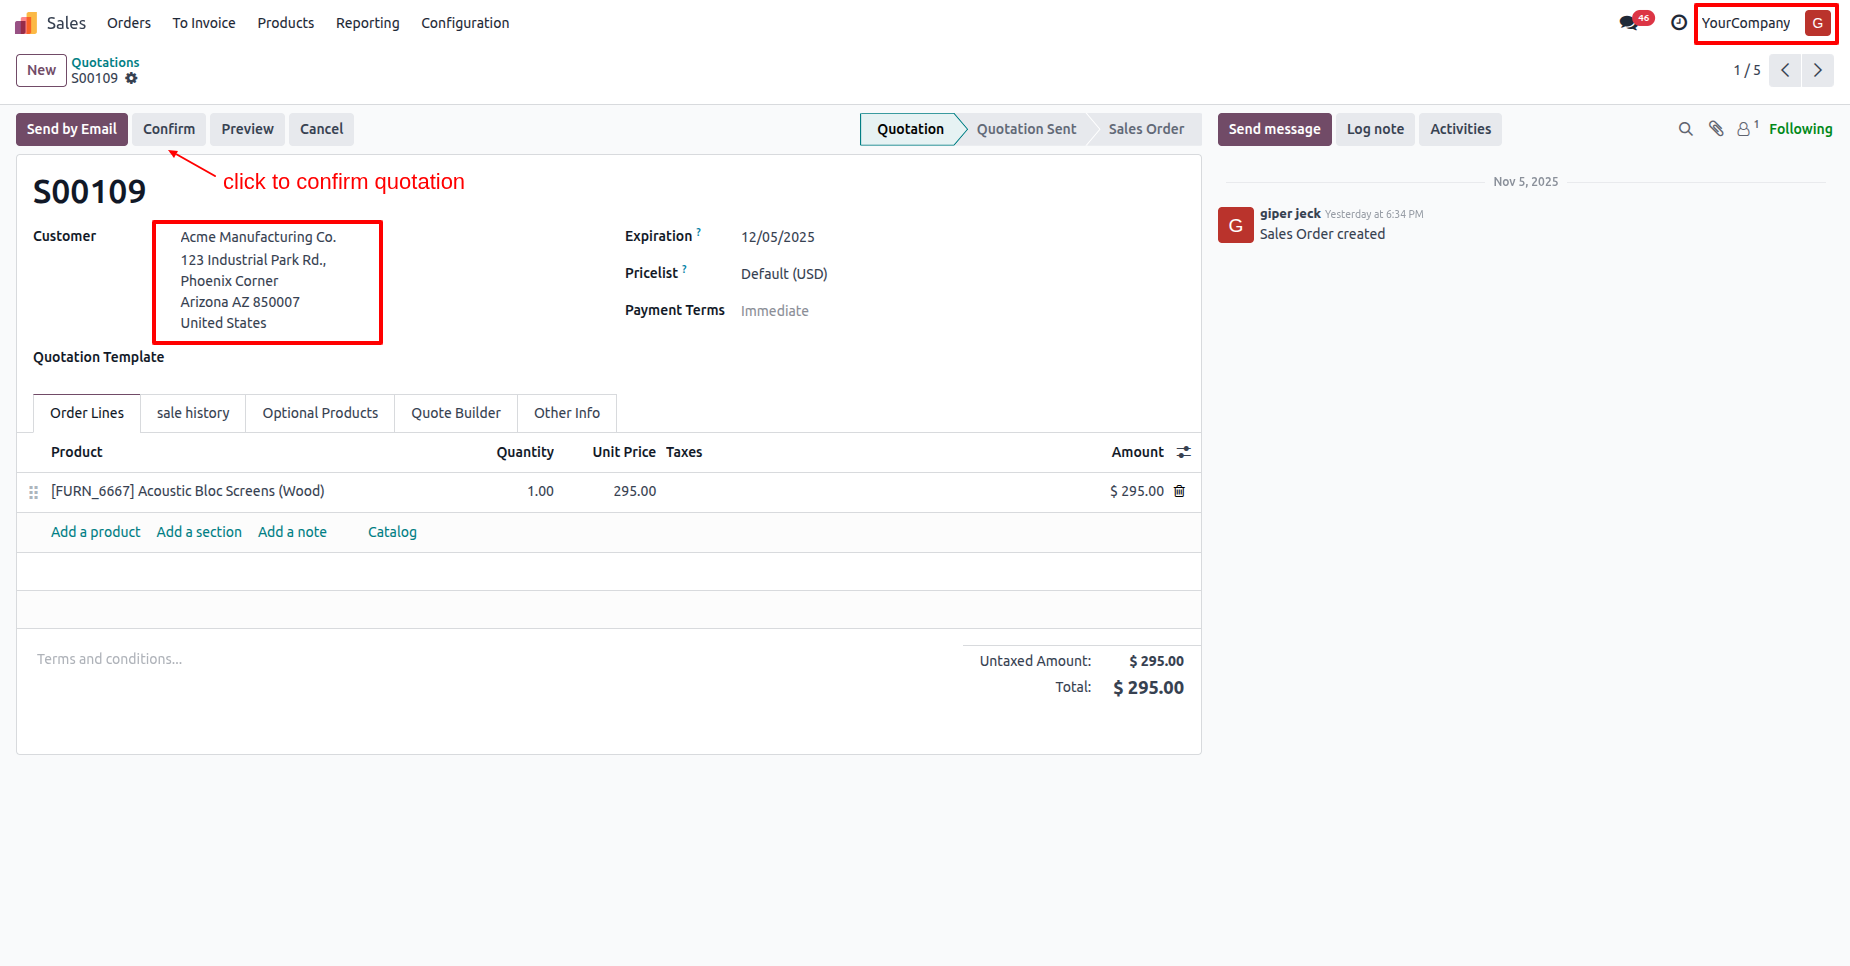
Click on the "Confirm" buttom.
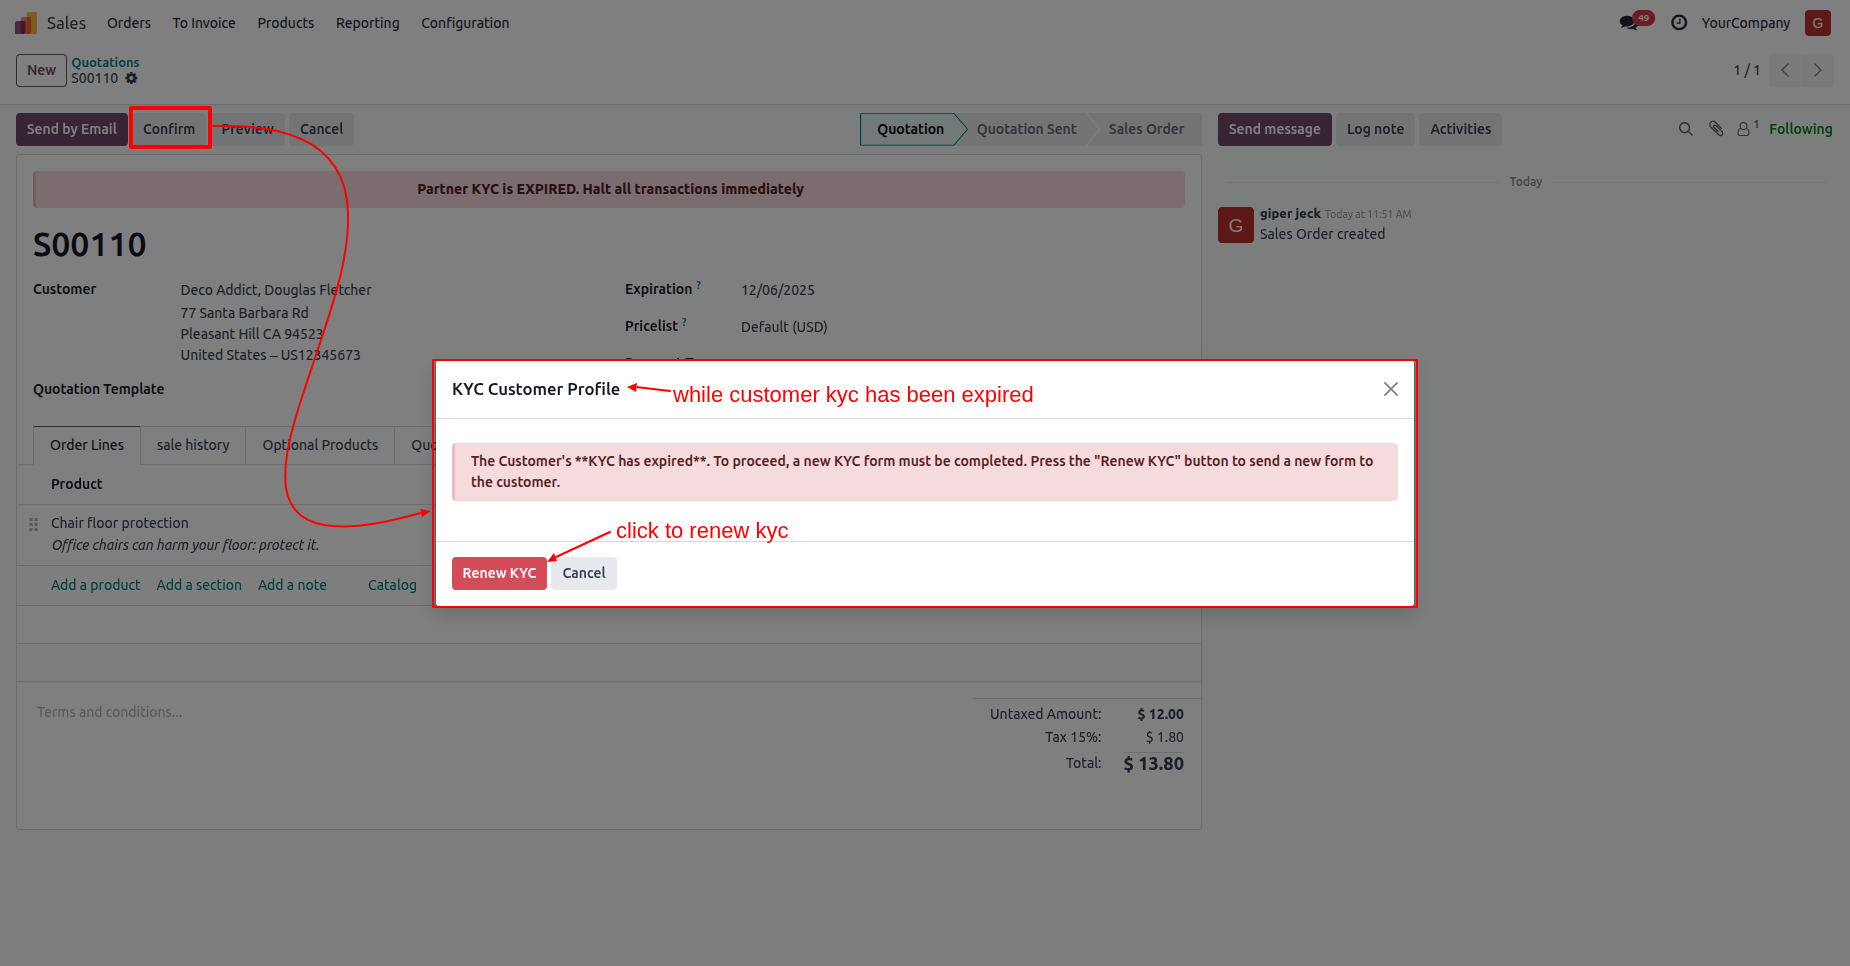
This warning popup will appear if the customers KYC has expired.
Click on the "Renew KYC" button.
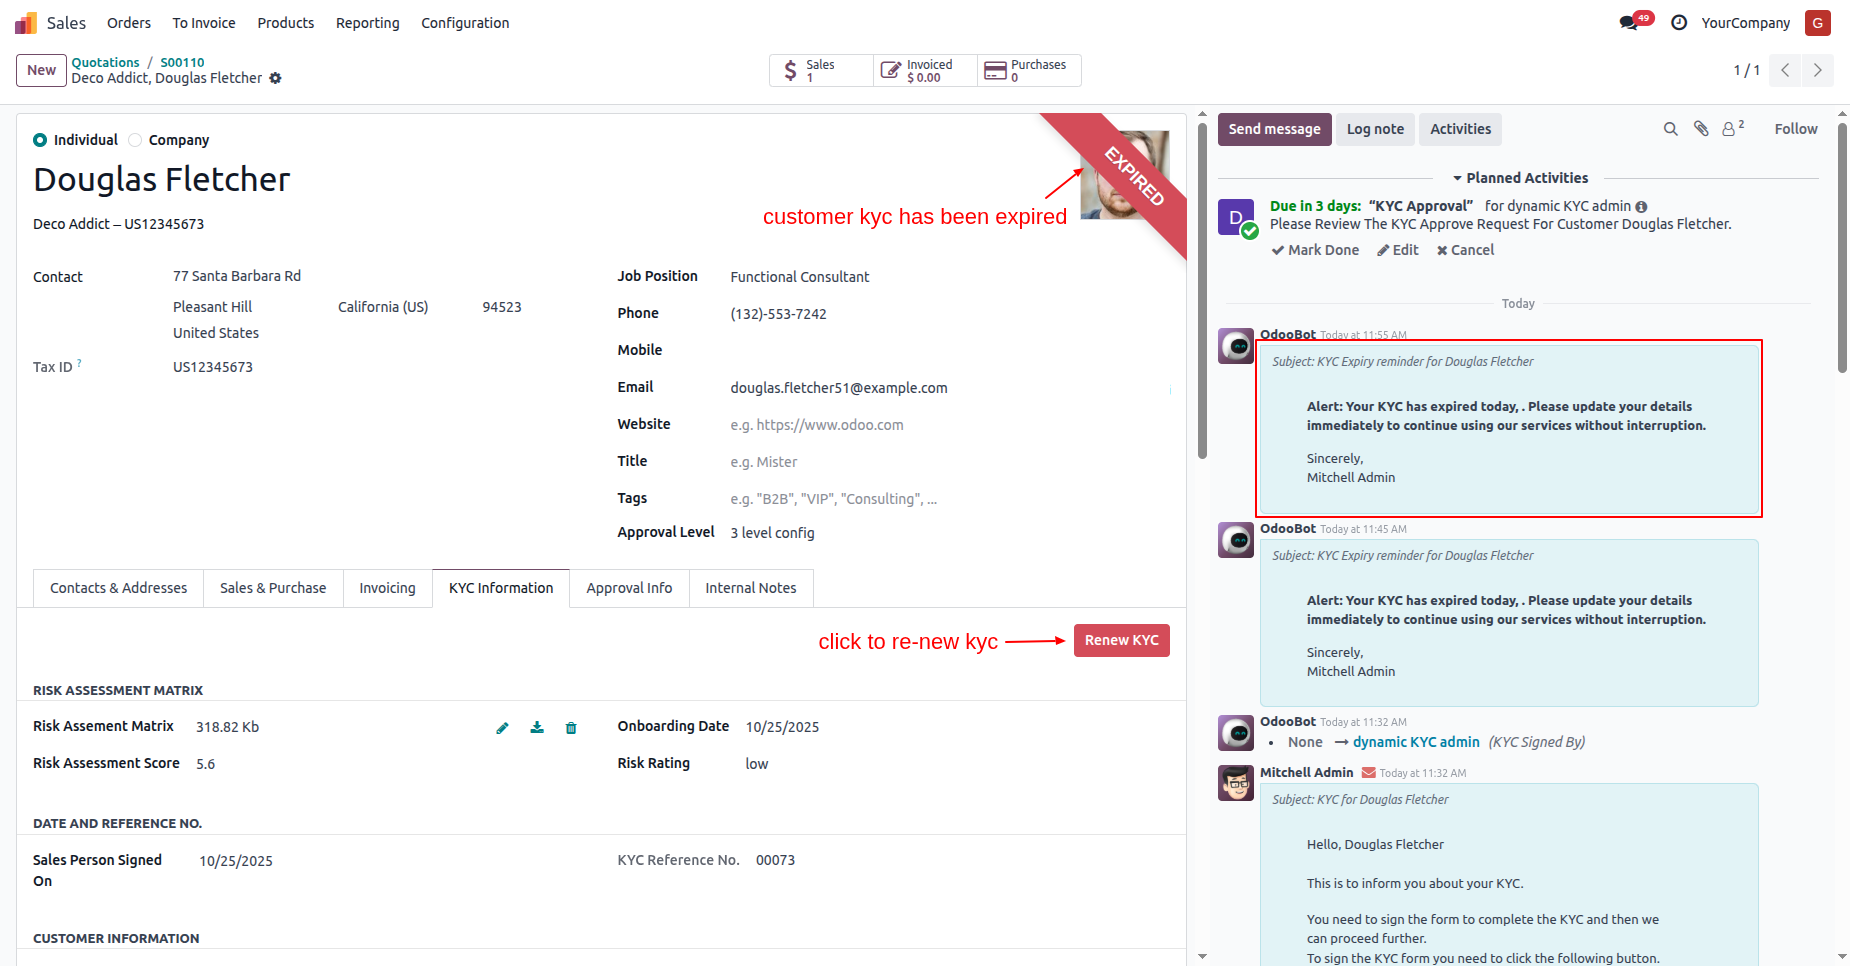
The customers KYC status is "Expired".
In the "KYC Infomation" tab, click on the "Renew KYC" button.
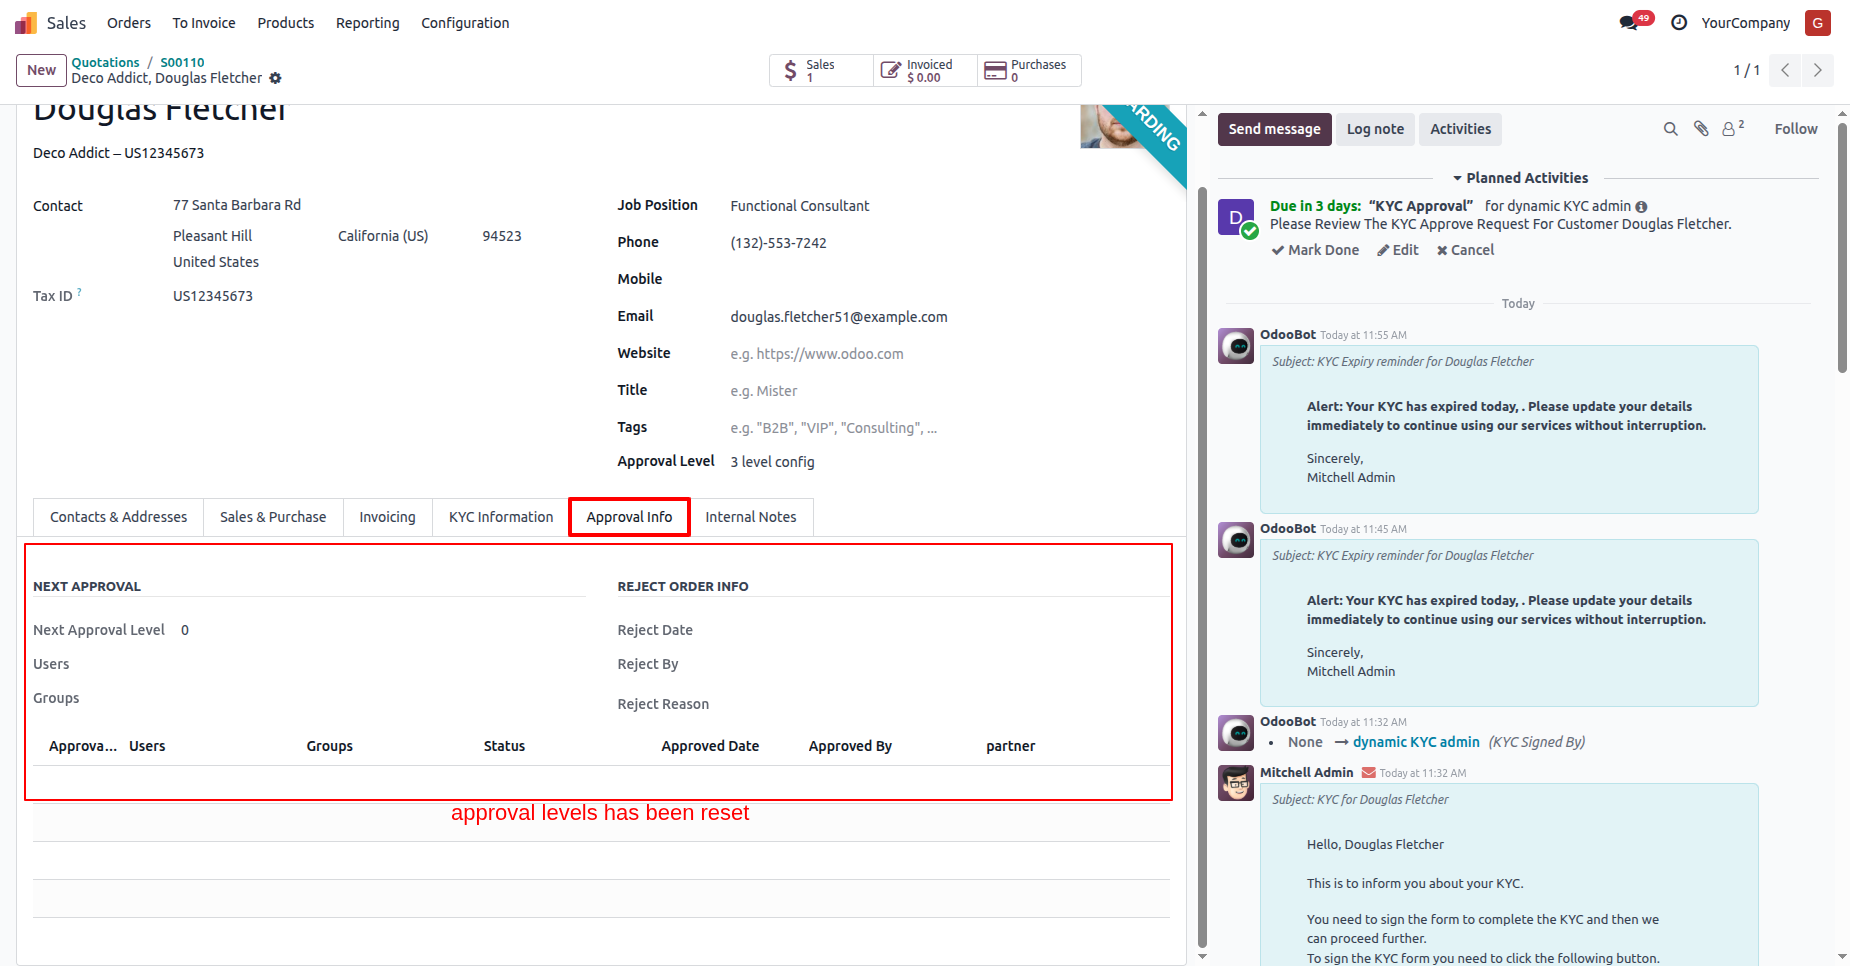
In the "Approval Info" tab, the KYC approval level has been reset.
Here you can see that the old signature has been removed.
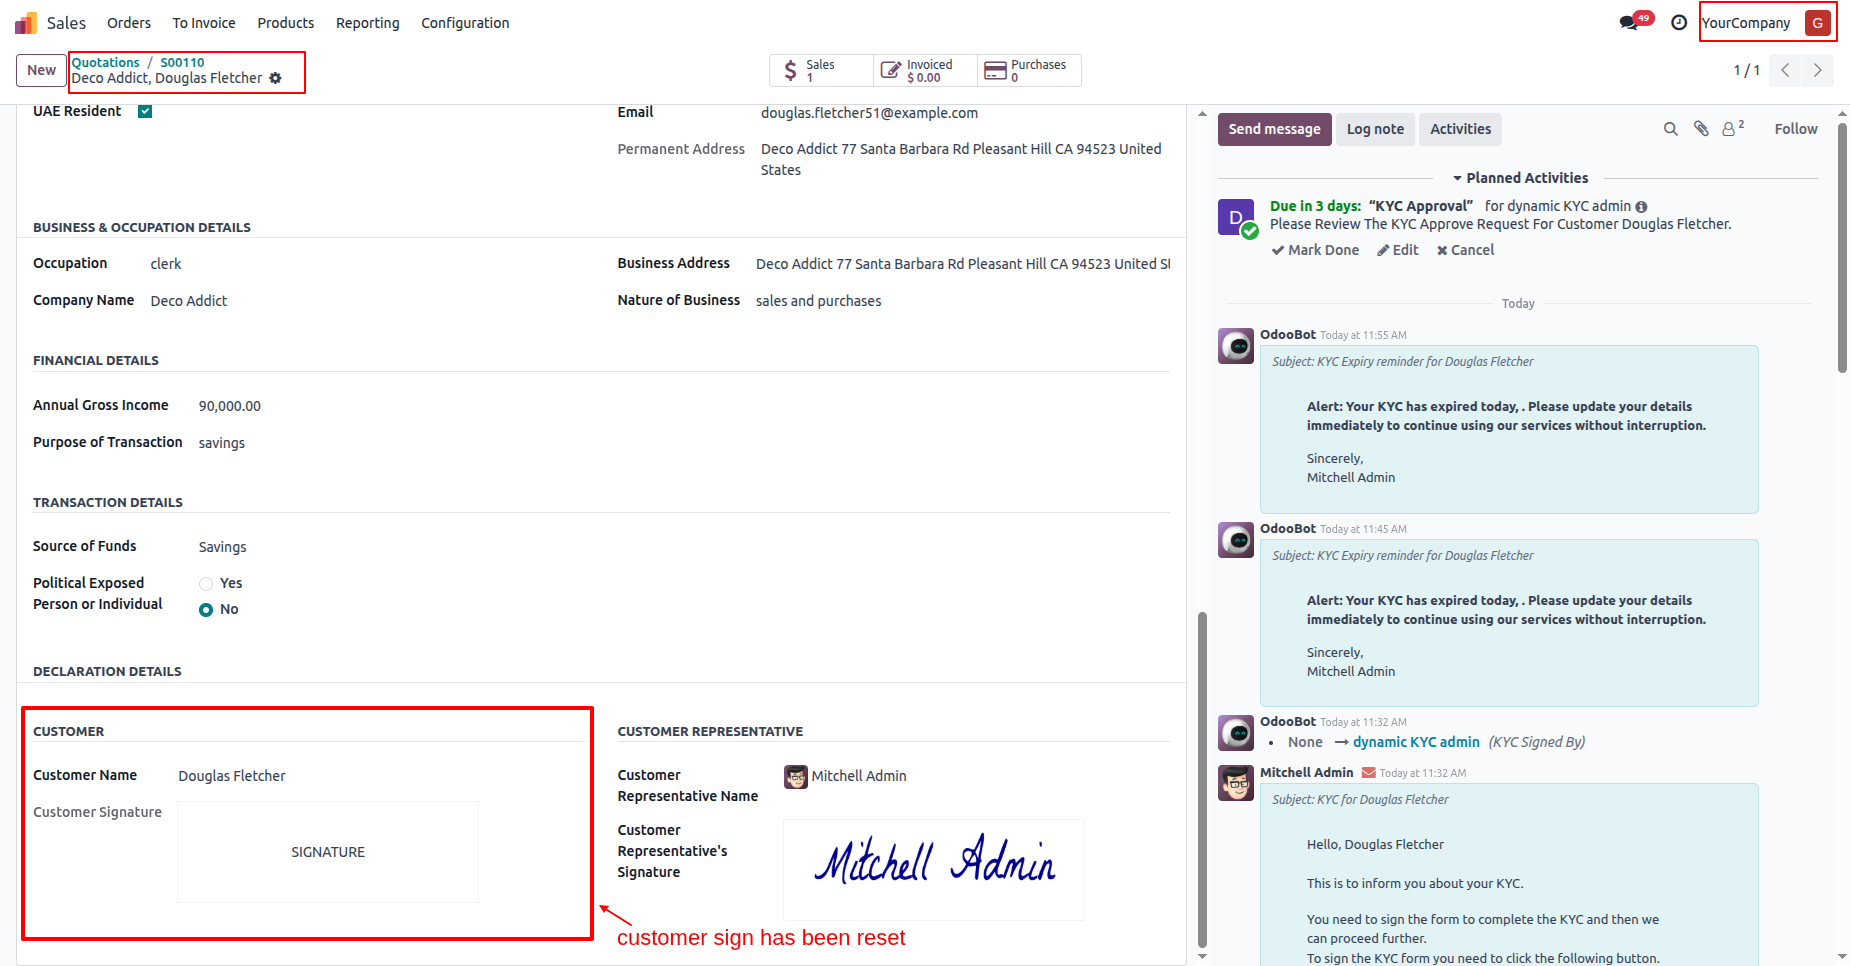
Here you can see that the customers KYC status is "Onboarding".
In the "KYC Information" tab, click on the "Send For Approval"
button.
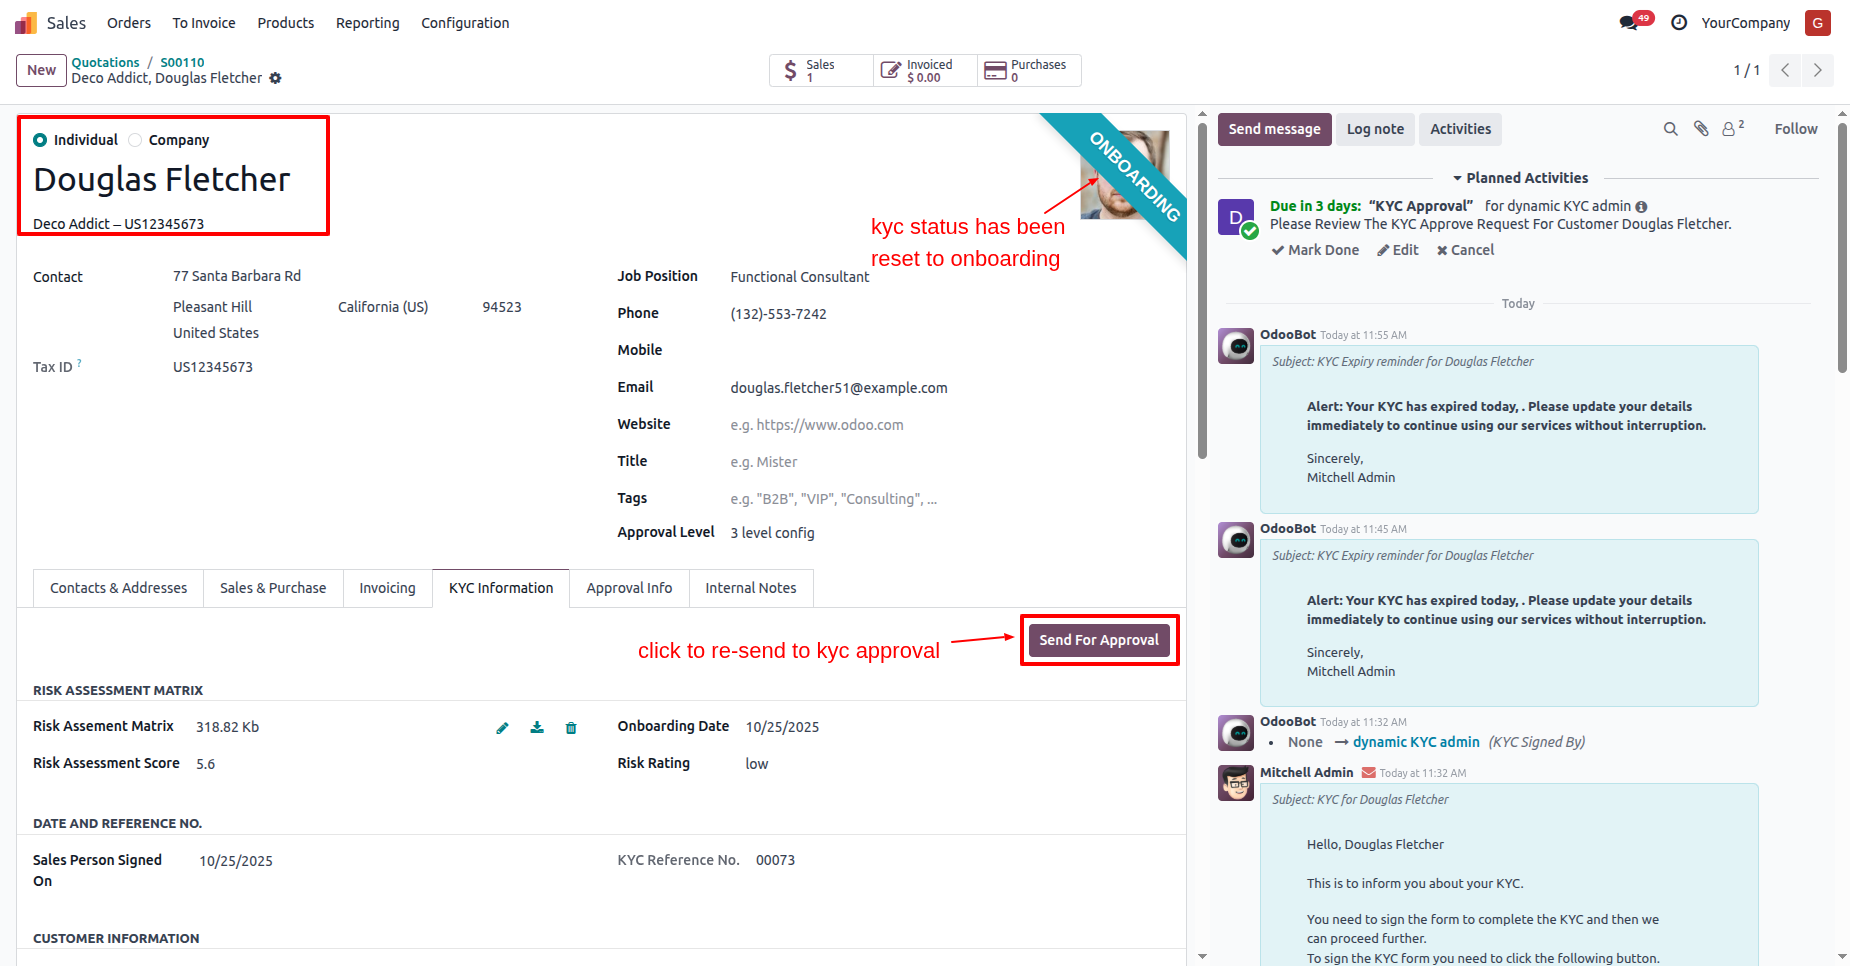
Here you can see that the customers KYC status has changed to
"Waiting for Approval".
The approval user will receive an approval notification popup.
In the "KYC Information" tab, click on the "Approve" button.
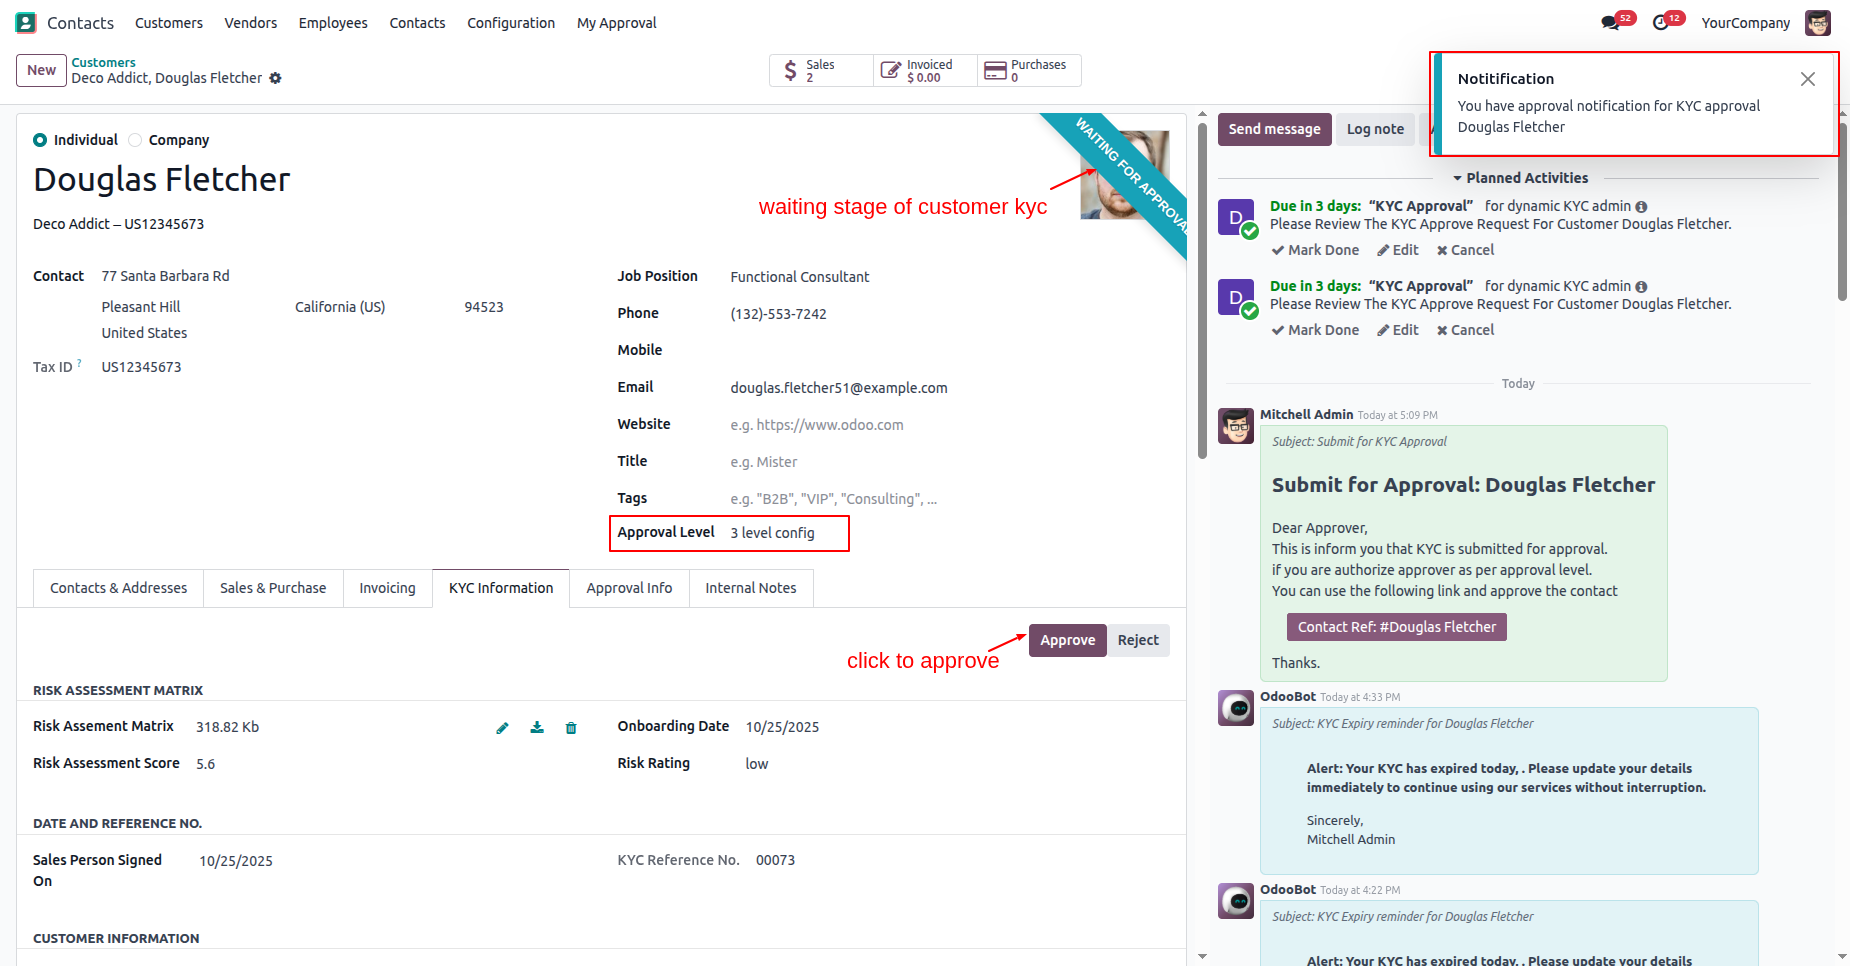
In the "Approval Info" tab, you can see that the approval information has been updated to the 2nd-level approval.
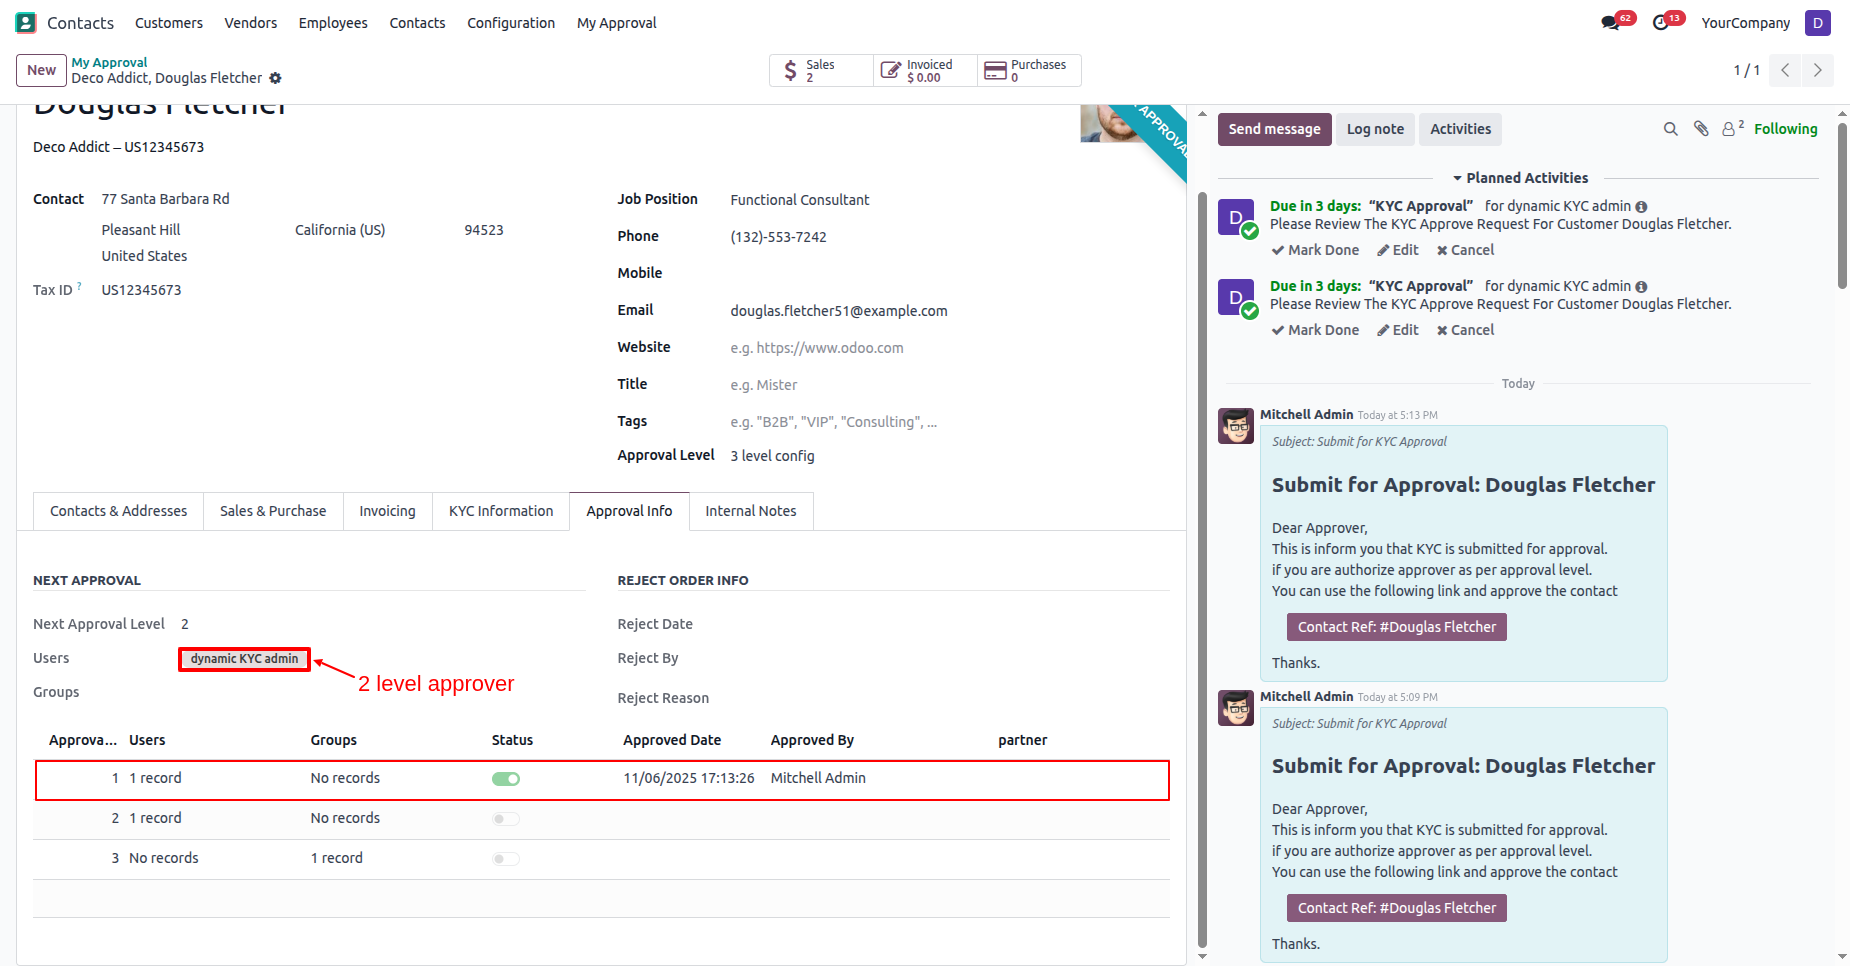
The approval user will receive an approval notification popup.
"My Approval" menu and list view.
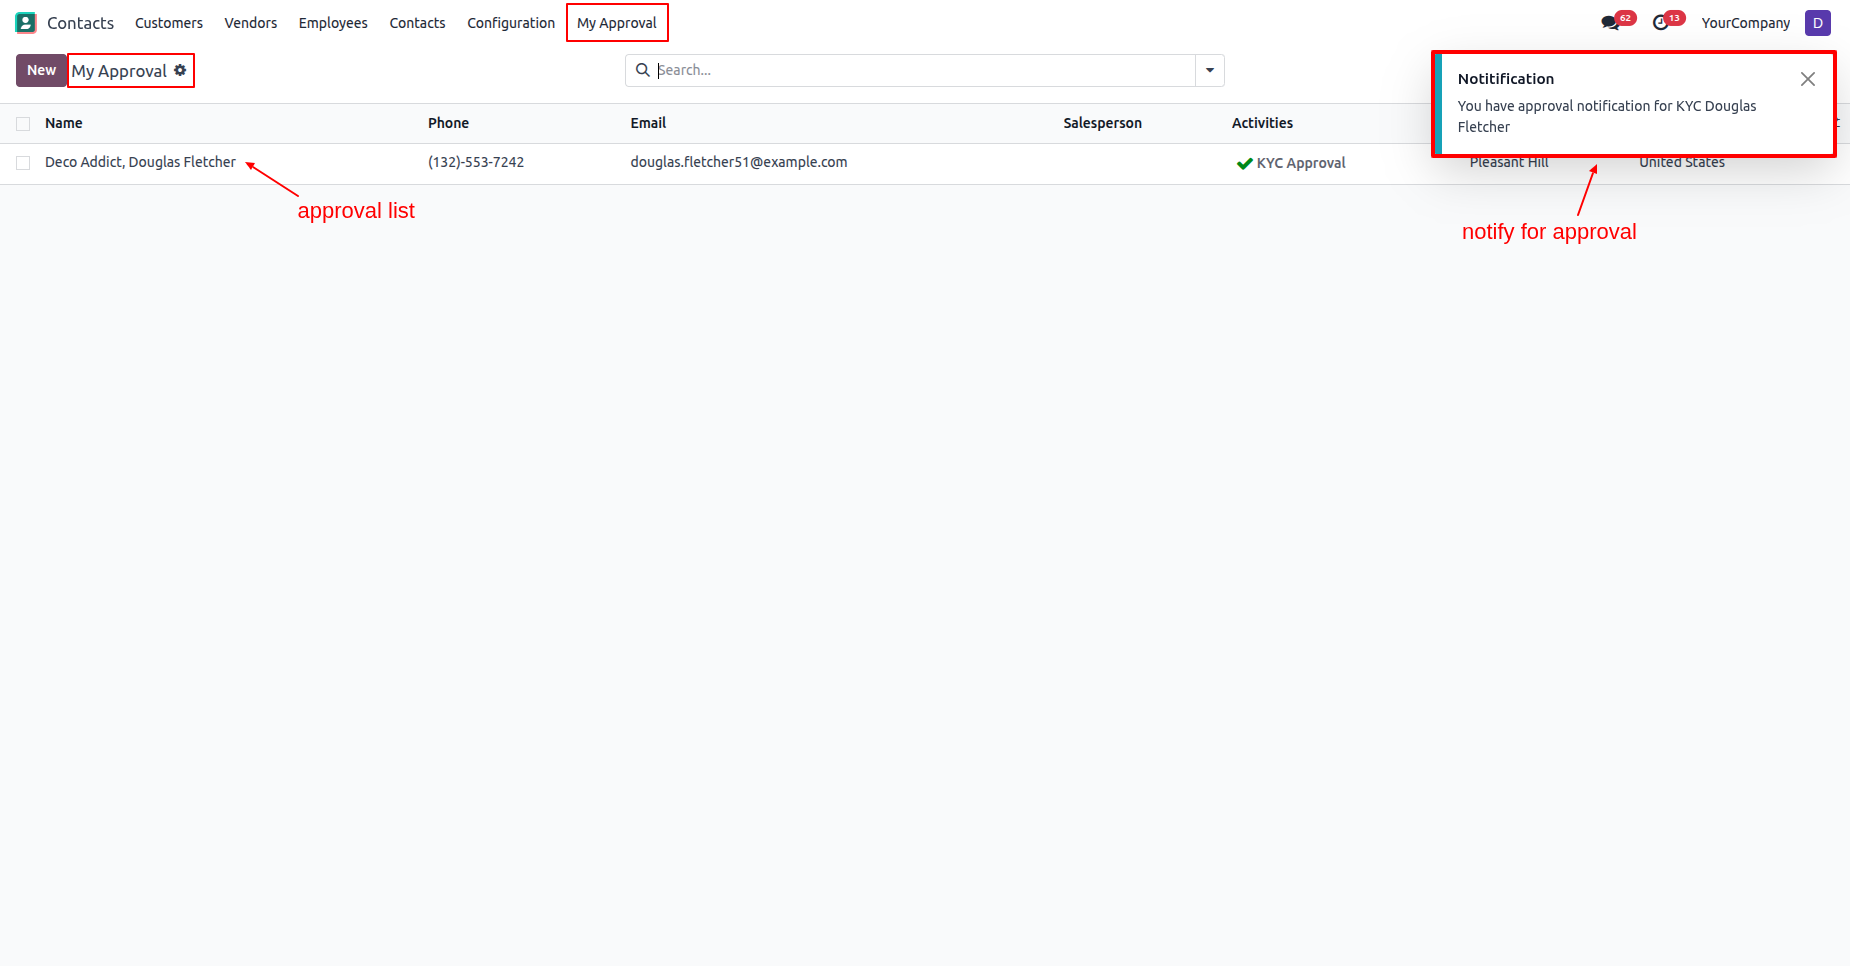
In the "KYC Information" tab, click on the "Approve" button.
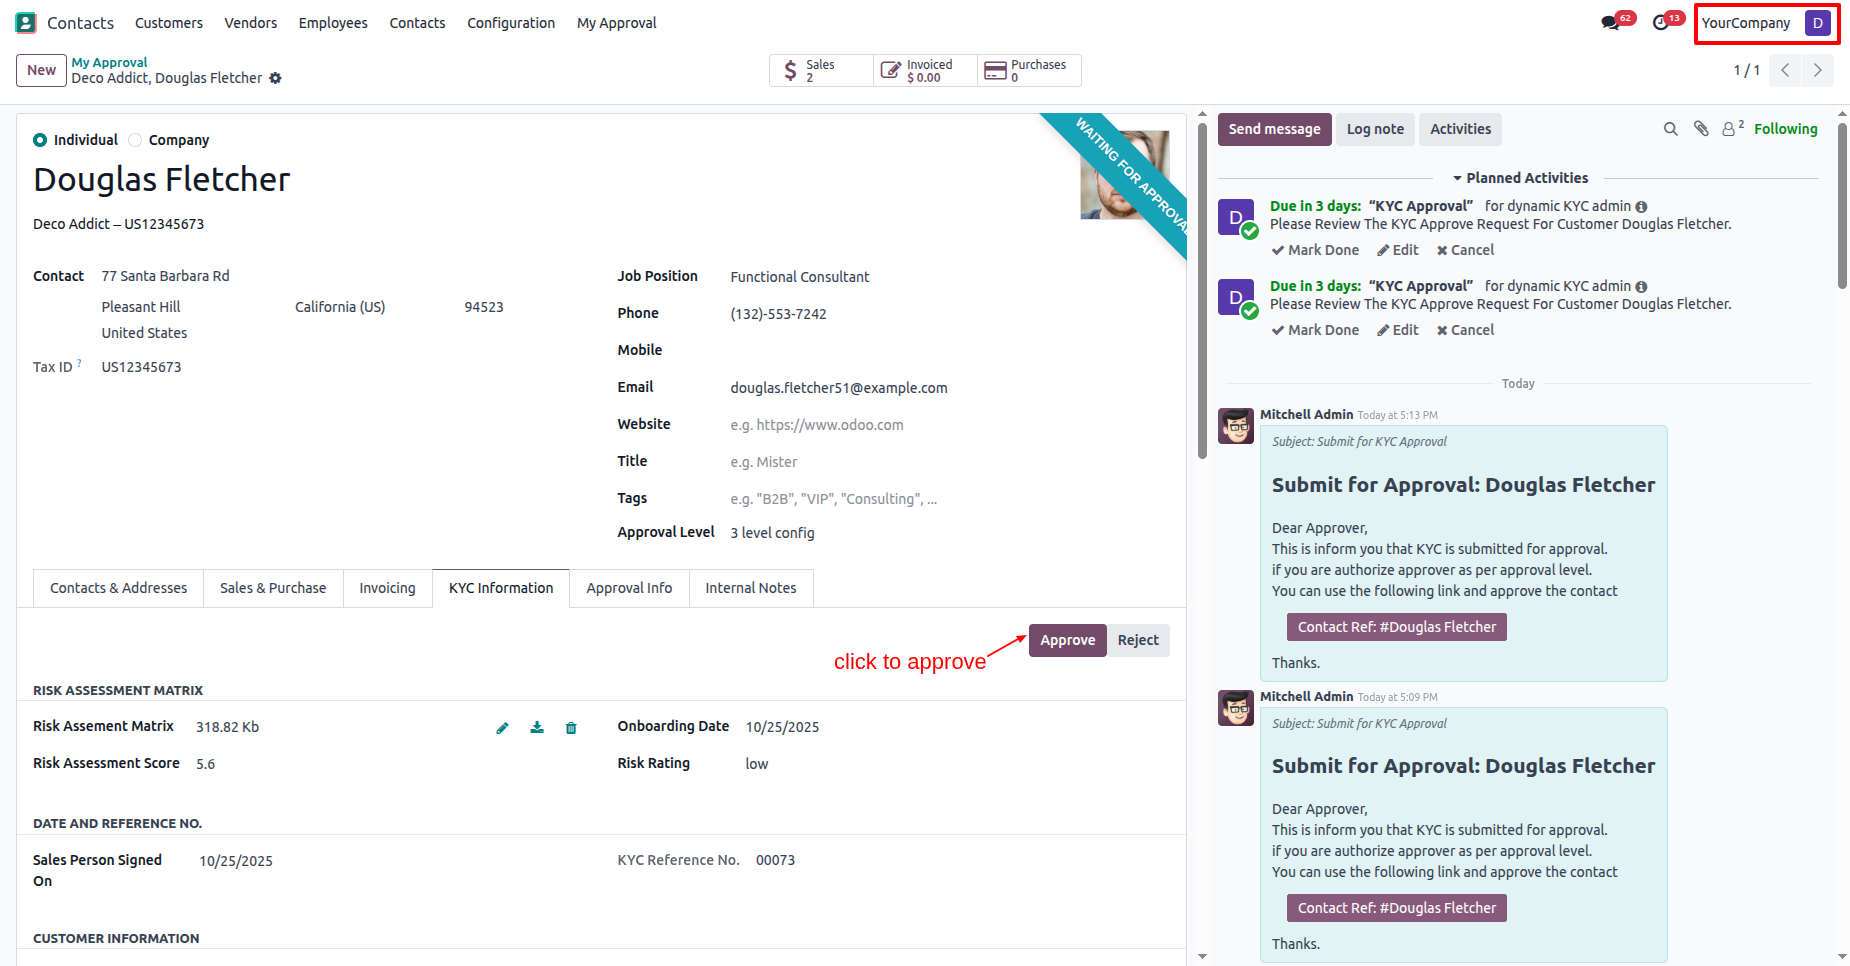
In the "Approval Info" tab, you can see that the approval information has been updated to the 3rd-level approval.
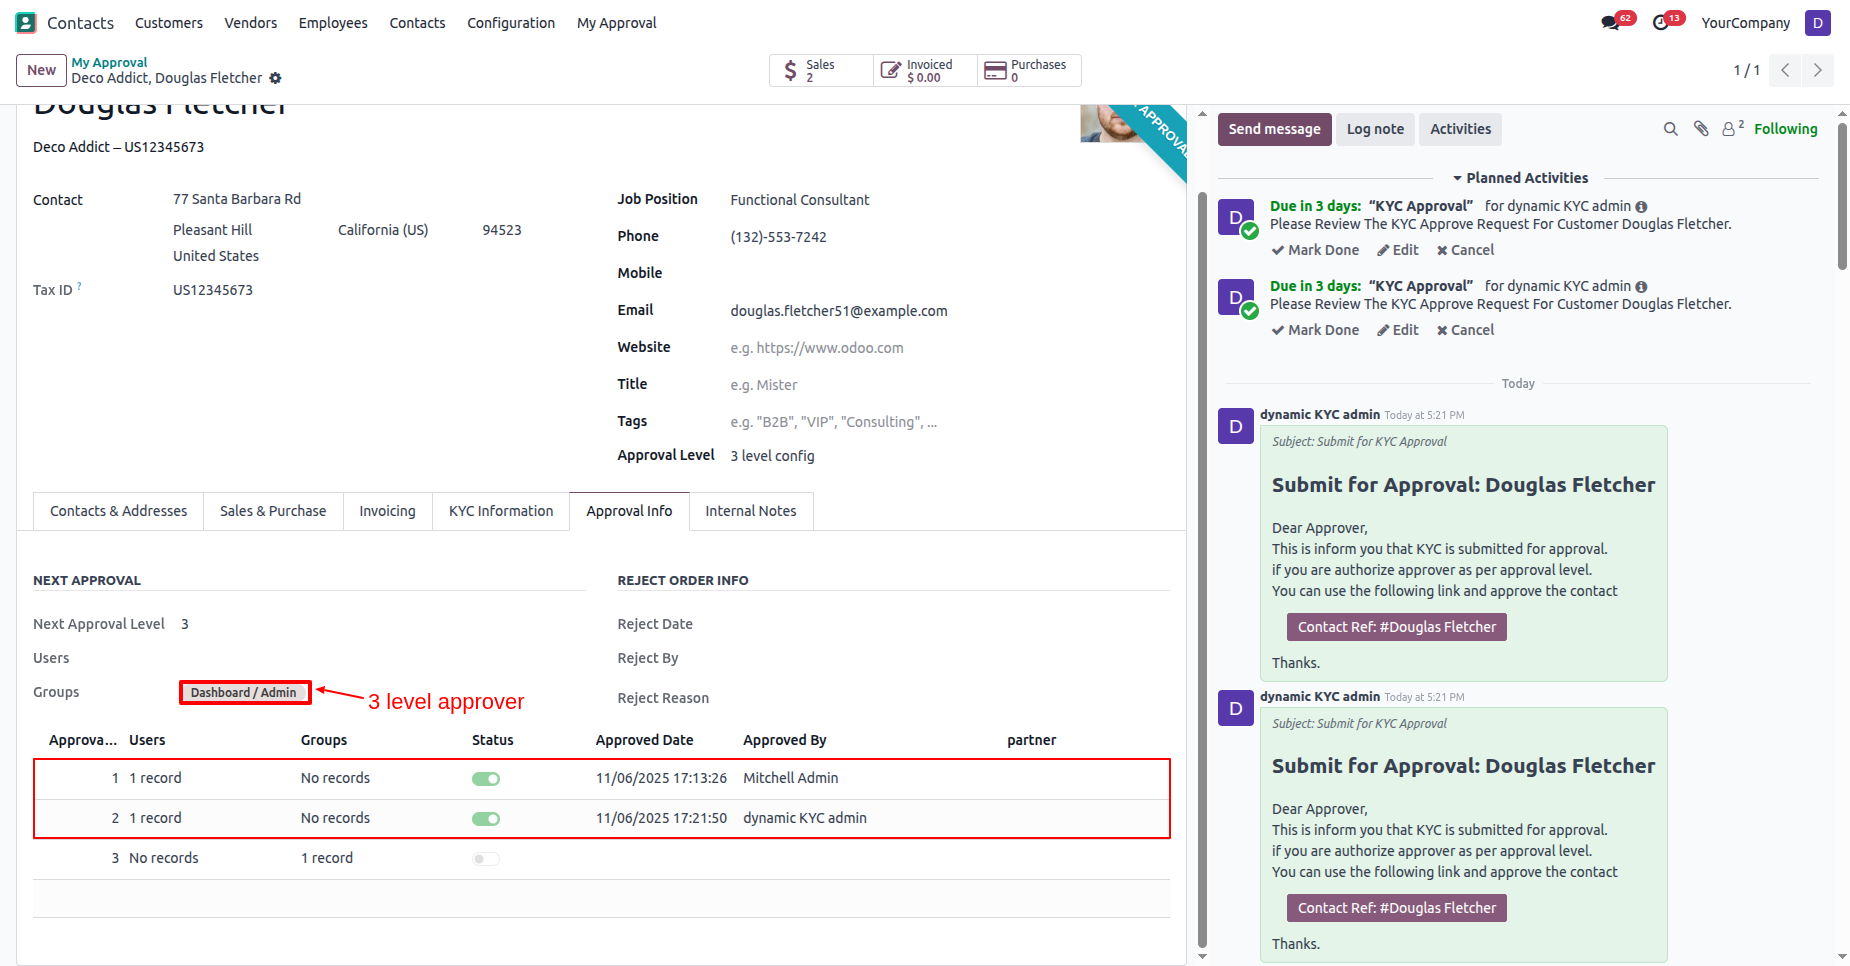
In the "KYC Information" tab, click on the "Approve" button.
In the "Approval Info" tab, you can see all the approval iformation.
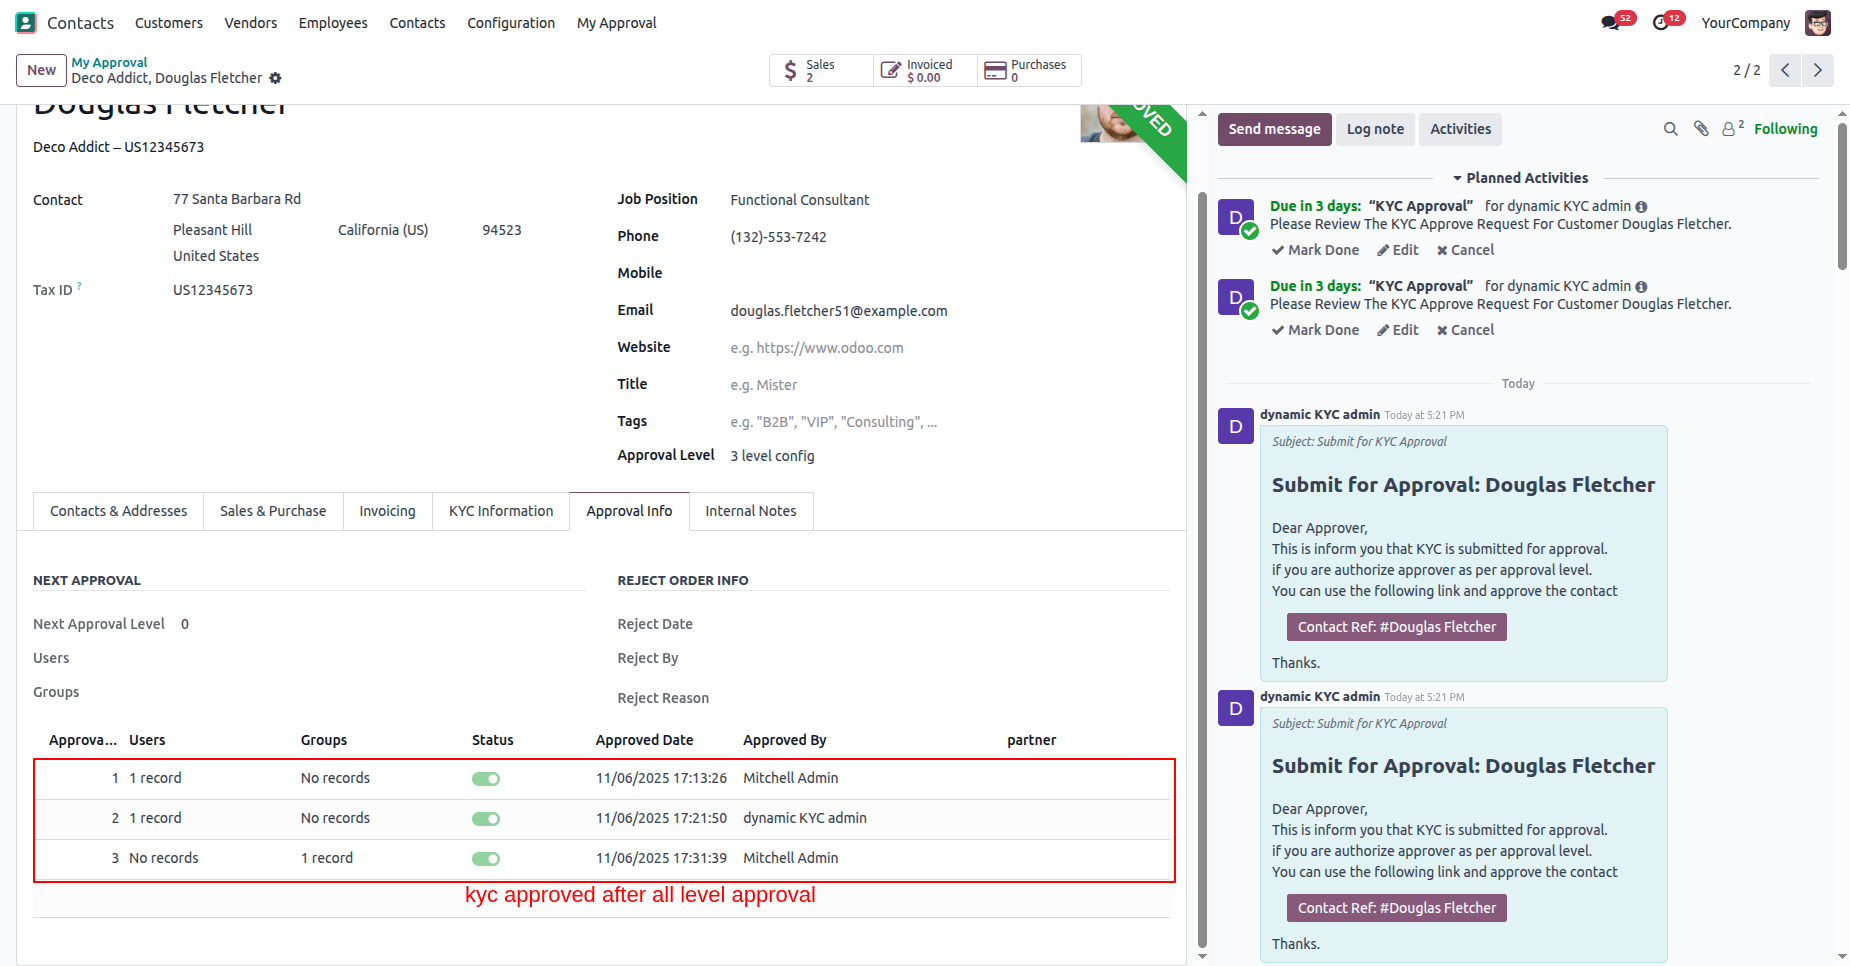
The customers KYC status has changed to "Approved".
In the "KYC Information" tab, click on the "Send Customer KYC" button
to send it for signature.
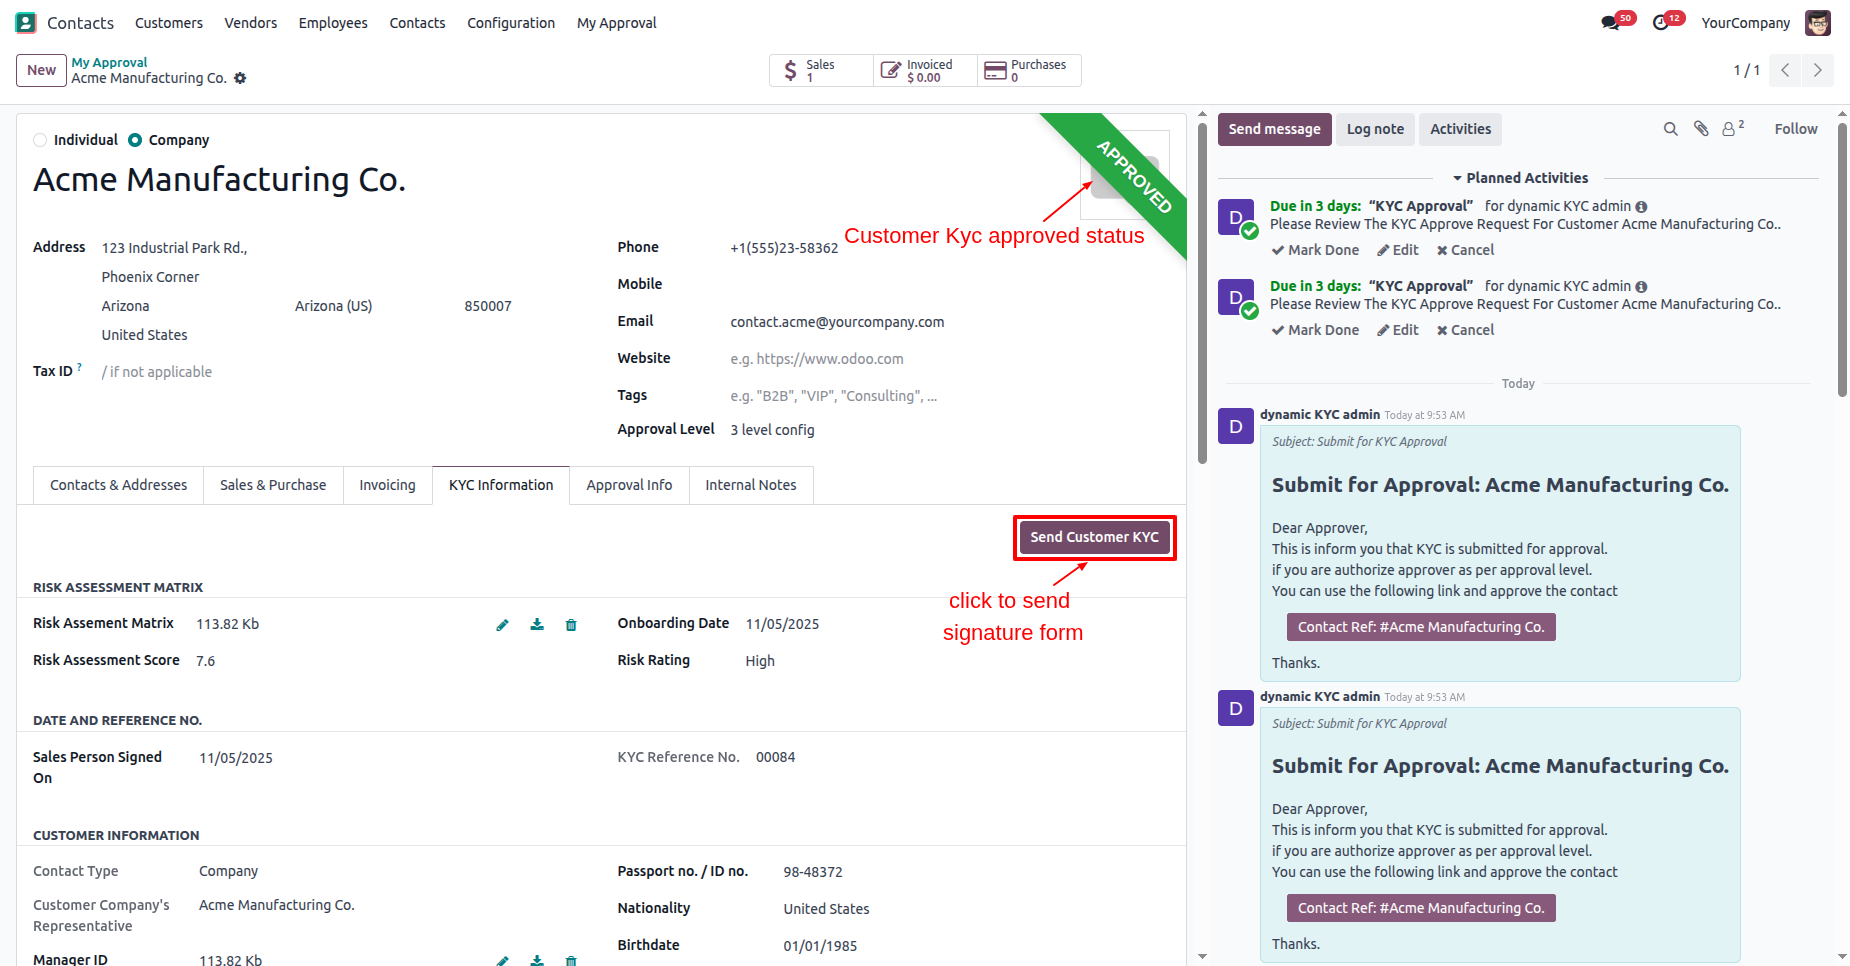
In the customer form view, you can see the kyc status is "Odoo Sign".
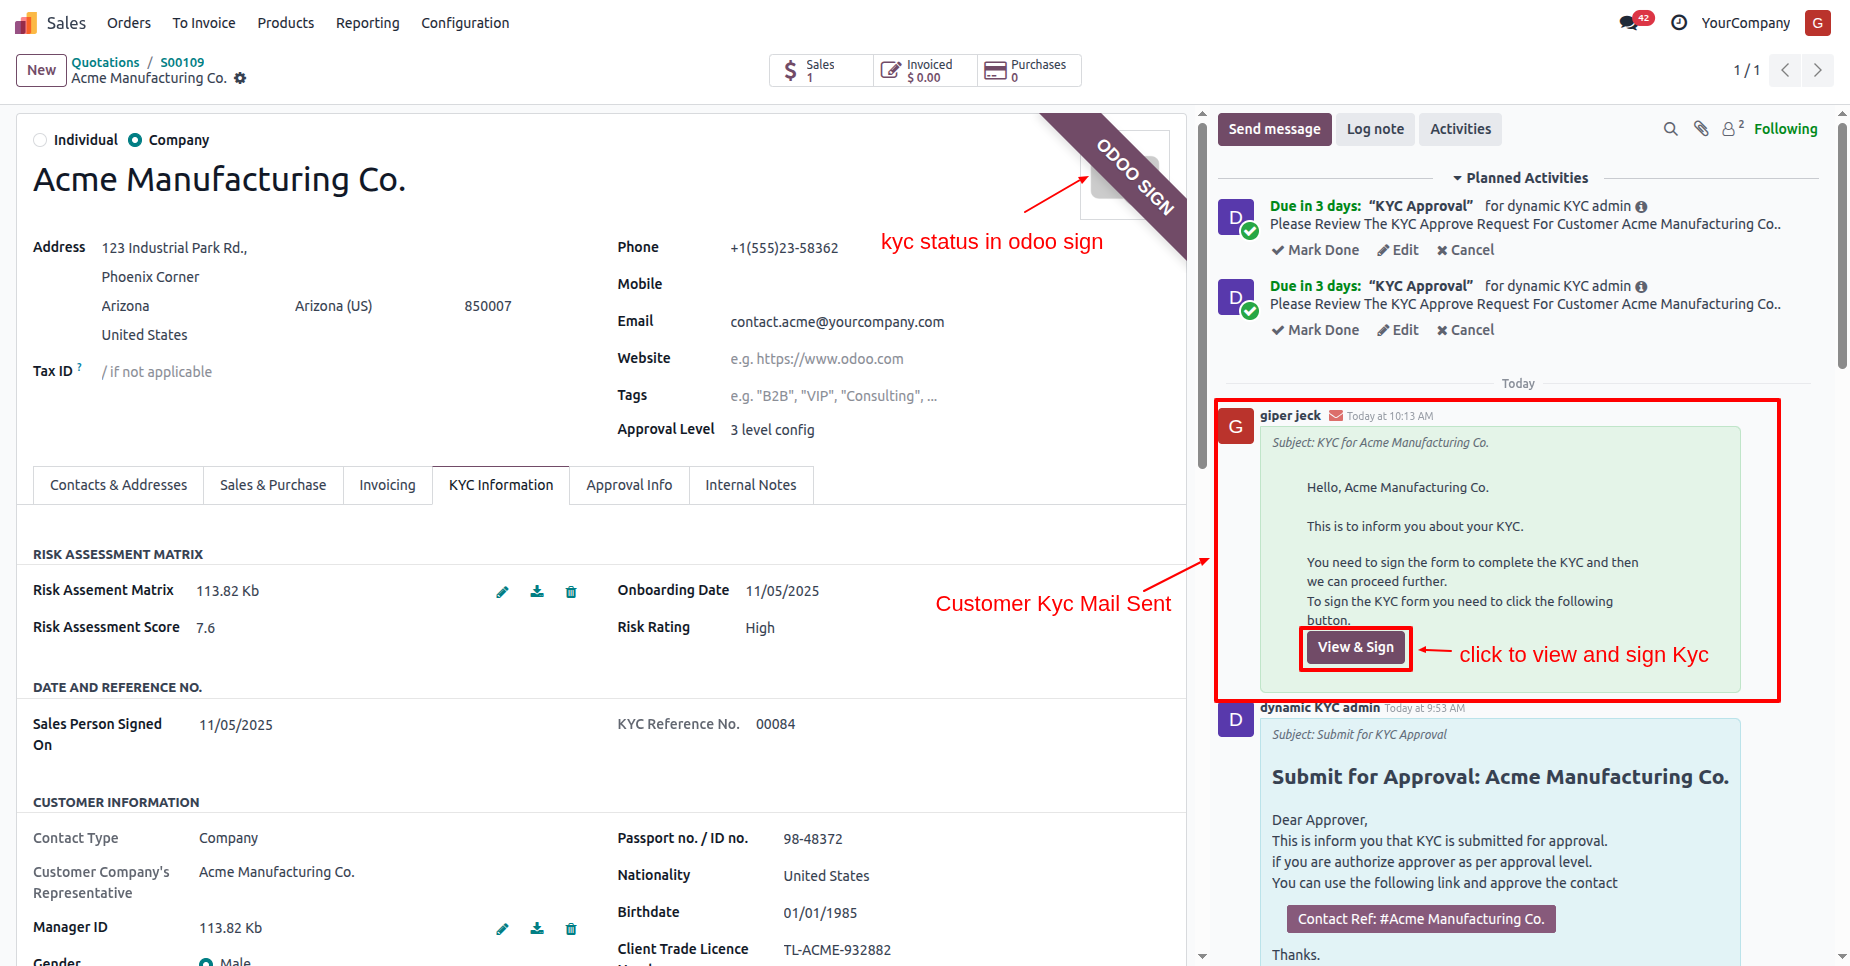
Here you can see that the KYC has been resent to the customer.
Click on the "View & Sign" button.
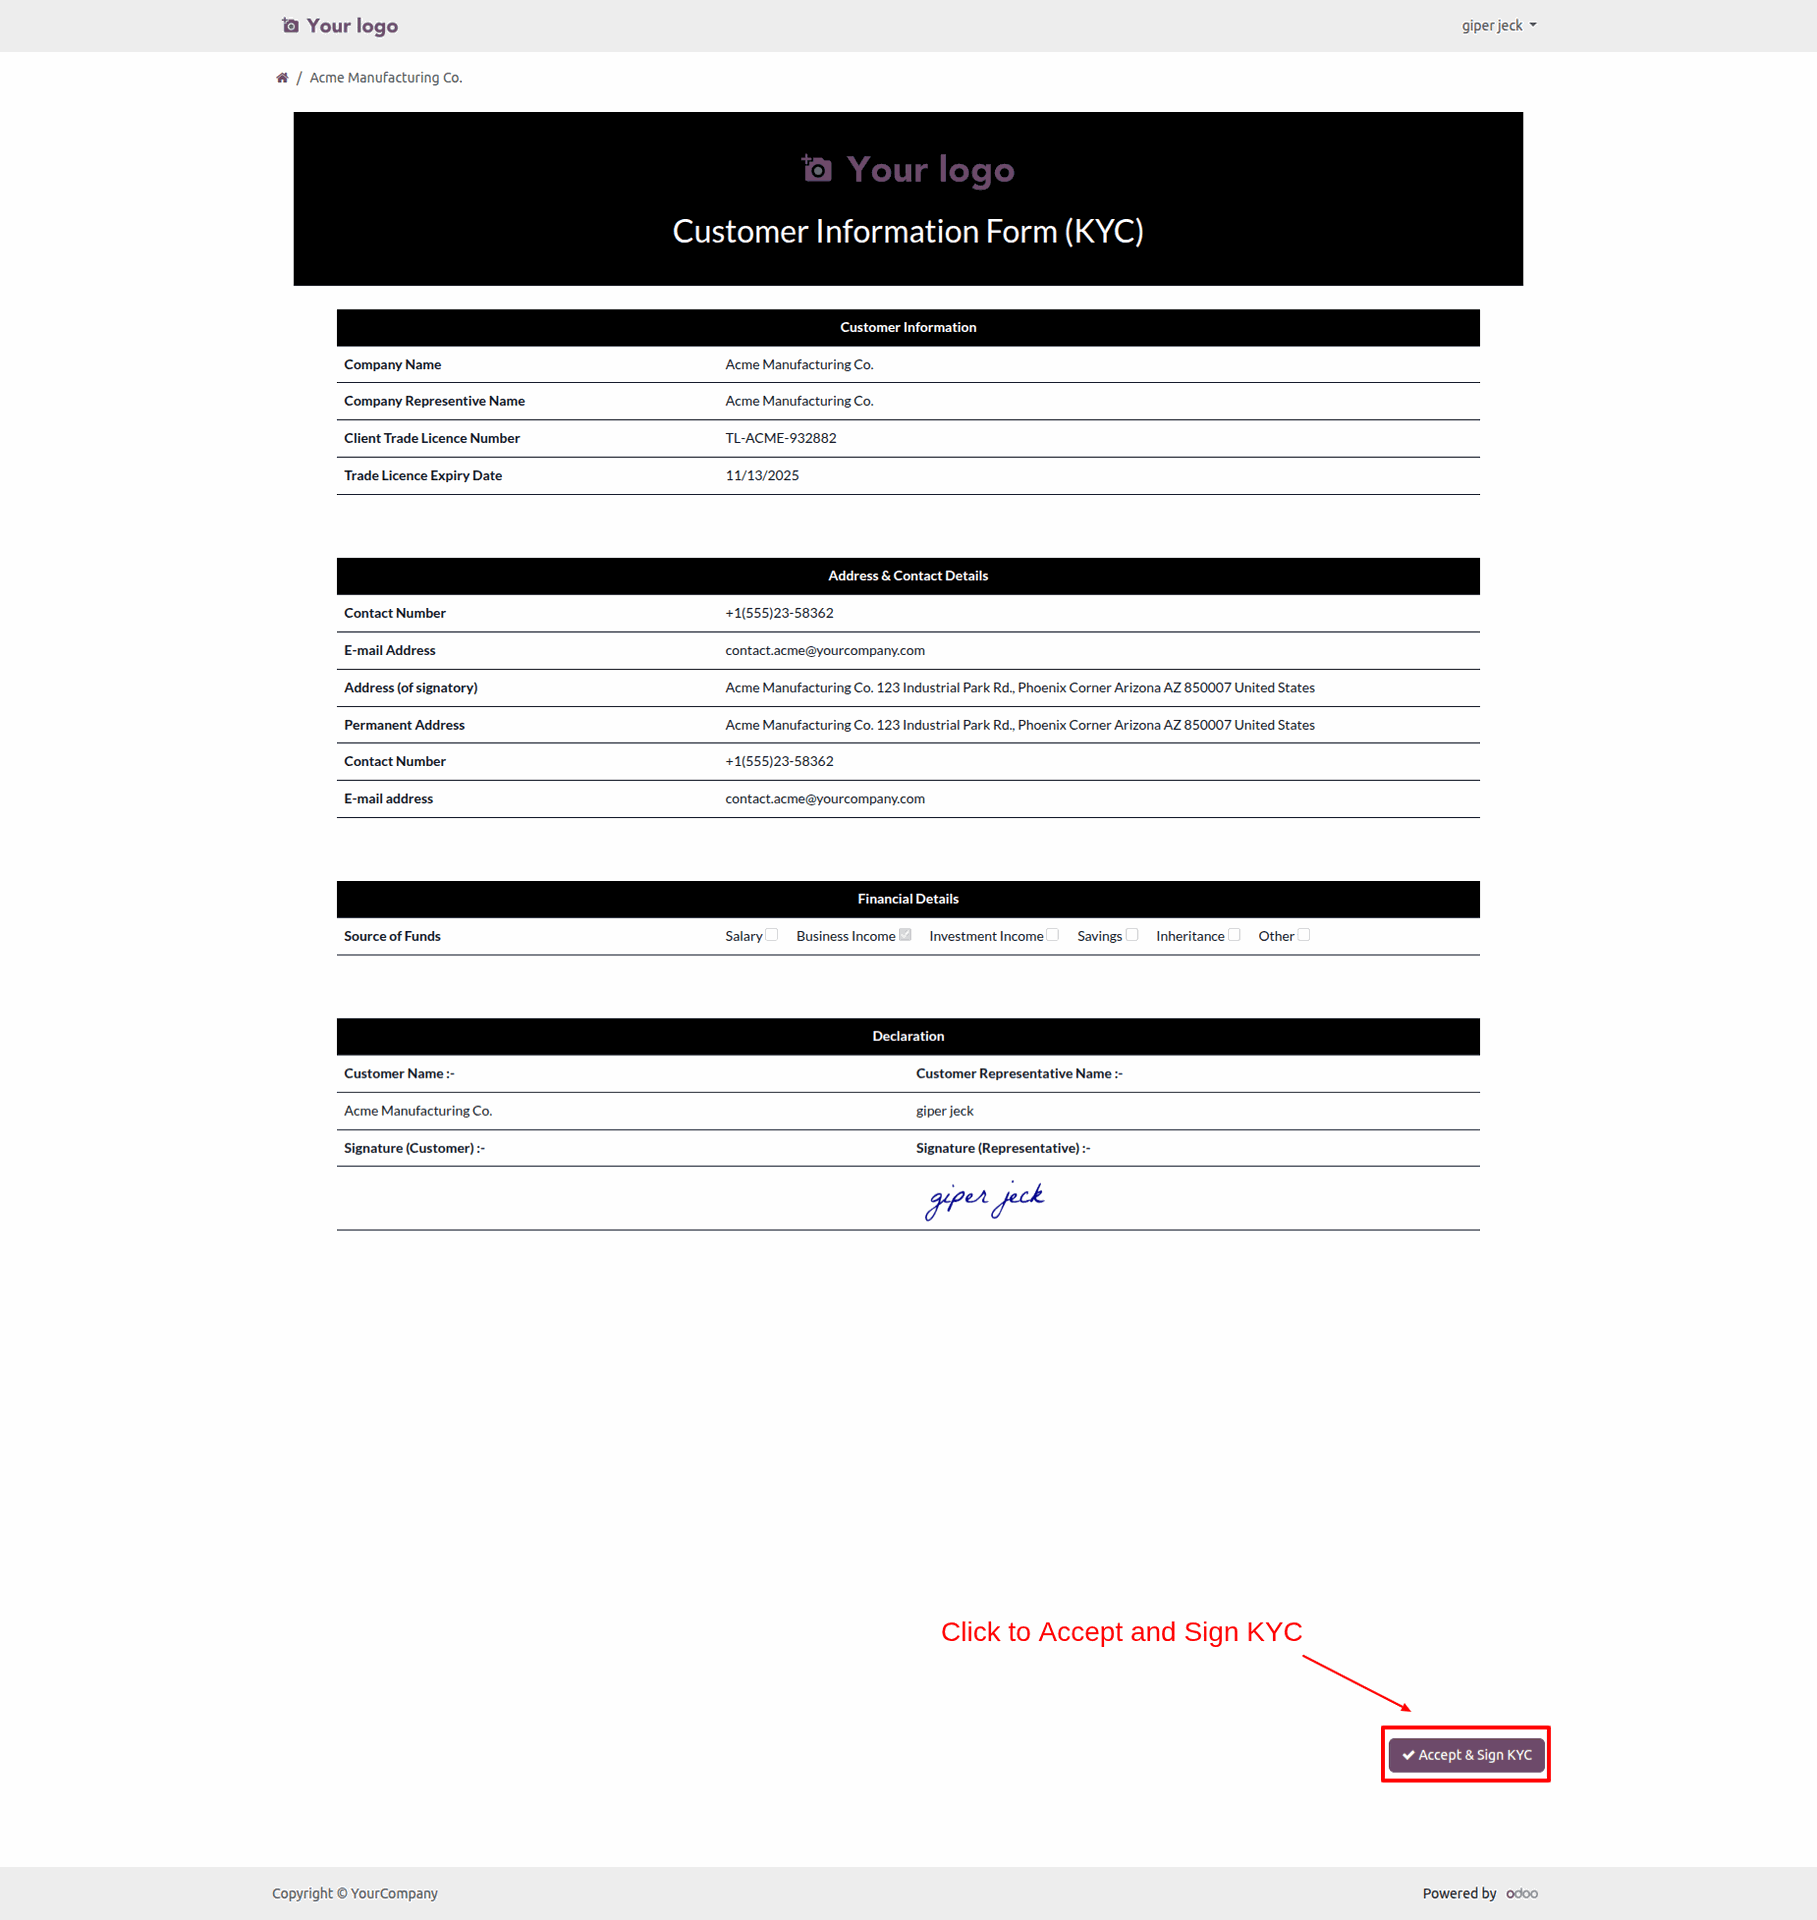
Click on the "Accept & Sign" button.
After that, the "Validate KYC" wizard will appear. Add a signature and click on the "Sign" button.
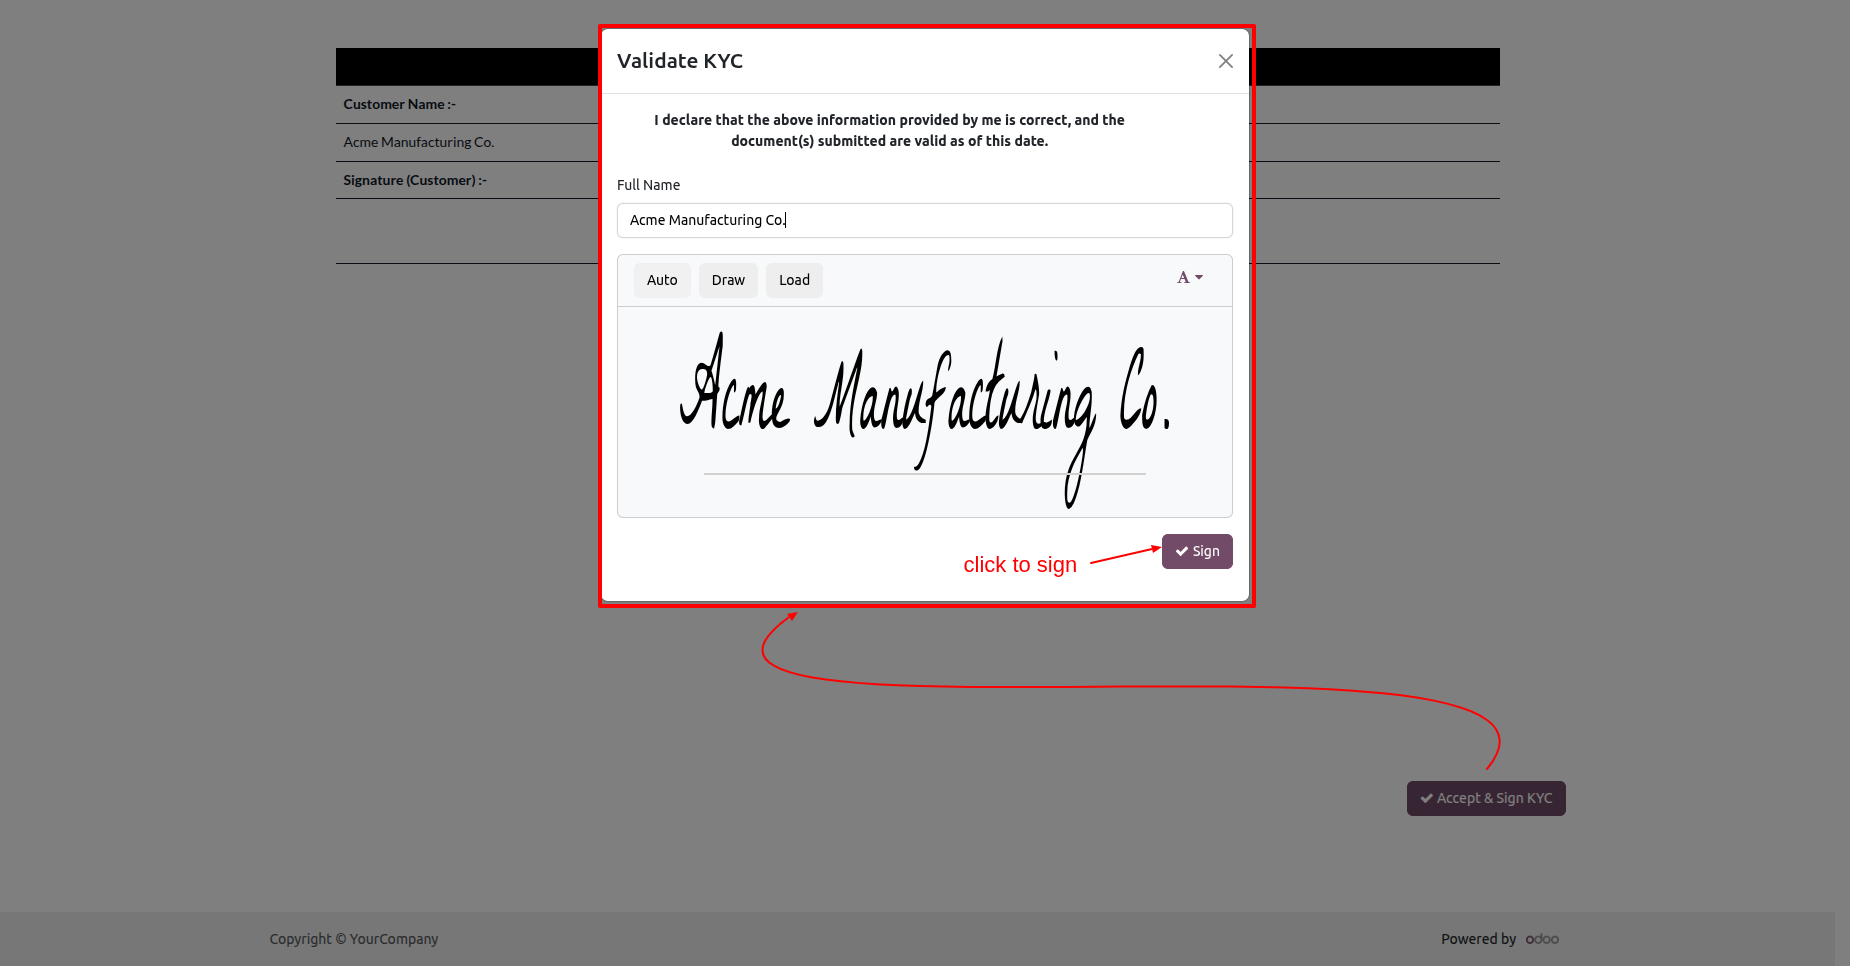
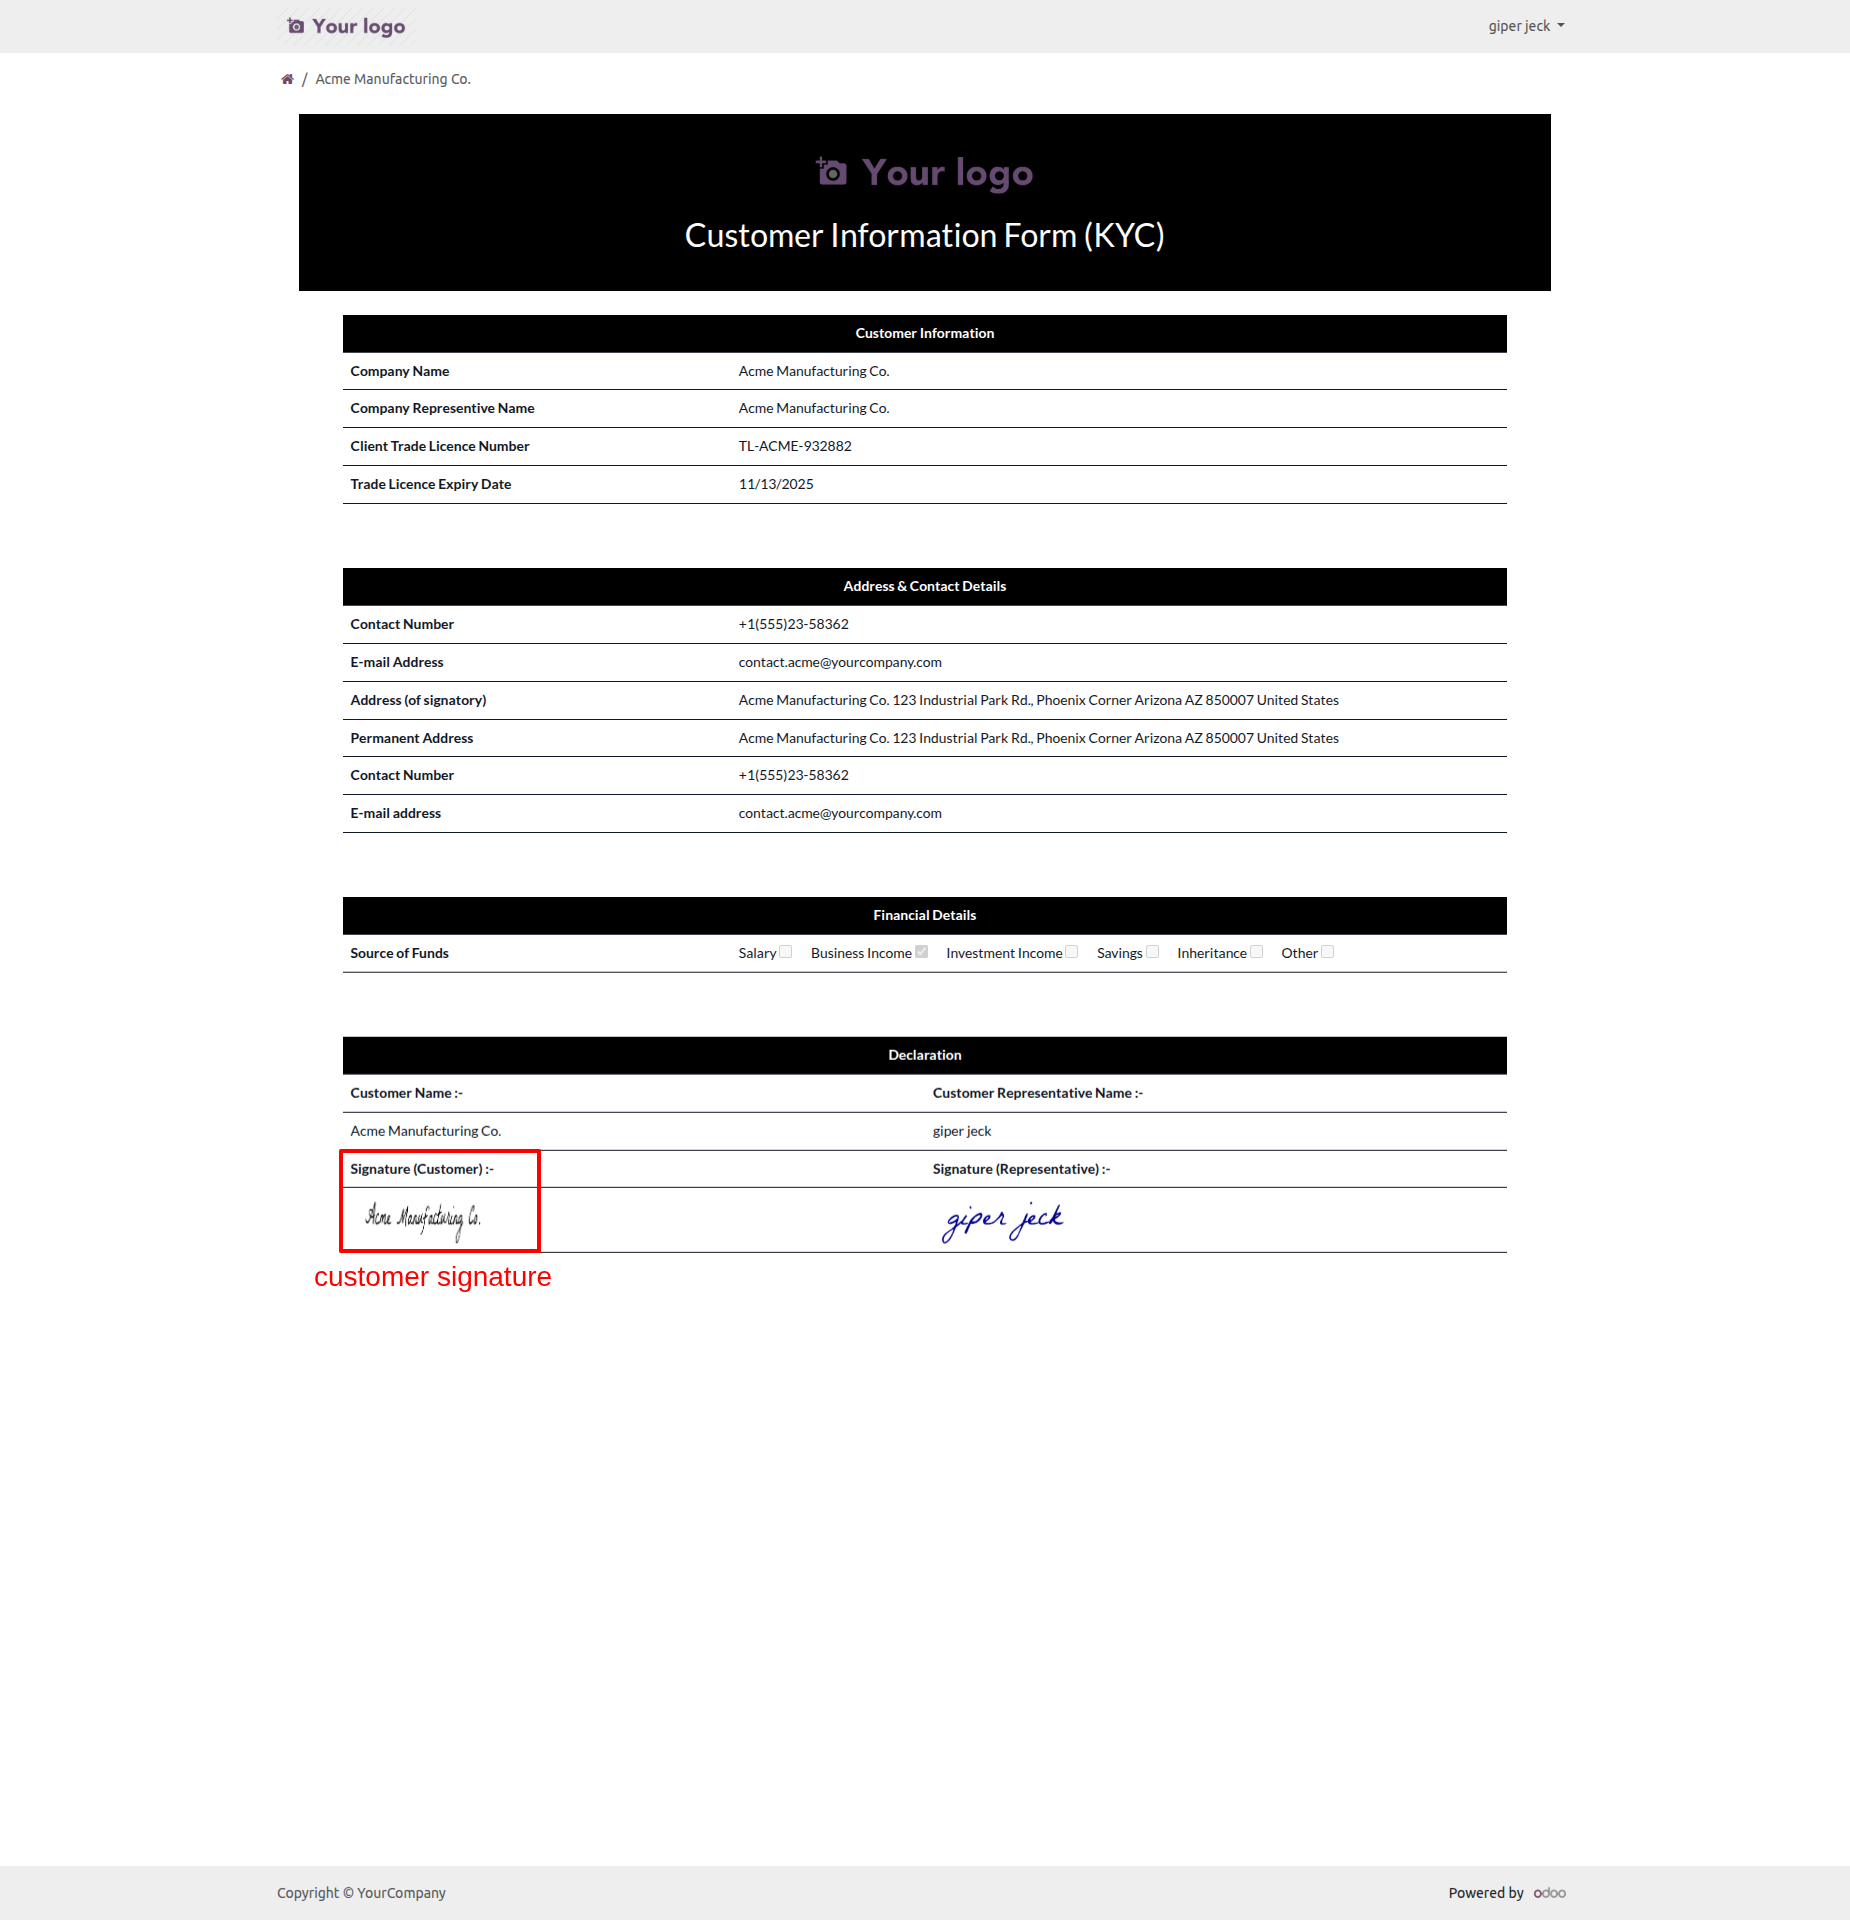
You can view the customers signature in the customer KYC.
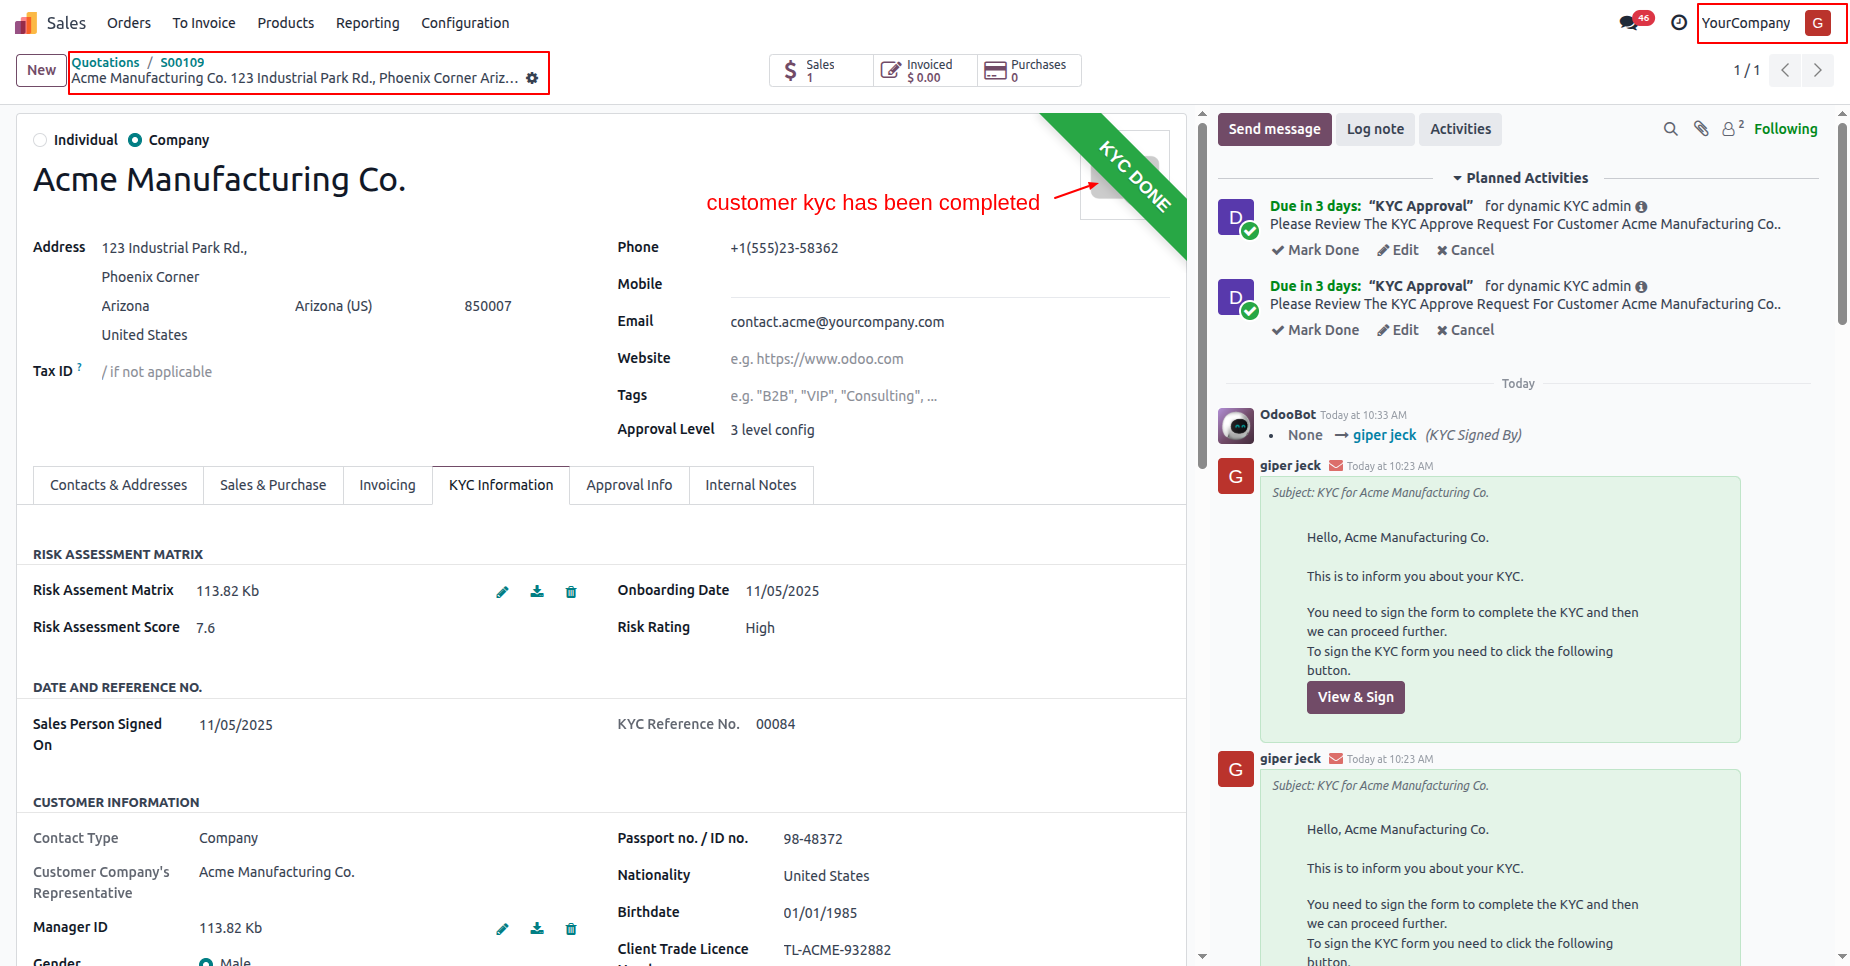
The customers KYC status has changed to "KYC Done".
Confirm the quotation.
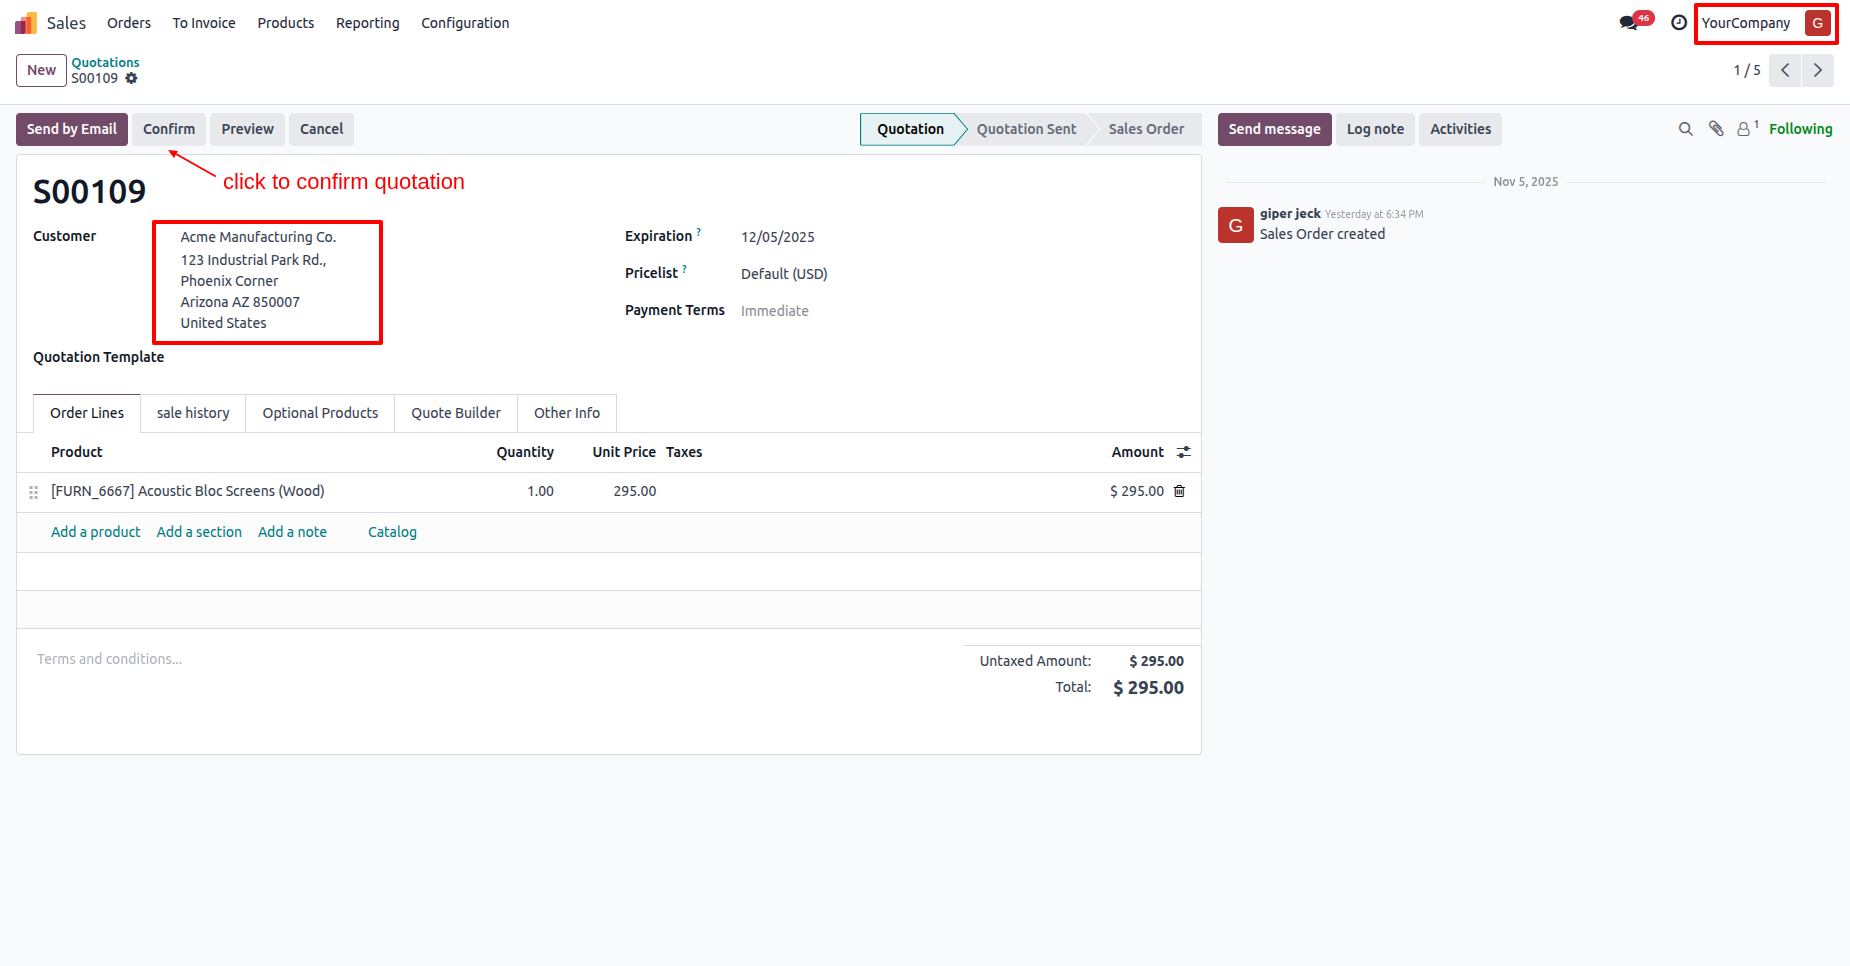
Quotation is confirmed now.
Version 18.0.1.0.0 | Released on : 21st August 2026
- Yes, this app works perfectly with Odoo Enterprise (Odoo.sh & Premise) as well as Community.
- No, this application is not compatible with odoo.com(odoo saas/Odoo Online)
- Yes, to test this module, please contact us at sales@softhealer.com.
- Please contact us at sales@softhealer.com to request customization.
- Yes, we provide free support for 365 days from the date of purchase.
- Yes, you will receive lifetime free updates for the version of the module you purchased.
- No, there is no need to install any additional libraries.
- Yes, for version 12 and above, you need to purchase the module separately for each version you intend to use.
- No, exchanges or refunds are not allowed. Please make sure to select the correct version before purchasing.
- You can contact us at support@softhealer.com for language translation support. We use Google Translator tools to provide translations in multiple languages, so the accuracy may vary. We welcome your suggestions to help improve translations.
