













Clinic Management System

This module is designed to streamline and automate the daily operations of clinics, hospitals, and healthcare centers by efficiently managing appointments, patients, doctors, and medical records. It allows users to easily schedule and track appointments, manage patient histories, and monitor overall clinic performance. Additionally, it provides a variety of insightful reports such as Appointment Summary, Doctor Availability, Monthly Revenue, Patient Visit History, Medicine Stock, Doctor Performance, Patient Demographics, Treatment Diagnosis, Disease-wise, and Emergency Reports, helping healthcare providers make informed decisions and improve overall efficiency.
Features
Doctor Profile Management
Manage complete doctor profiles including medical specialties, contact info, and consultation details.

Patient Profile Management
Maintain complete patient records with contact information and complete medical history.

Doctor Slot Management
Generate doctor availability slots, schedule working hours, and lock or publish slot schedules.

Appointment Stage Tracking
Track appointments through stages: New, Check In, In Progress, Completed, Pending, and Cancelled.
Medical Master Data Configuration
Configure Allergies, Mental Health, Lifestyle, Chronic Conditions, Diseases, Categories, and Symptoms.
Pharmacy Stock Management
Manage medicine master lists, medicine types, and update medicine details quickly via the wizard.

Case Expiry Configuration
Set a global limit on case days to standardize and manage case durations across clinic operations.

Patient Self-Service Portal
Empower patients to view their appointment history and book new clinic appointments online.
Comprehensive Healthcare Reports
Generate PDF/Excel reports for Appointment Summaries, Doctor Availability, Monthly Revenue, Patient Visit History, Medicine Stock, Doctor Performance, Patient Demographics, Treatment Diagnoses, Diseases Wise, and Emergencies.

Workflow
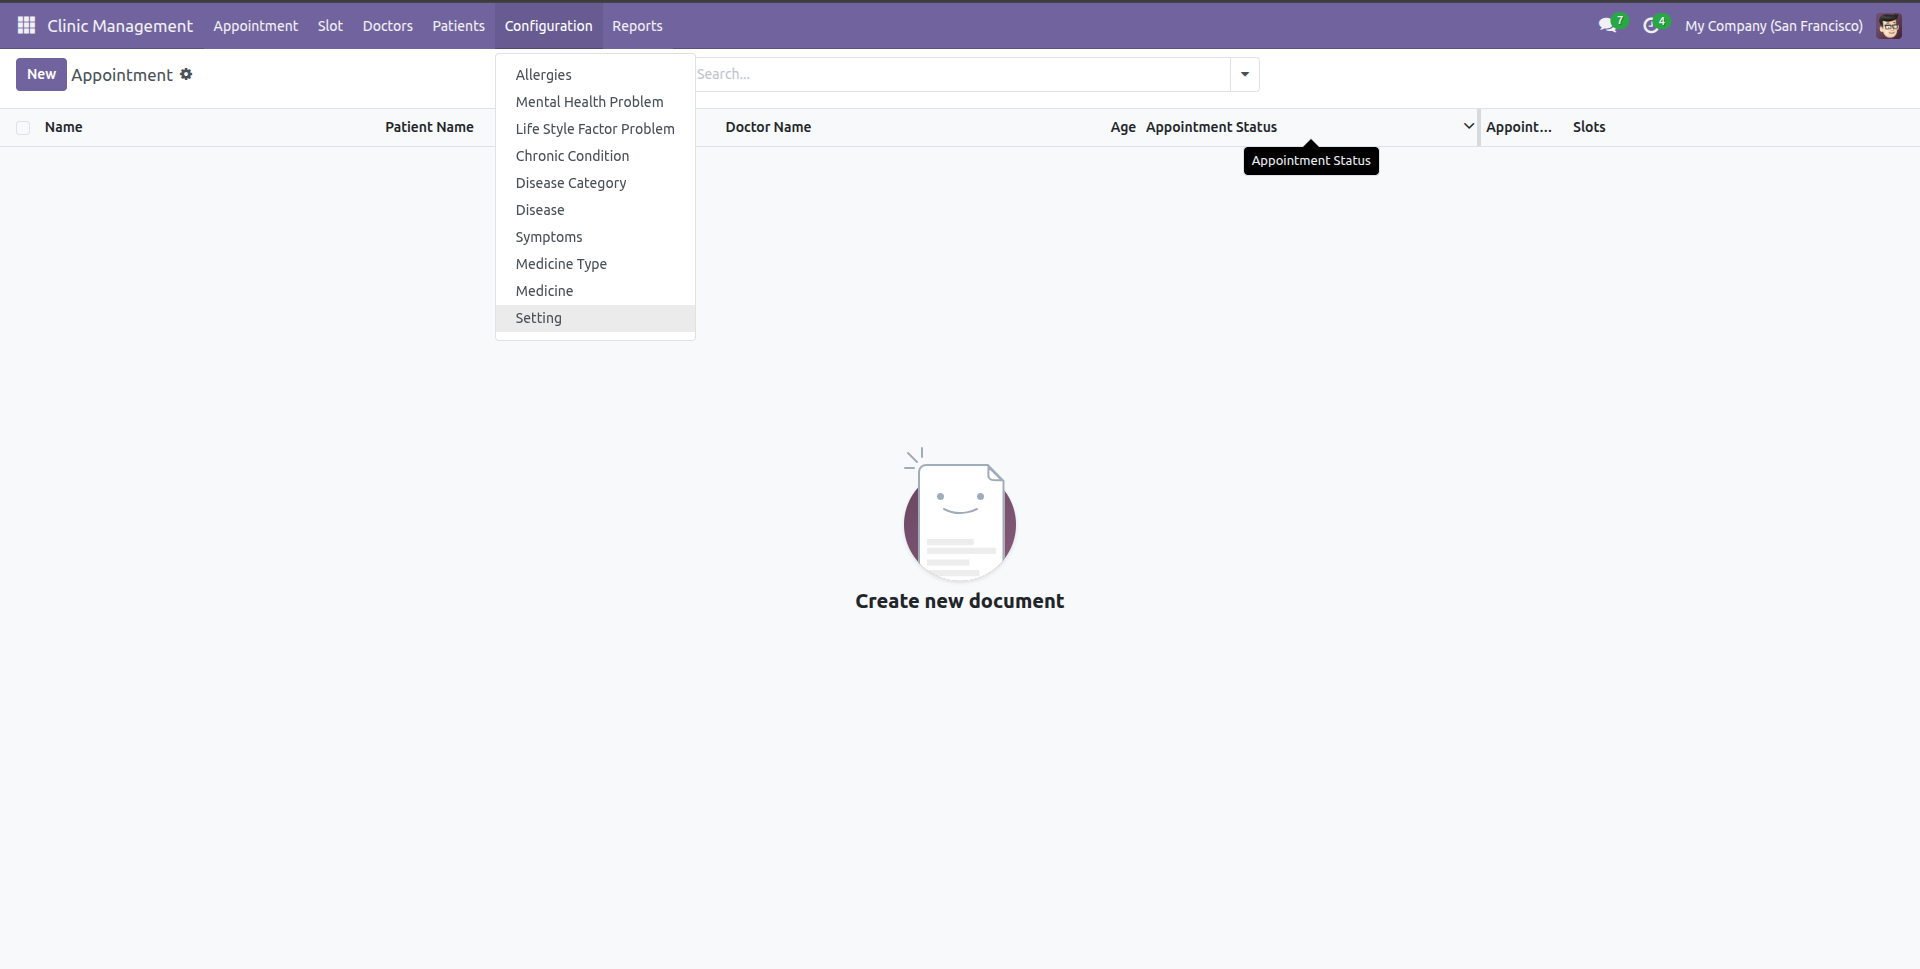
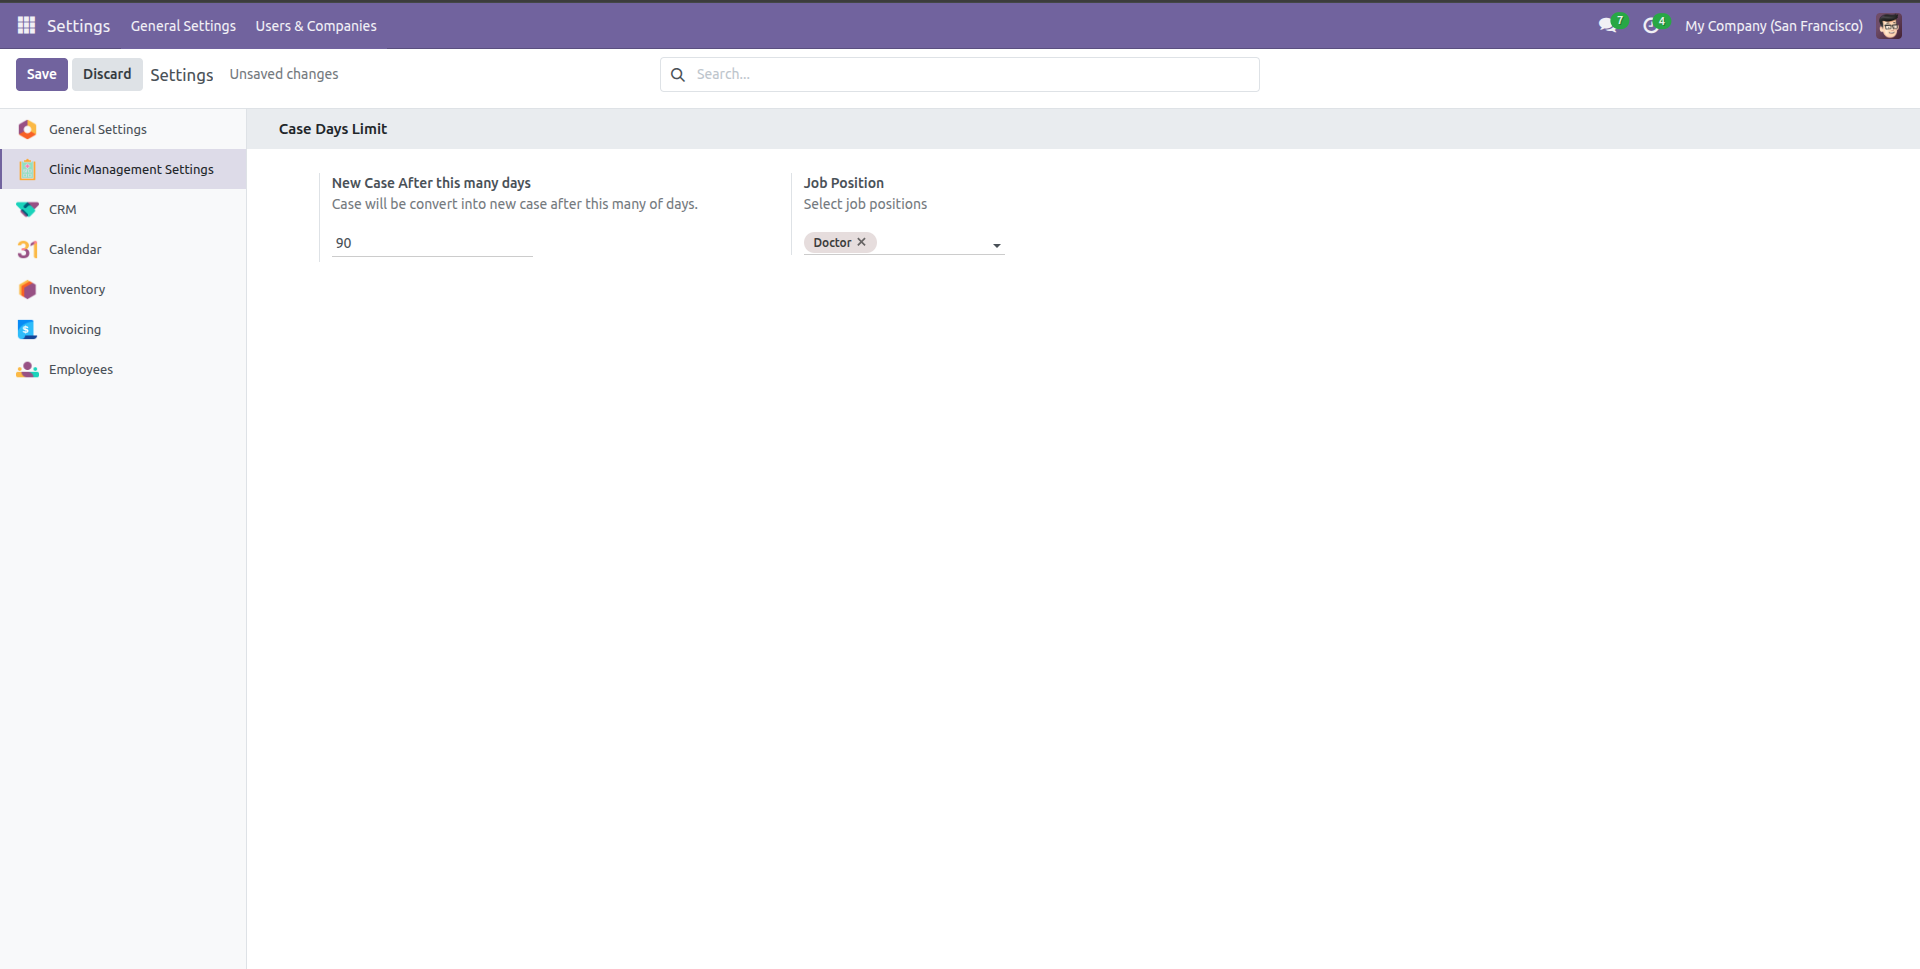
Go to clinic Management Settings from the Configuration menu.
Add "Case Days Limit".
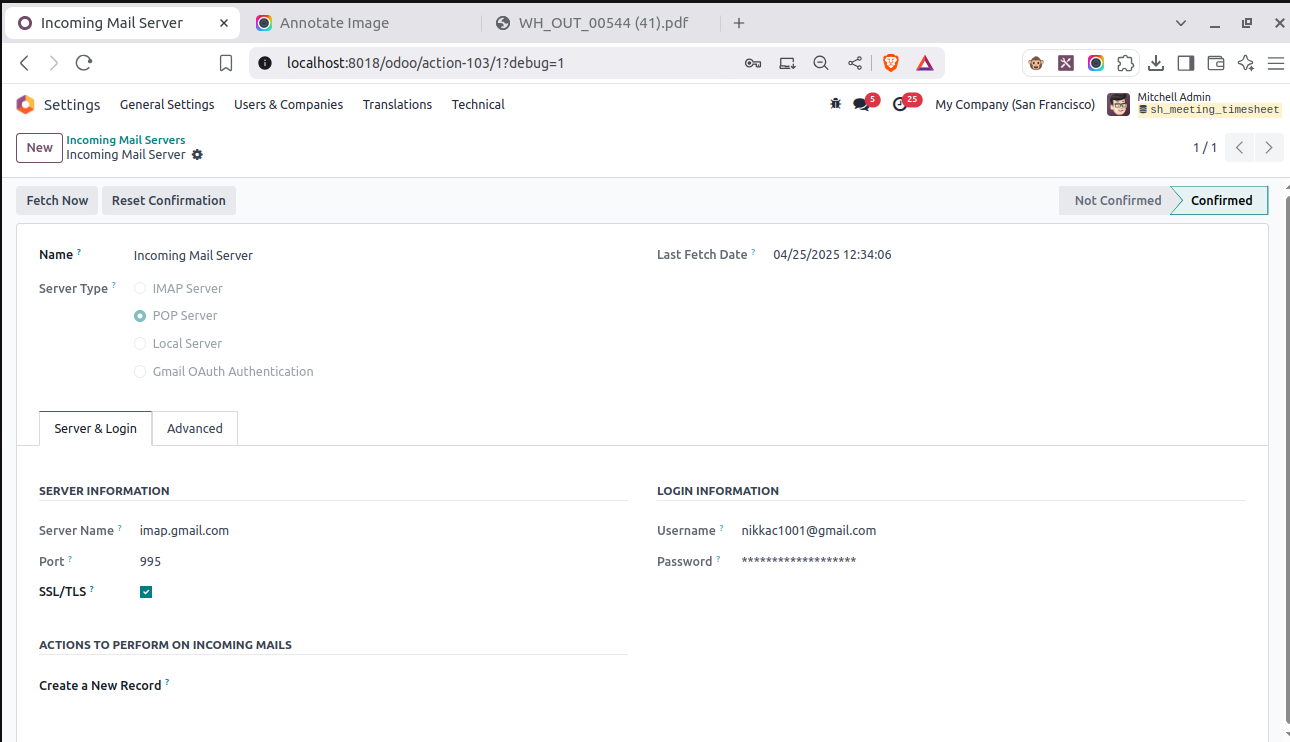
Setup "Incoming Mail Server".
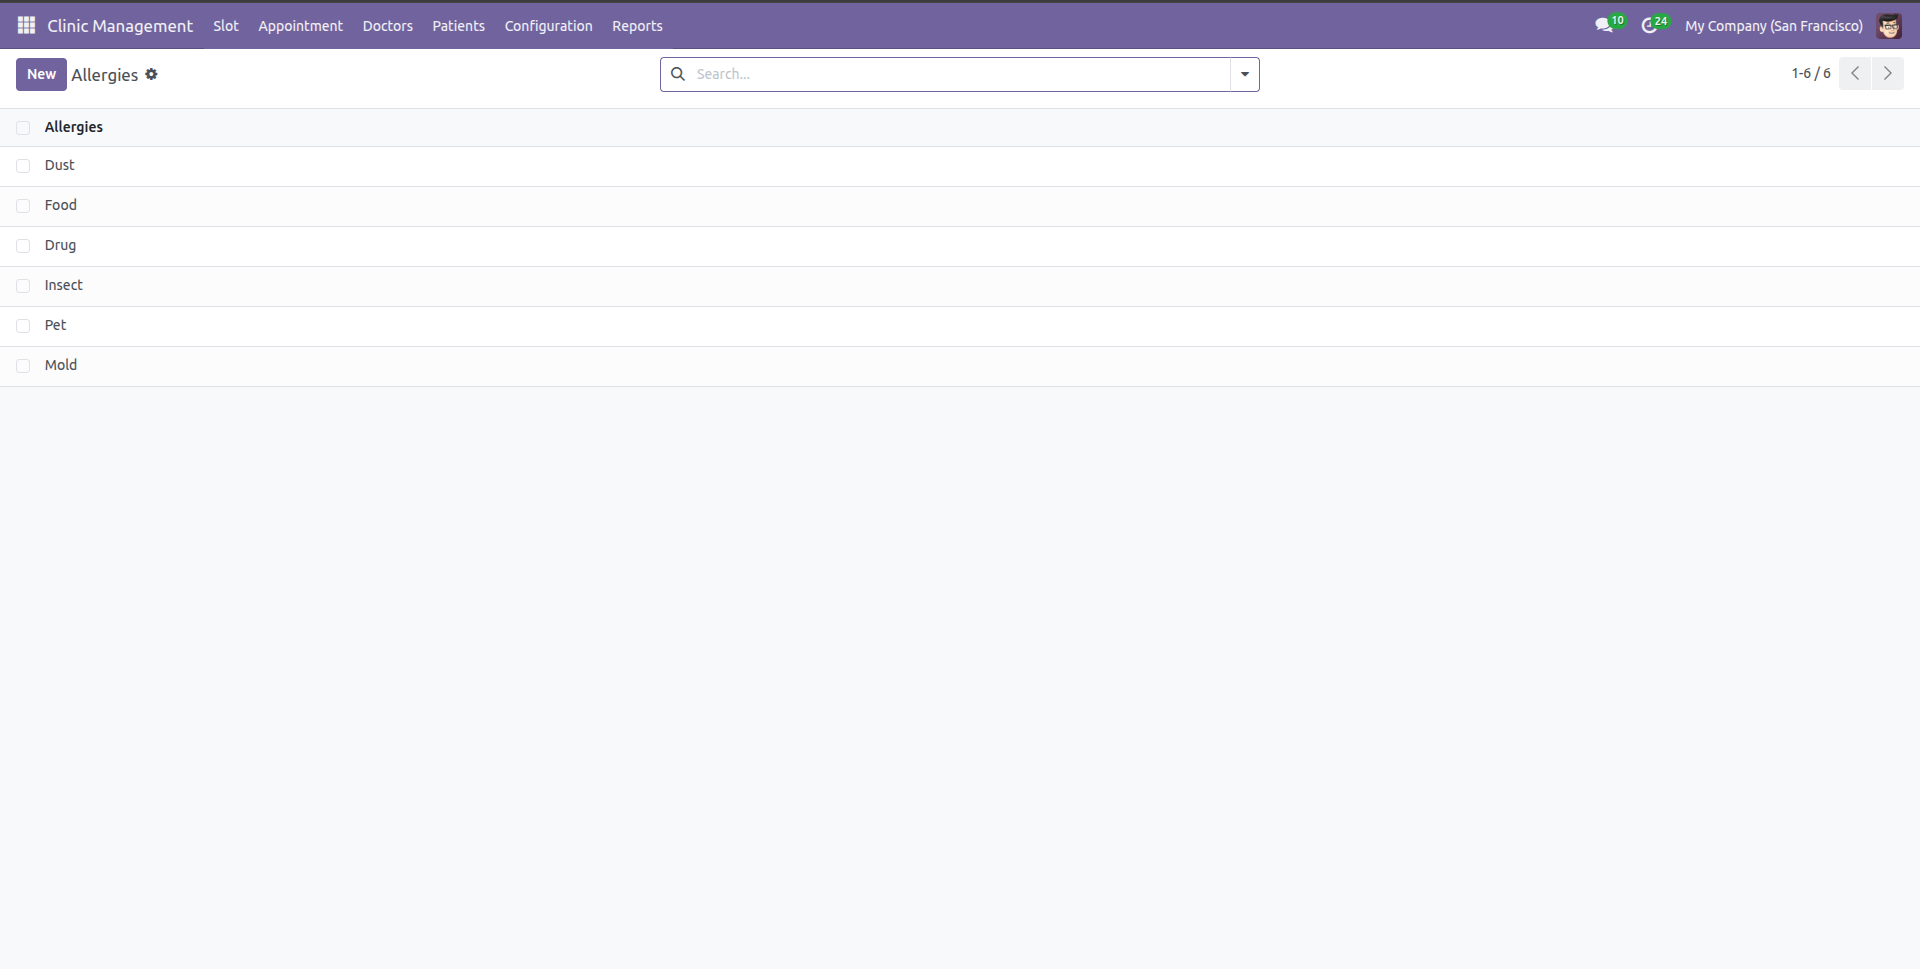
Tree view of the "Allergies".
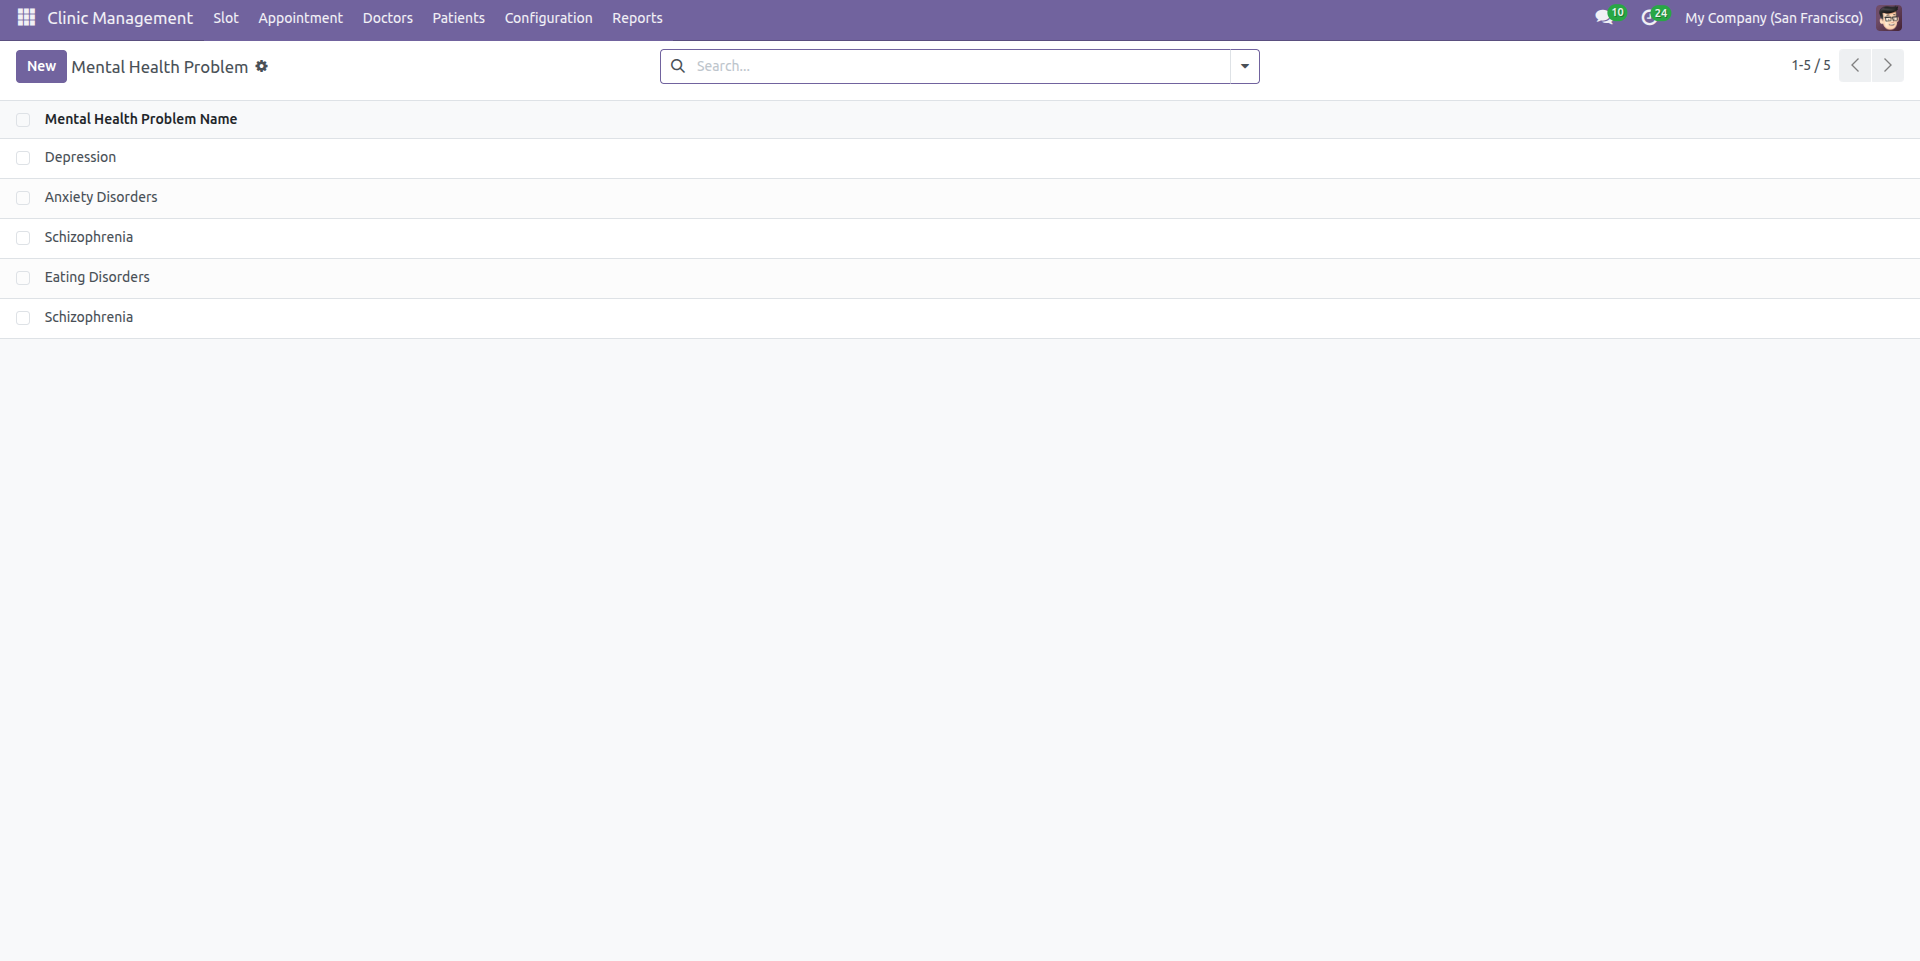
Tree view of the "Mental Health Problem".
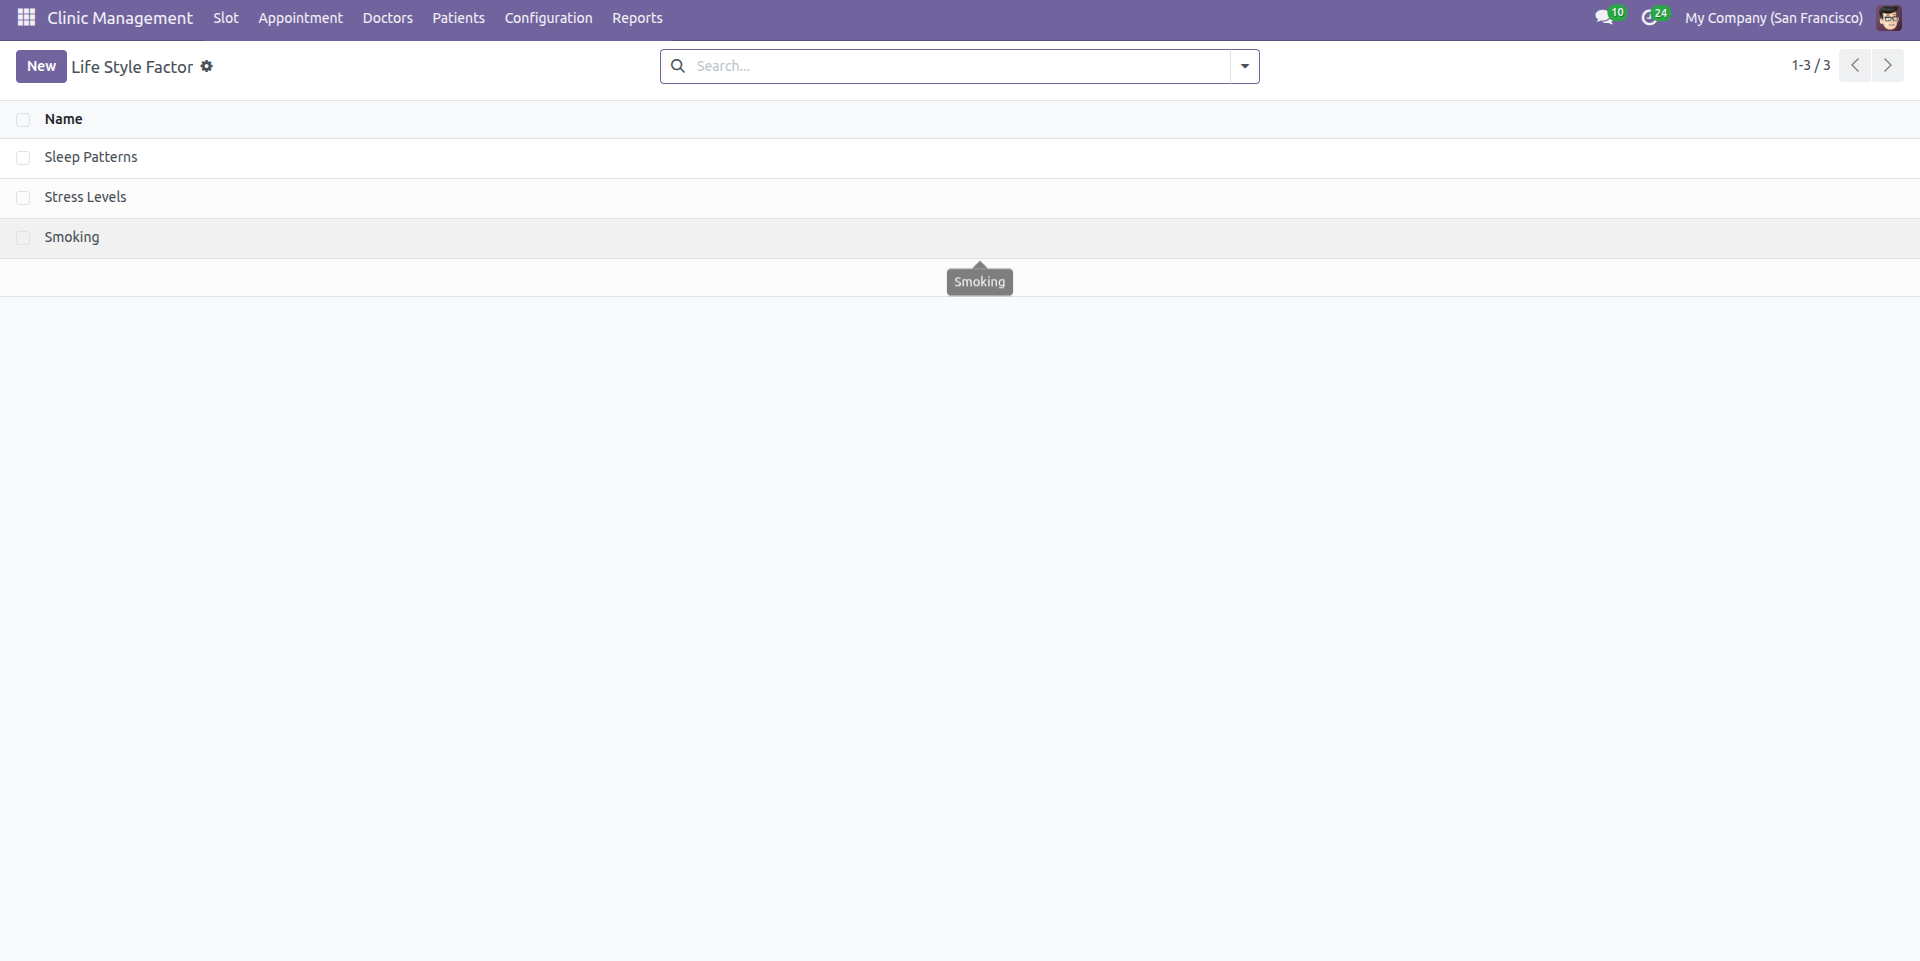
Tree view of the "Life Style Factor".
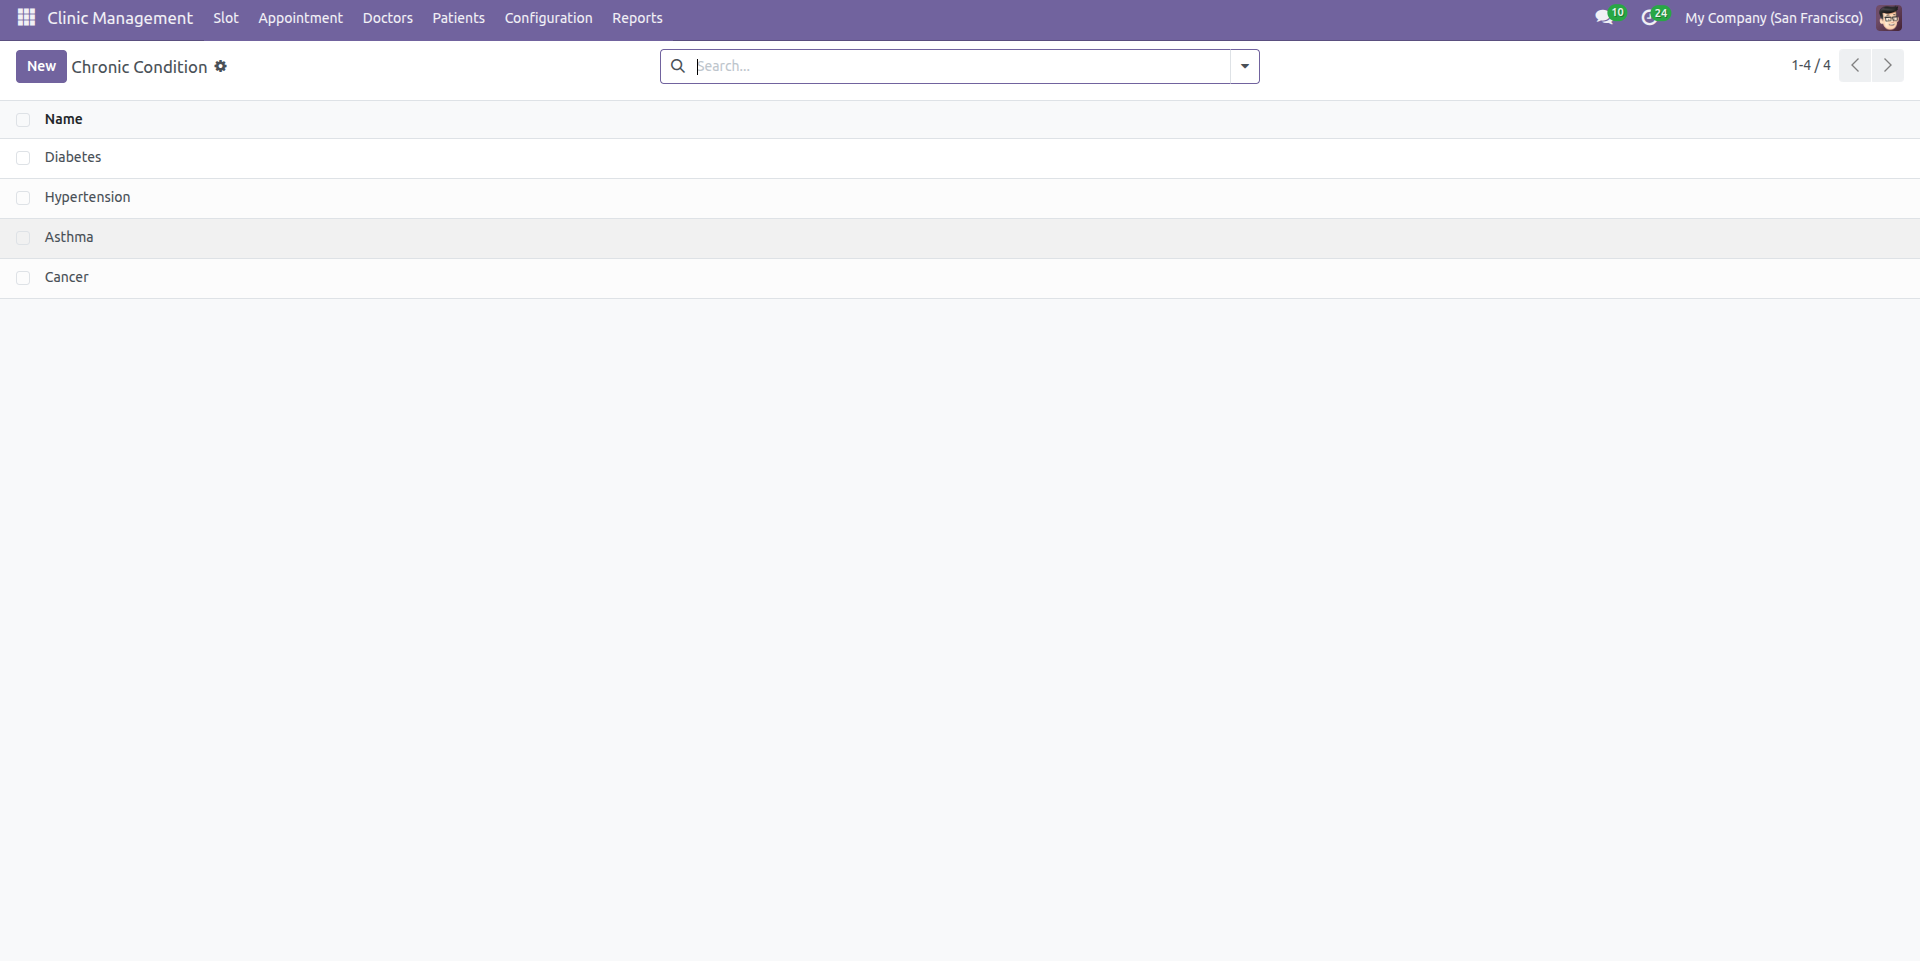
Tree view of the "Chronic Condition".
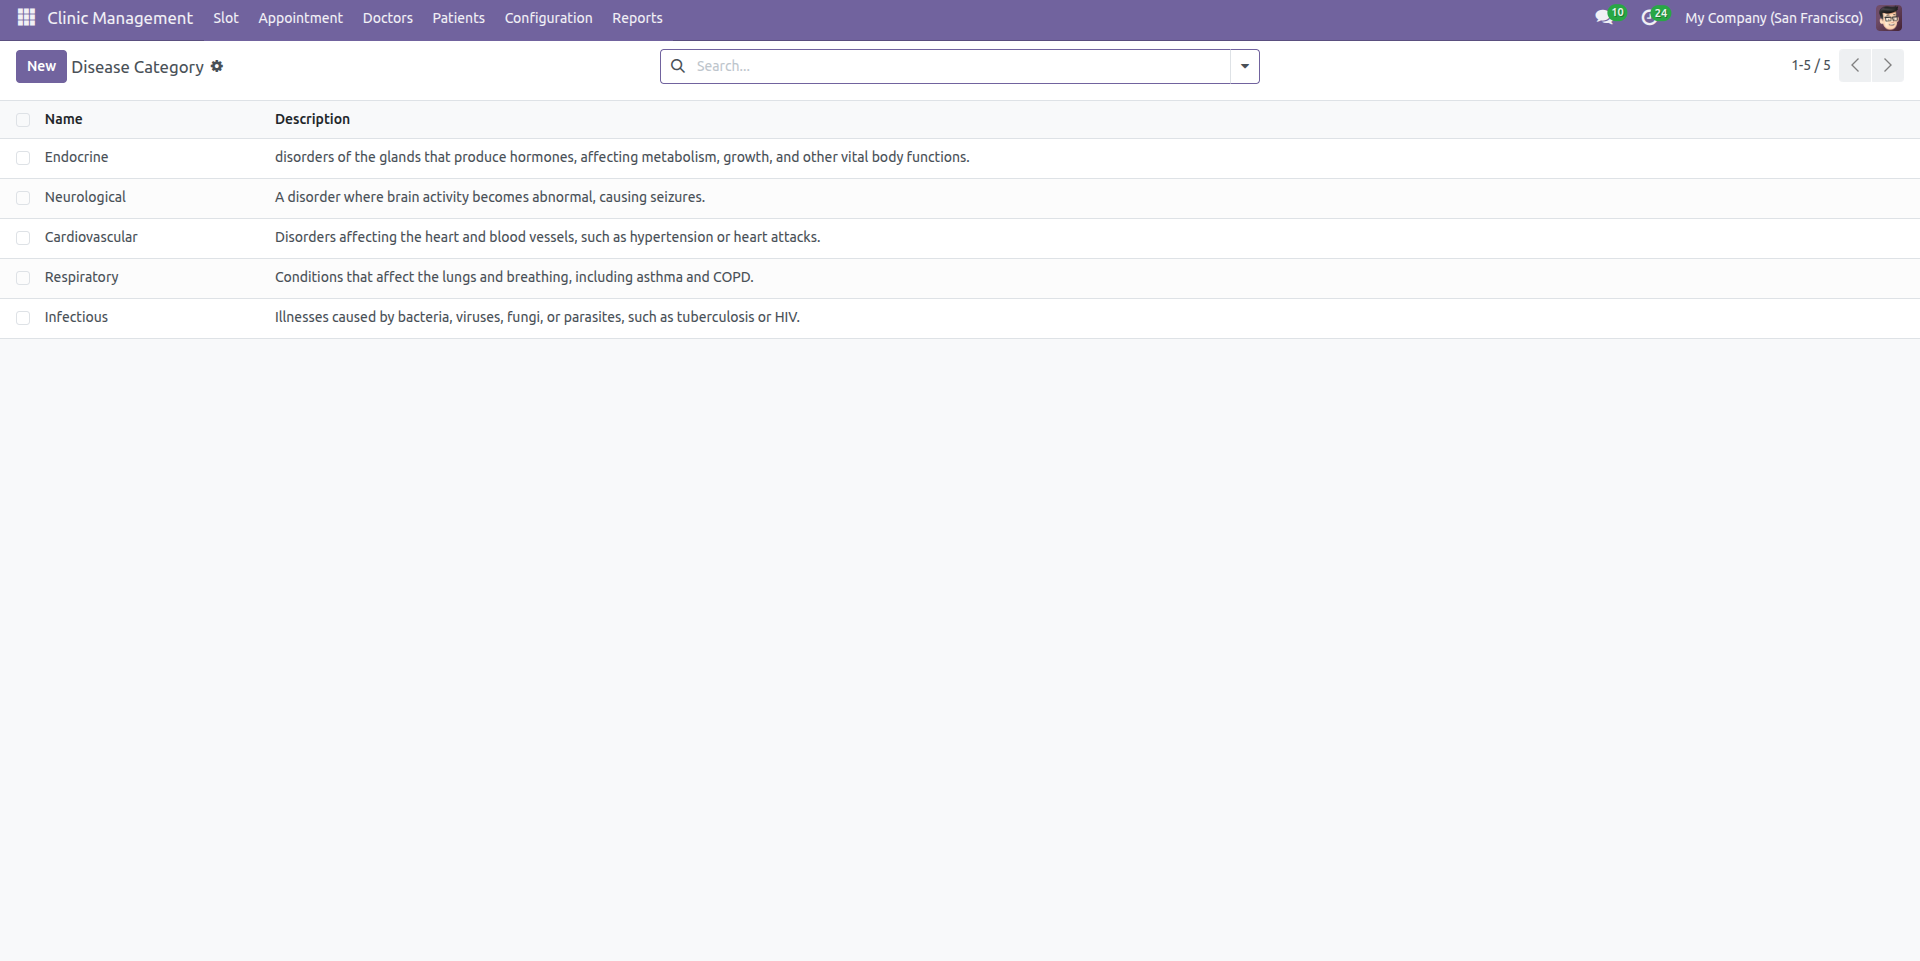
Tree view of the "Disease Category".
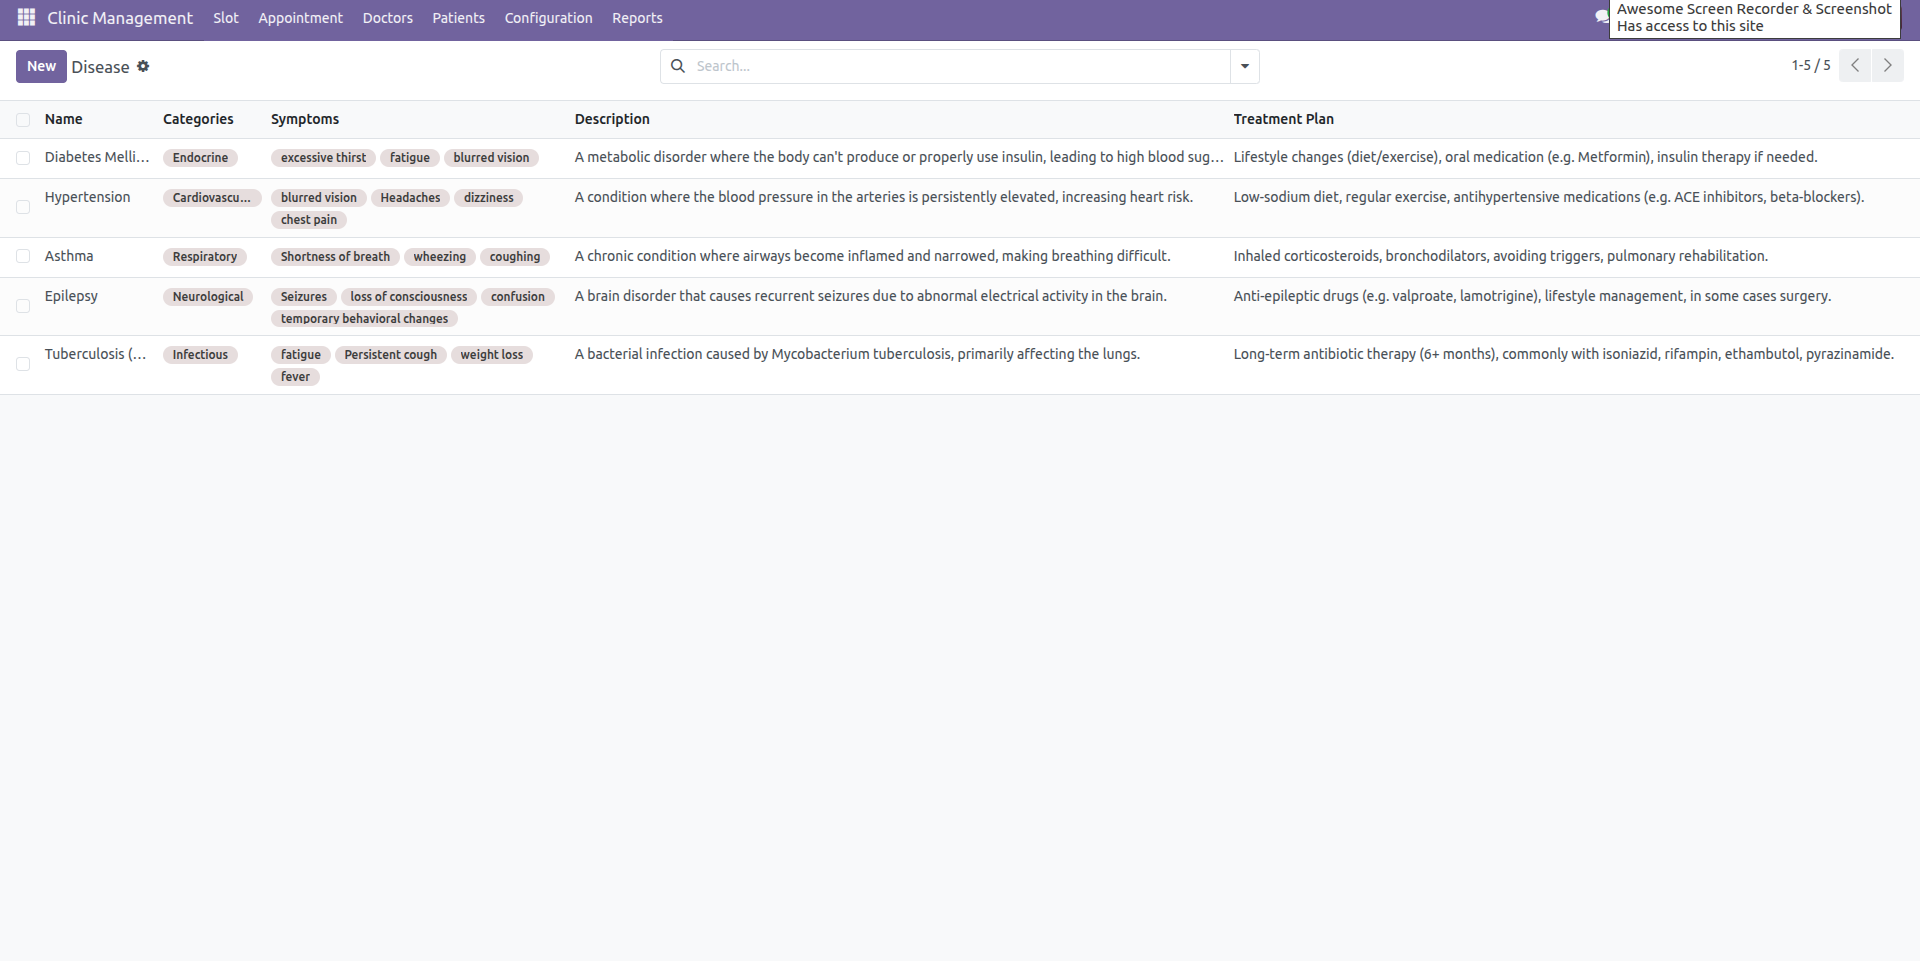
Tree view of the "Disease".
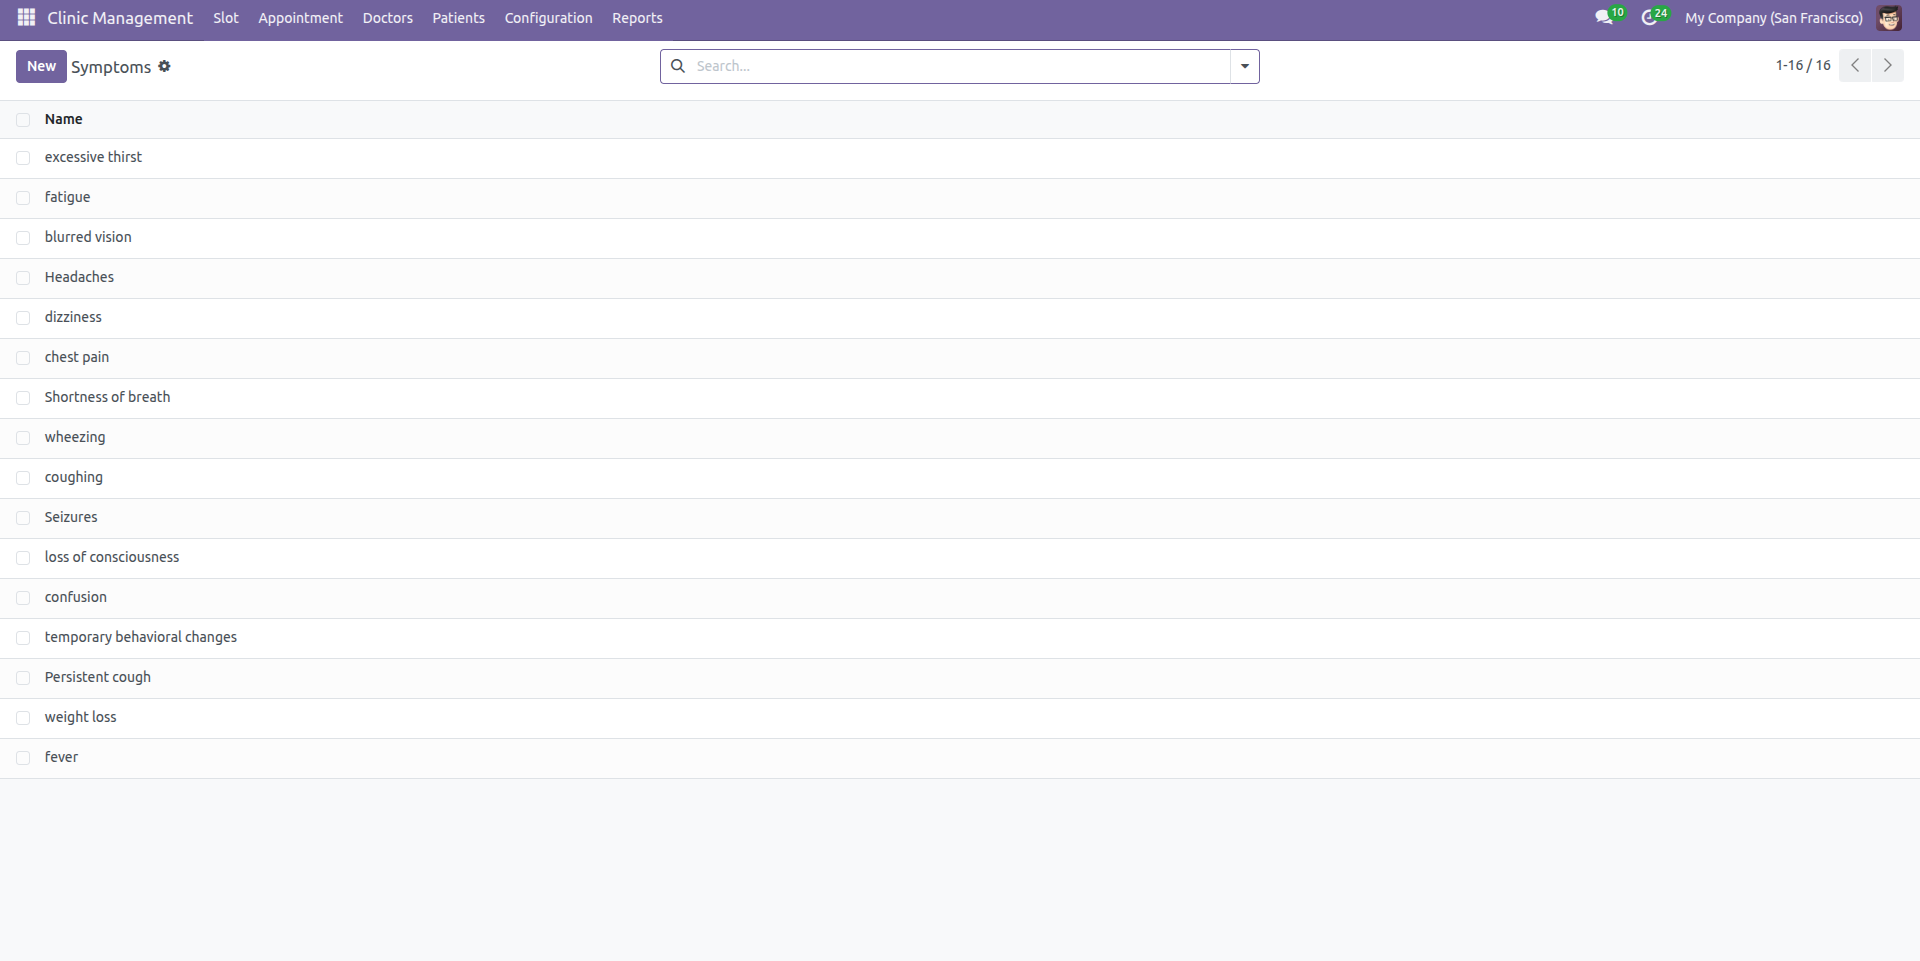
Tree view of the "Symptoms".
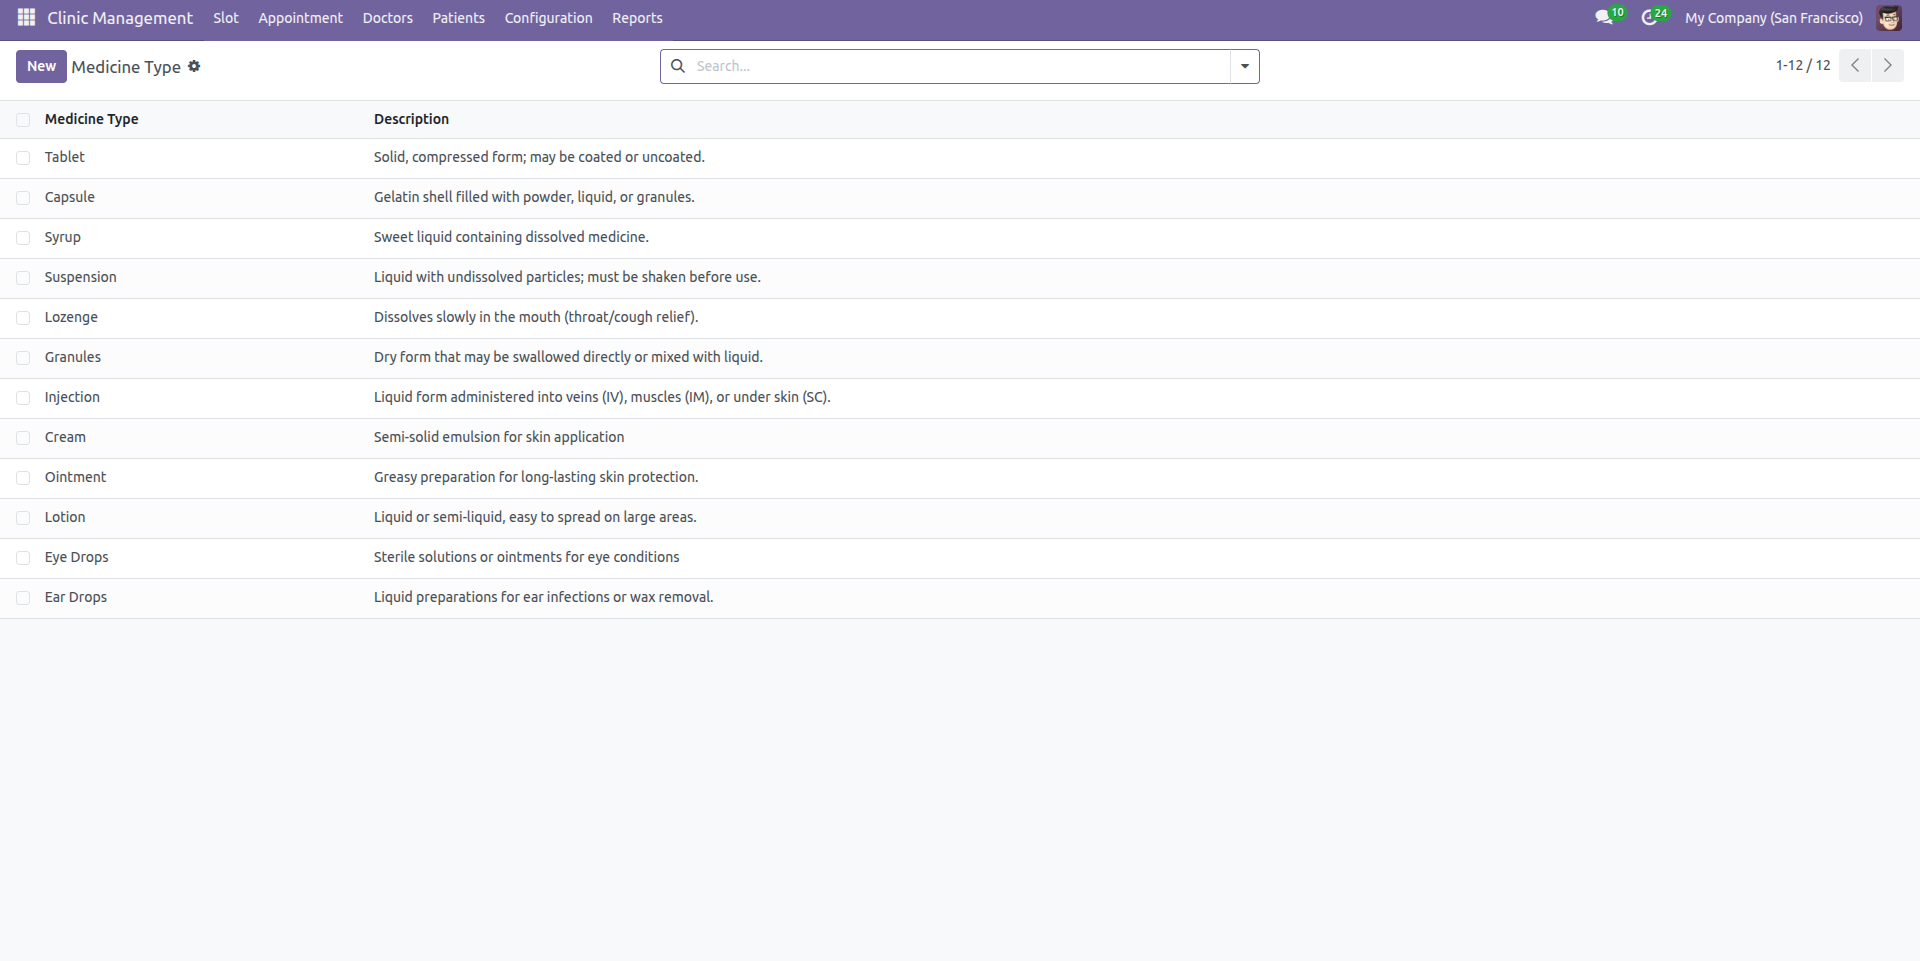
Tree view of the "Medicine Type".
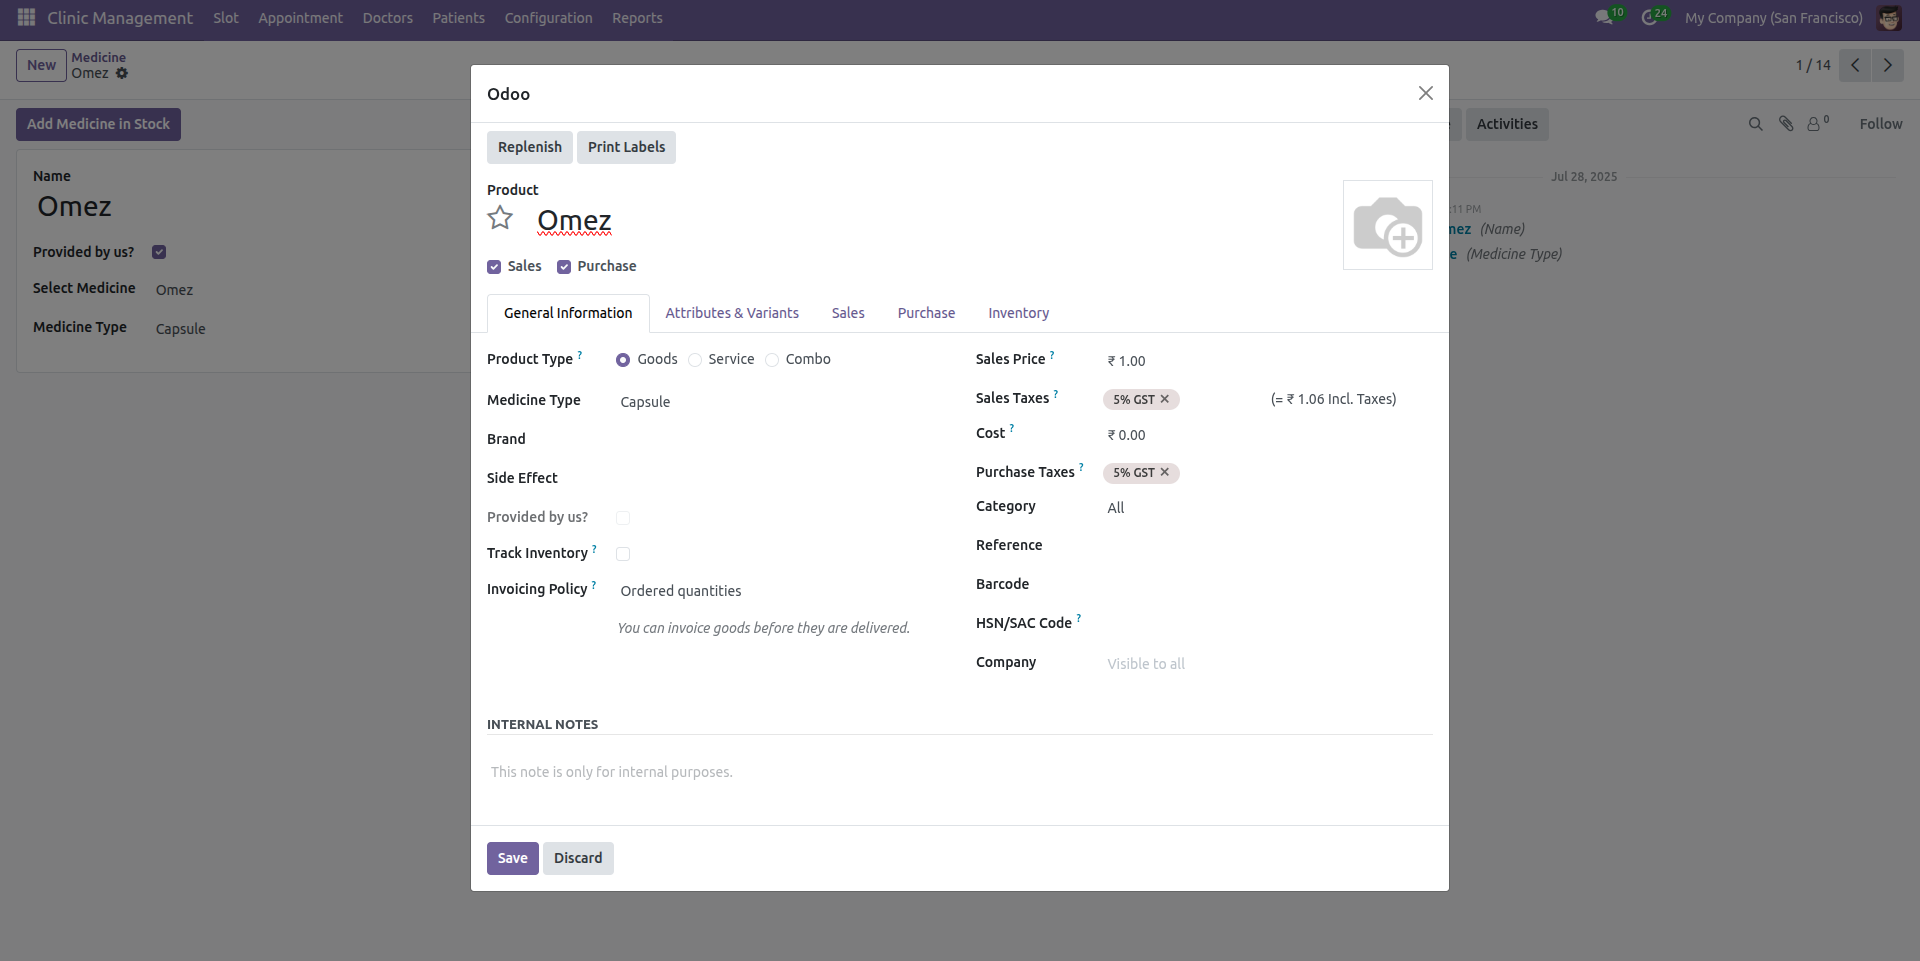
Tree view of the "Medicine".
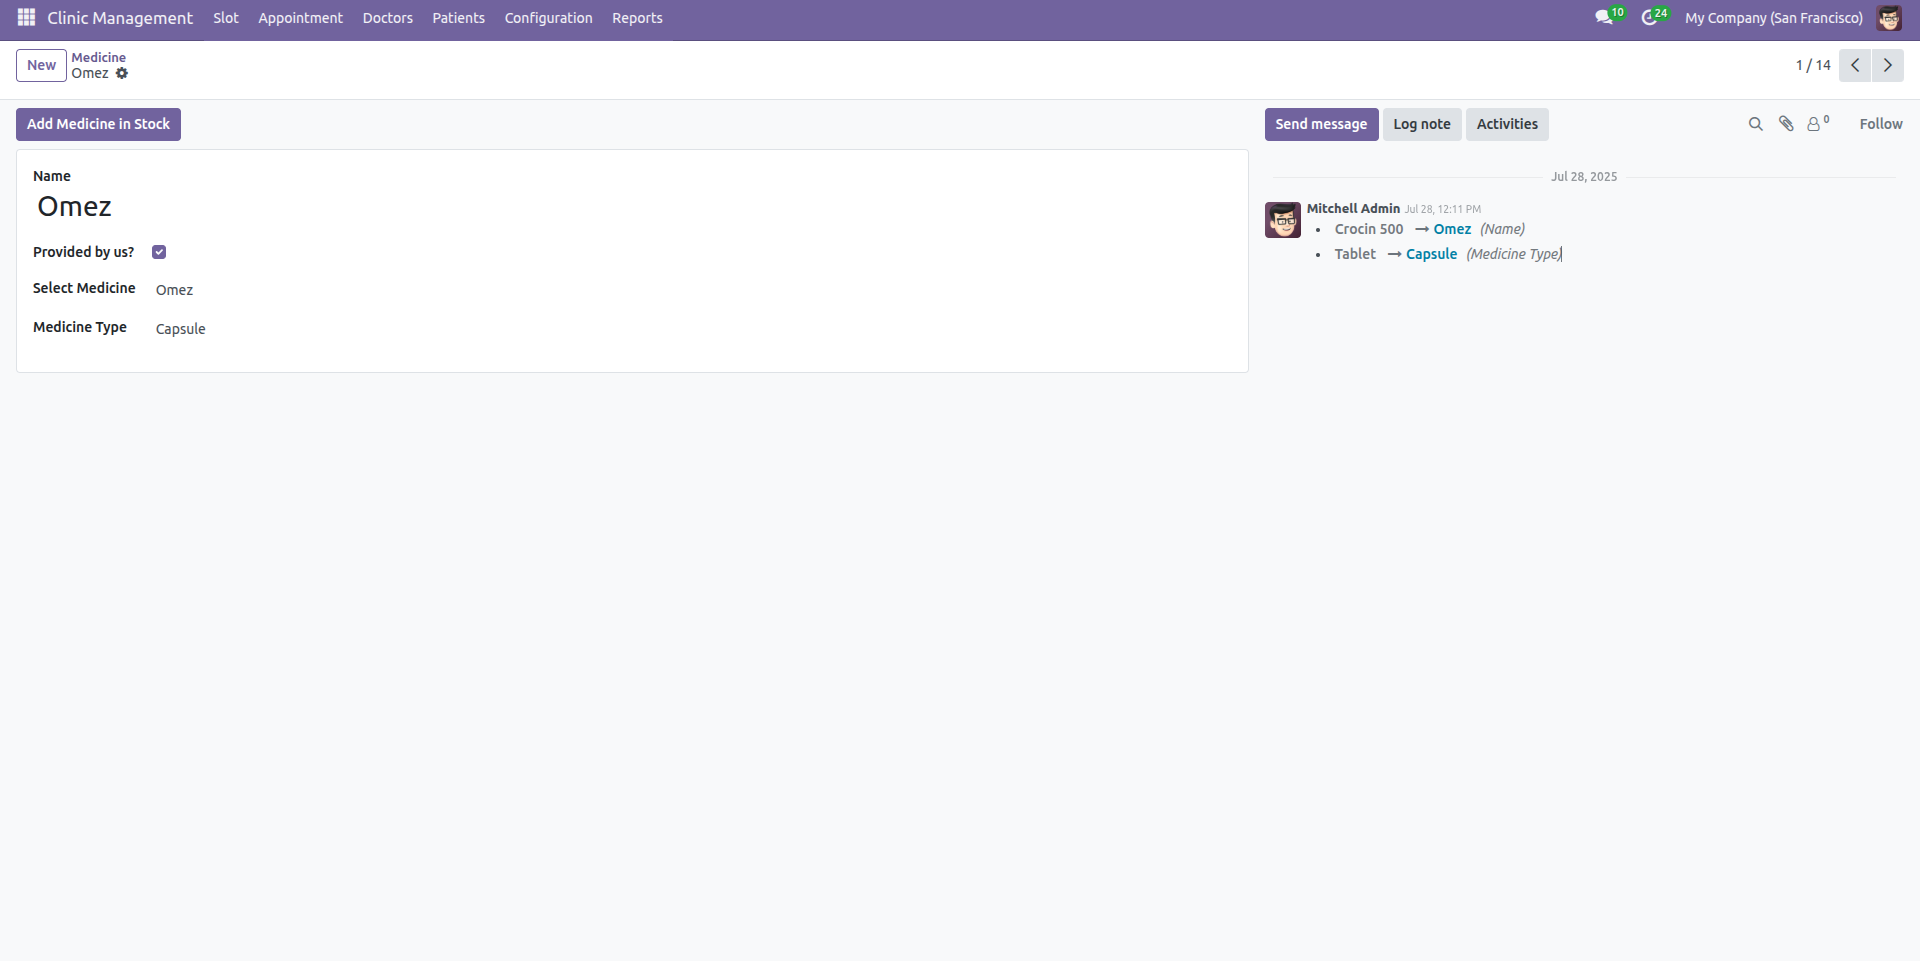
Click on the "Add Medicine In Stock" button.
After that, Odoo wizard will appear, add details and click on
the "Save" to proceed.
Workflow
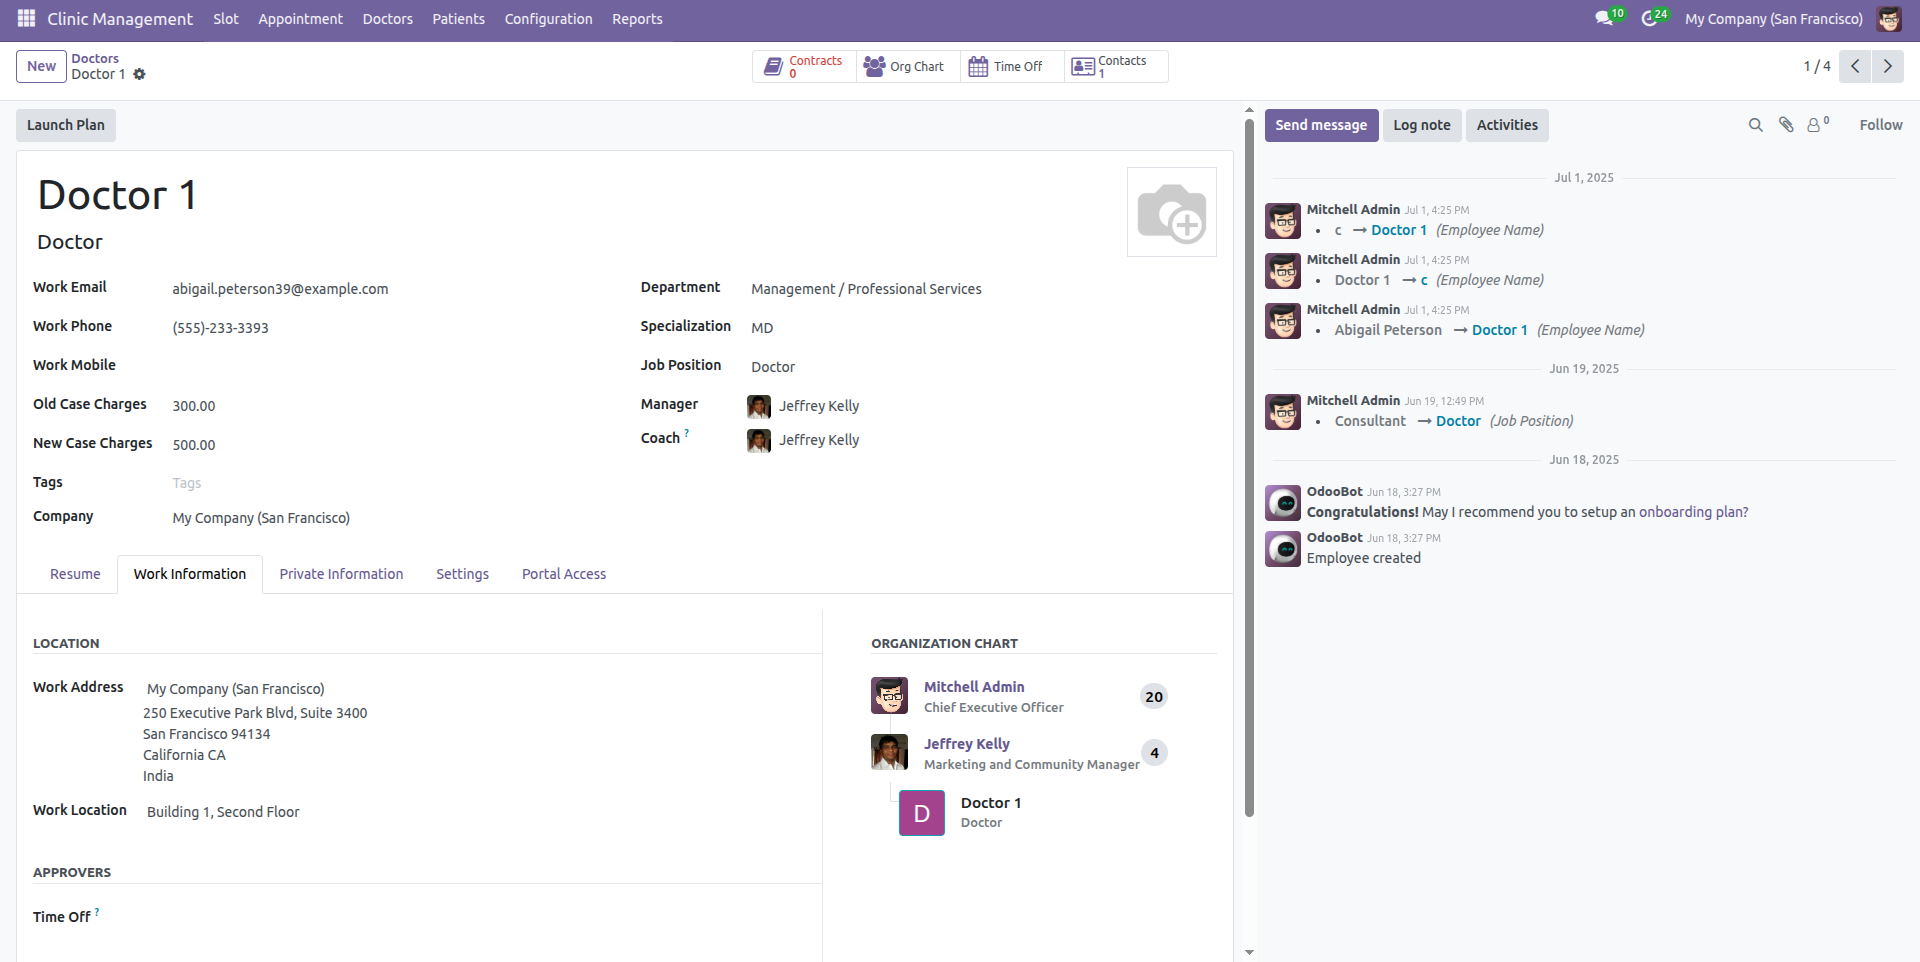
Form view of the "Doctors".
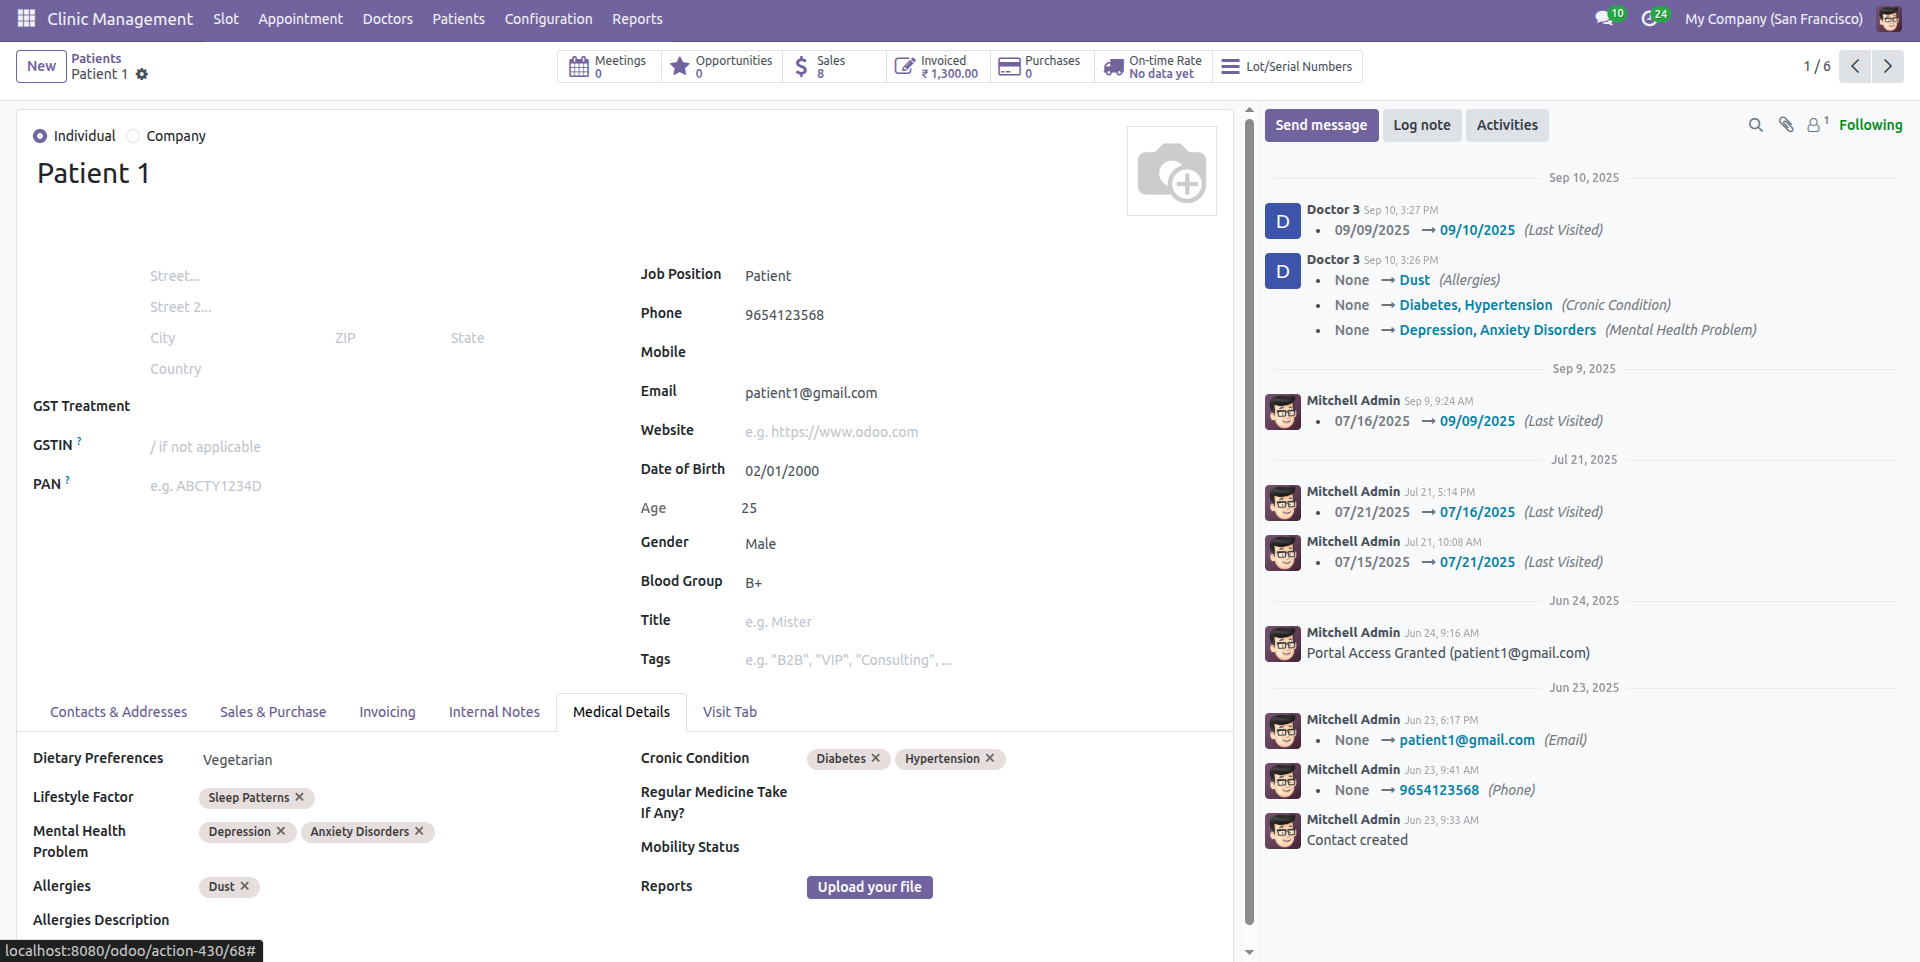
Form view of the "Patients".
Workflow
Form view of the "Appointments".
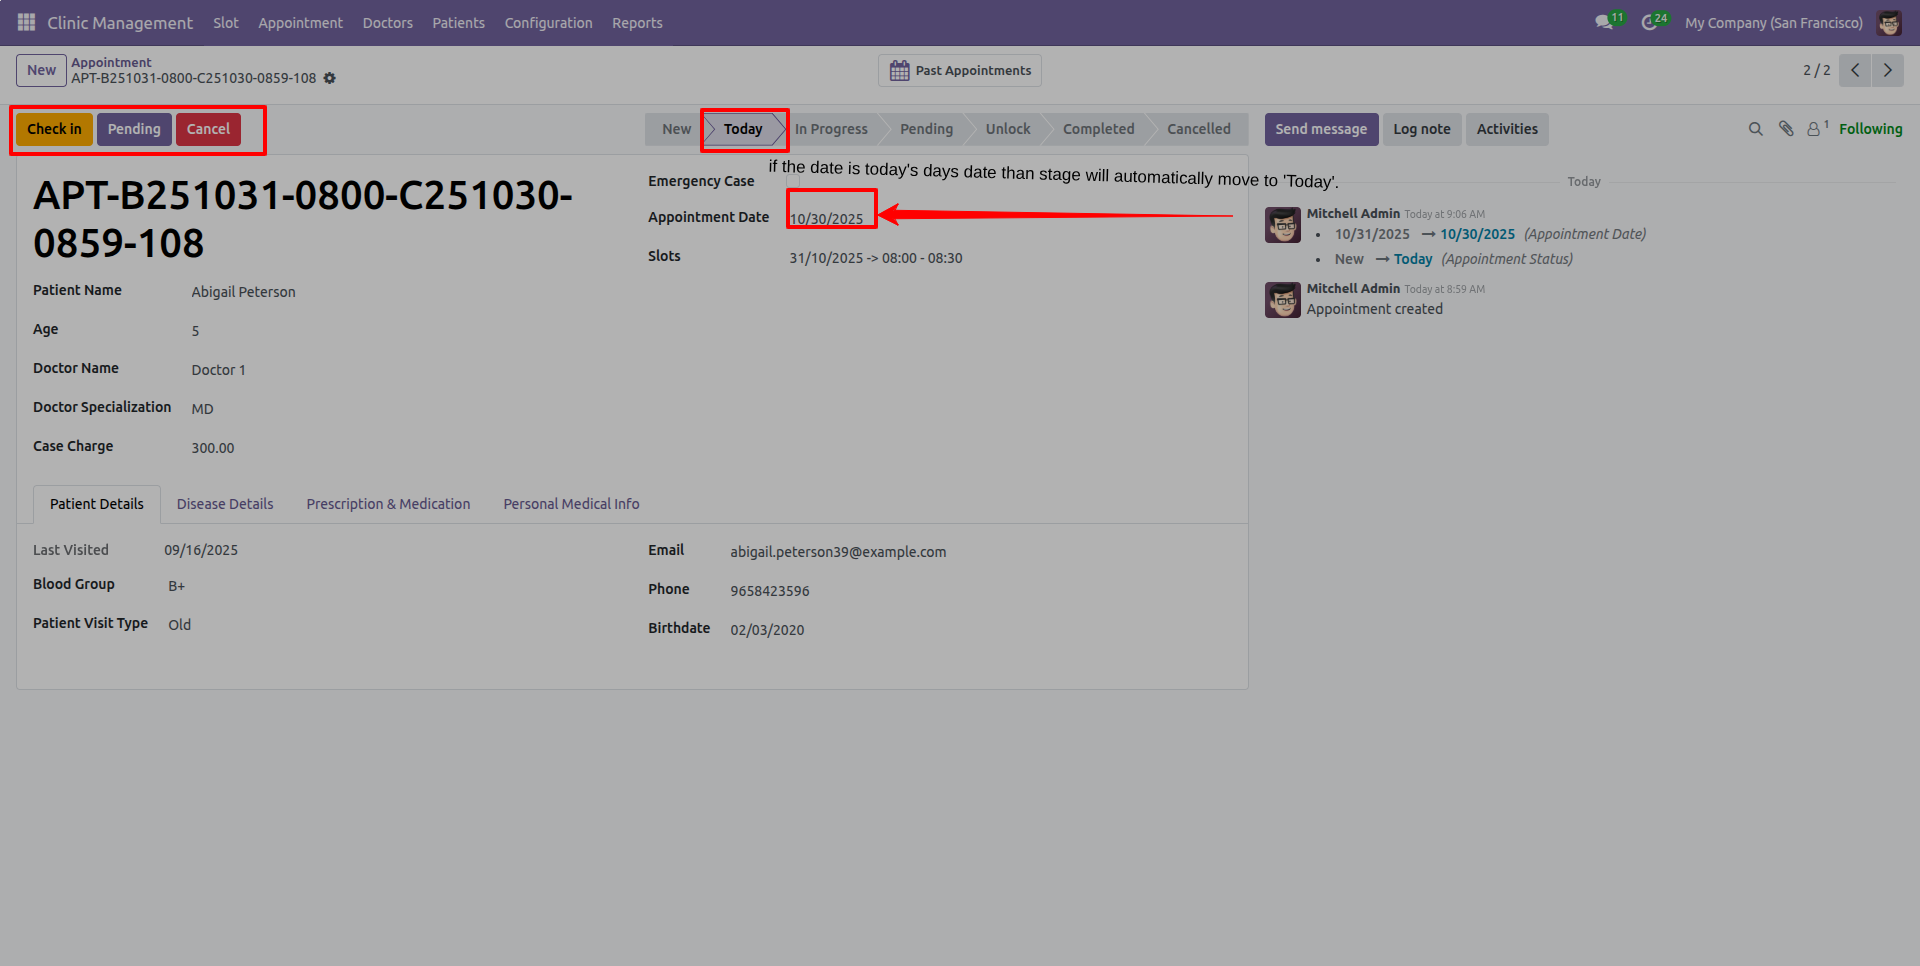
Click on the "Check In" button.
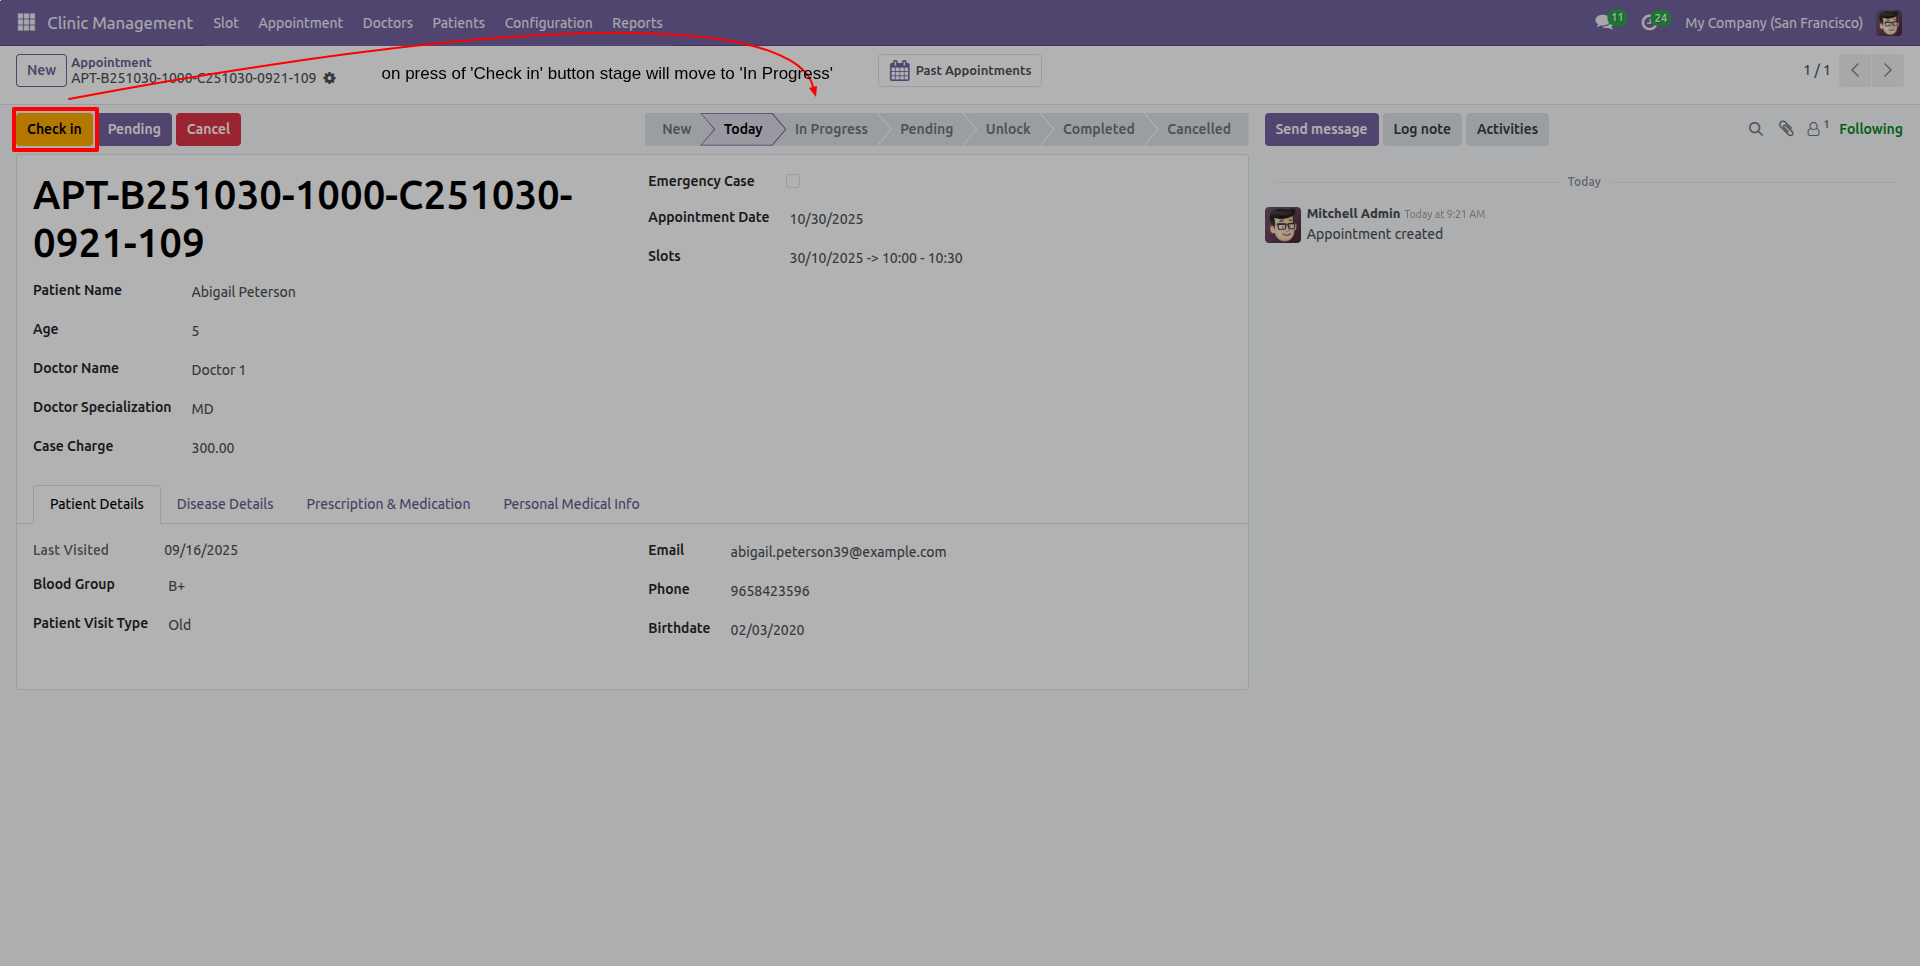
The appointment is now in the "In Progress" stage.
Next, click on the "Done" stage.
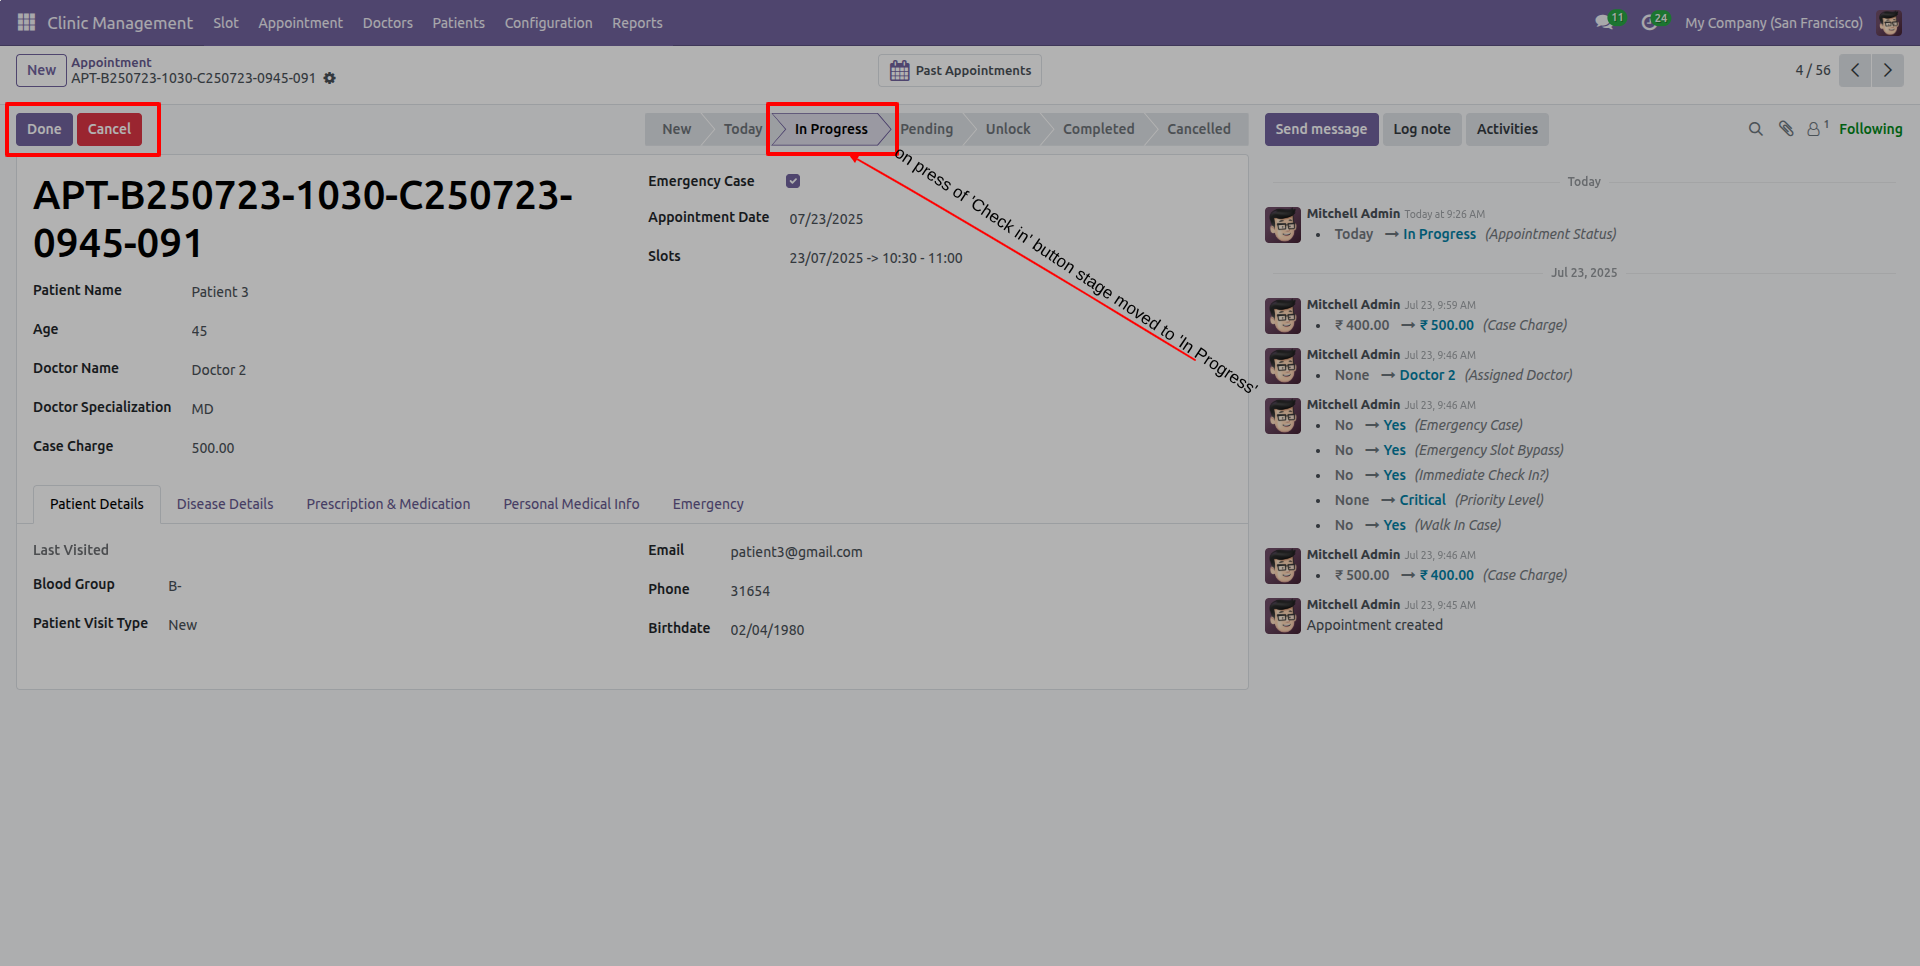
The appointment is now in the "Completed" stage.
To unlock the appointment, click on the "Unlock" button.
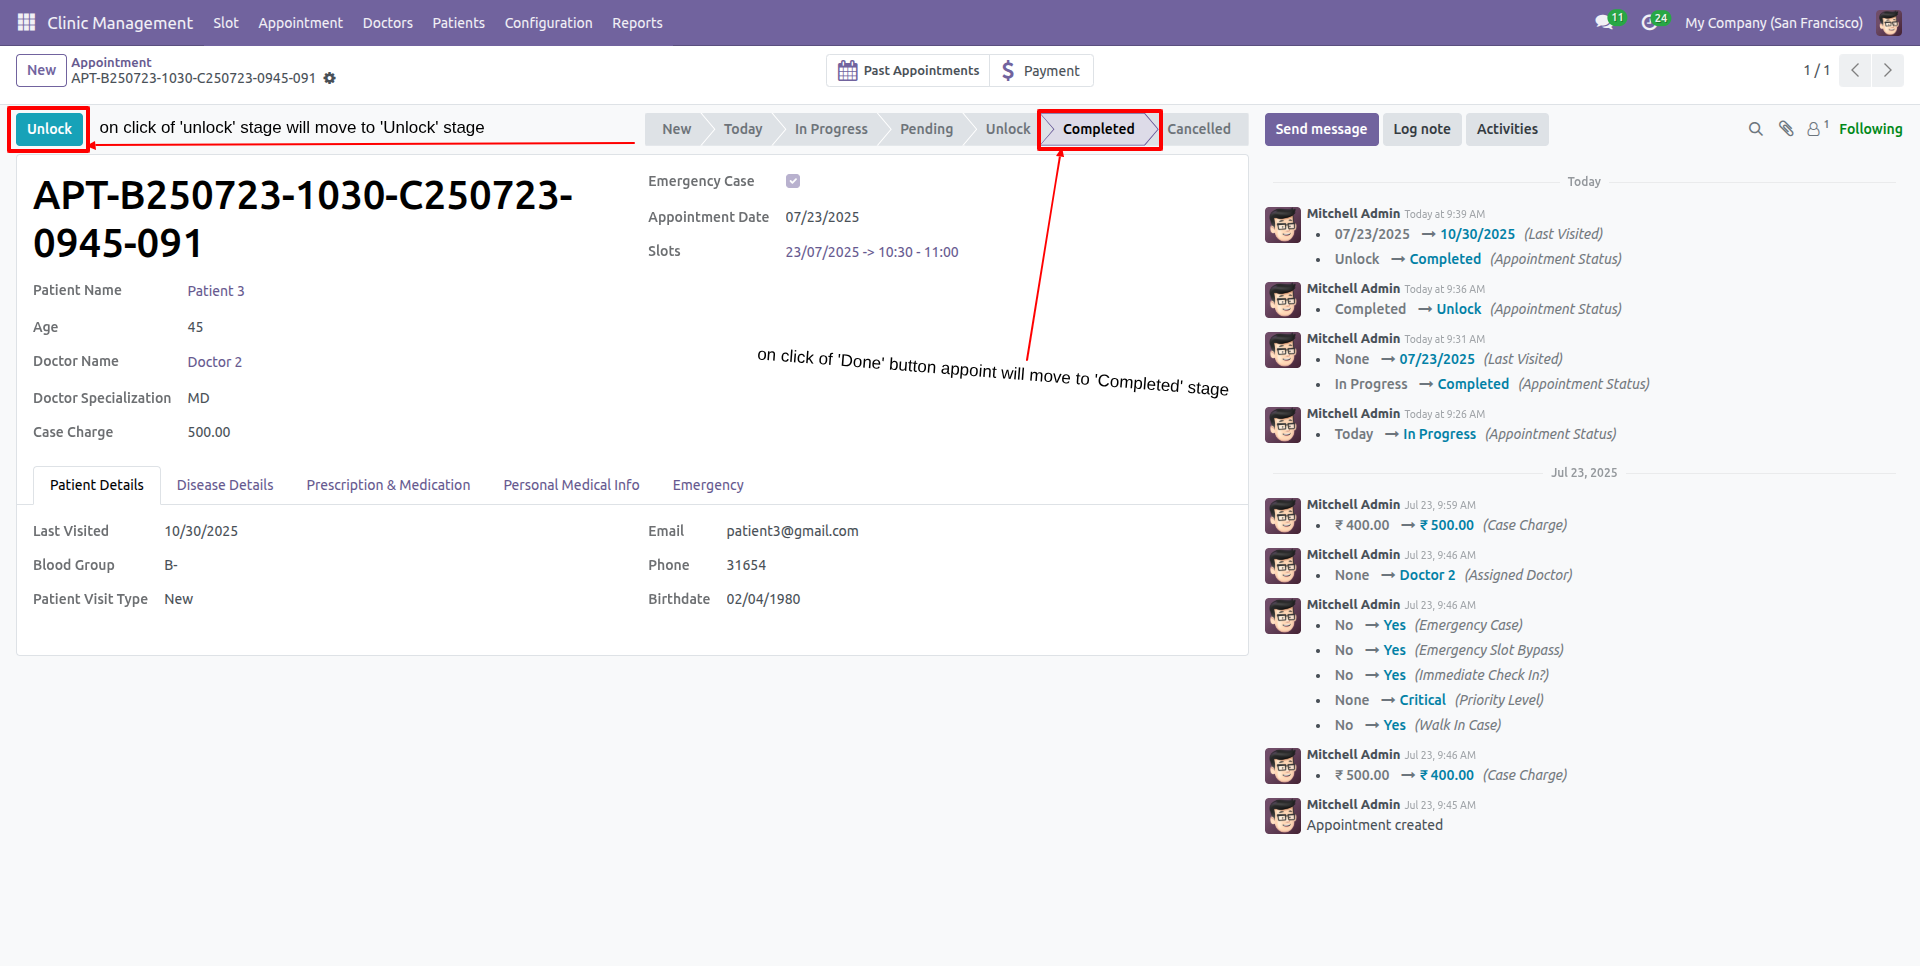
To cancel the appointment, click on the "Cancel" button.
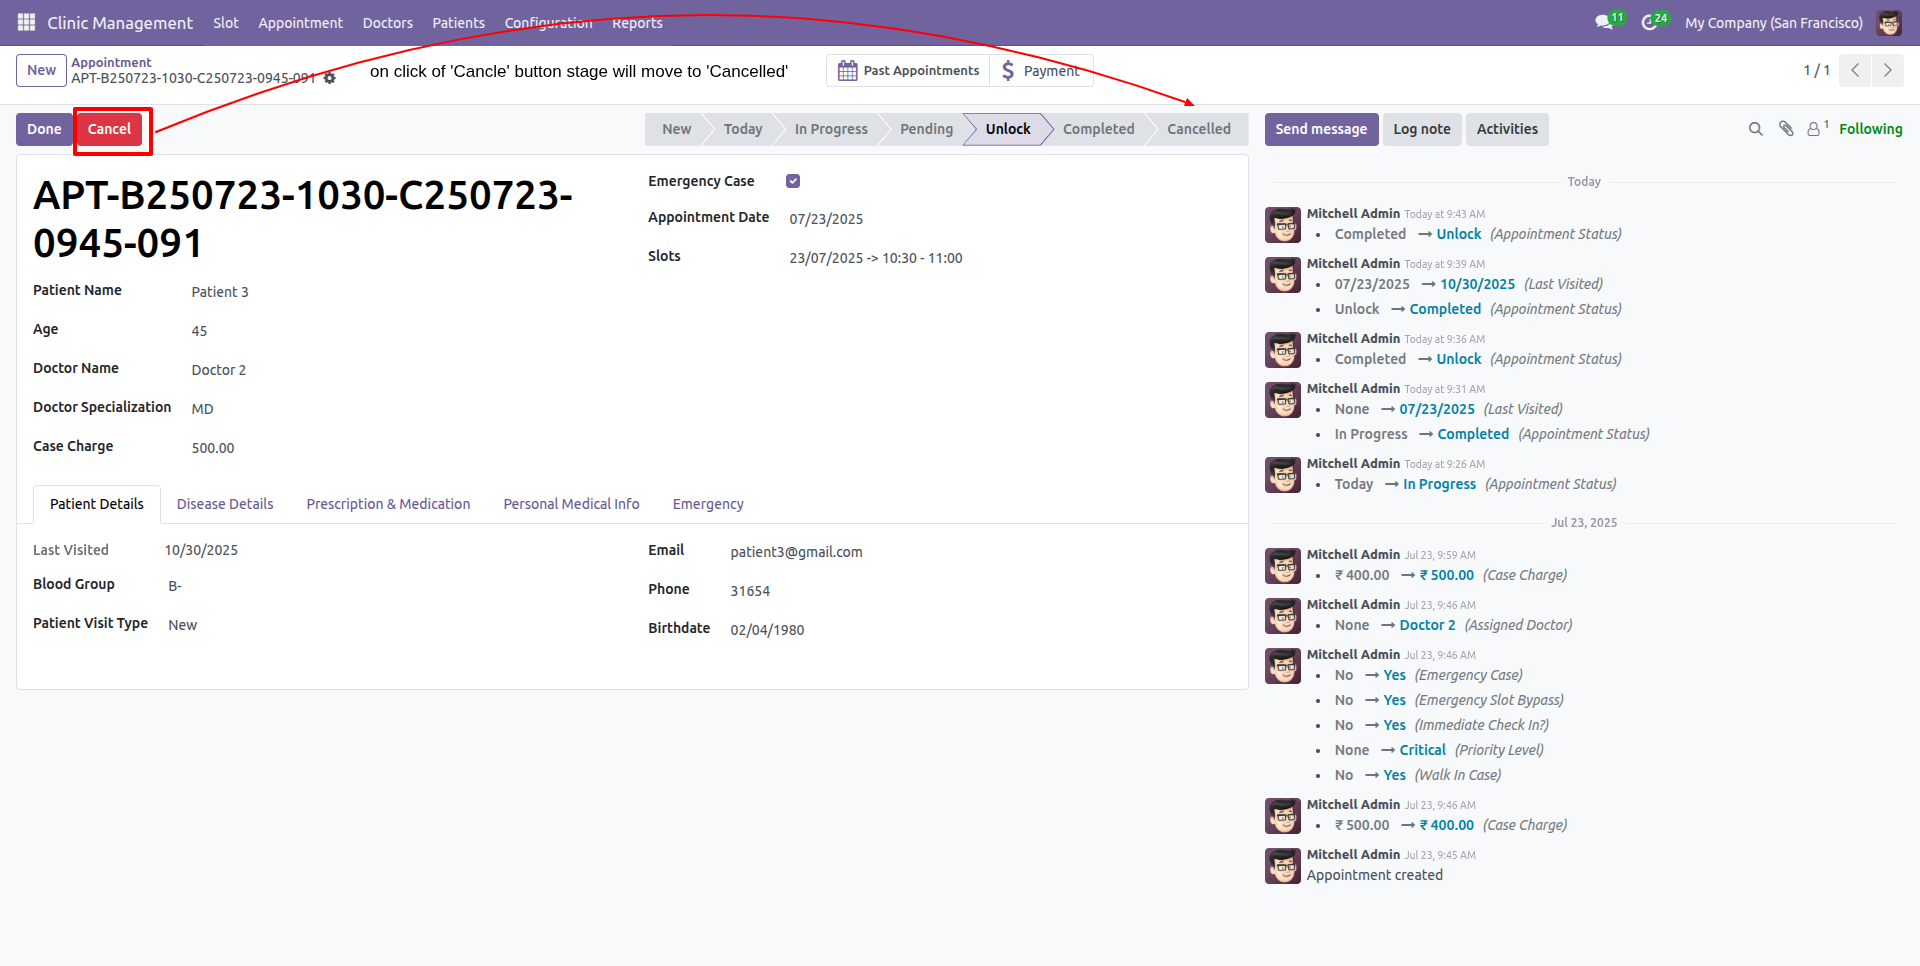
The appointment is now in the "Cancelled" stage.
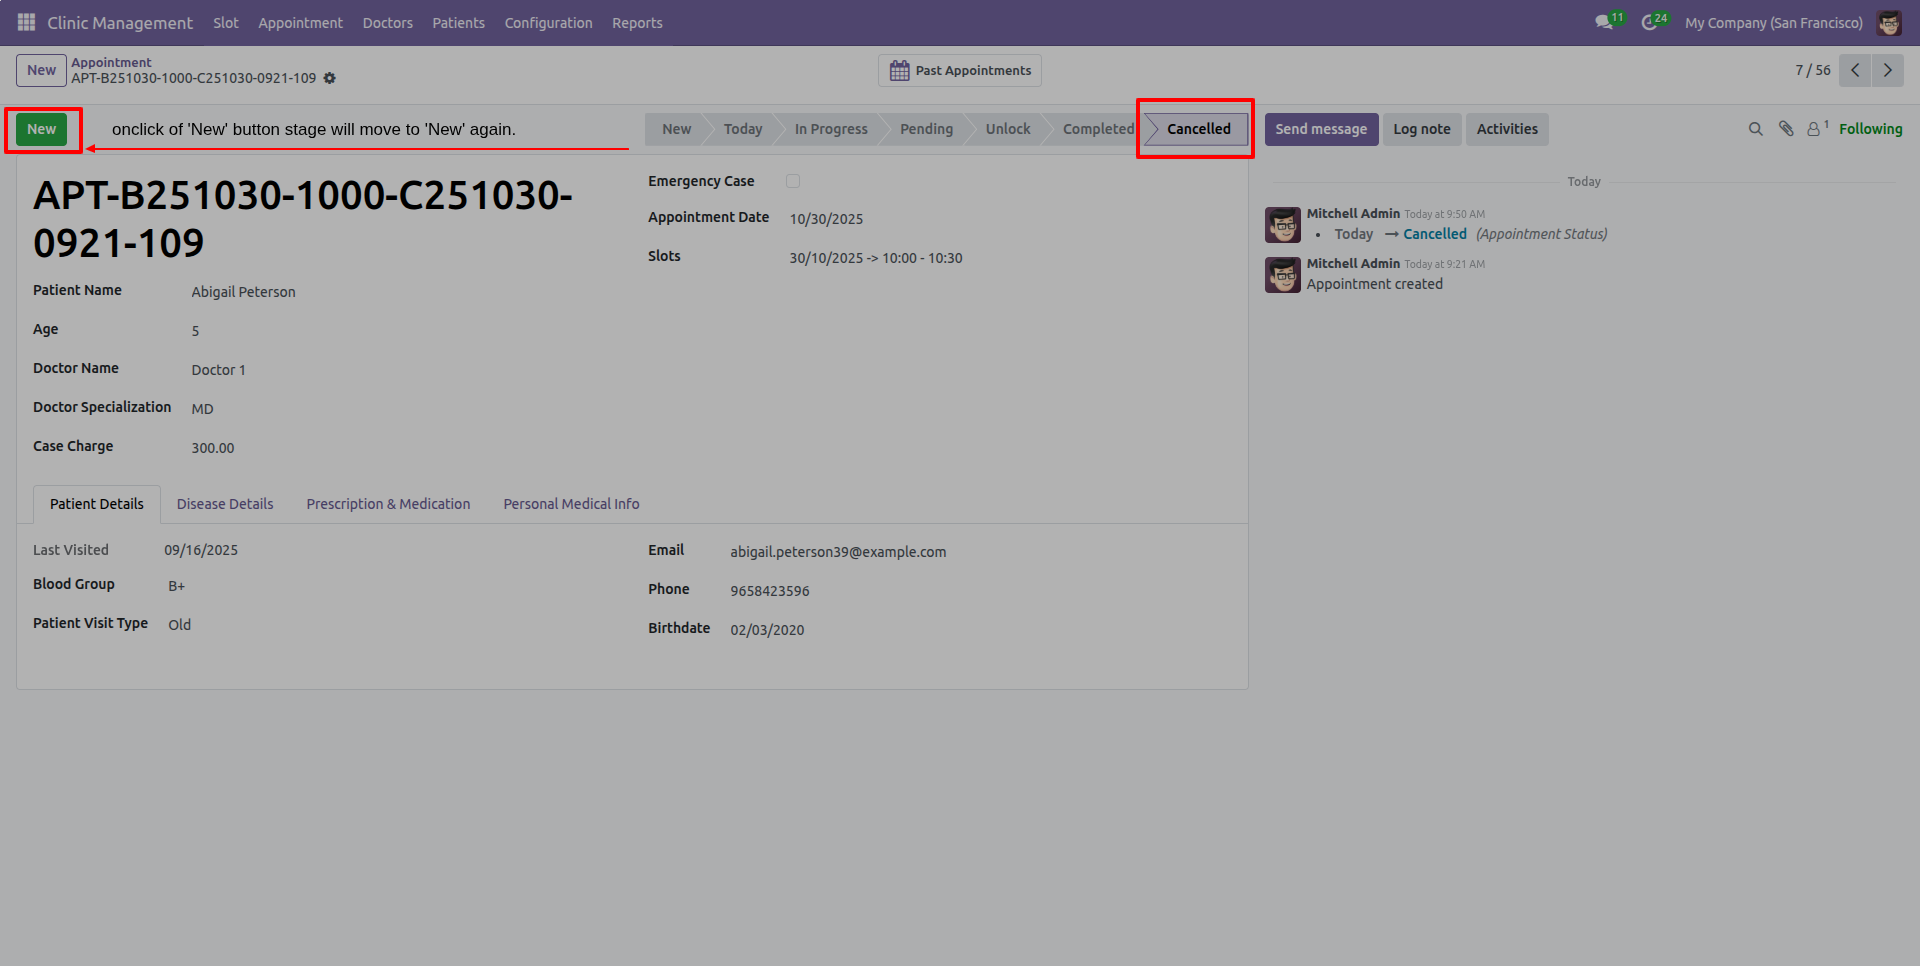
To reopen the appointment, click on the "New" button.
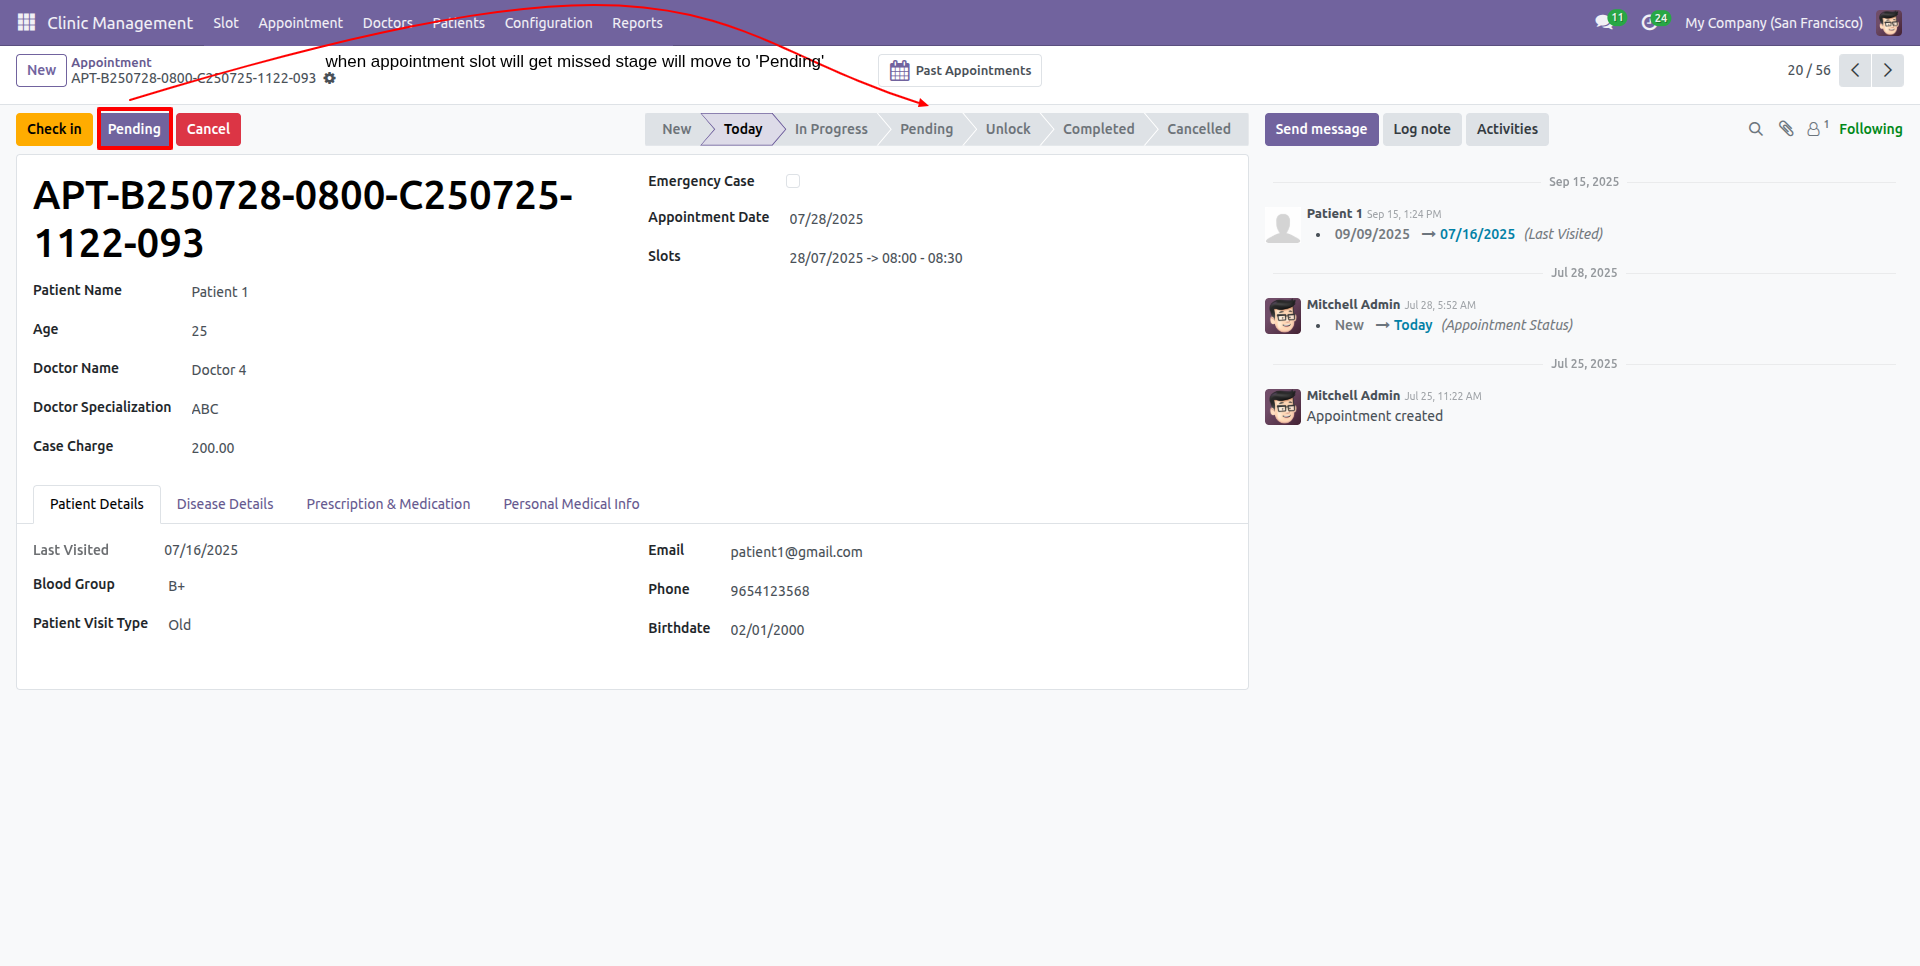
If a slot is missed, click on the "Pending" button.
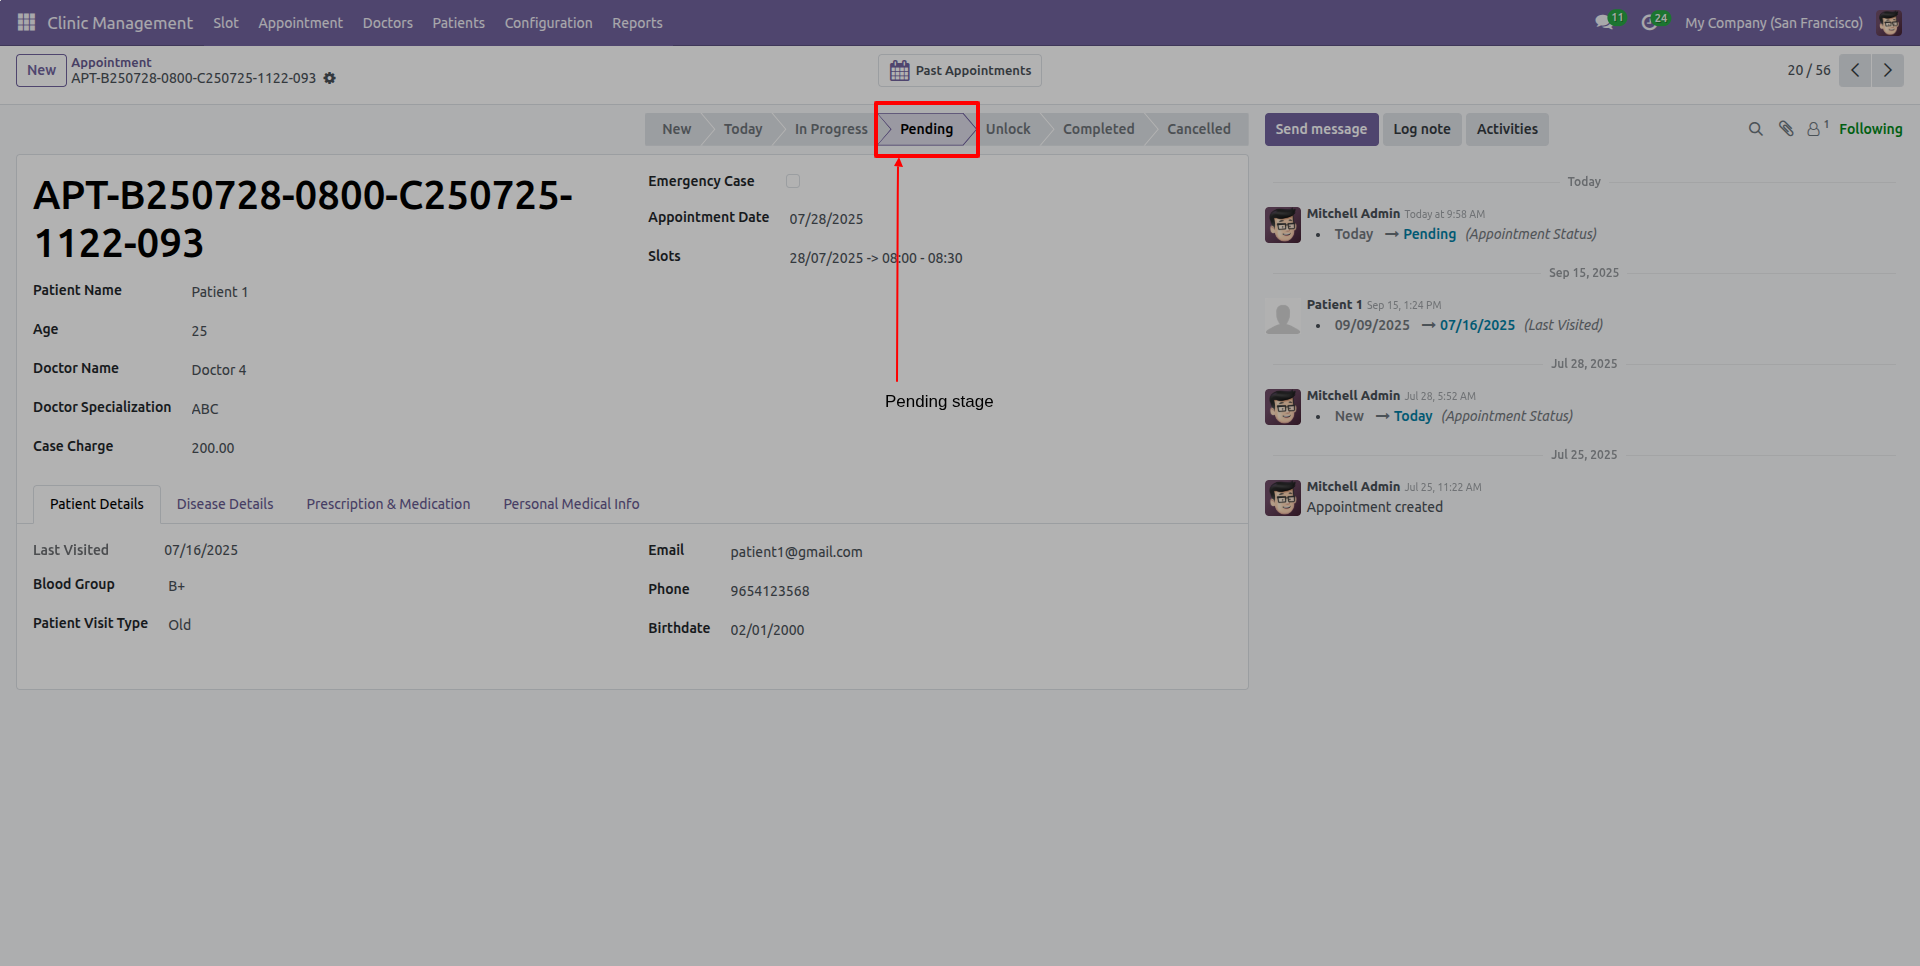
The appointment is now in the "Pending" stage.
Workflow
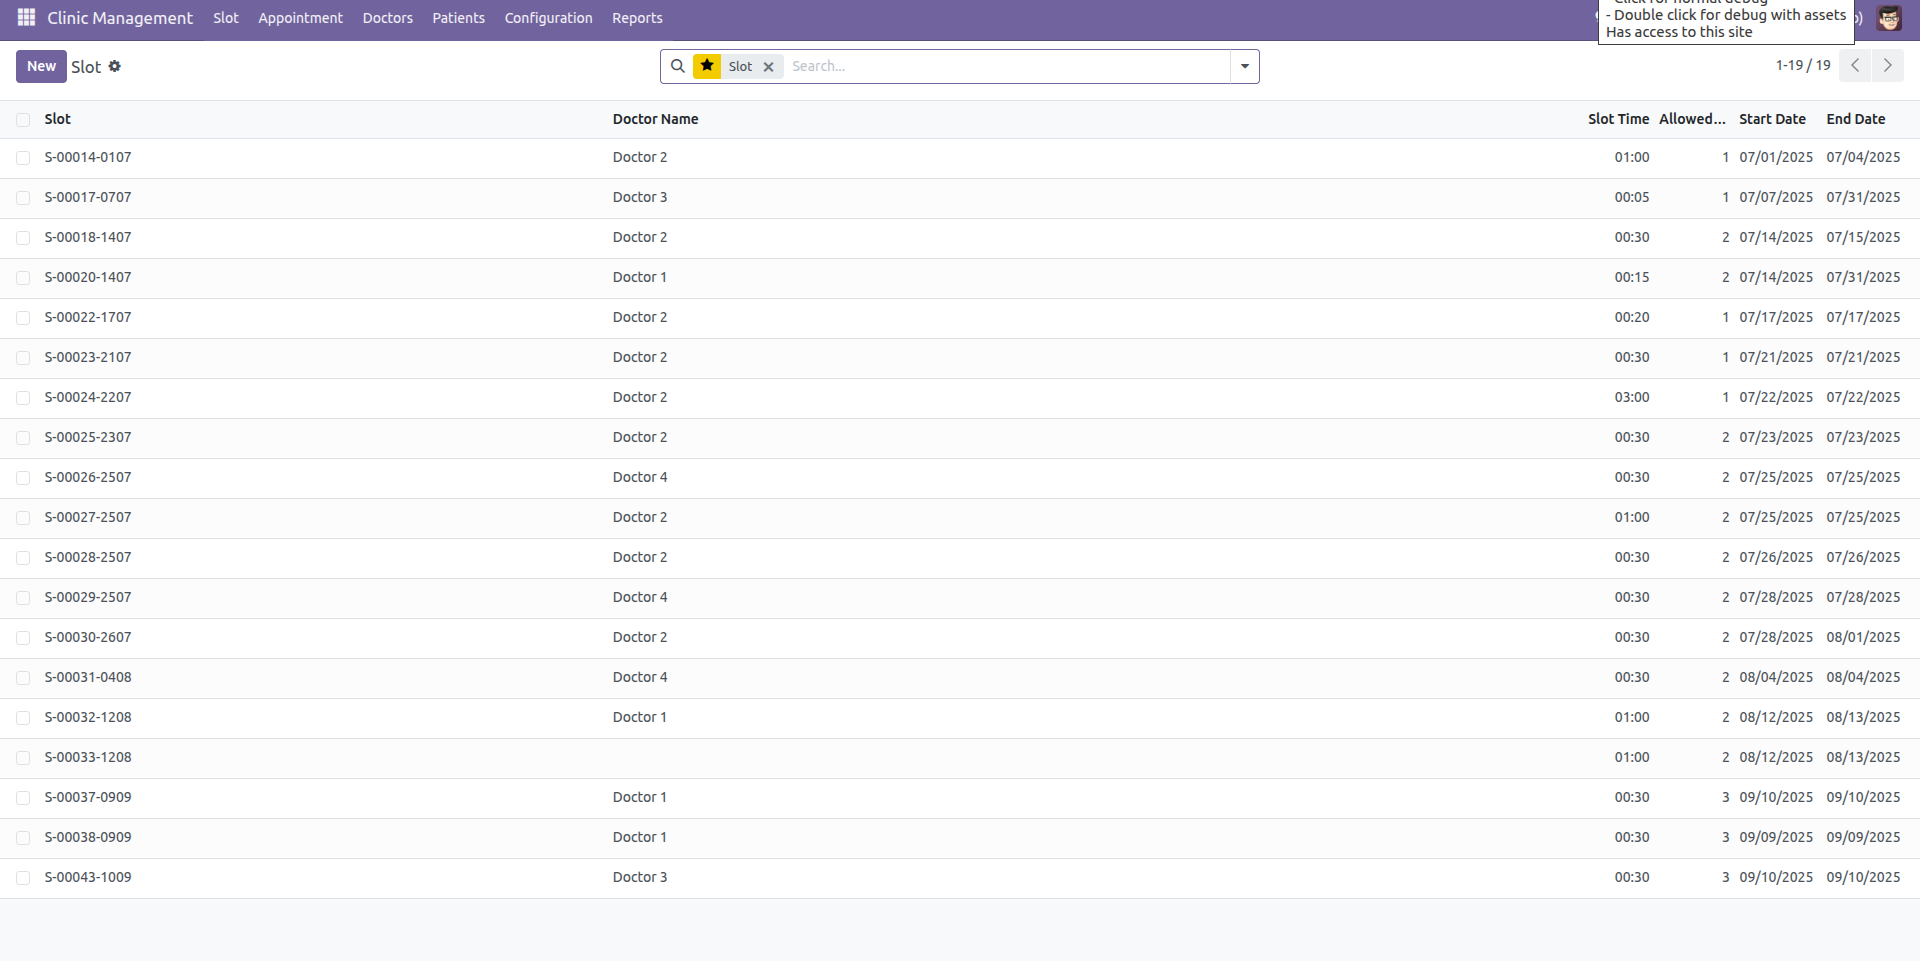
Tree view of the "Slot".
Create a new slot. Click on the "Generate Slot" button.
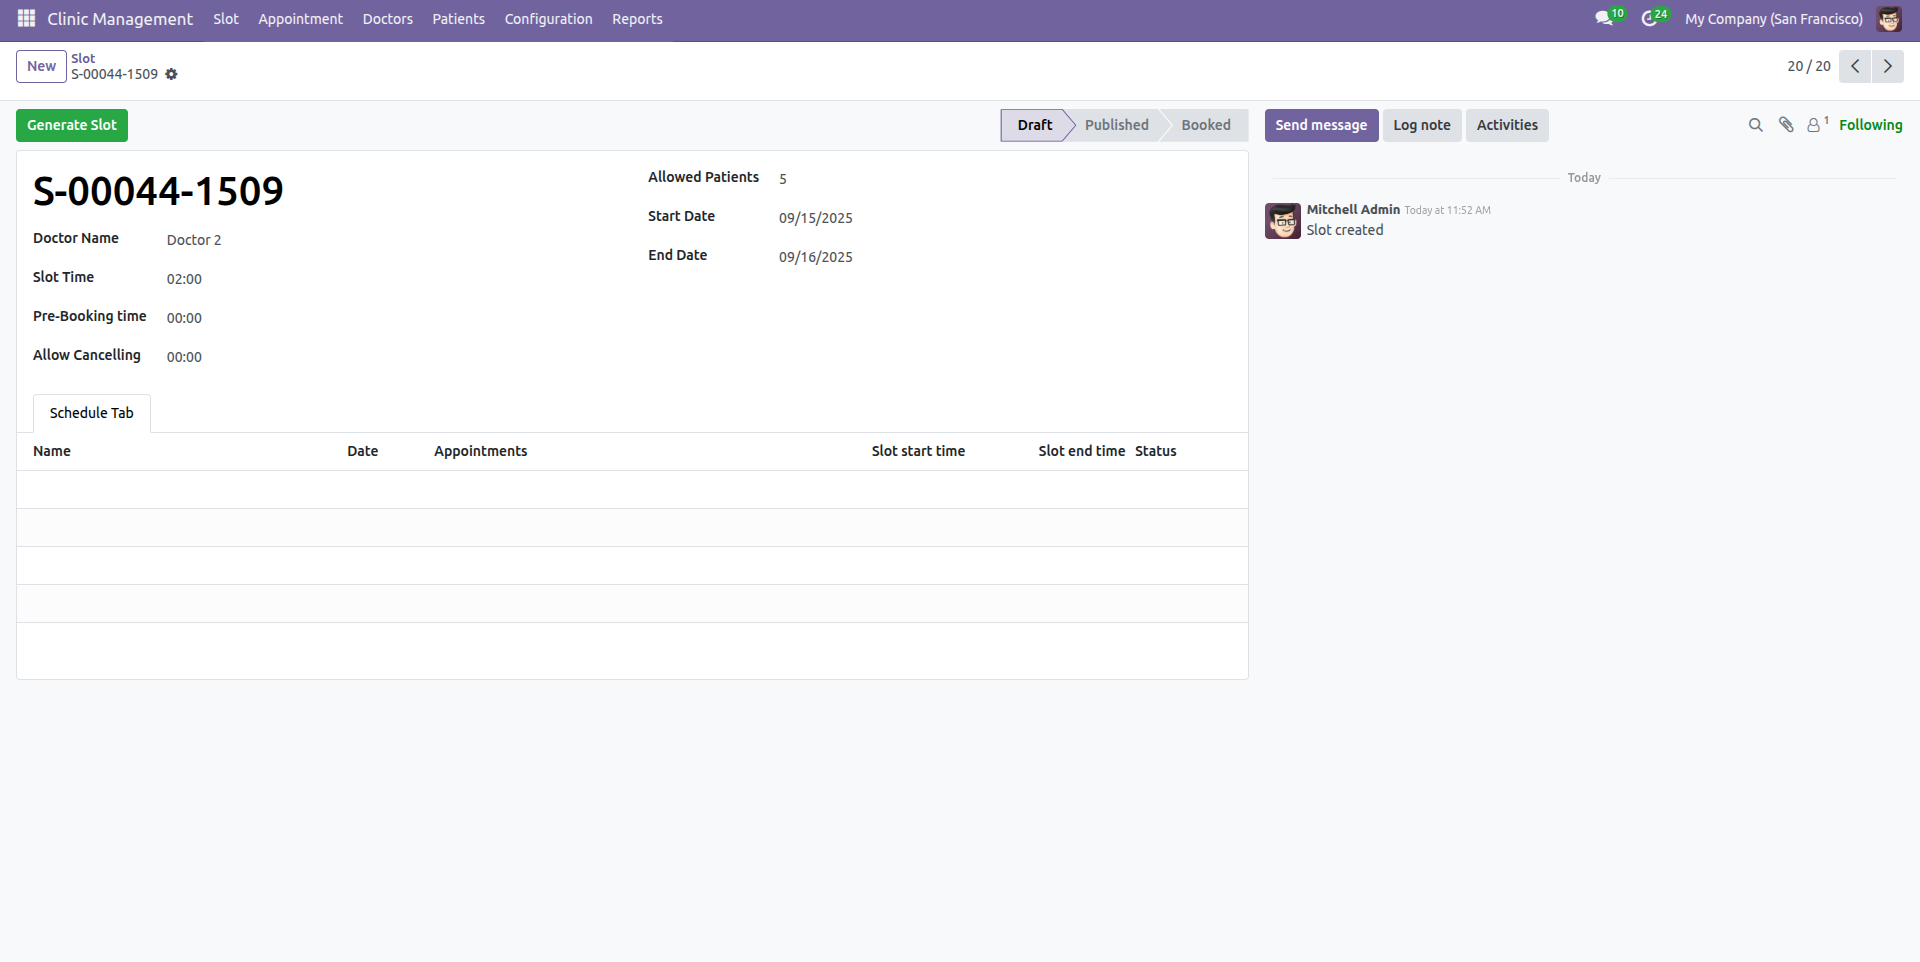
You can view the generated slots in the "Schedule" tab. Then, click on the "Publish" button.
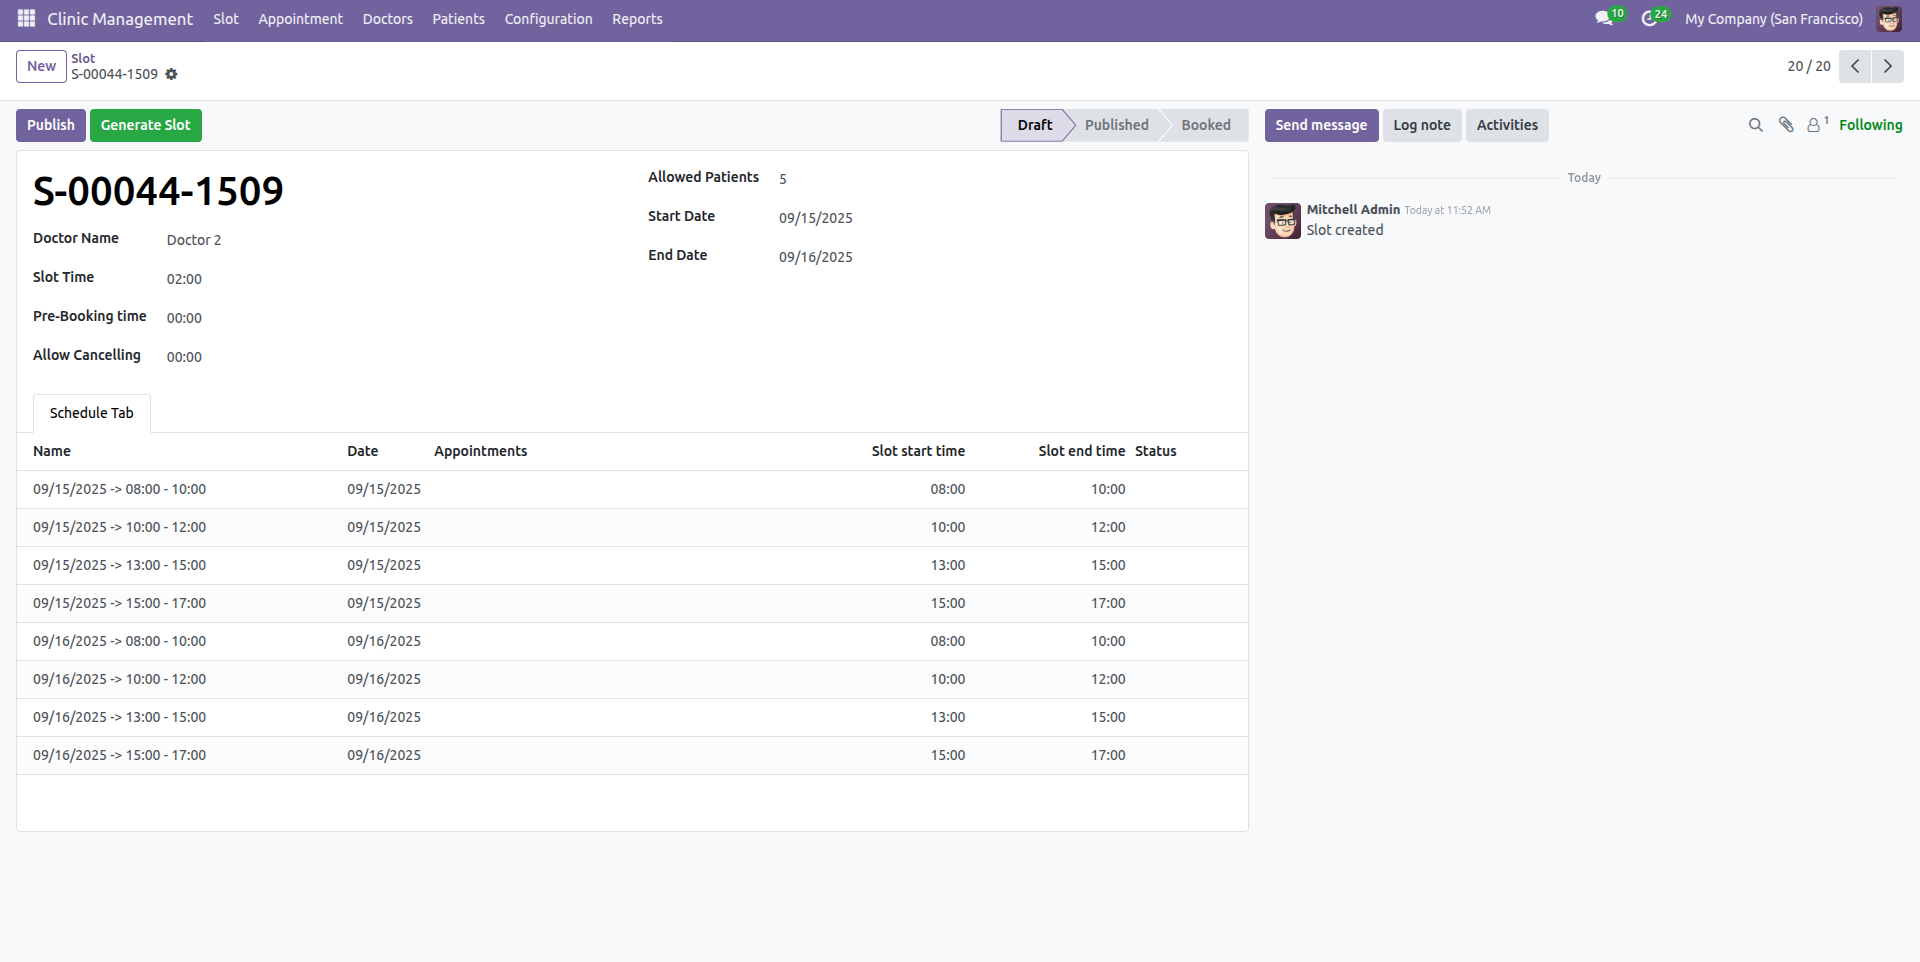
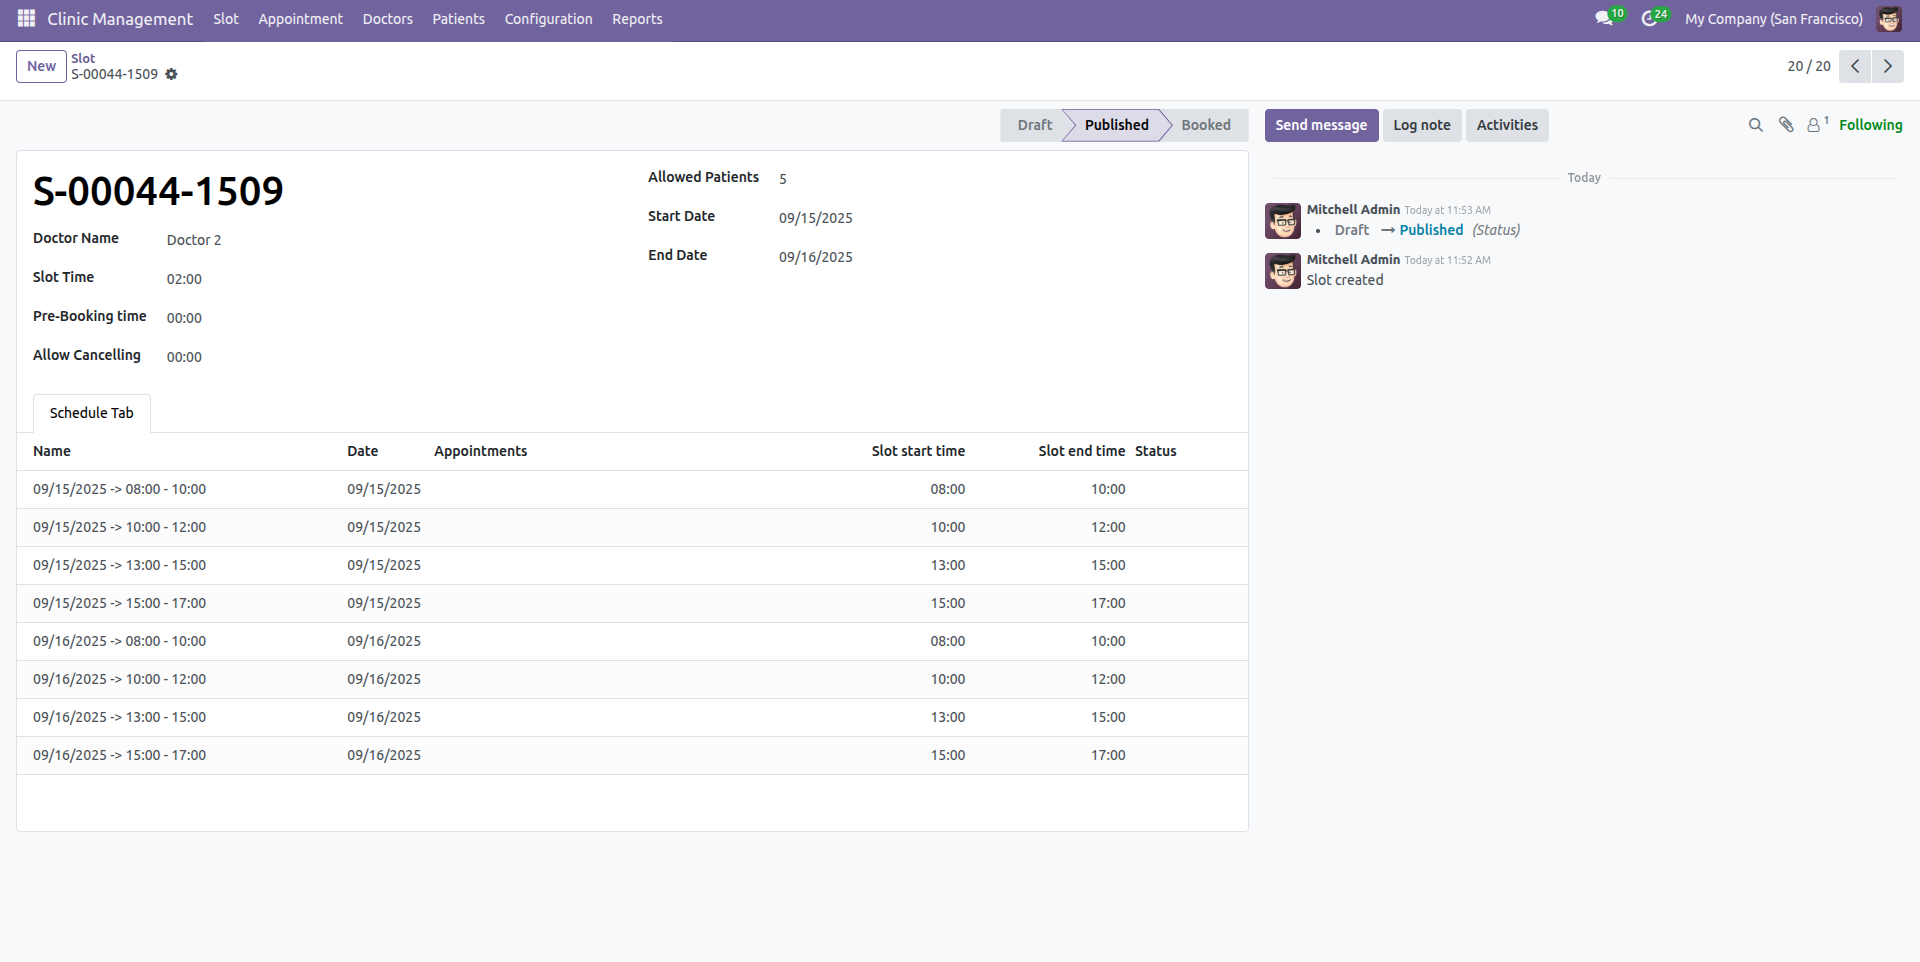
After the slot is published, you will not be able to make any changes to it.
Workflow
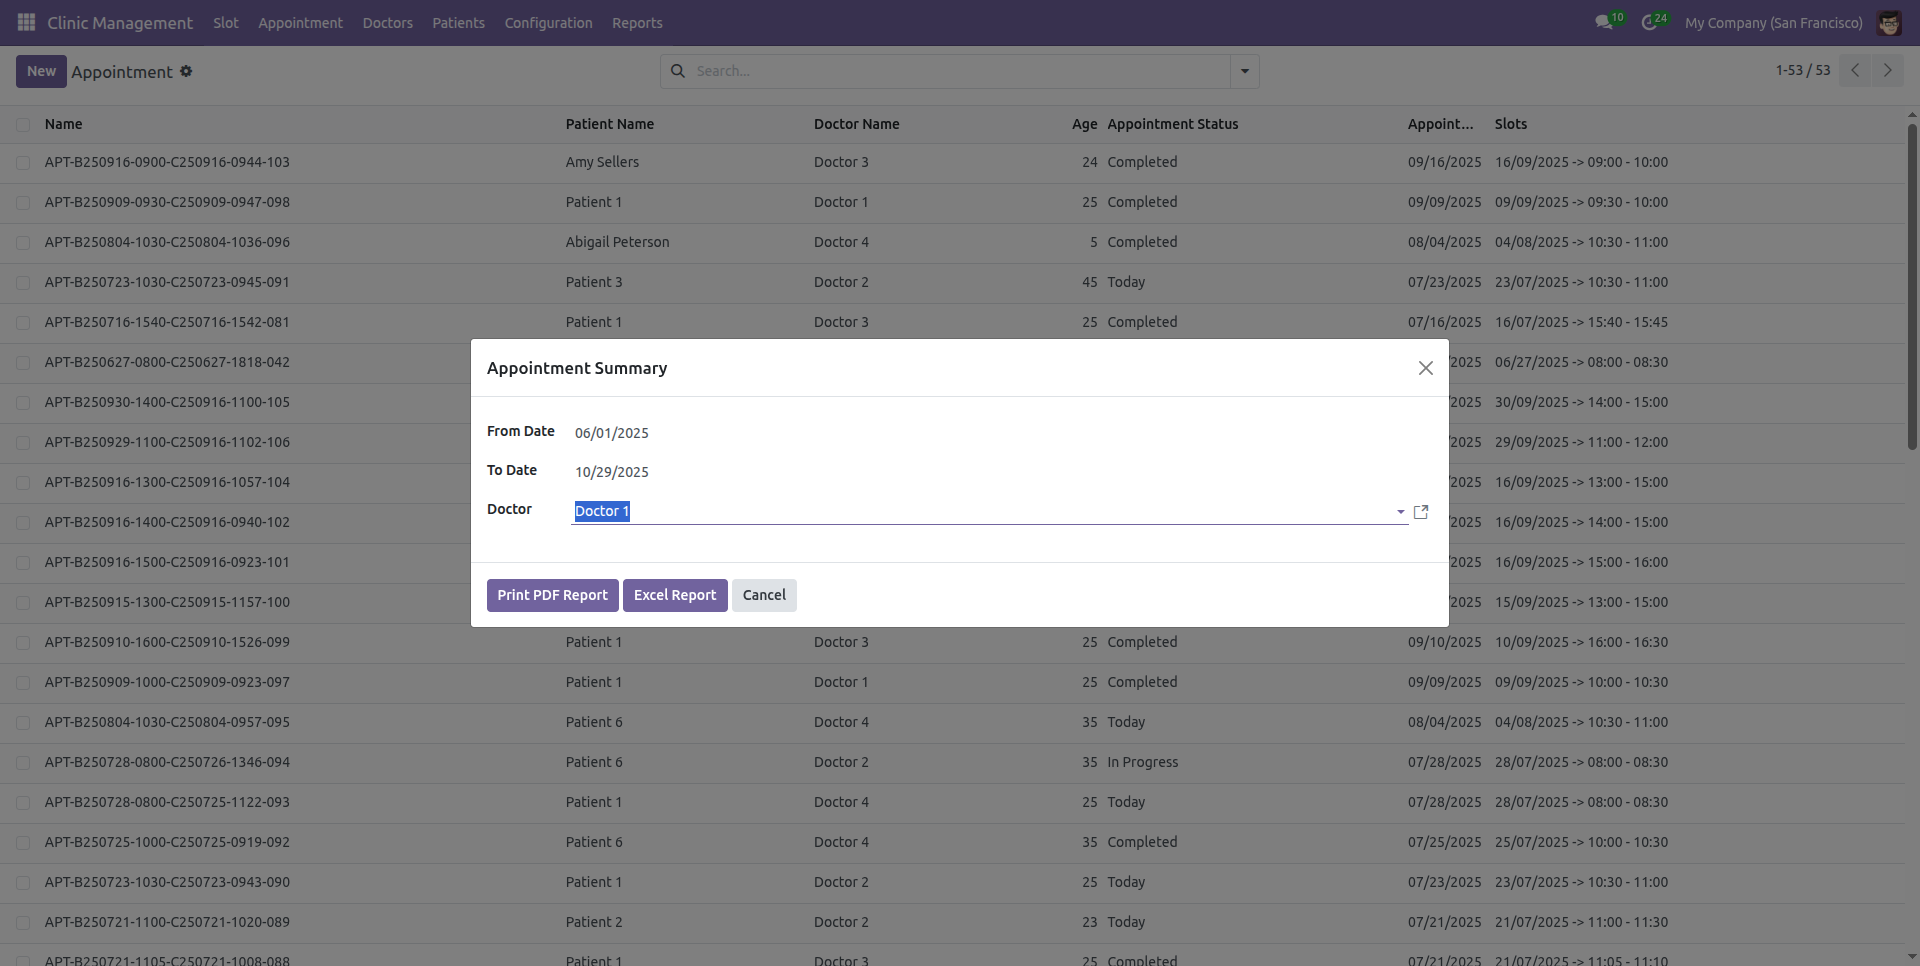
Go to the "Appointment Summary Report" under the Configuration menu.
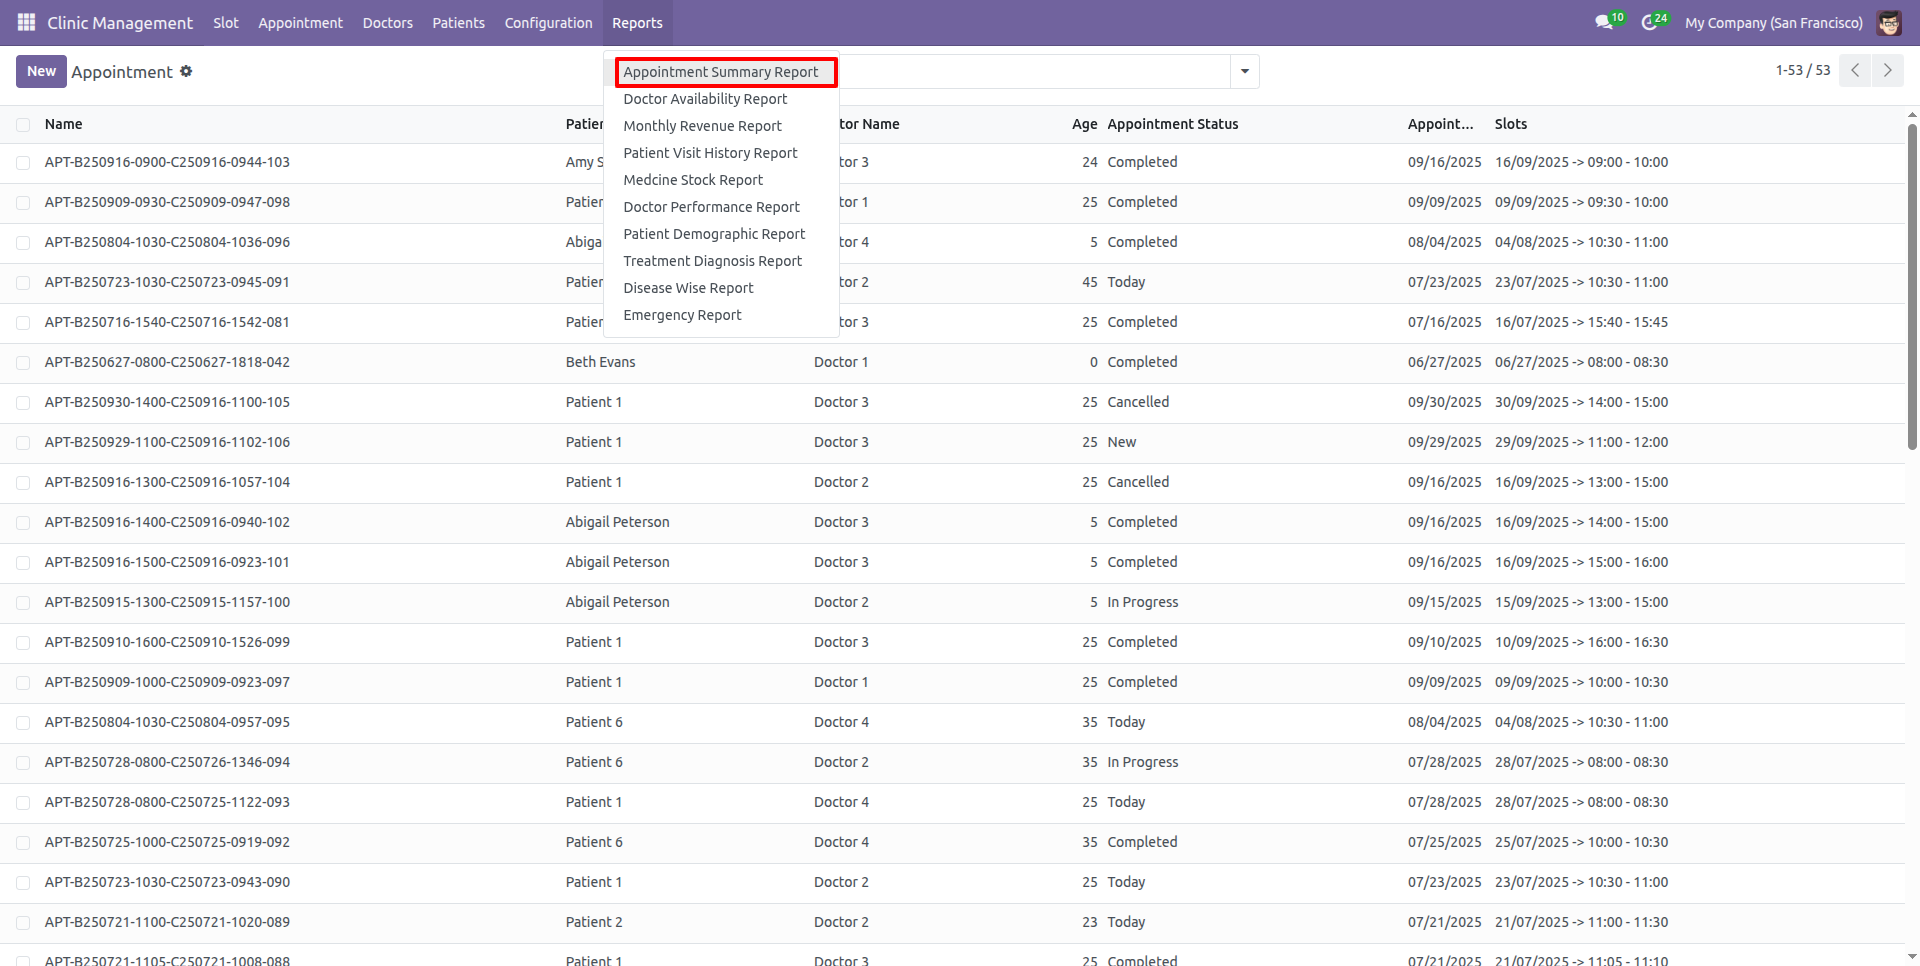
After that, the "Appointment Summary" wizard will appear. Add the required details and click on the "Print PDF Report" button.
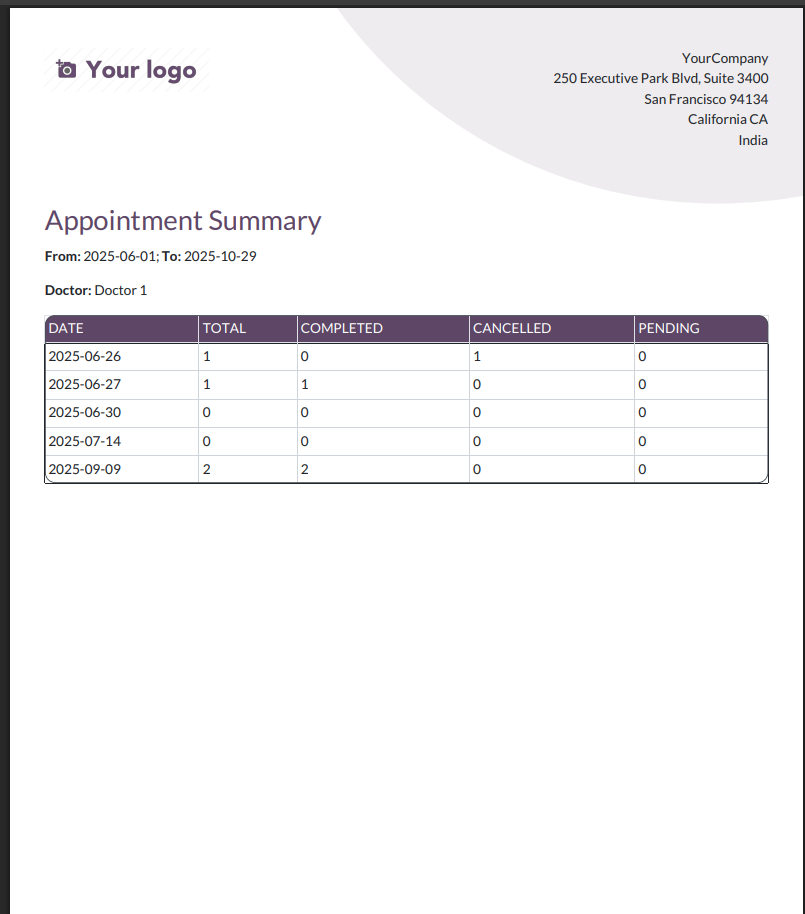
The PDF report will appear as shown below.
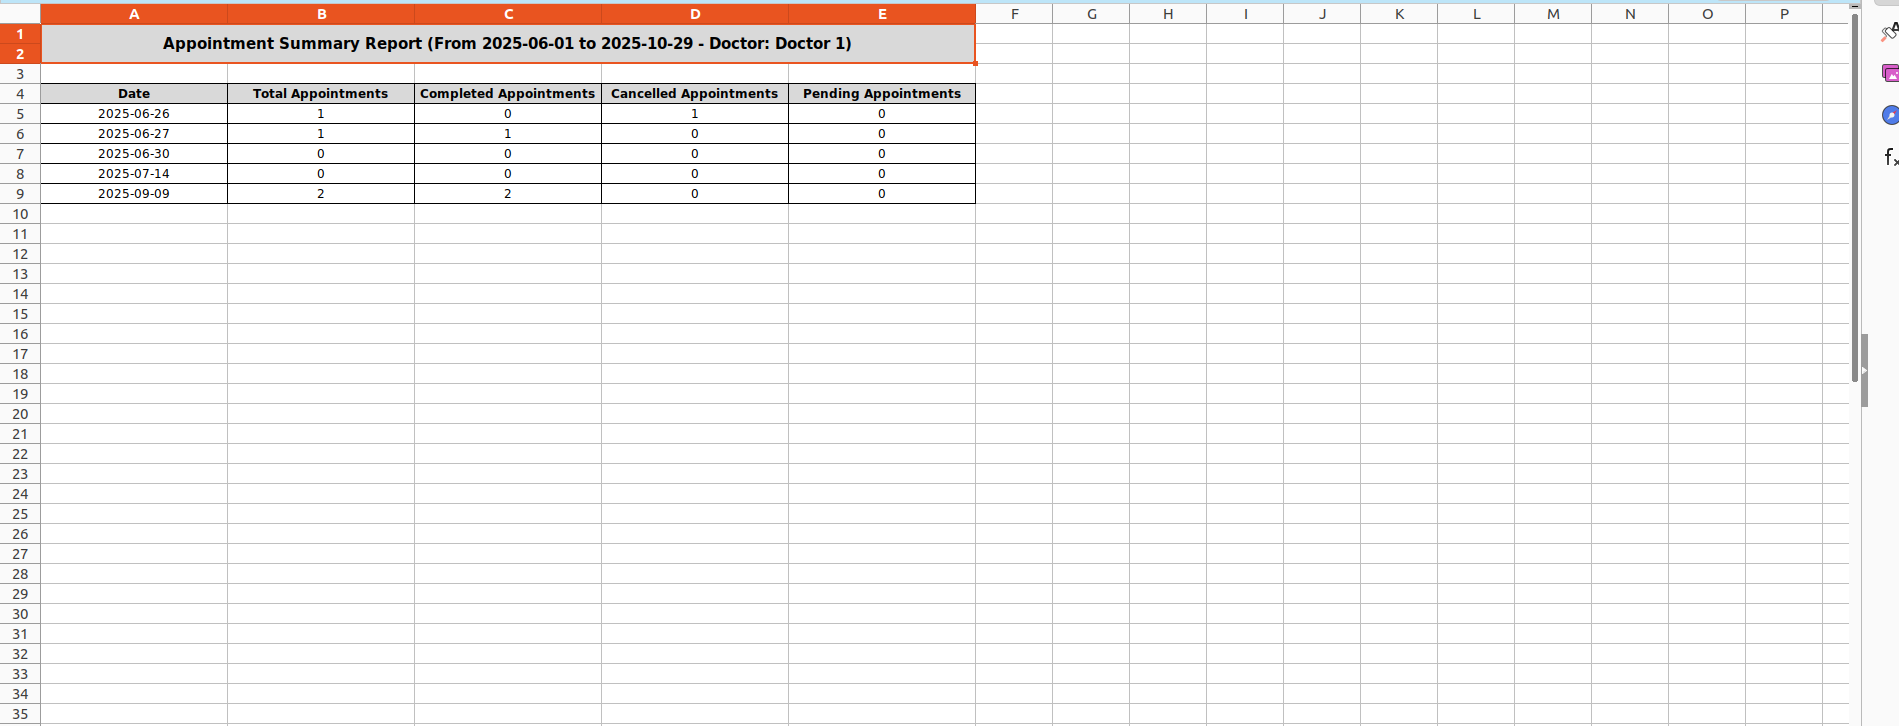
Add the required details and click on the "Excel Report" button.
The Excel report will appear as shown below.
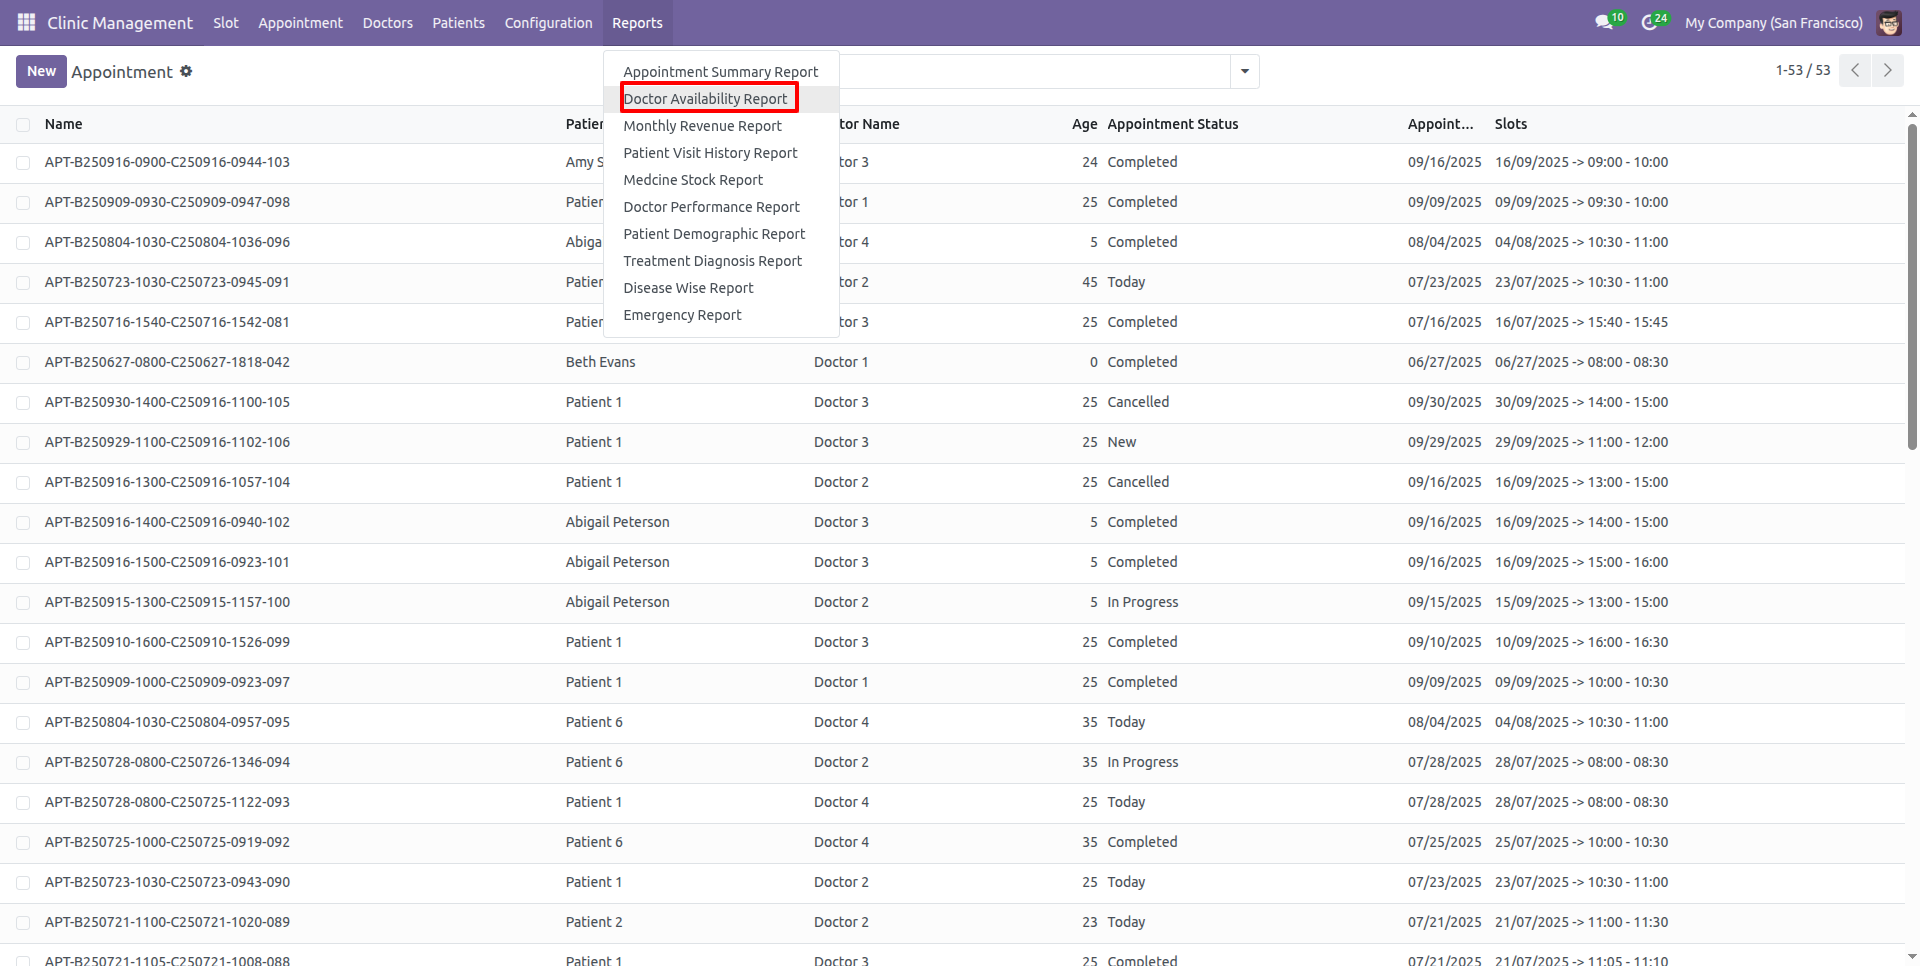
Go to the "Doctor Availability Report" under the Configuration menu.
After that, the "Doctor Availability Report" wizard will appear. Add the required details and click on the "PDF Report" button.
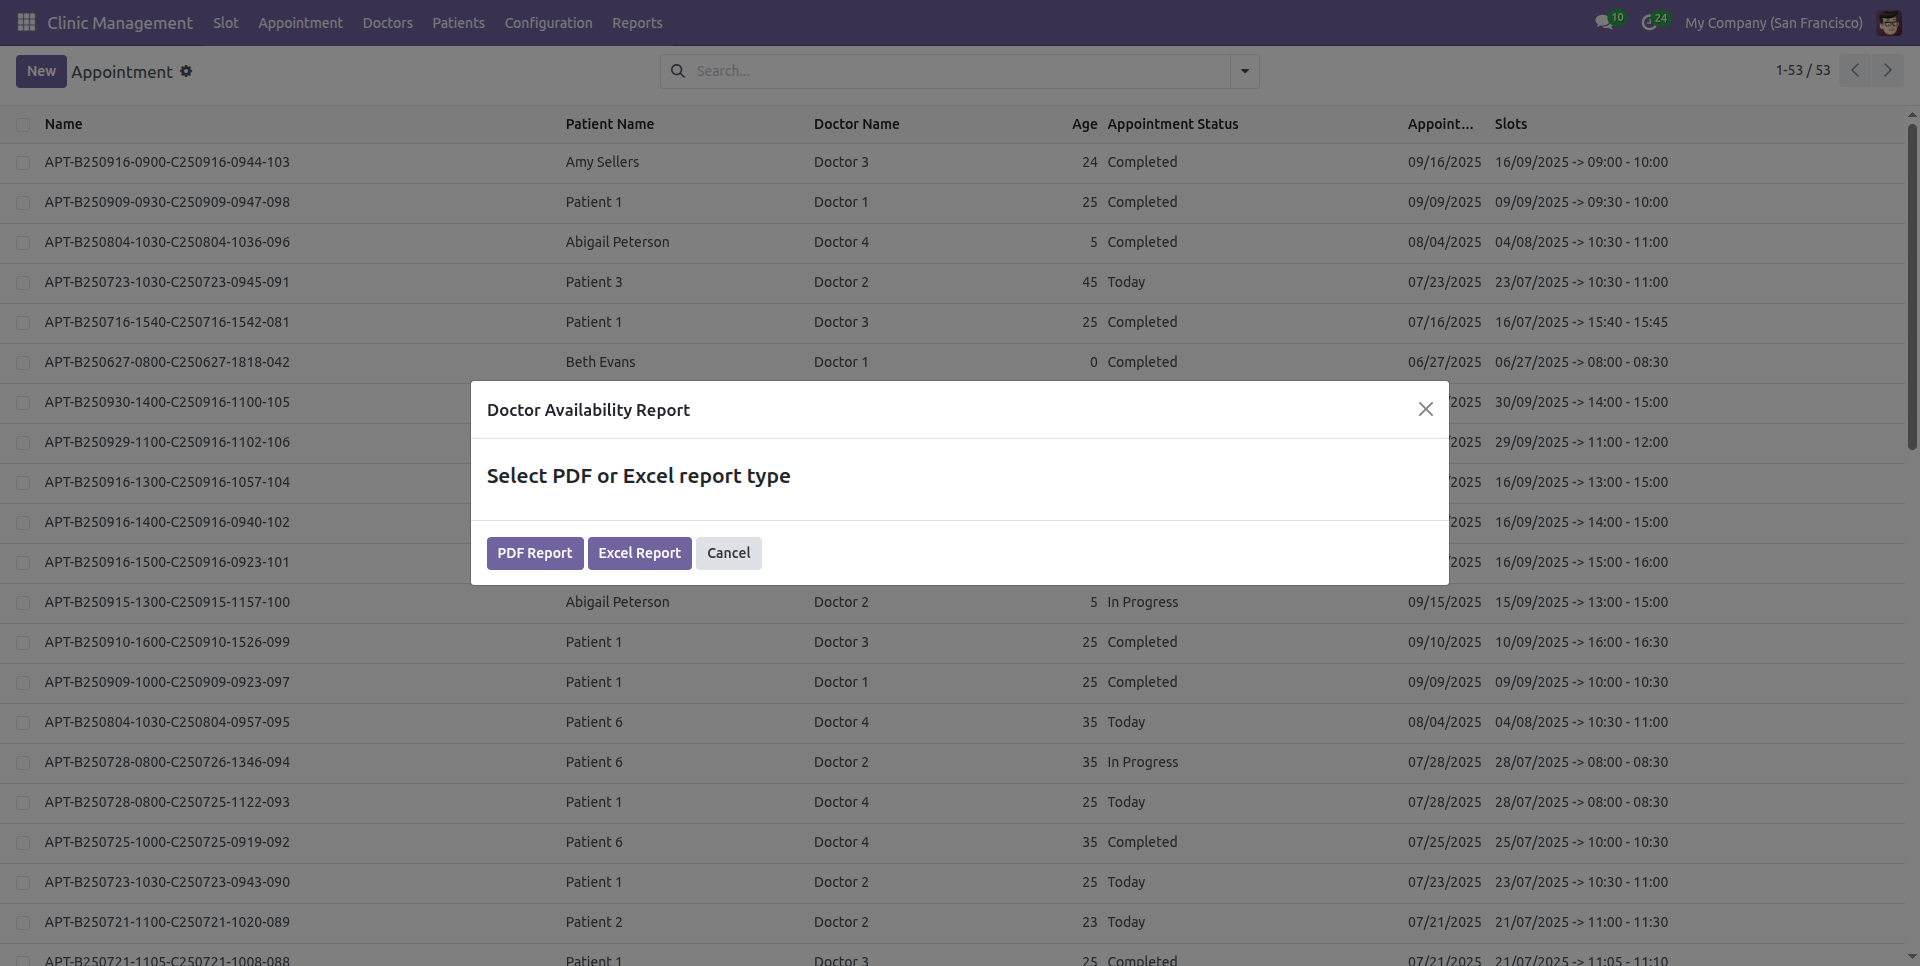
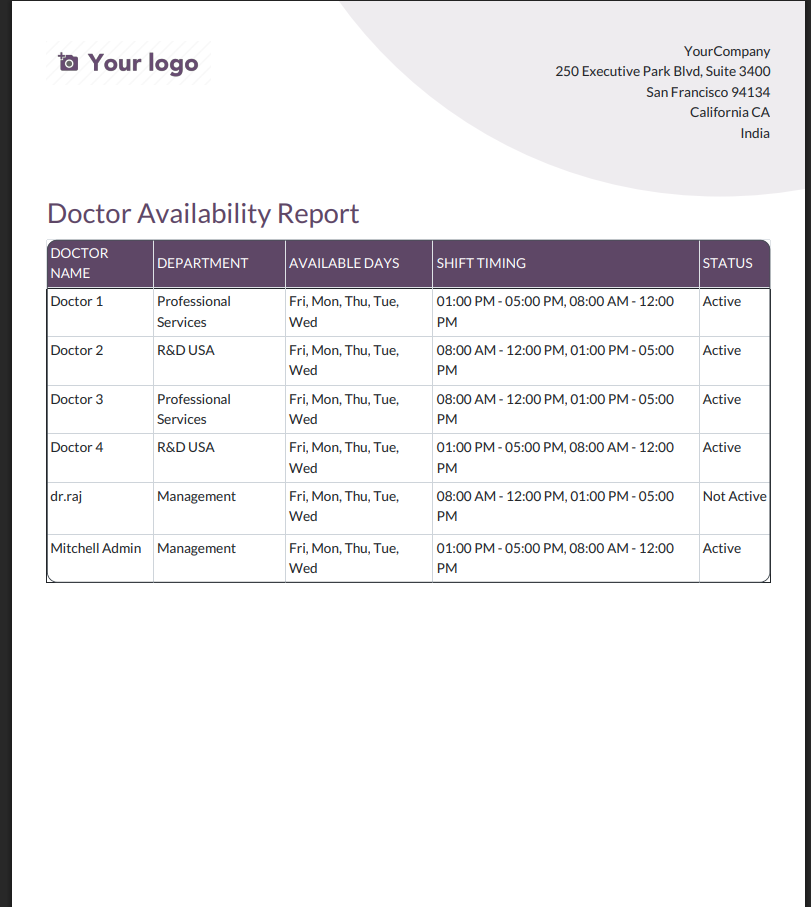
The PDF report will appear as shown below.
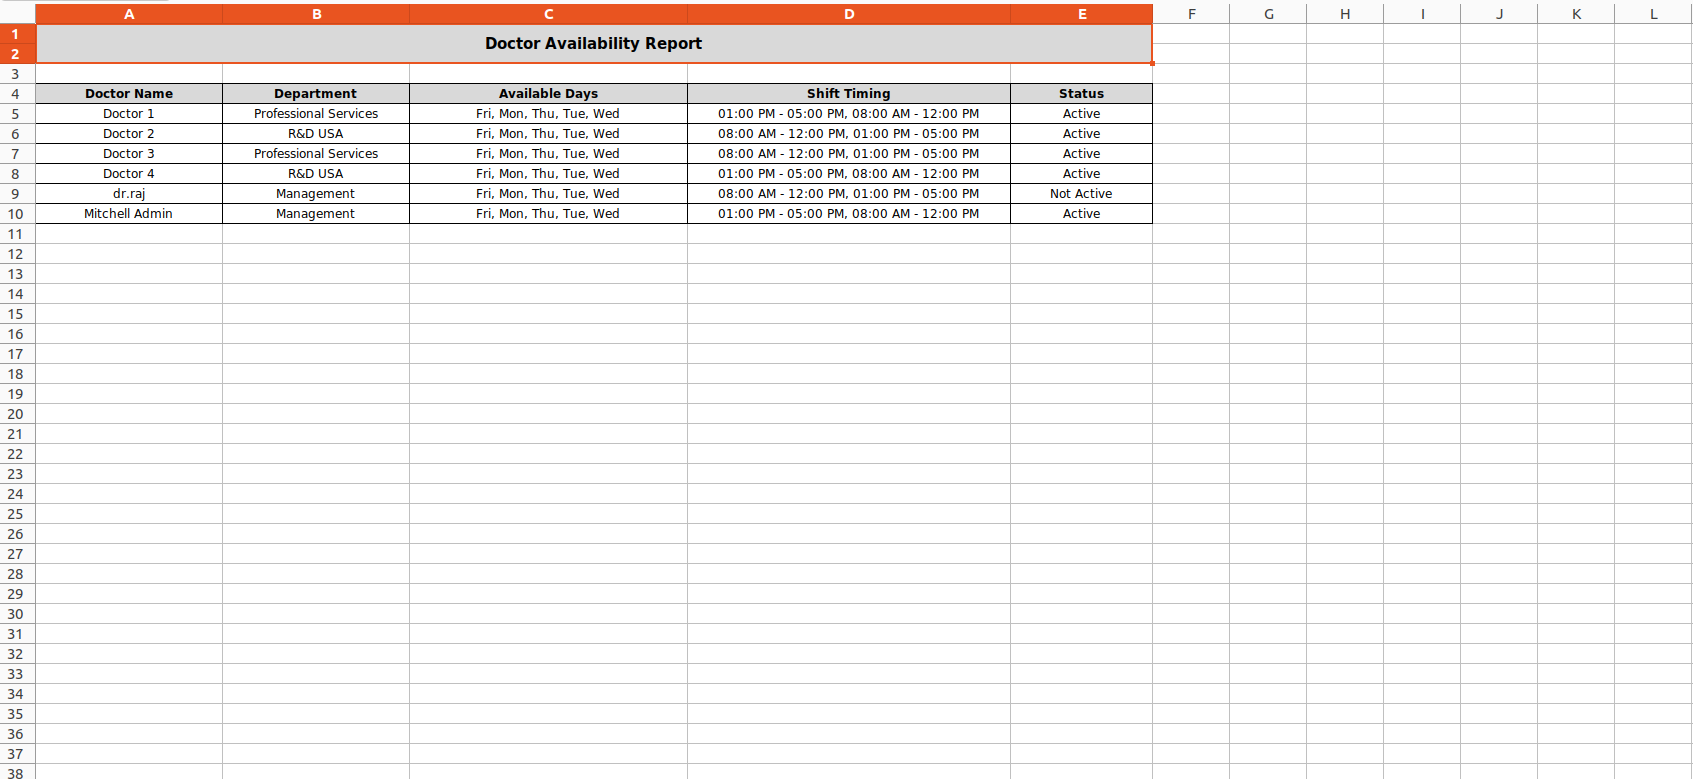
Add the required details and click on the "Excel Report" button.
The Excel report will appear as shown below.
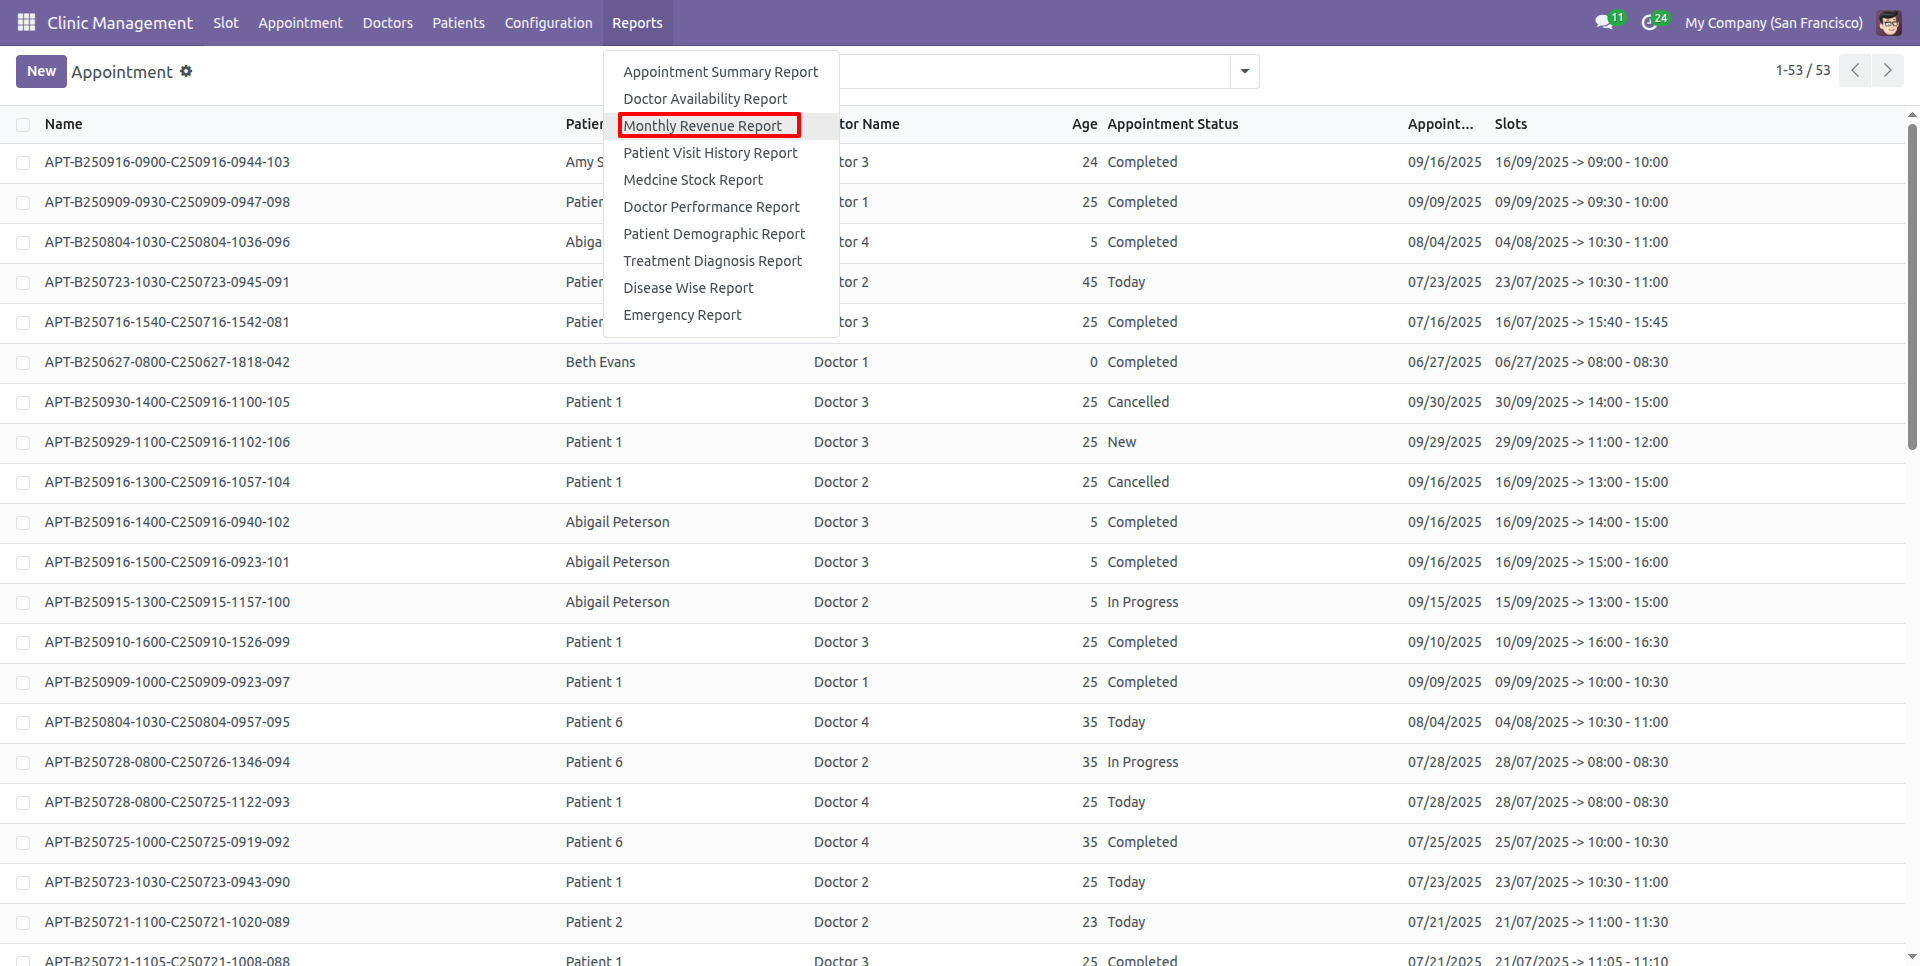
Go to the "Monthly Revenue Report" under the Configuration menu.
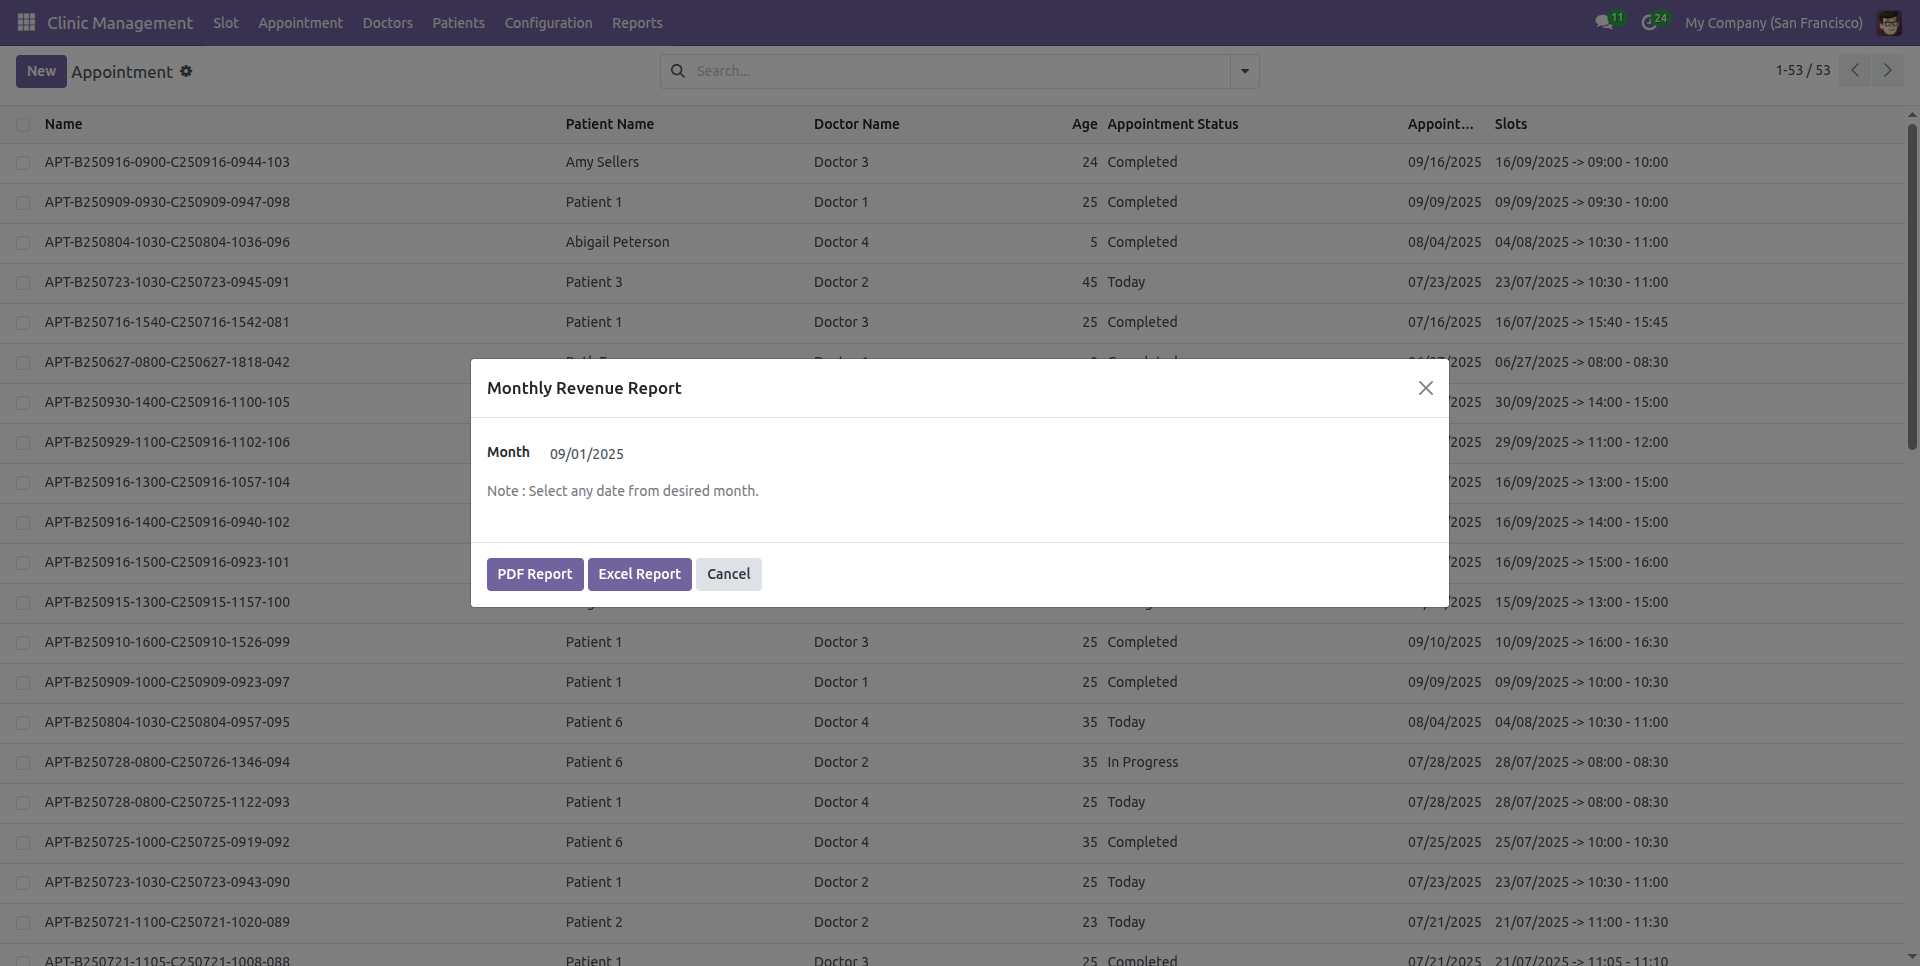
After that, the "Monthly Revenue Report" wizard will appear. Add the required details and click on the "PDF Report" button.
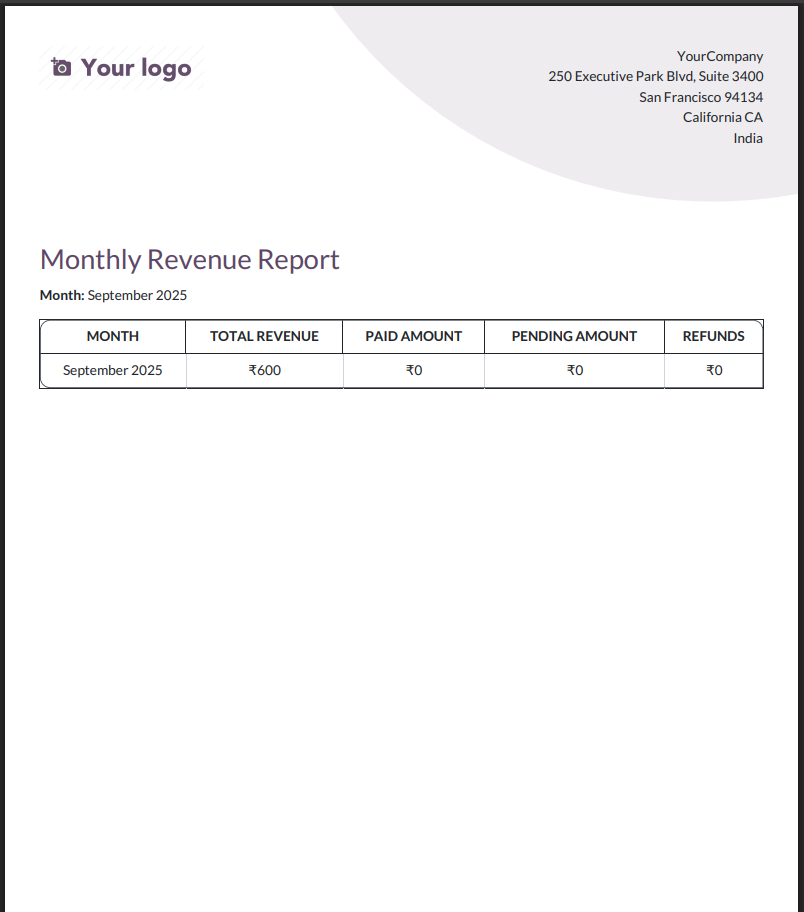
The PDF report will appear as shown below.
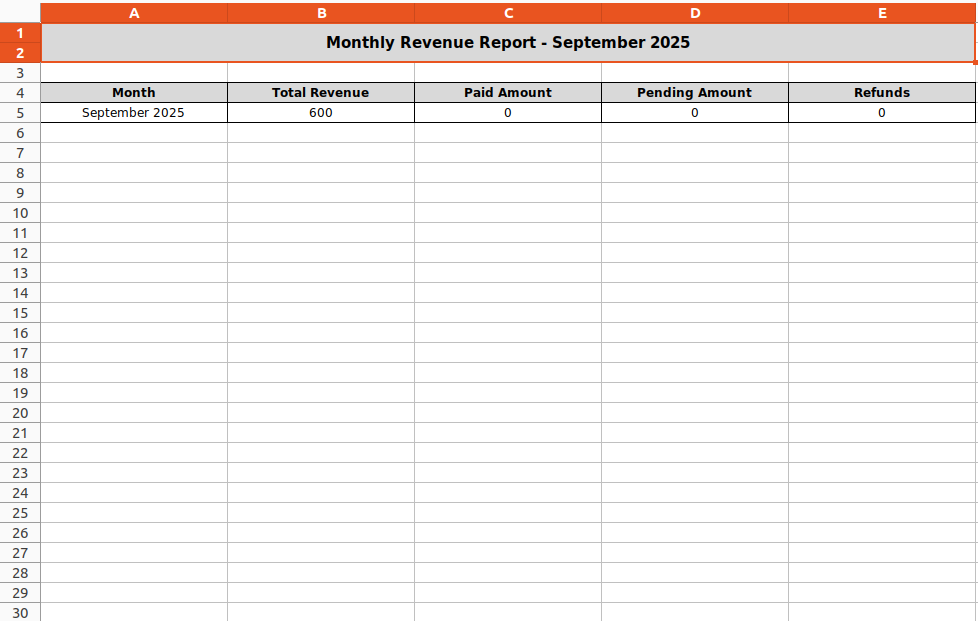
Add the required details and click on the "Excel Report" button.
The Excel report will appear as shown below.
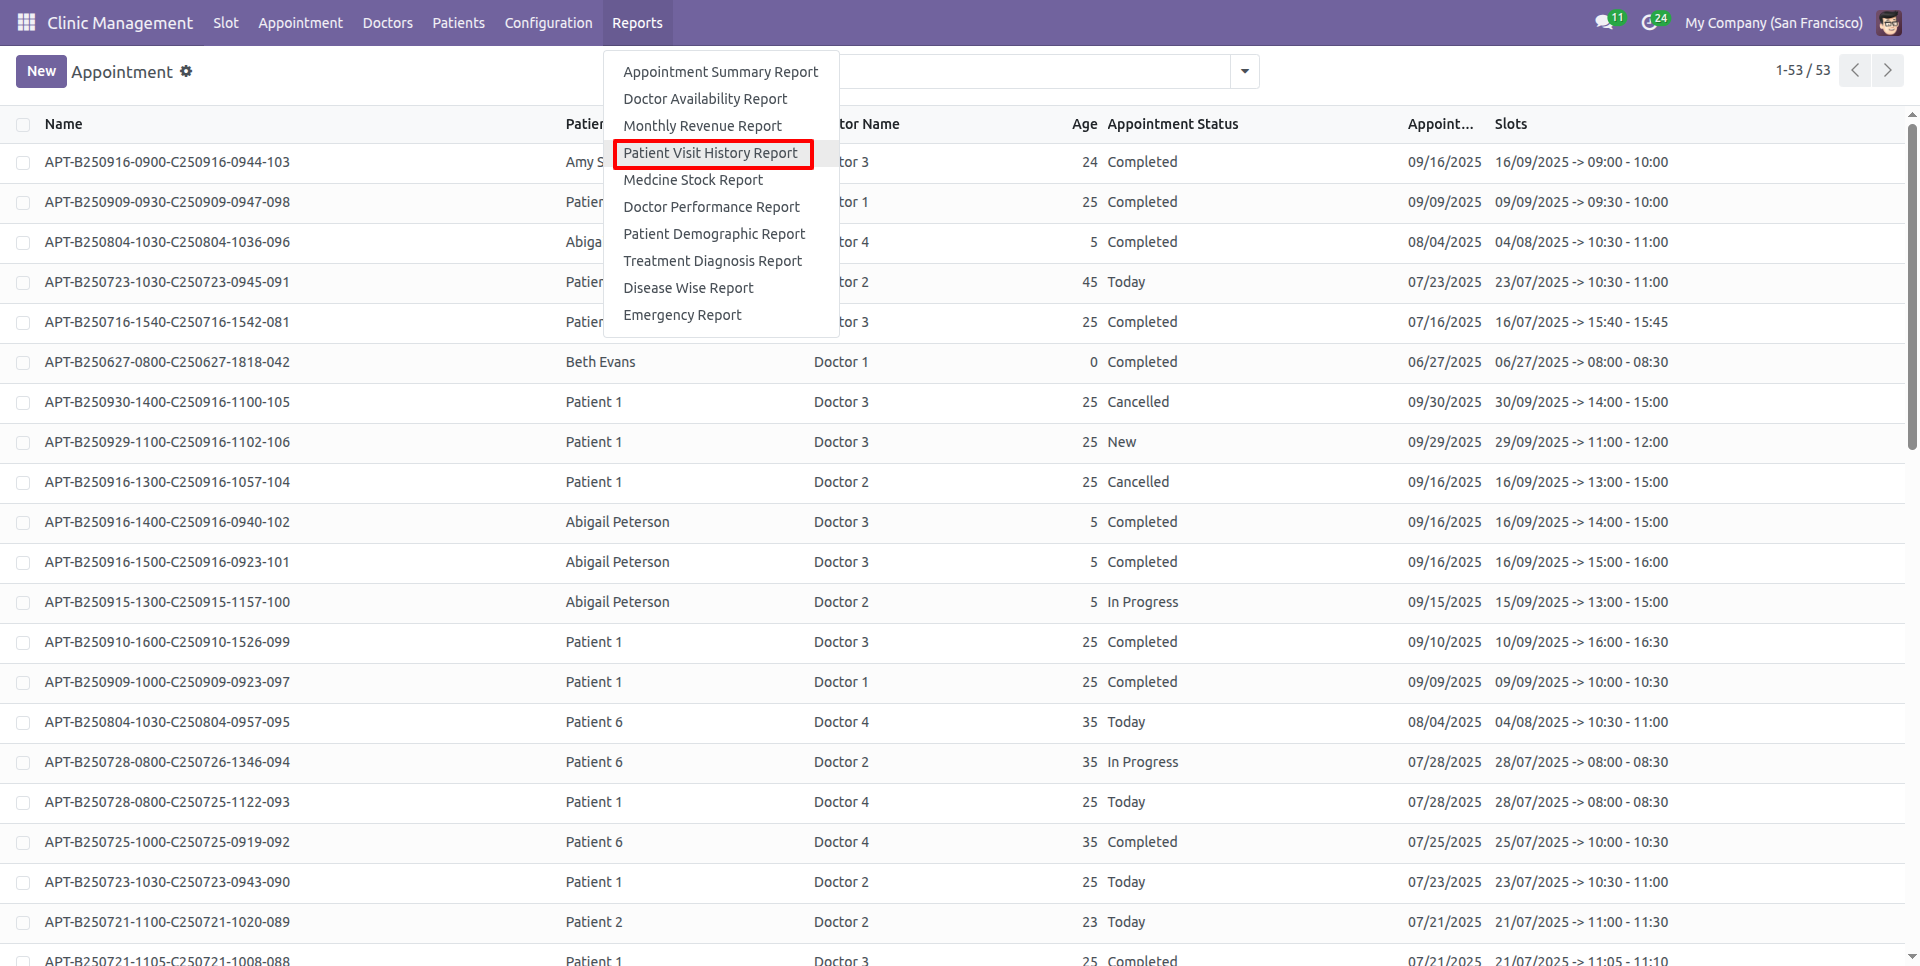
Go to the "Patient Visit History Report" under the Configuration menu.
After that, the "Patient Visit History Report" wizard will appear. Add the required details and click on the "PDF Report" button.
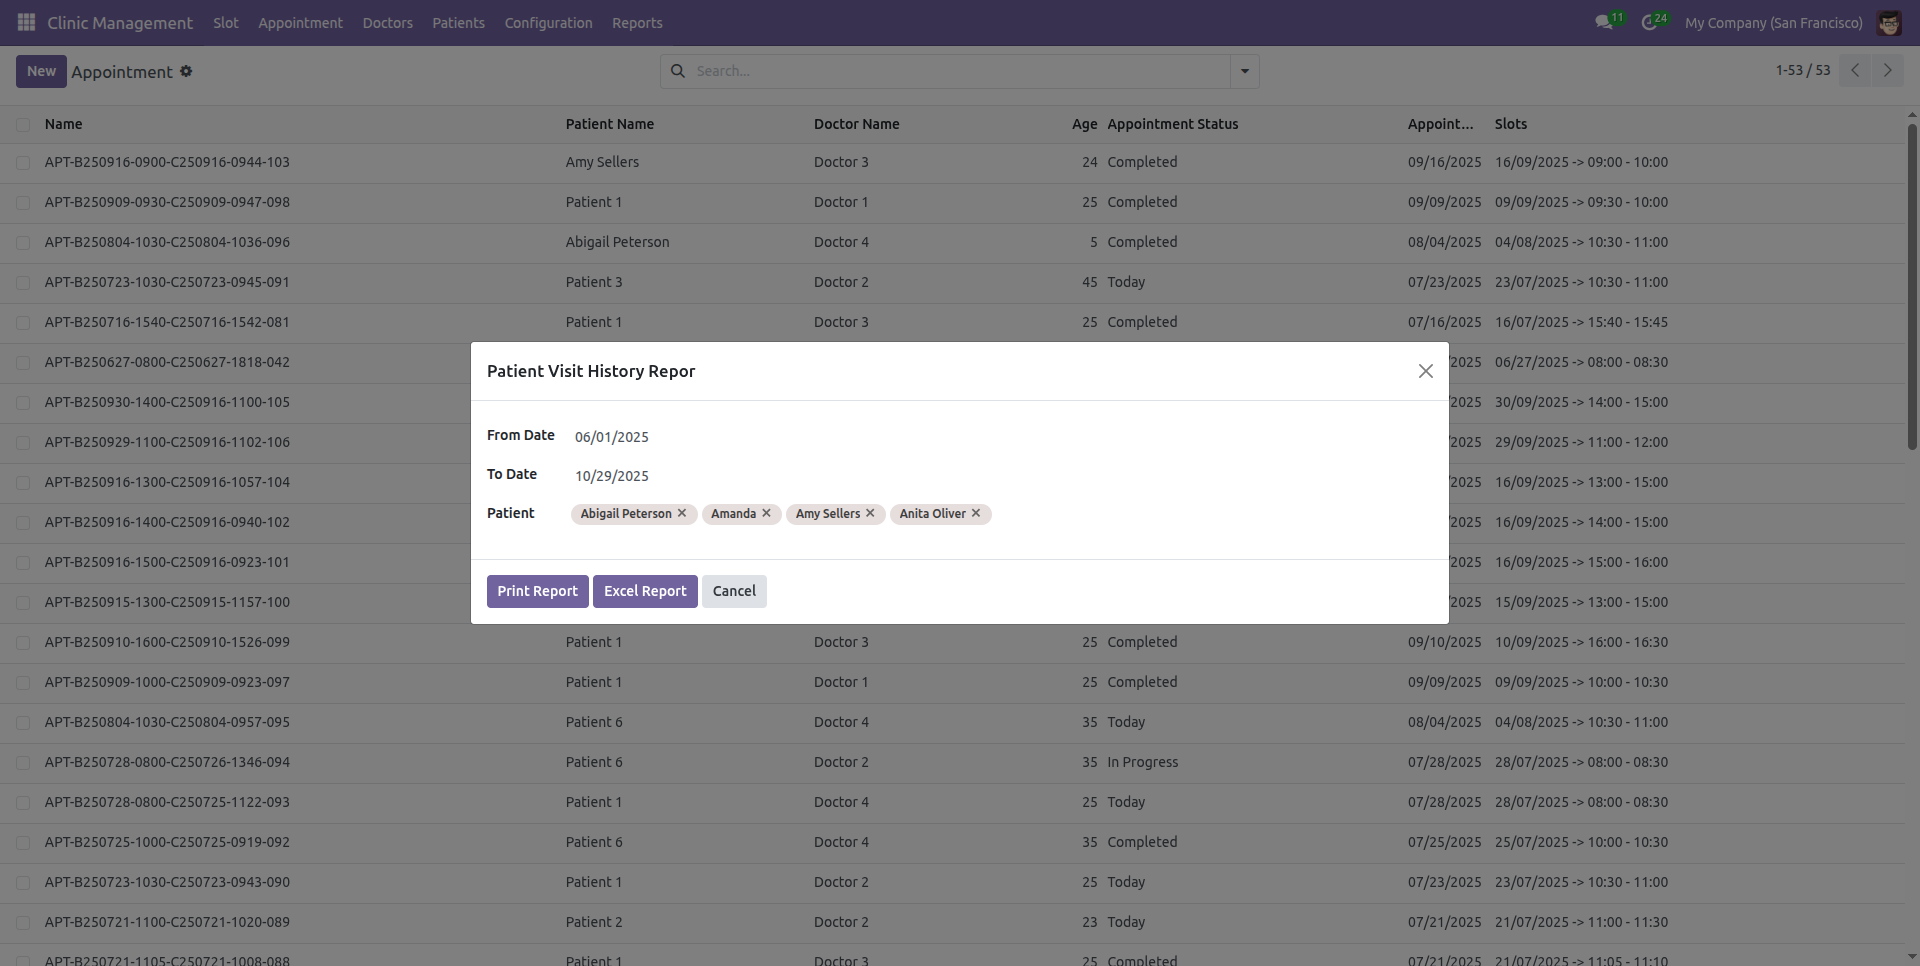
The PDF report will appear as shown below.
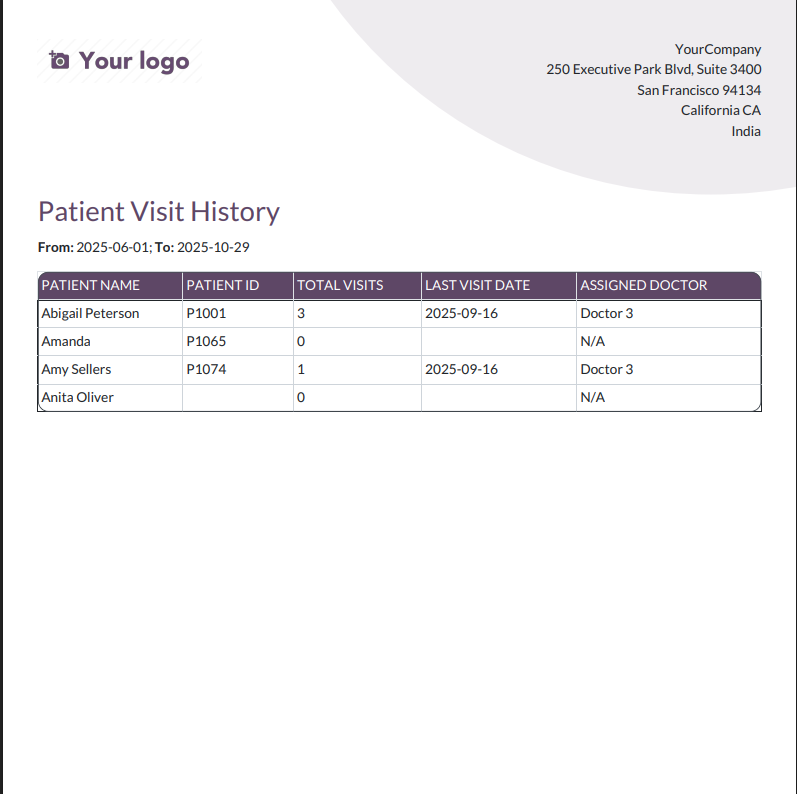
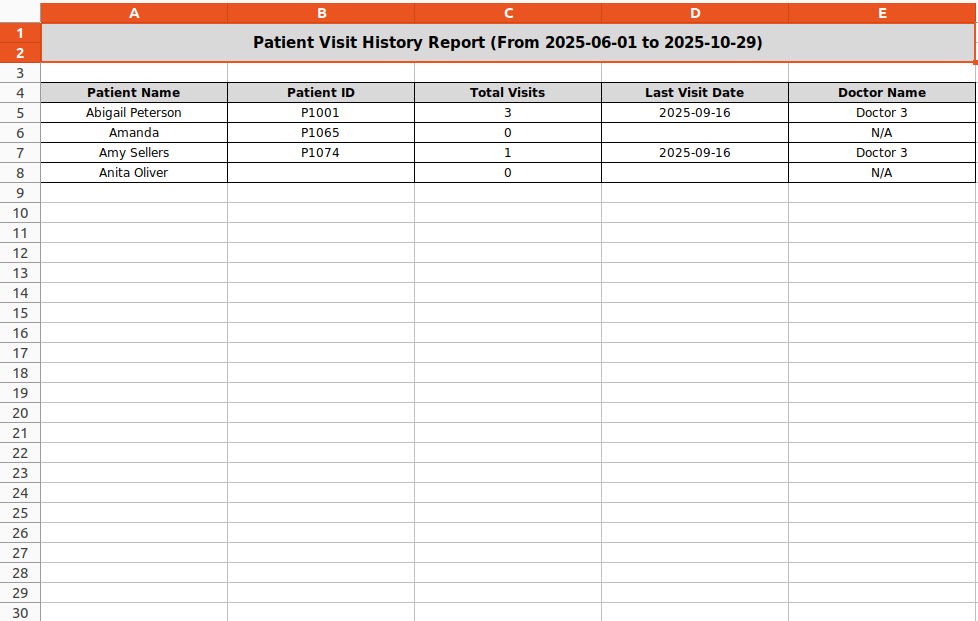
Add the required details and click on the "Excel Report" button.
The Excel report will appear as shown below.
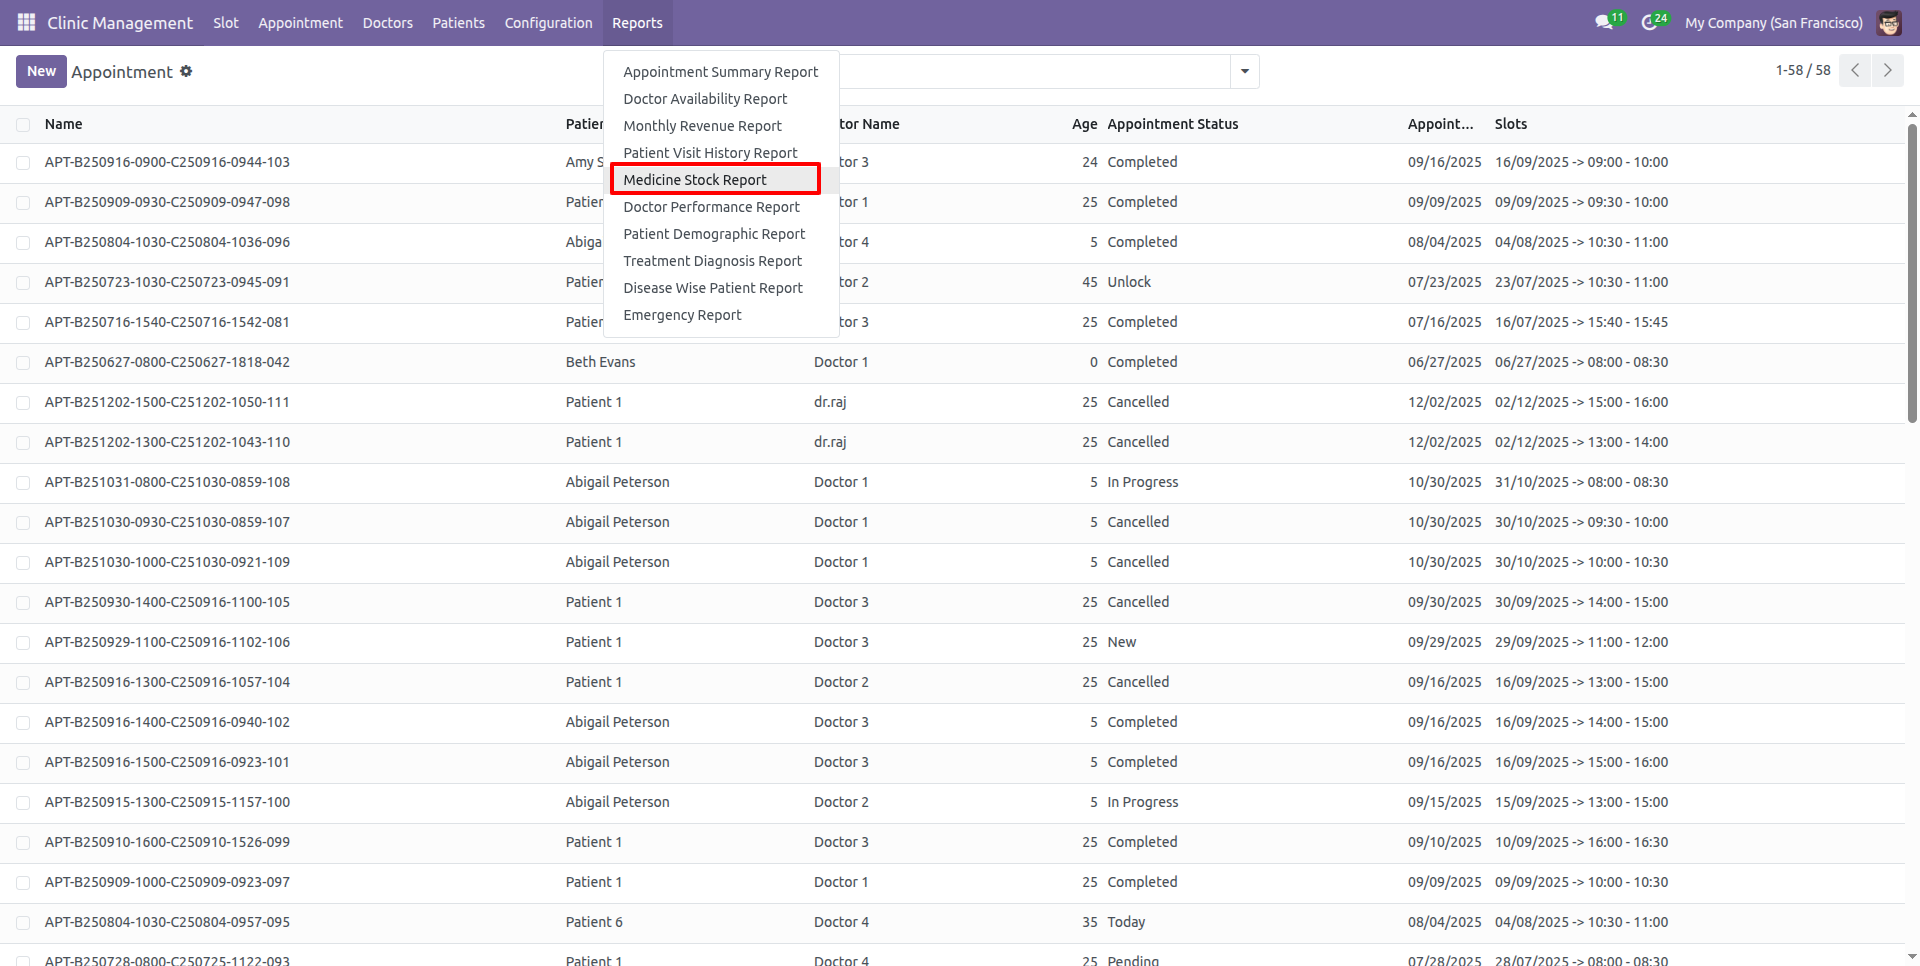
Go to the "Medicine Stock Report" under the Configuration menu.
After that, the "Medicine Stock Report" wizard will appear. Add the required details and click on the "Print PDF Report" button.
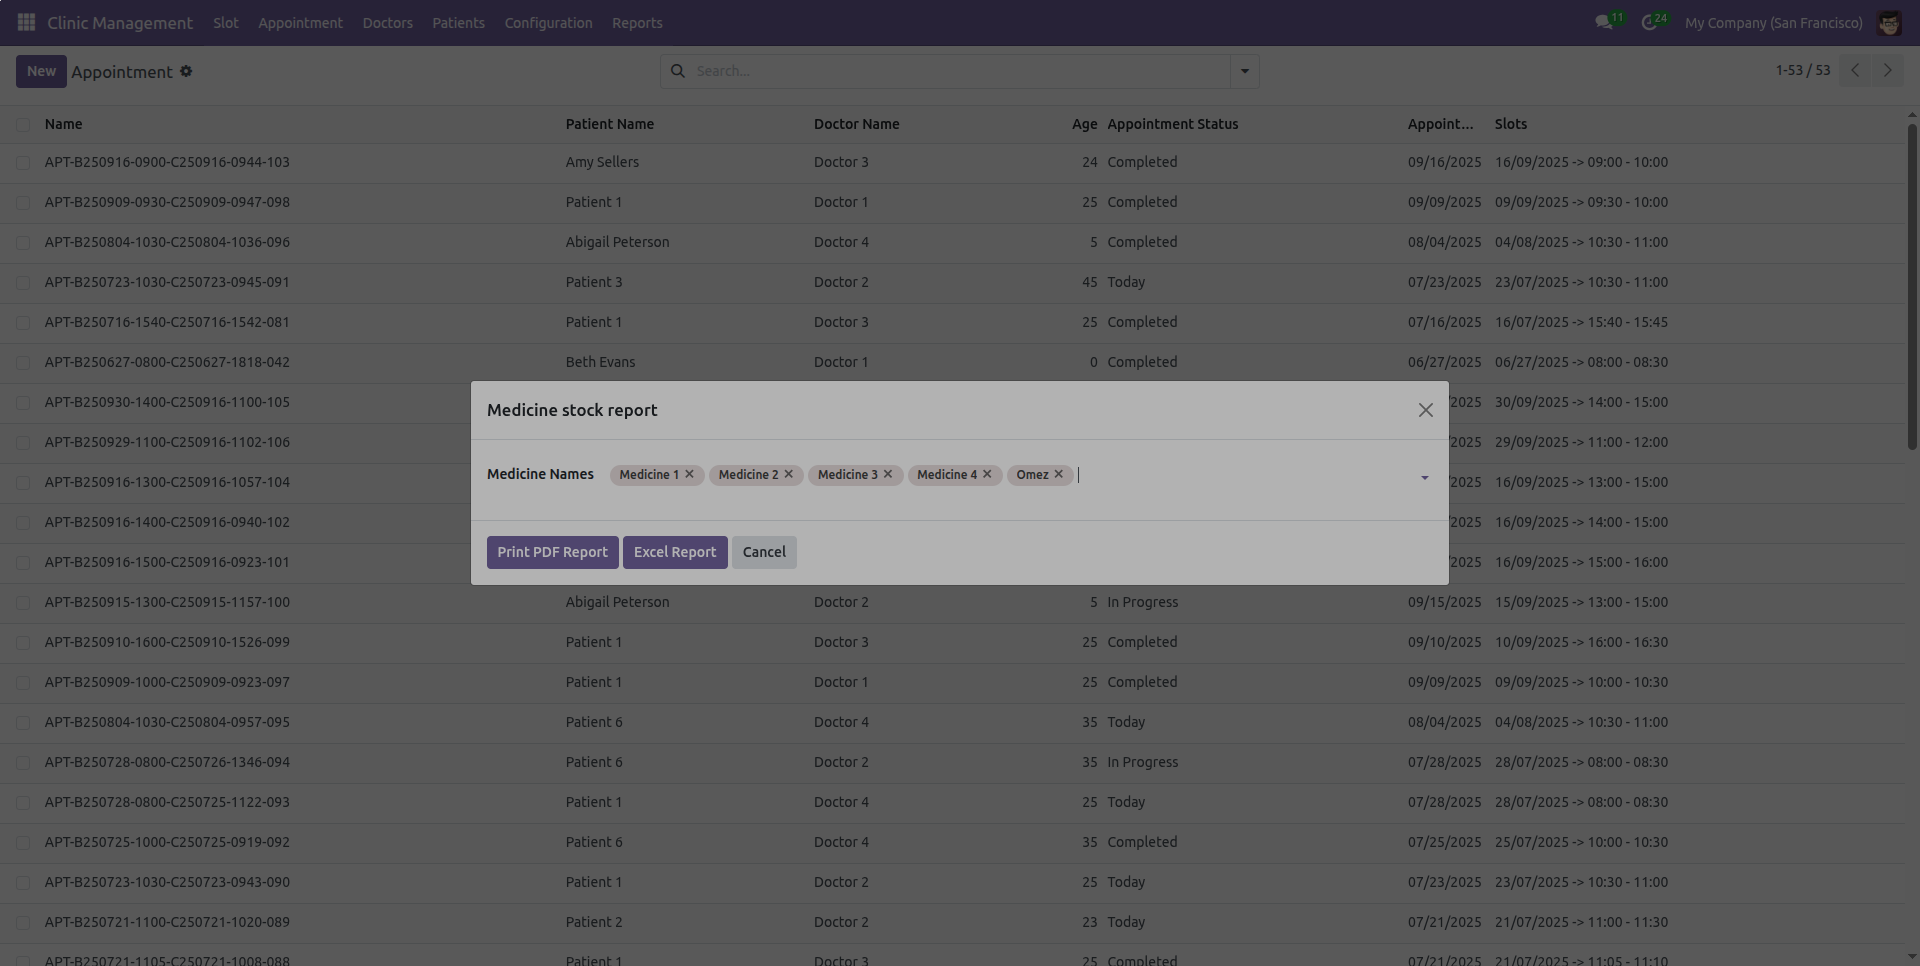
The PDF report will appear as shown below.
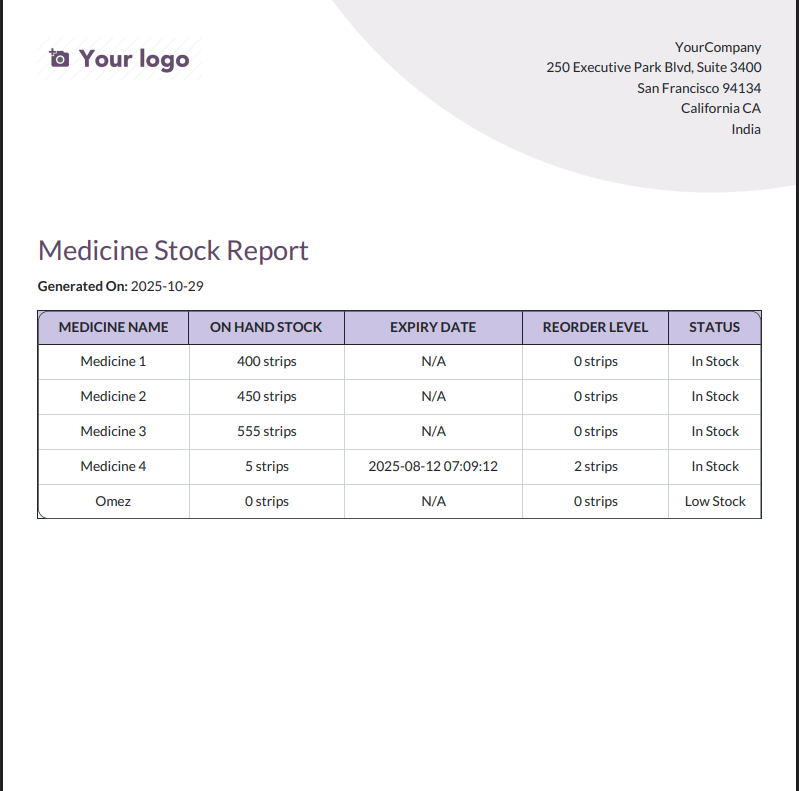
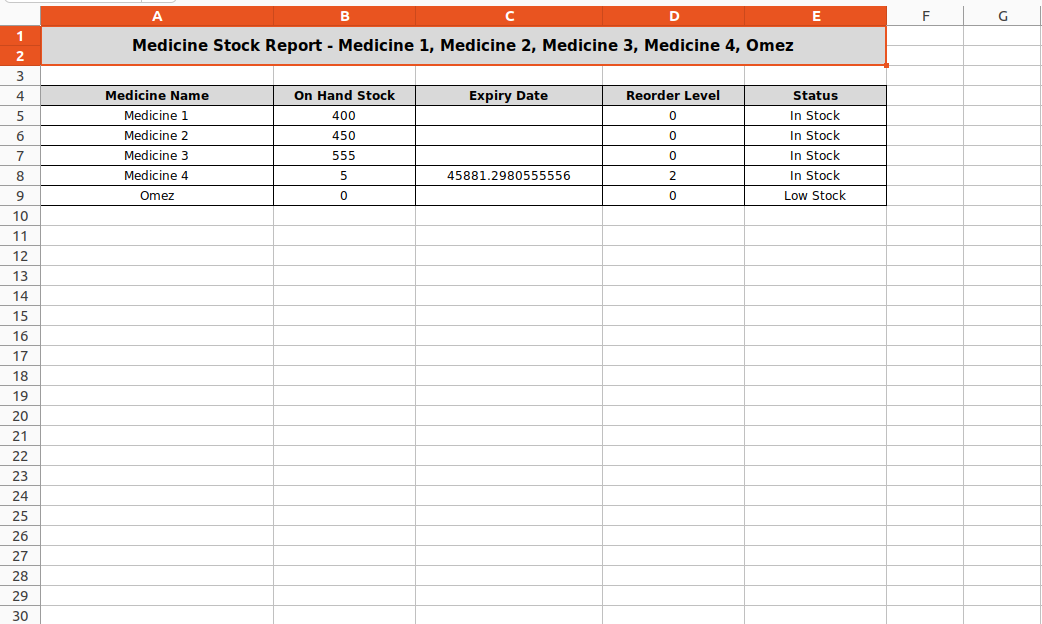
Add the required details and click on the "Excel Report" button.
'
The Excel report will appear as shown below.
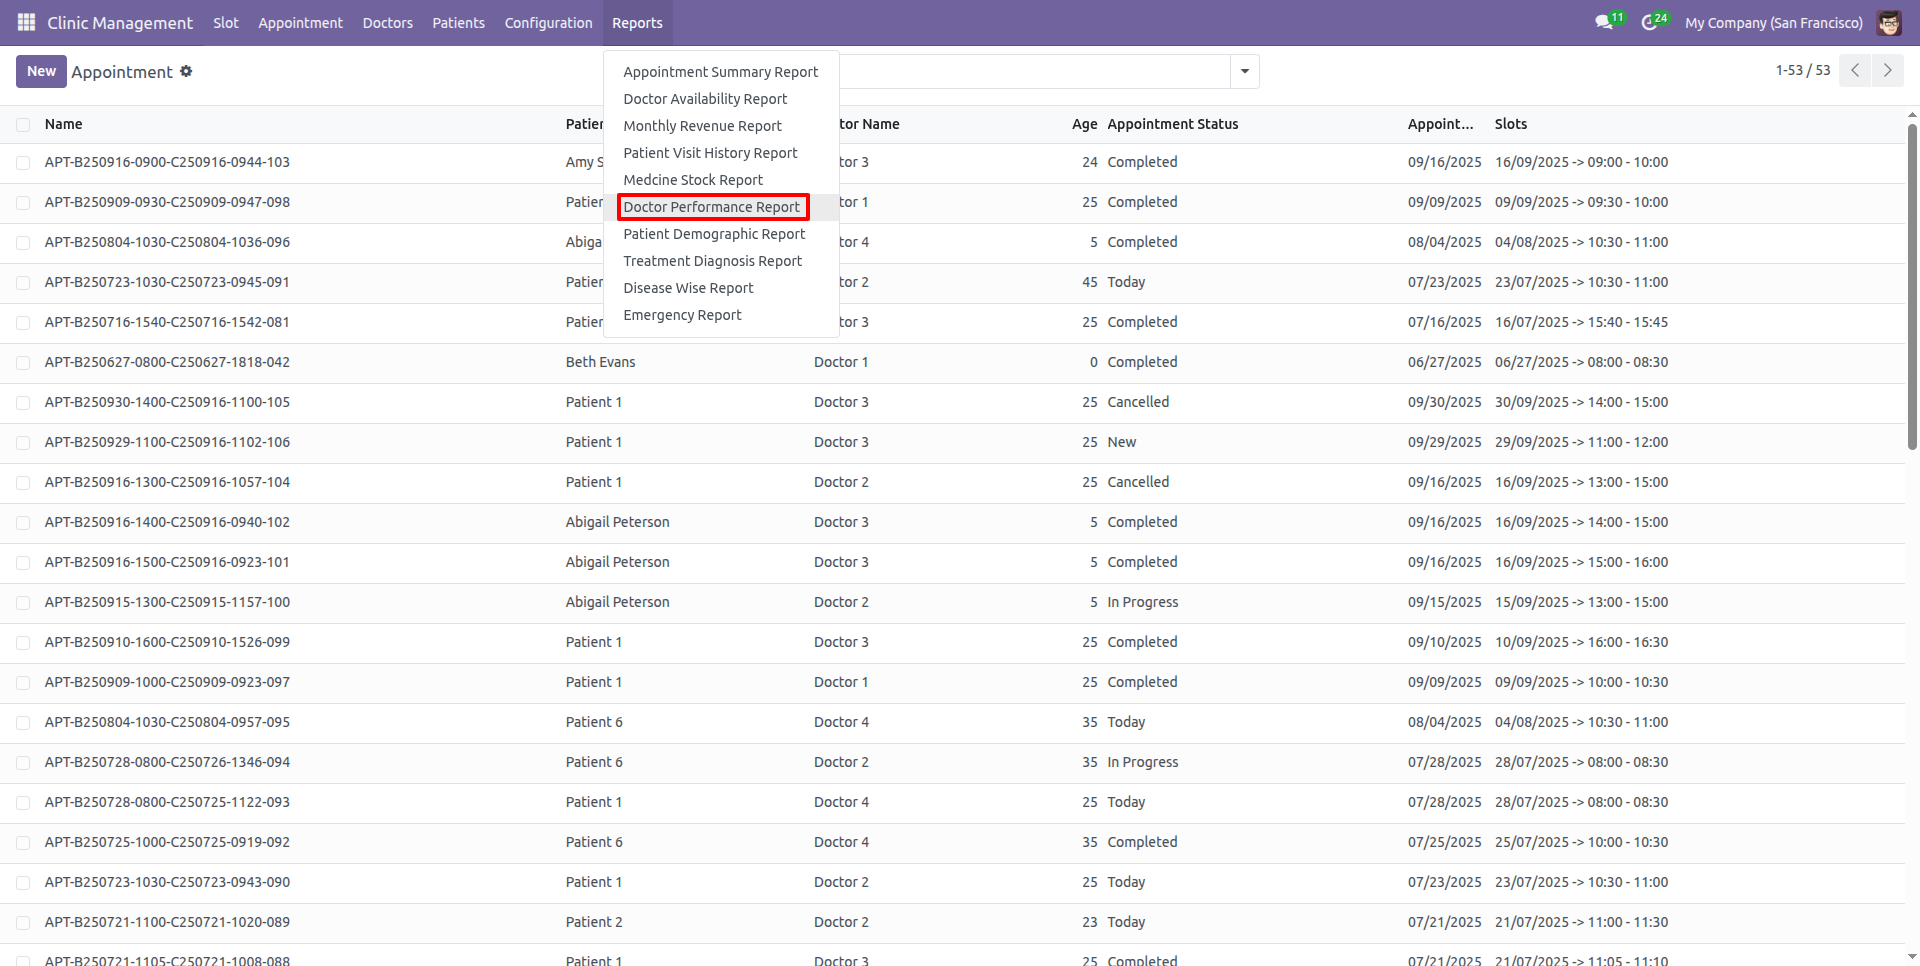
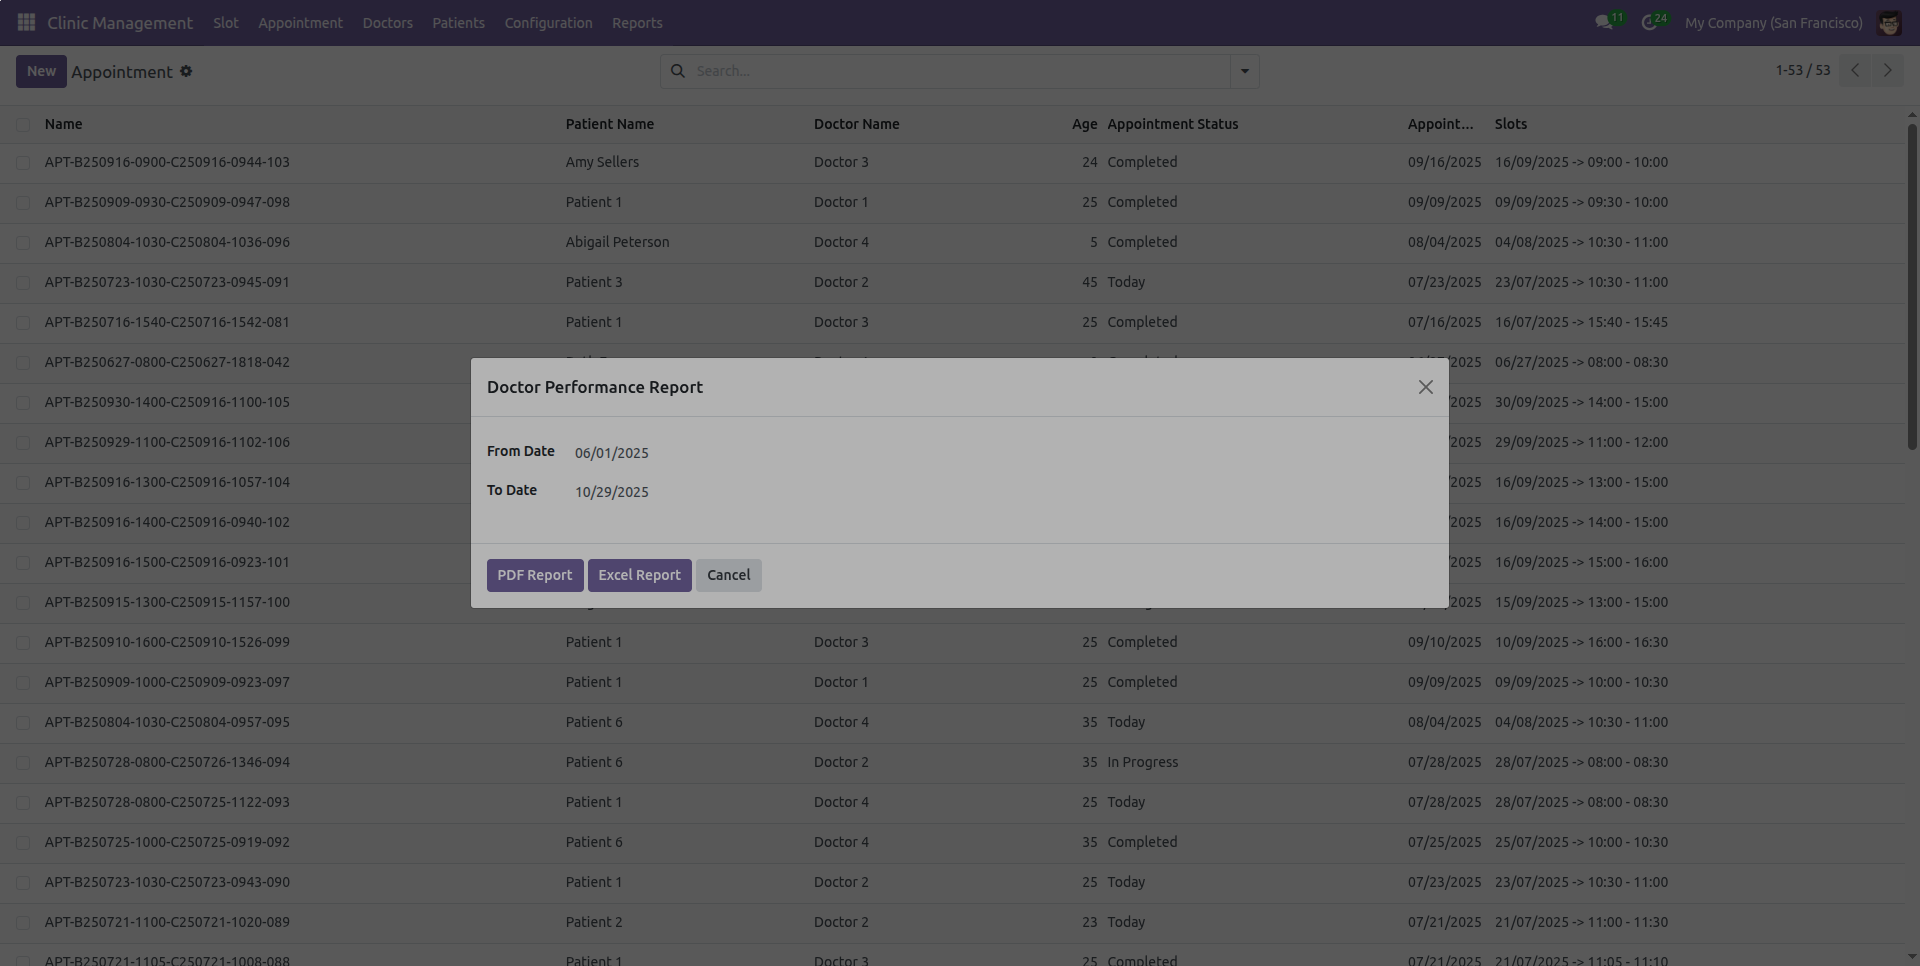
Go to the "Doctor Performance Report" under the Configuration menu.
After that, the "Doctor Performance Report" wizard will appear. Add the required details and click on the "PDF Report" button.
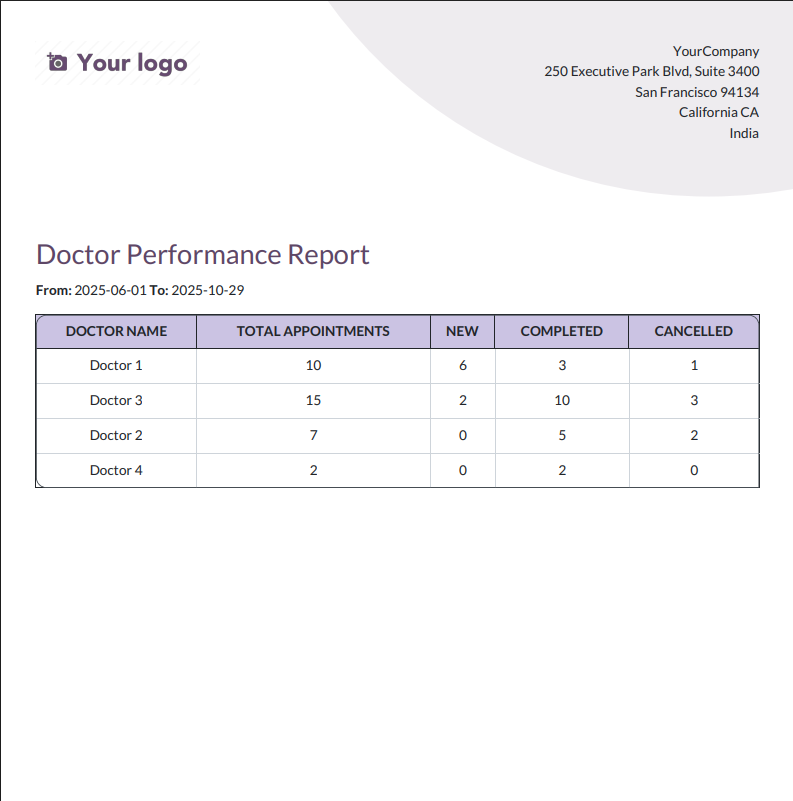
The PDF report will appear as shown below.
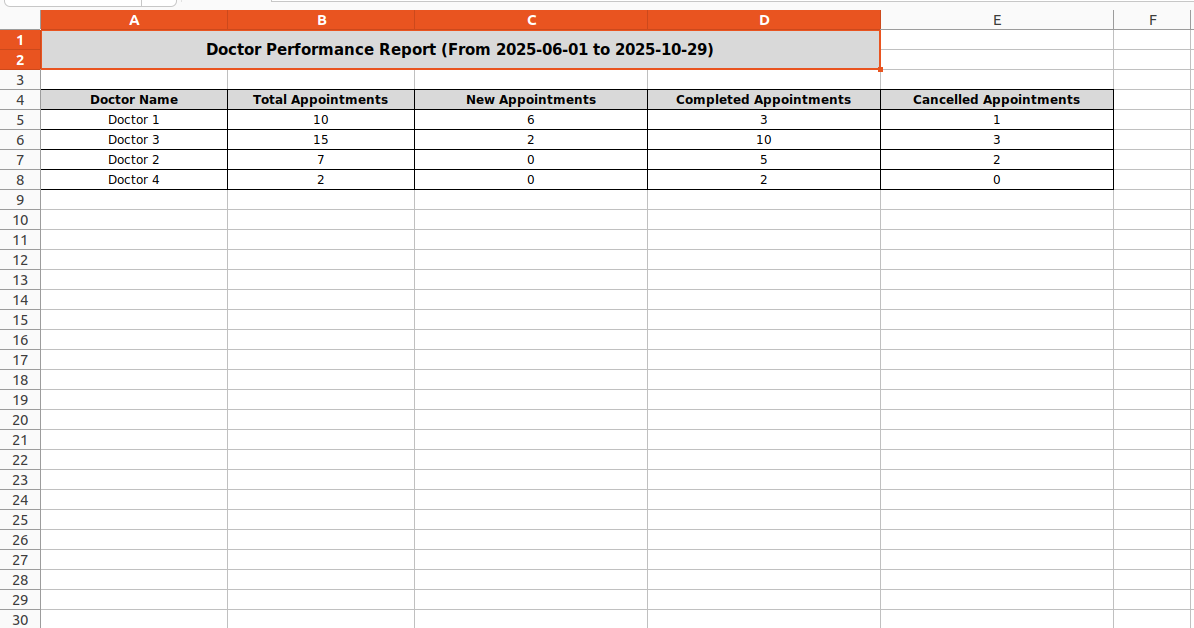
Add the required details and click on the "Excel Report" button.
The Excel report will appear as shown below.
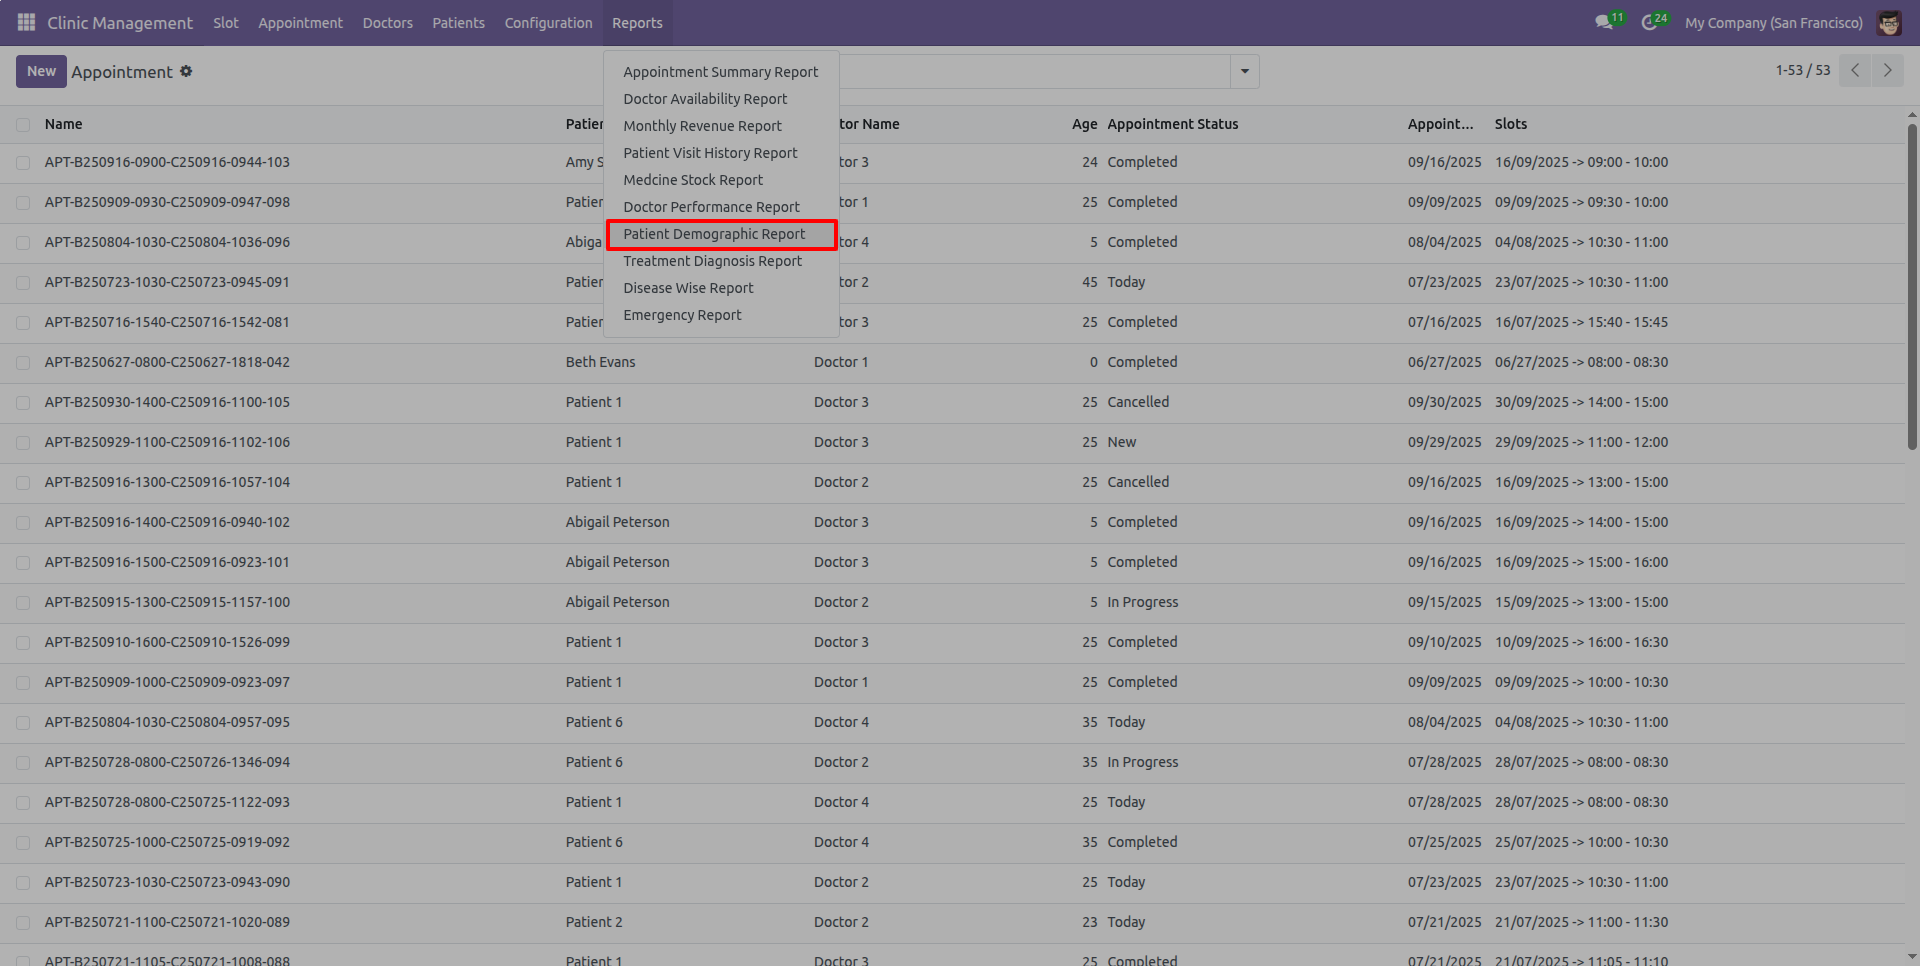
Go to the "Patient Demographic Report" under the Configuration menu.
After that, the "Patient Demographic Report" wizard will appear. Add the required details and click on the "PDF Report" button.
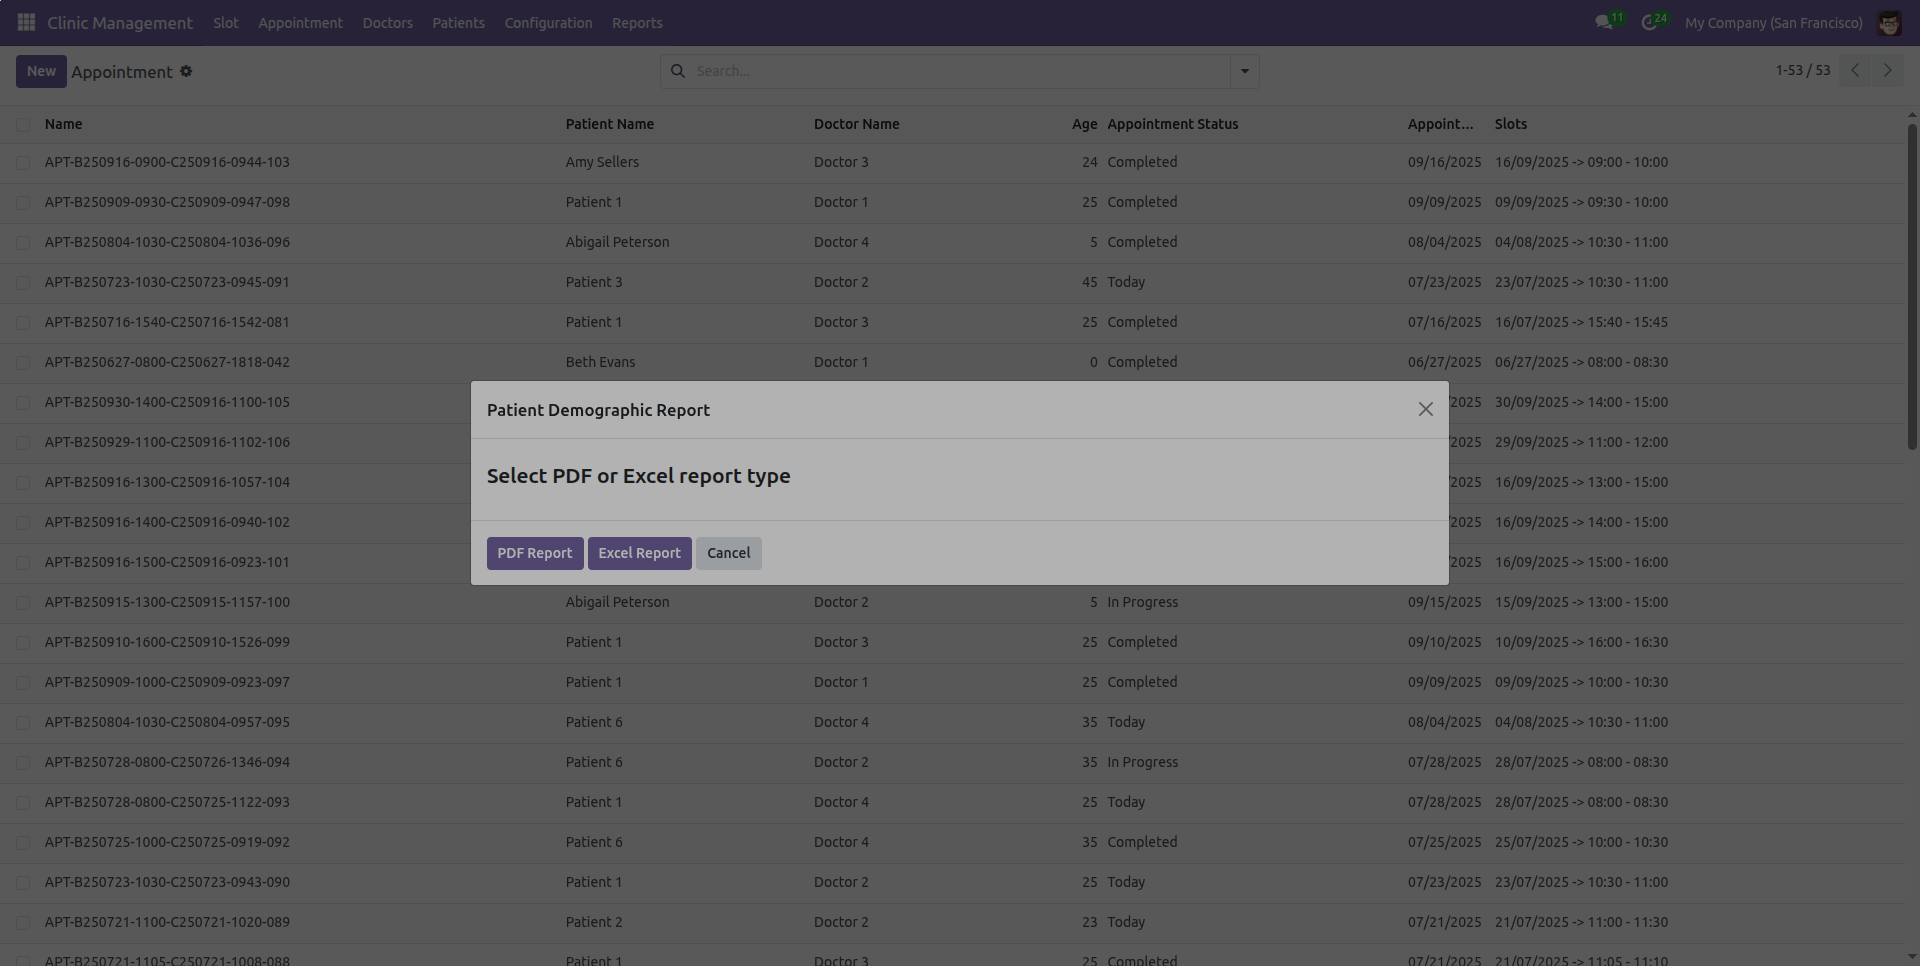
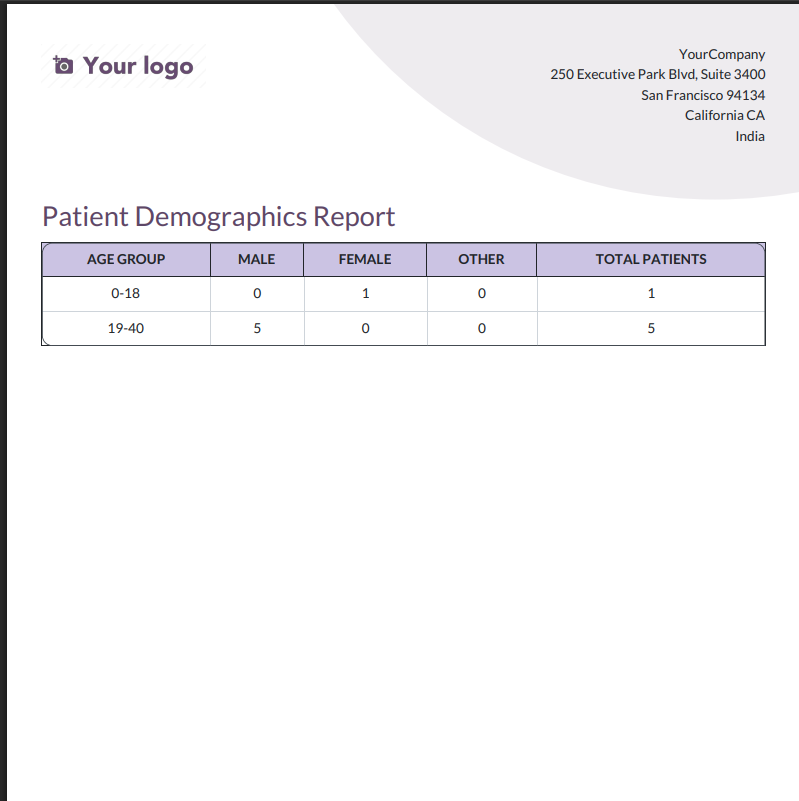
The PDF report will appear as shown below.
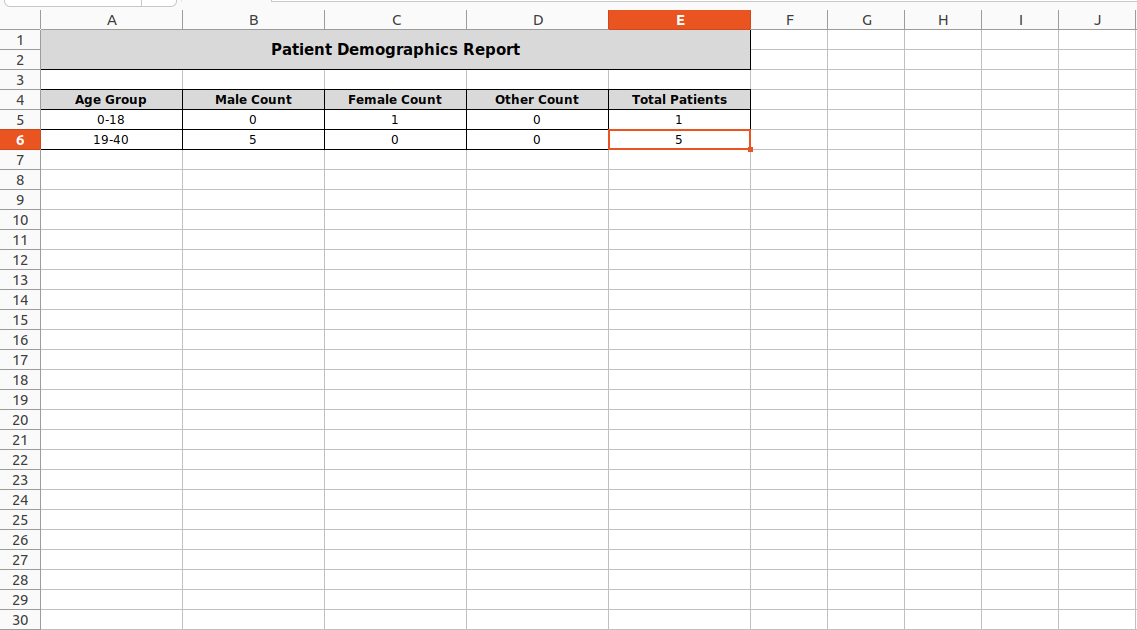
Add the required details and click on the "Excel Report" button.
The Excel report will appear as shown below.
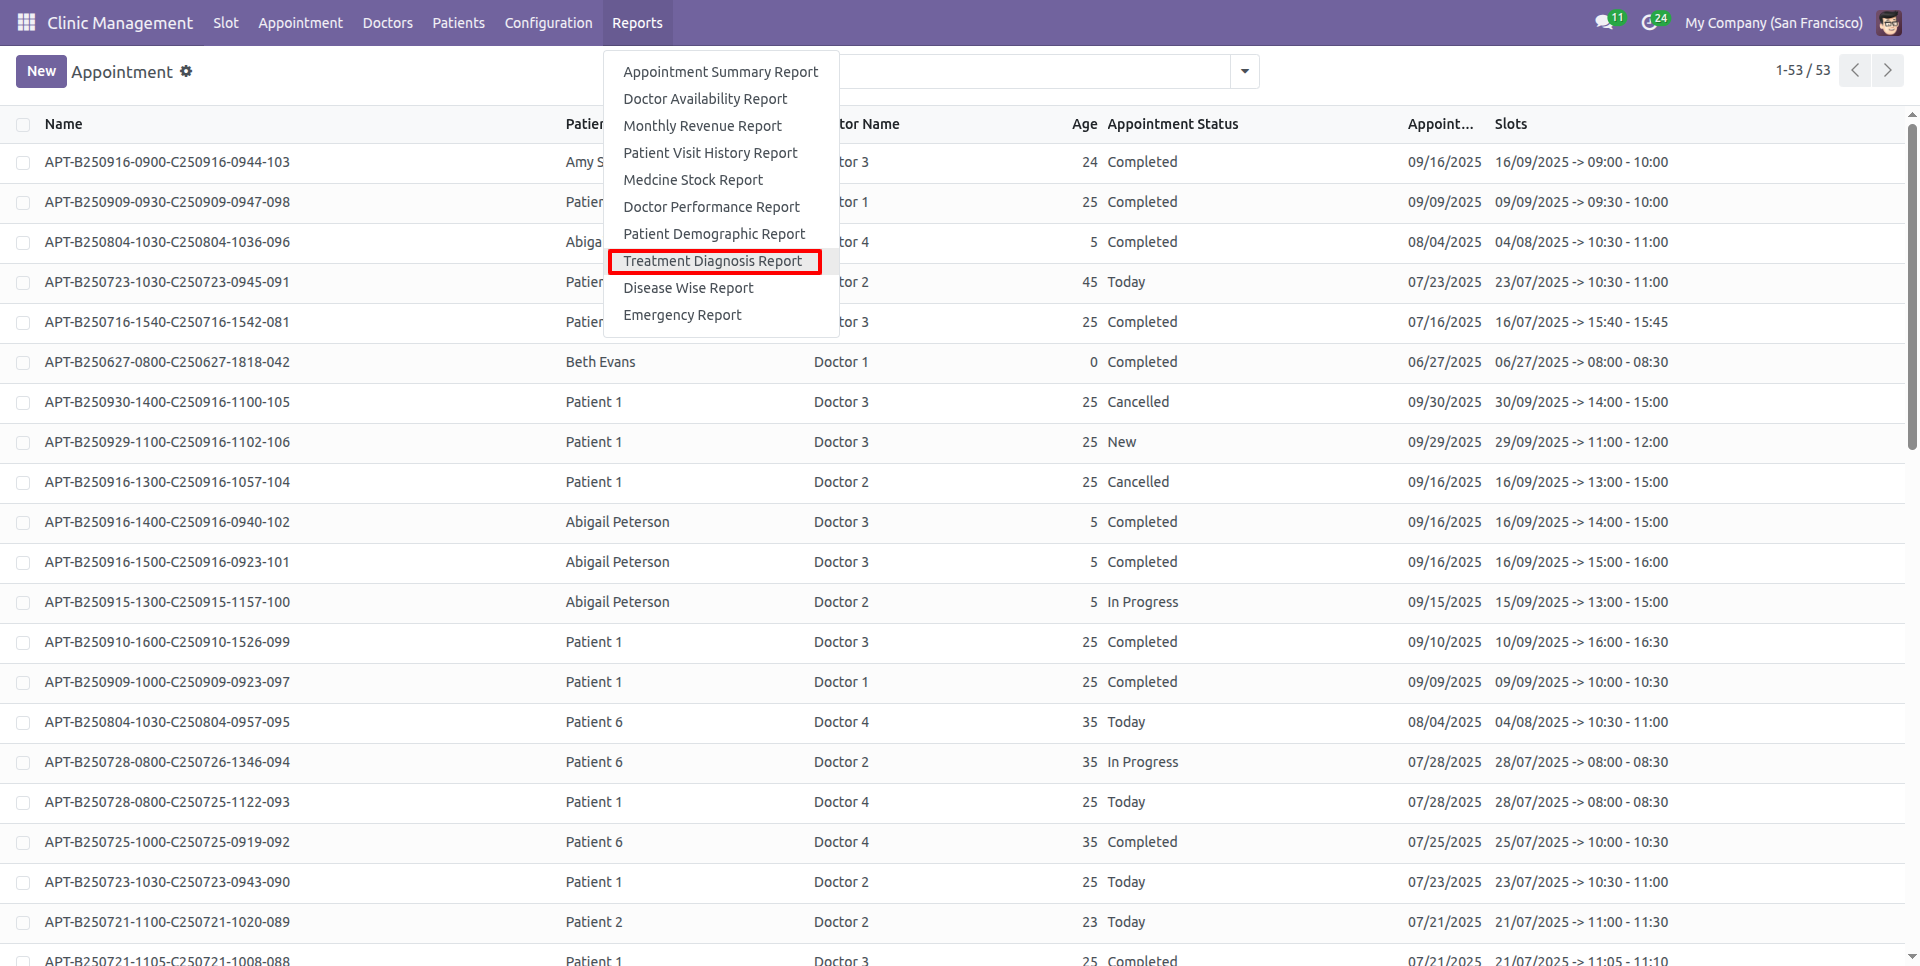
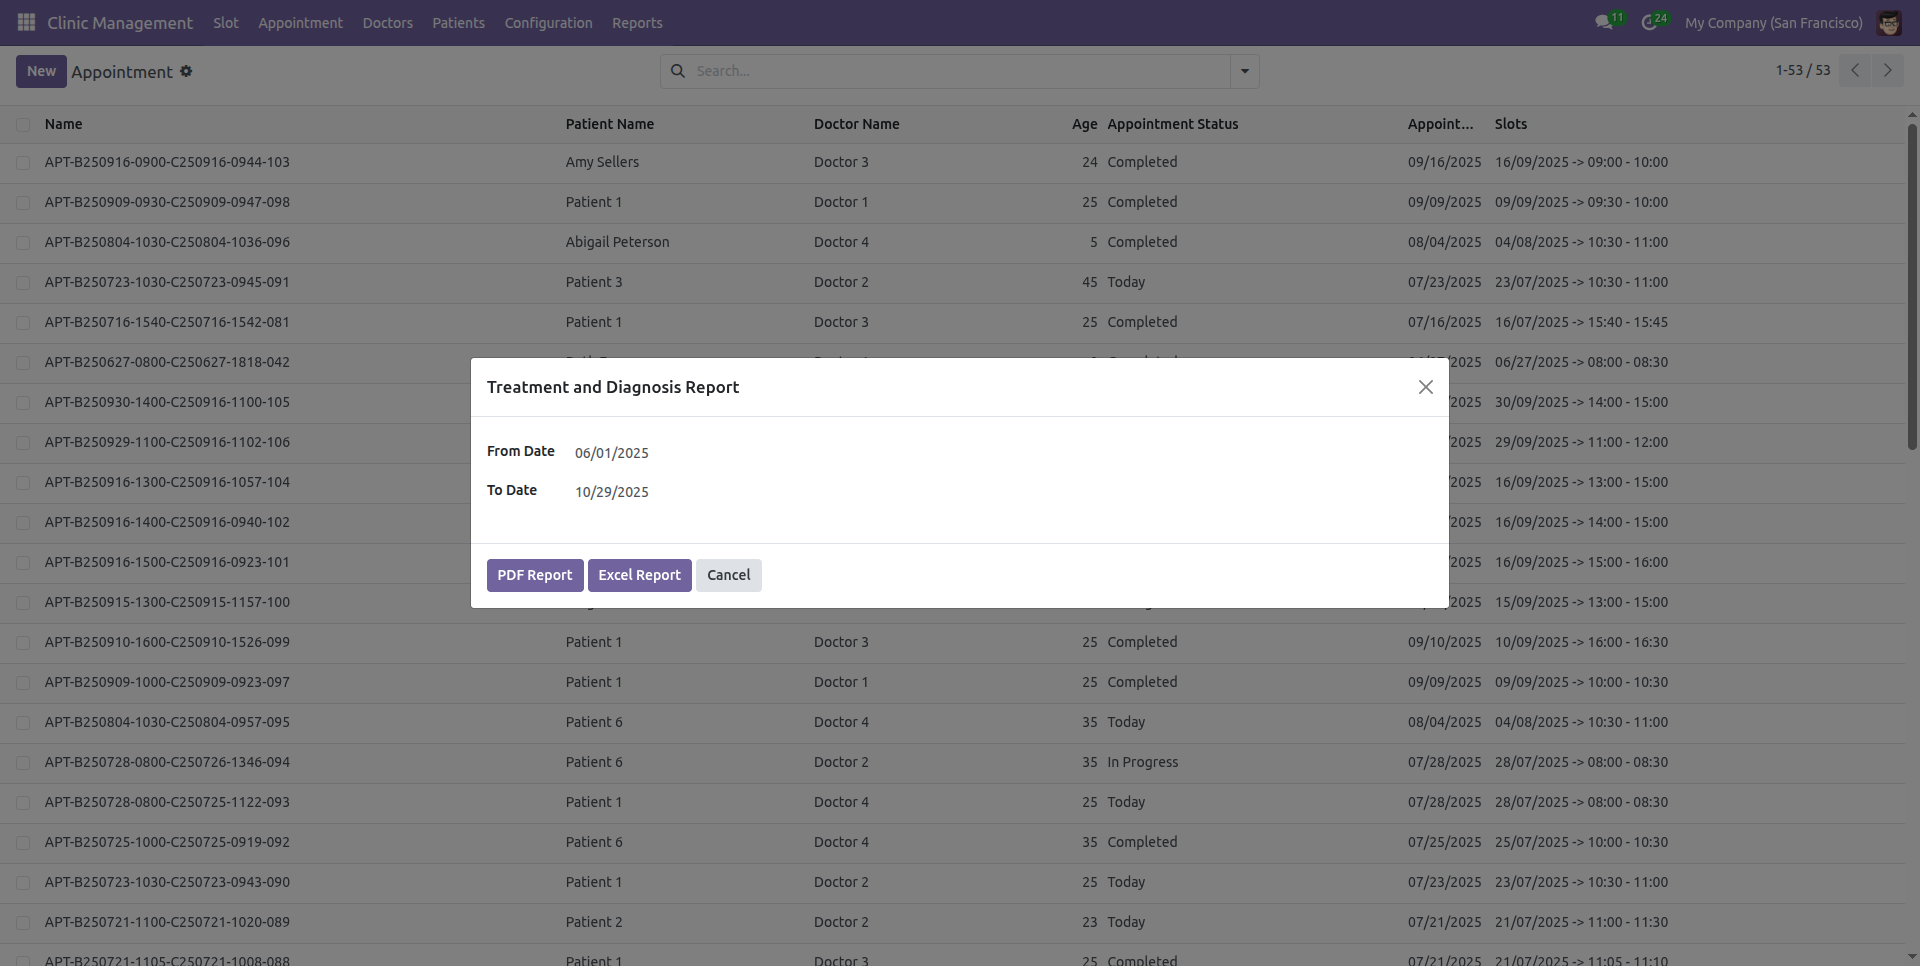
Go to the "Treatment Diagnosis Report" under the Configuration menu.
After that, the "Treatment Diagnosis Report" wizard will appear. Add the required details and click on the "PDF Report" button.
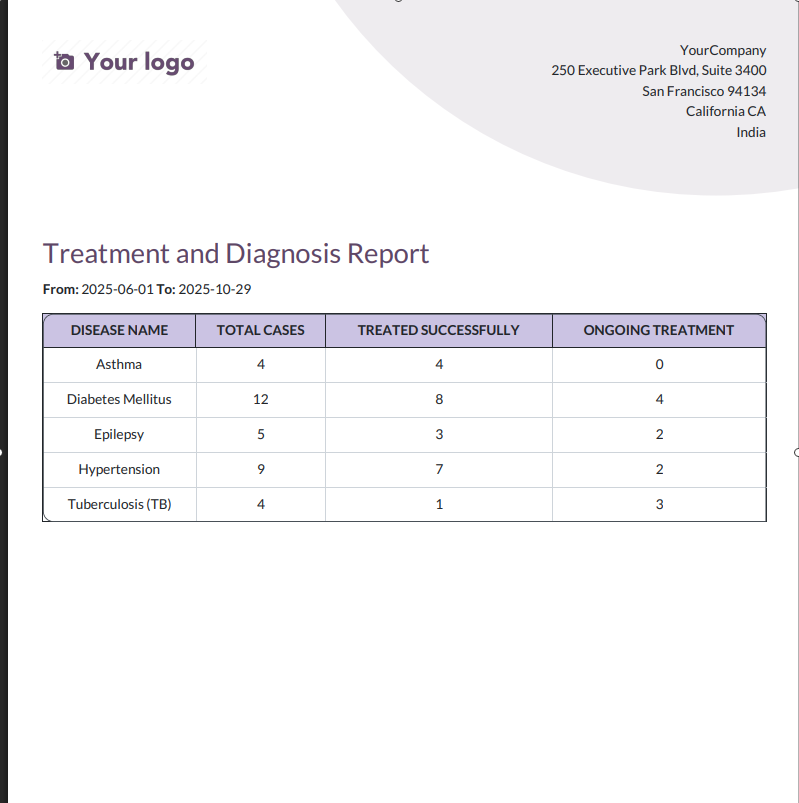
The PDF report will appear as shown below.
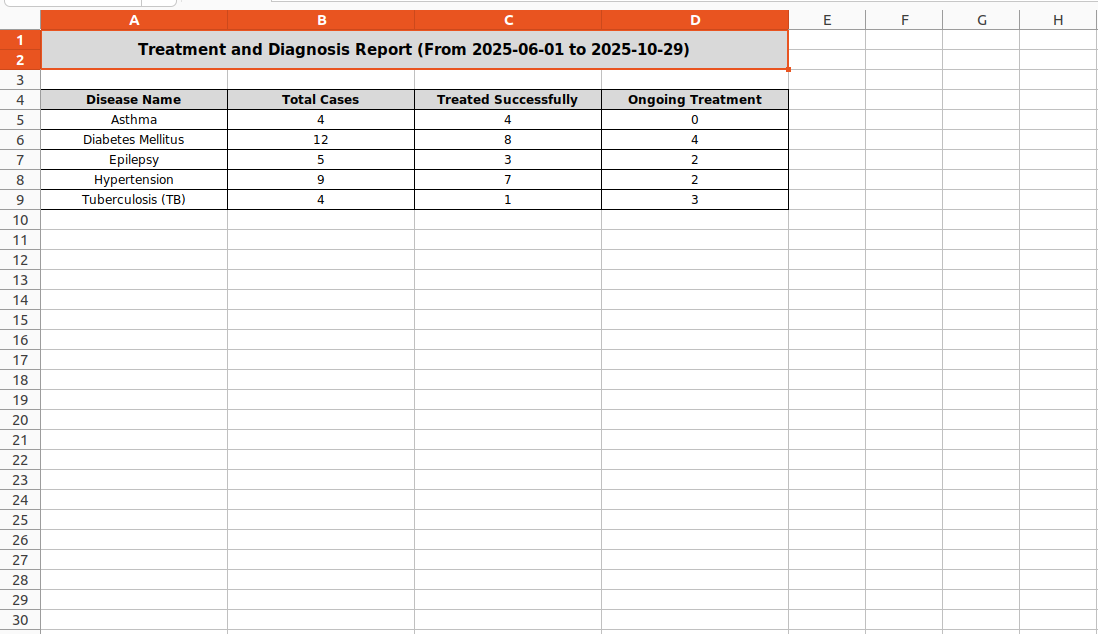
Add the required details and click on the "Excel Report" button.
The Excel report will appear as shown below.
Go to the "Disease Wise Report" under the Configuration menu.
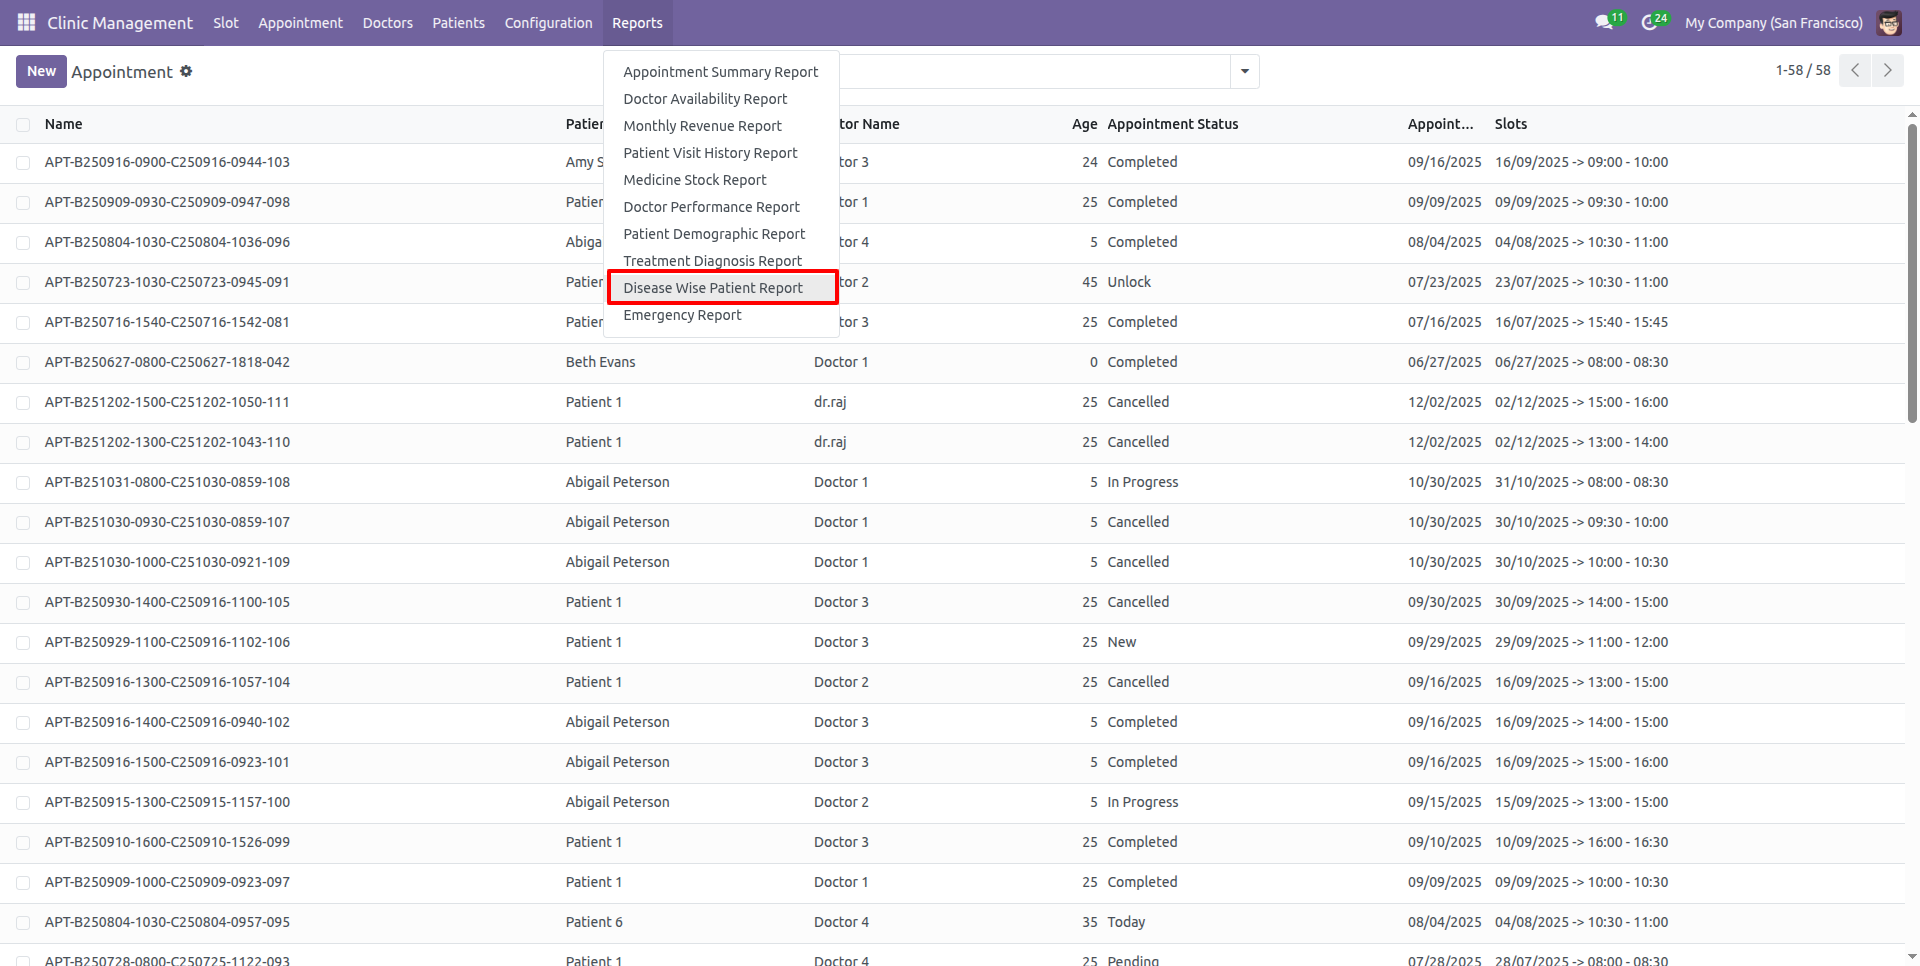
After that, the "Disease Wise Patient Report" wizard will appear. Add the required details and click on the "PDF Report" button.
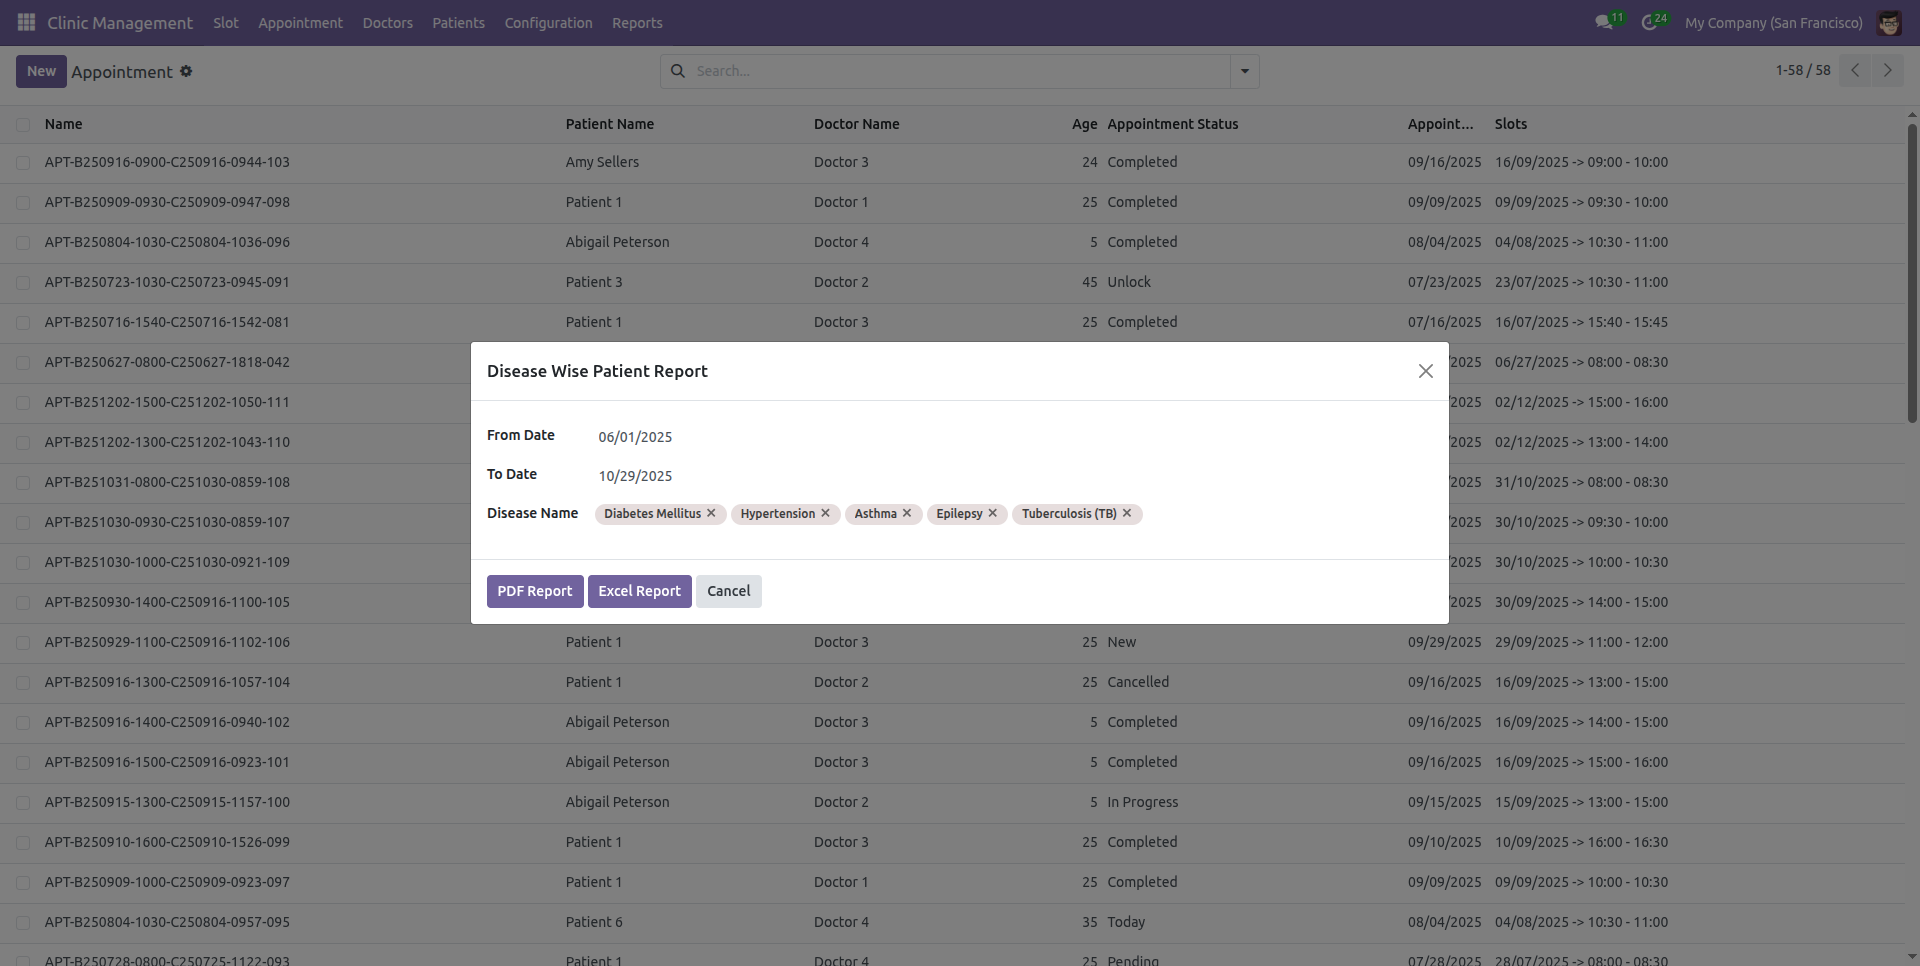
The PDF report will appear as shown below.
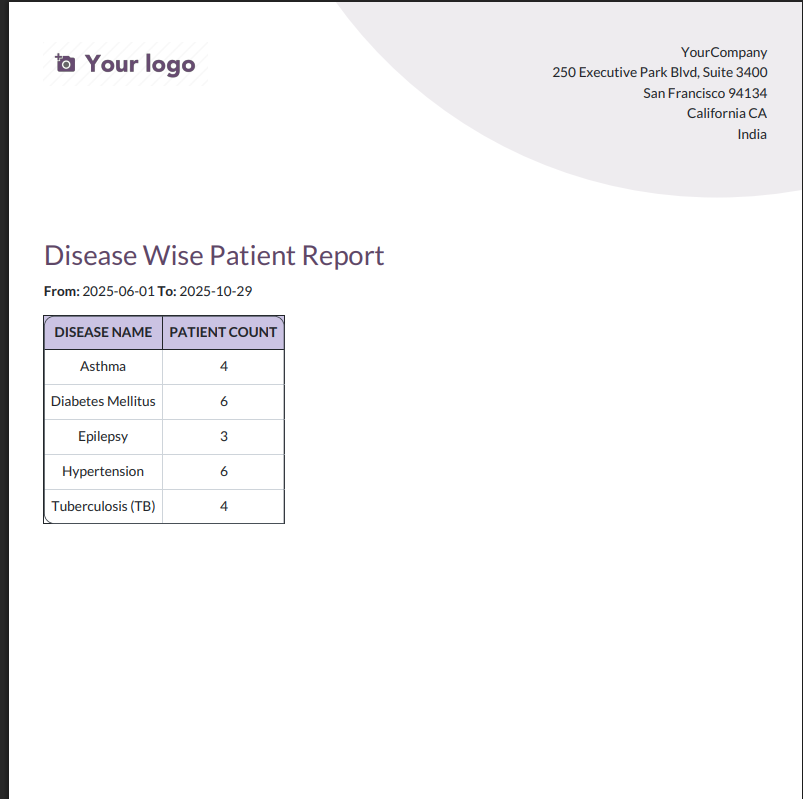
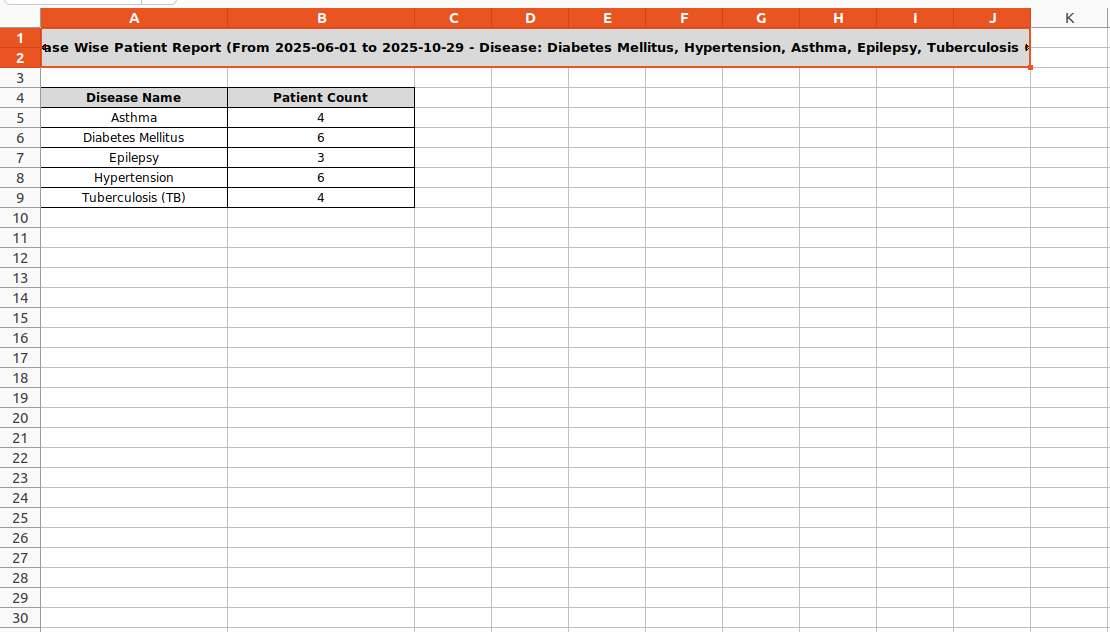
Add the required details and click on the "Excel Report" button.
The Excel report will appear as shown below.
Go to the " Emergency Report" under the Configuration menu.
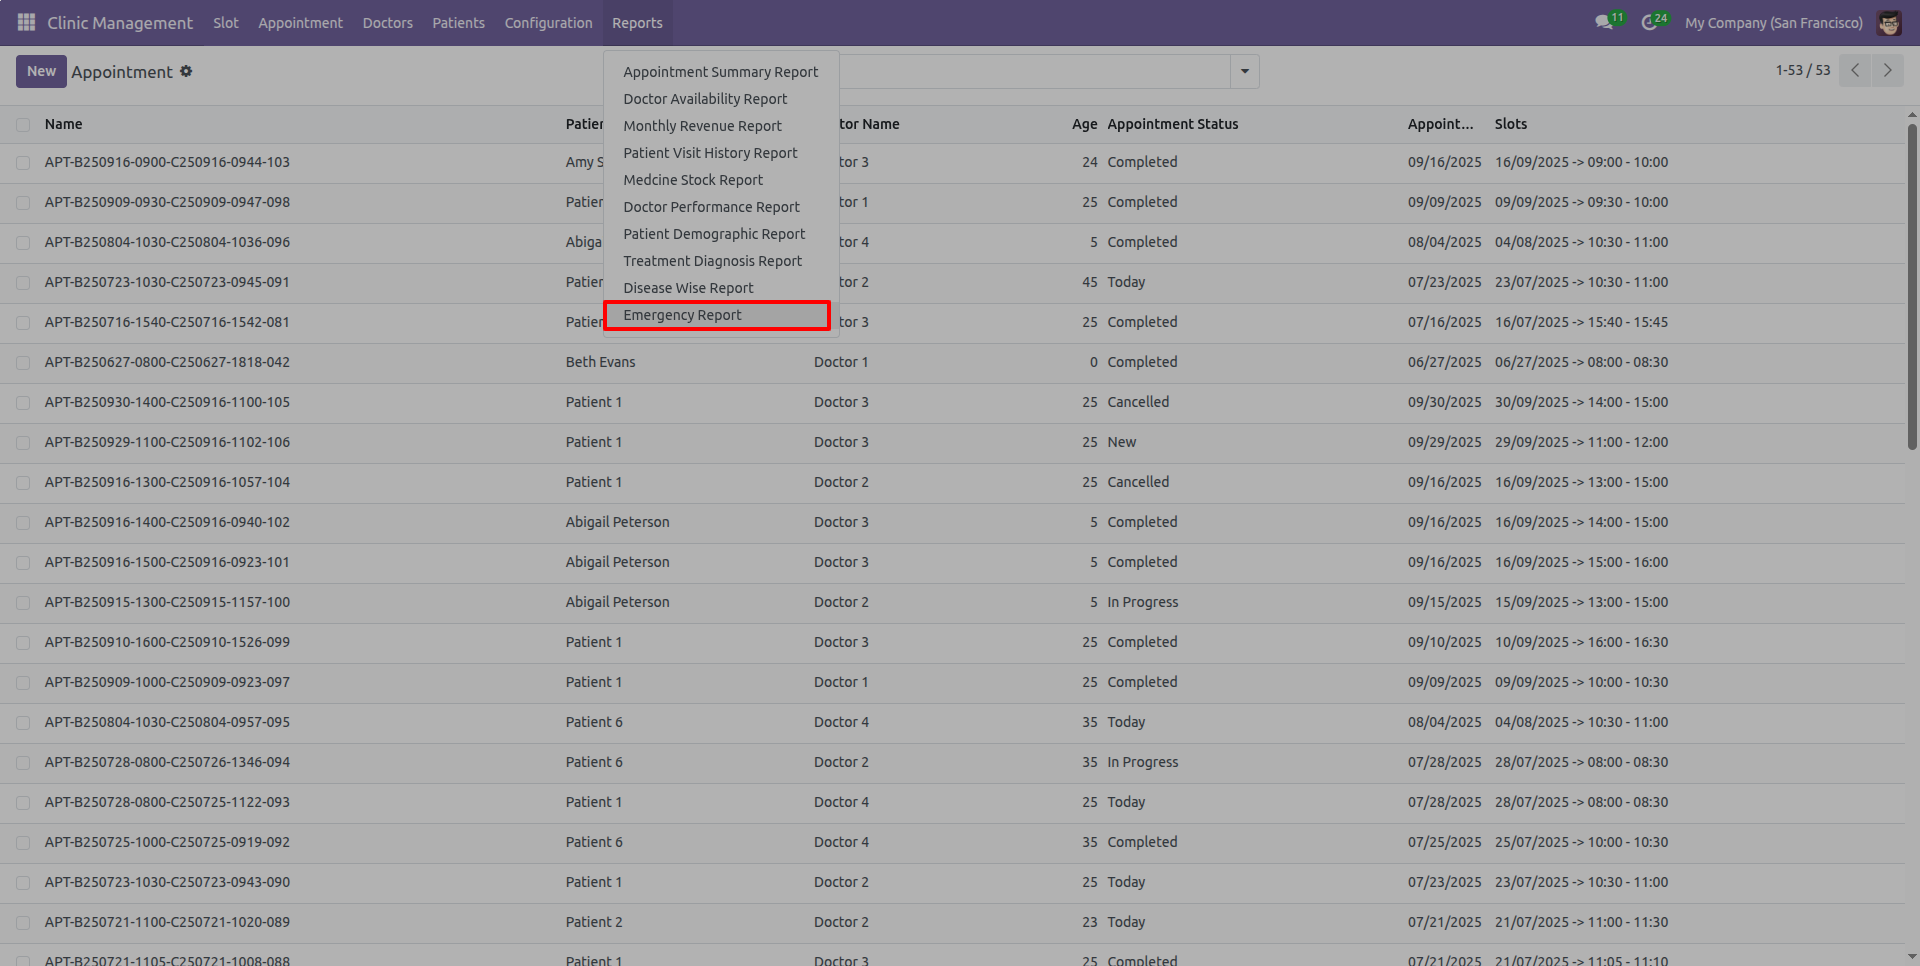
After that, the " Emergency Report" wizard will appear. Add the required details and click on the "PDF Report" button.
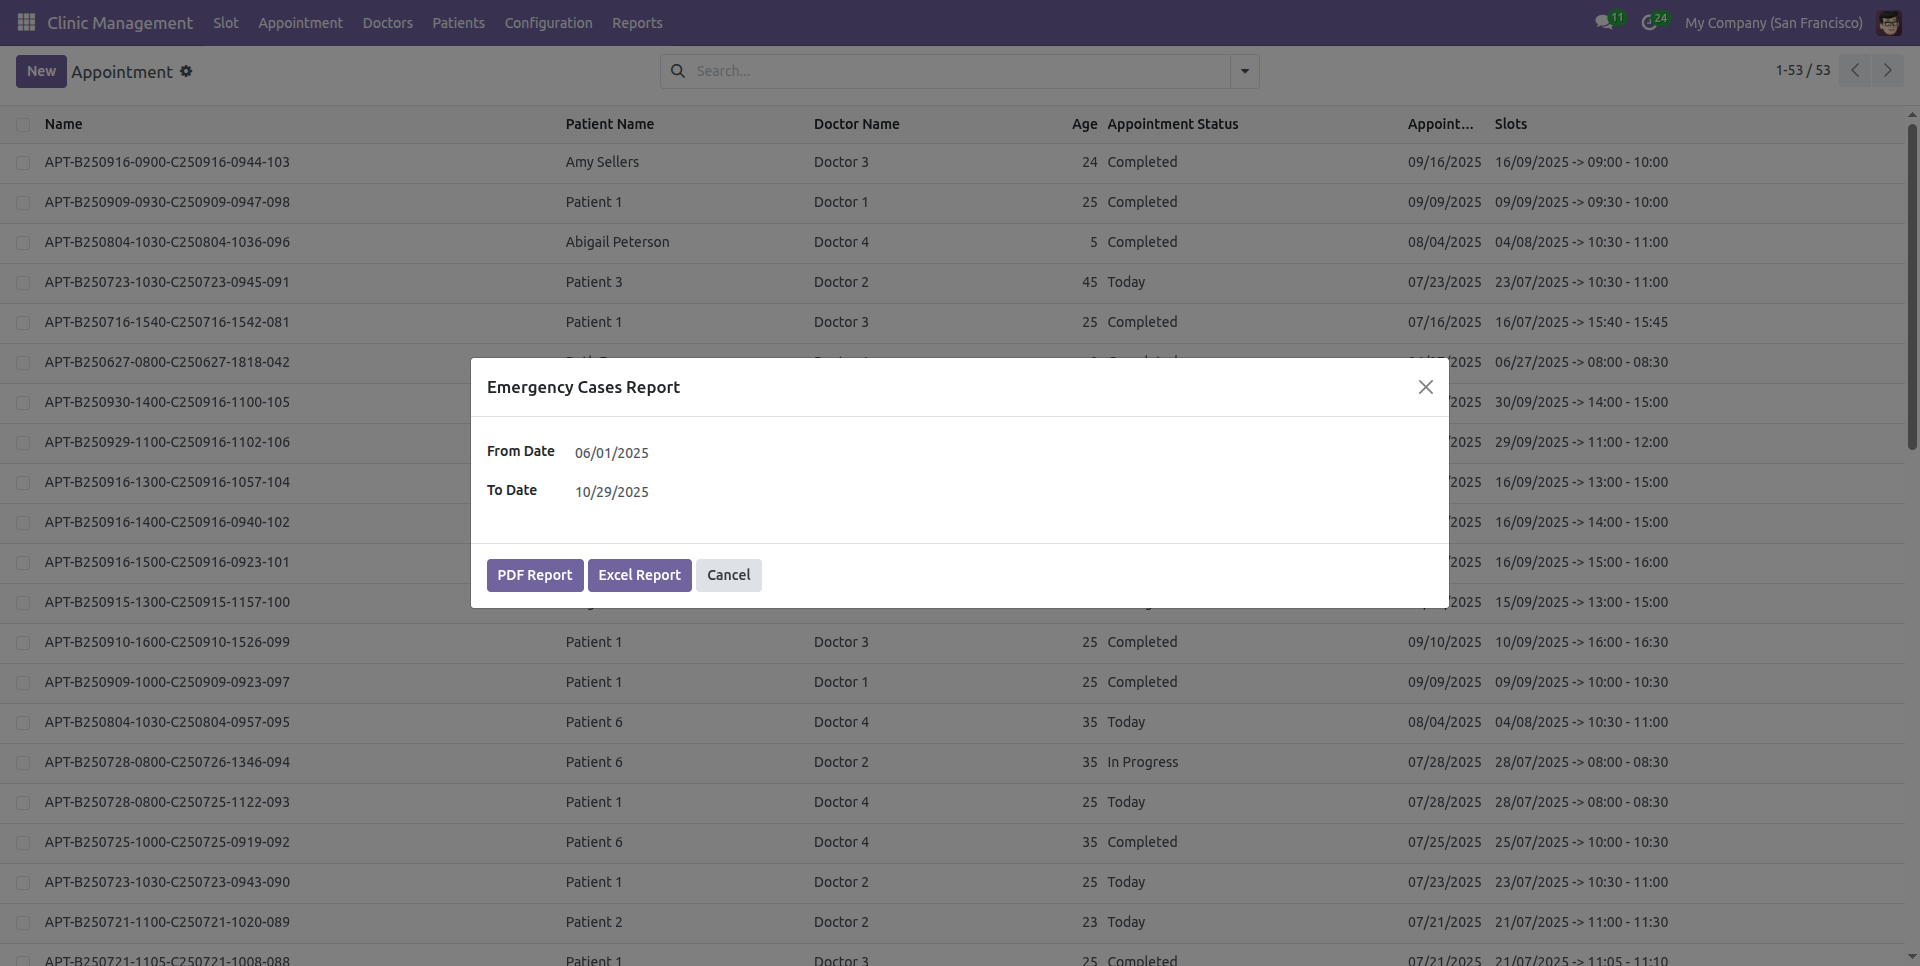
The PDF report will appear as shown below.
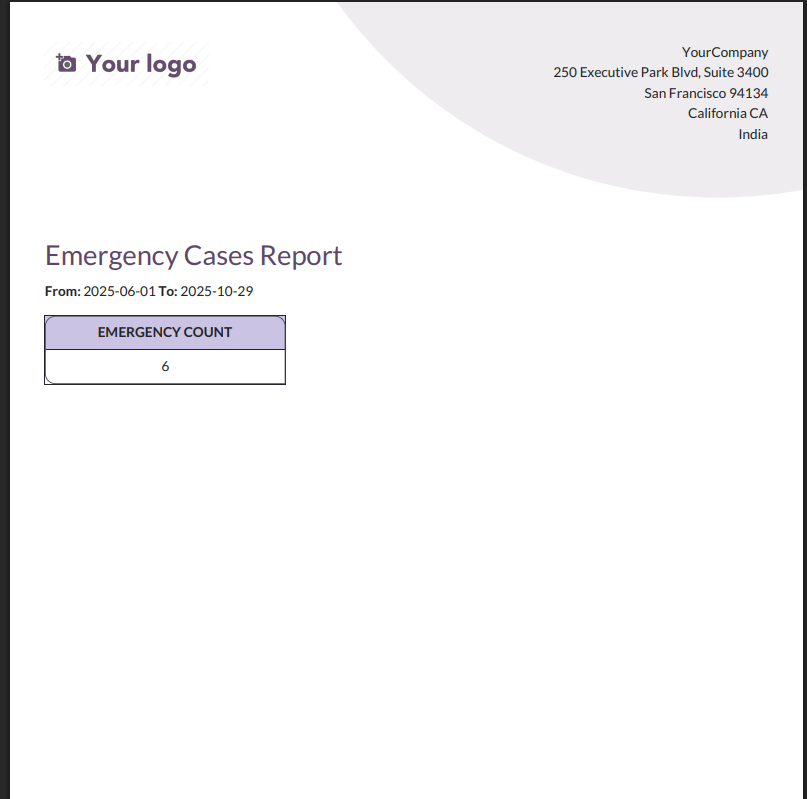
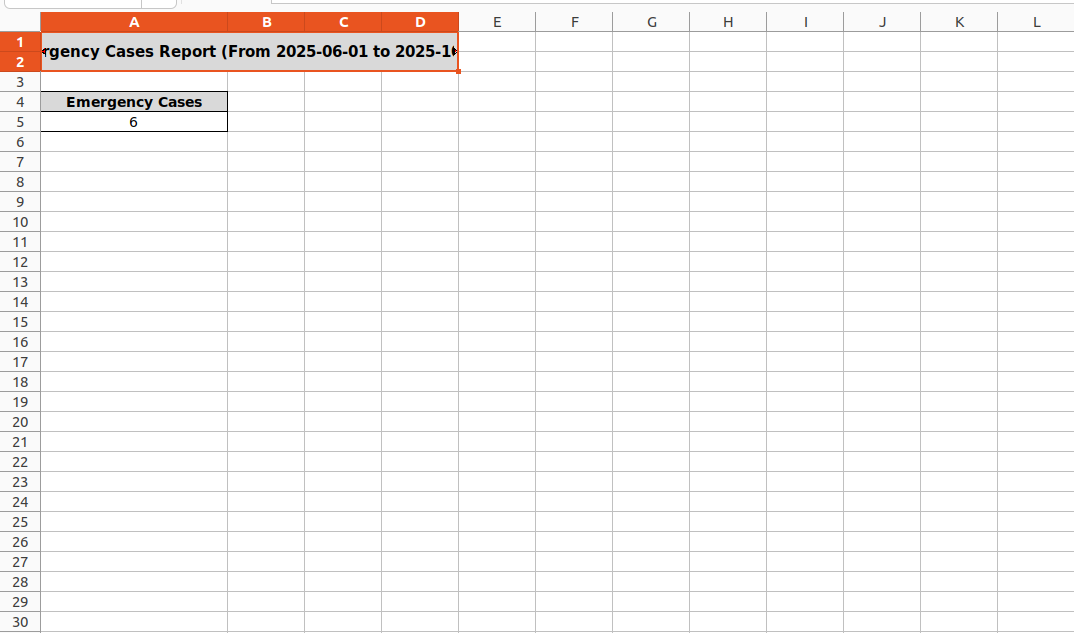
Add the required details and click on the "Excel Report" button.
The Excel report will appear as shown below.
Workflow
Portal view looks like below. Click on the "Appointment".
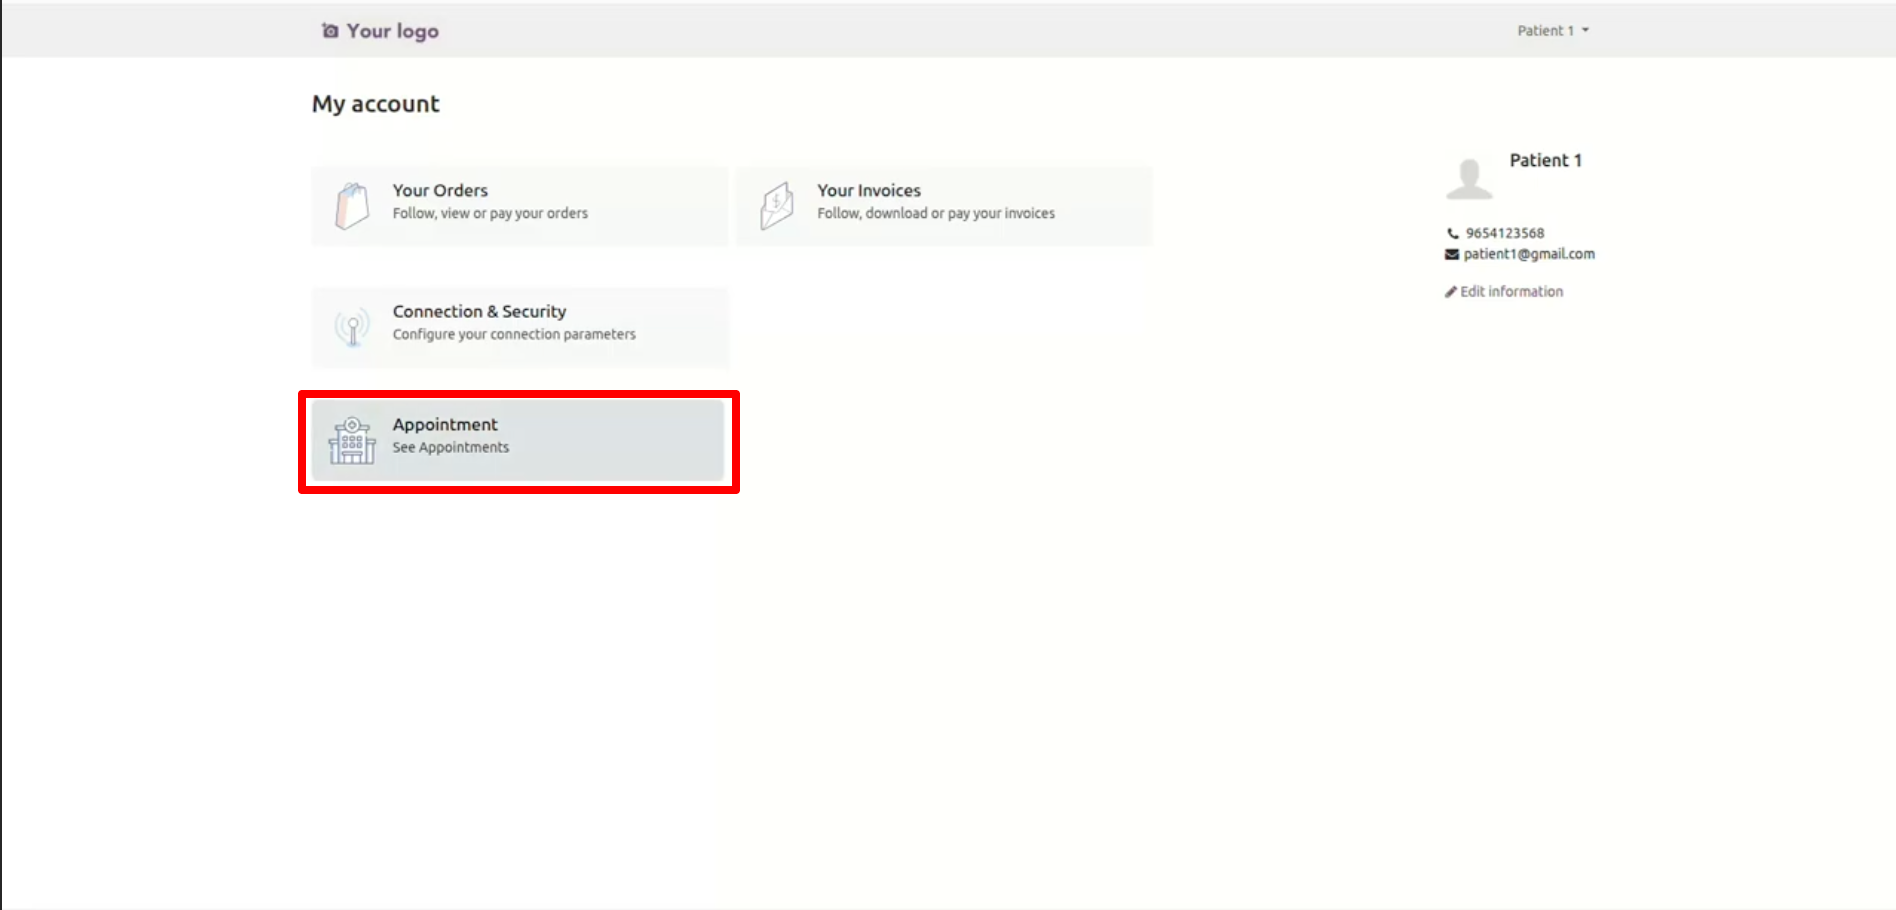
Here, you can view existing appointments and also book a new one.
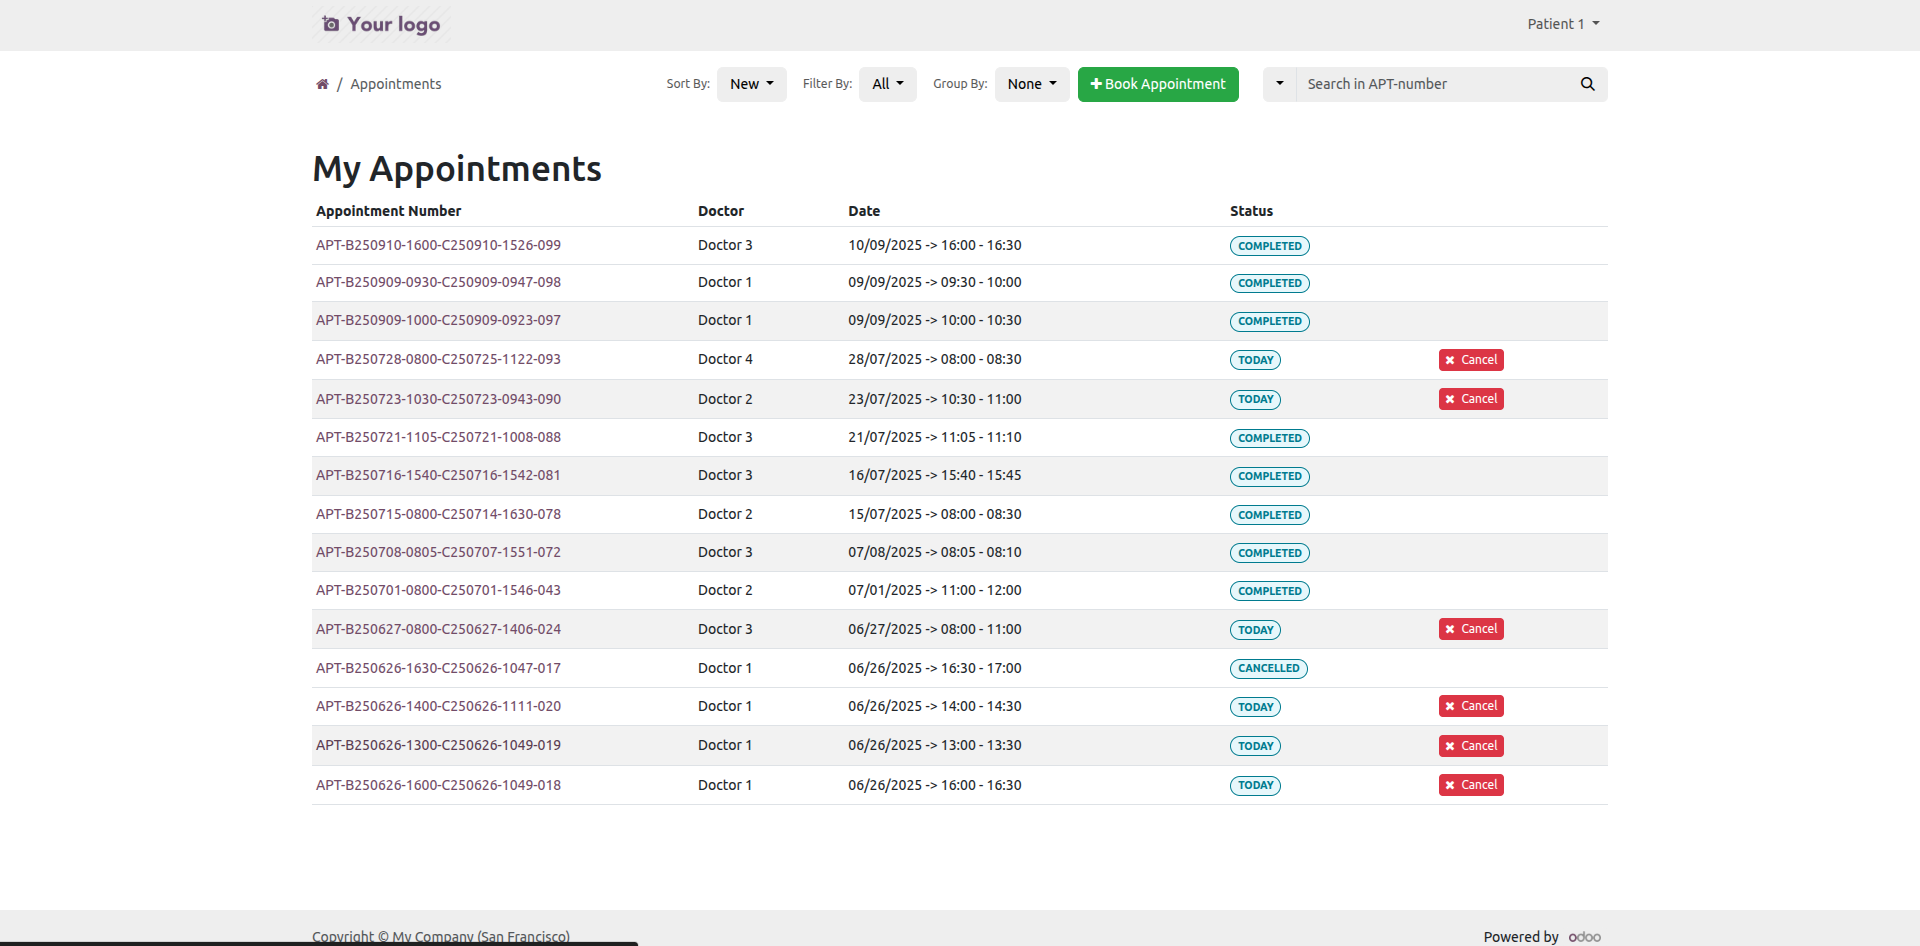
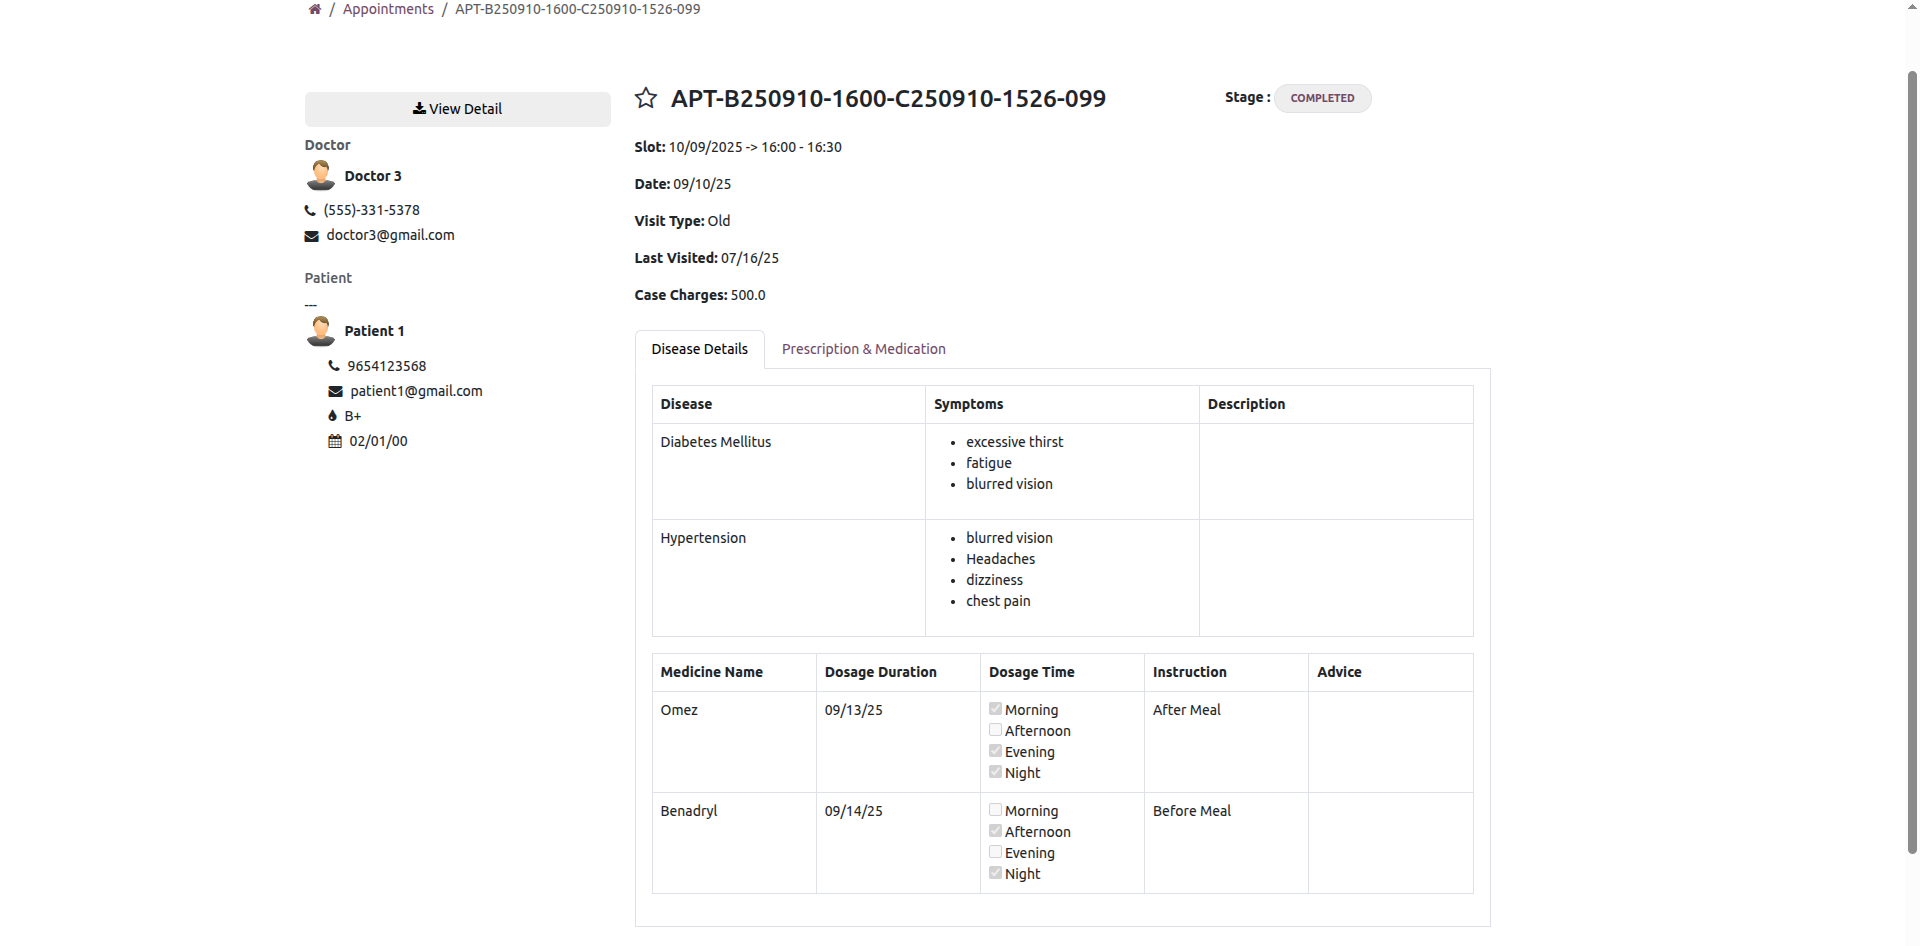
Form view of the "Appointment".
Version 18.0.1.0.0 | Released on : 27th August 2026
- Yes, this app works perfectly with Odoo Enterprise (Odoo.sh & On-Premise) as well as Community.
- No, this application is not compatible with odoo.com(odoo saas/Odoo Online).
- Please Contact Us at sales@softhealer.com to request customization.
- Yes, you will get free update for lifetime.
- No, you don't need to install additional libraries.
- For version 12 or upper, you will need to purchase the module for each version that you want to use.
- Yes, we provide free support for 100 days.
- No, We do not provide any kind of exchange.
