












Whatsapp - Odoo Connector

Nowadays, There is WhatsApp which is a widely used messenger to communicate with customers and it's faster than compares to emails. But in odoo there is no feature to send an order, documentation to your related customers, vendors, and contacts as well. Our this module will help to send message and orders on WhatsApp it sounds quite familiar, right? so what's new in this app? In this app you no need to go on WhatsApp web page, Just one click to send a message or order to your customer. Just get token and instance from 'Chat Api' and configure that in odoo and go for it.
Related Modules
Key Features
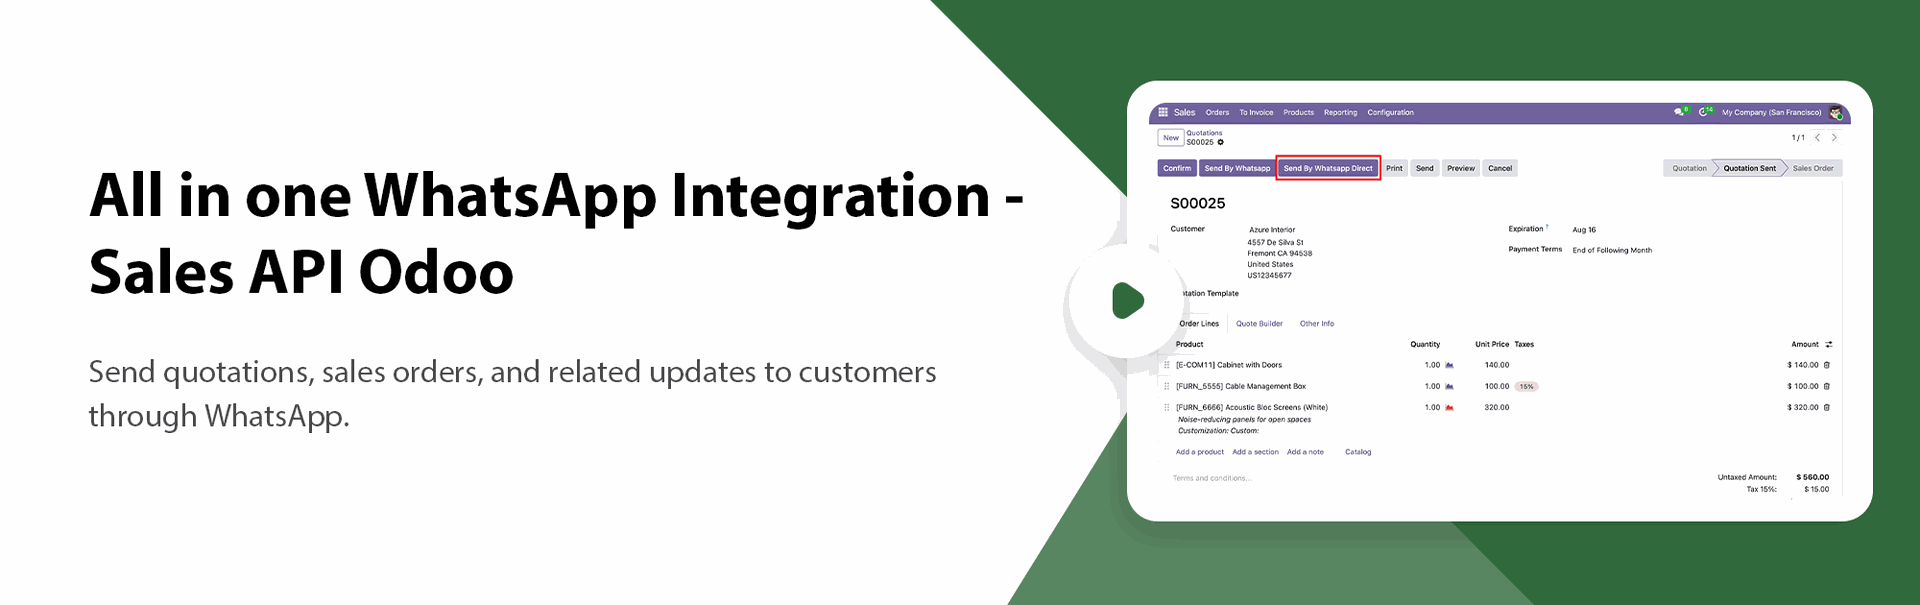
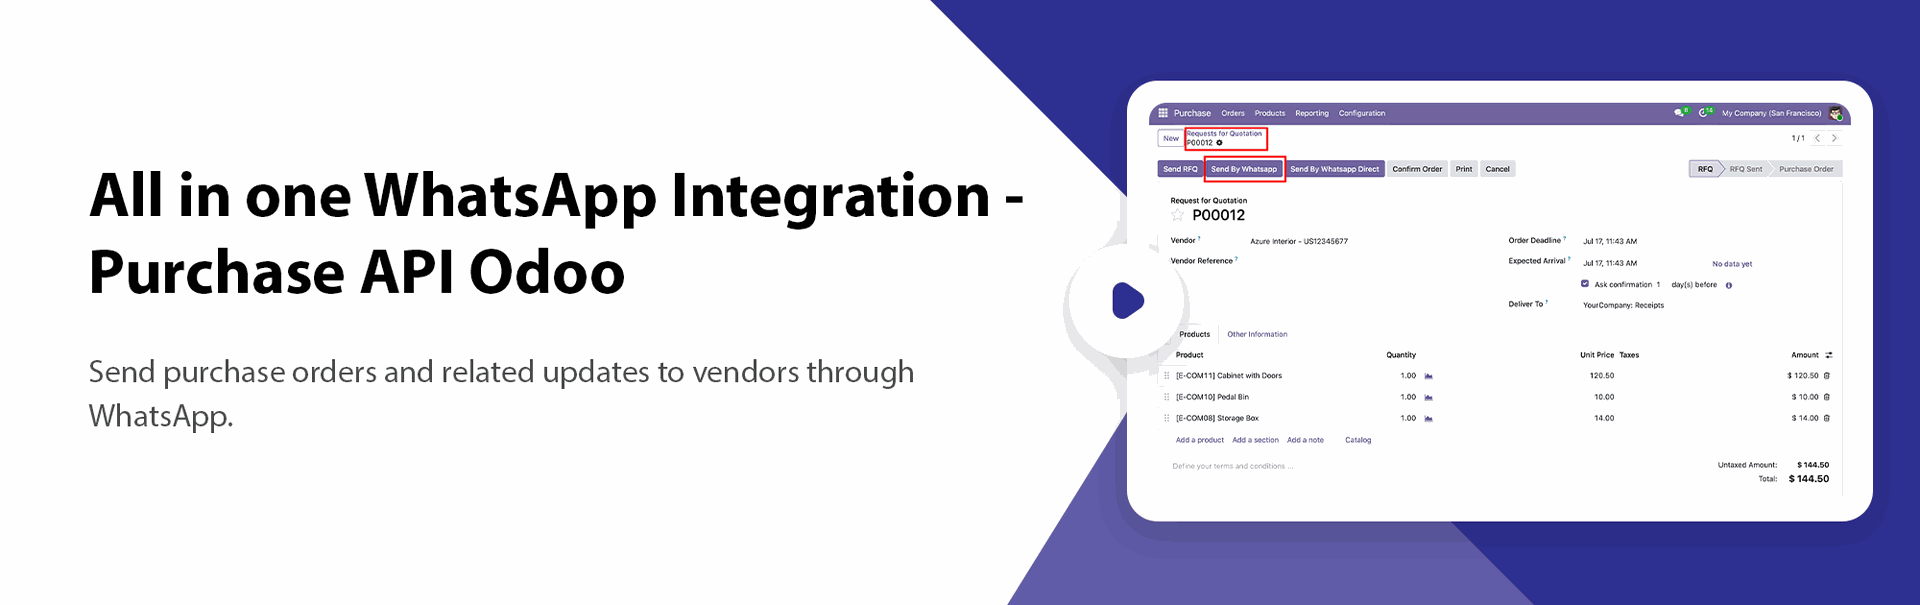
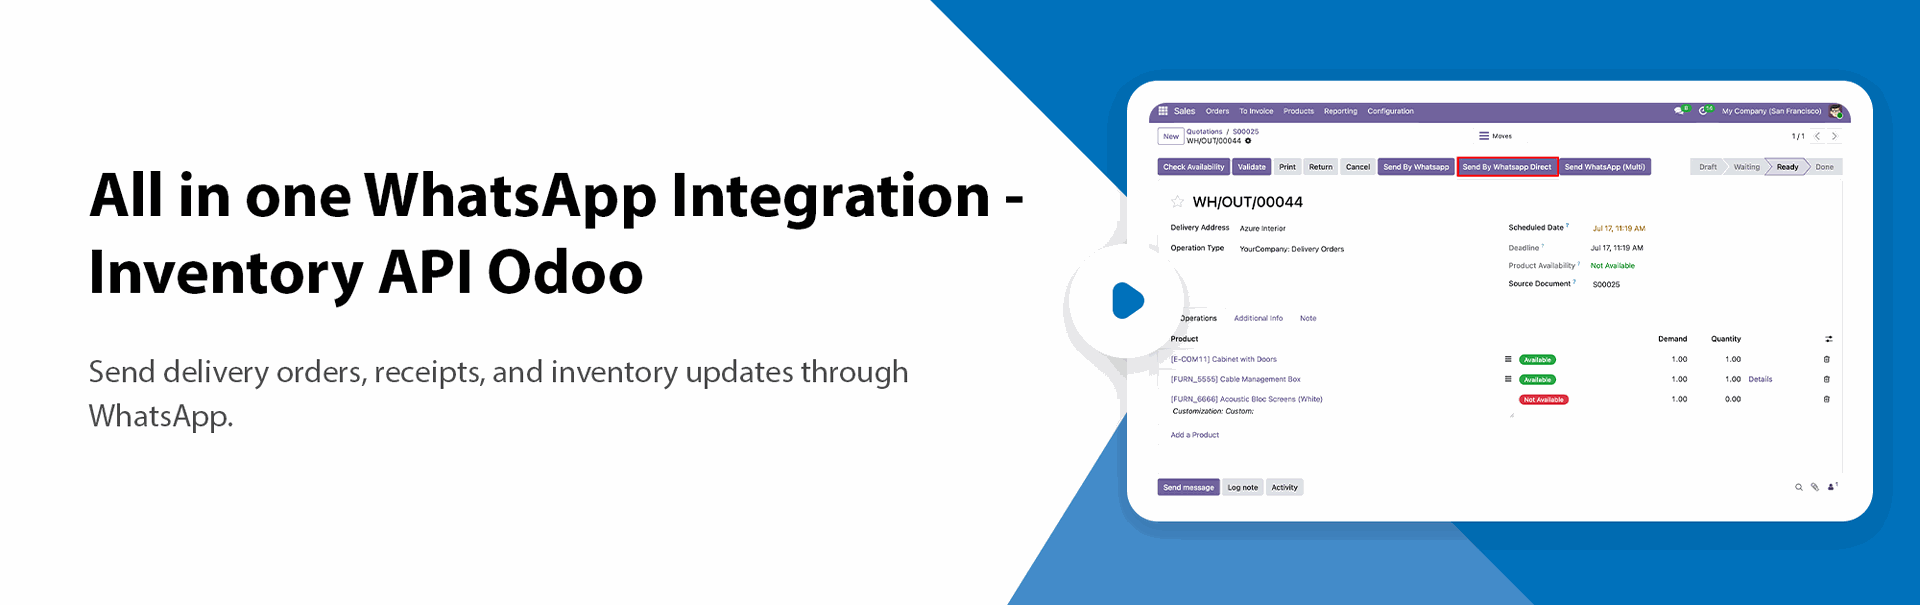
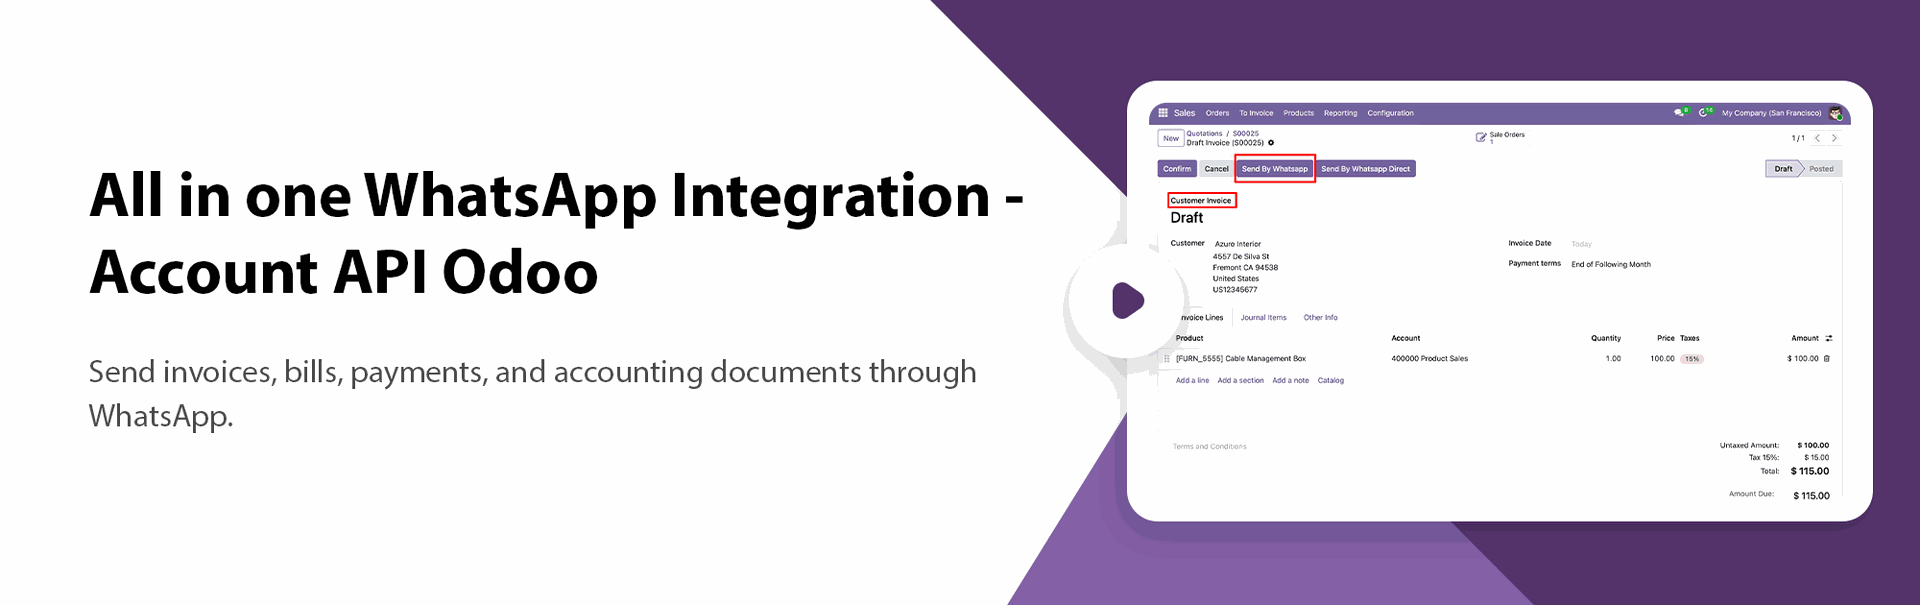
Features
All in One WhatsApp API
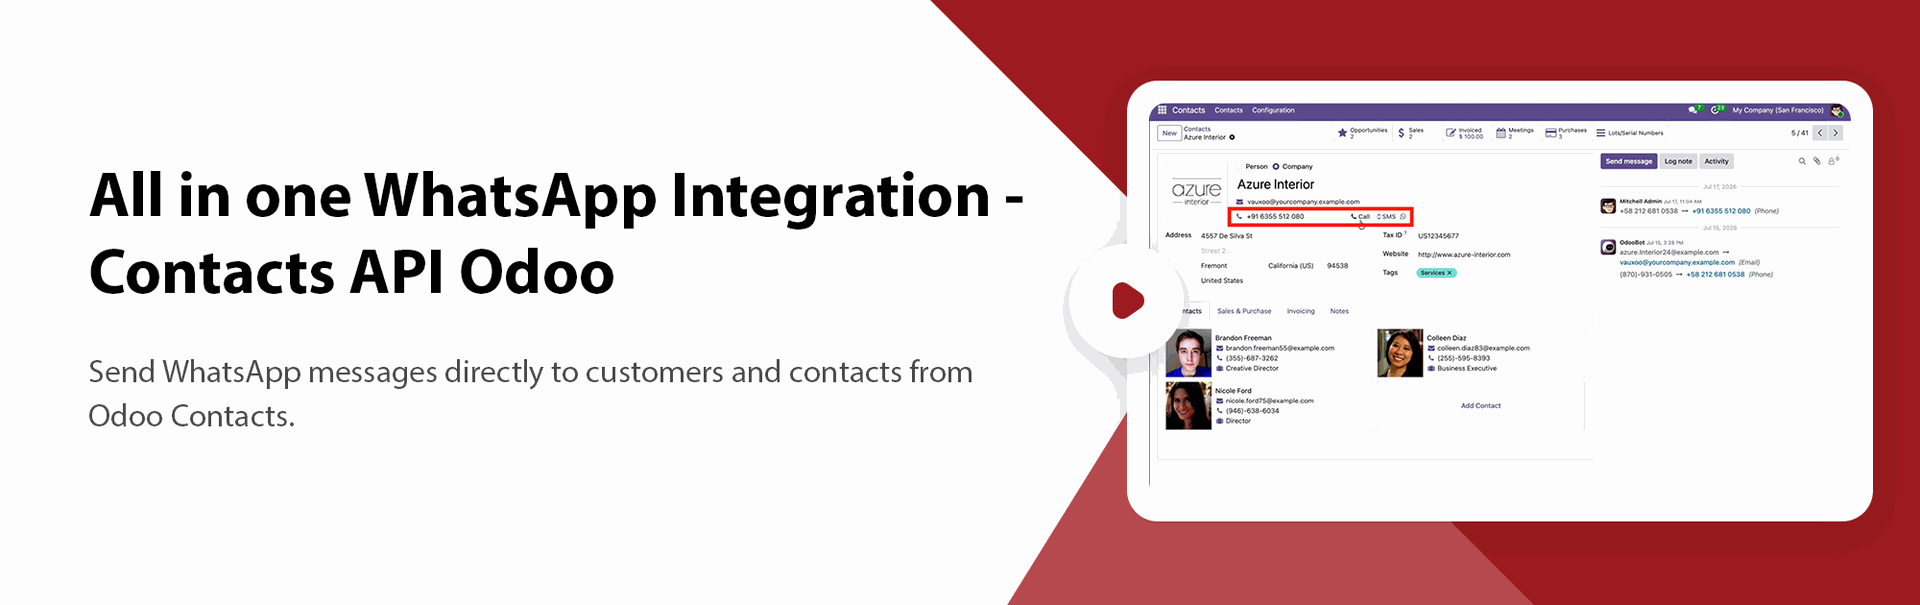
Connect Odoo with WhatsApp APIs and manage messaging from different Odoo apps in one place.
ApiChat Integration
Connect ApiChat with Odoo to send WhatsApp messages easily.

Multiple WhatsApp Accounts
Connect and manage multiple WhatsApp accounts in Odoo.

One-Click Messaging
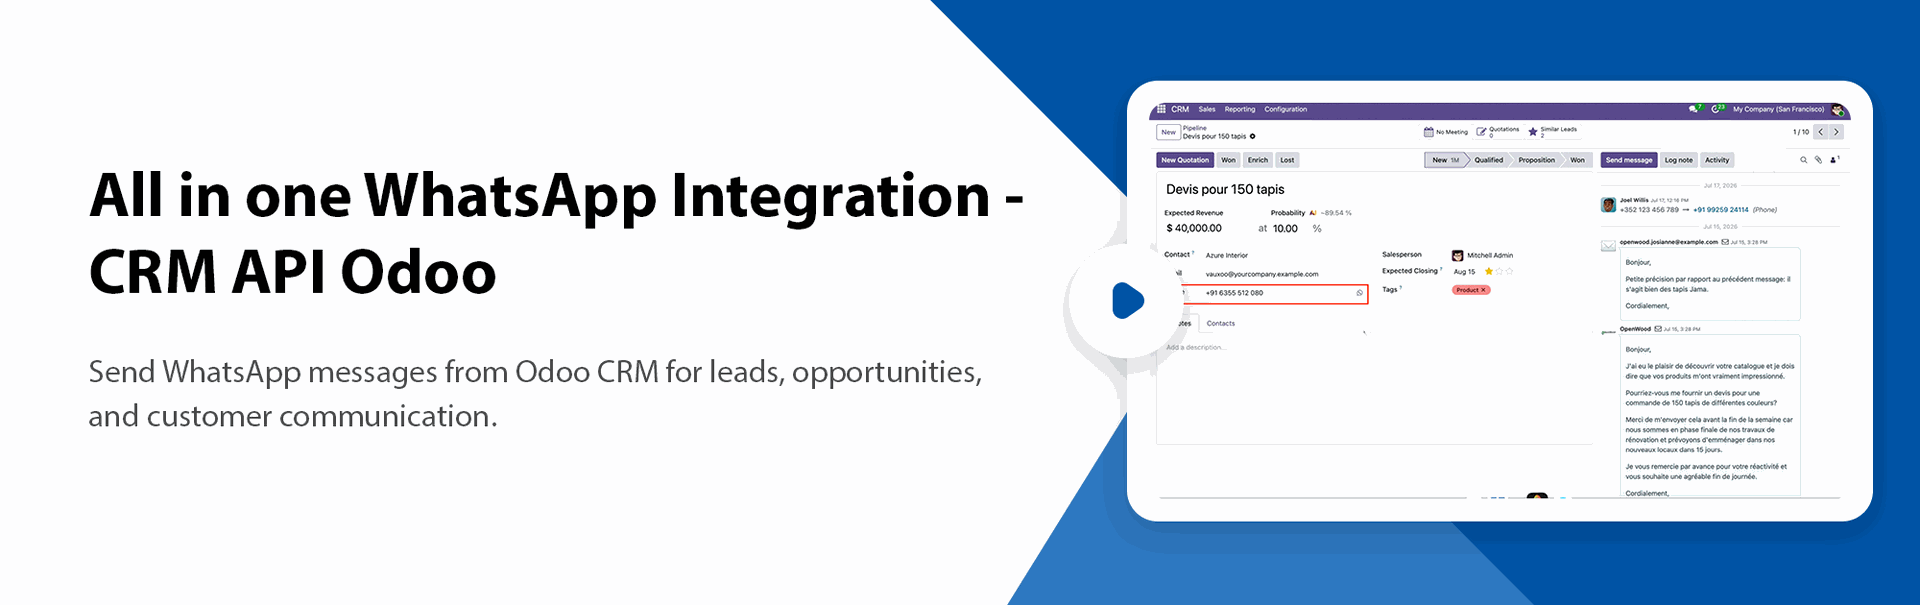
Send WhatsApp messages directly from Odoo with a single click.

Default WhatsApp Account
Set a default WhatsApp account for quick and easy messaging.
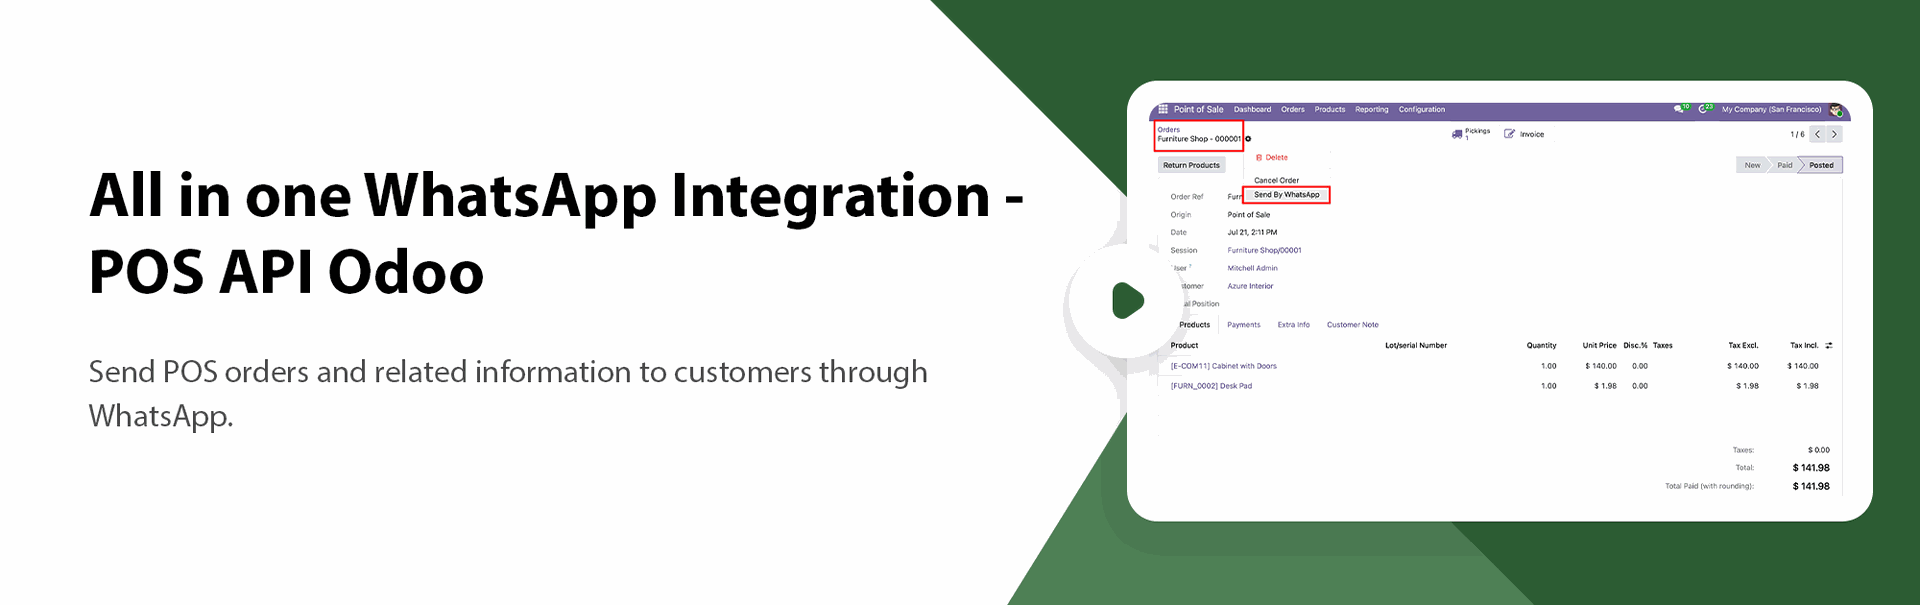
POS WhatsApp Messaging

Send POS order details and messages to customers through WhatsApp.

App-Wise WhatsApp Settings
Enable or disable WhatsApp messaging for Sales, Purchase, Inventory, Invoices, CRM, POS, and other apps.
Chat API Integration
Connect Chat API with Odoo and use it as a WhatsApp messaging provider.

Multiple WhatsApp Users
Allow multiple Odoo users to send WhatsApp messages using their assigned accounts.

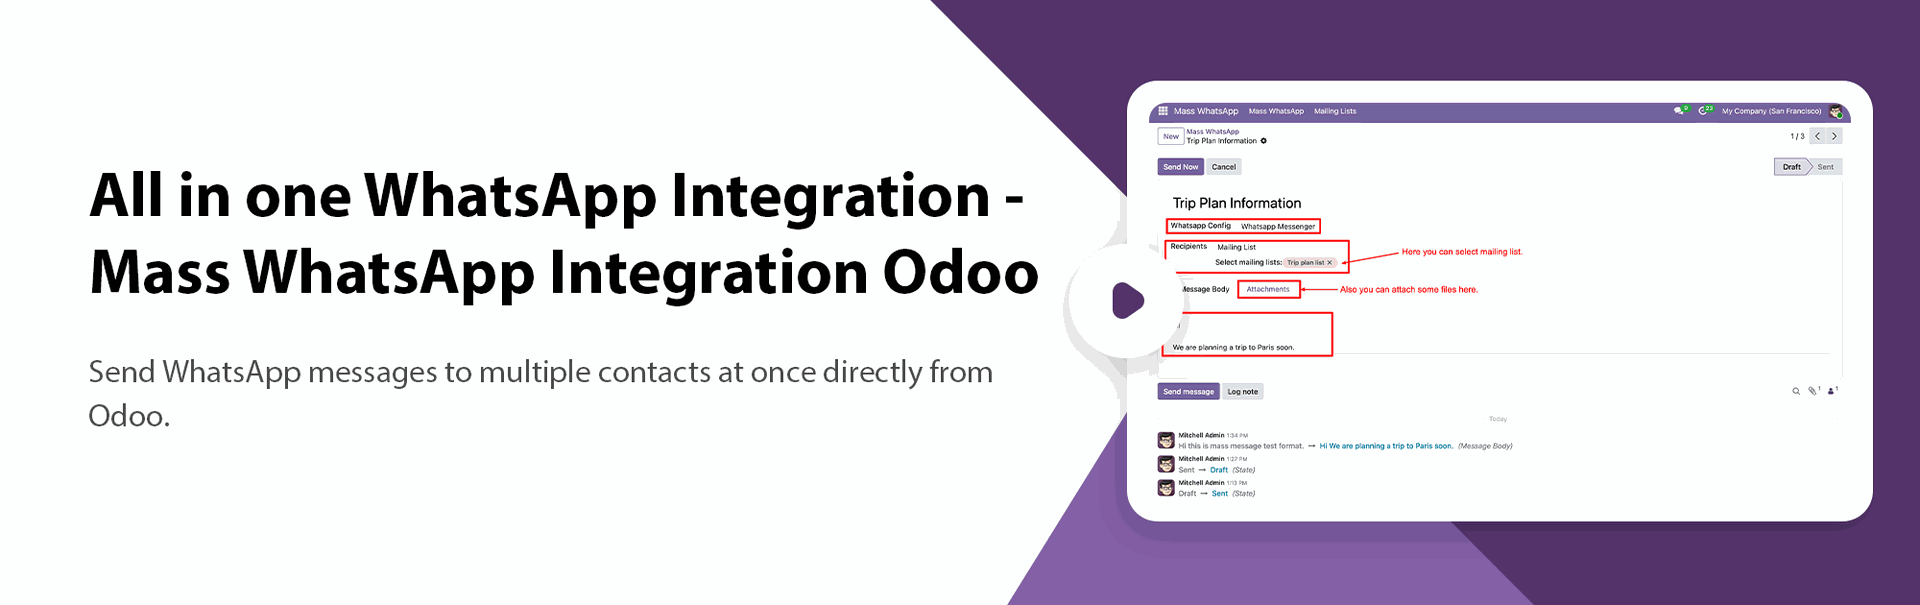
Mass WhatsApp Messaging
Send WhatsApp messages to multiple contacts at the same time.

Custom WhatsApp Messages
Create and edit WhatsApp messages in your preferred language.

Picking Order WhatsApp
Send receipt/delivery order details directly to customers/vendors through WhatsApp.

WhatsApp with Attachments
Send WhatsApp messages along with documents and other attachments.

ApiChat
You can get token and instance from 'ApiChat' and configure that in odoo.
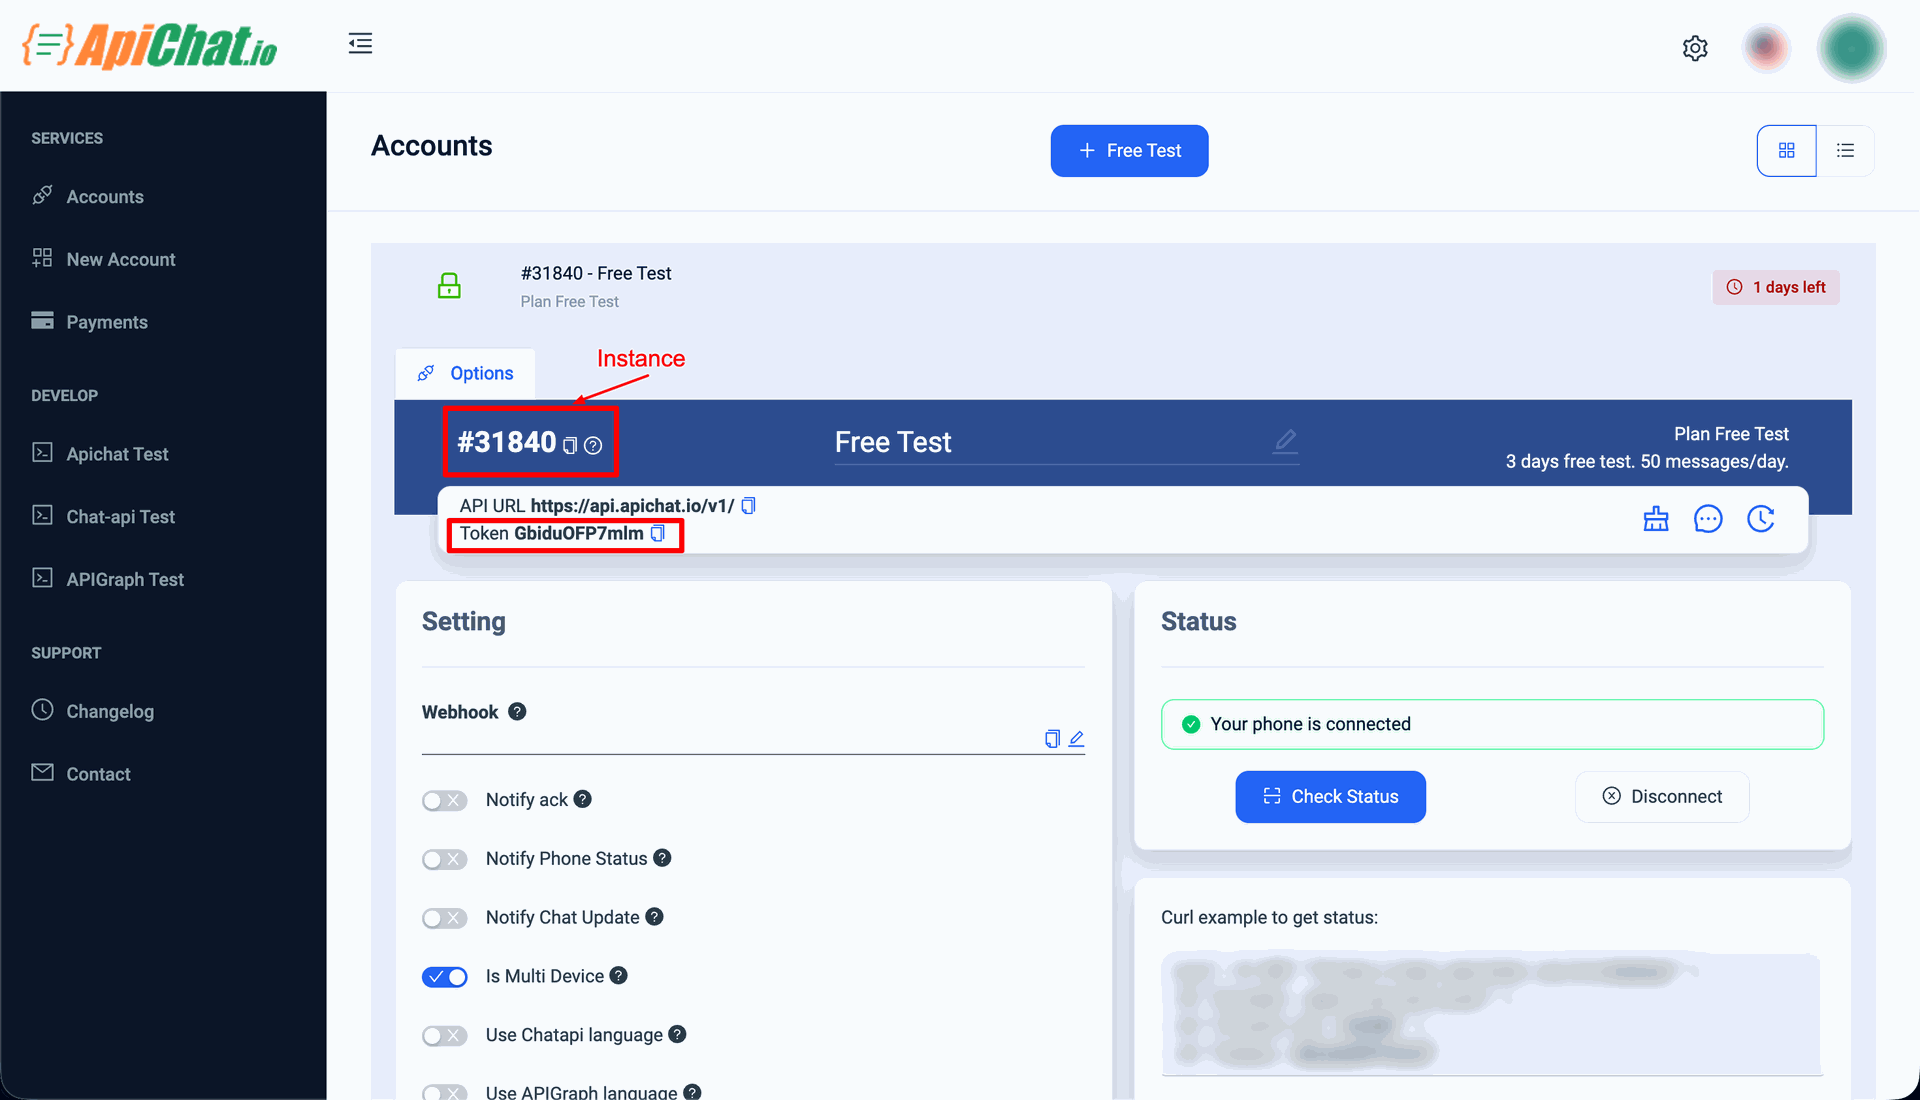
Goto Chat Api Dashboard and click on 'Whatsapp' menu on top left side. After that you can see the Your Api Url. I n Api Url just copy only selected part and paste in odoo whatsapp creds.
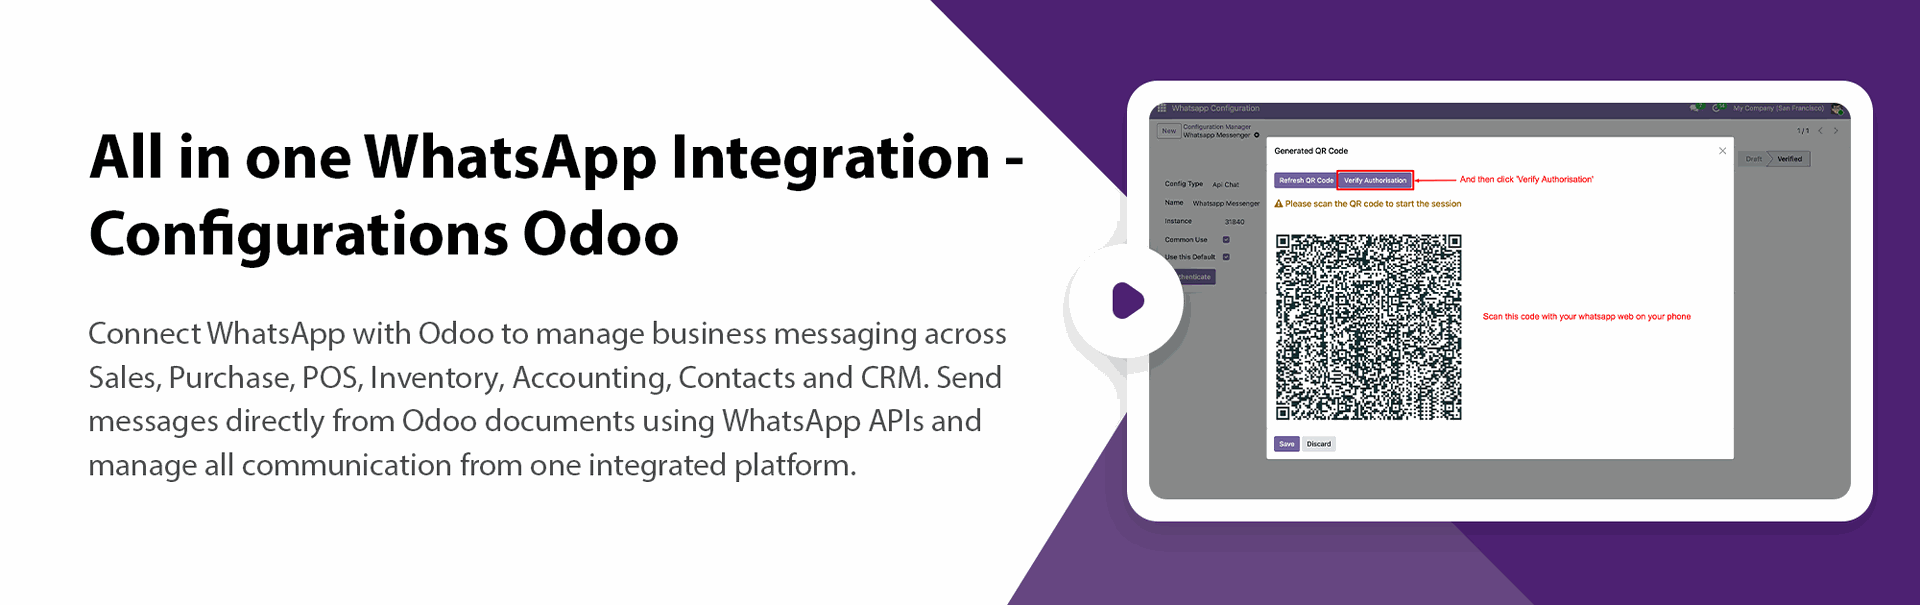
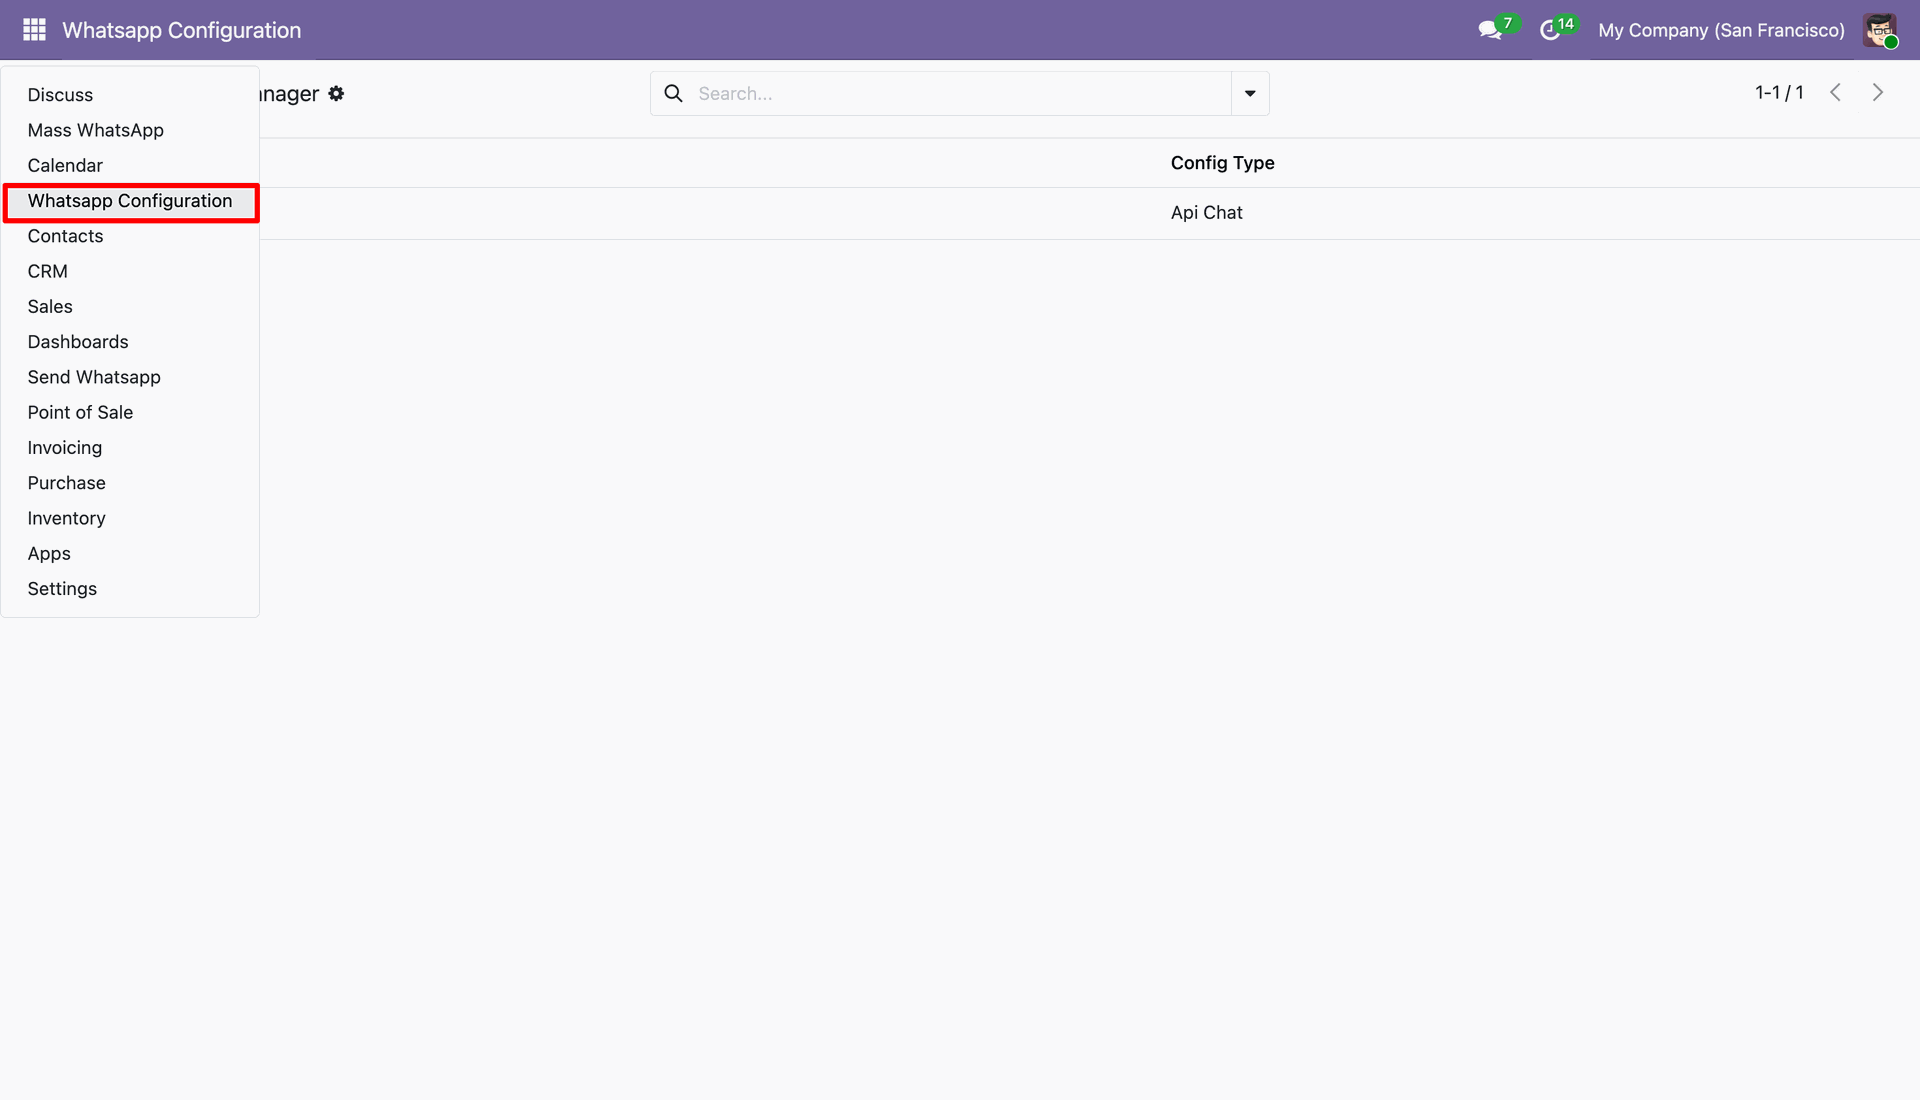
Go to the WhatsApp Configuration section to configure and manage the WhatsApp integration settings.
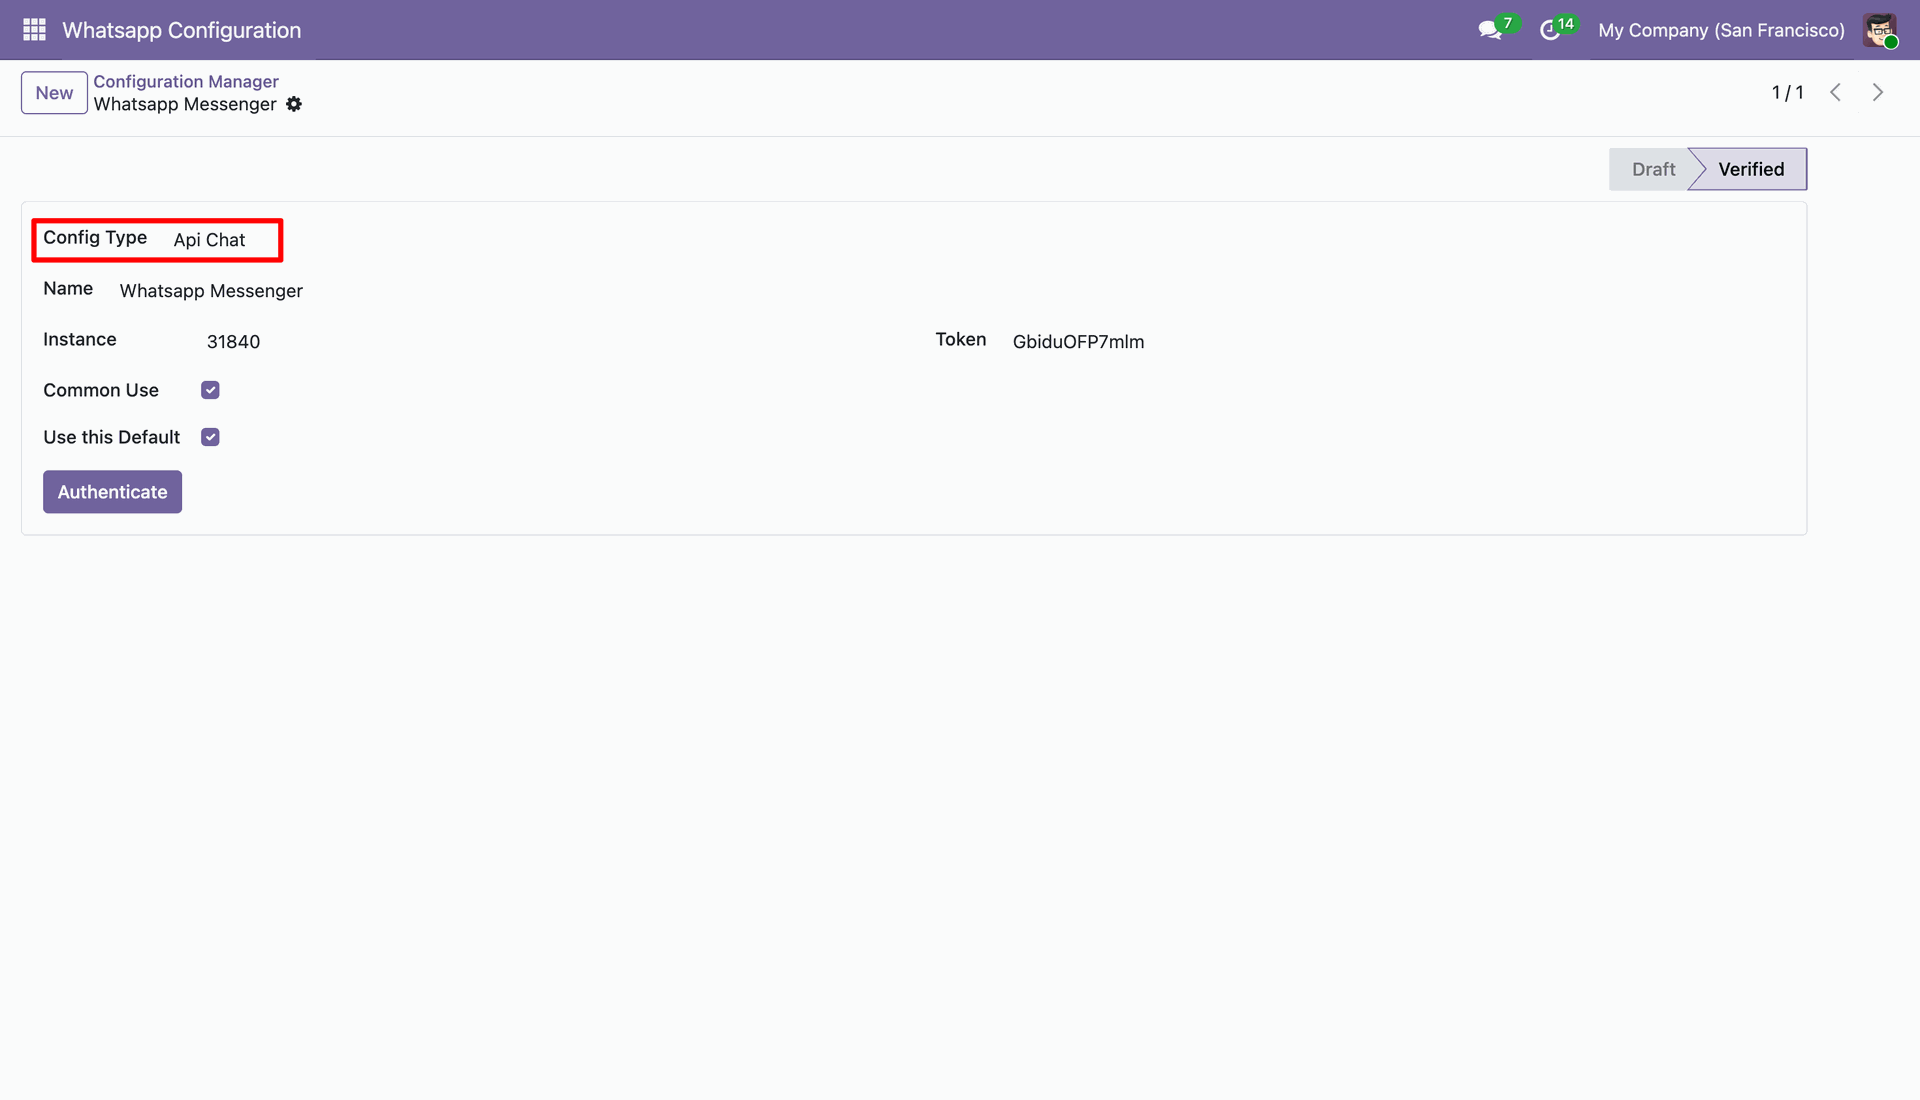
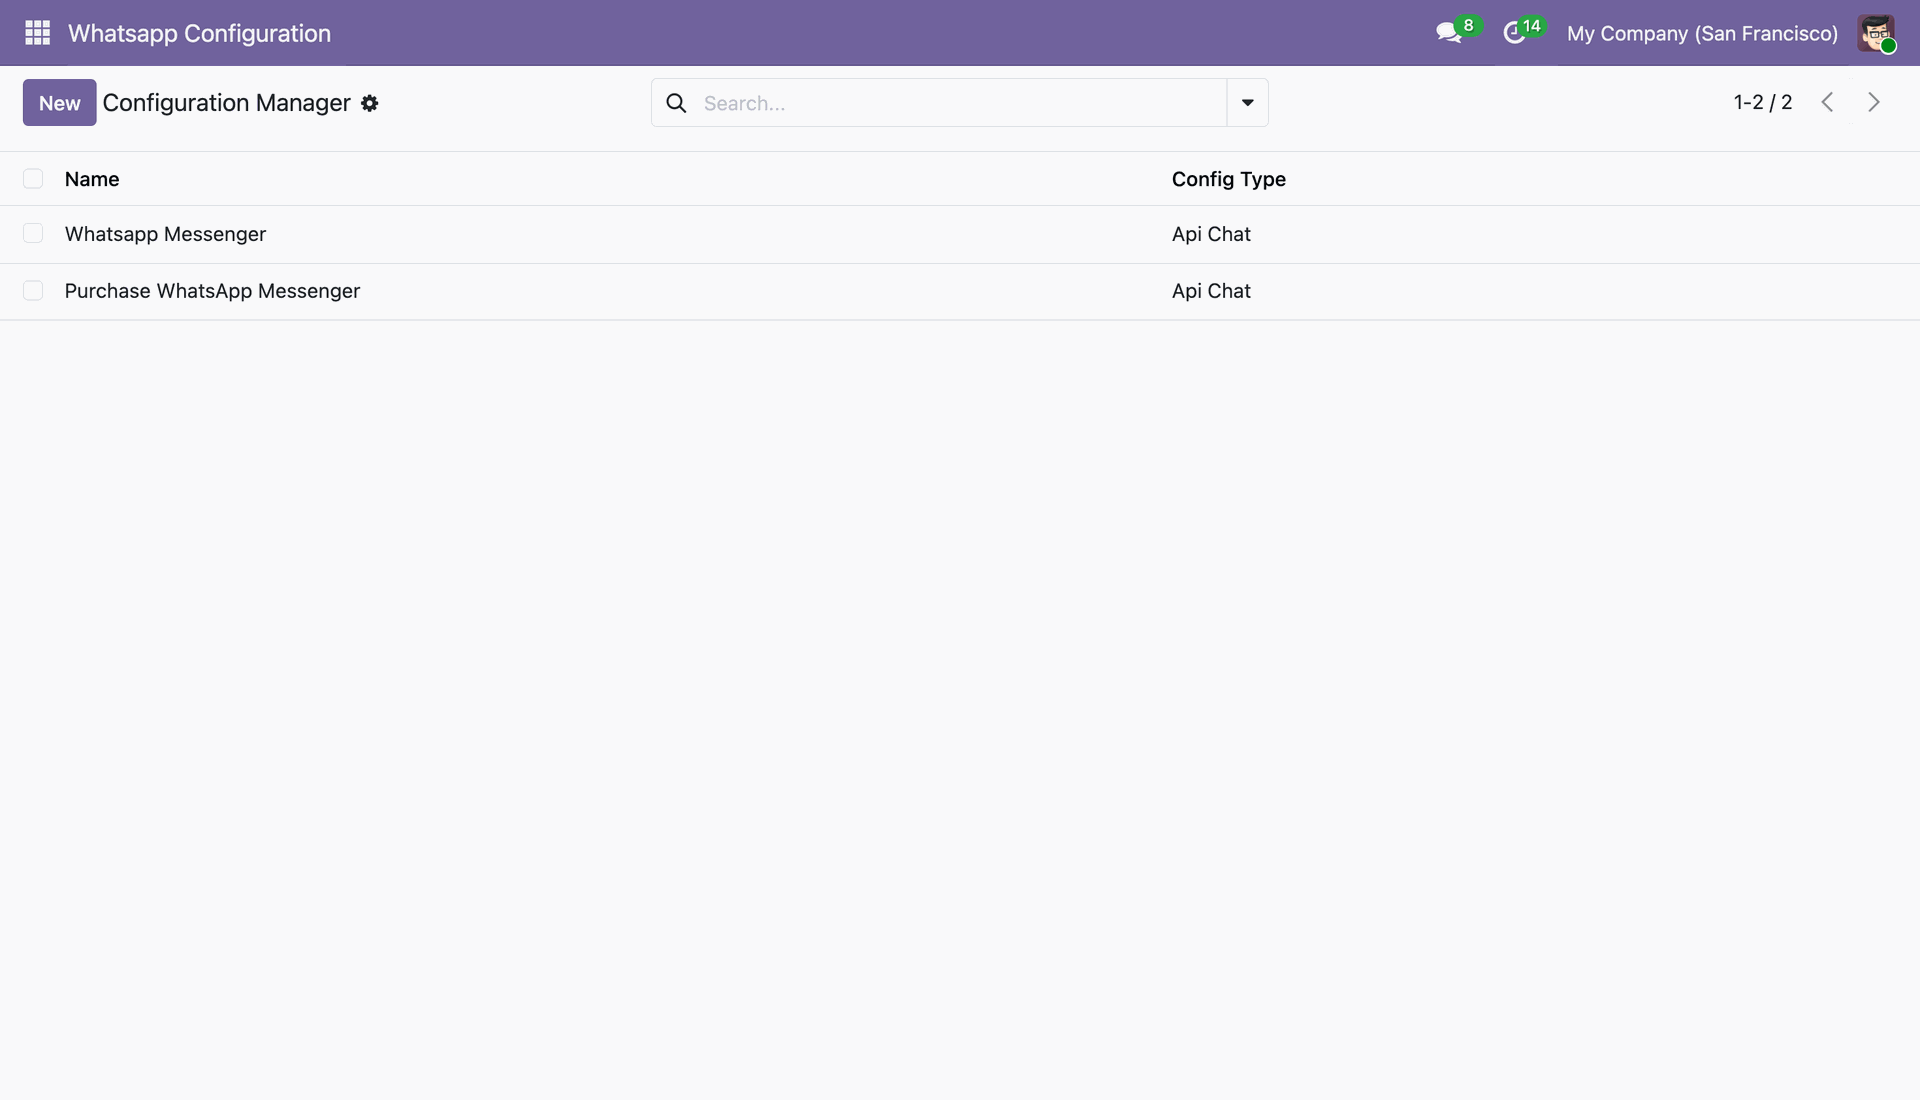
Go to the Configuration Manager in Odoo to access and manage the available configuration settings.
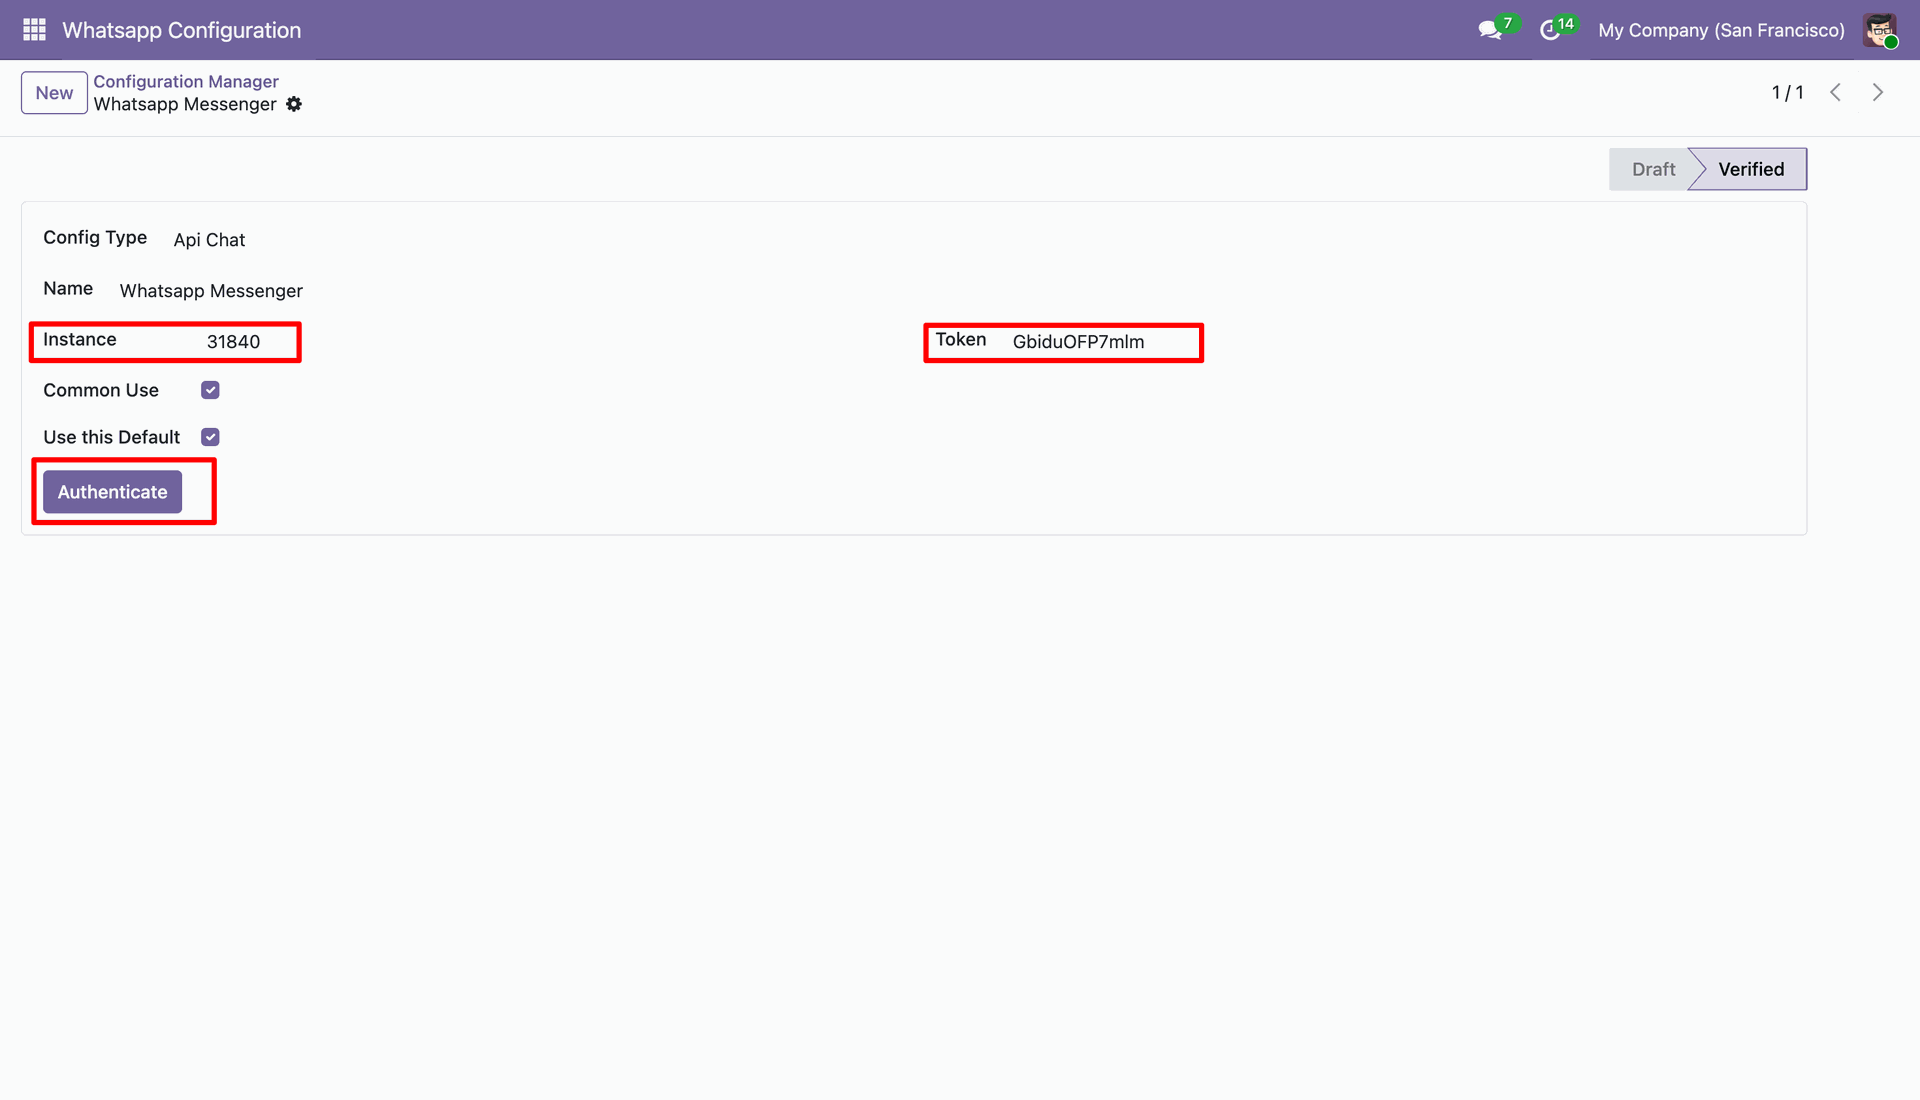
Create whatsapp creds and paste instance and token. and click 'Authenticate'.
After that in this wizard just scan your whatsapp web and click 'Verify Authorisation'.
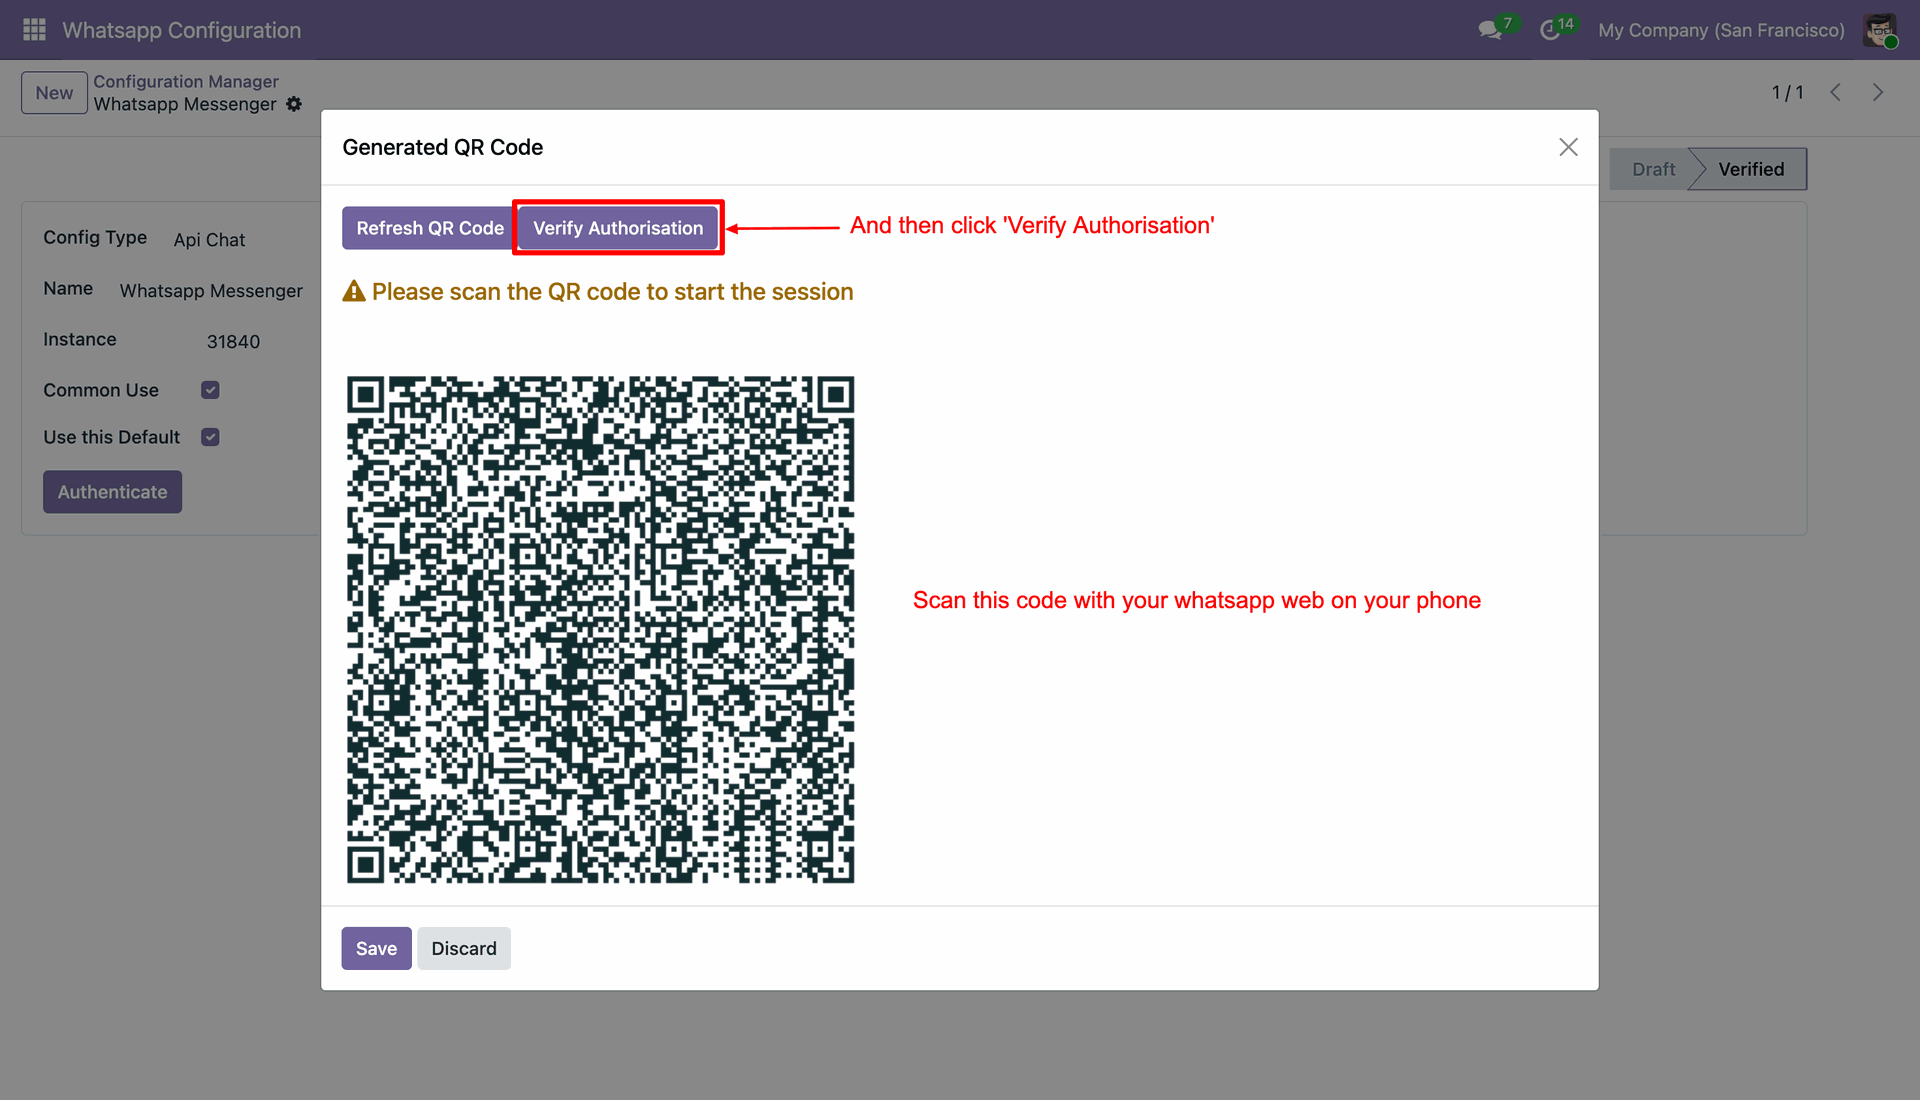
After Authorisation Config Stage change to 'Varified'.
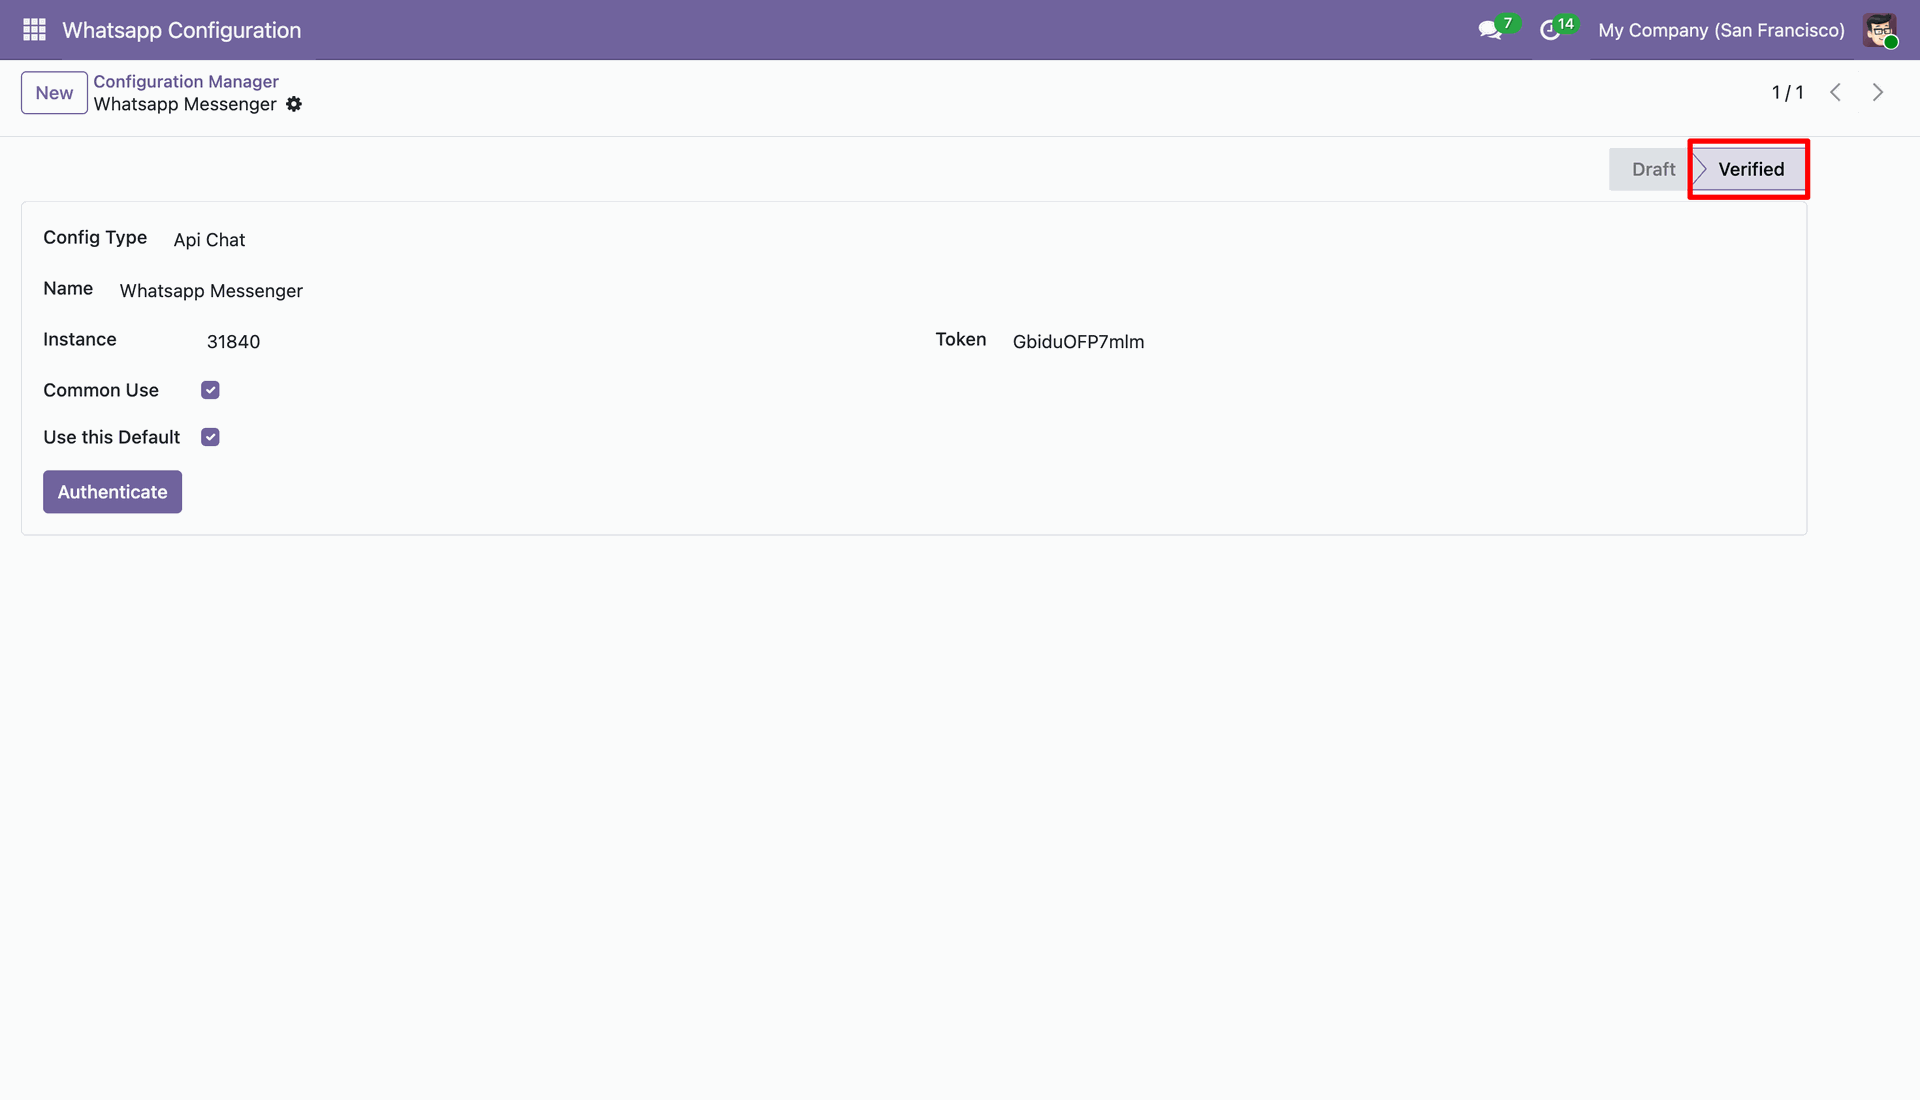
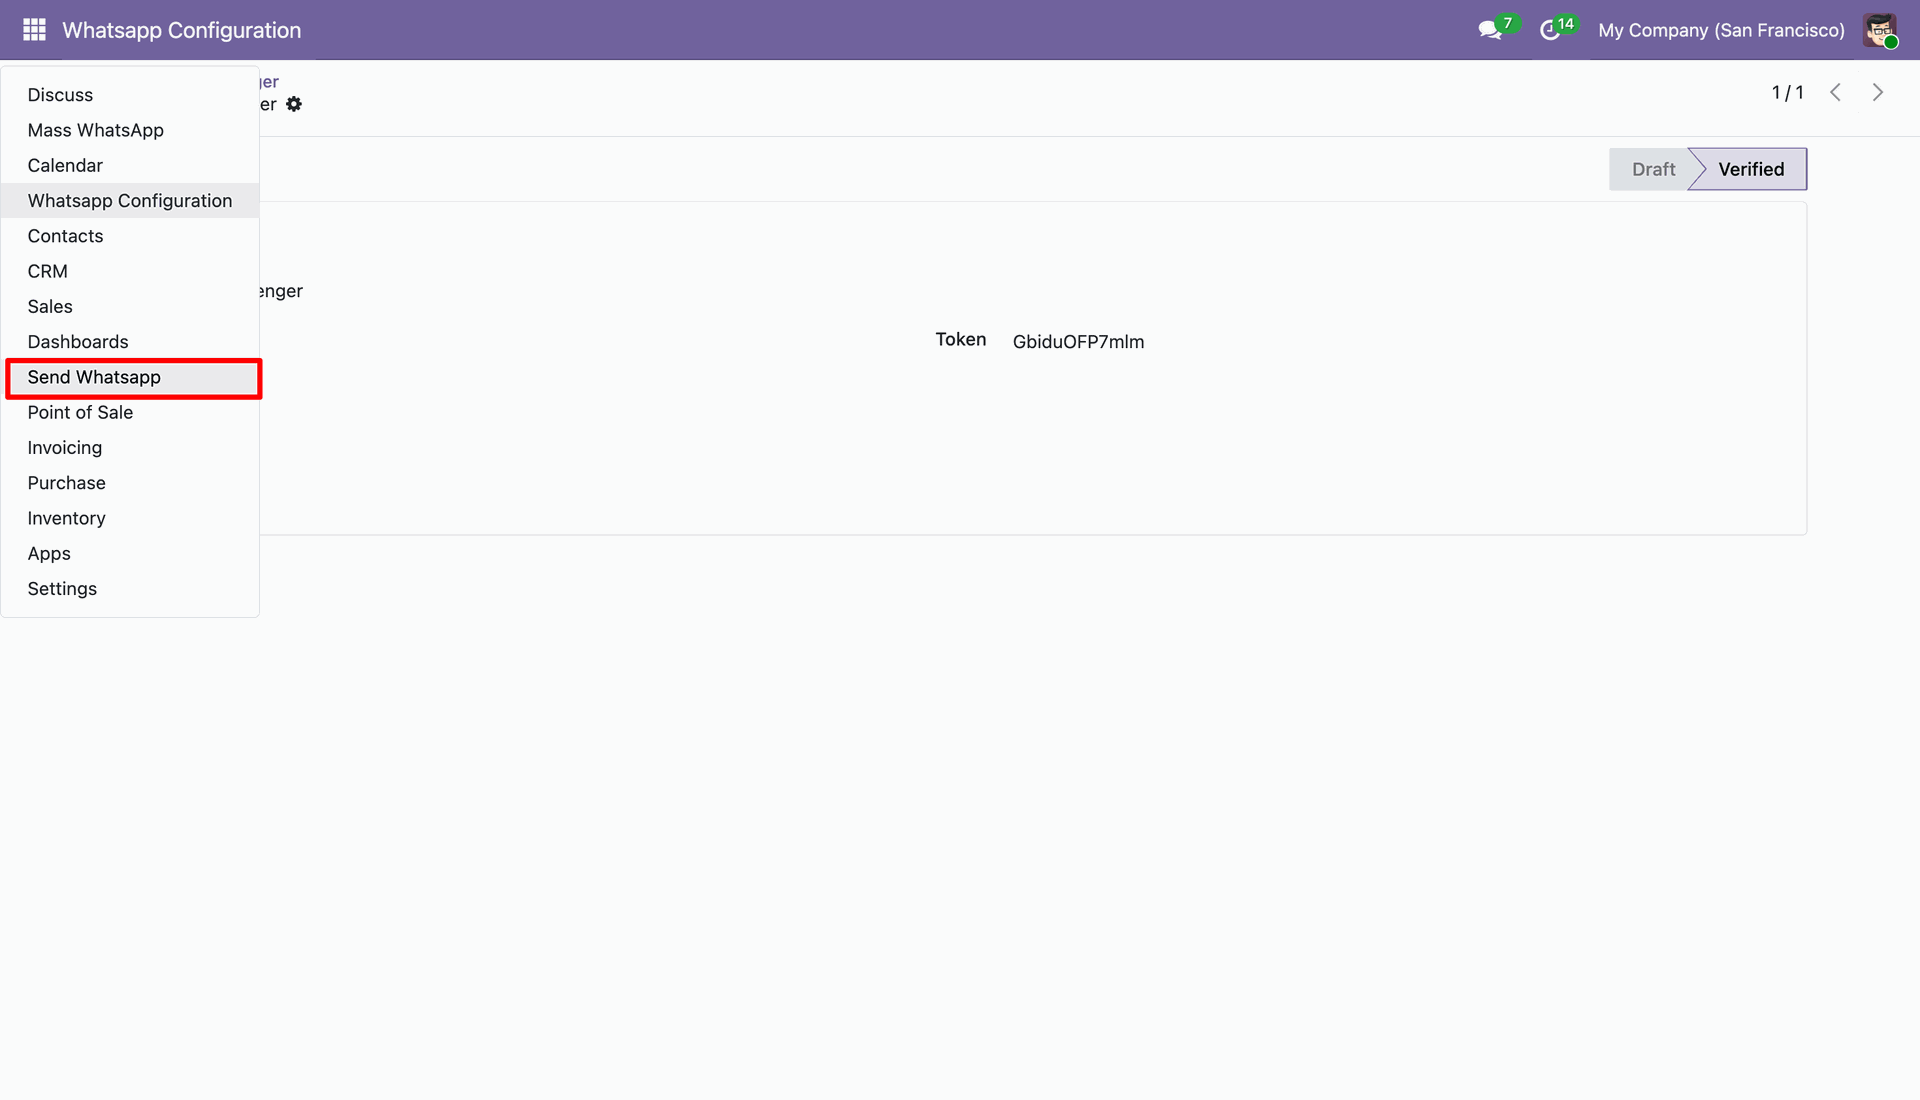
Click on 'Send Whatsapp' it will allows you to send message direct from any view.
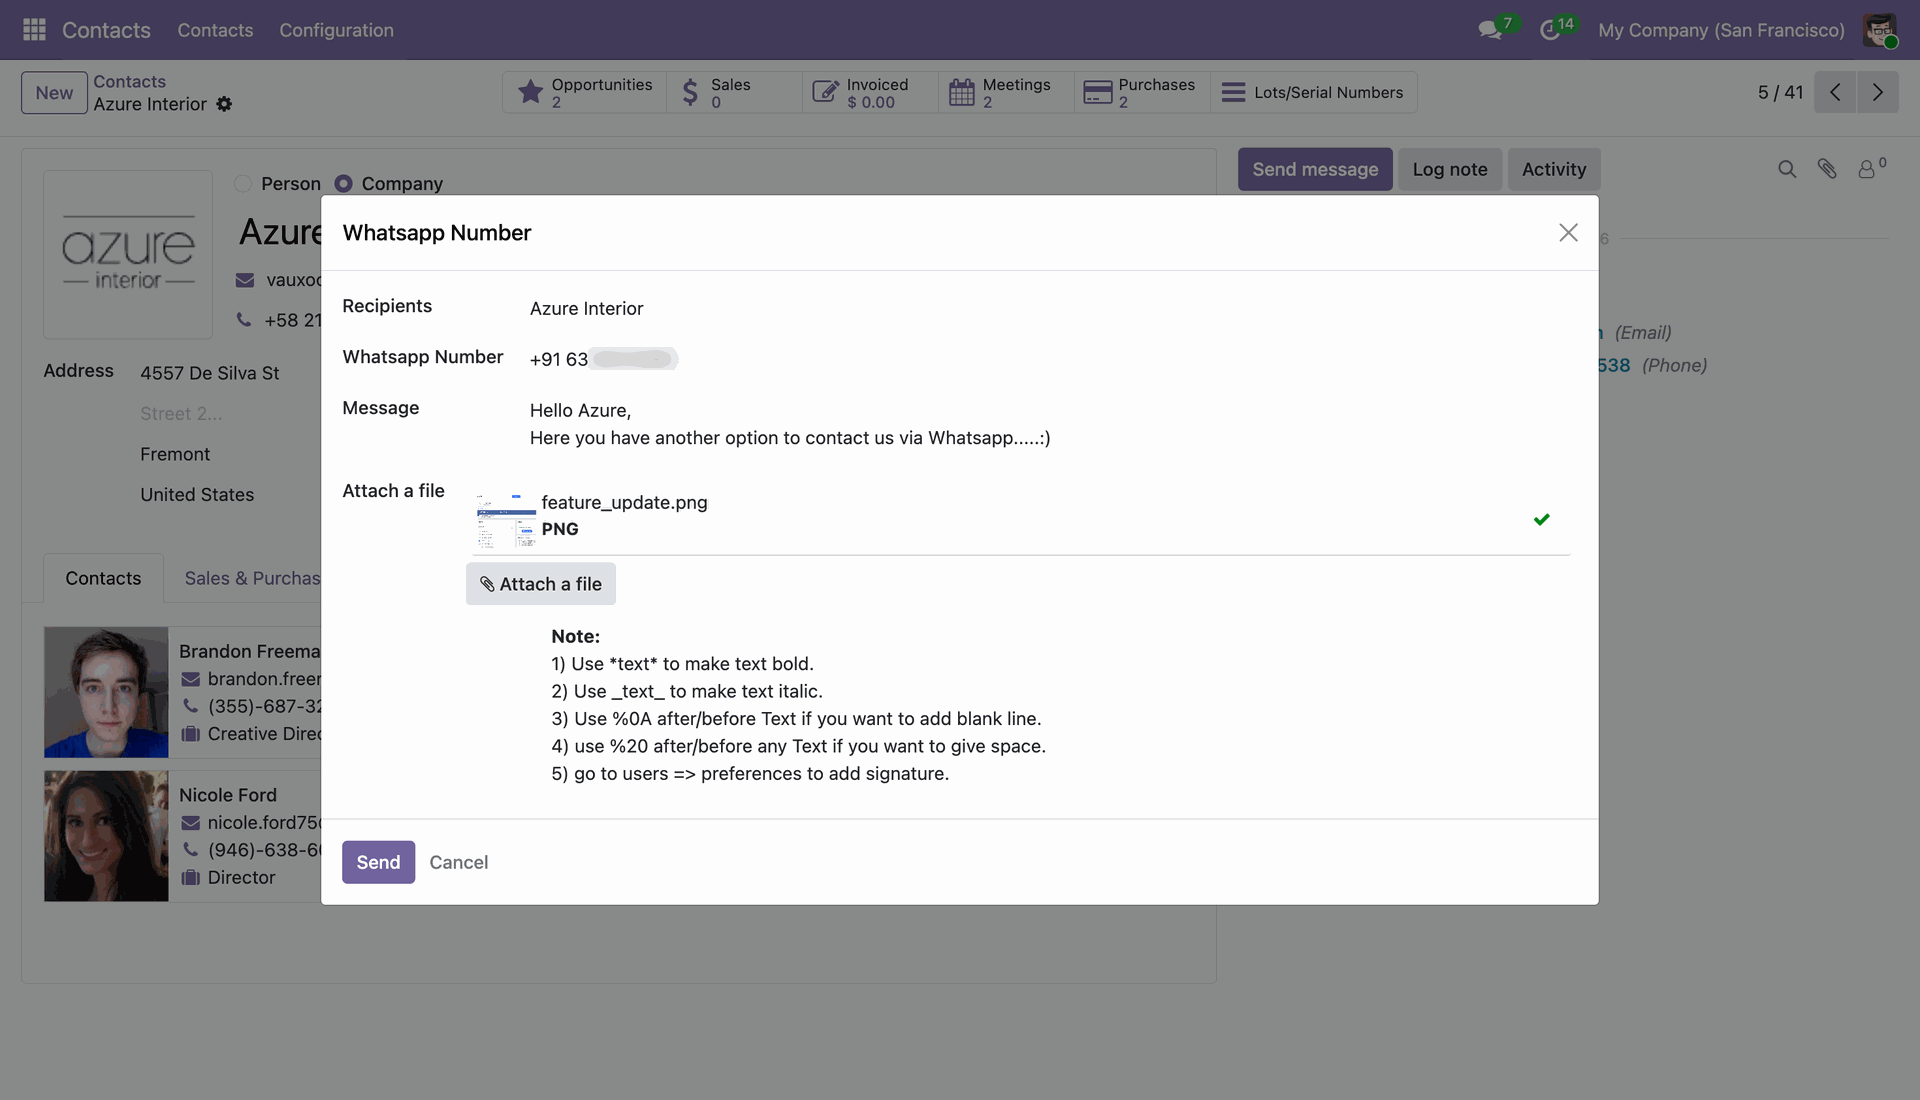
After that this wizard open, Just select an appropriate customer and add message, attachments as well and click 'Send'.
This is output of sended message on whatsapp.
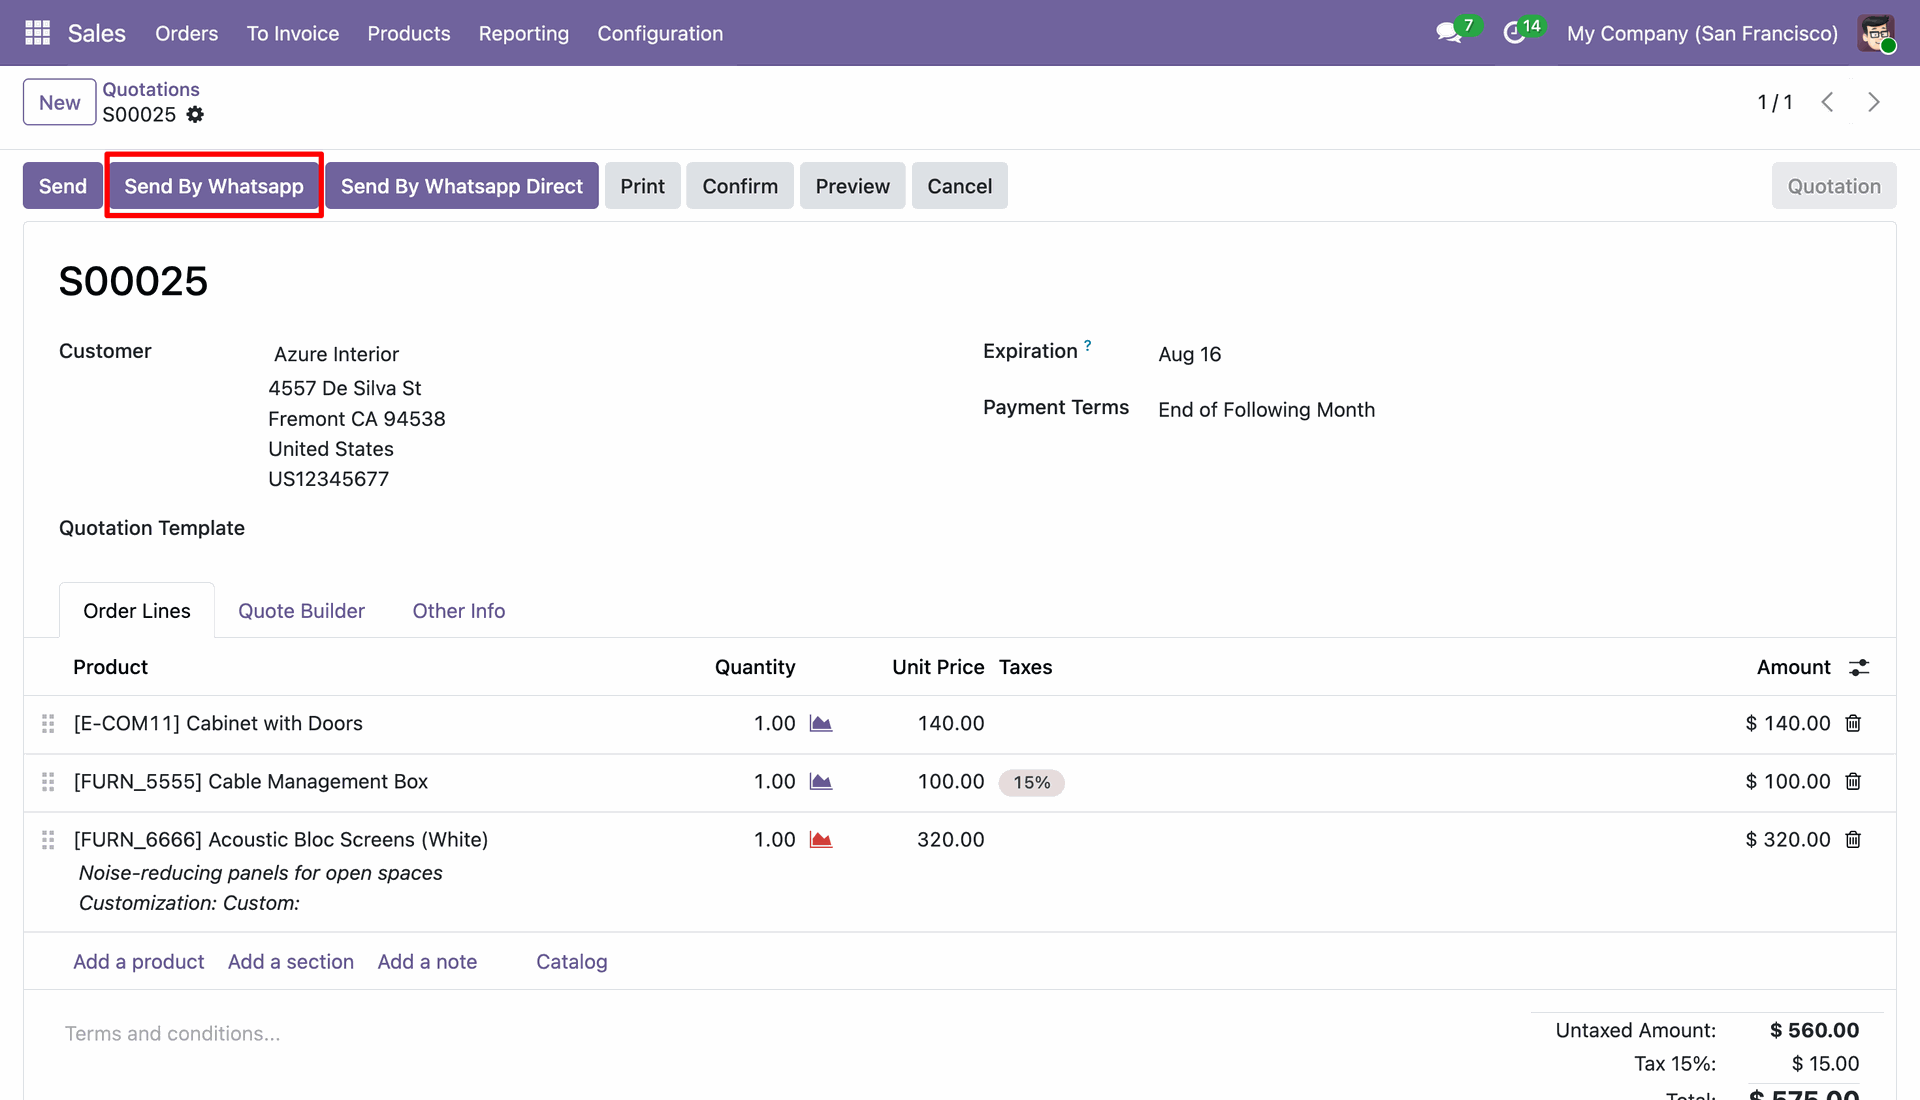
In sale order view click 'Send By Whatsapp' this button for customize message and then send.
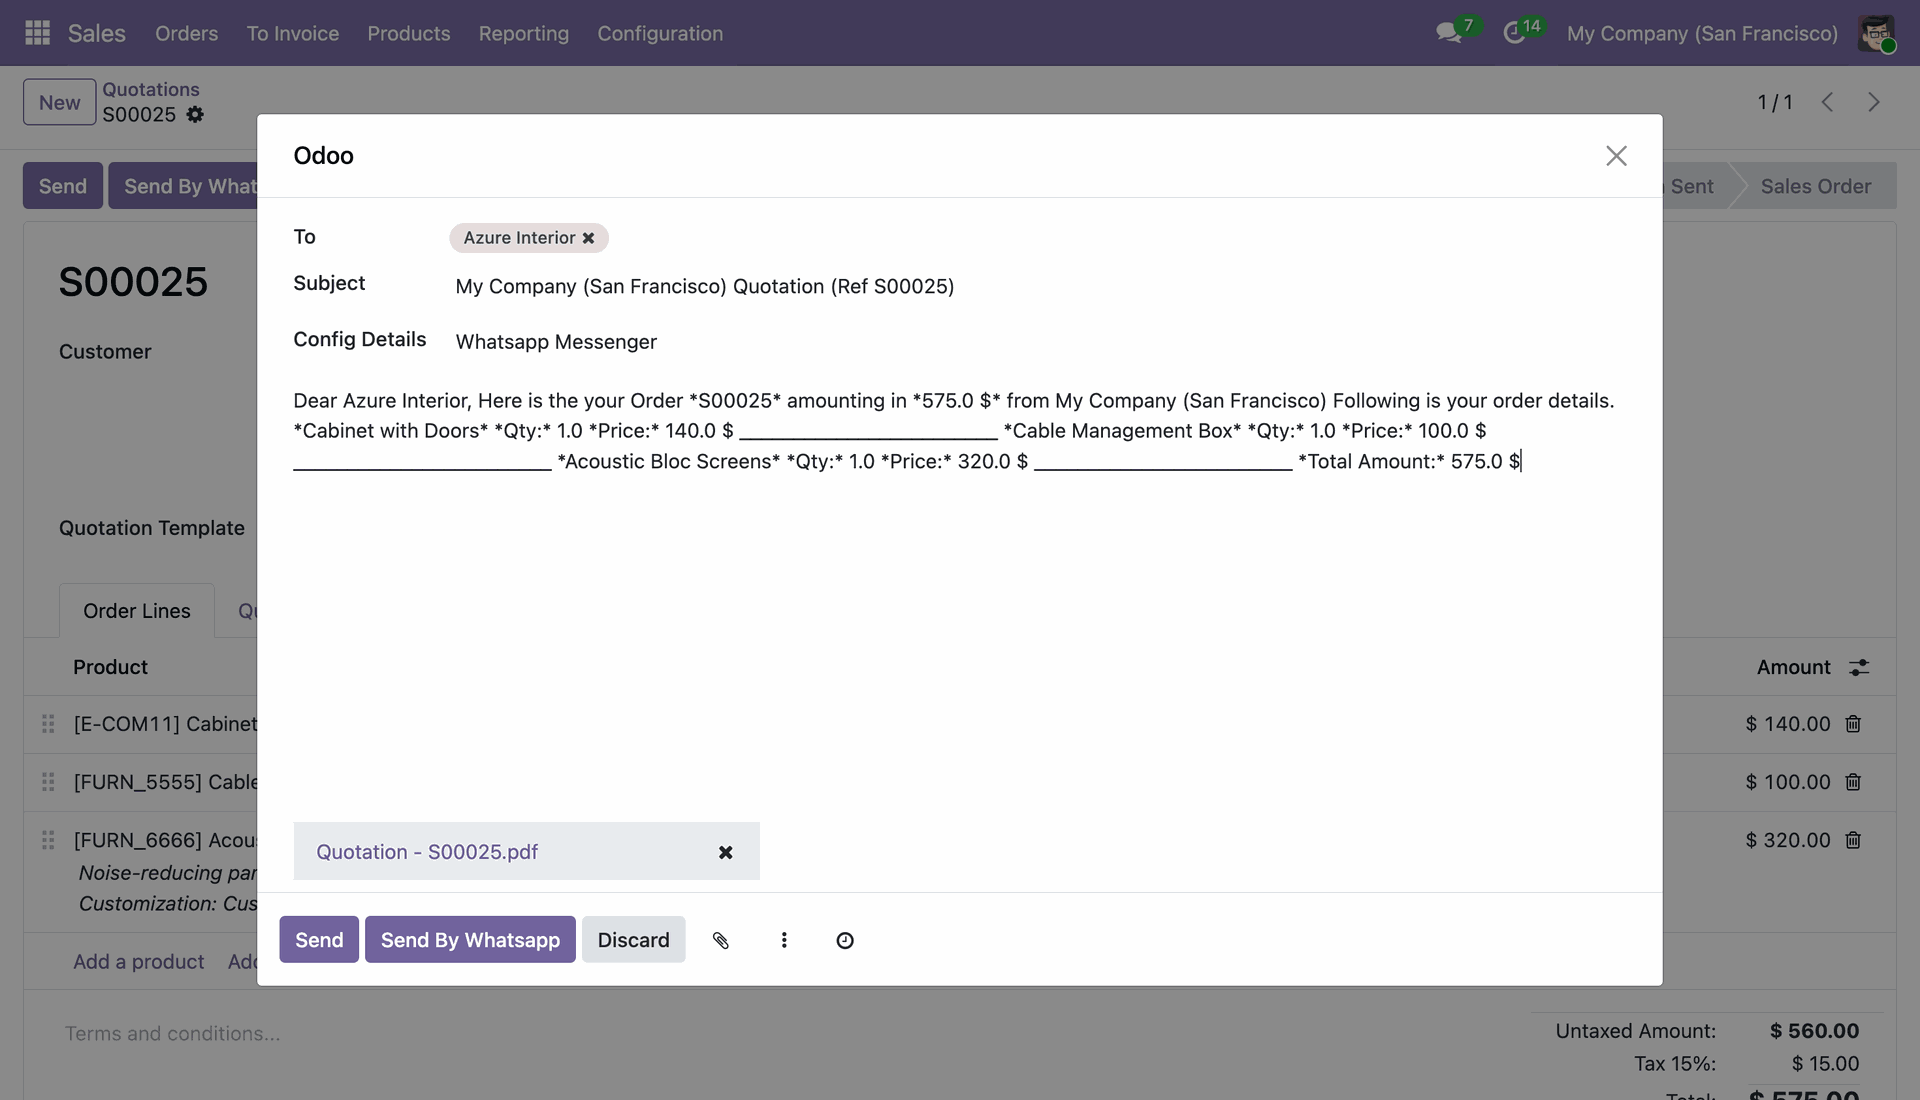
After that this wizard will display. Here you can customize your message and attach more attachments. and click 'Send By Whatsapp'.
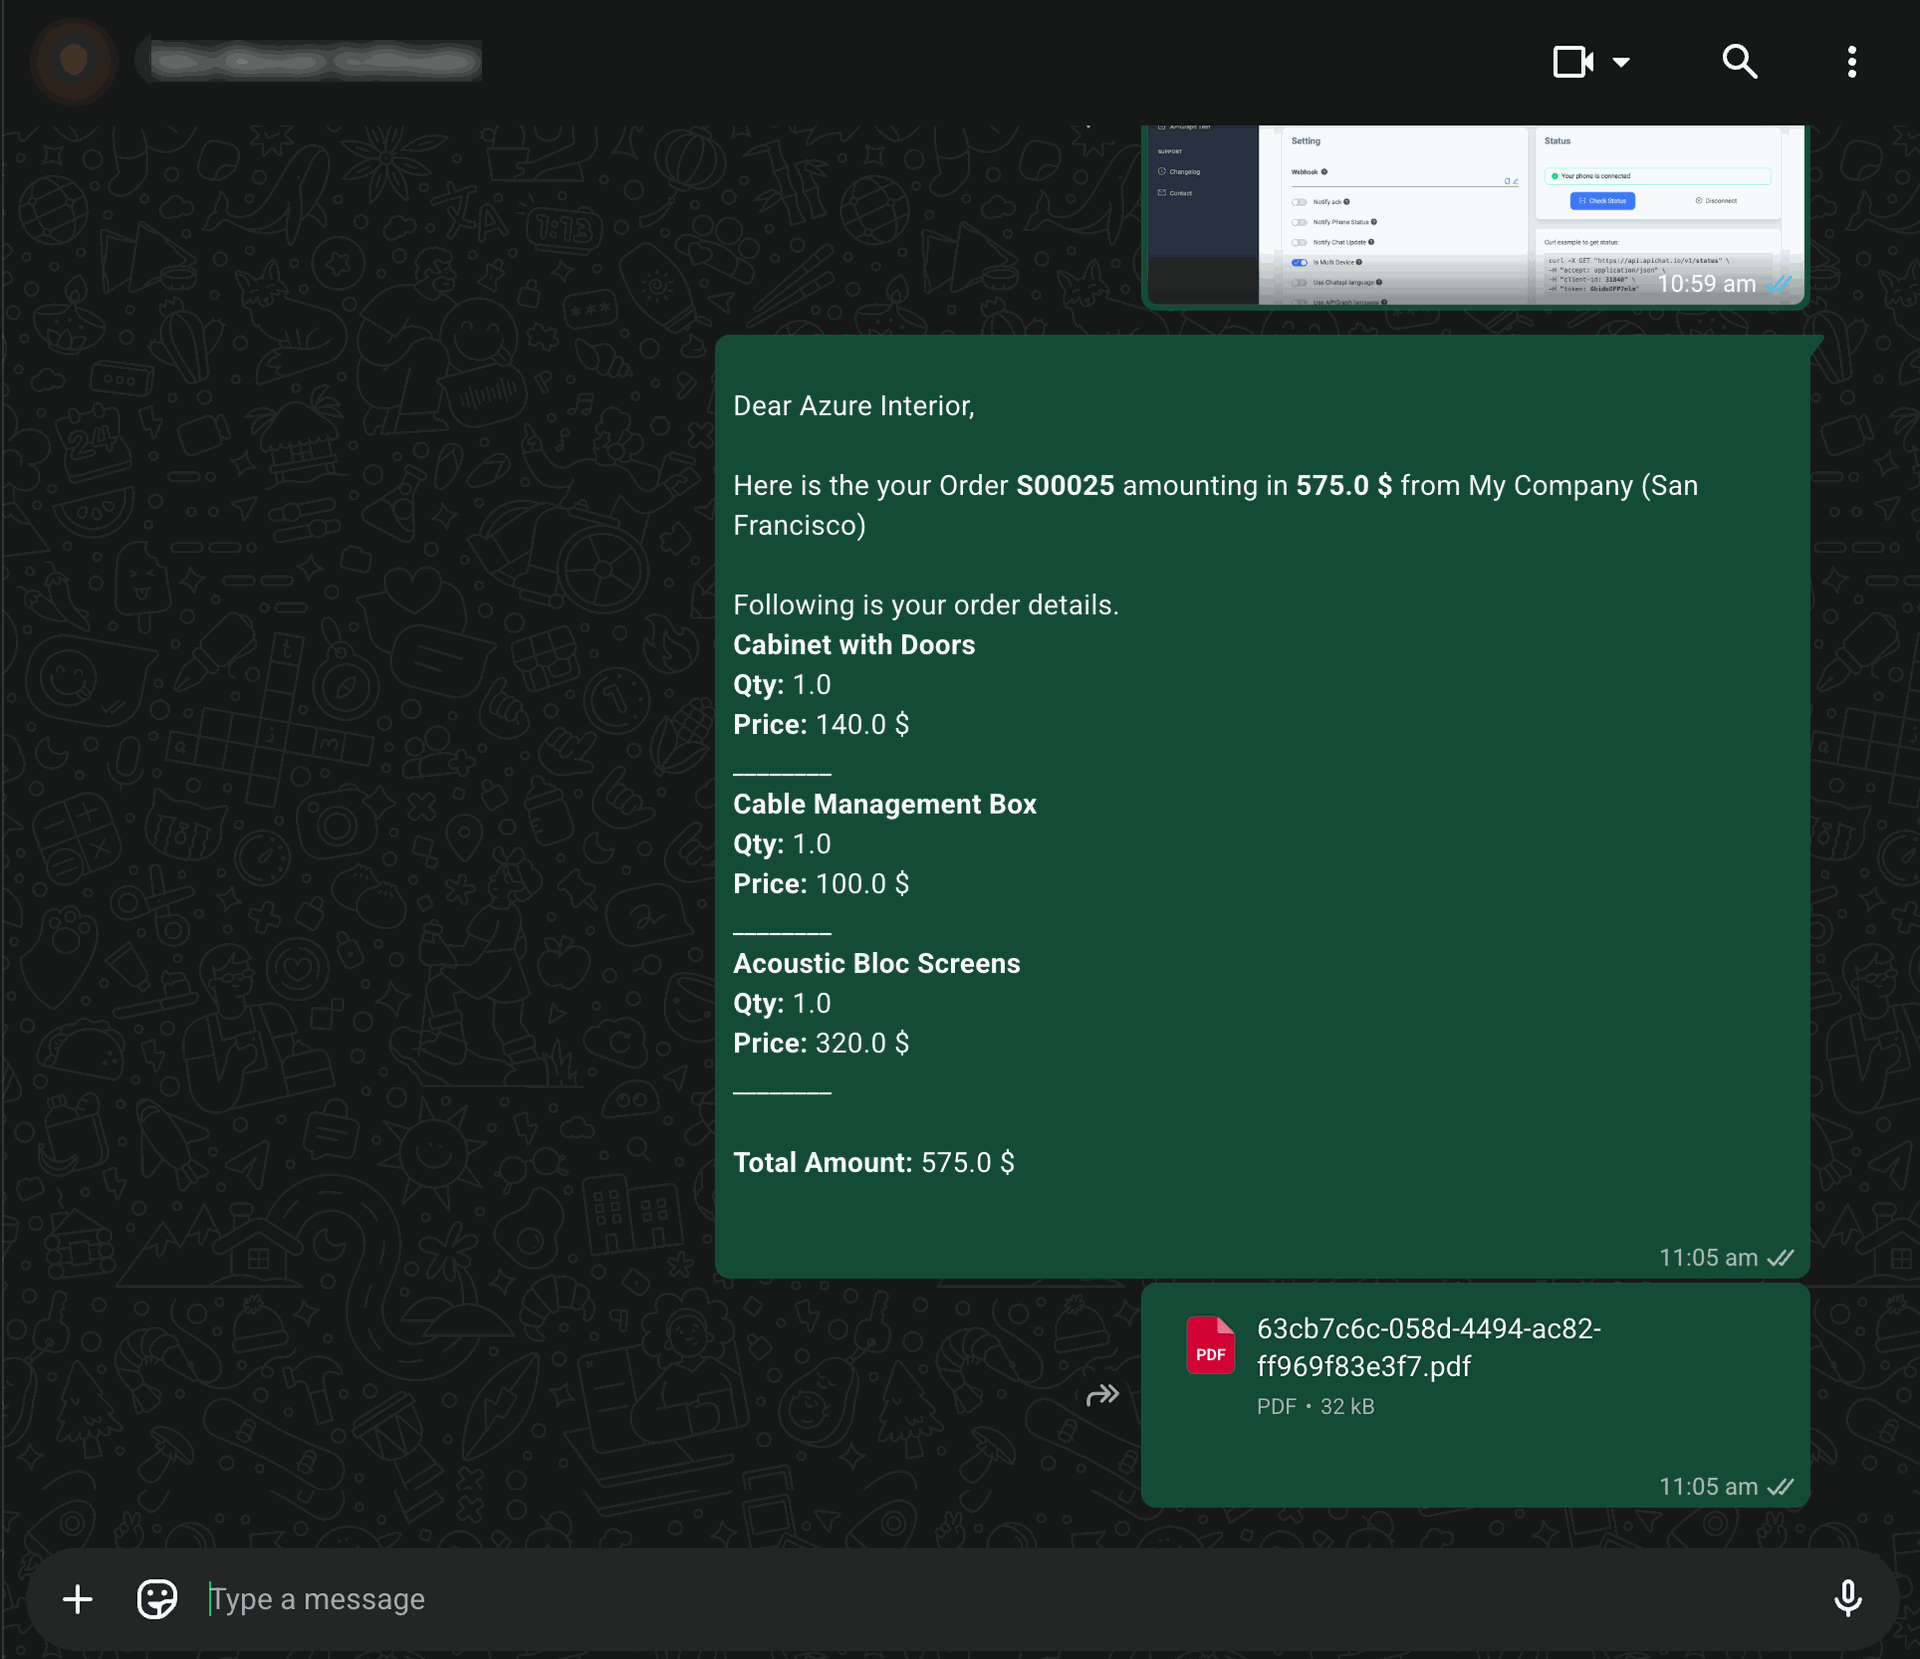
This is output of sended message on whatsapp.
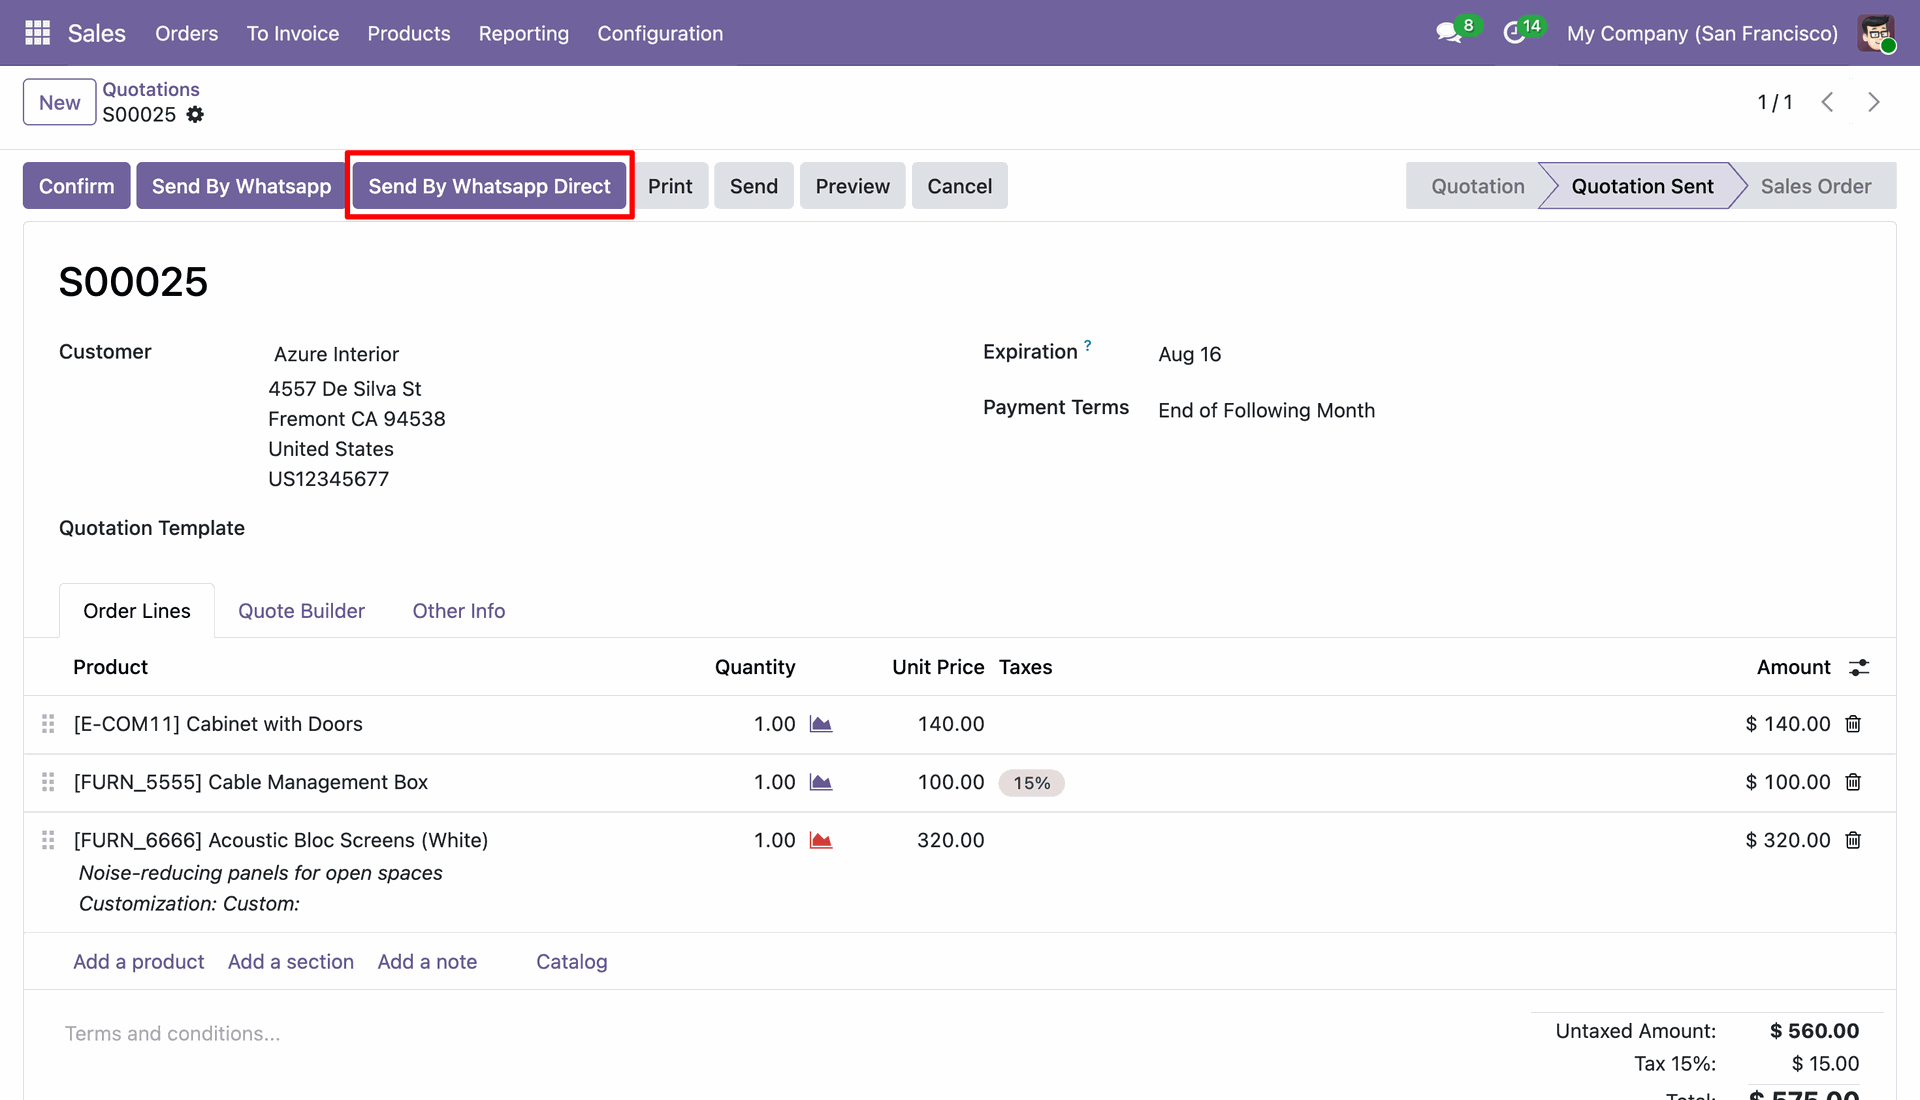
Click 'Send By Whatsapp Direct' and it will sending directly with predefine message and attachments.
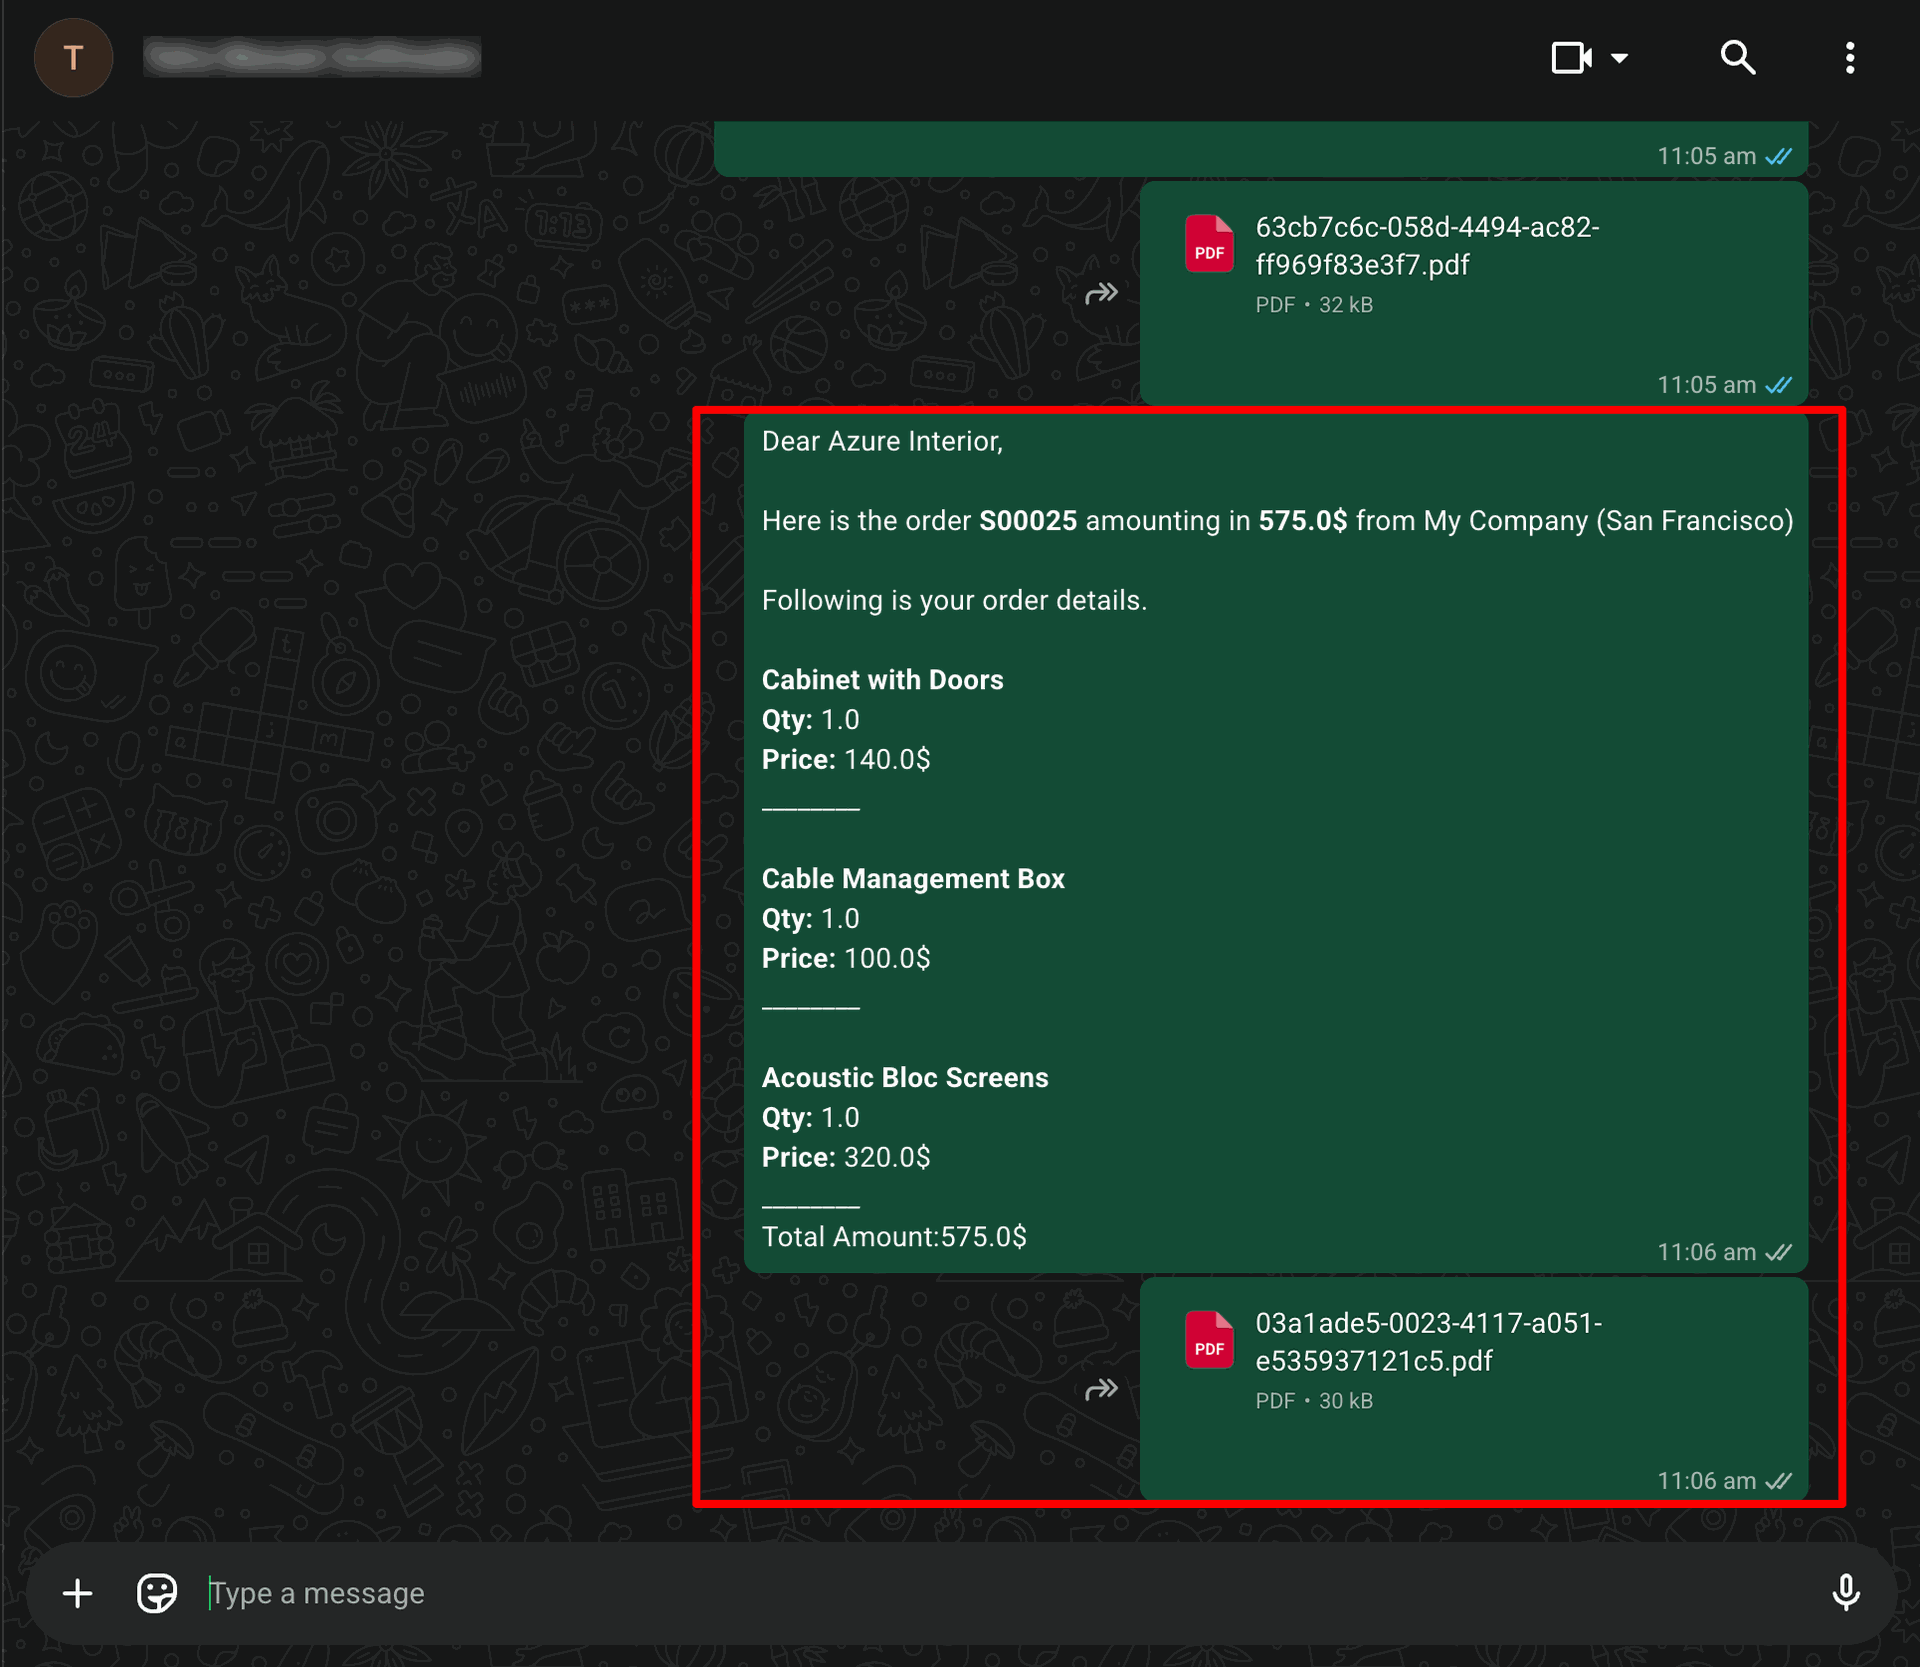
This is output of sended message on whatsapp.
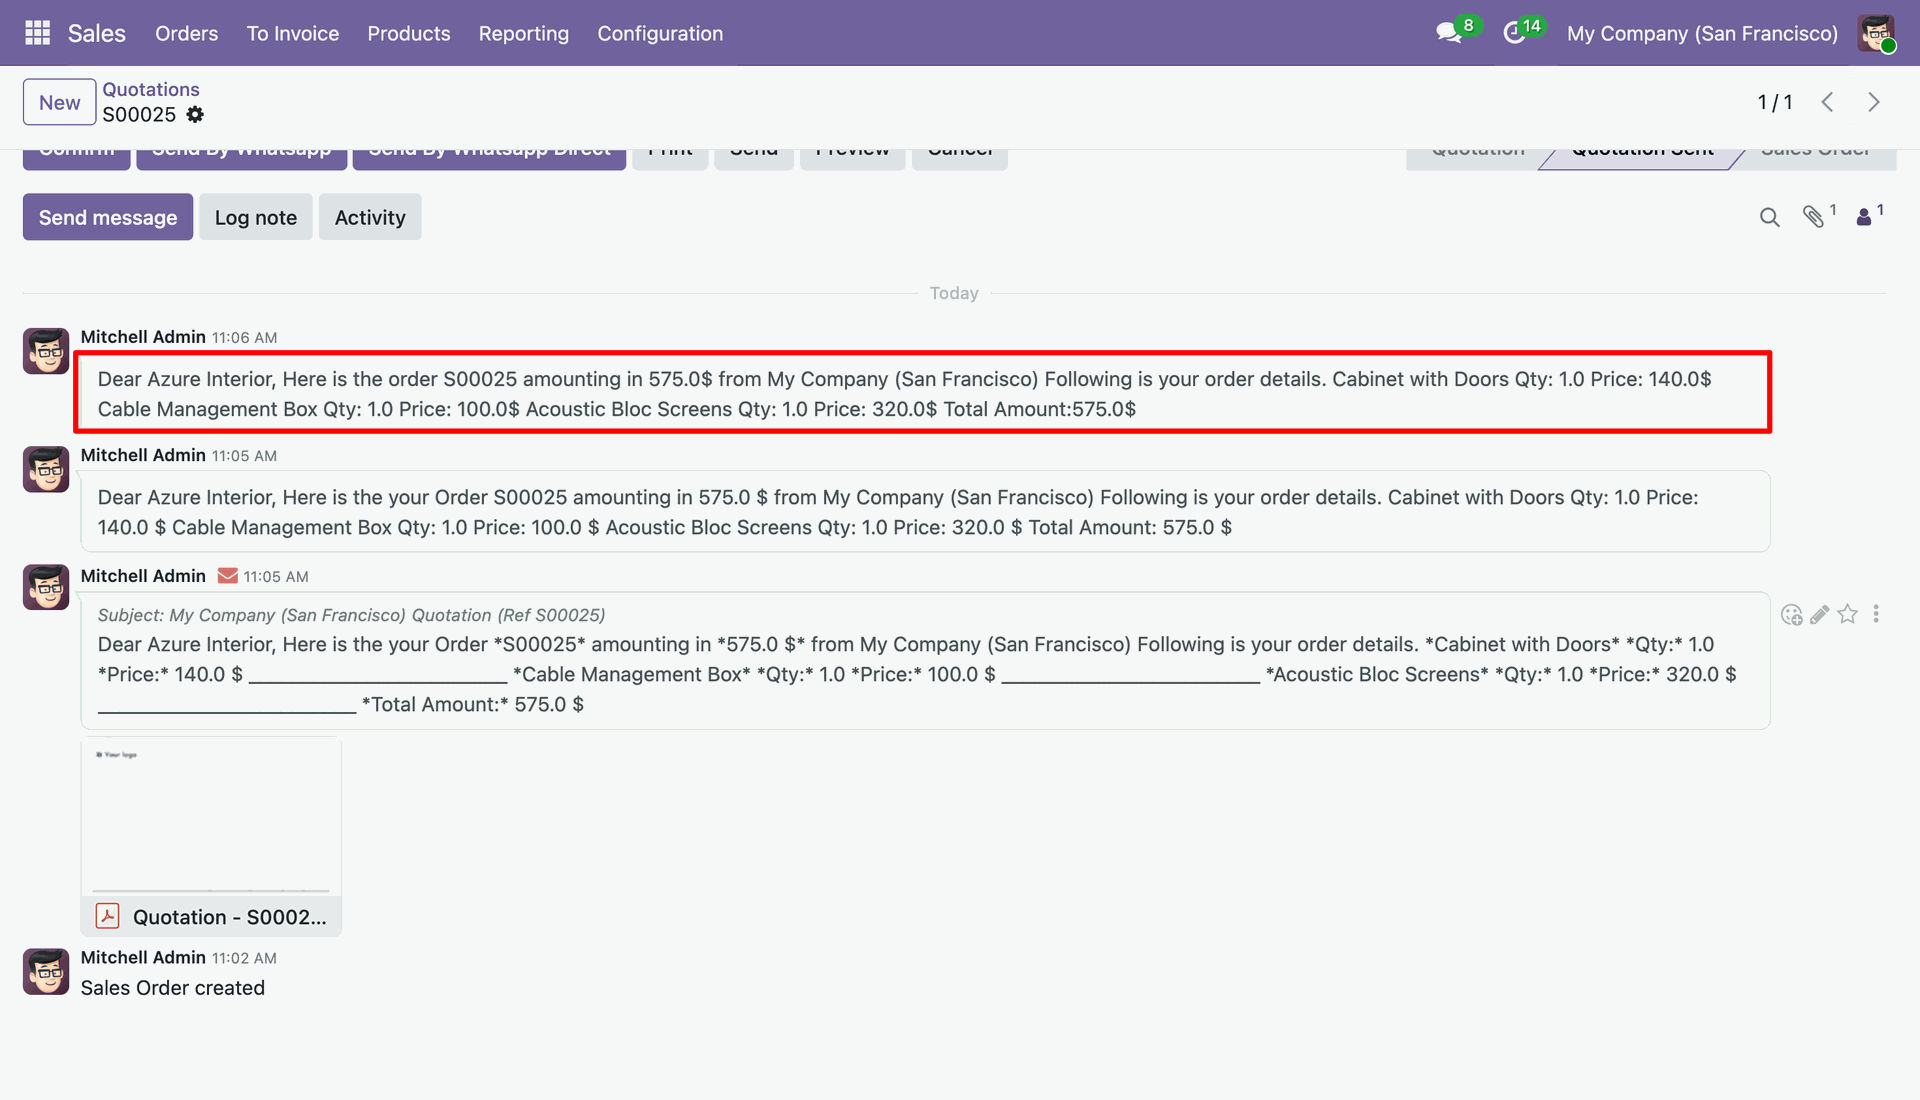
You can see the sended message in chatter also.
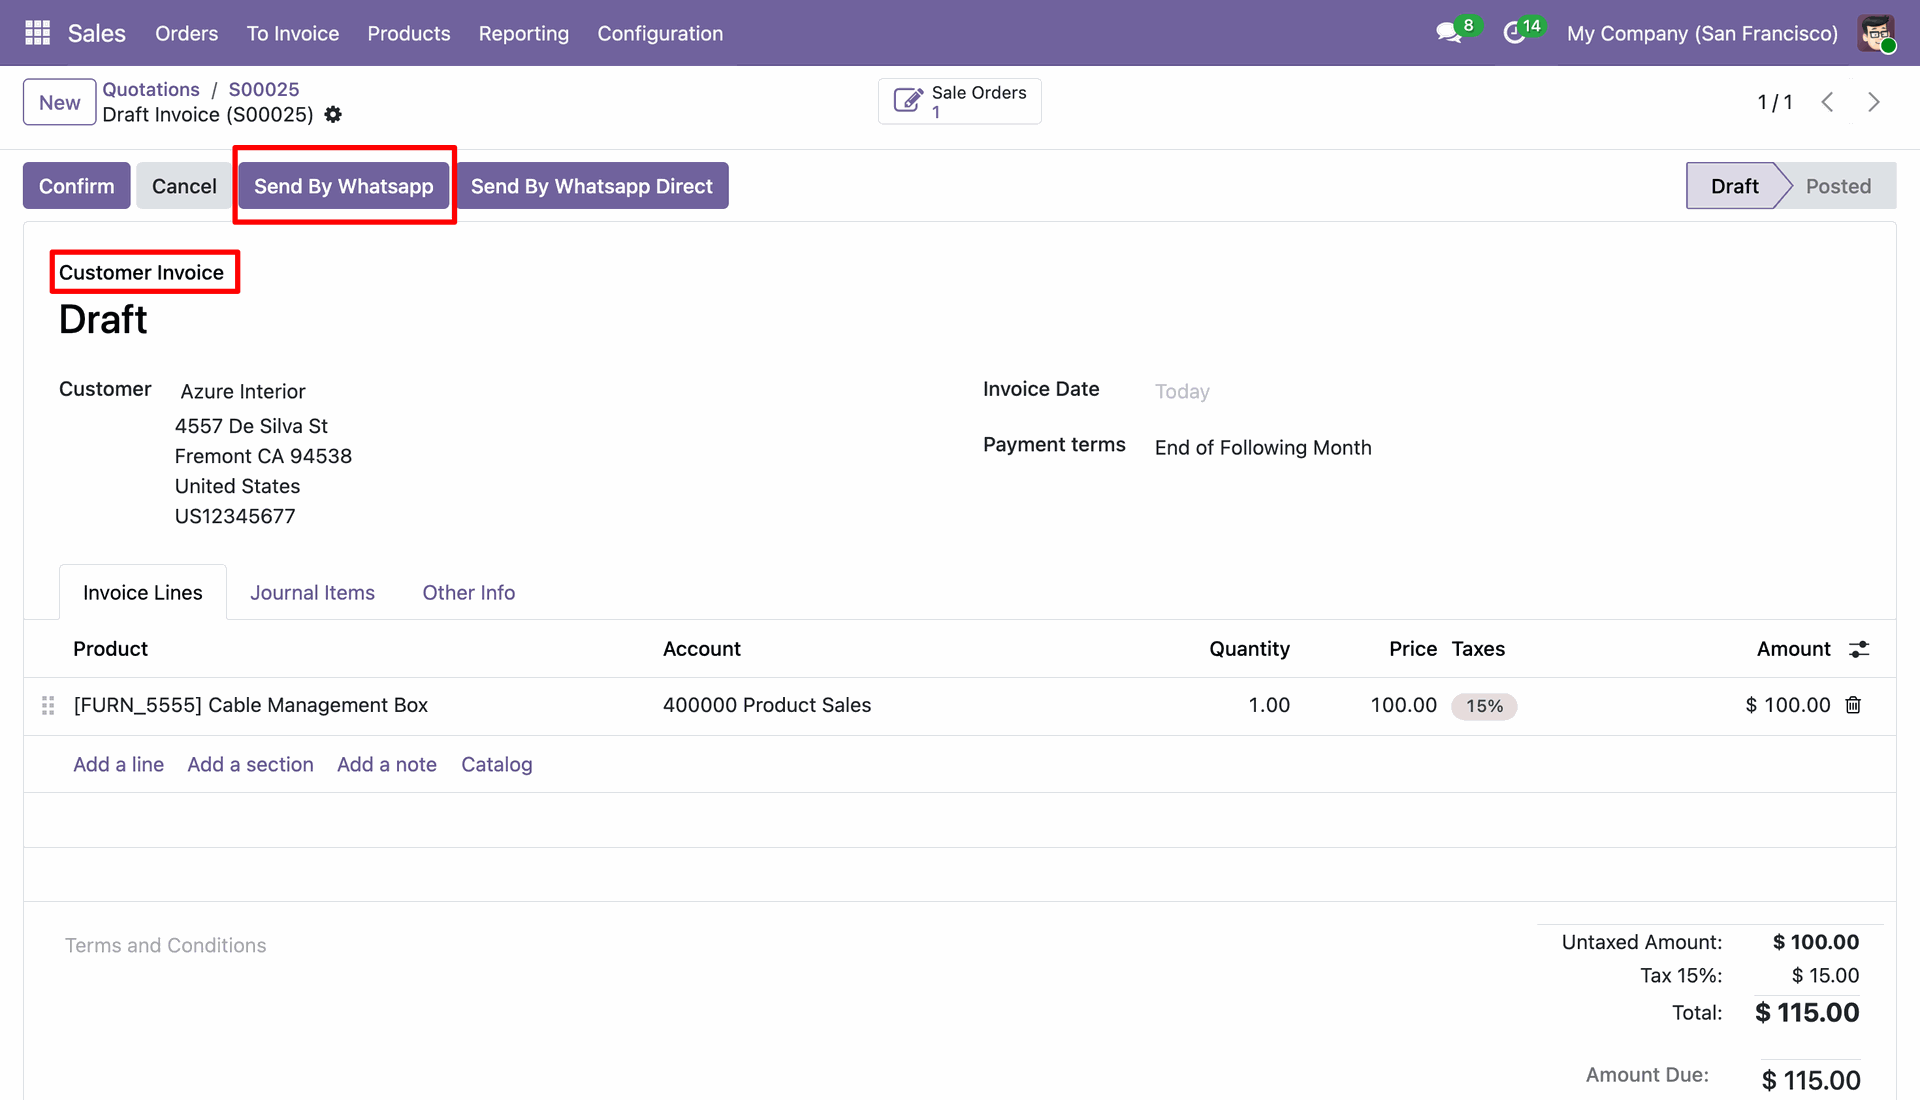
In invoice view click 'Send By Whatsapp' this button for customize message and then send.
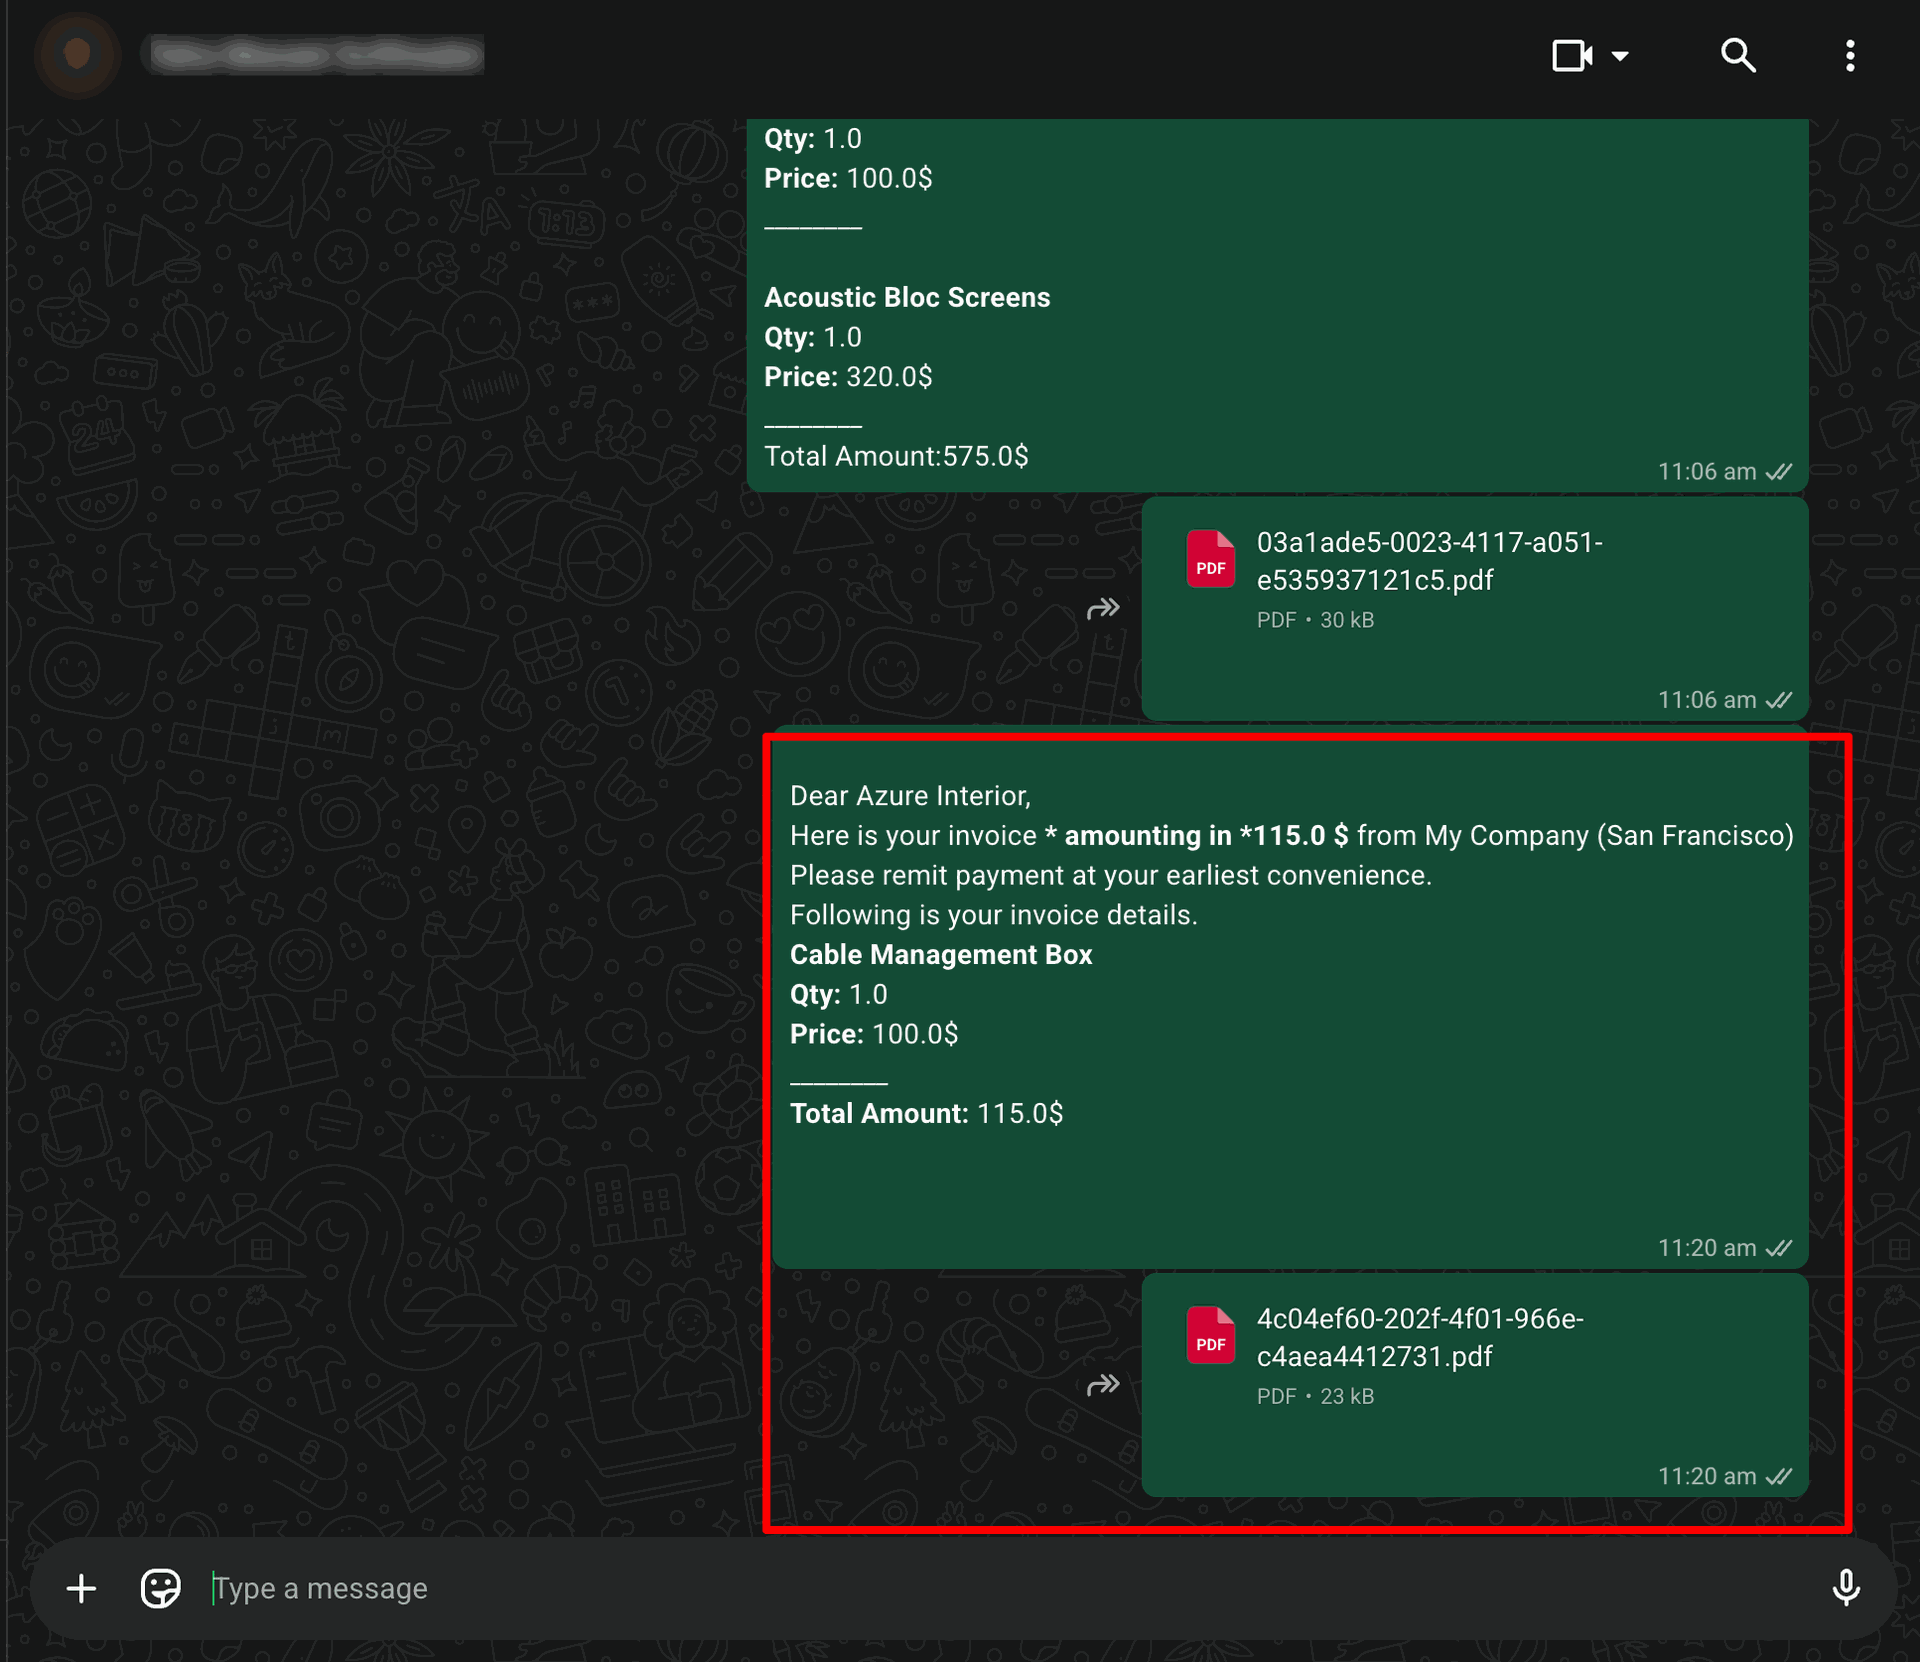
After that this wizard will display. Here you can customize your message and attach more attachments. and click 'Send By Whatsapp'.
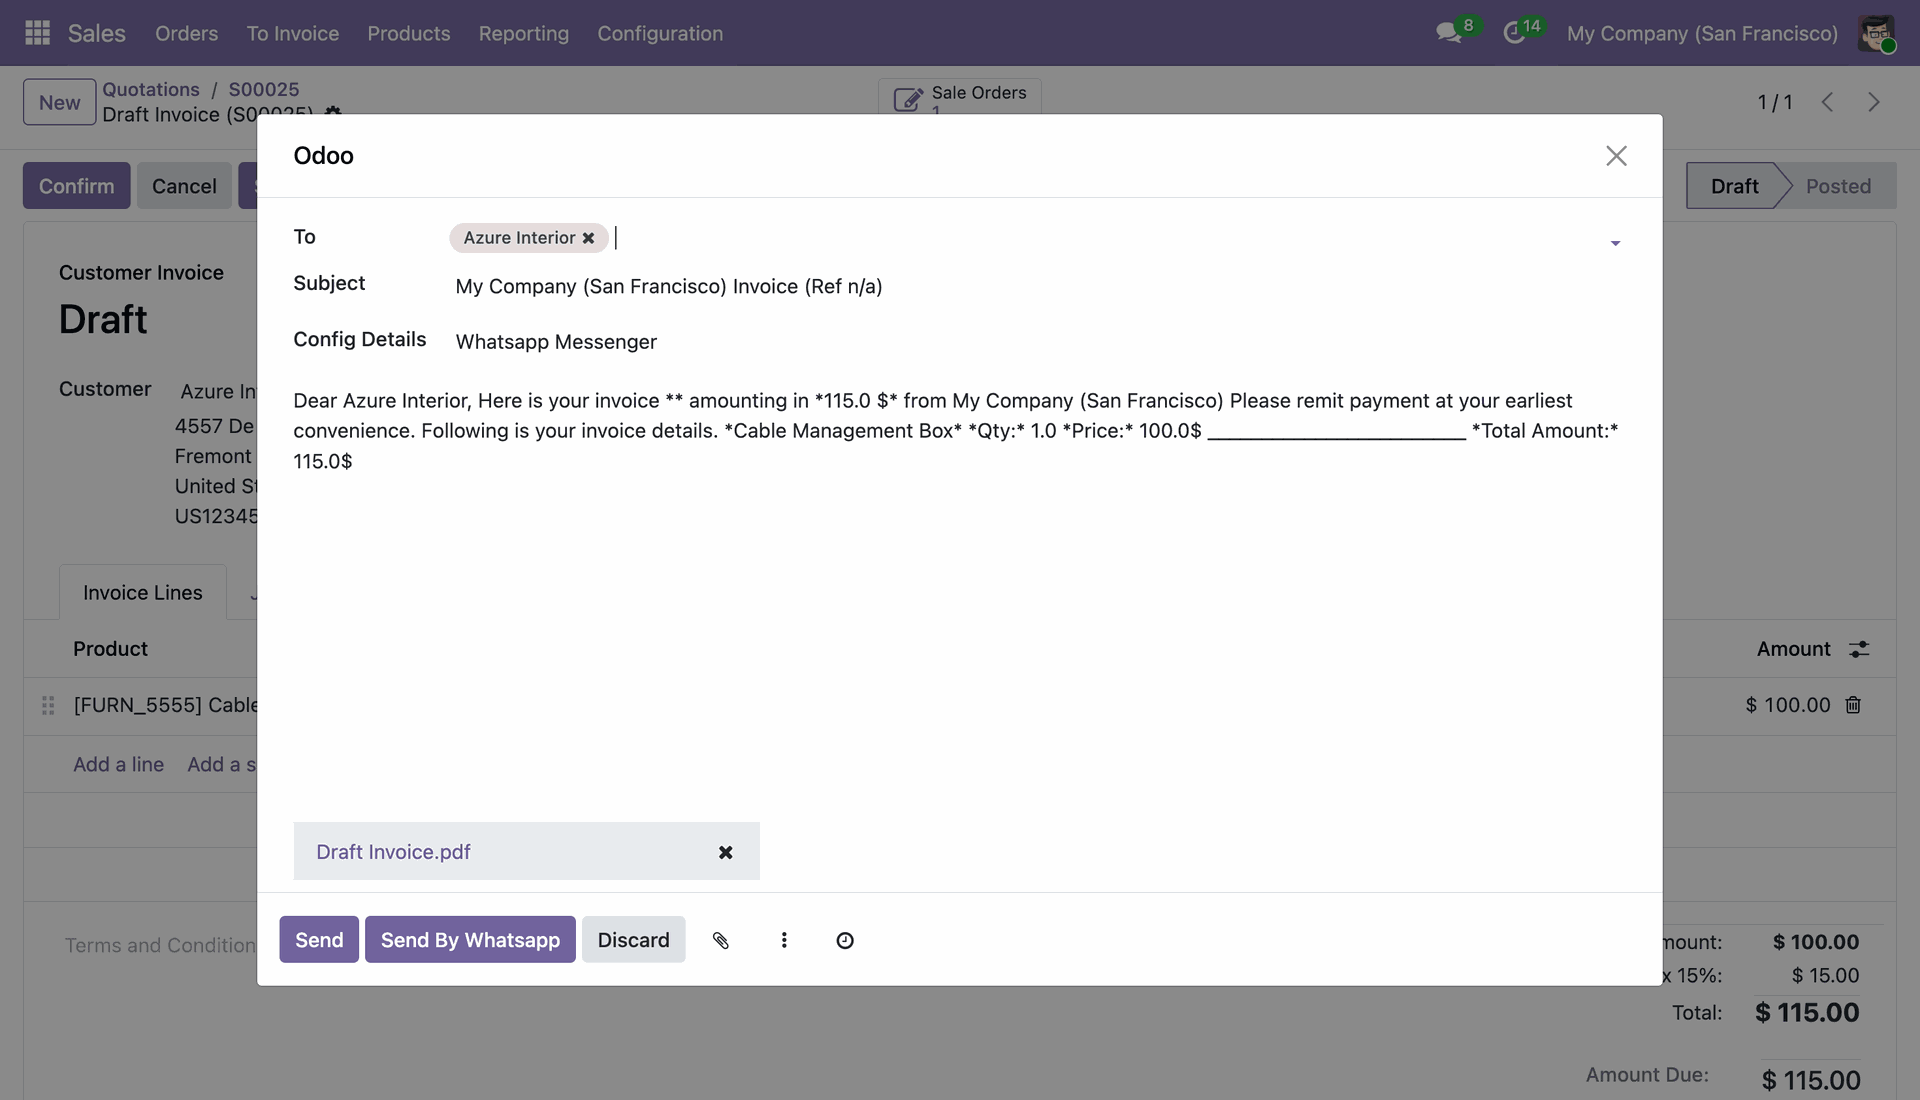
This is output of sended message on whatsapp.
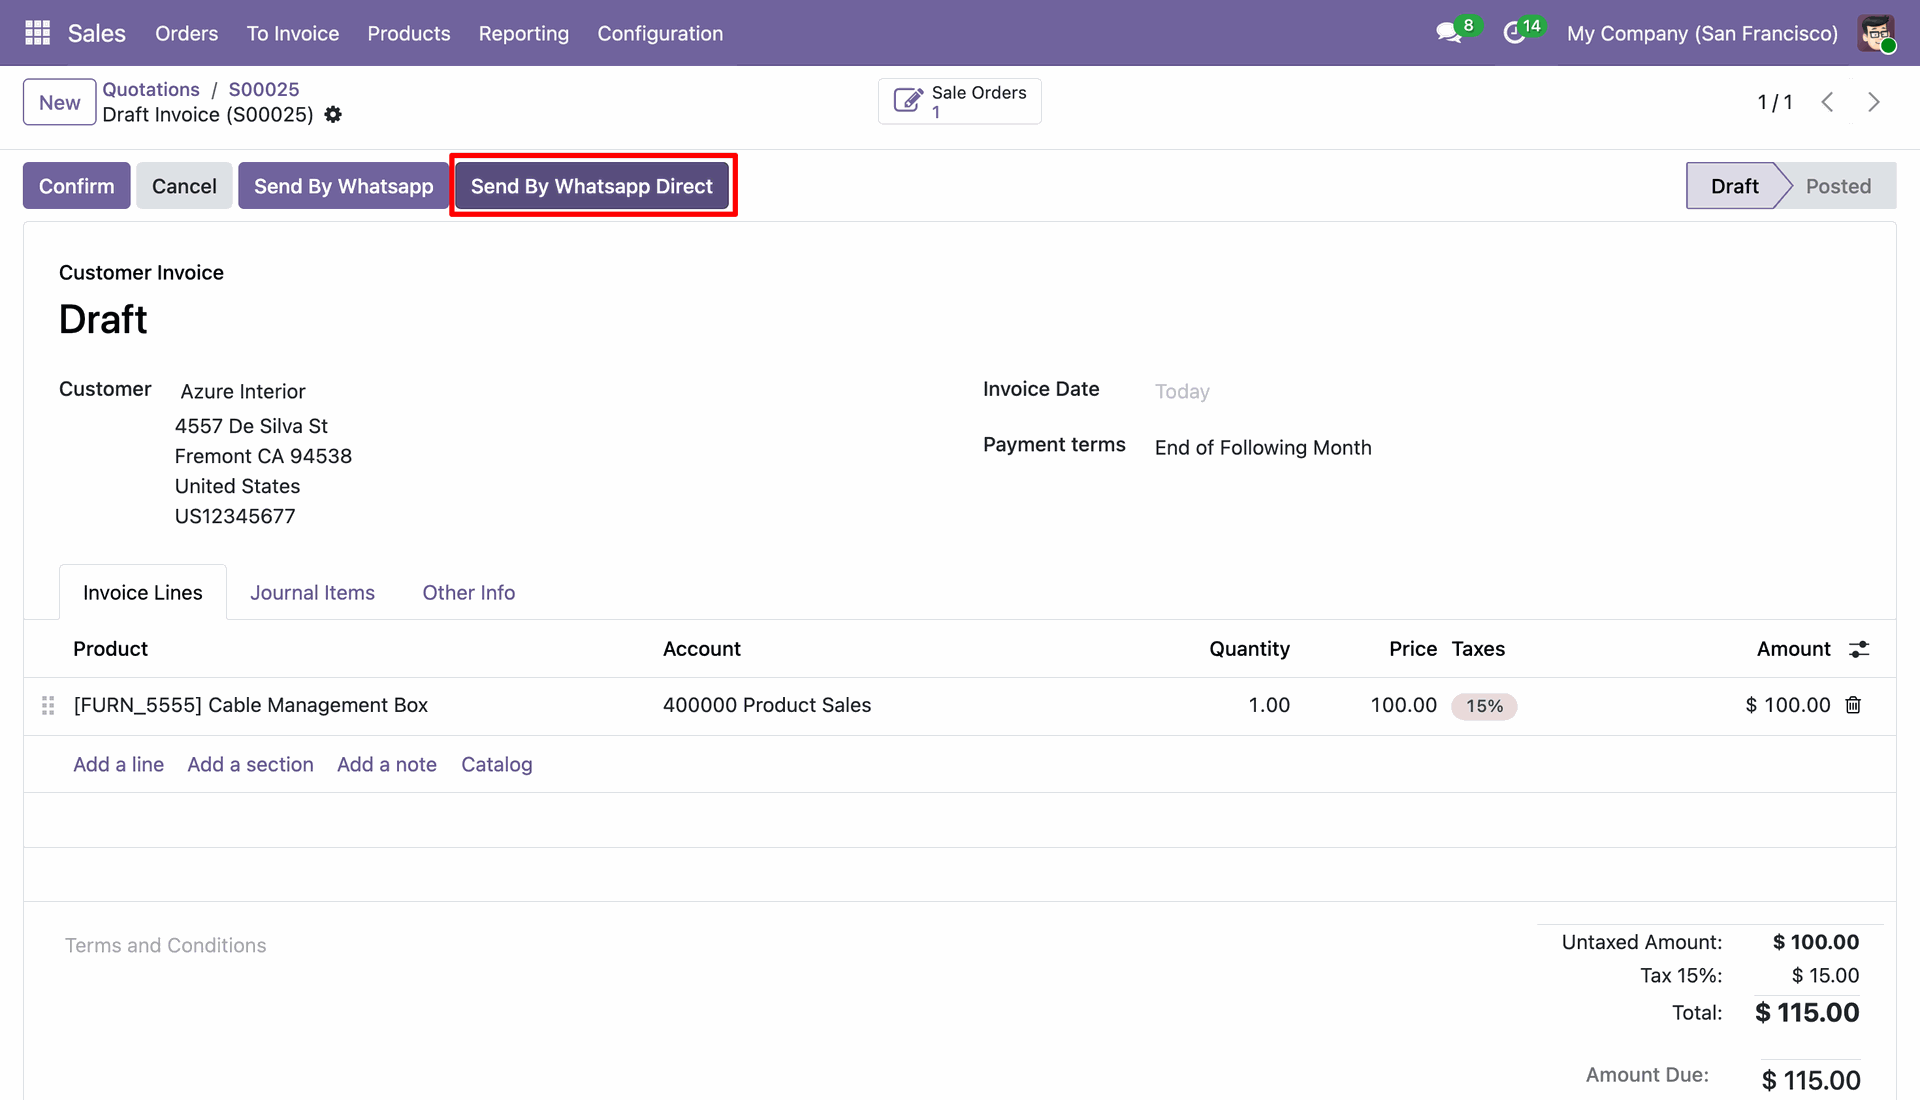
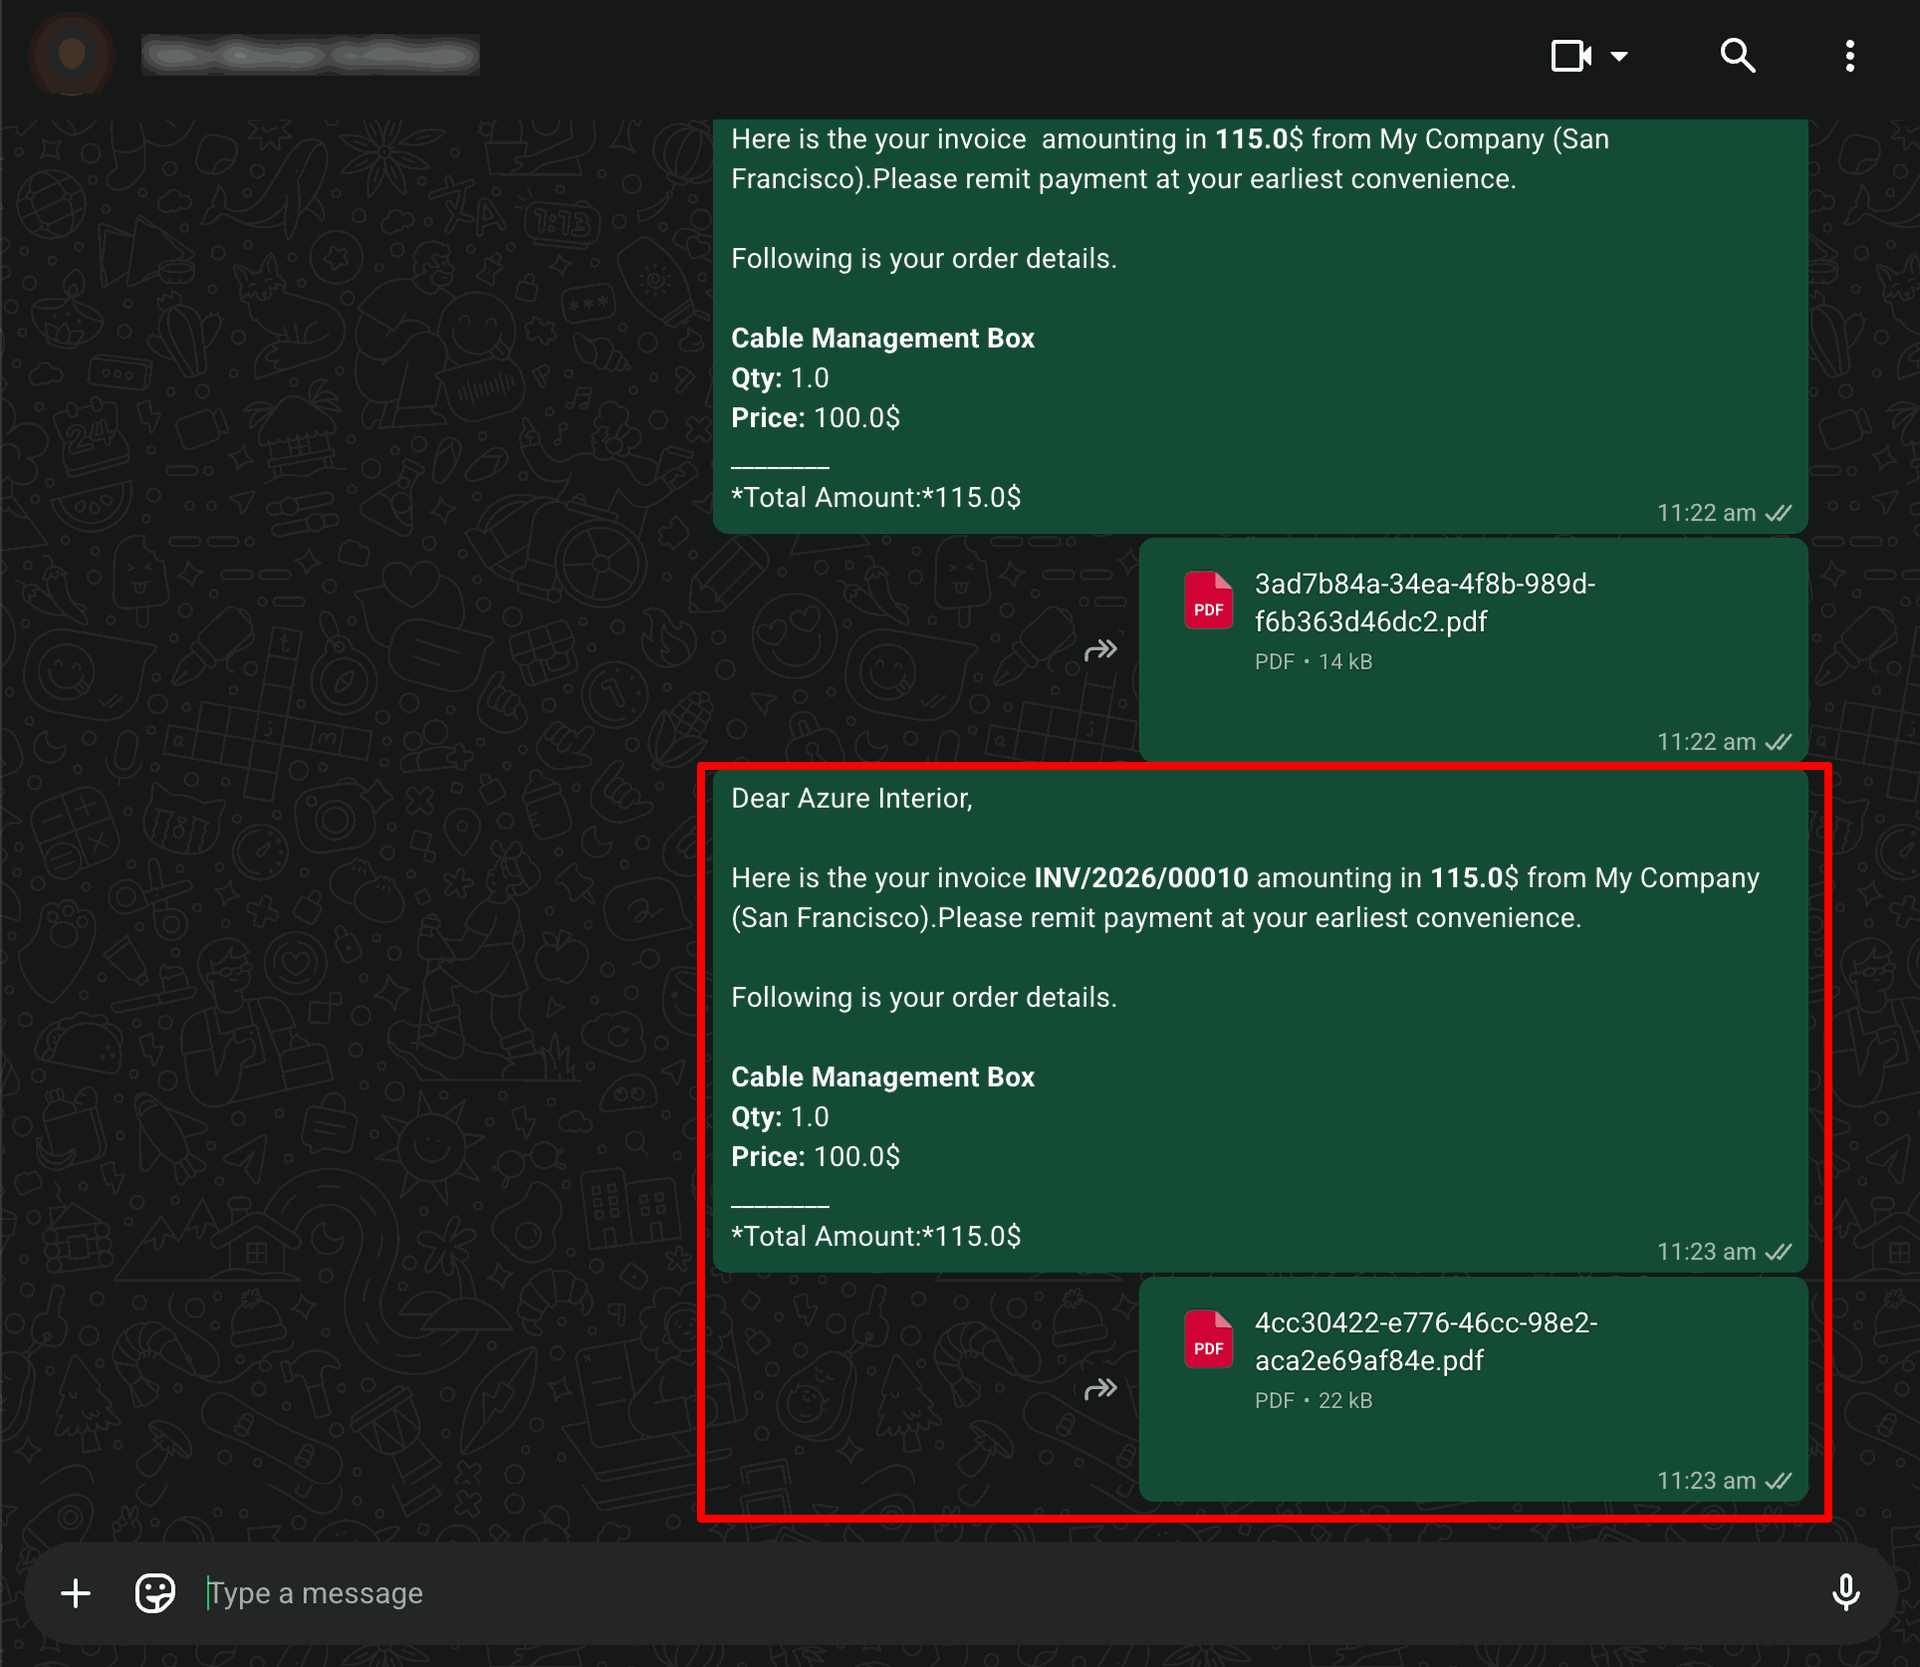
Click 'Send By Whatsapp Direct' and it will sending directly with predefine message and attachments.
This is output of sended message on whatsapp.
You can see the sended message in chatter also.
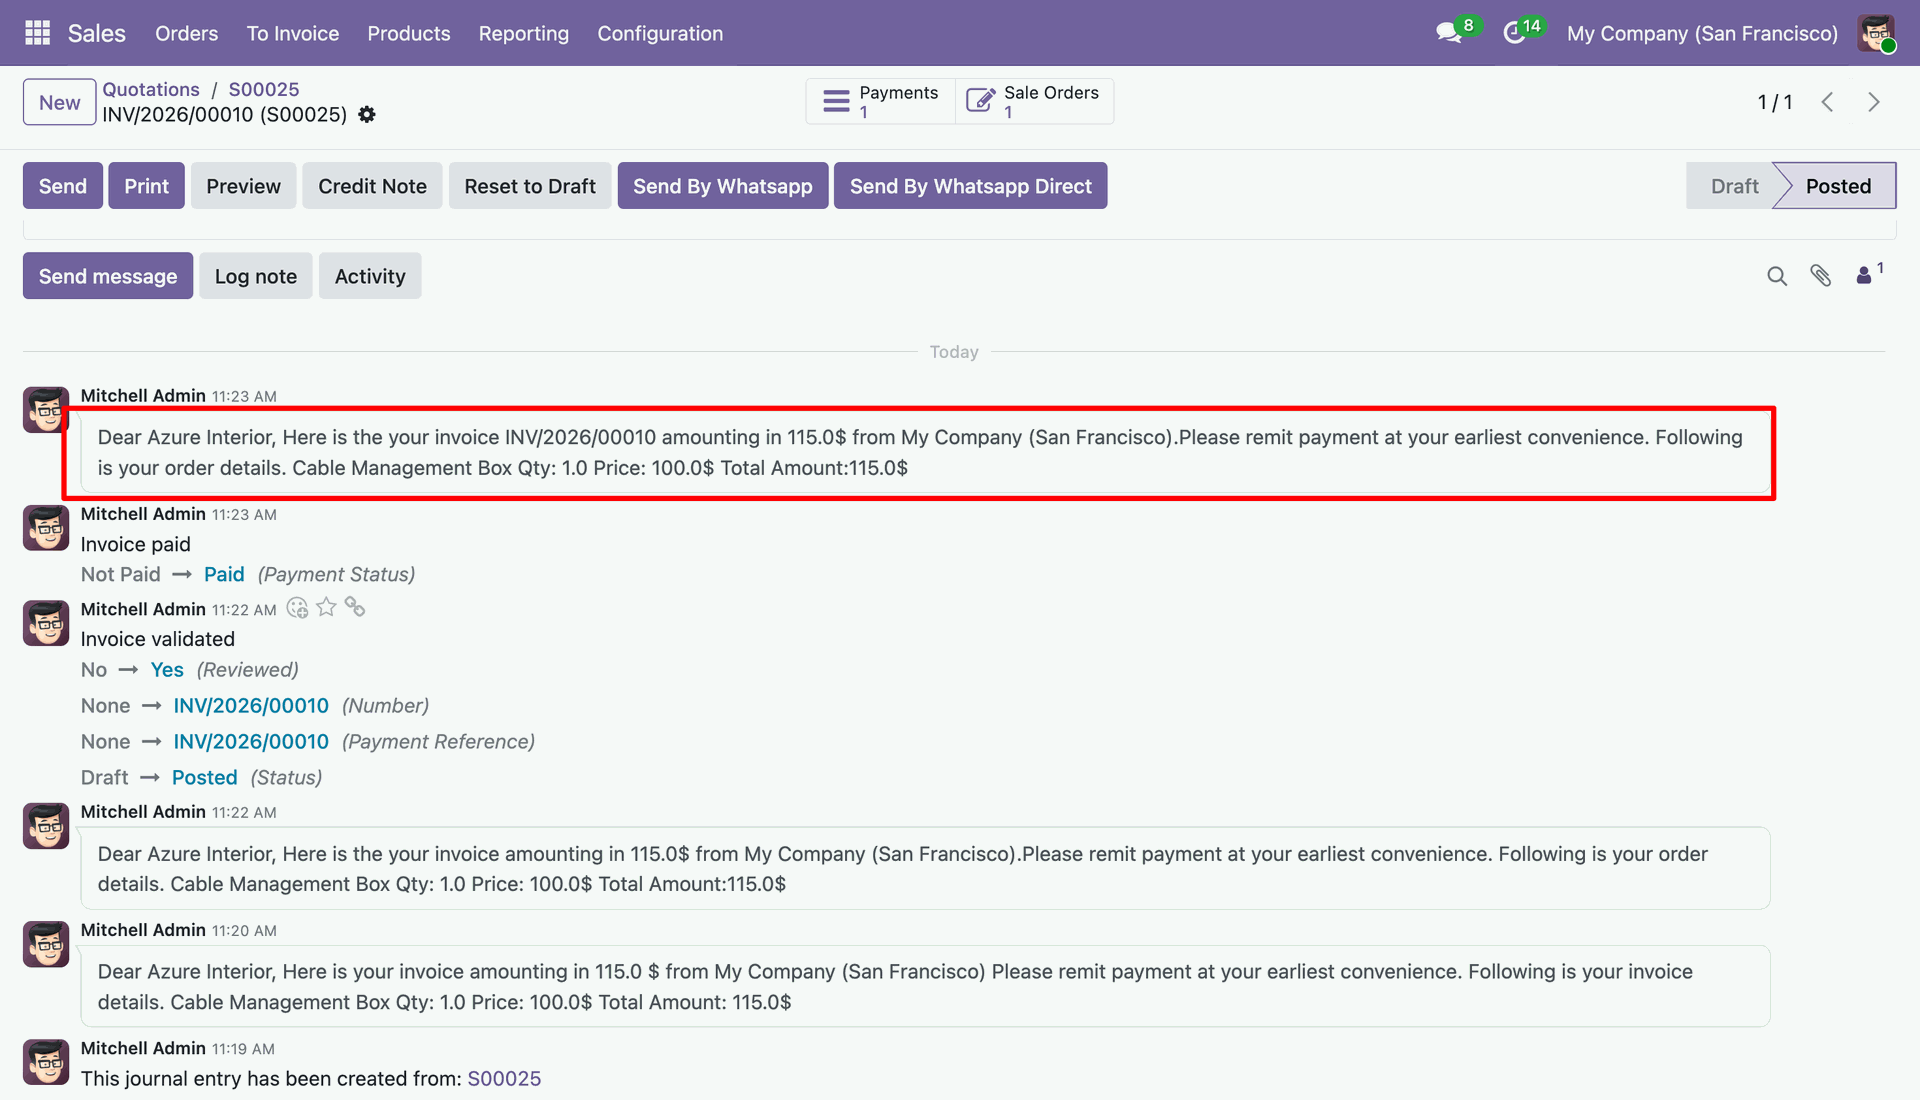
In Purchase Order view click 'Send By Whatsapp' this button for customize message and then send.
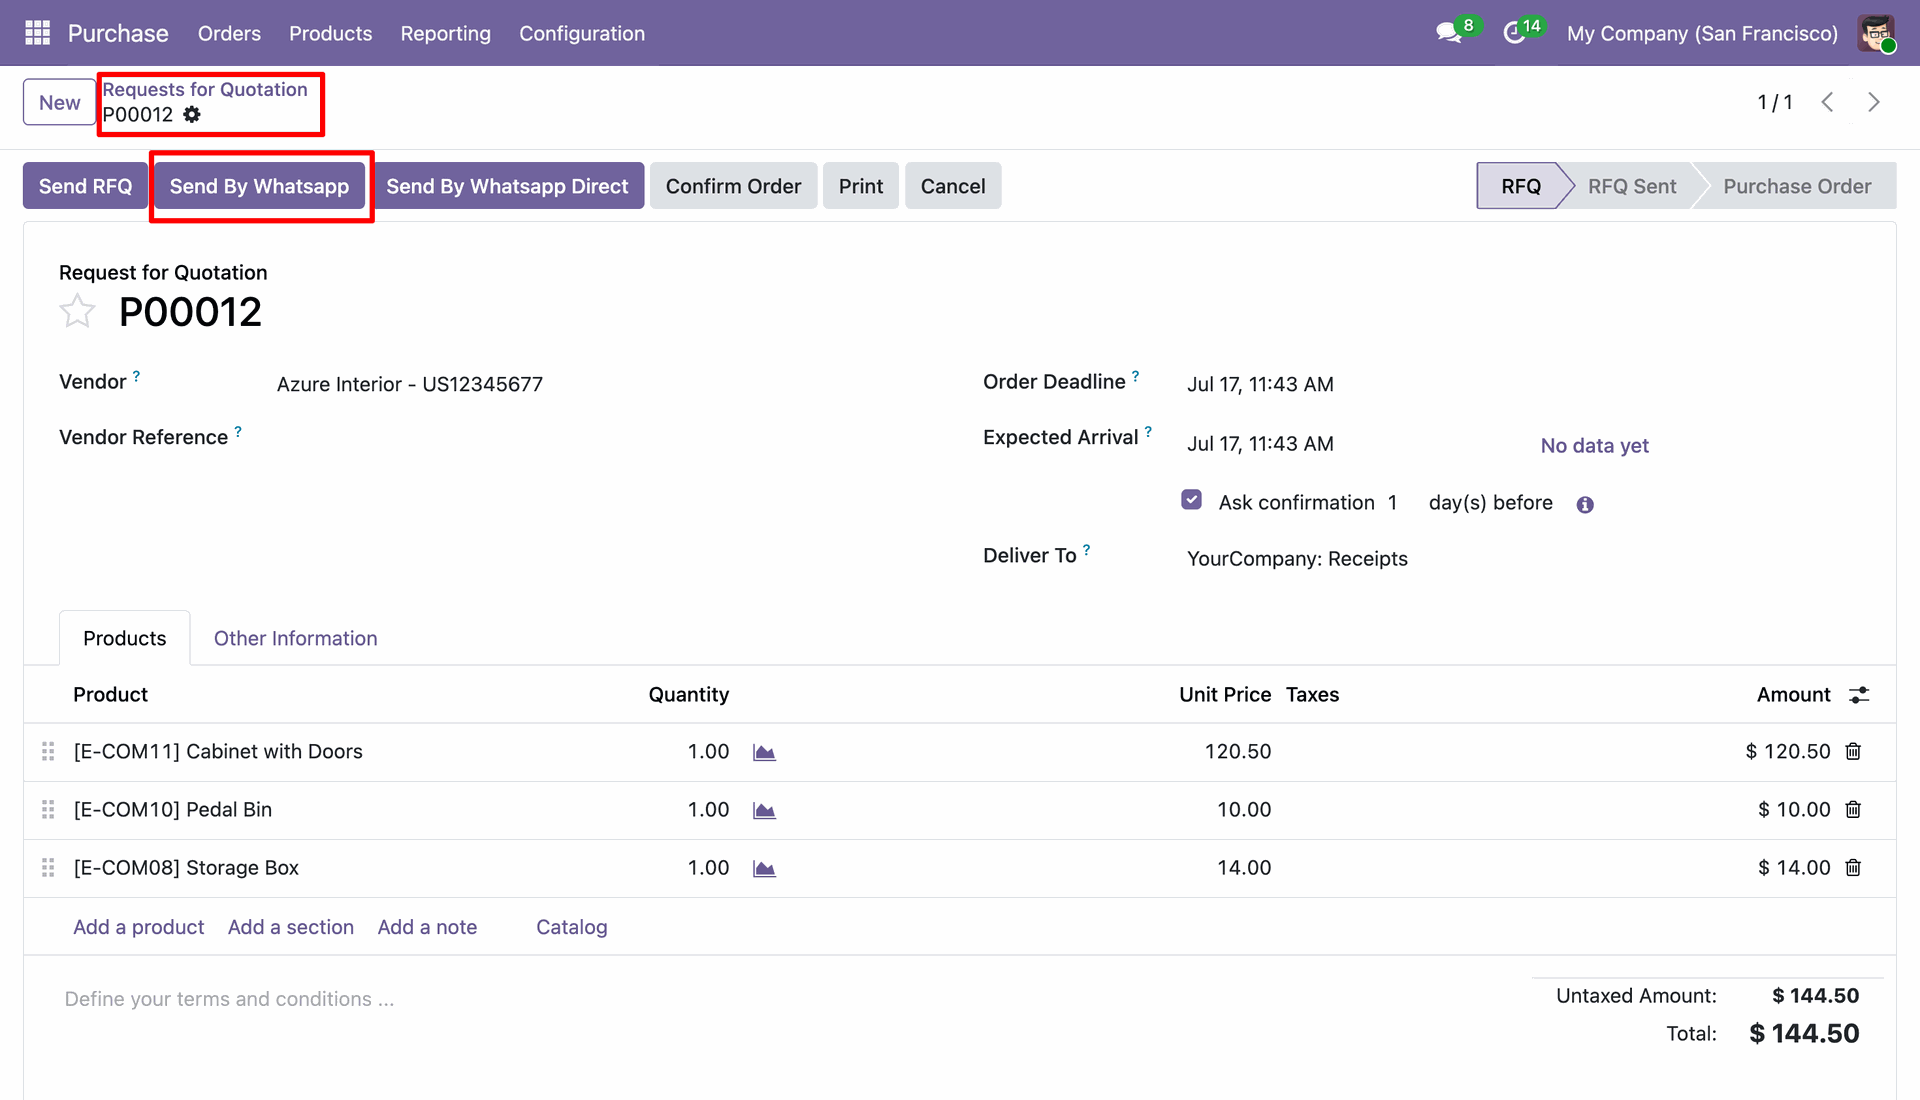
After that this wizard will display. Here you can customize your message and attach more attachments. and click 'Send By Whatsapp'.
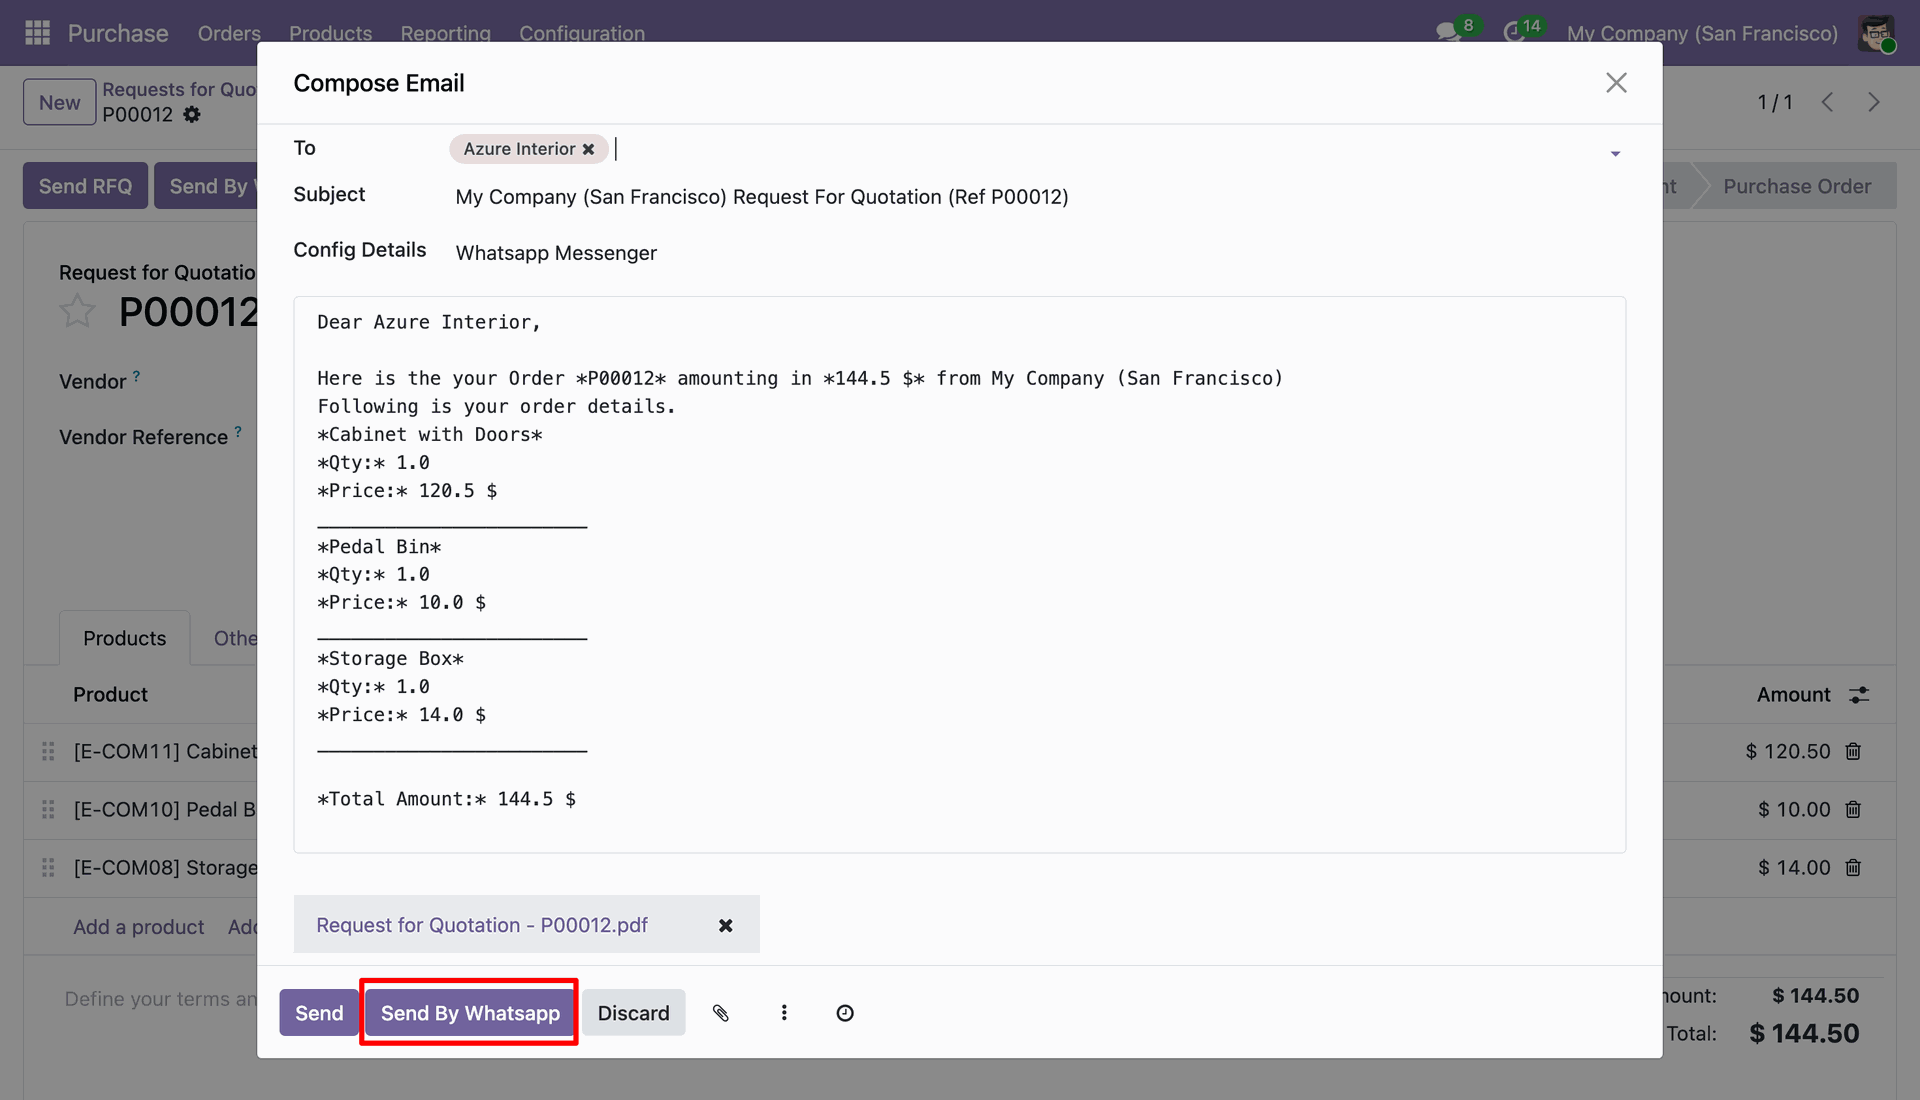
This is output of sended message on whatsapp.
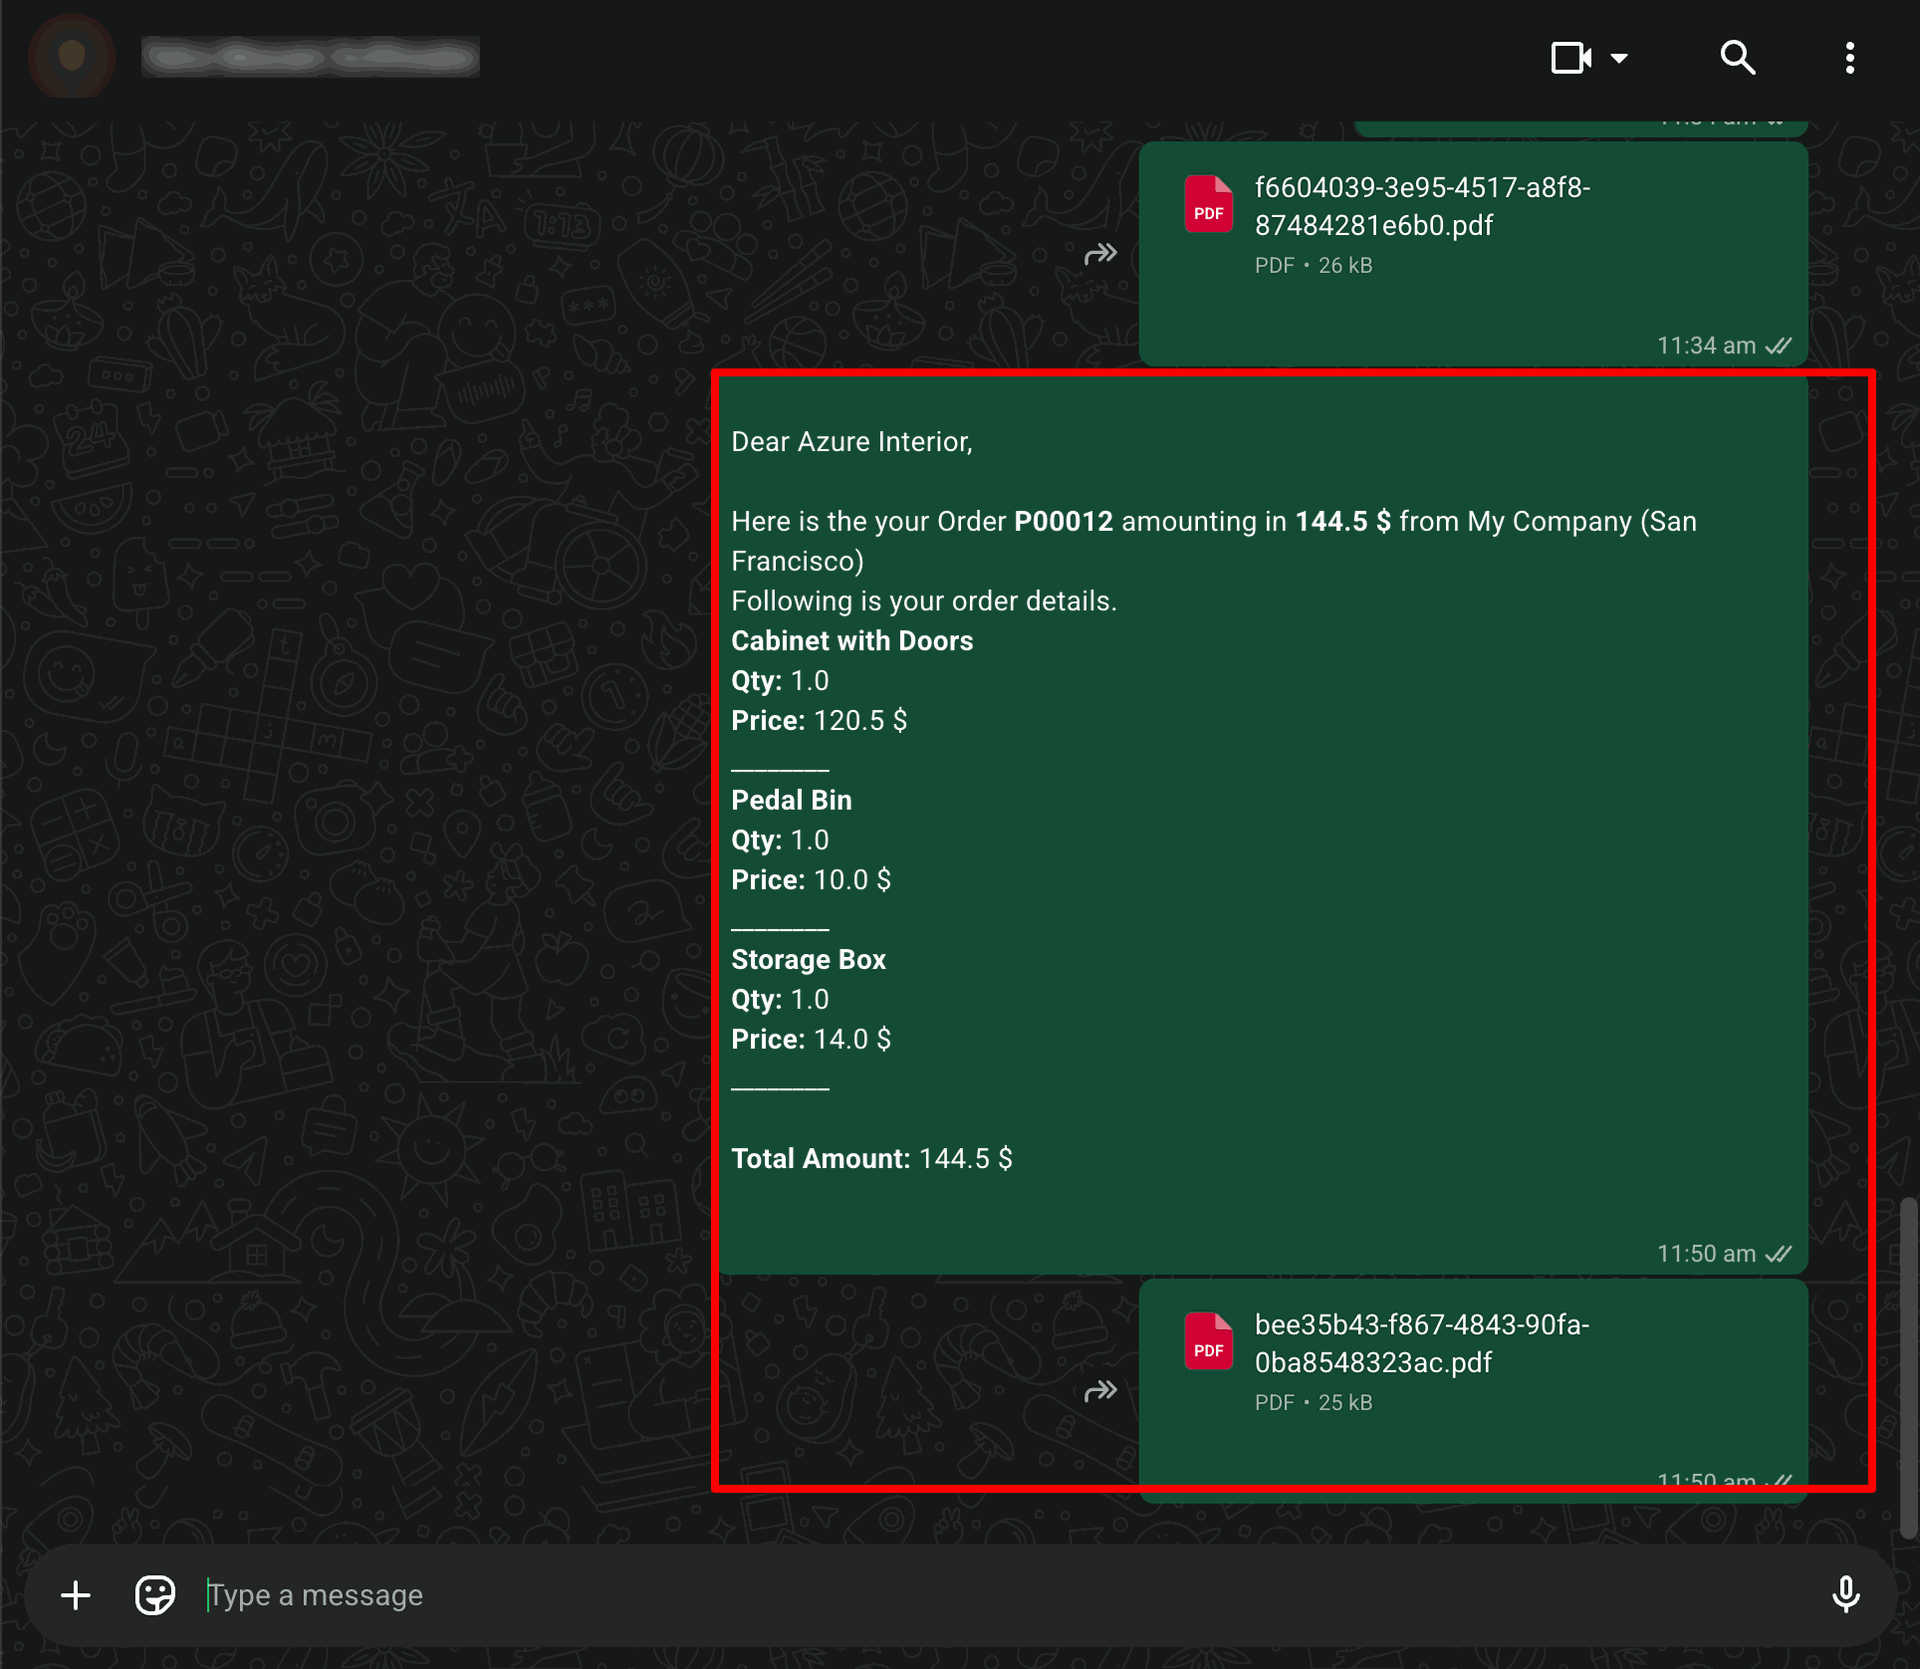
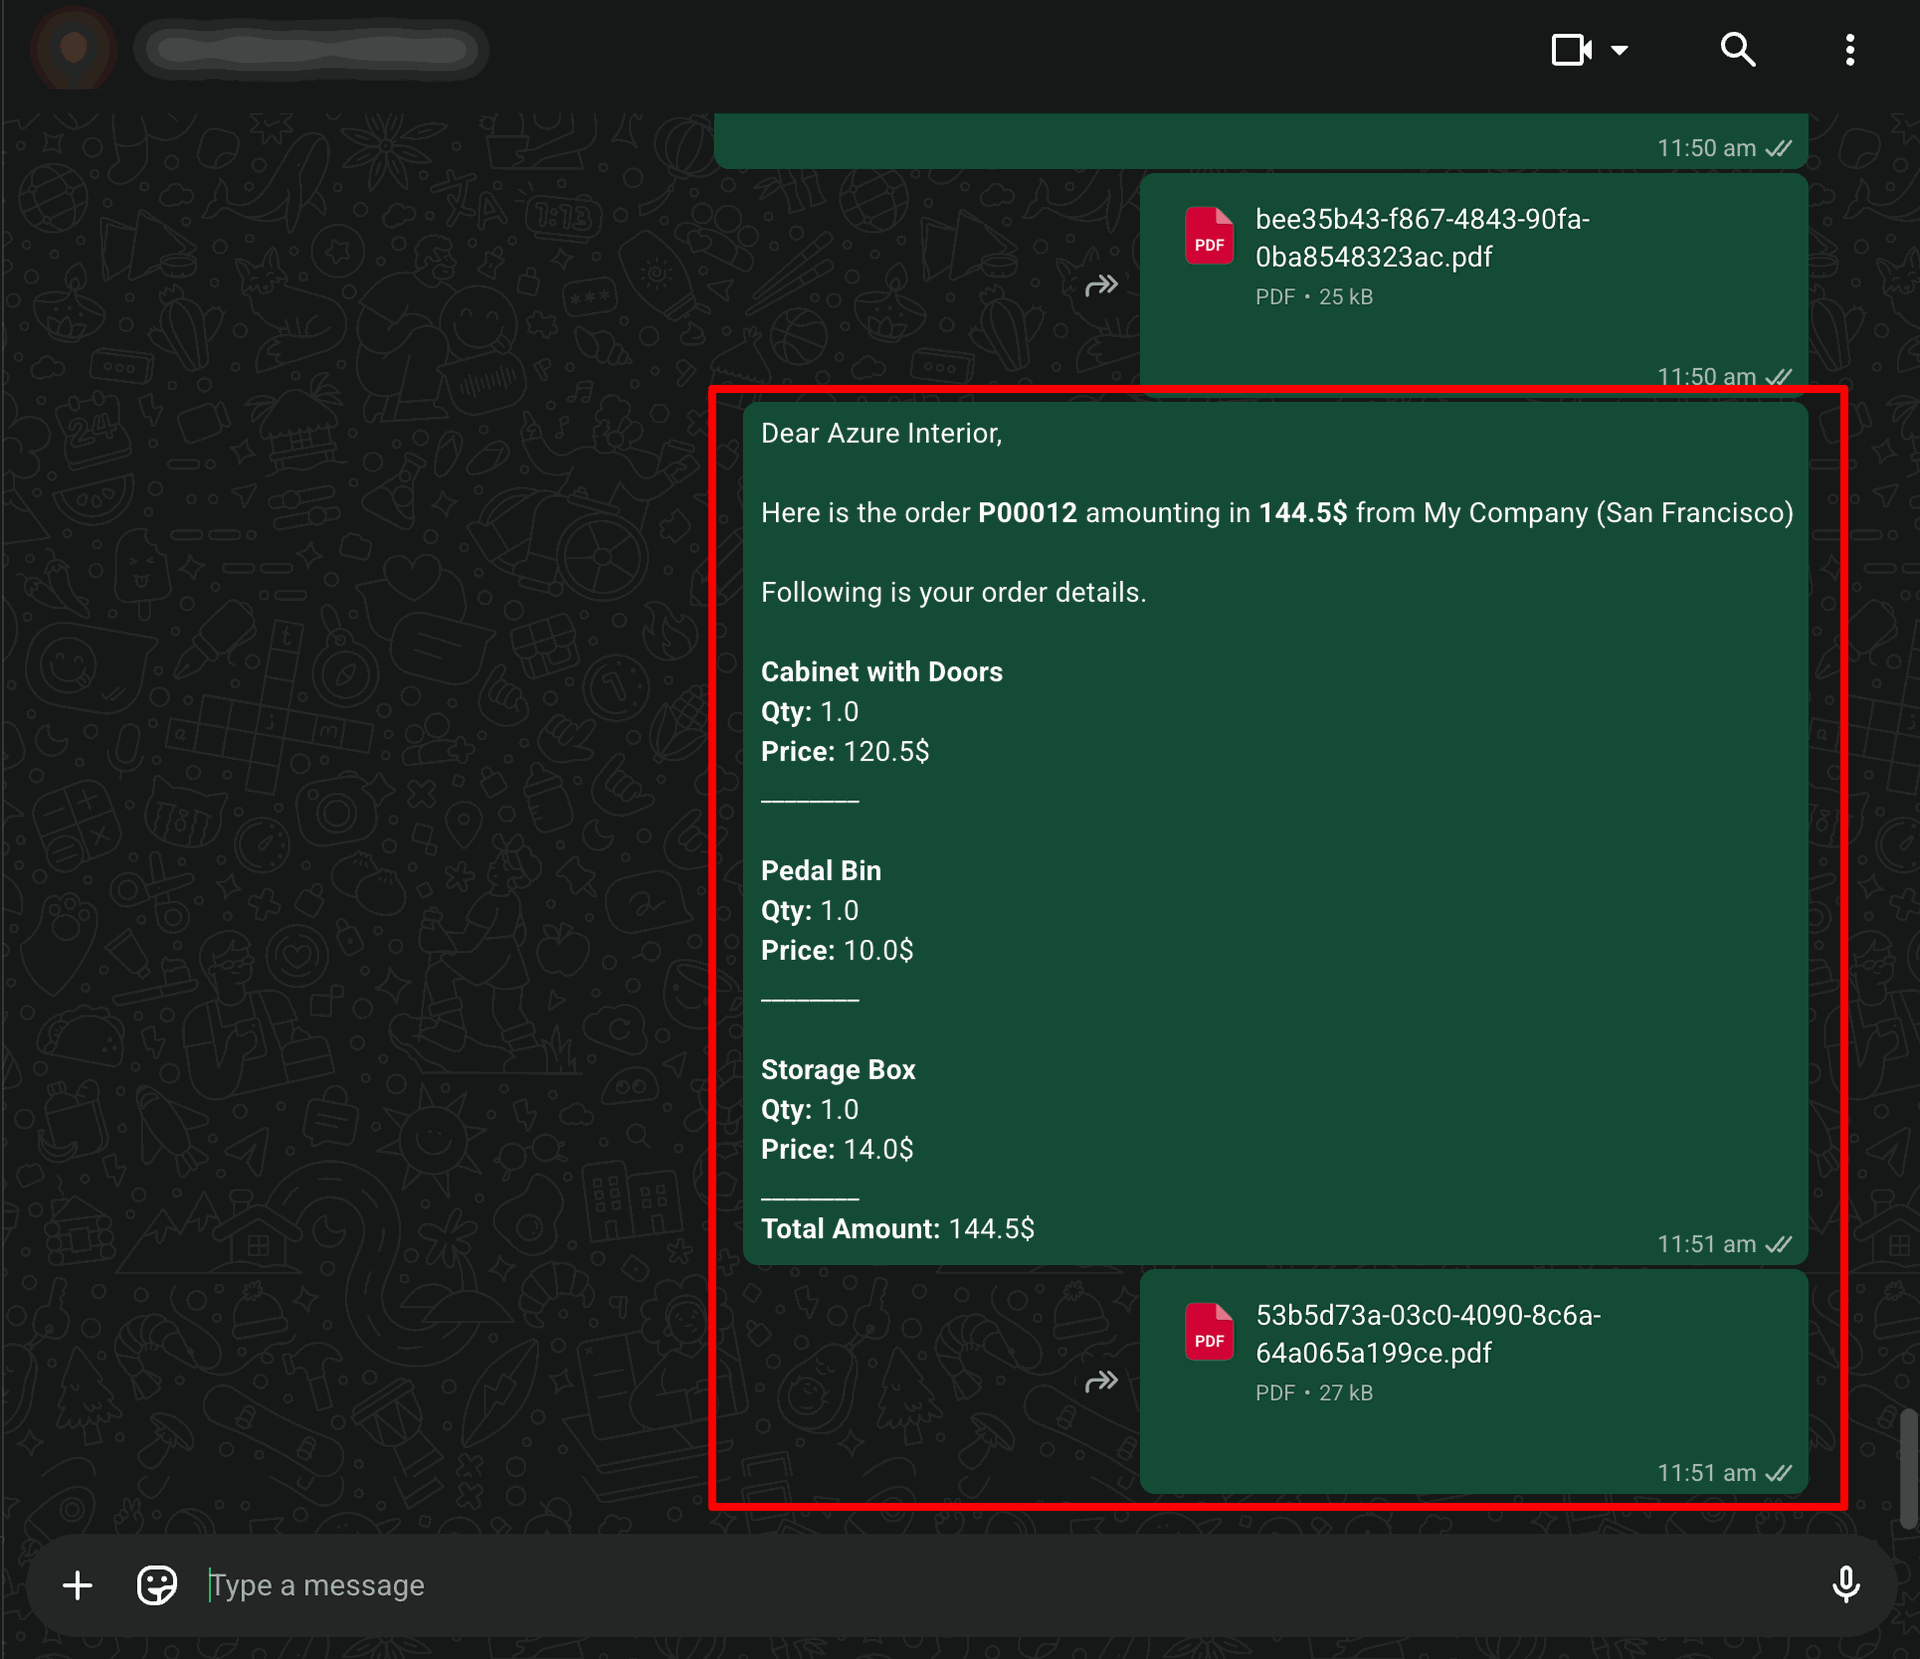
Click 'Send By Whatsapp Direct' and it will sending directly with predefine message and attachments.
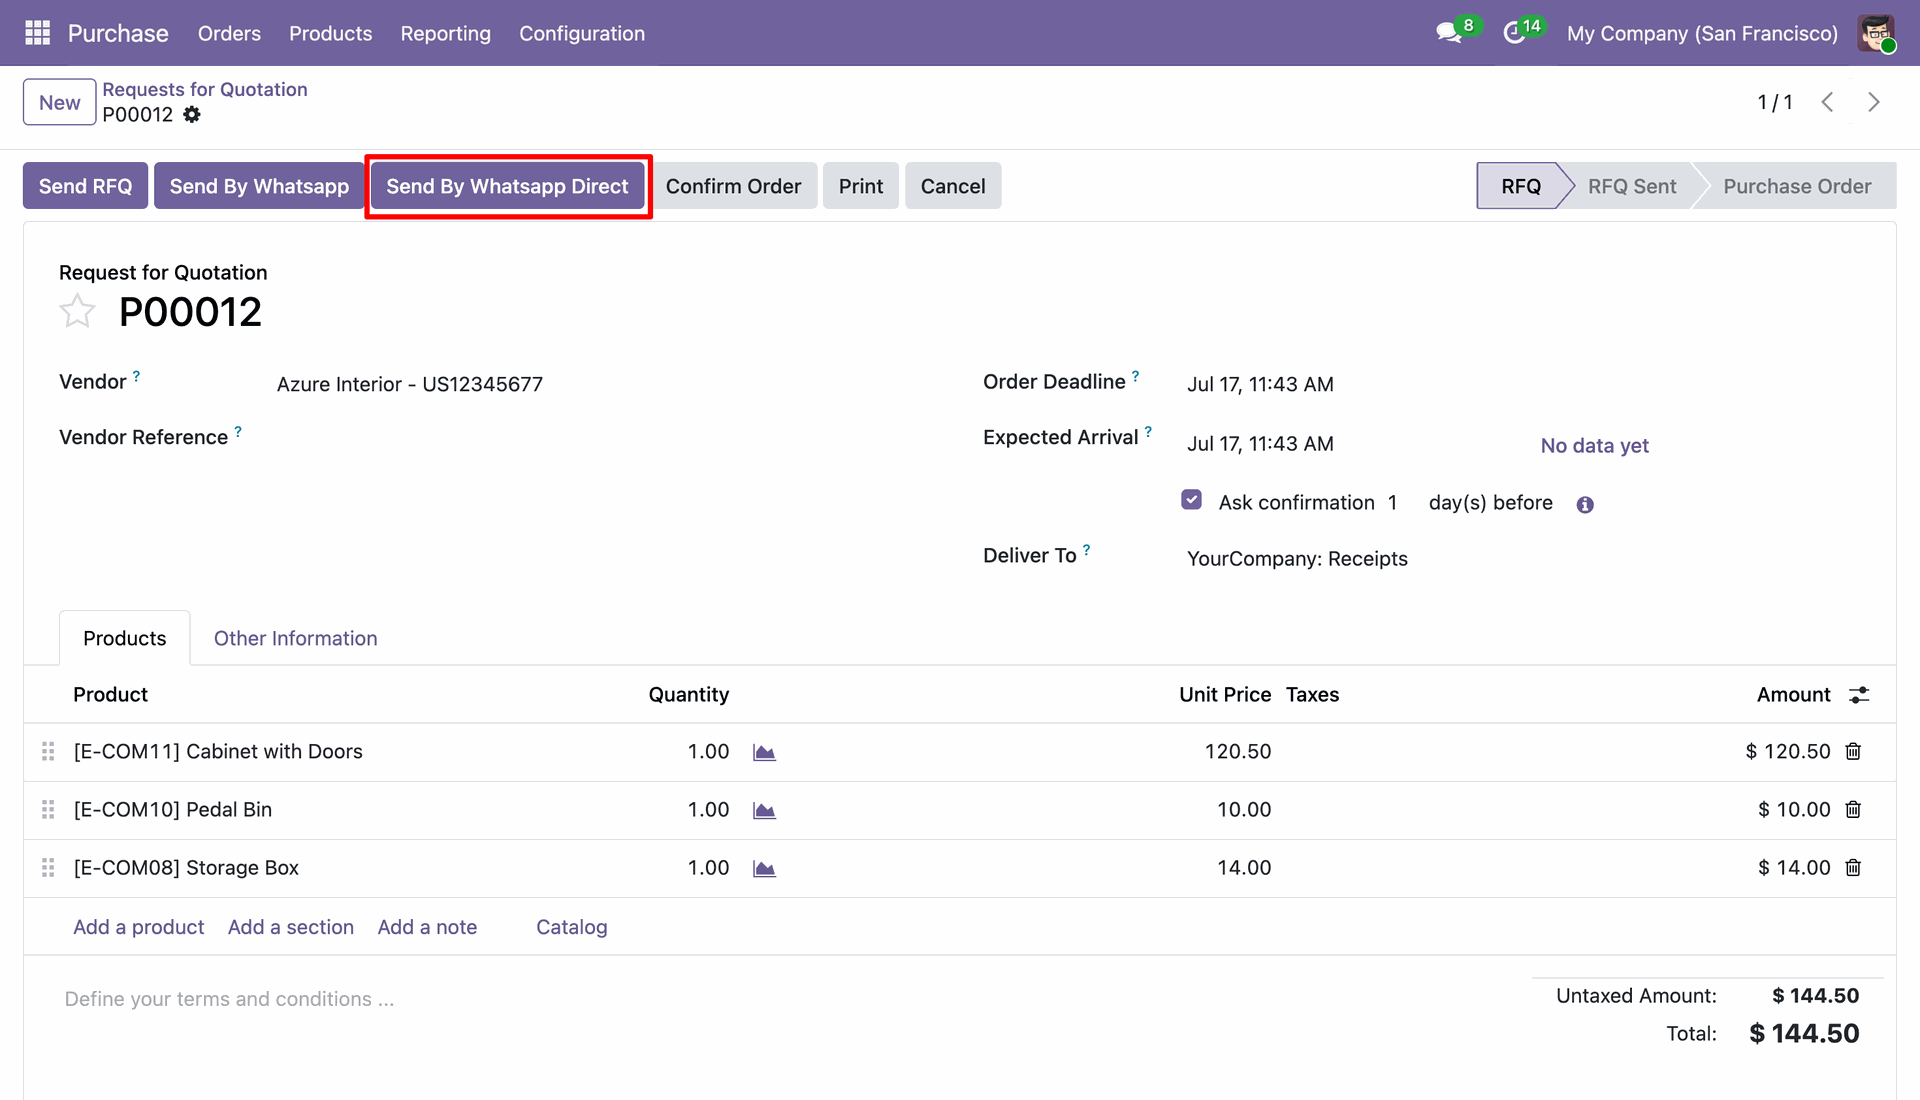
This is output of sended message on whatsapp.
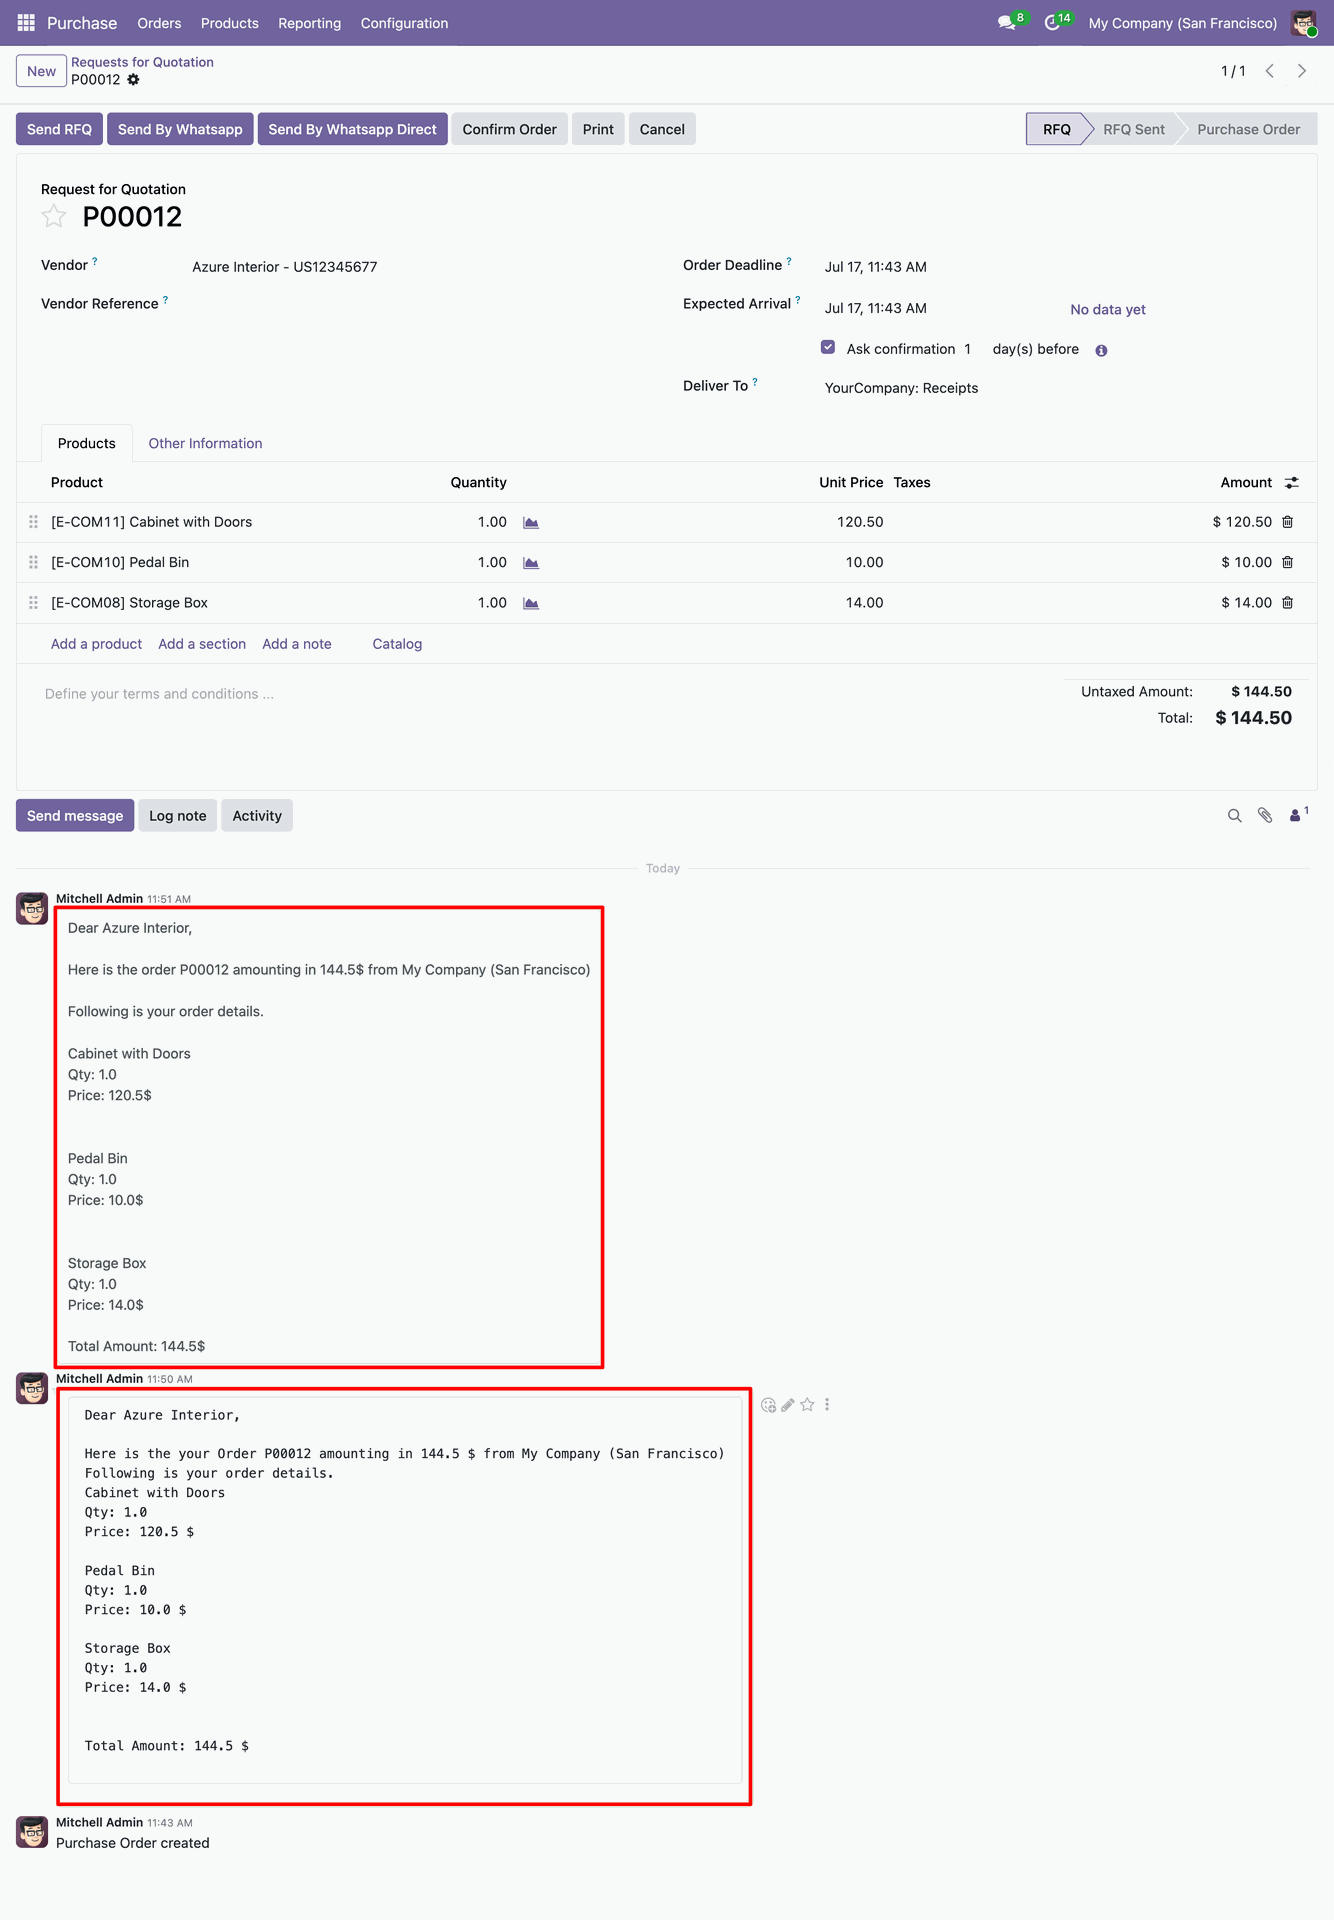
You can see the sended message in chatter also.
Go to Whatsapp Configuration Manager.
Create a whatsapp messanger for 'Sale Whatsapp Messanger' and assign to particular user.
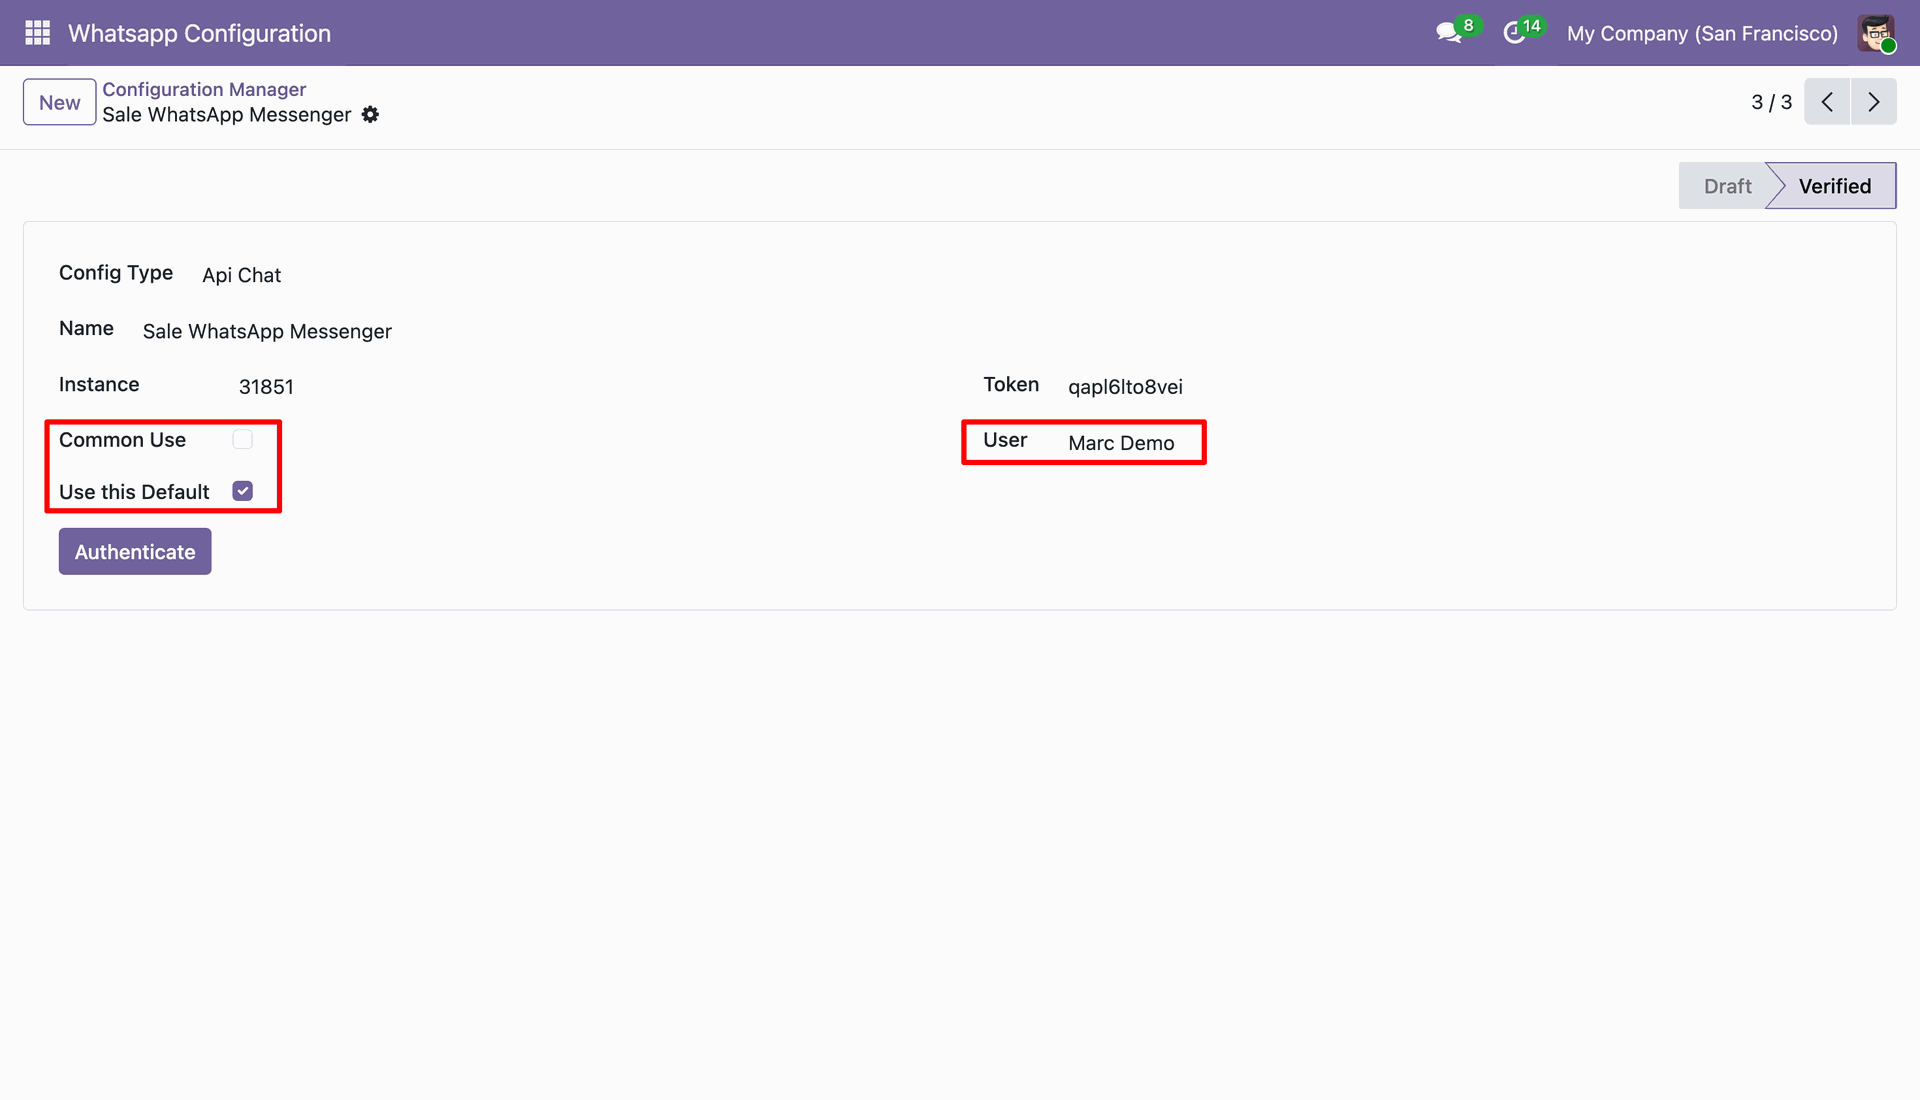
Create another whatsapp messanger for 'Purchase Whatsapp Messanger' and assign to particular user.
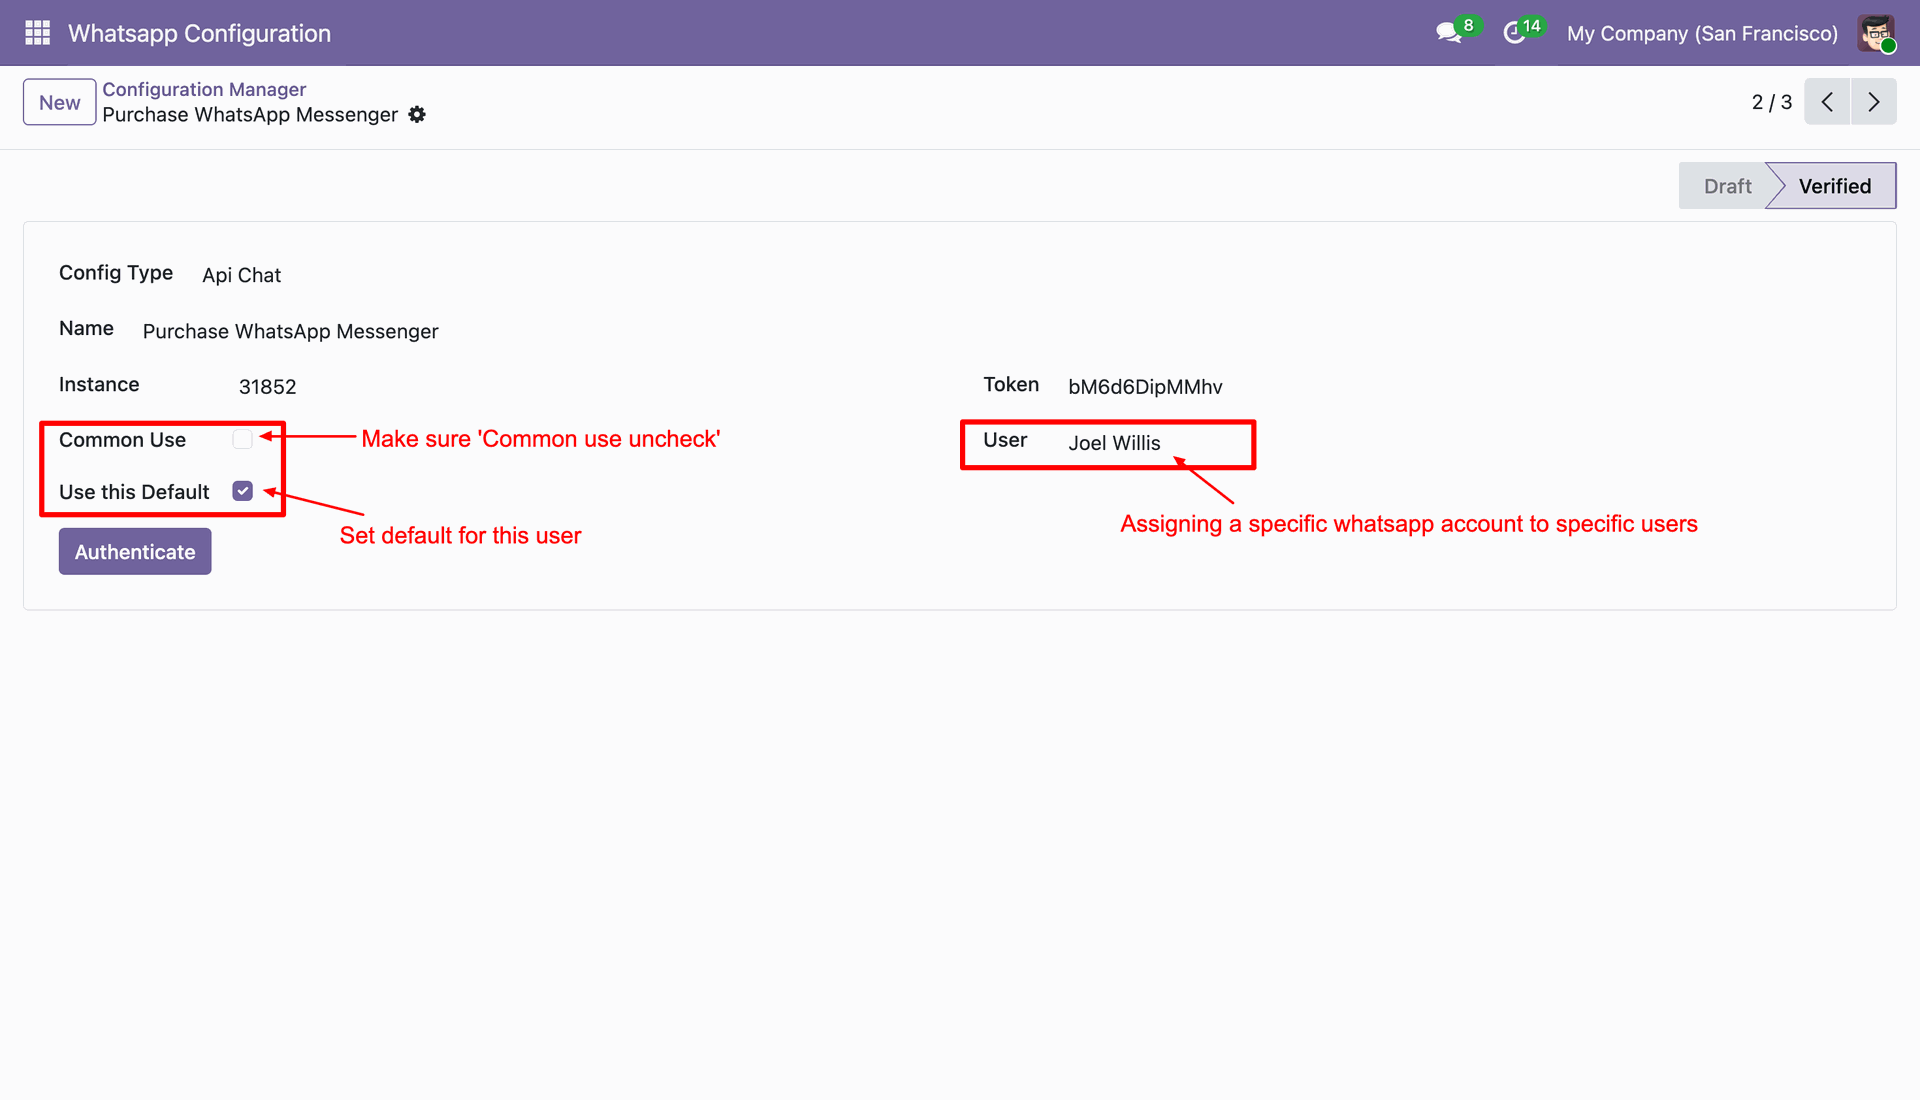
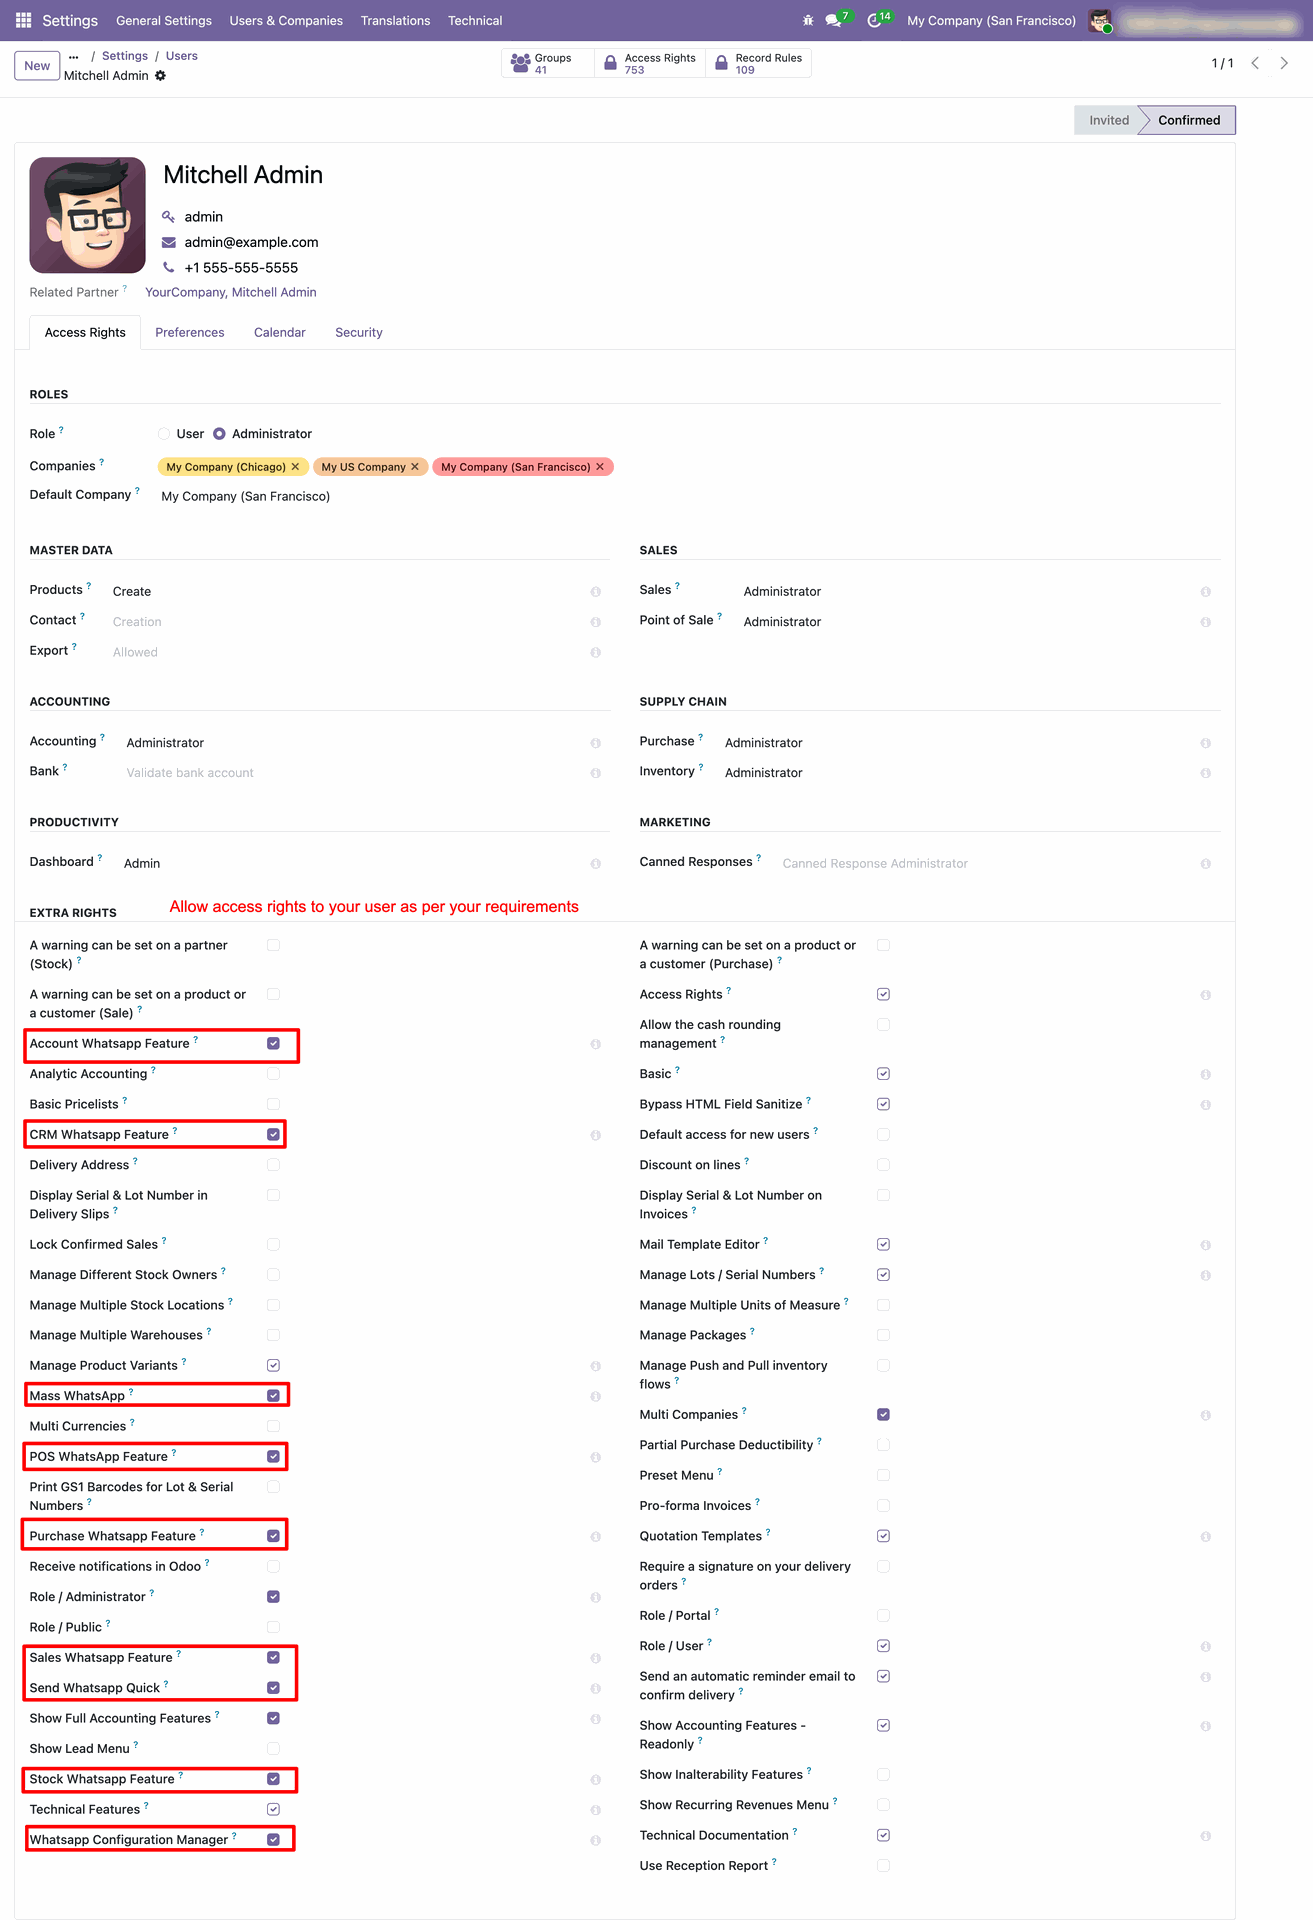
Now assign a perticular whatsapp feature to particular user
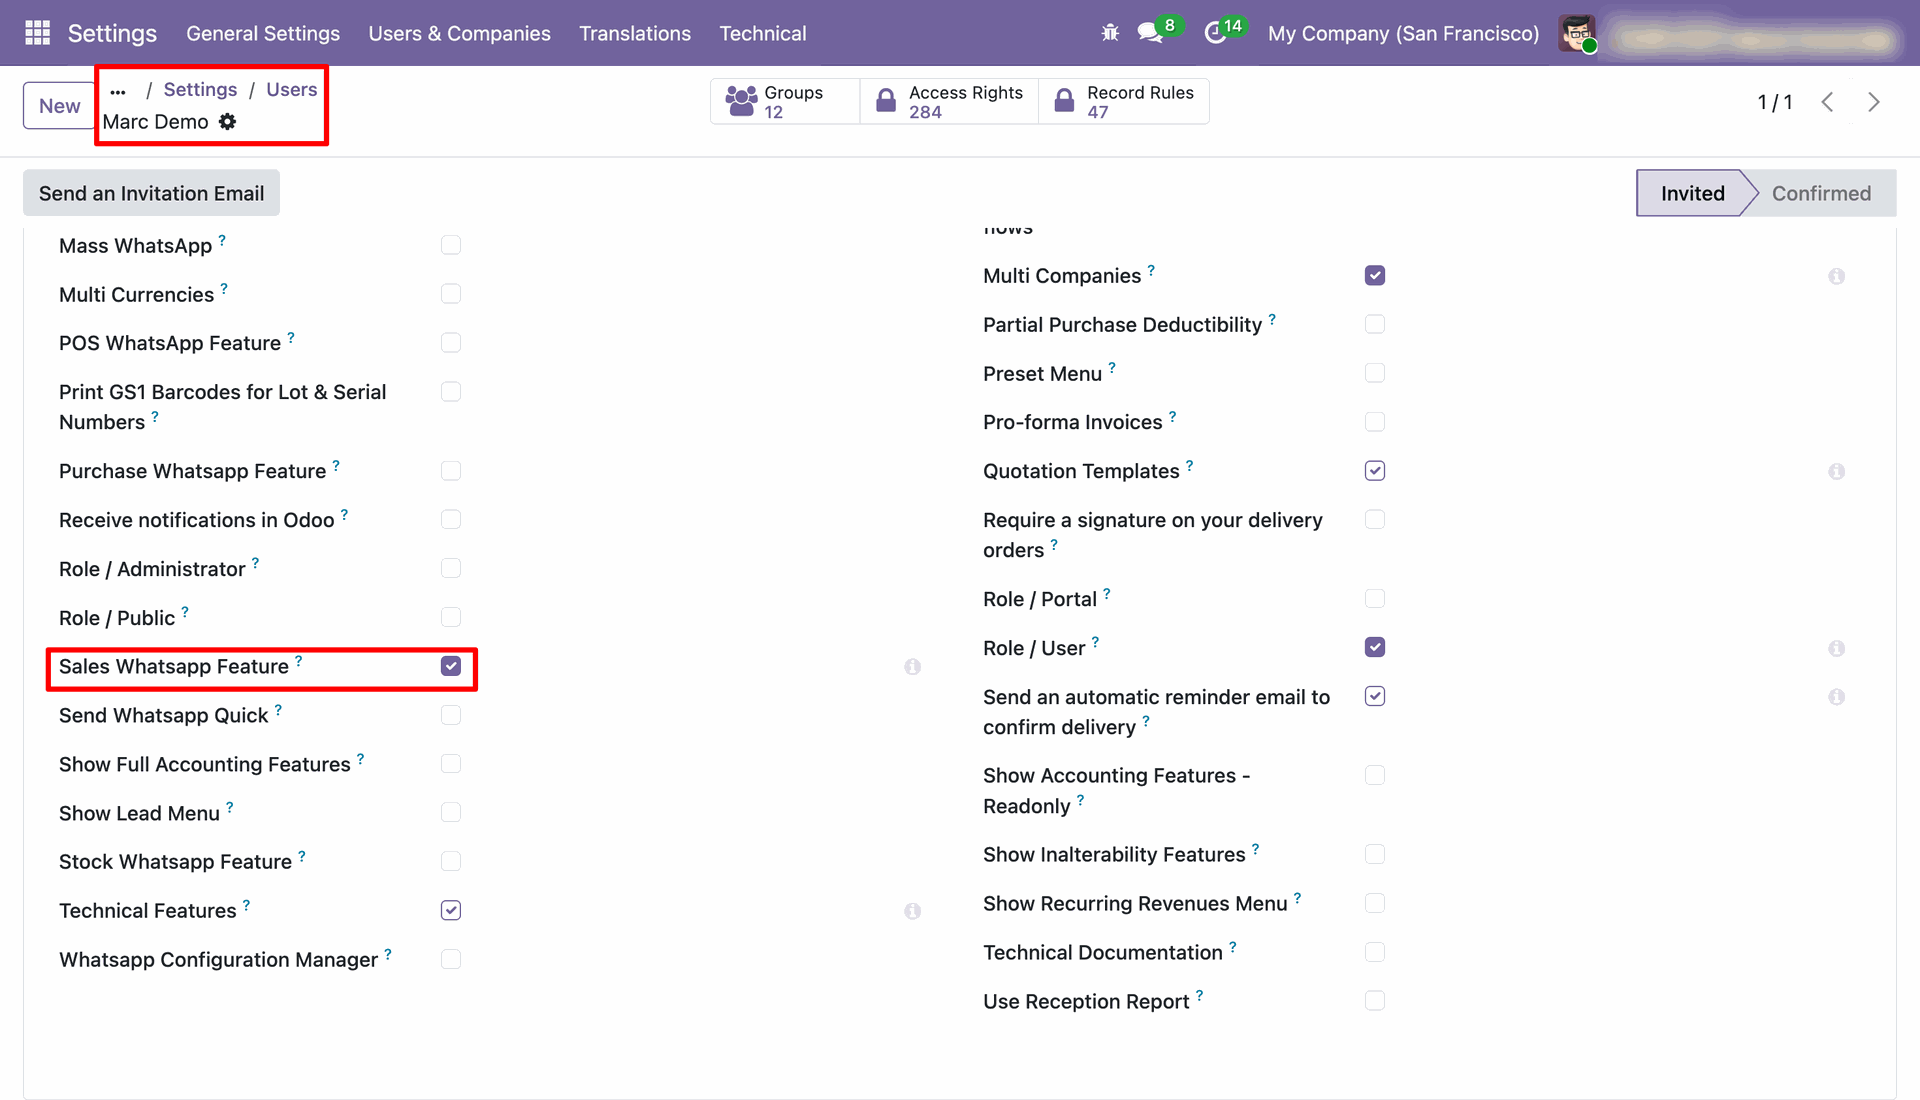
Now assign a perticular whatsapp feature to particular user.
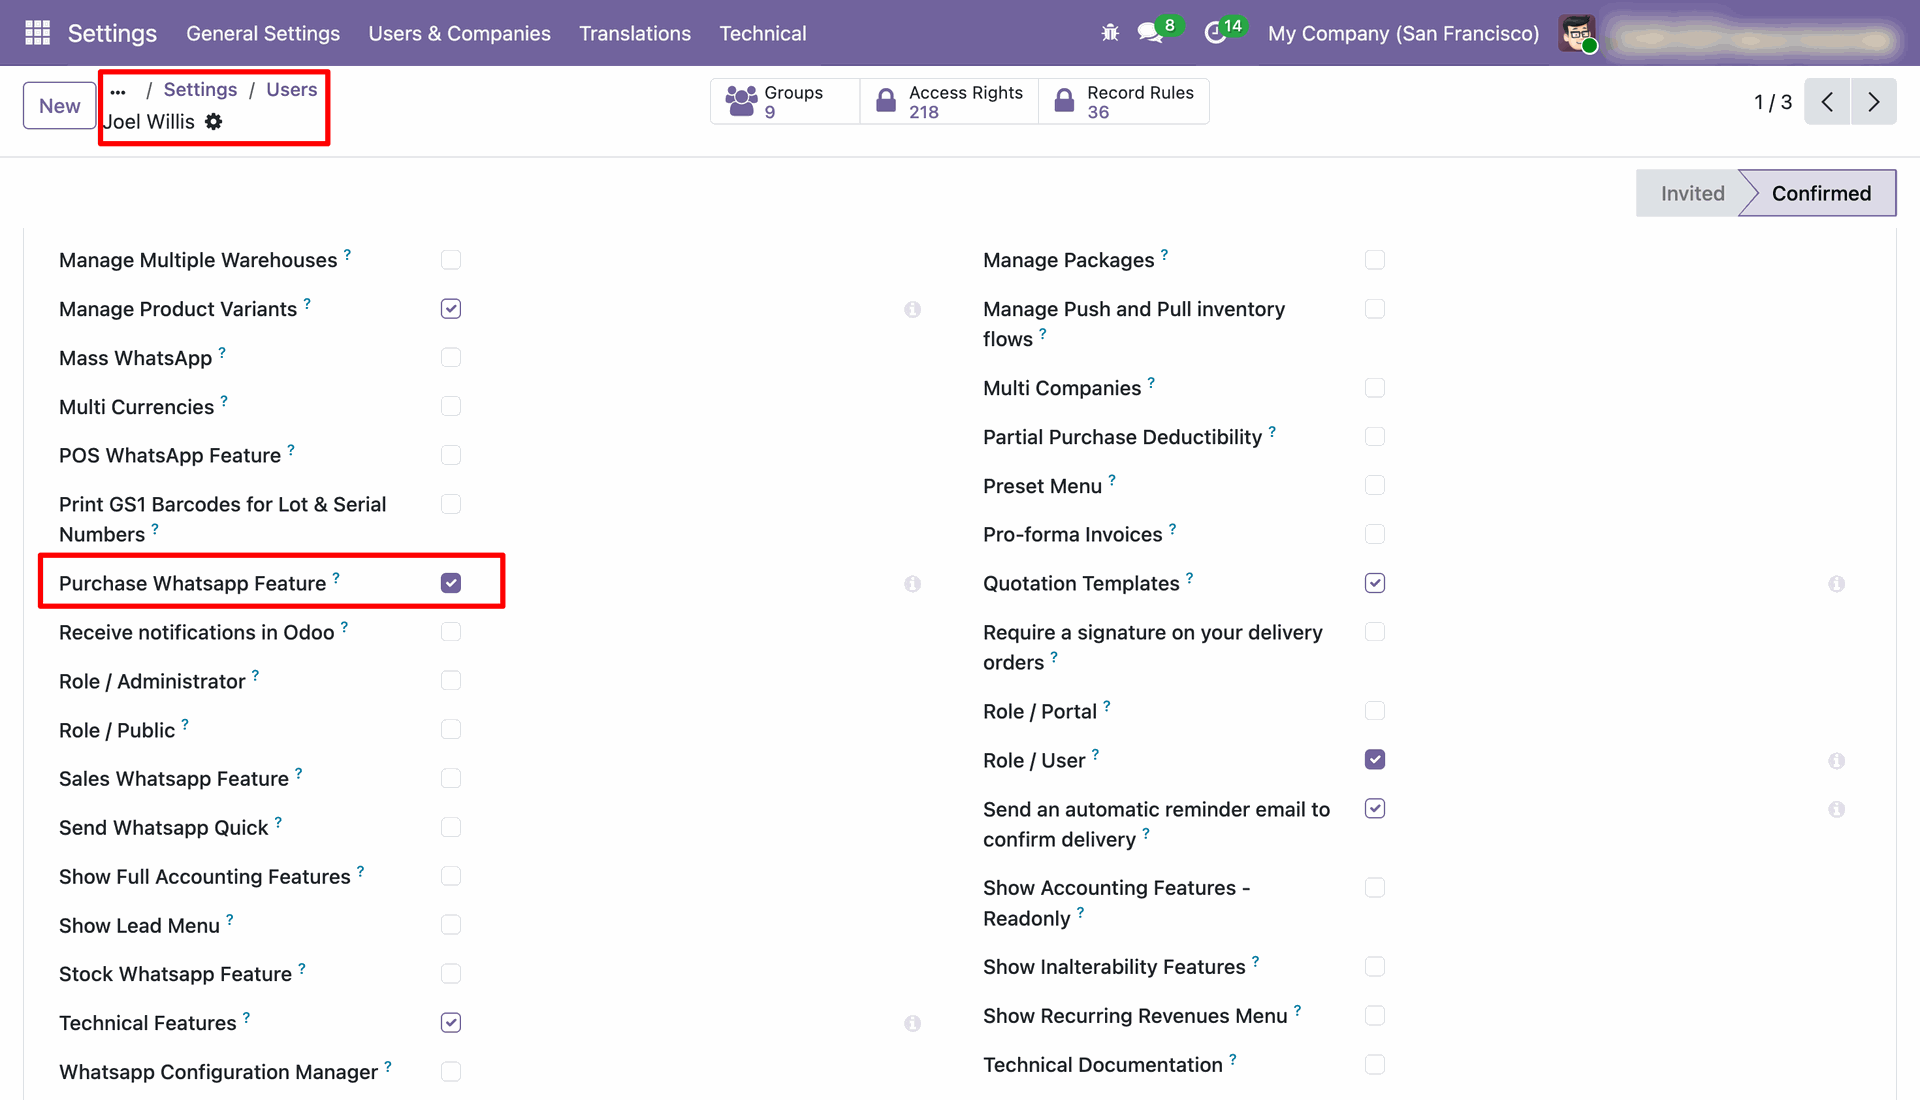
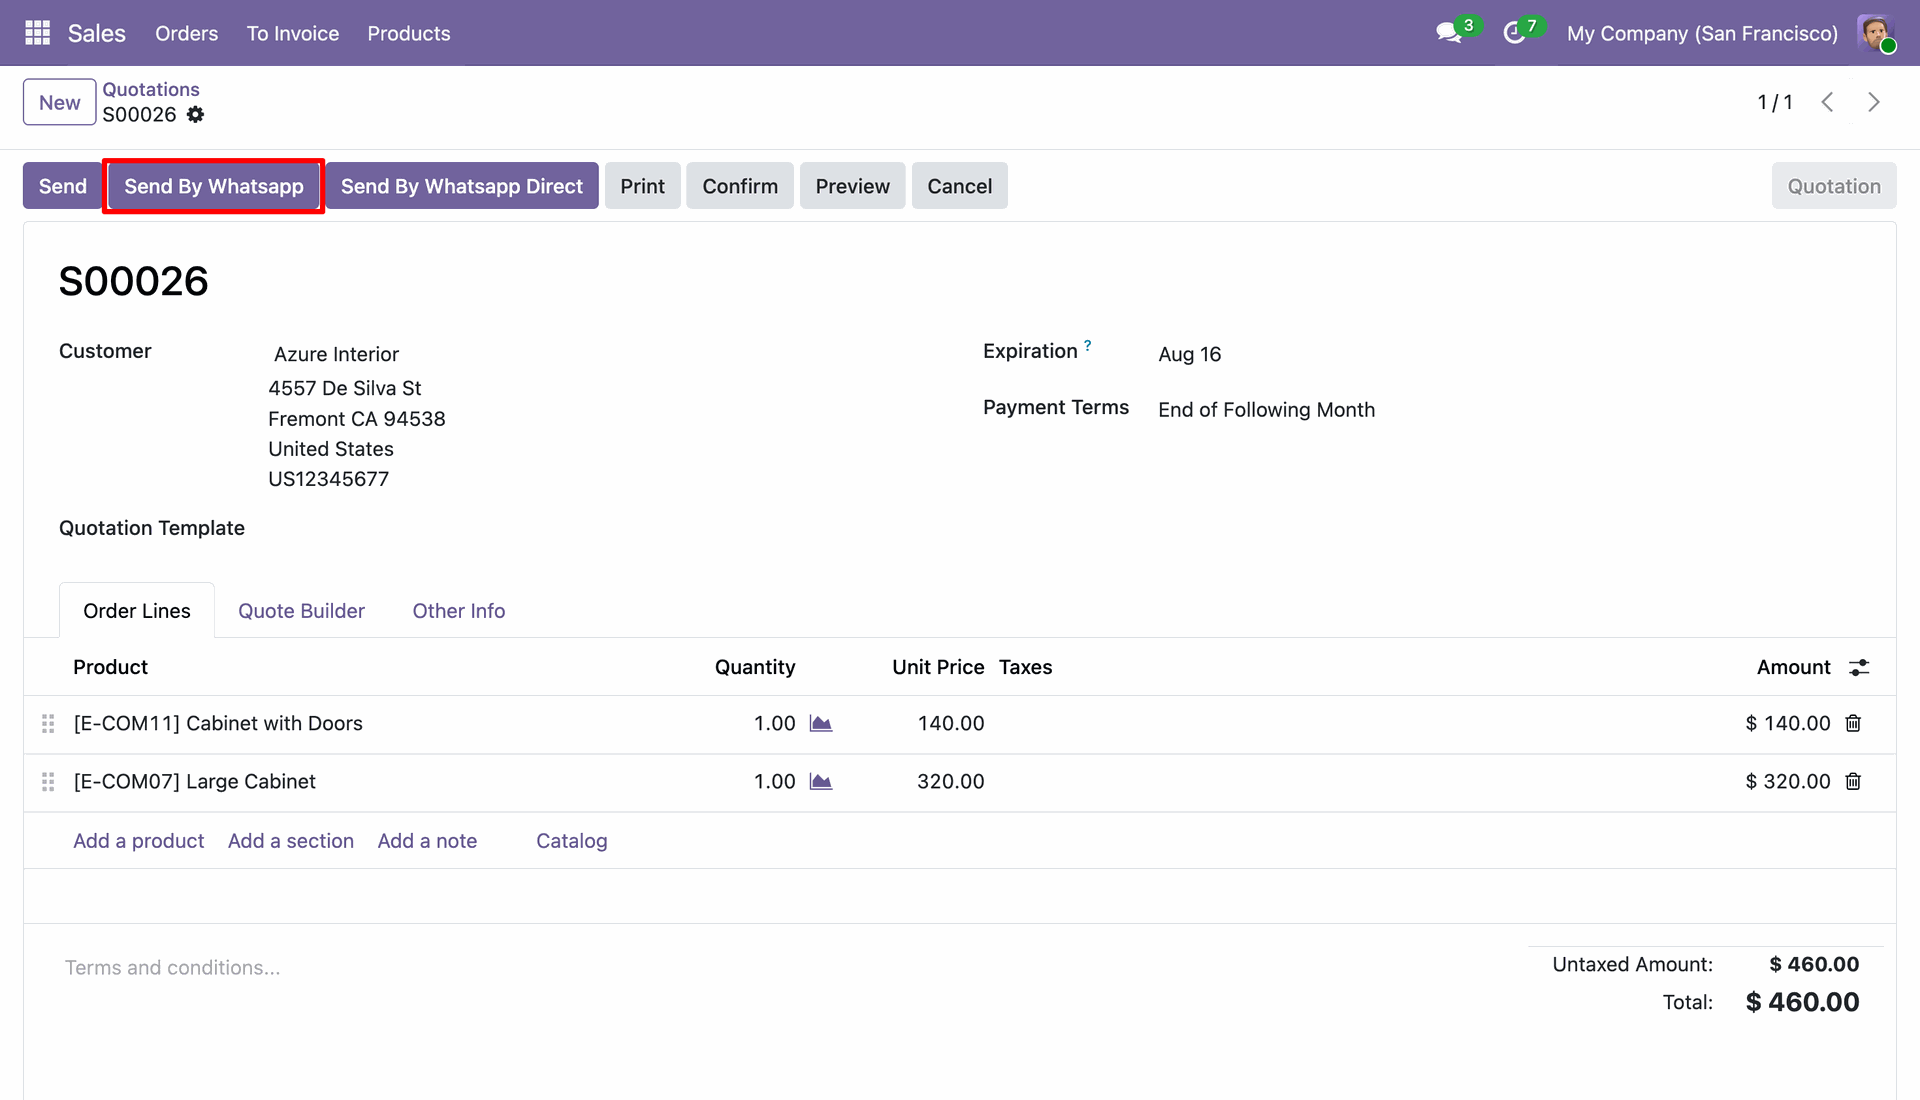
Login with 'Marc Demo' who have only sales whatsapp feature access. So he will send message for only sale.
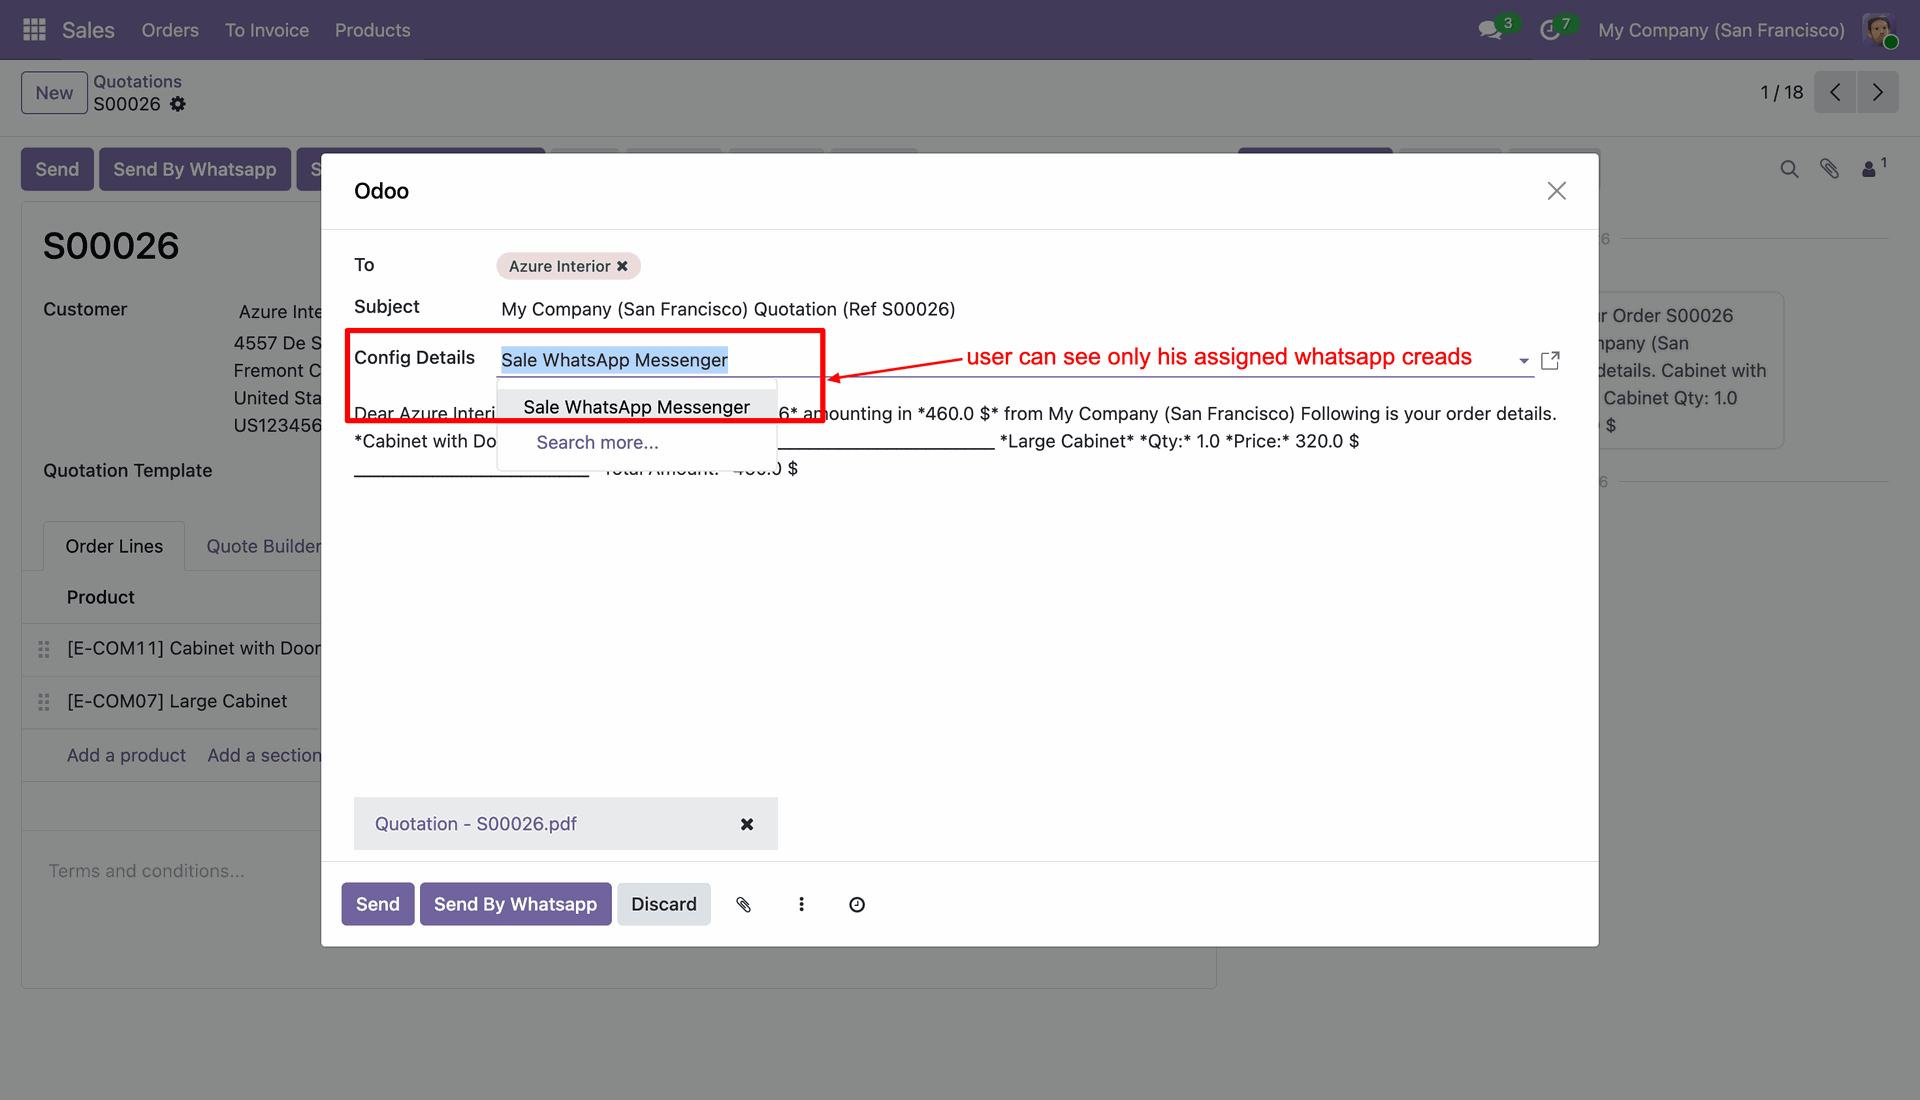
Here in config detail shown only 'Sale Whatsapp Messenger' because this user assigned in 'Sale Whatsapp Messenger'
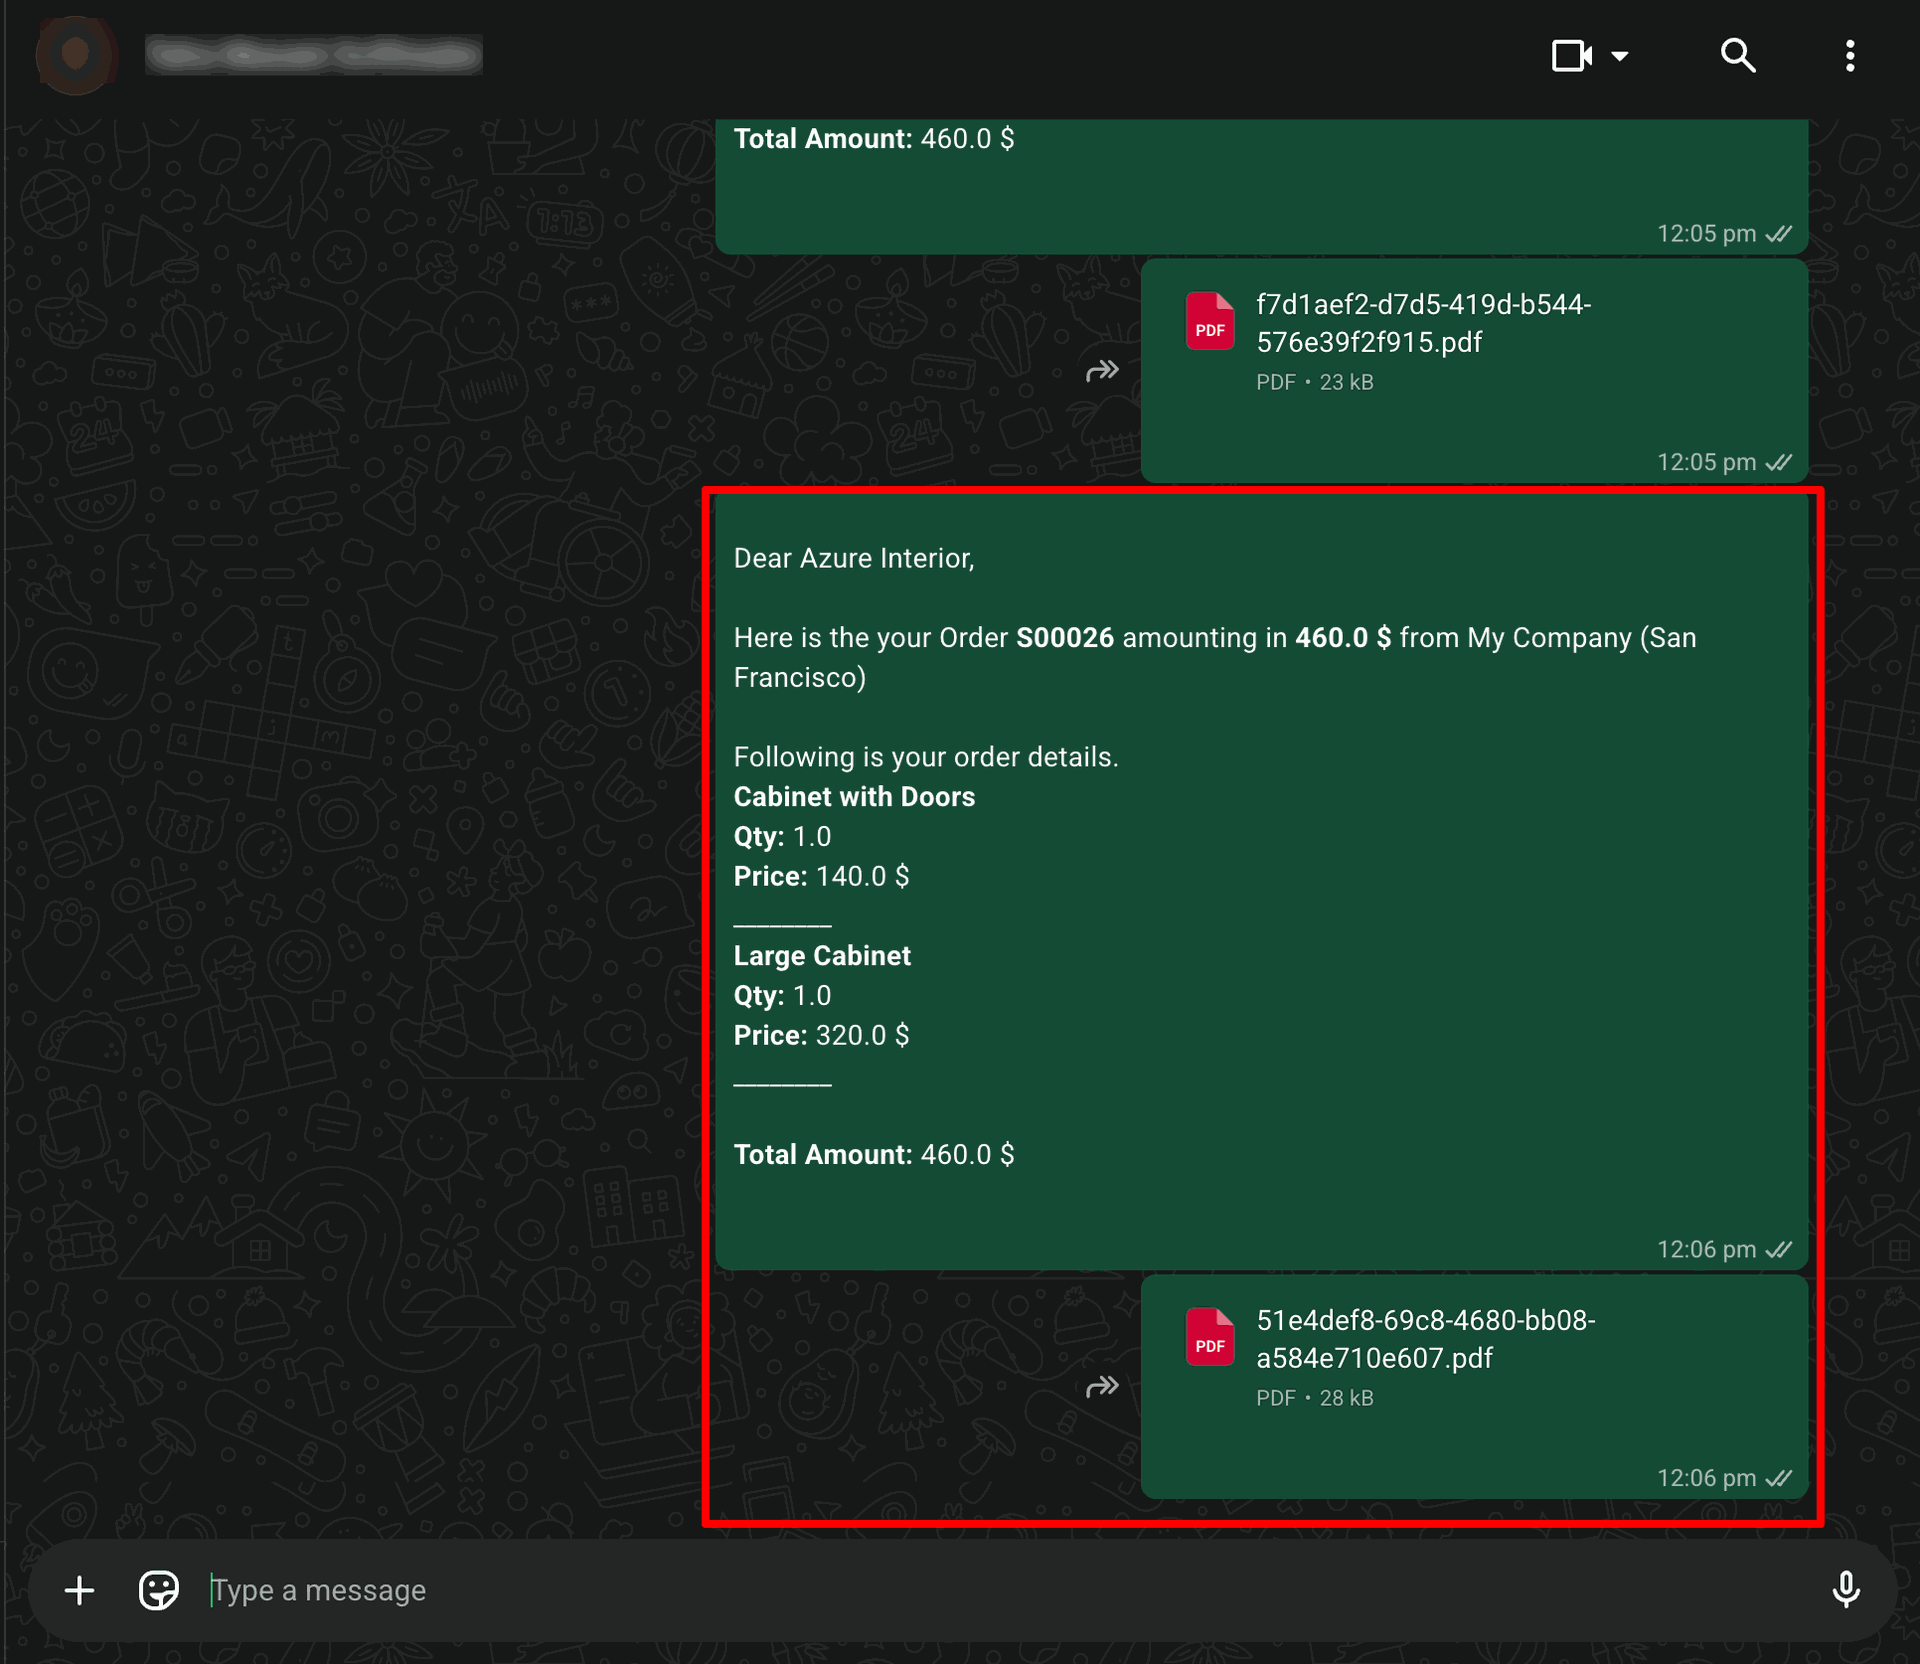
Message send in whatsapp.
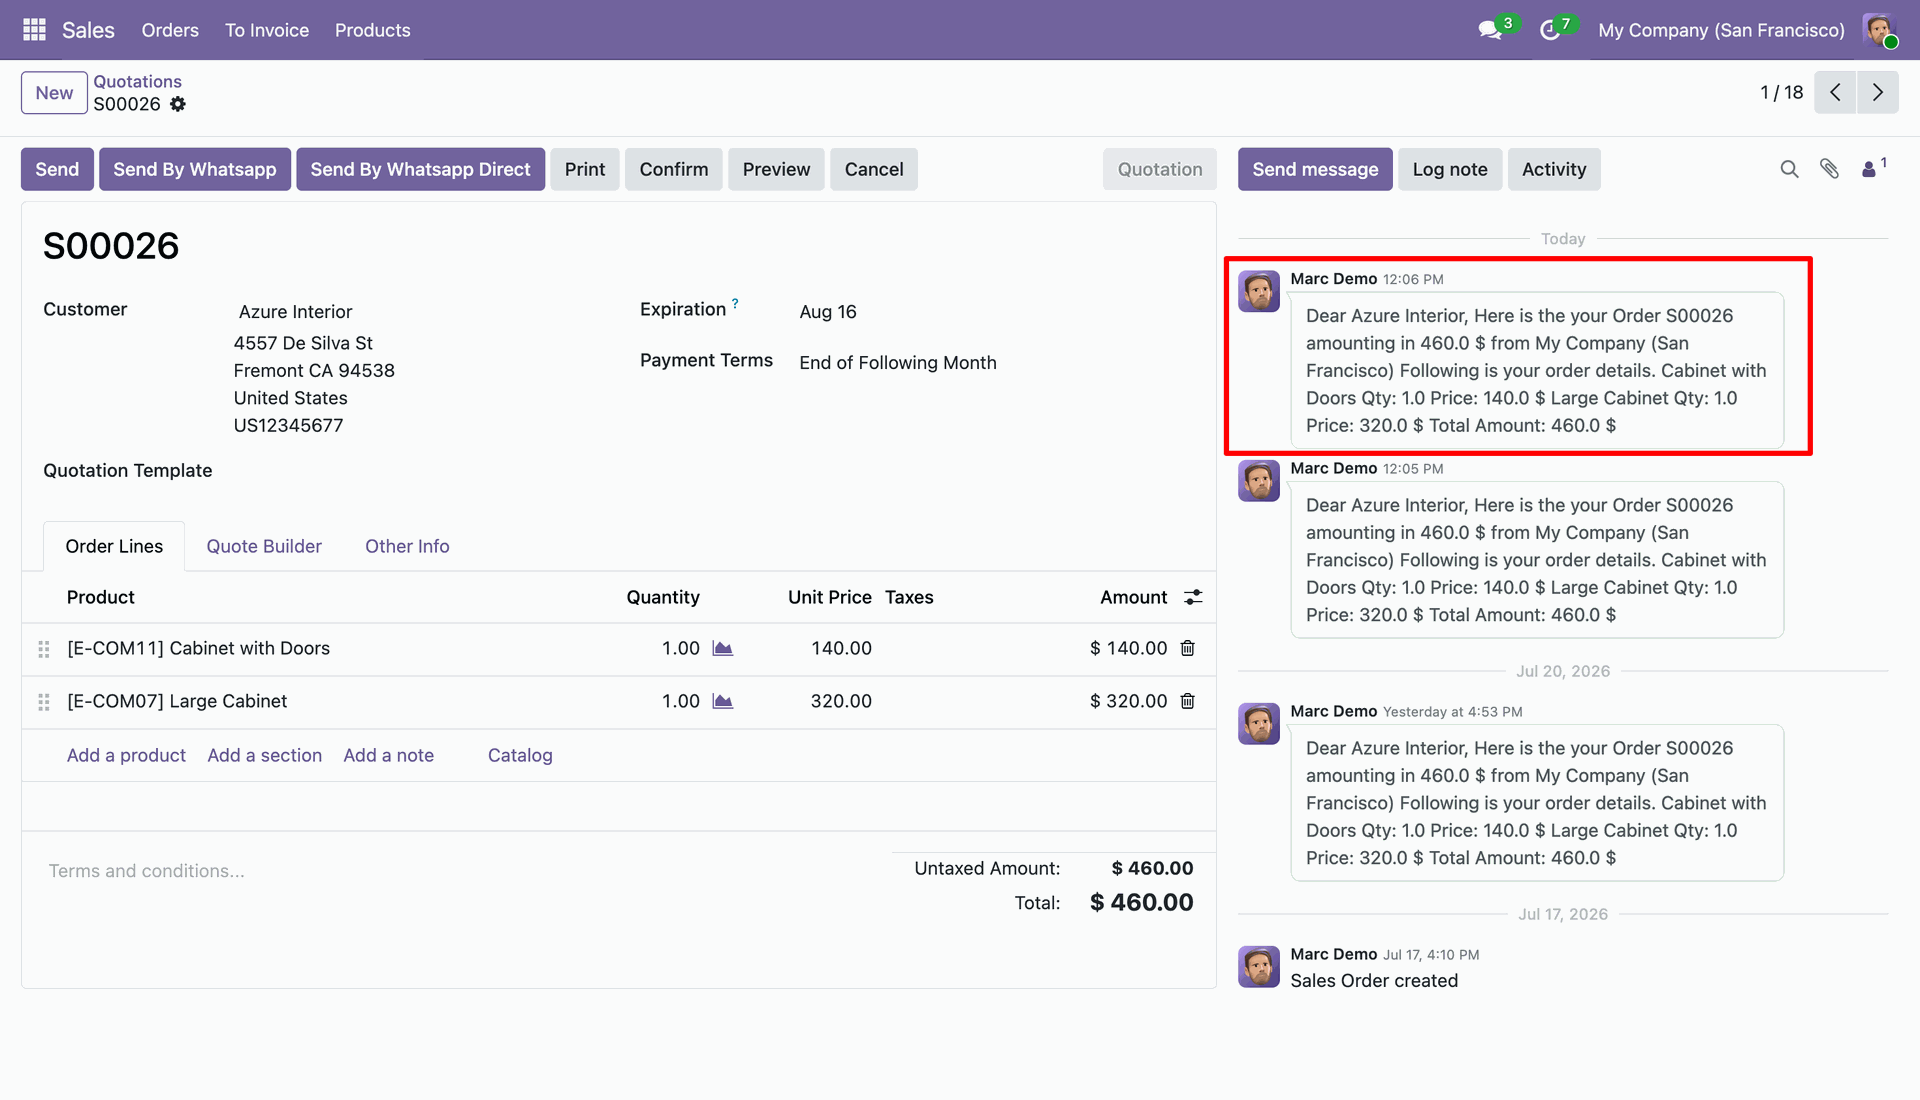
Sended message entry in chatter also.
Now login with 'Joel Willis' who have only purchase whatsapp feature access. So he will send message for only purchase.
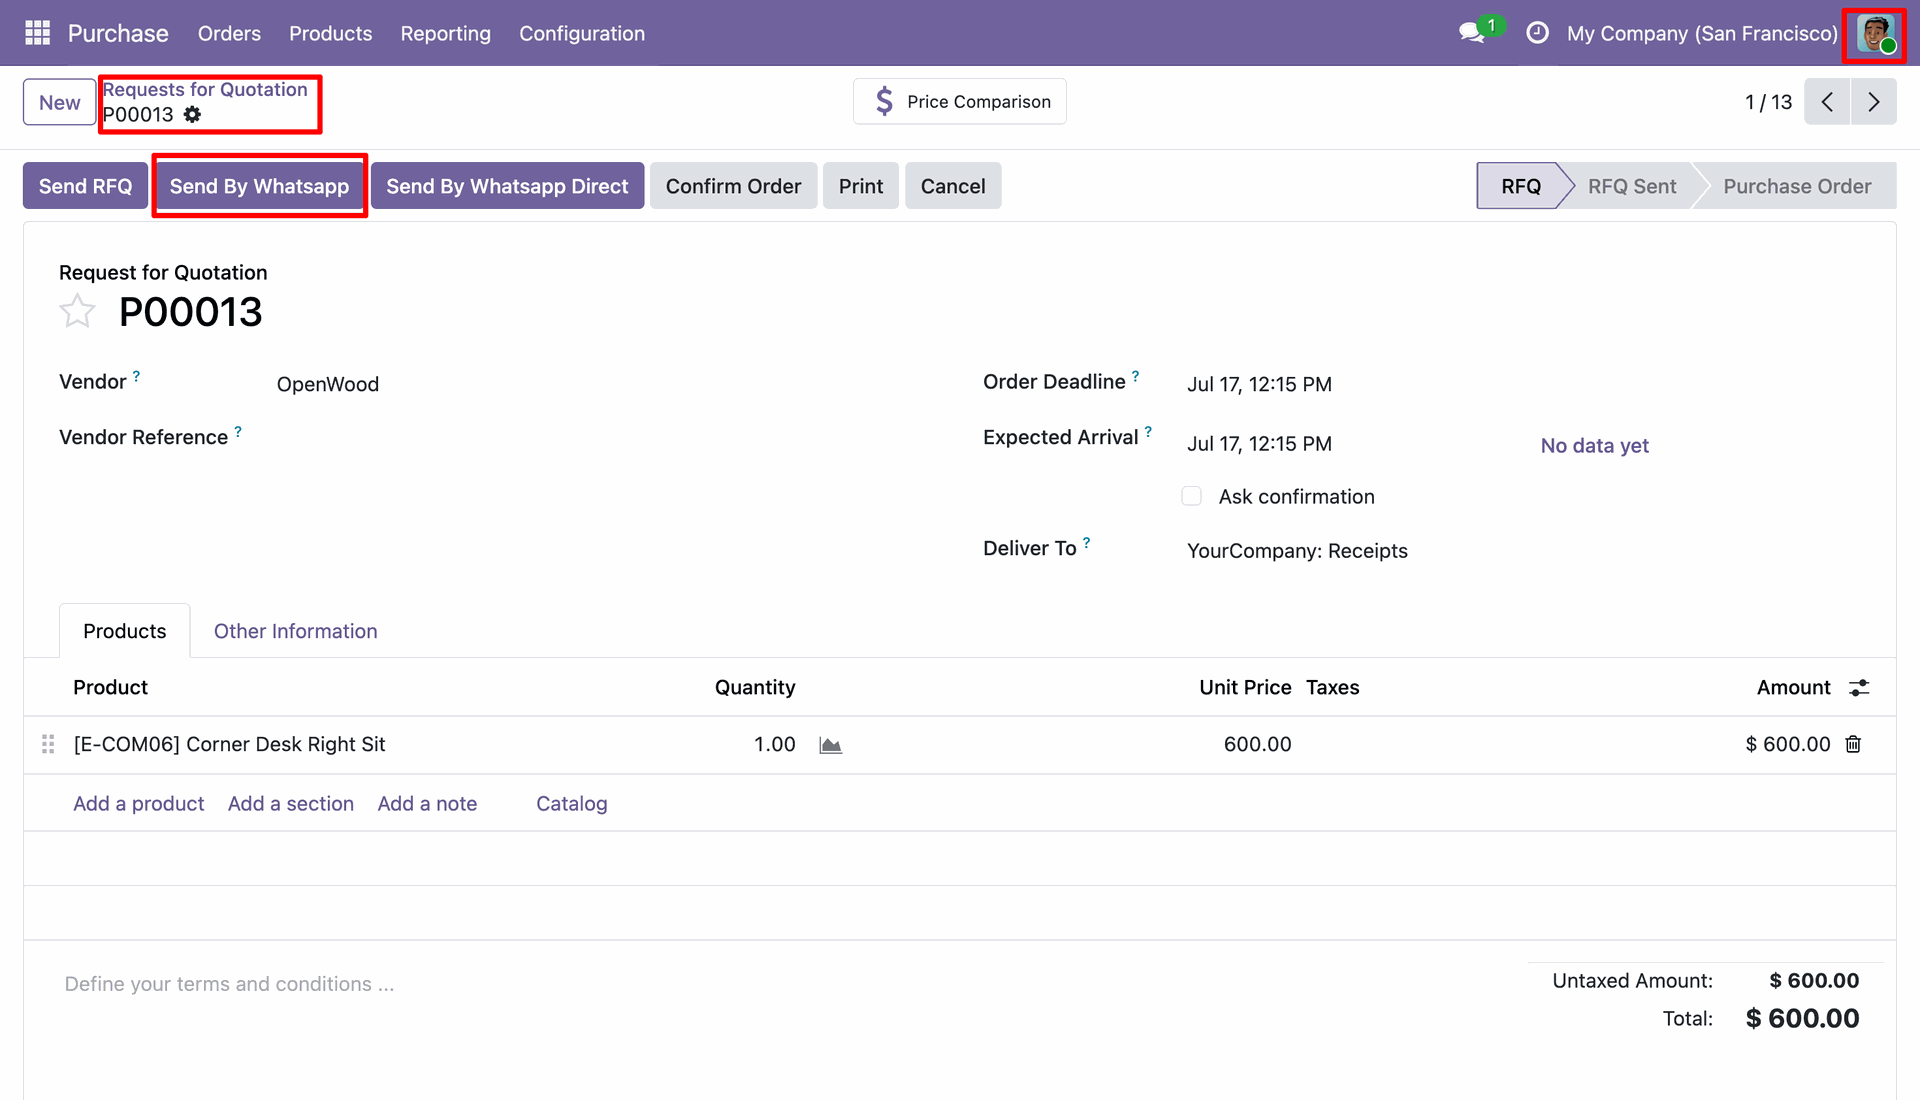
Here in config detail shown only 'Purchase Whatsapp Messenger' because this user assigned in 'Purchase Whatsapp Messenger'
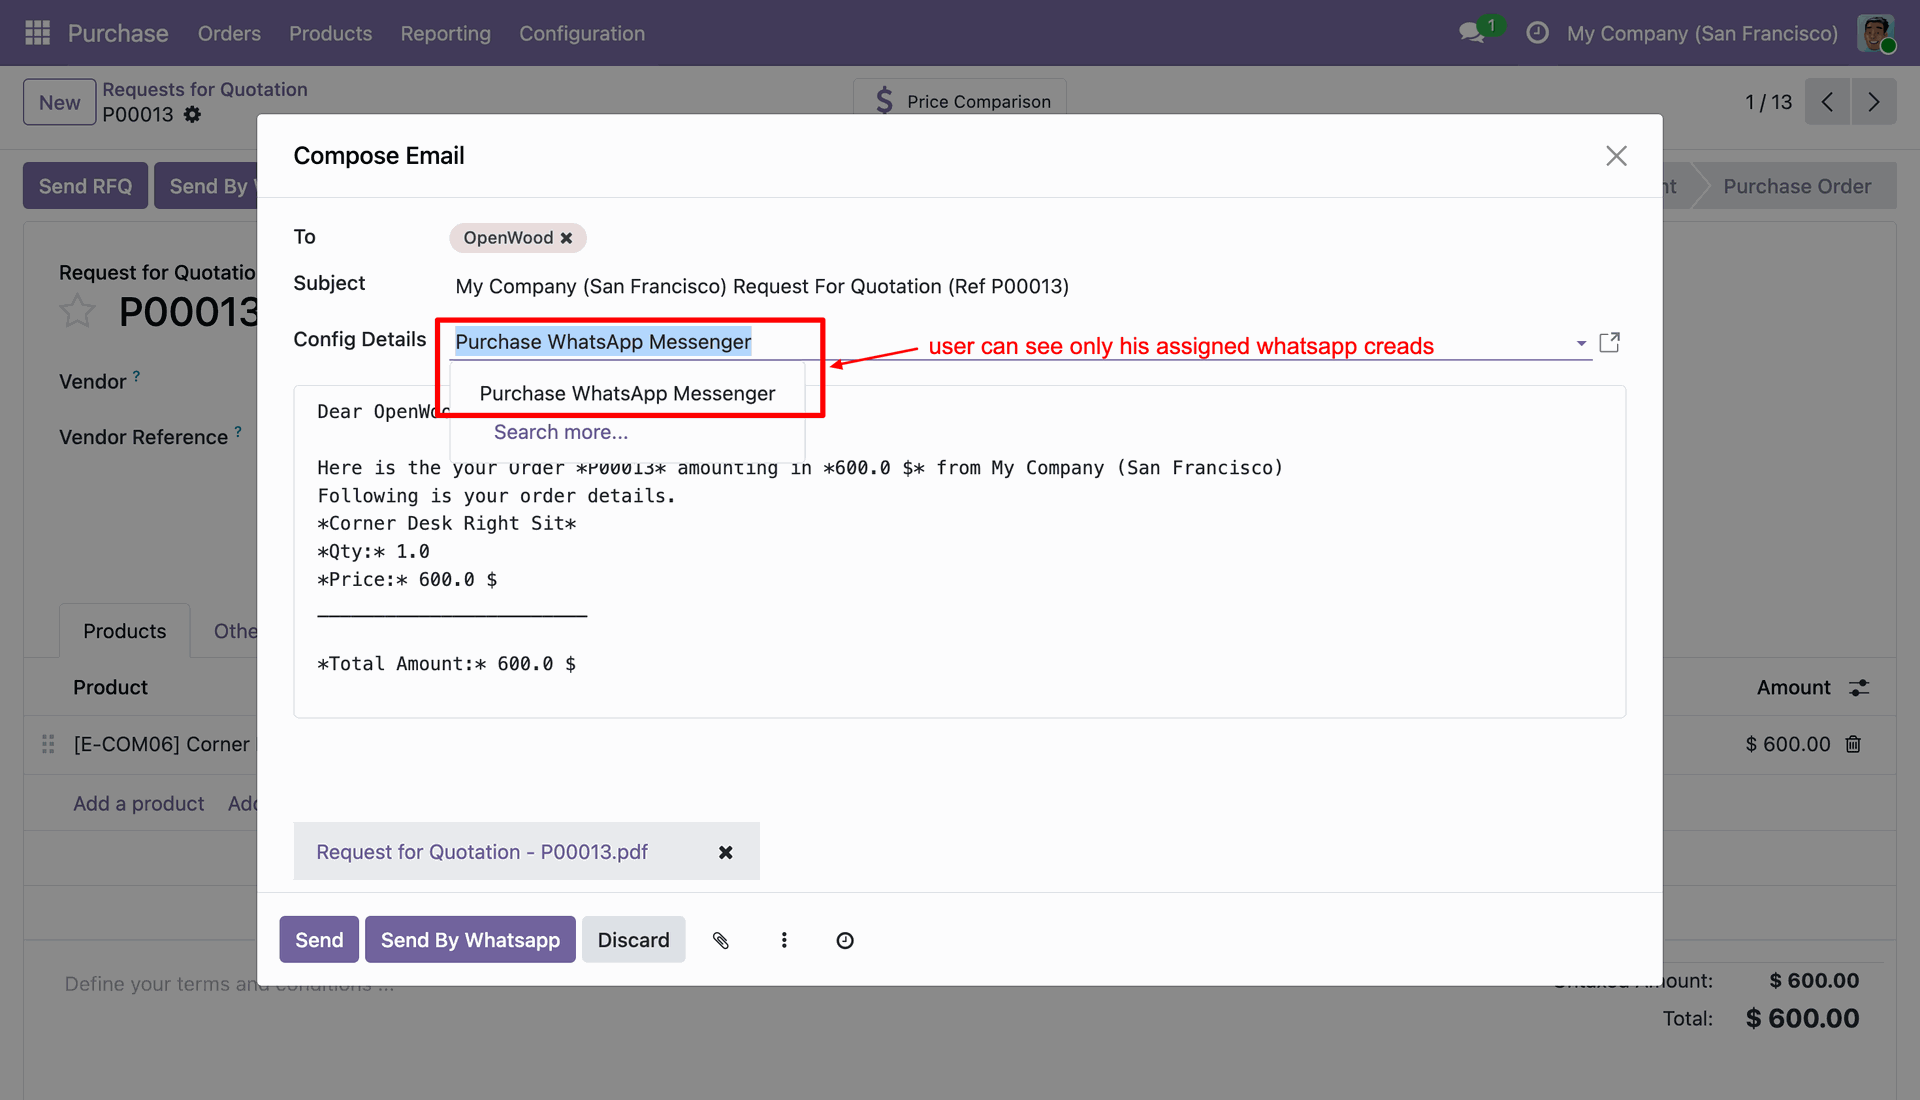
Message send in whatsapp.
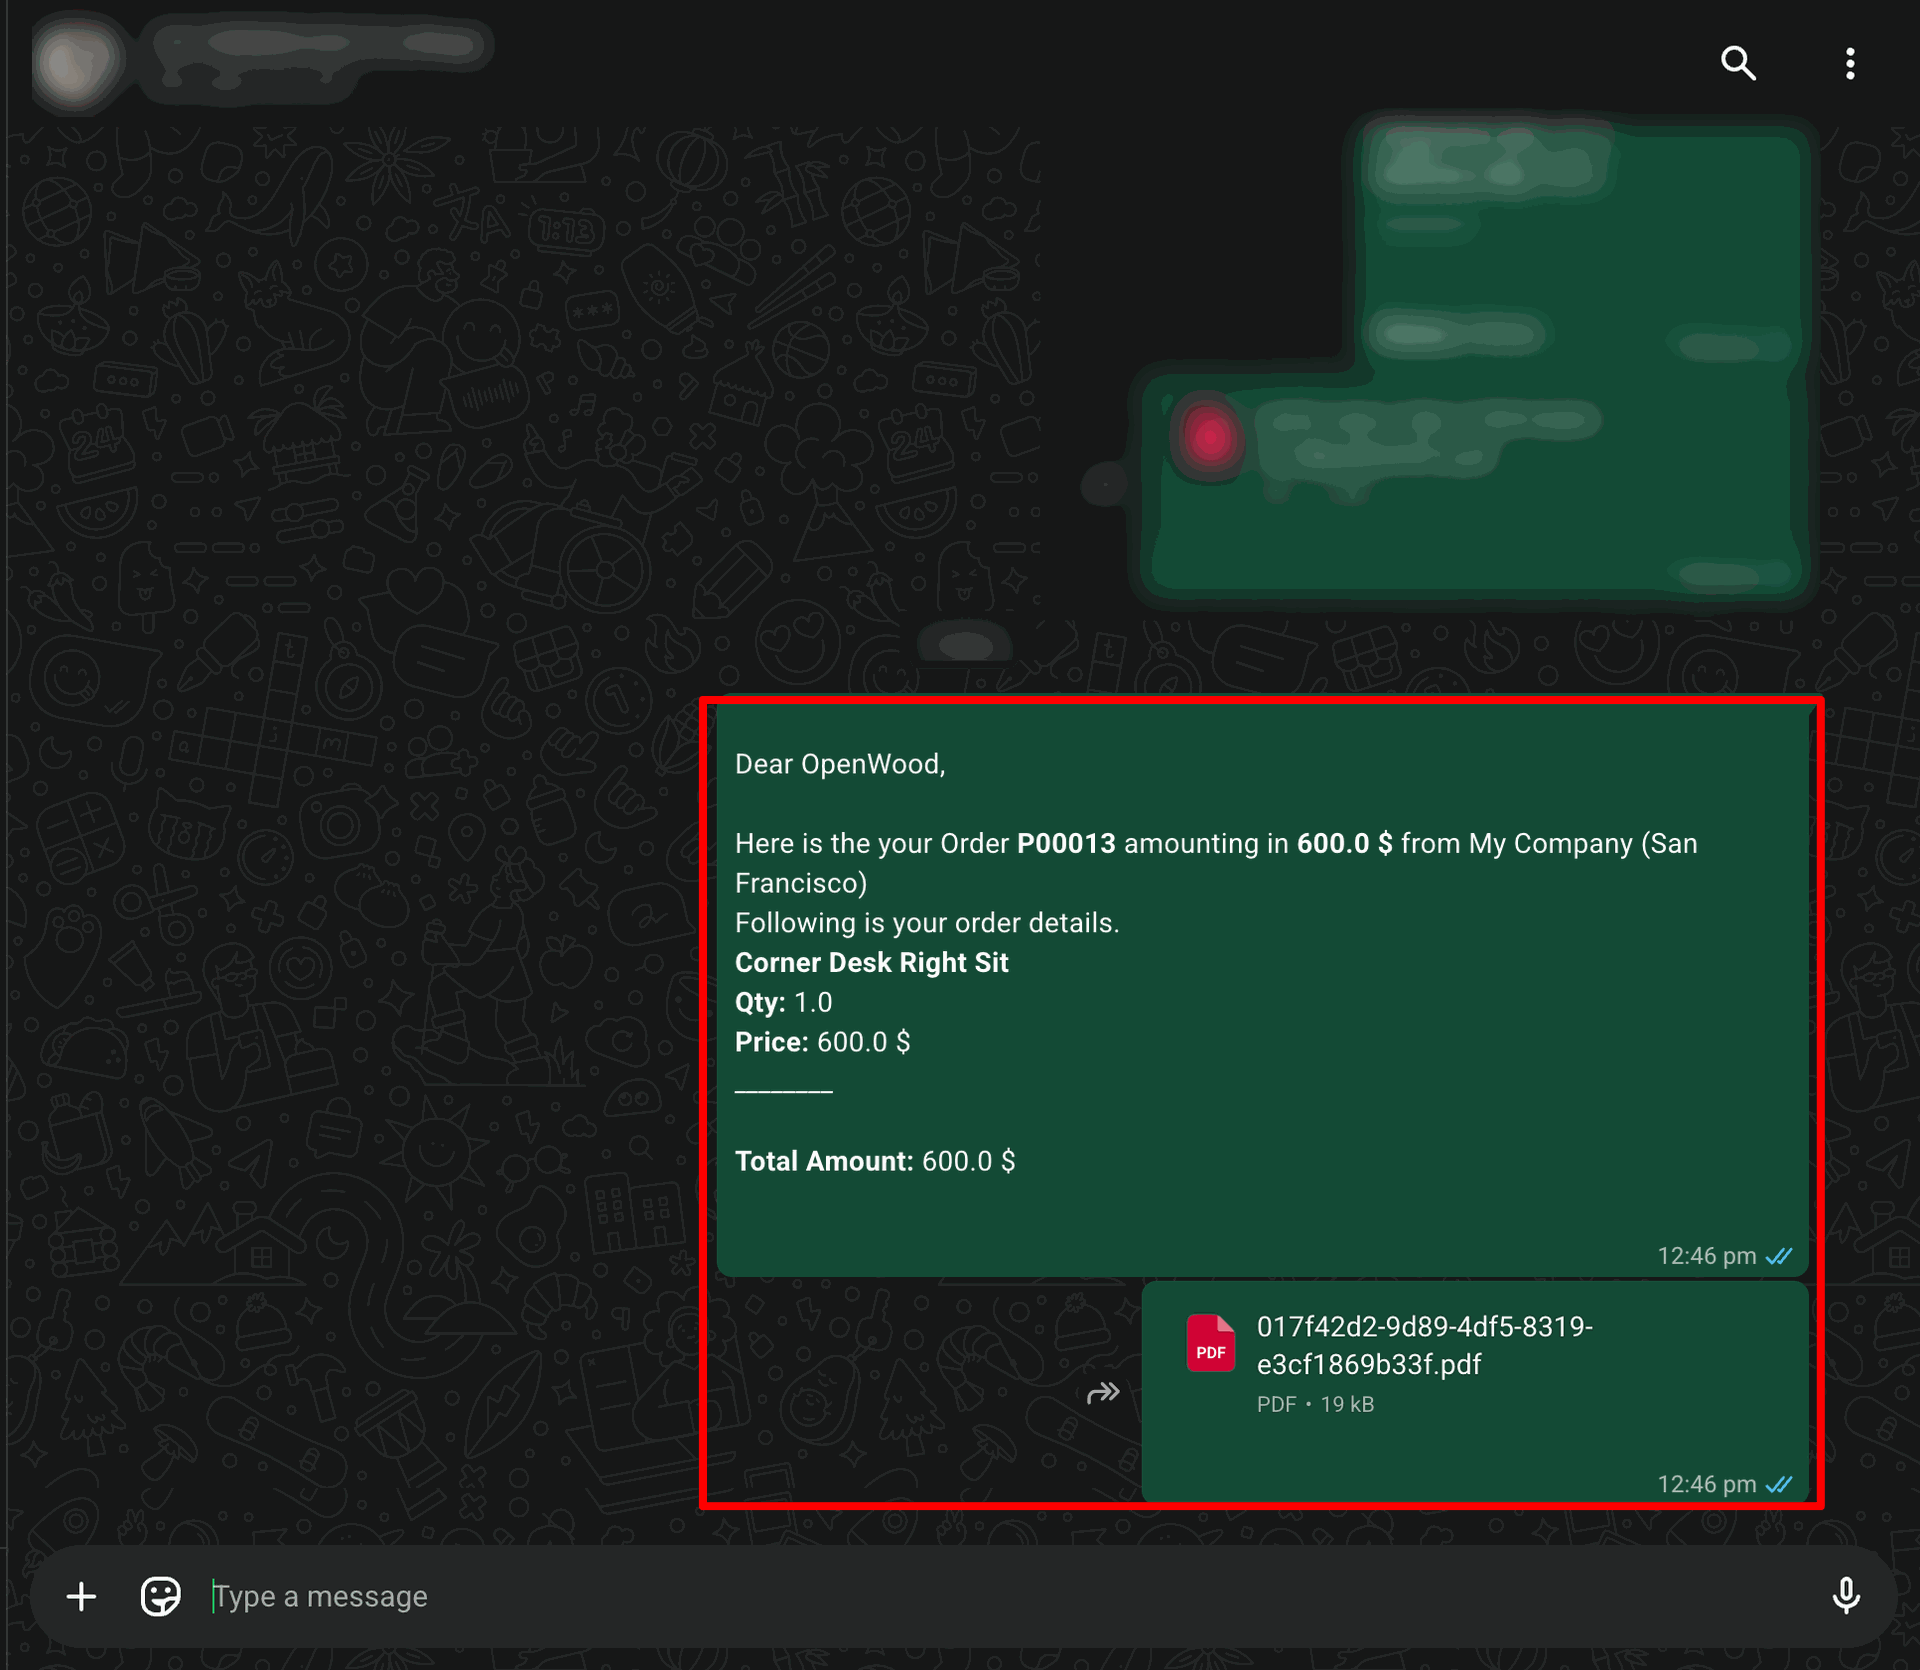
Sended message entry in chatter also.
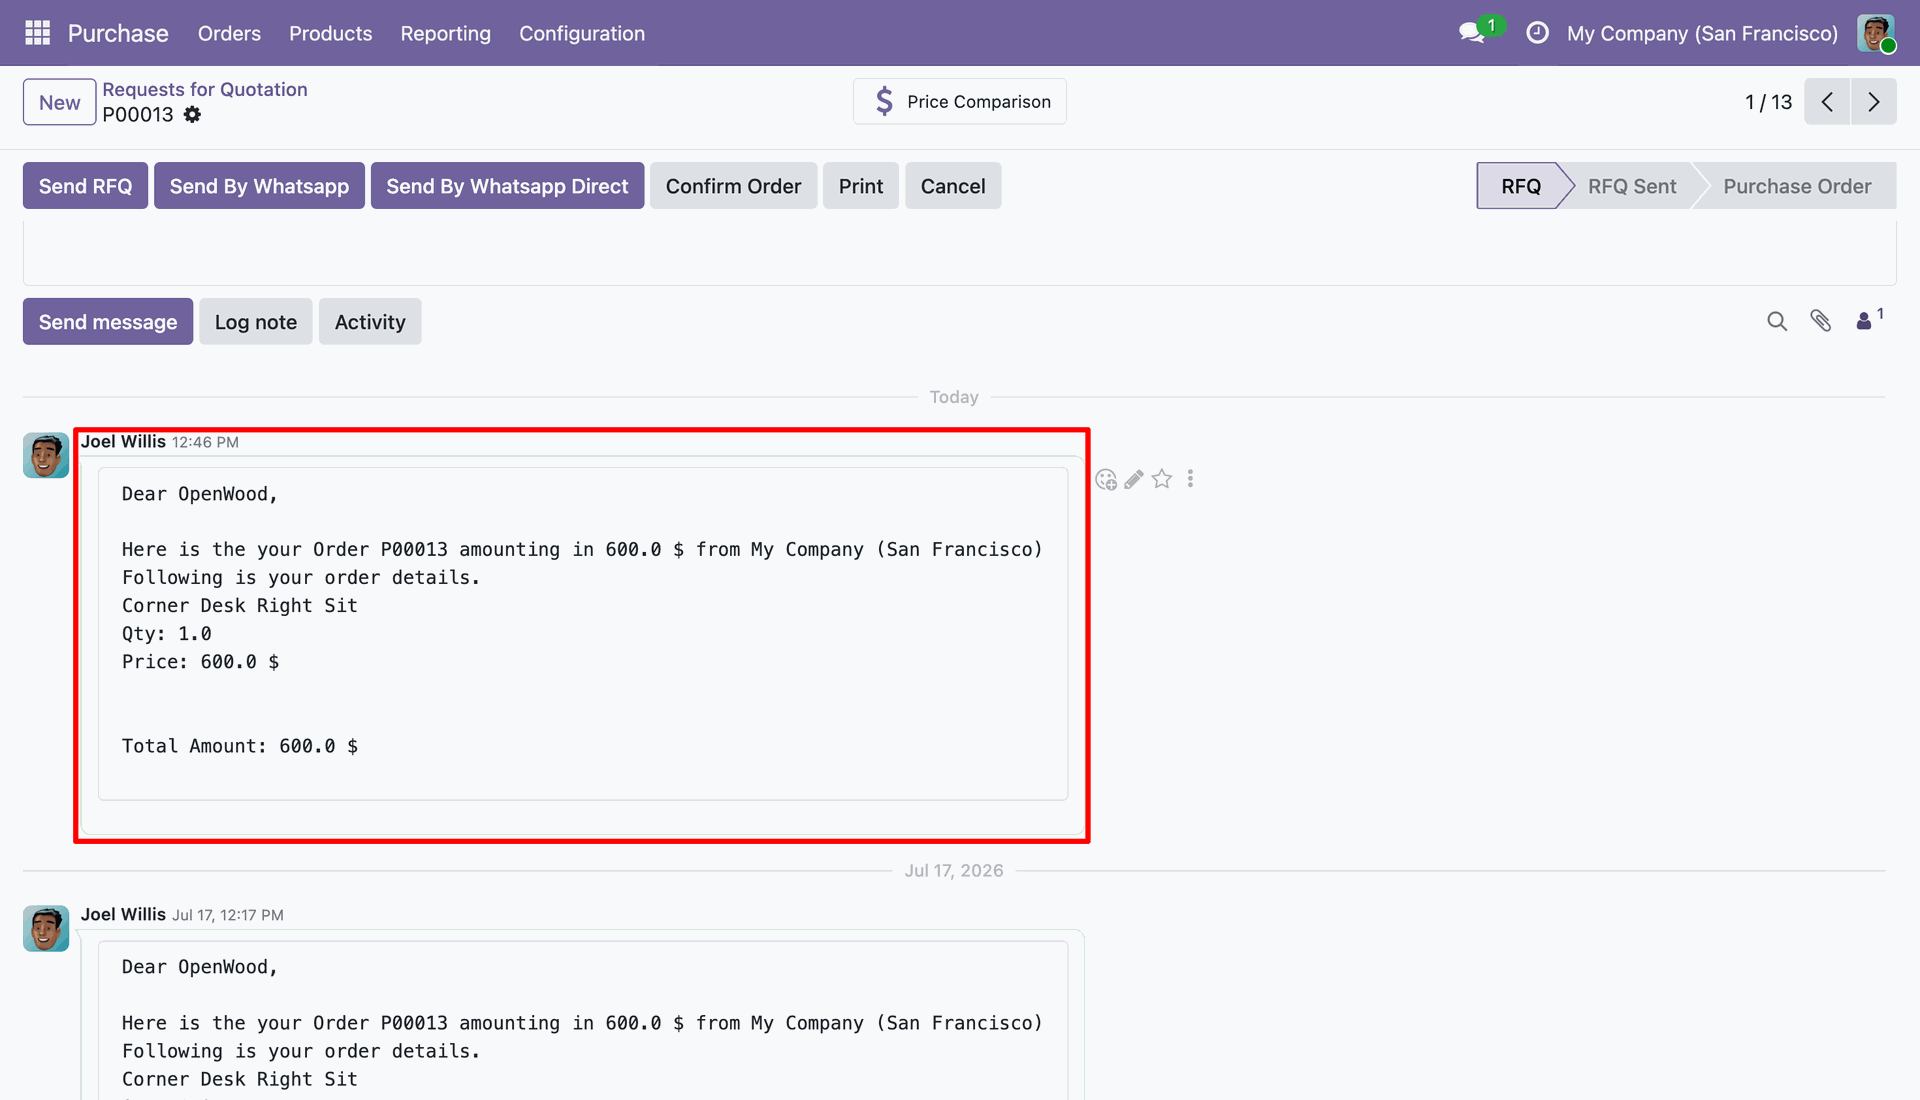
Admin can see all config details because admin have 'Whatsapp Configuration Manager' access.
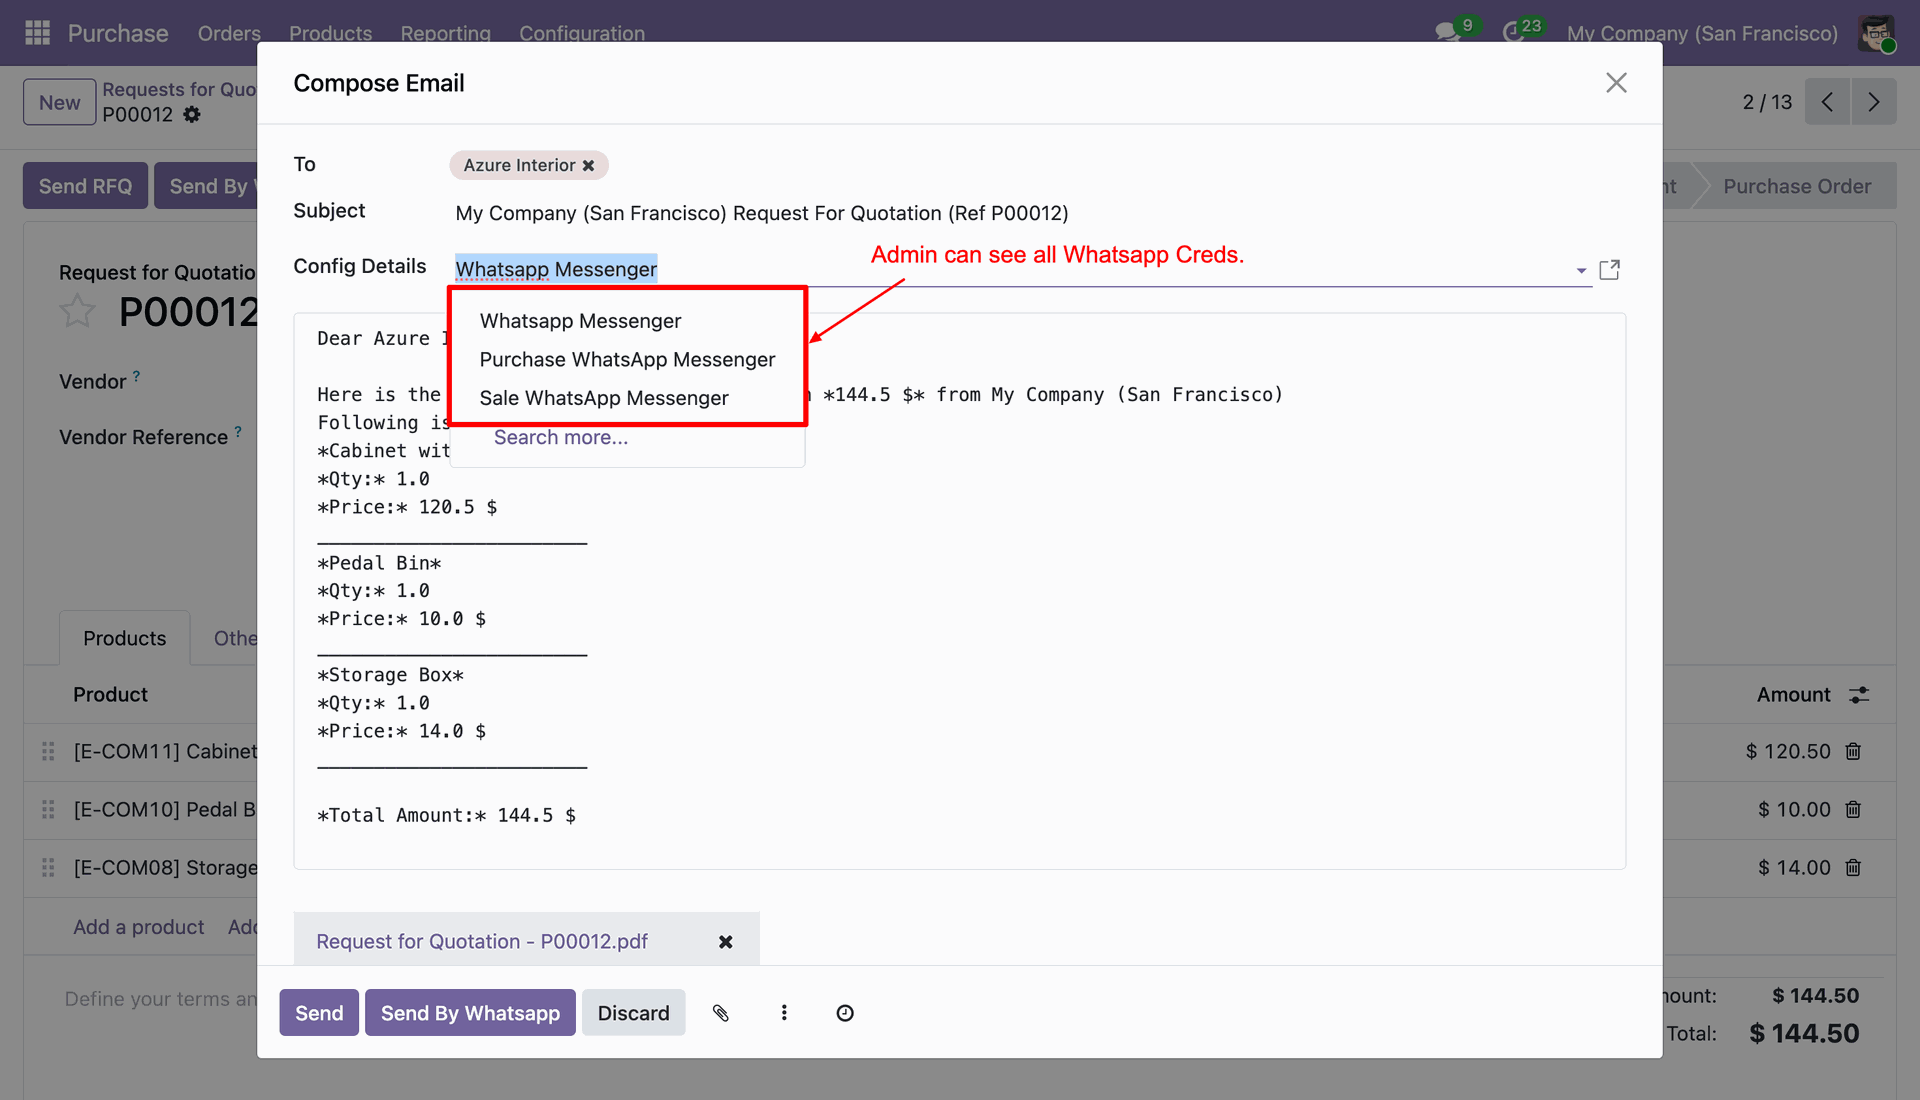
Go to User Settings and Tick "Mass WhatsApp".
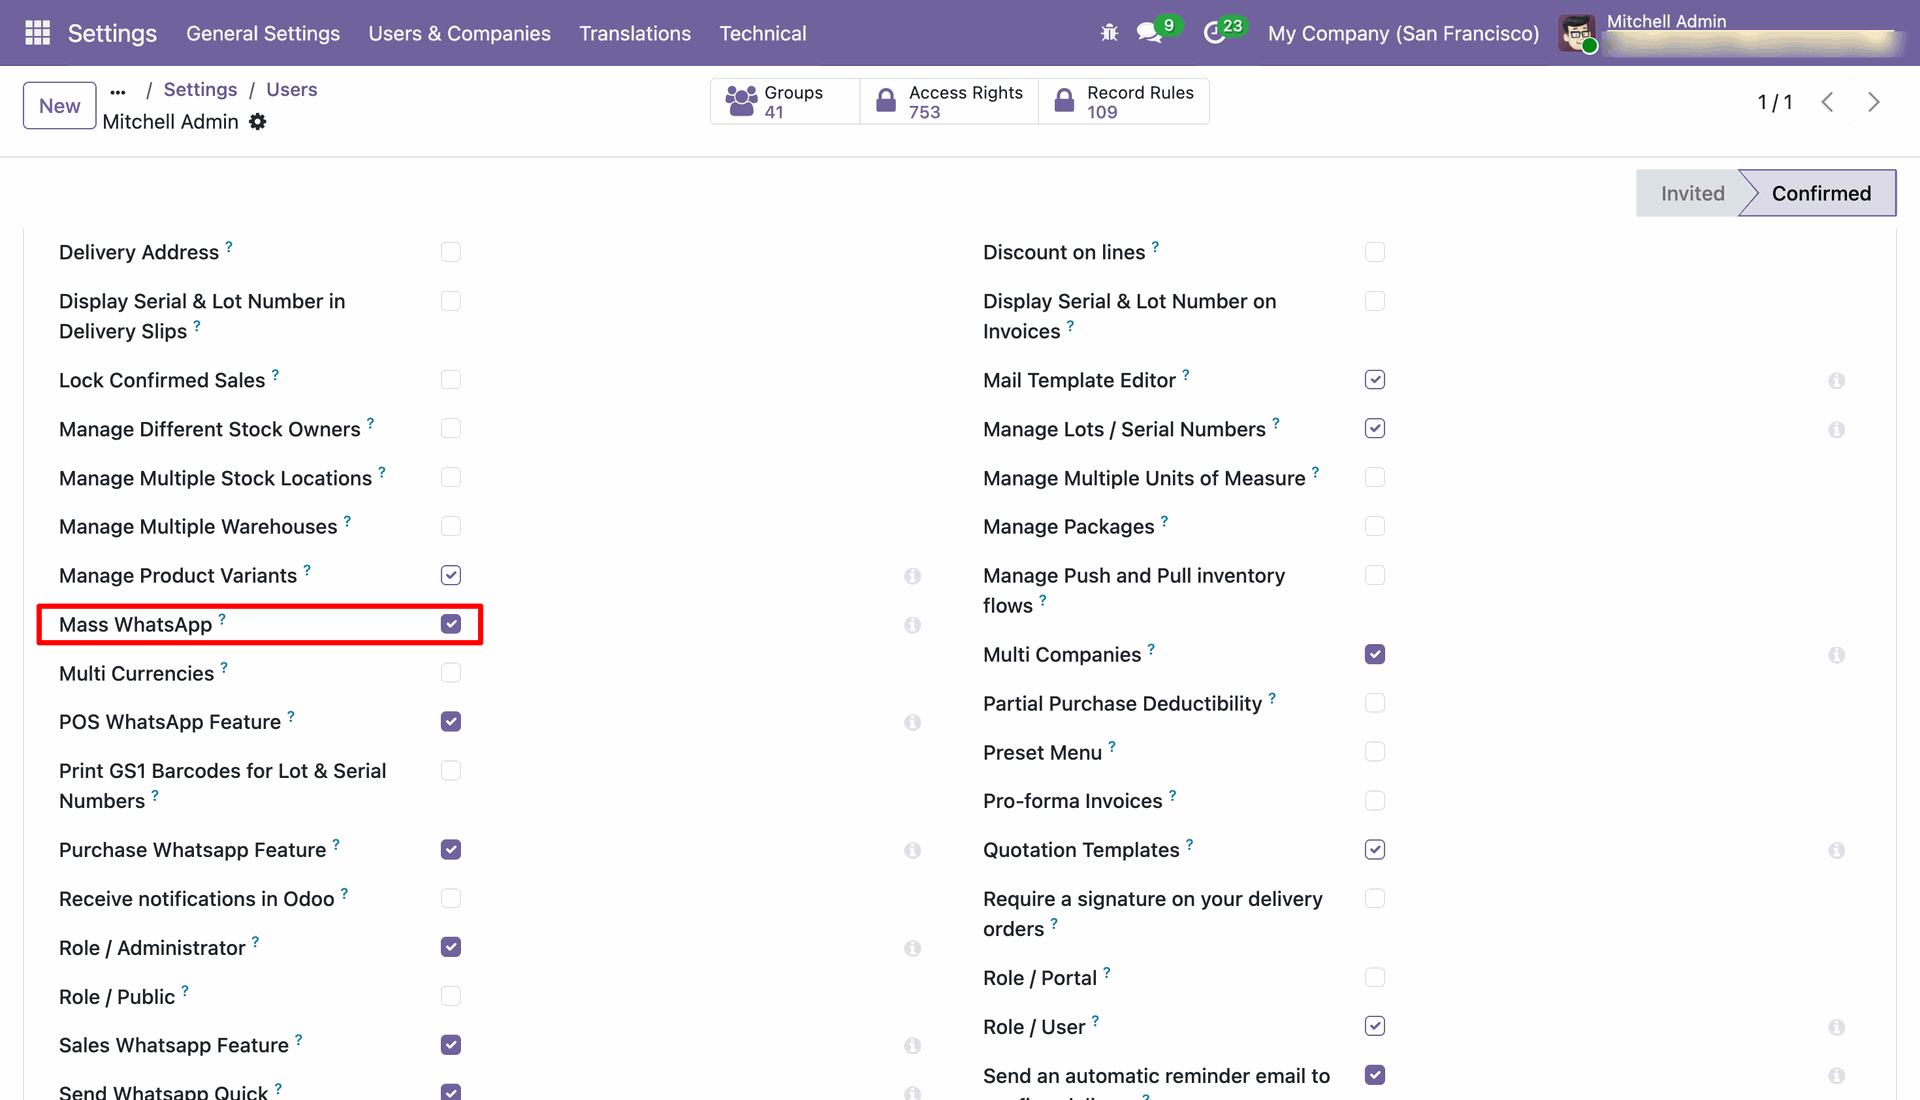
Go to Mass WhatsApp and Open "Mailing Lists".
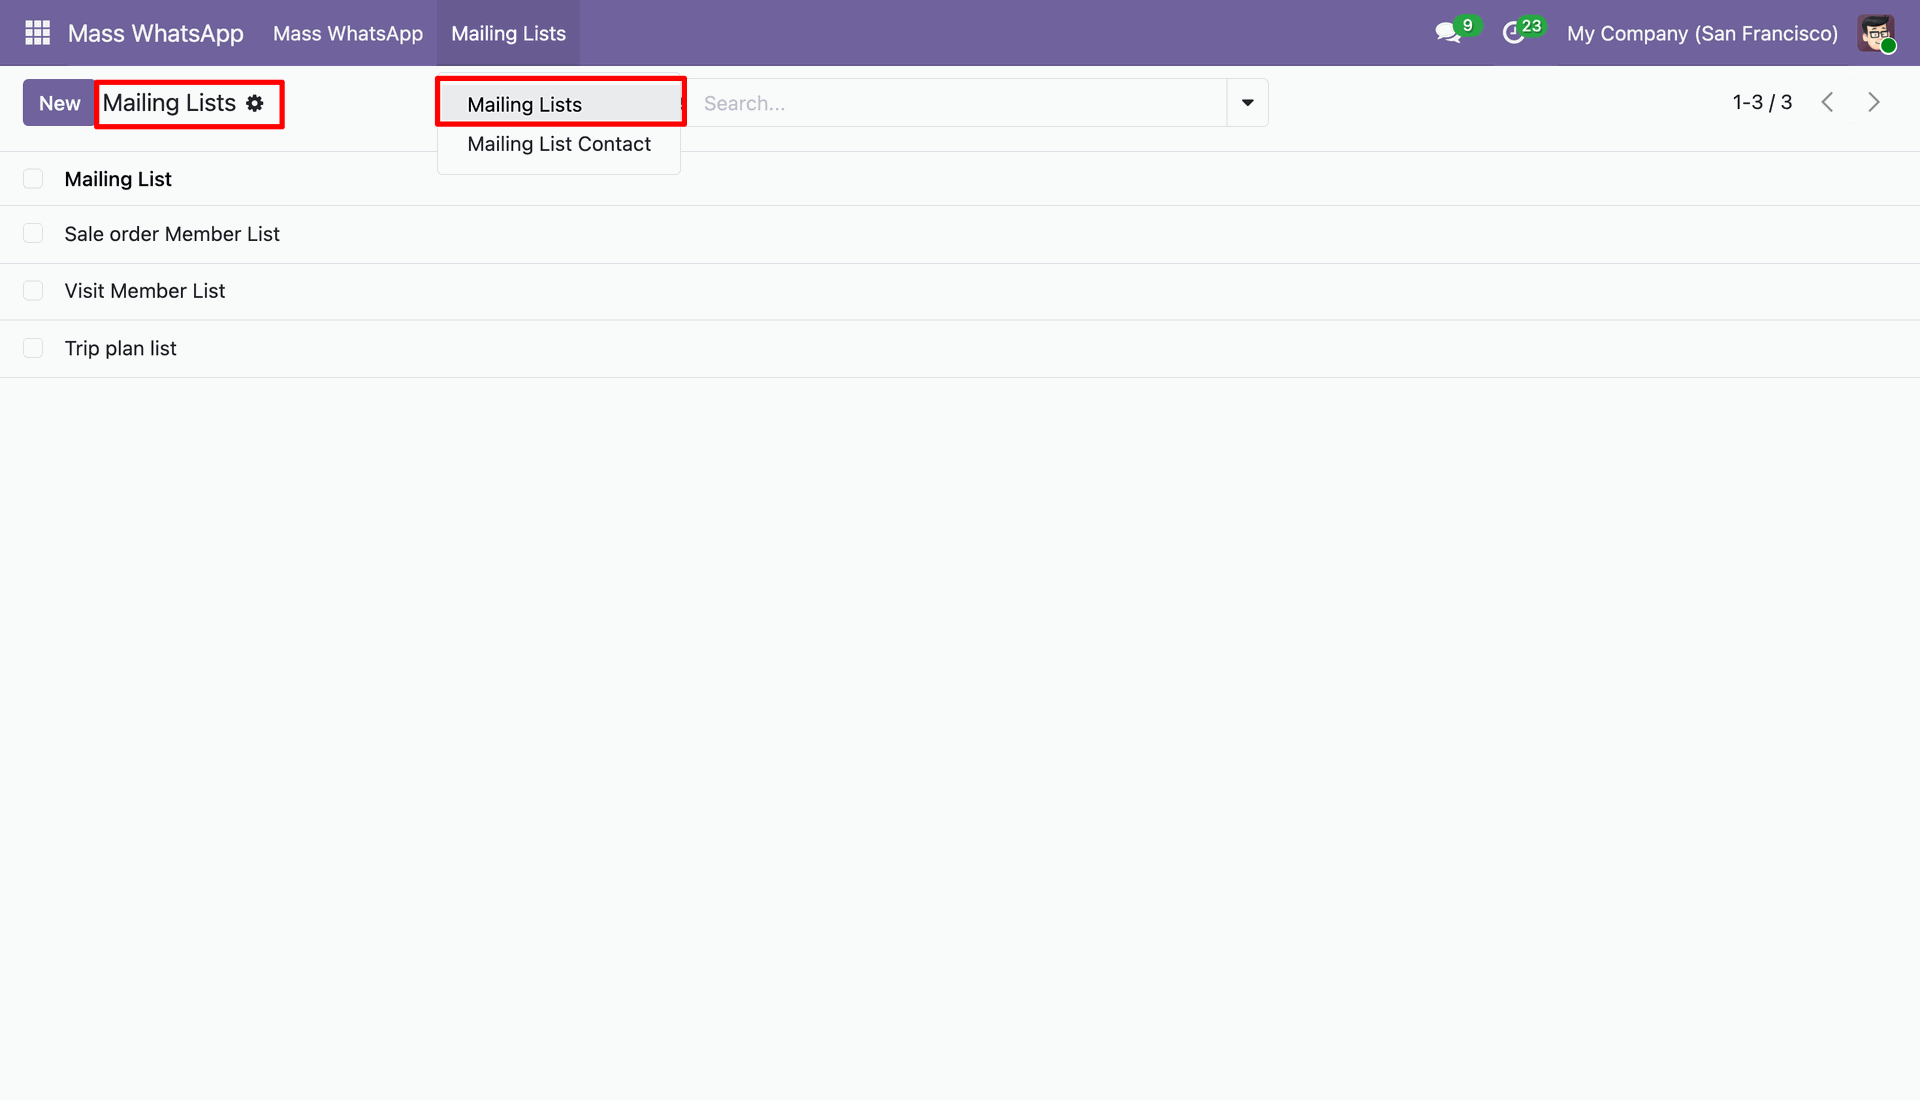
Mailing Lists Form View With recipients Smart Button.
Now Open Mailing List Contact.
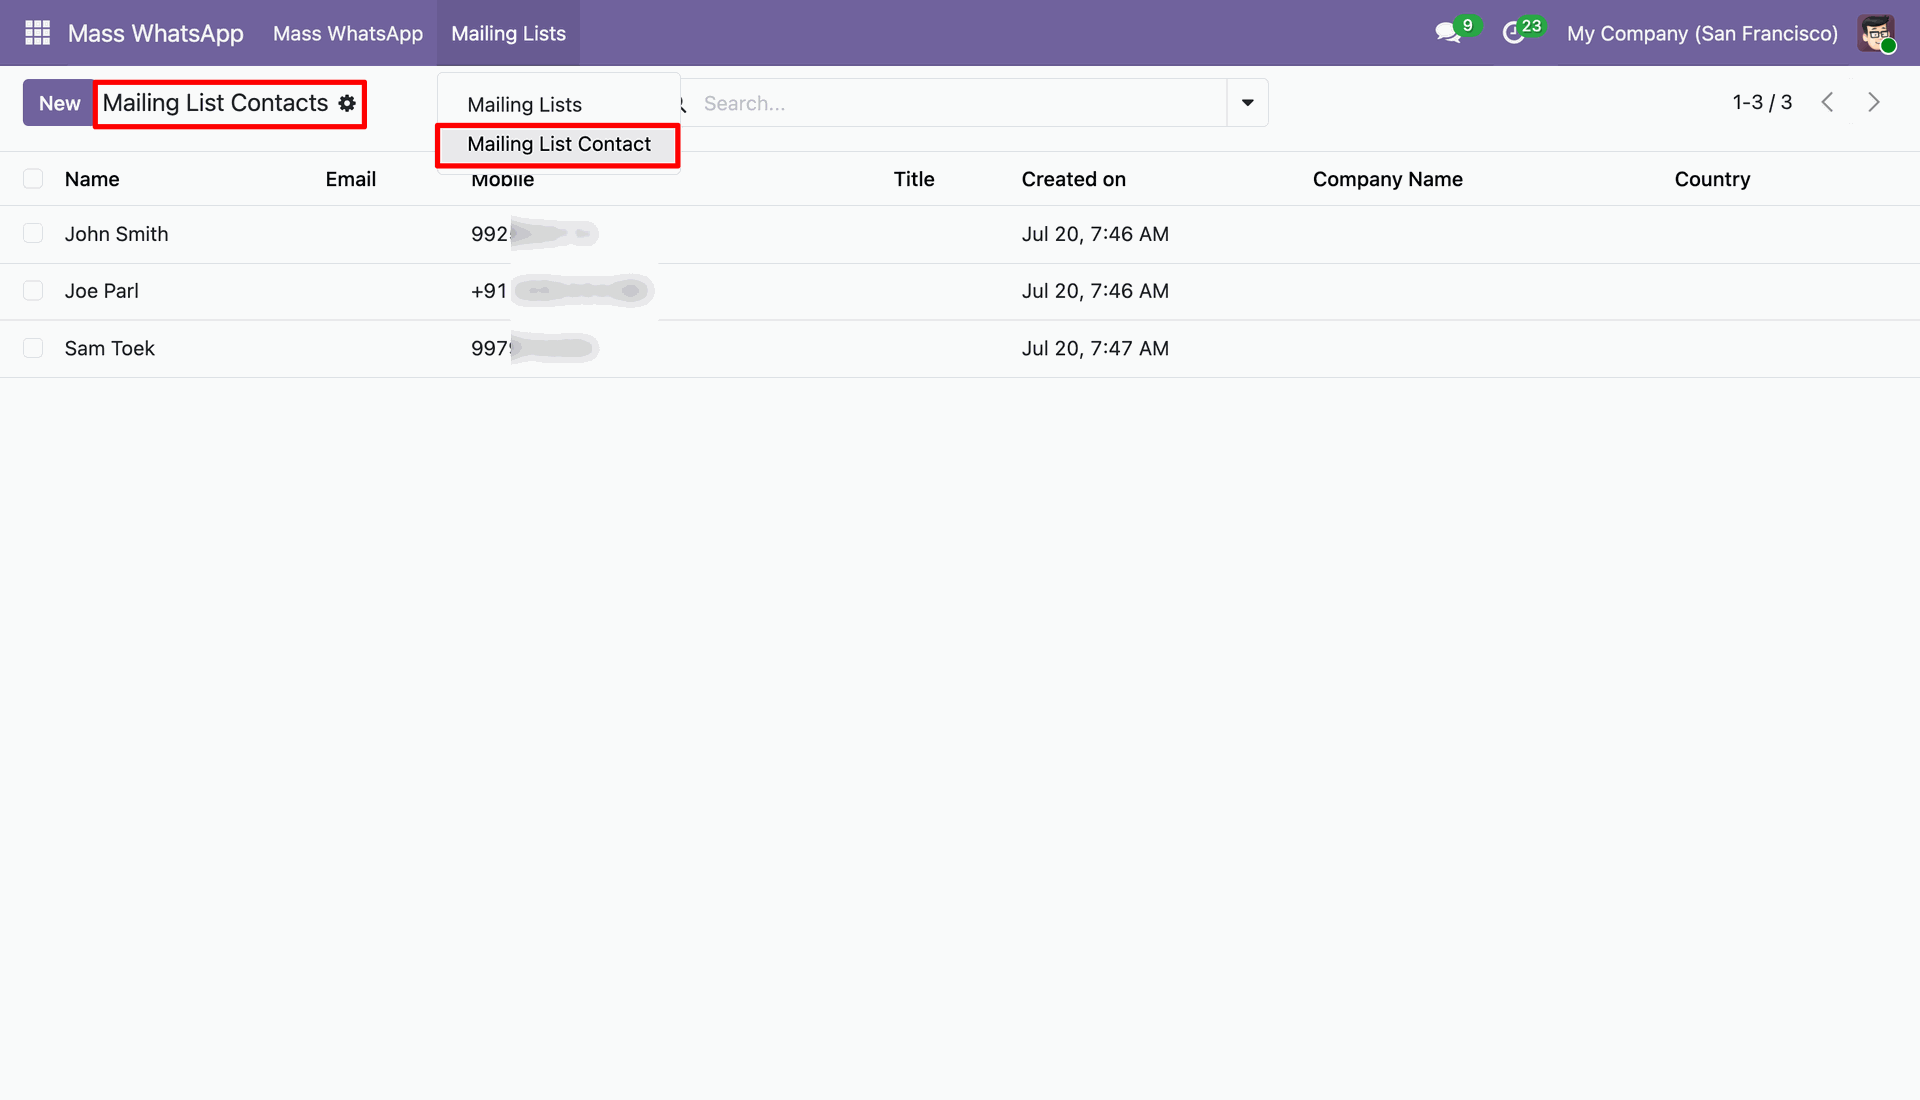
You can See Mailing Lists of that Contact.You Can Also Add/Remove Mailing List for That Contact.
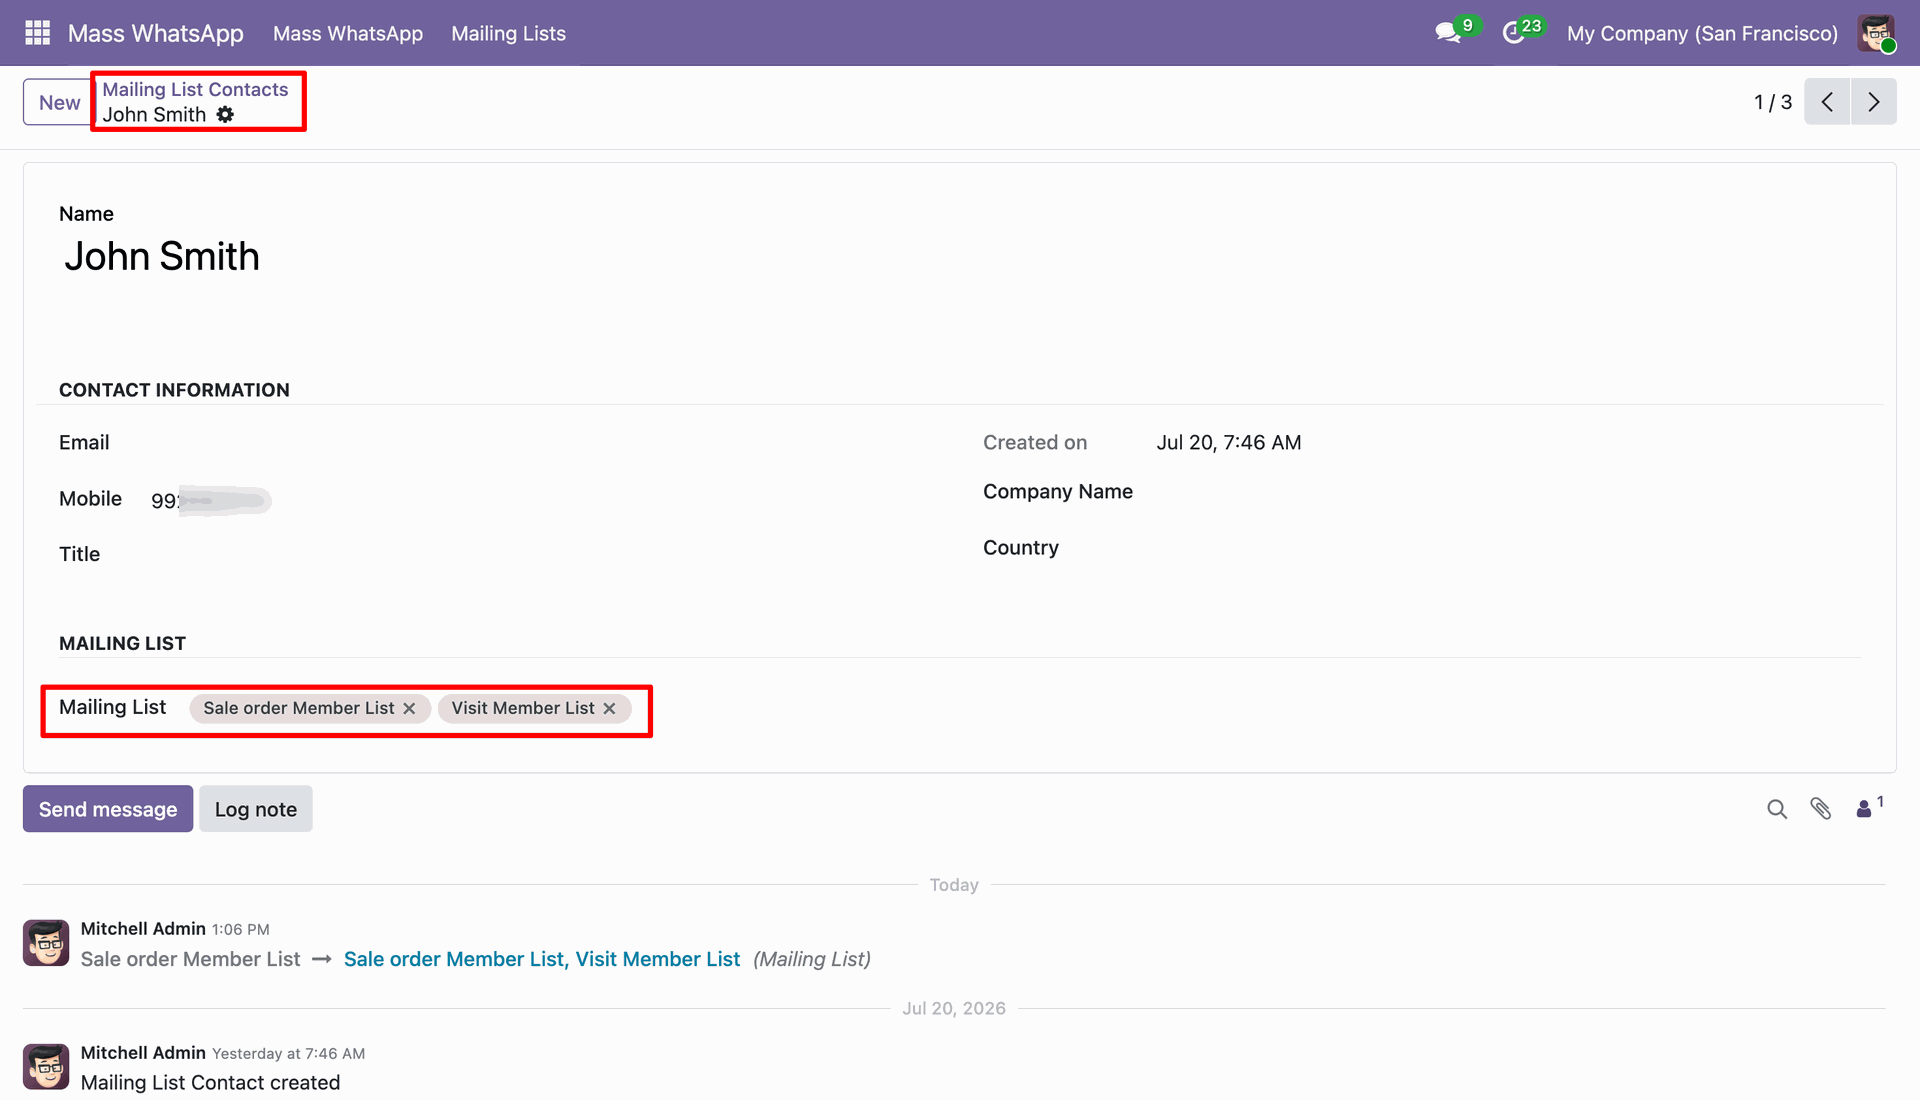
Mass WhatsApp menu with Brodcast List.
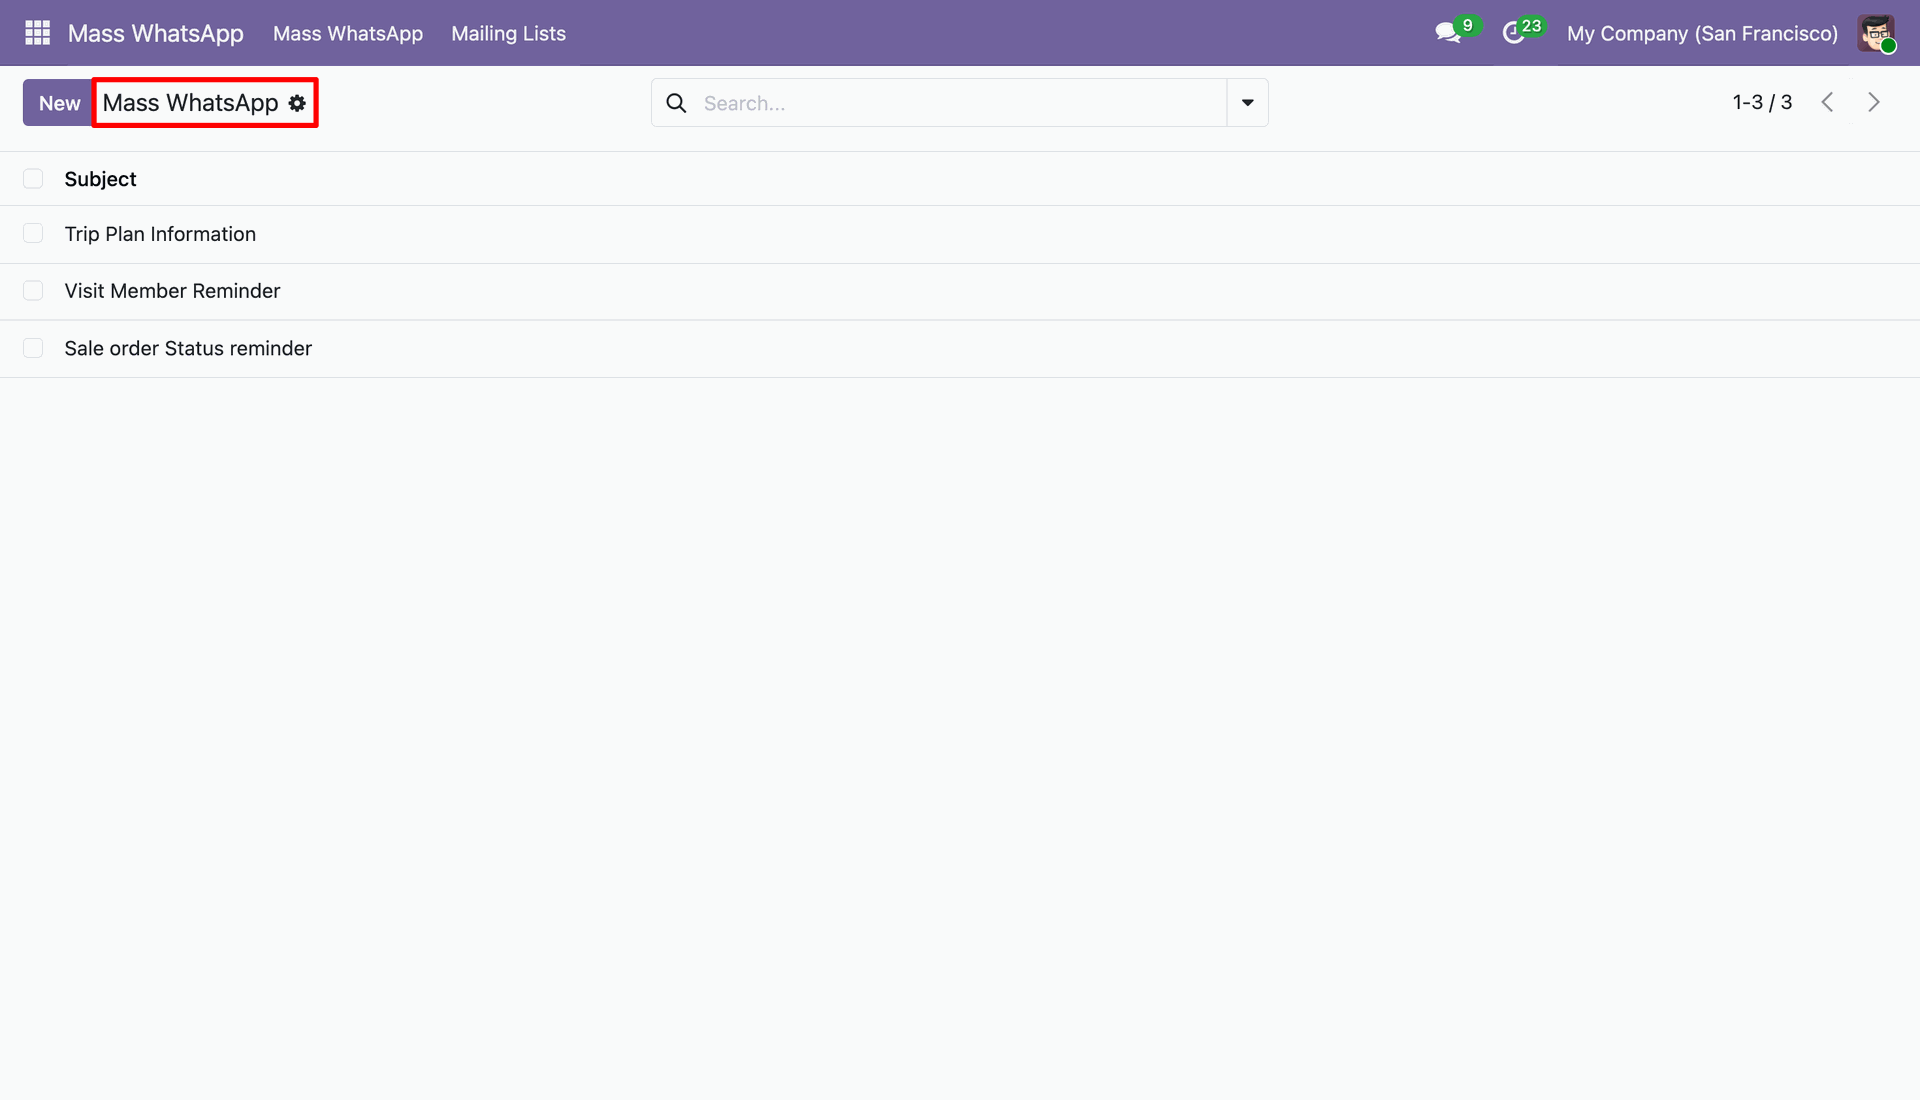
Select recepients in Broadcast Form View .
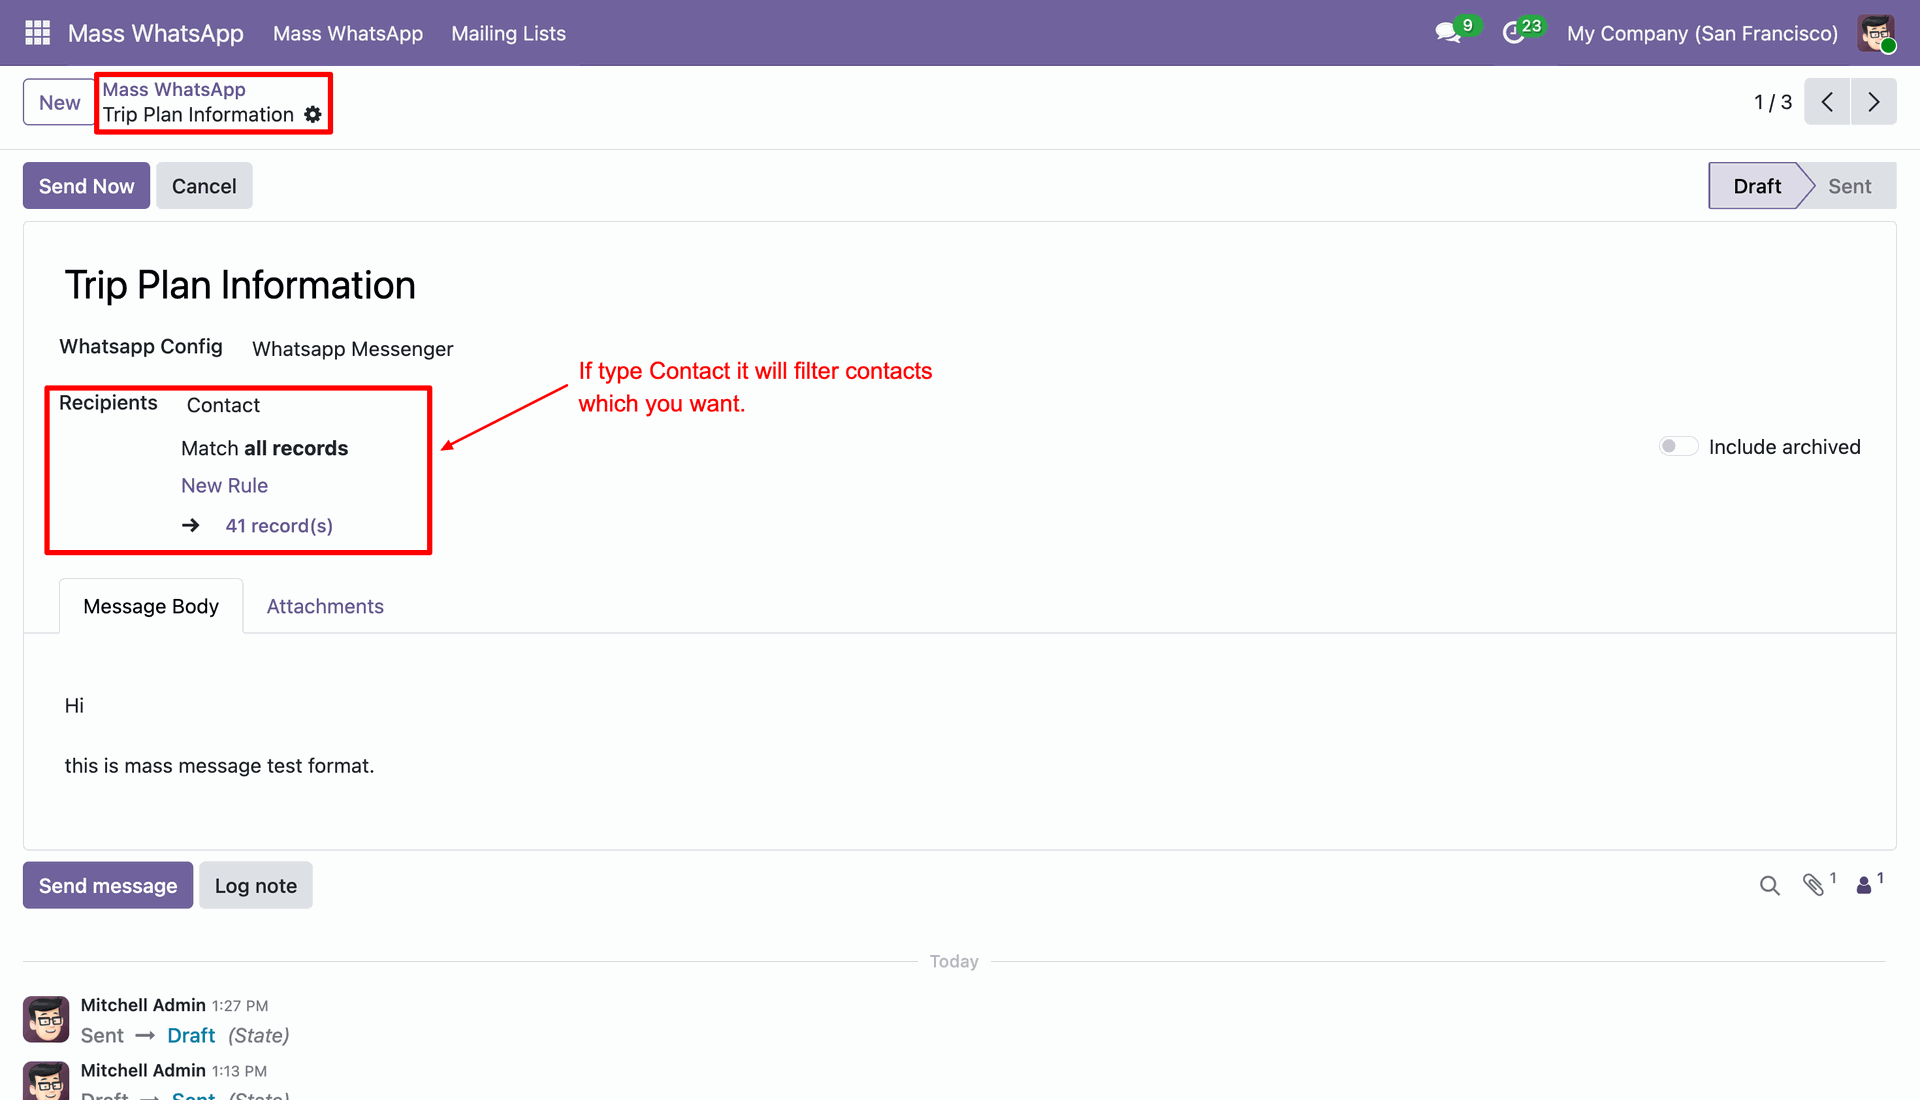
Select WhatsApp Config,mailing list in Brodcast Form View.You Can also add Attachment if you want.
On Clicking "Send Now" Button the Message will be send to all user of that Mailing List.
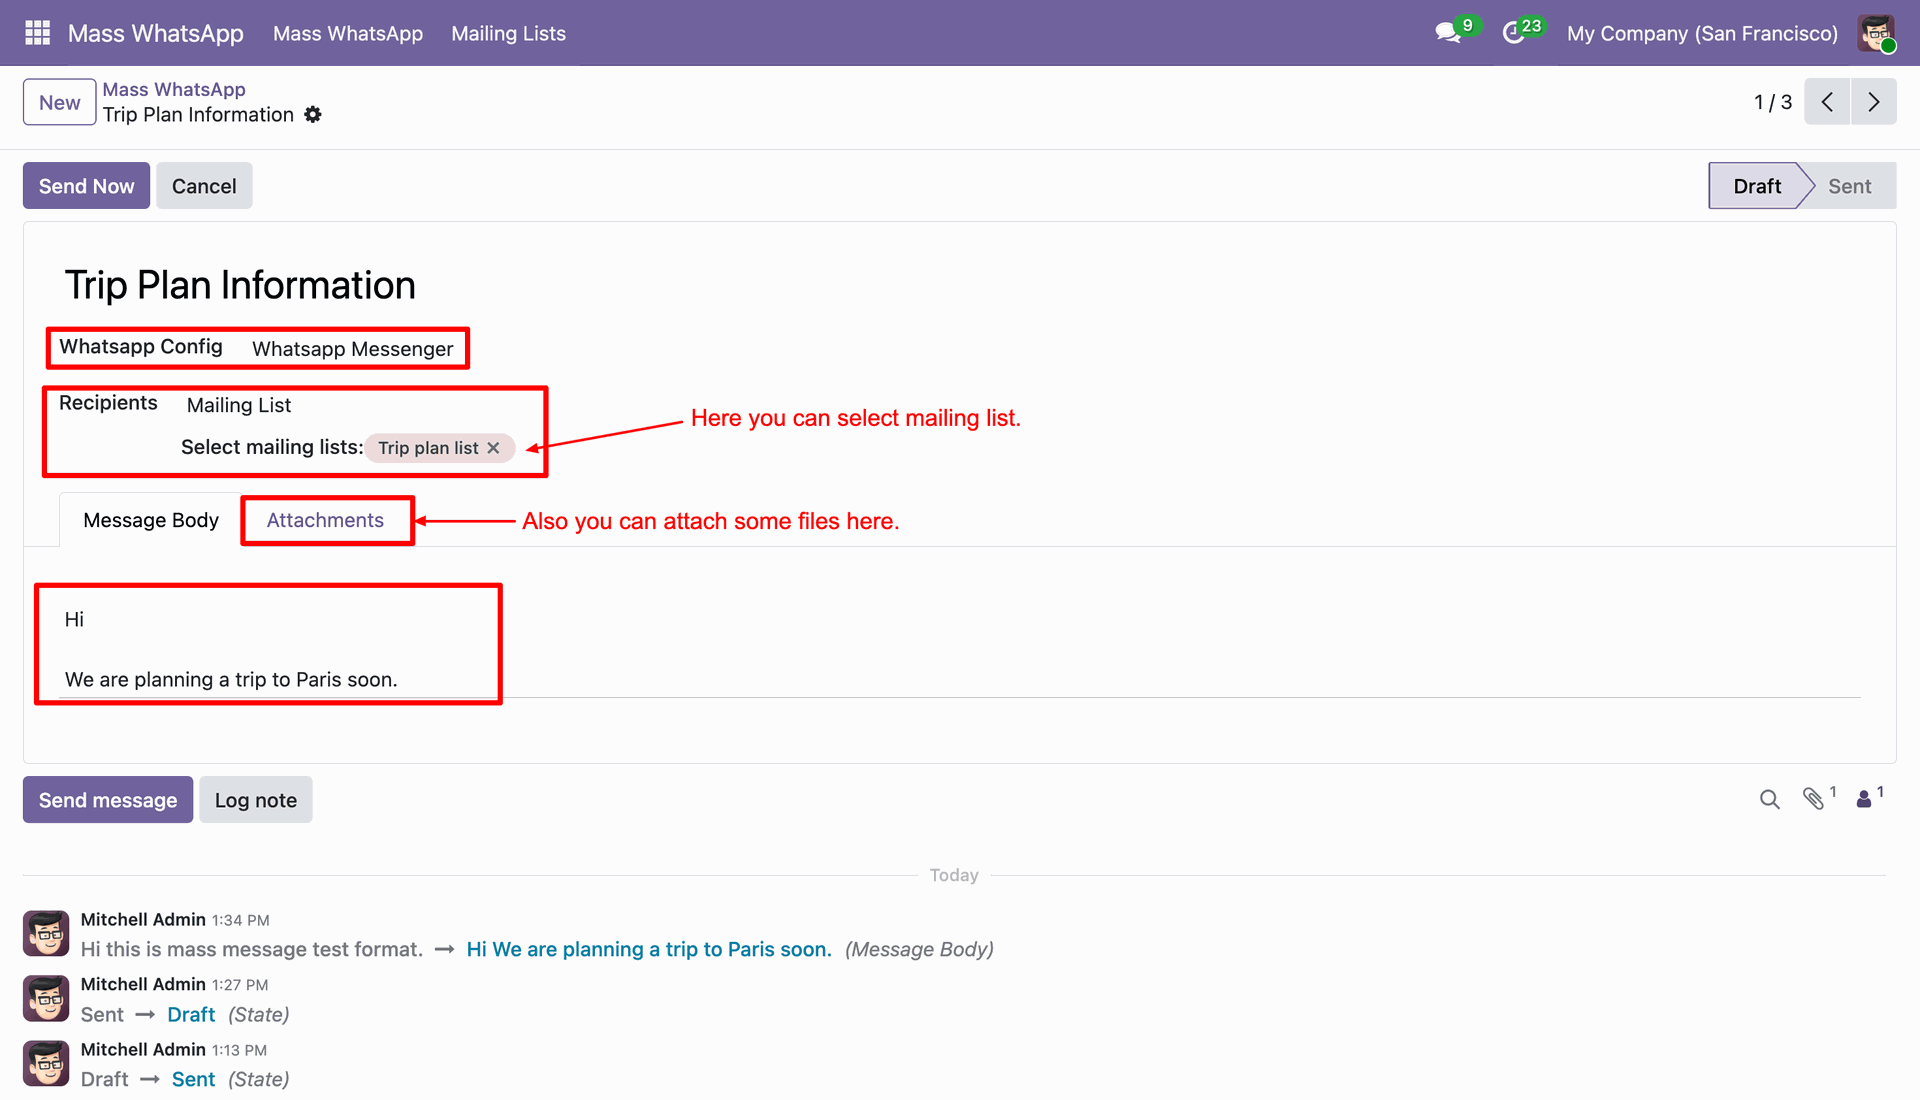
The Messege will send to all mail list contacts.
The Message recieved by the recepients Looks like below.
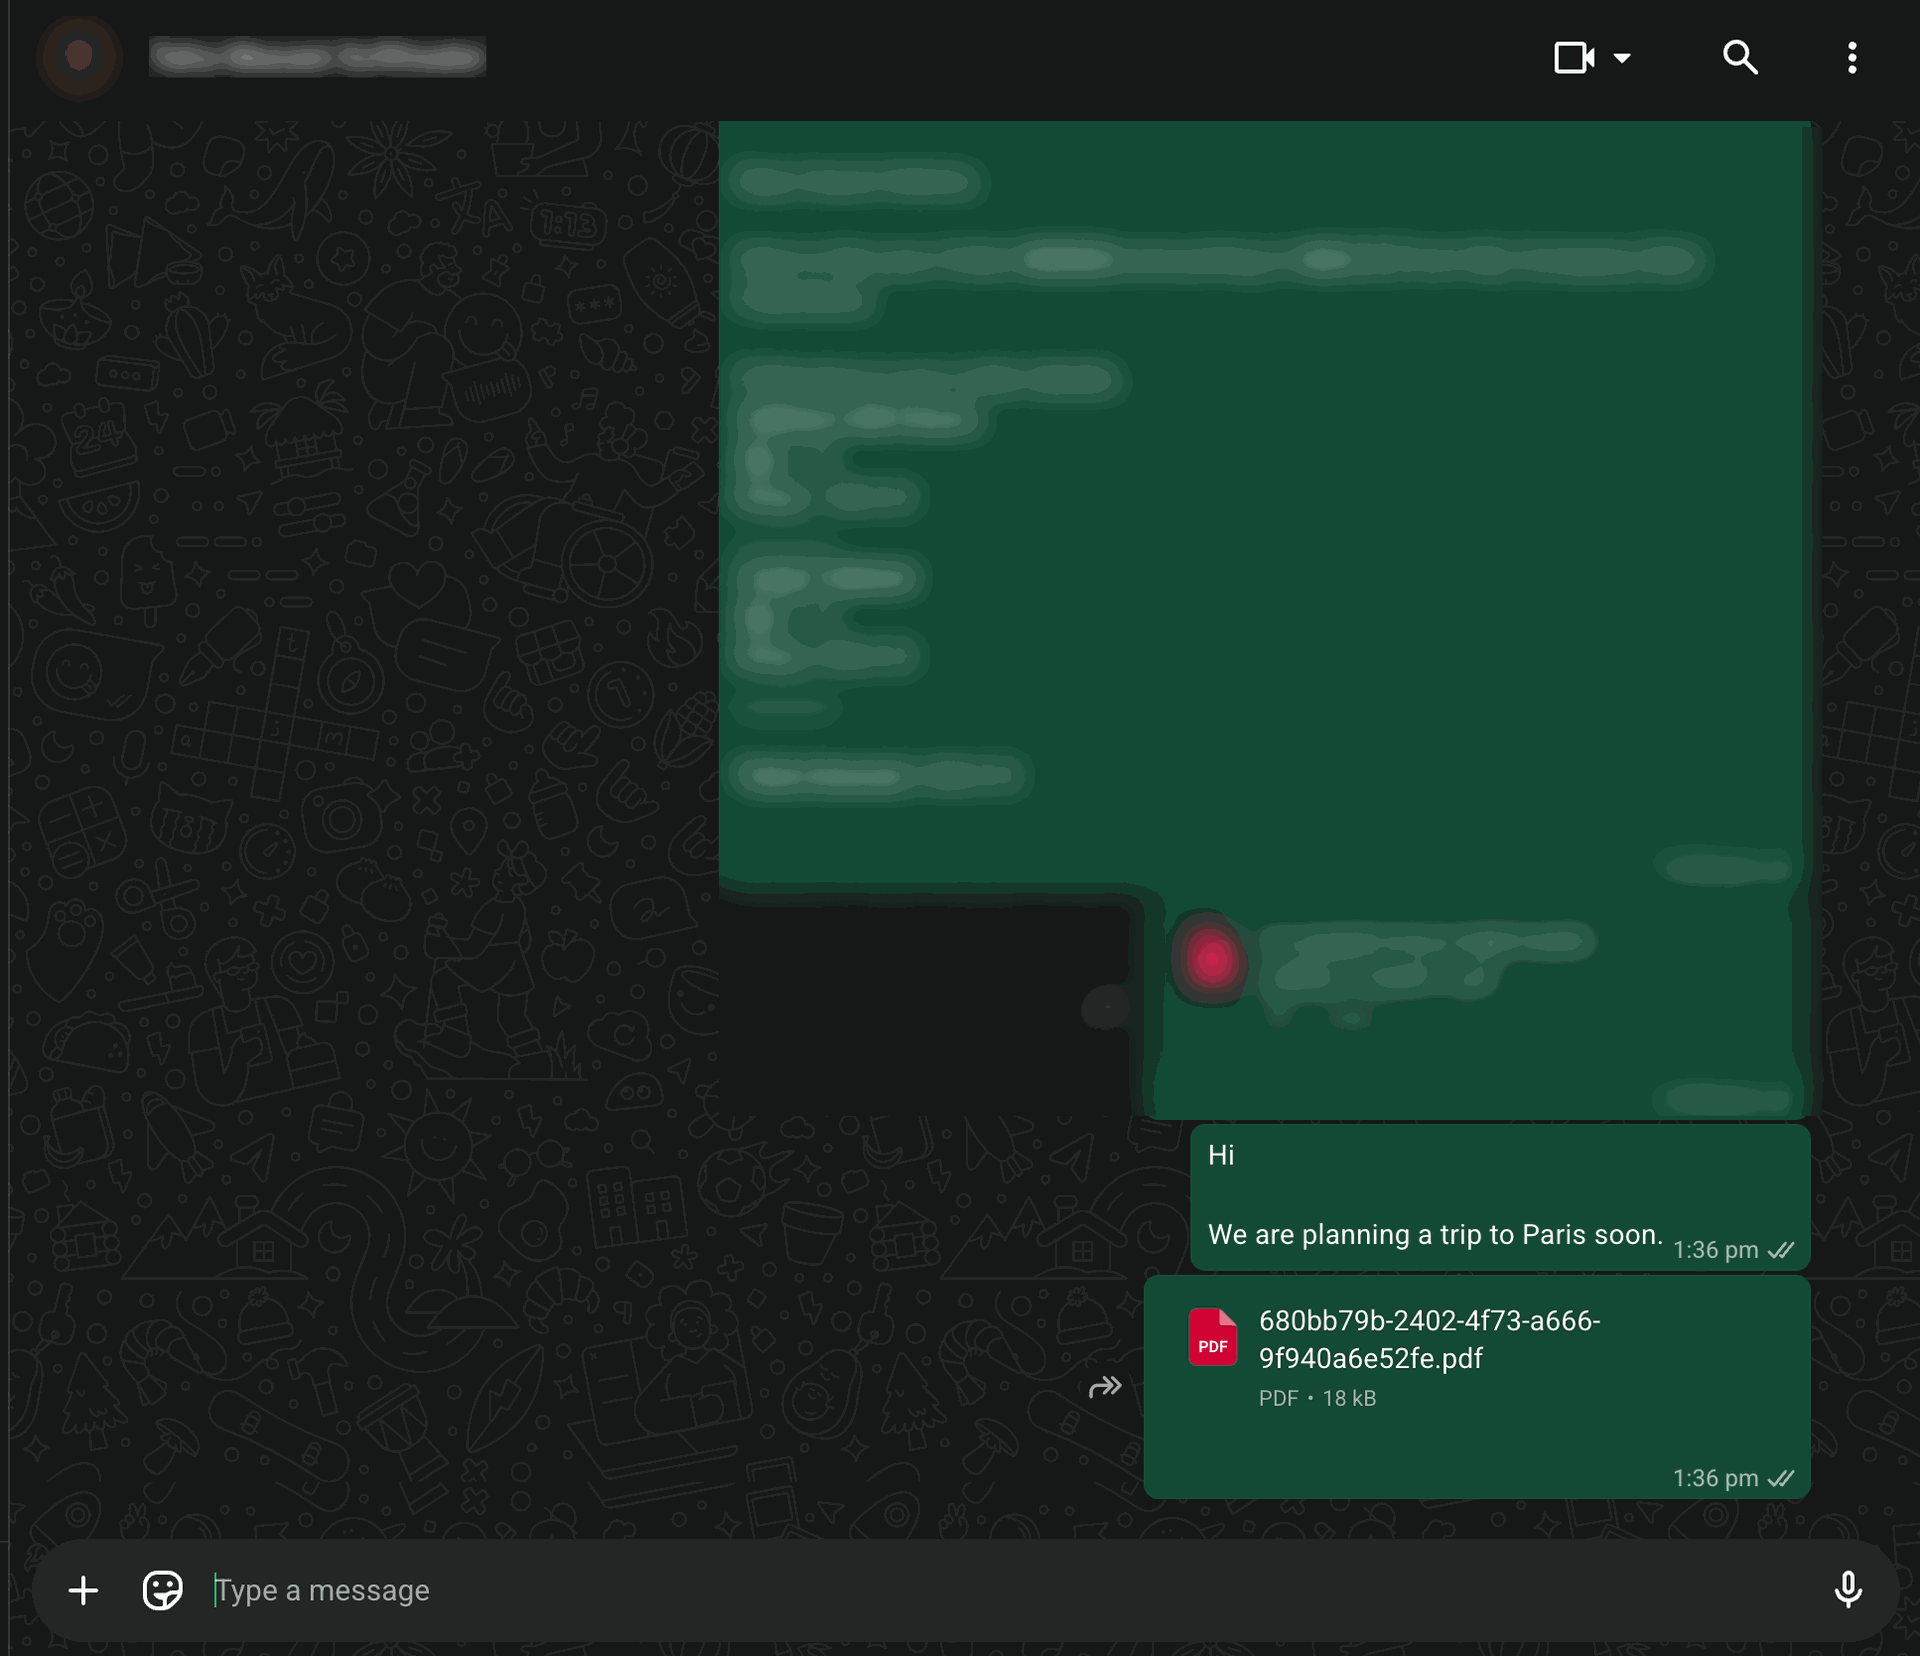
The Message recieved by the recepients Looks like below.
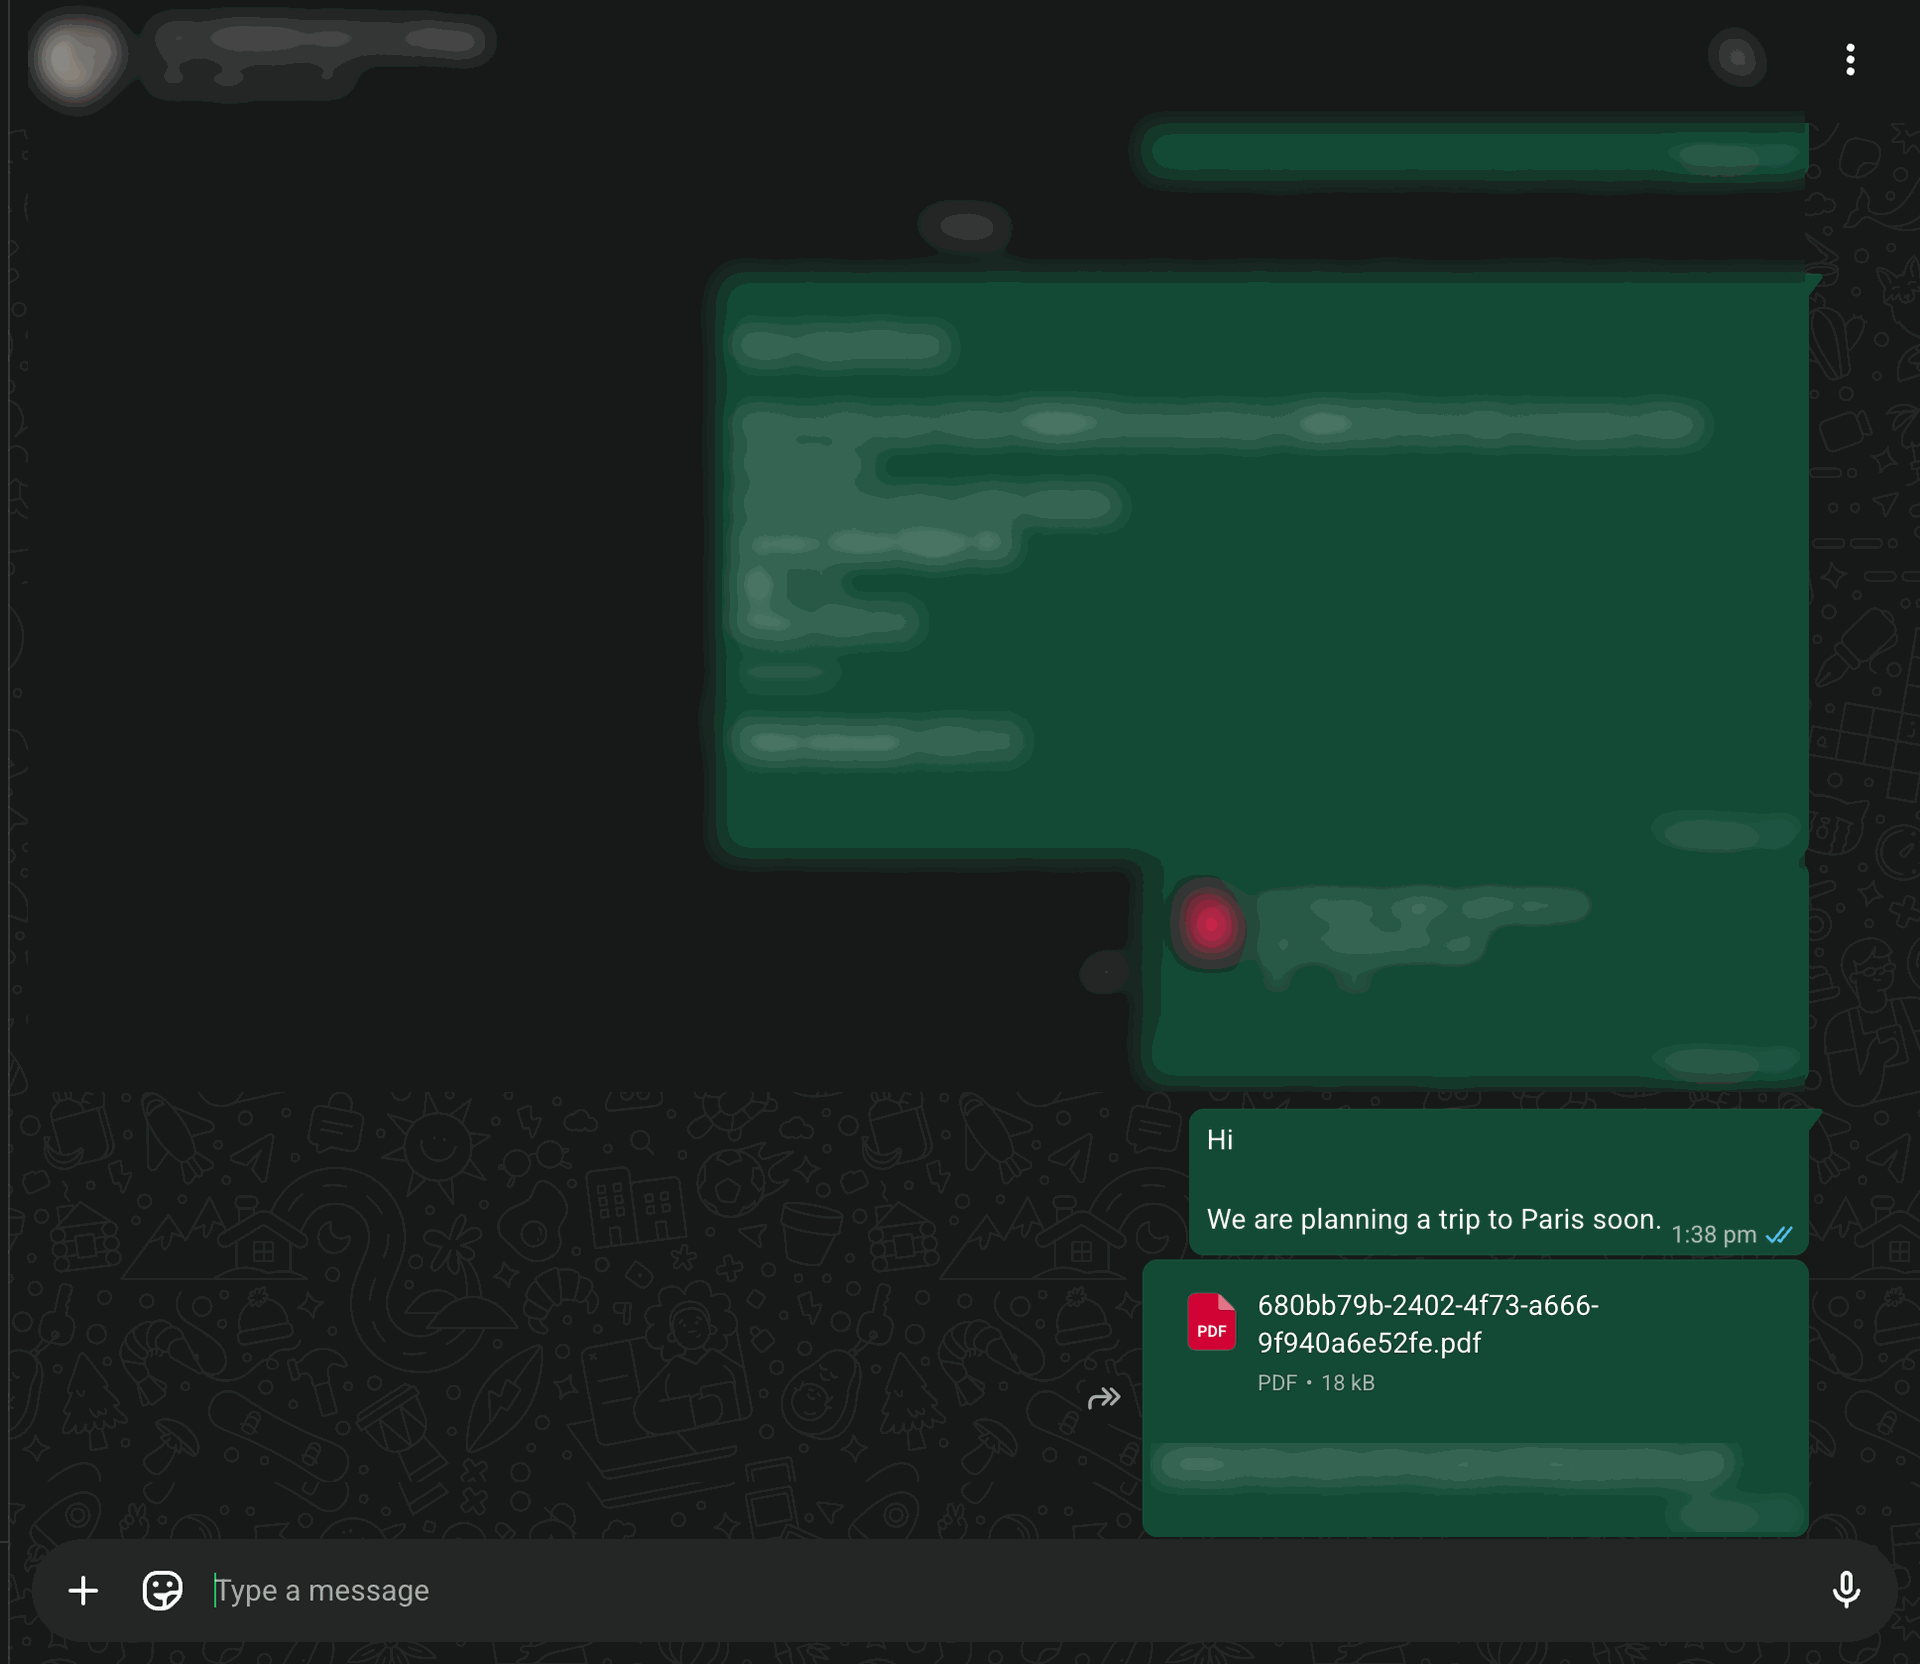
In delivery order click on 'Send By Whatsapp' button. This button is used to send customize message.
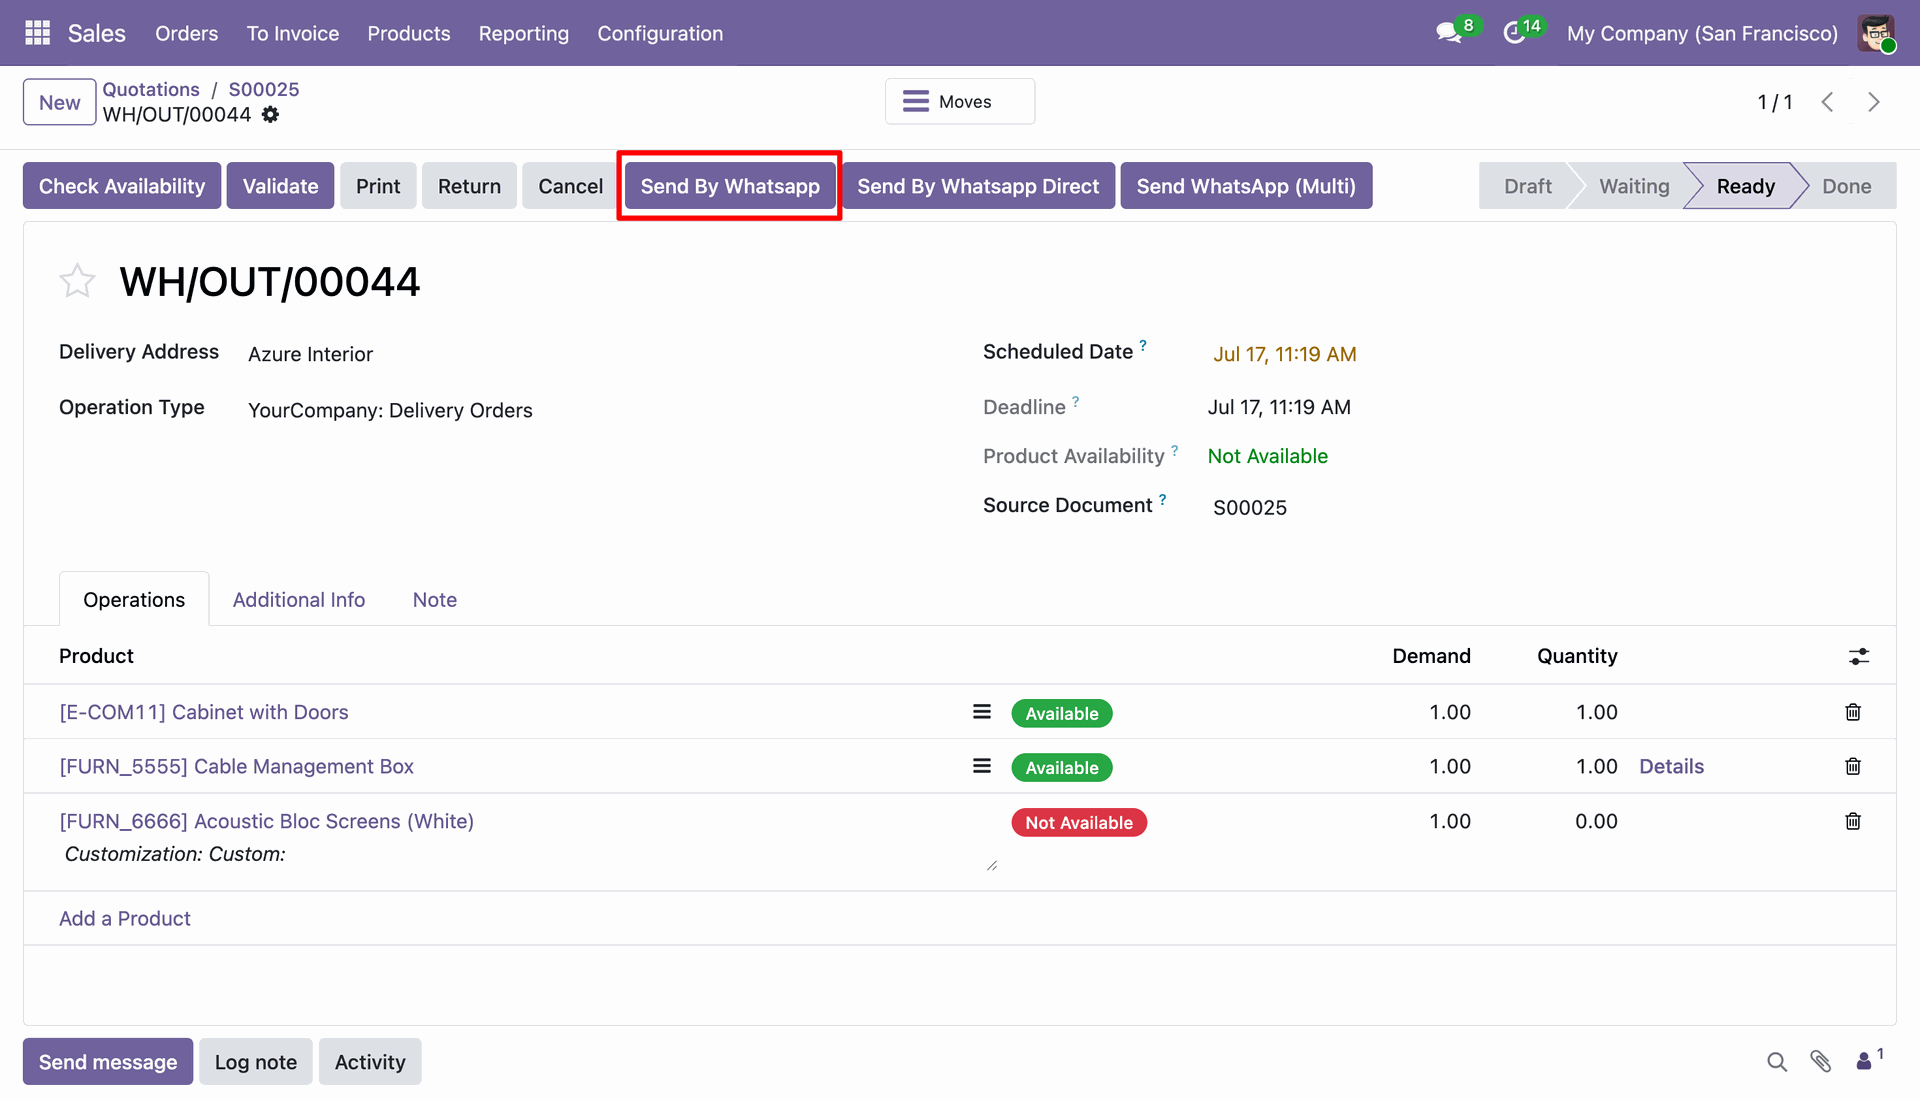
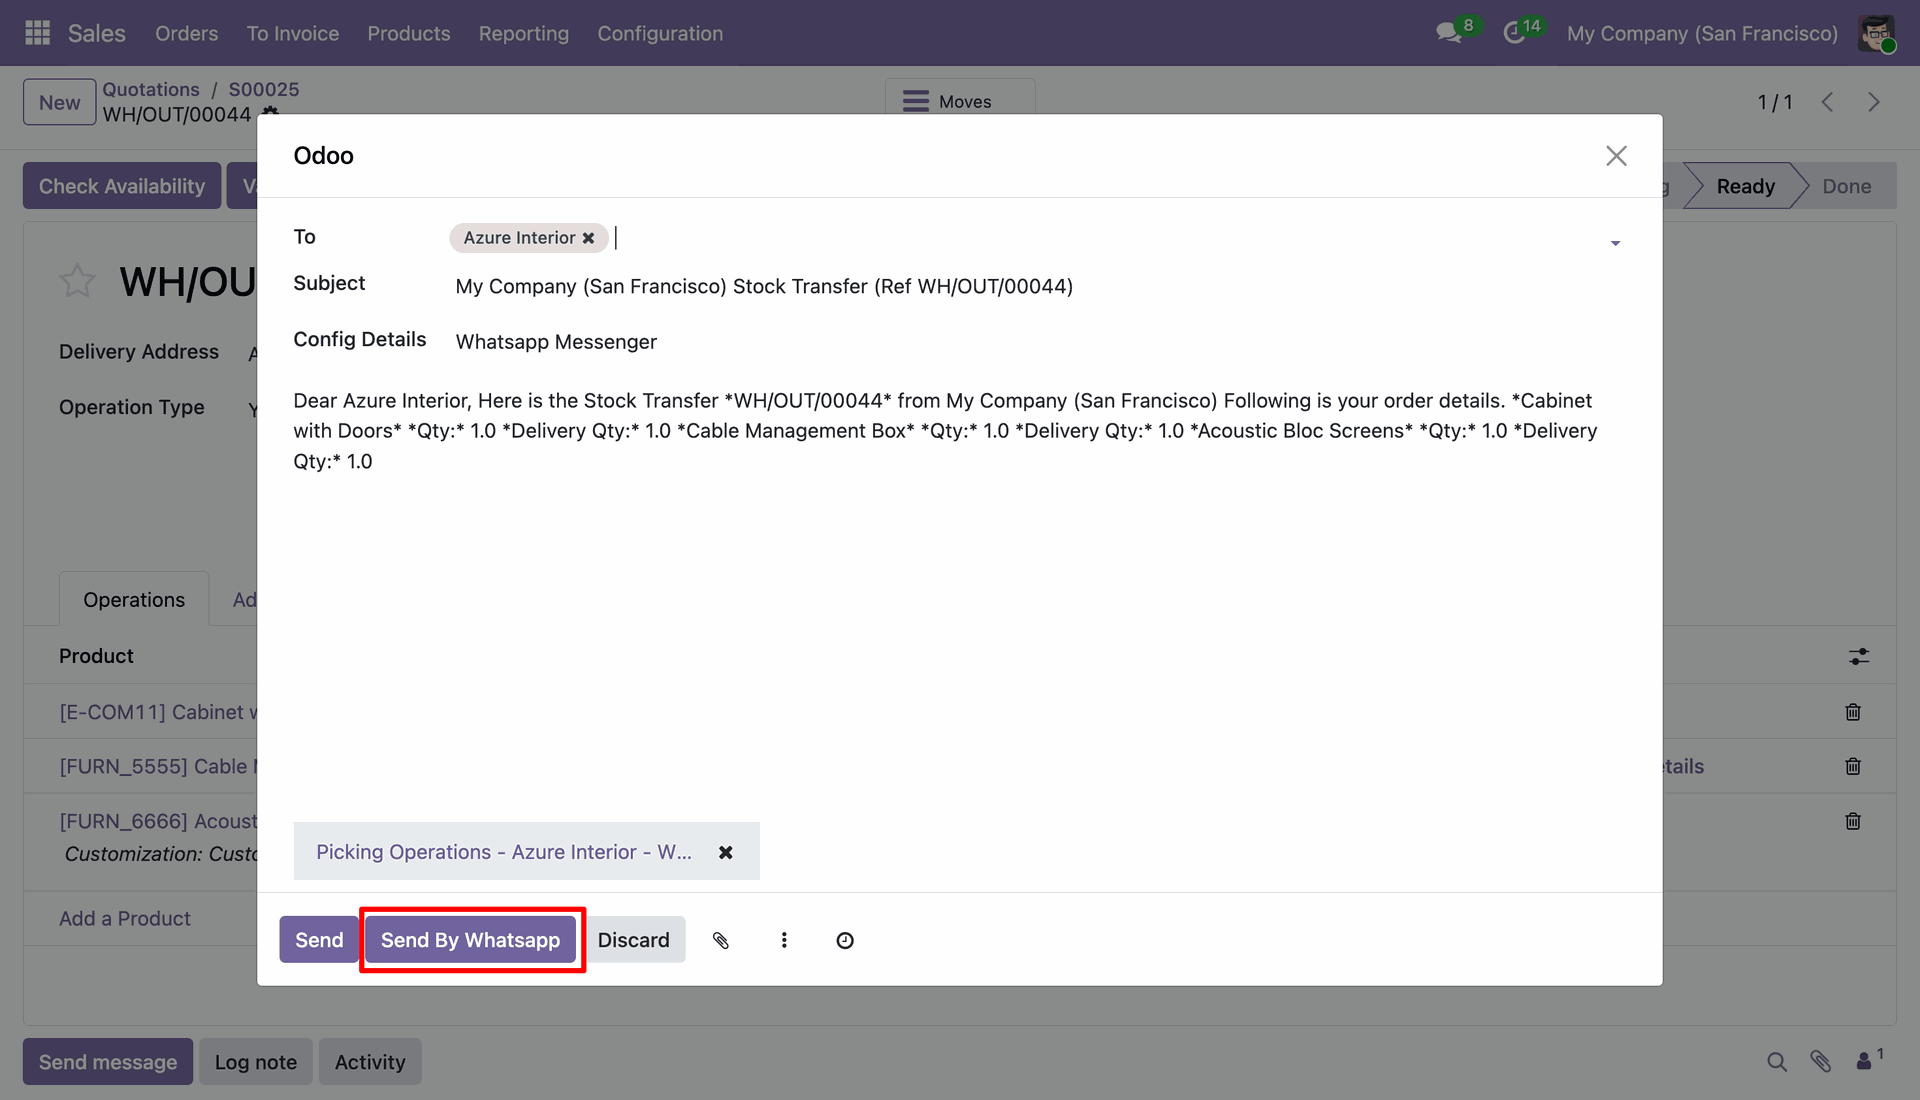
After that this wizard will display. Here you can customize your message and attach more attachments. and click 'Send By Whatsapp'.
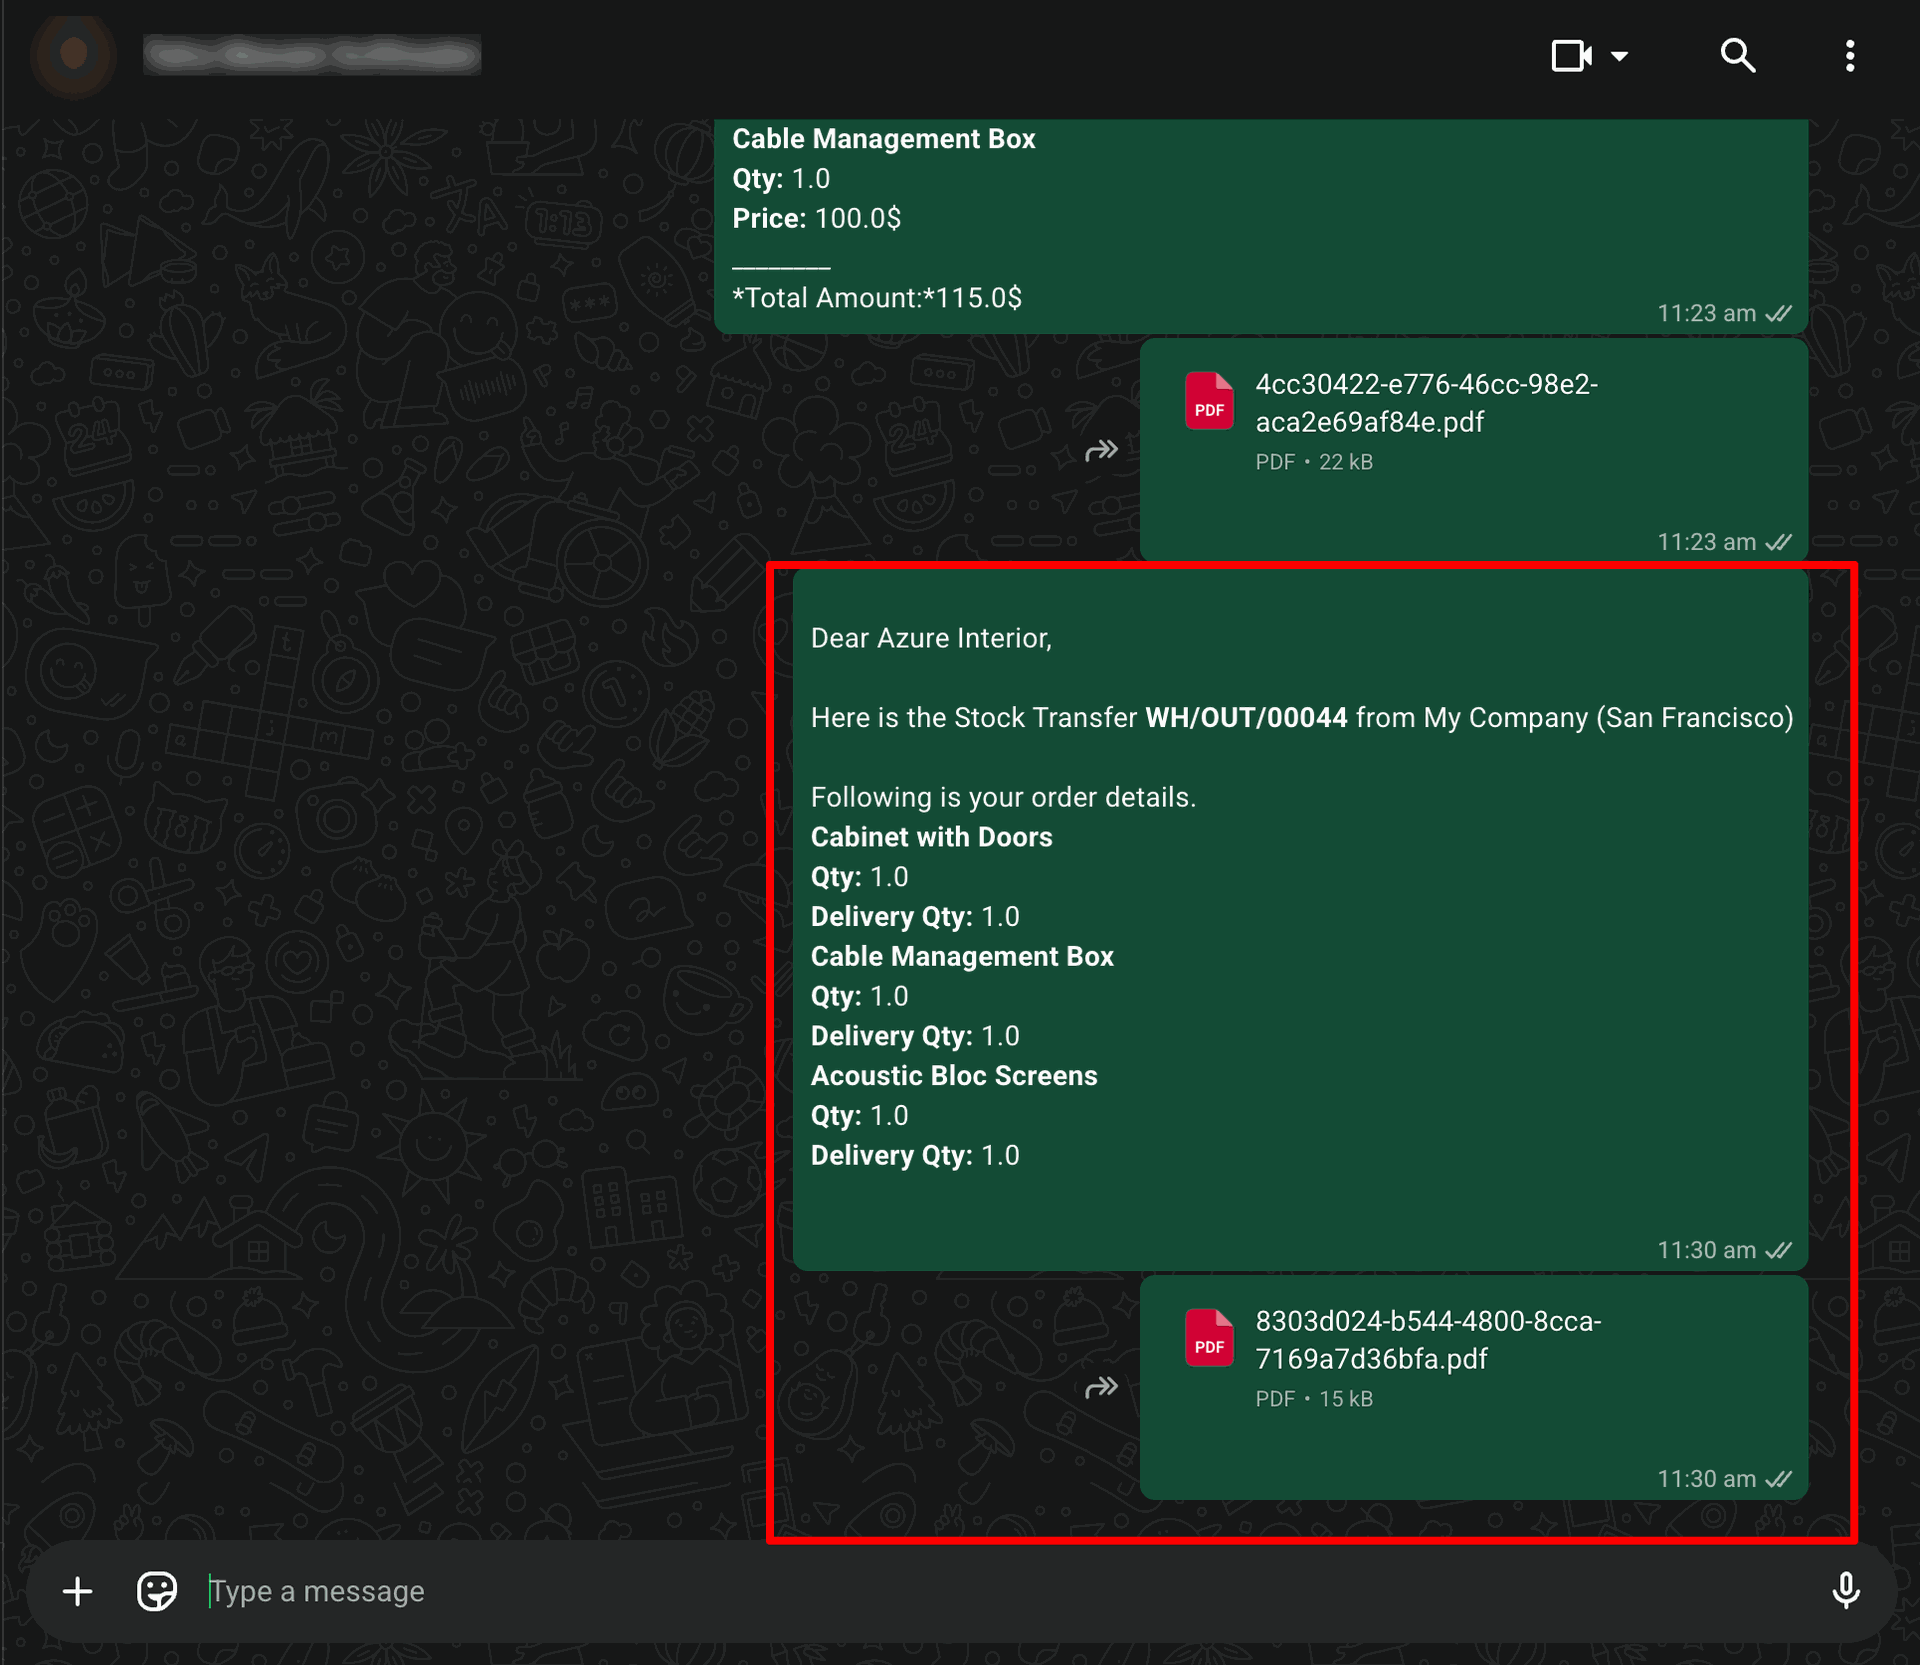
This is output of sended message on whatsapp.
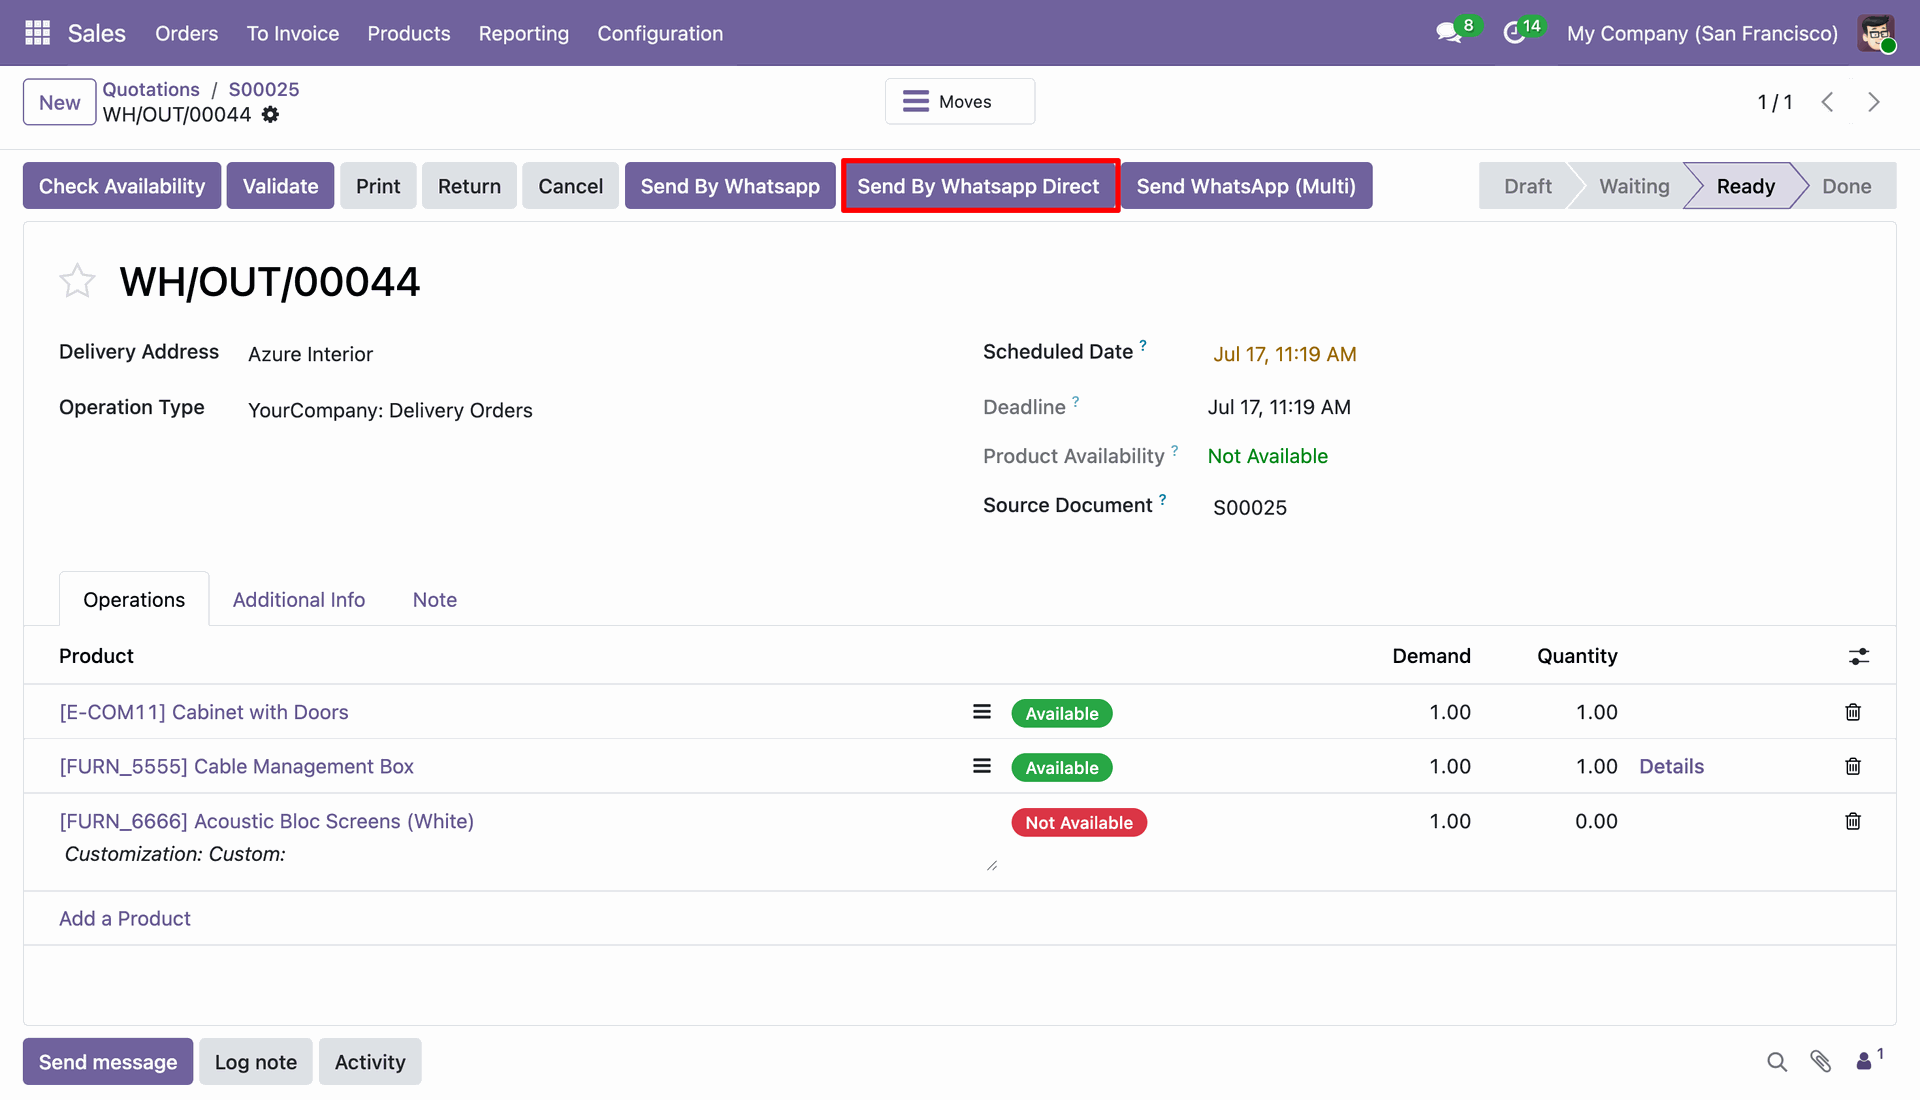
Click 'Send By Whatsapp Direct' and it will sending directly with predefine message and attachments.
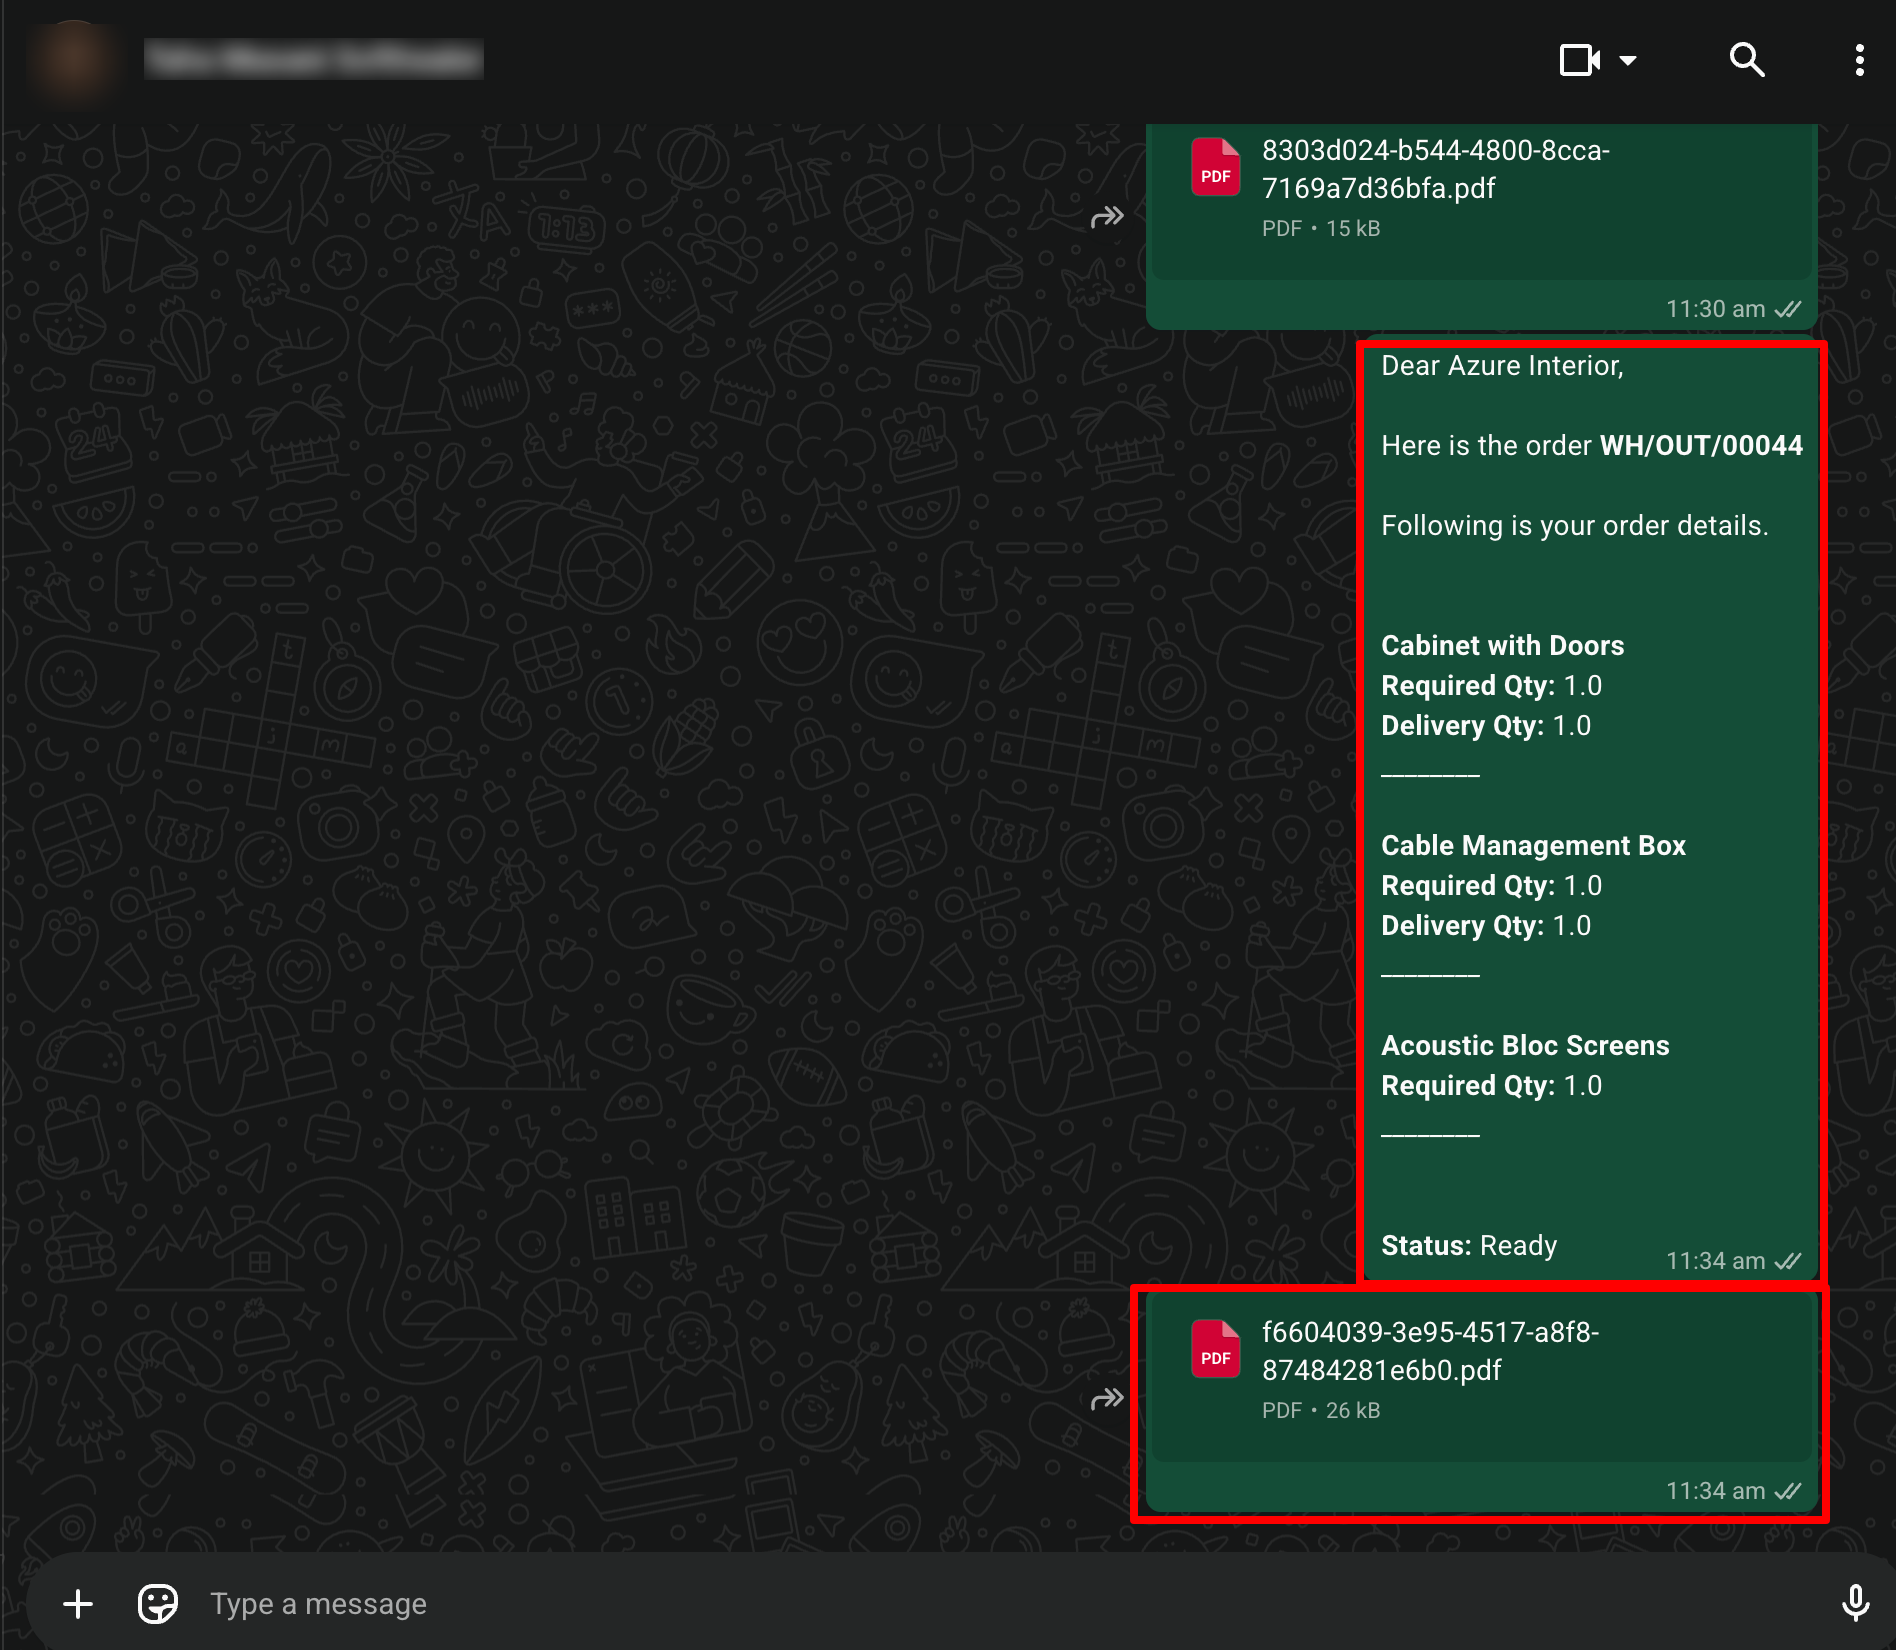
This is output of sended message on whatsapp.
Sended message entry in chatter also.
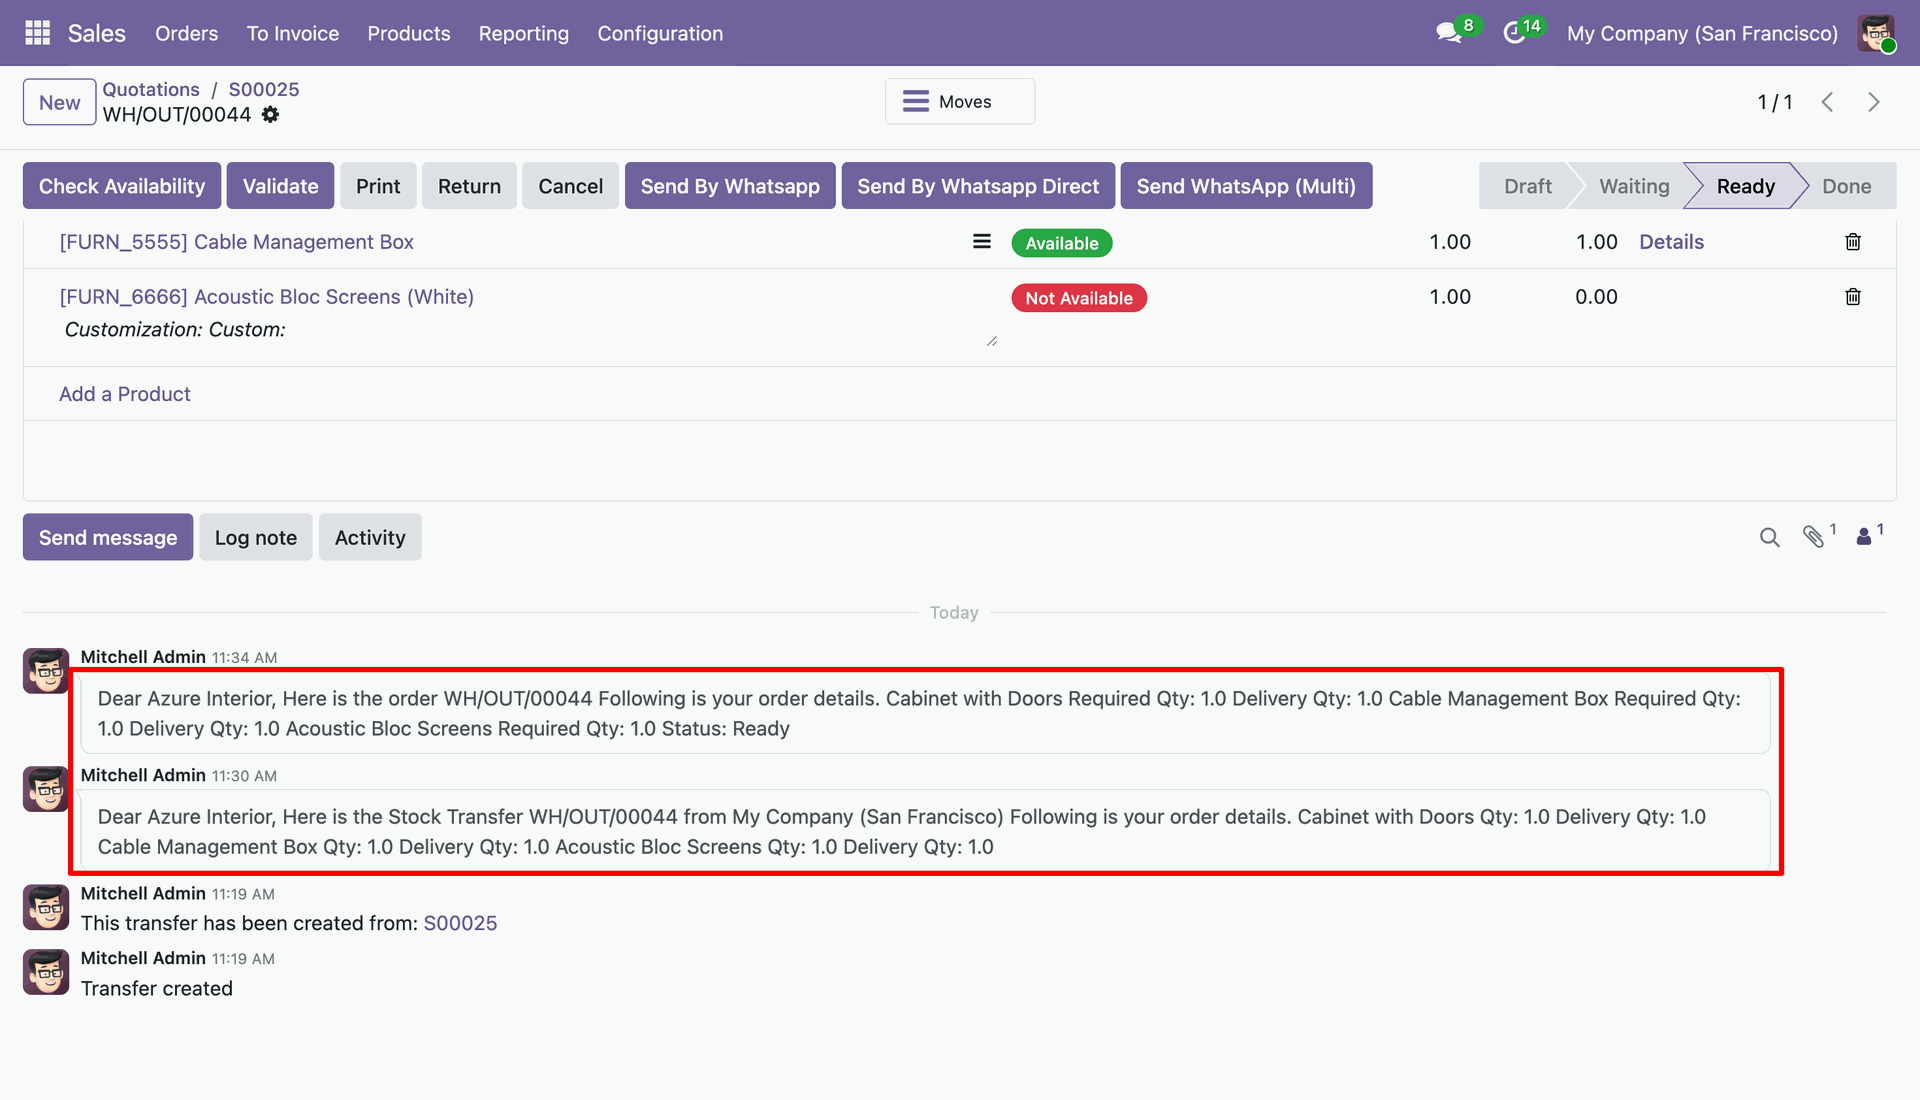
In receipt click on 'Send By Whatsapp' button. This button is used to send customize message.
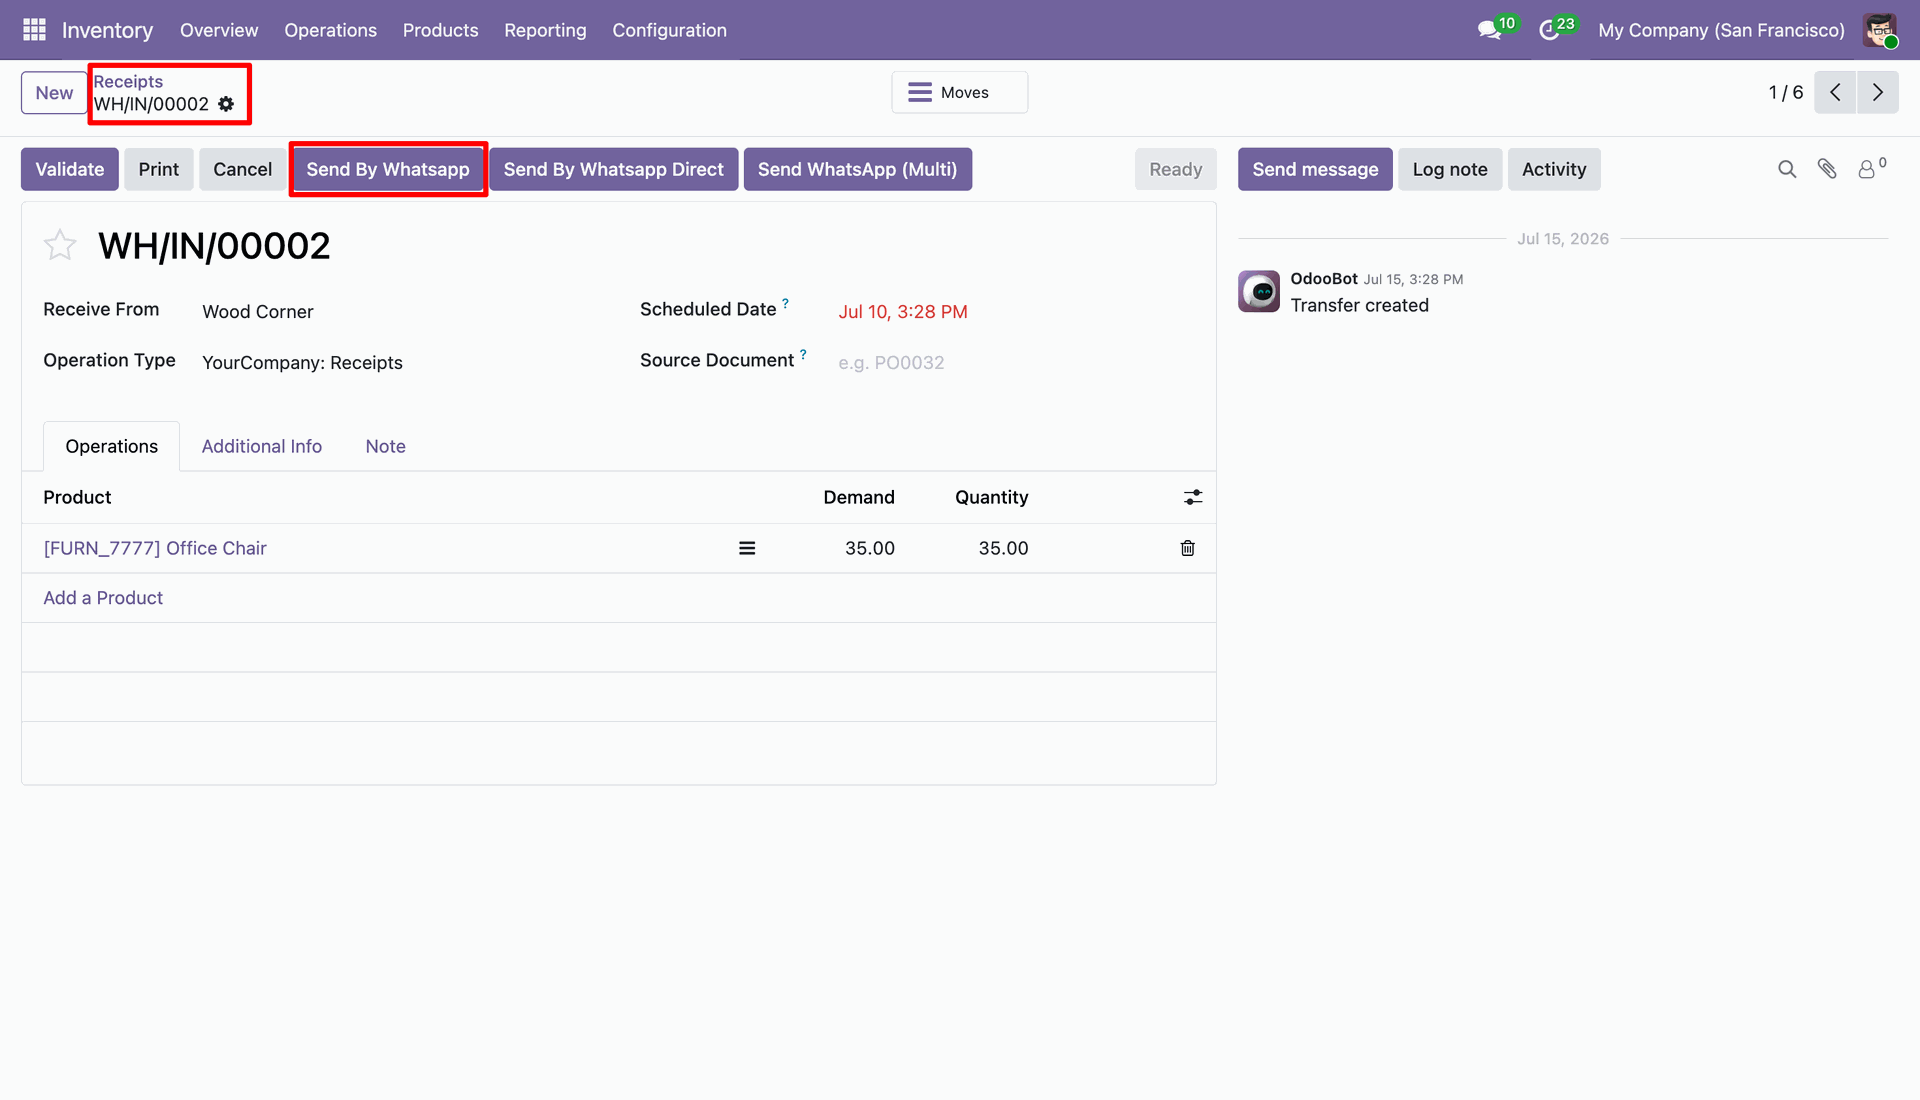
After that this wizard will display. Here you can customize your message and attach more attachments. and click 'Send By Whatsapp'.
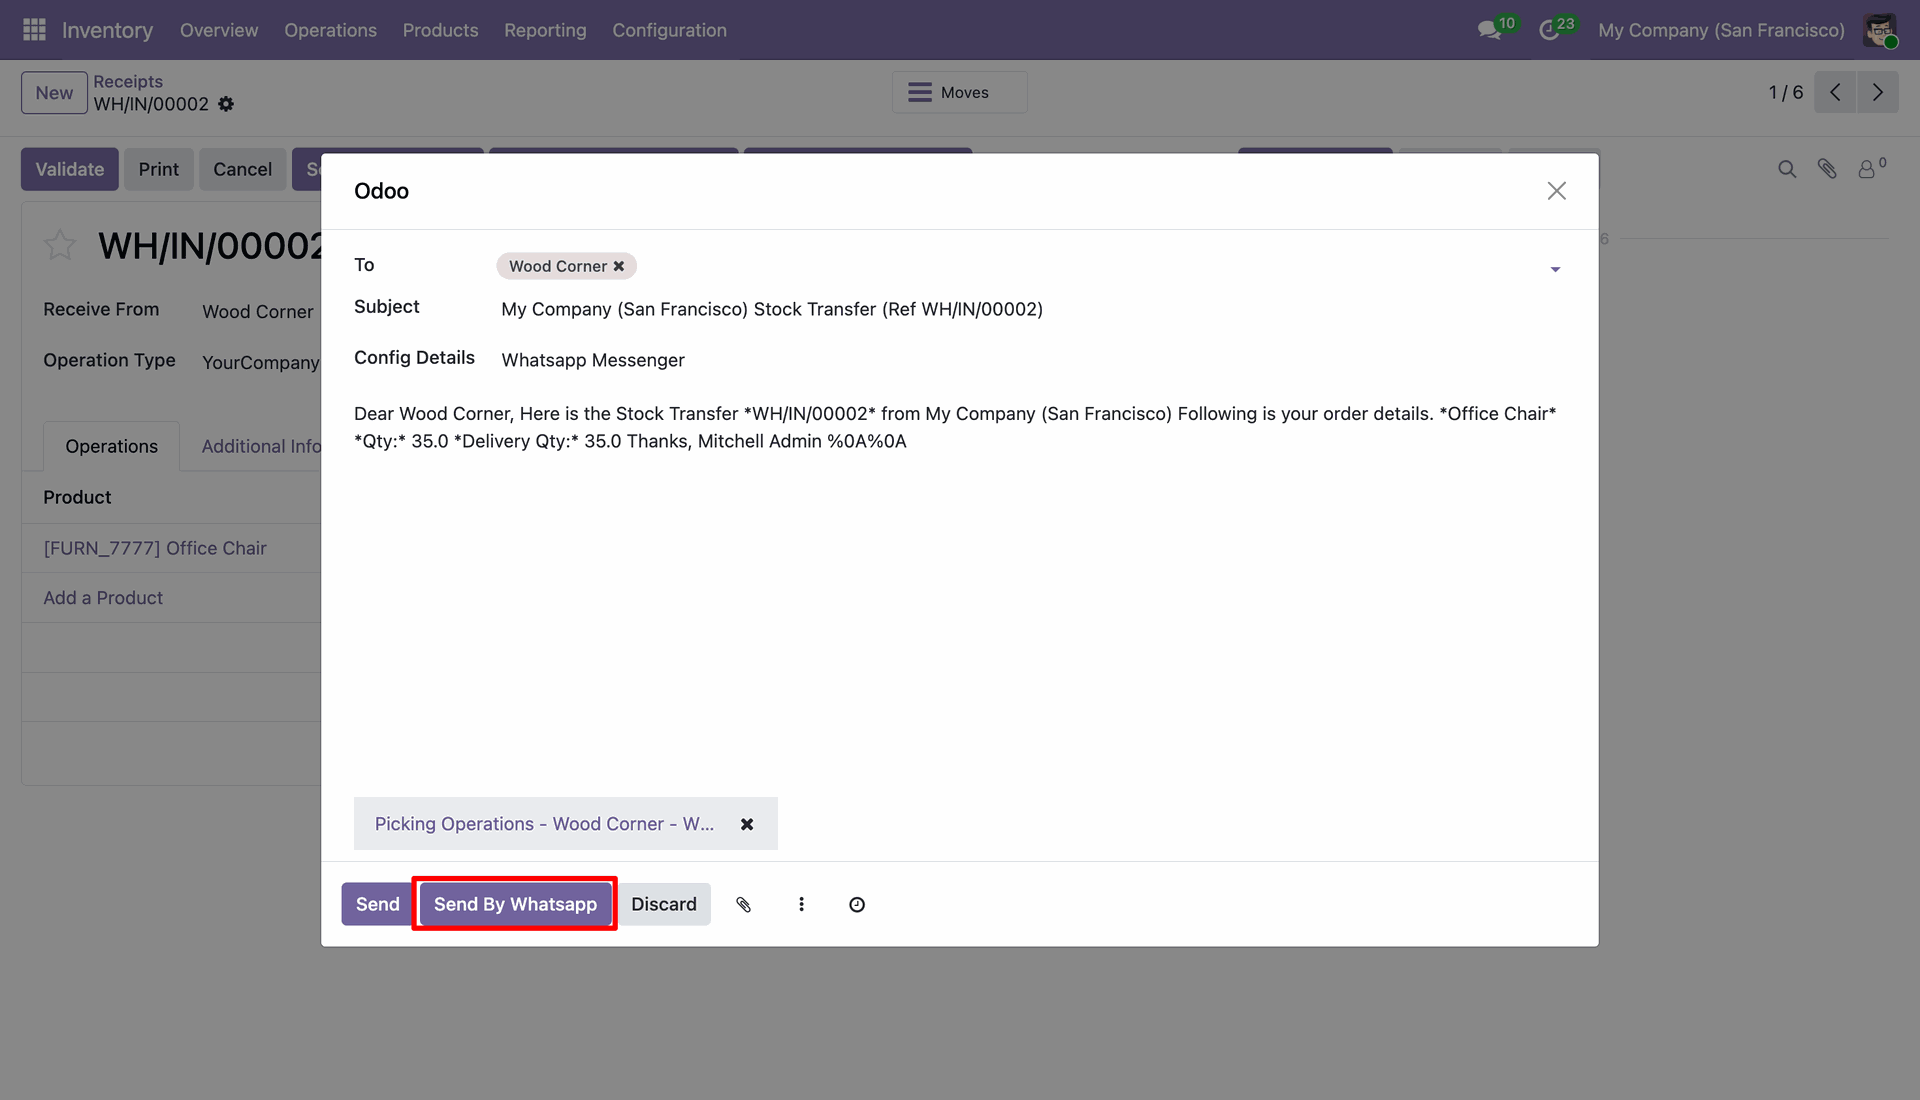
This is output of sended message on whatsapp.
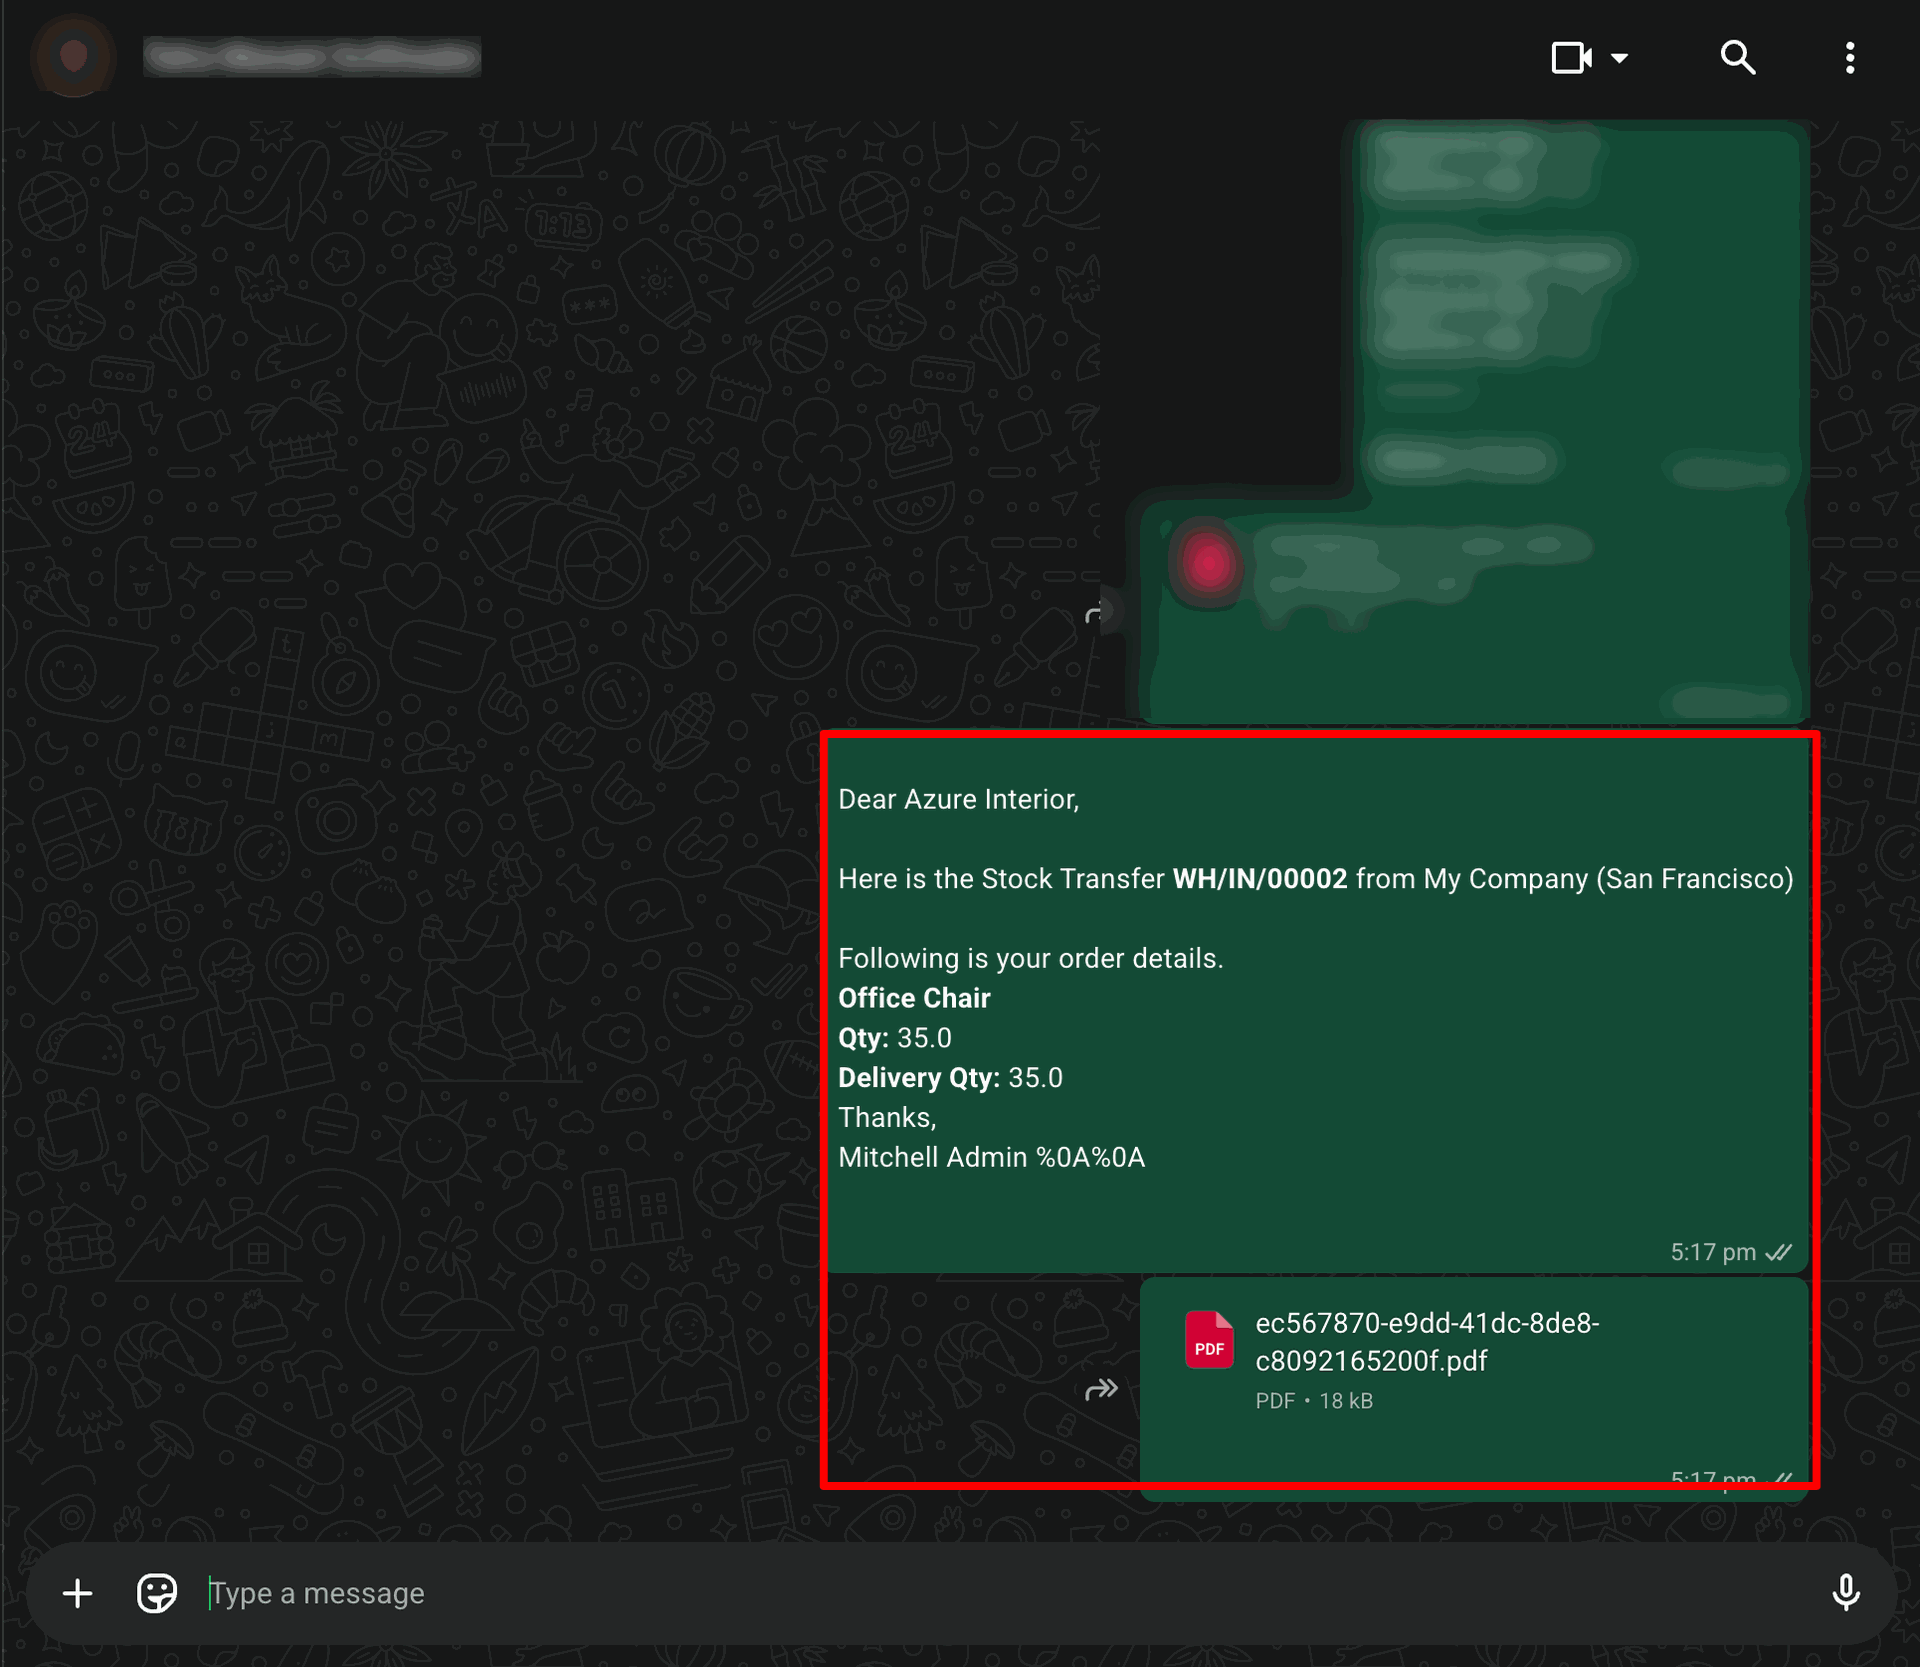
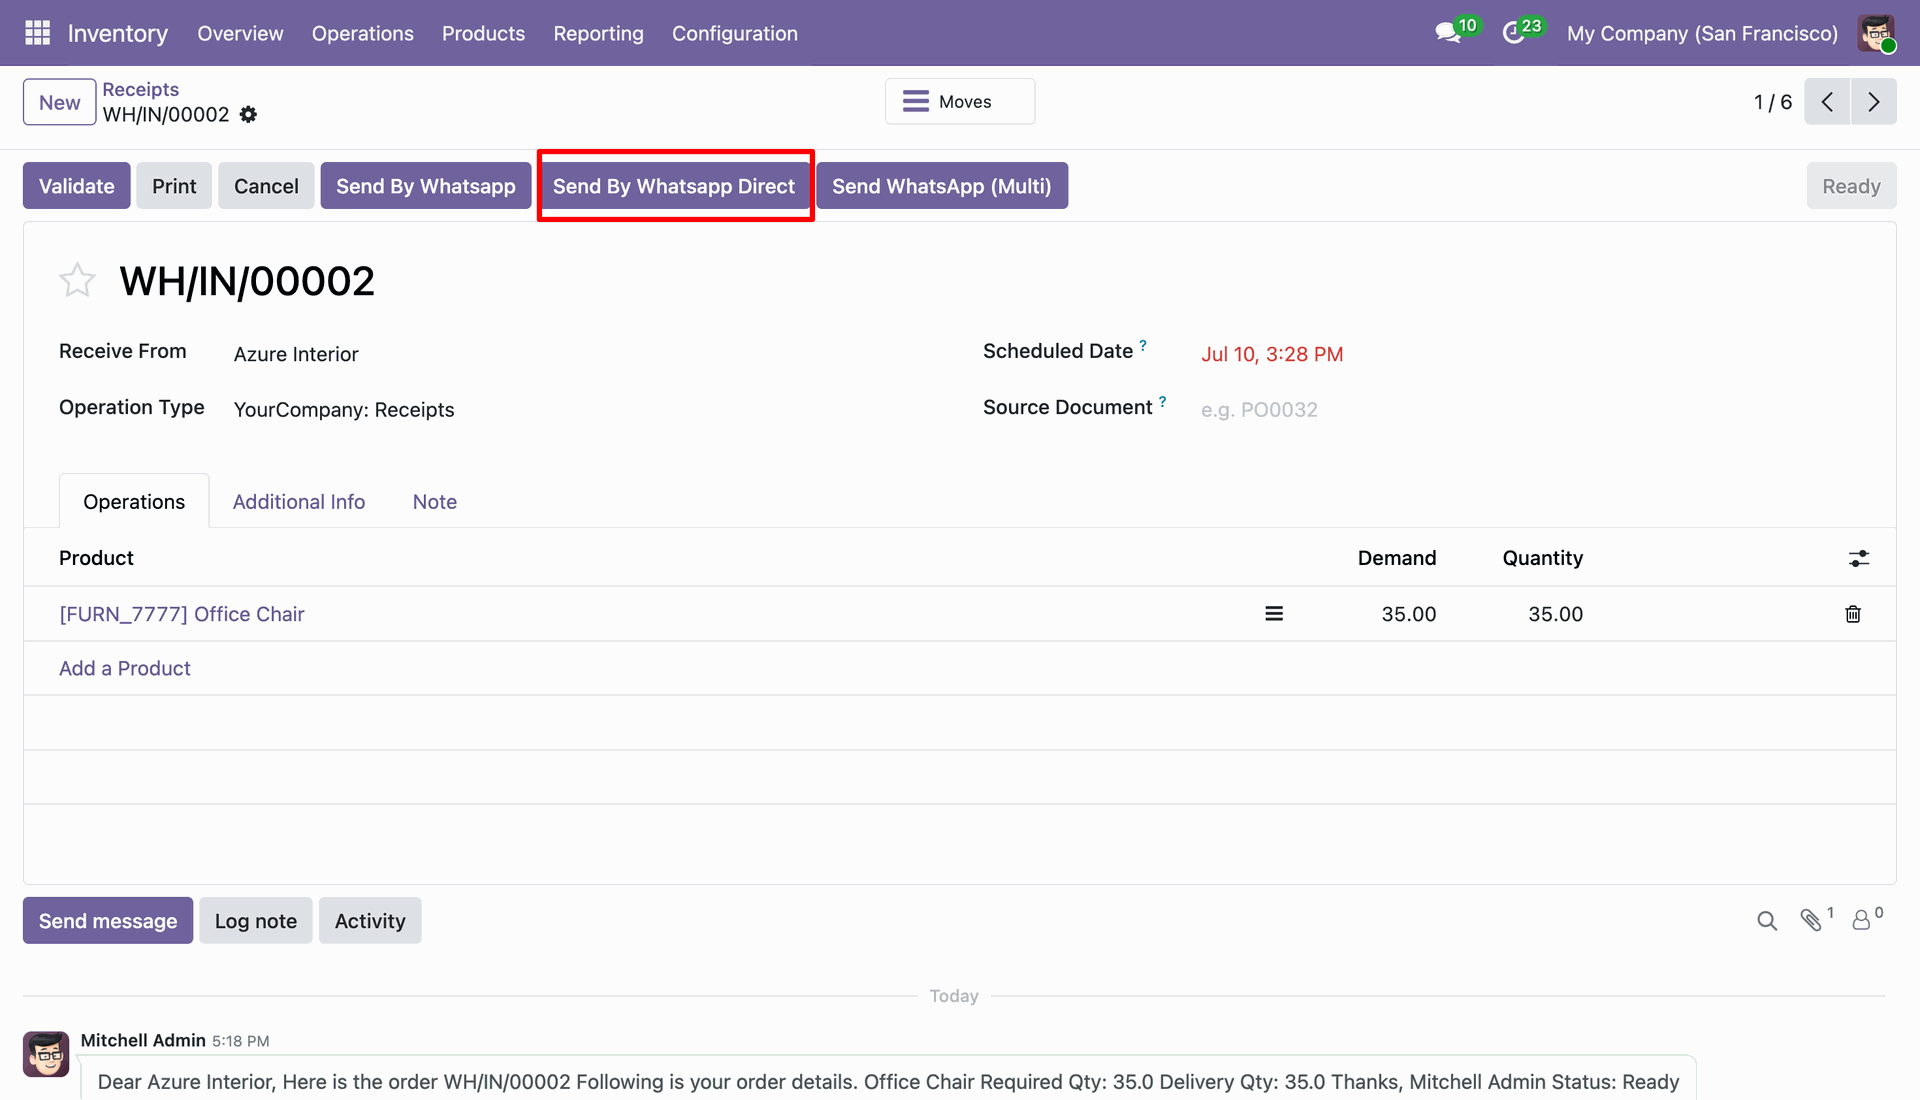
Click 'Send By Whatsapp Direct' and it will sending directly with predefine message and attachments.
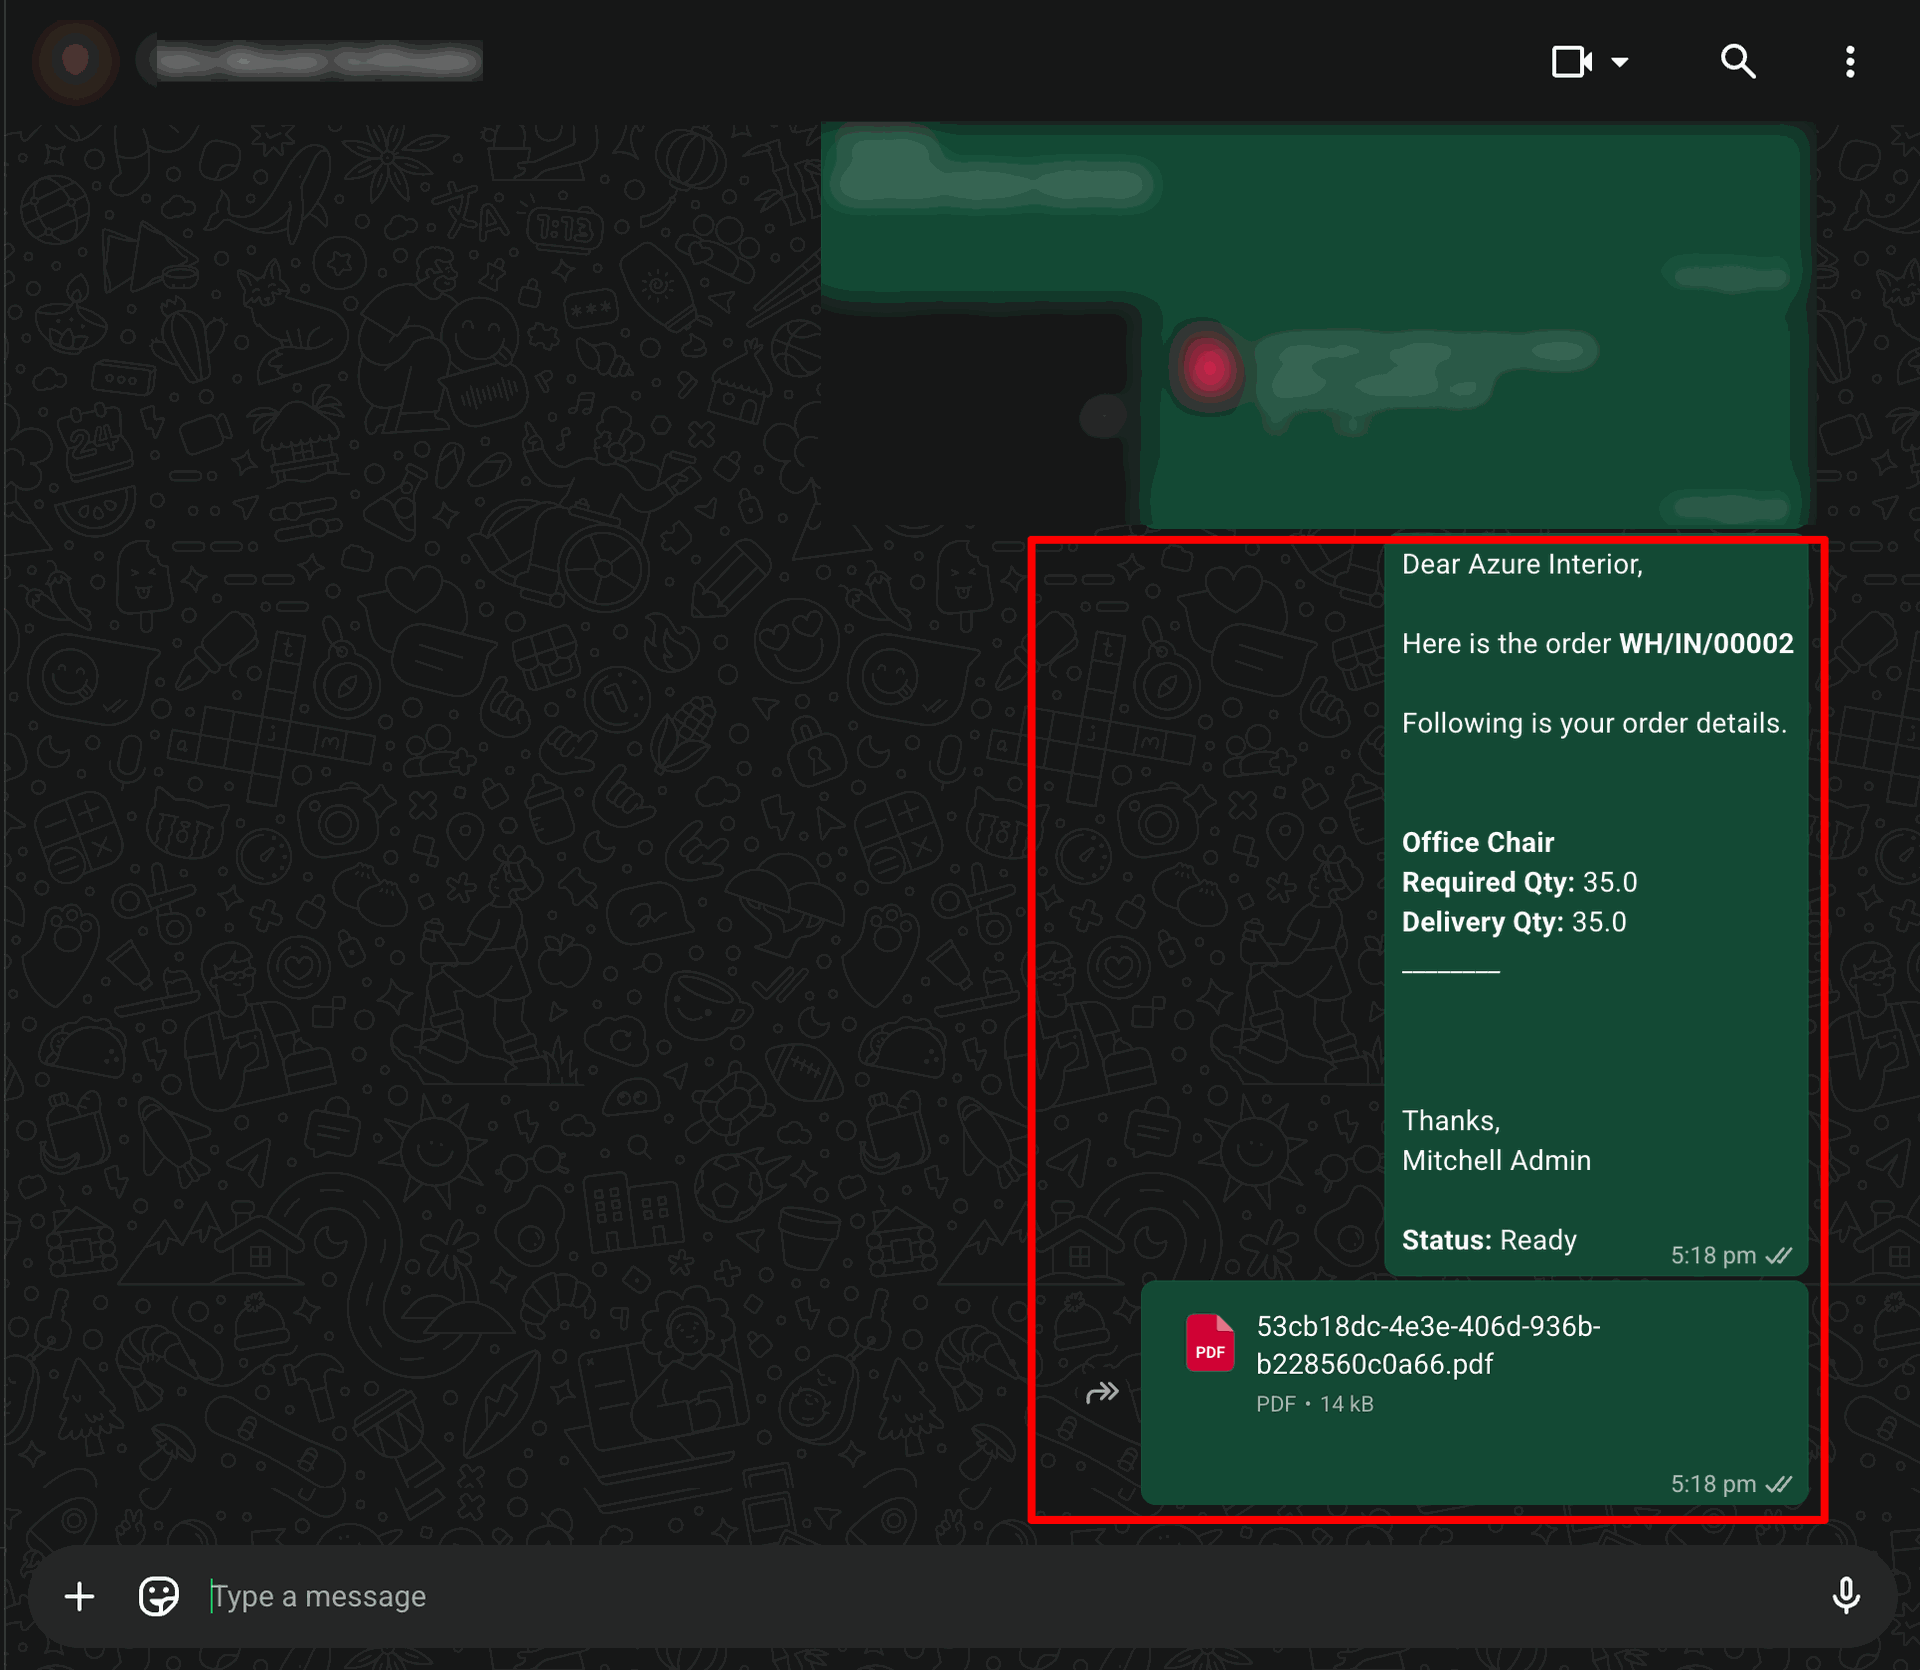
This is output of sended message on whatsapp.
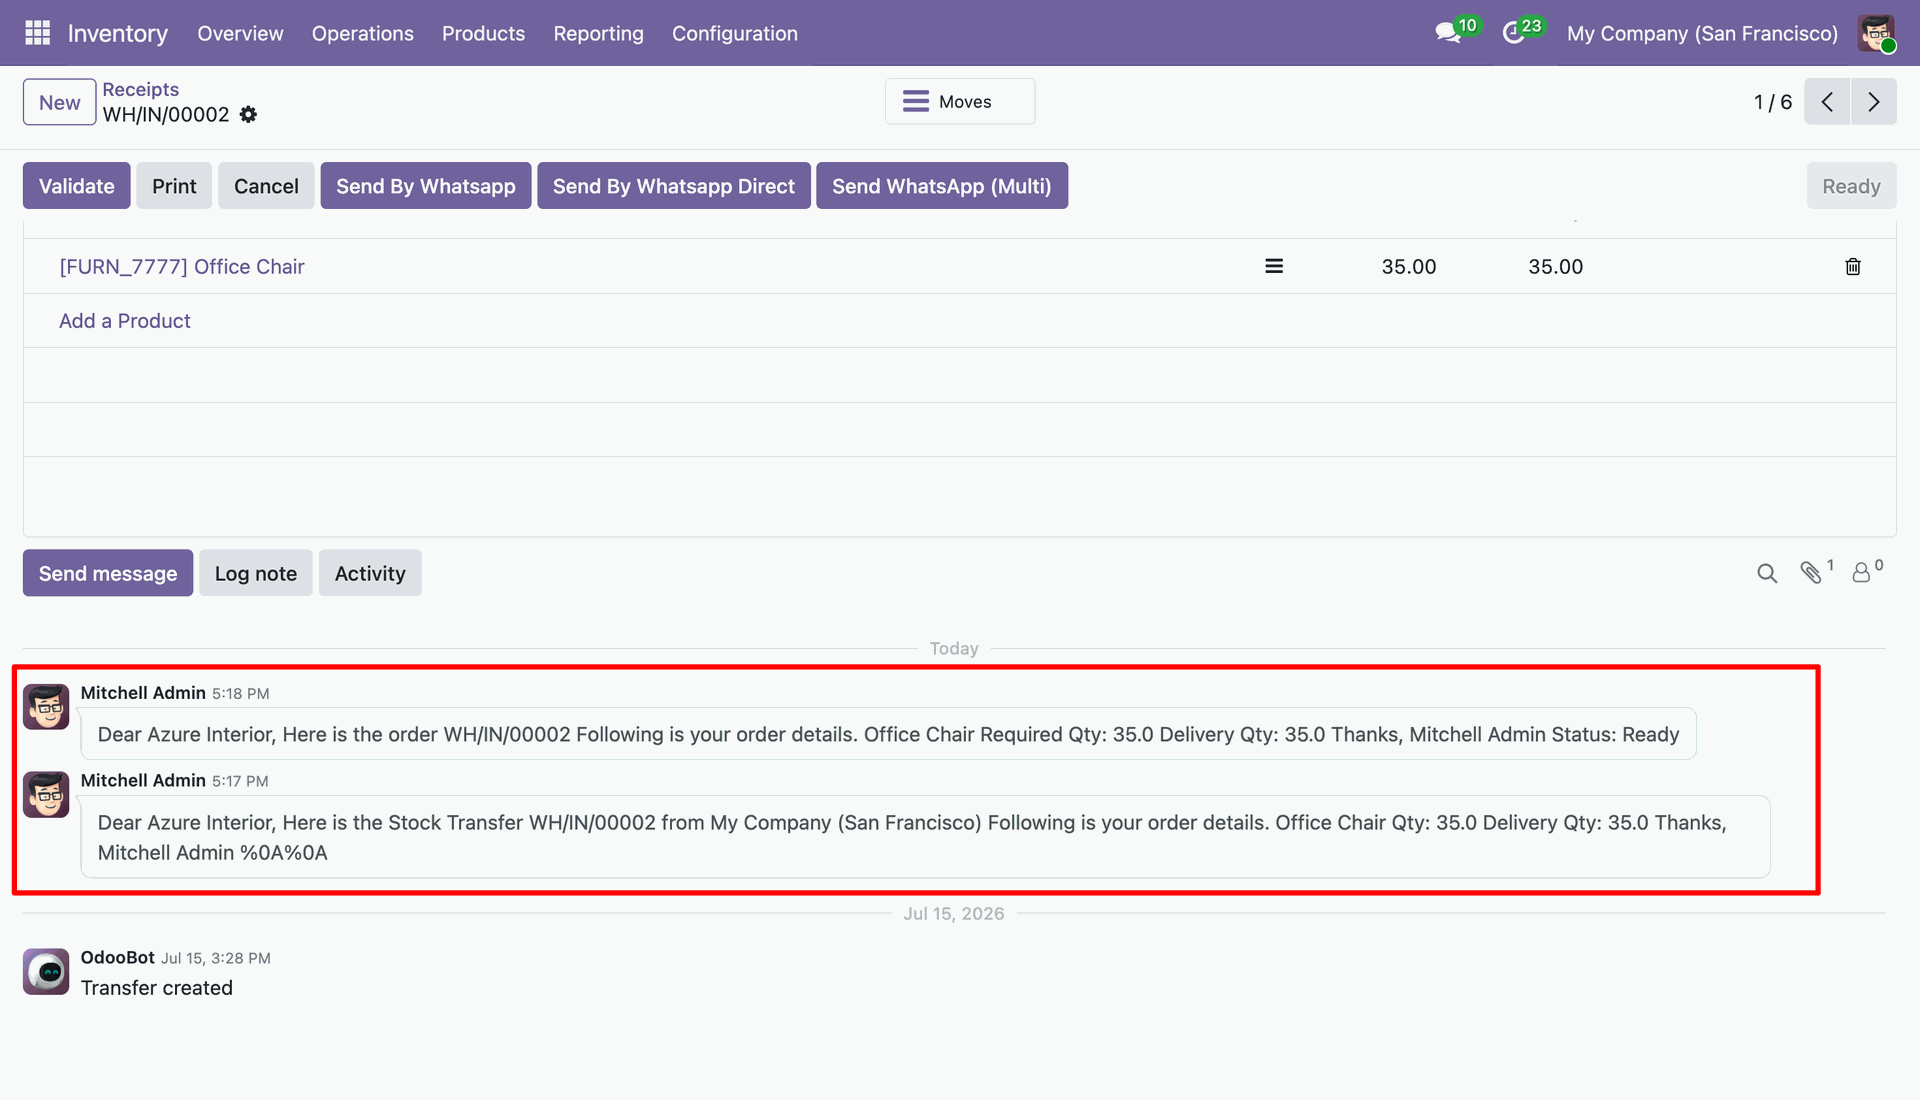
Sended message entry in chatter also.
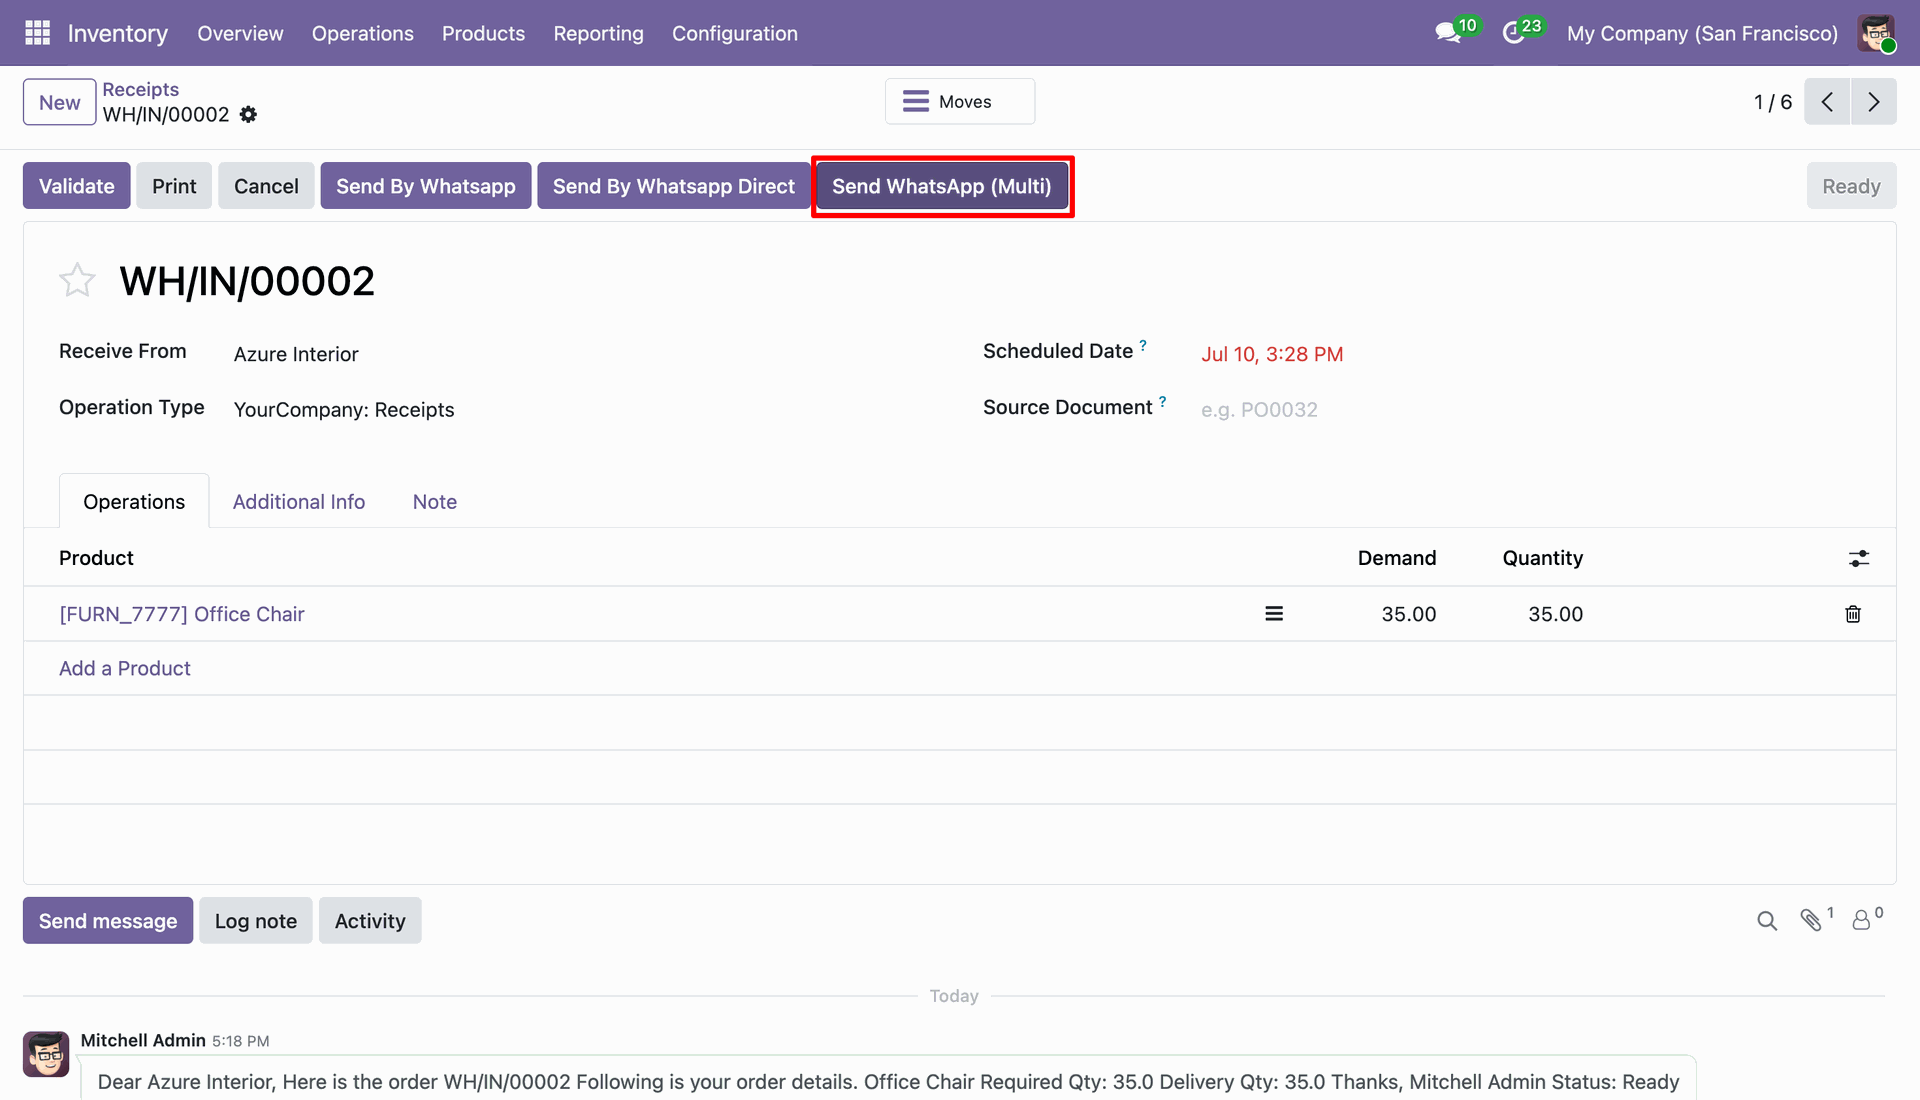
In receipt click on 'Send Whatsapp (Multi)' button. This button is used to send message to the multiple receipients.
After that this wizard will display. Here you can select multiple receipients. and click 'Send'.
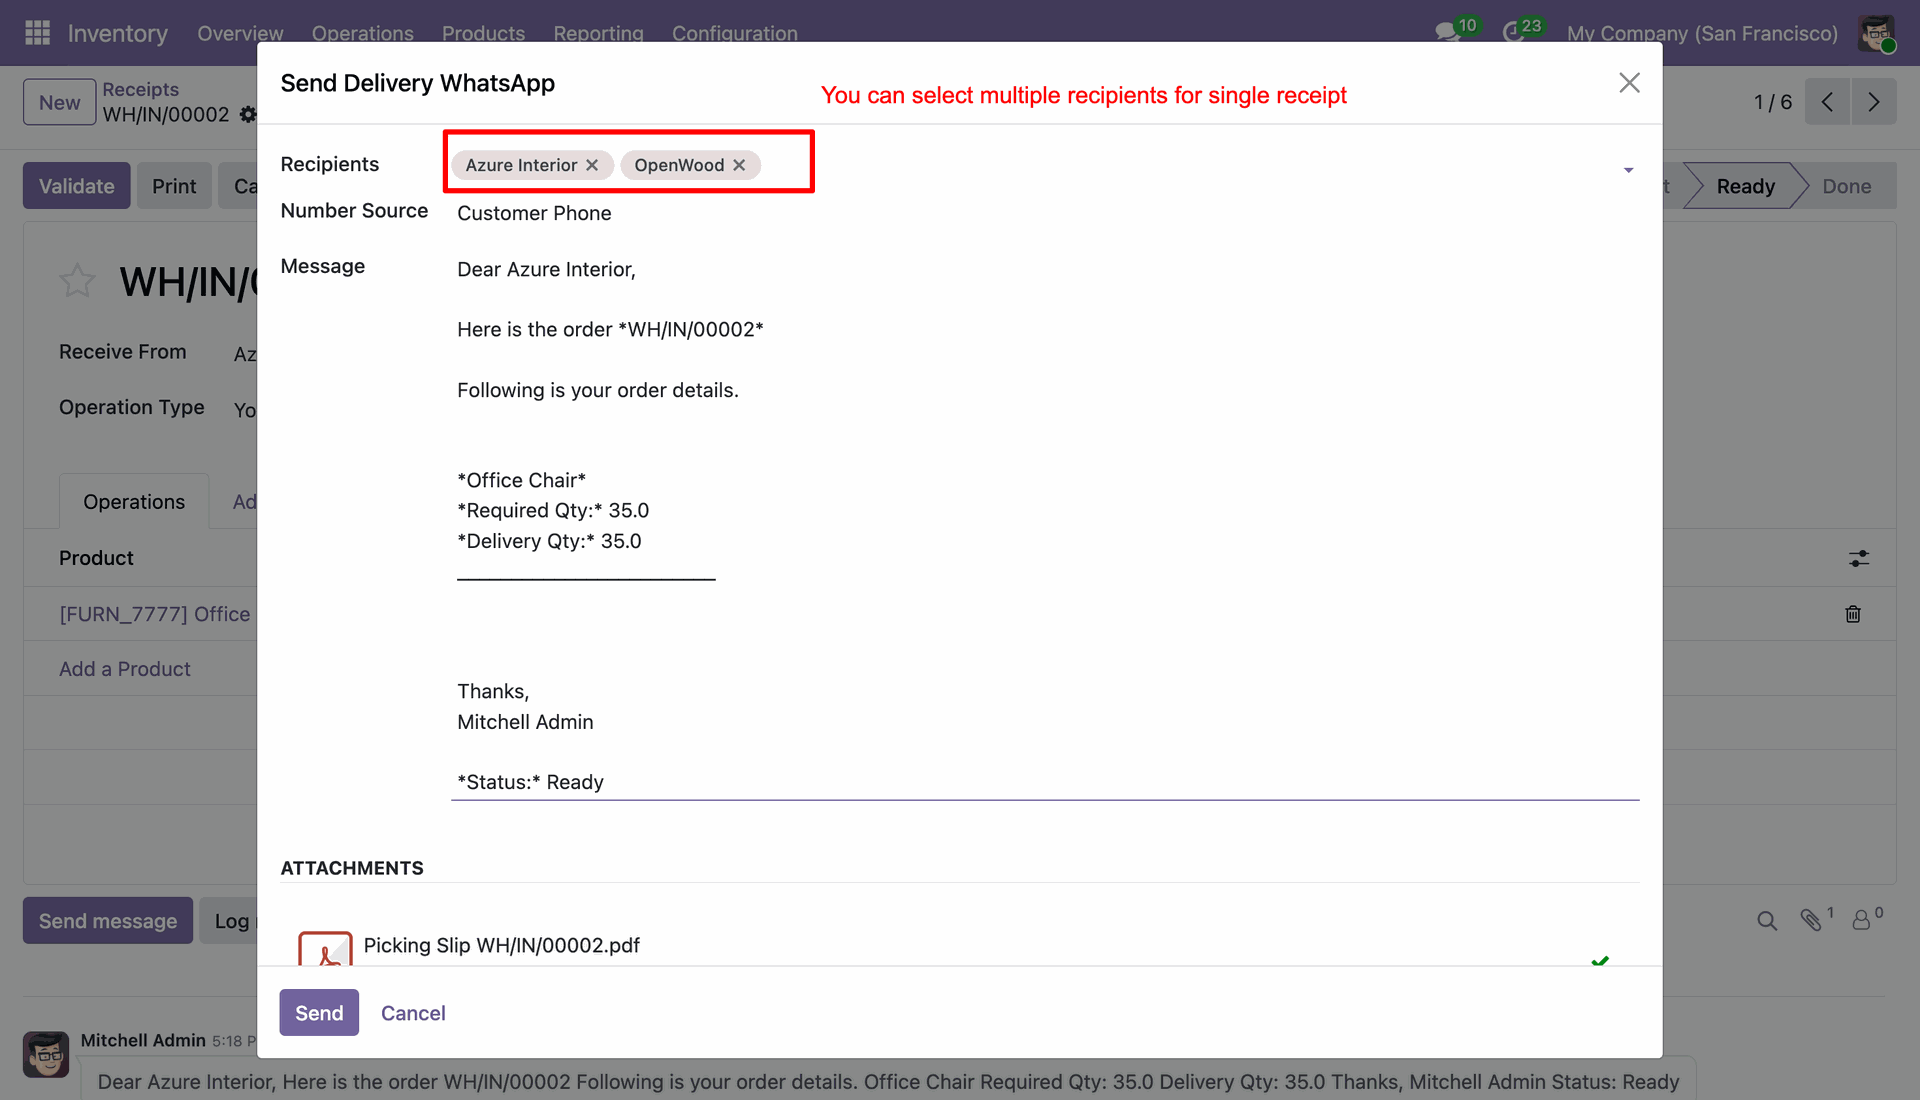
This is output of sended message to recipient whatsapp.
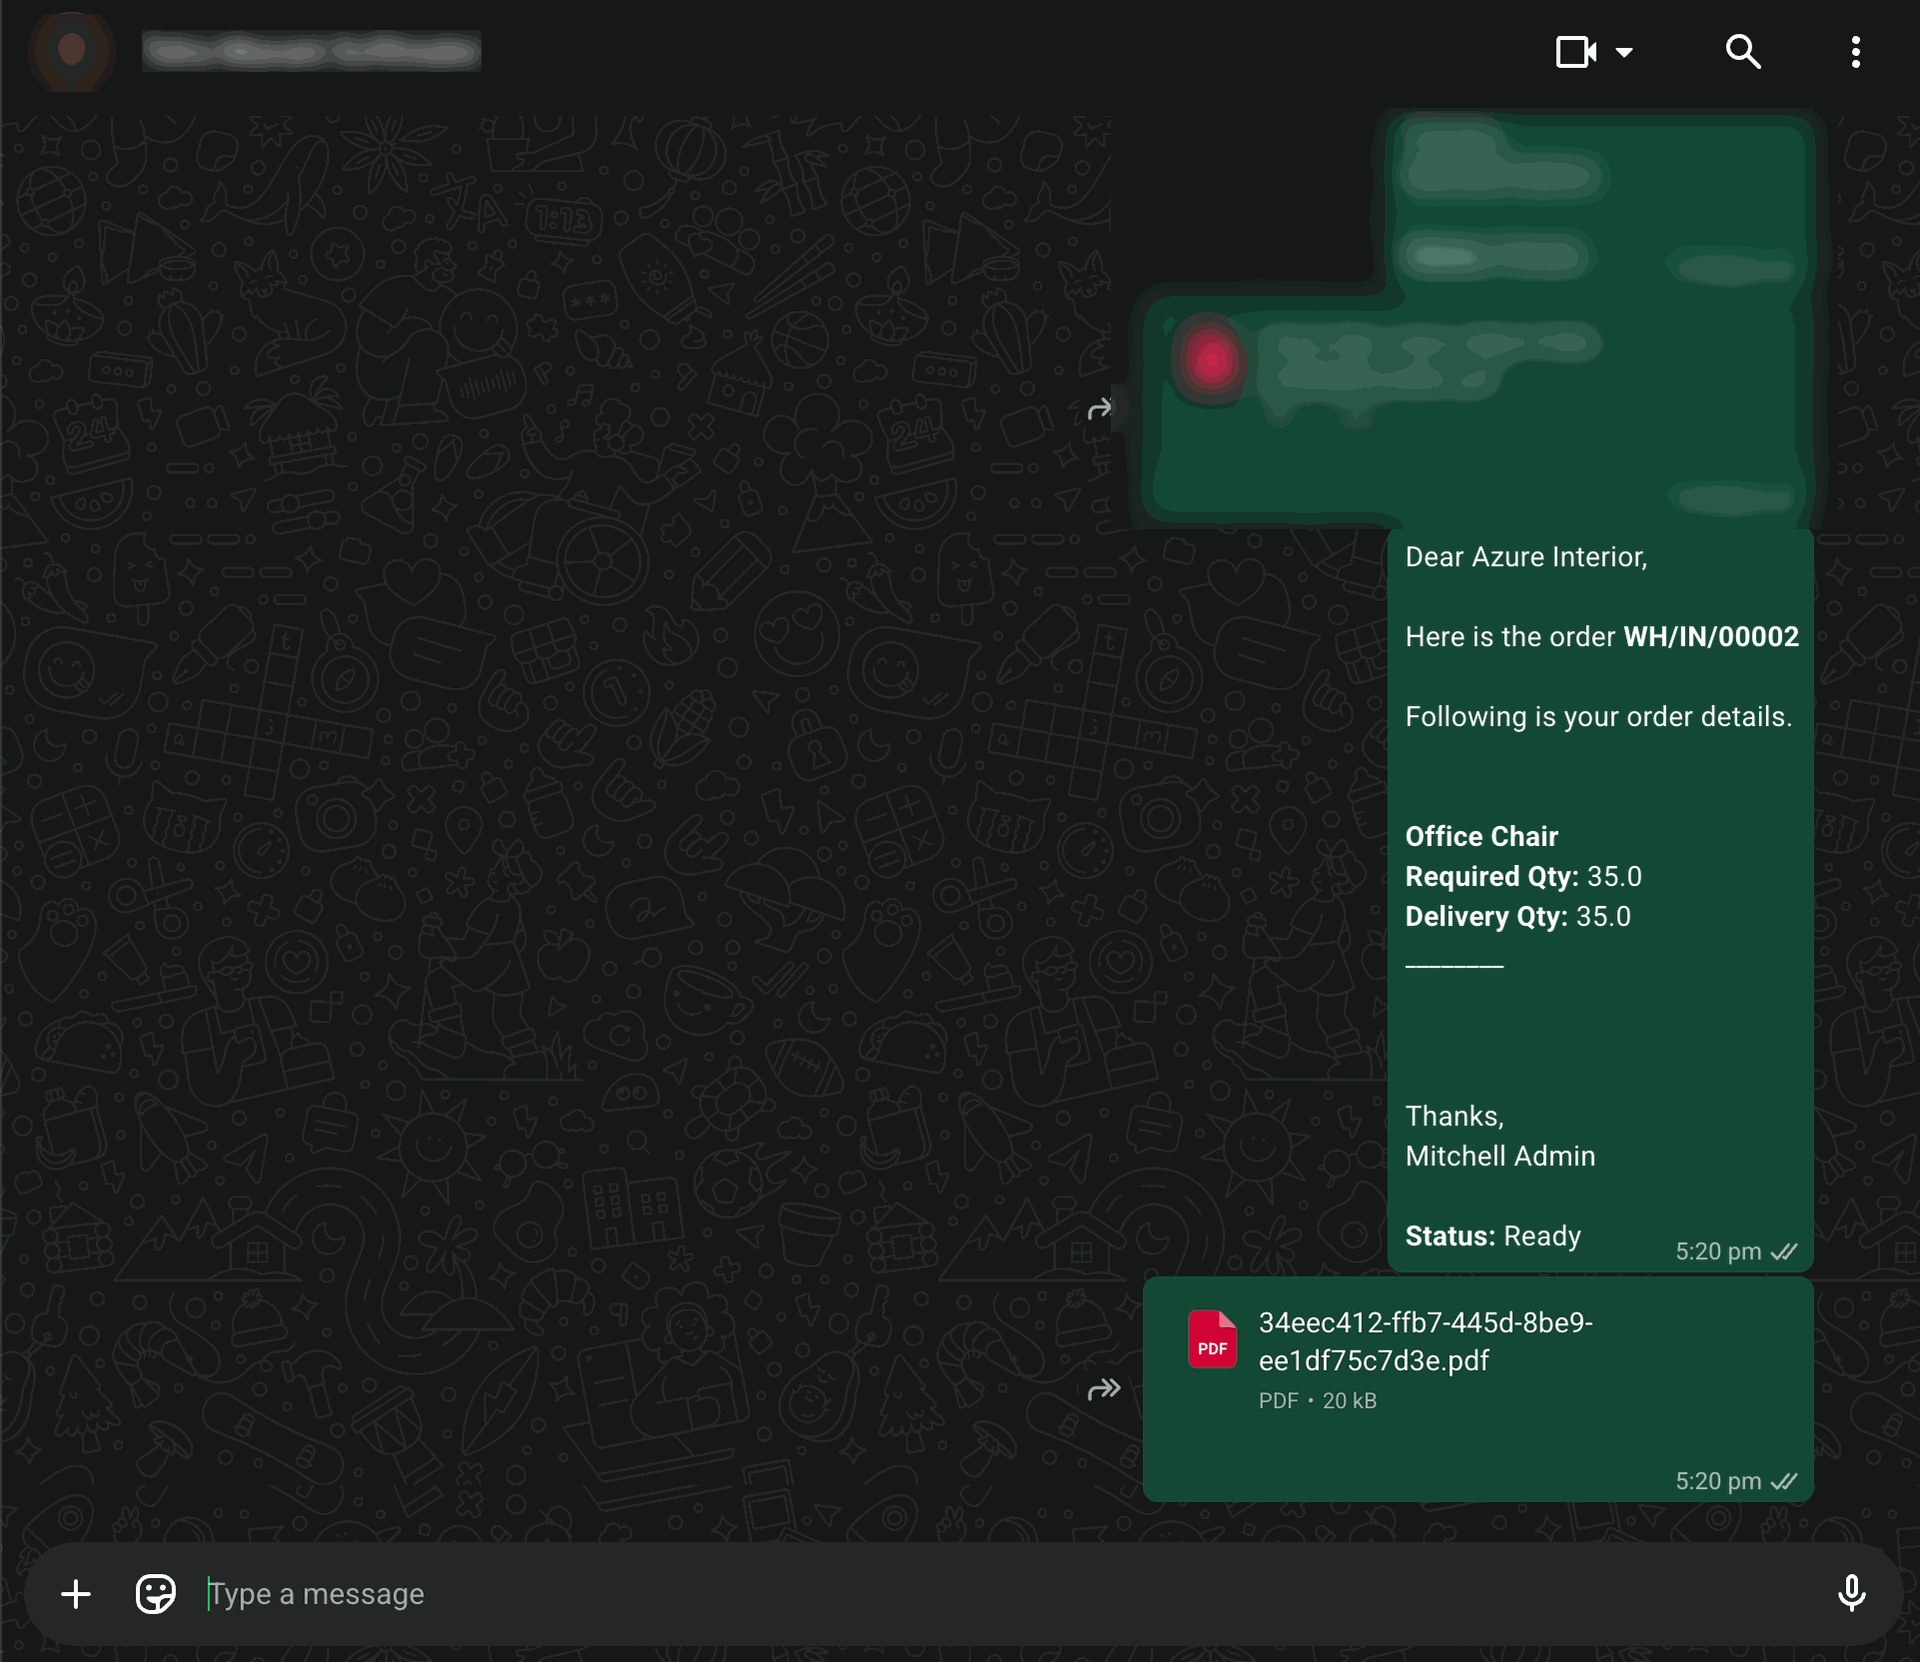
This is output of sended message to recipient whatsapp.
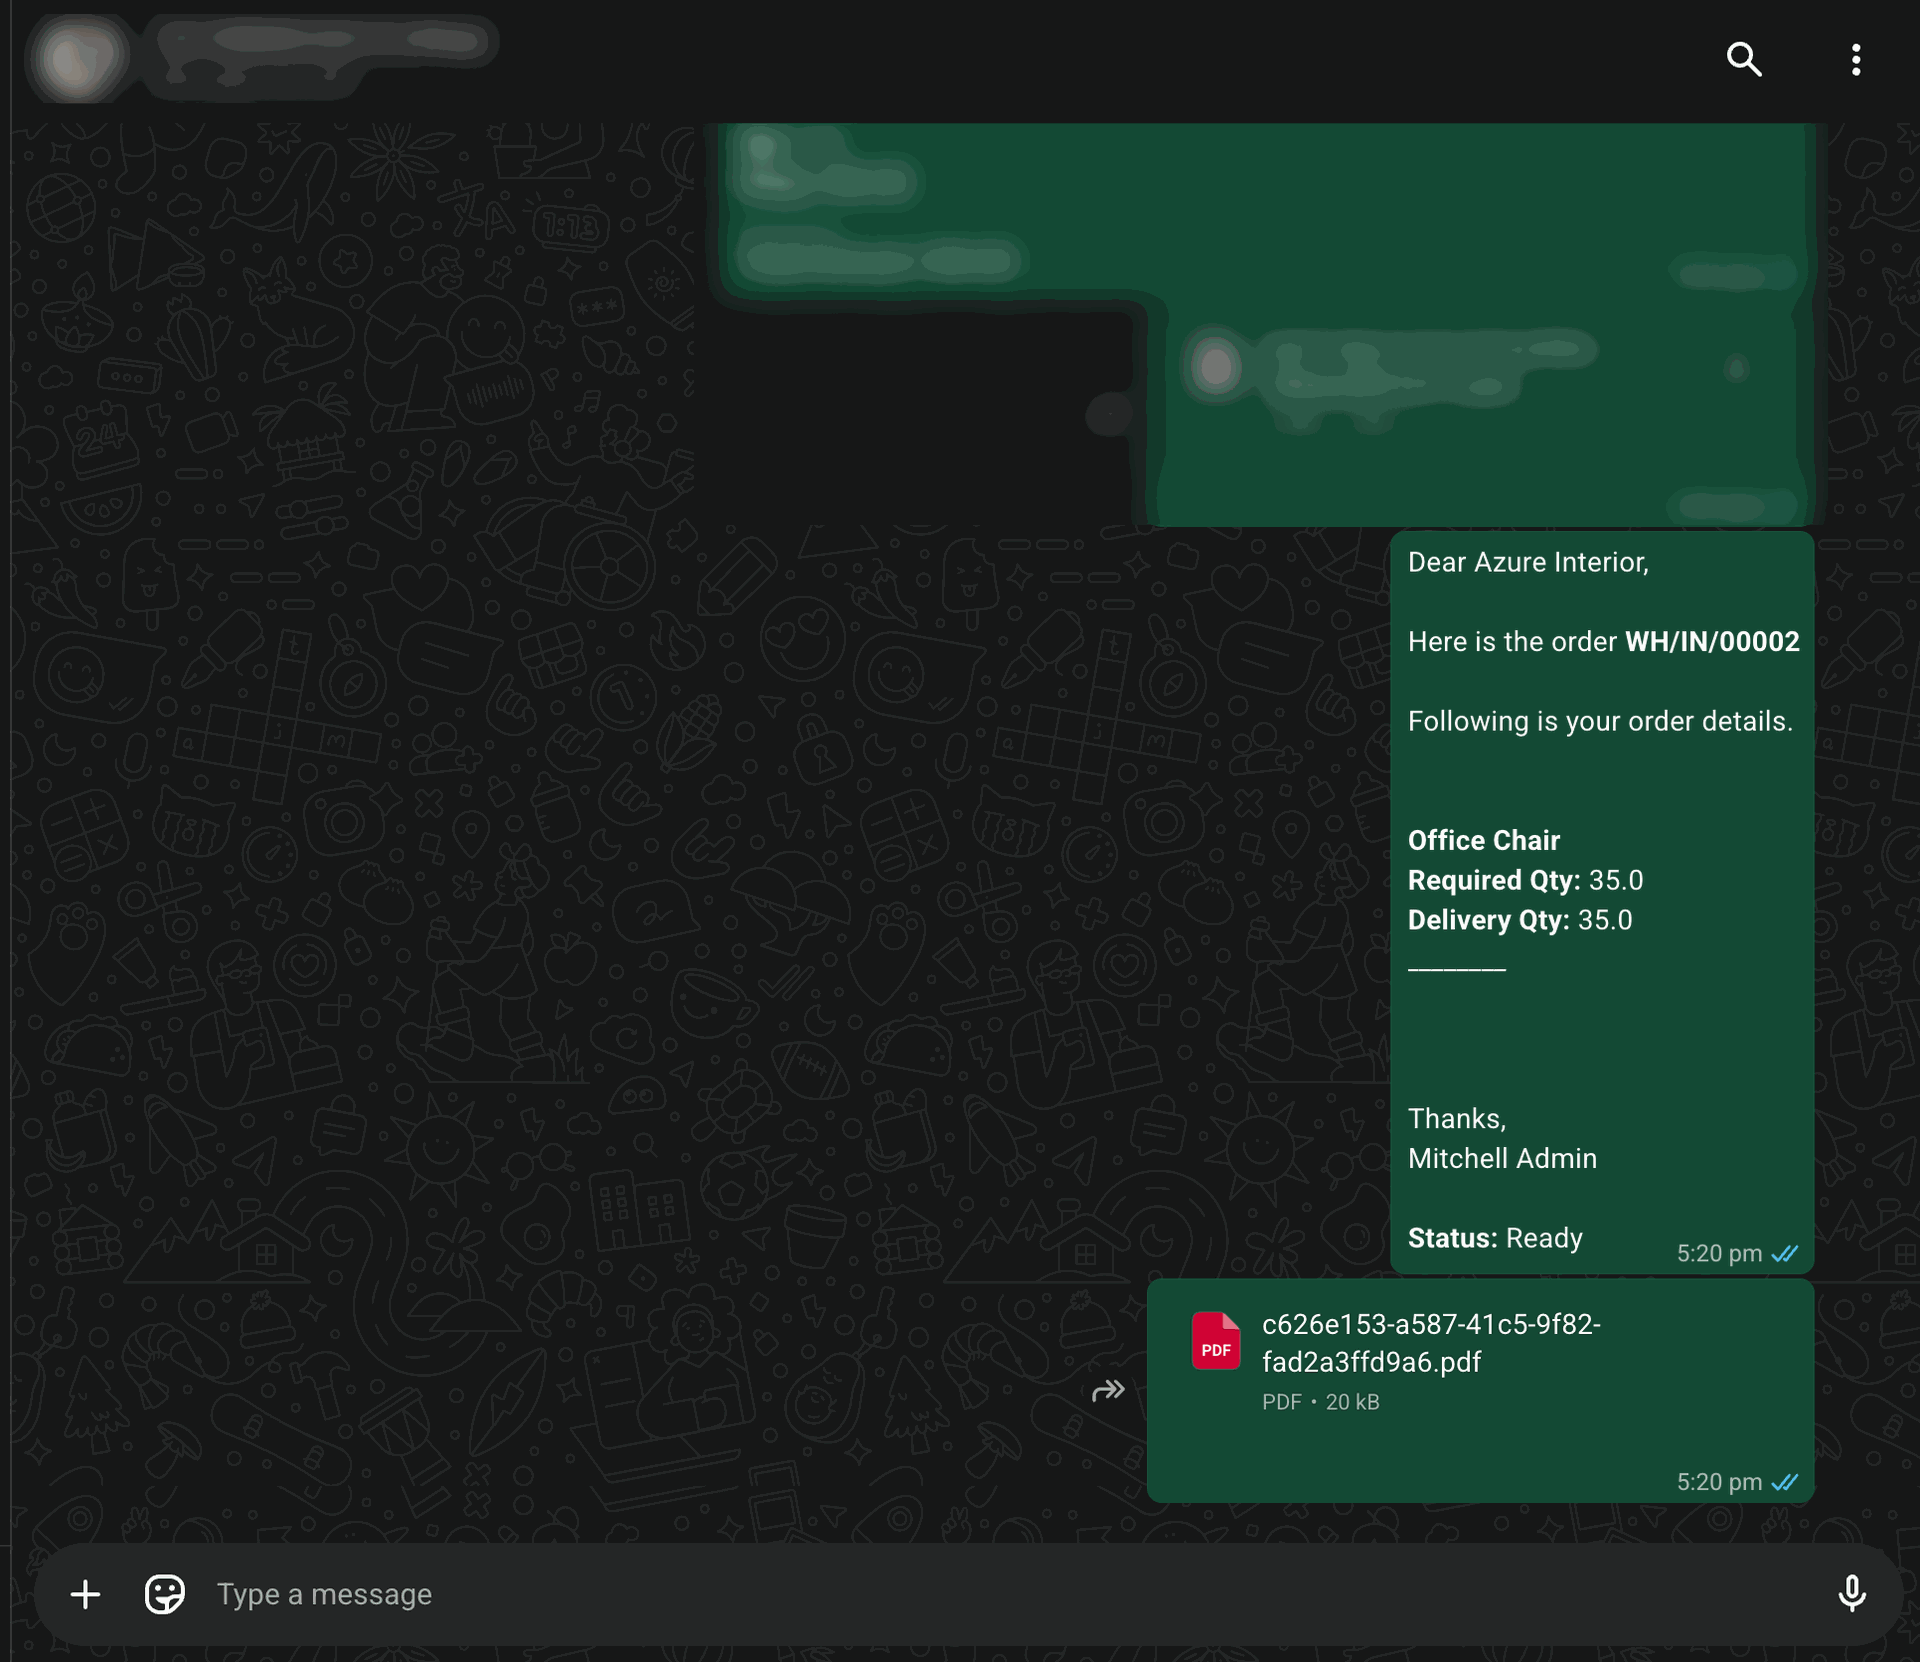
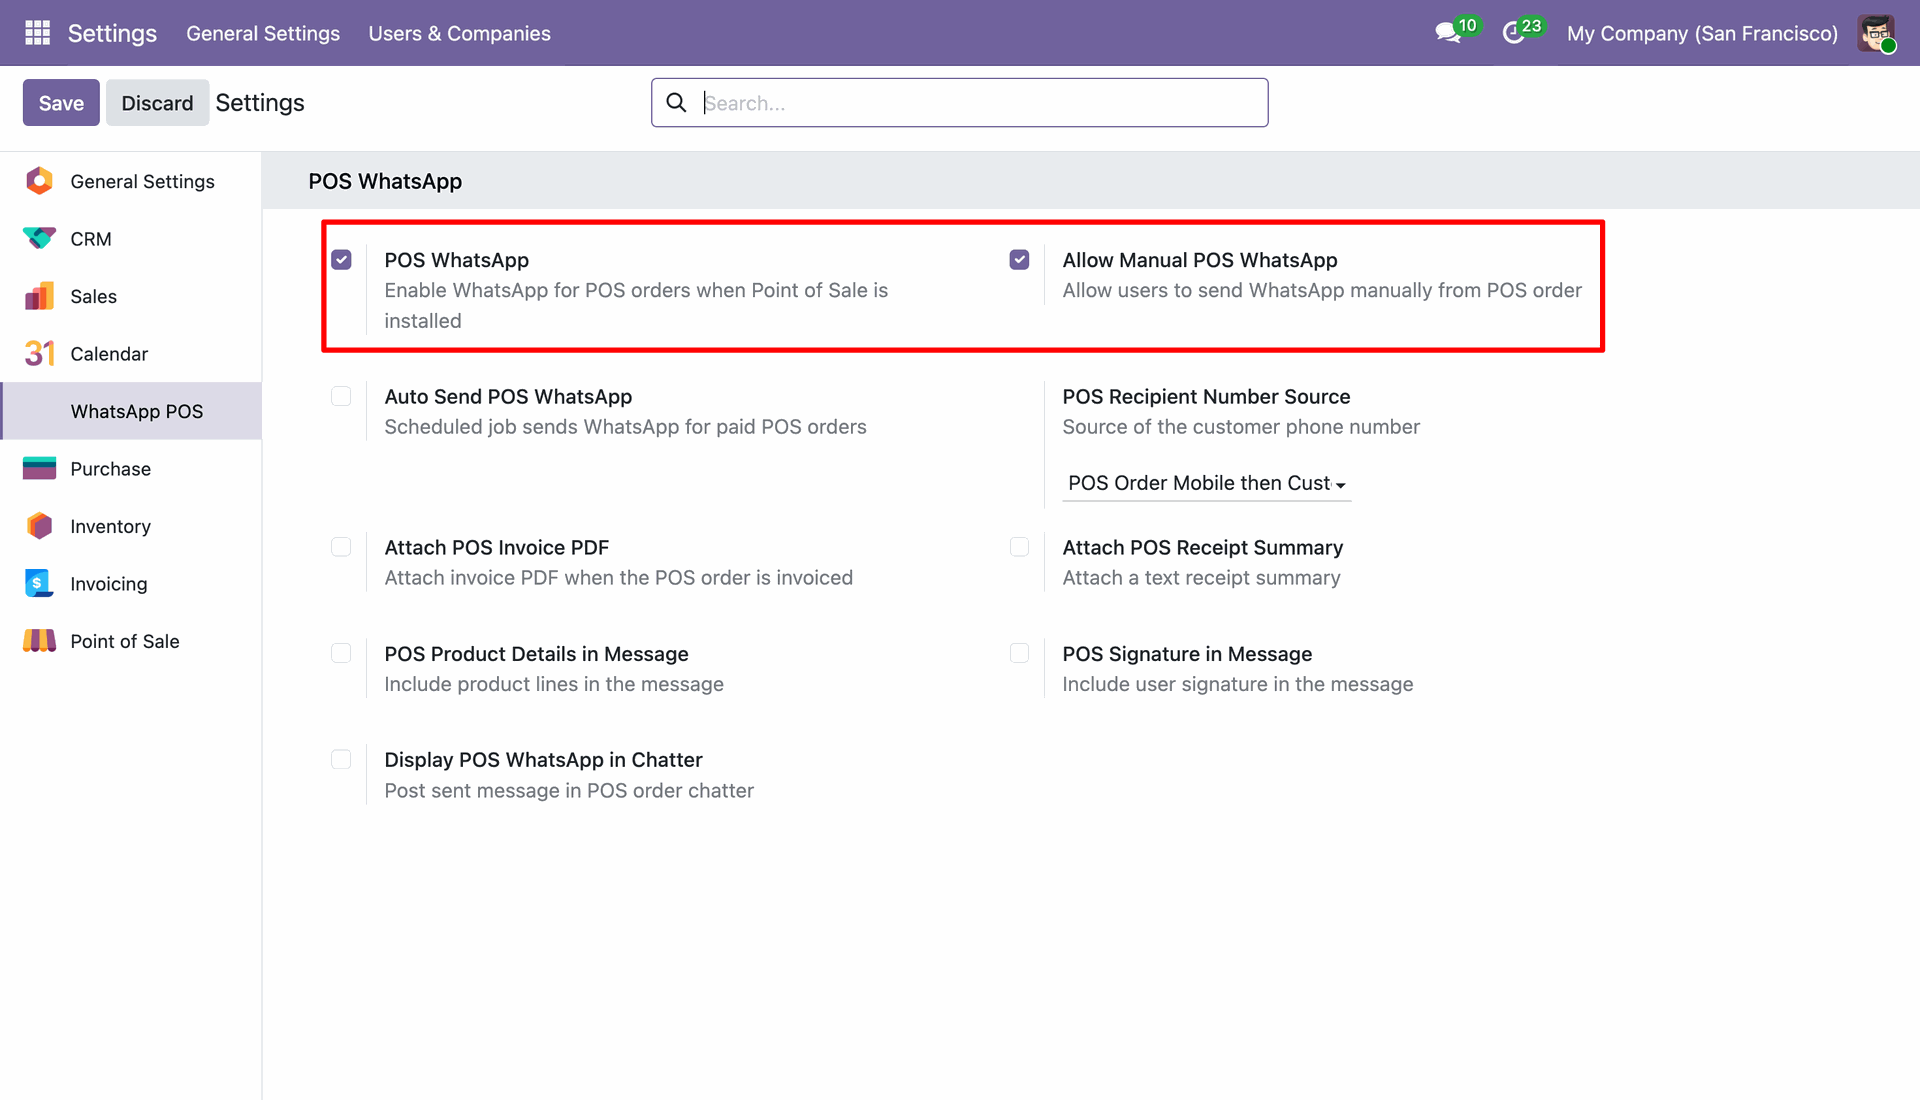
Go to General Settings and select WhatsApp POS to configure WhatsApp messaging for the Point of Sale.
Enable POS WhatsApp and Allow Manual POS WhatsApp to activate WhatsApp messaging and allow users to send messages manually from the POS.
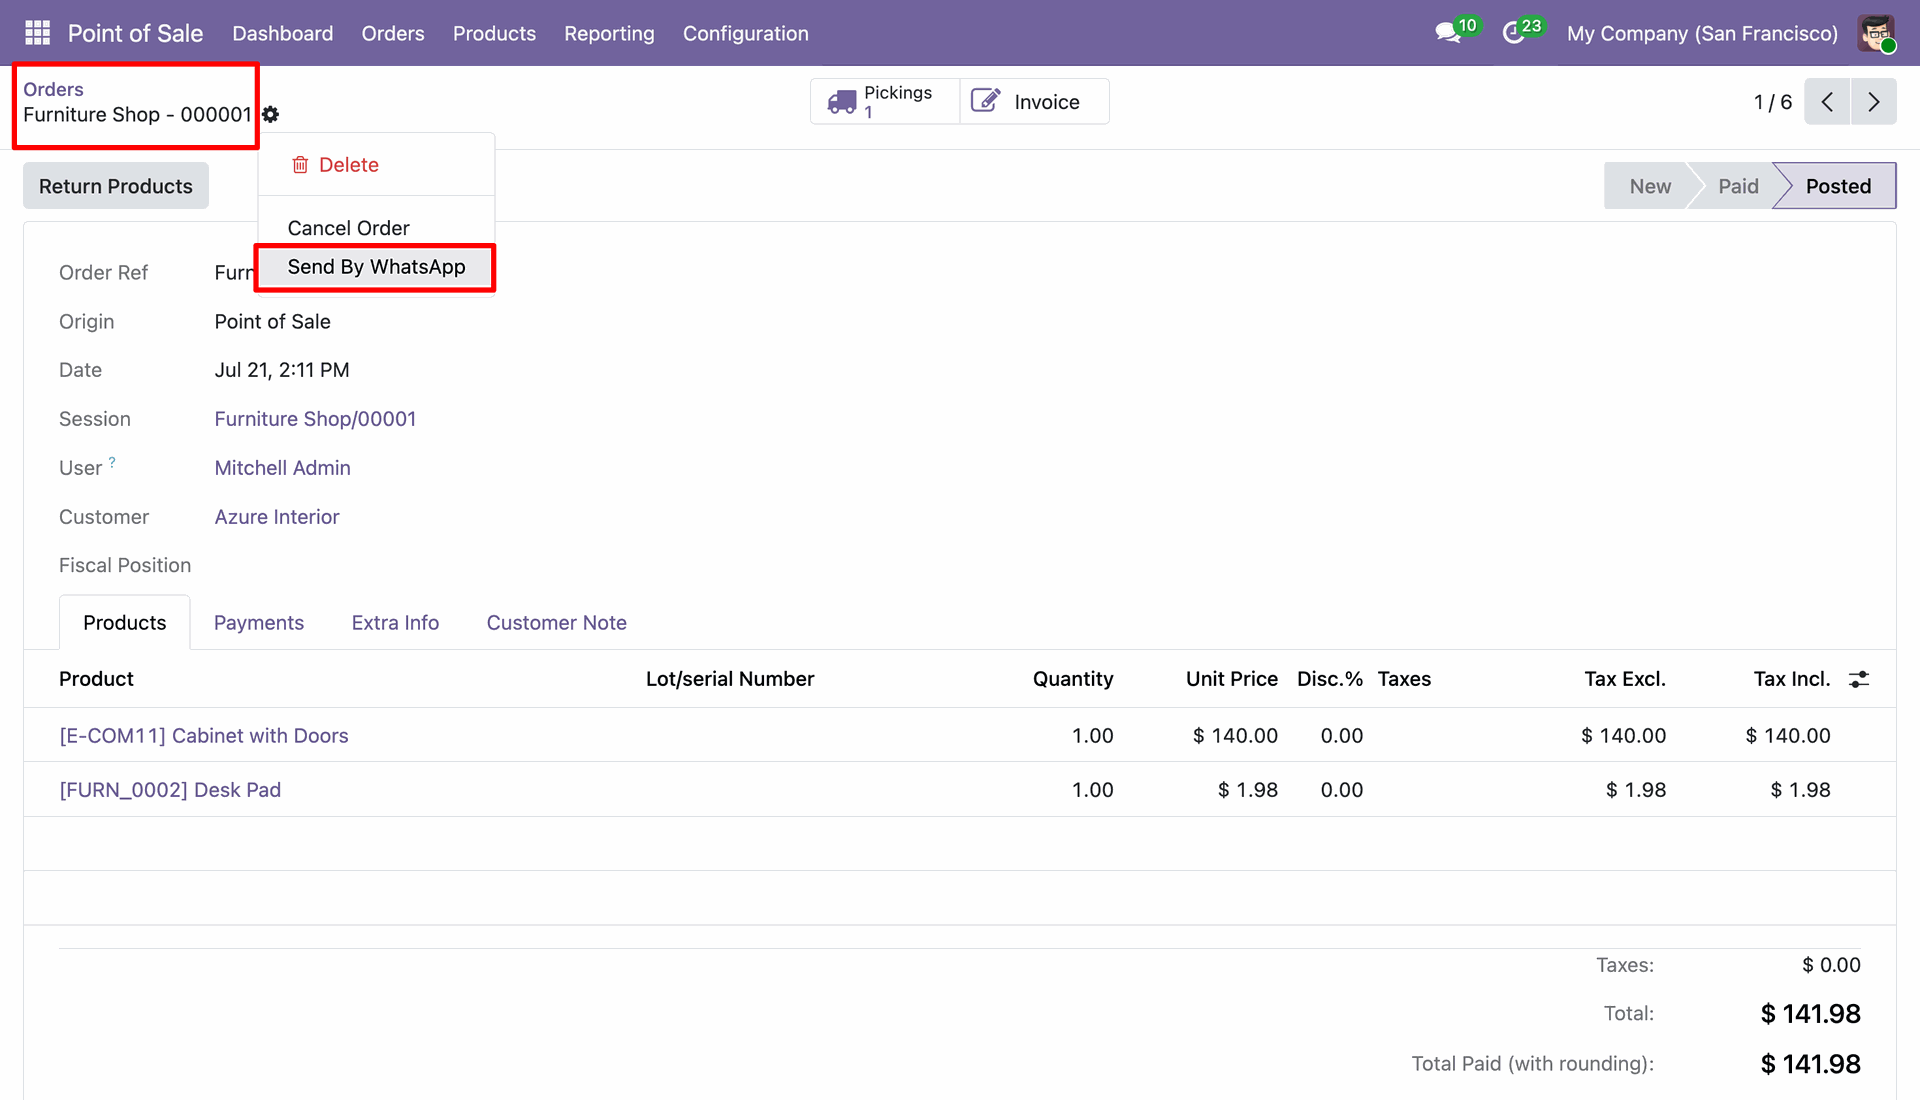
Go to POS Orders, select the required order, and click Send by WhatsApp from the Action menu.
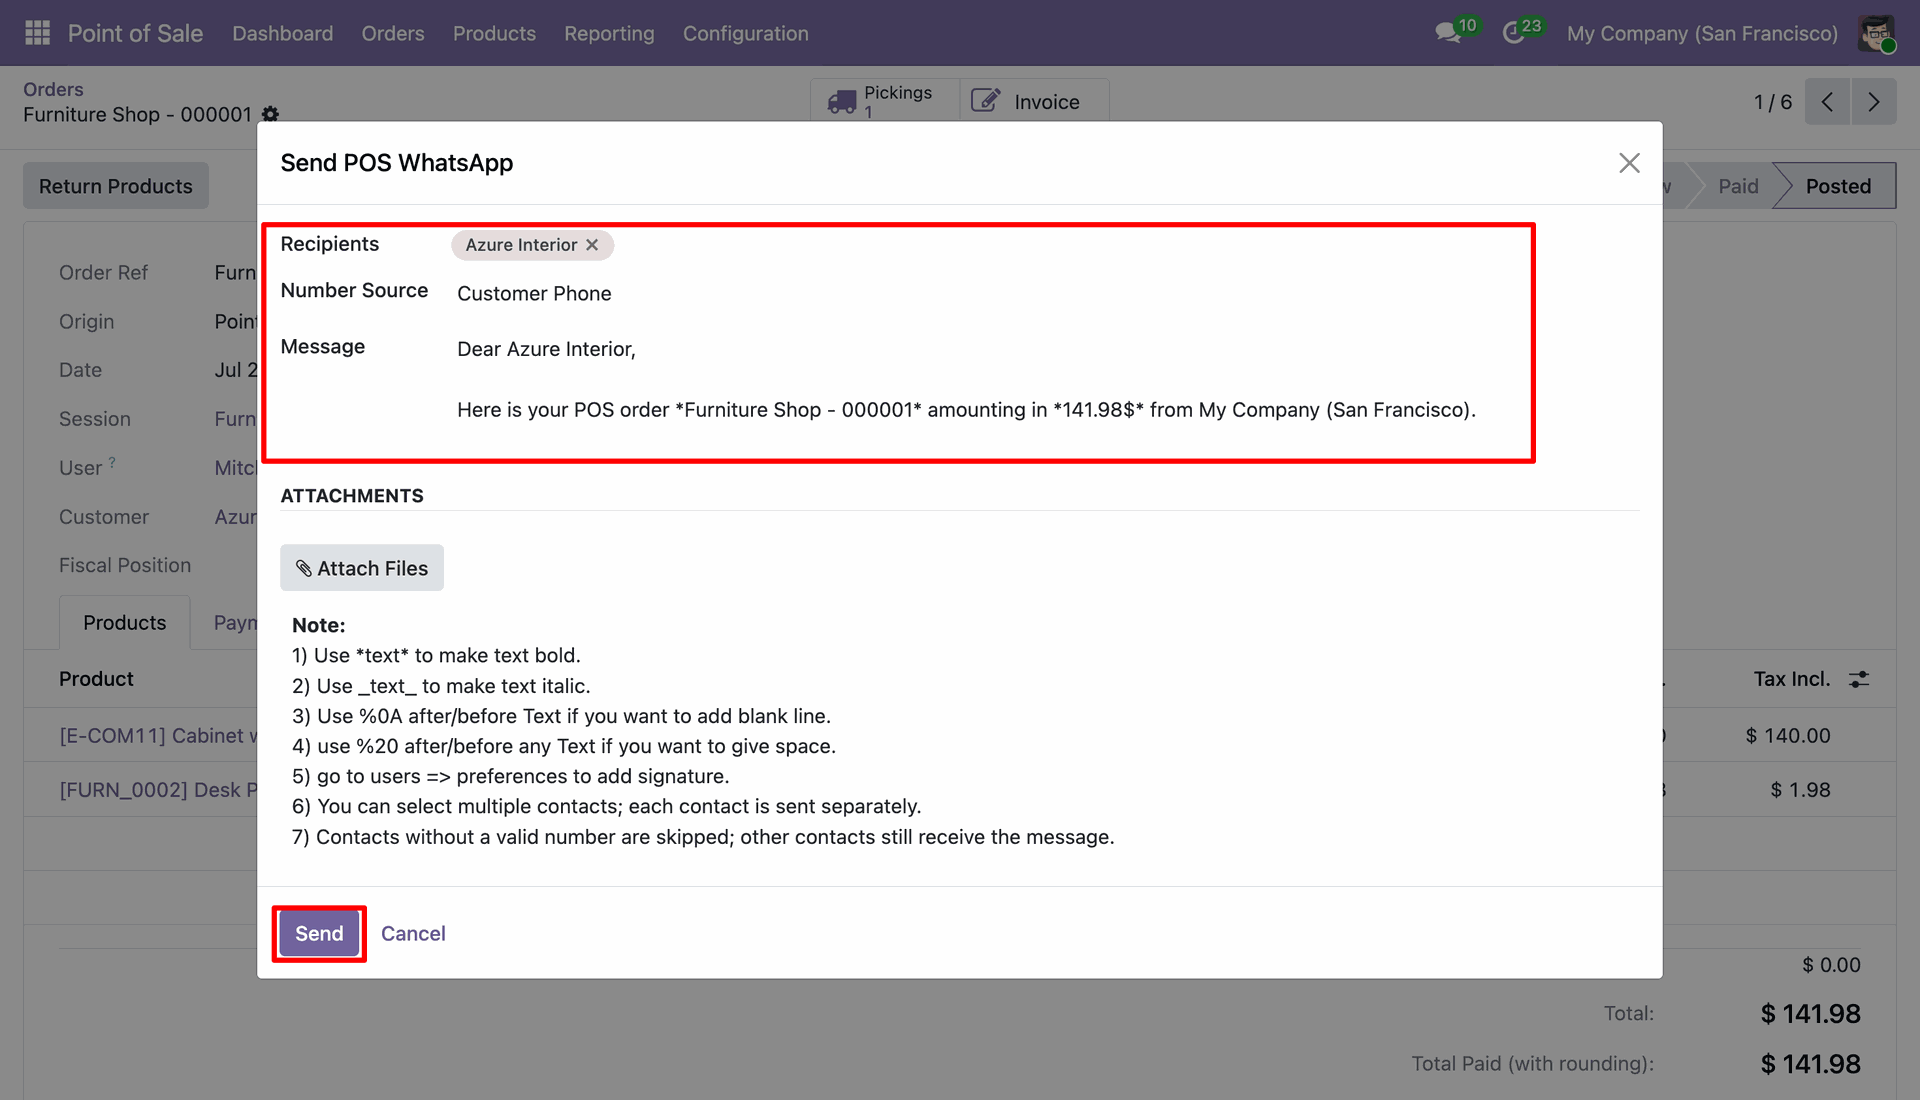
The WhatsApp Message wizard will open, allowing users to customize the message and add additional attachments. Once the message is ready, click Send to send it via WhatsApp.
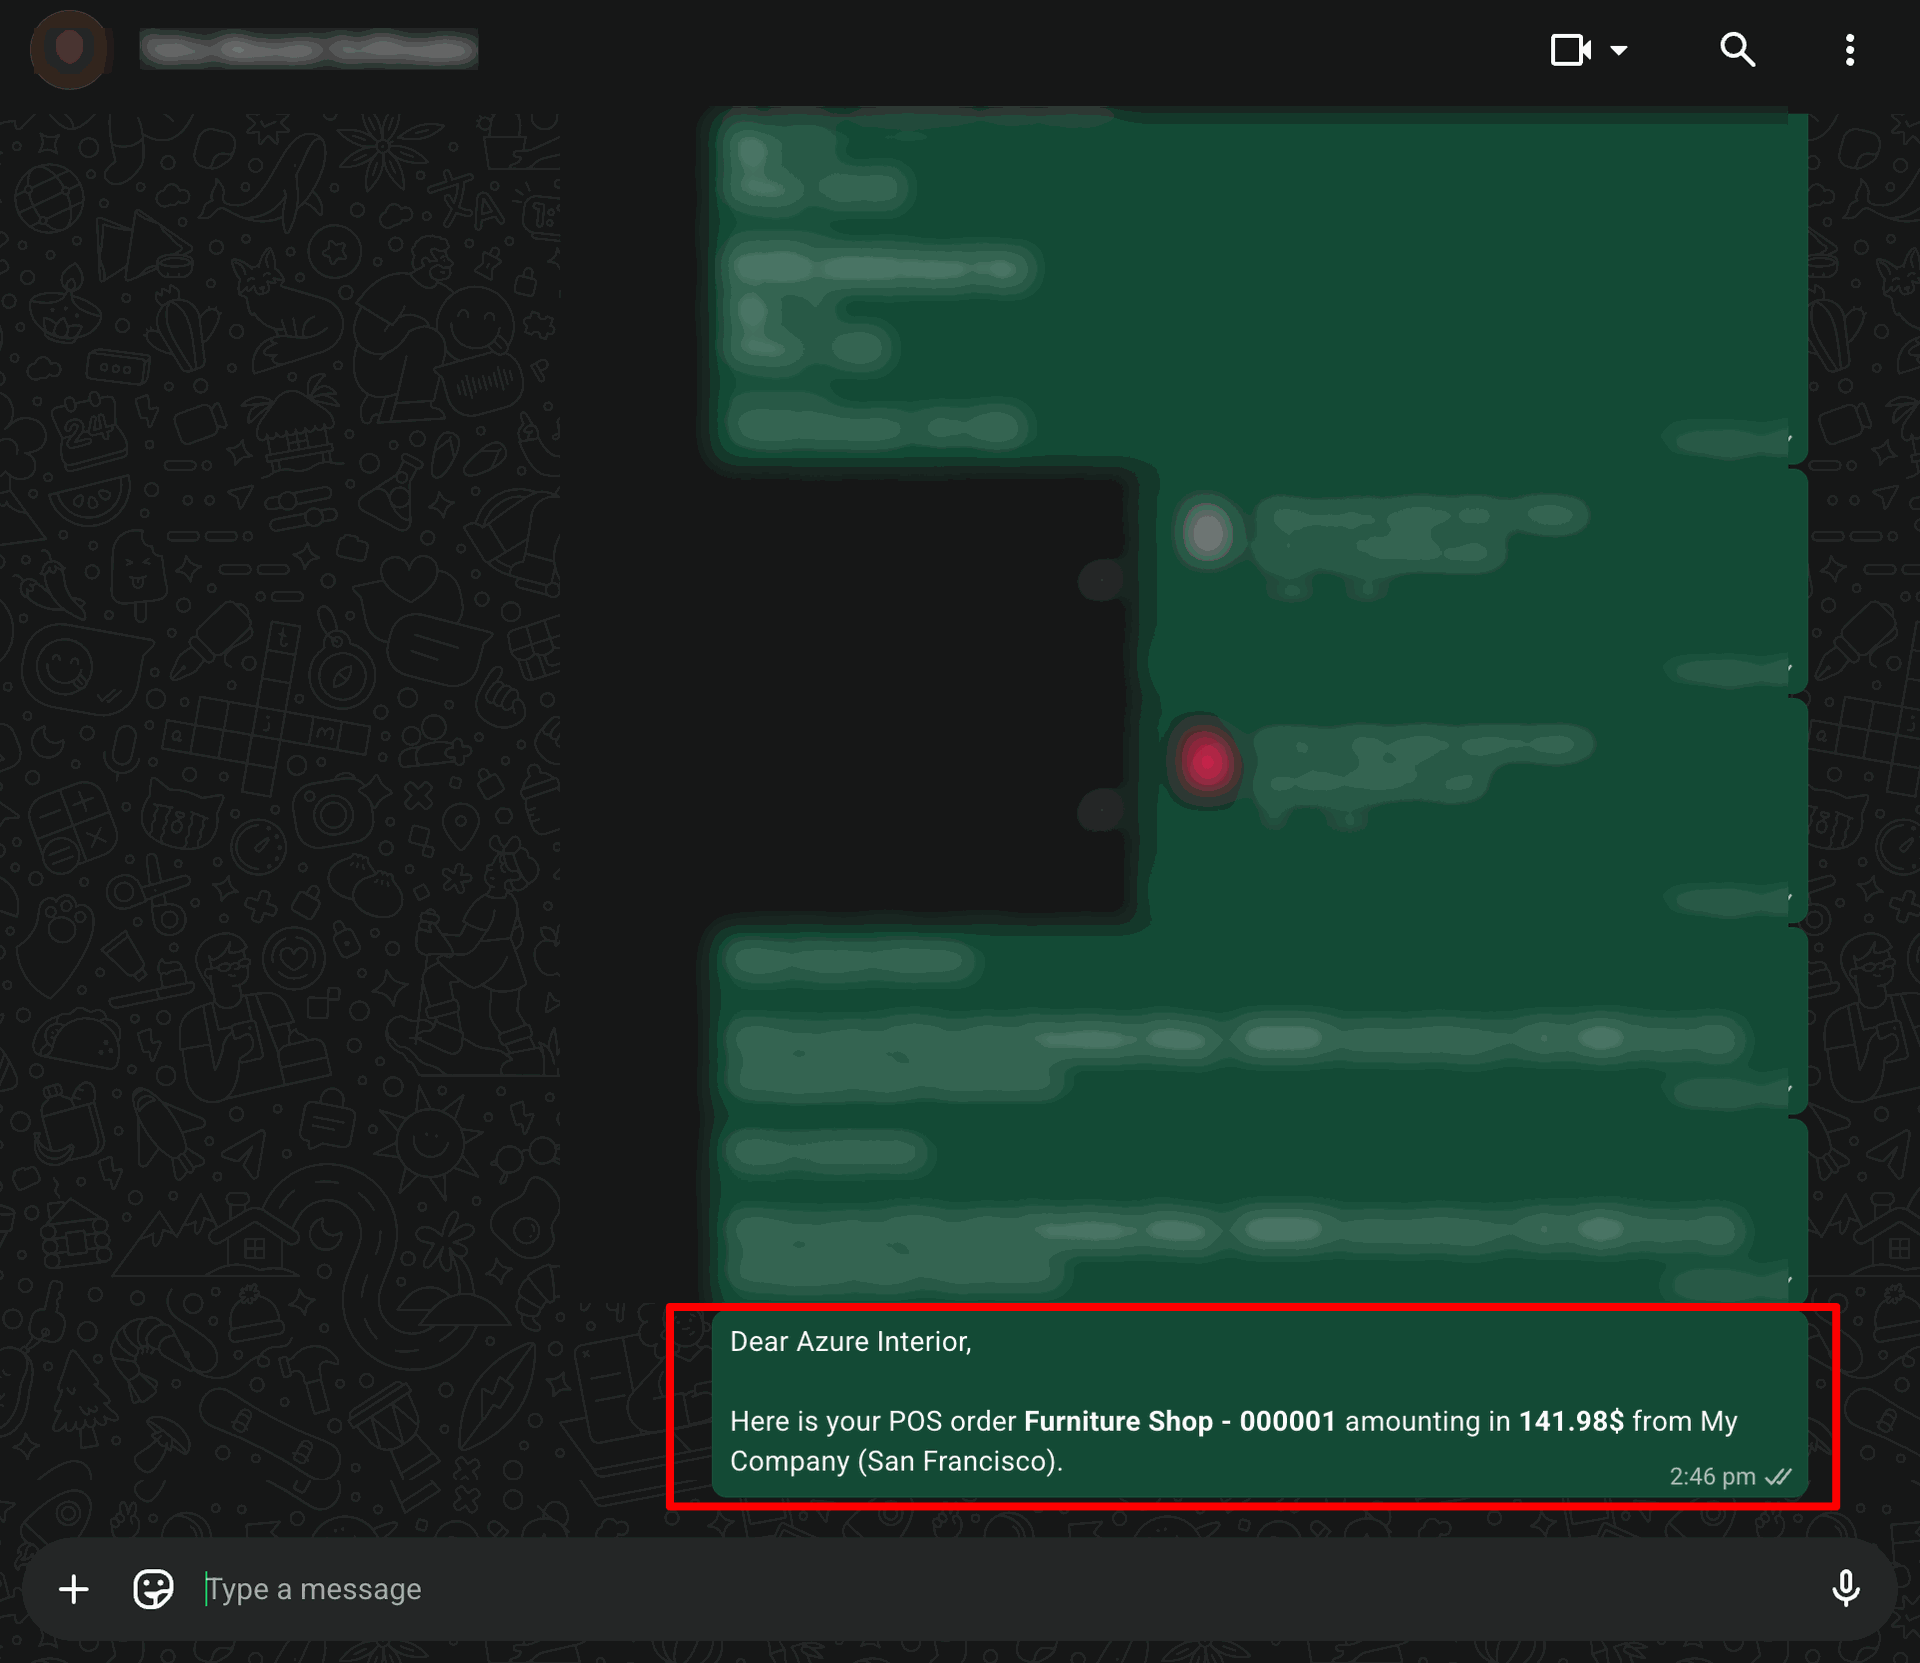
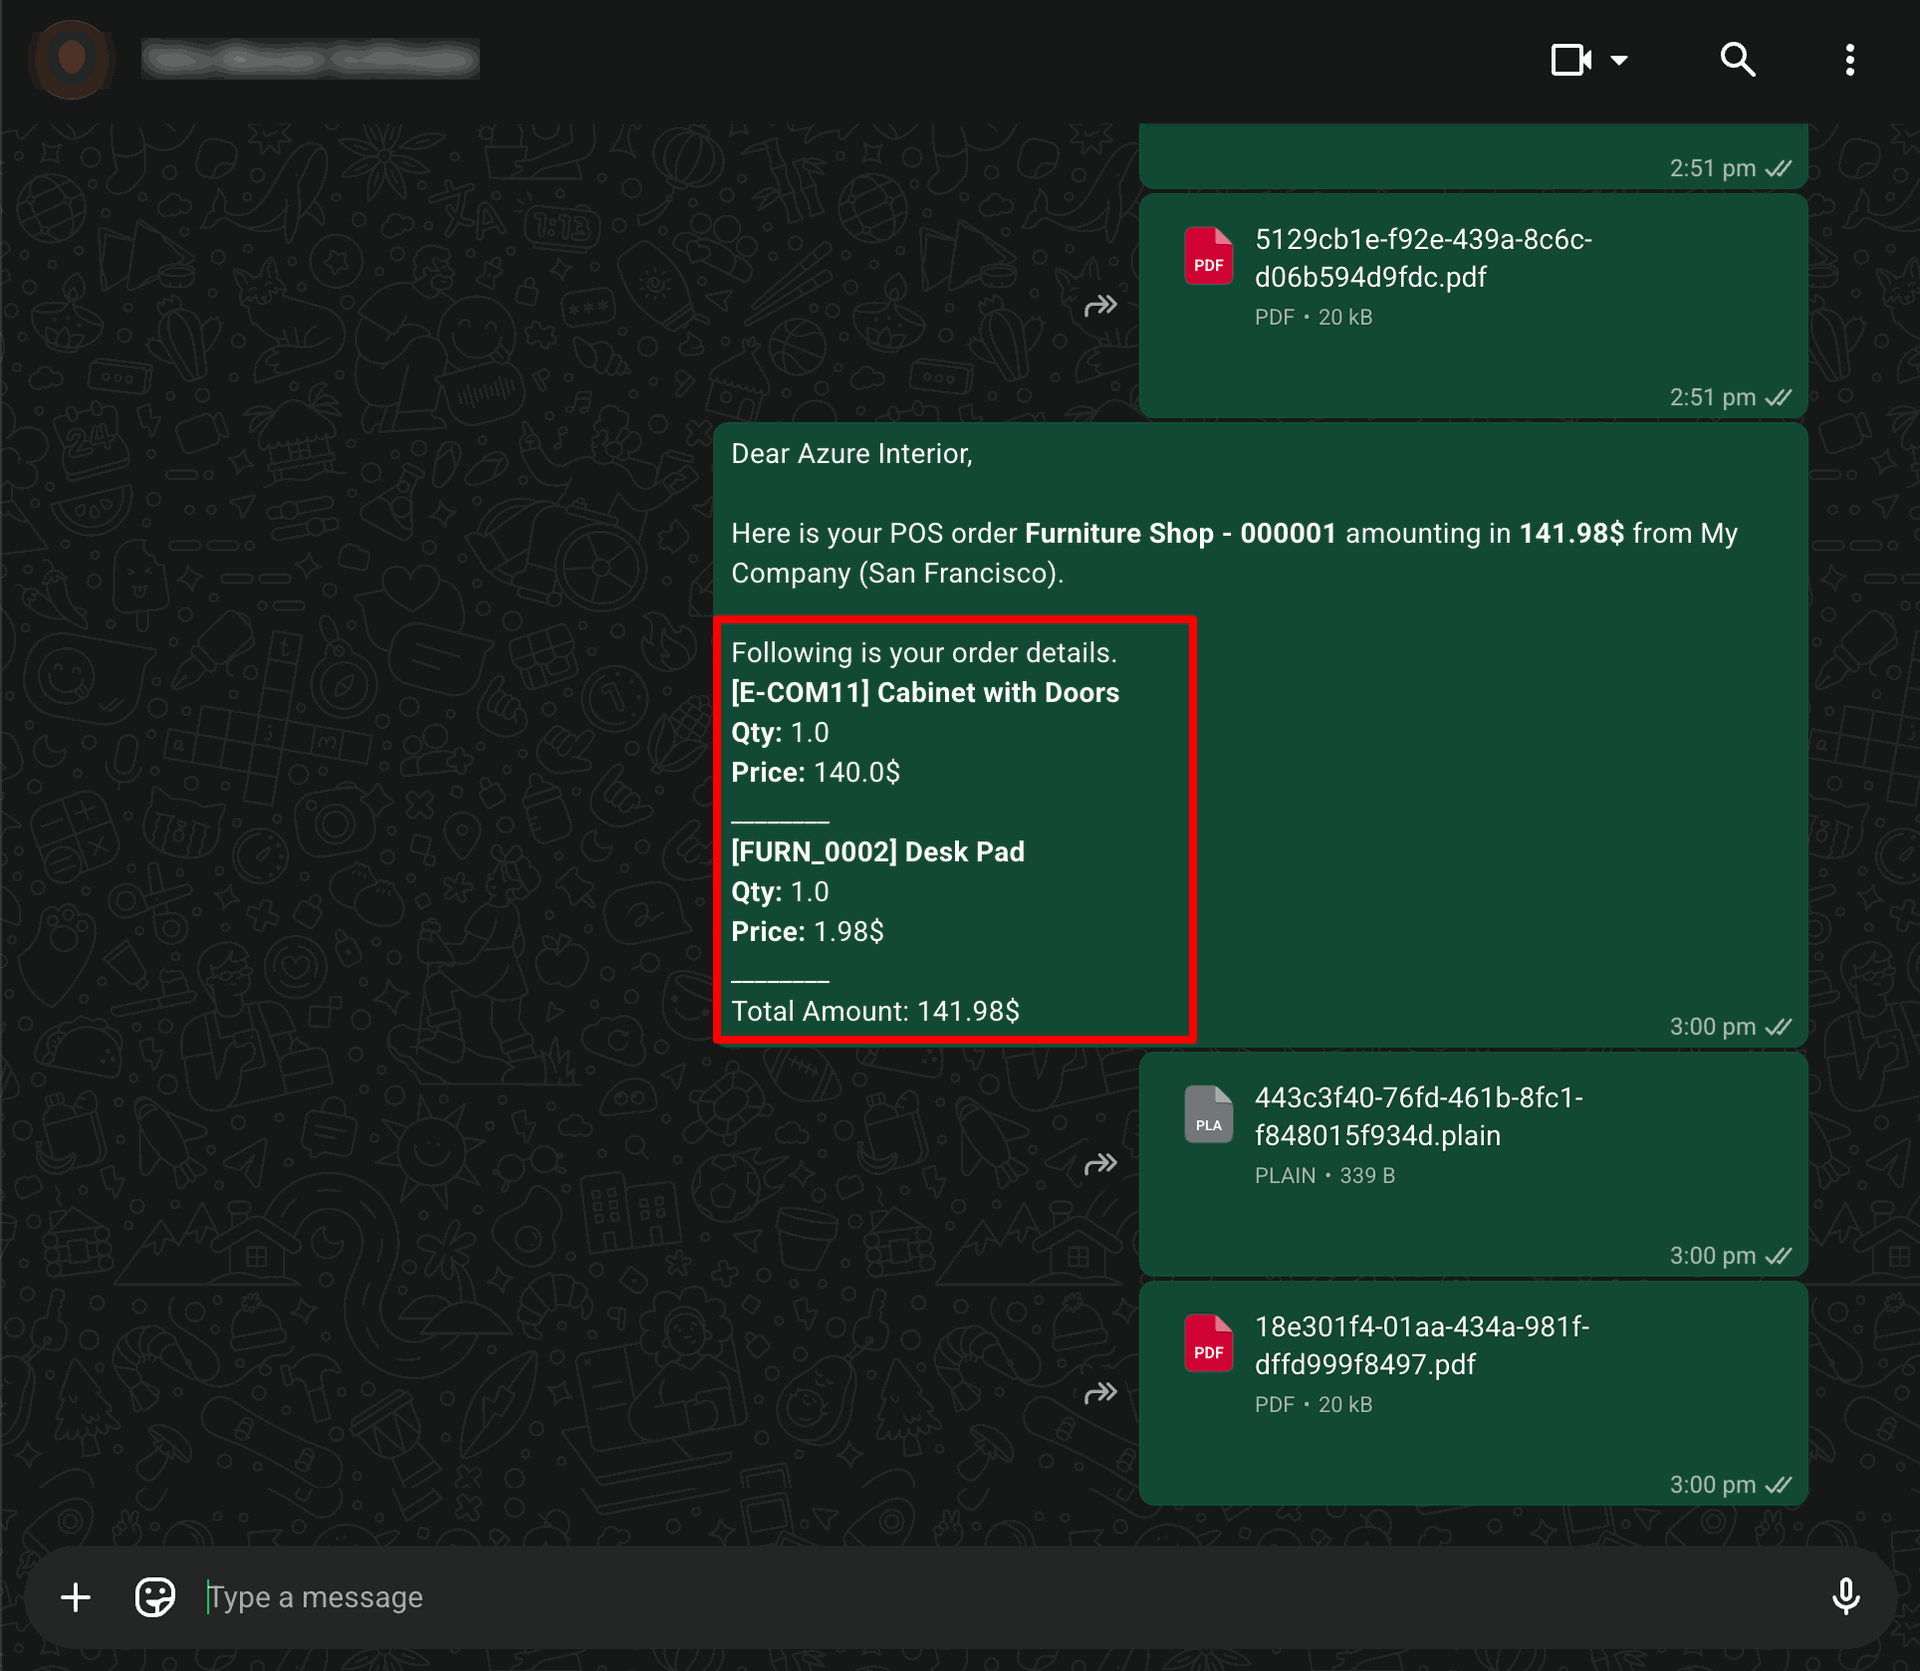
This is the WhatsApp message output received by the customer after the message is successfully sent from Odoo.
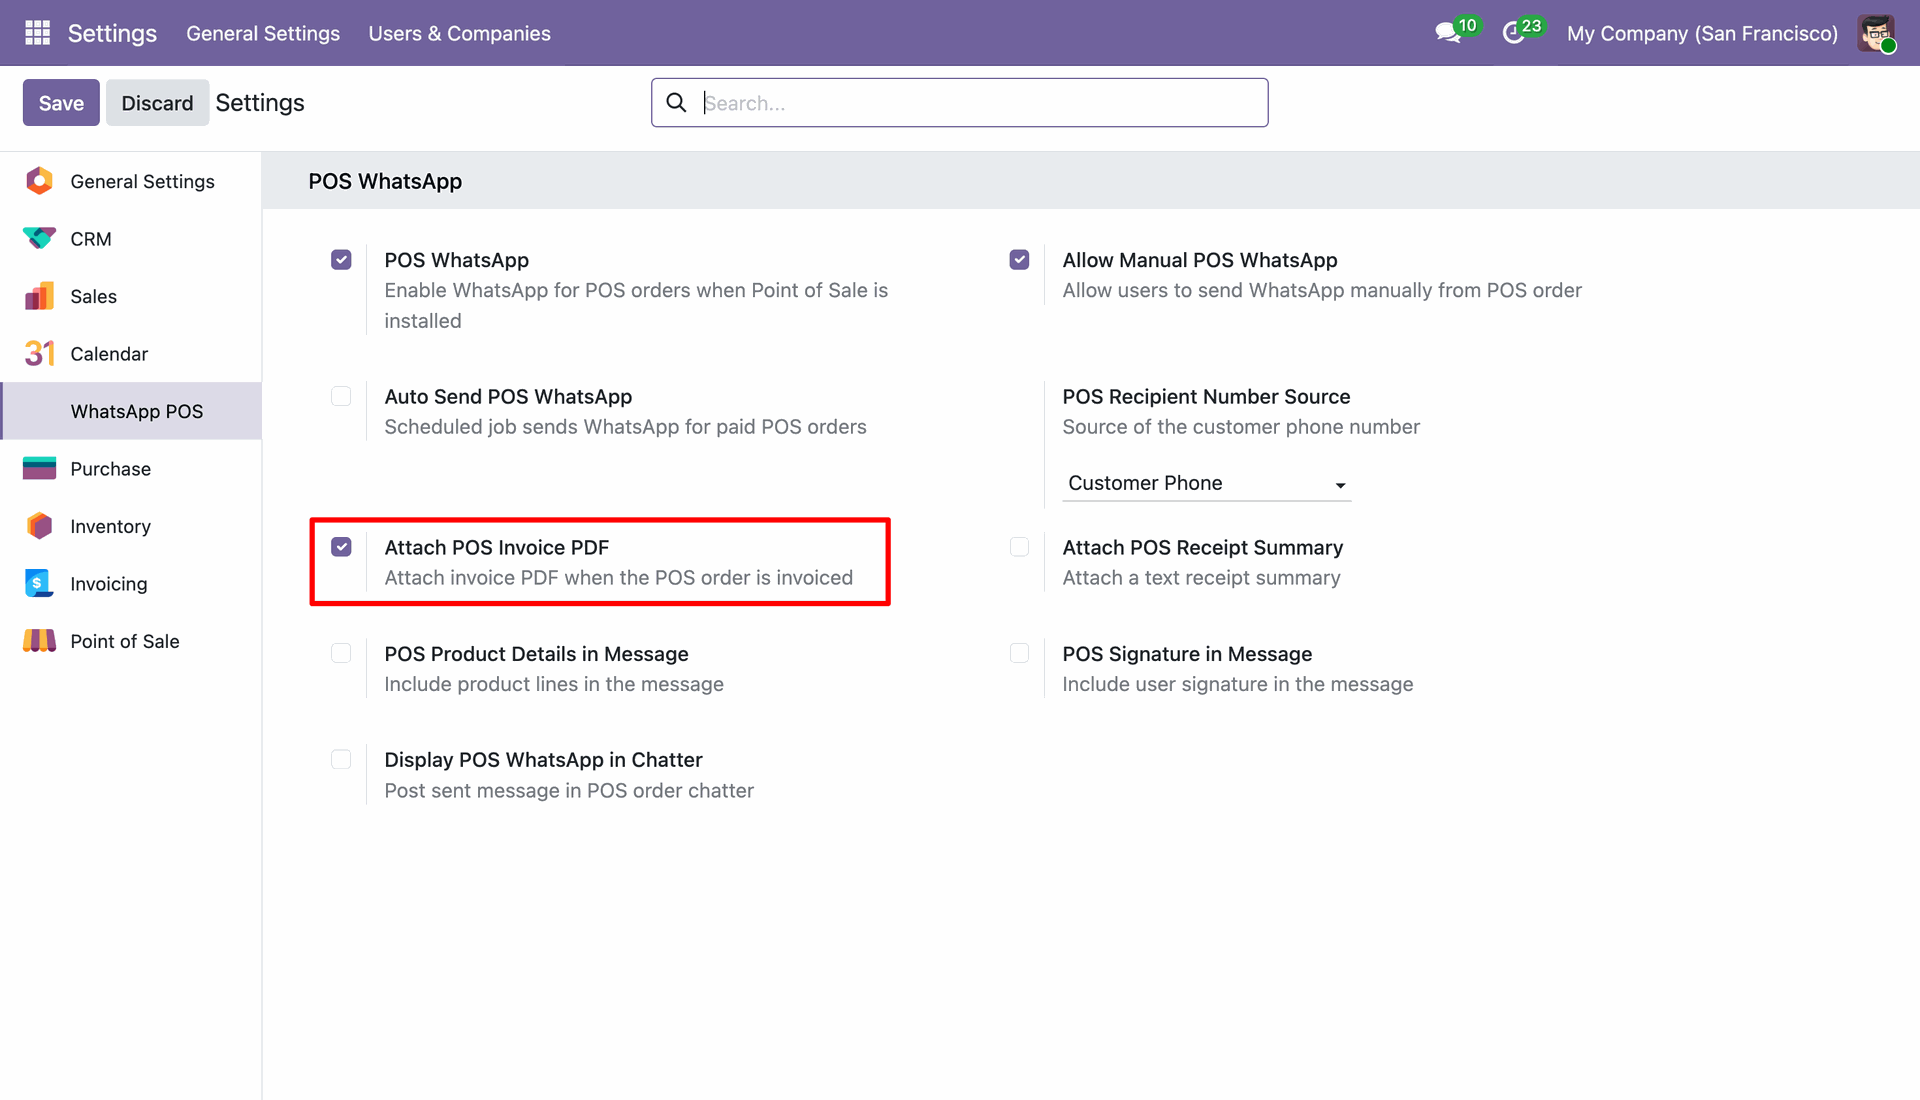
Go to WhatsApp POS General Settings and enable Attach POS Invoice PDF to automatically include the POS invoice PDF with WhatsApp messages.
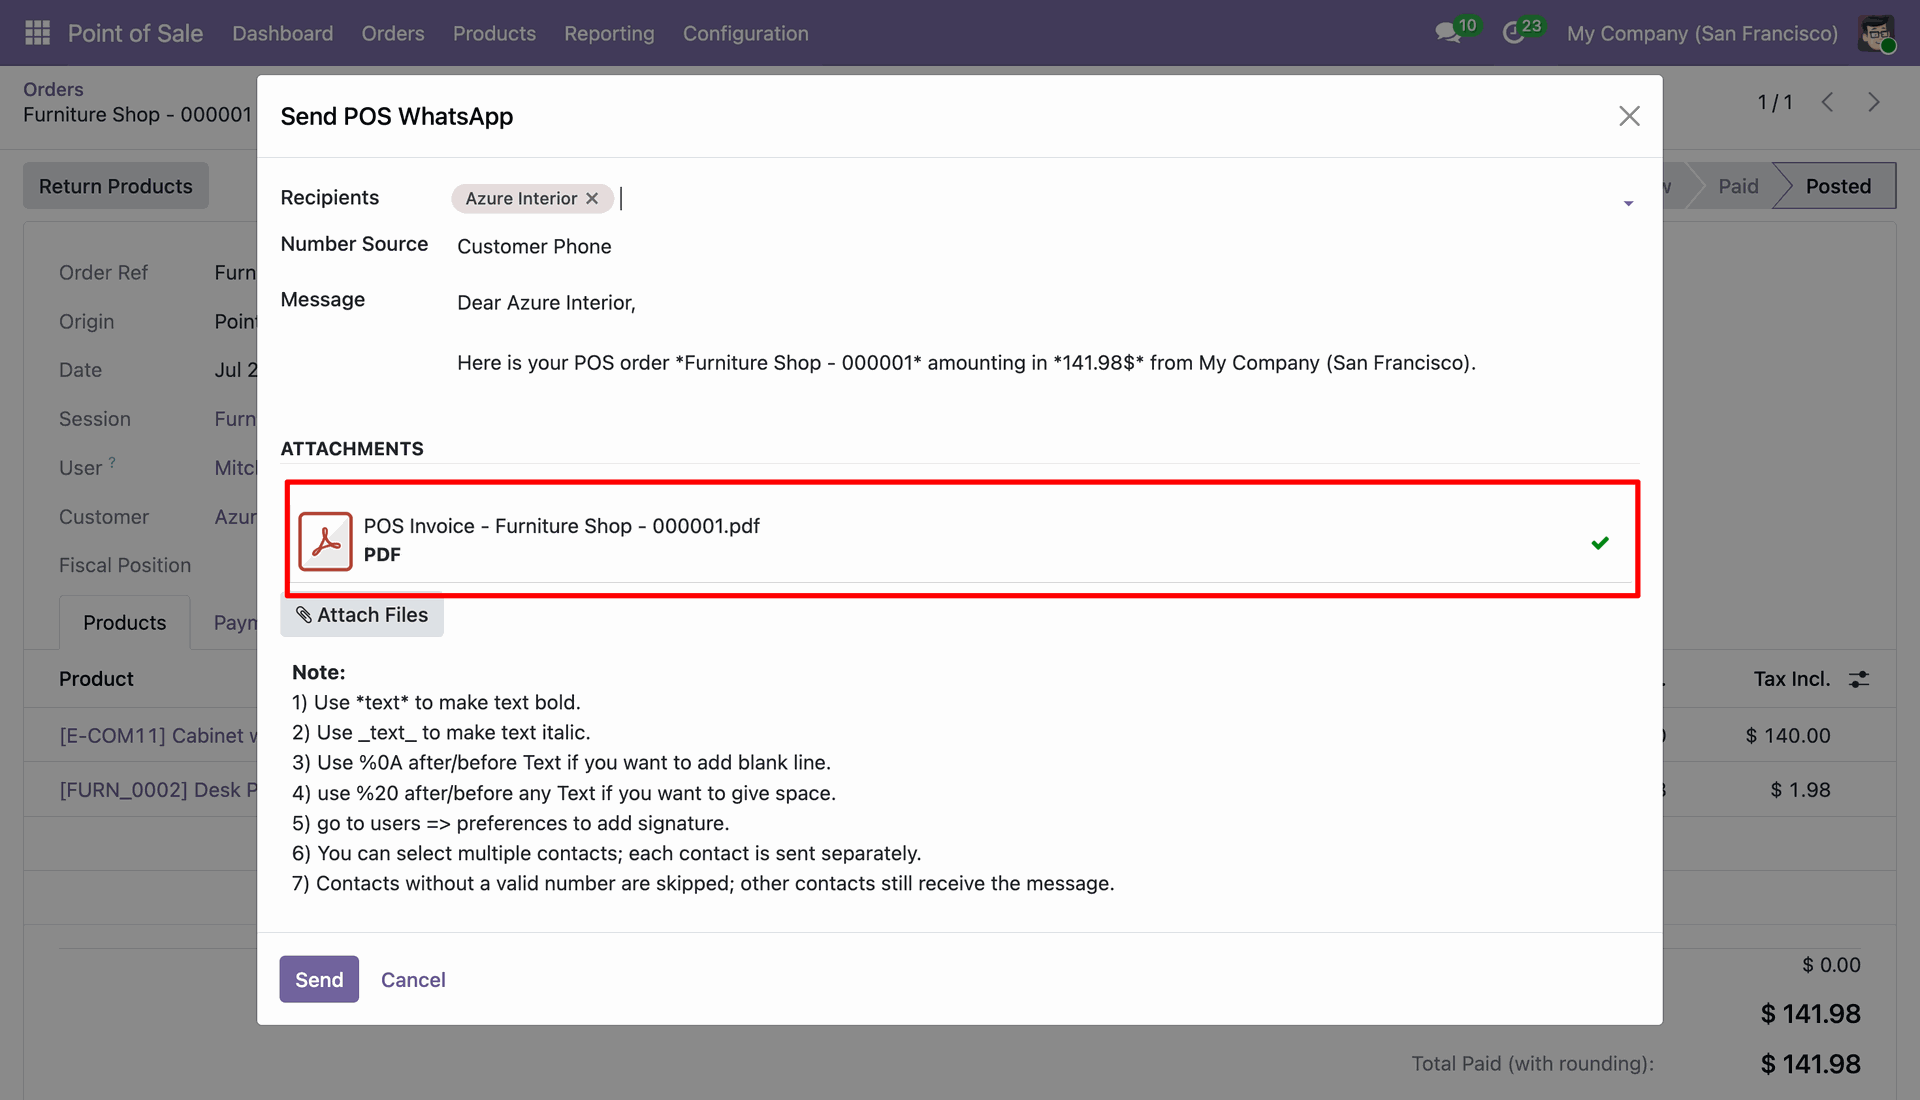
The POS WhatsApp wizard automatically adds the POS Invoice PDF as an attachment when the Attach POS Invoice PDF option is enabled.
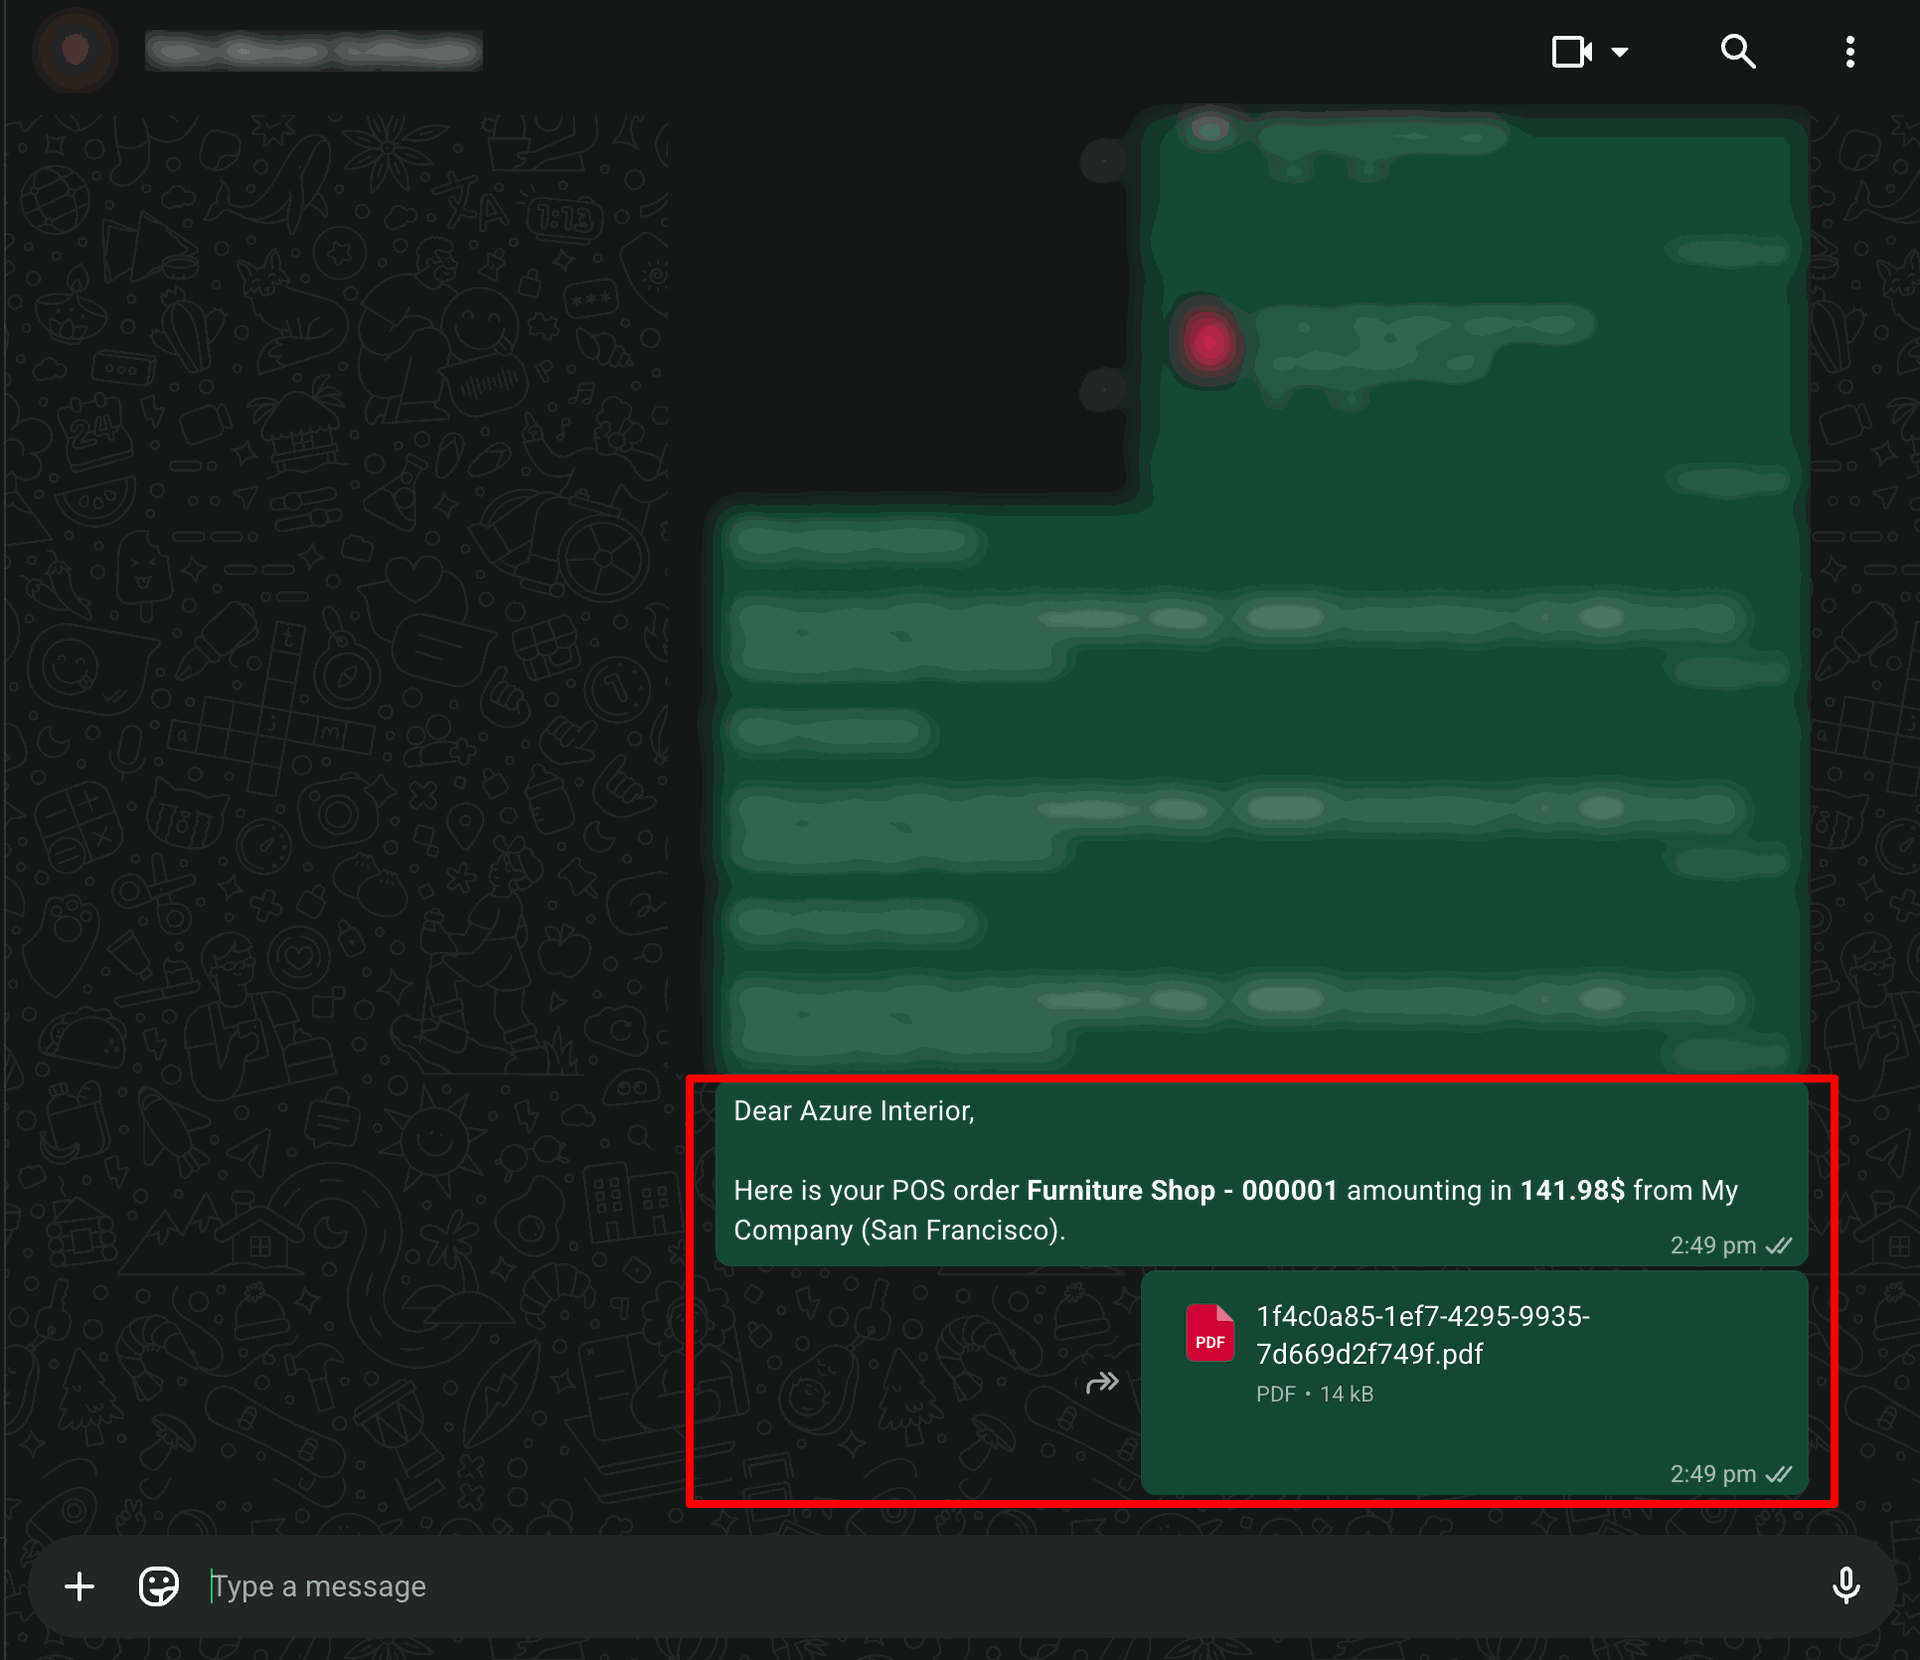
This is the WhatsApp message output received by the customer after the message is successfully sent from Odoo.
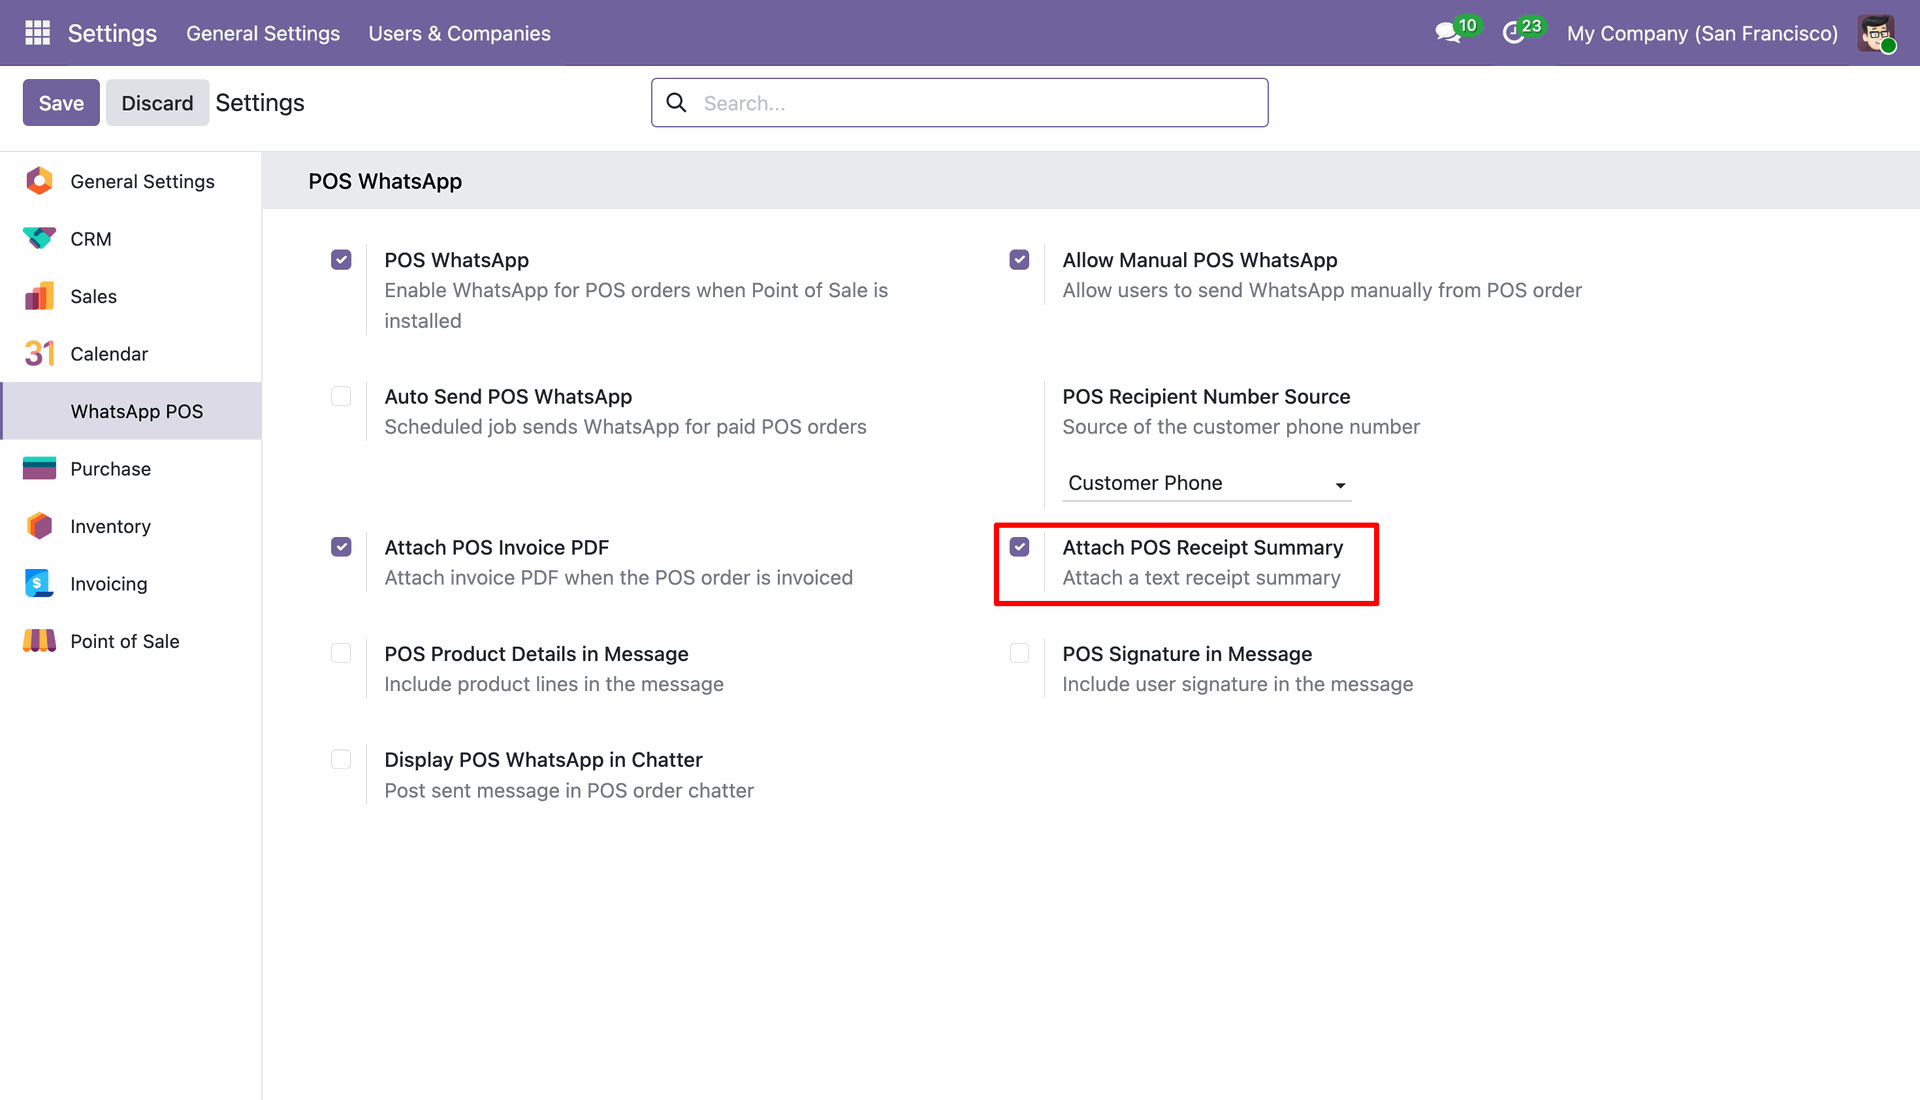
Go to WhatsApp POS General Settings and enable Attach POS Receipt Summary option with Invoice copy.
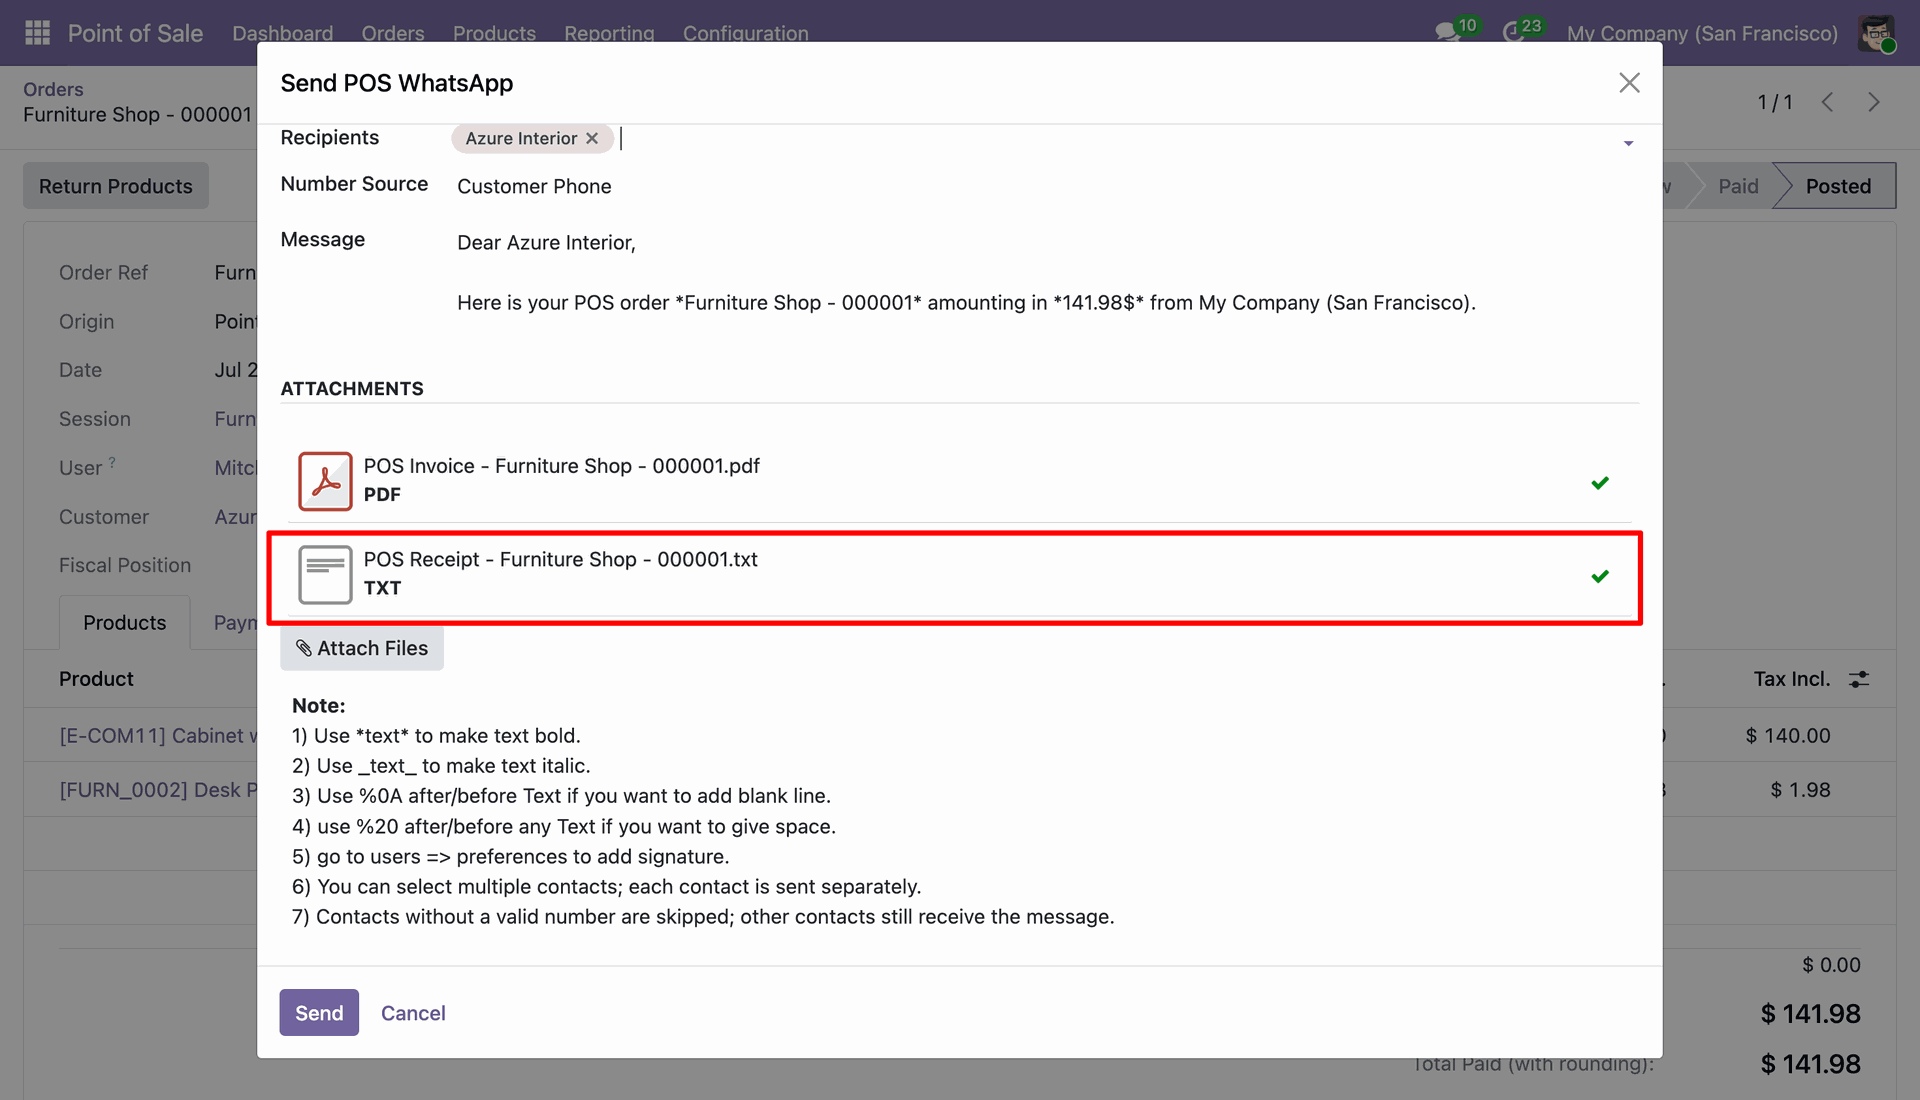
The POS WhatsApp wizard automatically adds the POS Receipt Summary as an attachment when the Attach POS Receipt Summary option is enabled.
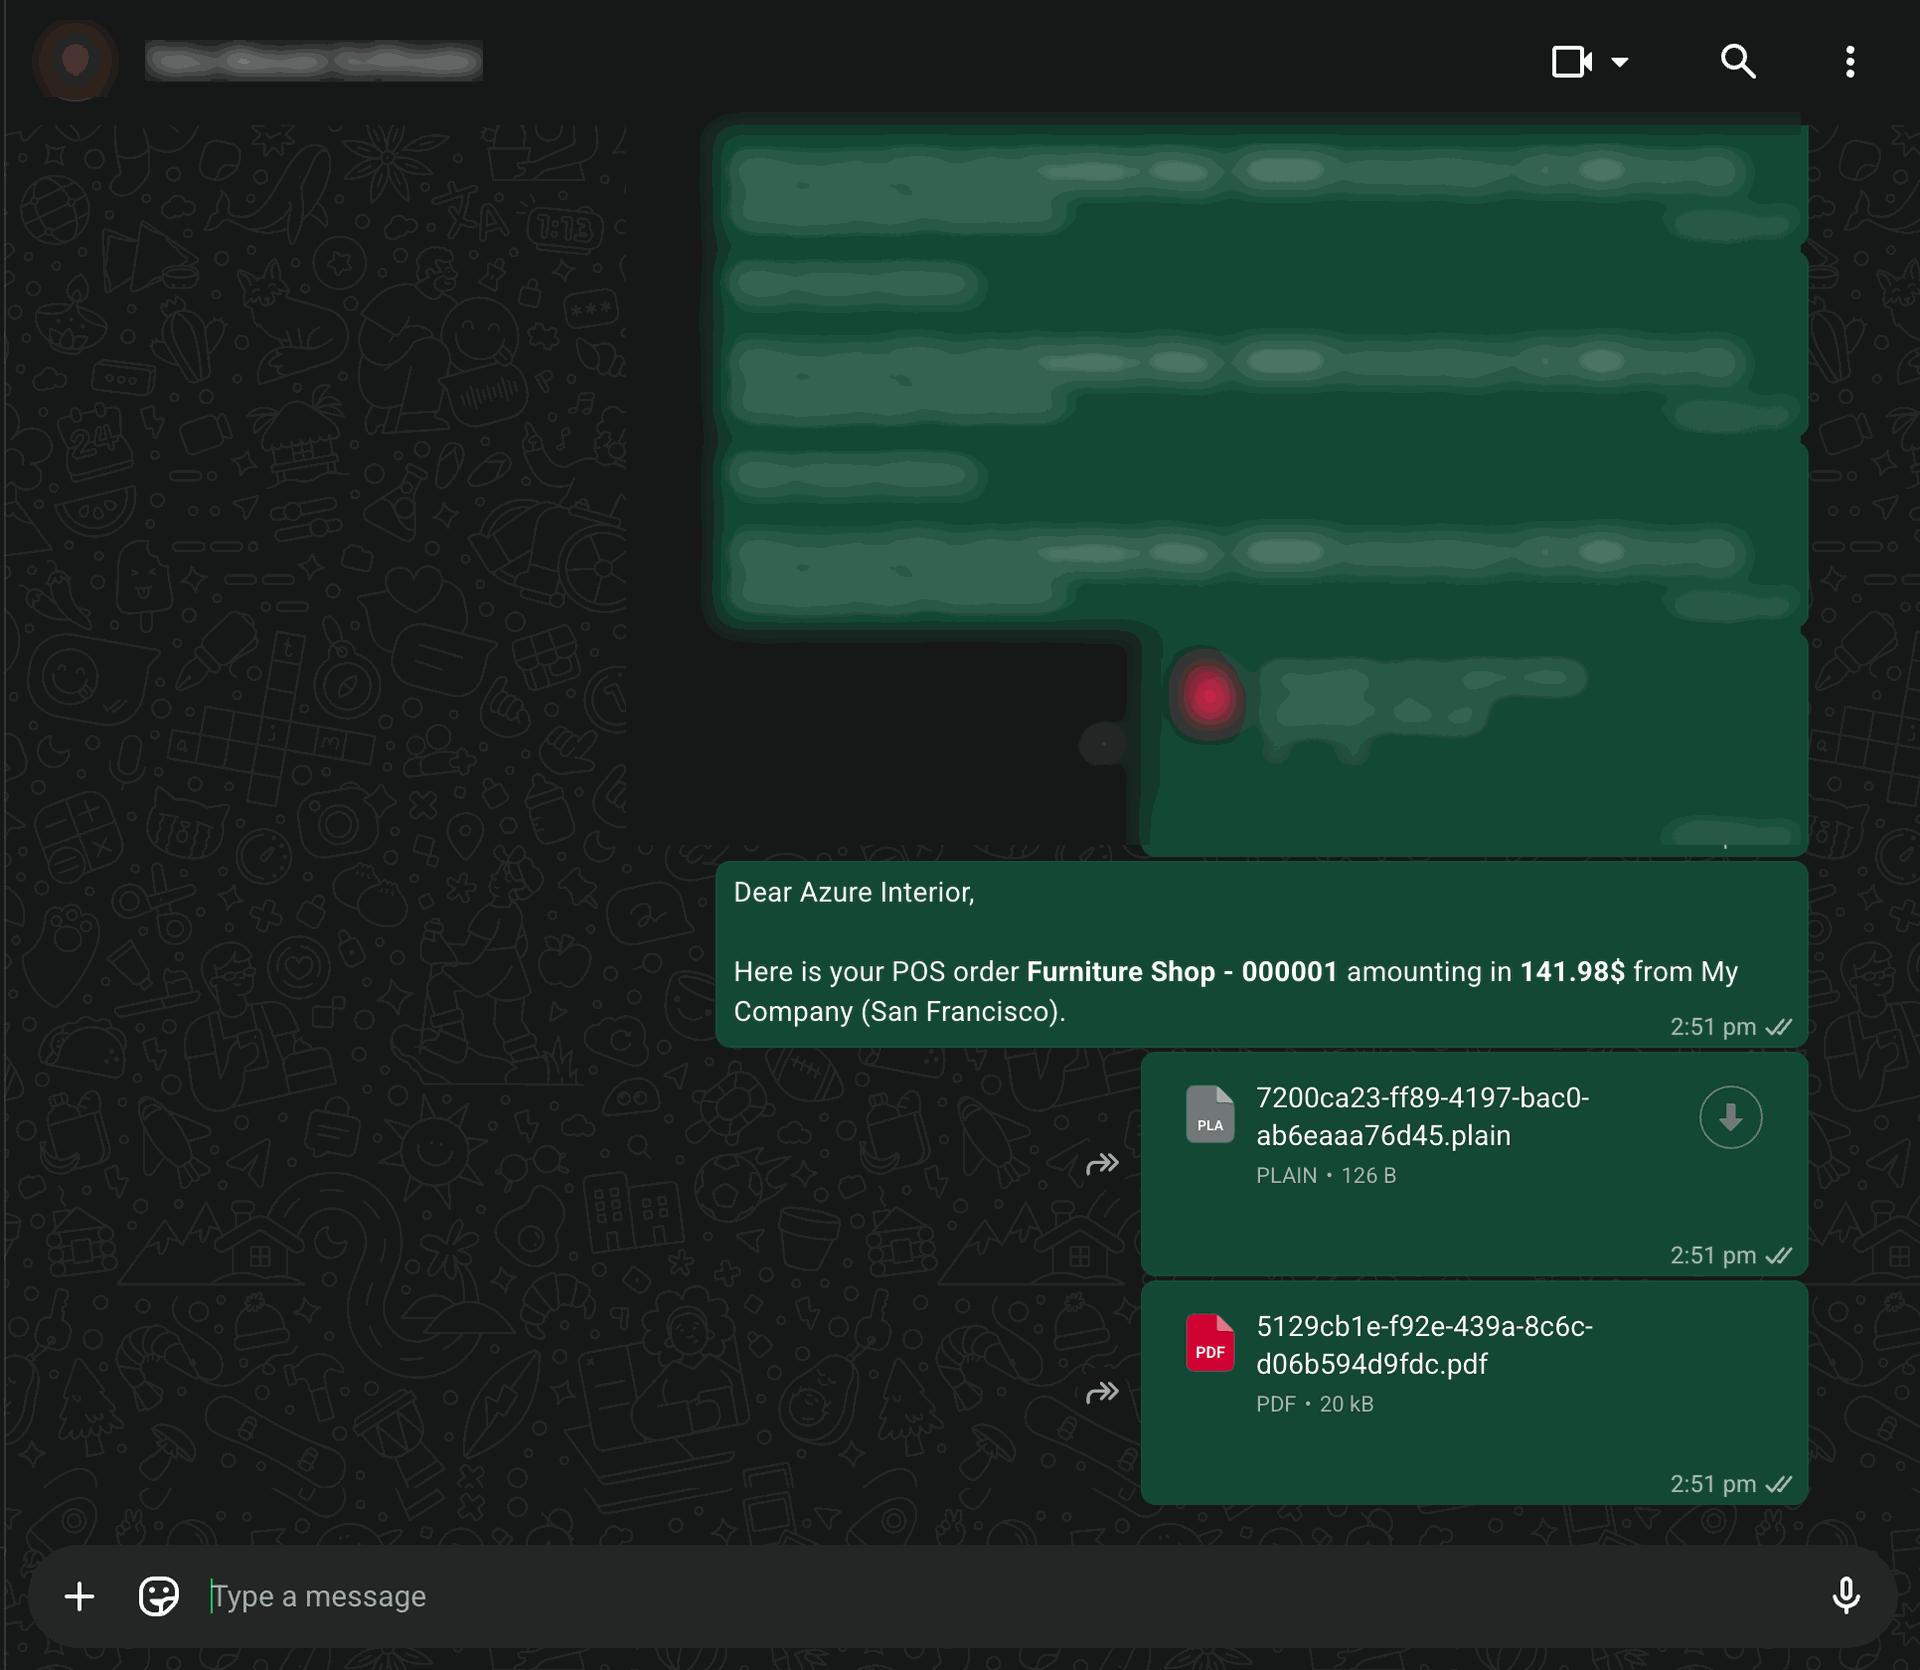
This is the WhatsApp message output received by the customer after the message is successfully sent from Odoo with Receipt Summary.
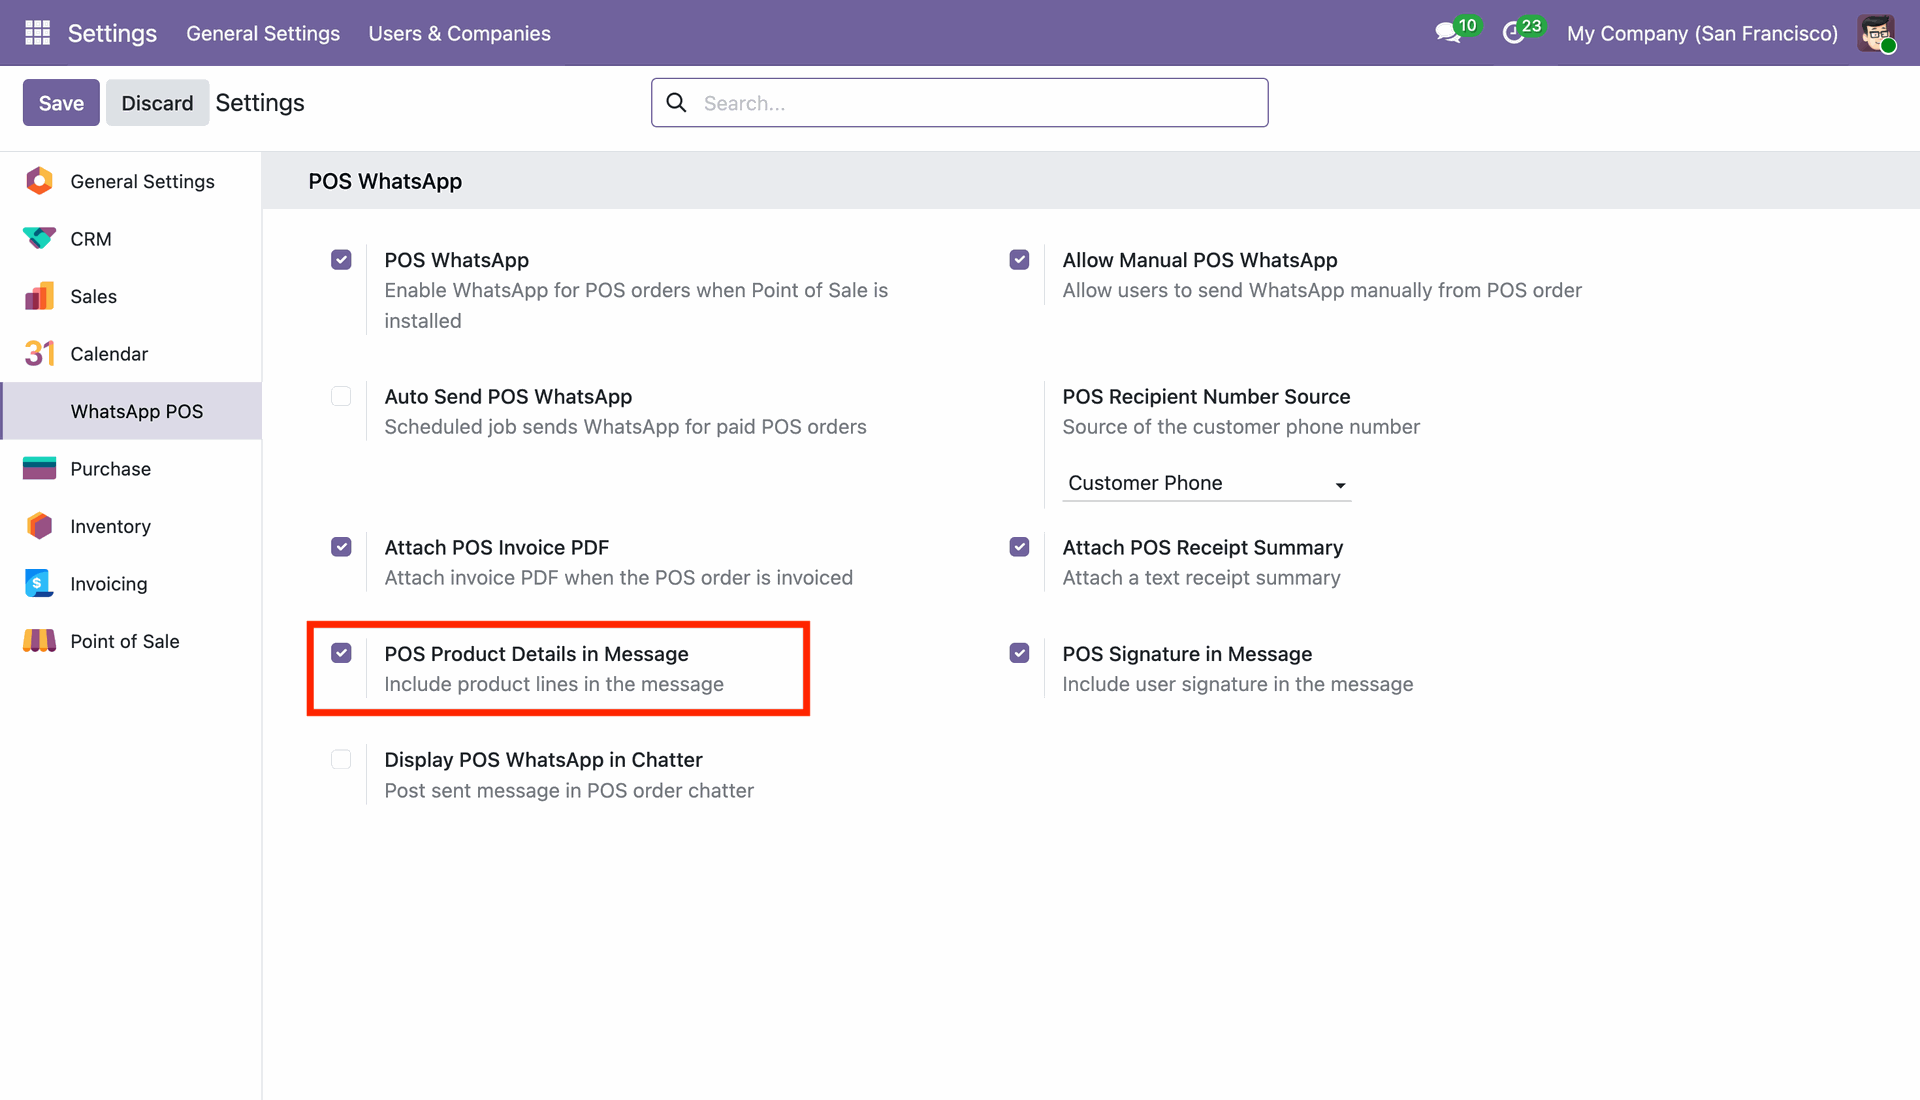
Go to WhatsApp POS General Settings and enable POS Product Details in Message.
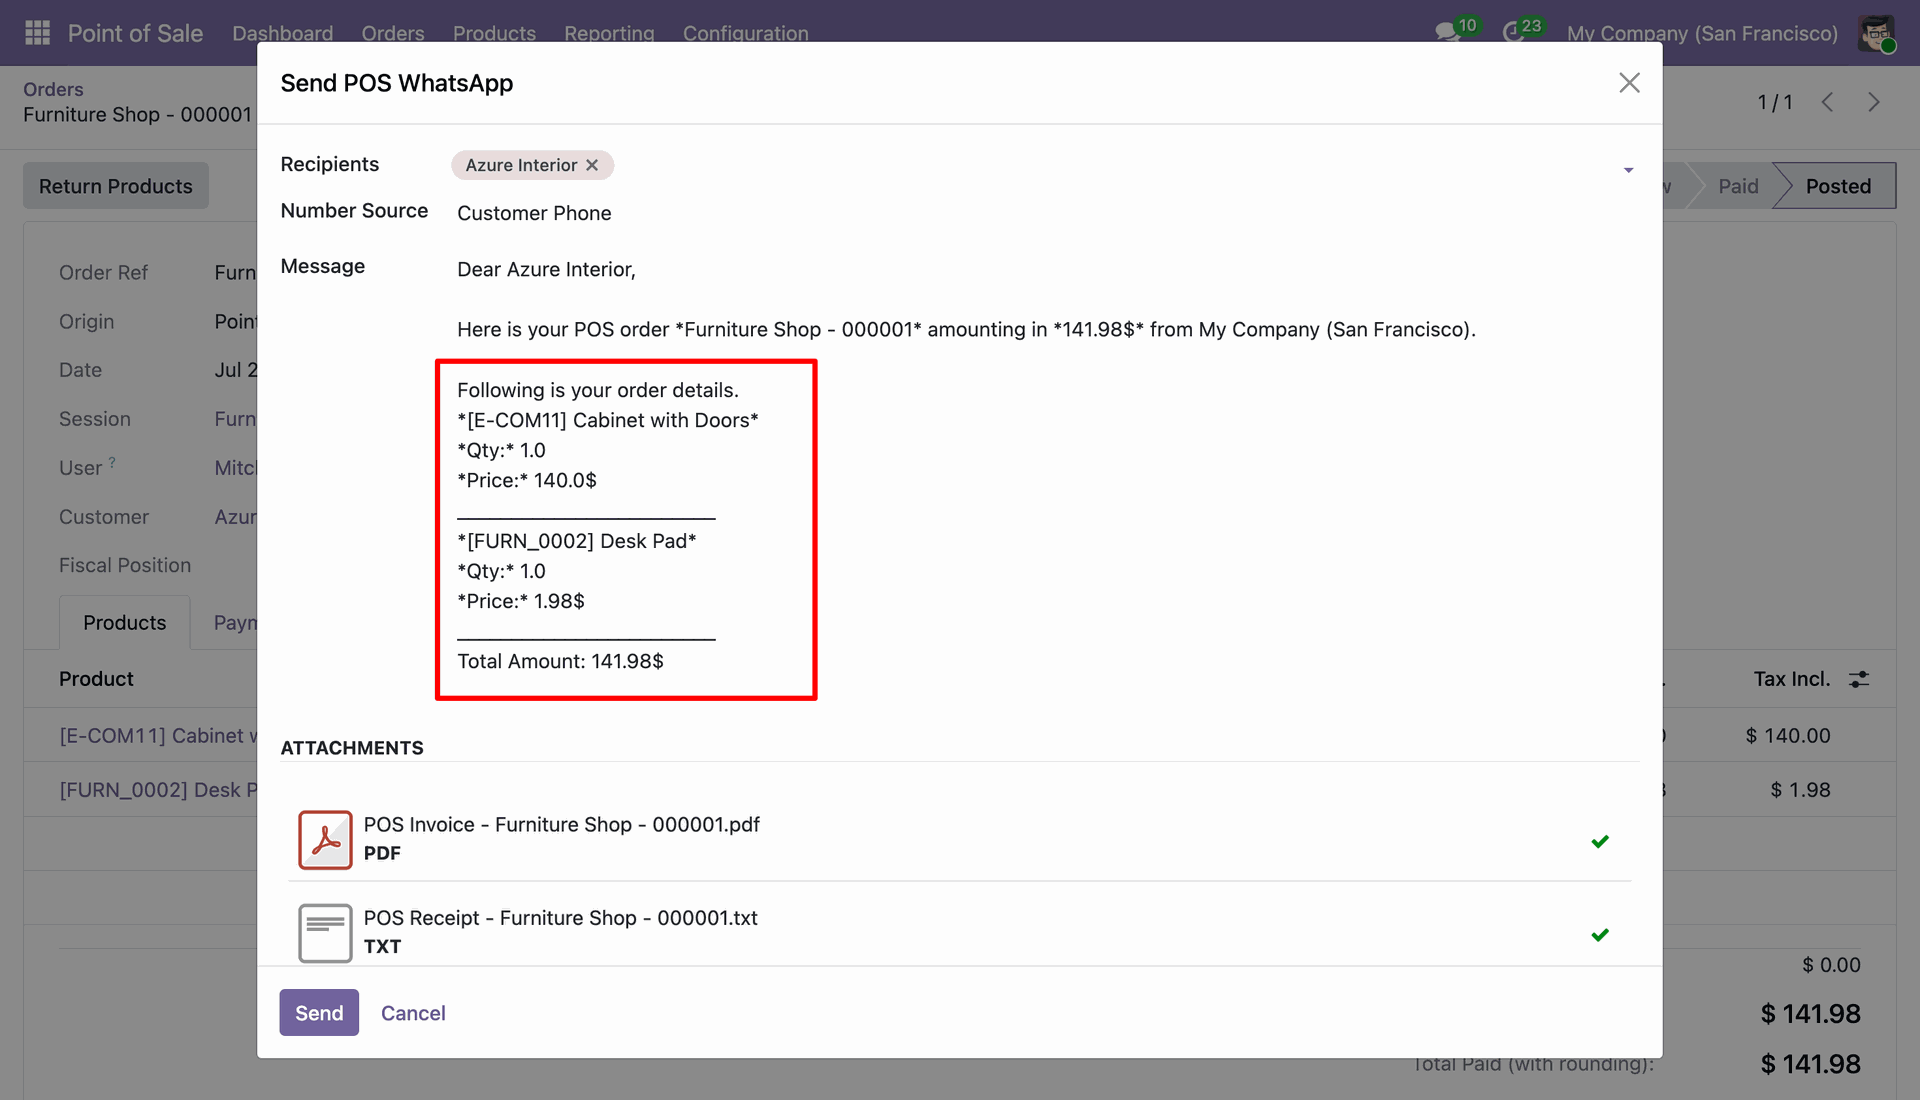
The POS WhatsApp wizard automatically adds the Order Details when the POS Product Details in Message option is enabled.
This is the WhatsApp message output with Order details received by the customer after the message is successfully sent from Odoo.
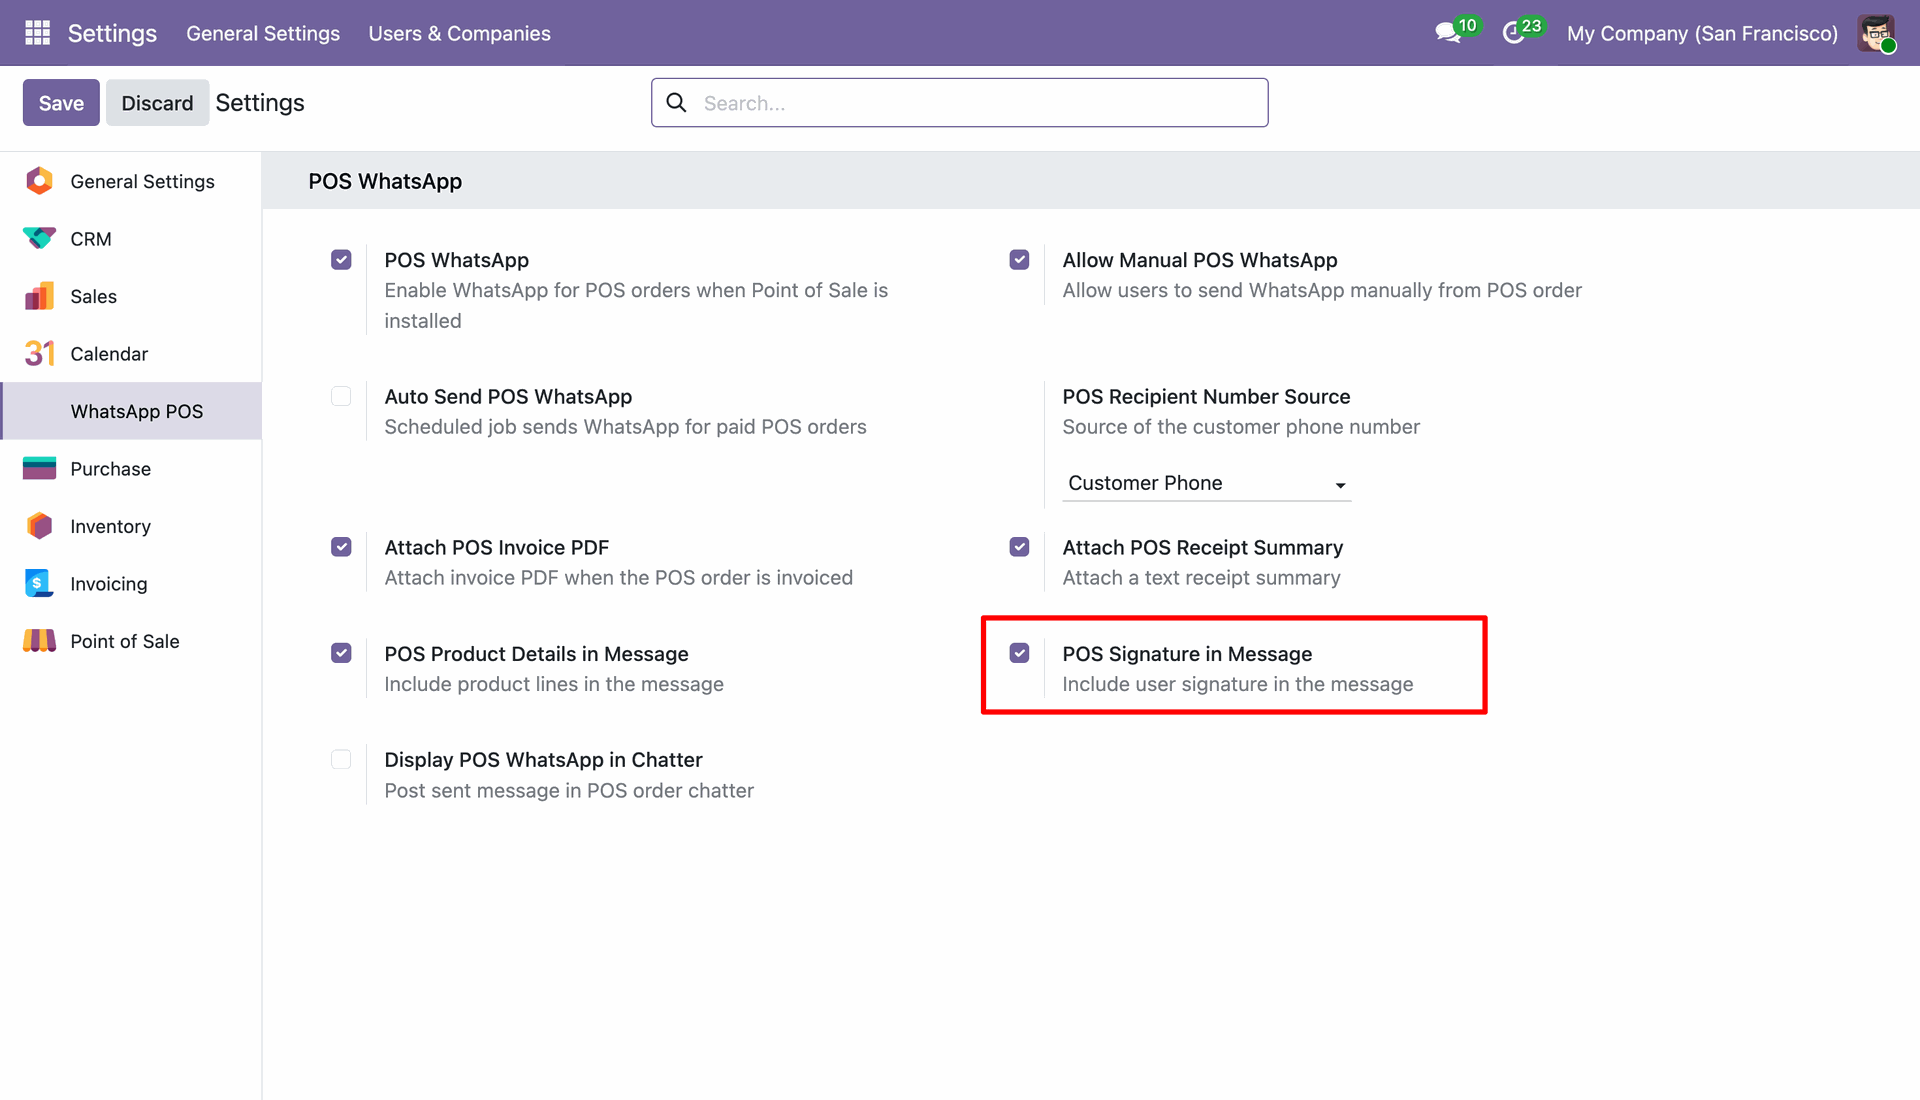
Go to WhatsApp POS General Settings and enable POS Signature in Message.
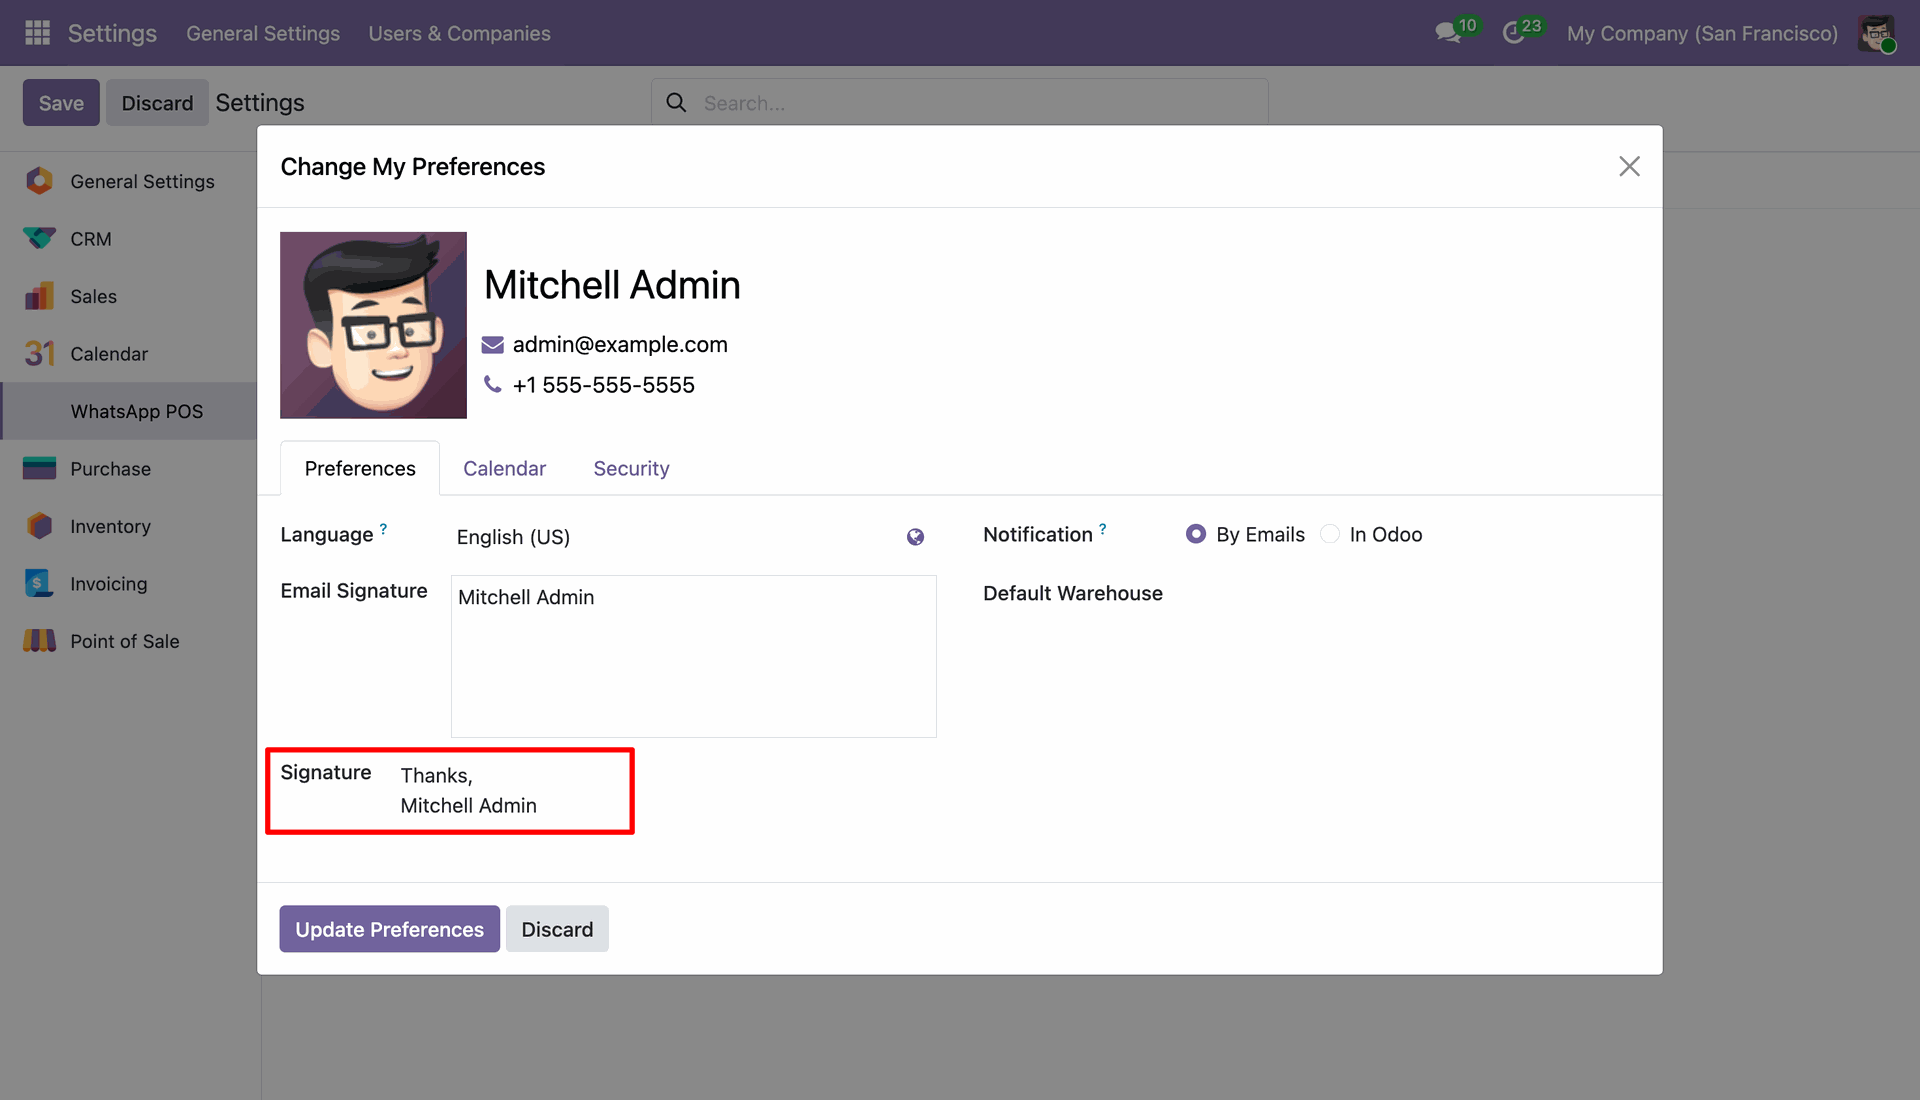
Open the My Preferences and add the signature.
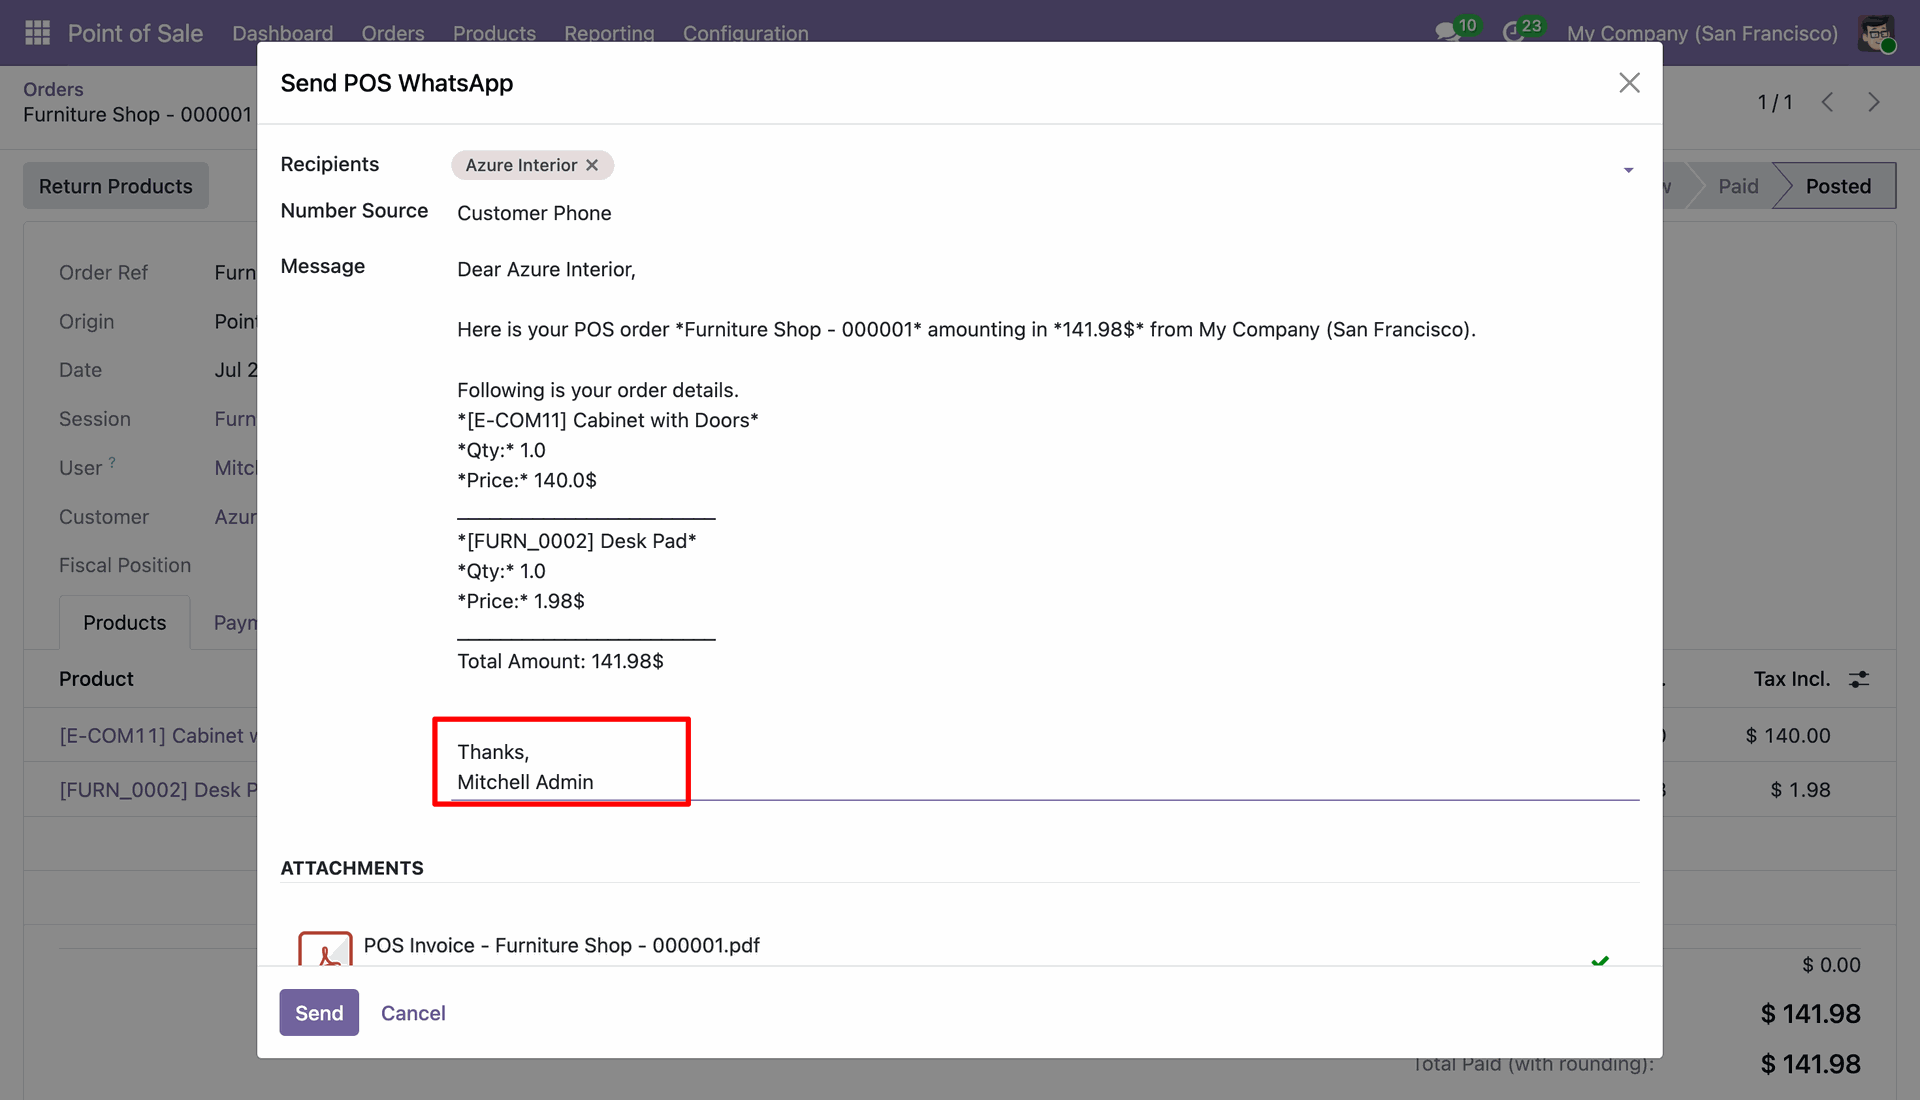
The POS WhatsApp wizard automatically adds the signature.
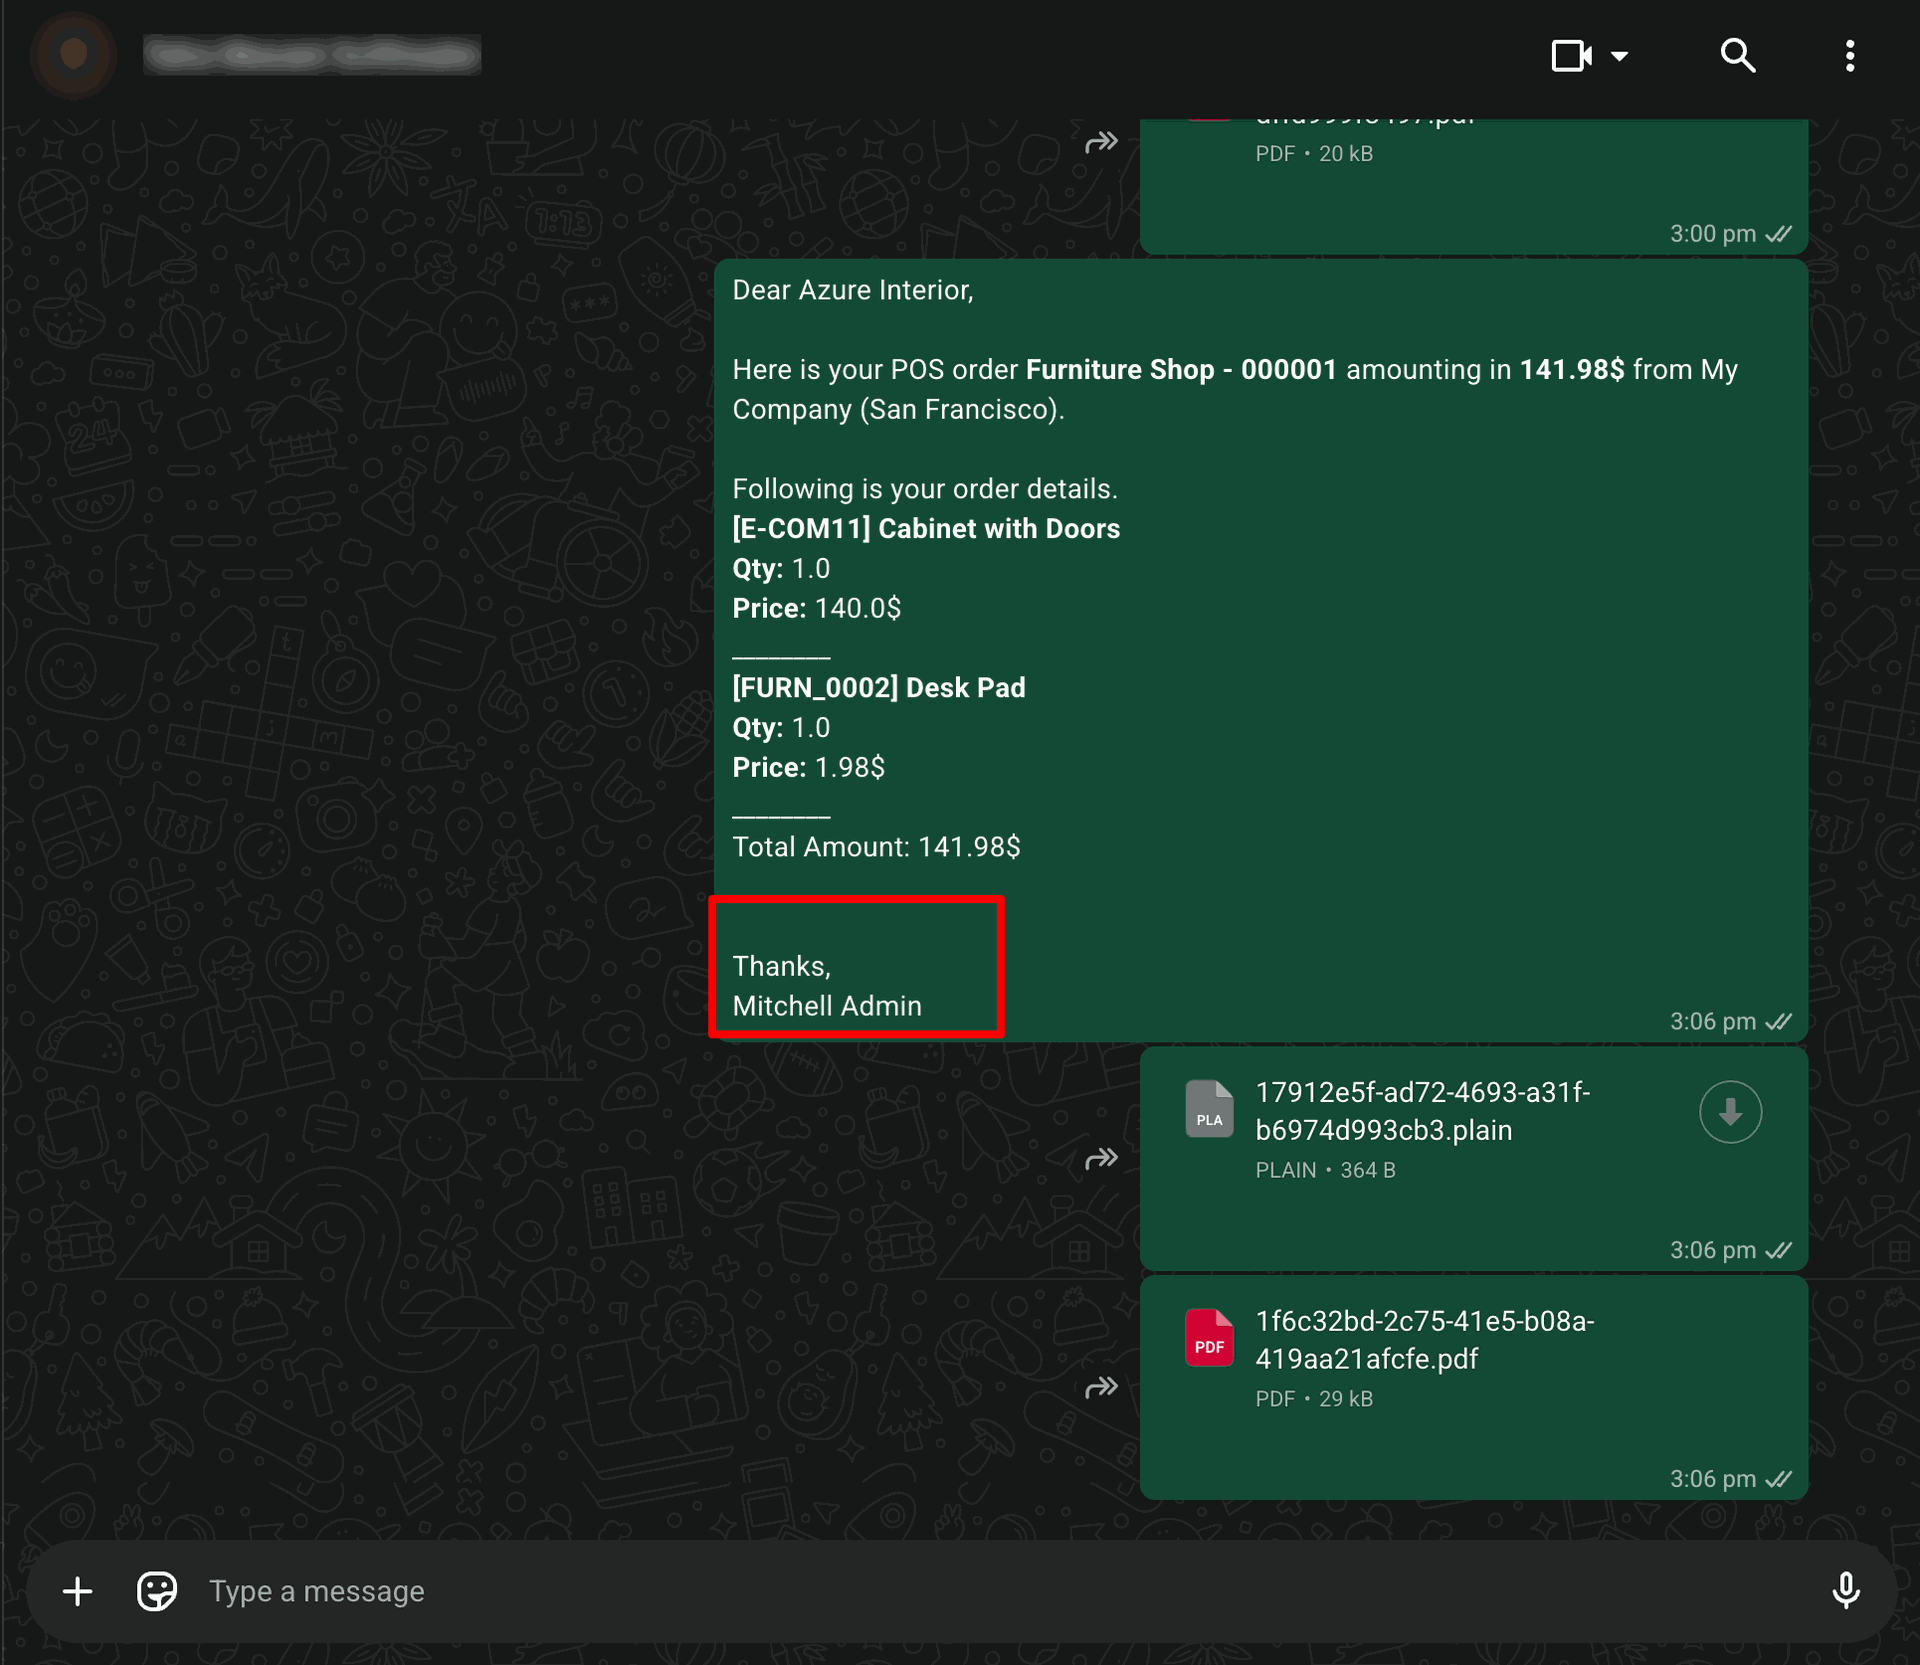
This is the WhatsApp message output with signature received by the customer after the message is successfully sent from Odoo.
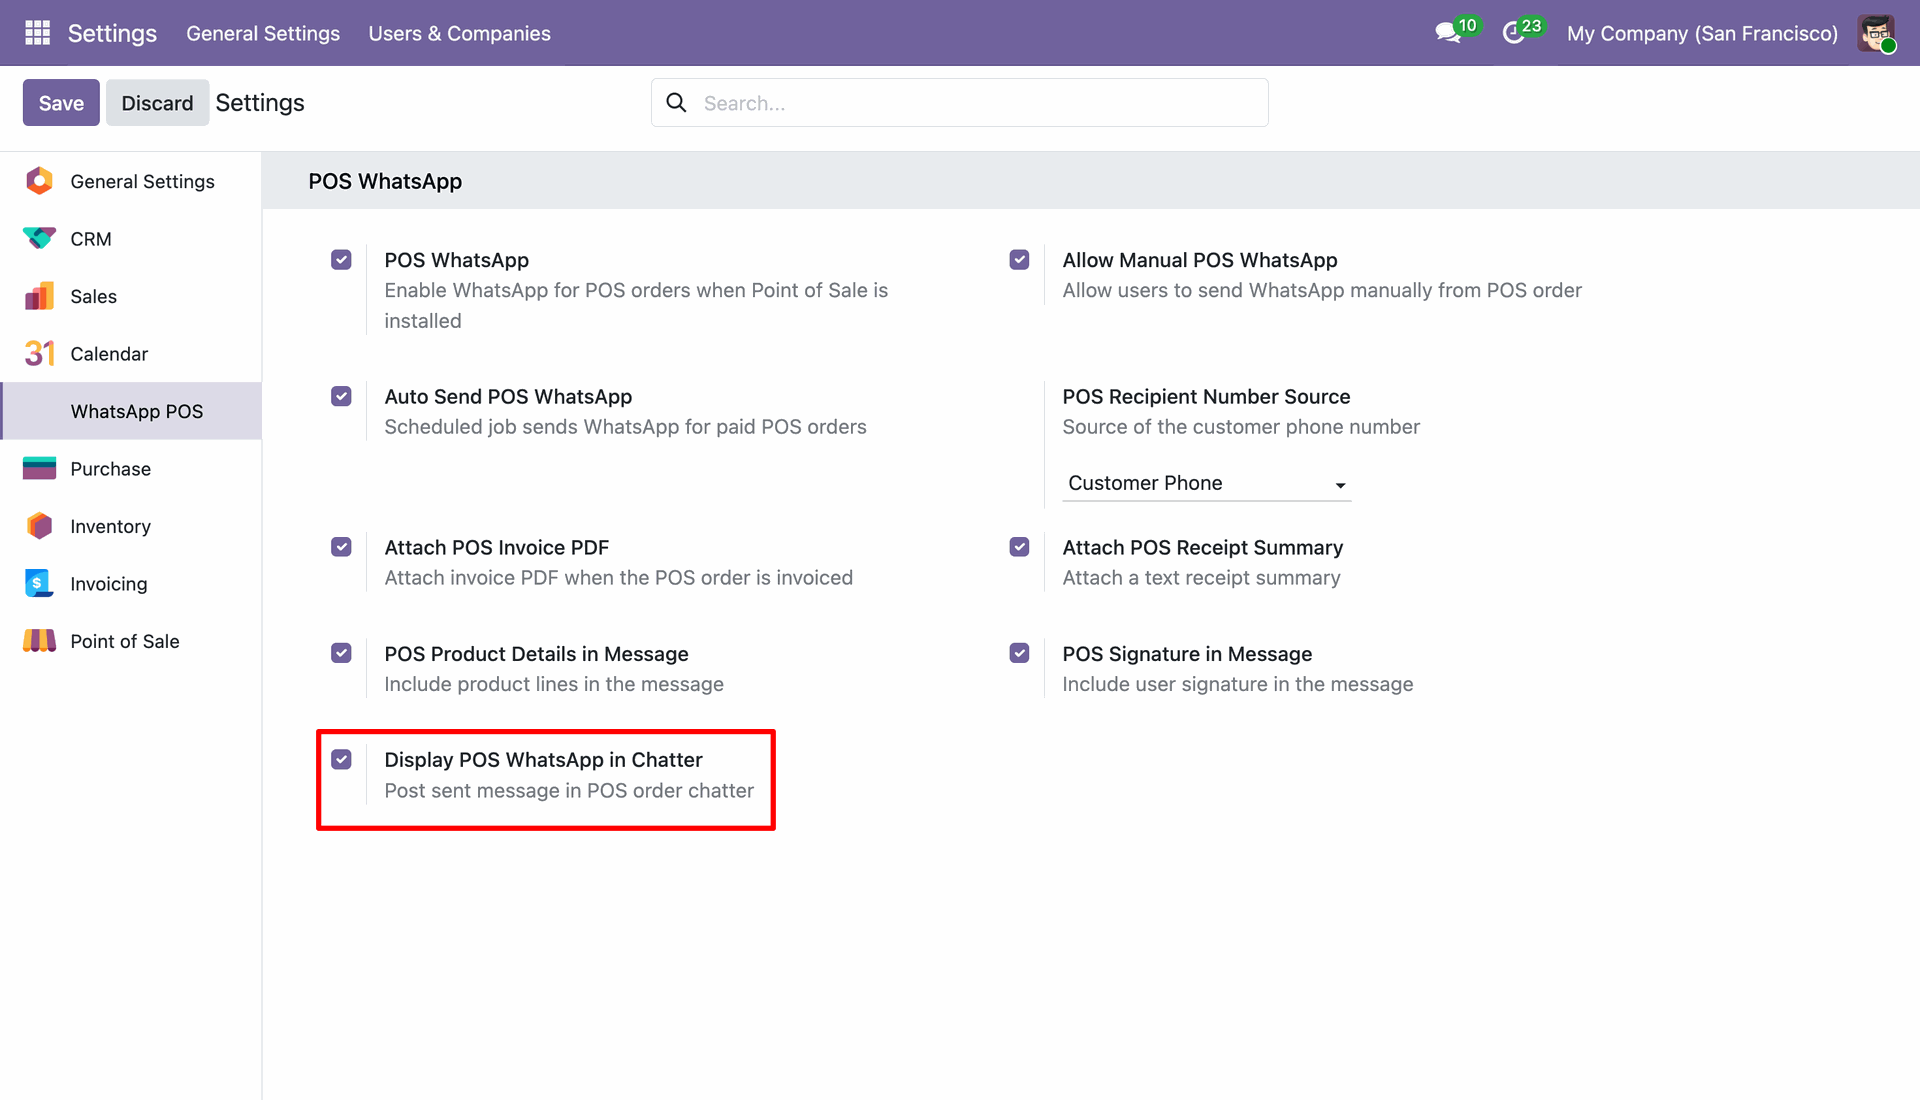
Go to WhatsApp POS General Settings and enable Display POS WhatsApp in Chatter.
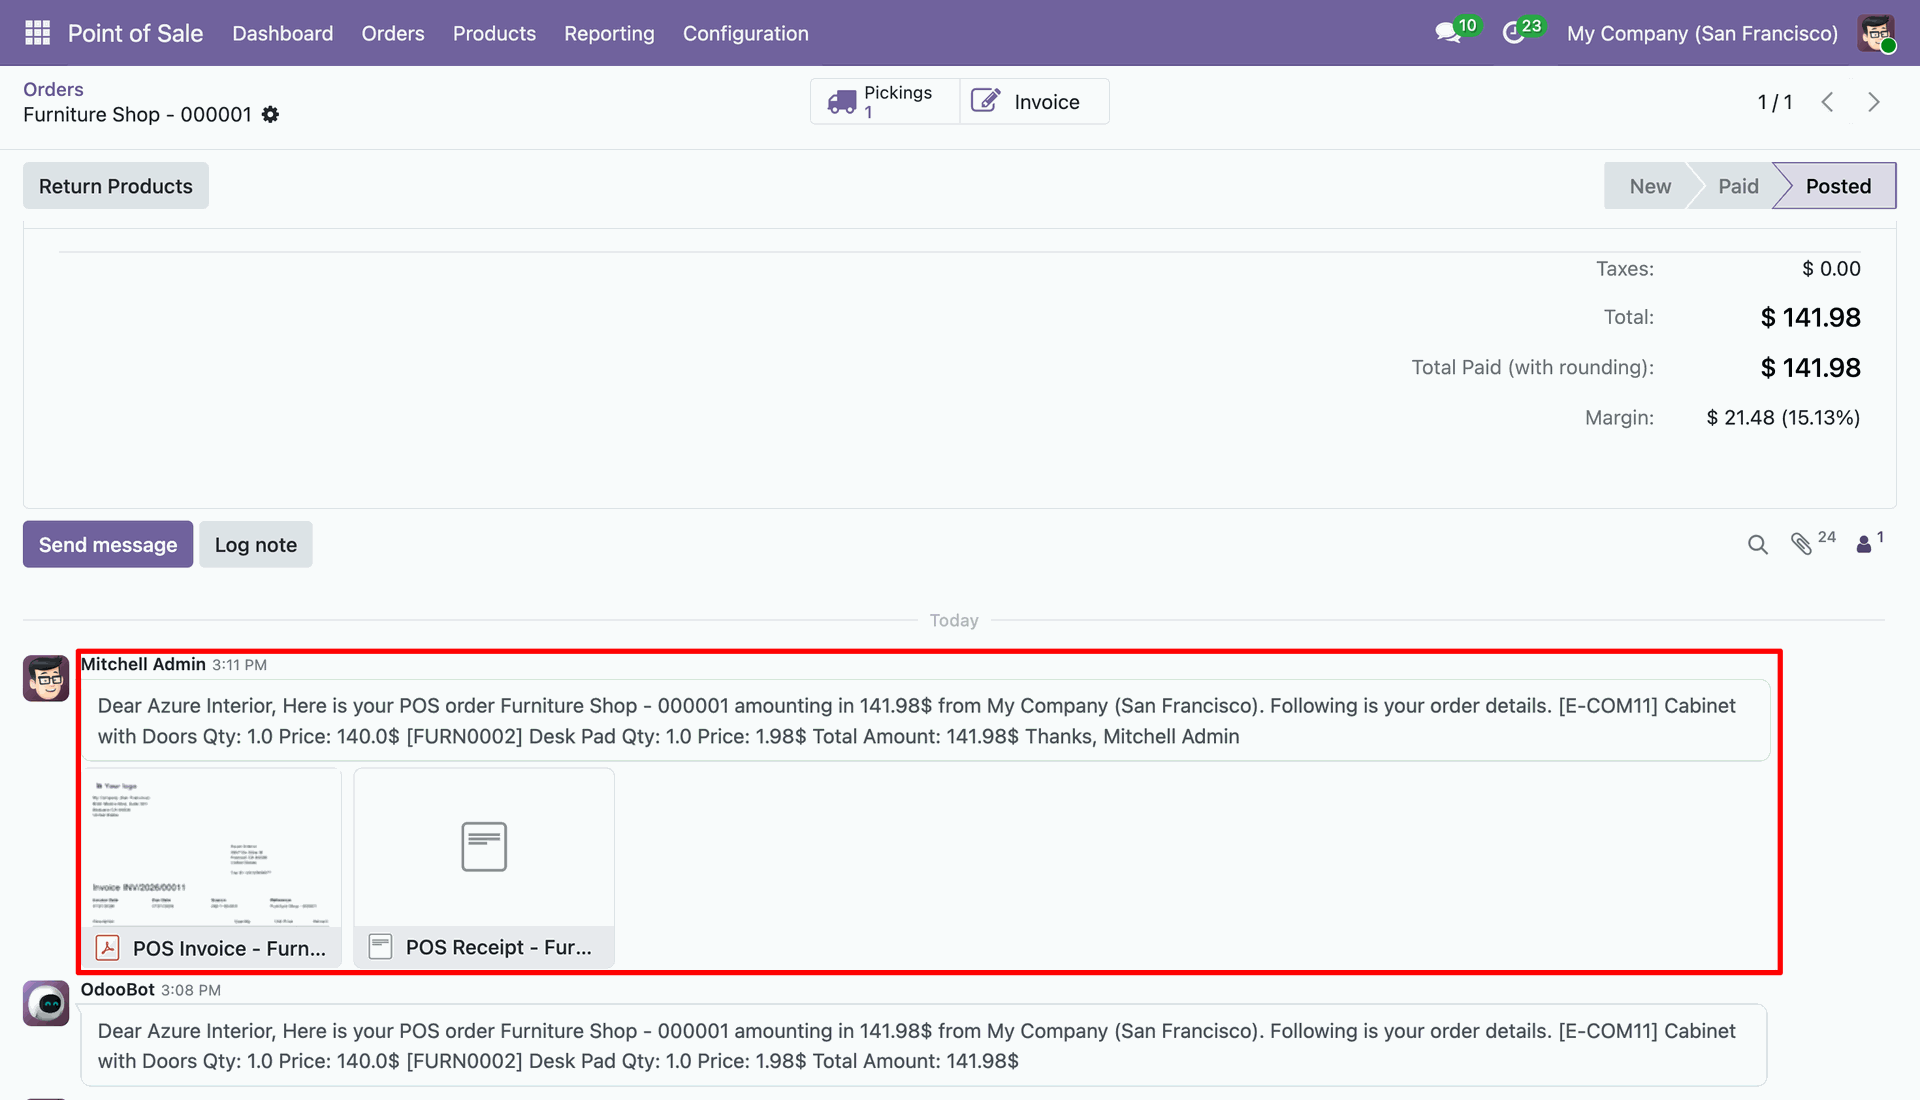
The WhatsApp message history will be visible in the Chatter of the related POS Order, allowing users to track sent messages and attachments.
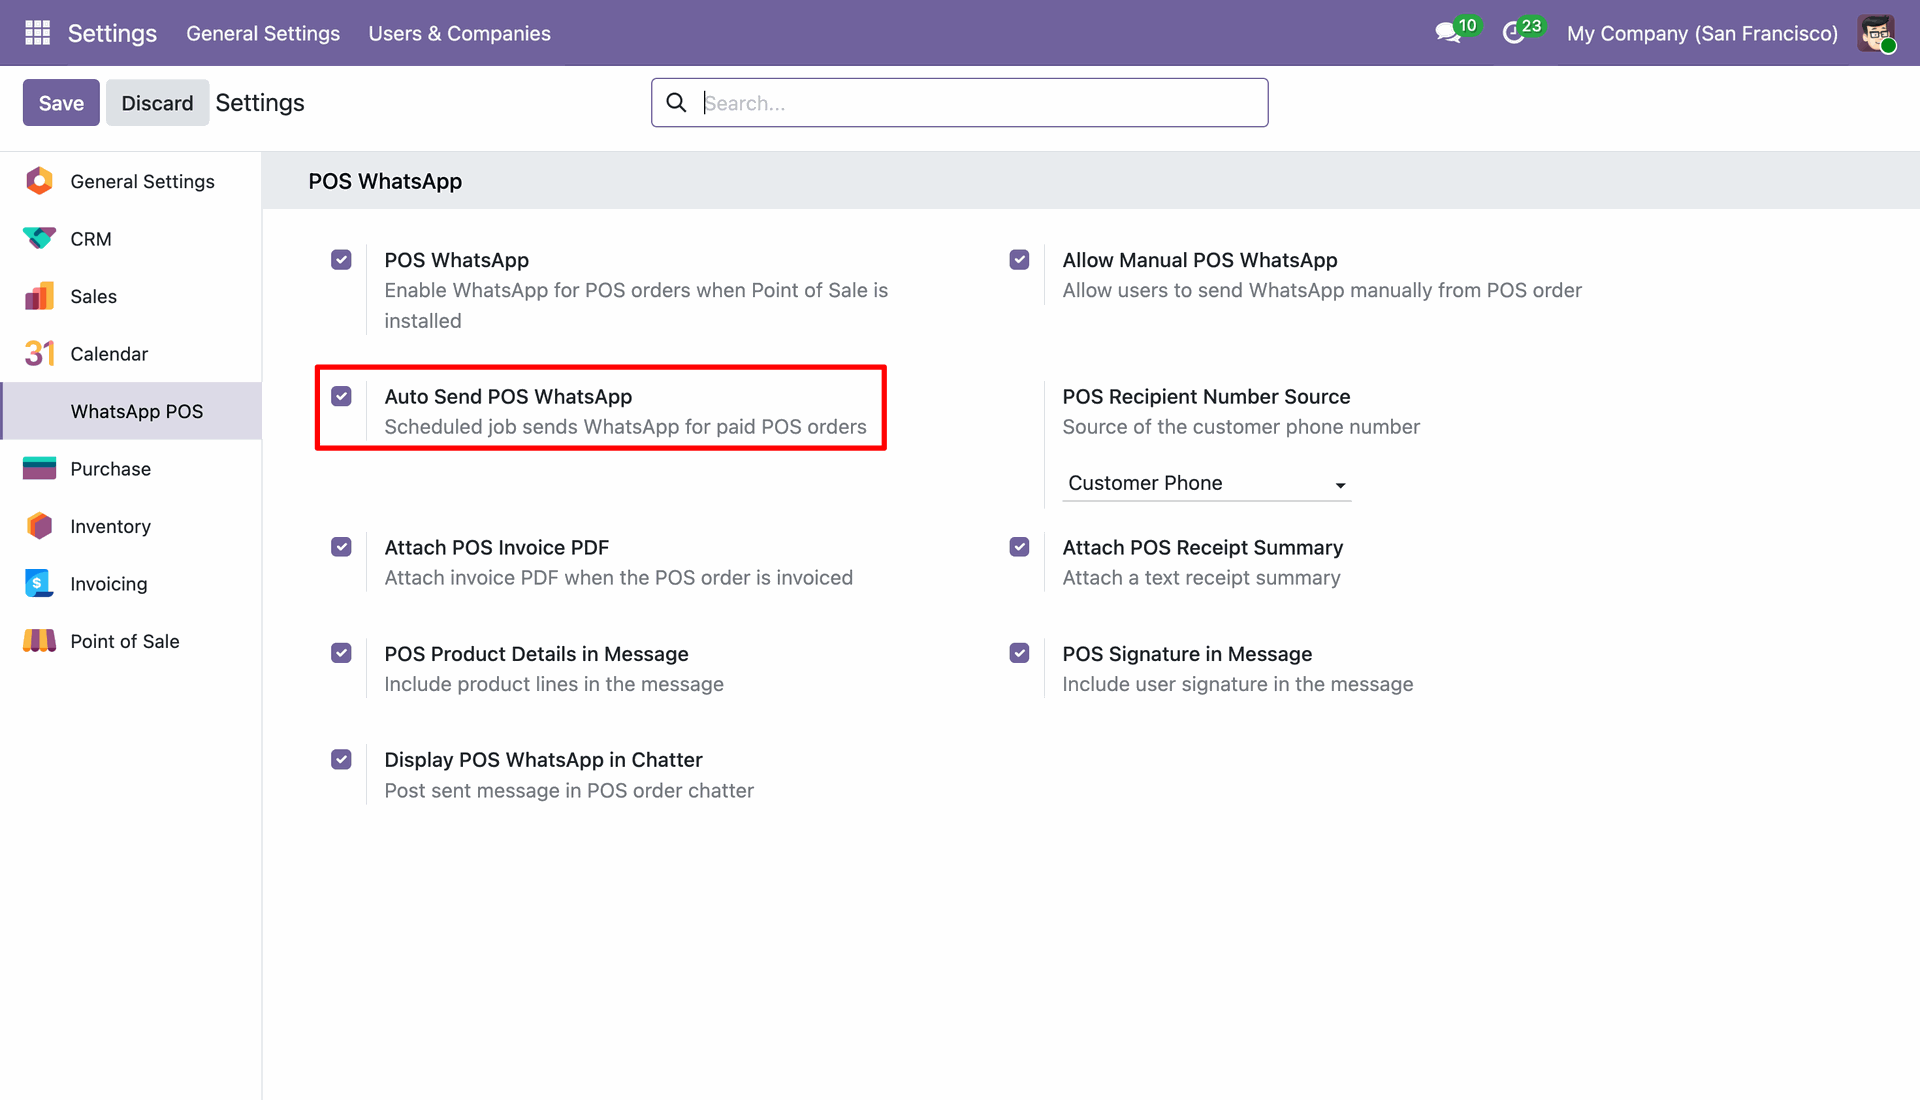
Go to WhatsApp POS General Settings and enable Auto Send POS Whatsapp.
Version 19.0.3.0.0 | Released on : 10th August 2026
Version 18.0.2.0.0 | Released on : 13th April 2026
Version 18.0.1.0.0 | Released on : 18th October 2024
- Yes, this app works perfectly with Odoo Enterprise (Odoo.sh & Premise) as well as Community.
- No, this application is not compatible with odoo.com(odoo saas/Odoo Online)
- Yes, to test this module, please contact us at sales@softhealer.com.
- Please contact us at sales@softhealer.com to request customization.
- Yes, we provide free lifetime support for the version you purchased.
- Yes, you will receive lifetime free updates for the version of the module you purchased.
- No, there is no need to install any additional libraries.
- Yes, for version 12 and above, you need to purchase the module separately for each version you intend to use.
- No, exchanges or refunds are not allowed. Please make sure to select the correct version before purchasing.
- You can contact us at support@softhealer.com for language translation support. We use Google Translator tools to provide translations in multiple languages, so the accuracy may vary. We welcome your suggestions to help improve translations.
Discover Our Latest Apps