


All in One Repair Order Management

Our Repair Order Management module enhances repair functionality by integrating powerful features for better control, automation, and visibility. It streamlines the repair process across departments such as CRM, MRP, and Work Orders while providing tools for approval workflows, mass actions, and task management.
Hot Features
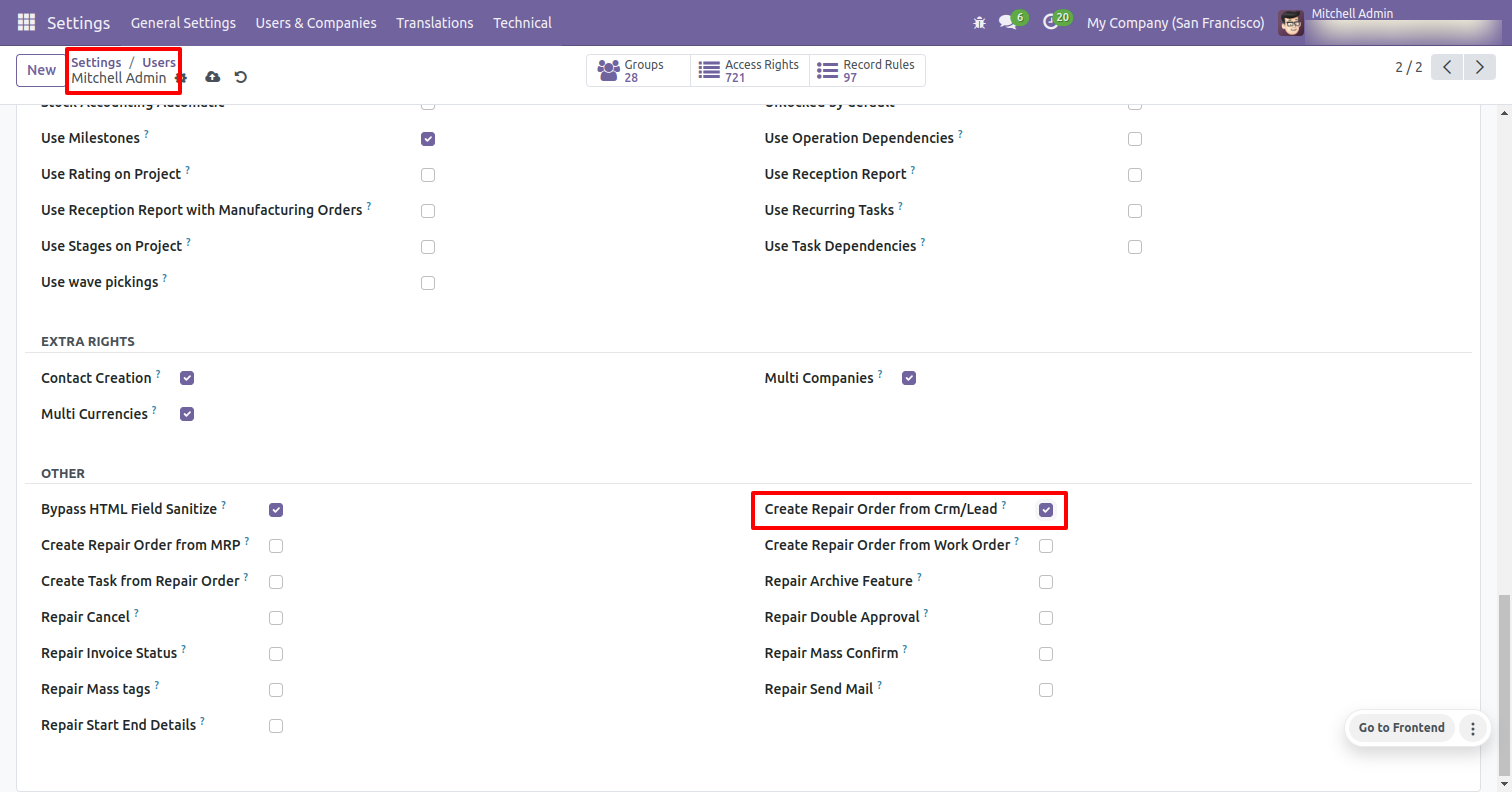
Go to the user settings and enable the 'Create Repair Order From CRM/Lead' boolean.
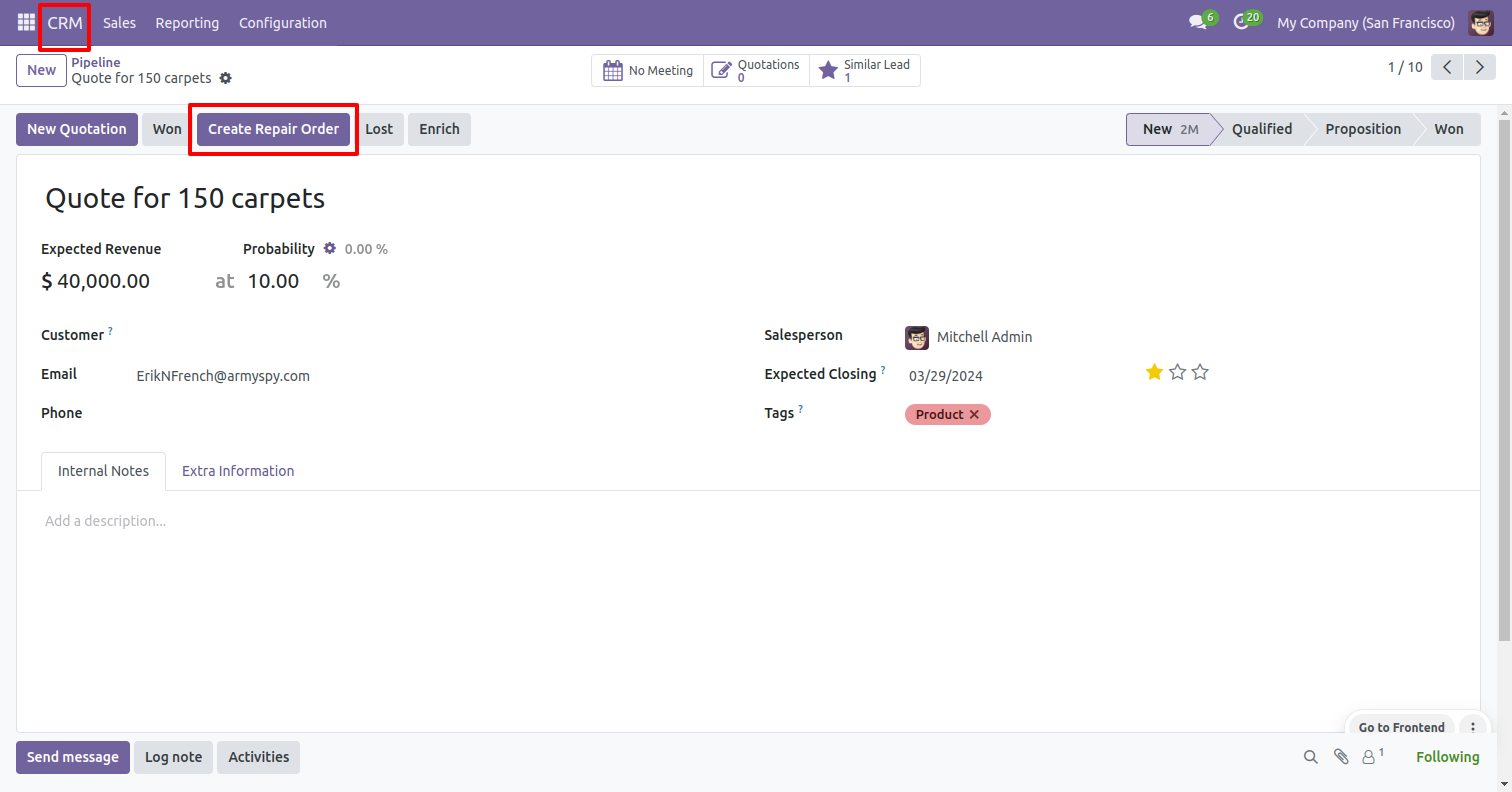
Form view of the Pipeline. Click on the 'Create Repair Order' button.
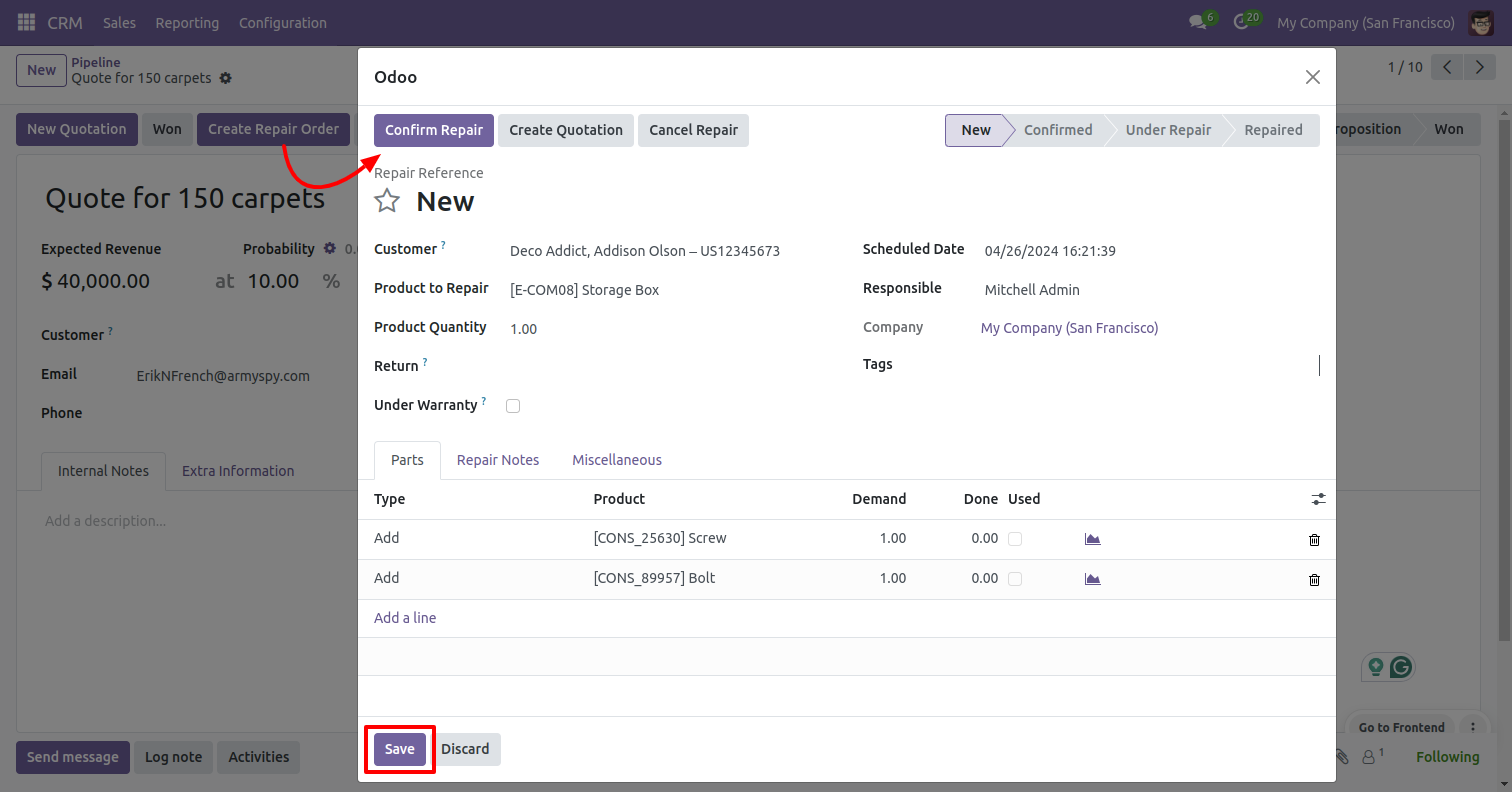
Add details and click on the 'Save' button.
Here you can see the repair order is created.
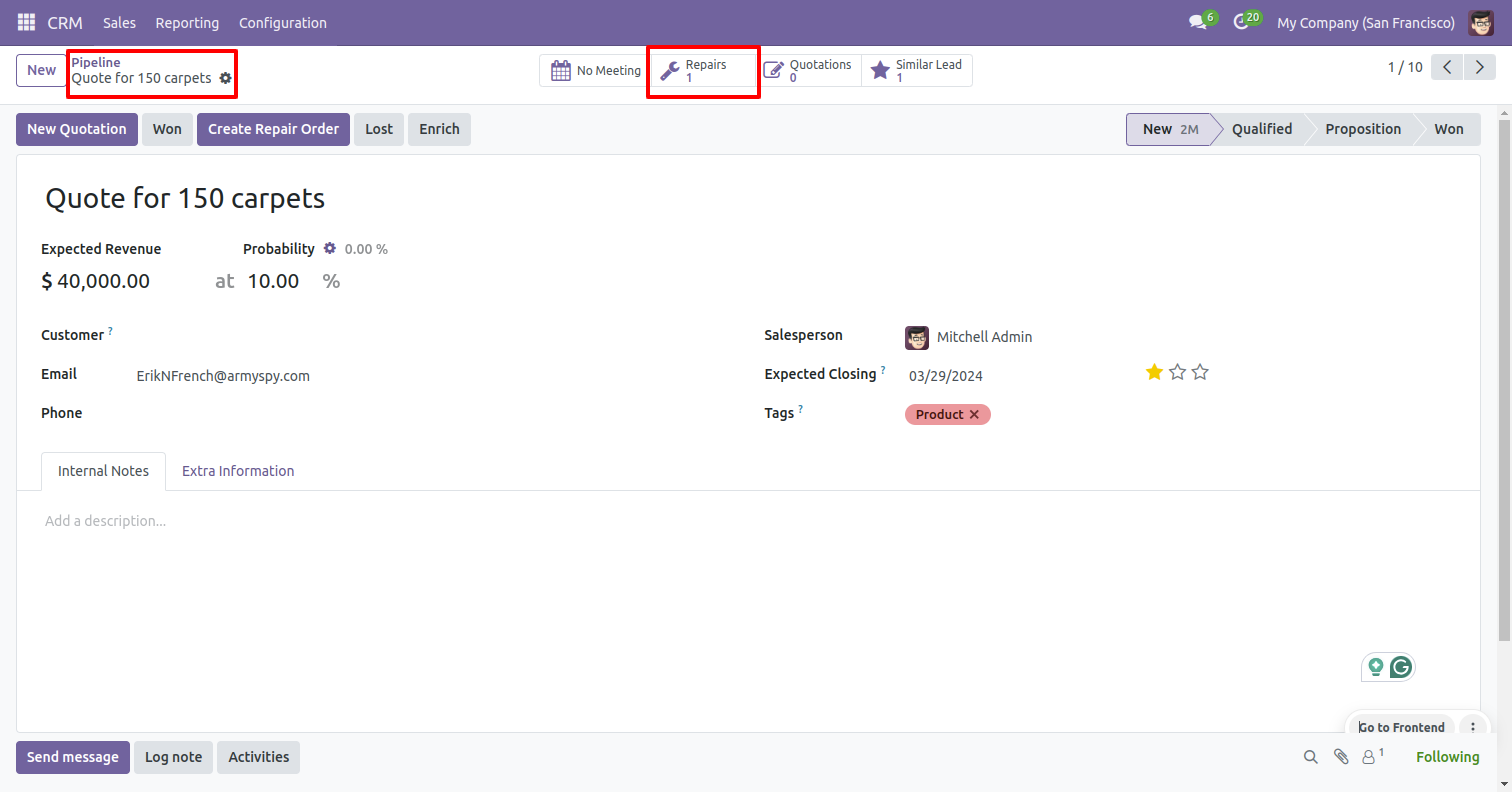
To see the repair orders, click on the 'Repairs' smart button.
After that you will redirect to the repair order.
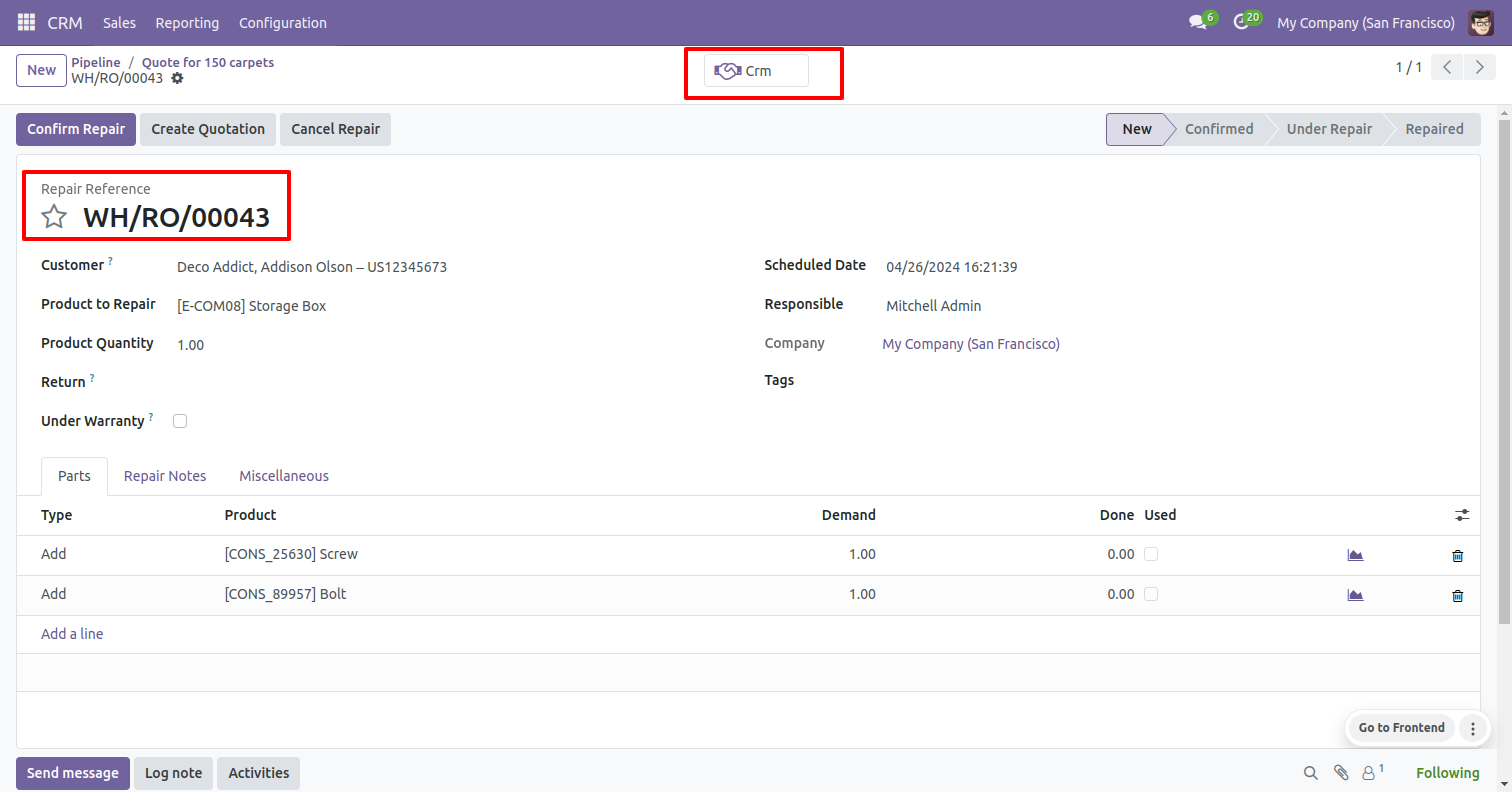
You can see the CRM from the 'CRM' smart button.
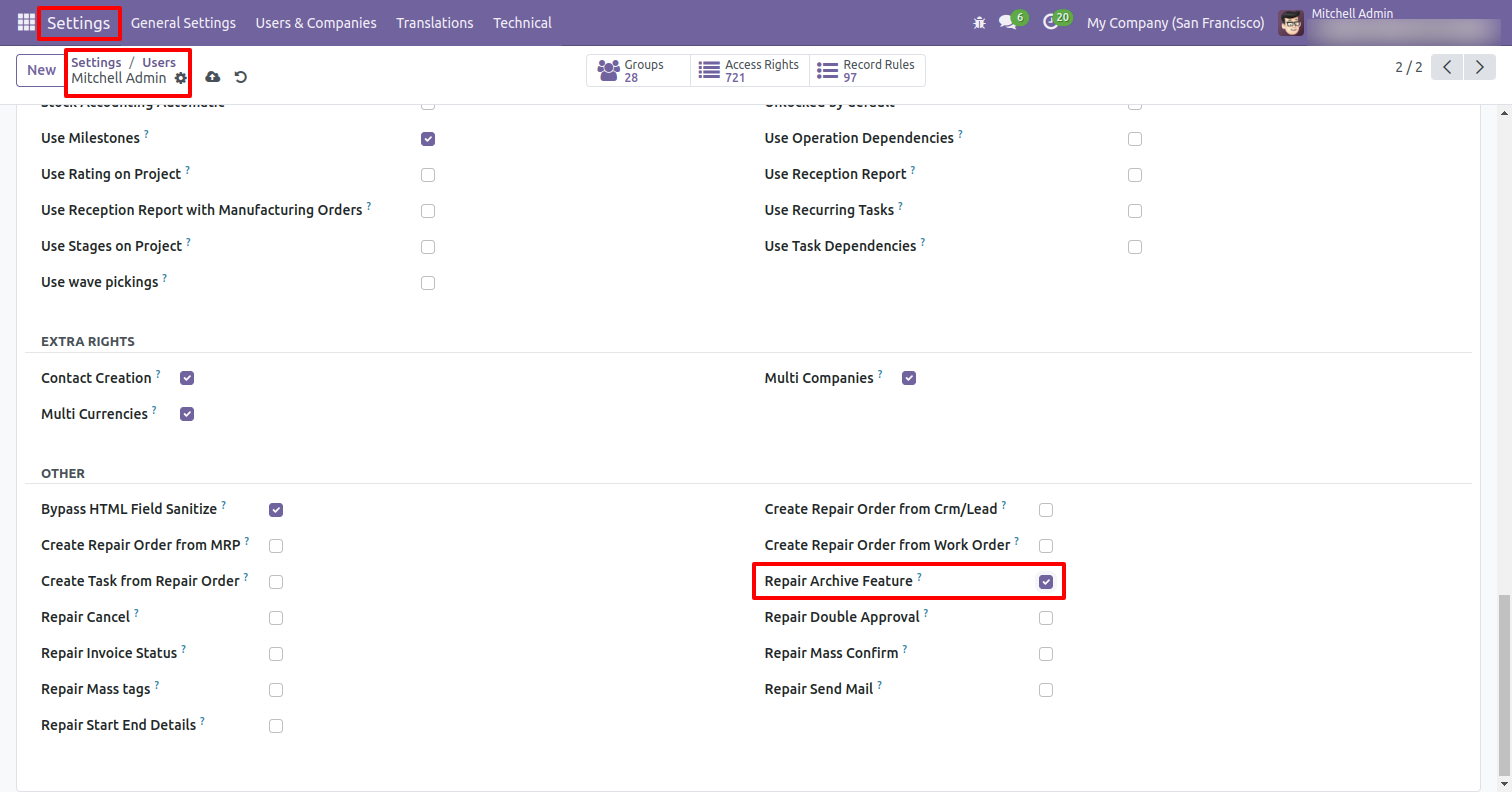
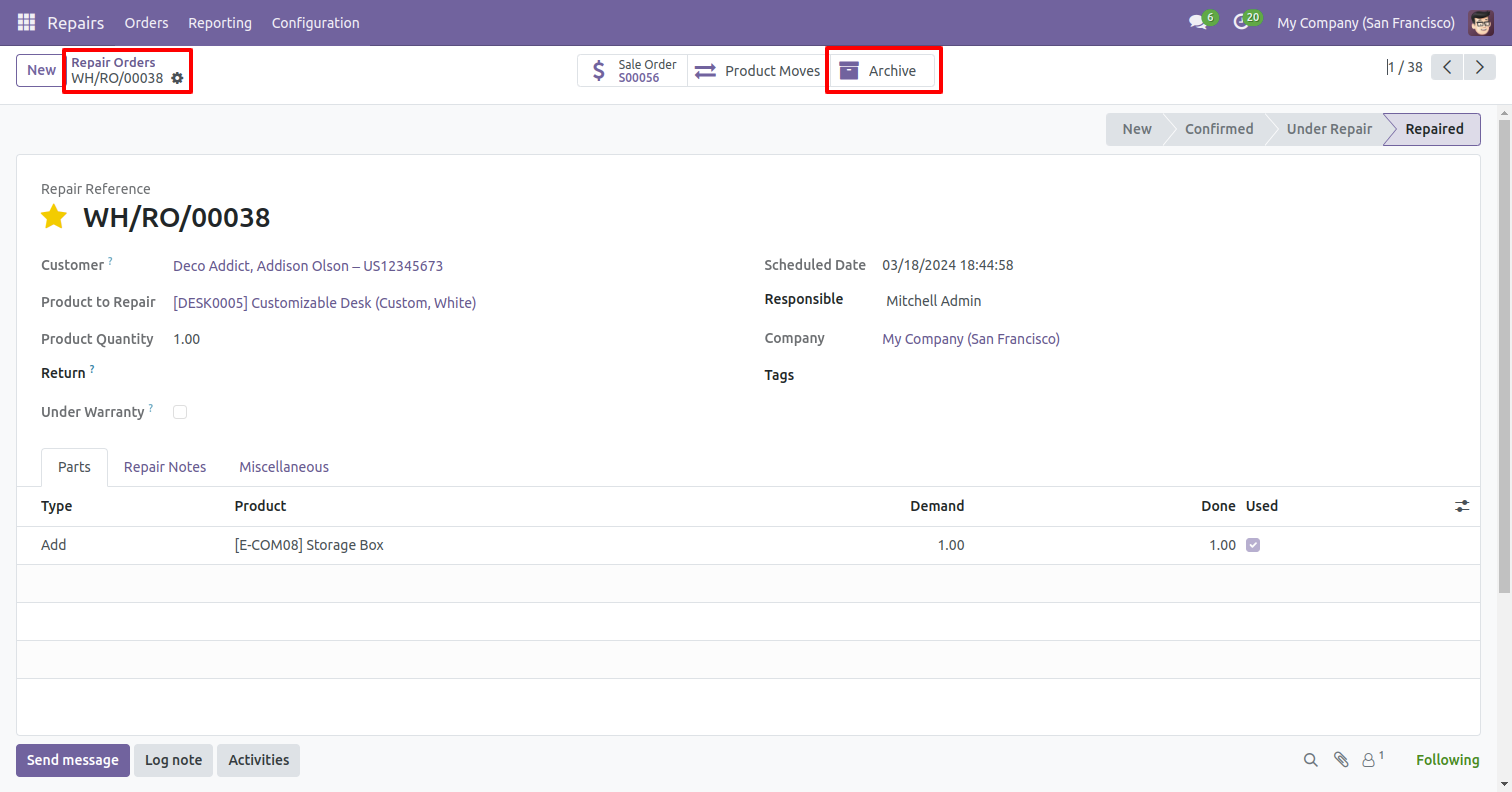
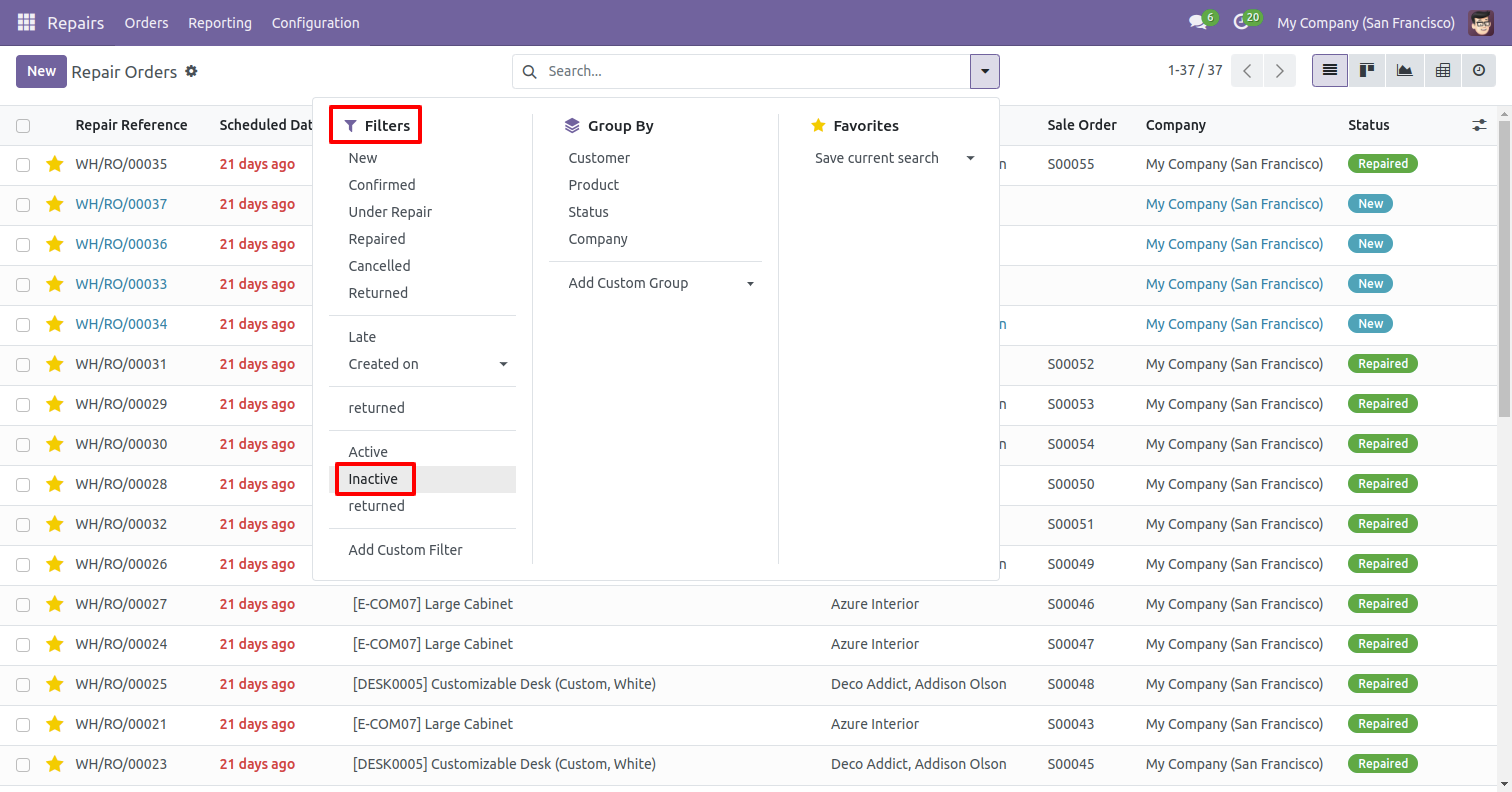
Go to the user settings and enable the 'Repair Archive Feature' boolean.
'Helpdesk Teams' menu and list view.
'Helpdesk Teams' form view. Where you can define team member and team leader or set team as default.
'Helpdesk Tickets Type' menu and list view.
'Helpdesk Subject Types' menu and list view.

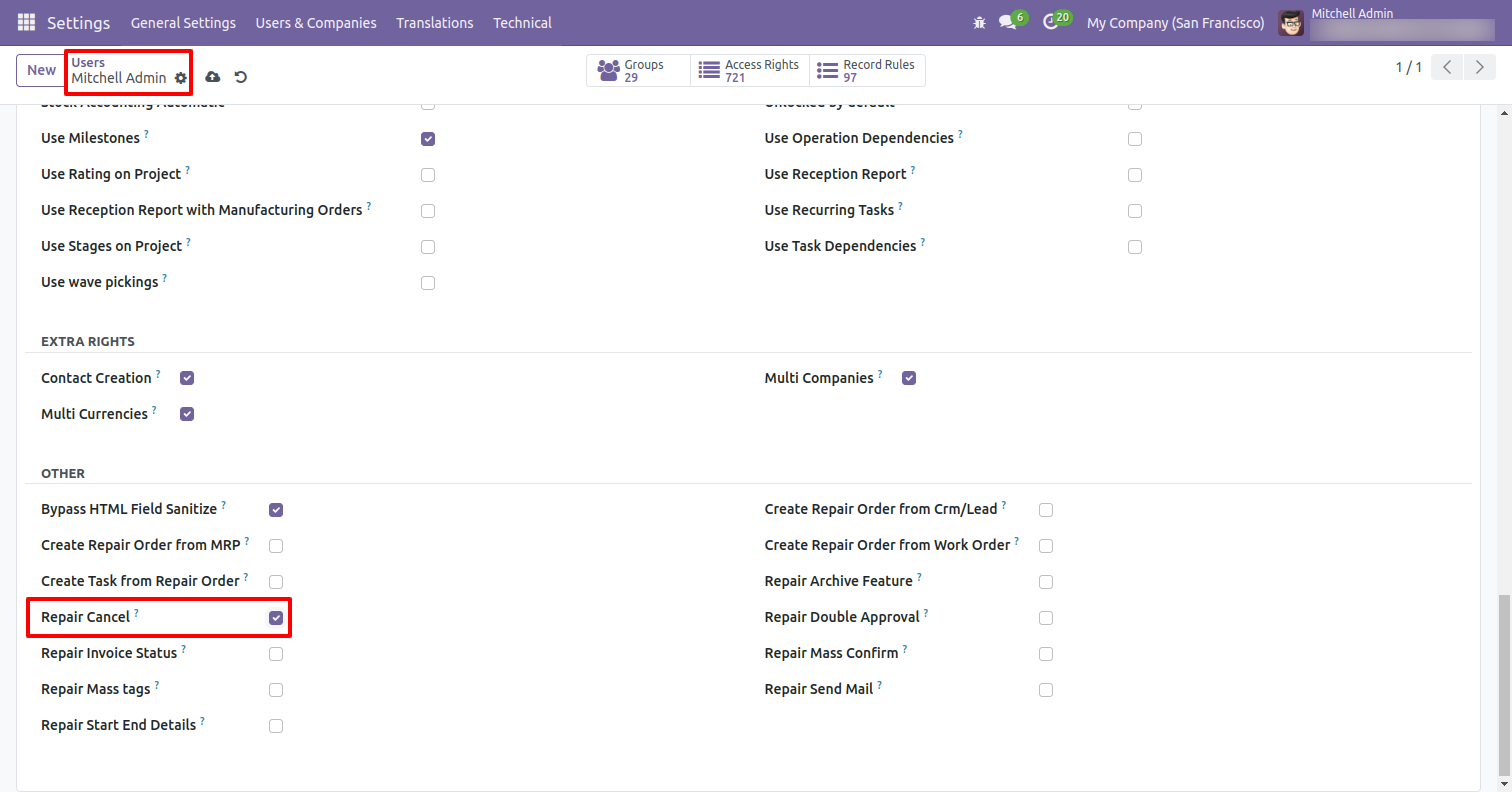
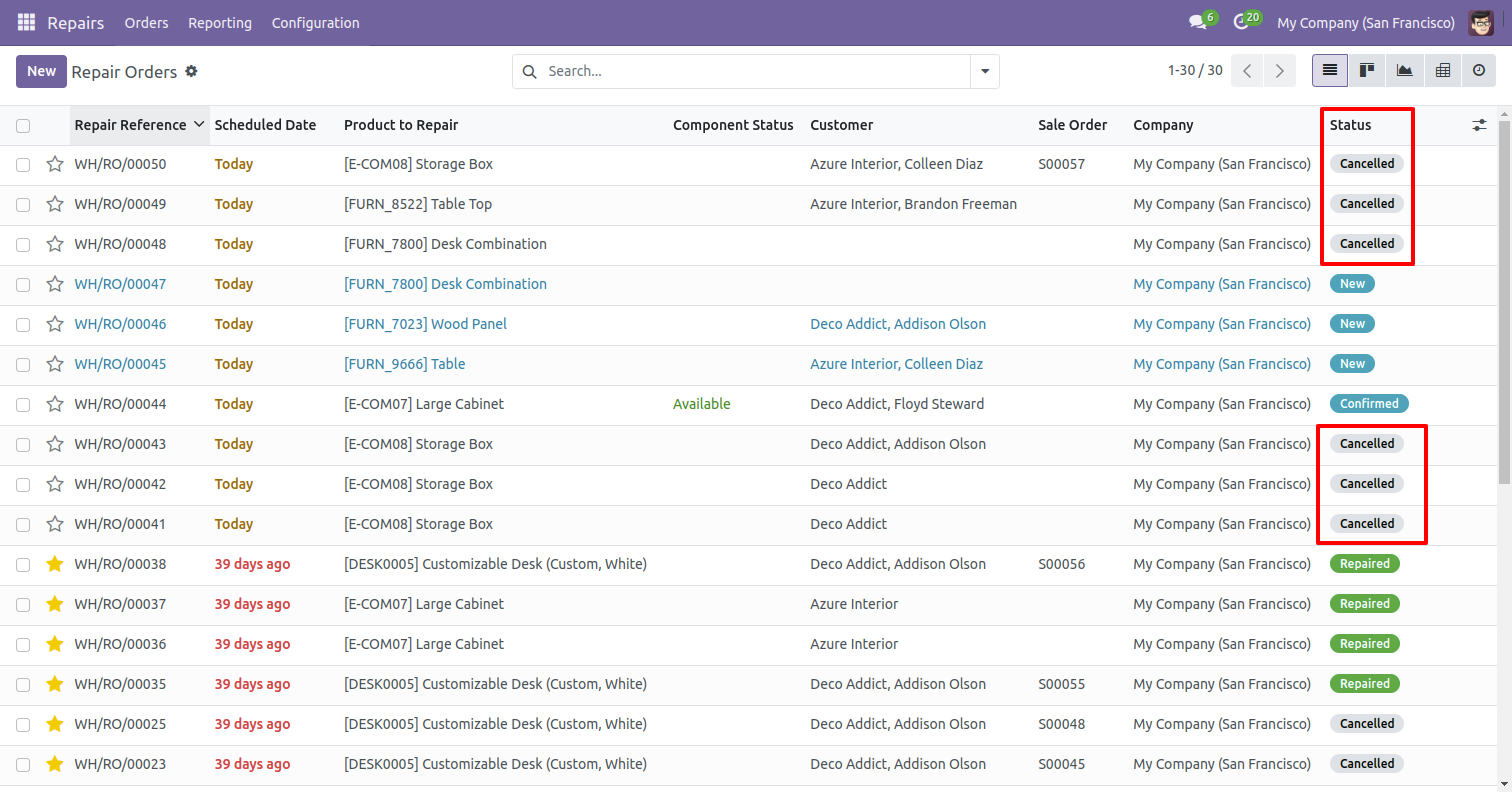
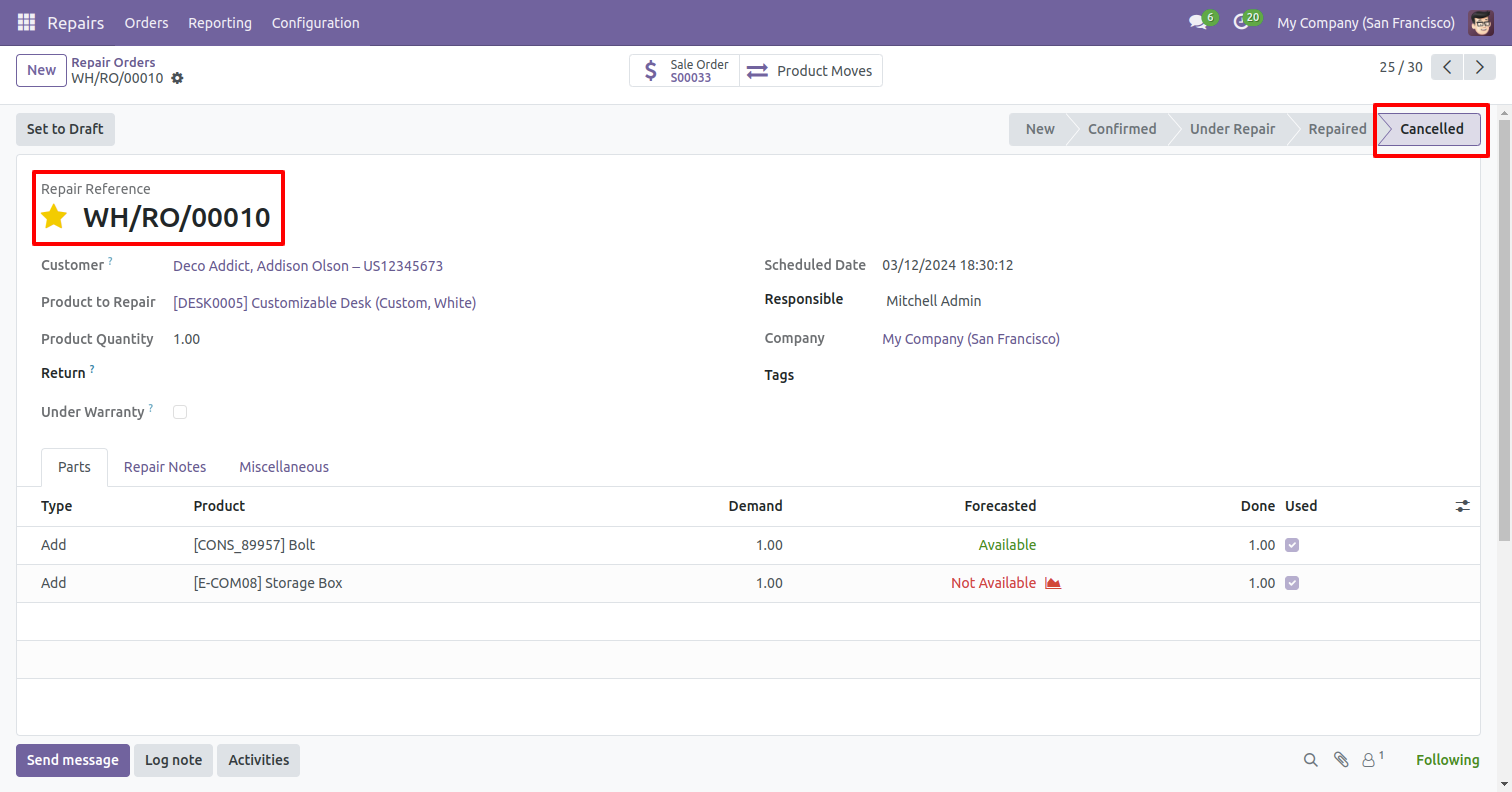
Go to the user settings and enable the 'Repair Cancel' boolean.
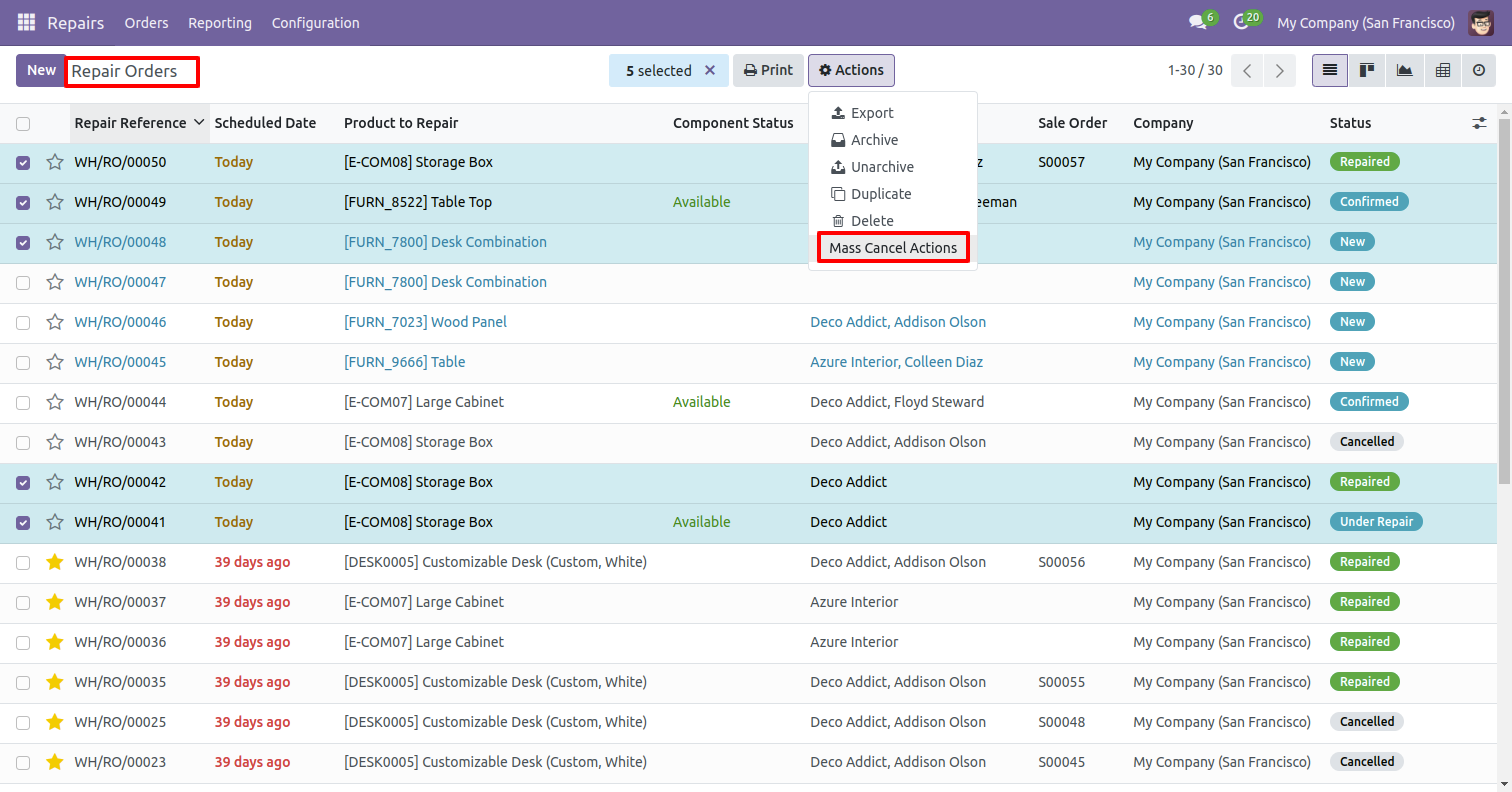
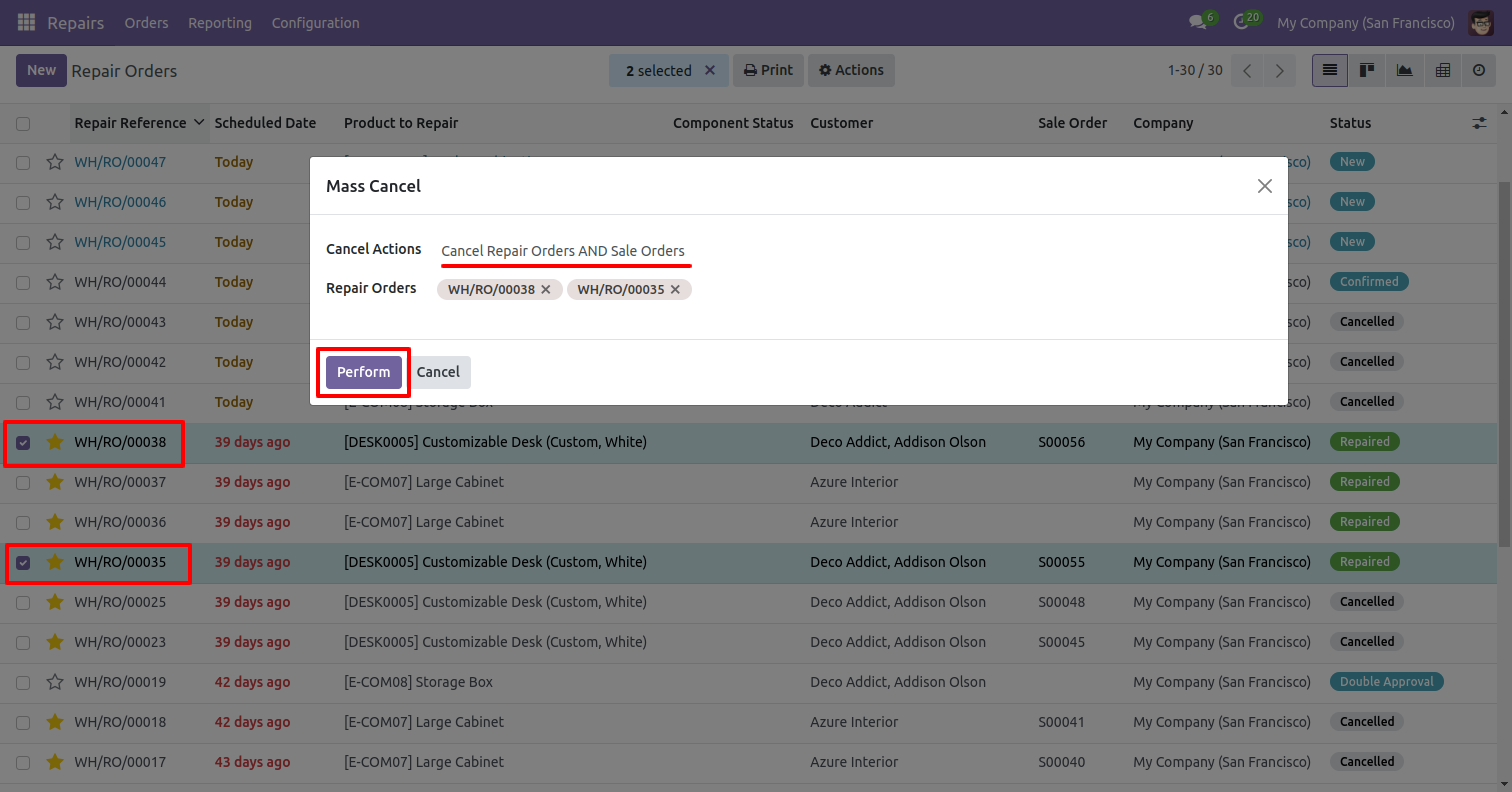
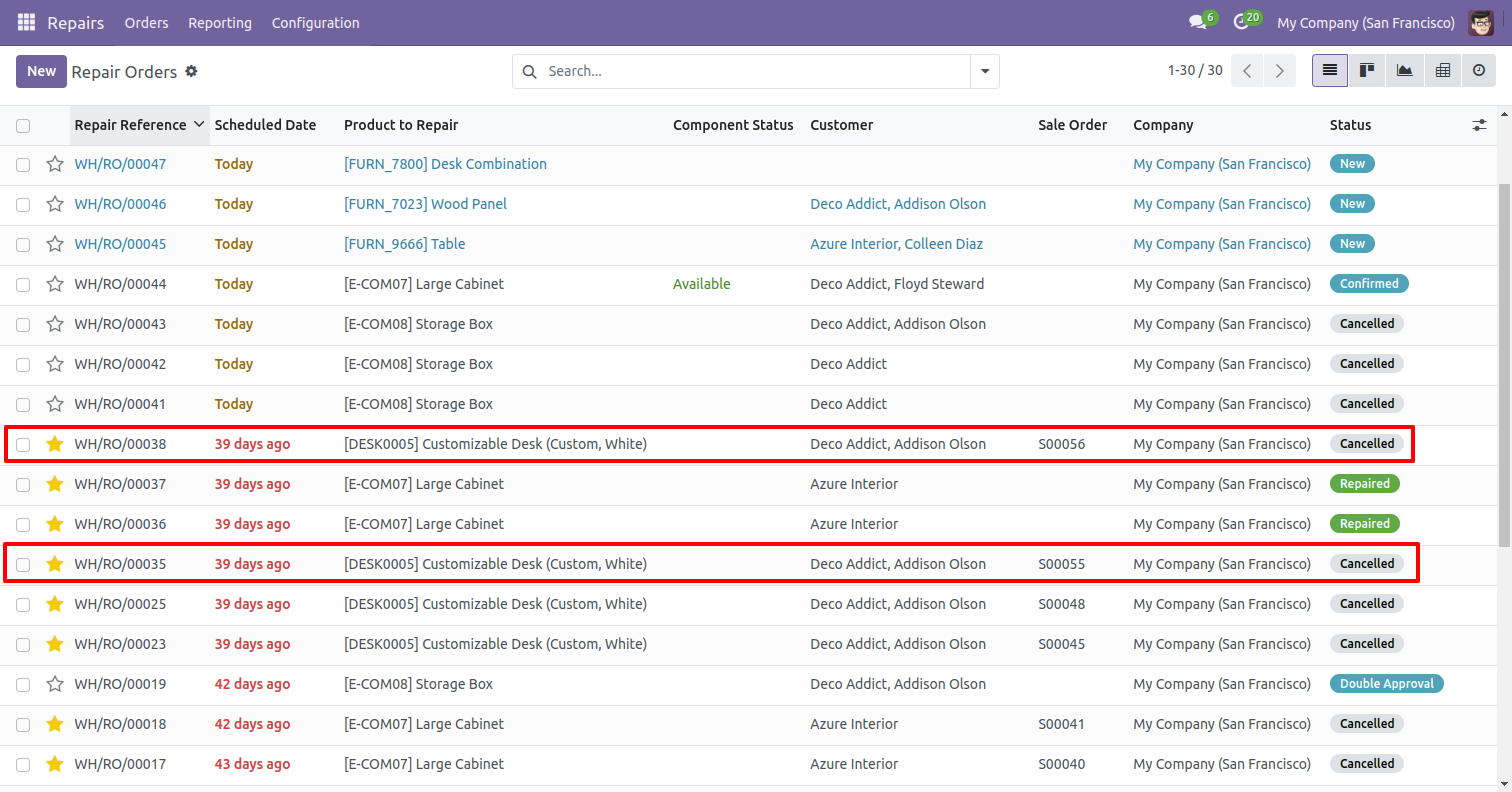
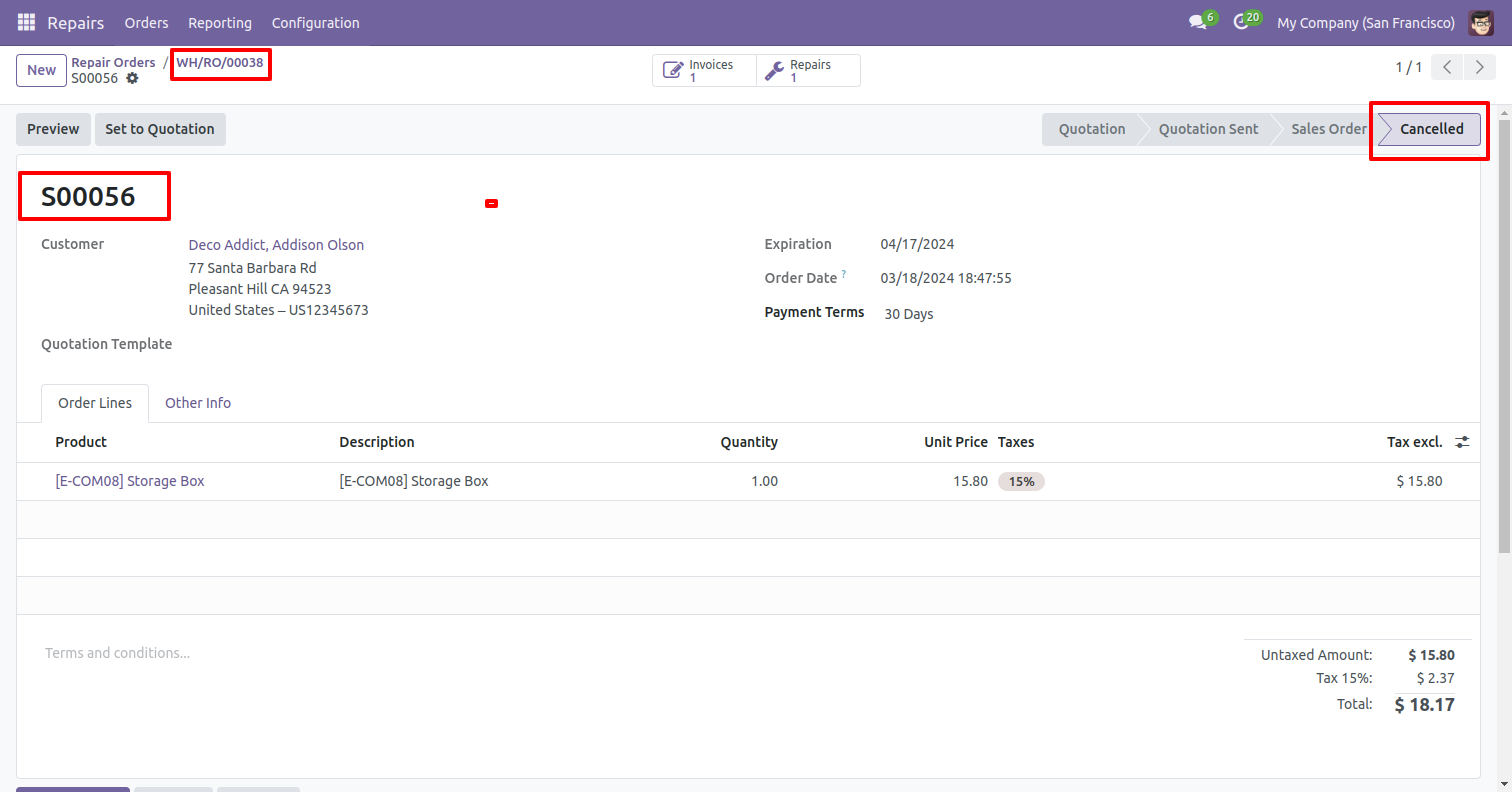
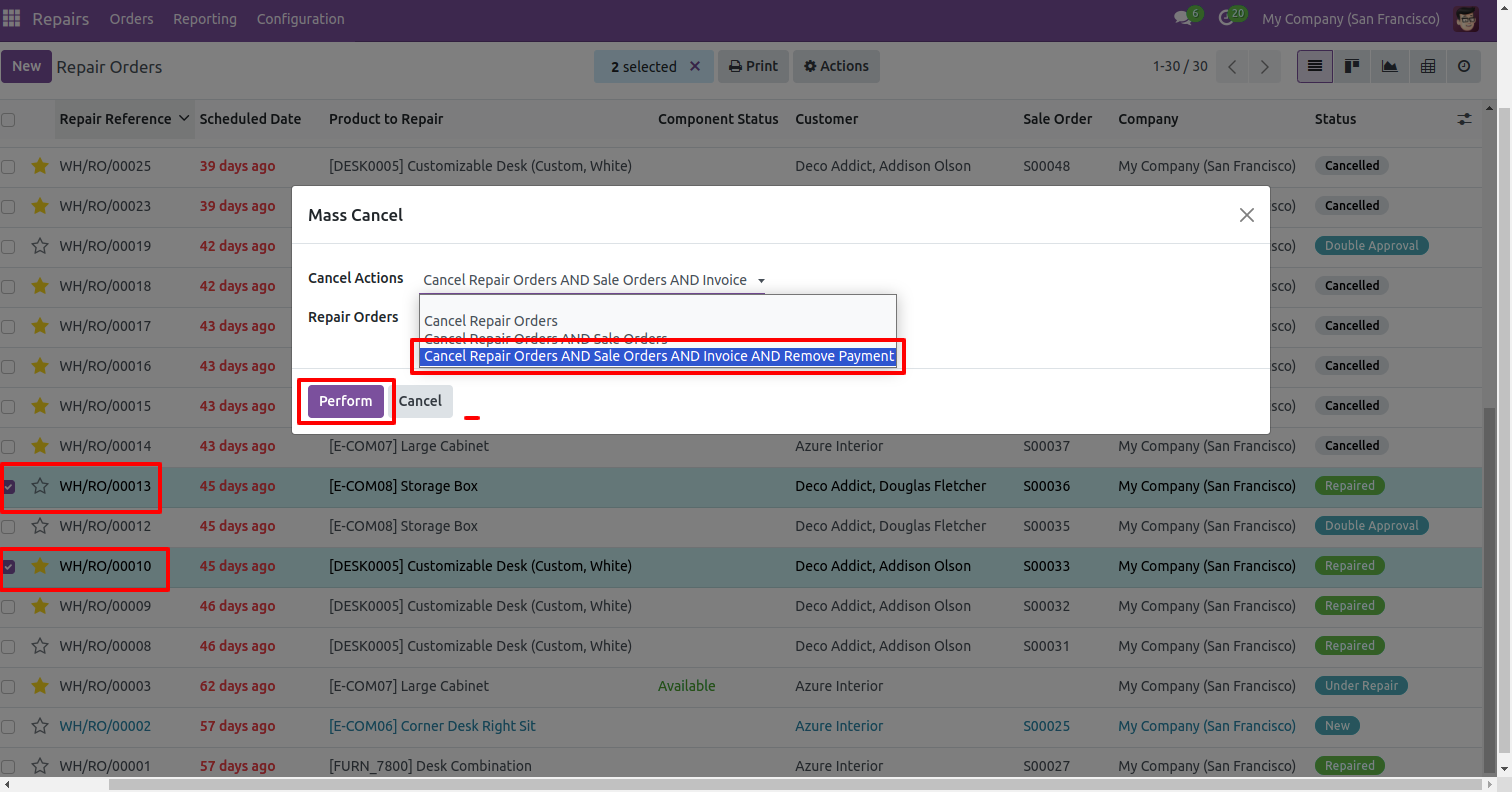
Select the repair order and click on the 'Mass Cancel Actions' from thr actions.
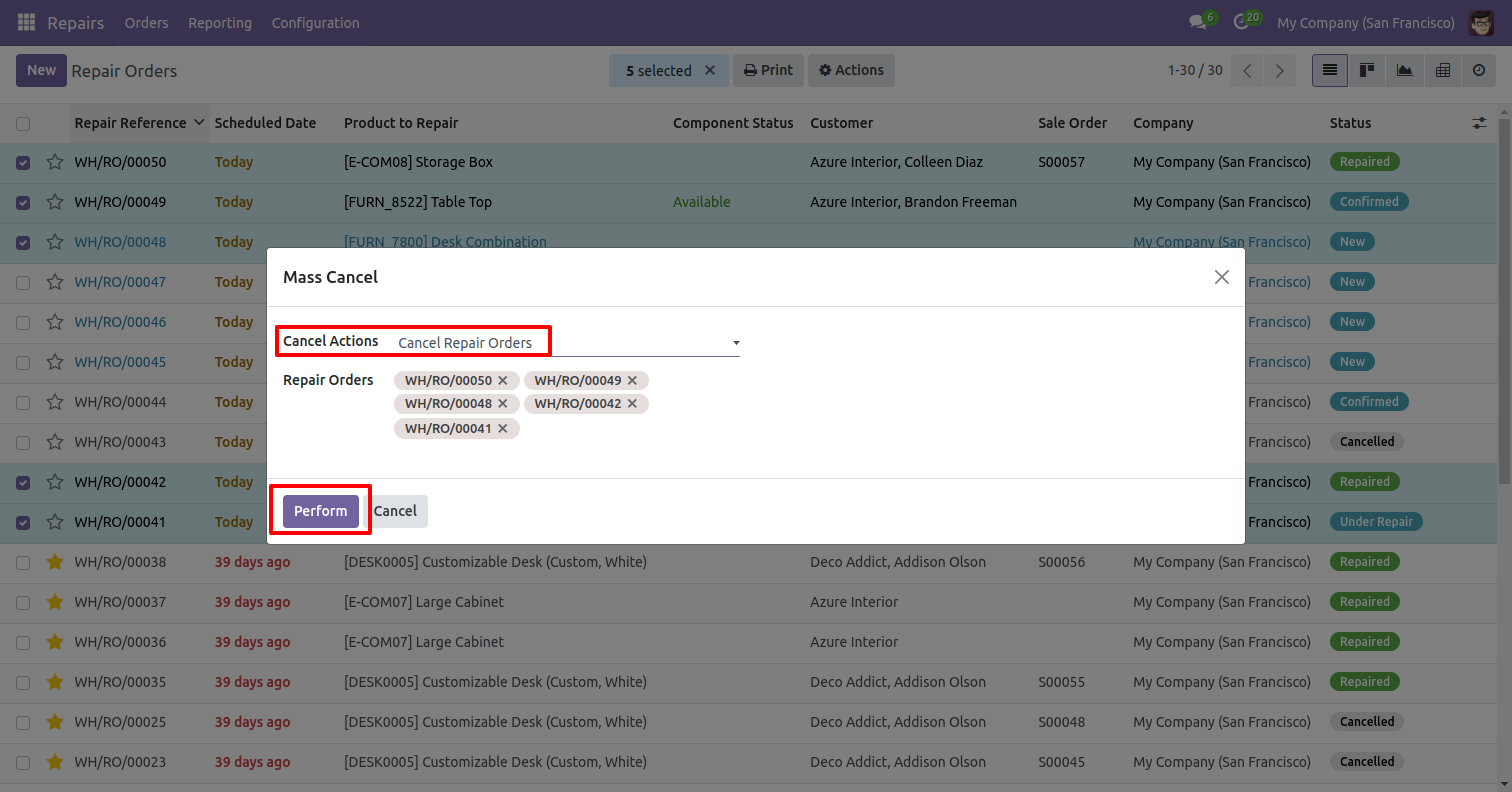
After that, the 'Mass Cancel' wizard will appear.
Enter the required details and select the 'Confirm Repair' action and click on the 'Confirm' button.
In 'User', enable the 'Whatsapp Configuration Manager' option.
Helpdesk >> Configurations >> Whatsapp Configuration
Click on the 'Verify Authentication' button.
Please scan the QRcode to start the session.
In the Configuration Manager form view, click the 'Post Webhook' button.
The 'Webhook Posted Successfully' notification will be displayed.
You can see the auth status as 'Authenticated' and the Webhook URL. Click the 'Save' button.
The WhatsApp view appears as shown below. Send a 'HI' message.
You can see the sended message.
In the Kanban view of the ticket, you can see the newly created ticket from WhatsApp.
In the ticket's form view, the partner's name and mobile number are displayed.
The message is visible in the ticket chatter.
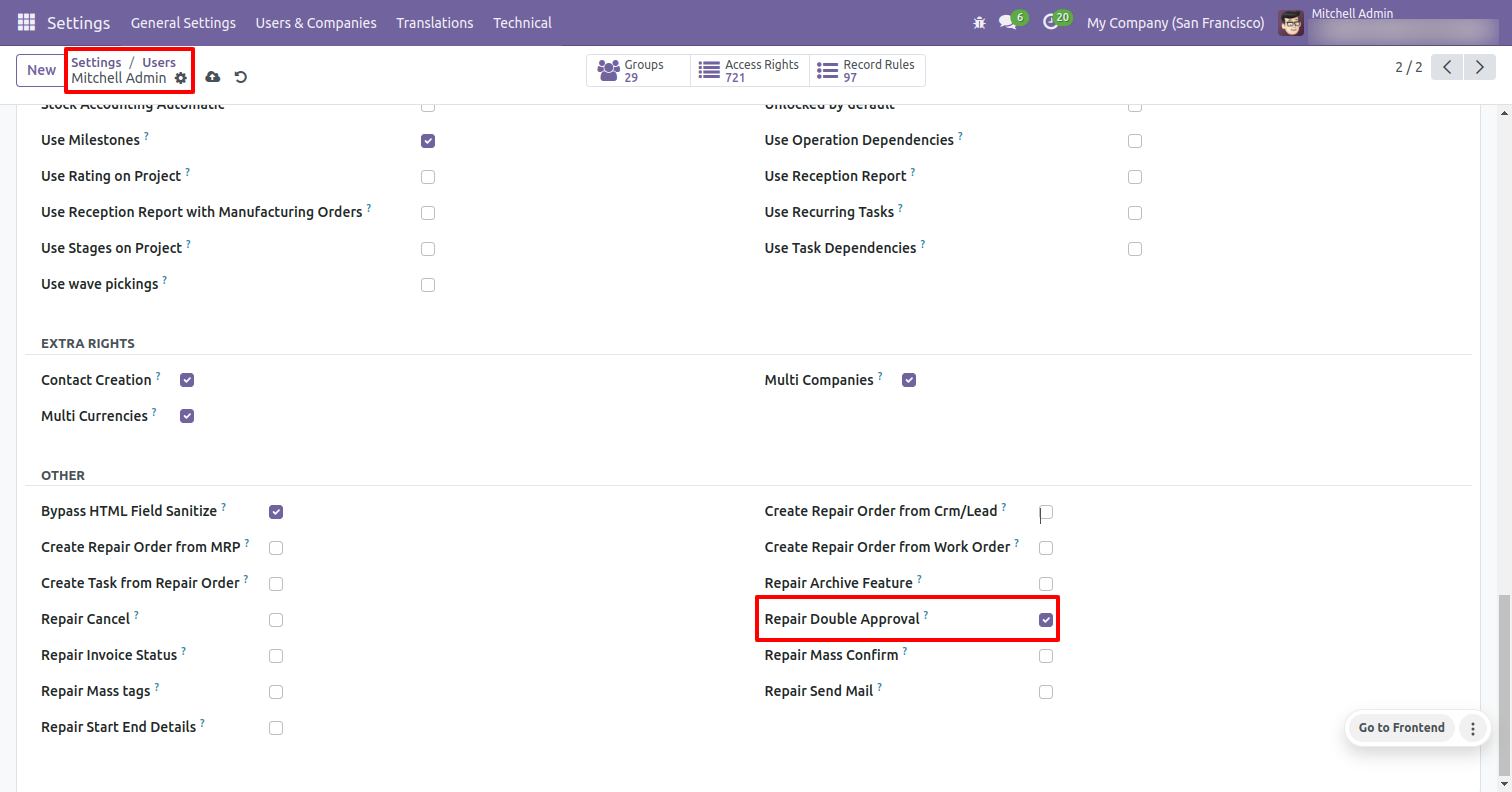
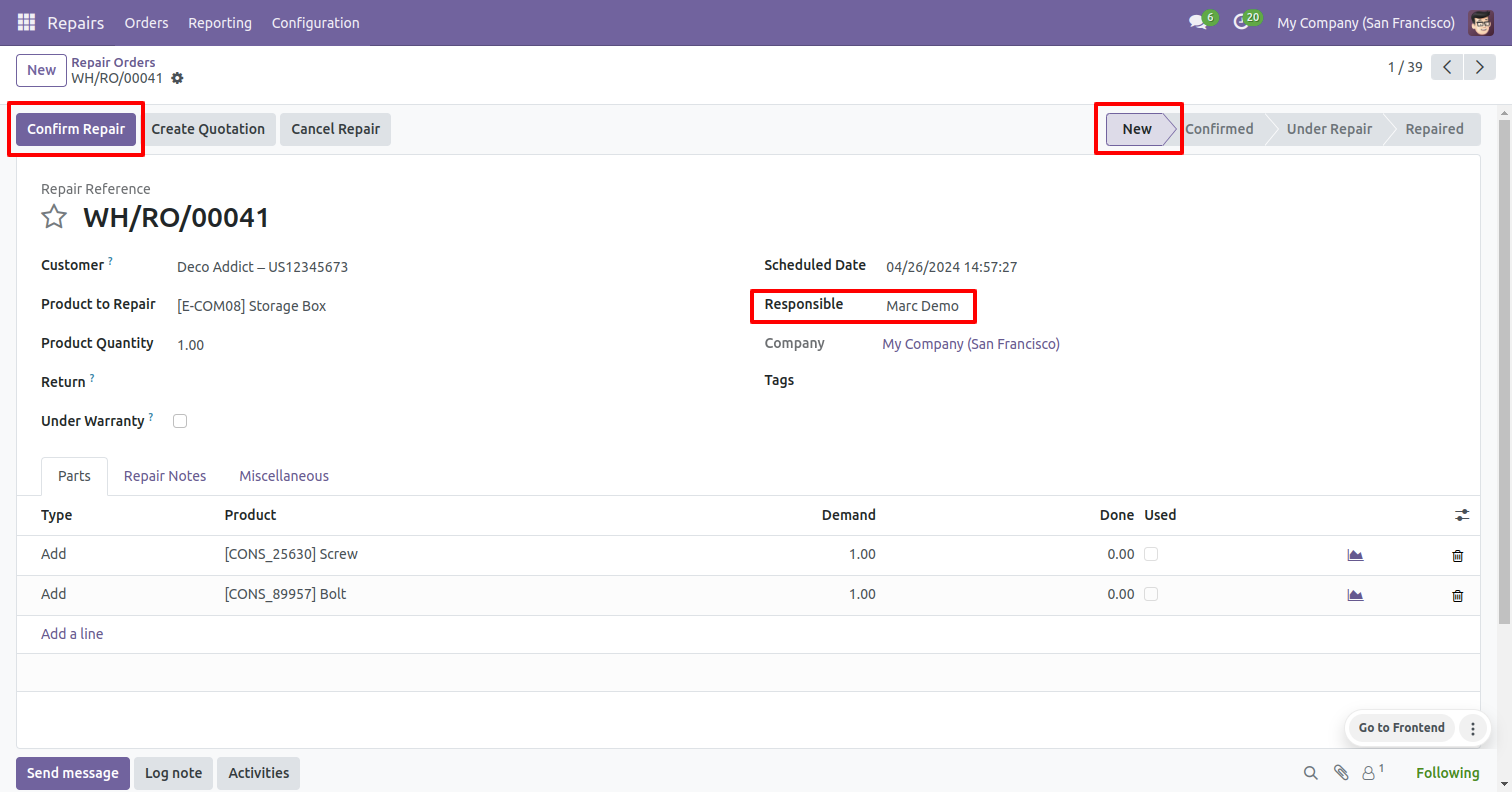
Go to the user settings and enable the 'Repair Double Approval' boolean.
In the repair order form view, click on the 'Confirm Repair' button.
The repair order is now in the 'Double Approval' stage.
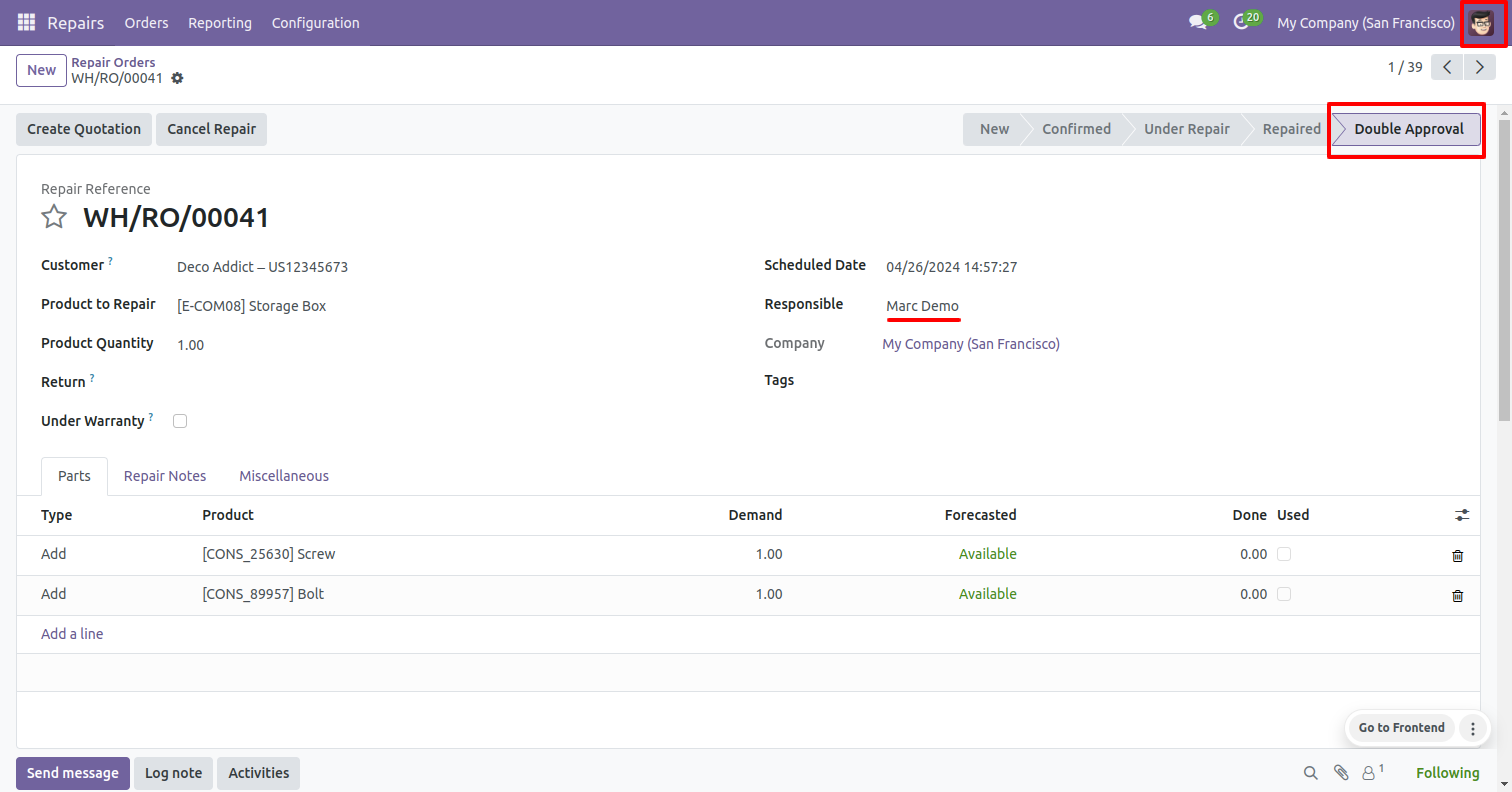
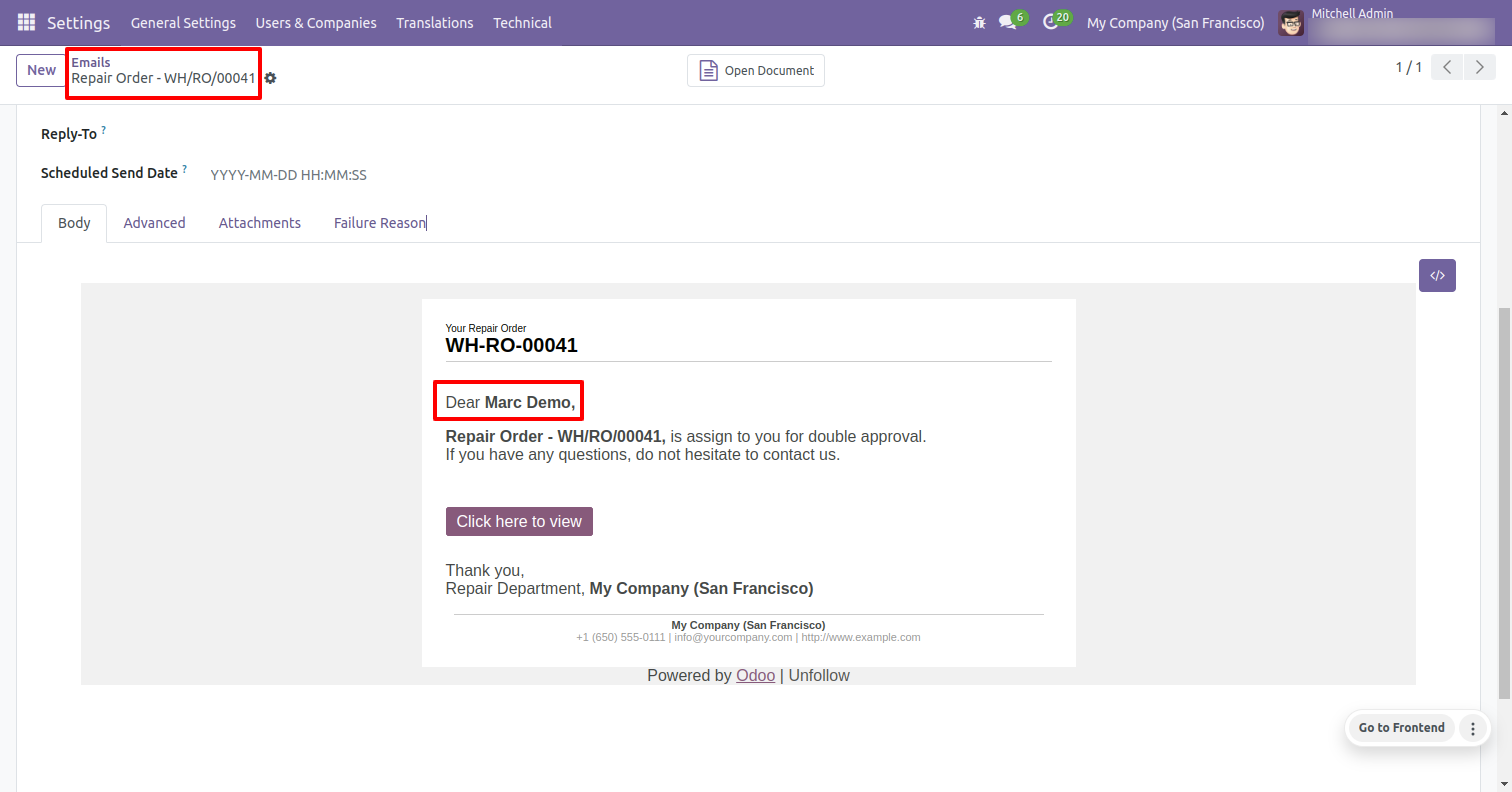
The responsible user will receive an email notification for the approval.
Click on the 'Approve' button to approve the repair order. Approval user can also cancel it by clicking the 'Cancel Repair' button.
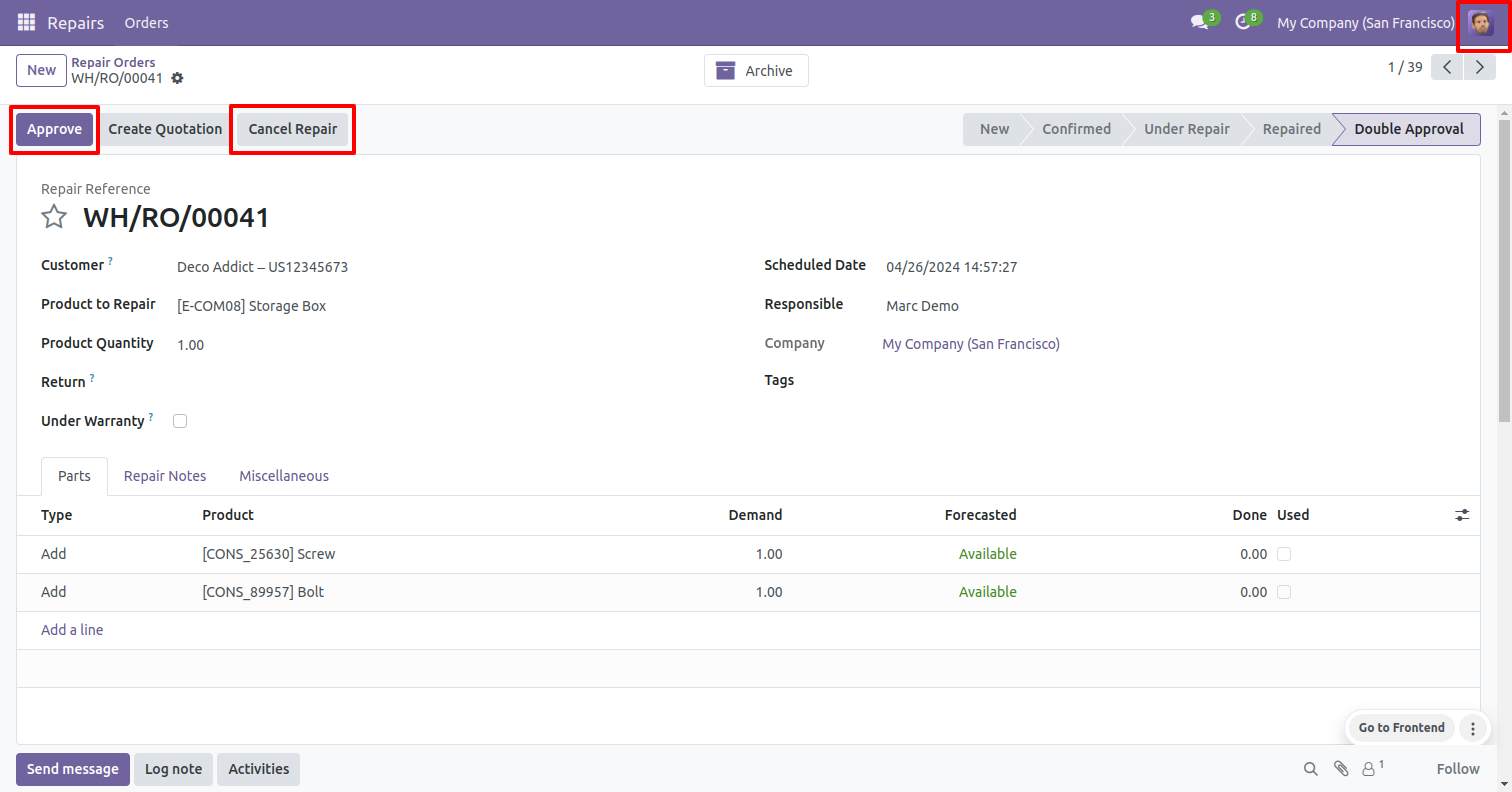
After approved the repair order user will see the 'Start Repair' button.
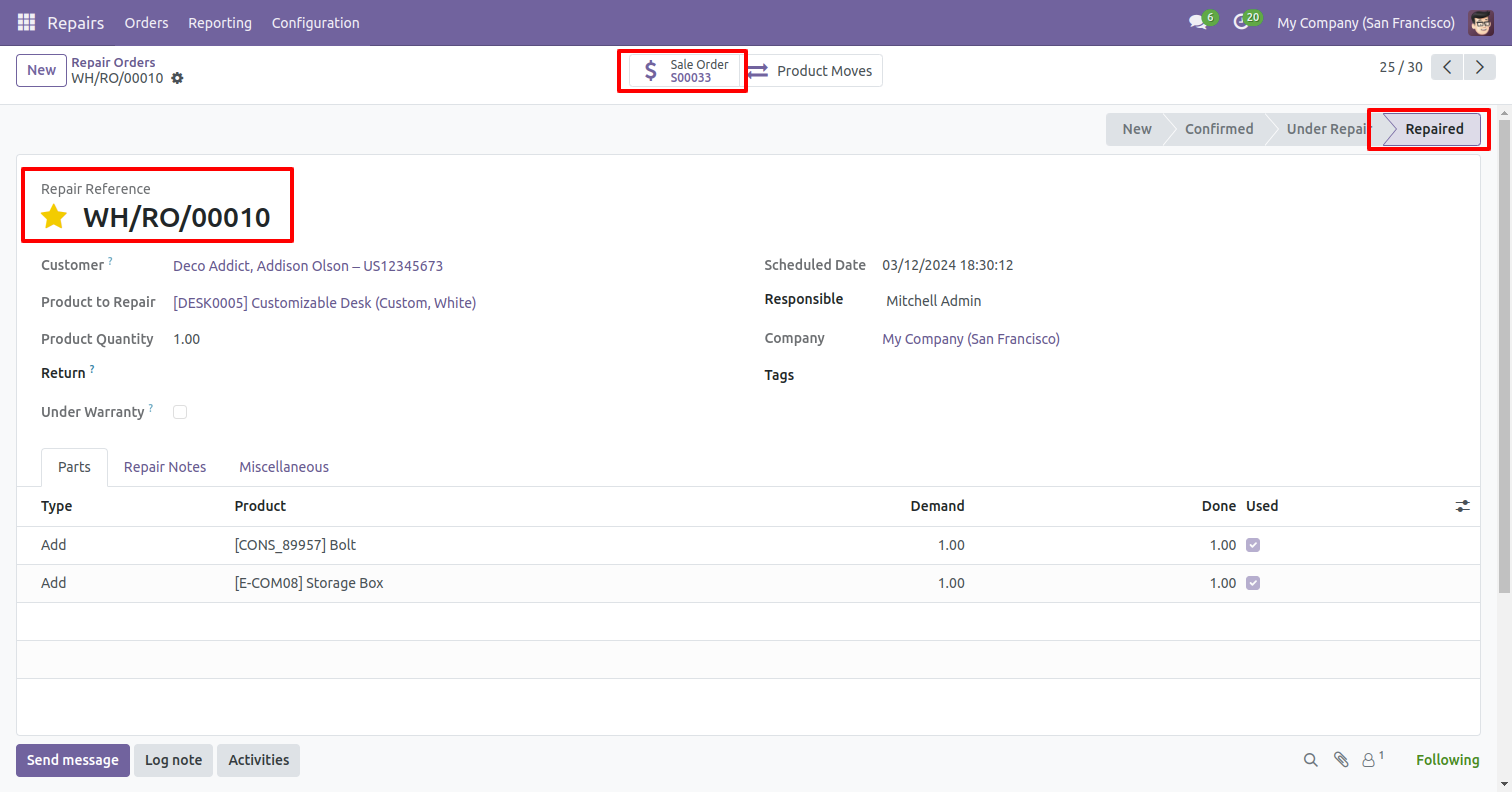
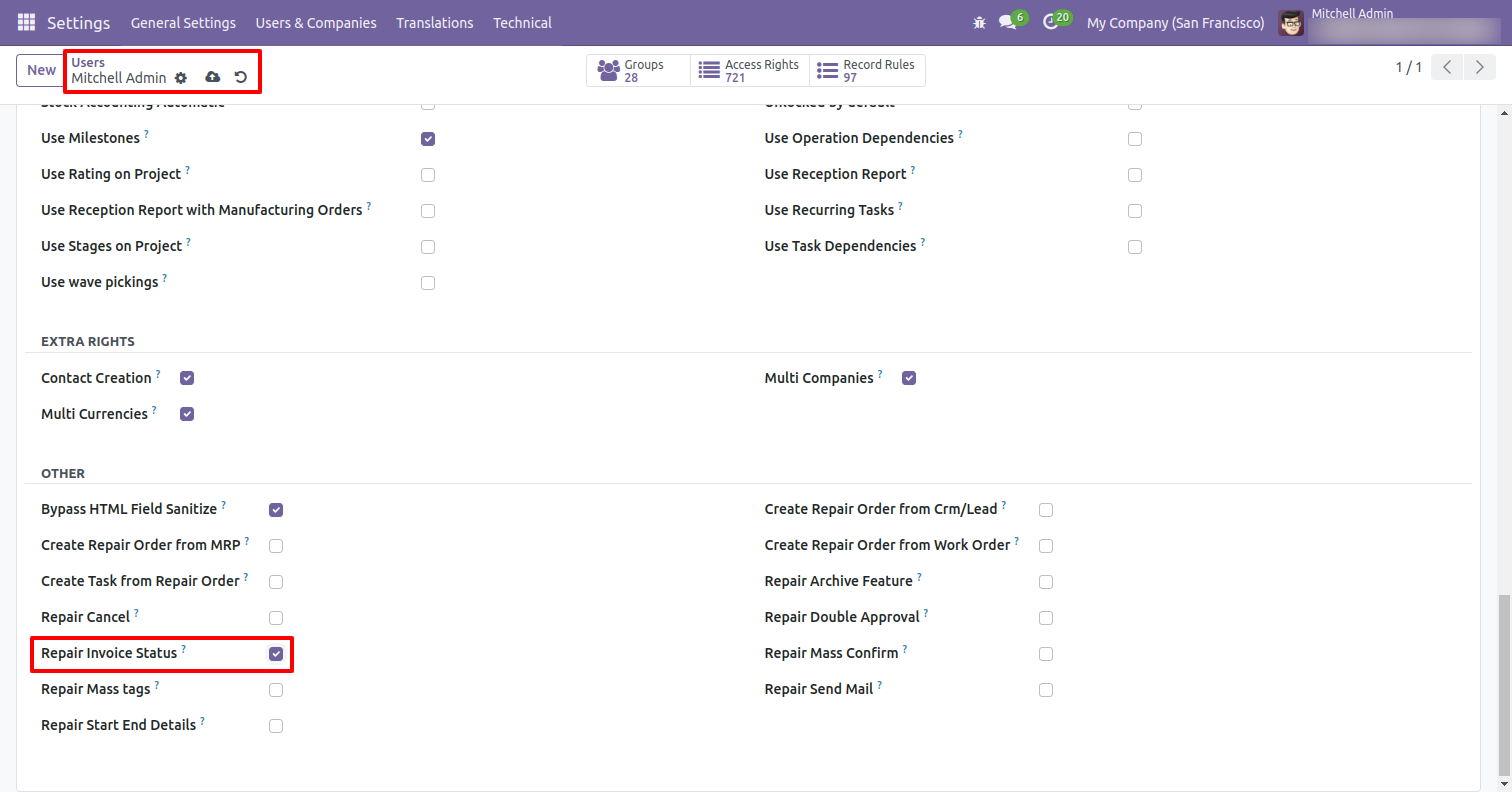
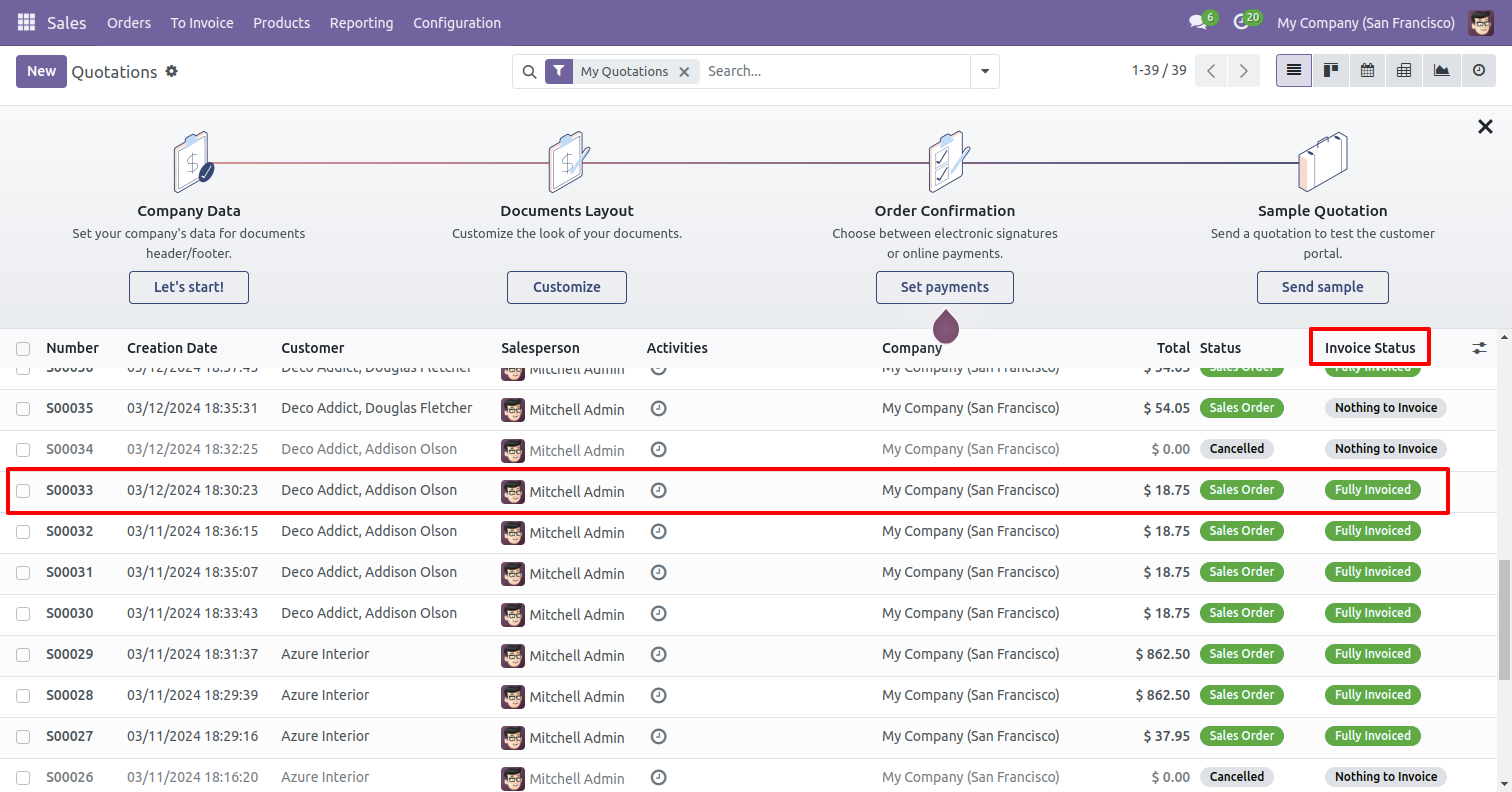
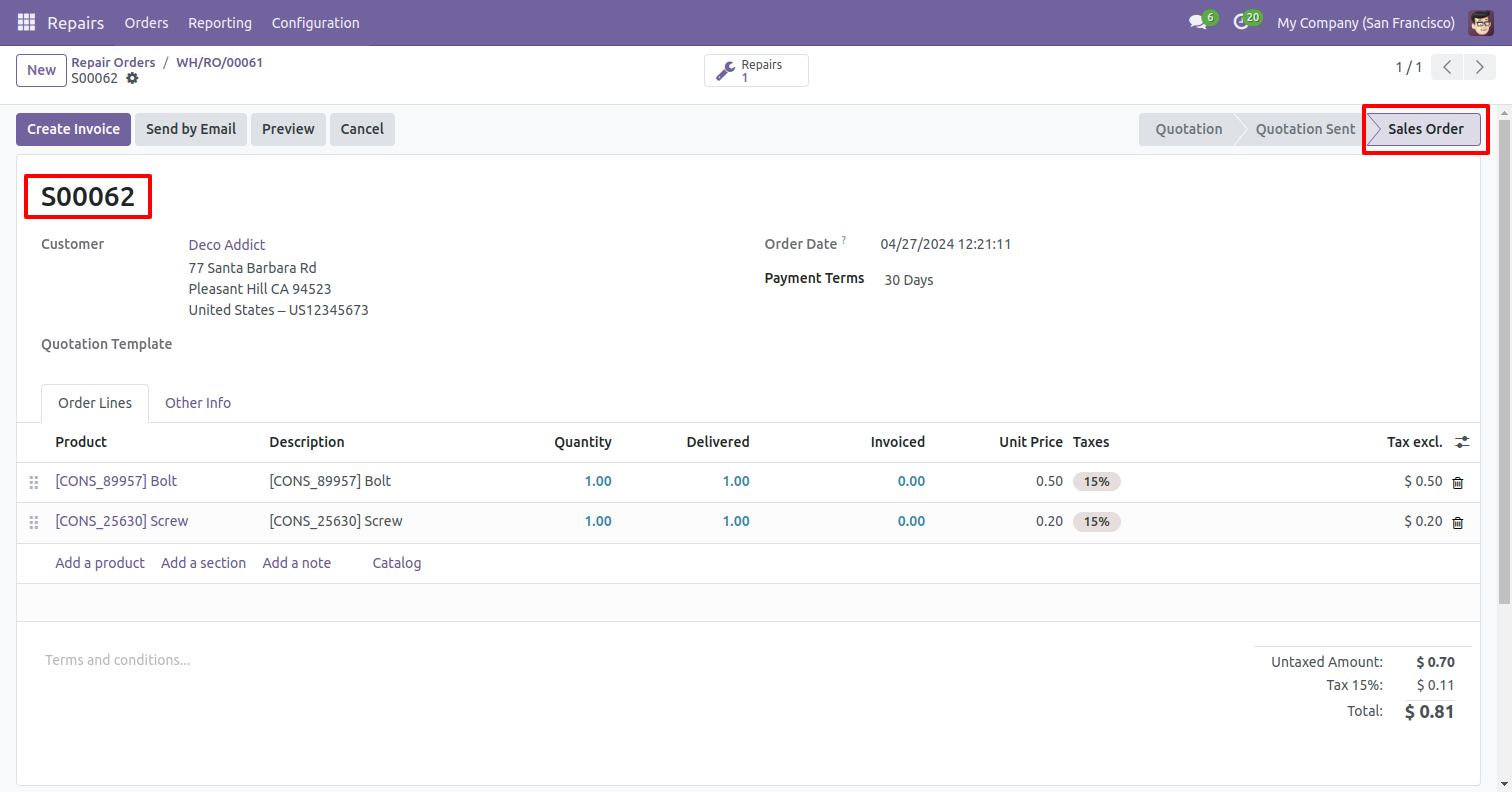
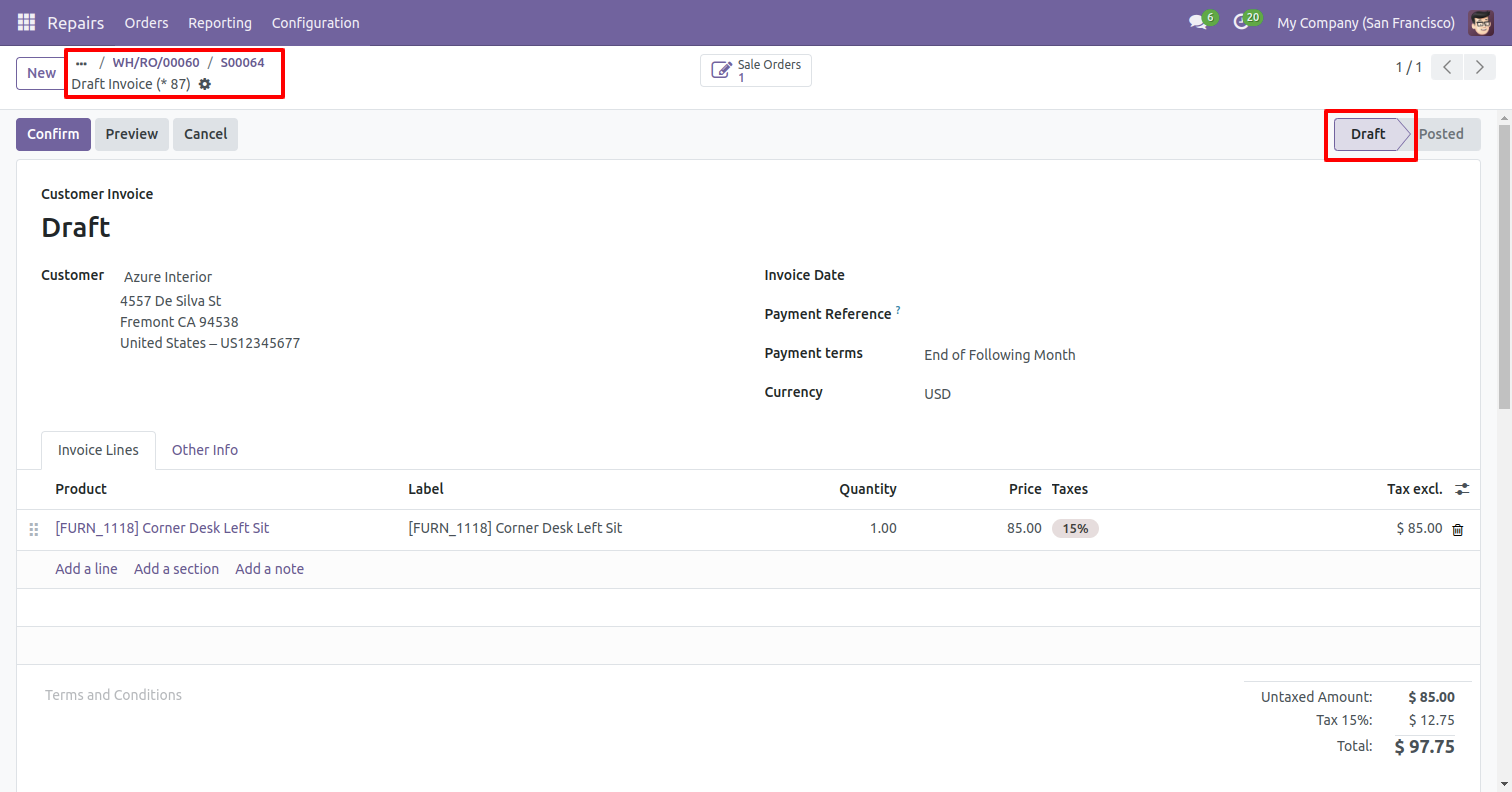
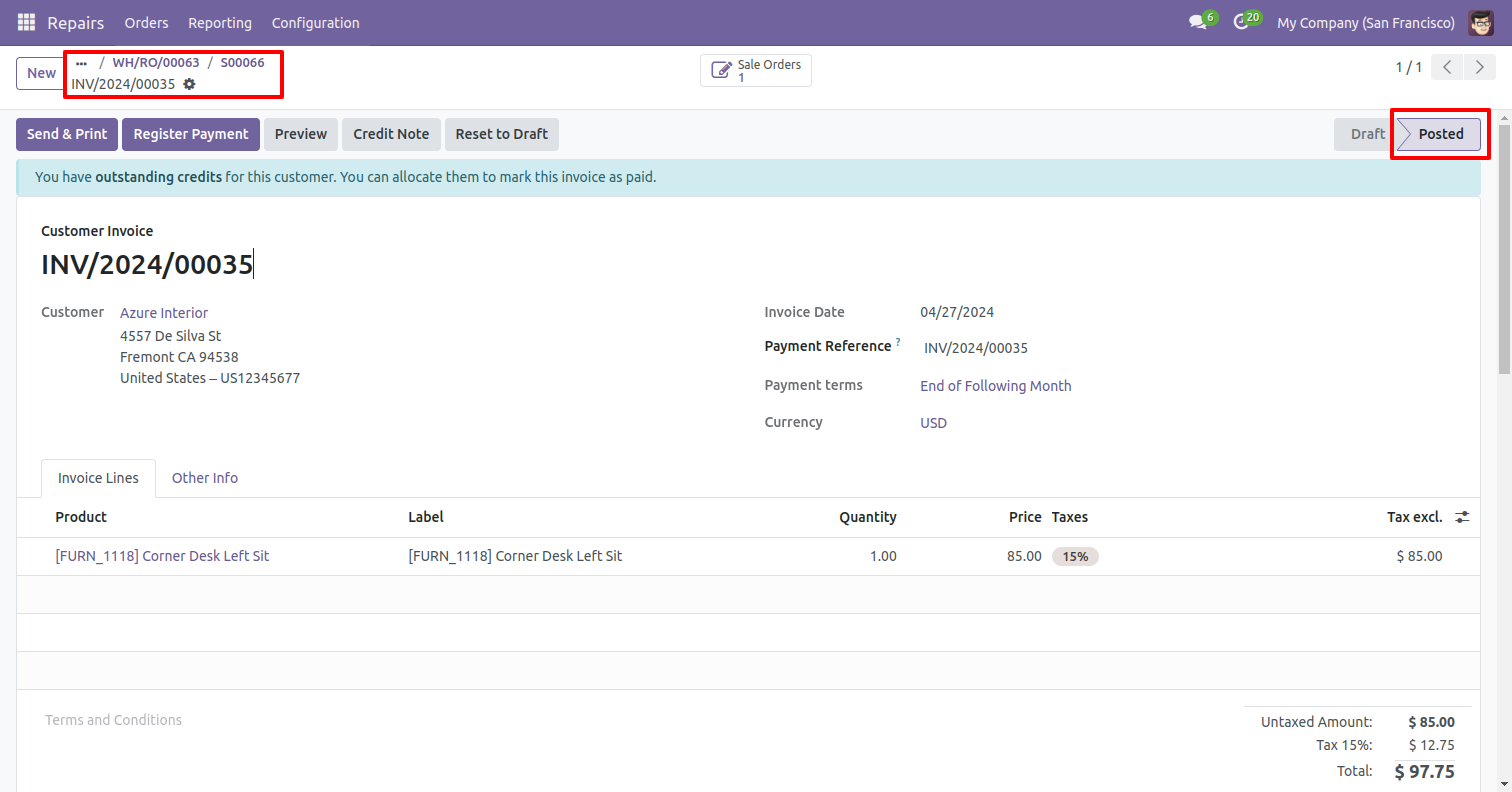
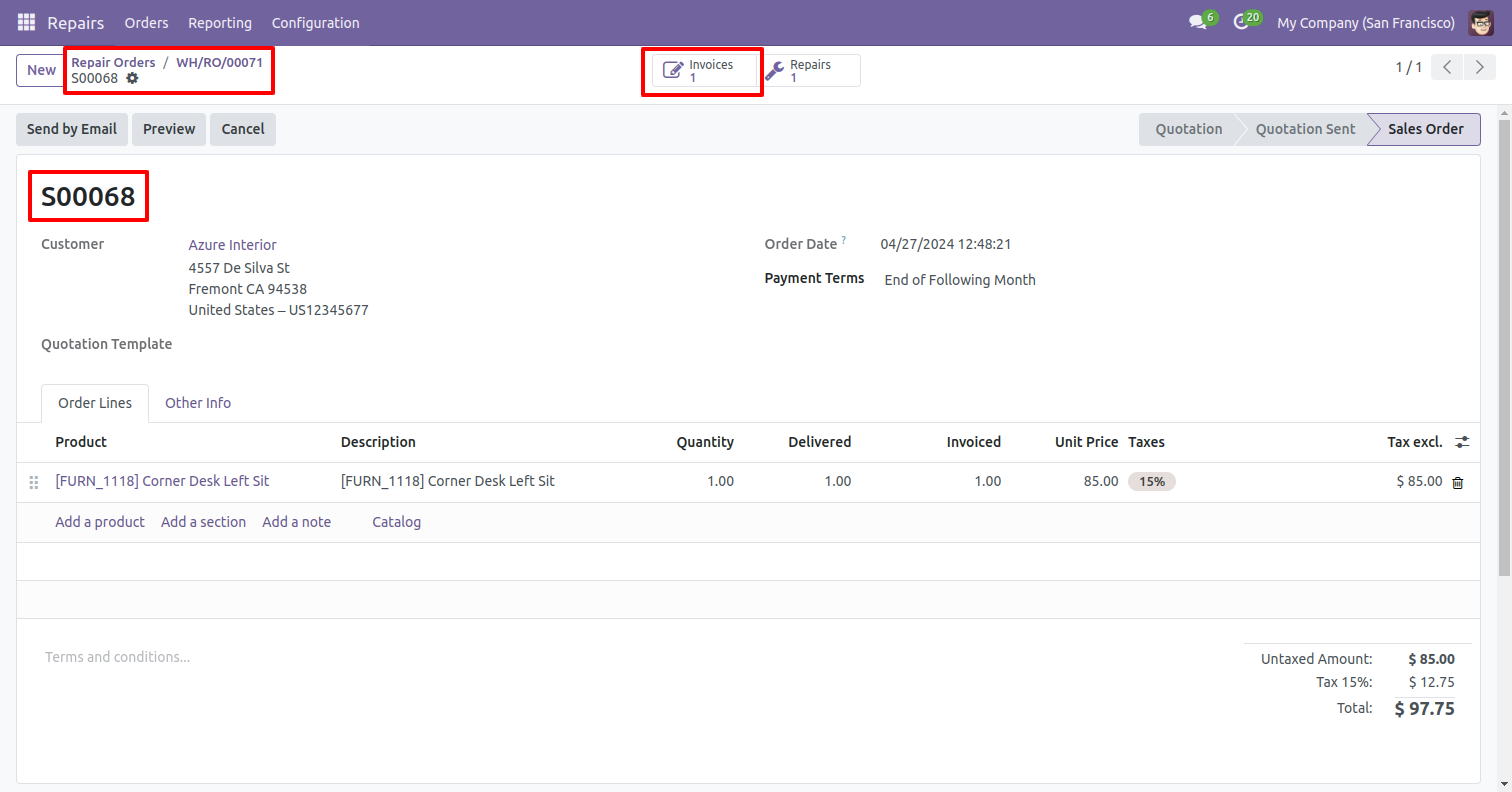
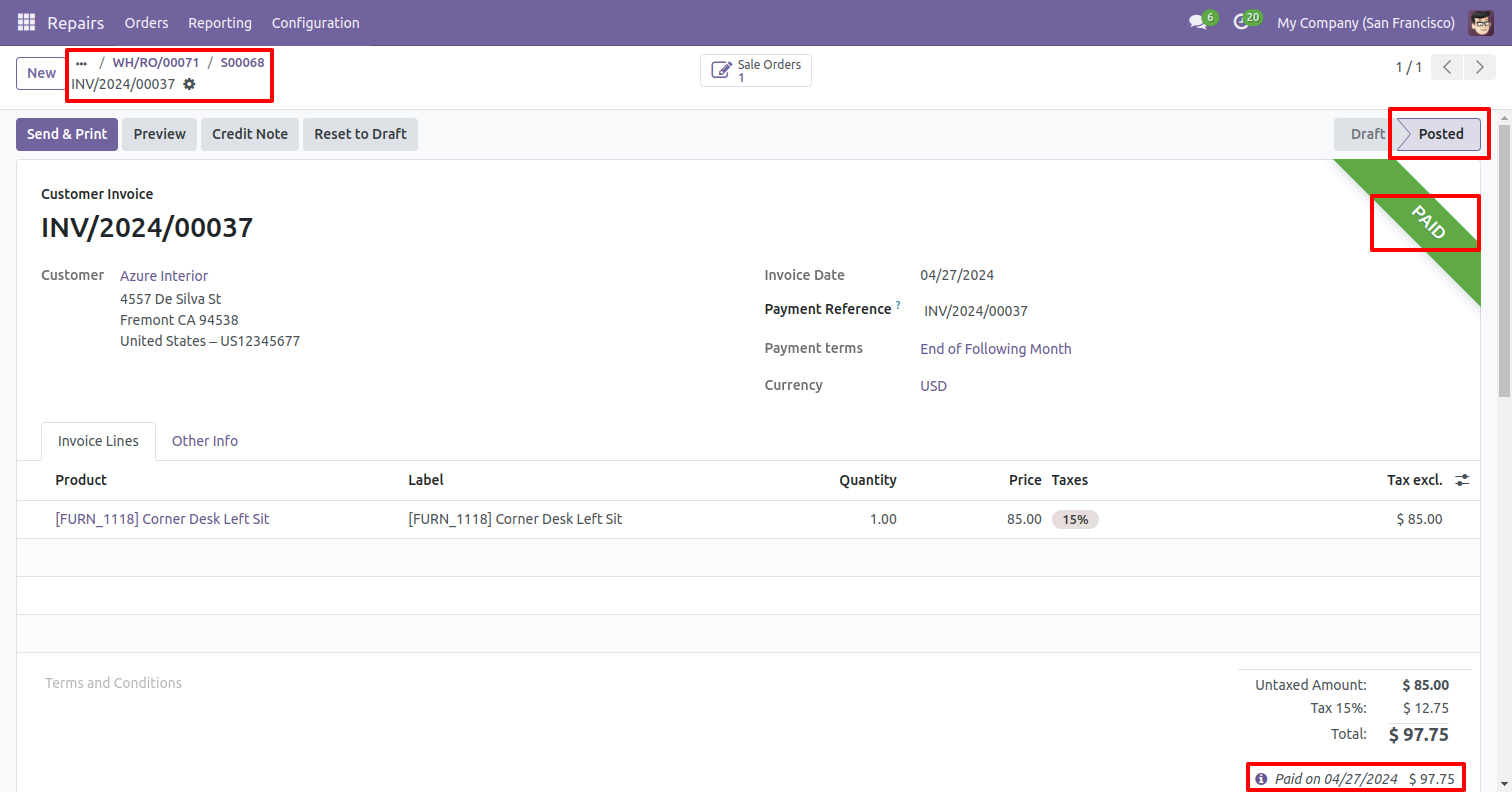
Go to the user settings and enable the 'Repair Invoice Status' boolean.
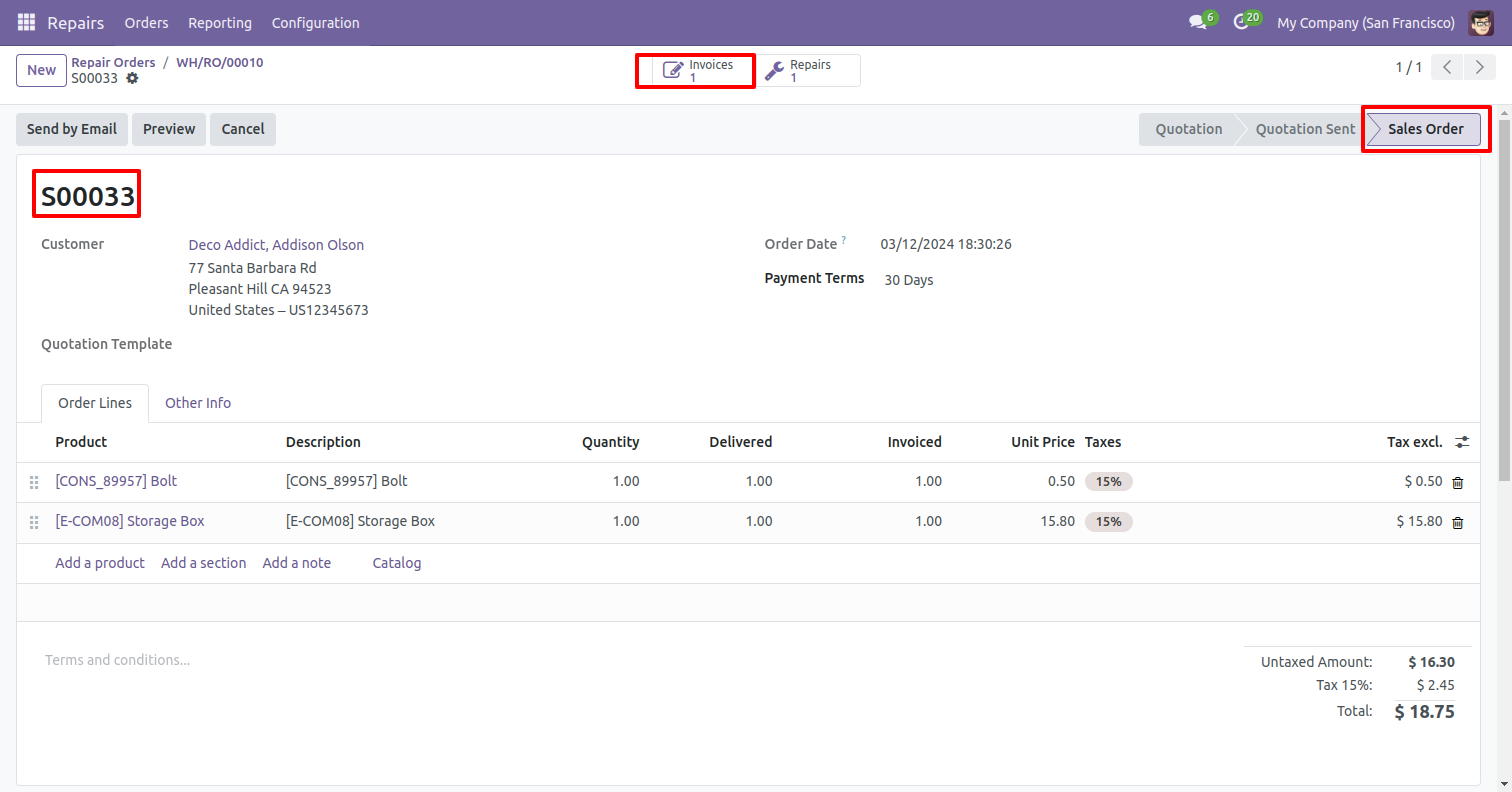
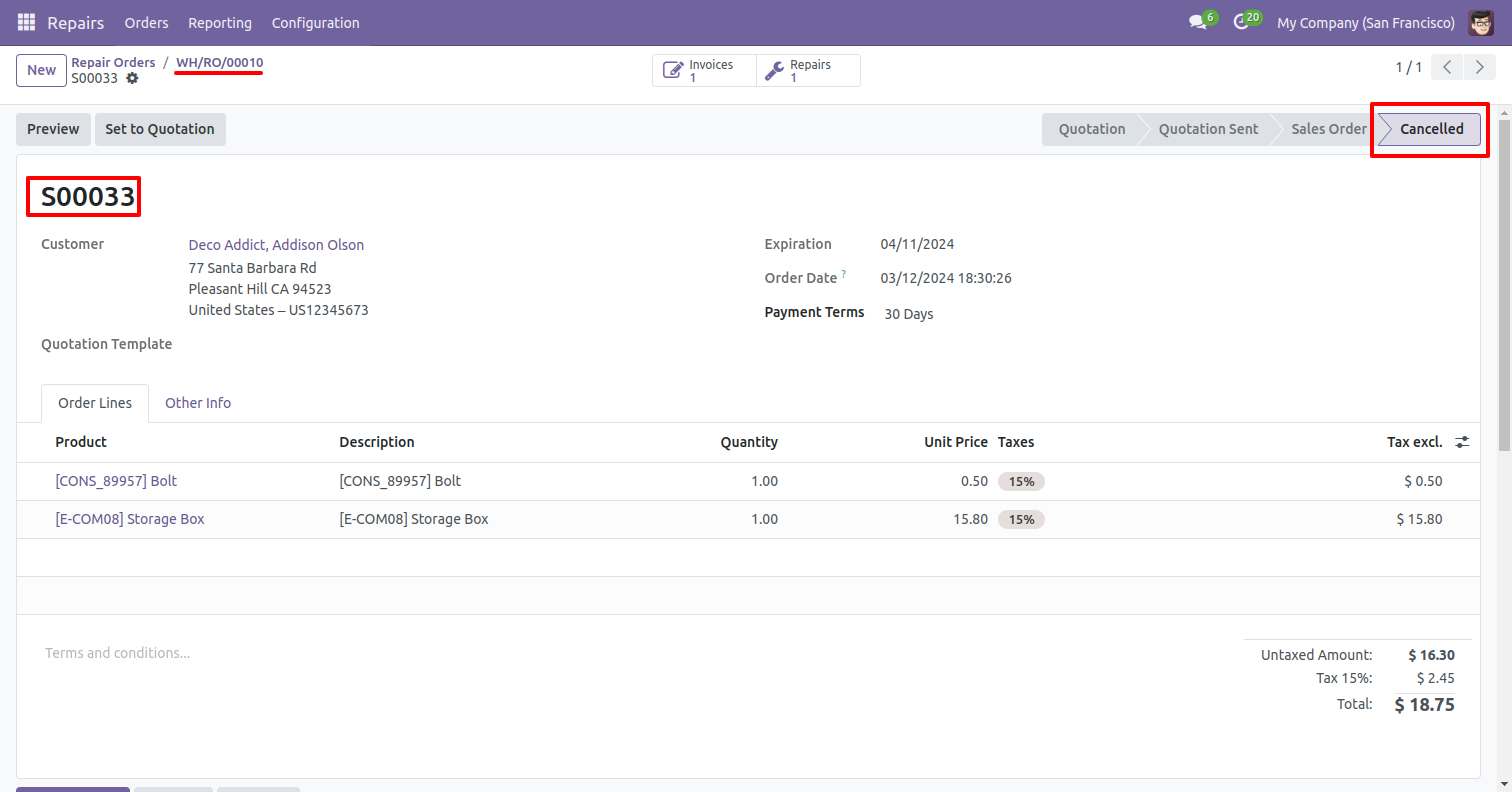
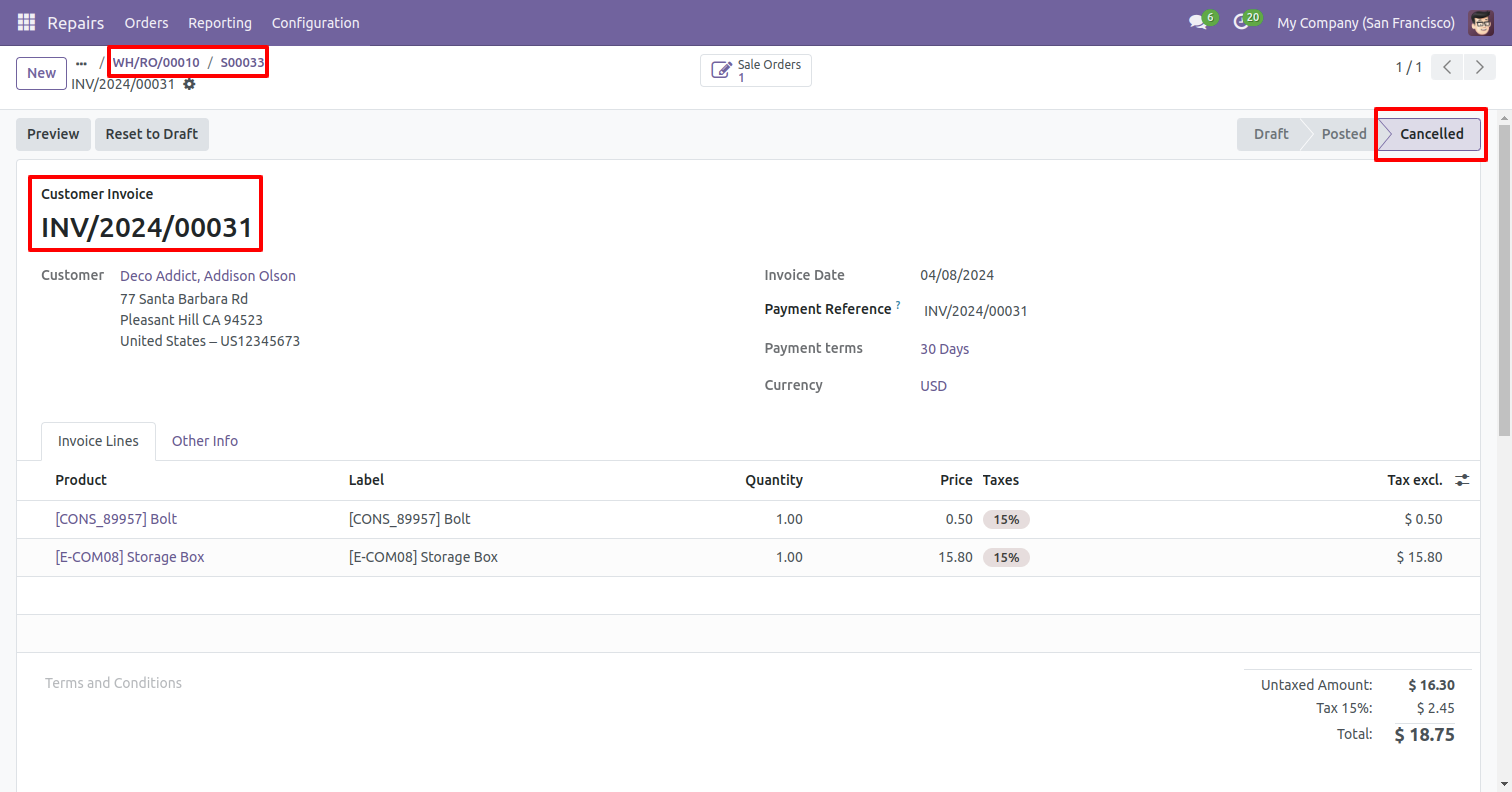
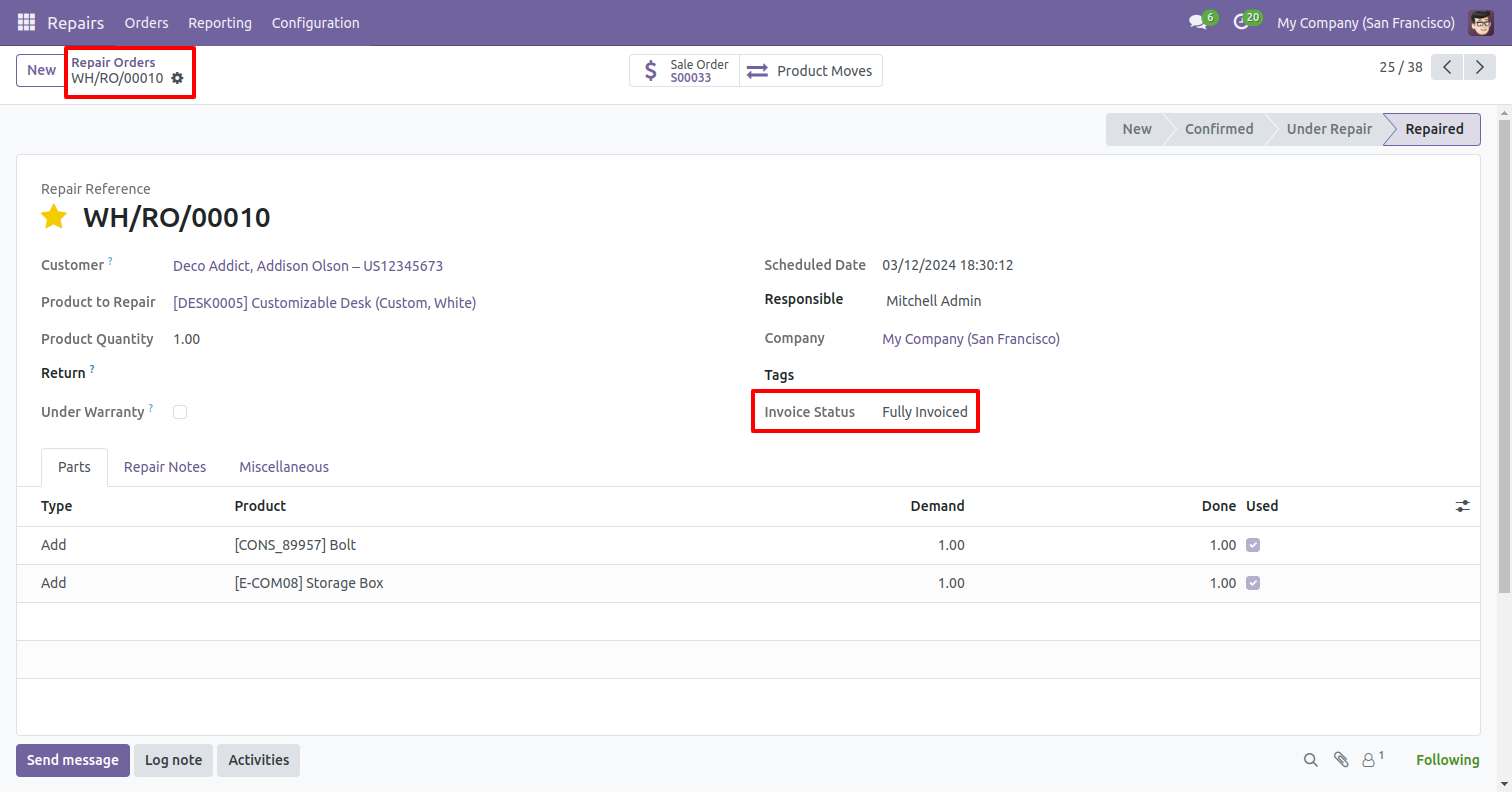
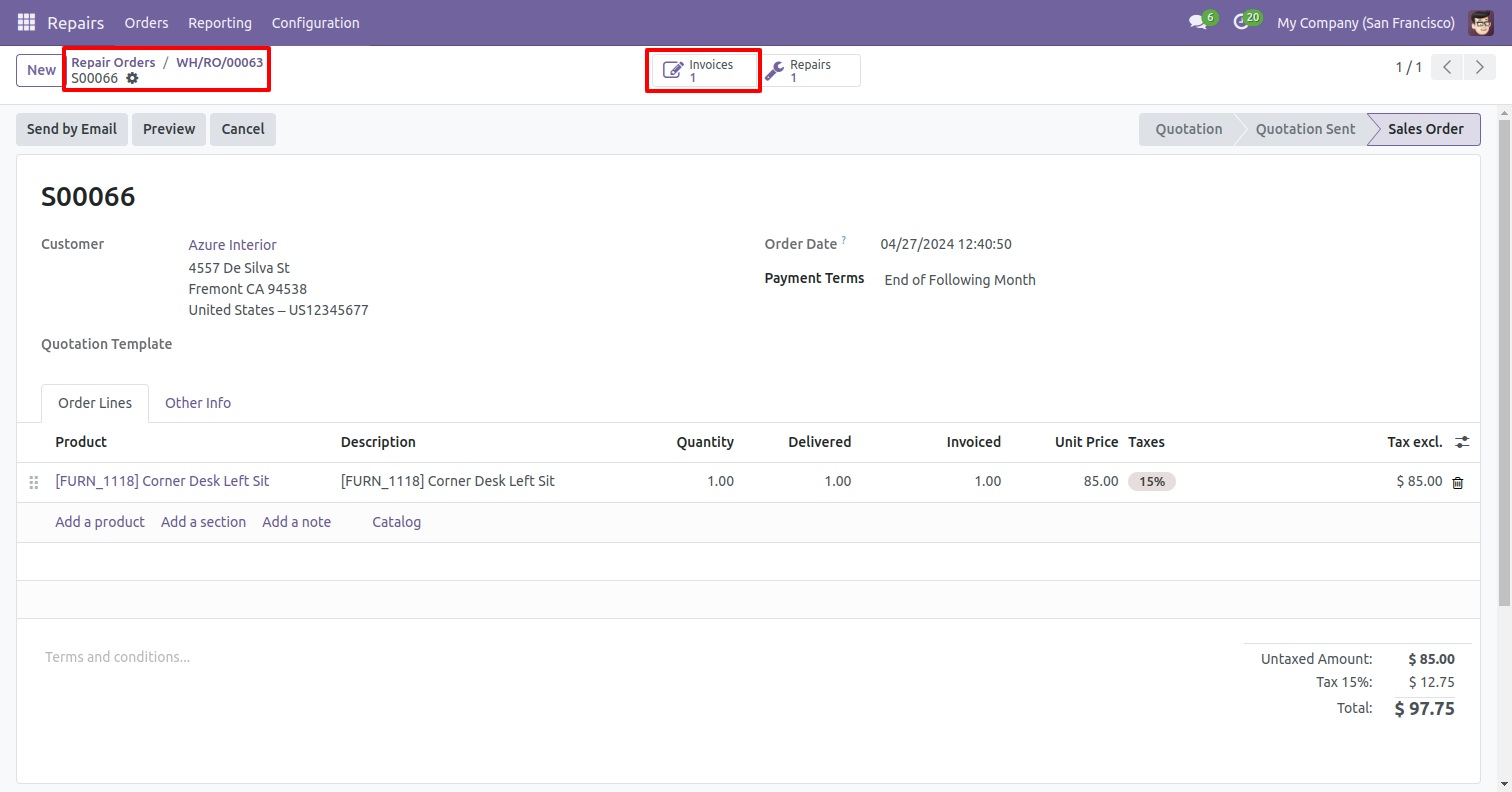
The invoice status is displayed in the form view of the repair order.
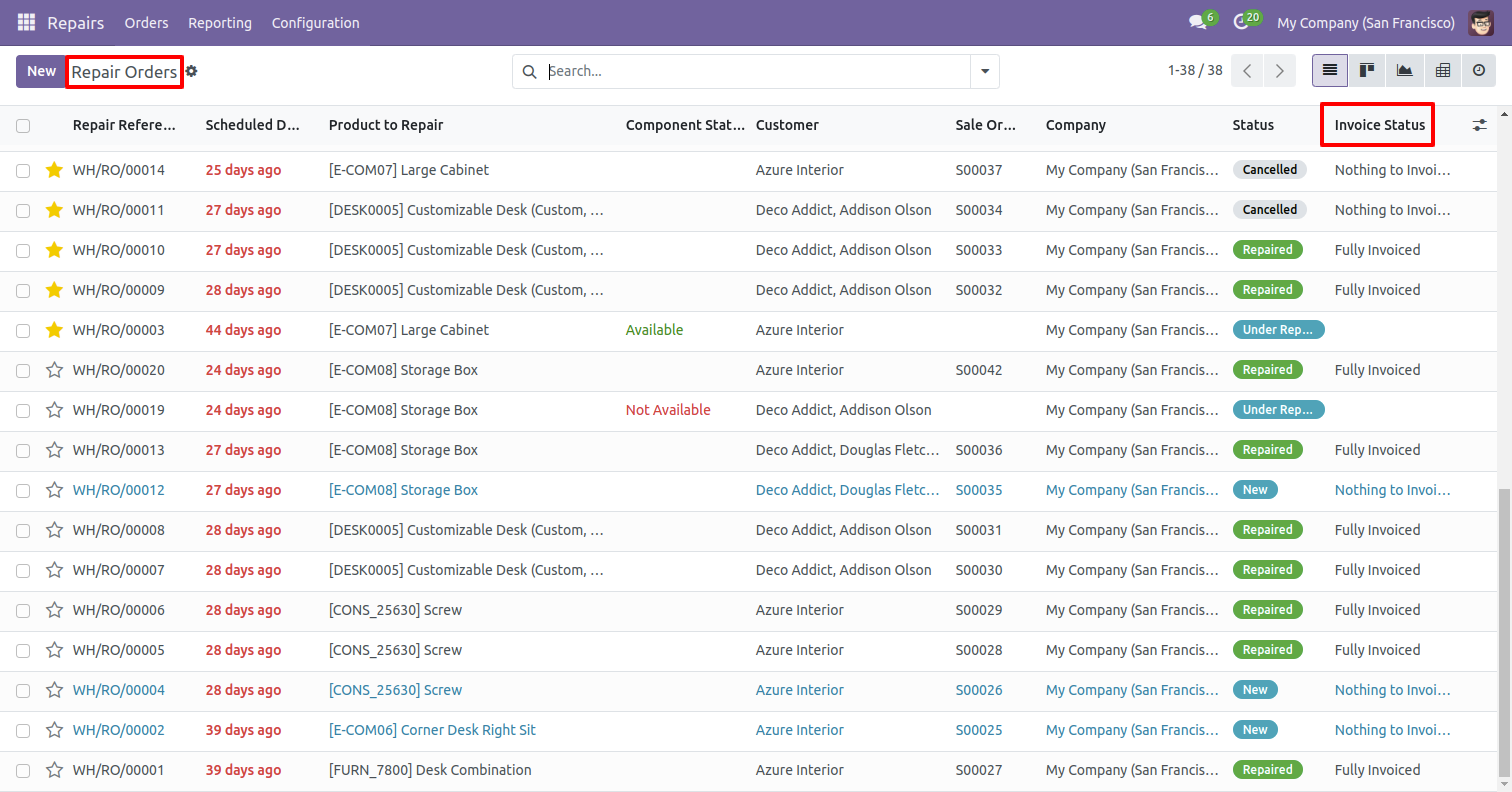
The invoice status is displayed in the tree view of the repair order.
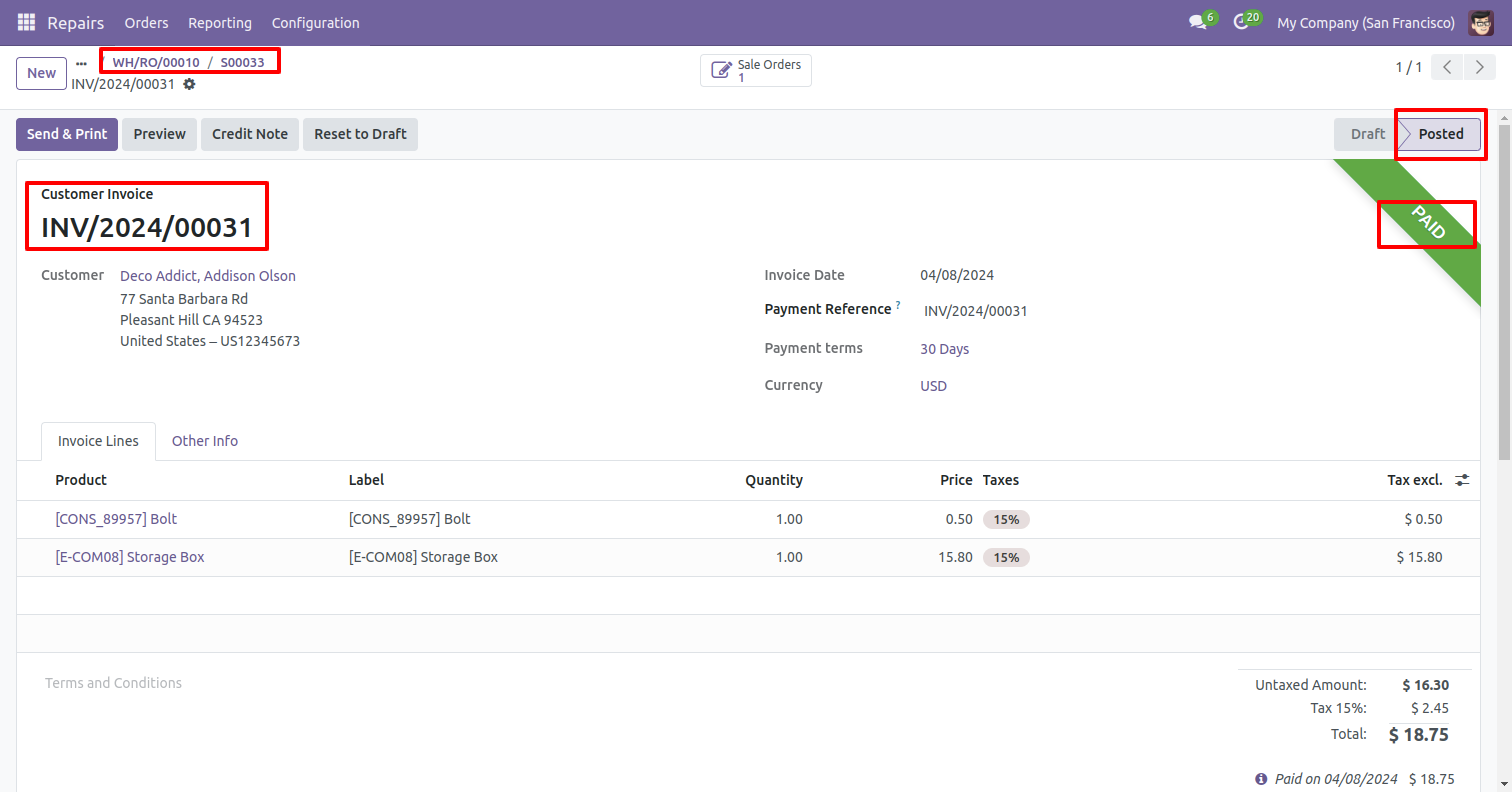
the invoice is posted.
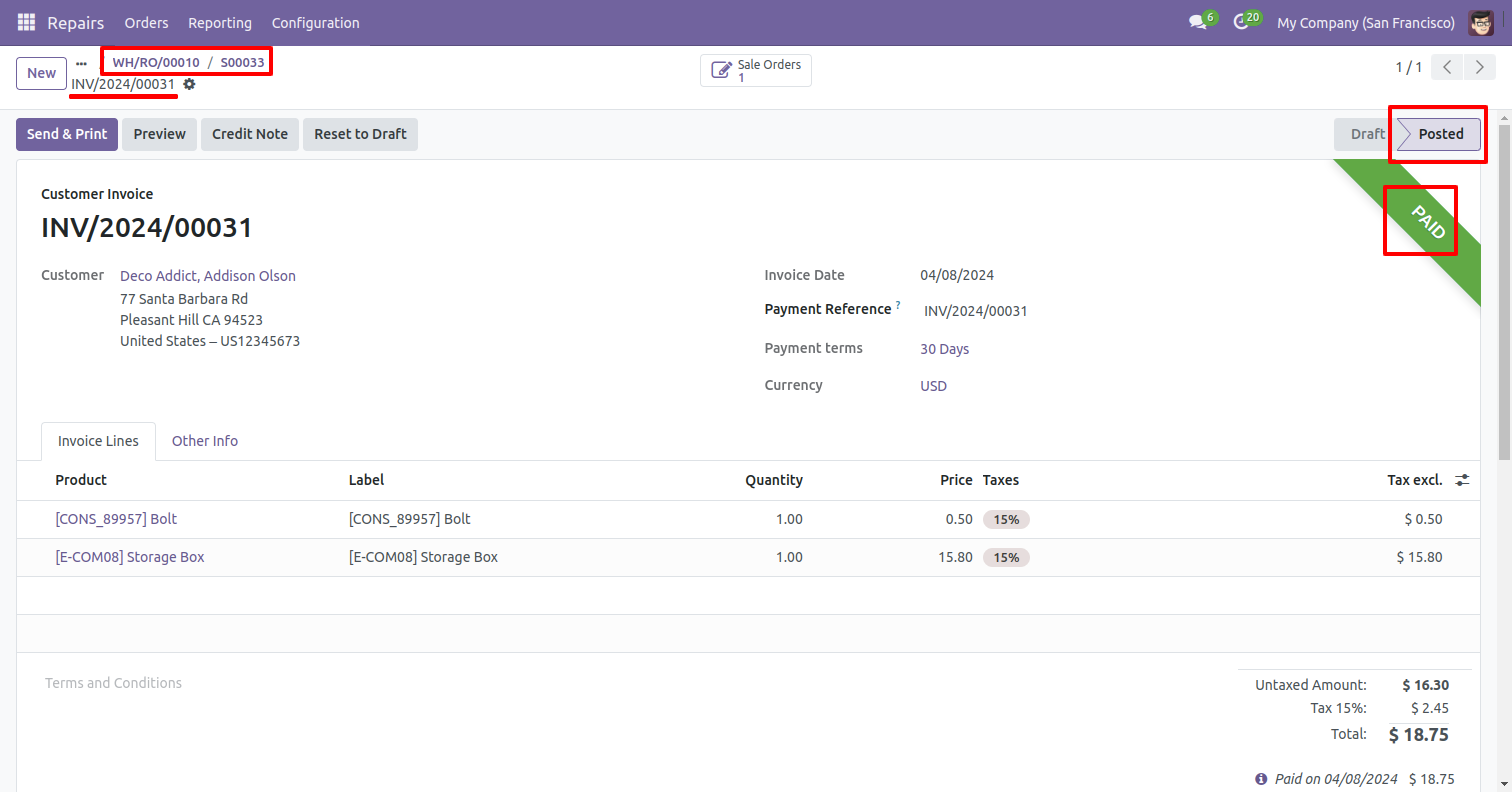
The invoice status is displayed in the tree view of the quotation.
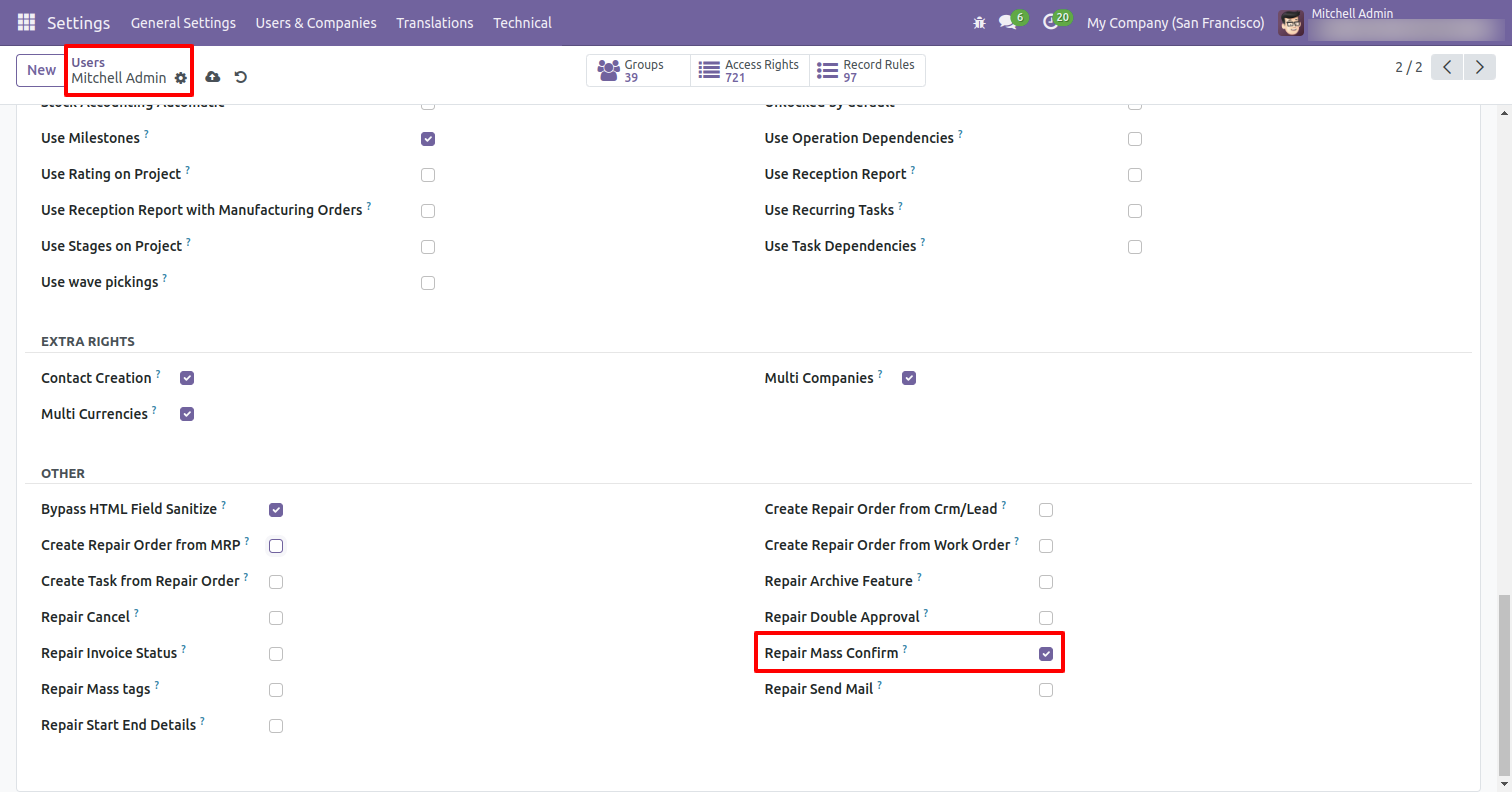
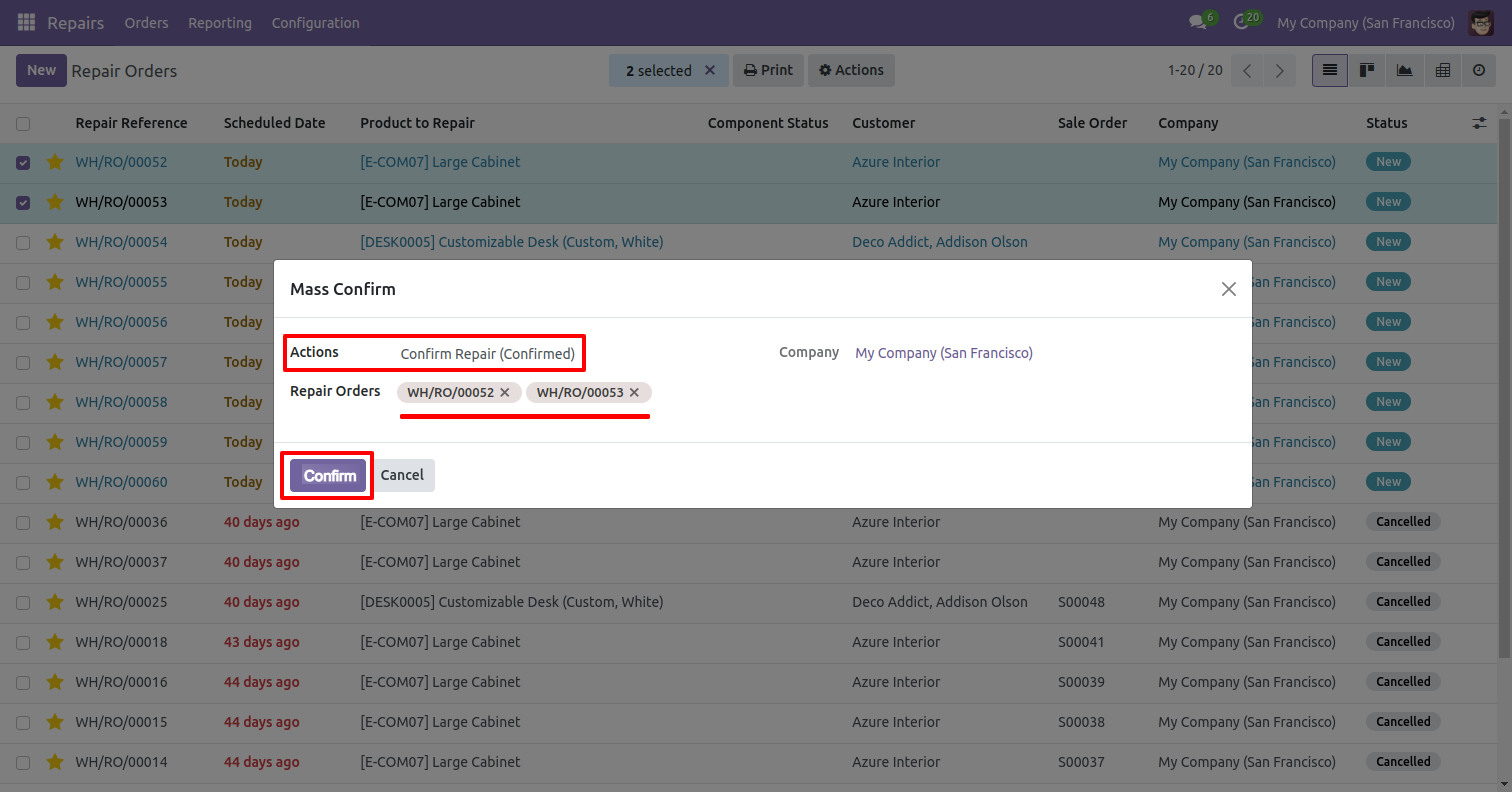
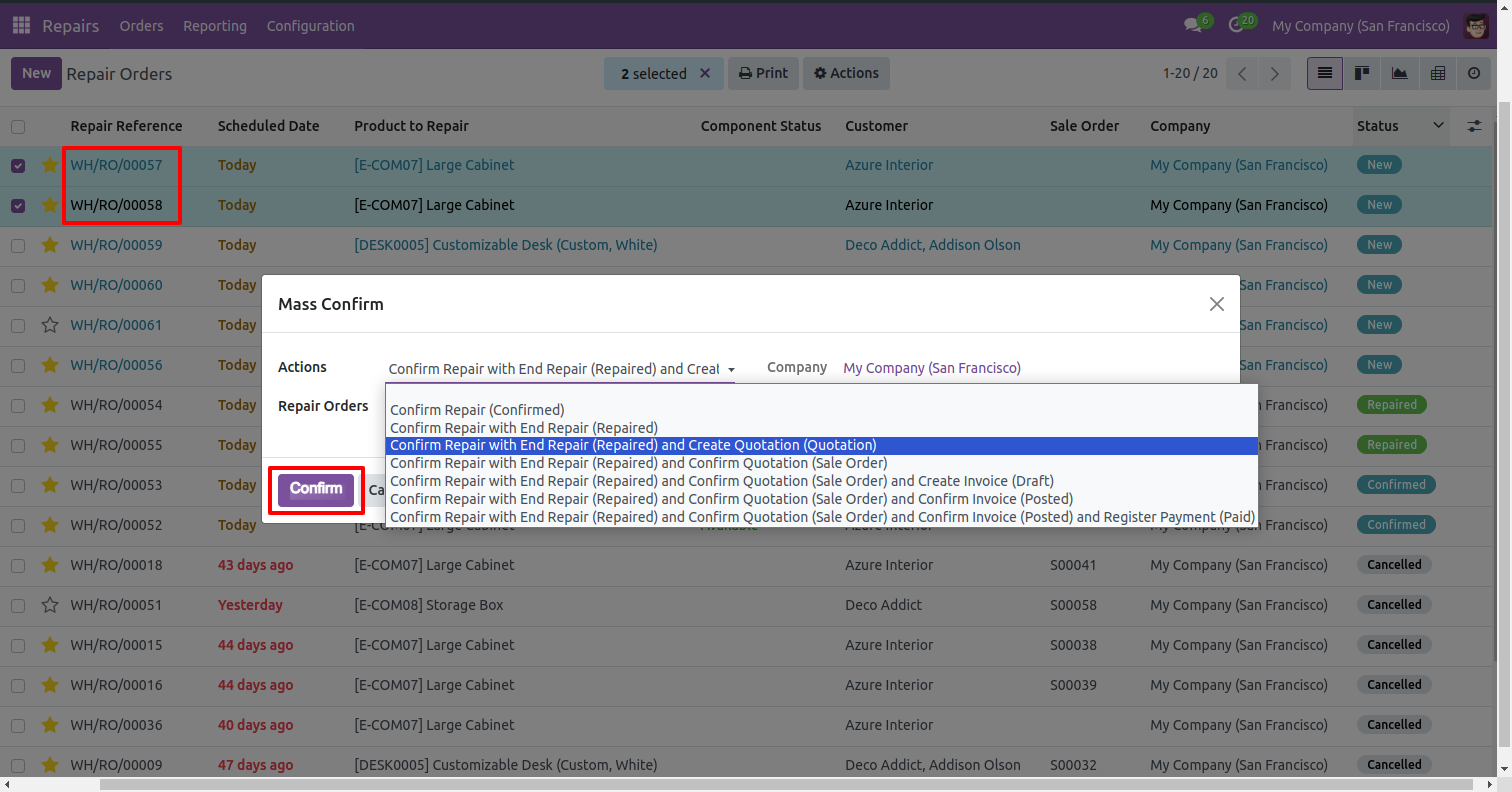
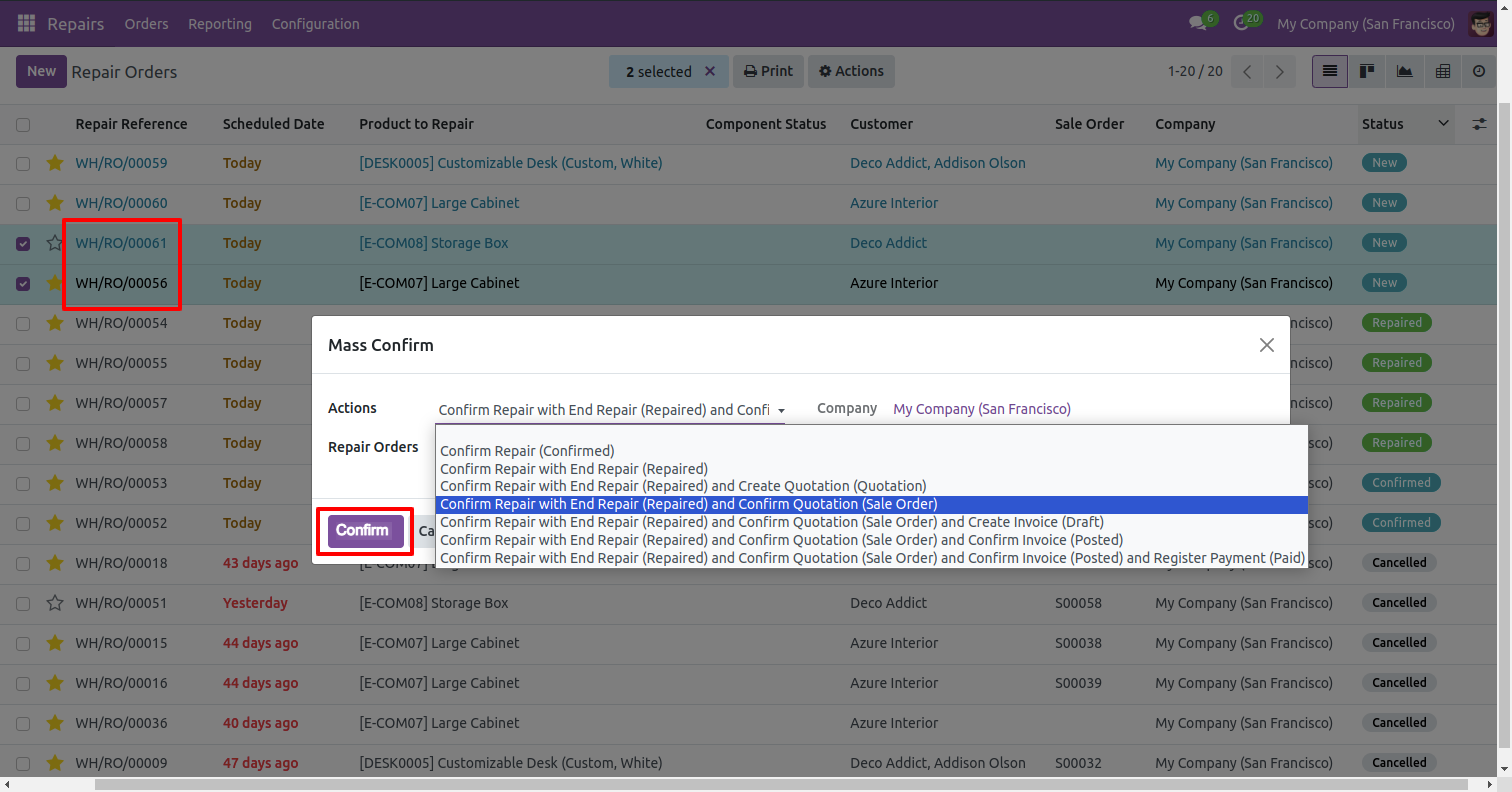
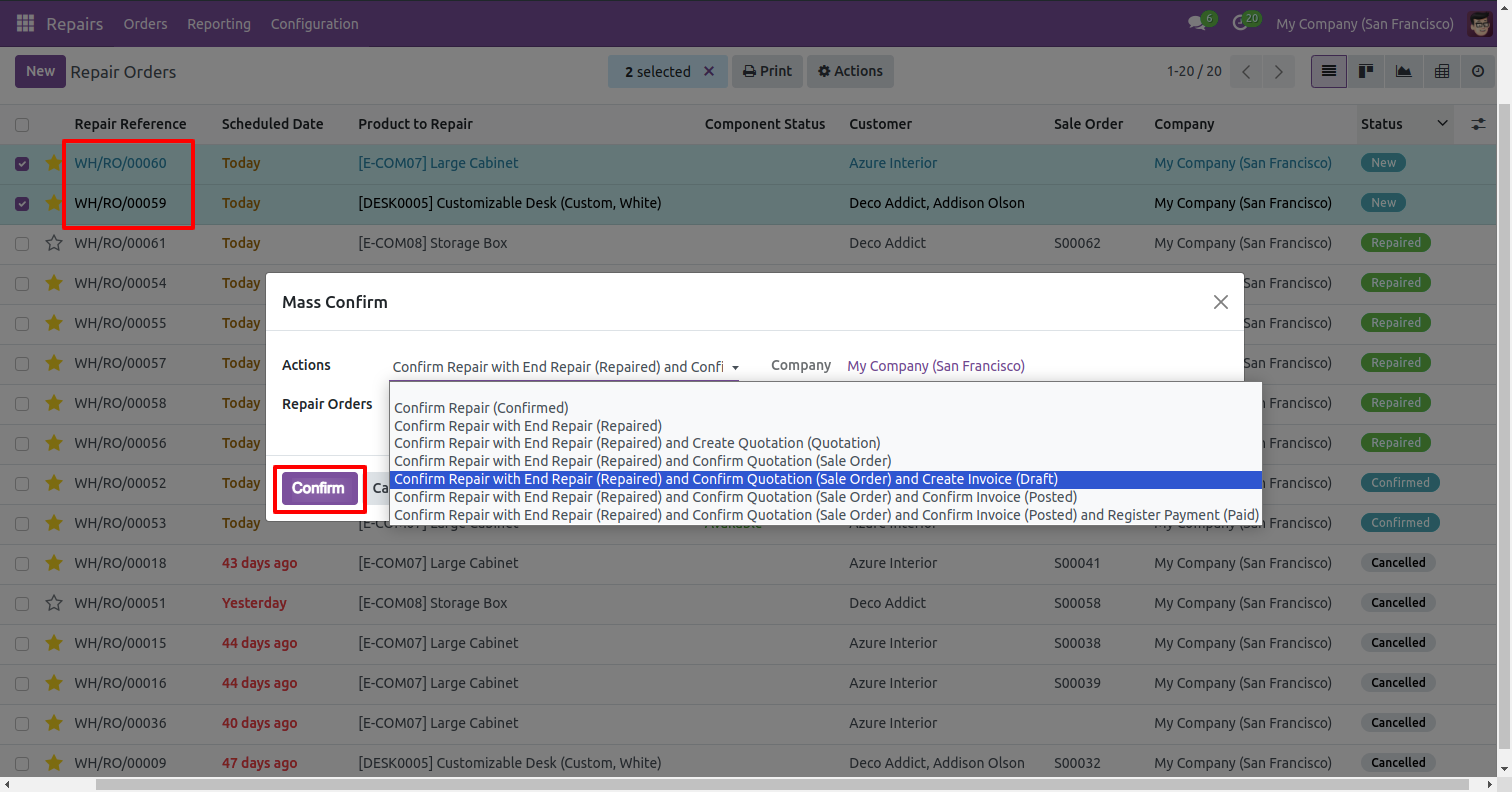
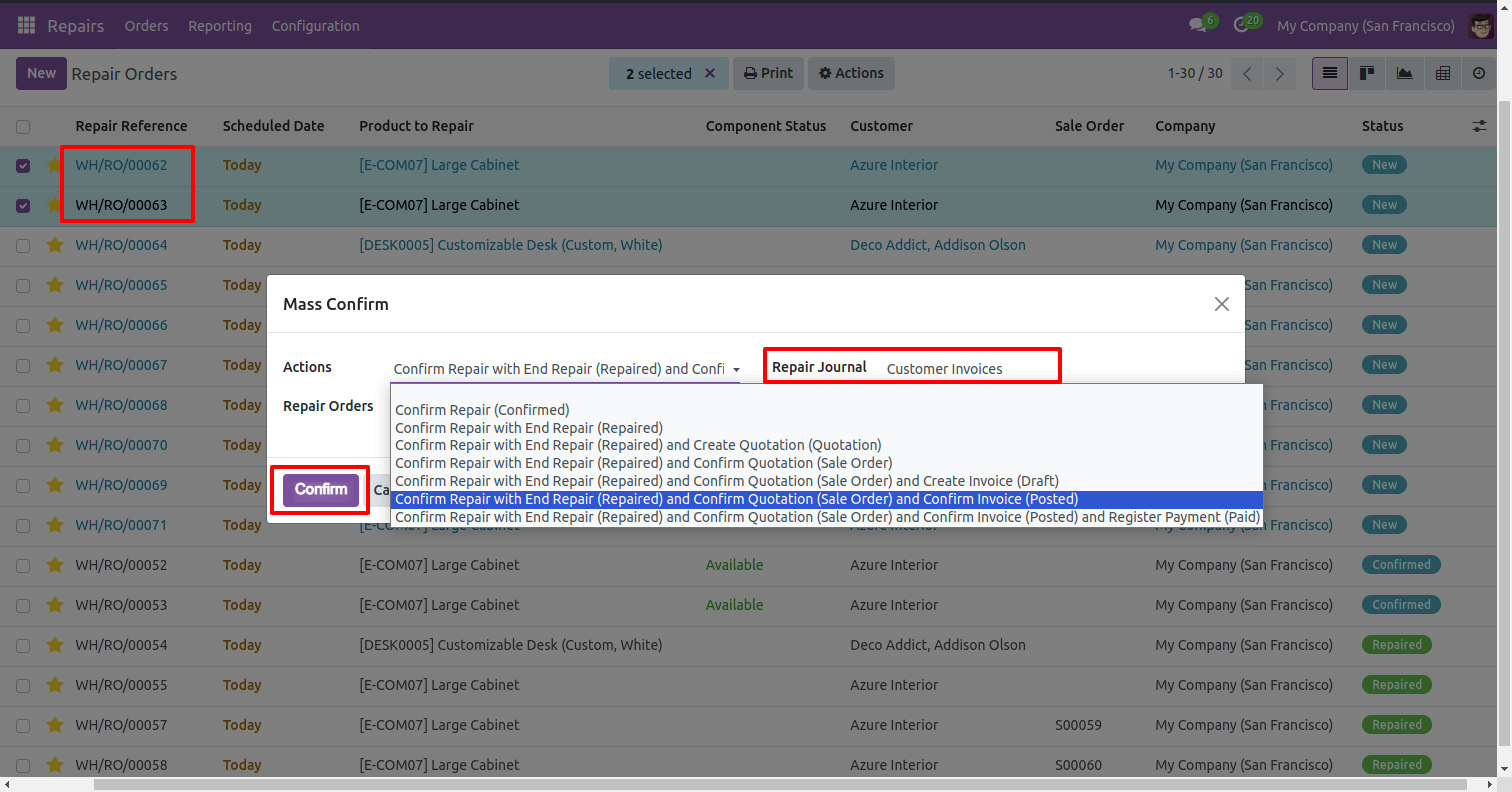
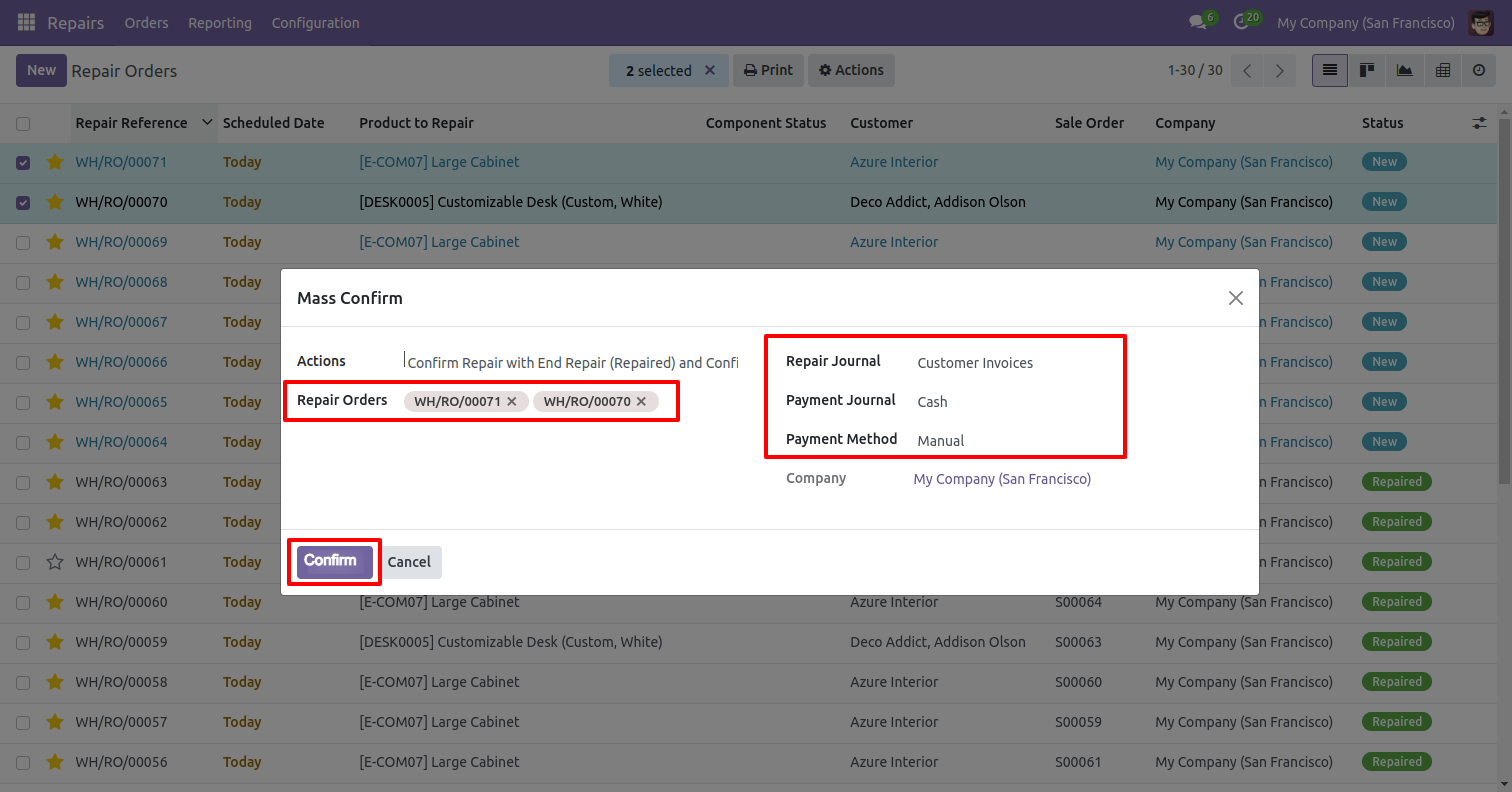
Go to the user settings and enable the 'Repair Mass Confirm' boolean.
Select the repair orders and click on the 'Mass Confirm Actions' from the Actions.
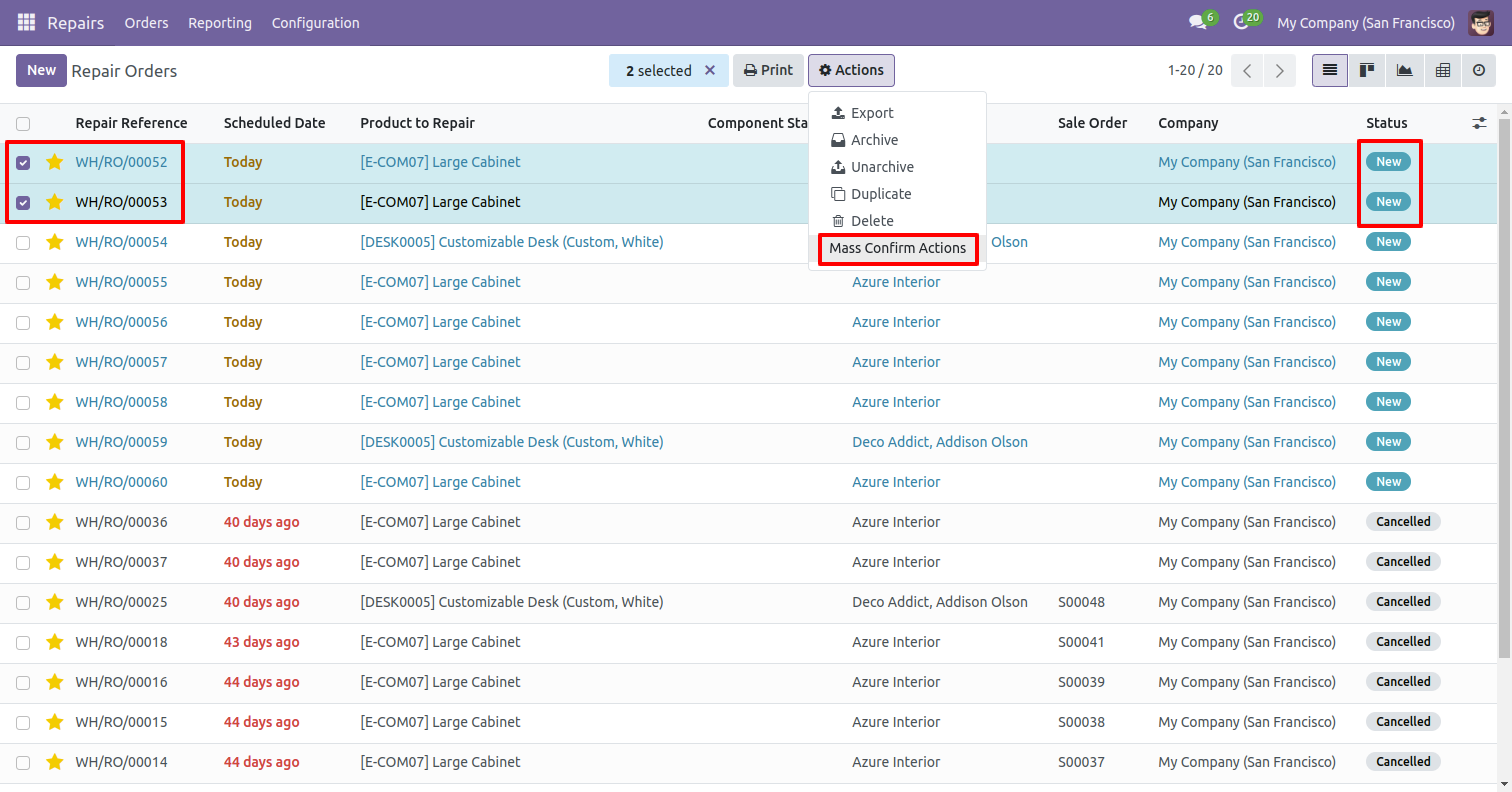
After that, the 'Mass Confirm' wizard will appear. Enter the required details and select the 'Confirm Repair' action and click on the 'Confirm' button.
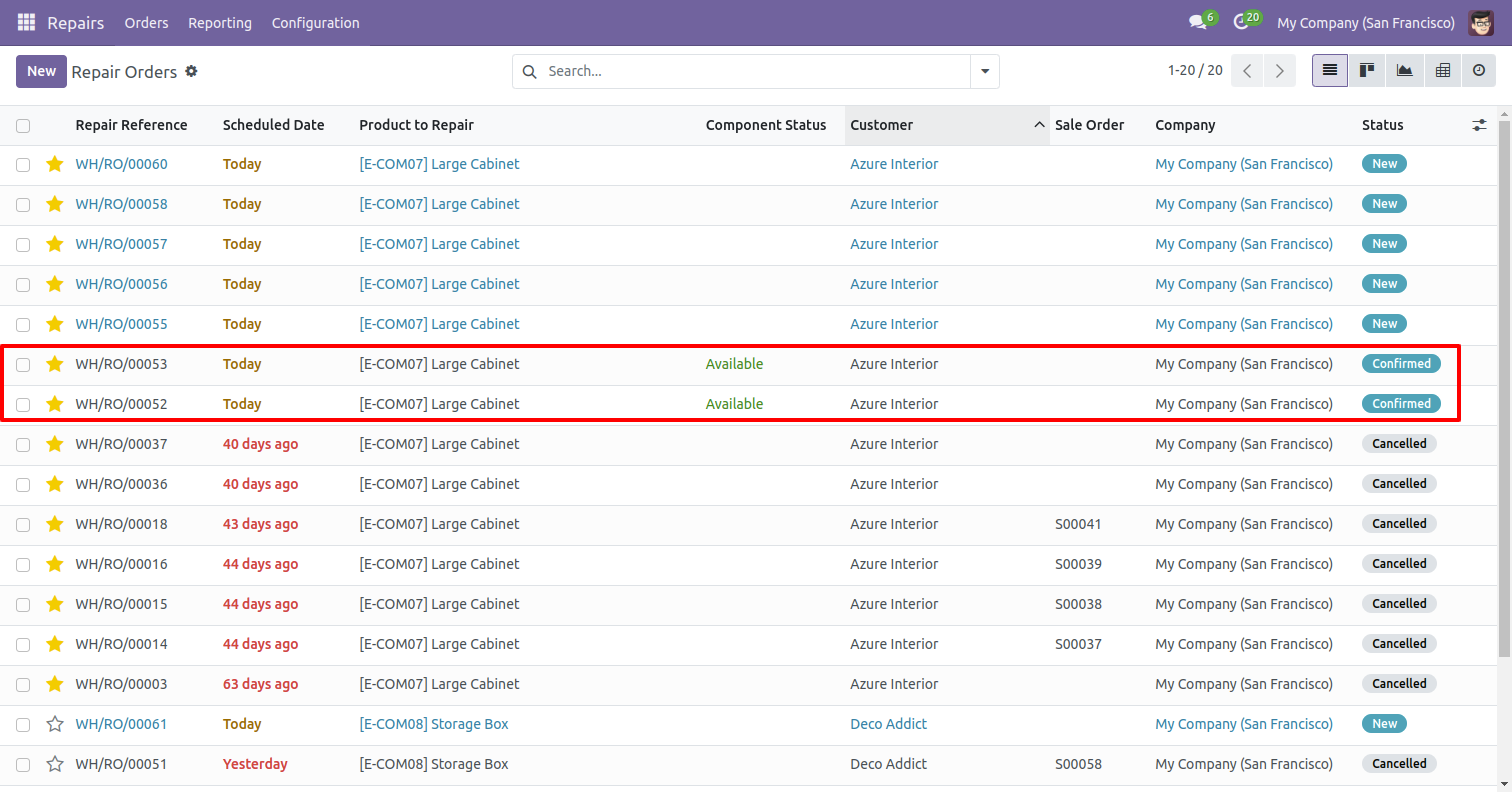
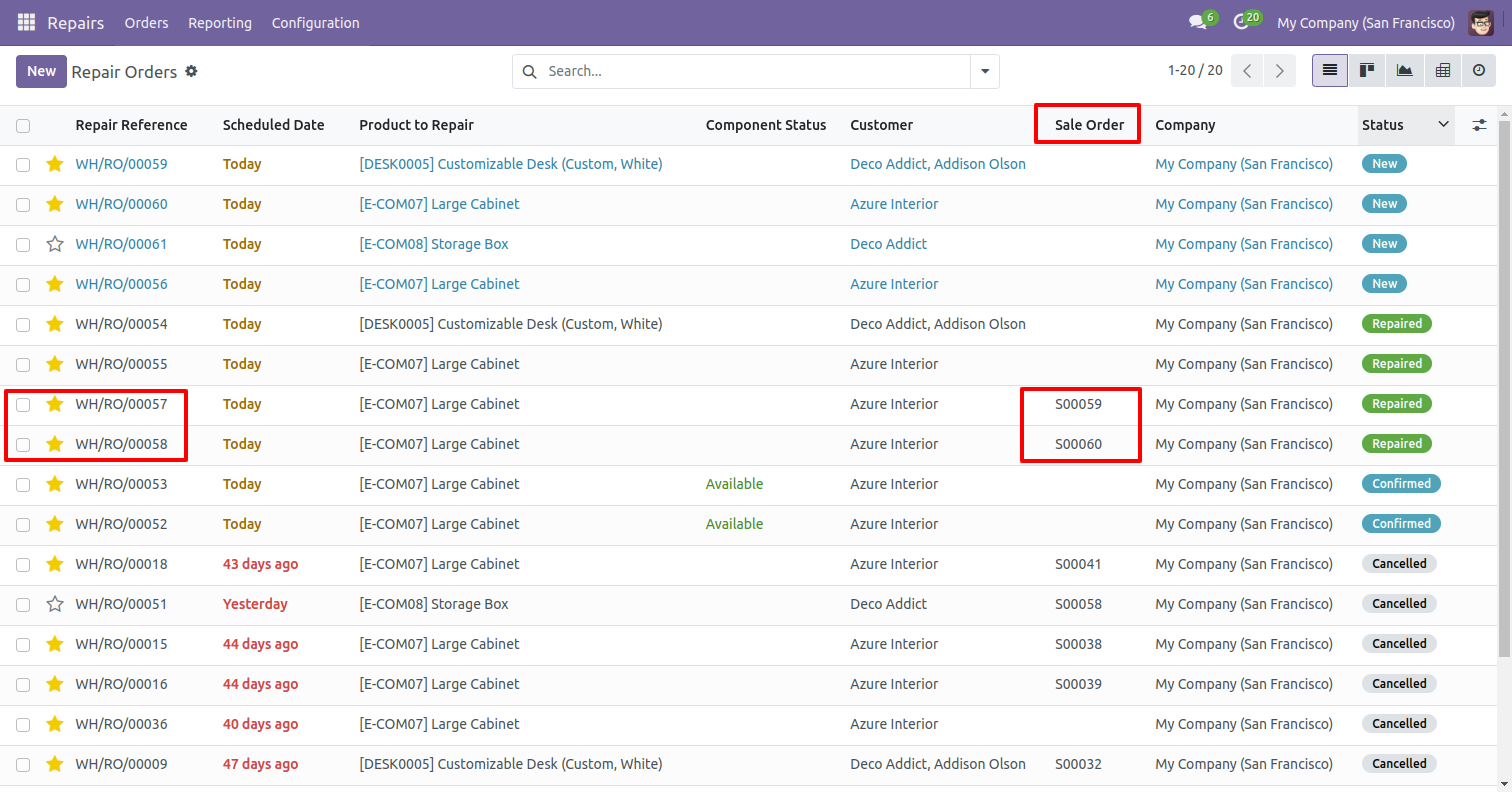
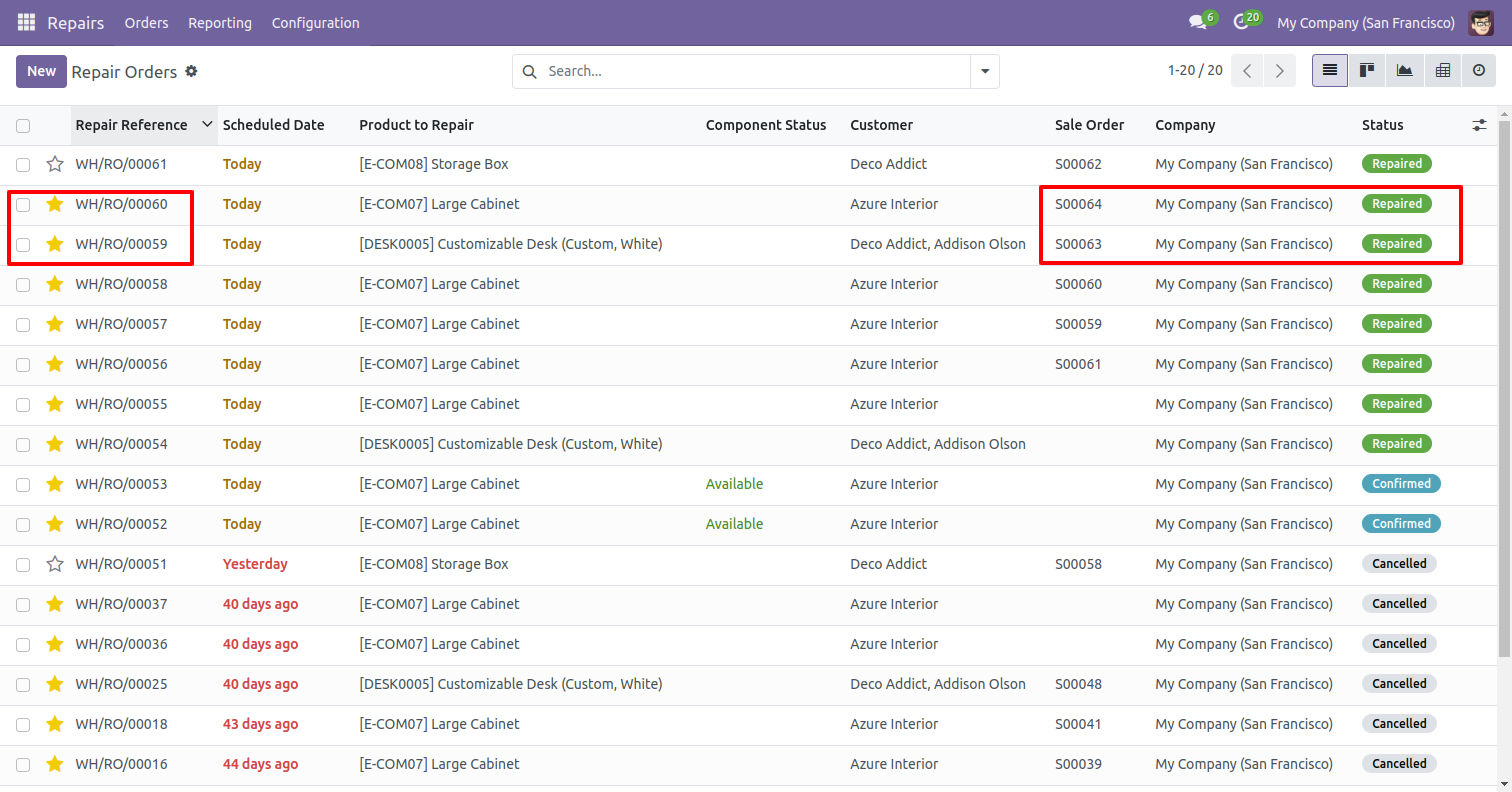
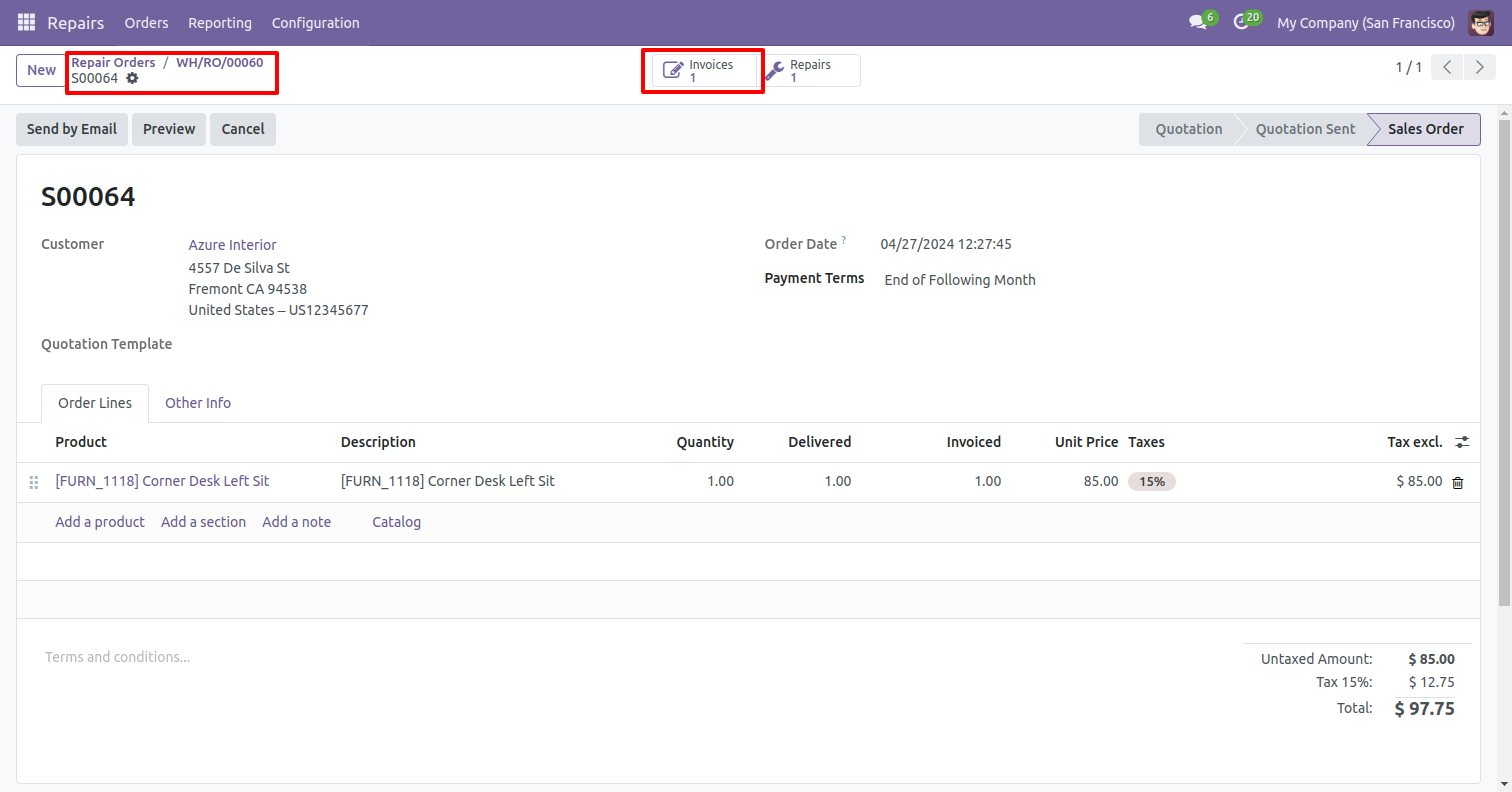
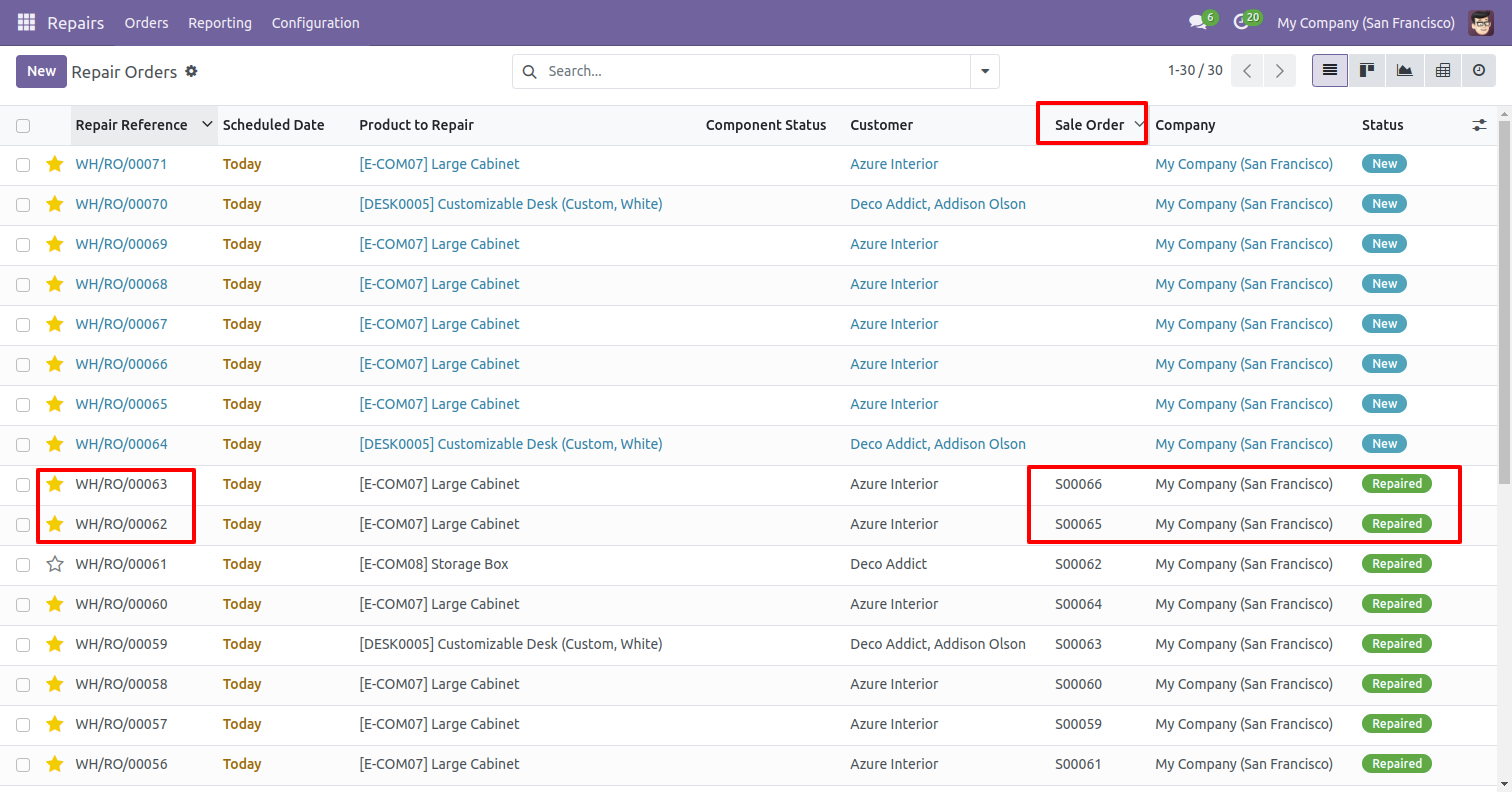
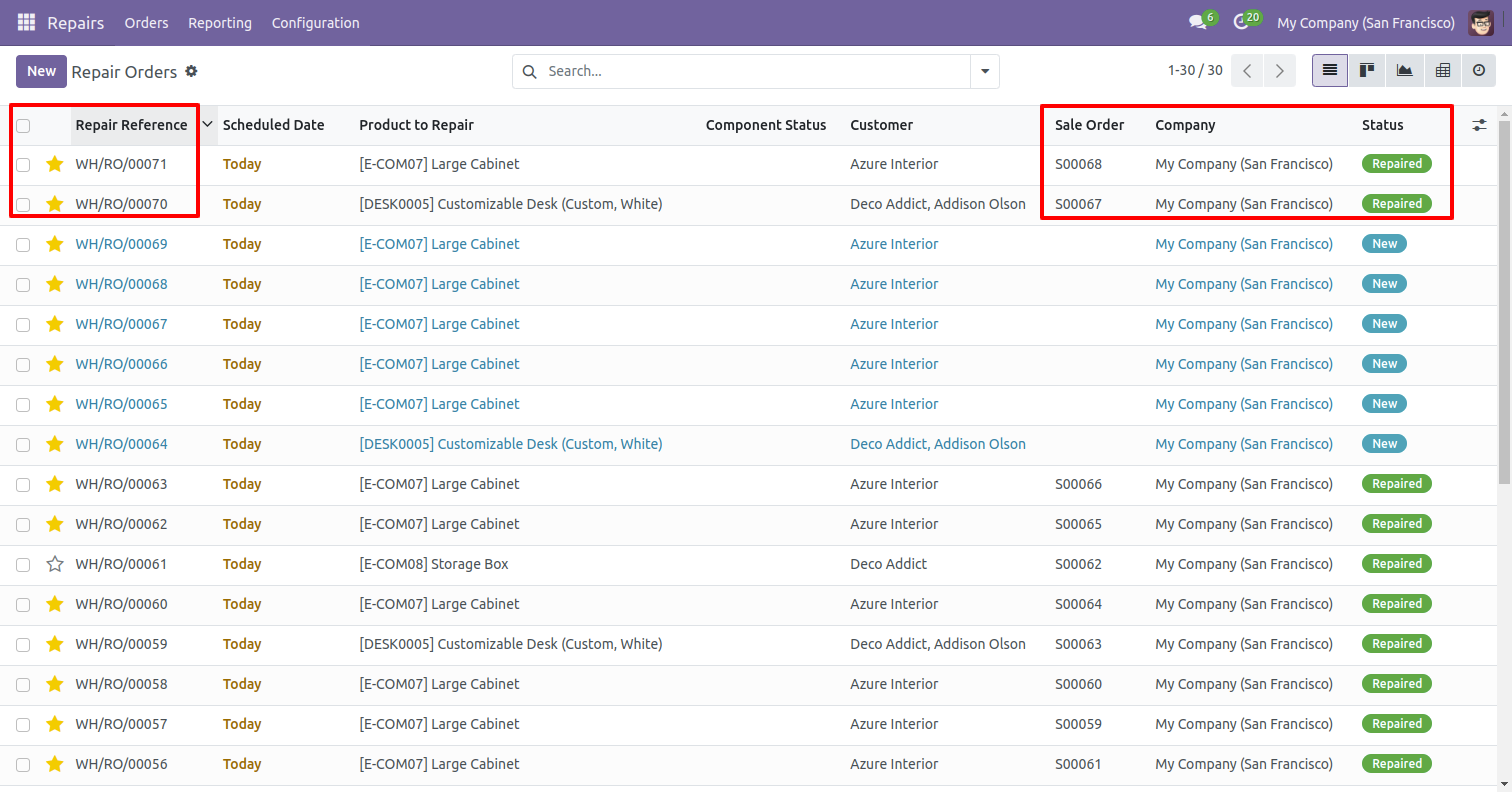
You can now see that all the selected orders have been confirmed.
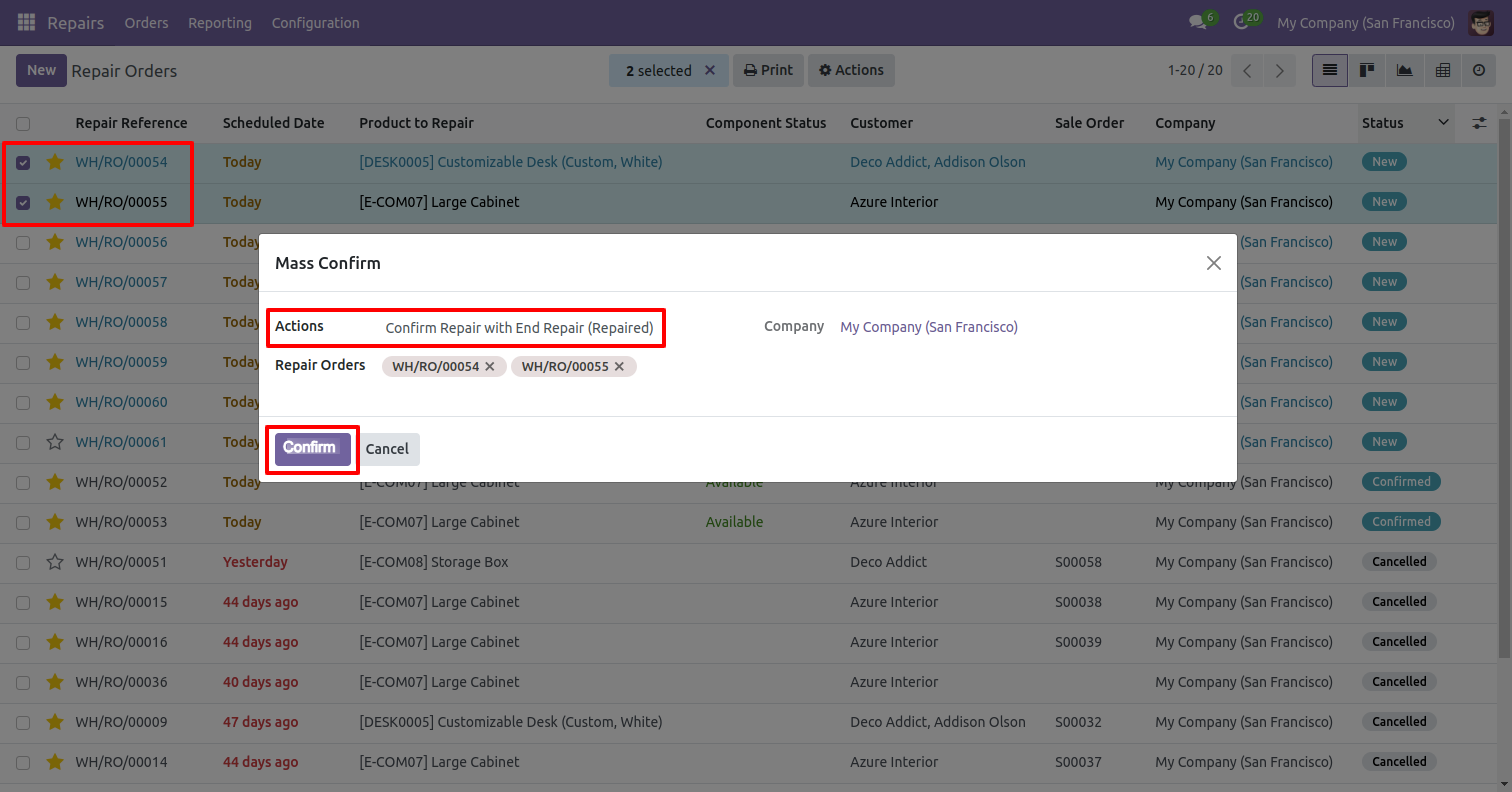
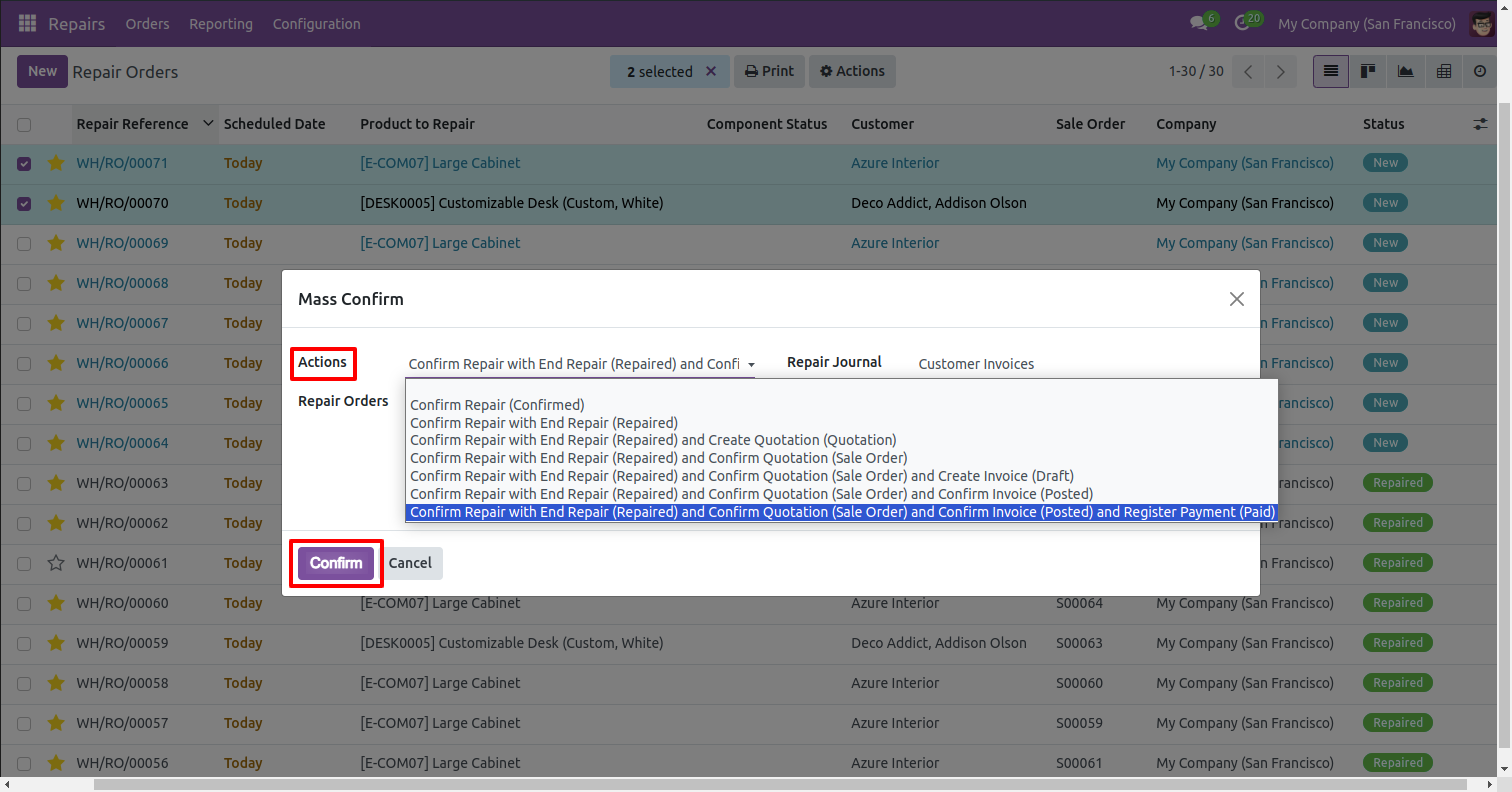
After that, the 'Mass Confirm' wizard will appear. Enter the required details and select the 'Confirm Repair With End Repair' action and click on the 'Confirm' button.
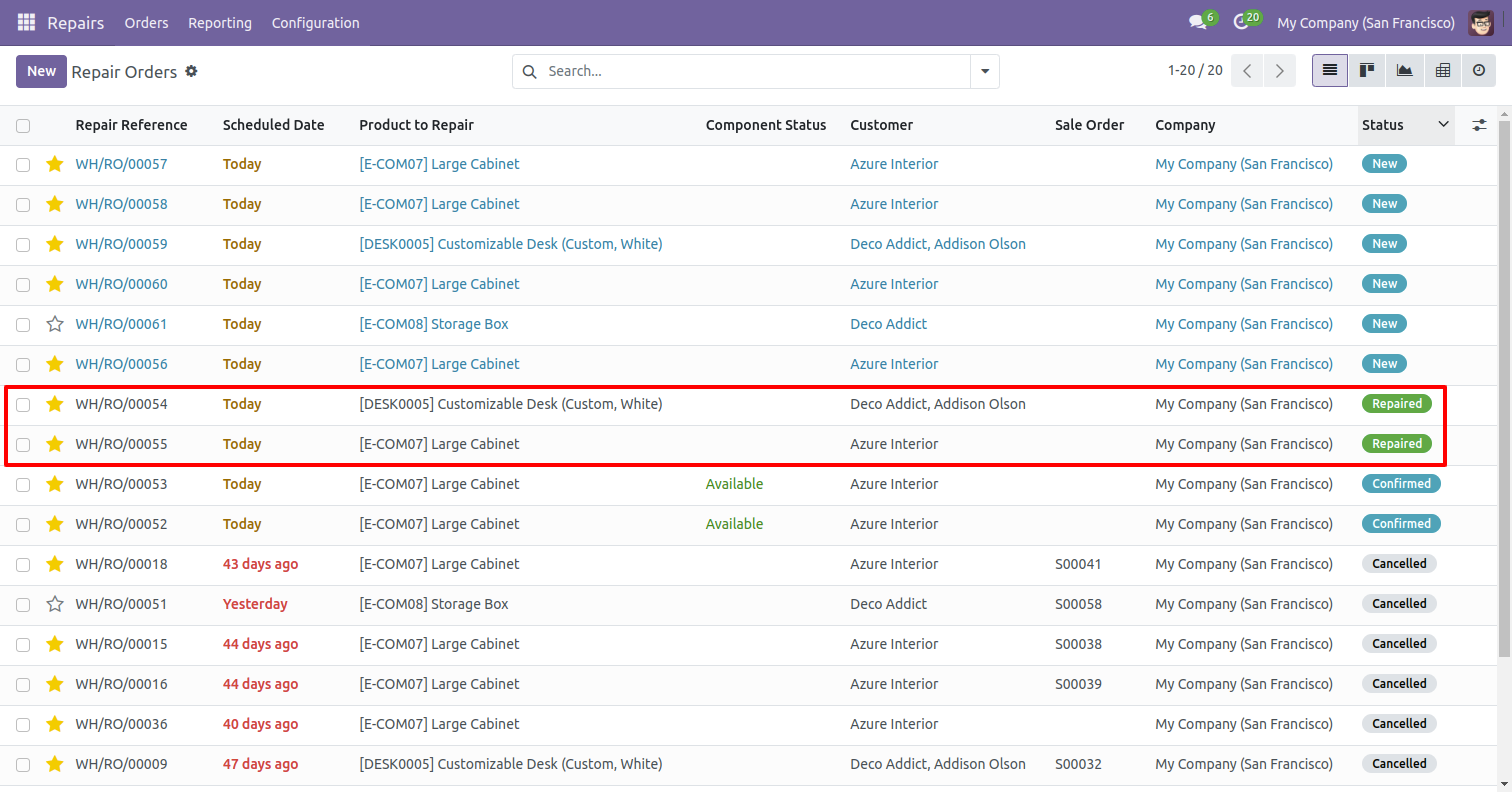
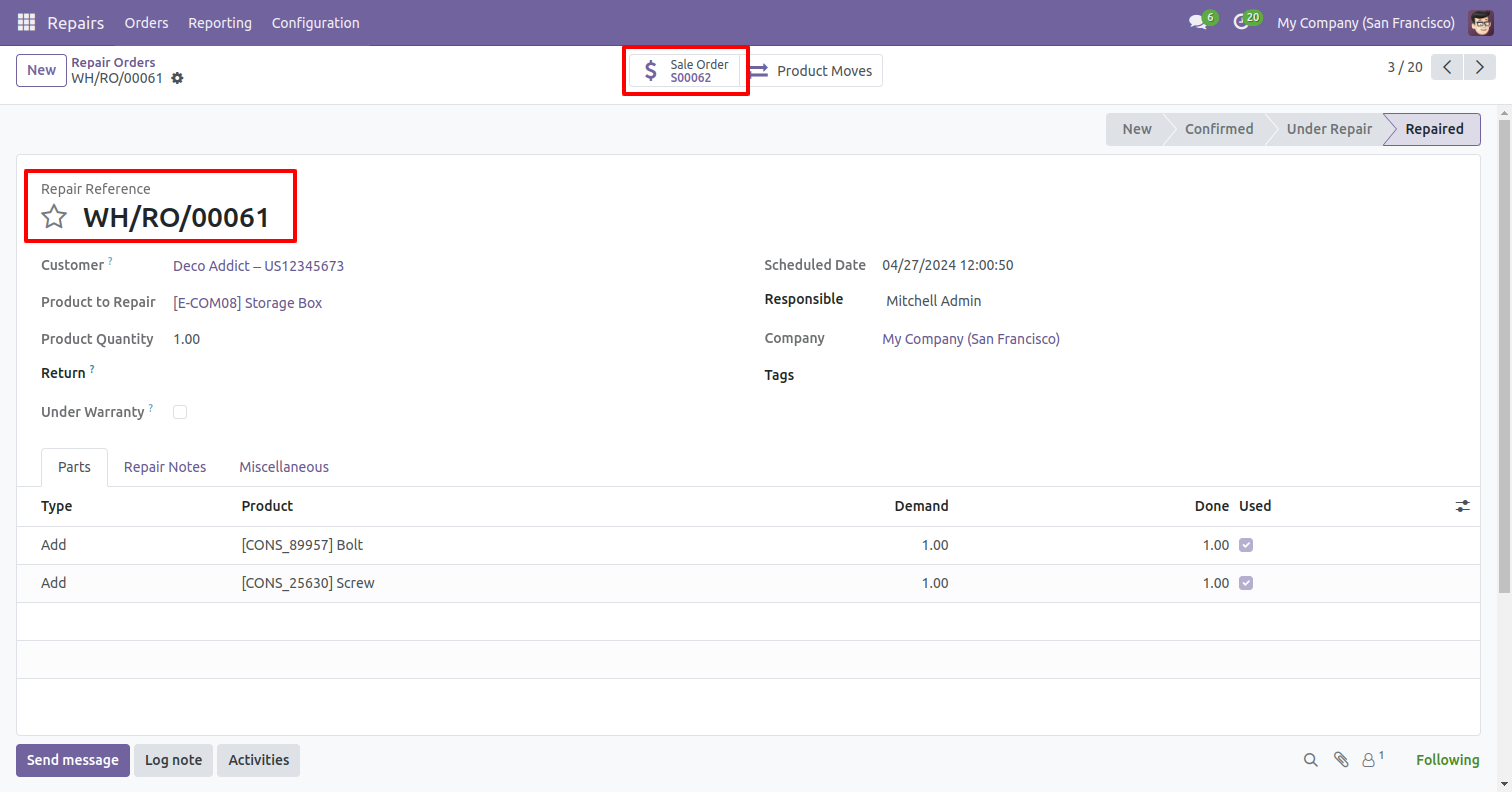
You can now see that all the selected orders have been Repaired.
"Helpdesk Teams" form view. Where you can define team members and the team leader or set team as default.
"Helpdesk Tickets Type" menu and list view.
"Helpdesk Subject Types" menu and list view.
"Helpdesk Tags" menu and list view.
"Helpdesk Stages" menu and list view.
"Helpdesk Stages" form view. Where you can define stages and it's access rights, E-Mail template, next stage.
"Helpdesk Categories" menu and list view.
"Helpdesk Sub Categories" menu and list view.
"Helpdesk Priorities" menu and list view.
"Helpdesk Setting" View.
"Helpdesk Ticket" Kanban view.
"Helpdesk Ticket" List view.
"Helpdesk Ticket" Pivot view.
"Helpdesk Ticket" Graph view.
"Helpdesk Ticket" Calender view.
"Helpdesk Ticket" Schedule activity view.
"Helpdesk Ticket" form view.
"Helpdesk Ticket" form attachment view. Where you can attach the document received from the customer.
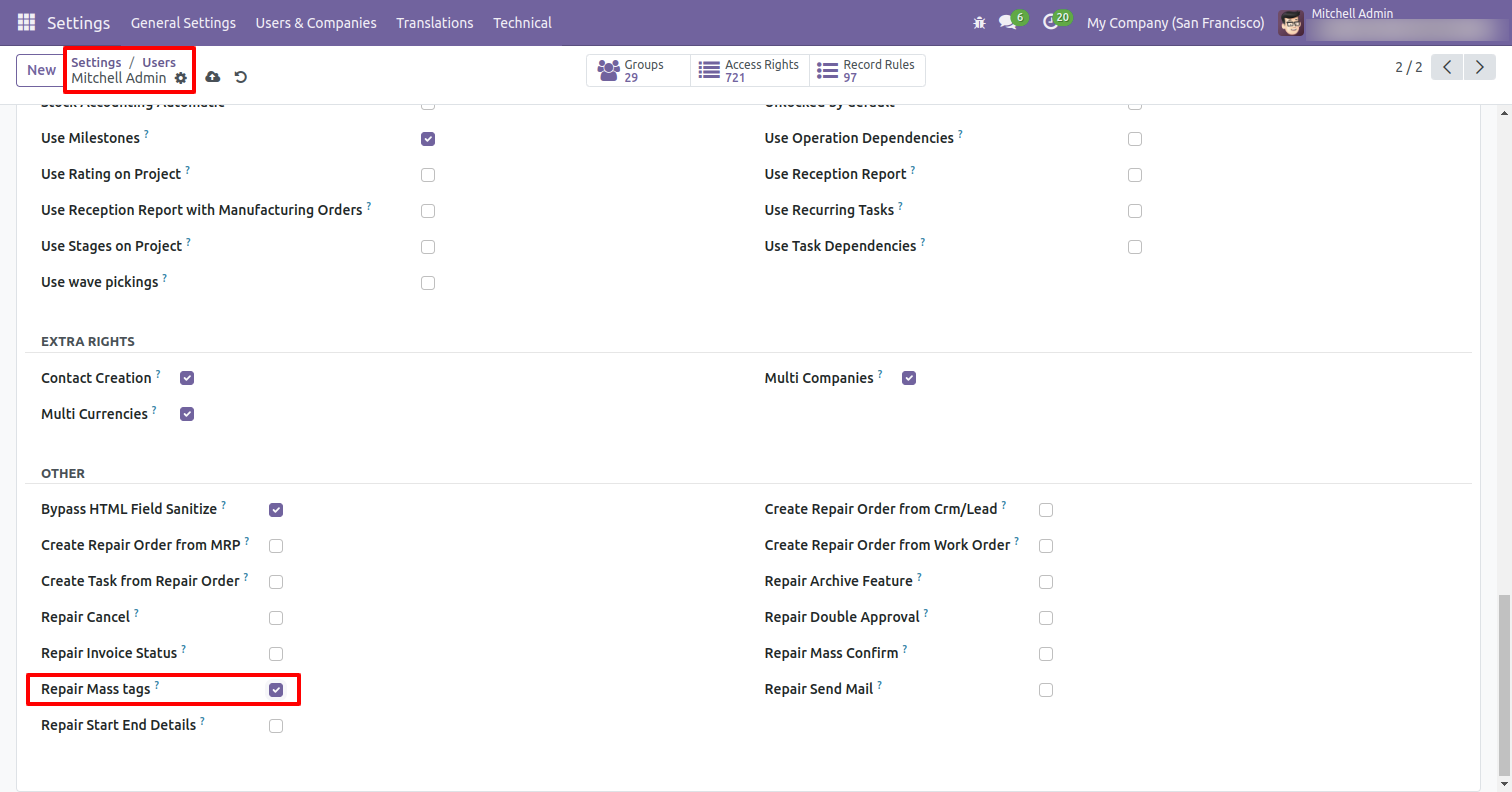
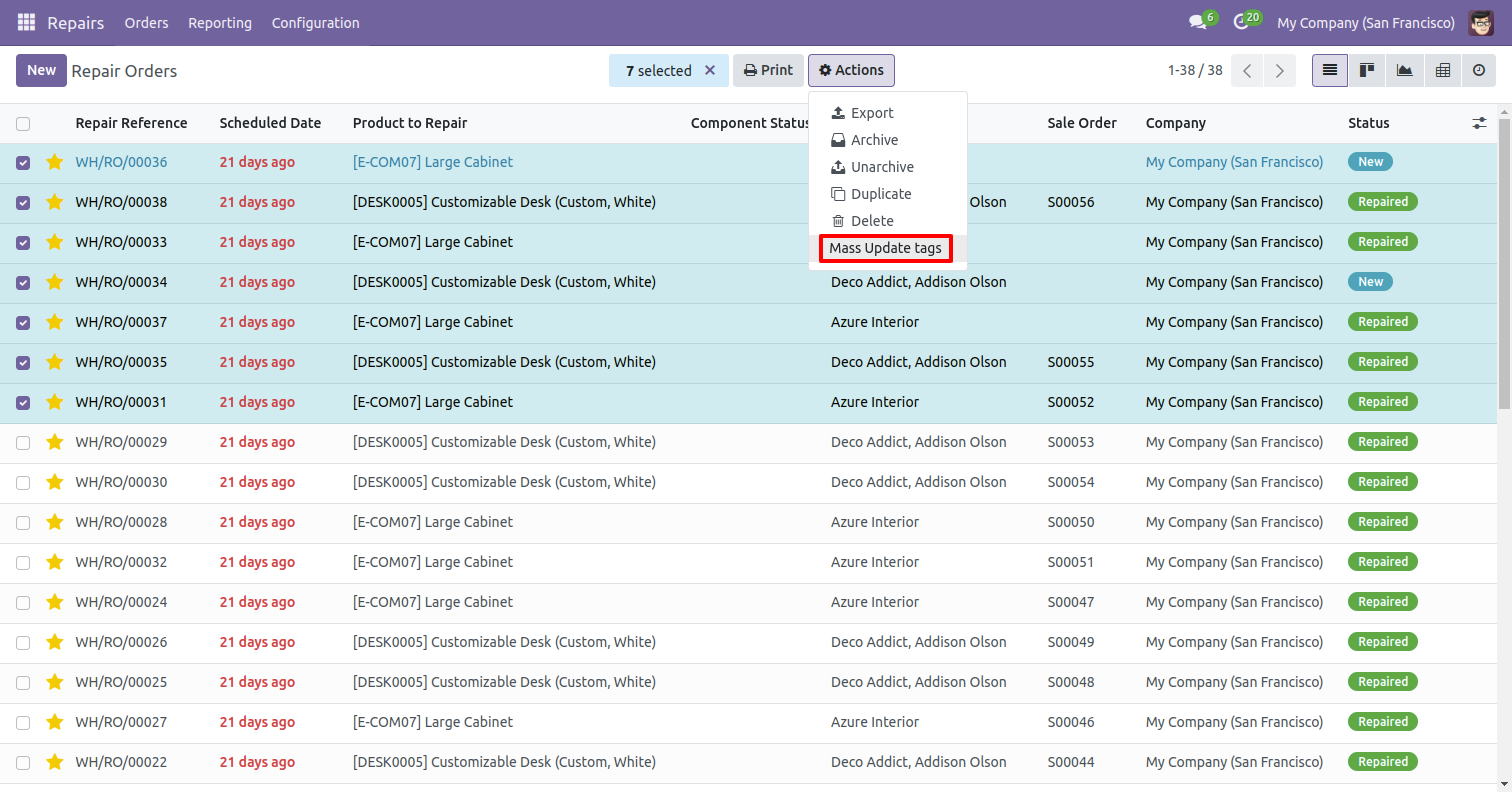
Go to the user settings and enable the 'Repair Mass Tags' boolean.
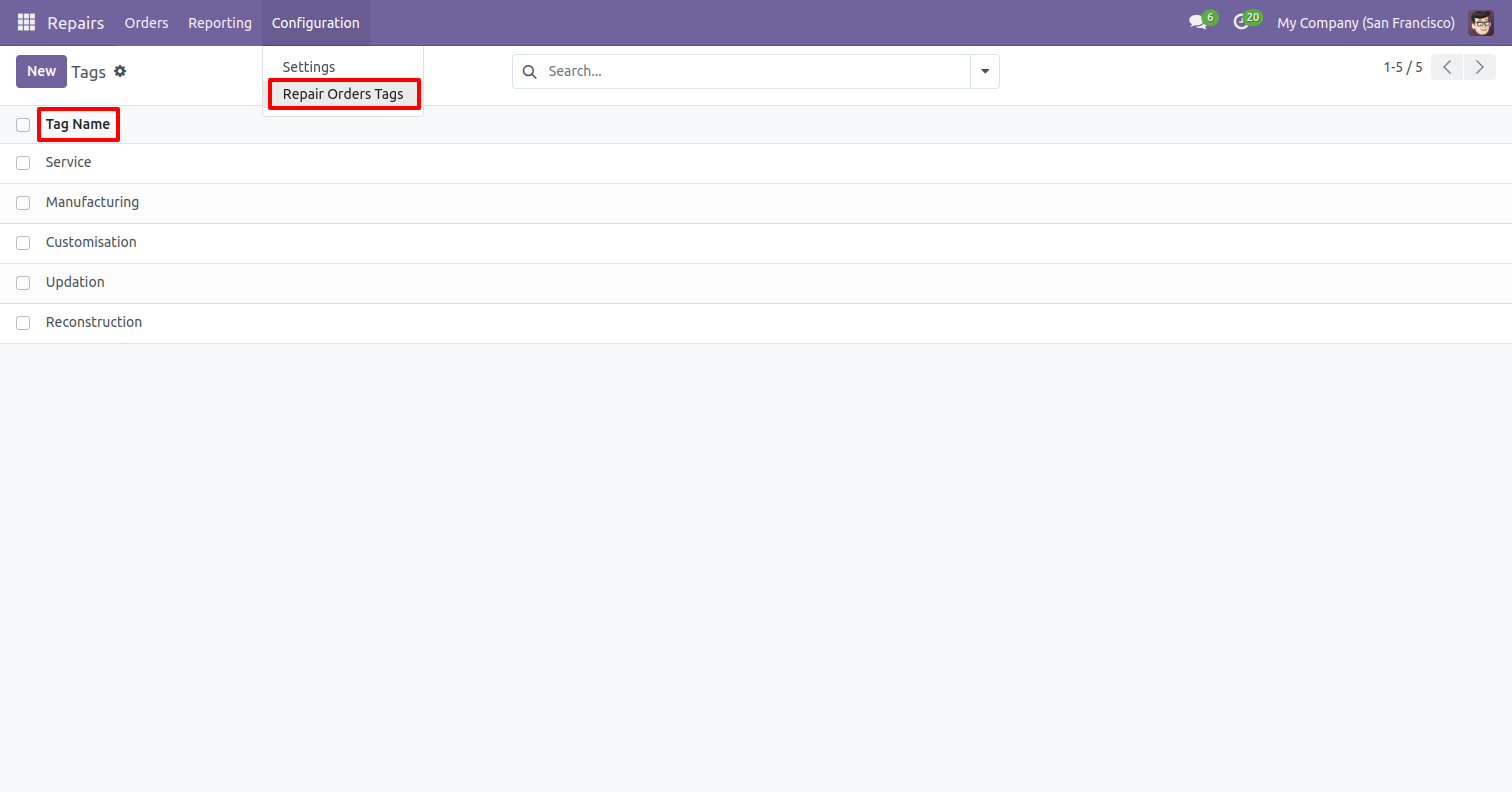
'Repair Orders Tags' menu and tree view.
Select the repair orders and click on the 'Mass Update Tags' from the Actions.
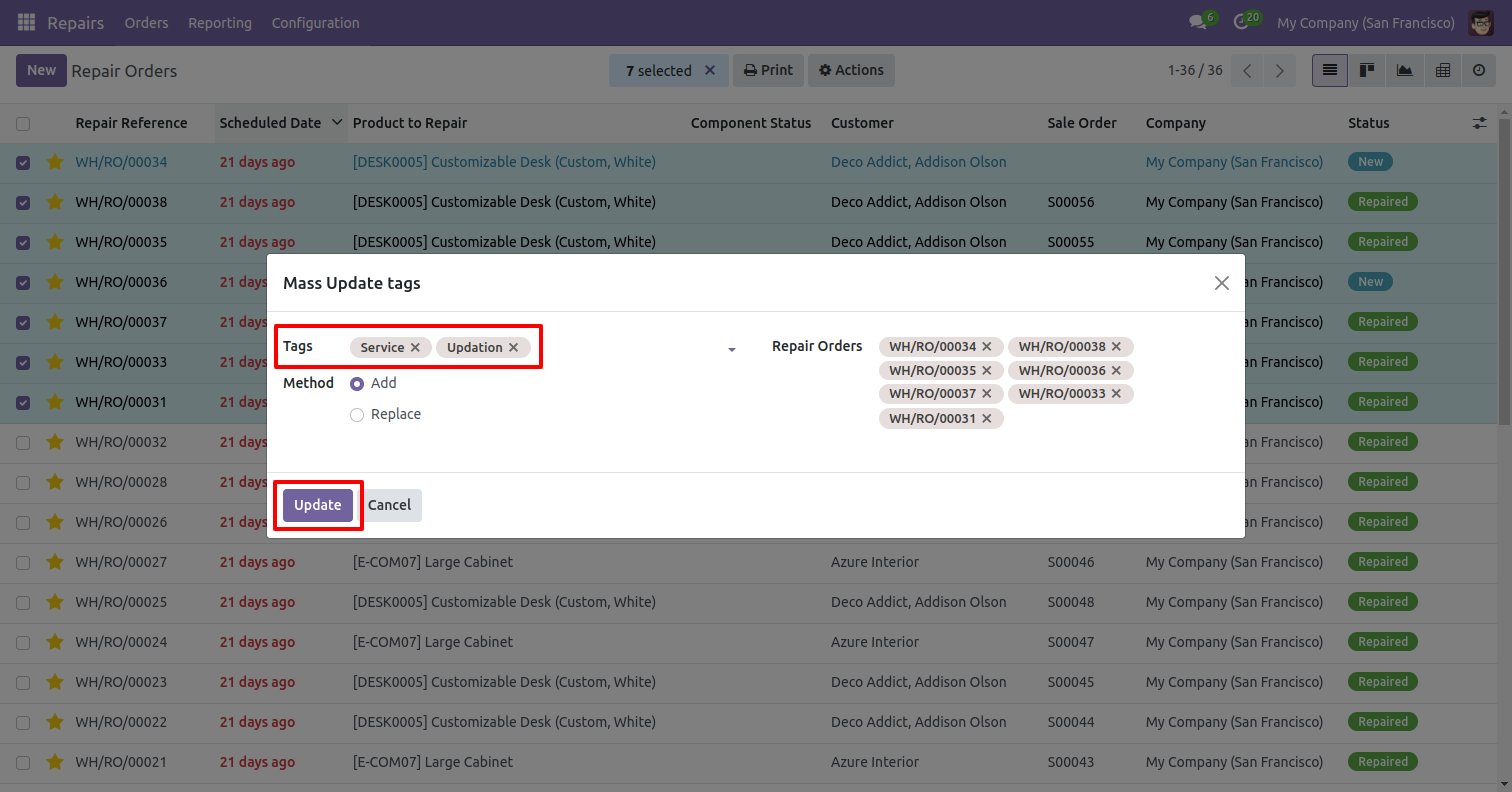
After that, the 'Mass Update tags' wizard will appear.
Enter the required details and click on the 'Update' button.
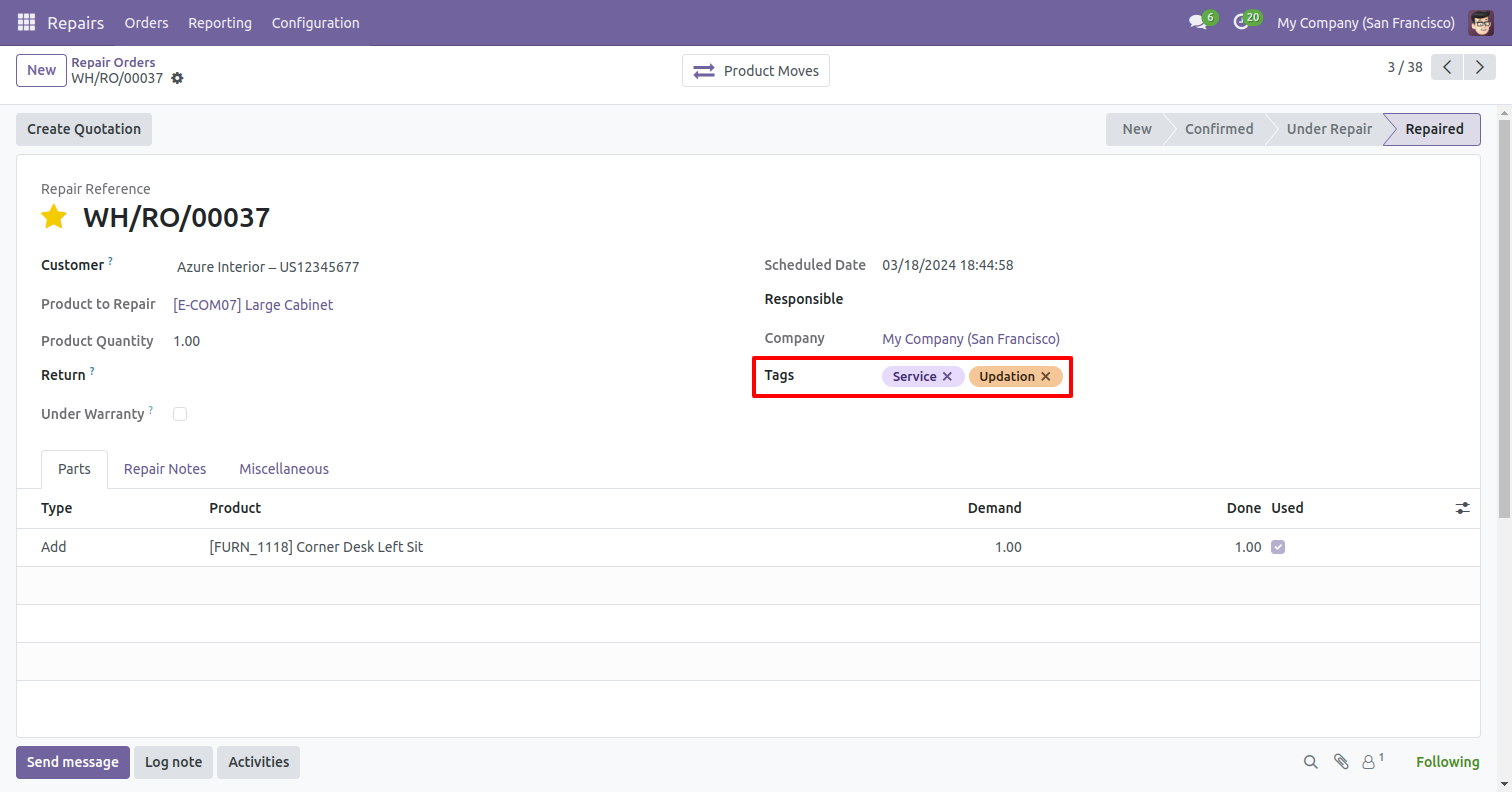
You can now see the updated tags here.
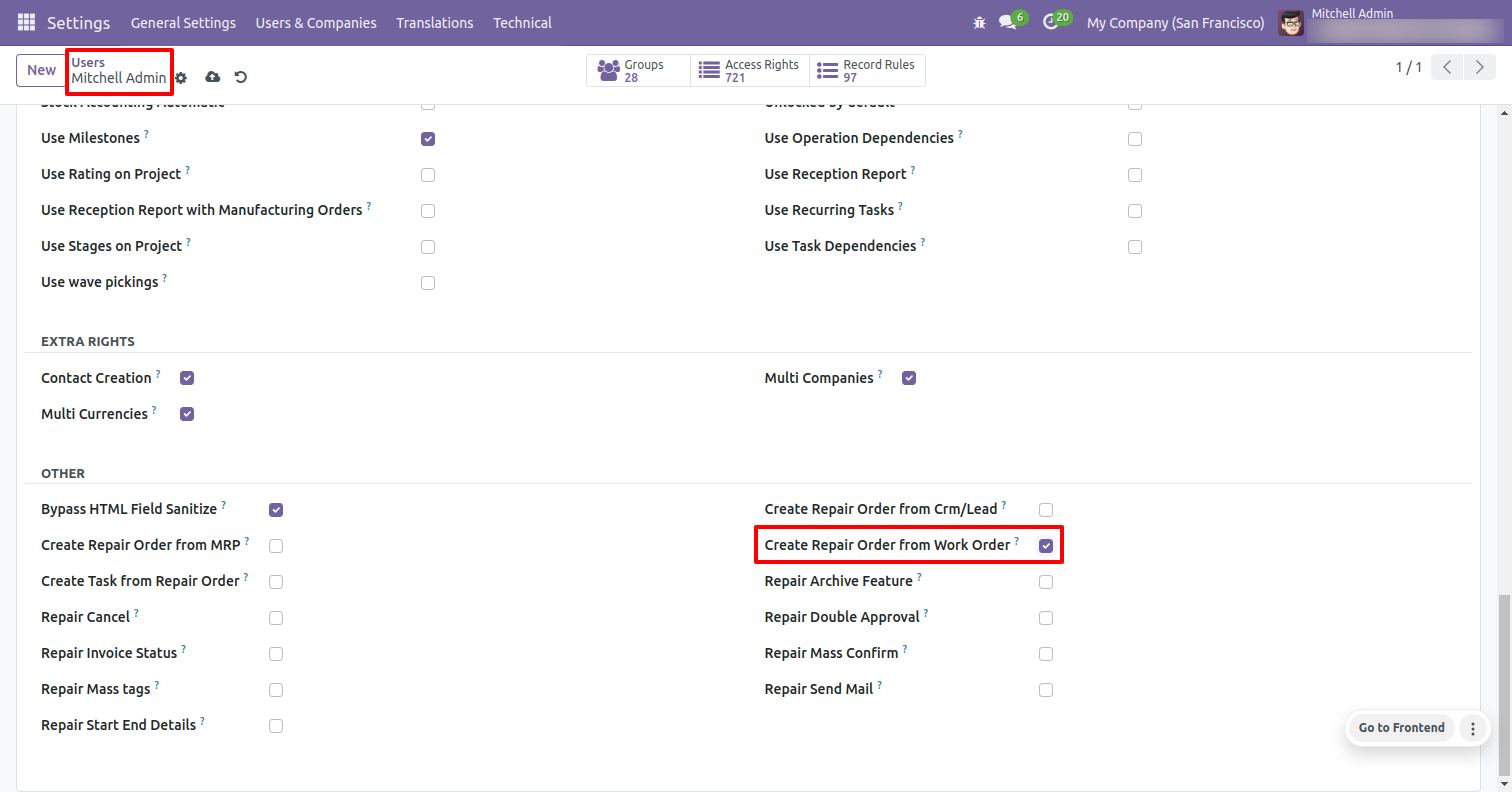
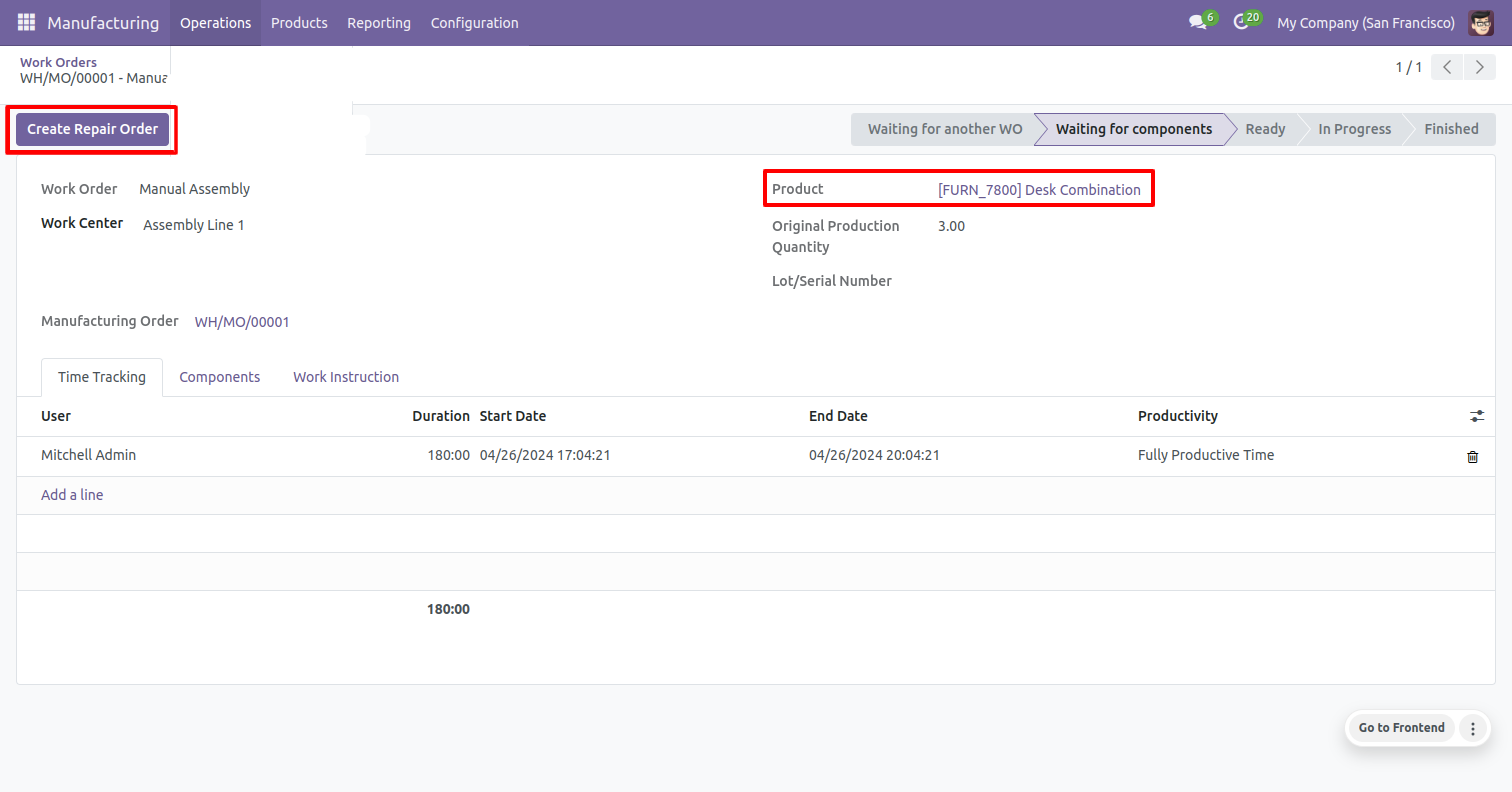
Go to the user settings and enable the 'Create Repair Order From Work Order' boolean.
In the Work orders form view, click on the 'Create Repair Order' button to generate a new repair order.
Enter the required details and click on the 'Save' button.
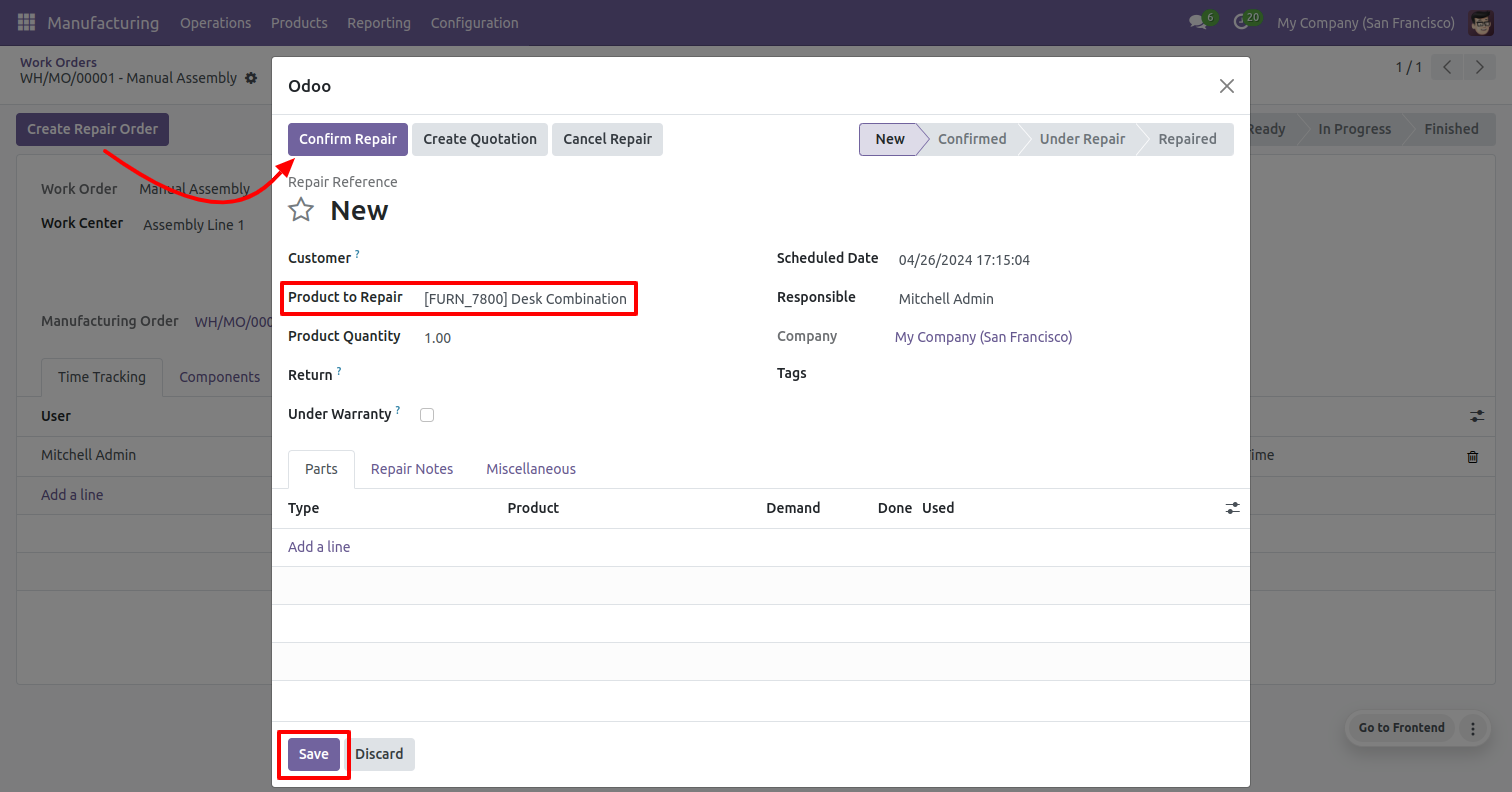
The repair order has been successfully created.
Click on the 'Repairs' smart button to view the repair orders.
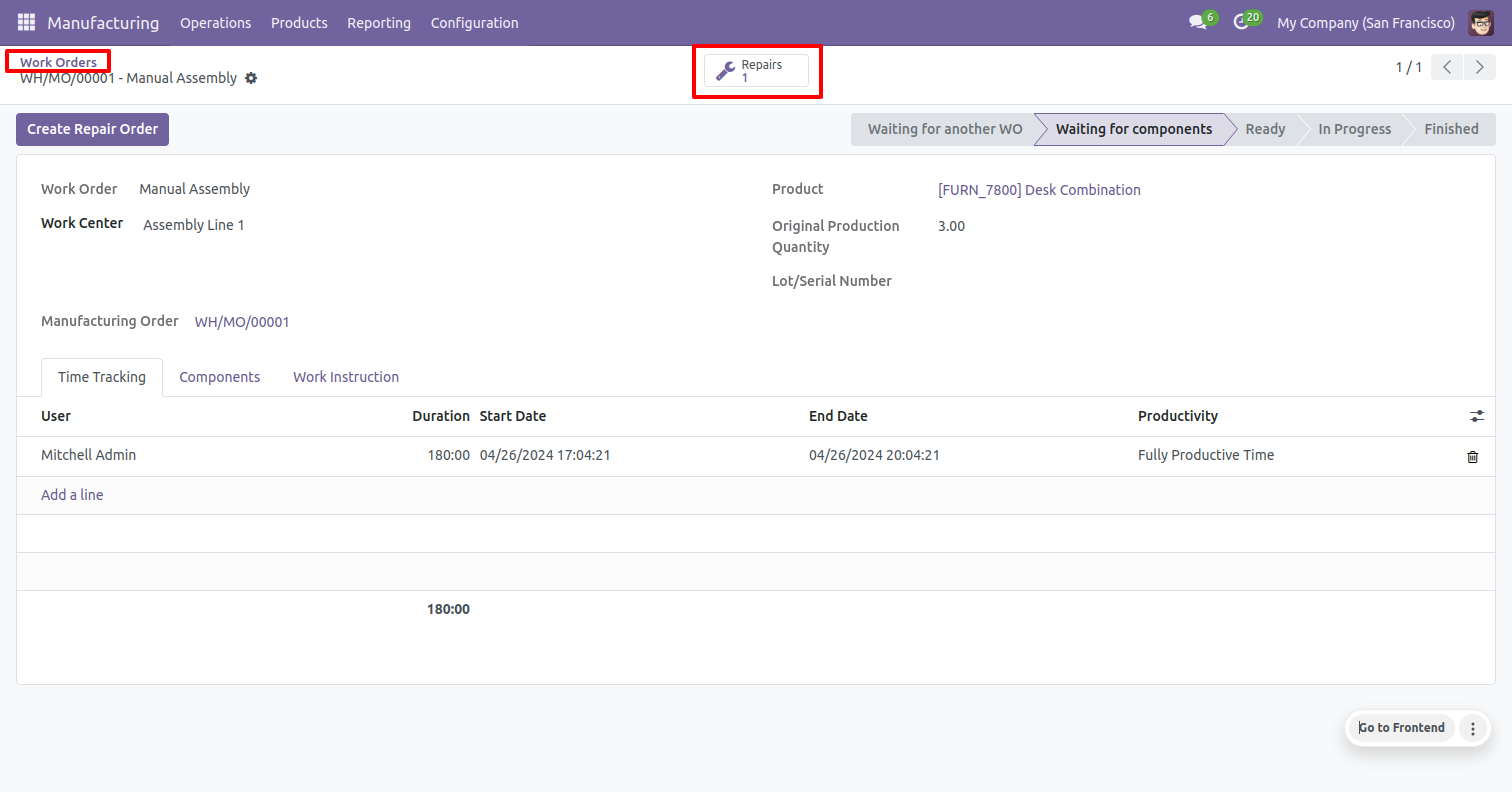
After that, you will redirected to the repair order.
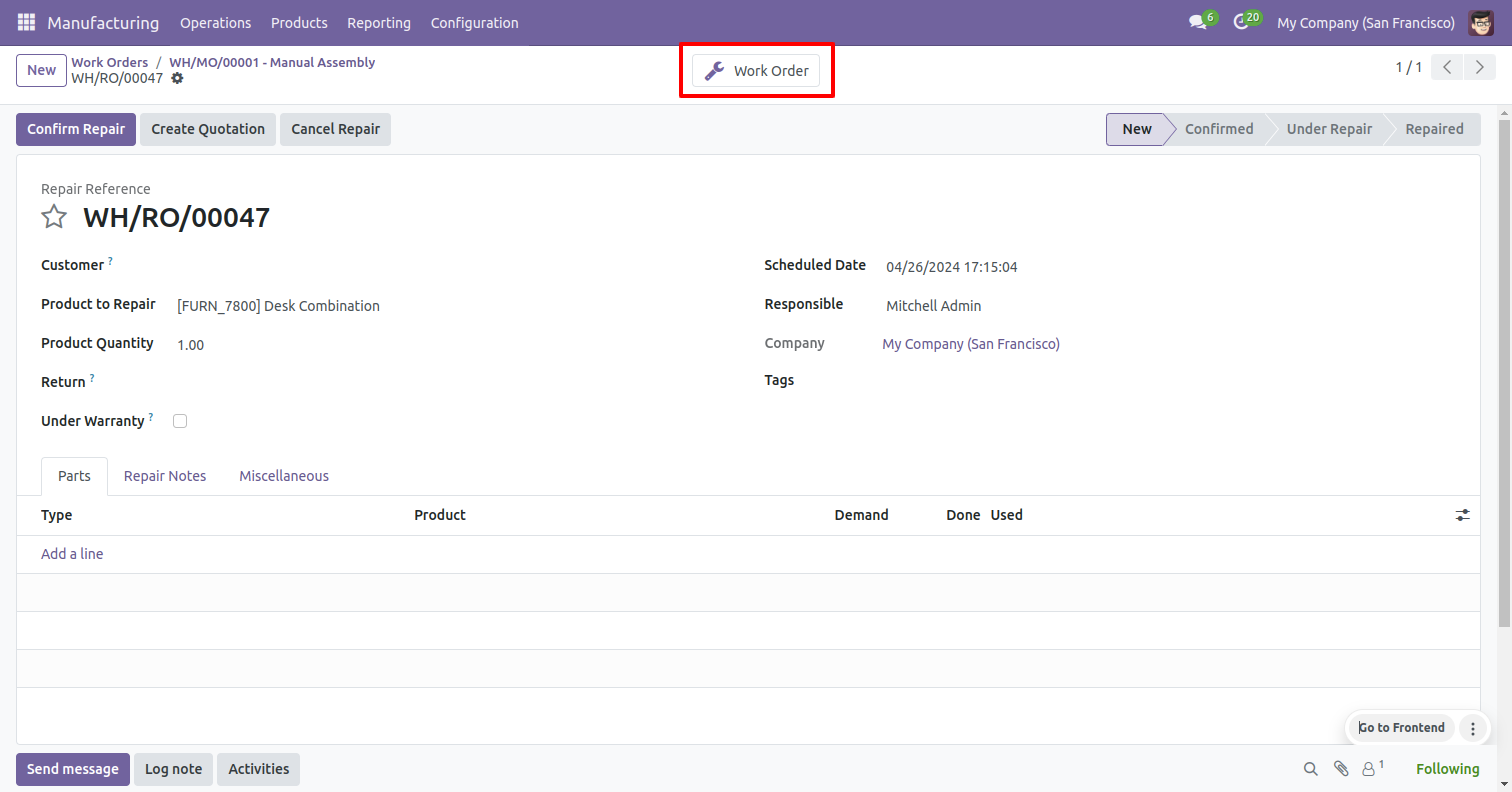
Click on the 'Work Order' smart button to view the related Work orders.
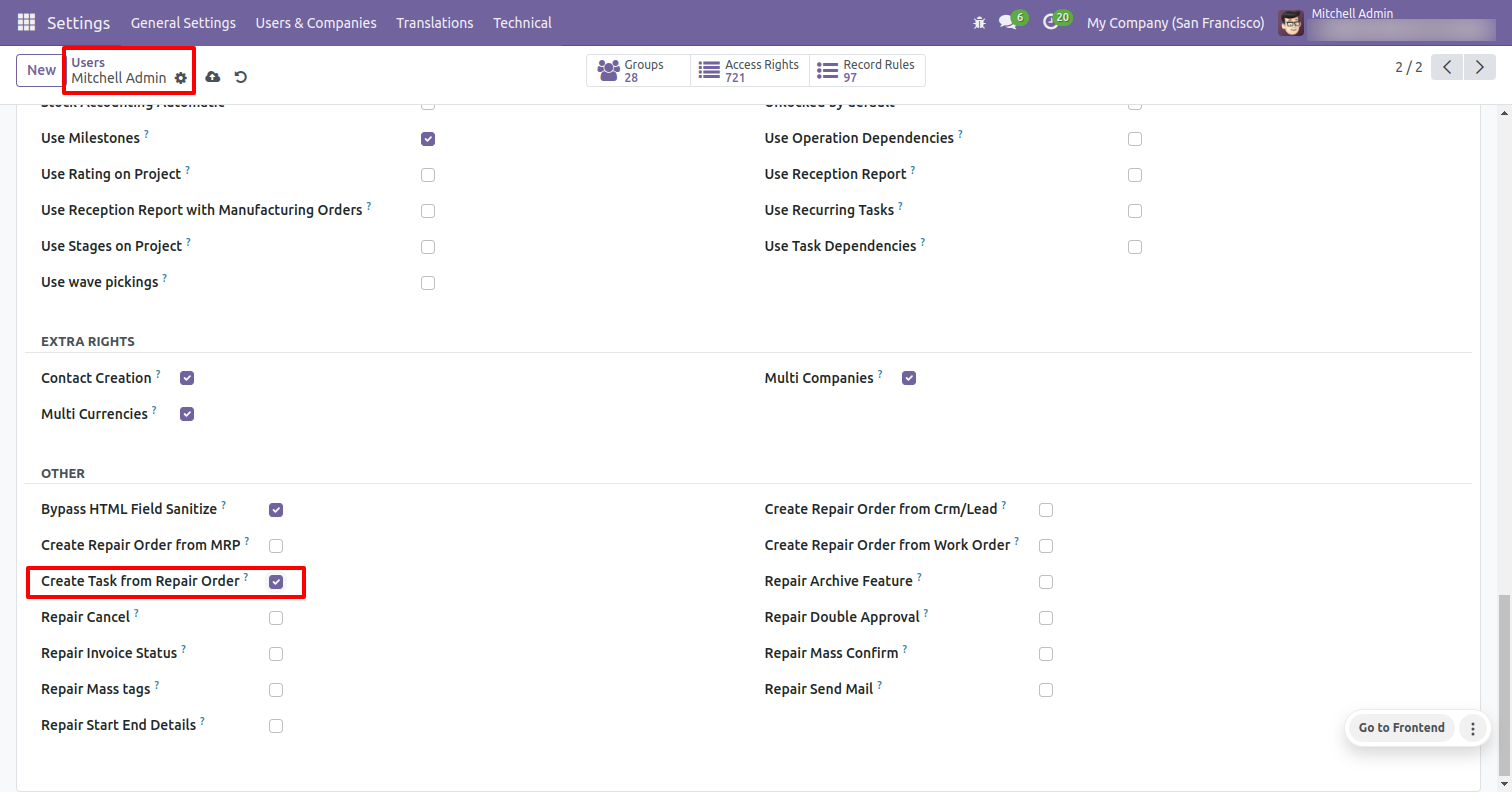
Go to the user settings and enable the 'Create Task From Repair Order' boolean.
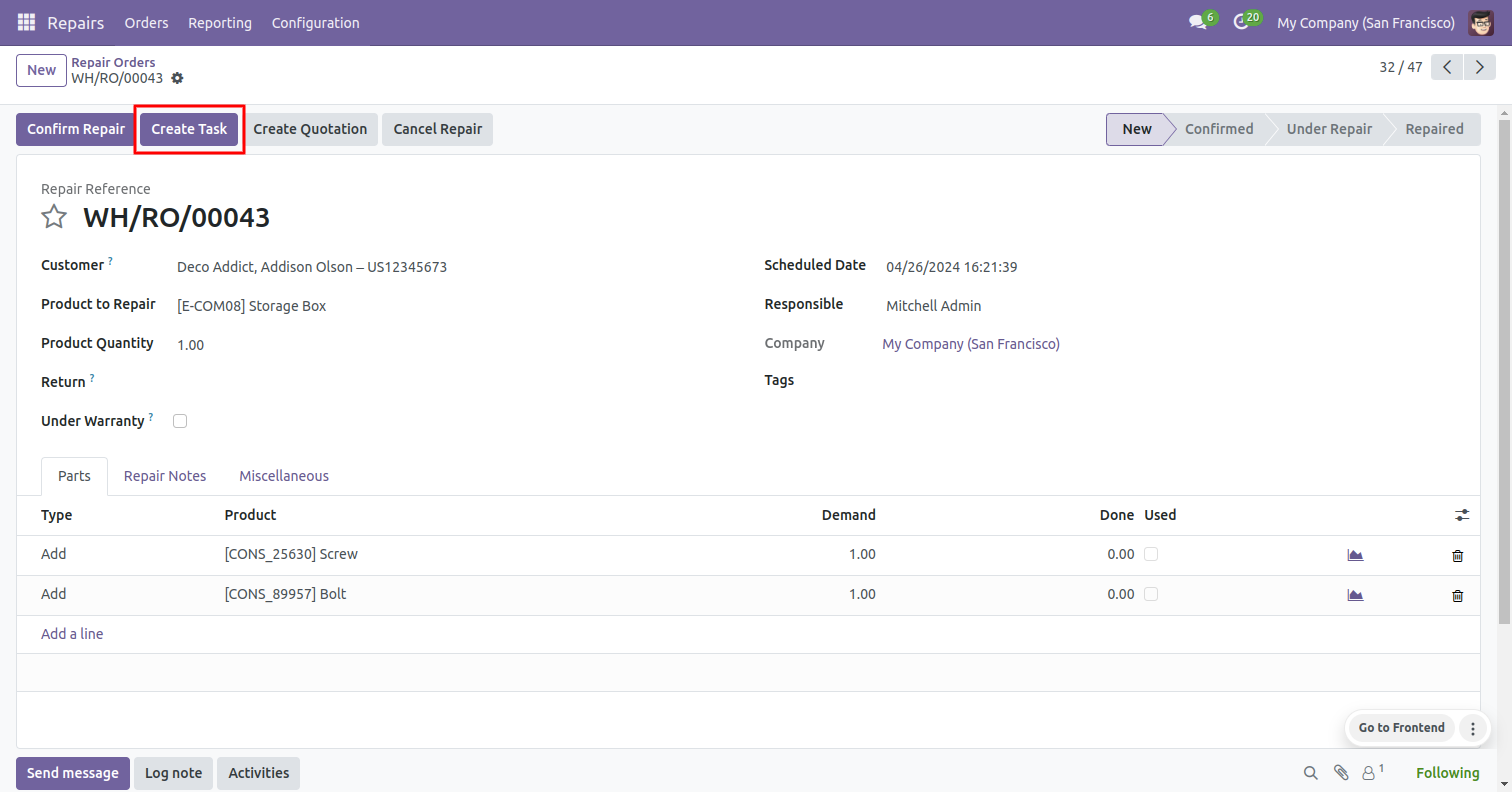
In the Repair Orders form view, click on the 'Create Task' button to generate a new task.
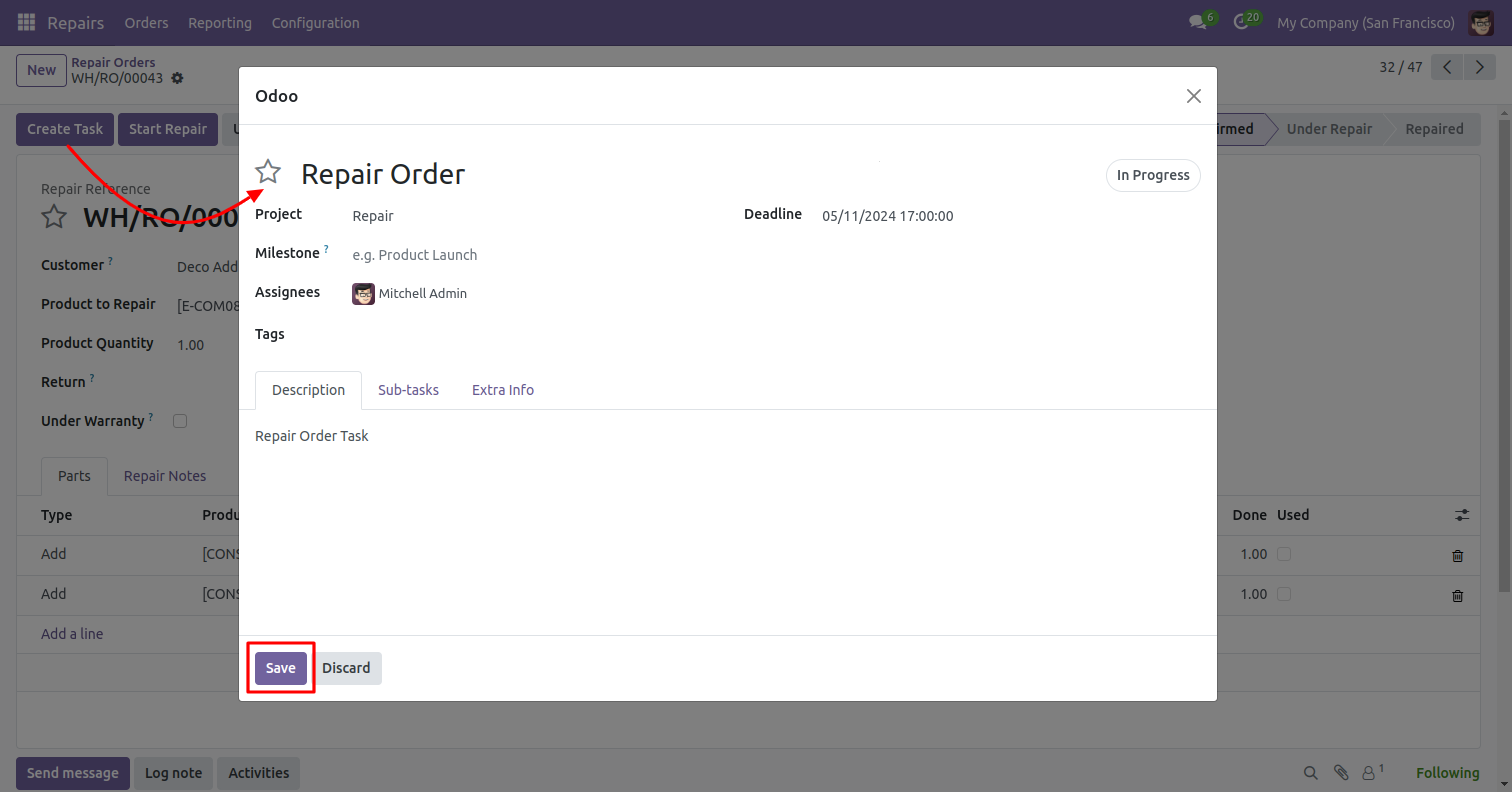
Enter the required details and click on the 'Save' button.
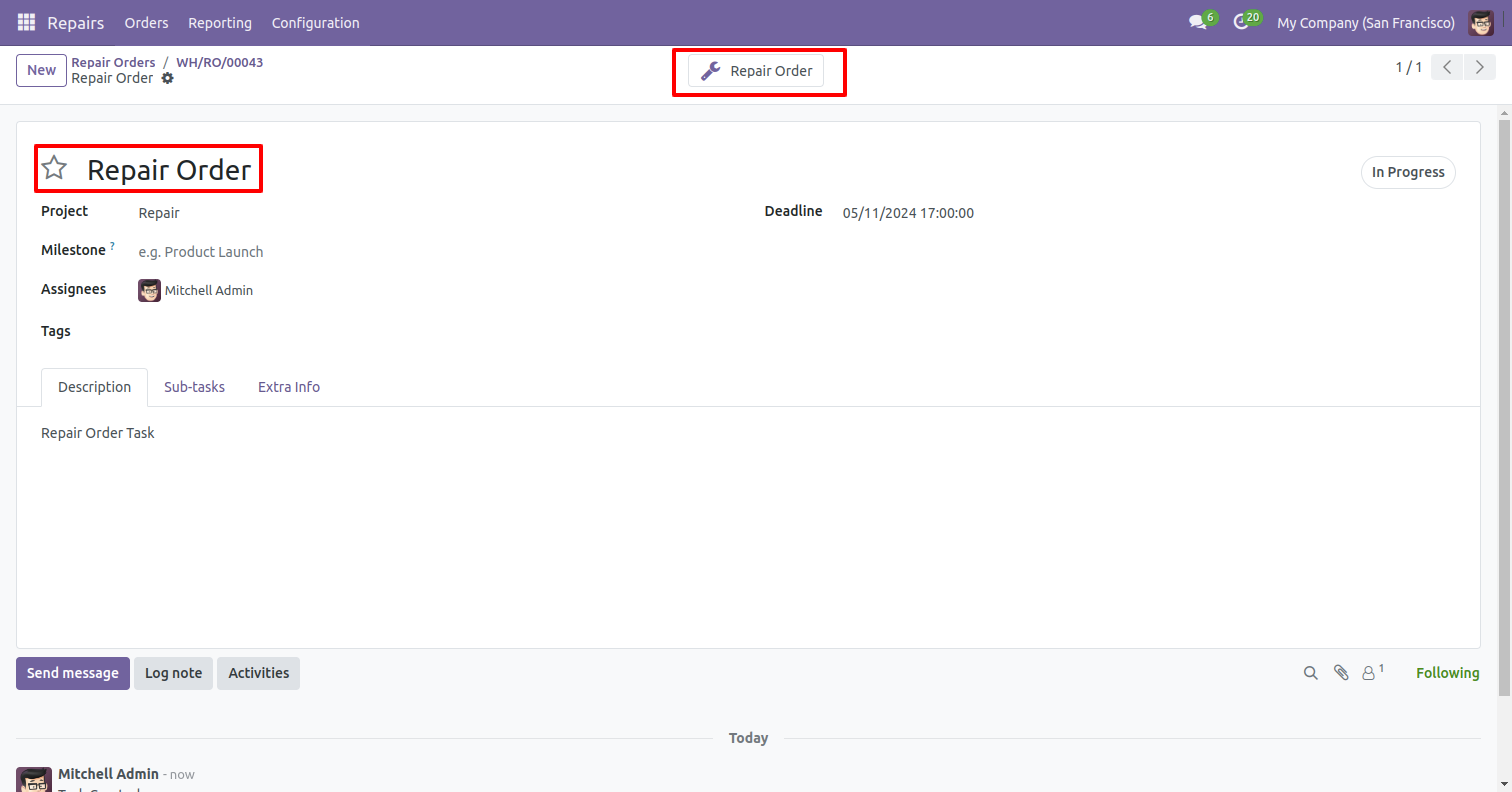
The task has been successfully created.
Click on the 'Tasks' smart button to view the tasks.

After that, you will redirected to the task.
Click on the 'Repair Order' smart button to view the related Repair orders.
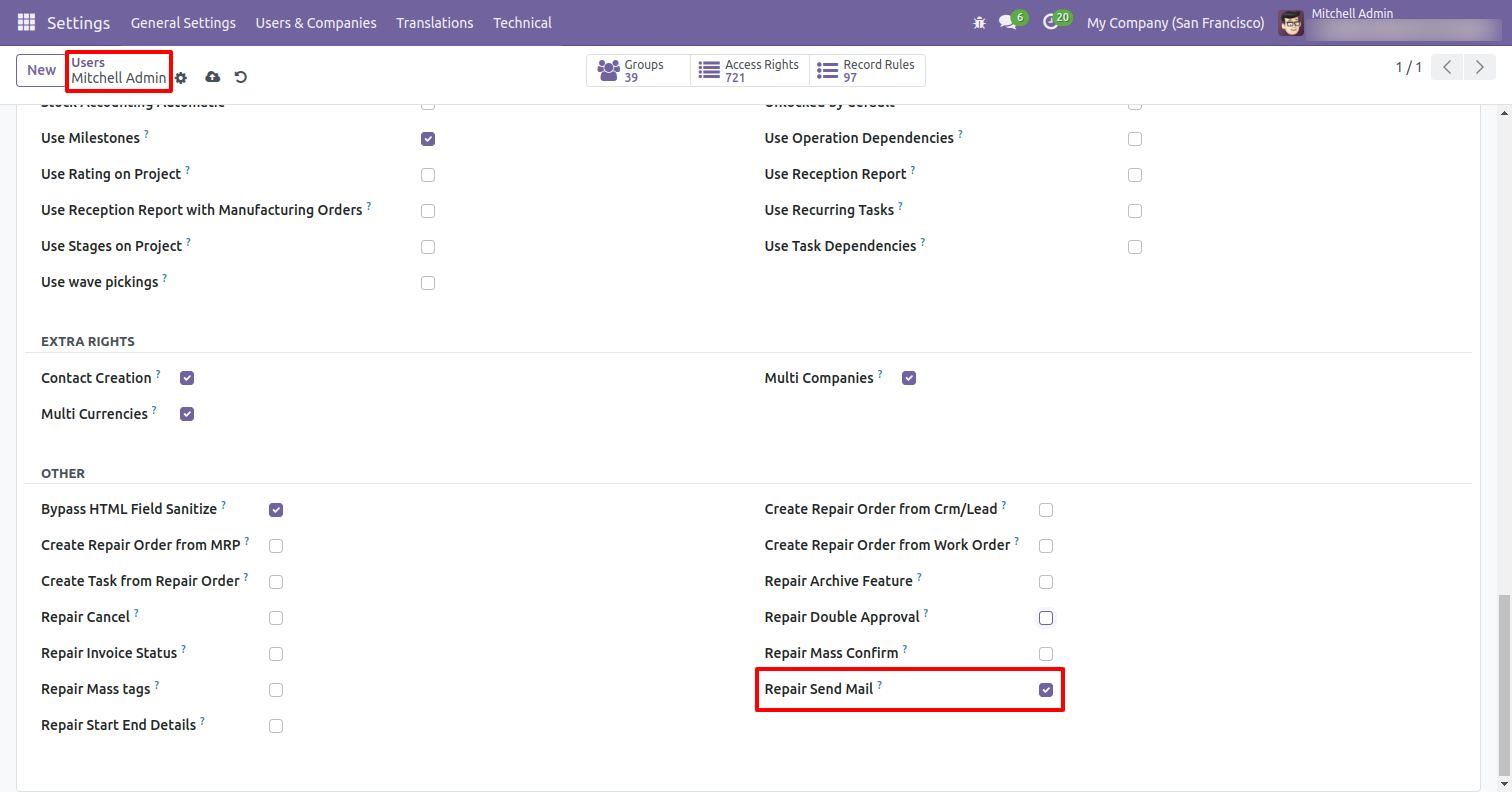
Go to the user settings and enable the 'Repair Send Mail' boolean.
Select the repair orders and click on the 'Mass Mail Actions' from the actions.
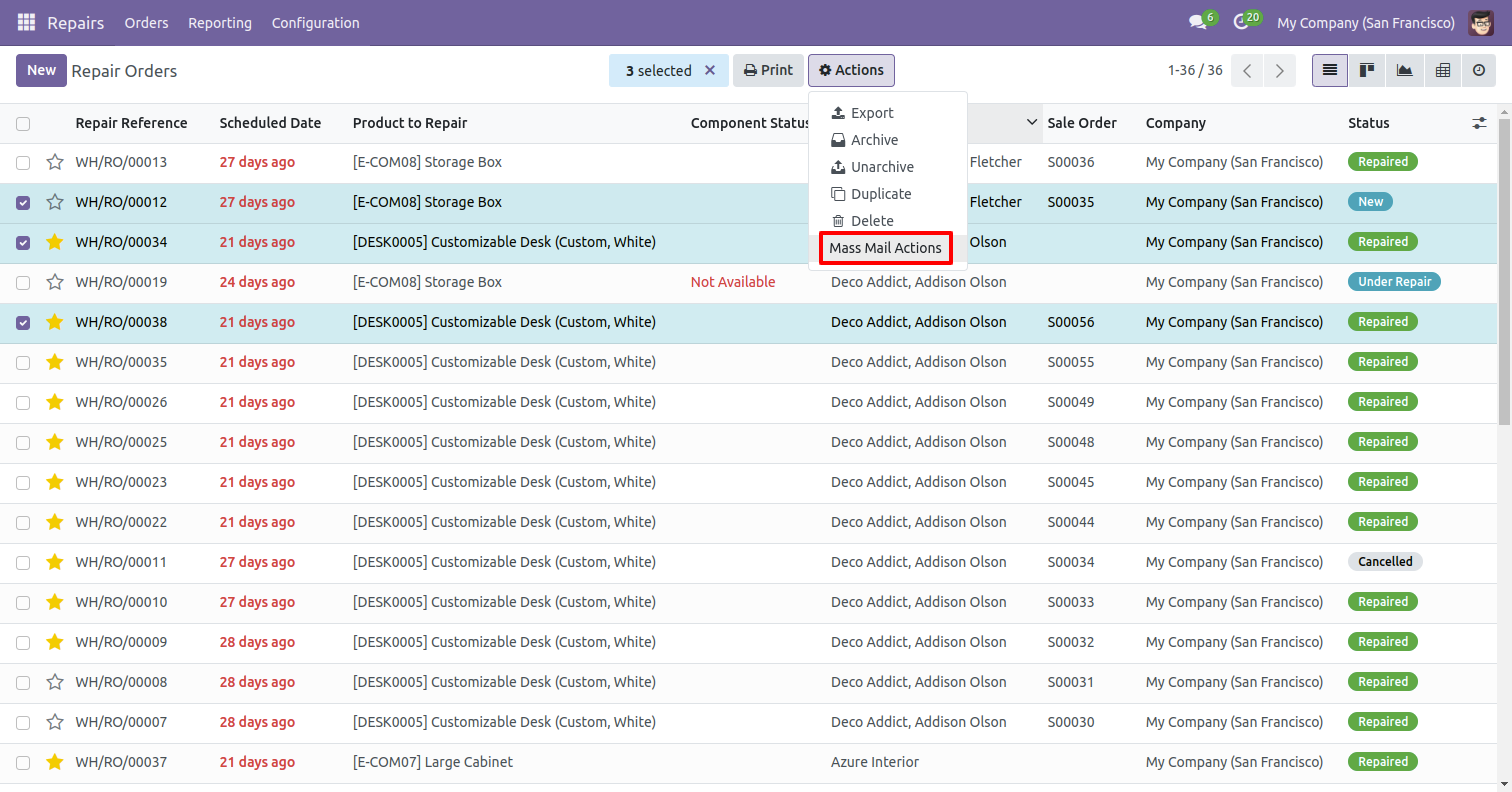
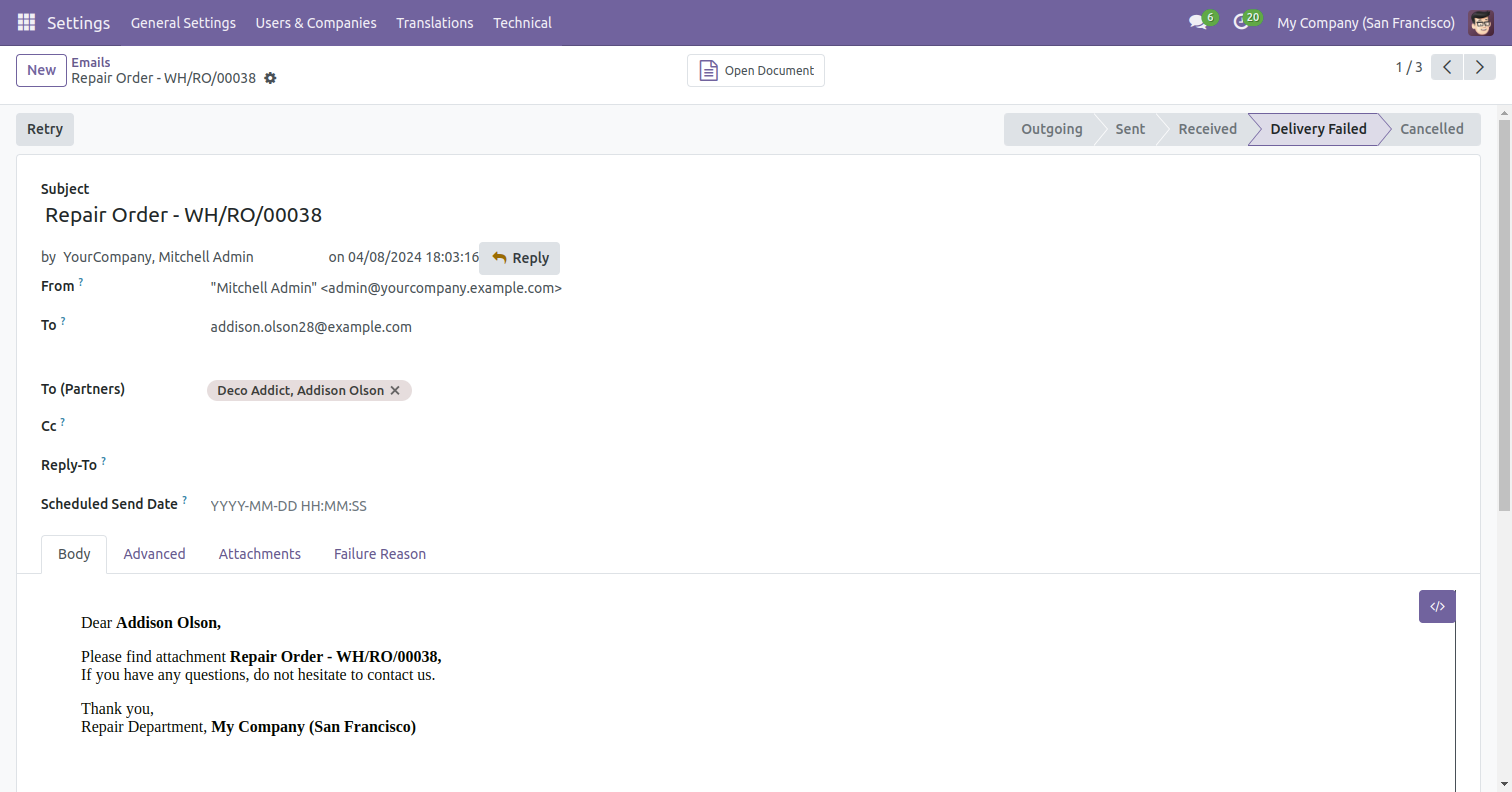
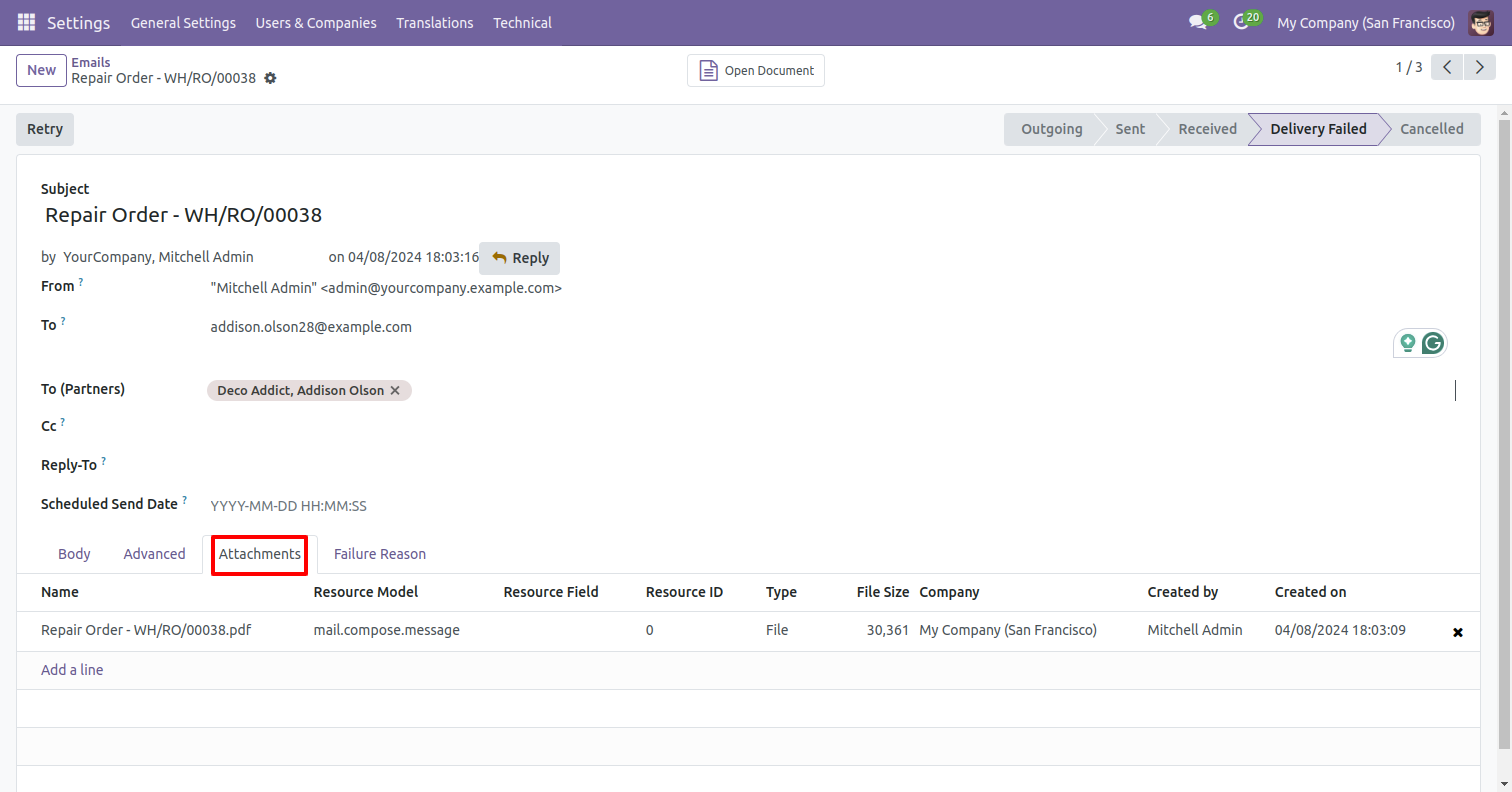
Here, you can see that emails have been sent for all the selected repair orders.

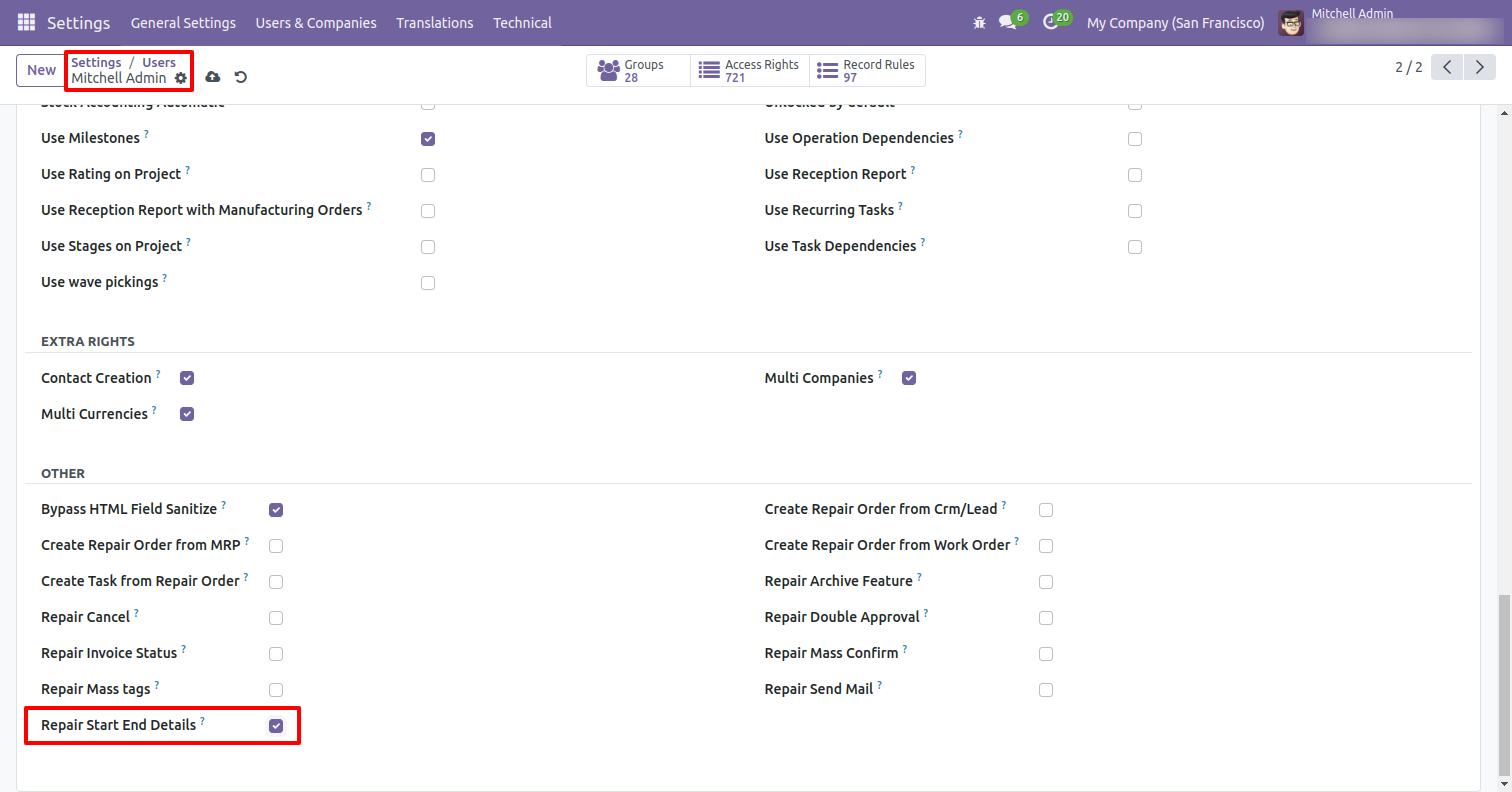
Go to the user settings and enable the 'Repair Start End Details' boolean.
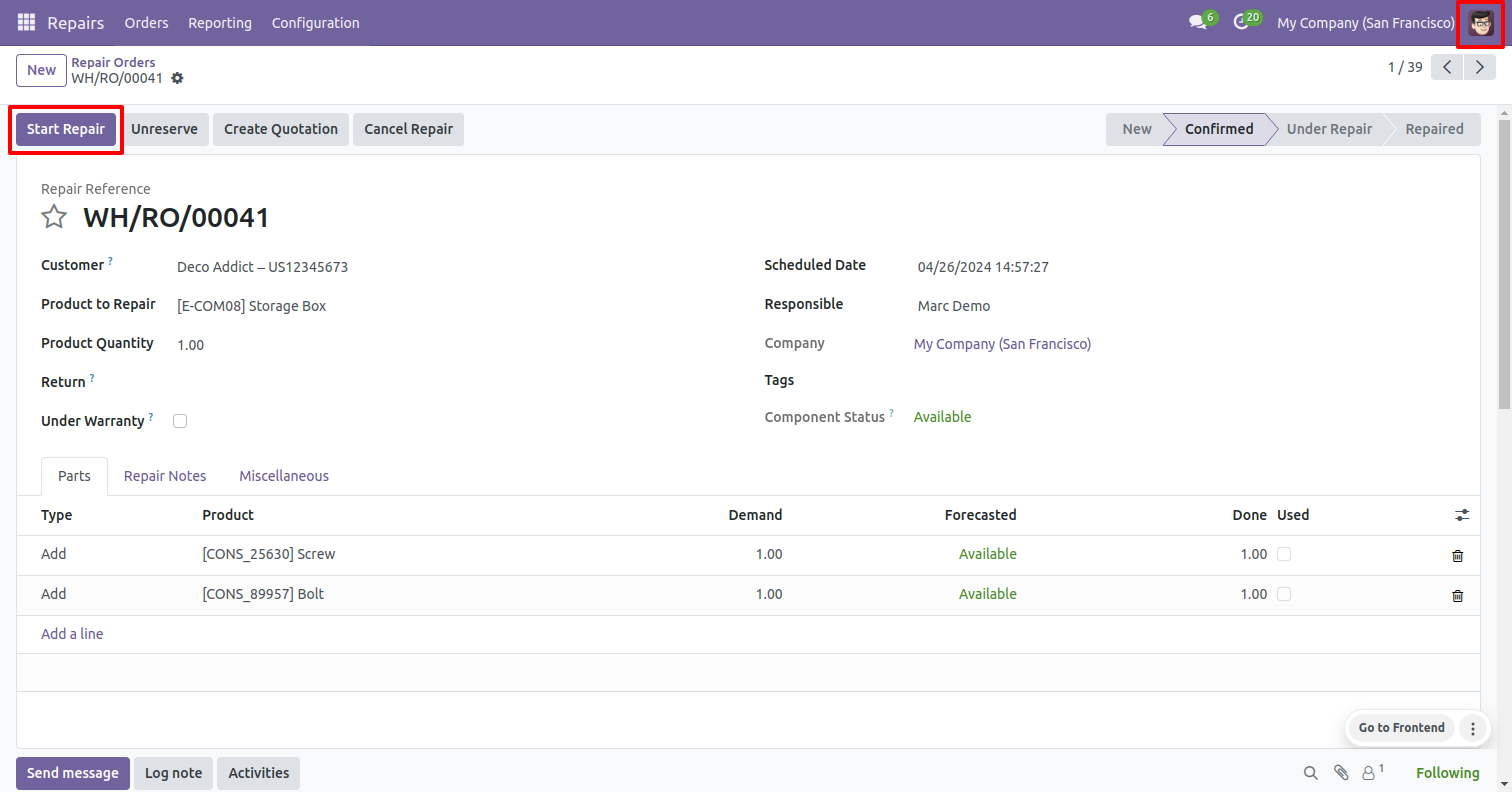
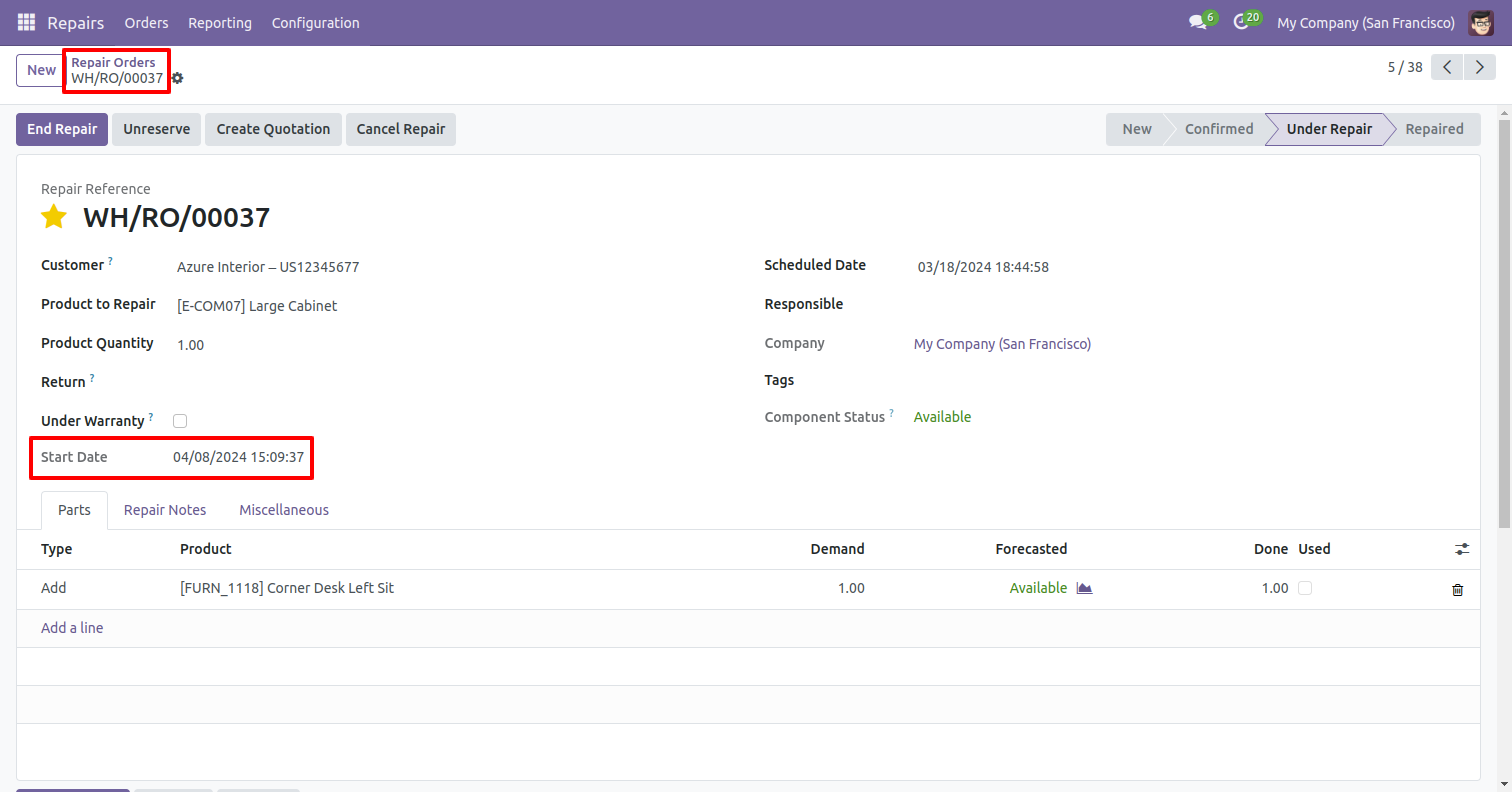
Click on the 'Start Repair' button to initiate the repair order.

The start date and time are displayed here.
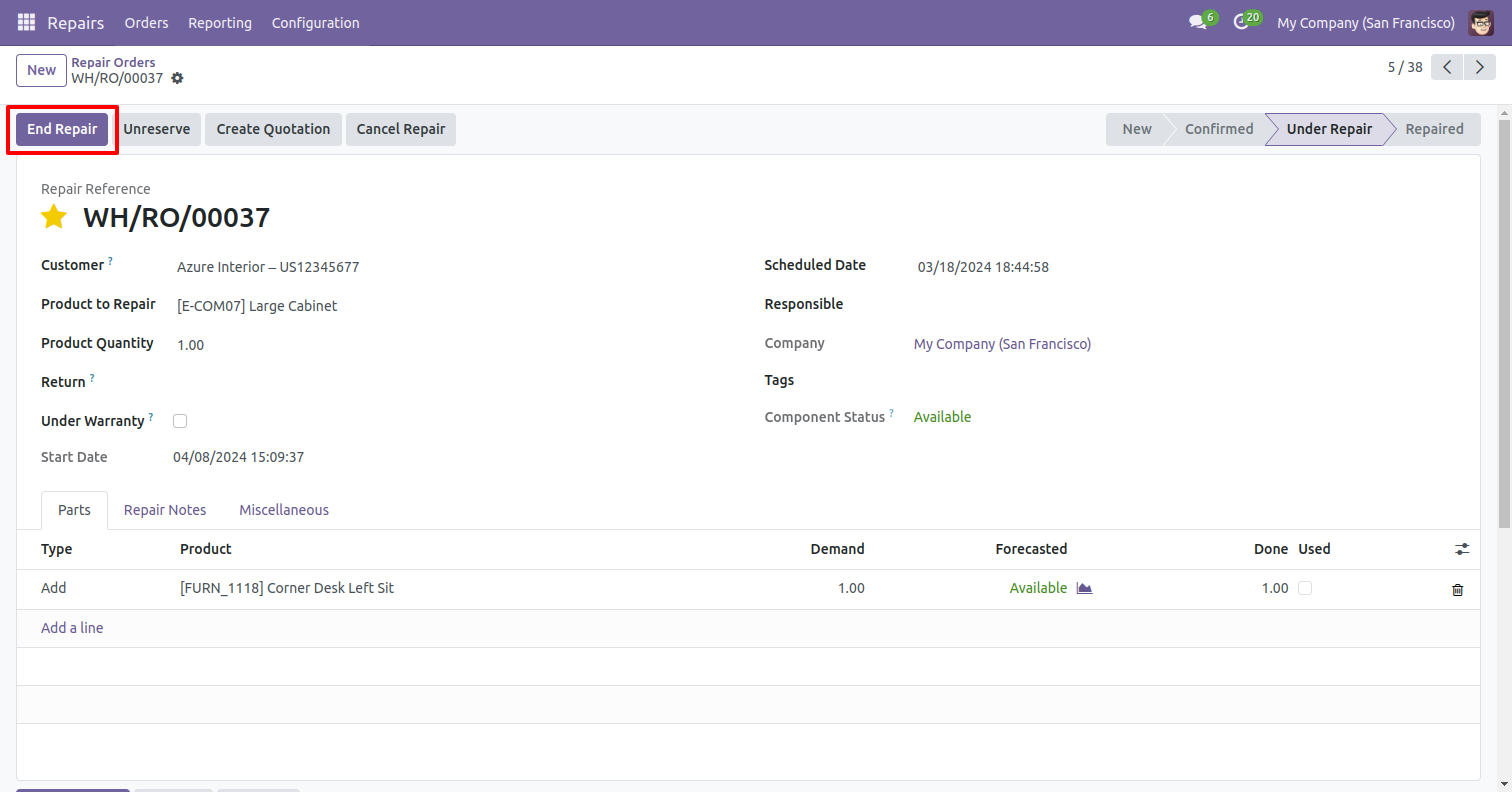
Click on the 'End Repair' button to end the repair order.
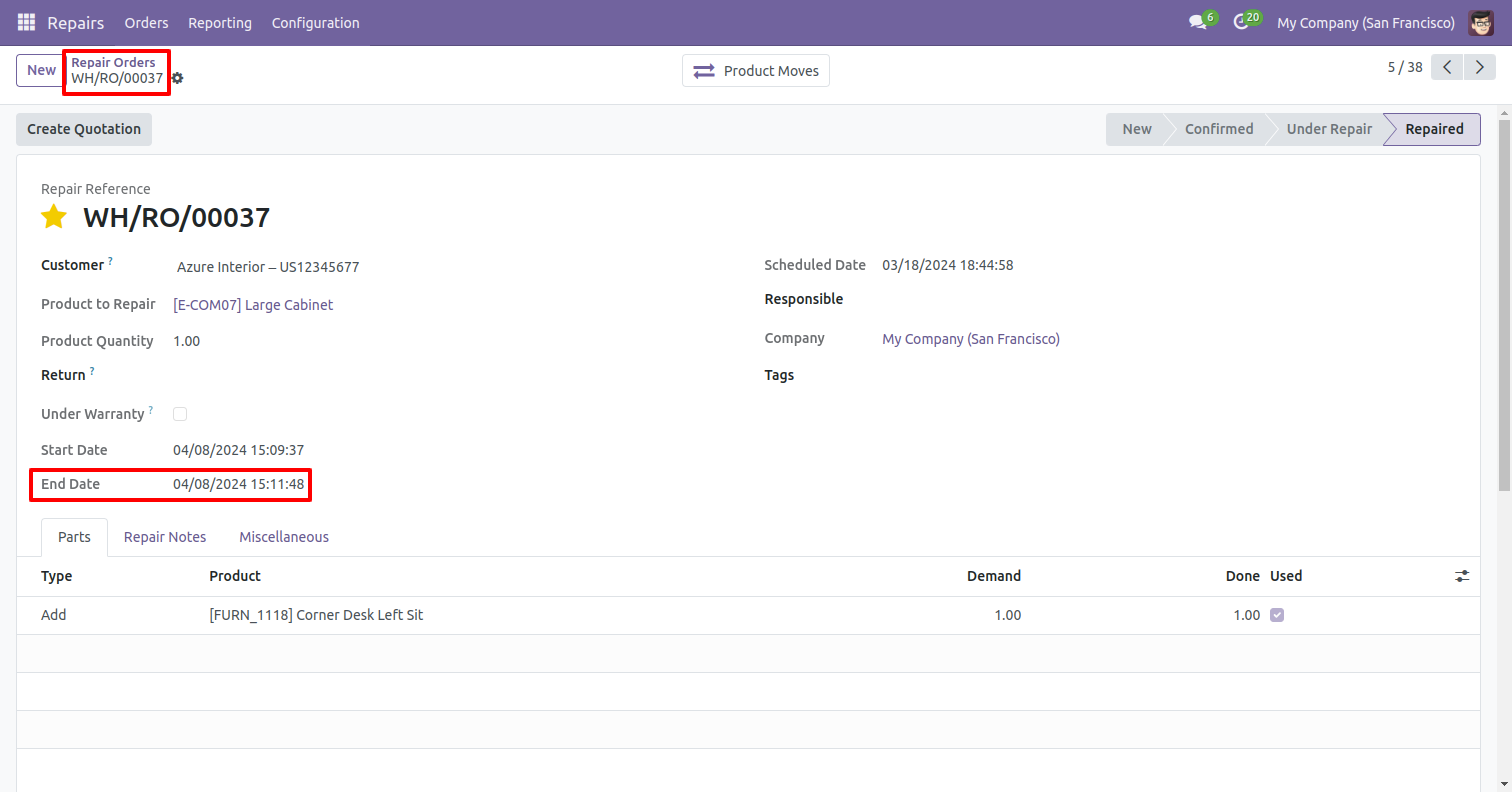
The end date and time are displayed here.
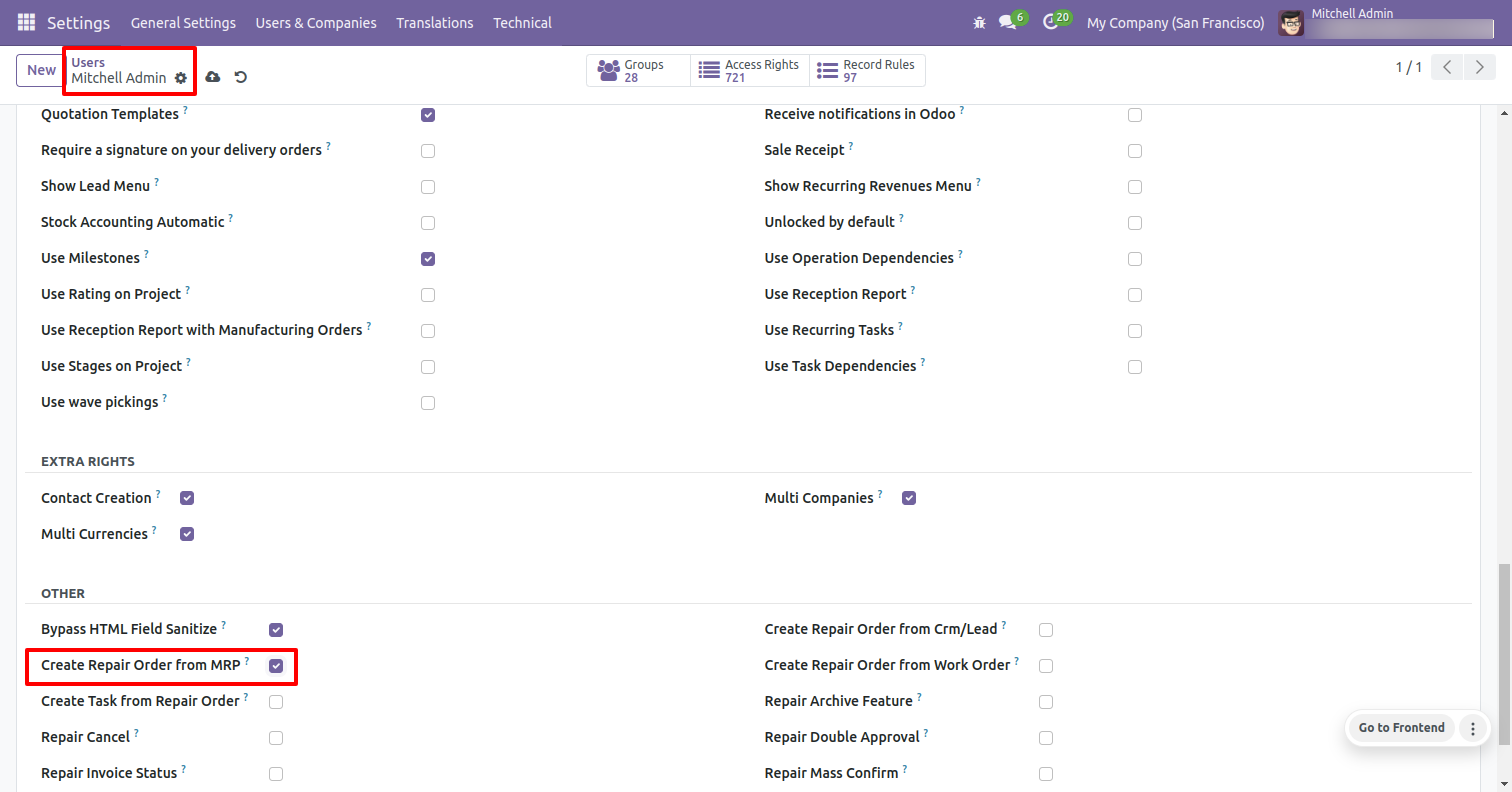
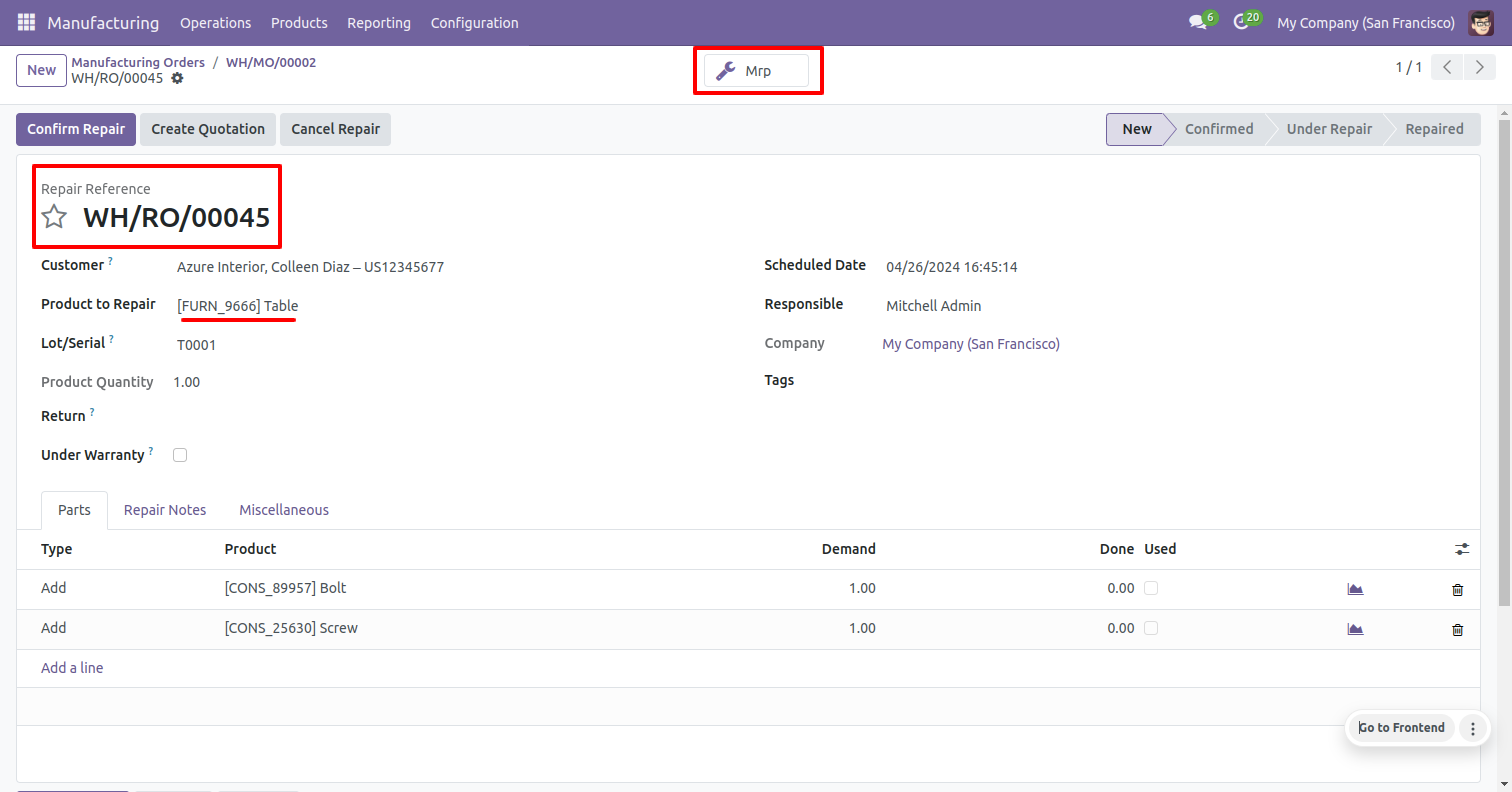
Go to the user settings and enable the 'Create Repair Order From MRP' boolean.
In the MRP form view, click on the 'Create Repair Order' button to generate a new repair order.
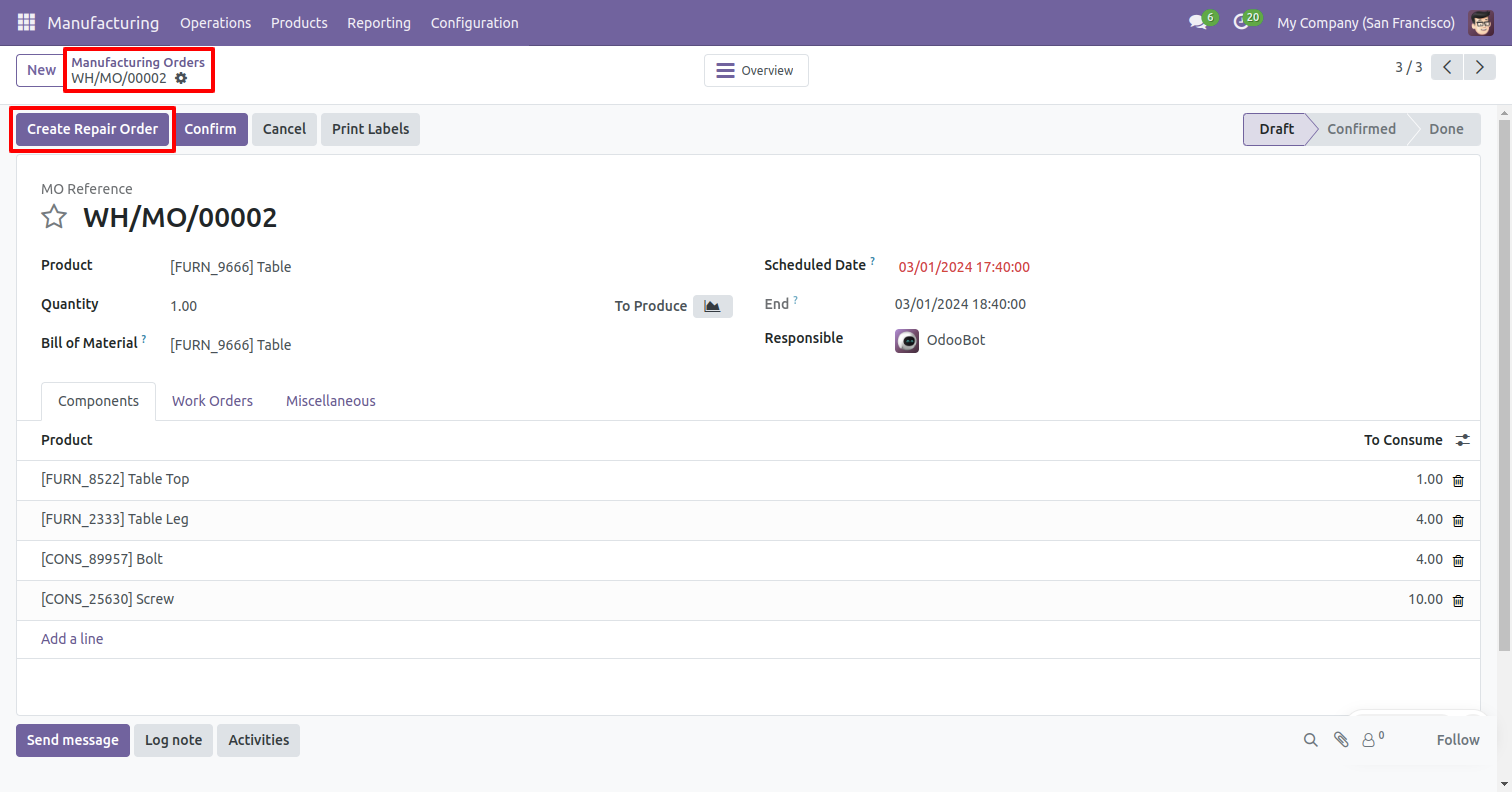
Enter the required details and click on the 'Save' button.
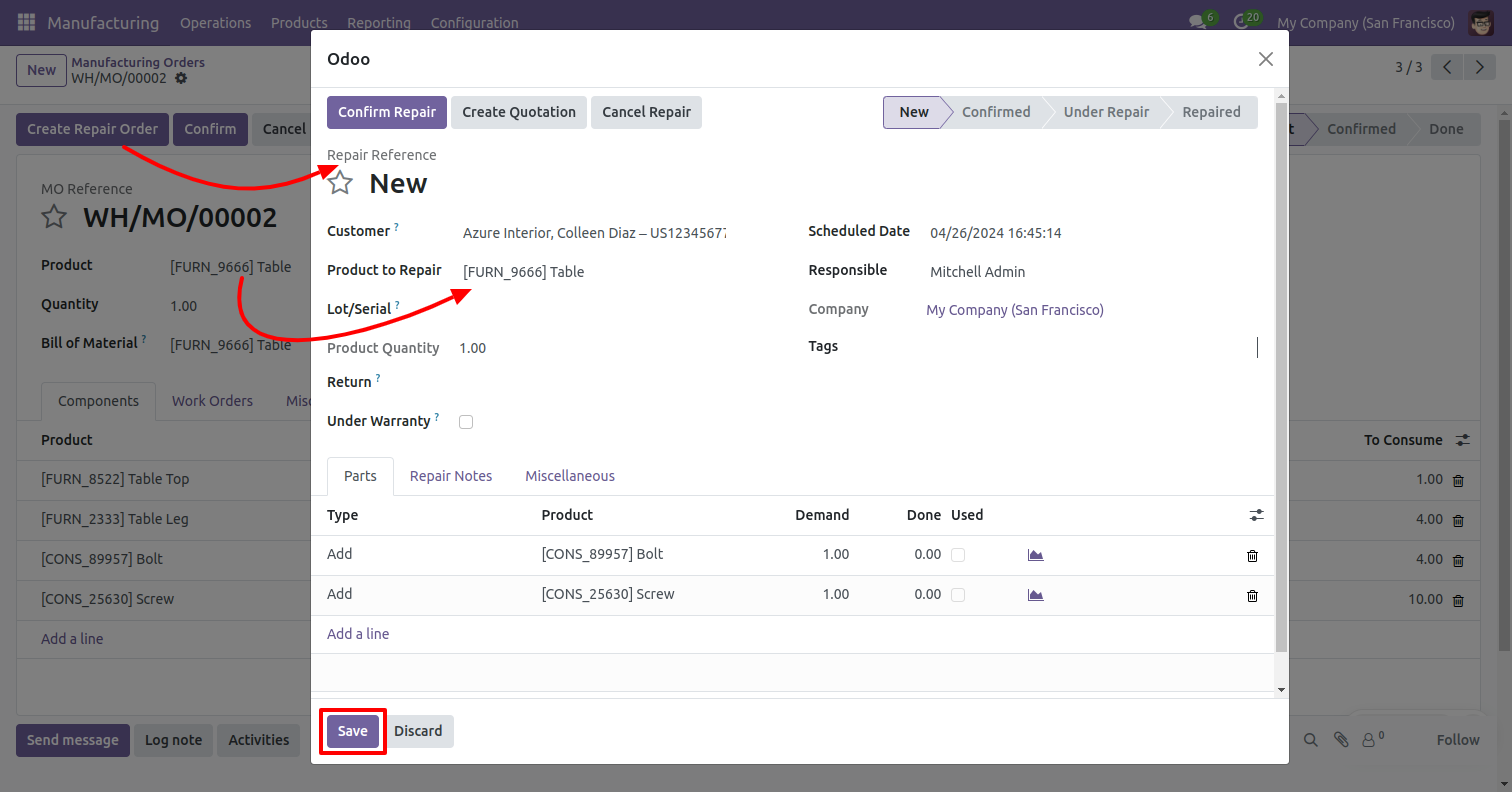
The repair order has been successfully created.
Click on the 'Repairs' smart button to view the repair orders.
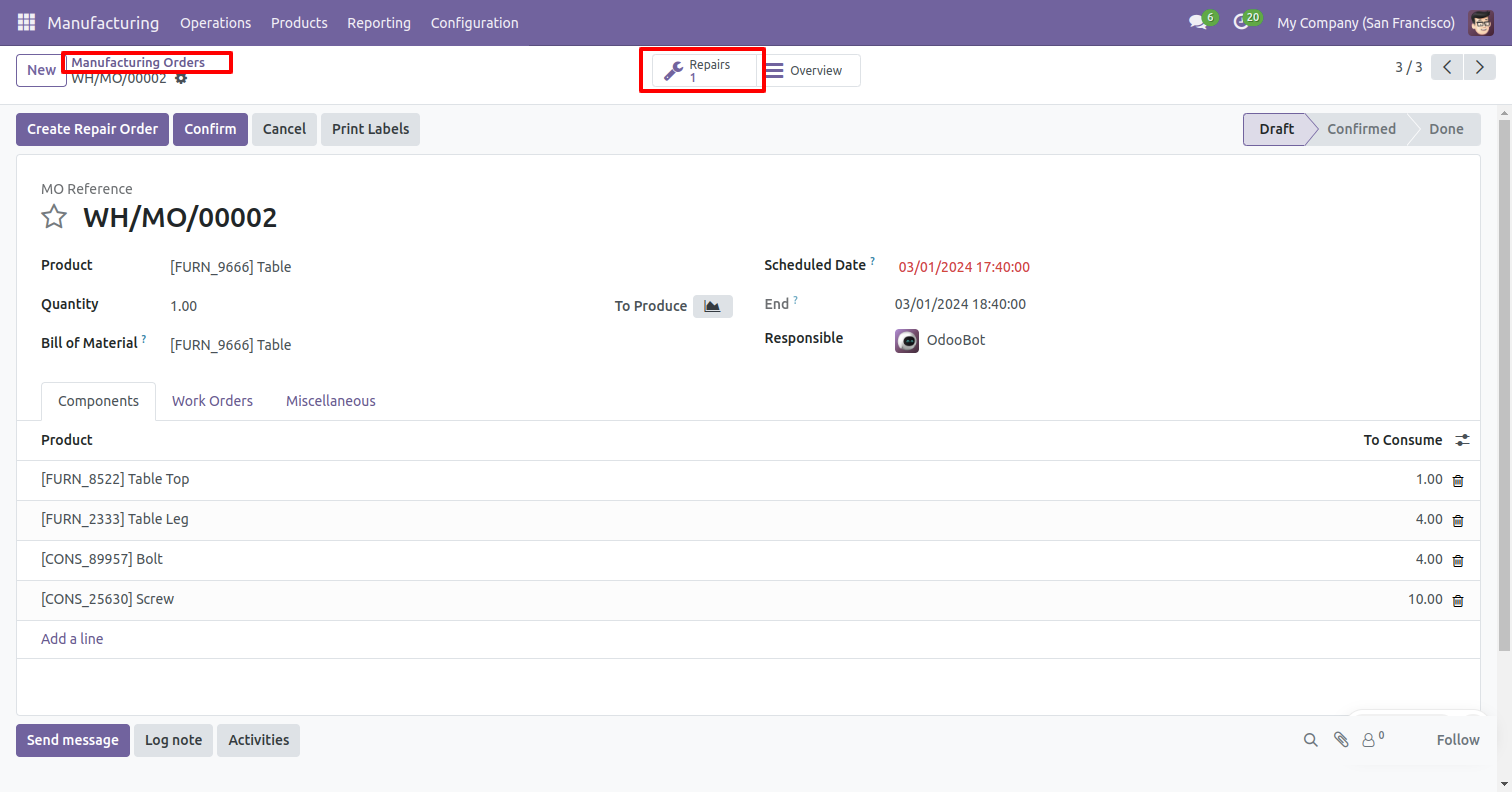
After that, you will redirected to the repair order.
Click on the 'MRP' smart button to view the related MRP orders.
Version 16.0.1.0.0 | Released on : 5th February 2026
- Yes, this app works perfectly with Odoo Enterprise (Odoo.sh & Premise) as well as Community.
- No, this application is not compatible with odoo.com(odoo saas/Odoo Online)
- Yes, to test this module, please contact us at sales@softhealer.com.
- Please contact us at sales@softhealer.com to request customization.
- Yes, we provide free support for 365 days from the date of purchase.
- Yes, you will receive lifetime free updates for the version of the module you purchased.
- No, there is no need to install any additional libraries.
- Yes, for version 12 and above, you need to purchase the module separately for each version you intend to use.
- No, exchanges or refunds are not allowed. Please make sure to select the correct version before purchasing.
- You can contact us at support@softhealer.com for language translation support. We use Google Translator tools to provide translations in multiple languages, so the accuracy may vary. We welcome your suggestions to help improve translations.
