













All In One Portal - Attendance, Overtime, Leaves, Timesheet

This module provides a centralized employee self-service portal for managing attendance, overtime, leave requests, and timesheets. Employees can checkin/checkout, view attendance records, submit overtime requests, apply for leave, and manage timesheets. The module streamlines workforce management by reducing administrative effort, improving transparency, and giving employees convenient access to their daily work-related activities.

Features

Portal Attendance Management
Allows portal users to Check In and Check Out directly via the portal with immediate backend synchronization.

Attendance Search & Filters
Search attendance details using the search bar and filter by last week, last month, this quarter, today and more.

Portal Leave Management
Create, view, cancel, and manage leave requests from the portal. Supports Full Day, Half Day, and Custom Hours leave types.
Leave Approval Workflow
Multi-level approval support. Admin can review, confirm, or cancel leave requests from the portal with automatic backend sync.

Leave Sort, Filter & Group By
Sort leaves by newest and name. Group by leave type. Filter by date ranges. Search easily using the search bar.

Leave Notifications & Chatter
Get instant notifications on create, reset, update & delete. Write comments, send messages, and attach files in the chatter.
Portal Overtime Management
Access and manage overtime requests directly from the portal with intuitive date and time pickers.

Automated Email Notification
Employees create overtime requests with auto-calculated hours. Managers approve or reject with email notifications at each stage.

Overtime Type Customization
Support for multiple overtime types to categorize and manage different work scenarios within the organization.

Managerial Approval Workflow
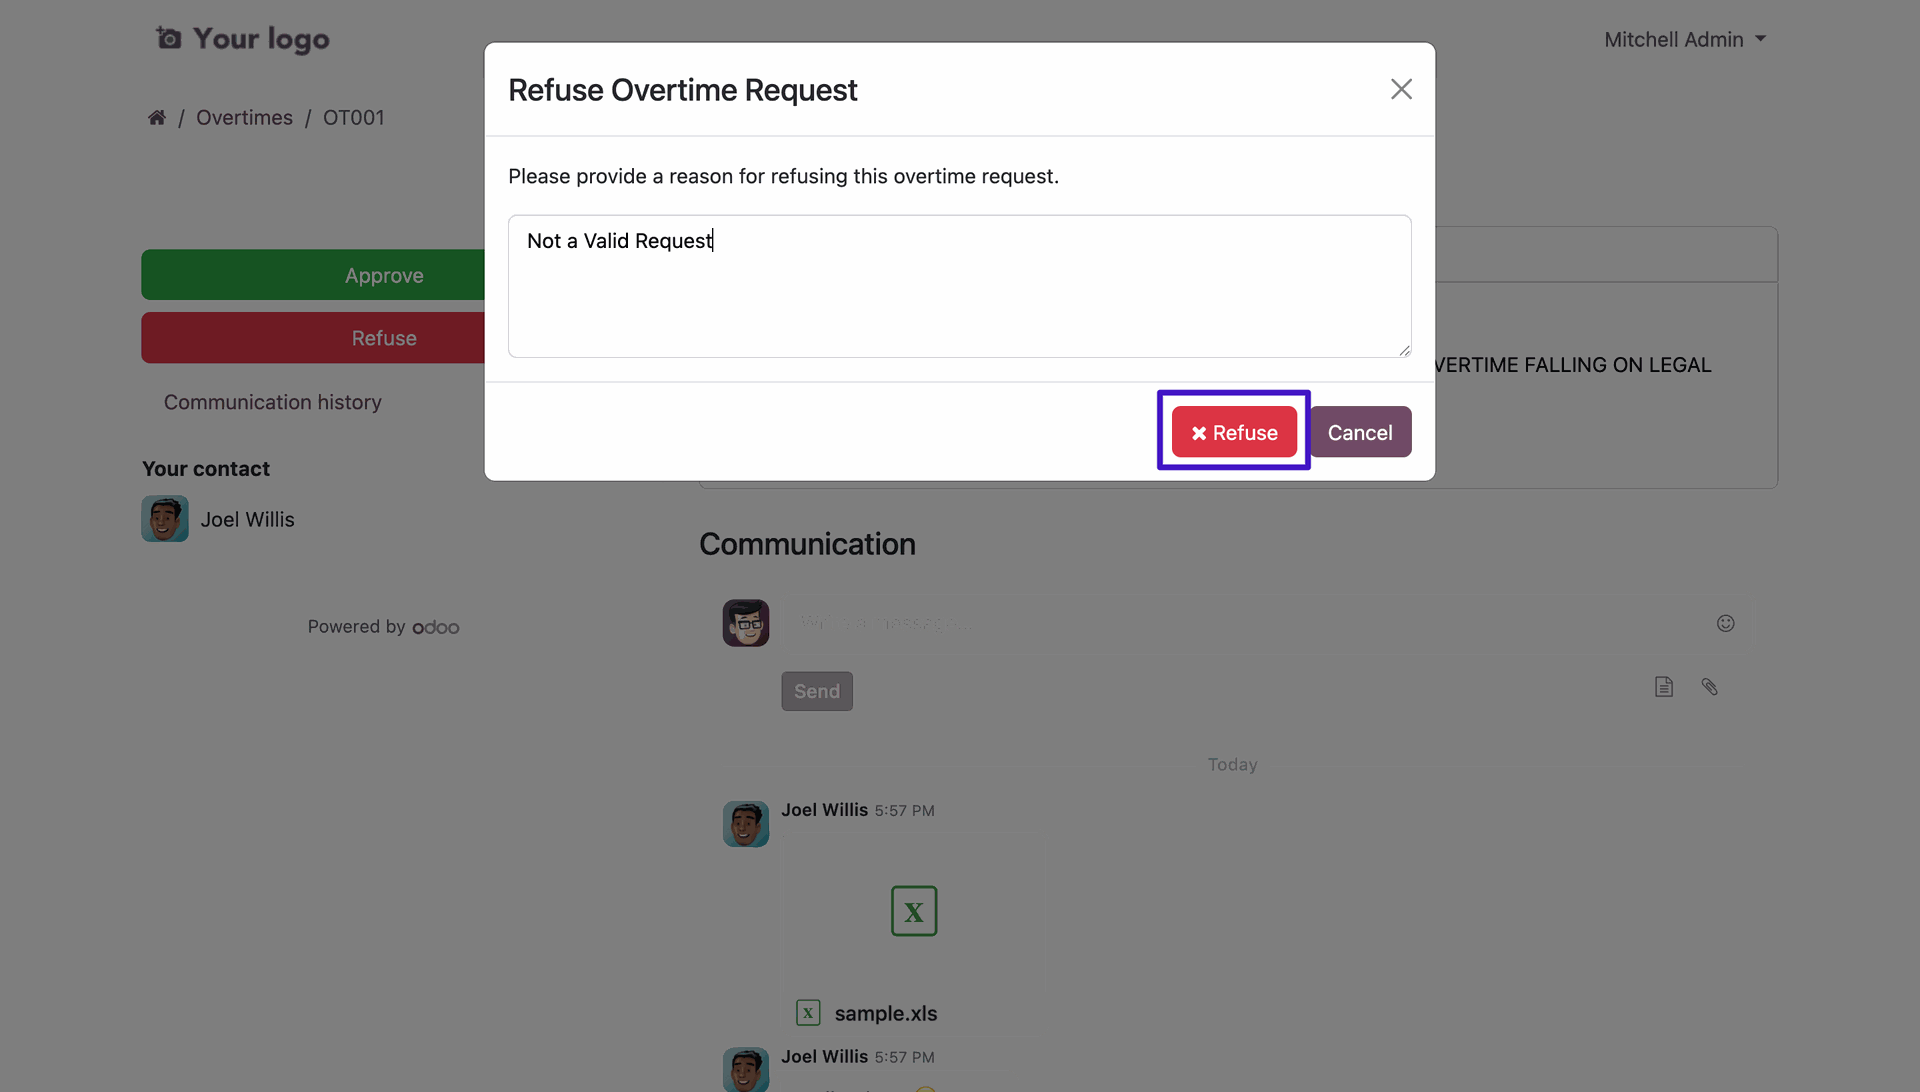
Managers can approve or refuse overtime requests from their portal. Rejection requires a valid reason via popup dialog.
Portal Timesheet Management
Create, update, and manage timesheet entries directly from the portal with a simple employee interface.
Timesheet Sort, Filter & Group By
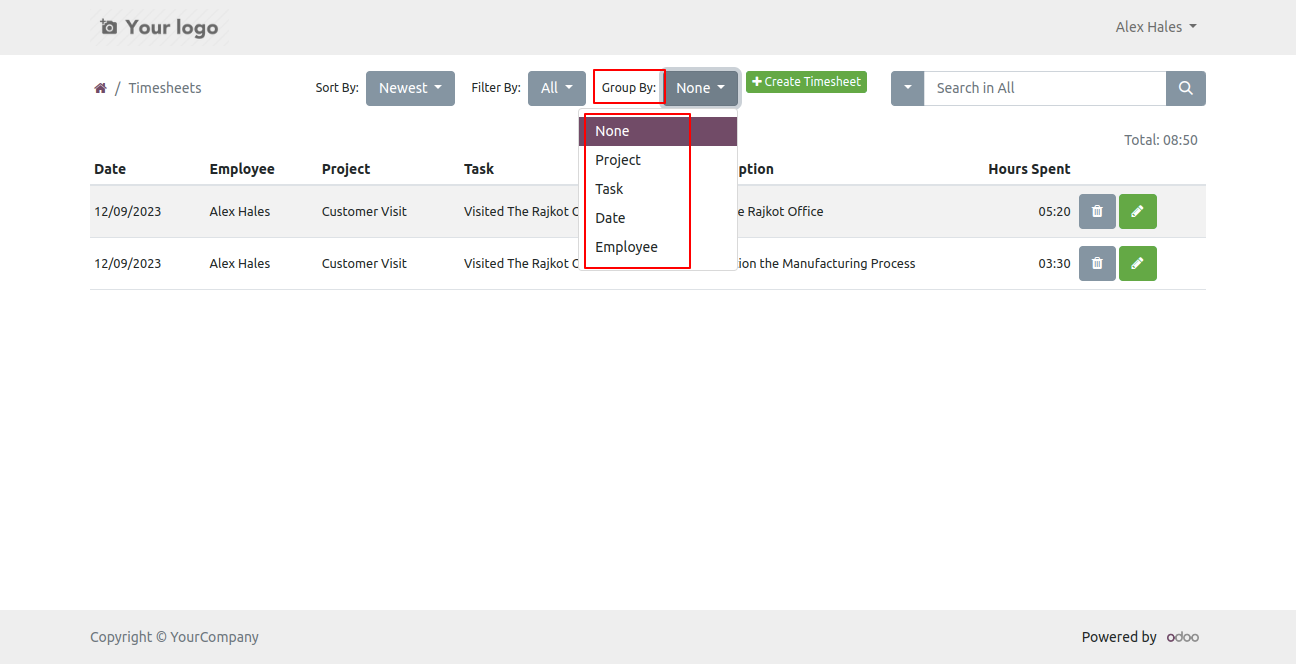
Filter, sort, and group timesheet records by project, date, and employee for quick access.
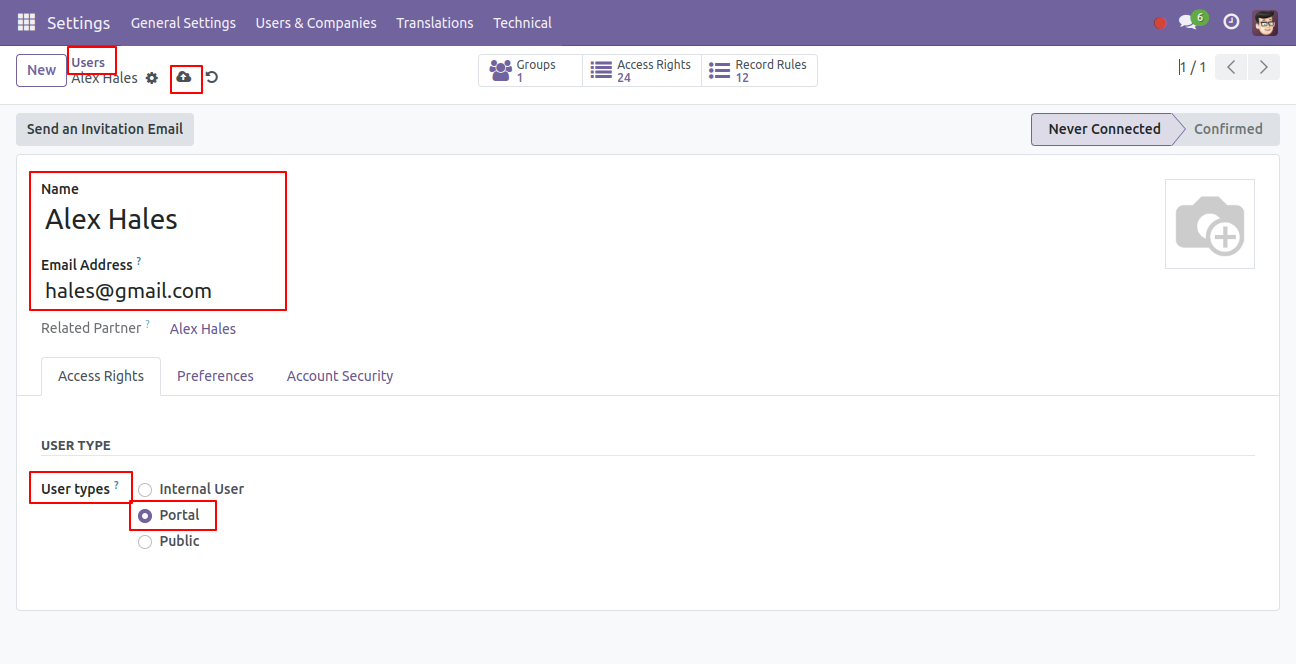
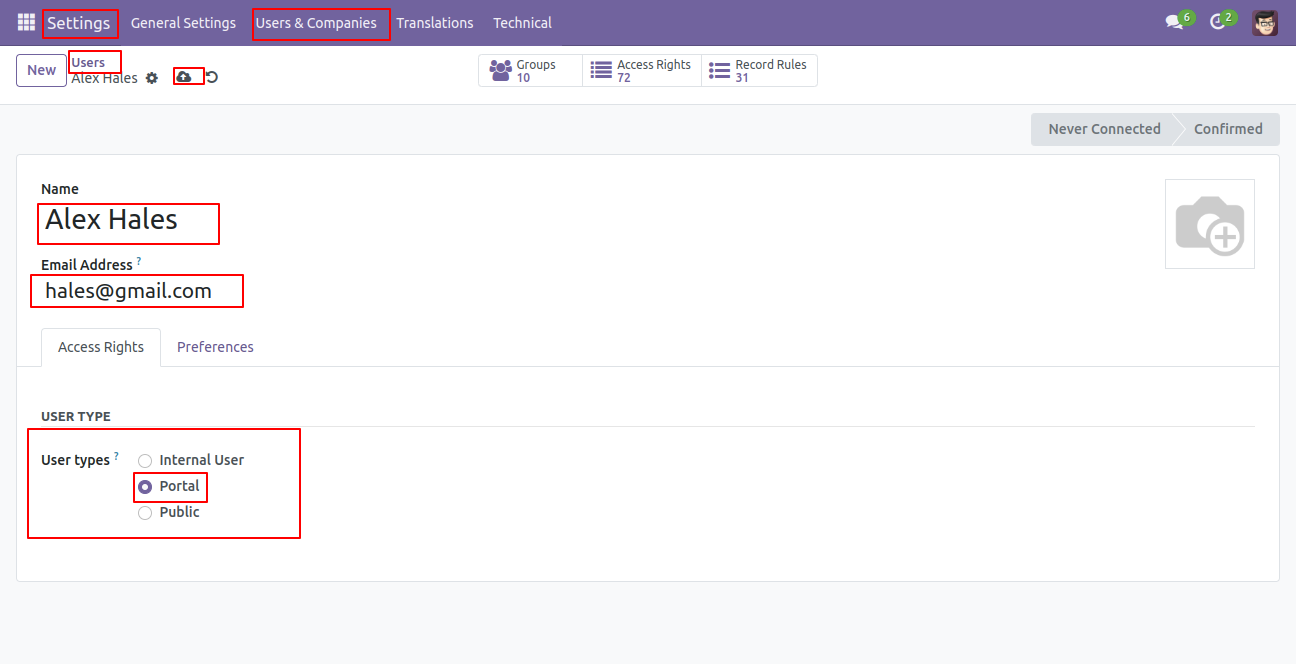
Go to the user and select user type: 'Portal'.
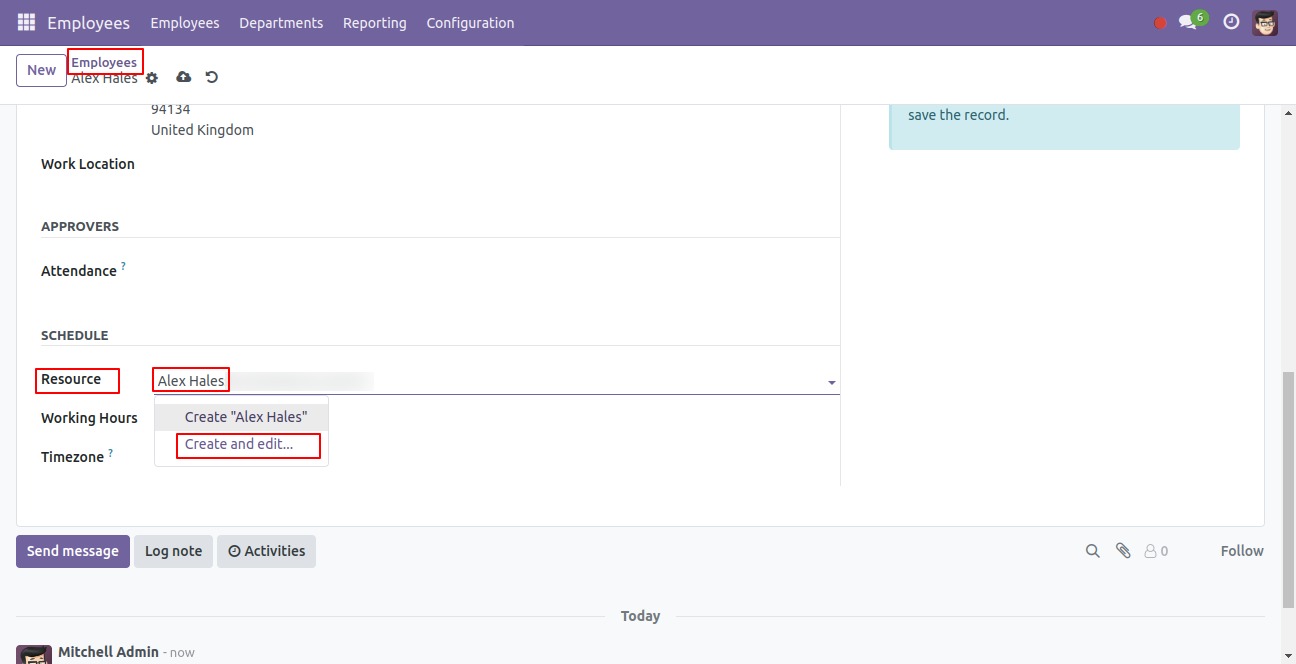
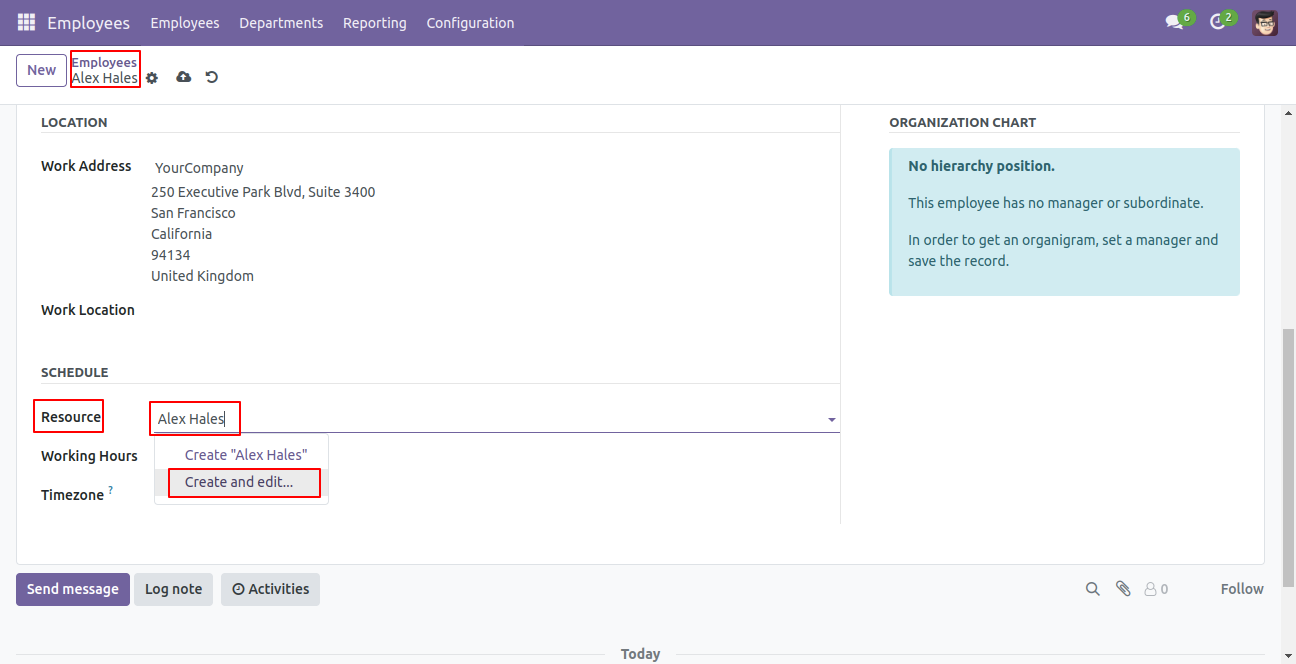
Form view of the employee. click on the 'Create and Edit' to create a resource.
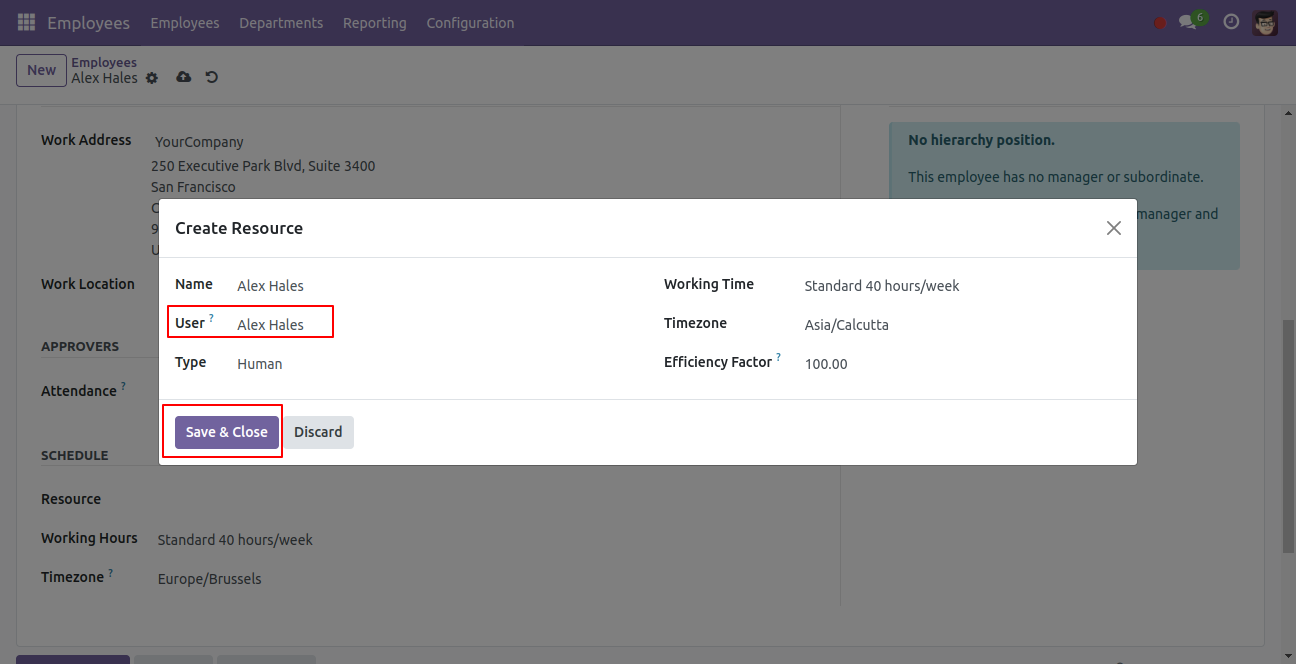
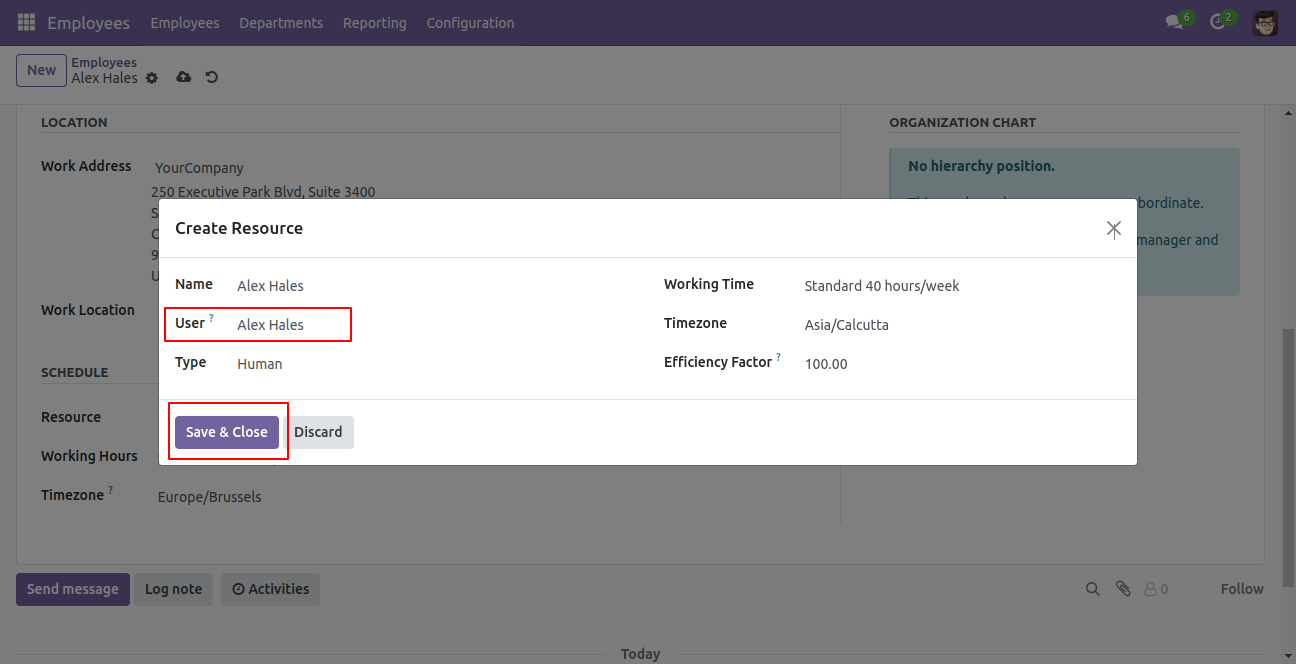
After that, create resource wizard will appears. Fill up the details and click on the 'Save & close' button.
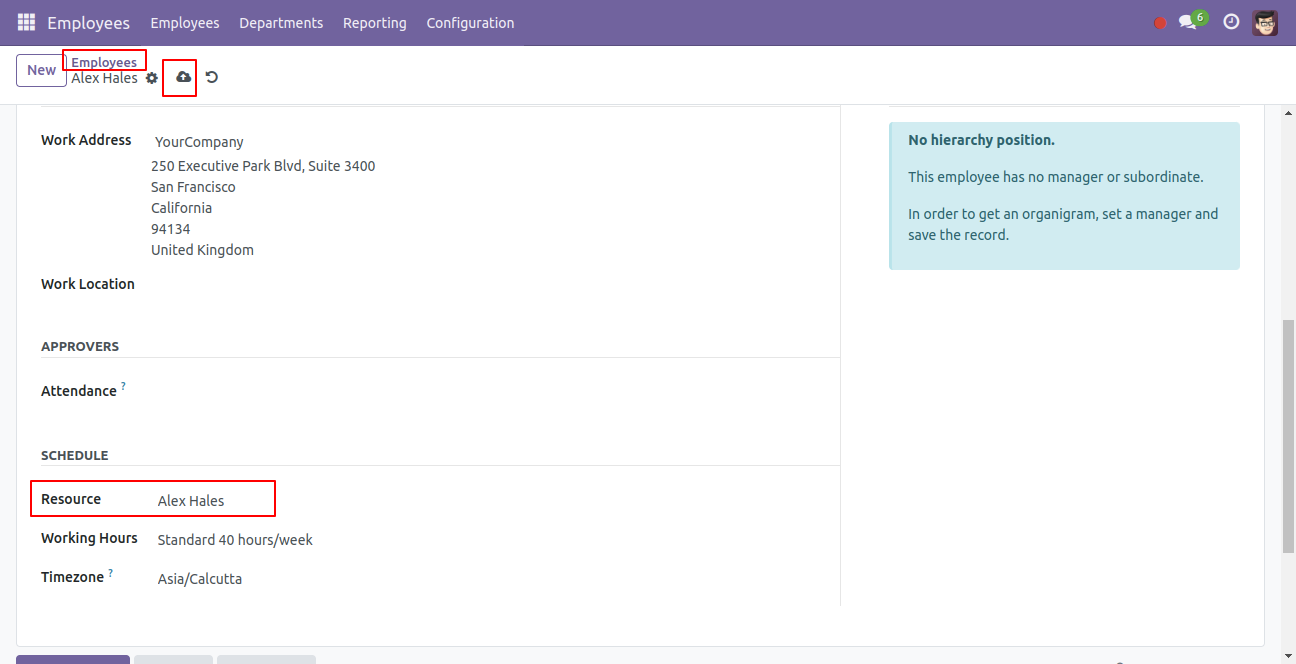
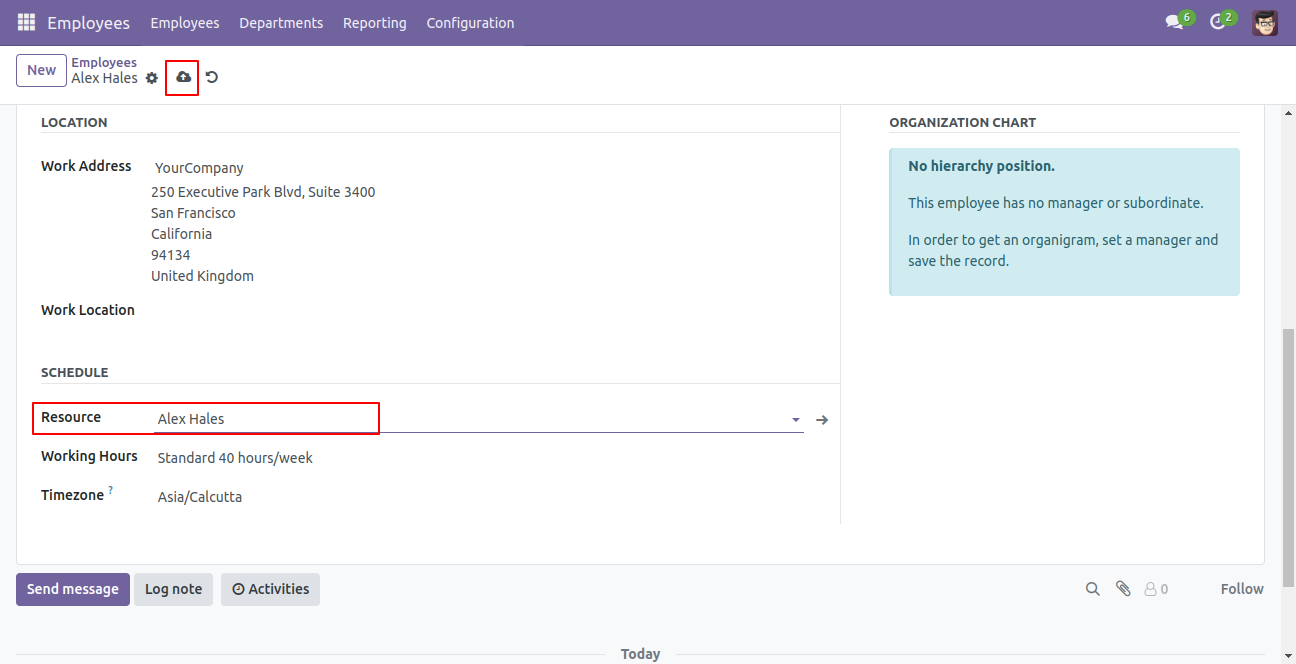
Select the resource in the employee's form view and save it.
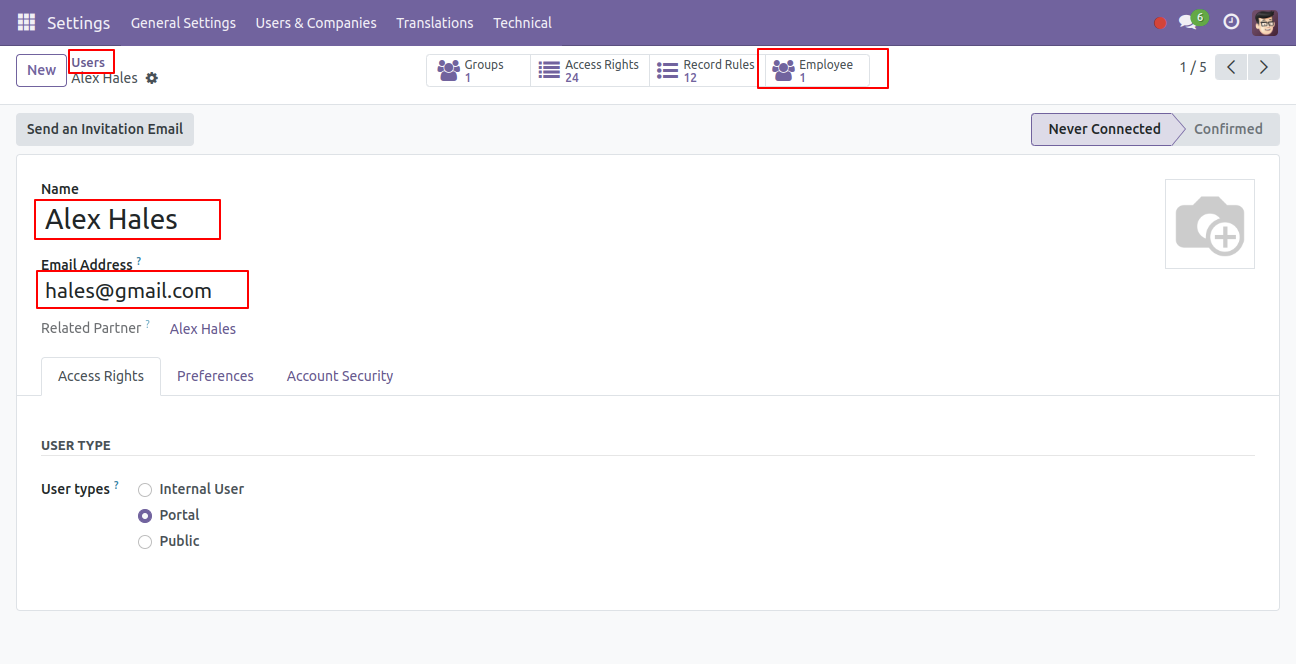
The employee's smart button is visible in the users form view.
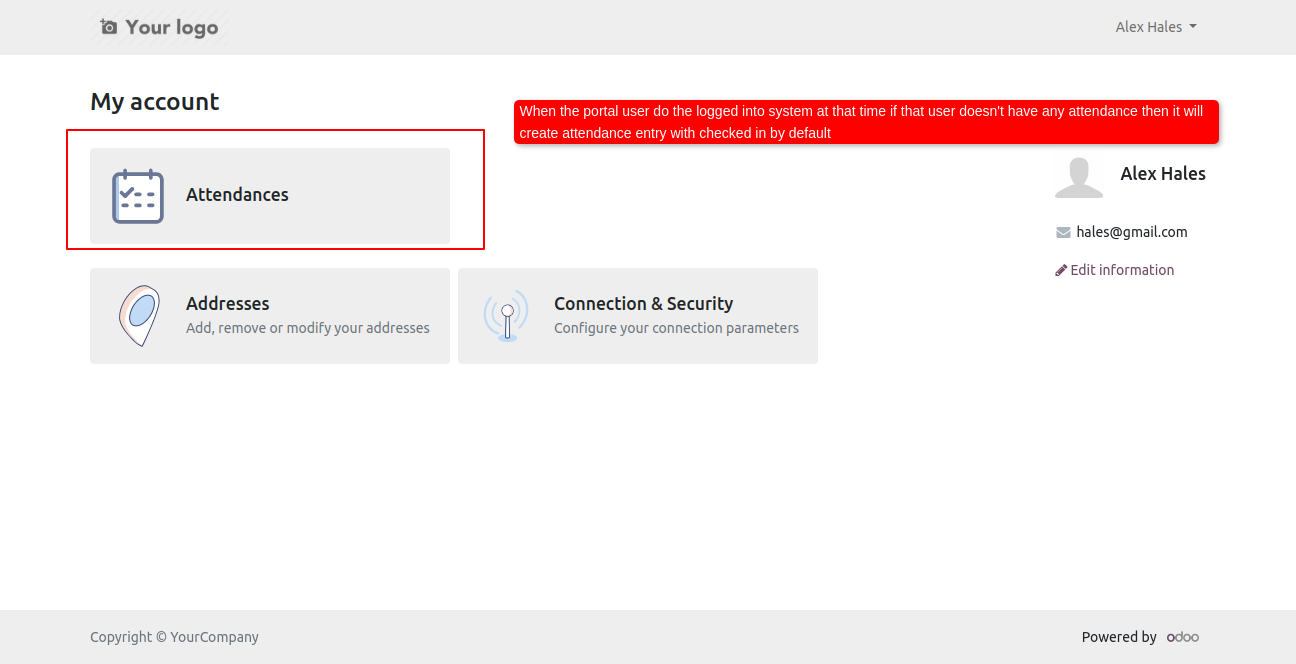
In my account(portal) go to 'Attendances'.
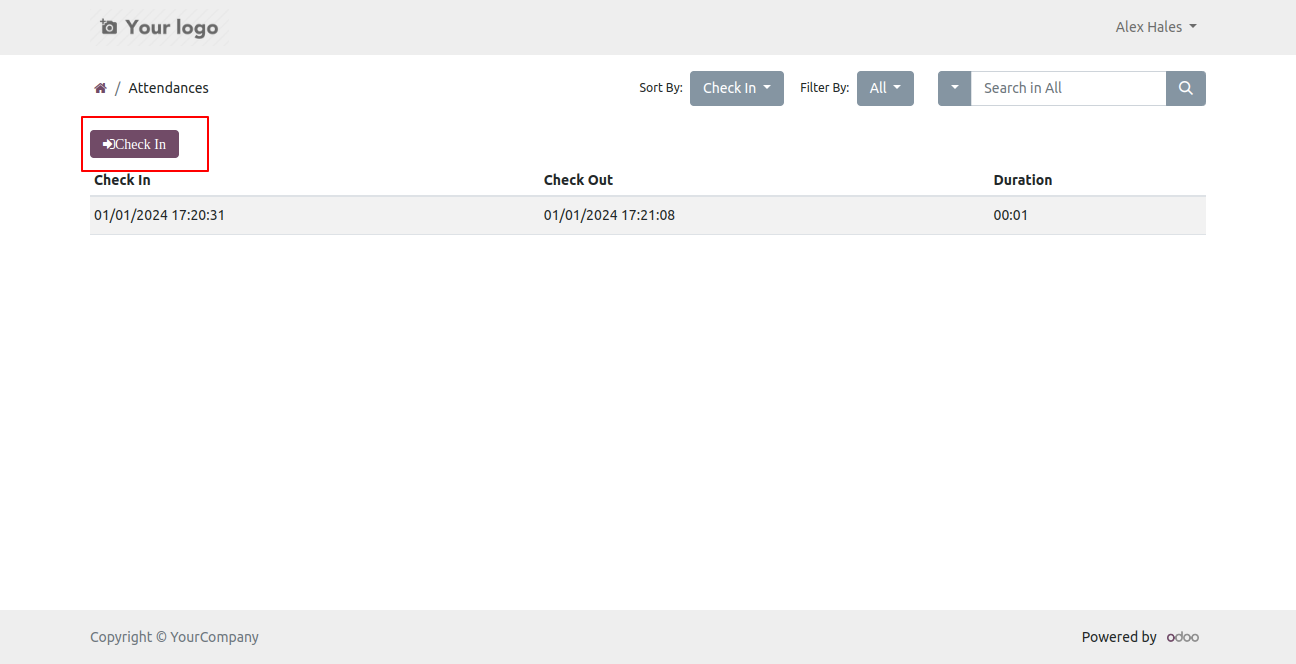
Portal users can check-in from a smart button.
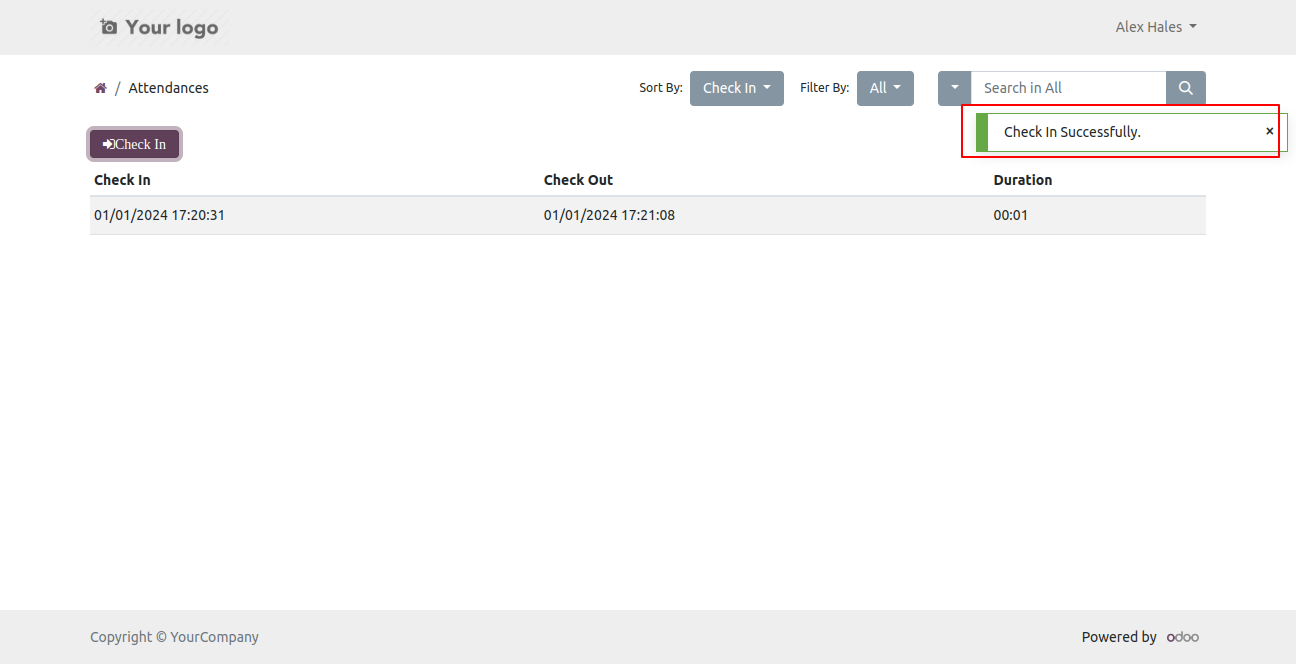
It shows notification after check-in.
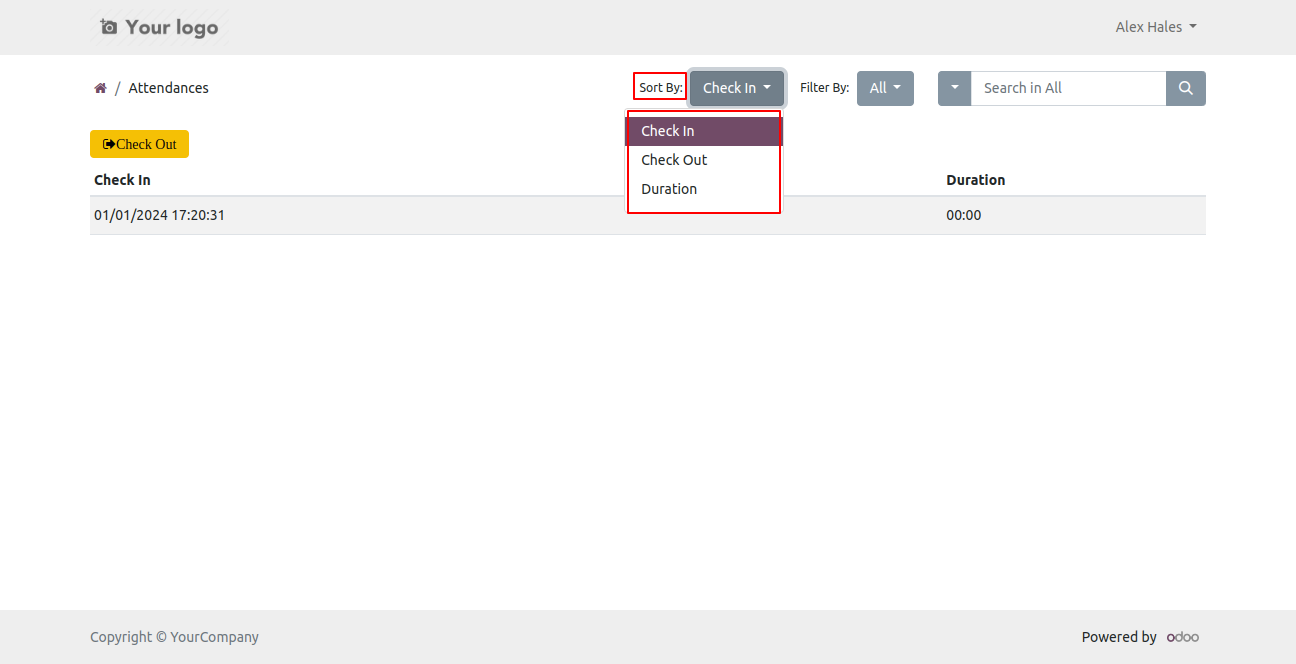
Portal users can check-out from a smart button, Sort by attendance.
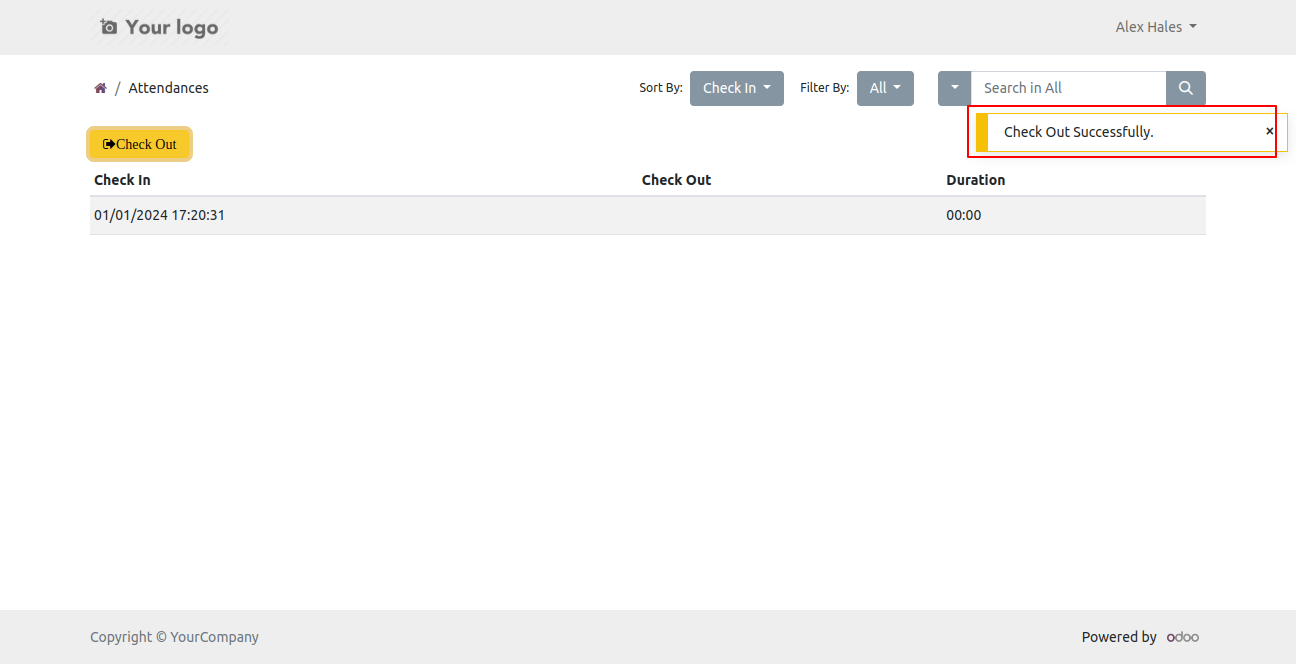
It shows notification after check-out.
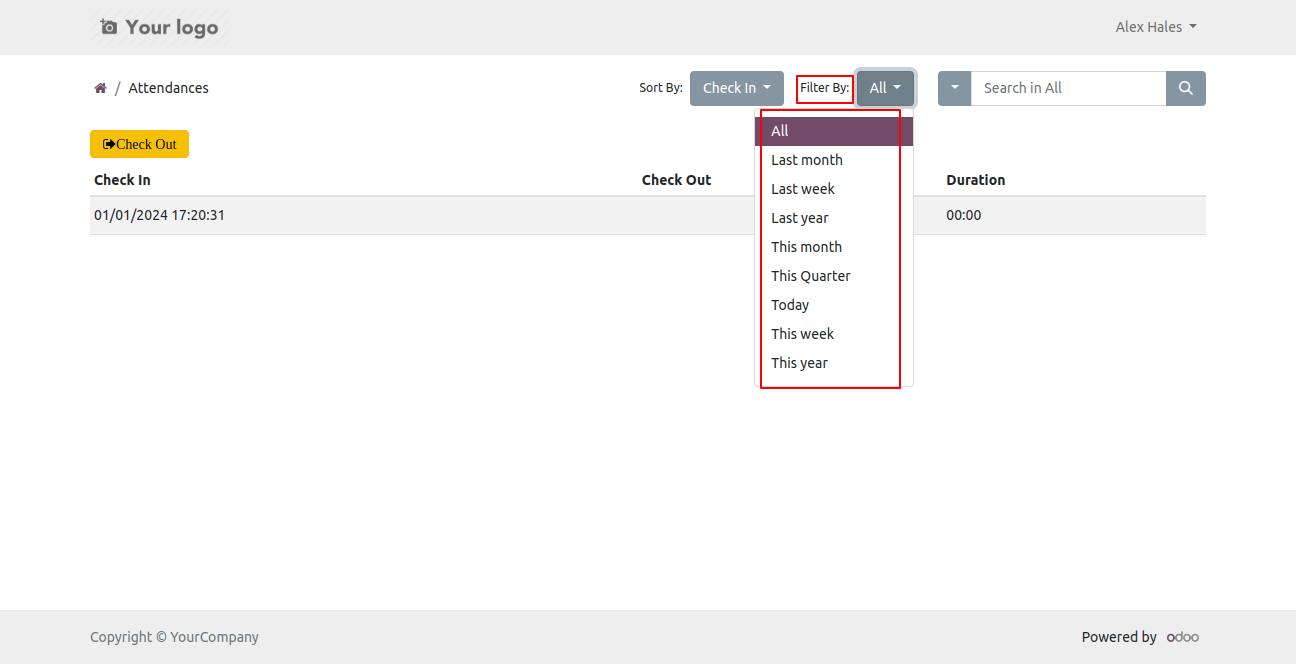
You can filter attendance using any of the provided custom filter list.
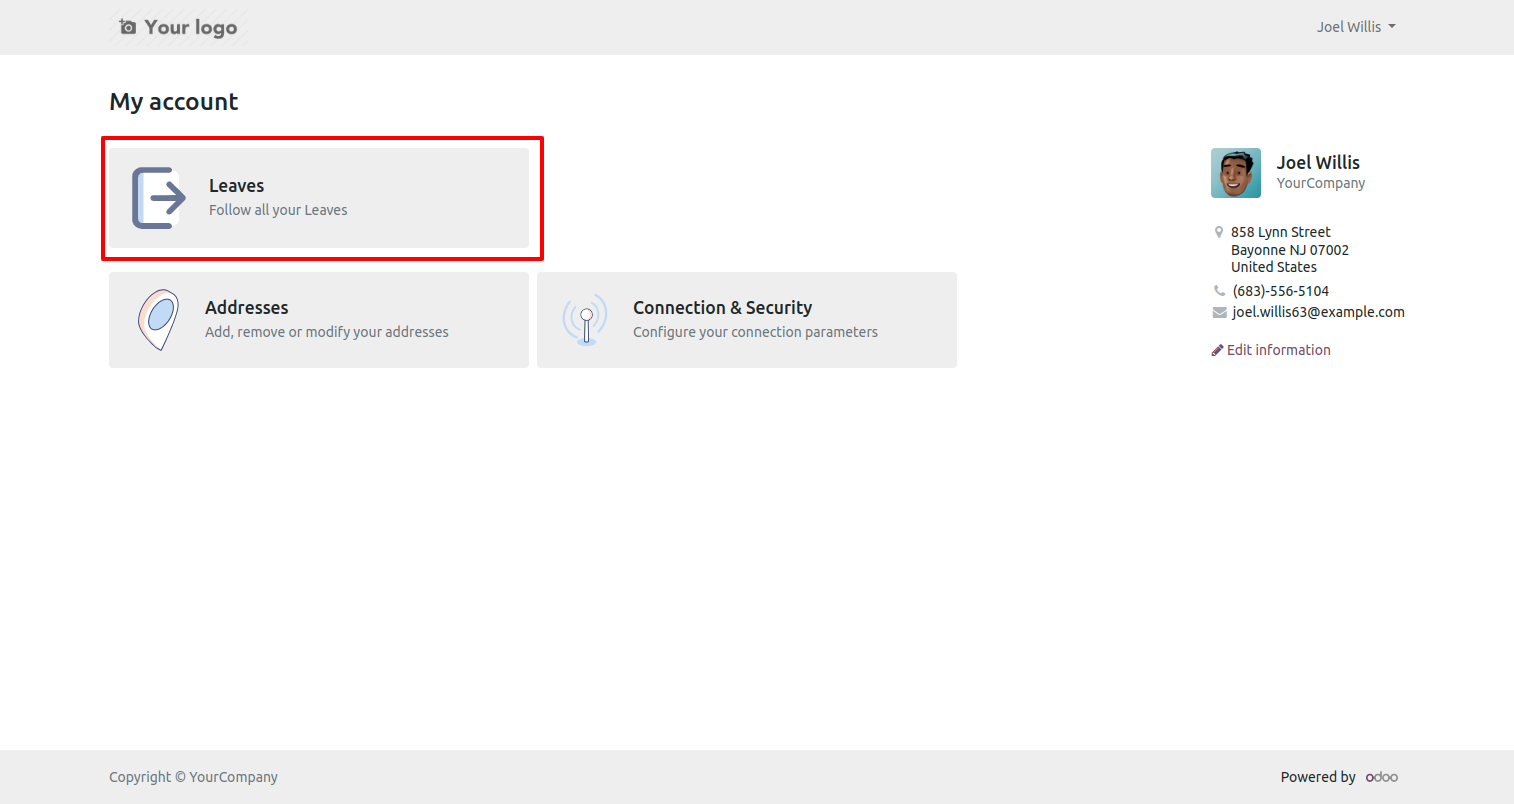
In my account(portal) go to 'Leaves'.
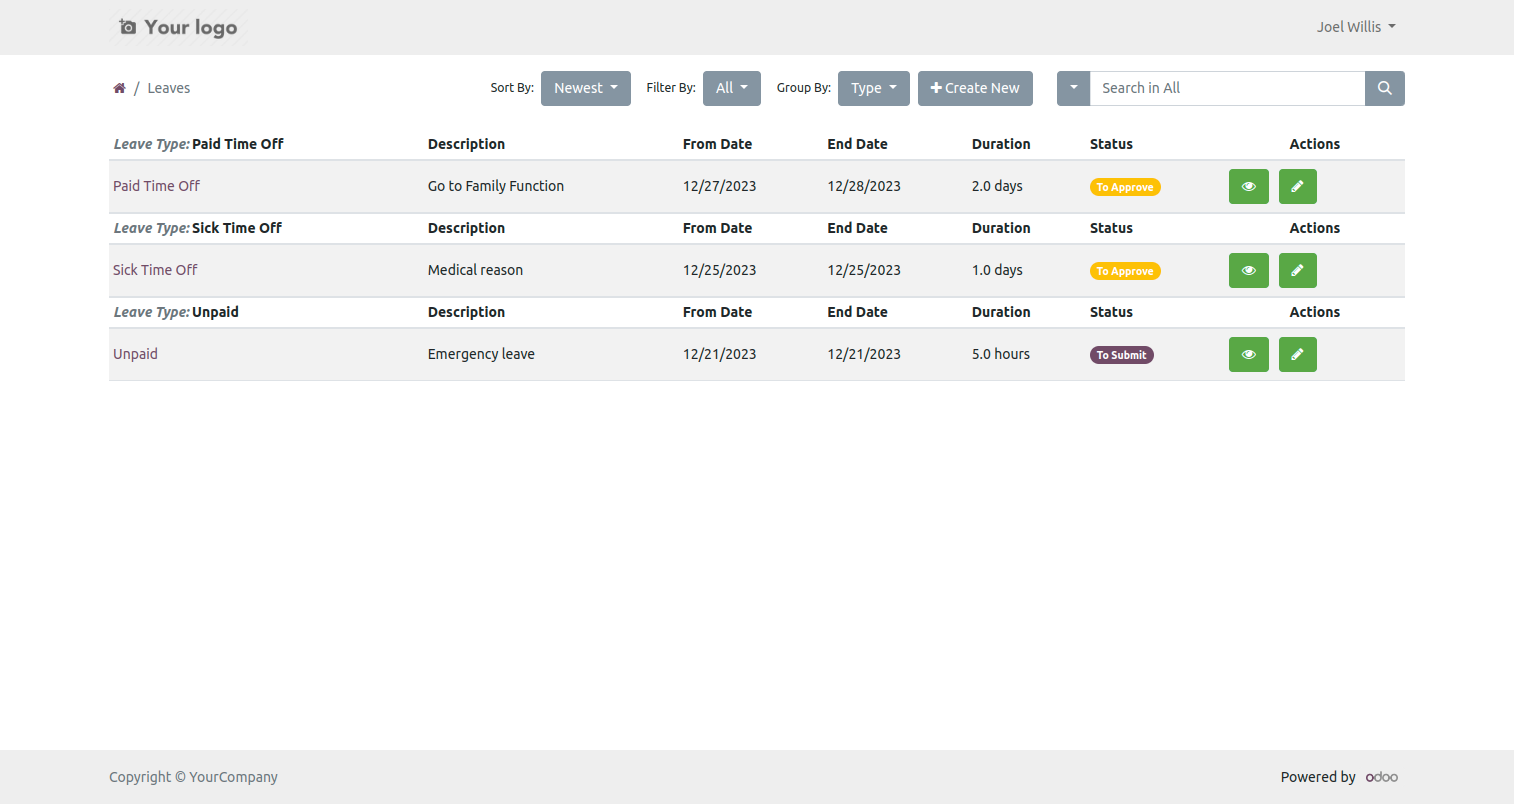
You can create a new leave from the 'Create New' button.
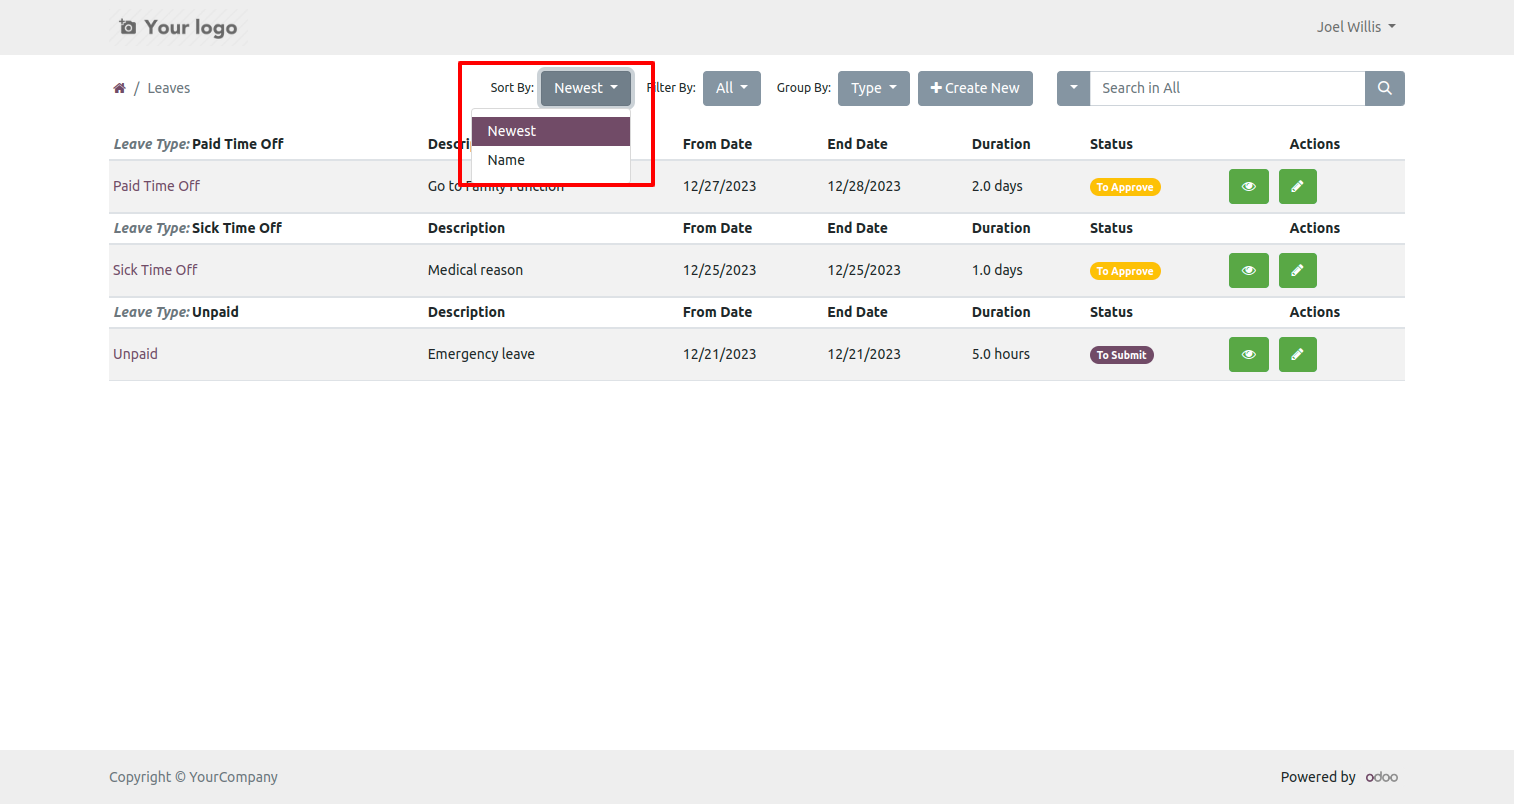
You can sort leaves by Newest and Name.
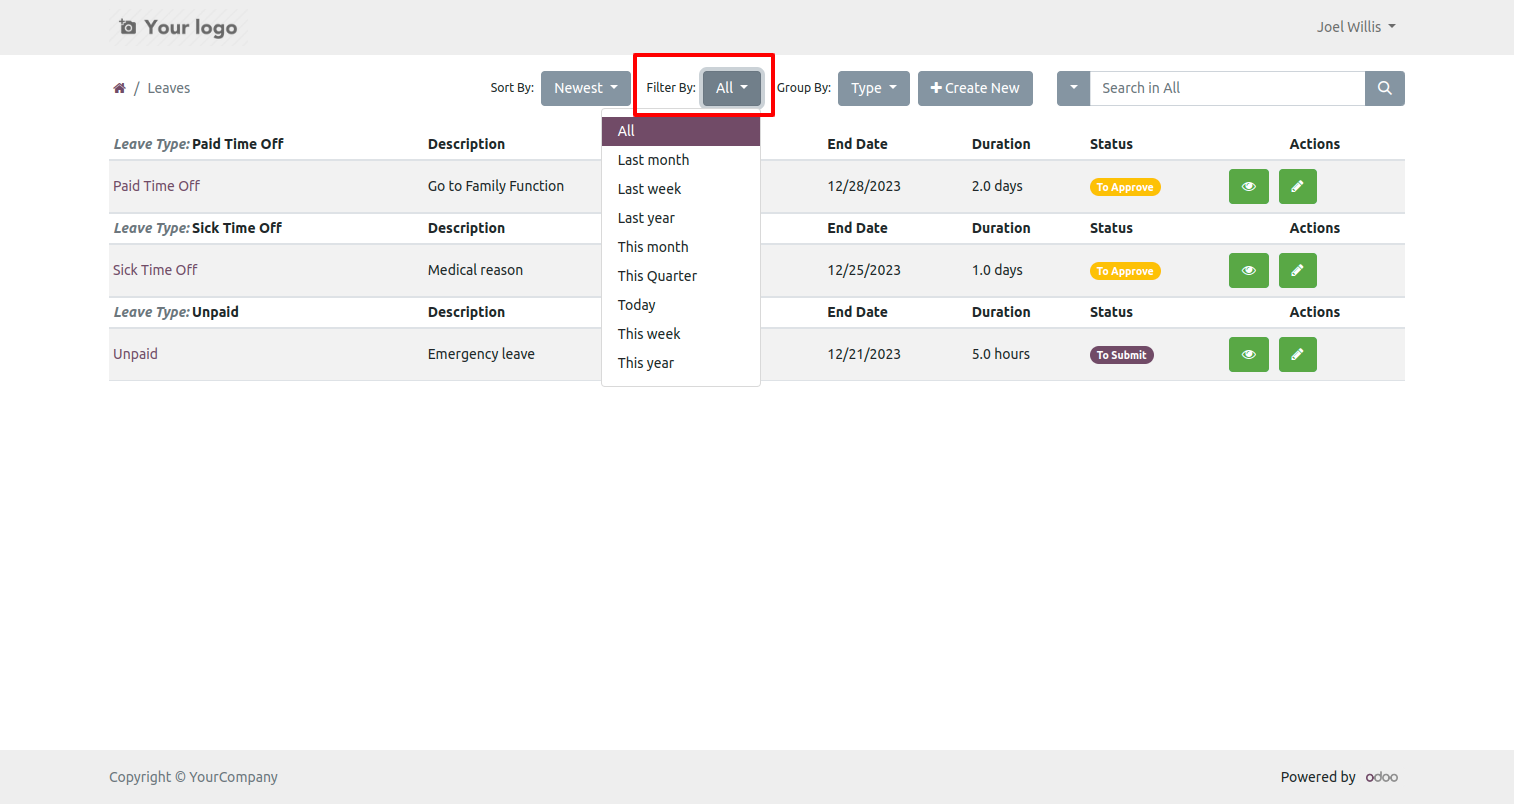
You can filter leaves using any of the provided custom filter list.
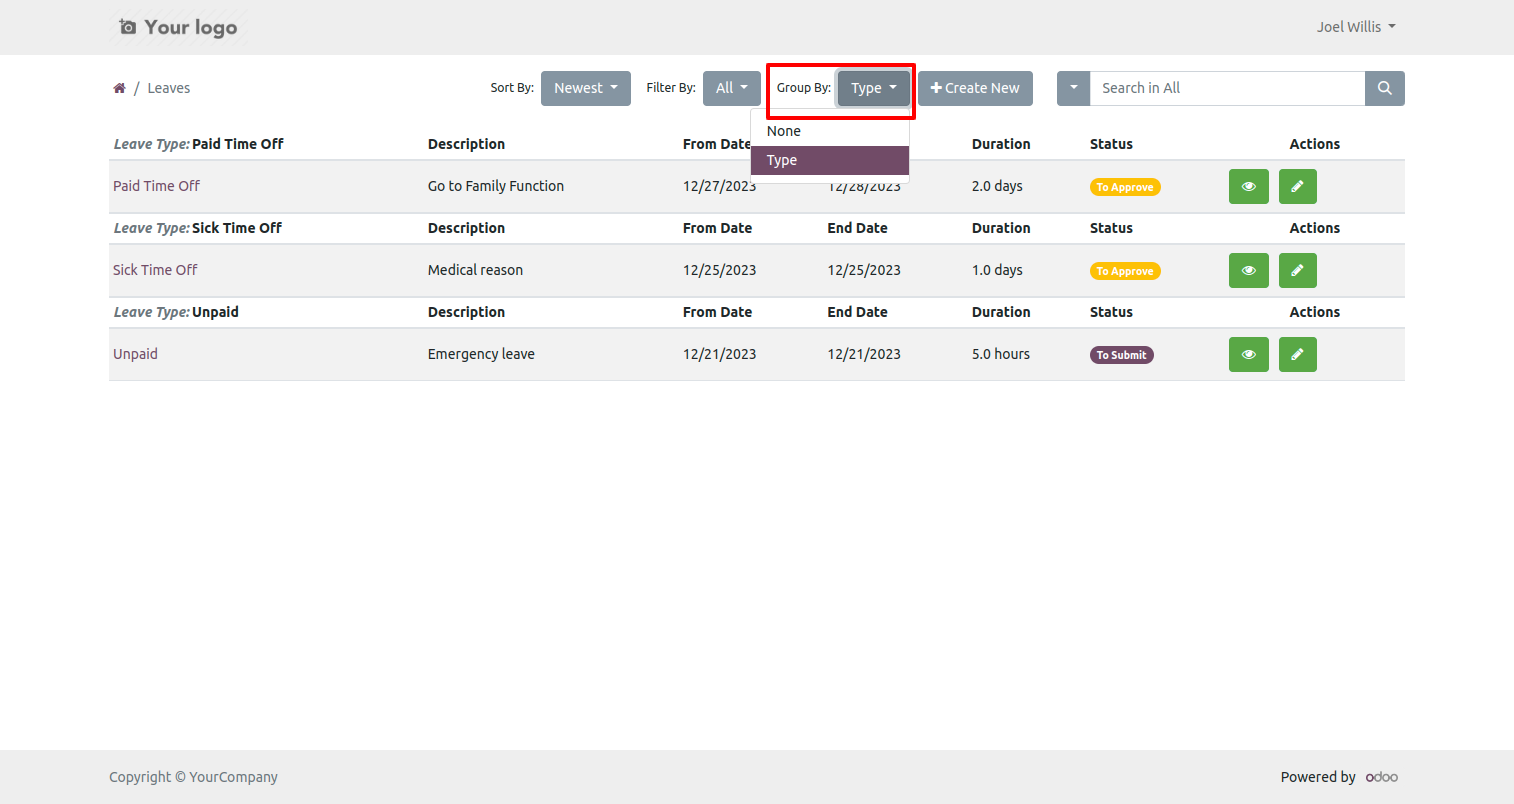
The 'Type' list view of the group by looks like below.
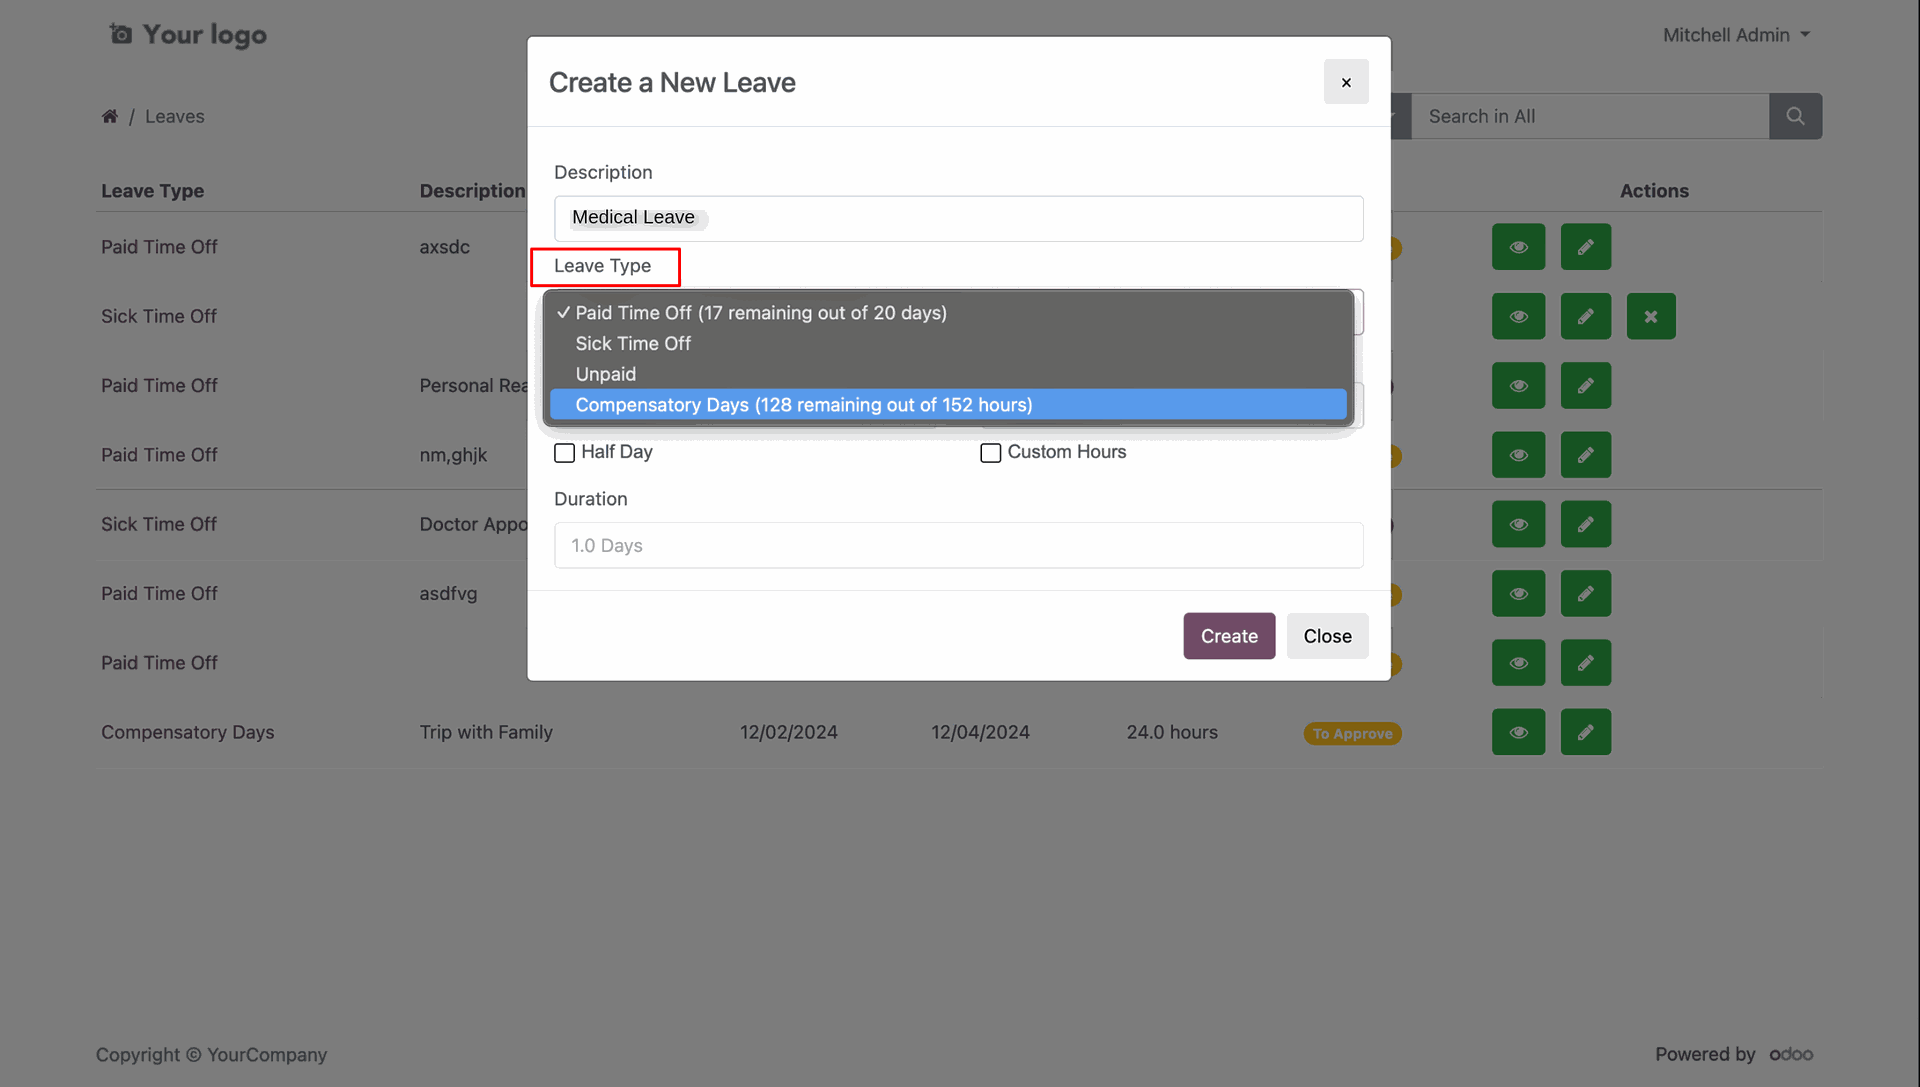
After clicking 'Create New' one wizard opens. Fill the details and select leave type.
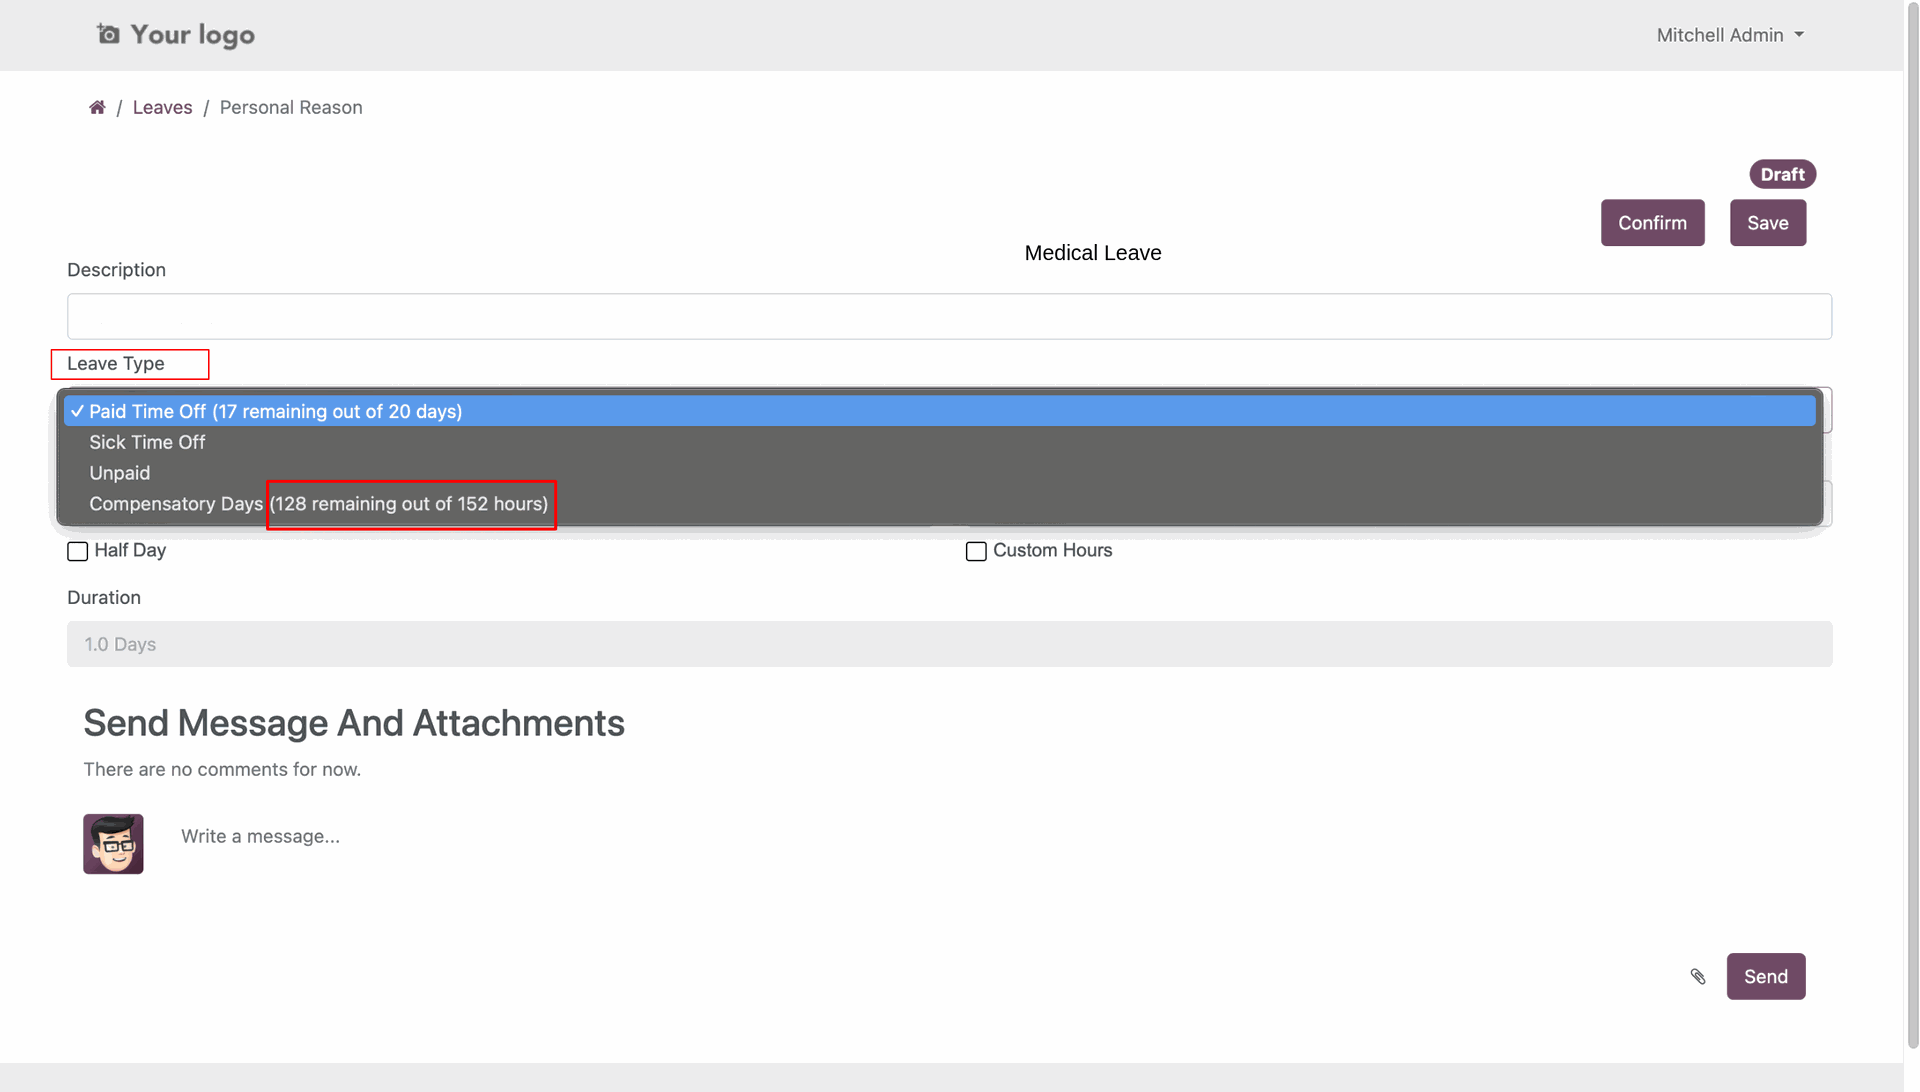
Here you can view the remaining compensatory hours.
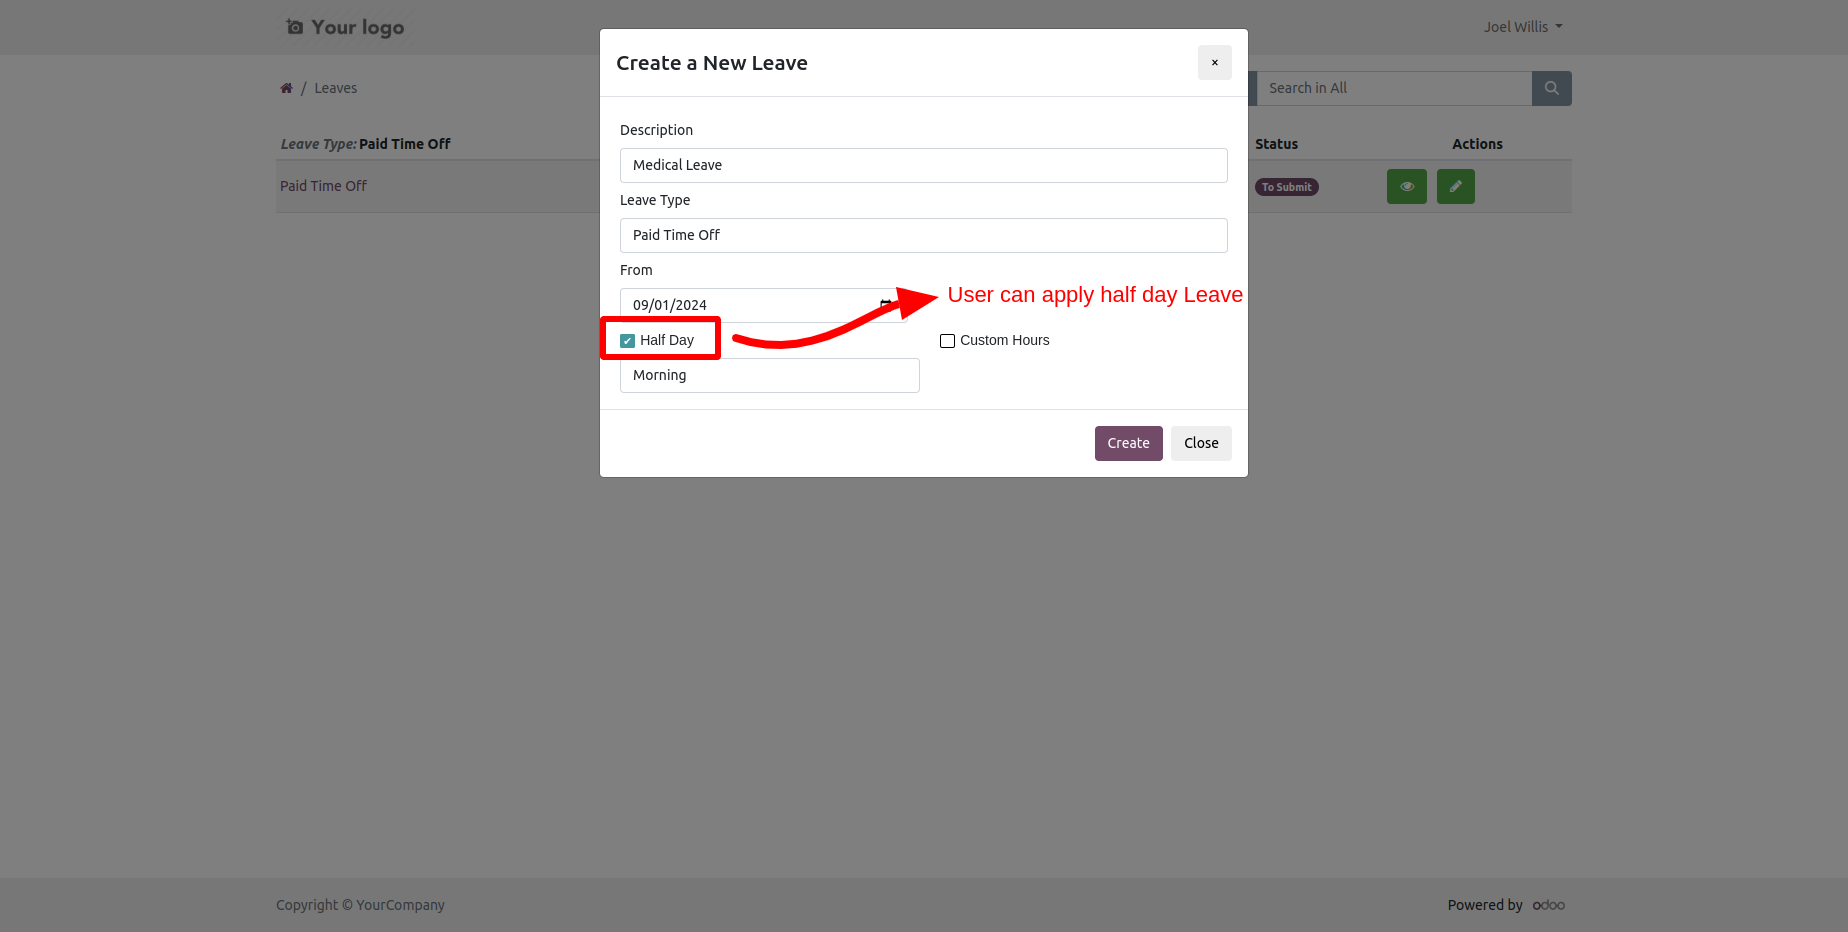
You can create half-day leave, so tick that checkbox and select period morning or afternoon.
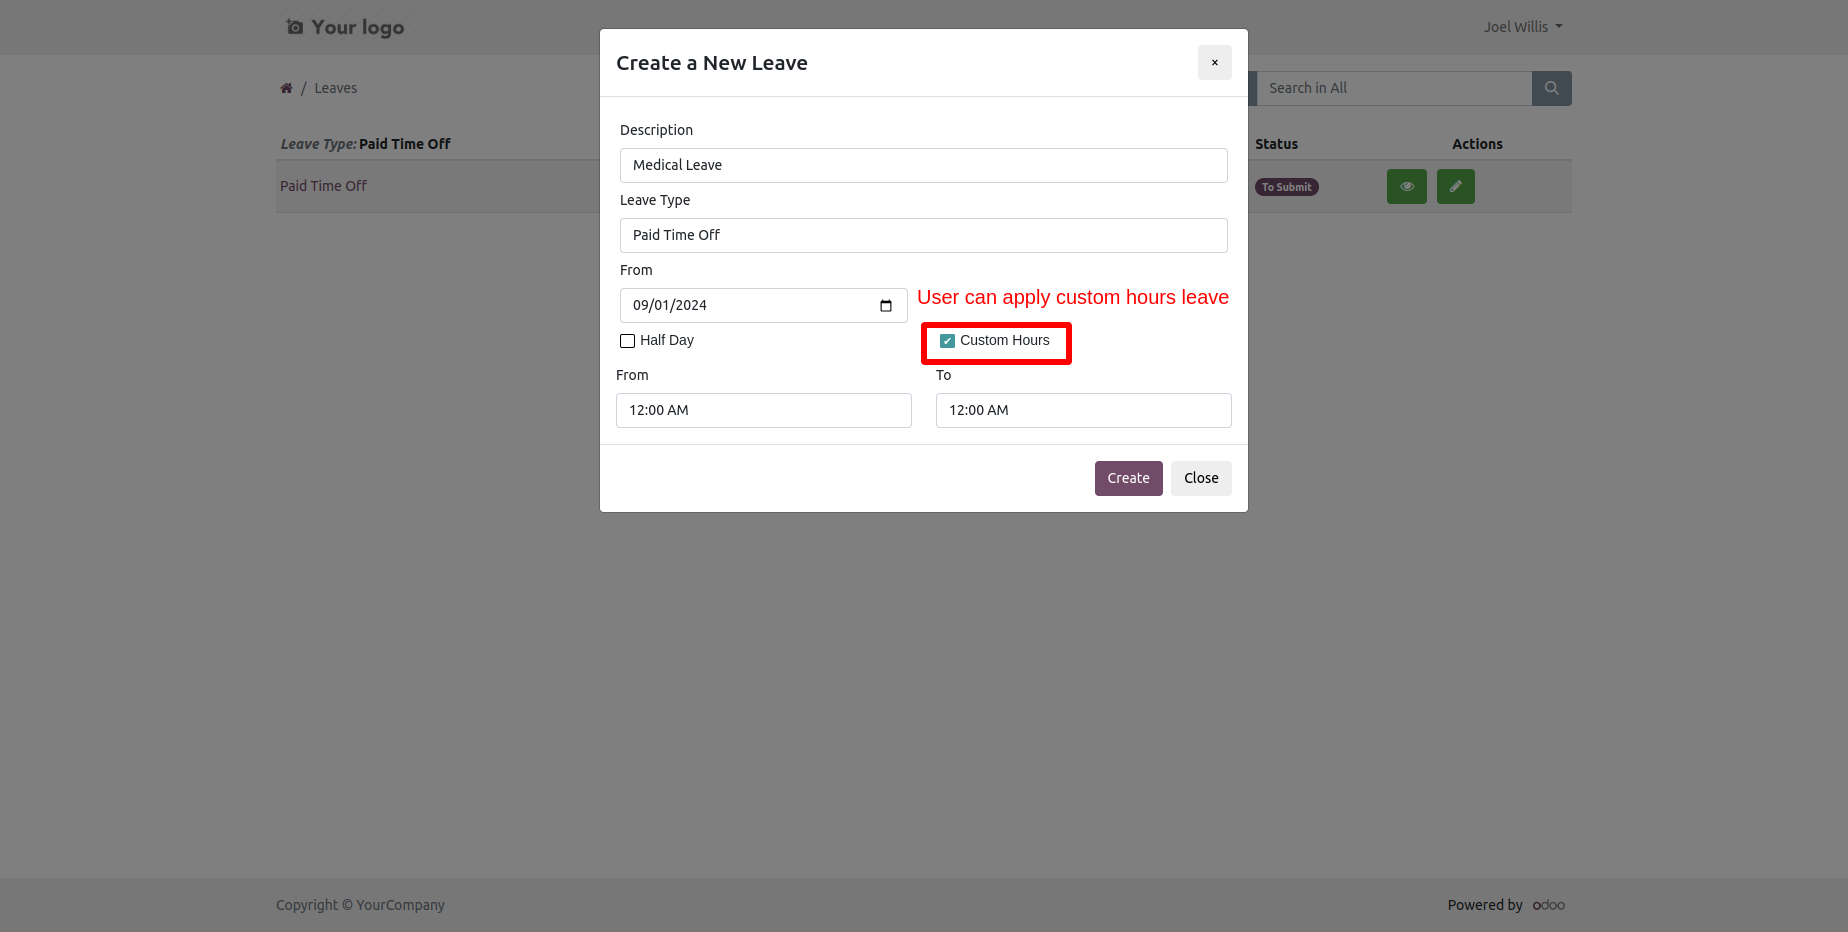
You can create custom hour's leave.
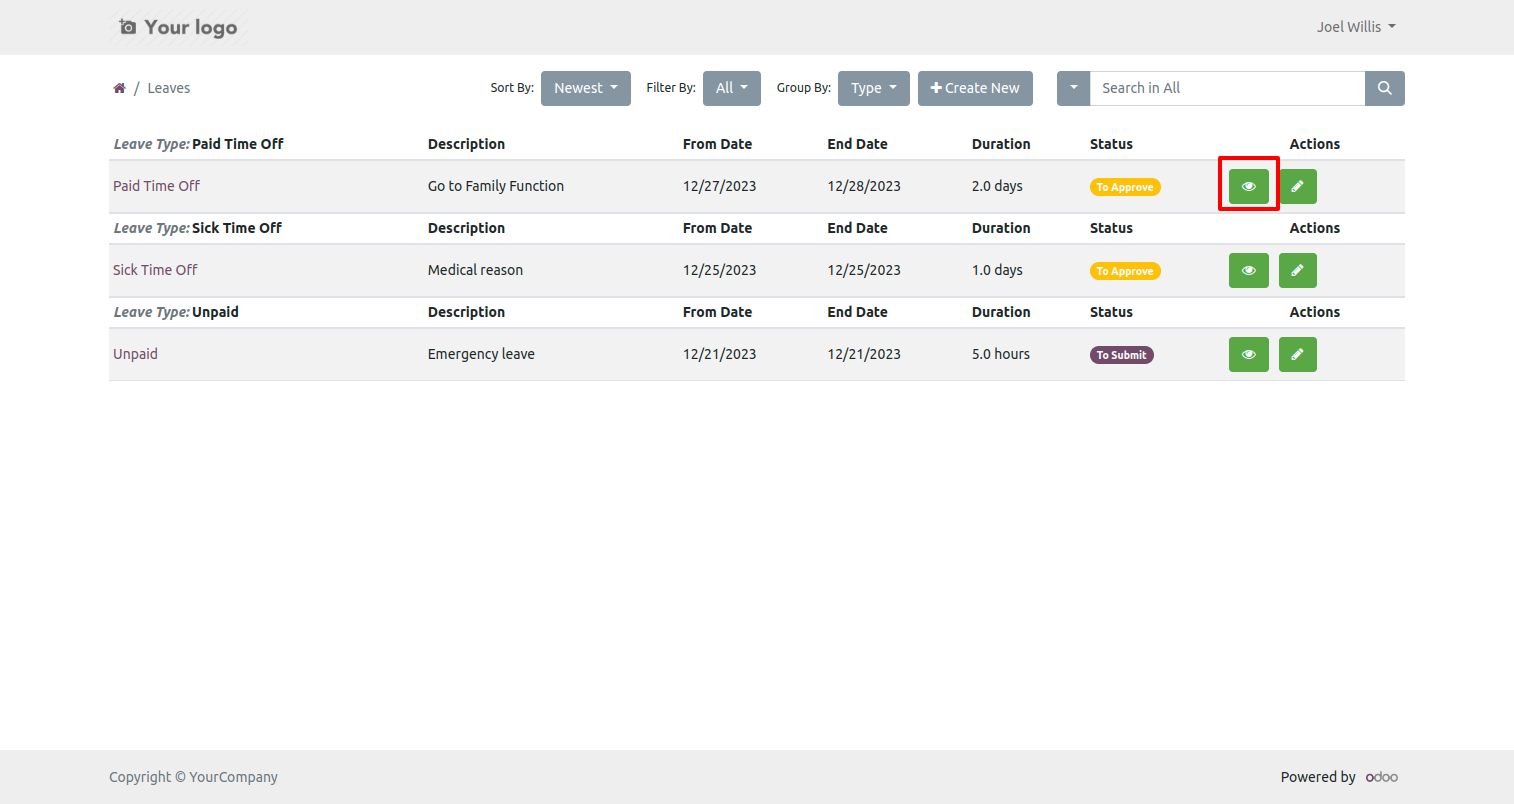
Press the view button to see leave from the portal.
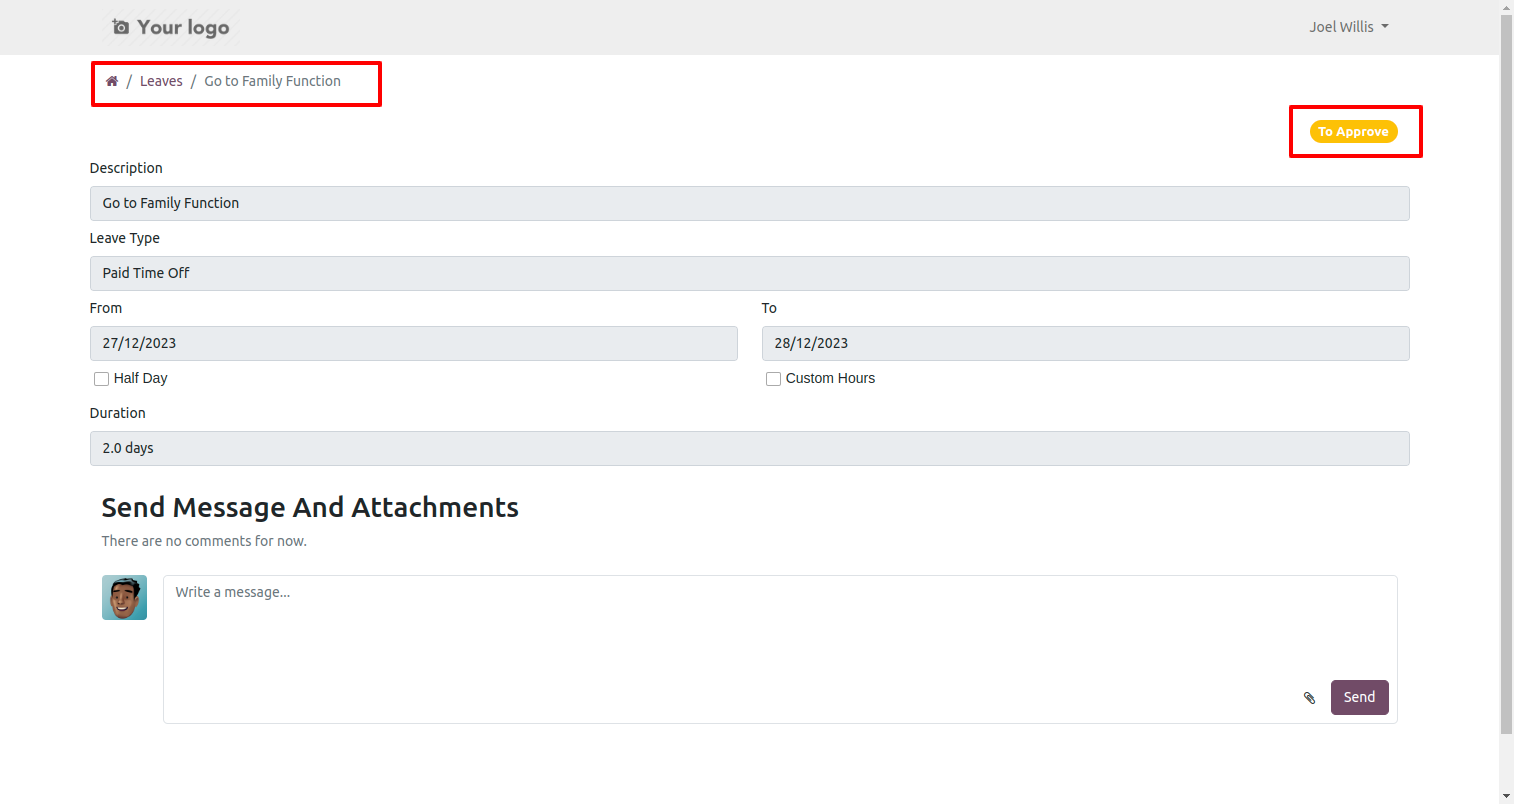
Now the leave is in 'To Approve' stage.
Press the edit button to edit the leave from the portal.
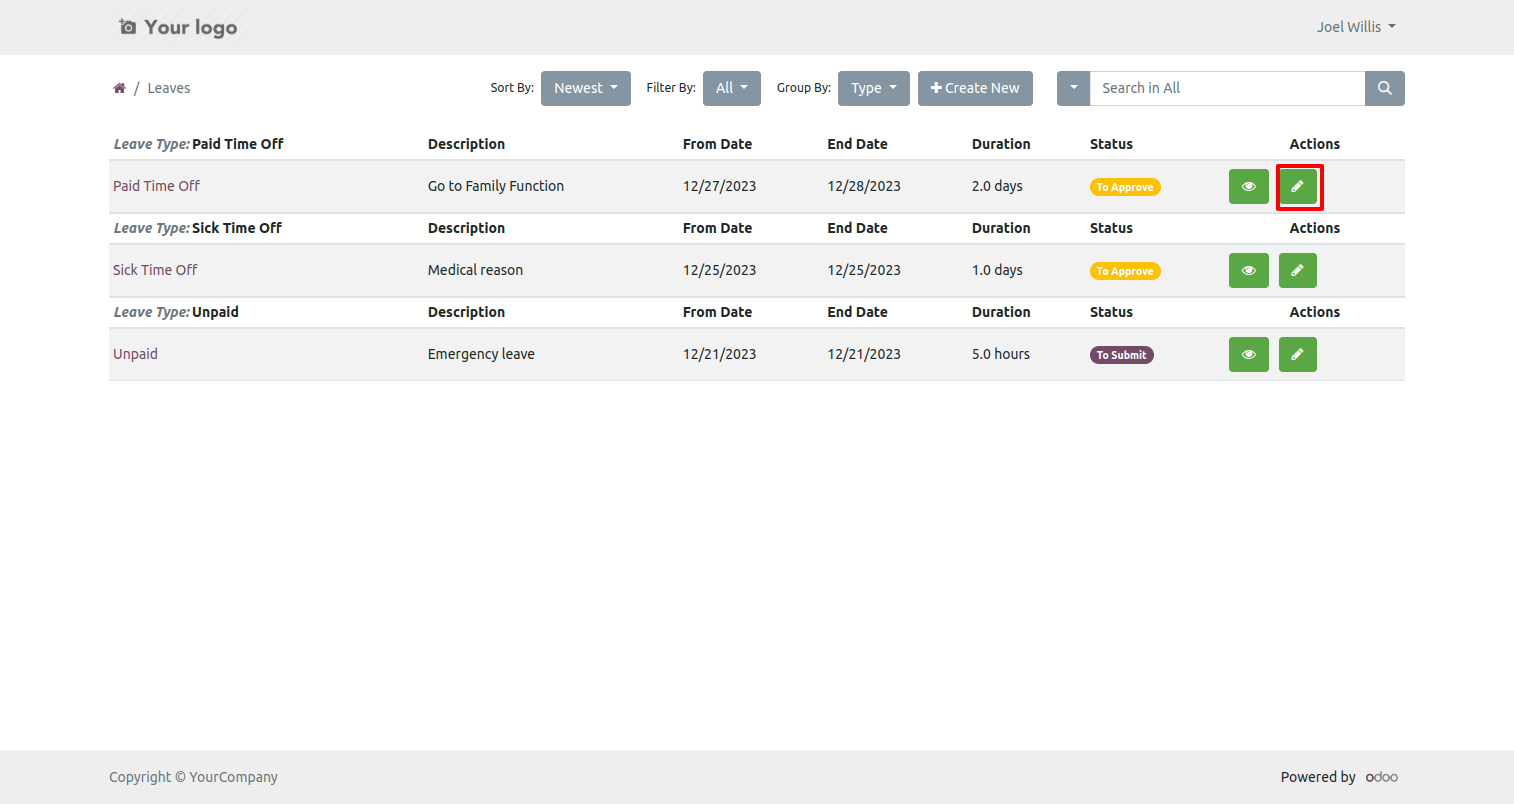
After that save and confirm the leave.
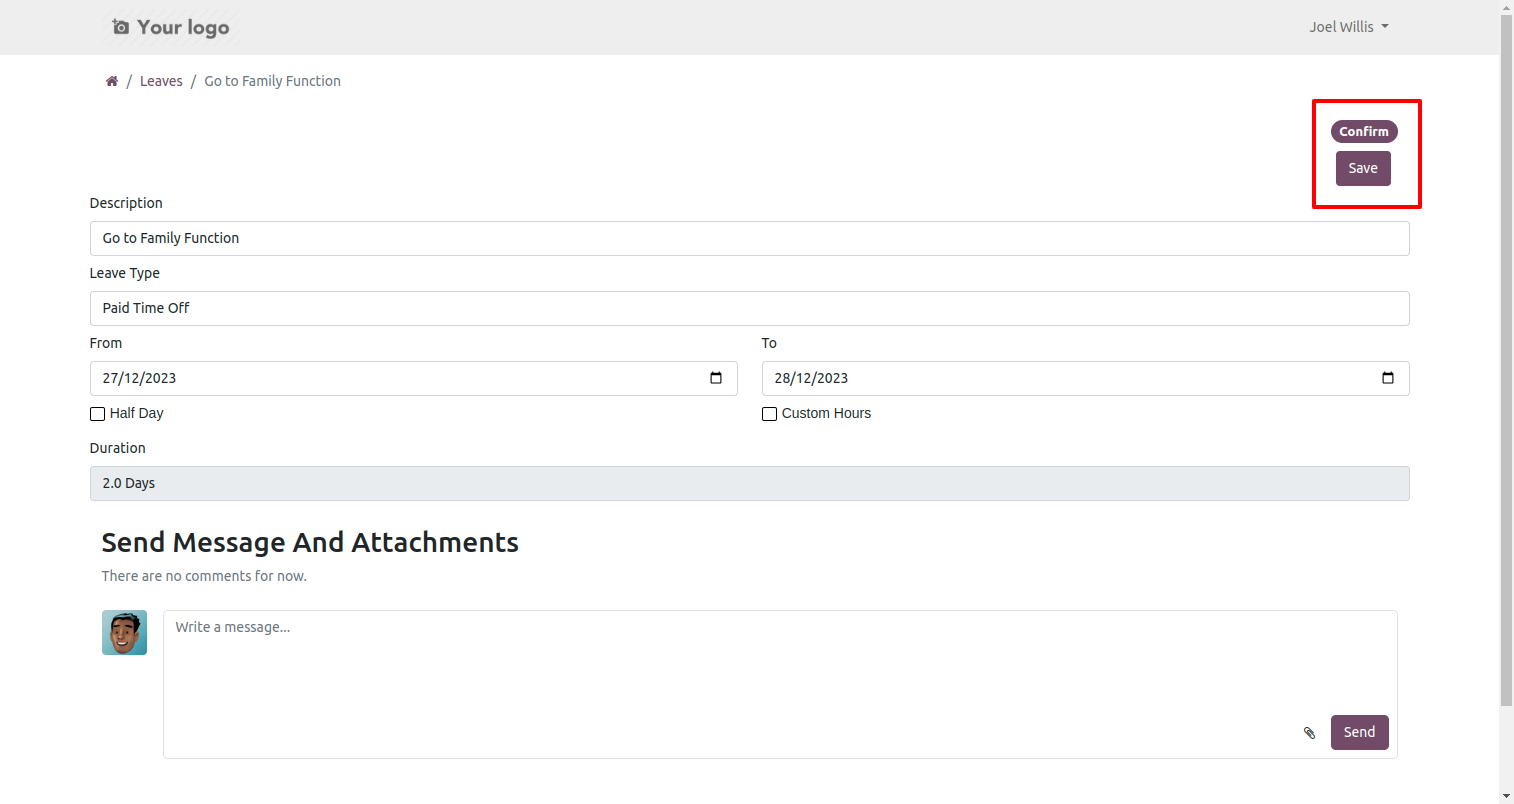
Your leave is in draft stage.
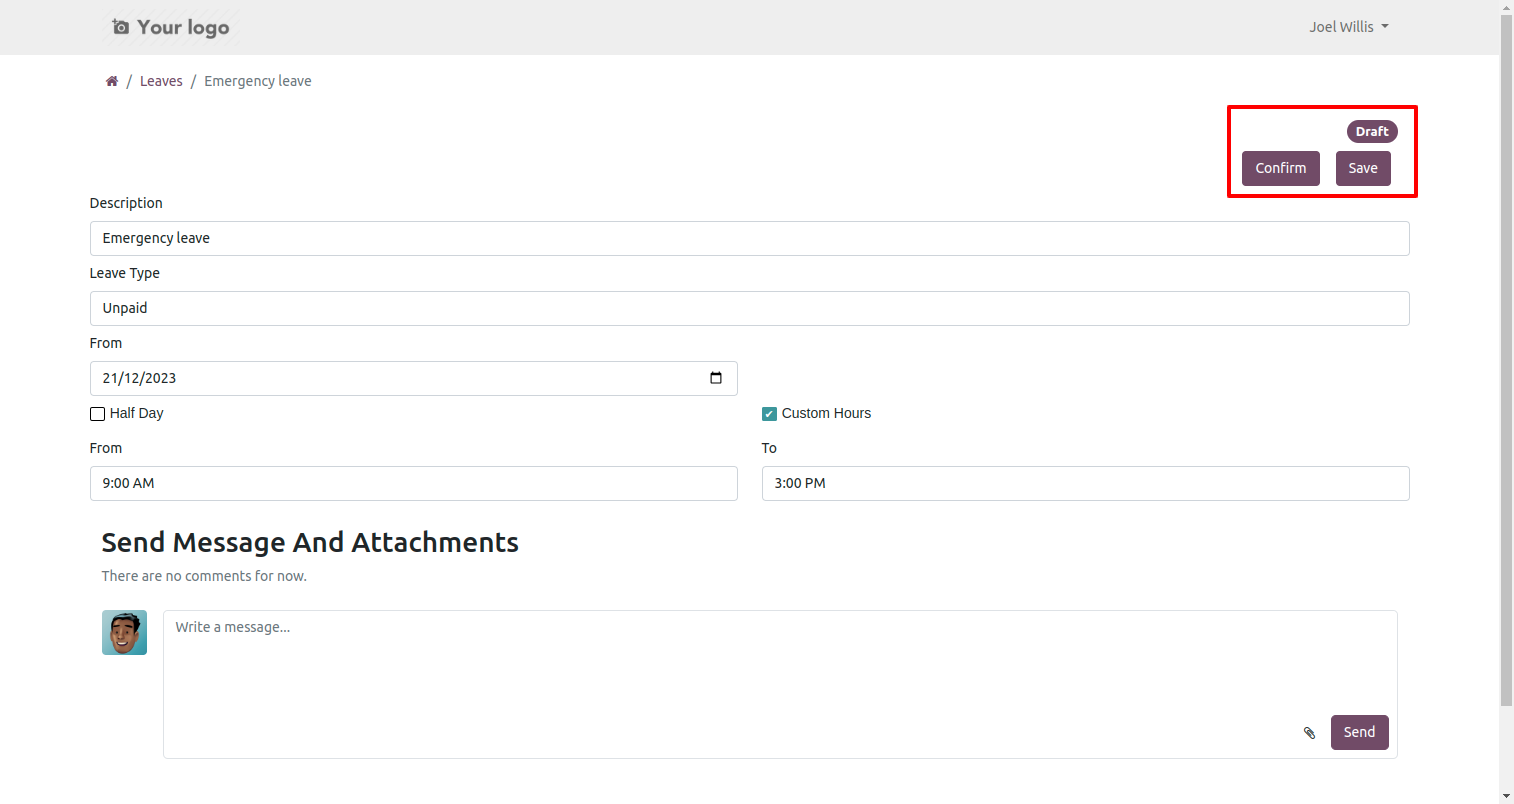
1st approval user approves the leave by clicking on the 'Confirm' button.
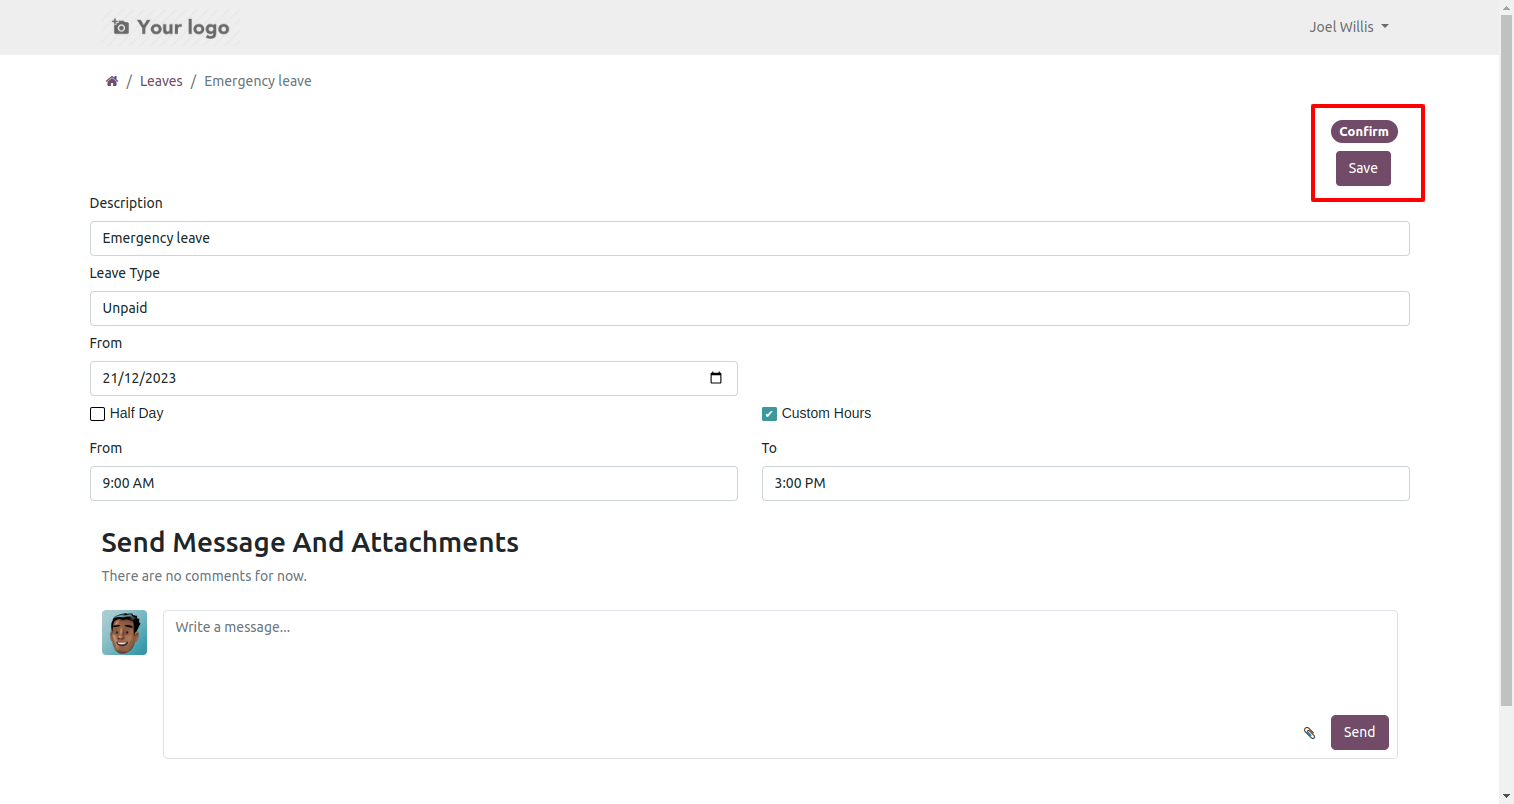
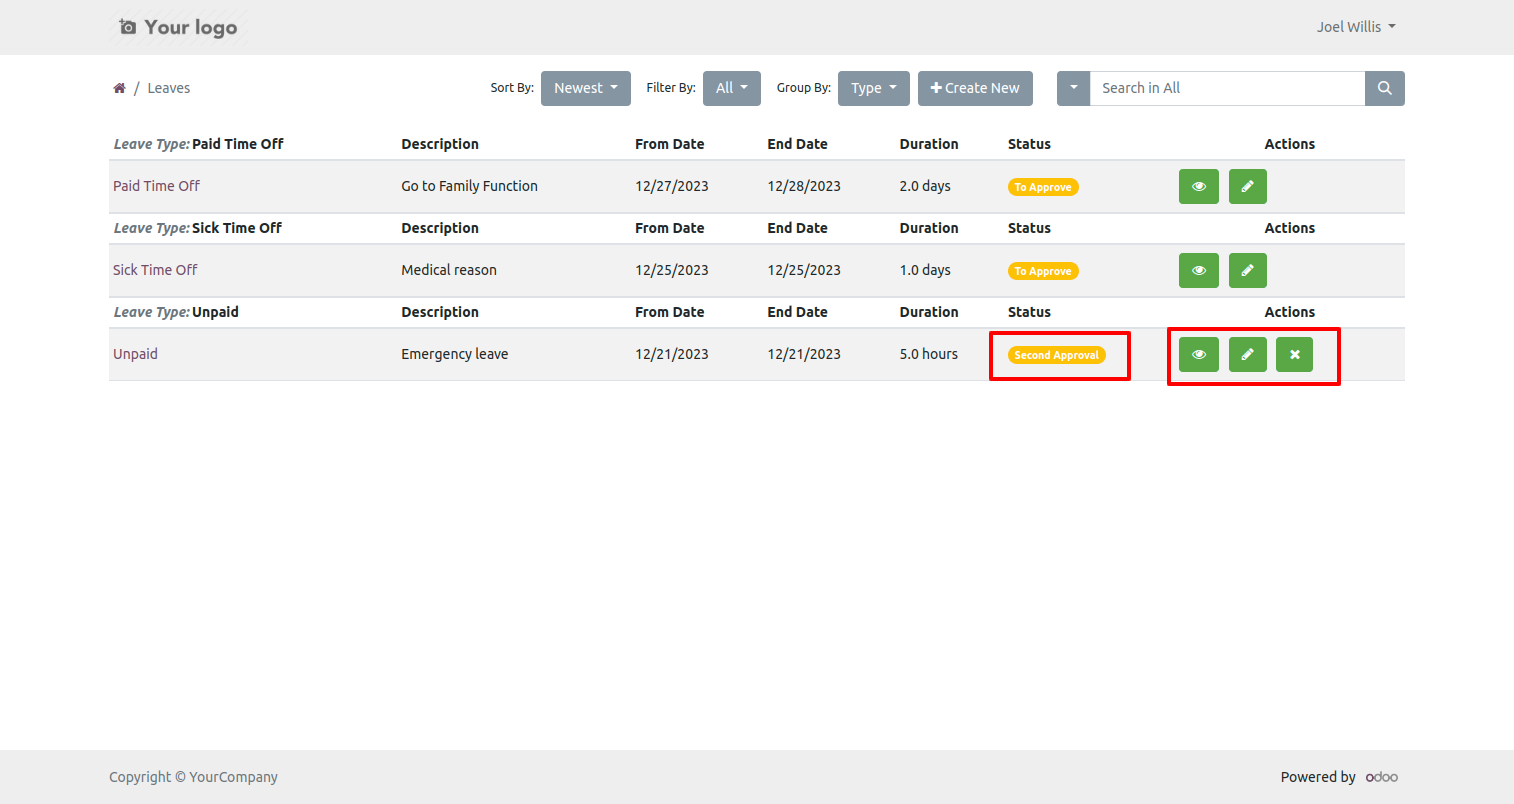
After that, the leave is transferred to the second approval user. They will view, edit, and cancel the leave request.
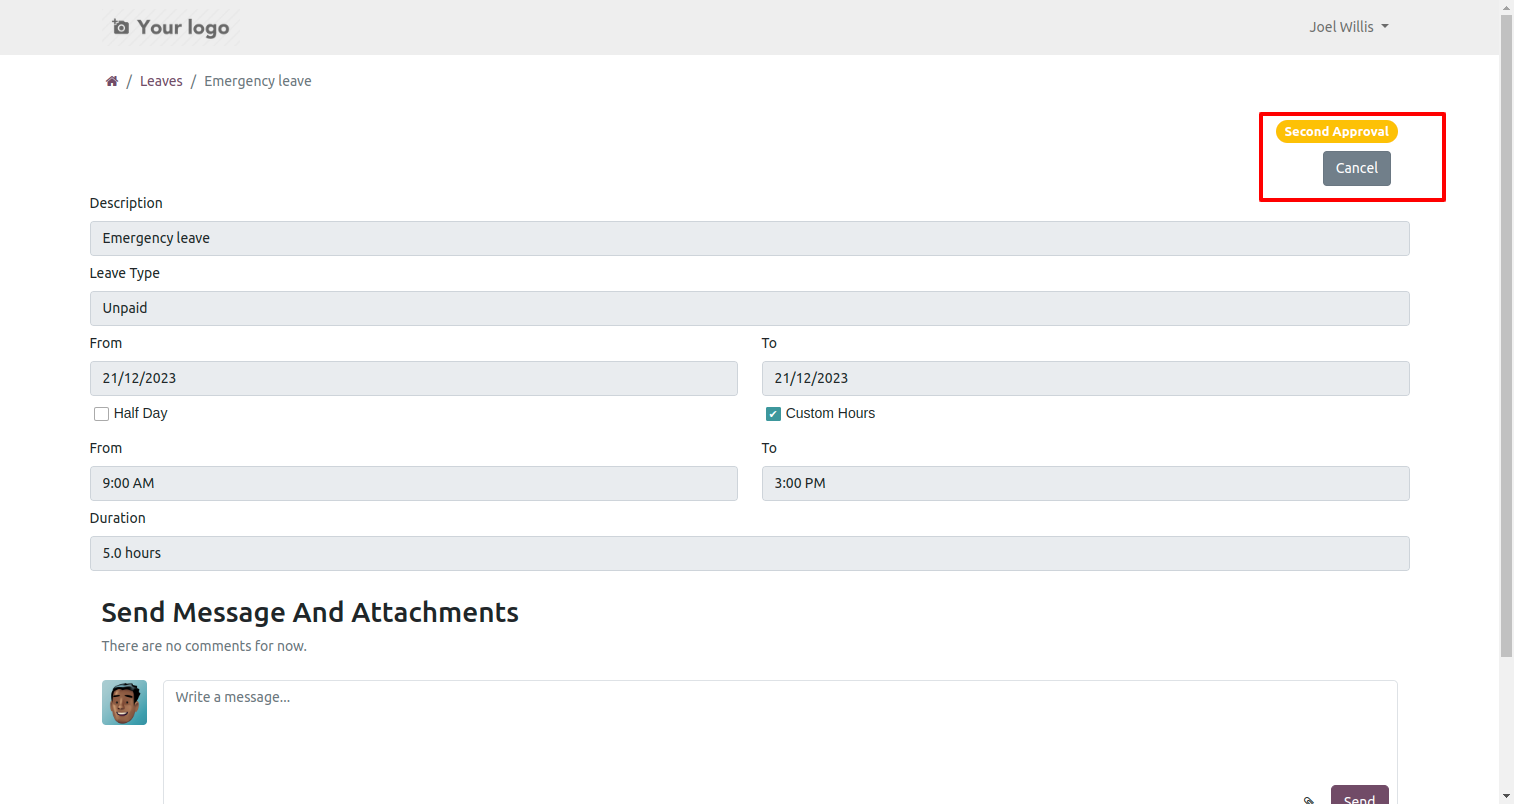
Form view of the leave. To cancel the leave, click on the 'Cancel' button.
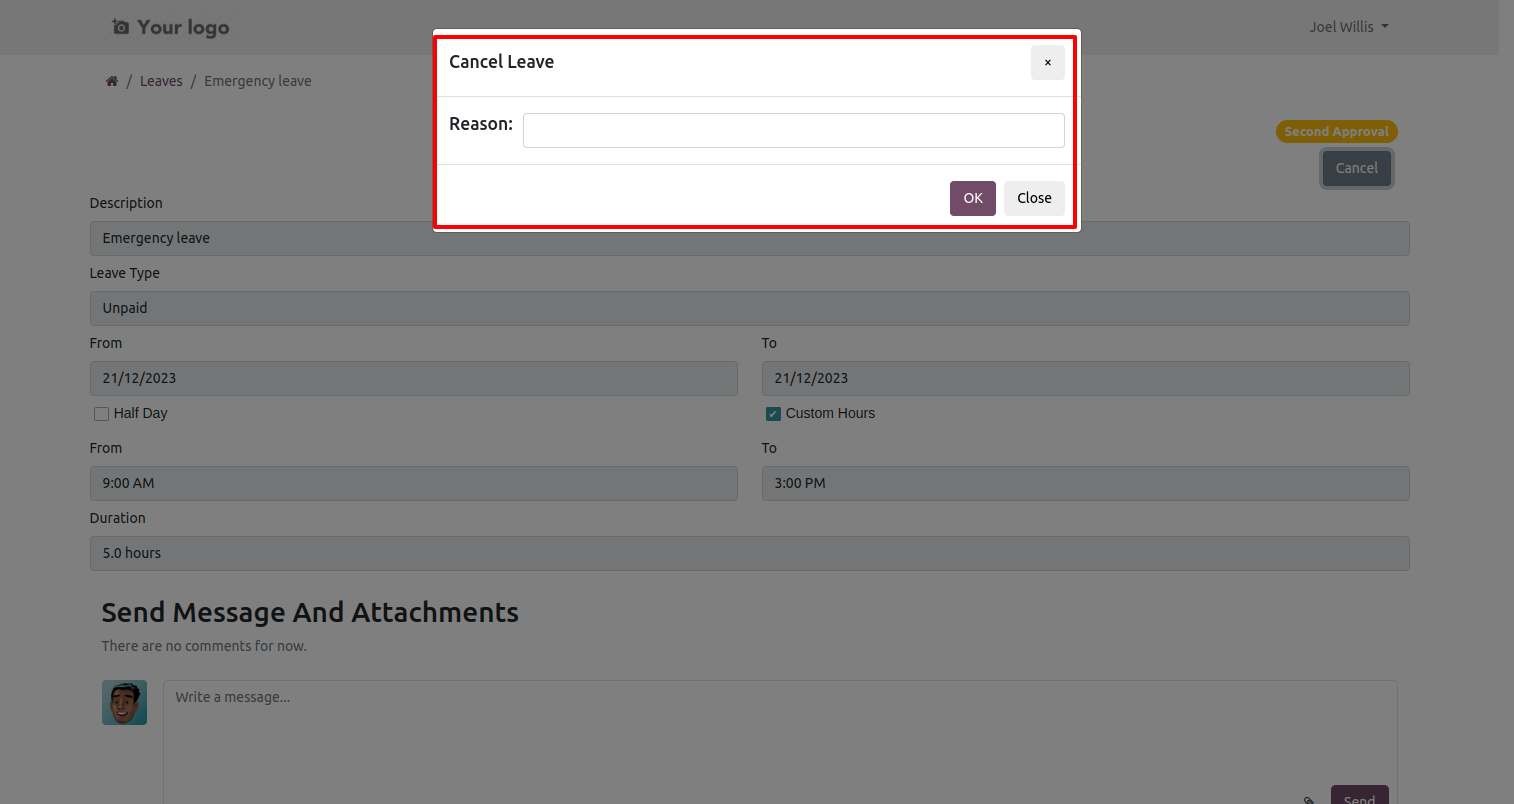
After that alert message comes, press 'Ok' to cancel leave from the portal.
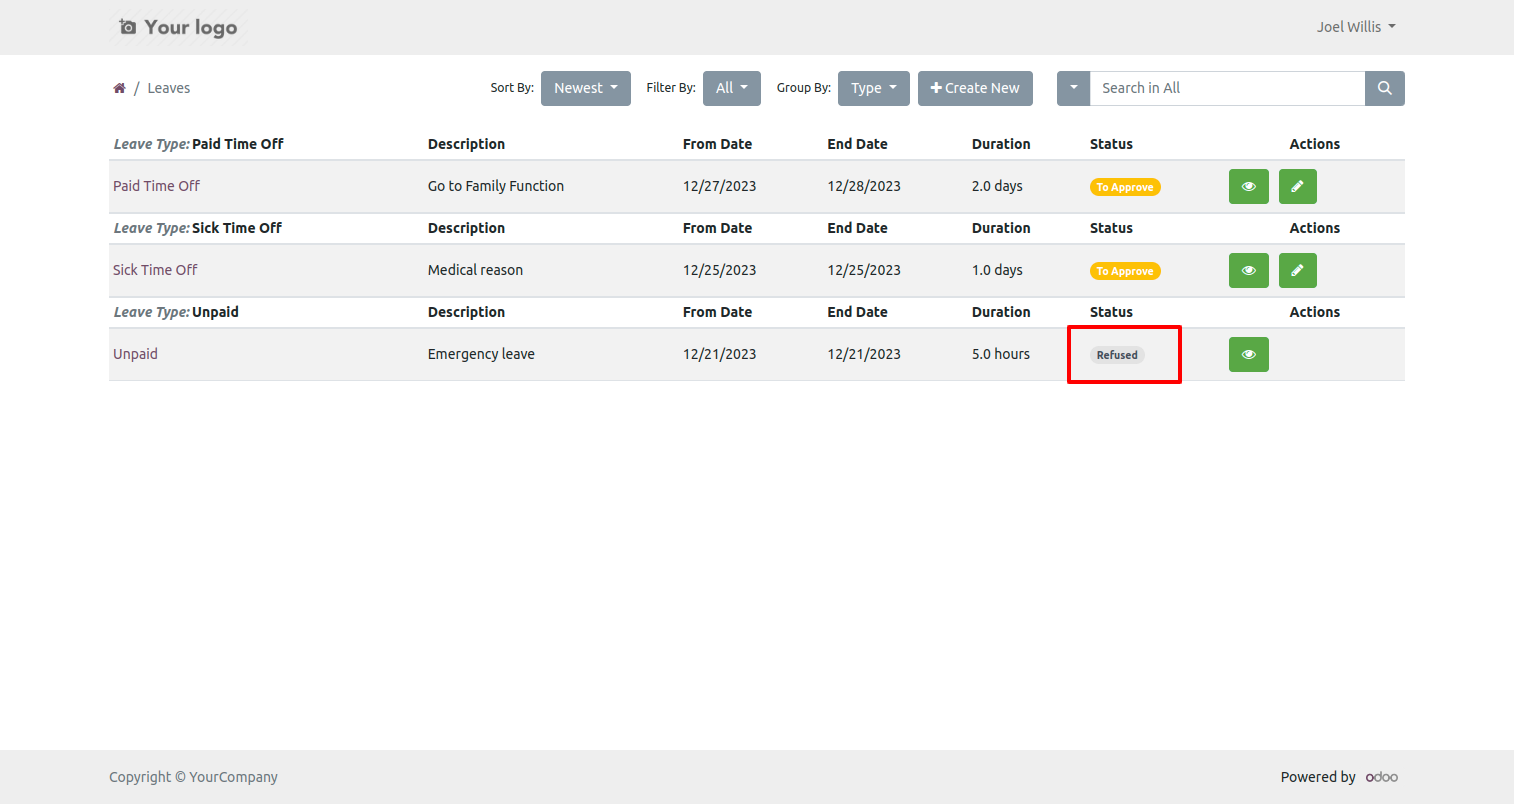
Here you can see the leave is refused.
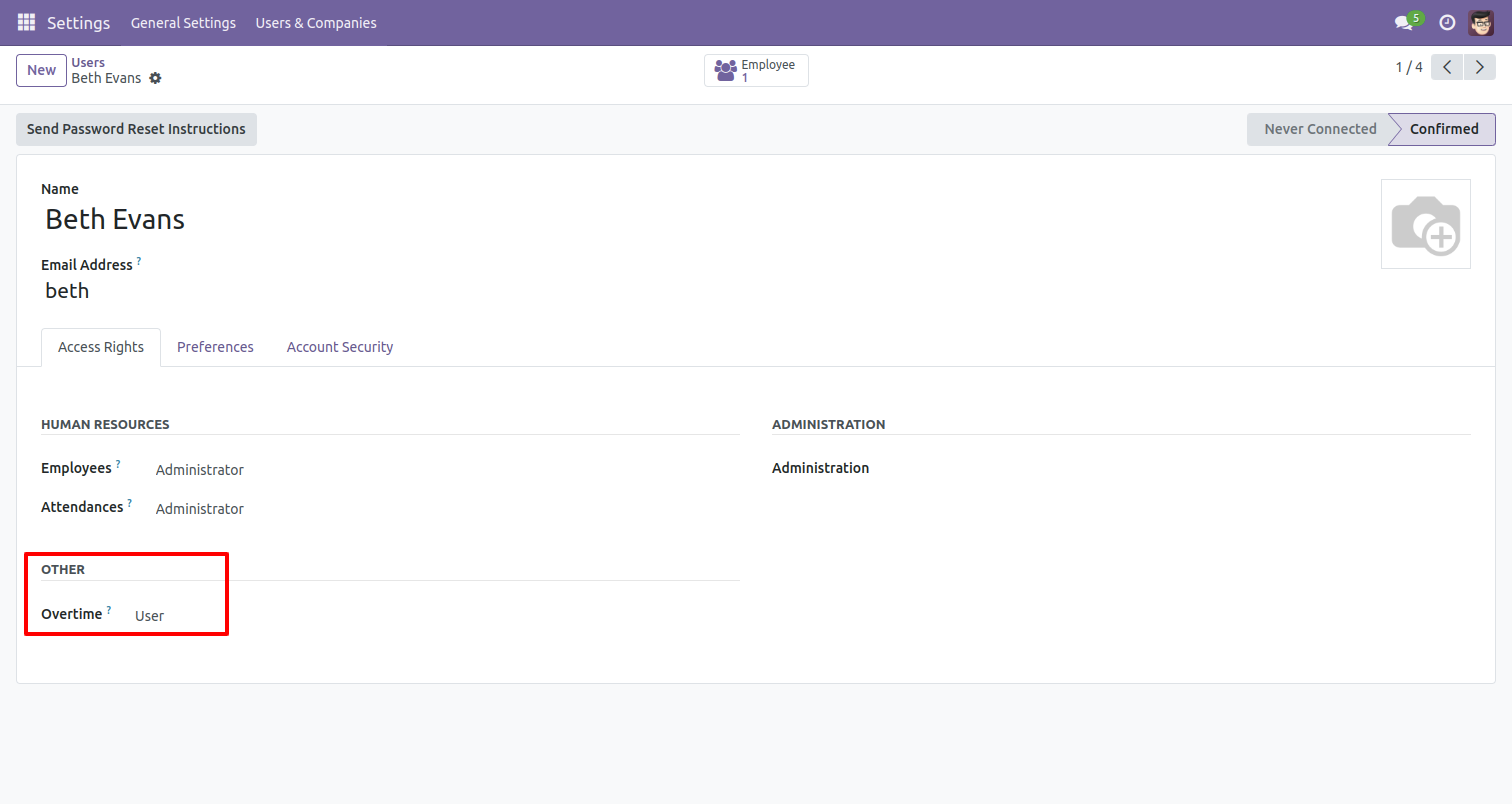
Configure 'Overtime User' role.
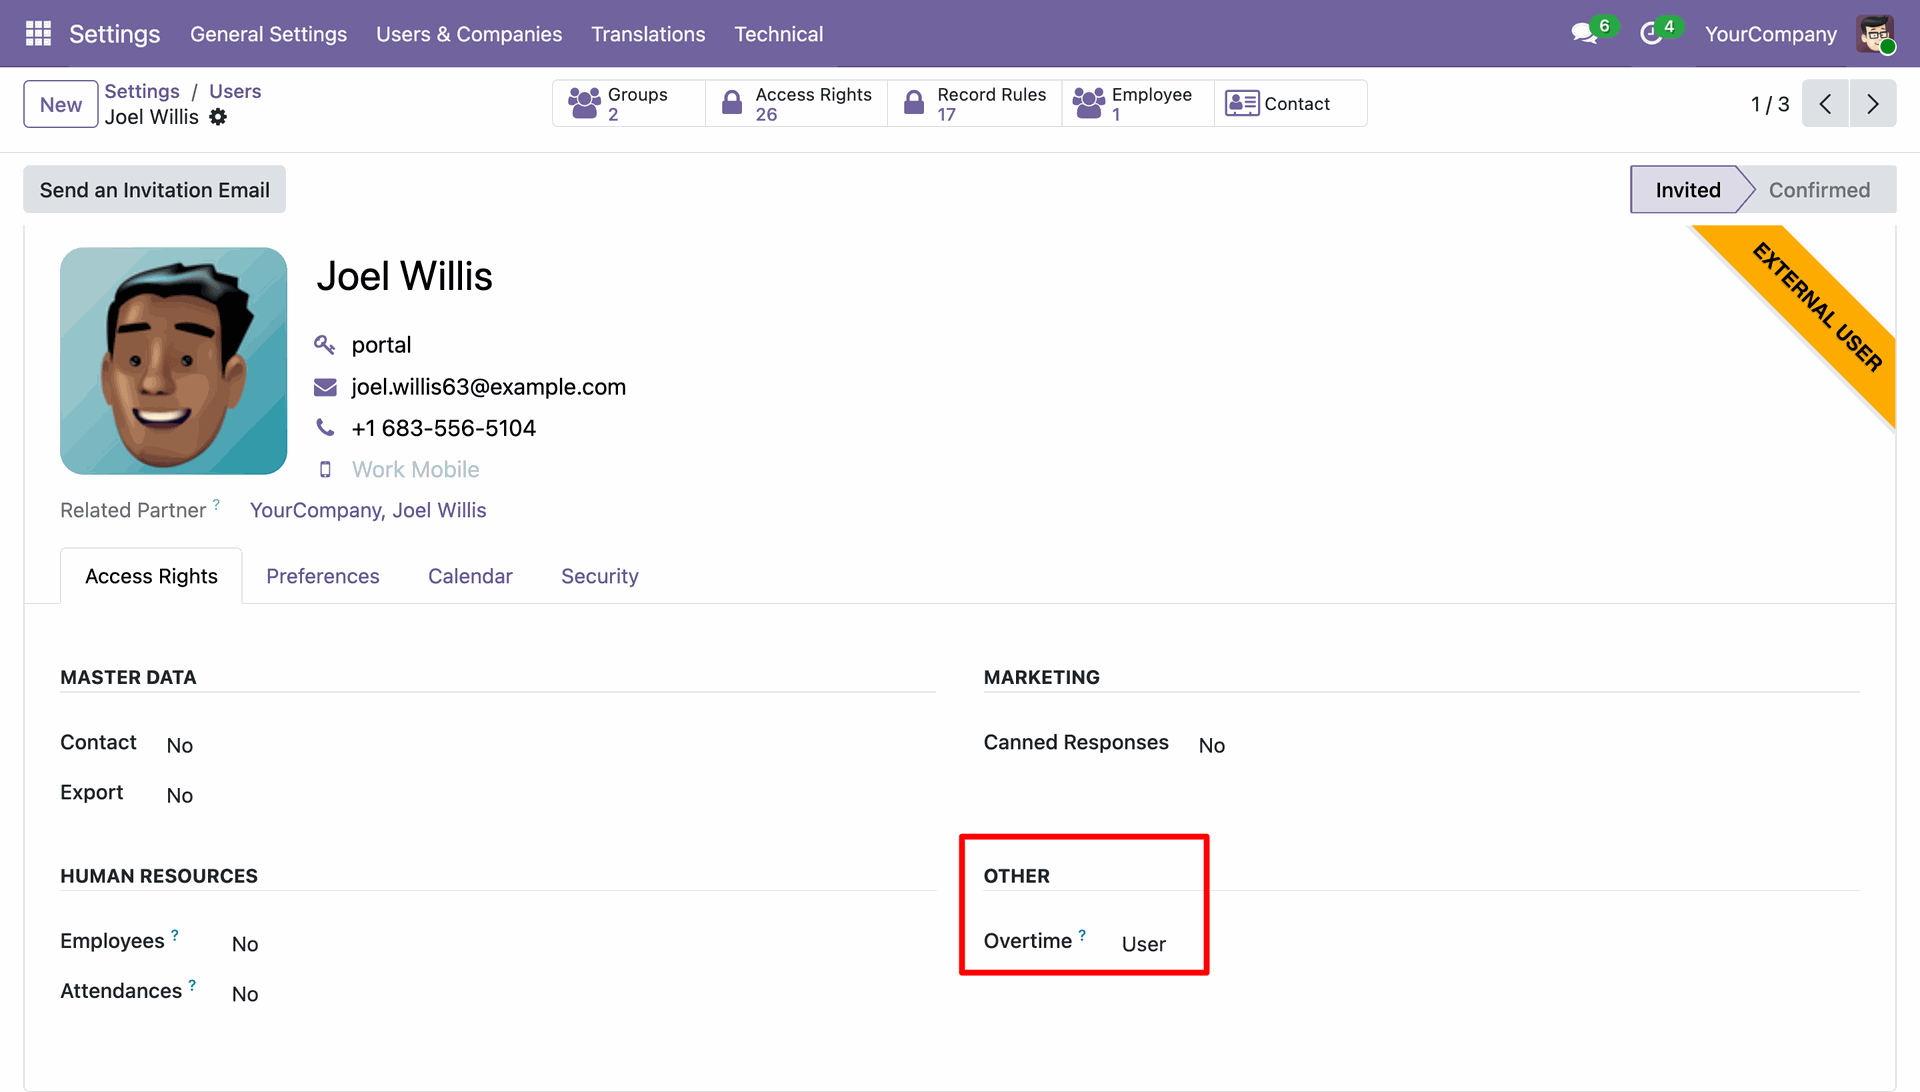
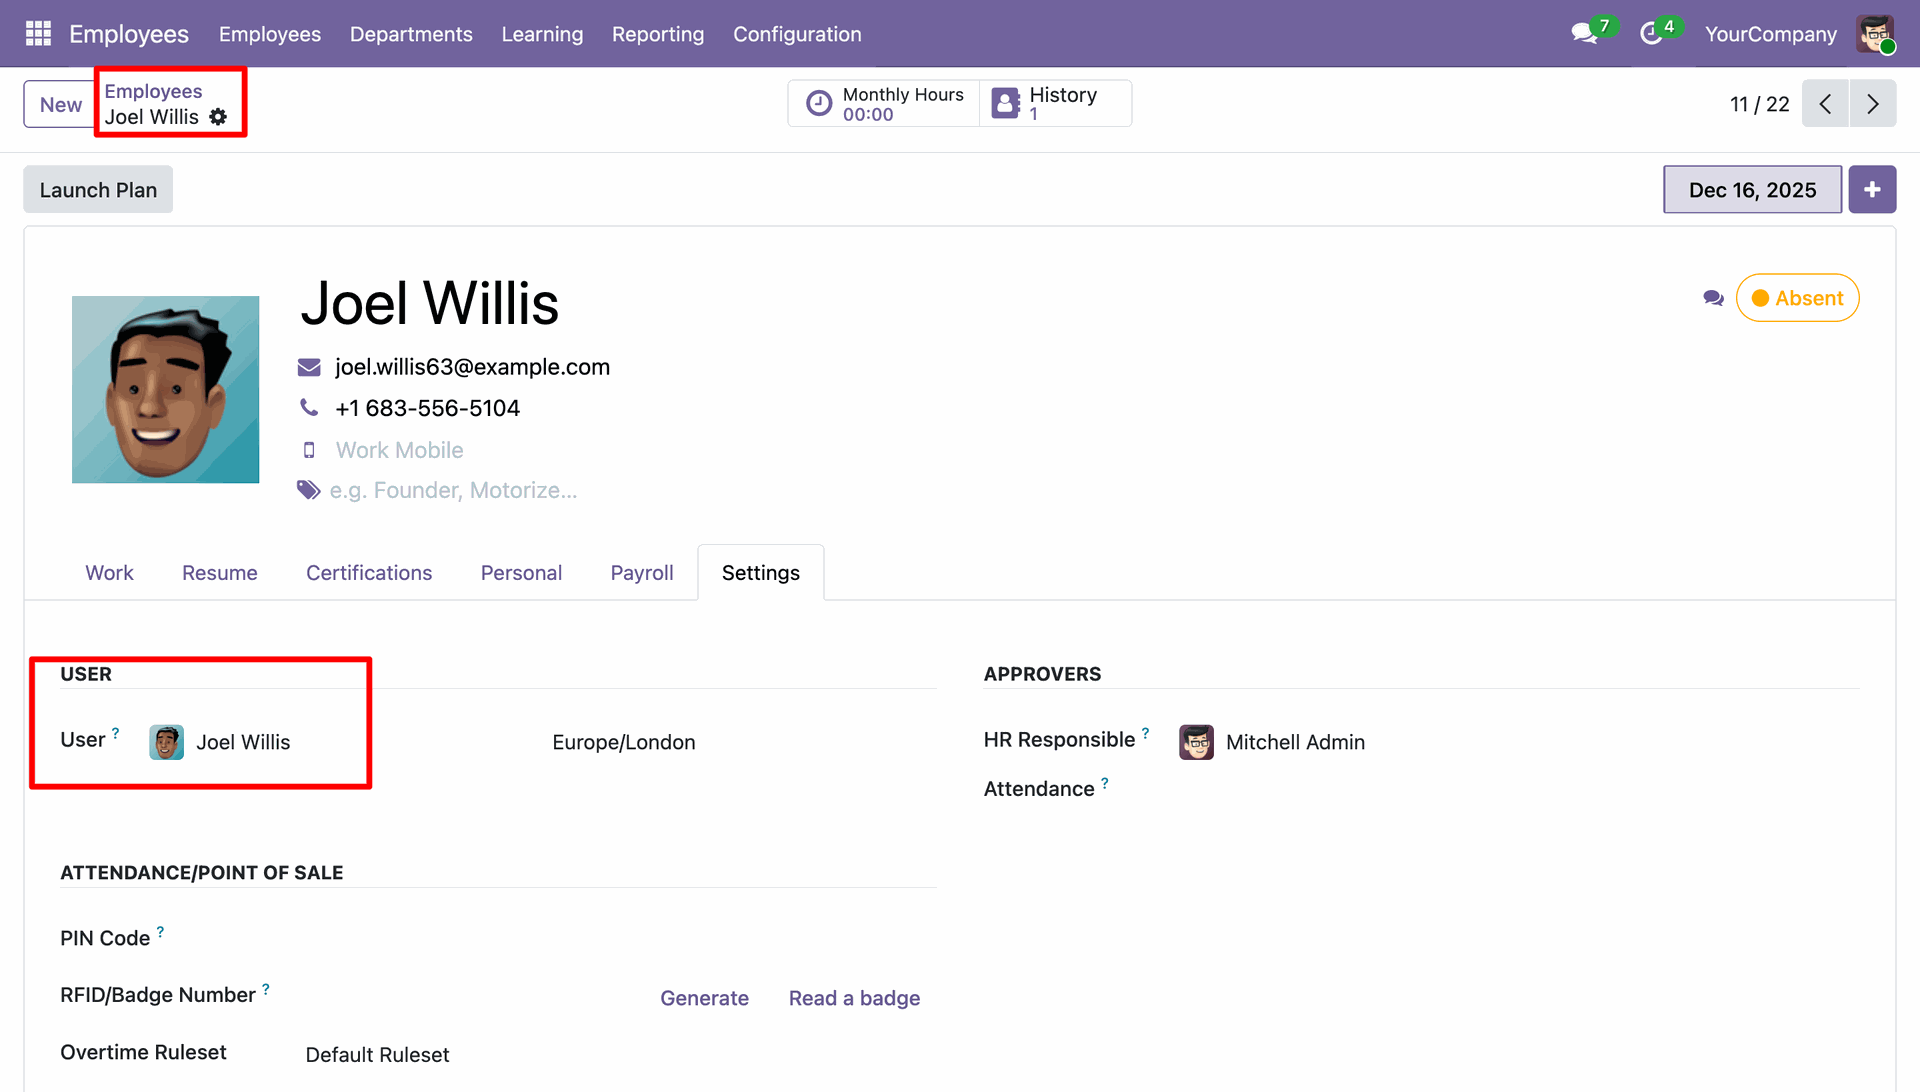
Link the portal user to the corresponding employee profile.
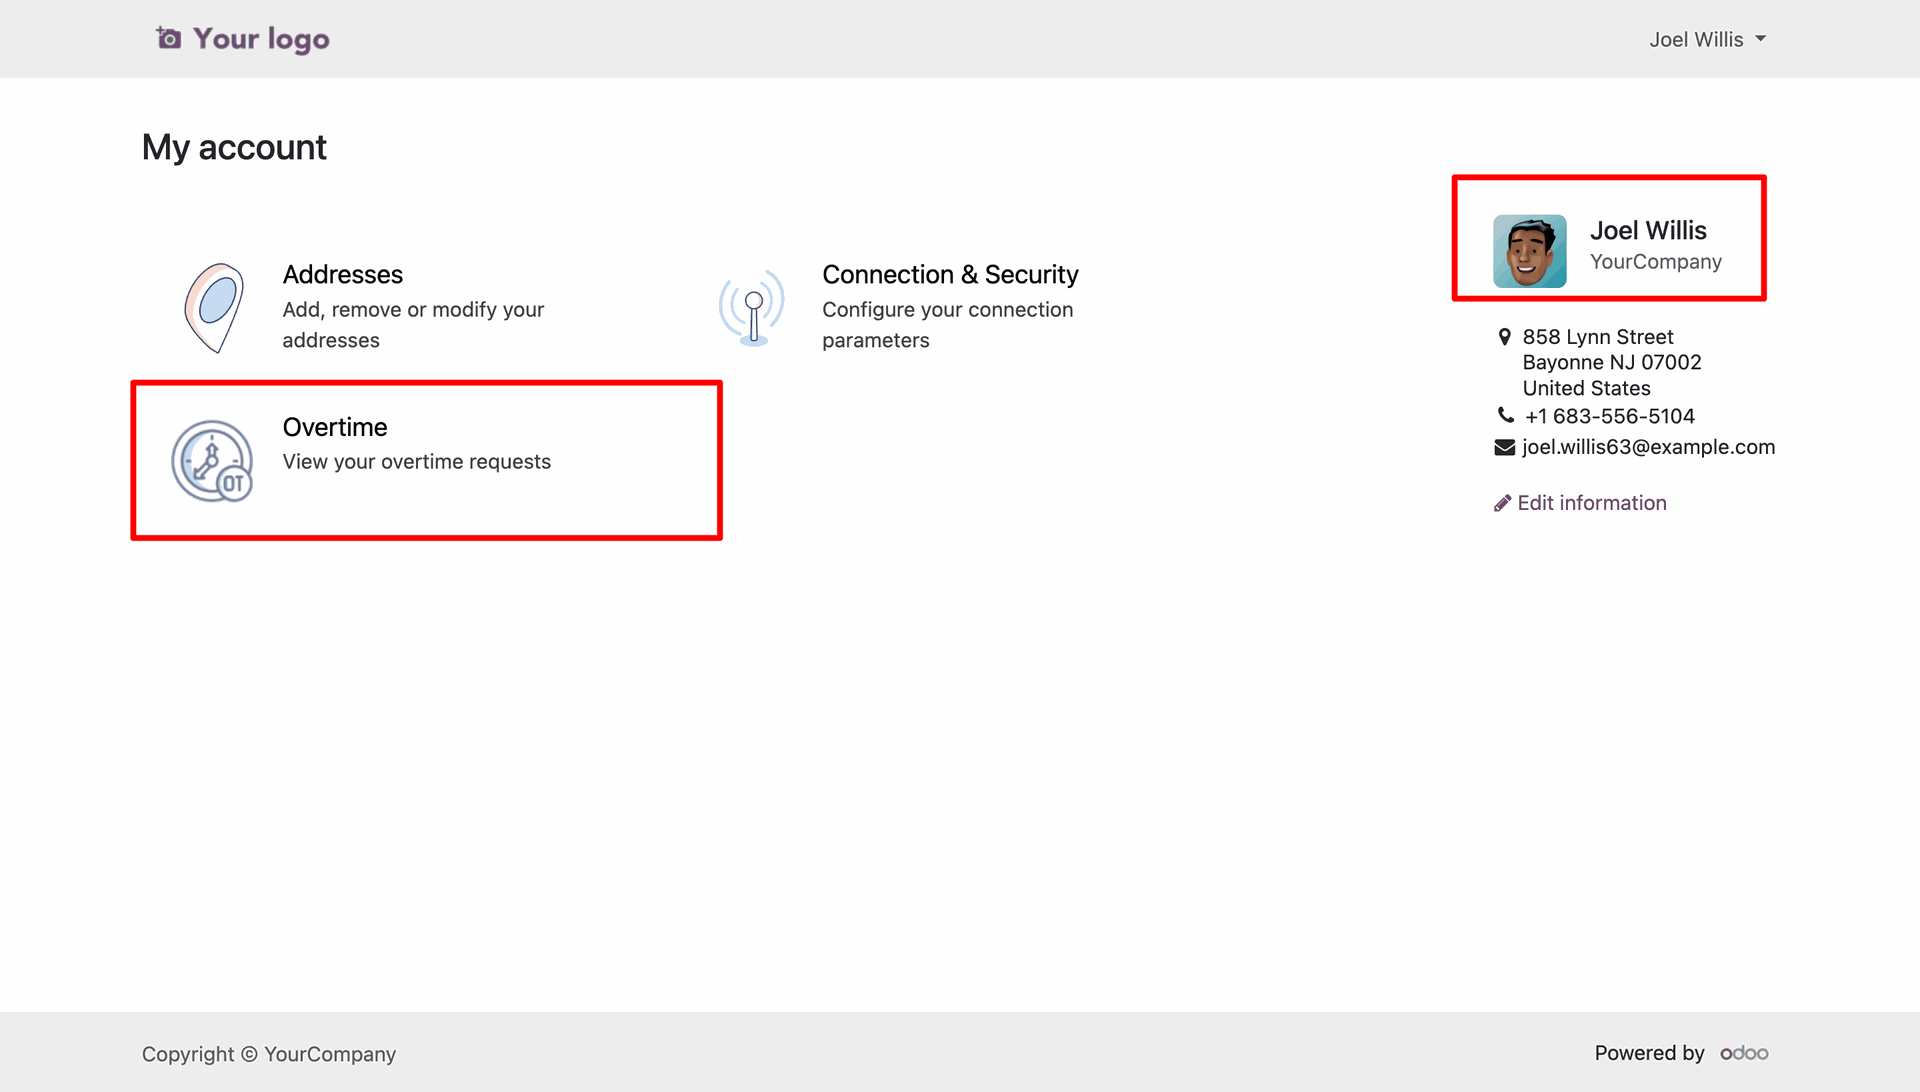
An 'Overtime' menu in the employee's portal for quick access.
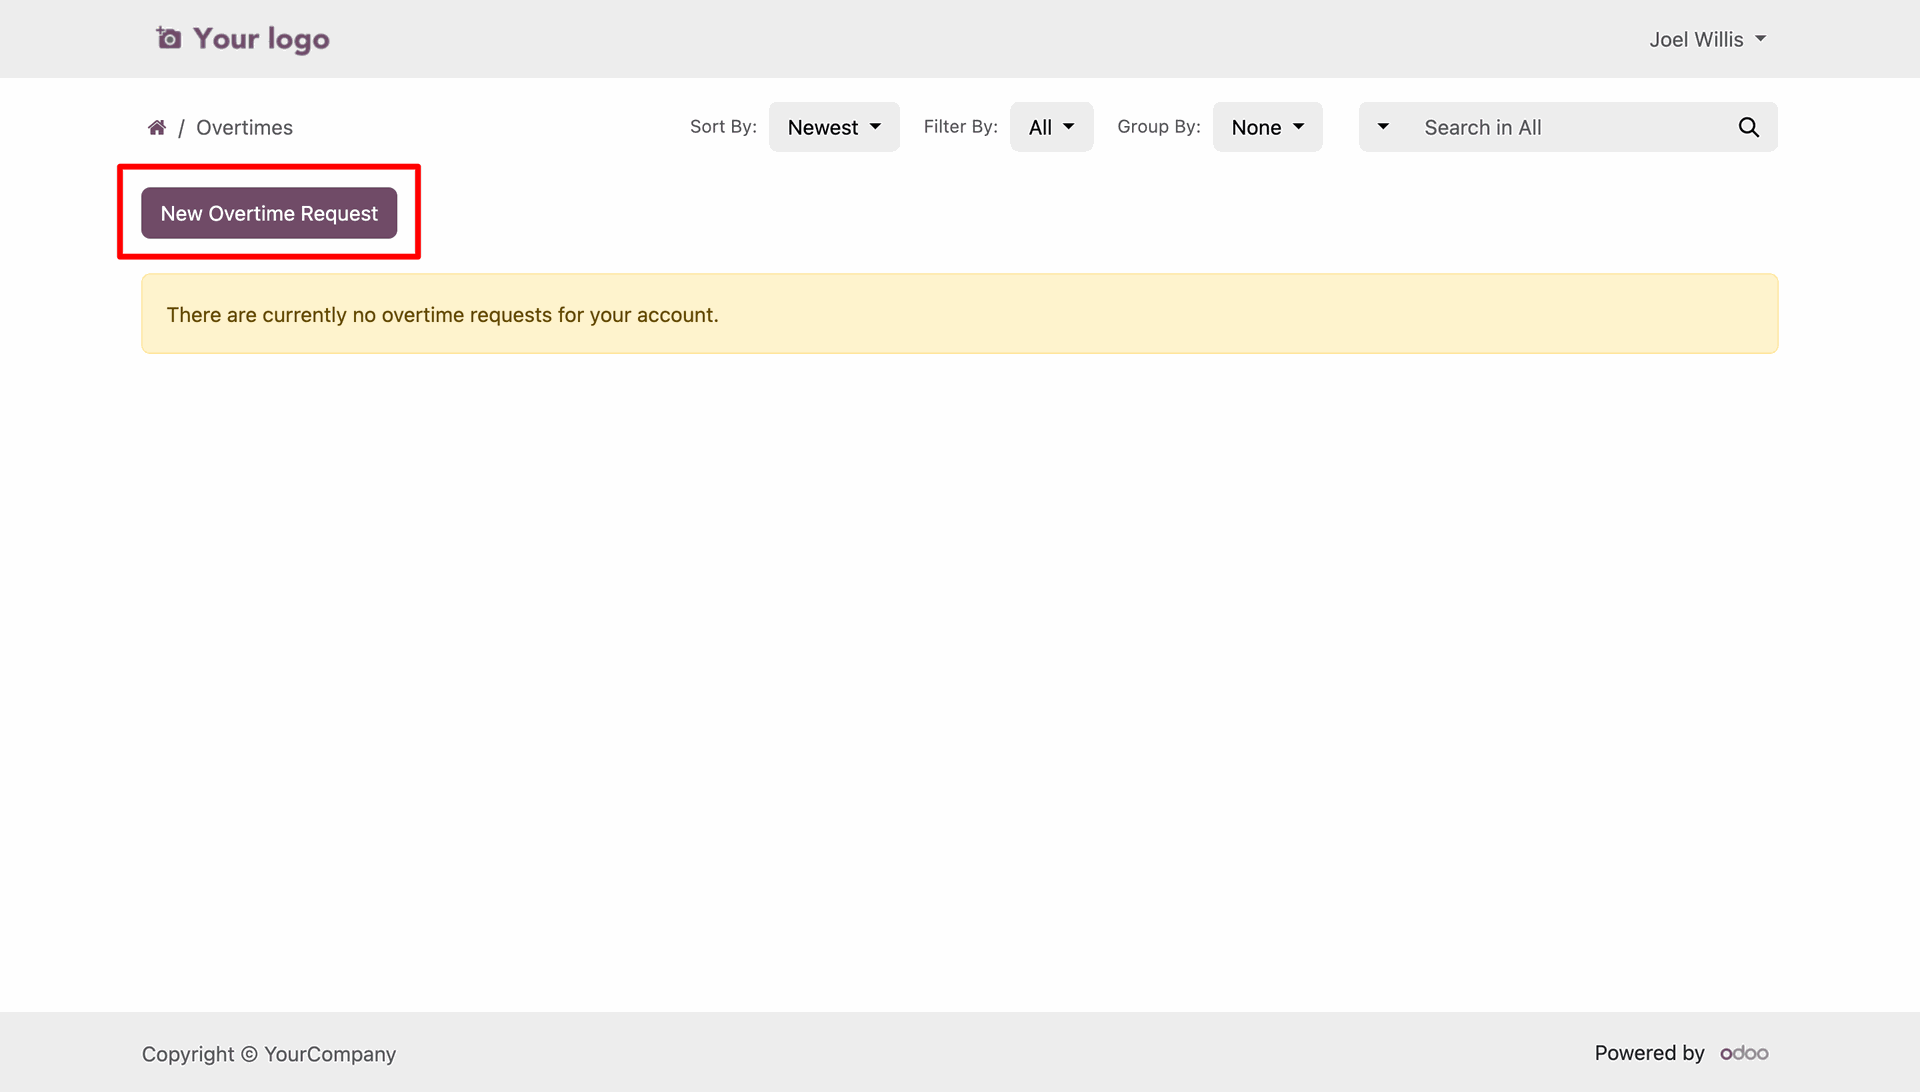
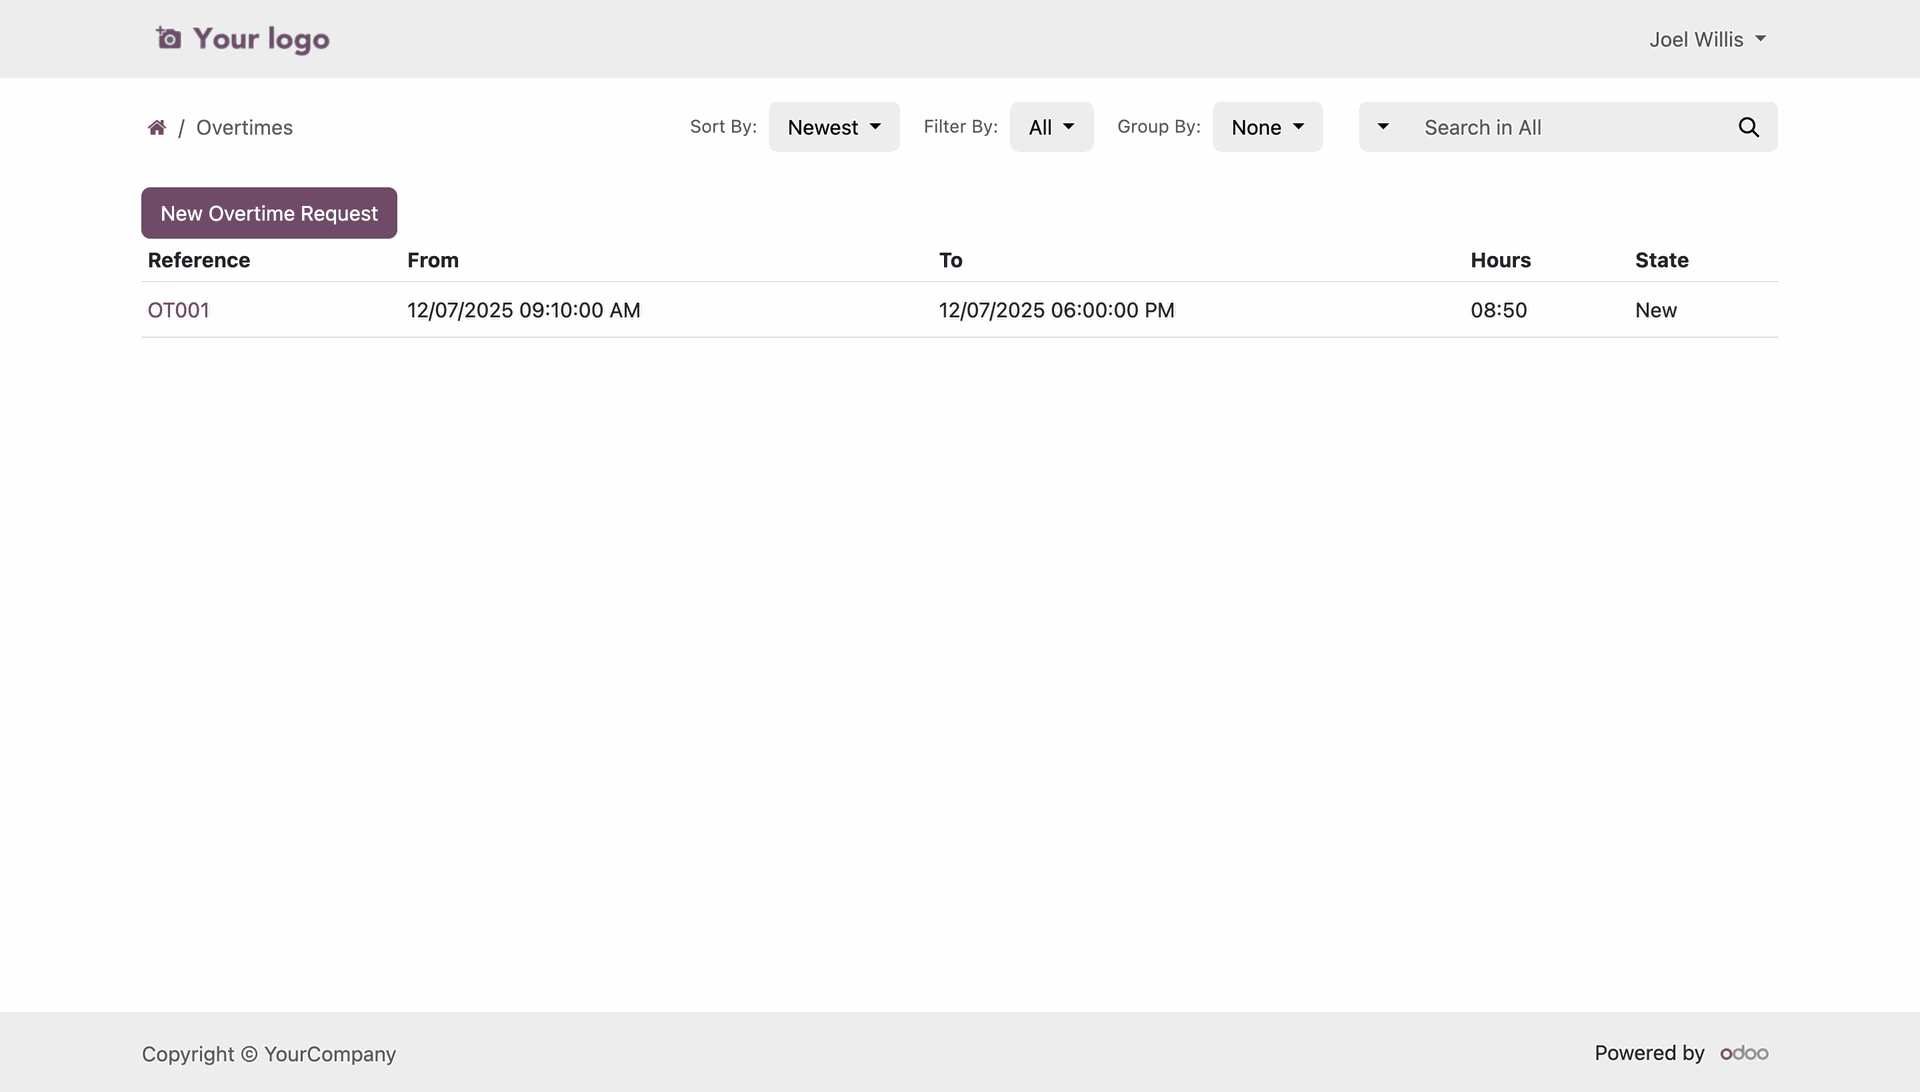
Employees can view a structured list of all their overtime submissions and current statuses. Create a new overtime request.
Employees can specify the date range, overtime type, and time.
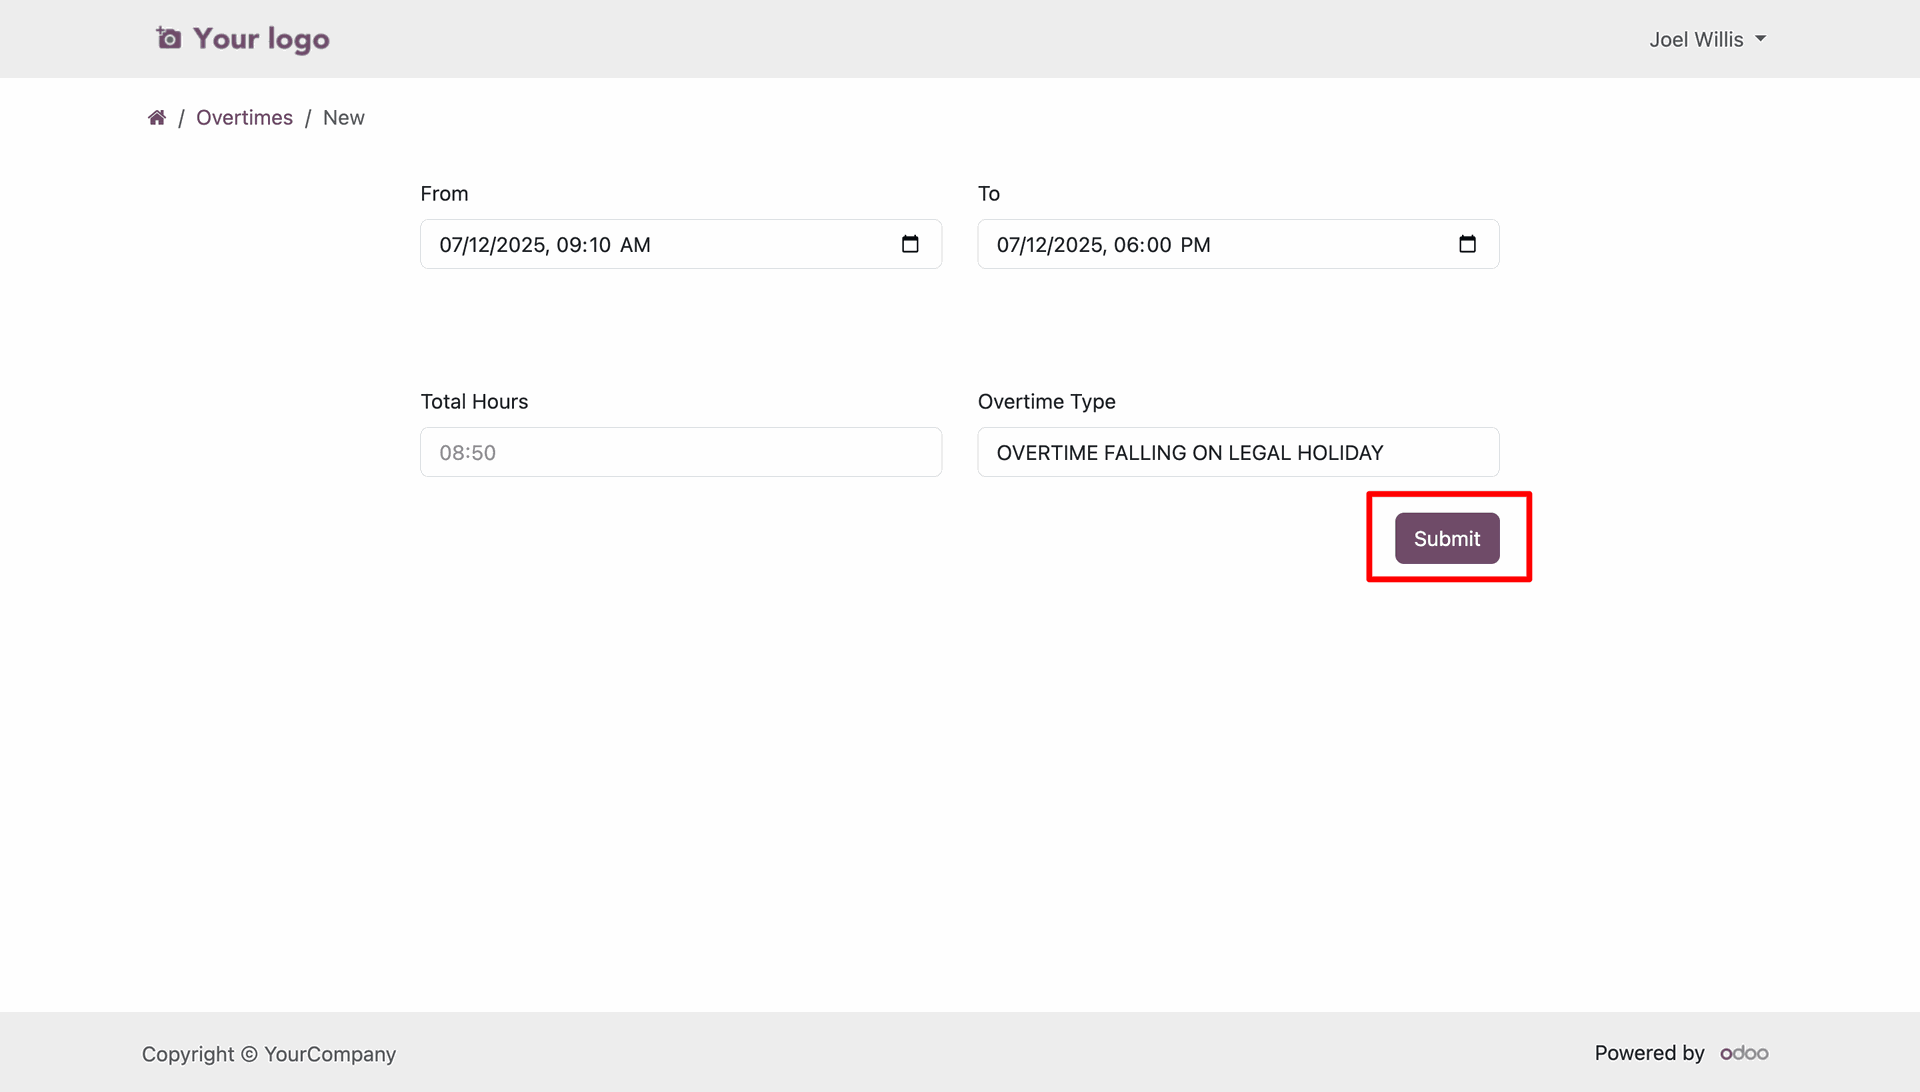
Once created, the overtime request appears in the list view in 'New' state.
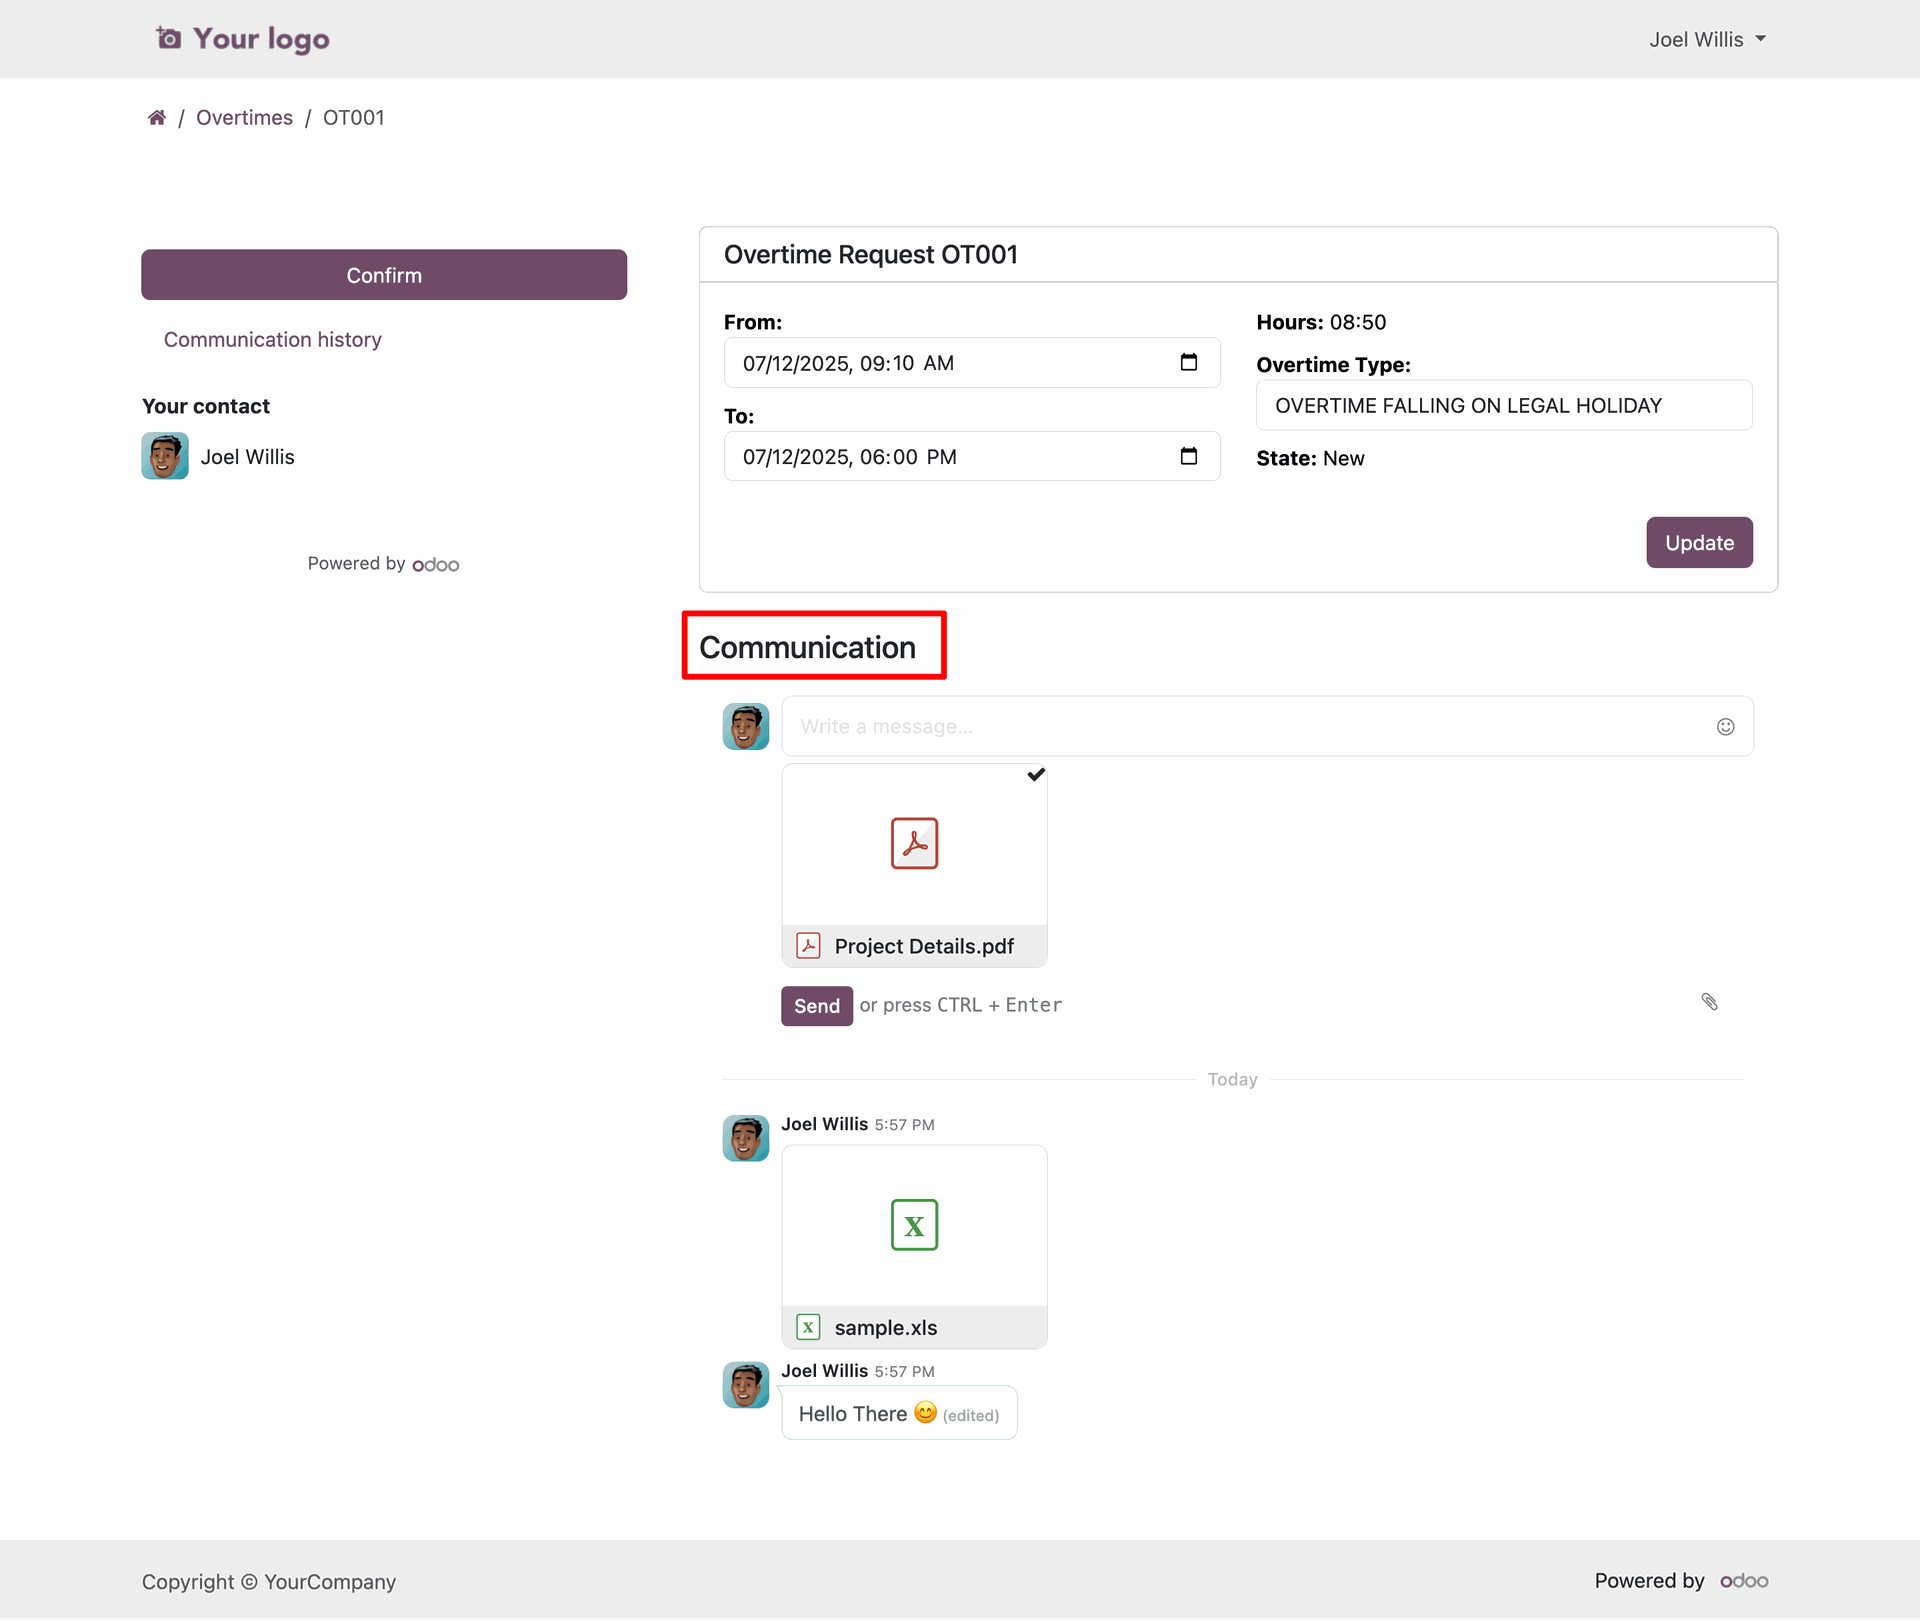
View all request-specific communication in the chatter.
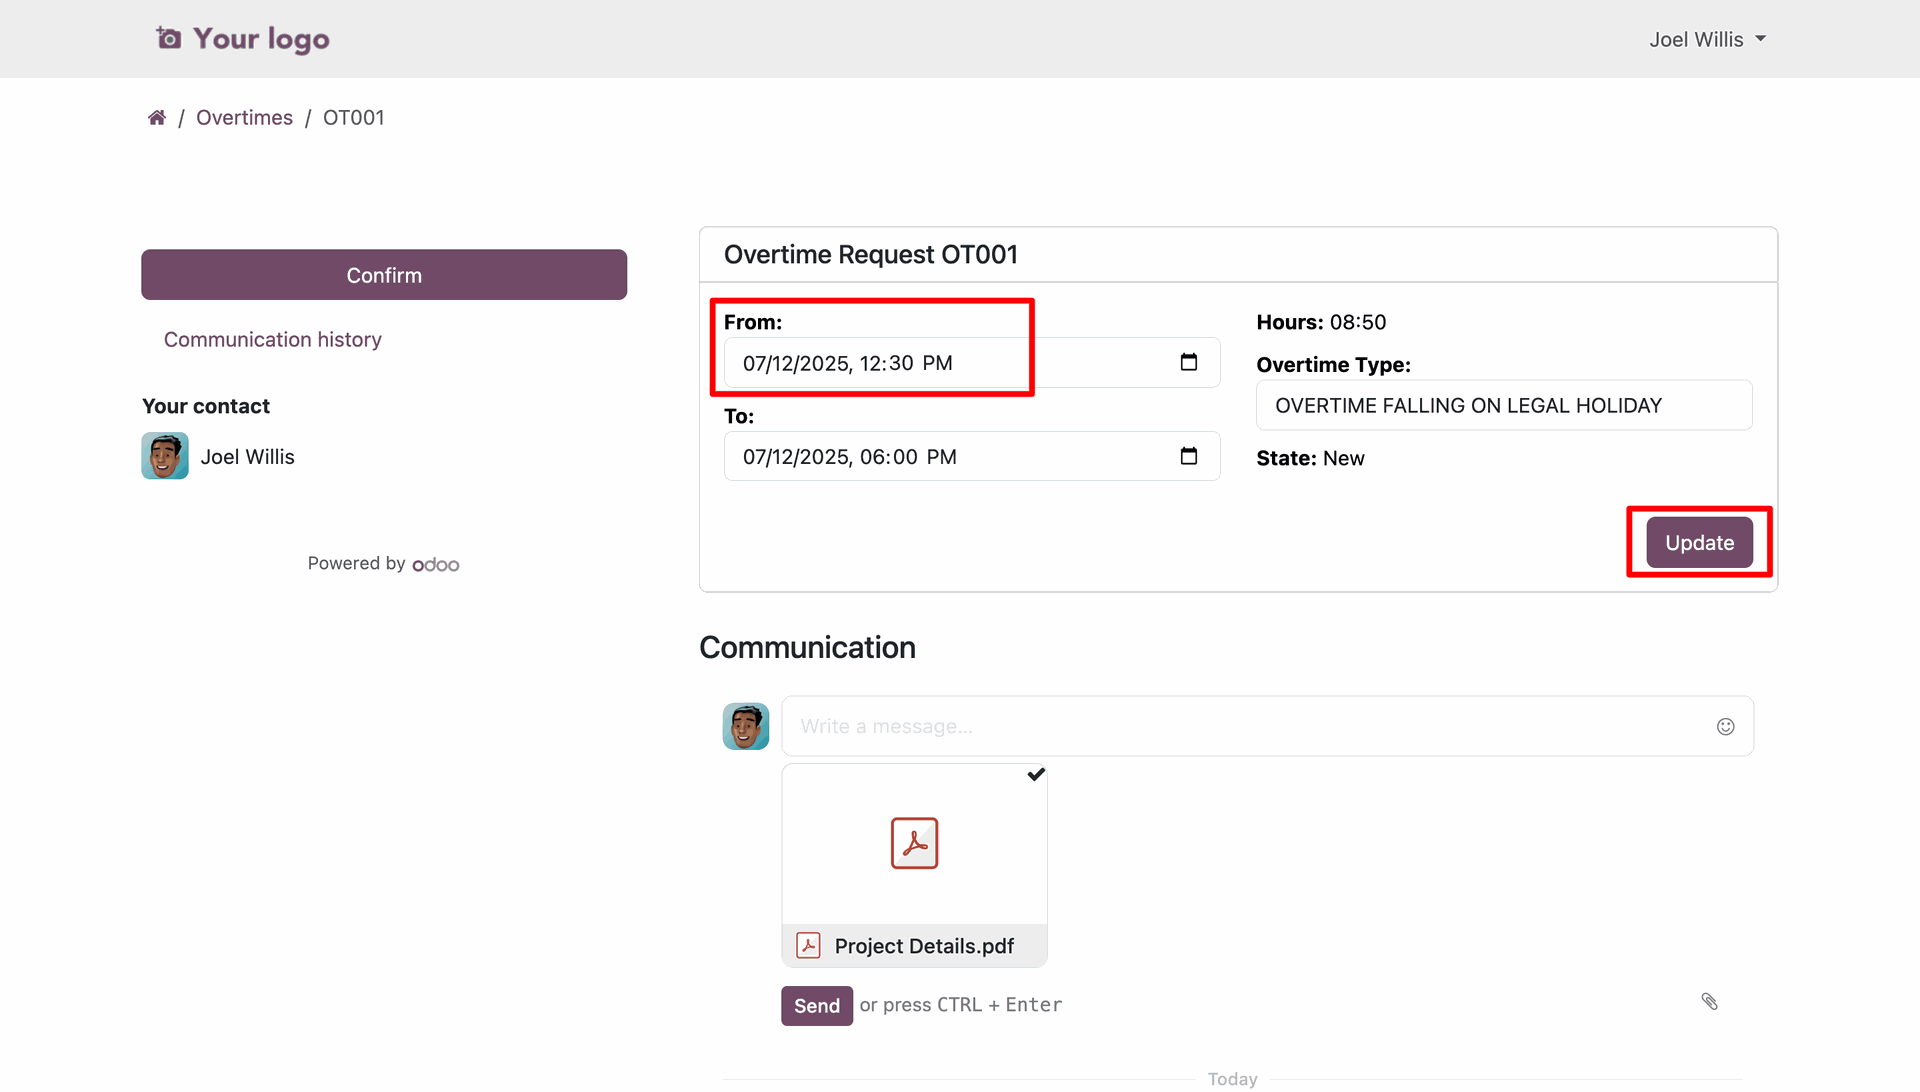
Employees can also update the overtime request details while in draft.
Employees can click 'Confirm' to submit their draft request for managerial review.
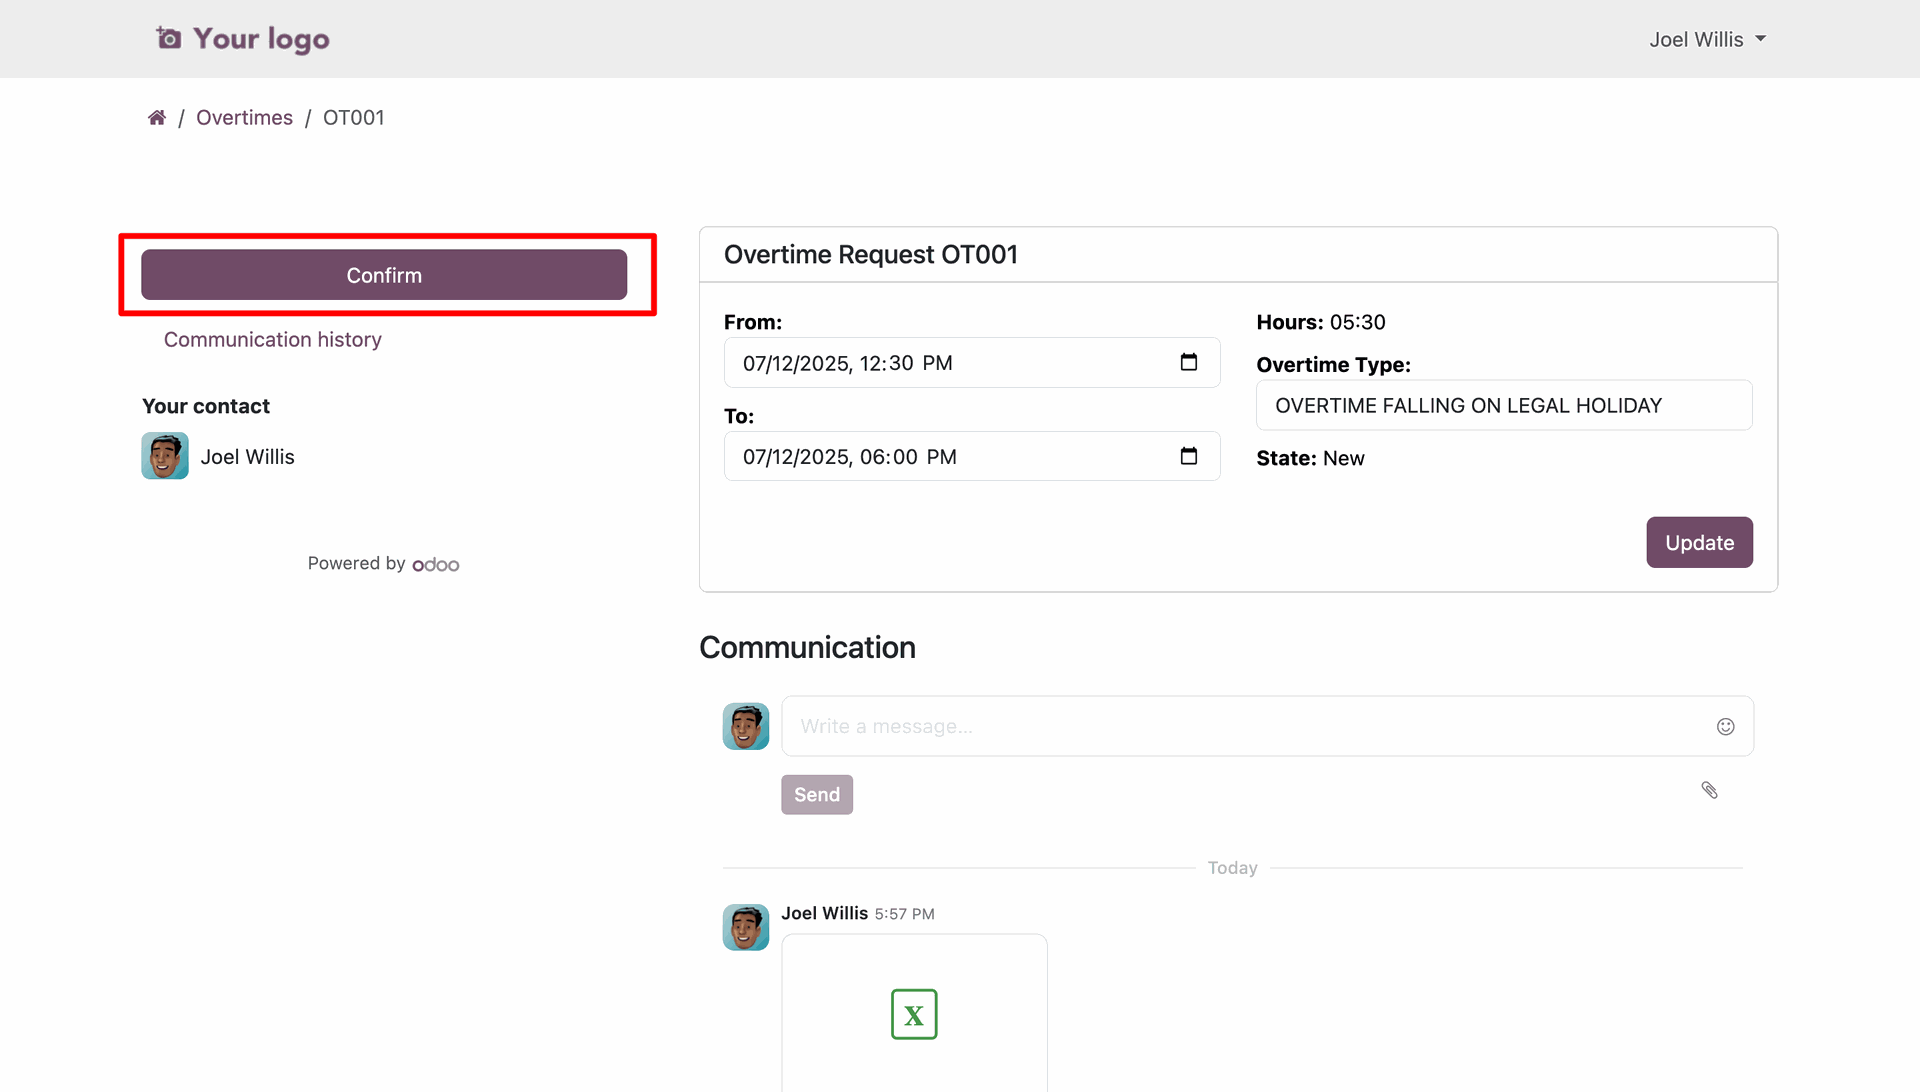
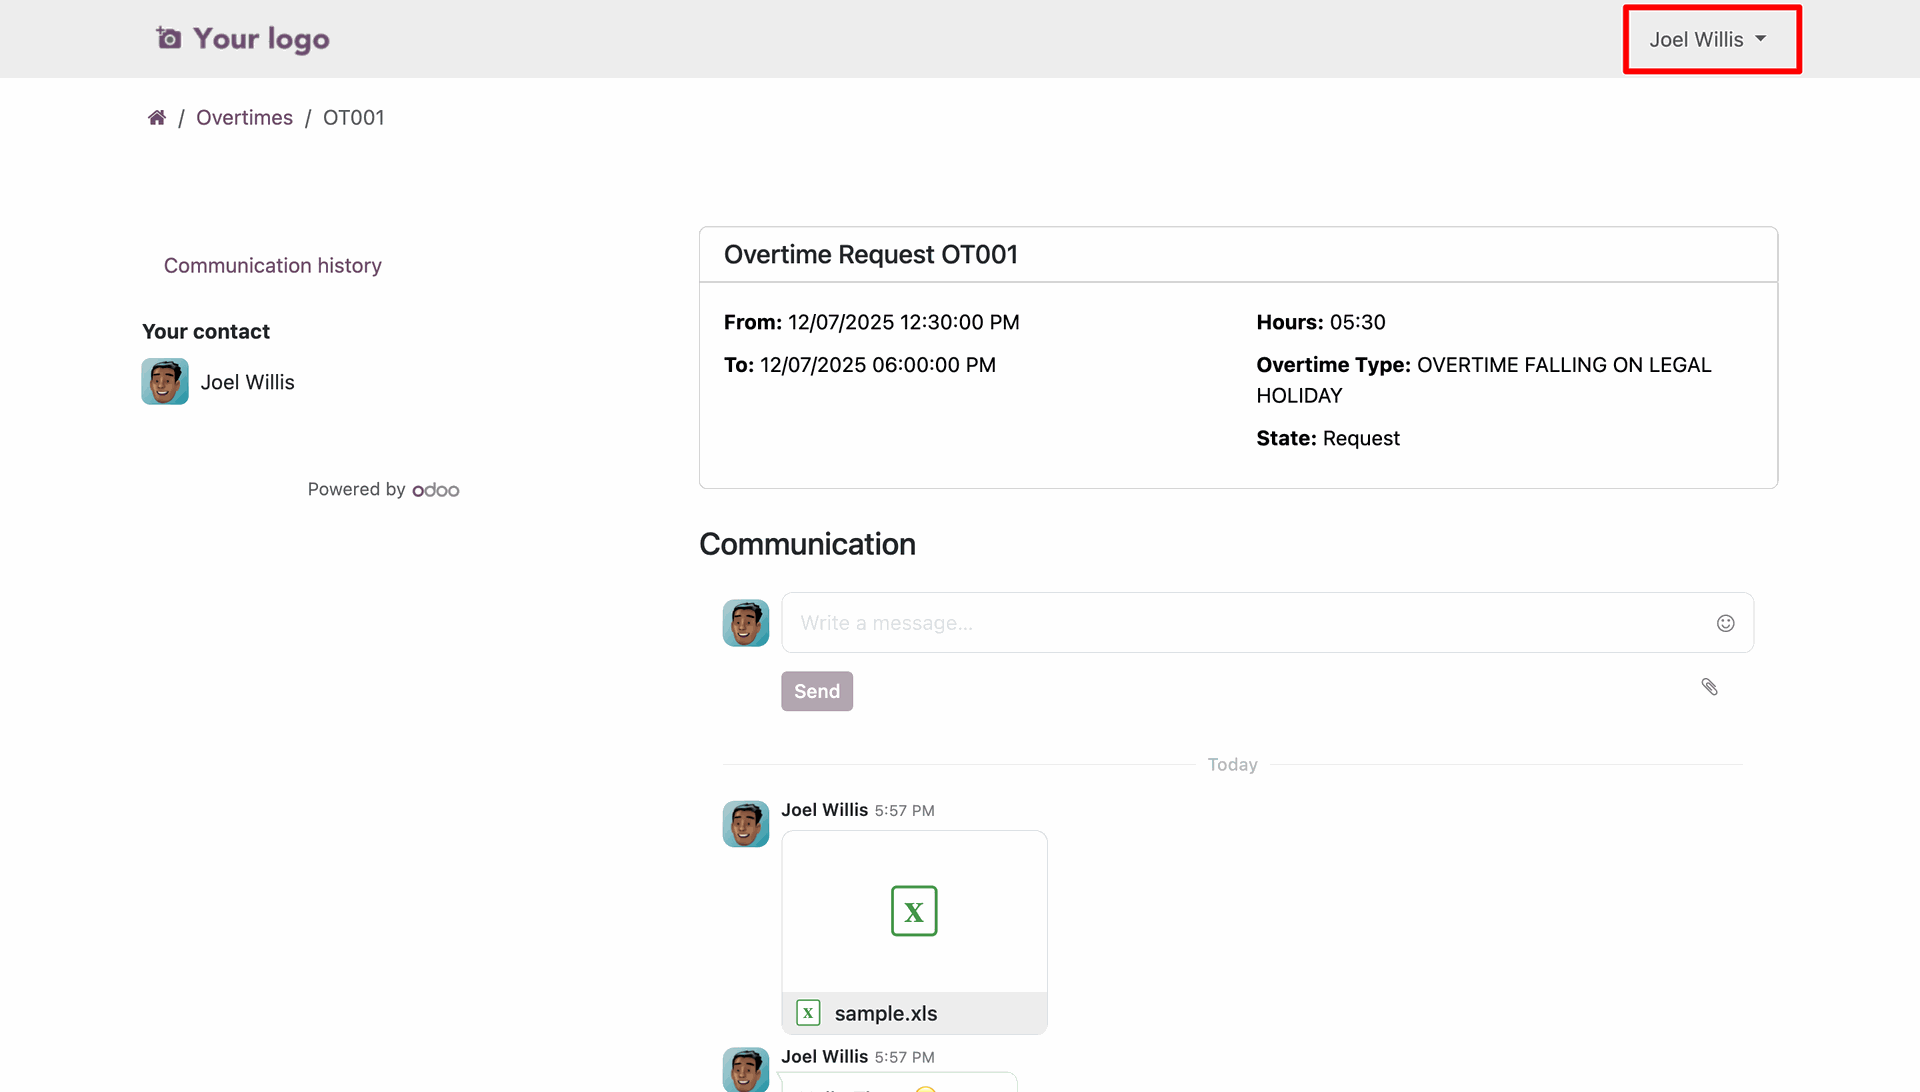
The request status automatically updates to 'Request' after confirmation, notifying the manager.
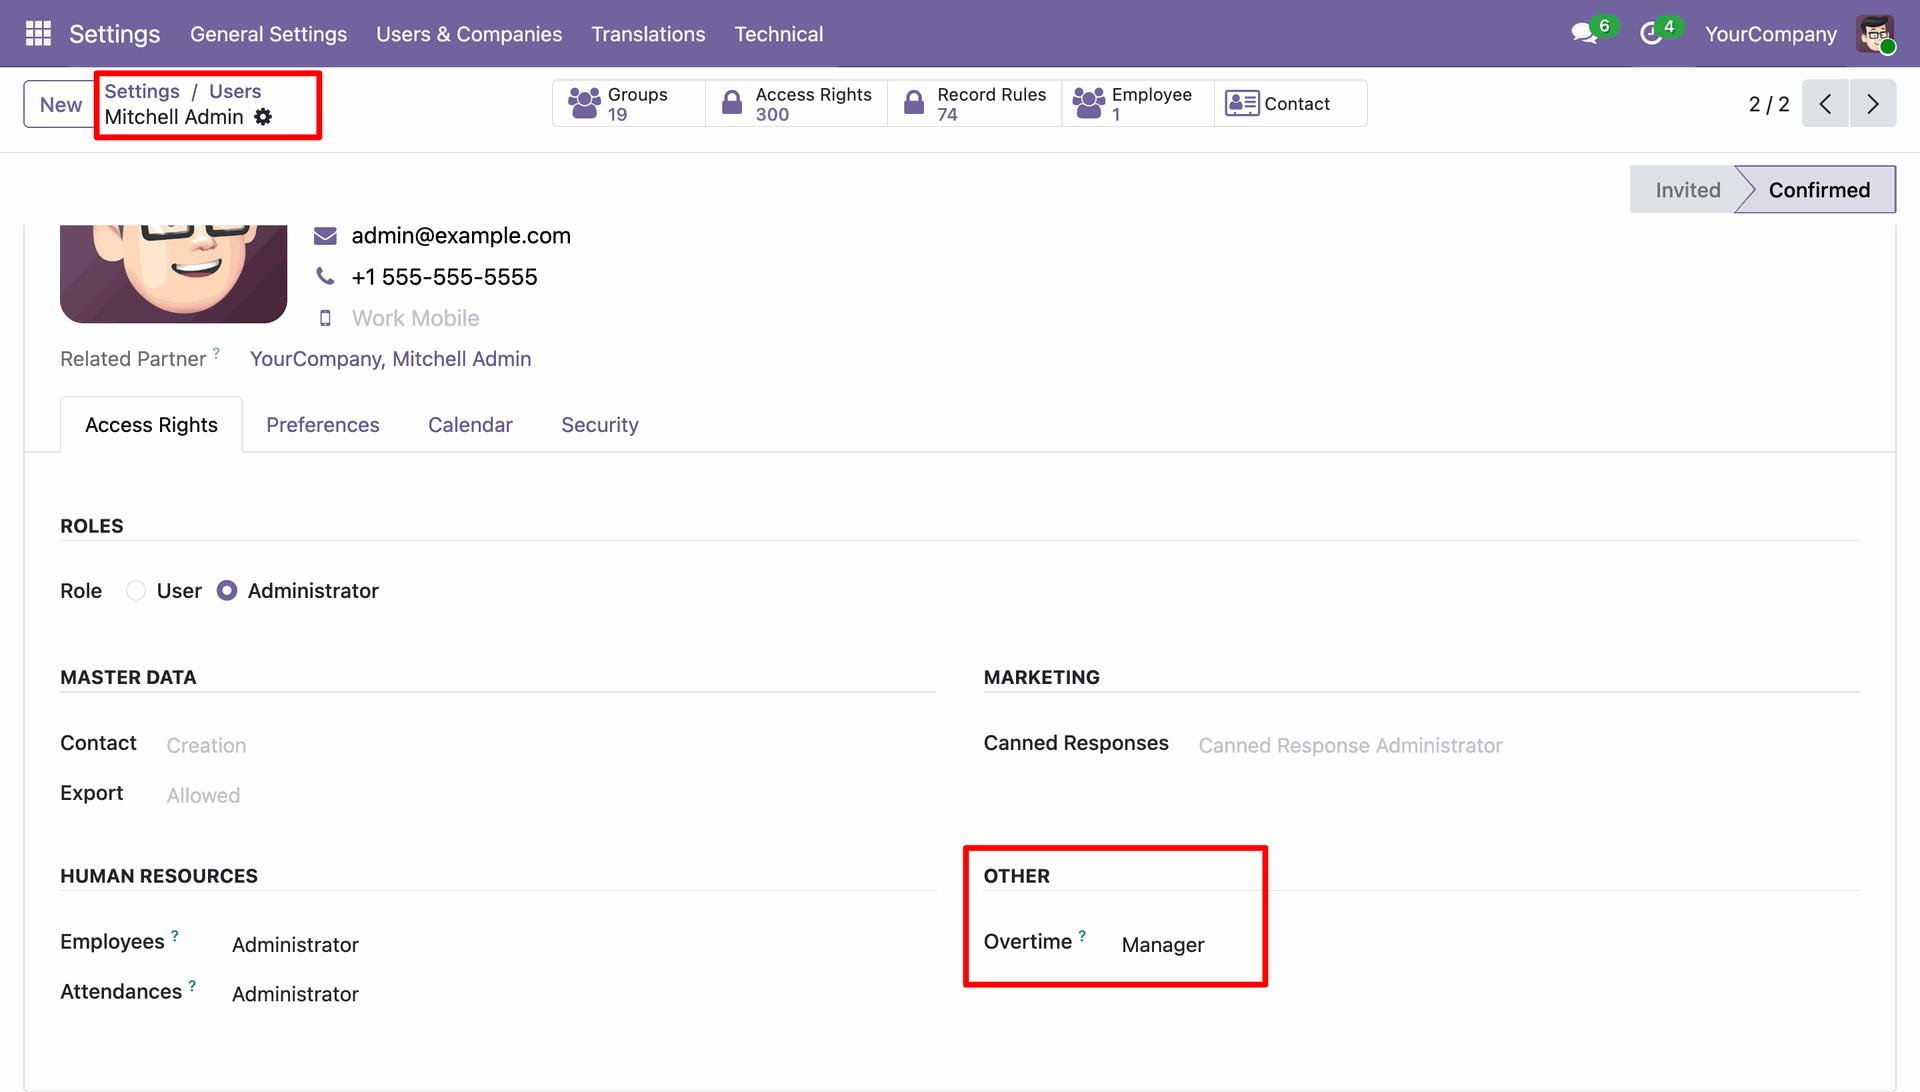
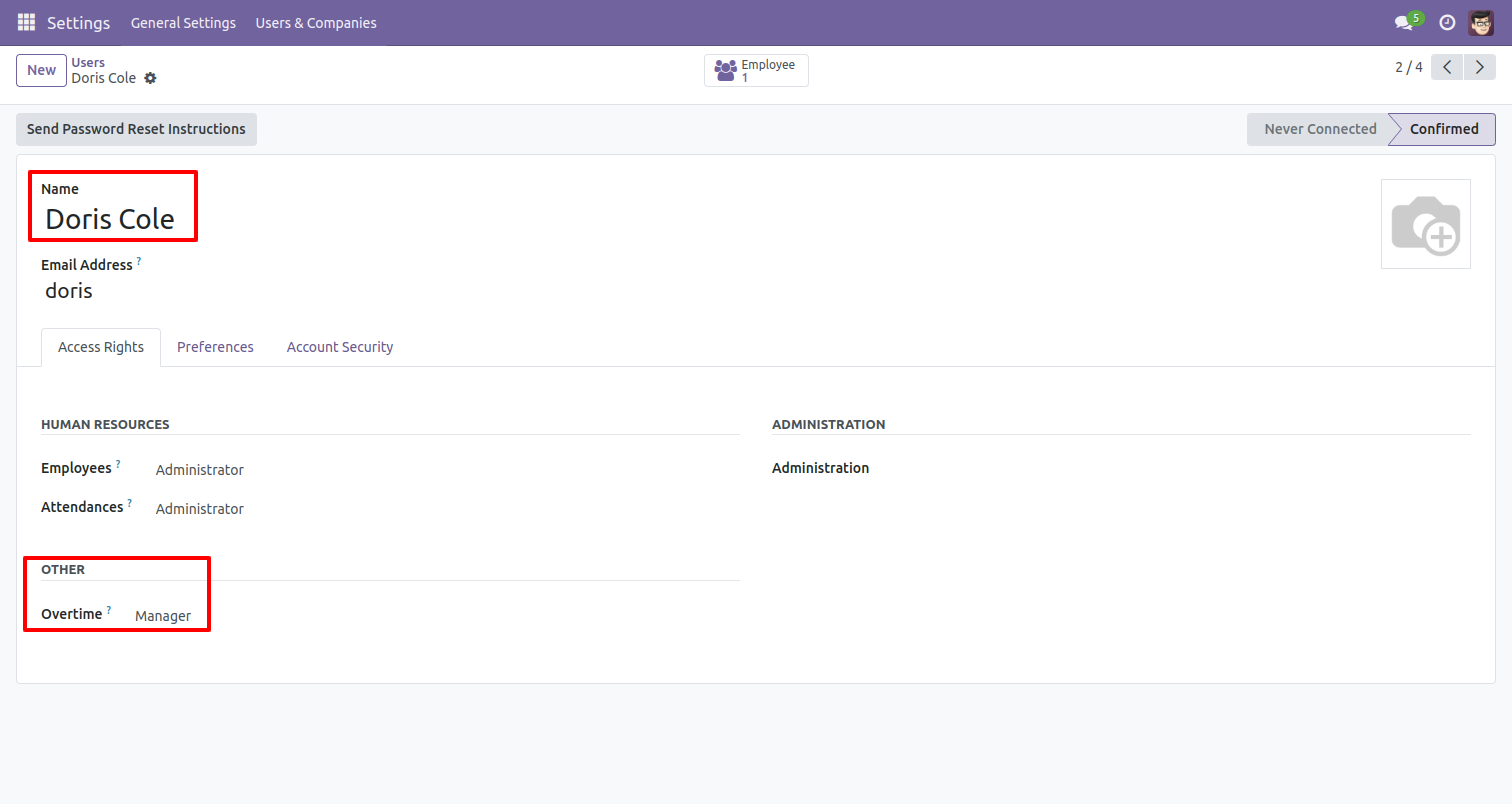
Define 'Overtime Manager' permissions for supervisors to handle the approval workflow.
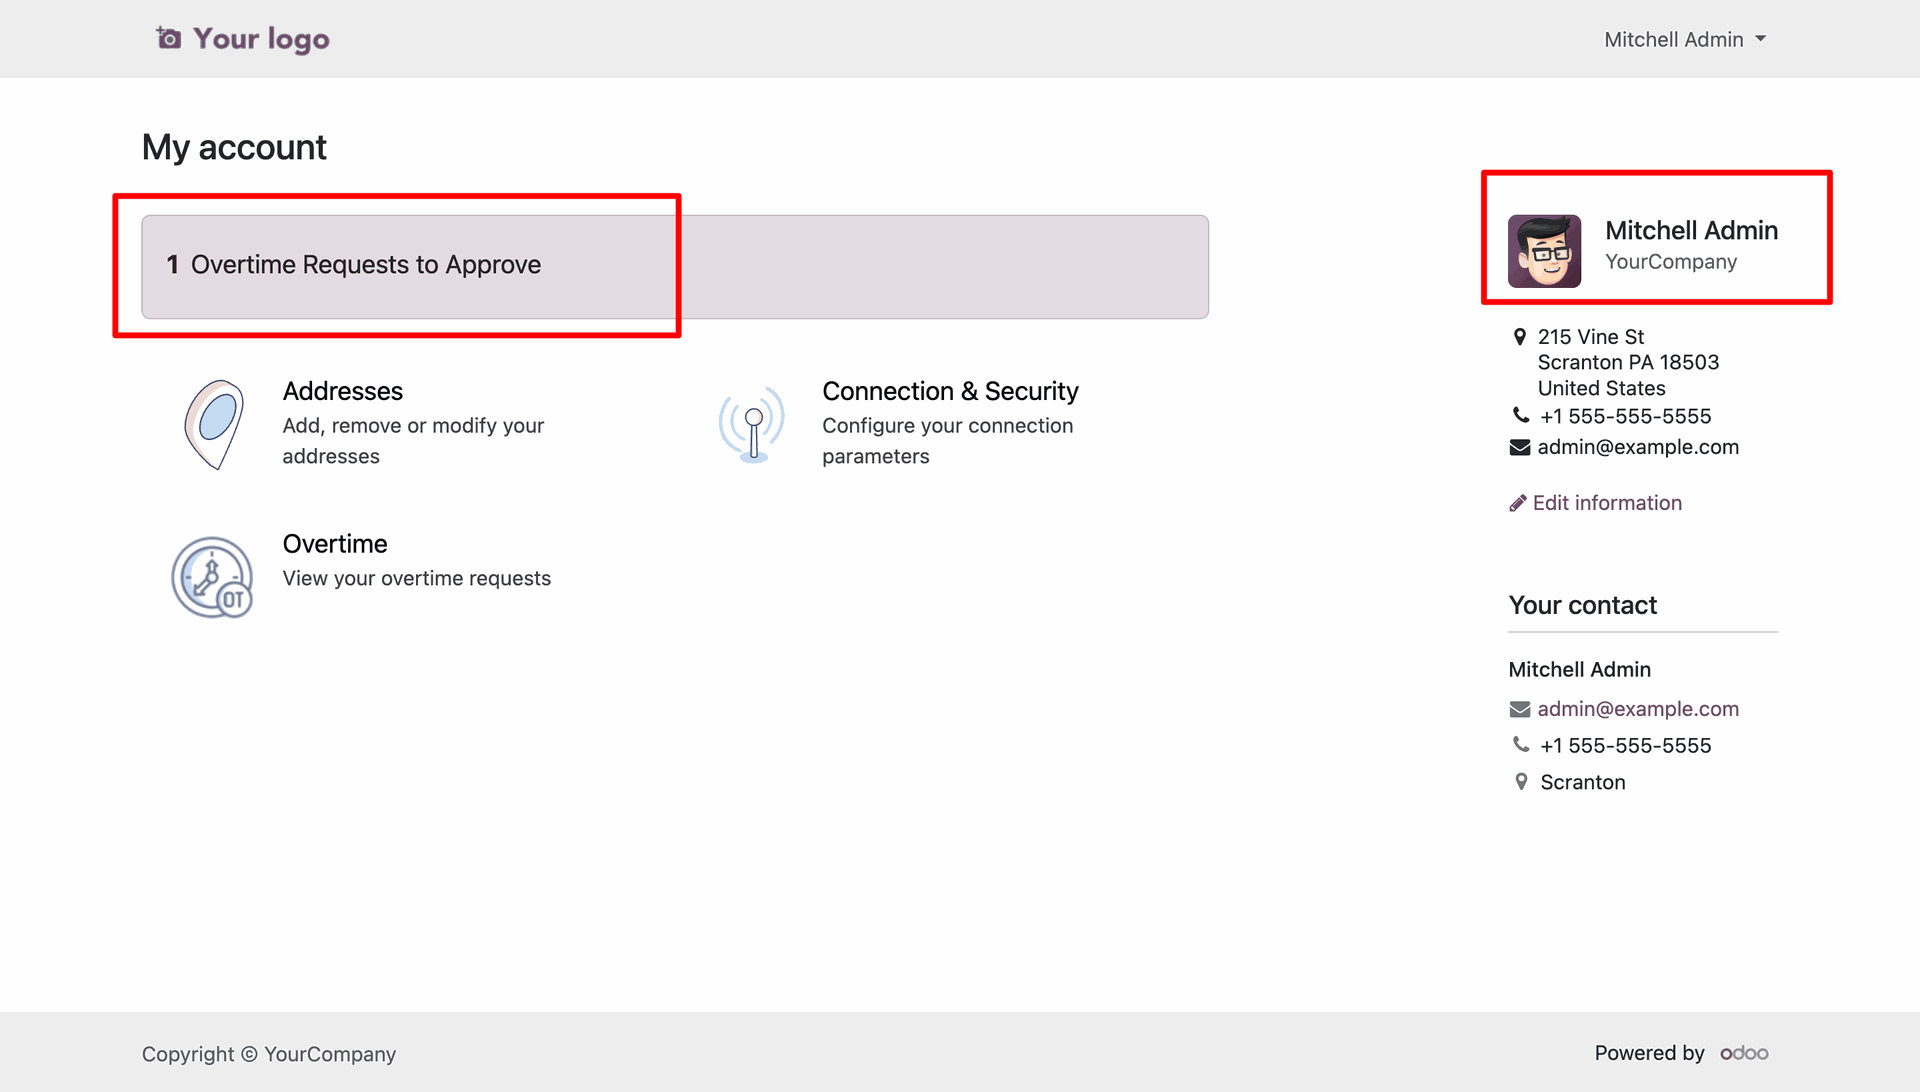
Manager can see 'Overtime Requests to Approve' on their portal.
Managers can review team requests with full details and direct 'Approve'/'Refuse' actions. Click on the 'Refuse' button.
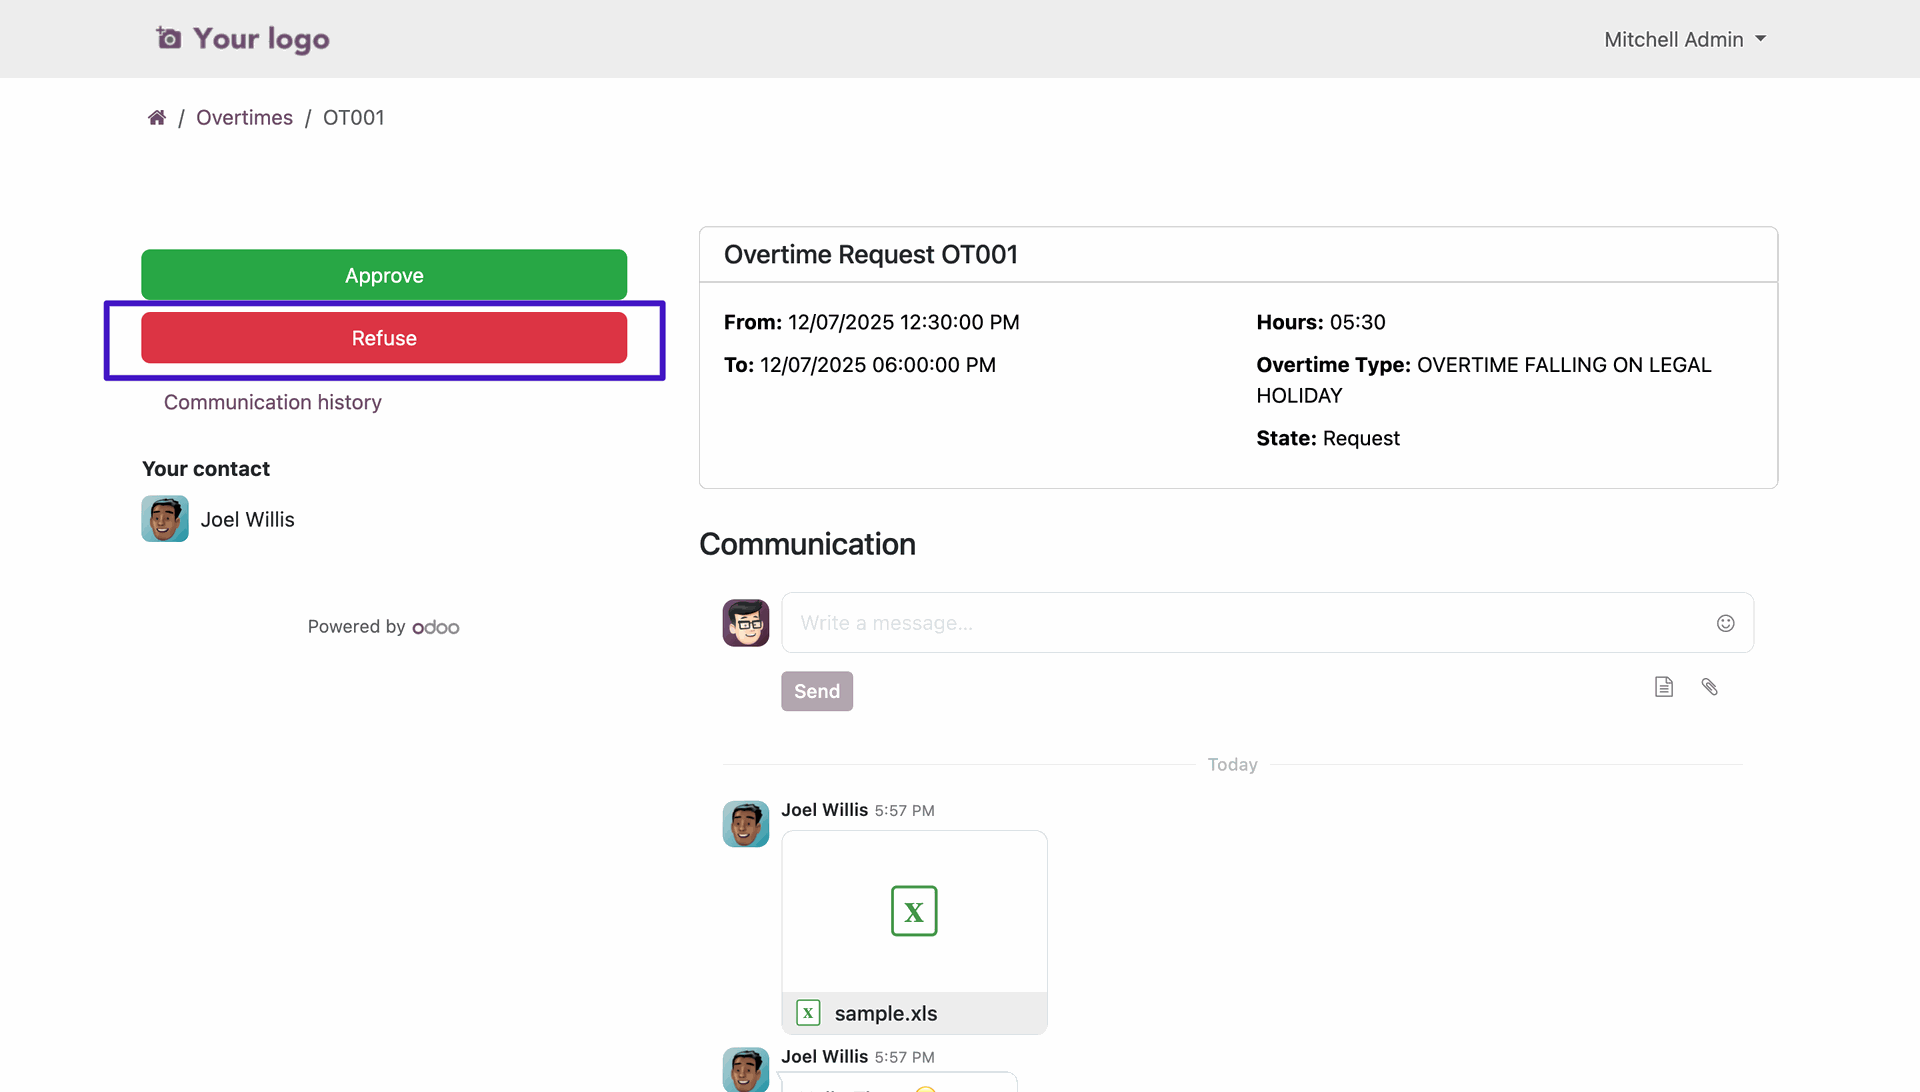
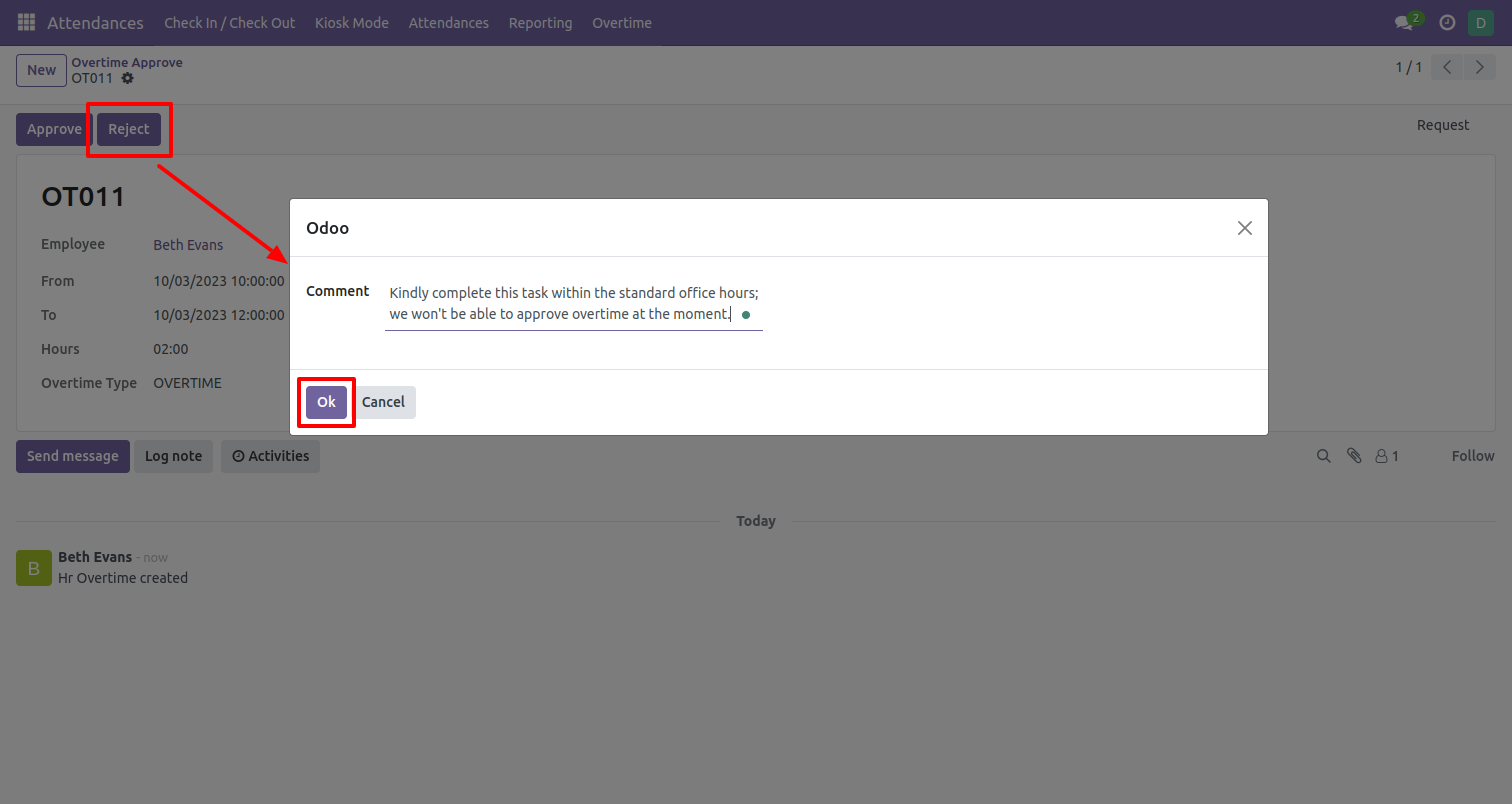
A popup allows managers to provide specific reasons when a request needs to be refused.
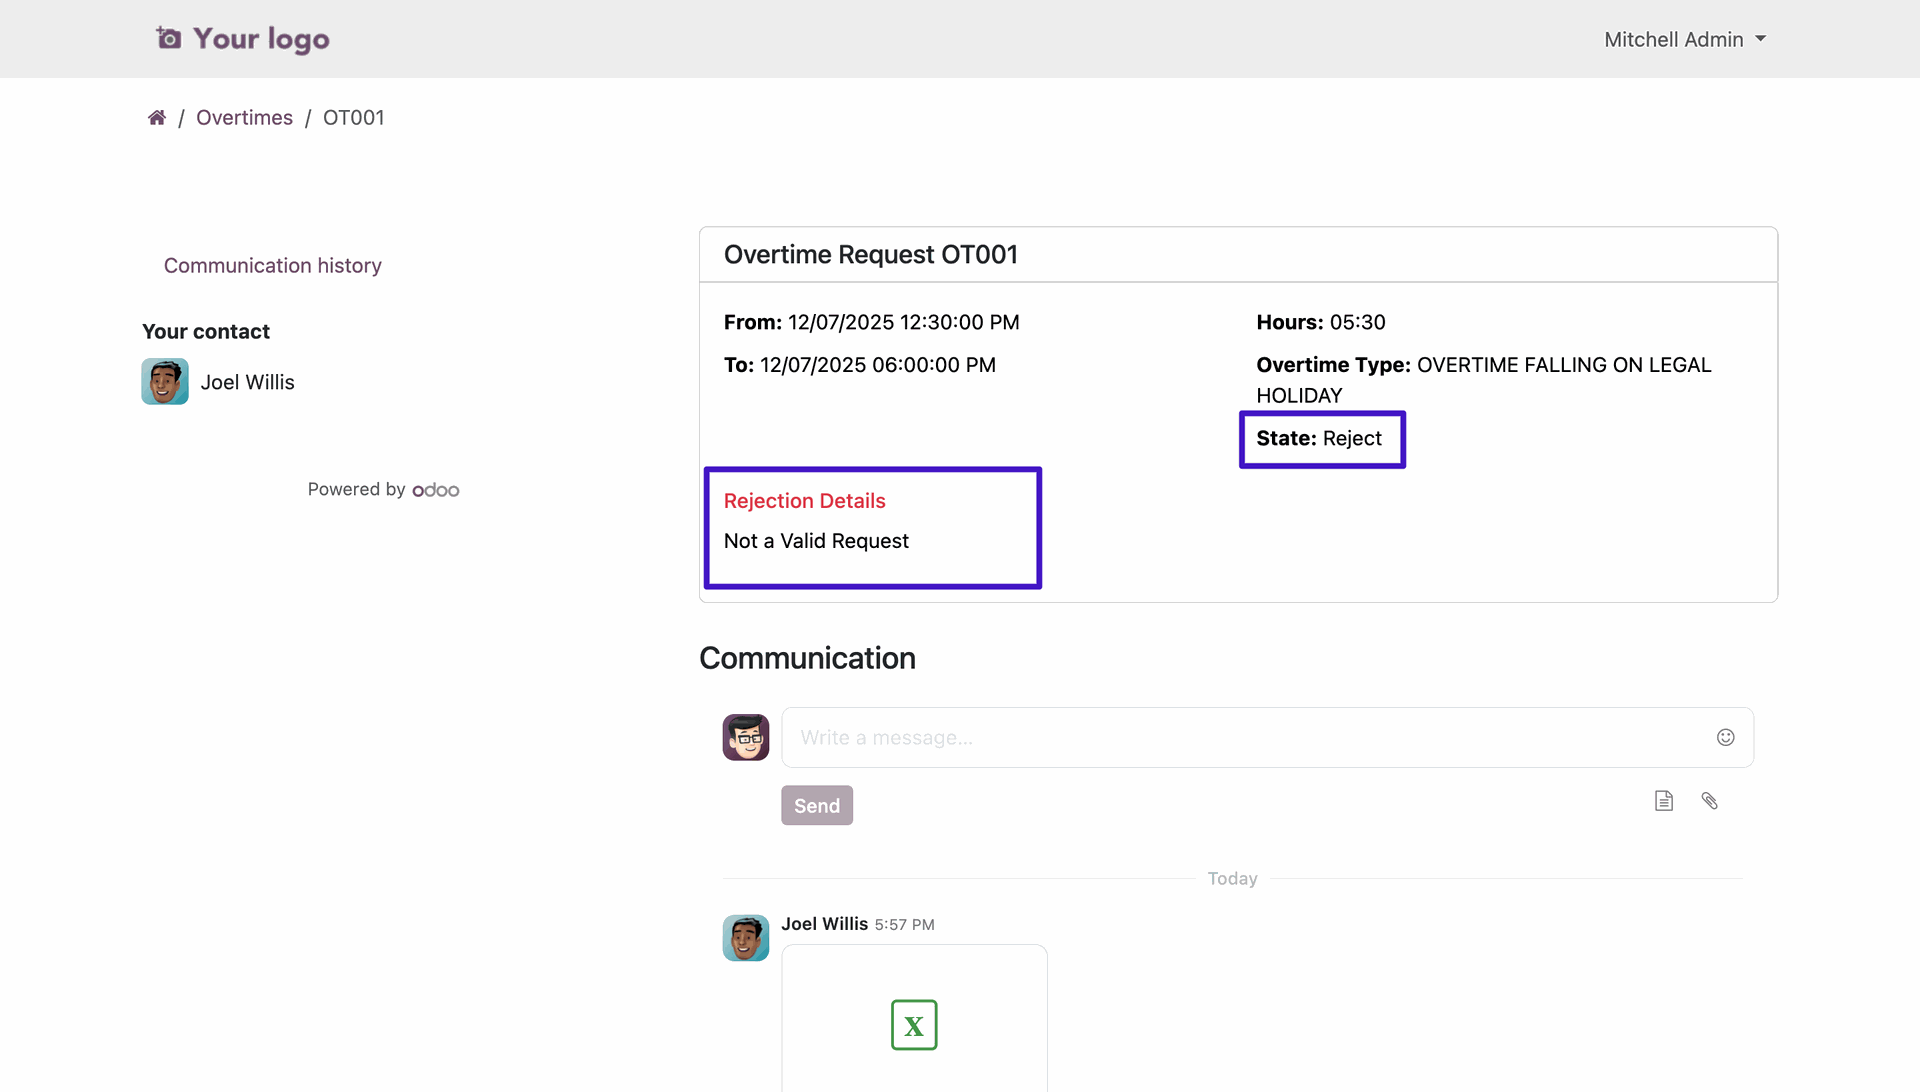
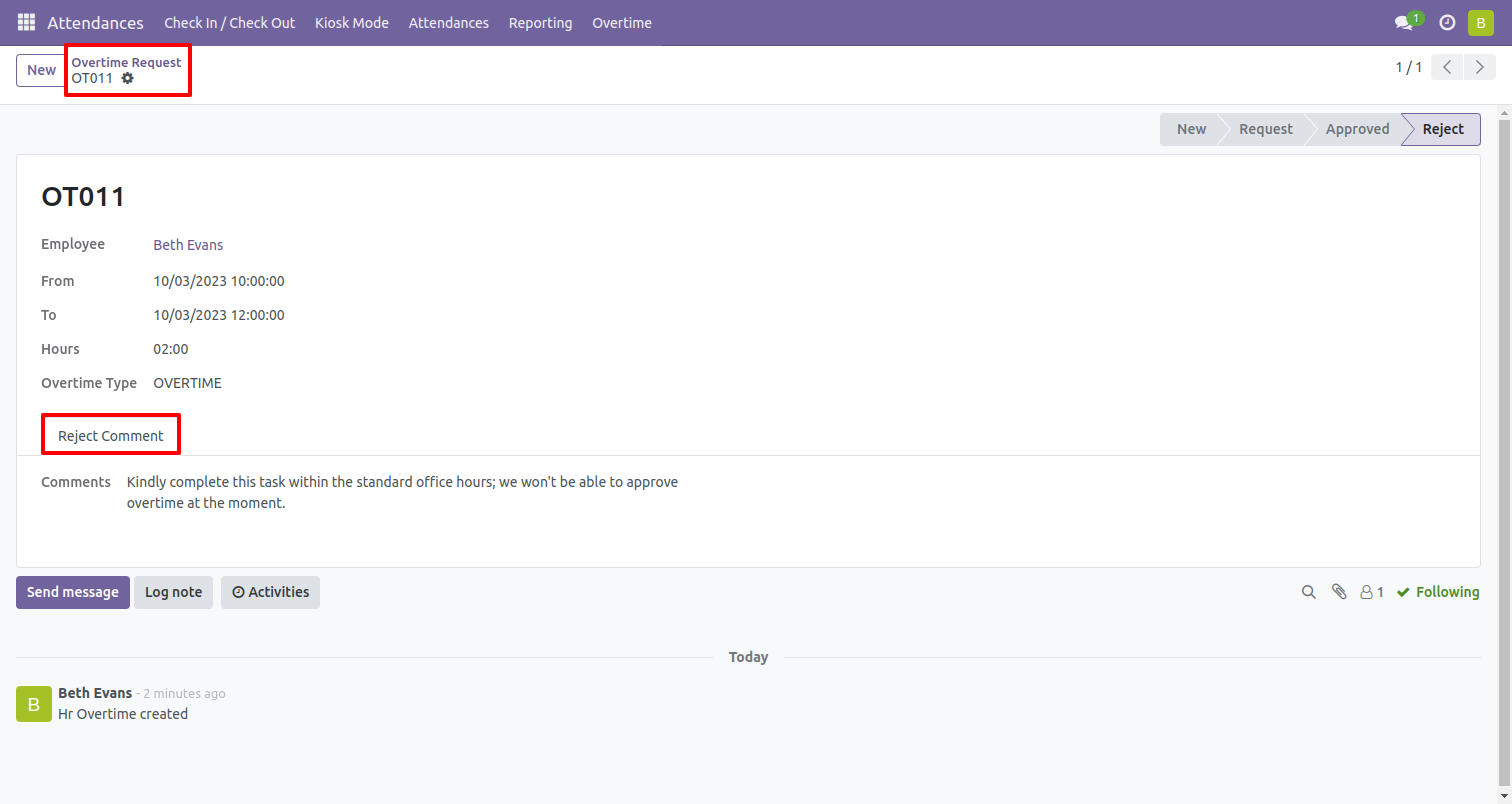
Rejection details are clearly displayed to the employee, facilitating clear feedback.
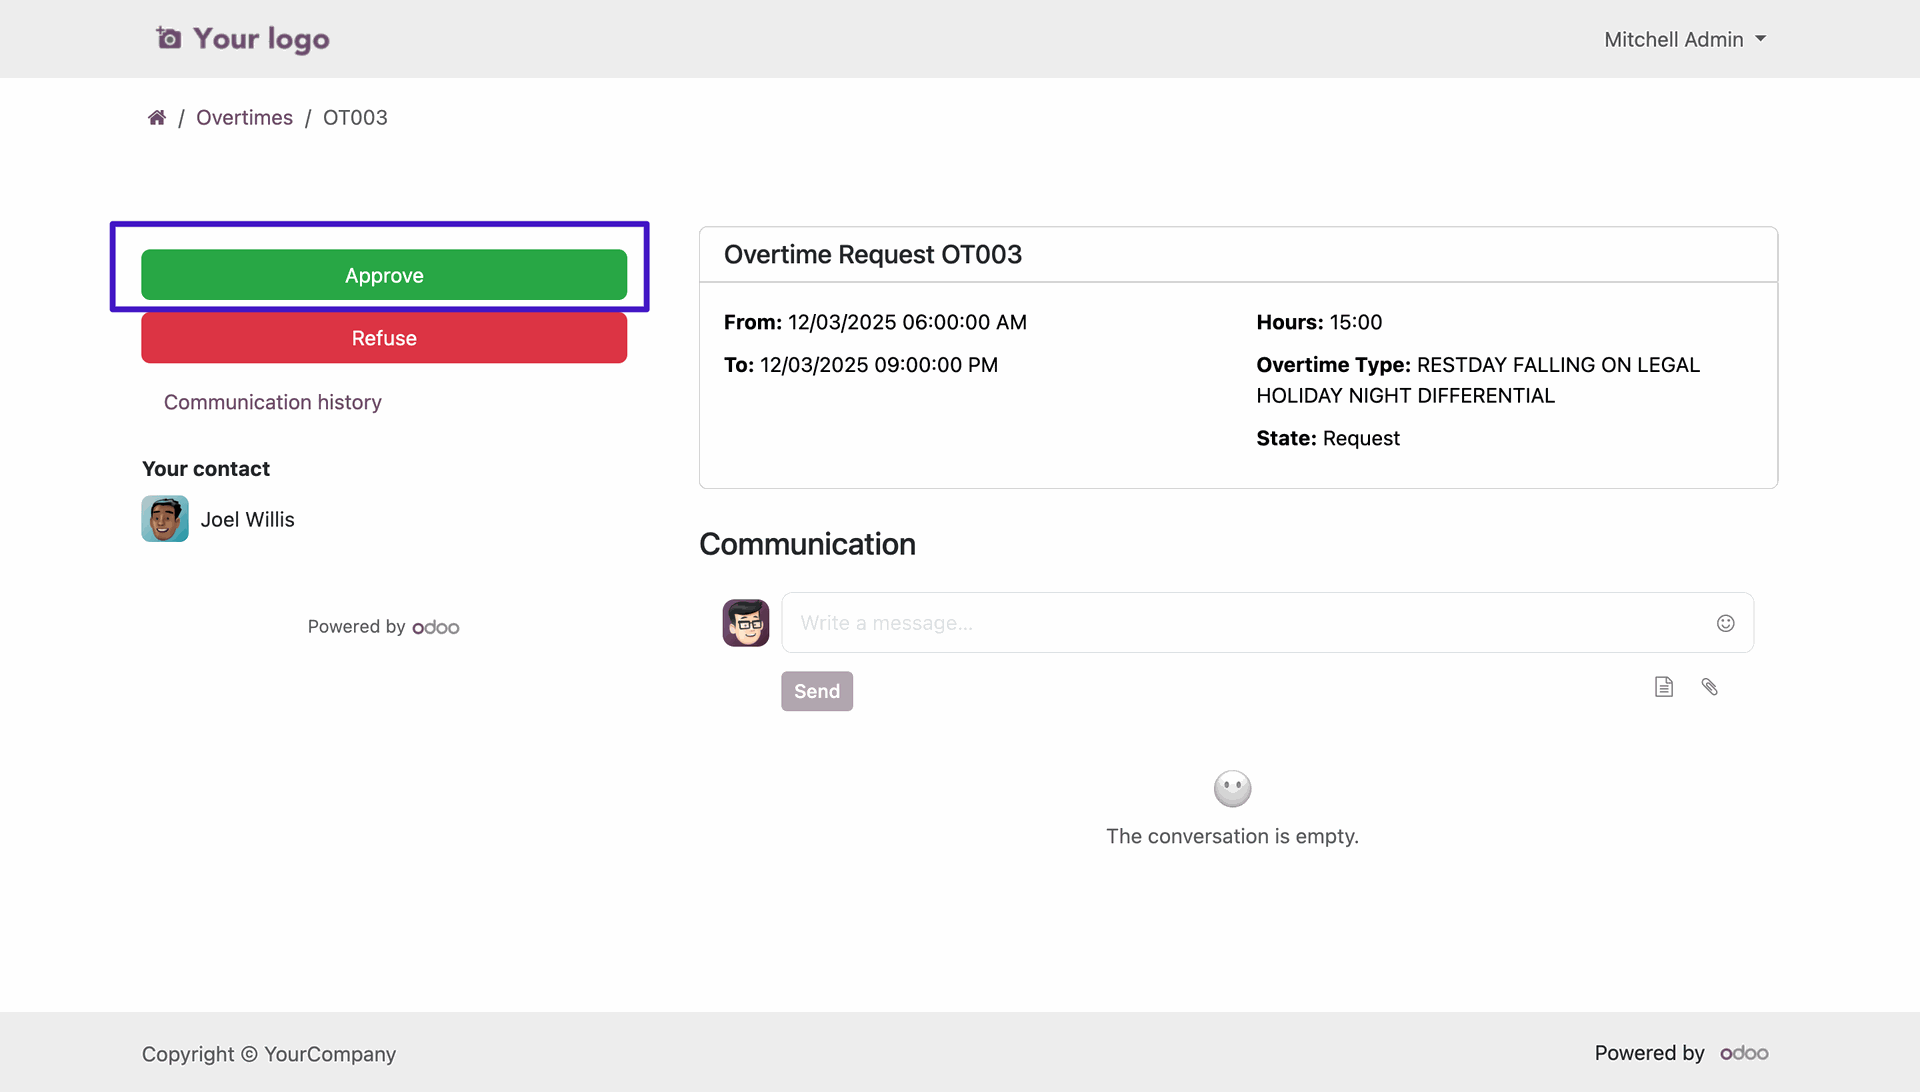
Click on the 'Approve' button to approve the request.
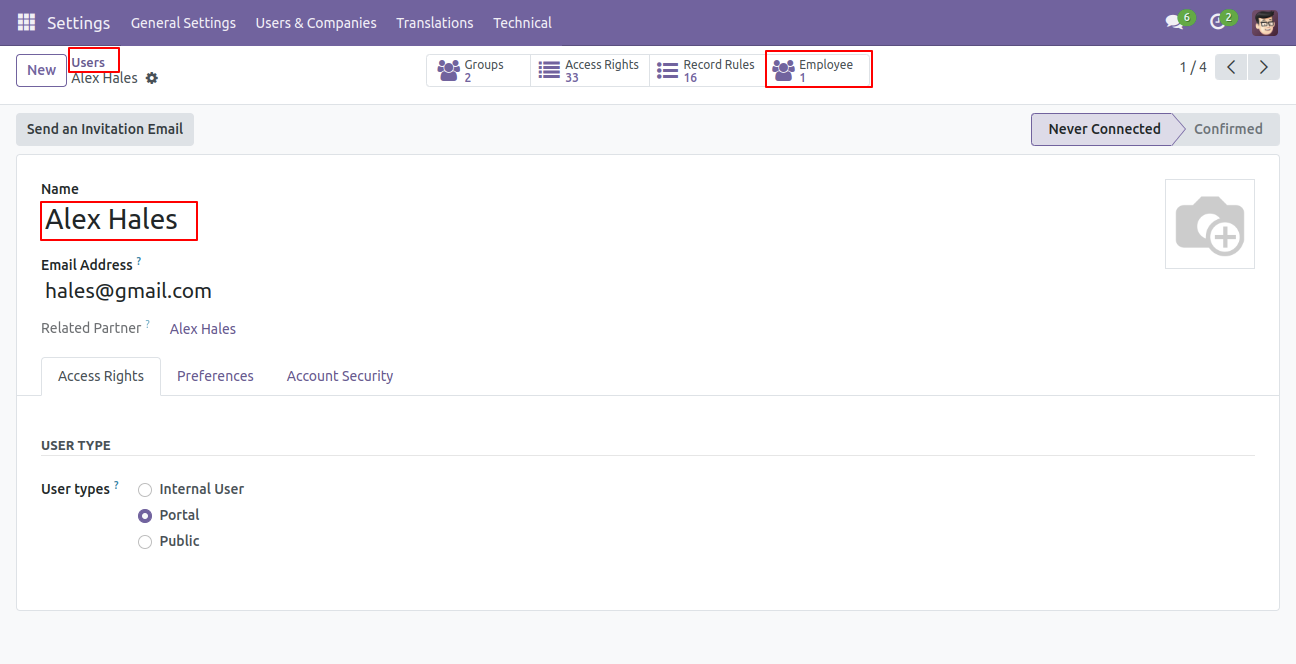
Go to the user's settings. Select user type ==> Portal.
Go to the employee and select the resource in the schedule tab. Create a new resource.
Add a user name in the 'Create resource' wizard and then click on the 'Save & Close' button.
Save the changes.
After that, the 'Employee' smart button becomes visible within the user's form view.
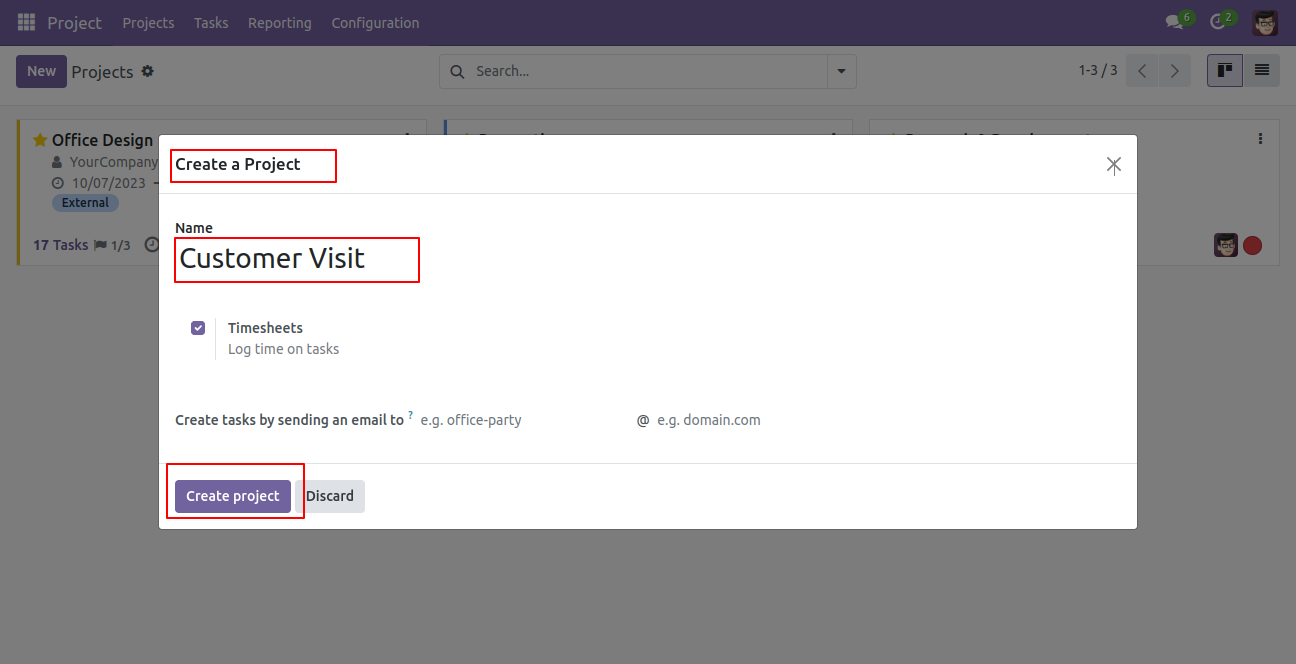
To create a new project, click on the 'New' button. Afterward, the 'Create a Project' wizard will appear. Fill the details and click on the 'Create Project' button.
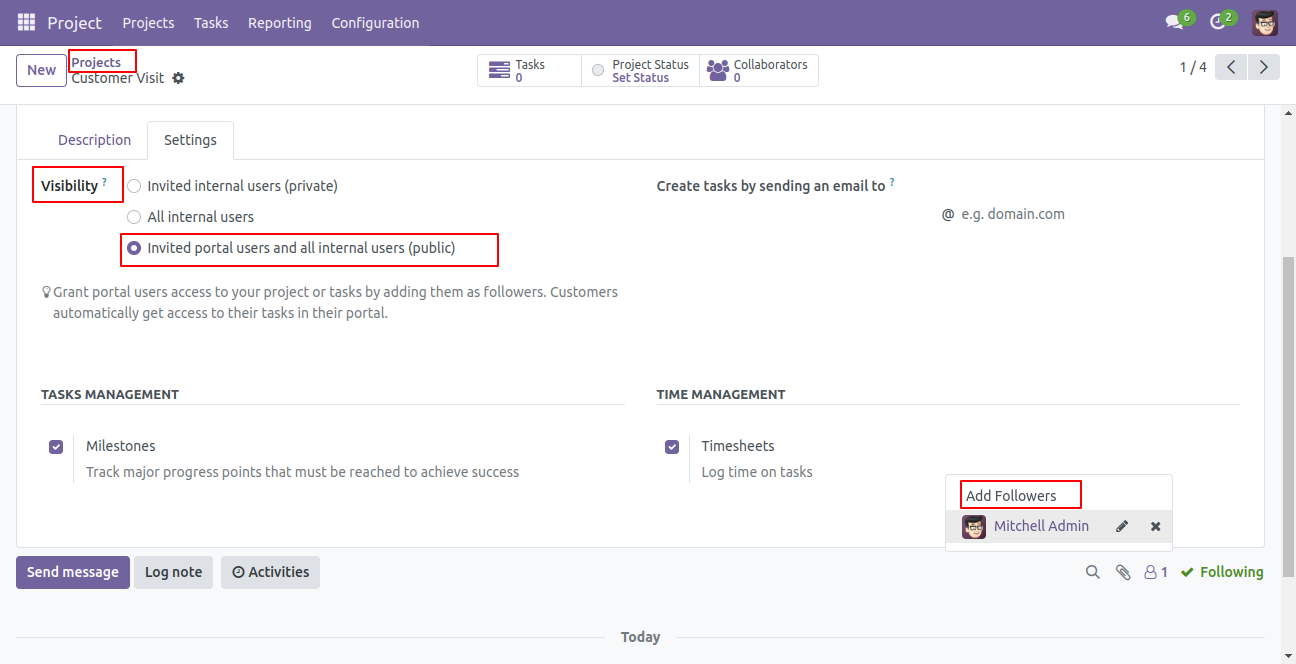
In the project's form view, choose the 'Invite Portal Users and All Internal Users (Public)' visibility option, and then click on the 'Add Followers' button.
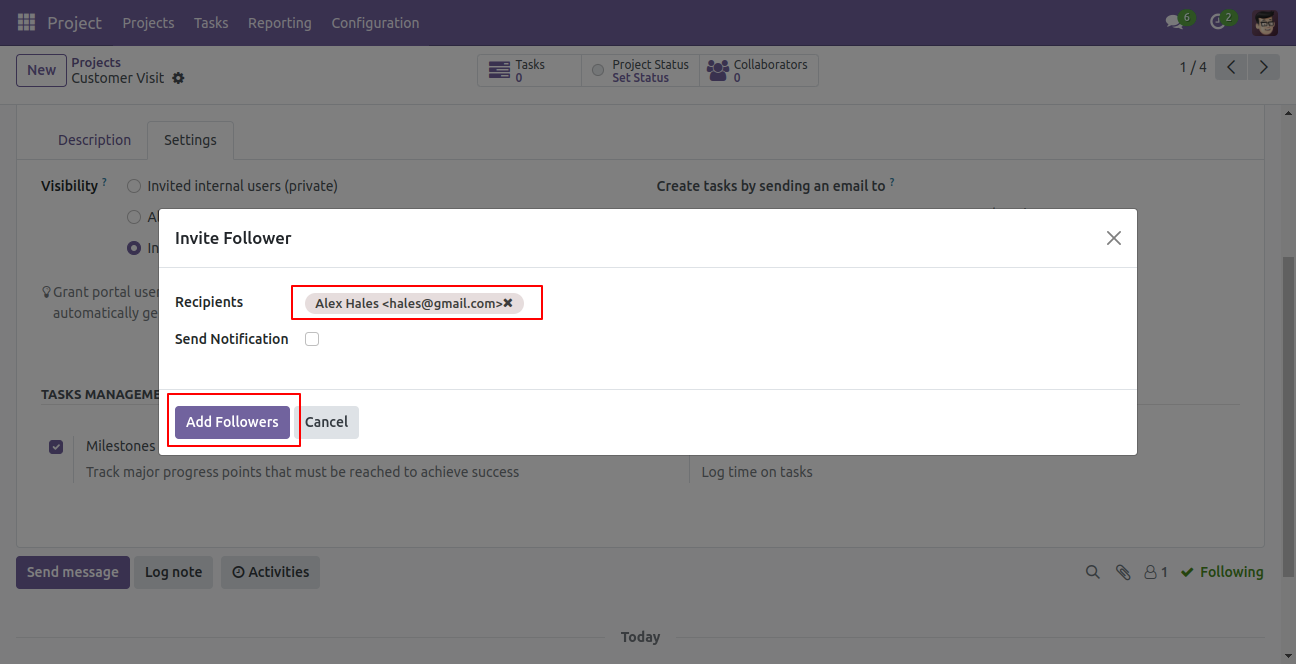
Add a recipient in the 'Invite Follower' wizard and then click the 'Add Followers' button.
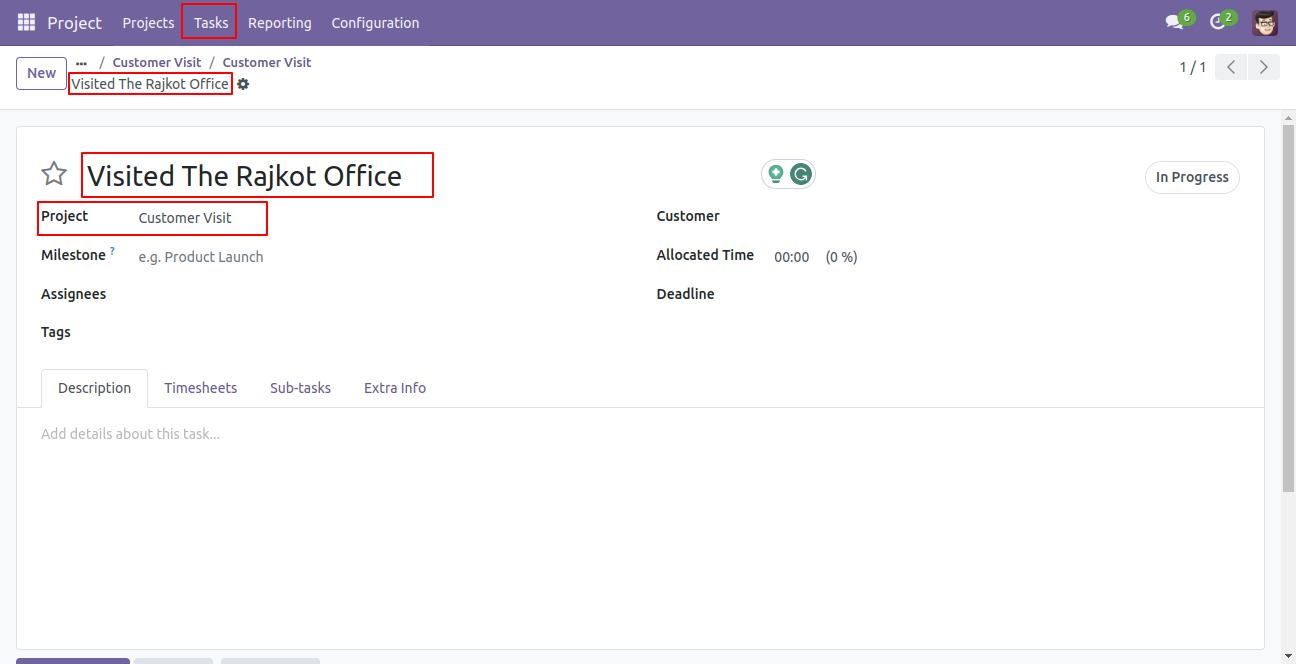
The project name is visible in the tasks form view.
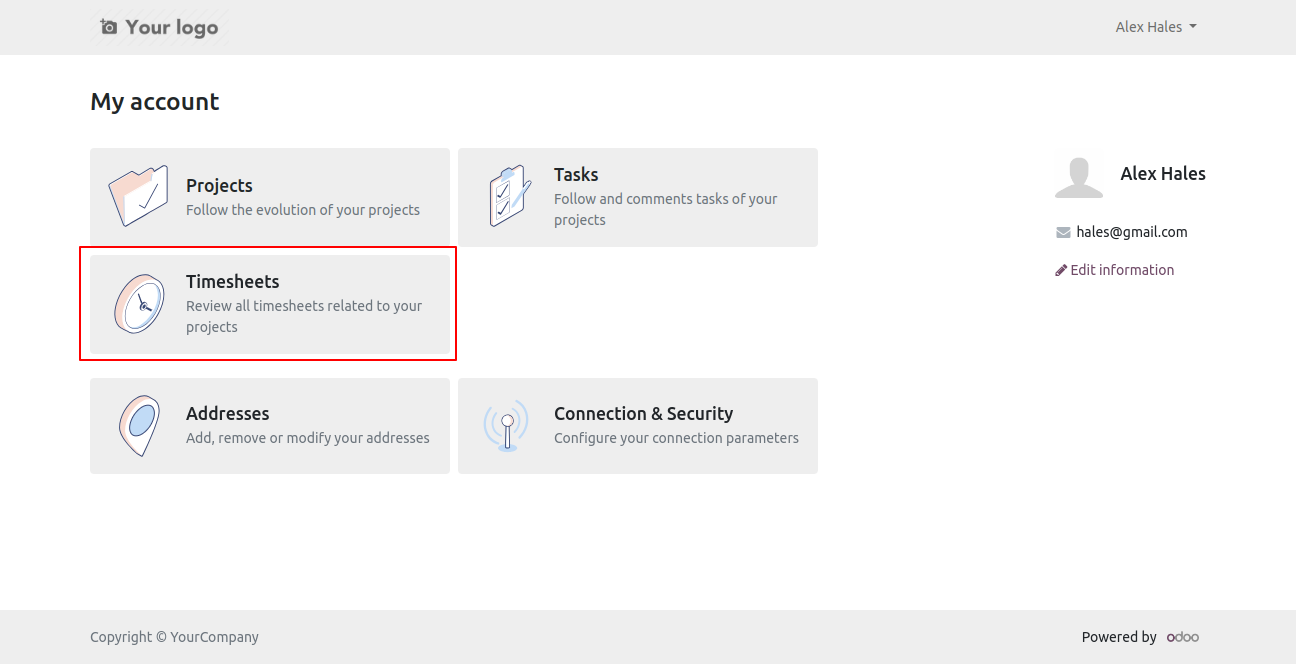
In my account(portal) go to 'Timesheets'.
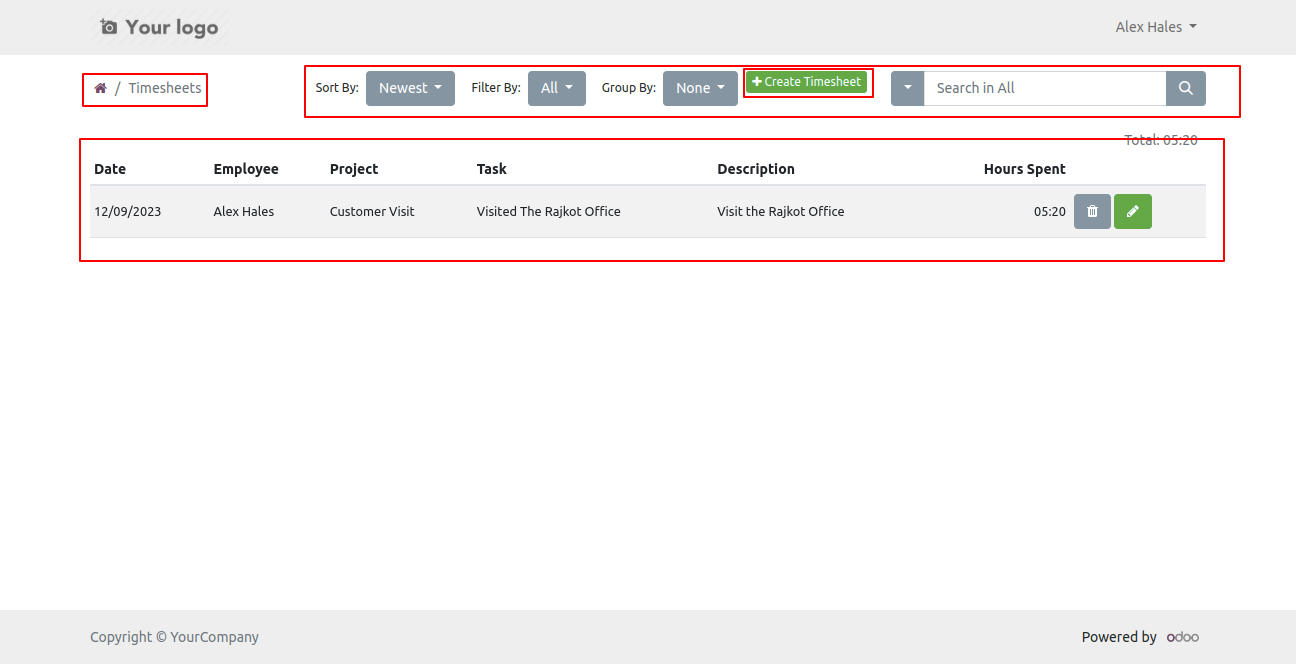
You can create a new timesheet from the 'Create Timesheet' button.
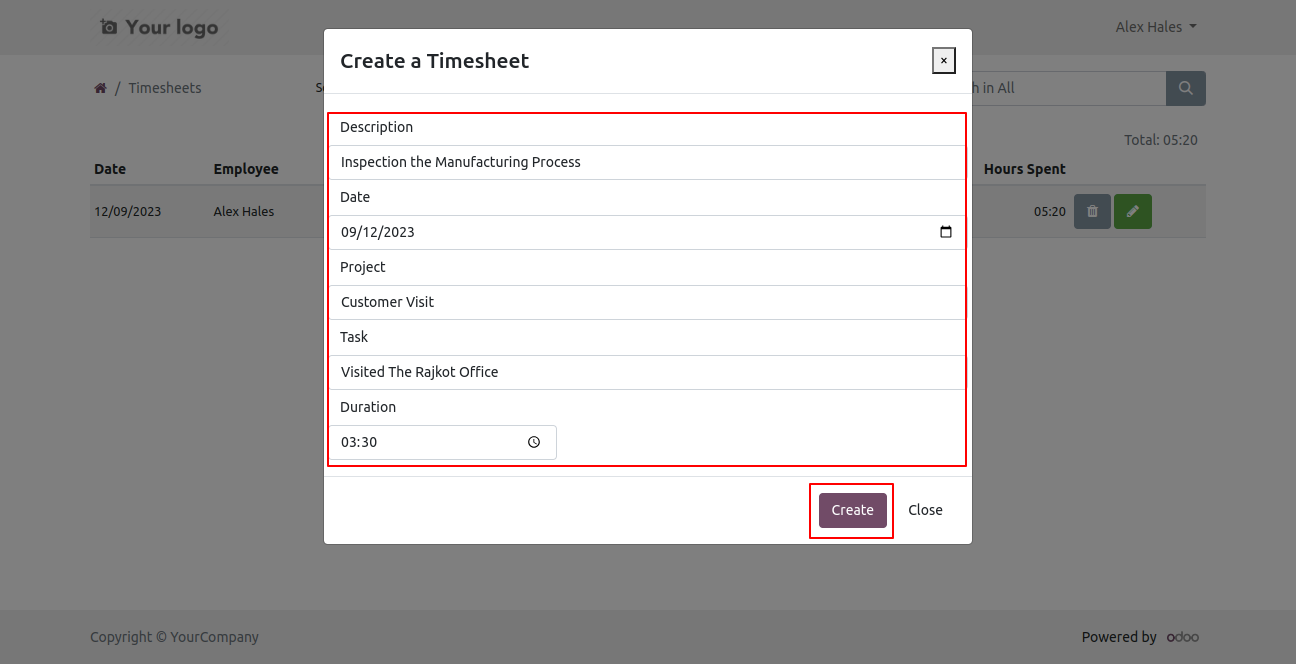
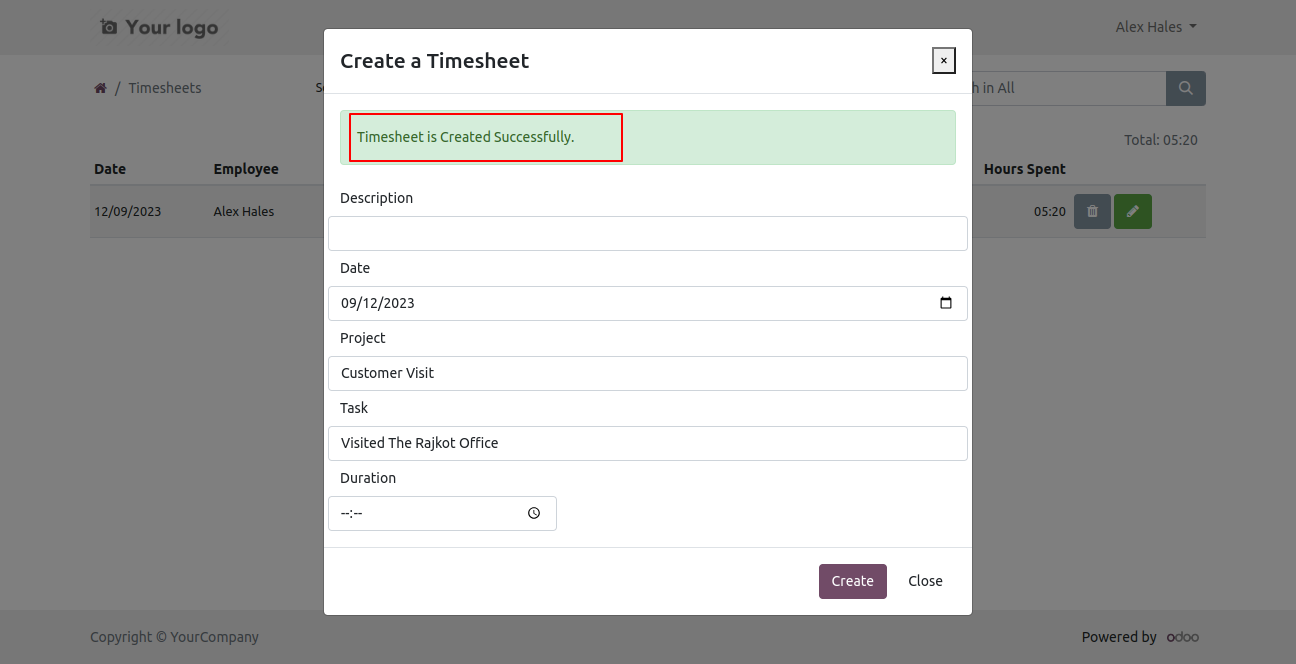
After that one wizard opens. Fill the details and press the 'Create' button.
It shows created timesheet popup.
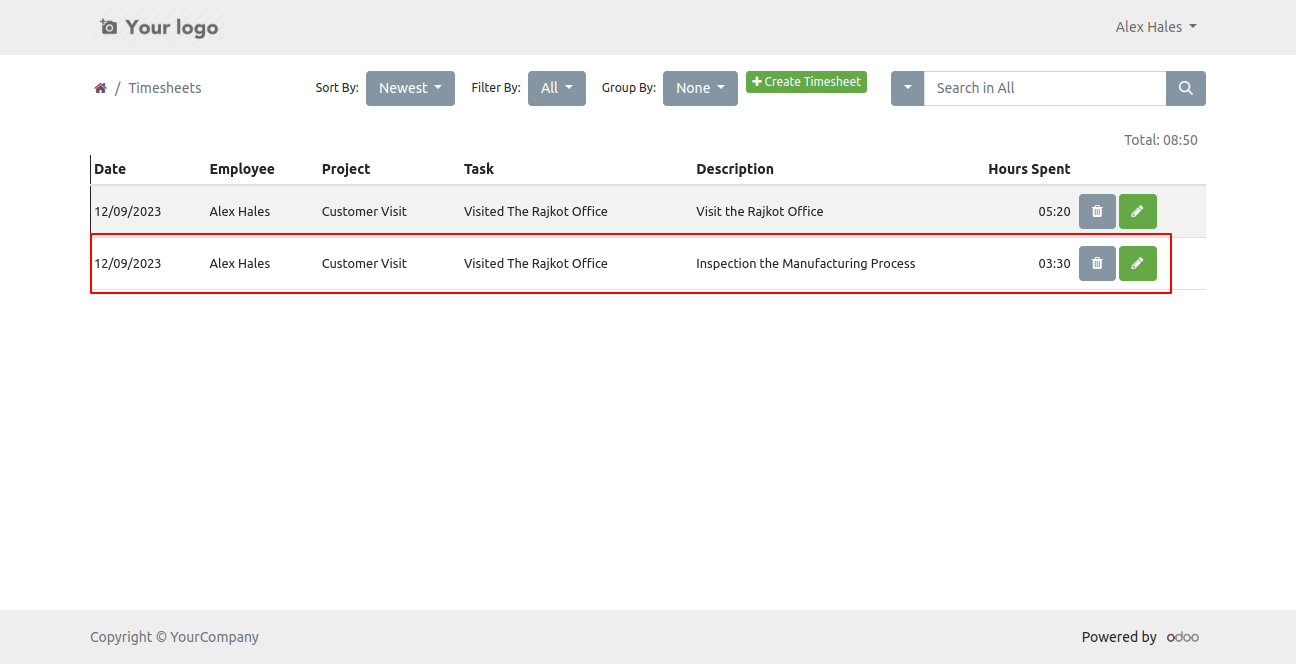
Timesheet list view looks like below.
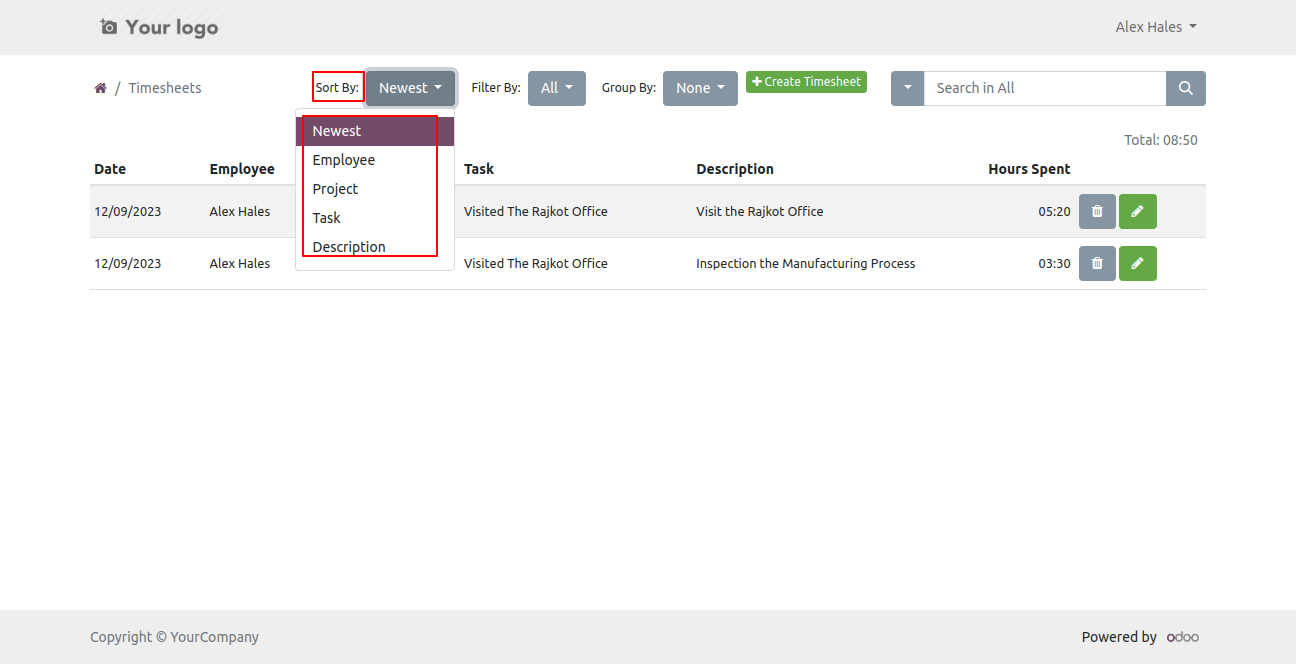
You can sort timesheets by Newest and Name.
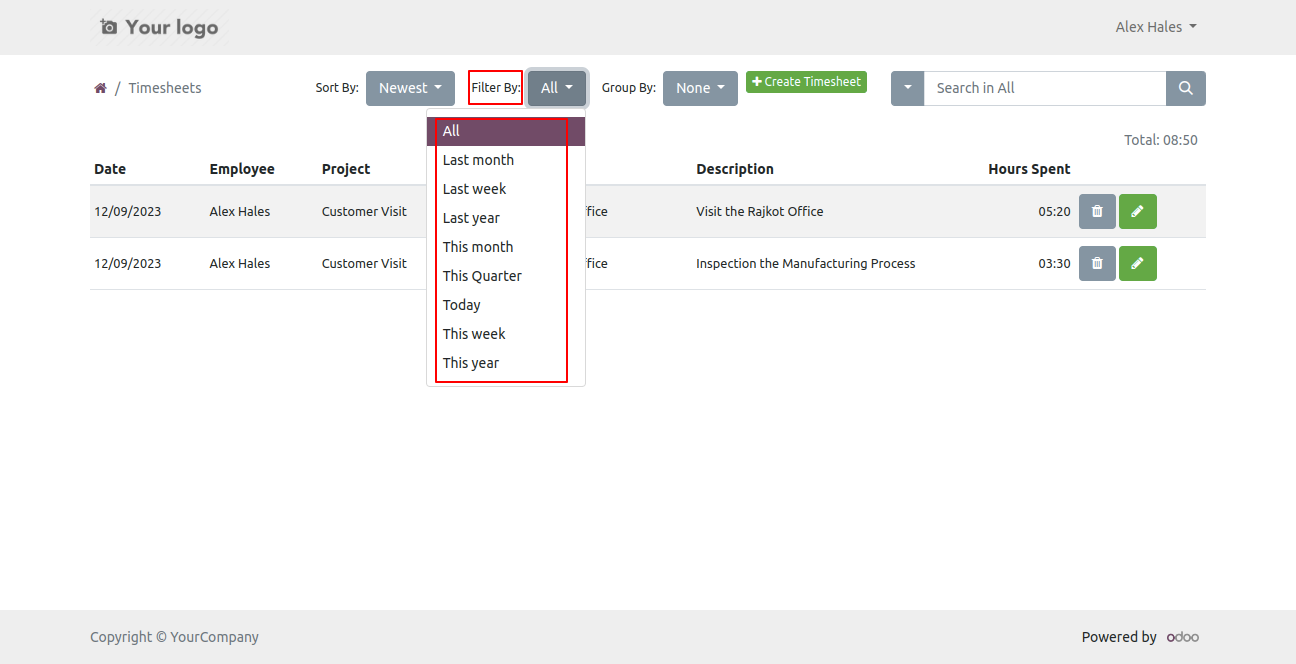
You can filter timesheets using any of the provided custom filter list.
You can group timesheets by assigned Projects.
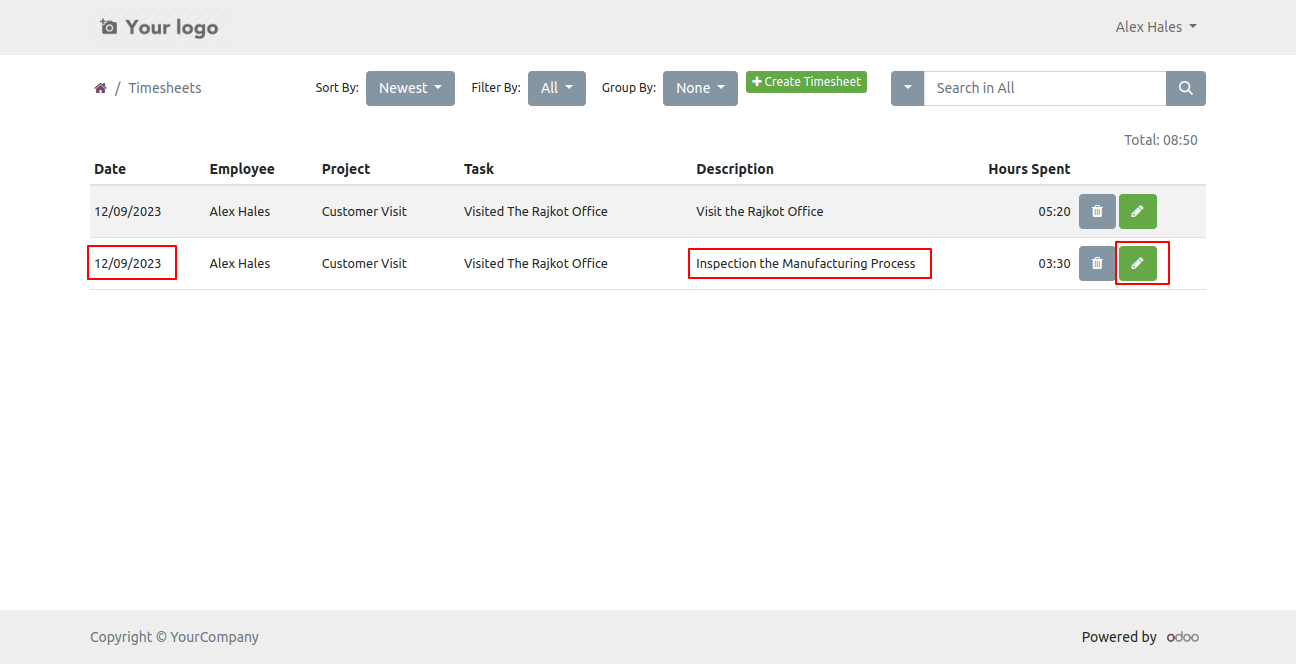
Using the edit button you can edit timesheets directly.
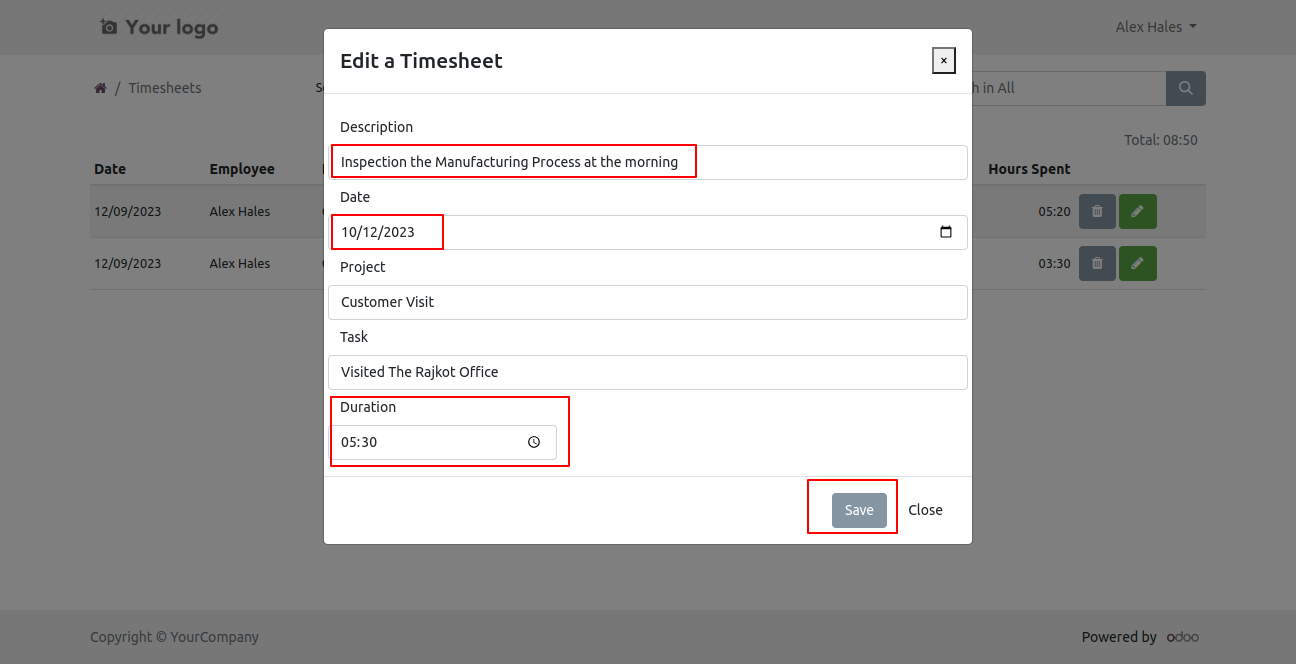
After the wizard opens, here details are fetched from backend timesheet and you can edit them.
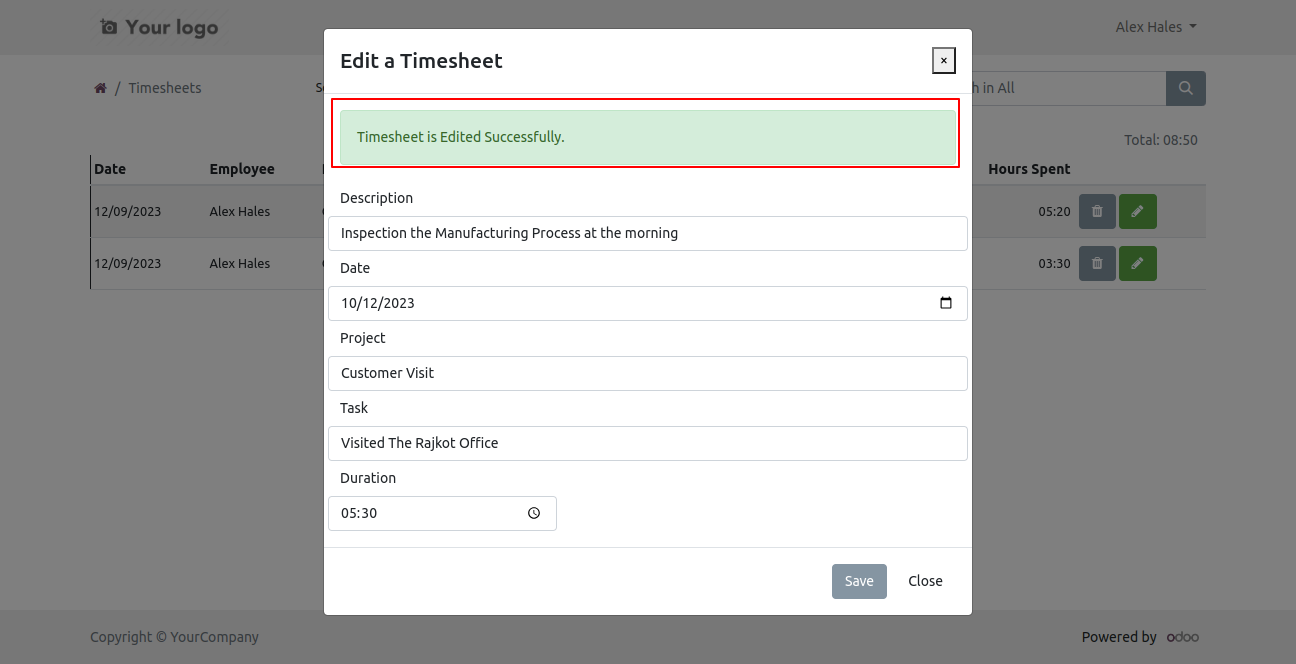
It shows an edited timesheet popup.
Using the delete button you can delete timesheets directly.
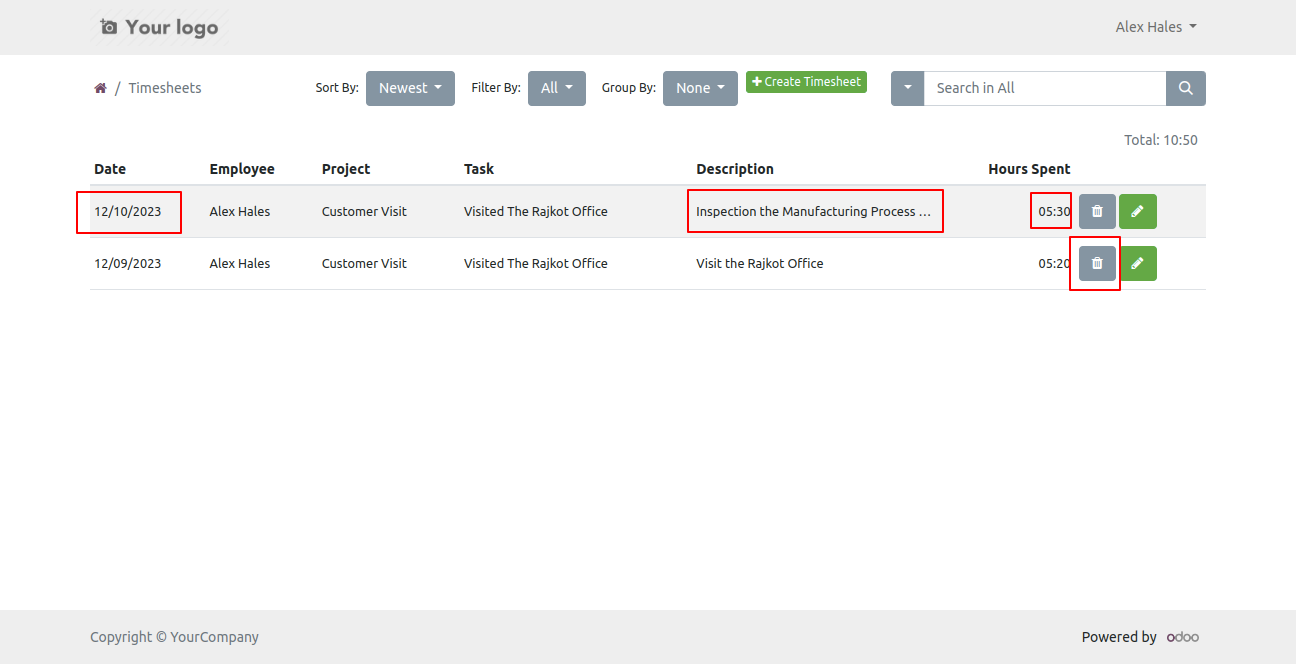
If you press the delete button a confirmation alert appears.
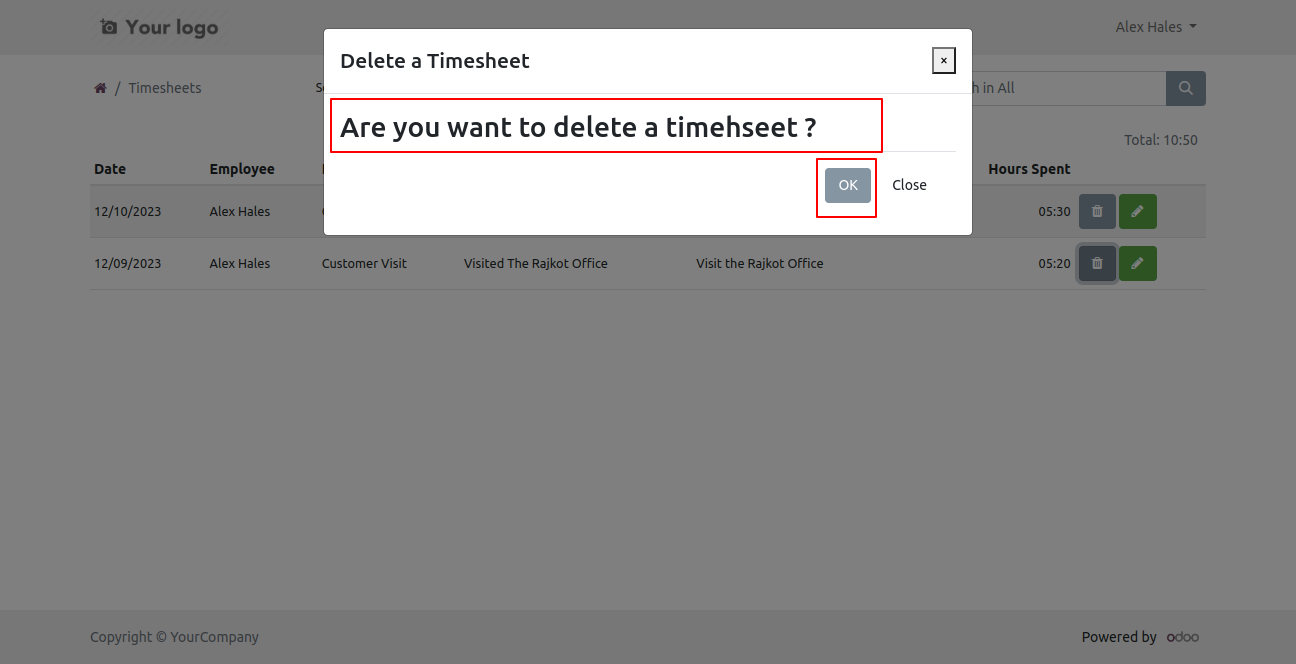
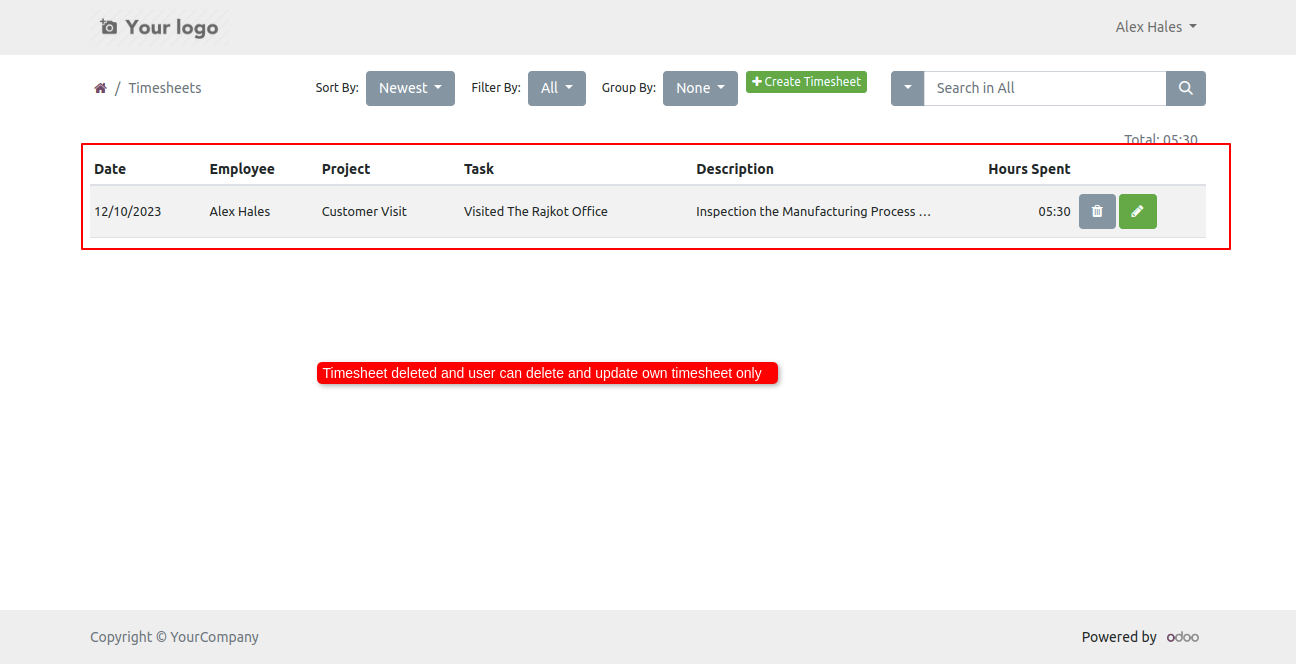
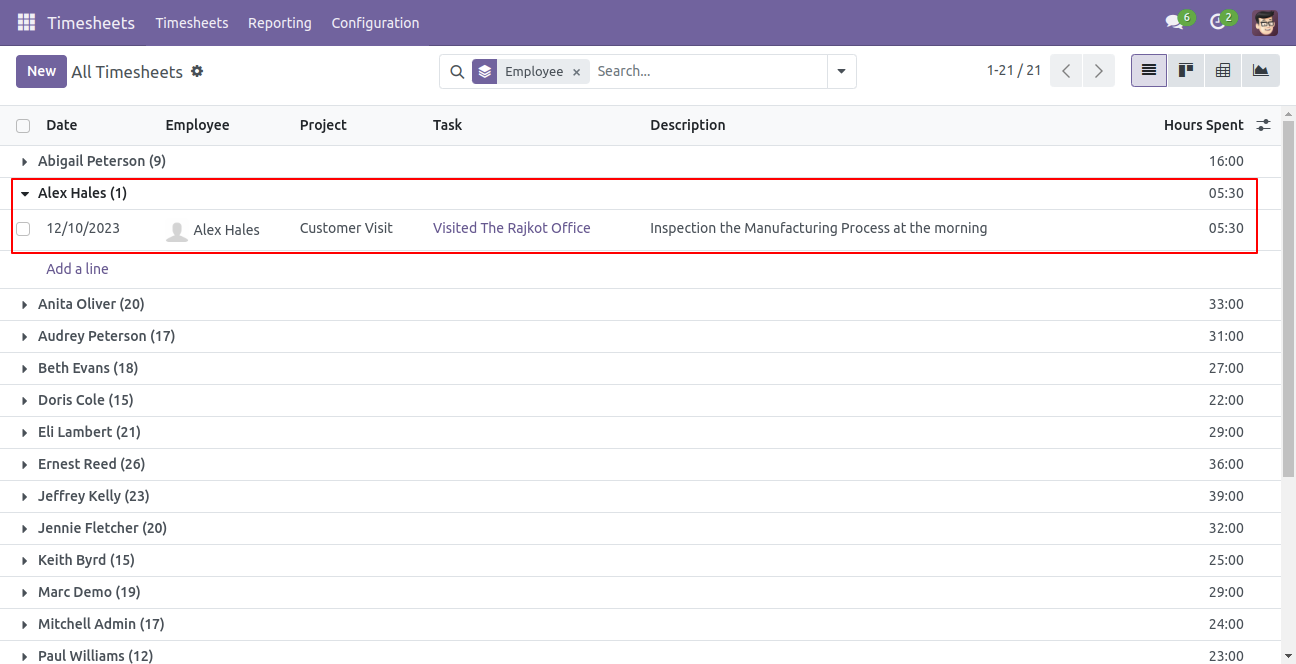
In that alert press 'Ok' and your timesheet will be deleted. Note: Users can only delete and update their own timesheet.
You can search timesheets using the search bar.
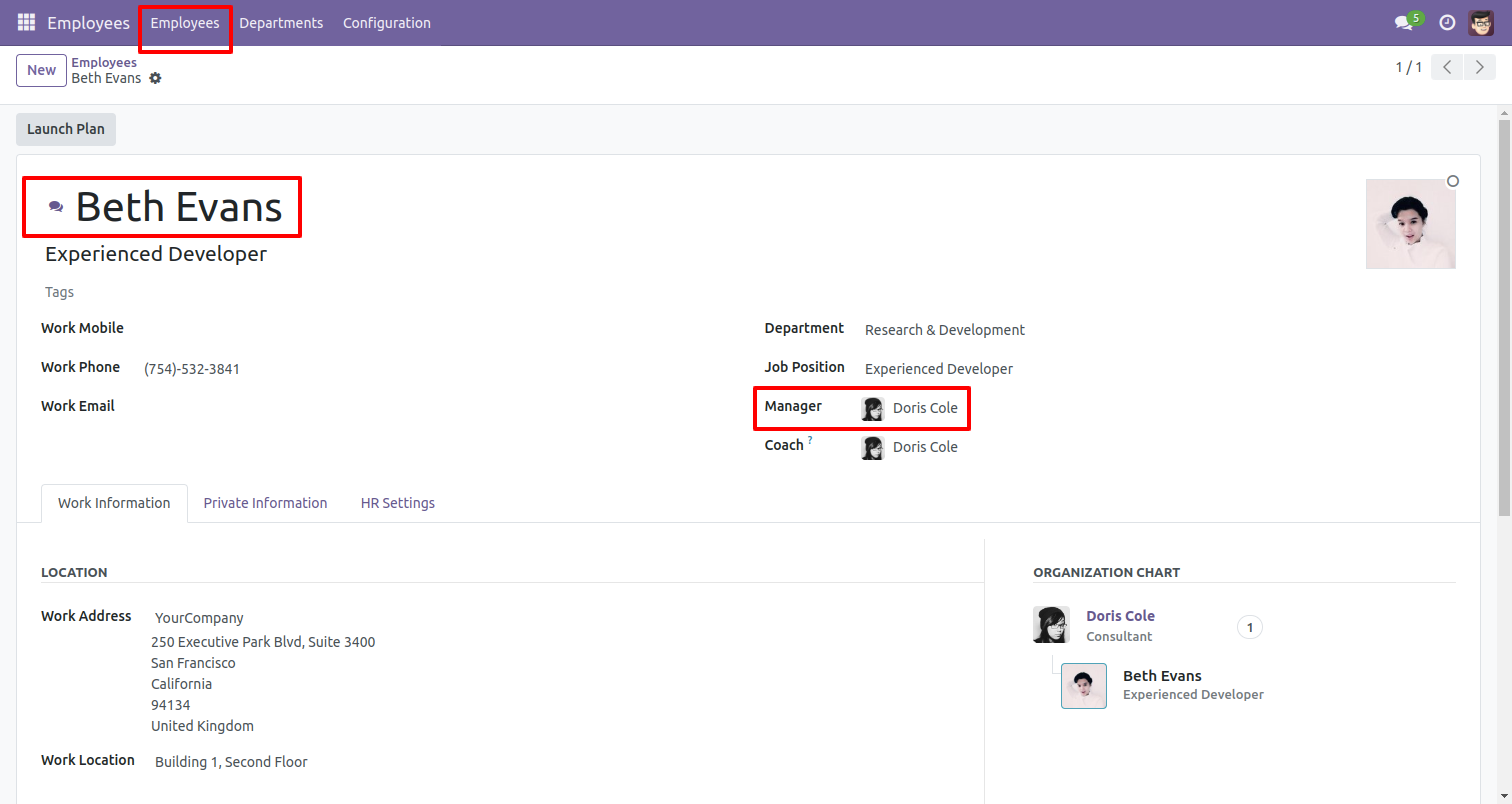
Set managers for employees.
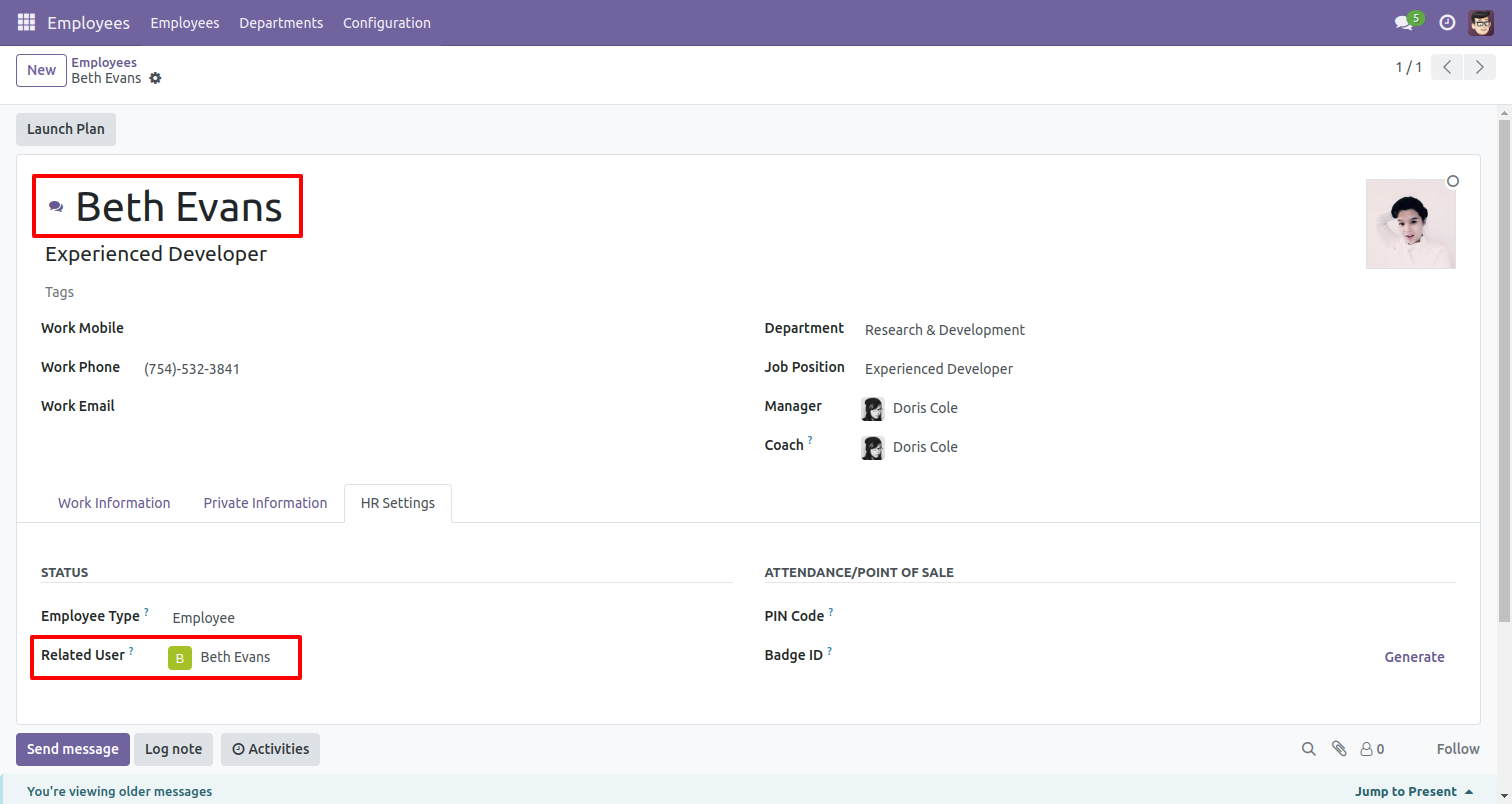
Select related user.
Go to settings => 'Users & Companies' set user access roles.
Configure access rights inside Odoo.
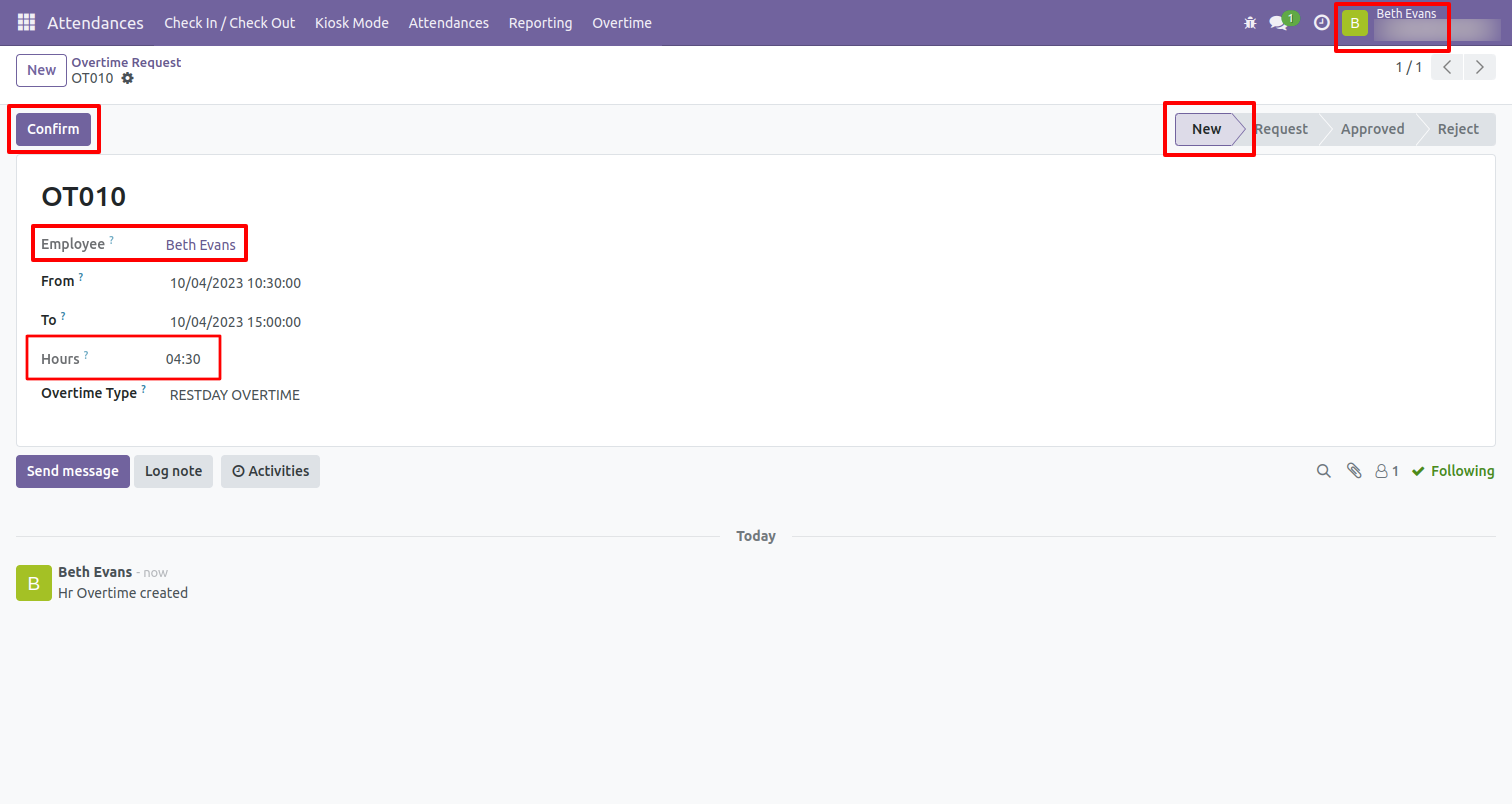
The overtime request backend form view.
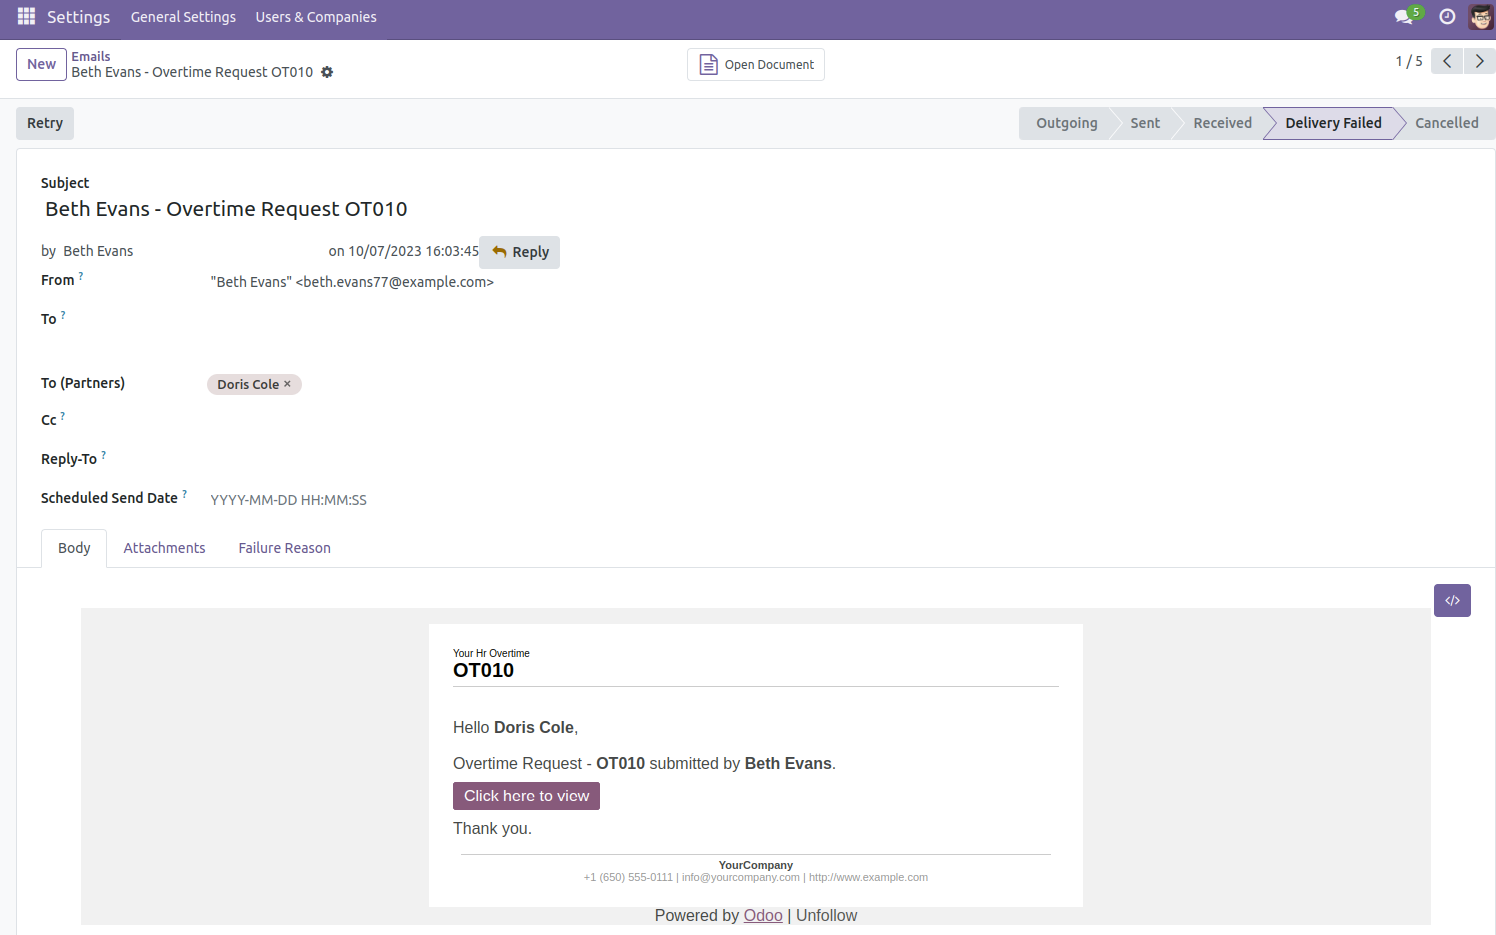
The manager gets an email notification when the request is created.
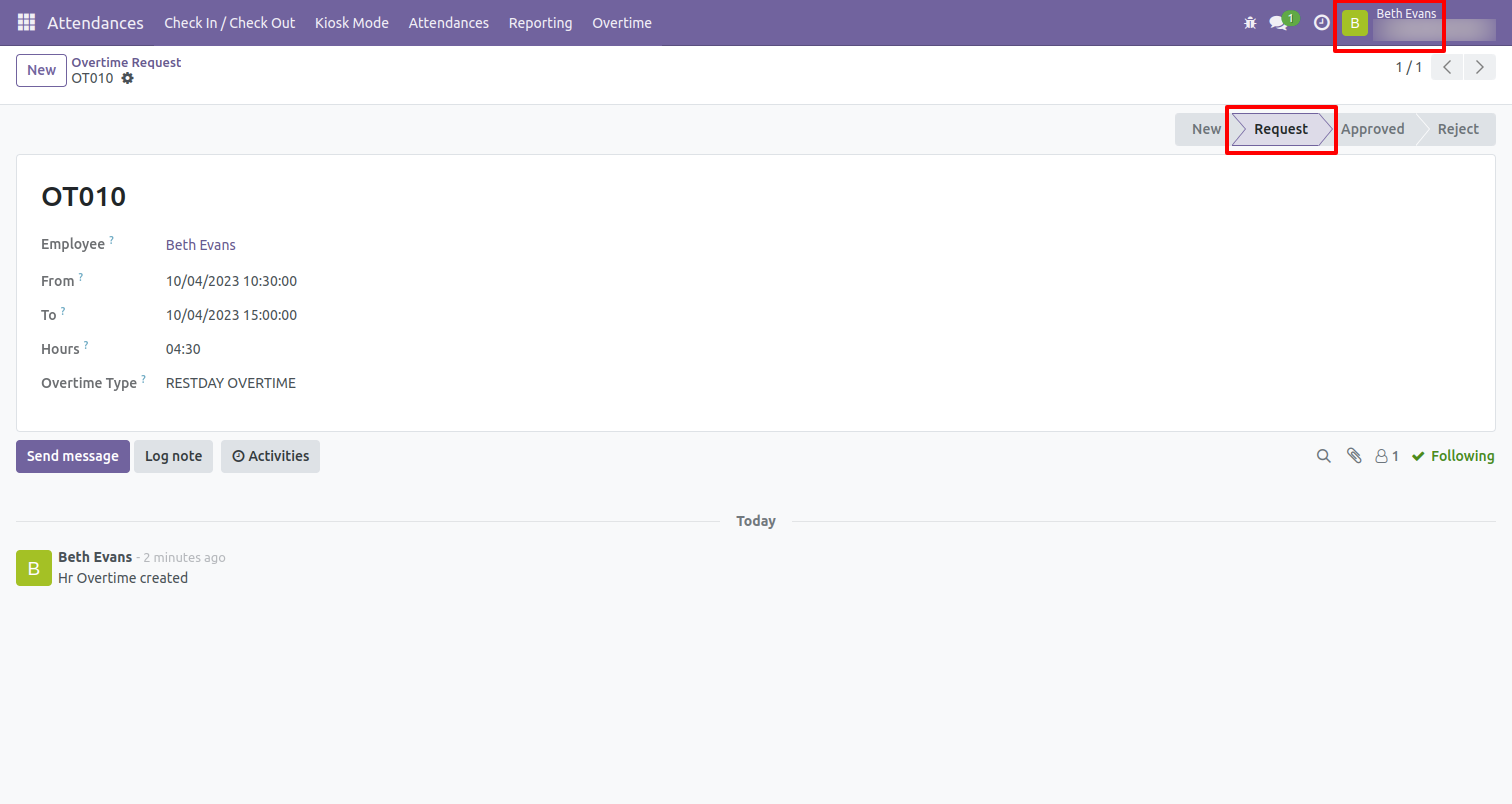
Now the approval request is in the 'Request' stage.
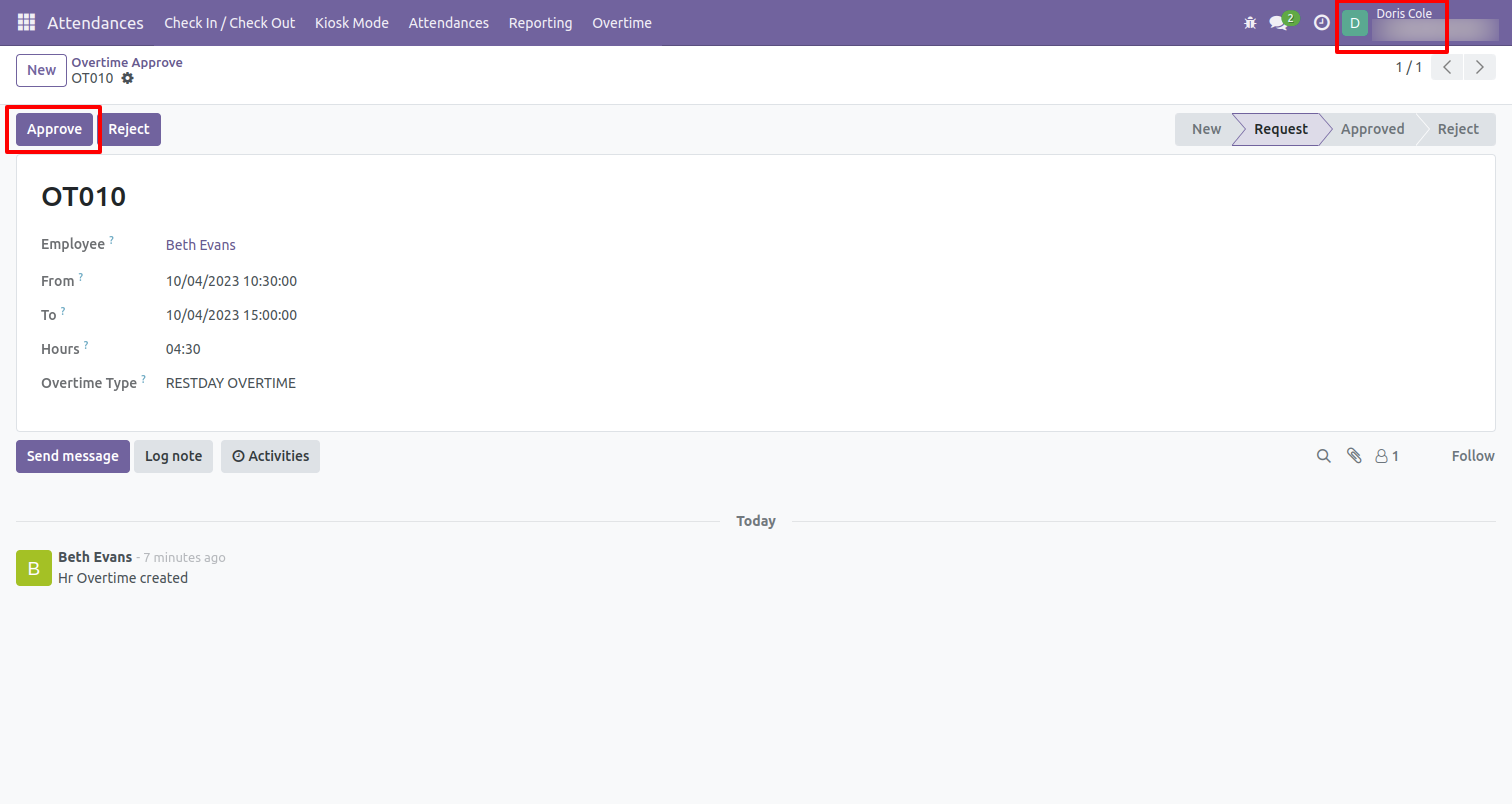
The overtime approve request form view. Click on the 'Approve' button to approve the request.
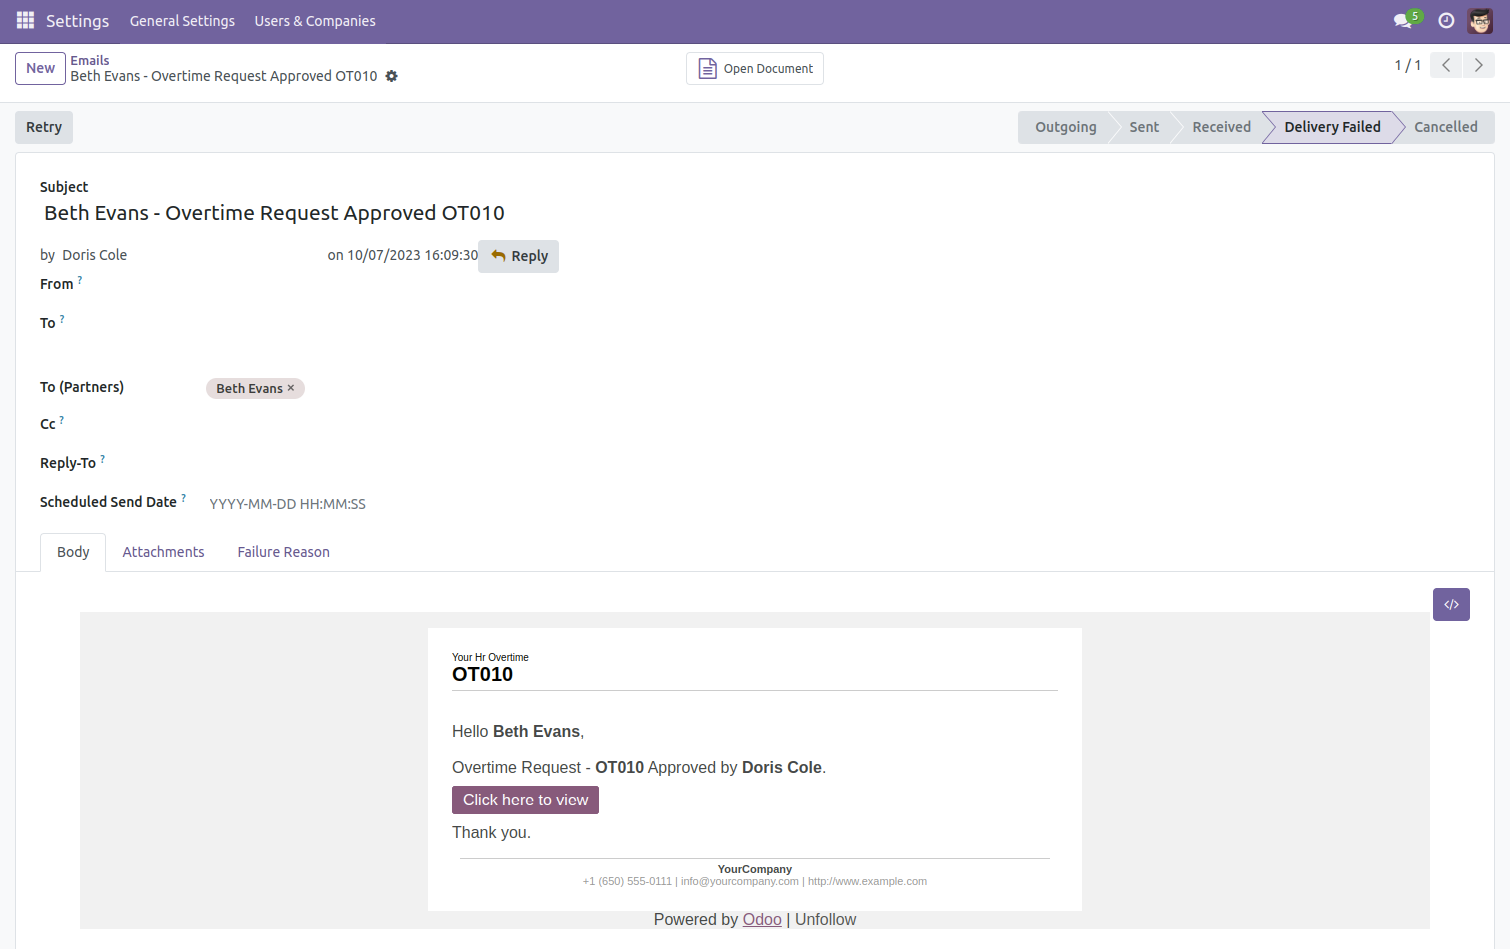
The employee gets an email notification when the request is approved.
If the request is rejected, it generates a popup for manager comments.
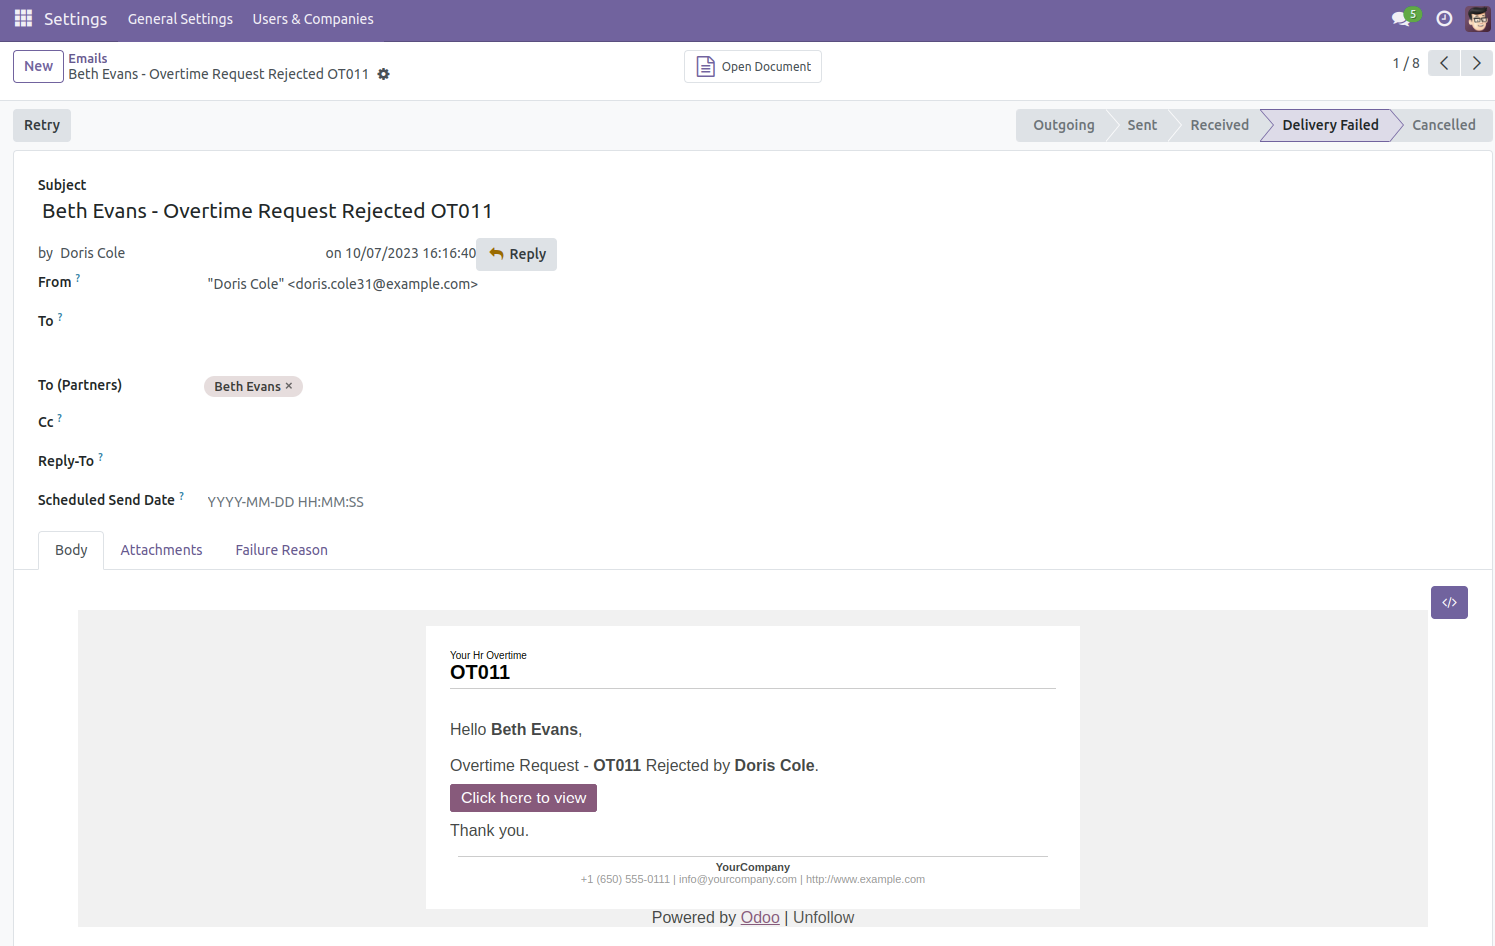
The employee gets an email notification when the request is rejected.
The employee can see the rejected request reason details.
Version 18.0.1.0.0 | Released on : 8th July 2026
- Yes, this app works perfectly with Odoo Enterprise (Odoo.sh & Premise) as well as Community.
- No, this application is not compatible with odoo.com(odoo saas/Odoo Online)
- Yes, to test this module, please contact us at sales@softhealer.com.
- Please contact us at sales@softhealer.comto request customization.
- Yes, we provide free support for 365 days from the date of purchase.
- Yes, you will receive lifetime free updates for the version of the module you purchased.
- No, there is no need to install any additional libraries.
- Yes, for version 12 and above, you need to purchase the module separately for each version you intend to use.
- No, exchanges or refunds are not allowed. Please make sure to select the correct version before purchasing.
- You can contact us at support@softhealer.com for language translation support. We use Google Translator tools to provide translations in multiple languages, so the accuracy may vary. We welcome your suggestions to help improve translations.
