All In One PMS

Are you still managing all projects and tasks with separate modules? That’s really a waste of time and effort. Our module, all-in-one project management system (PMS) focused on managing every aspect of your projects. You can handle projects, tasks, due dates, checklists etc in one module. All in one PMS makes it easier to manage all projects and tasks. So go ahead and download the module to improve your project management skills!
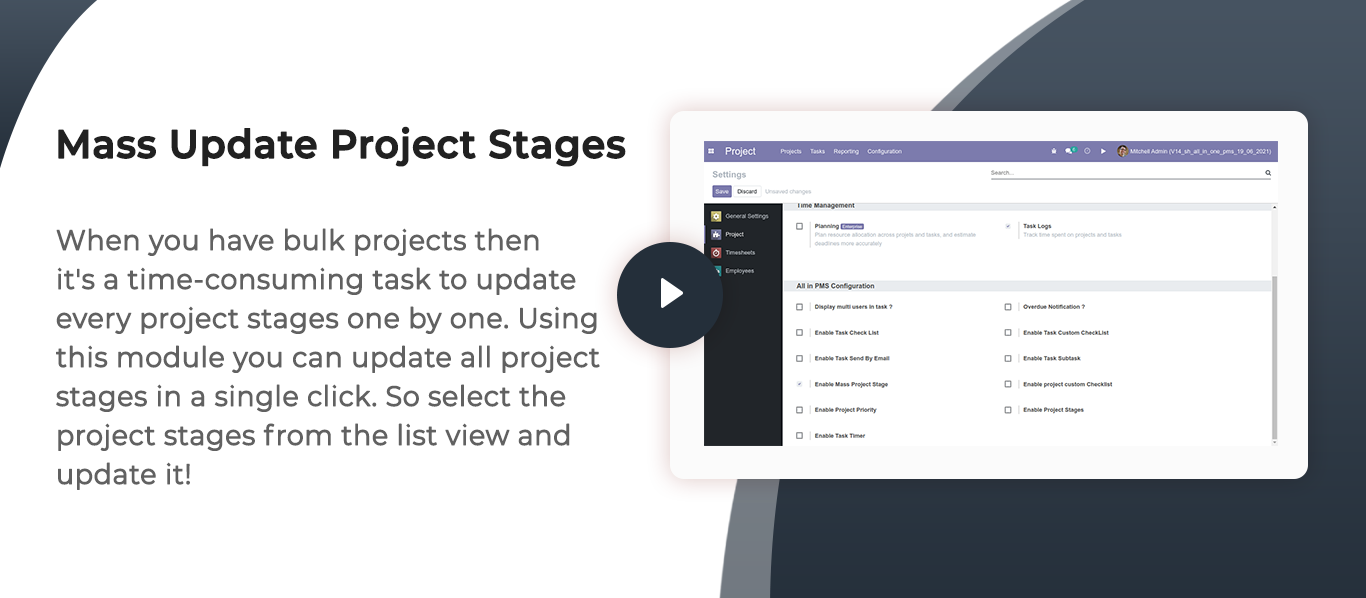
- Mass Update Project Stages
- Overdue Task Email Notification
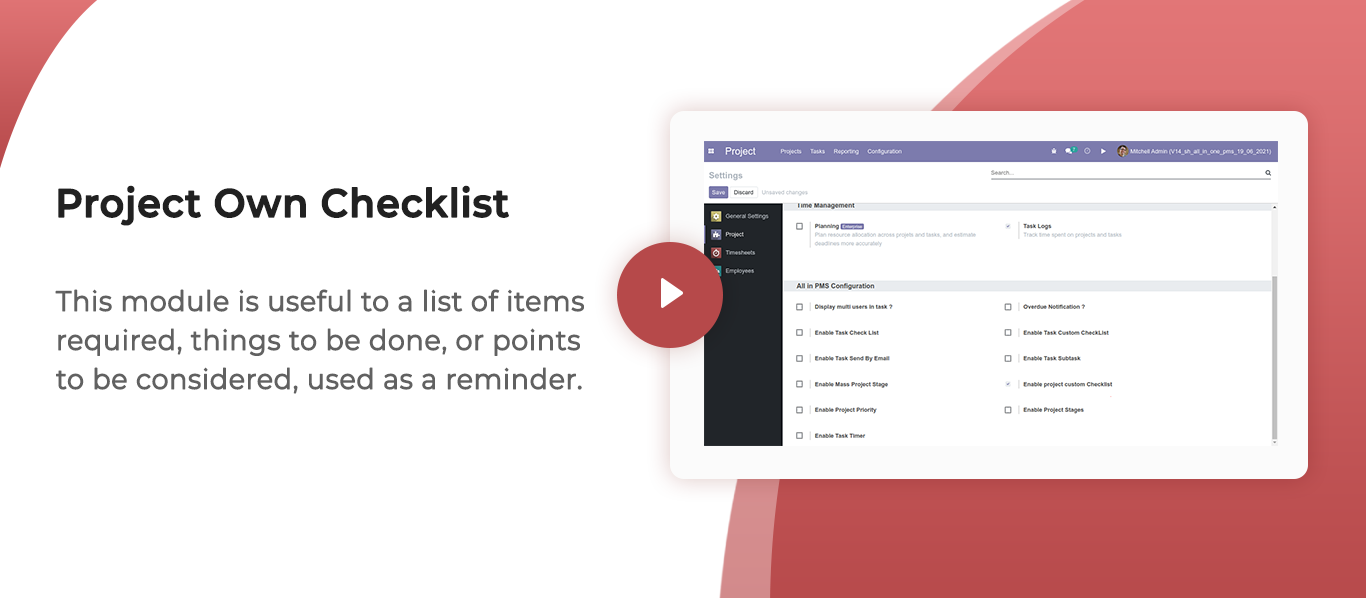
- Project Own Checklist
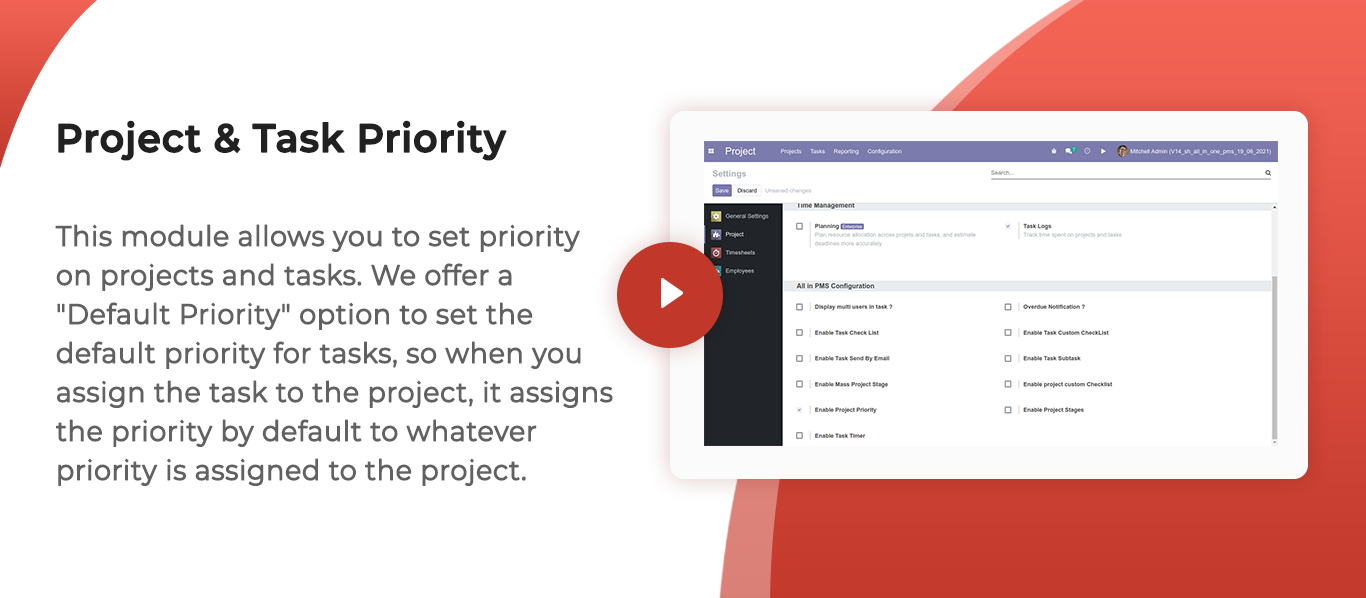
- Project & Task Priority
- Auto Project Task Stages
- Print Project Report
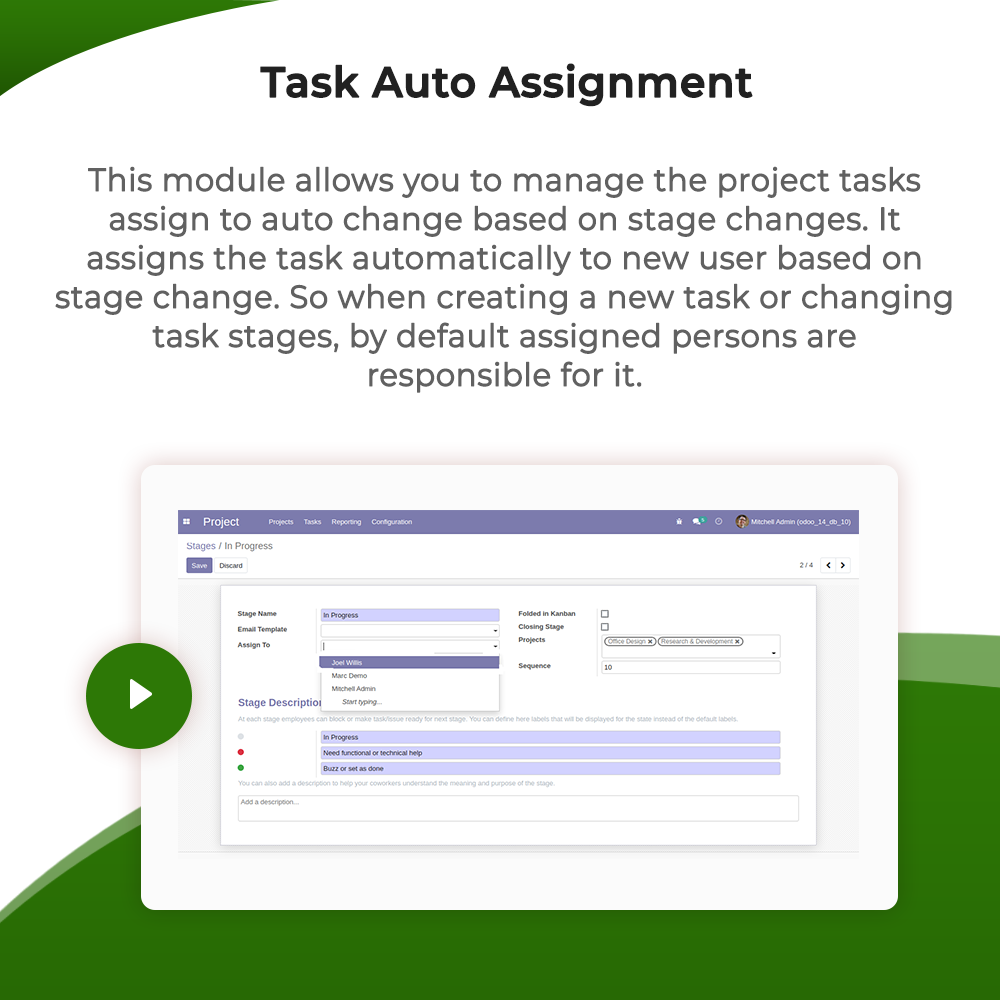
- Task Auto Assignment
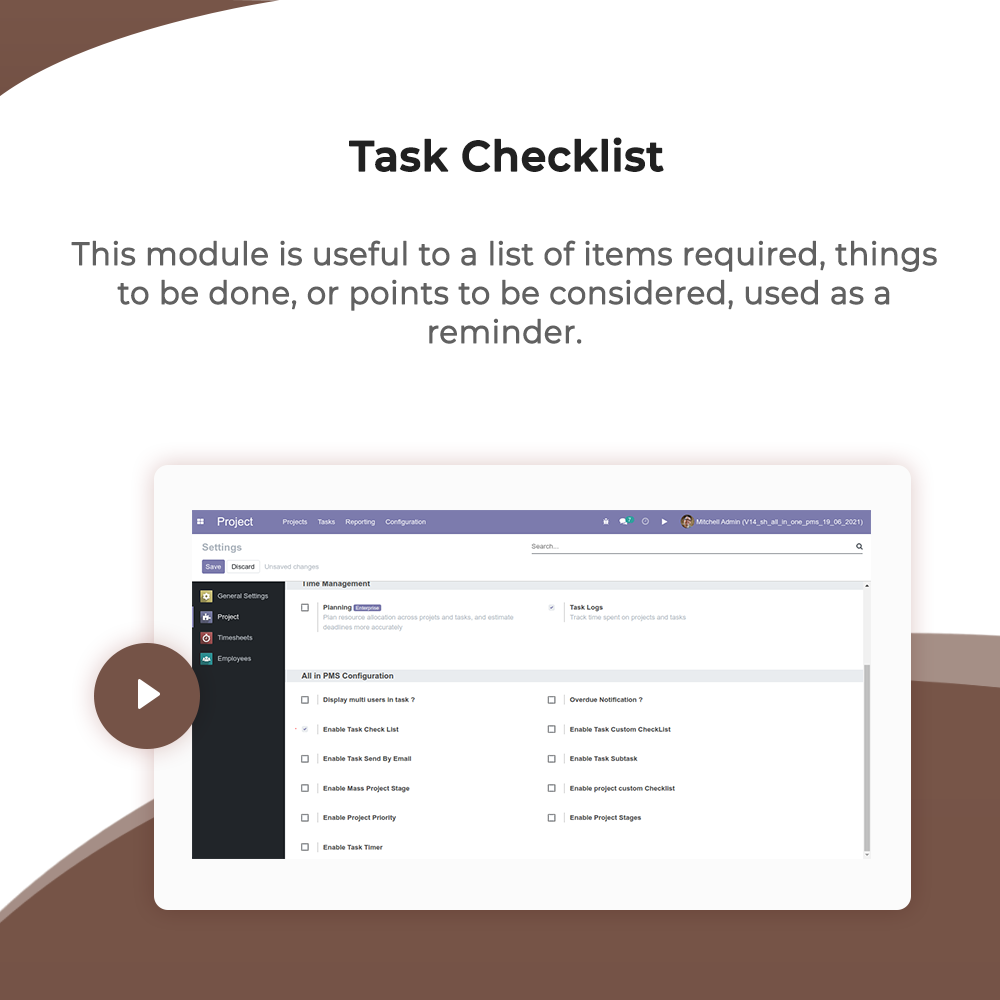
- Task Checklist
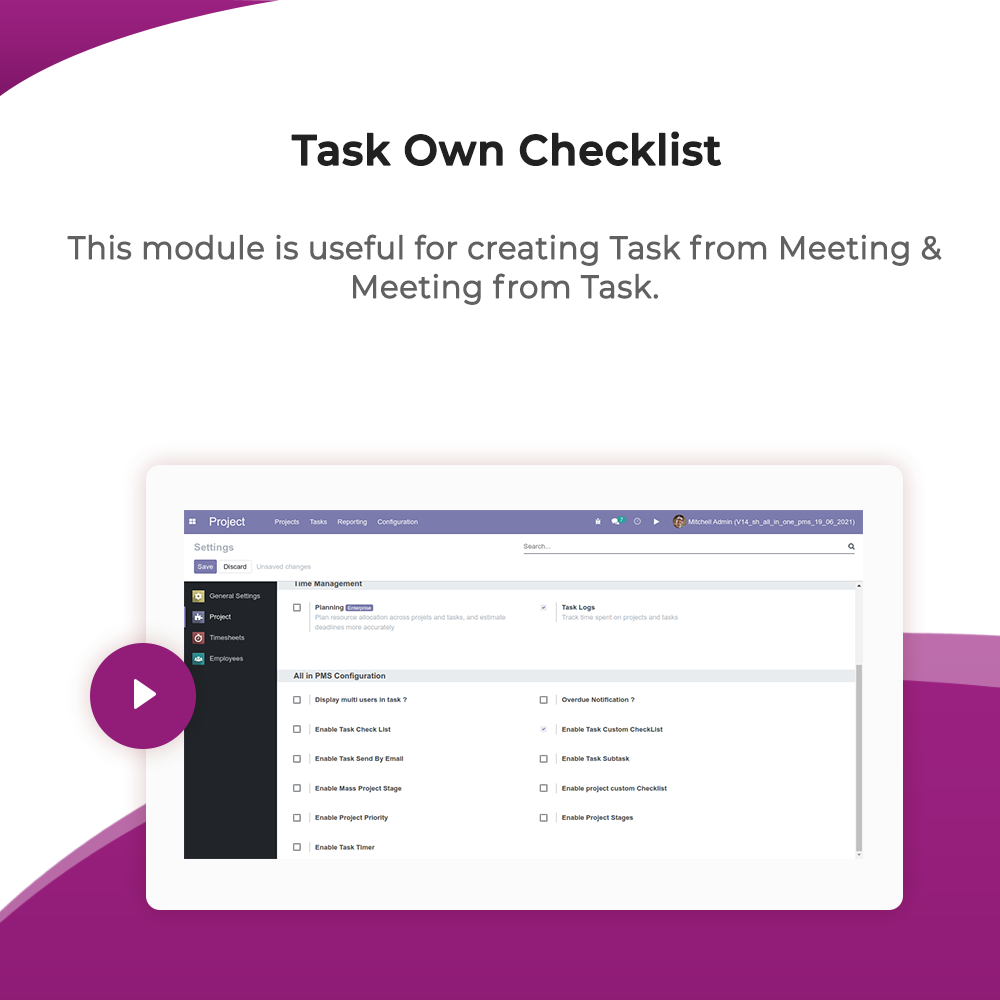
- Task Own Checklist
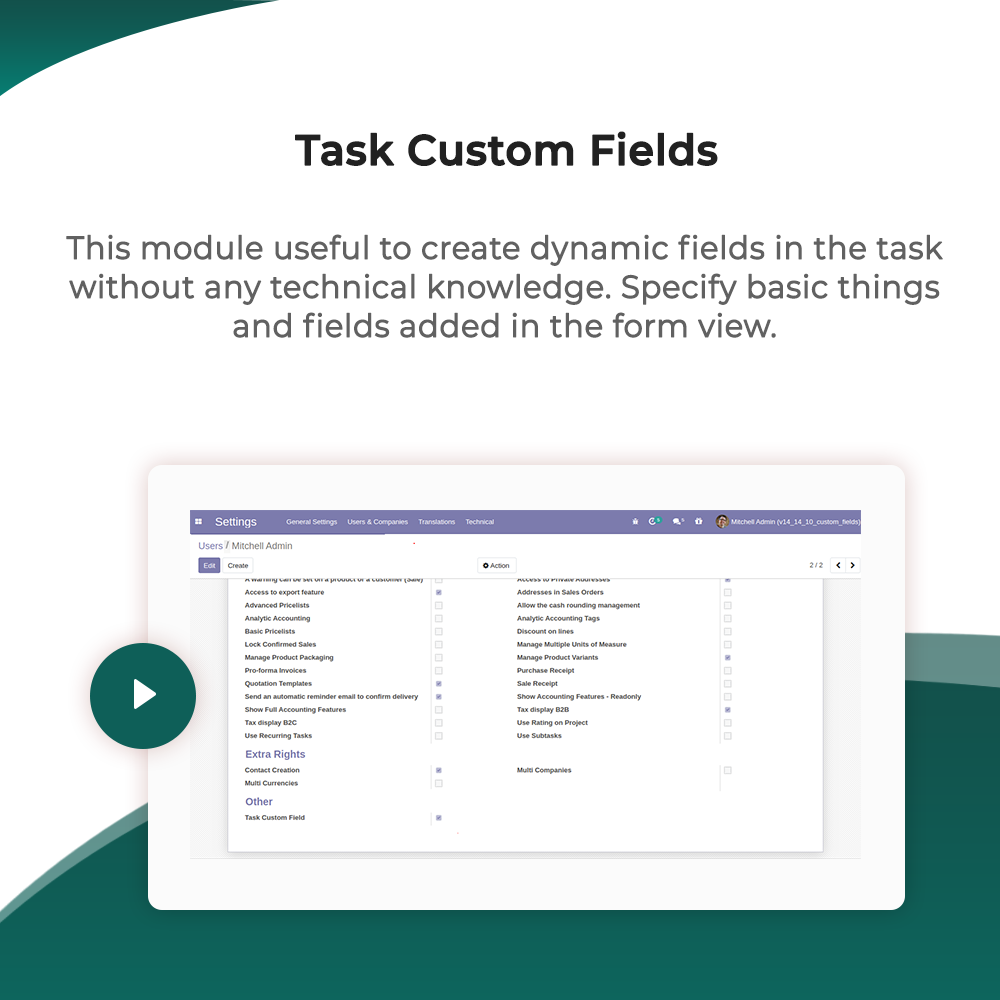
- Task Custom Fields
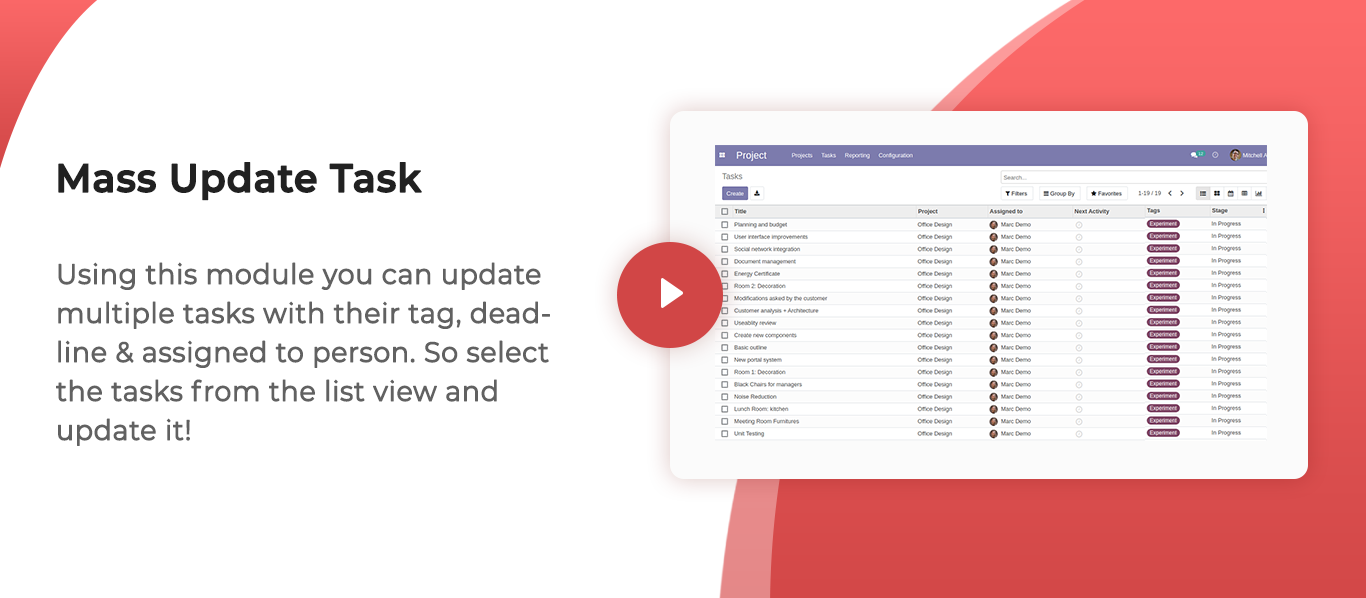
- Mass Update Task
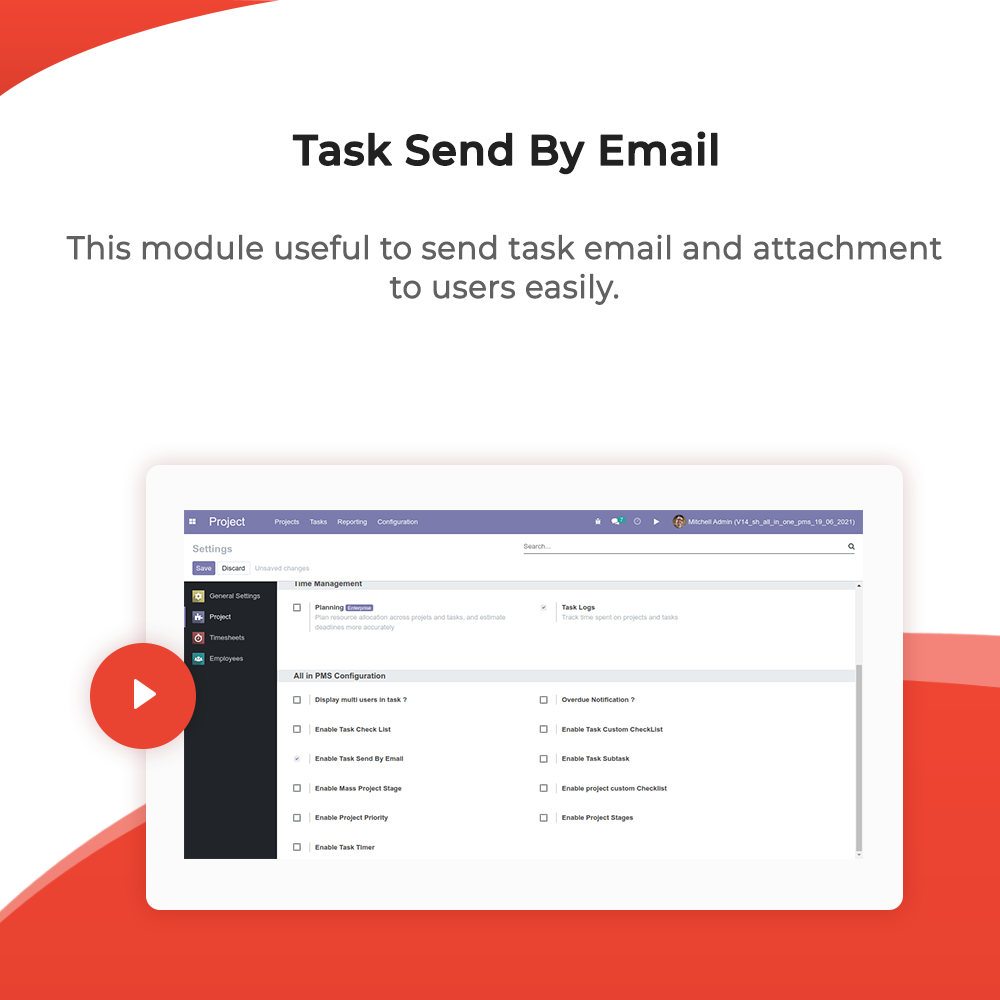
- Task Send By Email
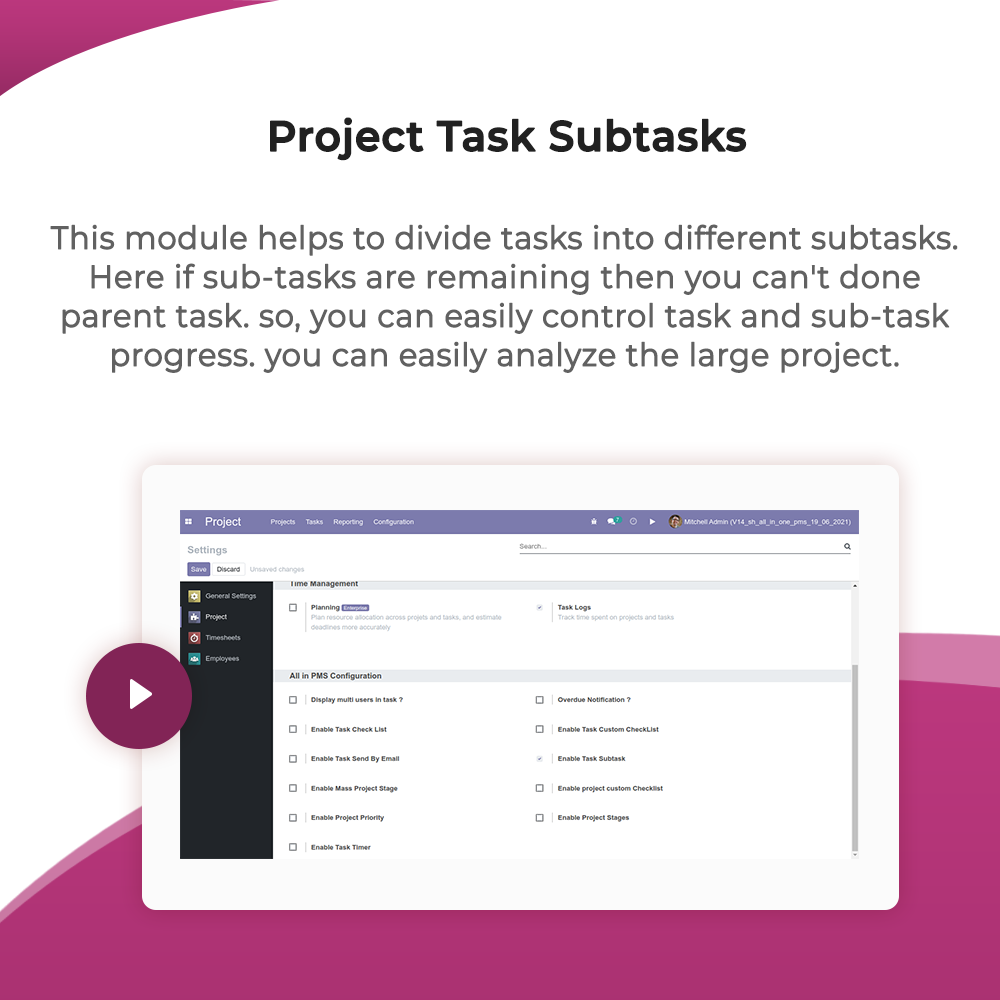
- Project Task Subtasks
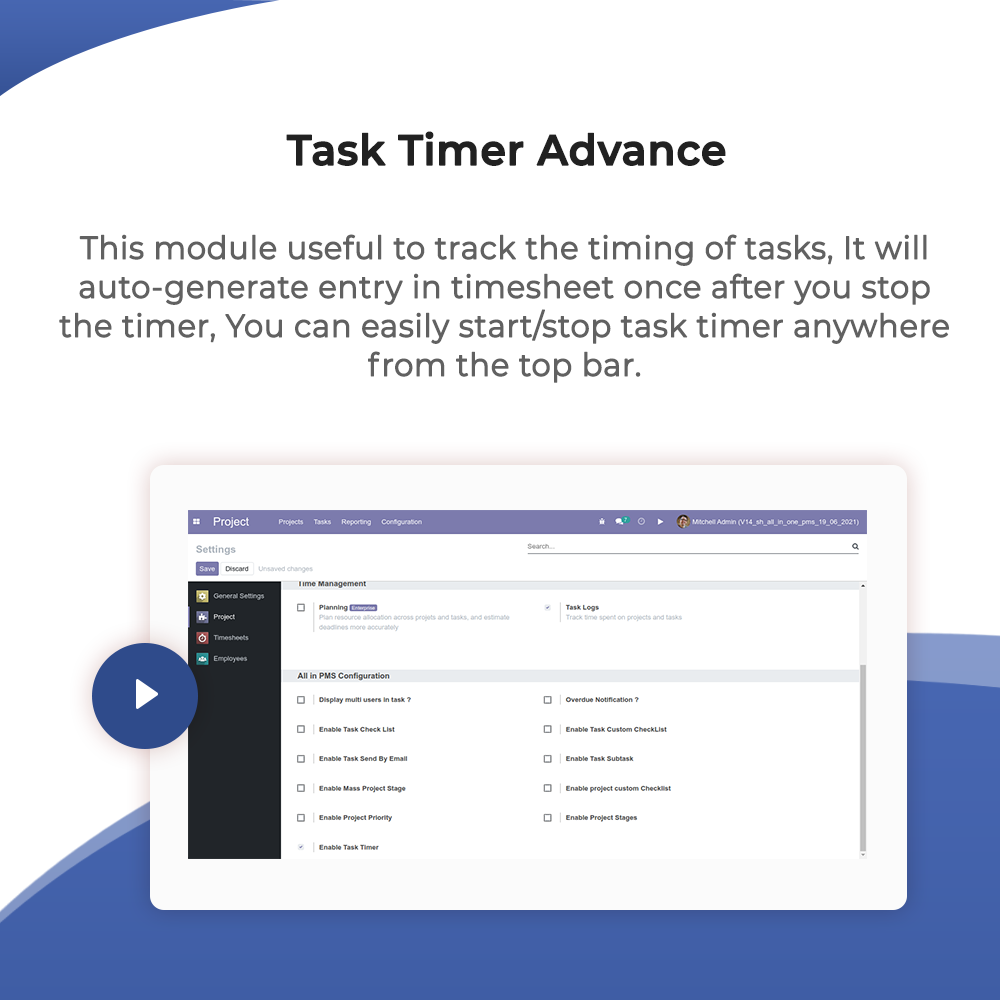
- Task Timer Advance
- Project/Task Document Management
- Project Category
- Import Project & Task Checklists
- Project Milestone
-
Project Team

-
Project Custom Task Template


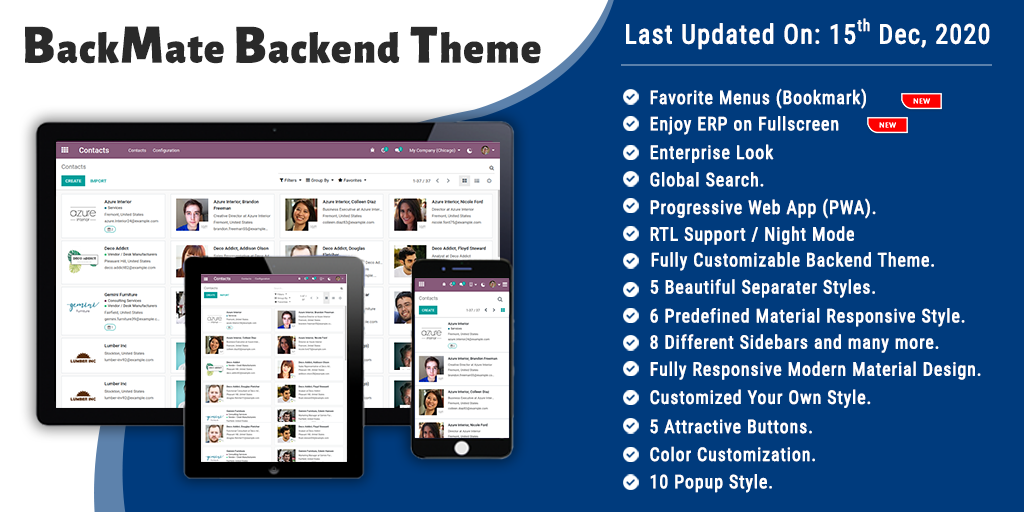
In the GIF, we are using our "Backmate Theme". Click Here To Download Backmate Theme


Only "Project Manager" can create project template, and can create task from project by choosing template. Create project template and create task List. Assign user and set description to each task. Set Task as per template requirement.
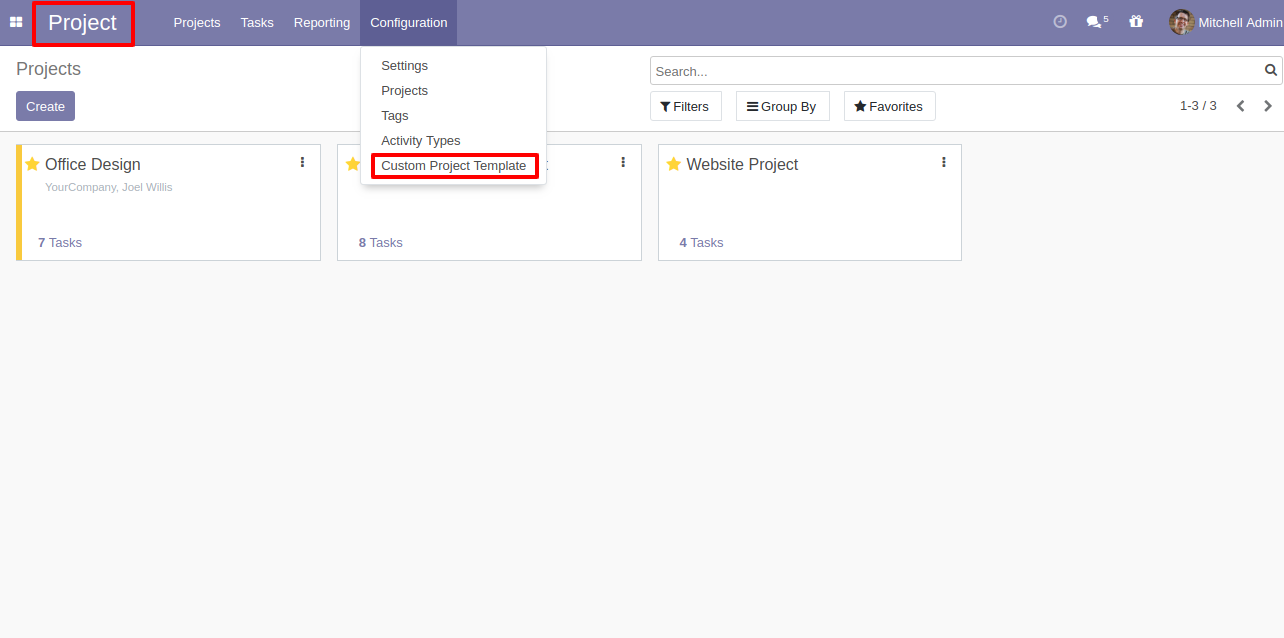
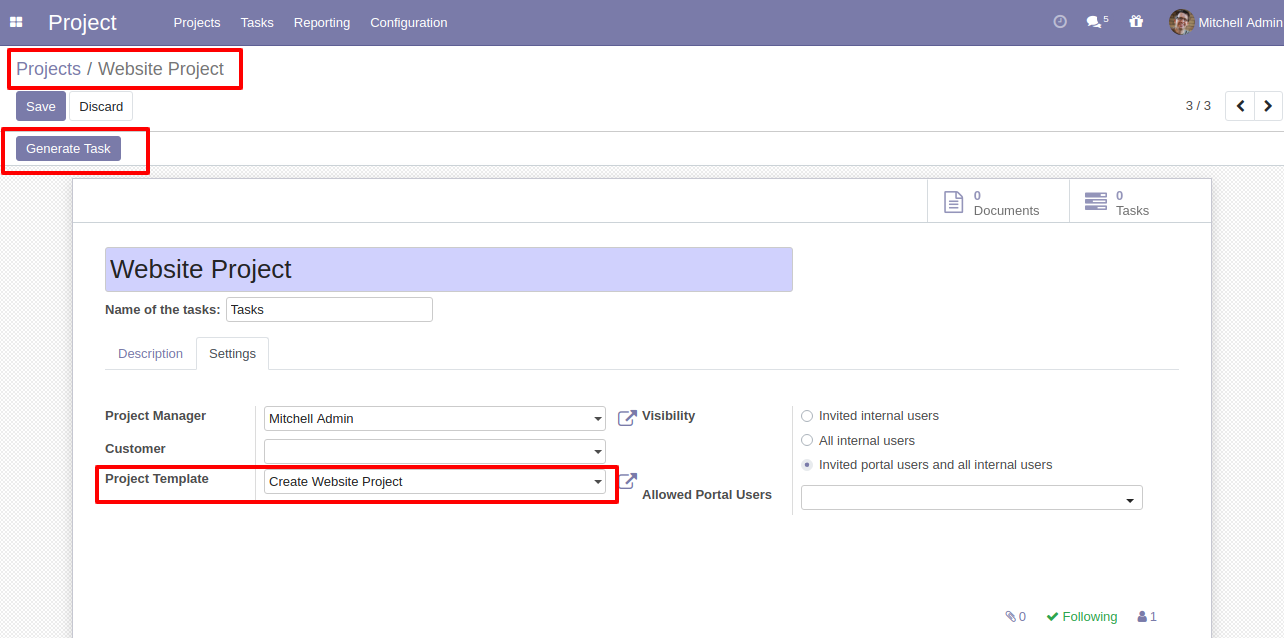
"Generate Task" and "Project Template" available to "Project Manager". Only "Active" templates are able to set.
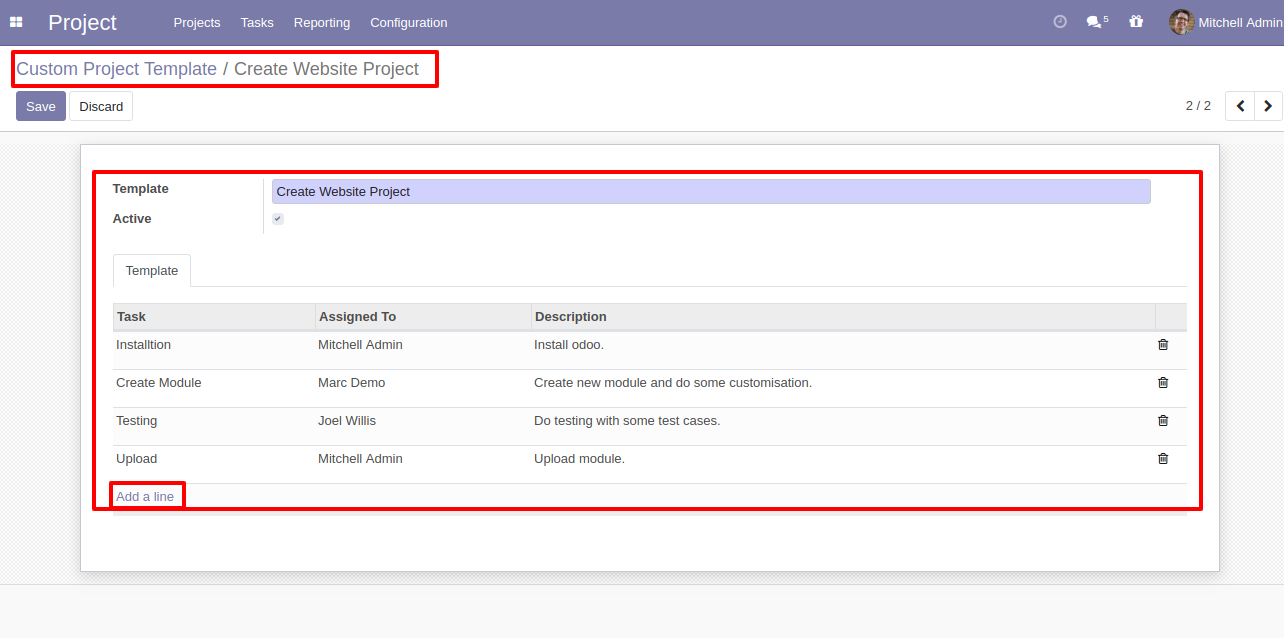
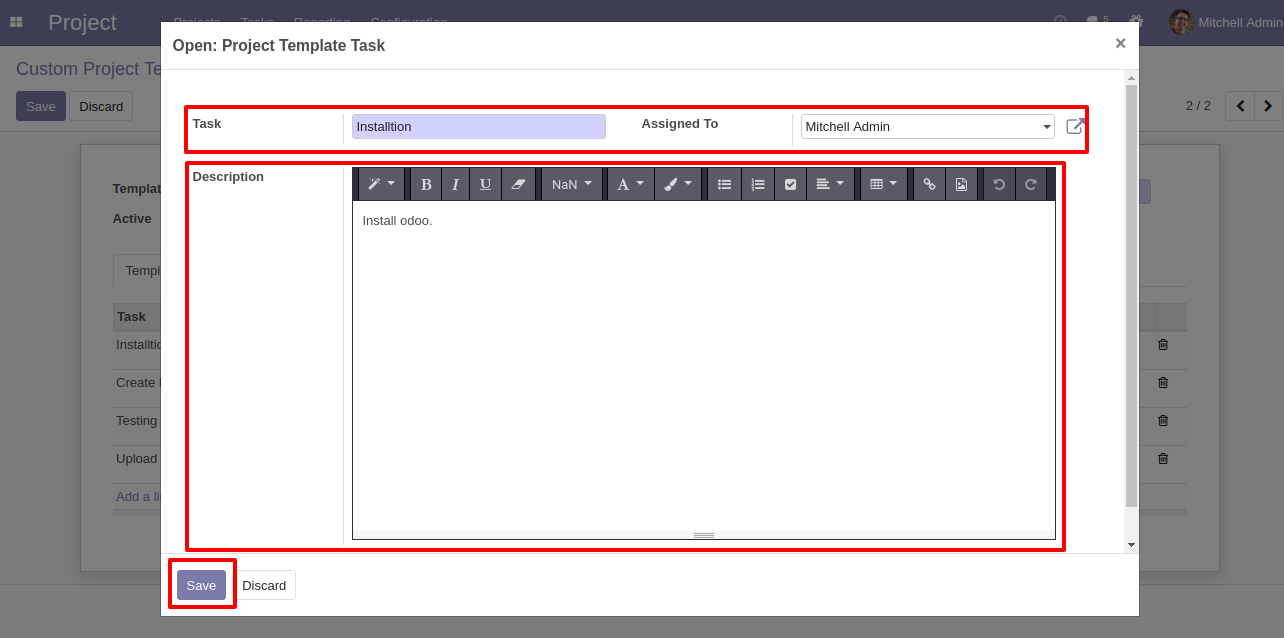
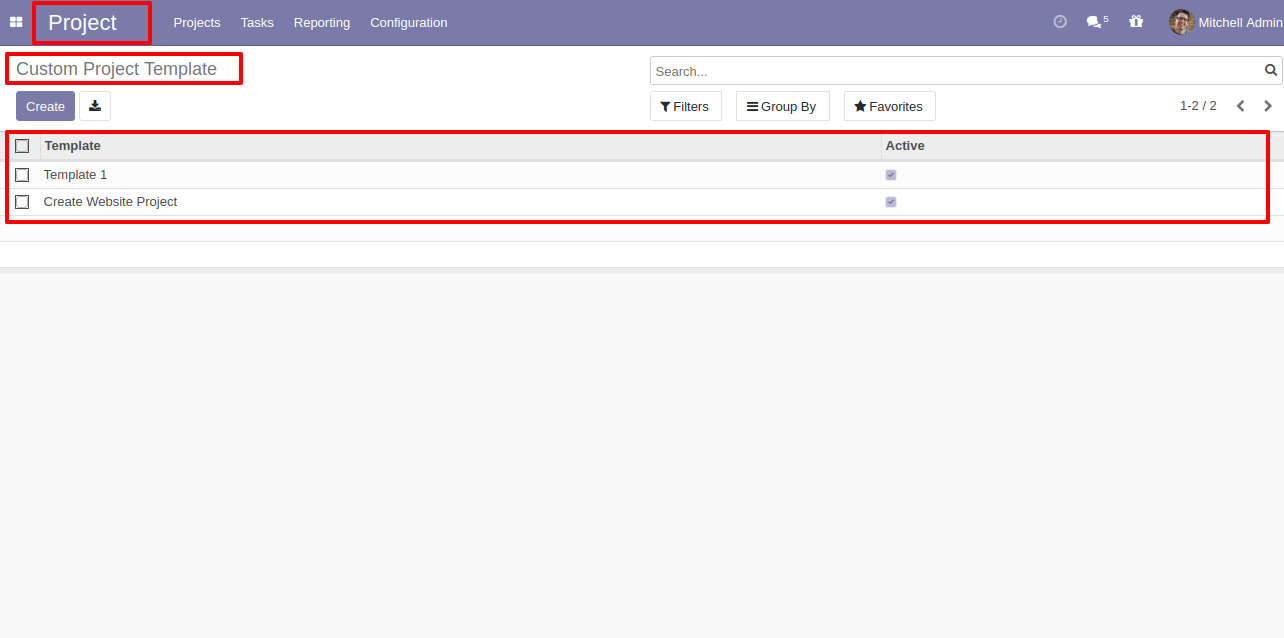
Created project template list.
First select template and then click on "Generate Task" button.
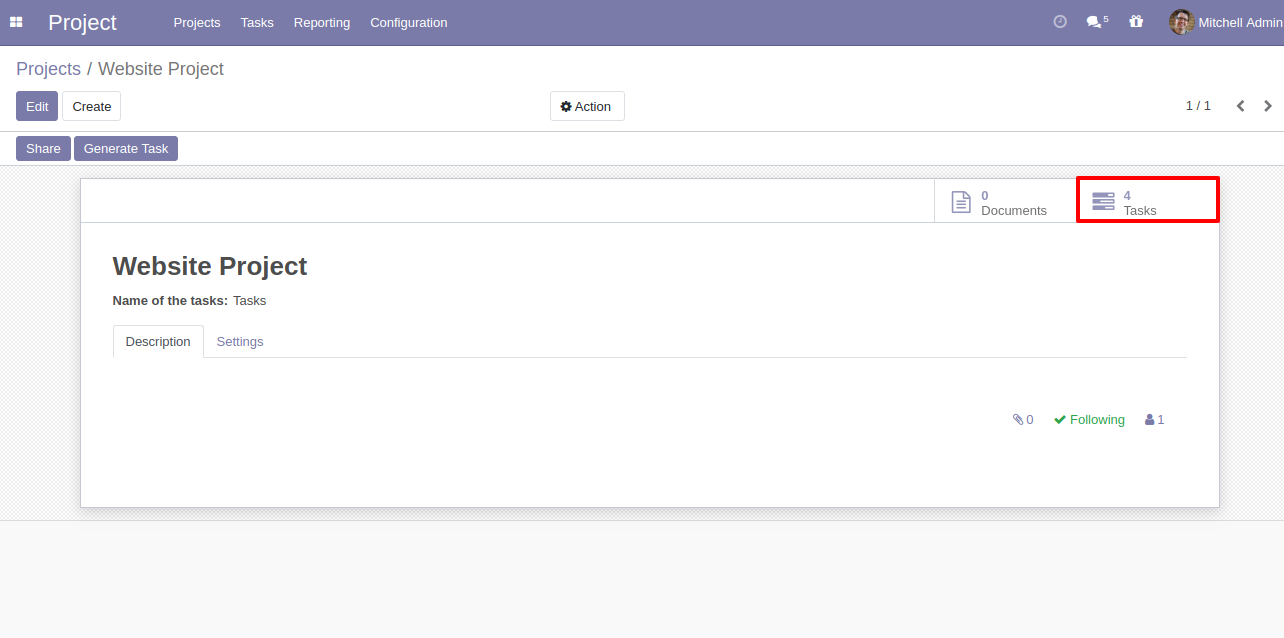
All task created inside "project.task" as per template on single click.
Default project task stage configuration.
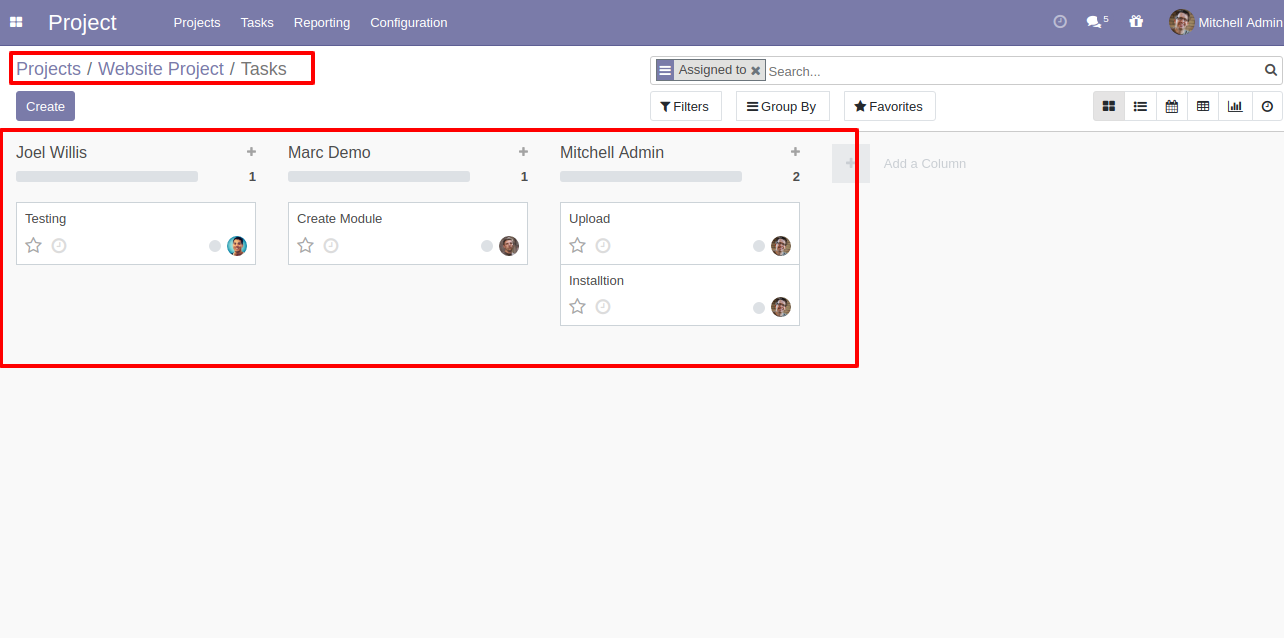
Project team menu.

Kanban view of project team.

List view of project team.

Create project team and team members.

Select project team in project.

Project team in project task.

Project team in project list view.

Project team in project kanban view.

Group by projects with project team.

Project team in tasks kanban view.

Project team in tasks list view.

Group by tasks with project team.

Go to project => project milestone.

Smart Button "Milestone" Count show No. of Milestone related to that Project.

Project milestones list view.

Project milestone form view with "New" stage, Press "In Progress" to change stage "in progress" from "new".

Project milestone form view with "In Progress" stage, Press "Complete" to change stage "complete" from "in progress".

Project milestone form view with "Complete" stage, Smart button "Task" show number of task related to that milestone.

You can filter project by expired & today expire.

You can group by project with project & milestone.

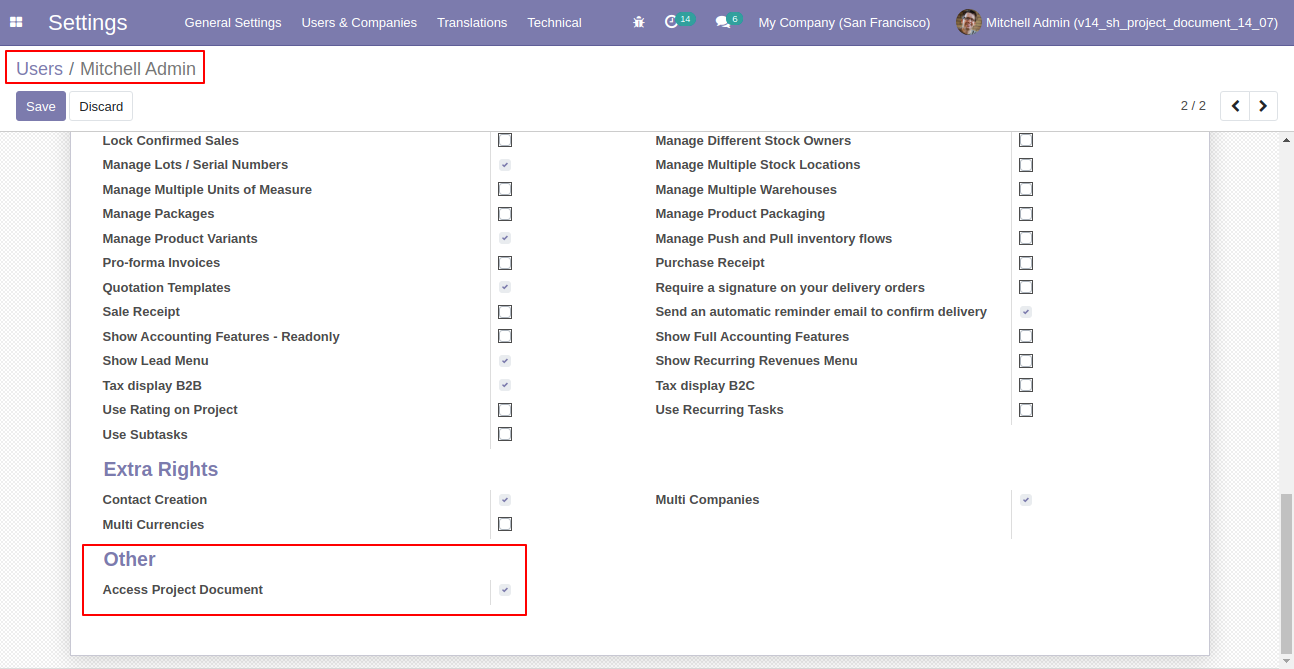
Tick the "Access Project Document" group.
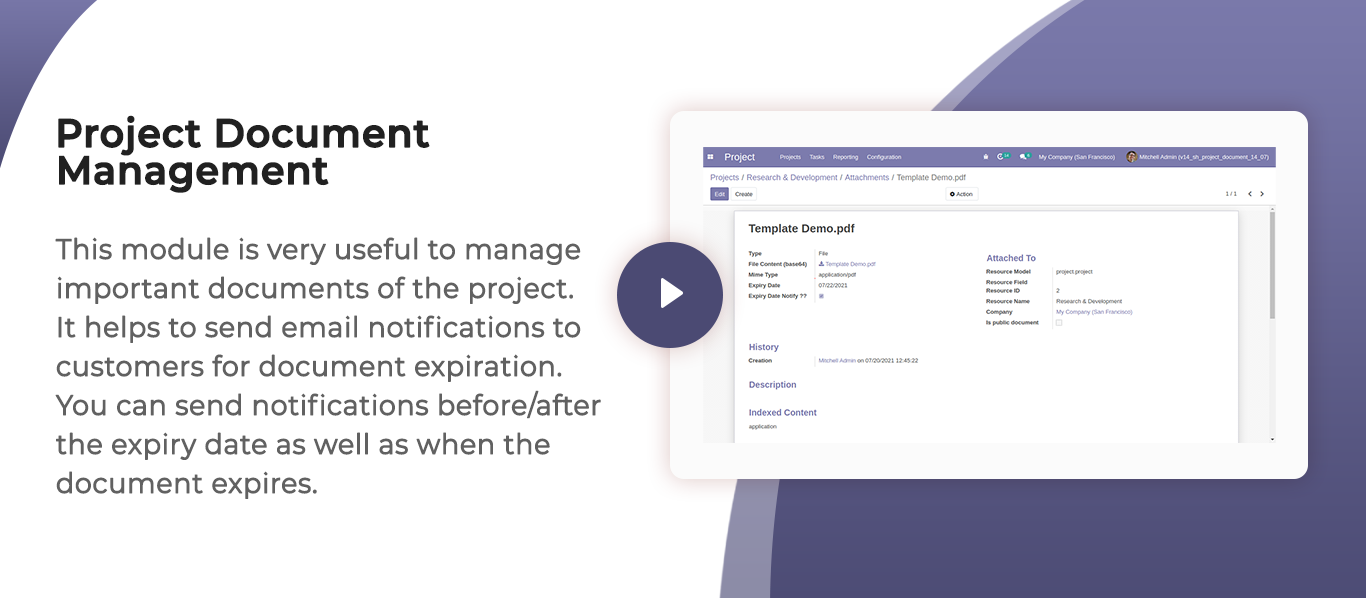
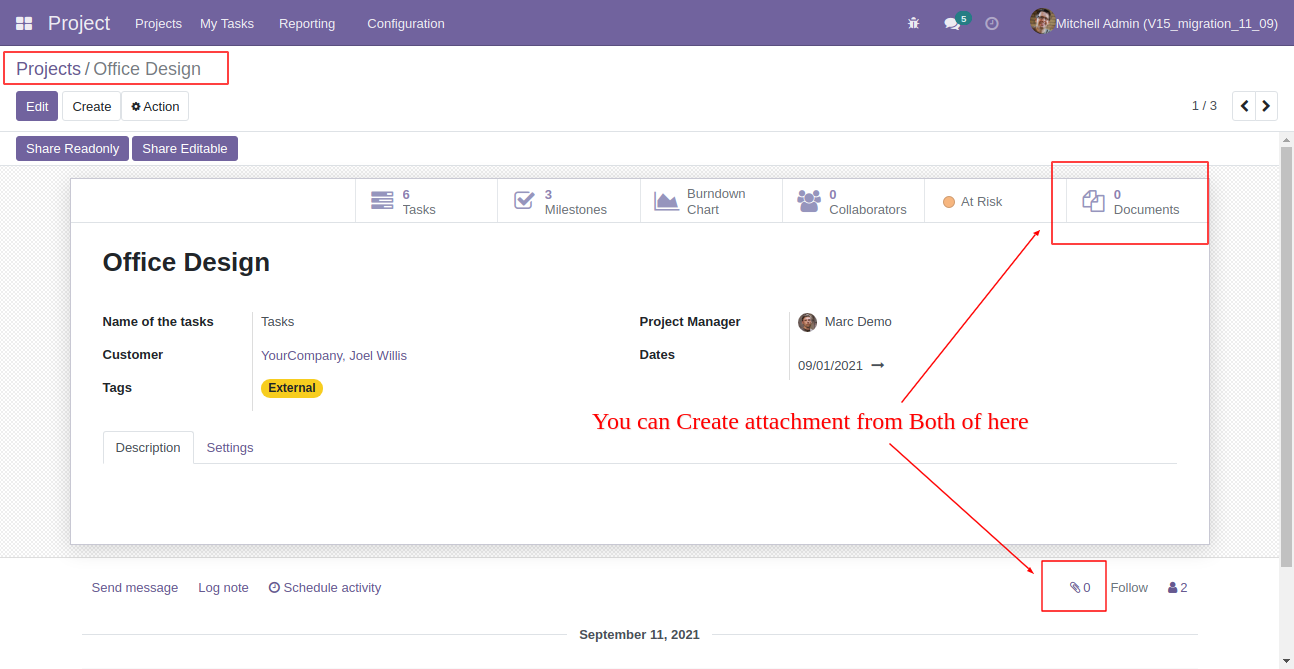
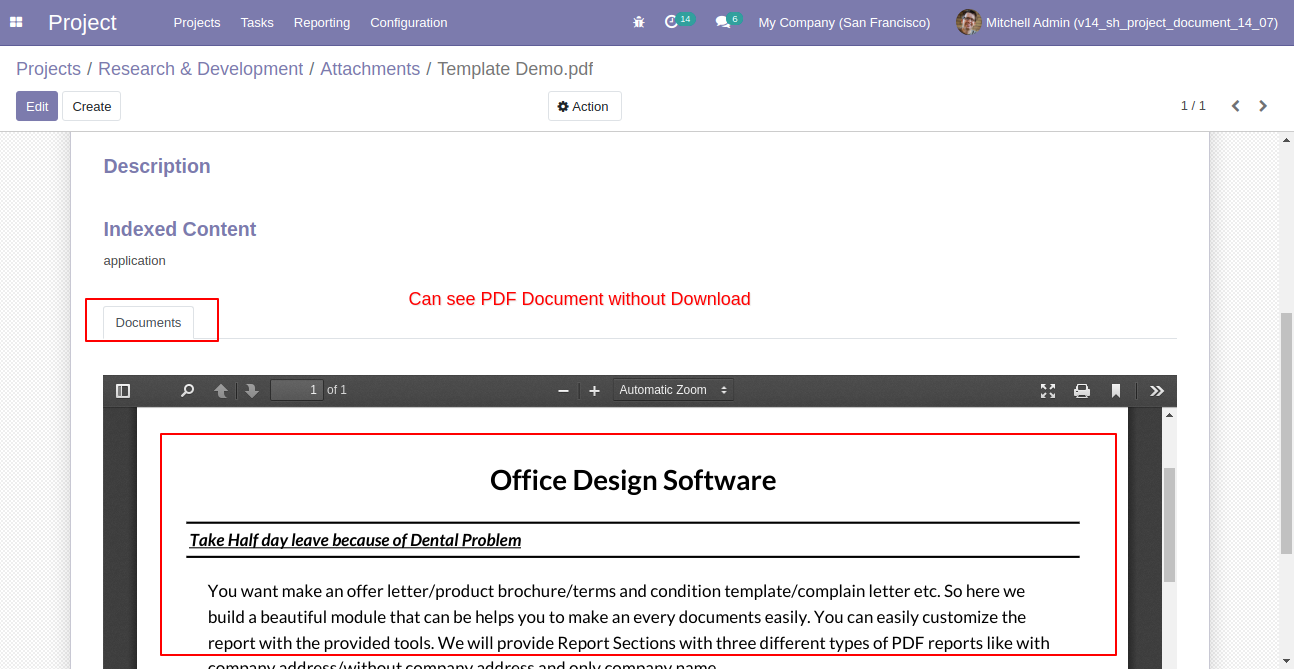
Now go to the project and attach the document. You can see the document without download using the document smart button.
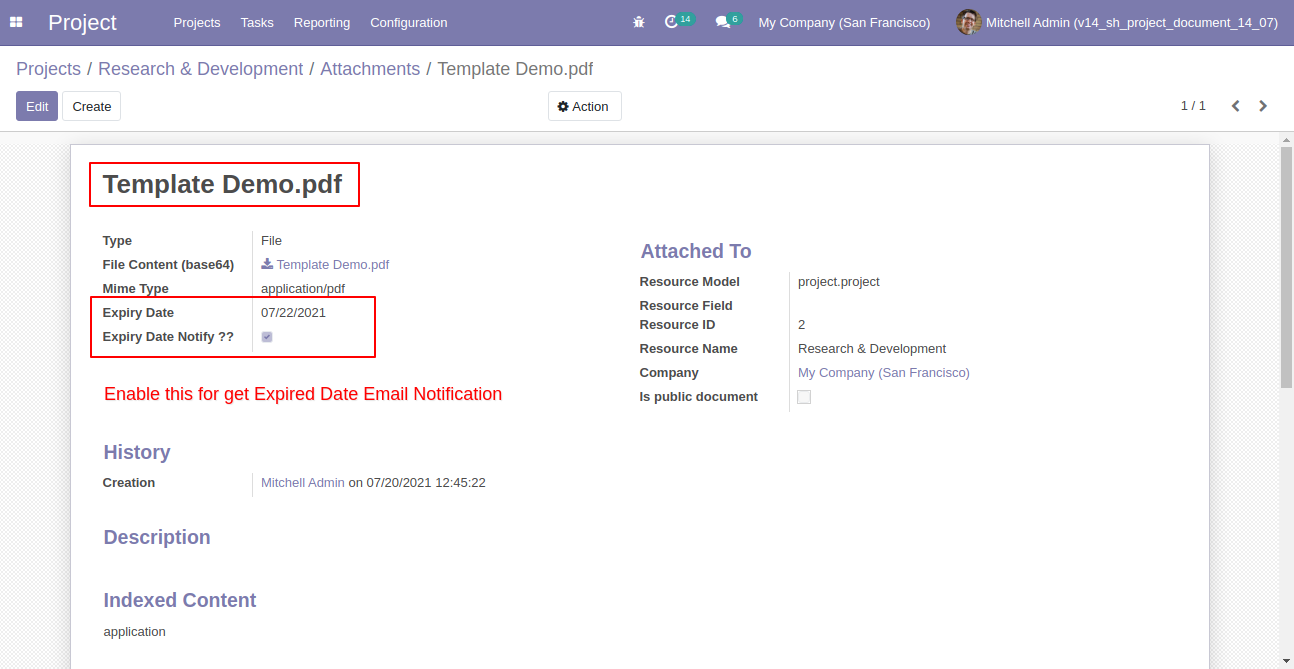
In the document form view tick, the "Expiry Date Notify?" to get expiry date email notification.
You can see the document without download that document.
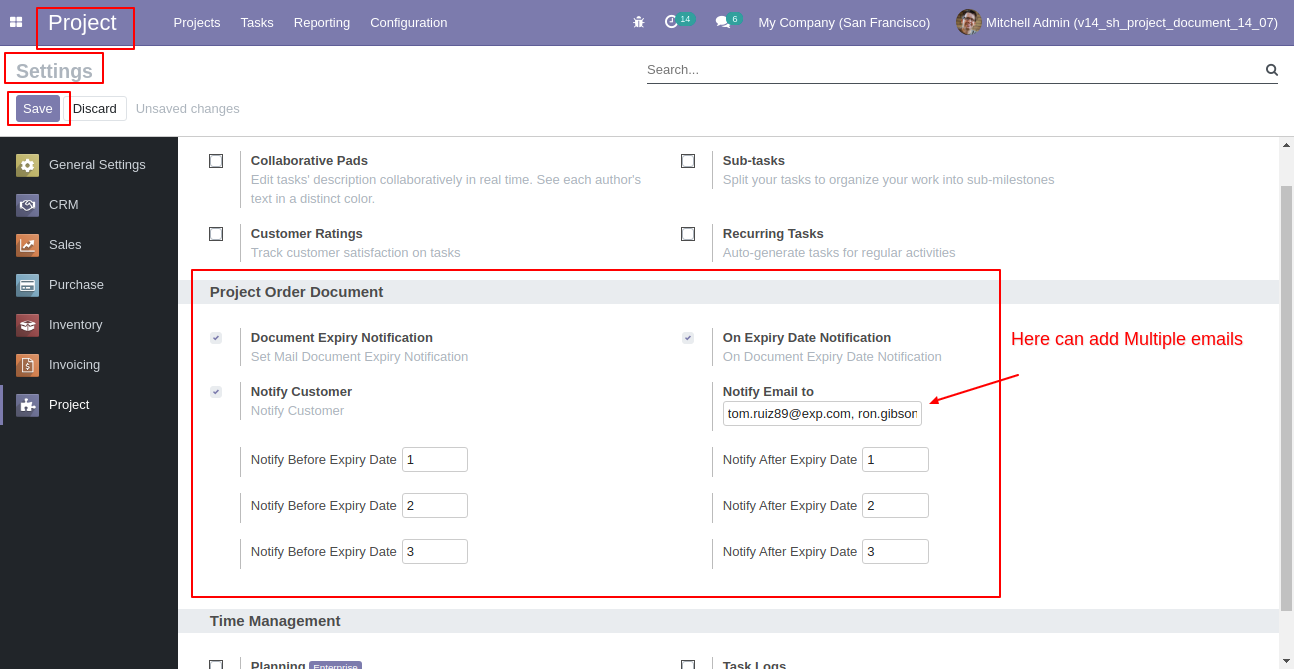
You can send email notifications to multiple customers using the "Notify Email" option.
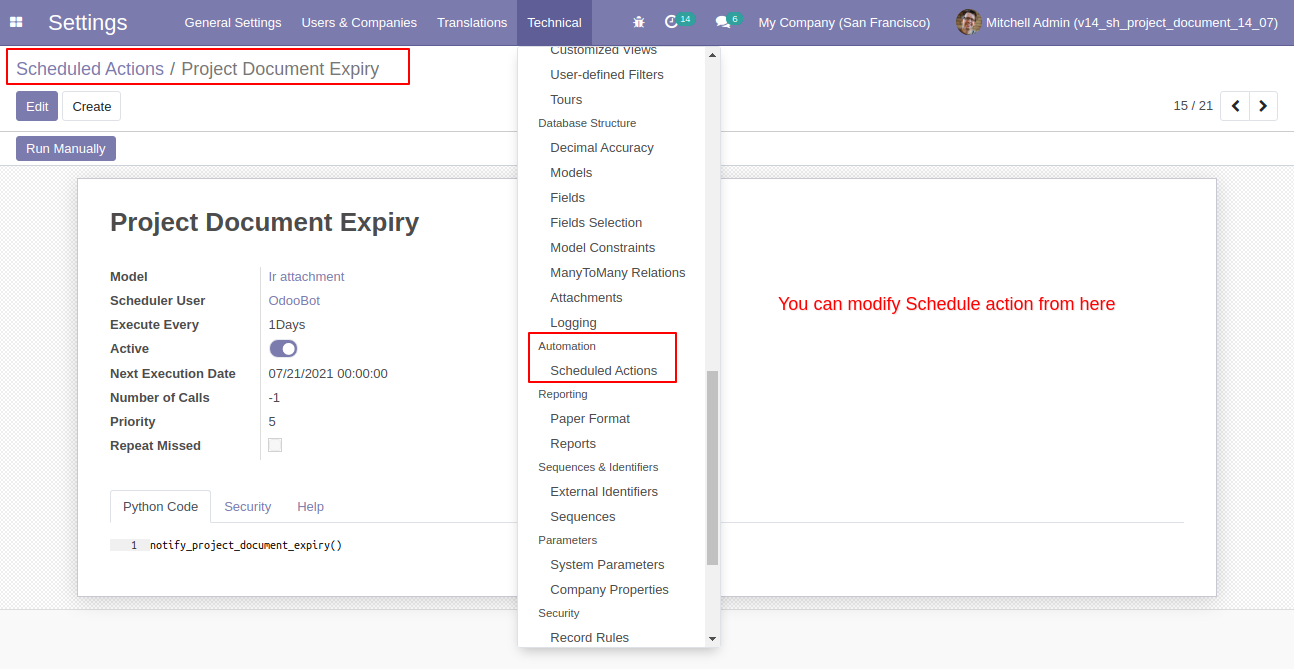
You can send the notification manually by modifying scheduled actions.
Manually sends email notifications without scheduled actions.
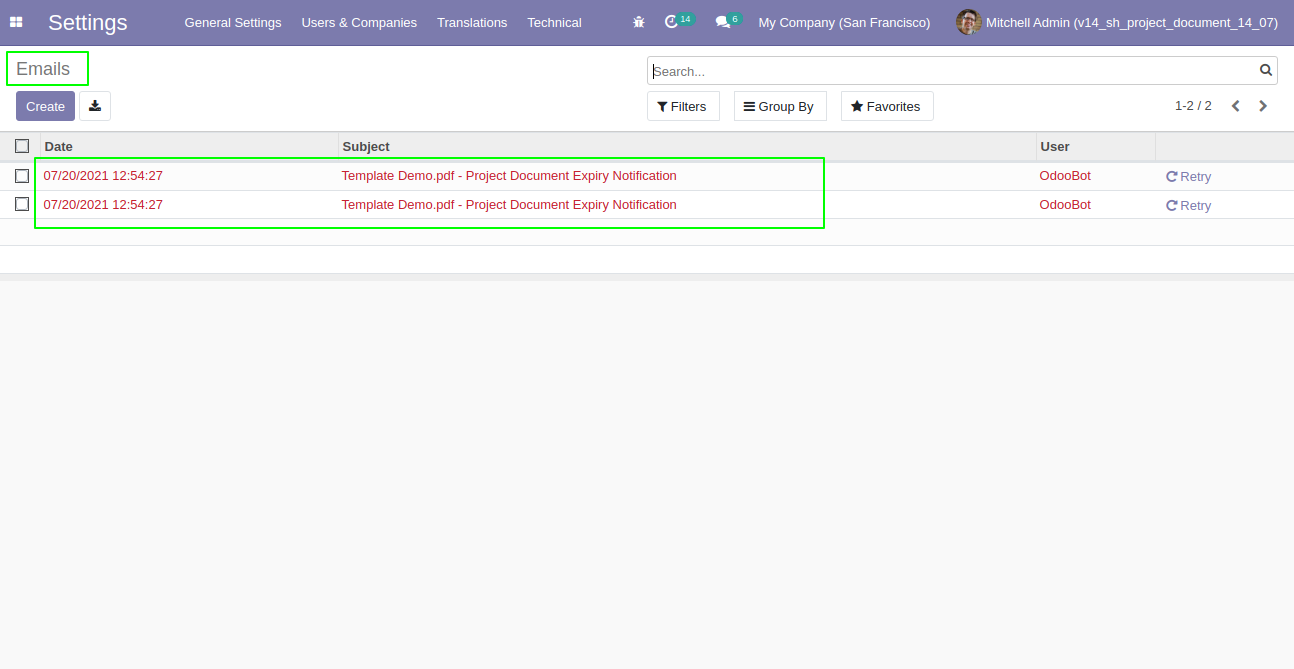
The email notification form view looks like this, you can see the document from here.
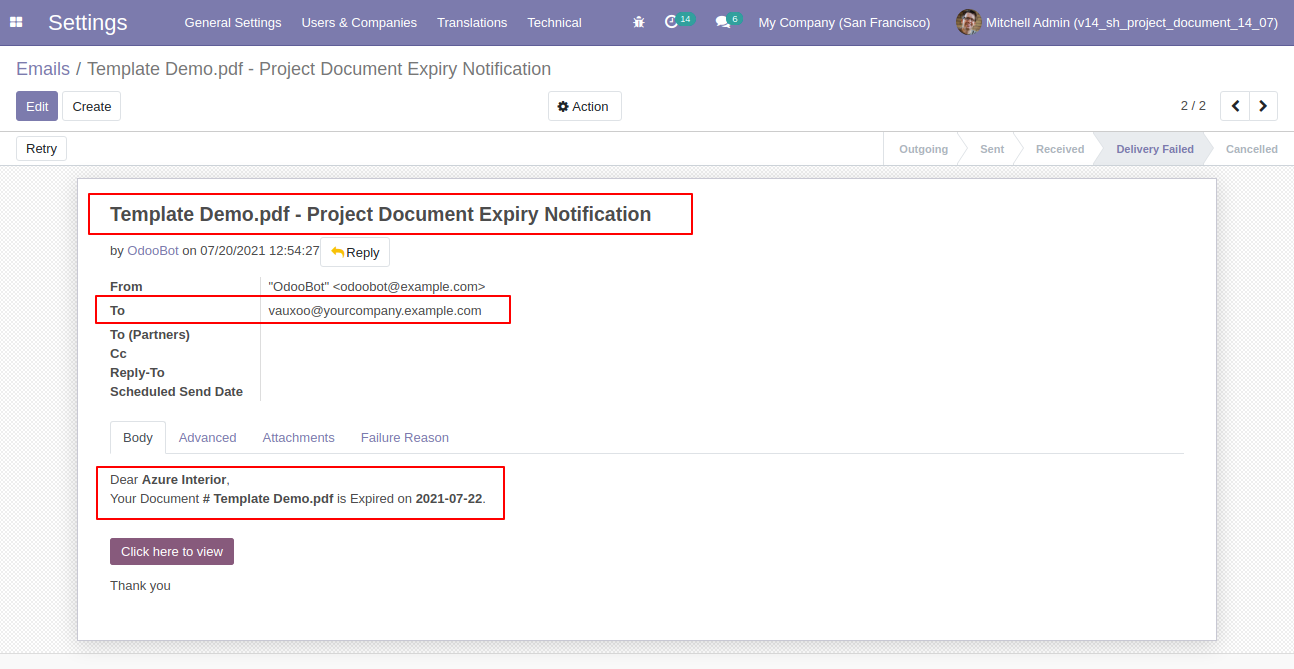
You can send multiple customer emails manually also.
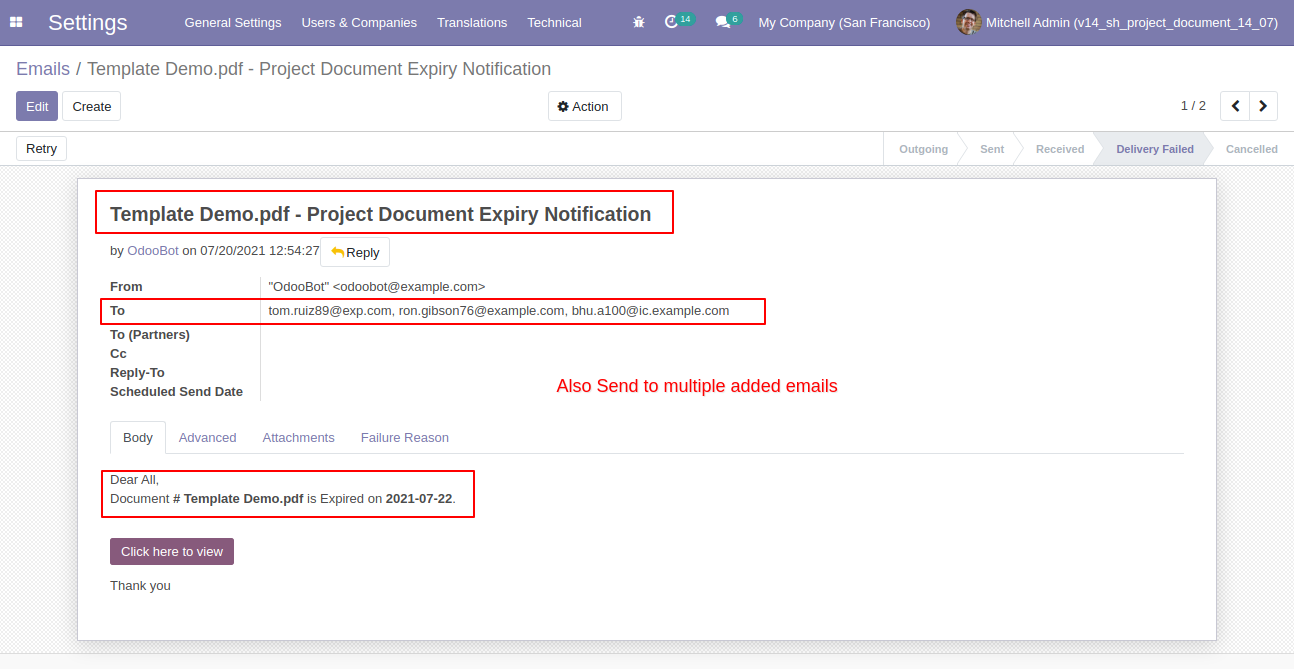
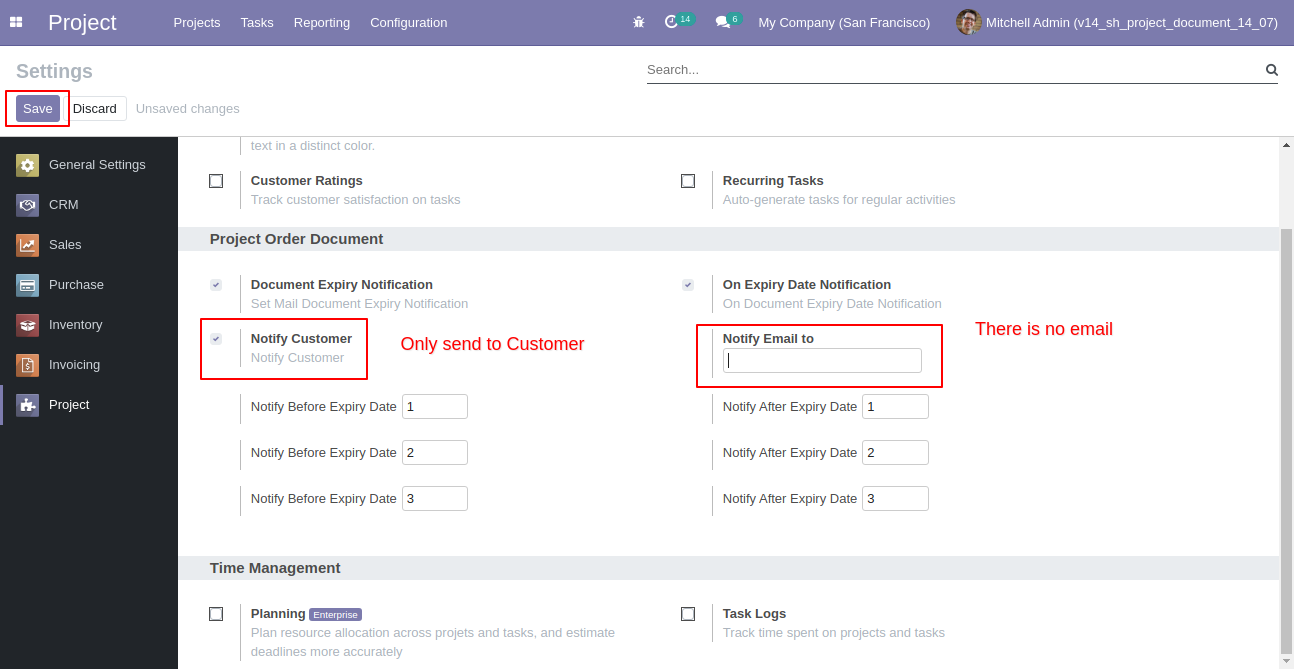
Tick the "Notify Customer" to send document expiry notification to the customer only.
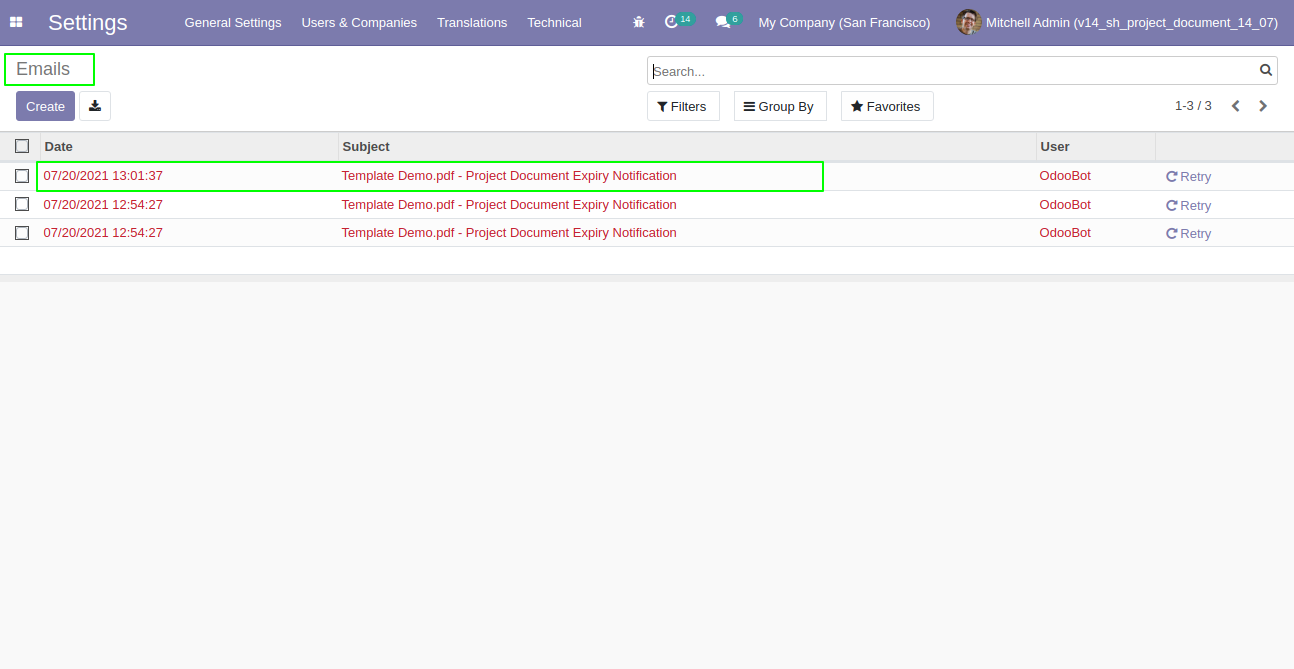
Email notification list view.
Email notification form view, you can also see the document from here.
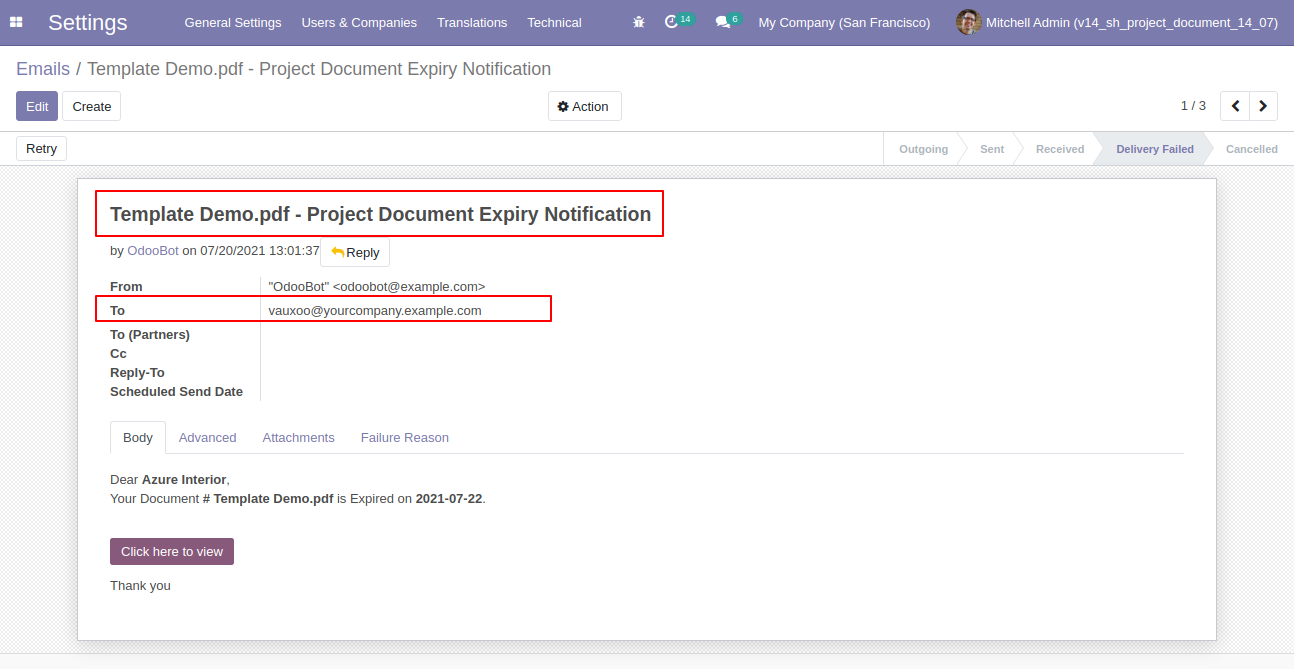
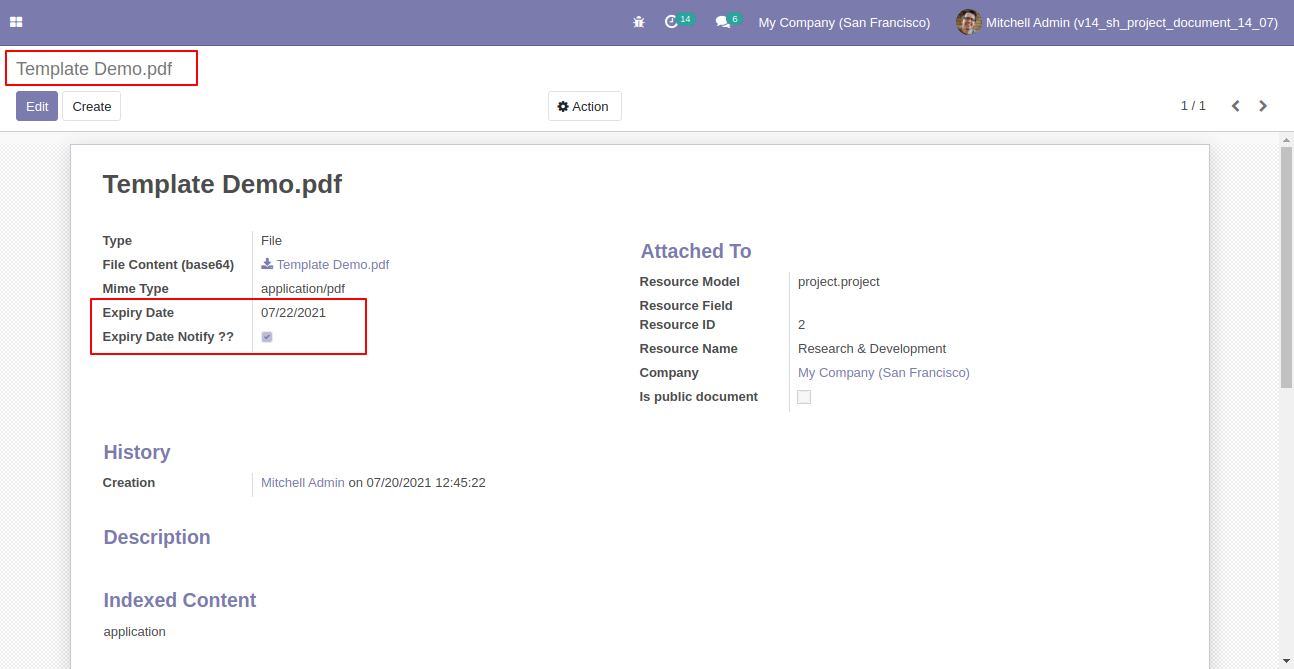
You have to tick "Expiry Date Notify?" to get an email notification on the expiry date.
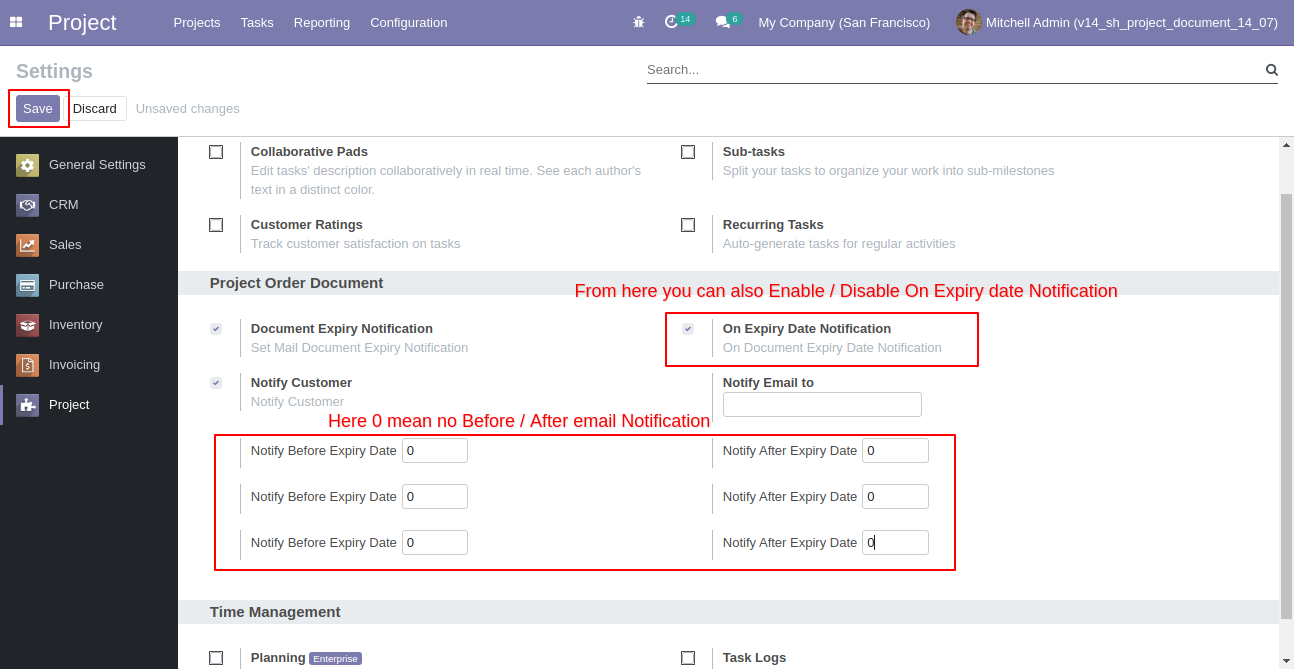
Tick/untick "On Expiry Date Notification" to enable/disable email notification on the expiry date.
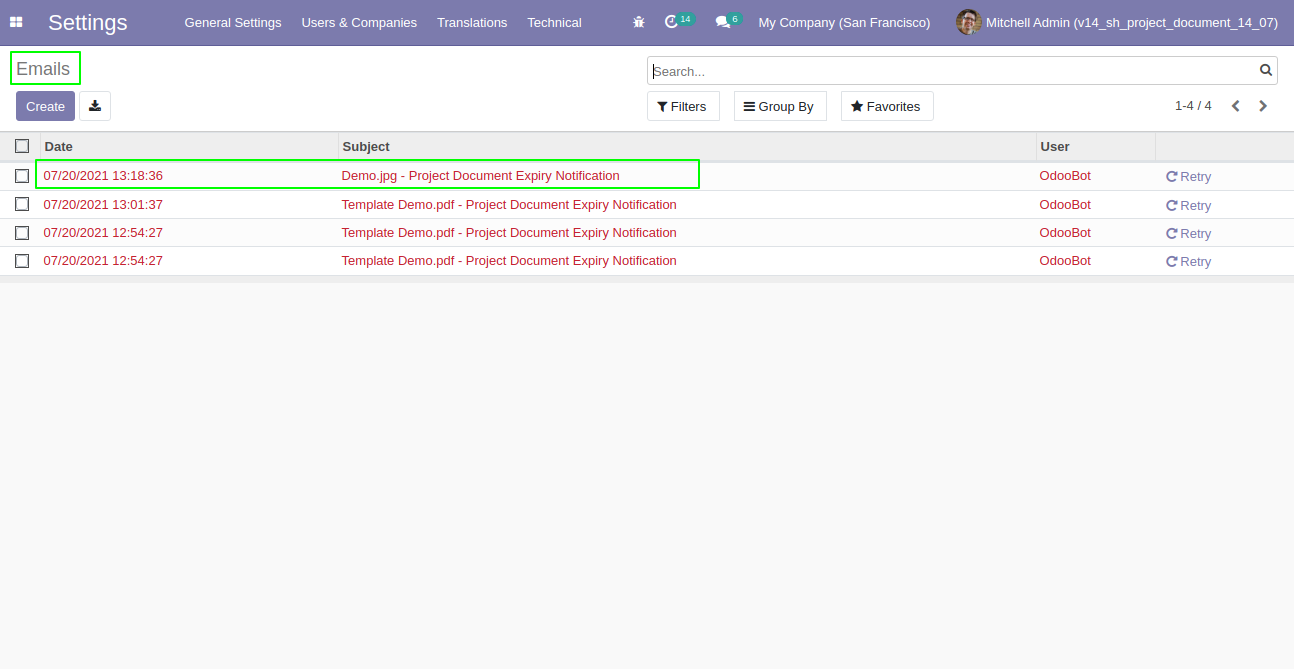
It sends email notifications based on the configuration.
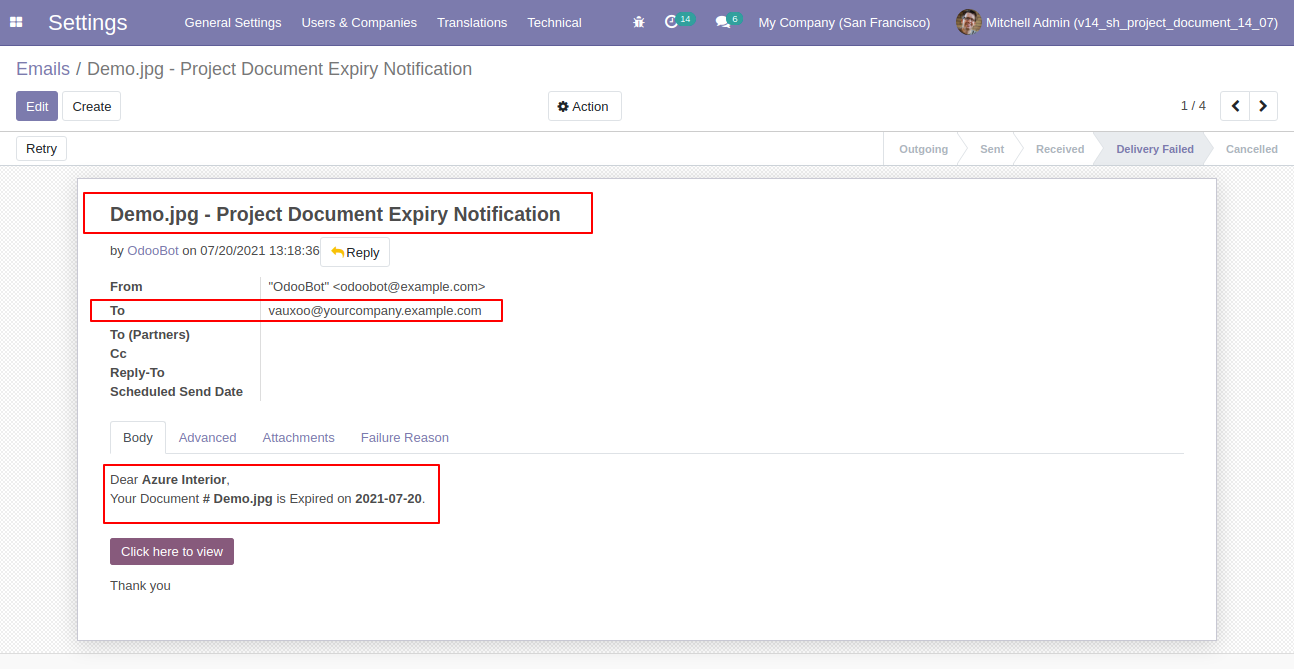
The email notification form view looks like this.
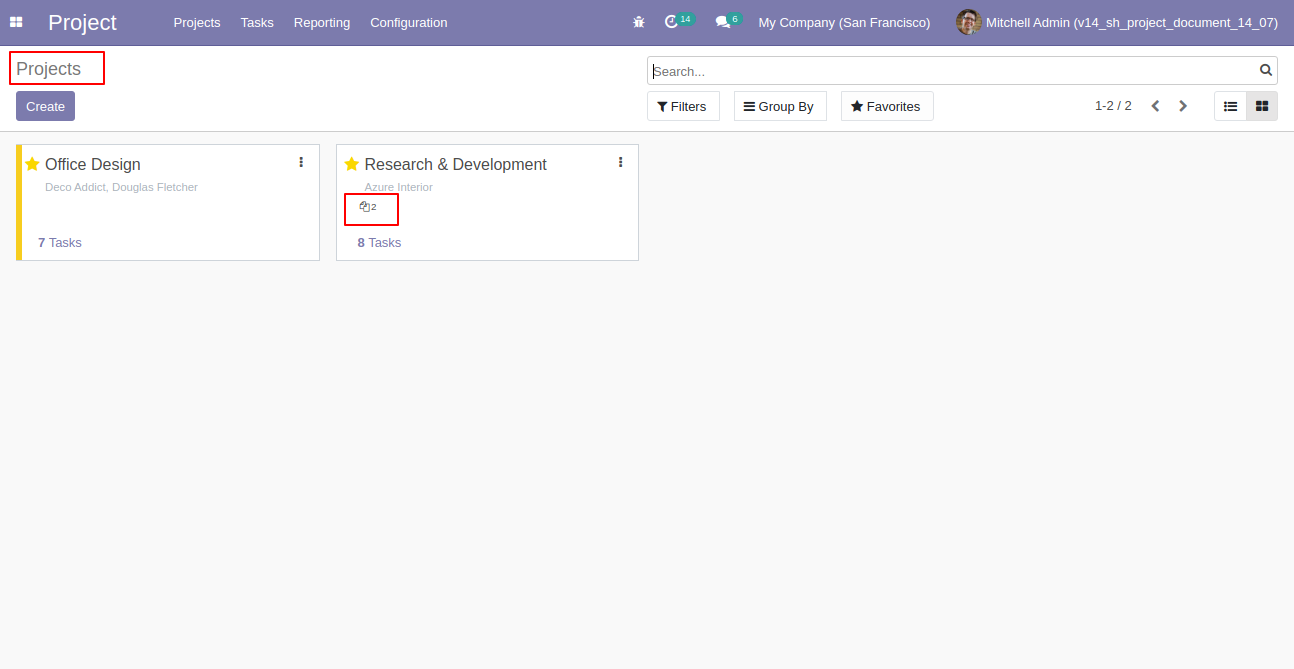
The project kanban view looks like this.
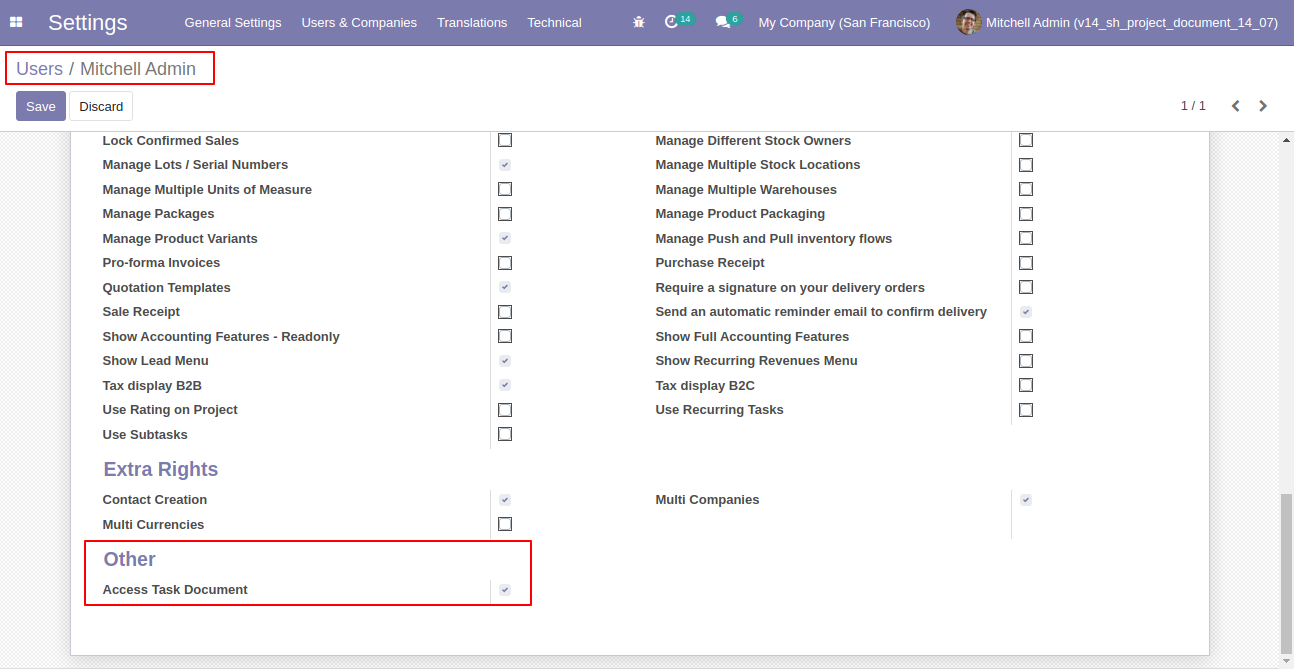
Tick the "Access Task Document" group.
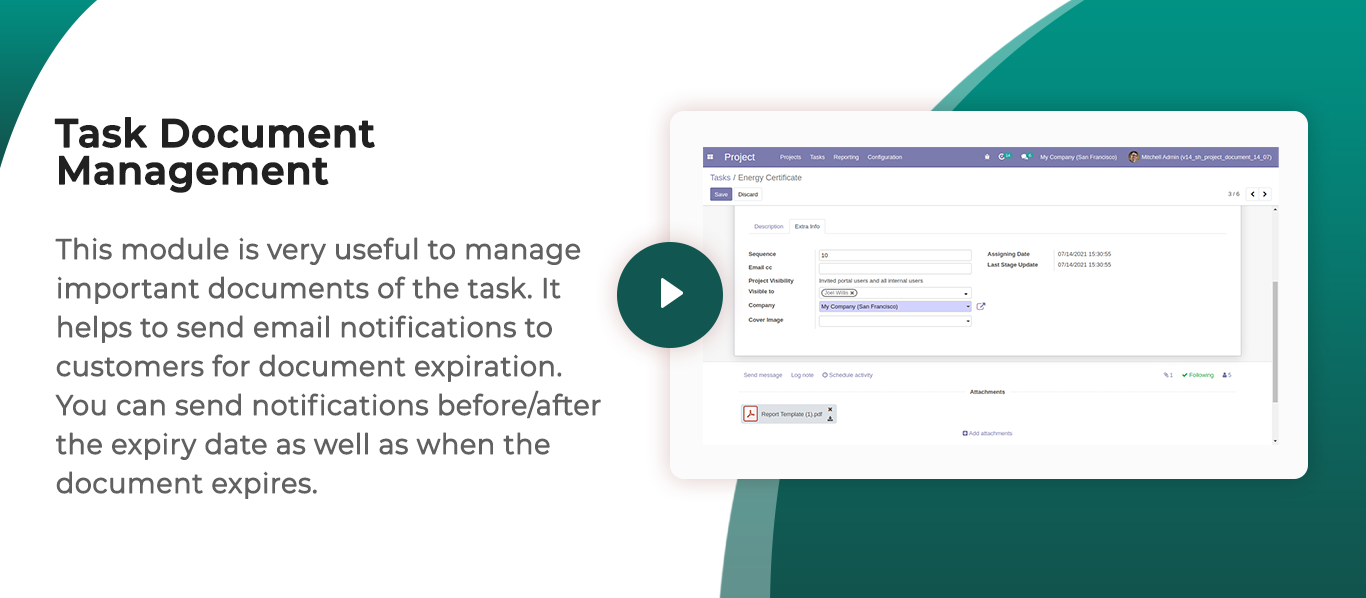
Now go to the task and attach the document.
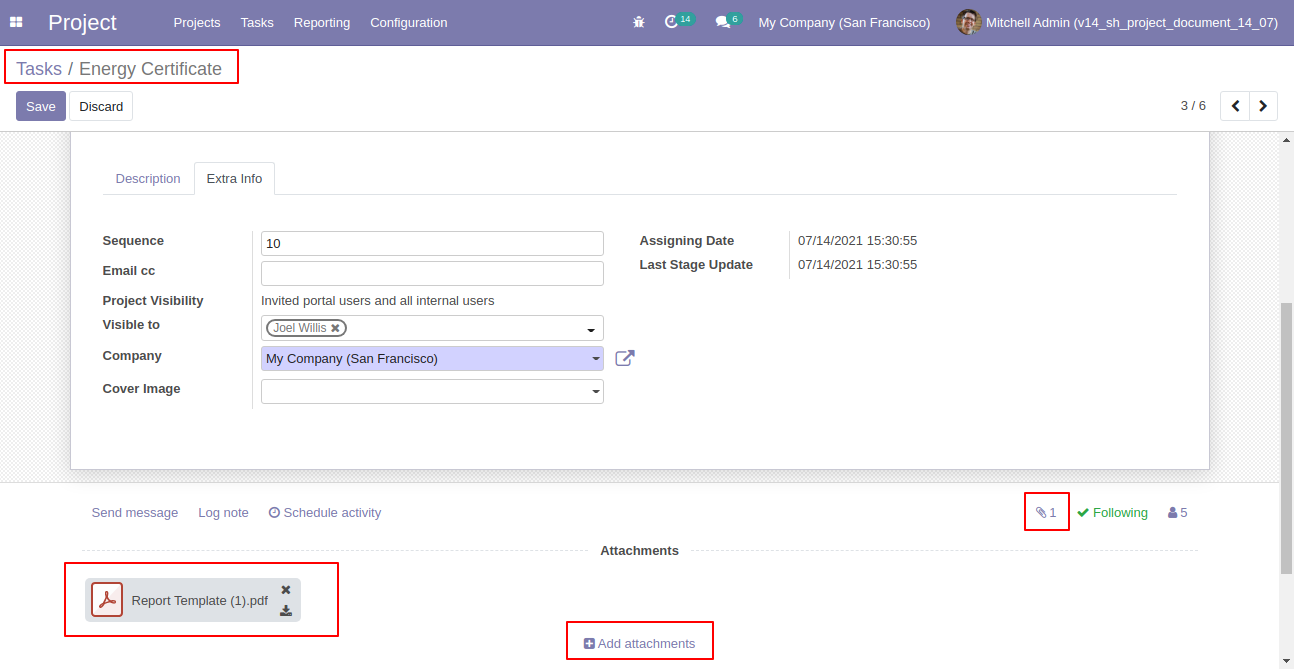
You can see the document without download using the document smart button.
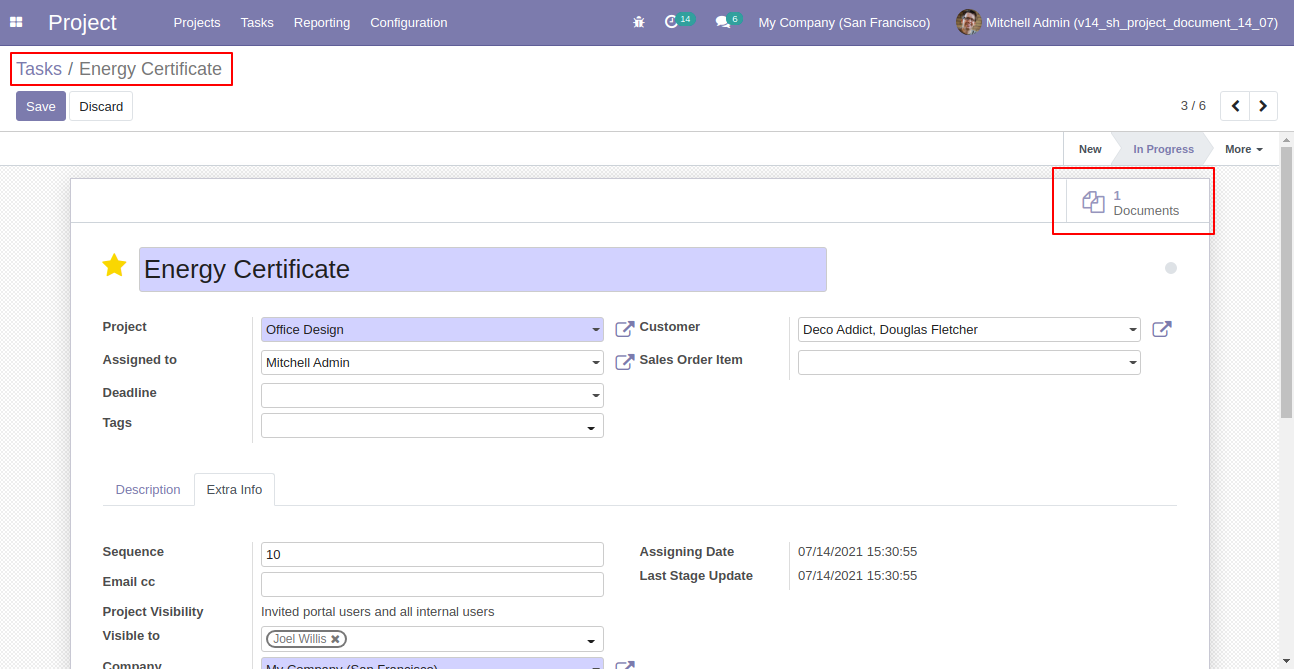
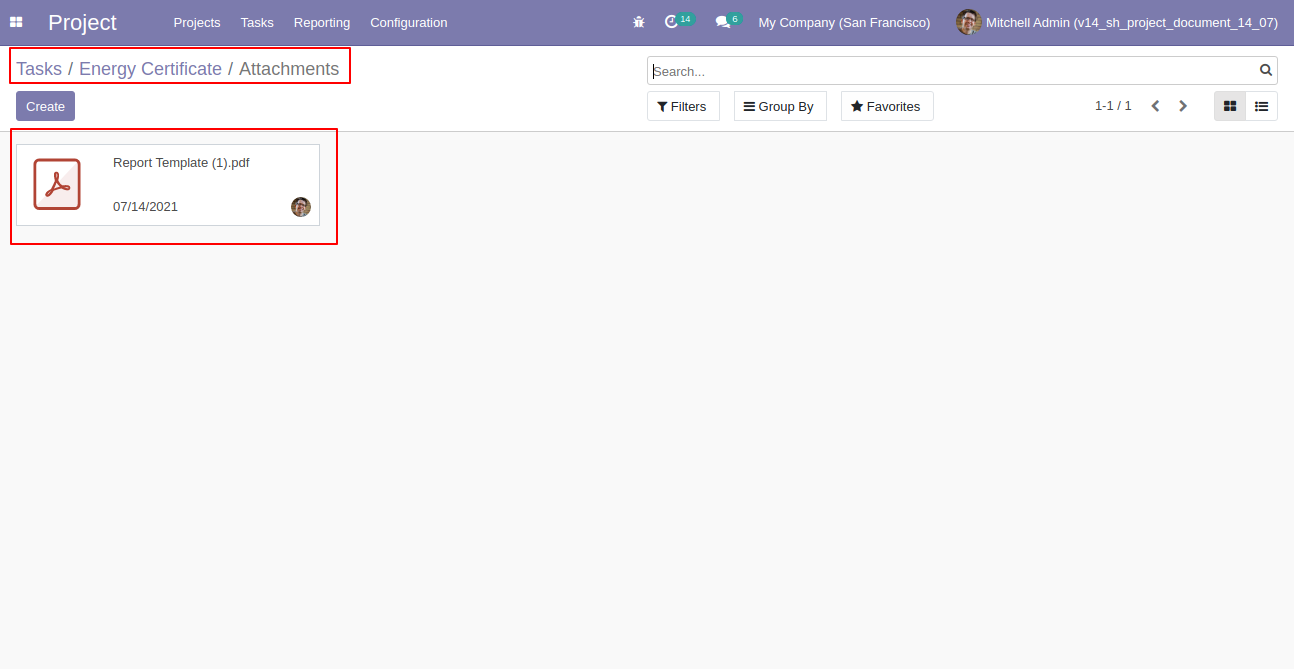
After press on the document smart button, it opens the document kanban view.
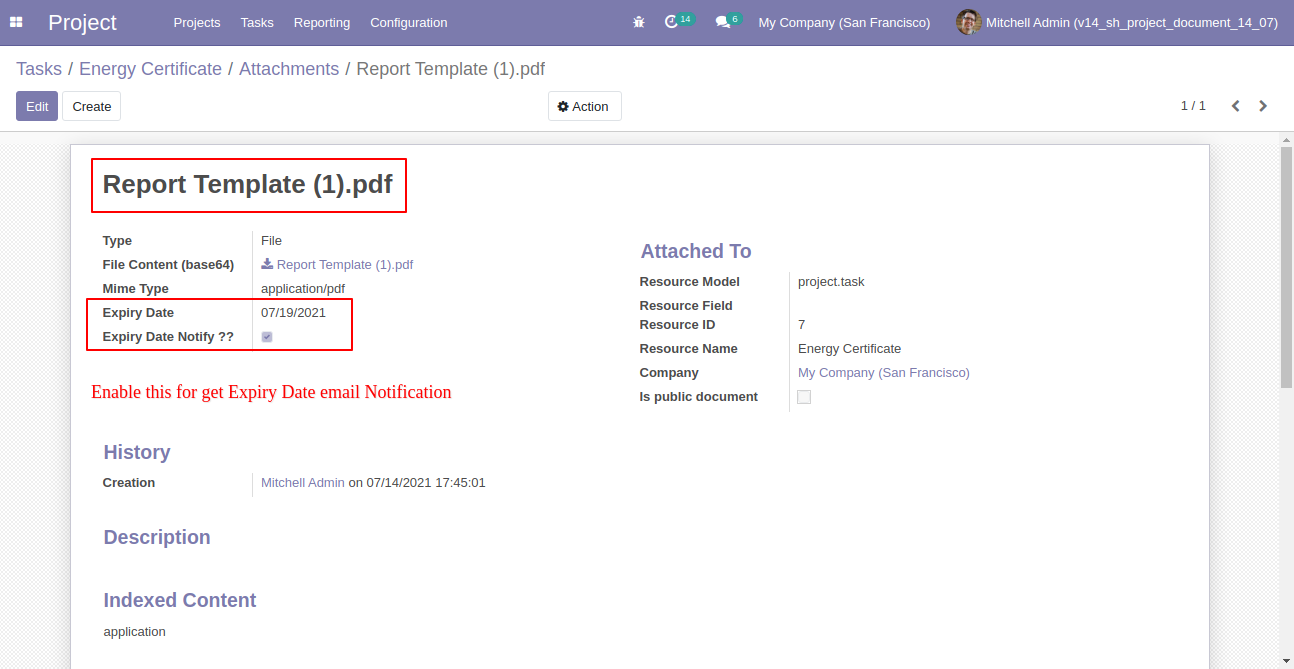
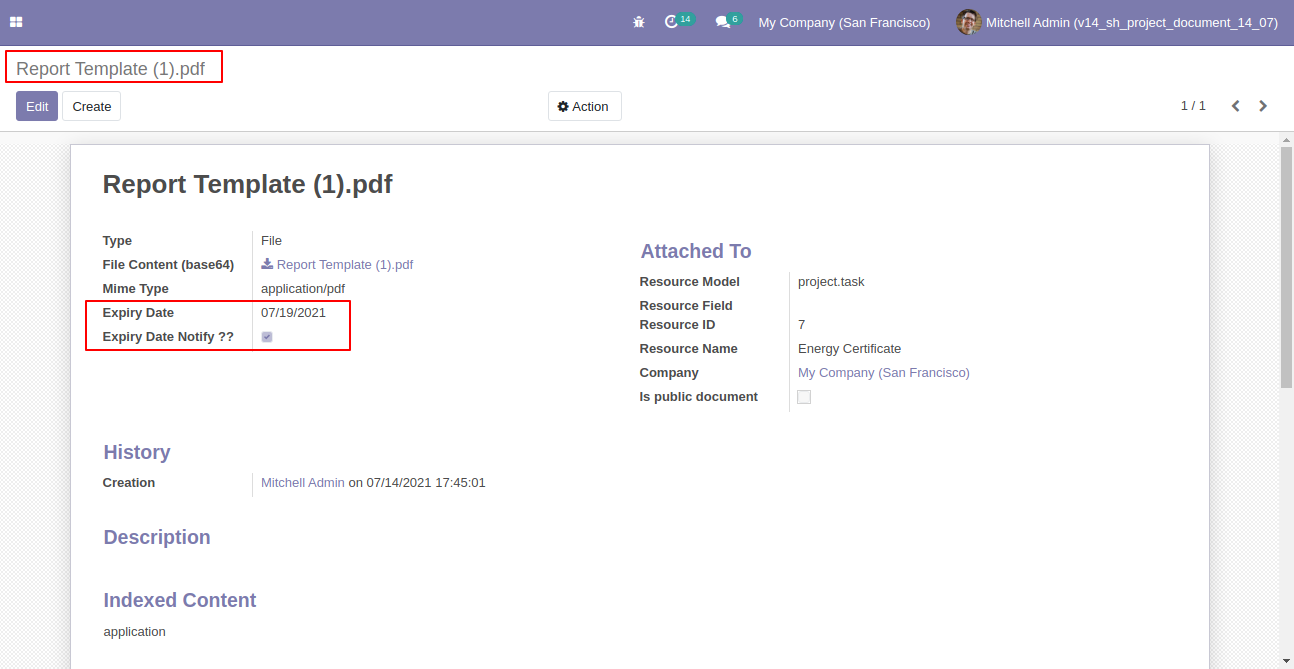
In the document form view tick, the "Expiry Date Notify?" to get expiry date email notification.
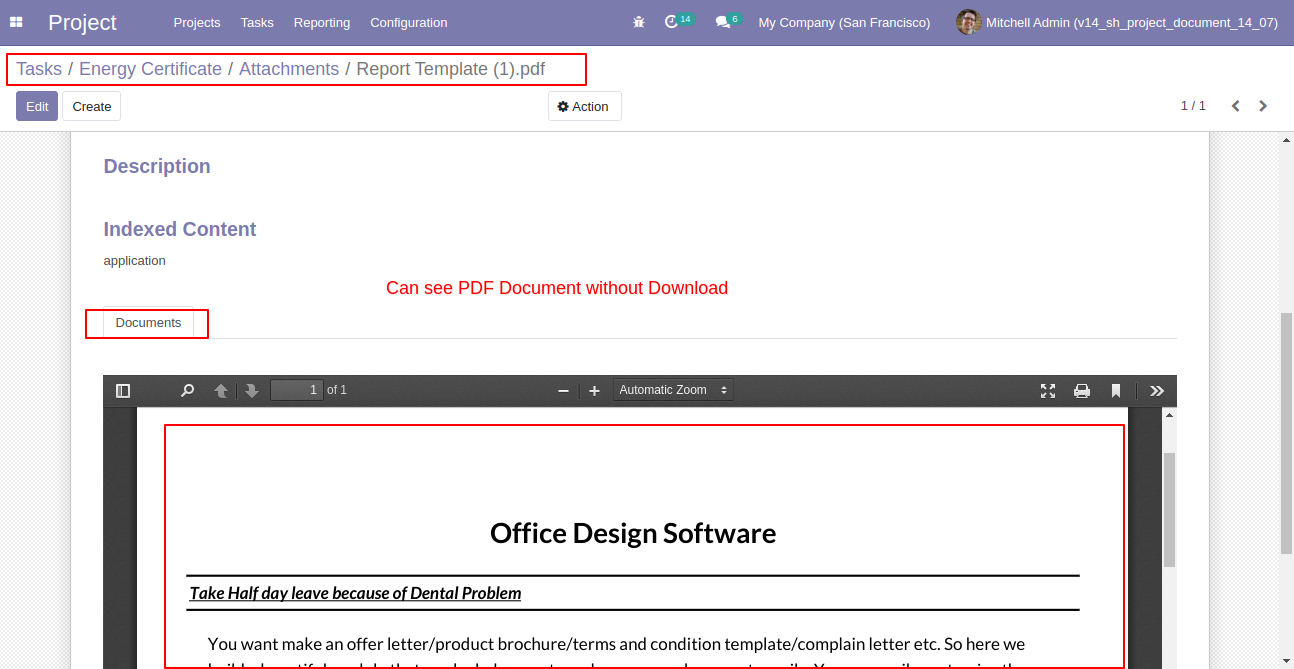
You can see the document without download that document.
You can send email notifications to multiple customers using the "Notify Email" option.
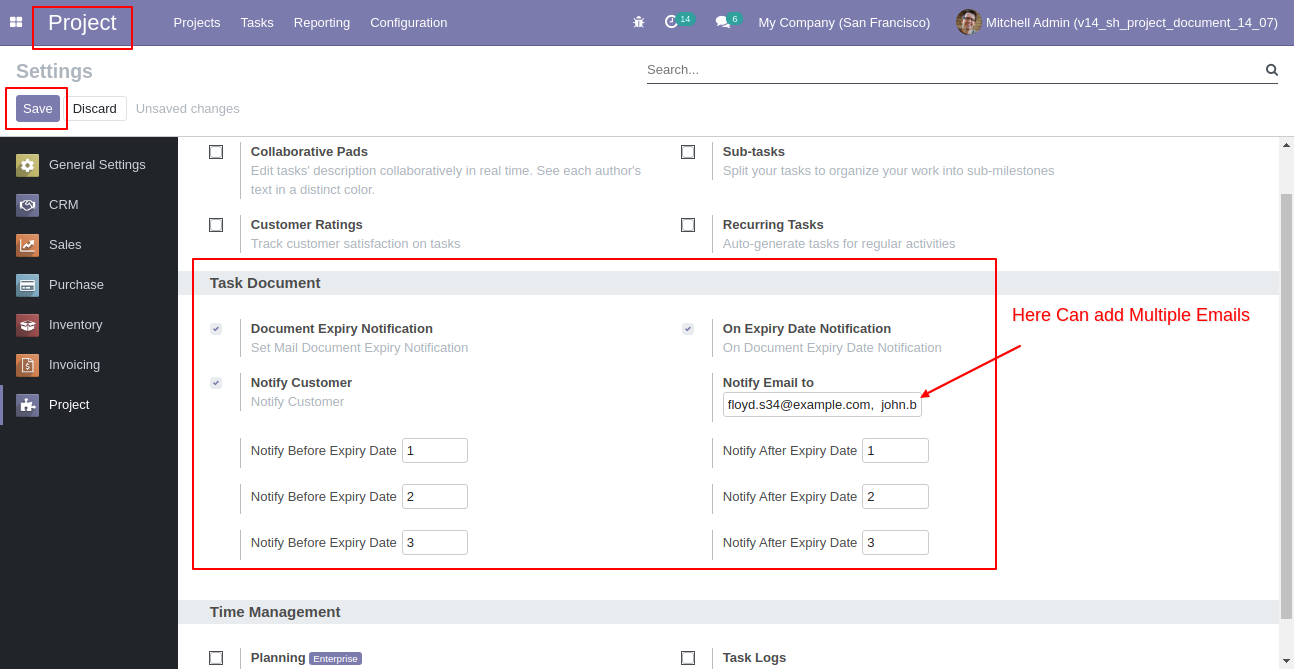
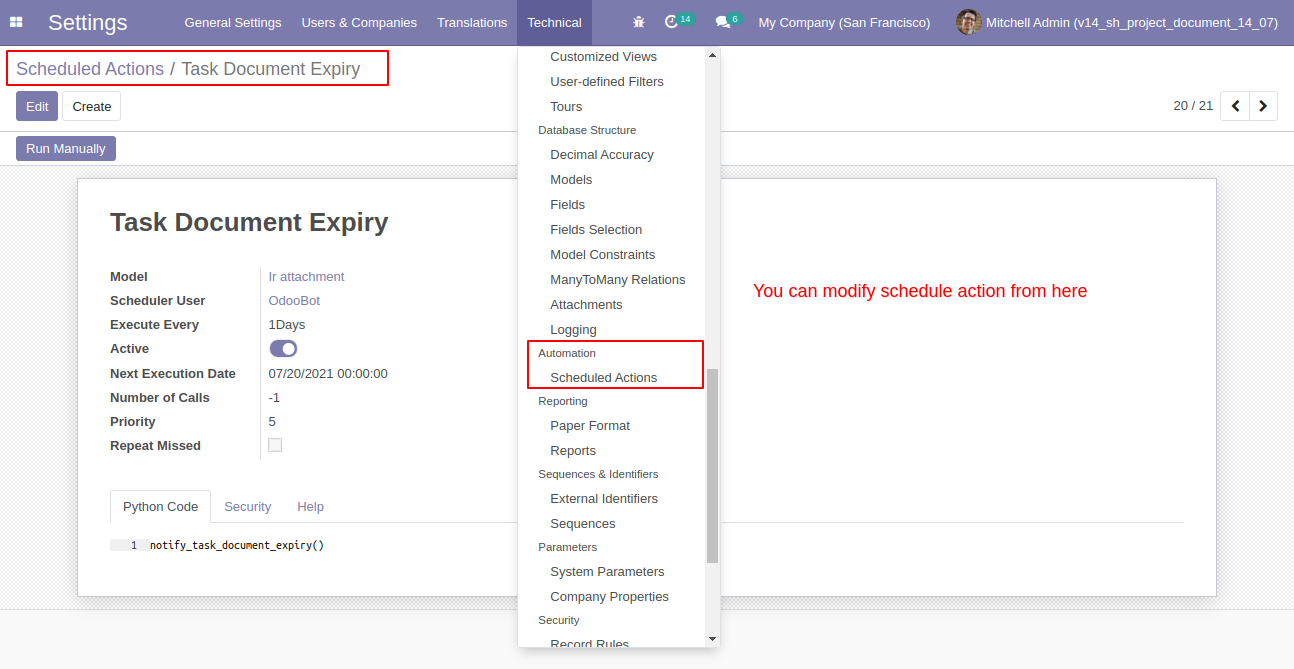
You can send the notification manually by modifying scheduled actions.
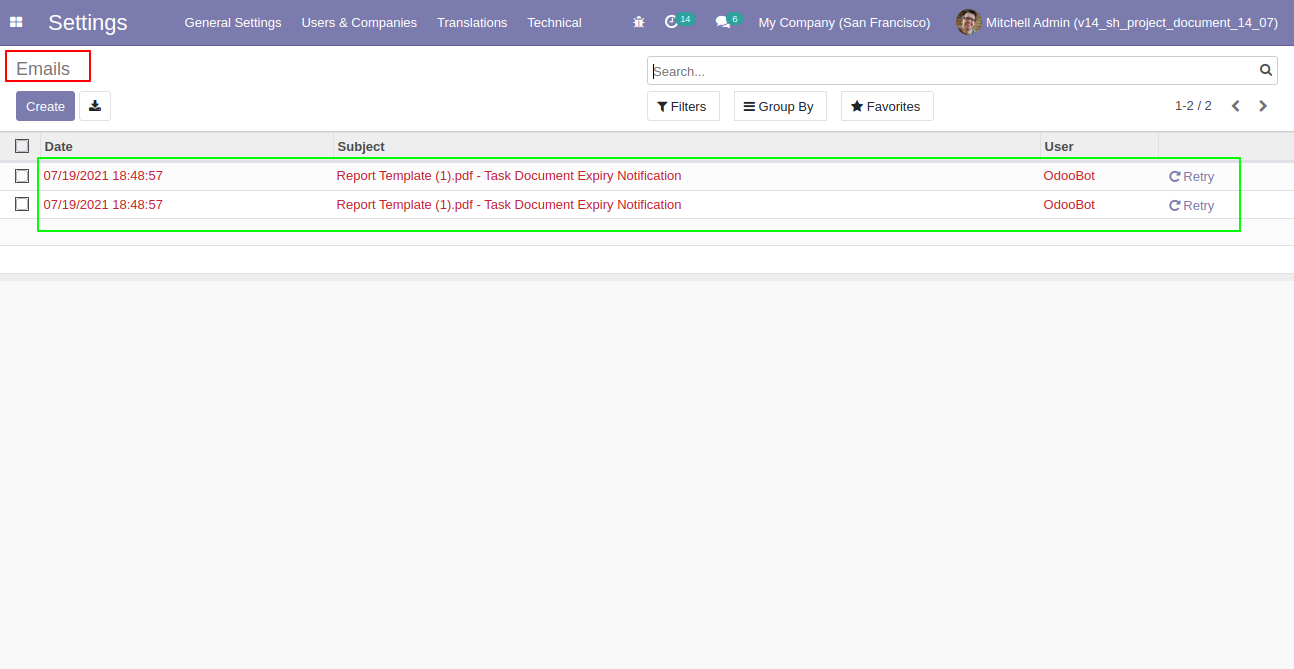
Manually sends email notifications without scheduled actions.
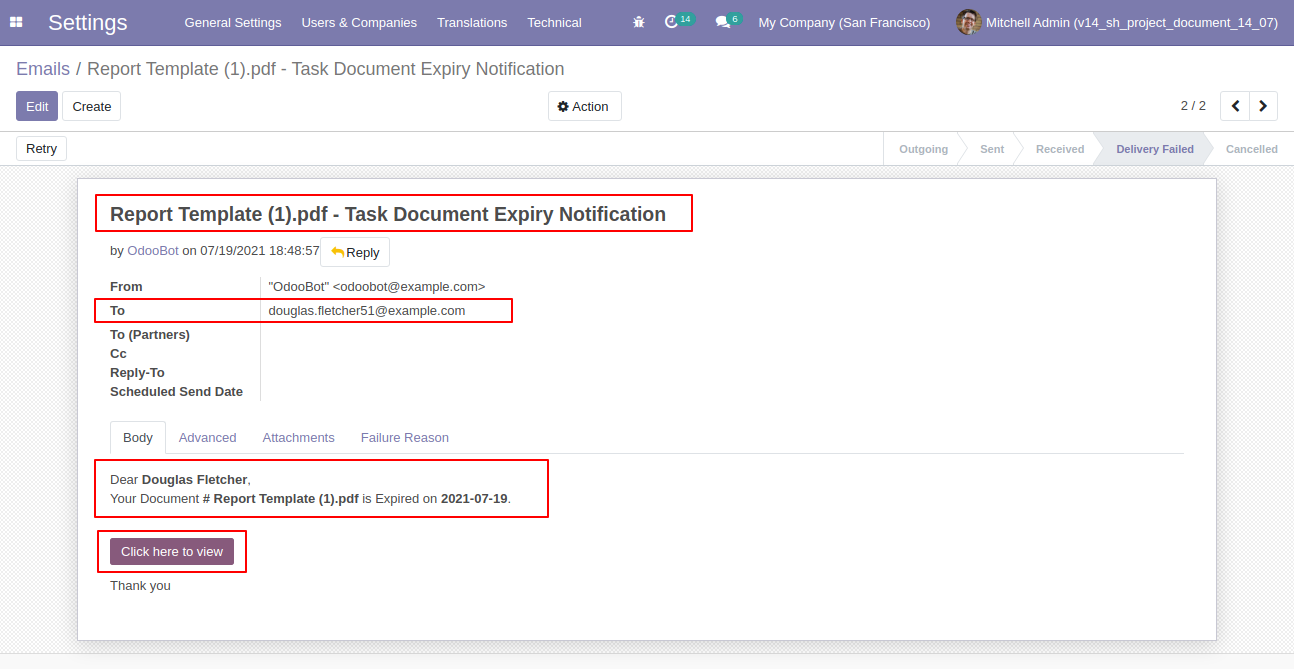
The email notification form view looks like this, you can see the document from here.
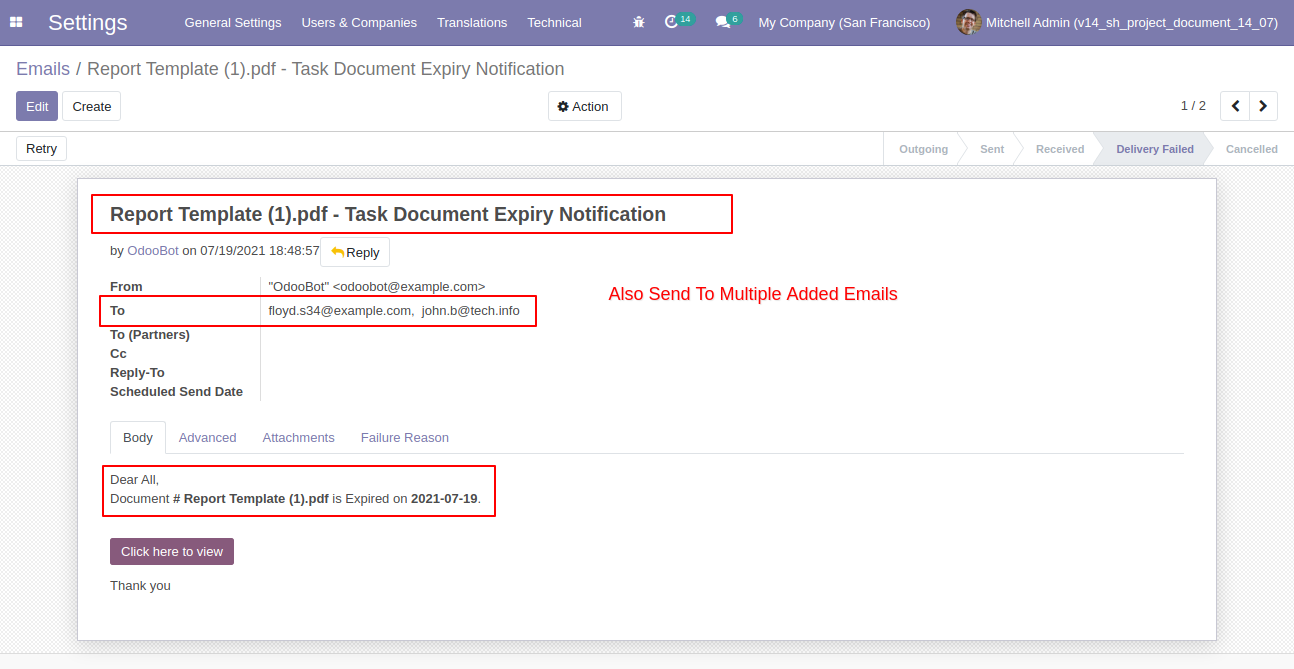
You can send multiple customers emails manually also.
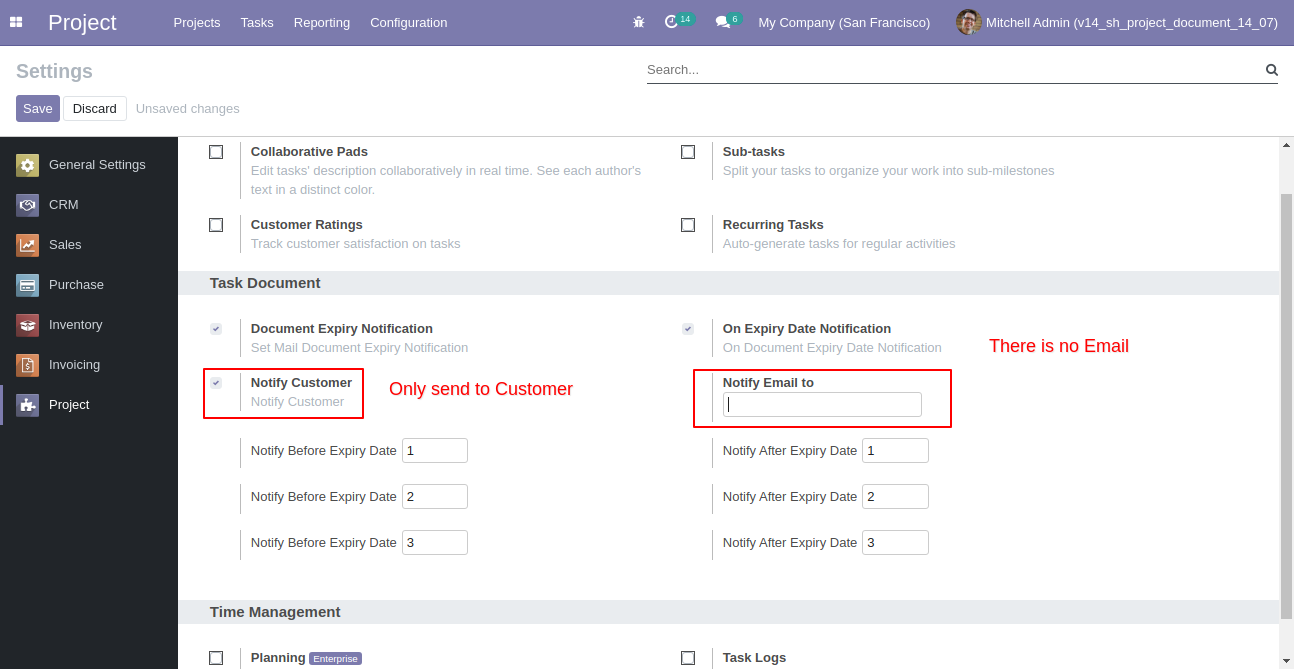
Tick the "Notify Customer" to send document expiry notification to the customer only.
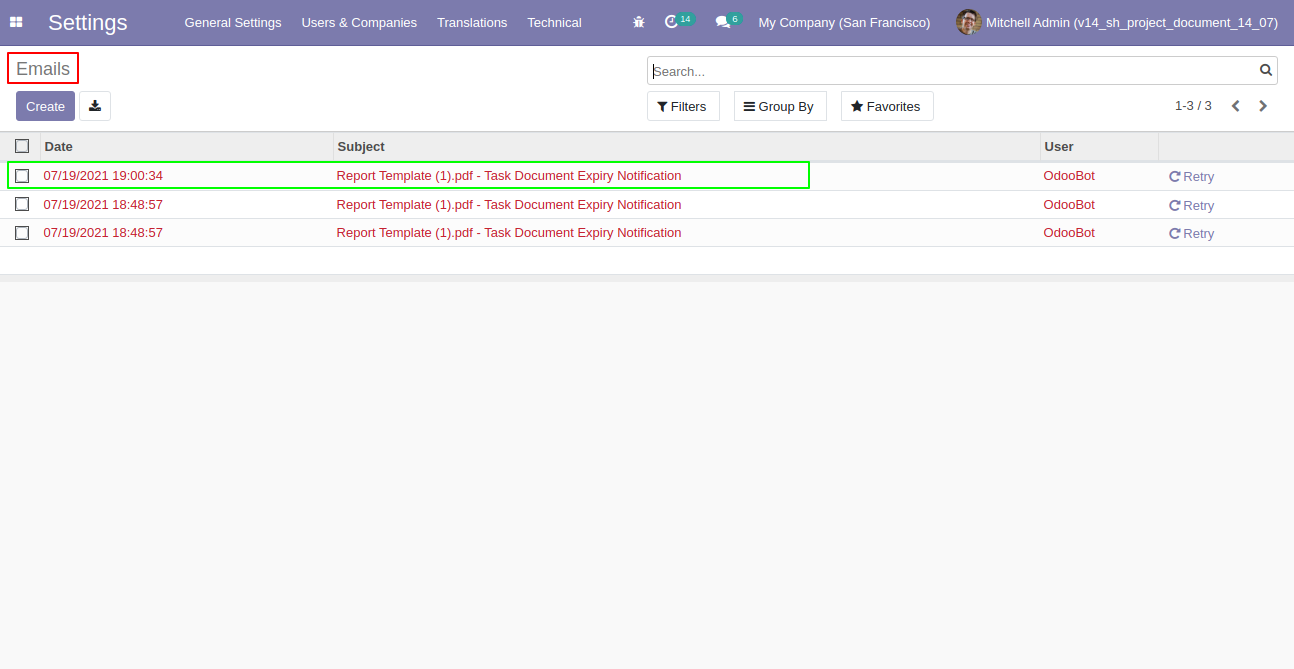
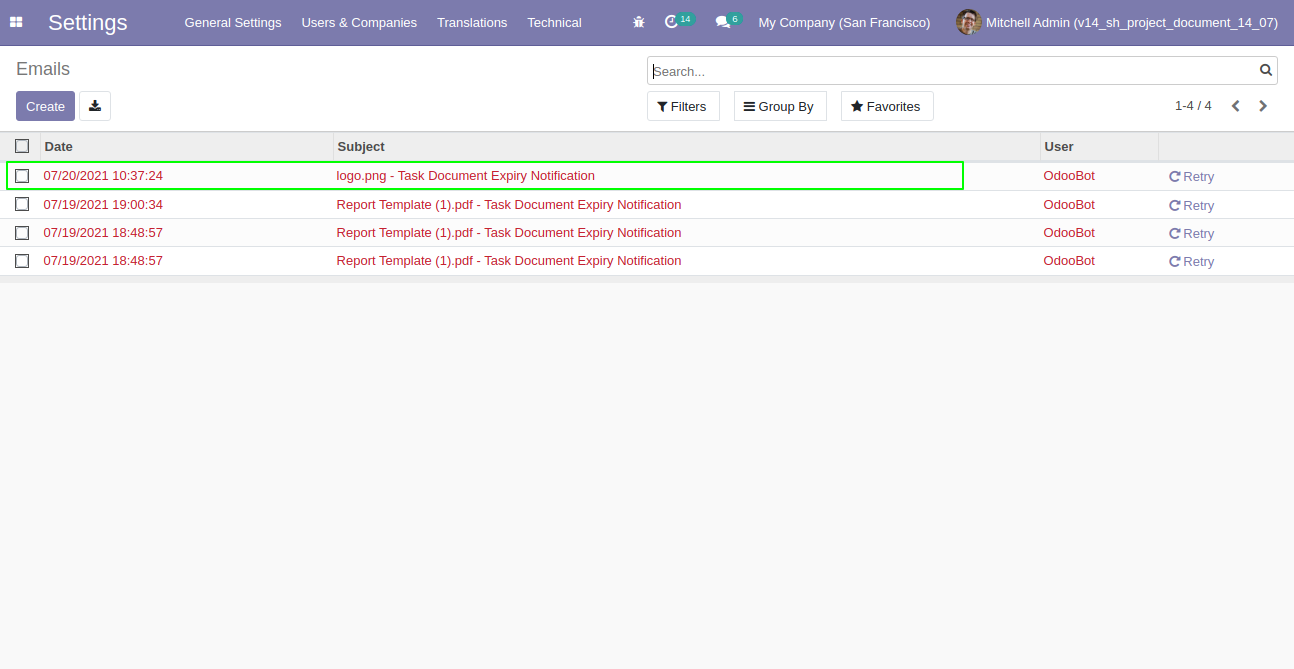
Email notification list view.
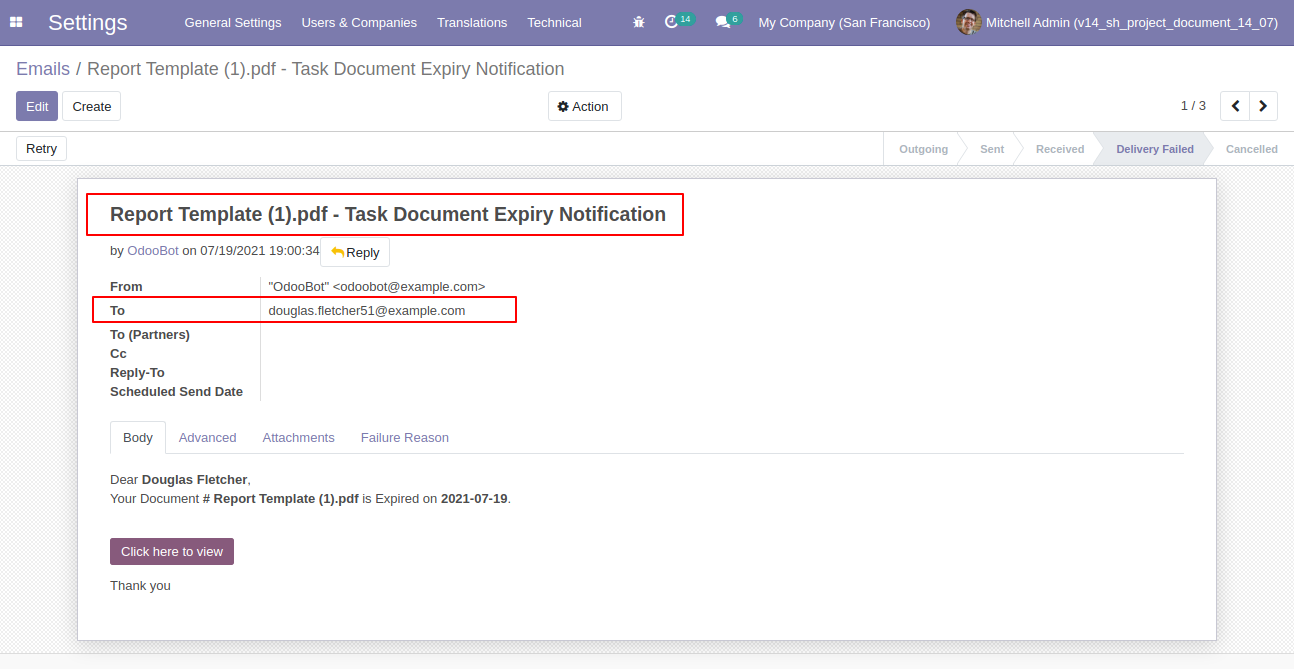
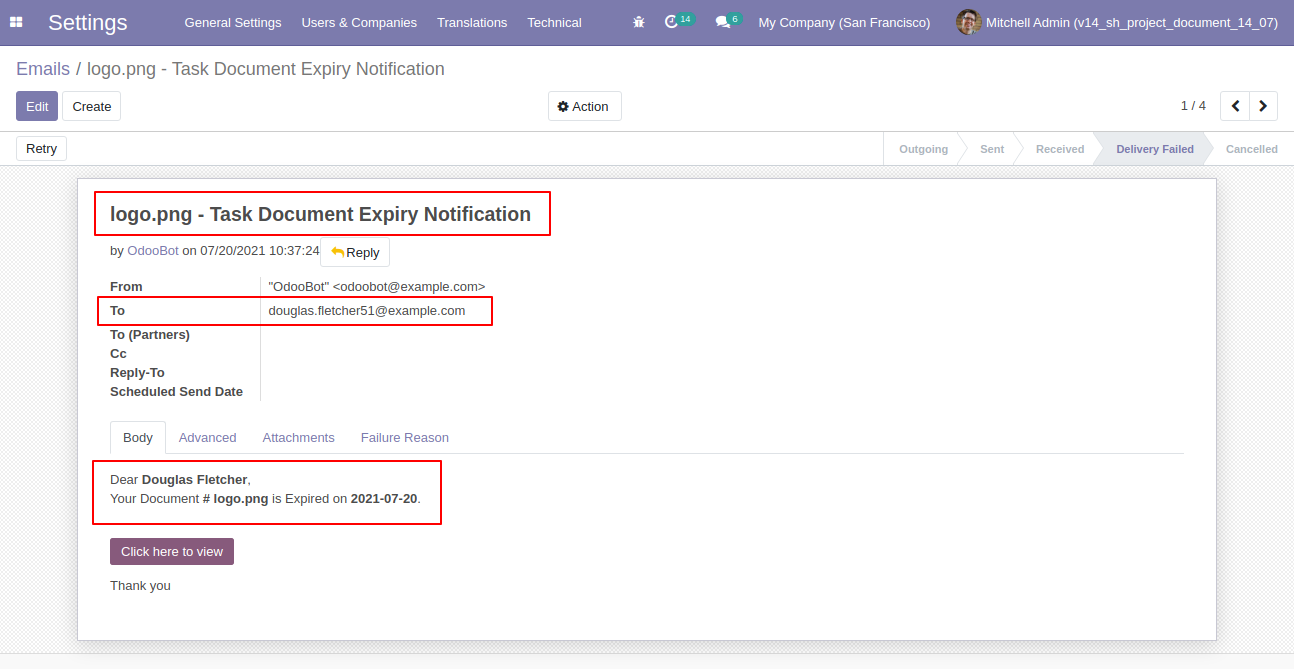
Email notification form view, you can also see the document from here.
You have to tick "Expiry Date Notify?" to get an email notification on the expiry date.
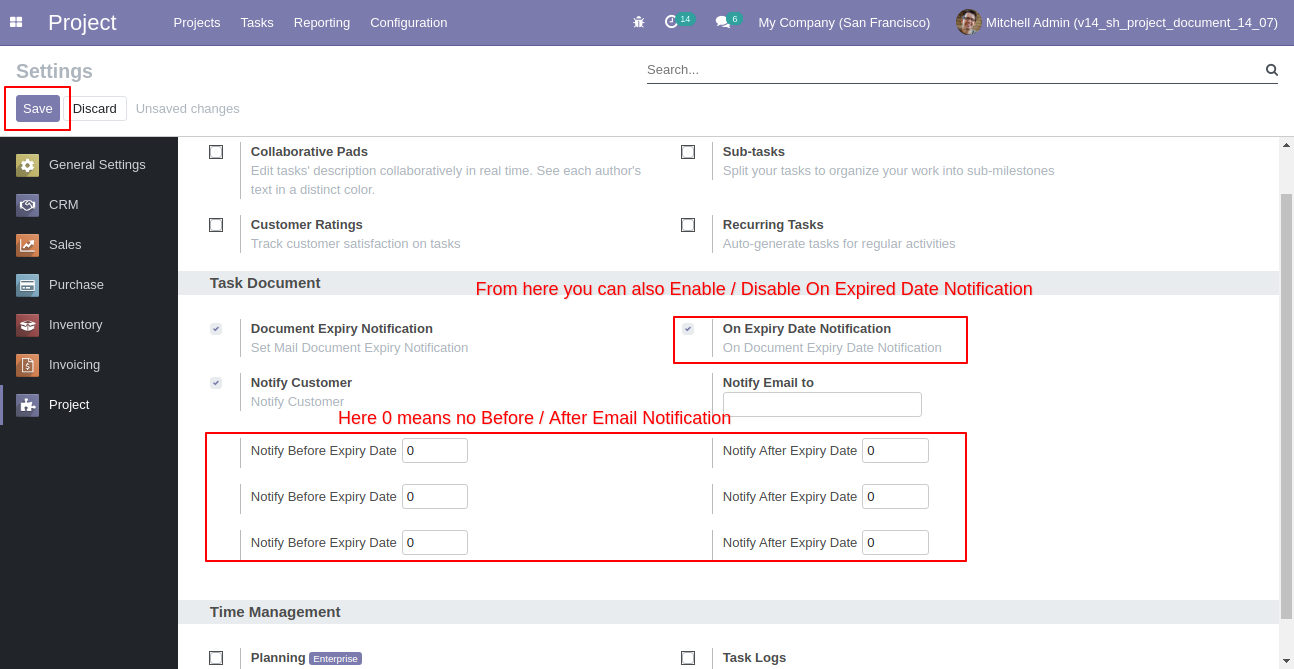
Tick/untick "On Expiry Date Notification" to enable/disable email notification on the expiry date.
It sends email notifications based on the configuration.
The email notification form view looks like this.
The task kanban view looks like this.
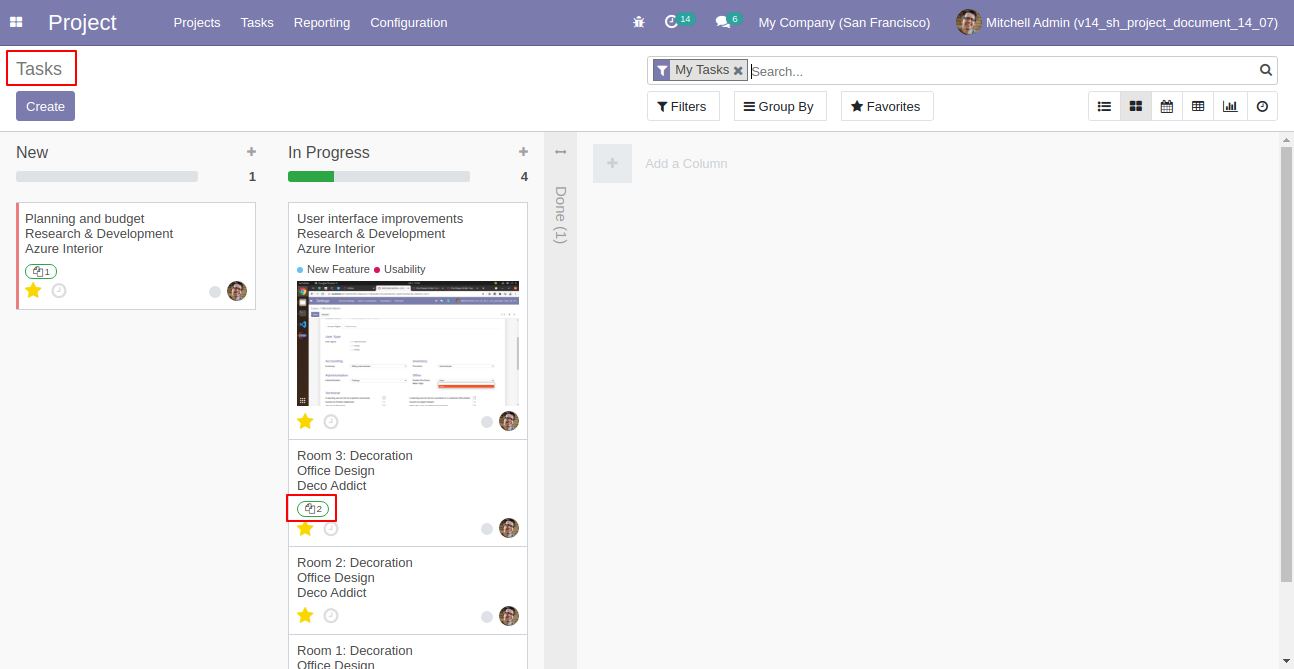
Tick the "Enable Project Category" group.
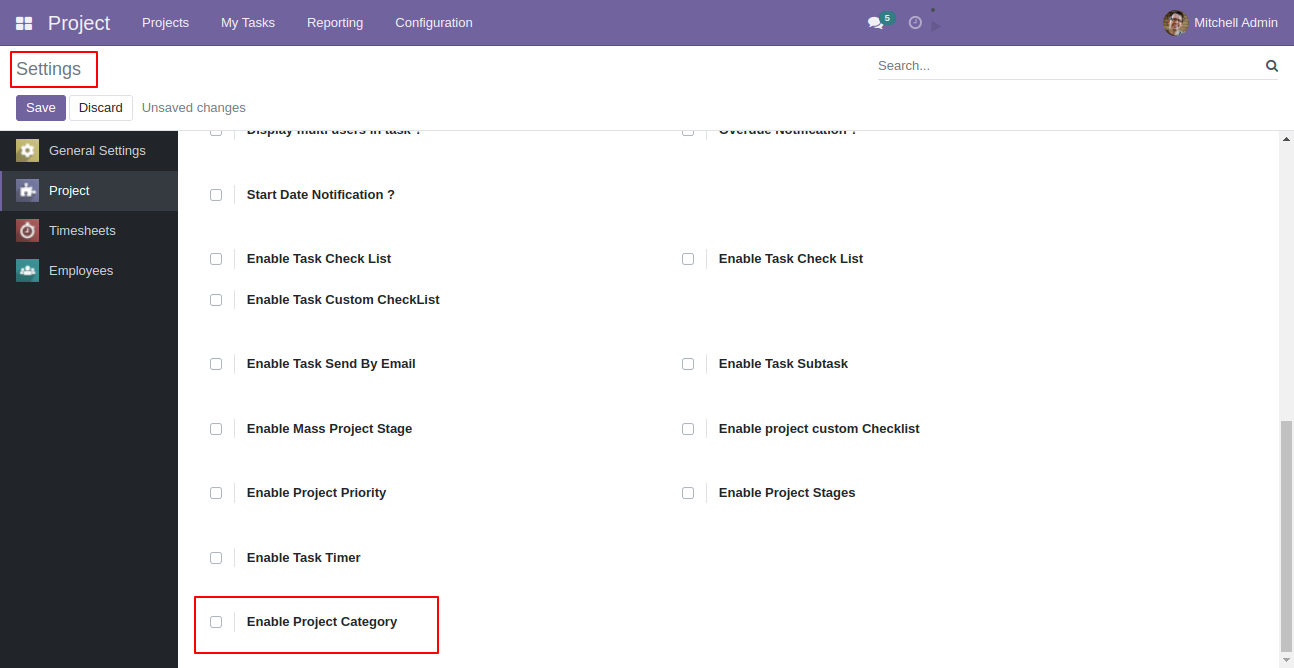
Go to Configuration => Project Category.
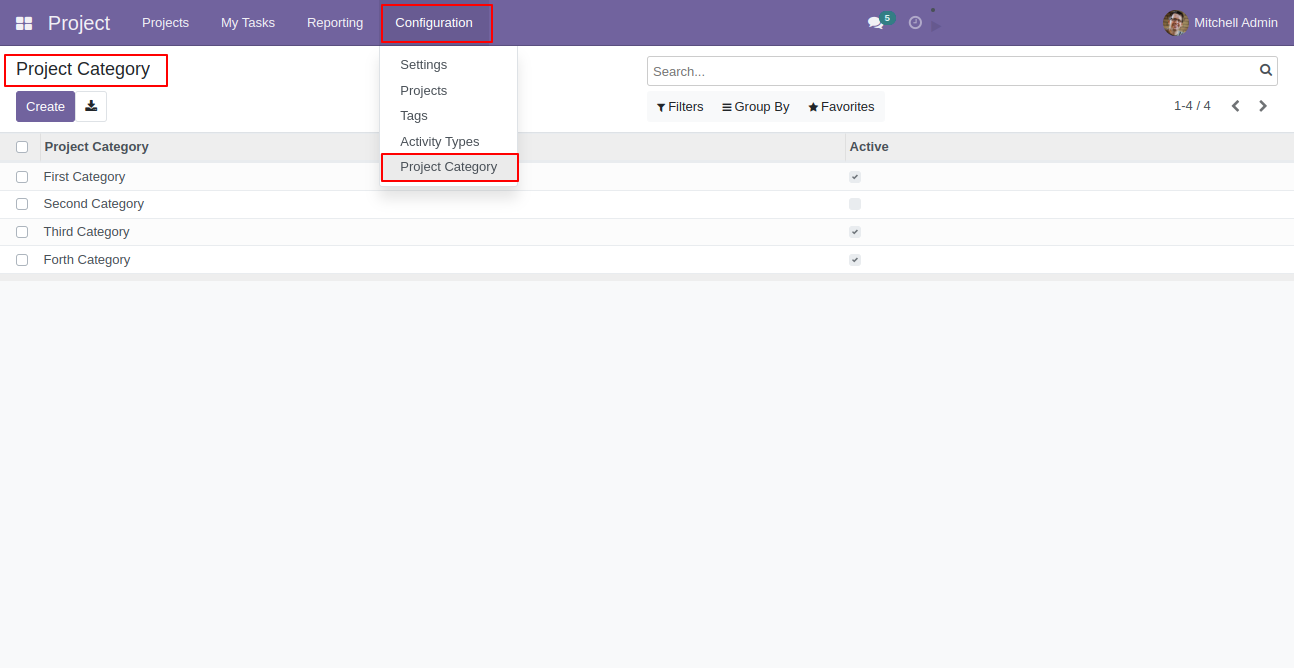
Create project category, set active to true if you want that category in project and task.
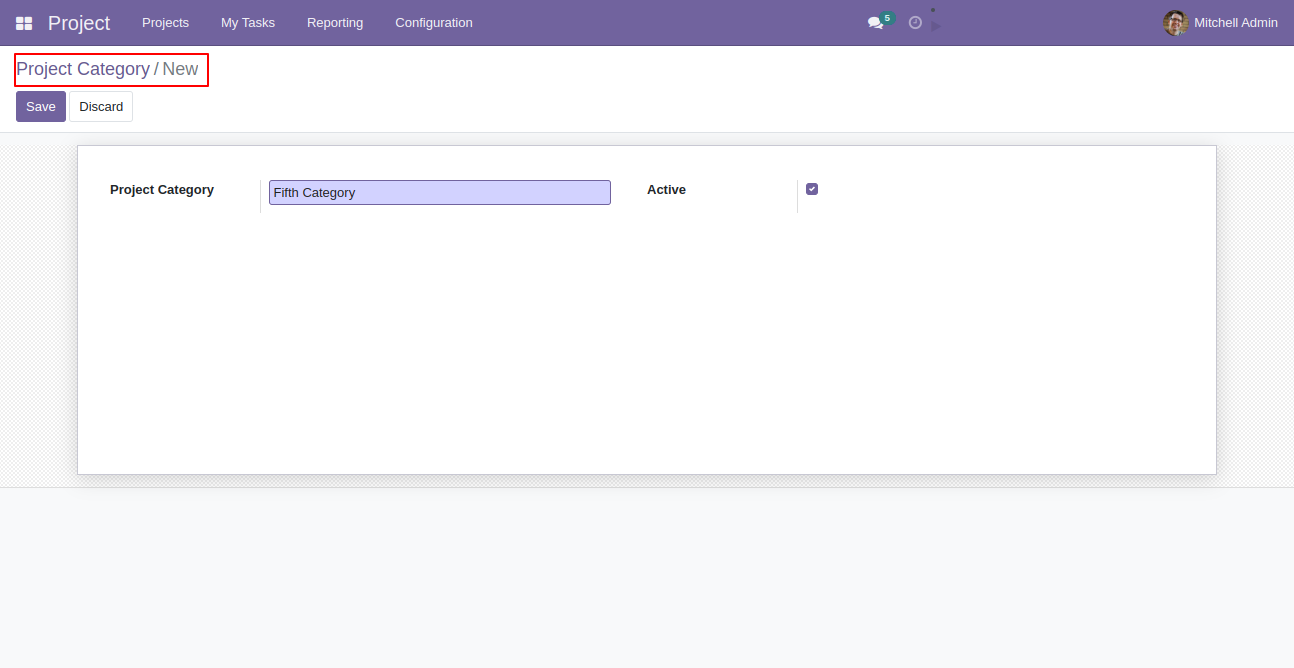
Projects with project categories.
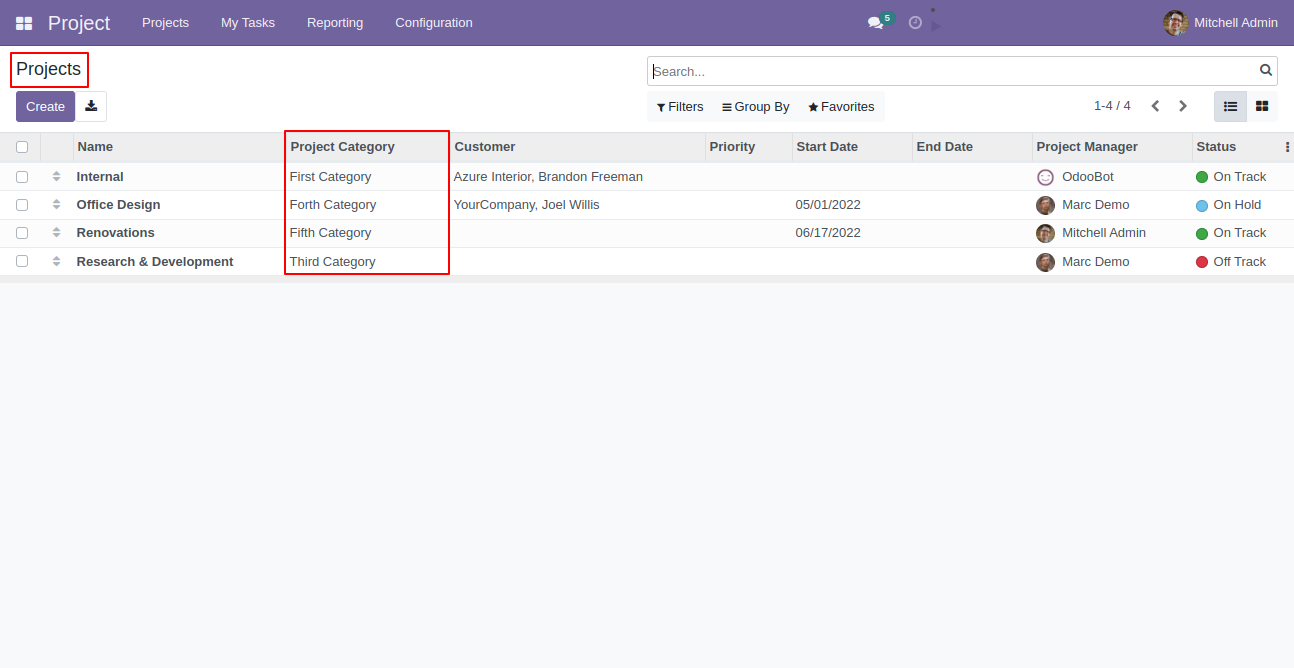
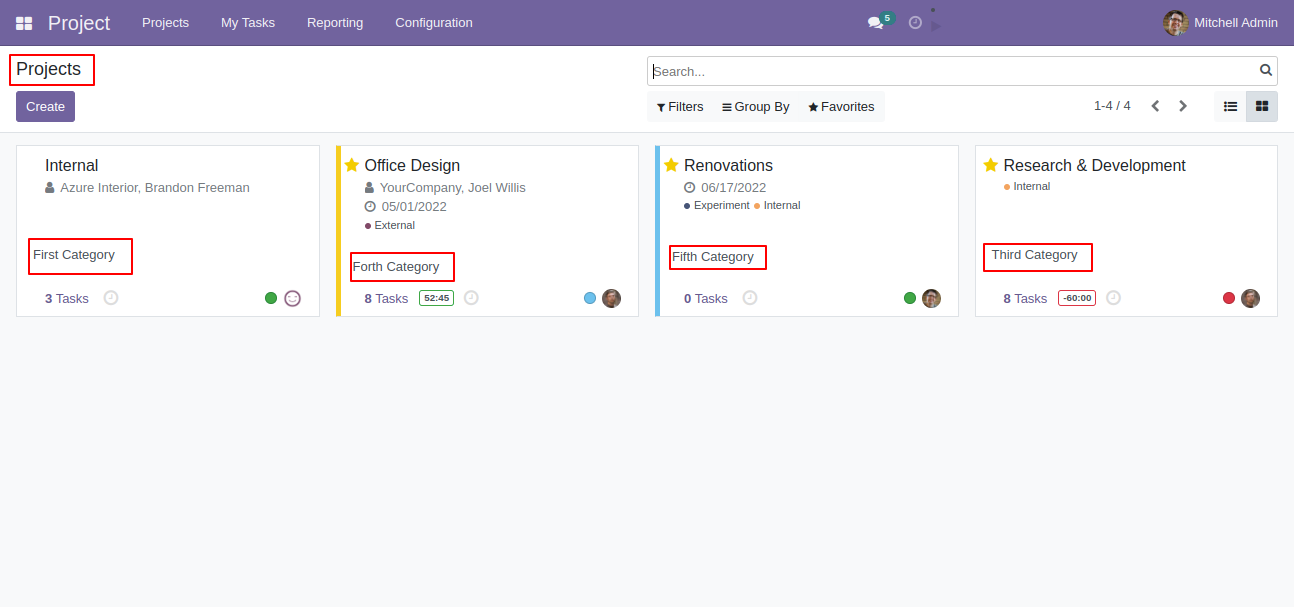
Kanban view of the project mentioned category of project.
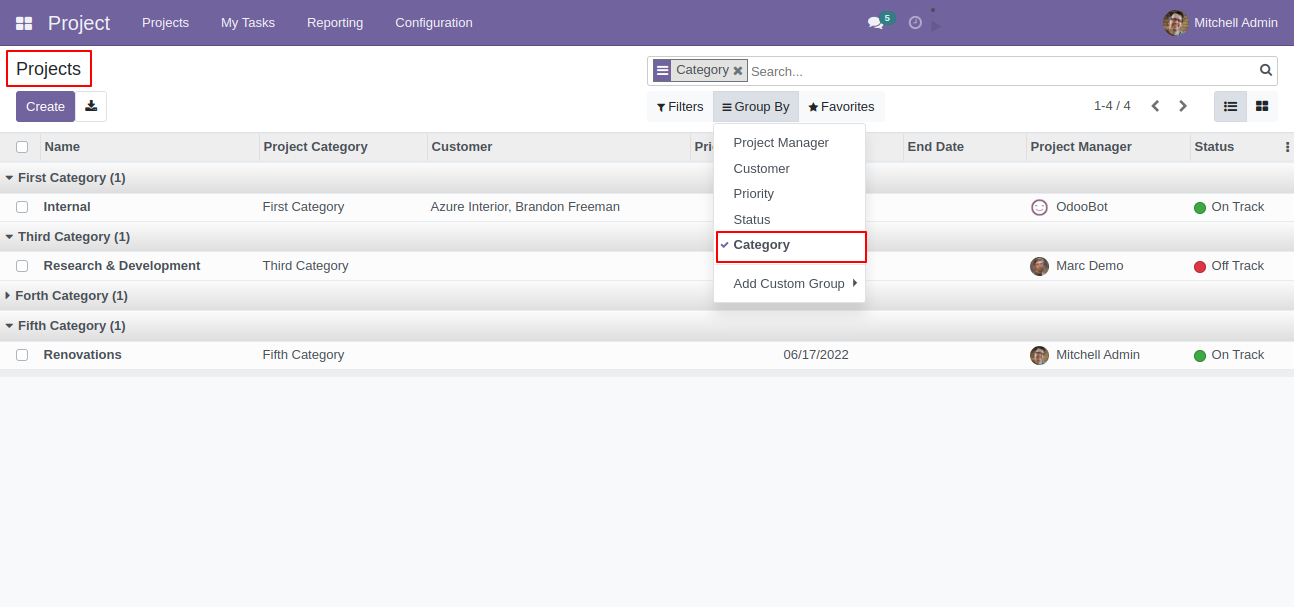
You can group by projects based on project category.
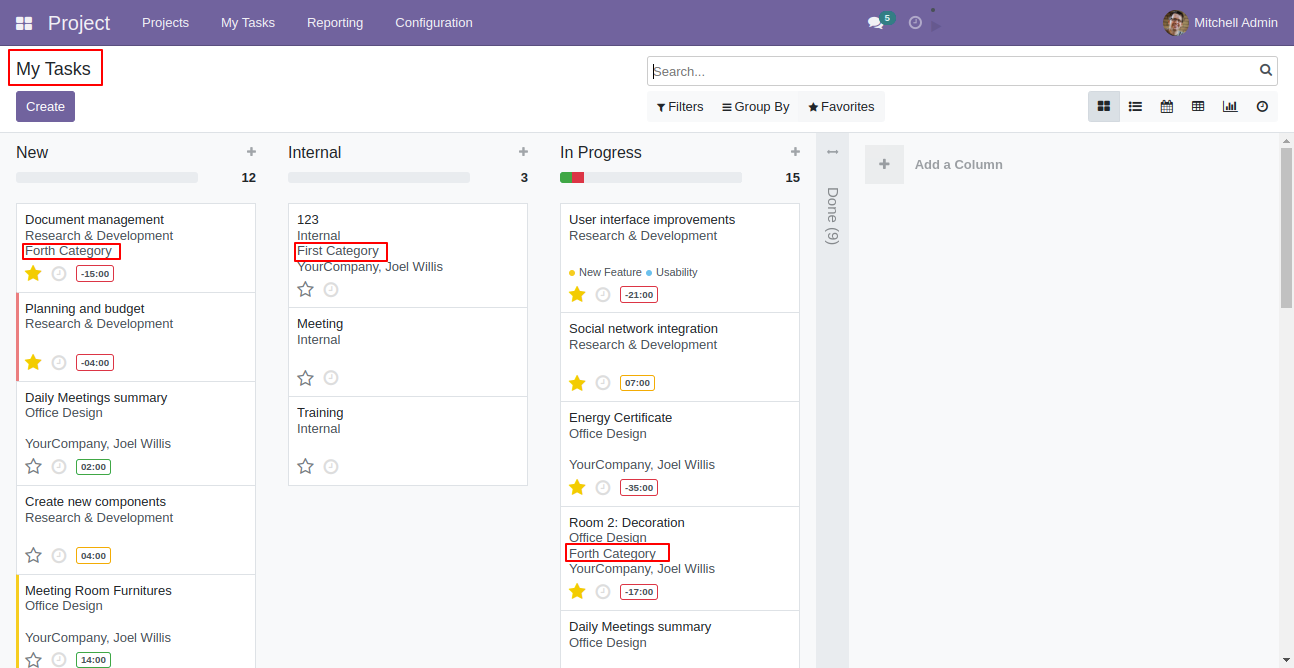
Task kanban view with project category.
Enable "Mass Project Stage" group.

Select stages from the list view and click "Add Project".

After that one wizard opens, select update method and project then press the "Done" button to update projects. Here we choose the "Add" method so it adds stages with old stages in the projects.

Project stages updated.

Now we choose the "Replace" method for project stages so it removes old stages and updates new stages.

Project stages updated.

Latest Updates

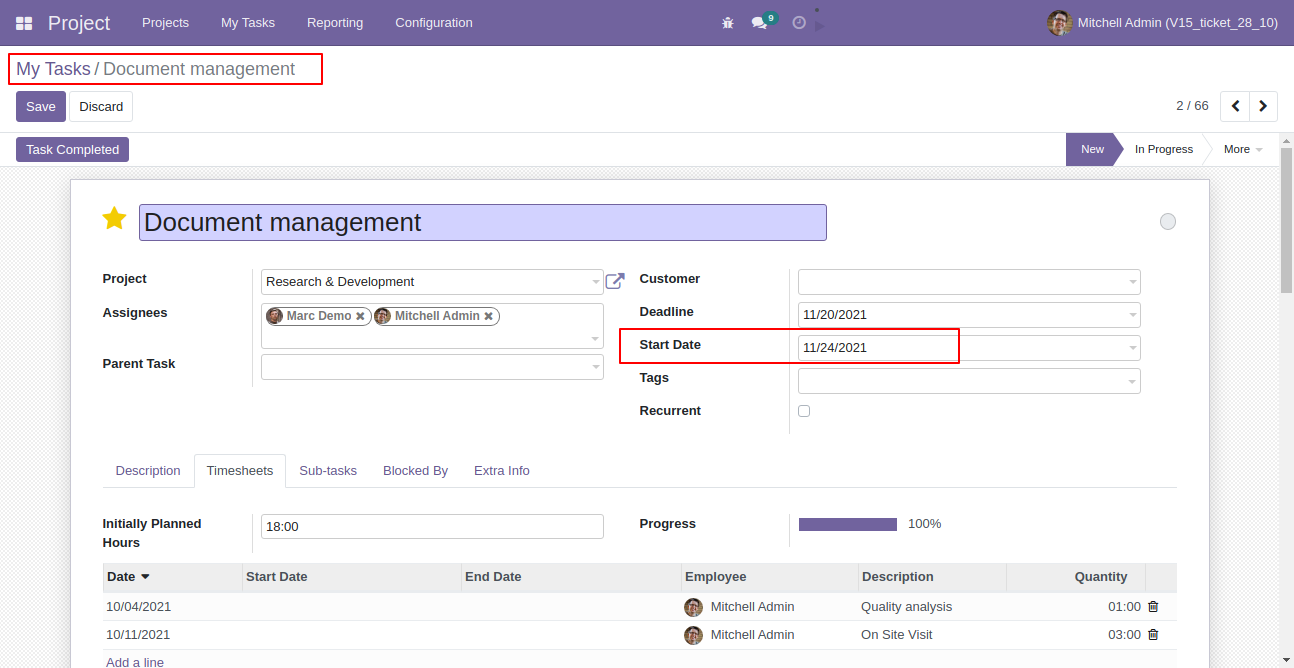
Set start date in task.
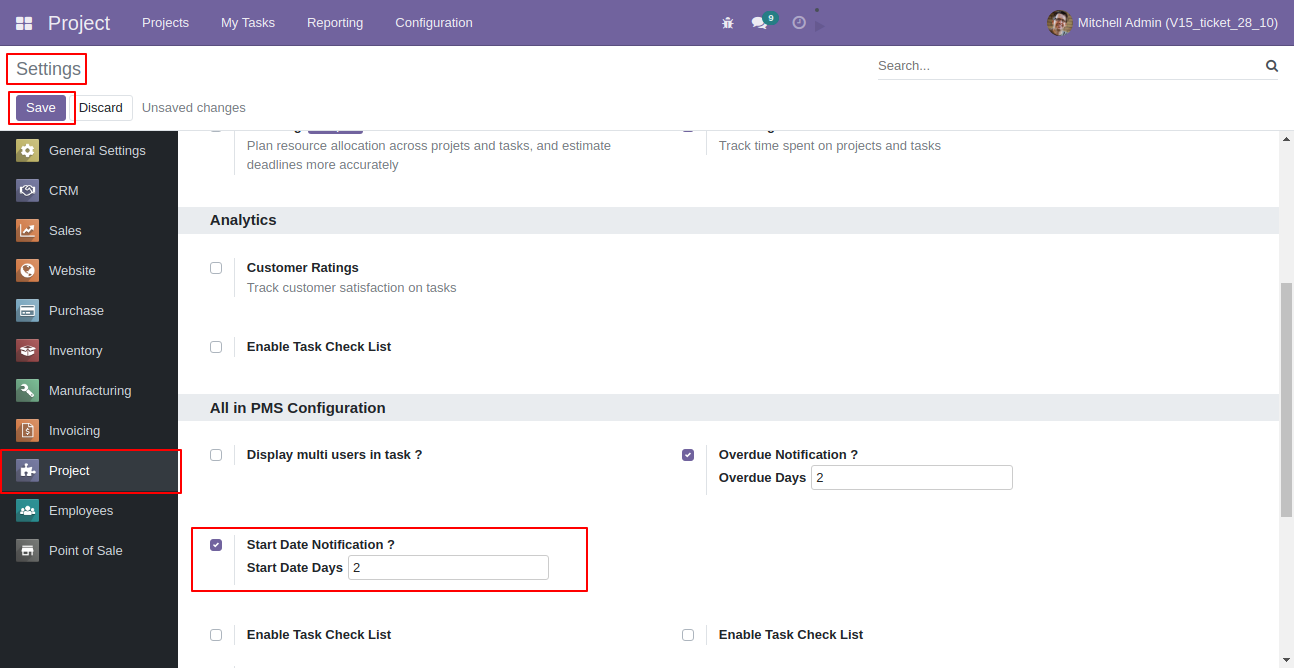
Enter days for start date task notification.
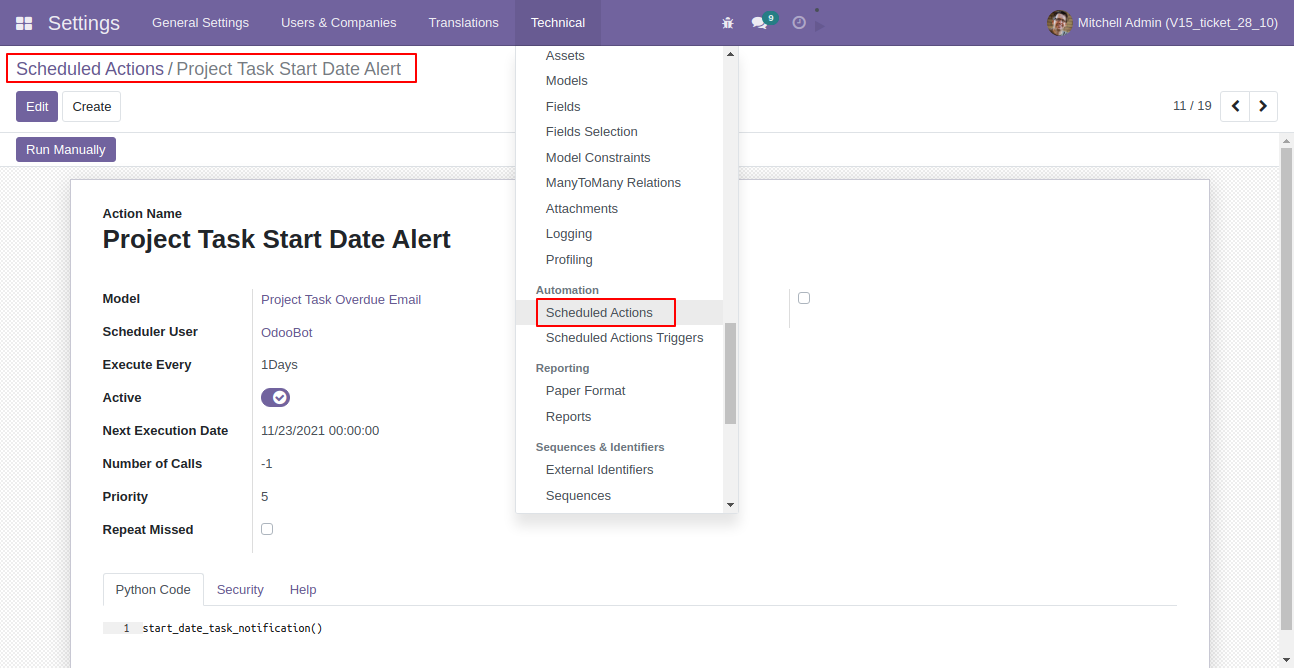
Now run schedule action.
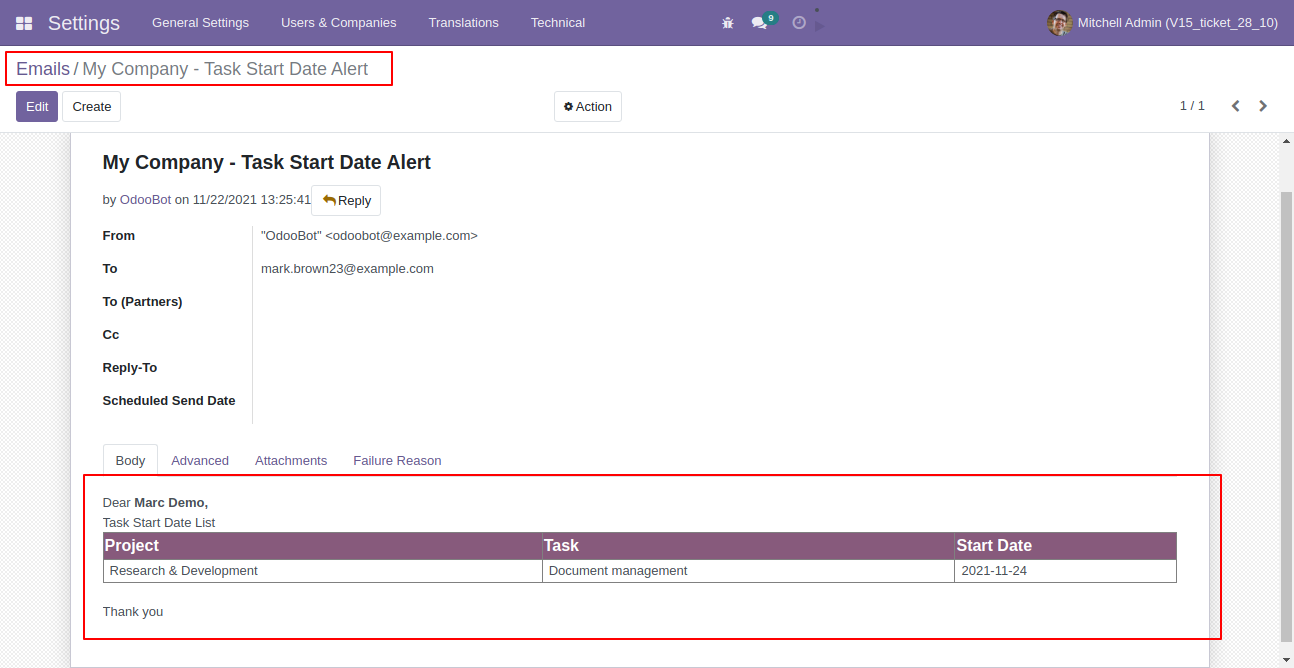
Email notification looks like this.
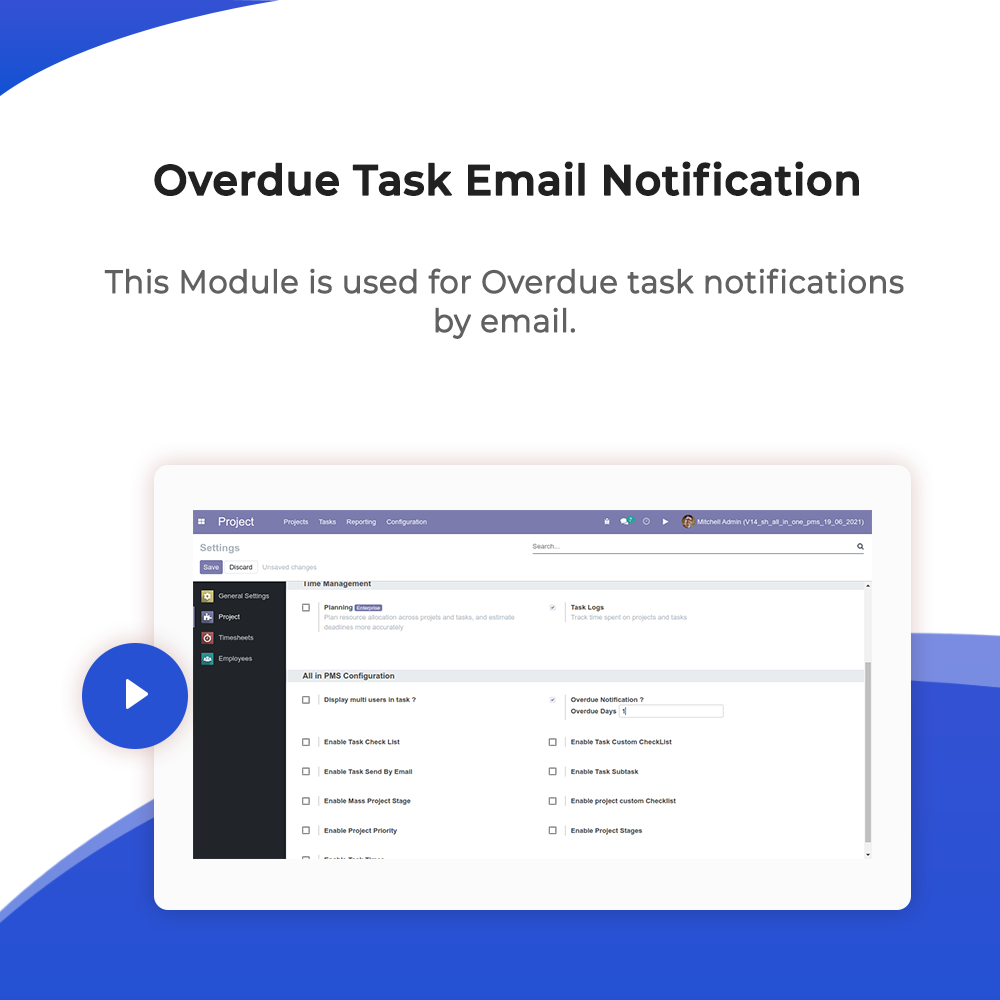
Set Overdue Notification Days. Task Deadline Date is Compared with ( Today's Date - Overdue Days Entered).
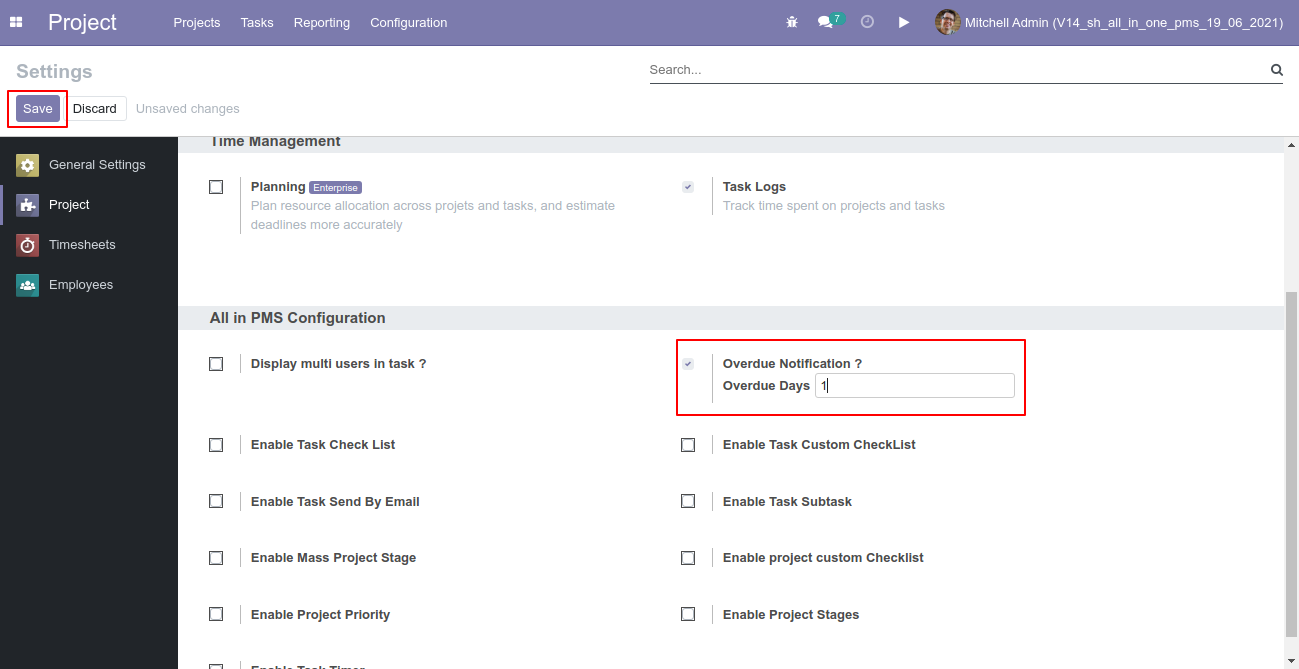
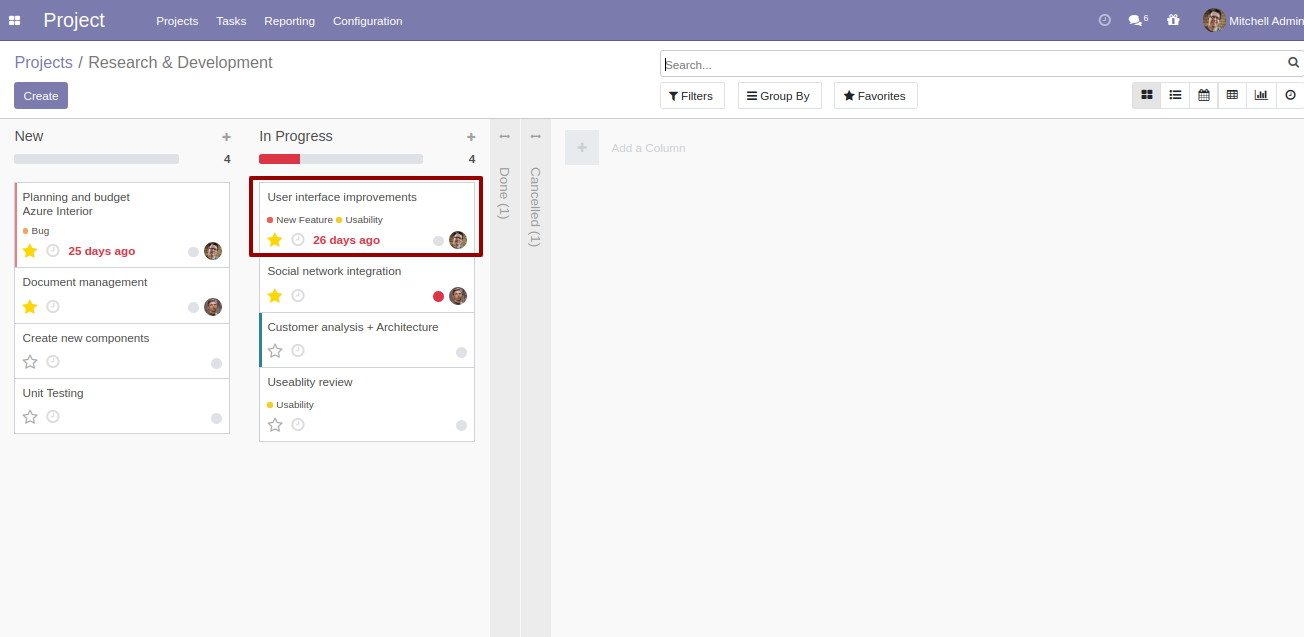
Set Deadline Date, Assigned User and if "Task Completed".

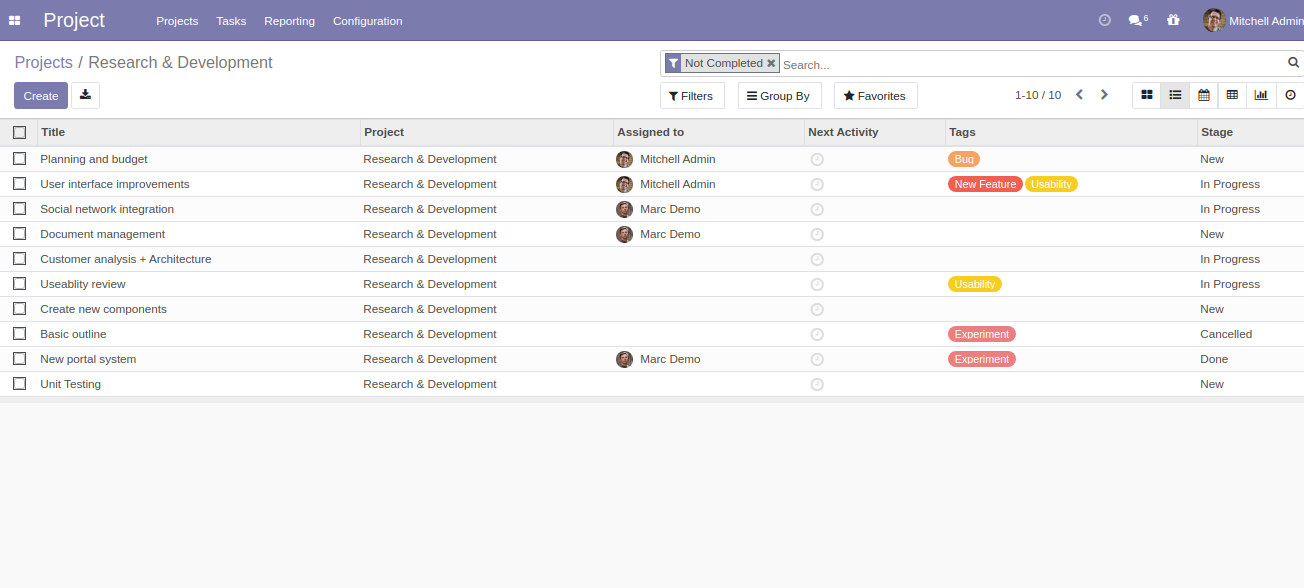
Filter Task by "Completed" or "Not Completed" Status.
Not Completed Task List.
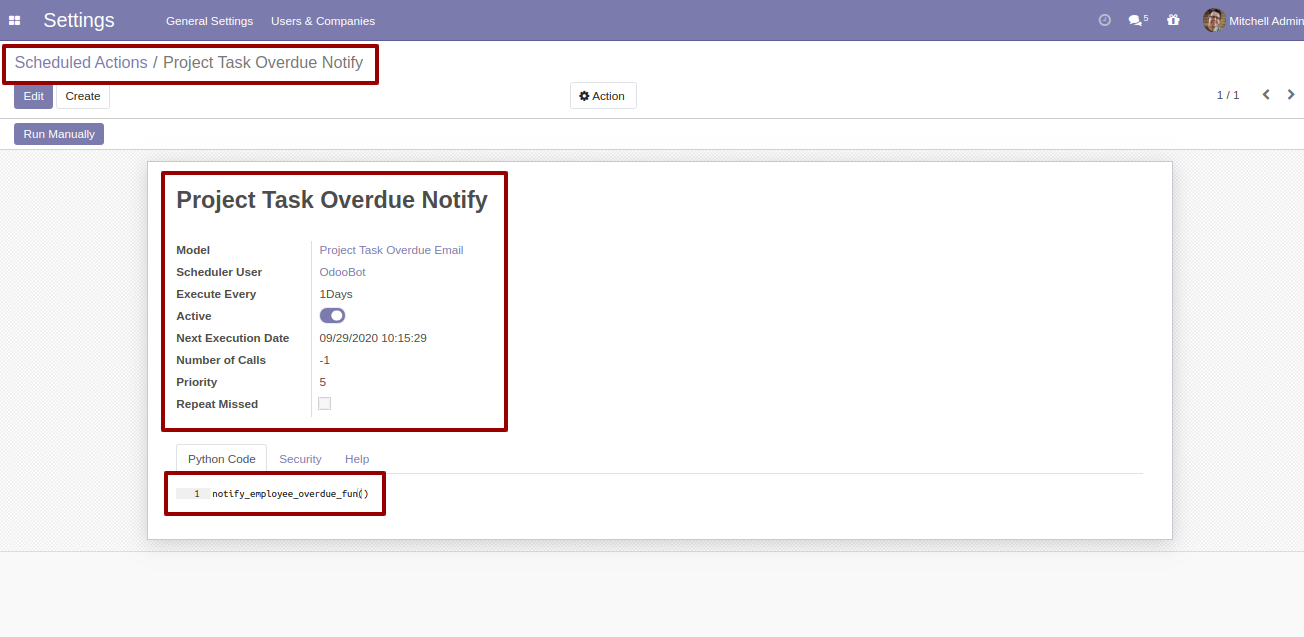
Schedule Action will run Auto Every Day and sends Email to Assigned User whose Task "Not Completed" and Deadline Date is Gone.
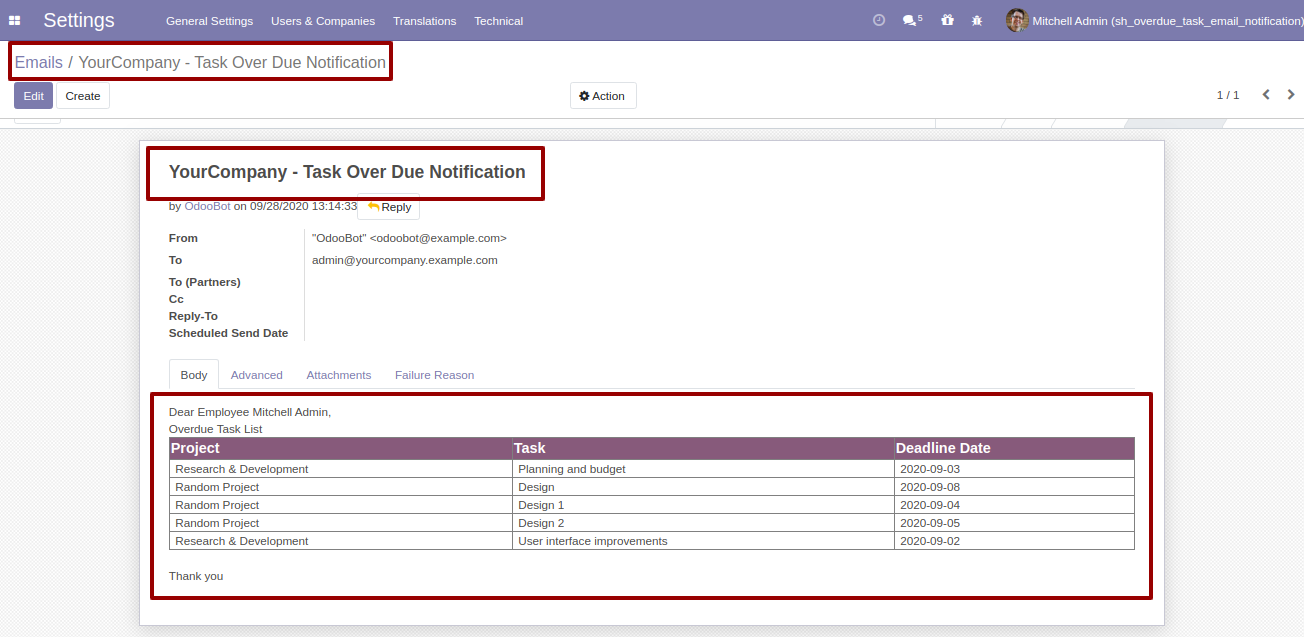
Notification Email sent to User whose Task Not Completed and Deadline Date is Overdue
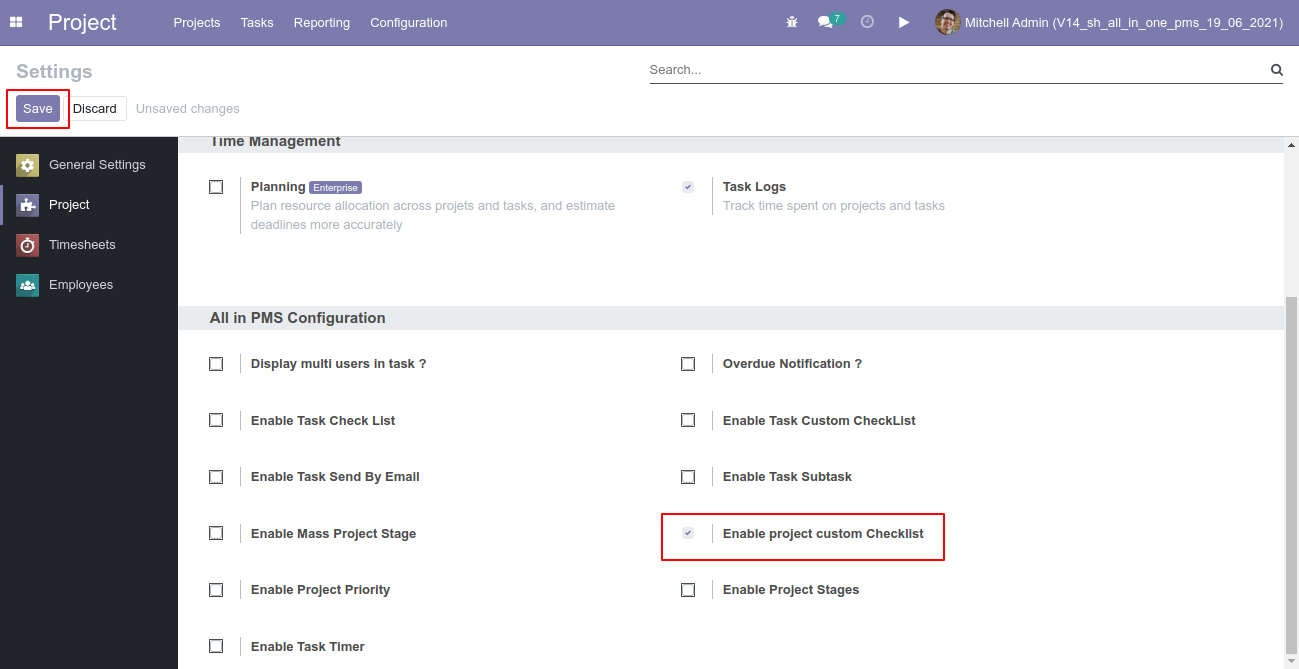
Enable "Project Custom Checklist" group.
Create Project Checklist entry.

Project Checklist entry available inside project.

Project Checklist with State New,Completed and Cancelled.Project Checklist based on Checklist Completed. Click on Check Icon To Complete Checklist.Cancel Icon to Cancel Checklist.

Checklist Completed Percentage on List view.
 >
>
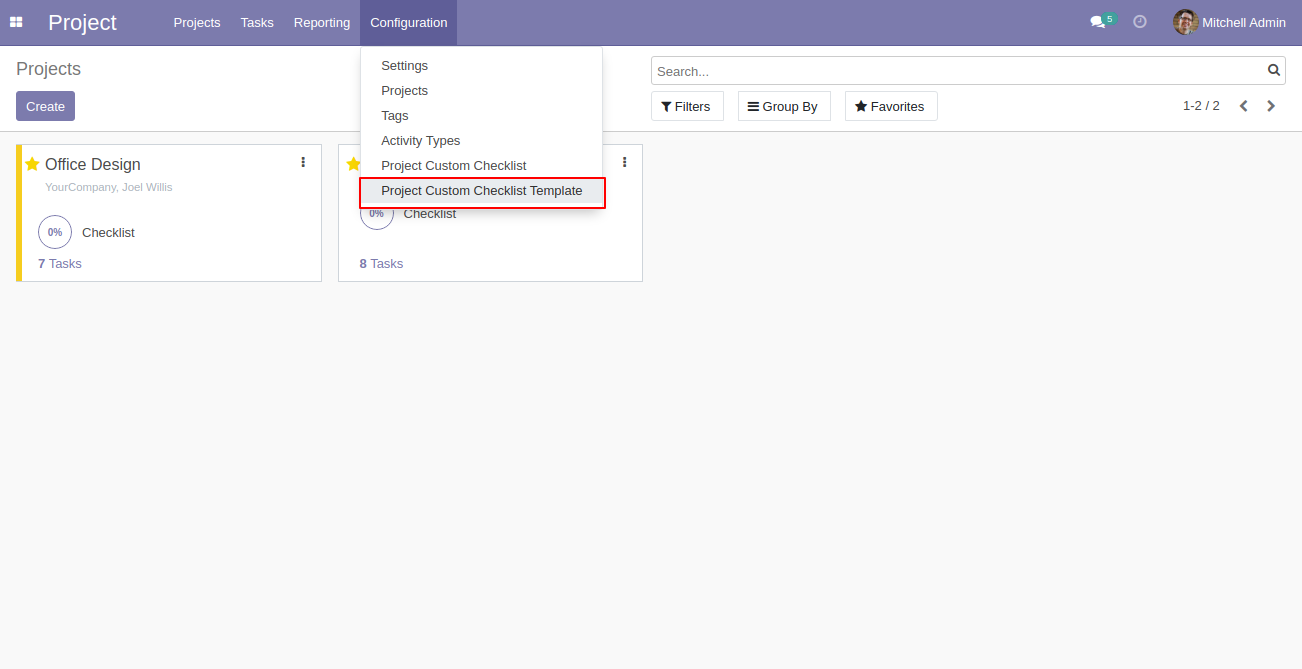
Go to the "Configuration" => Project Custom Checklist Template.
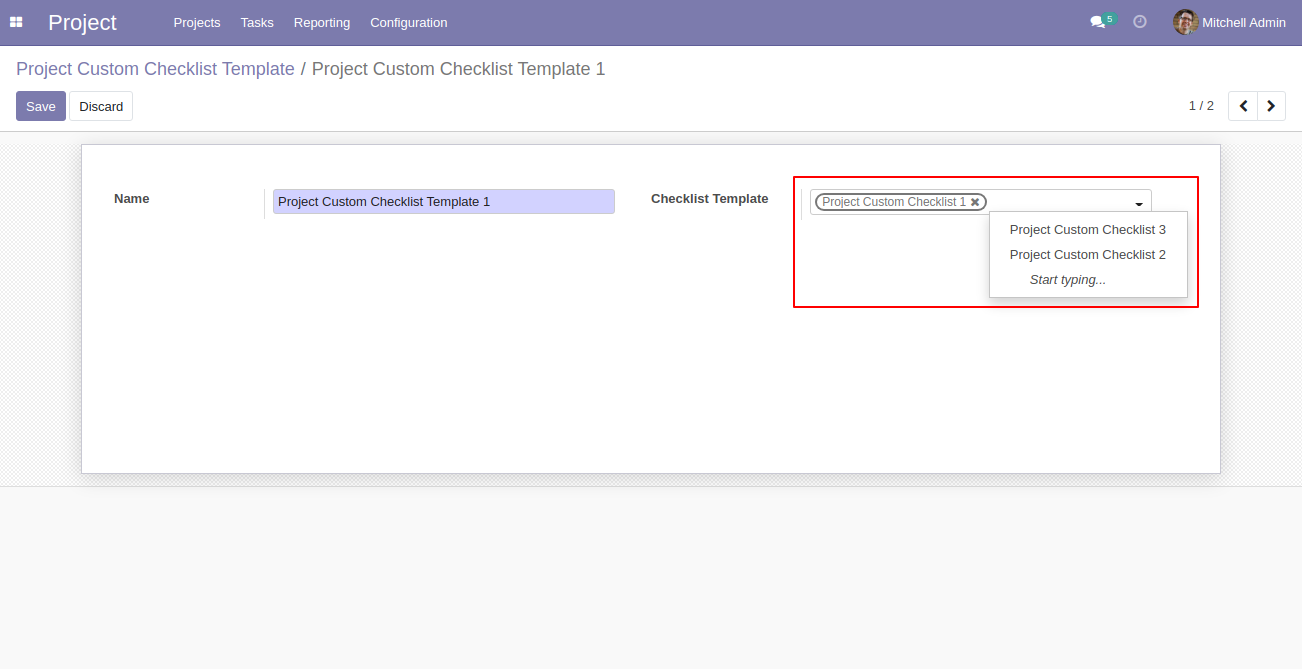
Now we create a project checklist template, checklist template form view looks like this.
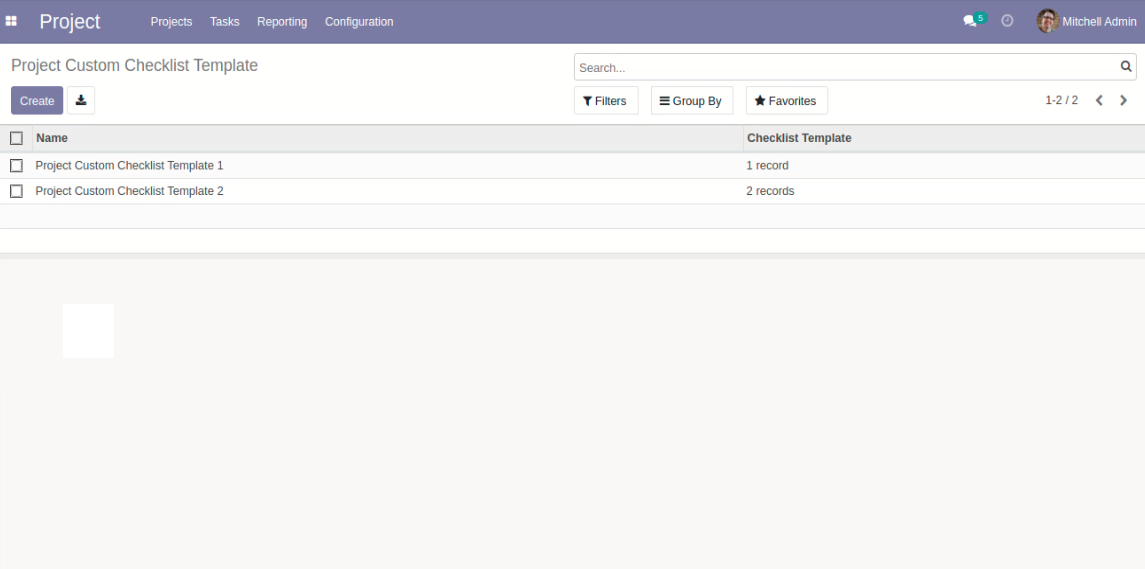
Project checklist template list view looks like this.
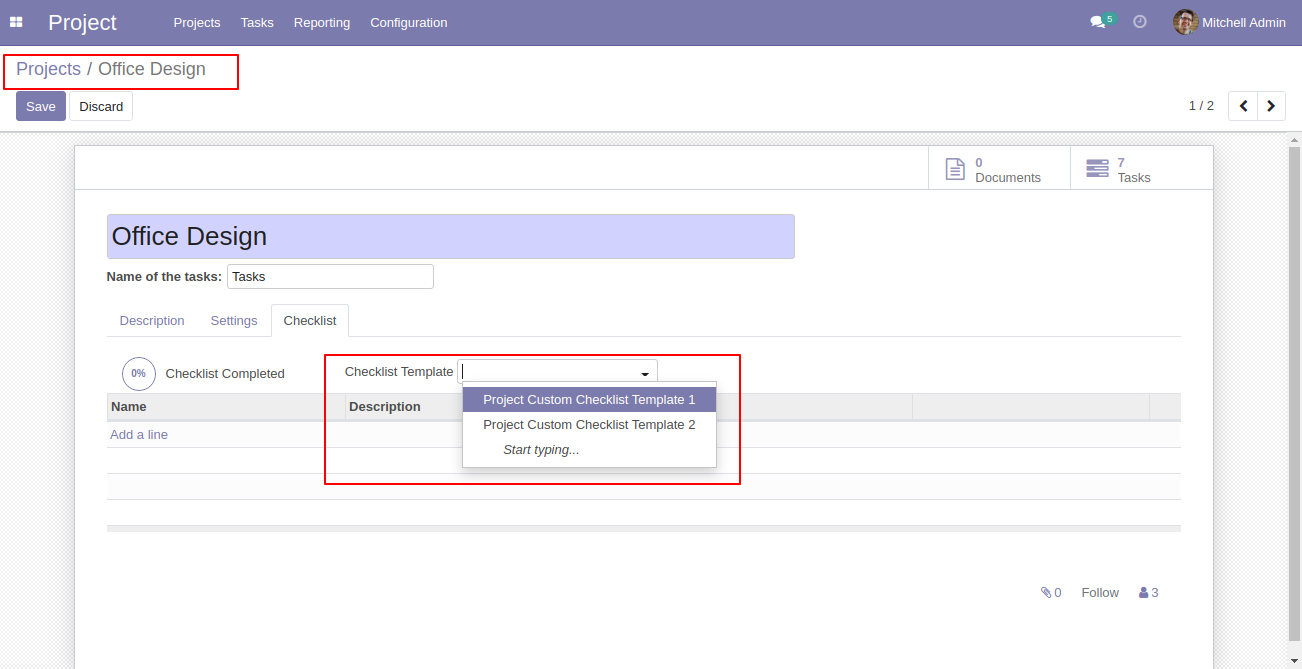
Now we fill the checklist by selecting the checklist template.
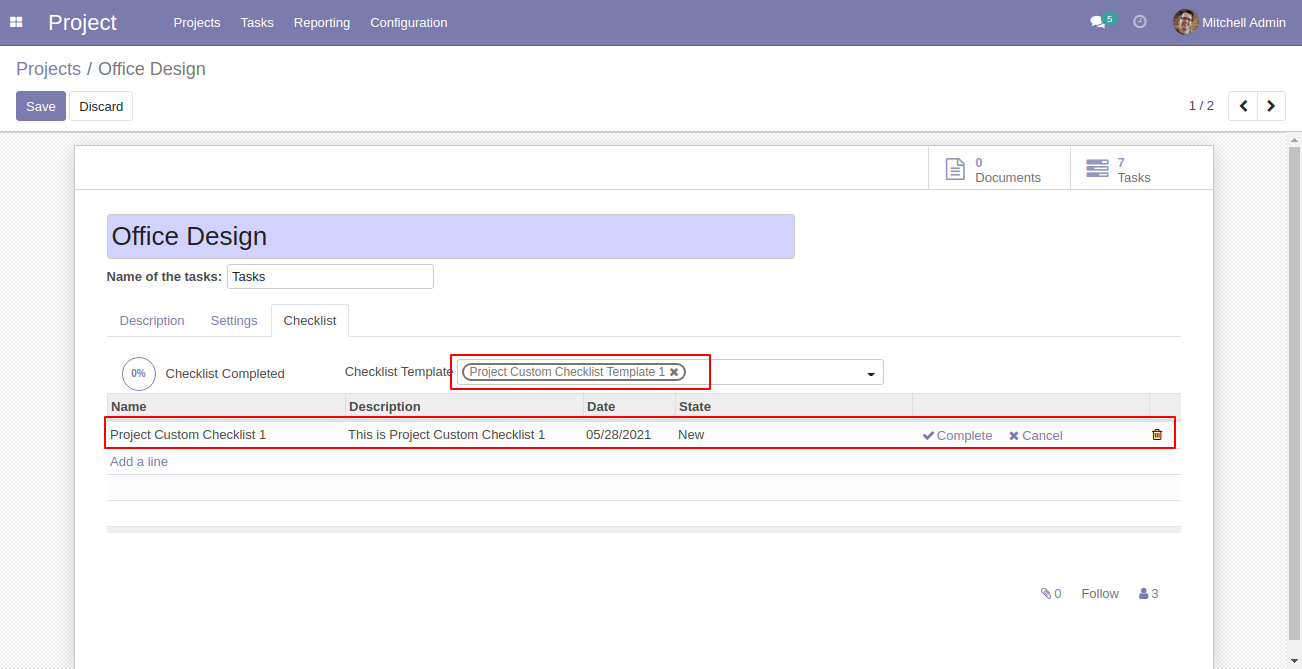
When we select checklist template, it adds a record by default.
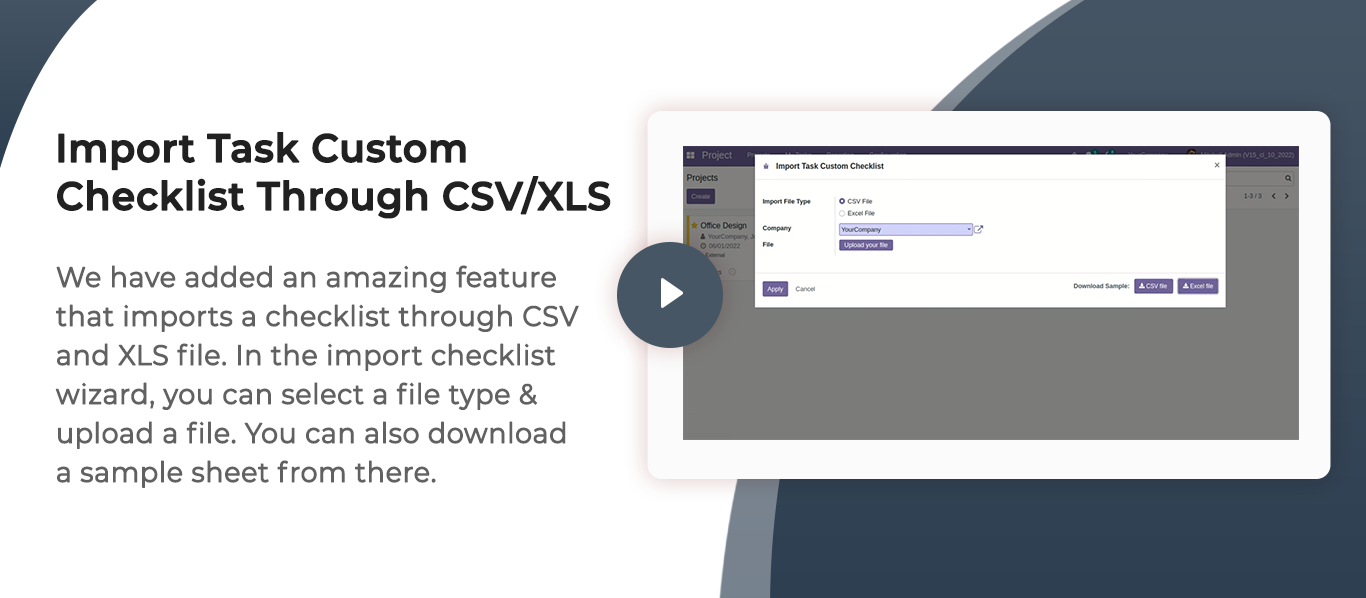
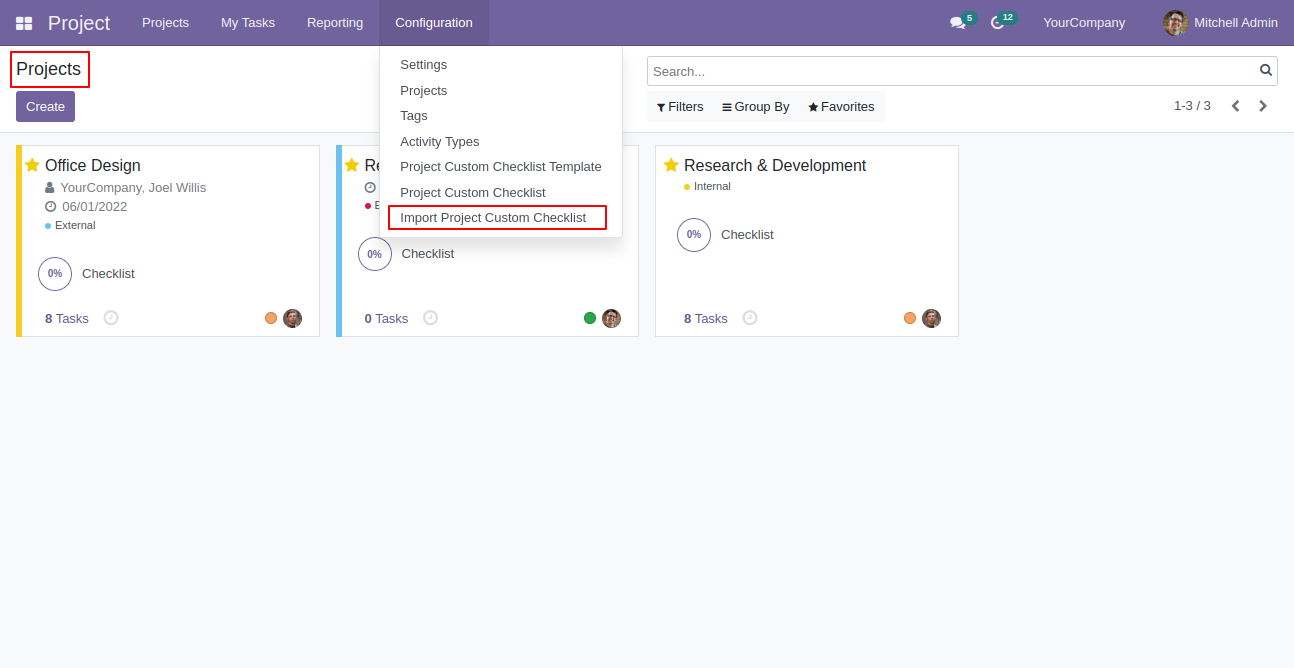
Import checklist menu.
Import checklist wizard, select file type & upload file. You can download sample sheet from here.
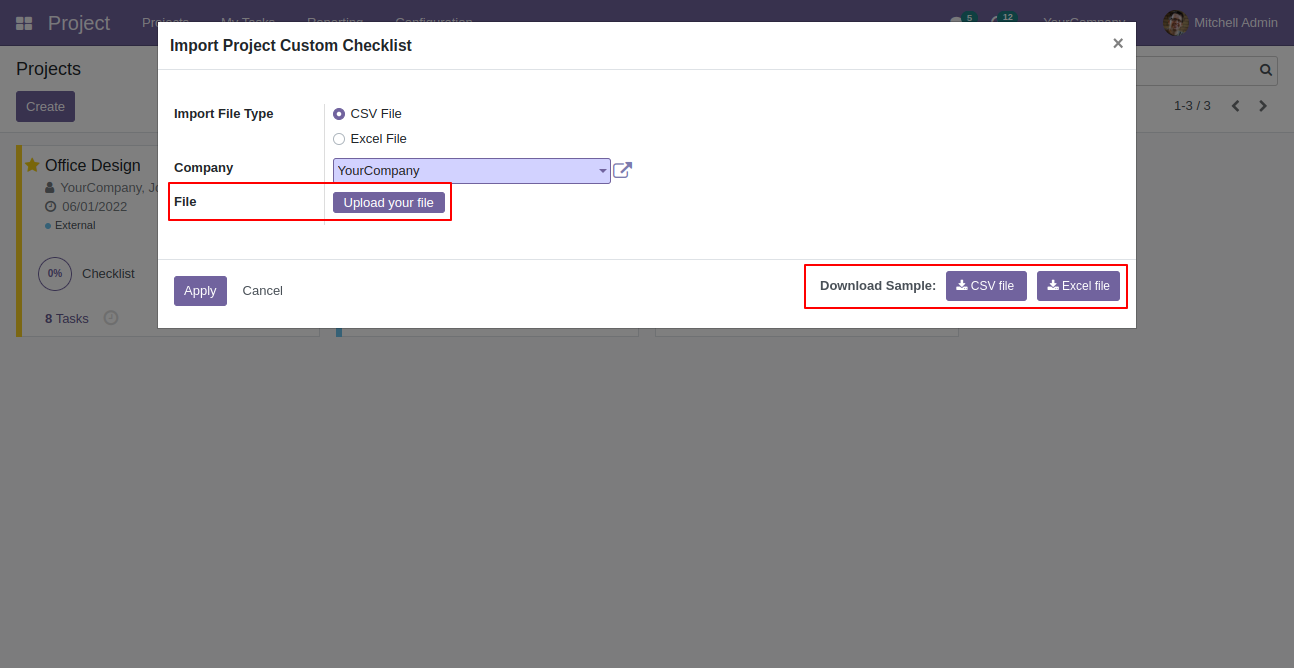
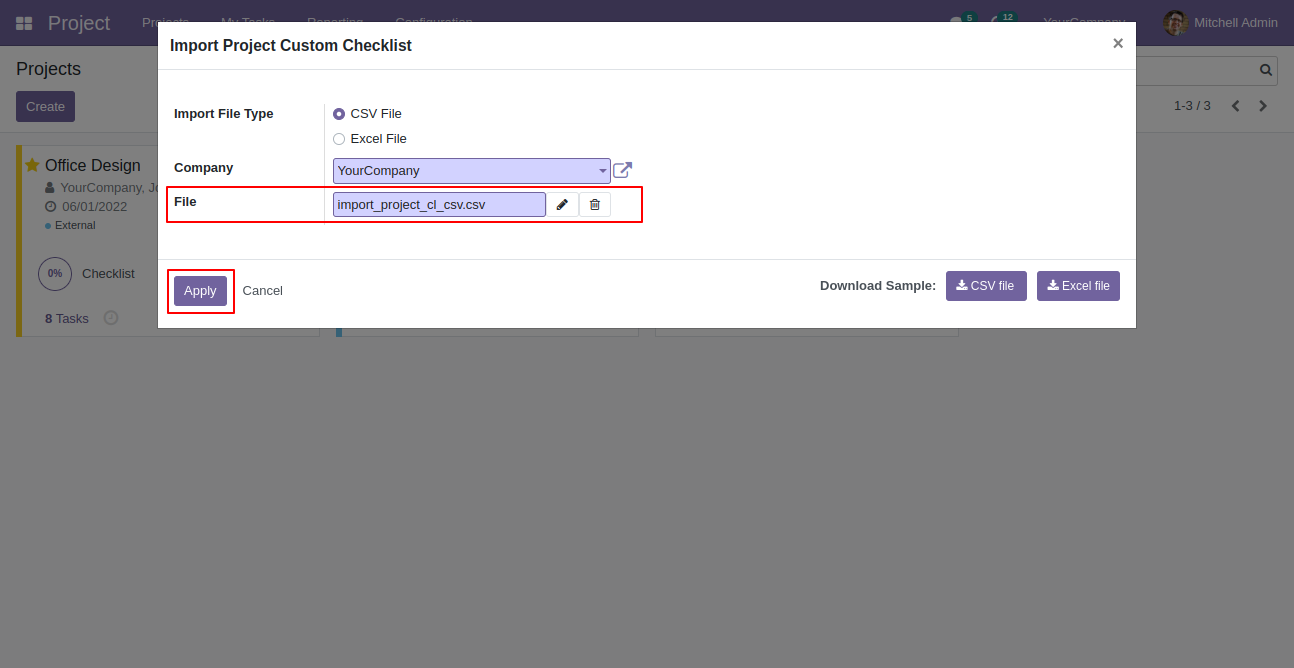
Click apply after the file is uploaded.
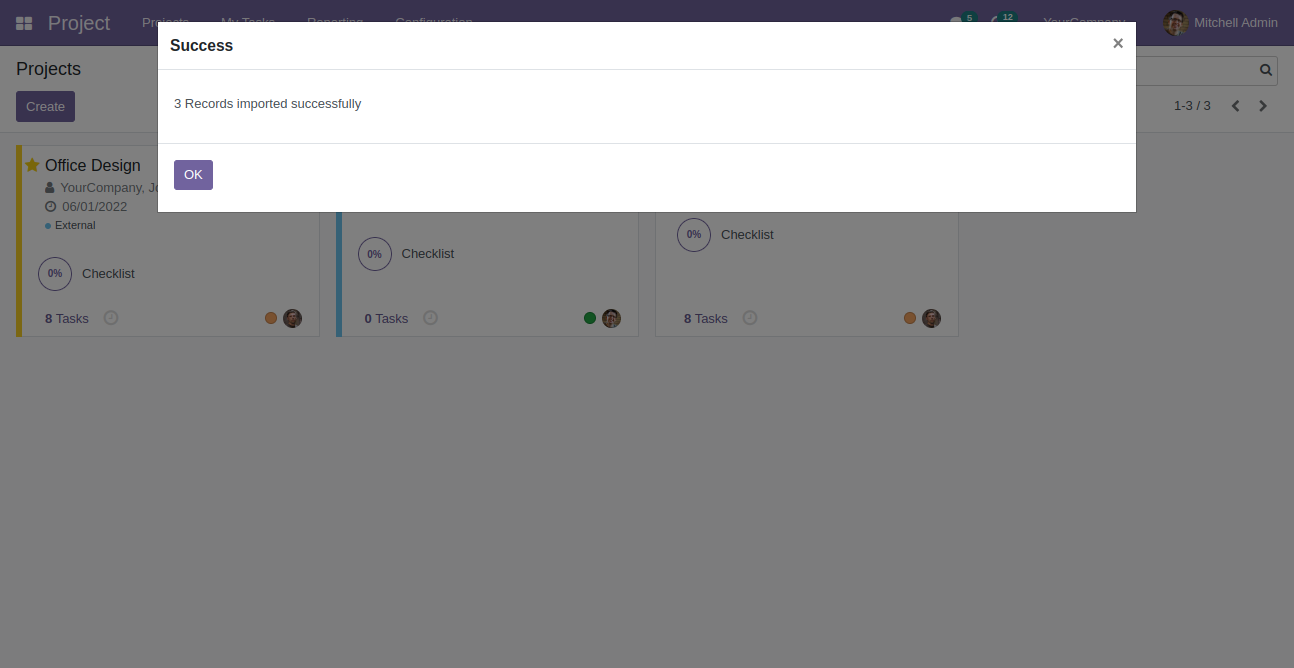
Success message looks like below it's shows successfully imported records.
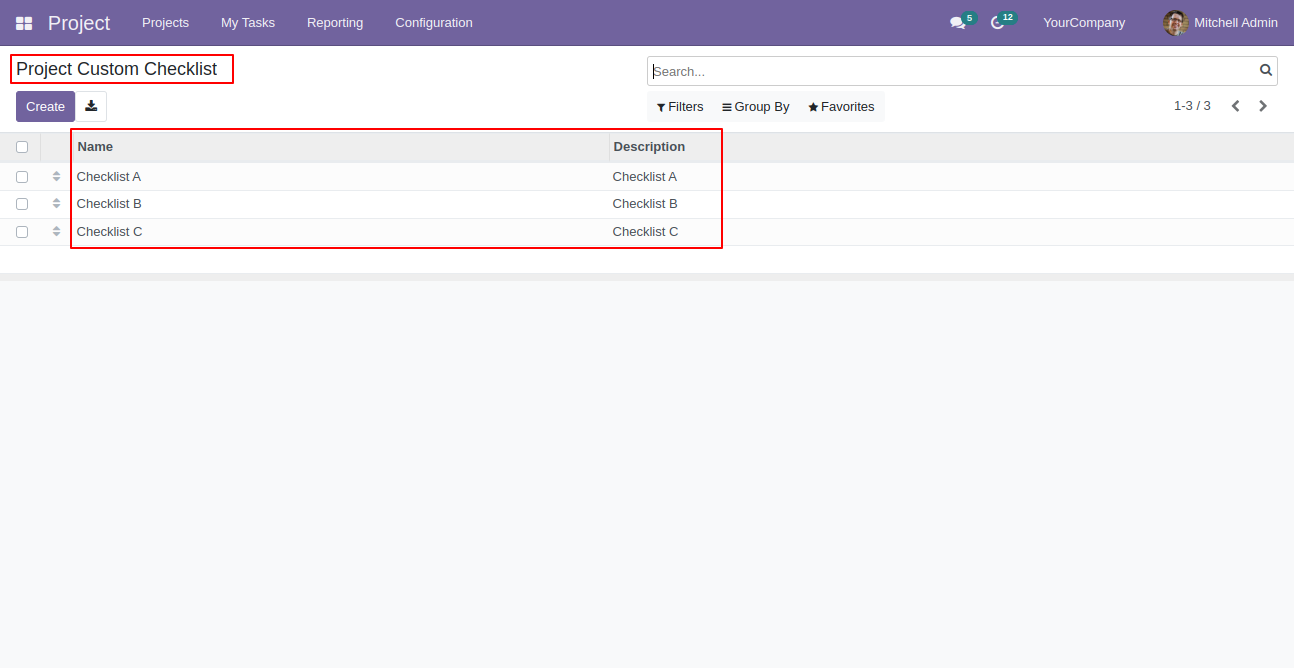
Following checklists are imported.
Enable "Project Priority" group.
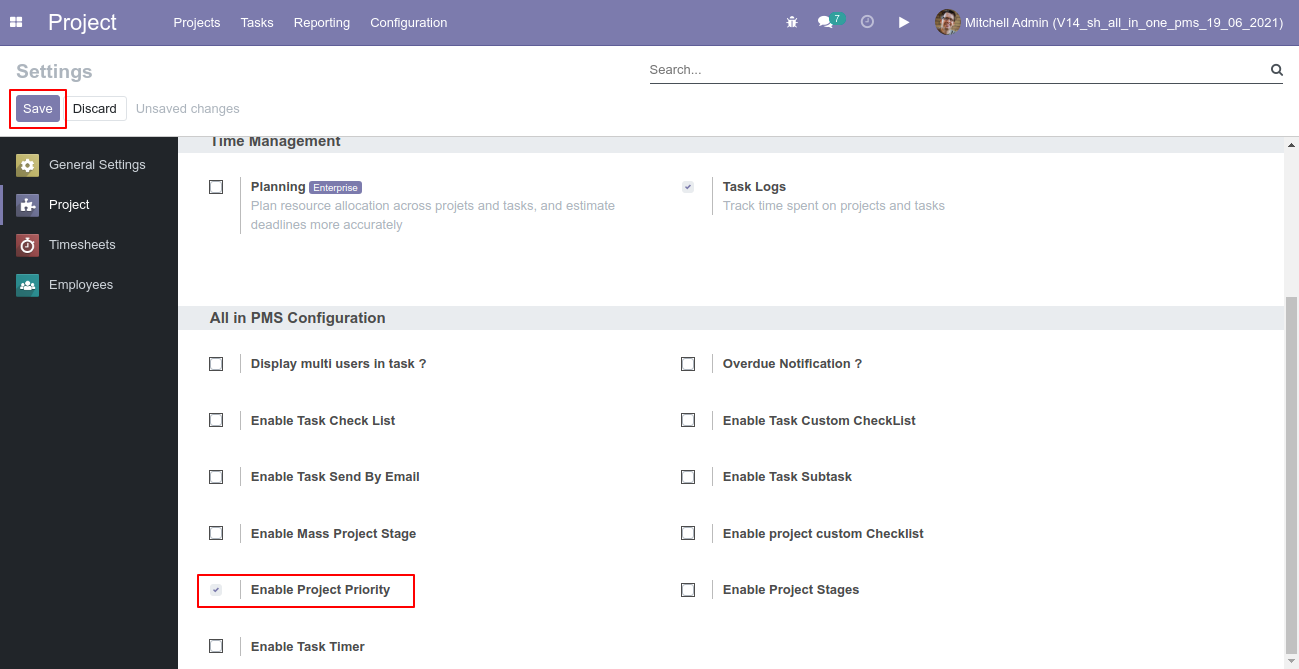
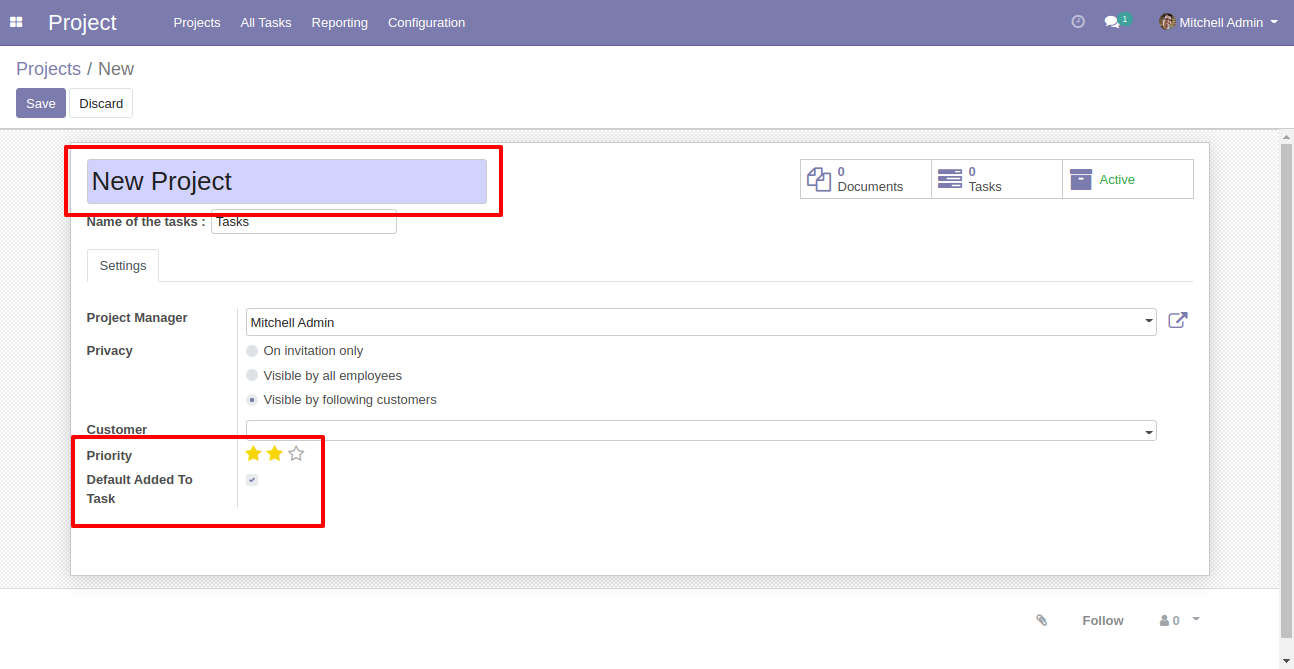
We create a new project with priority and tick "Default Added To Task" to set default priority for a task which priority assigned to the project.
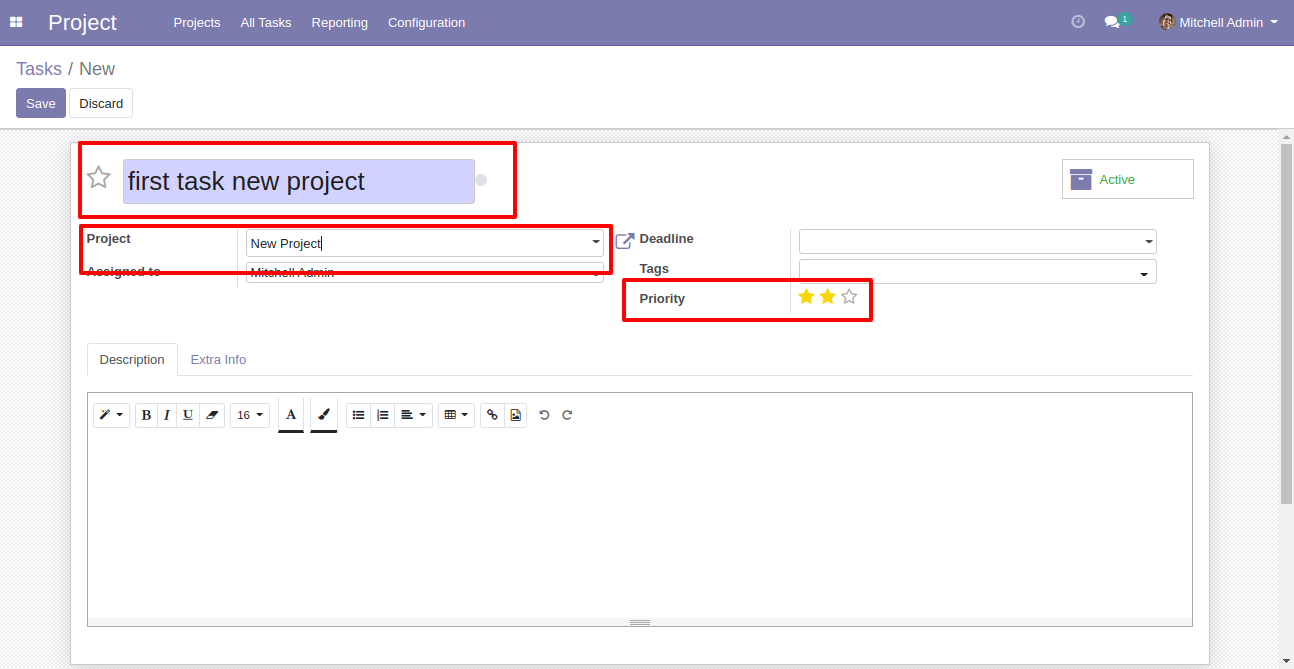
After that, we create a new task and it does not show priority in any projects.

Now we choose a project in which we had tick "Default Added To Task" in the priority. so it set default priority for a task which priority assigned to the project.
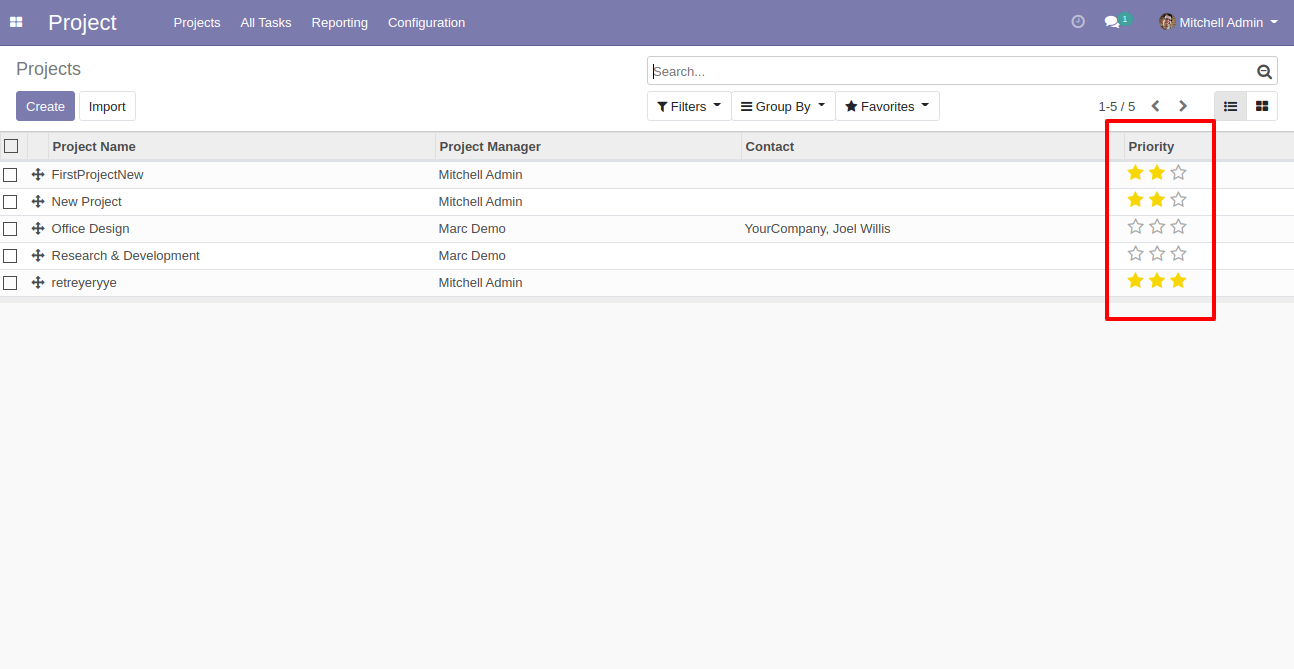
Project list view with the priority.
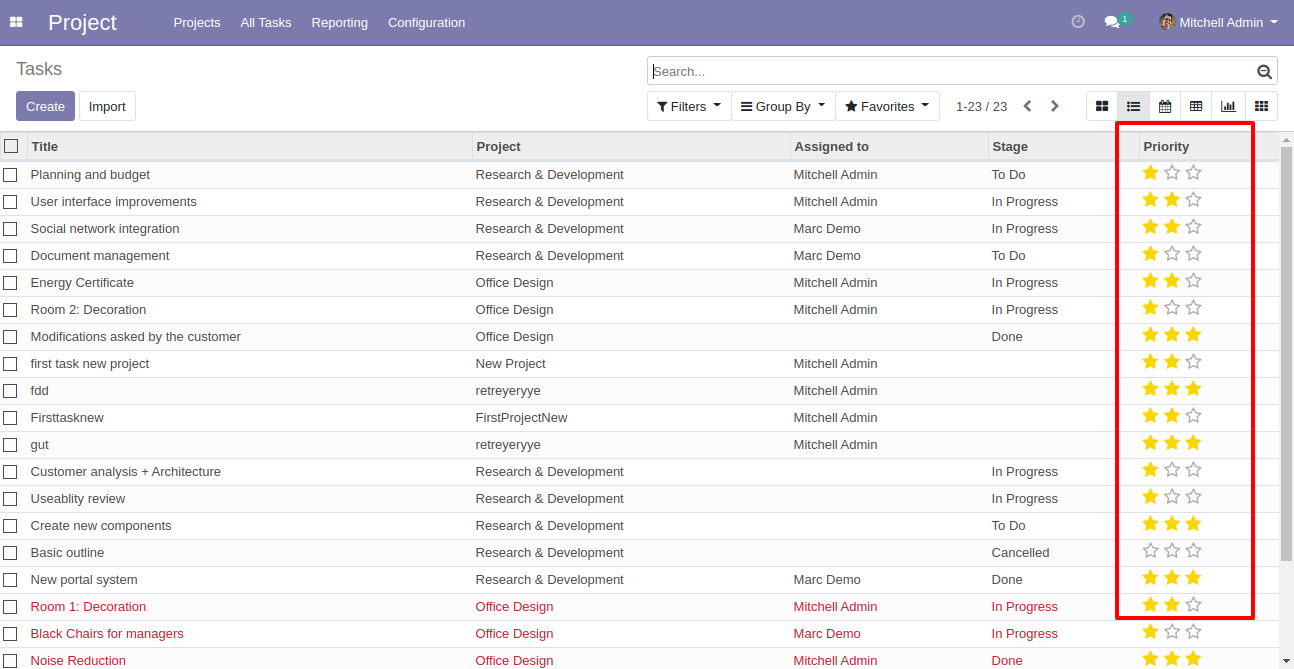
Tasks list view with the priority.
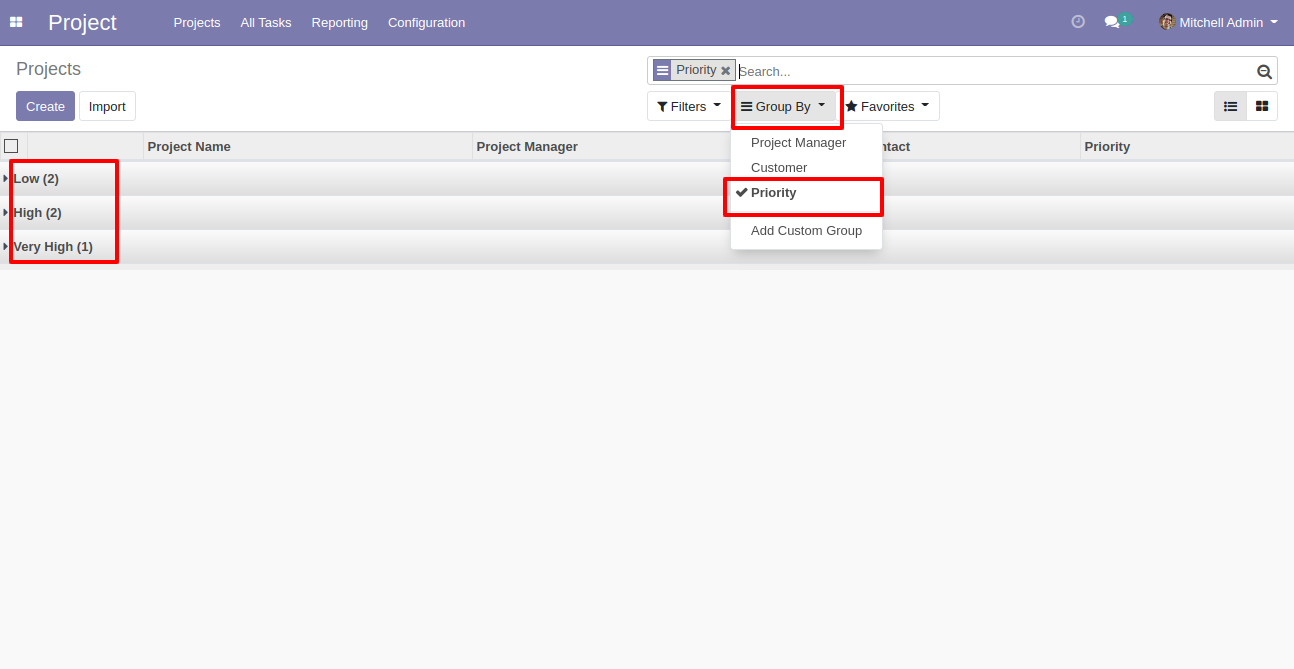
Now we group by projects by "Priority" in the list view.
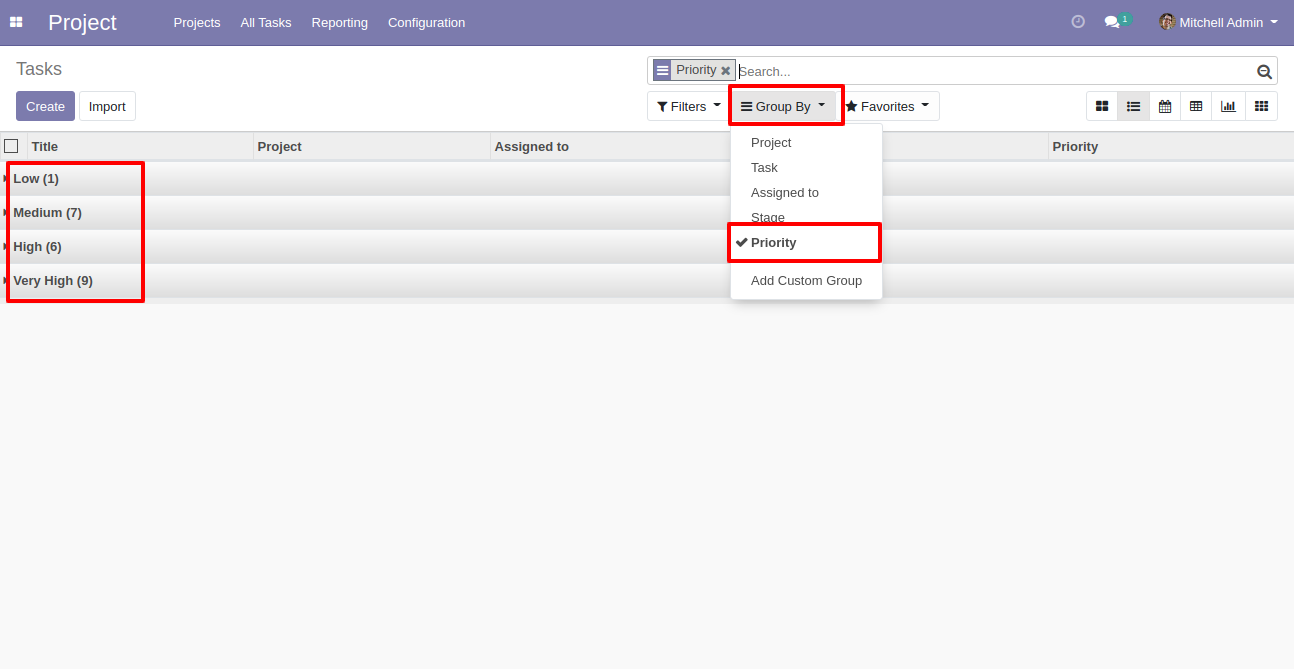
Now we group by tasks by "Priority" in the list view.
Select projects from the list view and click "Mass Stage Update".

After that one wizard opens, select update method and stages then press the "Done" button to update stages. Here we choose the "Add" method so it adds stages with old stages.

Stages updated.

Now we choose the "Replace" method for stages so it removes old stages and updates new stages.

Stages updated.

When task stages replaced, that stage will be removed.


Go to the configuration to create the project stages template.

Enter details and save it.

You can choose created template in the project.

Project with the stage template.

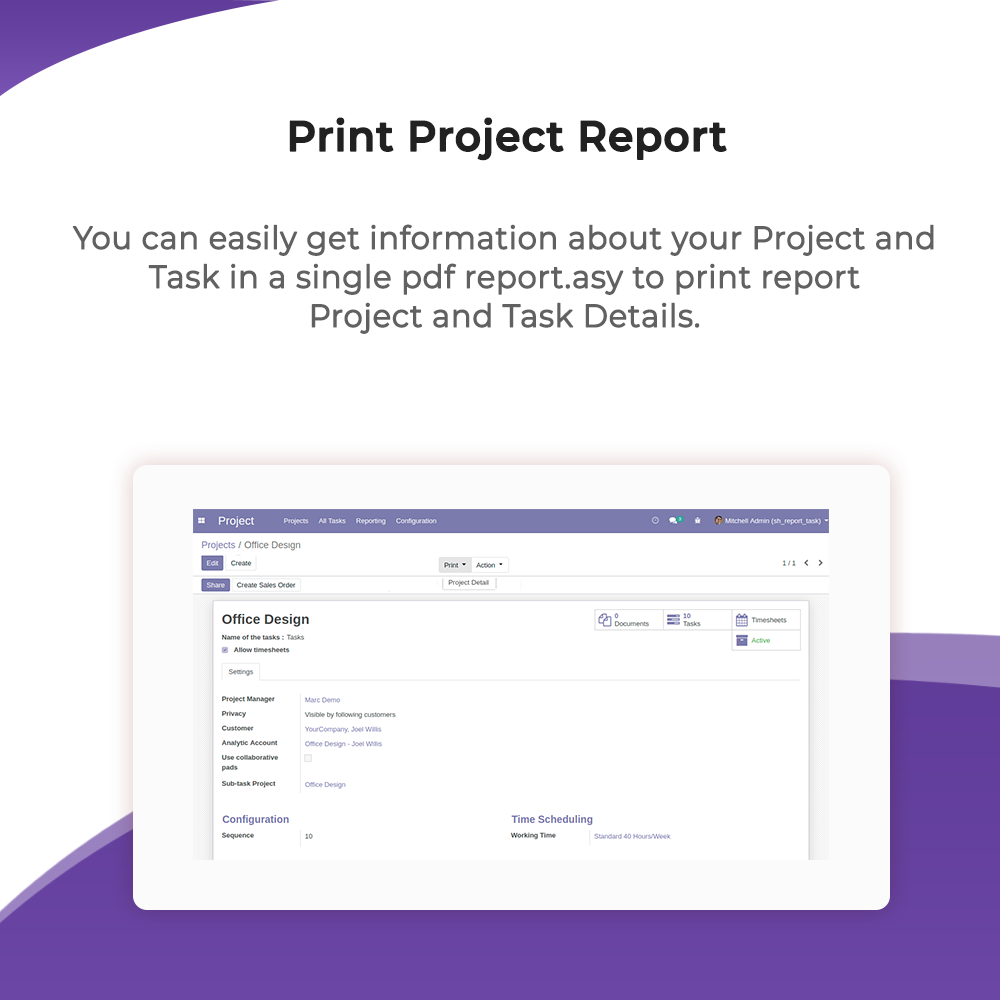
Goto Project => Select Print => Select Project Detail.
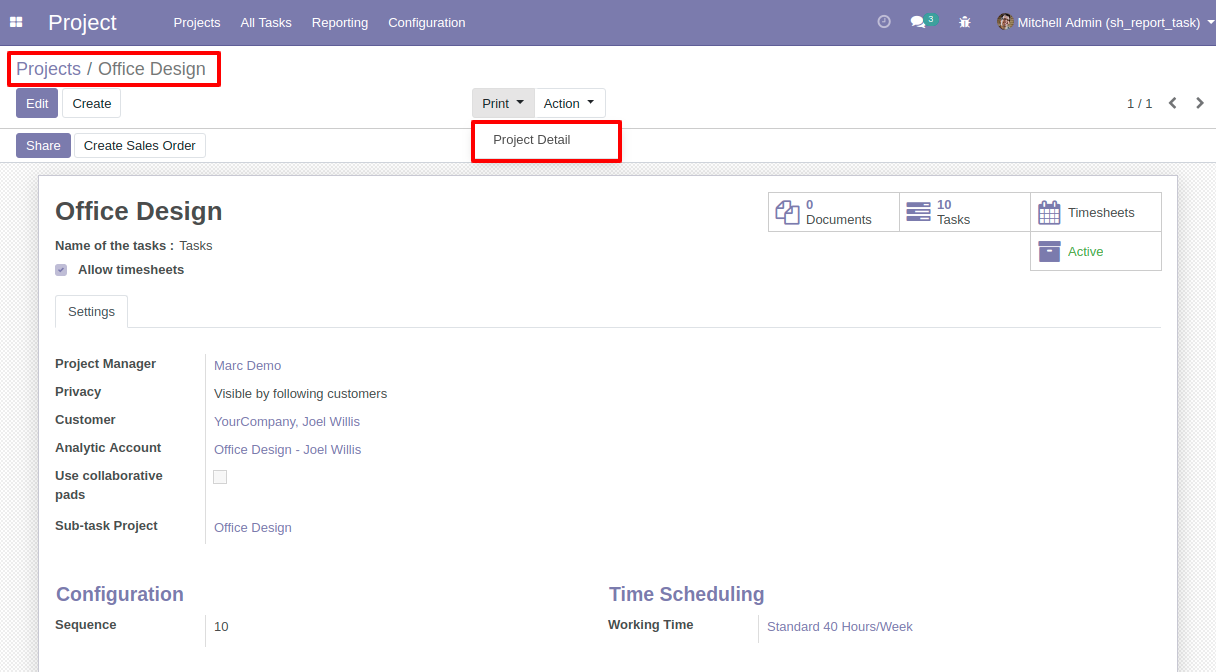
Project Detail Print.

Goto Task => Select Print => Select Task Detail.
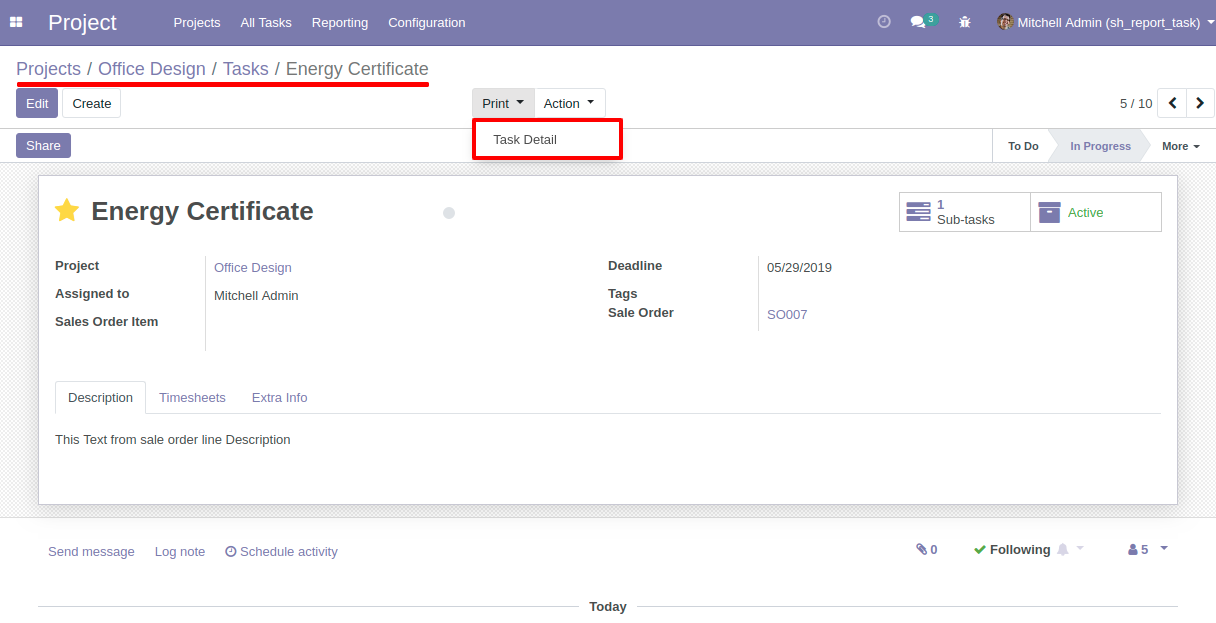
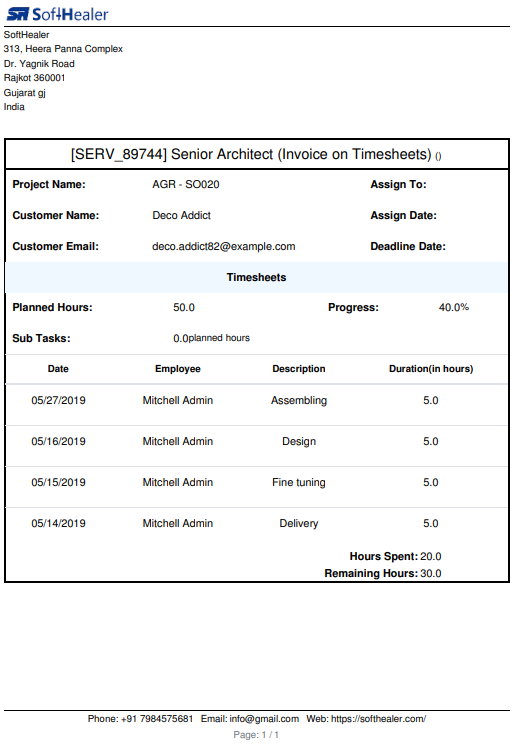
Task Detail Print.
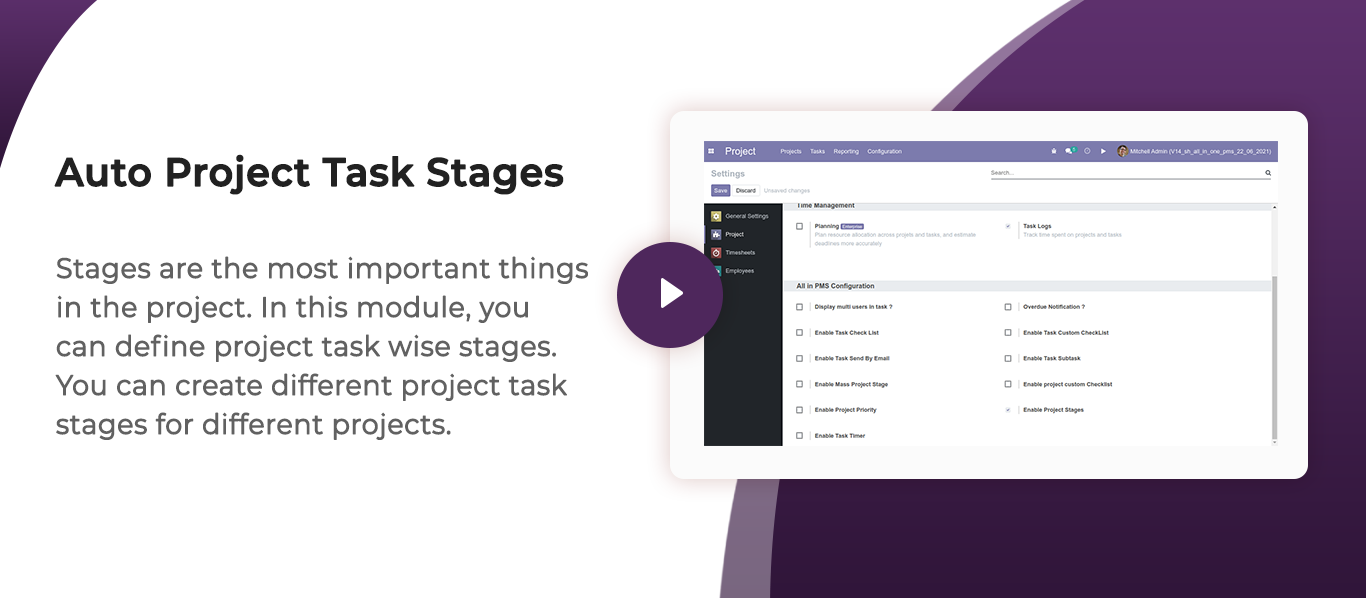
Select "Assign To" in the project stages.

Select "Assign To" in the project stages.

Automatically assign a task to a responsible user when you change stages.

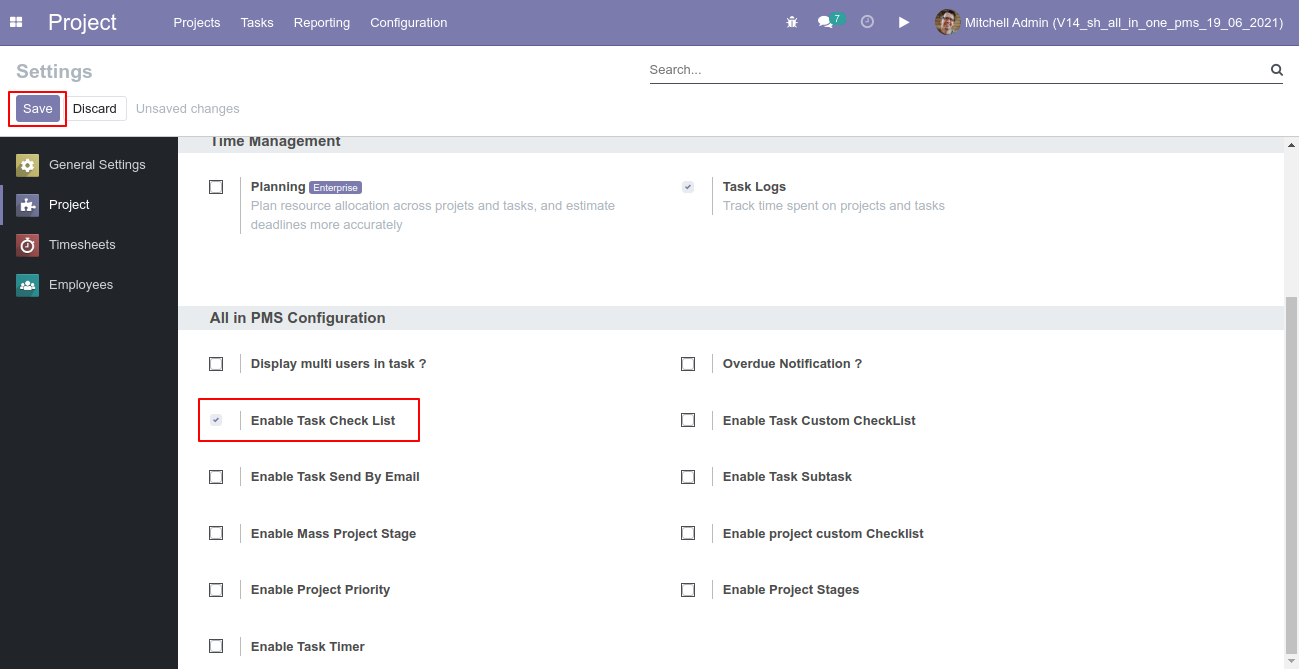
Enable "Task Checklist" group.
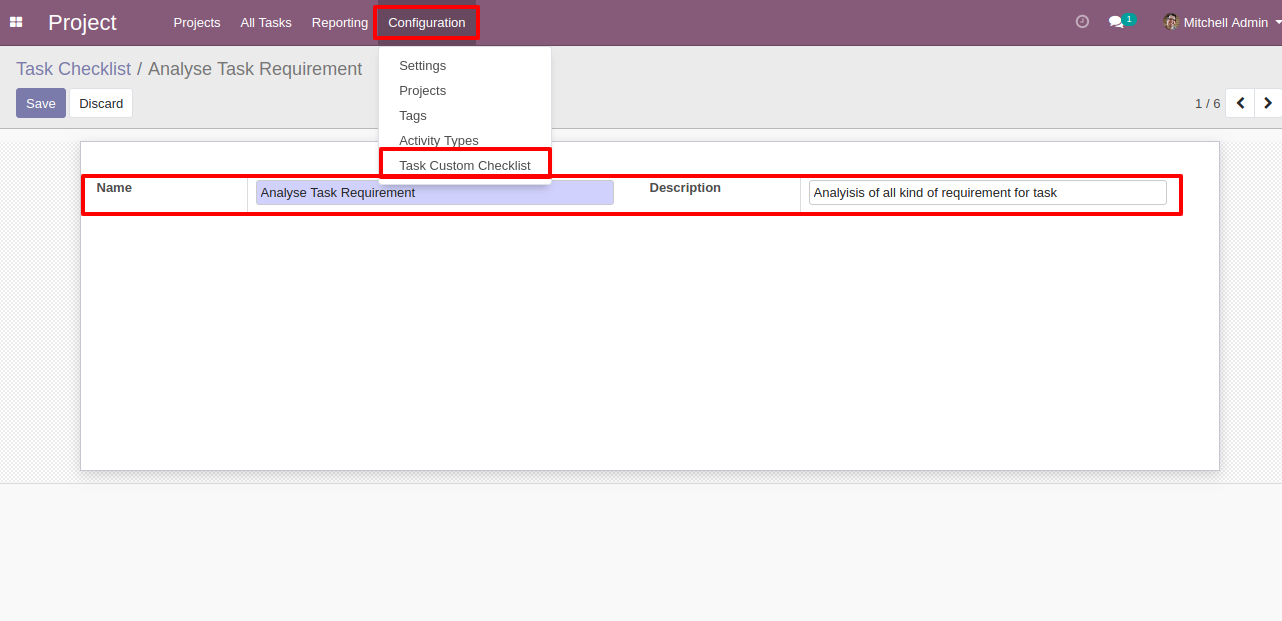
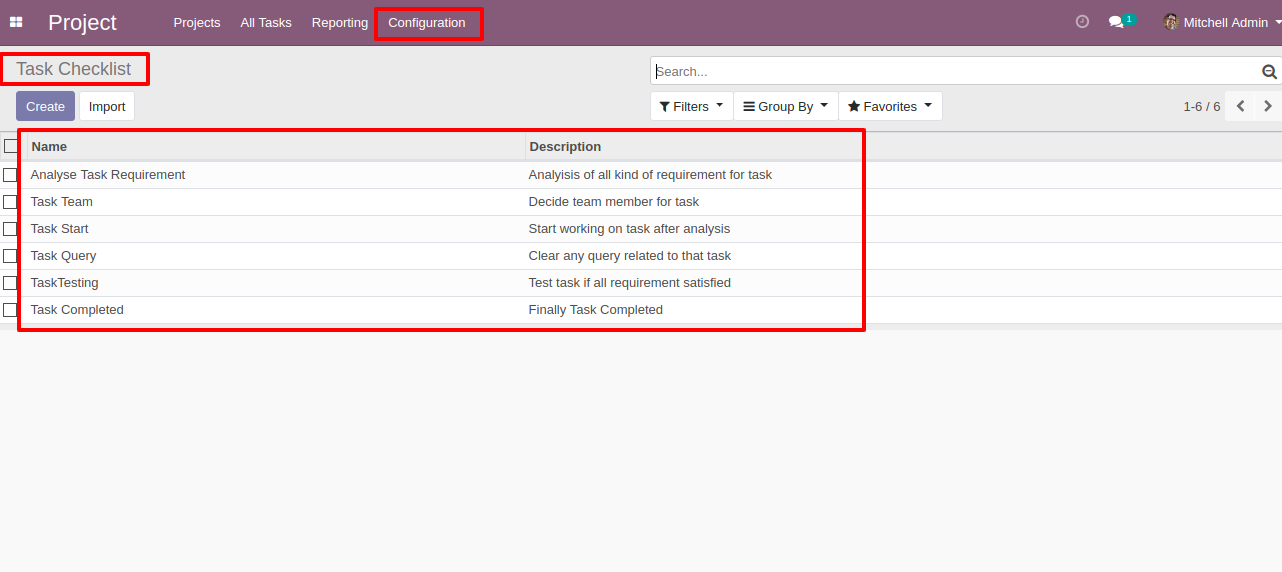
Create Task Checklist and description.
Task Checklist List available in Task.
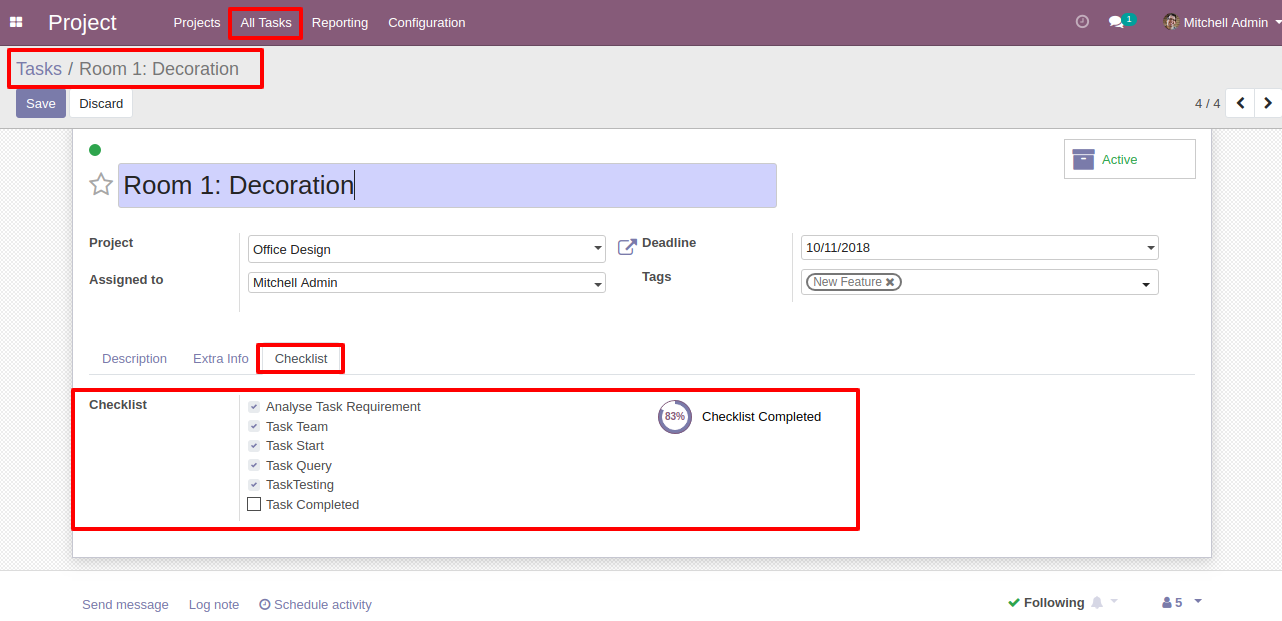
Select Task Checklist that are completed, based on that Checklist percentage calculated.
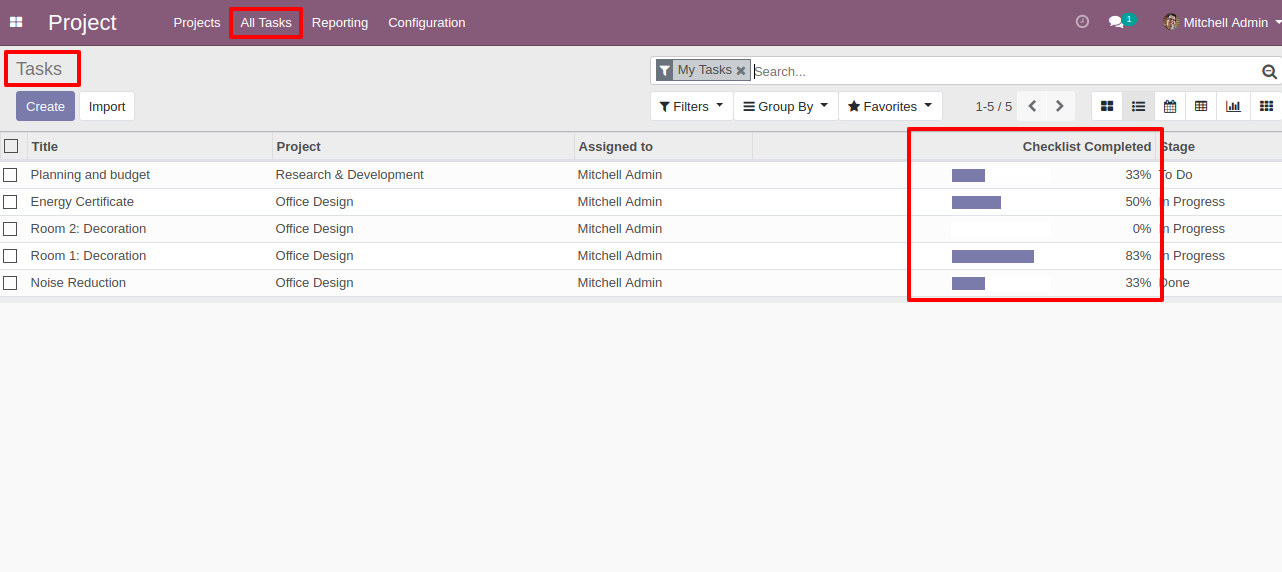
Task Checklist Completed Percentage on List view.
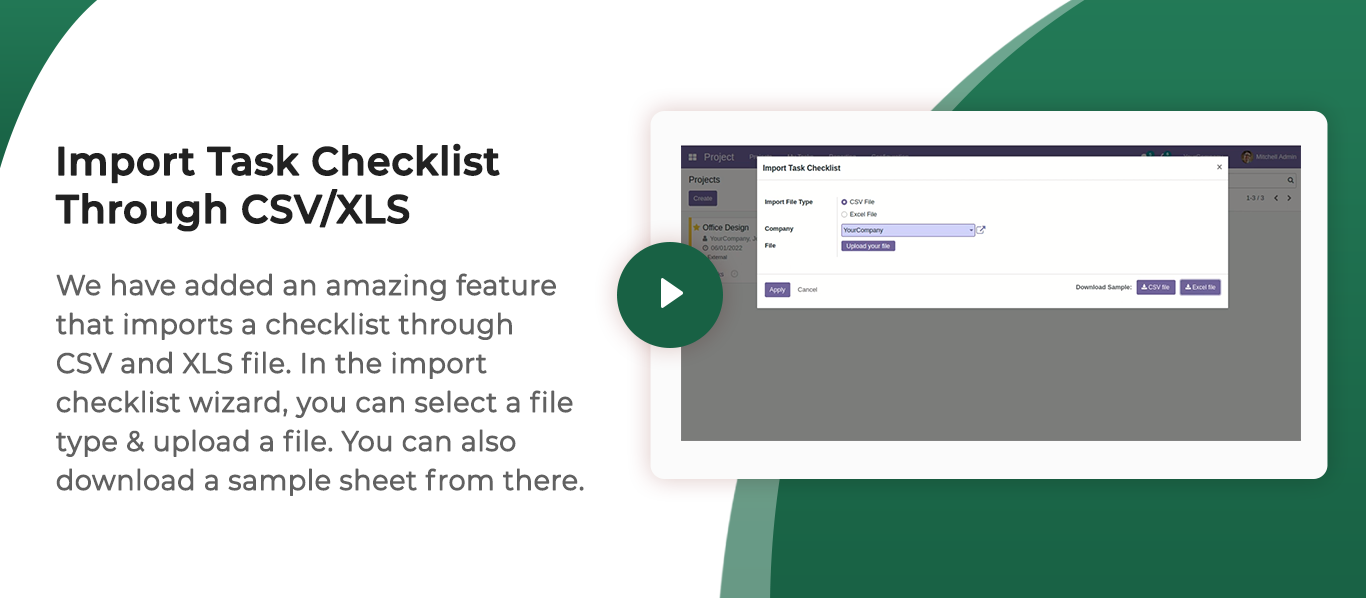
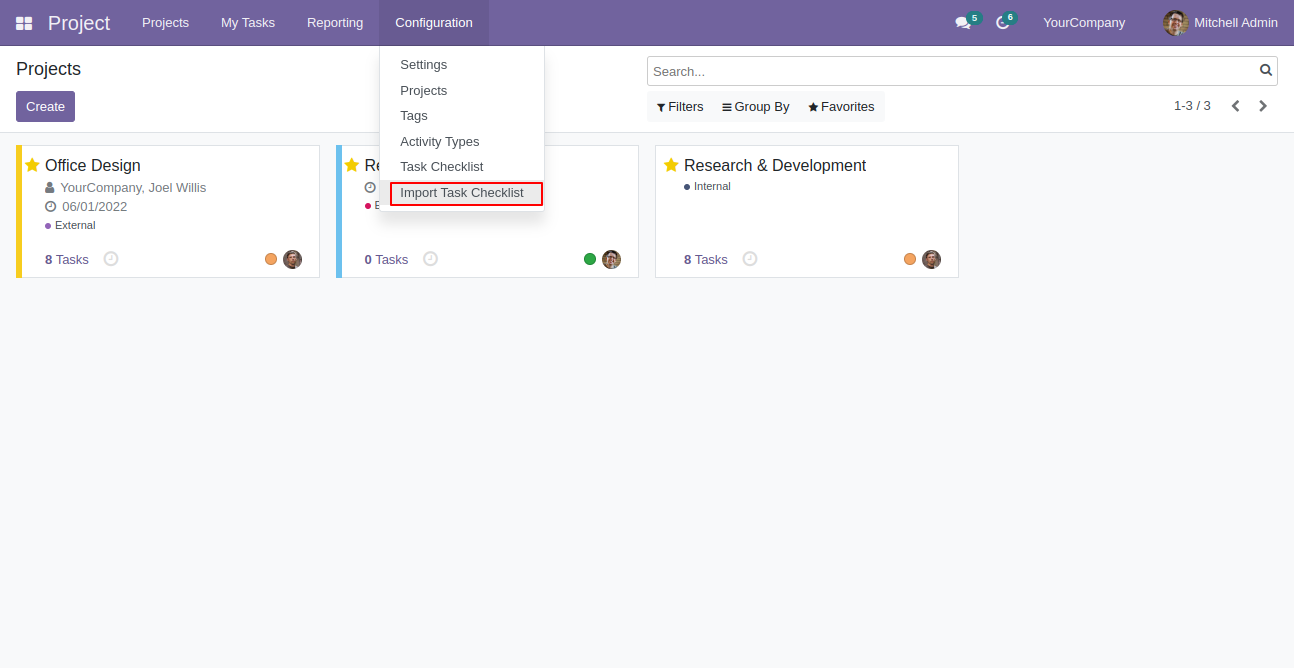
Import checklist menu.
Import checklist wizard, select file type & upload file. You can download sample sheet from here.
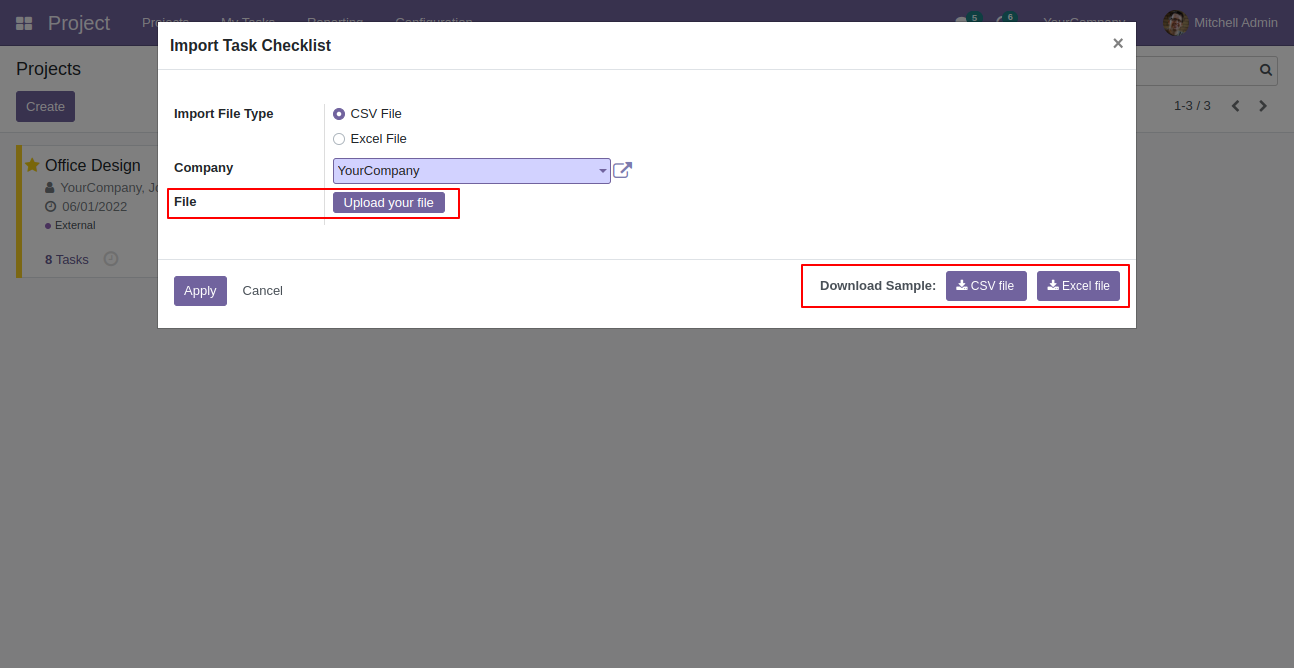
Click apply after the file is uploaded.
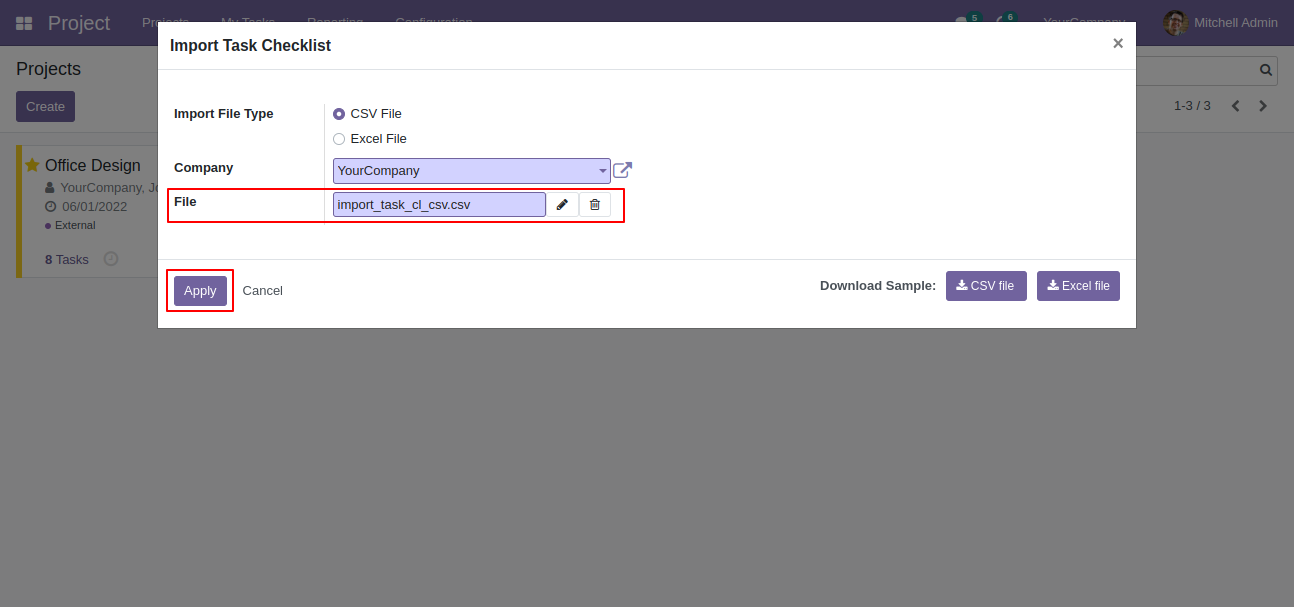
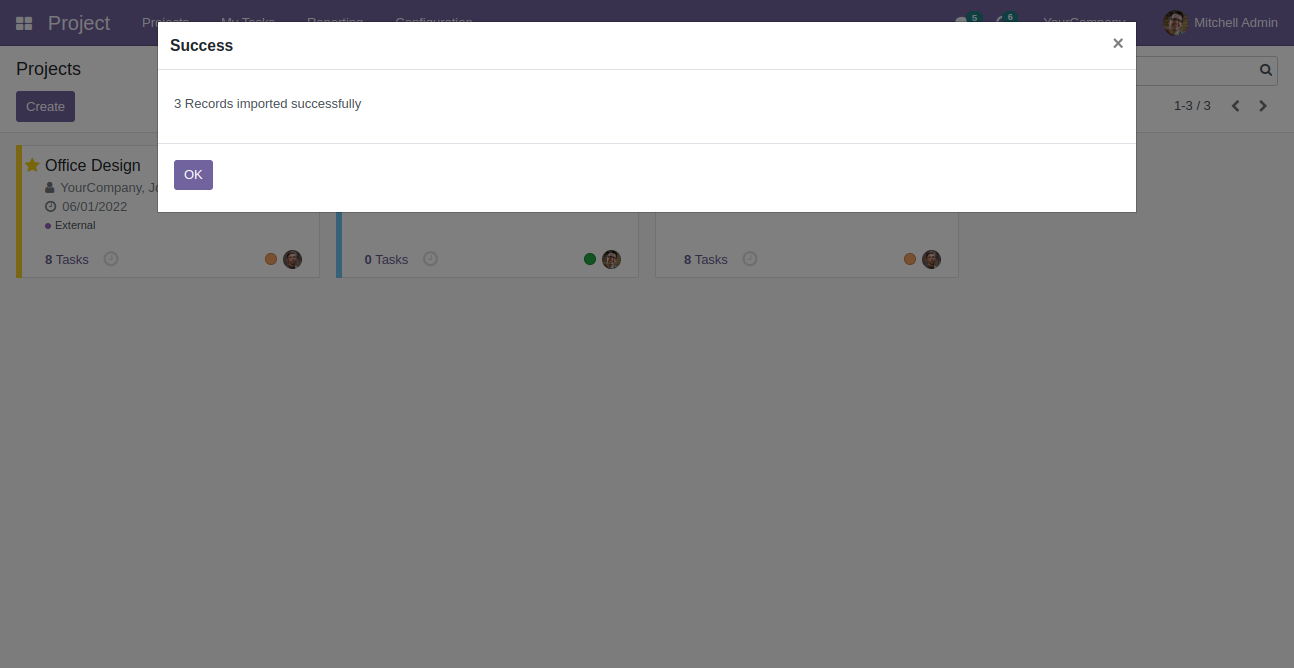
Success message looks like below it's shows successfully imported records.
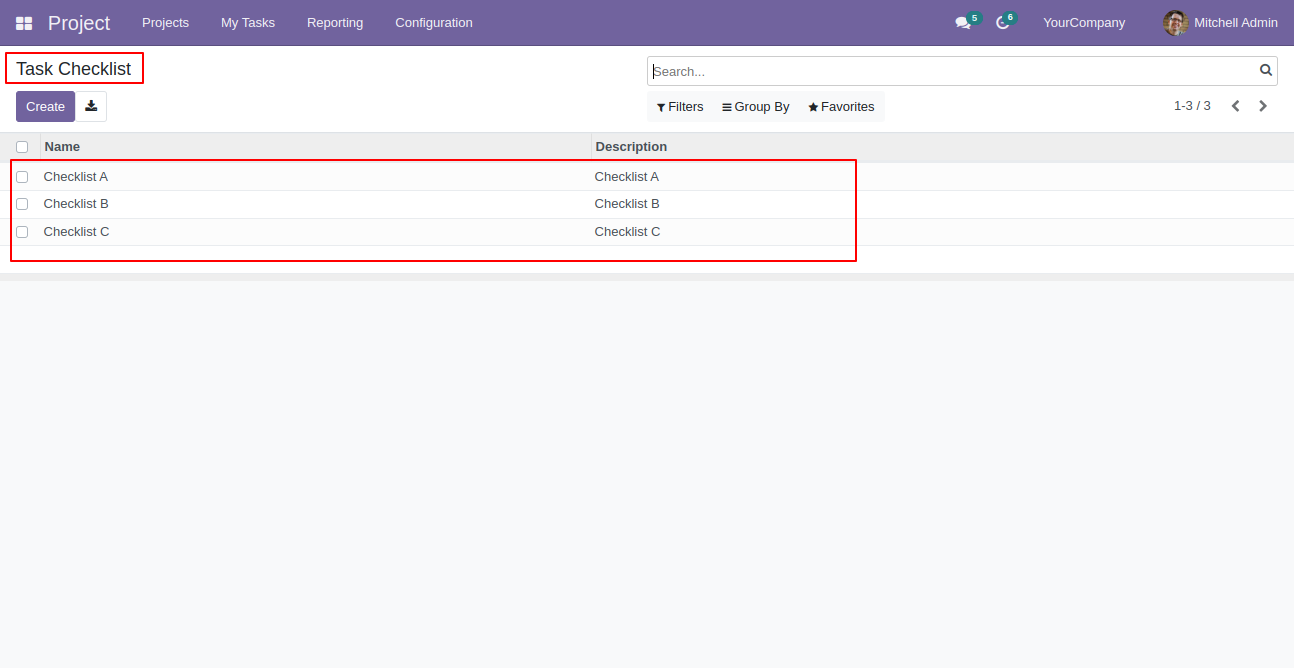
Following checklists are imported.
Enable "Task Custom Checklist" group.
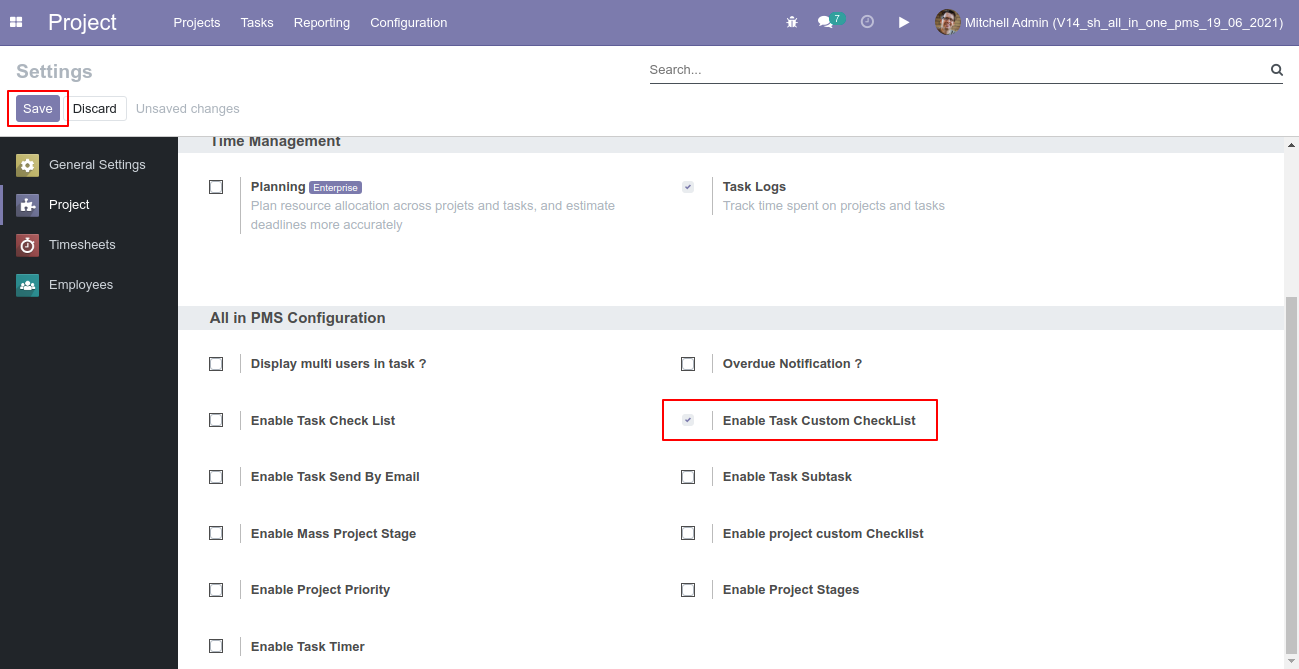
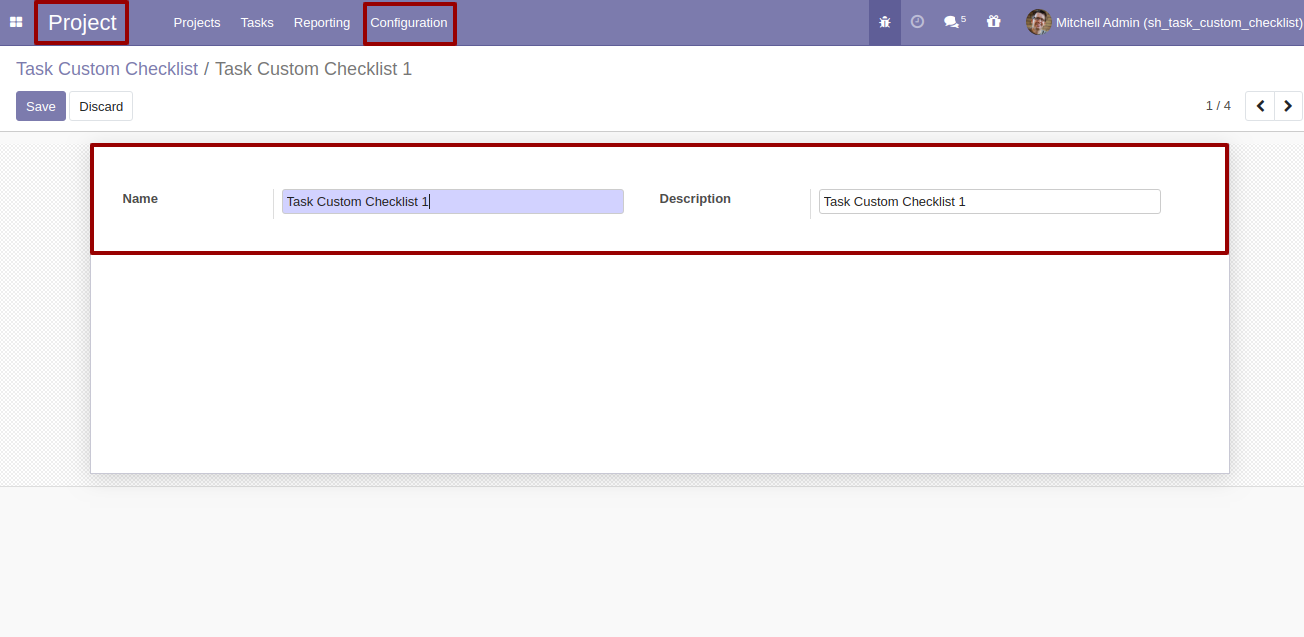
Create Task Checklist and description.
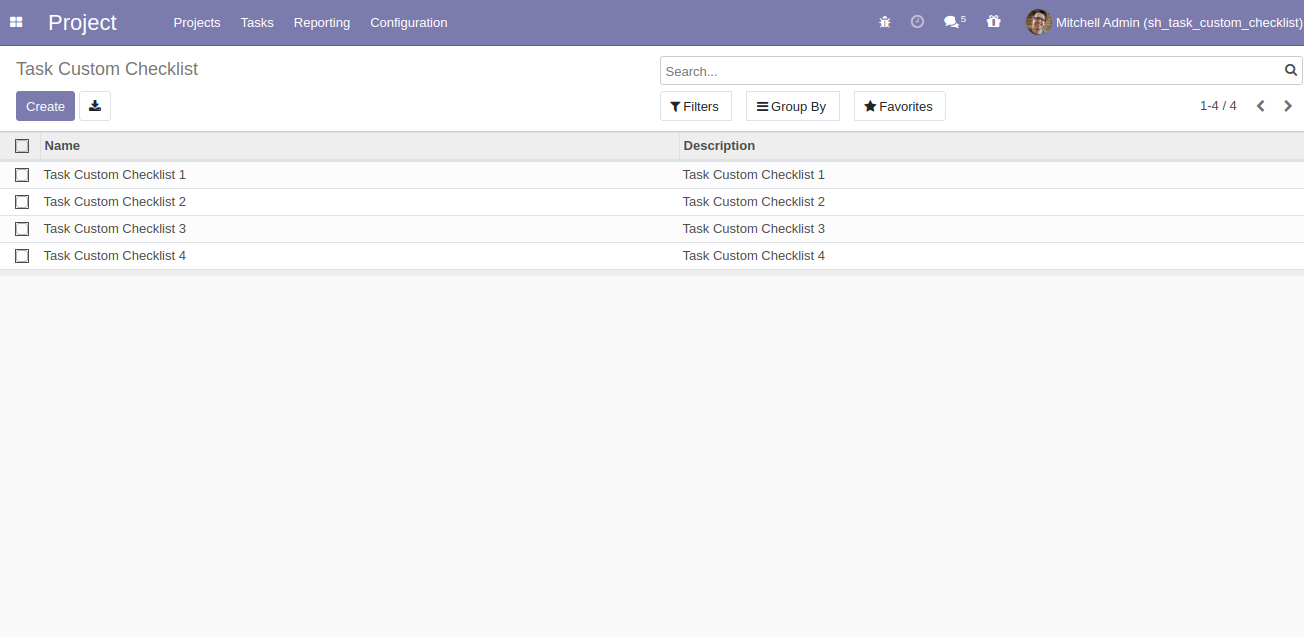
Task Checklist List available in Task.
Task Checklist with State New,Completed and Cancelled.Task Checklist based one Checklist Completed. Click on Check Icon To Complete Checklist.Cancel Icon to Cancel Checklist.
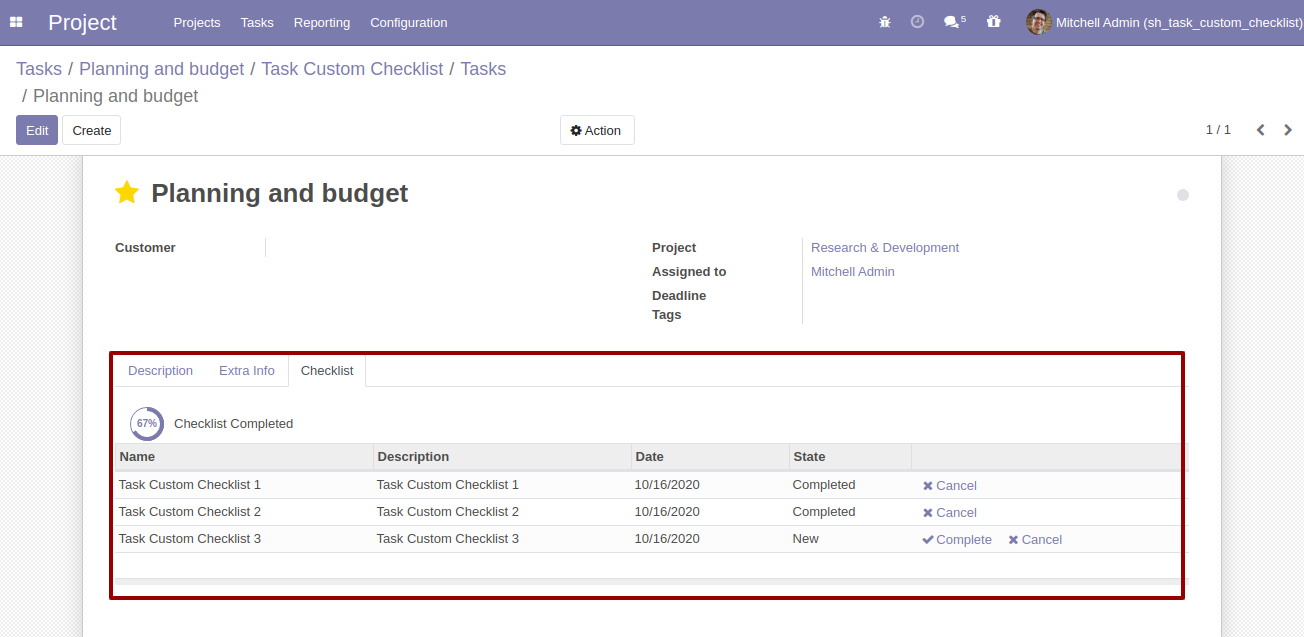
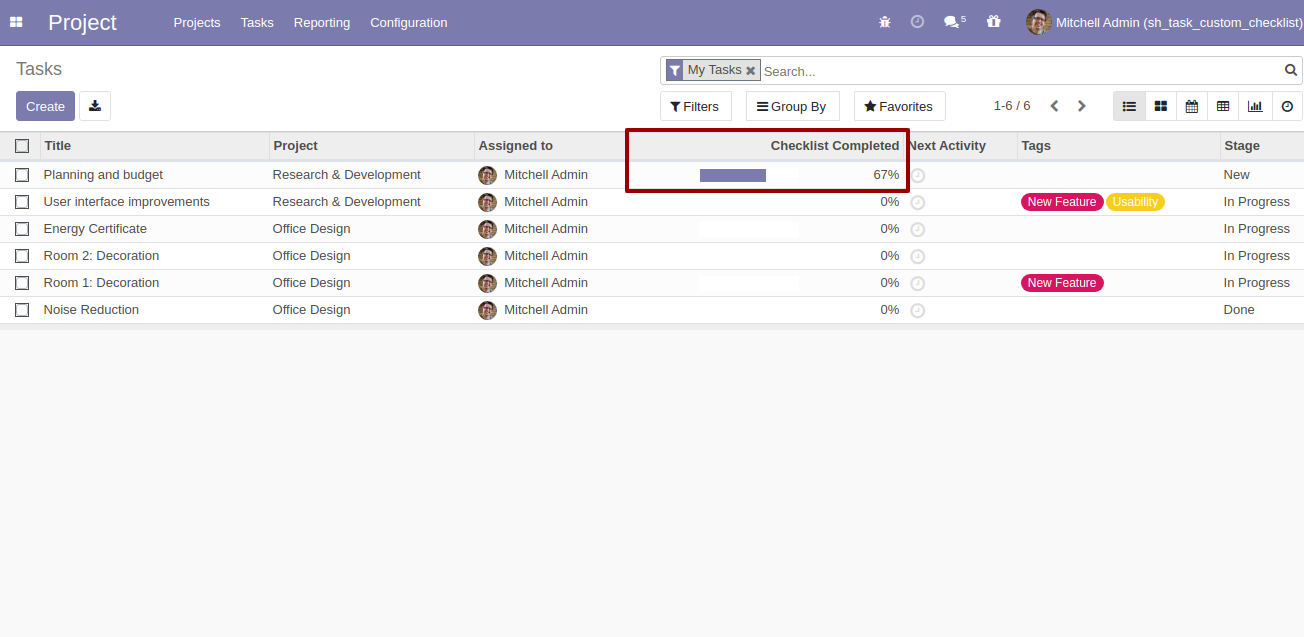
Task Checklist Completed Percentage on List view.
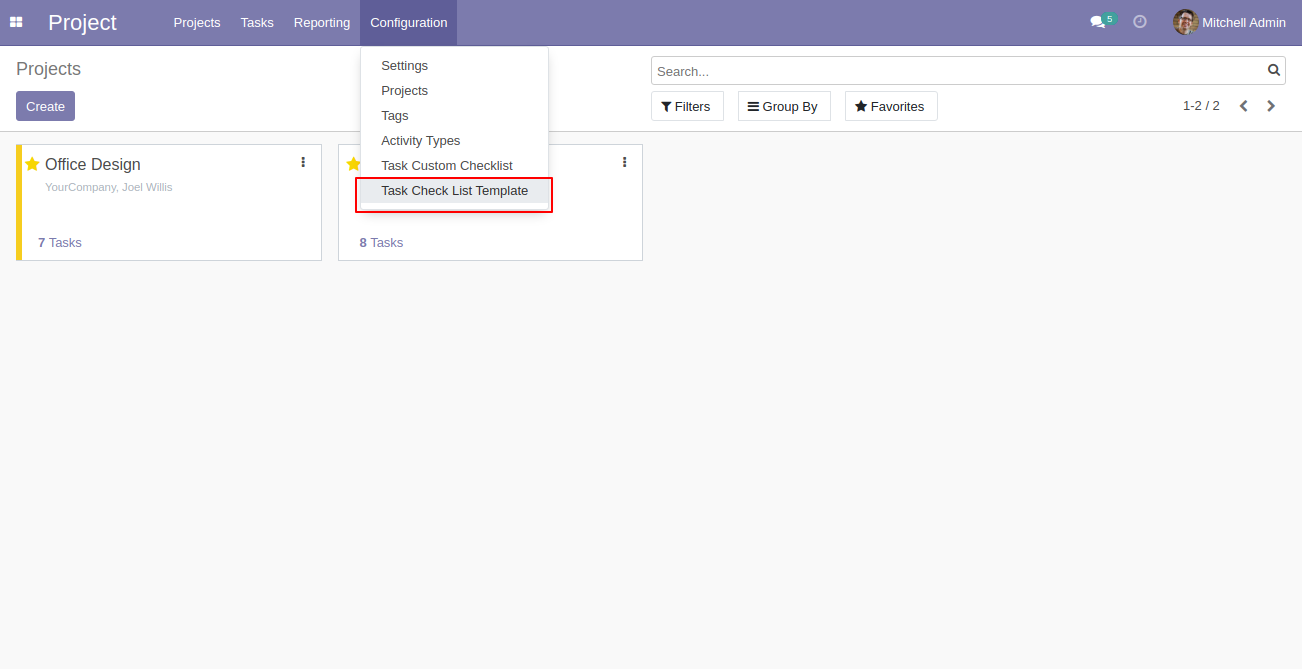
Go to the "Configuration" => Task Checklist Template.
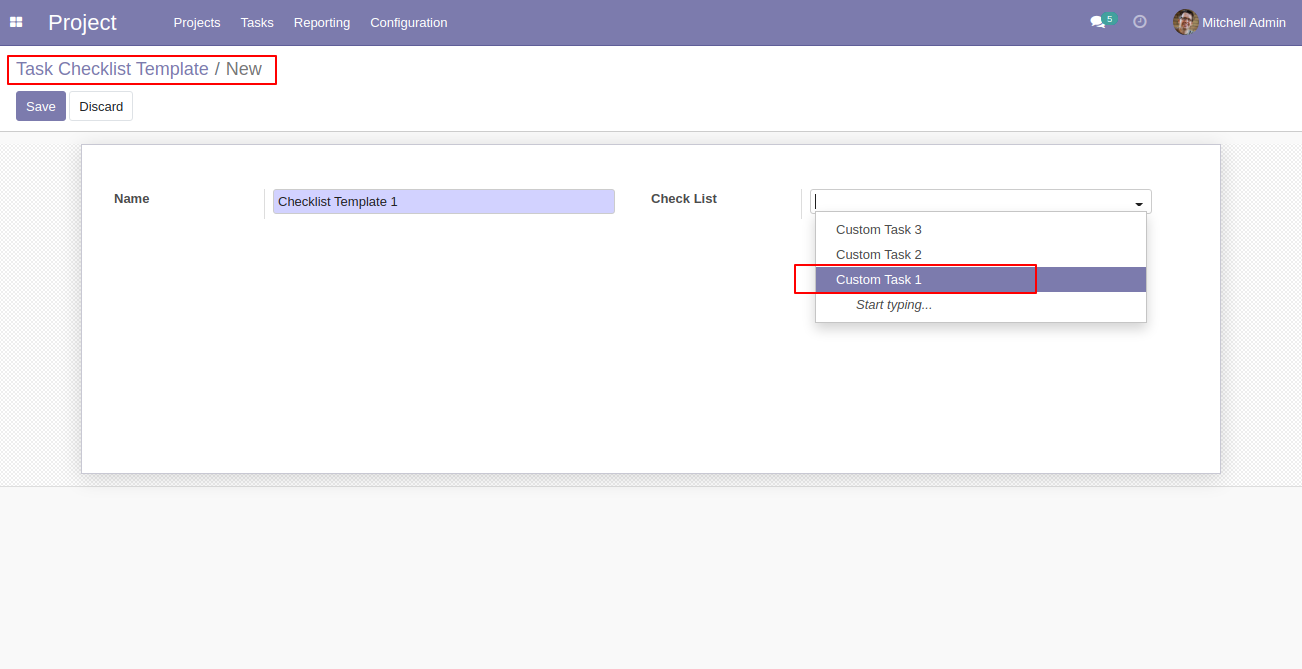
Now we create a task checklist template, checklist template form view looks like this.
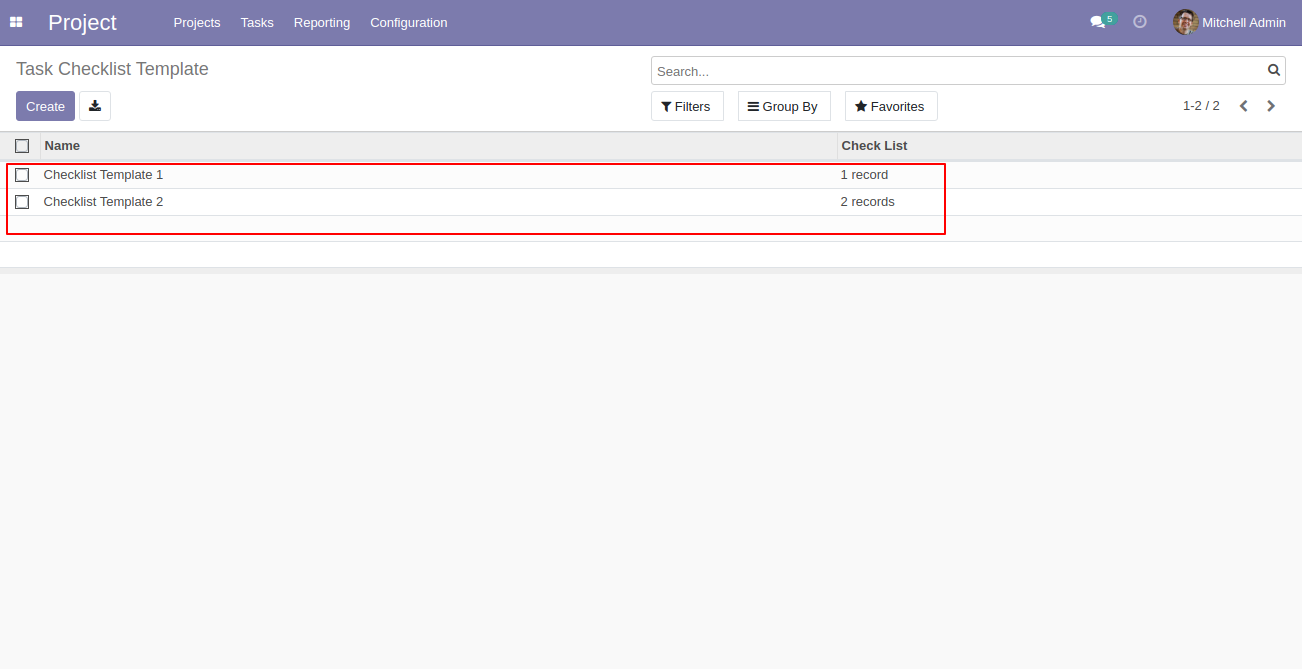
Task checklist template list view looks like this.
Now we fill the checklist by selecting the checklist template.
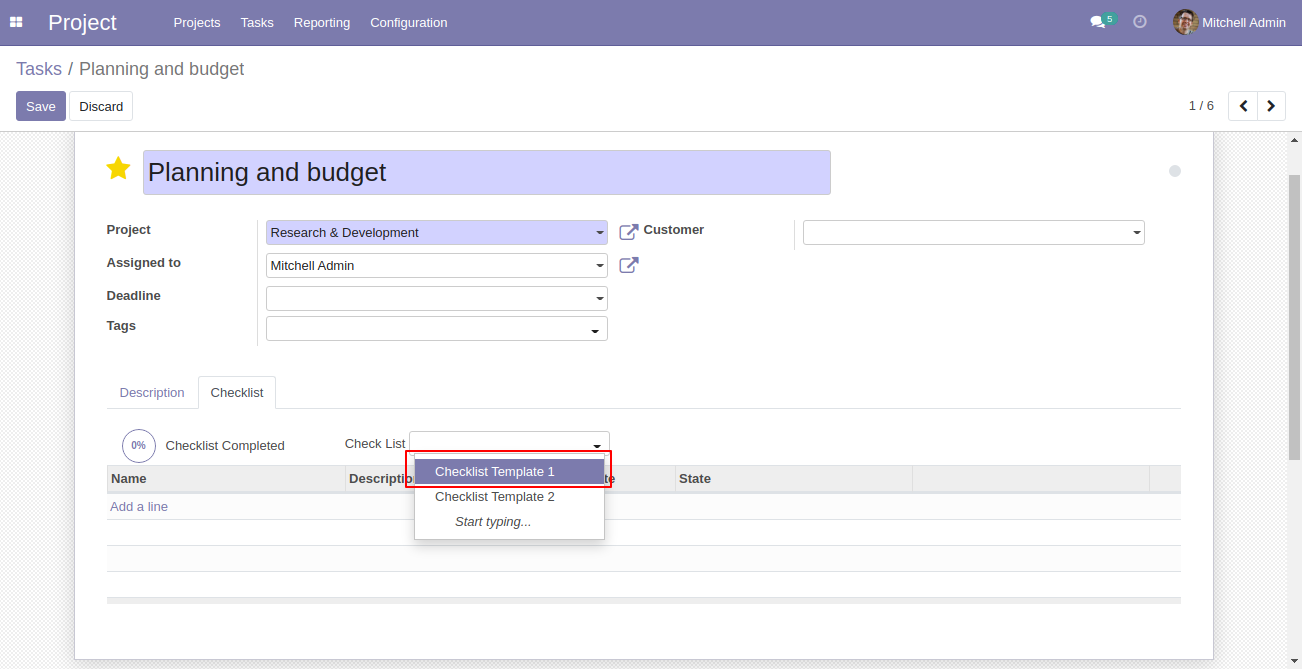
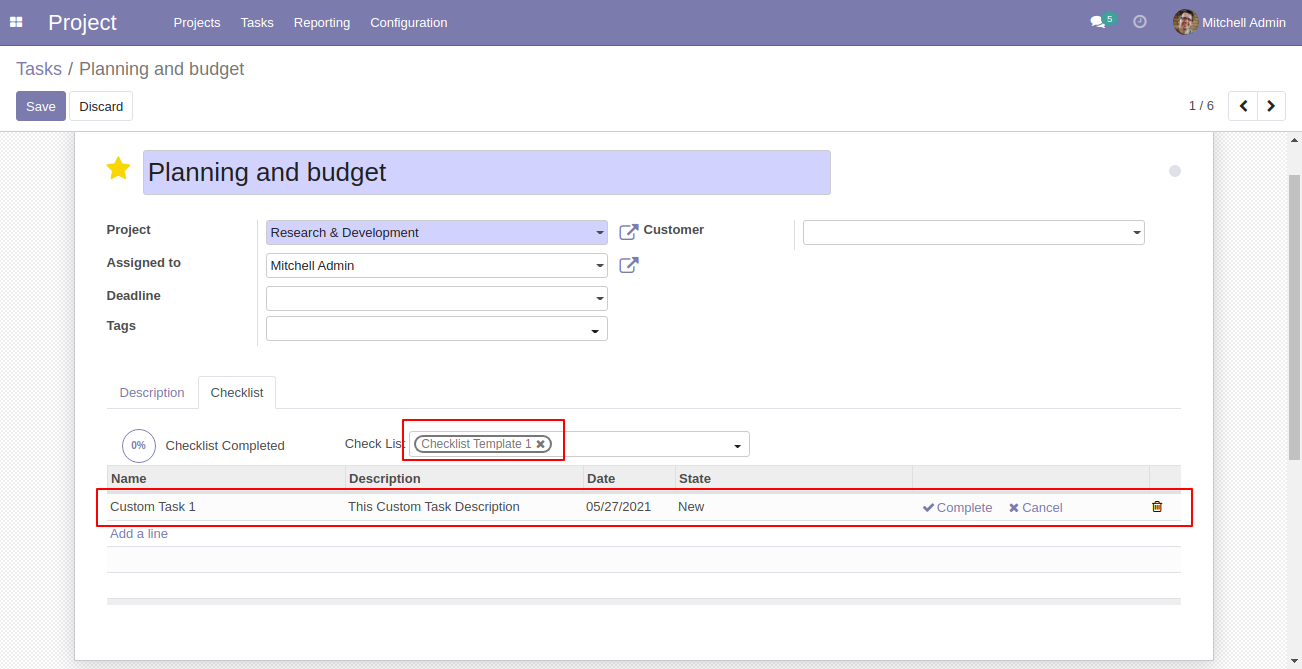
When we select checklist template, it adds a record by default.
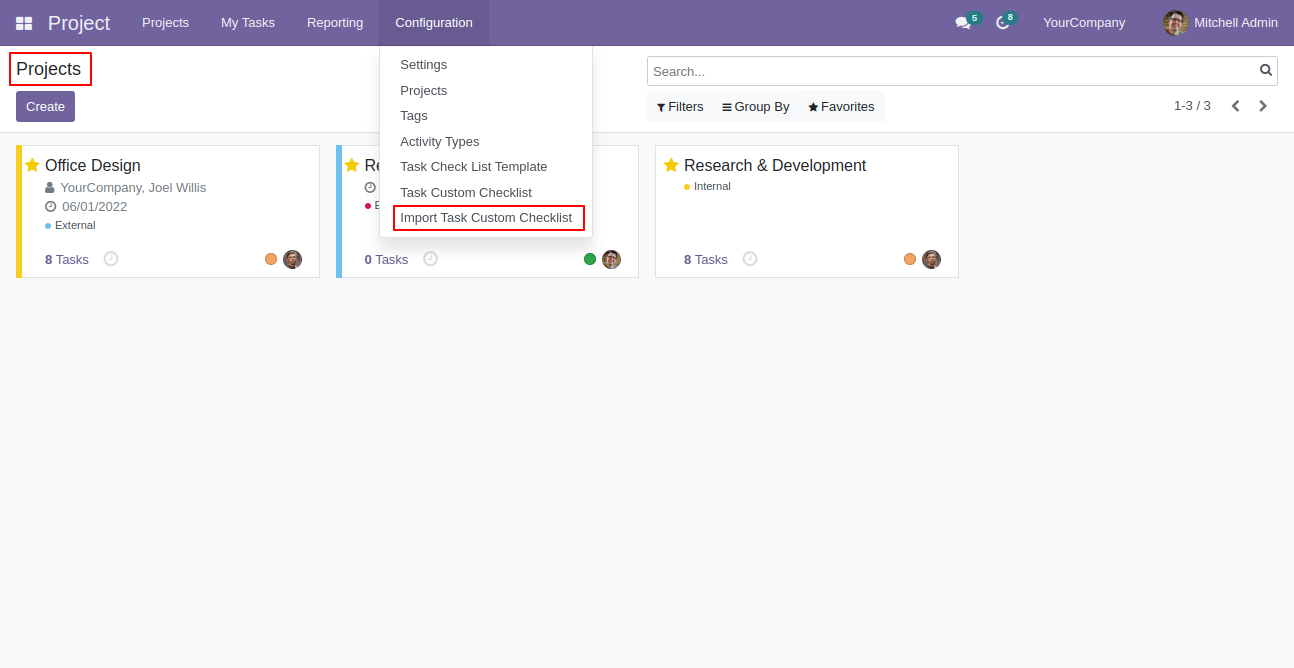
Import checklist menu.
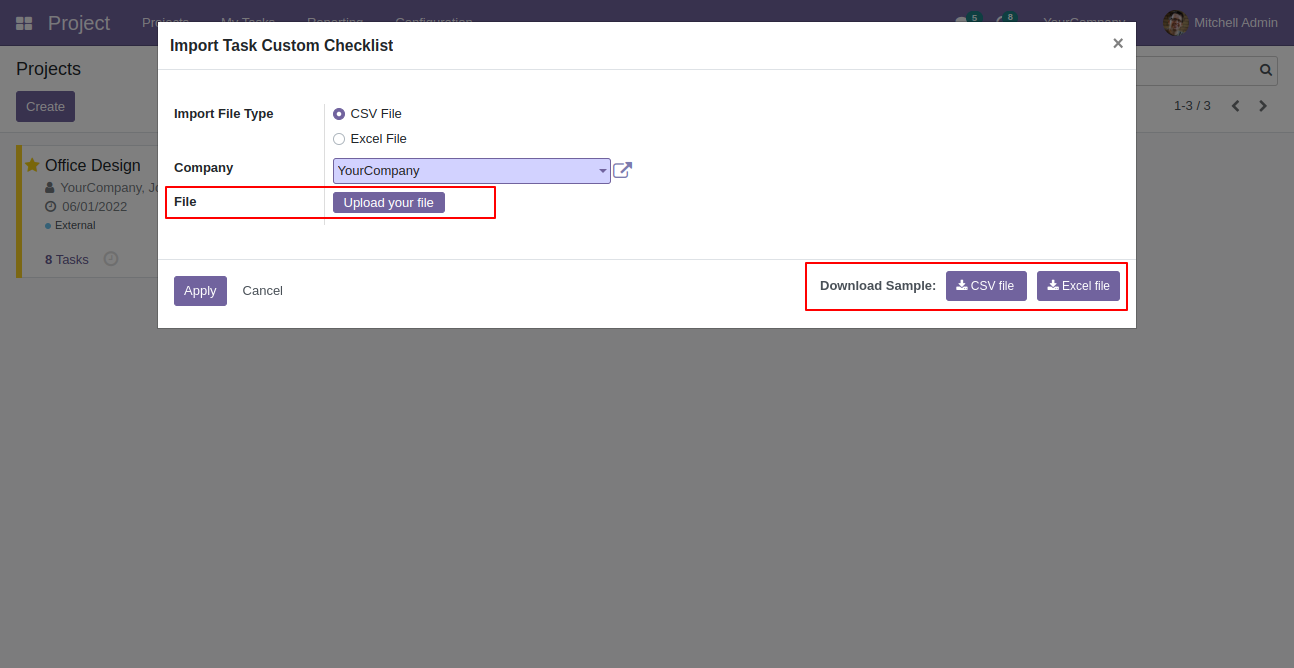
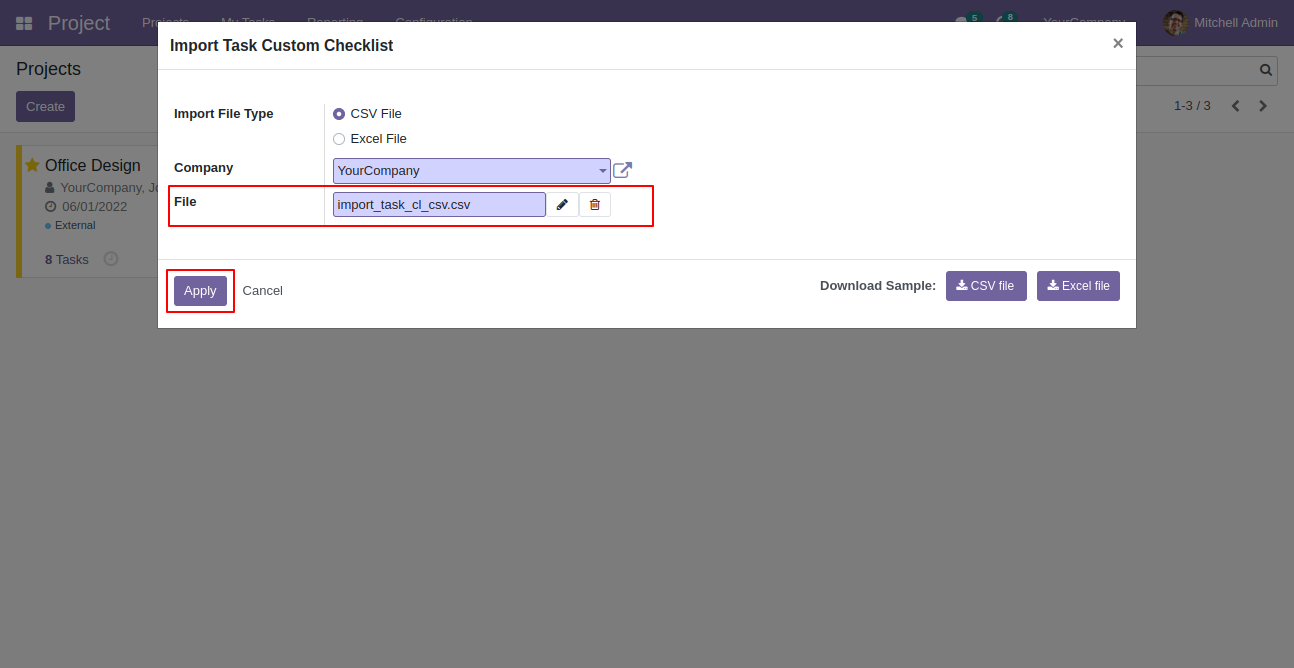
Import checklist wizard, select file type & upload file. You can download sample sheet from here.
Click apply after the file is uploaded.
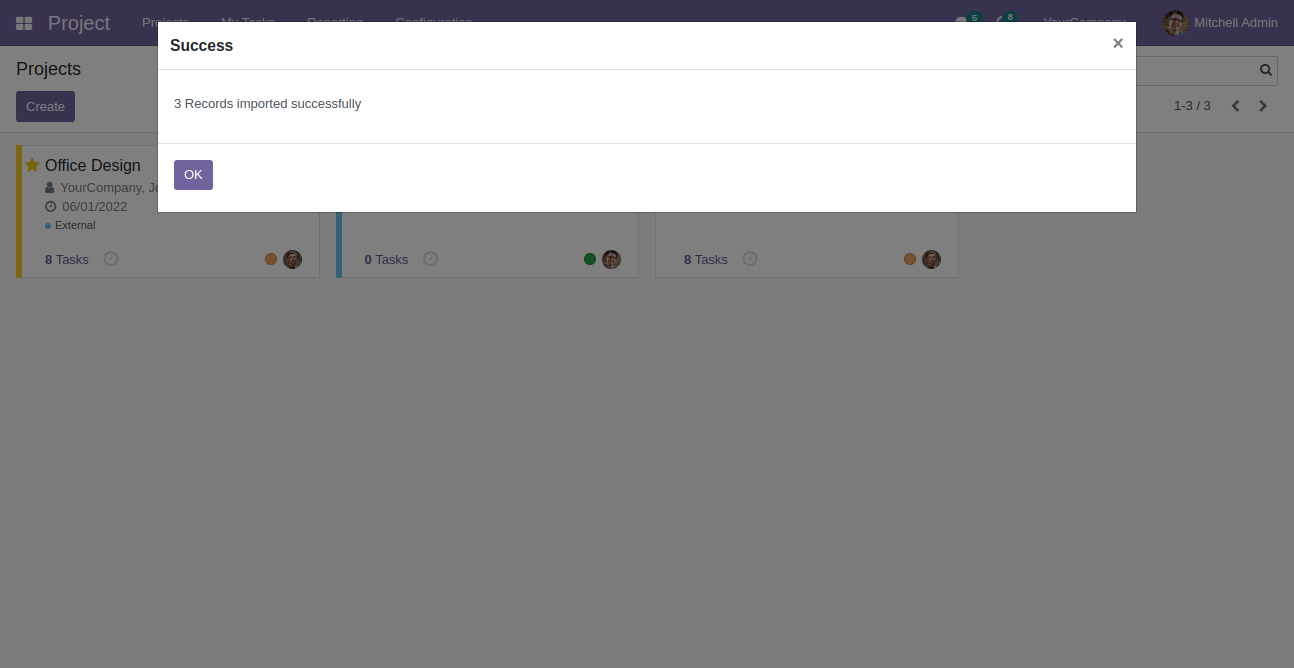
Success message looks like below it's shows successfully imported records.
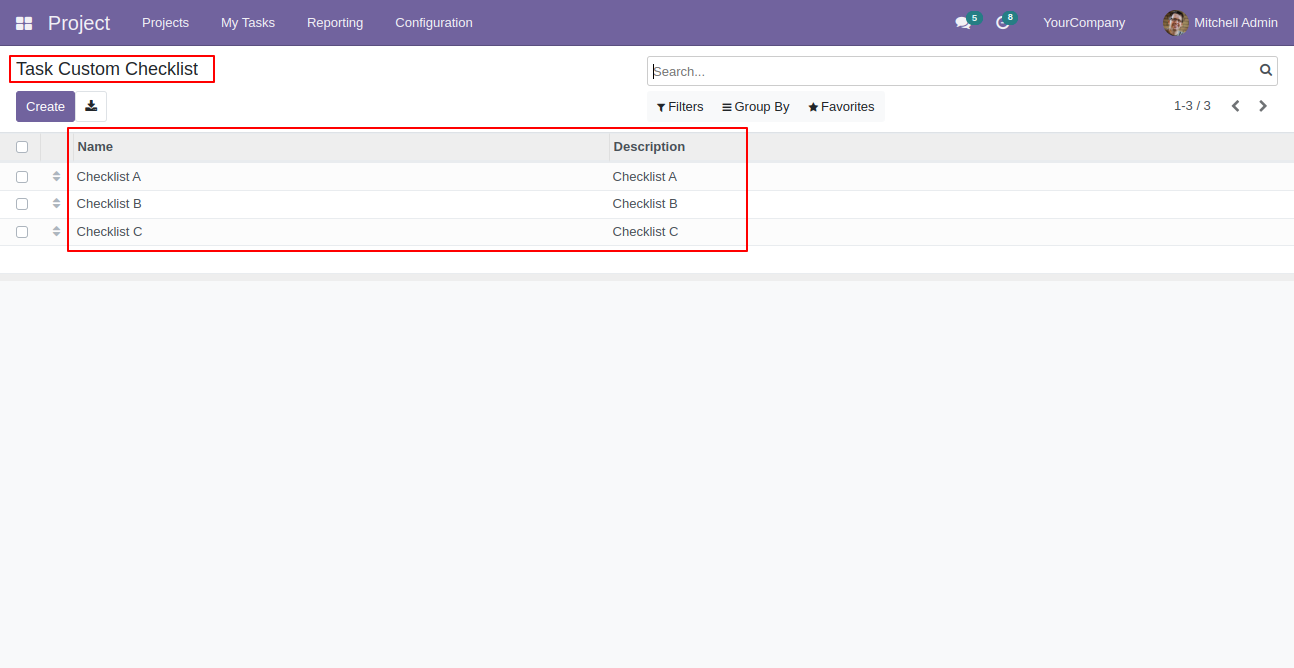
Following checklists are imported.
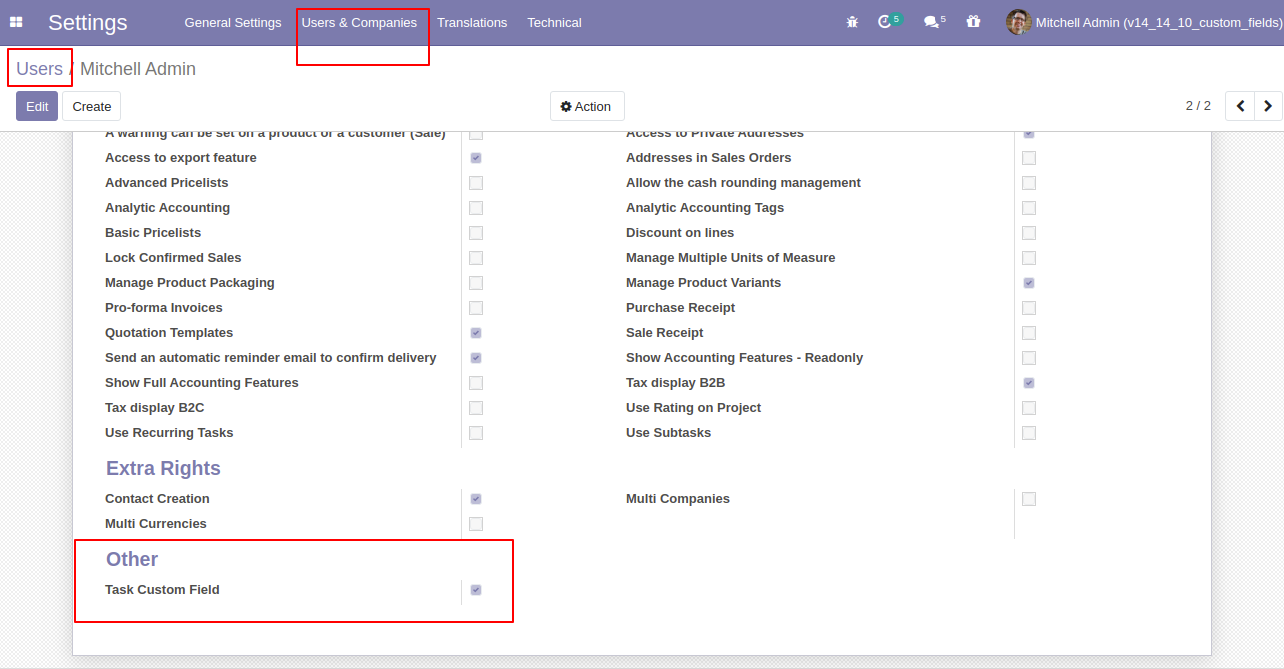
Set user rights to allow add custom field inside the task.
Click on the "Add Custom Field" & 'Add Custom Tab' button to add a new field & tab in the task form.
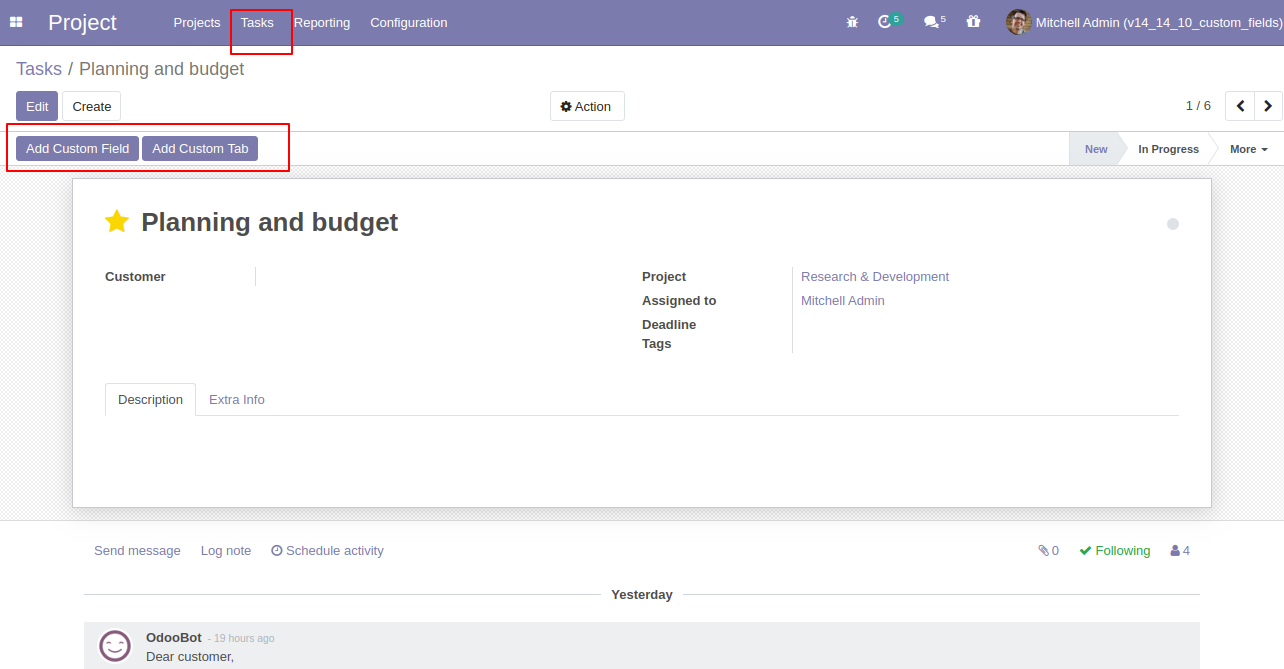
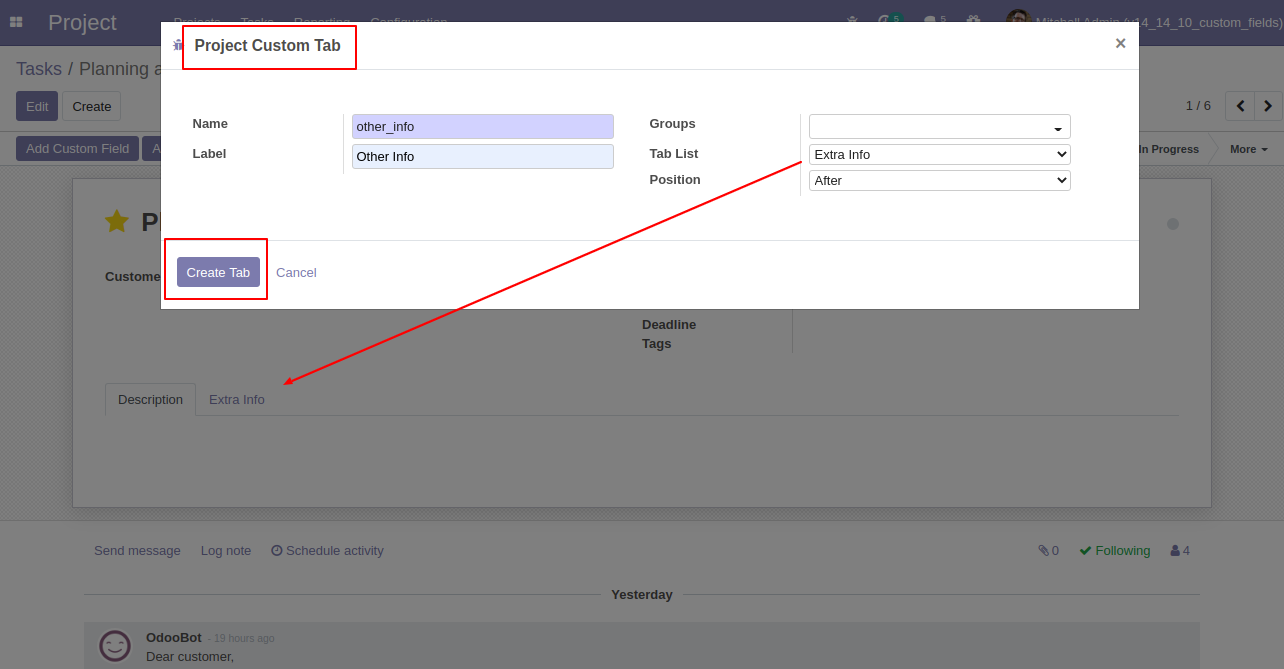
You can set tab name, label, groups & tab list position and click 'Create Tab'.
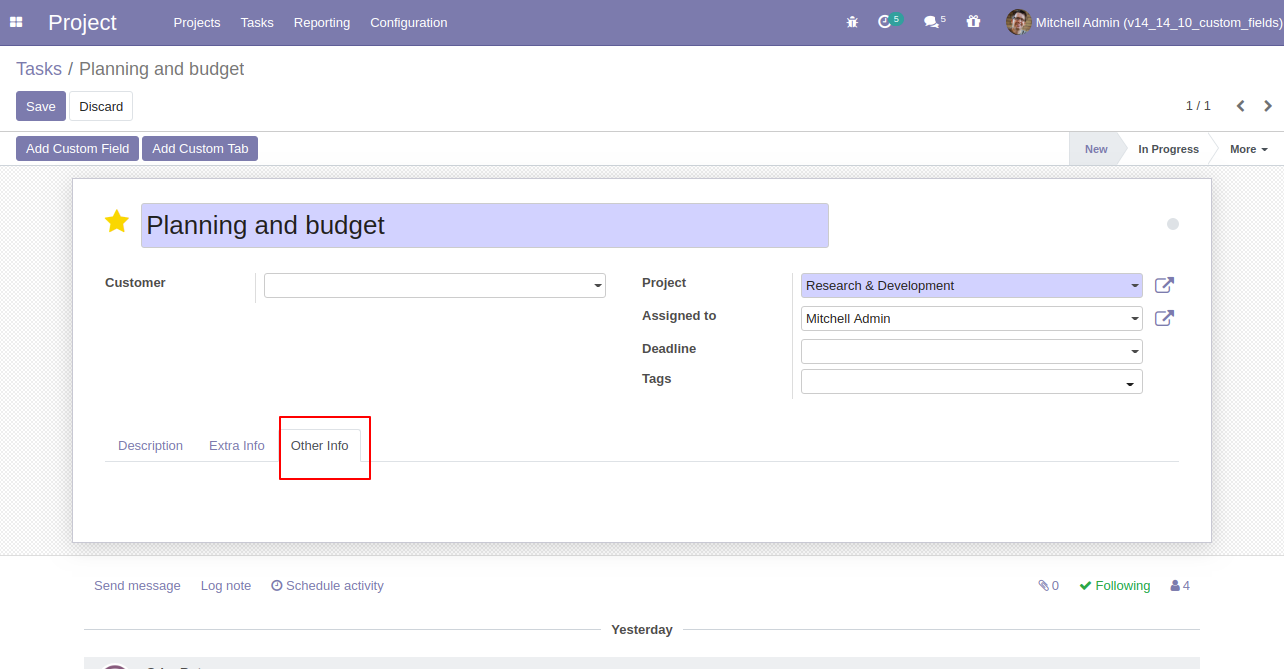
'Other Info' Tab is created.
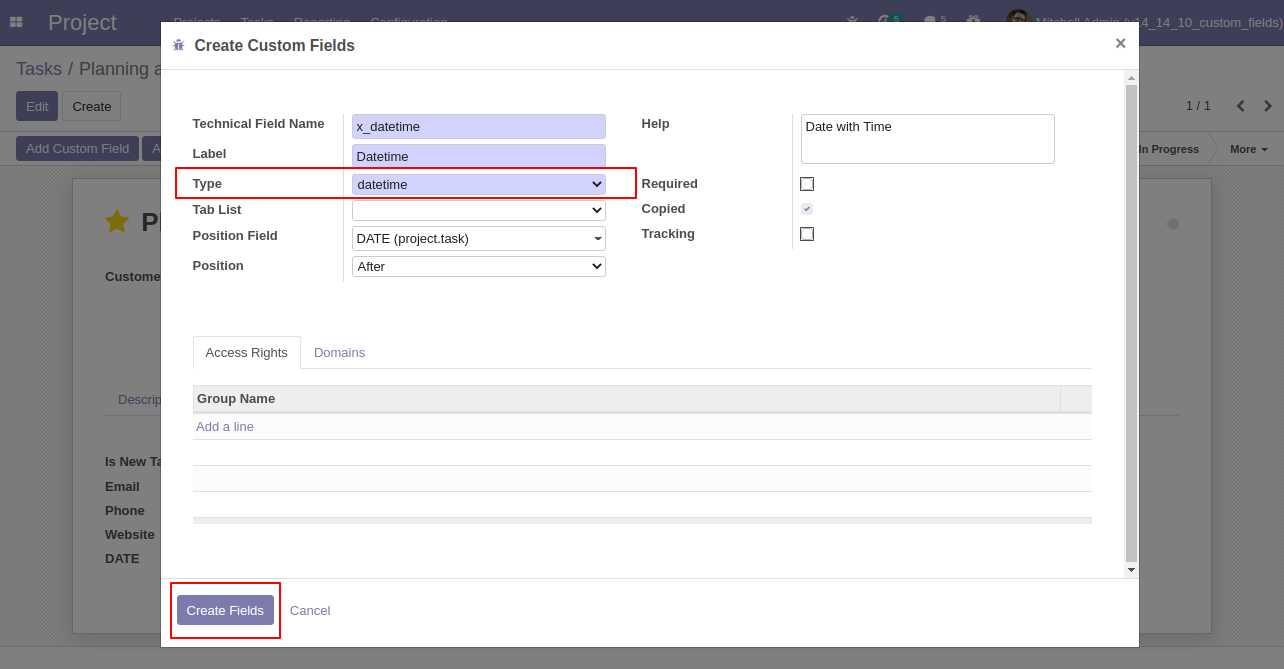
For adding the field in the custom tab click 'Add custom field' and add field name, label, type, tab list, tracking for track field value, and click 'Create fields'.
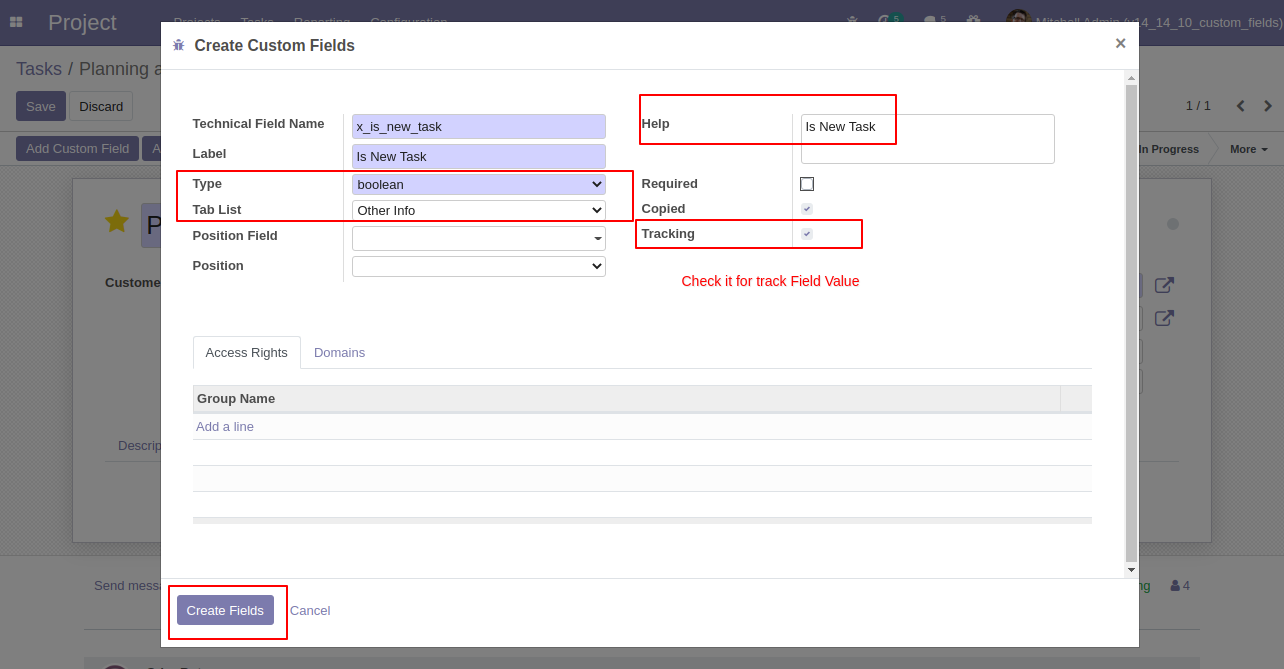
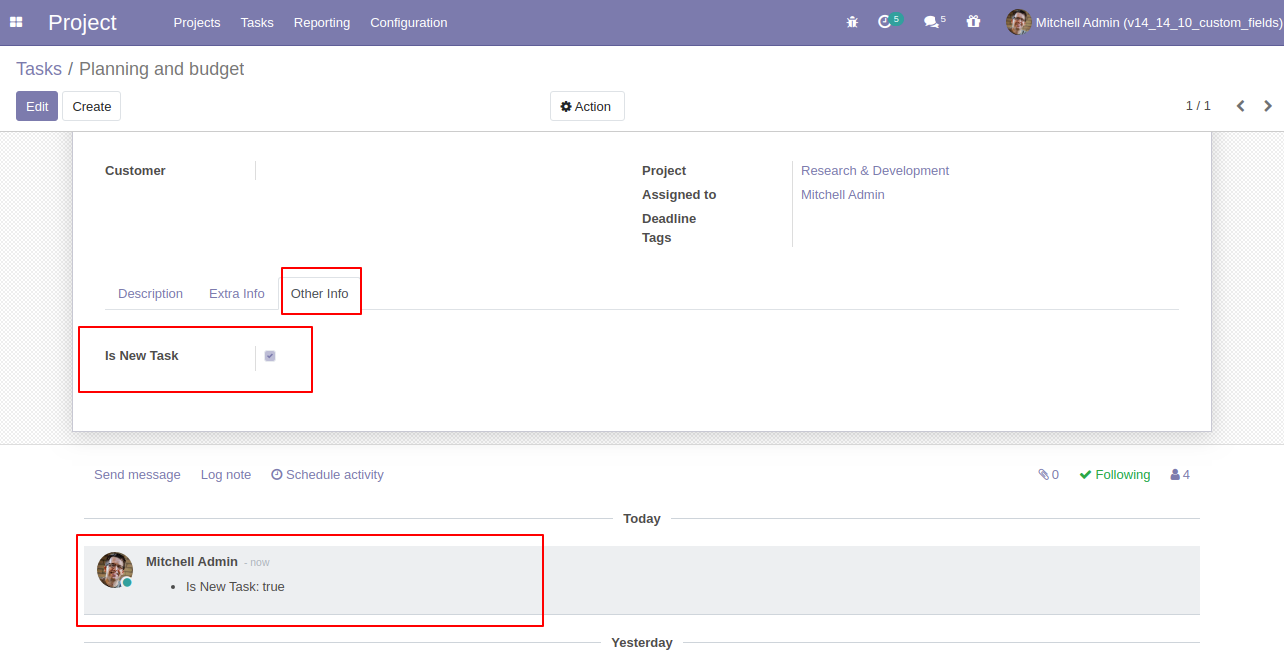
The custom field 'Is New Task' is created.
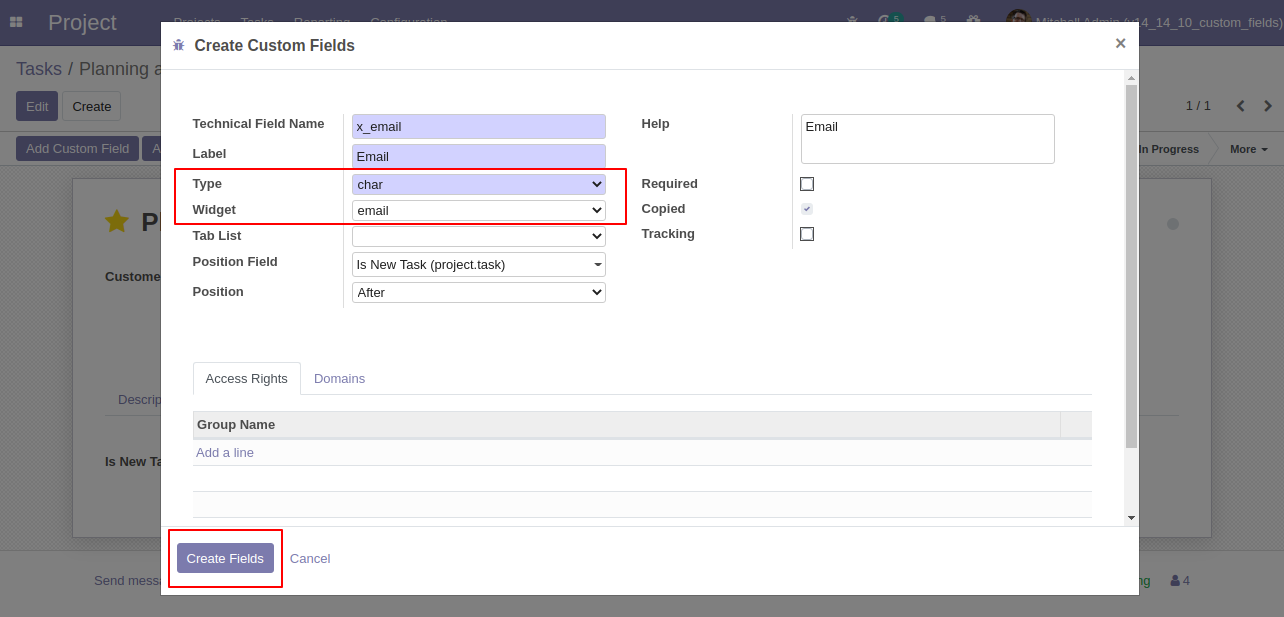
Char field with widget "Email".
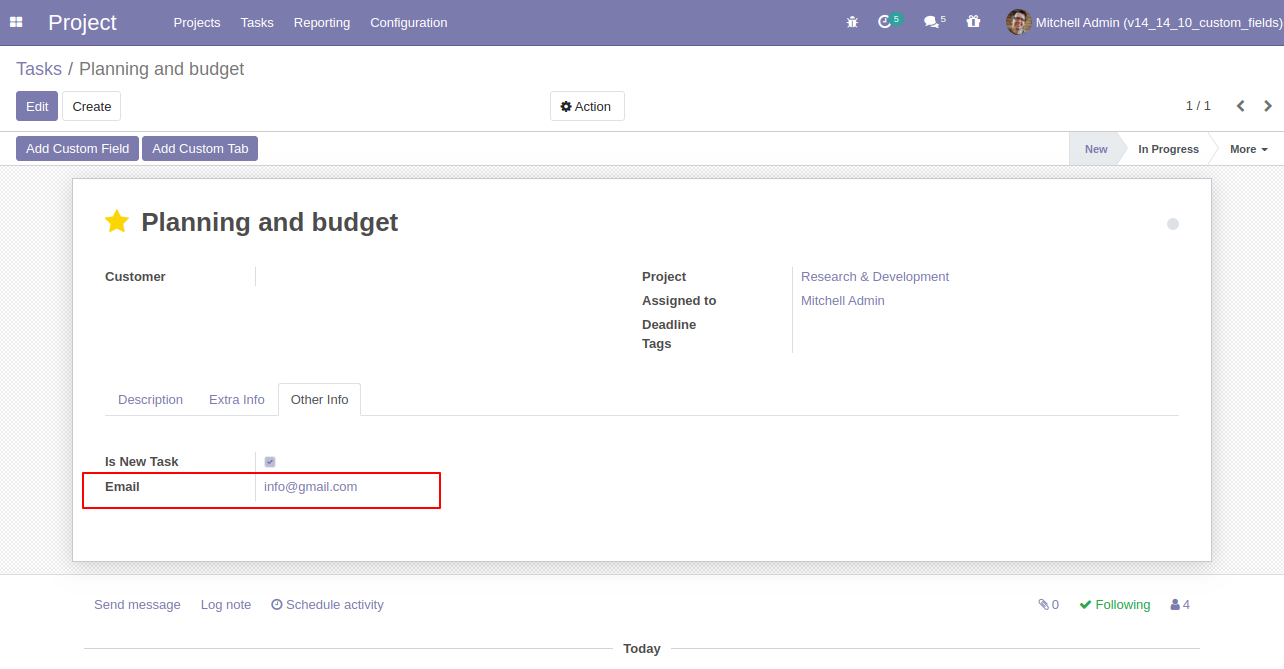
Email field added.
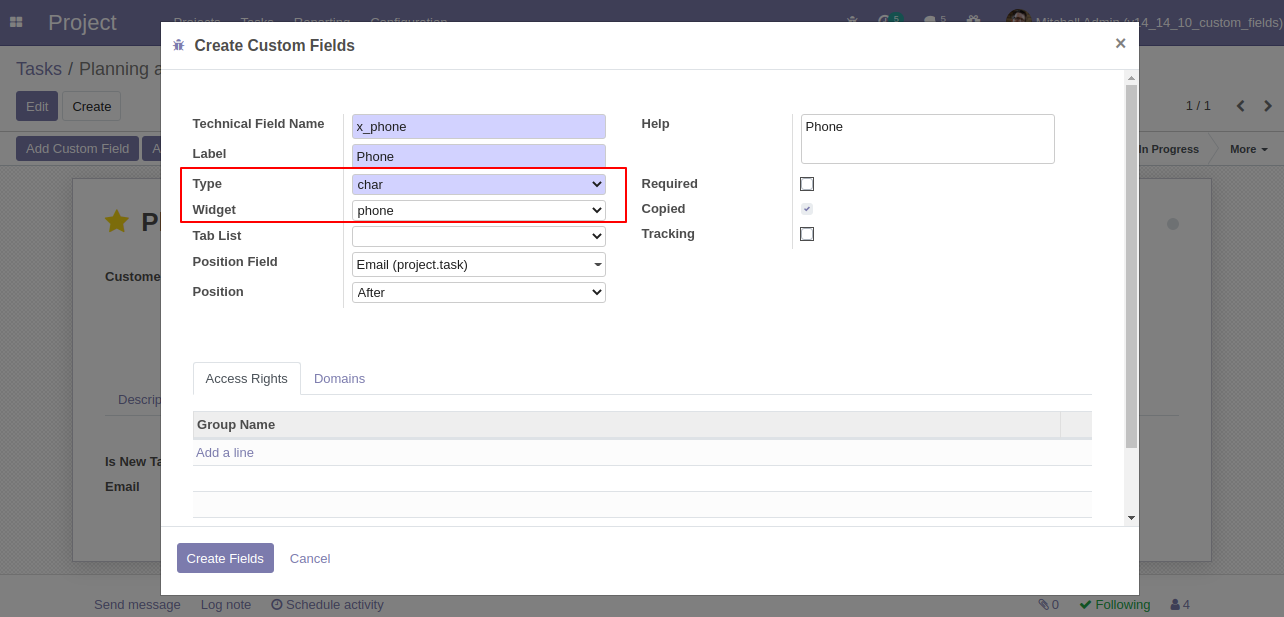
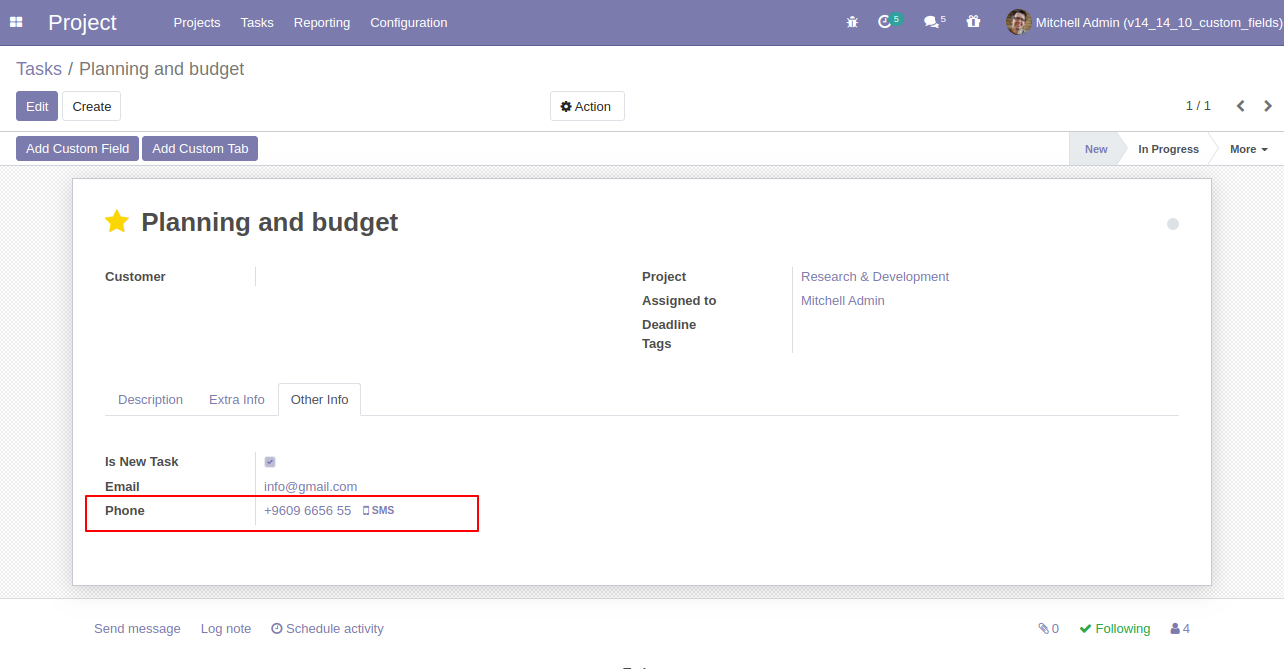
Char field with widget "Phone".
Phone field added.
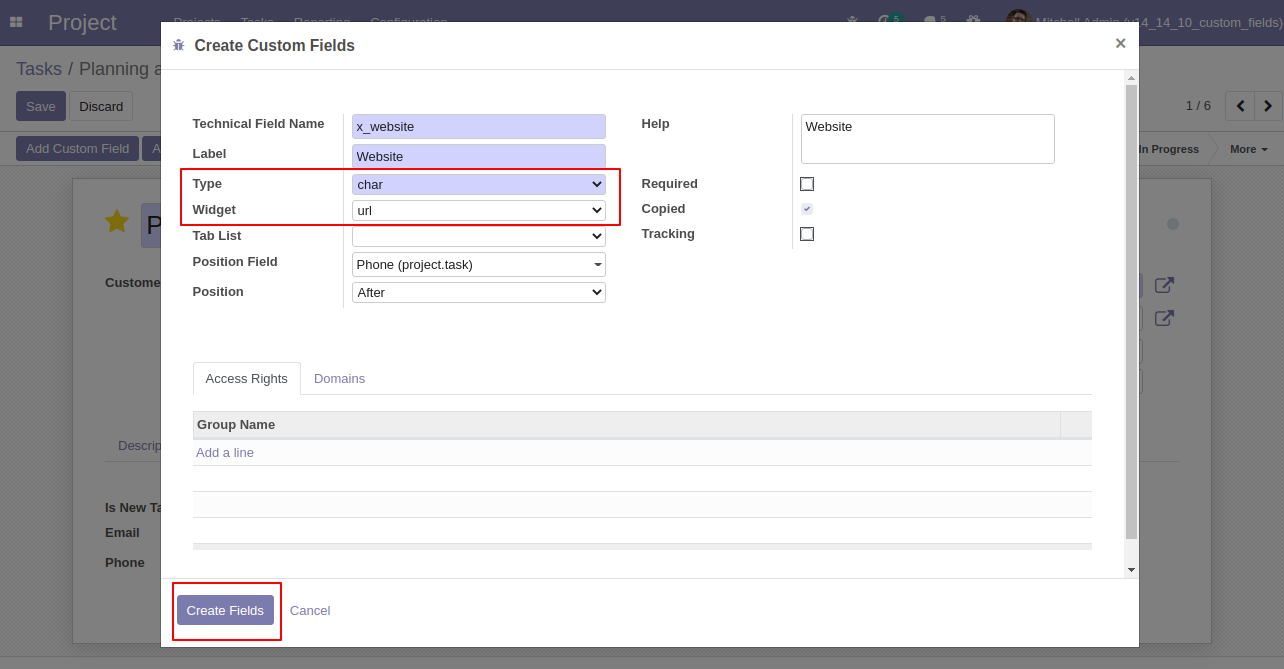
Char field with widget "URL".
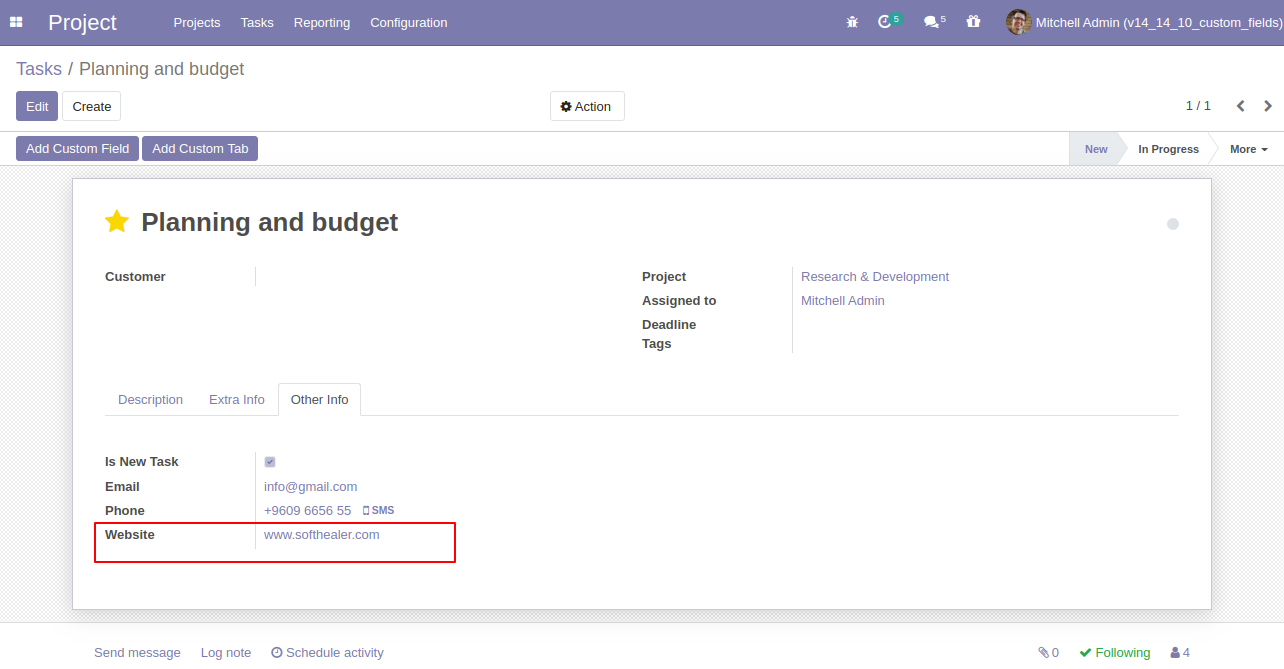
User must Enter Website address, on click redirect to linked URL.
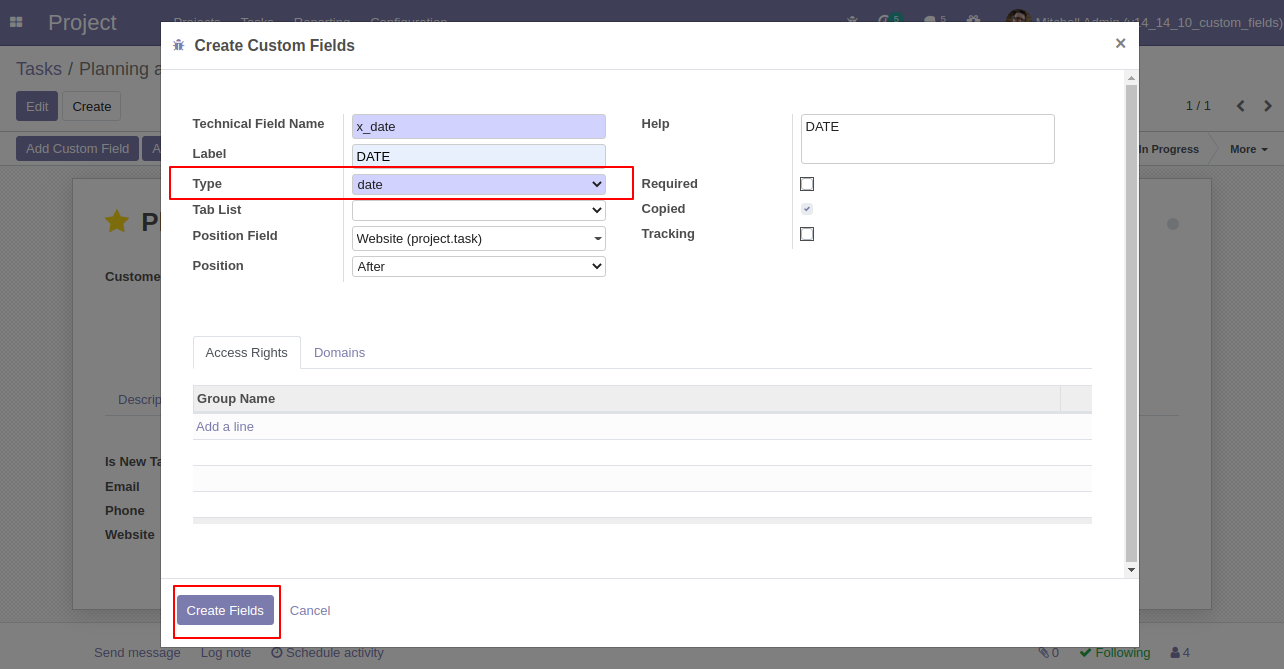
Date field set to copied "True".
Date field added in form view.
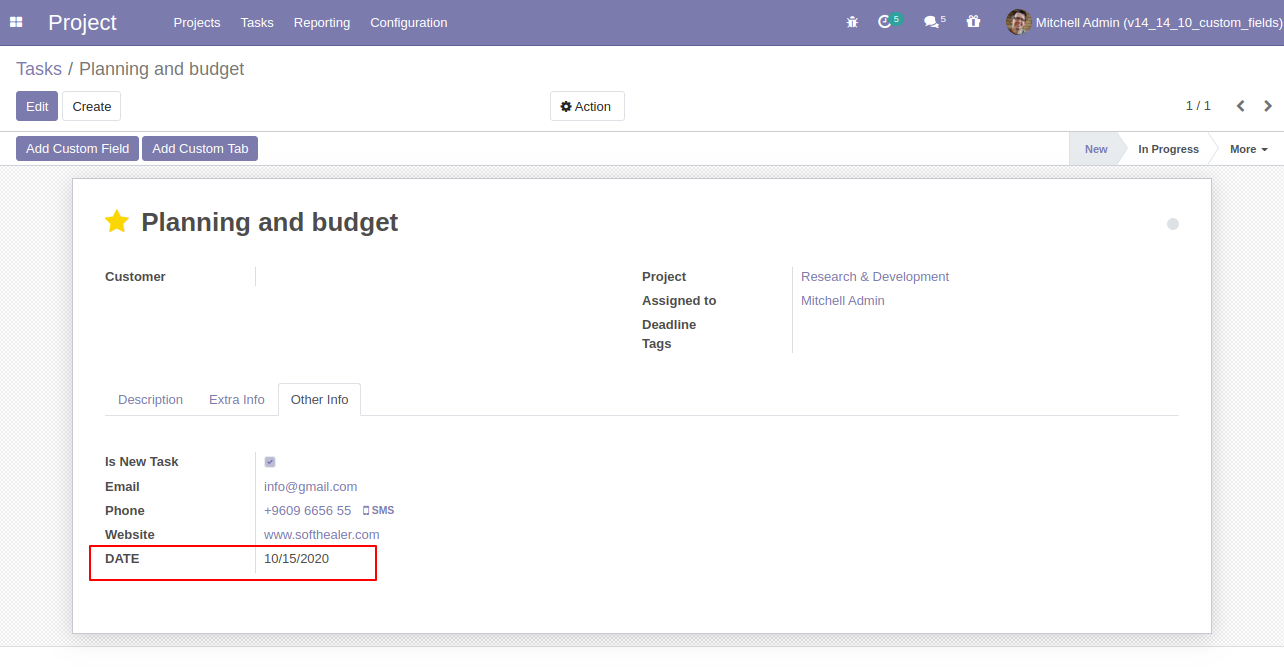
Datetime field set to copied "True".
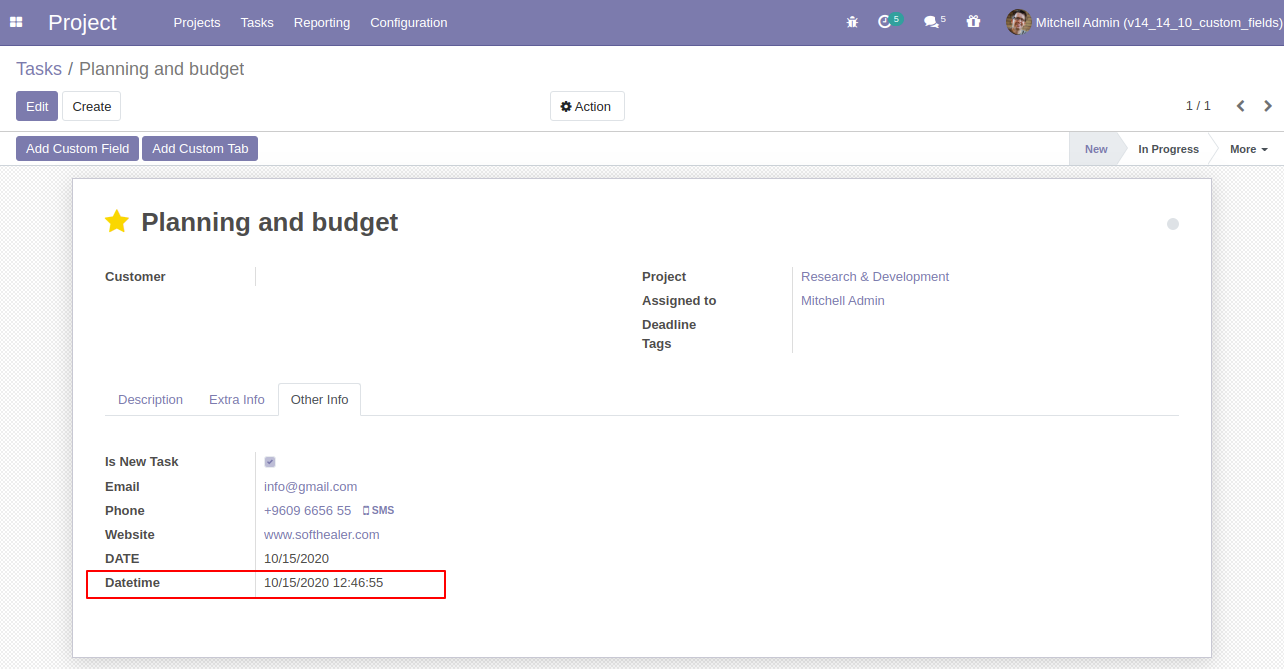
Datetime field added.
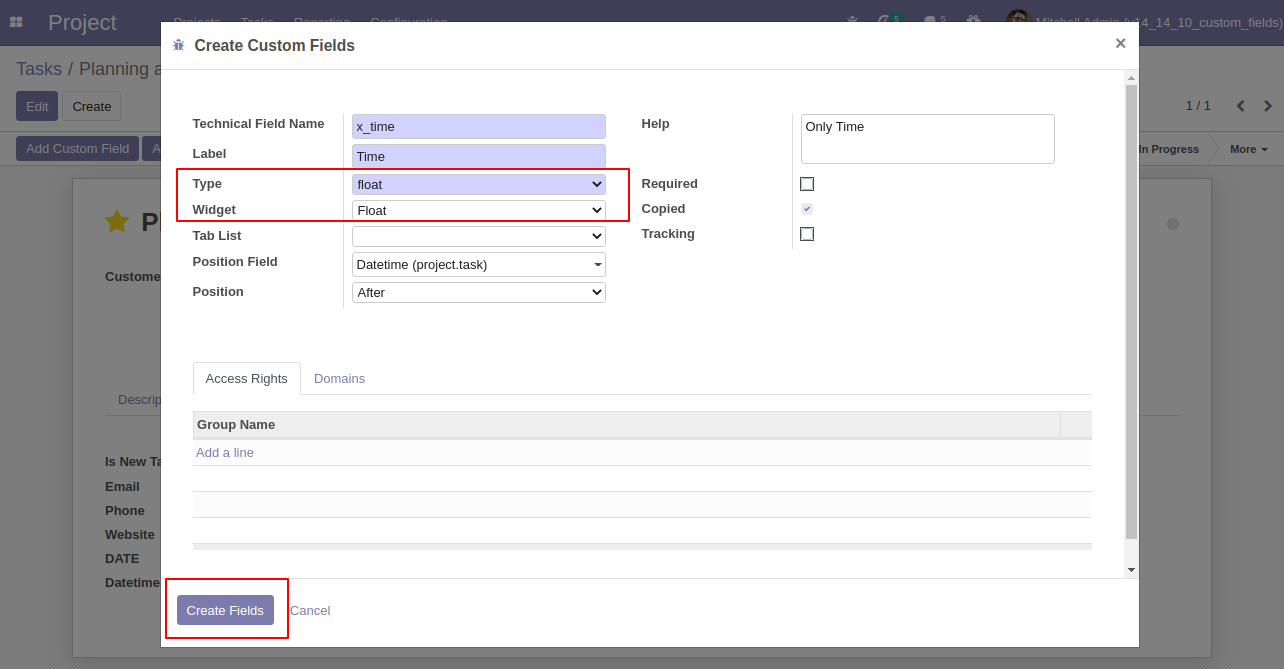
Float: Float time widget added to track time (hours: minutes).
Float time widget added.
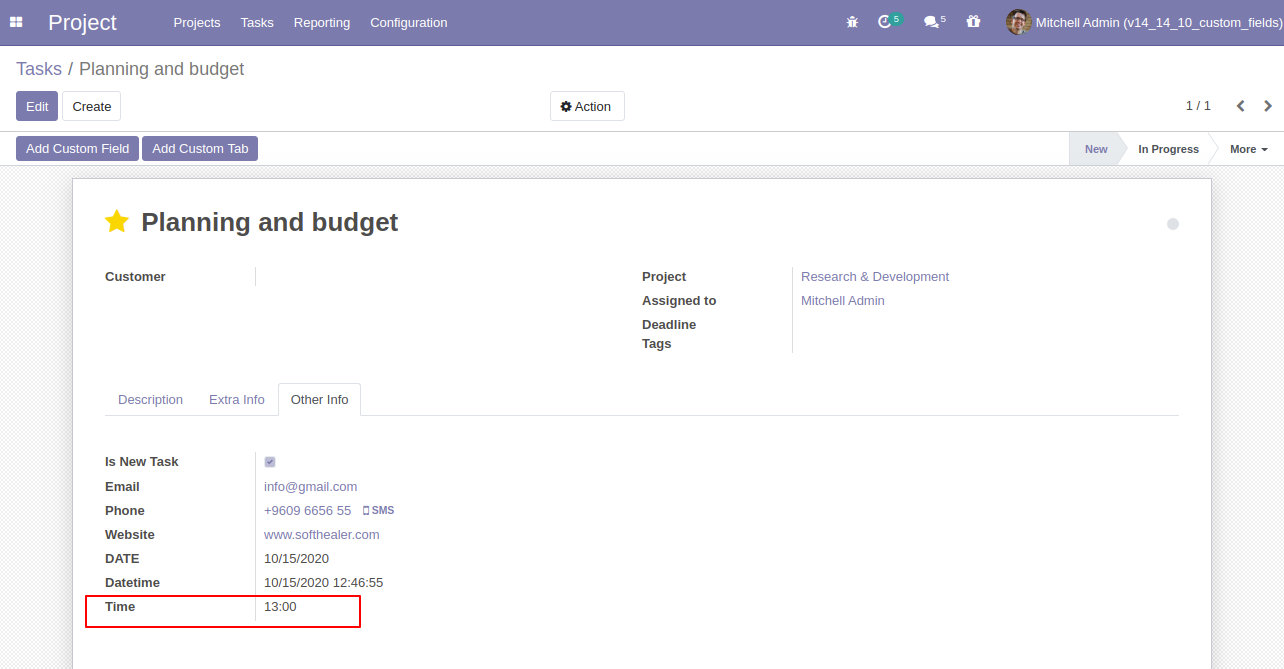
Html type added which will be useful to get an HTML interface.
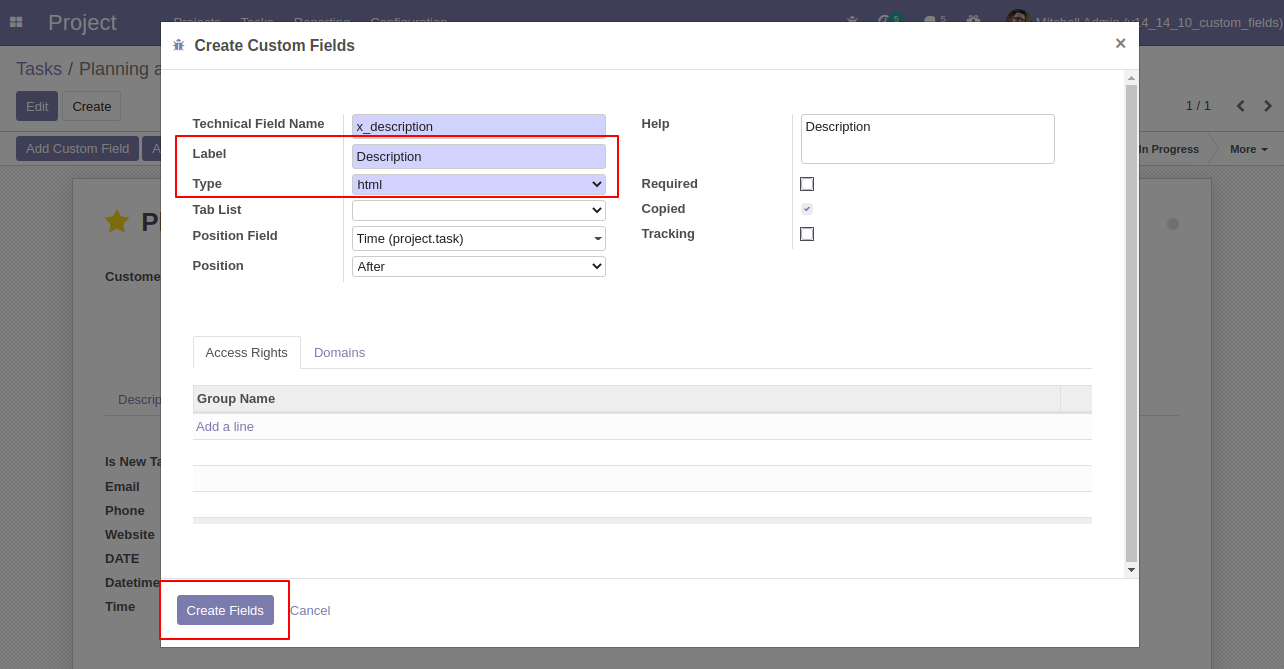
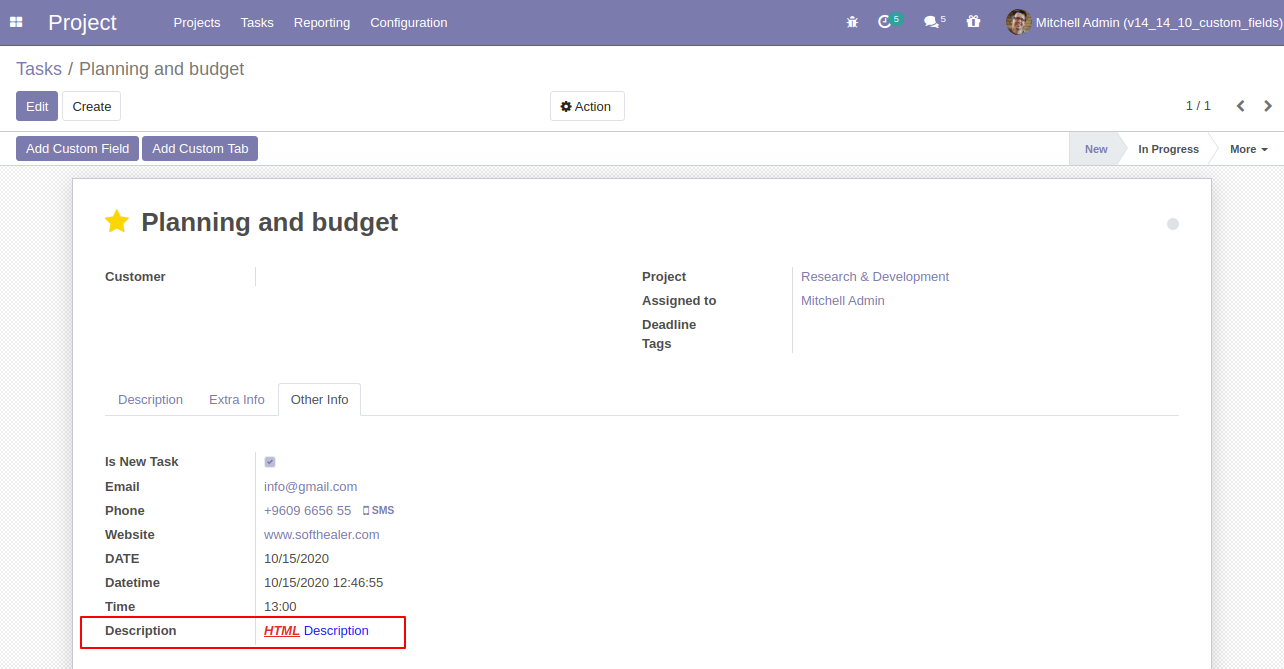
Html feature added.
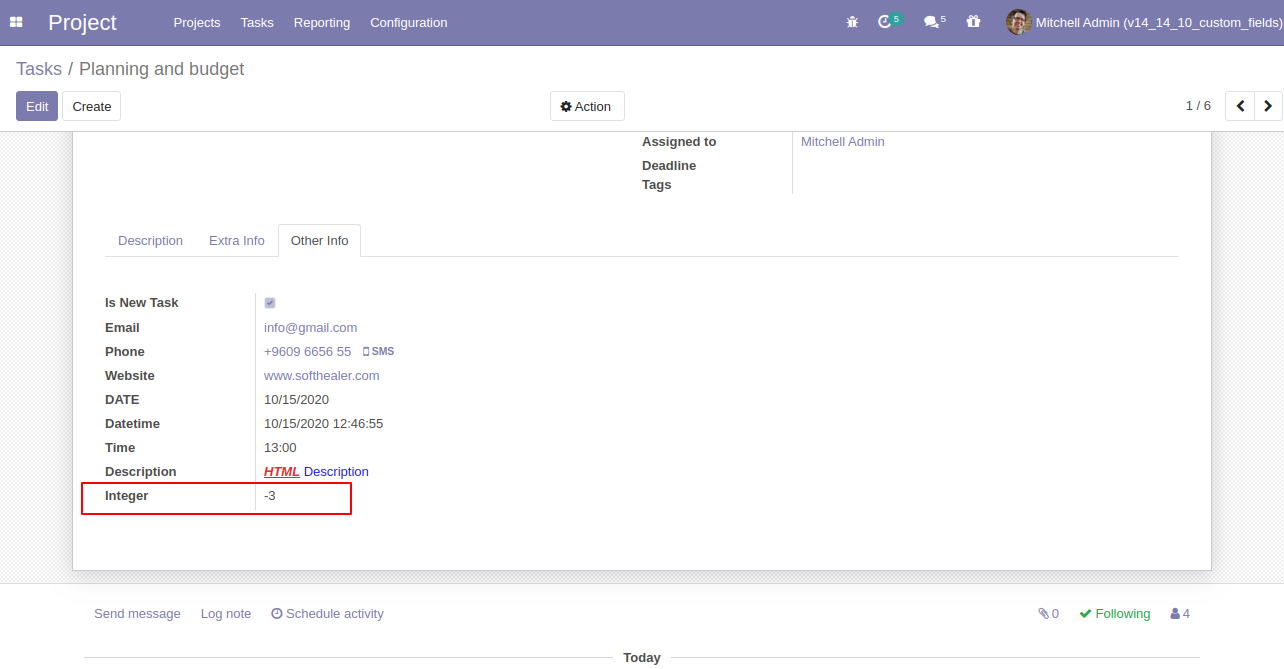
Integer type added.
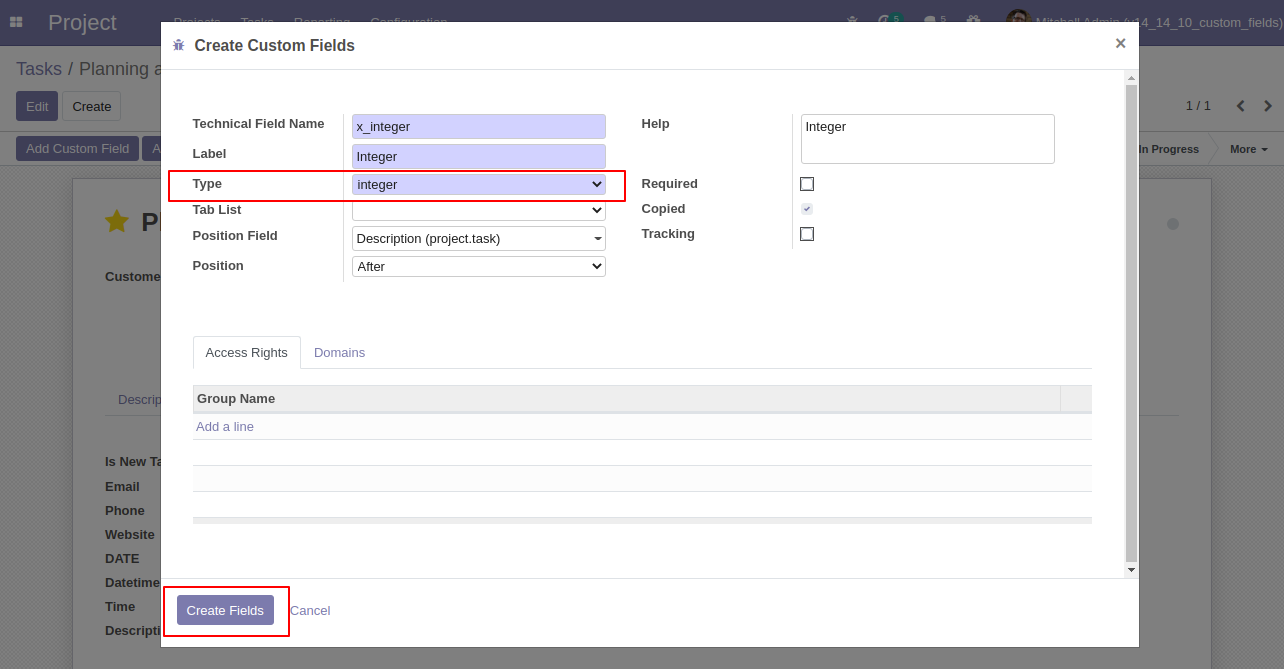
Integer value added.
Many to many fields with model and widget and access rights set to the given group.
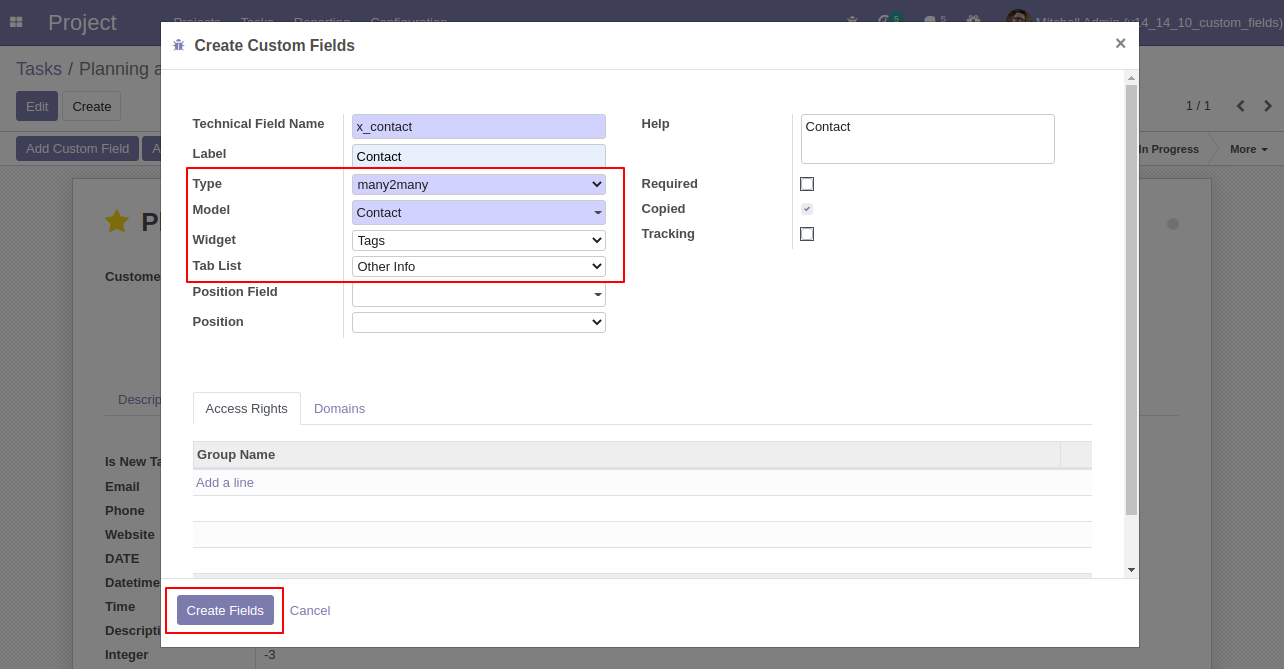
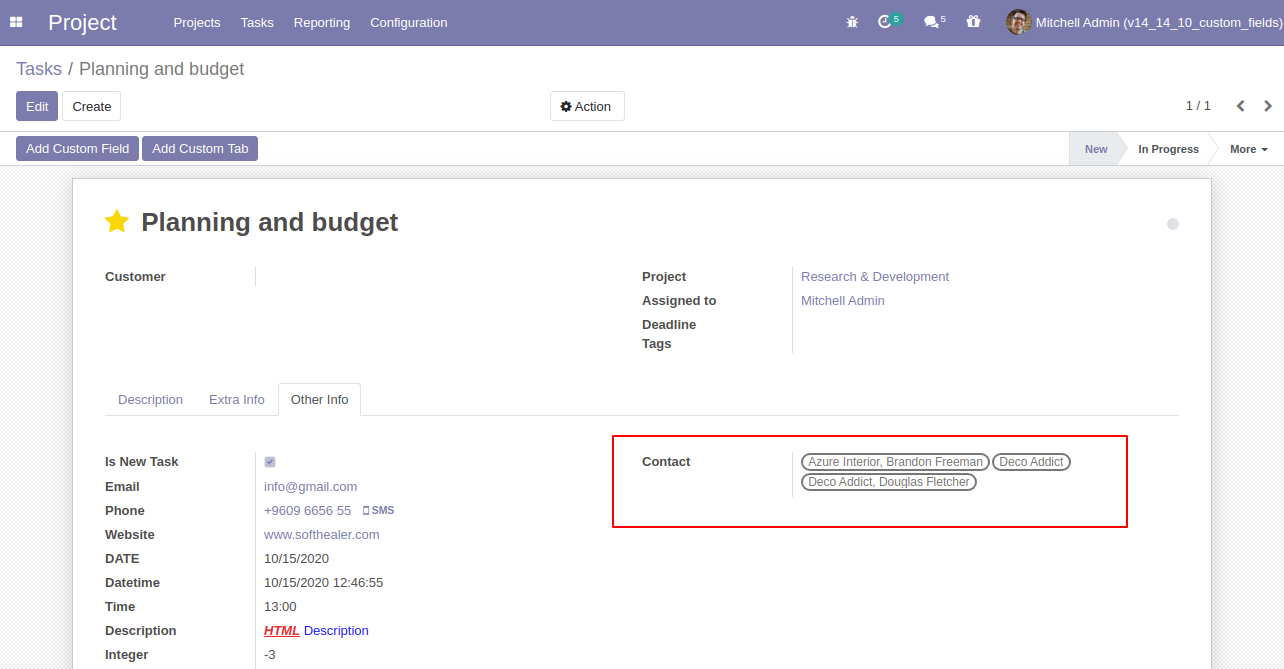
Many to many: This feature added for many to many fields. this will help you to filter records of the selected model. let's say you have selected contacts model and you want to filter only customers. so you can easily do using this feature.
Checkboxes: This feature added to select multiple values from the model. in this, you will see all options with a tickbox. you can tick multiple items.
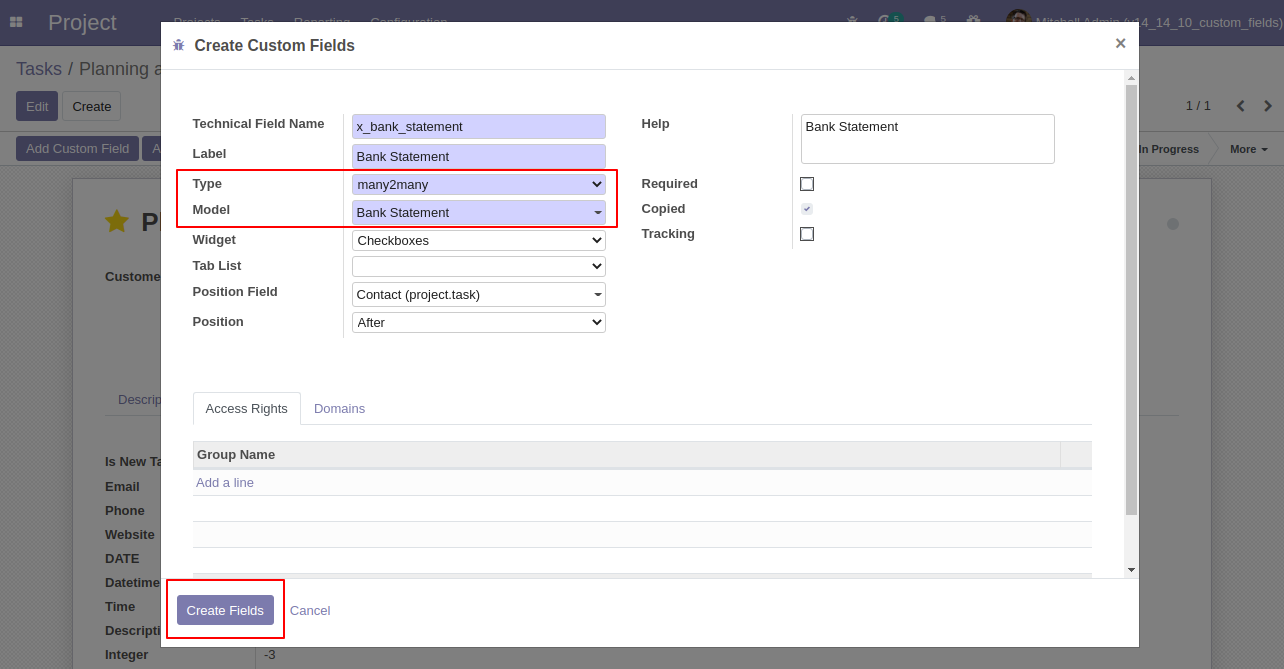
Many to many of Checkbox's outputs looks like below.
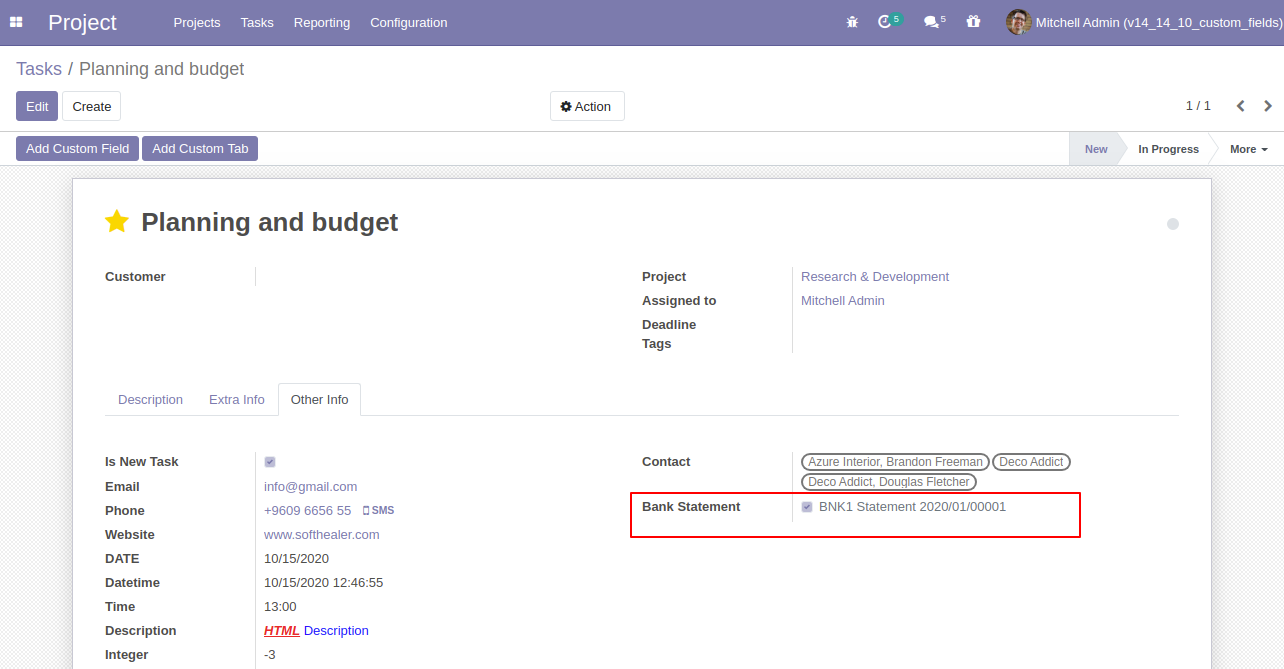
Many to many: Binary widget added.
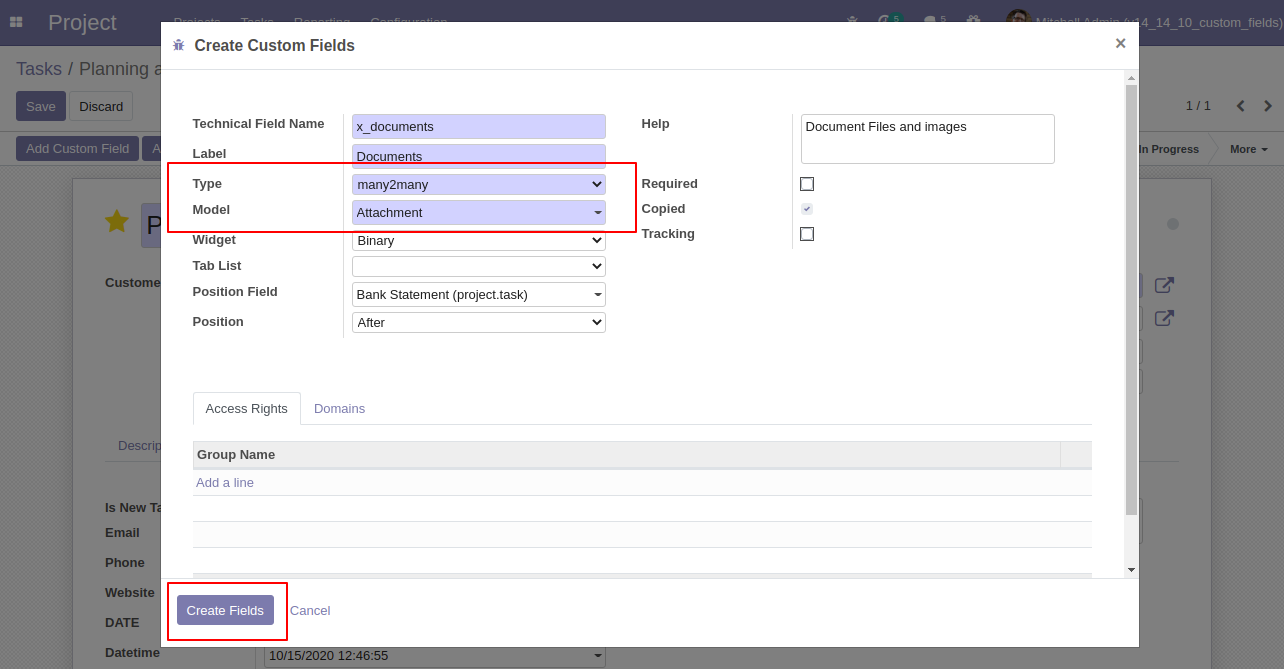
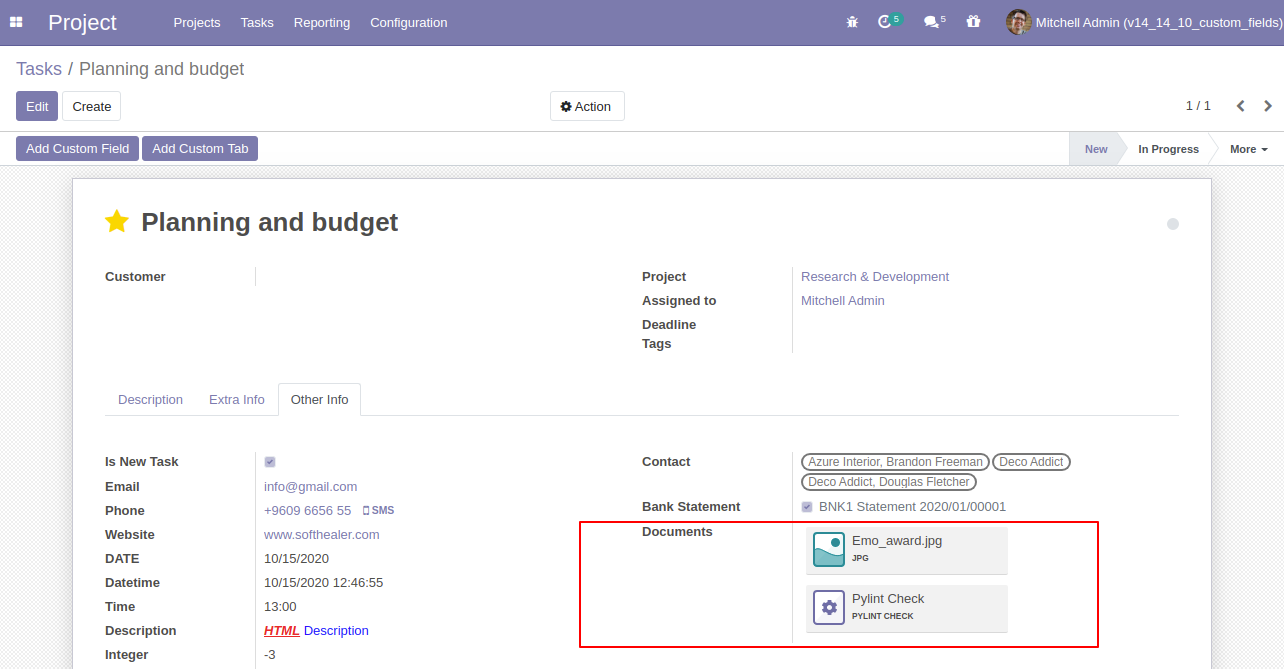
Binary widget added (Binary widget useful to give more than 1 one attachments).
Many to one: Selection widget added.
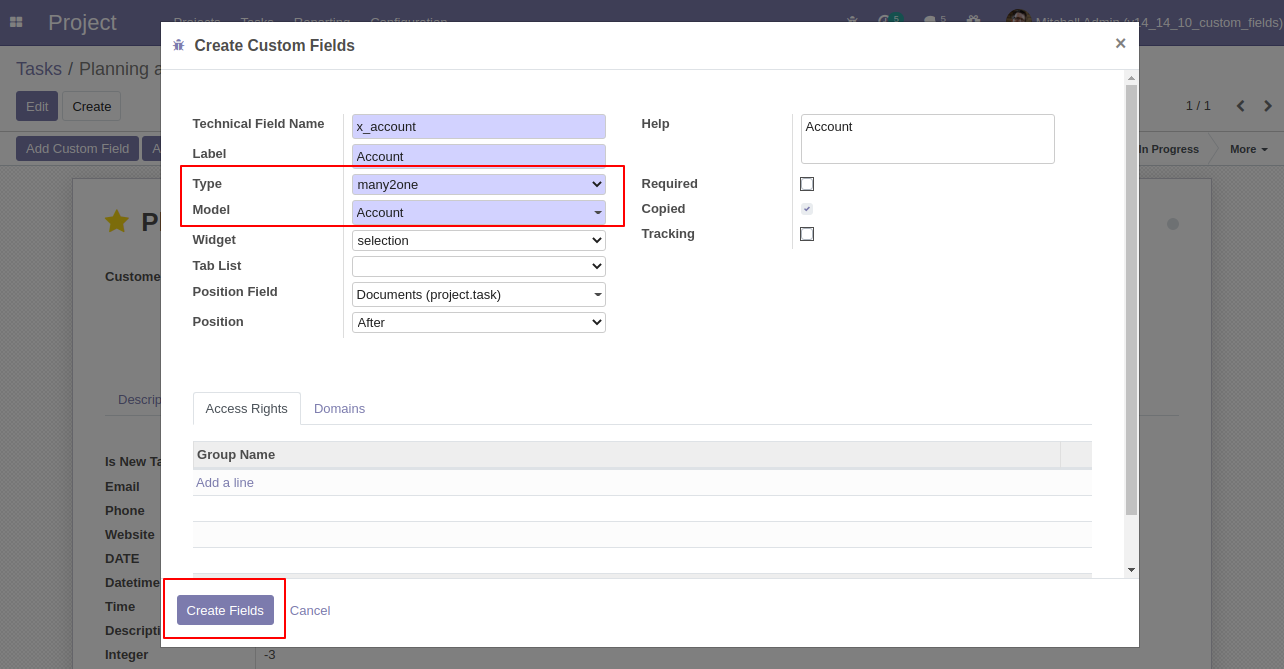
Selection widget added.
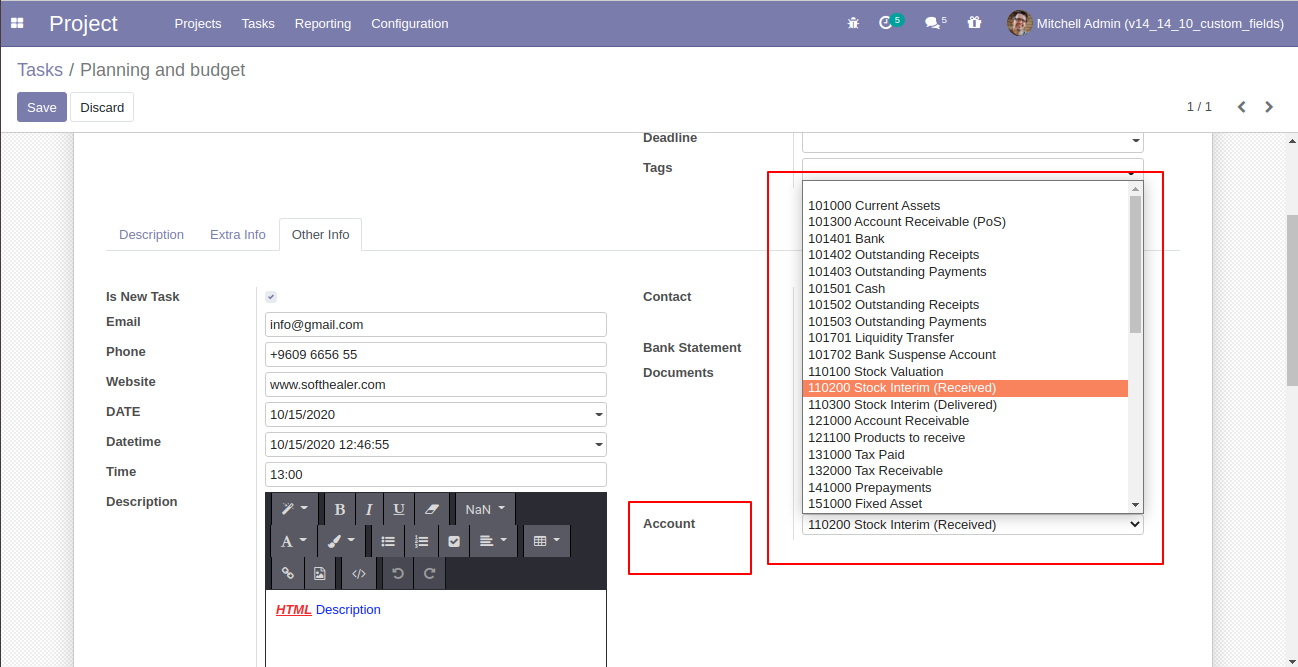
Set type as selection and enter options as per requirement, widget set to the radio.
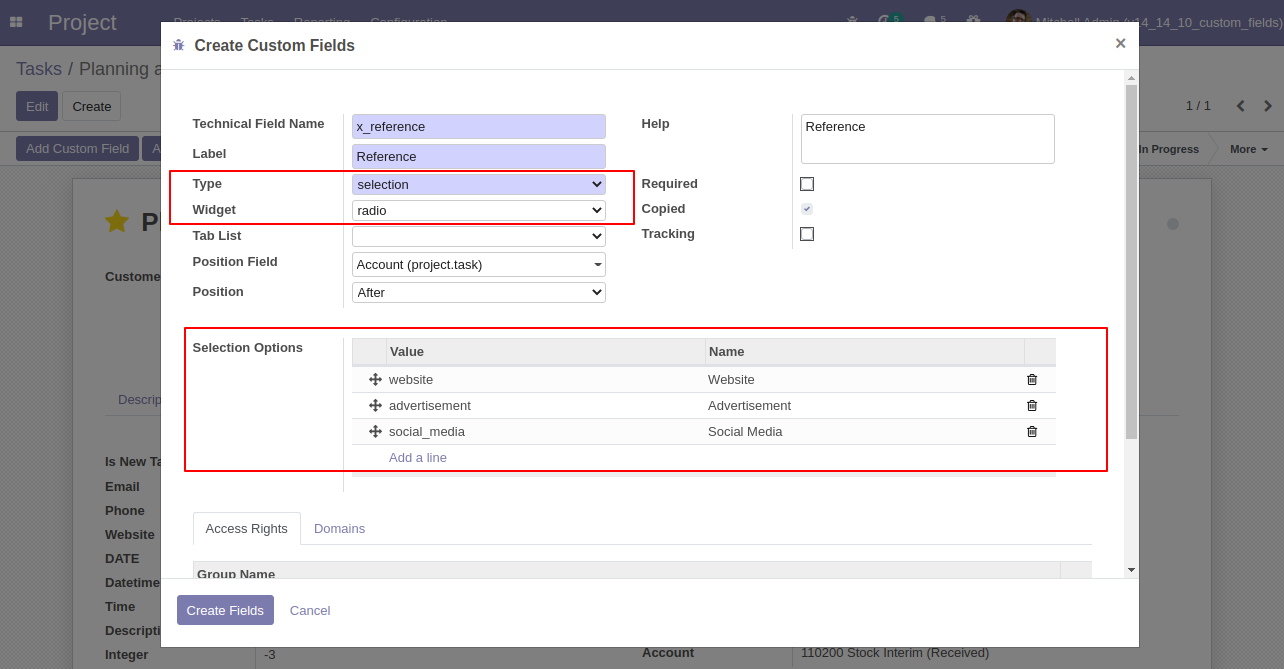
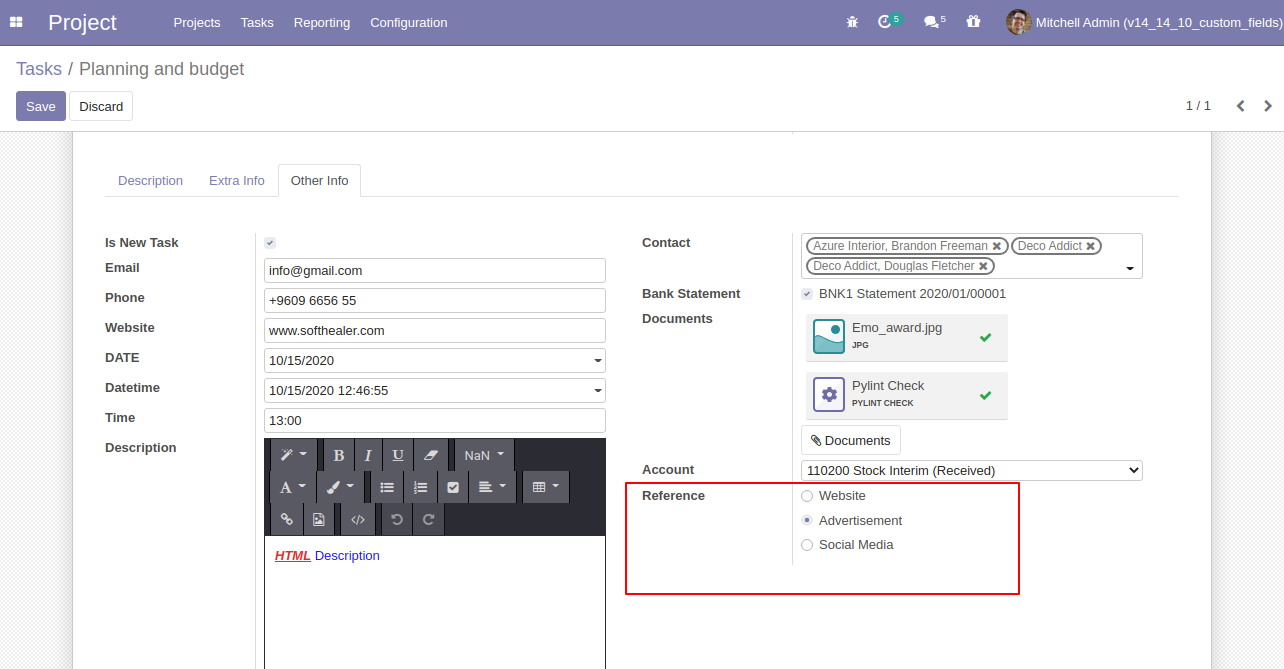
The selection field with "radio" widget added to form.
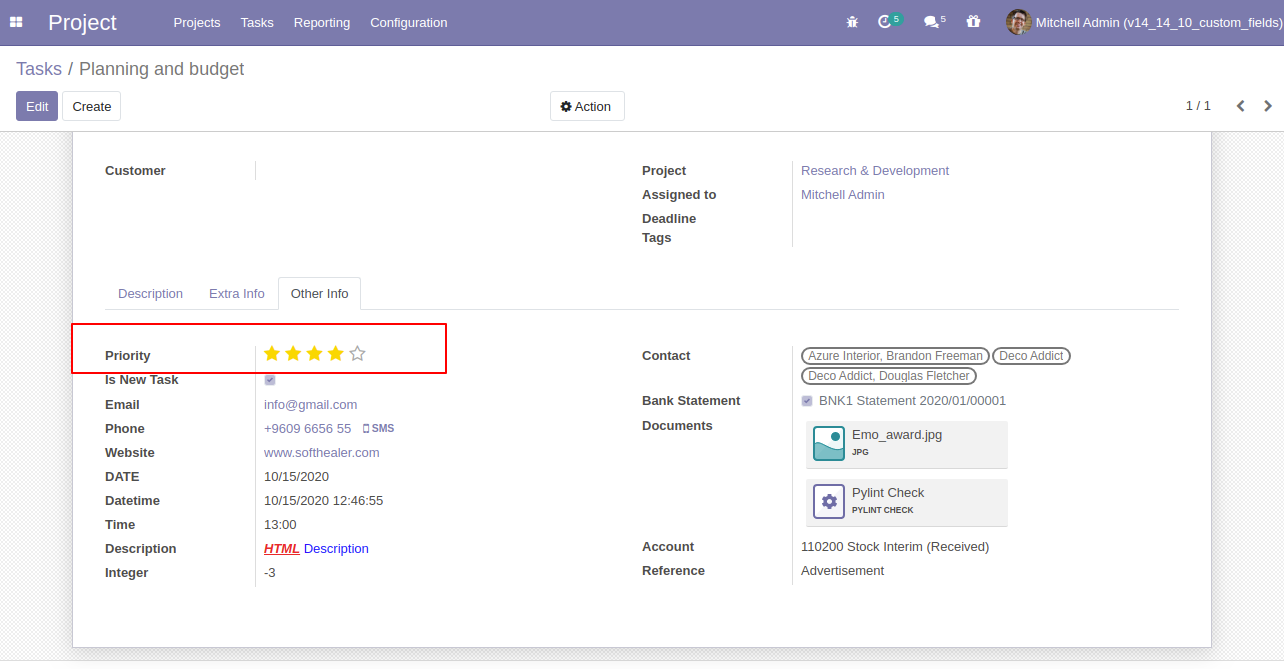
Priority: This feature added to add a priority view.
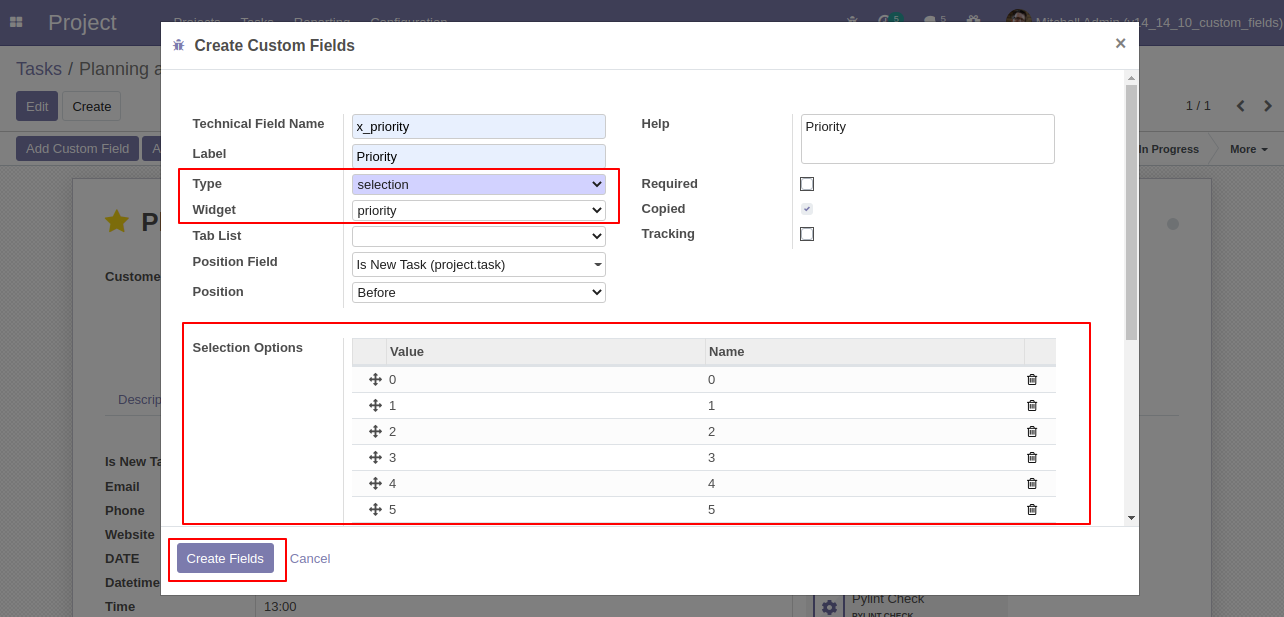
The selection field with "priority" widget added to form.
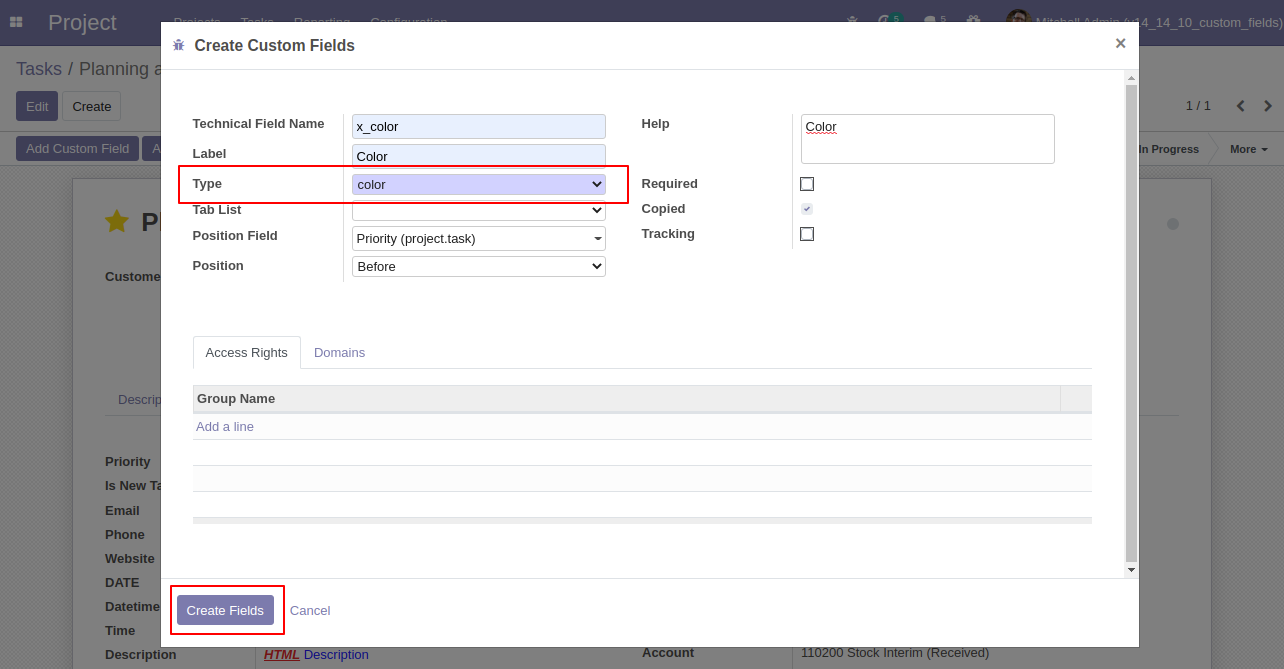
Color field added.
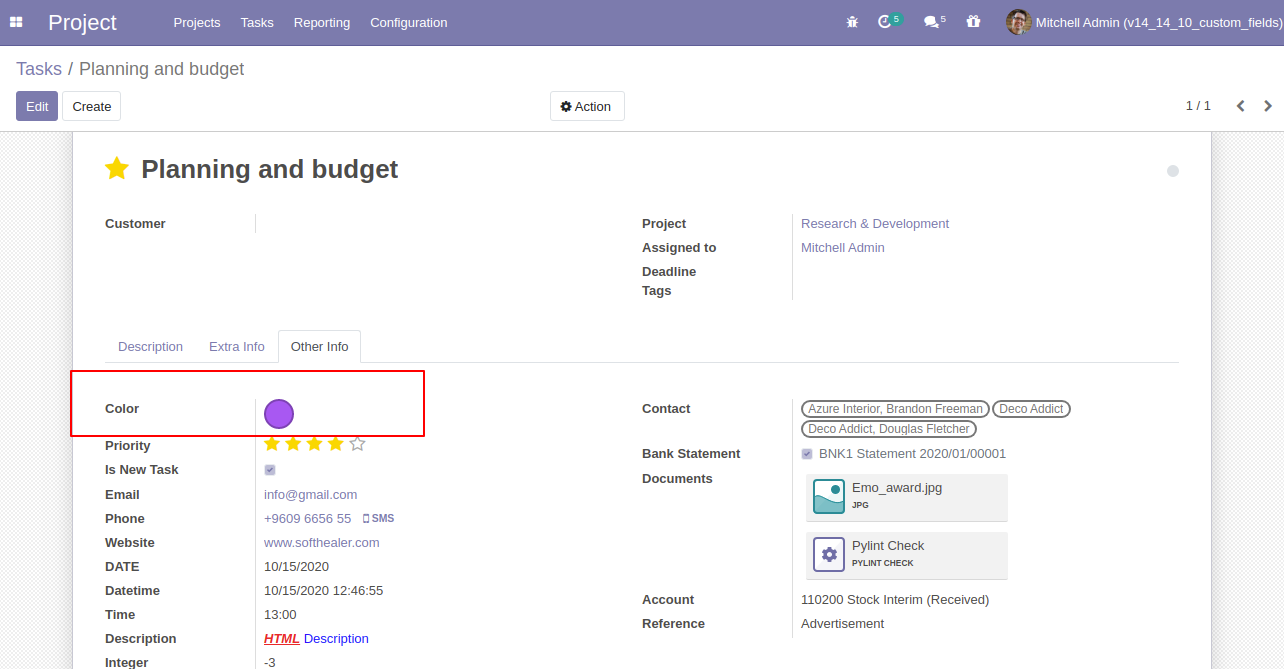
Color field added for a selection of different colors.
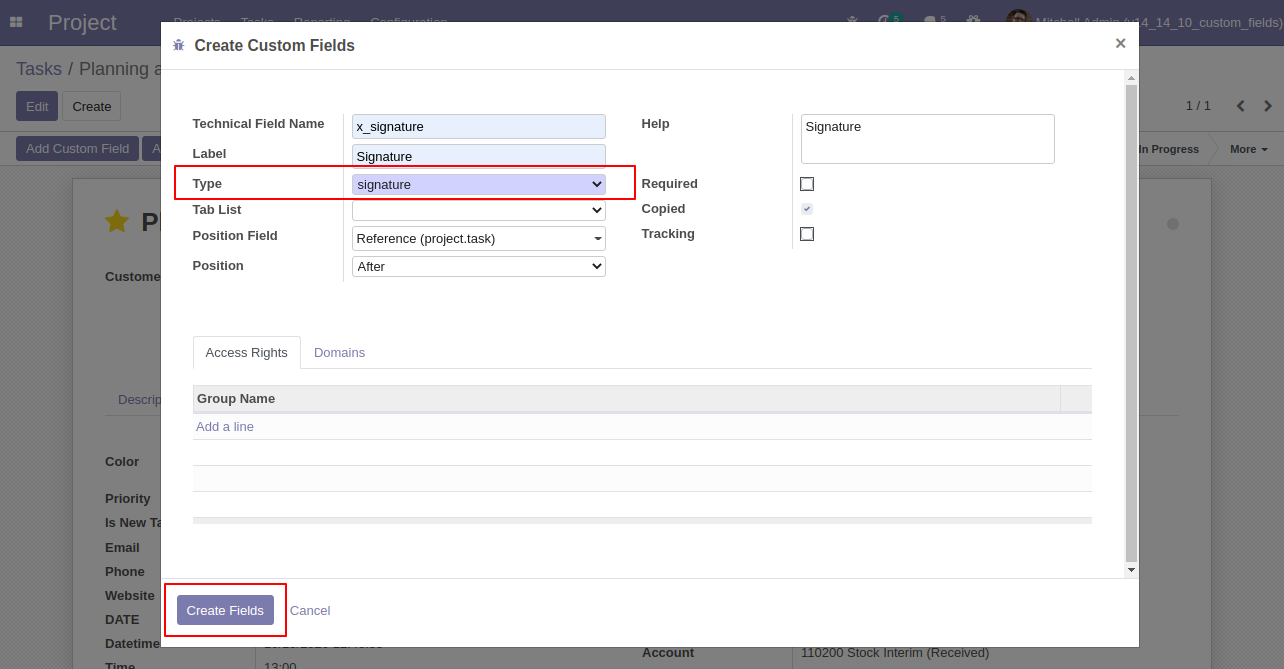
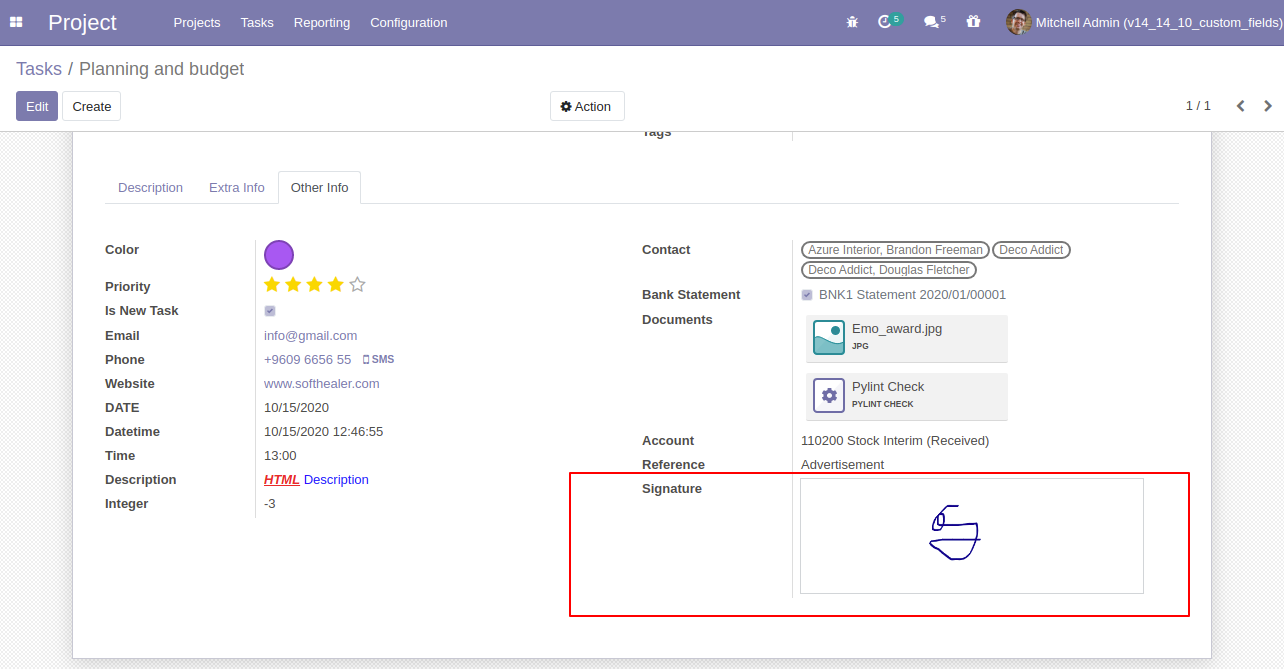
Signature field with access rights.
Signature field added.
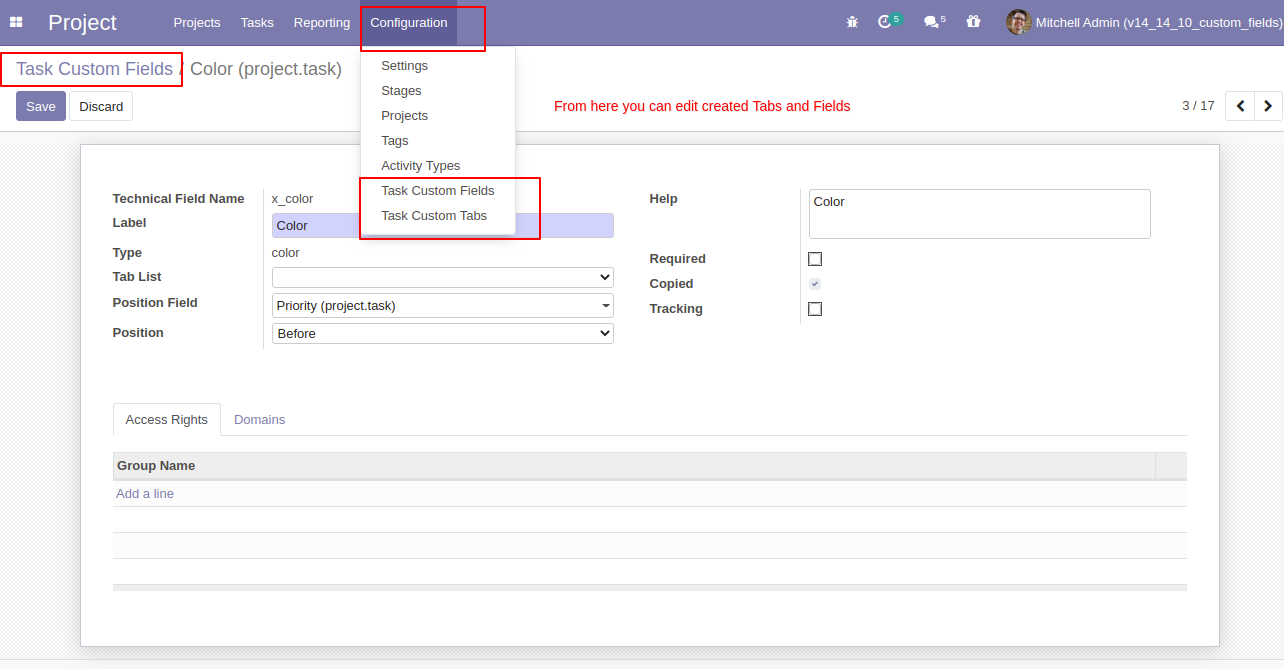
'Task Custom Field' & 'Task Custom Tab' menu in the configuration. where you can see the list of the custom tab & custom fields.
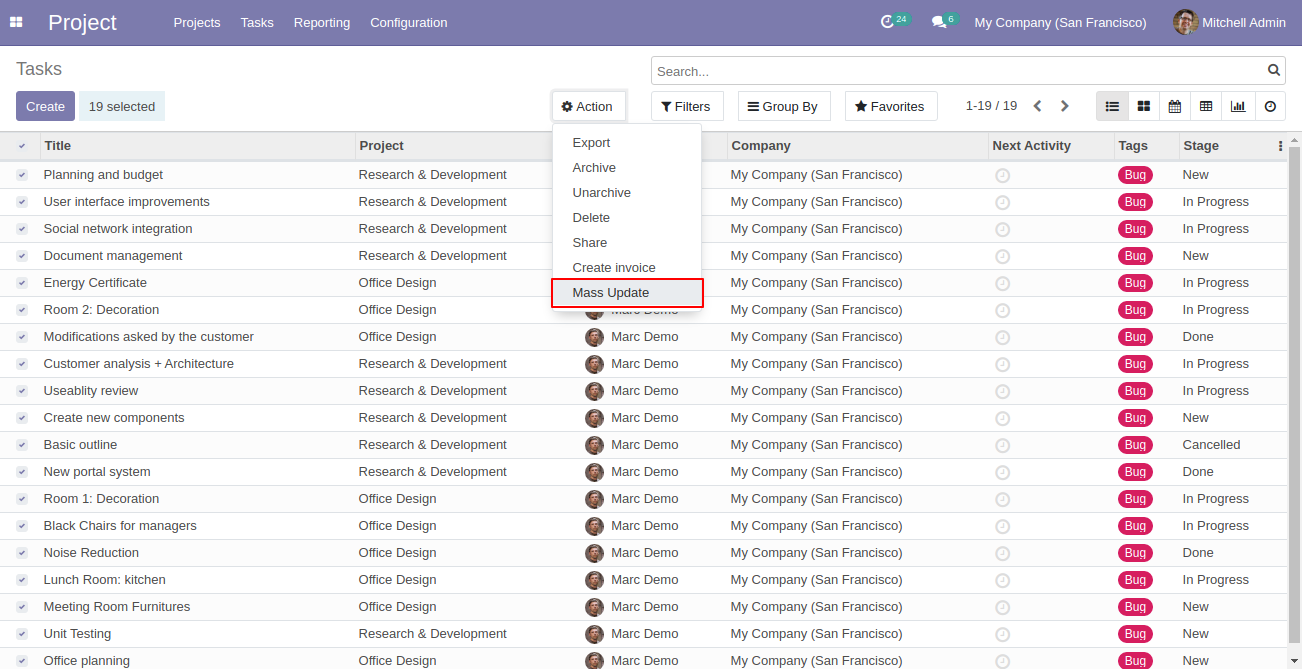
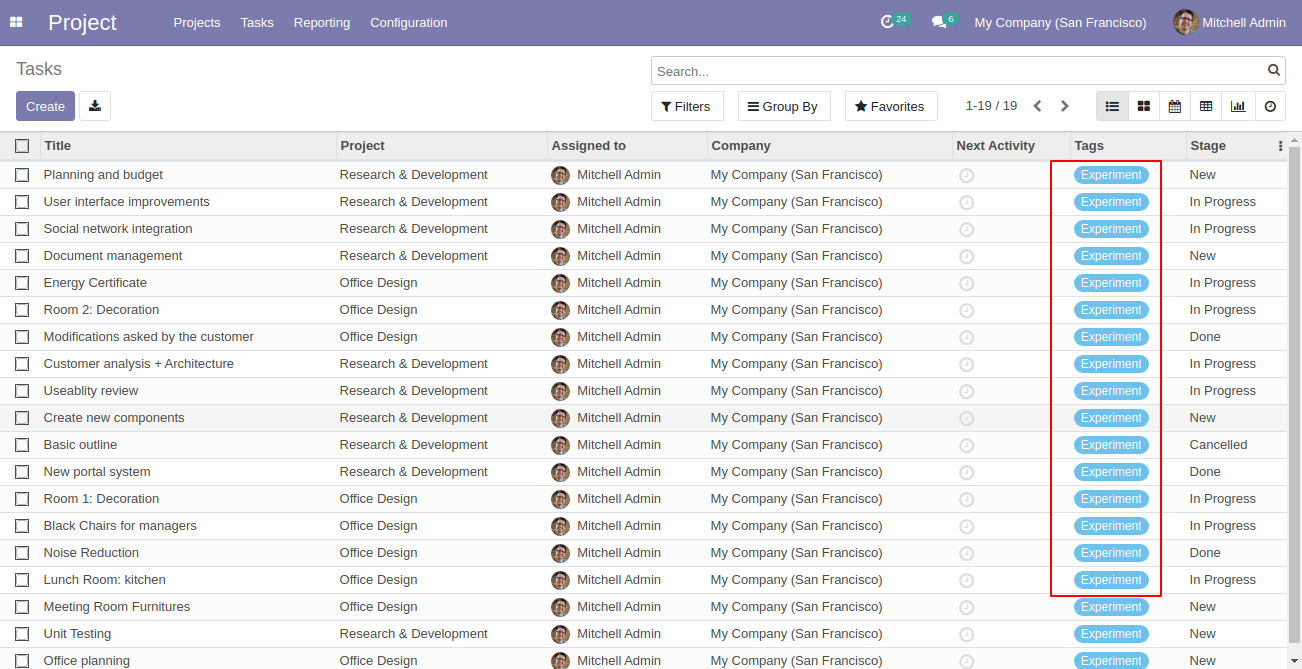
Select the tasks from the list view and then from the "Action" menu select "Mass Update".
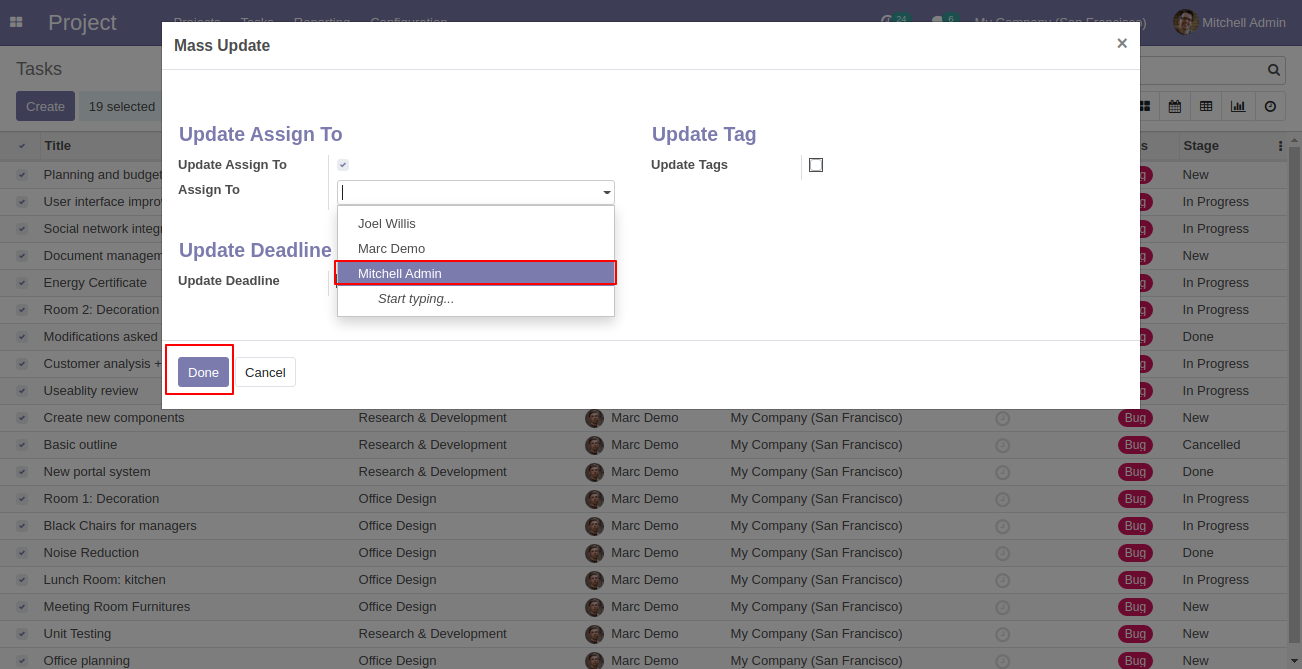
After that one wizard opens, you can update multiple task's from here, here we update assigned to person of the mass tasks.
Mass tasks updated with the assigned person.
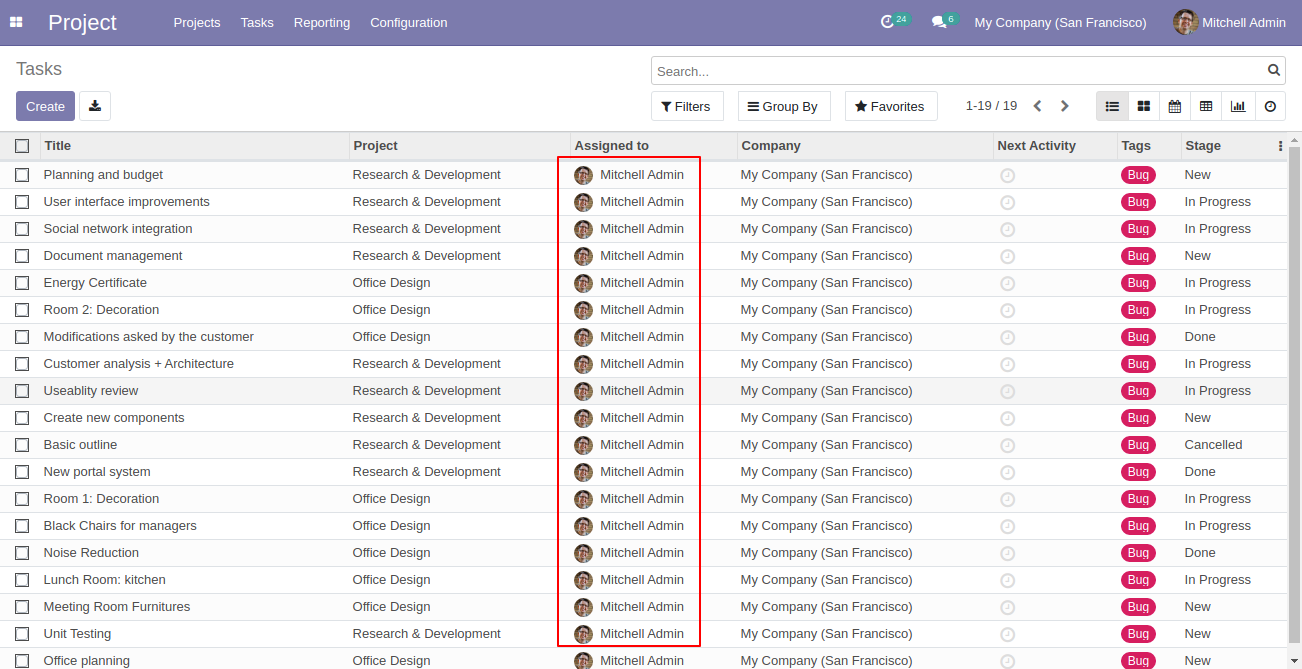
Now we update the tags of the multiple tasks. You can update tags by 2 methods,
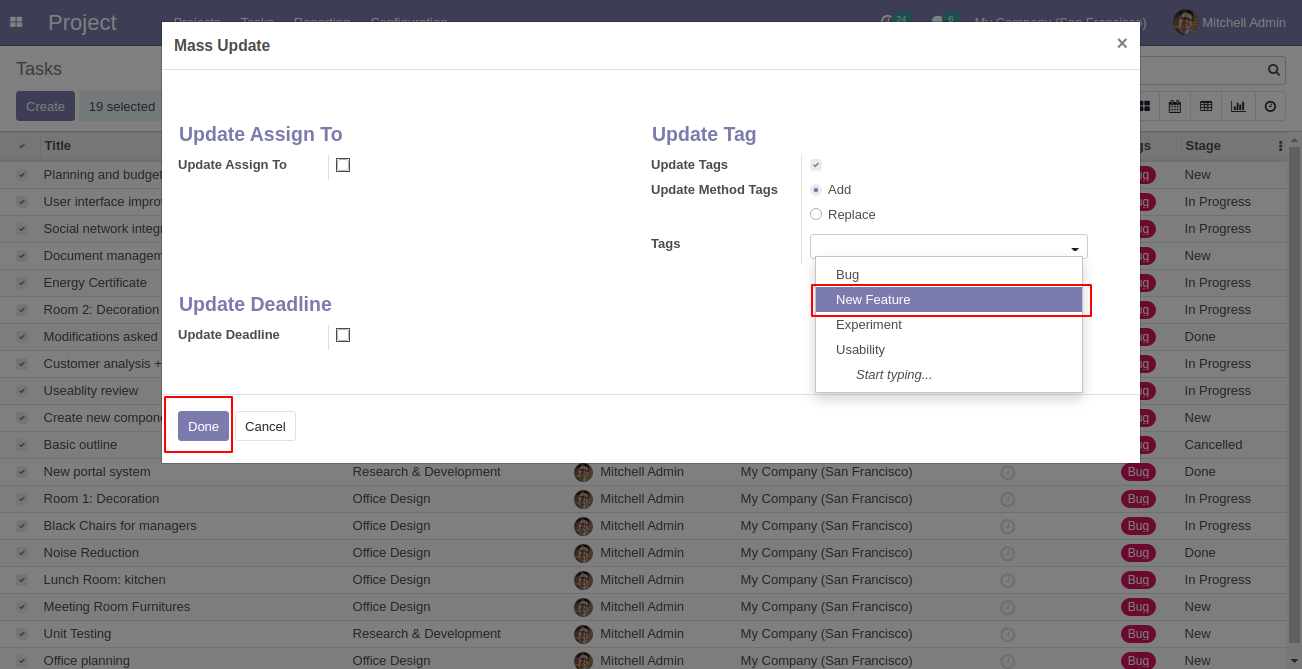
"Add"
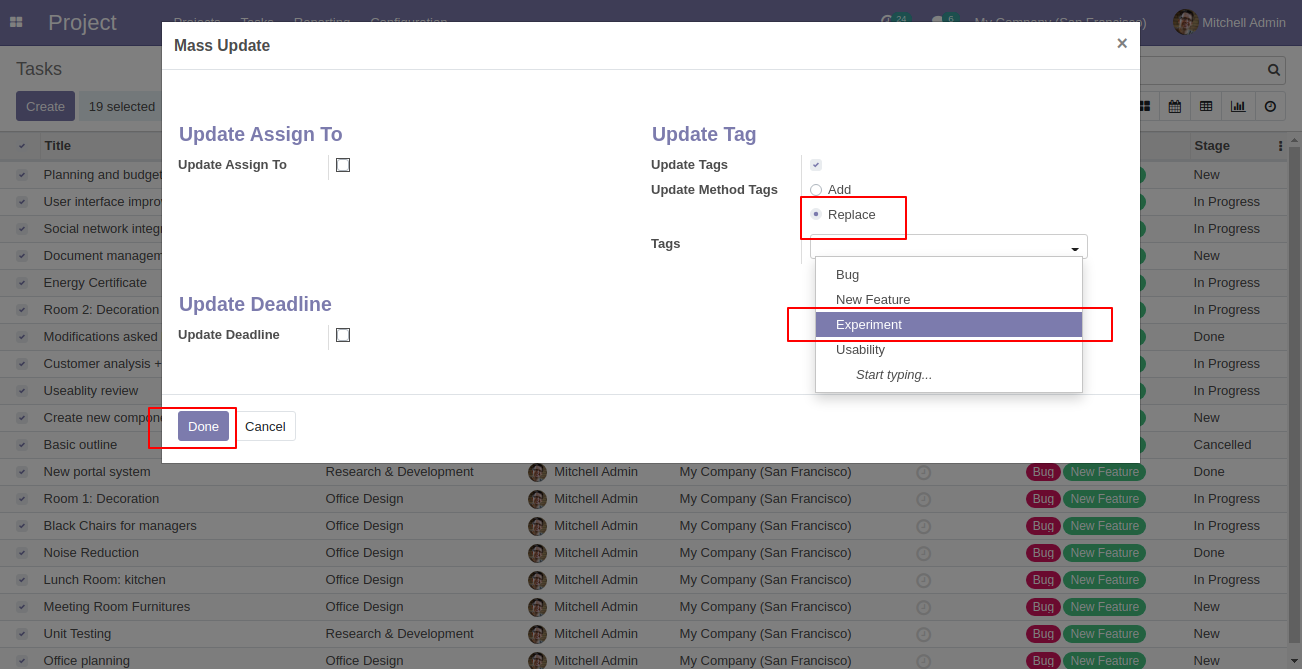
and "Replace".
Add: It adds new tags in old tags.
Replace: It replaces new tags with old tags,
so it removes old tags.
Here we update tasks tags by using the method "Add".
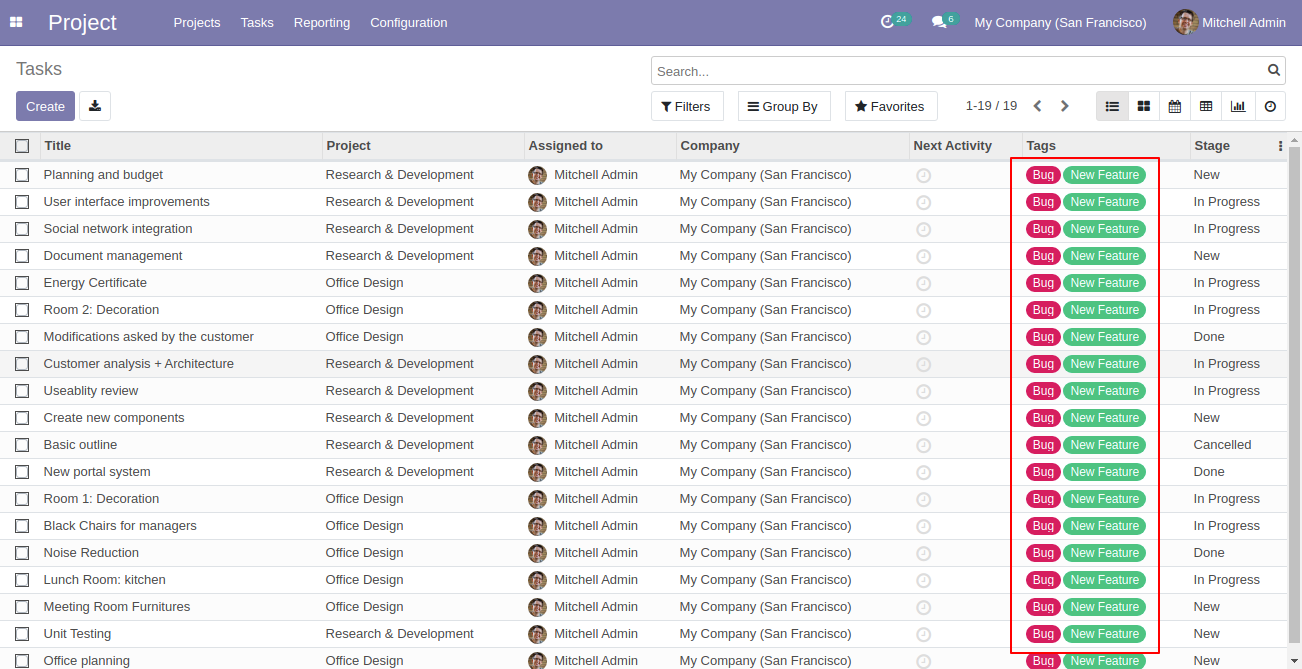
Mass tasks updated with the tags.
Now we update tasks tags by using the method "Replace".
Mass tasks updated with the tags.
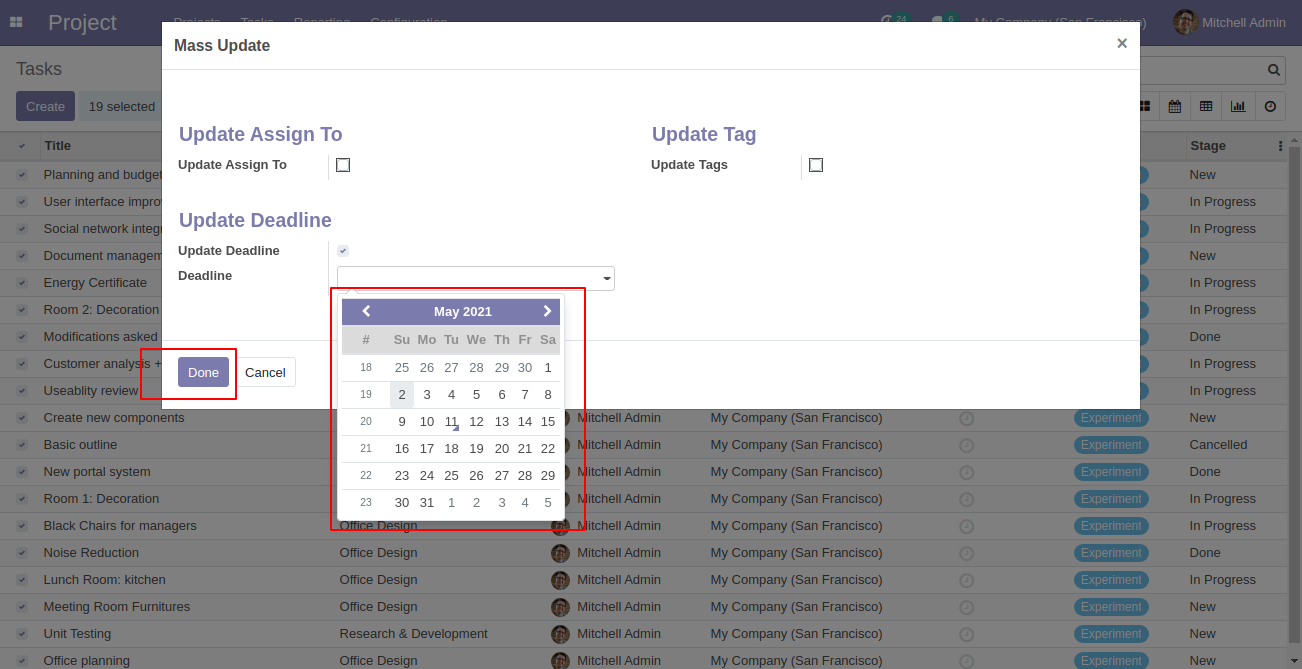
Now we update the deadline of the multiple tasks.
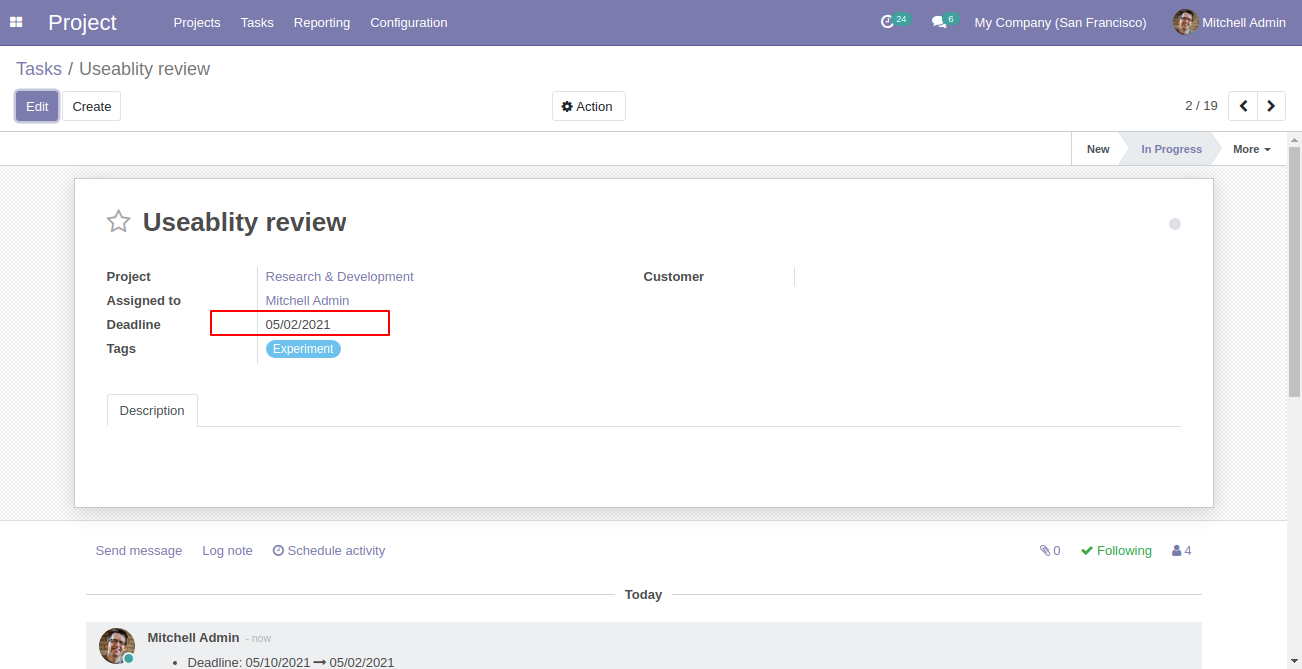
Mass tasks updated with the deadline.
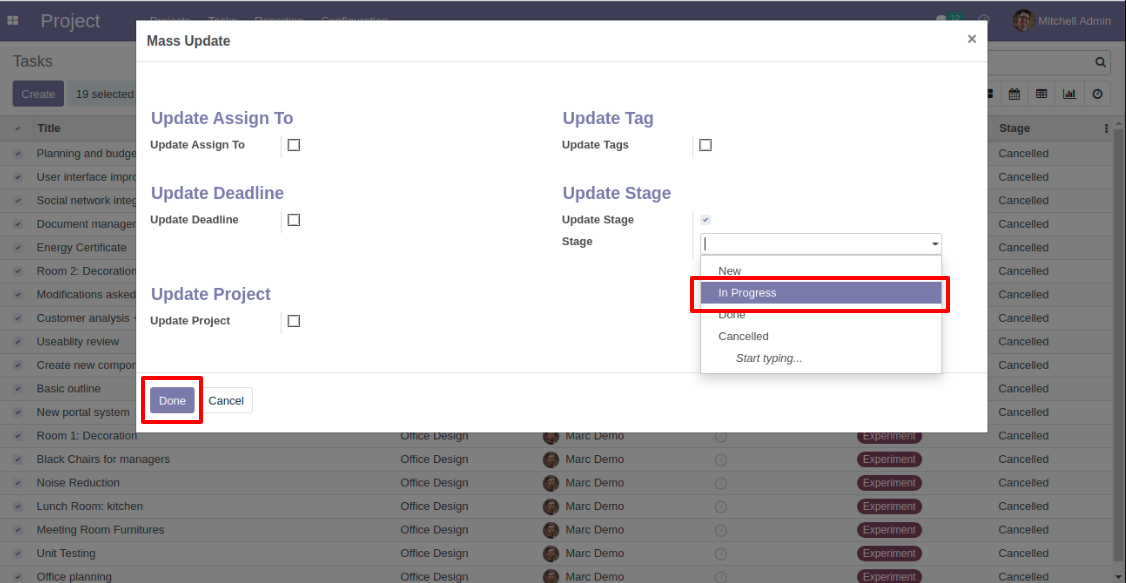
Select the tasks from the list view and then from the "Action" menu select "Mass Update" so it opens one wizard, here we update the stages of the mass tasks.
Mass tasks updated with the stages.
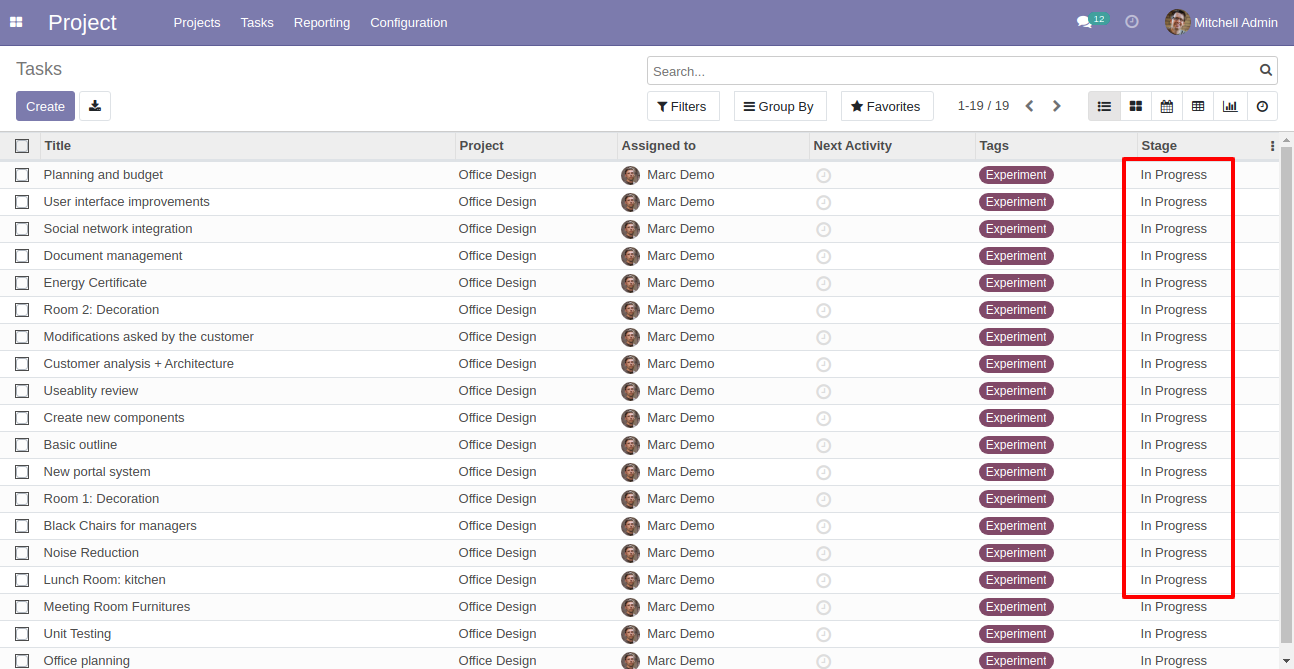
Select the tasks from the list view and then from the "Action" menu select "Mass Update" so it opens one wizard, here we update the projects of the mass tasks.
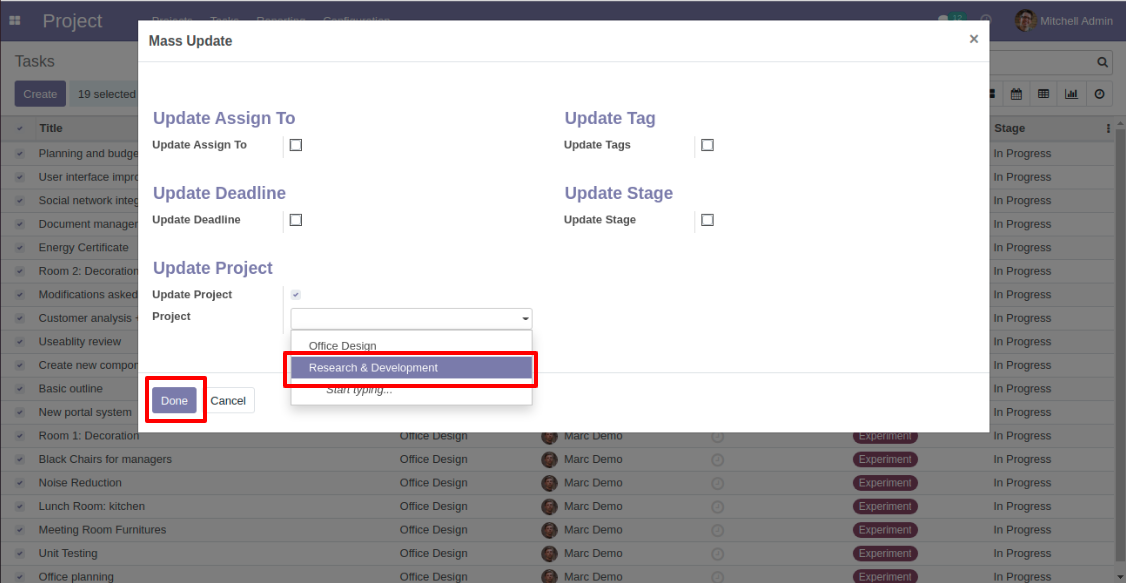
Mass tasks updated with the projects.
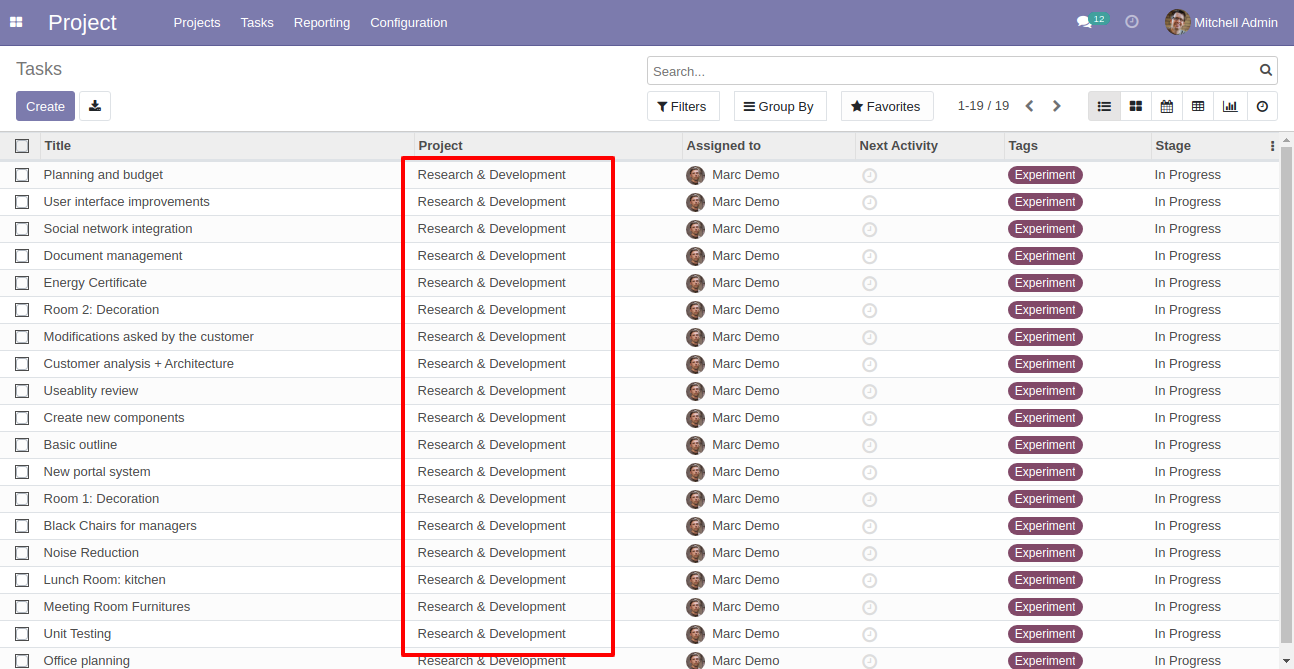
Enable "Task Send By Email" group.
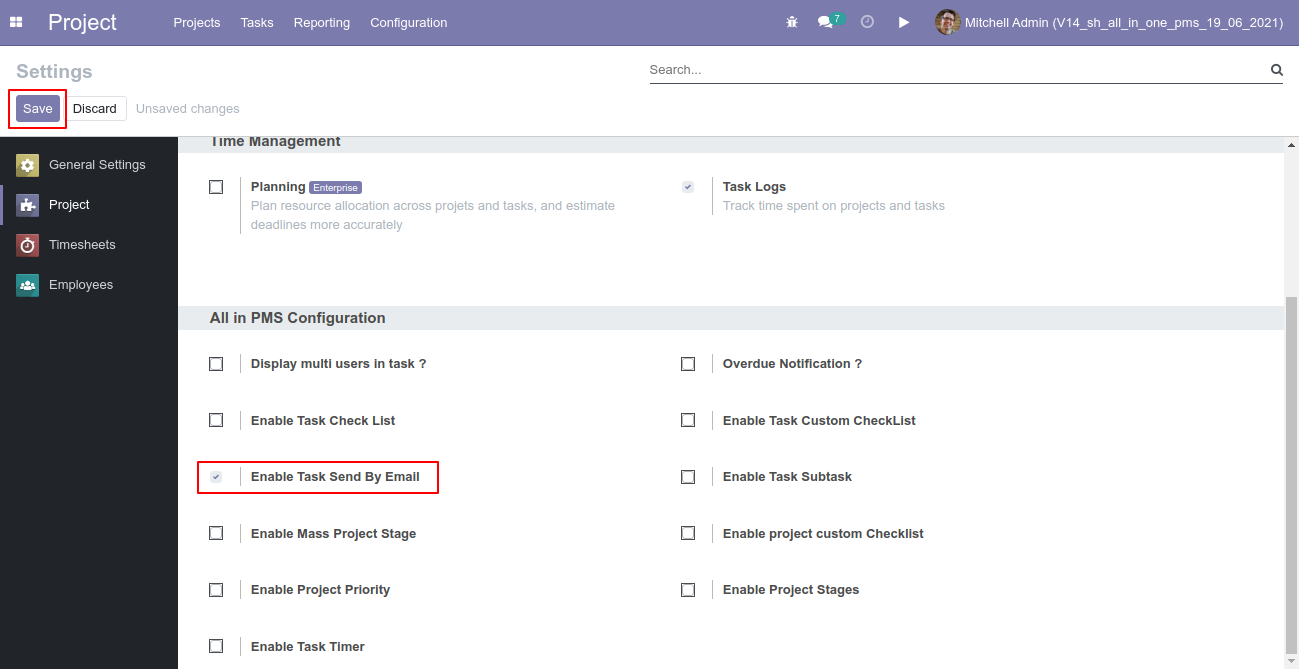
Inside Project Task add attachments that you want to send in email. Now click on "Send by Email" button.
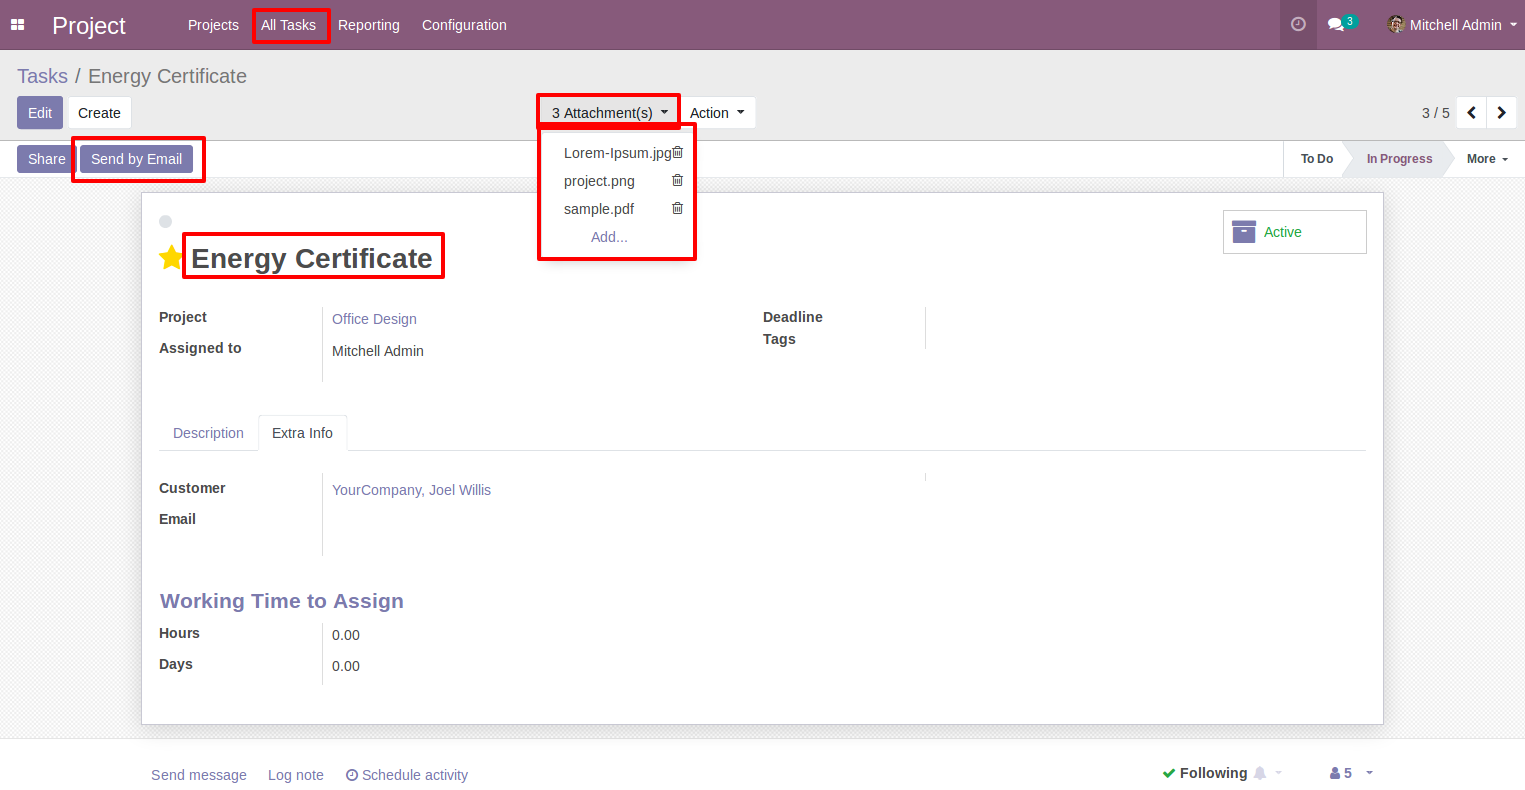
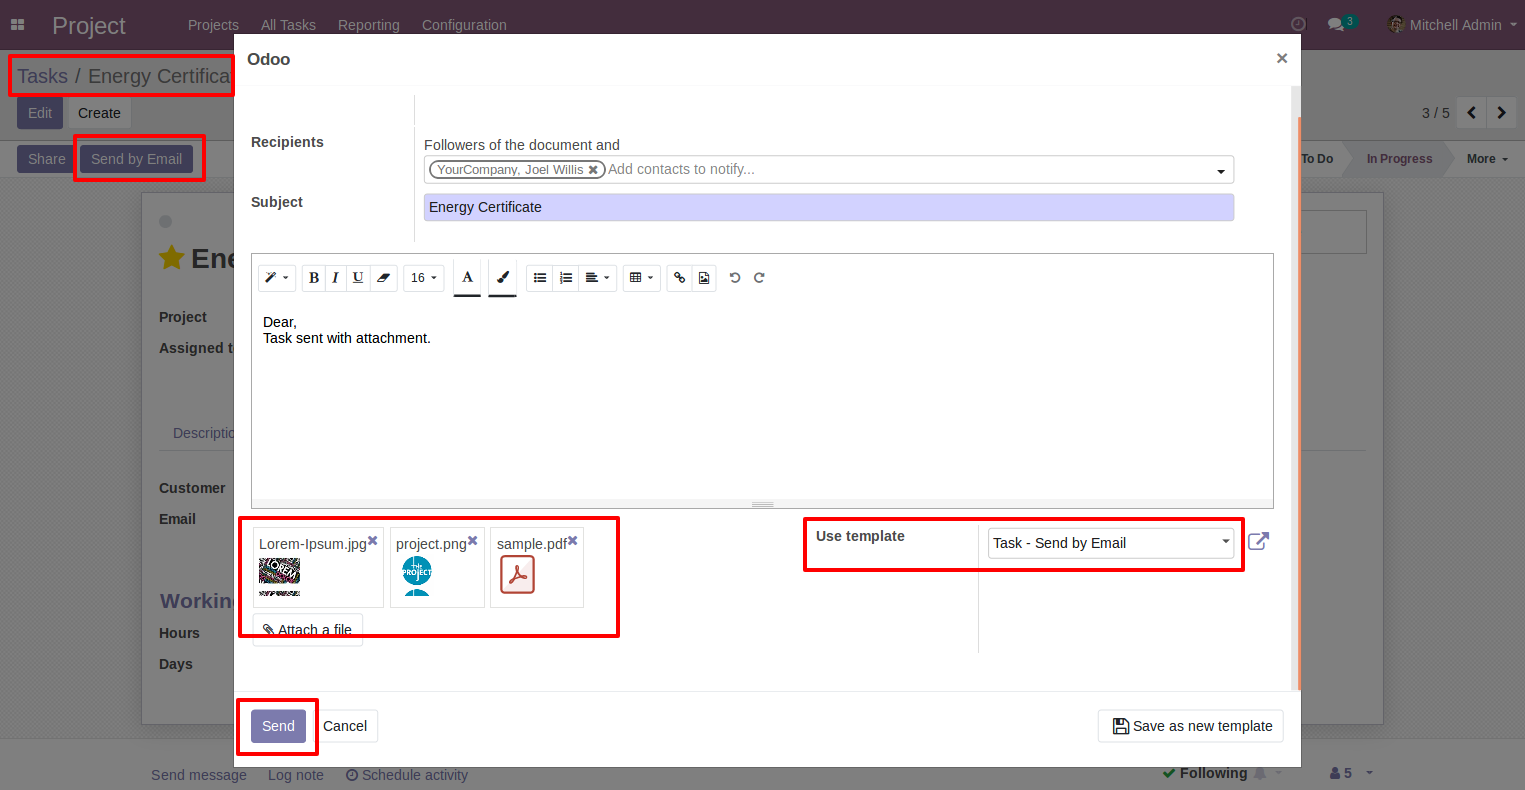
On "Send by Email" button click, wizard opens where all the attached documents shows. These all documents will be sent to receiver of mail. You can remove any attachment from wizard that you don't want to send at that time. Click on "Send" button.
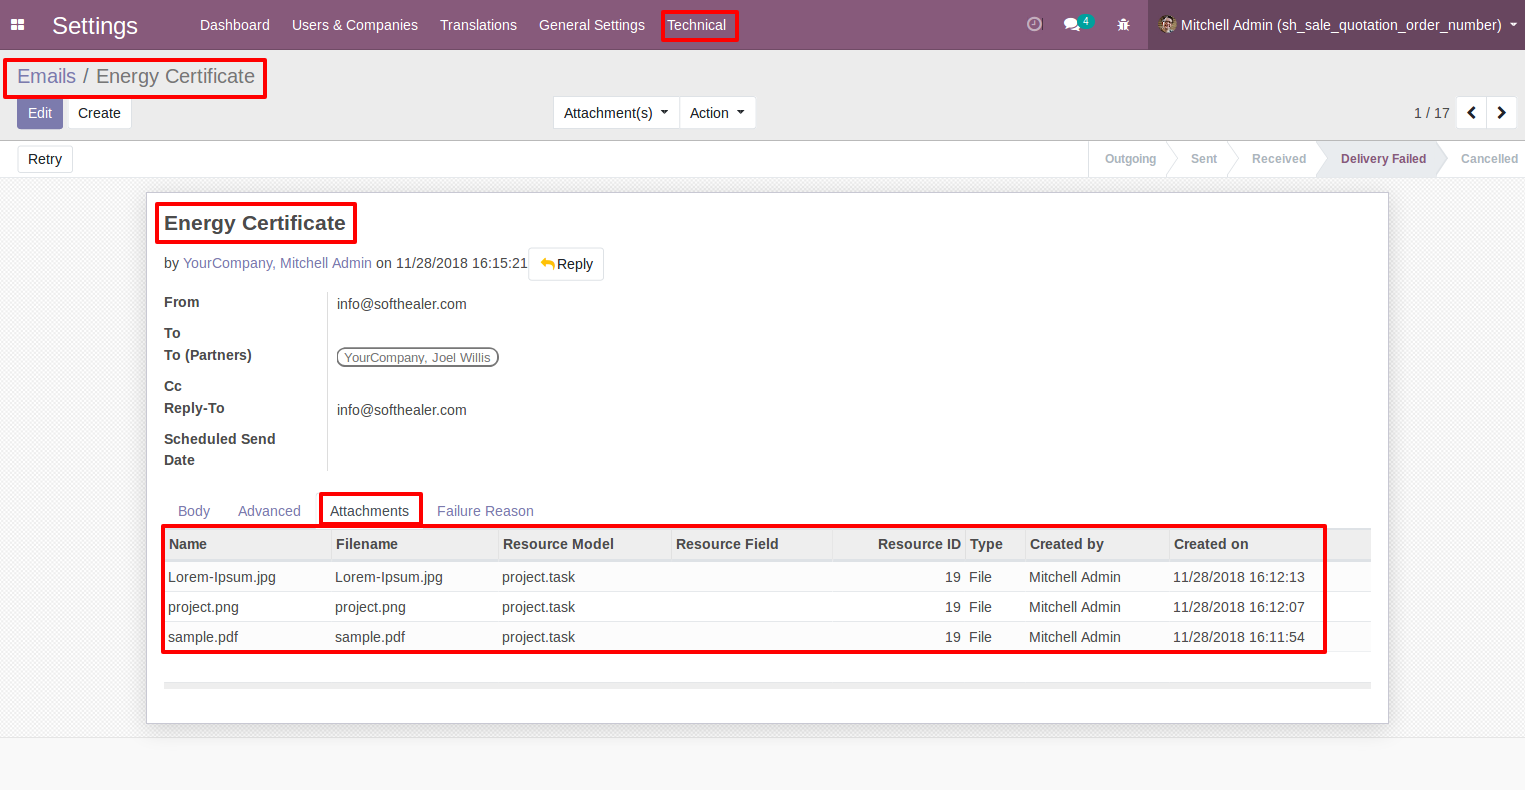
Email sent to all selected "Recipients". Attachment that are added in wizard are sent inside email.
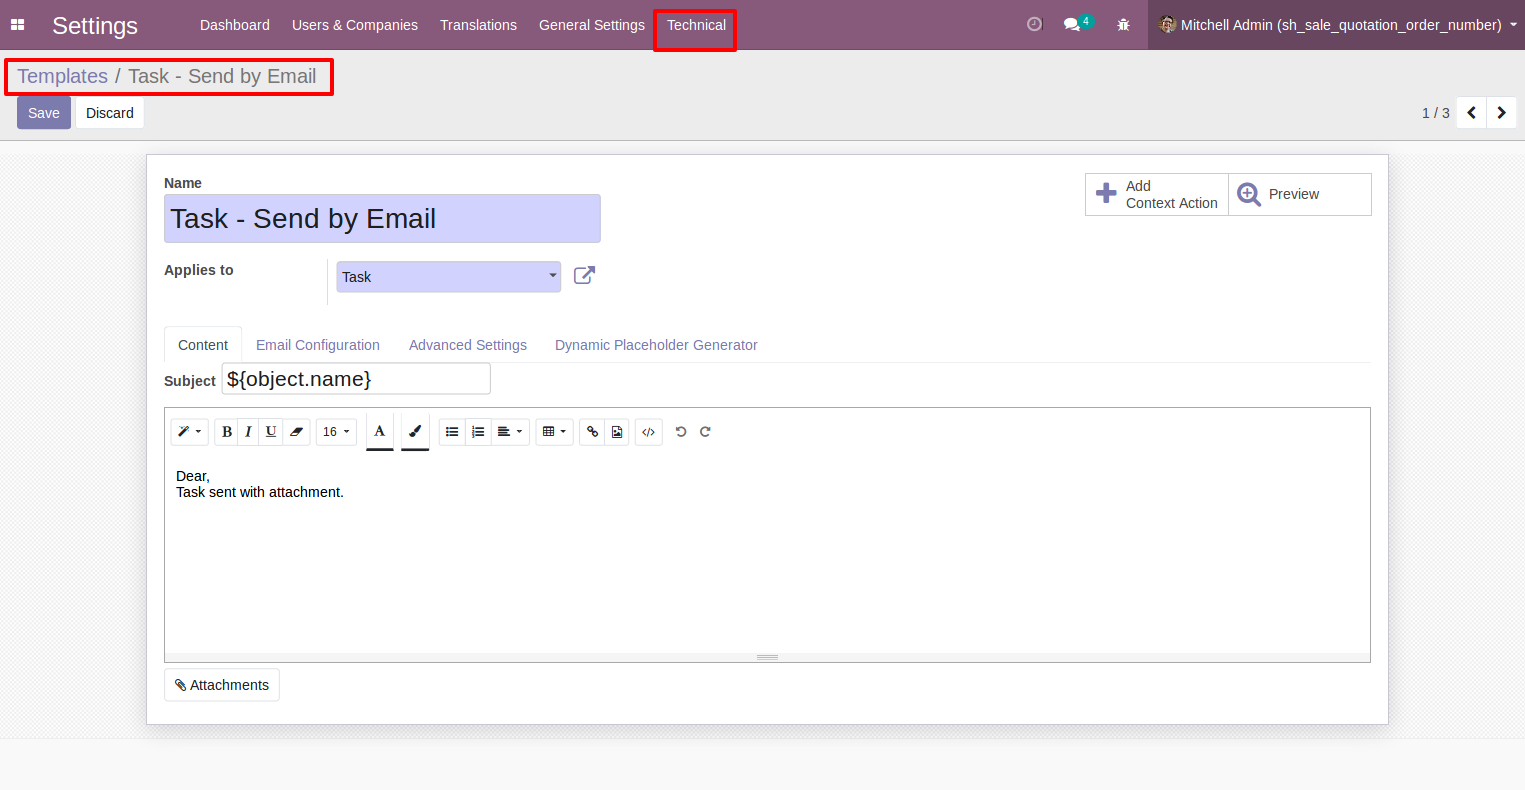
Customize Email template created. One can edit it as per their requirement.
Enable "Project Task Subtask" group.
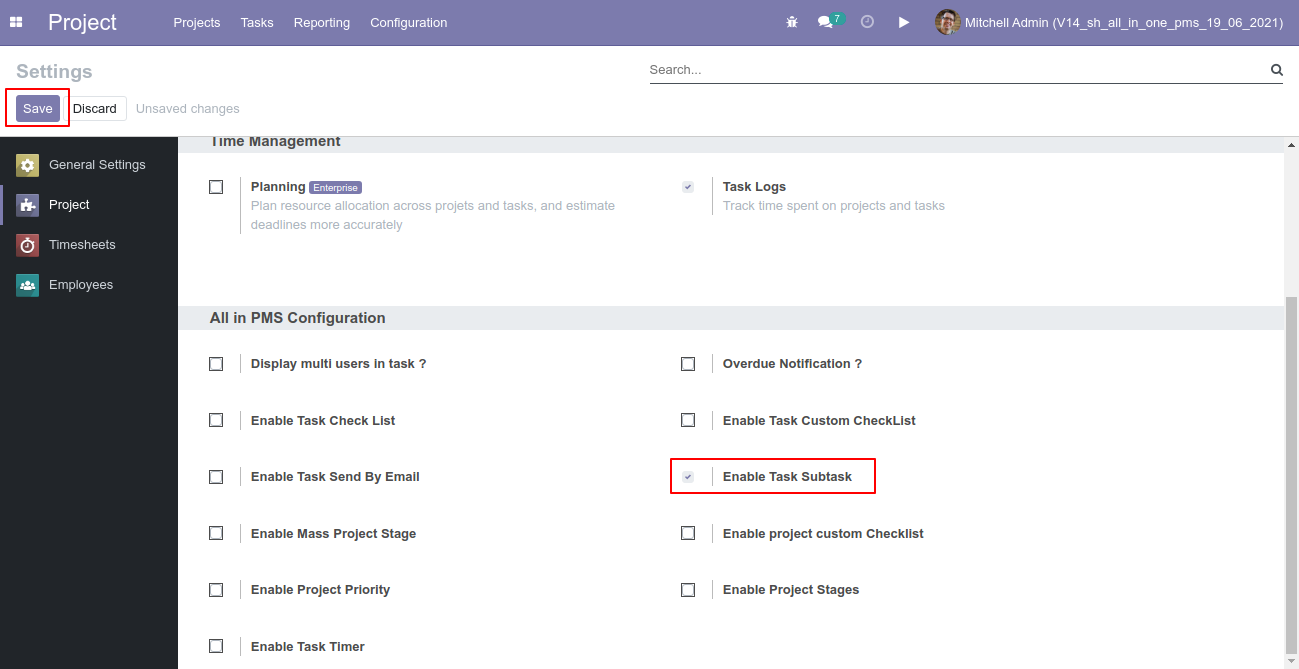
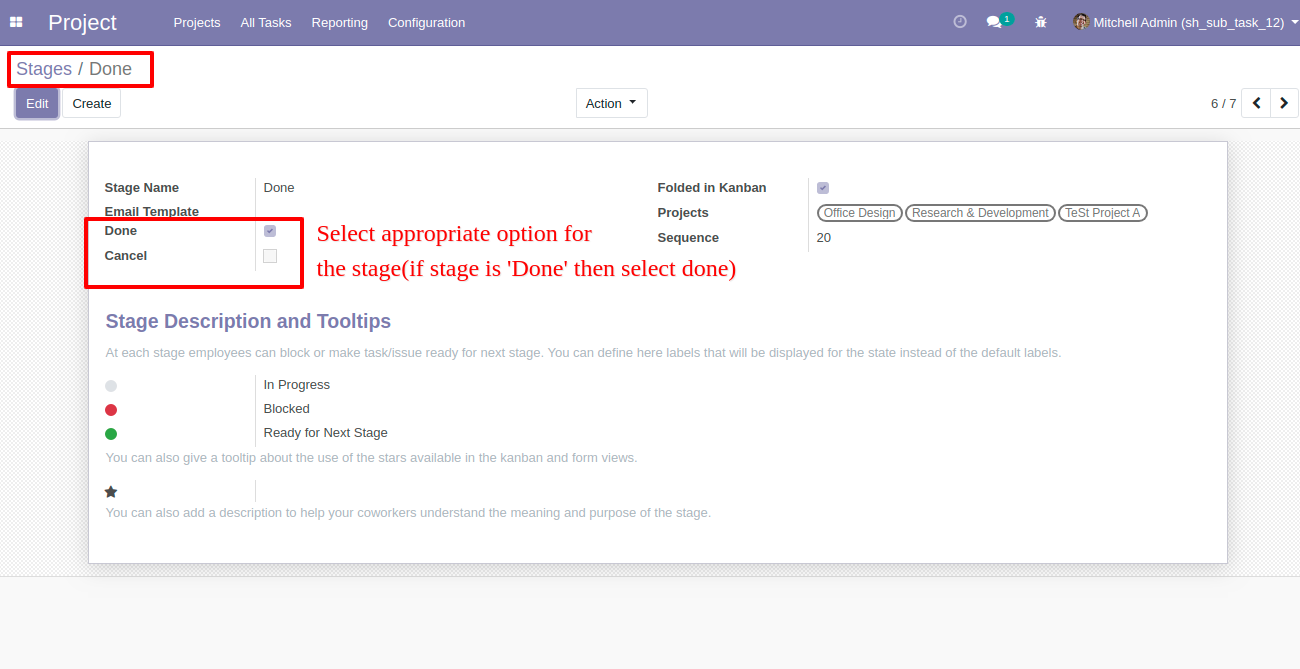
Select appropriate project stages like "Done" and "Cancel".
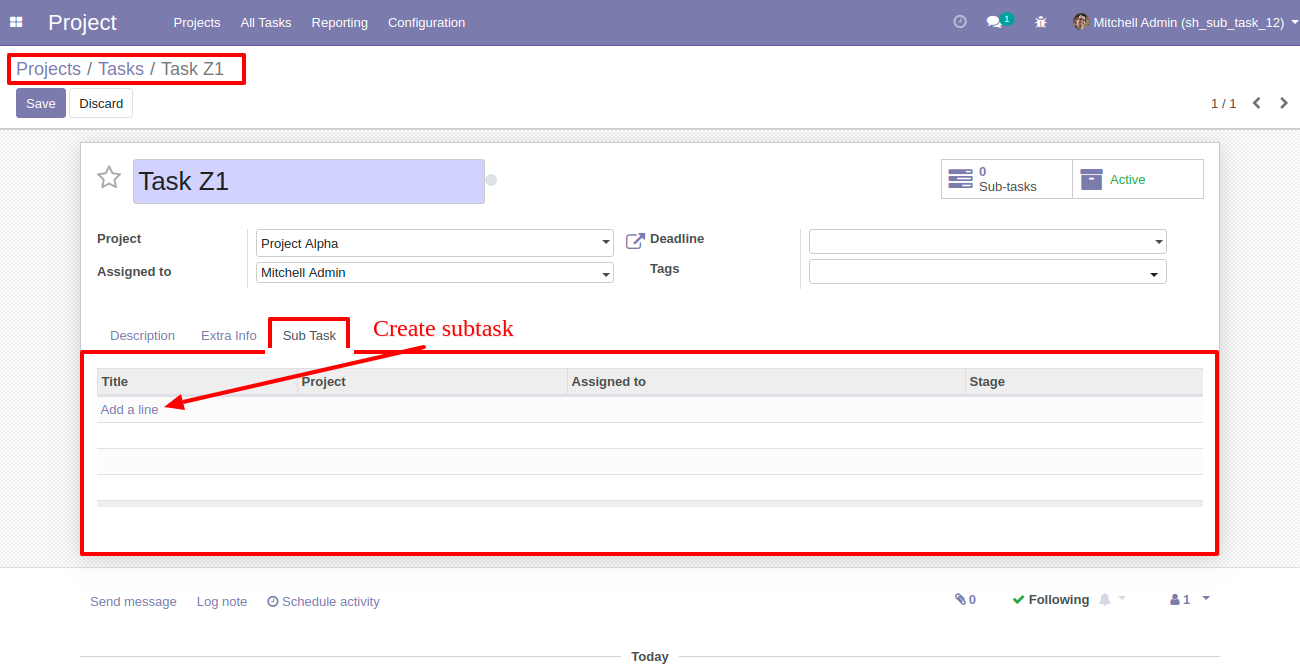
For creating subtasks click "Add a line".
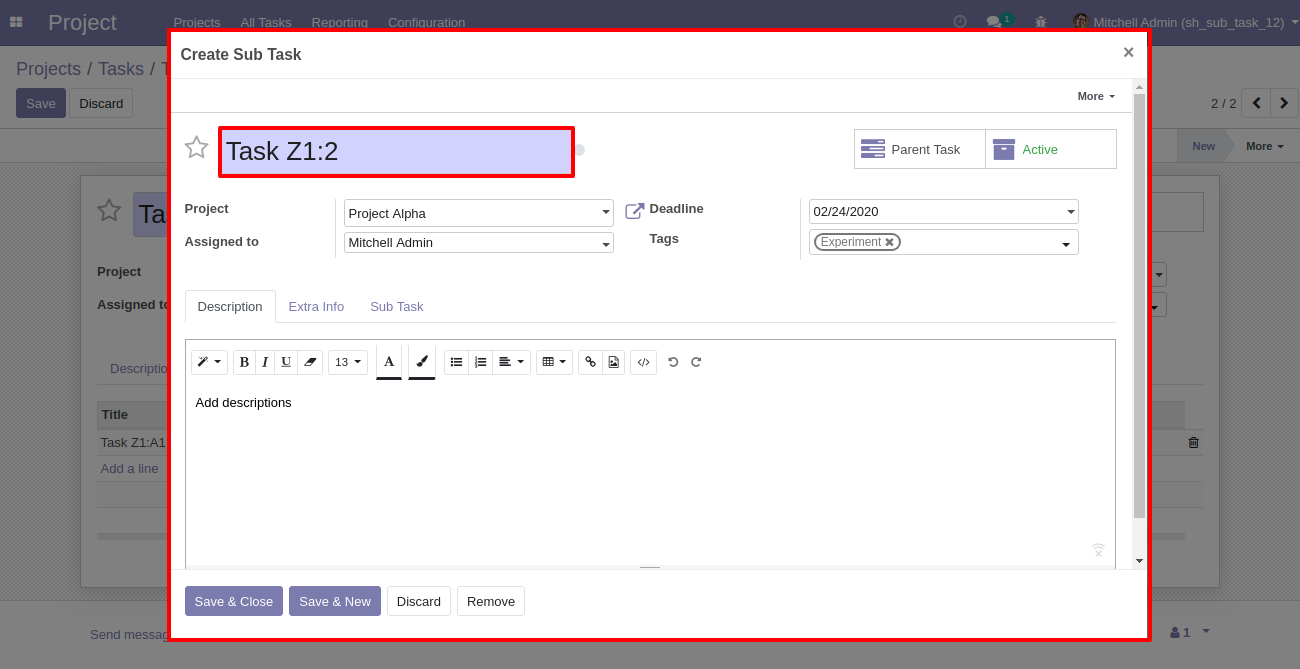
After that one wizard open, you can add a description, image or link here.
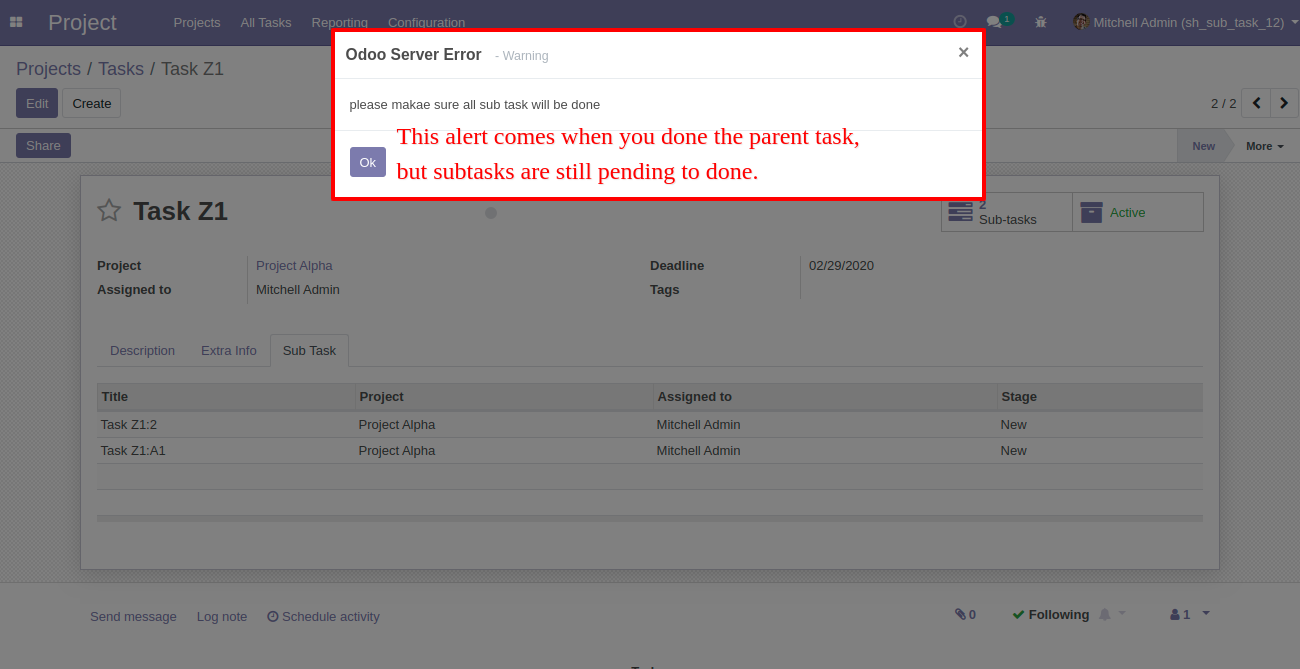
If your sub-task still pending and you have done the parent task than alert will come.
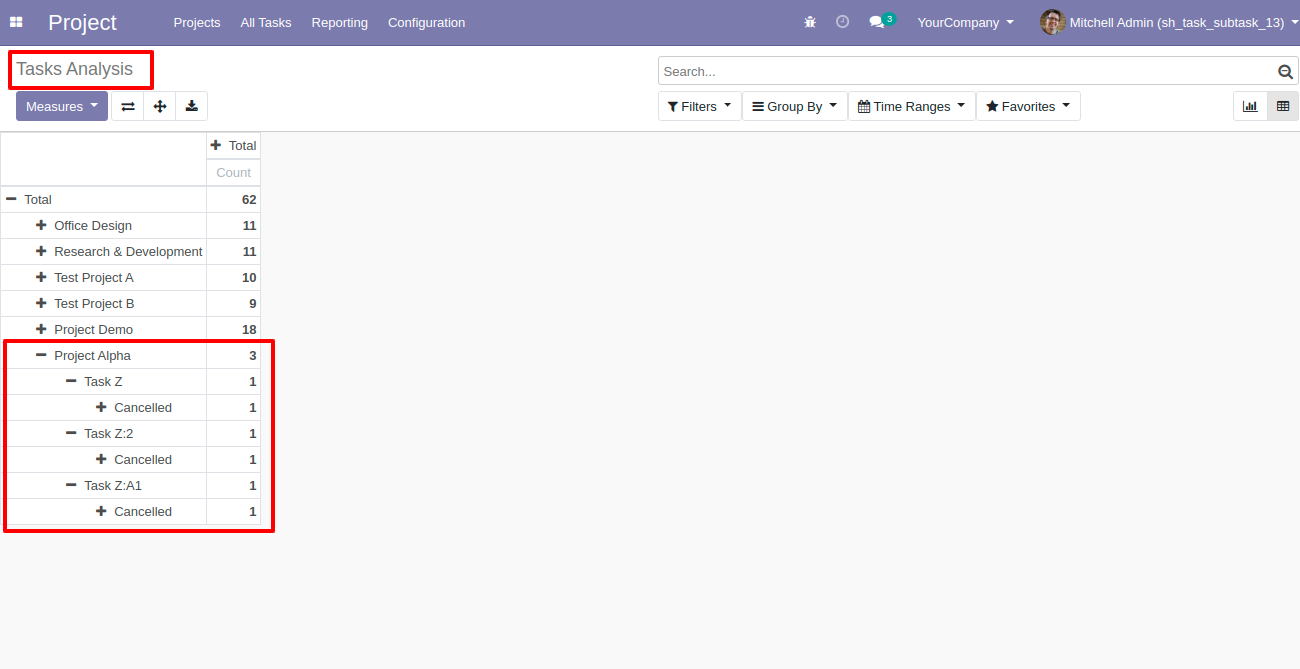
You can see the subtask analysis easily.
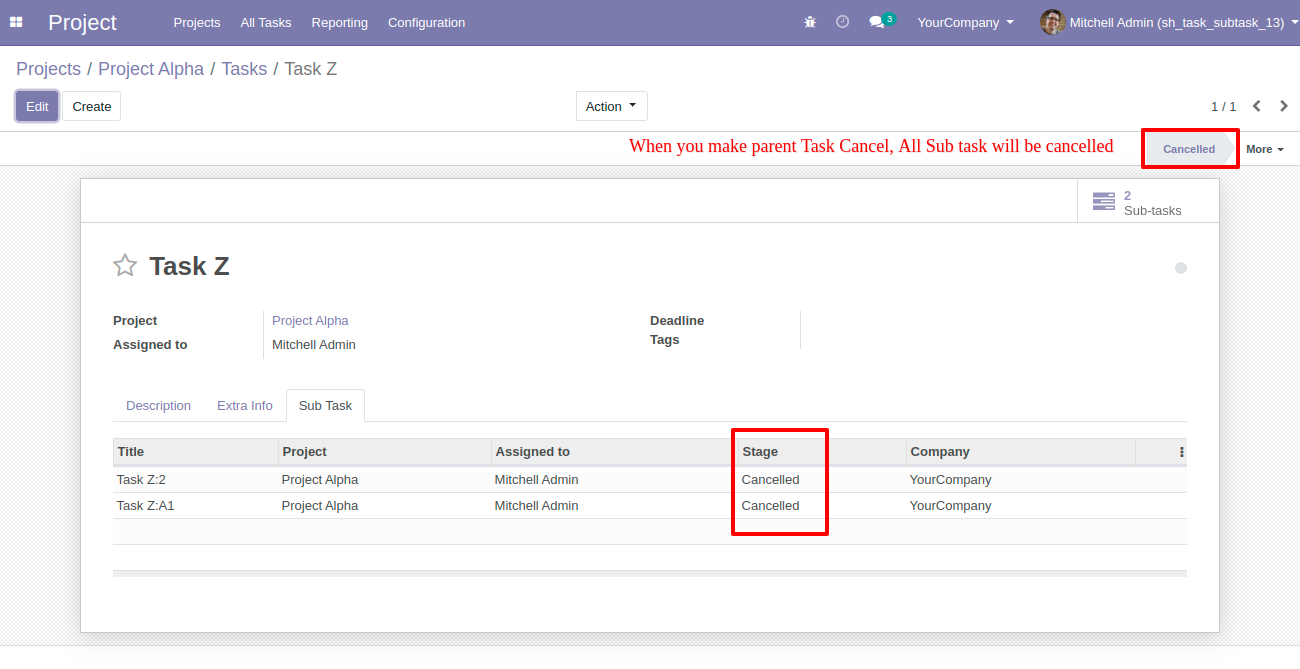
Auto cancel subtasks if the parent task canceled.
Enable "Task Timer" group.

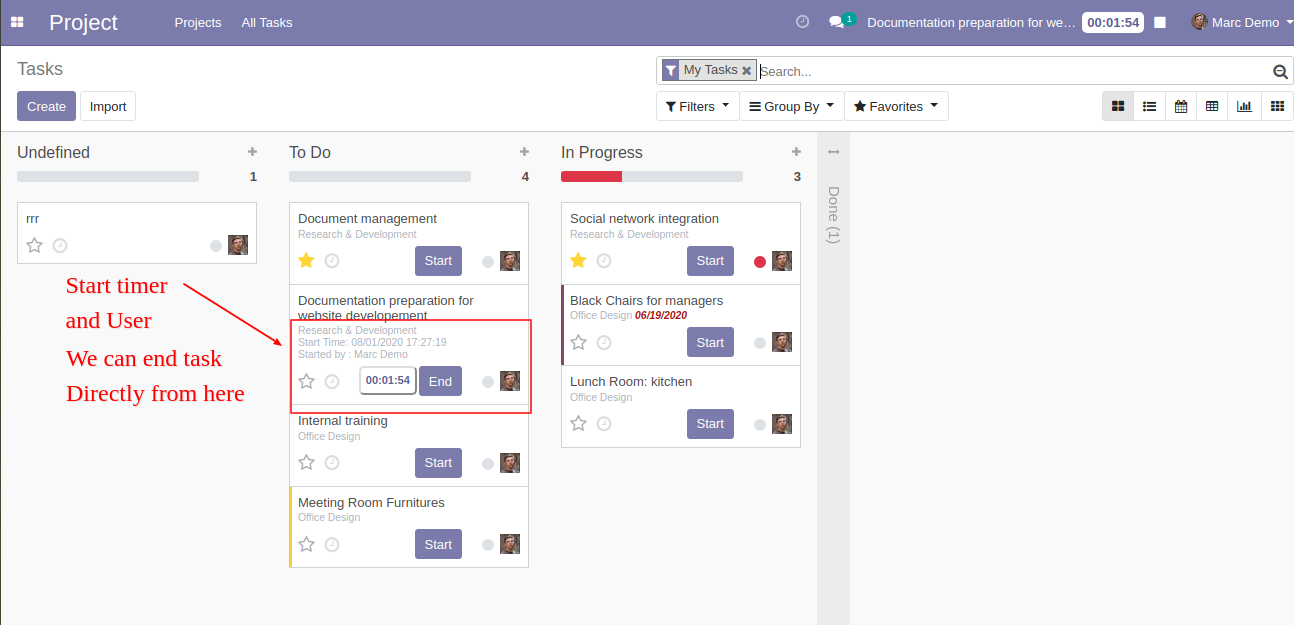
You can start/end each task from the kanban view & menu bar.
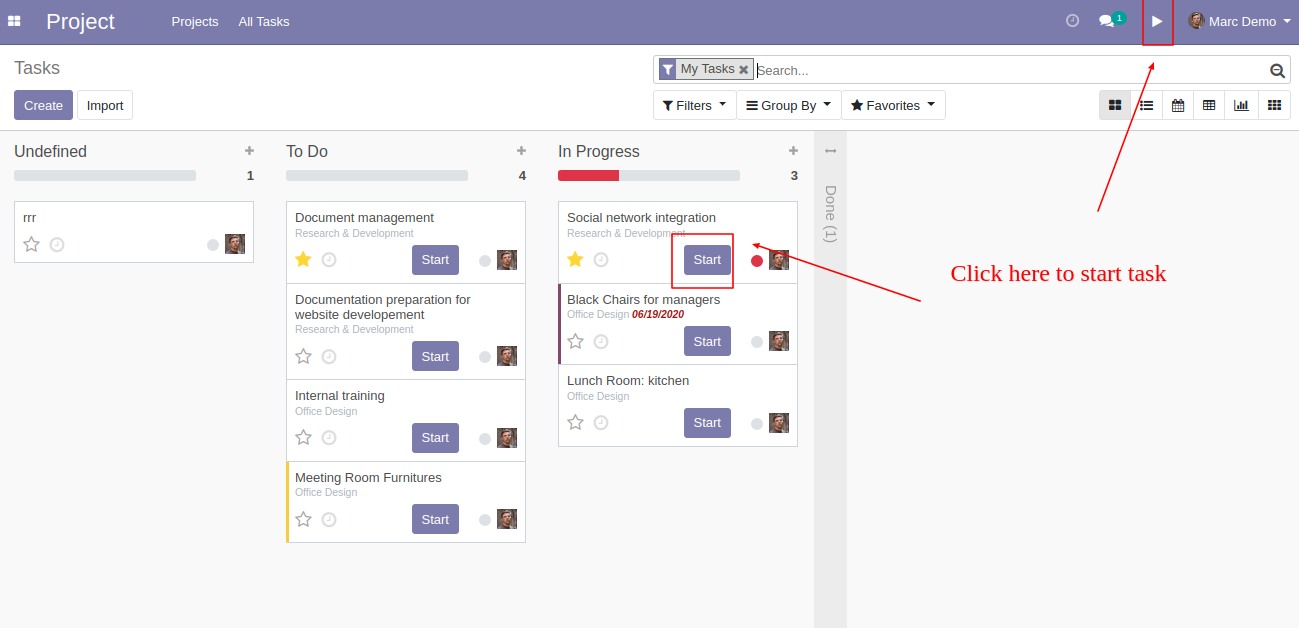
It opens the wizard after press "Start" button, enter a project and task detail, and press the "Start Task" button.
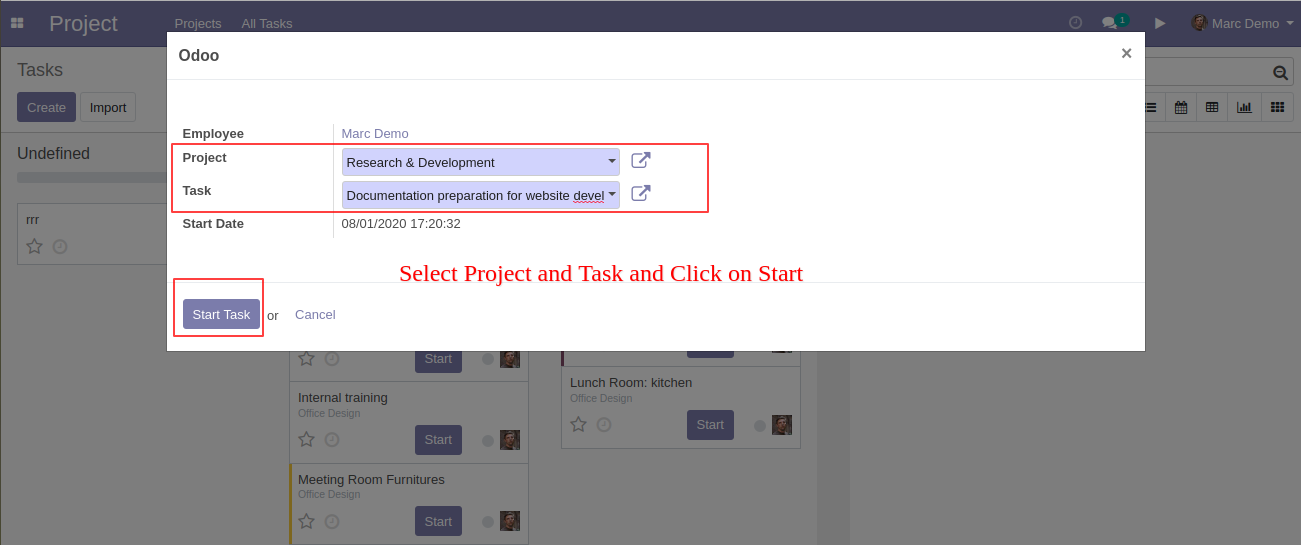
Kanban view of the tasks with the timer and employee name. You can see task full details from here also.
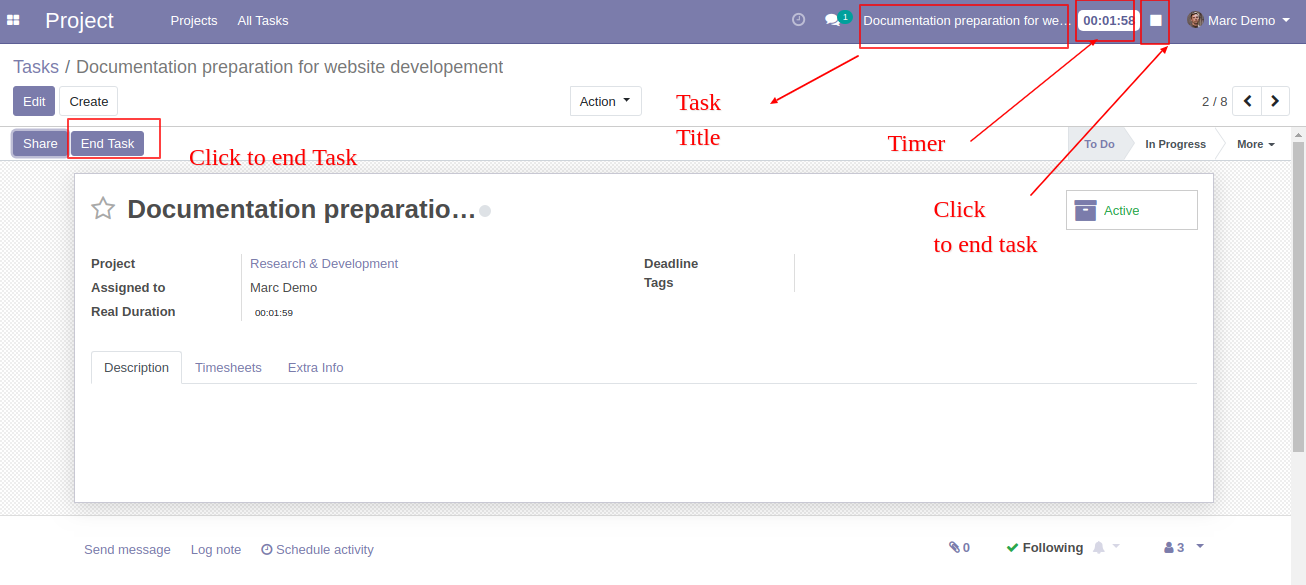
The form view of the task, you can start/end task also from here.
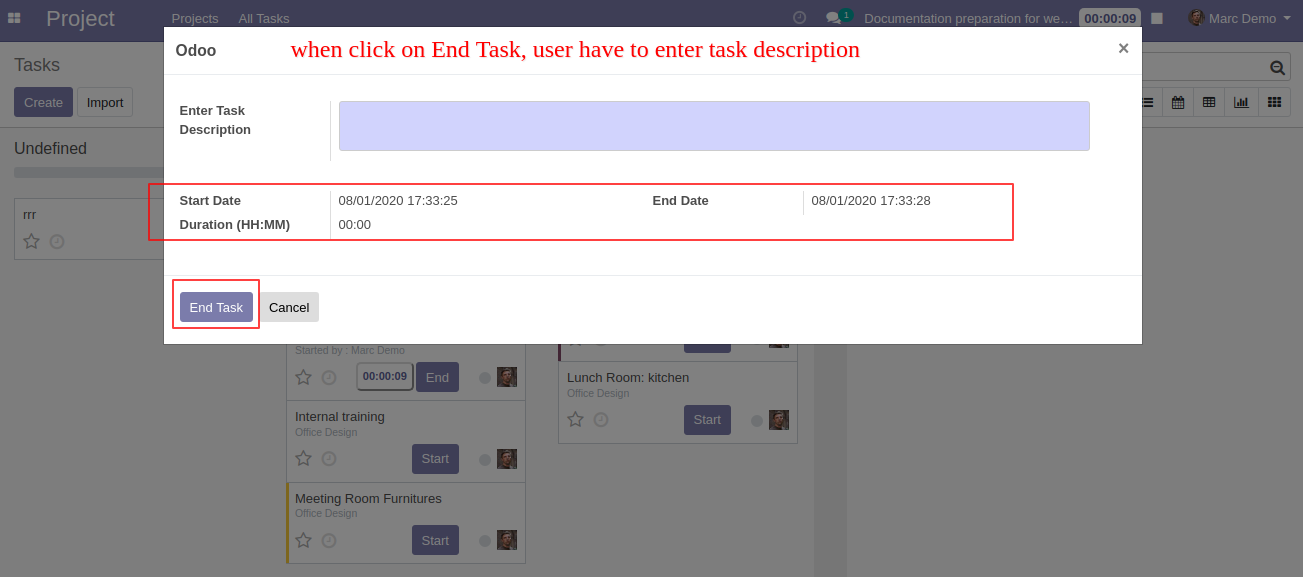
It opens the wizard after press "End Task" button, enter a task description, and press the "End Task" button.
After the task ends, The time duration and date will update automatically with full task detail in the timesheet.
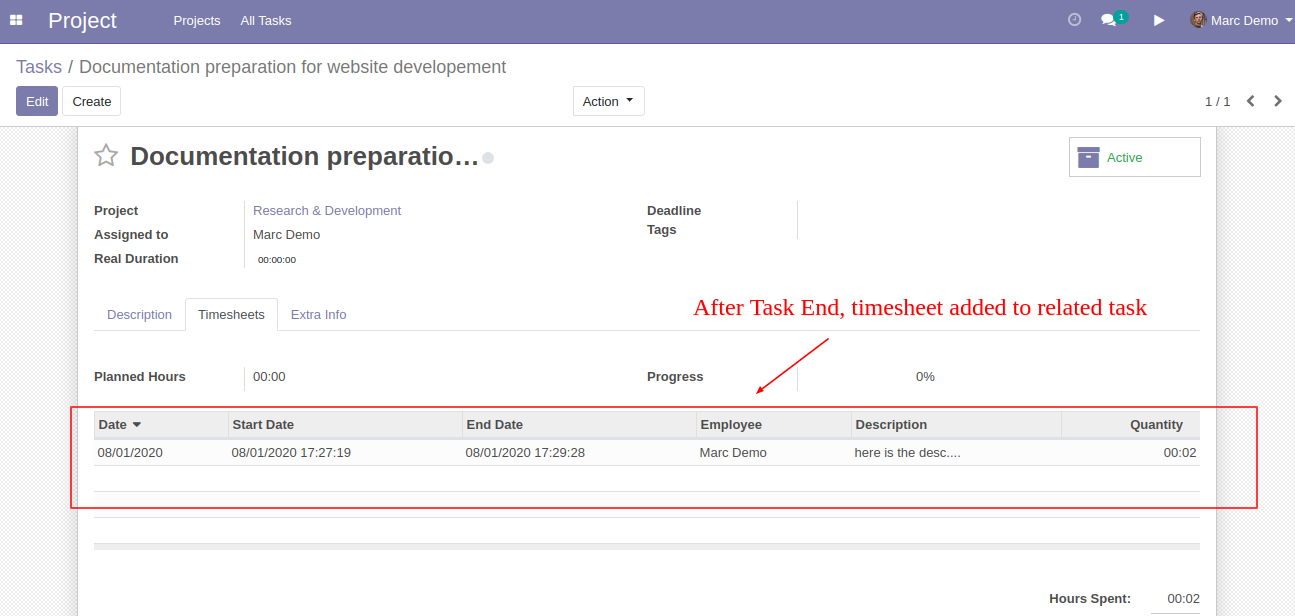
Start and End Date fields read only for user groups so Start & End Date edit by project/timesheet manager only.

Version 16.0.10 | Released on : 31st January 2024
Version 16.0.9 | Released on : 18th December 2023
Version 16.0.8 | Released on : 02nd May 2023
Version 16.0.7 | Released on : 14thApril 2023
Version 16.0.6 | Released on : 12thApril 2023
Version 16.0.5 | Released on : 30thMarch 2023
Version 16.0.4 | Released on : 29thMarch 2023
Version 16.0.3 | Released on : 22ndFebruary 2023
Version 16.0.2 | Released on : 9thFebruary 2023
Version 16.0.1 | Released on : 28th November 2022
- Yes, This app works perfectly with Odoo Community and Enterprise version.
- Please Contact Us at sales@softhealer.com to request customization.
- Yes, we provide free support for 100 days.
- Yes, you will get free update for lifetime.
- No, you need to install any external libraries.
- Yes, You have to download module for each version (13,14,15) except in version 12 or lower.
- No, We do not provide any kind of exchange.
You May Also Like

We offer extremely unique and awesome features for you.


