











 AI-Powered Assistant for Smart Helpdesk Ticket Management.
Automatic AI Ticket Analysis for Faster Issue Understanding.
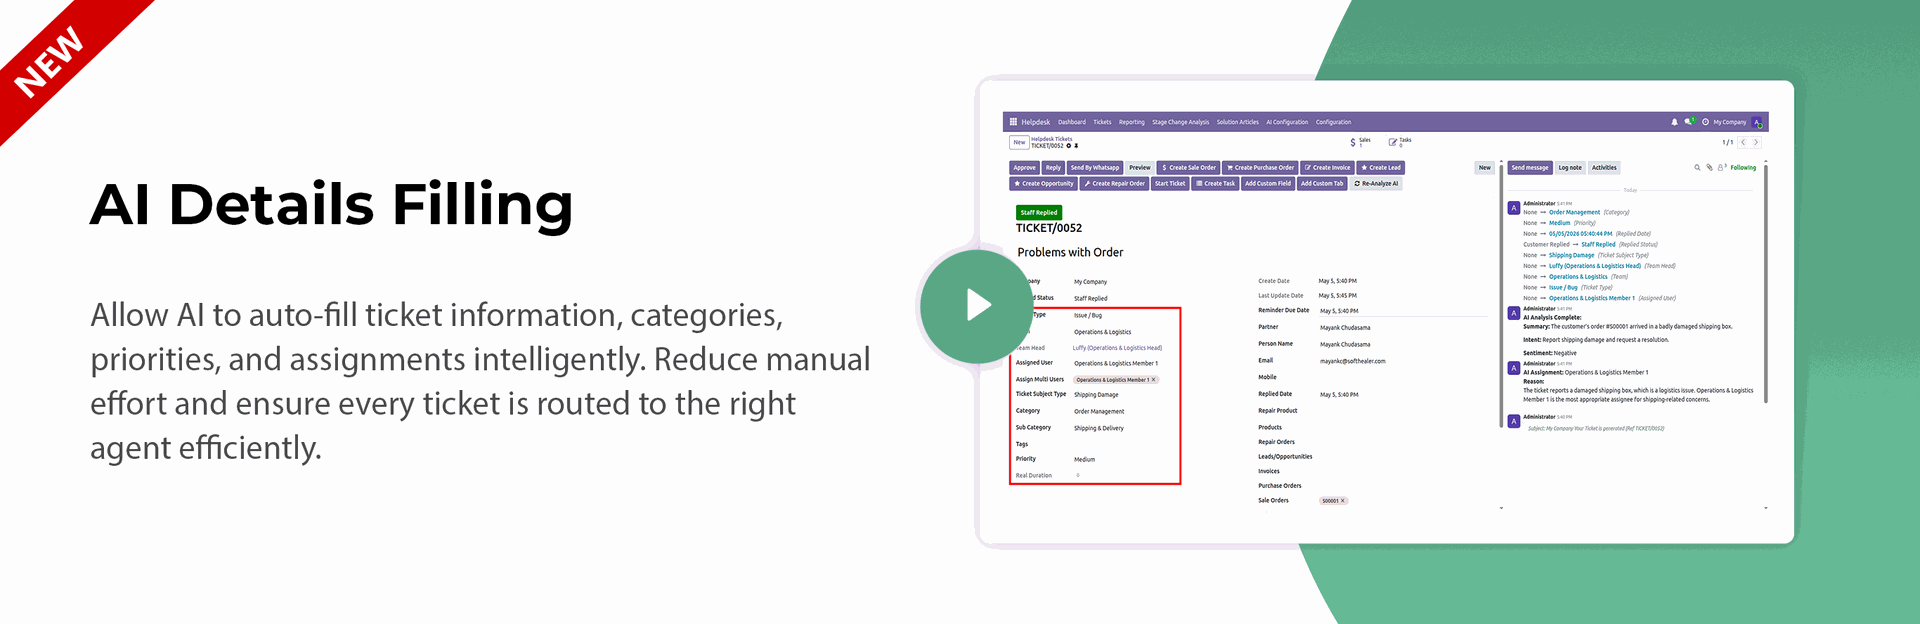
AI-Based Auto Filling of Ticket Details & Information.
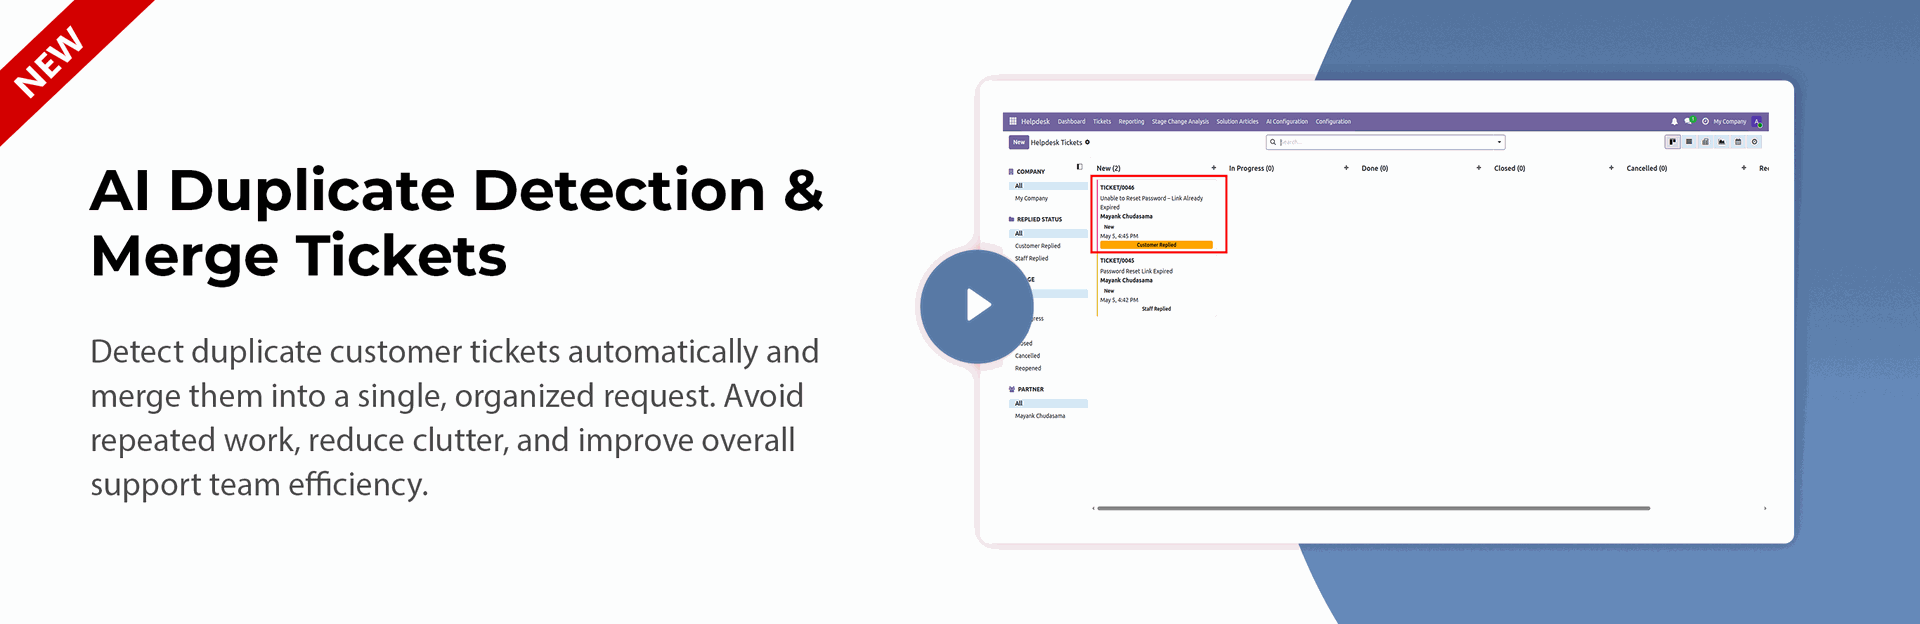
Introducing Intelligent Duplicate Ticket Detection & One-Click Merge.
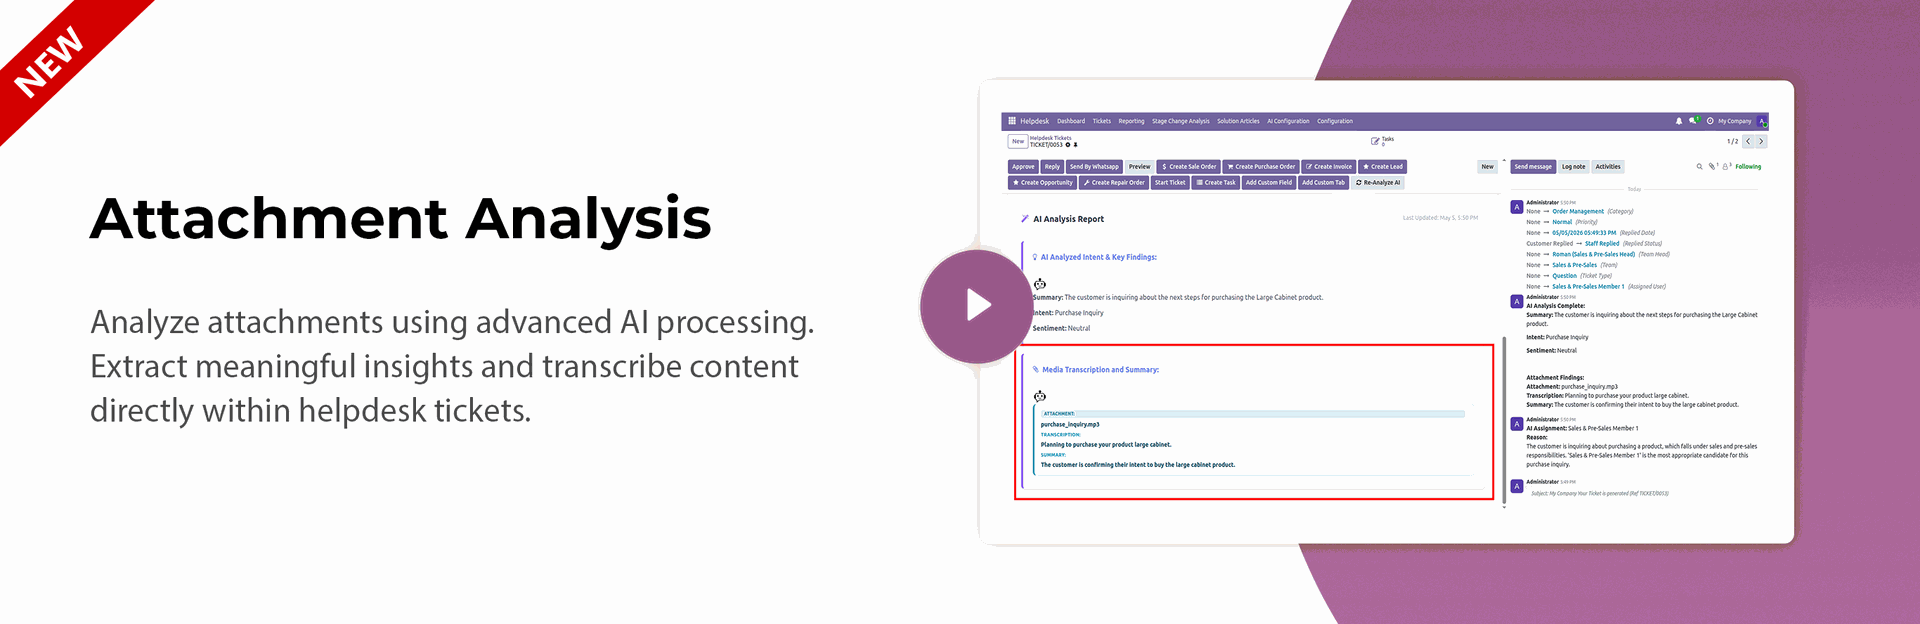
Smart Attachment Analysis with AI Insights.
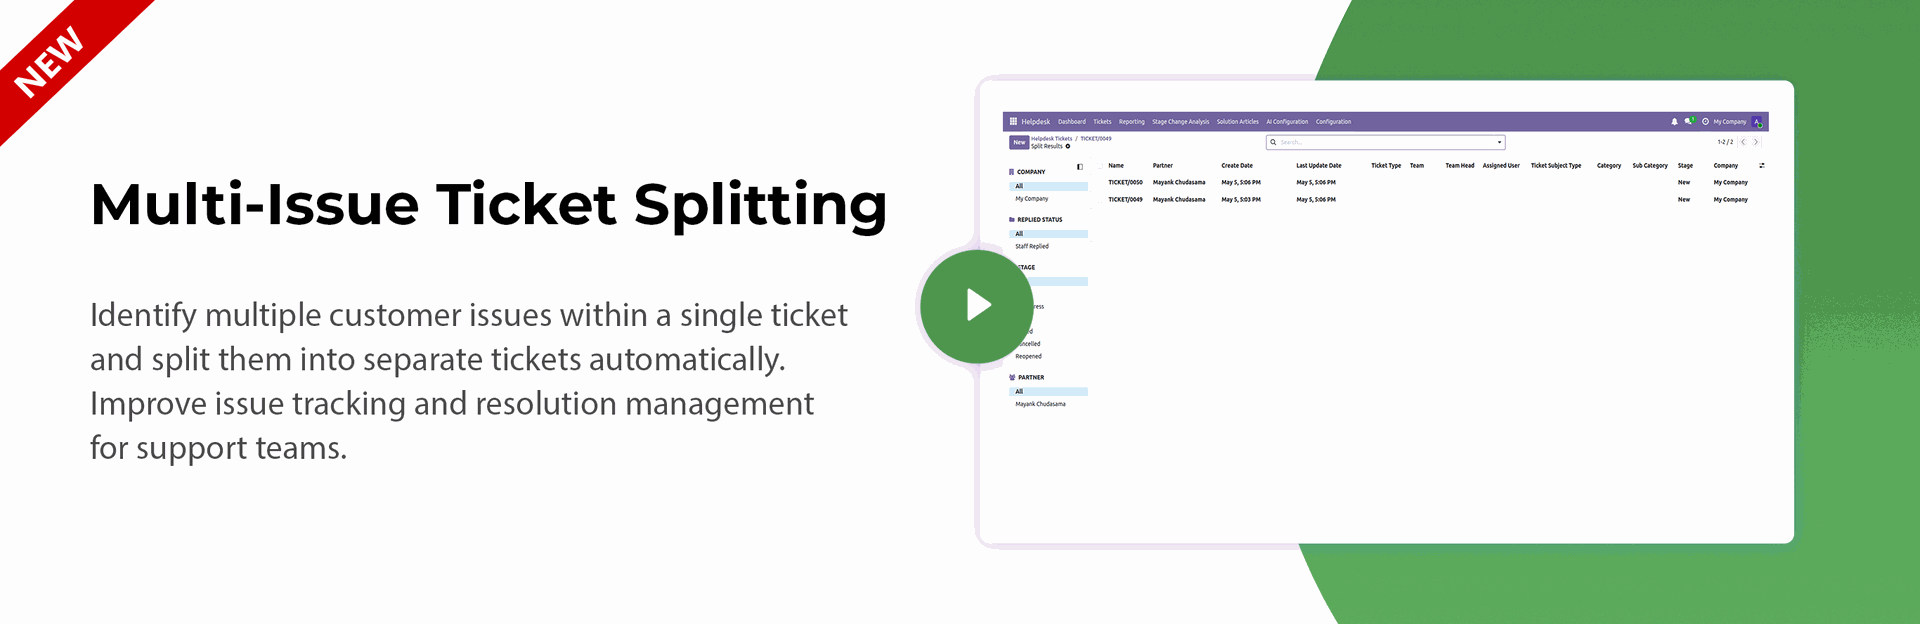
Automatic Multi-Issue Ticket Splitting for Better Ticket Organization.
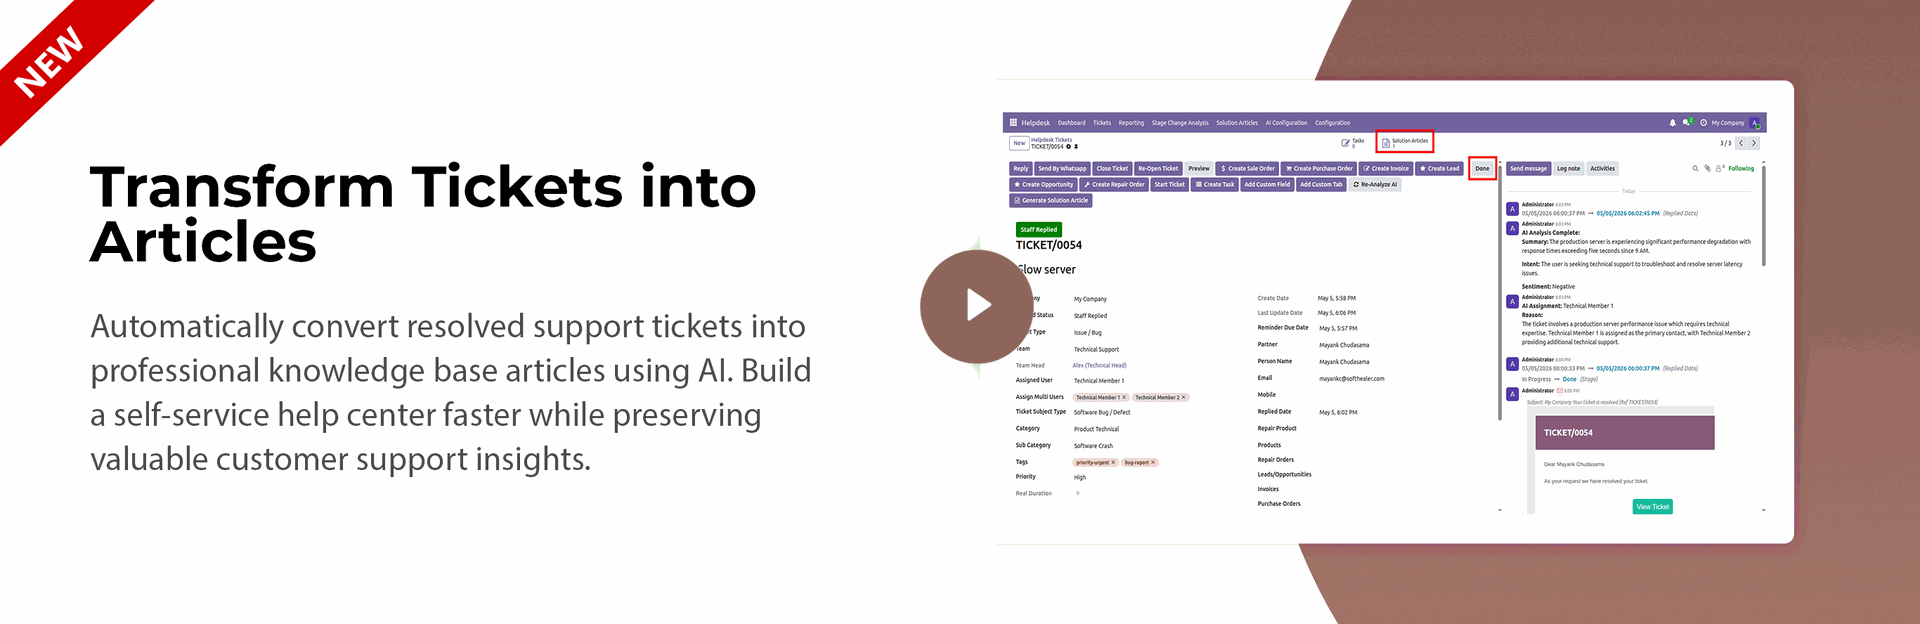
Instant Transformation of Support Tickets into Knowledge Base Articles.
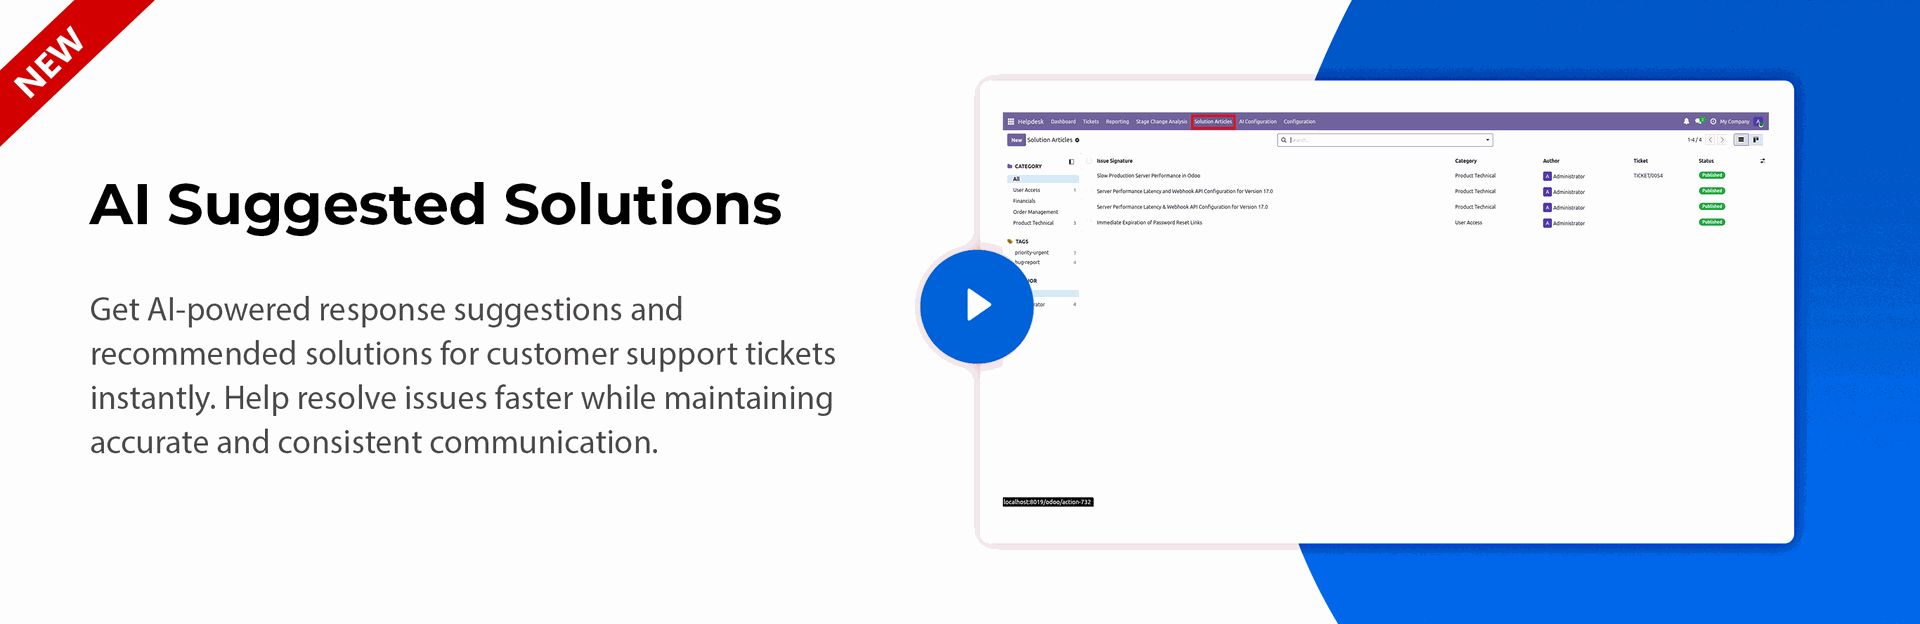
AI-Suggested Solutions for Faster Ticket Resolution.
AI-Powered Assistant for Smart Helpdesk Ticket Management.
Automatic AI Ticket Analysis for Faster Issue Understanding.
AI-Based Auto Filling of Ticket Details & Information.
Introducing Intelligent Duplicate Ticket Detection & One-Click Merge.
Smart Attachment Analysis with AI Insights.
Automatic Multi-Issue Ticket Splitting for Better Ticket Organization.
Instant Transformation of Support Tickets into Knowledge Base Articles.
AI-Suggested Solutions for Faster Ticket Resolution.AI Powered Helpdesk | All In One Helpdesk Advance | Whatsapp Helpdesk | CRM Helpdesk | Sale Order Helpdesk | Purchase Helpdesk | Invoice Helpdesk | Helpdesk Timesheet | Helpdesk Support Ticket To Task

Looking for a fully customizable and flexible helpdesk in Odoo? This advanced Odoo Helpdesk solution helps businesses manage customer support,
service requests, technical issues, and tickets from one centralized platform.
Customers can submit requests, attach documents, track ticket status,
and receive real-time updates through the online portal.
With powerful integrations, you can convert helpdesk tickets into leads, opportunities,
quotations, sales orders, purchase requests, invoices, and tasks. The module also includes AI-powered features,
ChatGPT integration, and WhatsApp Helpdesk to improve ticket management and customer communication.
Designed as a complete helpdesk management system, this solution provides Helpdesk Management Software,
service desk software, Customer Support Software, and a powerful helpdesk ticketing system for efficient
issue tracking and resolution. With Odoo Helpdesk Advance functionality, businesses can streamline support workflows
and manage customer issues more effectively.
For businesses searching for the best helpdesk system, best helpdesk software, or best helpdesk ticketing system,
this module provides a centralized solution for managing support operations while
connecting customer service with other Odoo business workflows.
Note
- This app is not compatible with standard Helpdesk app of Enterprise Edition. It works independently. You can purchase the Helpdesk Enterprise app from here Helpdesk Enterprise
- We are using ChatGPT 3.5 turbo model of chatgpt API.
- We are using Ultra Message WhatsApp API for WhatsApp integration feature
- In our module, we have created an internal-type user for ChatGPT, which the enterprise customer should consider.
Premium Support - Every Step
Get expert assistance before and after your purchase. From product demonstrations to setup and ongoing support, our team helps you get the most from your Odoo Helpdesk Module.

|
|
Free 1-Hr Pre-Sales Demo
|
|
See the module live before you commit. Our team walks you through every feature, answers your questions, and confirms the fit. |
 sales@softhealer.com
|

|
|
Free 5-Hr Post-Purchase Setup
|
|
After purchase, get up to 5 hour of free hands-on configuration support - instance connected, authentication configured, and fully verified. |
|
support@softhealer.com
|

|
|
Lifetime Free Support & Updates
|
|
Every purchase includes lifetime free support and updates for your version - no subscriptions, no hidden fees. Just email us anytime. |
 support@softhealer.com
|
Key Features
Hot Features




.png)






.png)
















-
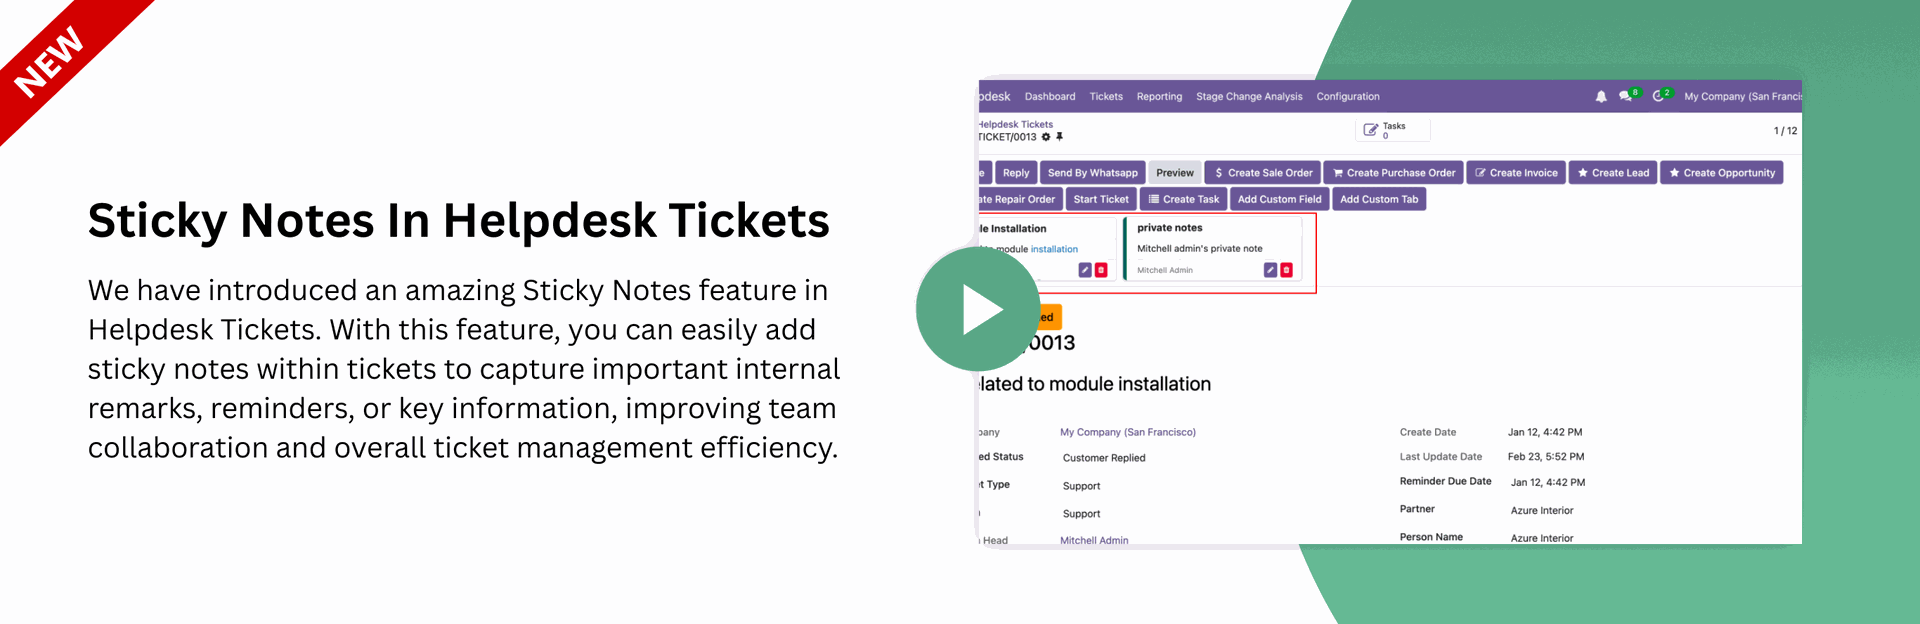
Sticky Notes

-
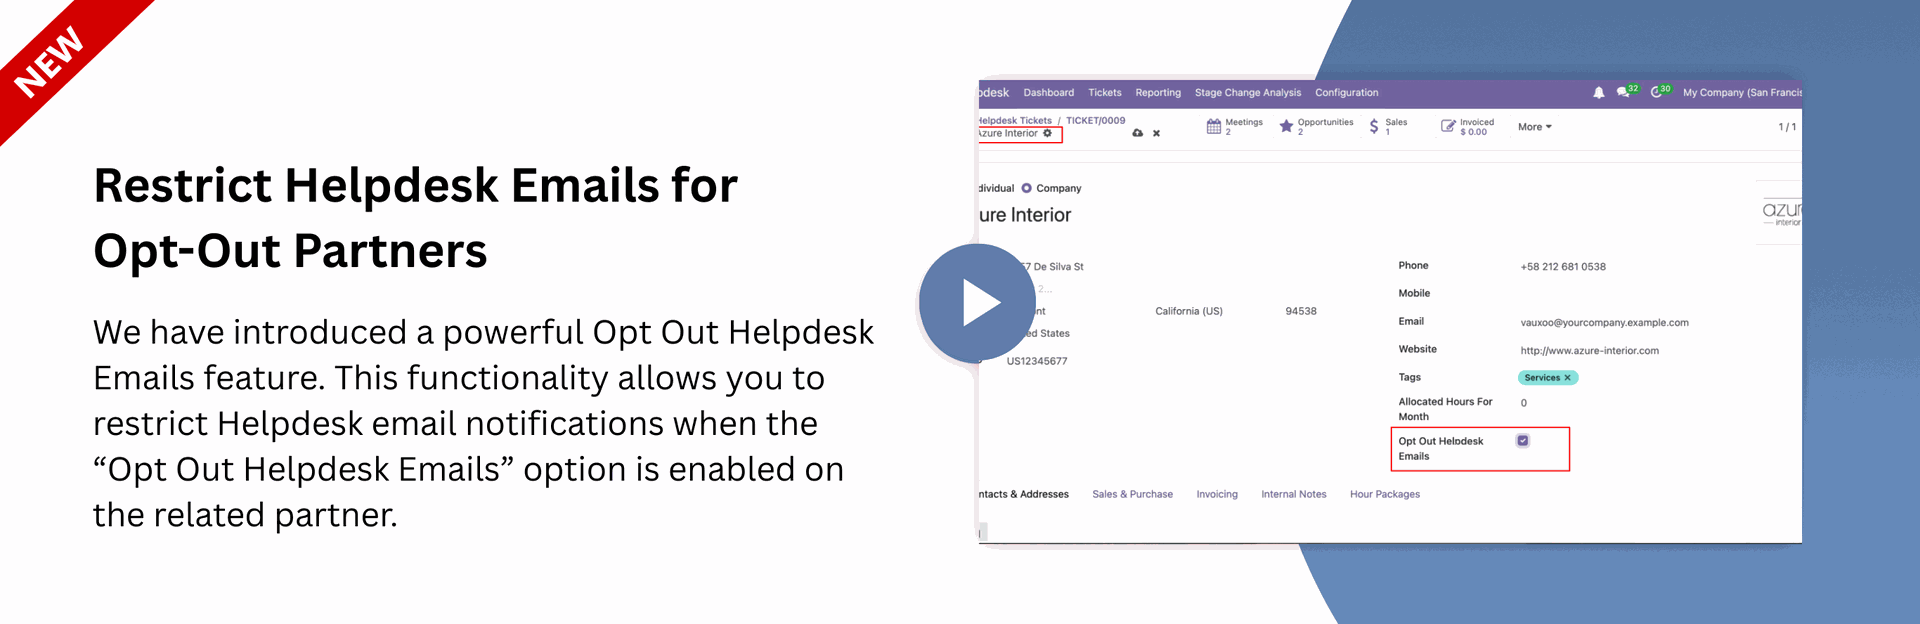
Restrict Helpdesk Emails for Opt-Out Partners
-
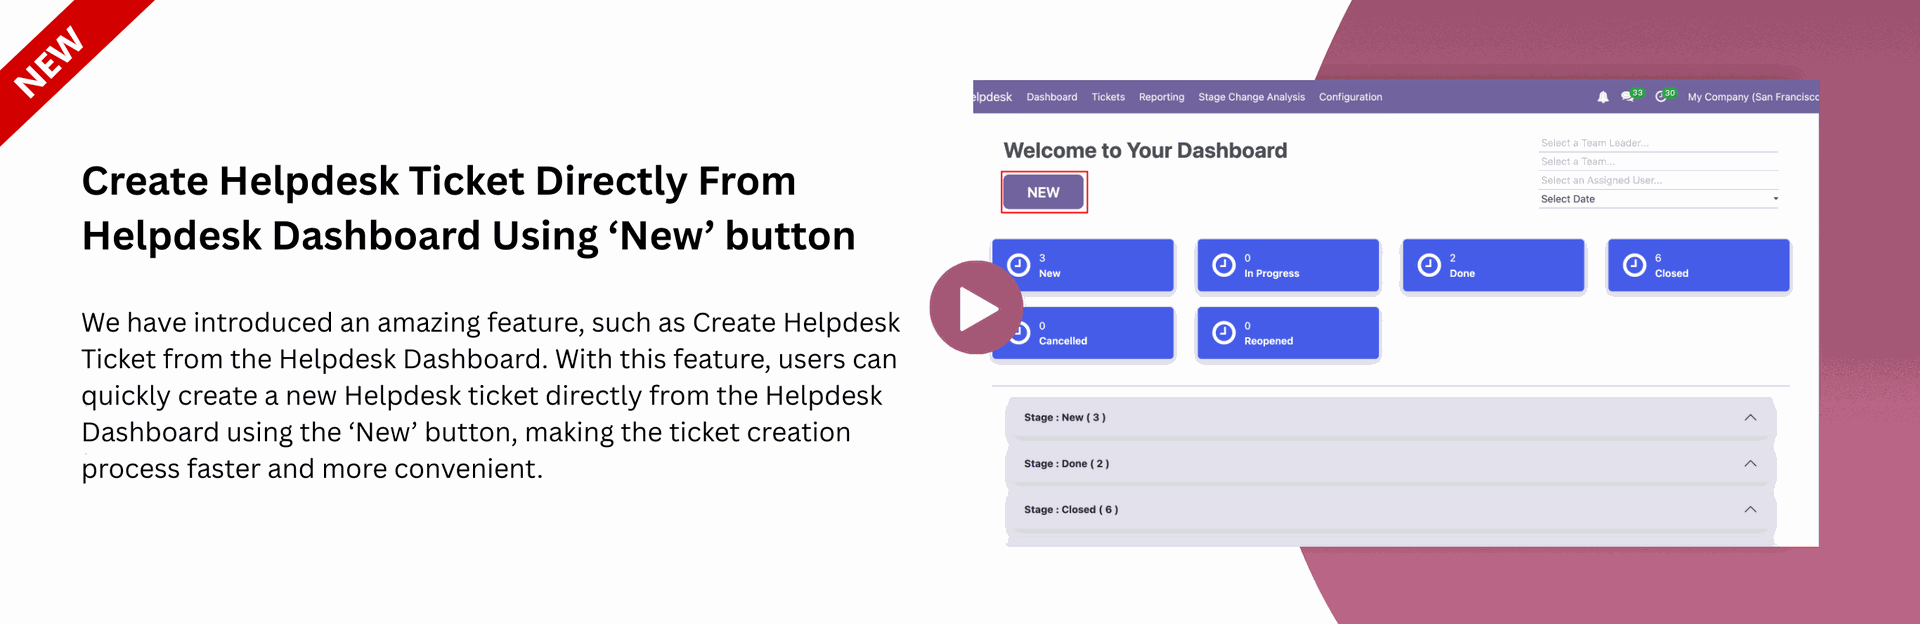
Create Helpdesk Ticket Directly From Helpdesk Dashboard
-
Ticket Type Field Added to Website Helpdesk Ticket Form
-
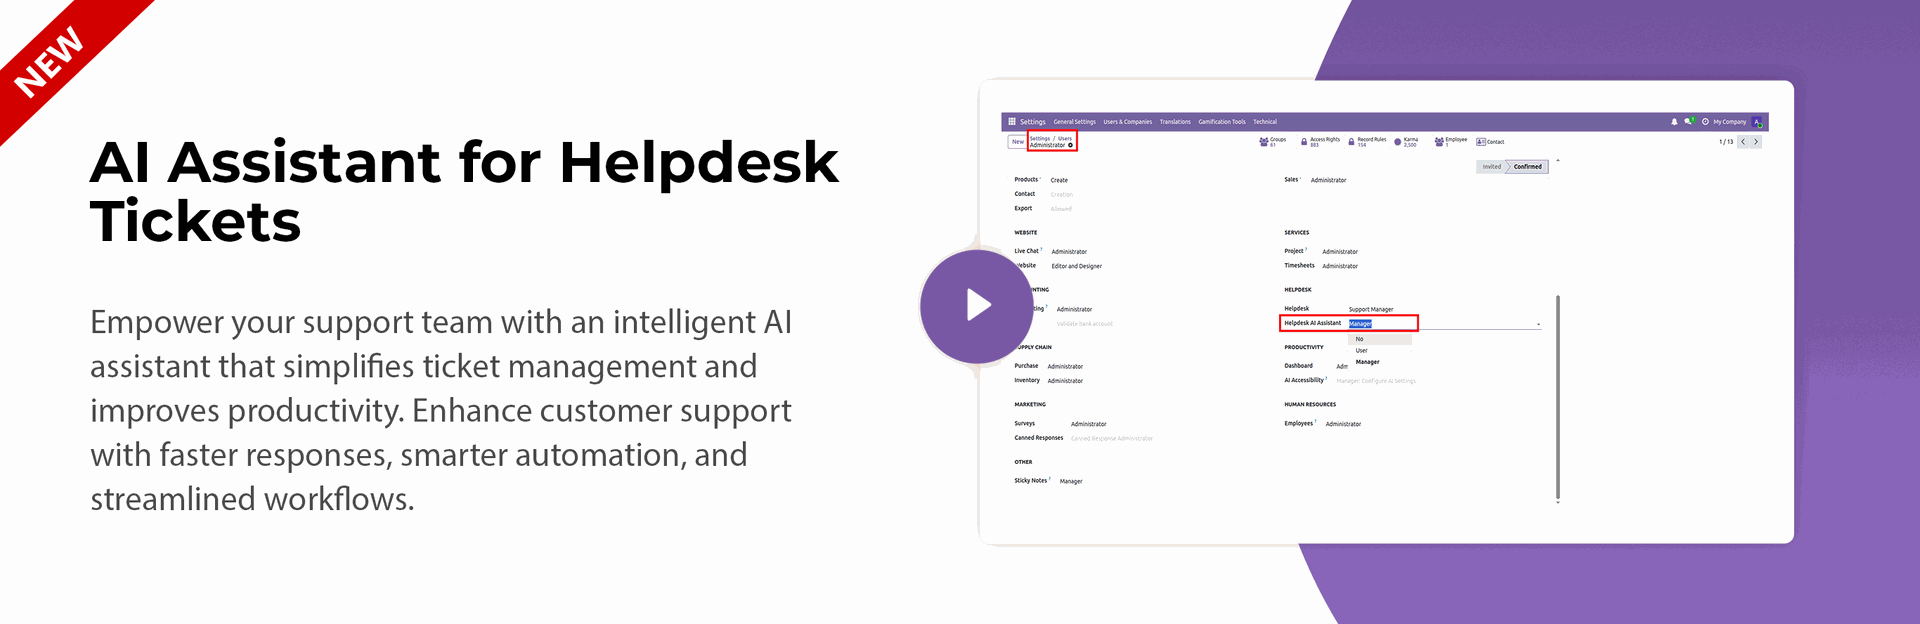
AI Insight Assistant
-
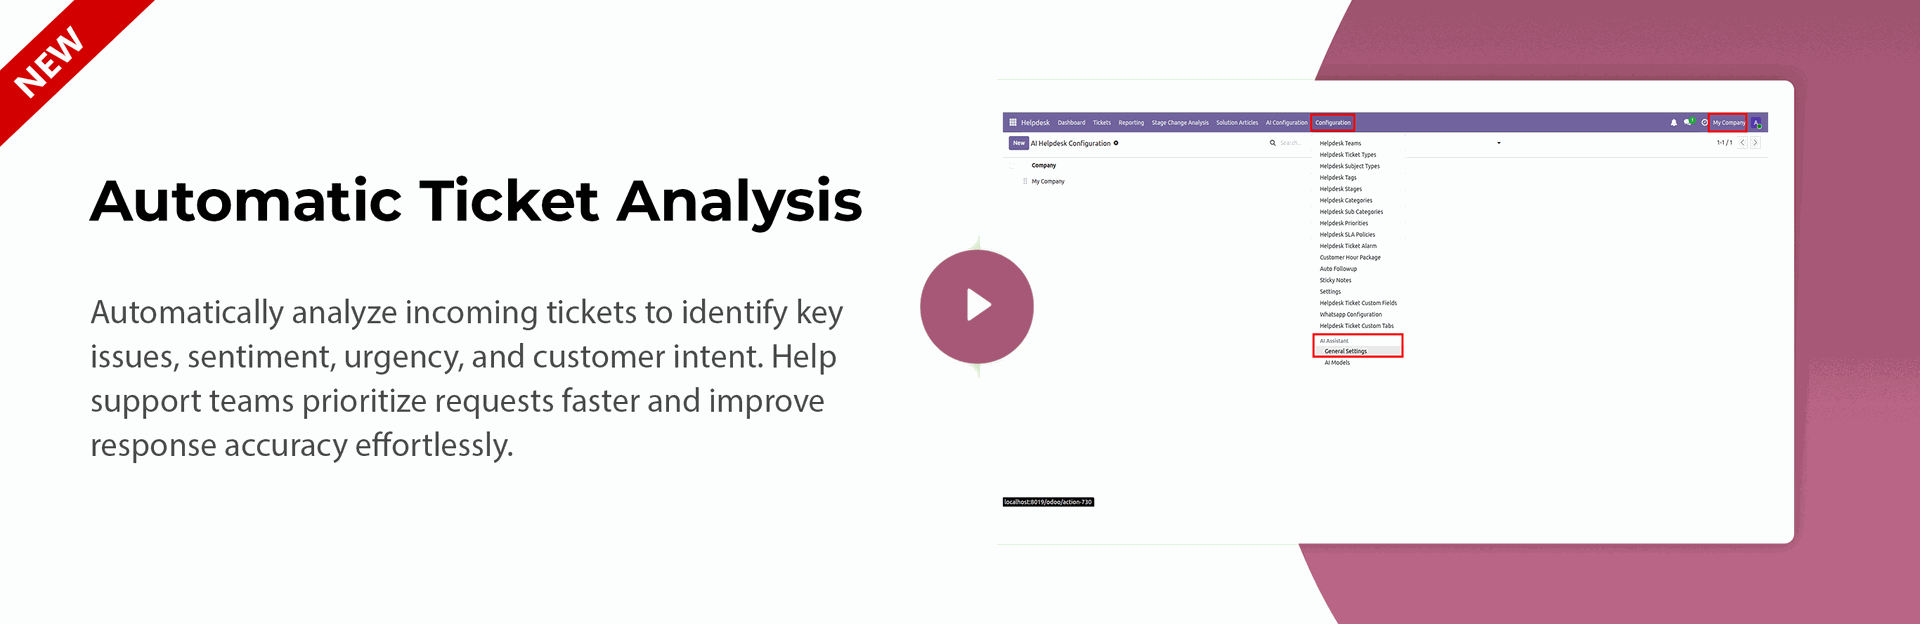
Automatic Ticket Analysis
-
Ai Details Filling
-
Ai Duplicate Detection & Merge Tickets
-
Attachment Analysis
-
Multi Issue Ticket Splitting
-
Transform Tickets into Knowledge Articles
-
AI-suggested solutions in Ticket
Open user access rights and set Helpdesk AI Assistant role to Manager.
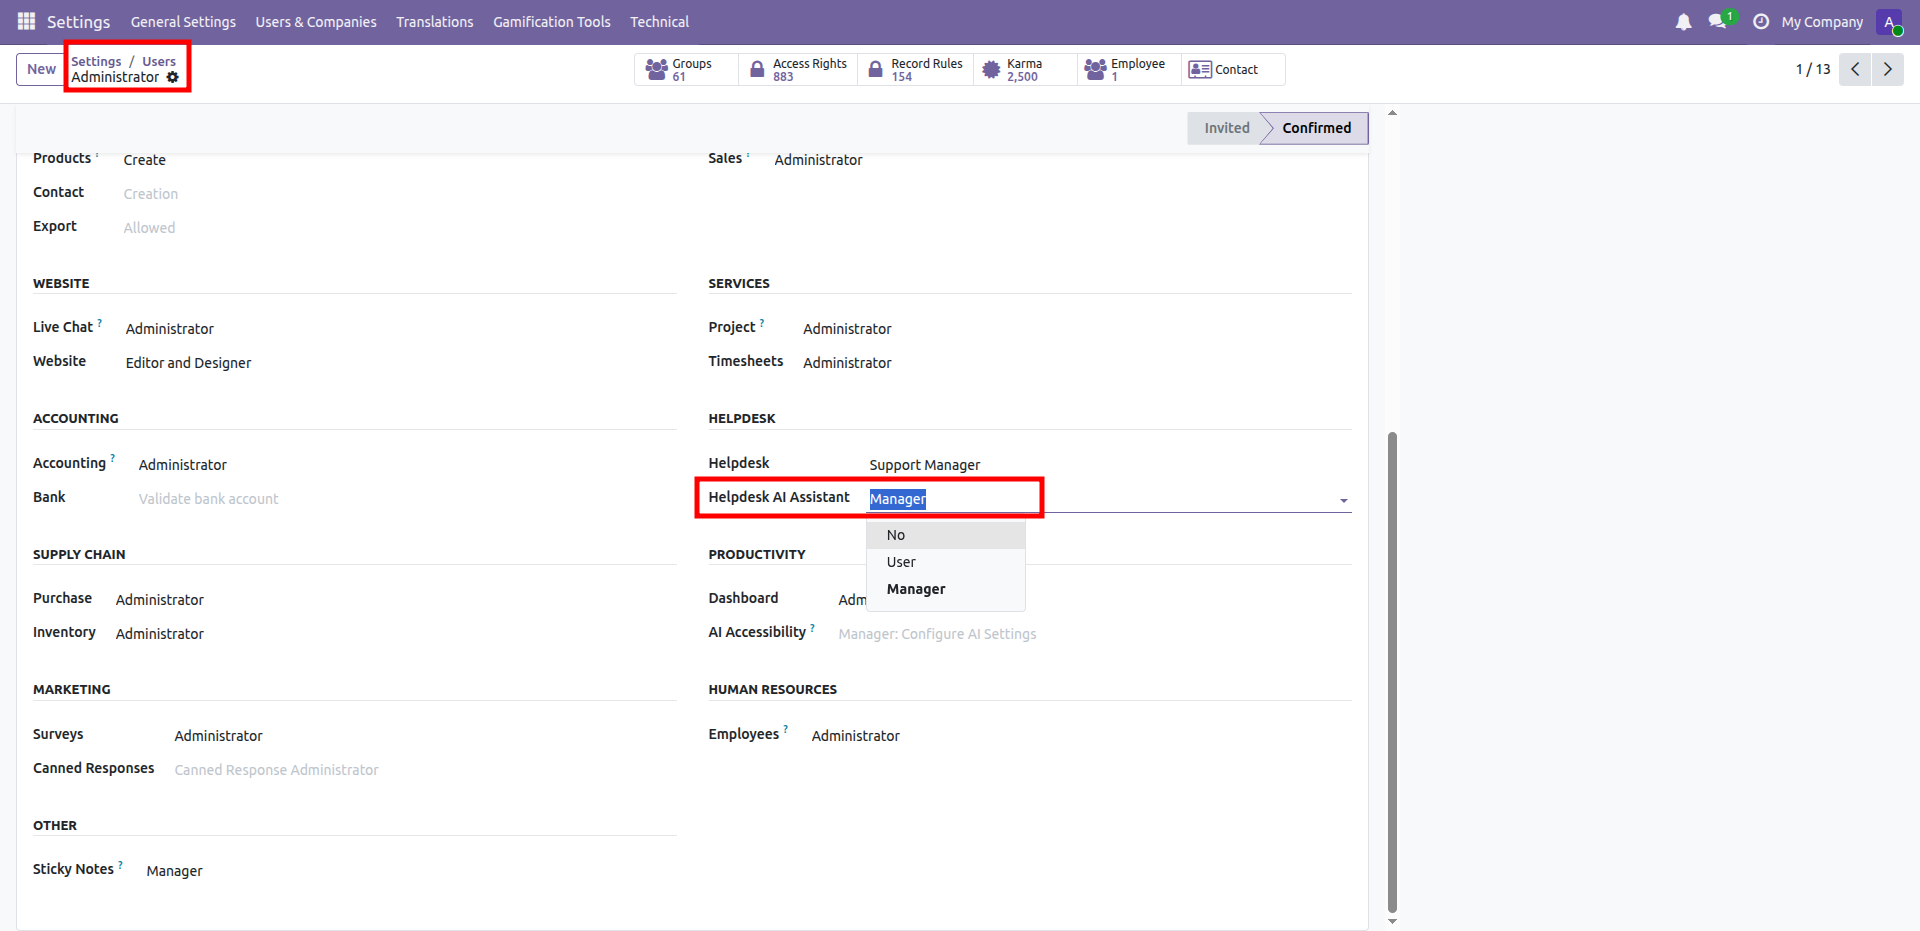
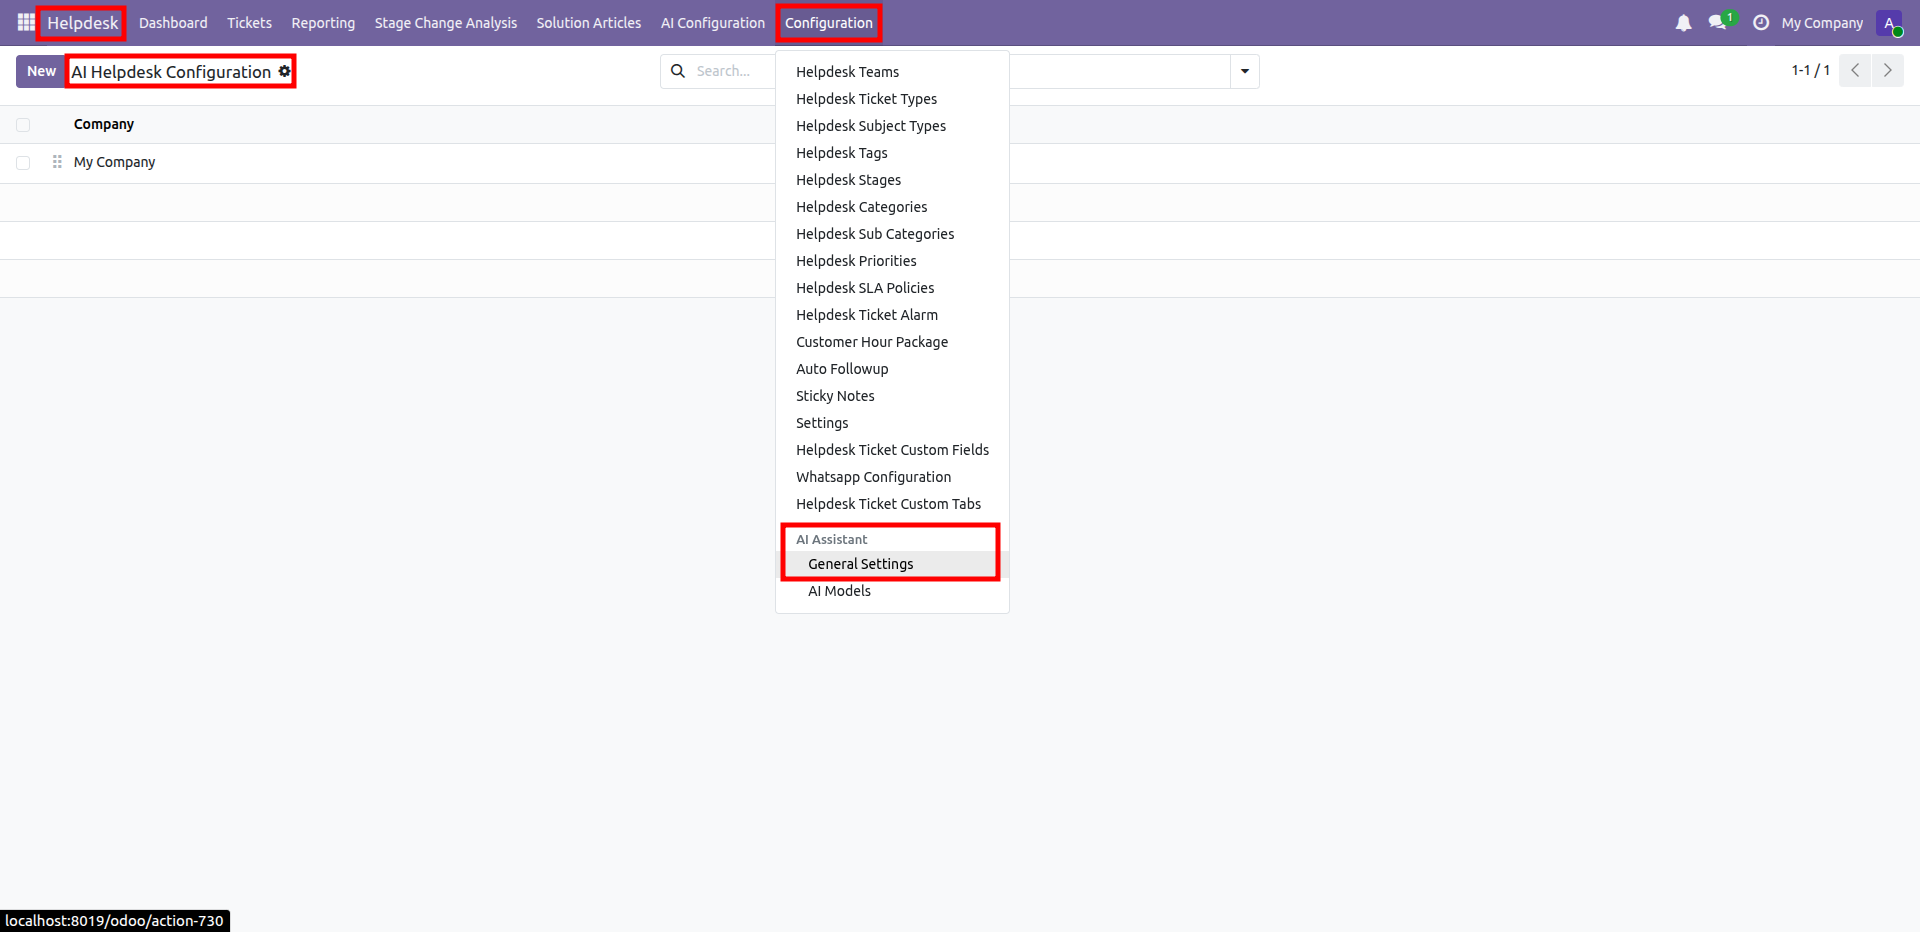
Open Configuration, select AI Assistant, and then press General Settings.
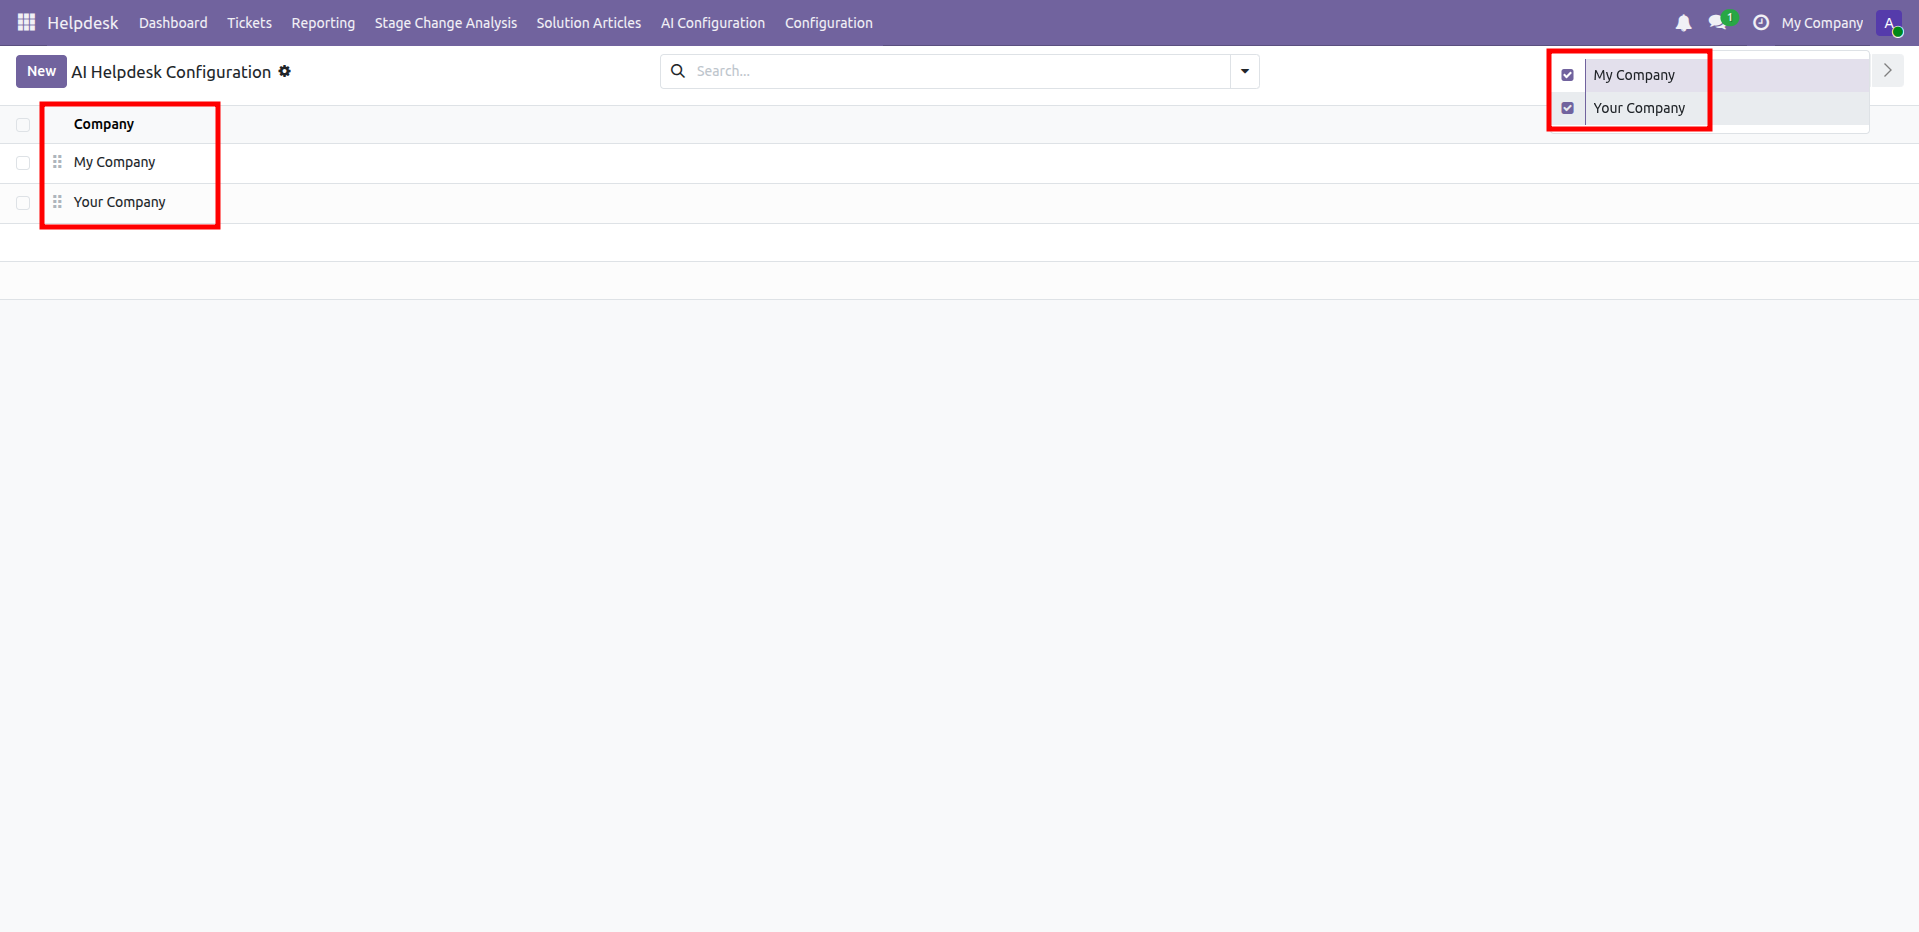
Review available AI Helpdesk configurations and confirm the selected companies are enabled.
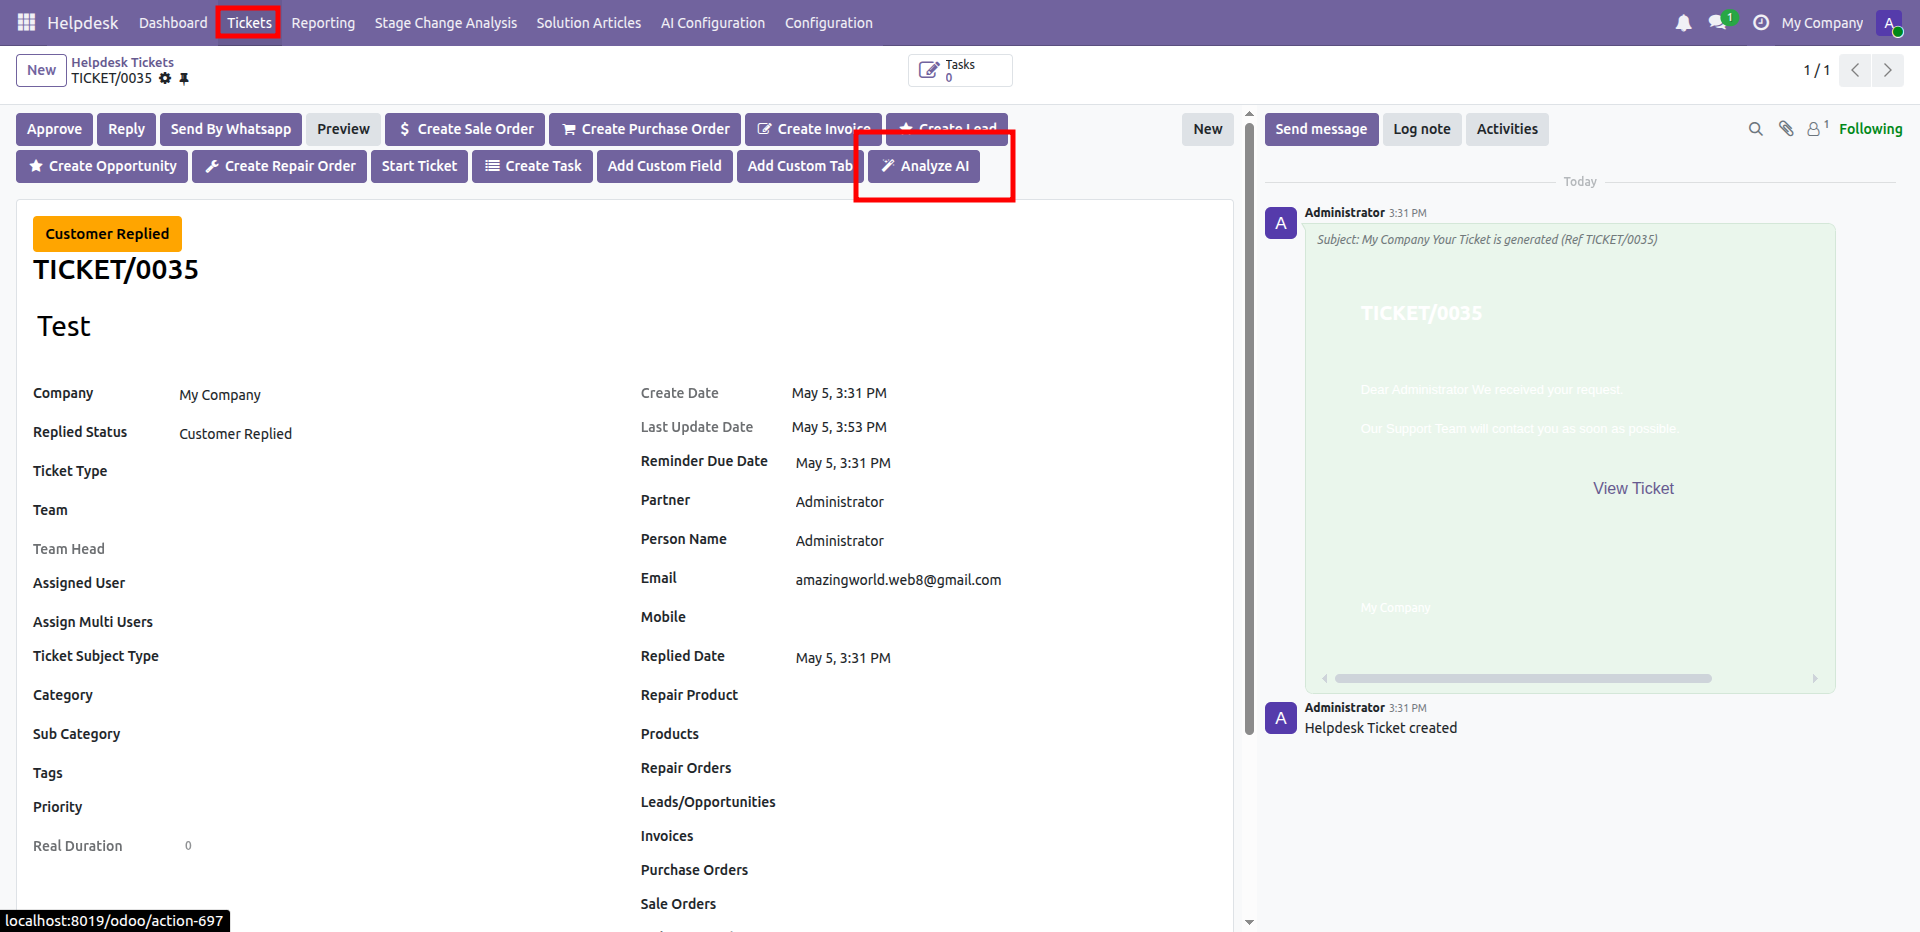
Click 'Analyze AI' to analyze tickets.
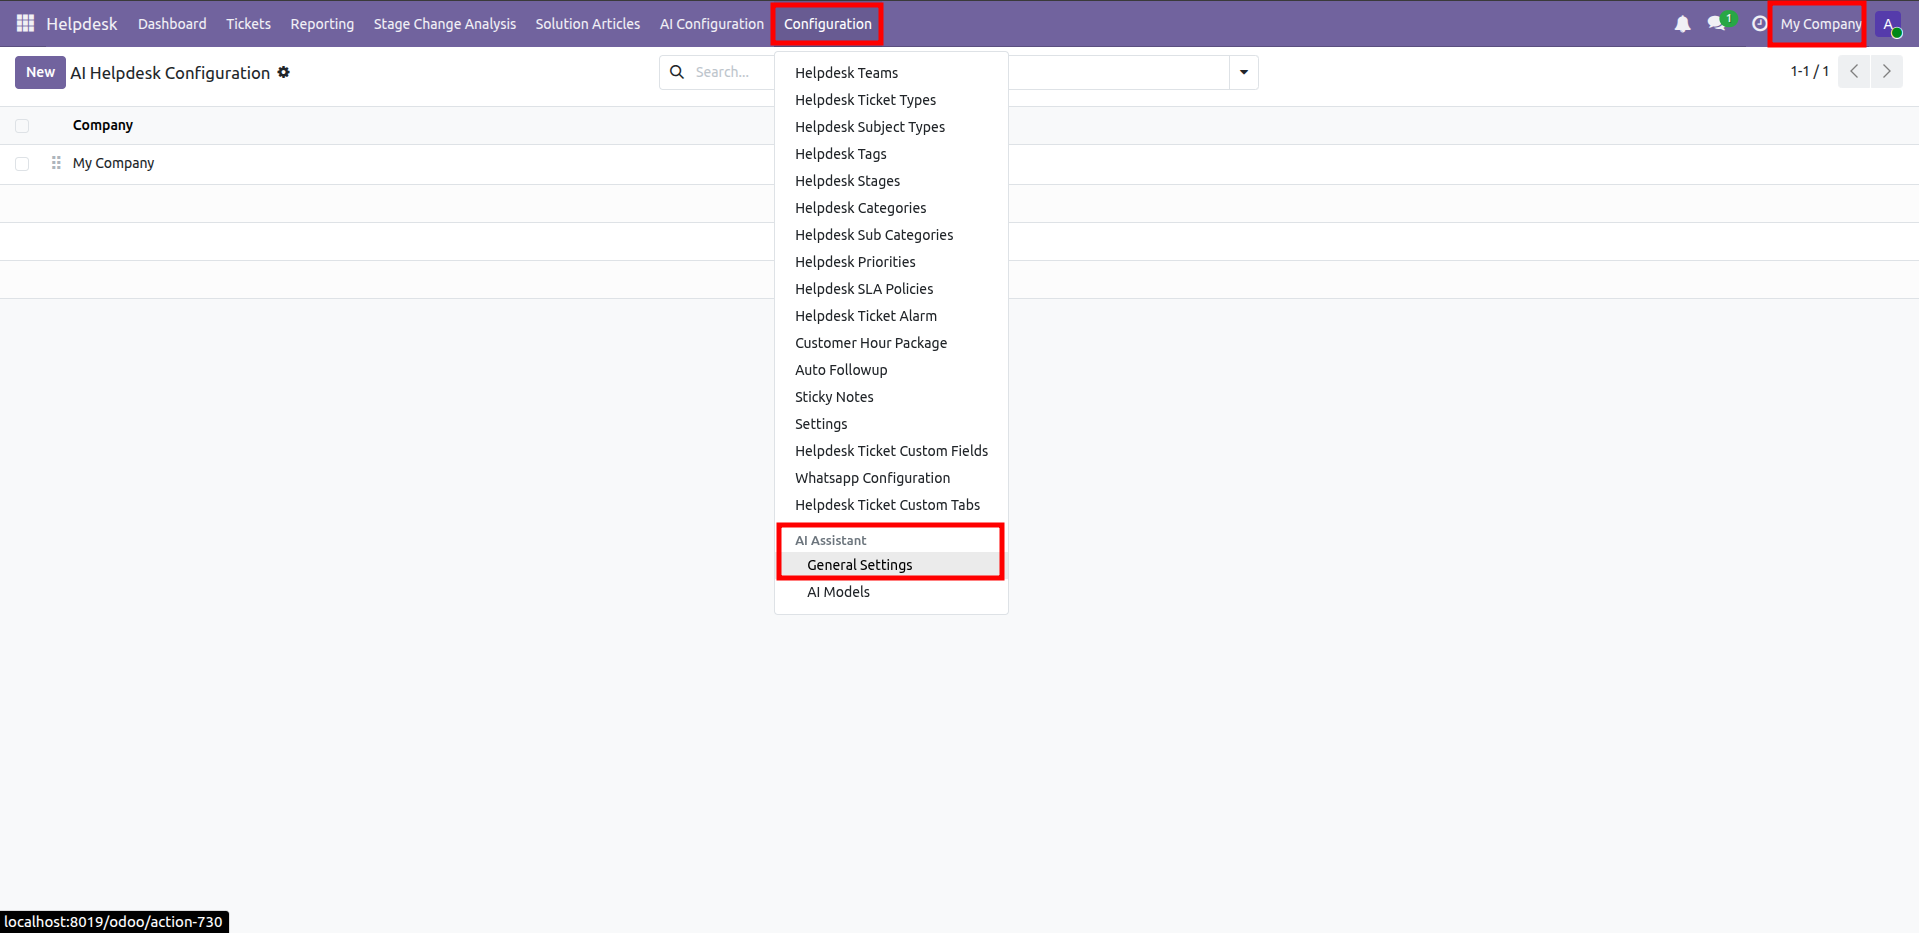
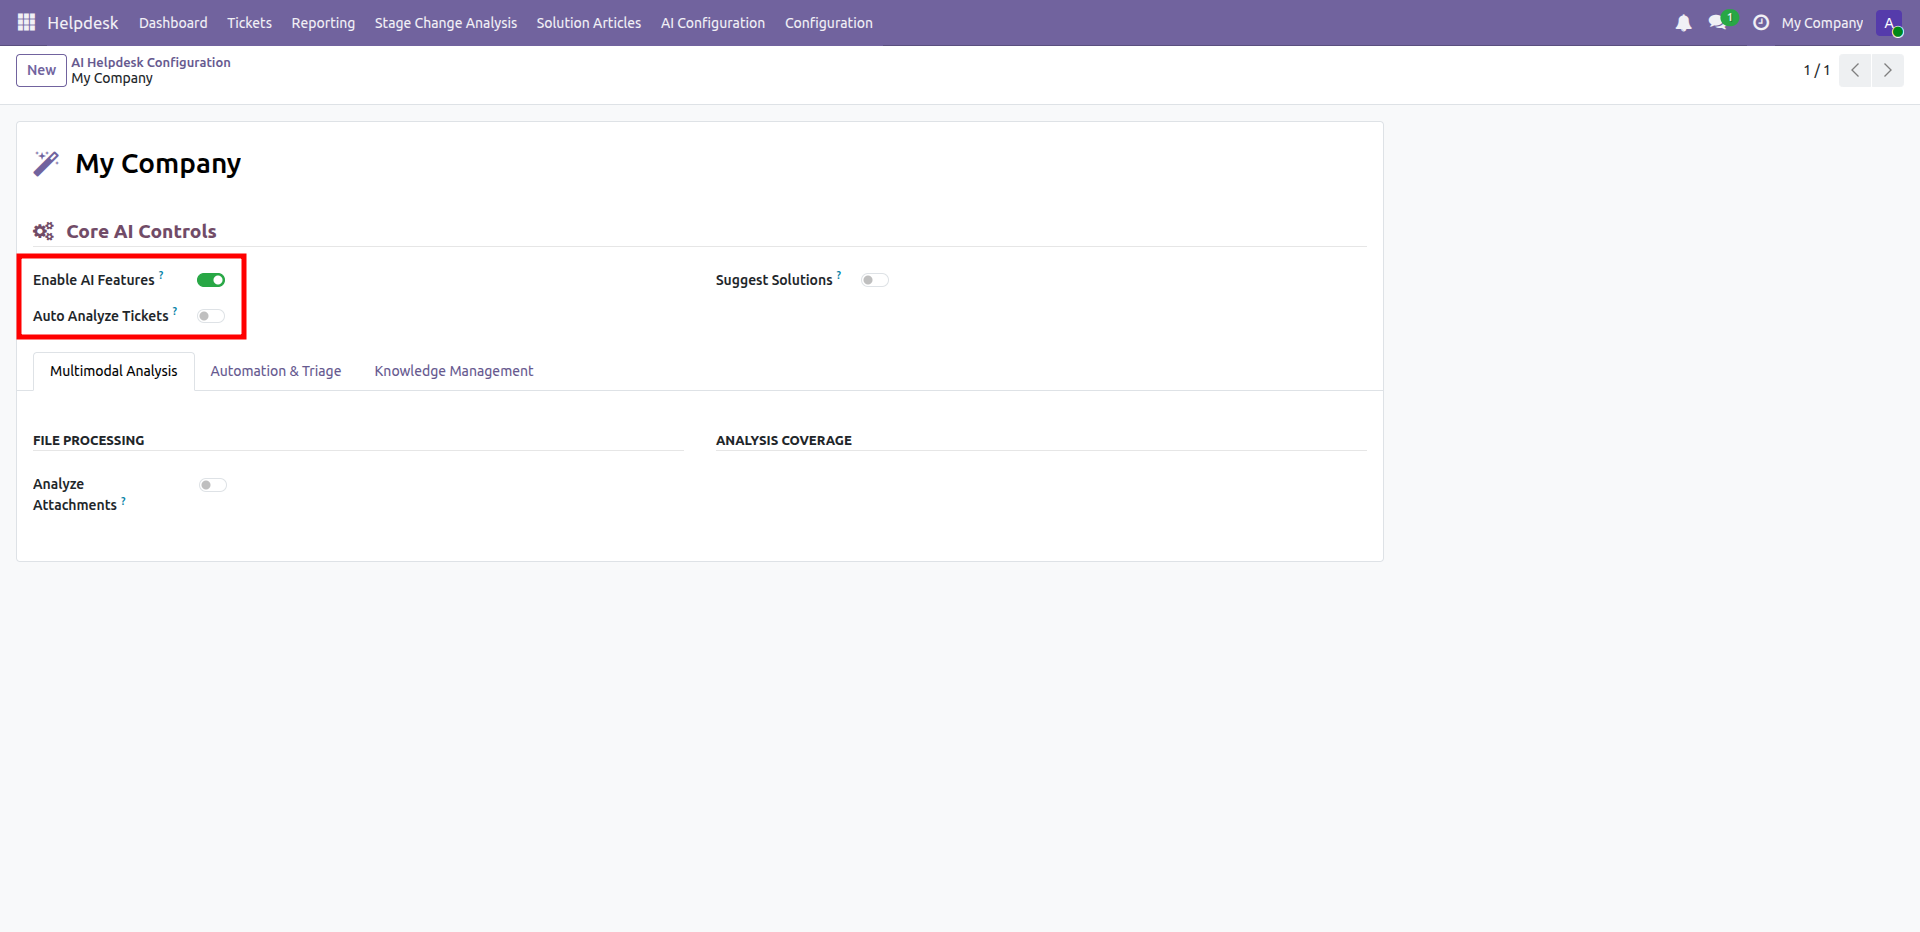
Open AI Assistant General Settings.
Enable Auto Analyze Tickets to start automatic analysis for incoming helpdesk requests.
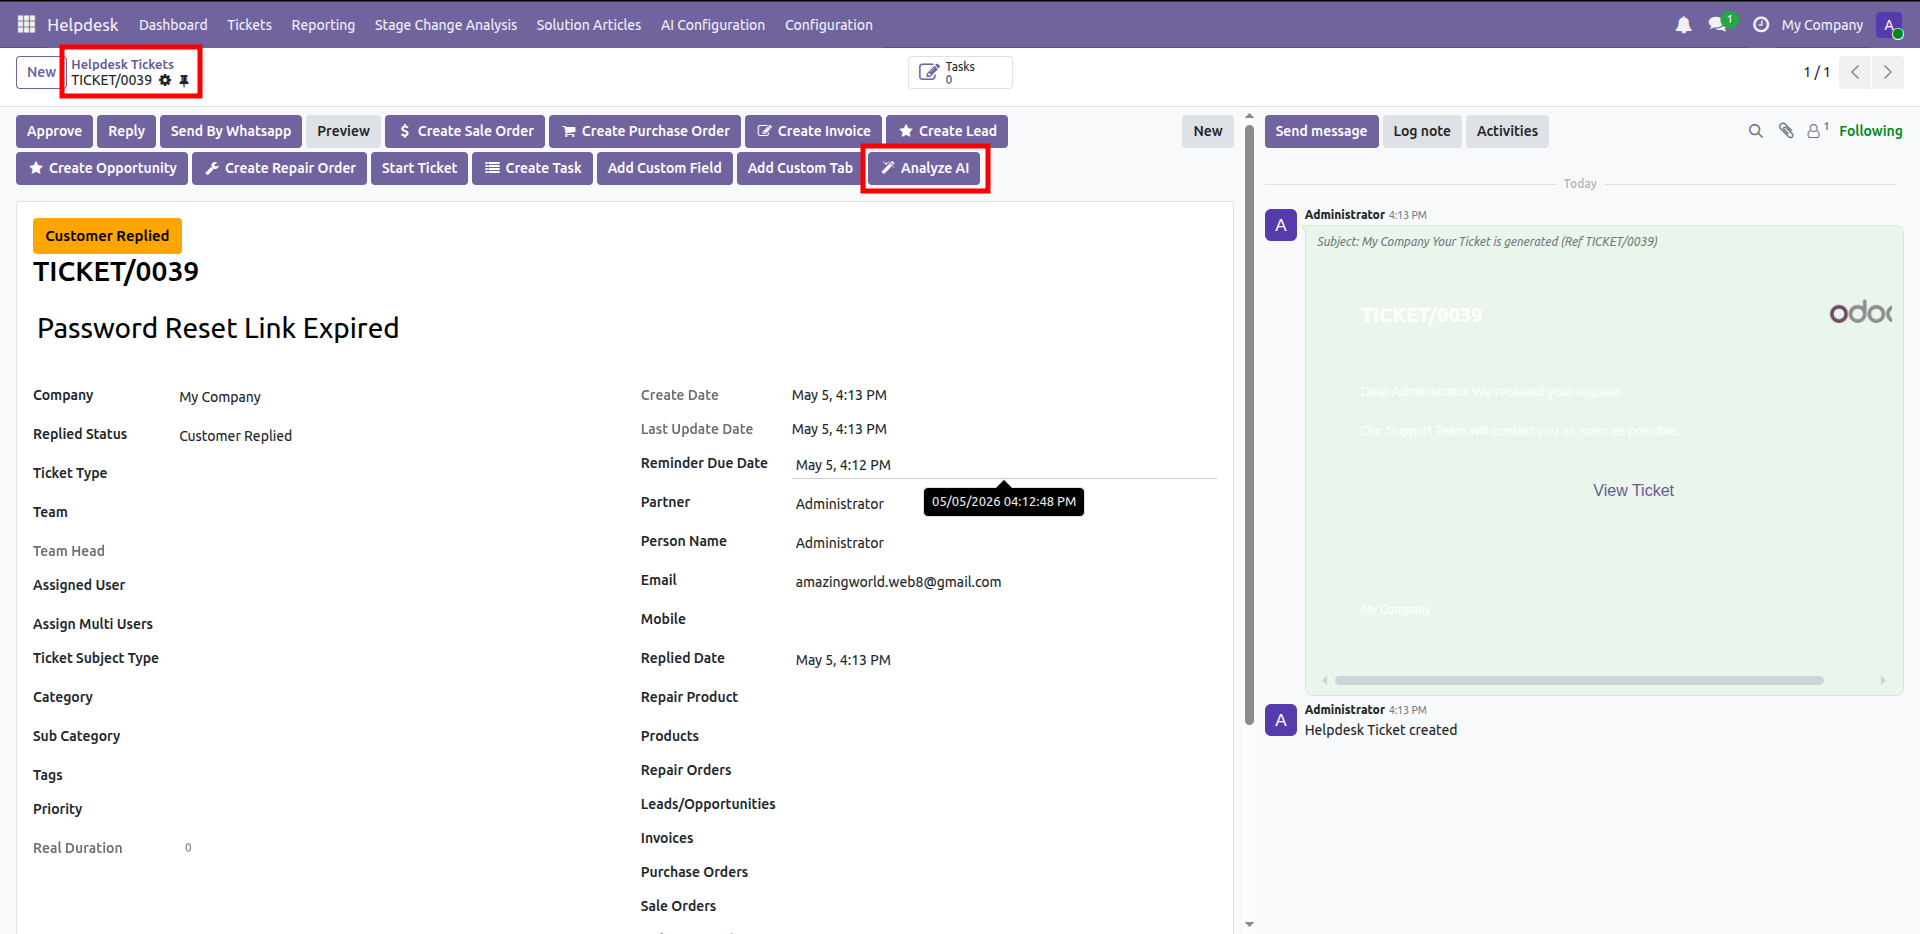
Open the ticket and then press Analyze AI to generate findings.
Open the AI Assistant tab to review the generated analysis report.
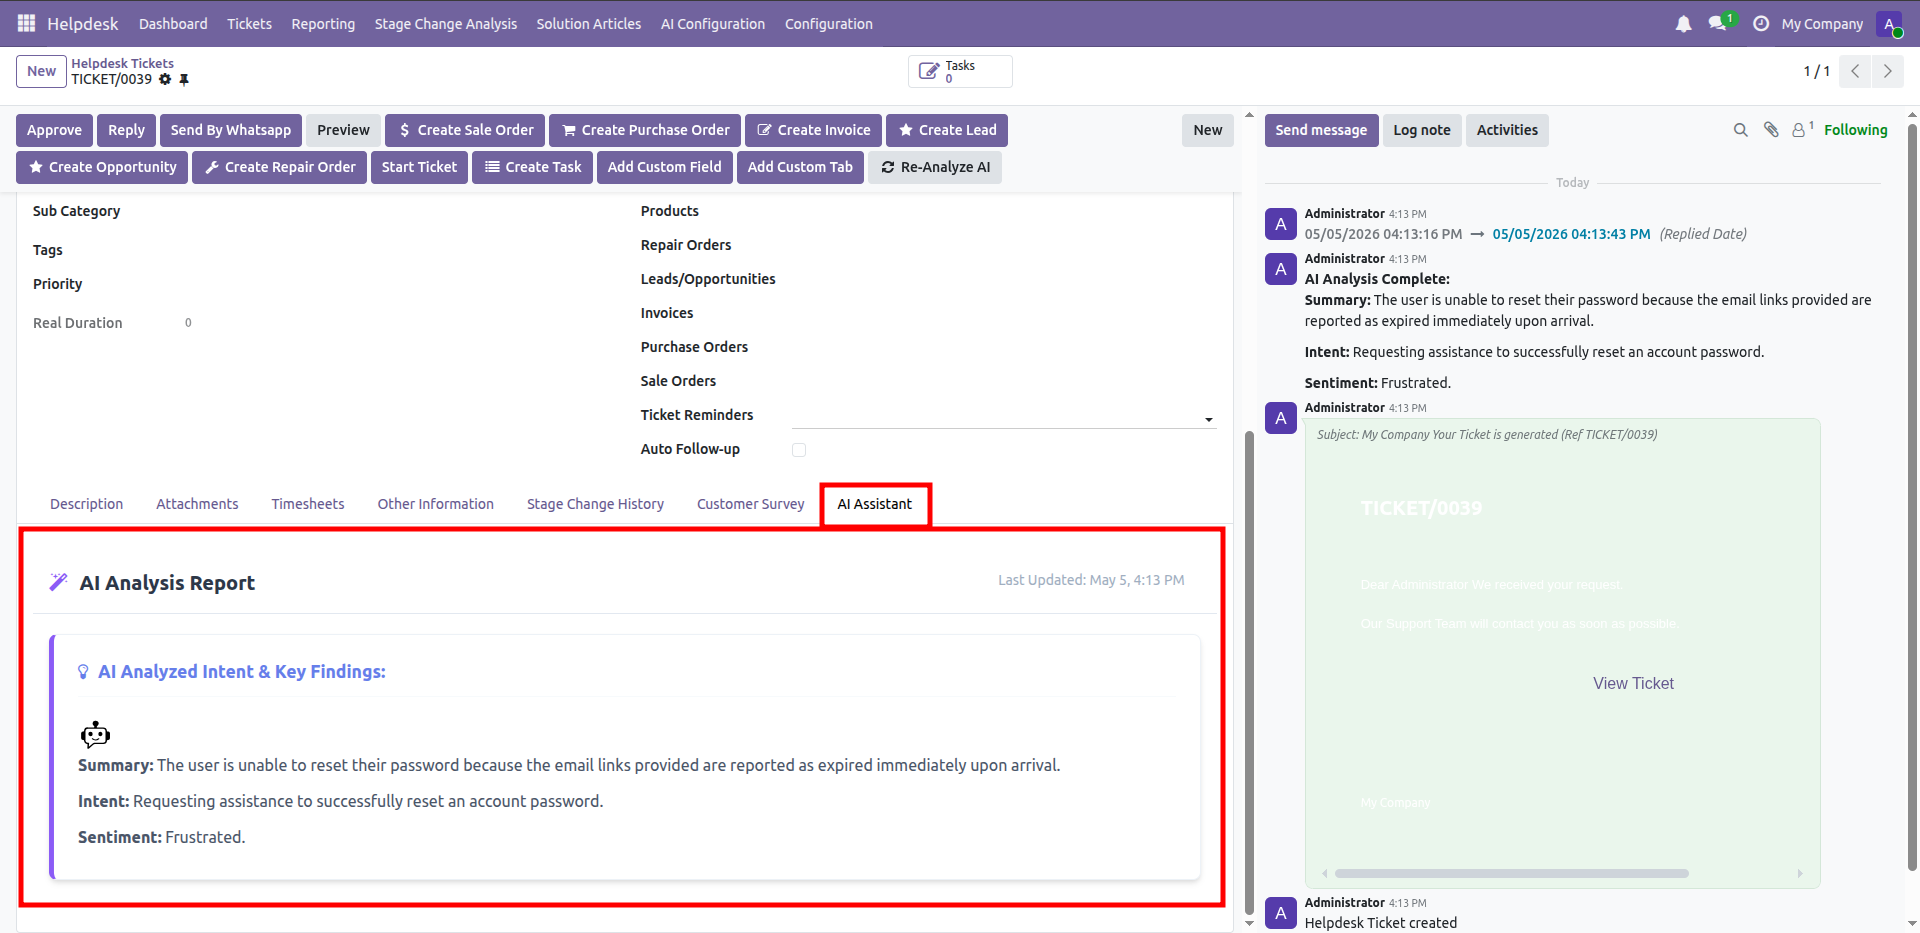
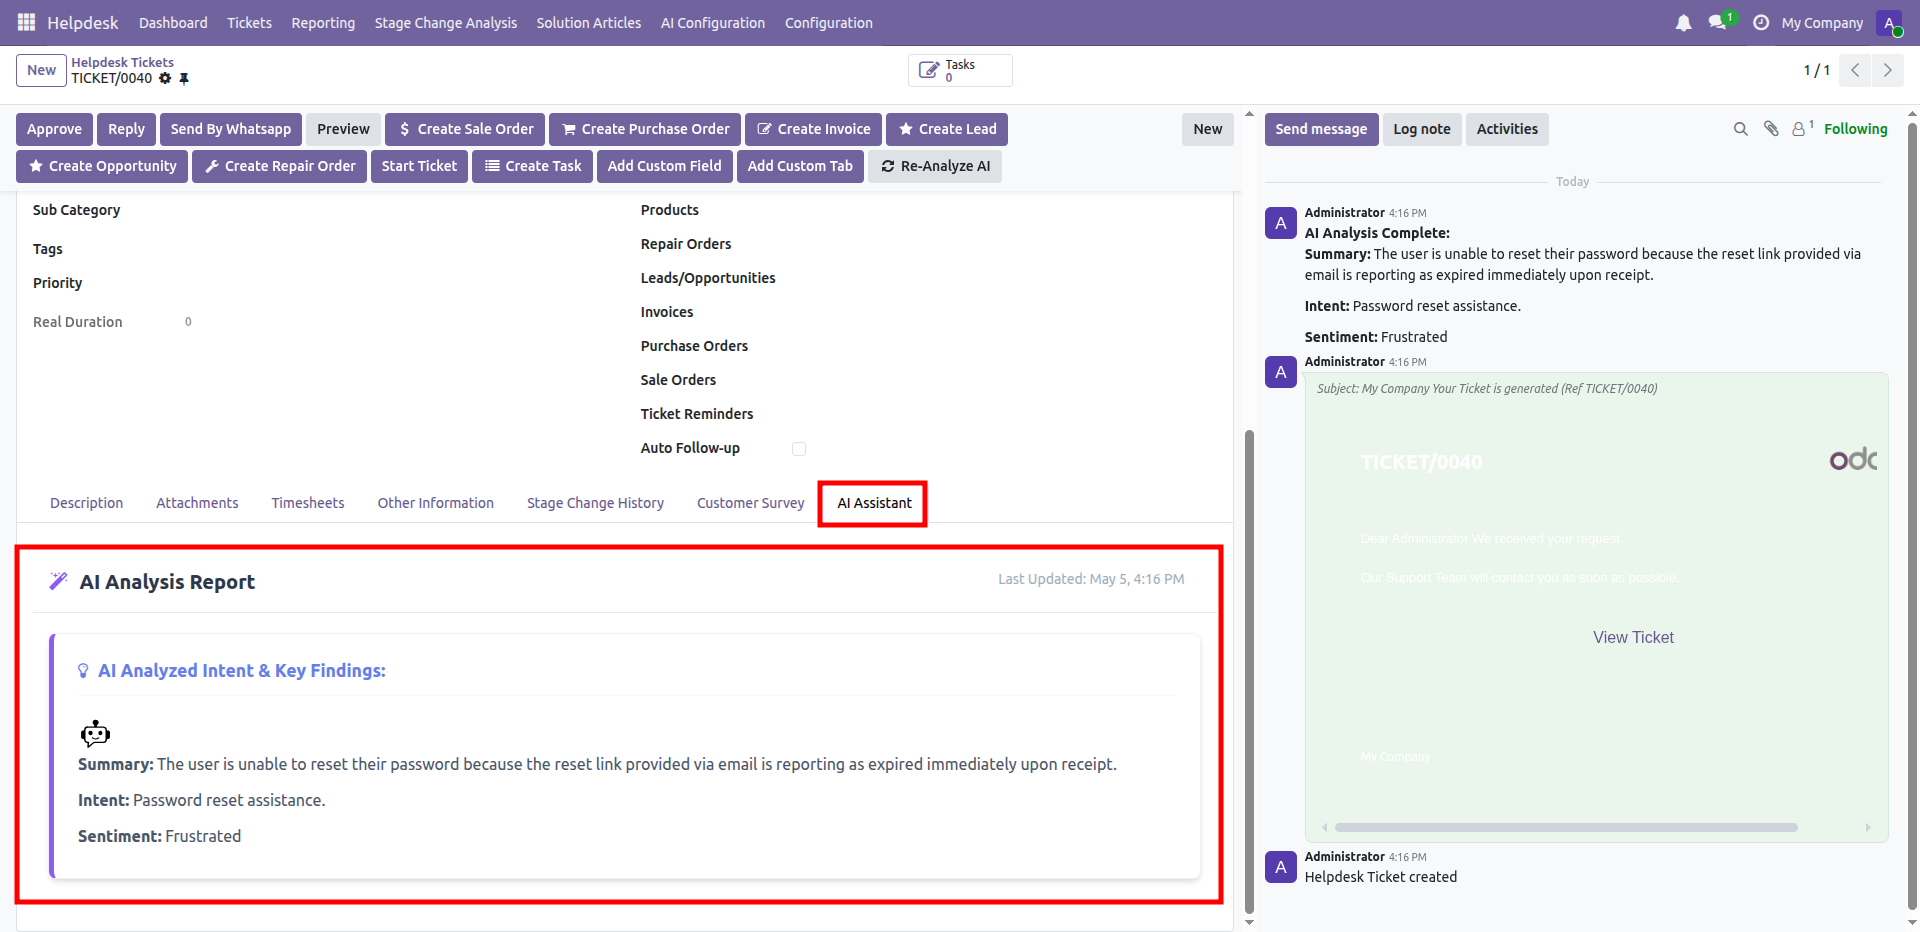
Displays the AI analyzed summary, intent, and sentiment for this ticket.
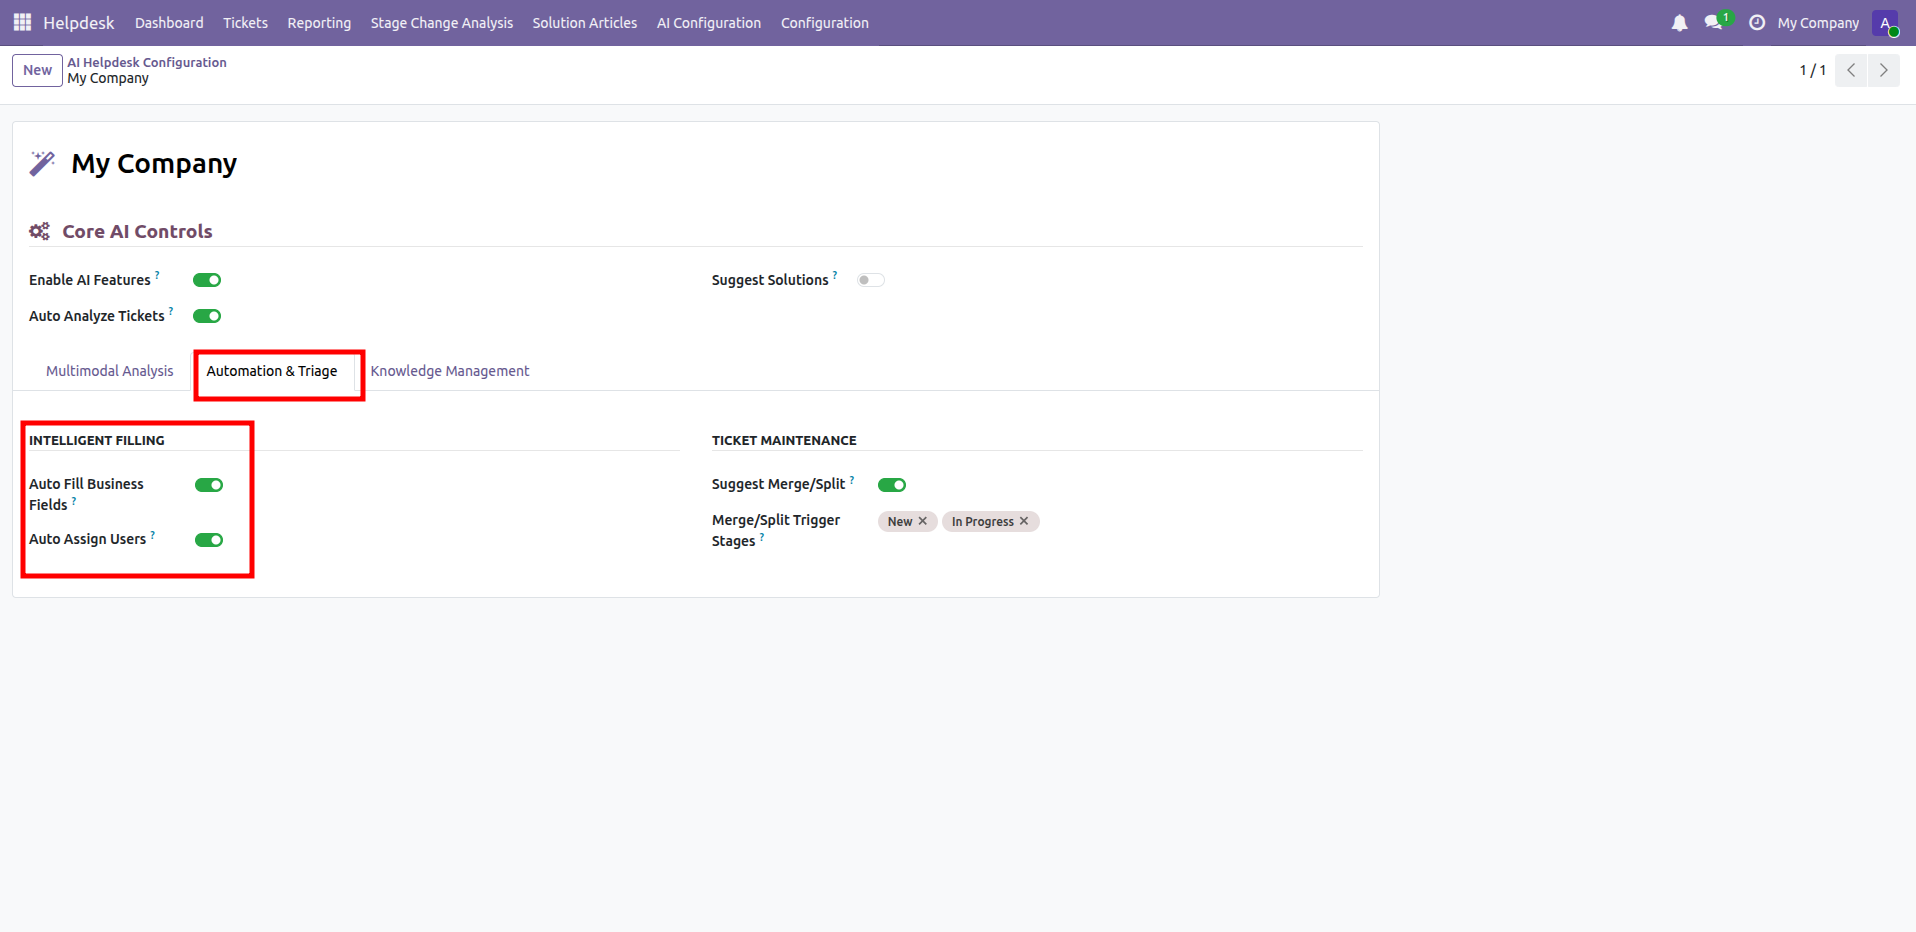
Open Automation & Triage to enable auto fill and user assignment.
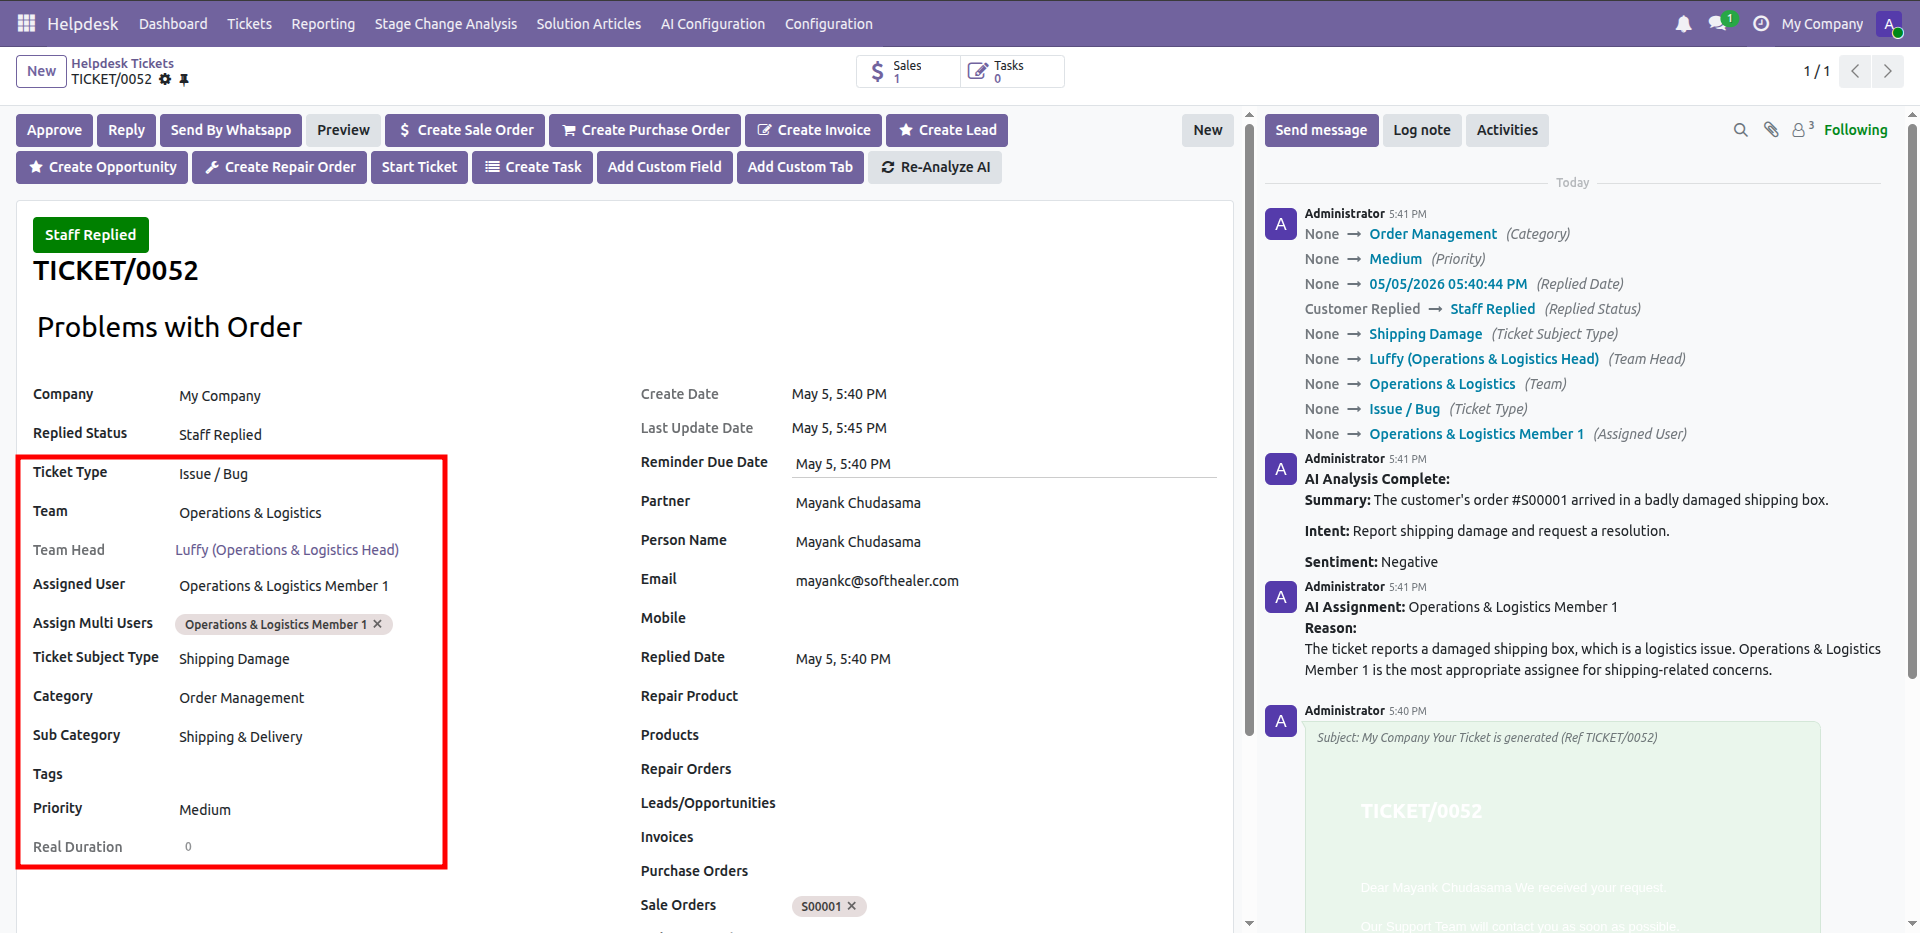
Review the ticket fields populated automatically from the AI assignment result.
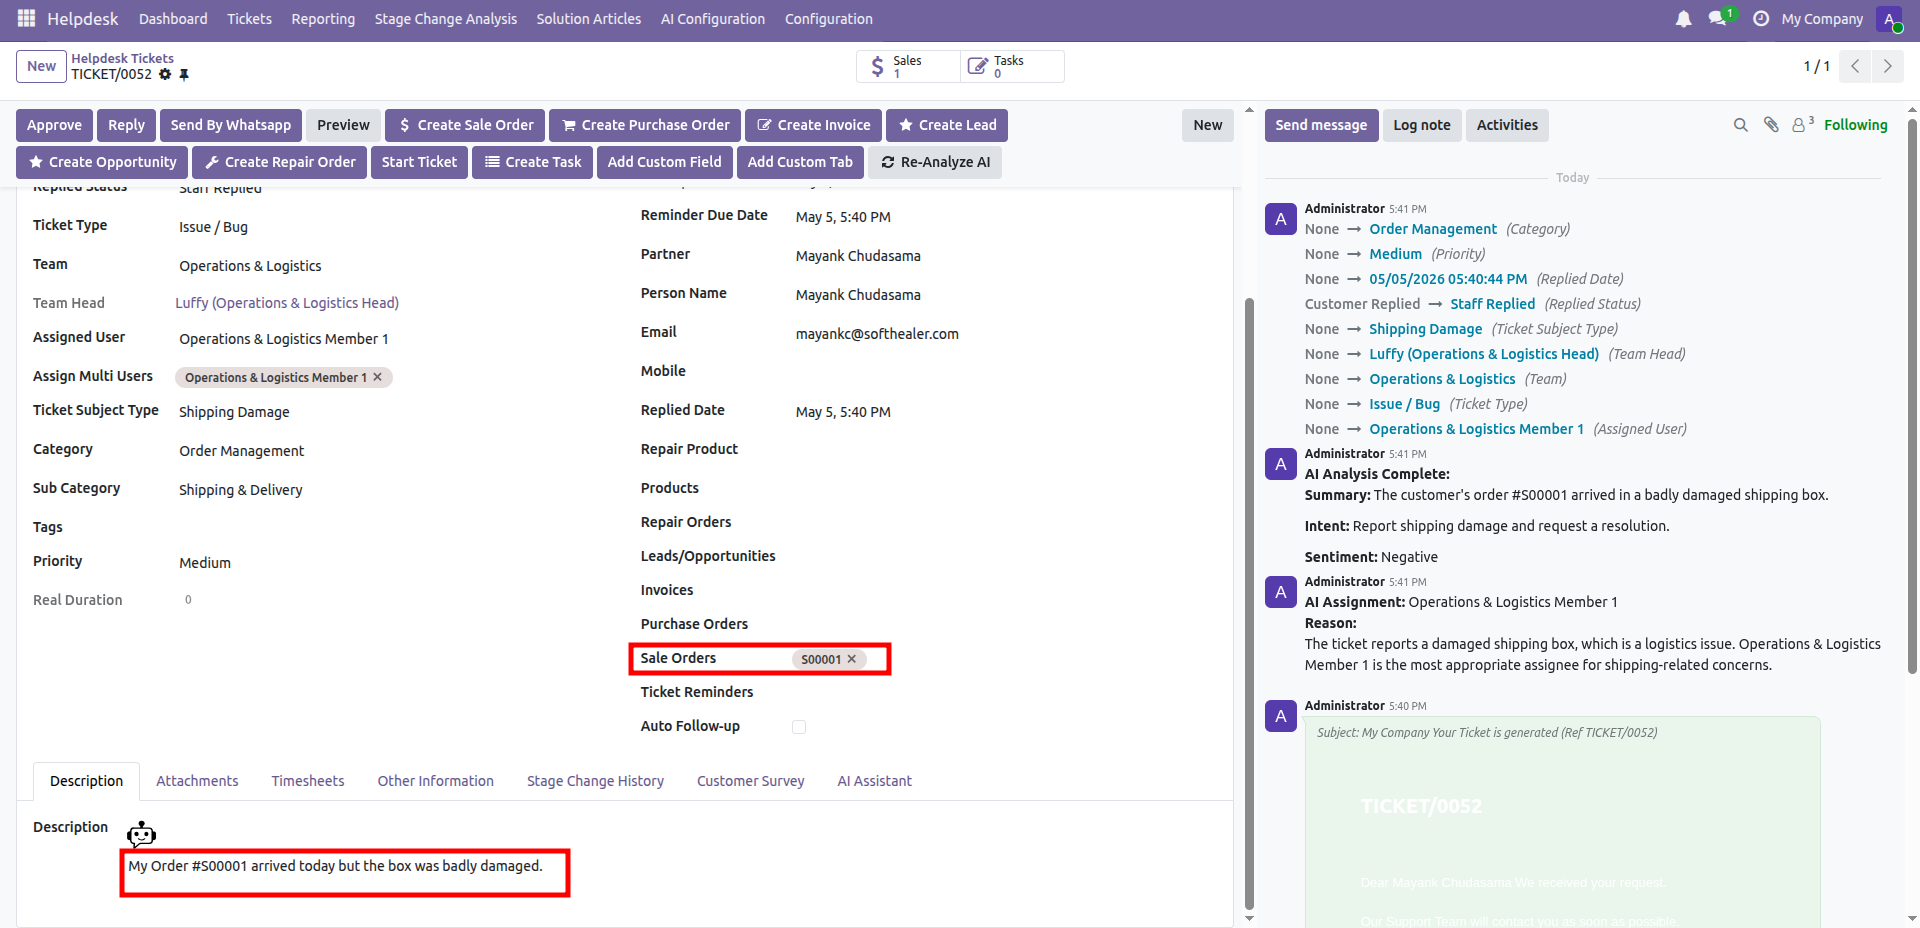
Open the sales order reference created from the analyzed attachment content.
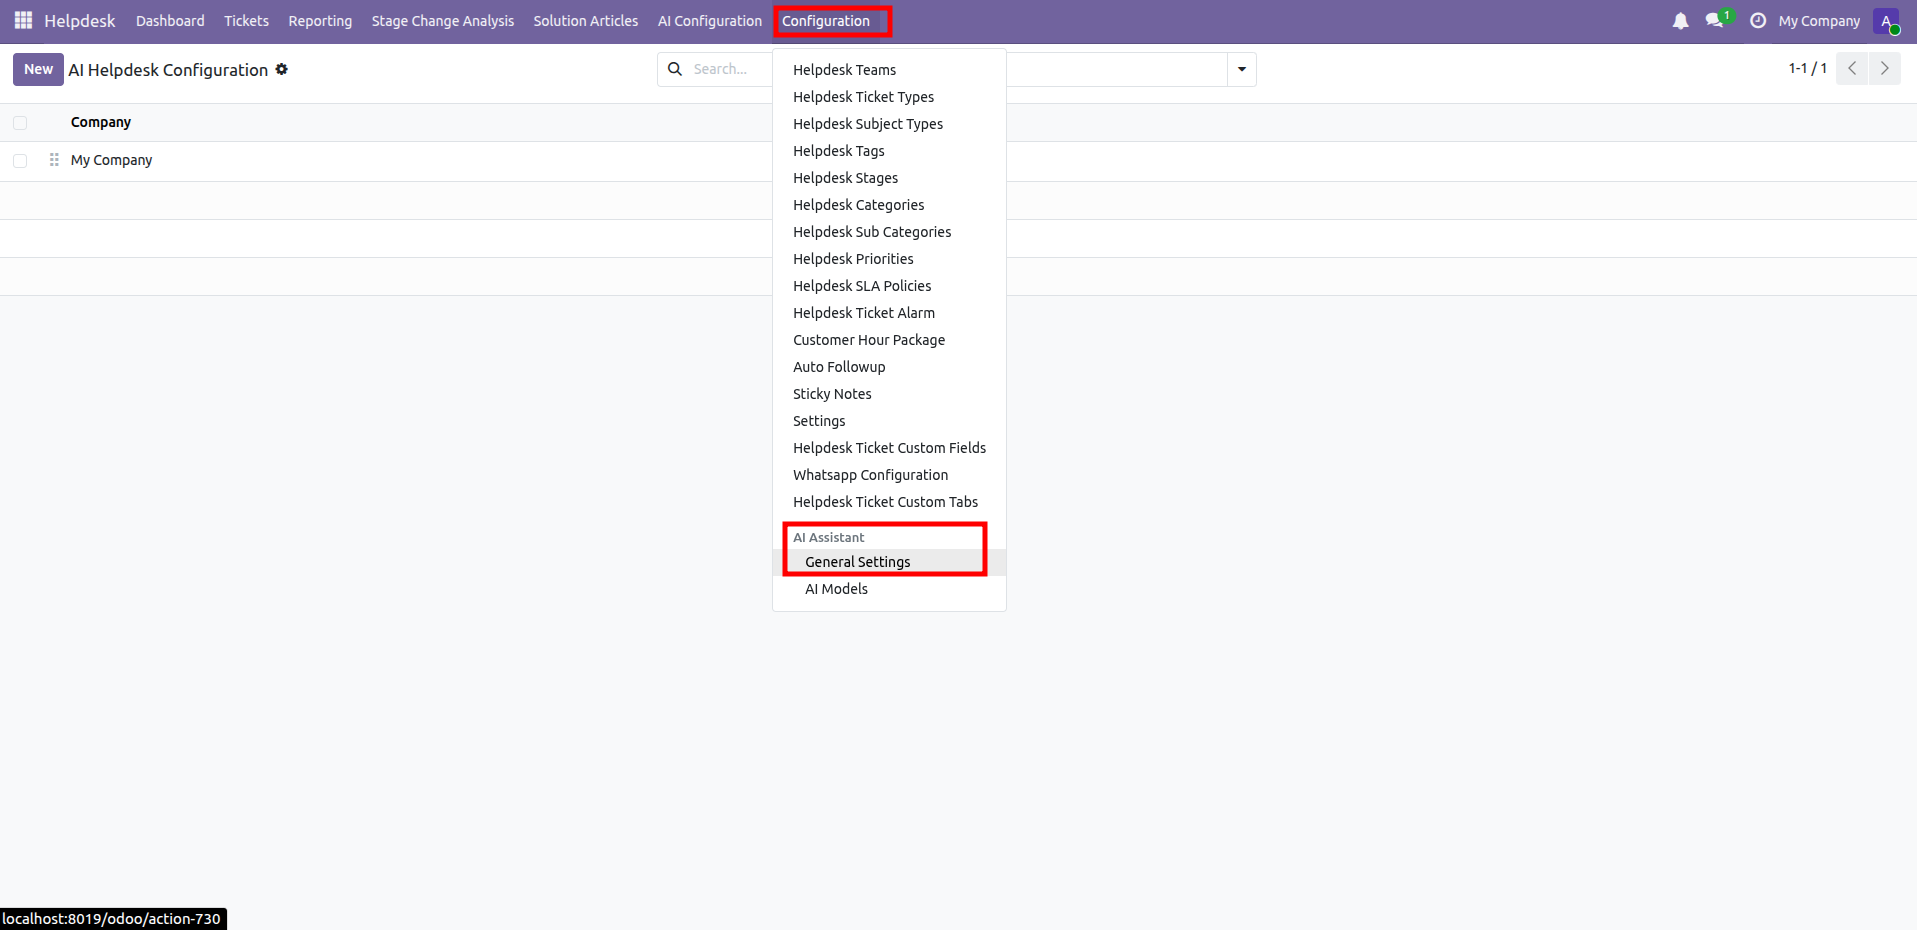
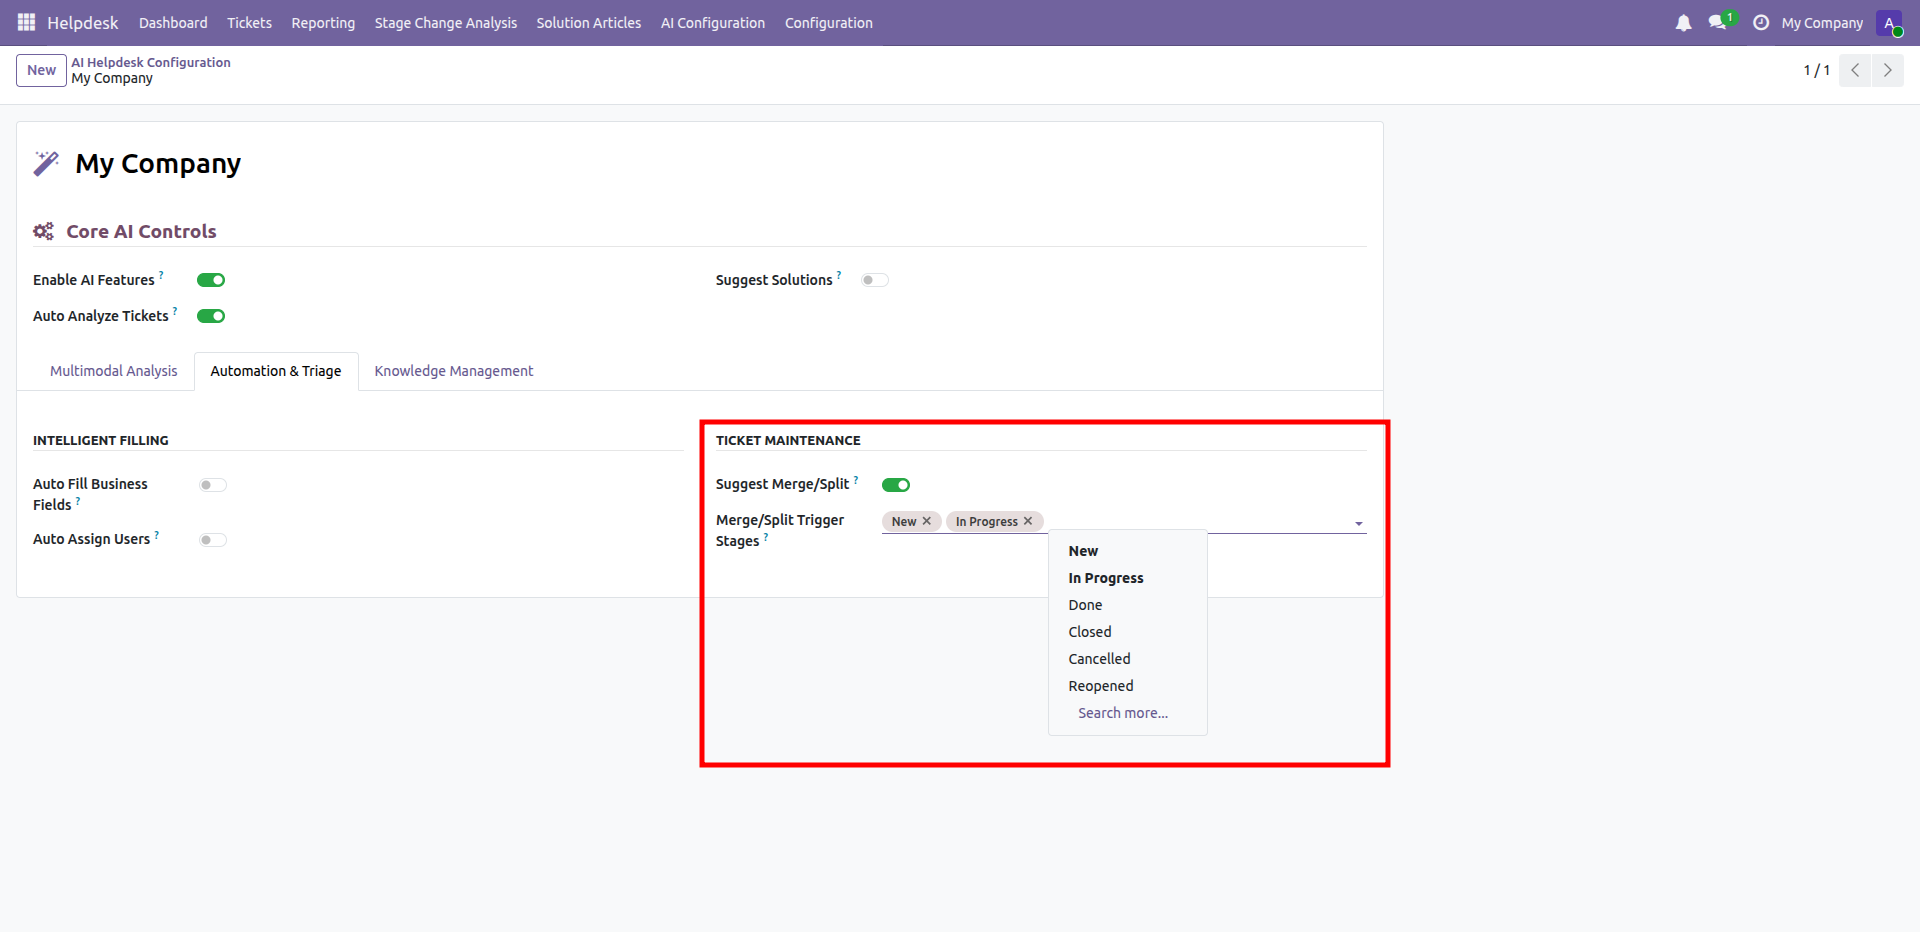
Open Configuration and then select General Settings under AI Assistant to configure duplicate merging.
Enable Suggest Merge/Split and then choose trigger stages to detect duplicate tickets automatically.
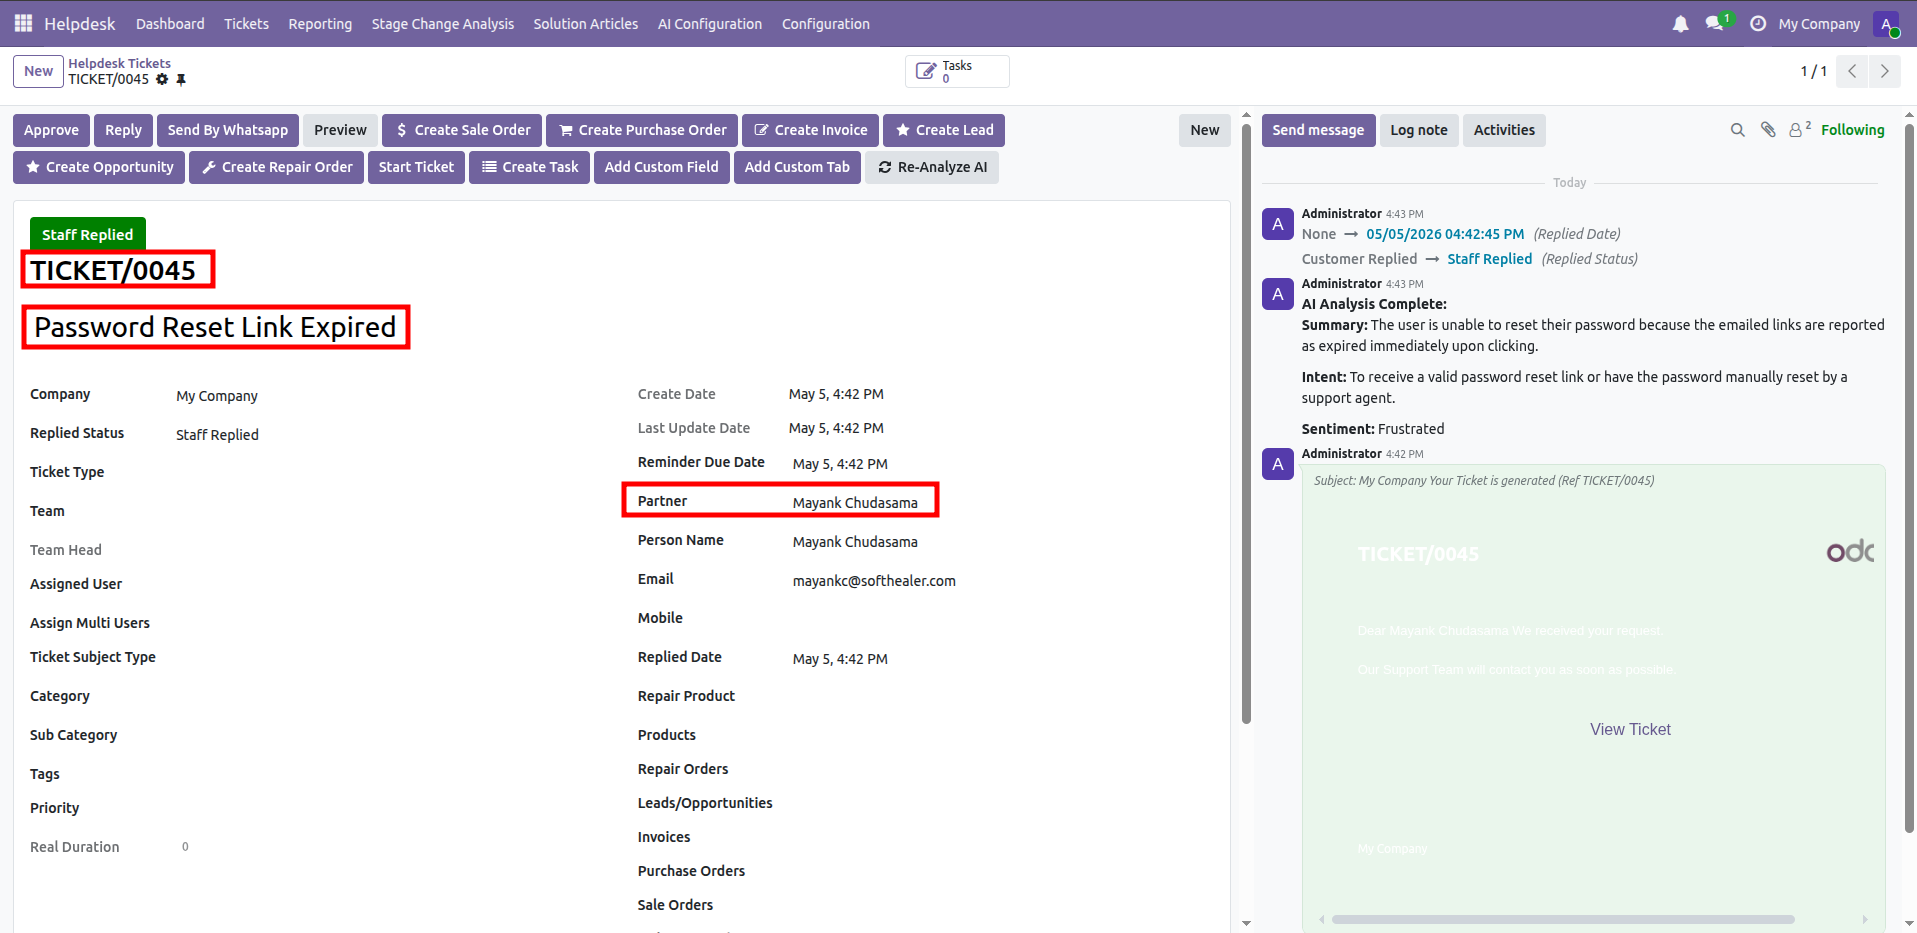
Review the original ticket details before checking AI duplicate matching for this customer issue.
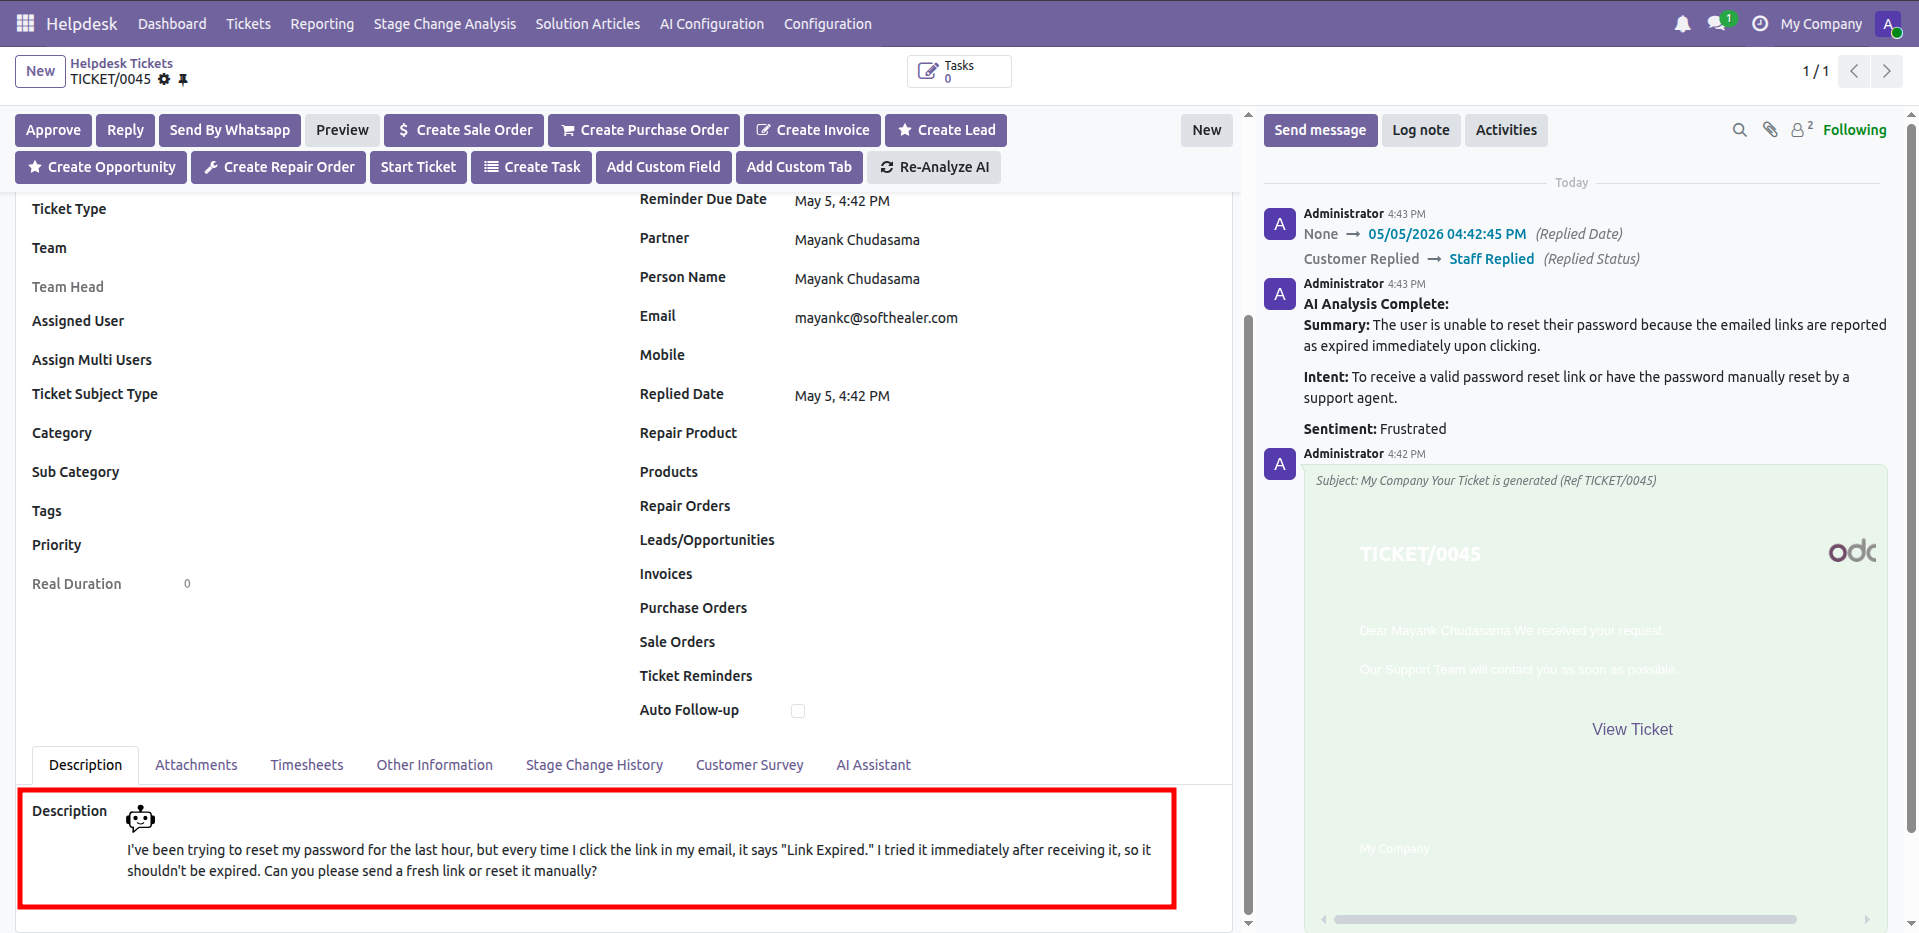
Review the ticket description to confirm the reported reset issue matches another support request.
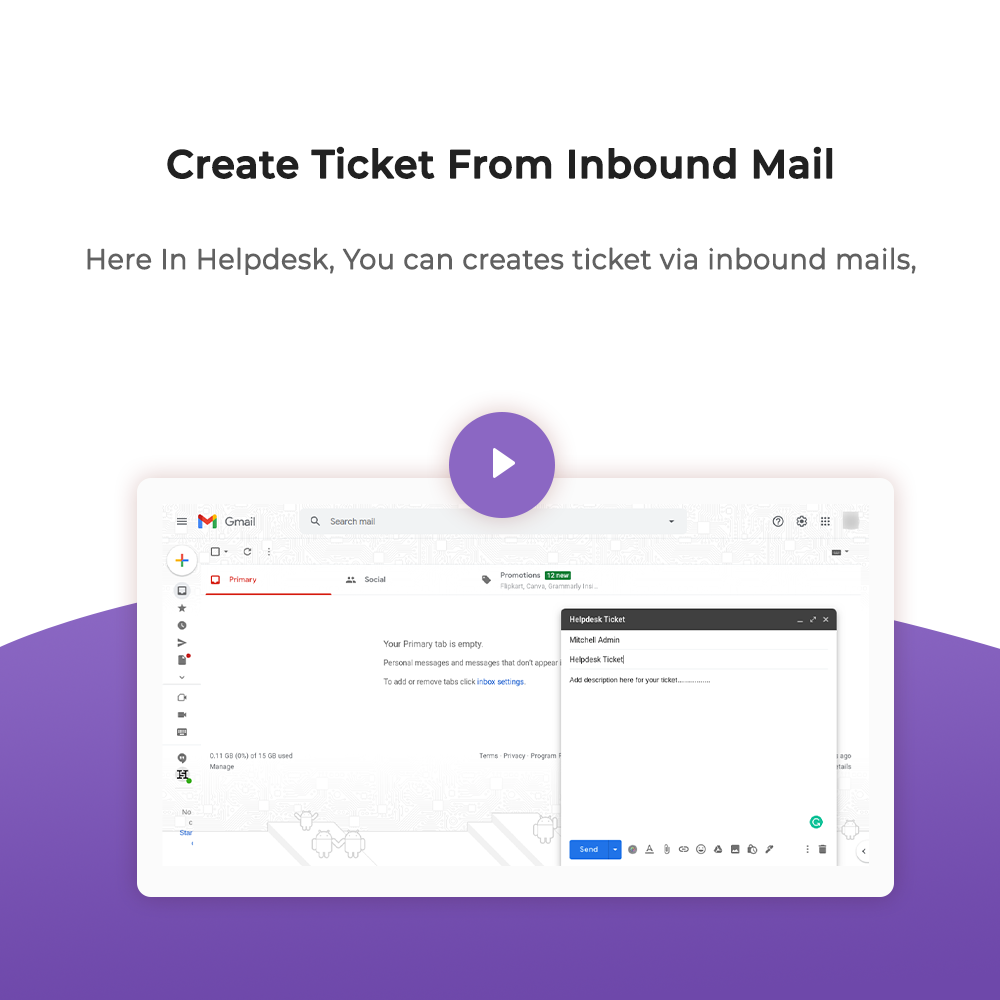
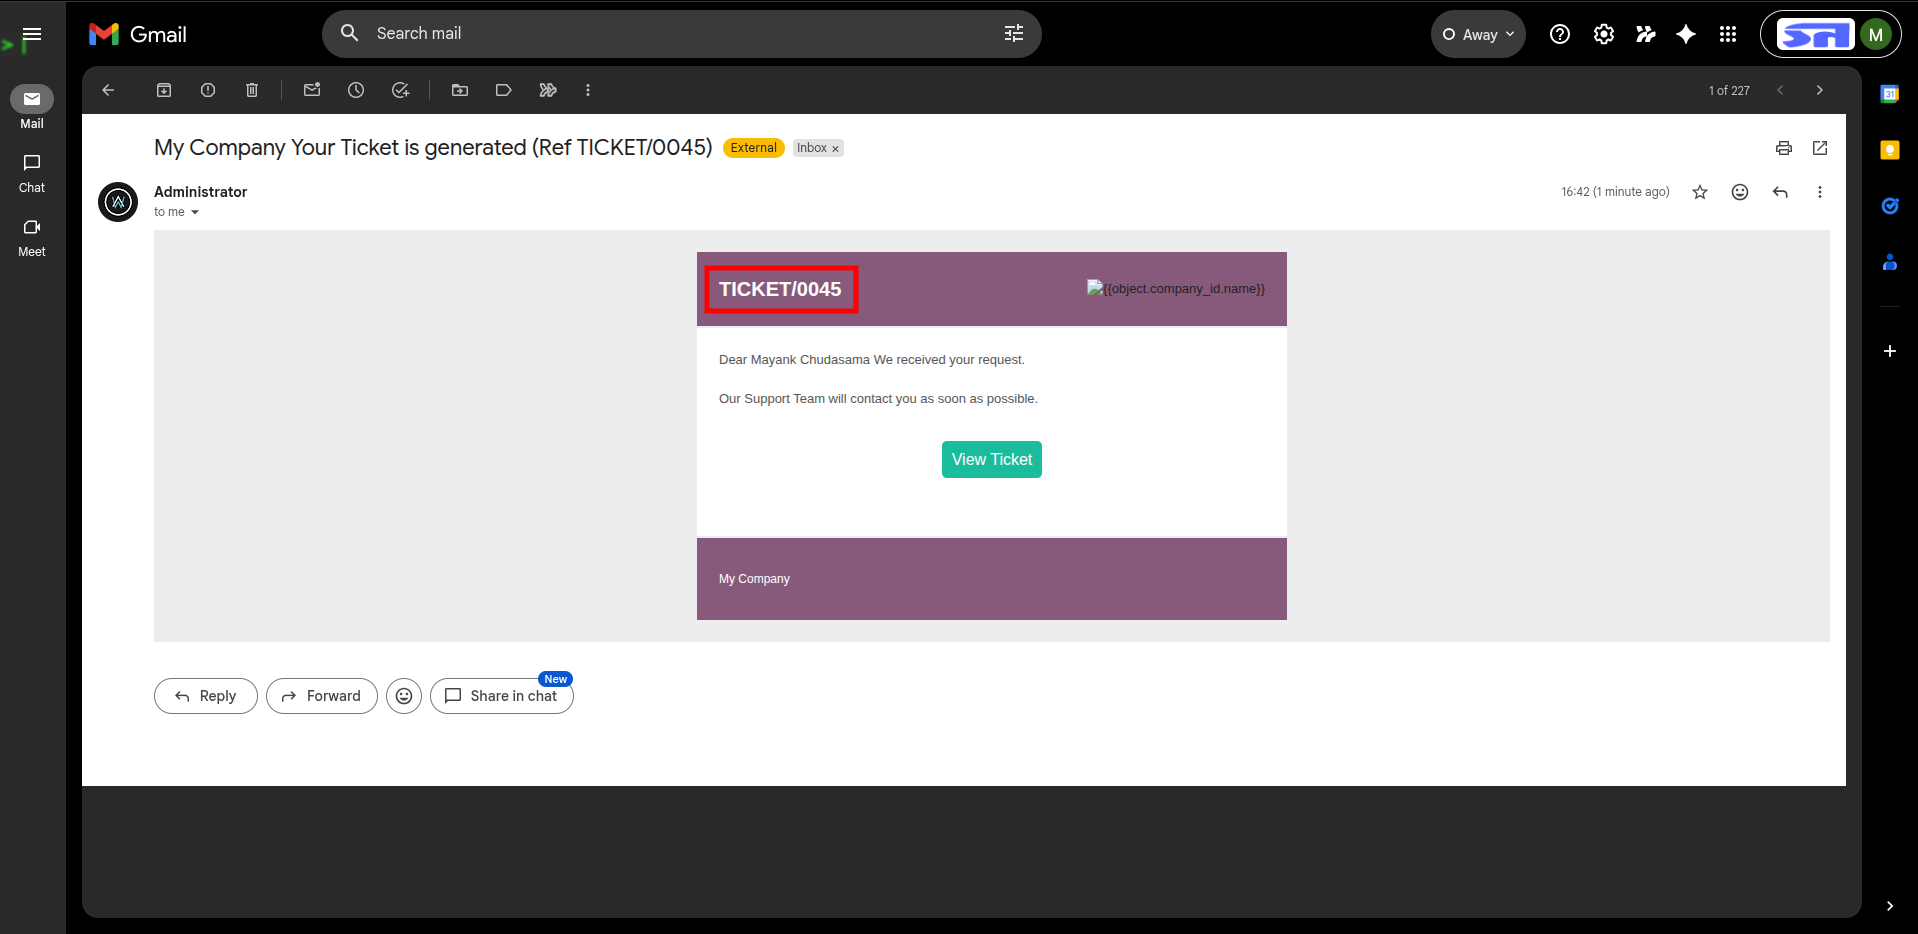
Send the customer email to generate another ticket carrying the same password reset complaint.
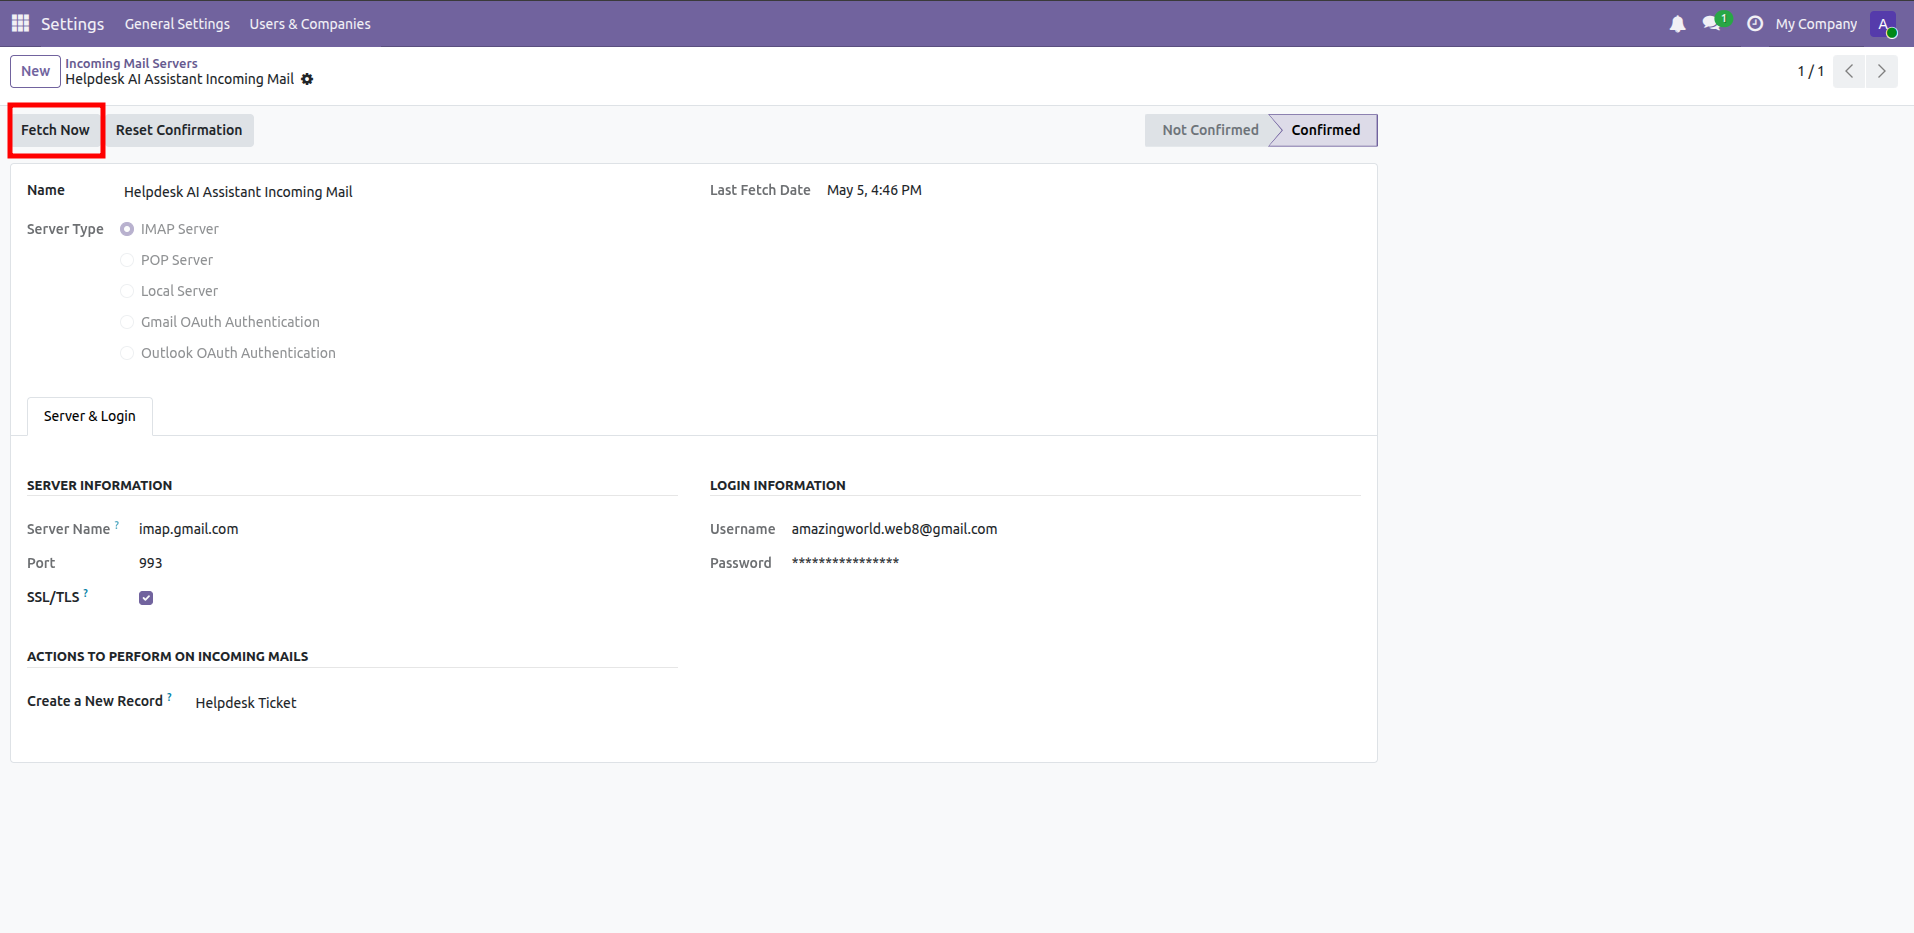
Press Fetch Now to import the email and create the duplicate helpdesk ticket.
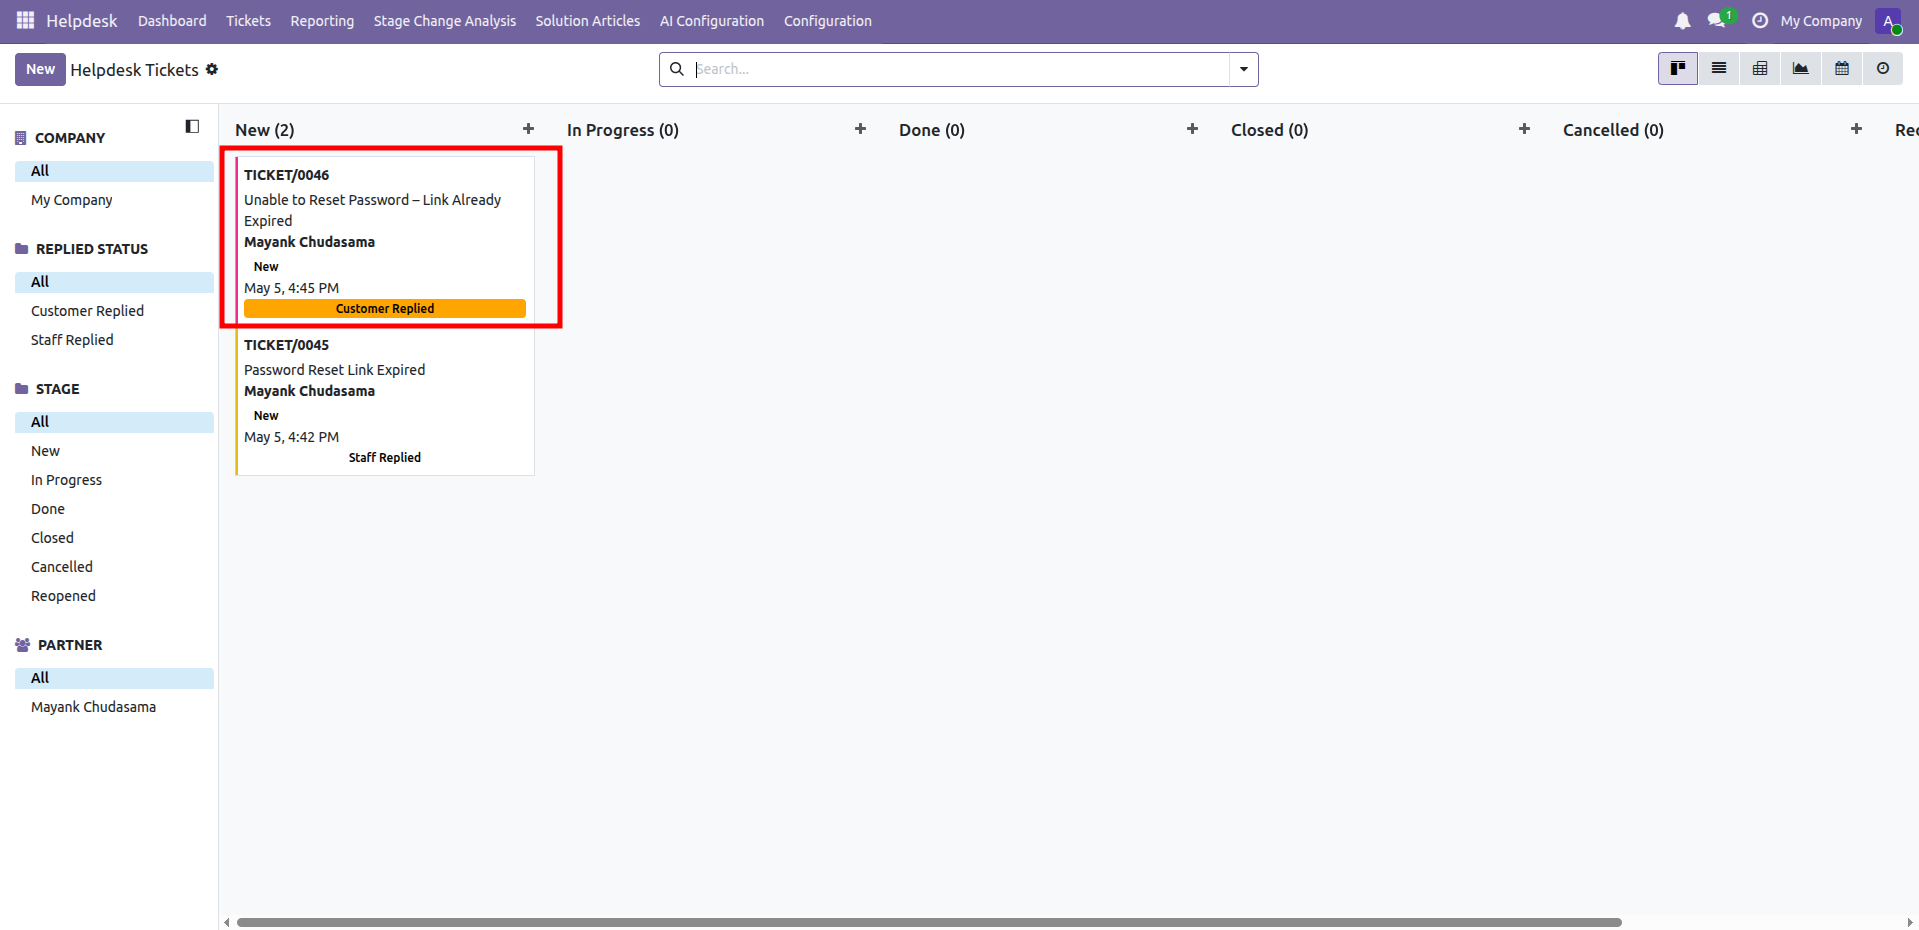
Review the kanban view to confirm the new duplicate ticket appears beside the original.
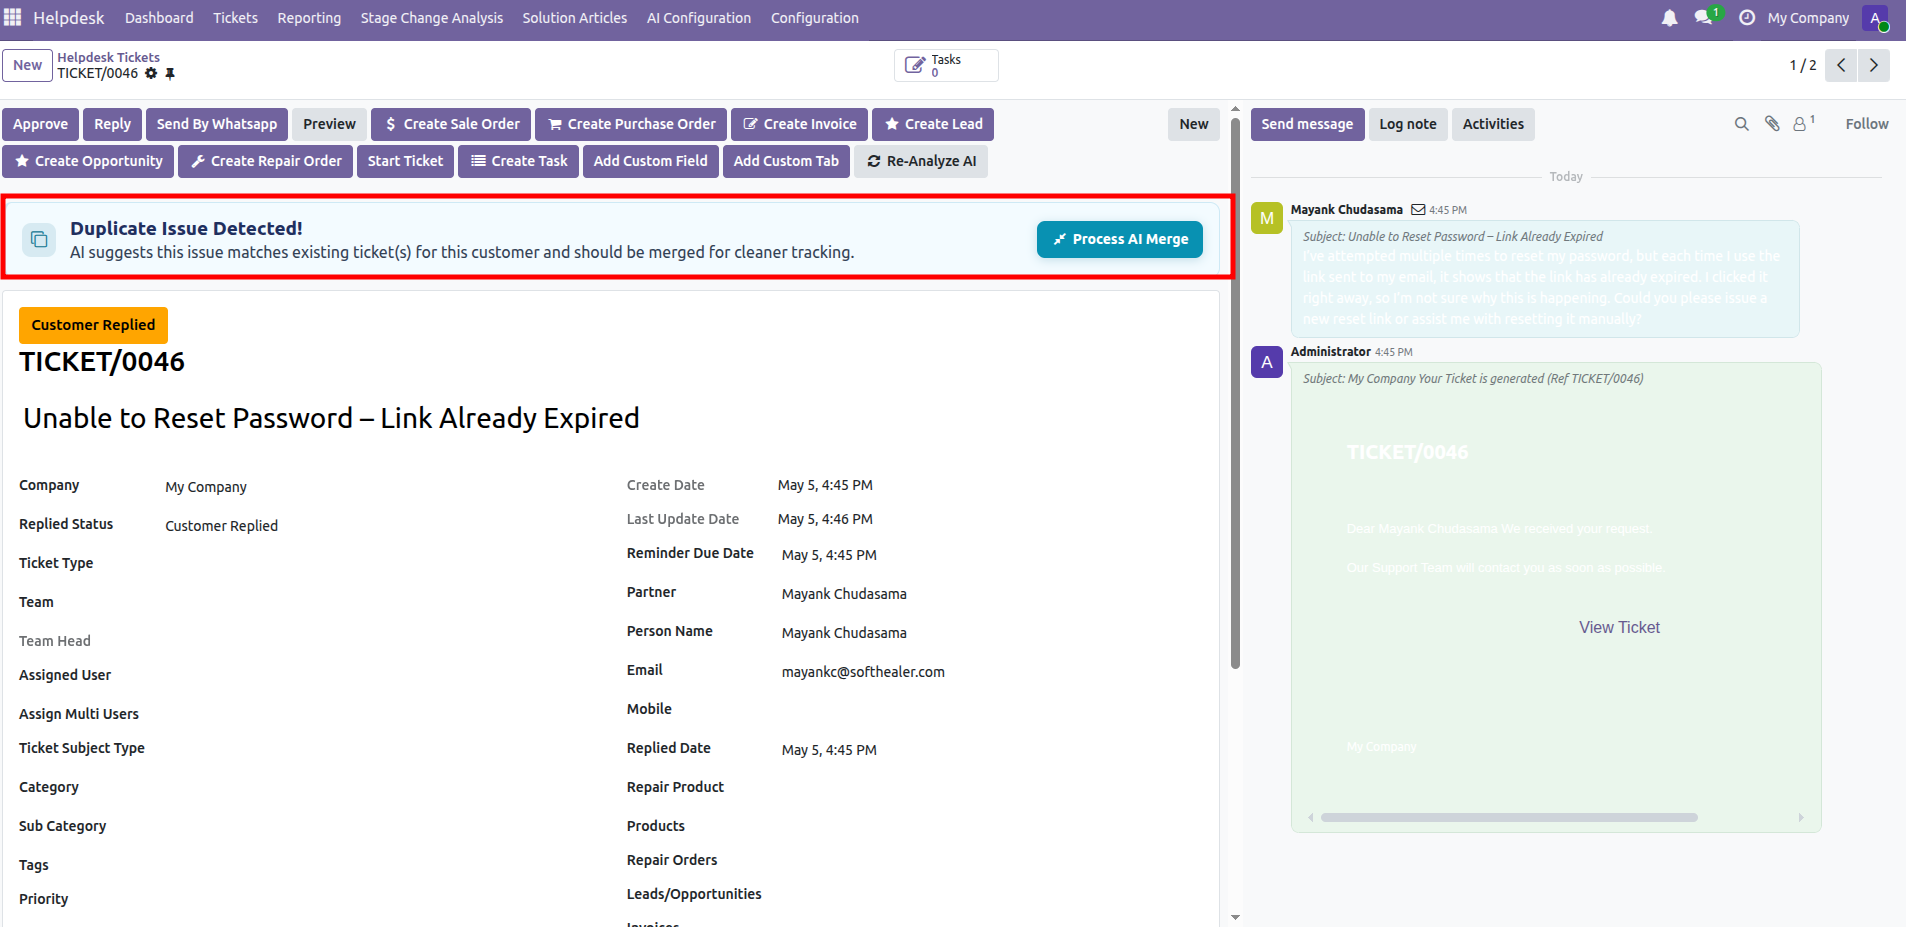
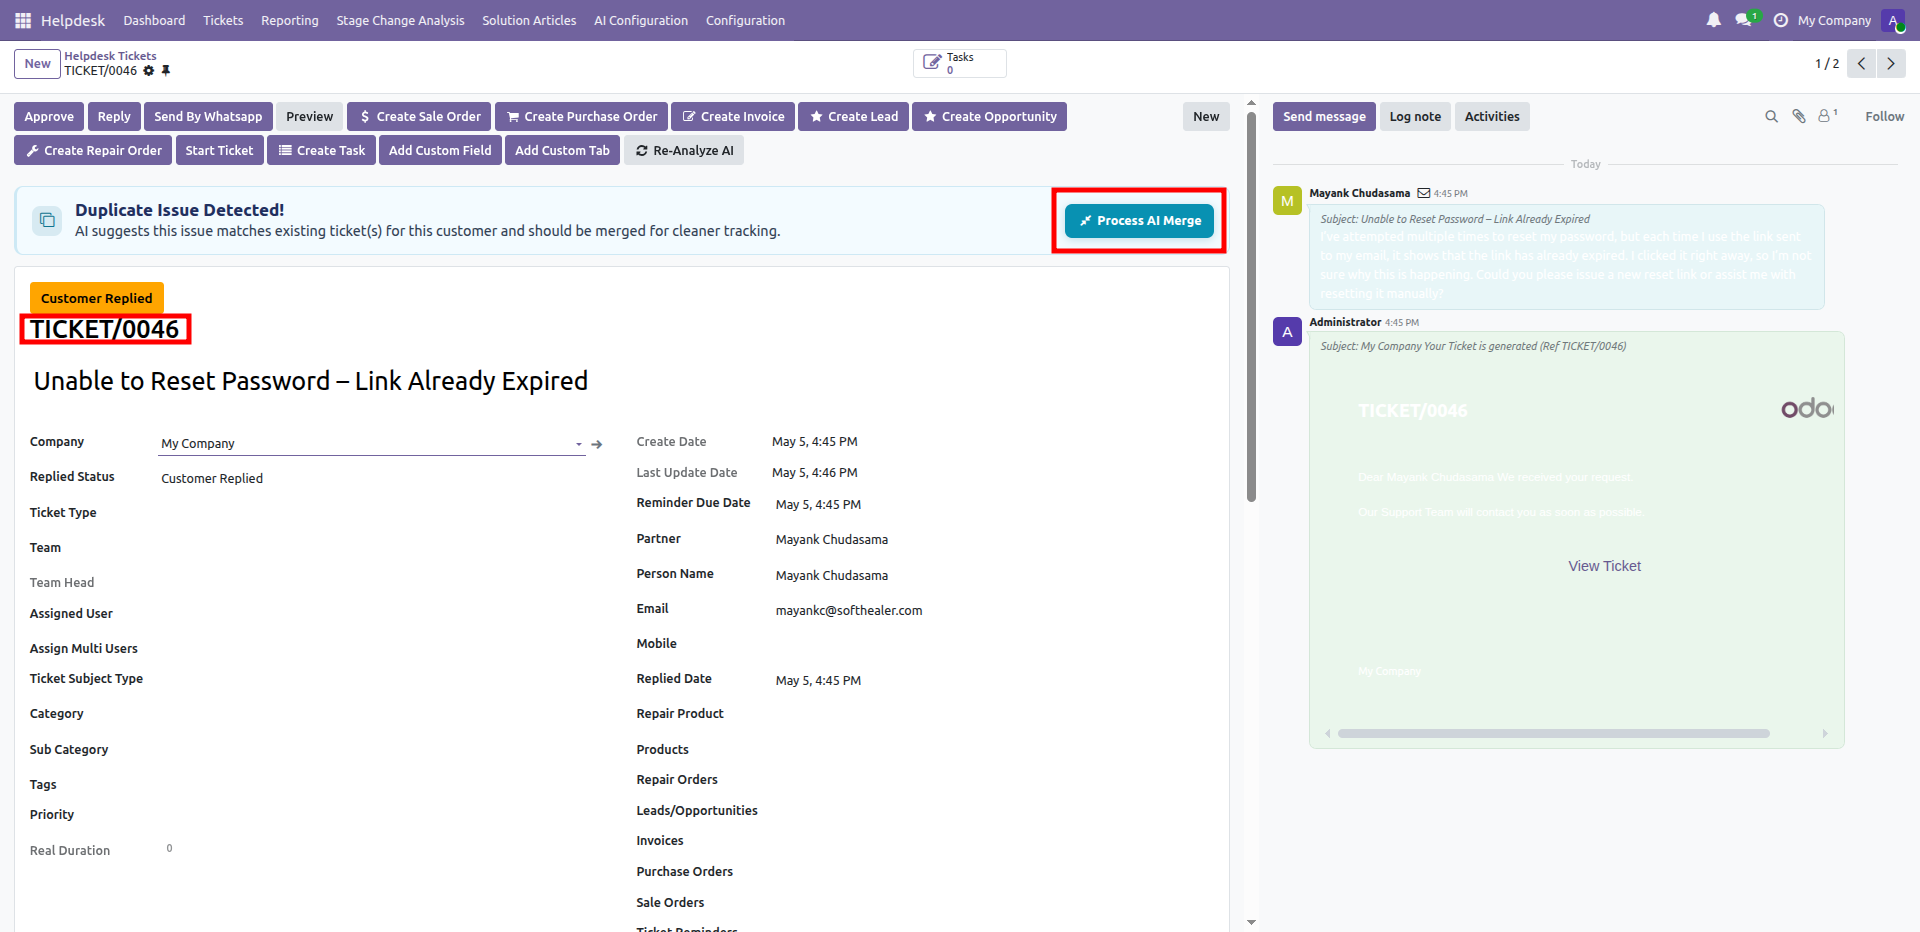
Review the duplicate alert and then press Process AI Merge to combine matching tickets.
Open the AI Assistant tab to review the suggested merge target and issue explanation.
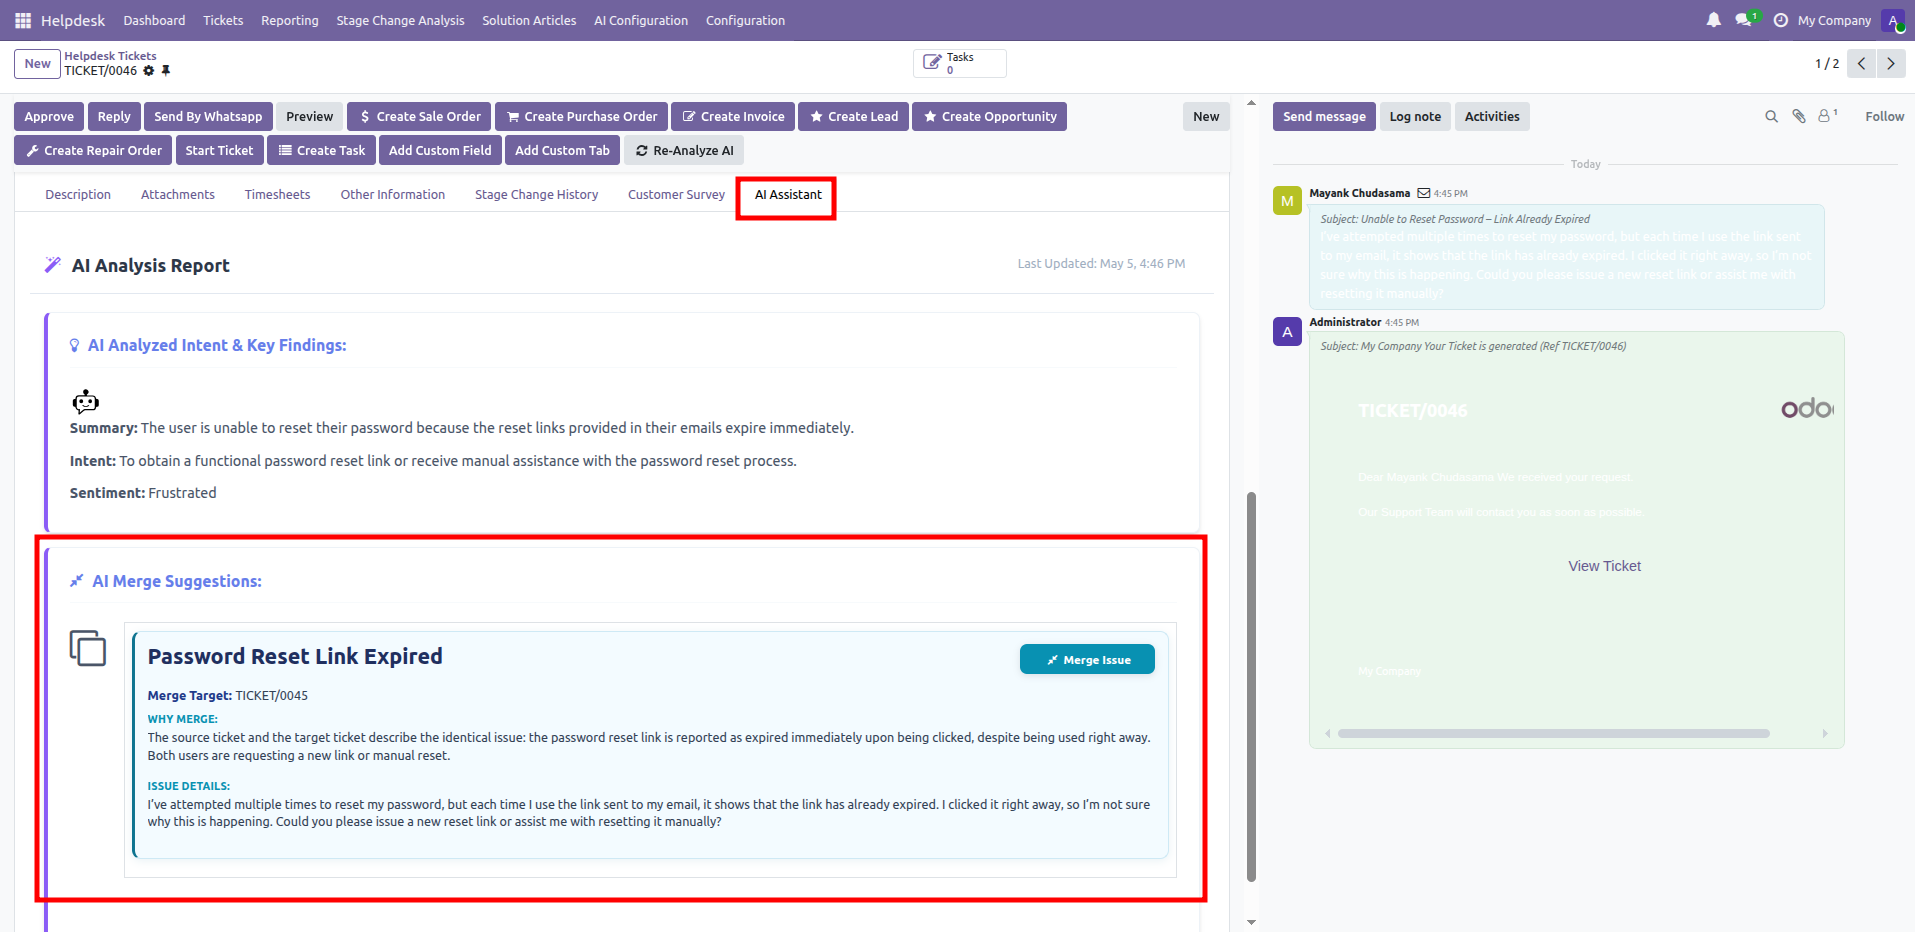
Open AI Merge Suggestions to compare source, target, and matching issue details before merging.
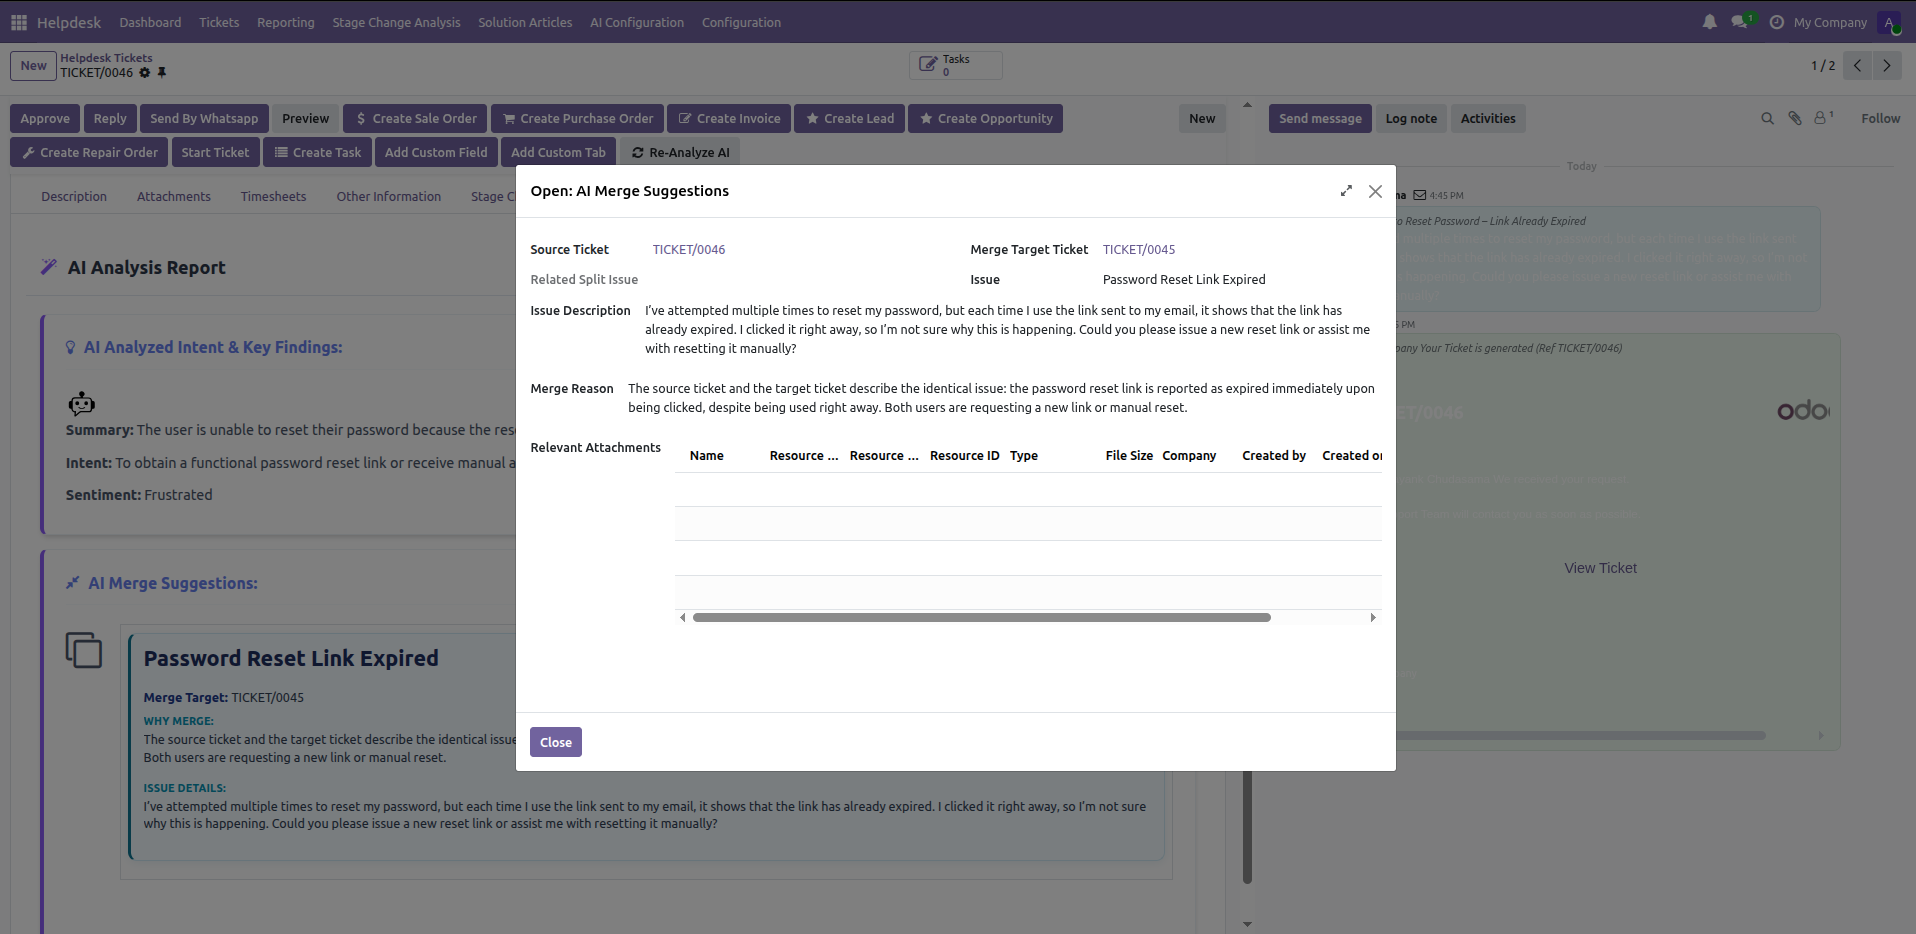
Select Process AI Merge from the duplicate alert to merge the related customer tickets.
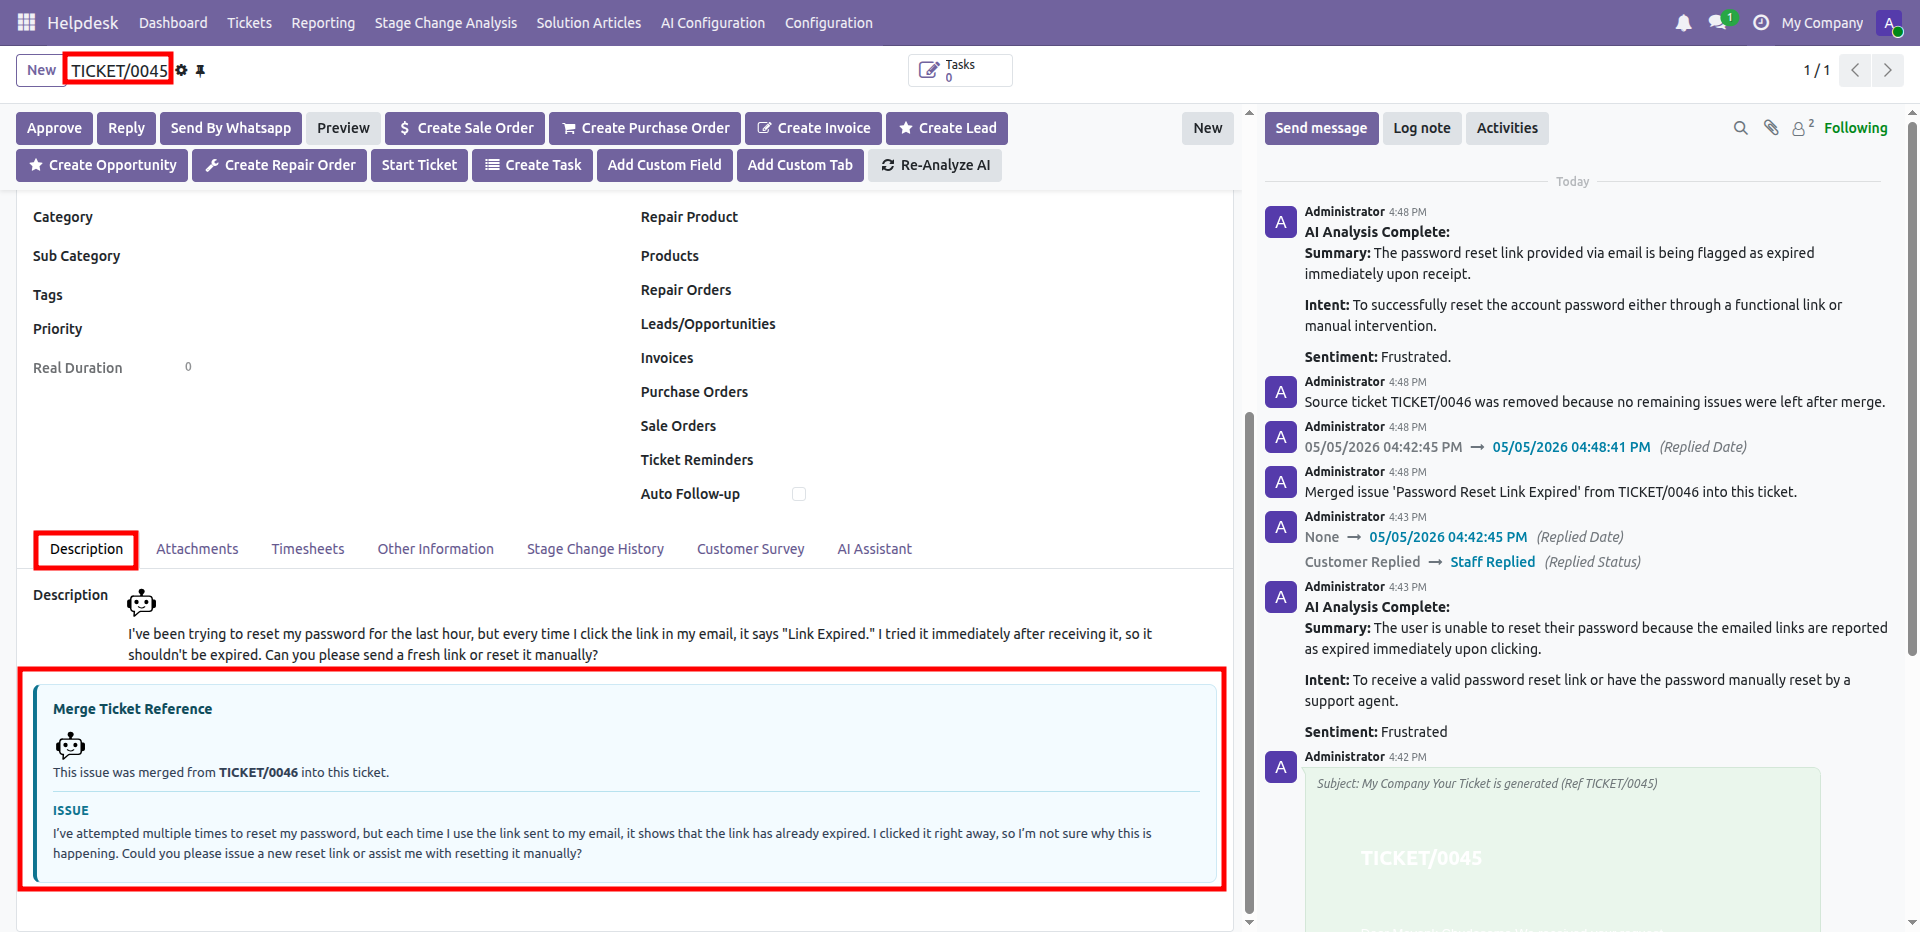
Review the merged ticket chatter to confirm the source issue was consolidated successfully.
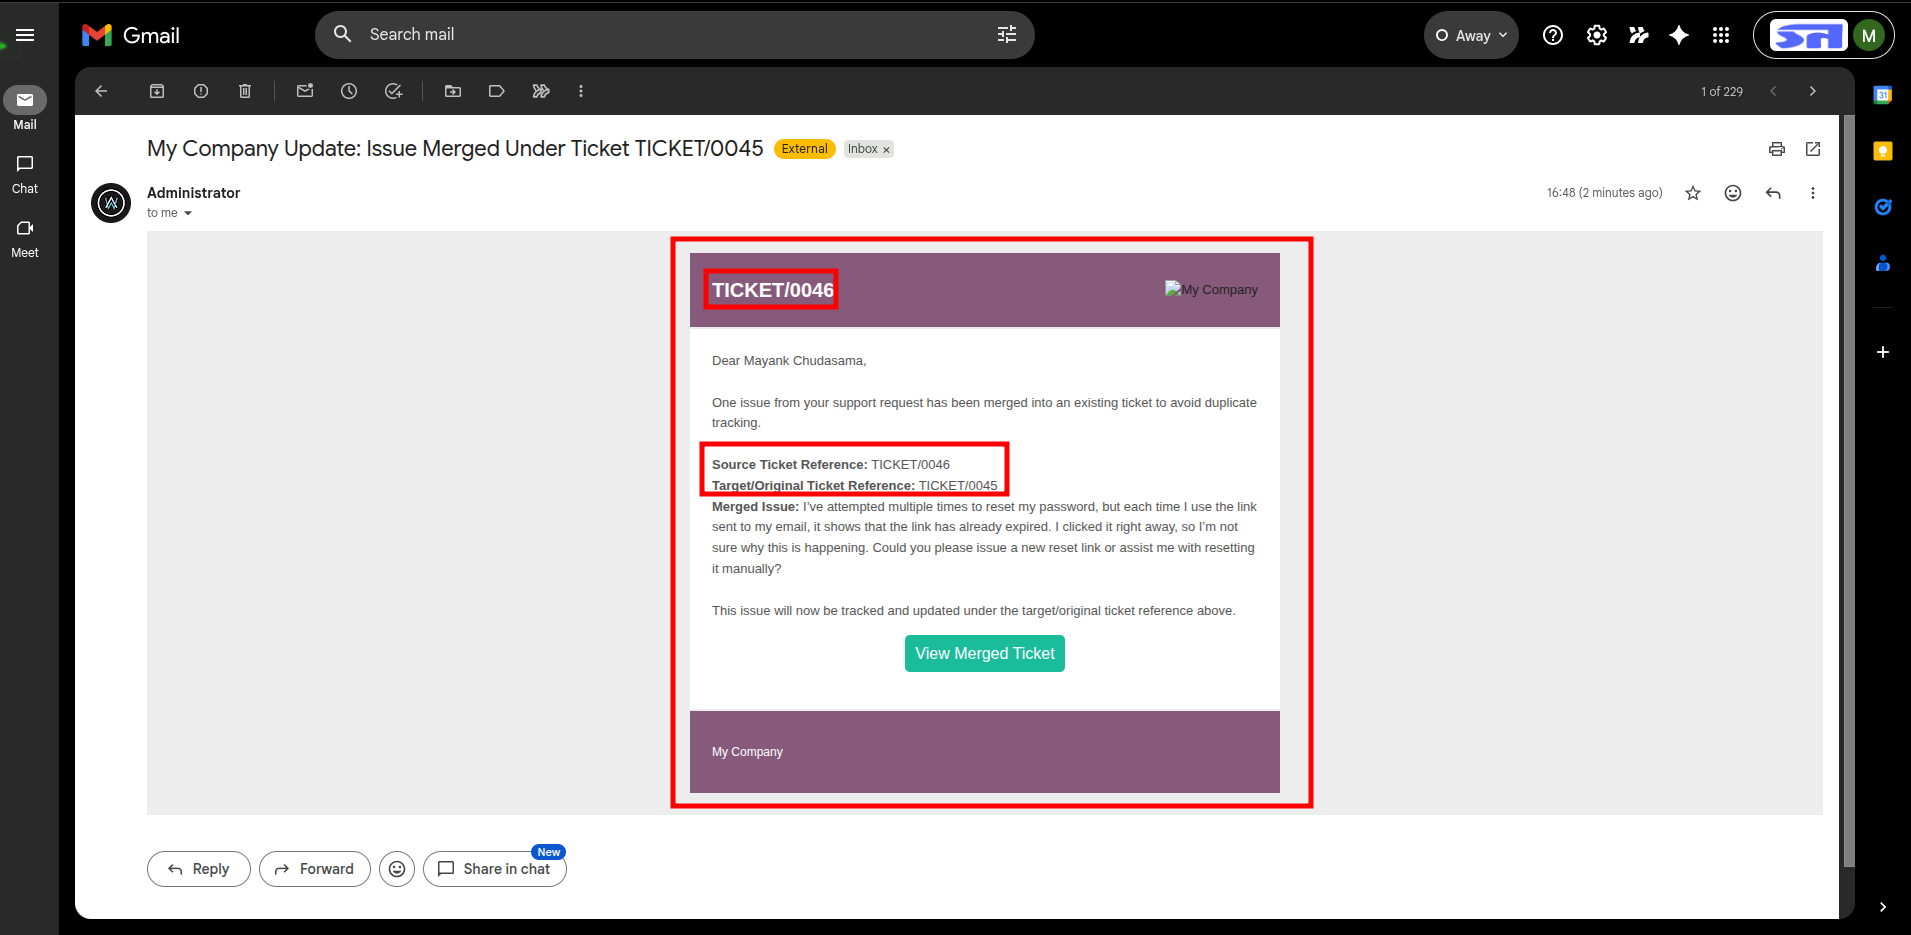
Review the customer email confirming the issue now continues under the merged target ticket.
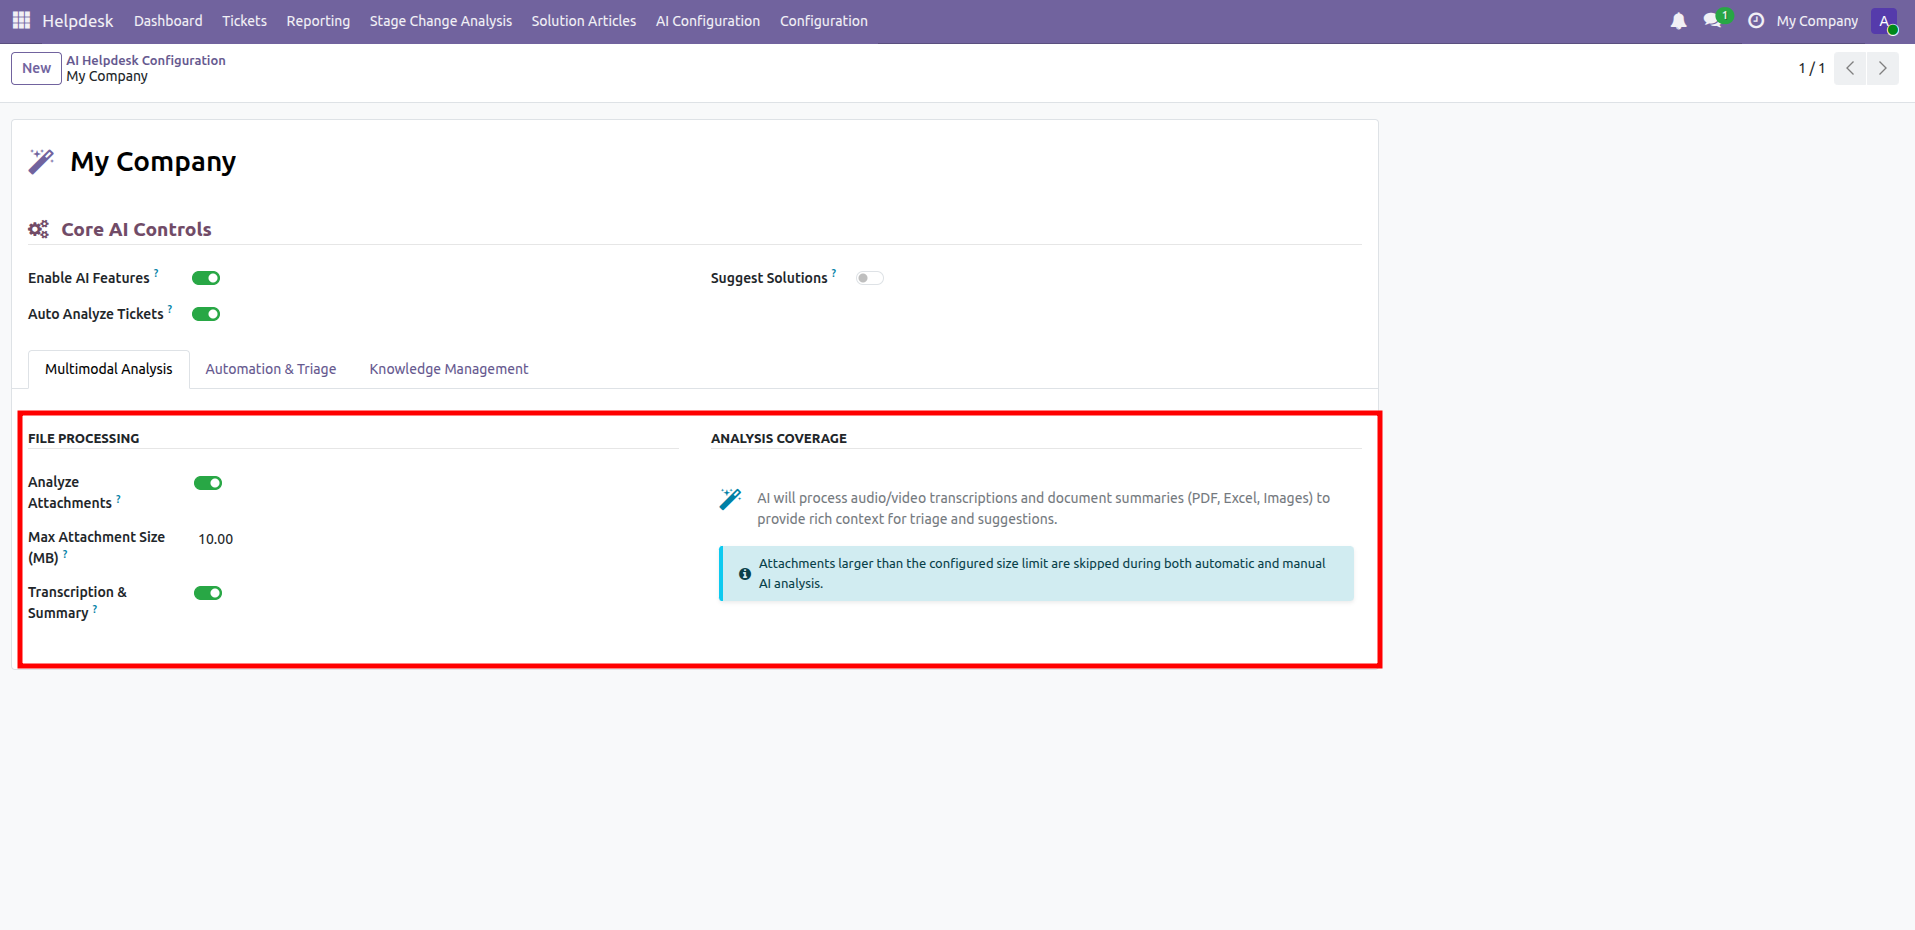
Enable attachment analysis and transcription options under the Multimodal Analysis settings.
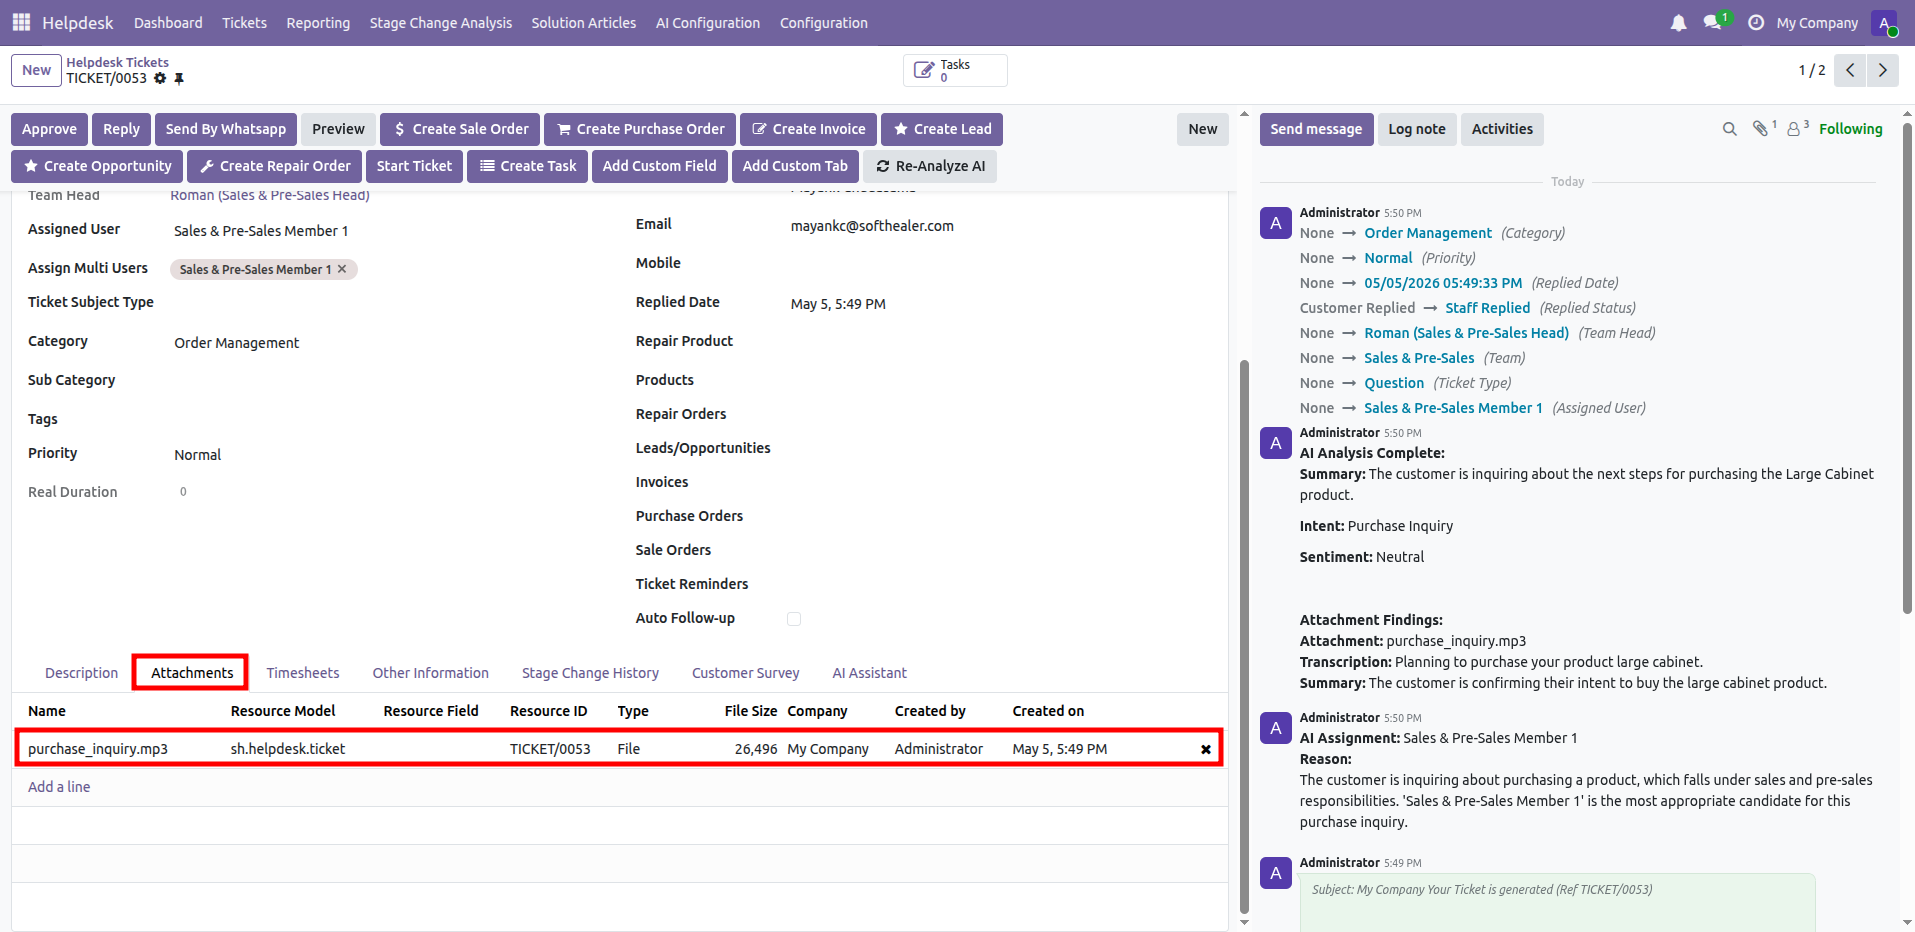
Open the Attachments tab to review the uploaded media file on the ticket.
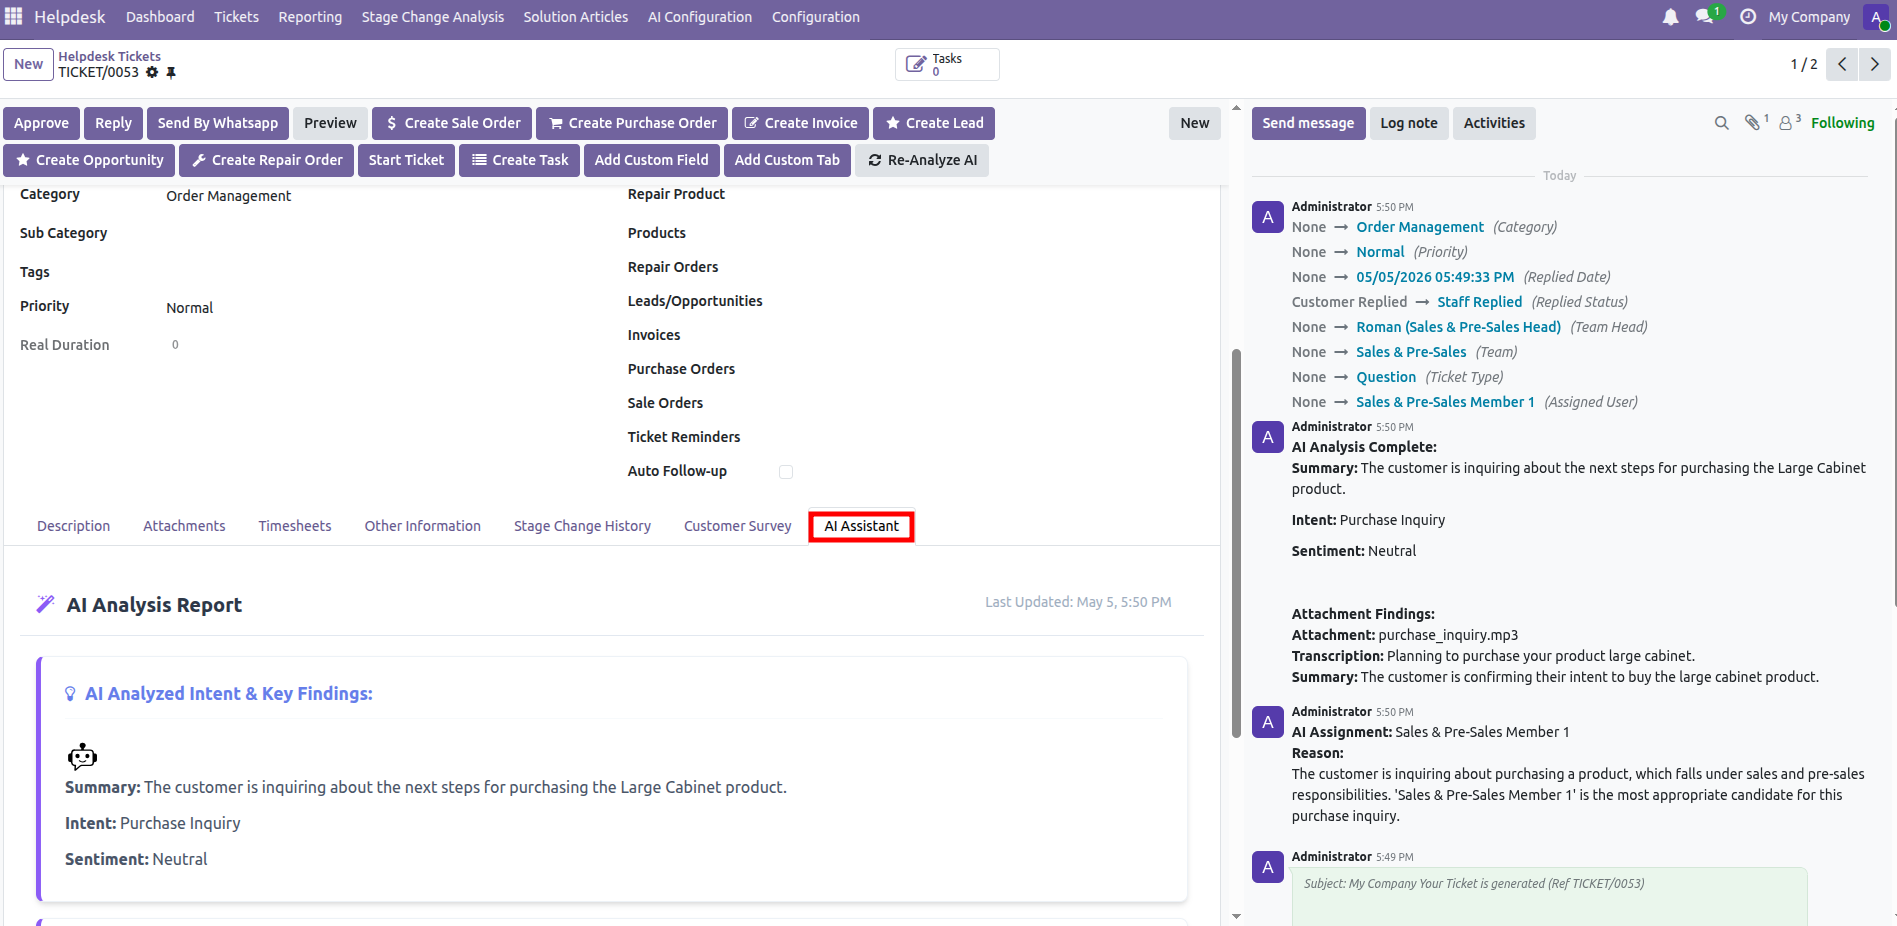
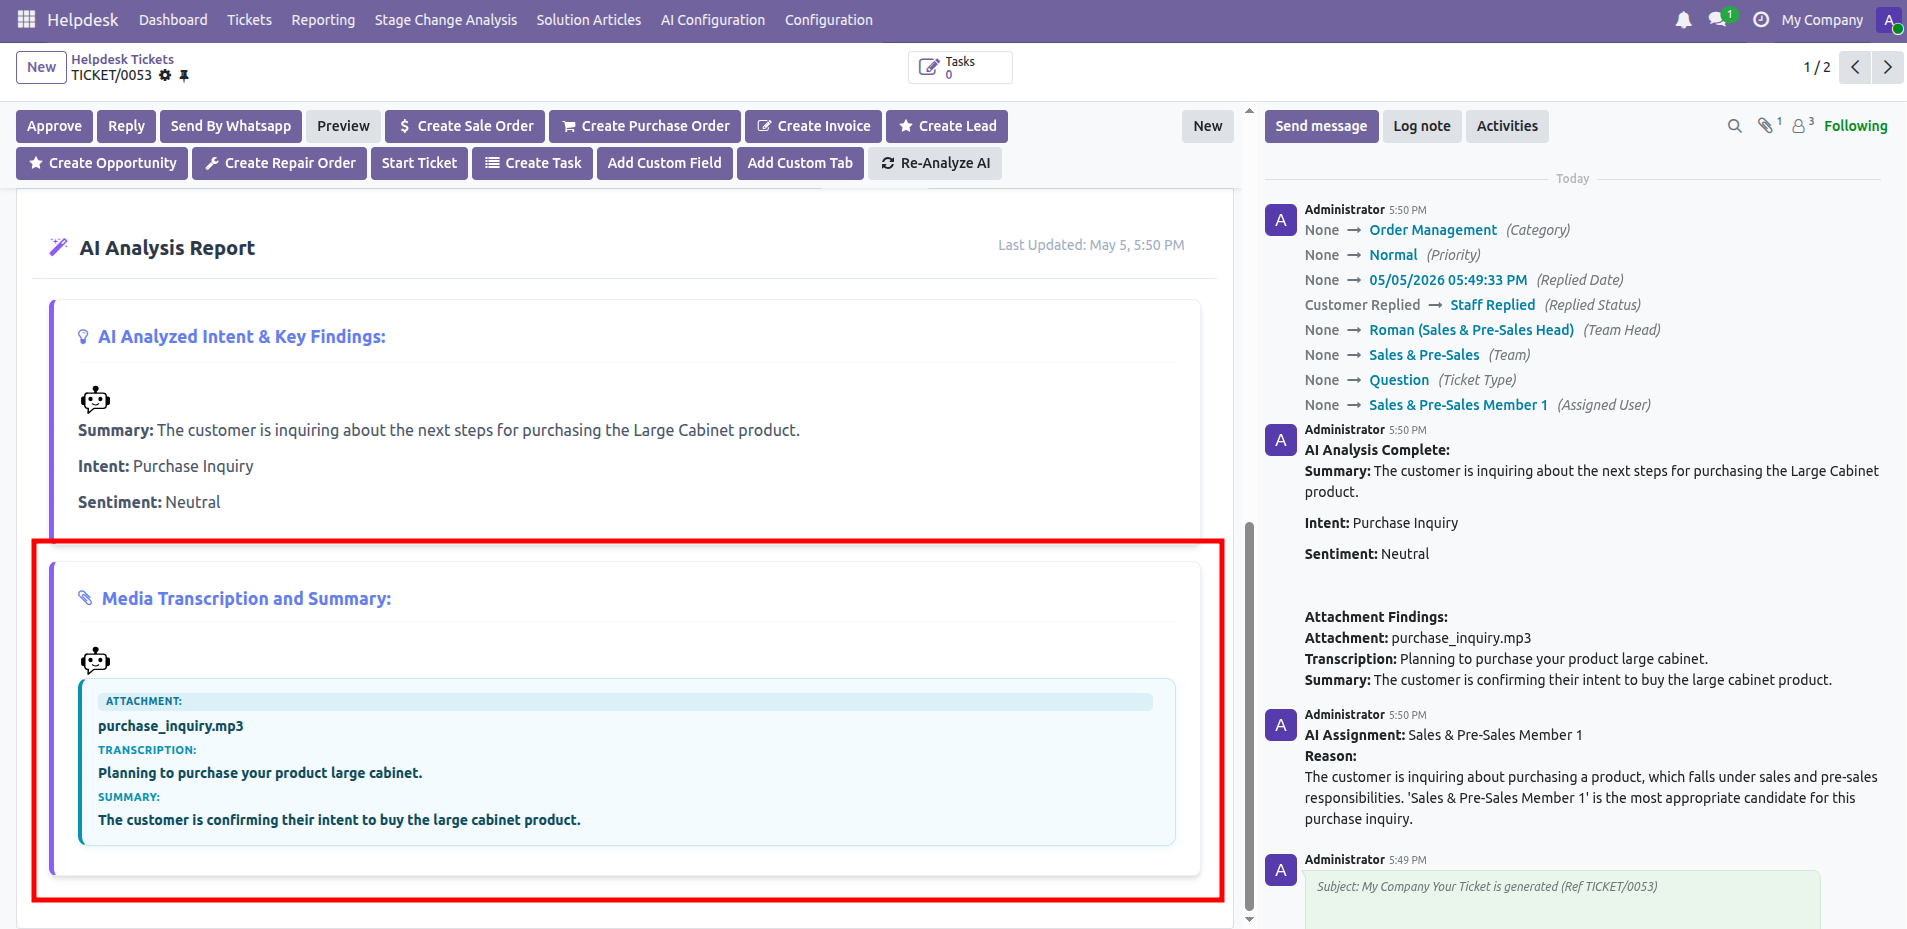
Open AI Assistant to review transcription and summary generated from the attachment.
Enable Suggest Solutions to use attachment findings during ticket recommendations.
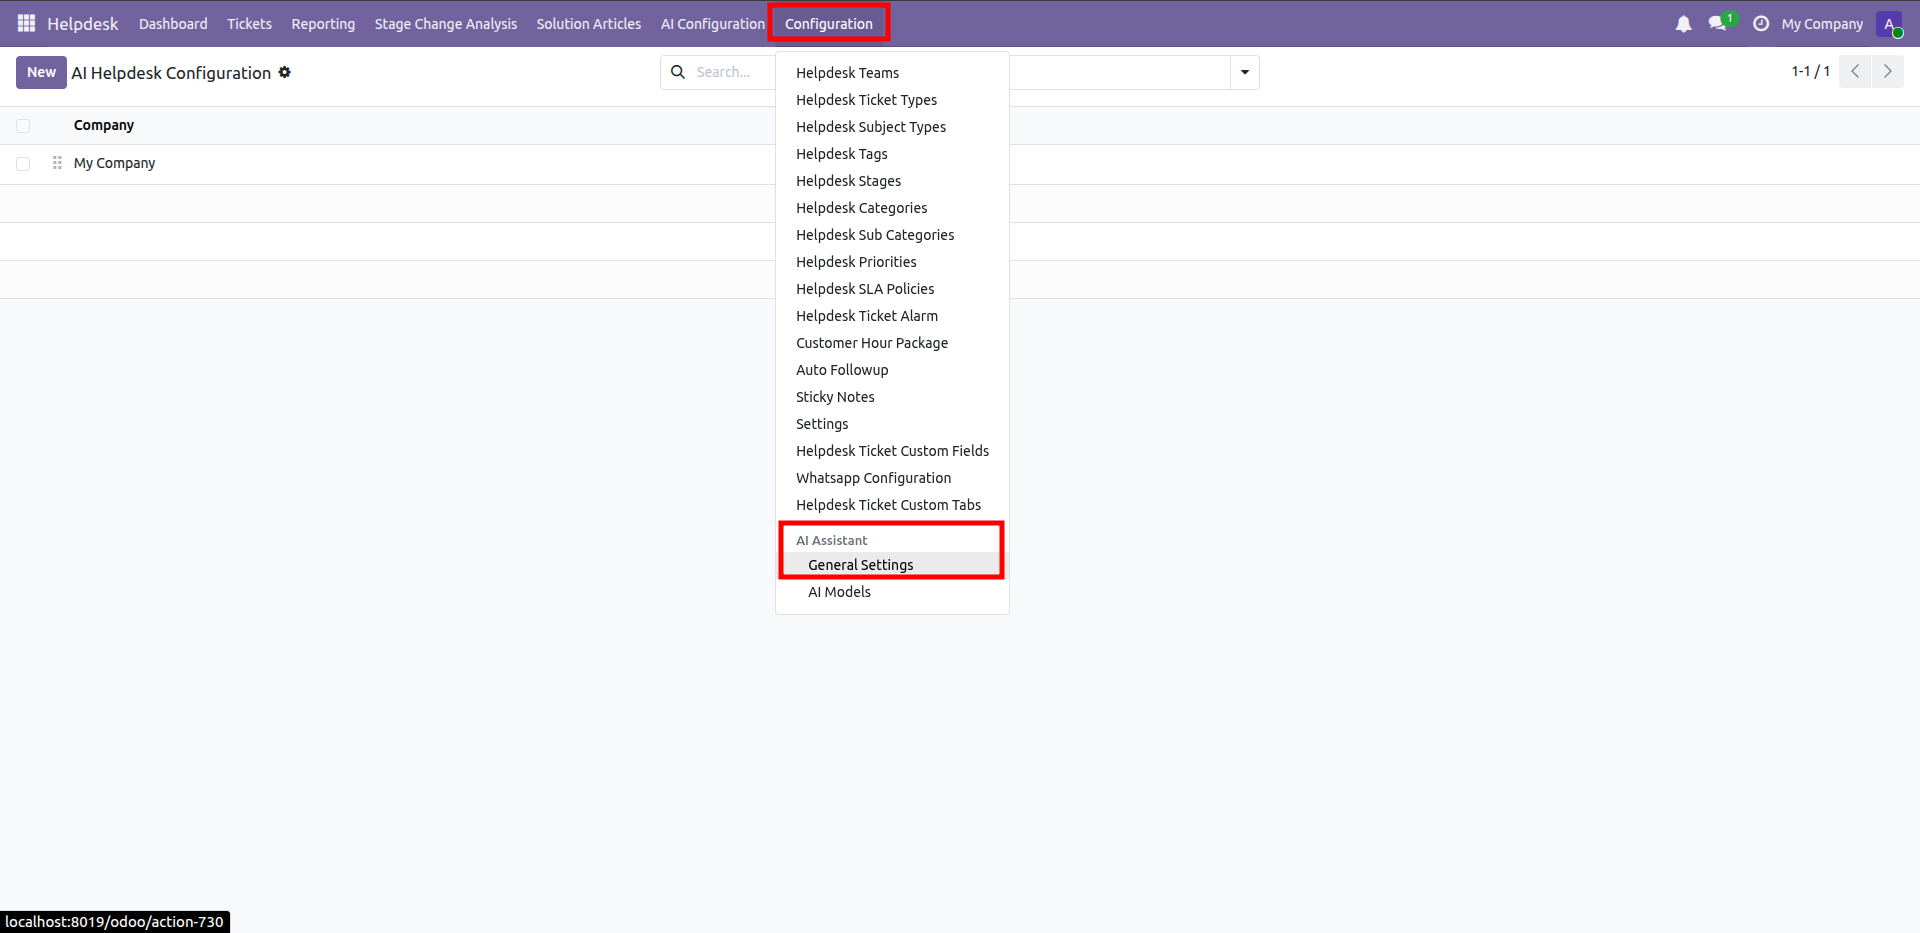
Open Configuration and then select General Settings under AI Assistant to manage split detection.
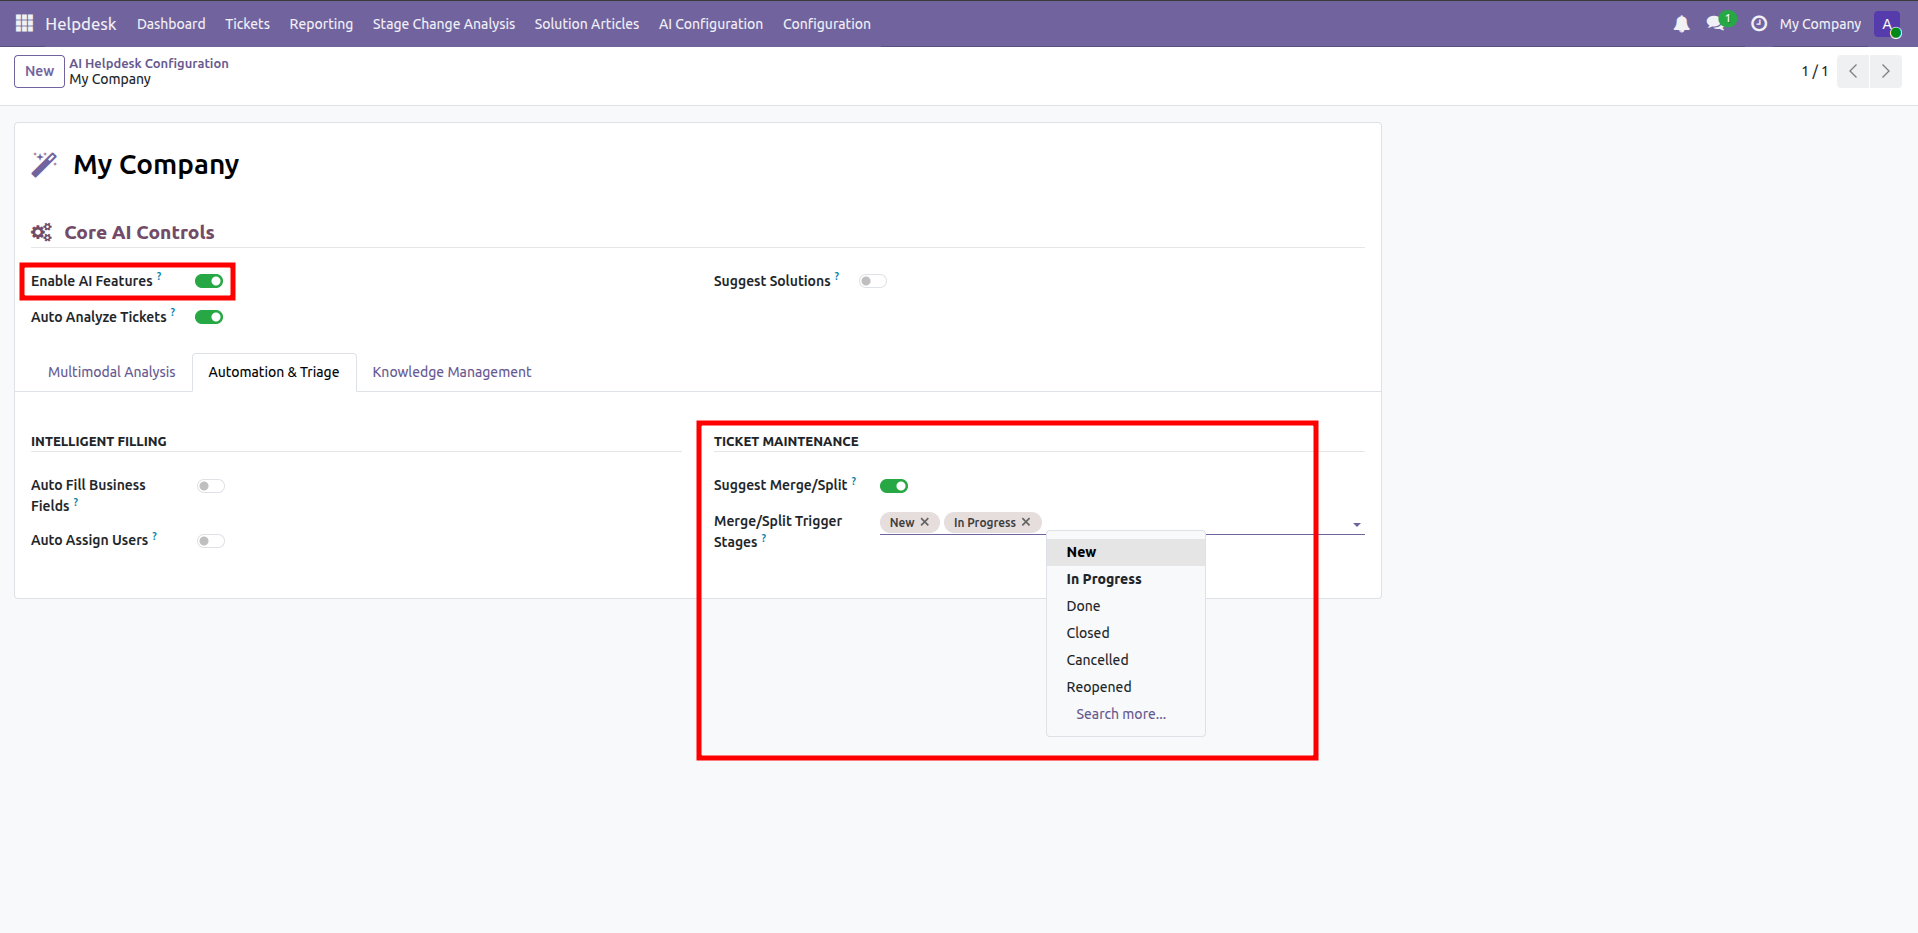
Enable AI features and merge or split triggers to detect multi-issue tickets automatically.
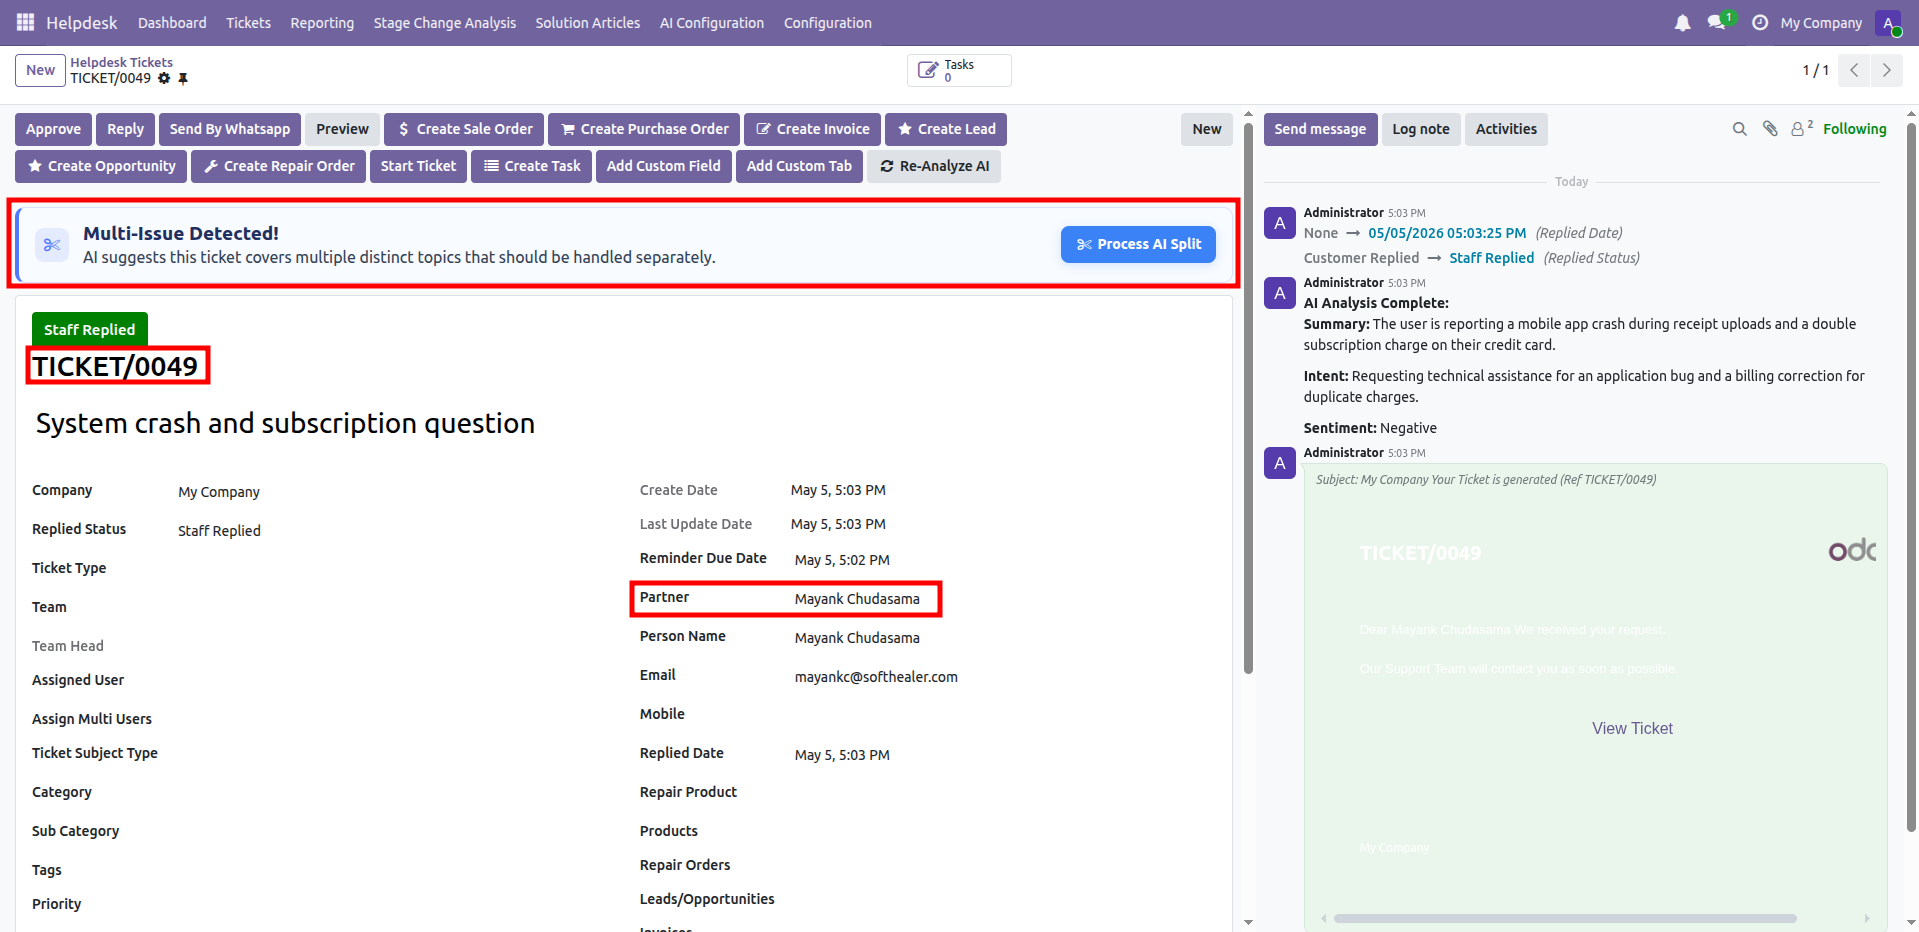
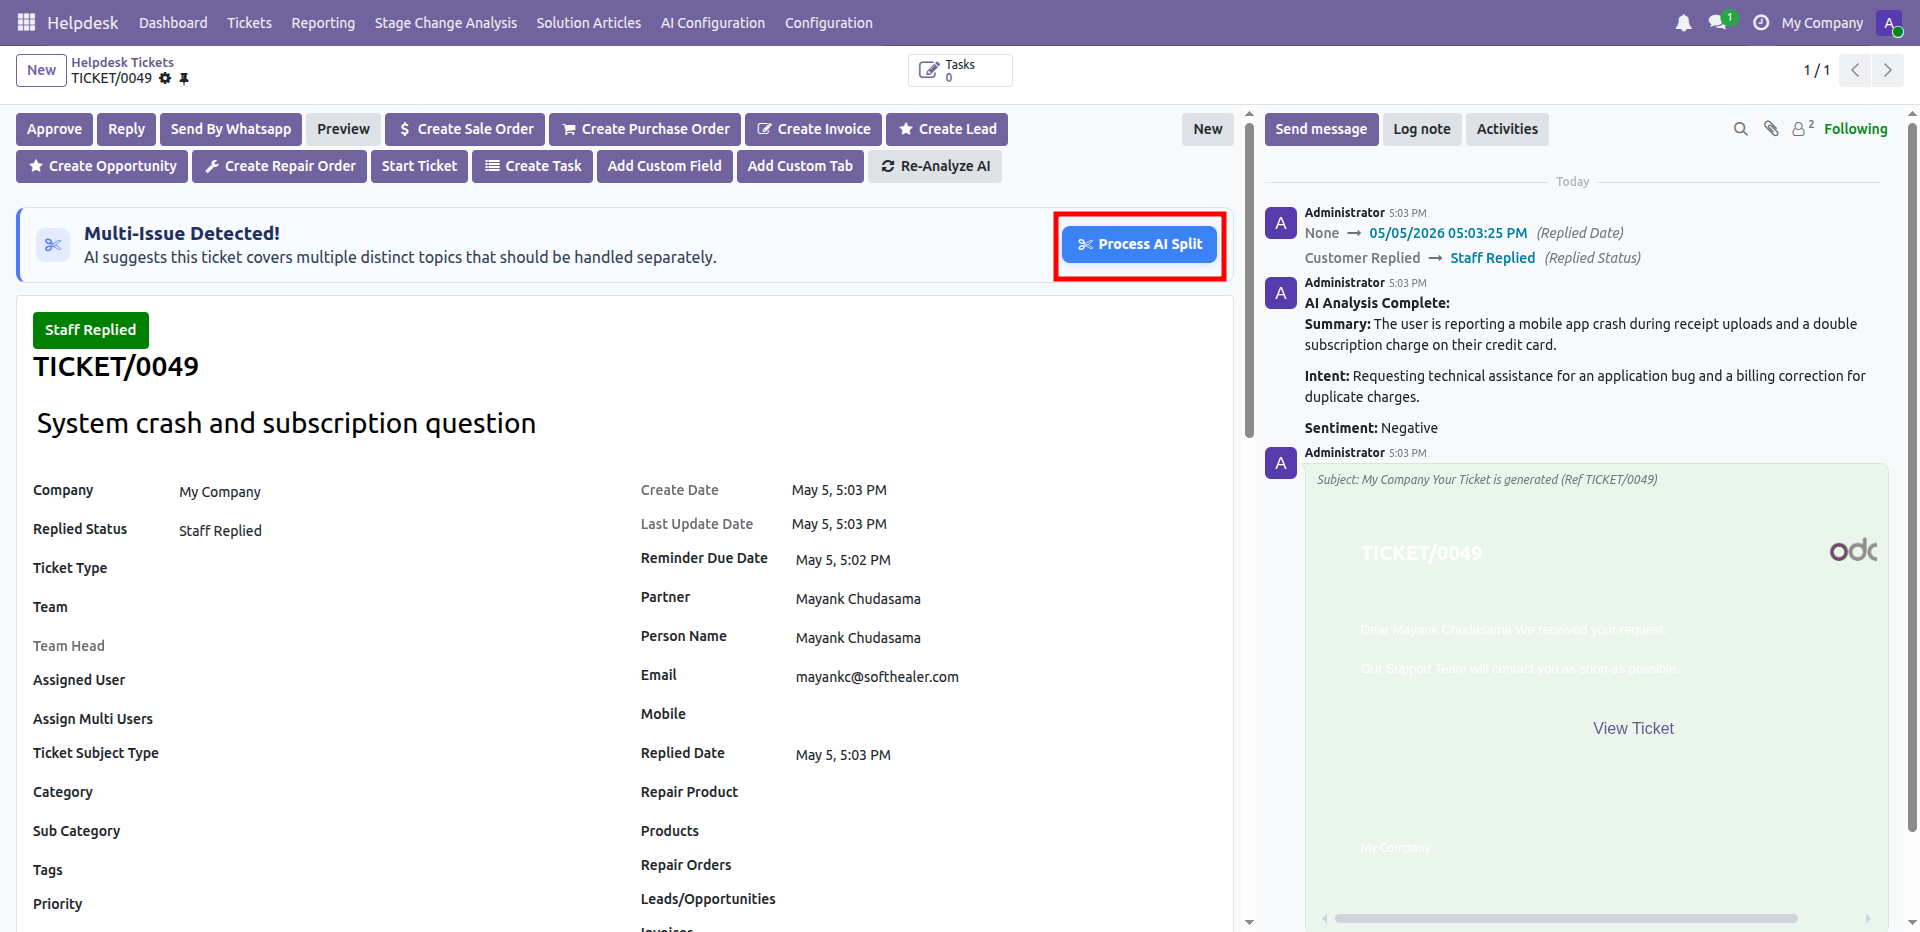
Review the multi-issue alert showing this ticket contains separate problems requiring individual handling.
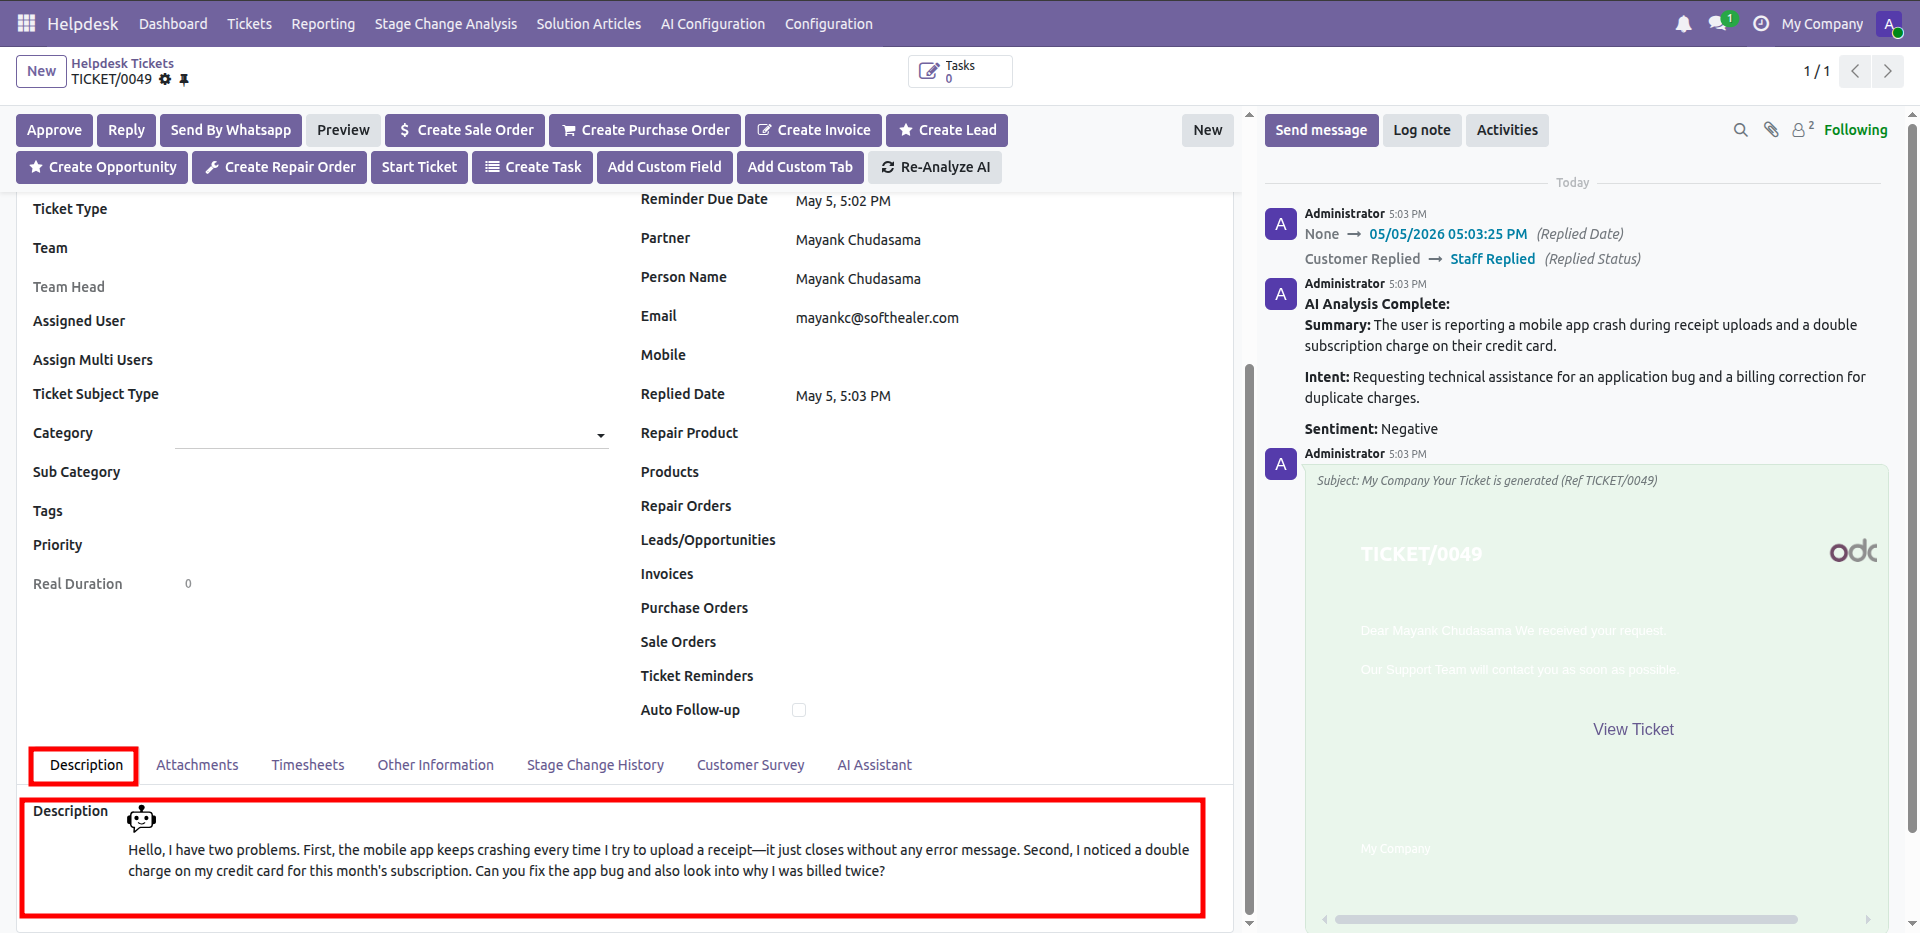
Review the ticket description to confirm both the app crash and billing issue.
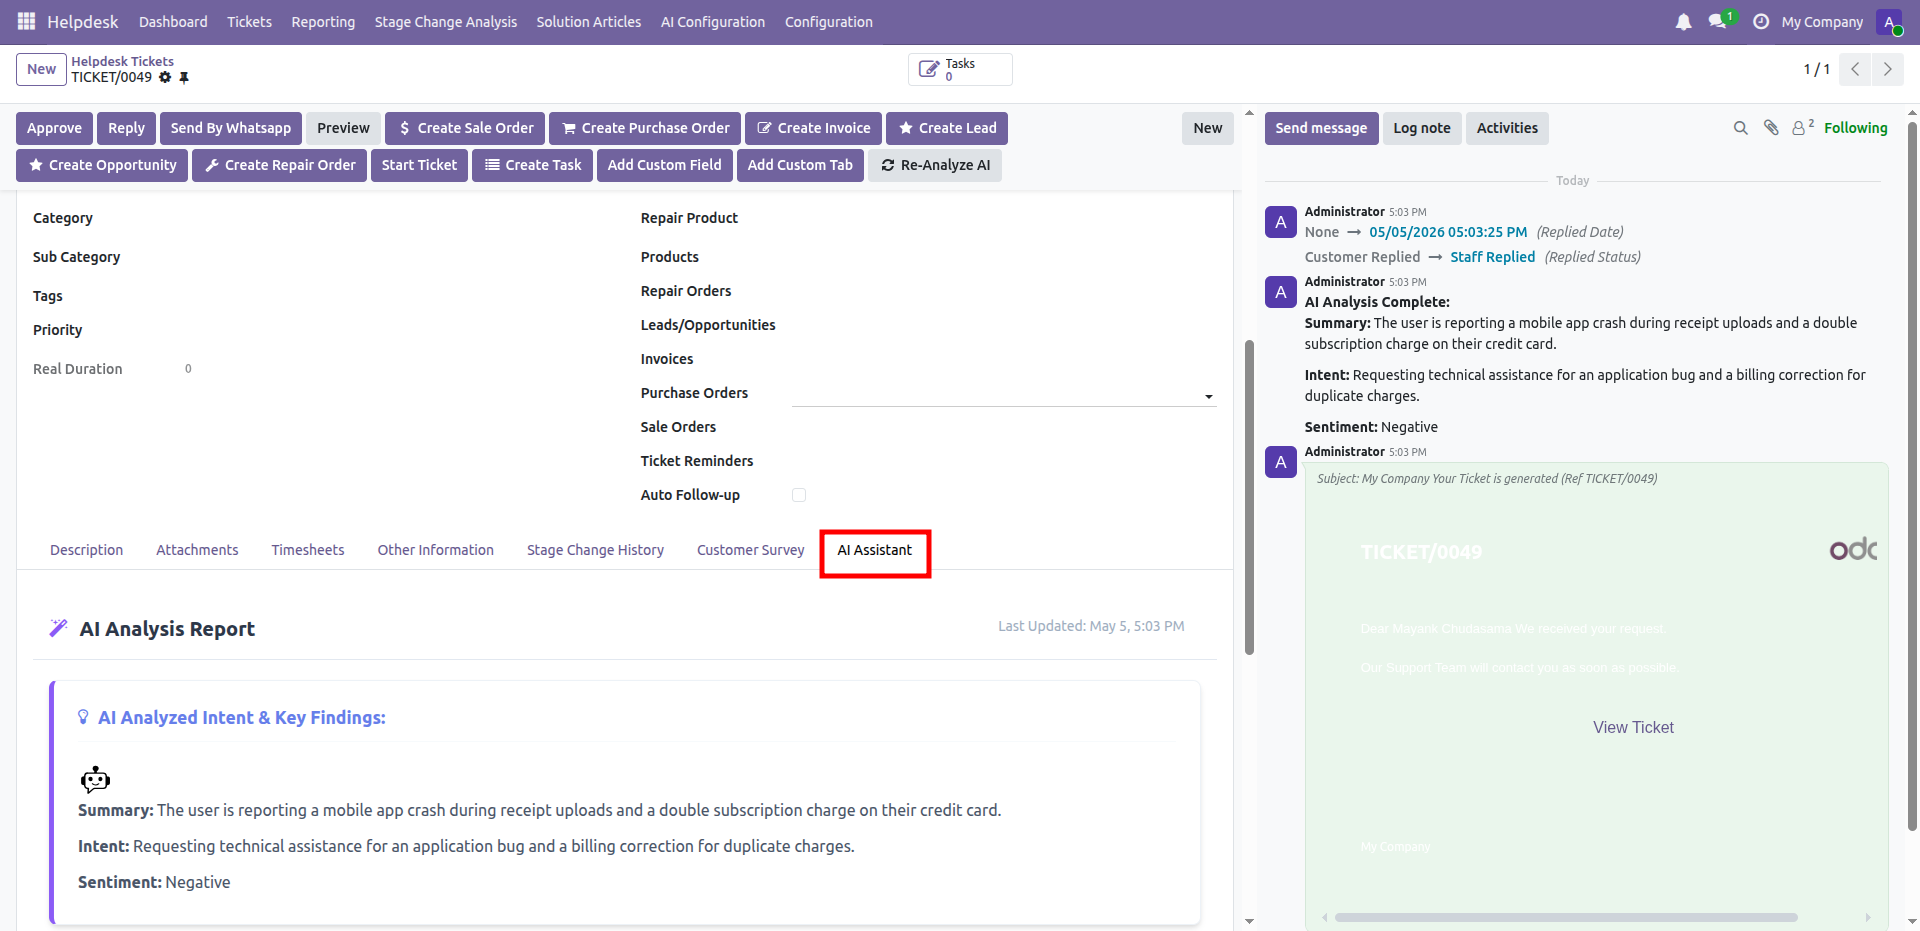
Open the AI Assistant tab to review analysis and ticket splitting recommendations.
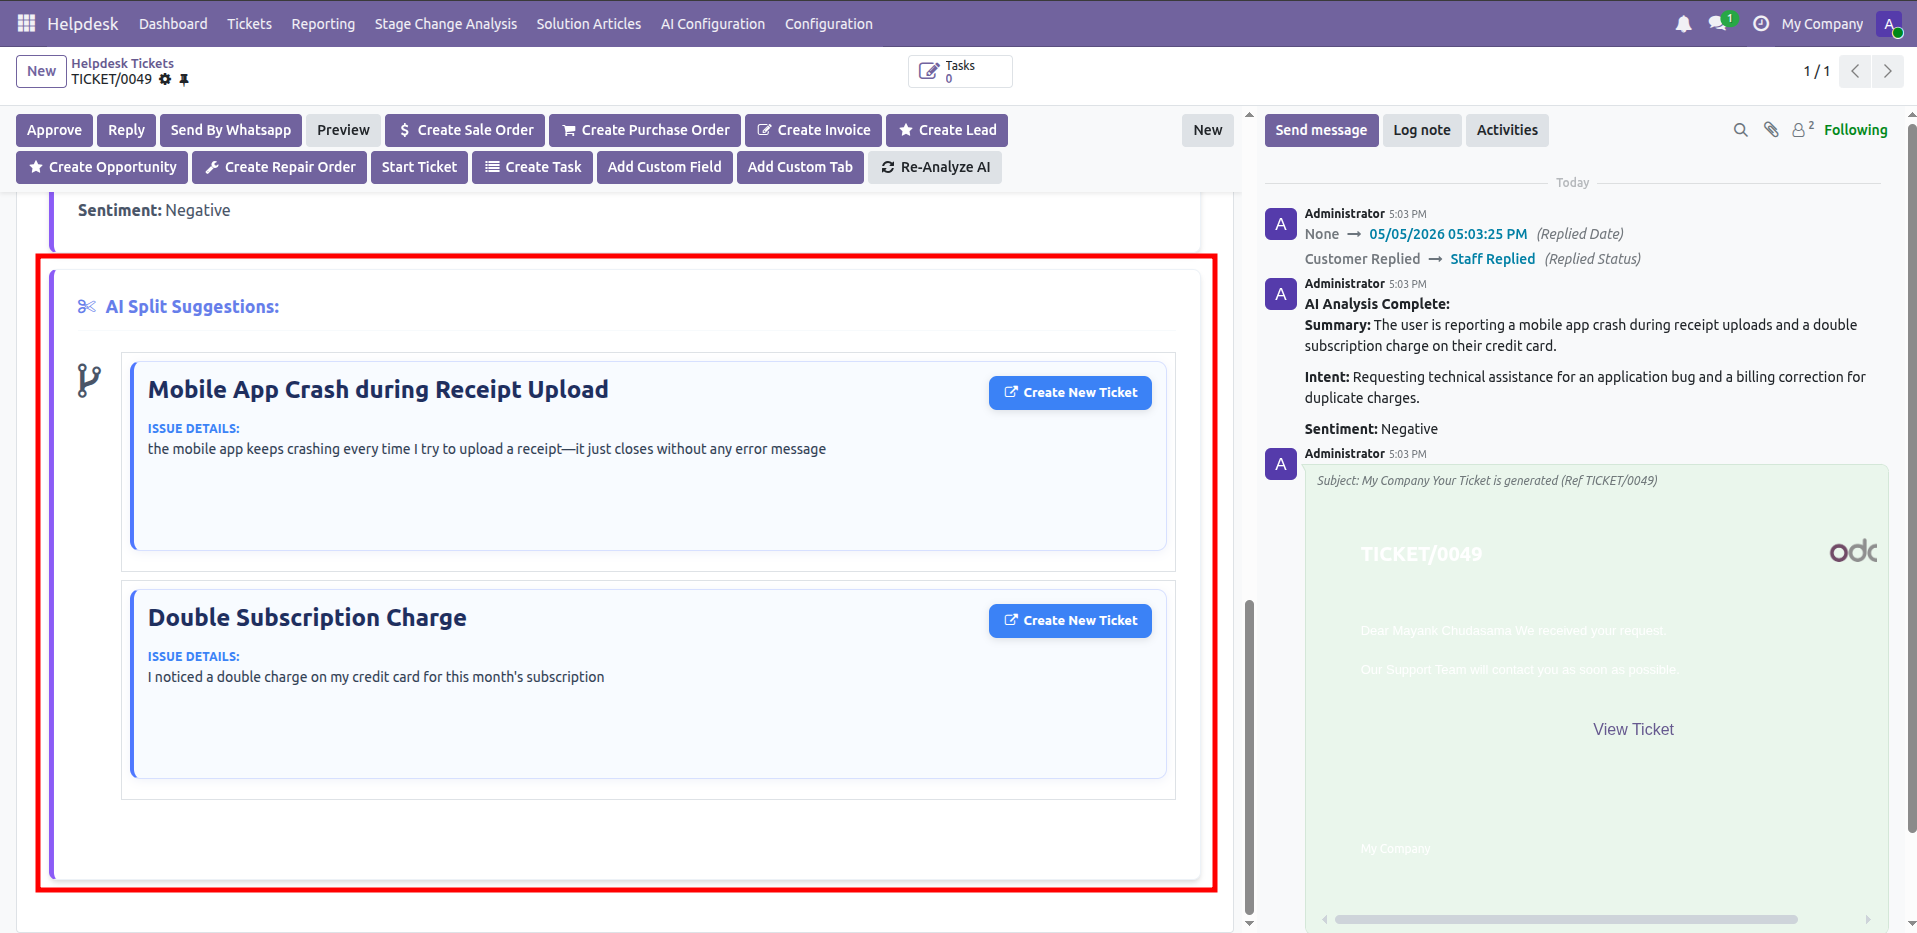
Review each AI split suggestion and press Create New Ticket for the selected issue.
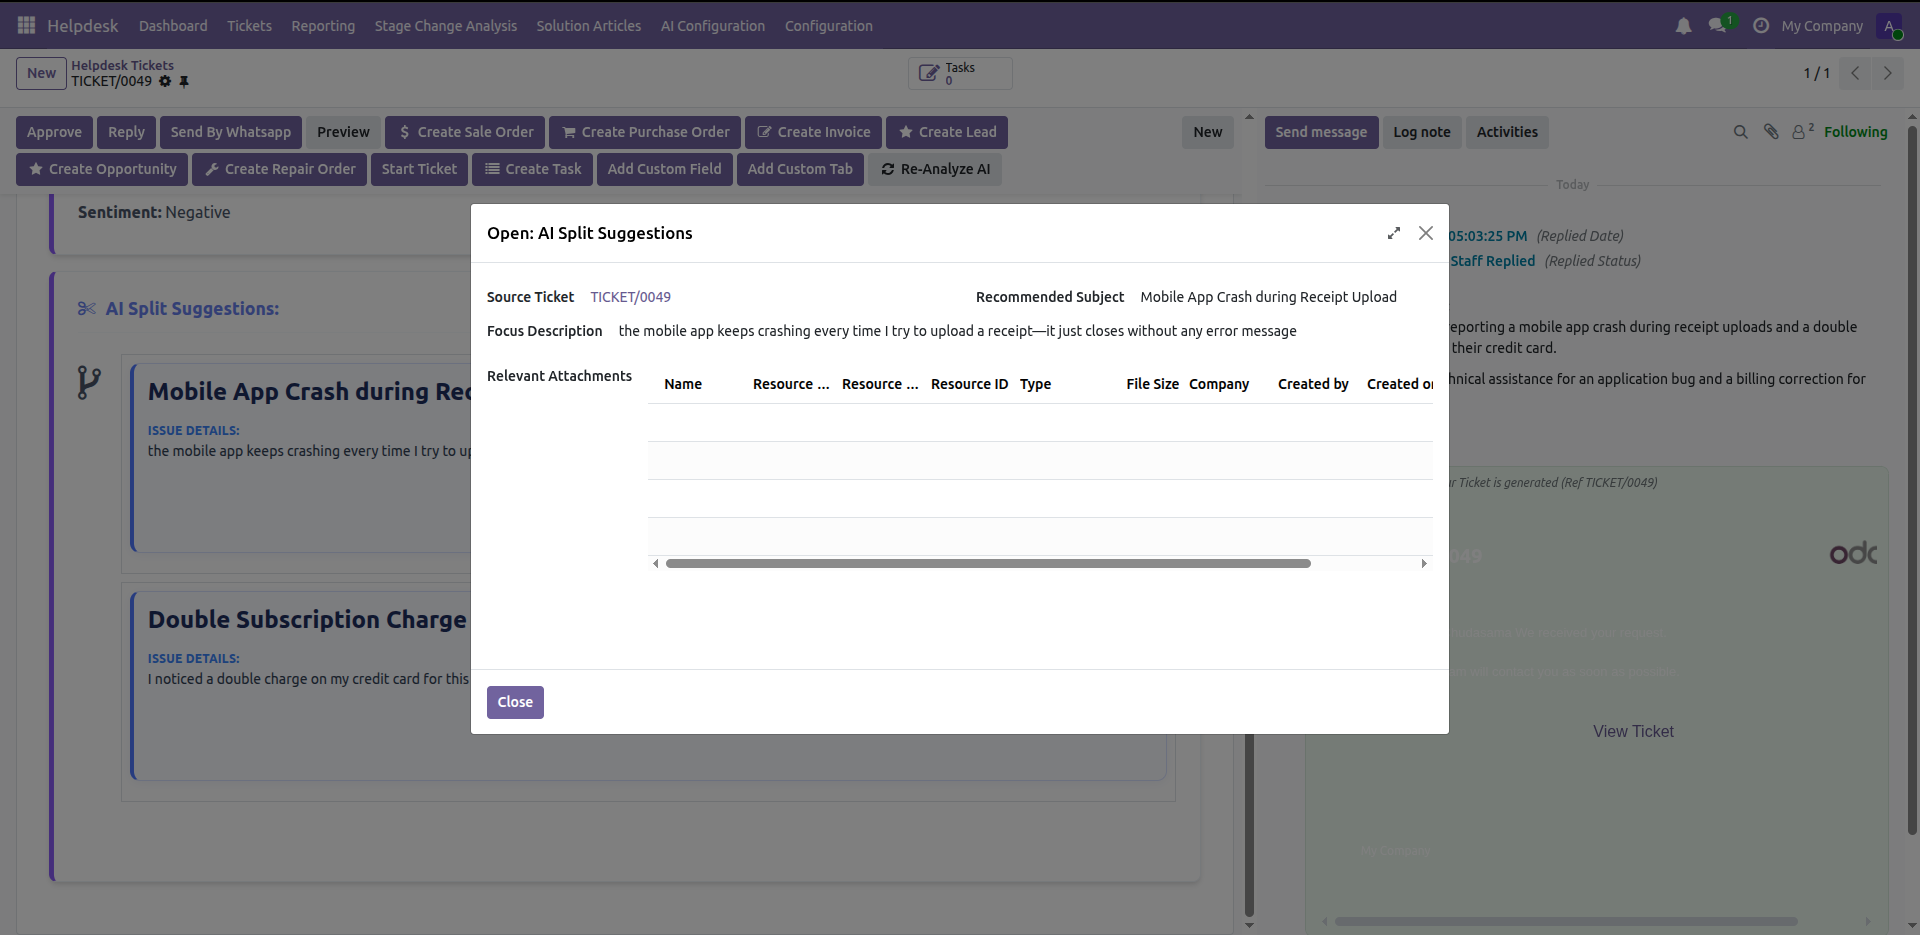
Open AI Split Suggestions to review the focused description for the mobile app issue.
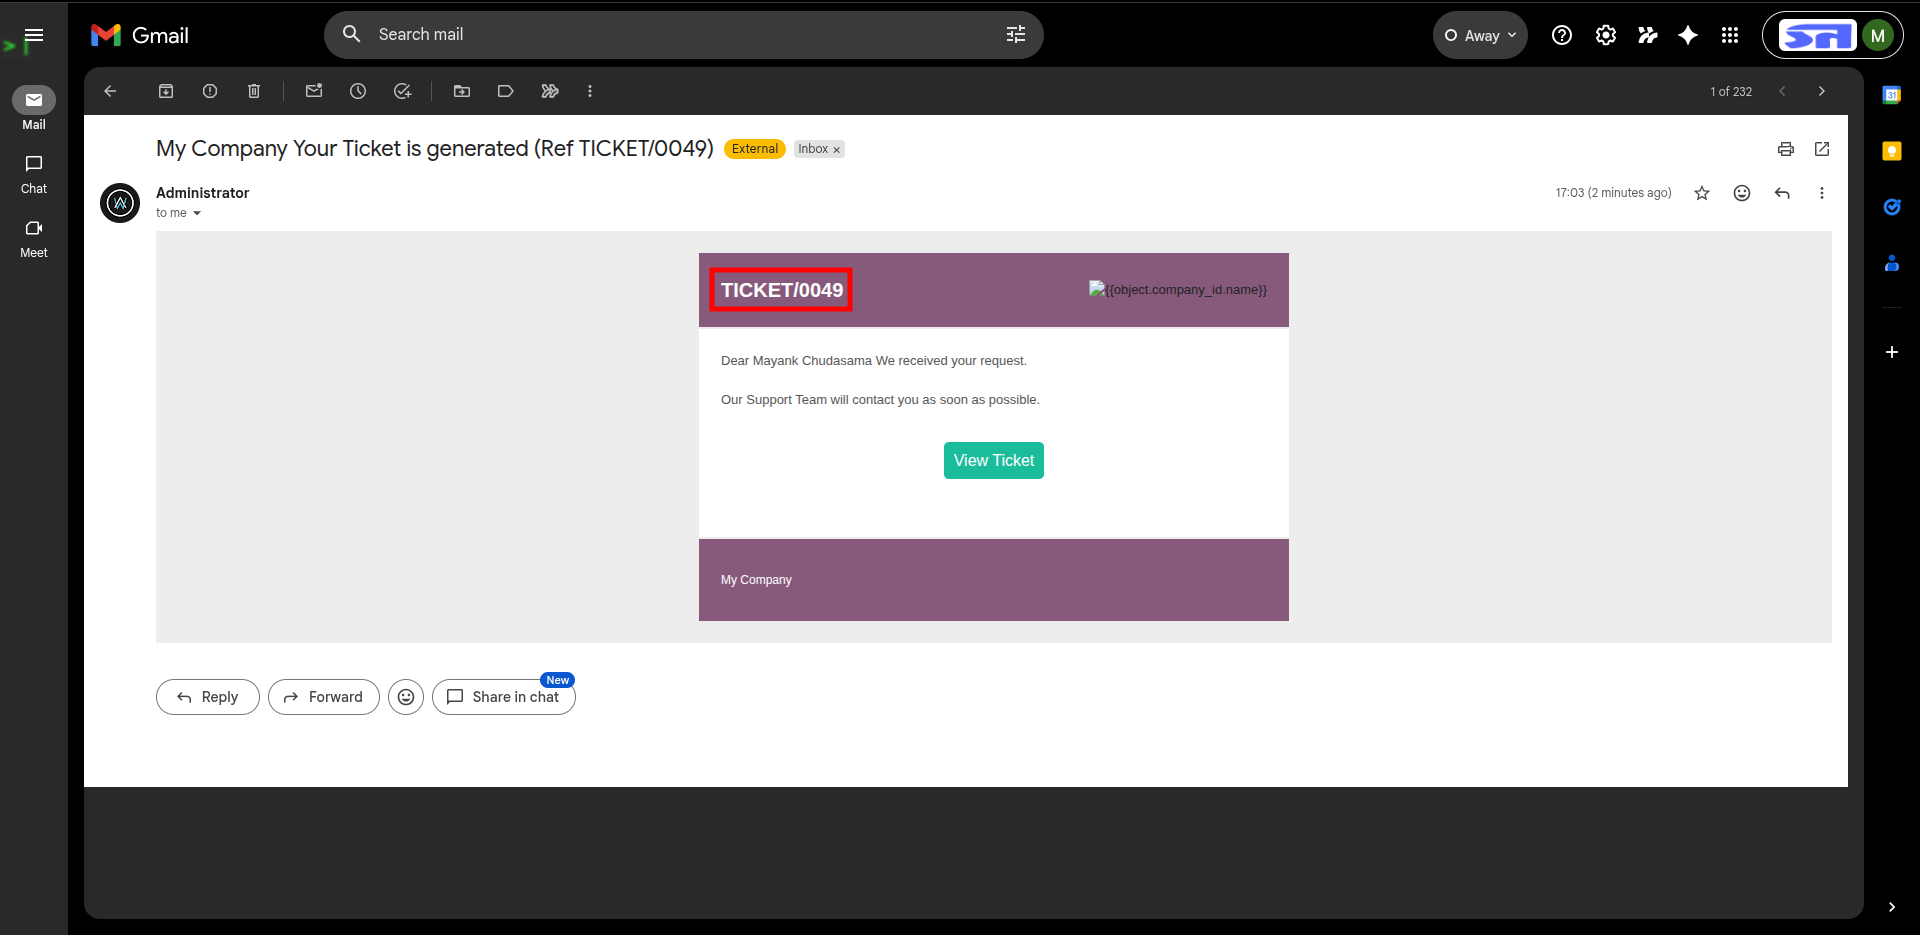
Review the generated customer email confirming the original multi-issue ticket was received.
Press Process AI Split from the alert to create separate tickets for each issue.
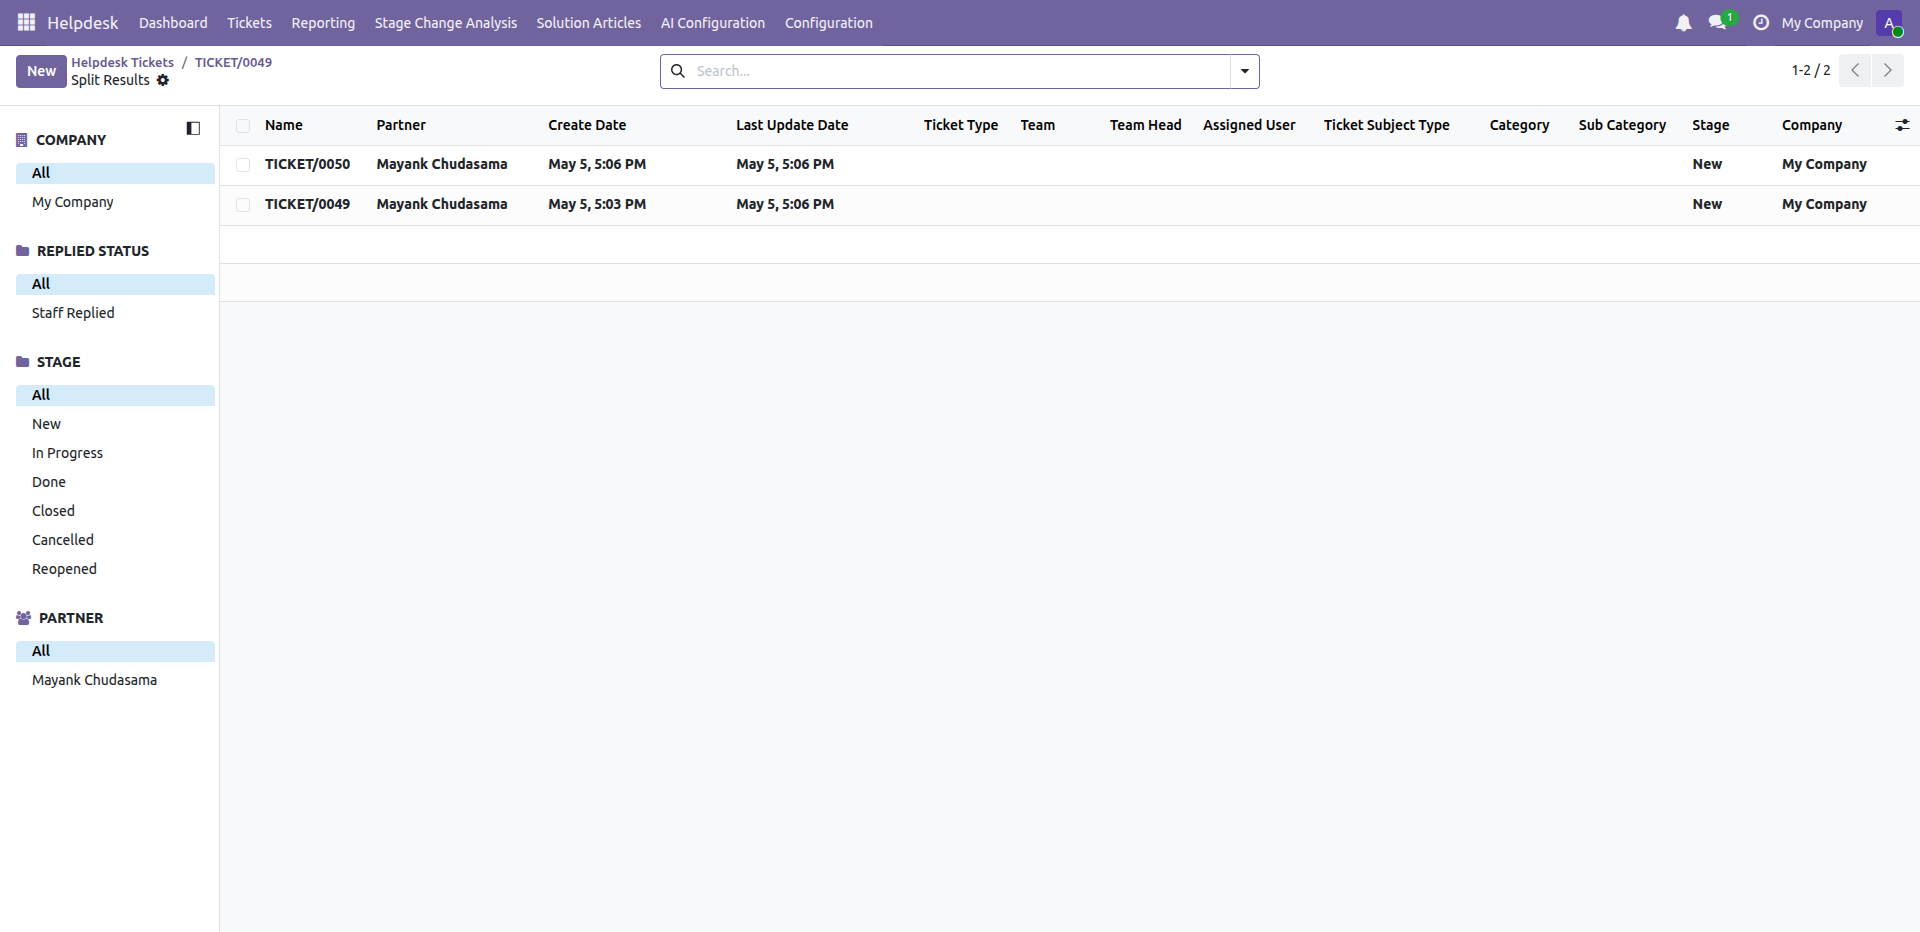
Review Split Results to confirm the original ticket and new split ticket were created.
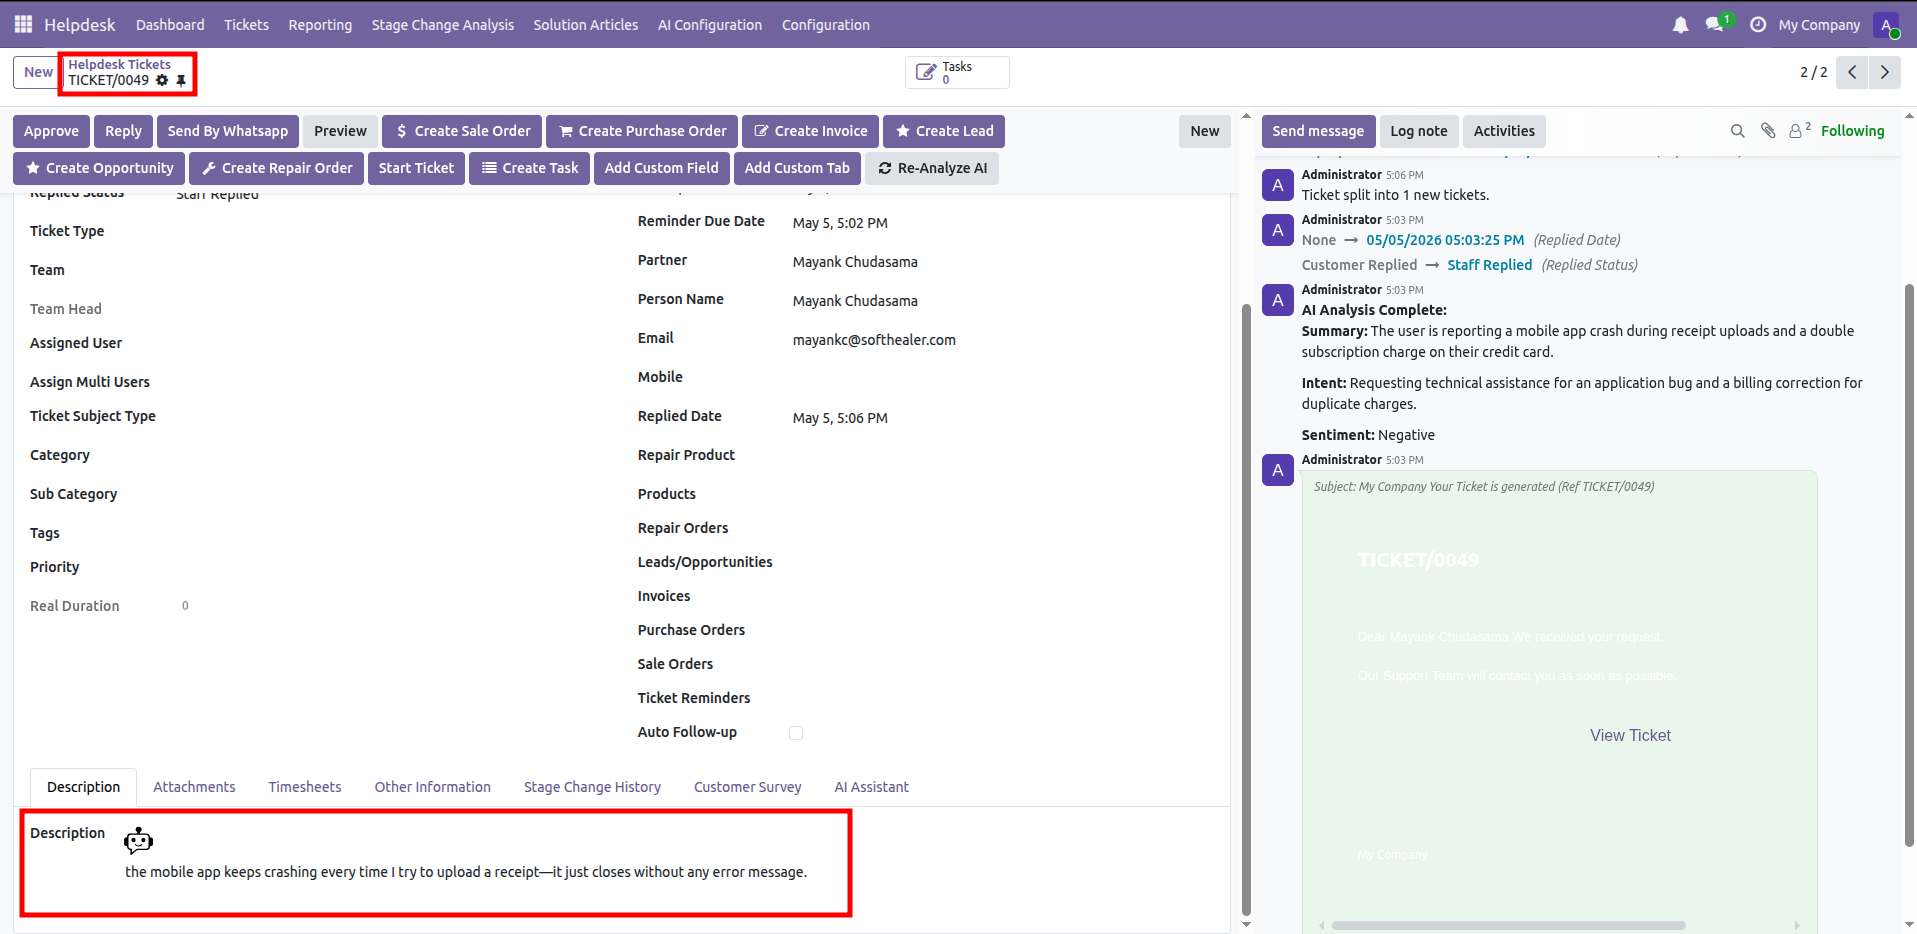
Open the updated ticket to confirm it now keeps only the mobile app issue.
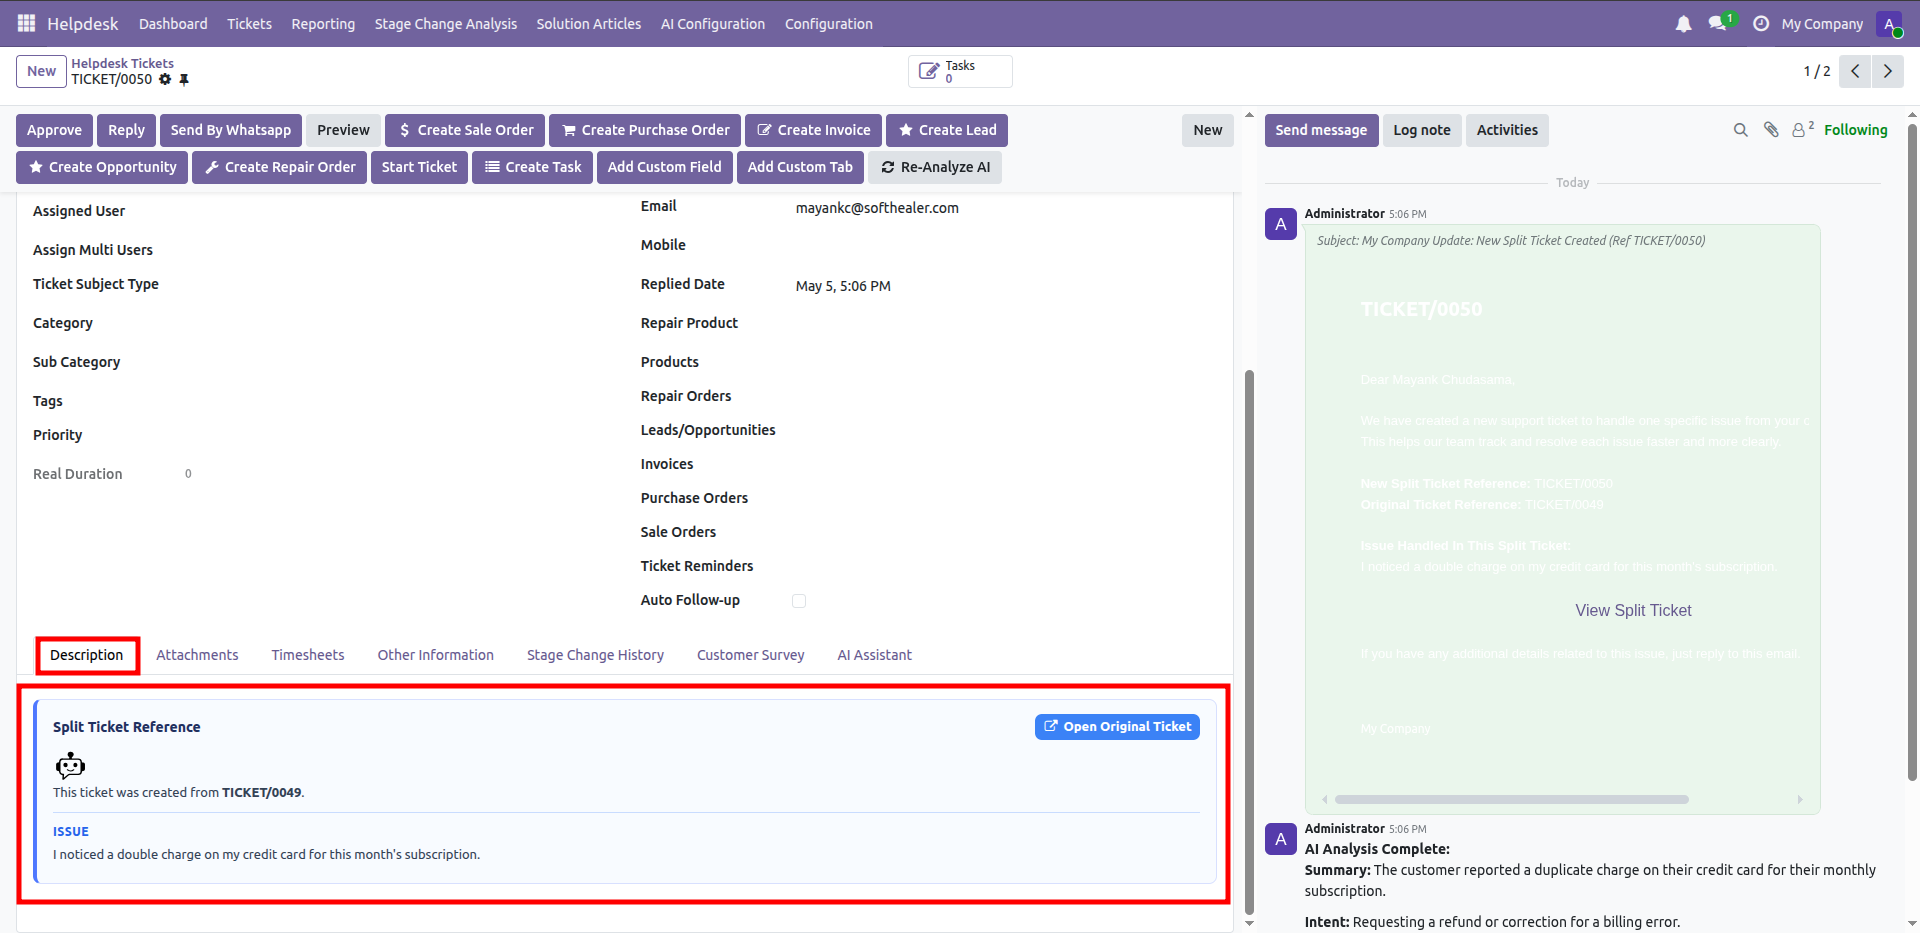
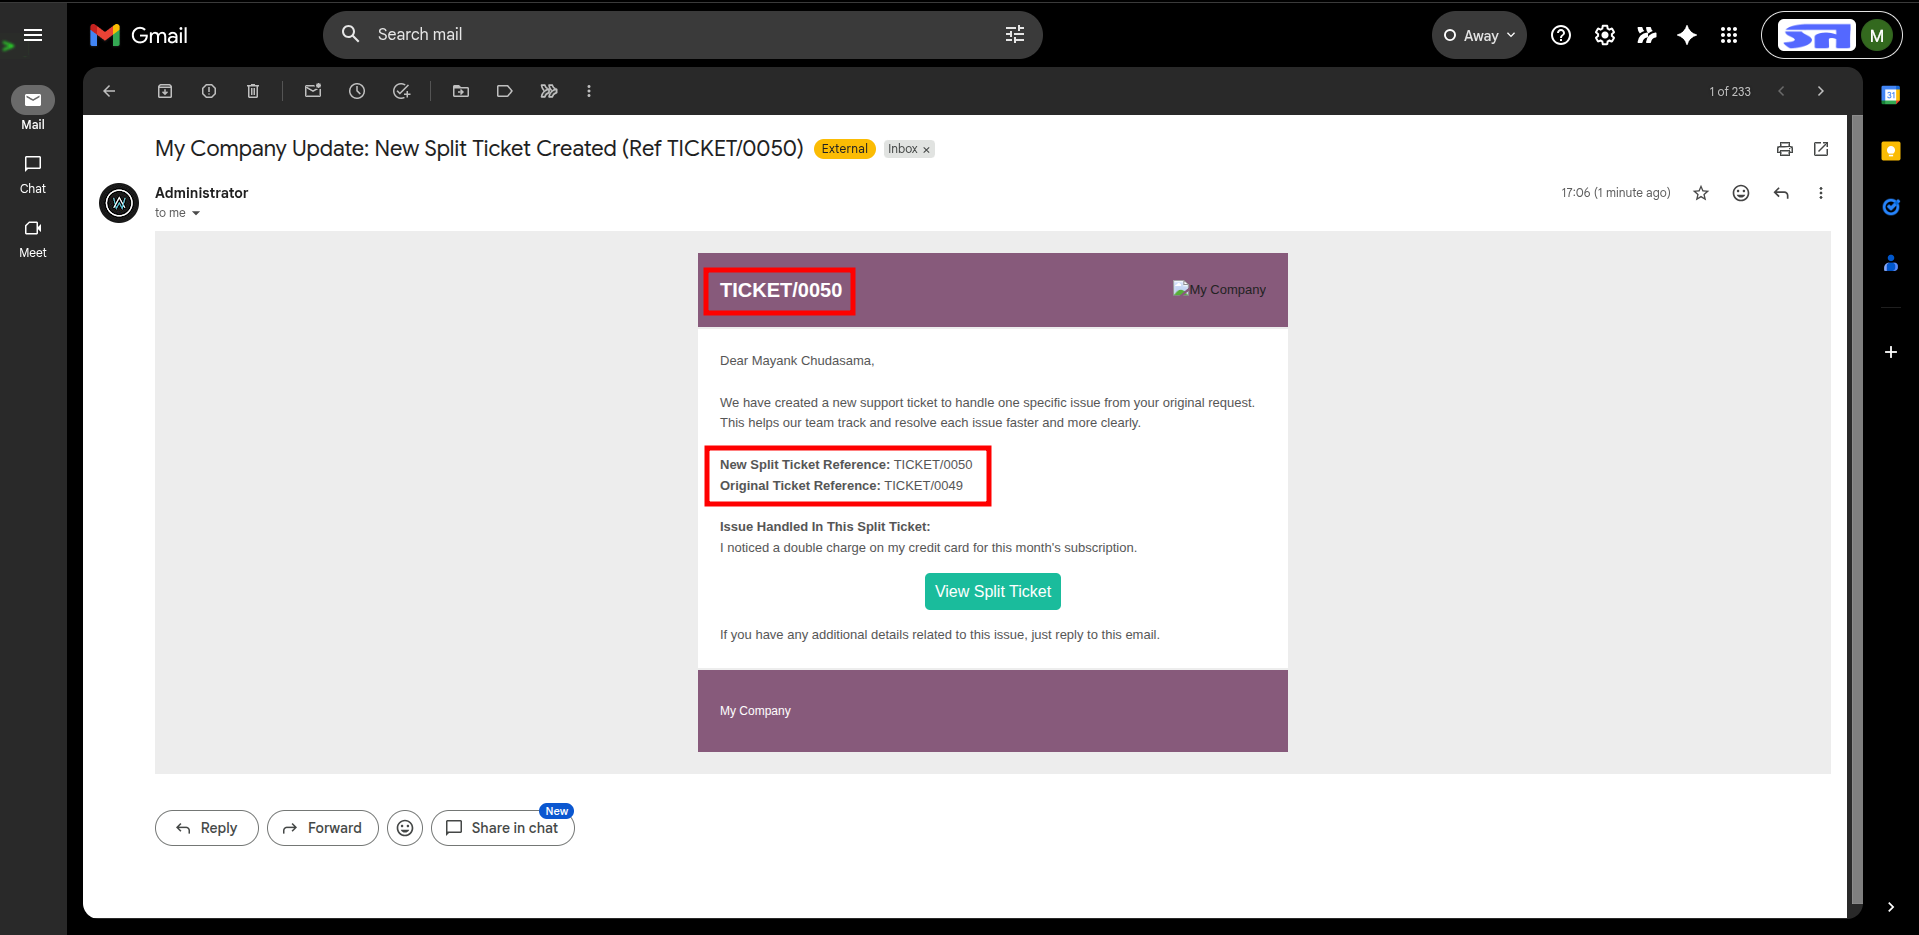
Review the split ticket reference block showing this billing issue came from TICKET/0049.
Review the customer email showing the new split ticket reference and original ticket link.
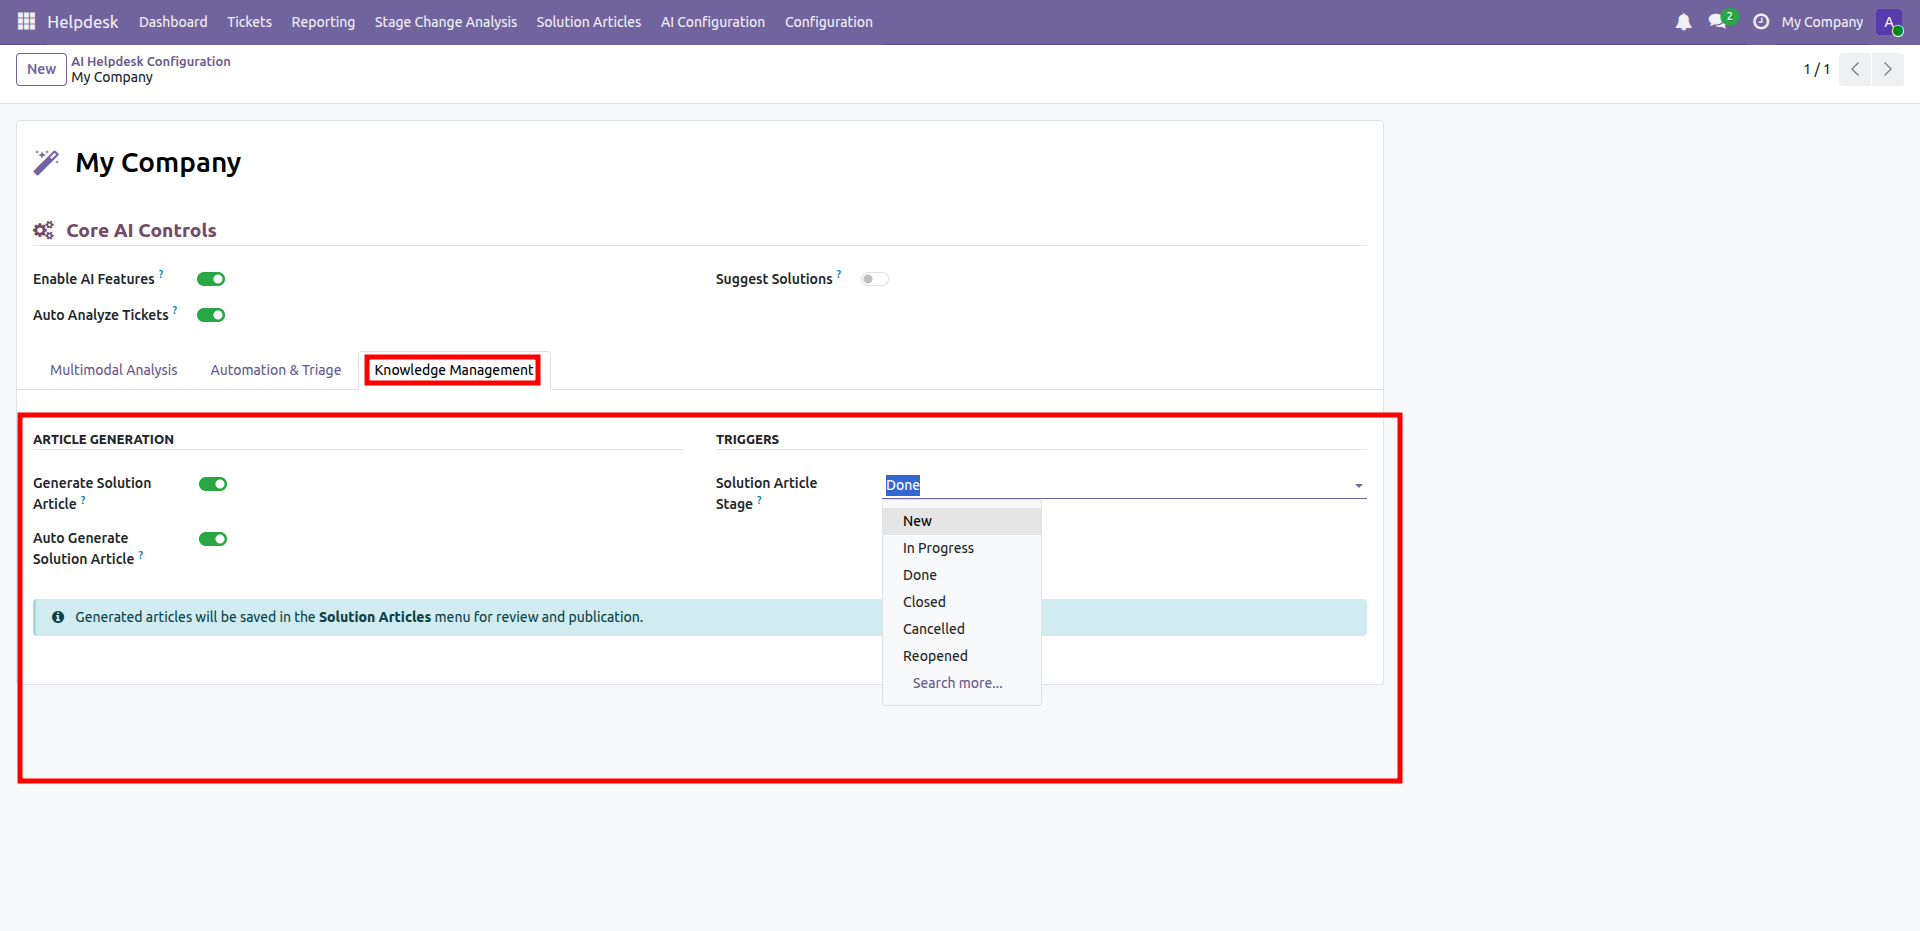
Open Knowledge Management settings and enable automatic solution article generation.
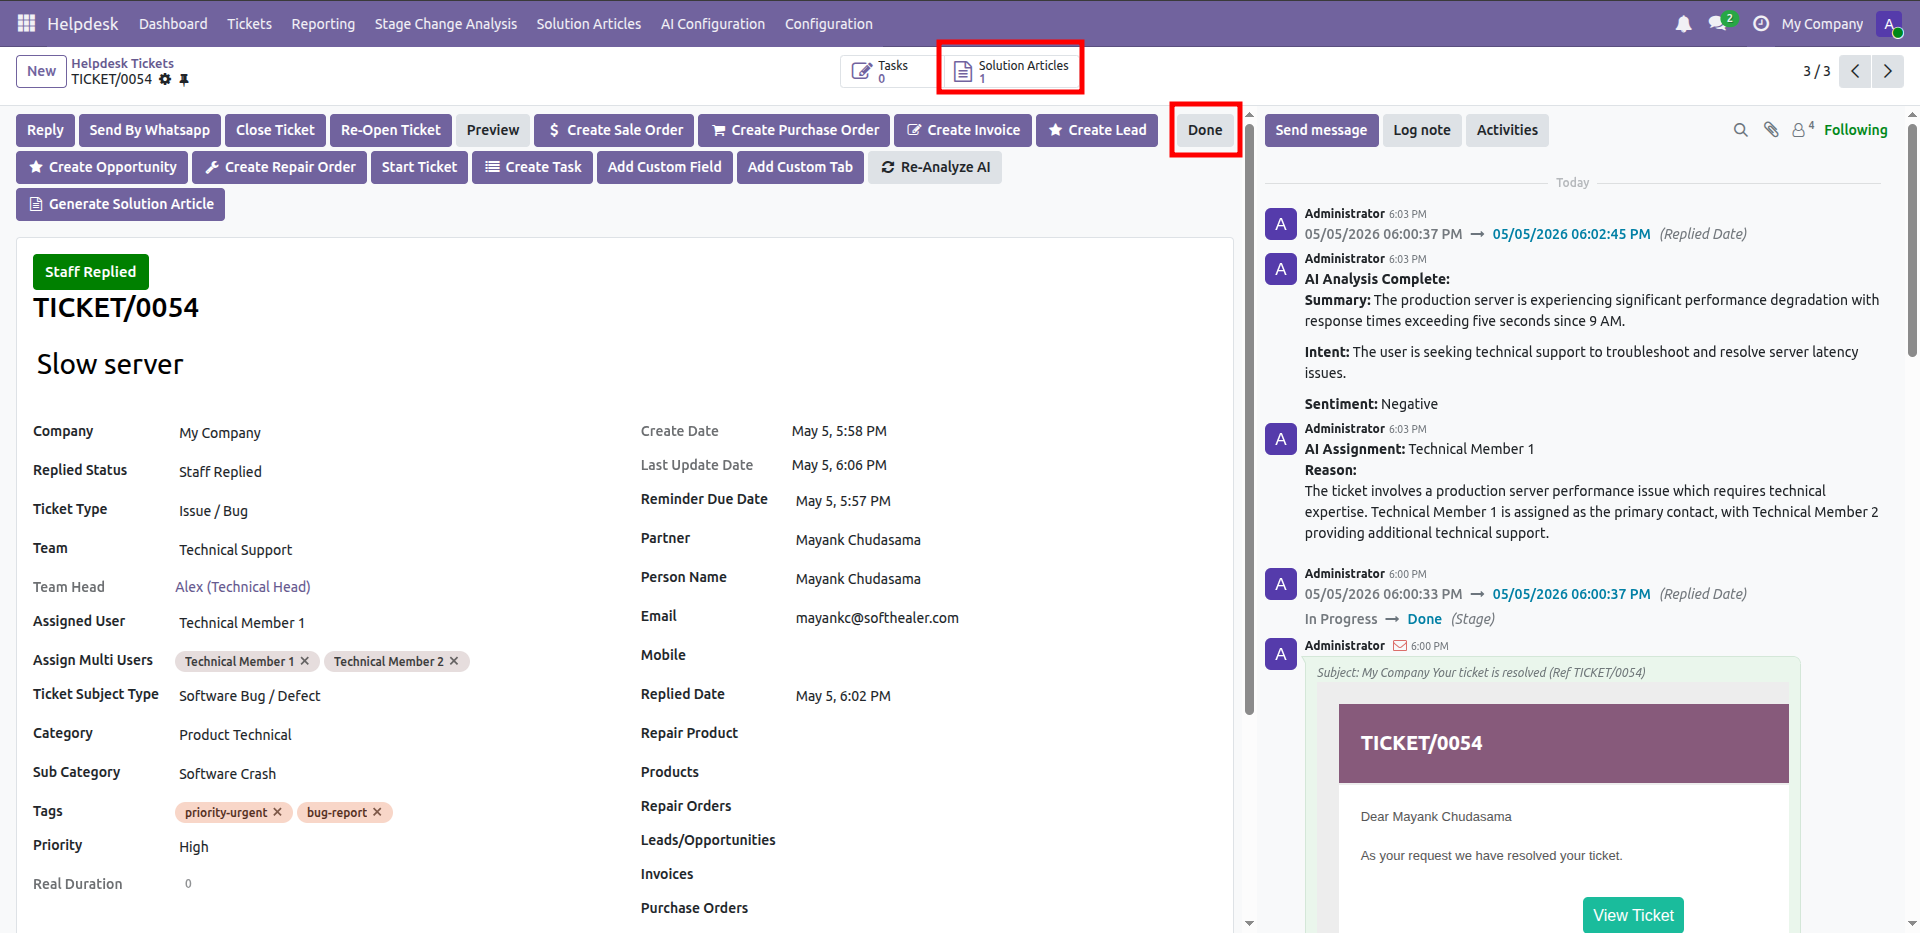
Open a resolved ticket and review the generated Solution Articles smart button.
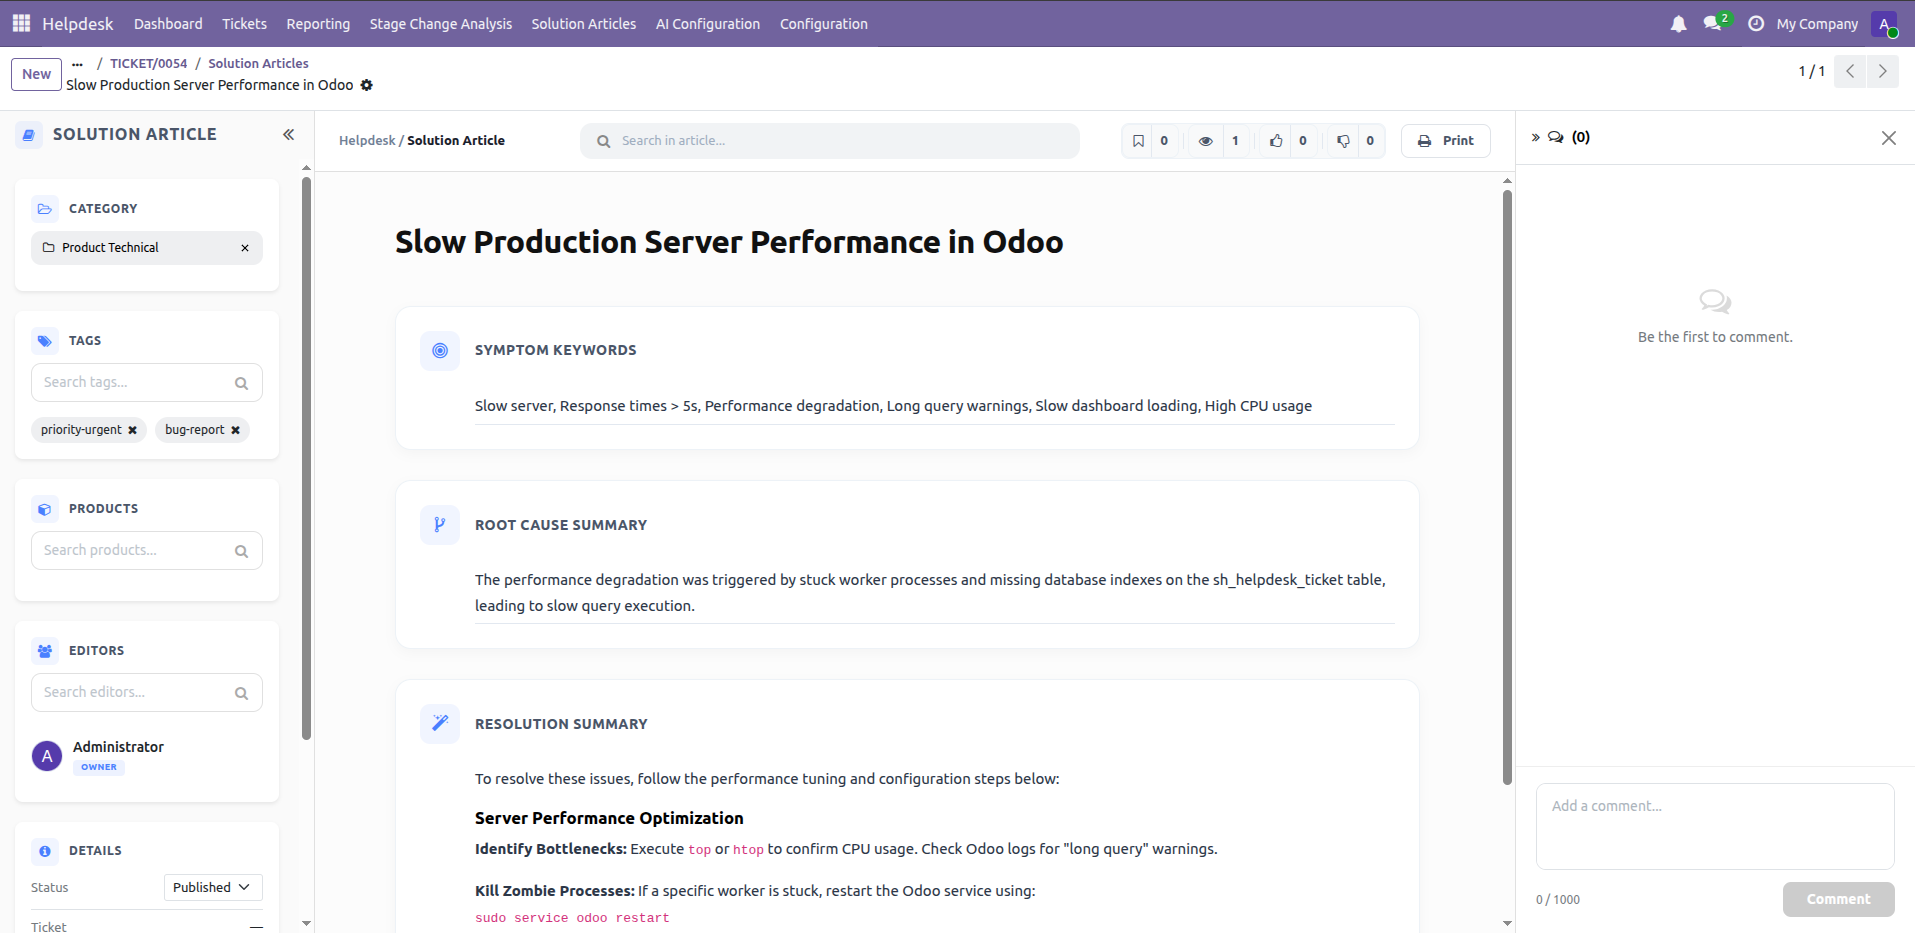
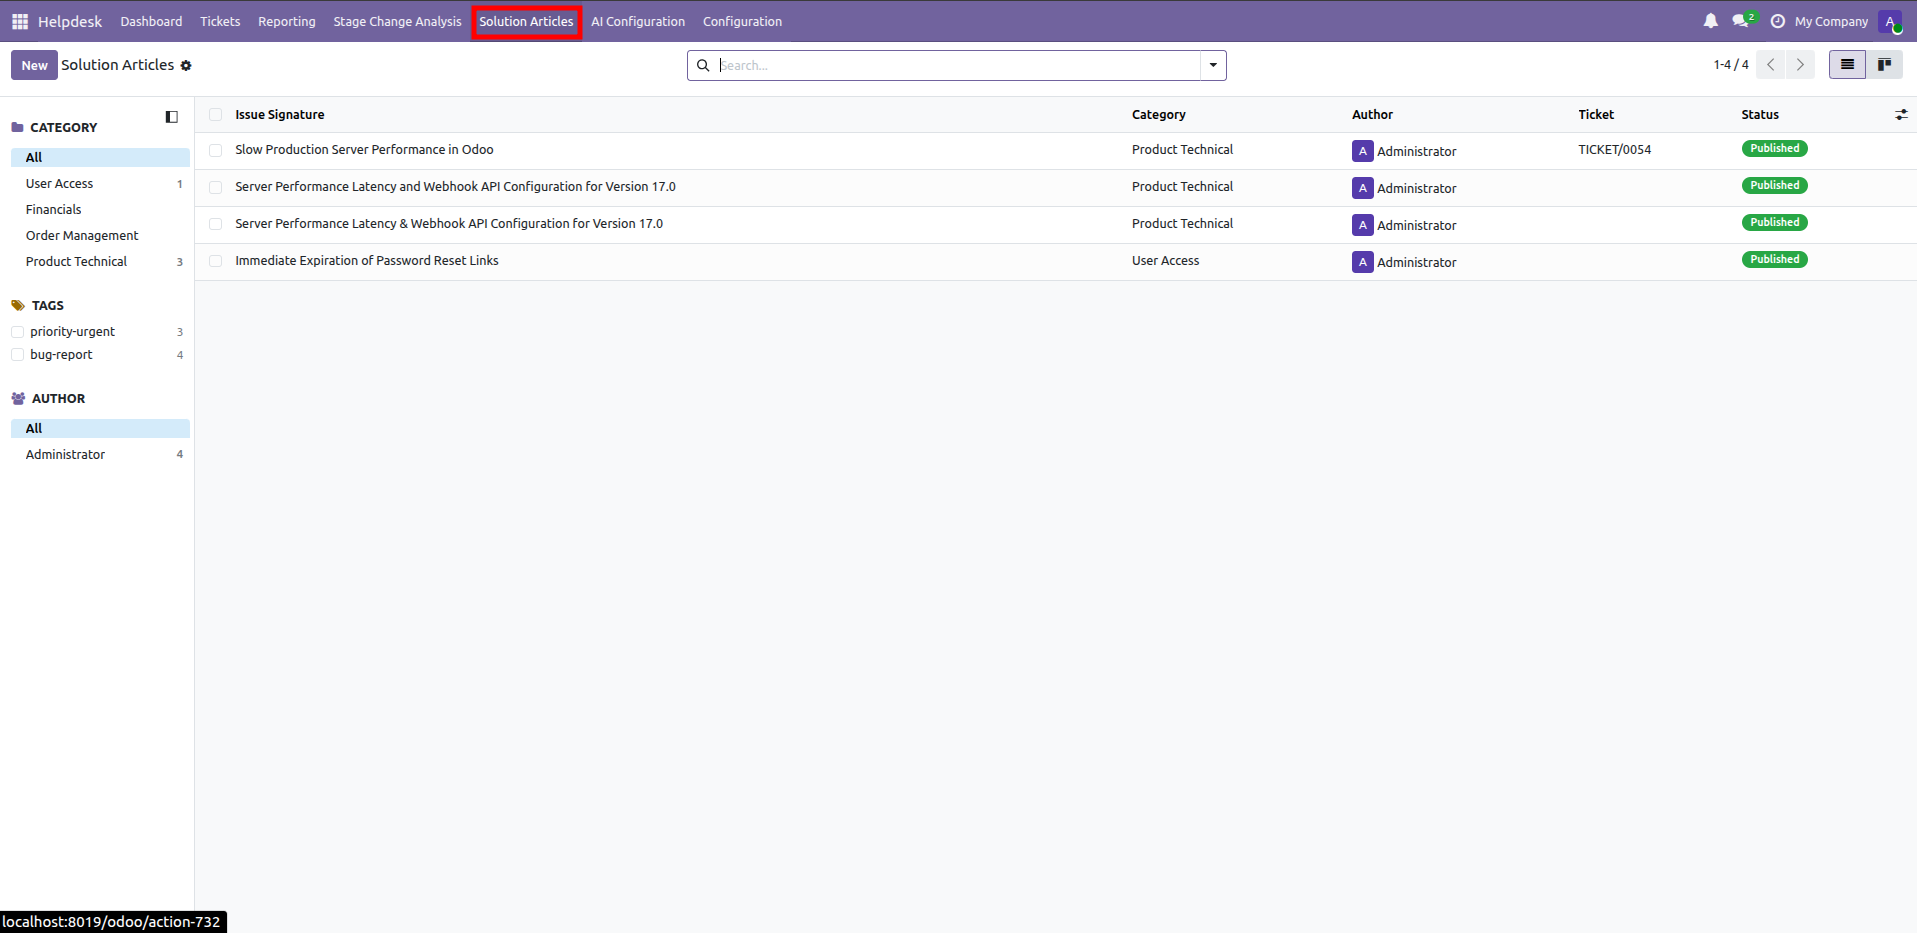
Displays the generated solution article with issue summary and resolution steps.
Open Solution Articles to review published knowledge articles created from tickets.
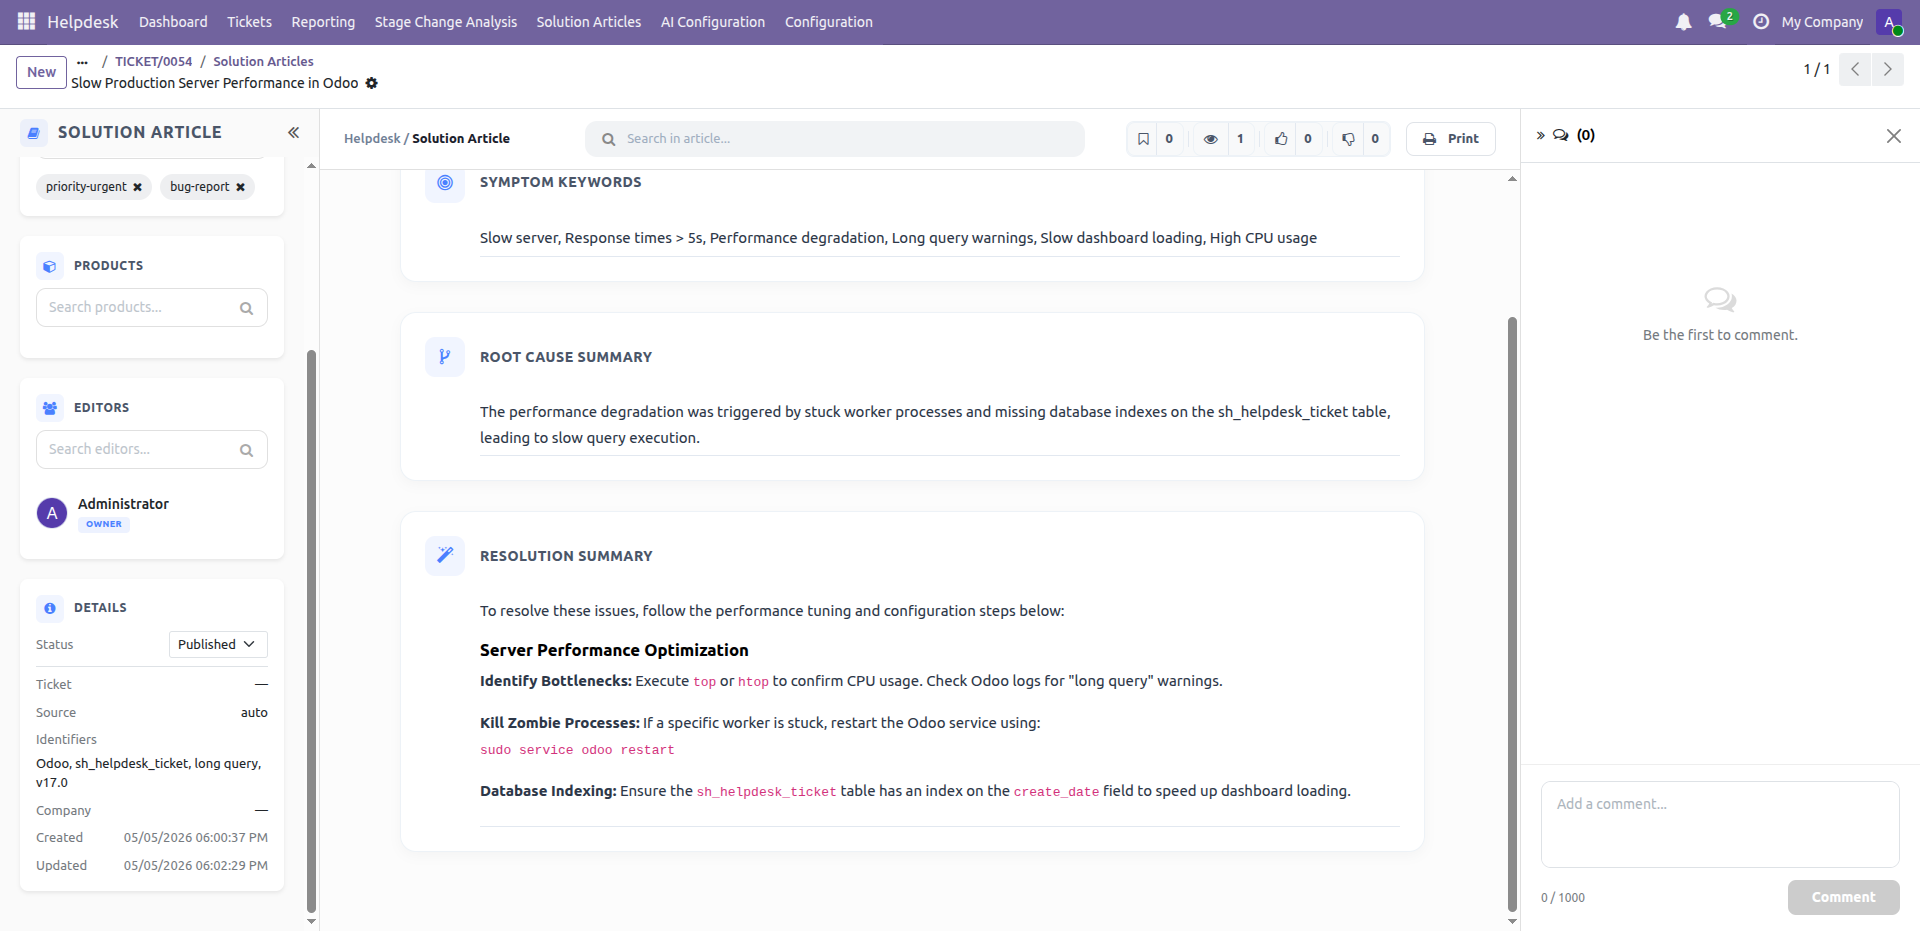
Enable Suggest Solutions in settings to display article recommendations on tickets.
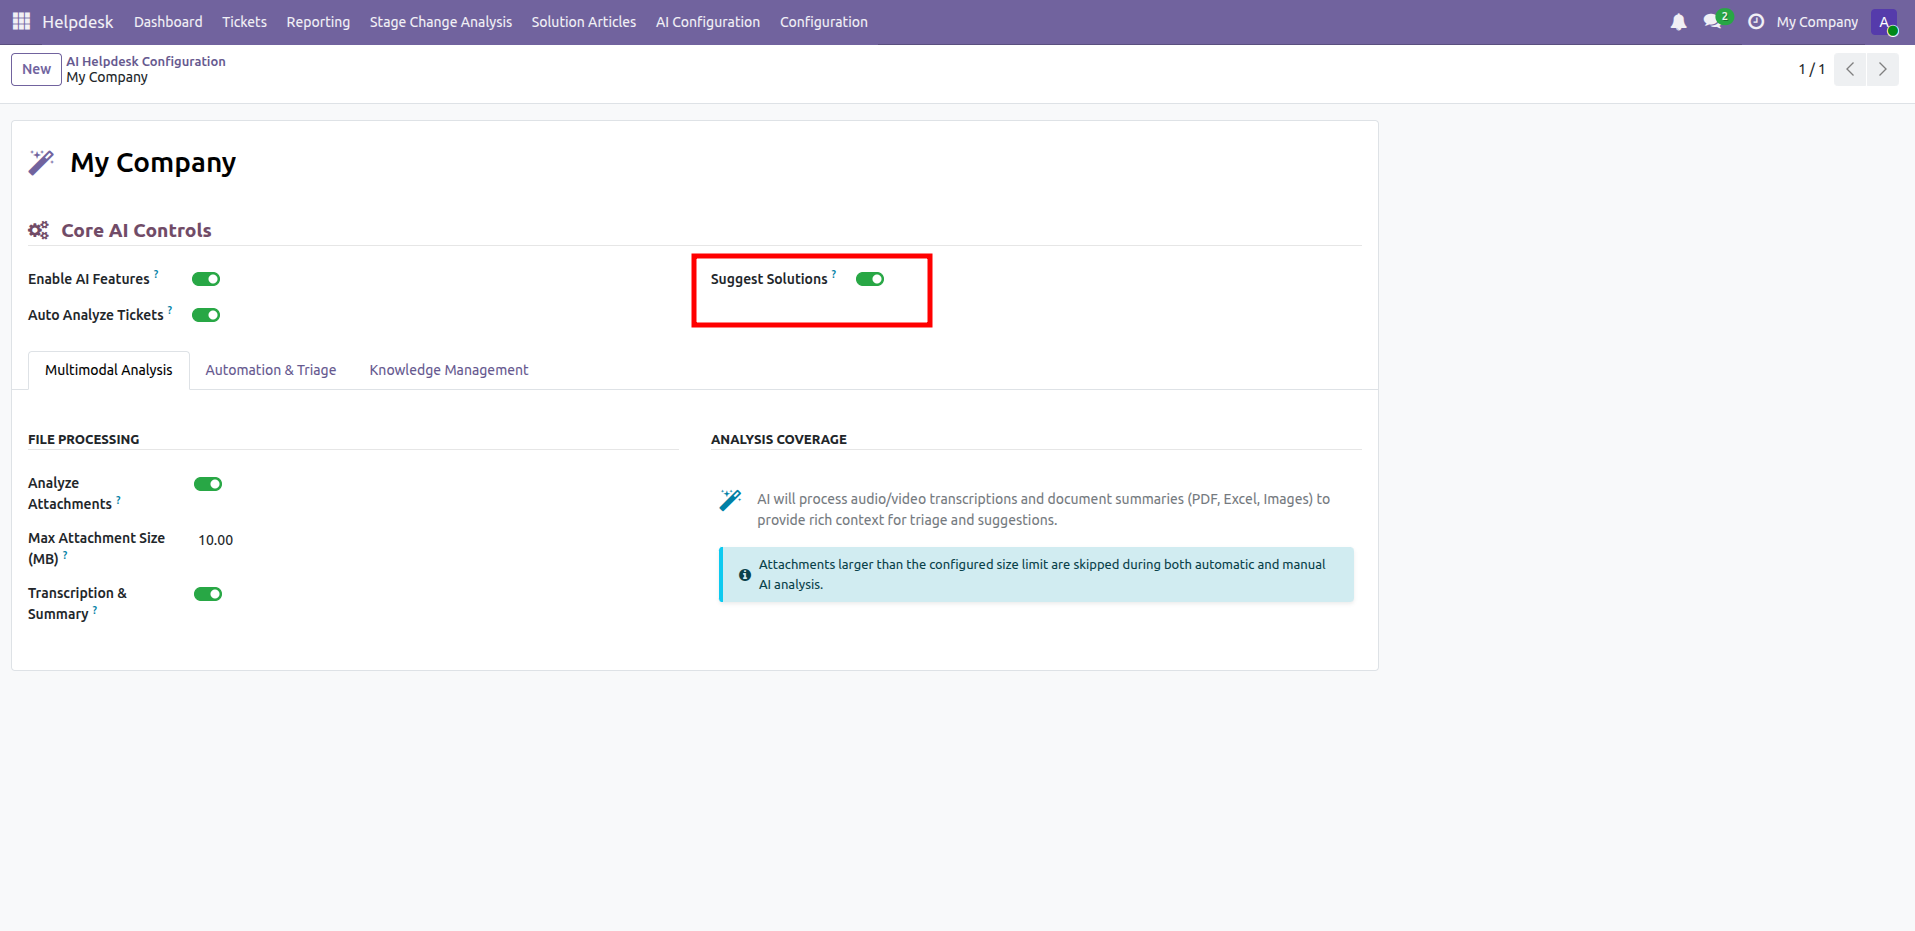
Open AI Assistant to review the suggested solution card for this ticket.
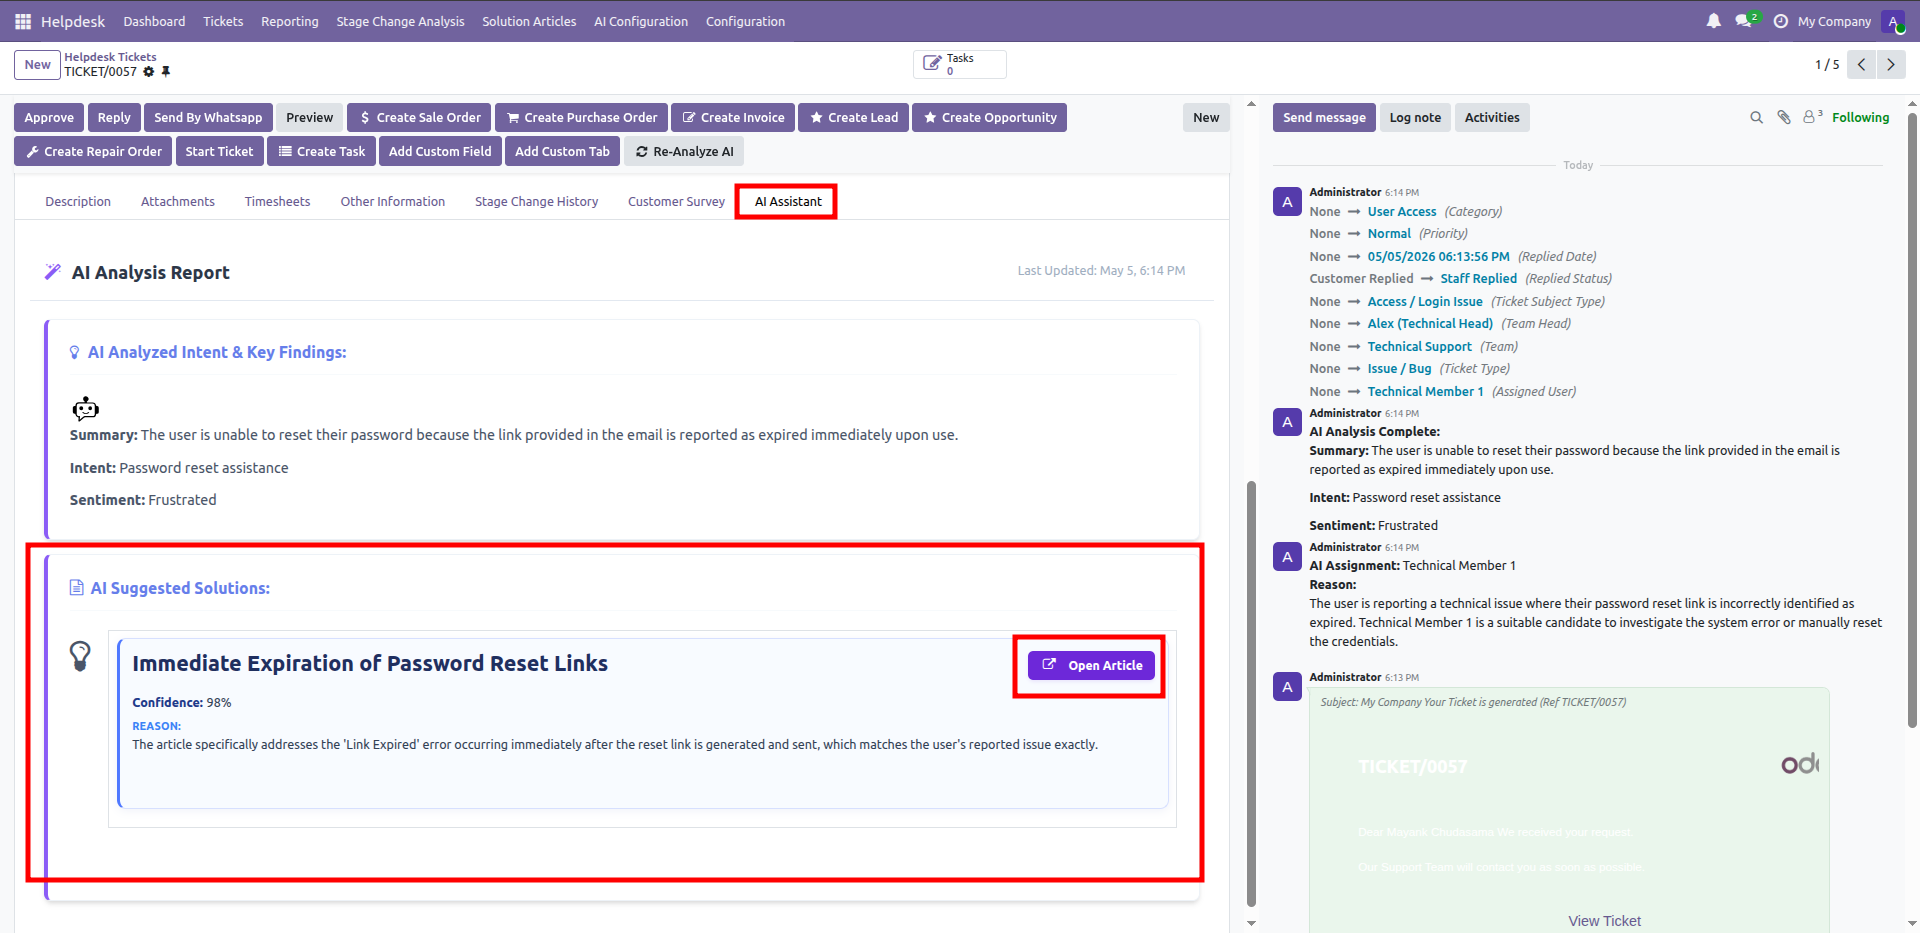
Press Open Article to view the recommended knowledge article for this issue.
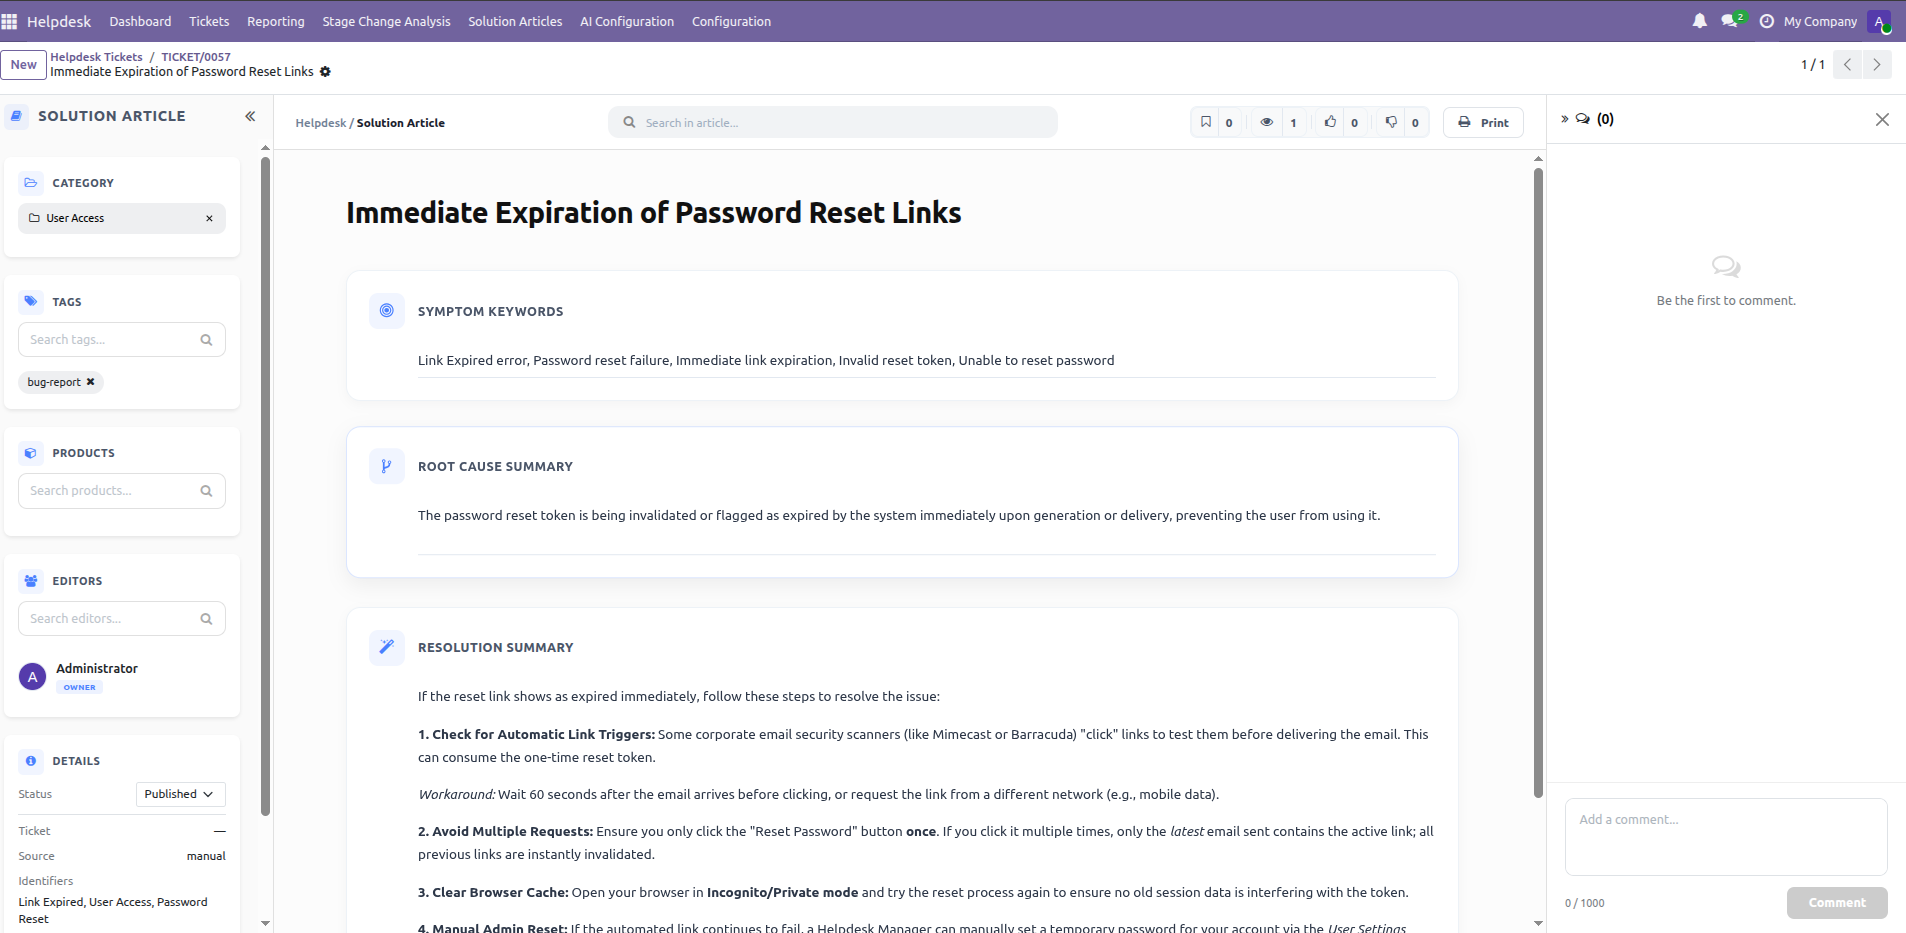
Displays the full solution article opened from the AI suggested solution panel.
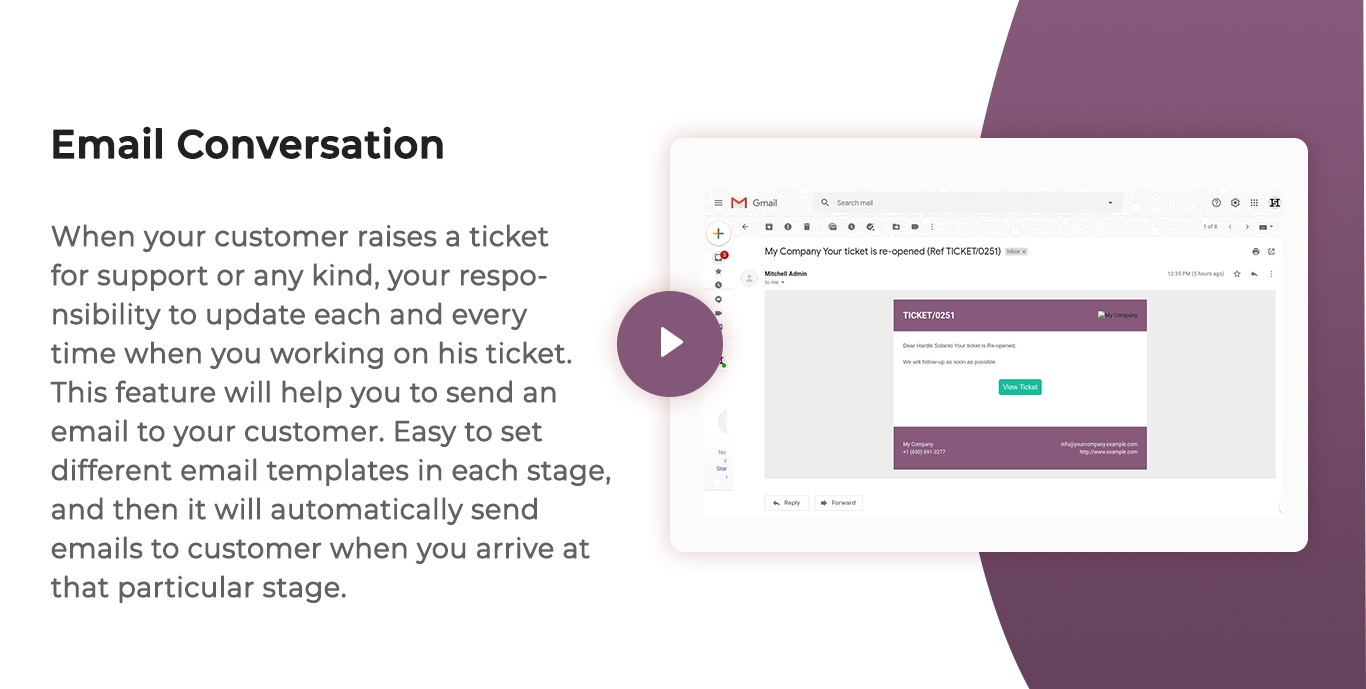
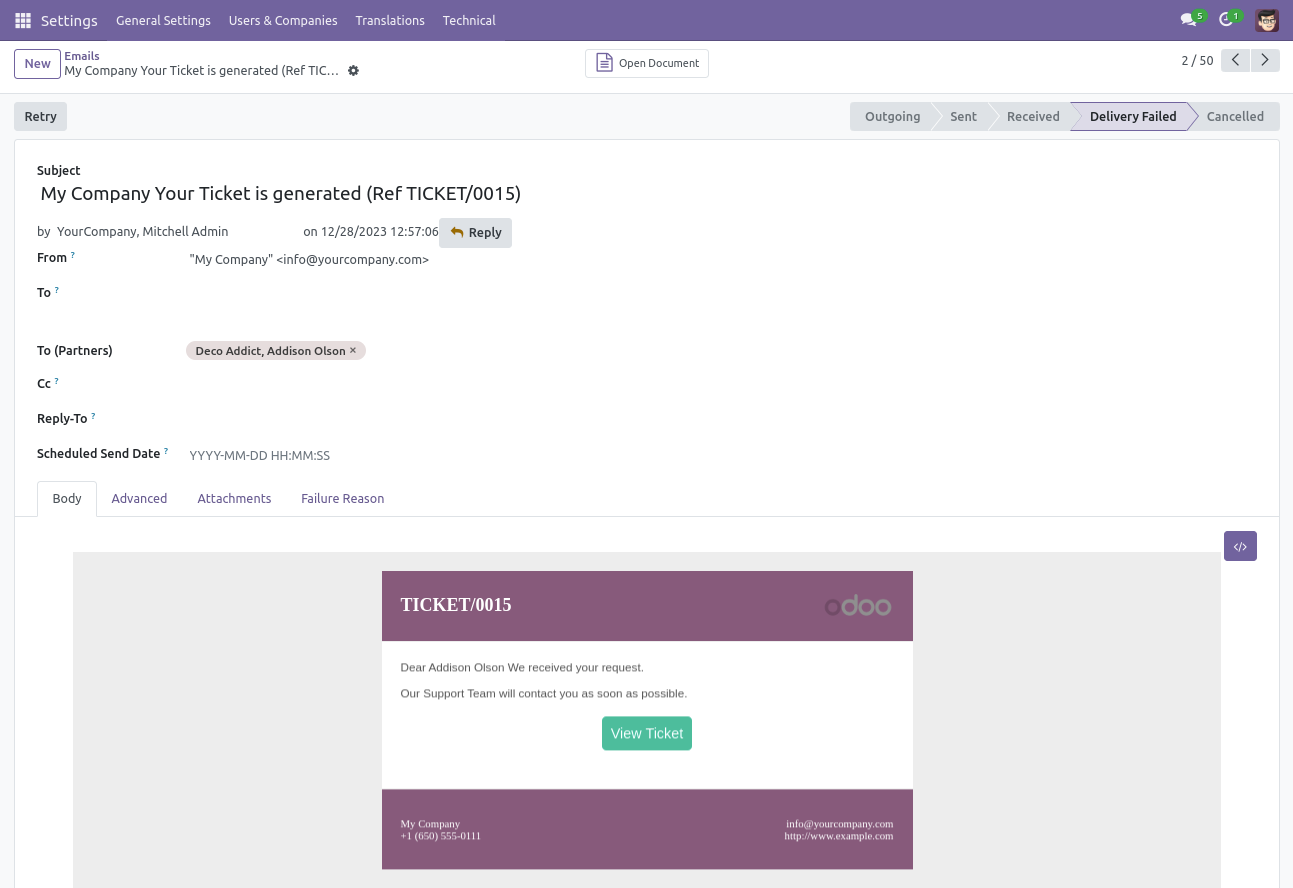
When a ticket is created that time customer will notify via email.
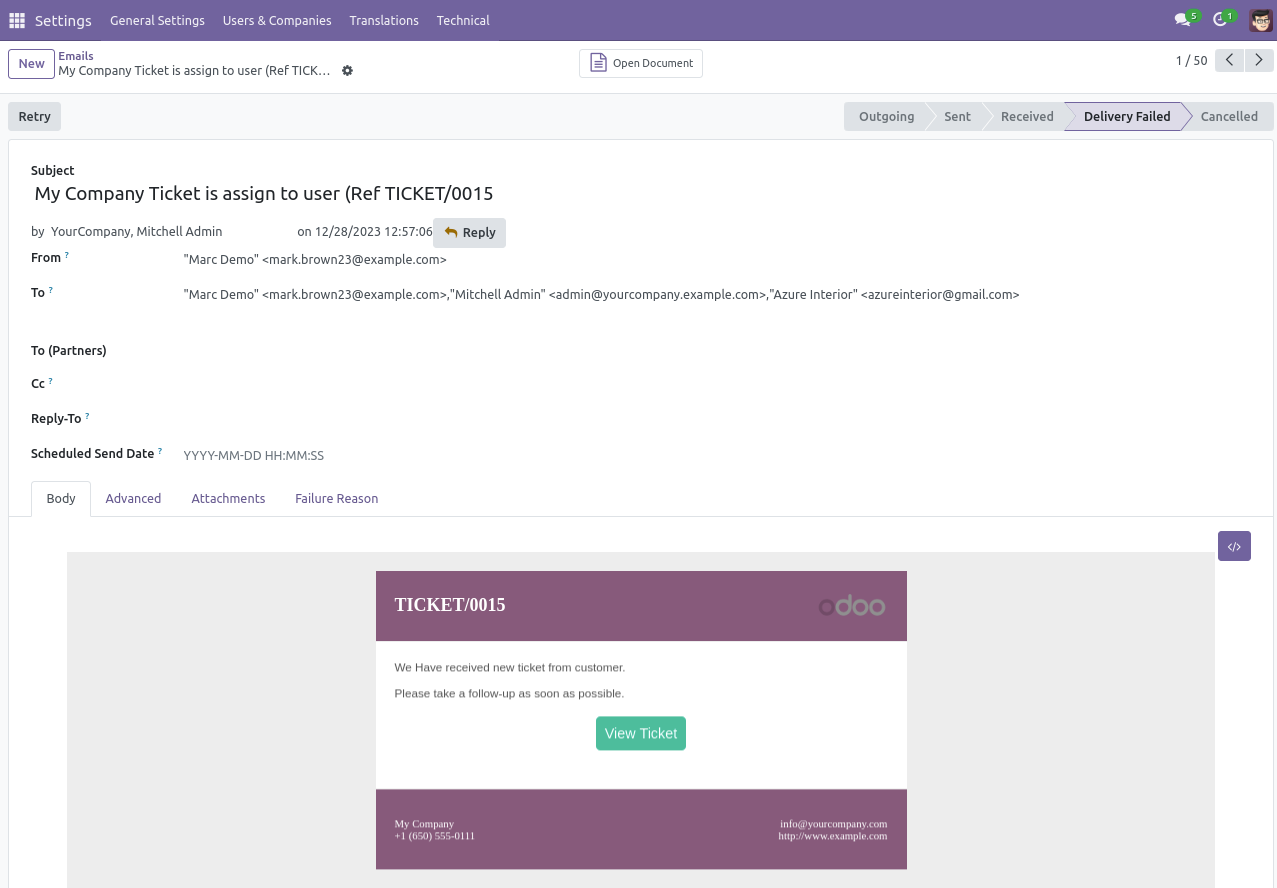
When a ticket is created that time assigned users will notify via email.
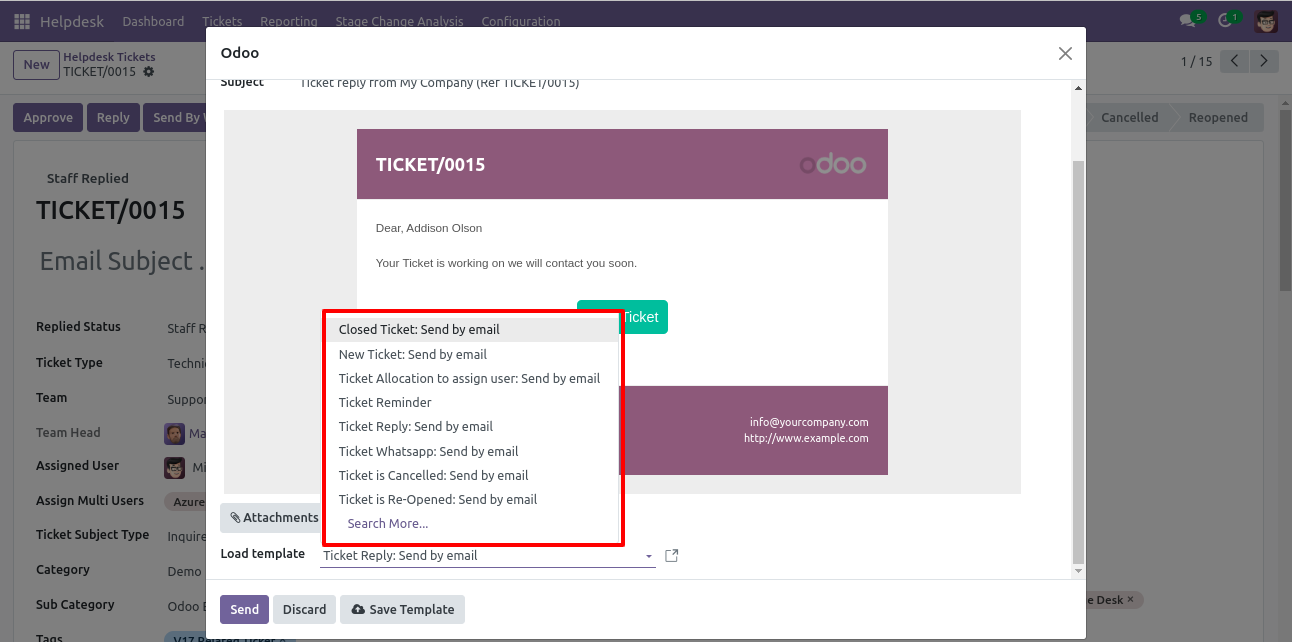
When you click on the 'Reply' button on the form, this wizard will appear where you can set an email template as per reply. In Email, there is one link 'View Ticket', Where customer can see the ticket status.
'Replied Date' added after reply and replied status will change 'Staff Replied'.
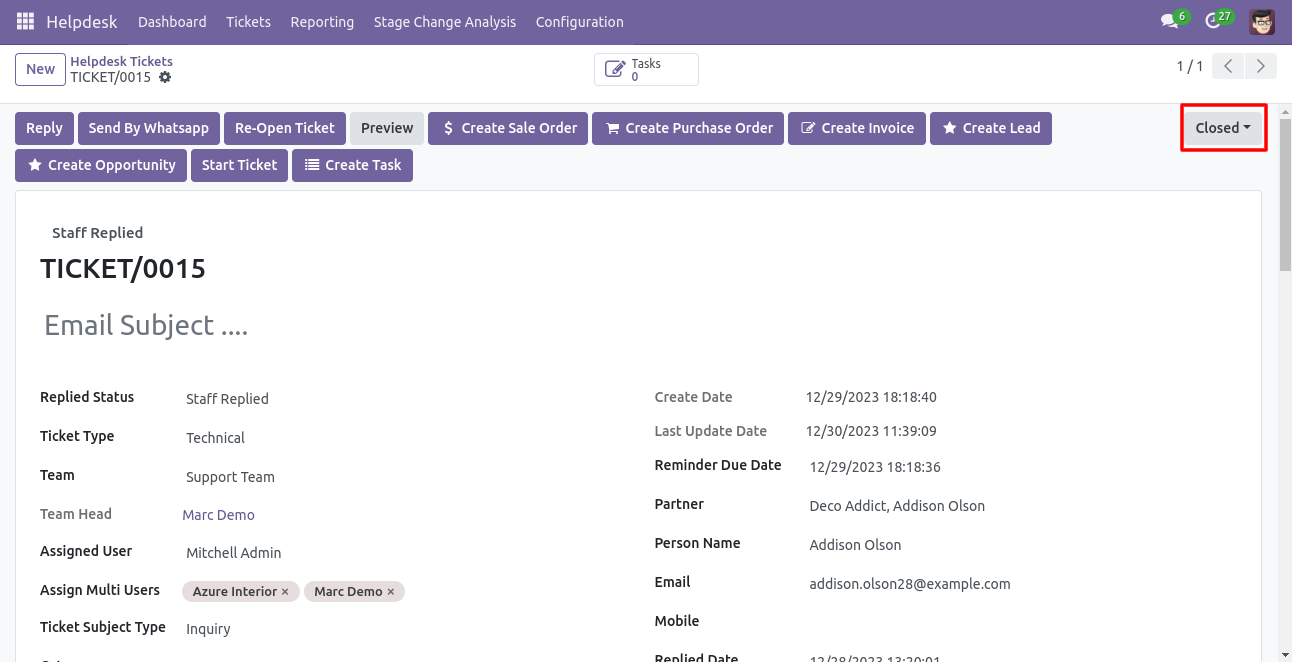
While the ticket is closed, customers will notify via email with a feedback link.
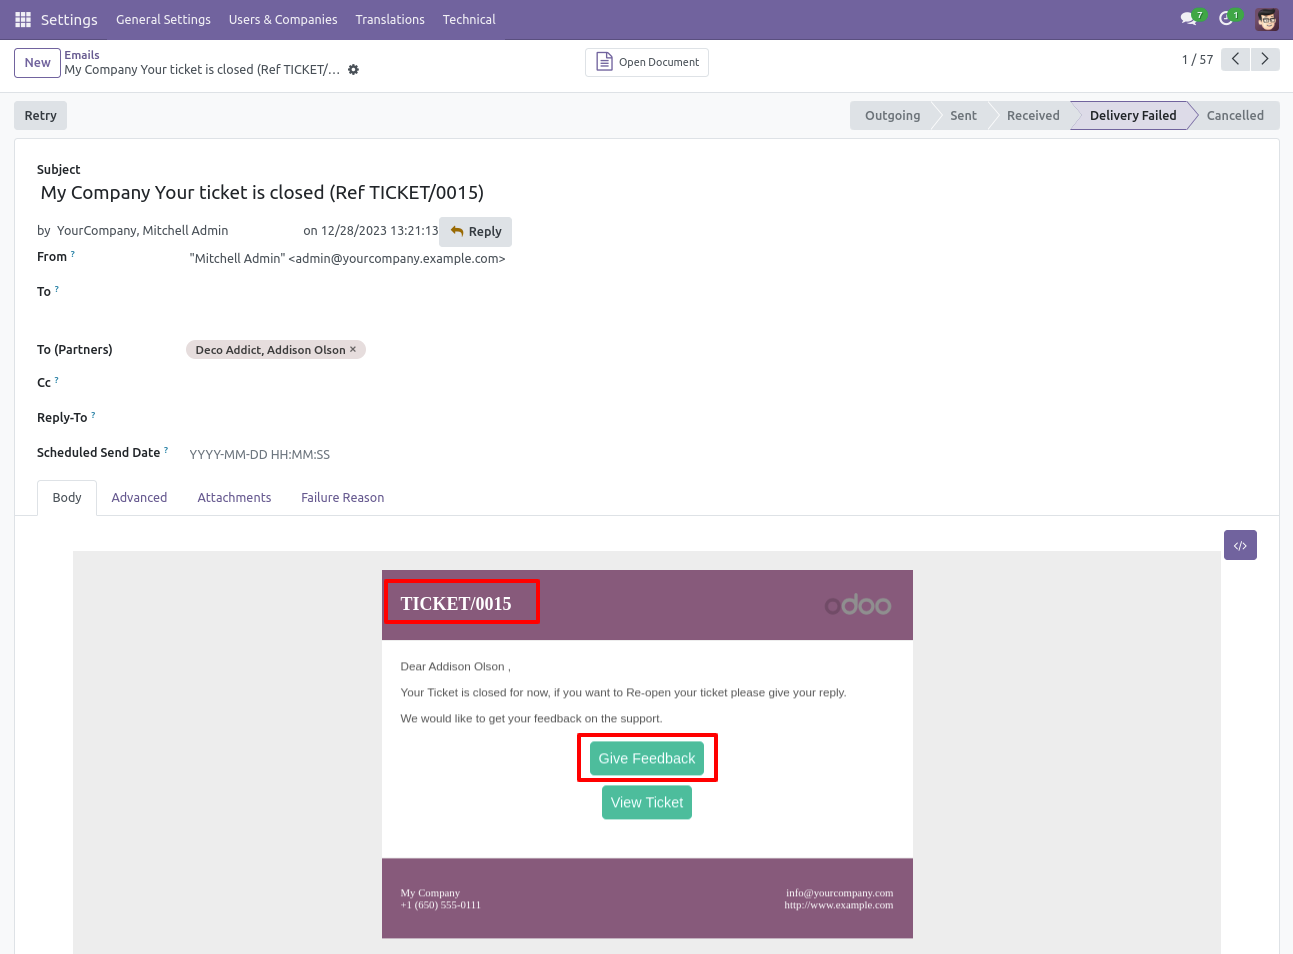
After click on link customer will see this view, where customer give feedback with comment.
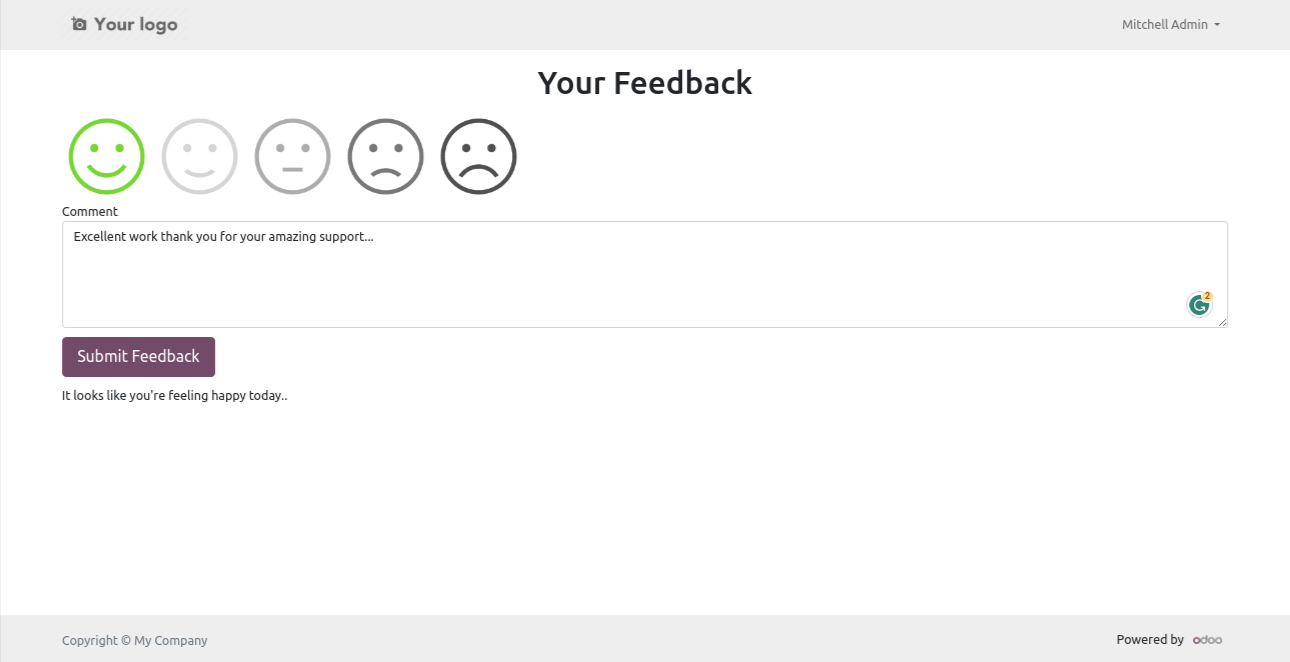
Thank you message after submit feedback.

Customer feedback.
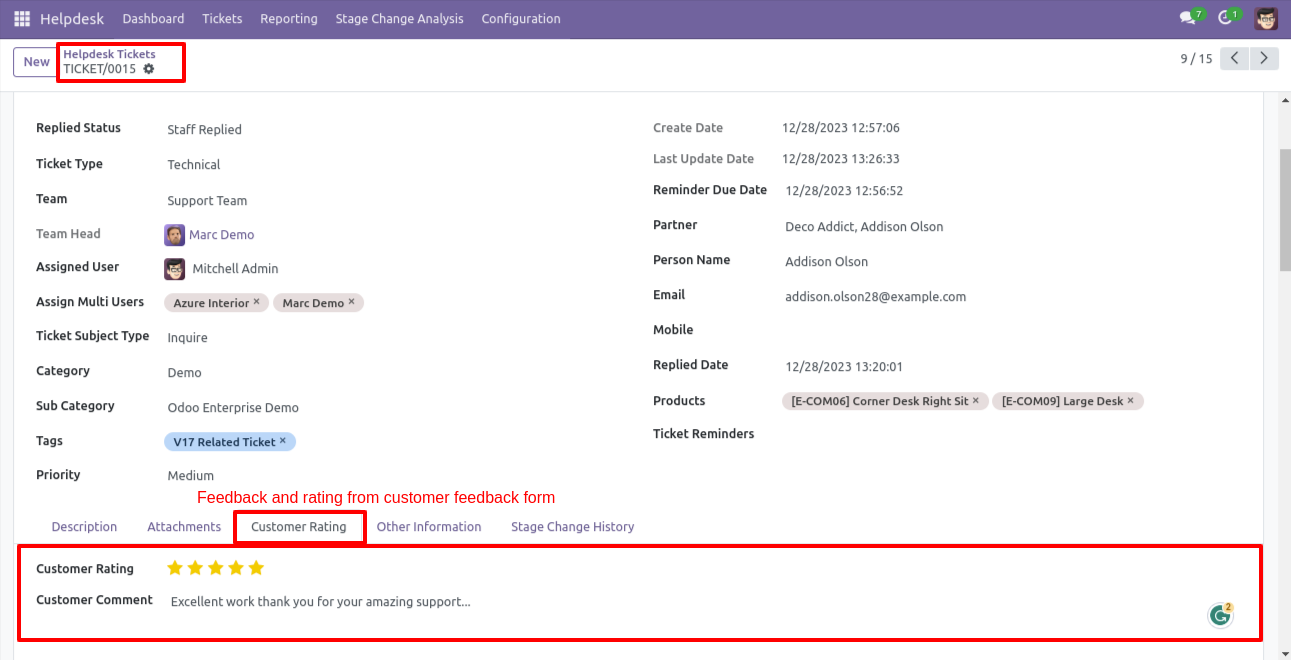
Customer ratings visible to only manager & team leader.
A colorful dashboard appears as below.
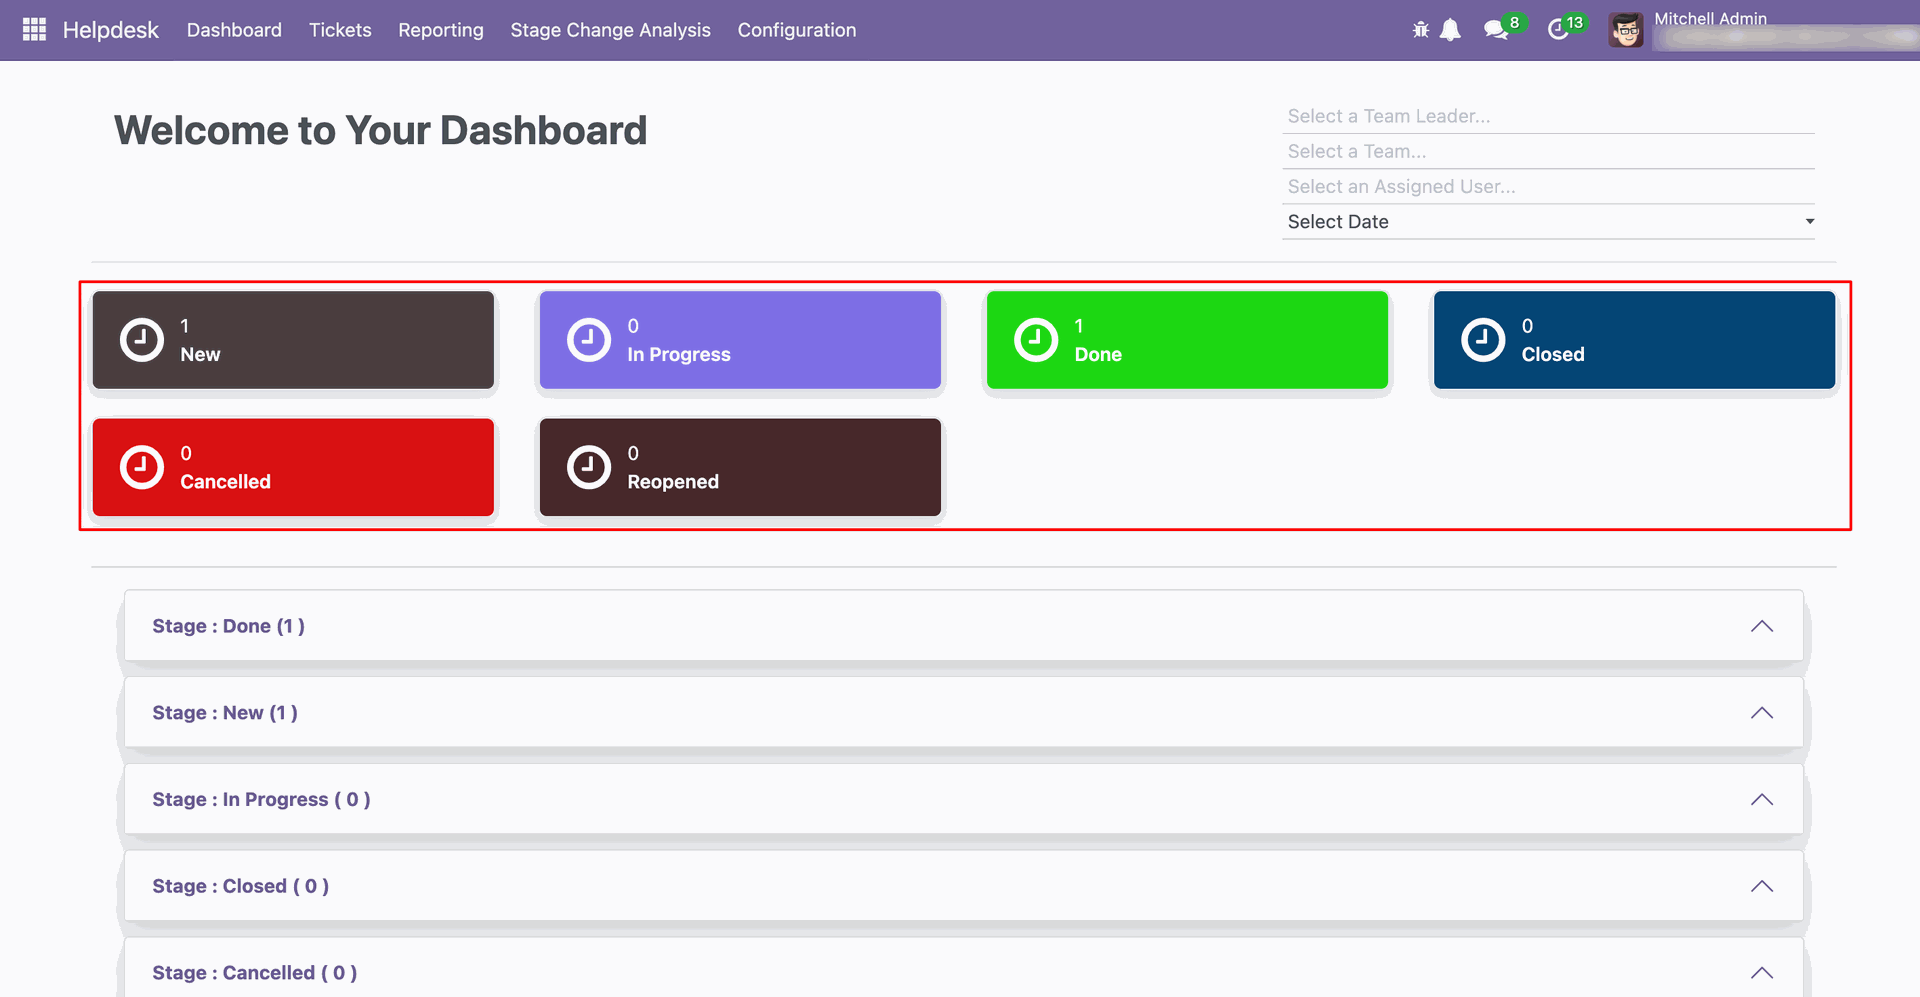
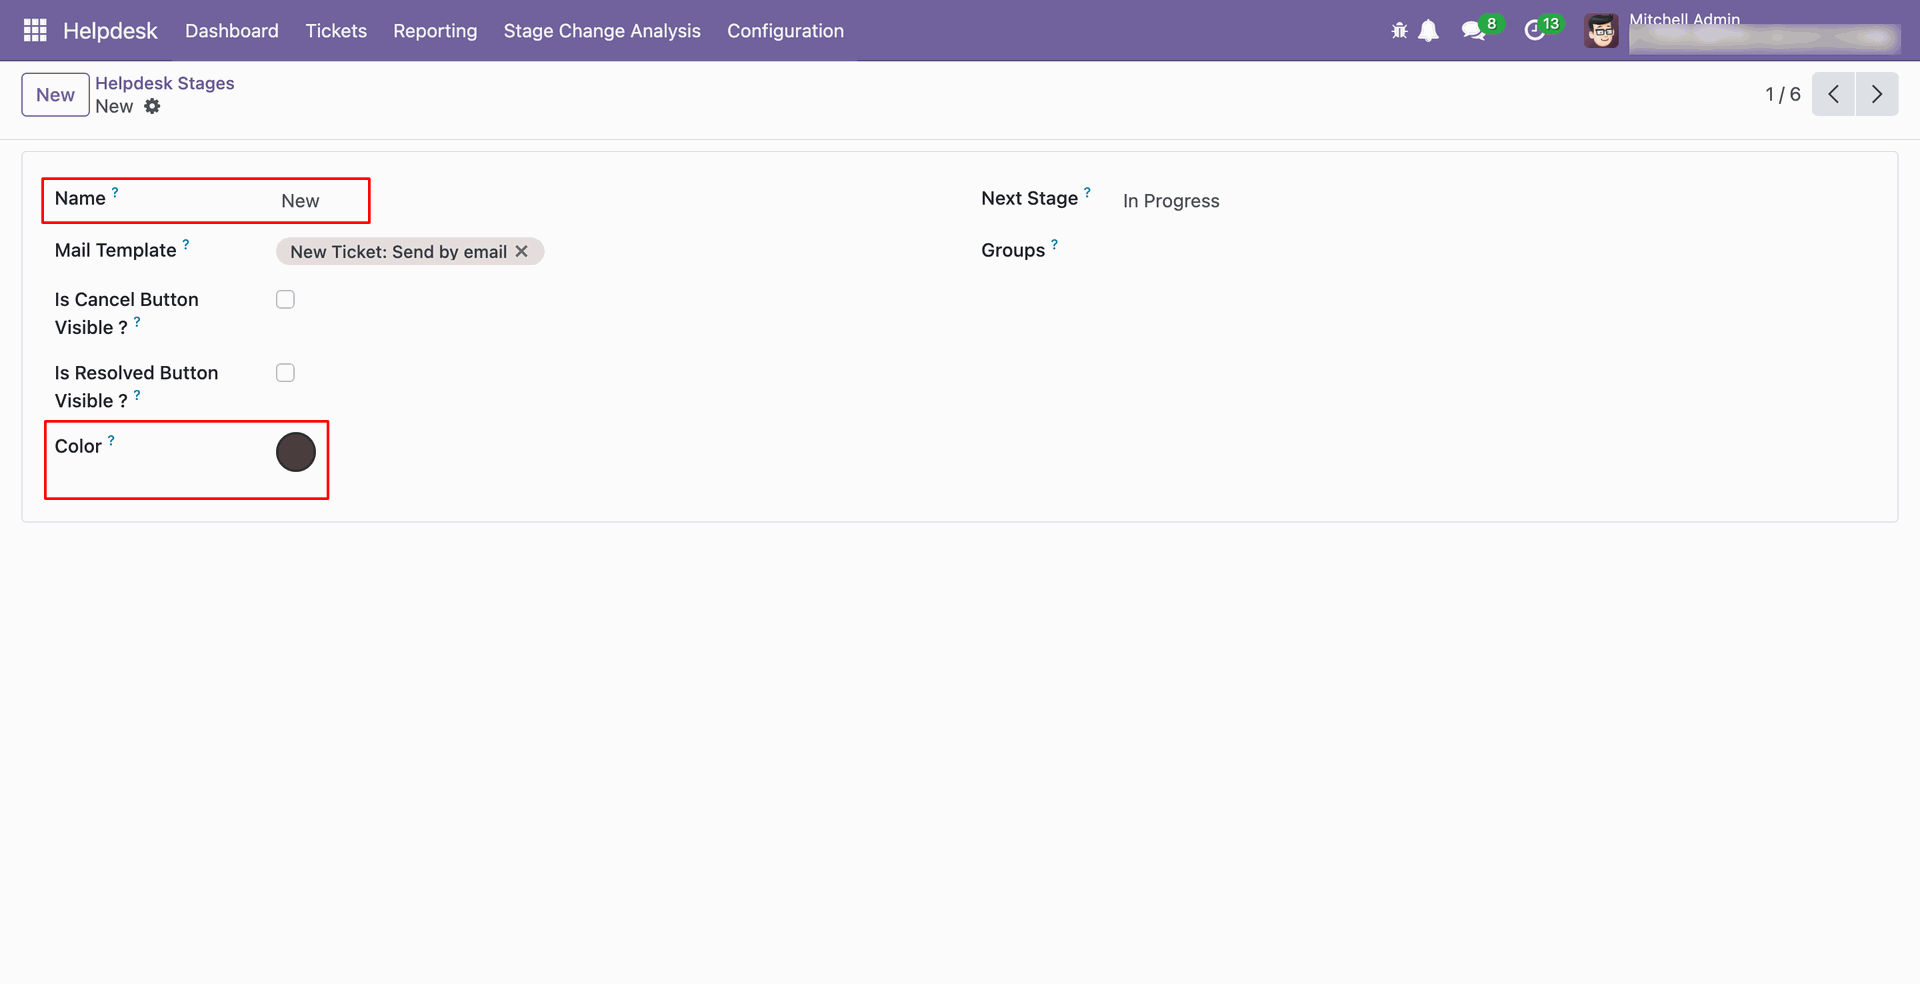
Go to the Helpdesk Stages form view and set the color you wish to display on the dashboard.
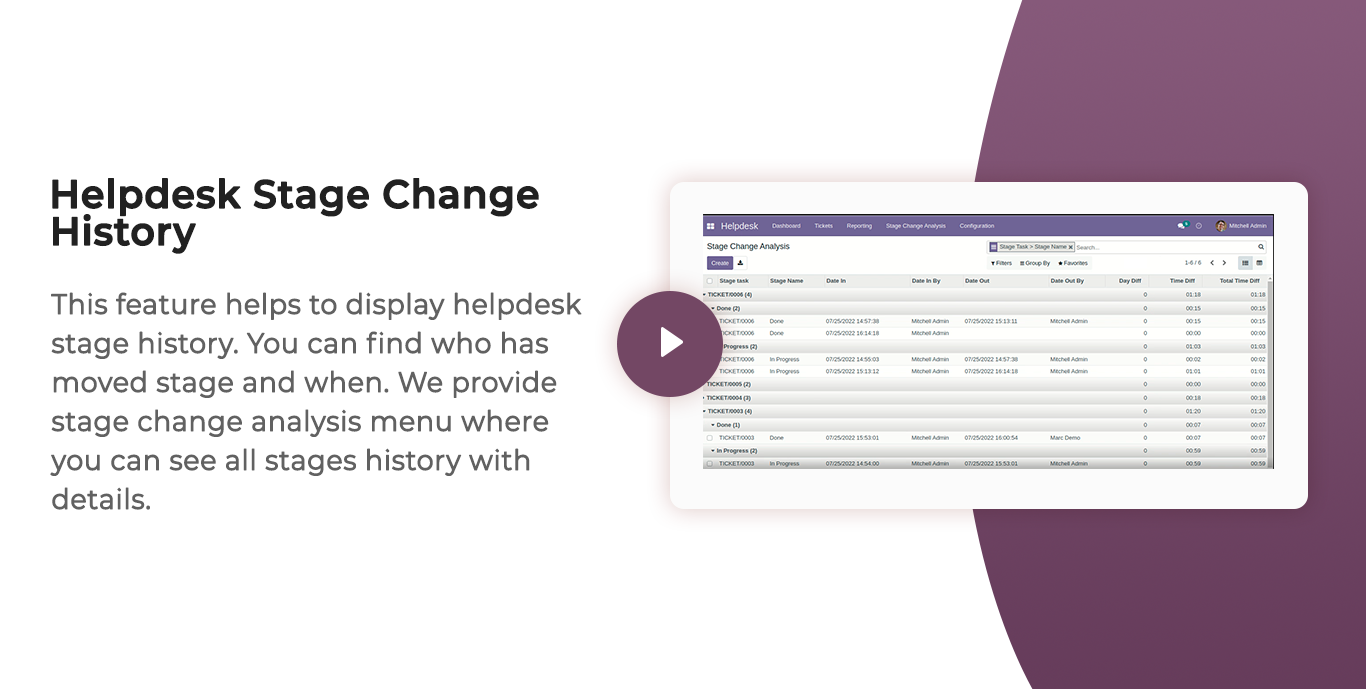
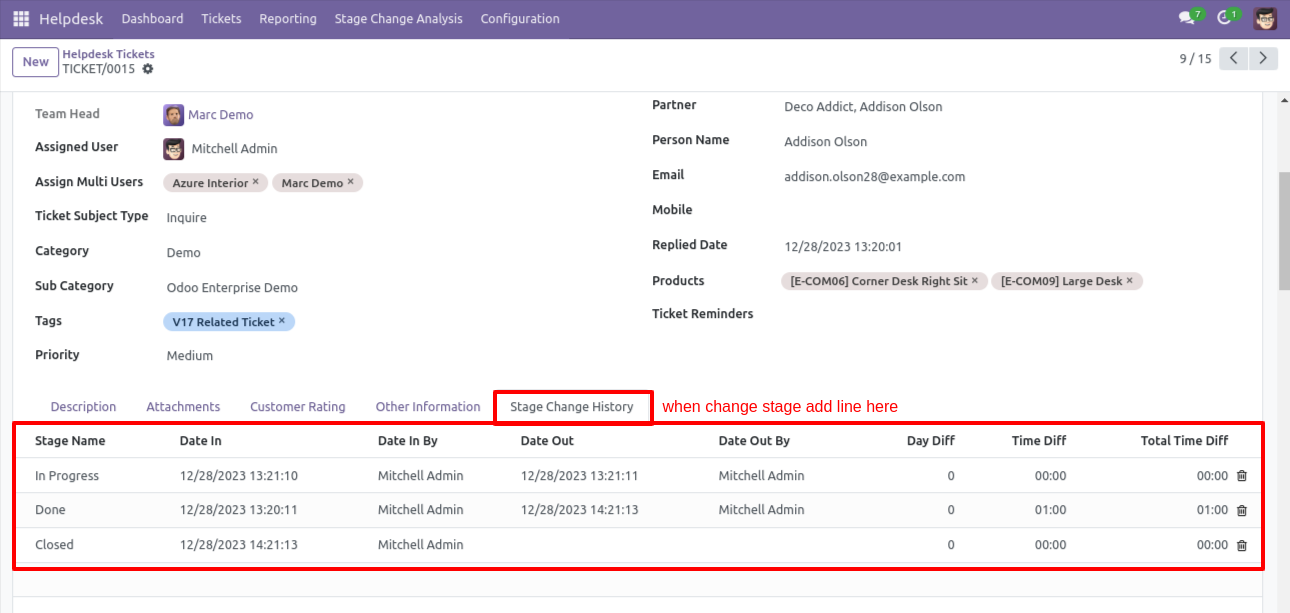
When stage is change then add line here.
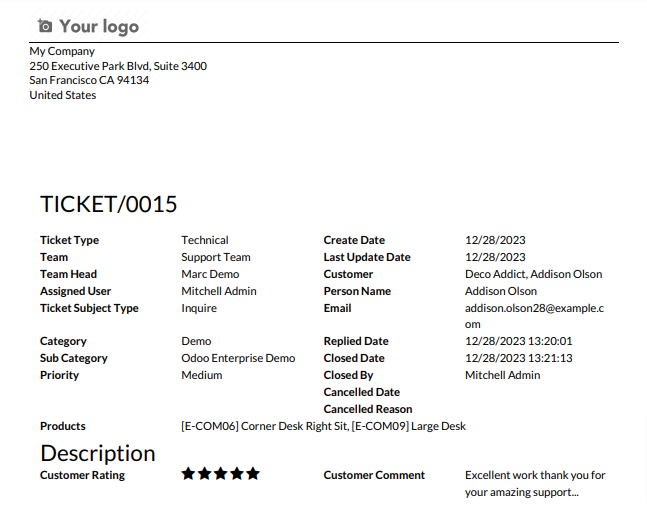
Ticket PDF report looks like below.
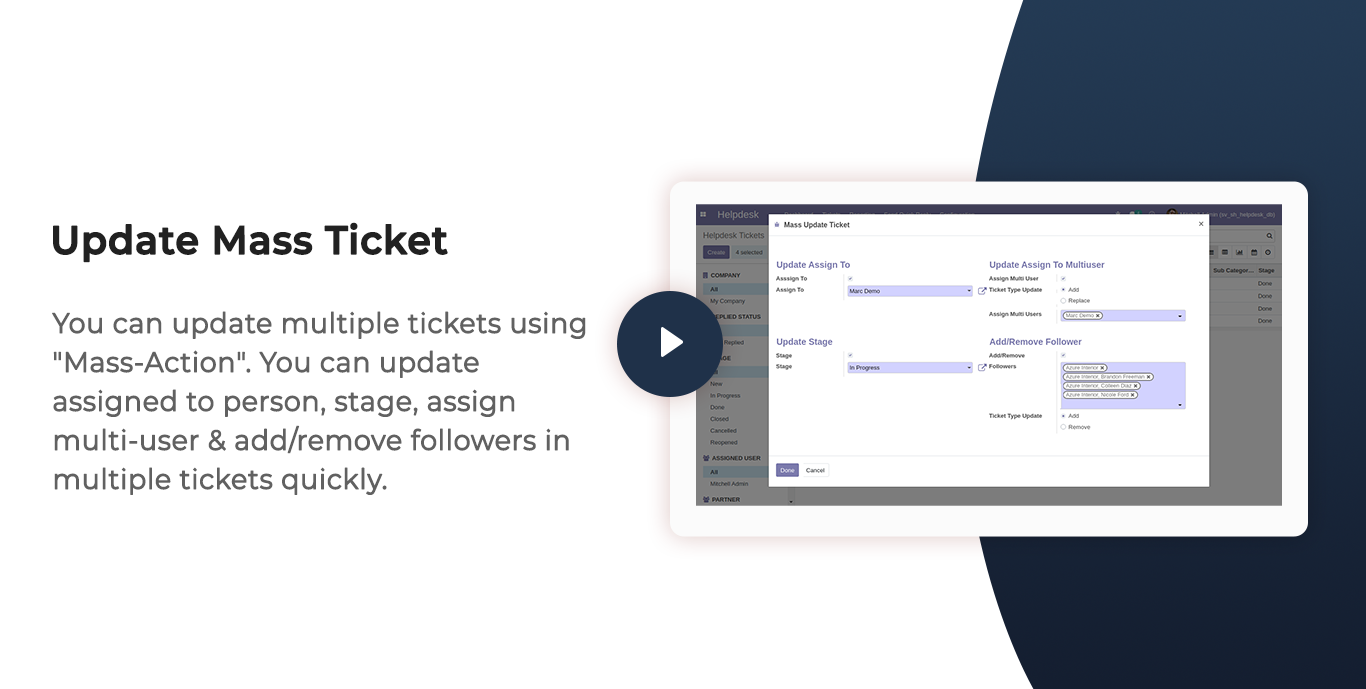
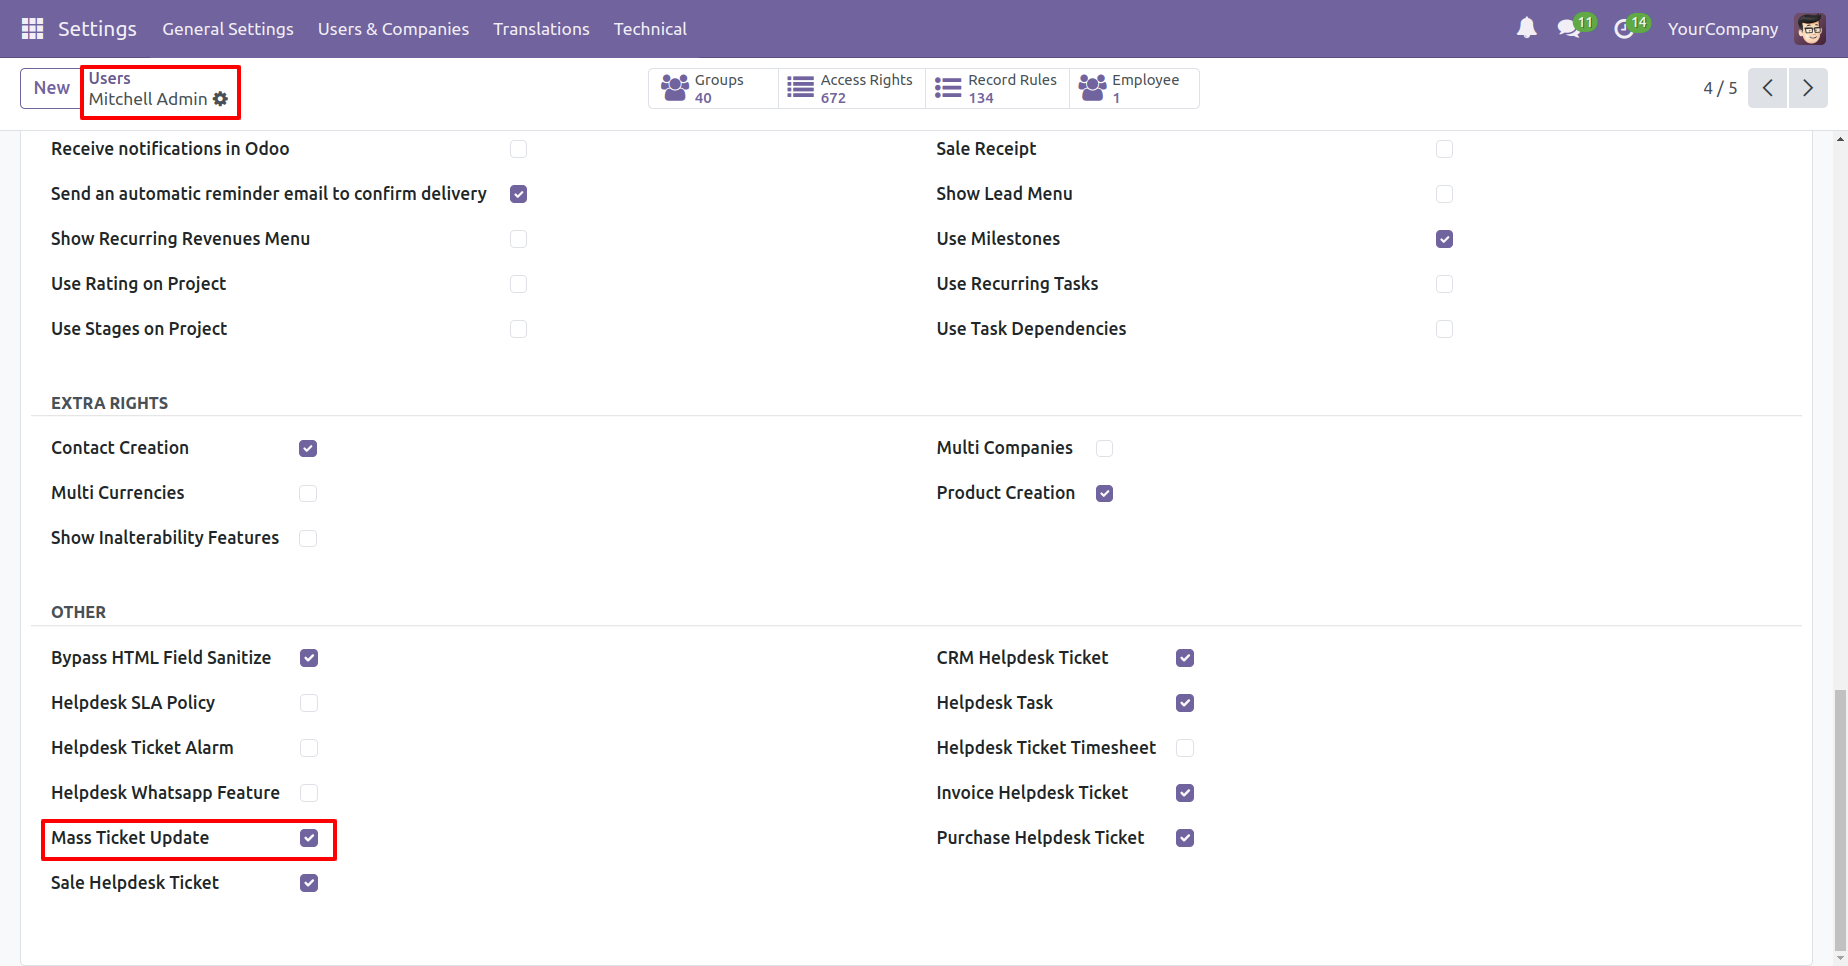
Go to the users and enable the 'Mass Ticket Update' option.
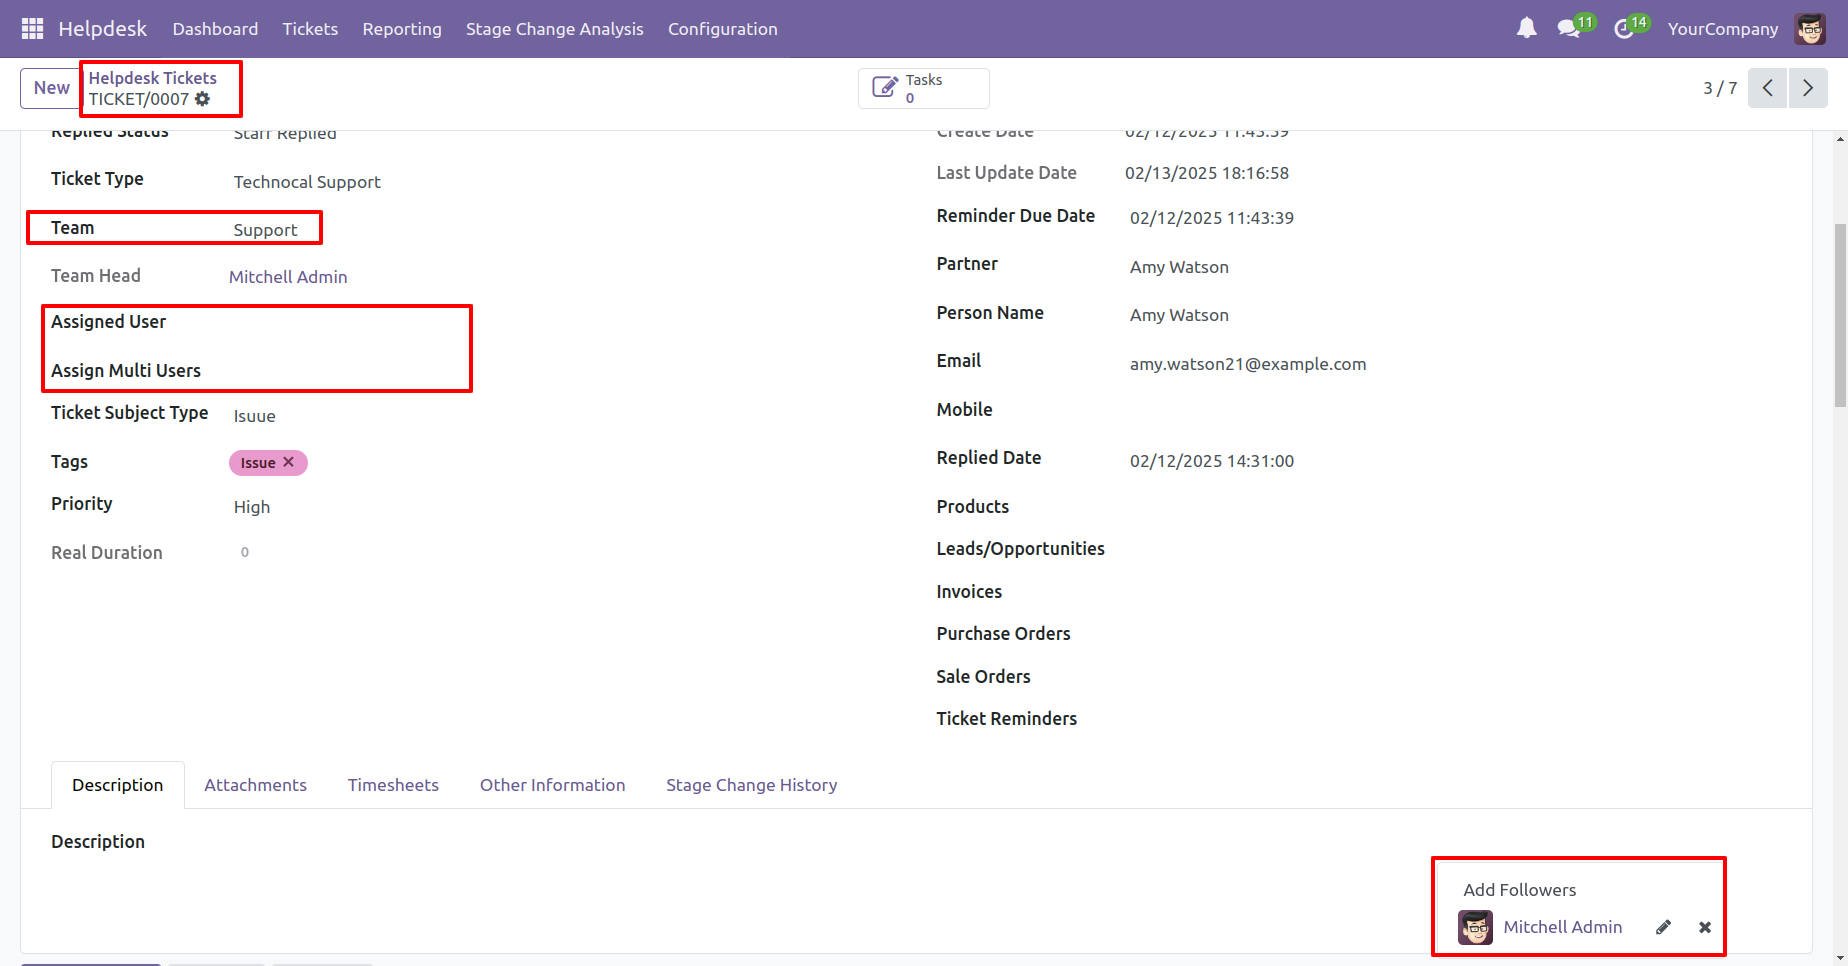
From view of the ticket before updating it's details.
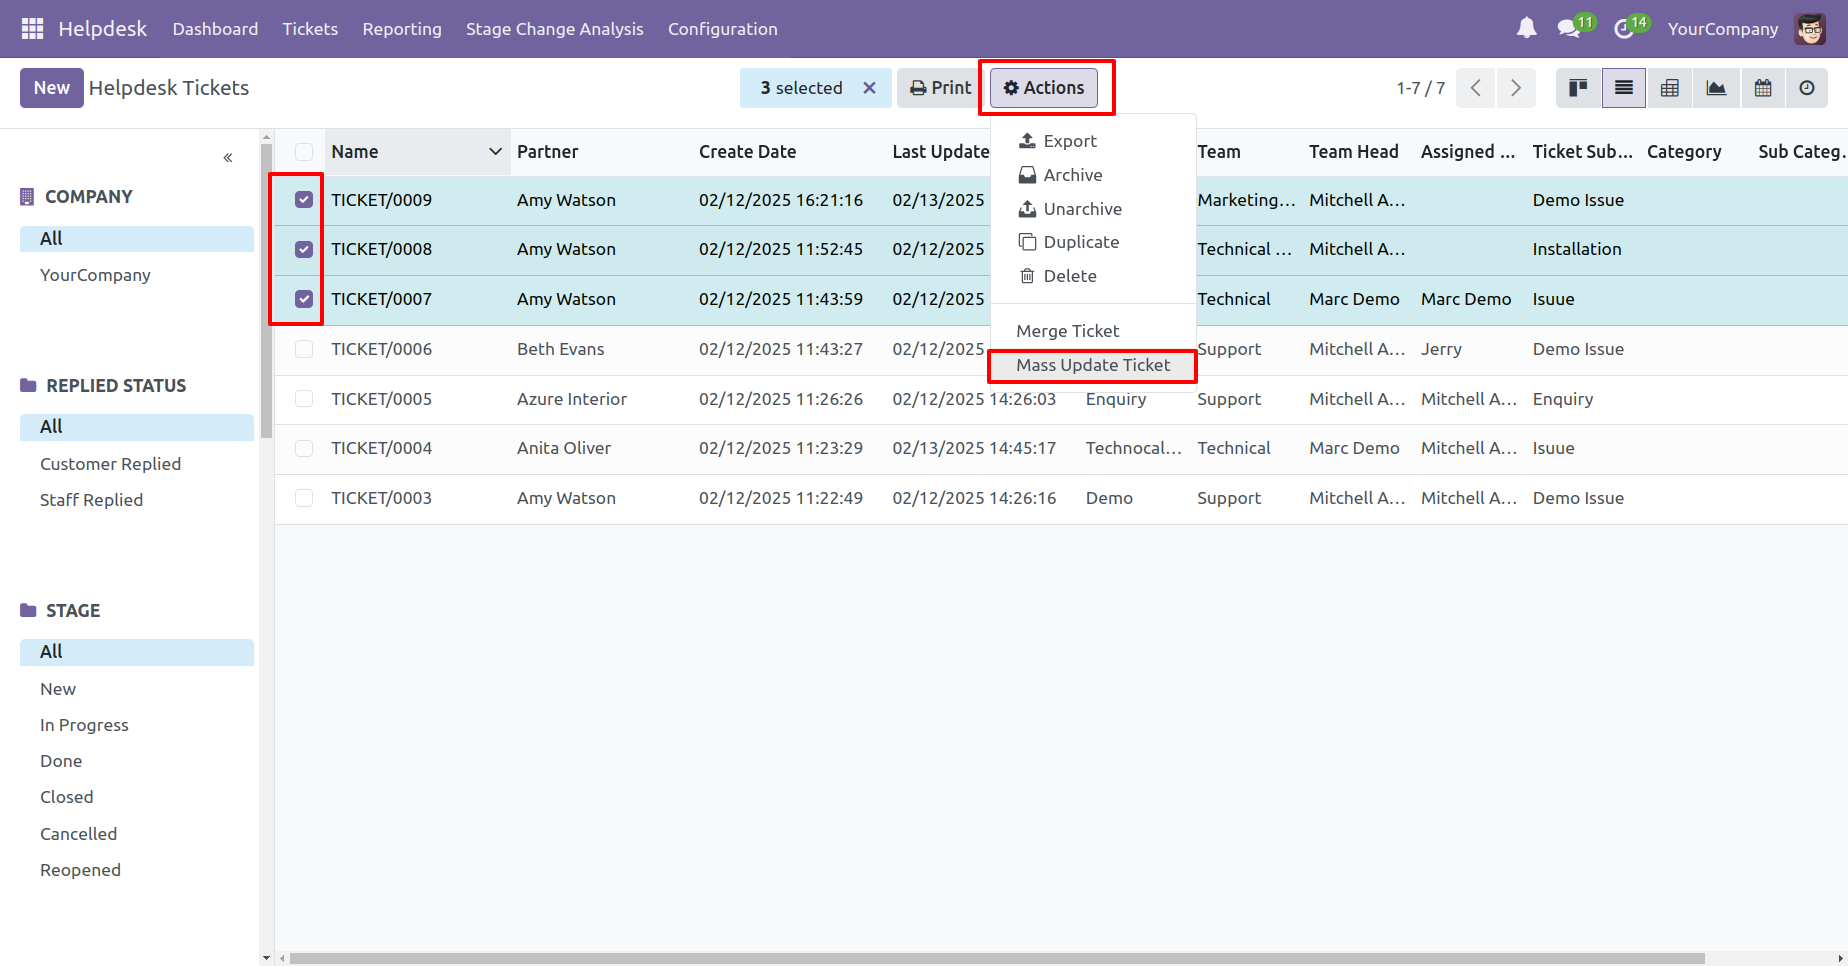
Select the tickets and click 'Mass Update Ticket' from the action button.
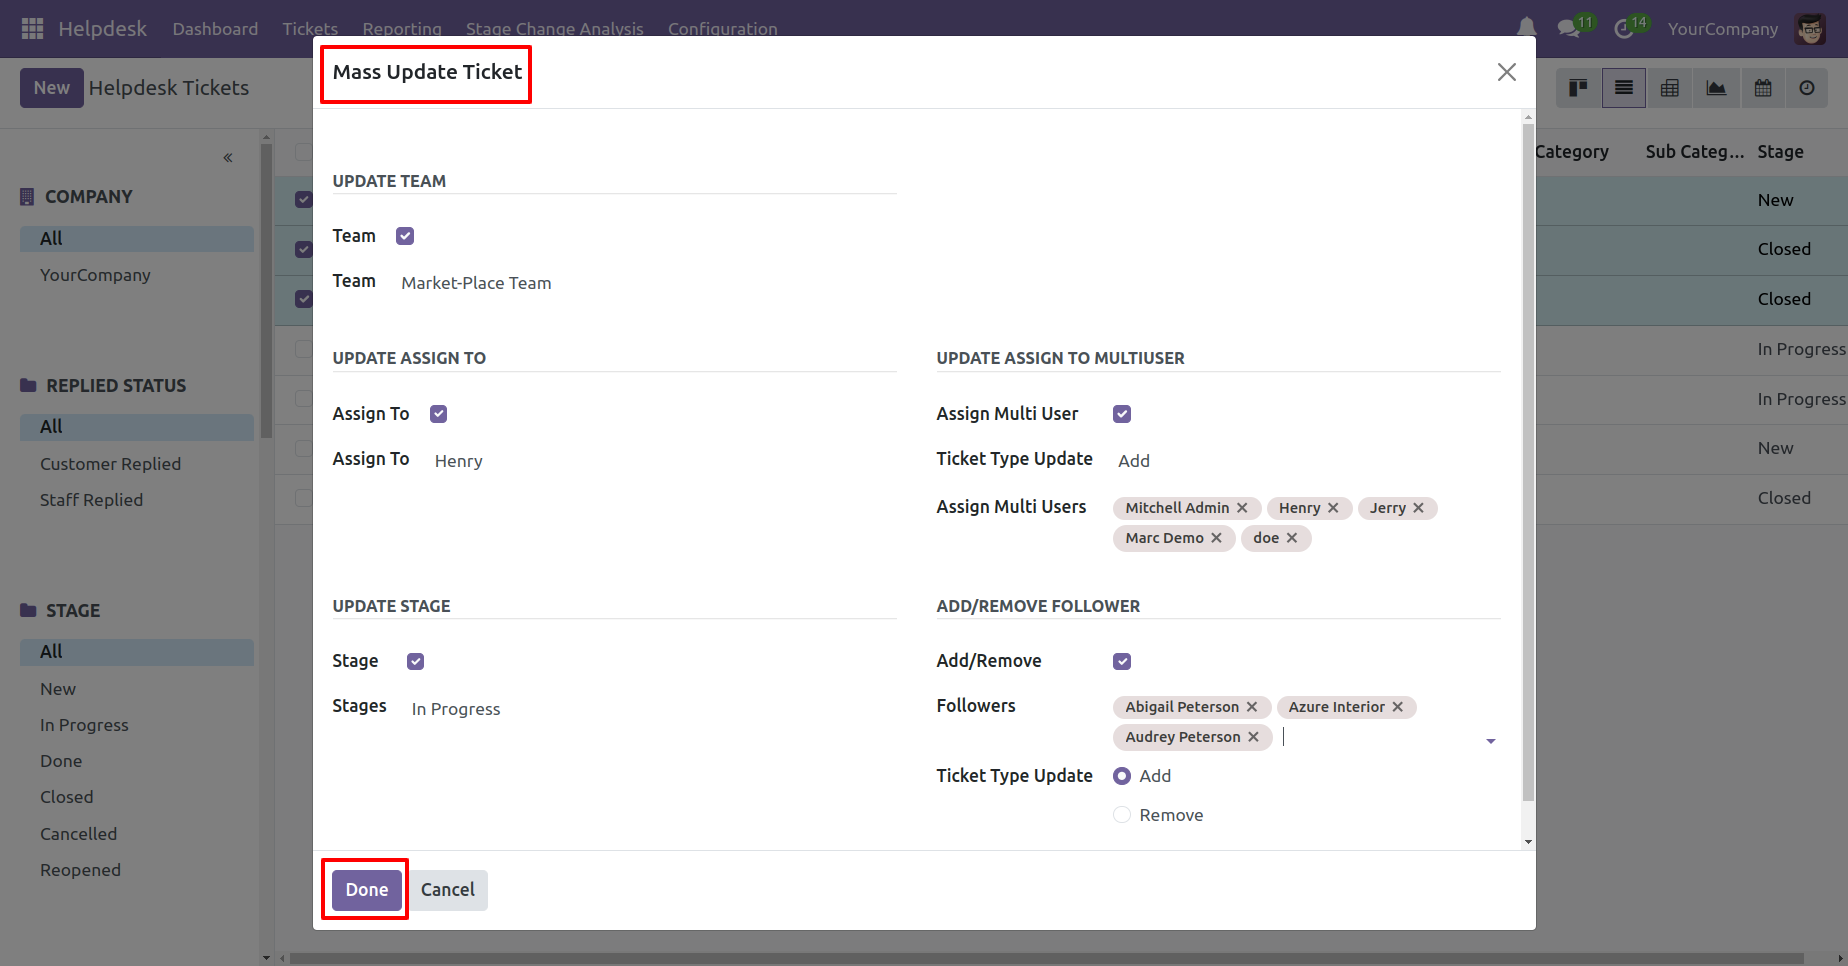
After that, the 'Mass Update Ticket' wizard will appear.
Fill the details and click on the 'Done' button.
Here, you can see that the ticket details have been updated.
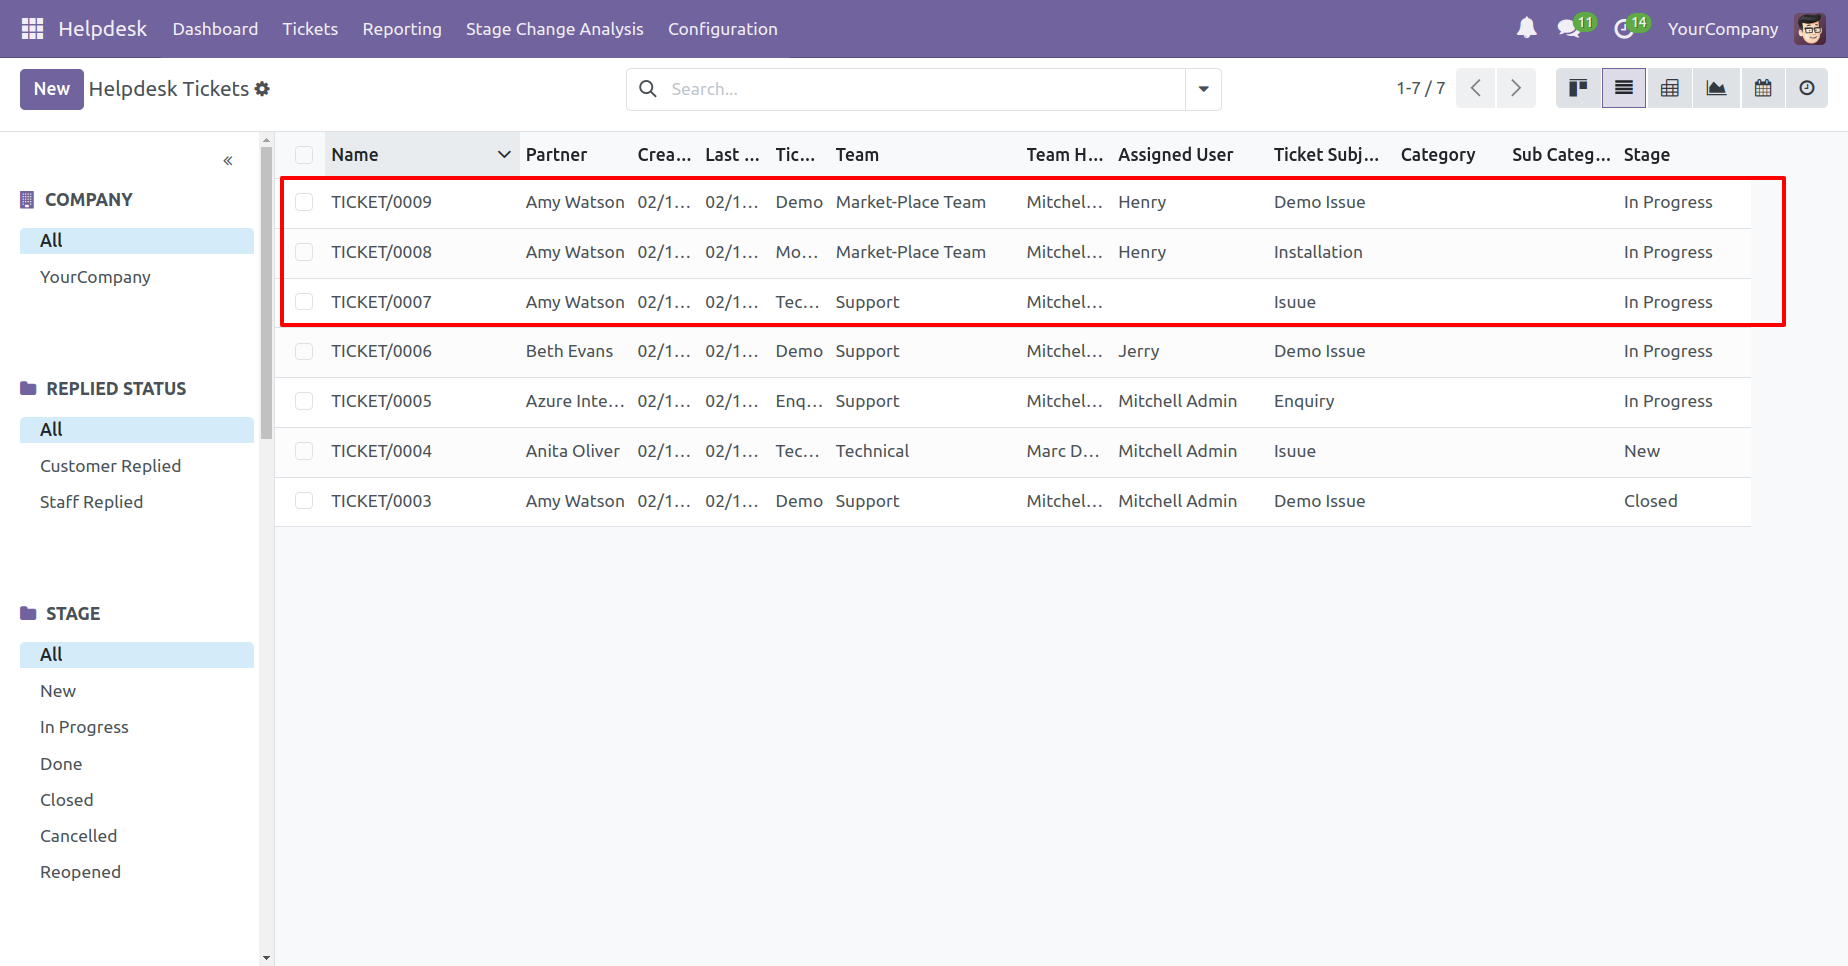
View of the ticket with the updated details.
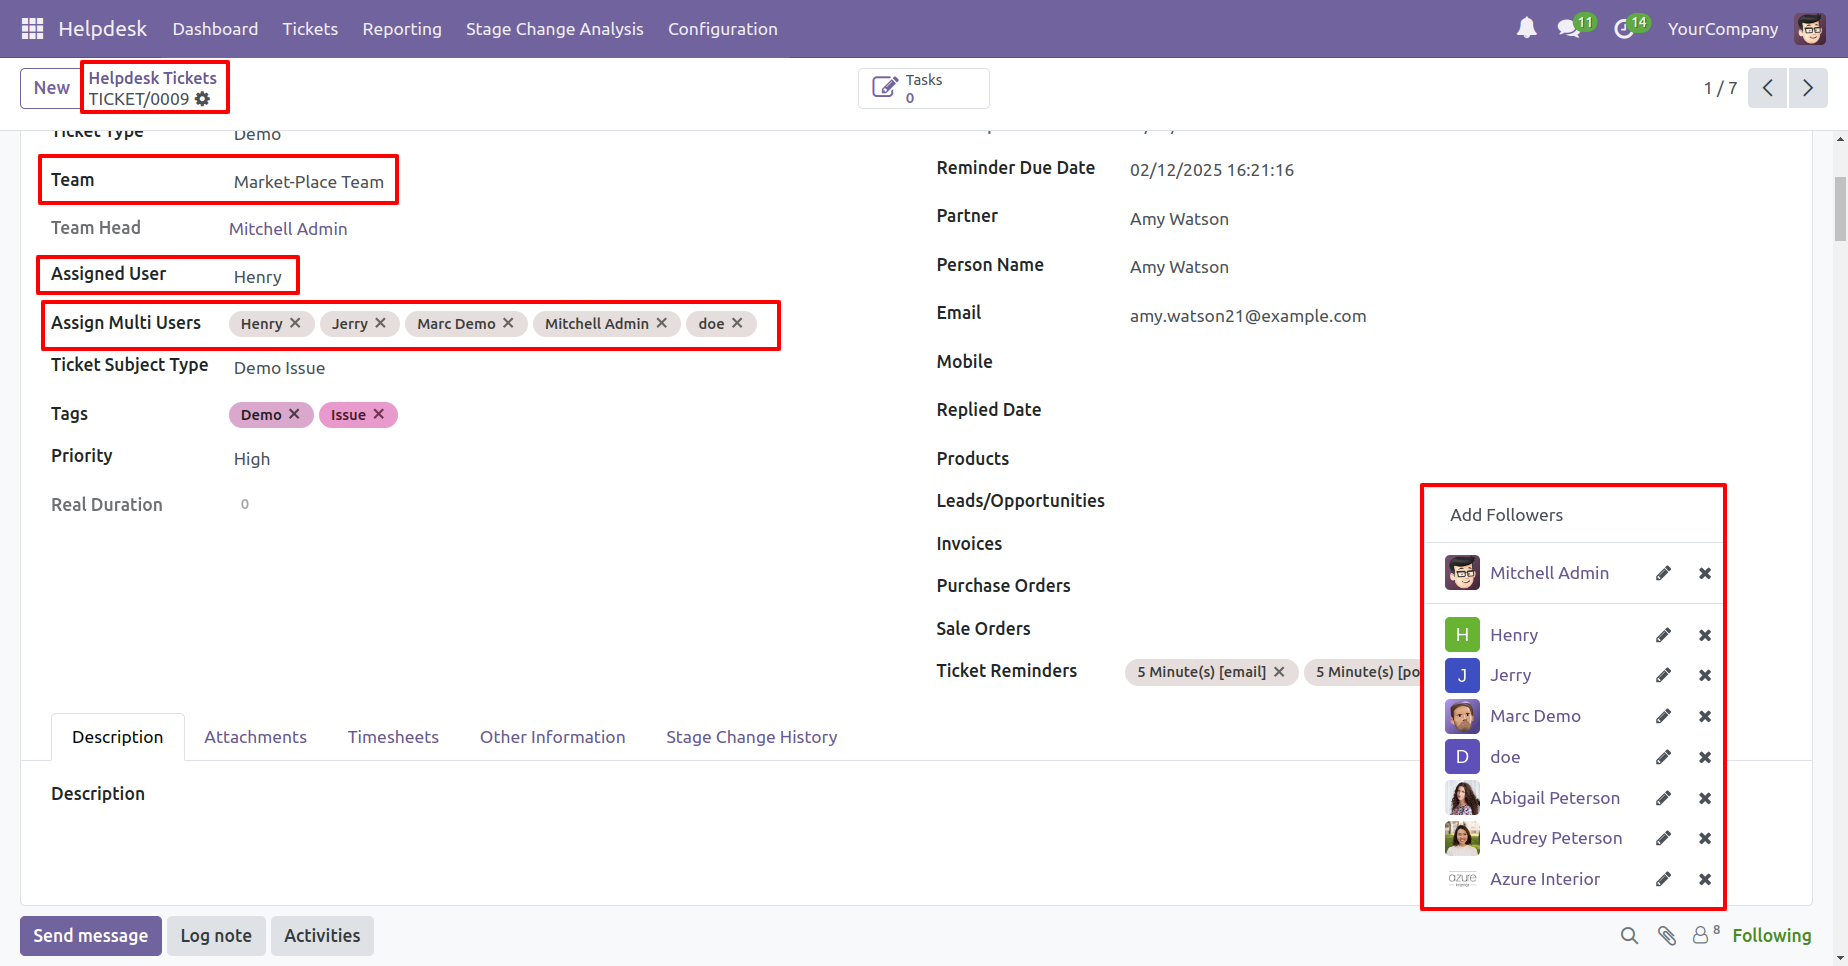
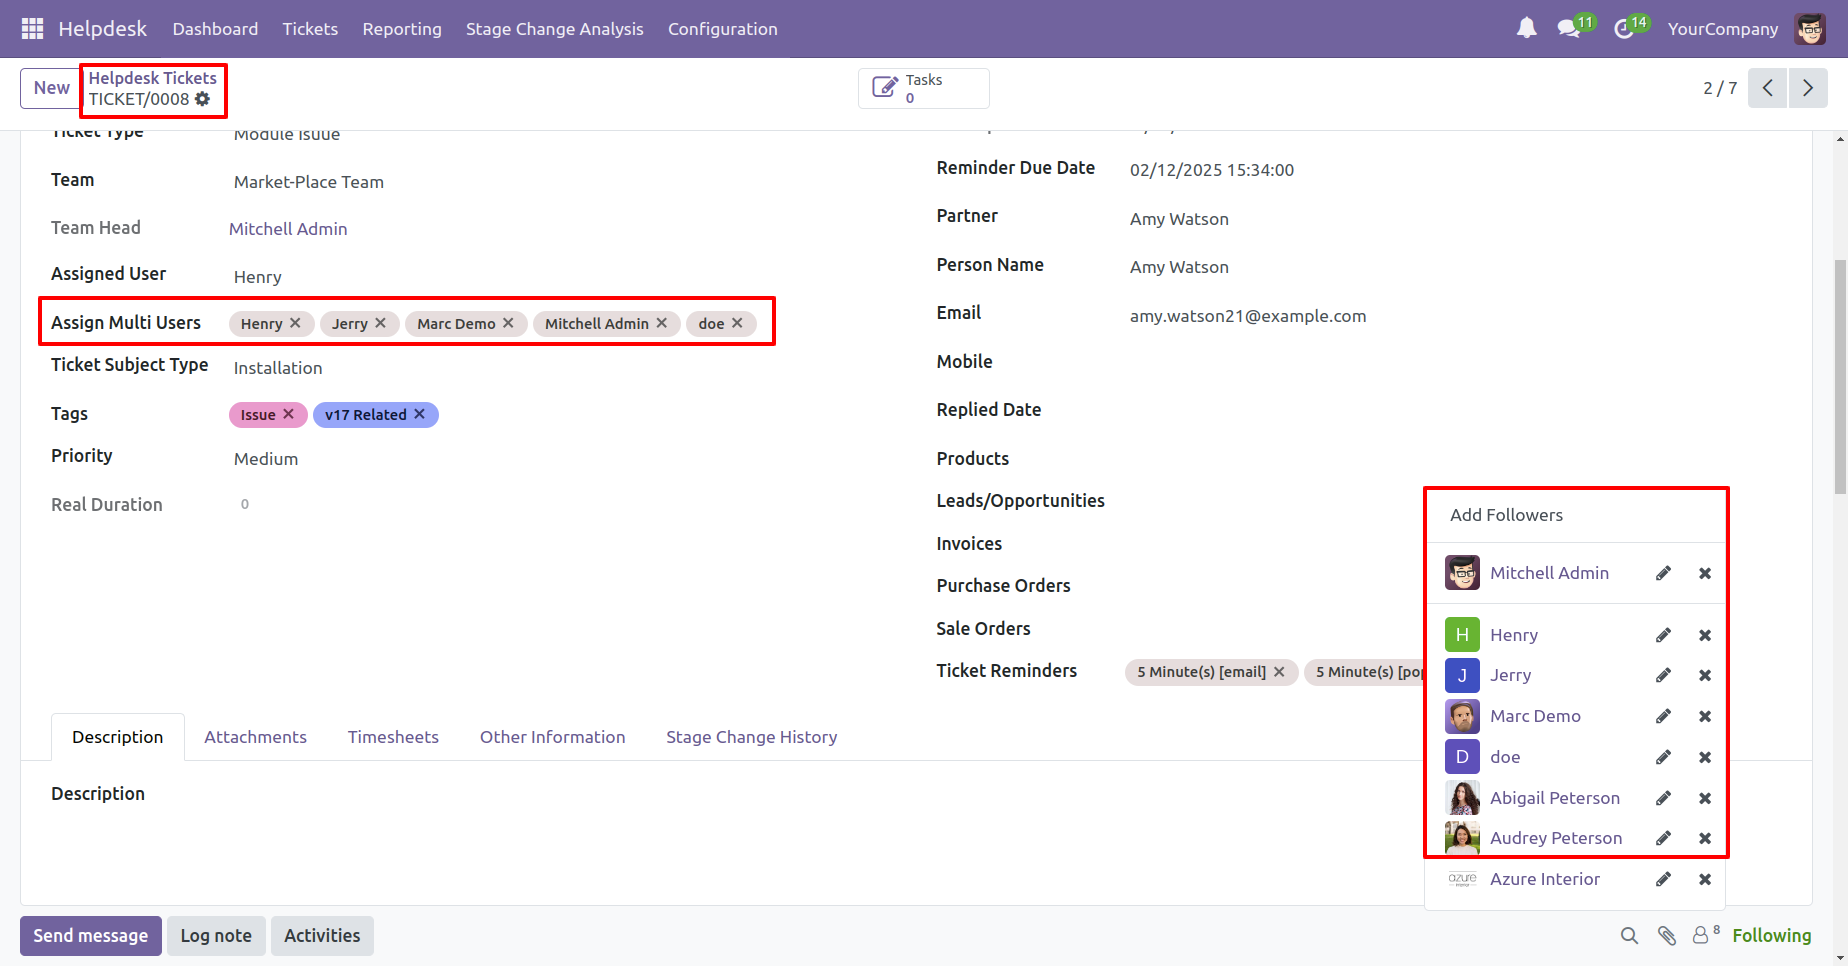
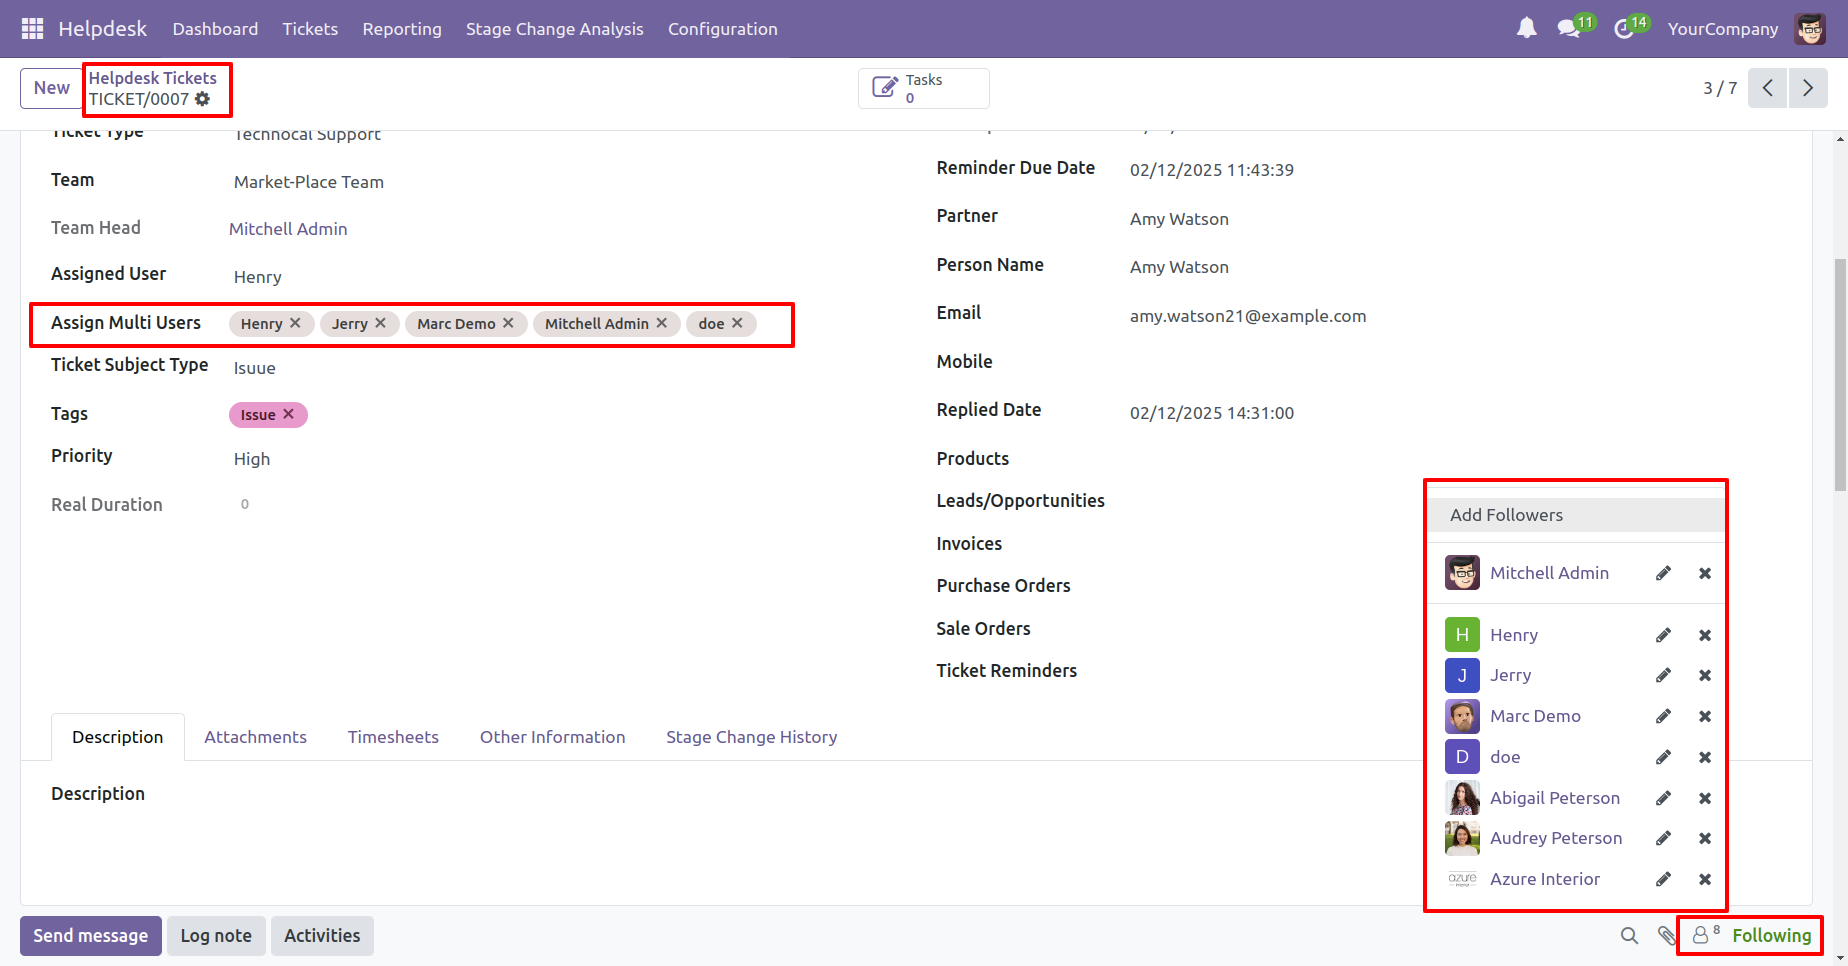
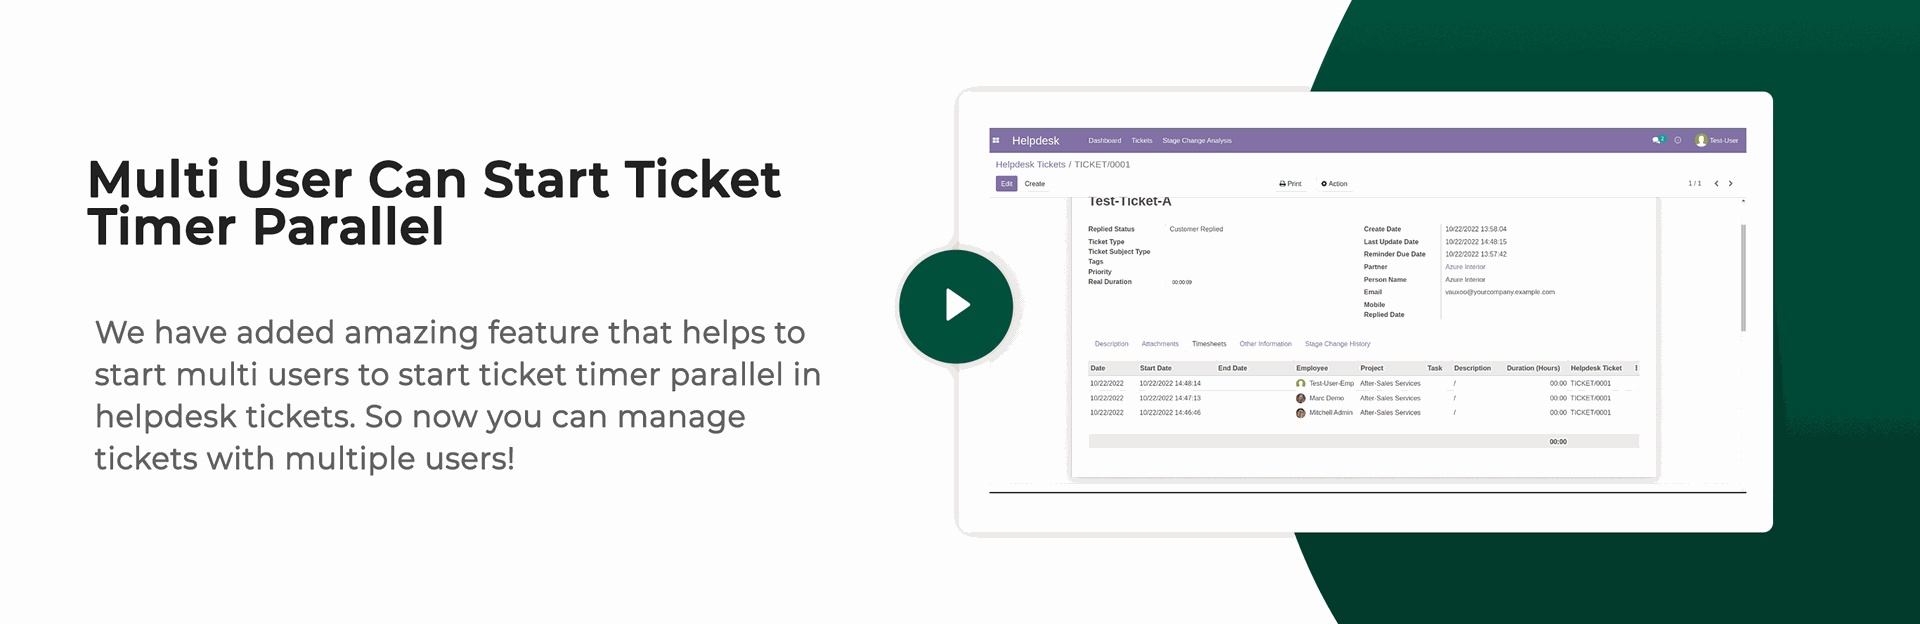
You can start the activity timer directly from the Kanban view by clicking the 'Start' button.
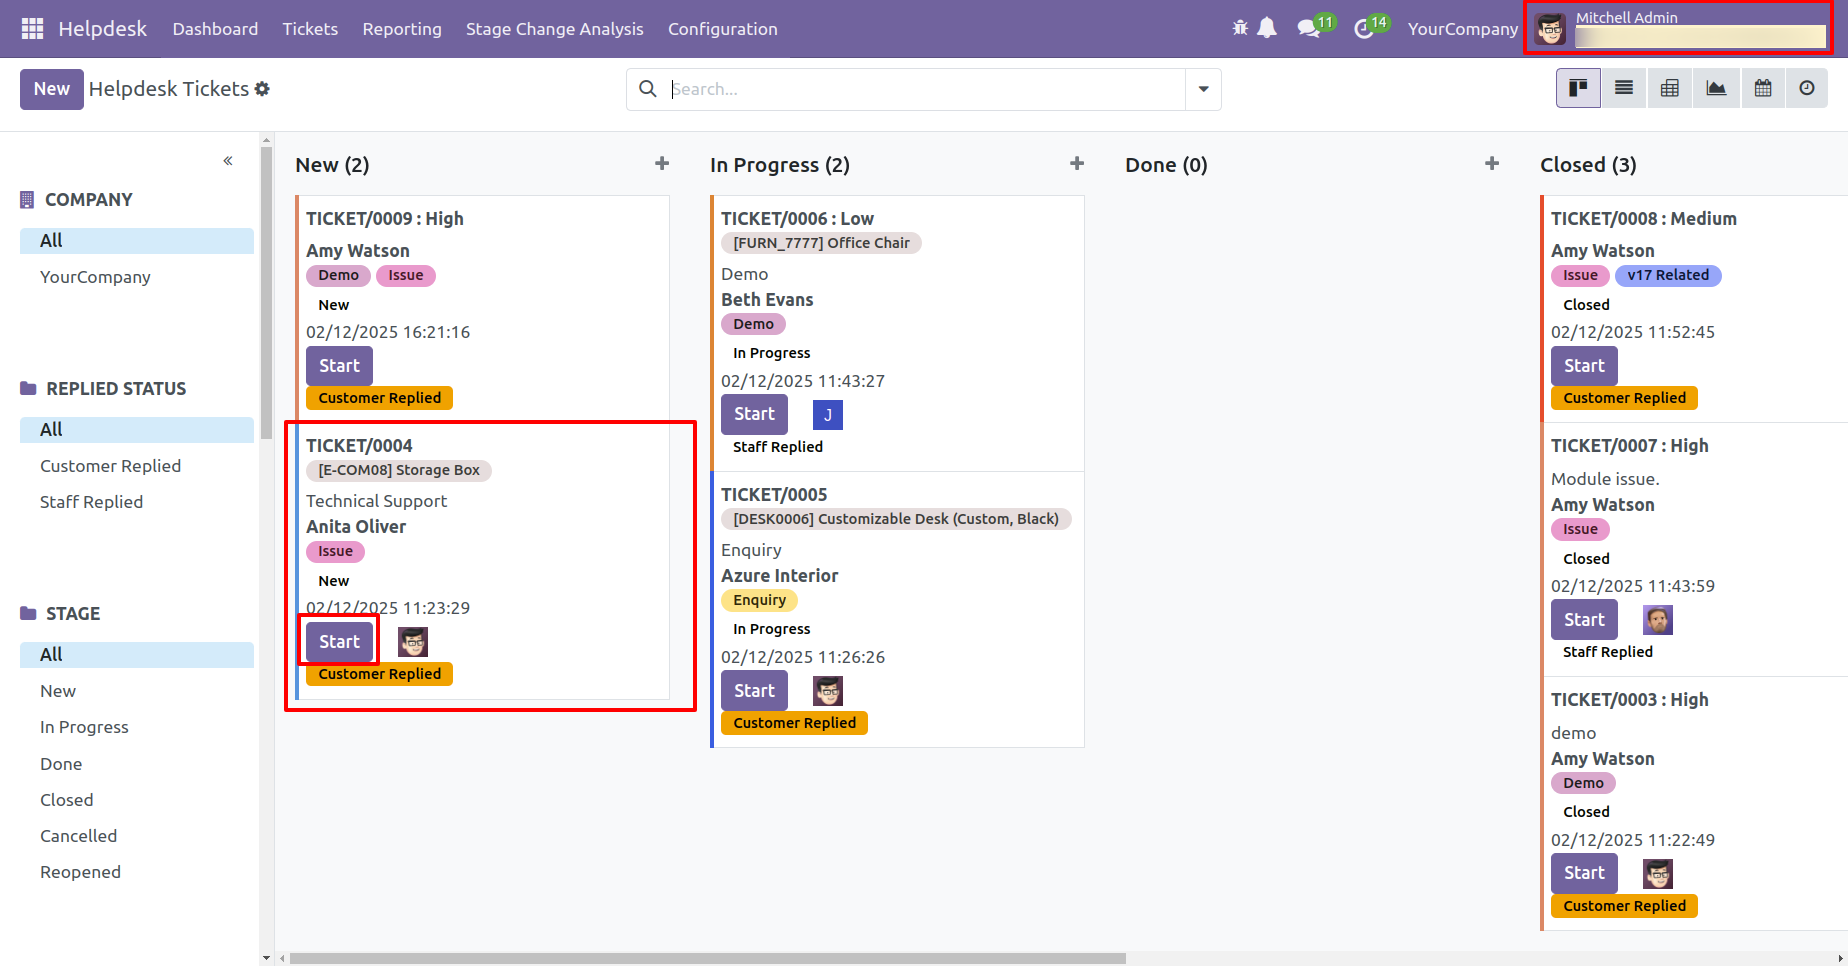
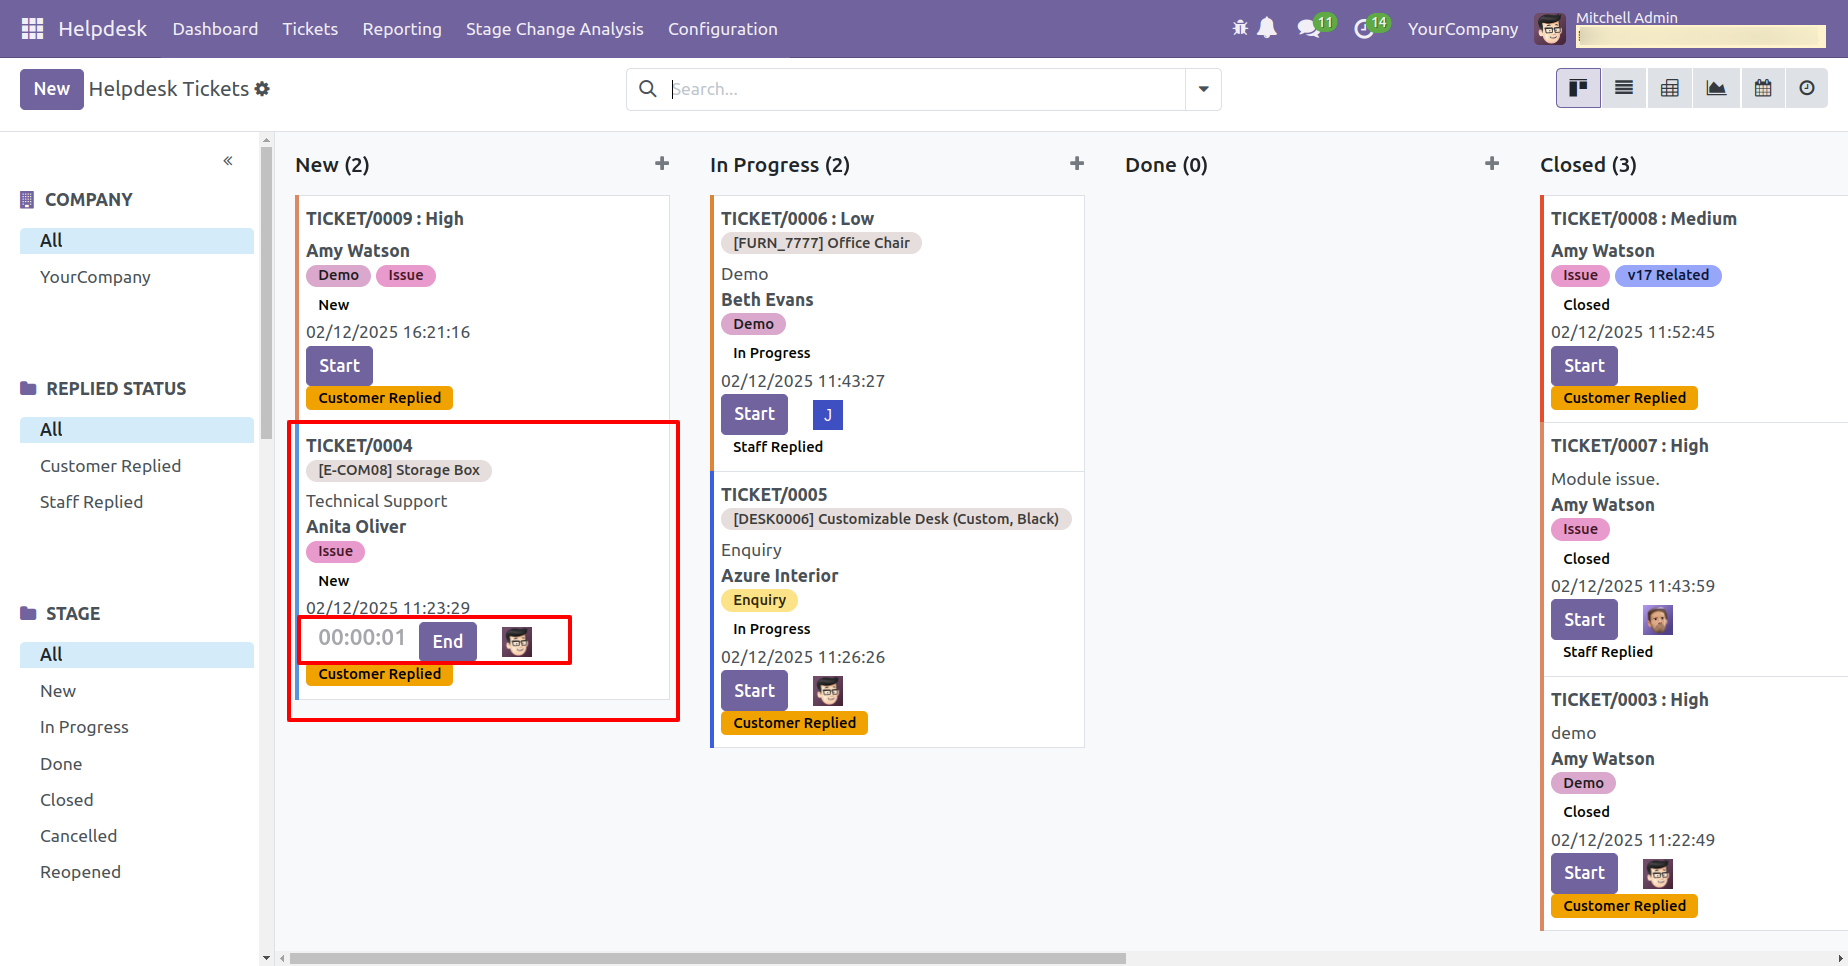
You can see that the ticket timer for 'Mitchel Admin' has started.
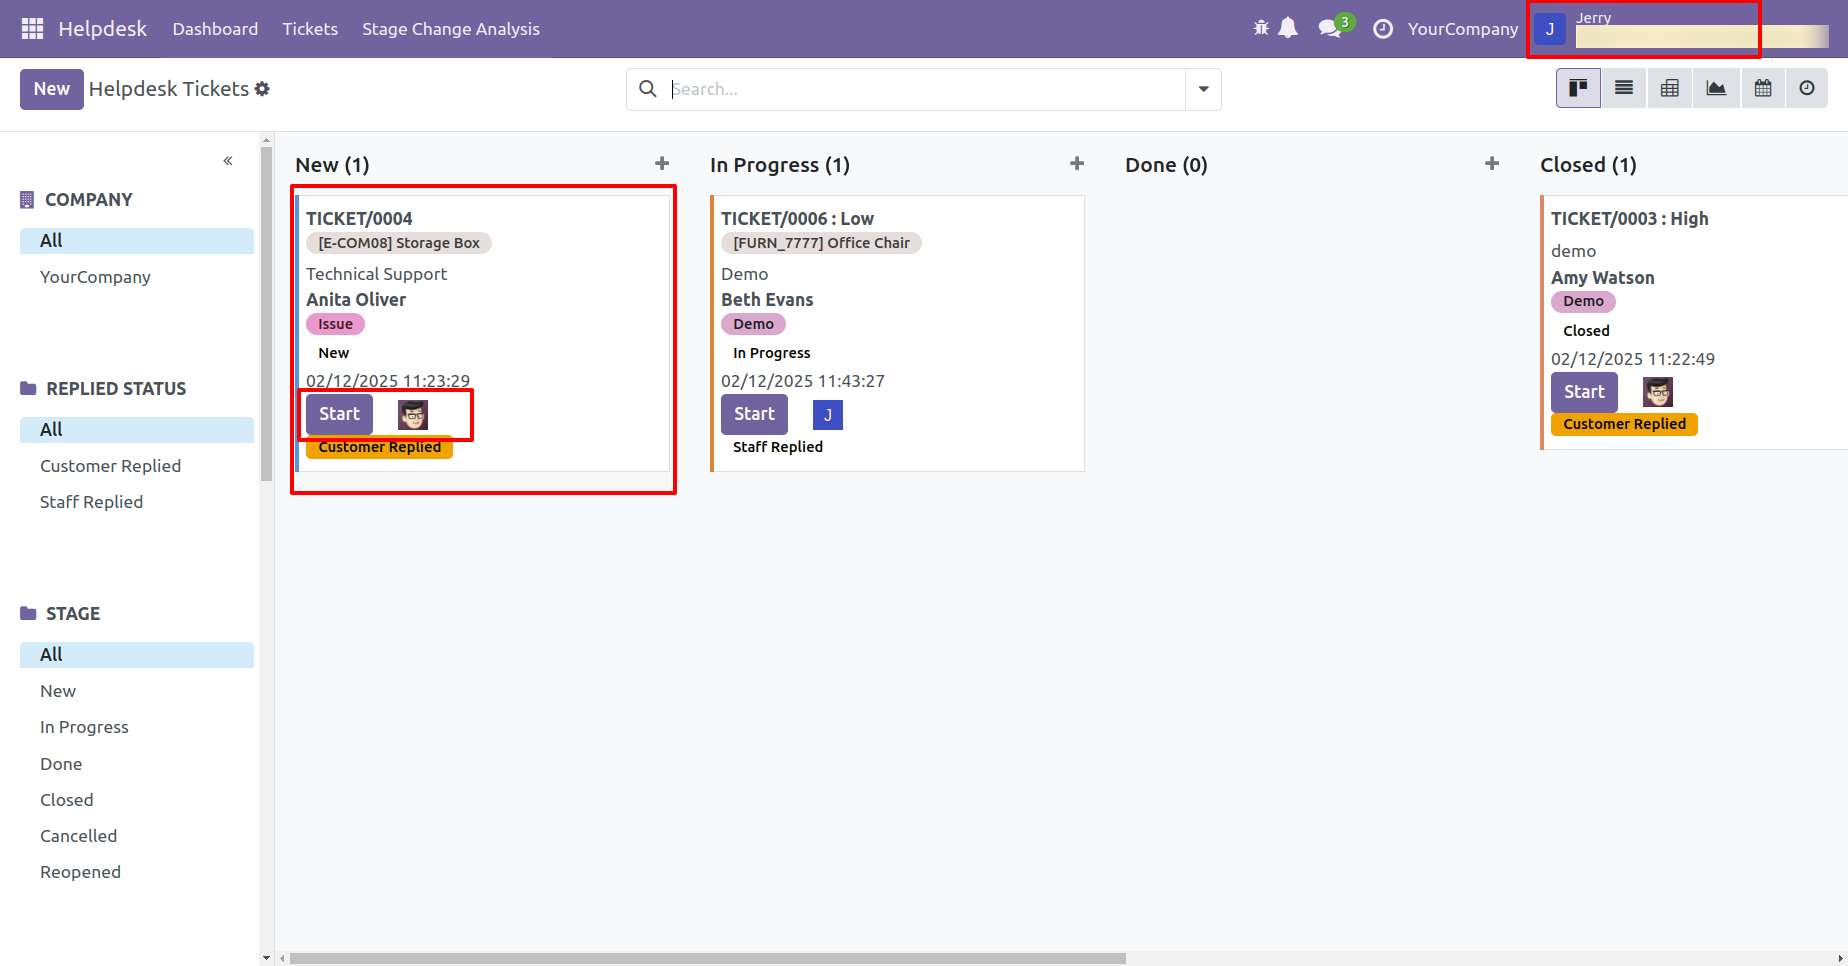
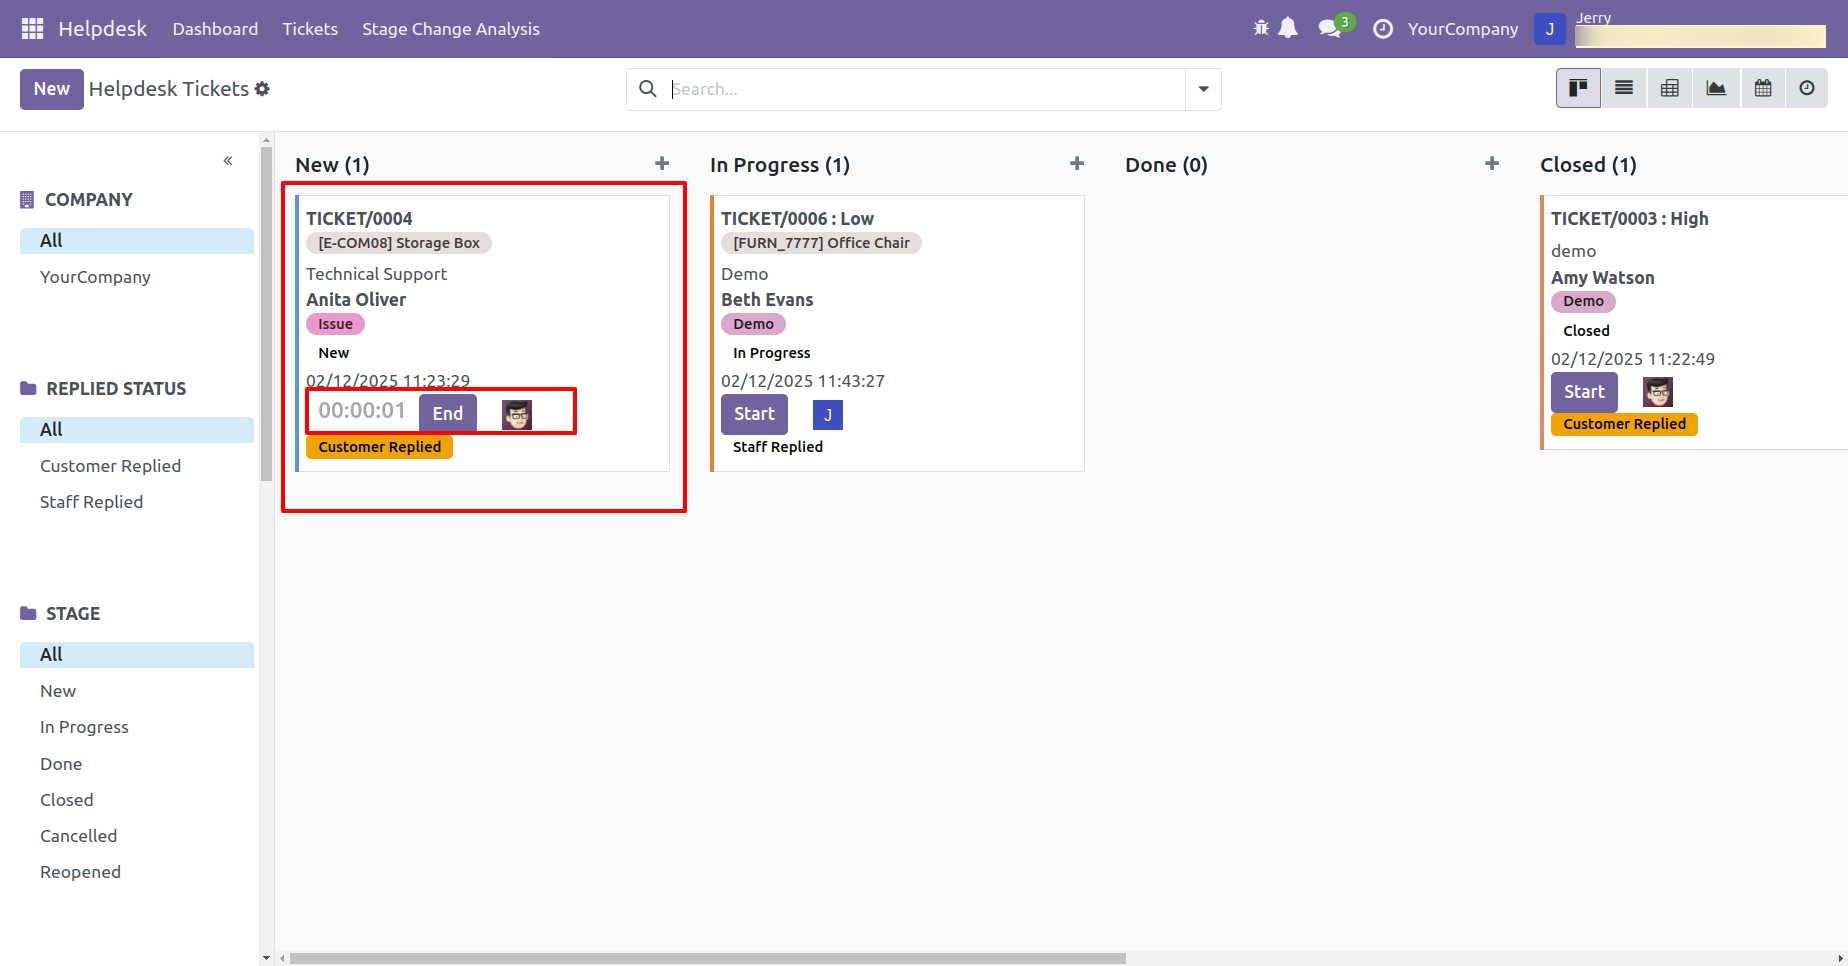
You can see that the ticket timer for 'Jerry' has started for the same ticket.
In the ticket form view, the running timer is visible in the timesheet tab.
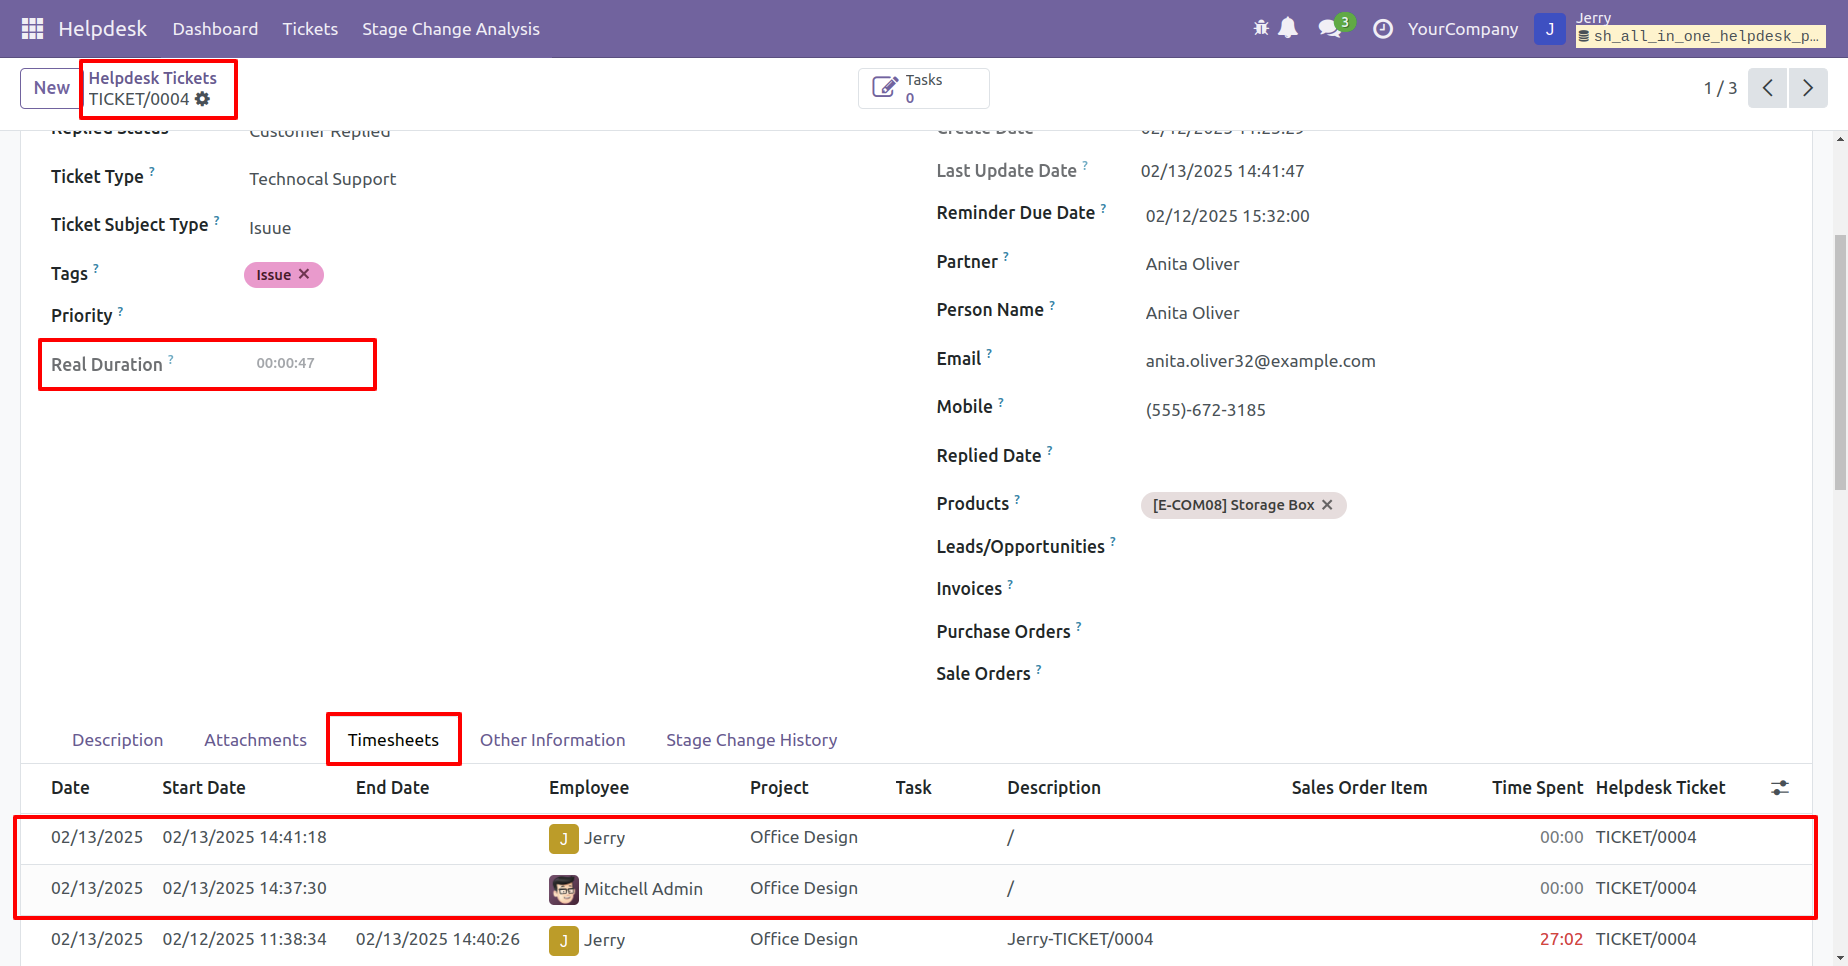
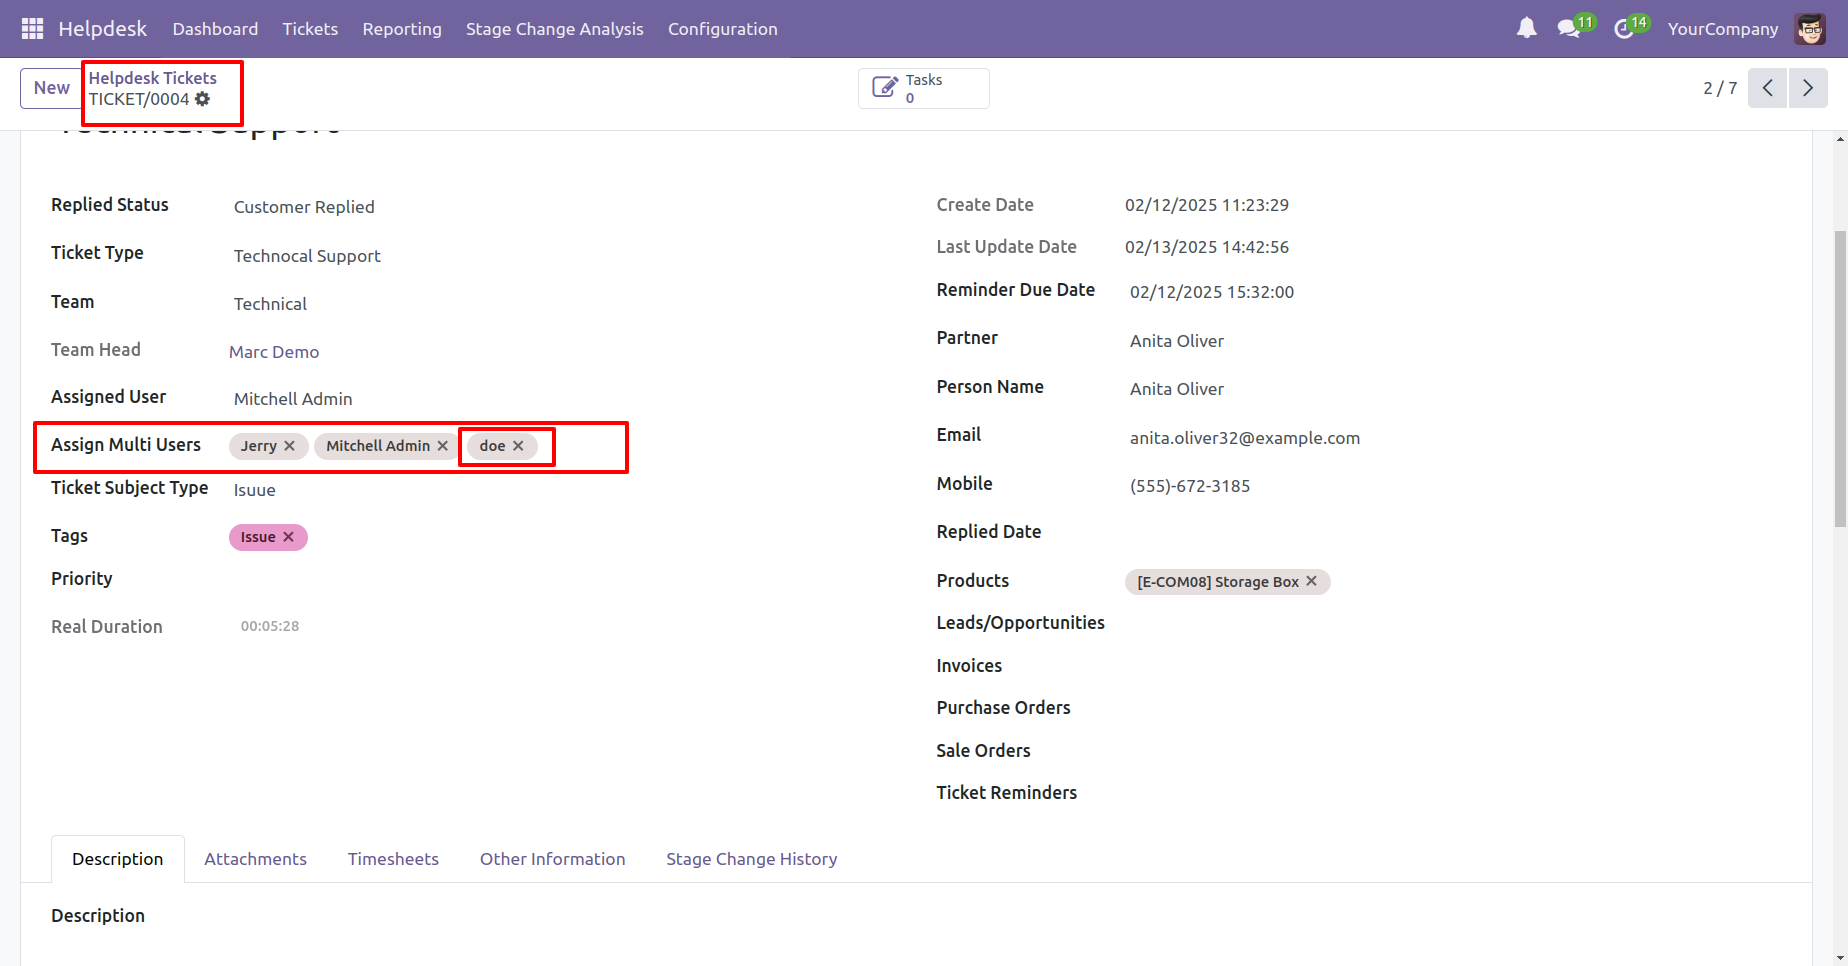
Assign the ticket to another user, 'Doe'.
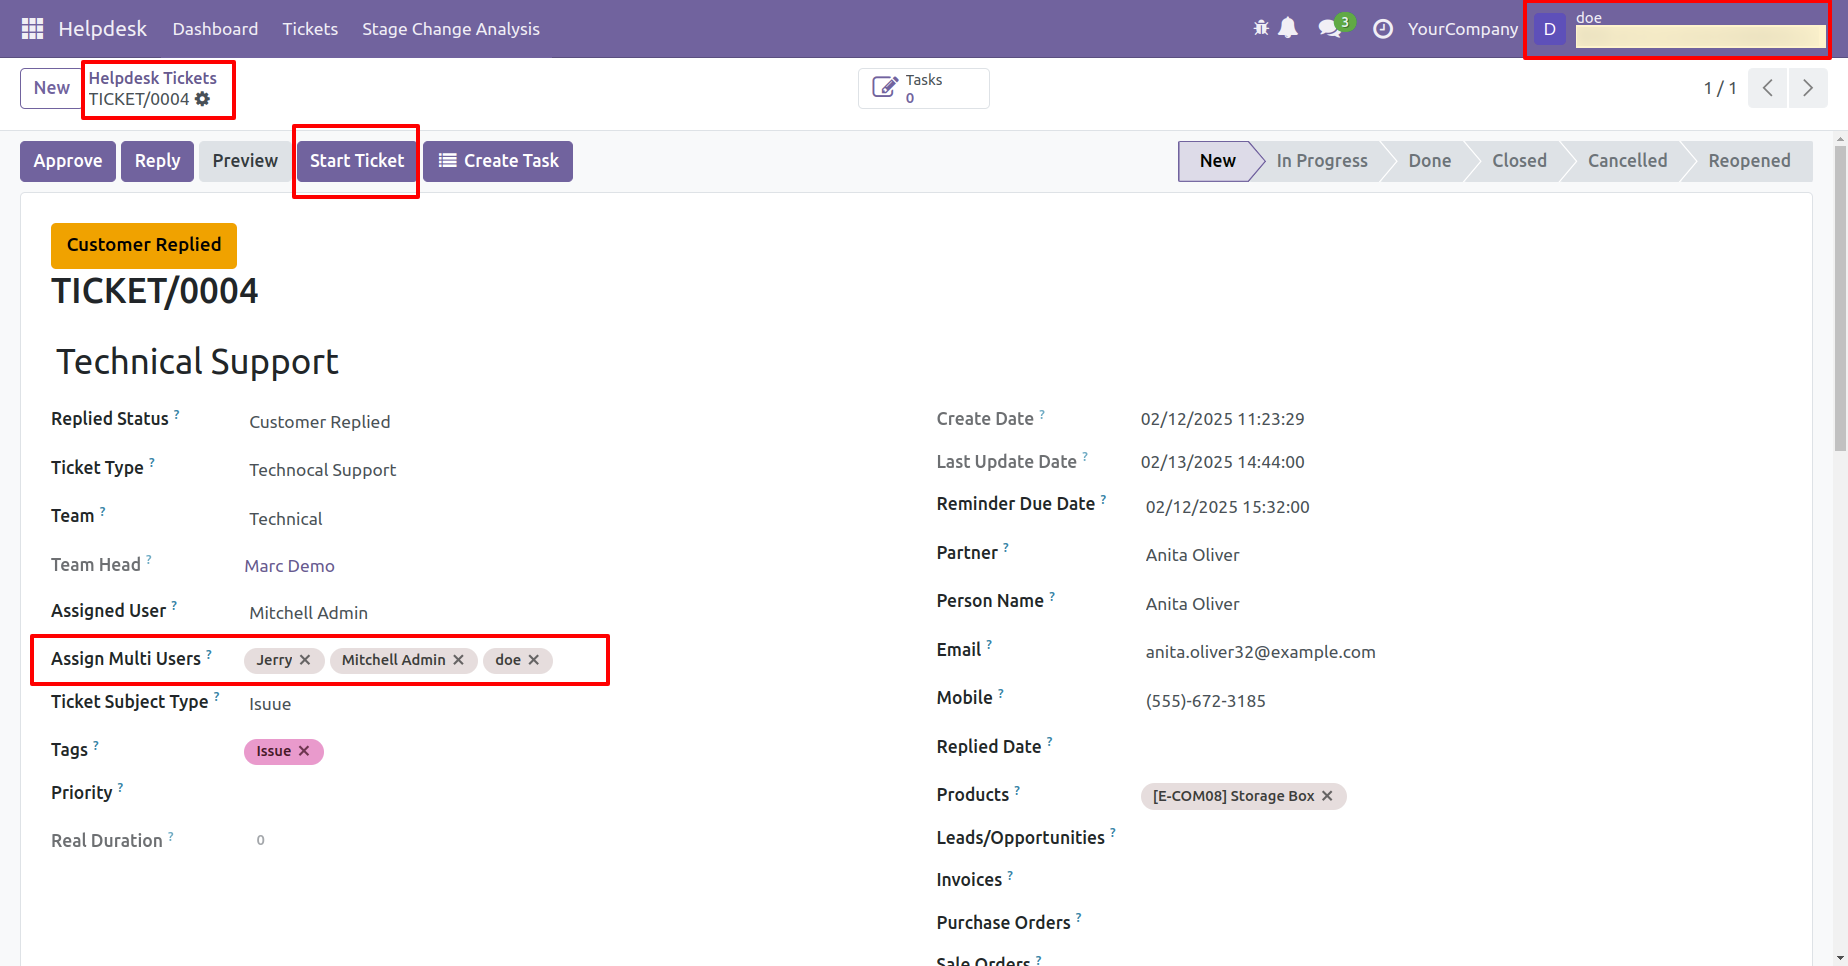
Start the ticket timer by clicking the 'Start' button.
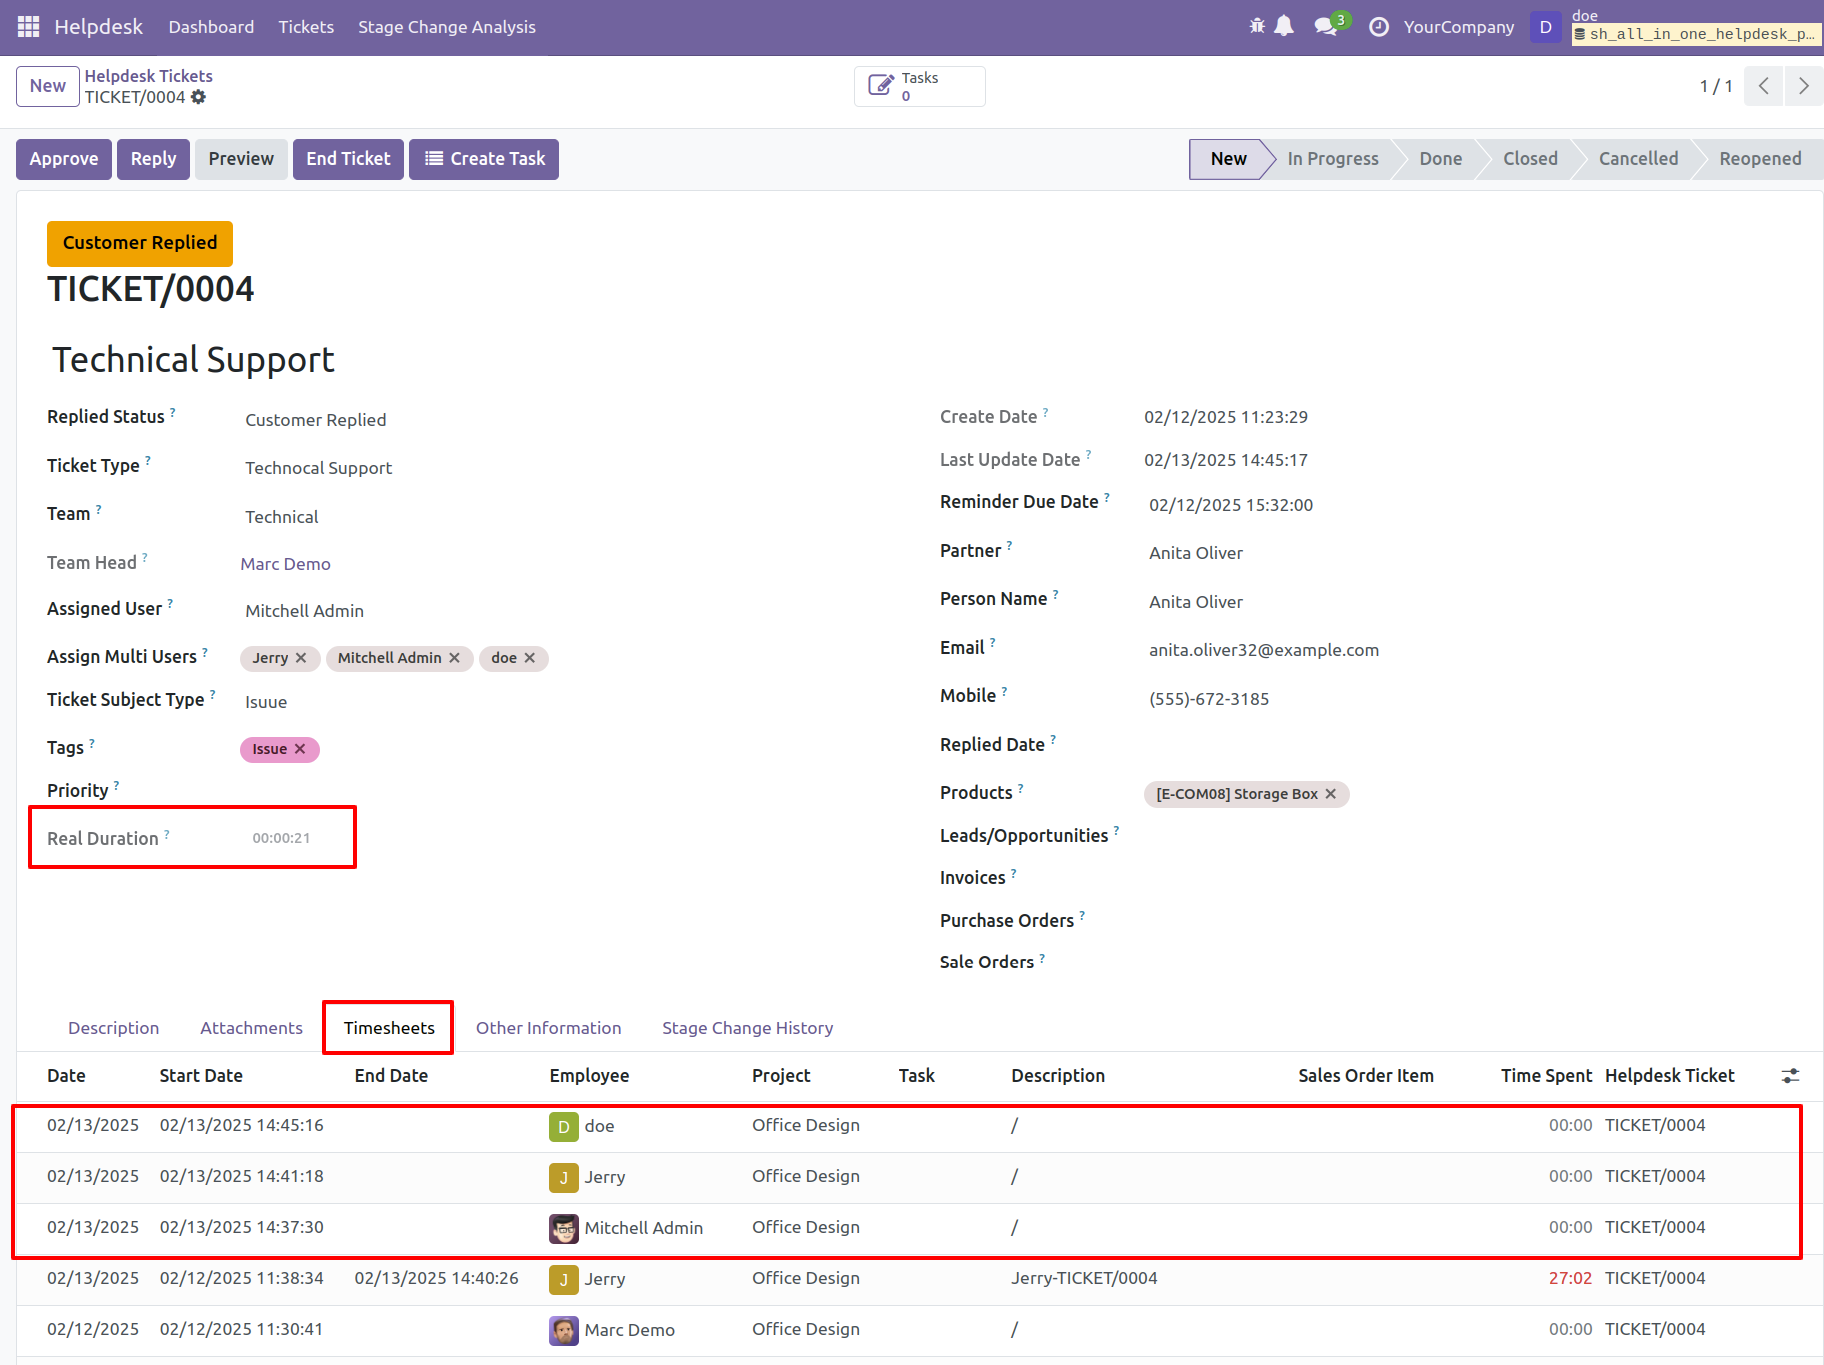
You can see that three users started the same ticket timer simultaneously.
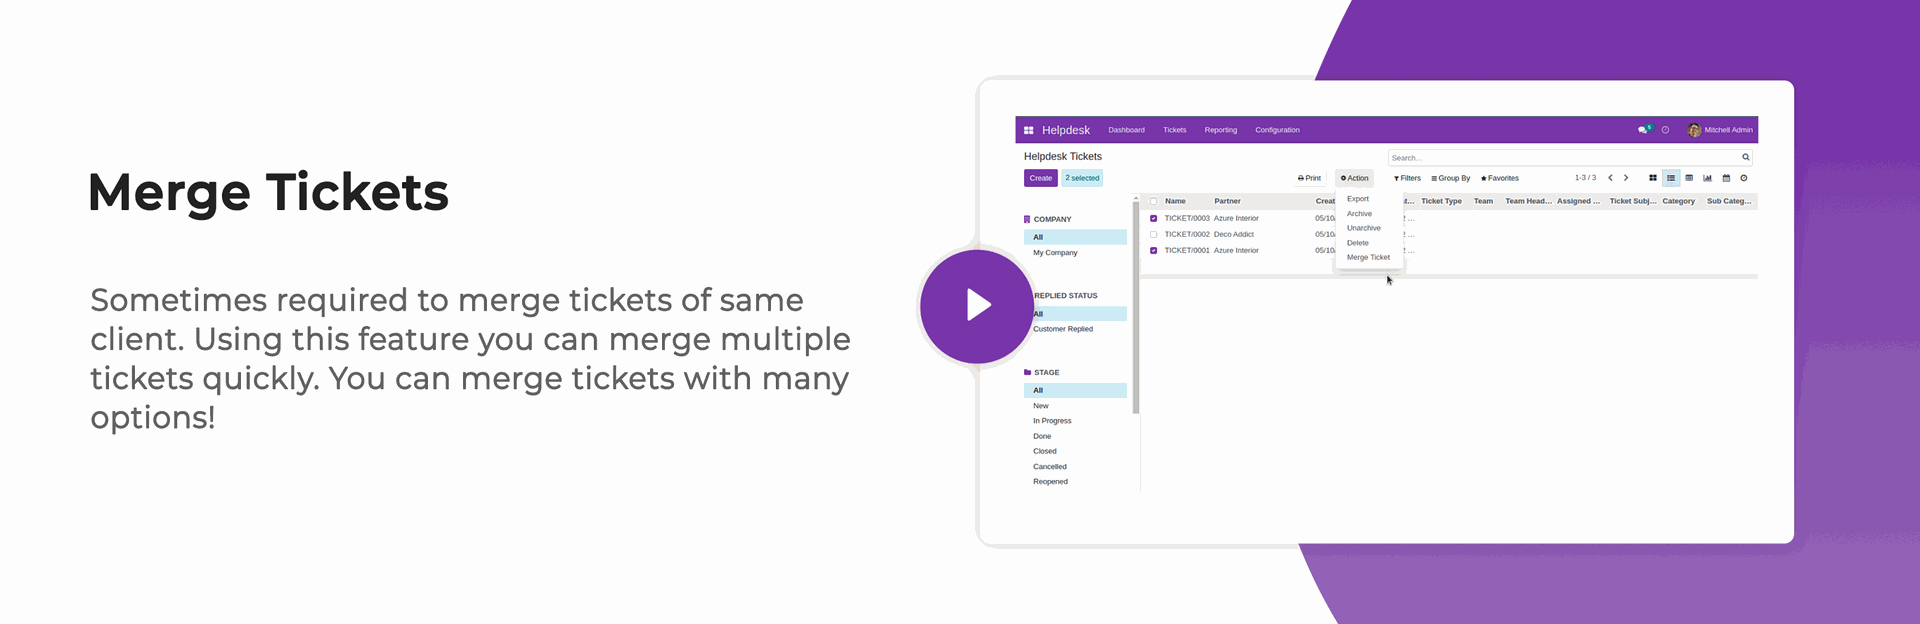
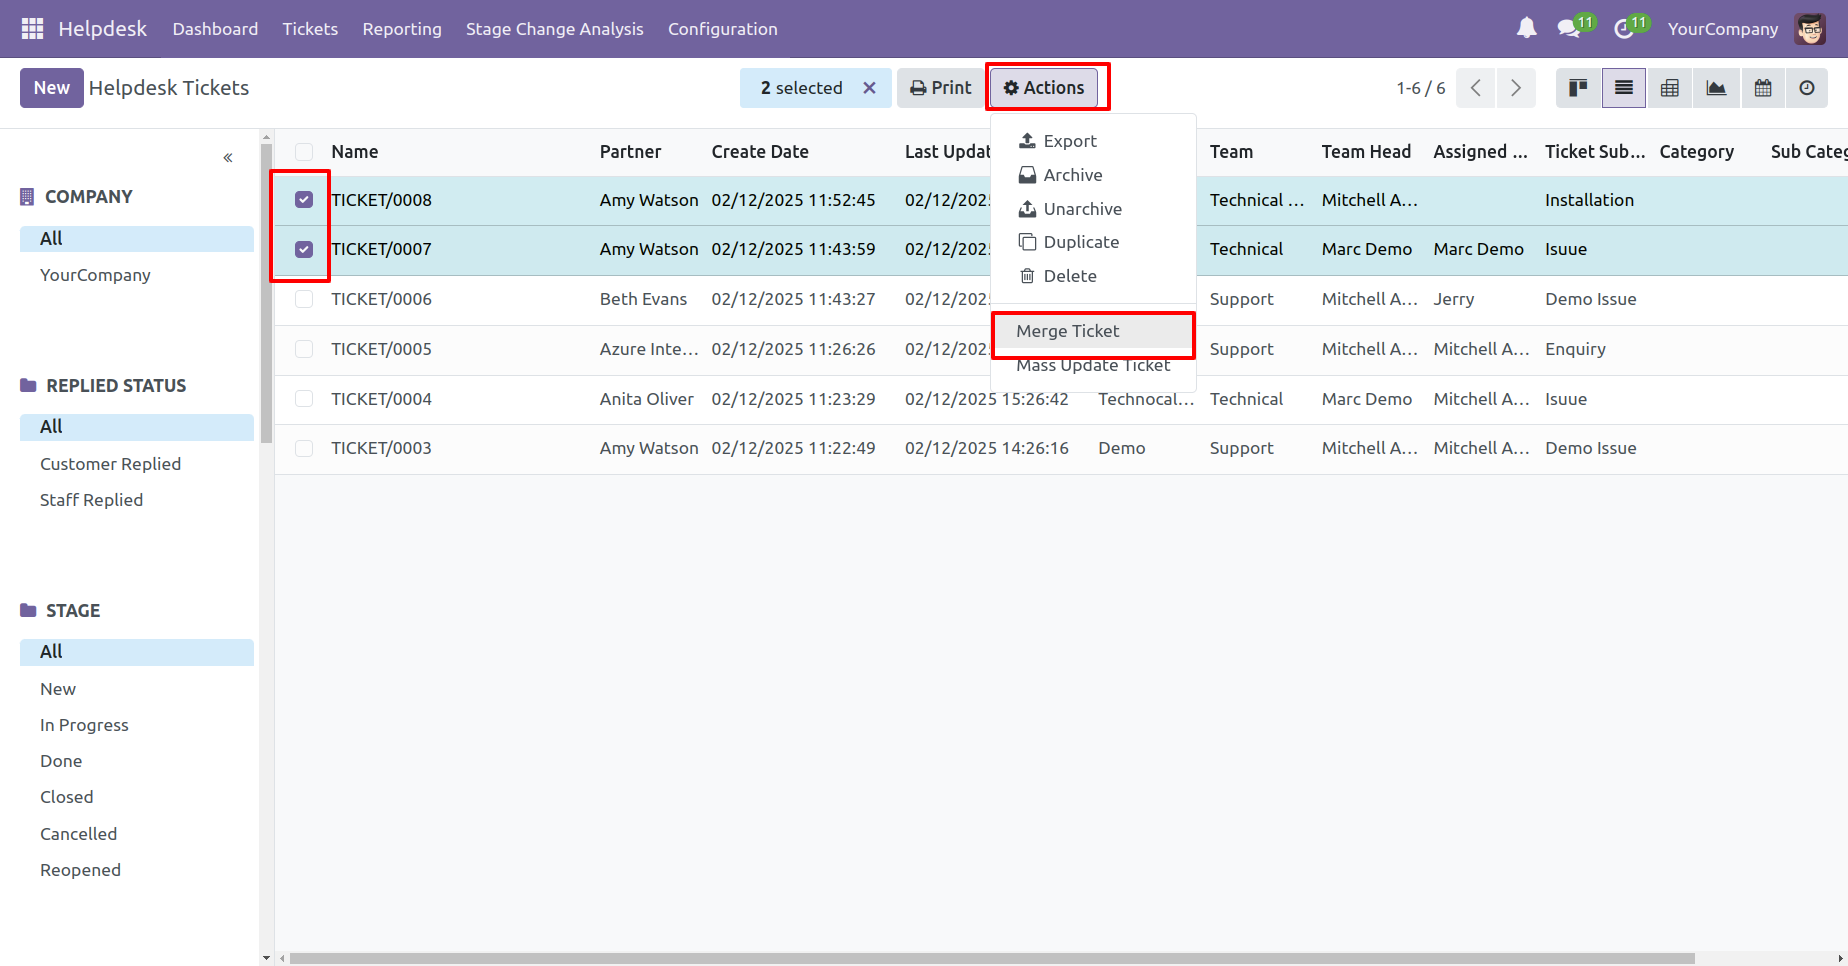
Select the tickets and click 'Merge Ticket' from the action button.
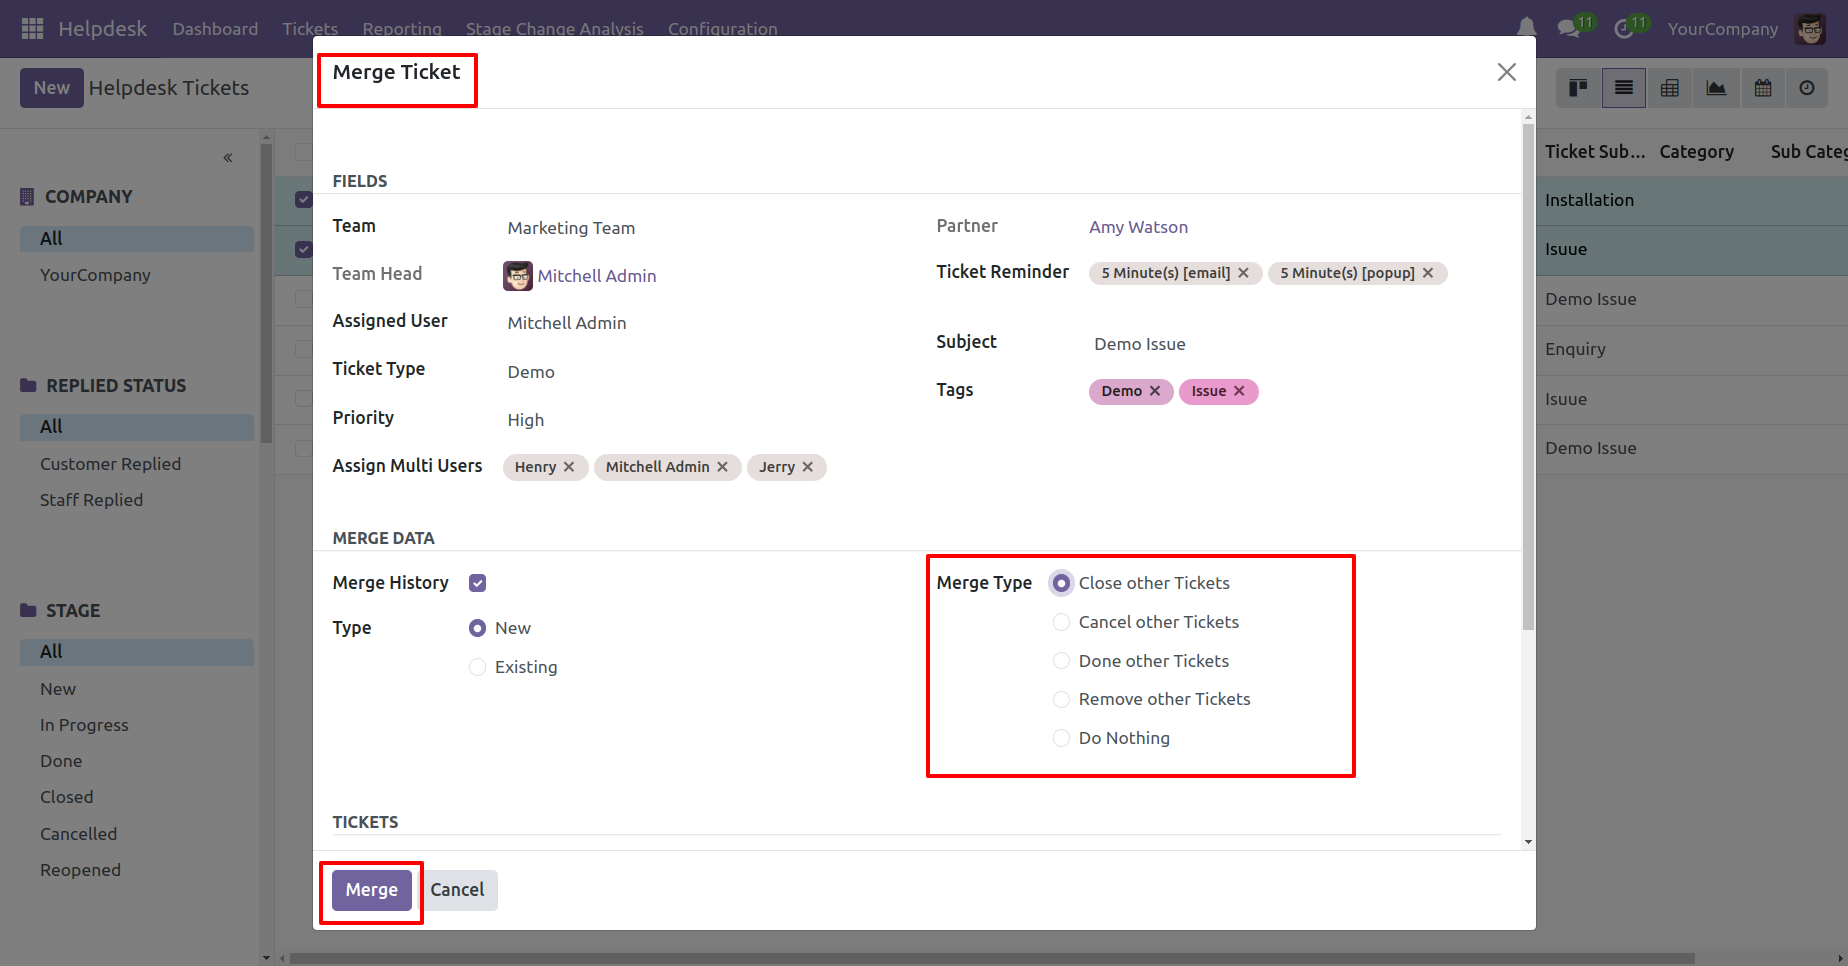
After that, the 'Merge Ticket' wizard will appear.
Fill the details and click on the 'Merge' button.
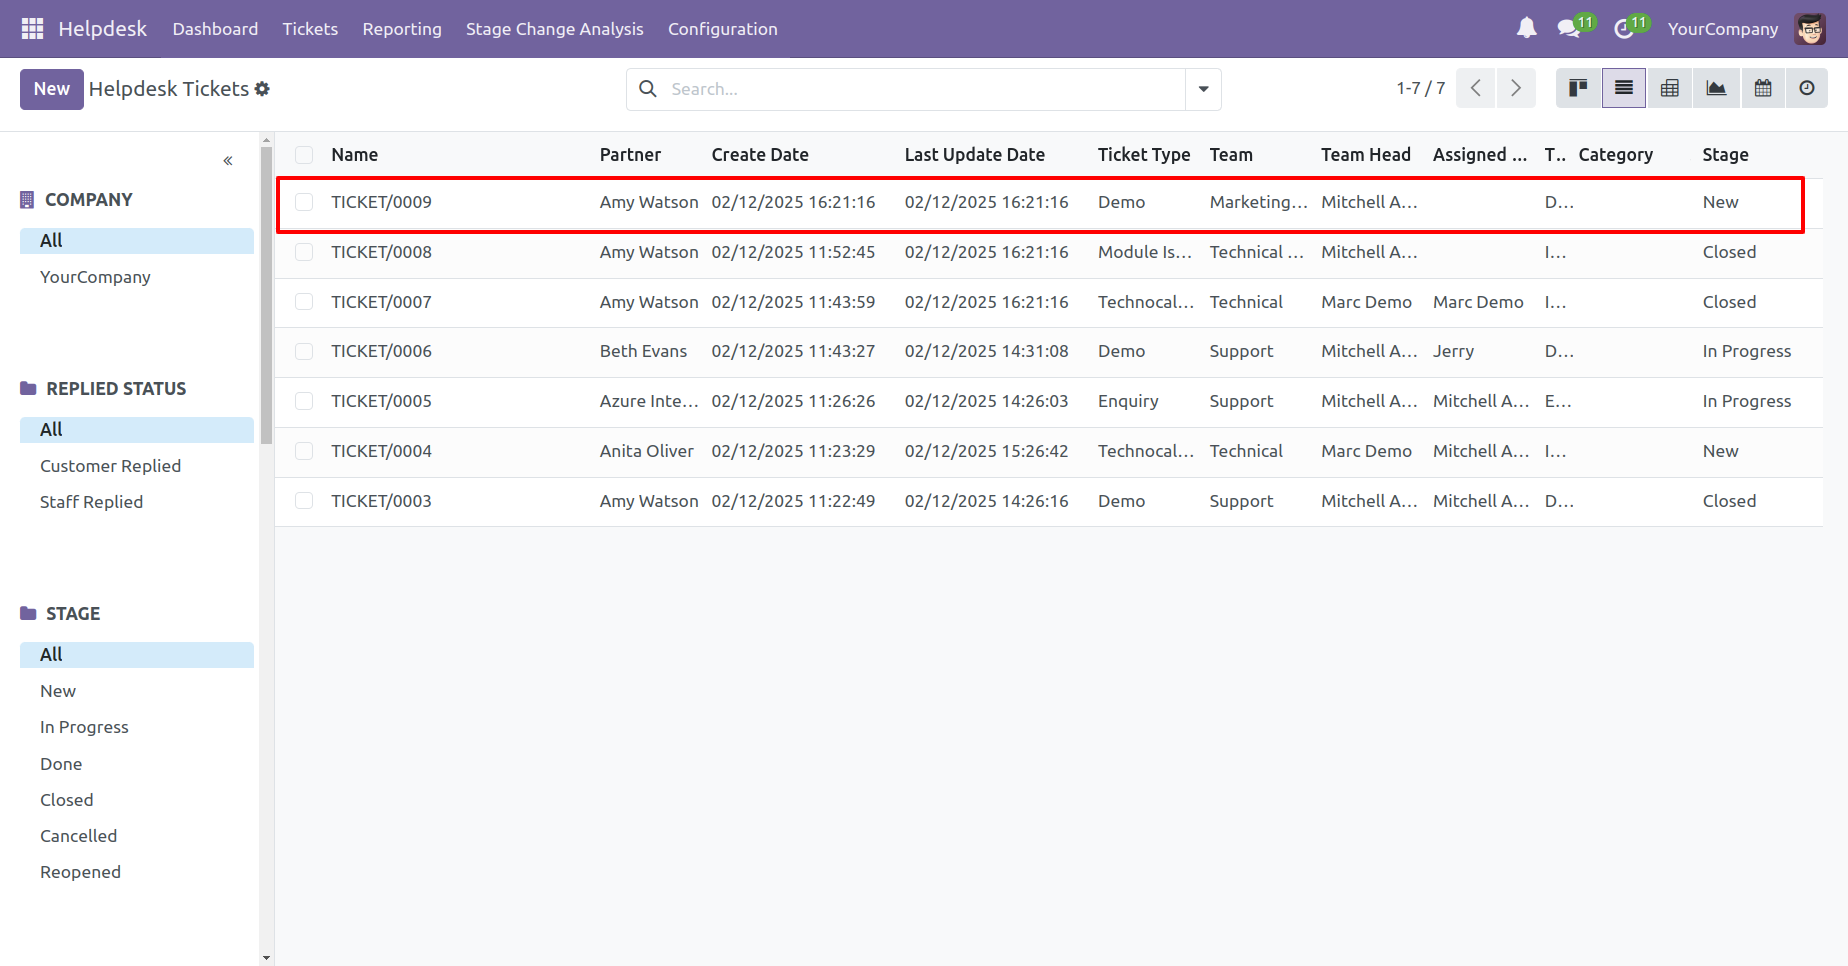
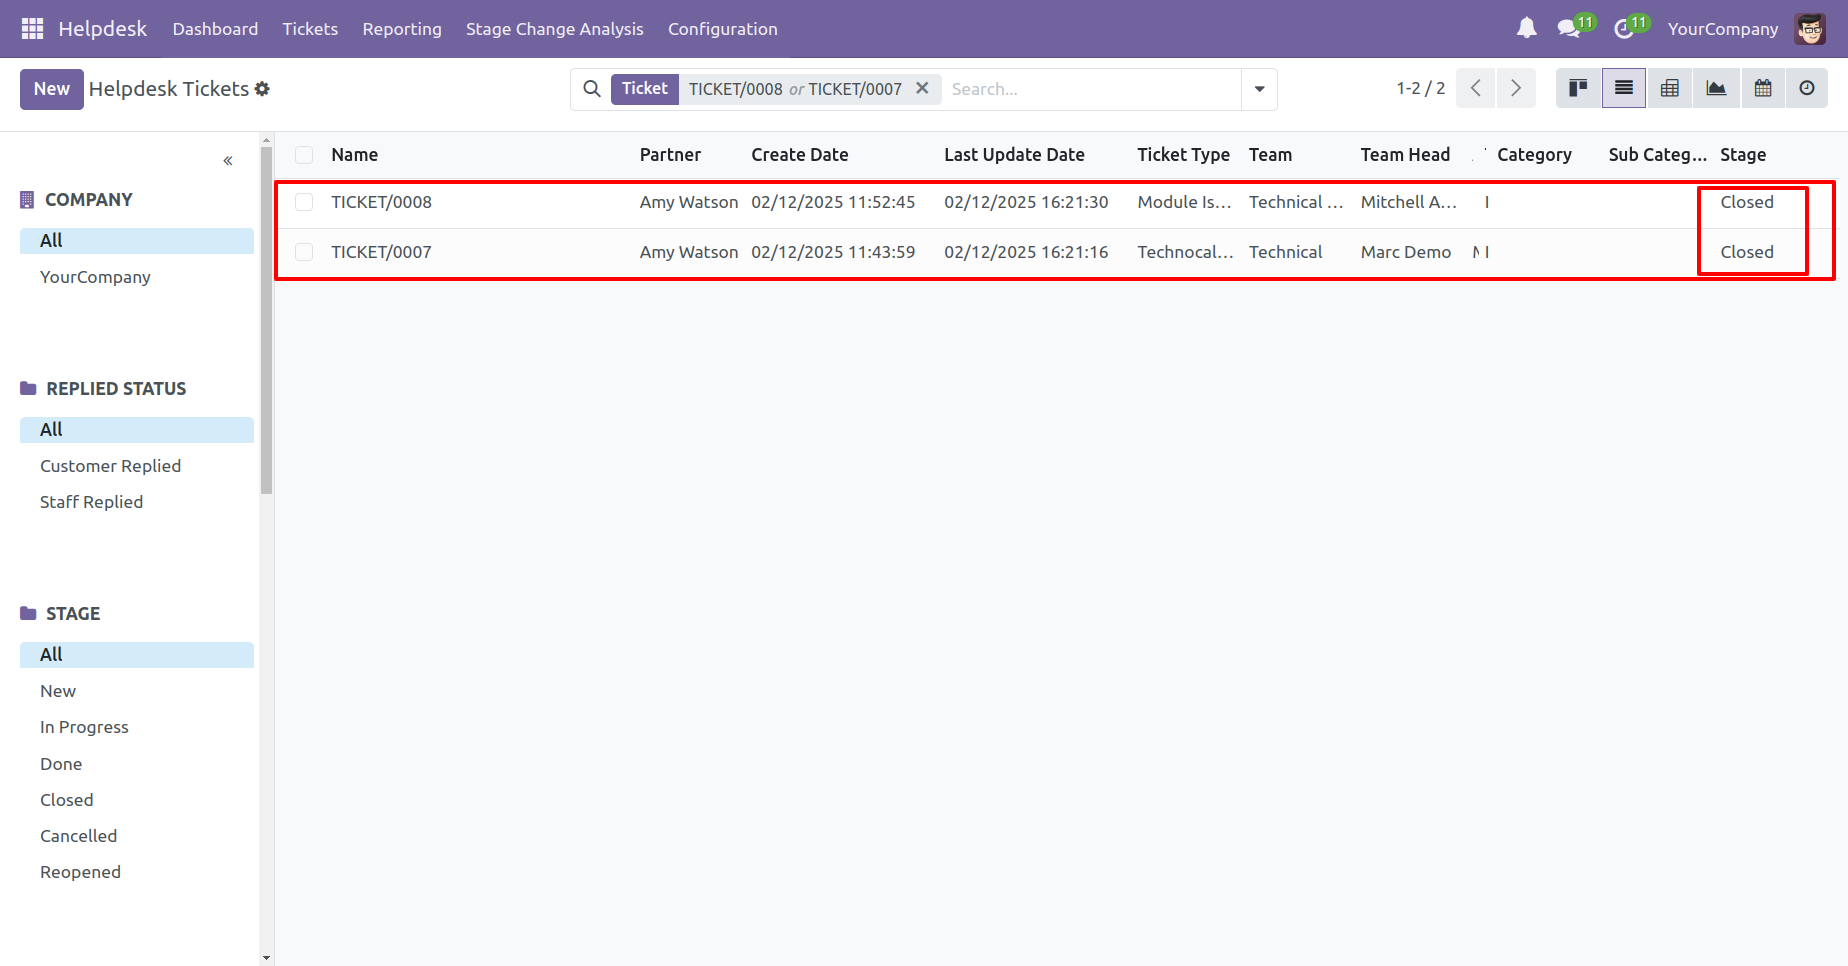
Here, you can see that a new ticket has been created, and the selected tickets are closed.
Select the tickets and click 'Merge Ticket' from the action button.
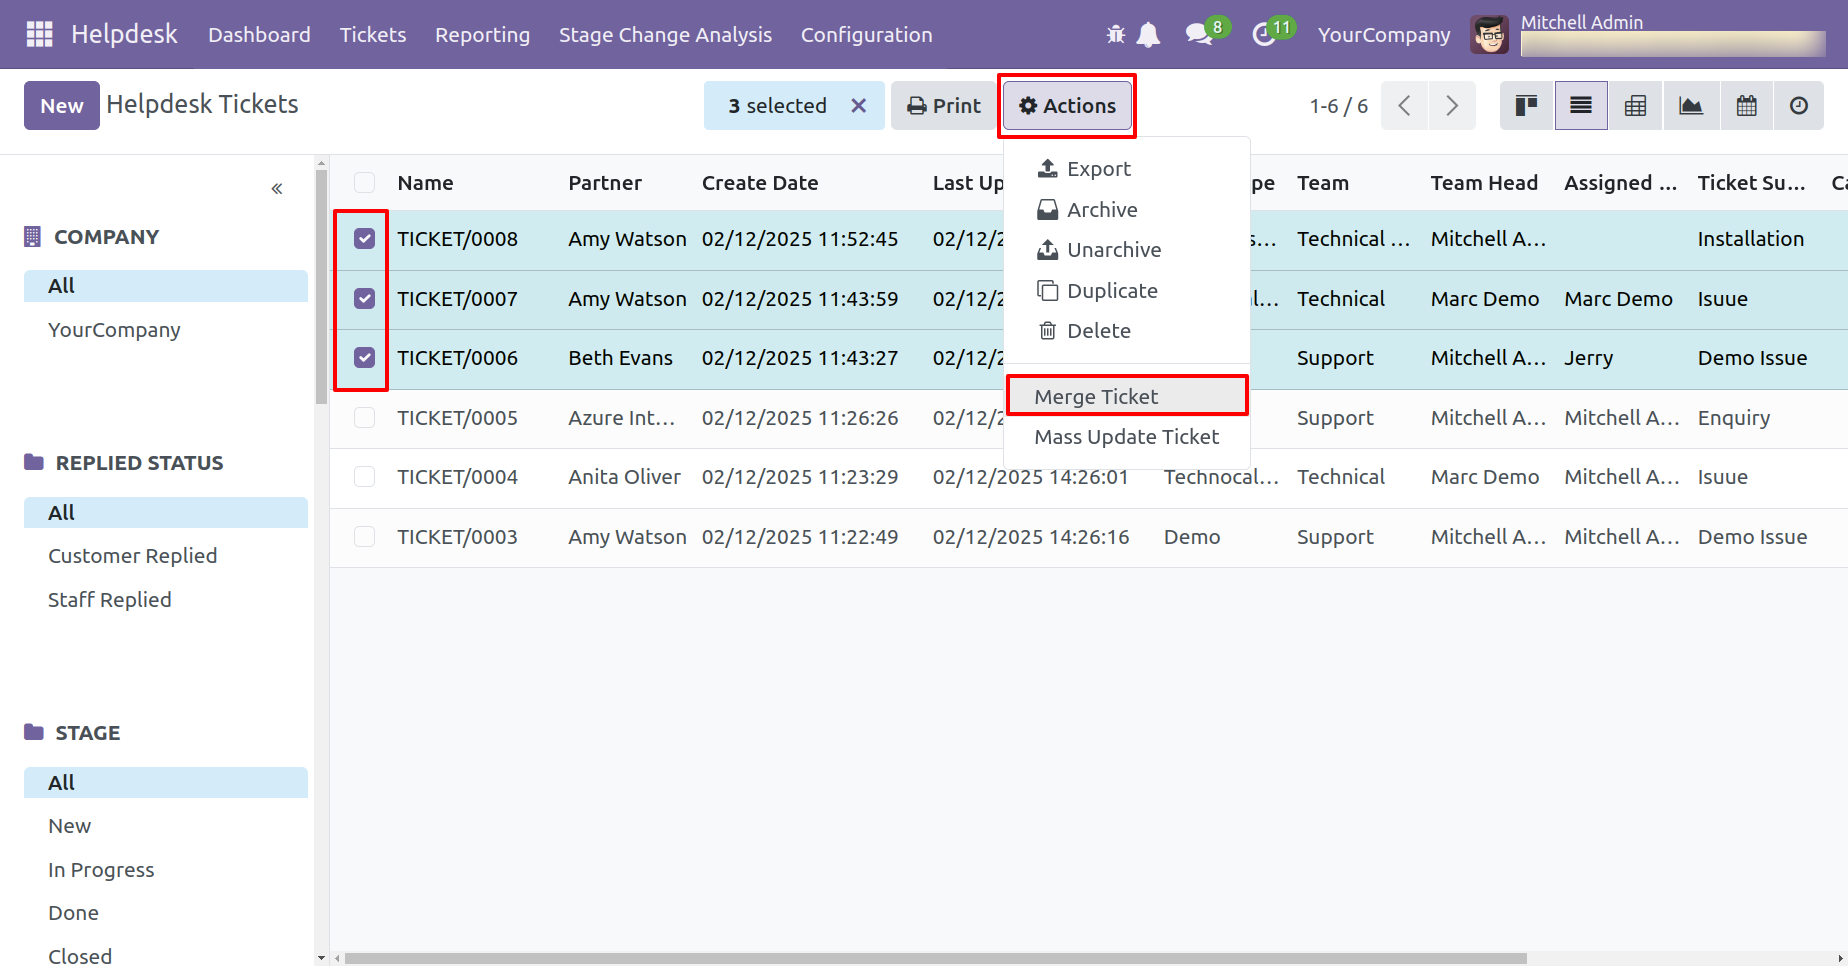
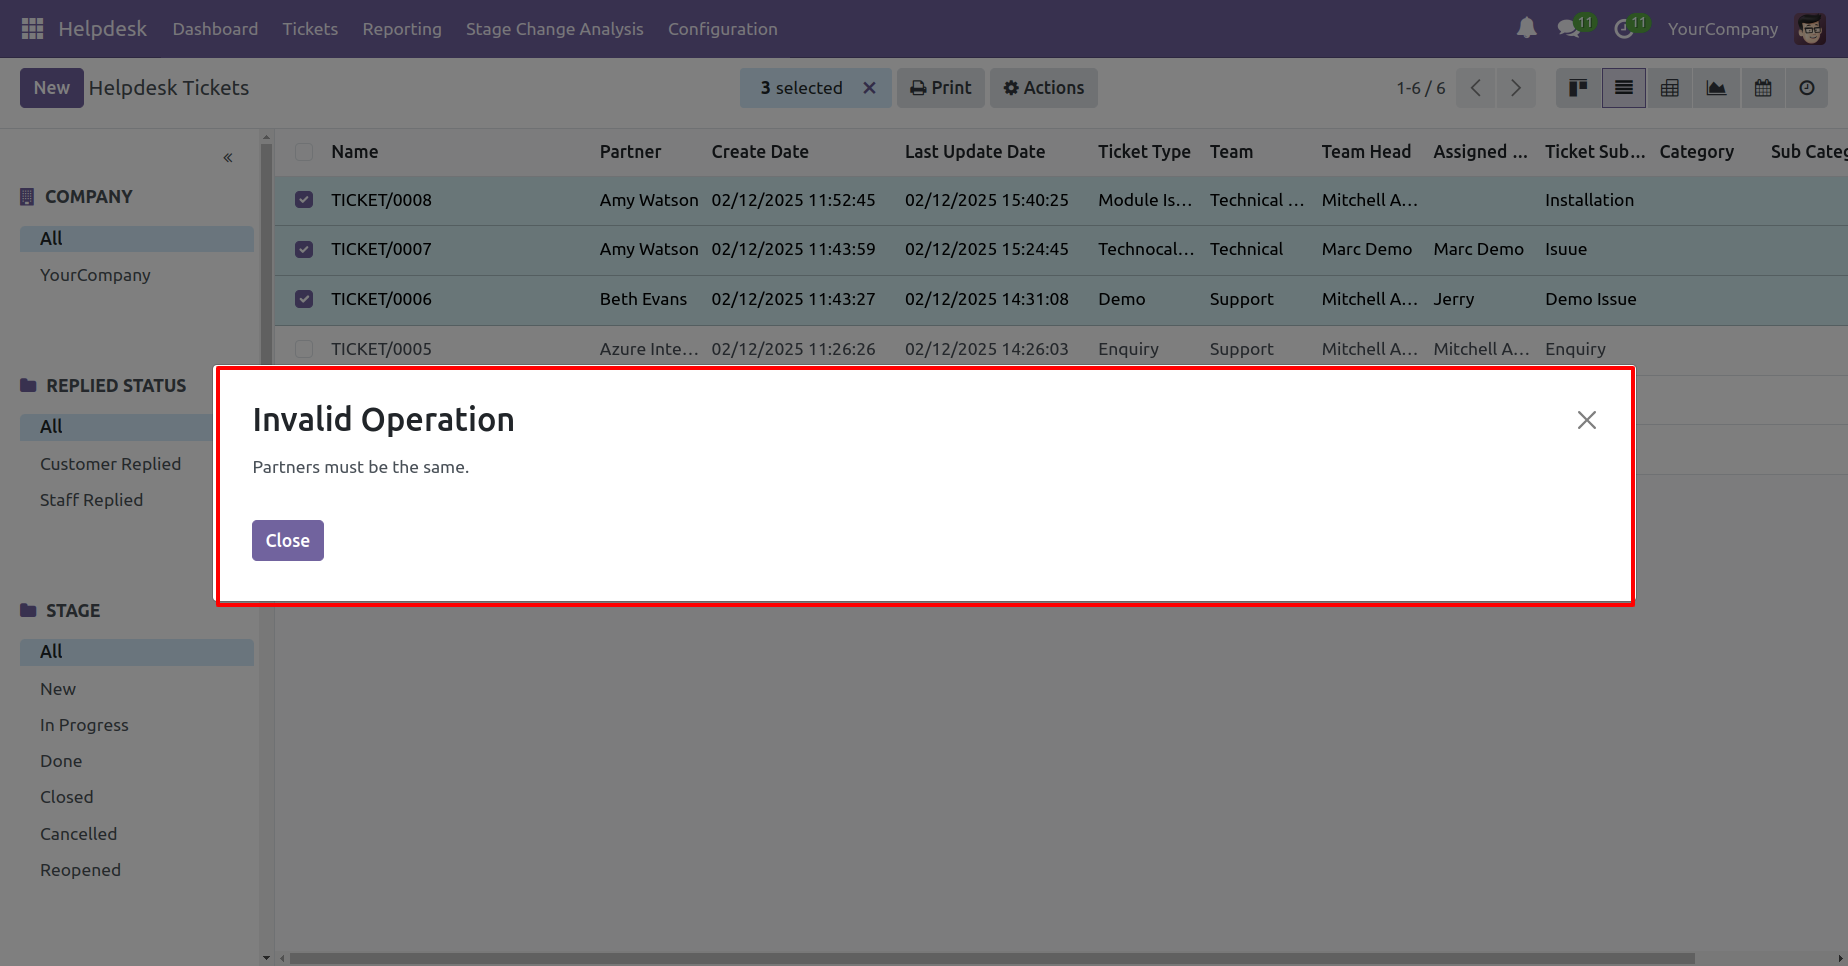
If you try to merge tickets from different partners, a warning pop-up will appear.
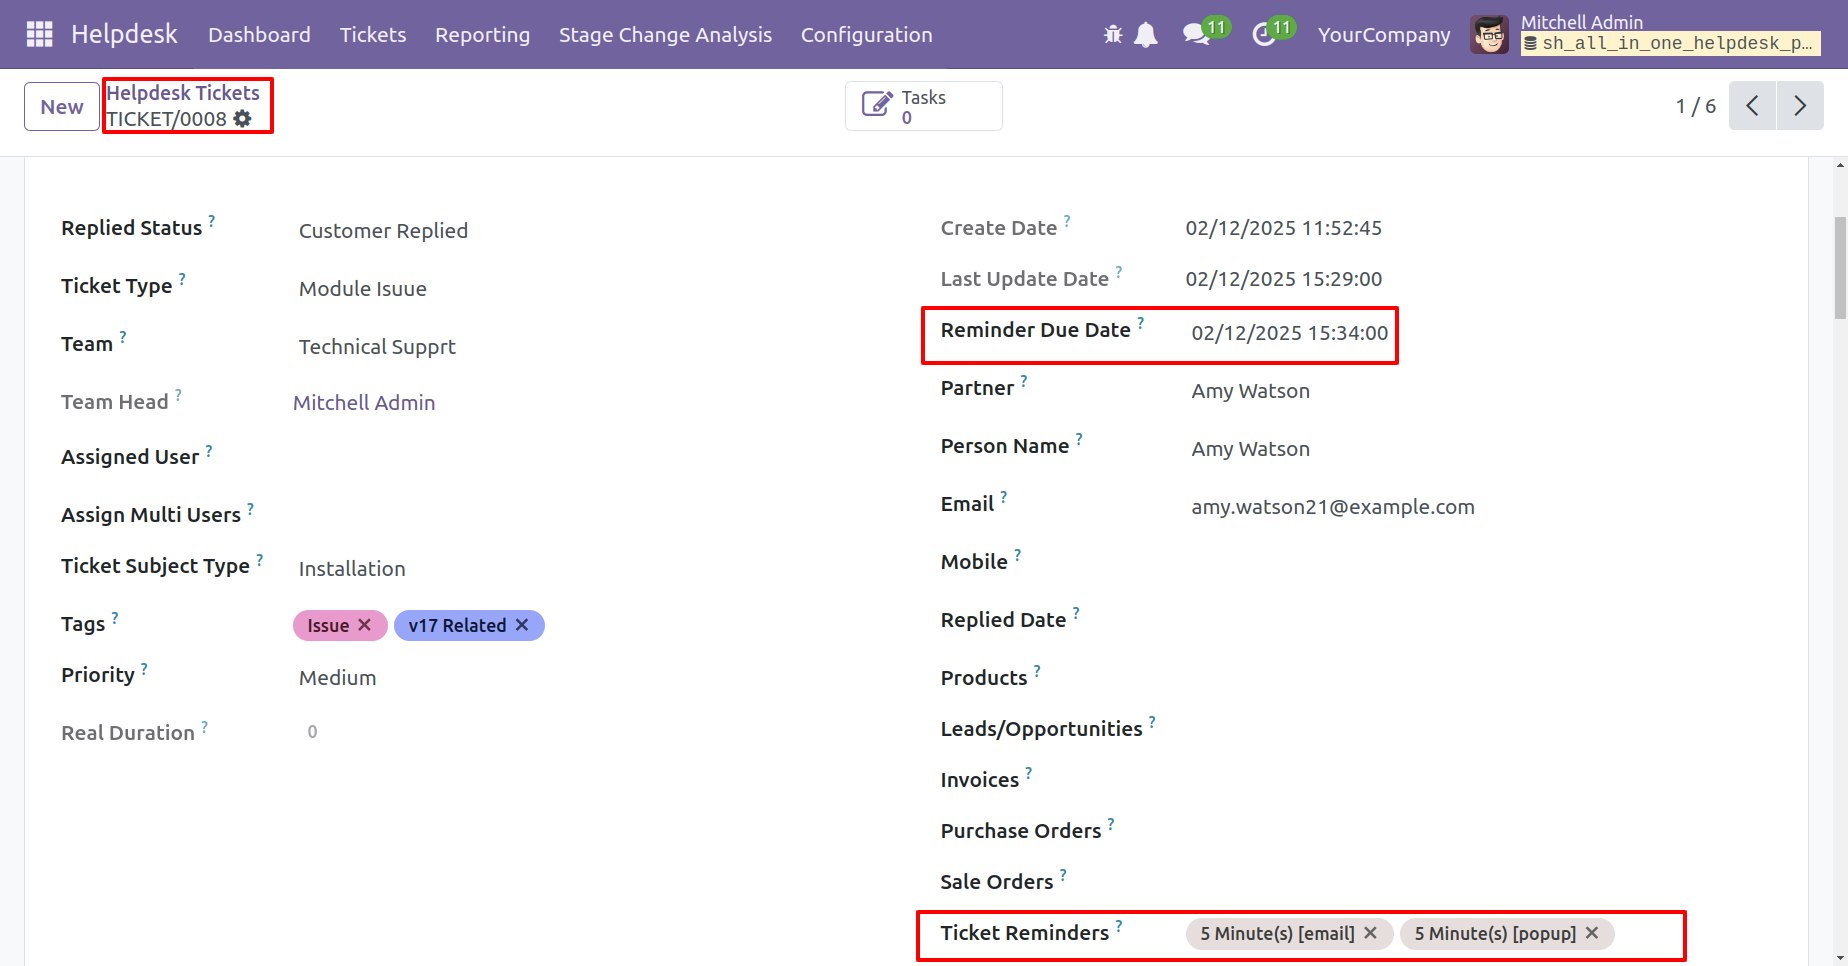
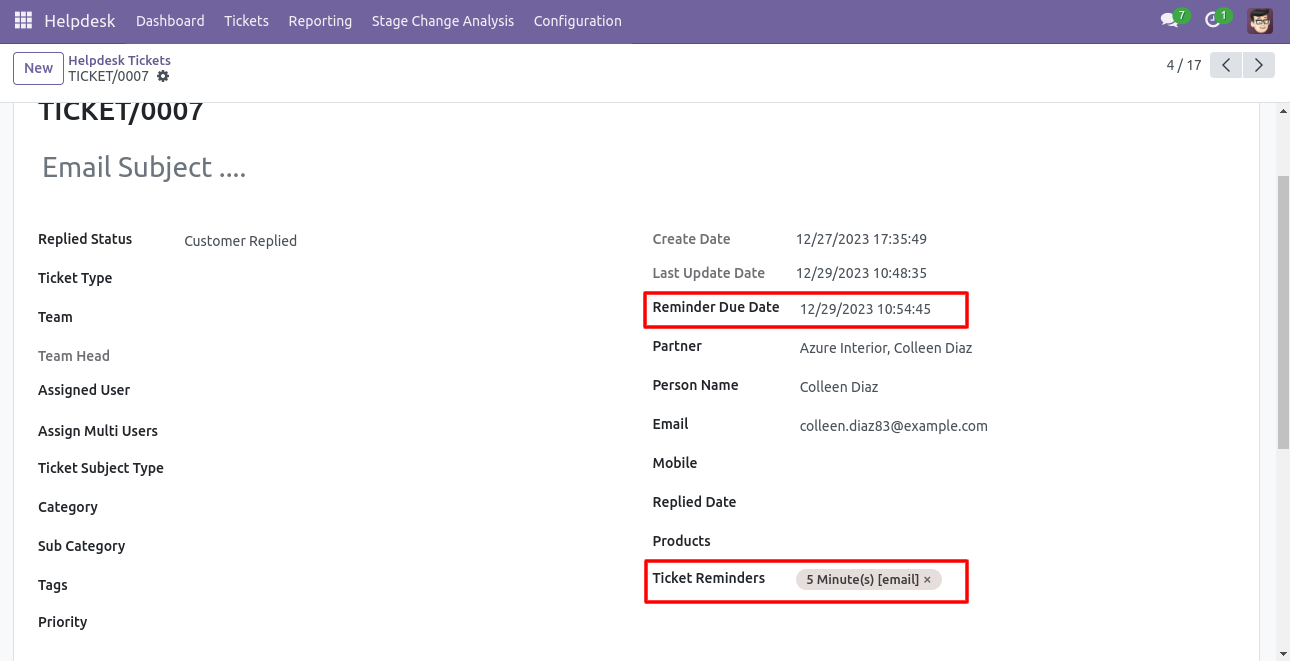
Set the 'Reminder Due Date' and 'Ticket Reminder' in the ticket.
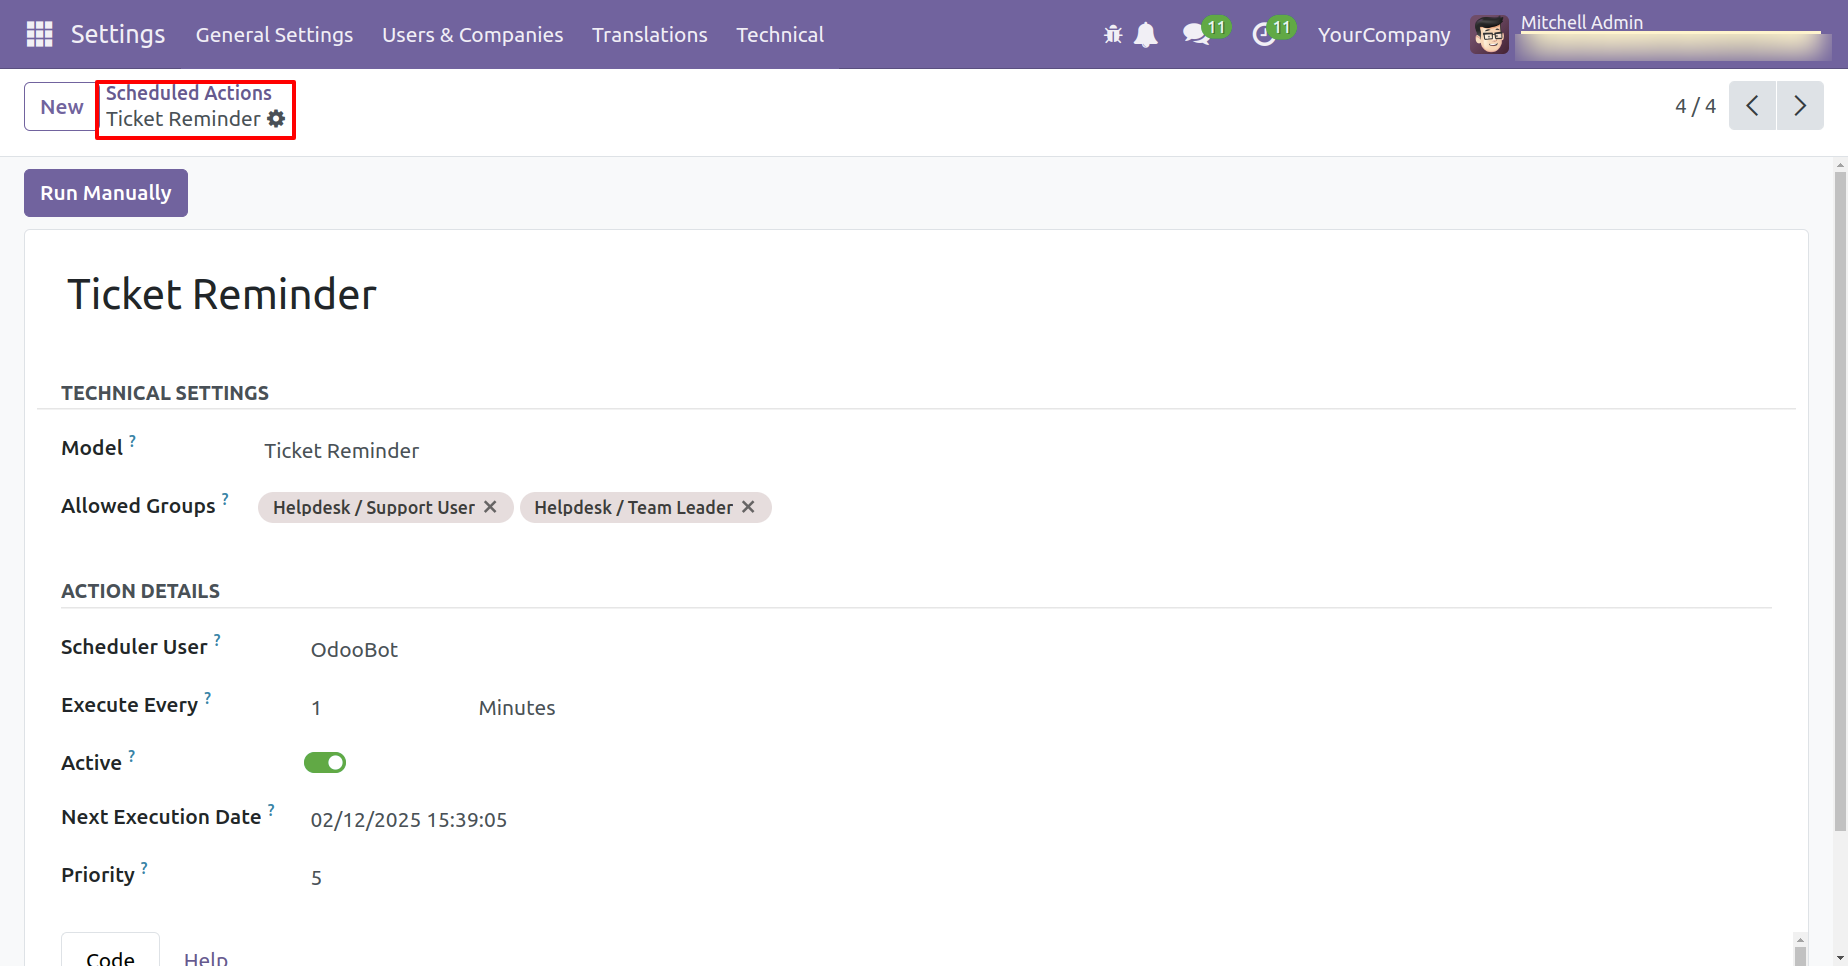
Schedule actions.
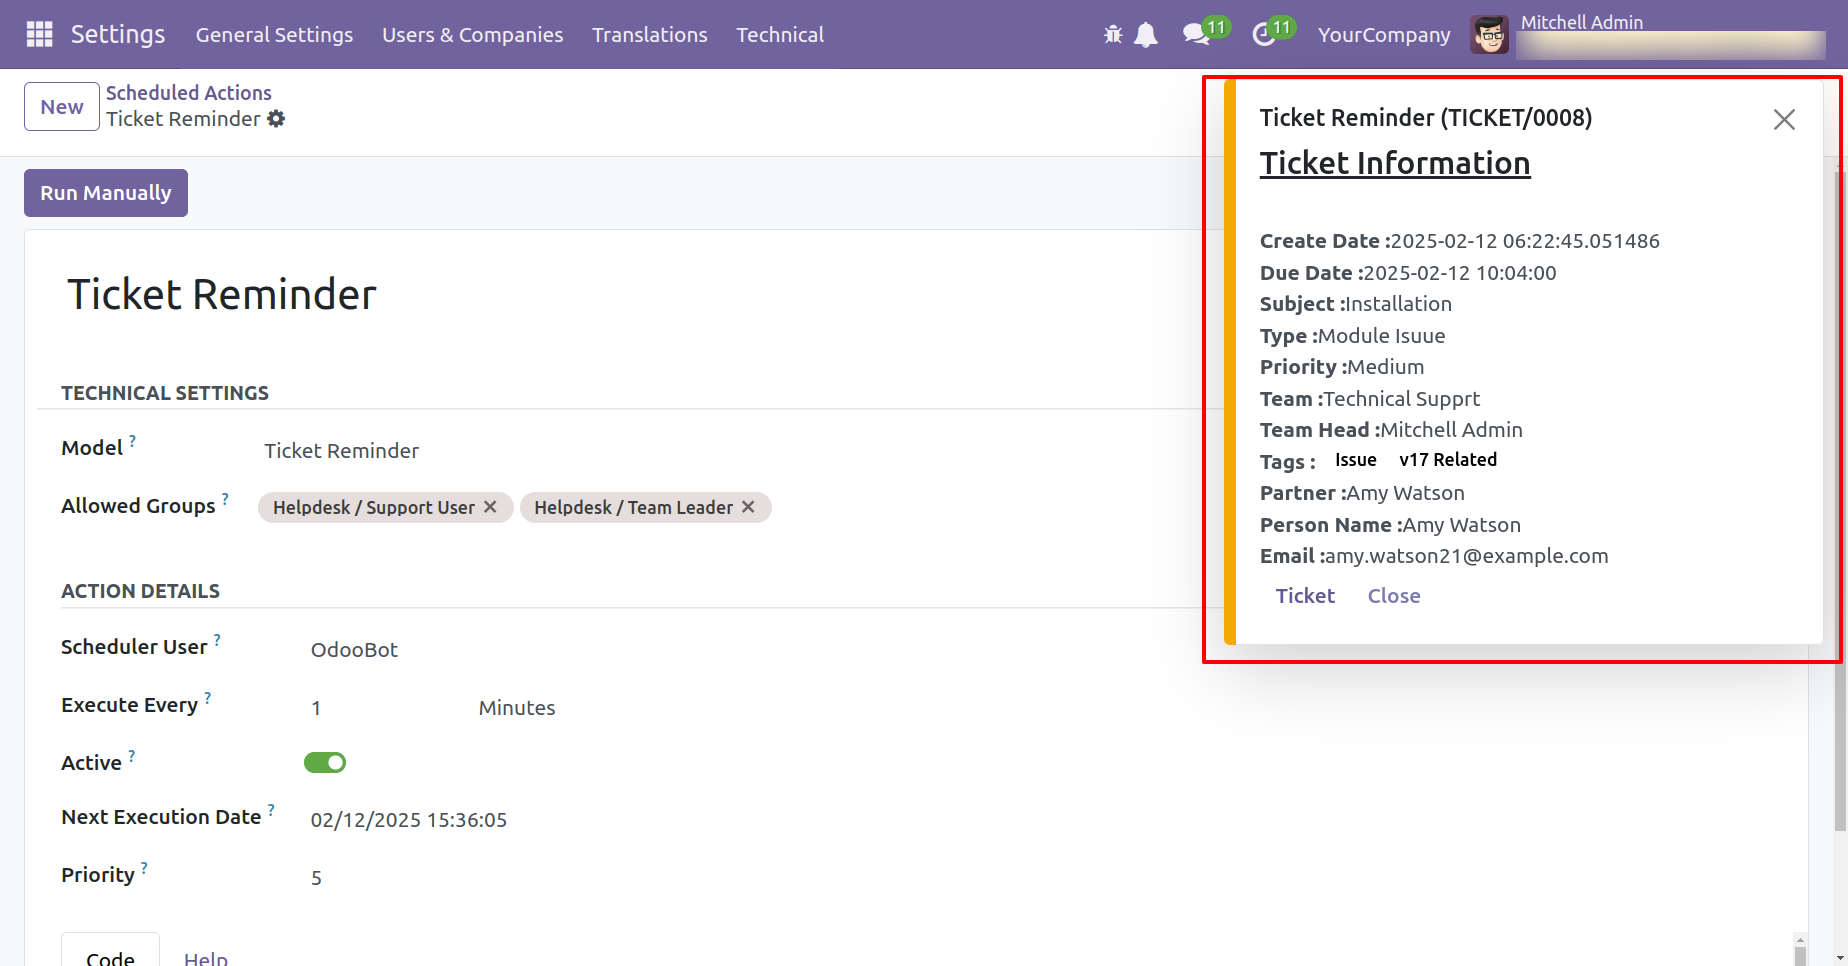
Reminder pop-up looks like below.
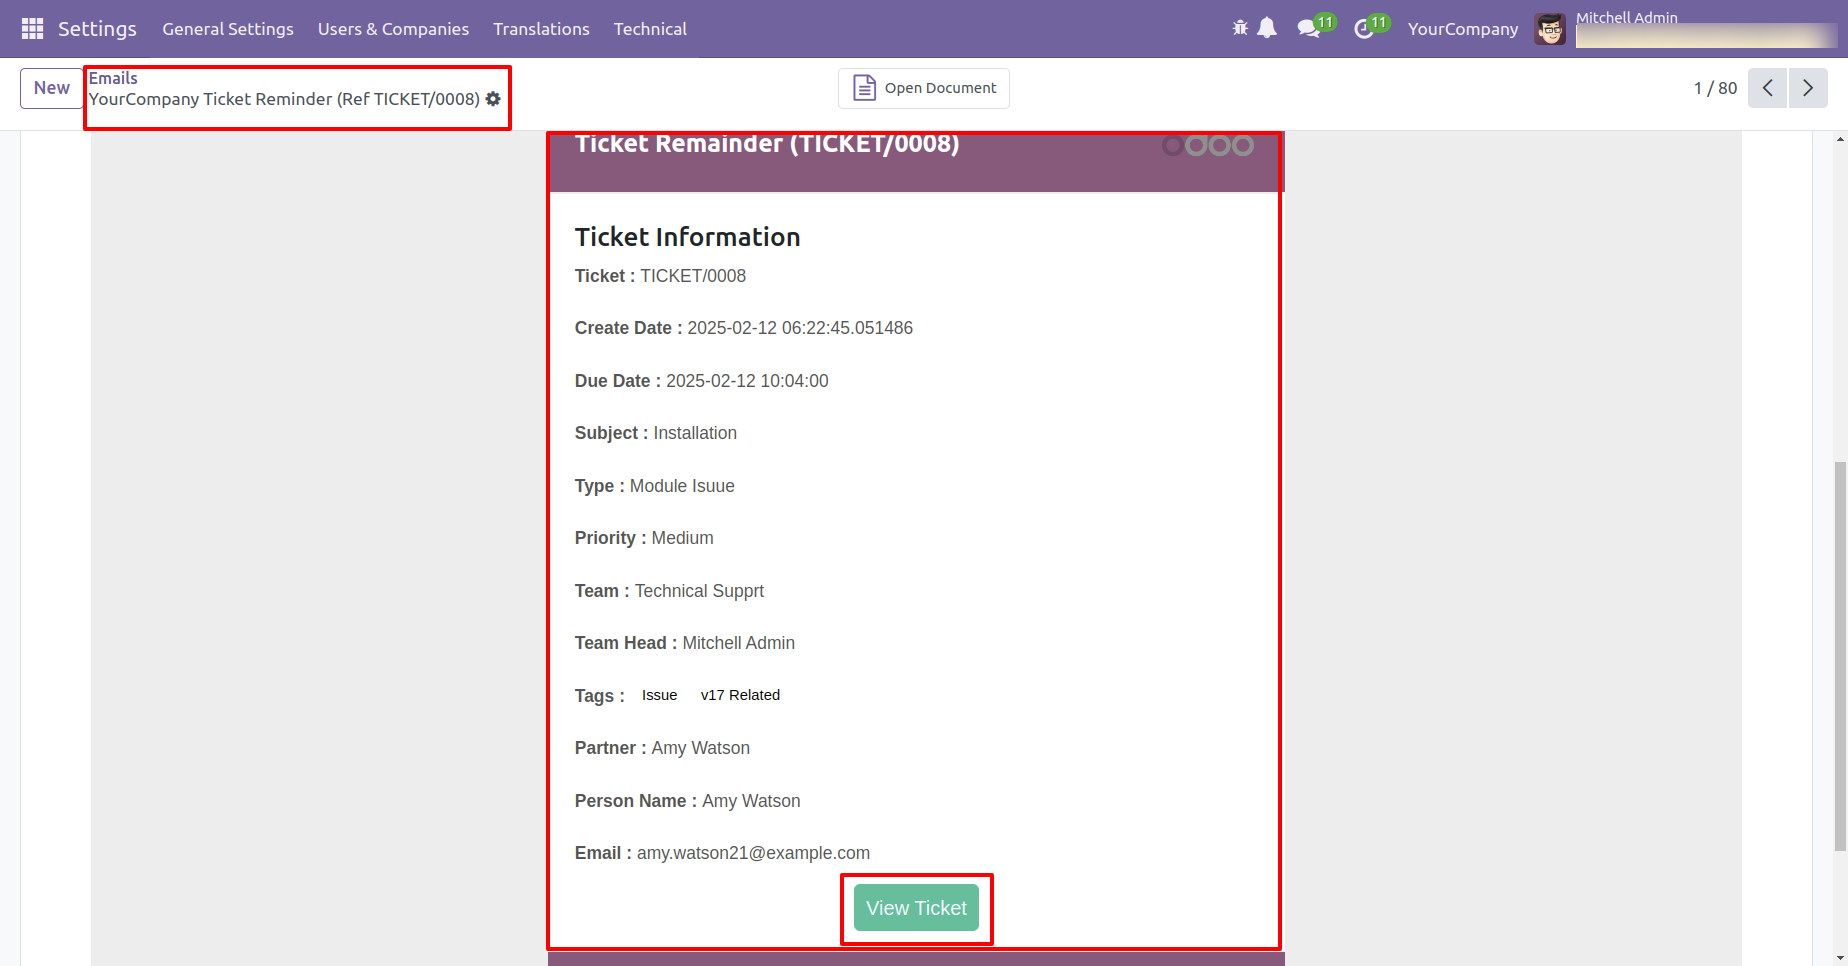
Reminder email looks like below. Click on the 'View' button to view that ticket.
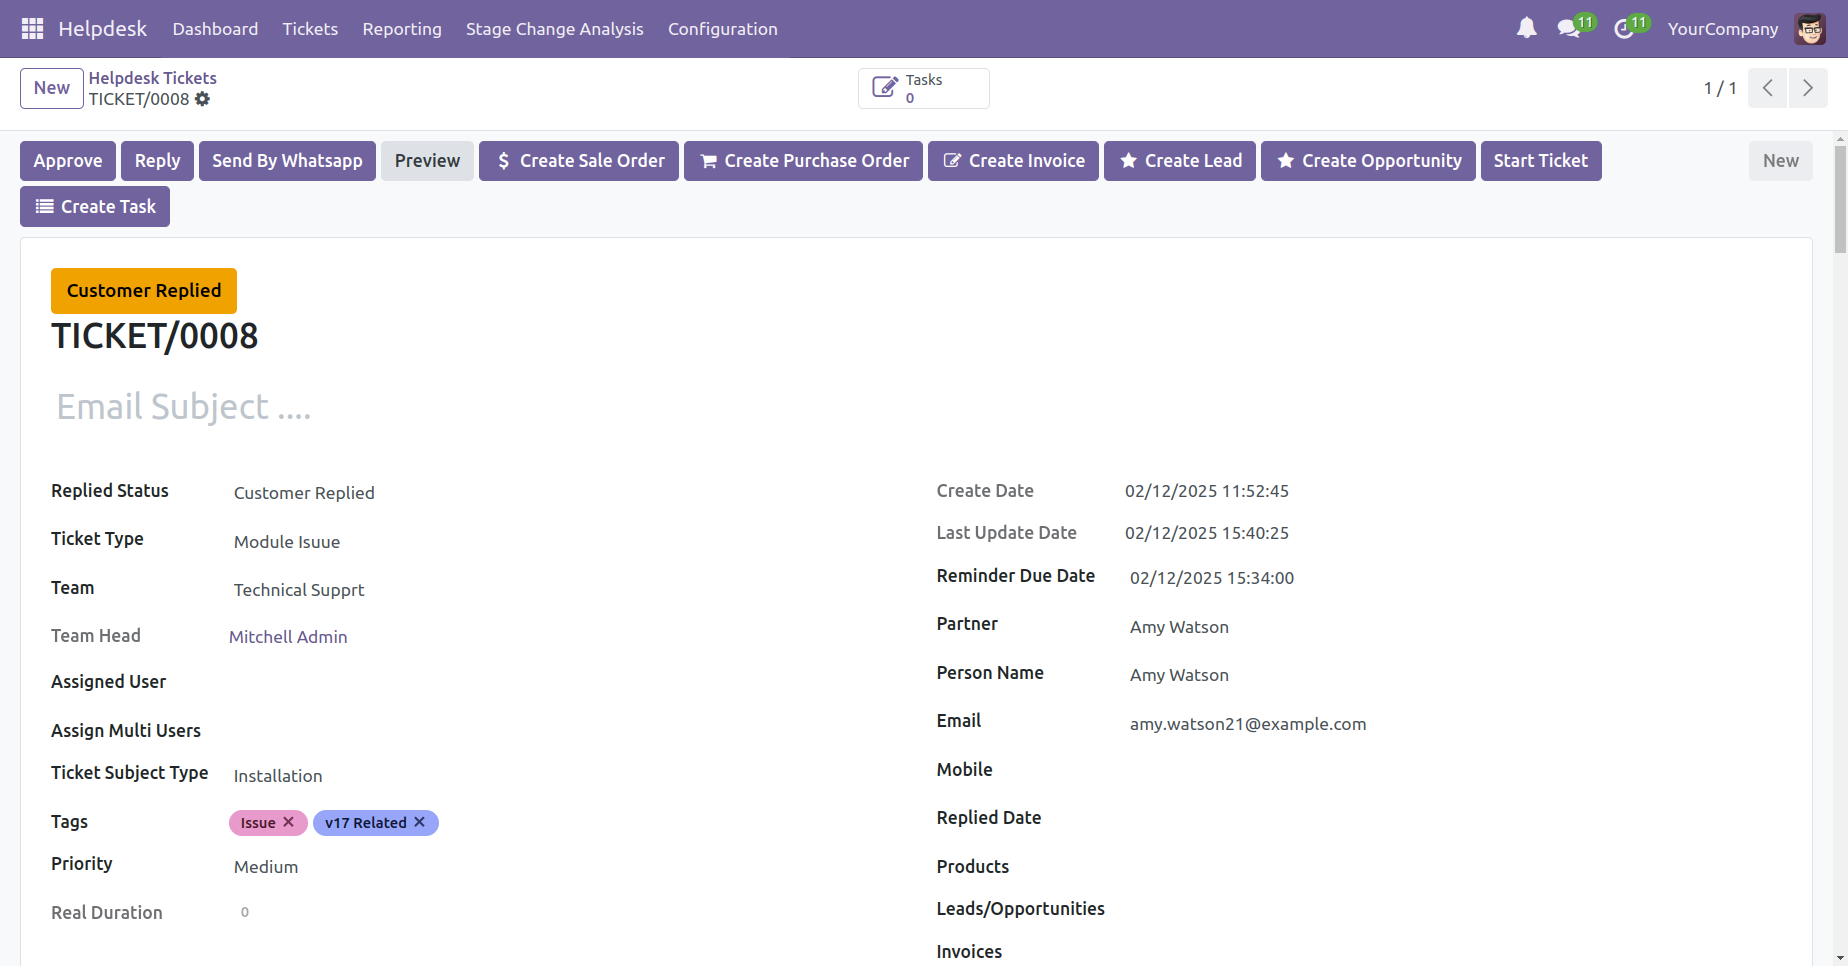
Ticket view looks like below.
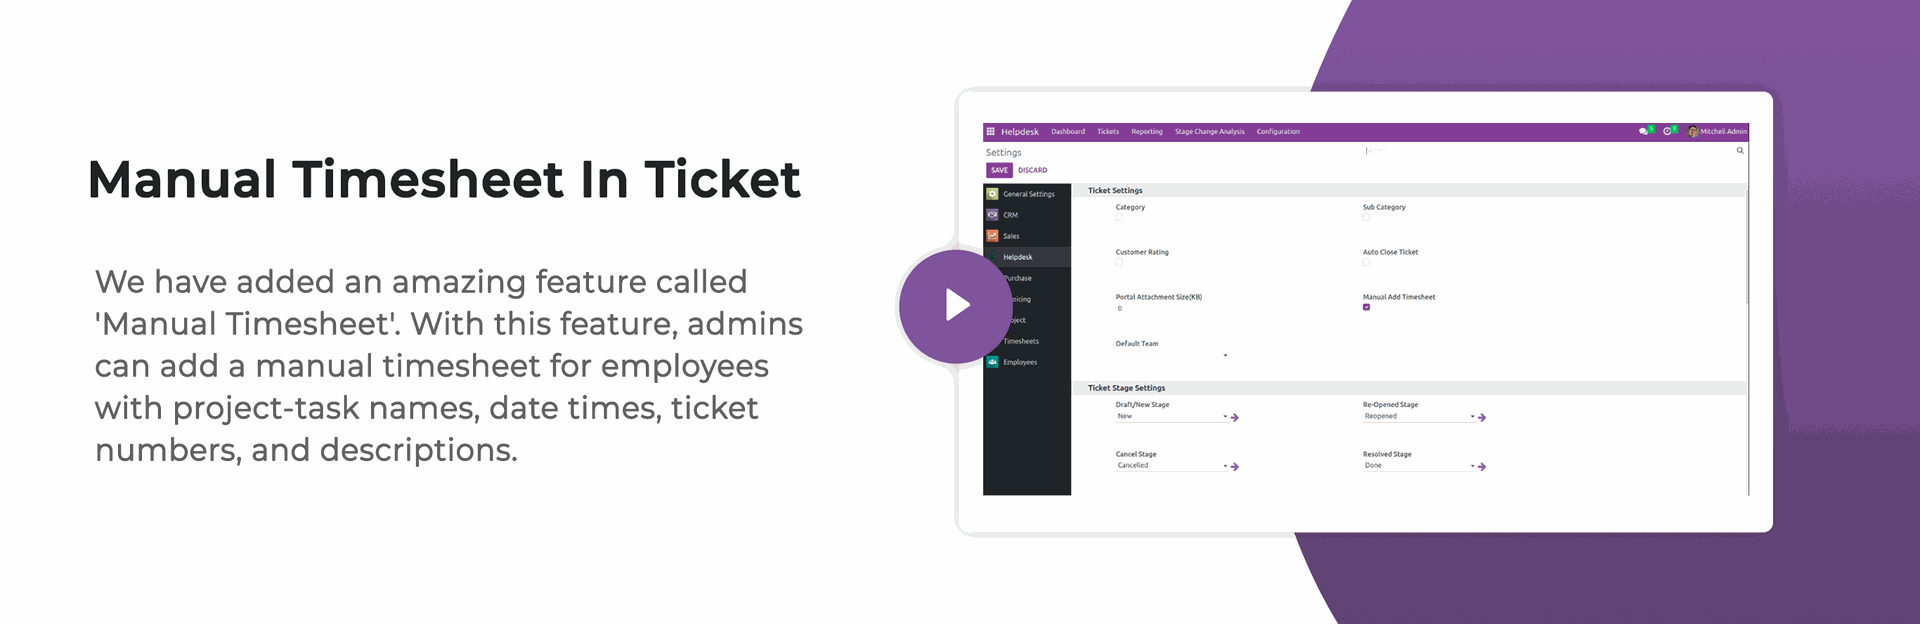
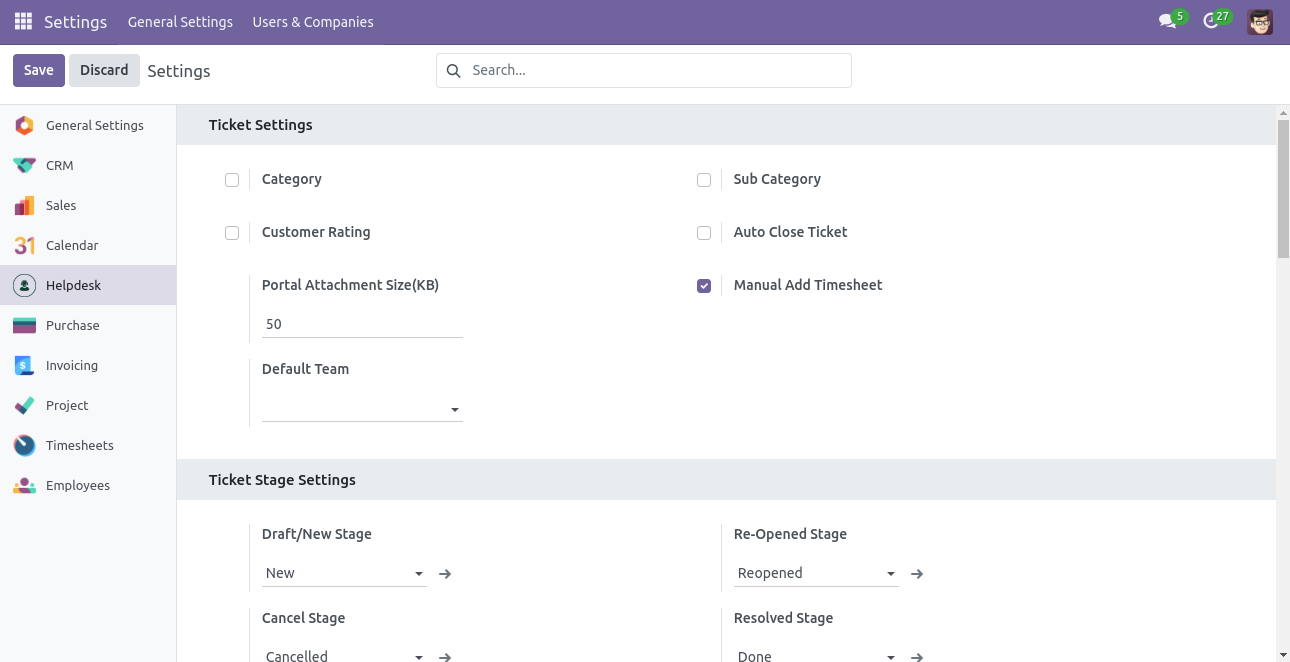
Go to the helpdesk setting and enable the 'Manual Add Timesheet' feature.
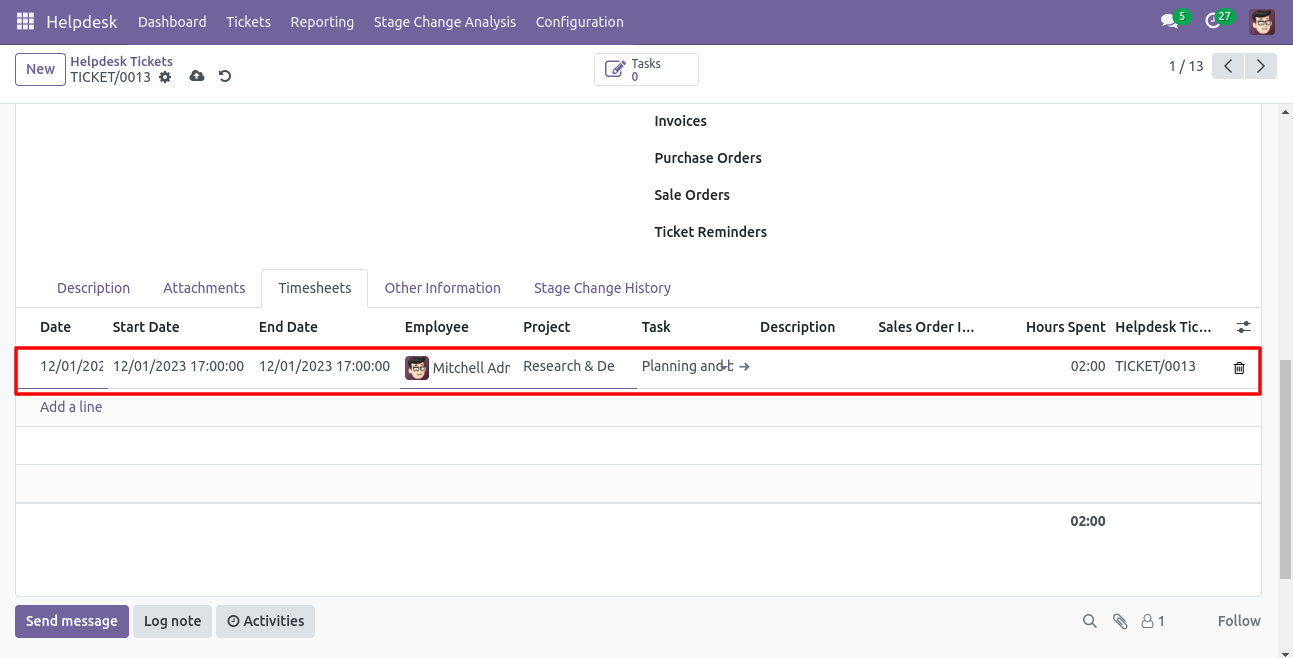
Form view of the ticket. Add the timesheet in the timesheets tab.
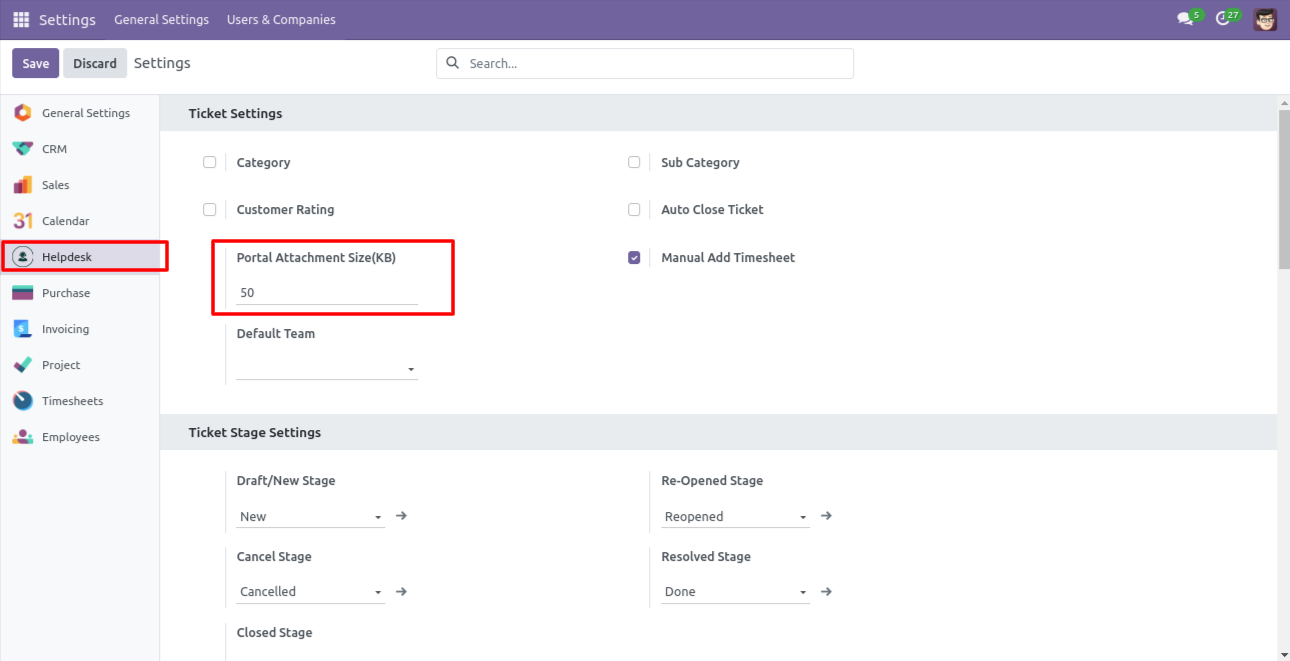
Configuration to give attachment size limit on portal.
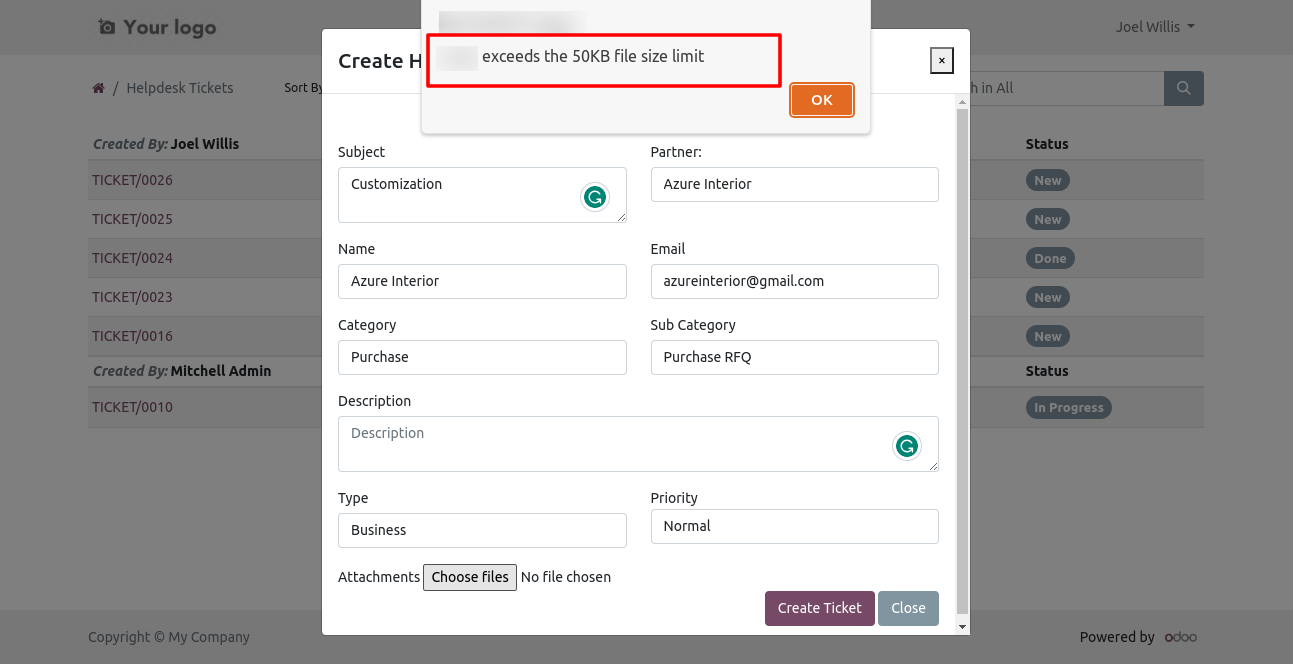
Alert comes when attachment size larger then configuration.
Schedule activity in helpdesk ticket form view.
Whenever any customer/staff replied, the stage changes according to configurations. You can find tickets easily by customer/staff reply based on tags.
'Auto Update Replied Status & Replied Date Based On Customer/Staff Replied To Ticket'.
We have updated the auto-close mechanism based on the last replied date of staff.
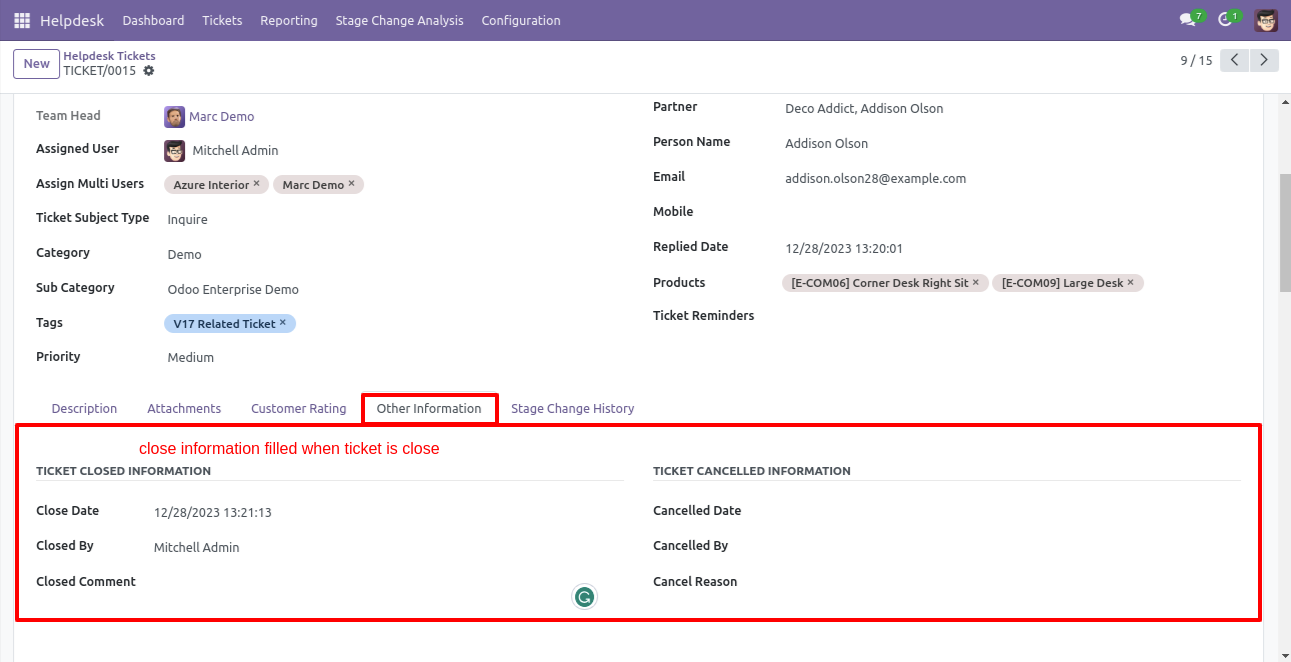
'Ticket Close' information will added here.
Customer ratings visible to only manager & team leader.
You can filter tickets by creation date.
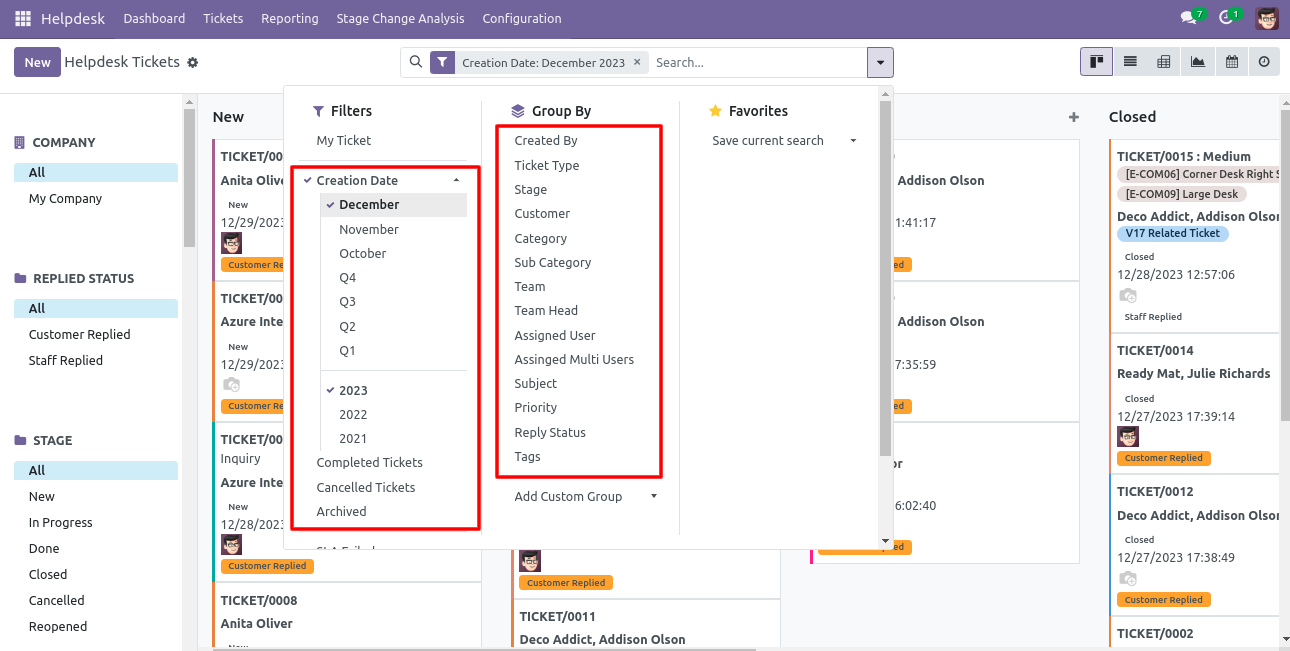
You can search tickets by product name from the search bar.
We were by default adding customers as followers on ticket create, to make this better we have given configuration to on/off these auto-add followers.
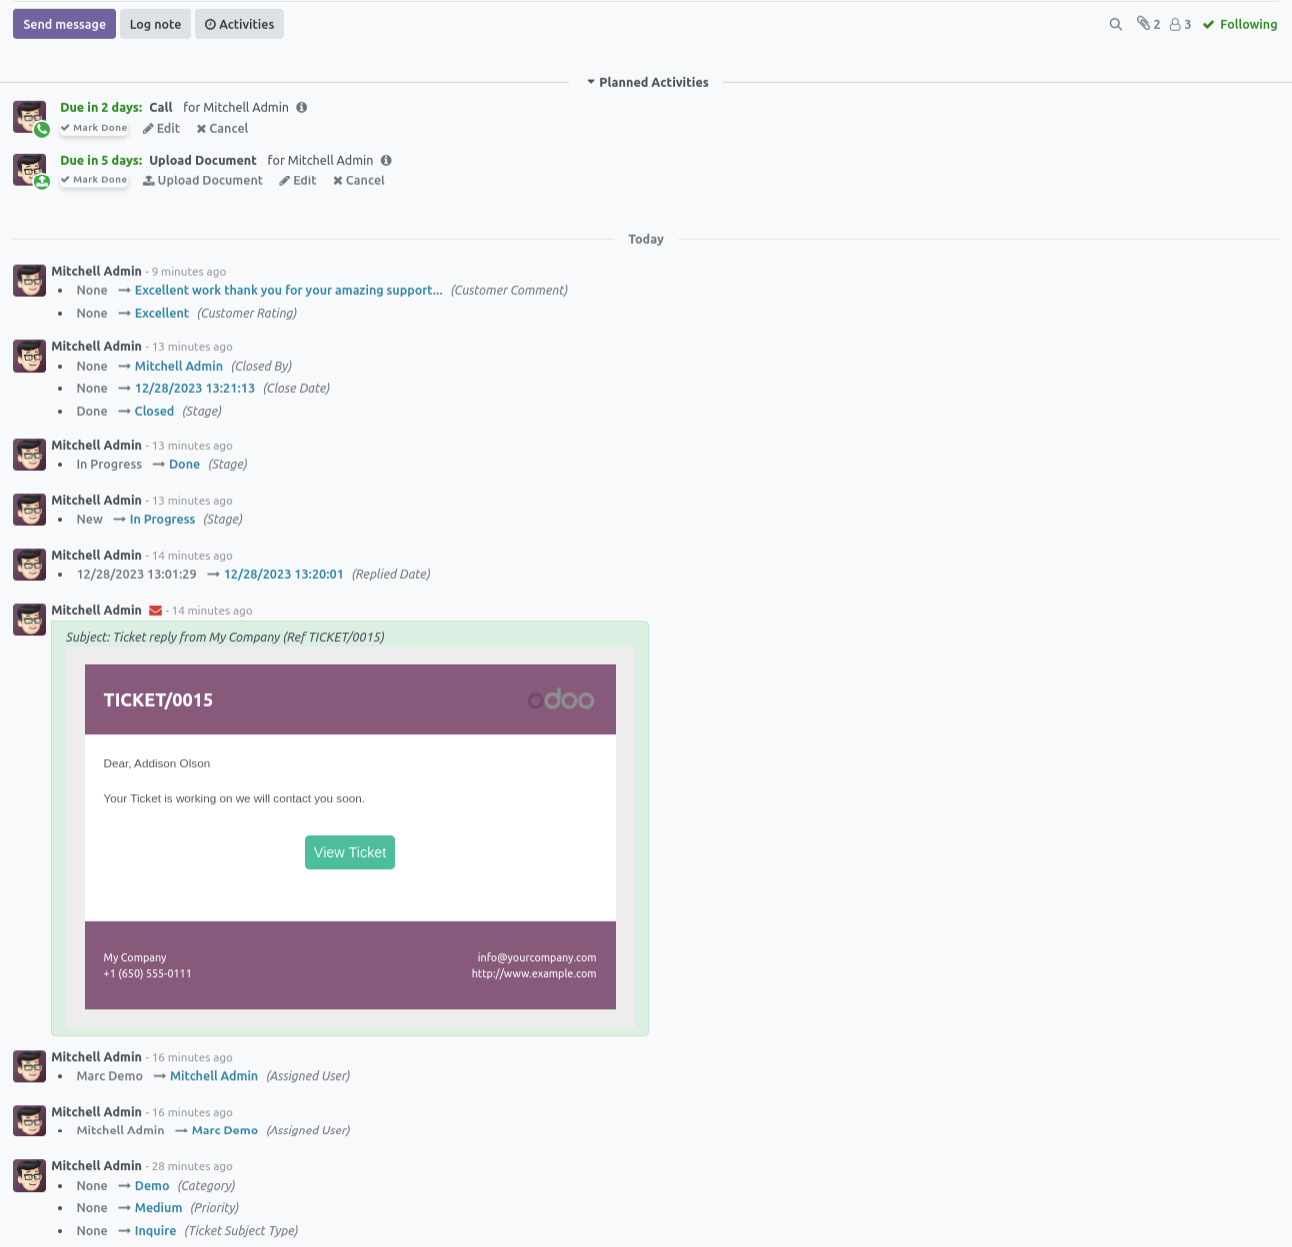
Chat with customer in chatter.
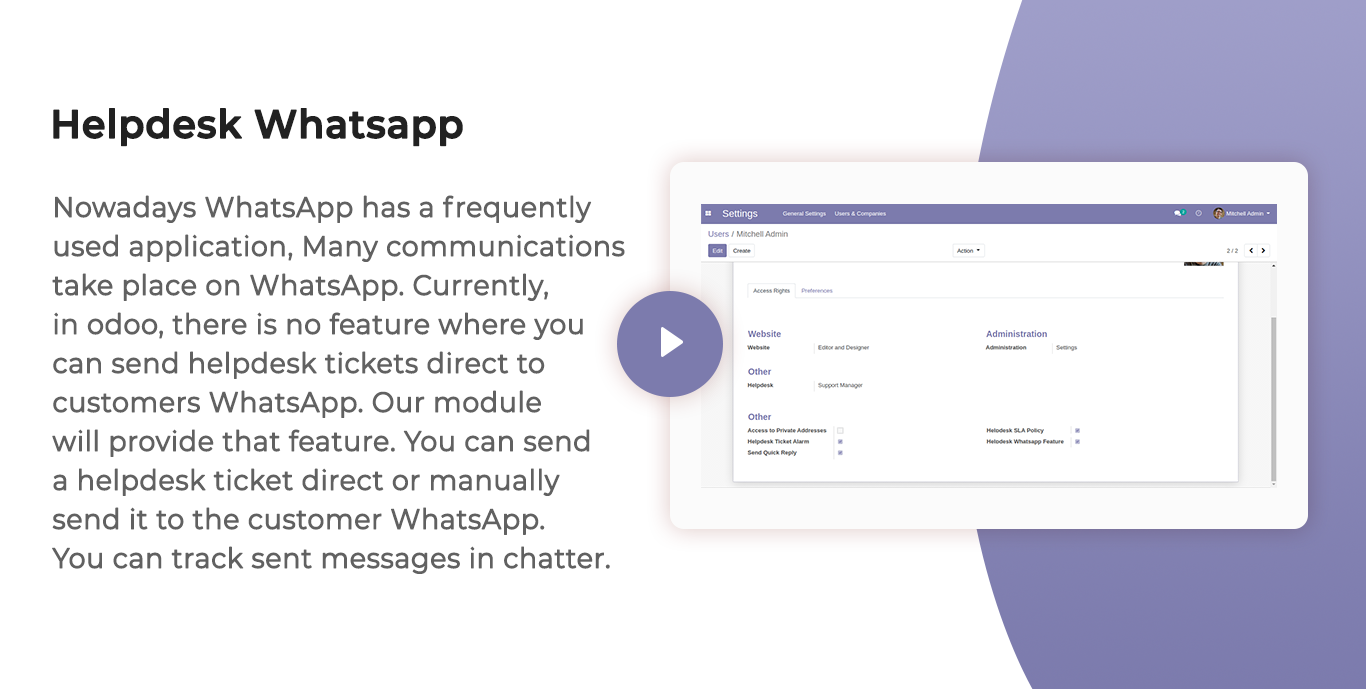
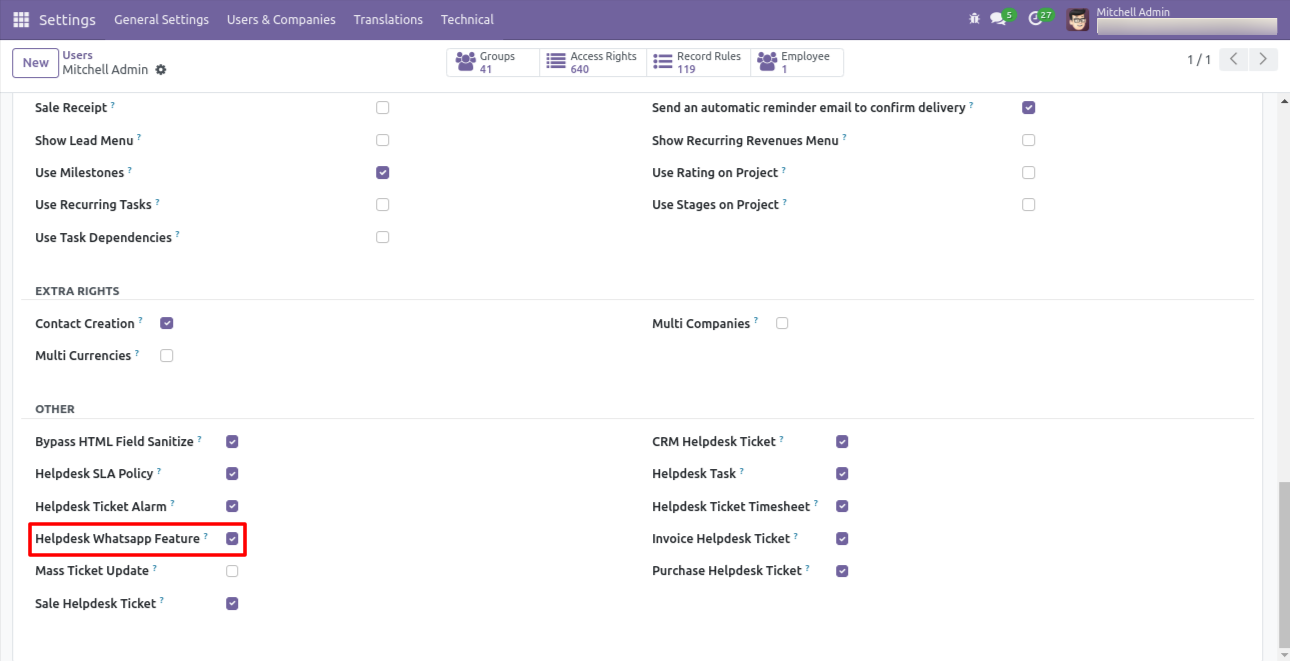
In 'User', enable the 'Helpdesk Whatsapp Feature' option.
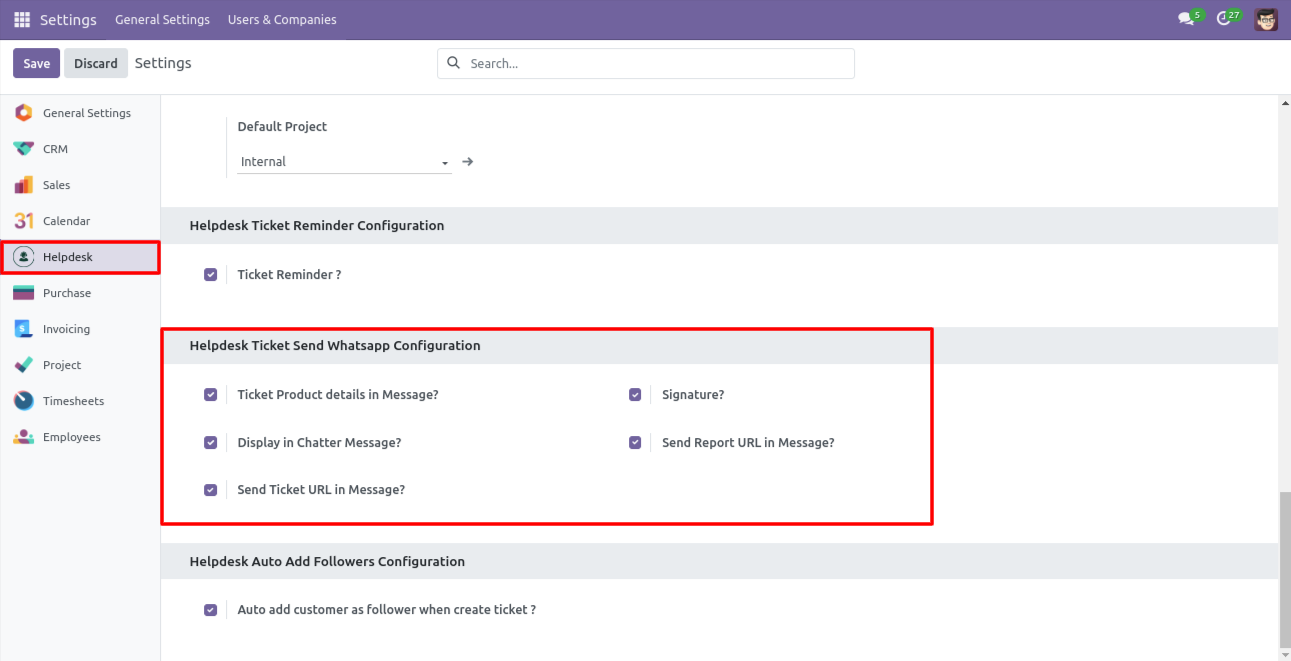
Whatsapp message description with the configuration setting.
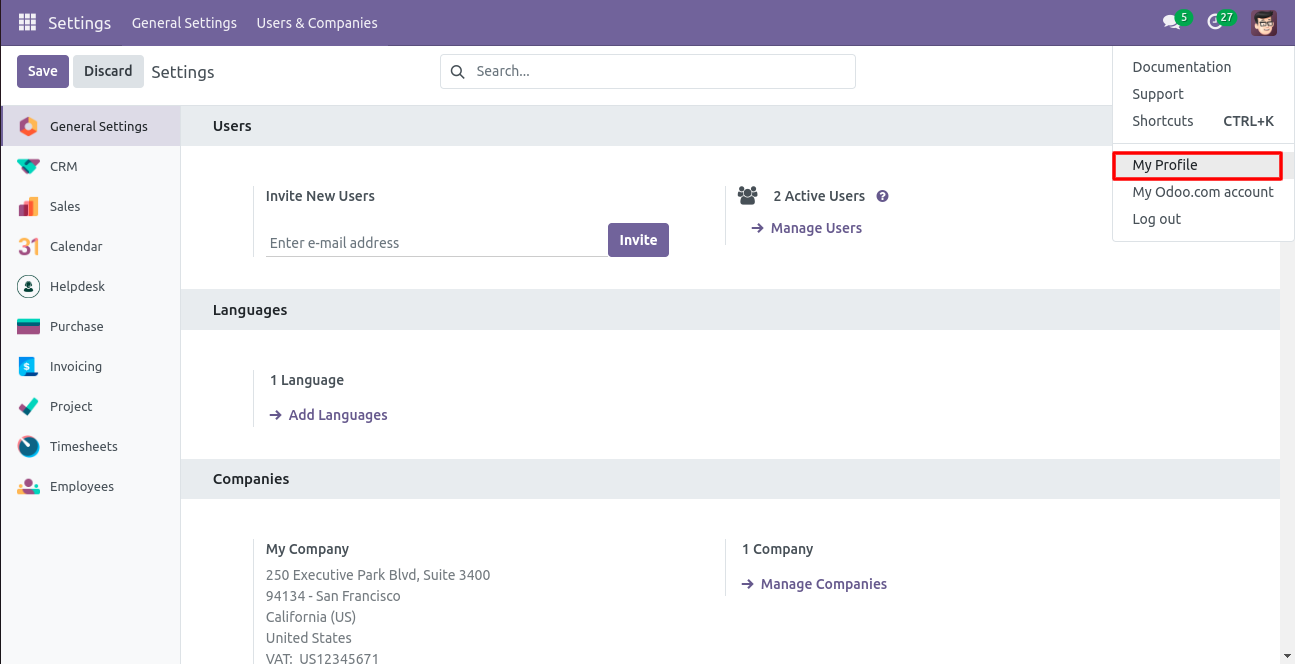
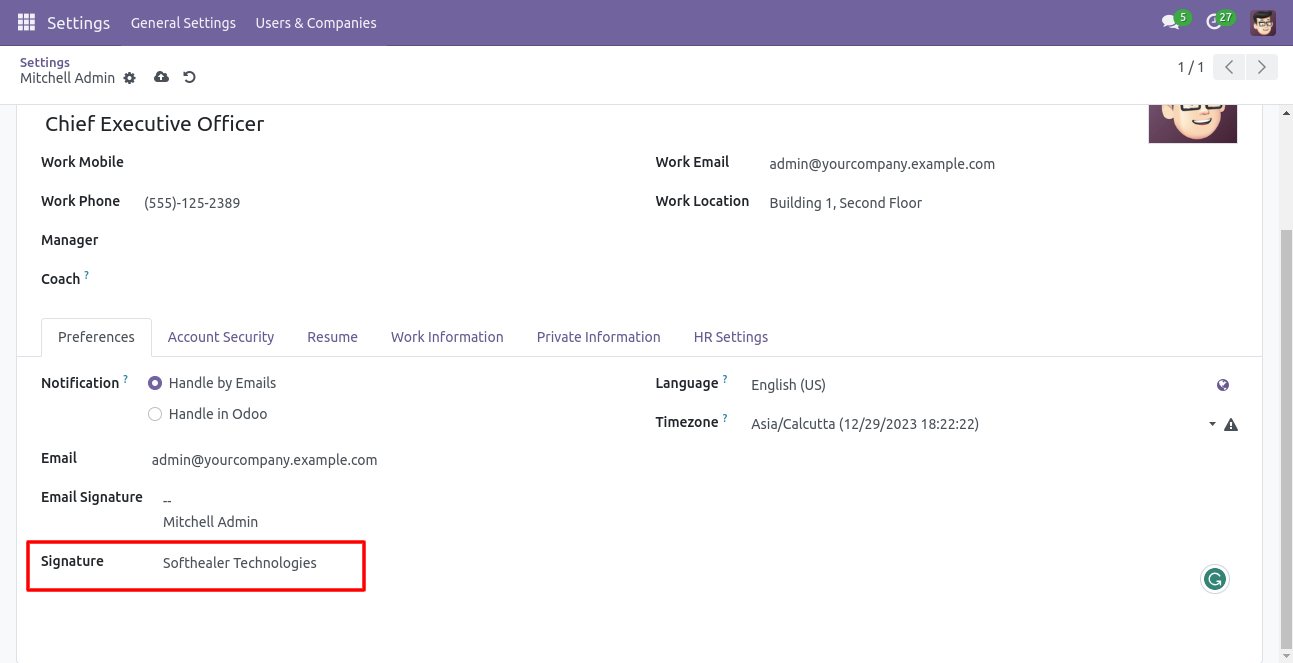
Set the signature in the message,
1) Go to Preferences.
2) Add Signature.
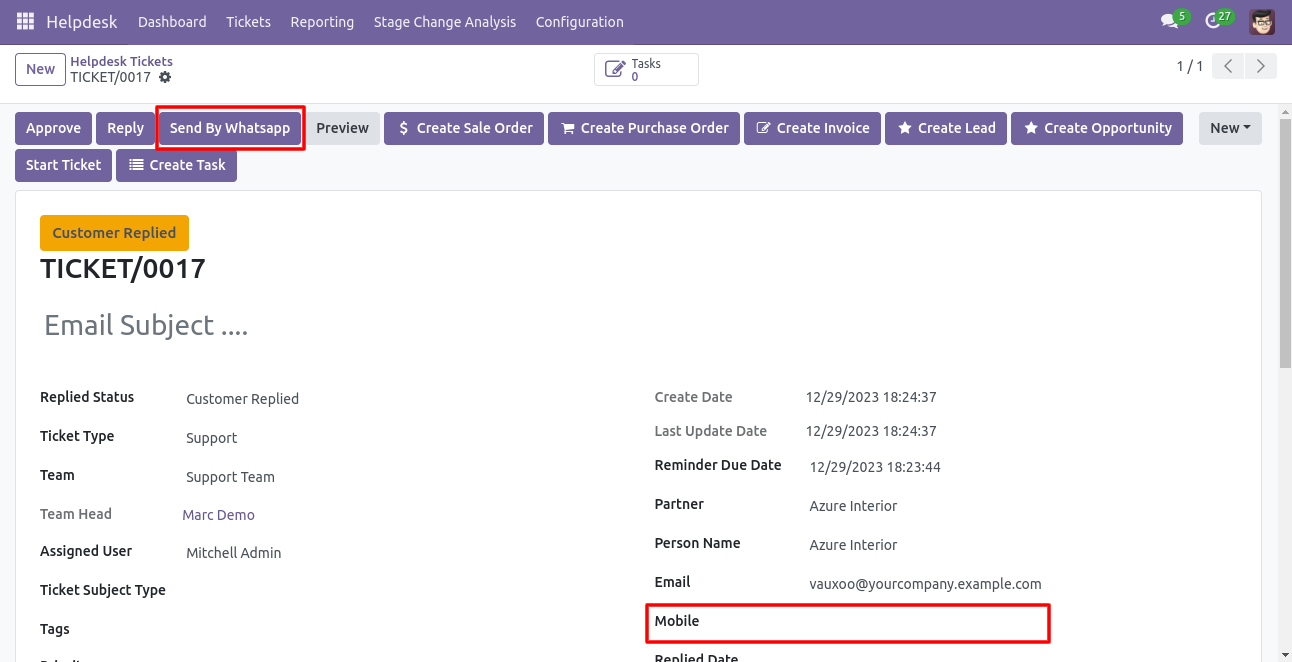
Click 'Send By WhatsApp' Button in helpdesk tickets.
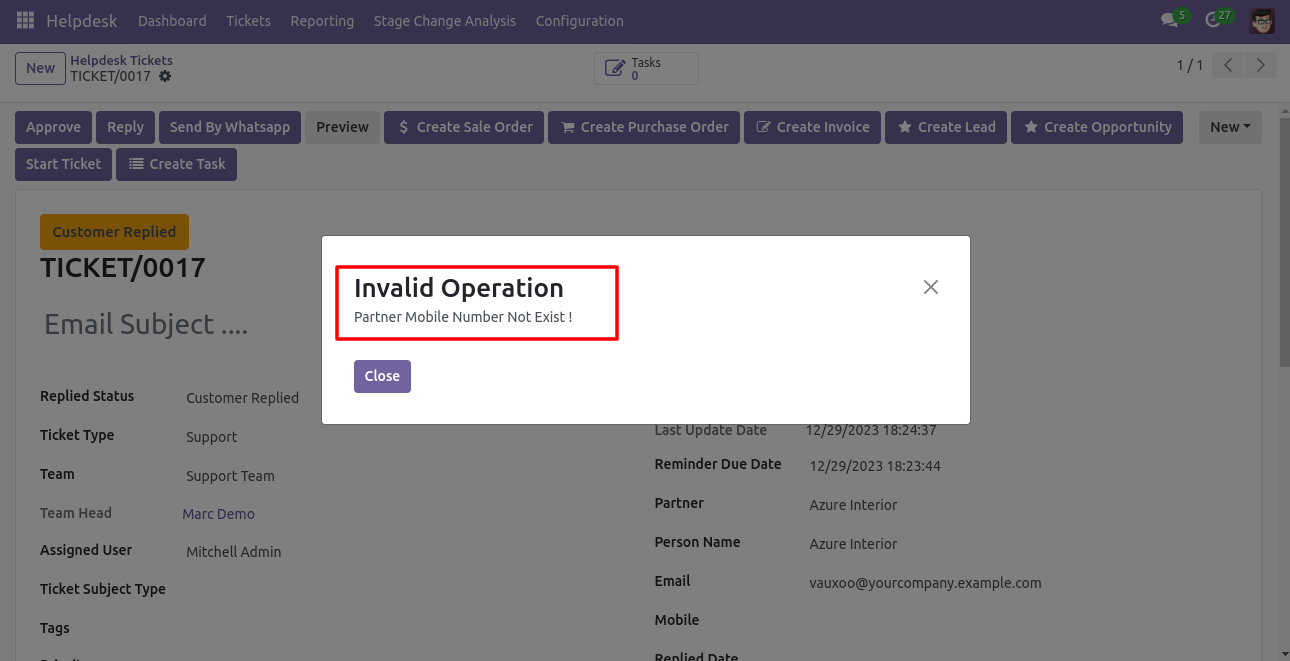
If partner mobile number is not added then this error popup will be appears.
Click 'Send By WhatsApp' Button in helpdesk tickets.
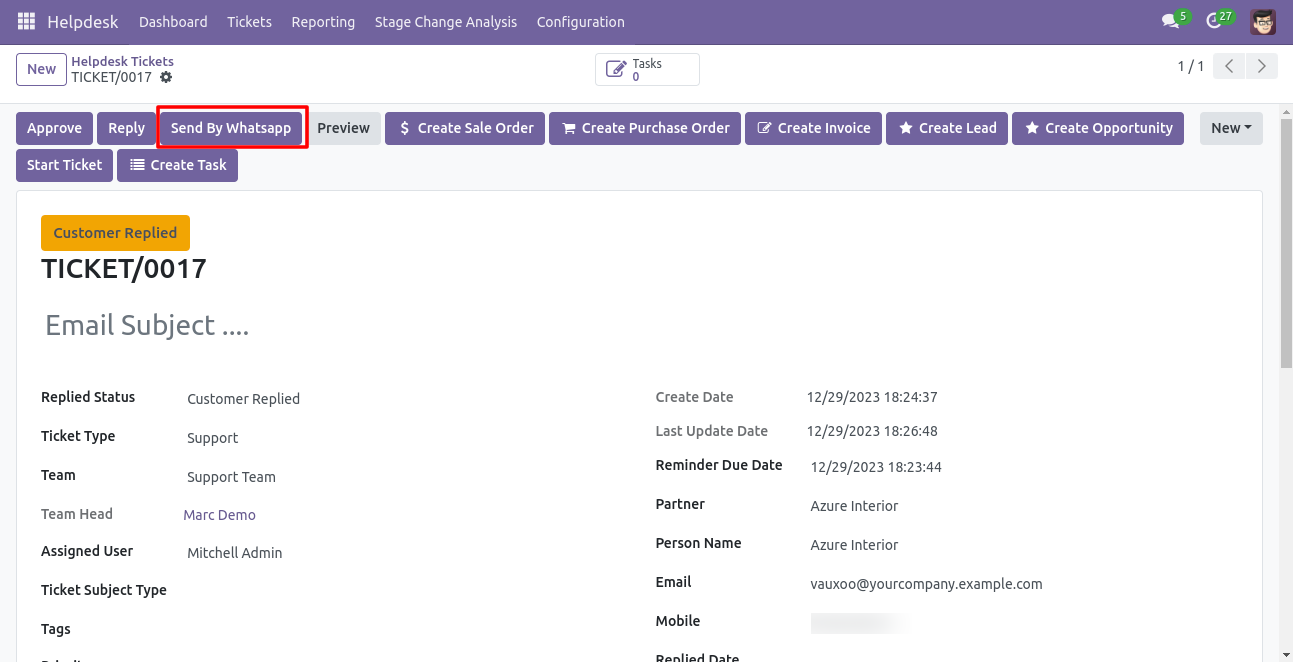
Click on the 'Send By Whatsapp' button.
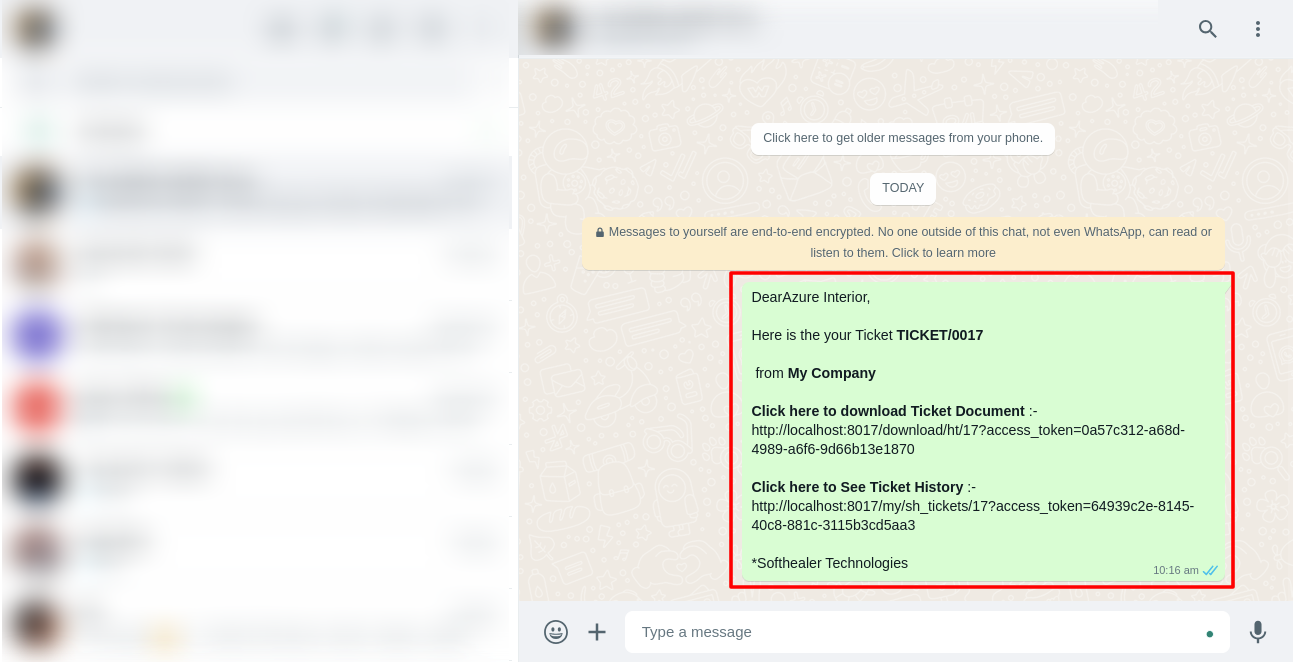
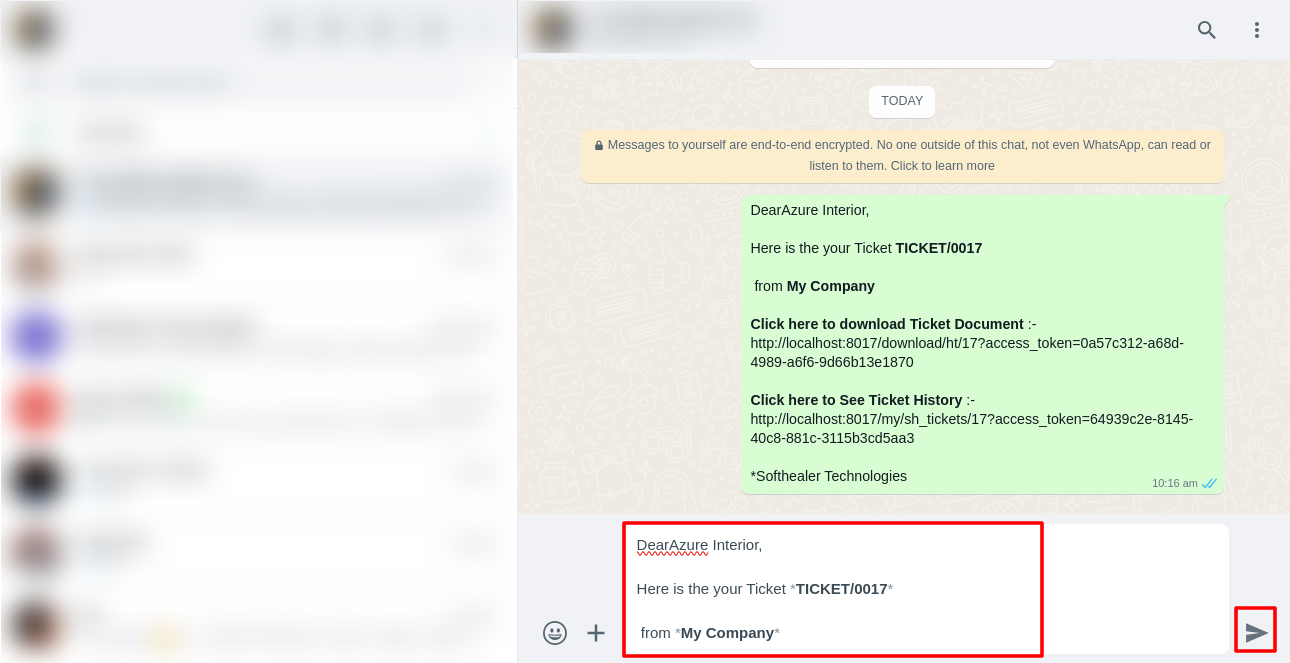
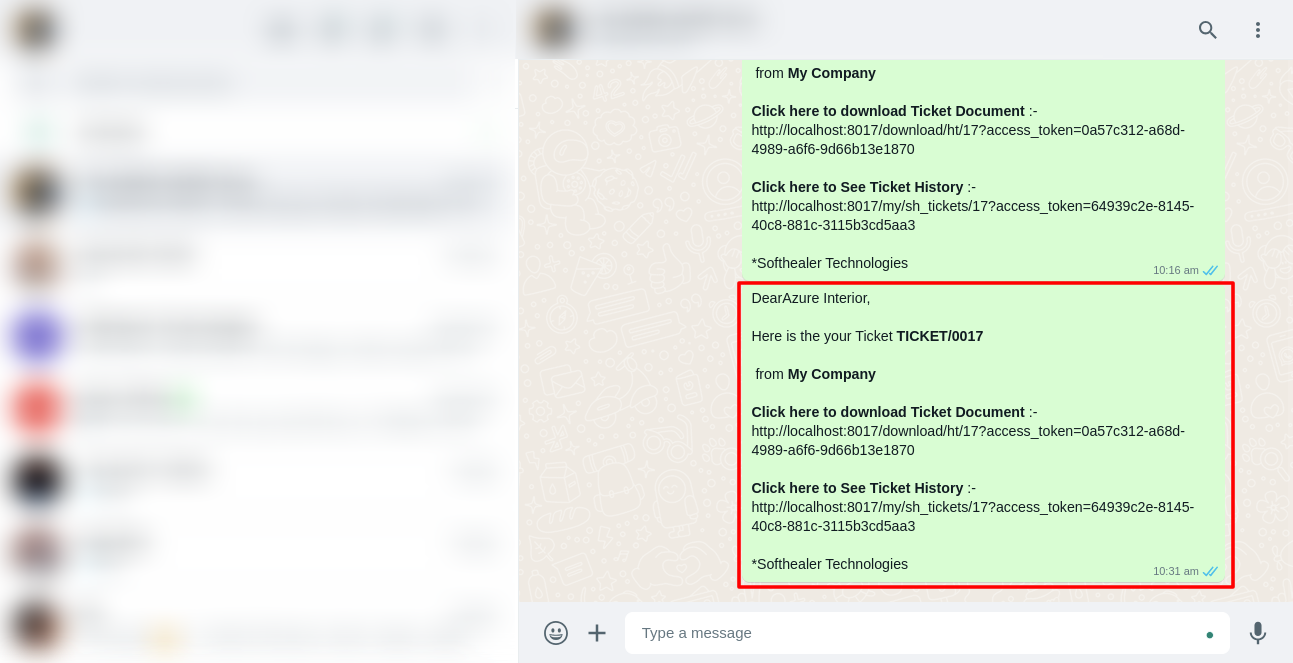
This is the output shown in the WhatsApp messenger.
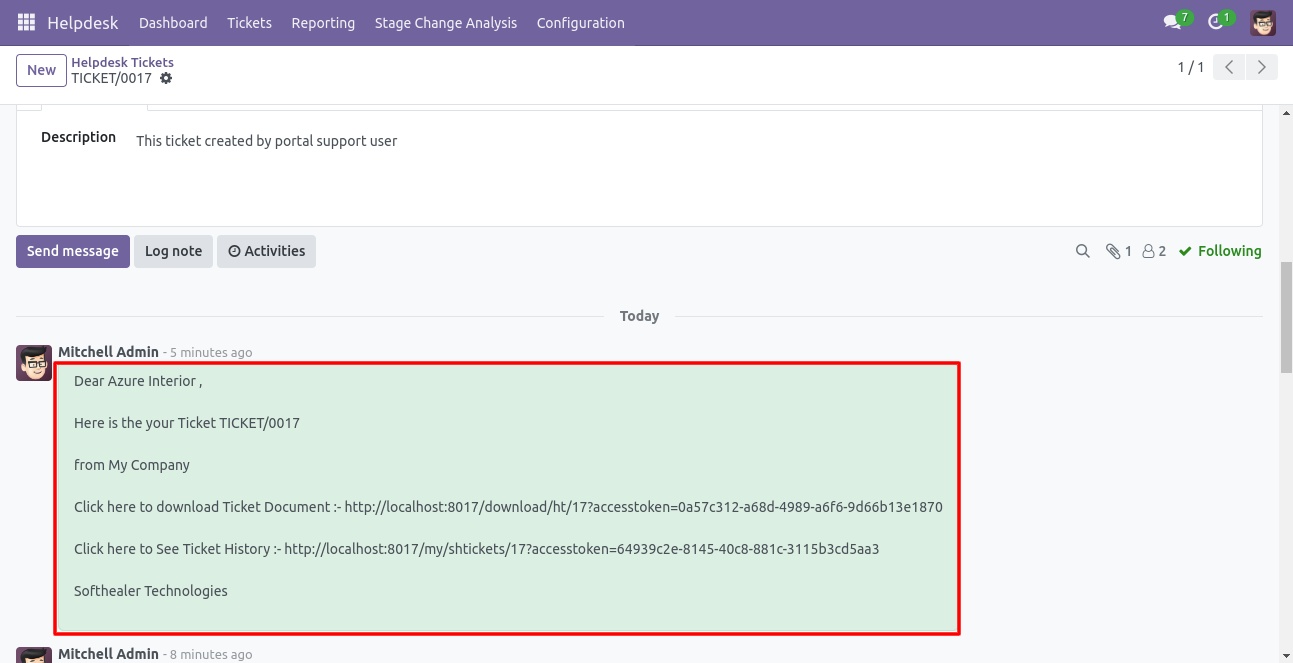
In helpdesk ticket chatter you can see the message which is sent.
You can send a Whatsapp message direct from the dashboard.
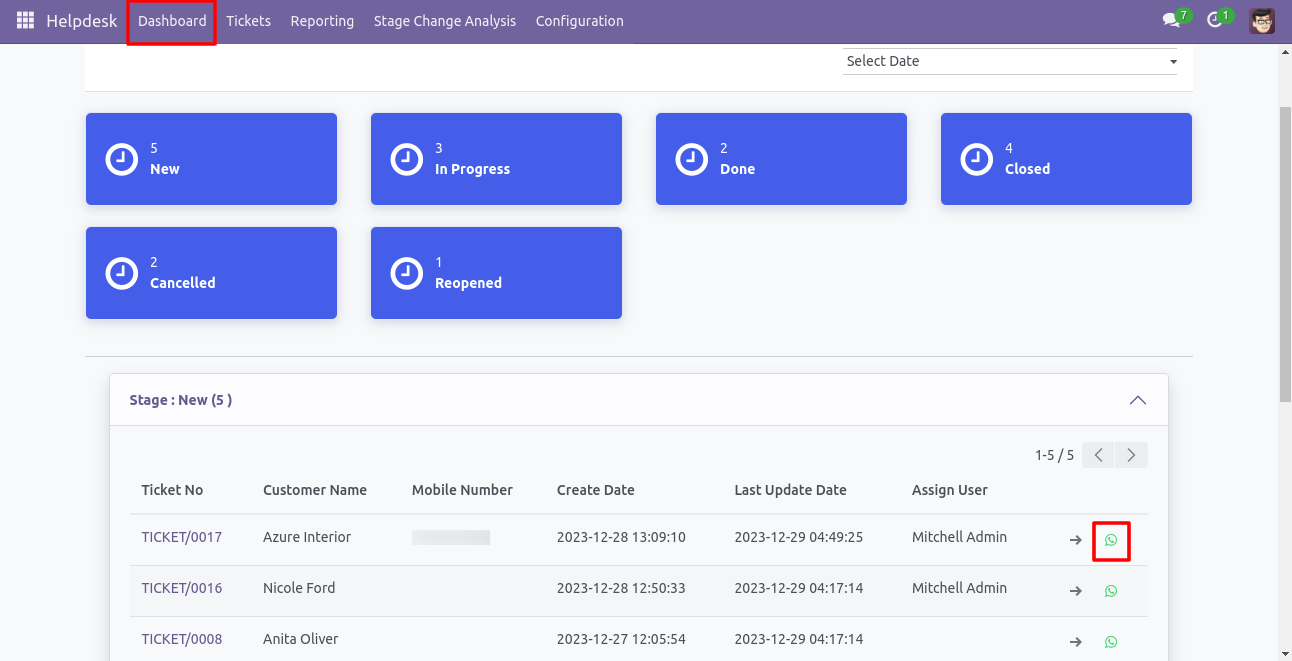
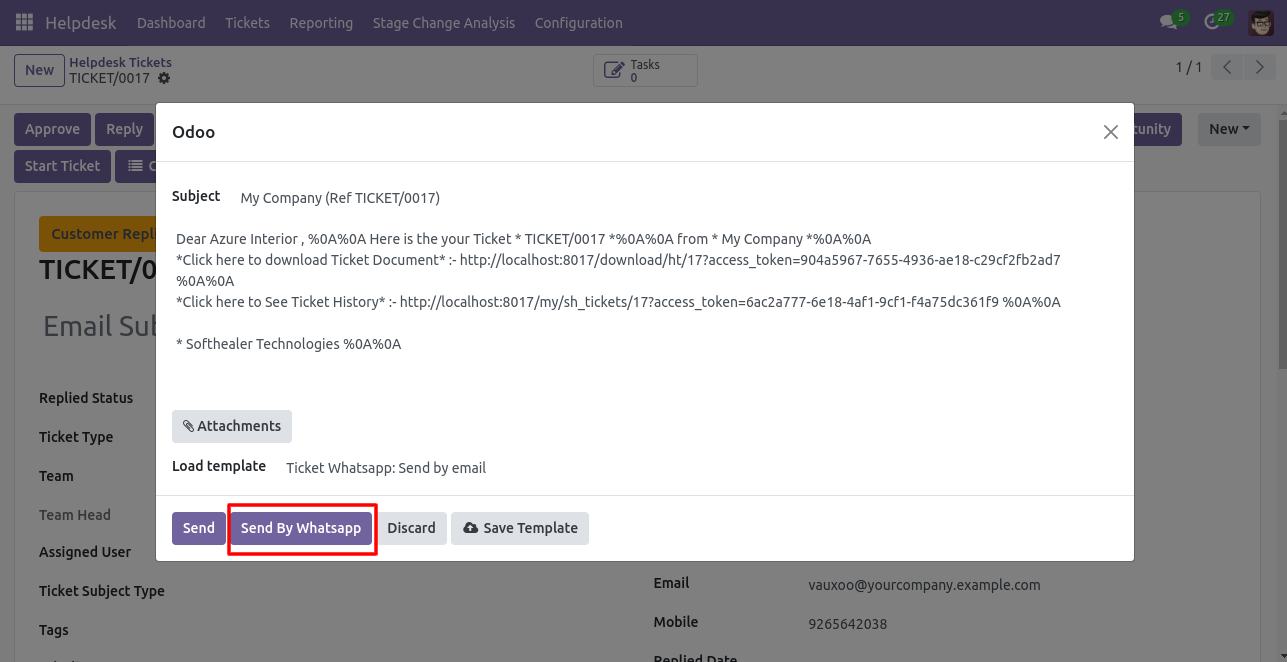
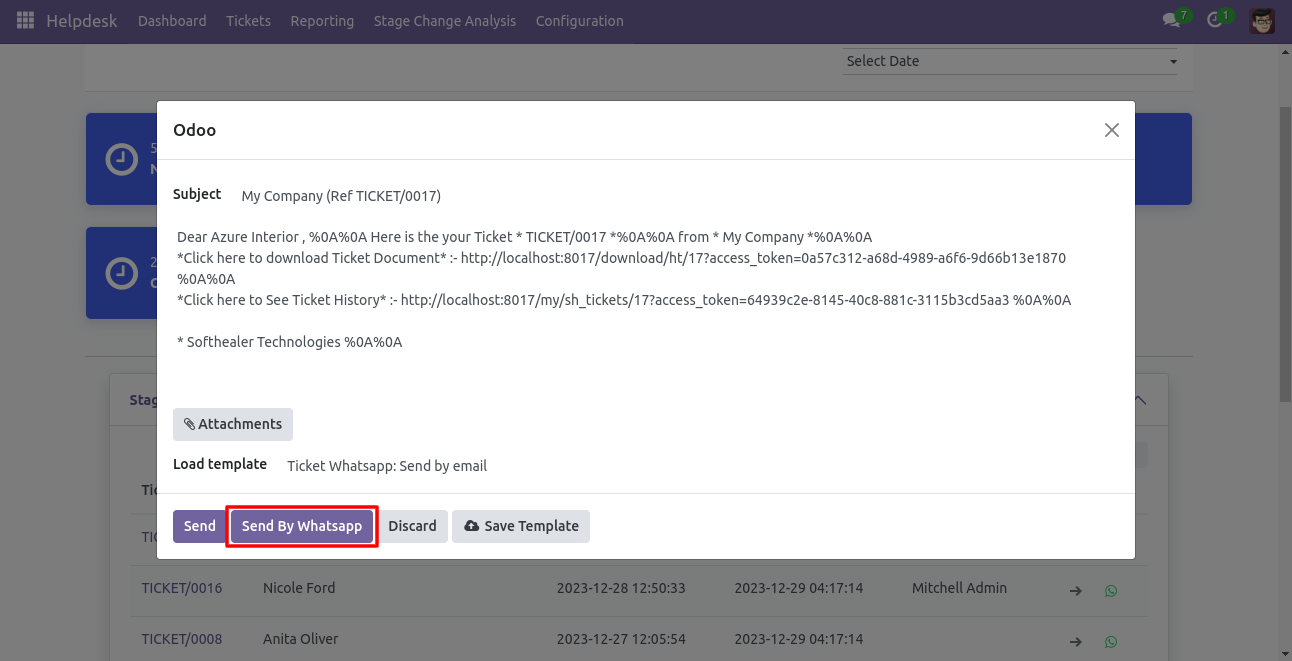
After that one wizard opens, select details and press 'Send by whatsapp'.
This is the output shown in the WhatsApp messenger.
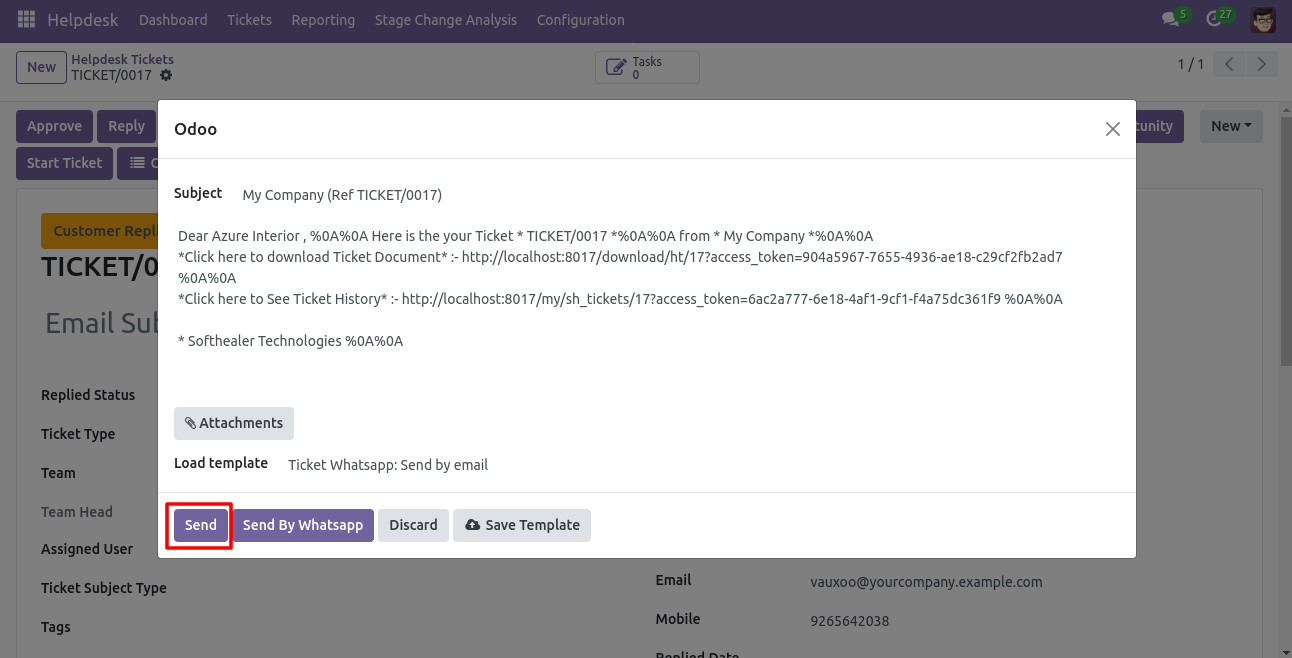
When you click 'Send By WhatsApp' Button in helpdesk tickets, this wizard opens choose details and if you click send then mail is sent. If you click send by WhatsApp it sends the message on WhatsApp.
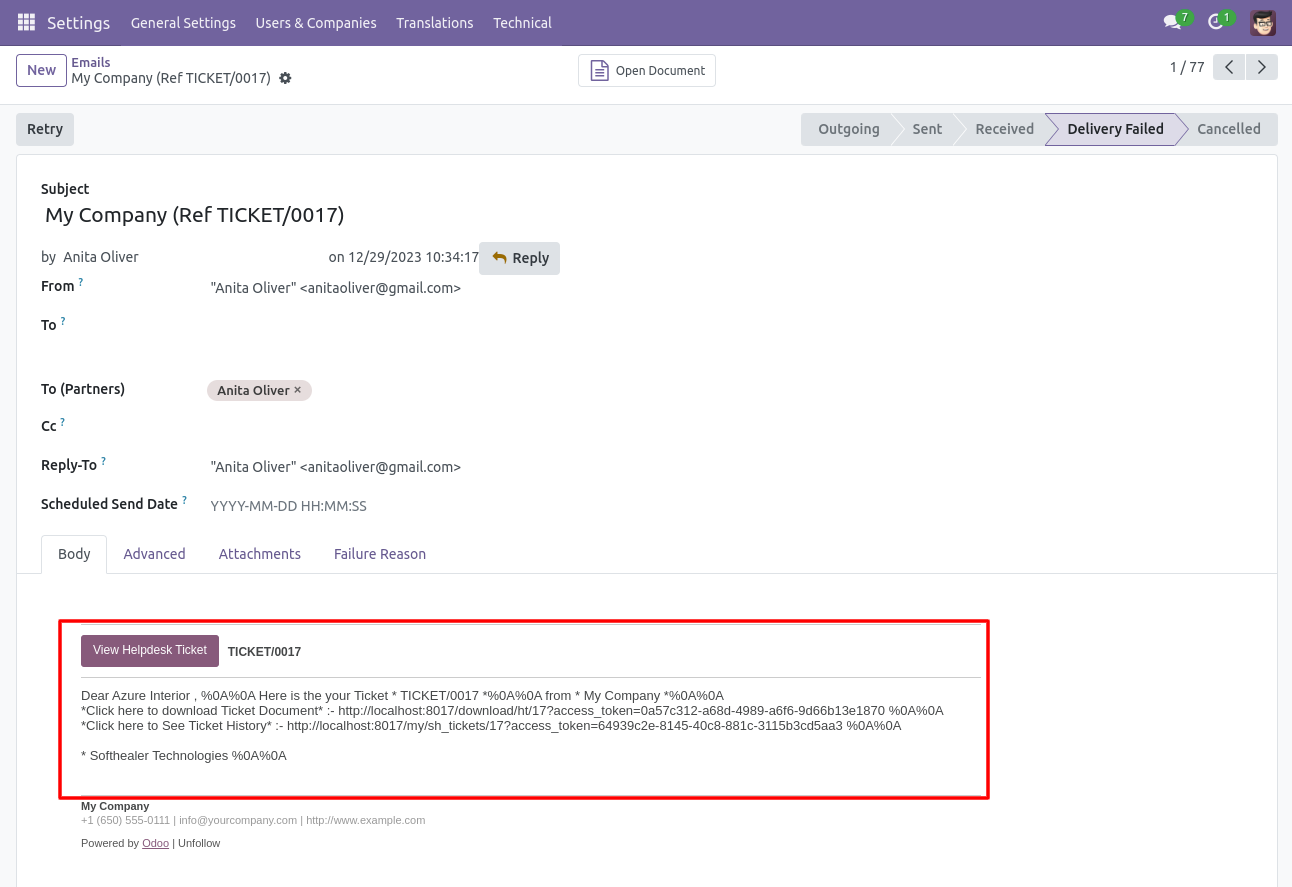
The sent email looks like this.
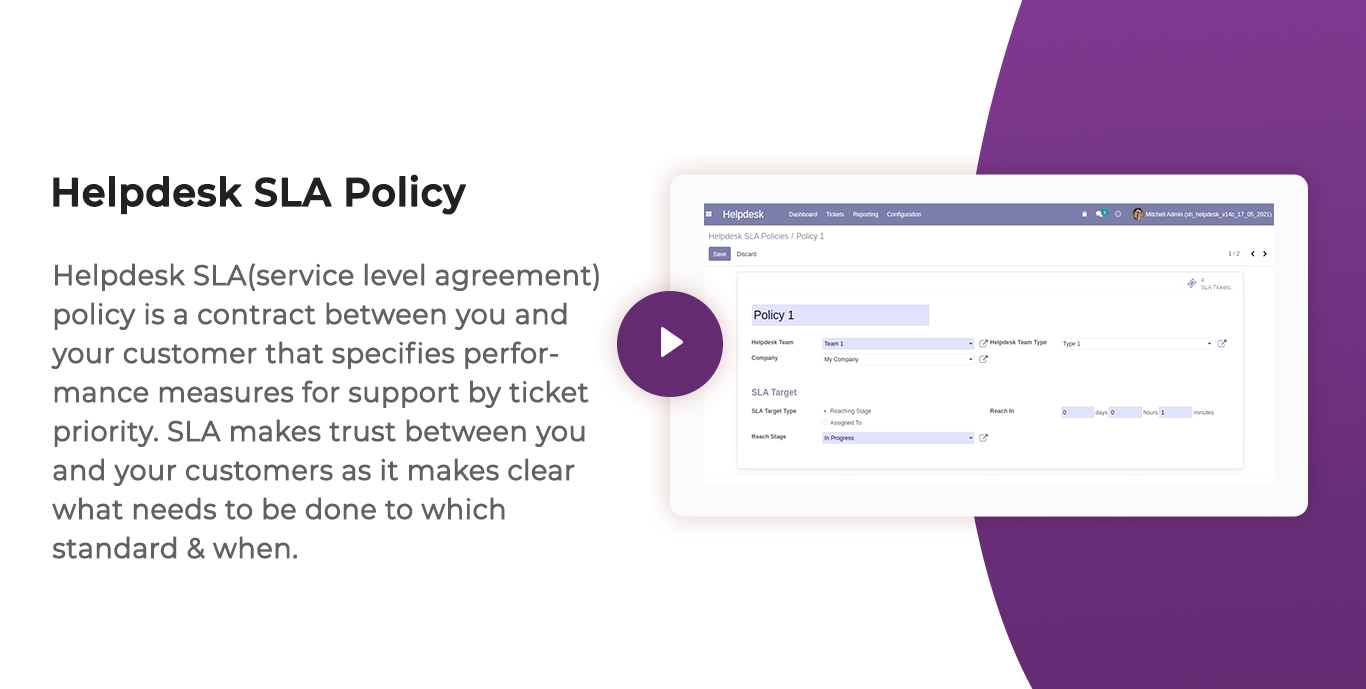
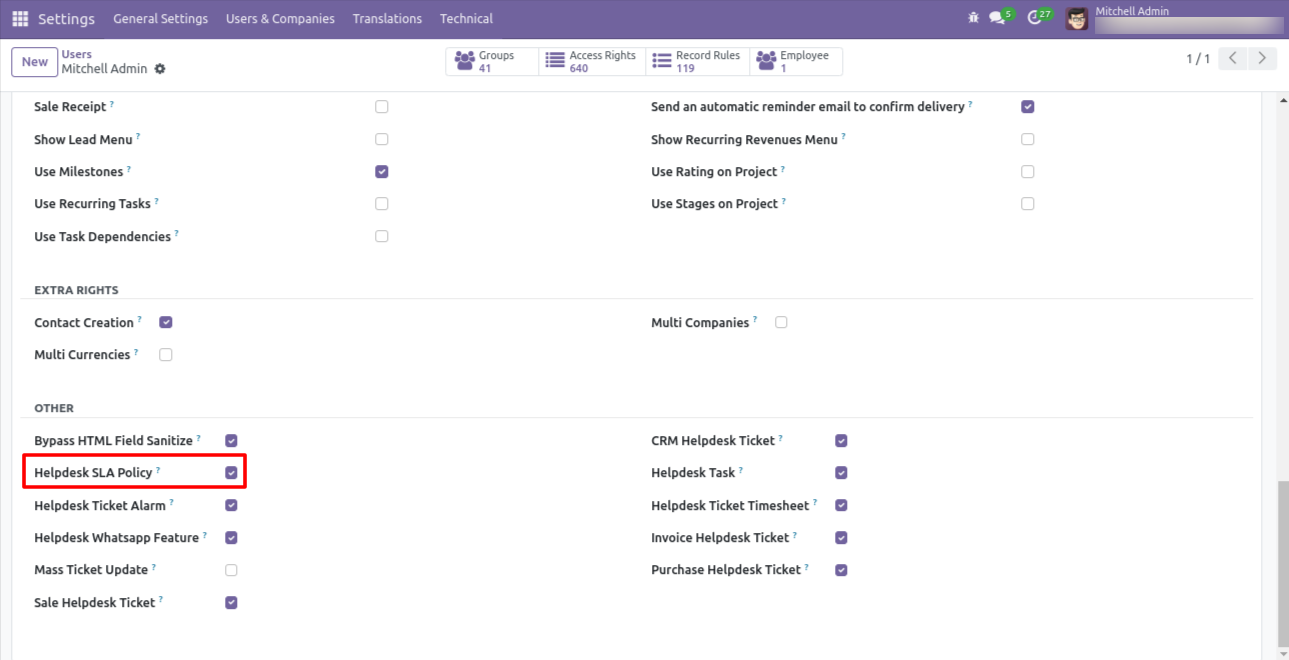
Helpdesk SLA Policy group.
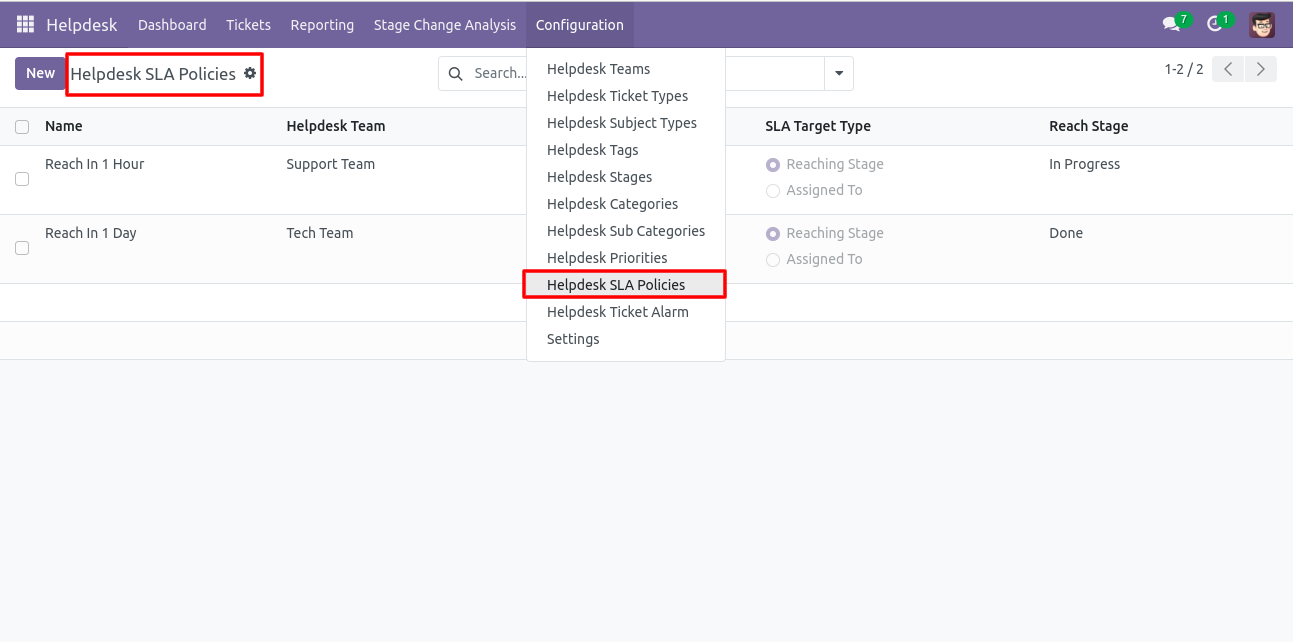
Go to the configuration => 'Helpdesk SLA Policies'.
The 'Helpdesk SLA Policy' form view looks like this.
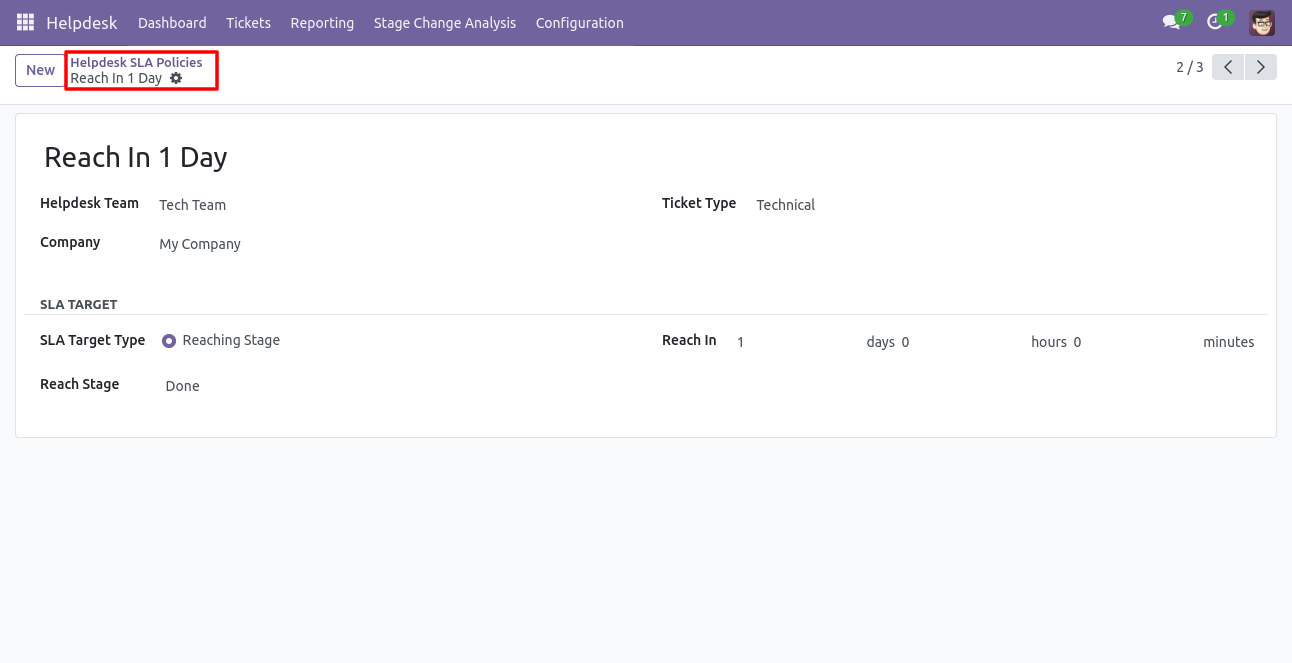
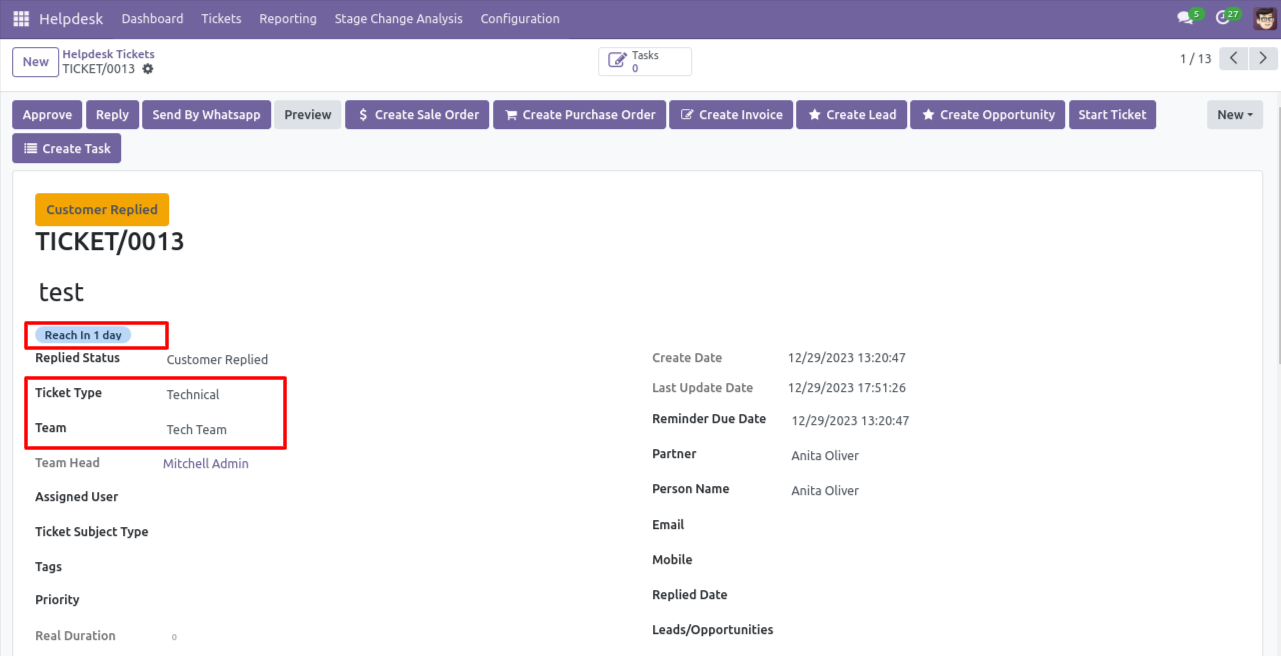
'SLA Tickets' form view looks like this.
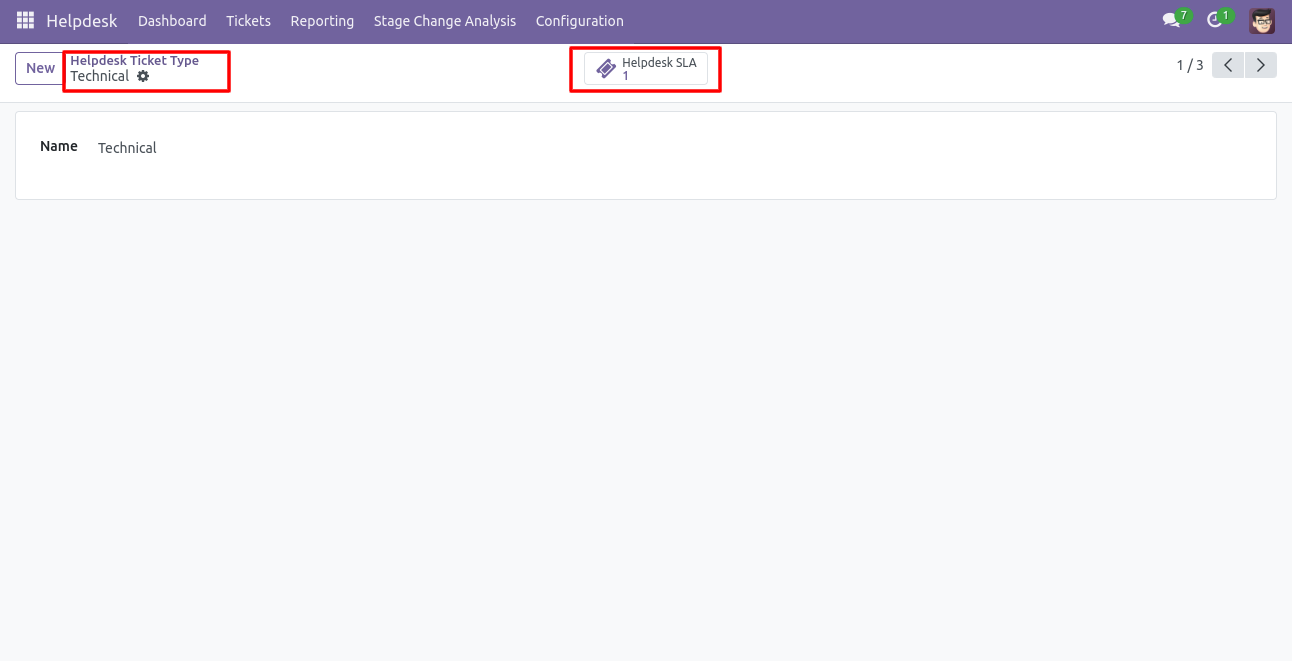
You can see helpdesk SLA tickets also from the helpdesk ticket types using the smart button 'Helpdesk SLA'.
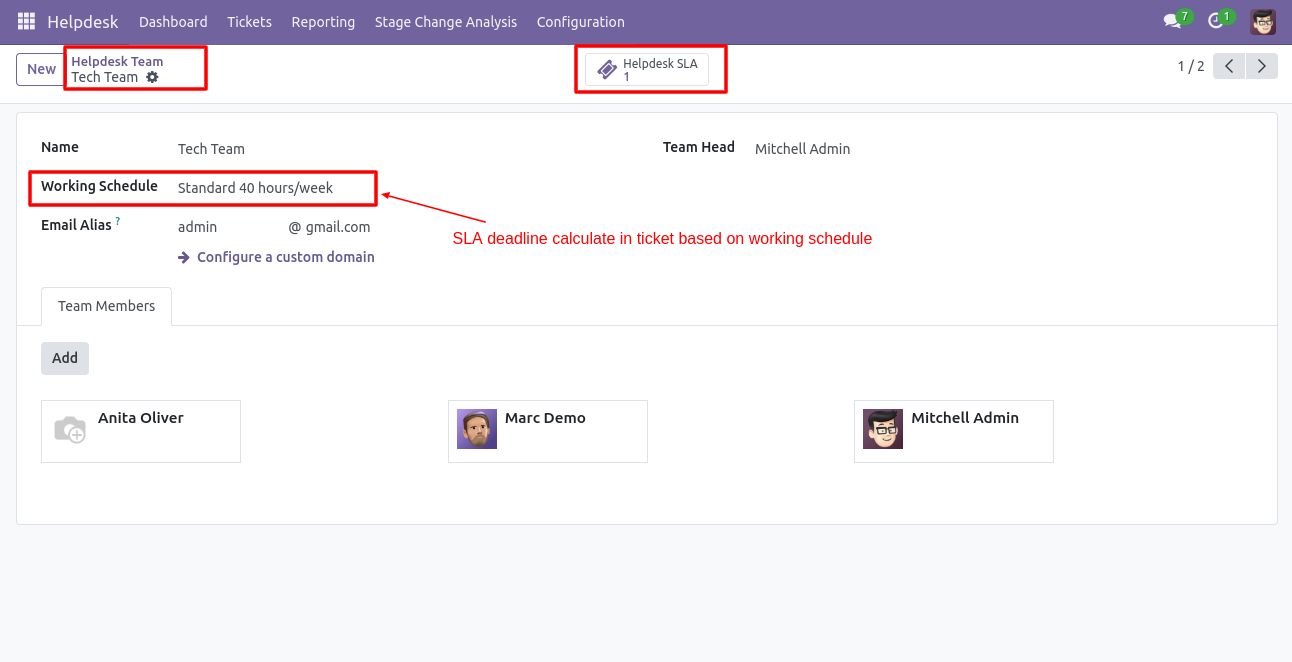
'Helpdesk Teams' form view. Where you can define working schedule as well as see helpdesk SLA ticket using the smart button 'Helpdesk SLA'.
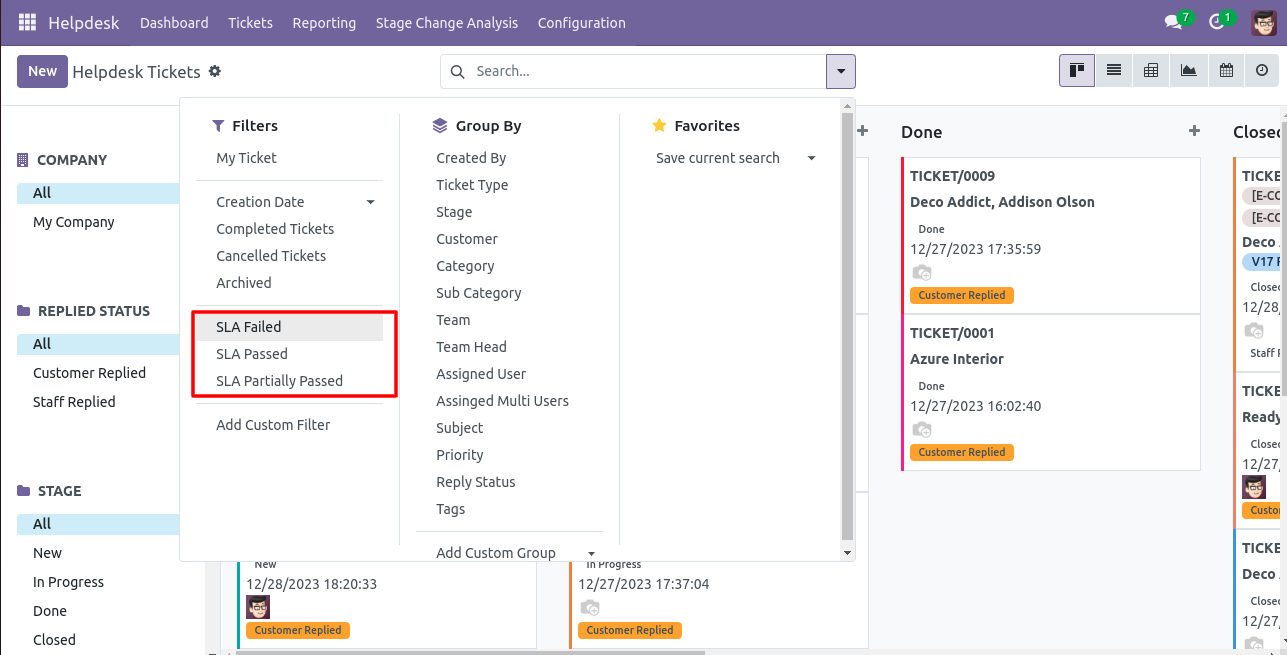
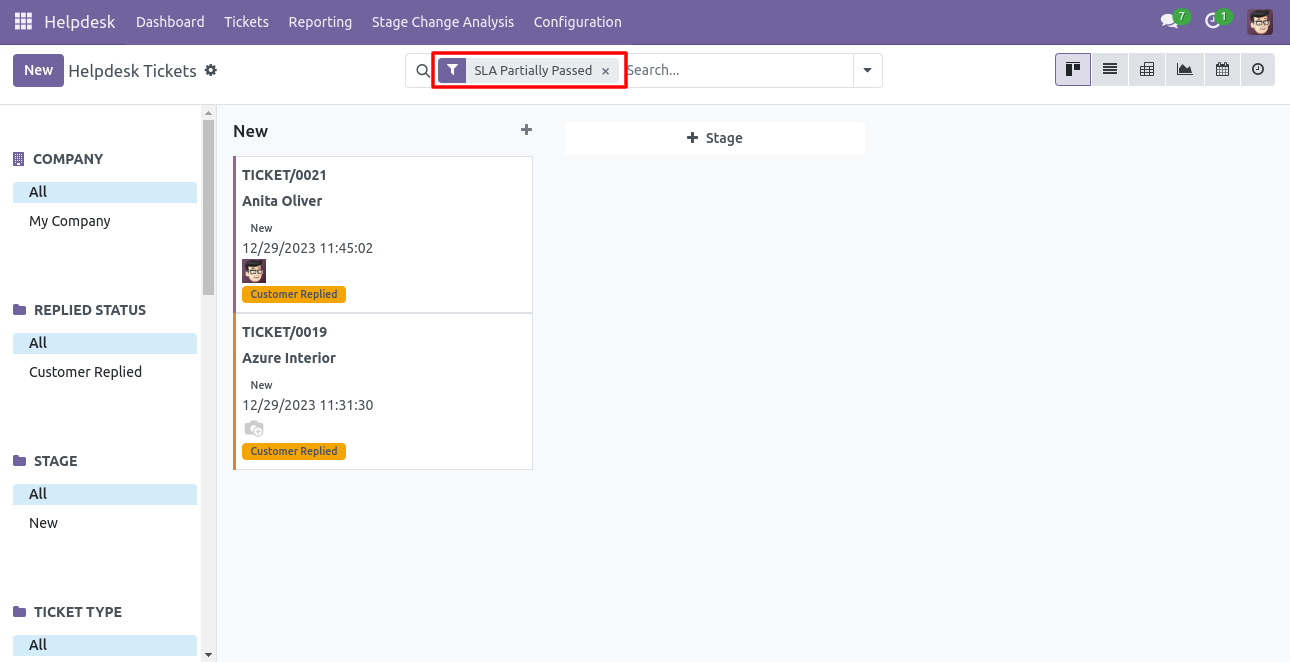
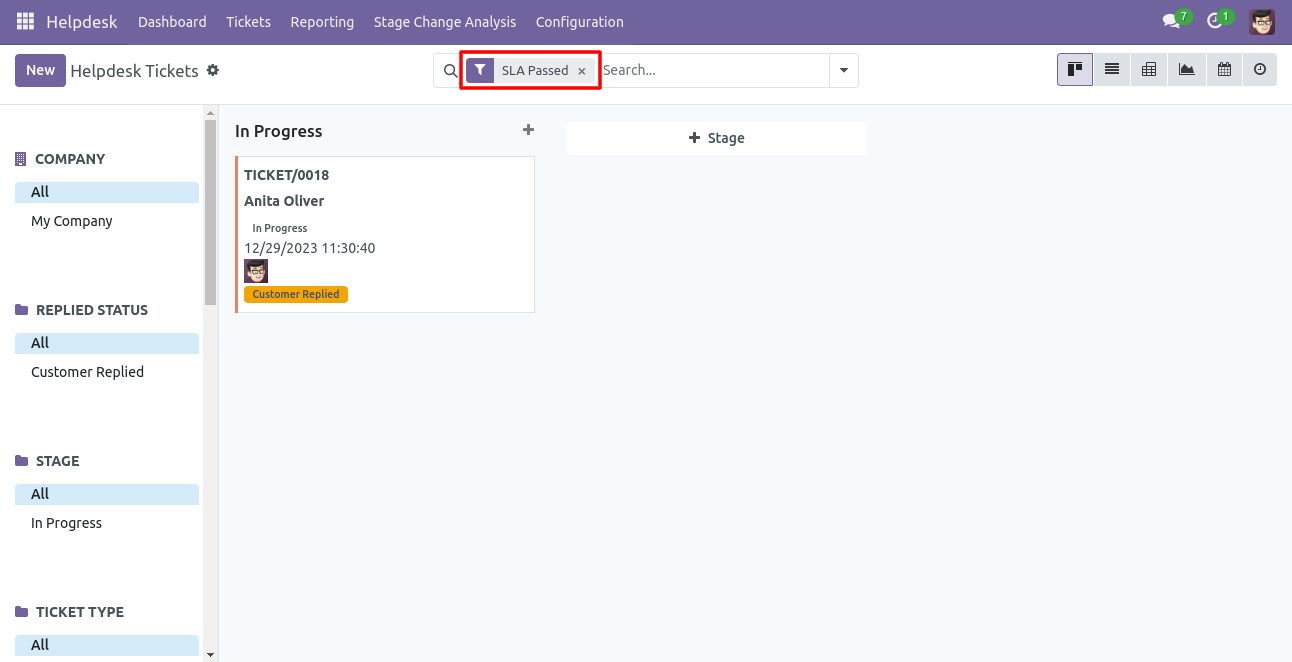
The search panel in the helpdesk tickets looks like this, you
can filter SLA
using different filters.
Note: Search panel and multi-edit option available in
only v13,v14 &
v15.
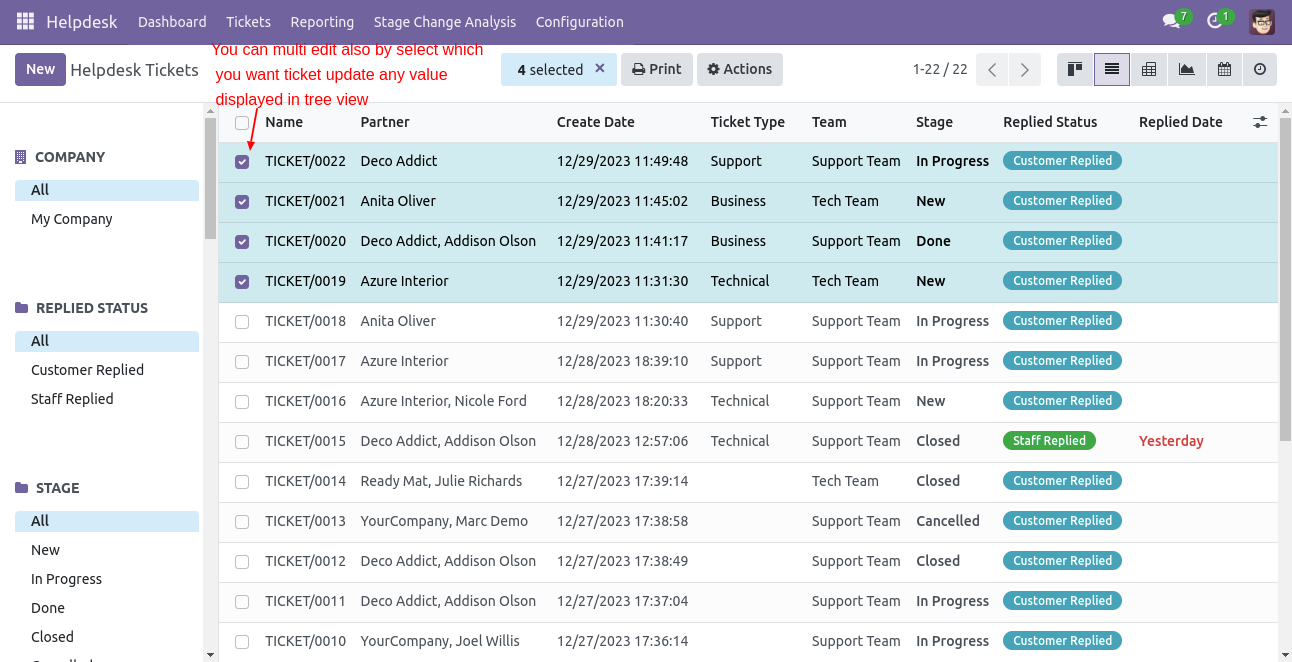
You can edit multiple records from the helpdesk tickets list
view.
Note: Search panel and multi-edit option available in
only v13,v14 &
v15.
'Helpdesk Ticket' form view, create a ticket and save it.
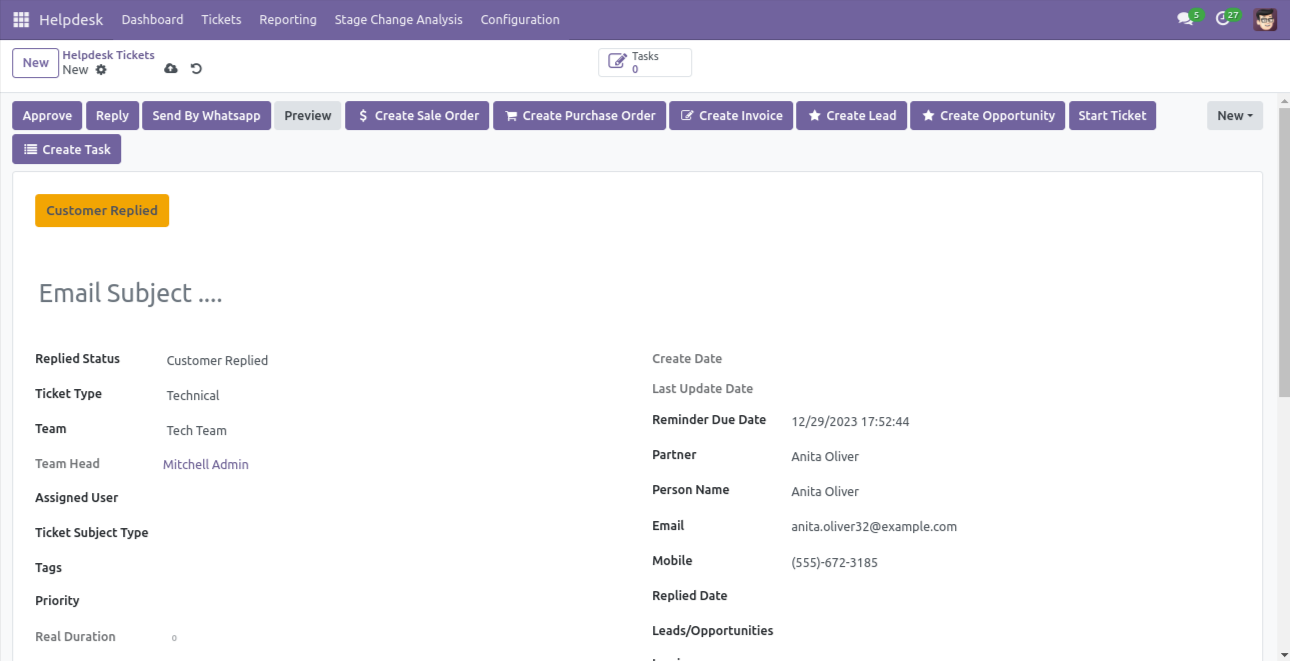
In the helpdesk ticket form view, you can see SLA deadline, Now we press the 'Approve' button.
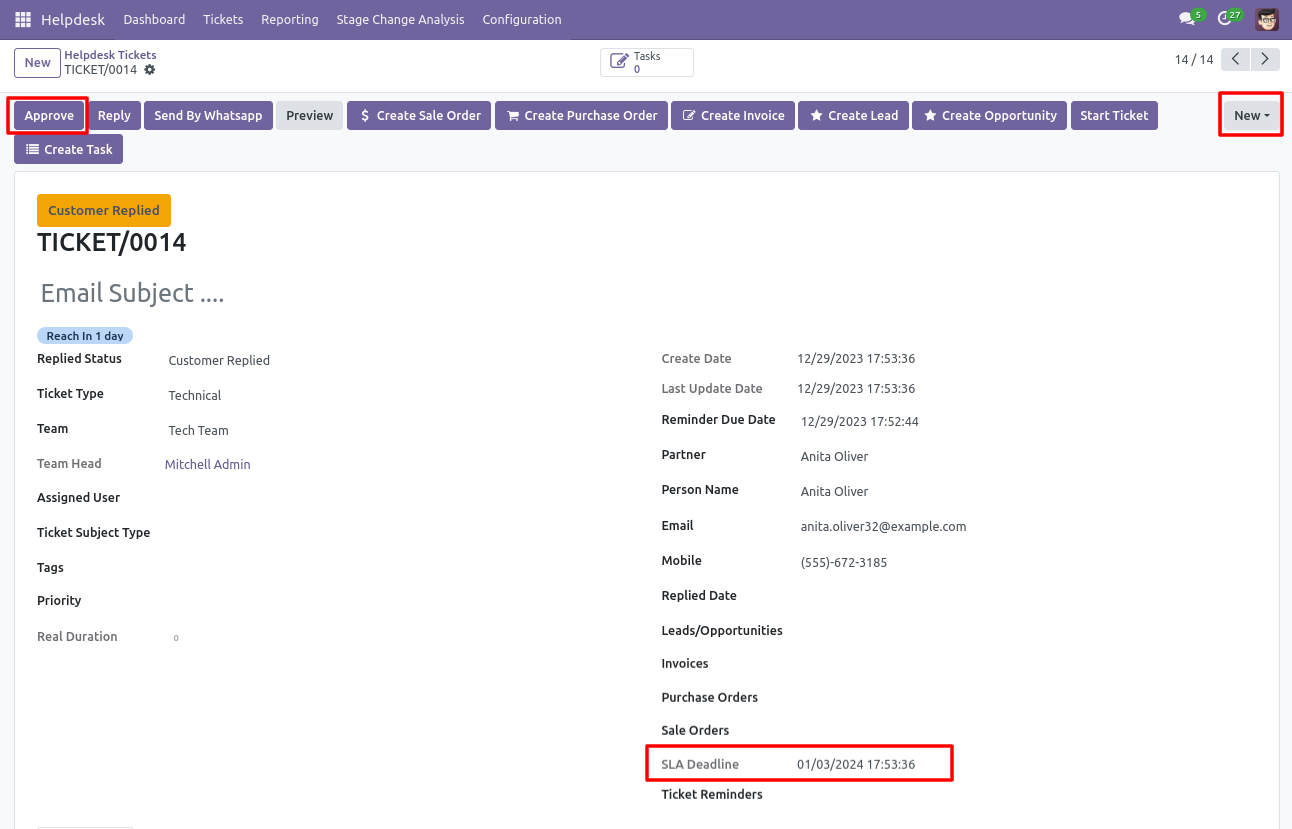
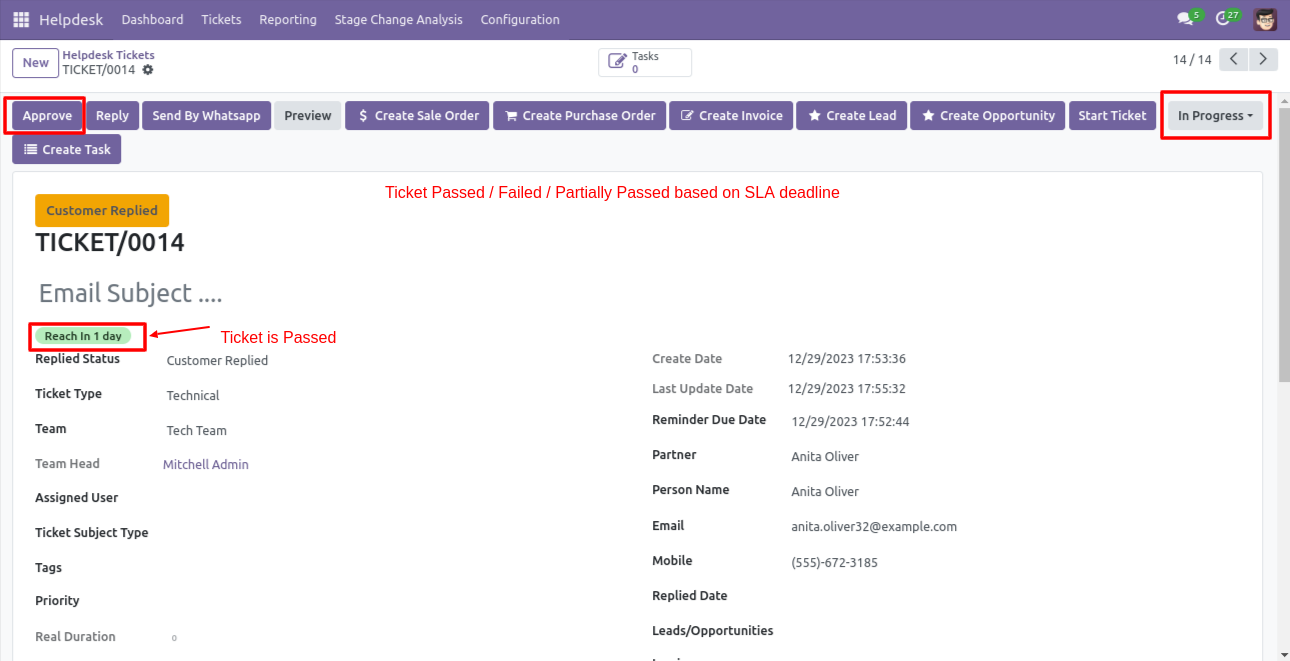
When press on the 'Approve' button and all policies are approved then stage change to 'Done'.
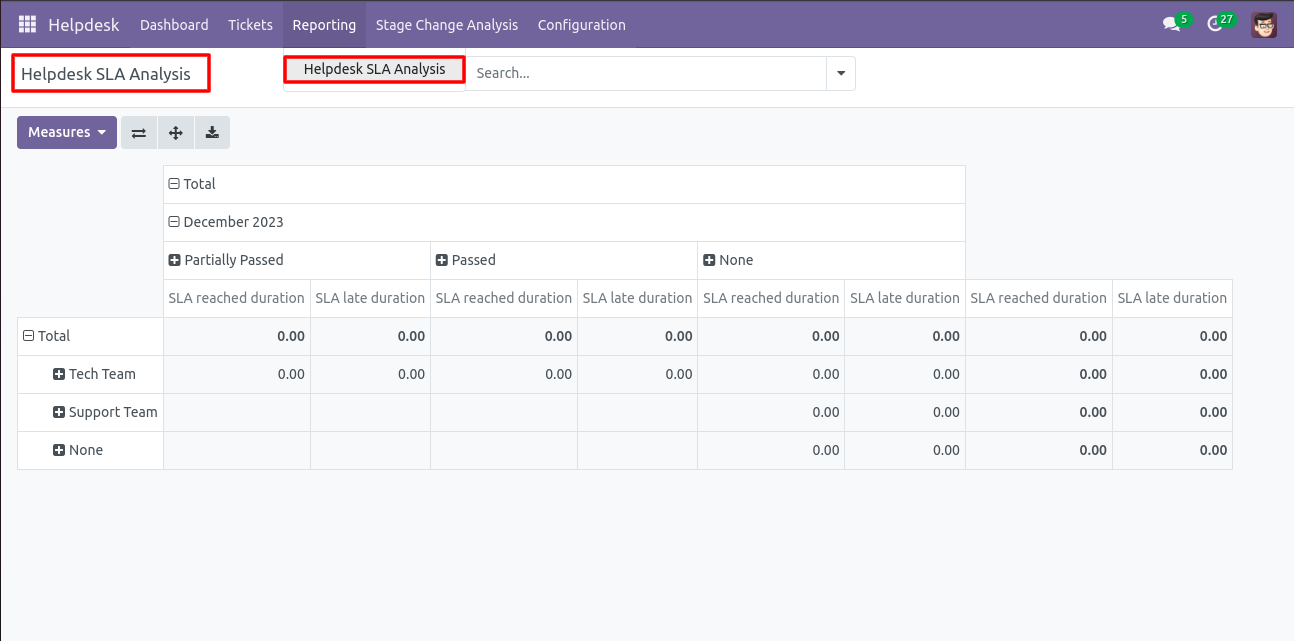
You can do helpdesk SLA analysis from the 'Reporting' menu.
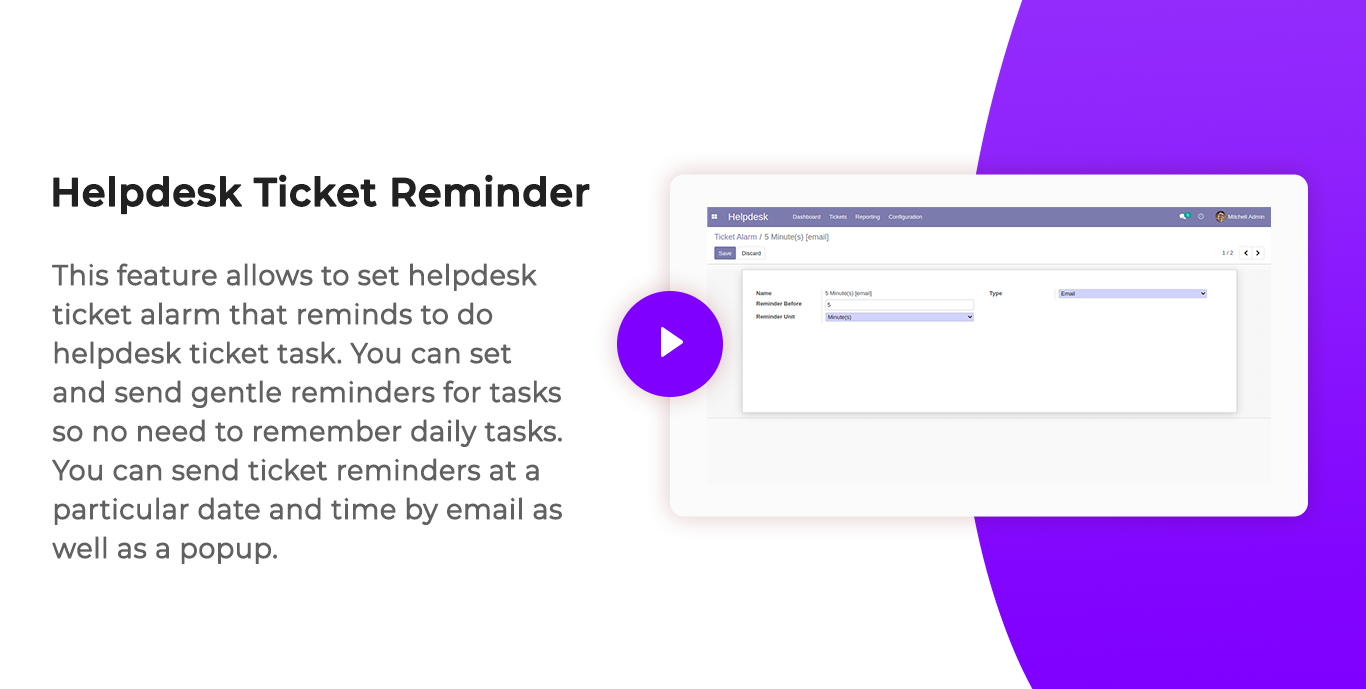
Enable 'Ticket Reminder'.
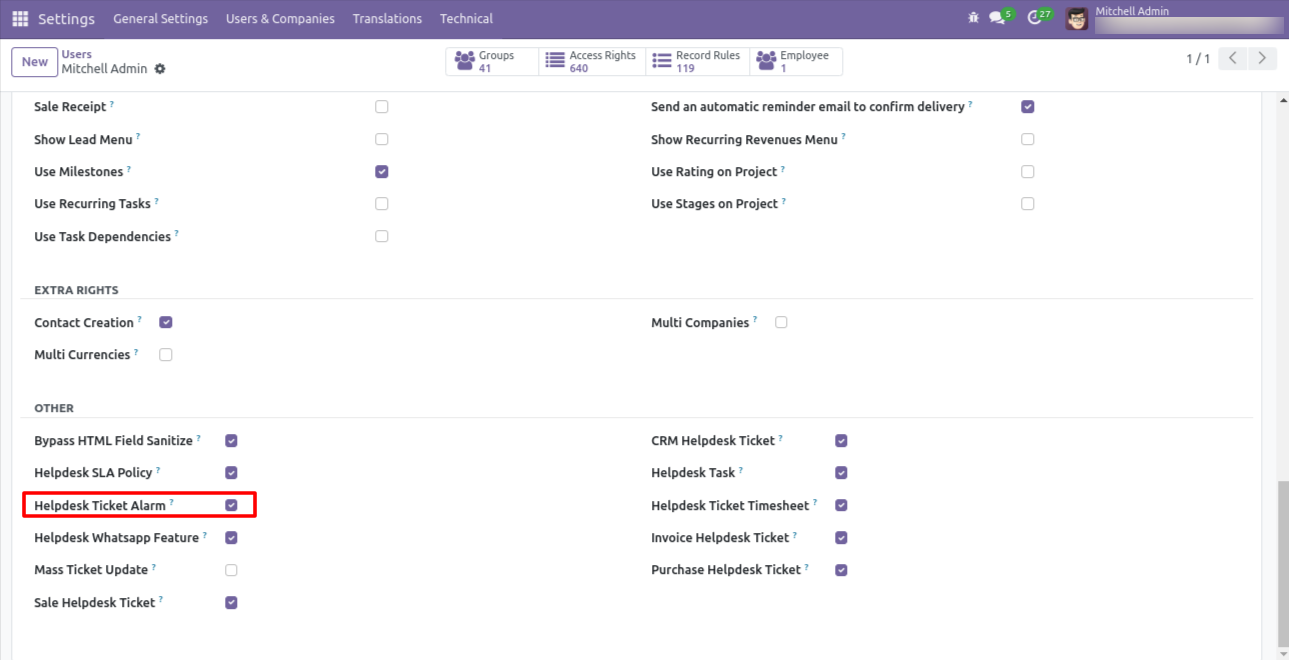
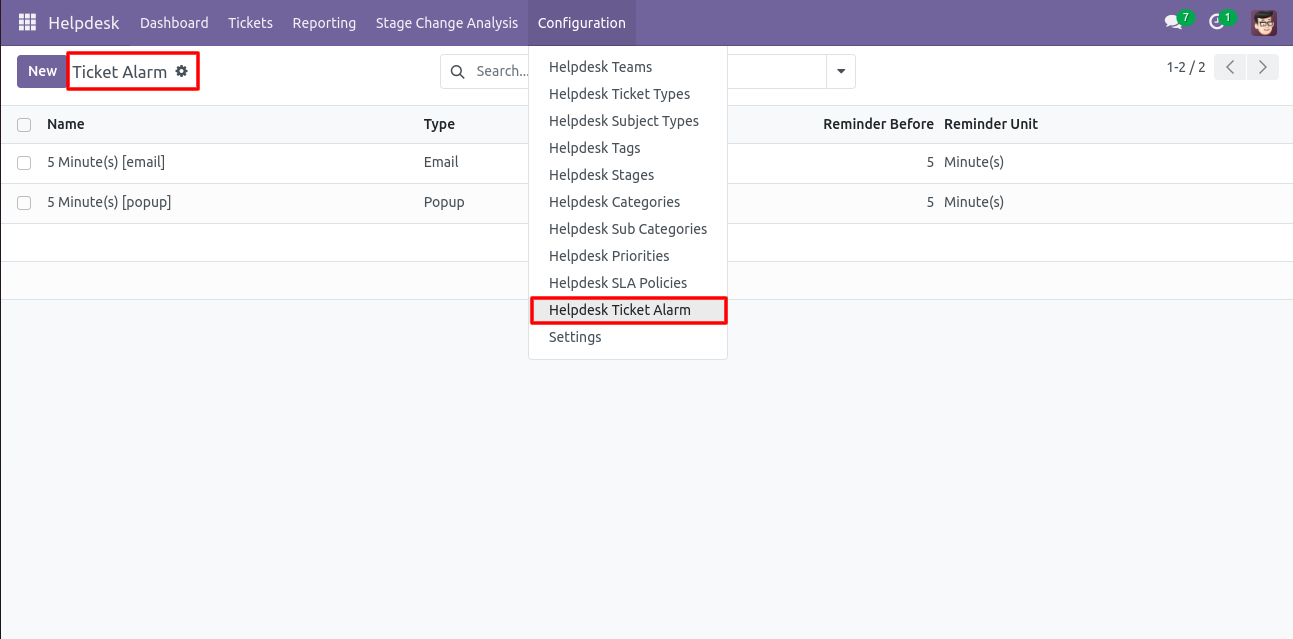
Go to the configuration => 'Helpdesk Ticket Alarm'.
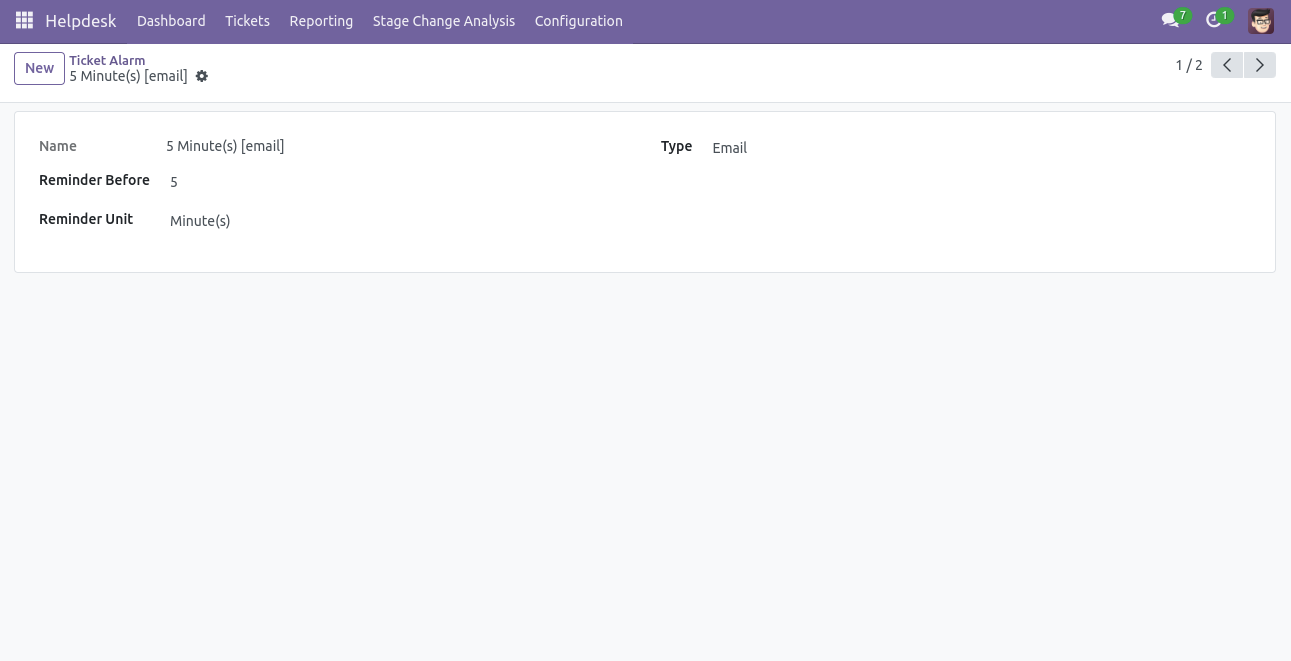
Helpdesk ticket alarm form view looks like this.
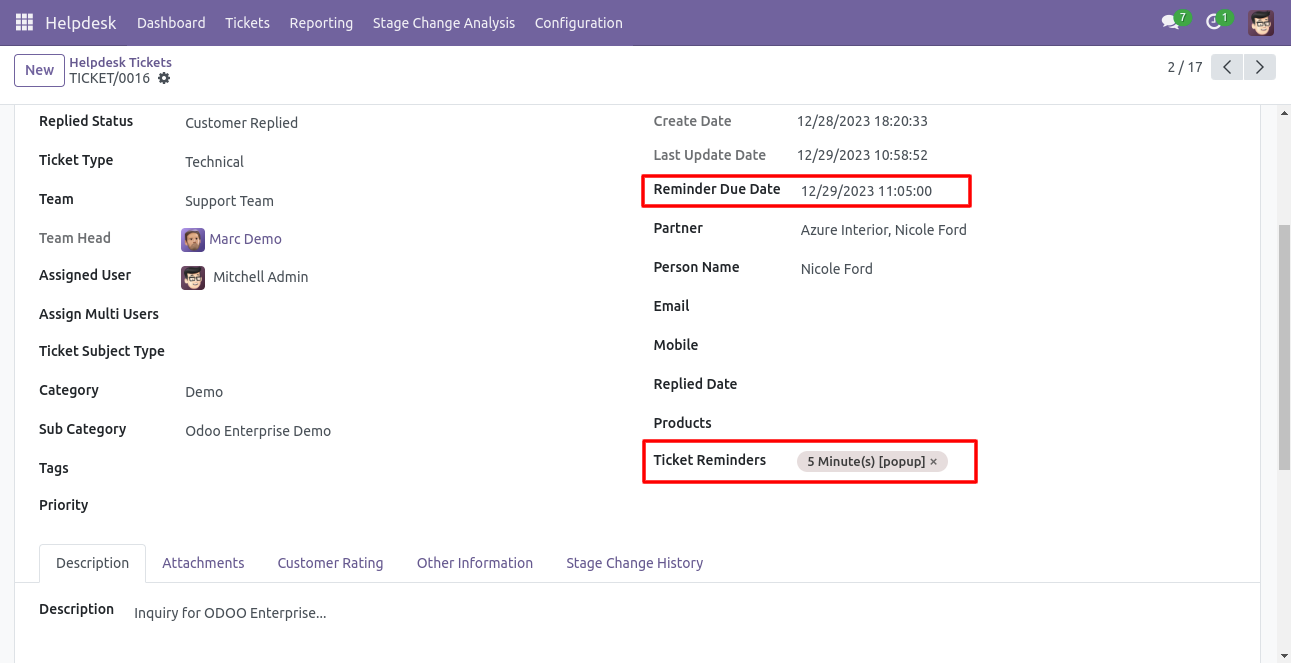
Helpdesk ticket alarm form view with the ticket reminder.
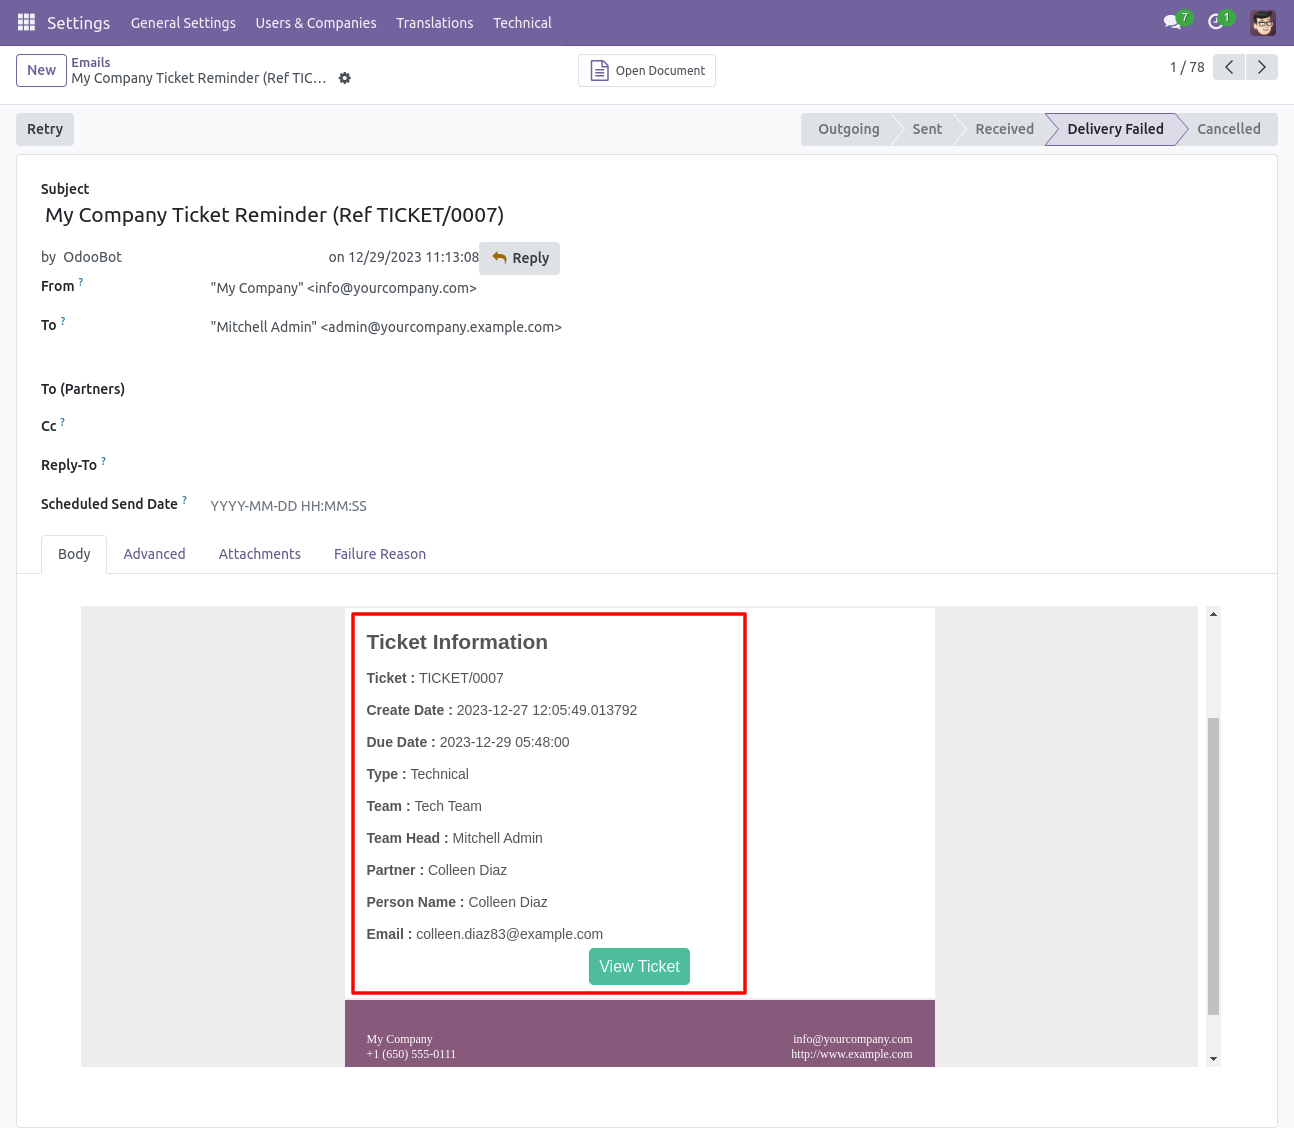
Helpdesk ticket reminders email looks like this.
Helpdesk ticket alarm form view with the ticket reminder.
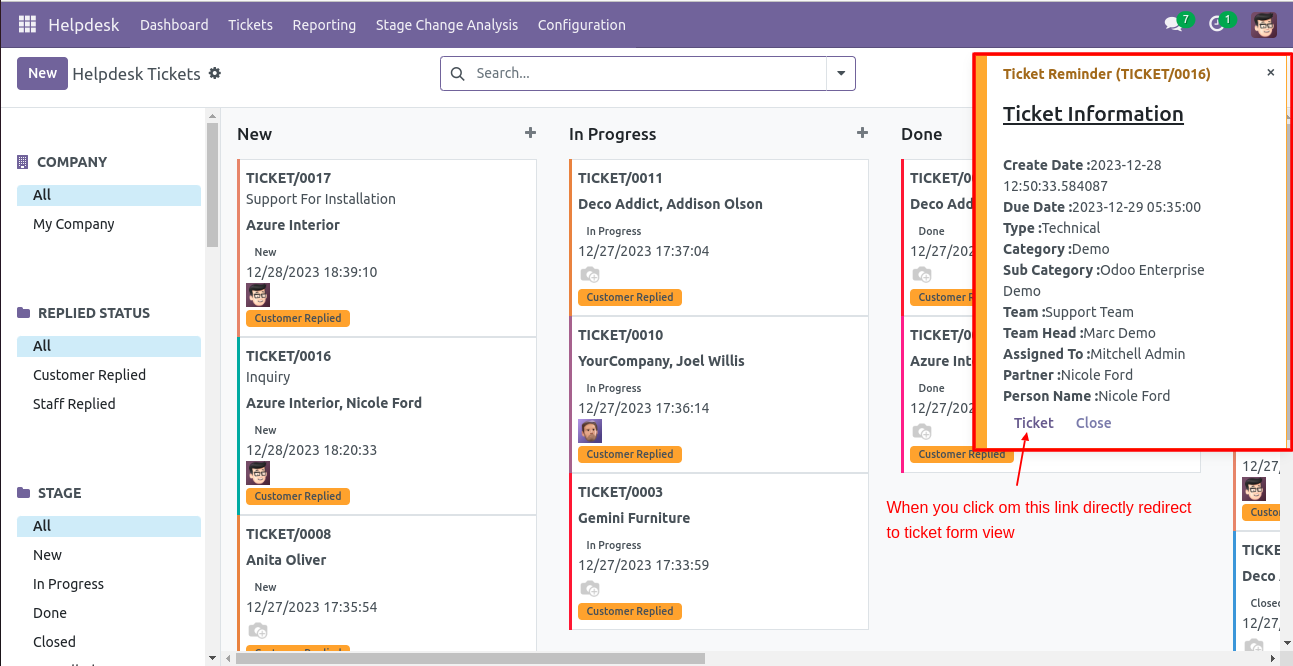
Helpdesk ticket reminders popup looks like this.
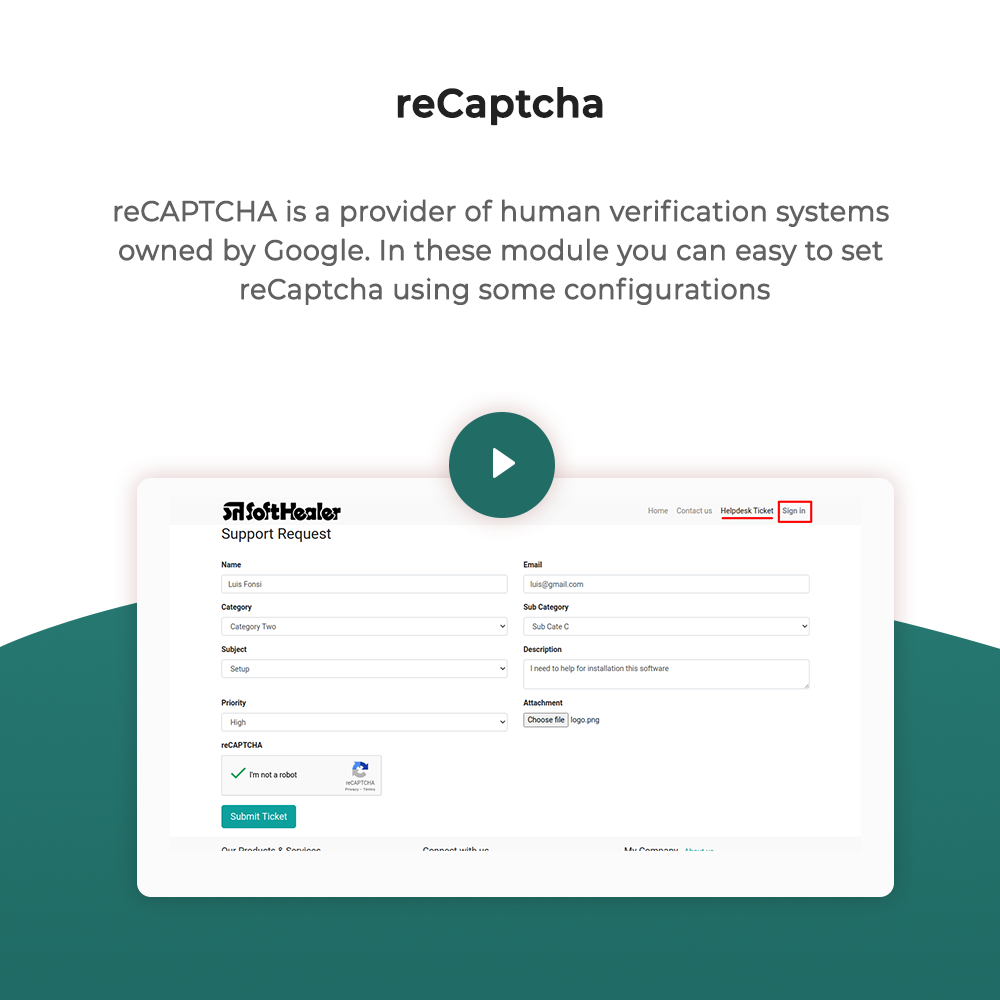
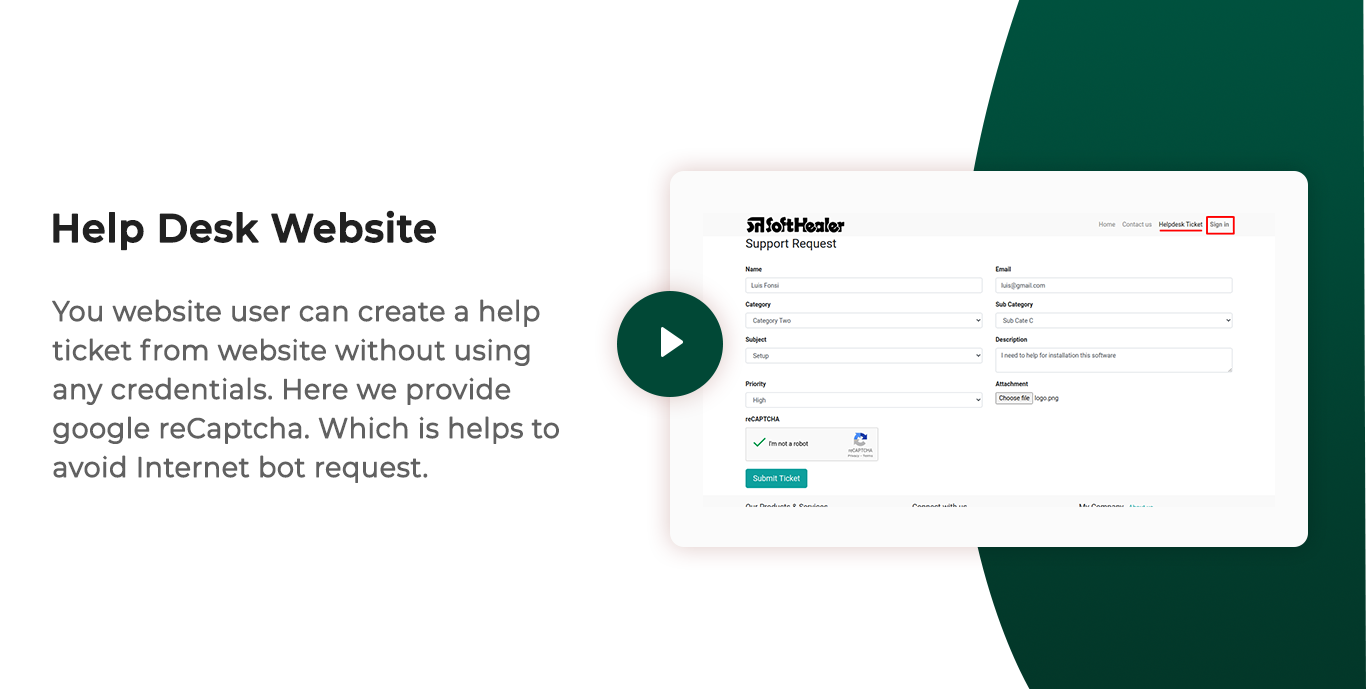
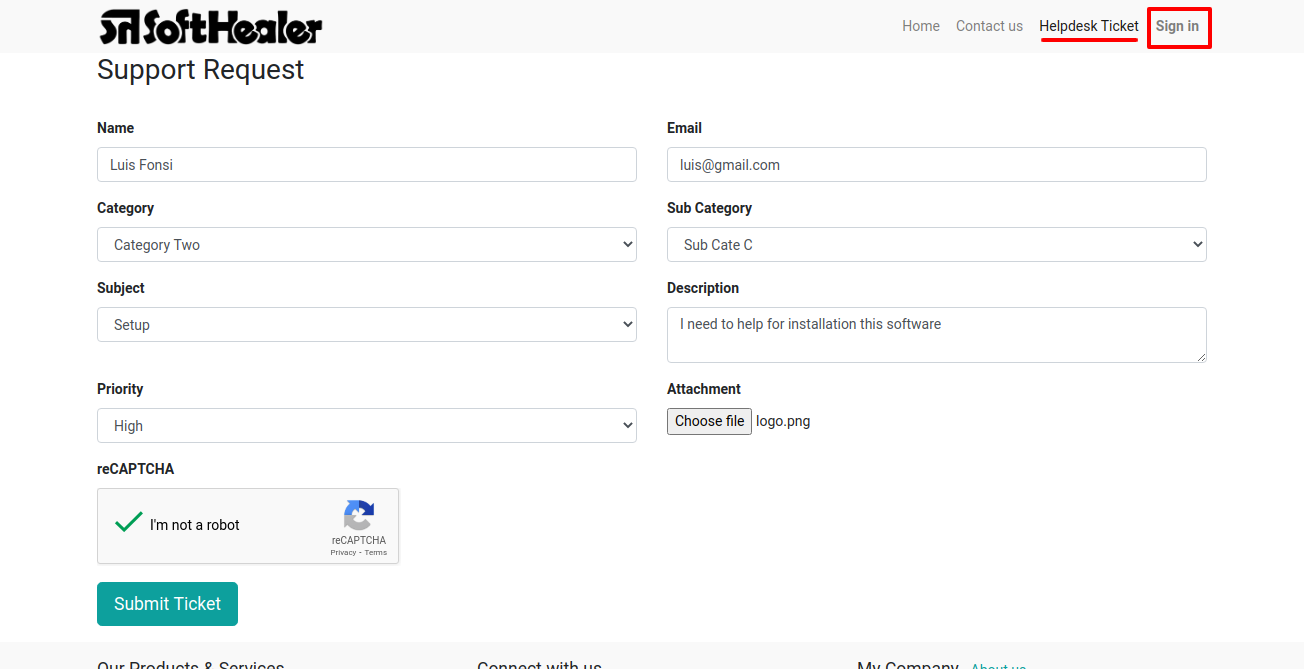
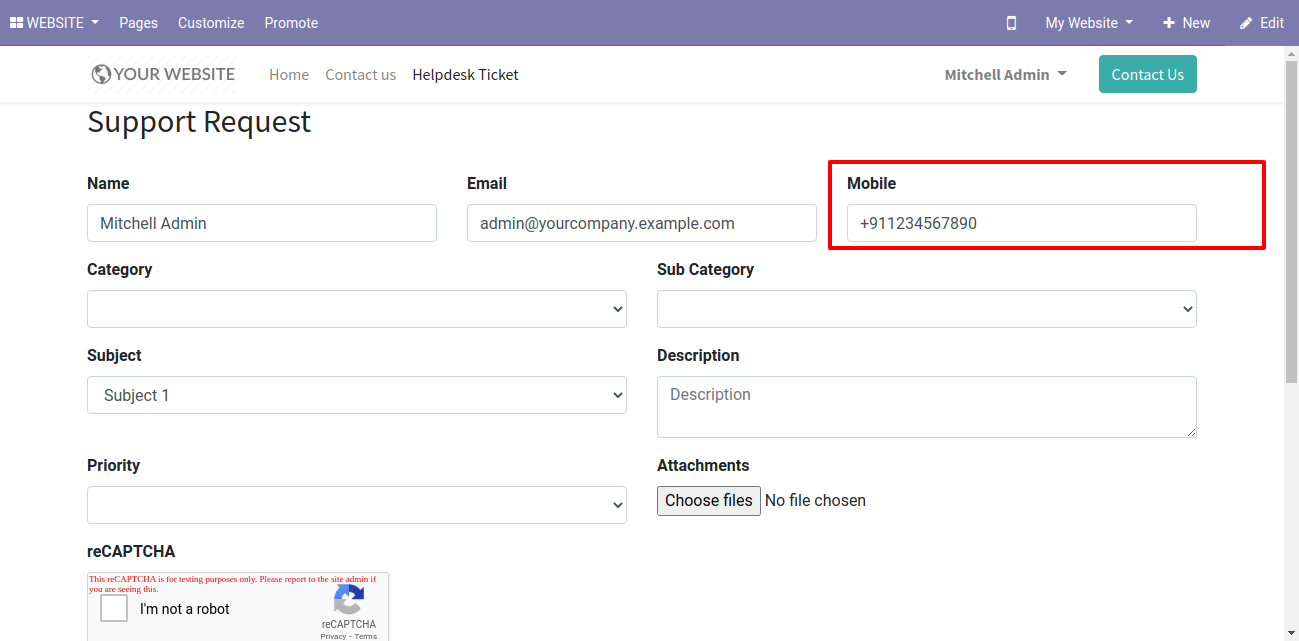
Create tickets from the website by the website user.
You can add a mobile number in the helpdesk ticket.
"Success" message.

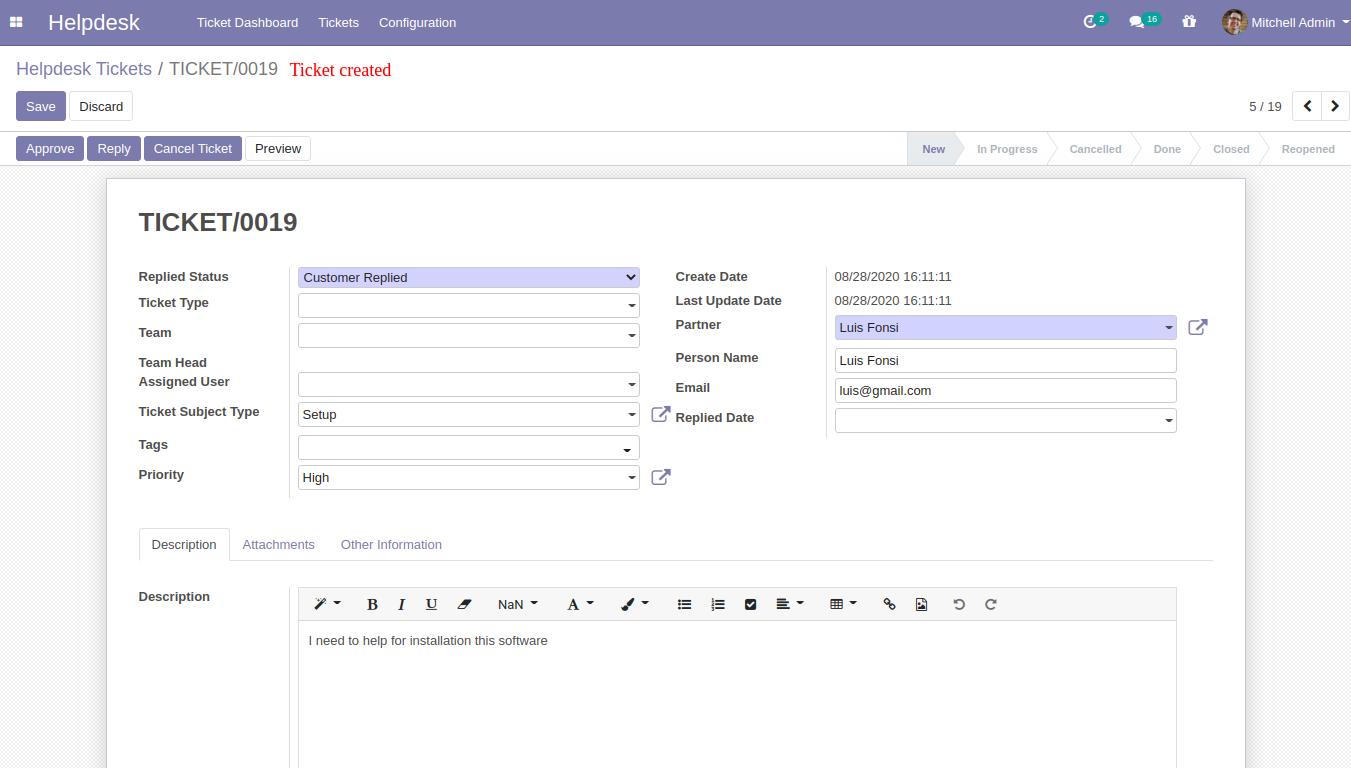
A ticket was created in the backend.
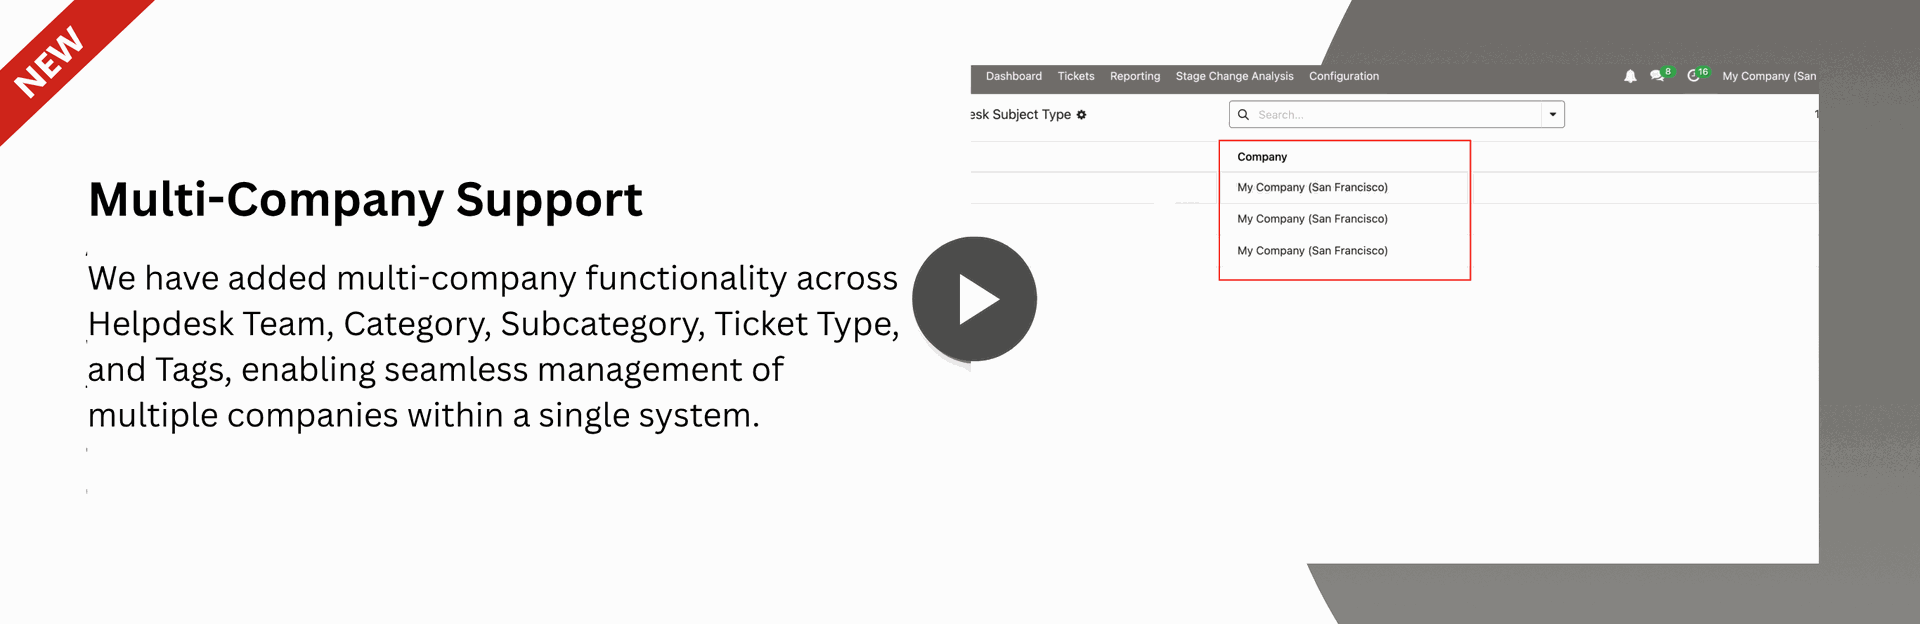
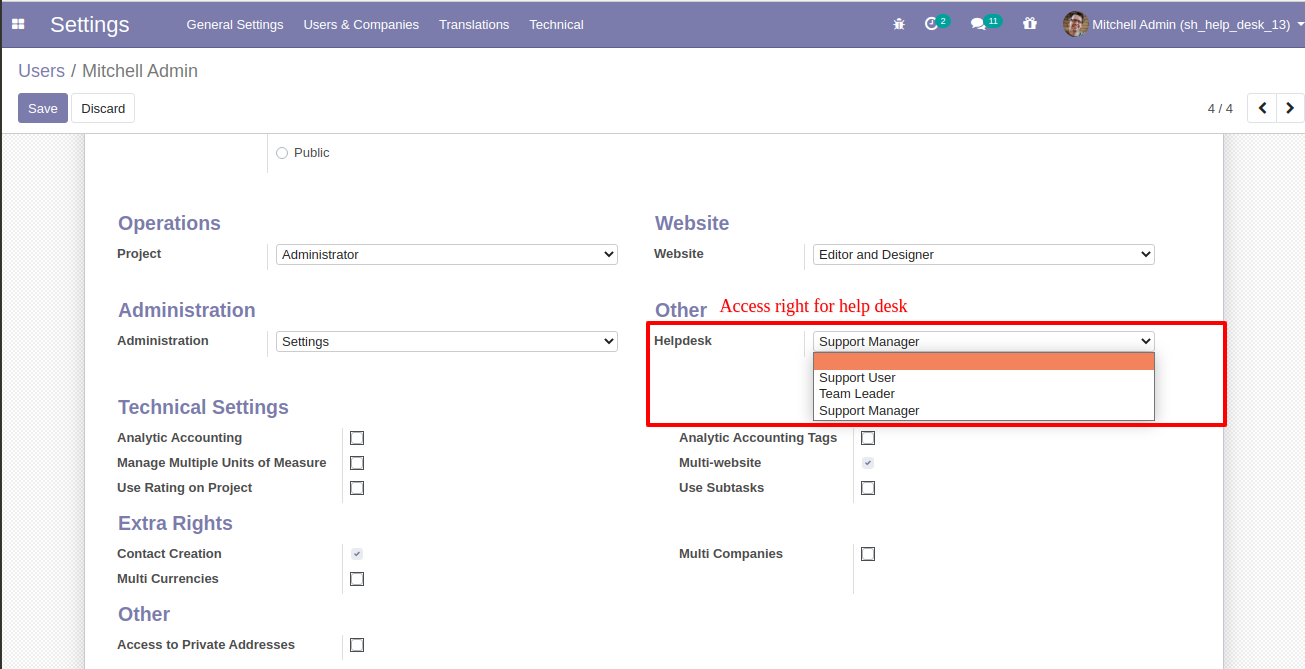
Access group for "Helpdesk Manager", "Helpdesk Team Leader", "Helpdesk User"
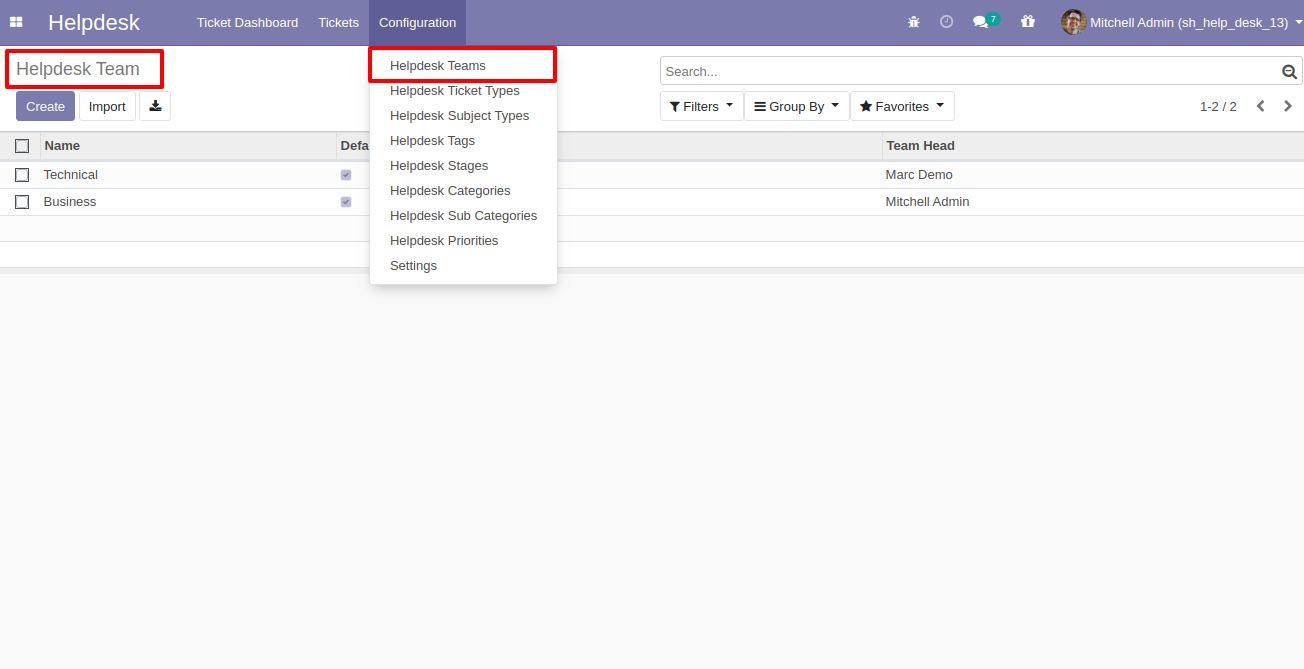
Helpdesk Teams menu and list view.
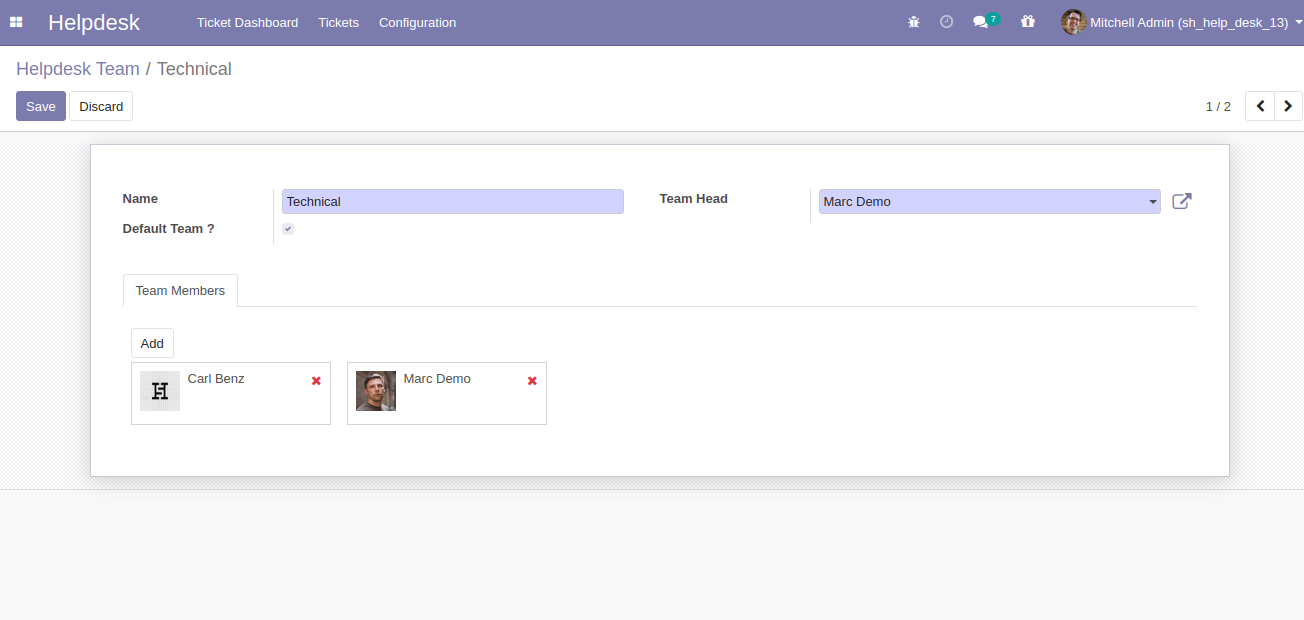
"Helpdesk Teams" form view. Where you can define team members and the team leader or set team as default.
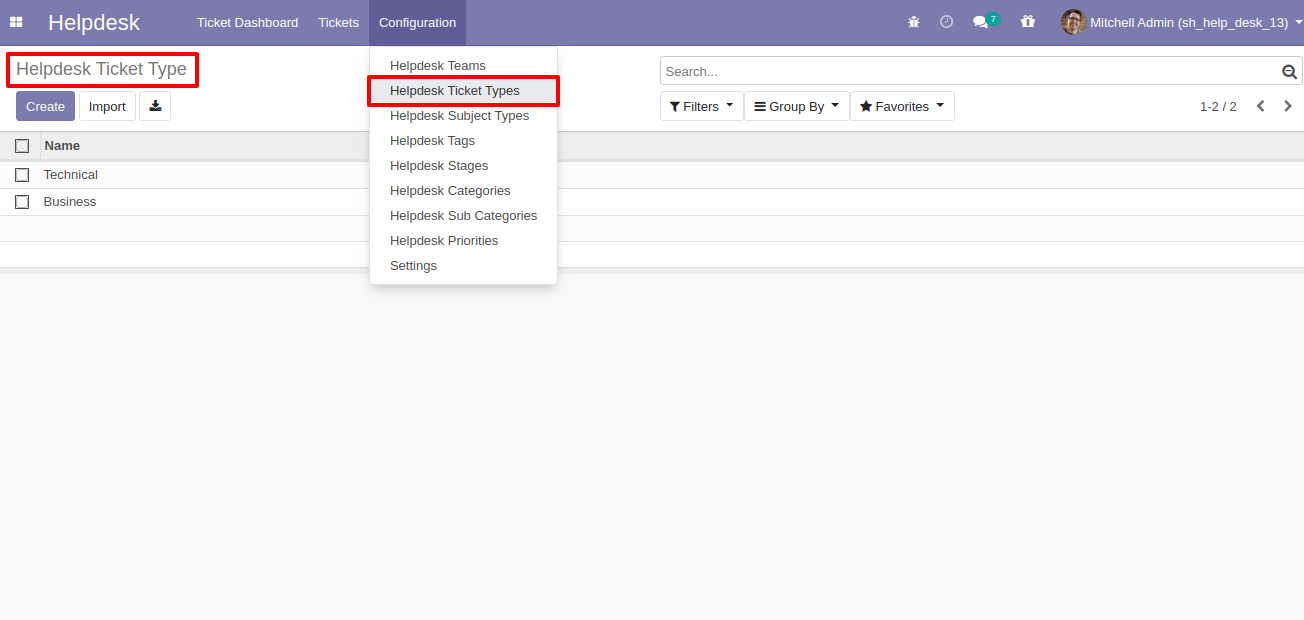
"Helpdesk Tickets Type" menu and list view.
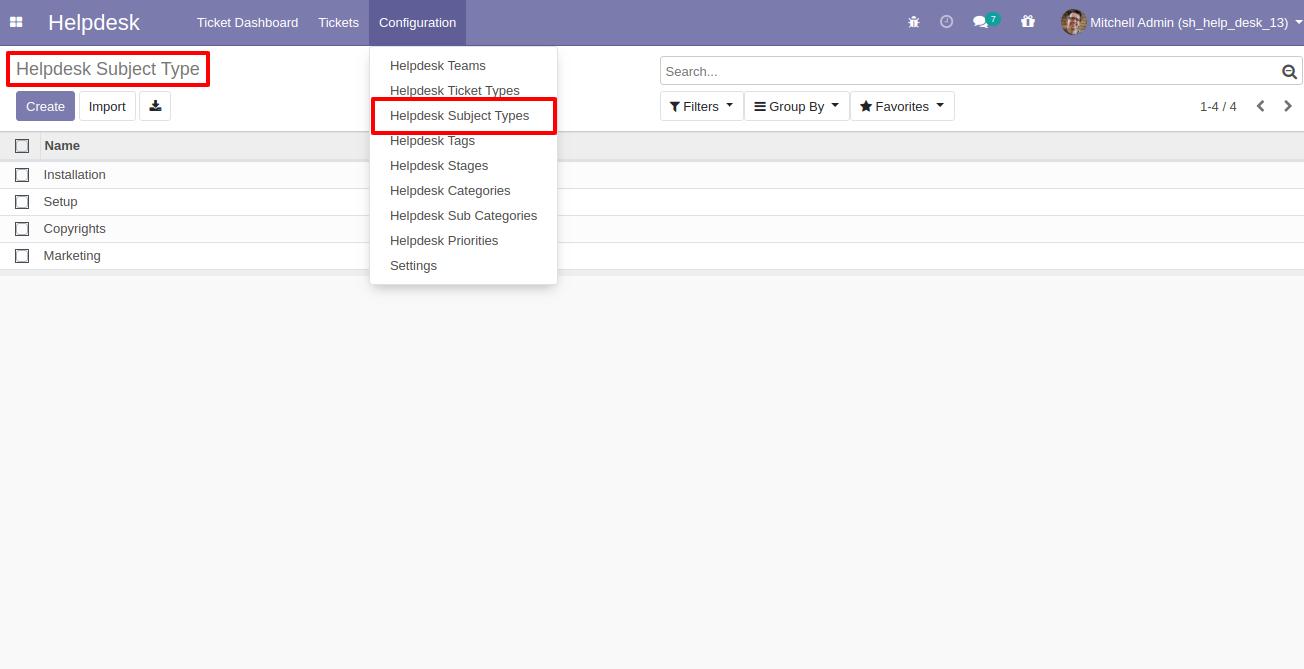
"Helpdesk Subject Types" menu and list view.
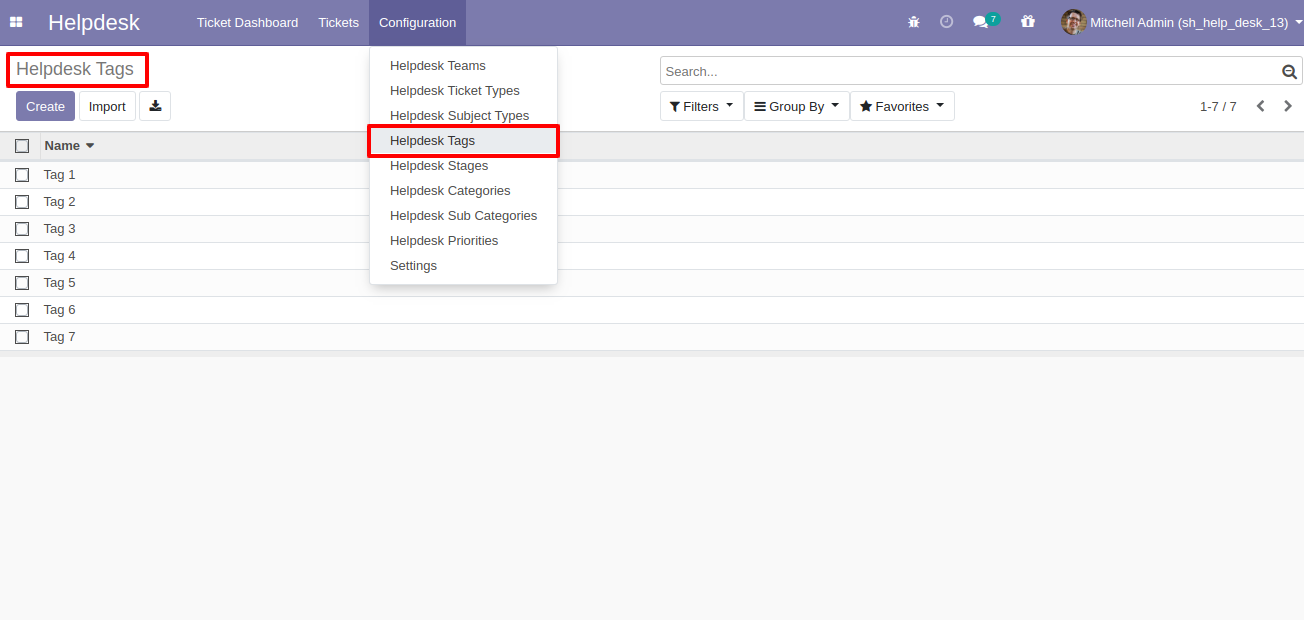
"Helpdesk Tags" menu and list view.
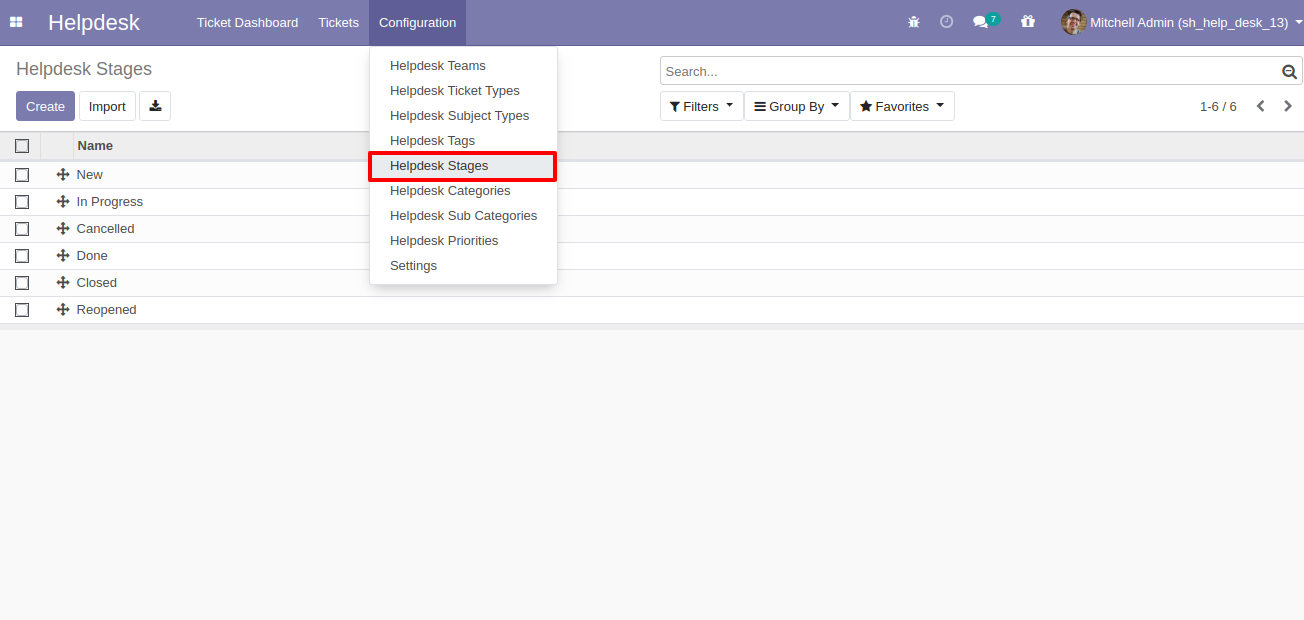
"Helpdesk Stages" menu and list view.
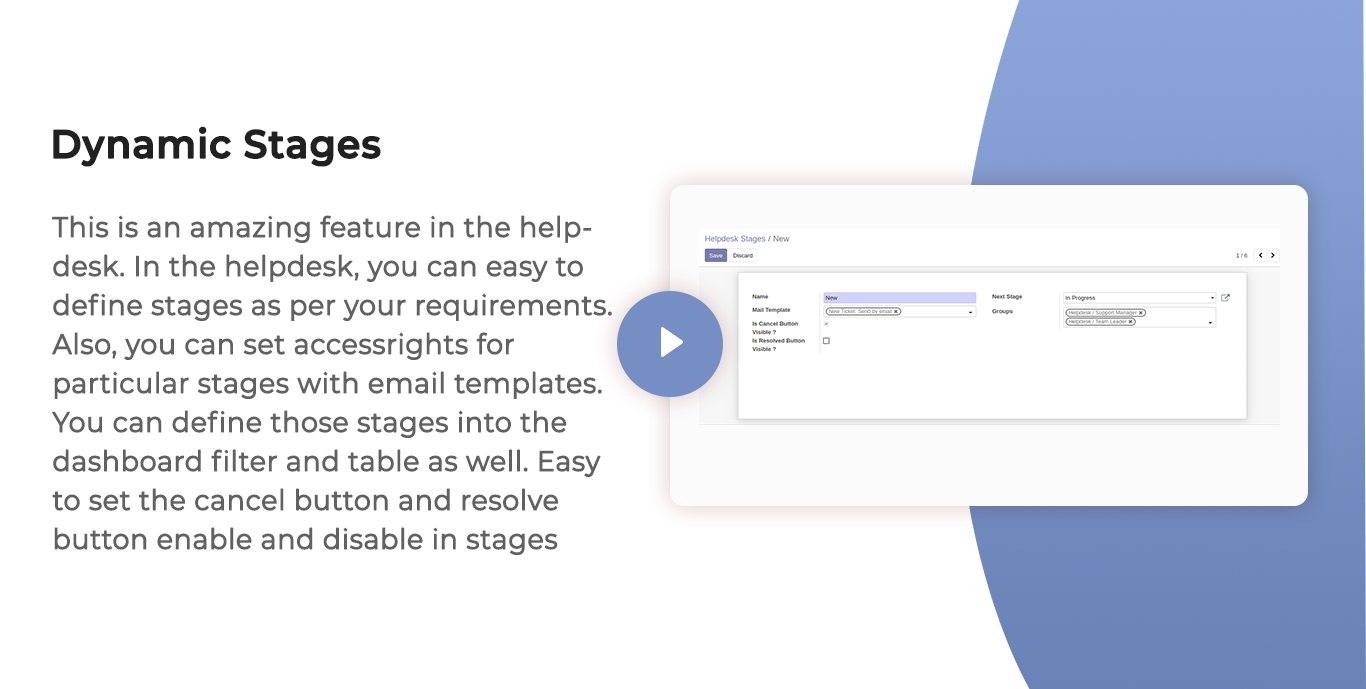
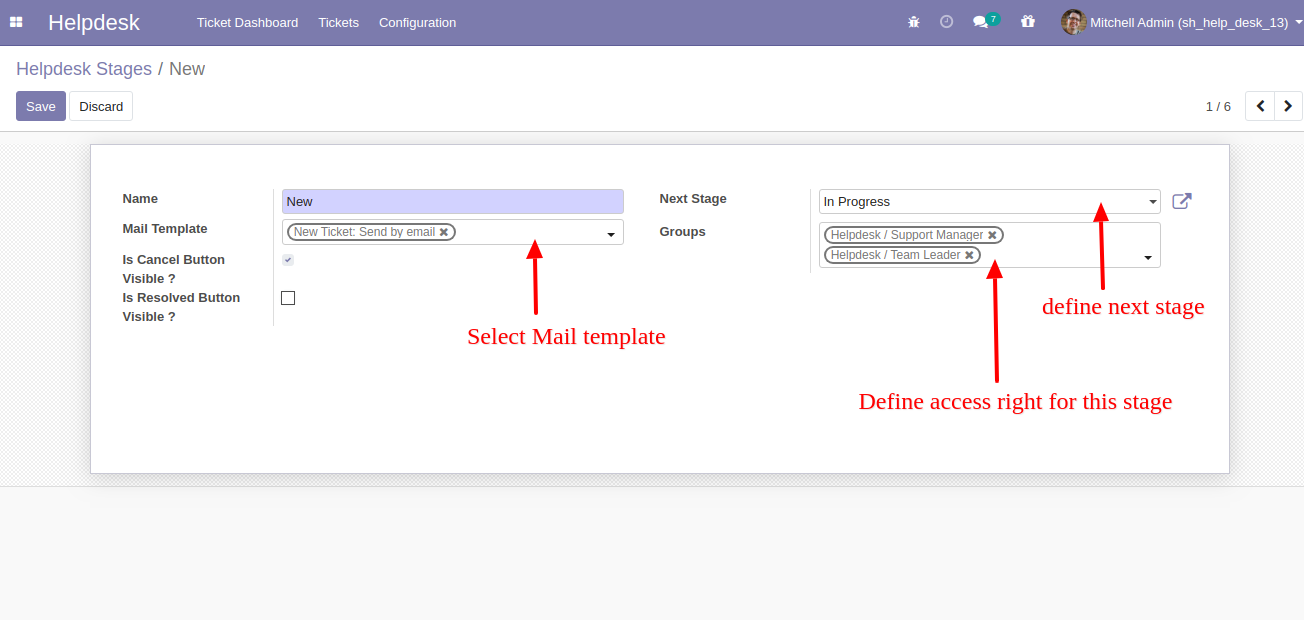
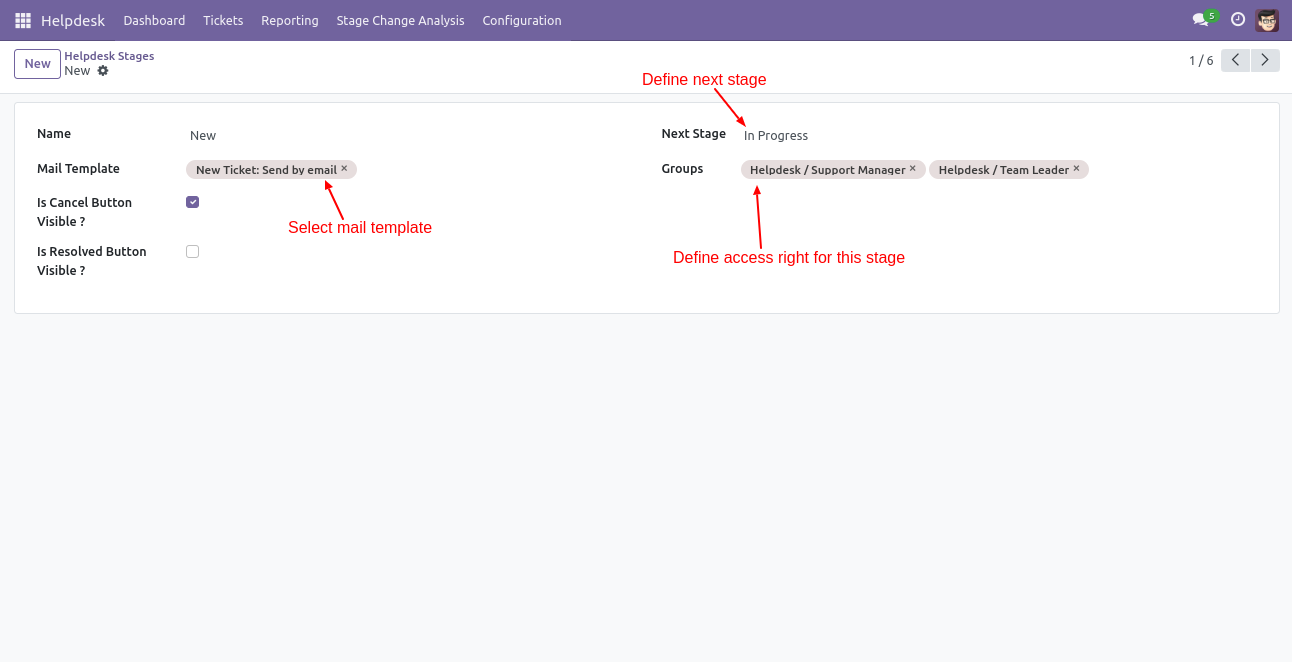
"Helpdesk Stages" form view. Where you can define stages and it's access rights, E-Mail template, next stage.
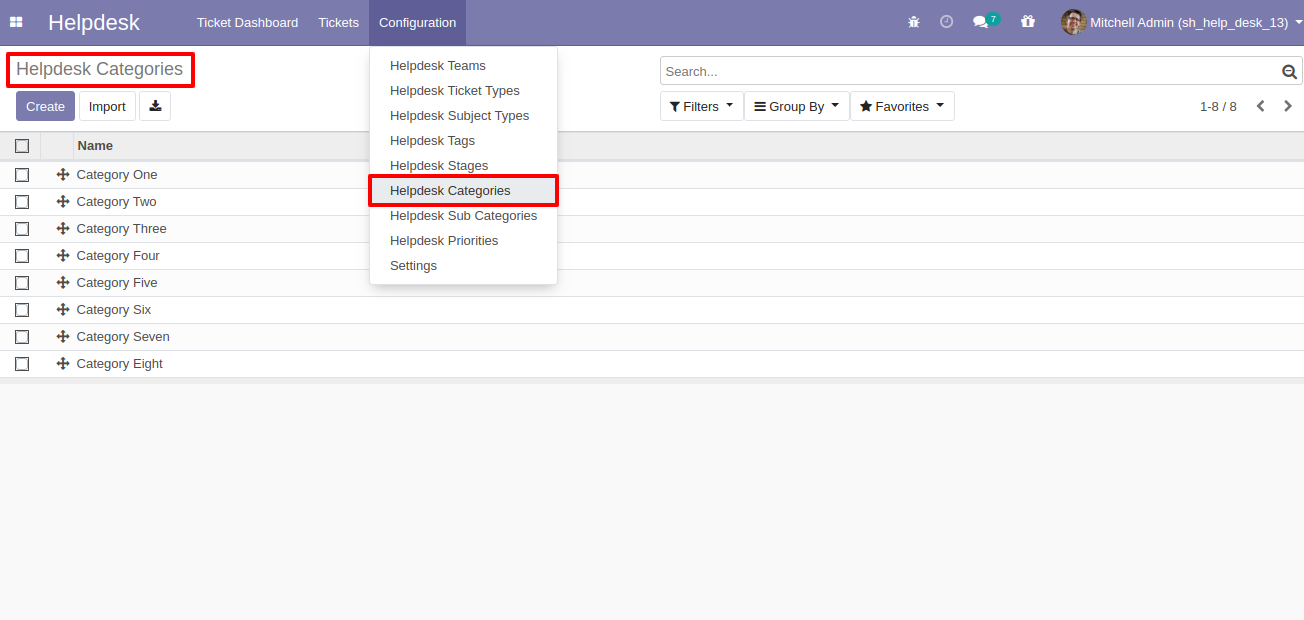
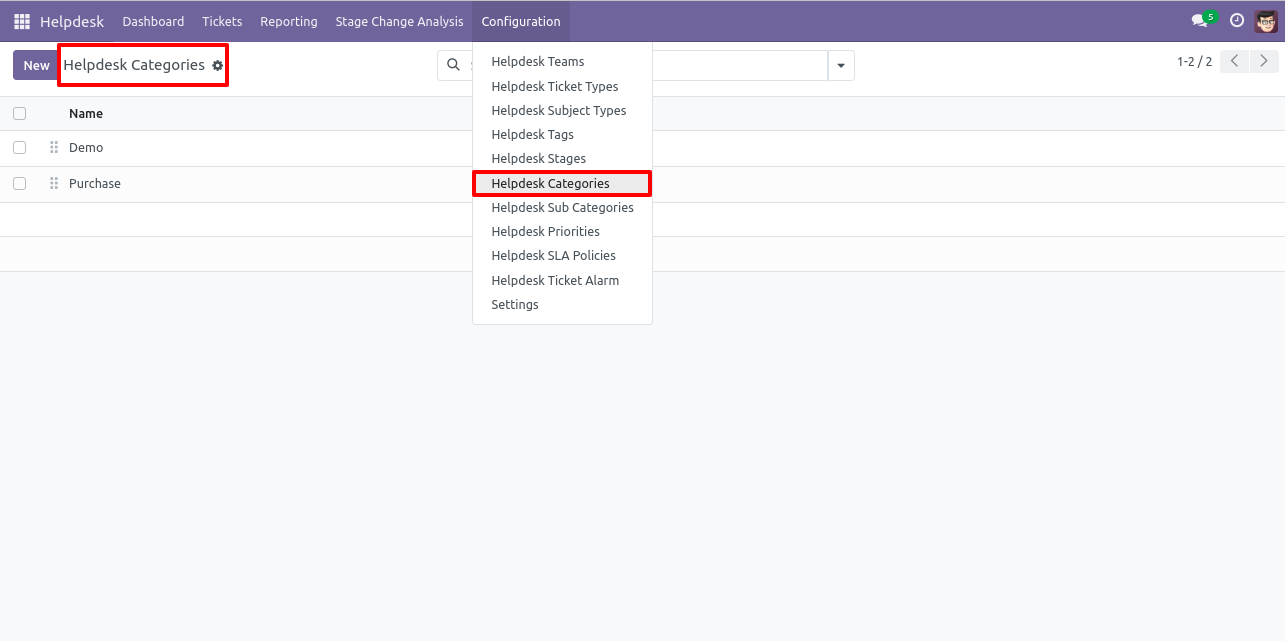
"Helpdesk Categories" menu and list view.
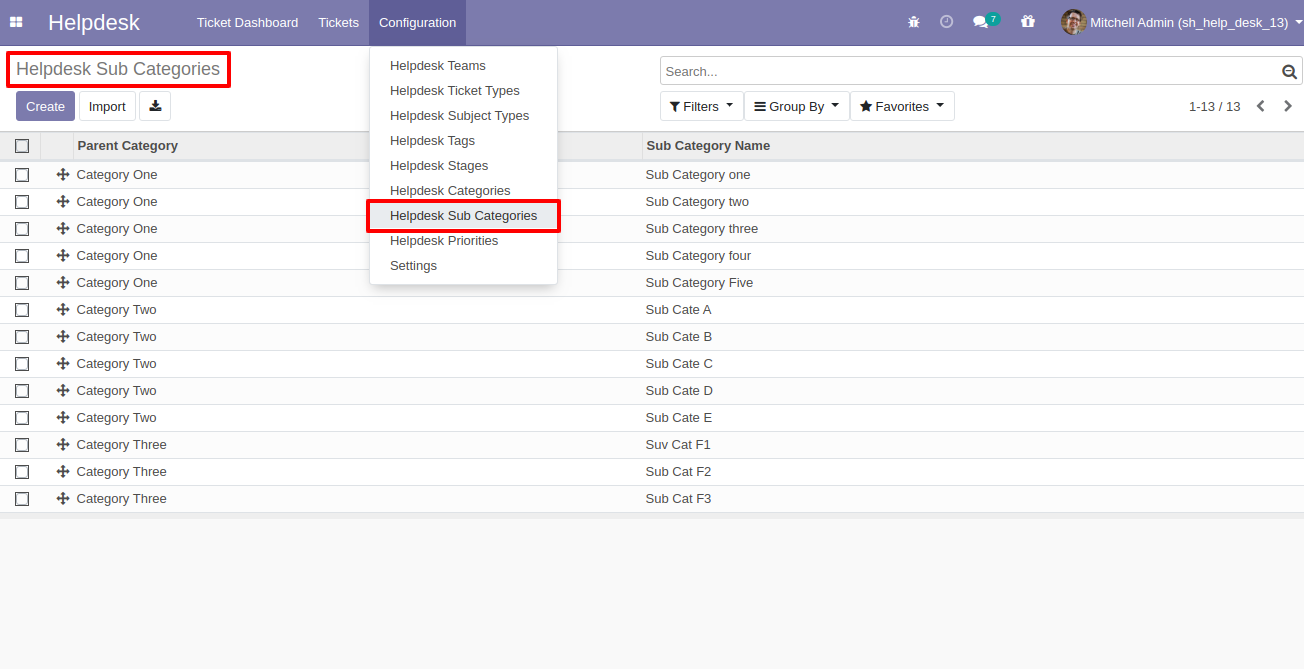
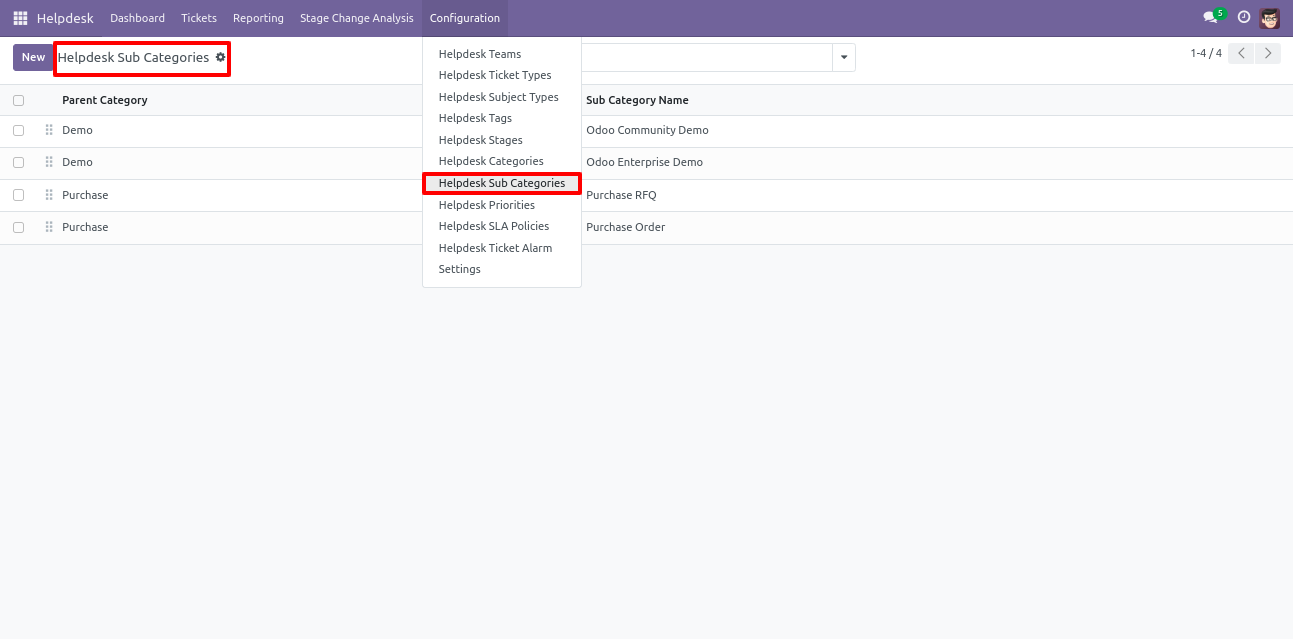
"Helpdesk Sub Categories" menu and list view.
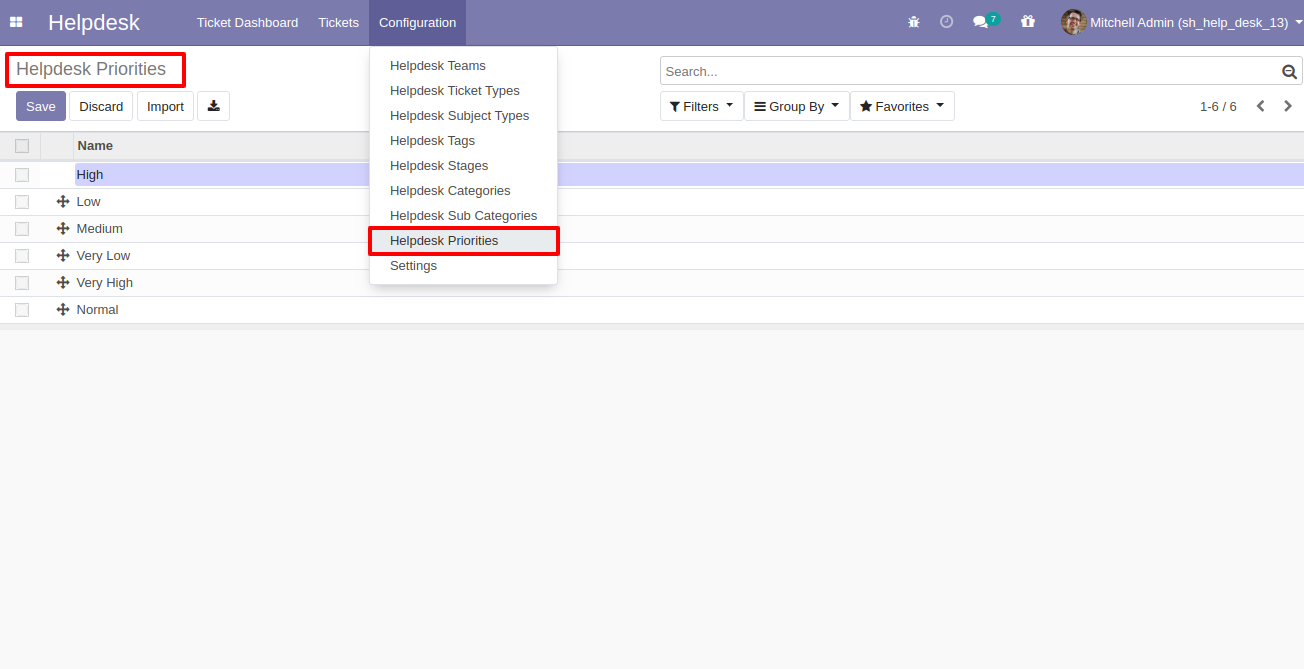
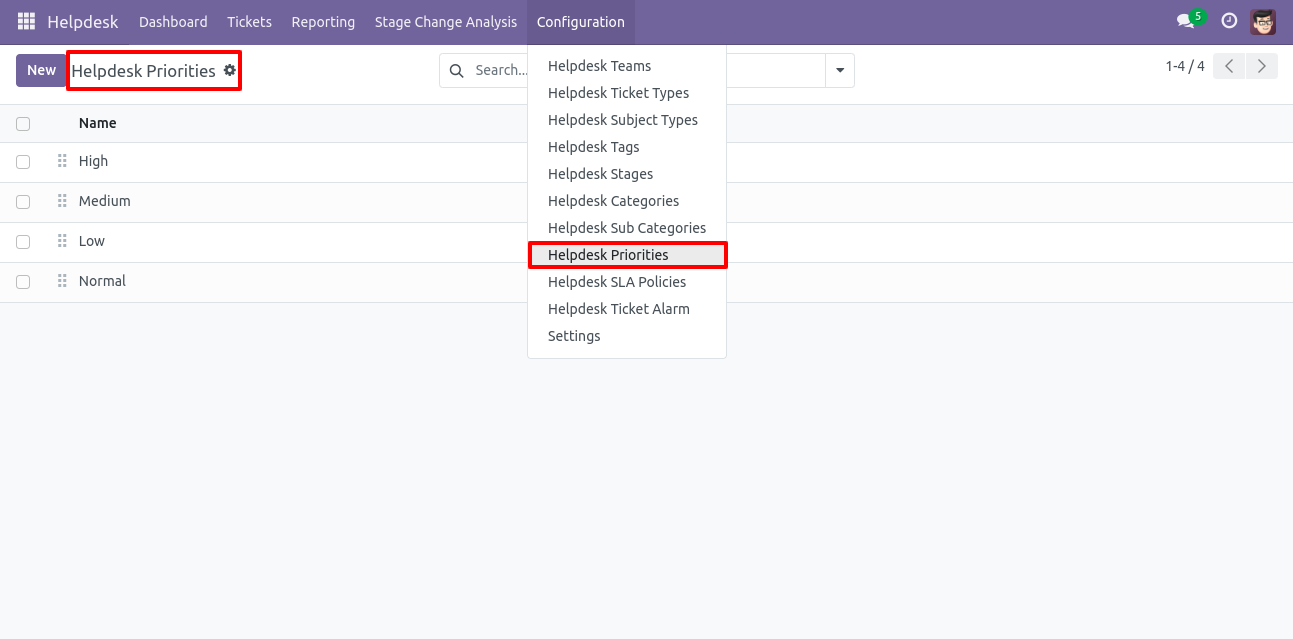
"Helpdesk Priorities" menu and list view.
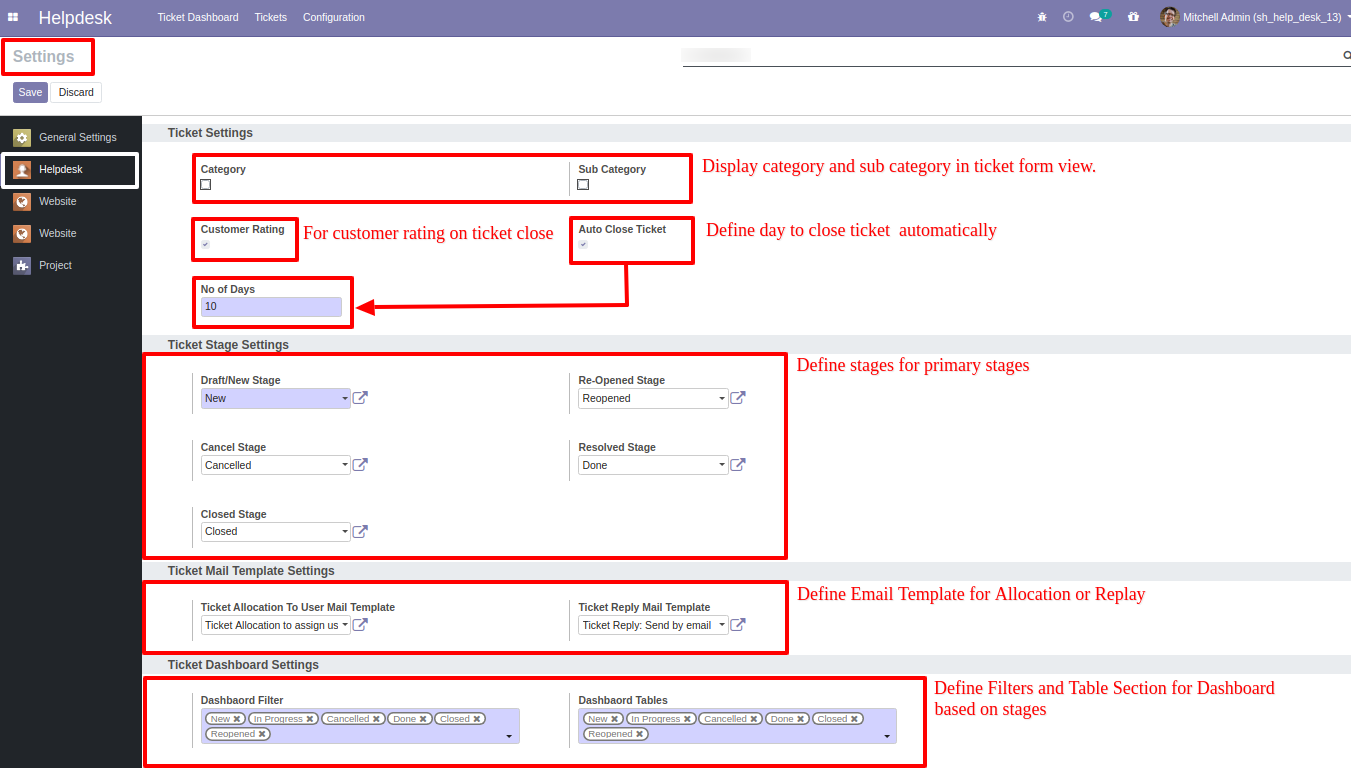
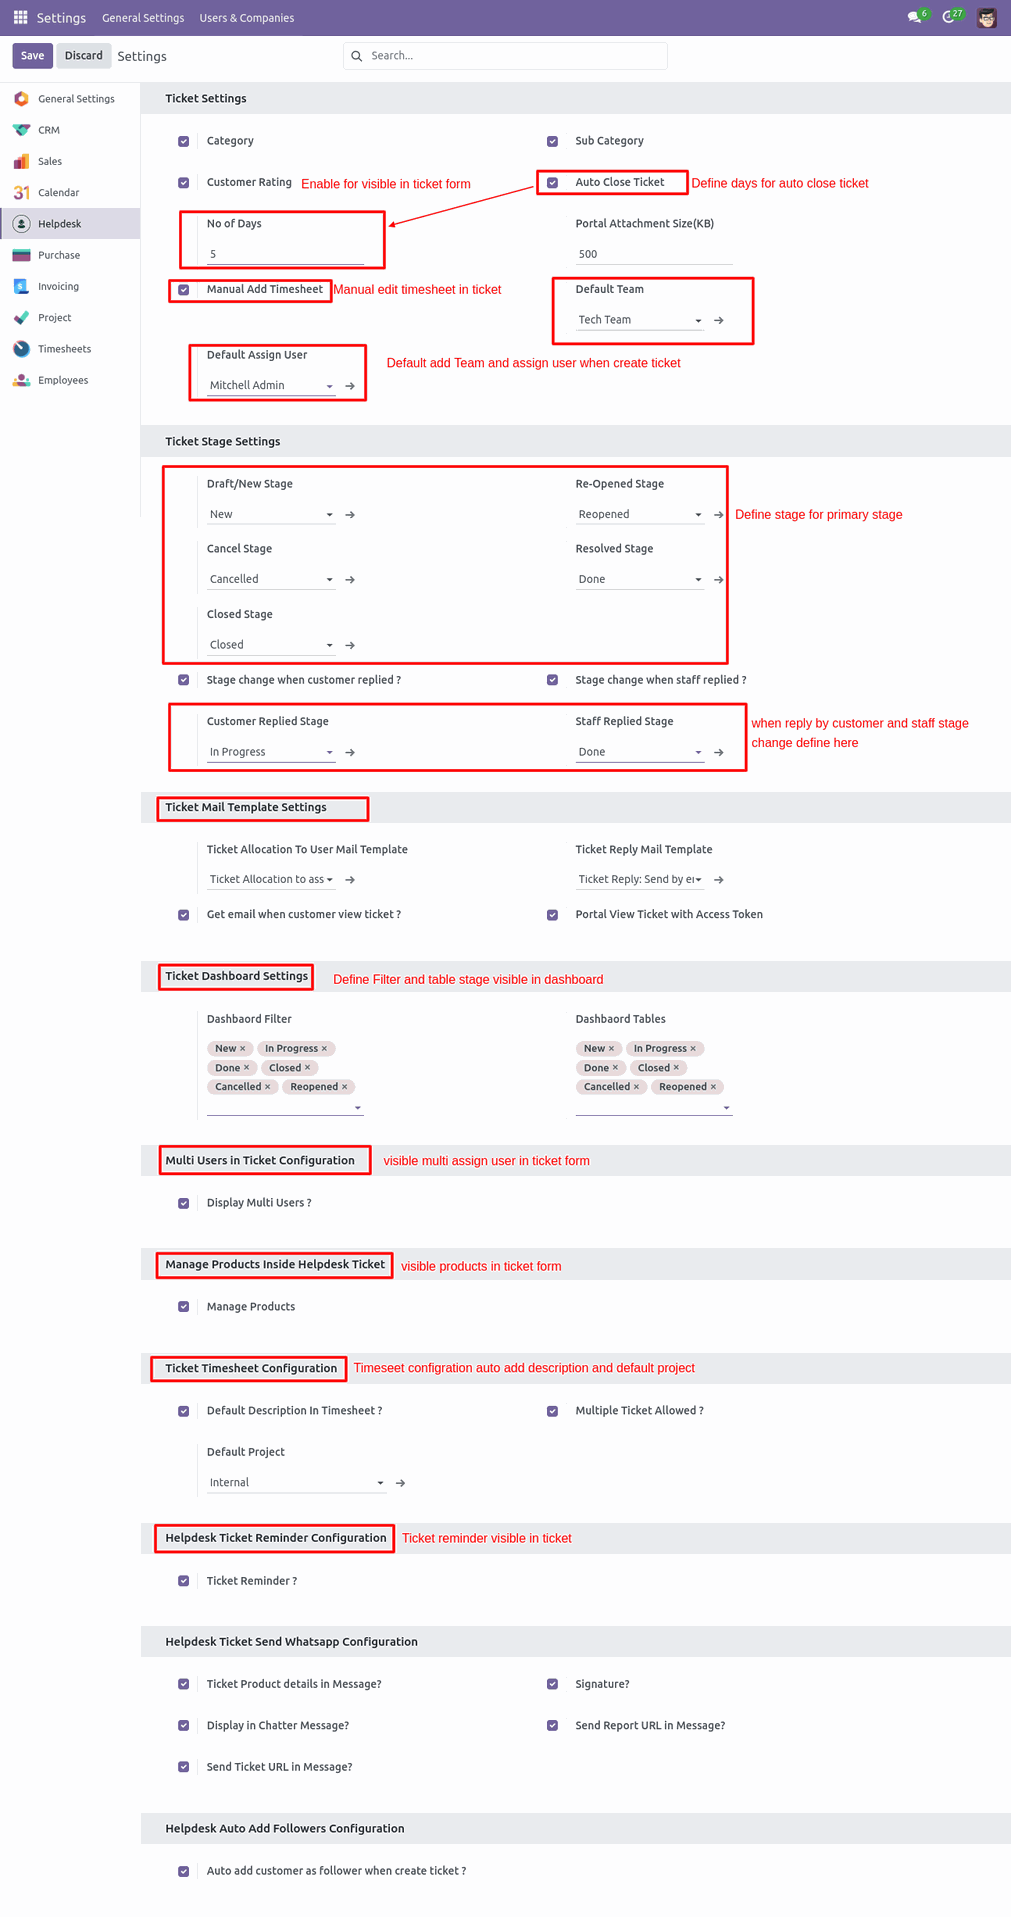
"Helpdesk Setting" View.
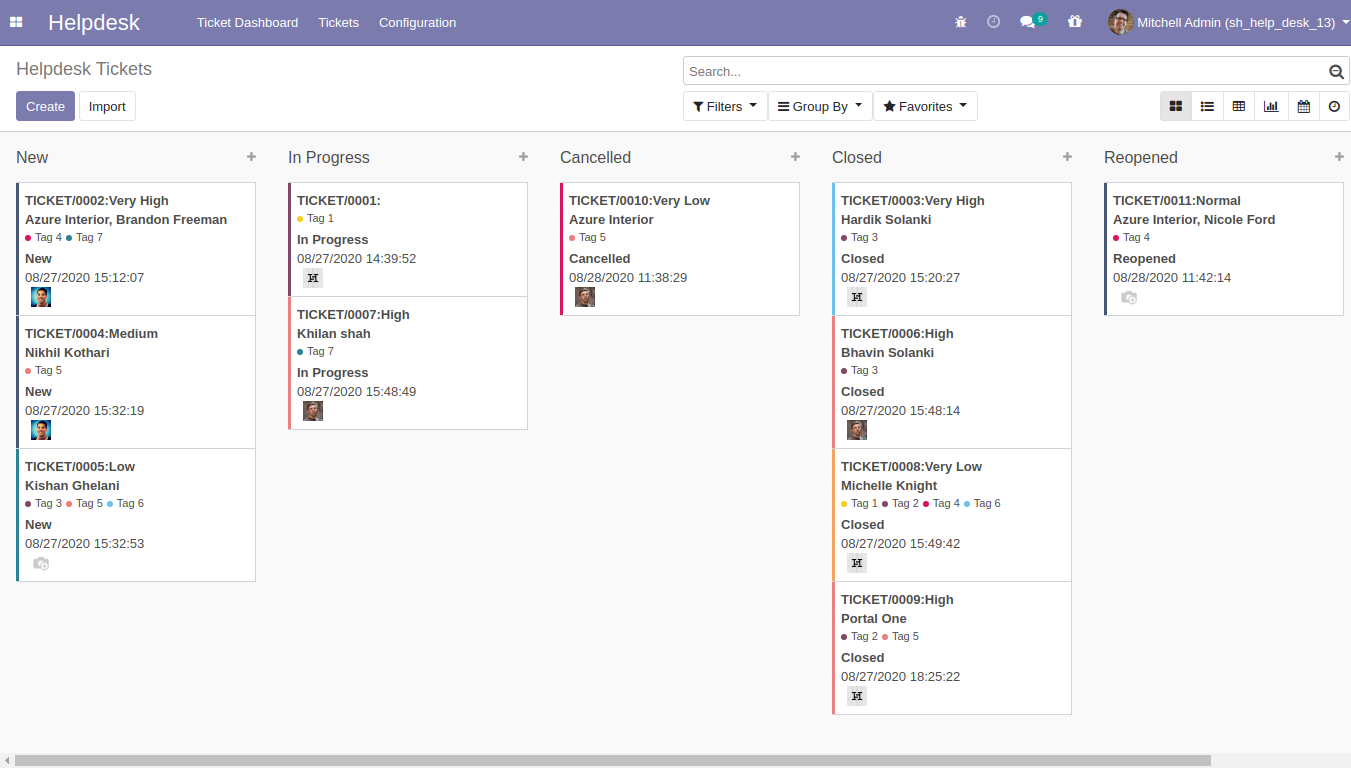
"Helpdesk Ticket" Kanban view.
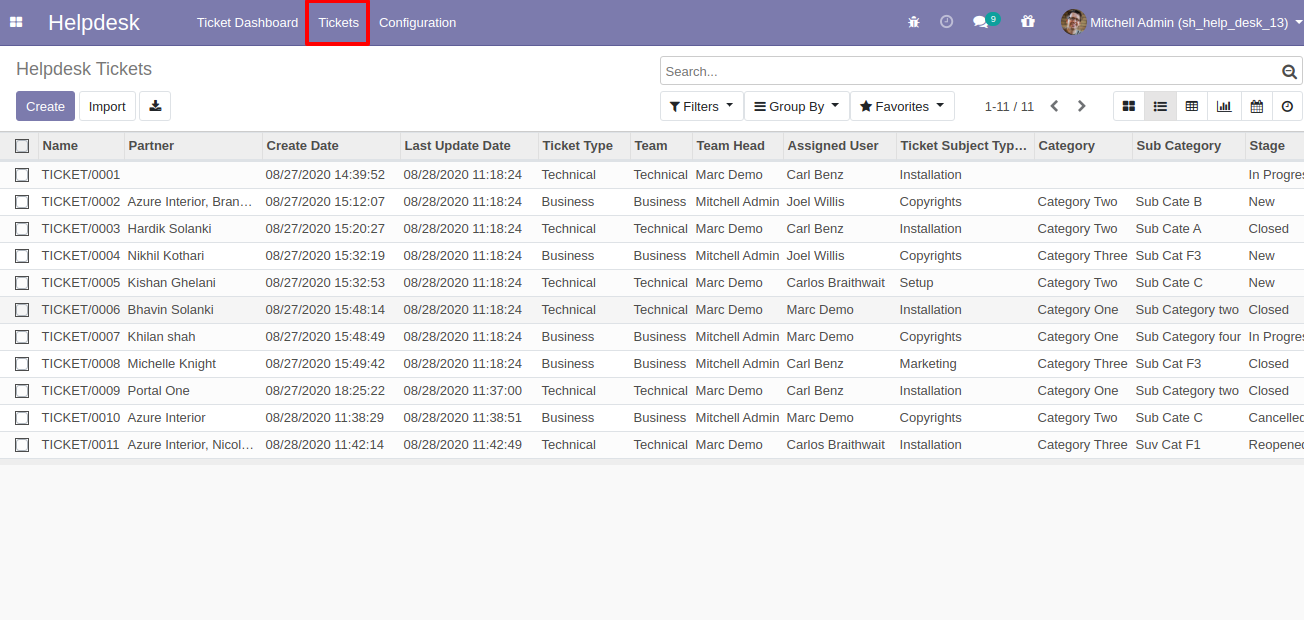
"Helpdesk Ticket" List view.
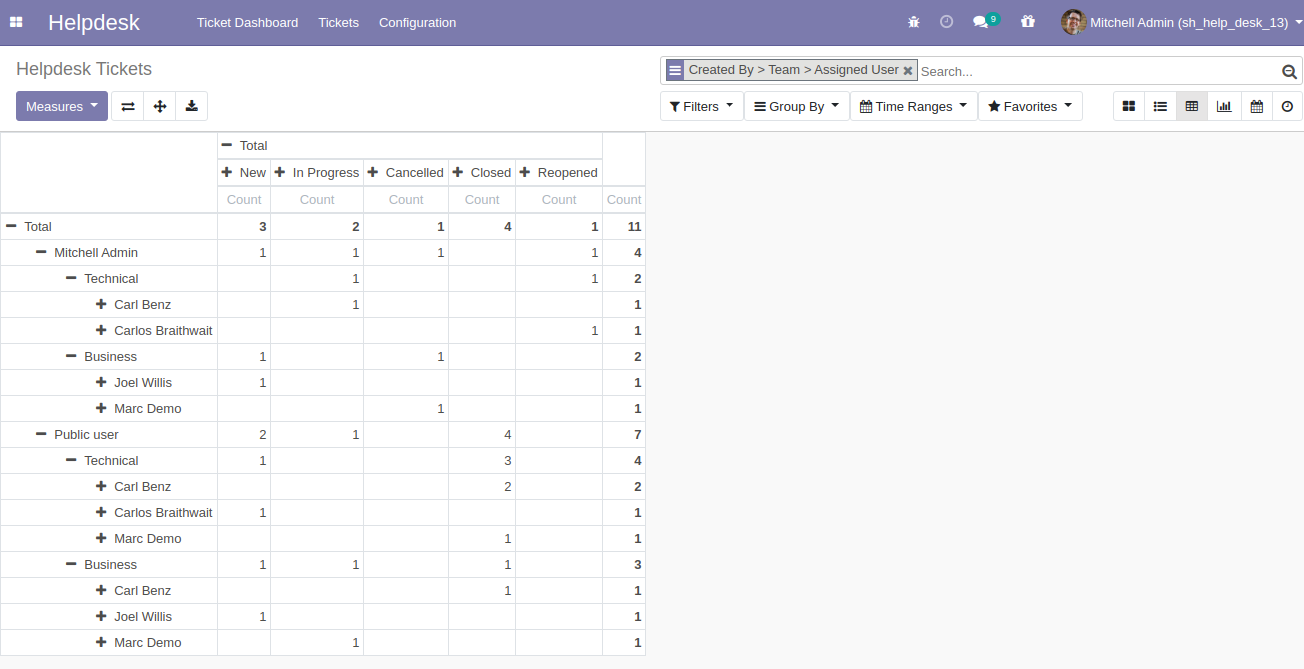
"Helpdesk Ticket" Pivot view.
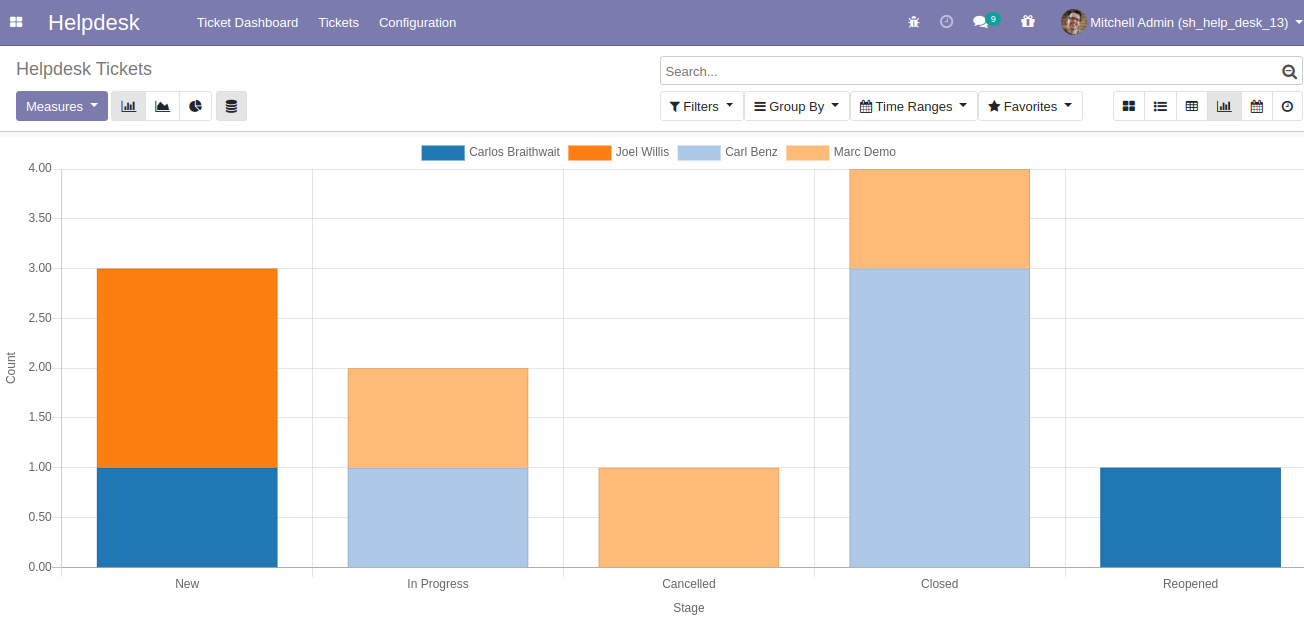
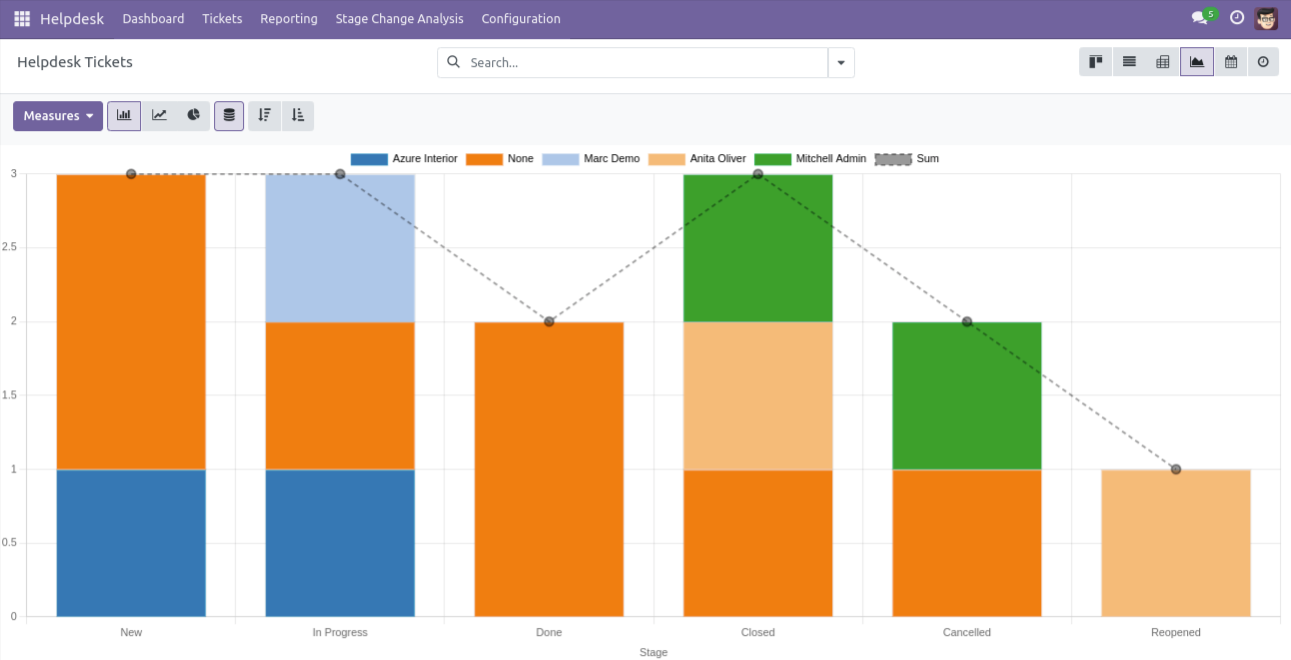
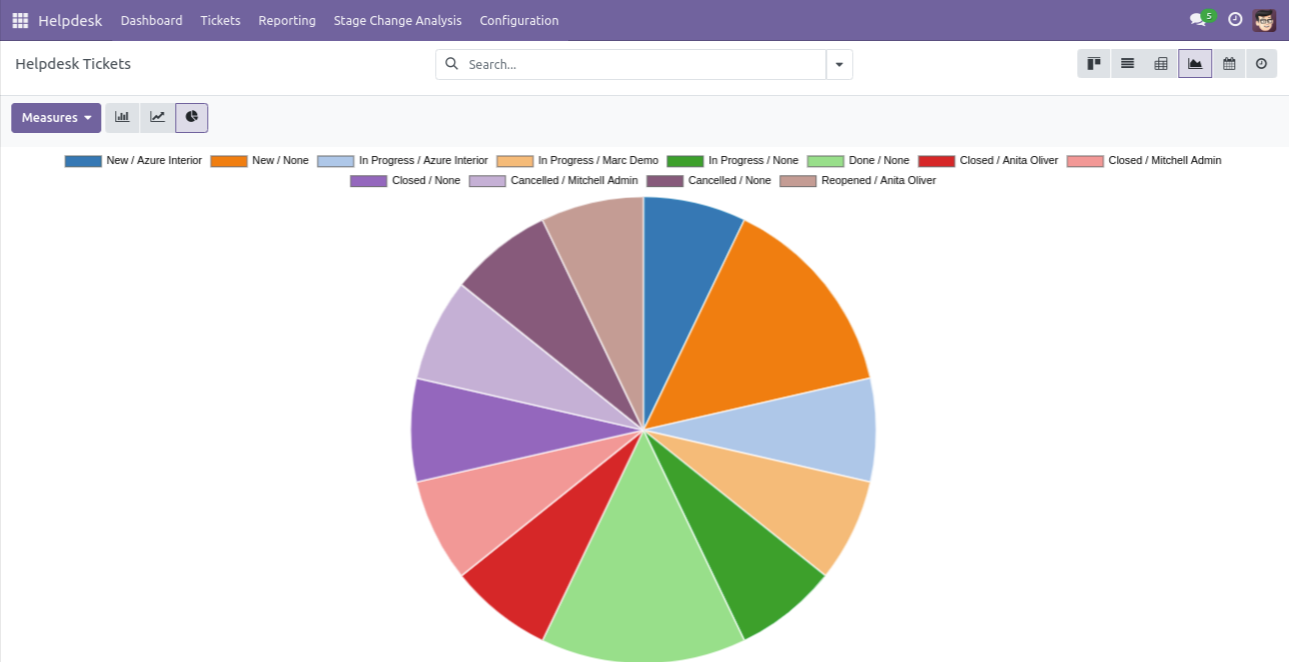
"Helpdesk Ticket" Graph view.
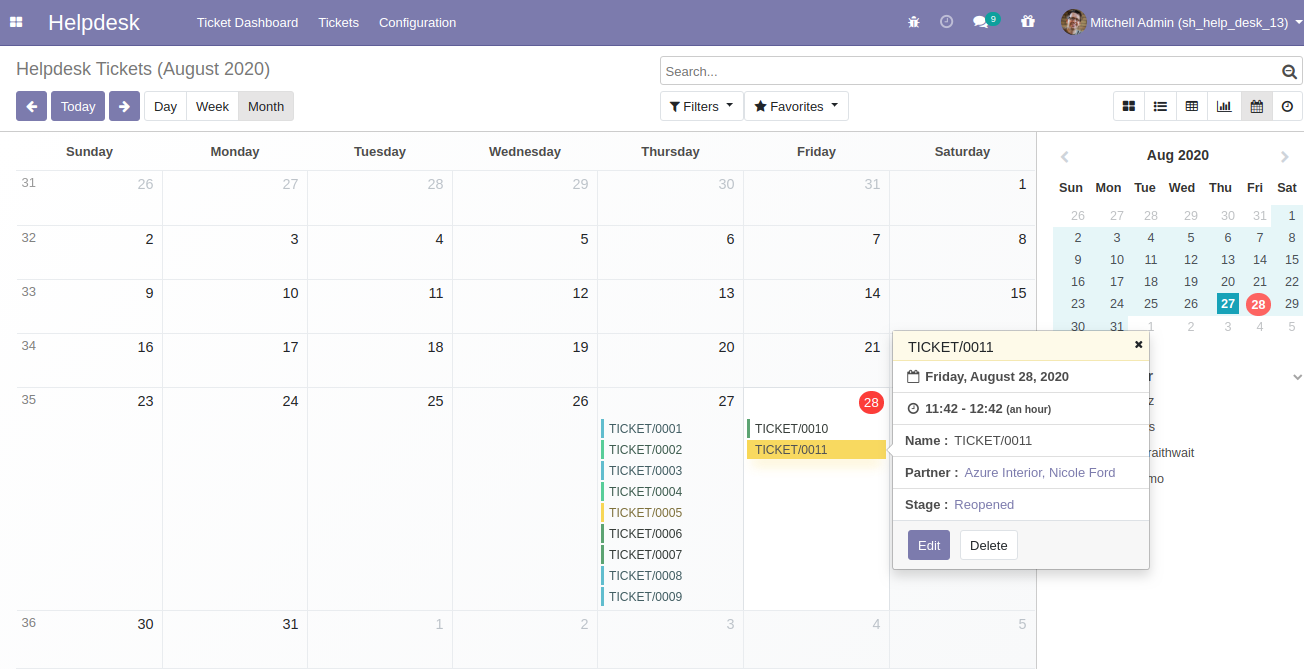
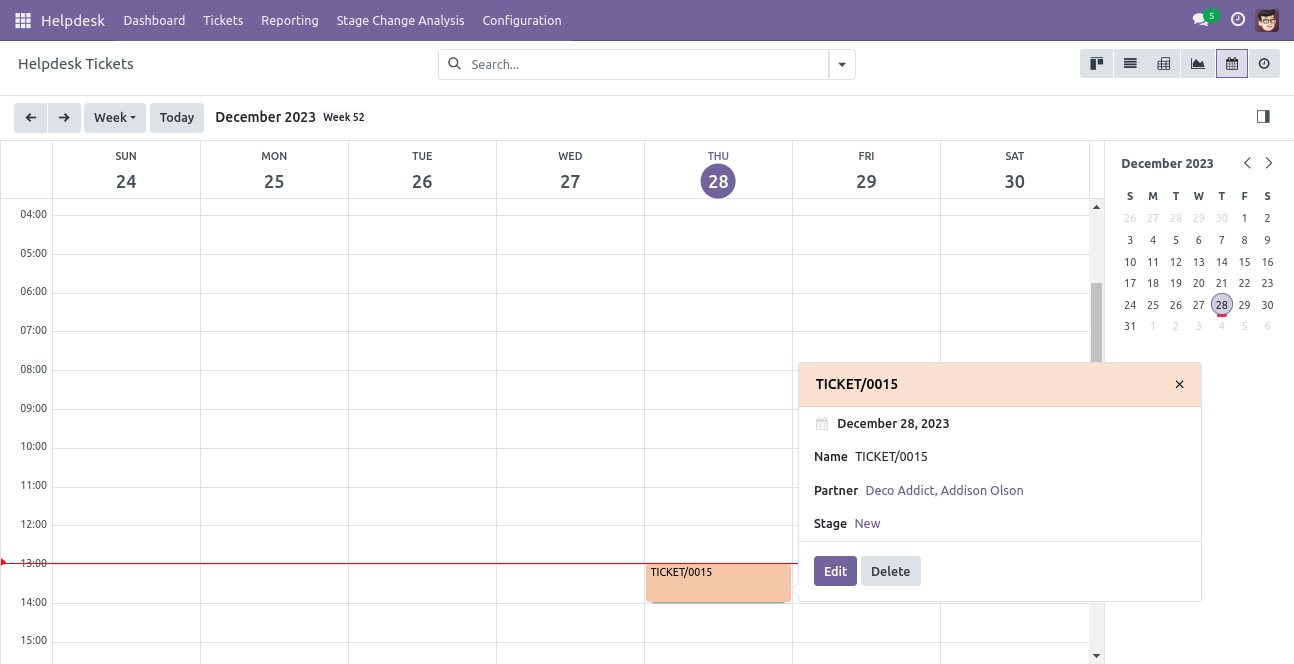
"Helpdesk Ticket" Calender view.
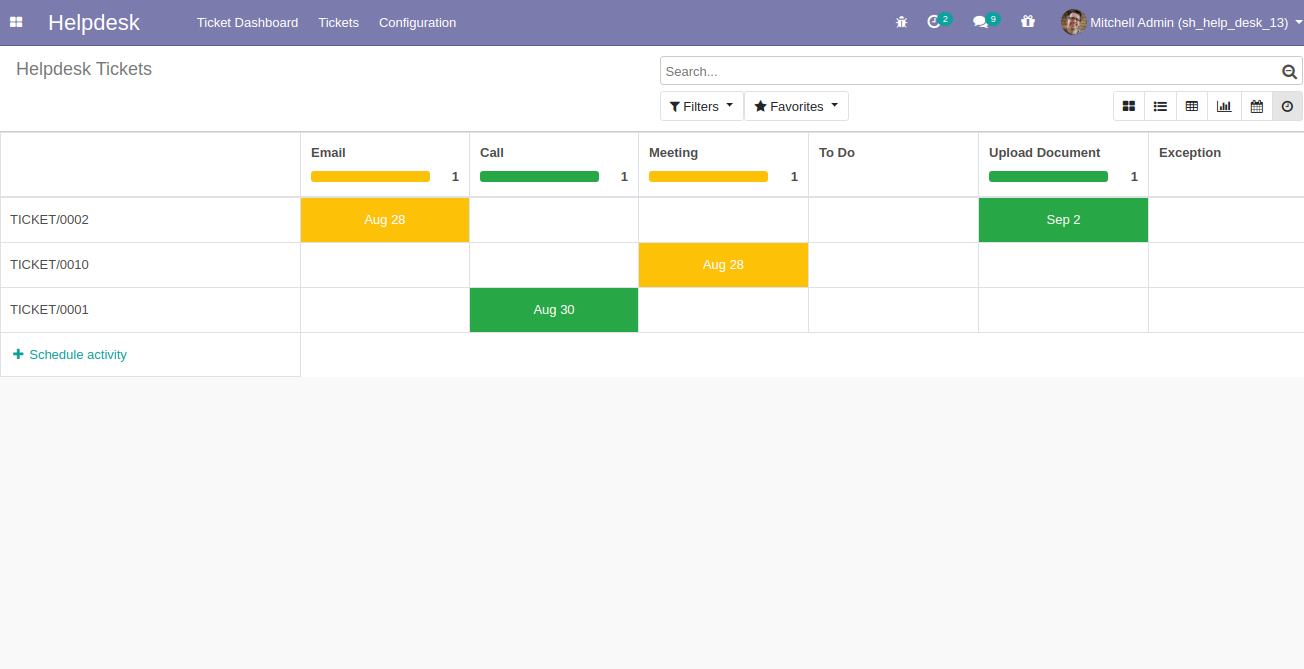
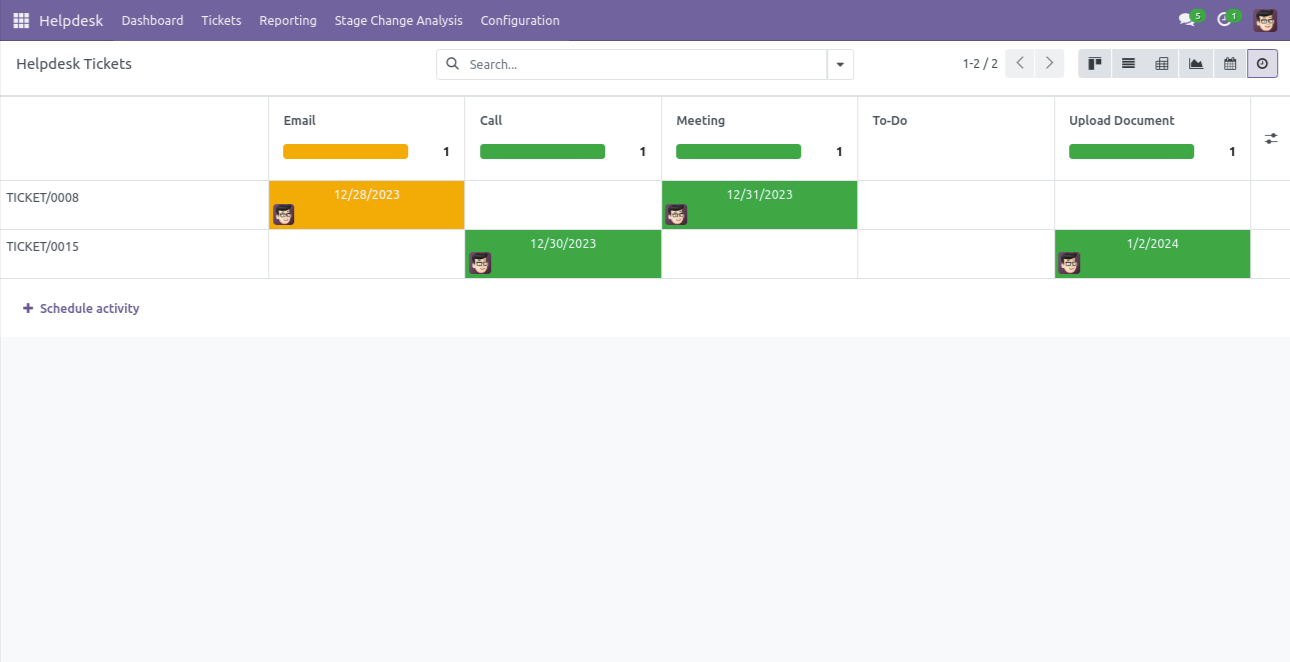
"Helpdesk Ticket" Schedule activity view.
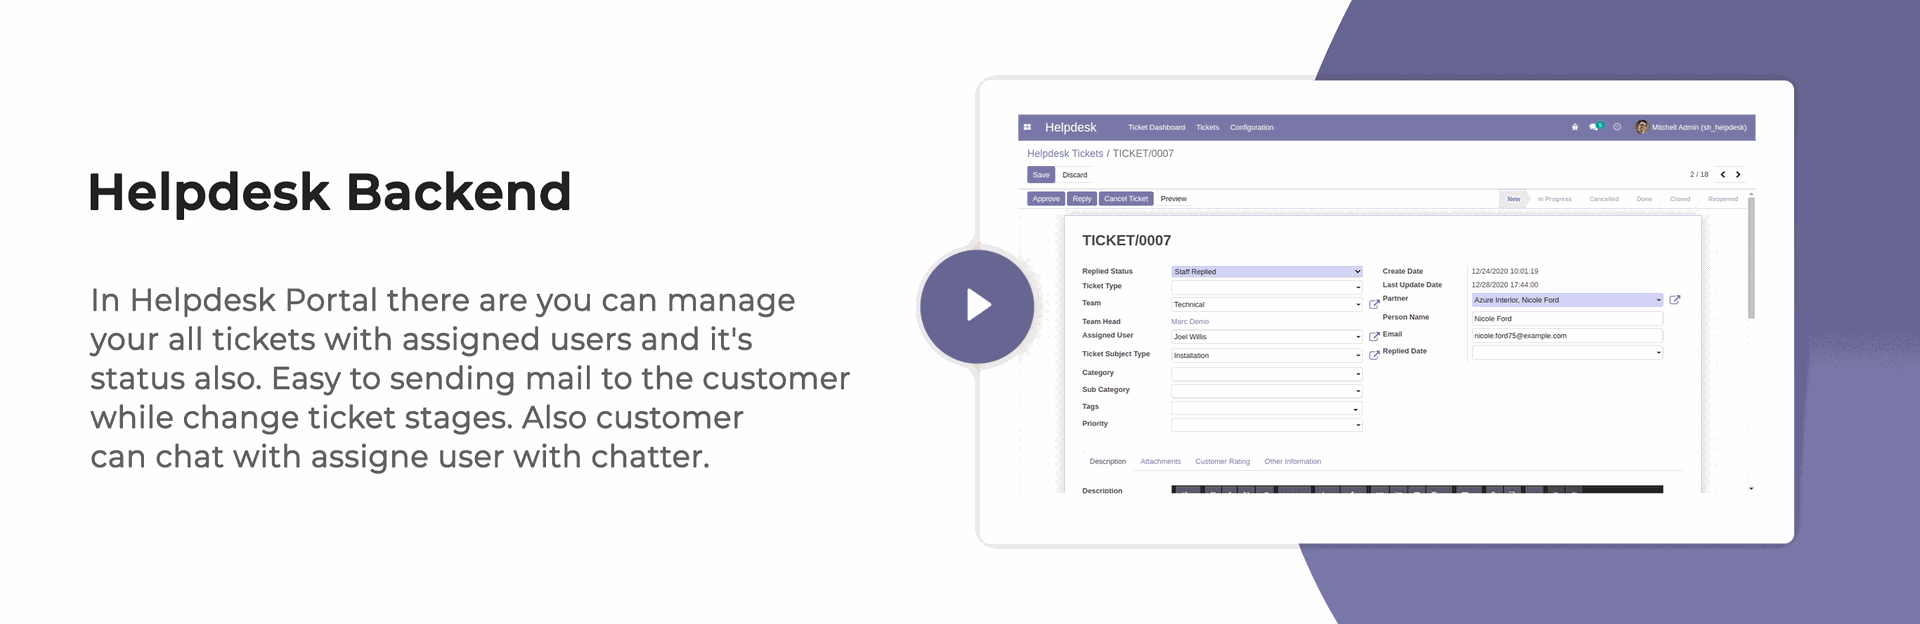
"Helpdesk Ticket" form view.
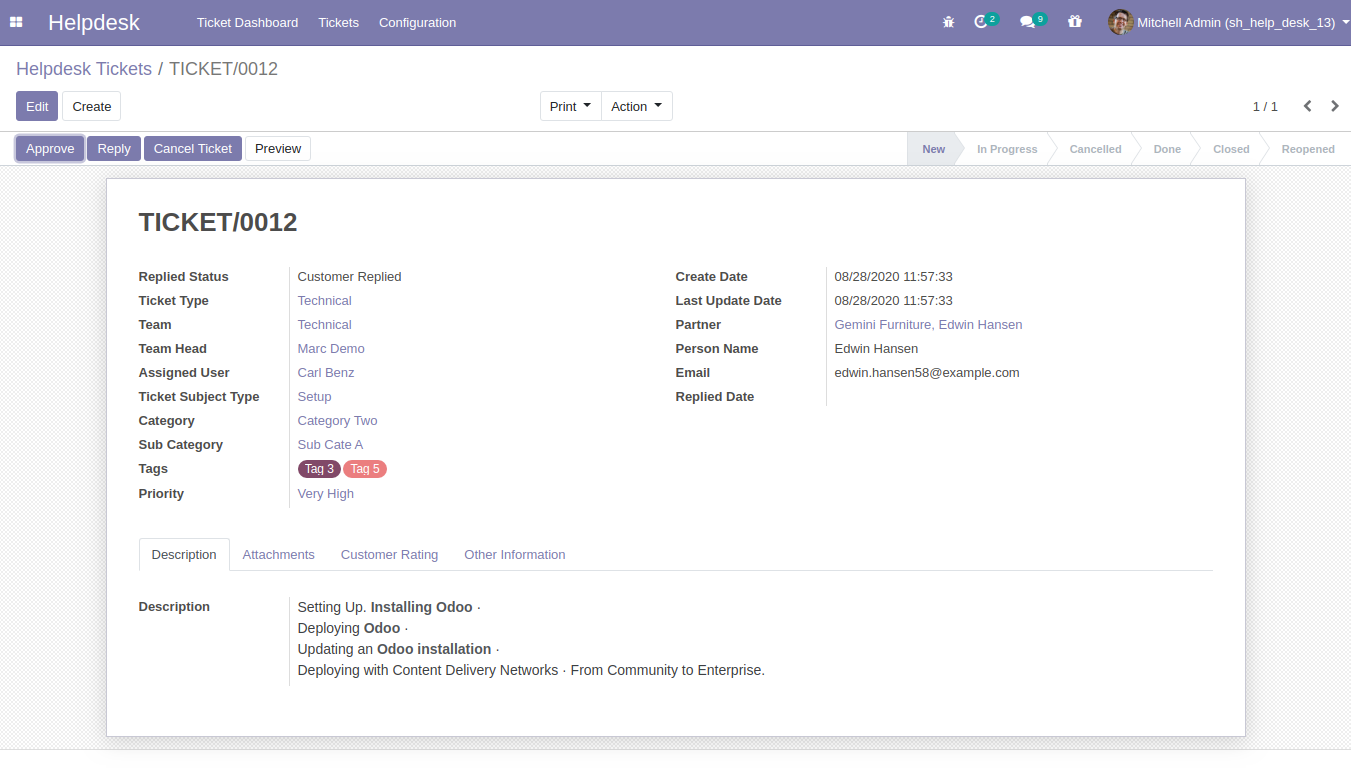
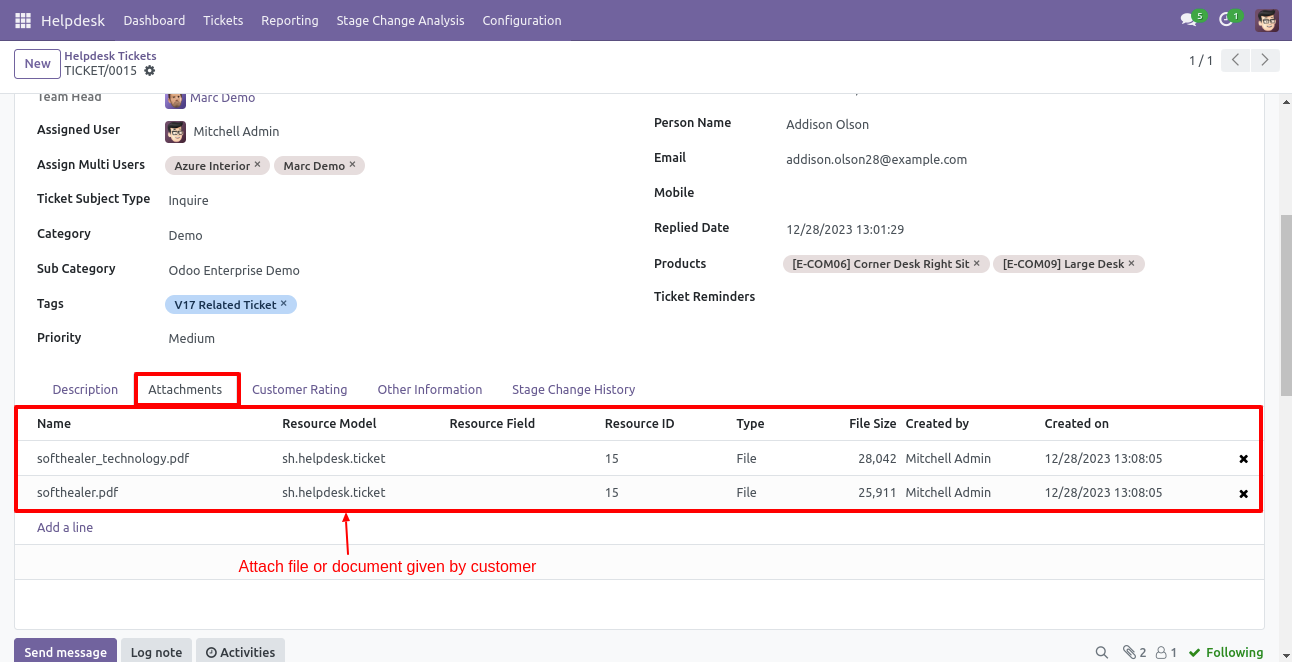
"Helpdesk Ticket" form attachment view. Where you can attach the document received from the customer.
When a ticket is created that time customer will notify via email.

When a ticket is created that time assign user will notify via email.

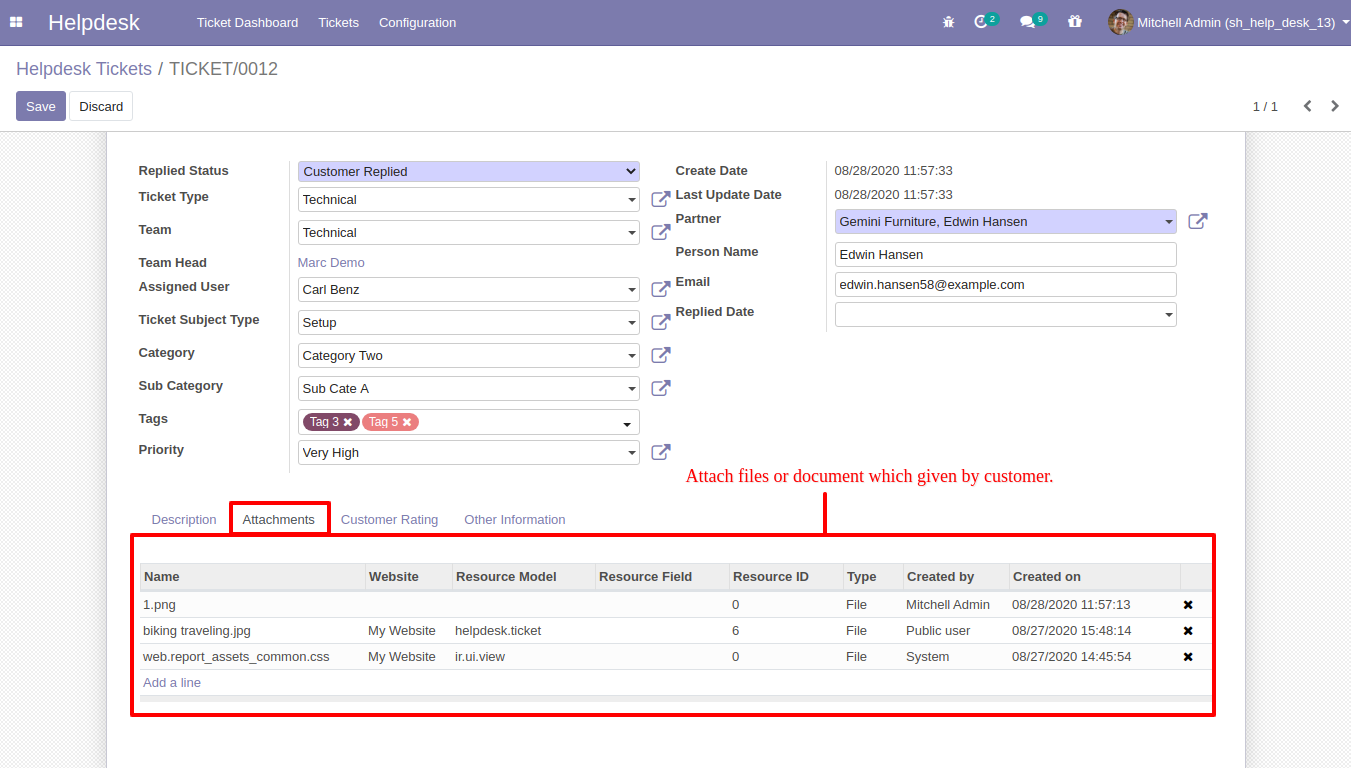
When you click on the 'Replay' button on the form, this wizard will appear where you can set an email template as per replay. In Email, there is one link 'View Ticket', Where customers can see the ticket status.
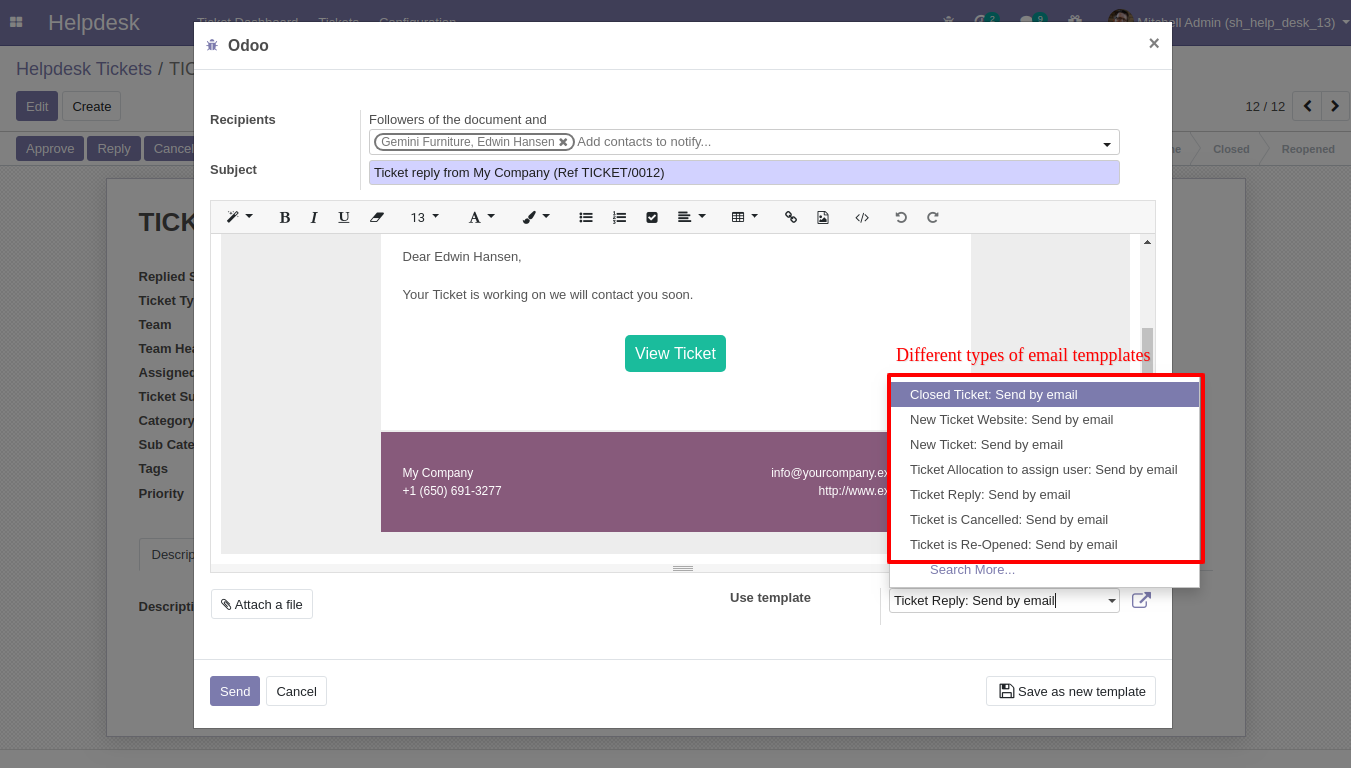
'Replied Date' added after a replay and replied status will change 'Staff Replied'.
While the ticket is closed, the customer will notify via email with a feedback link. Click on the link.
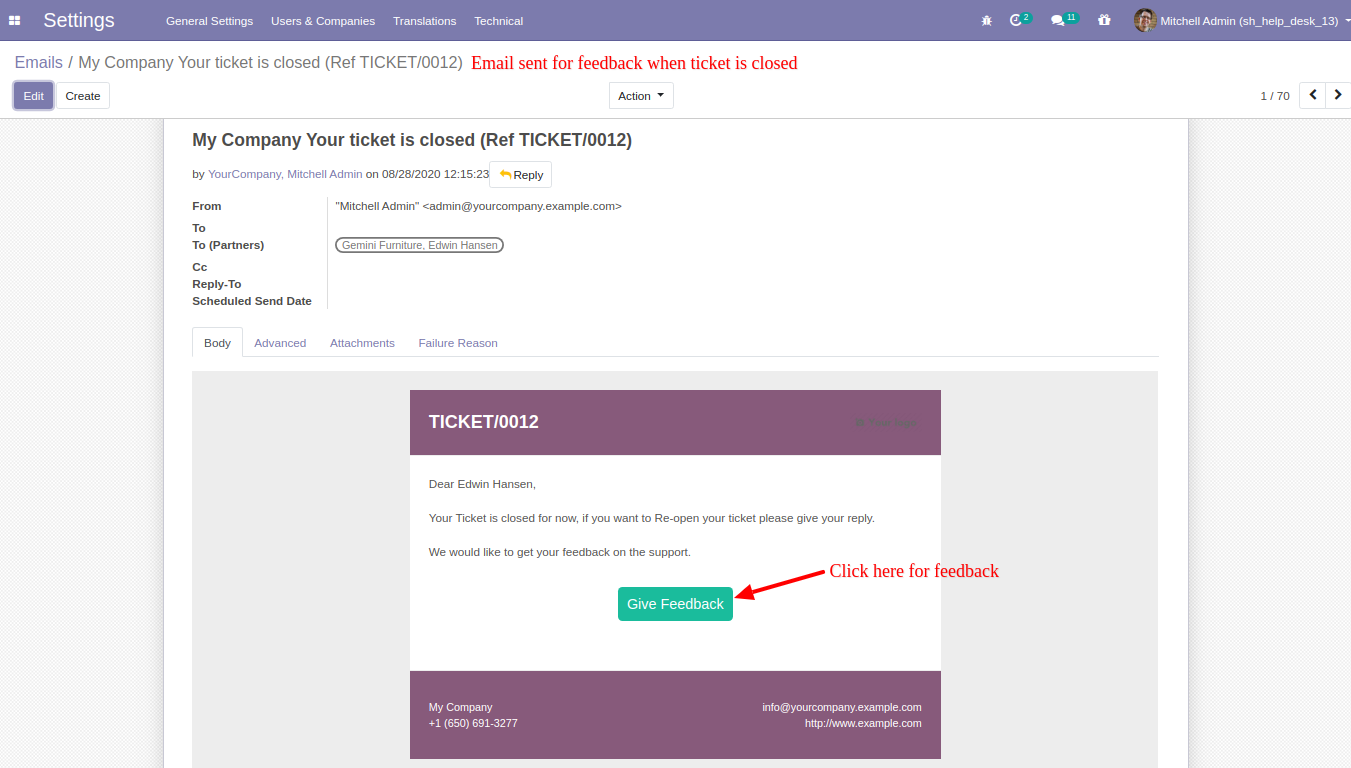
After click on the link customer will see this view, where customers give feedback with comments.

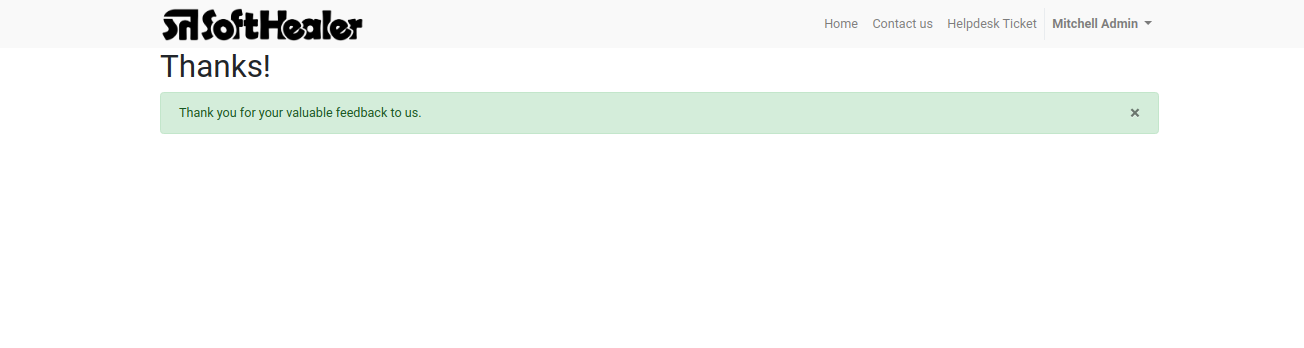
Thank you message after submitting feedback.
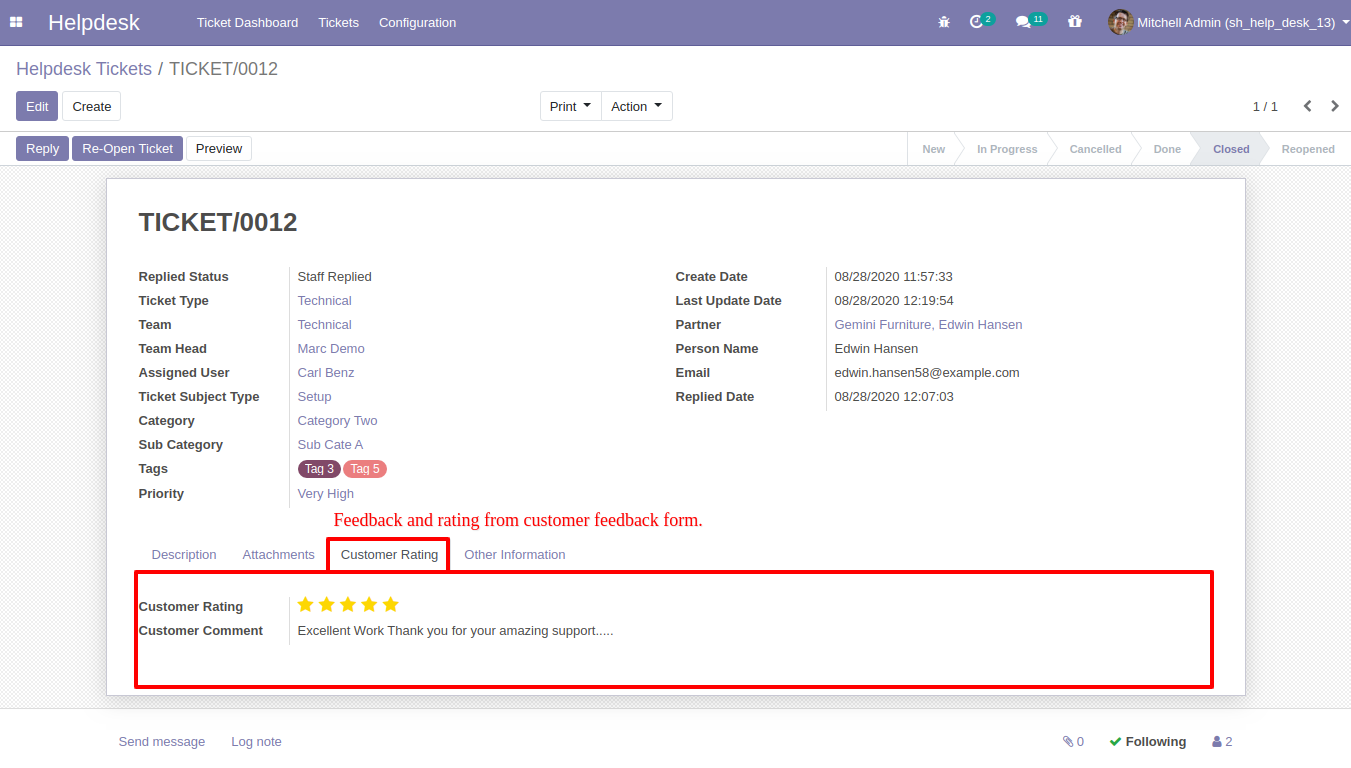
Customer feedback.
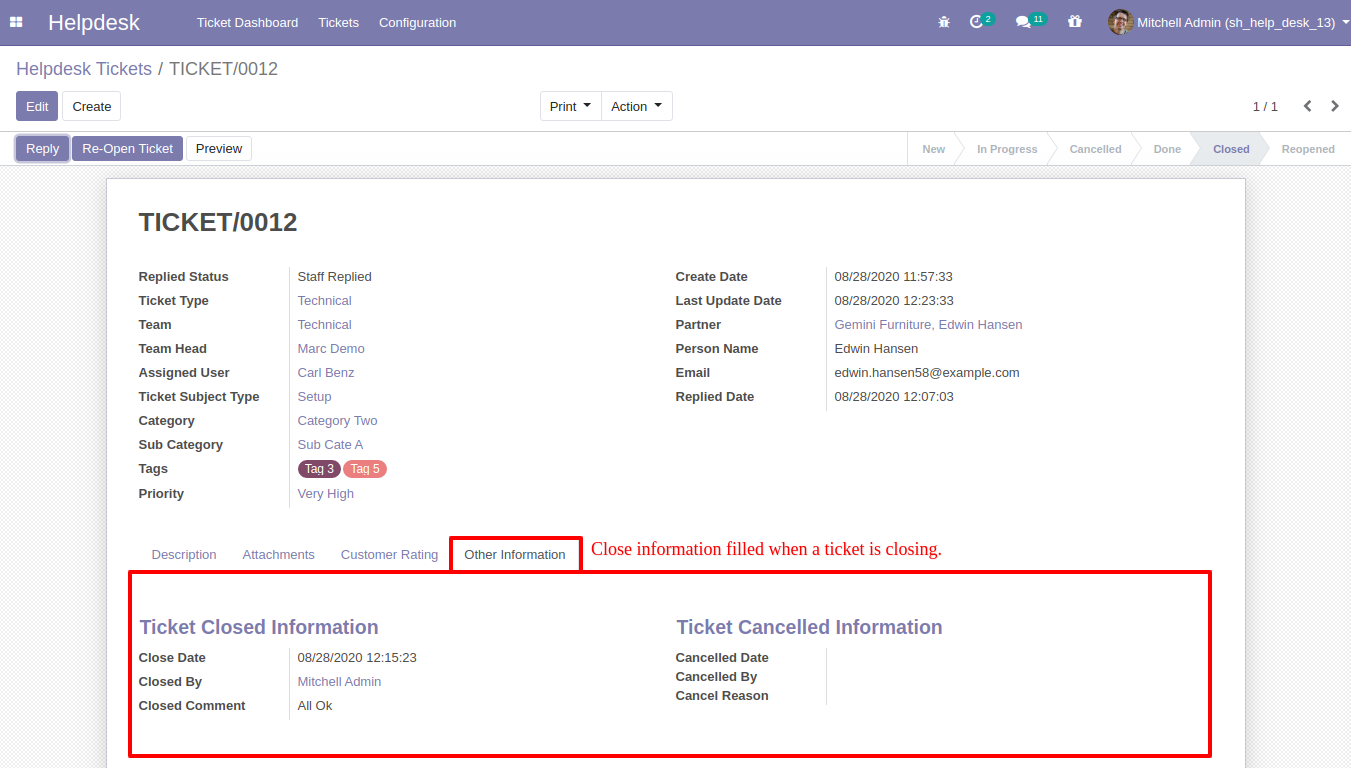
"Ticket Close" information will be added here.
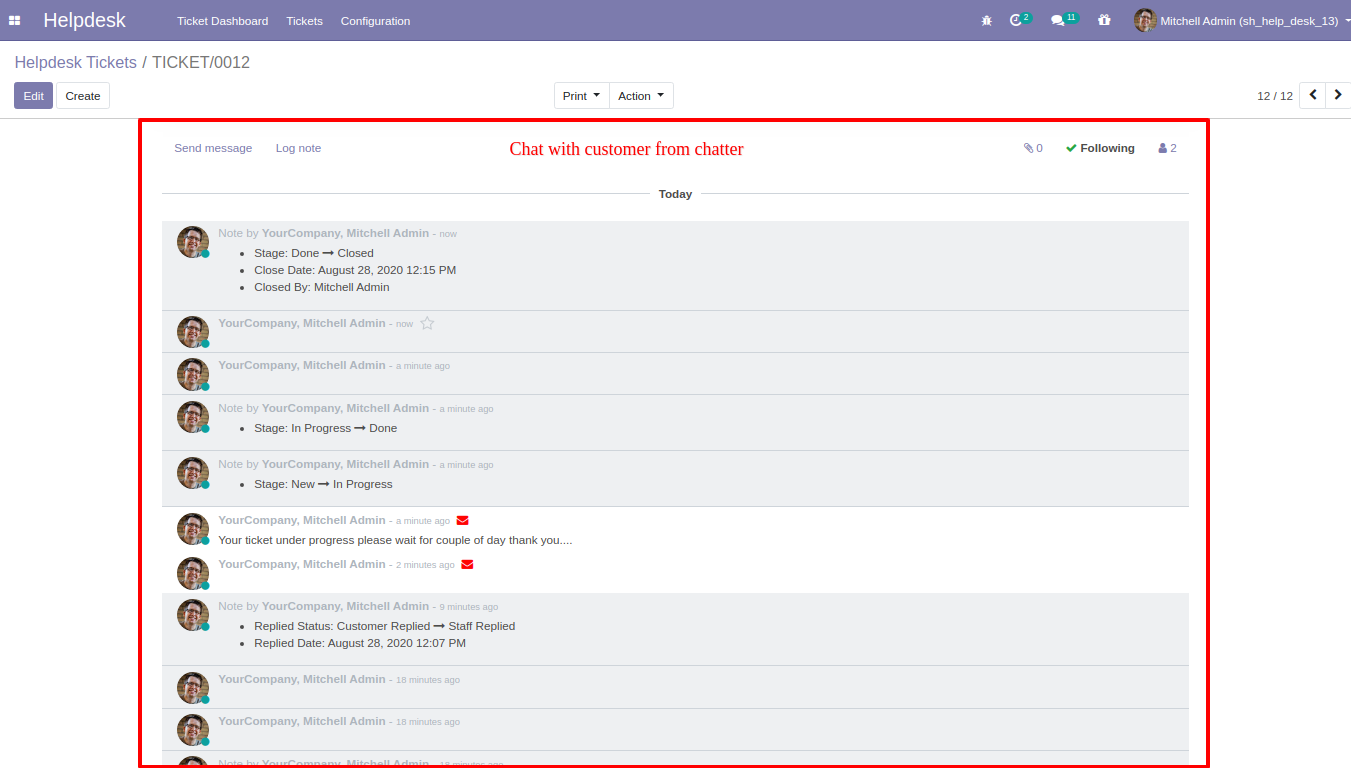
Chat with customers in chatter.
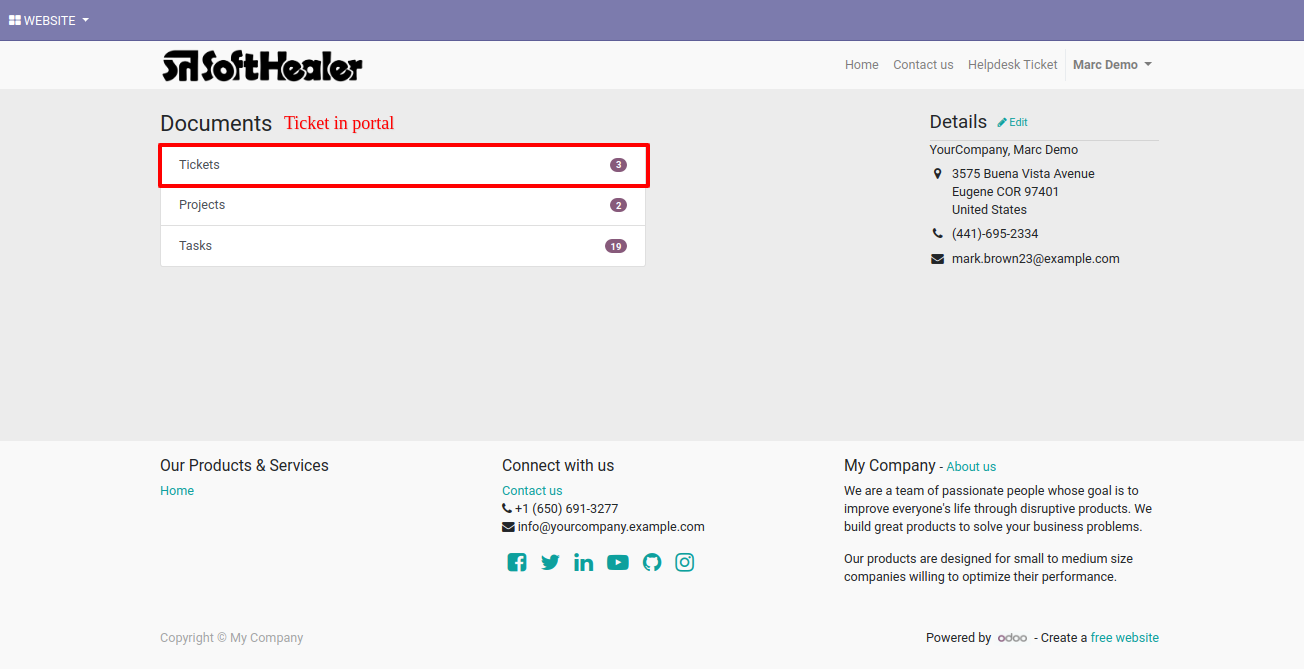
Ticket on the portal.
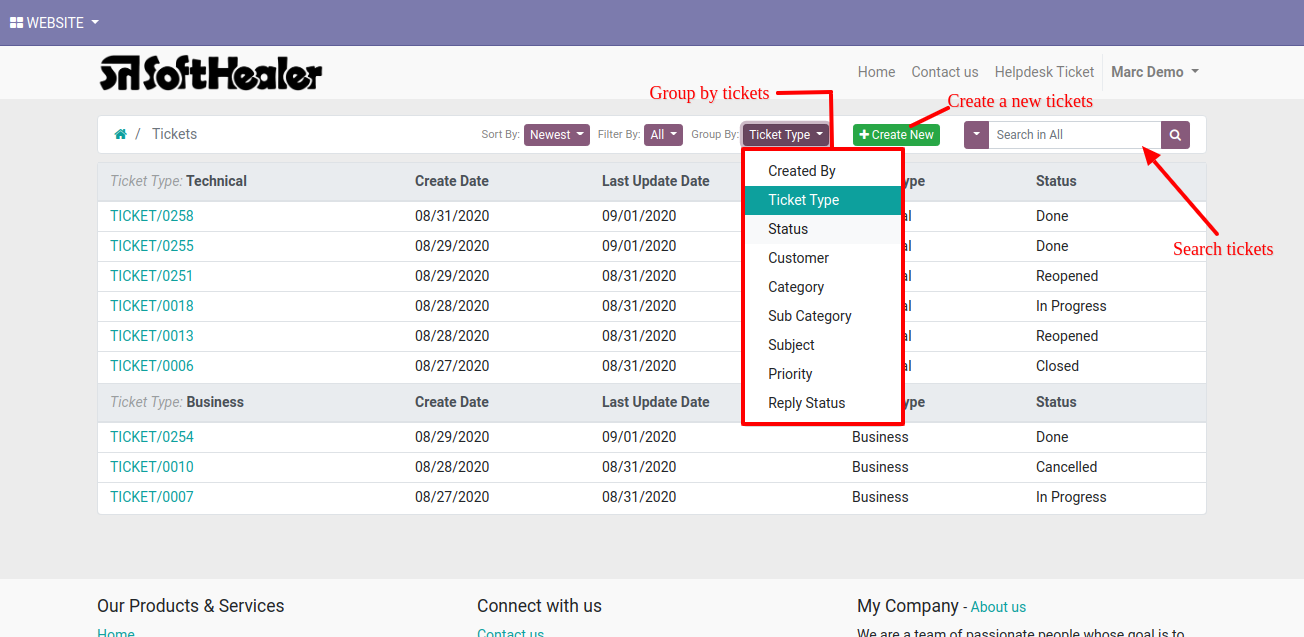
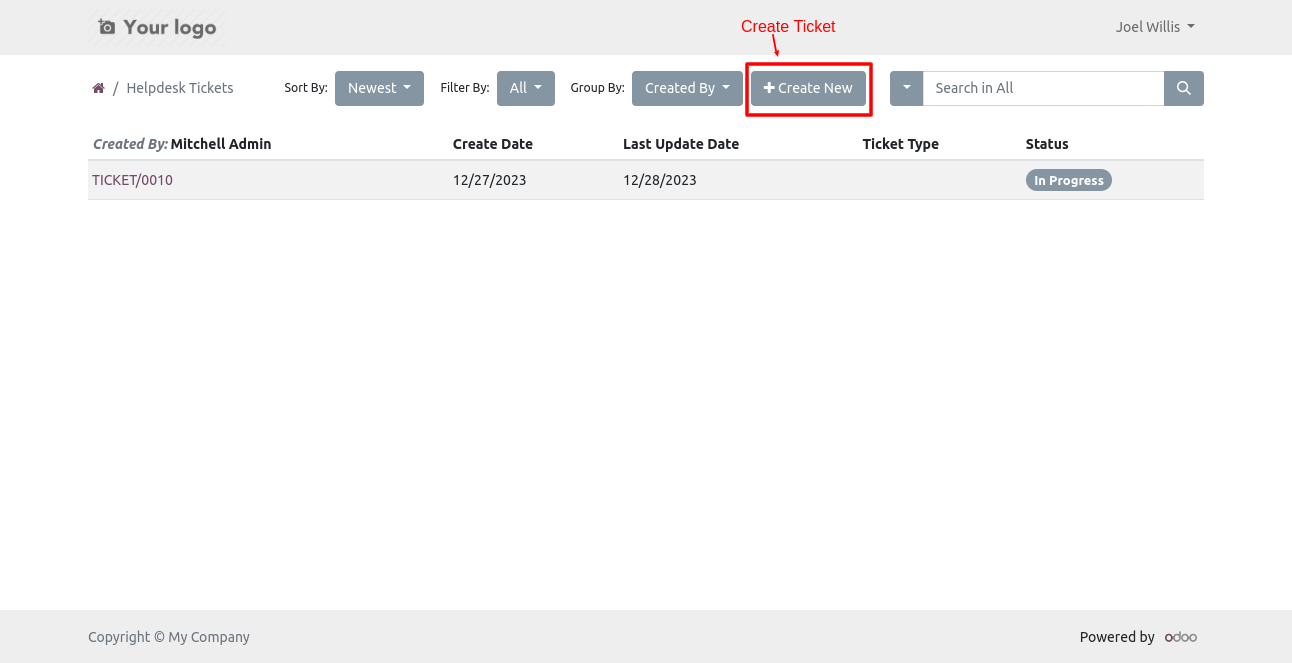
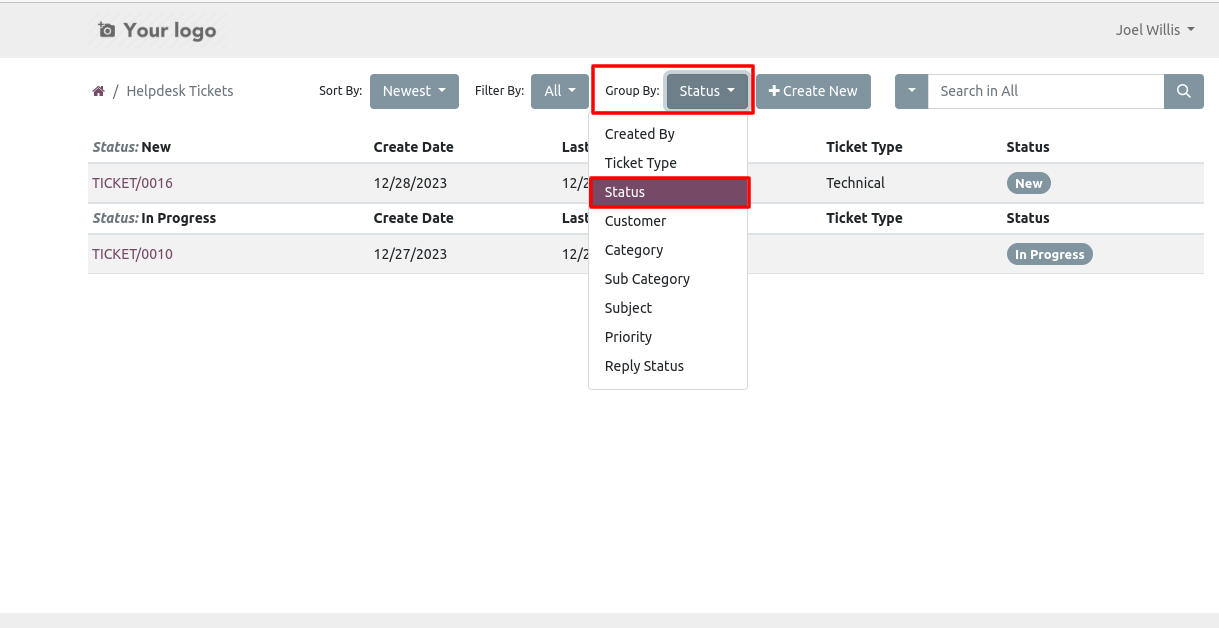
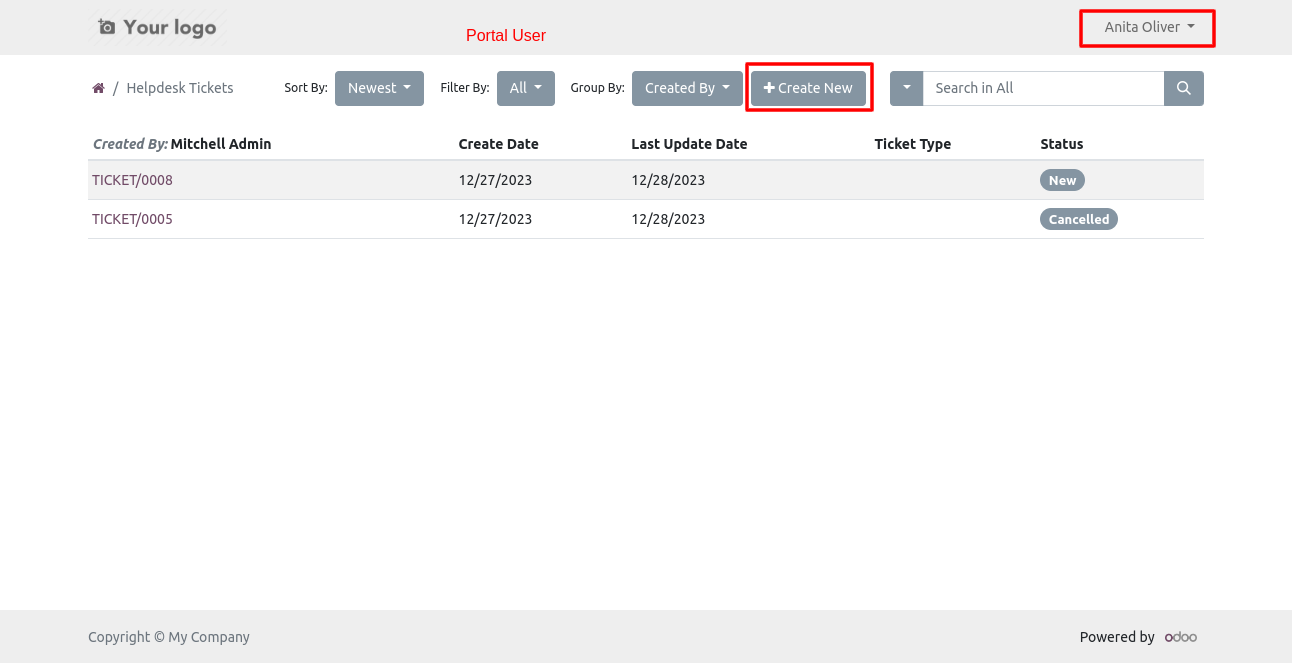
List view on portal. You can group by, search, and create tickets.
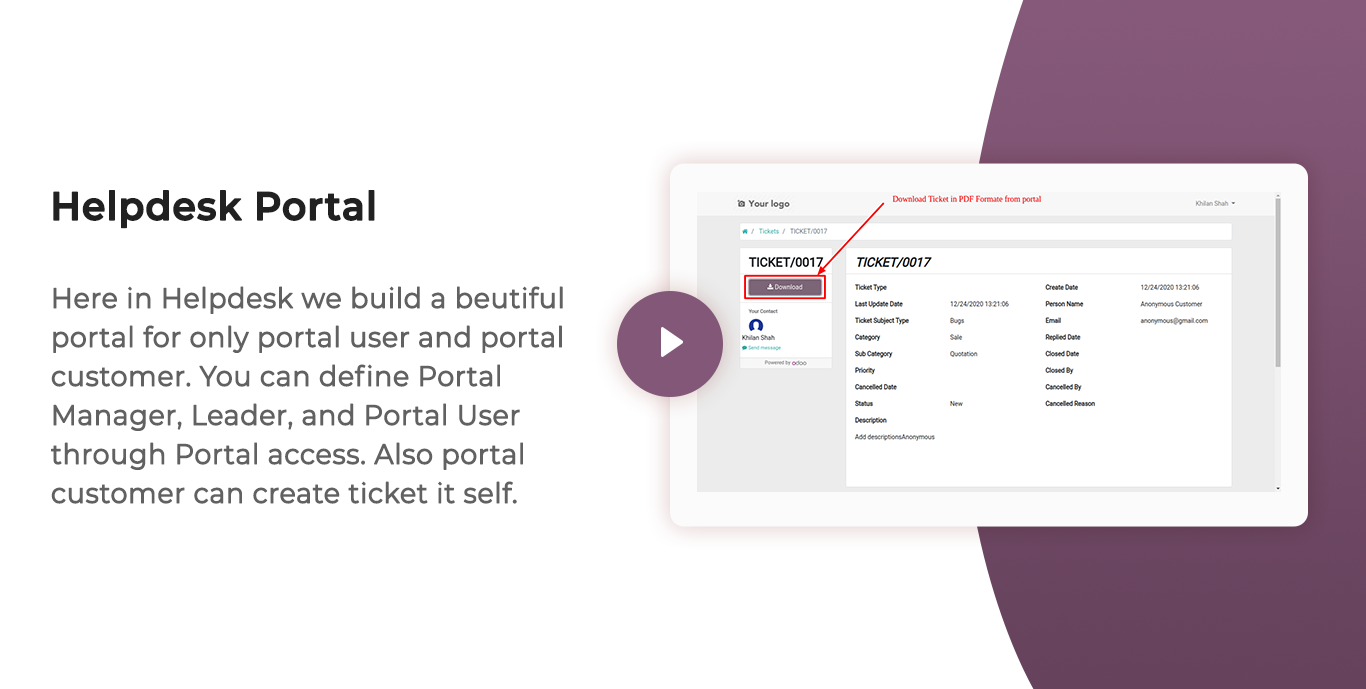
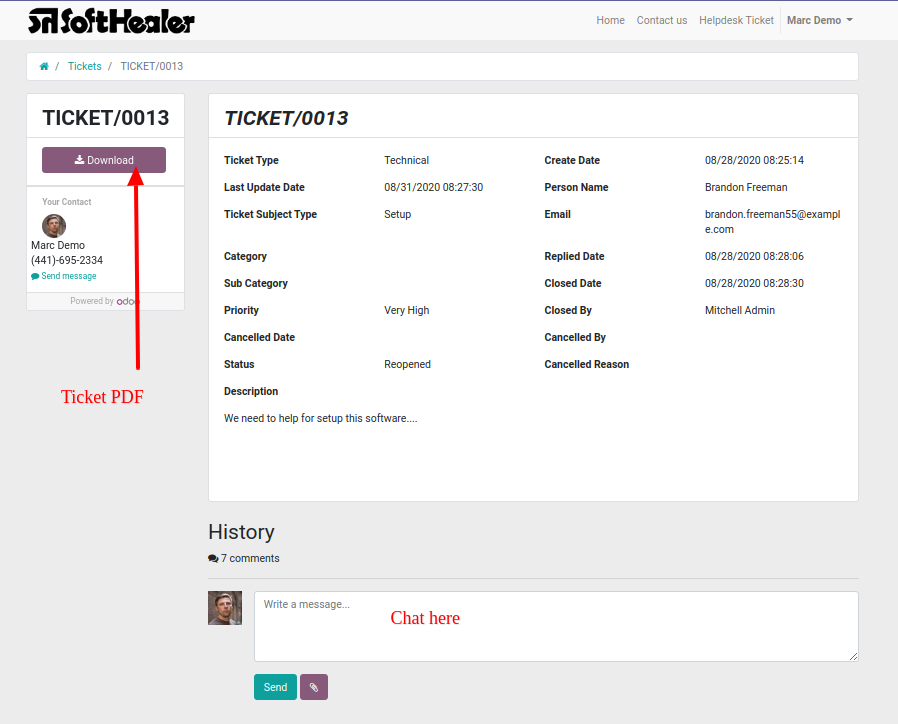
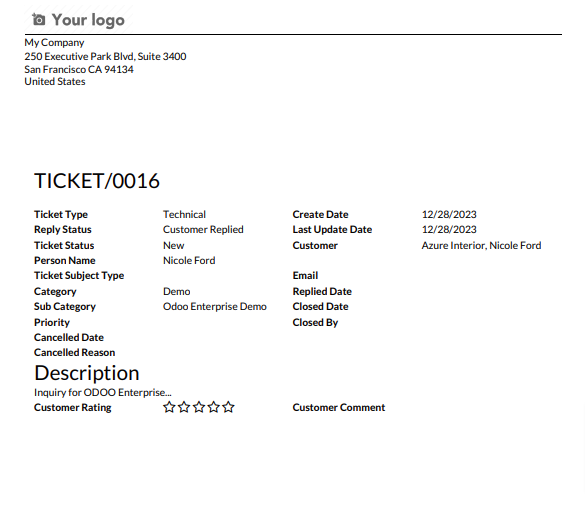
Helpdesk Portal ticket view where users can download ticket in PDF.
Helpdesk Portal ticket in PDF.
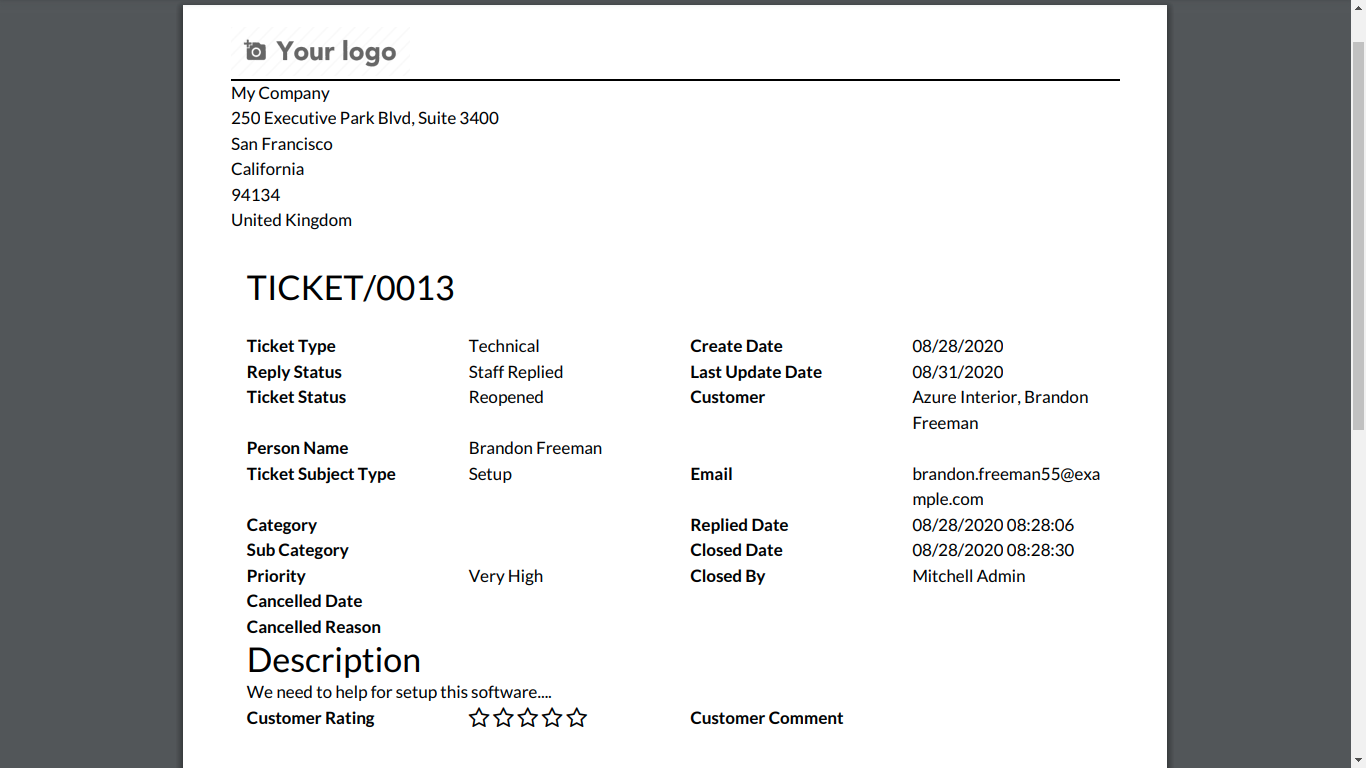
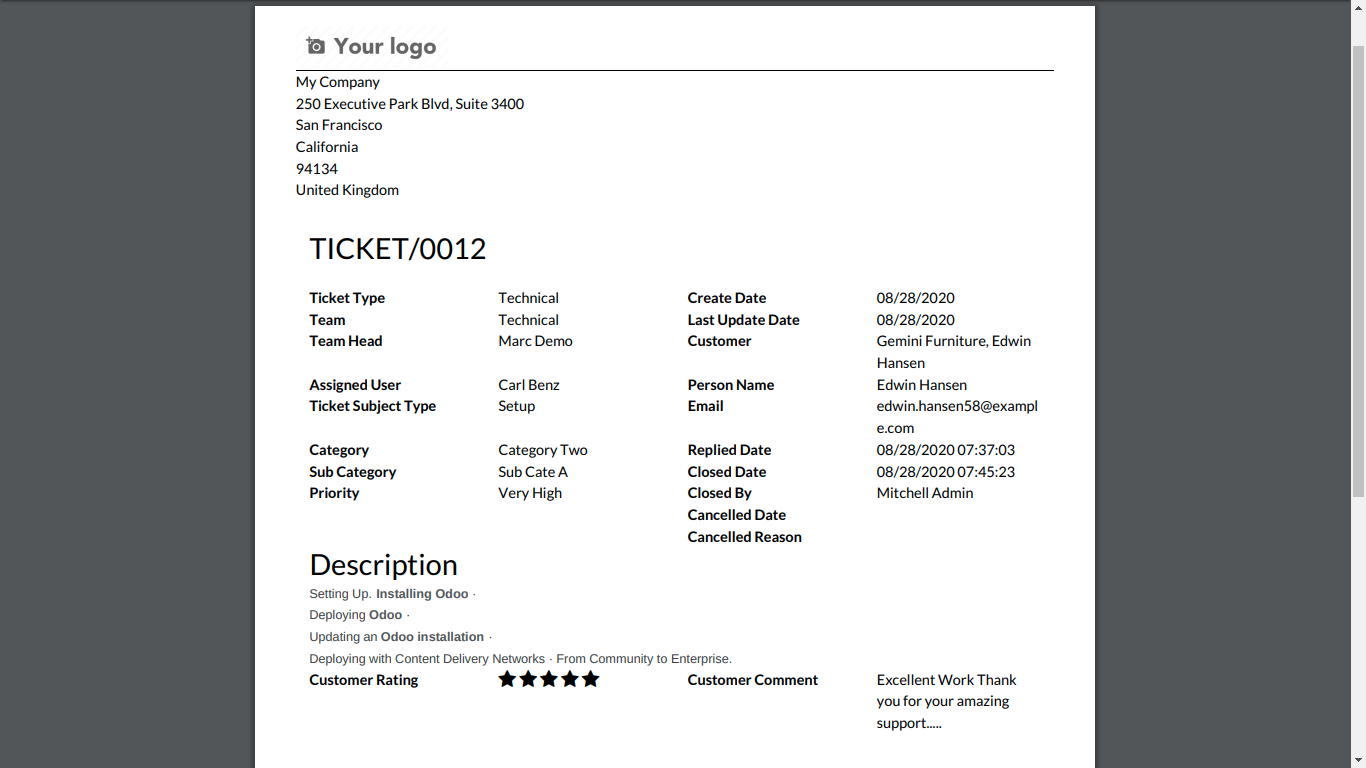
Helpdesk Portal ticket in PDF for the backend.
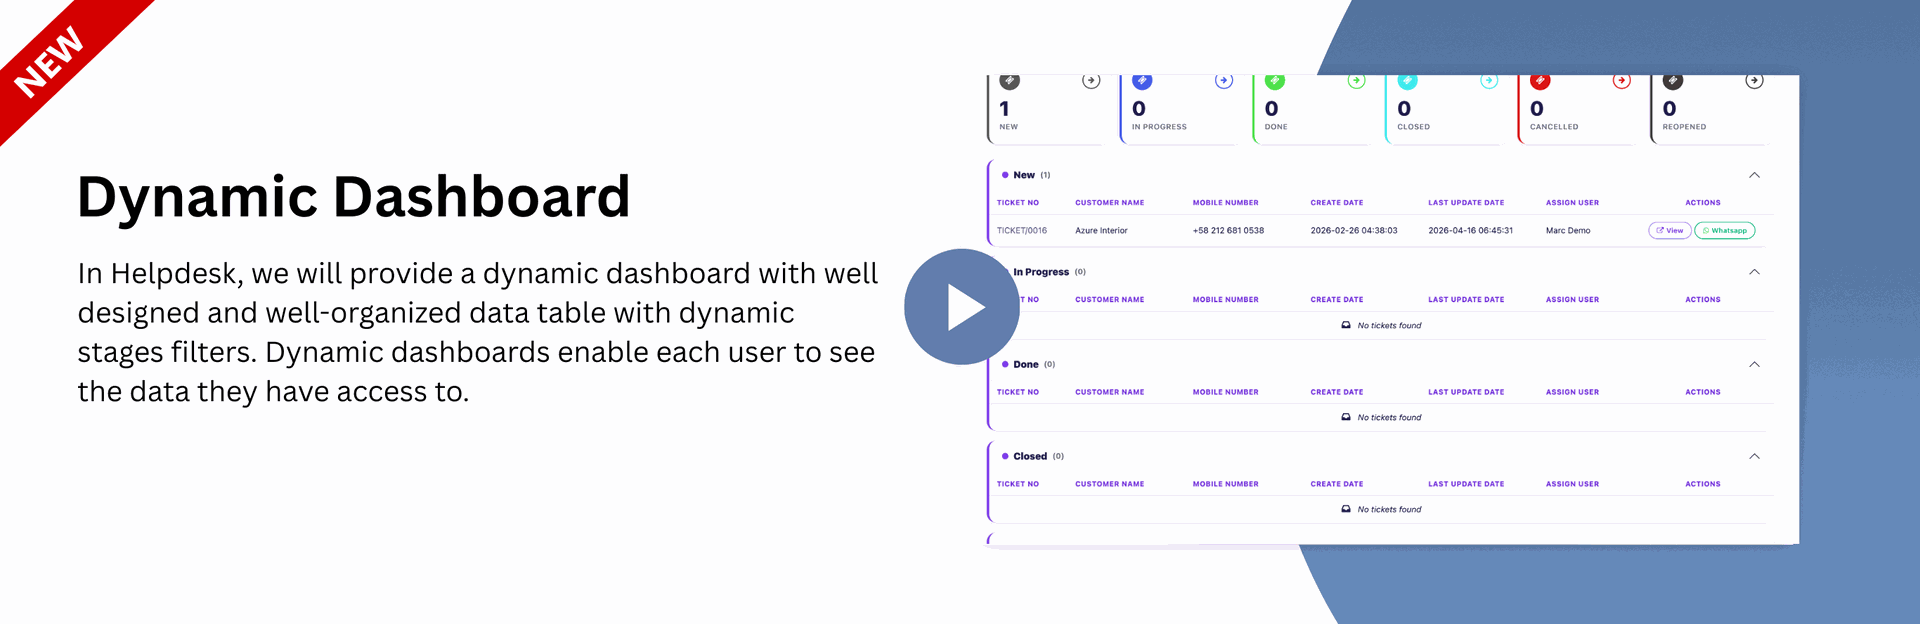
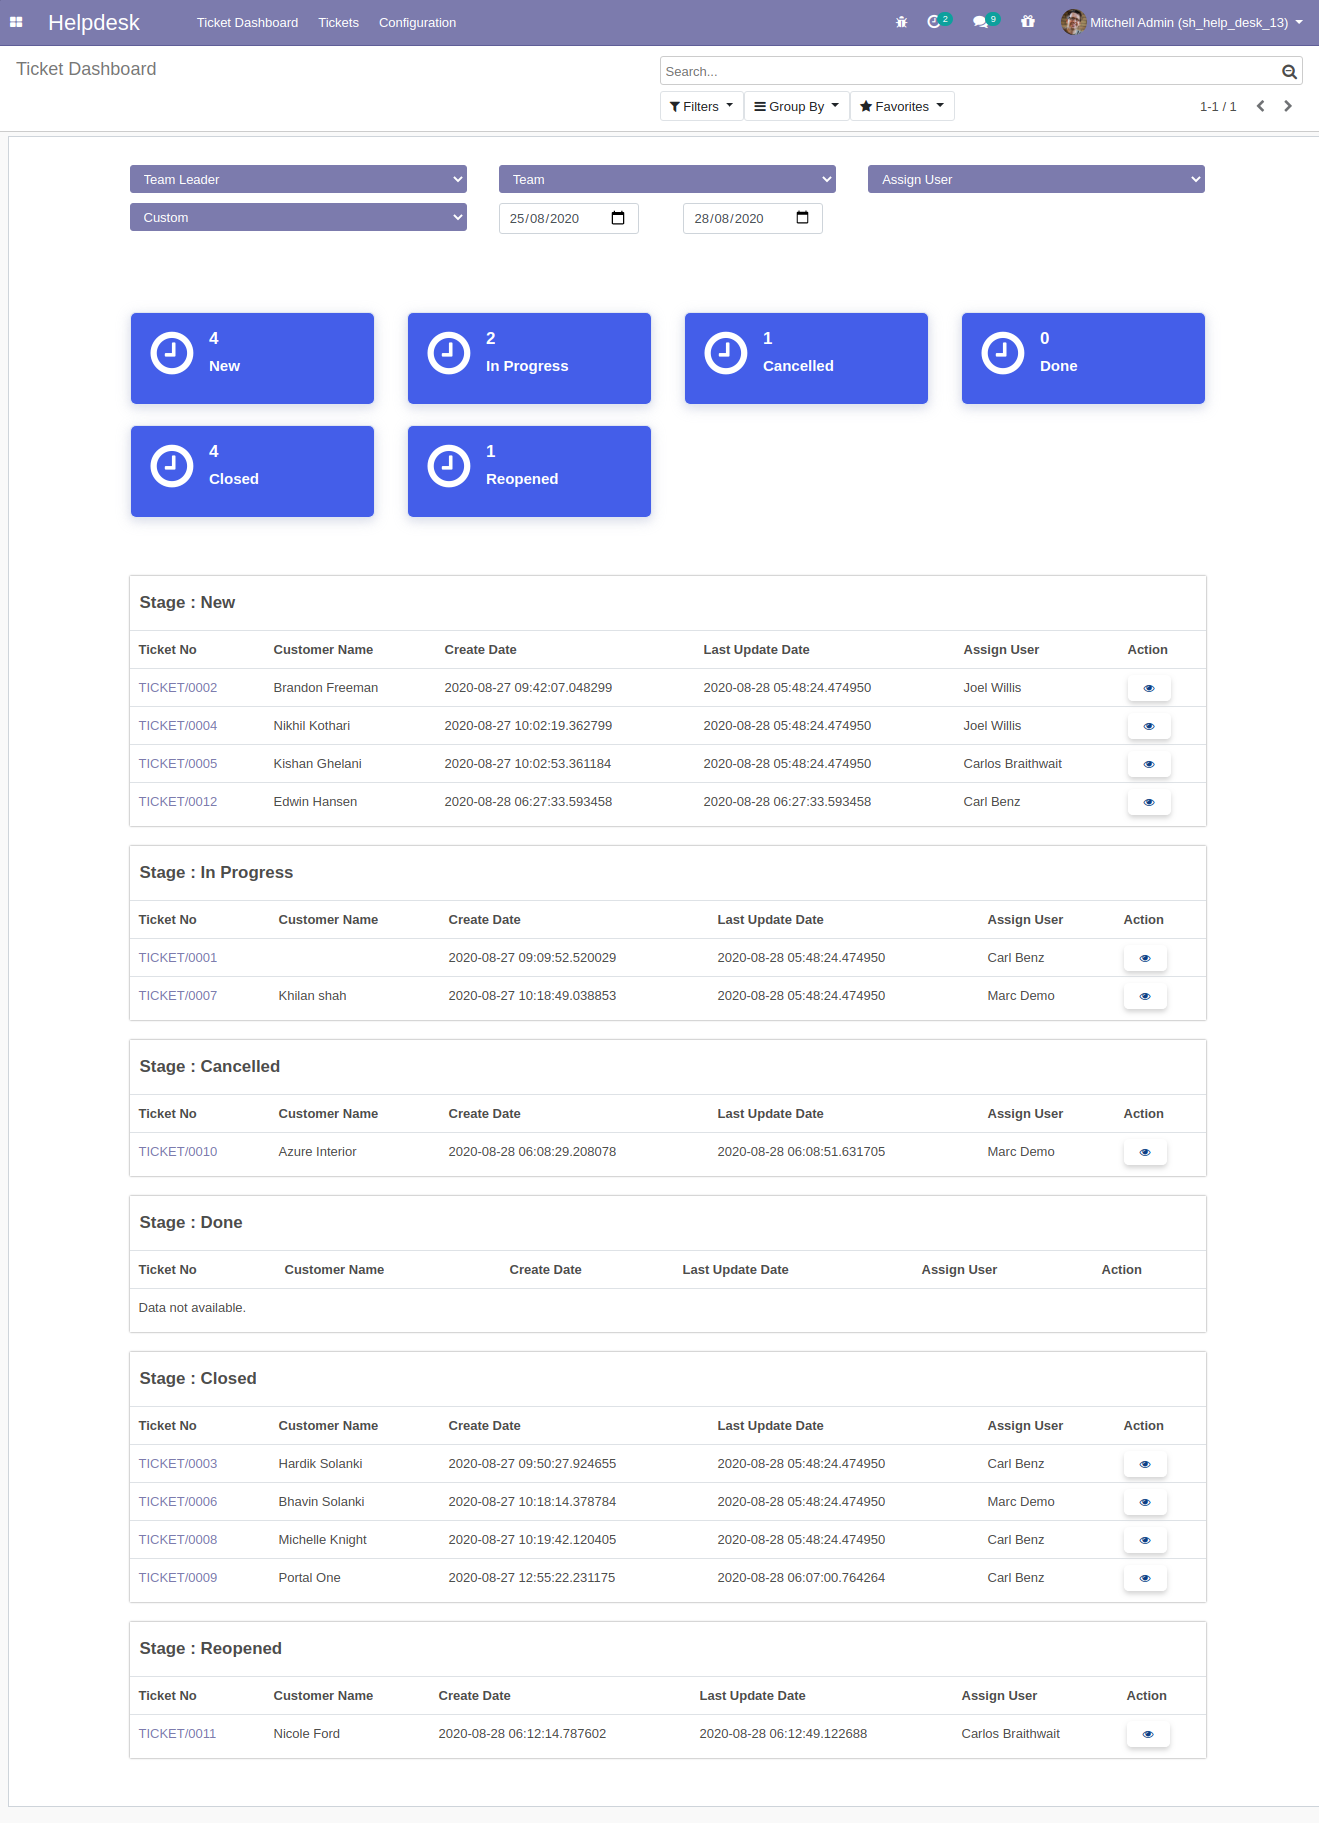
'Ticket Dashboard' for Helpdesk Manager. Where you can filter data with various filters and see data in well-organized table format.
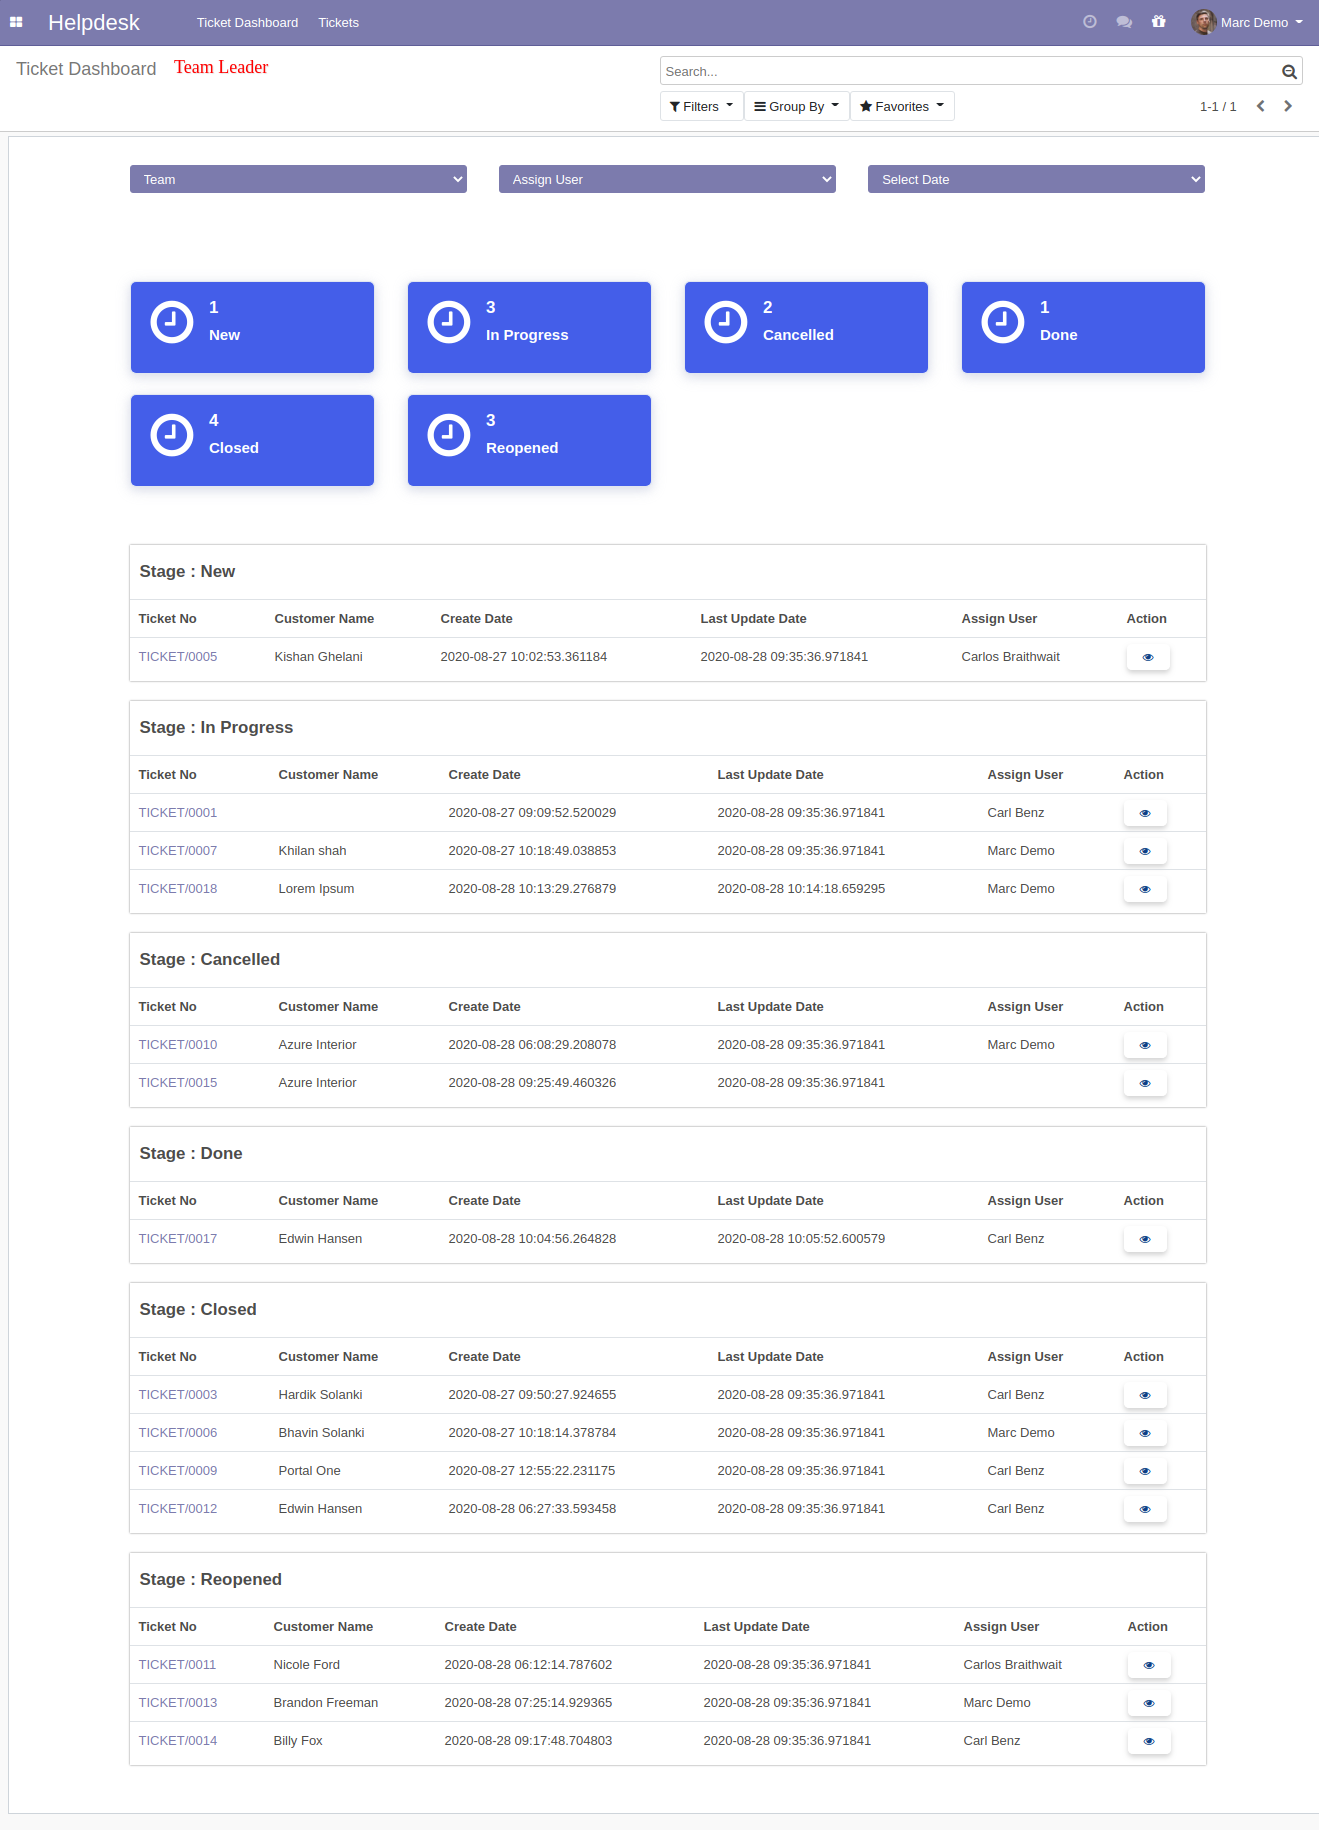
'Ticket Dashboard' for Helpdesk Team Leader. Where a leader can see only his team data and filter data with various filters, see data in well-organized table format.
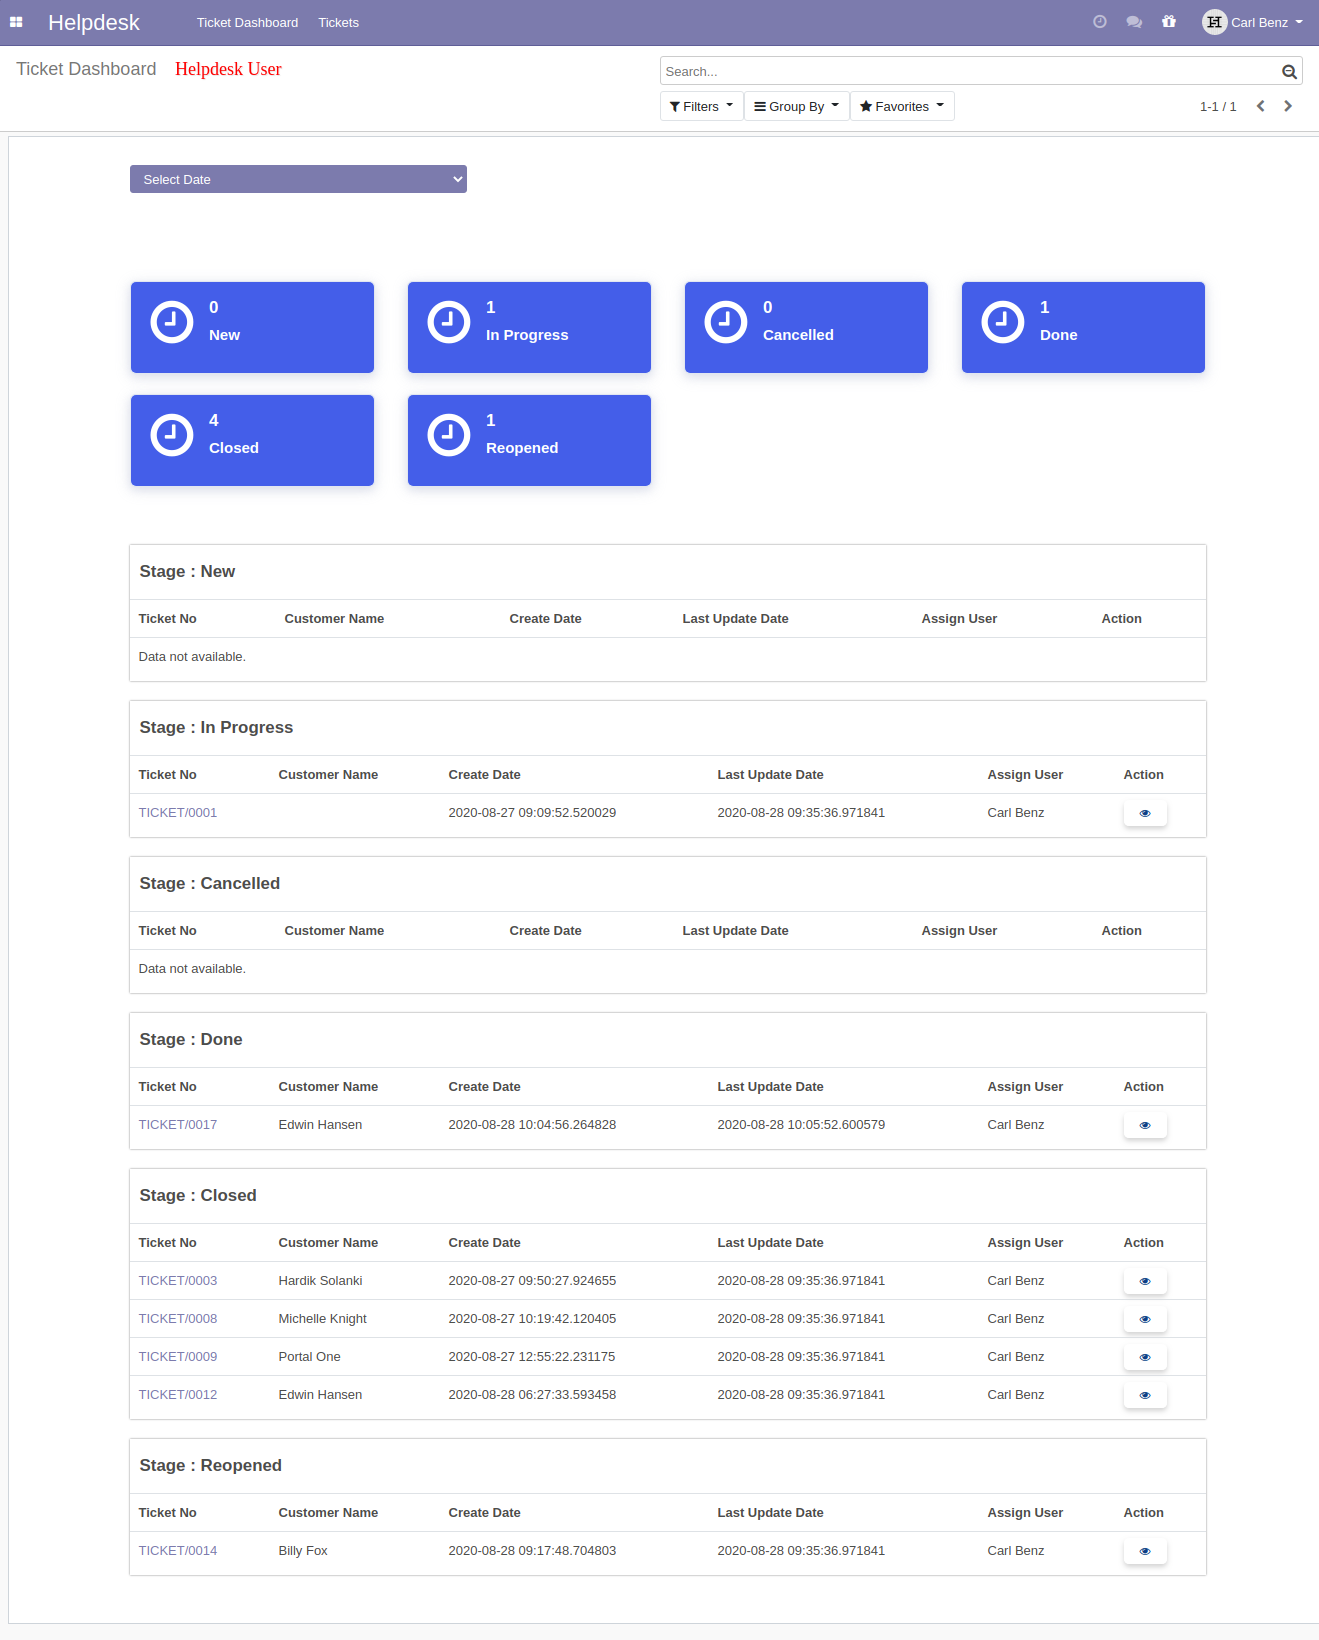
'Ticket Dashboard' for Helpdesk User. Where users can see the only ticket which is assigned, filter data with date filters, and see data in a well-organized table format.
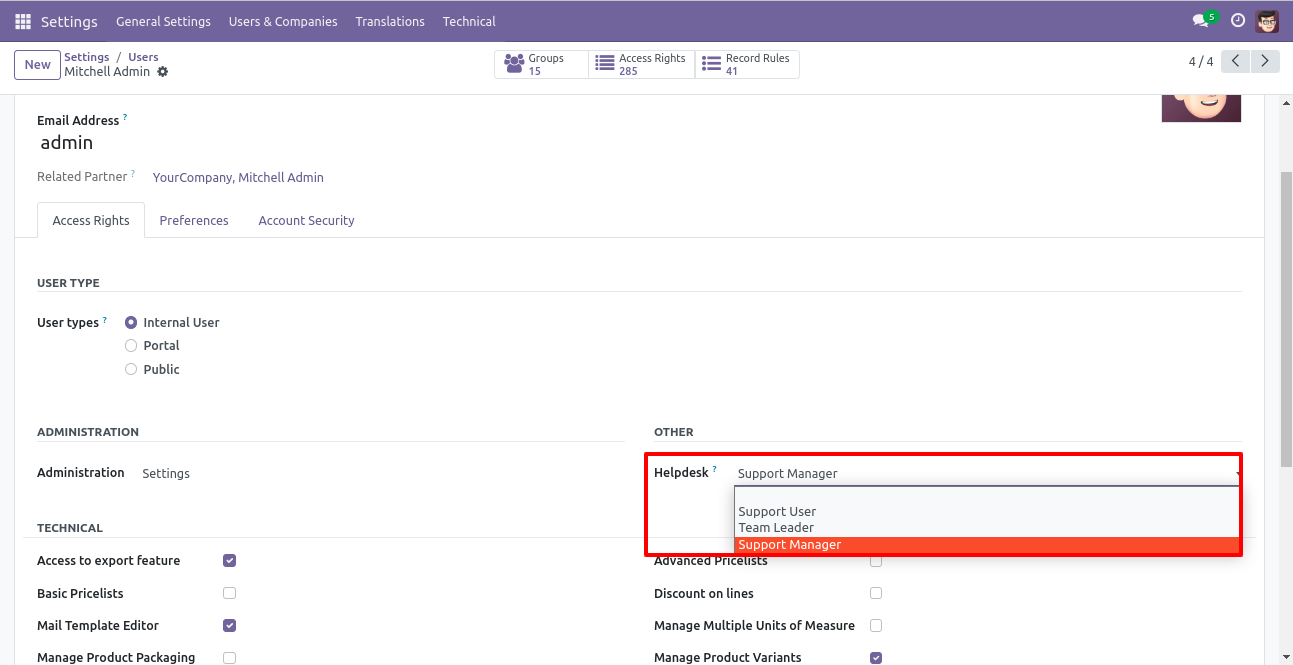
Access group for 'Helpdesk Manager', 'Helpdesk Team Leader', 'Helpdesk User'.
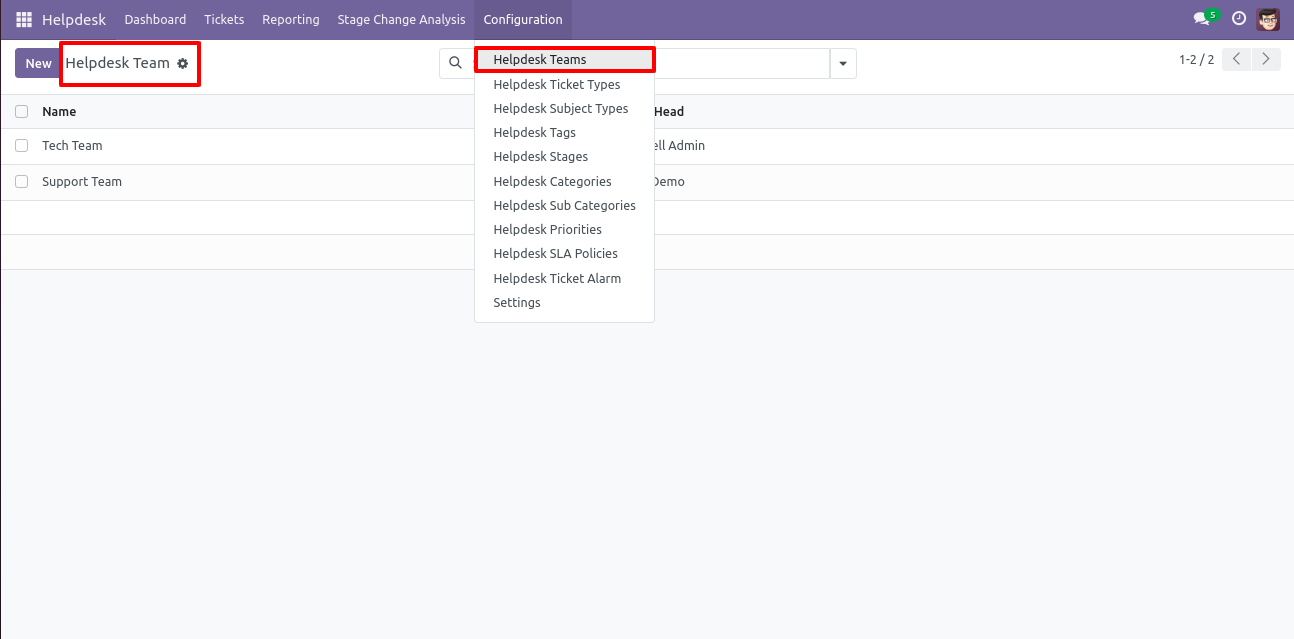
'Helpdesk Teams' menu and list view.
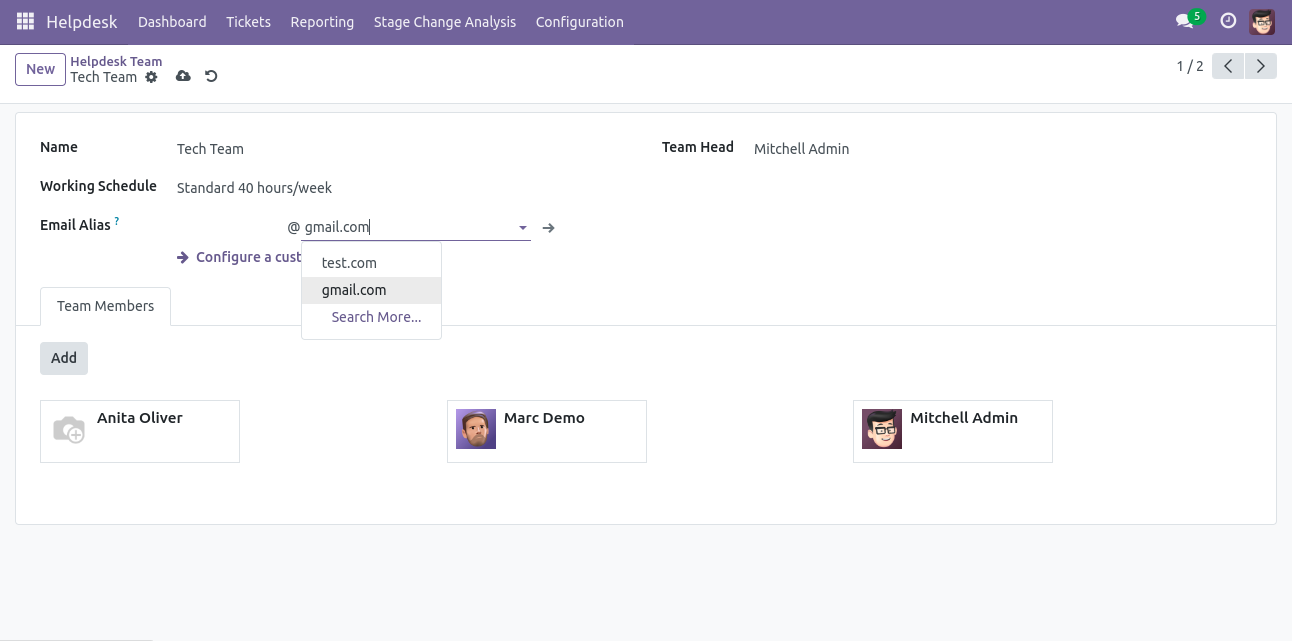
'Helpdesk Teams' form view. Where you can define team member and team leader or set team as default.
'Helpdesk Tickets Type' menu and list view.
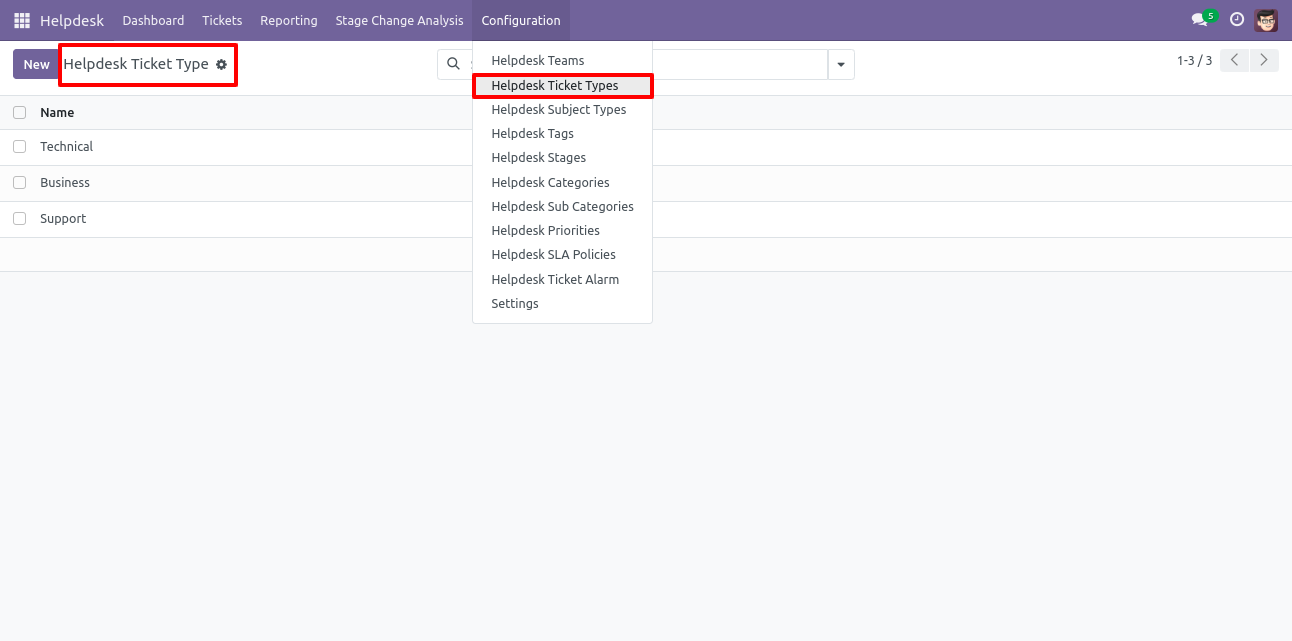
'Helpdesk Subject Types' menu and list view.
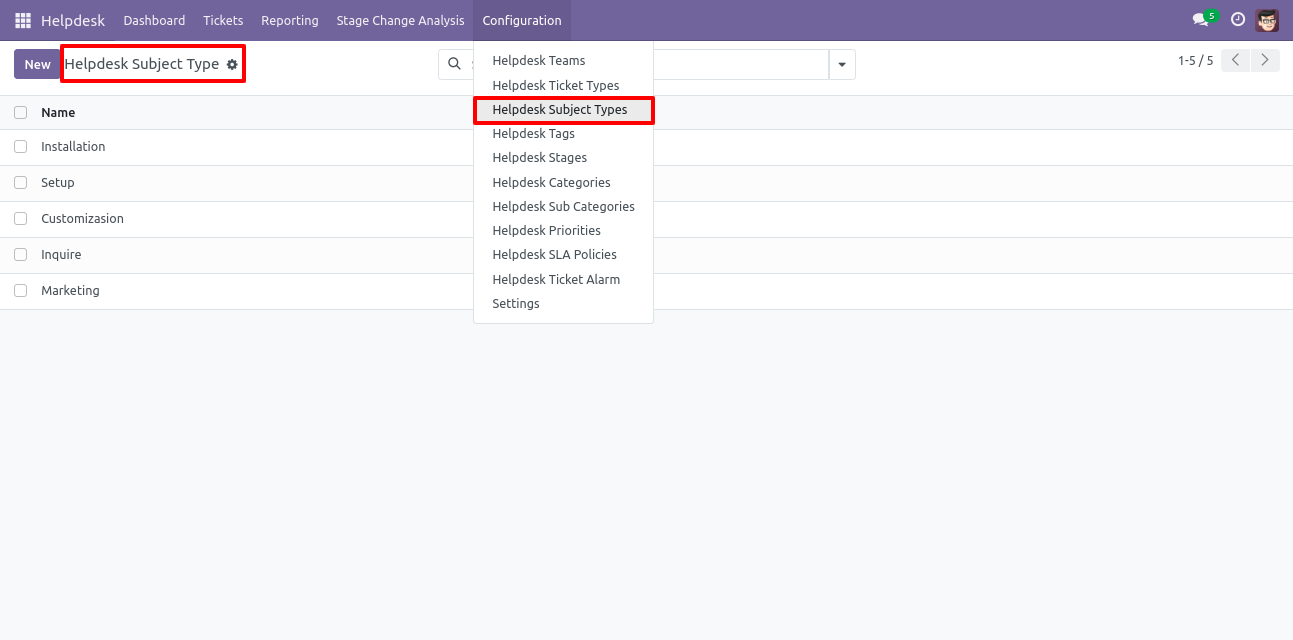
'Helpdesk Tags' menu and list view.
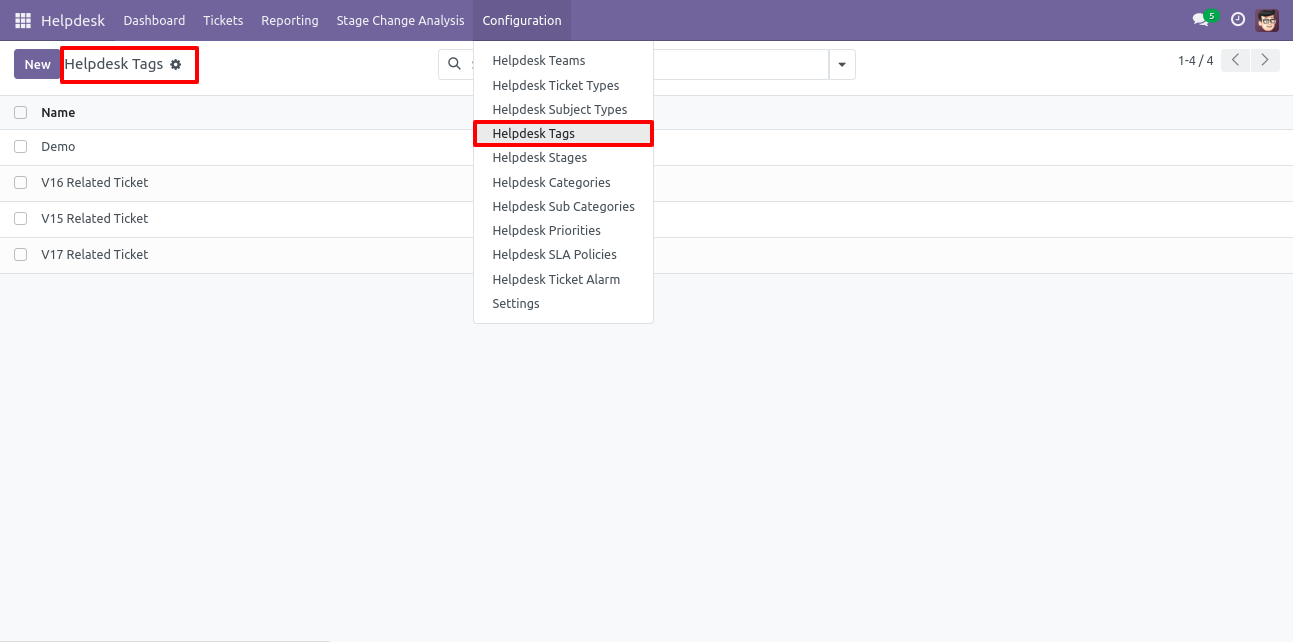
'Helpdesk Stages' menu and list view.
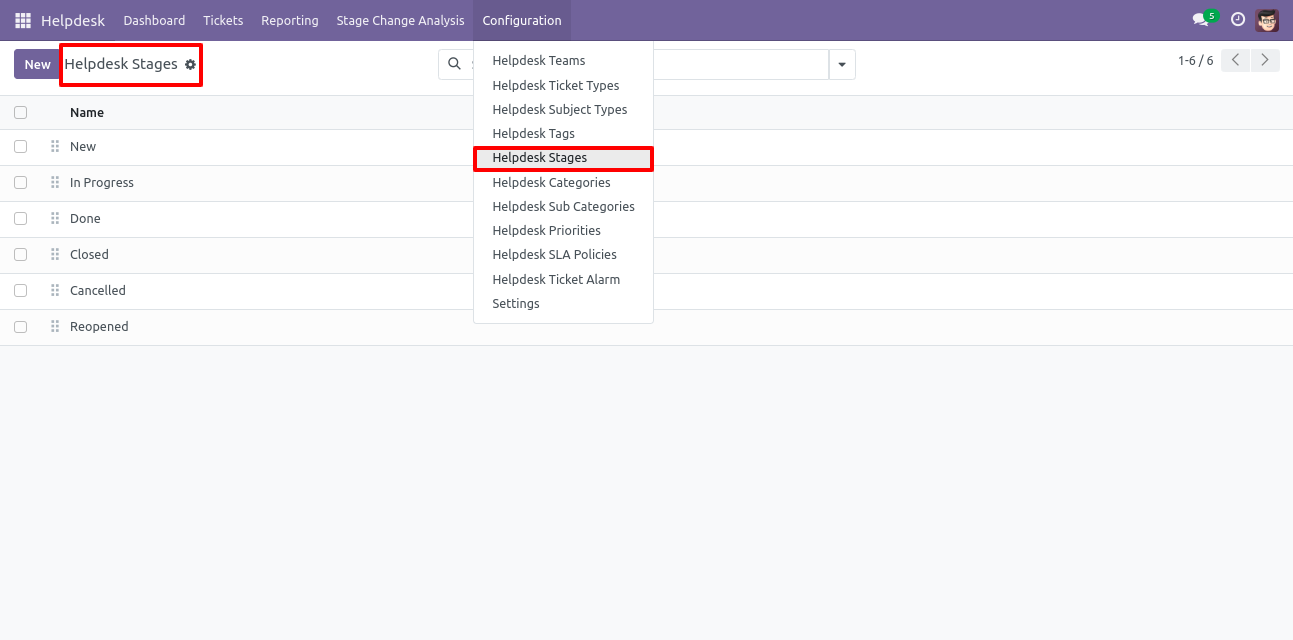
'Helpdesk Stages' form view. Where you can define stages and it's access rights, E-Mail template, next stage.
'Helpdesk Categories' menu and list view.
'Helpdesk Sub Categories' menu and list view.
'Helpdesk Priorities' menu and list view.
'Helpdesk Setting' View.
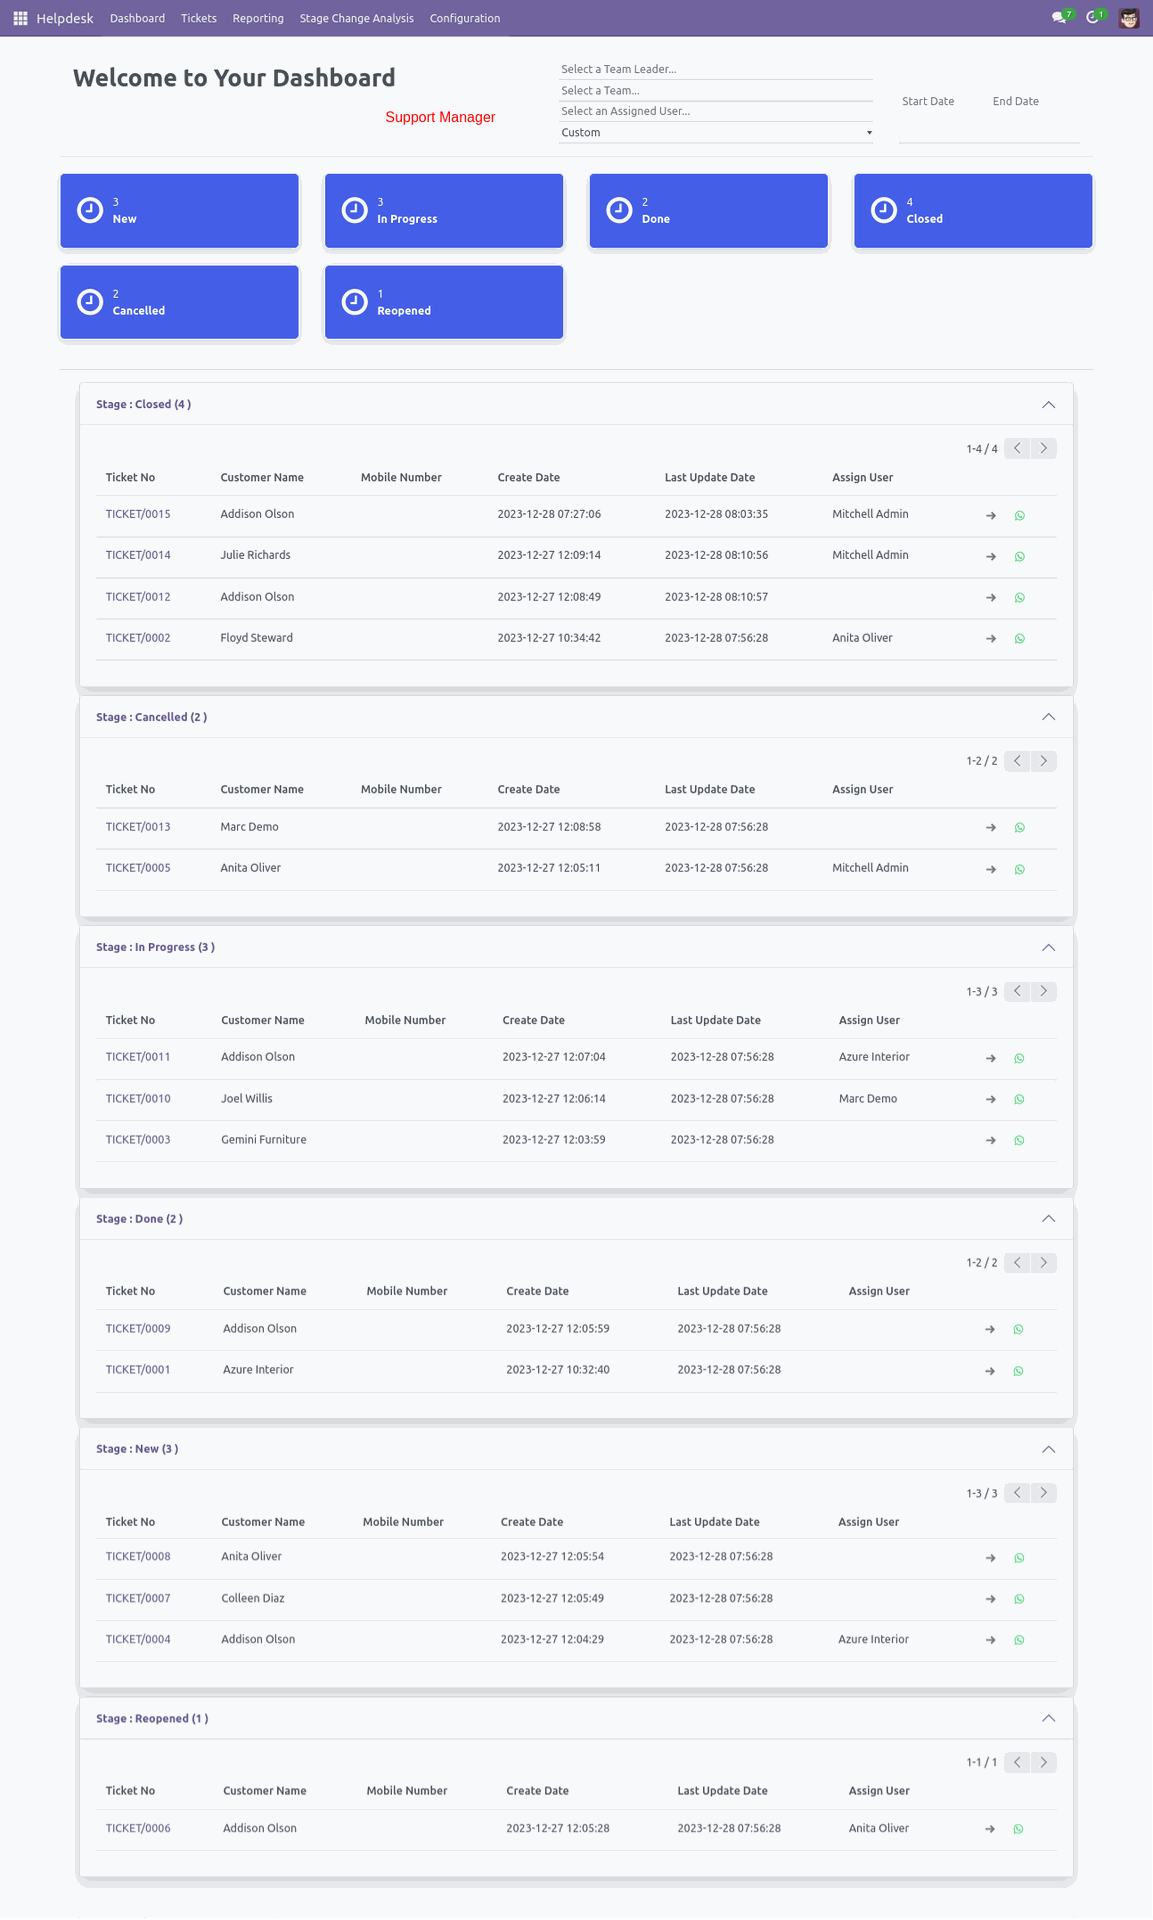
'Ticket Dashboard' for Helpdesk Manager. Where you can filter data with various filters and see data in well organized table formate.
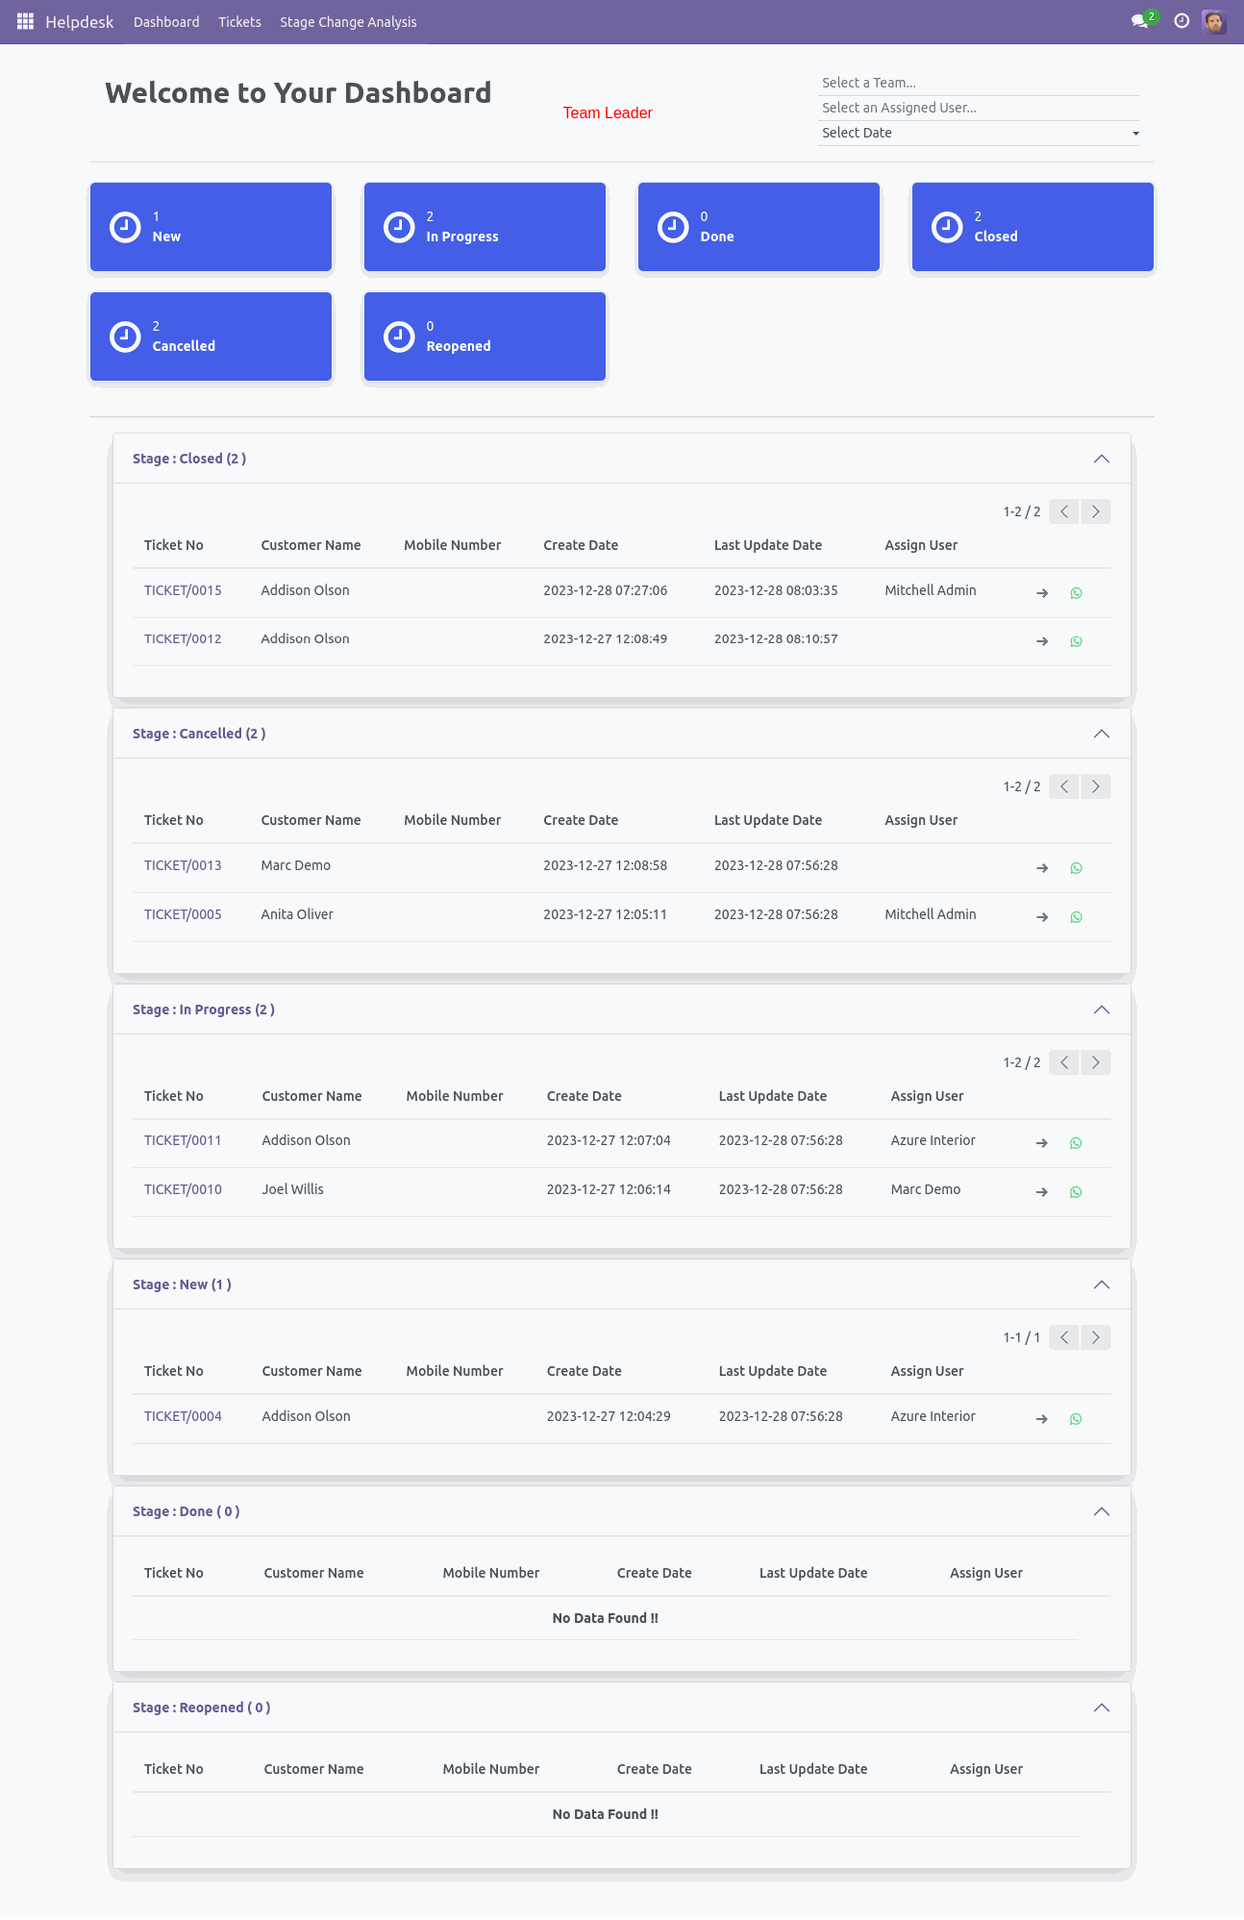
'Ticket Dashboard' for Helpdesk Team Leader. Where leader can see only his team data and filter data with various filters, see data in well organized table formate.
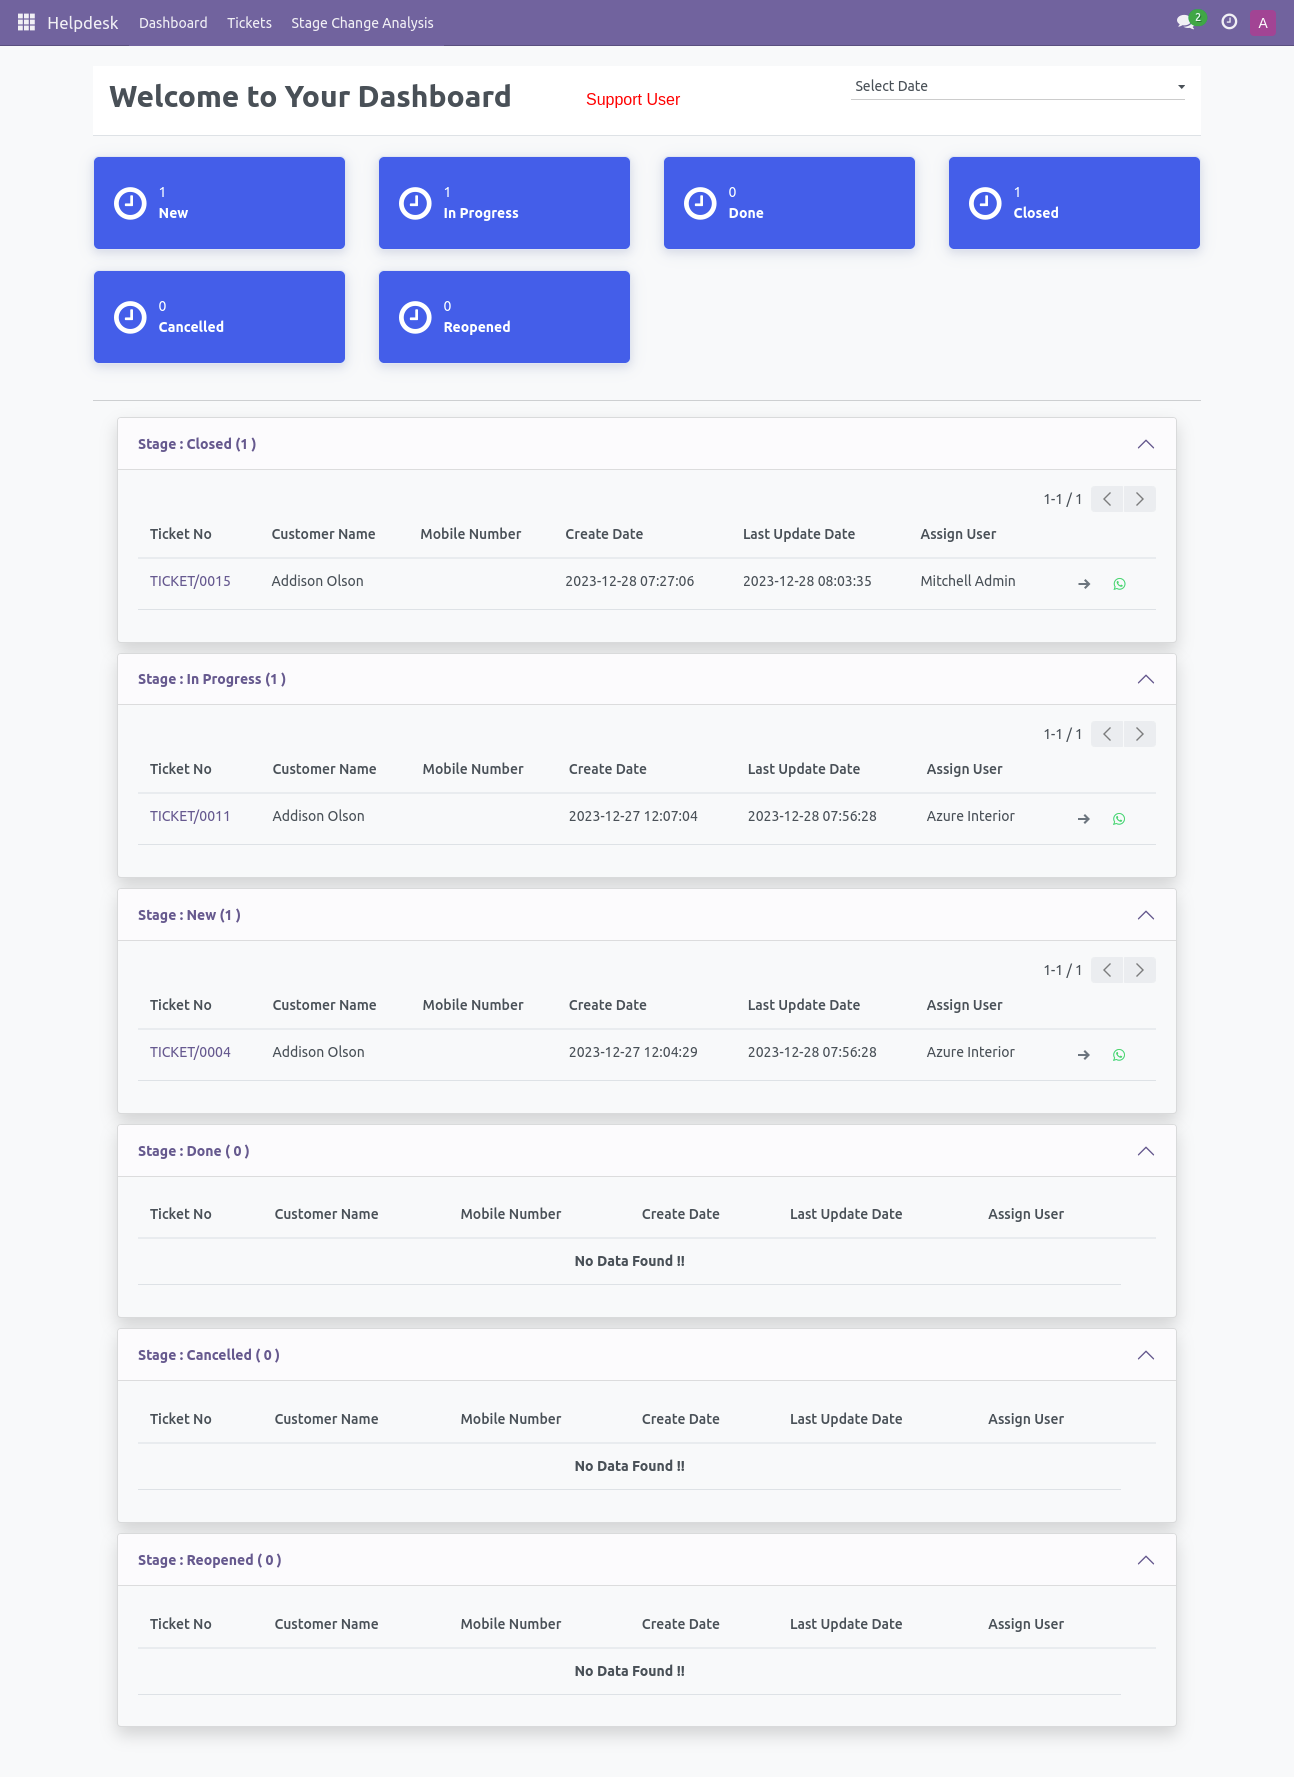
'Ticket Dashboard' for Support User.
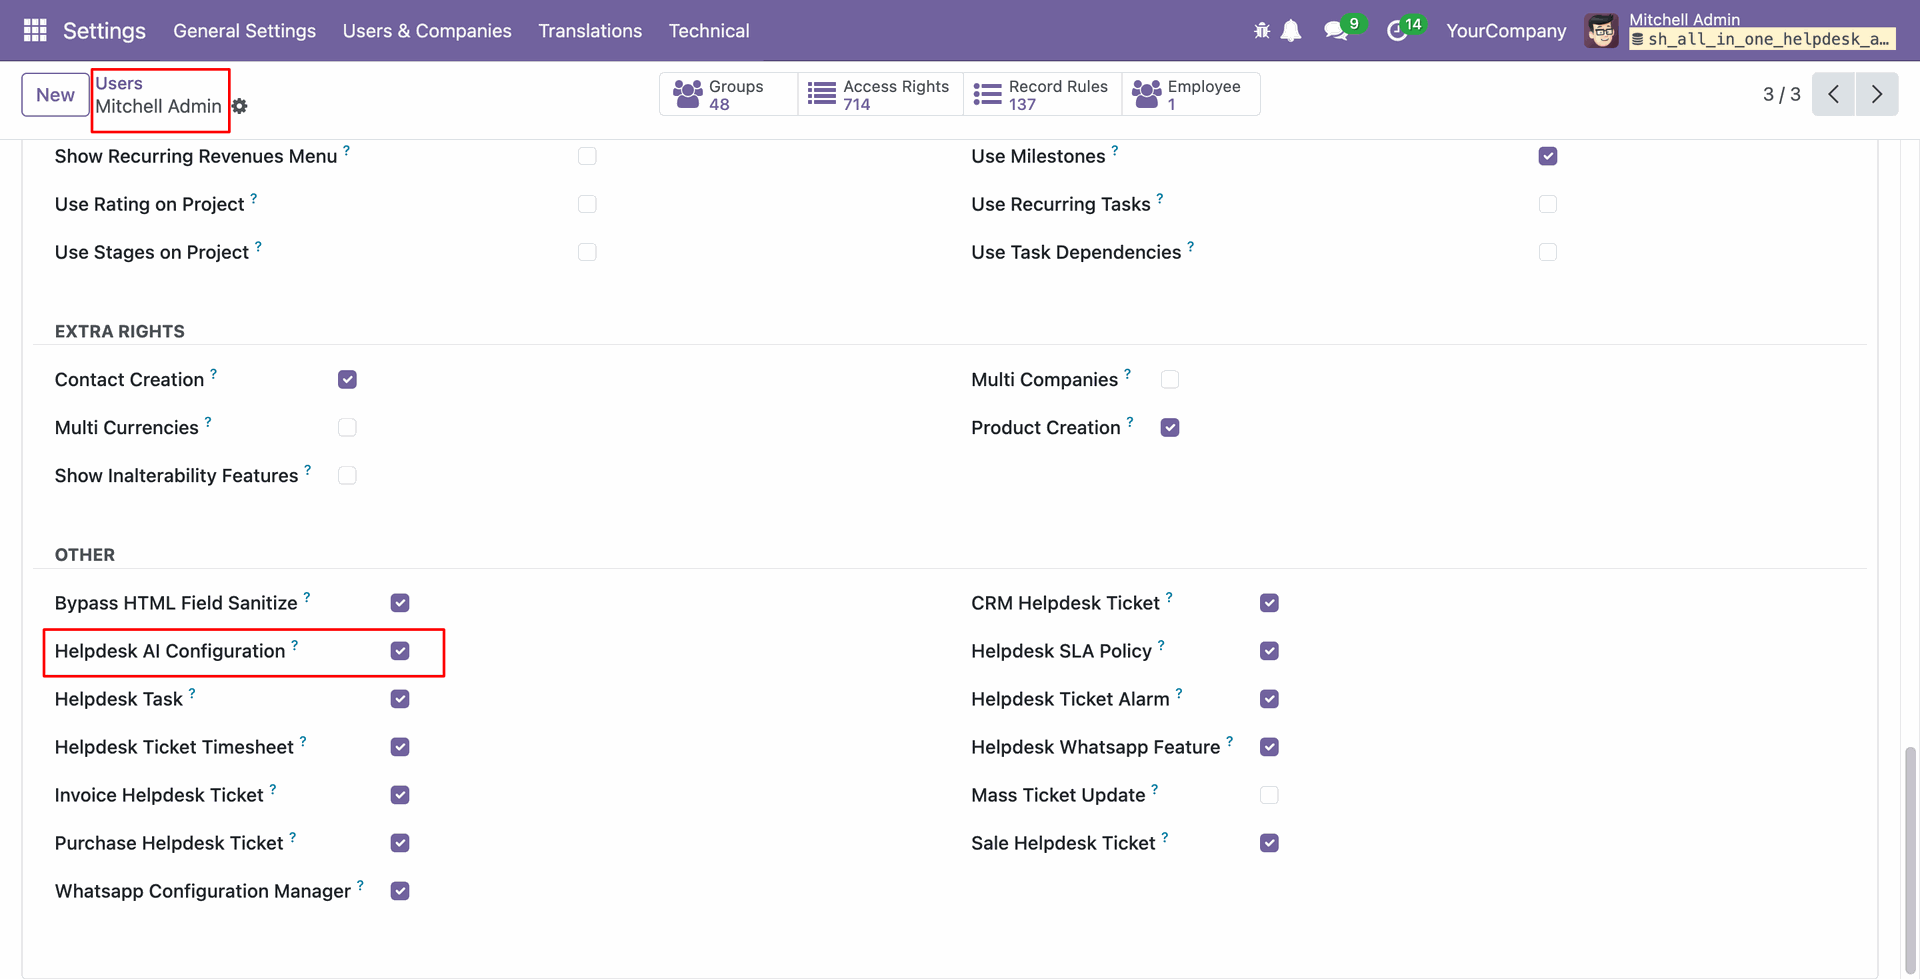
Go to the user and enable 'Helpdesk AI Configuration'.
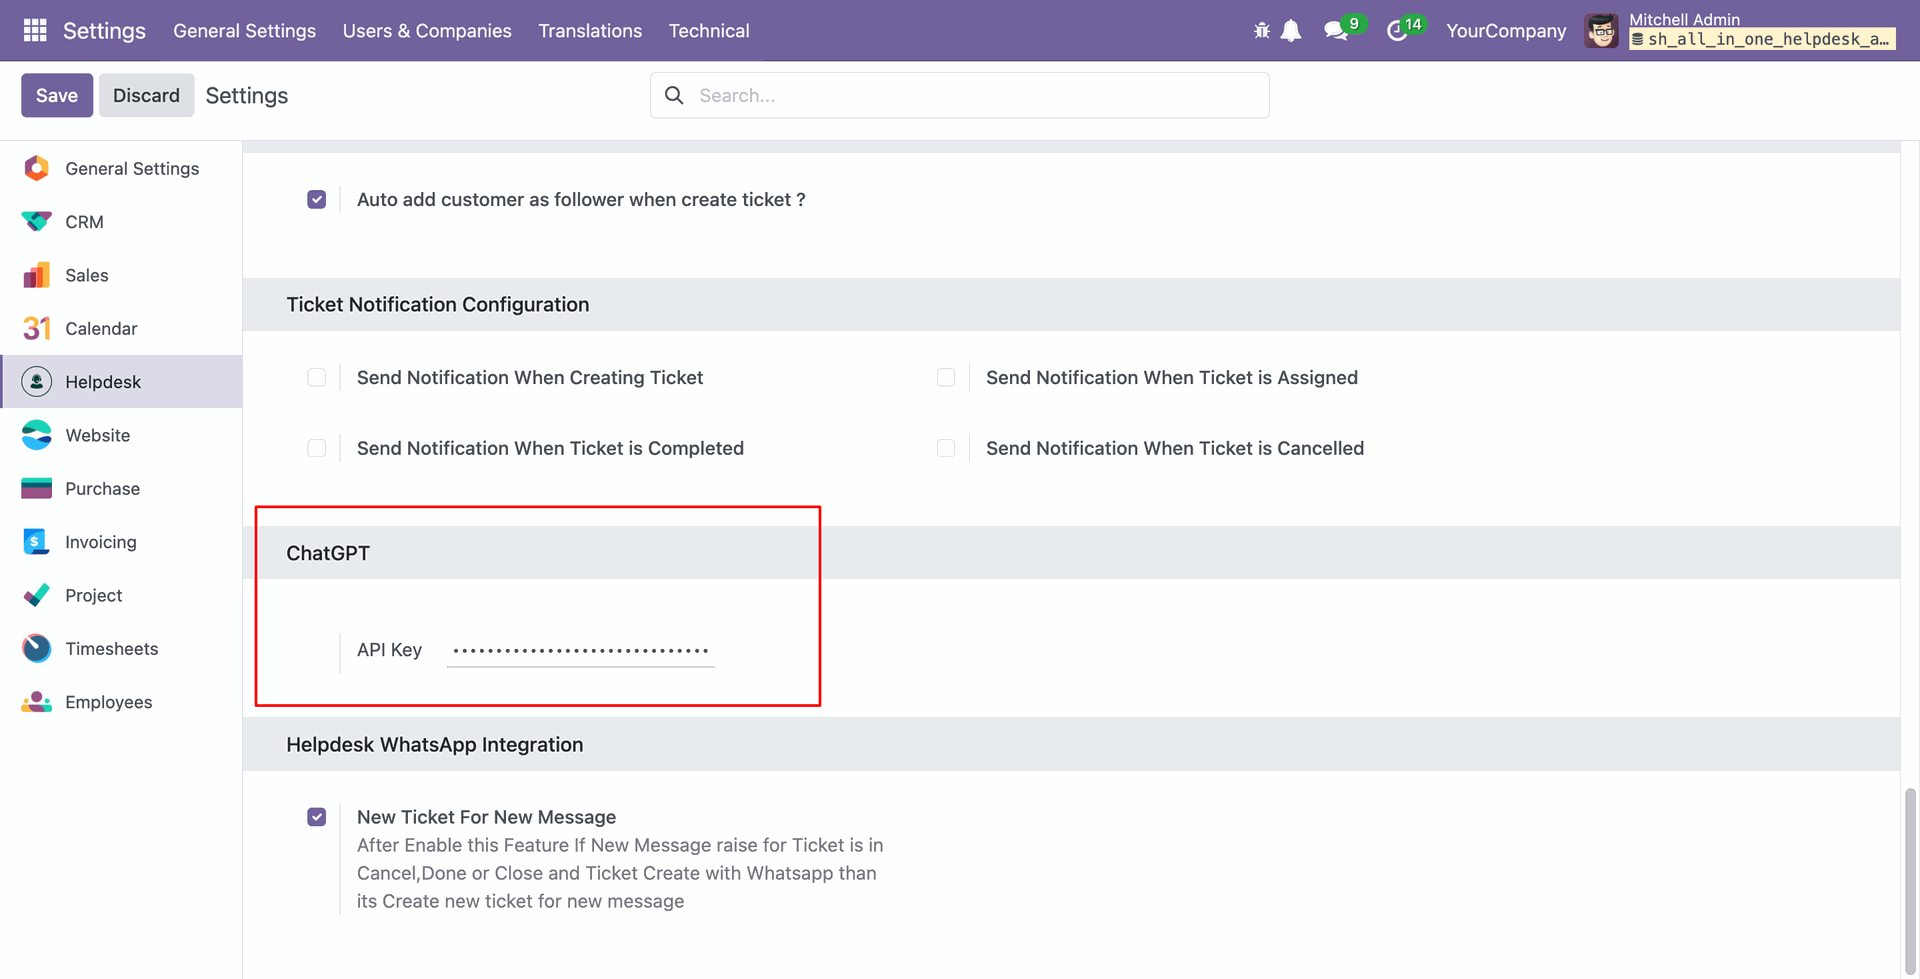
In helpdesk setting add an API key for chatgpt.
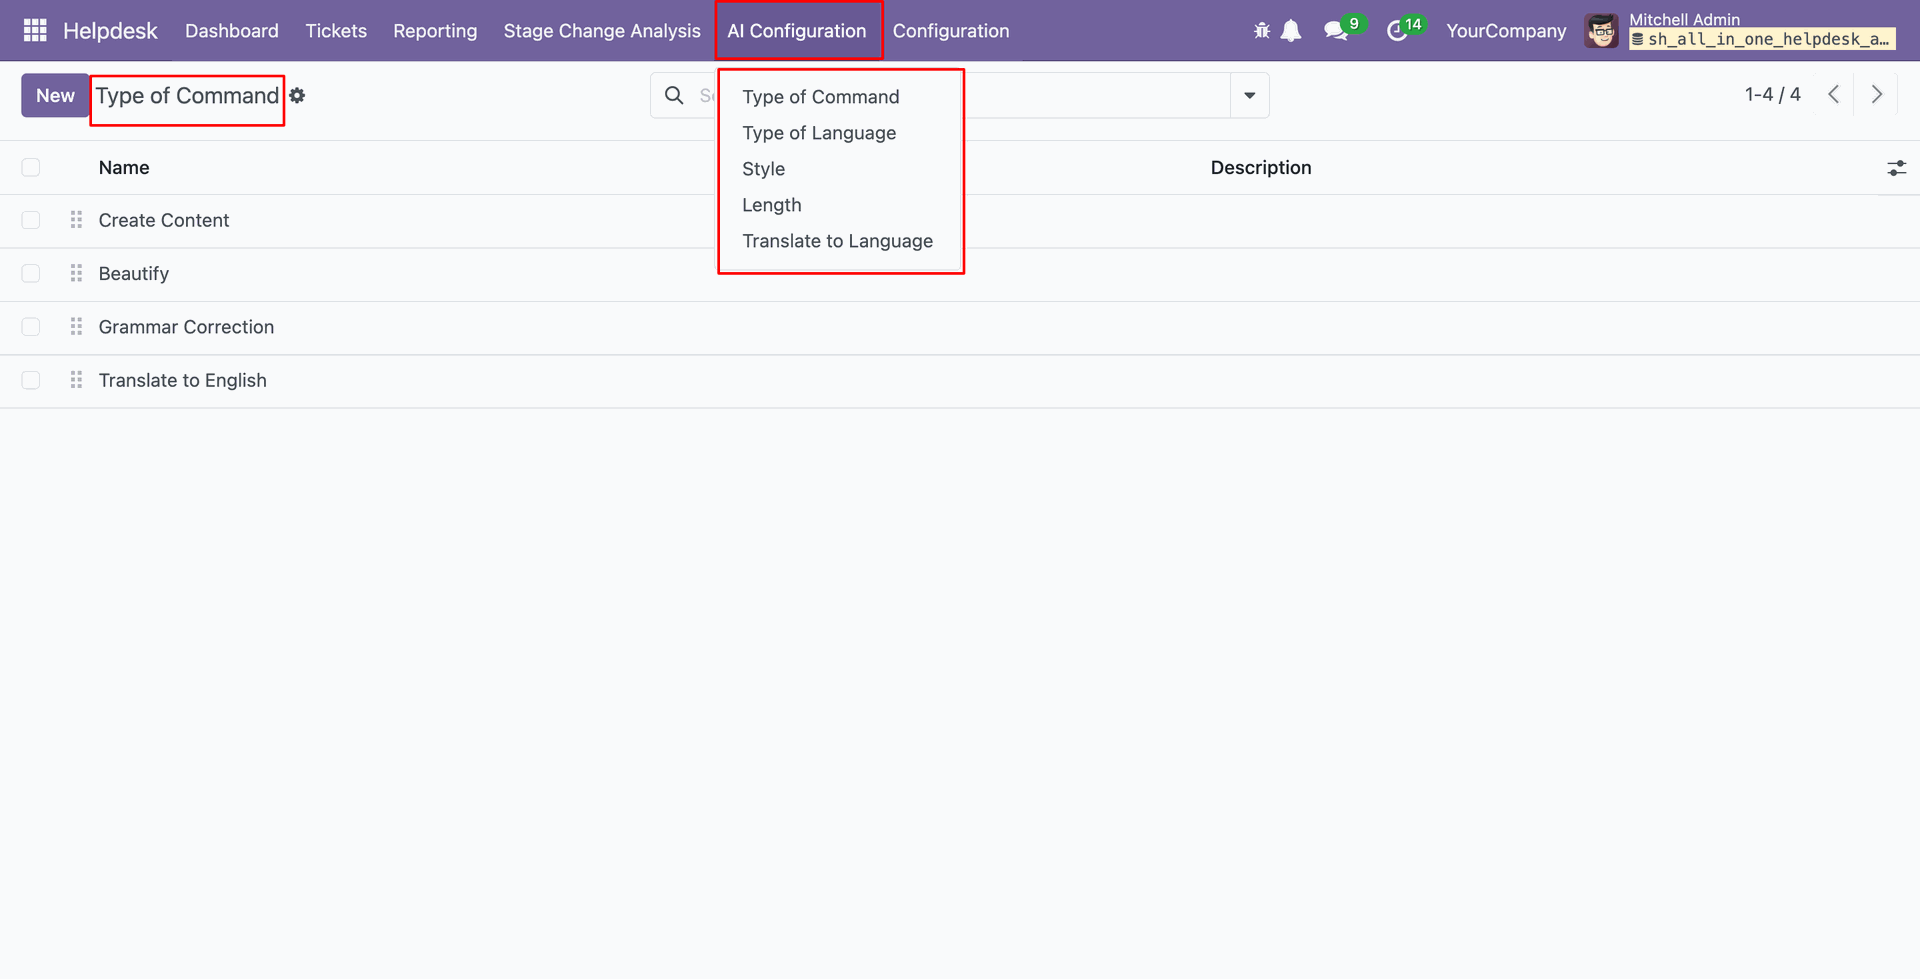
'Type Of Command' menu and list view.
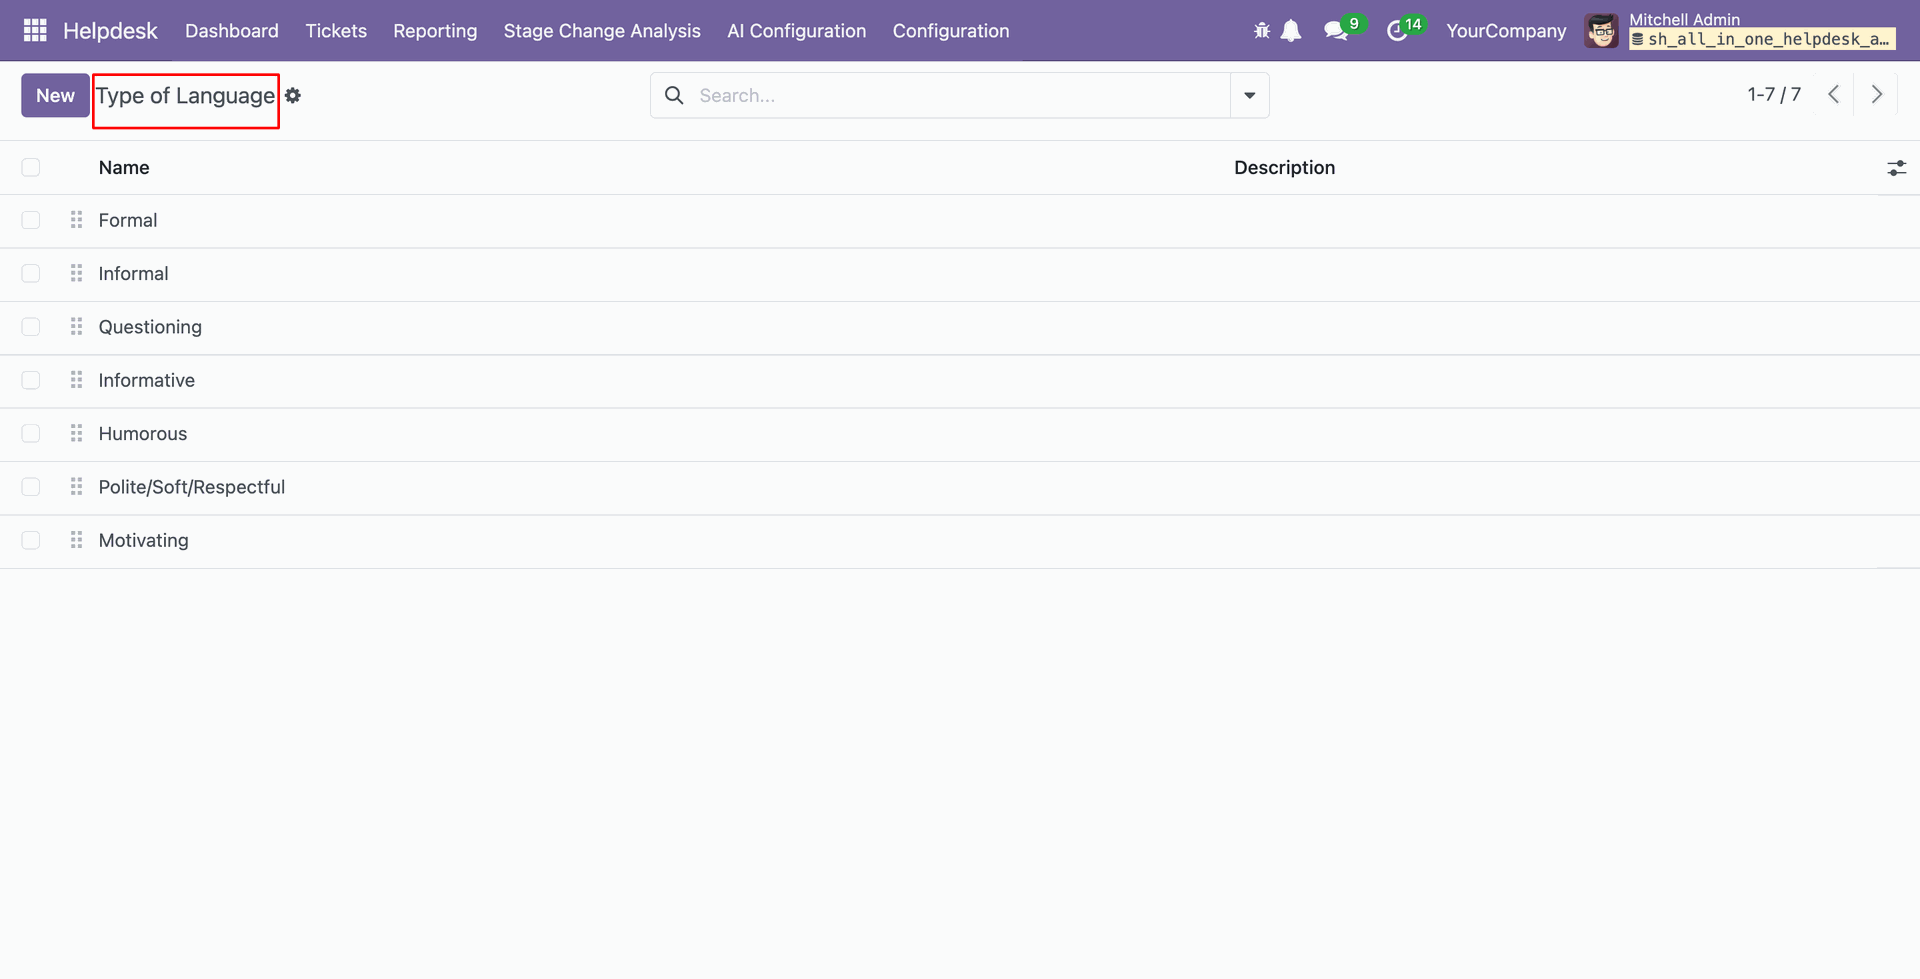
'Type Of Language' menu and list view.
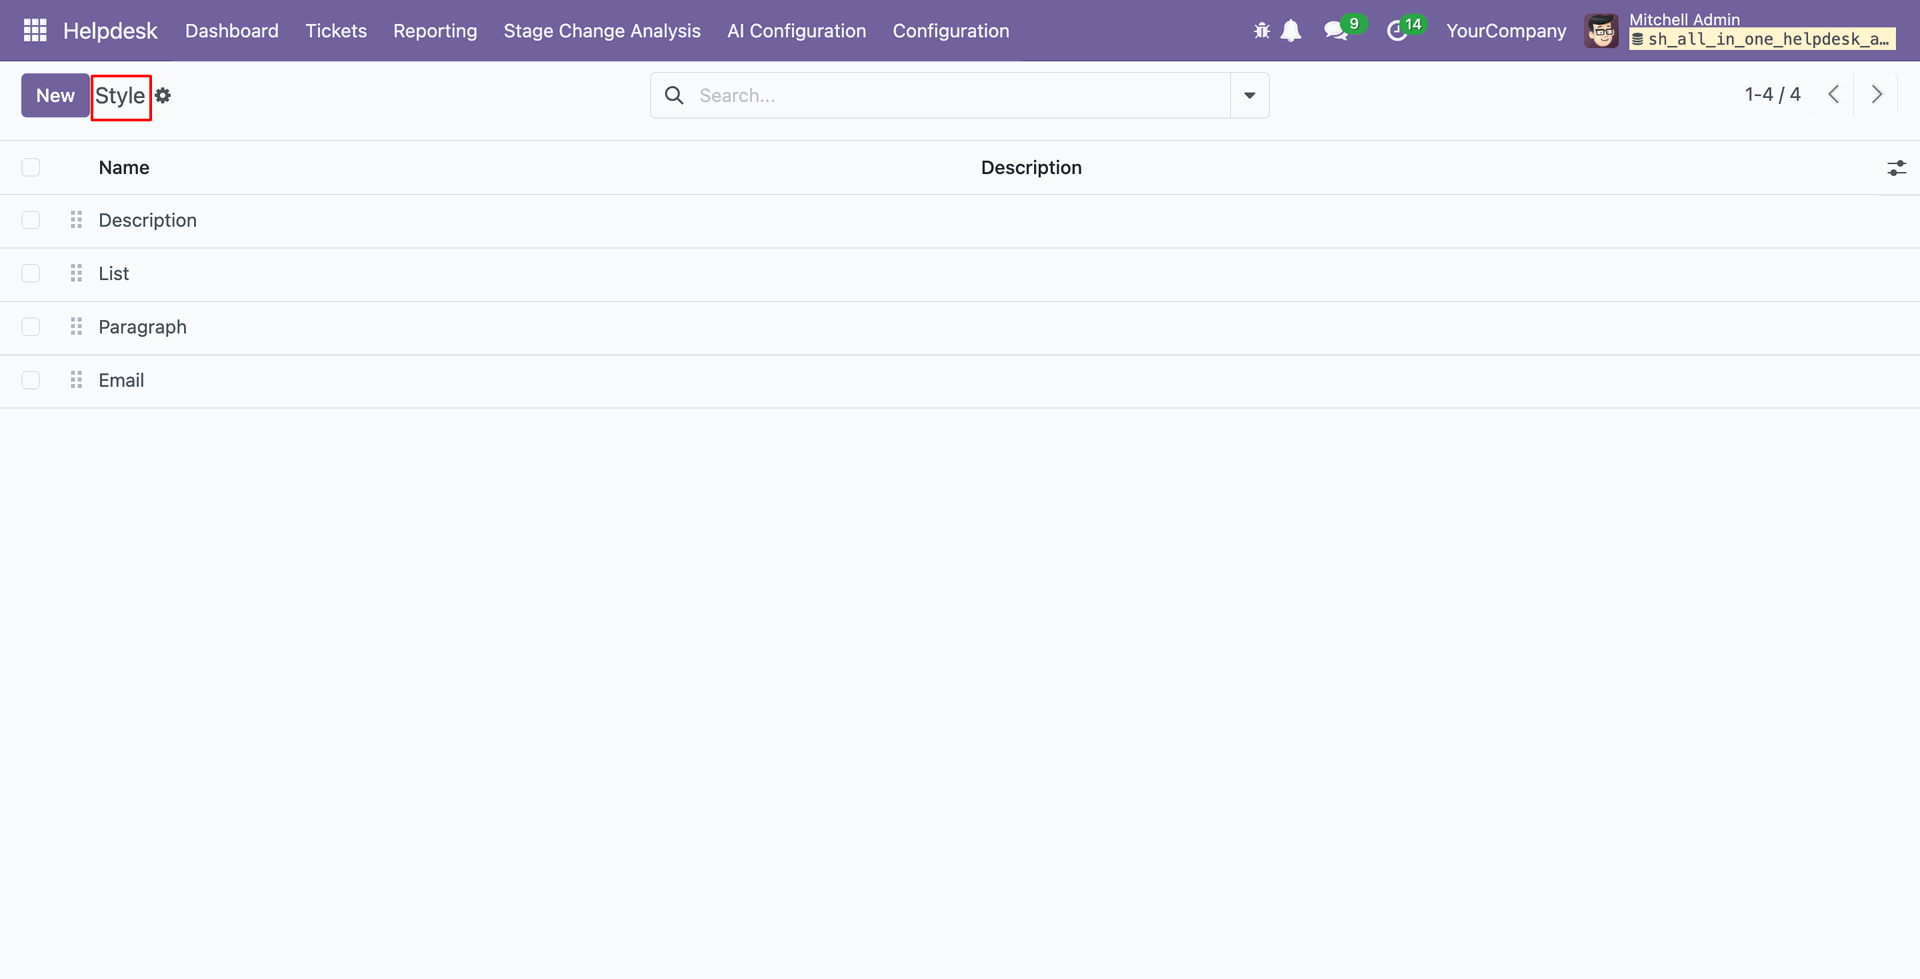
'Style' menu and list view.
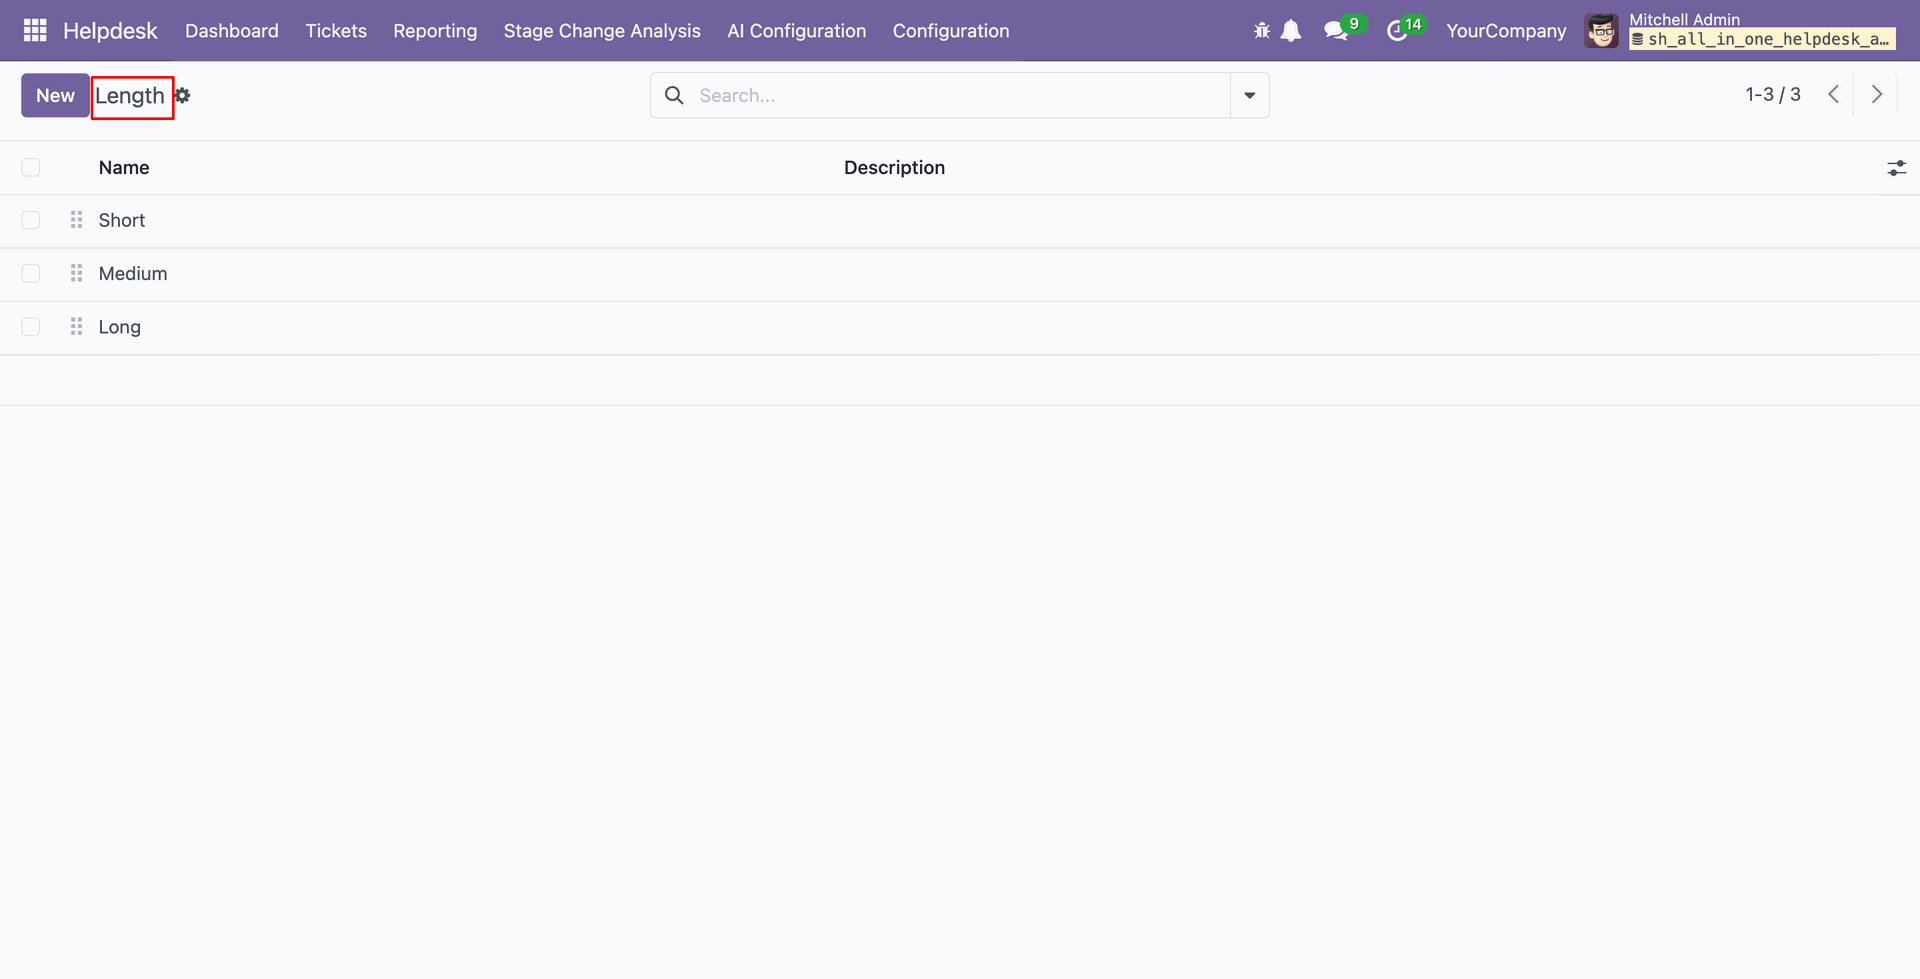
'Length' menu and list view.
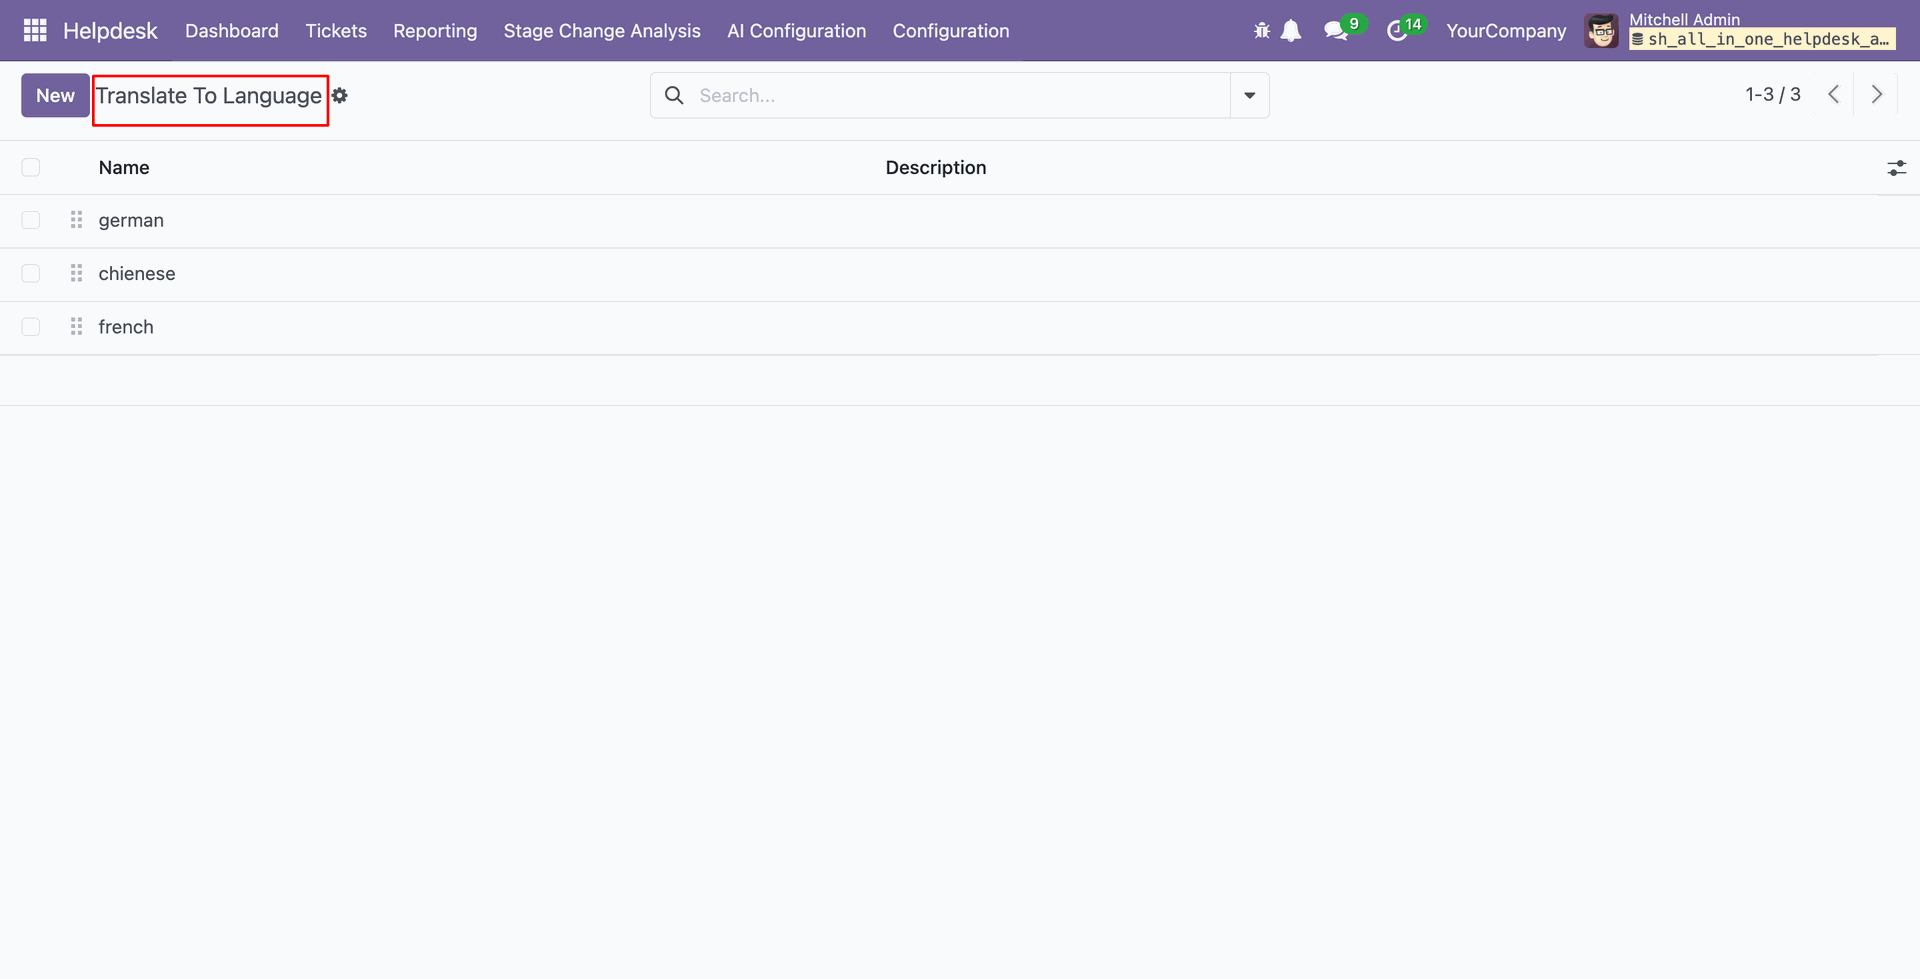
'Translation Of Language' menu and list view.
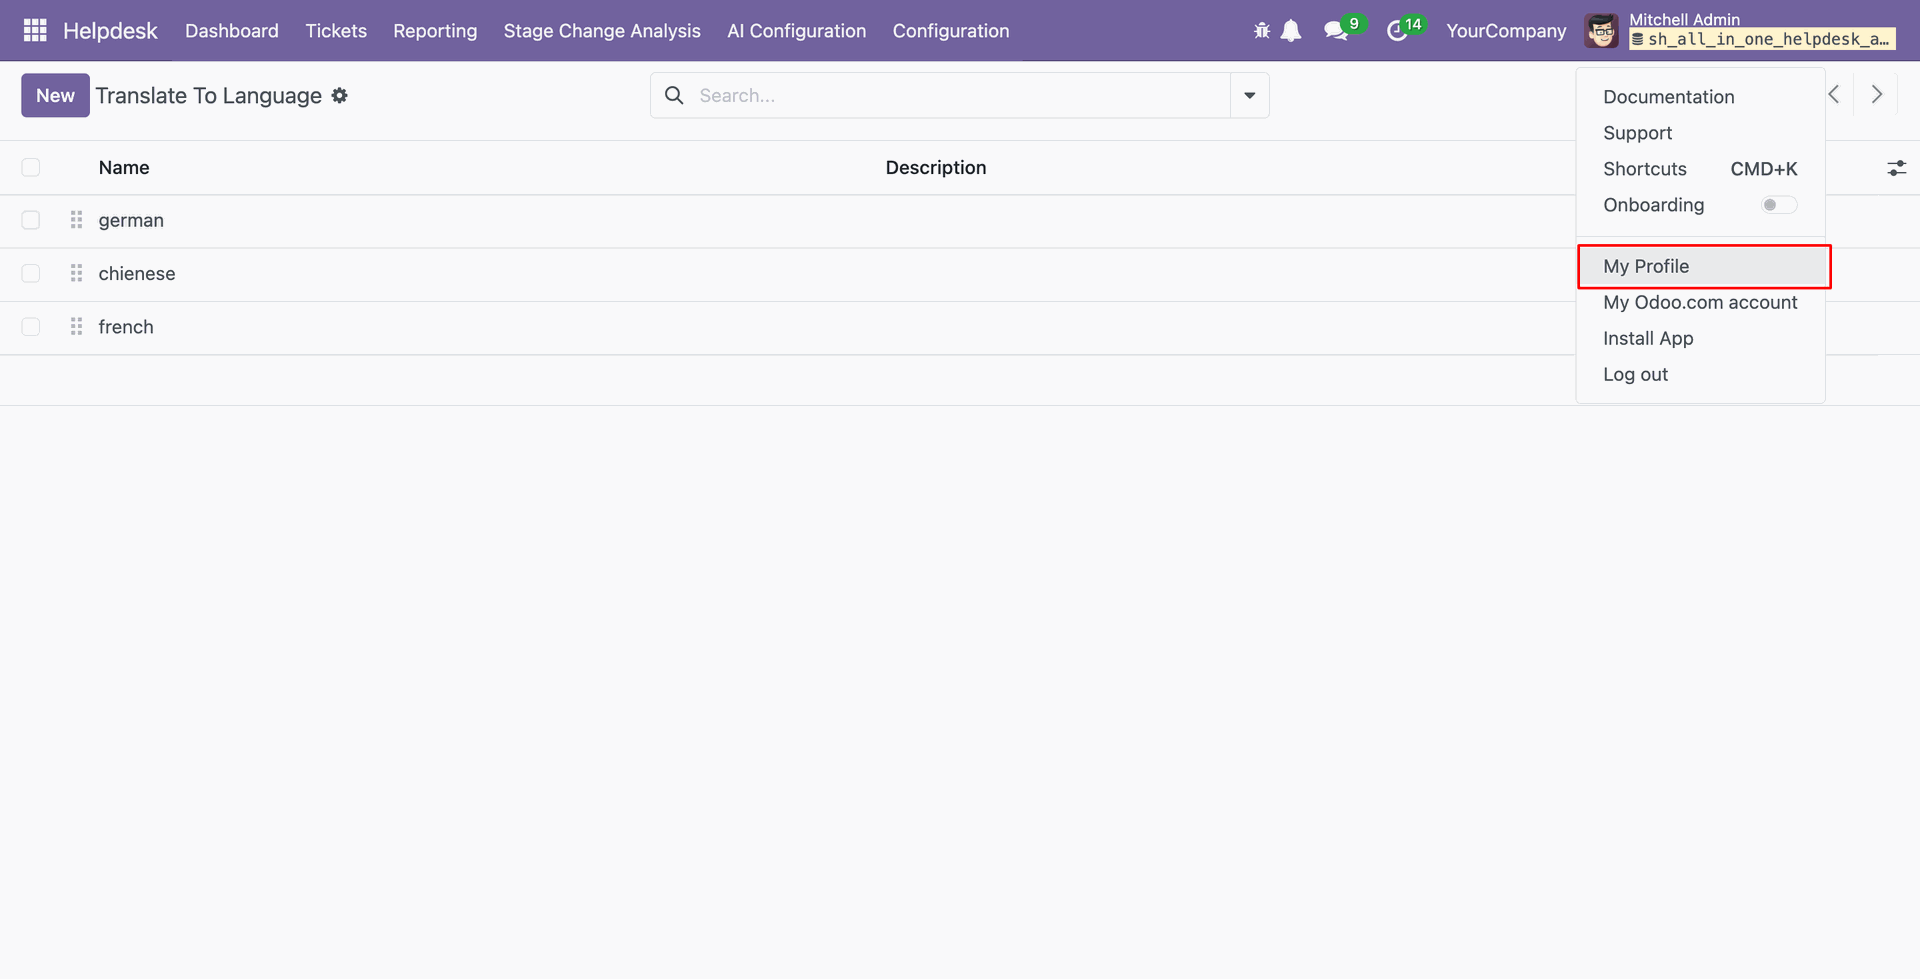
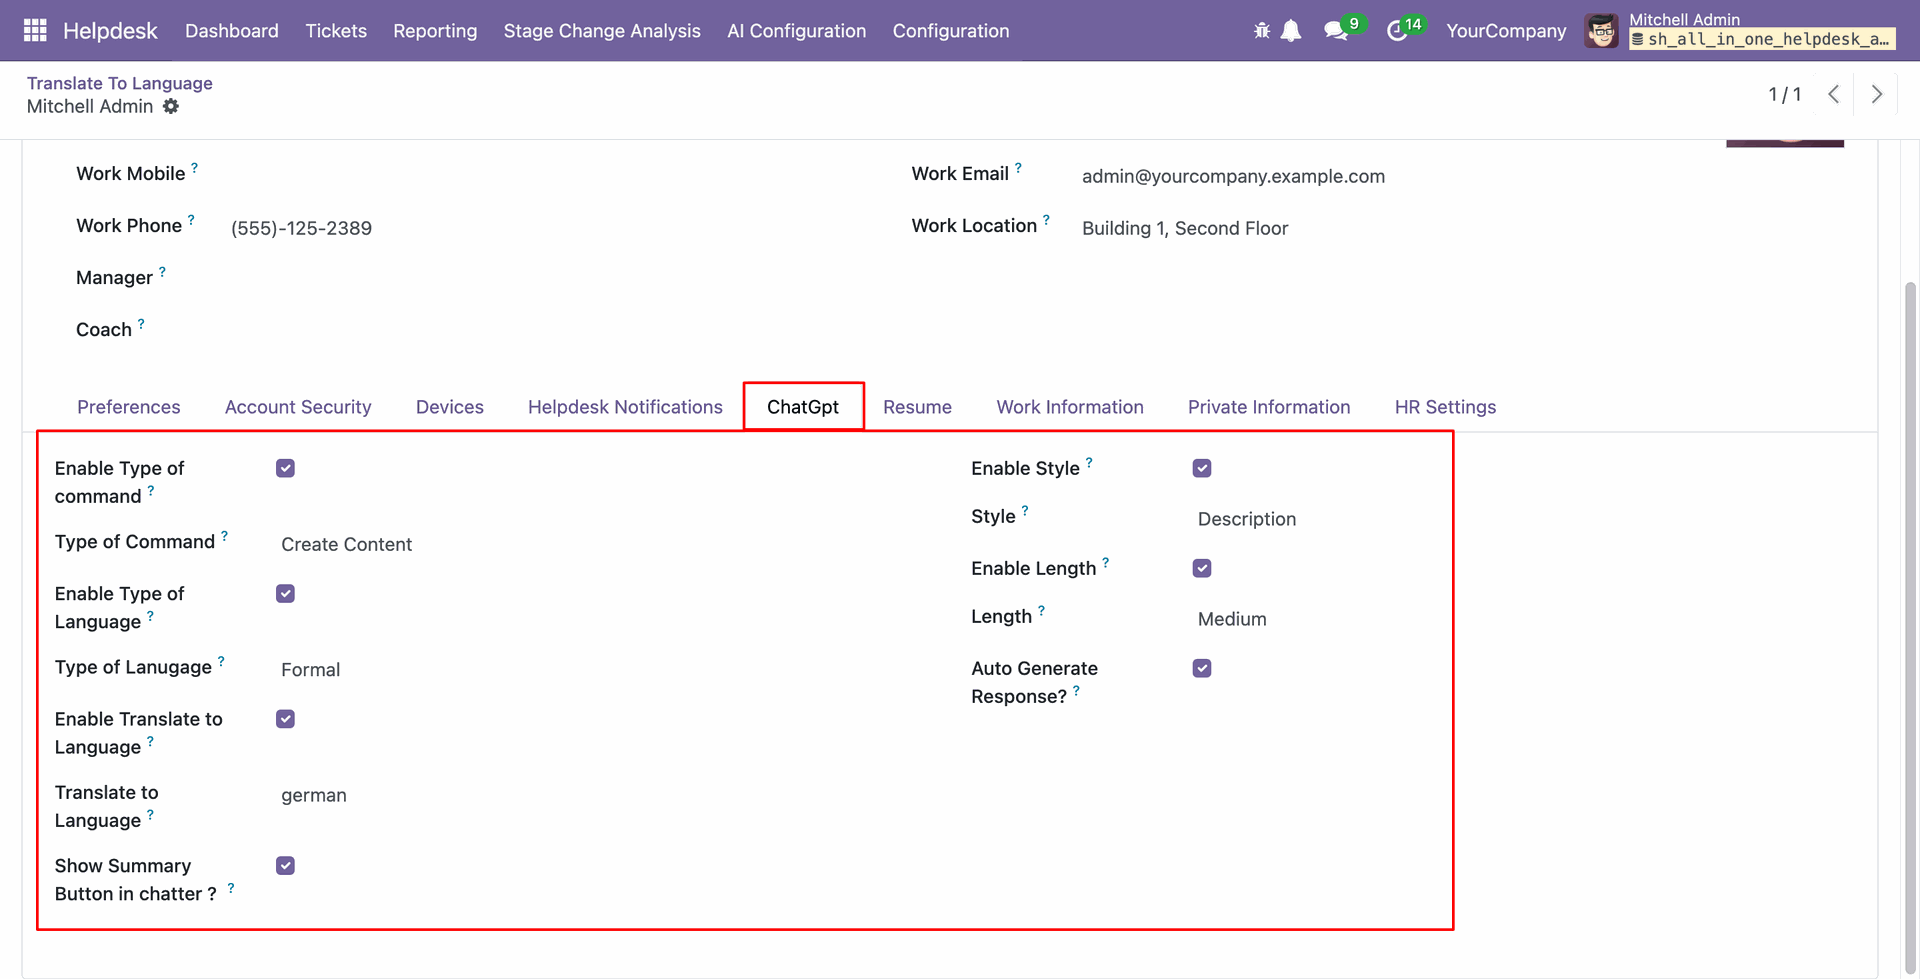
Go to 'My Profile'.
Configure ChatGPT settings from the 'ChatGPT' tab.
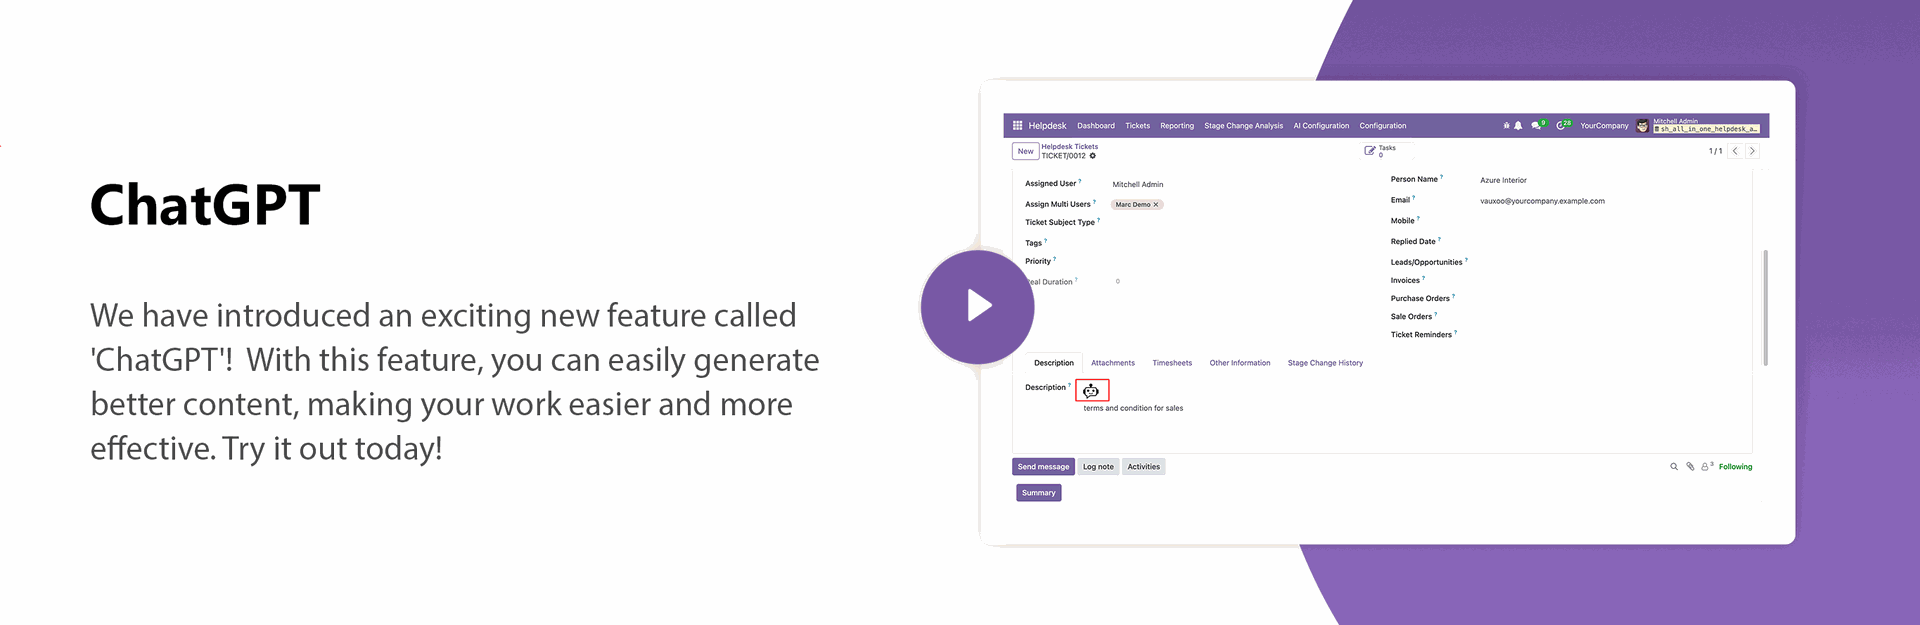
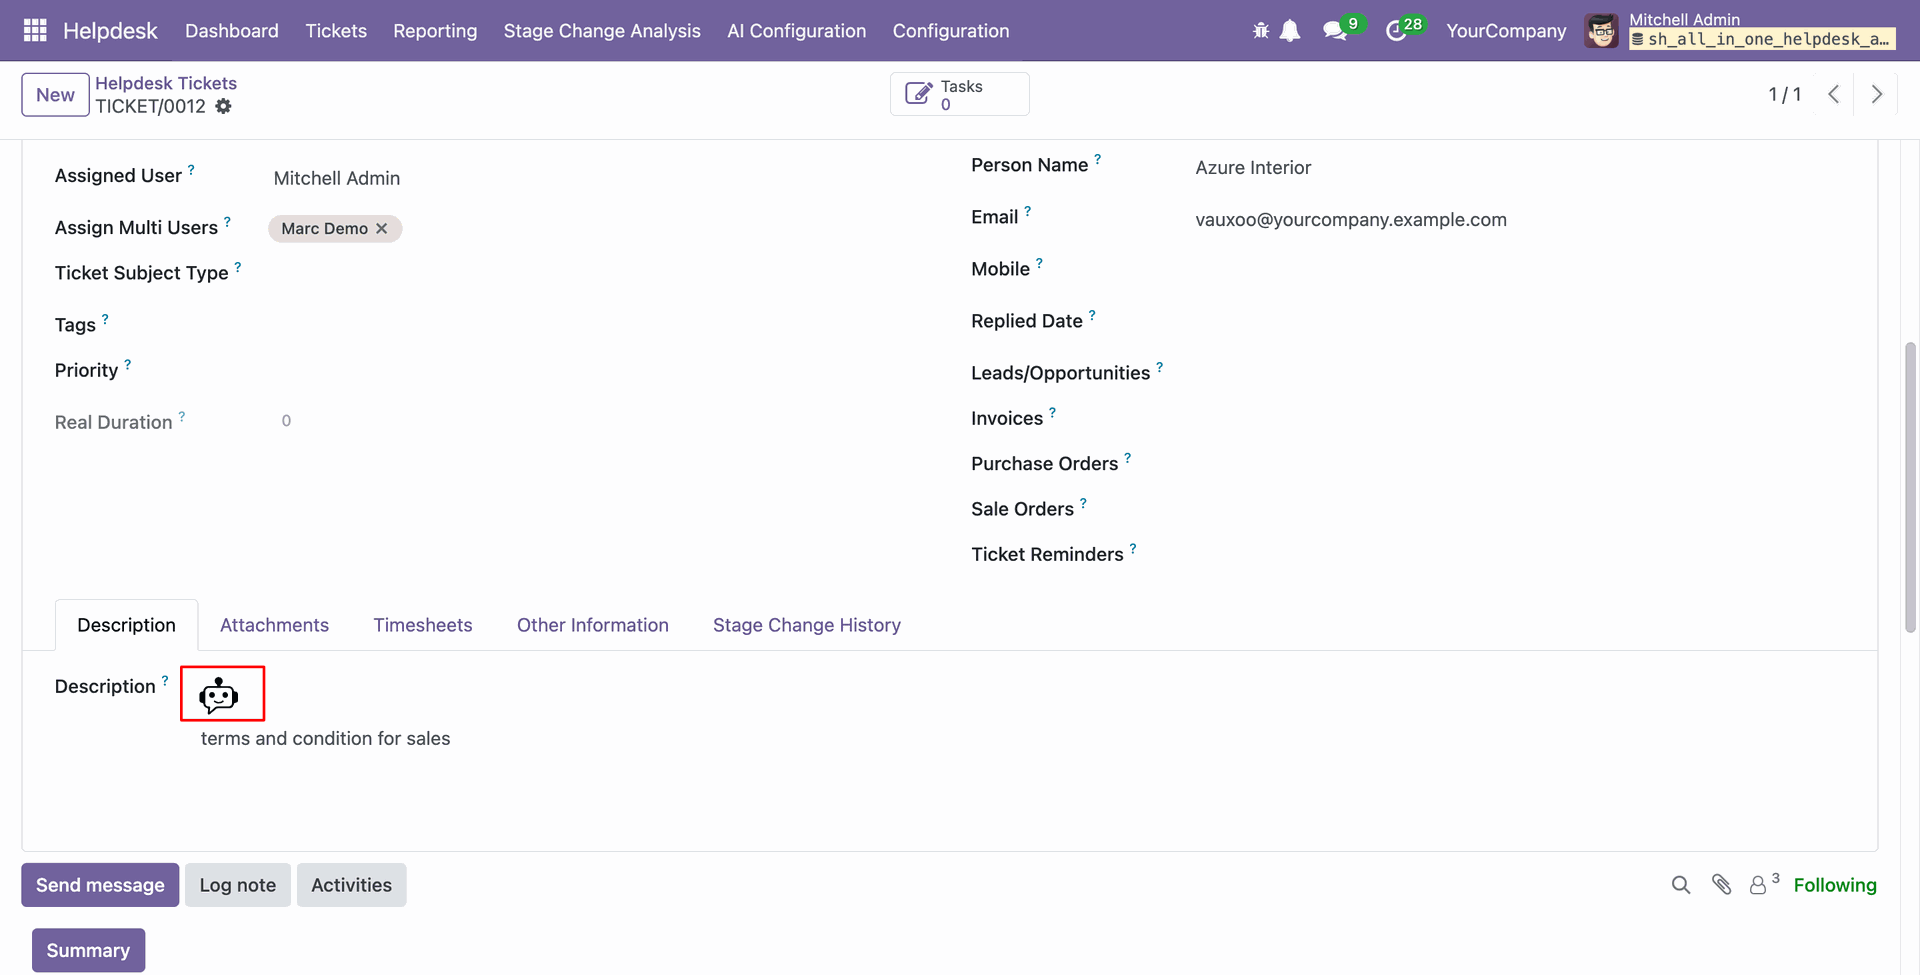
Form view of the ticket, click on the ChatGPT icon.
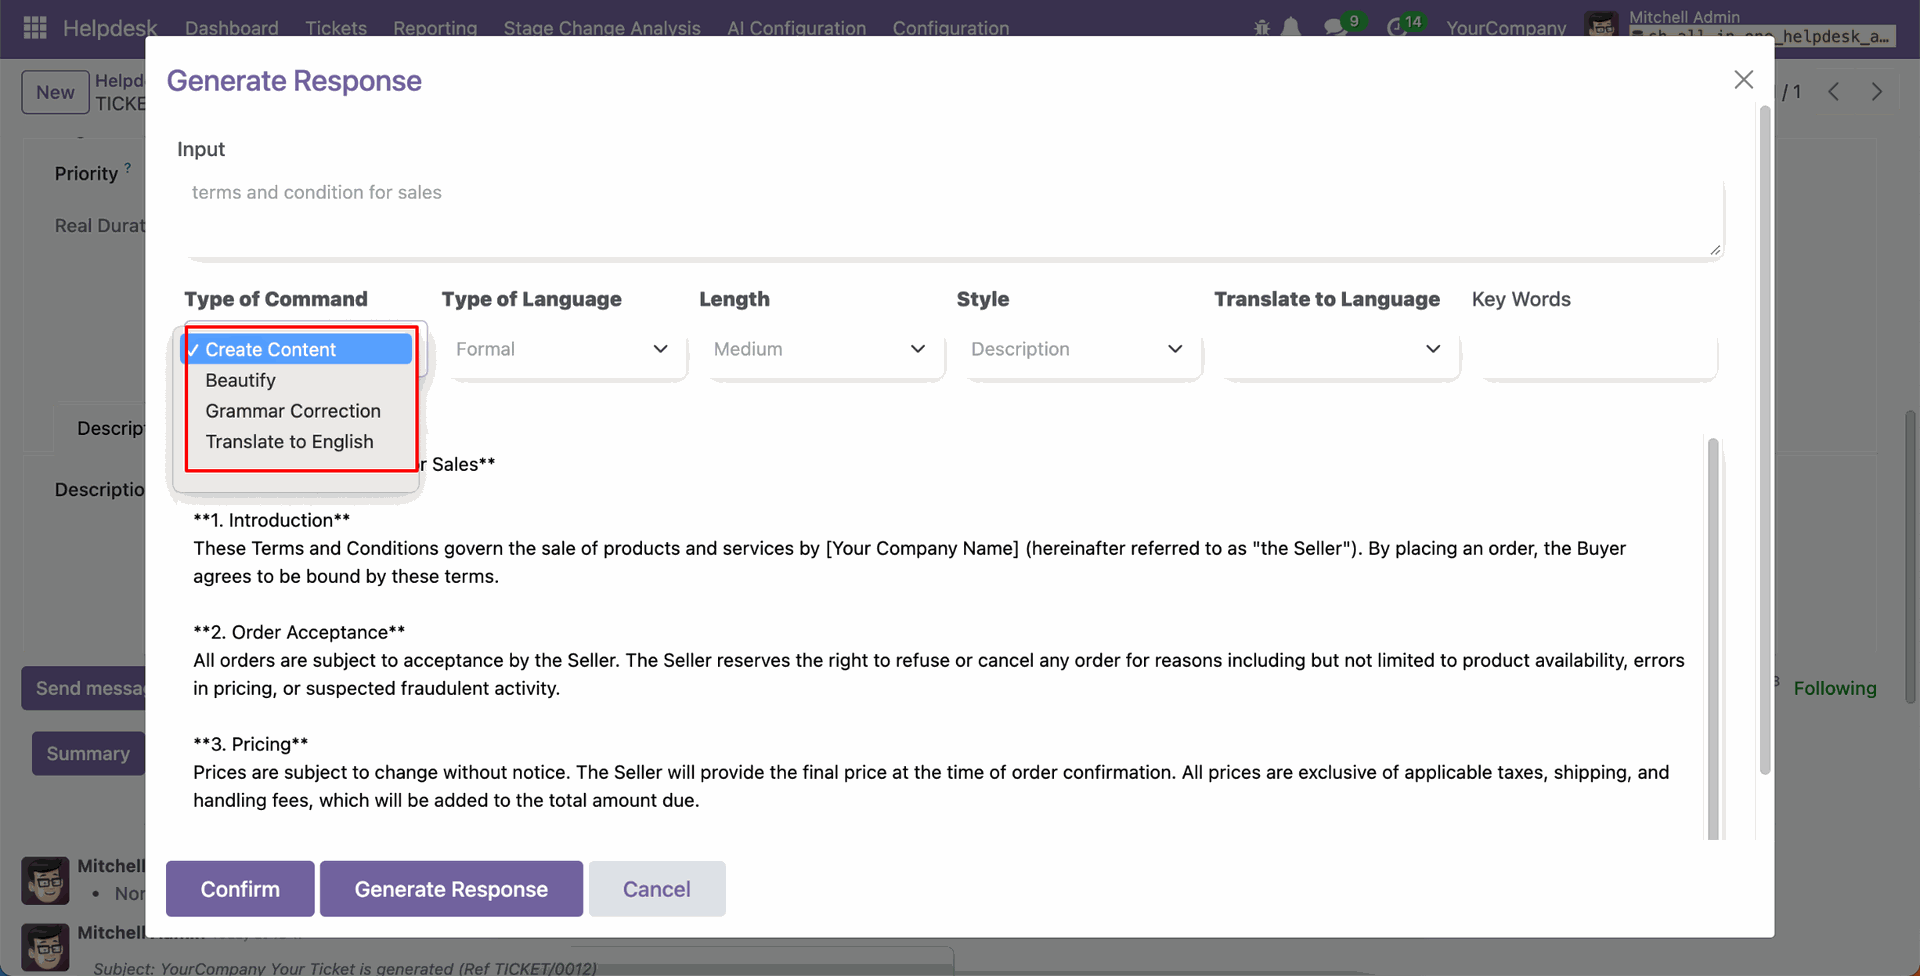
After that, the 'Generate Response' wizard will appear. Choose the 'Type of Command', 'Type of Language' and 'Length', 'Style'.
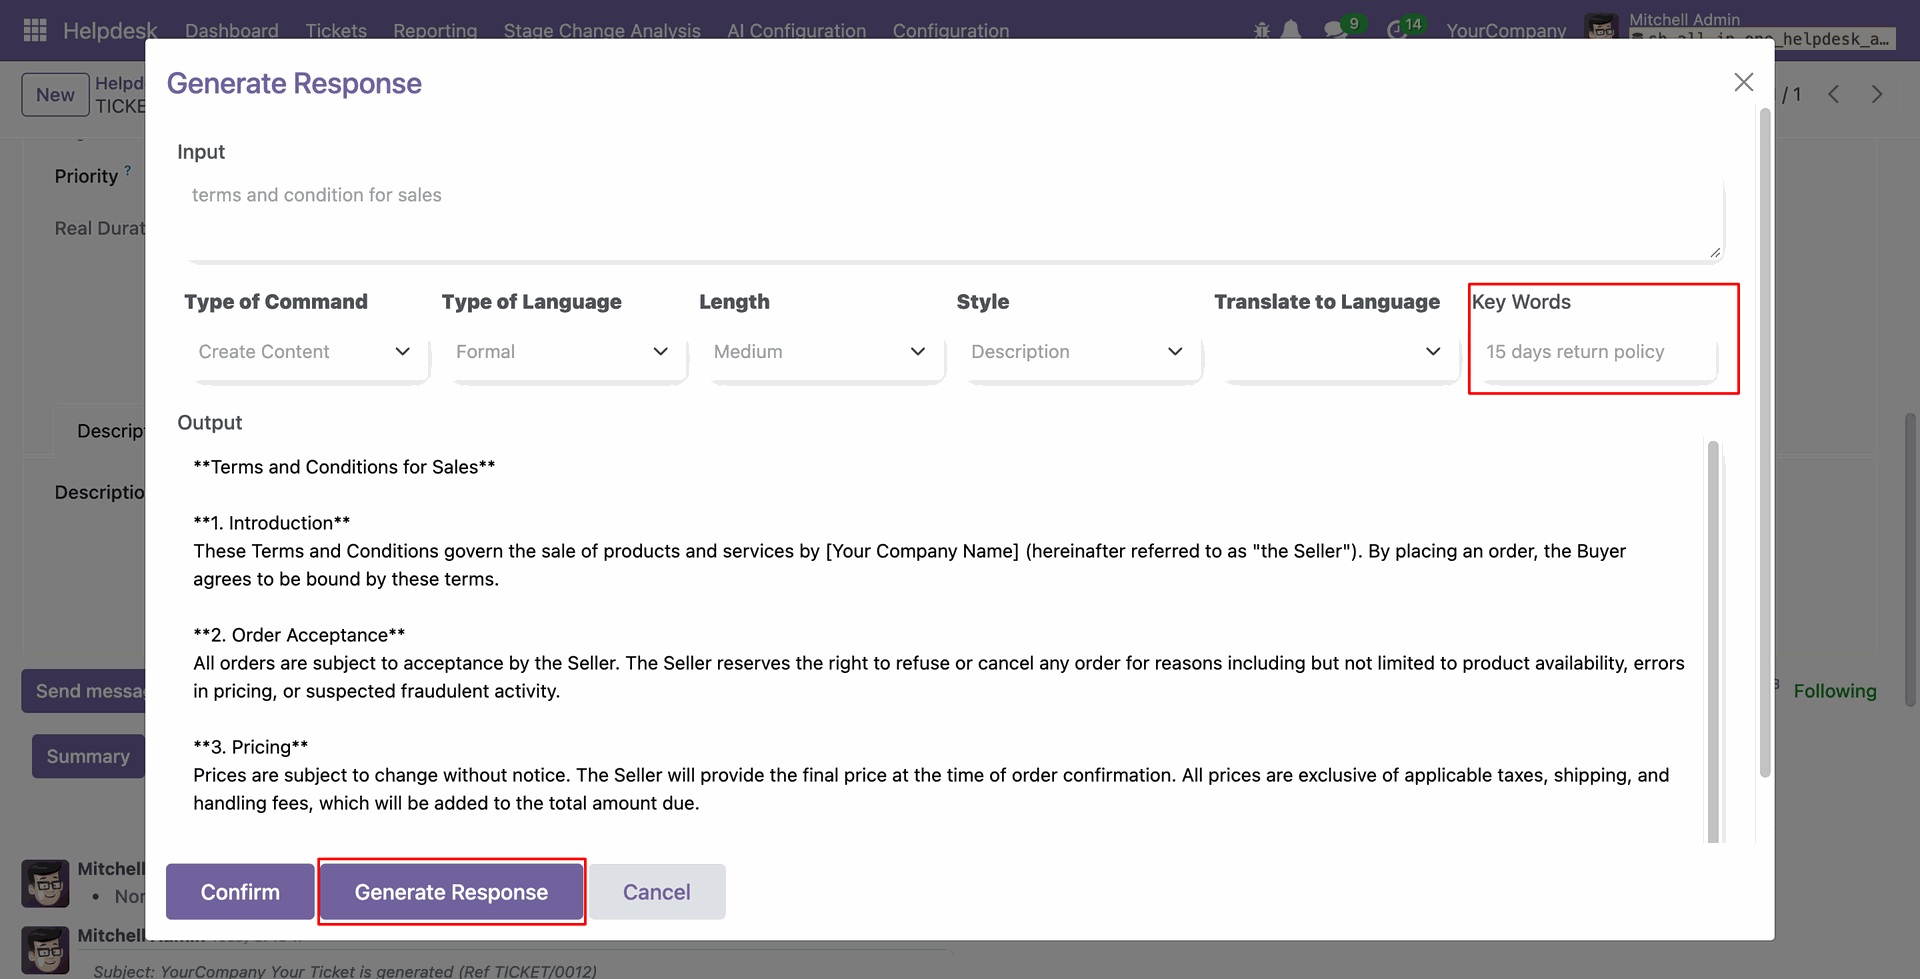
Add 'Key Words' and click on the 'Generate Response' button.
Verify the generated output and click on the 'Confirm' button.
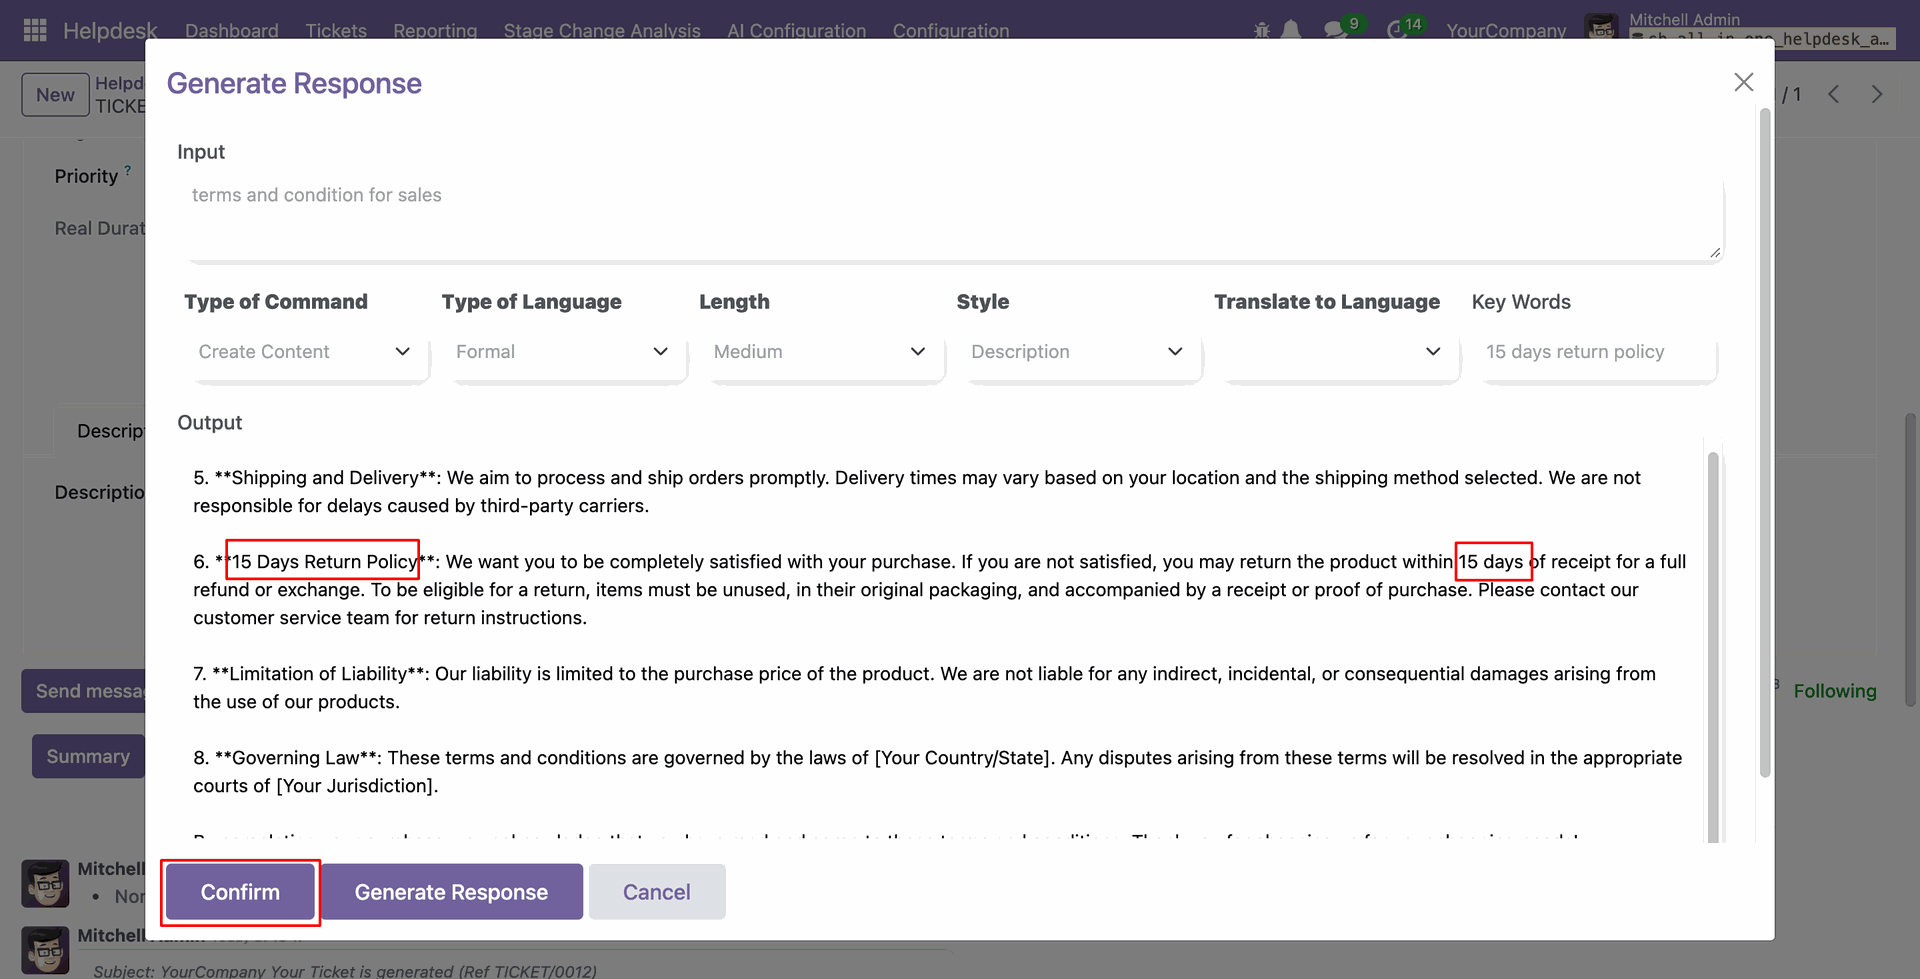
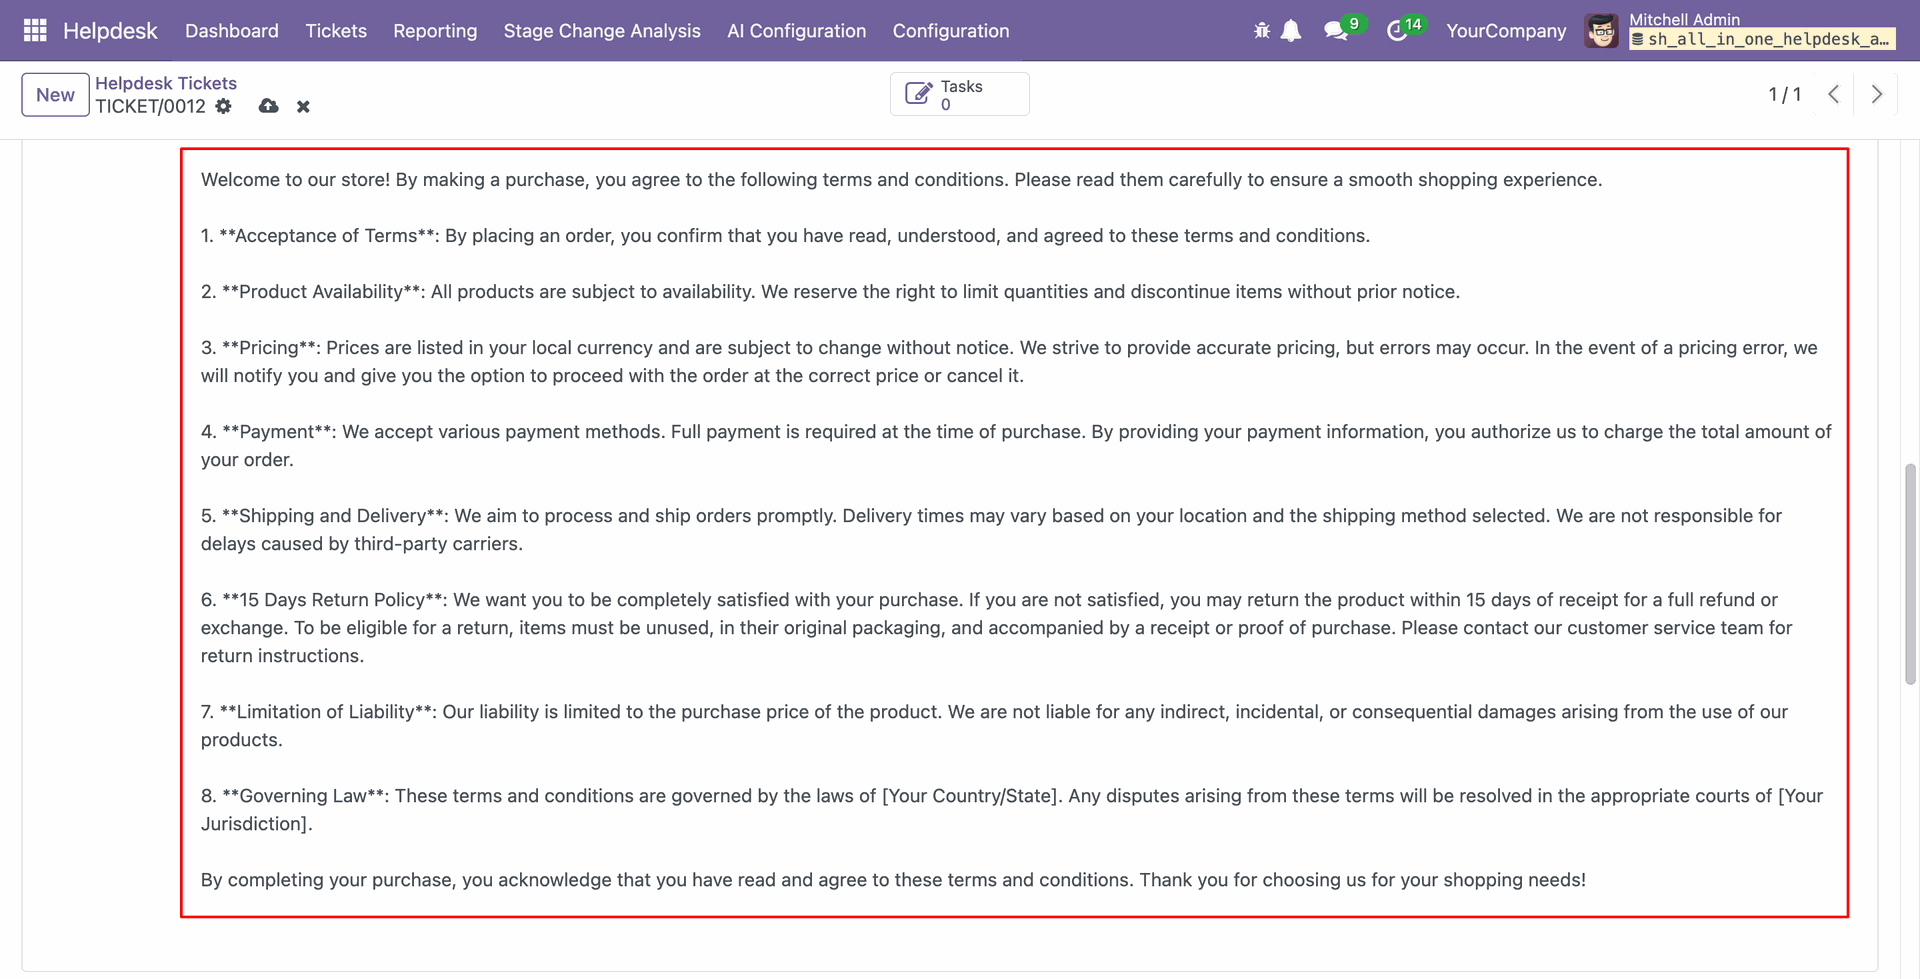
In the ticket's form view, you can see the generated output added. Click on 'Send Message' button to send the generated replay.
Click the 'Draft Reply' button.
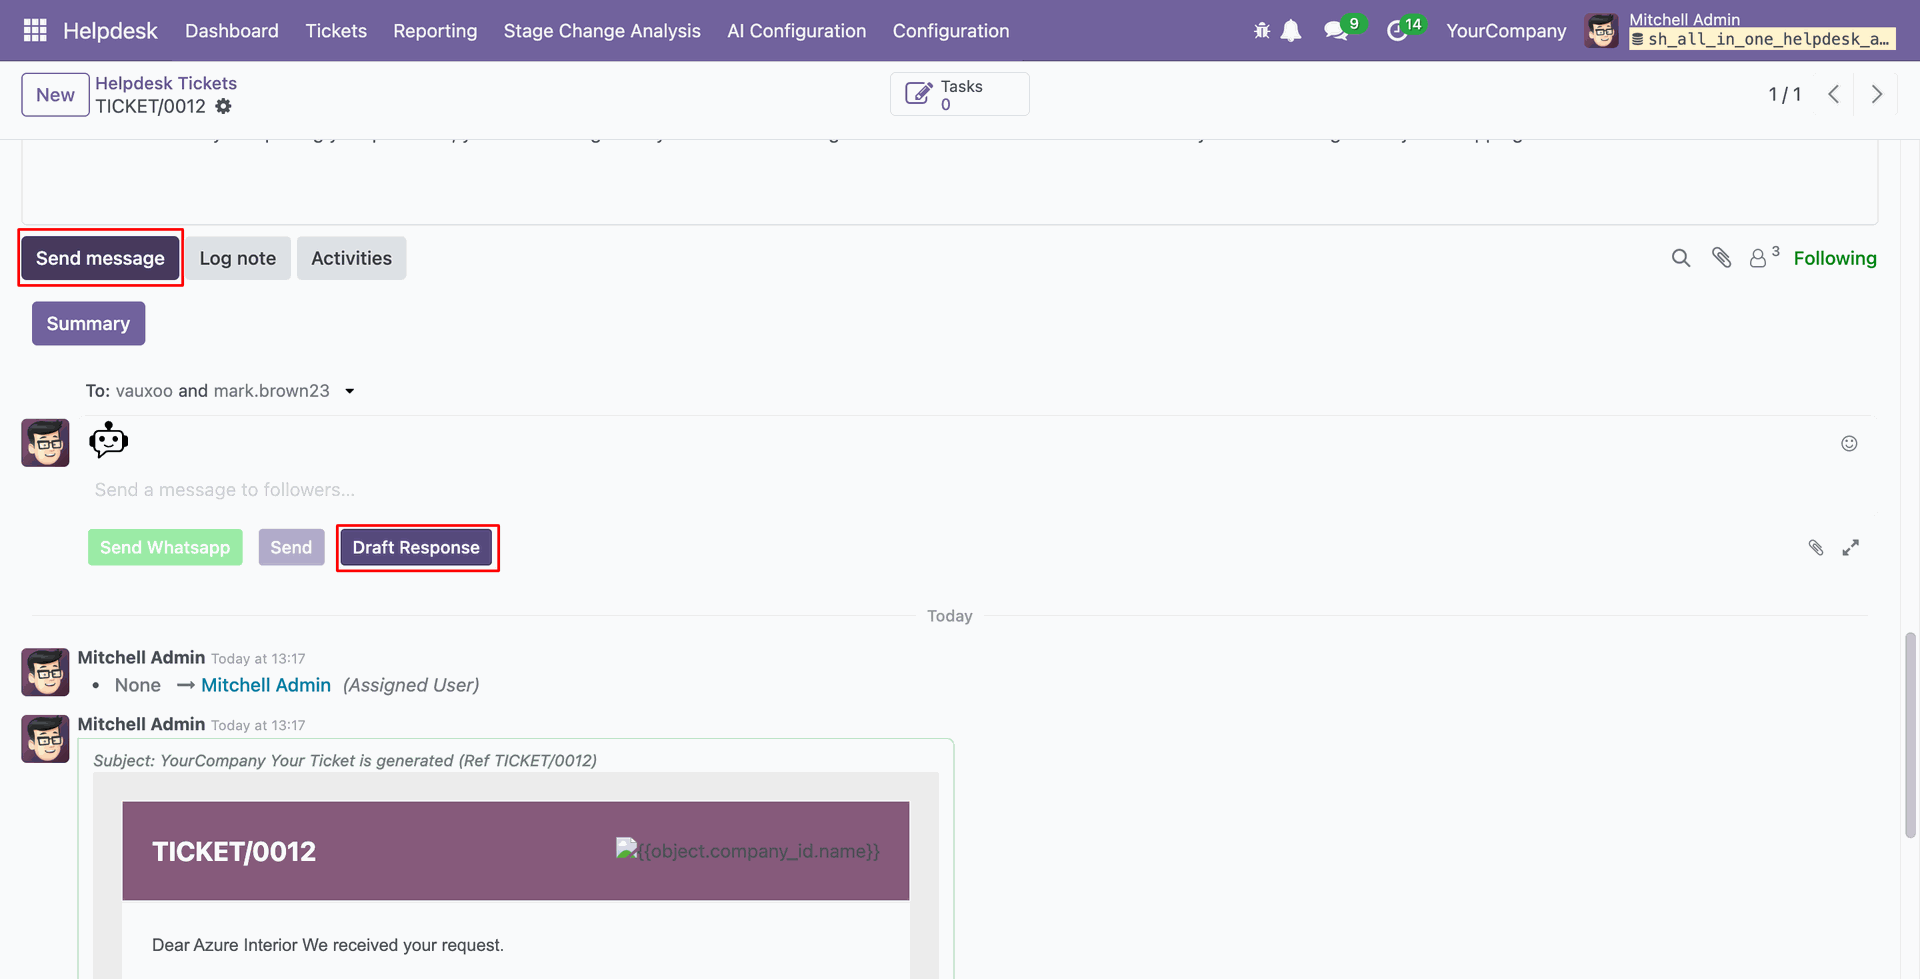
On clicking the draft response button it will generate a response you can edit it if you want to change.
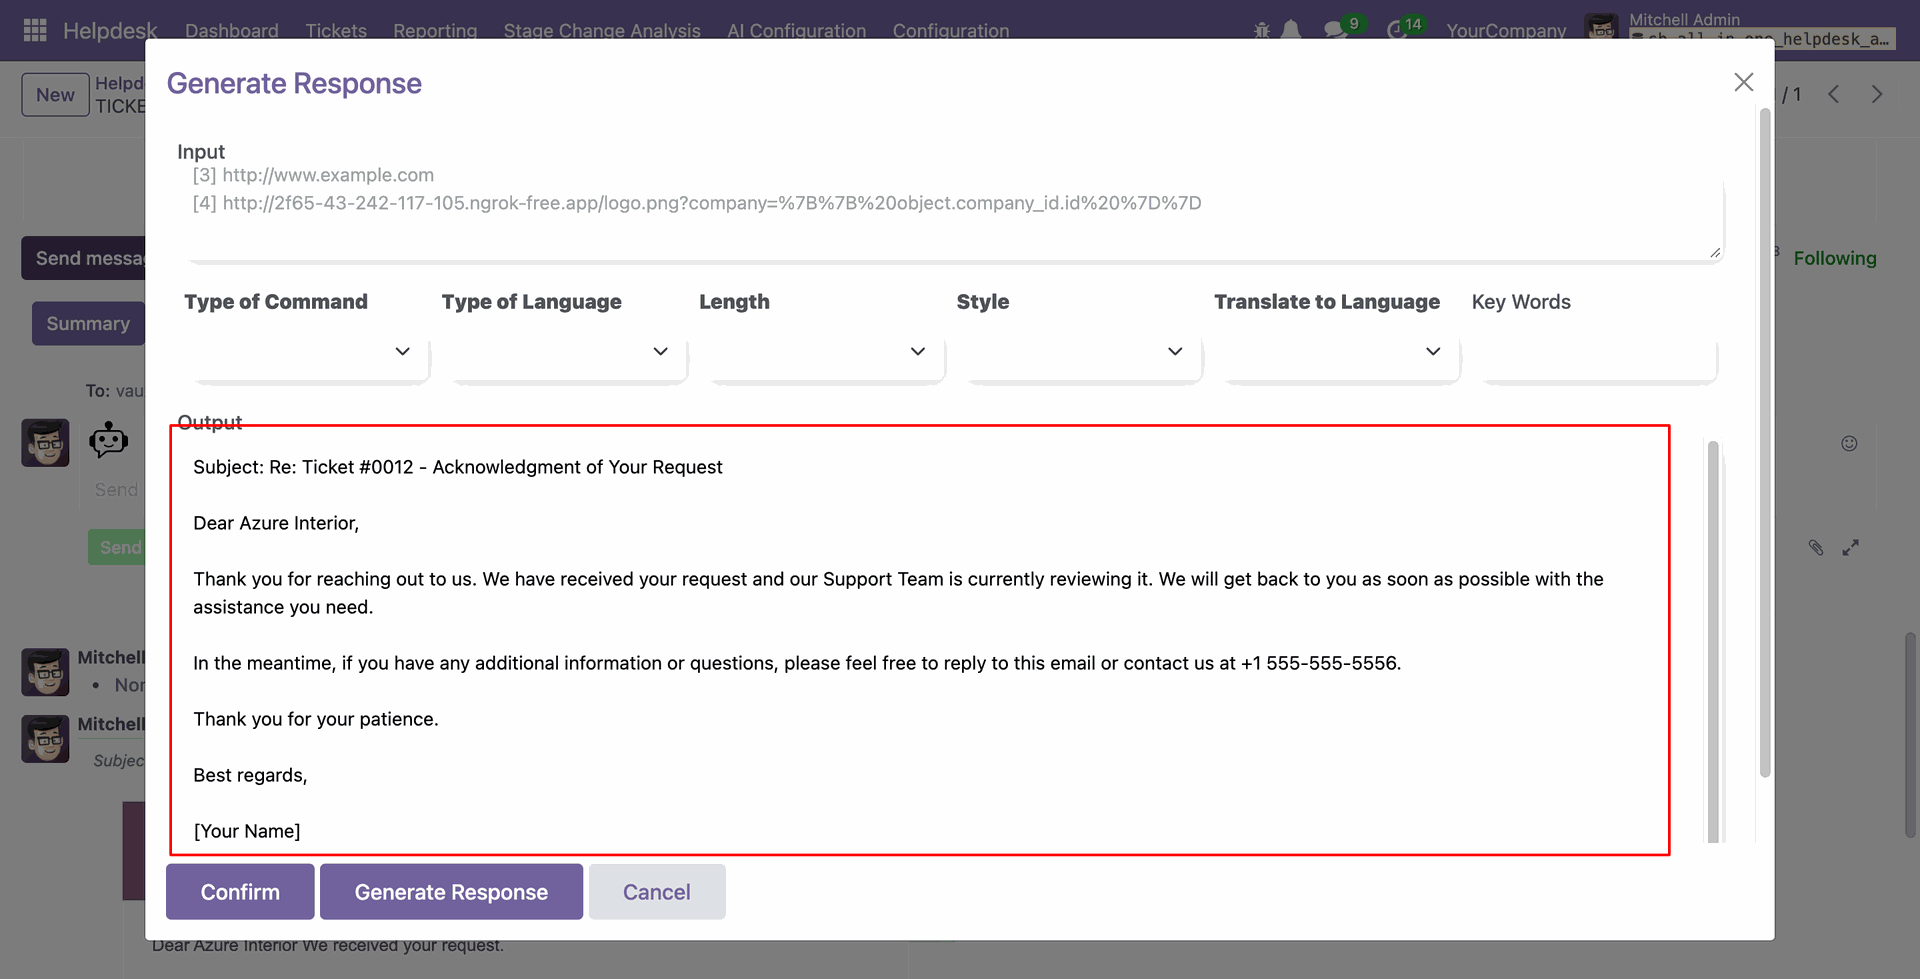
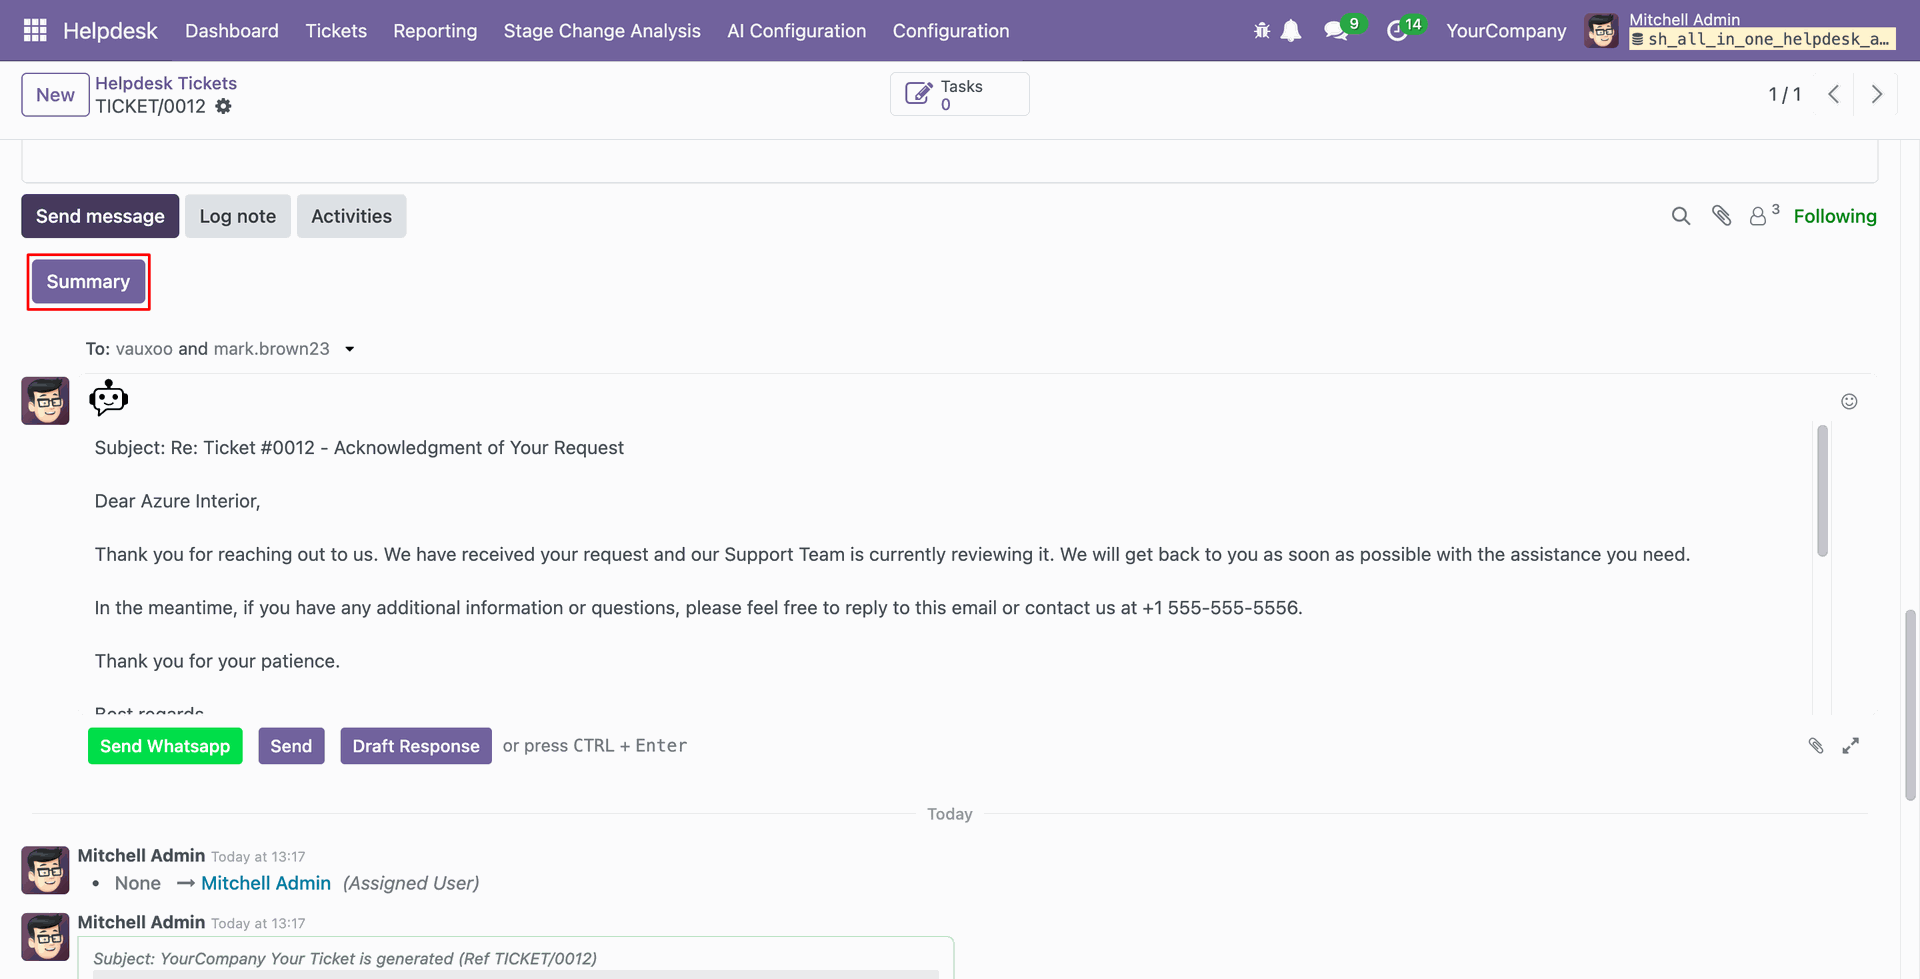
Click on the 'Summary' button to view the chatter summary.
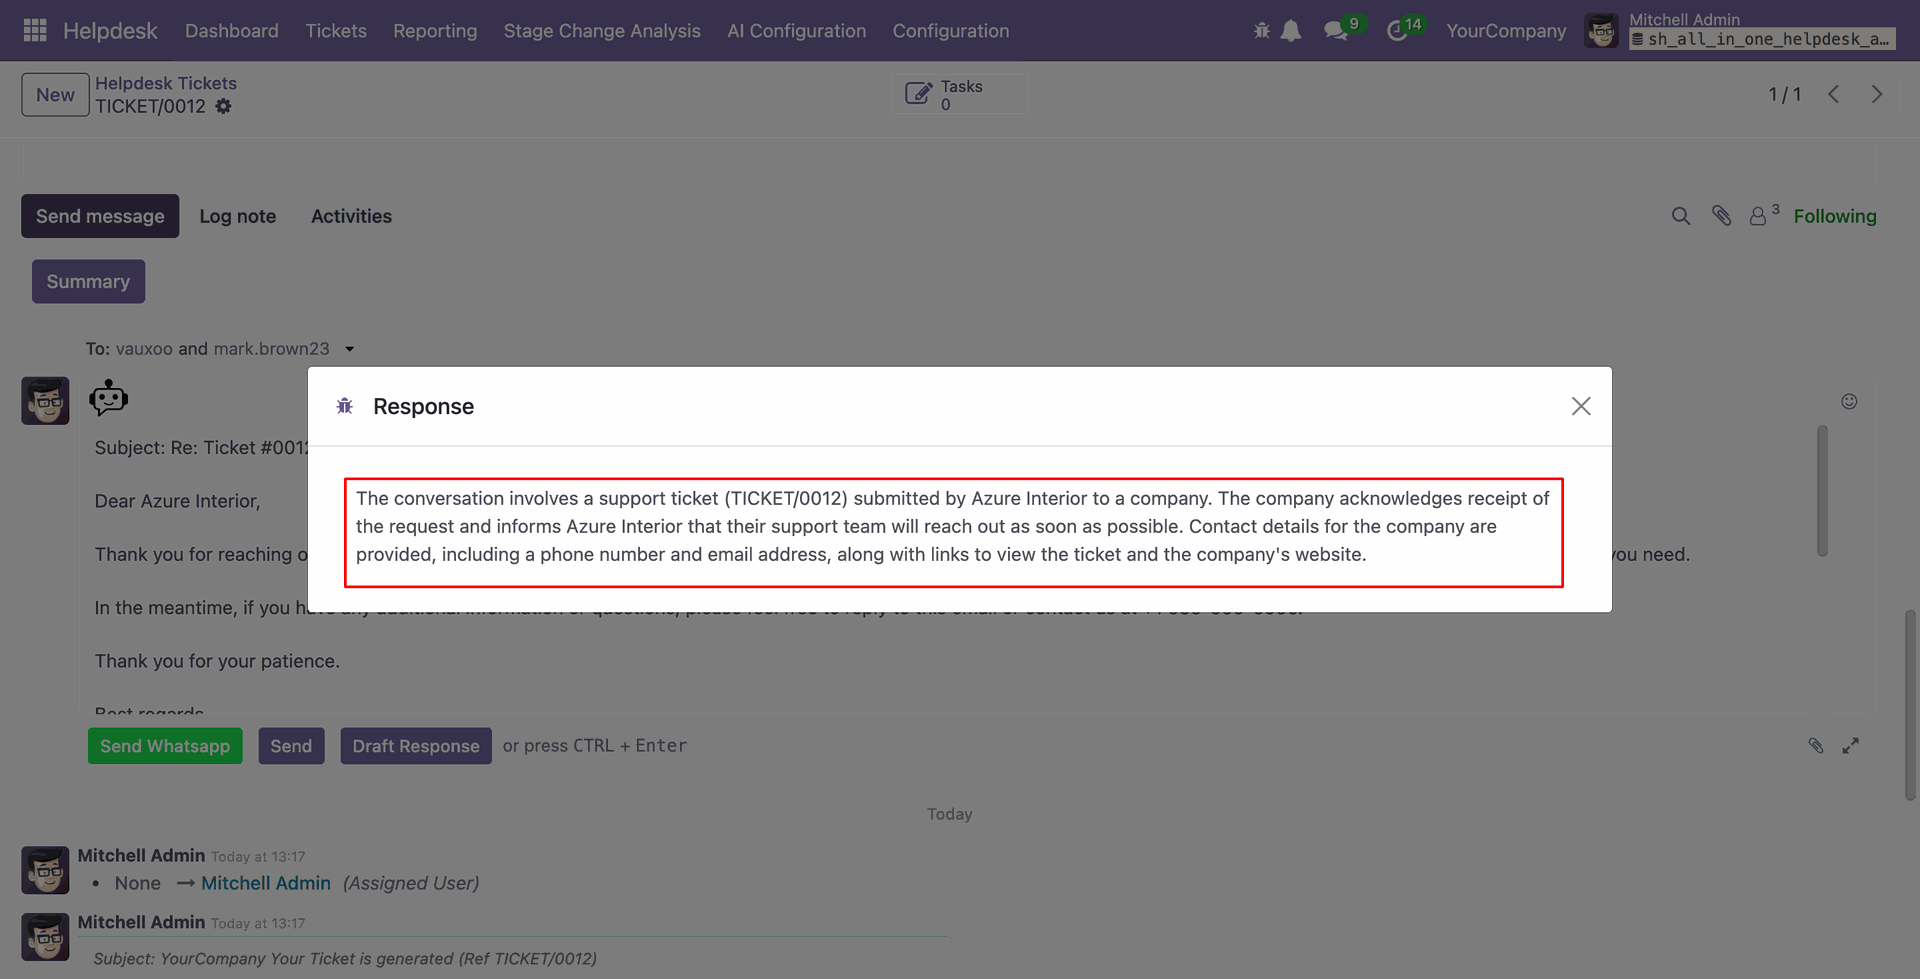
'Response' wizard looks like below.
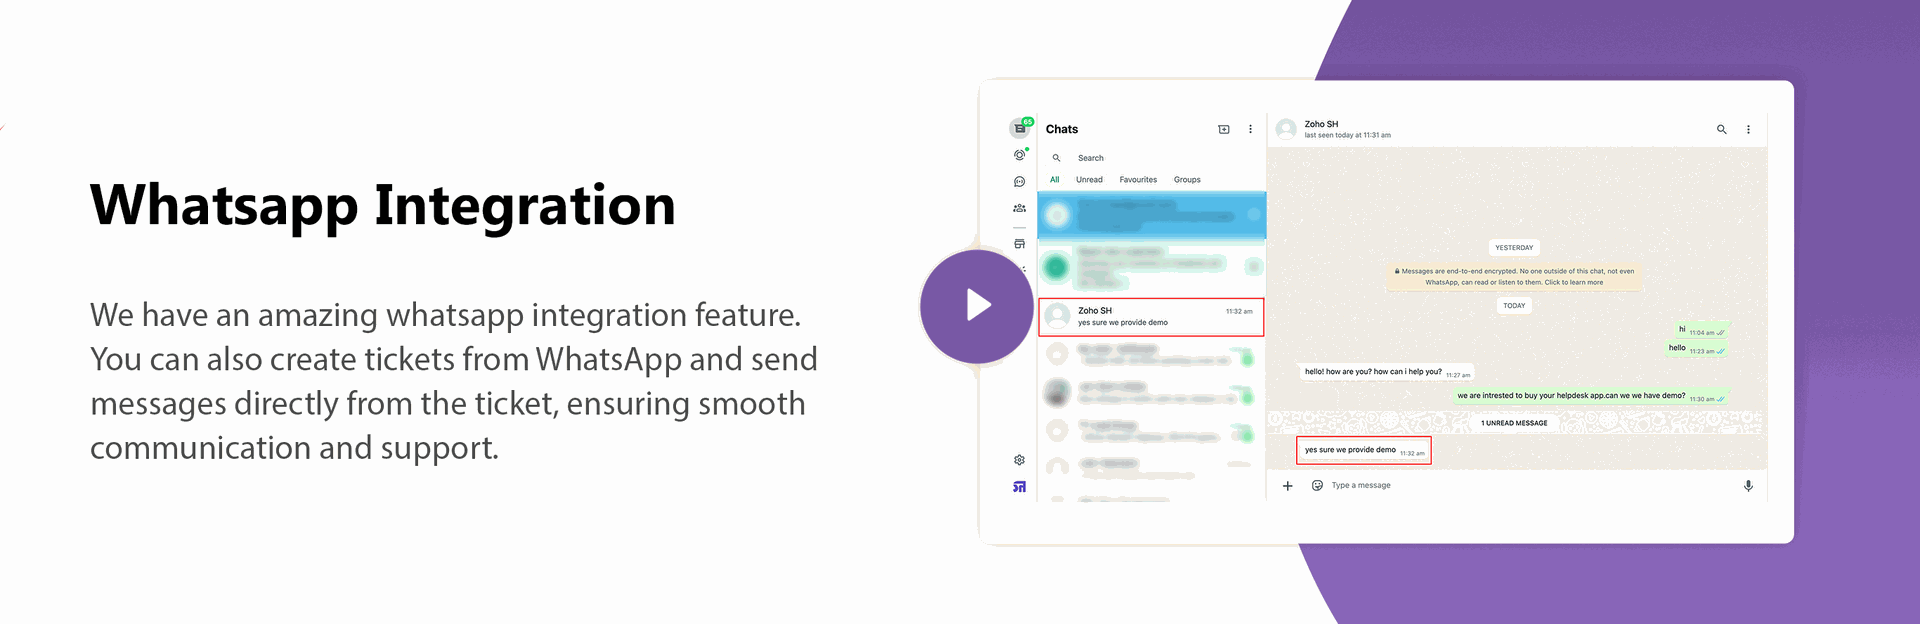
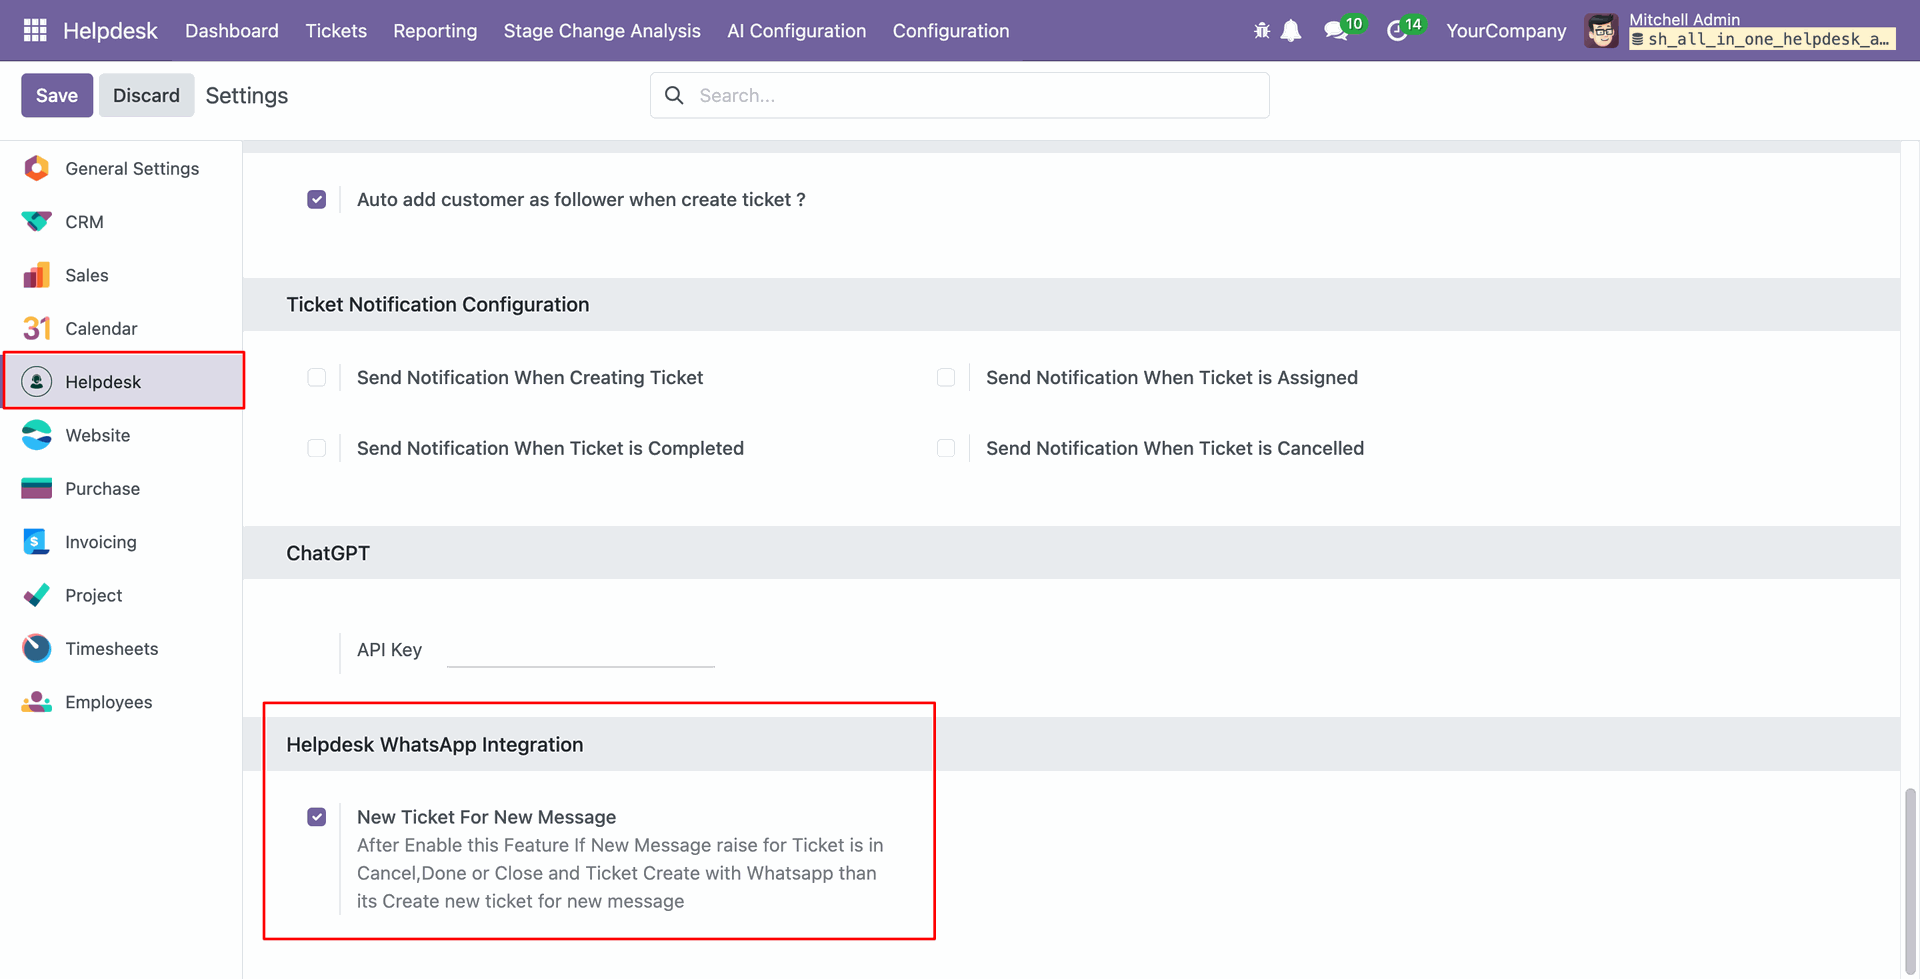
Go to the whatsapp configuration and enable 'New Ticket From New Message'.
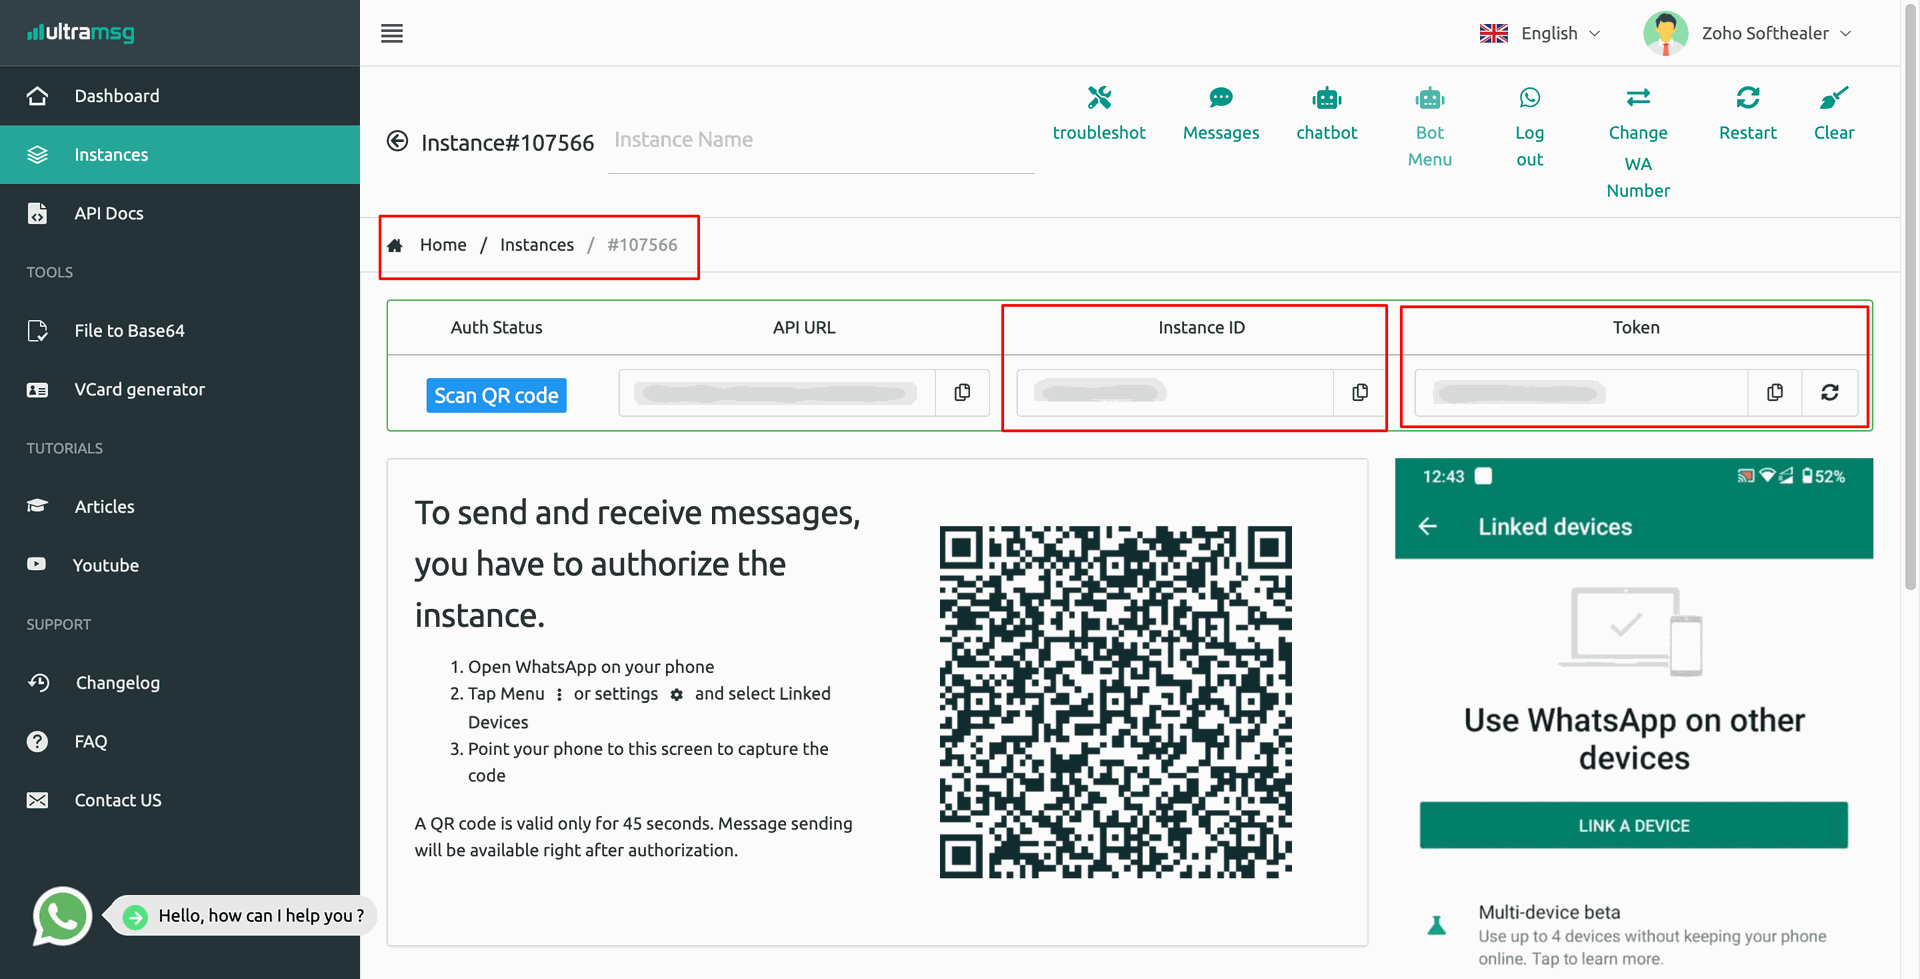
Open 'Ultramsg', go to 'Instance', and click on the desired instance.
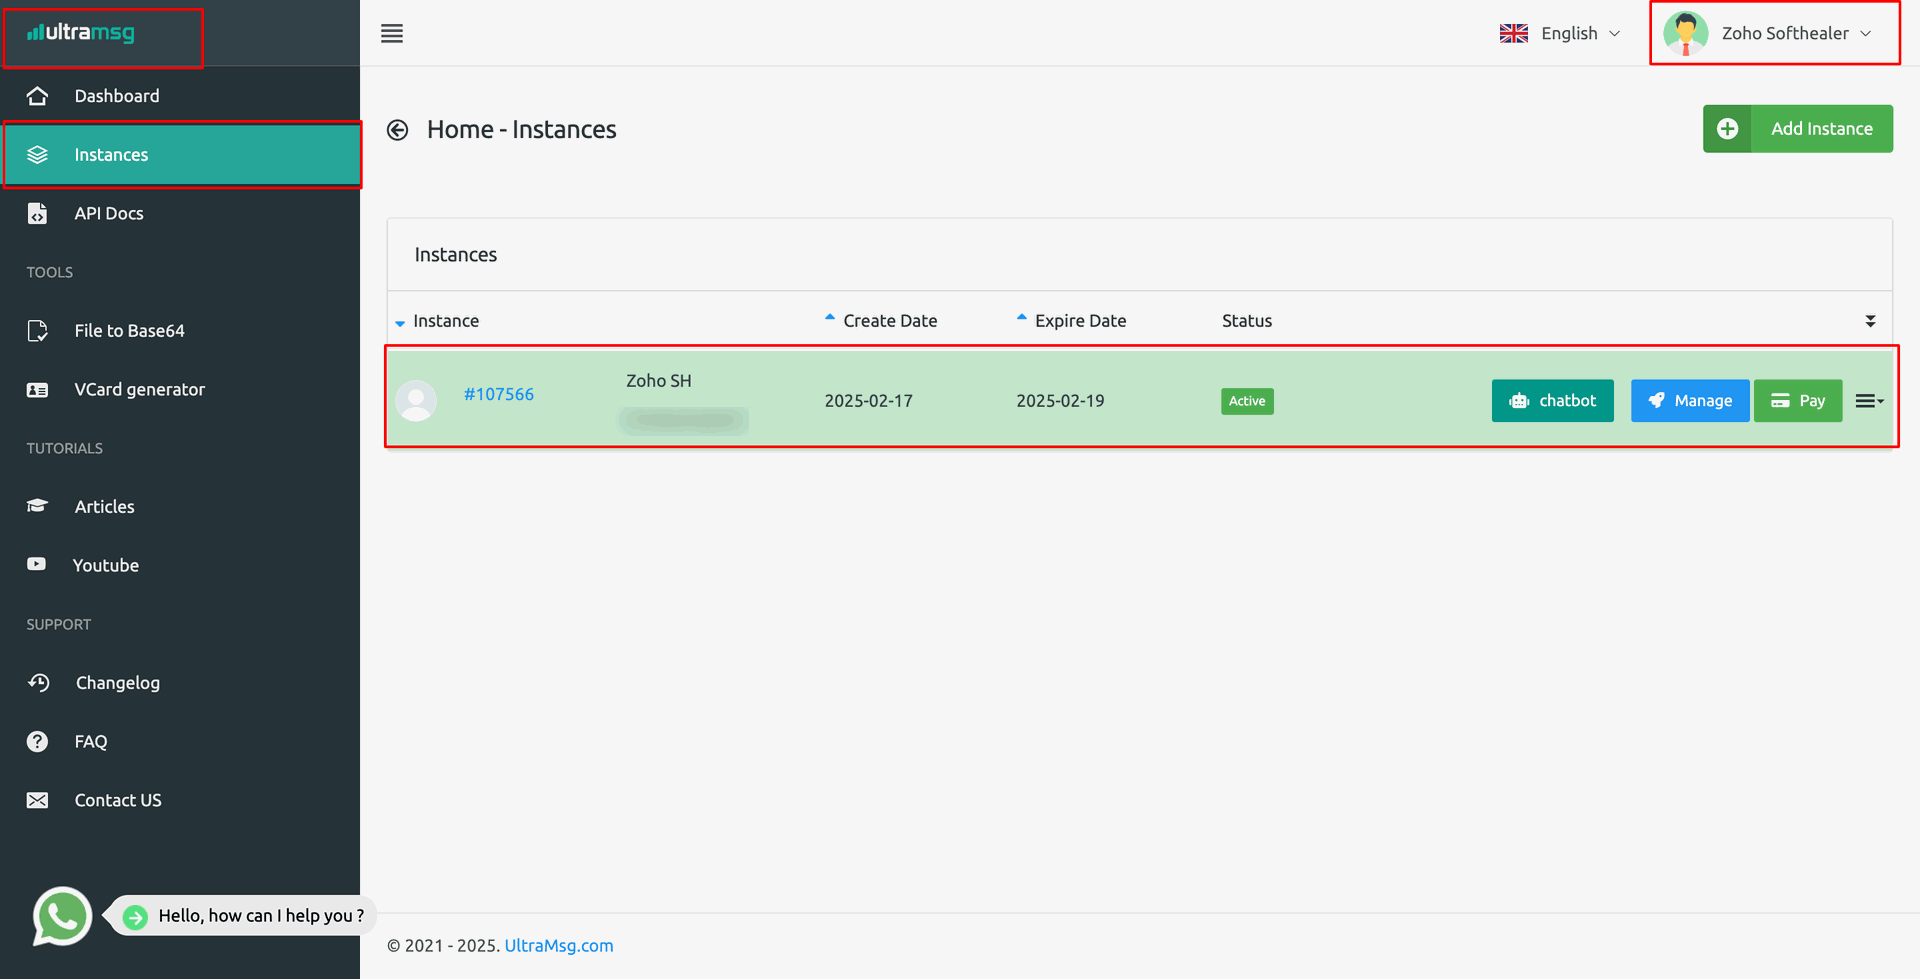
You can view the Instance ID and Token here.
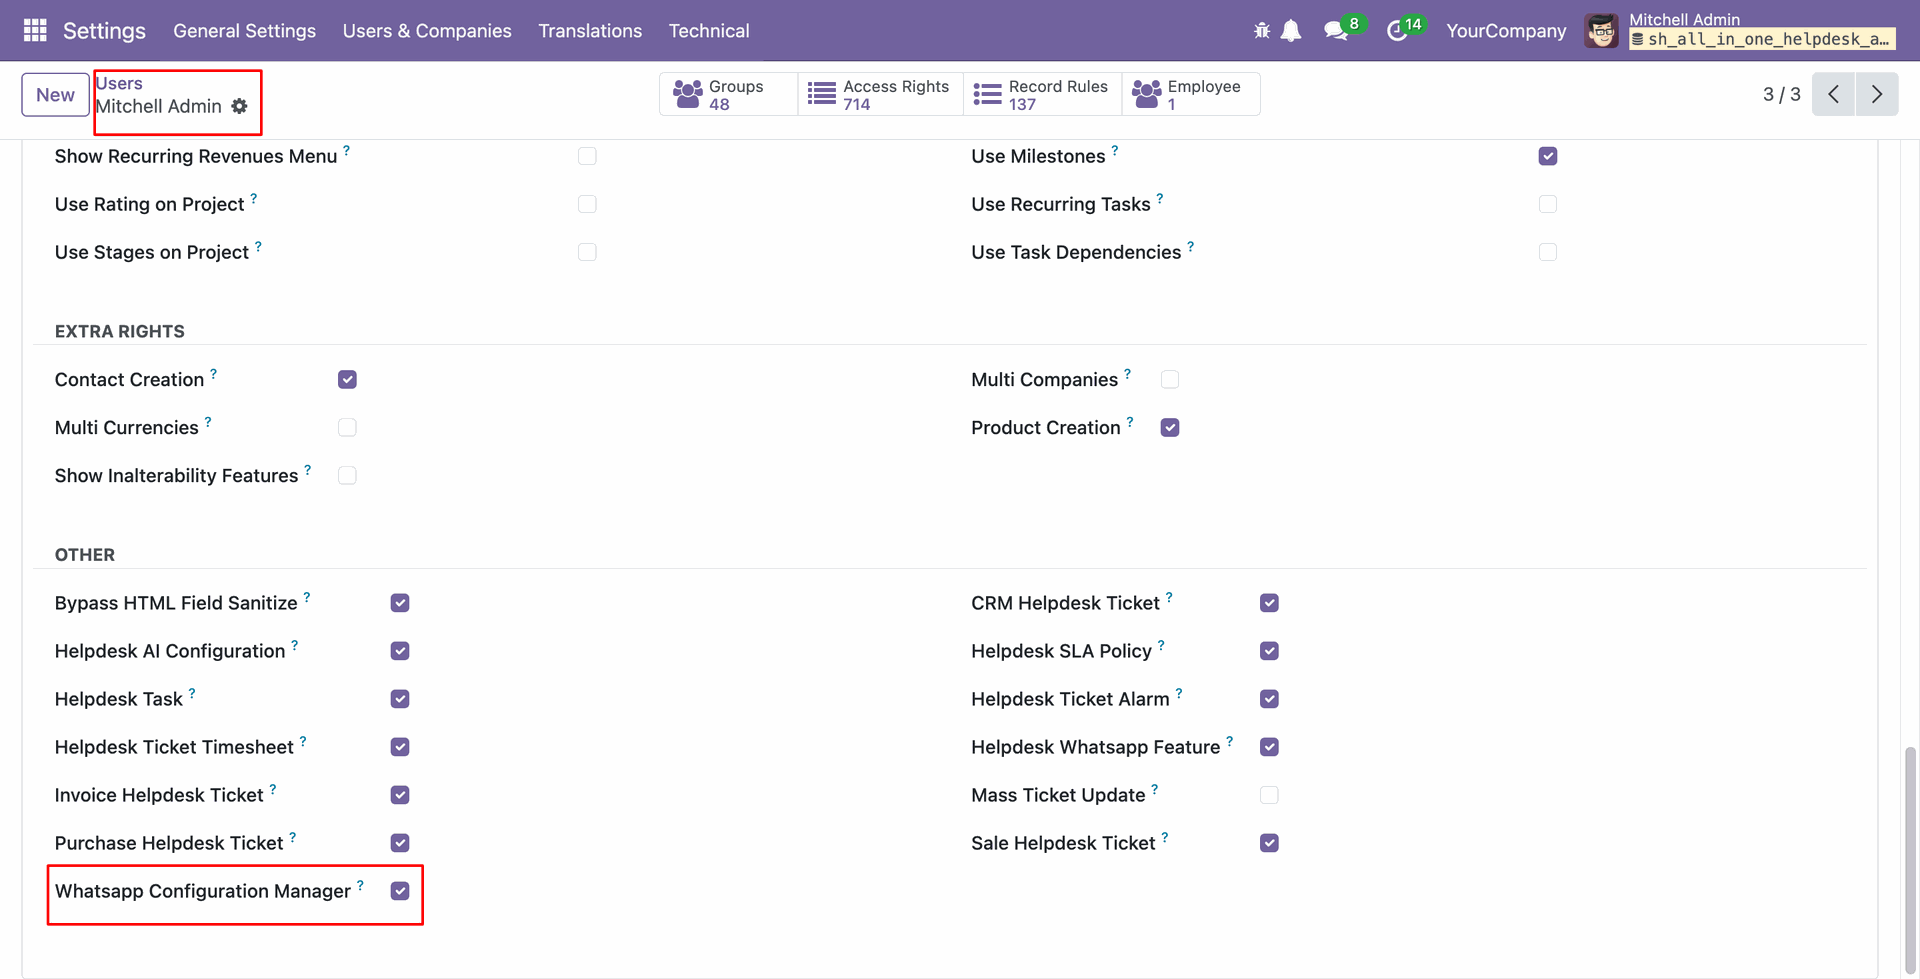
In 'User', enable the 'Whatsapp Configuration Manager' option.
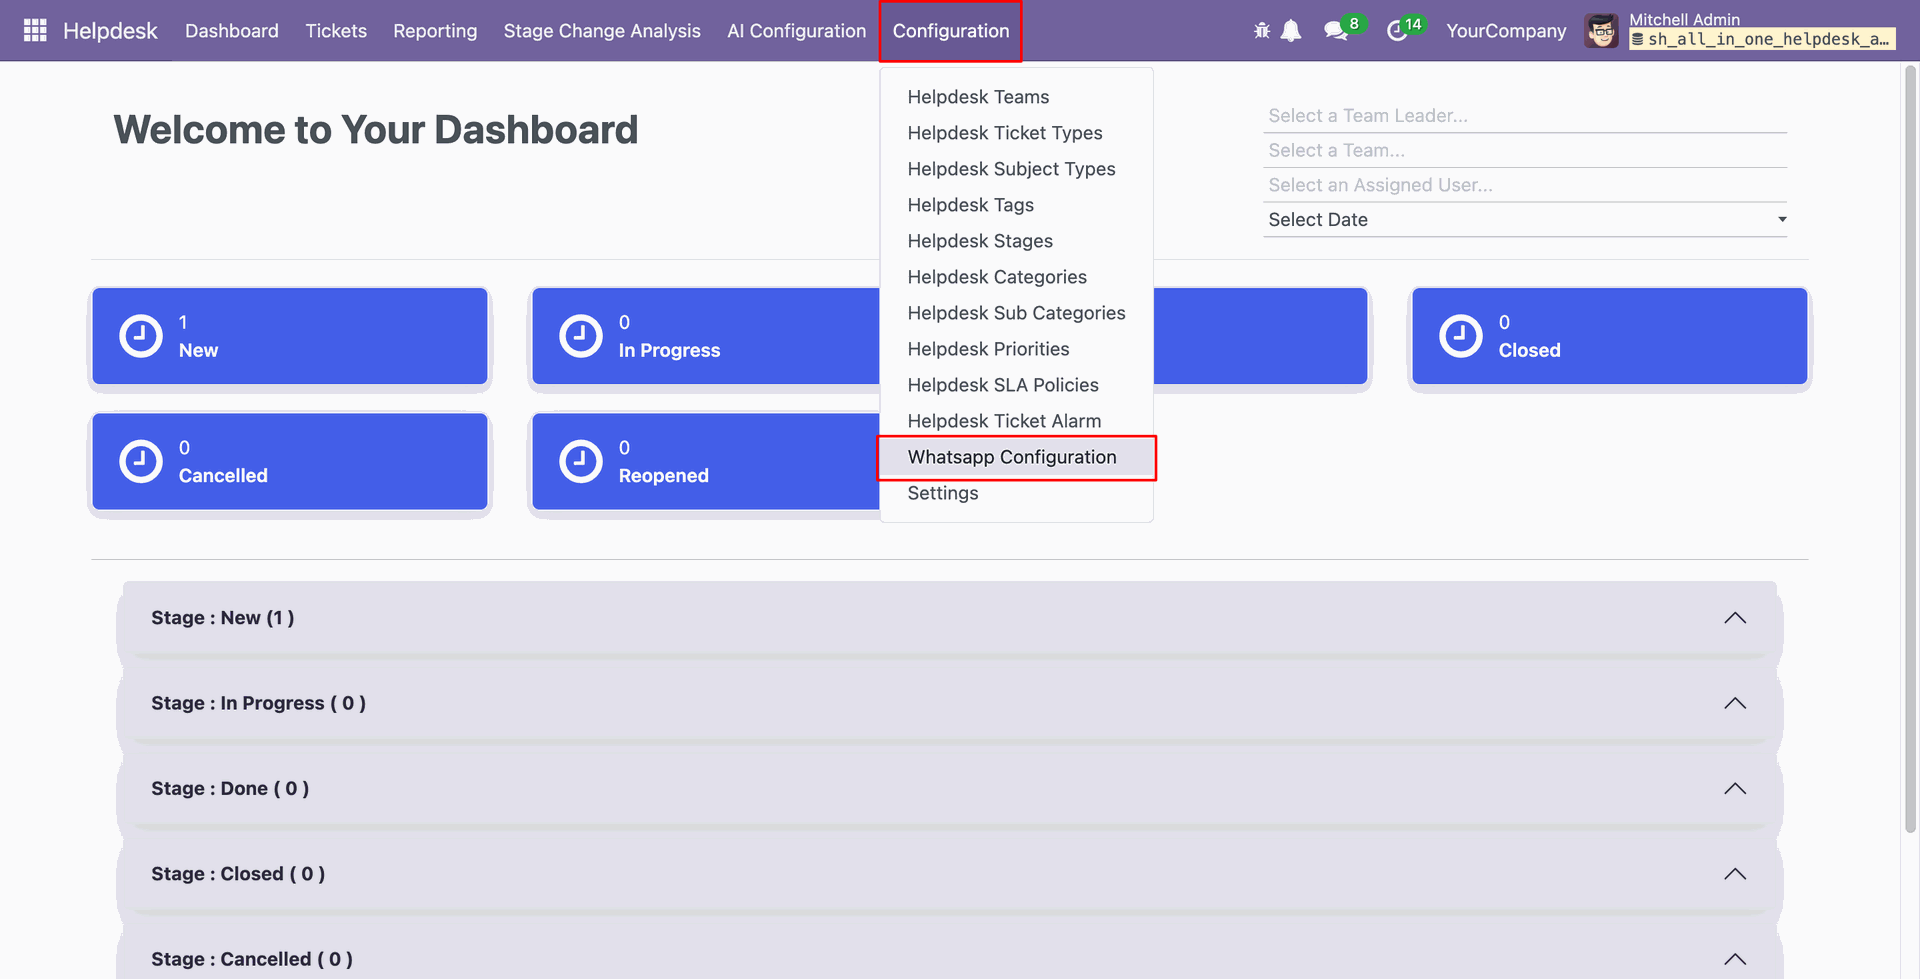
Helpdesk >> Configurations >> Whatsapp Configuration
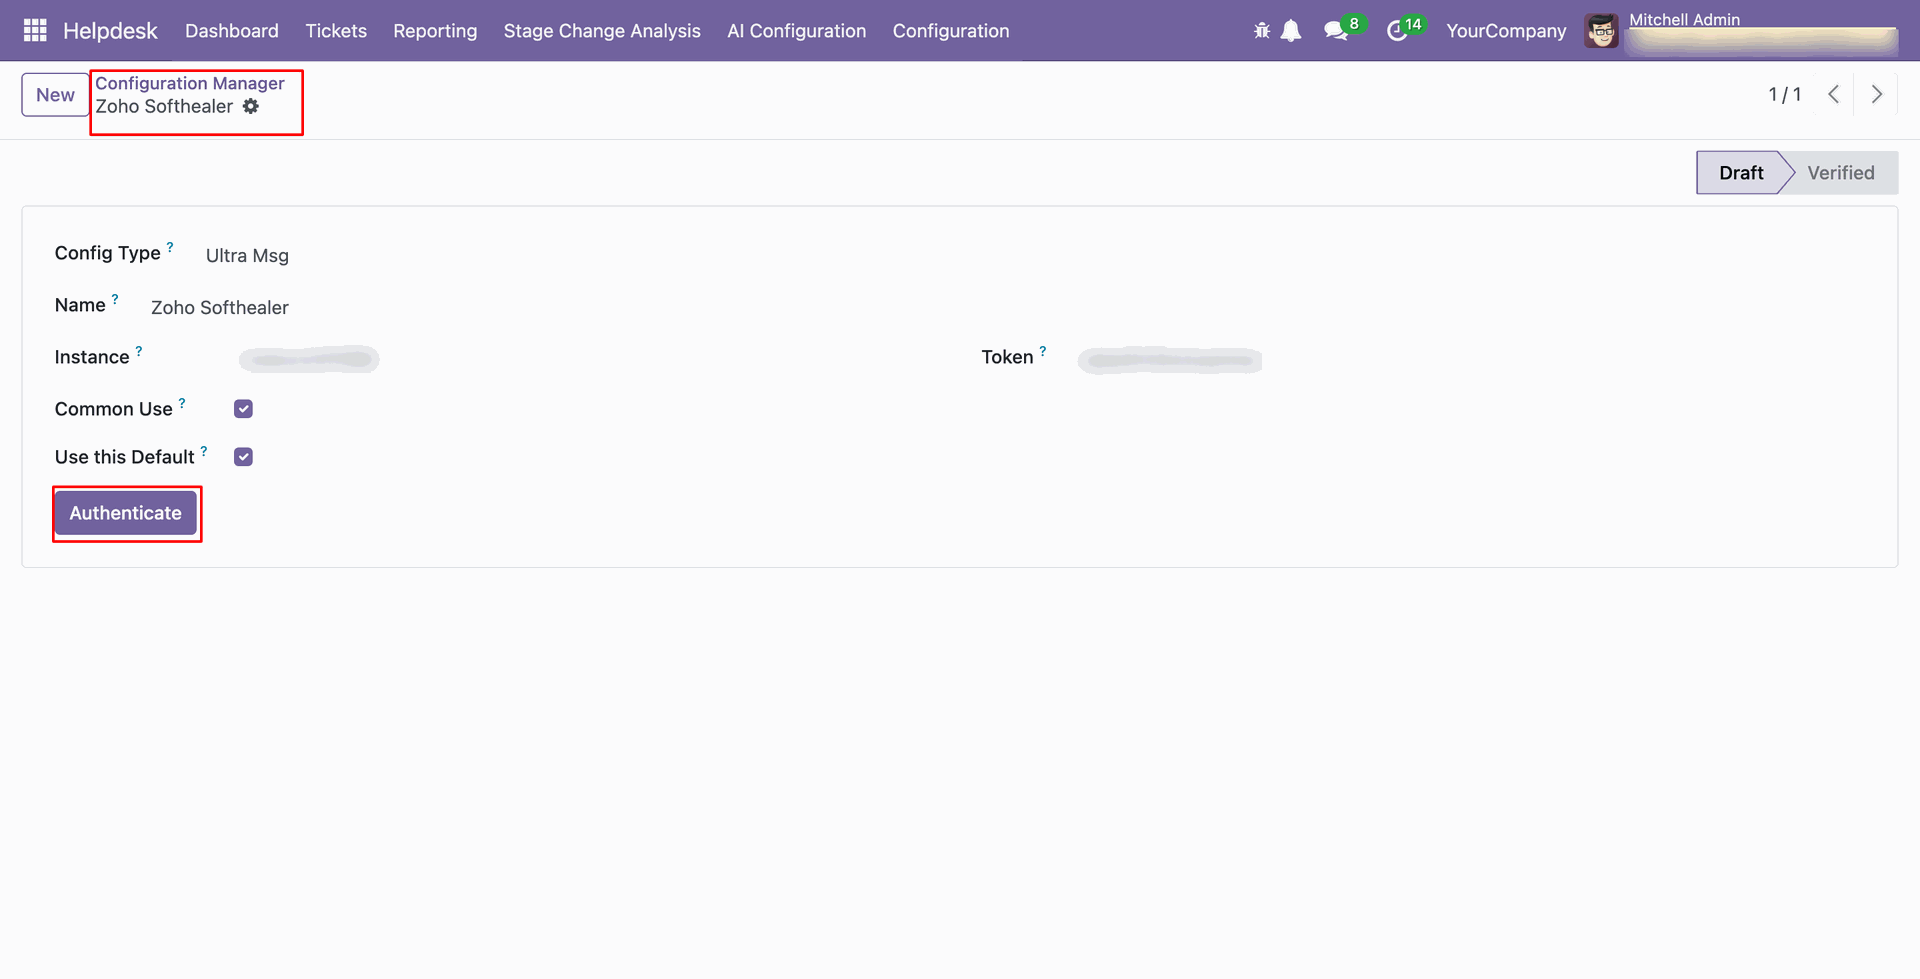
In the configuration Manager form view, click on the 'Authenticate' button.
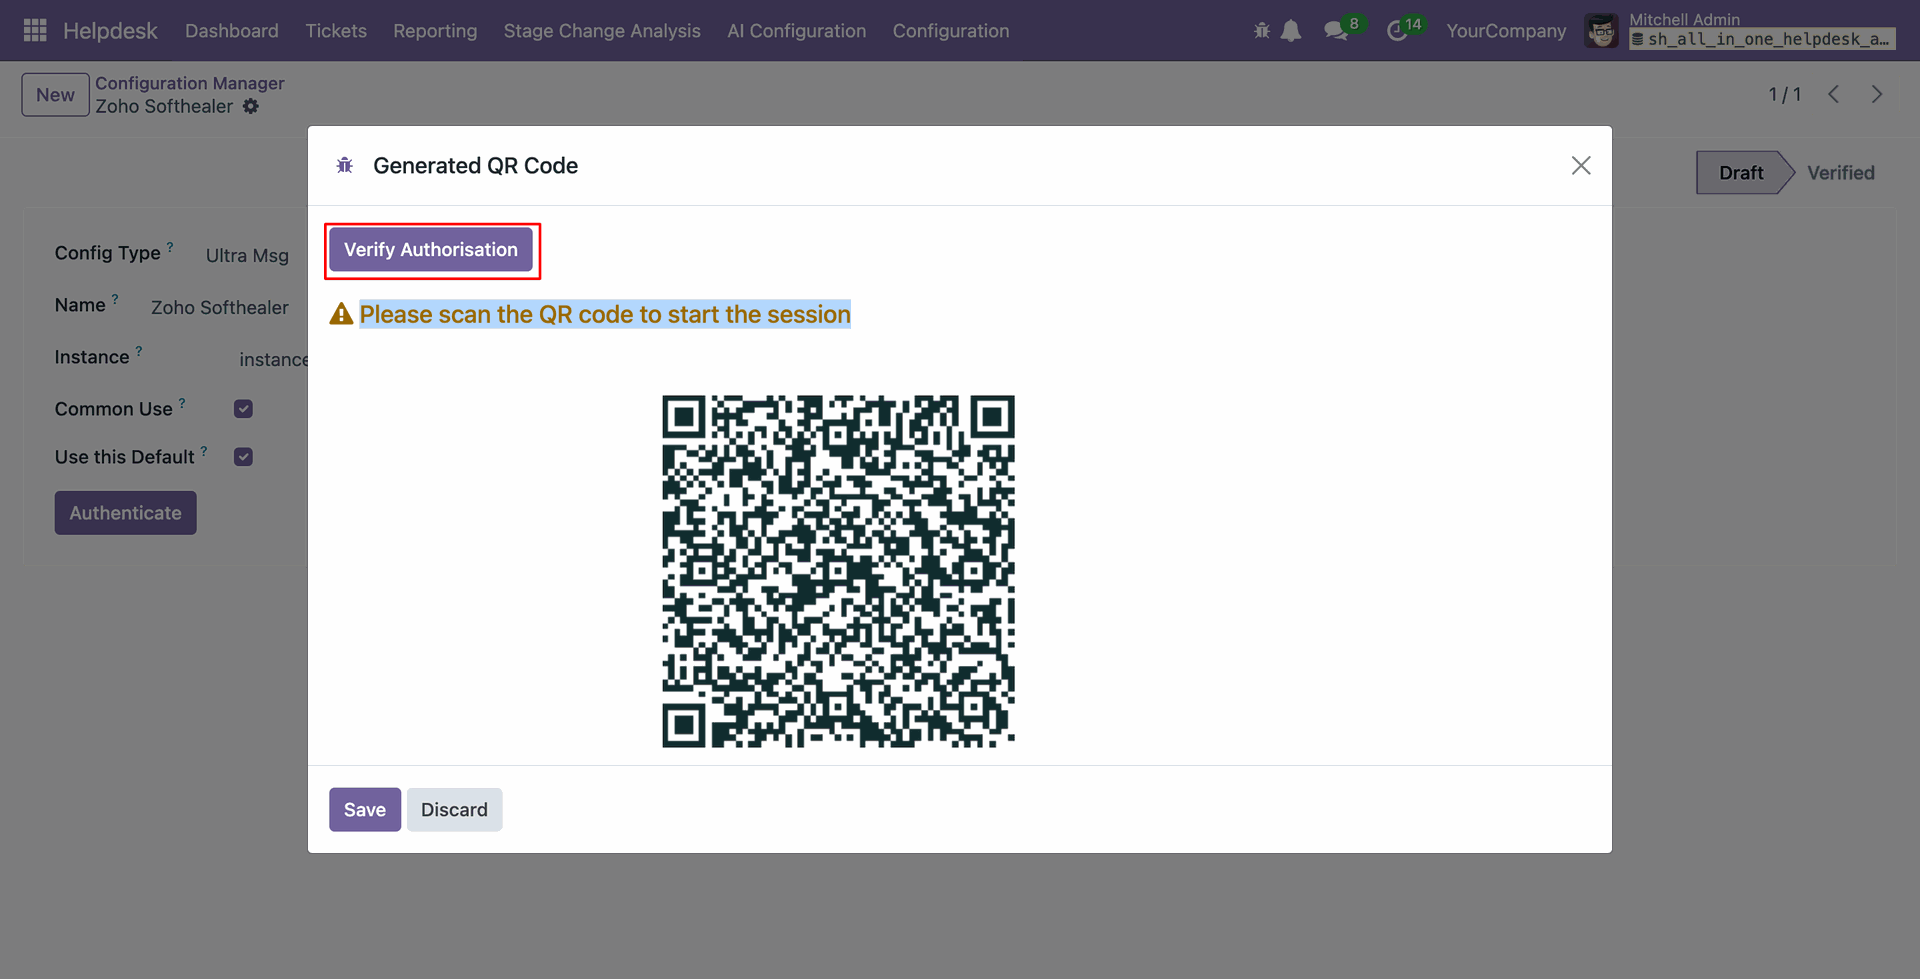
Click on the 'Verify Authentication' button.
Please scan the QRcode to start the session.
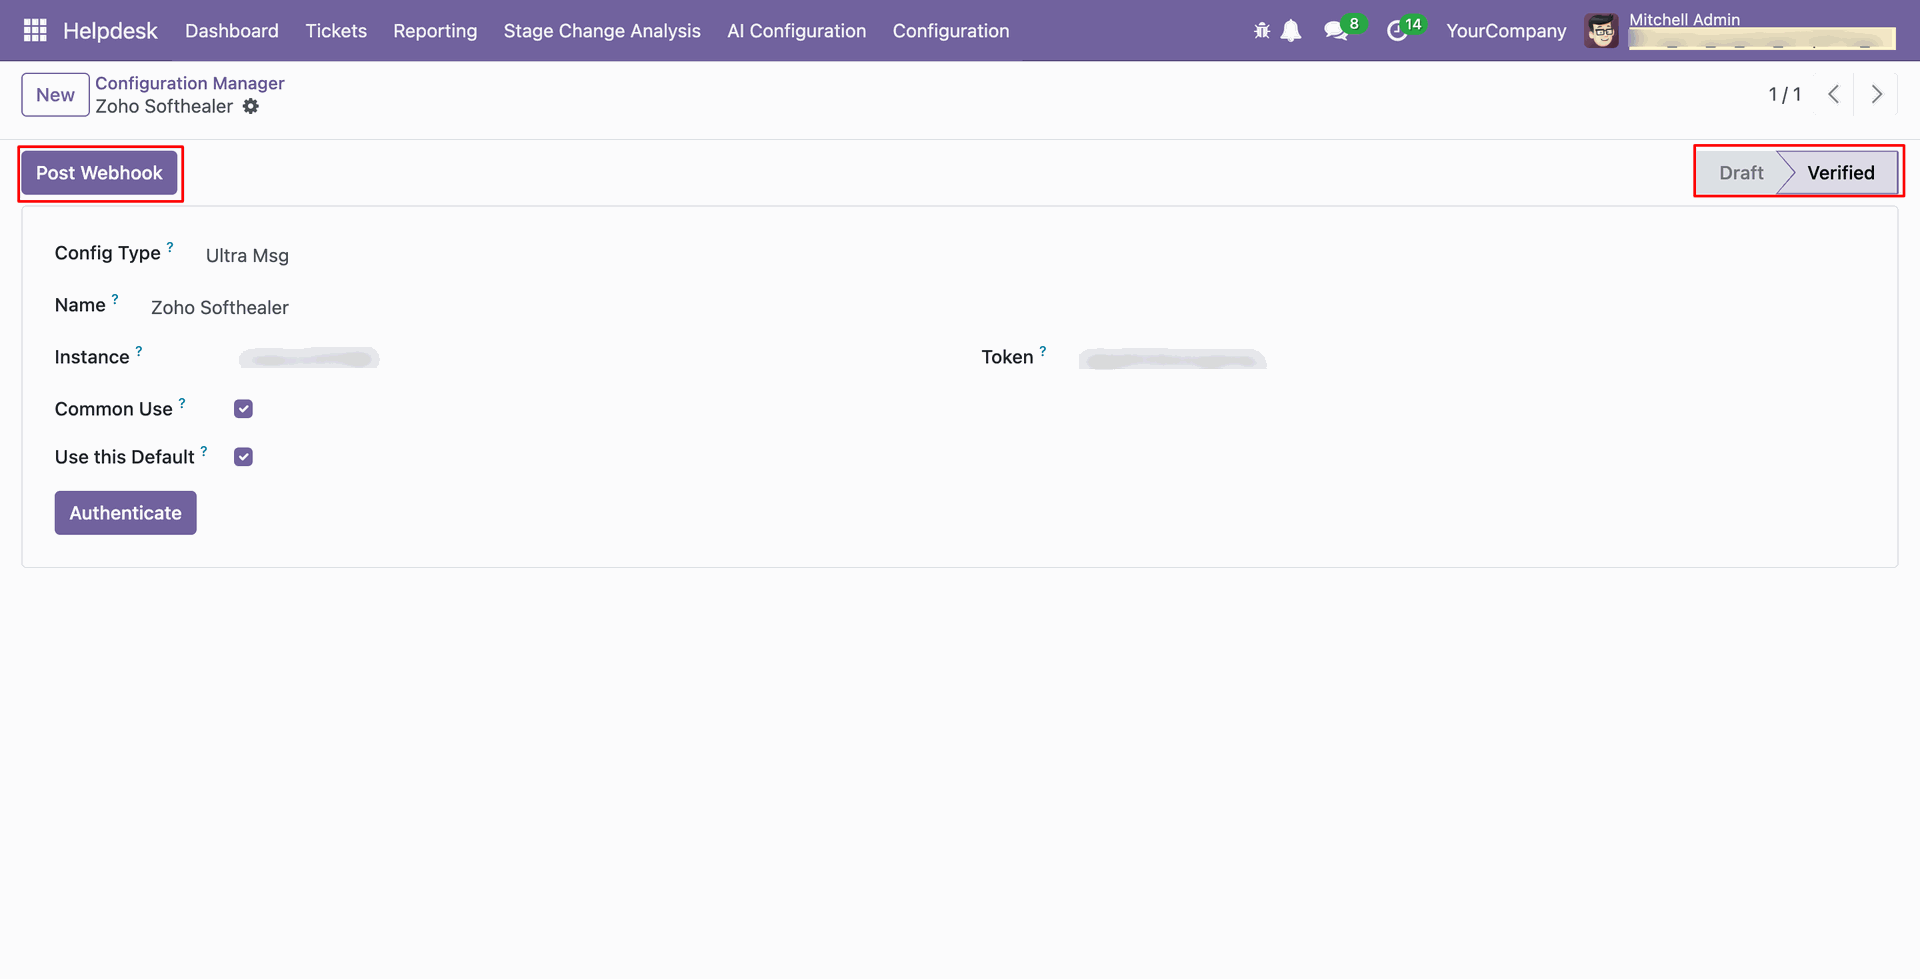
In the Configuration Manager form view, click the 'Post Webhook' button.
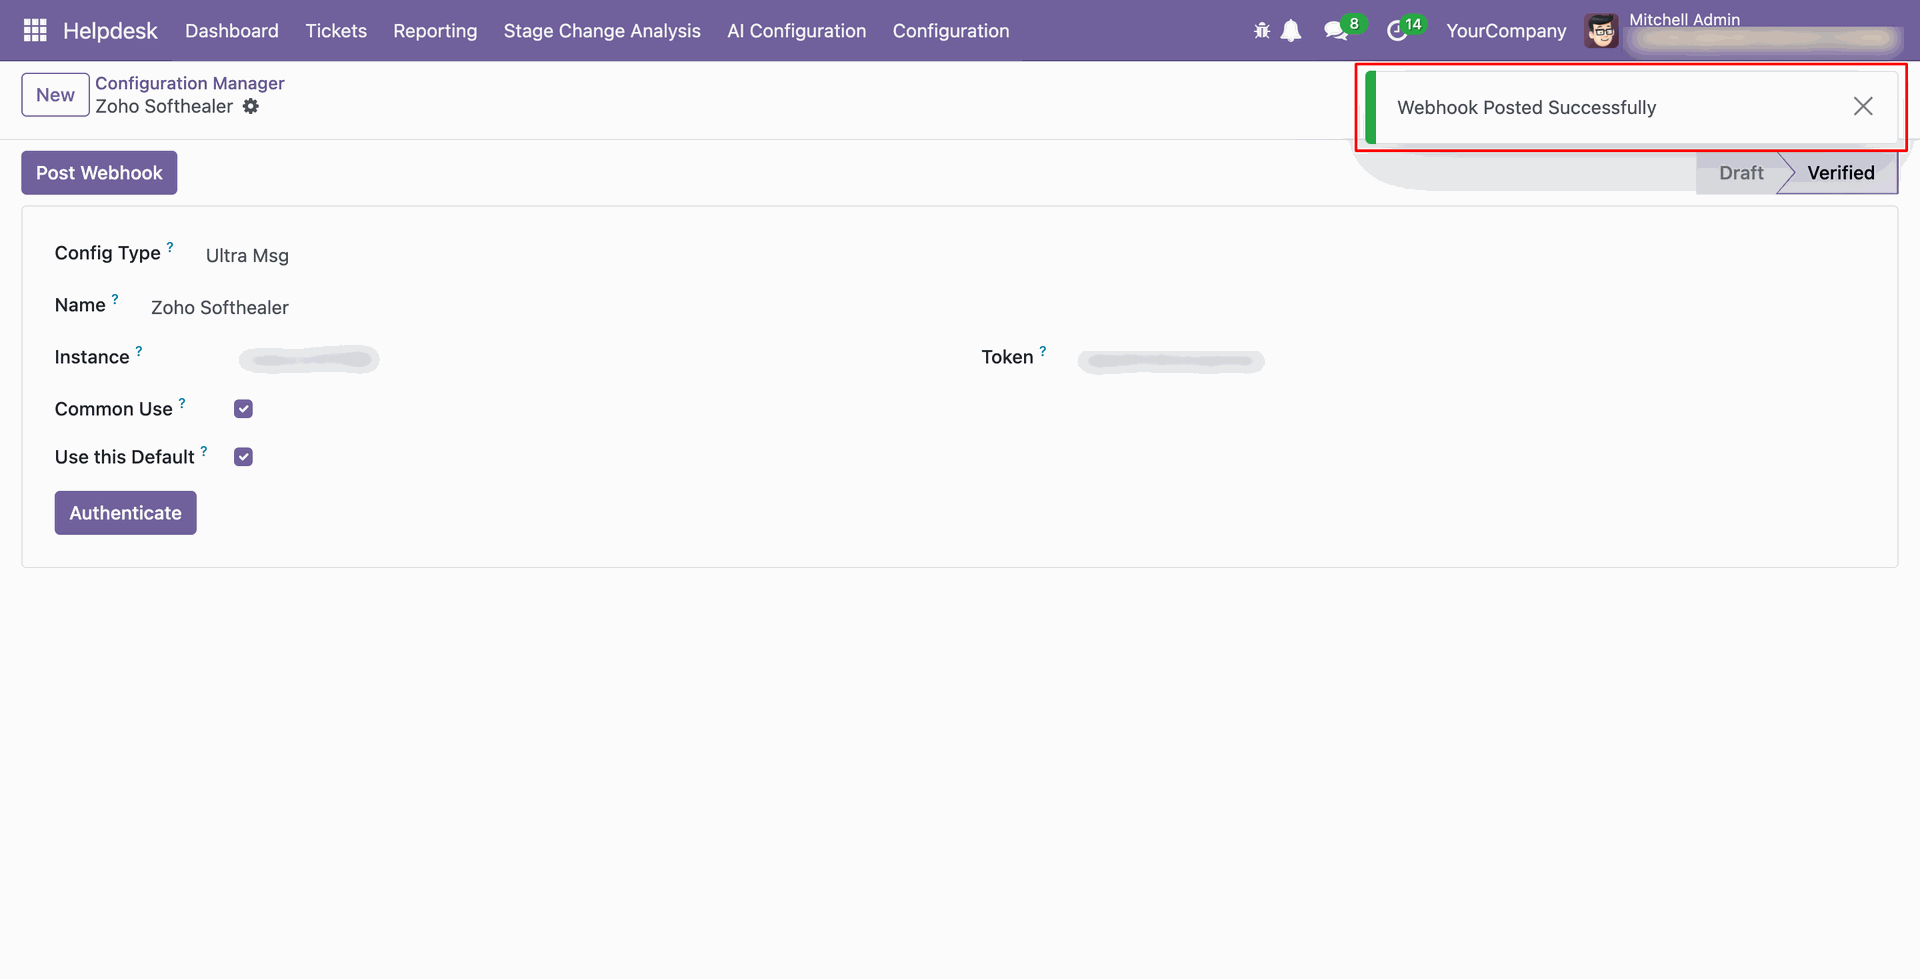
The 'Webhook Posted Successfully' notification will be displayed.
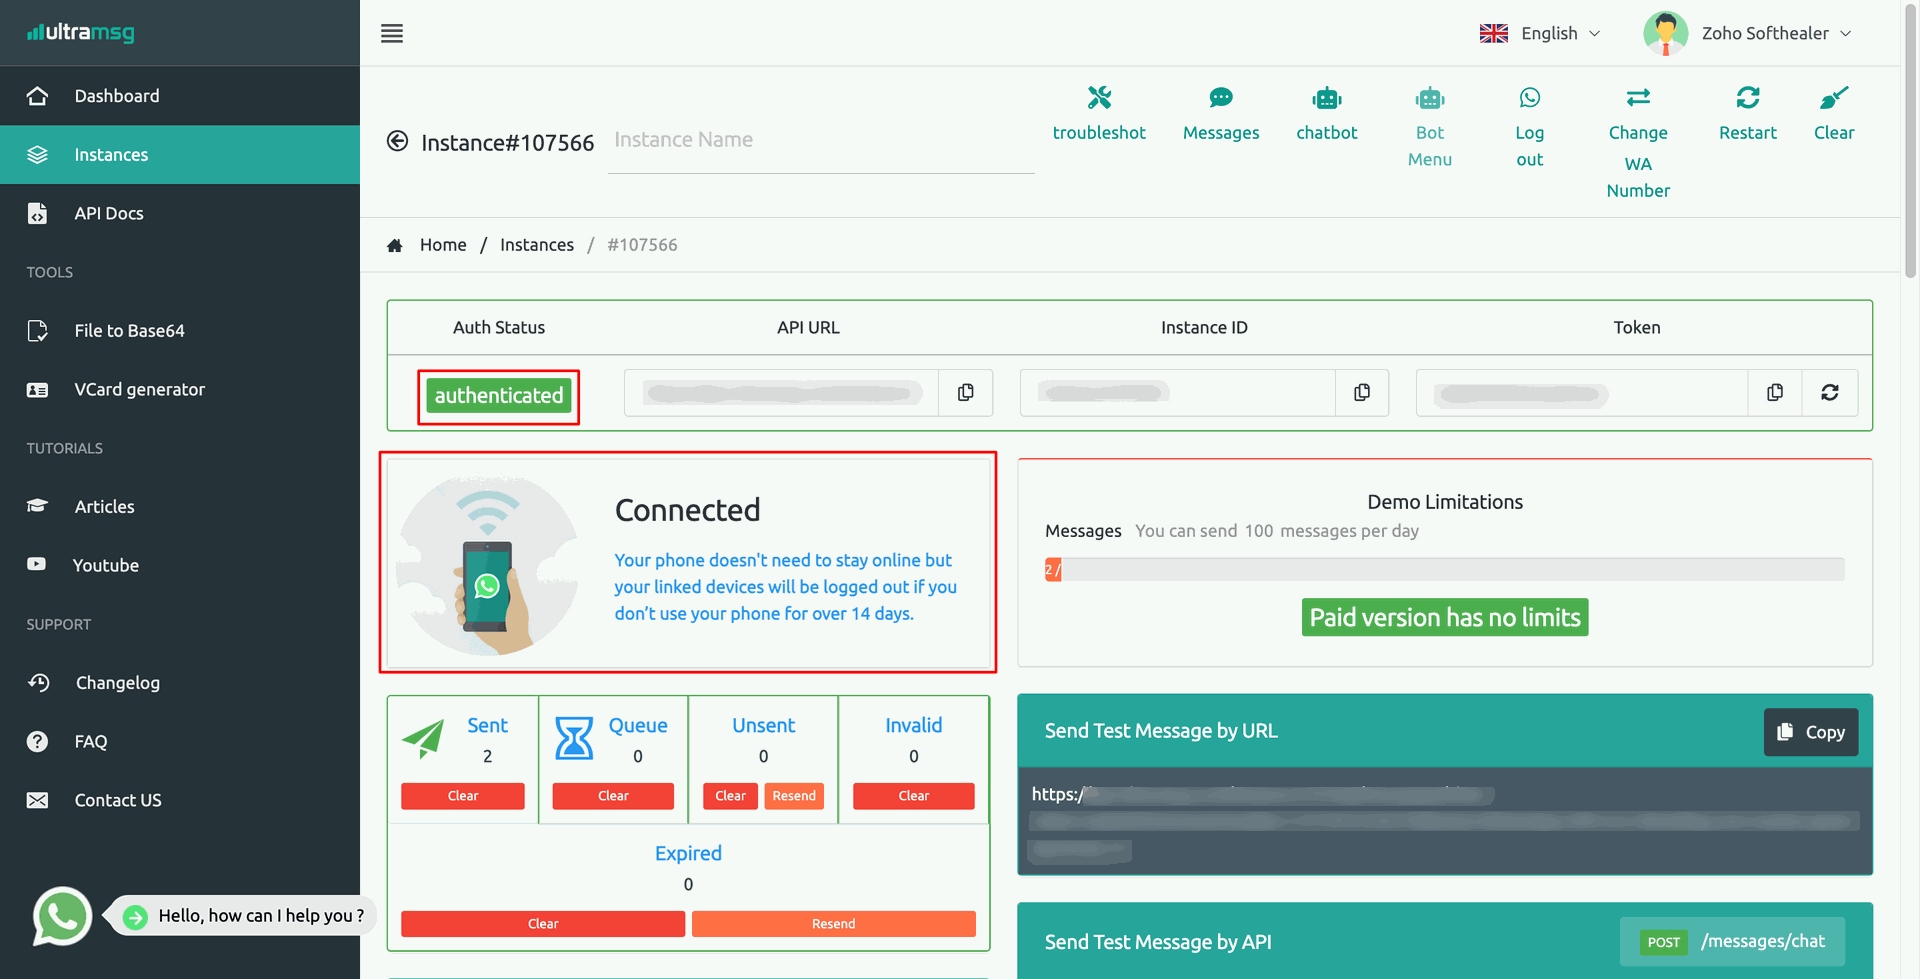
You can see the auth status as 'Authenticated' and the Webhook URL. Click the 'Save' button.
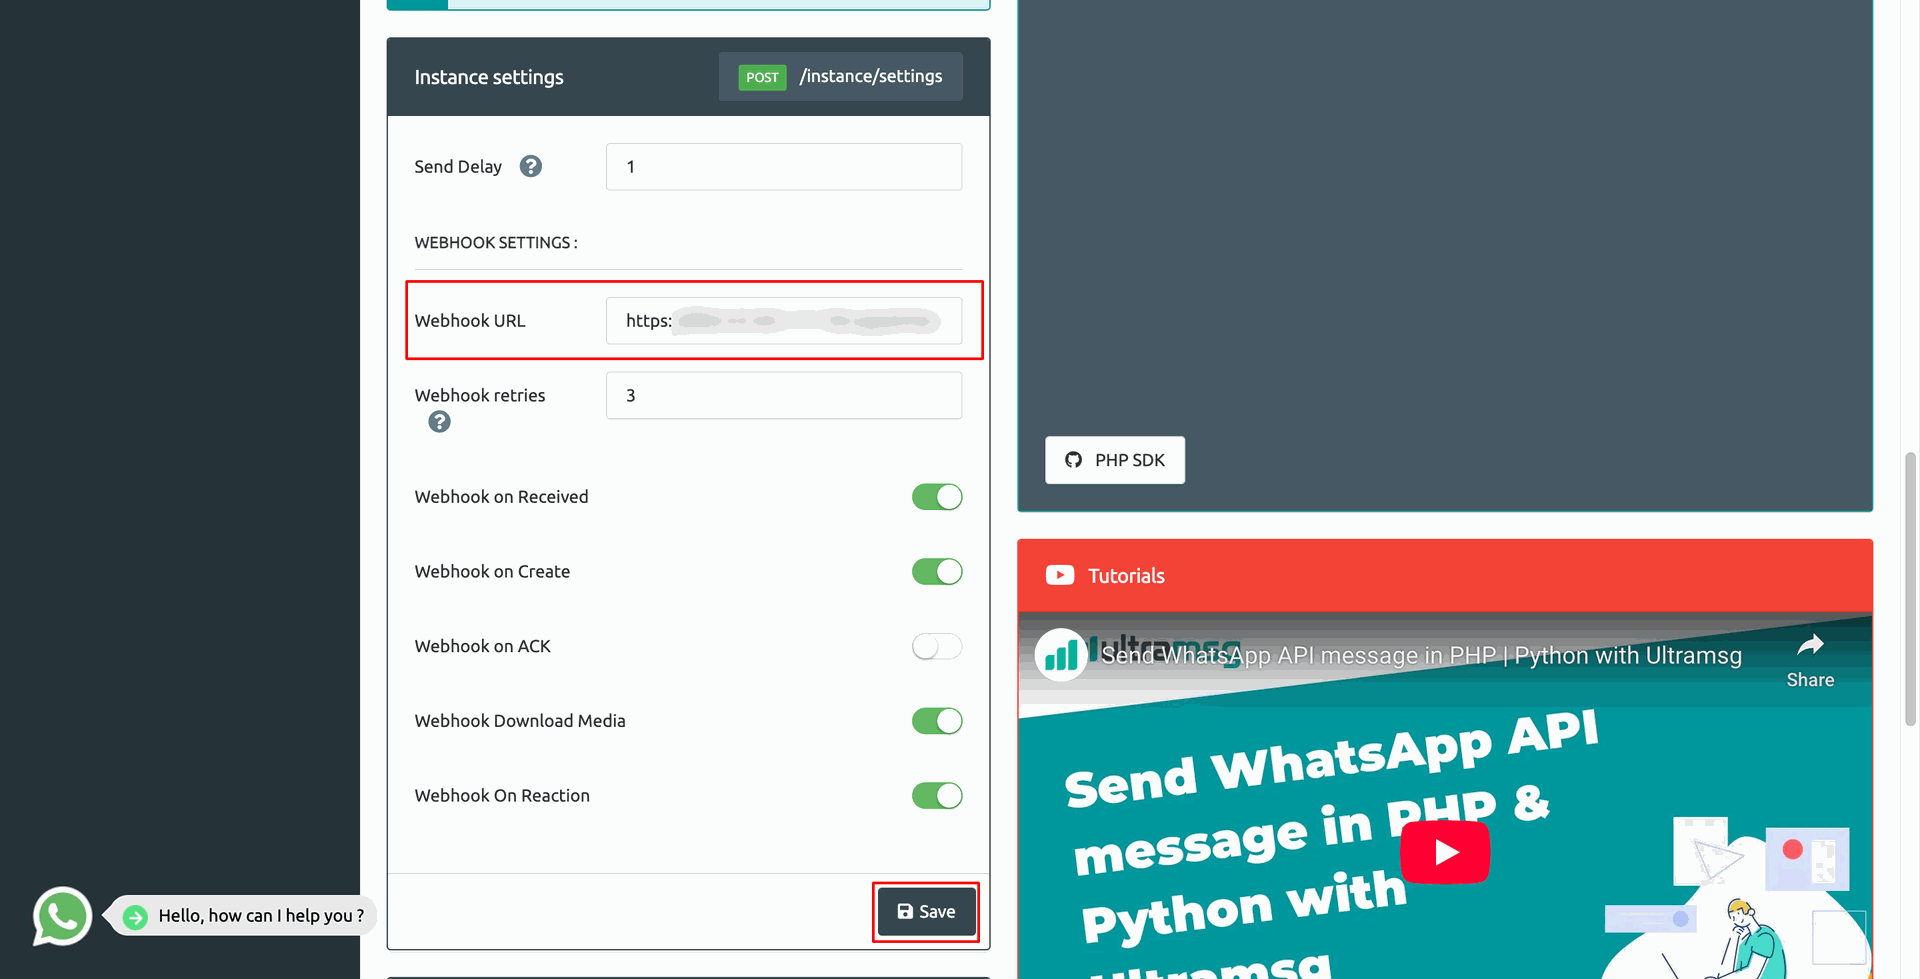
The WhatsApp view appears as shown below. Send a 'HI' message.
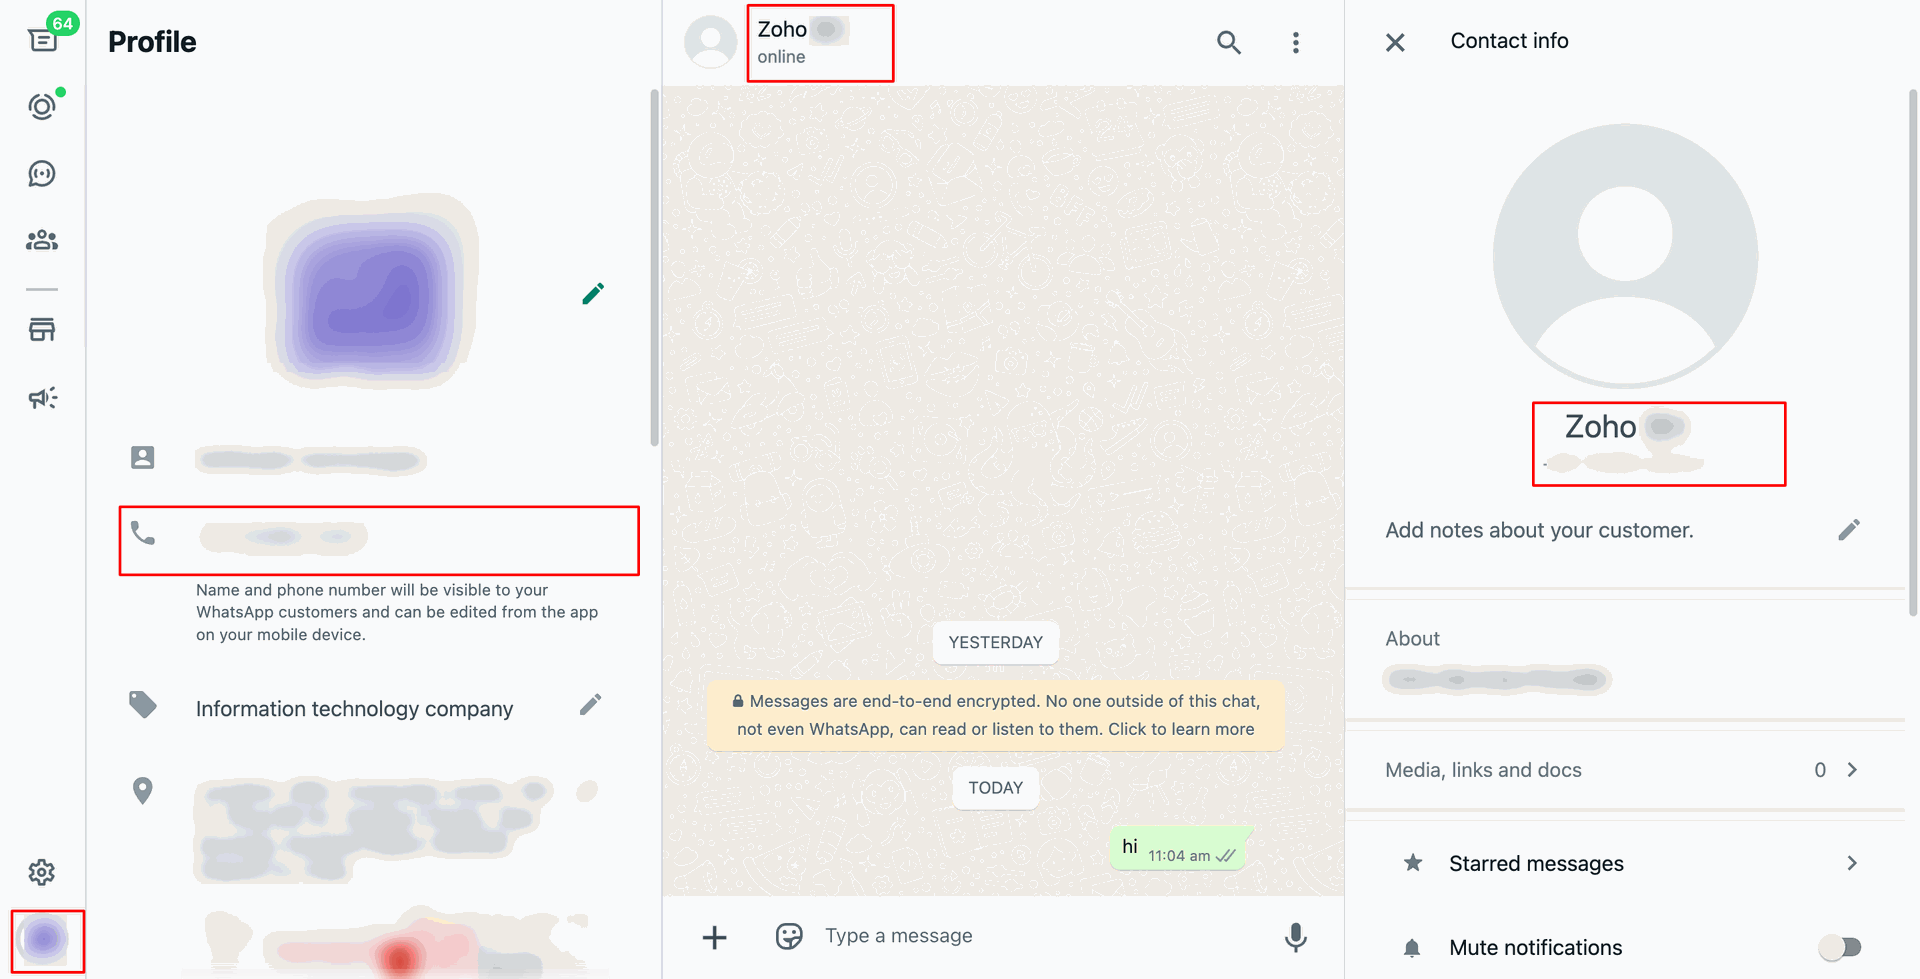
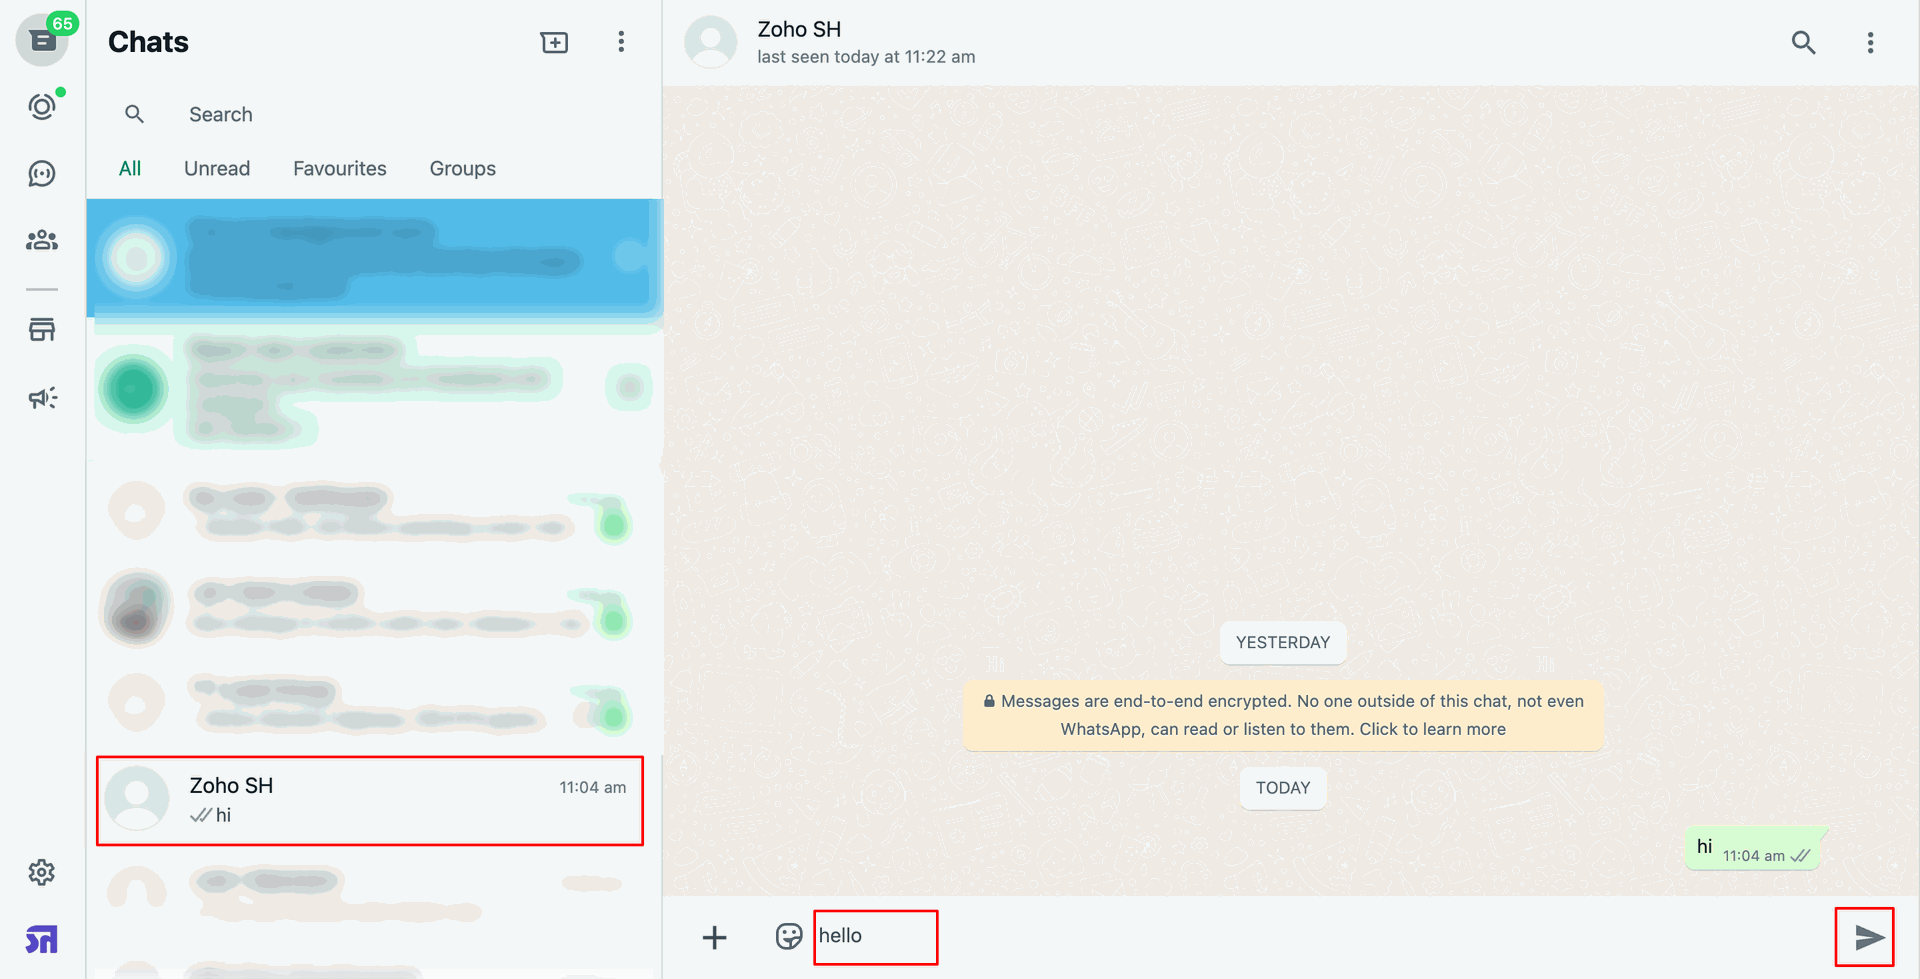
You can see the sended message.
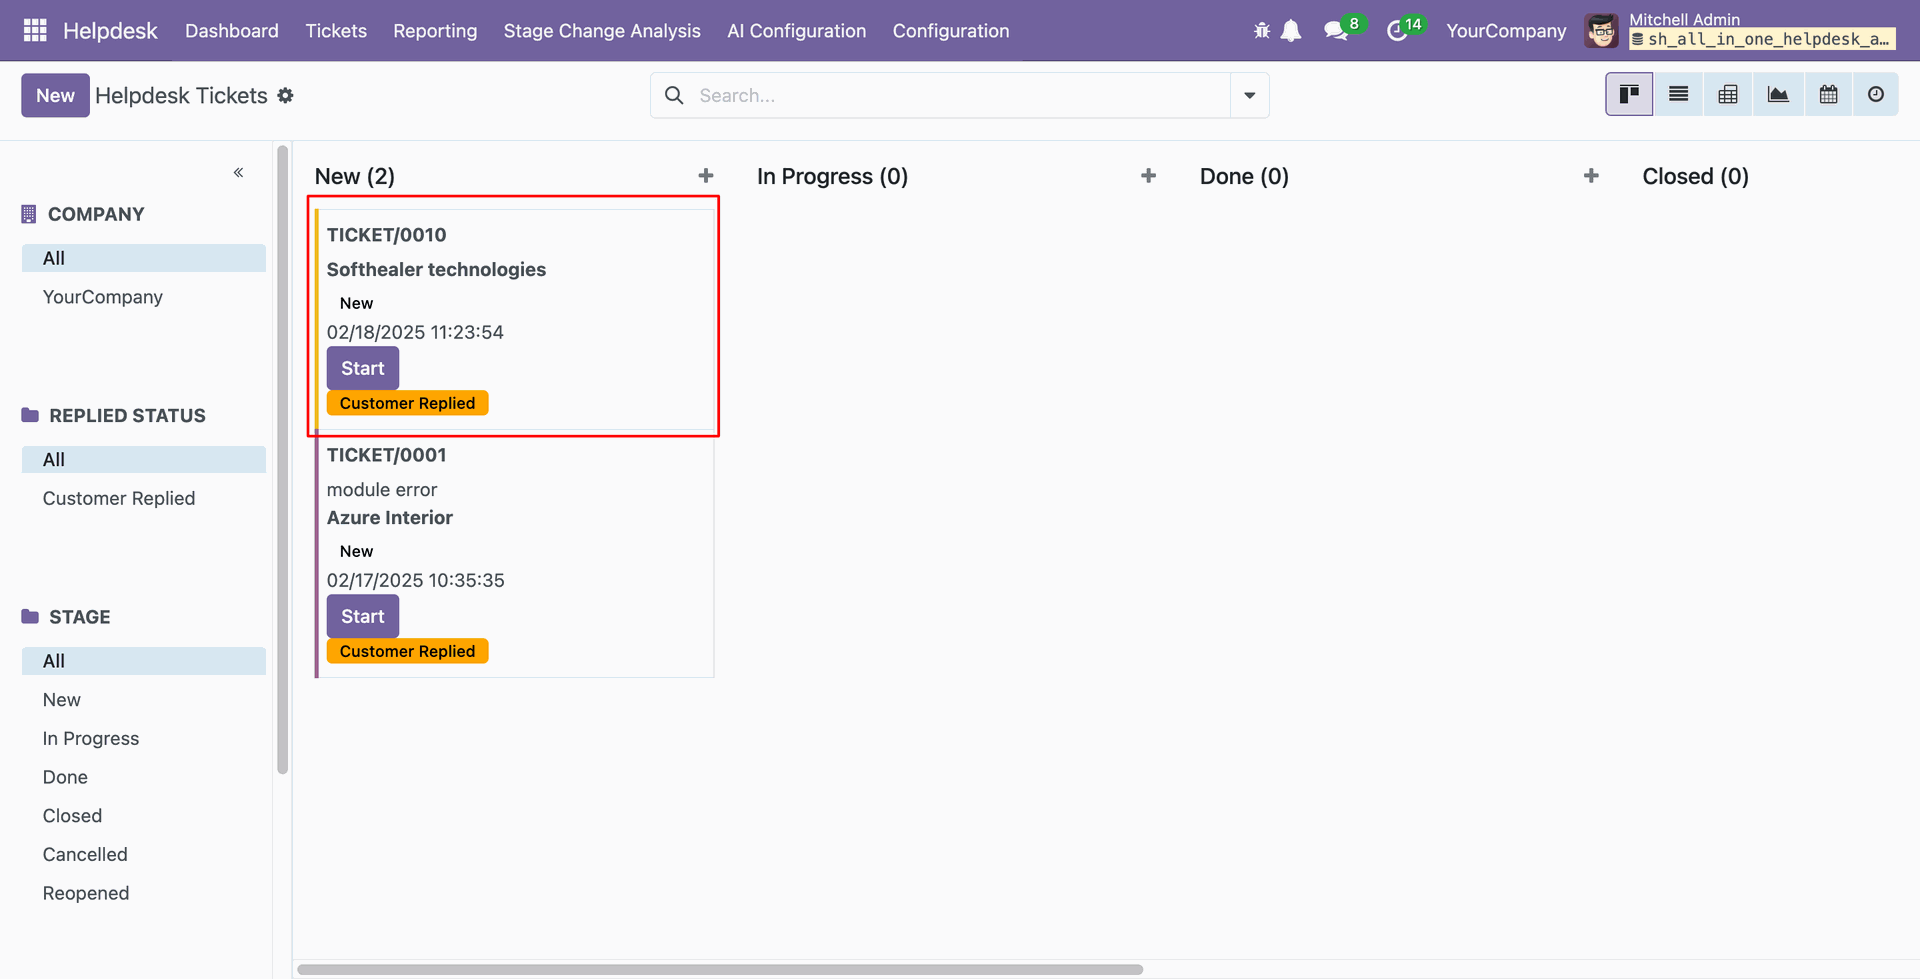
In the Kanban view of the ticket, you can see the newly created ticket from WhatsApp.
In the ticket's form view, the partner's name and mobile number are displayed.
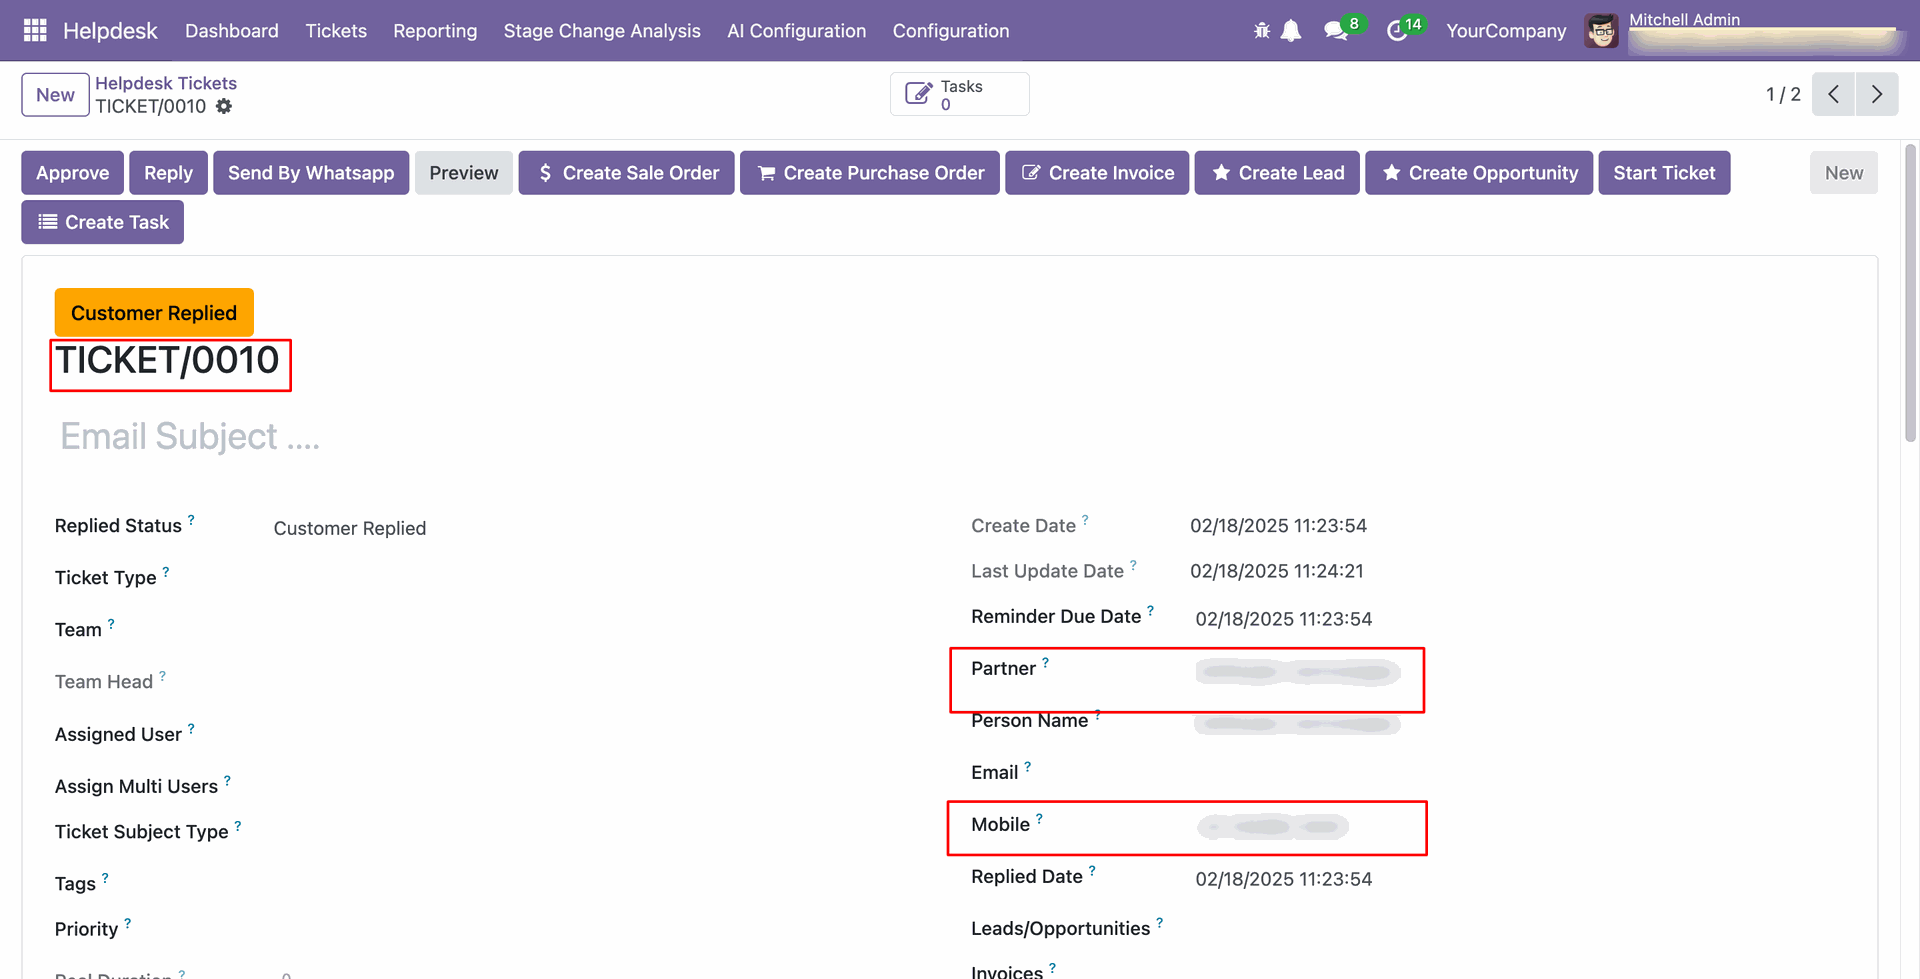
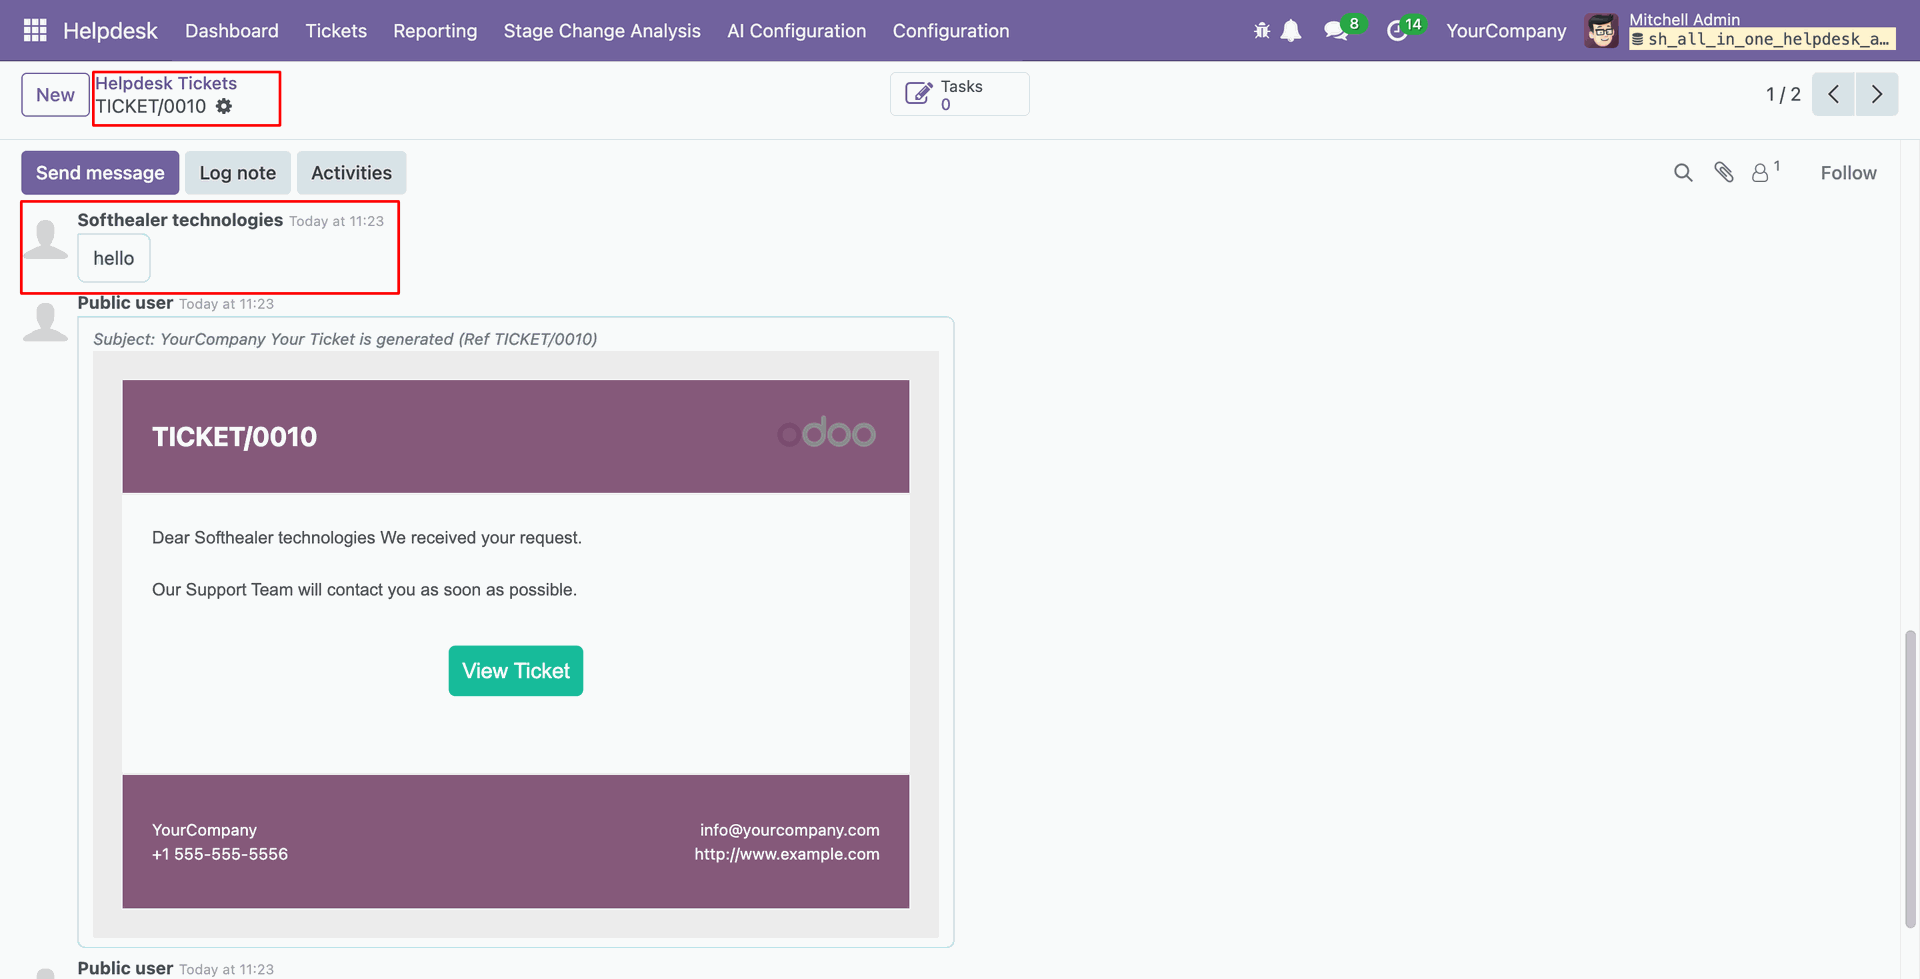
The message is visible in the ticket chatter.
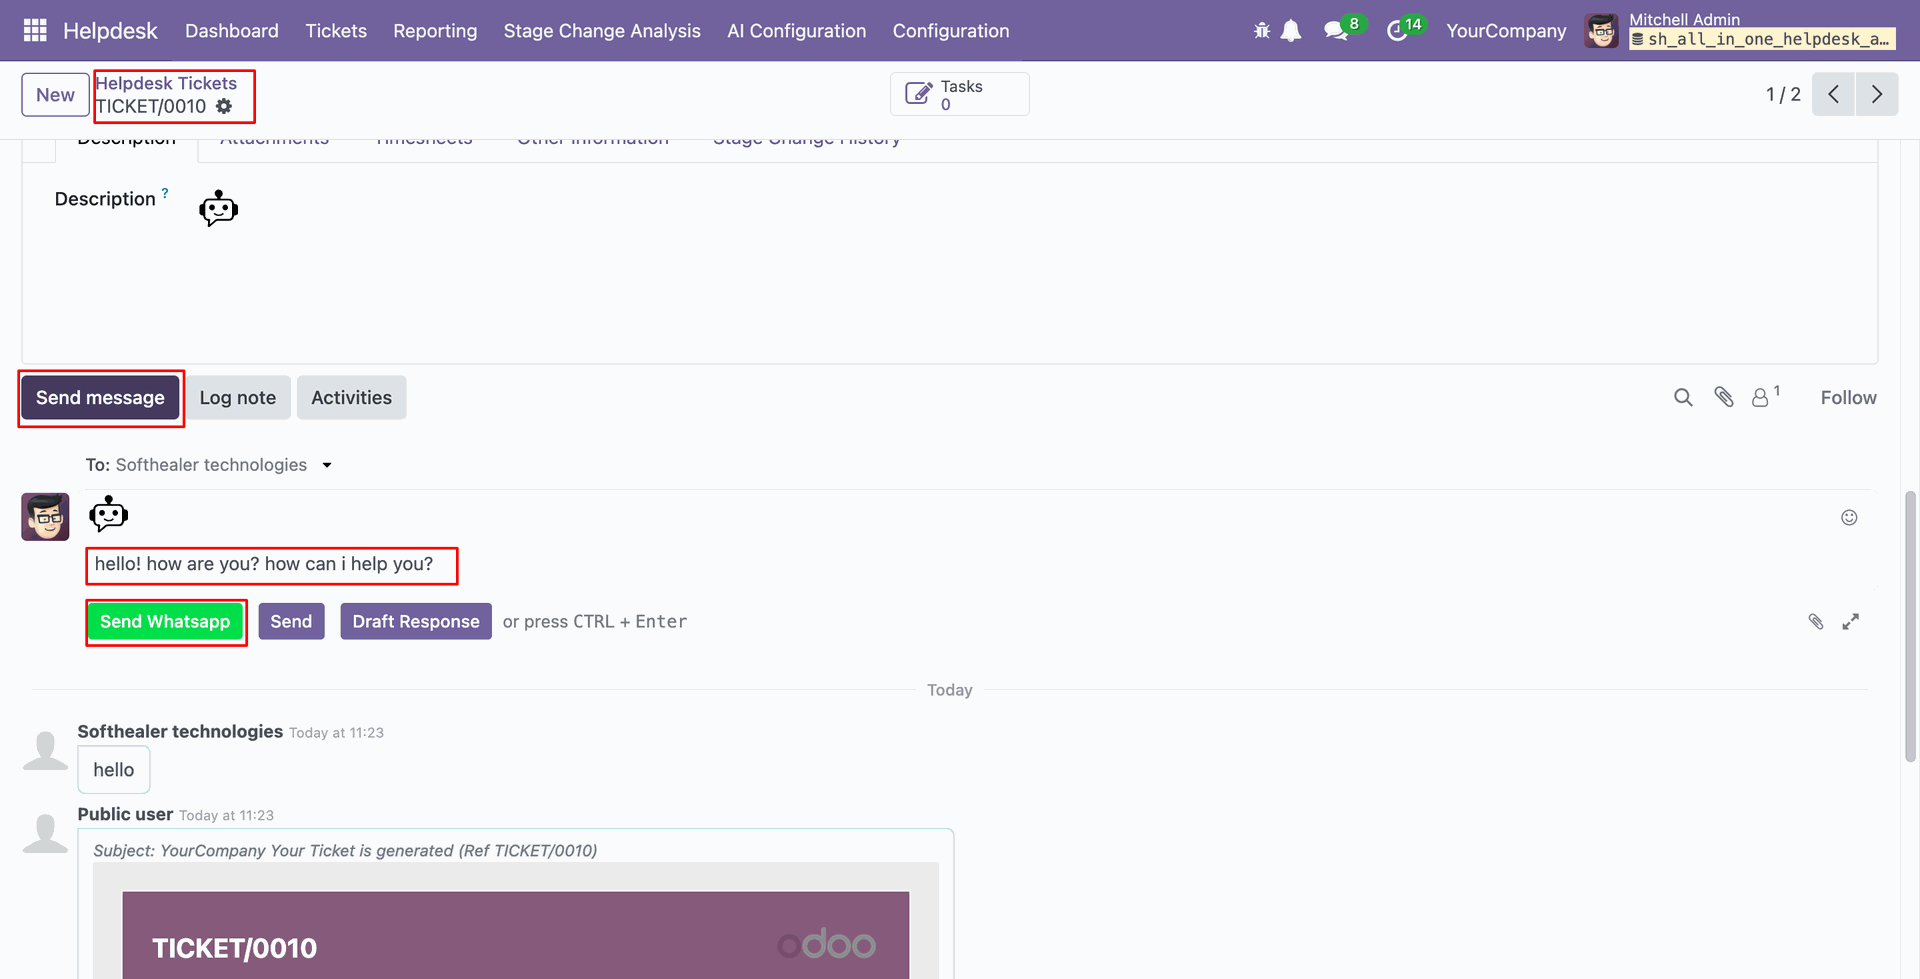
Click on the 'Send Message' button, write a message, and then click the 'Send WhatsApp' button.
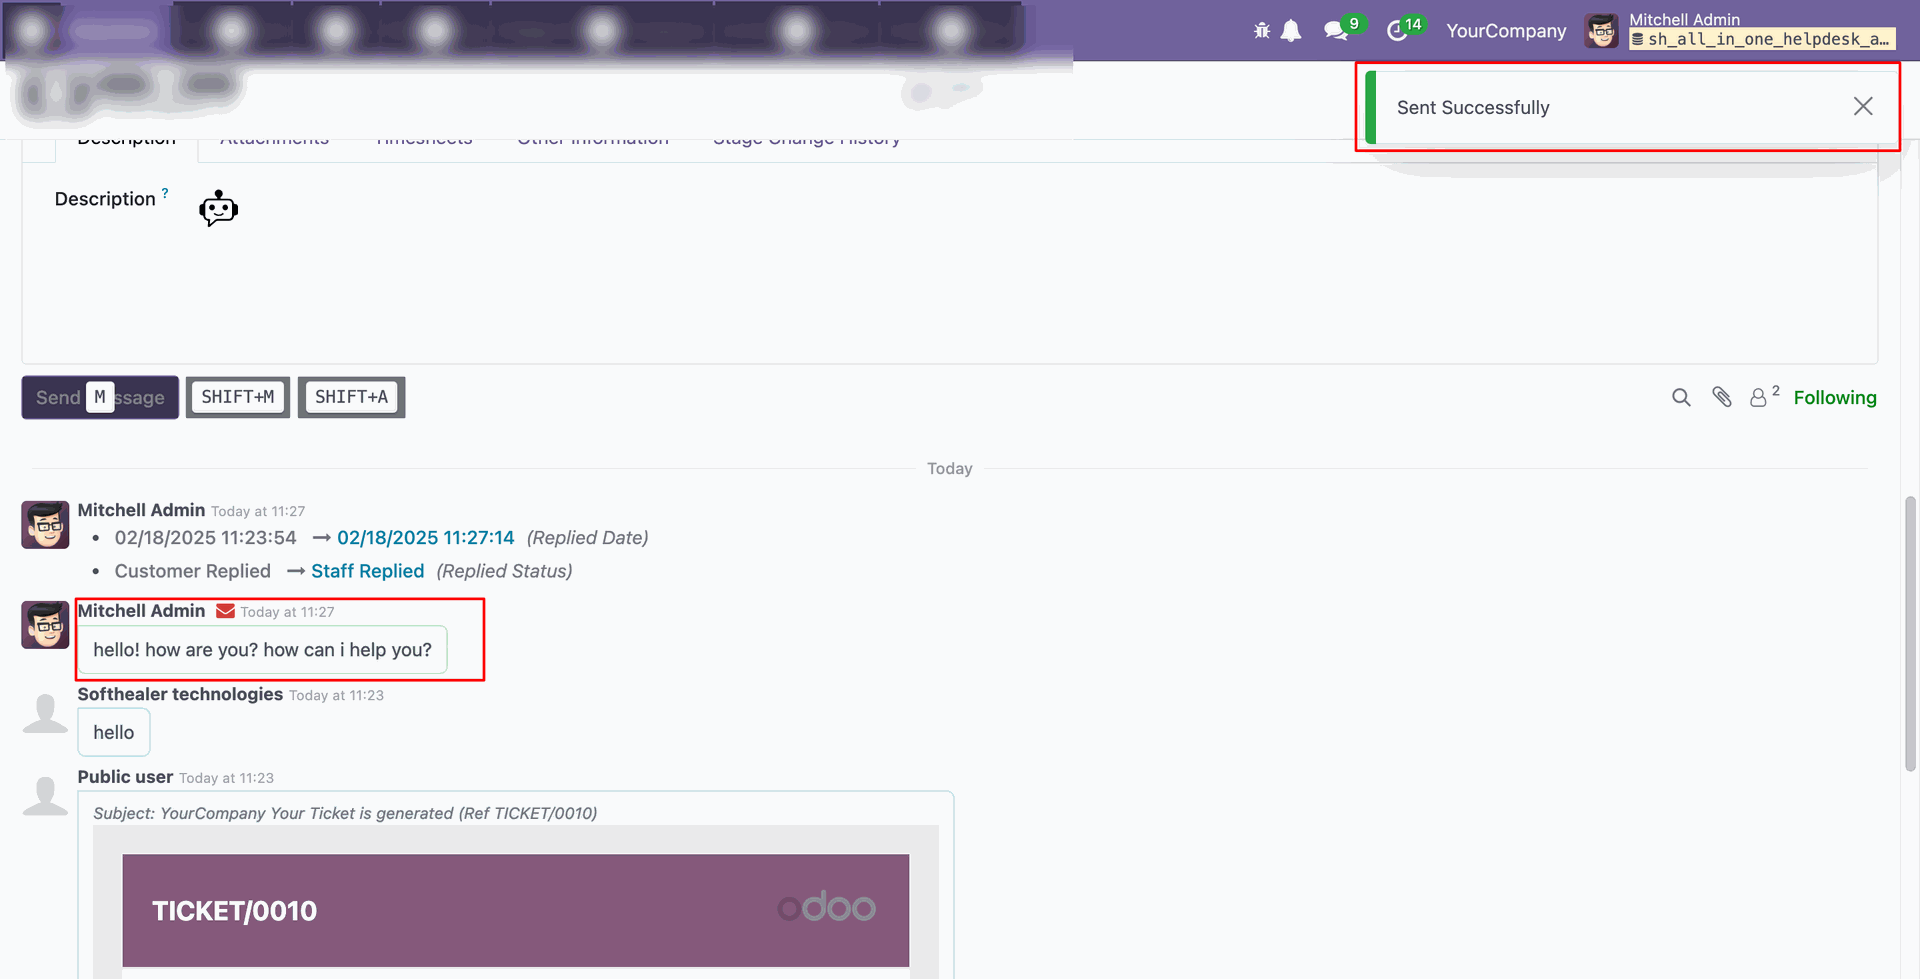
The user receives the 'Send Successfully' notification, and the sent message is also visible in the chatter.
The message appears in the chat.
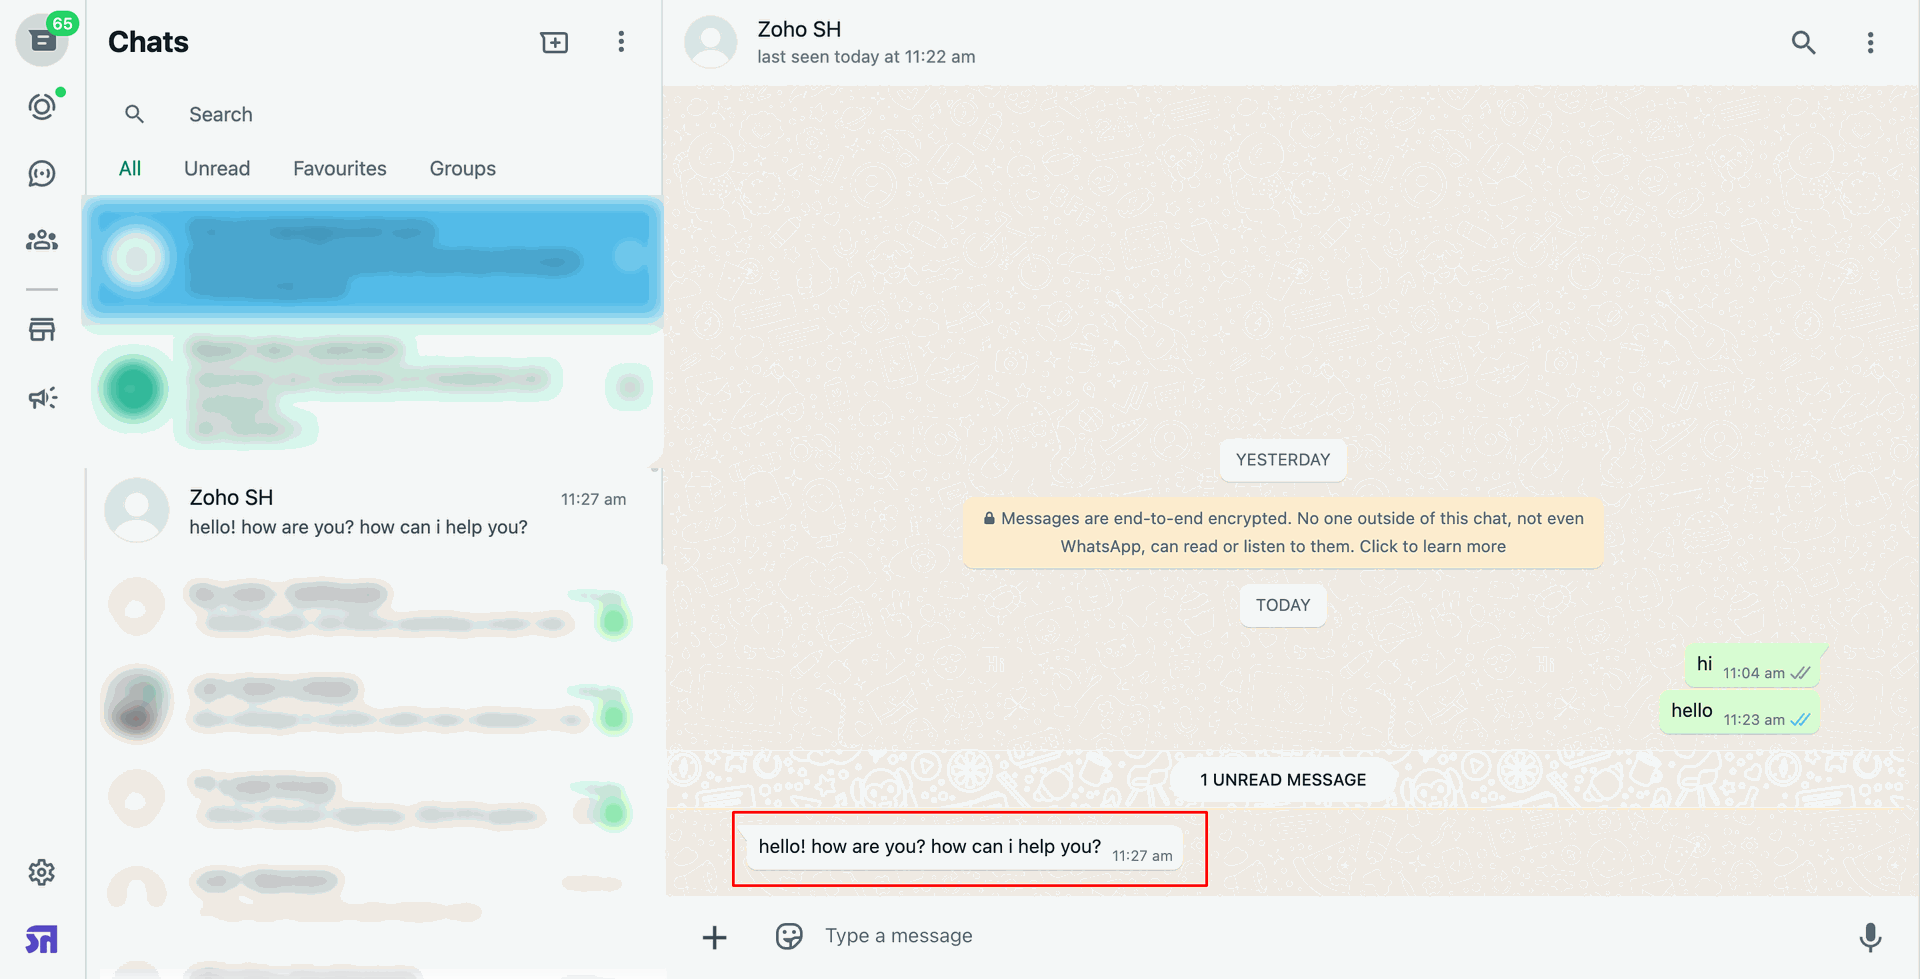
Send a response from whatsapp.
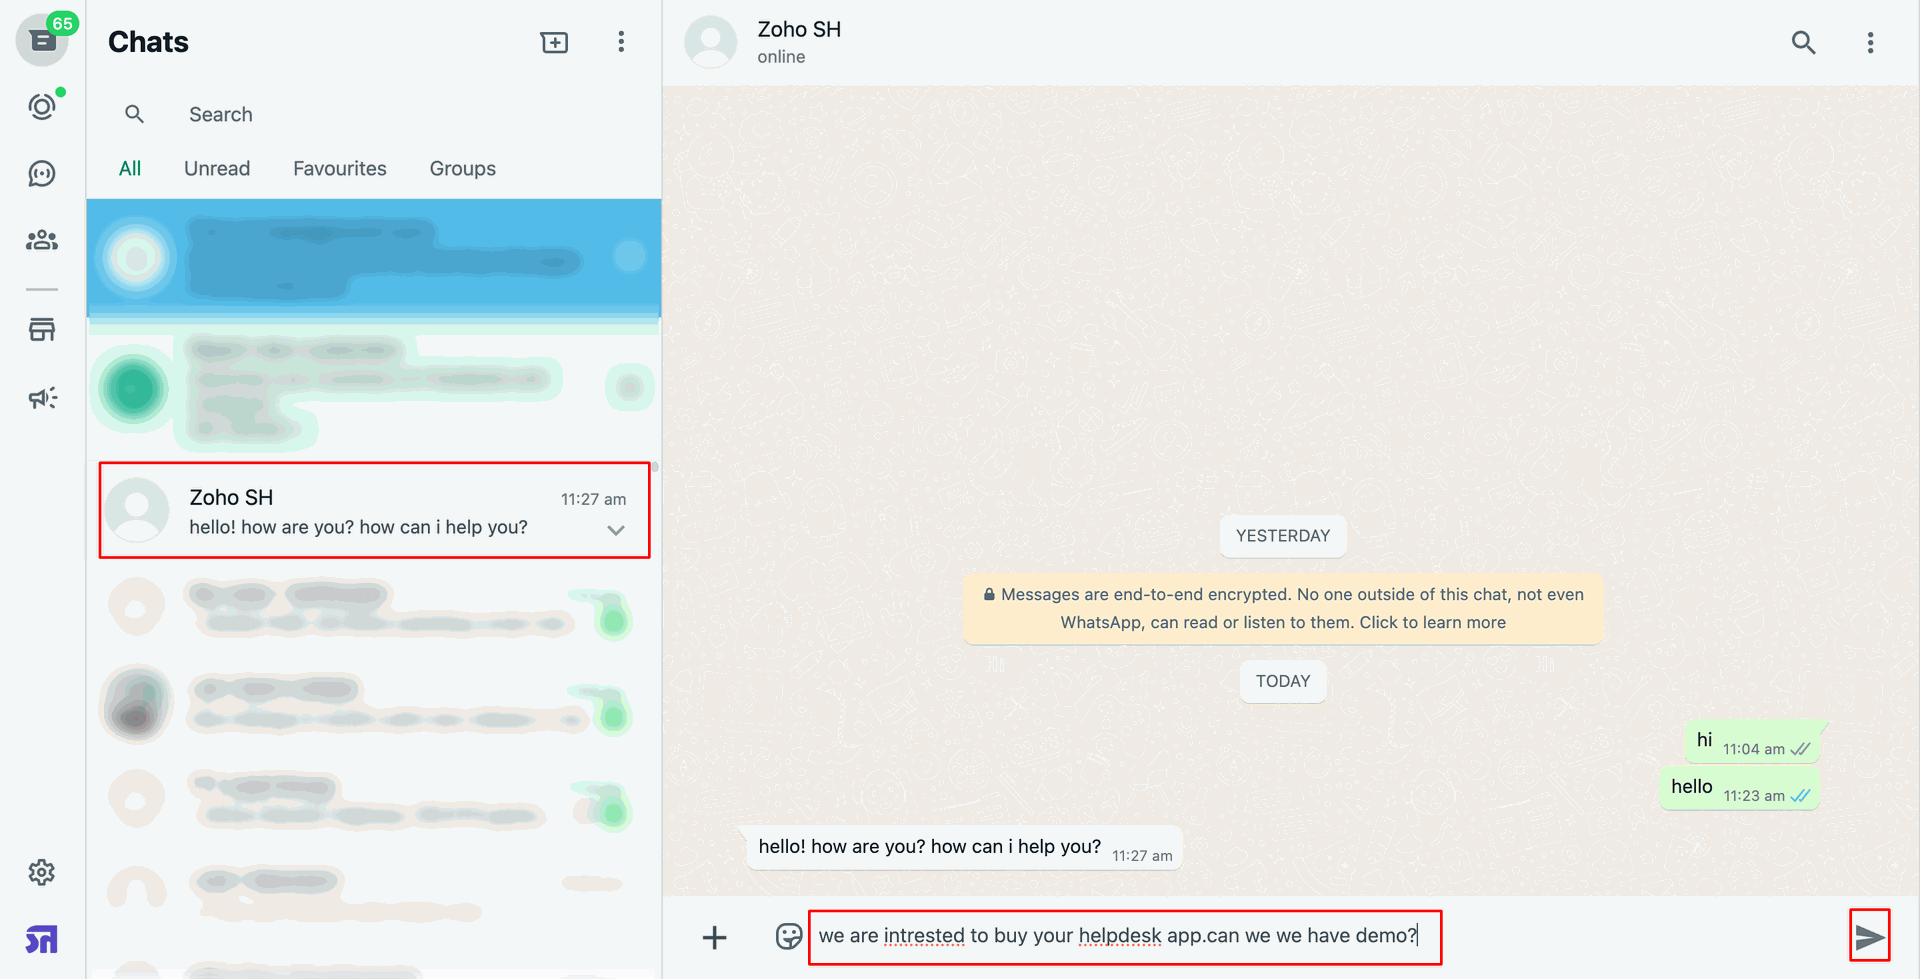
The response is visible in the ticket chatter.
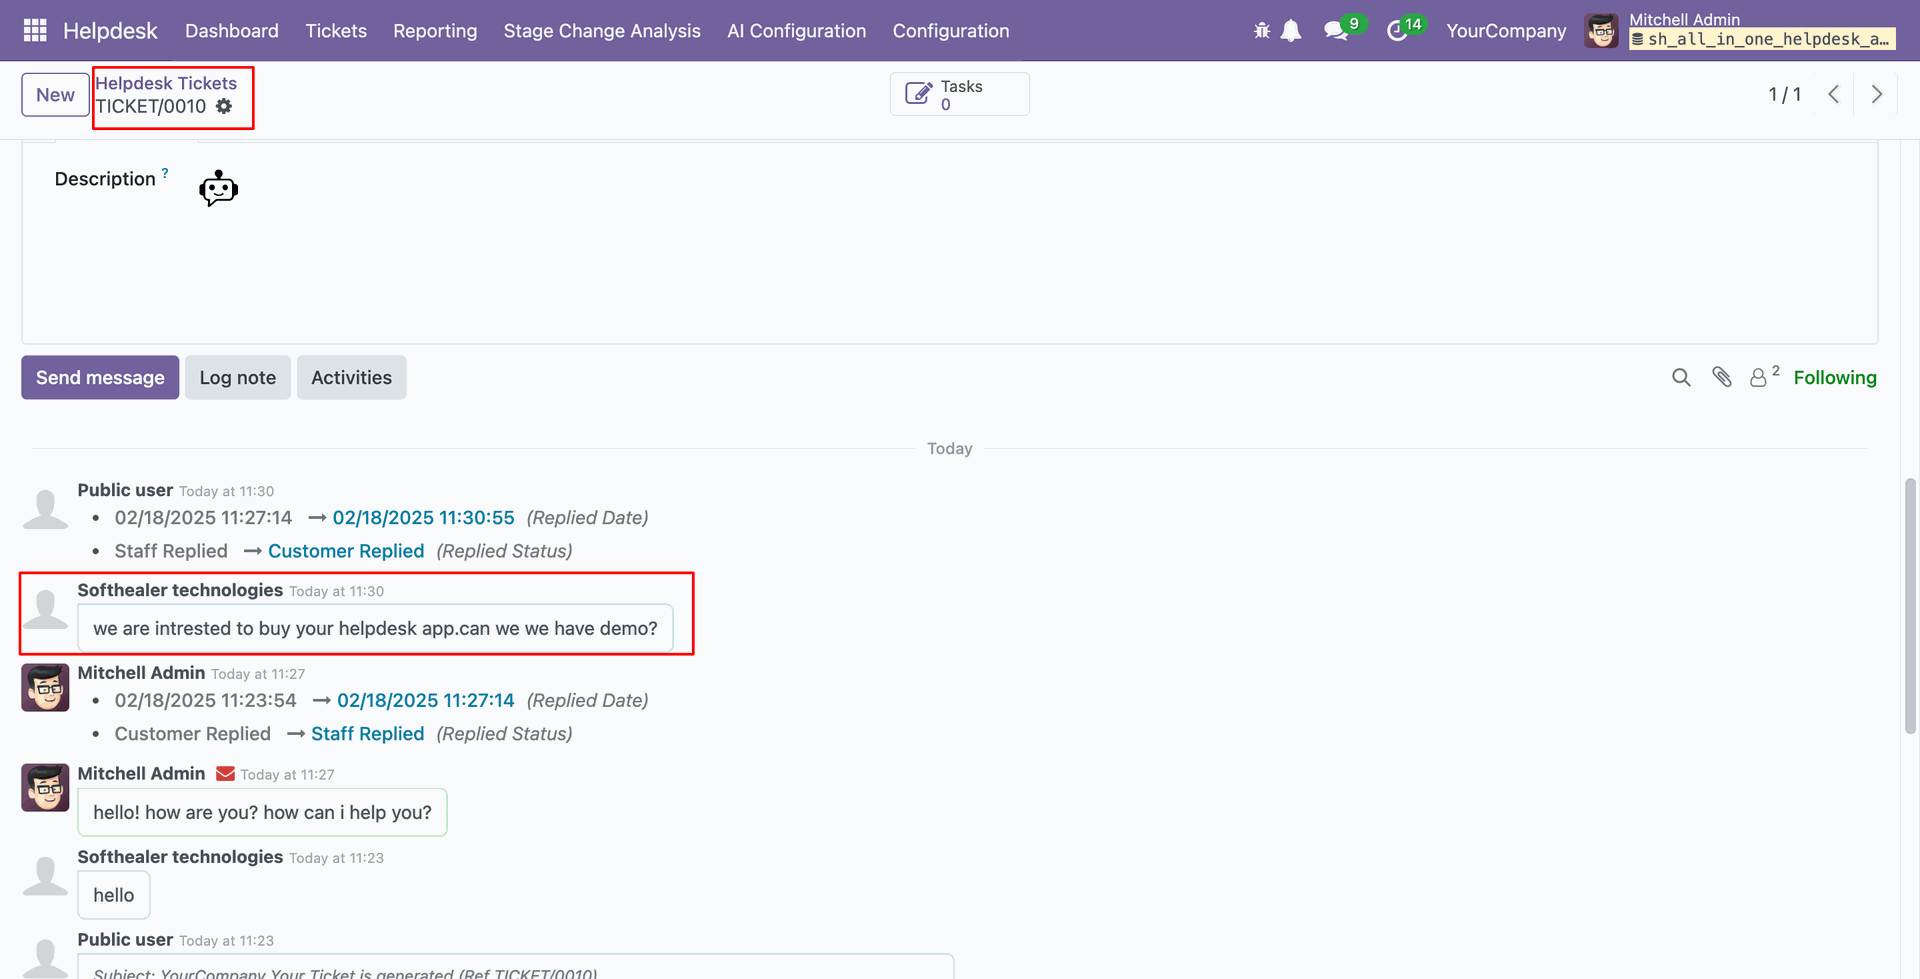
Send a response from the ticket.
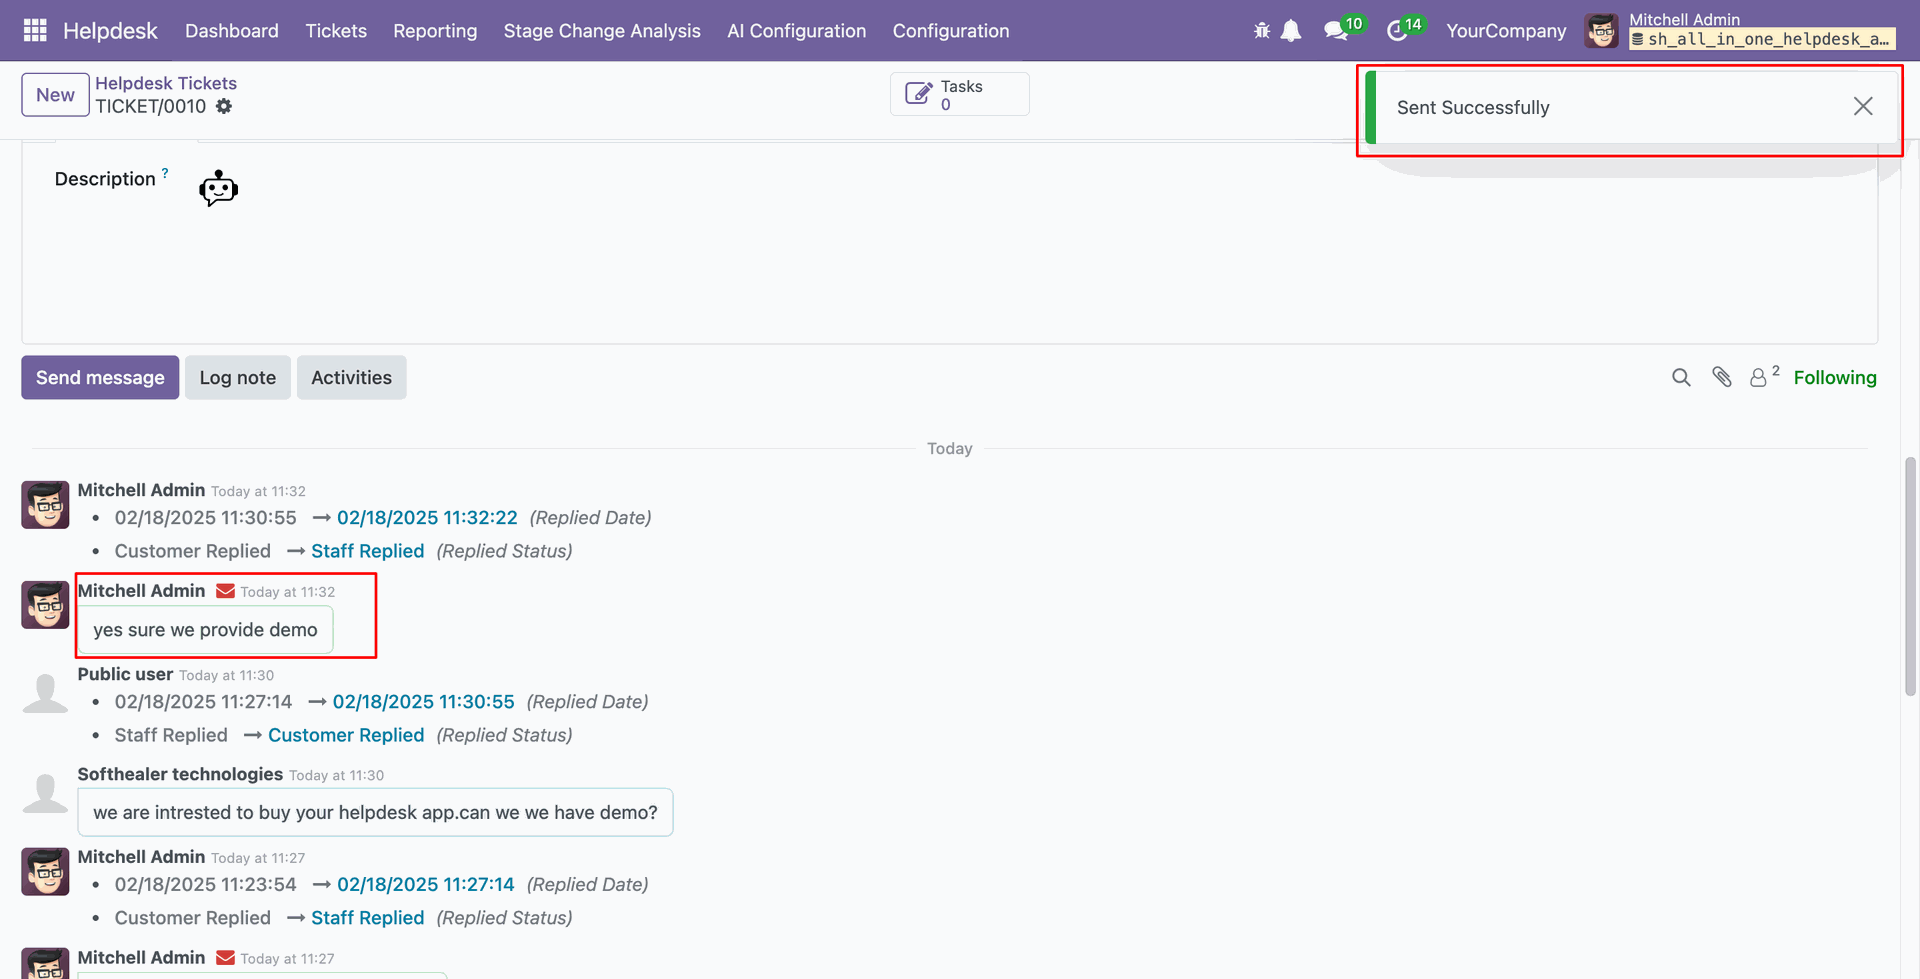
The response has been received on whatsapp chat.
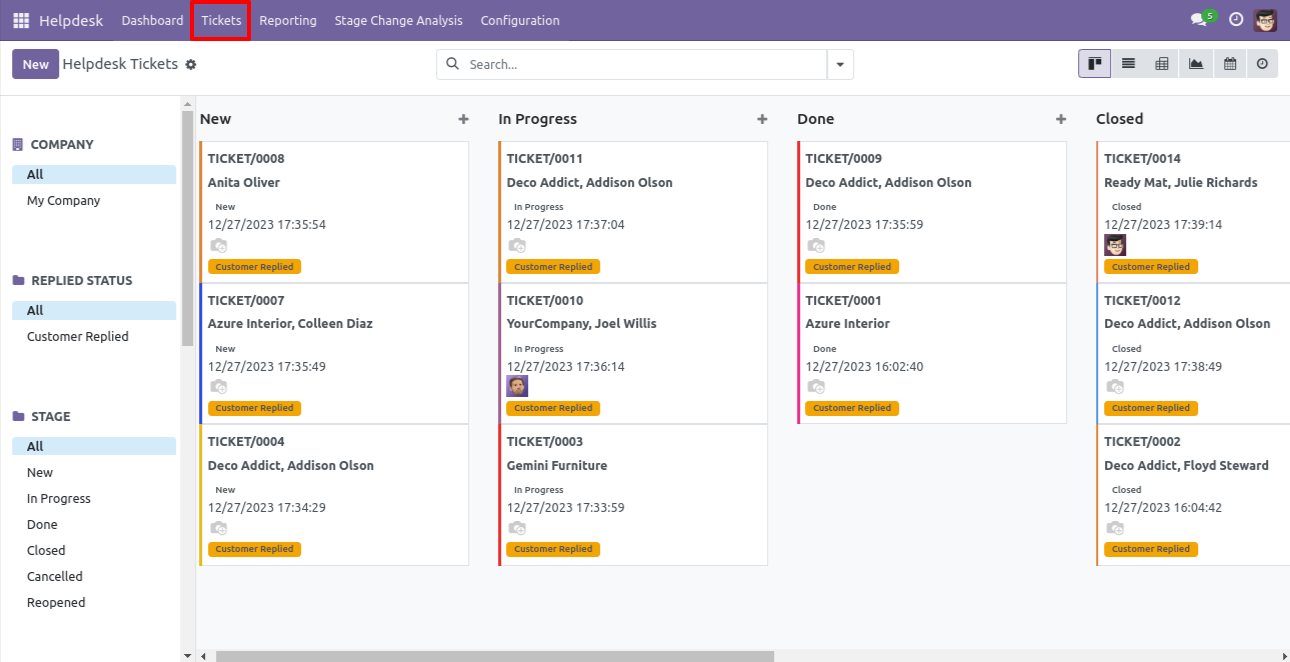
'Helpdesk Ticket' Kanban view.
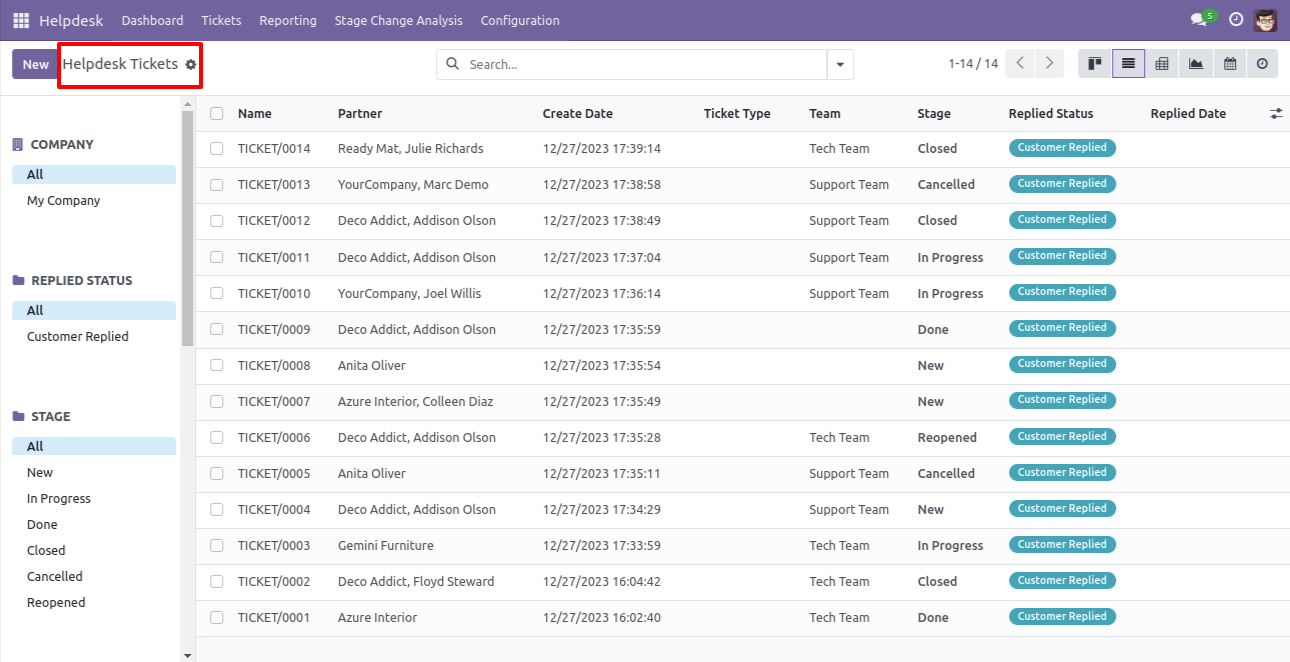
'Helpdesk Ticket' List view.
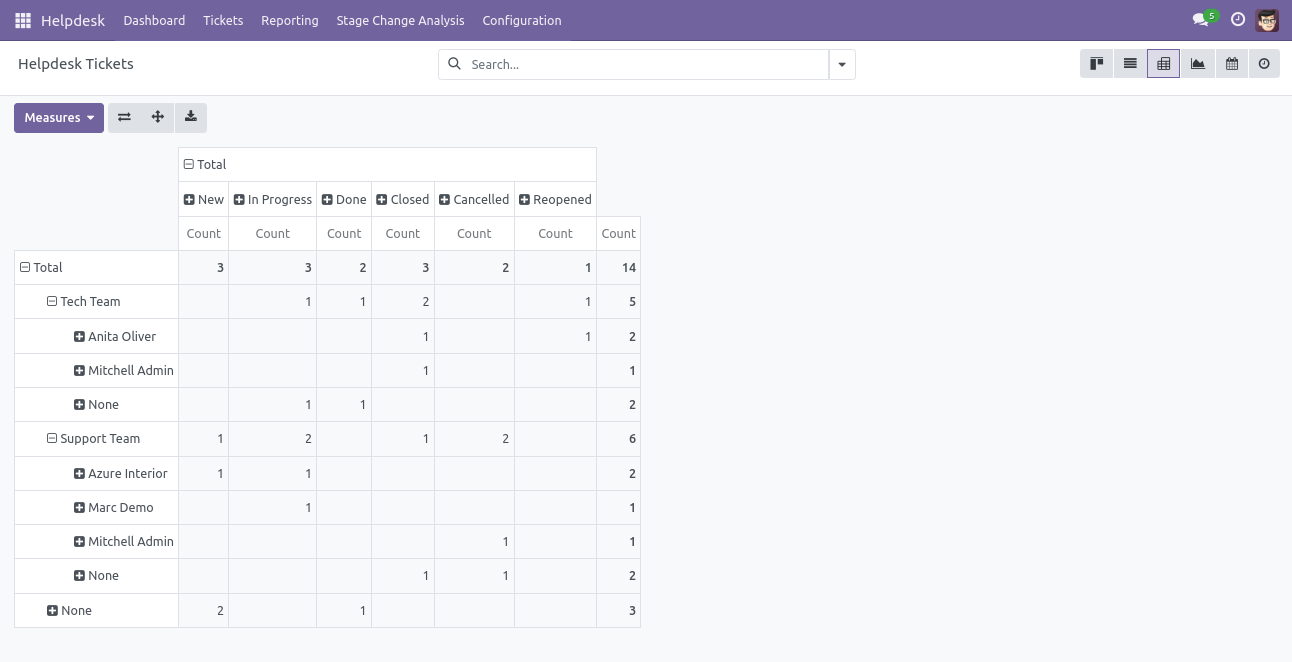
'Helpdesk Ticket' Pivot view.
'Helpdesk Ticket' Graph view.
'Helpdesk Ticket' Calender view.
'Helpdesk Ticket' Activity view.
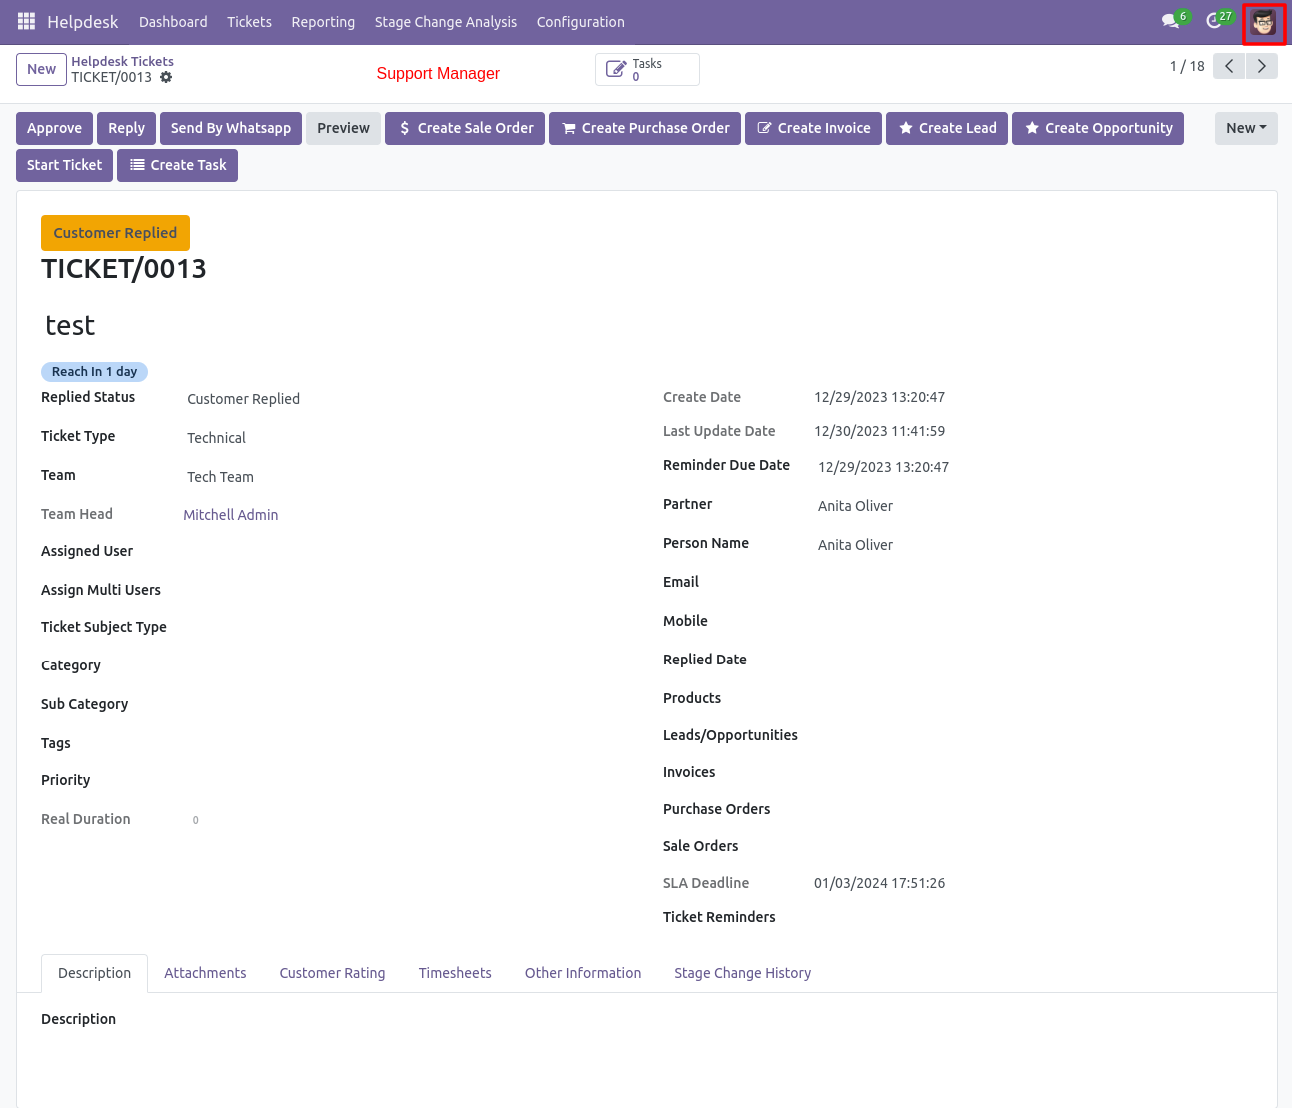
Helpdsk form view of the support manager.
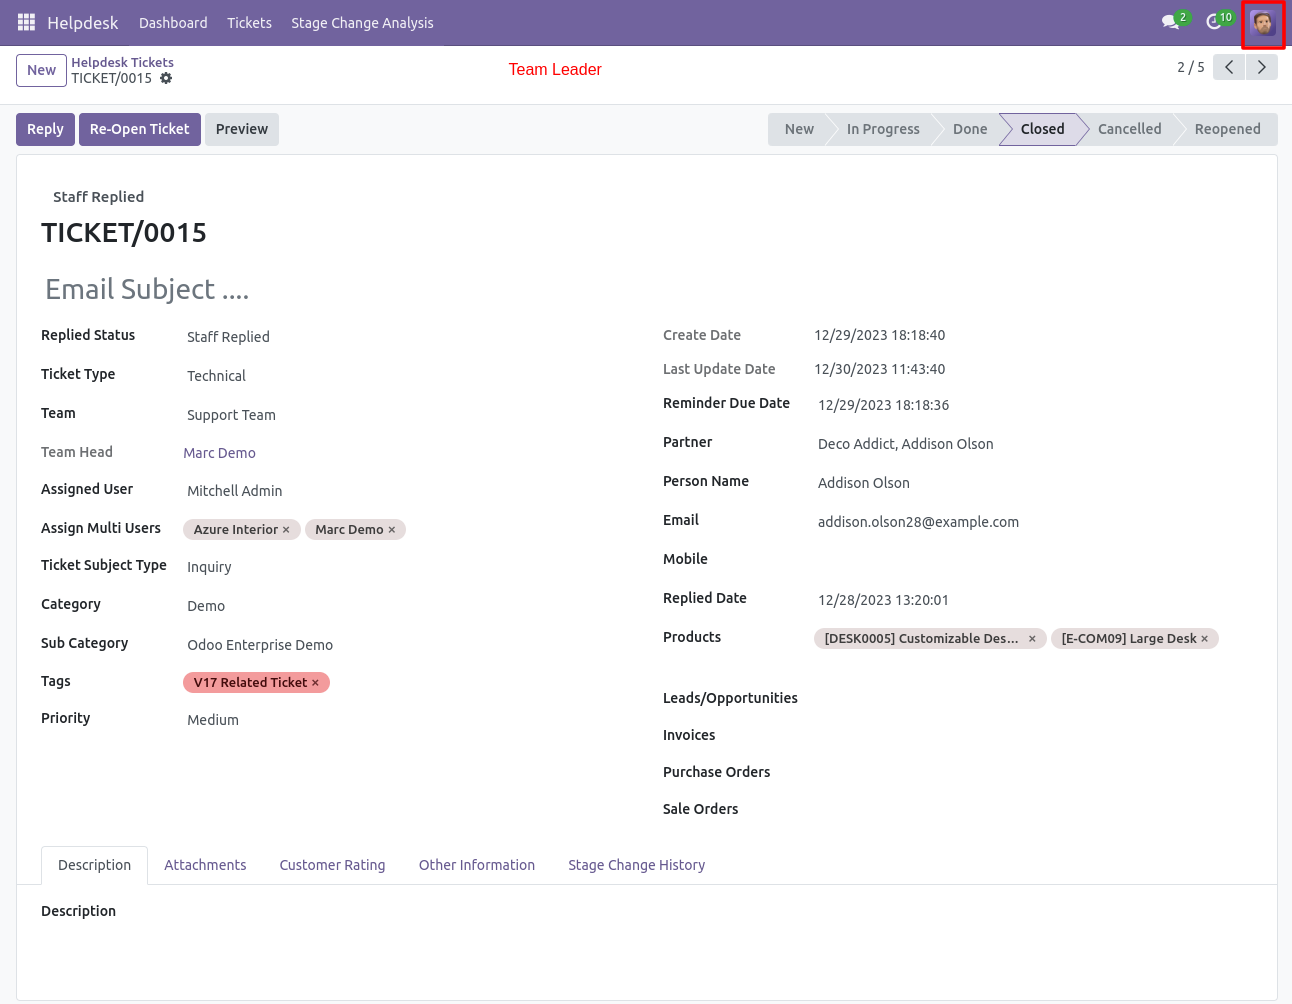
Helpdsk form view of the team leader.
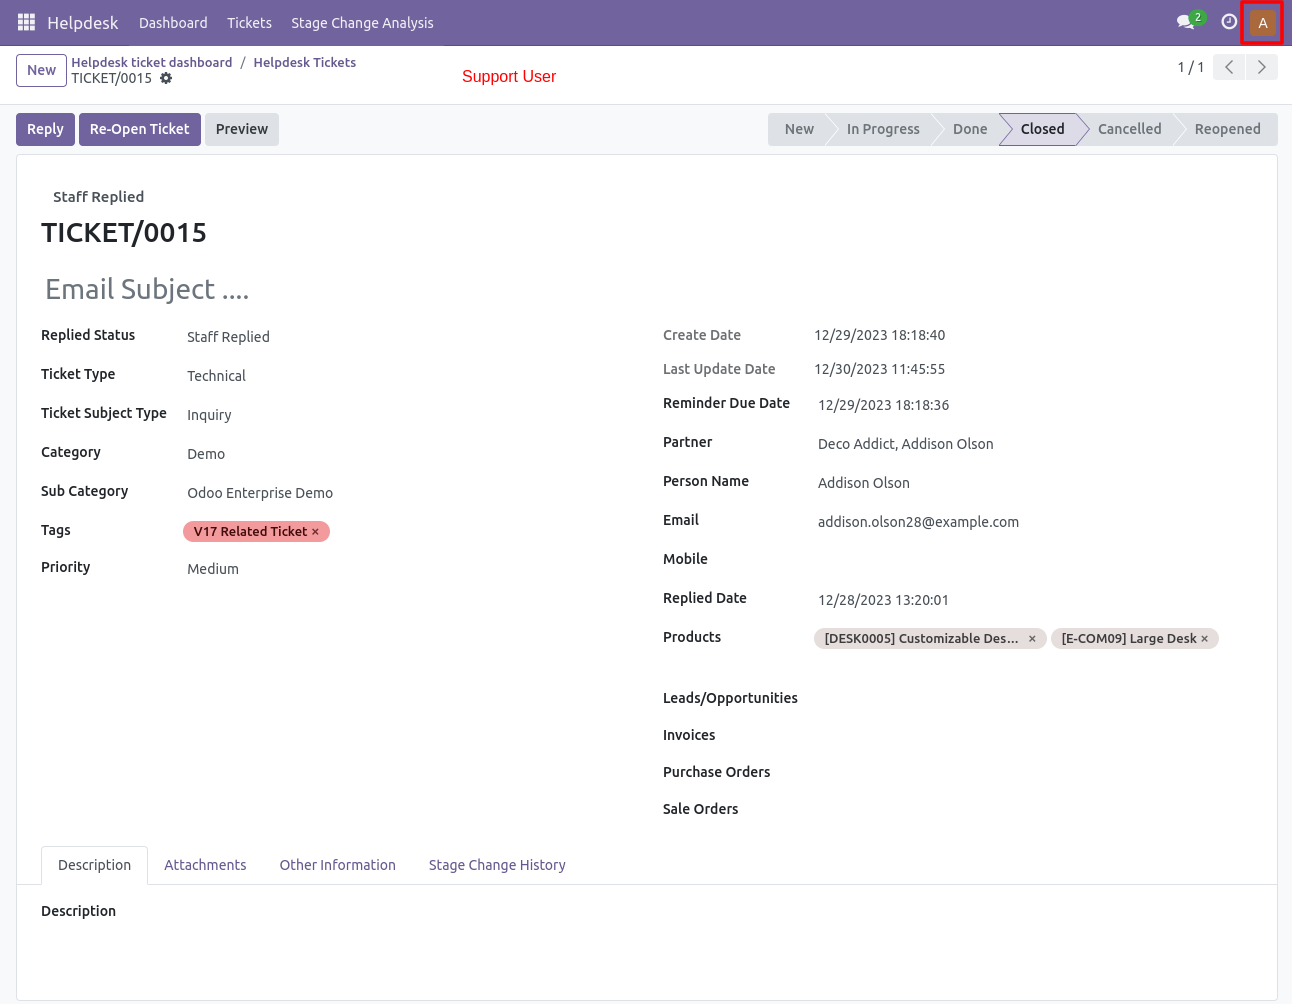
Helpdsk form view of the support user.
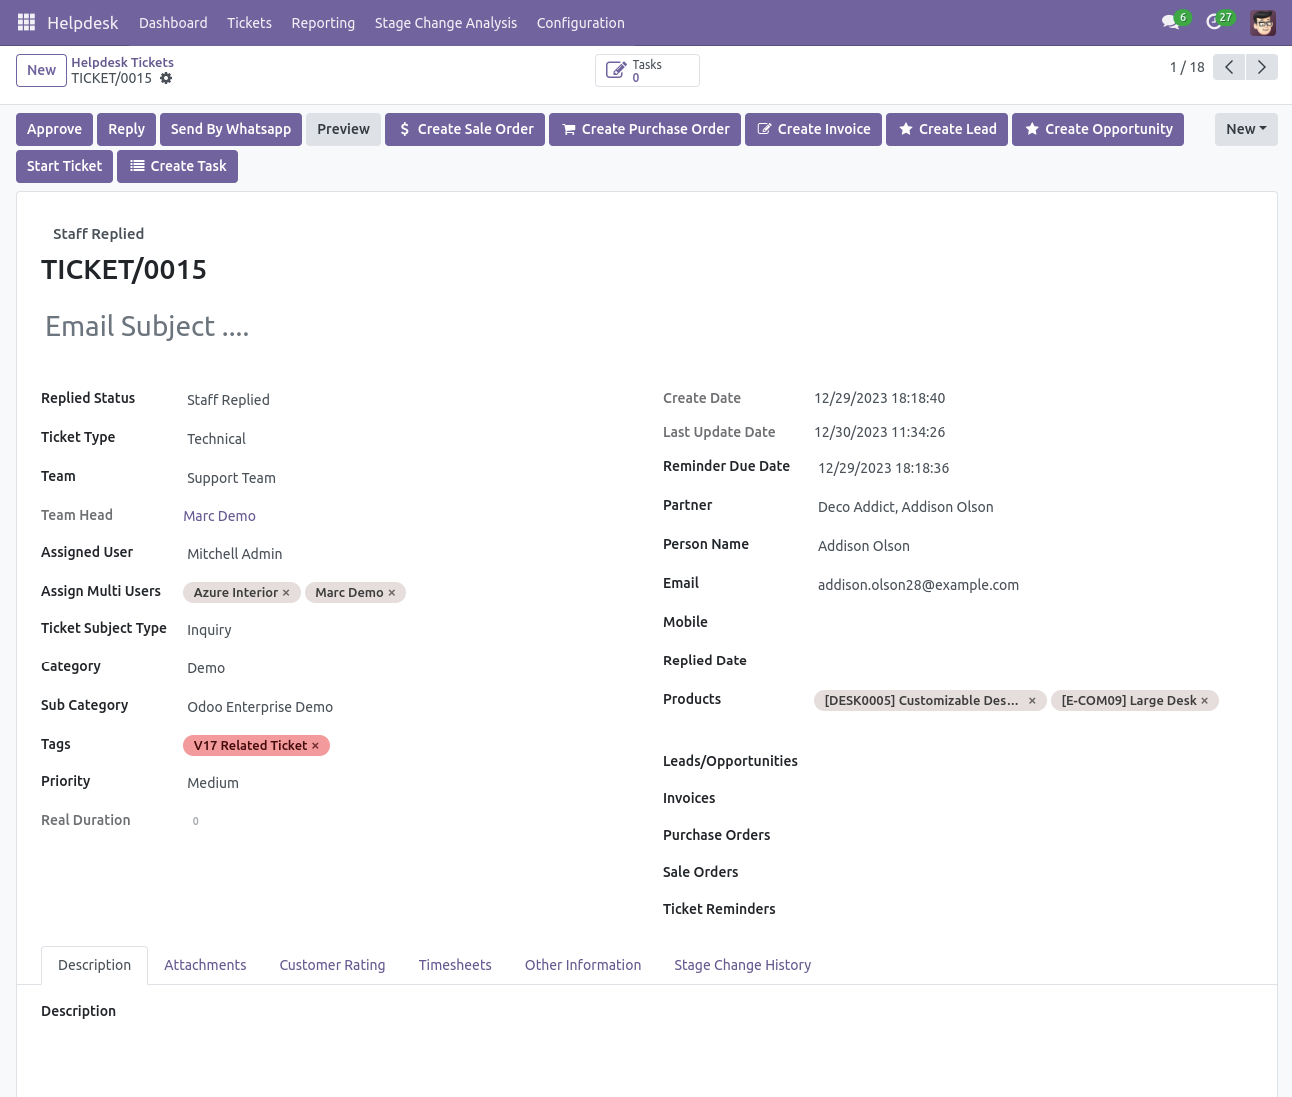
'Helpdesk Ticket' form view.
'Helpdesk Ticket' form attachment tab. Where you can attach documents received from customers.
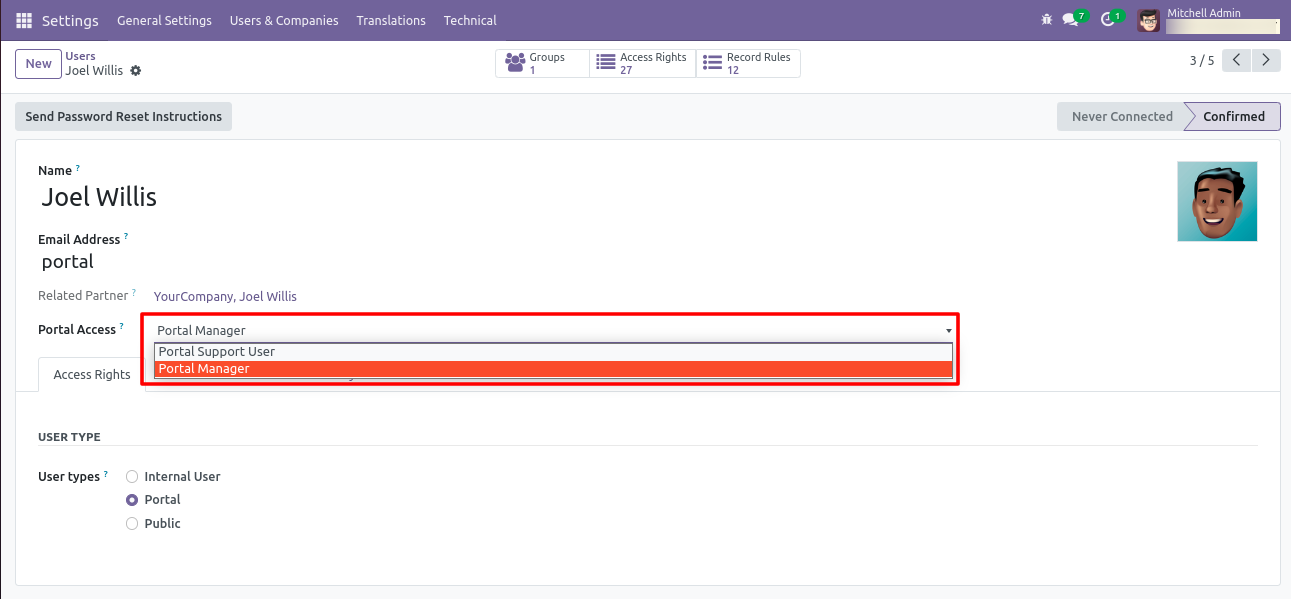
In User configuration there is access rights for only portal users.(Only visible when portal user true)
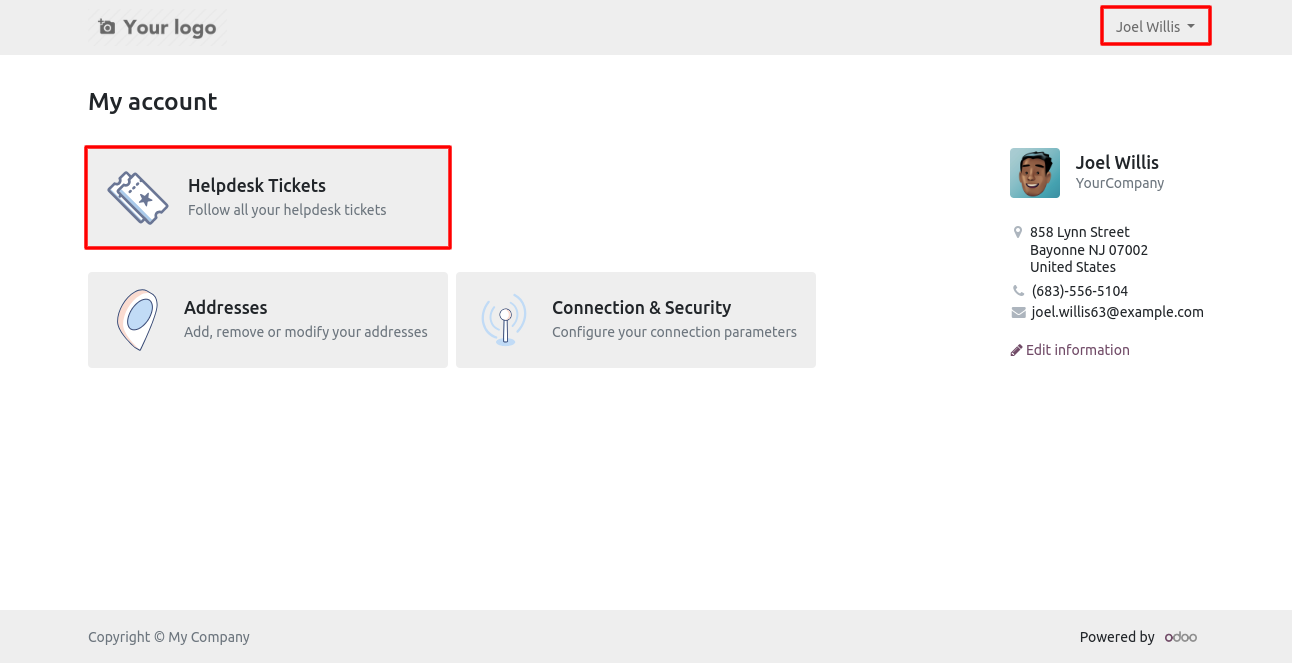
Login with manager and click on 'Helpdesk Tickets'.
Click on 'Create'.
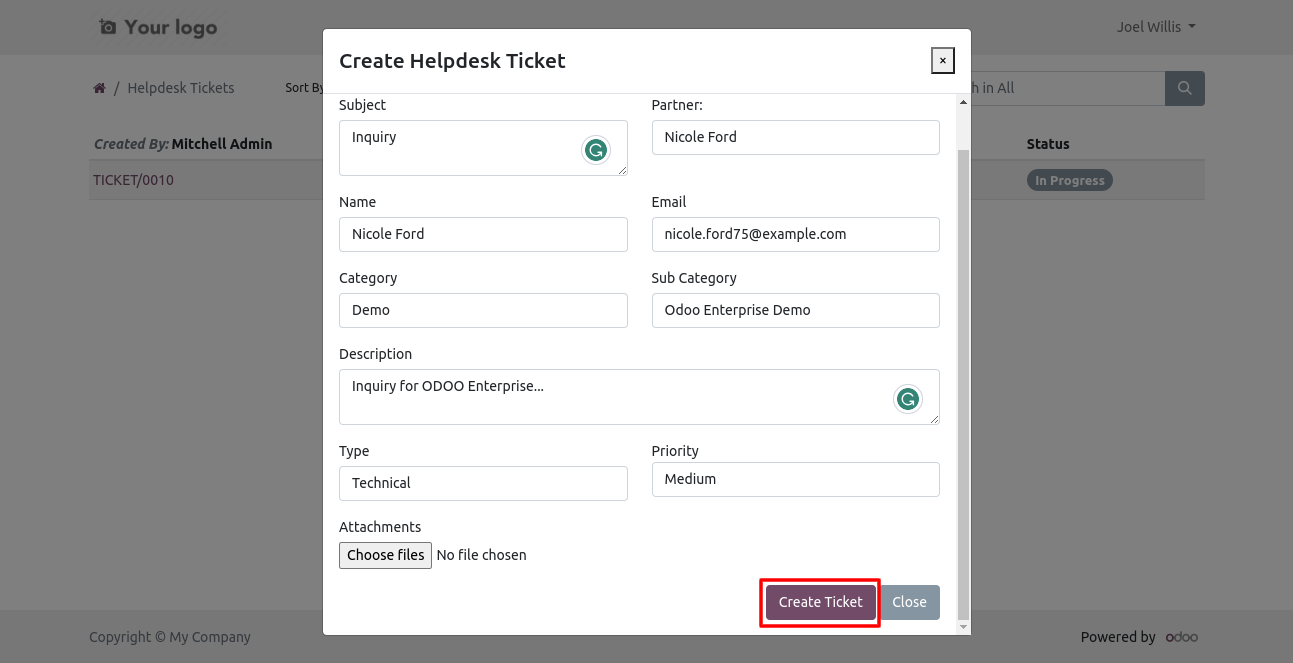
This Wizard will popout after click on create. Here Only Portal Manager,Leader, Manager can select partners.
You can group by tickets.
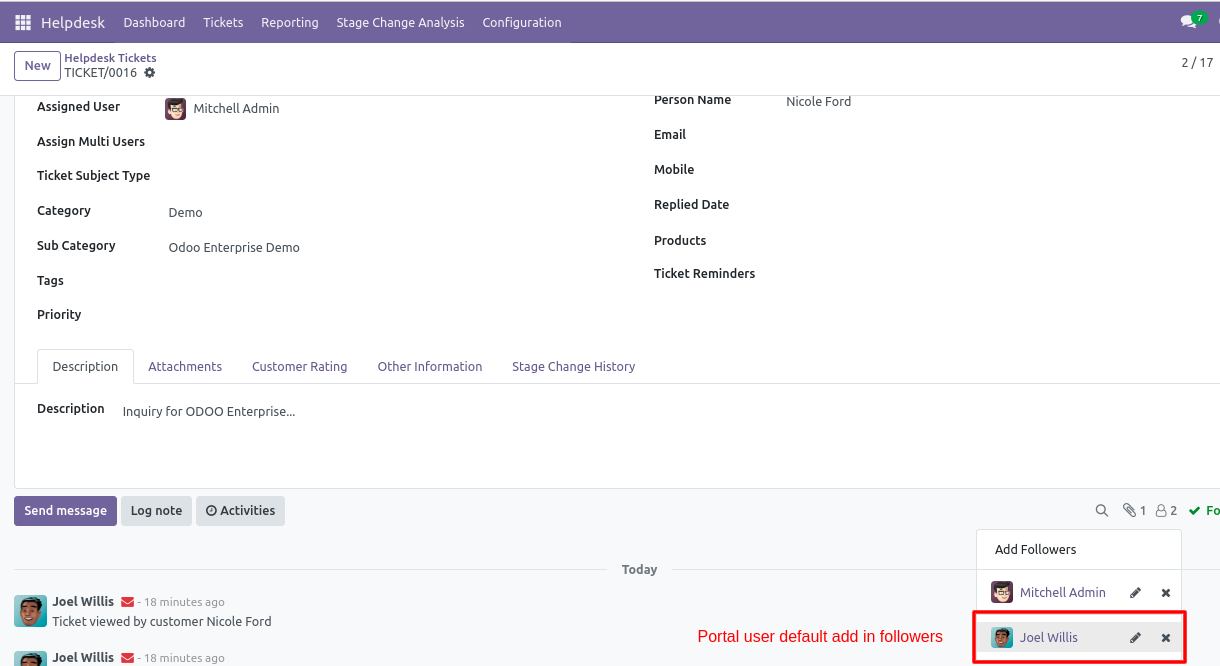
New customer created and it will automatically added to followers.
In portal you can download ticket in PDF formate also. Just click 'Download'.
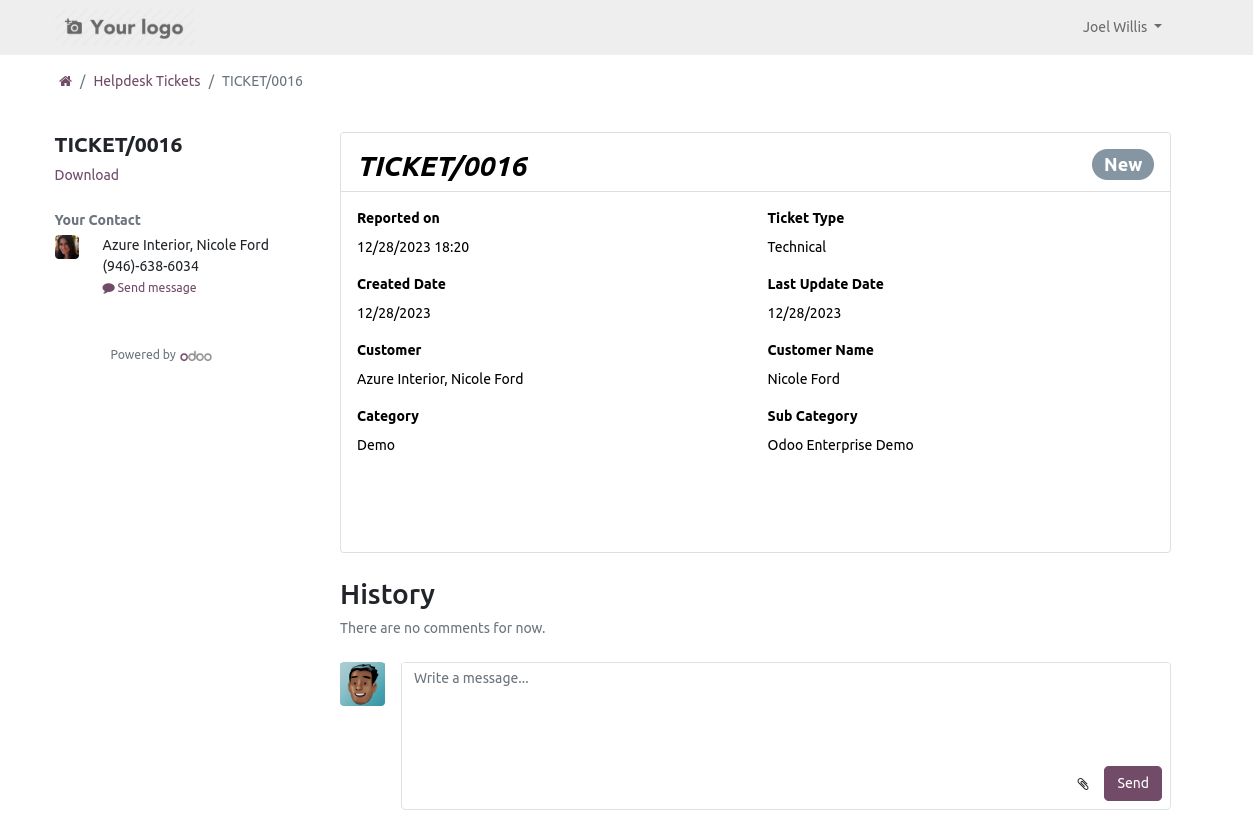
Ticket in PDF formate.
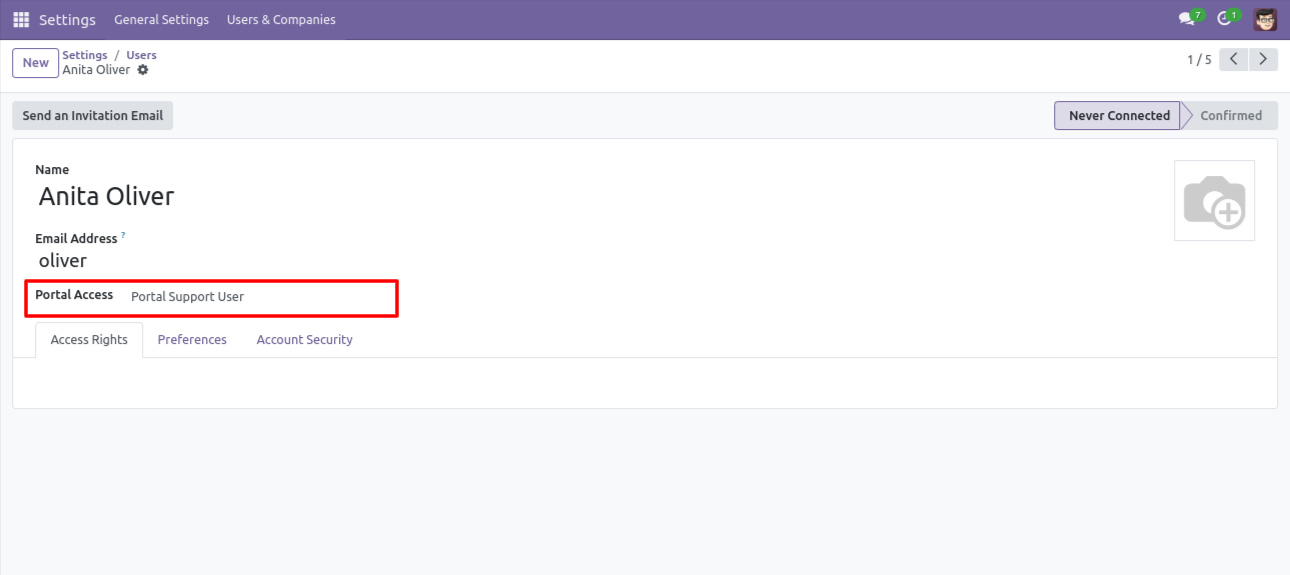
'Portal Support User'
Login with Portal Support User and click on 'Create'.
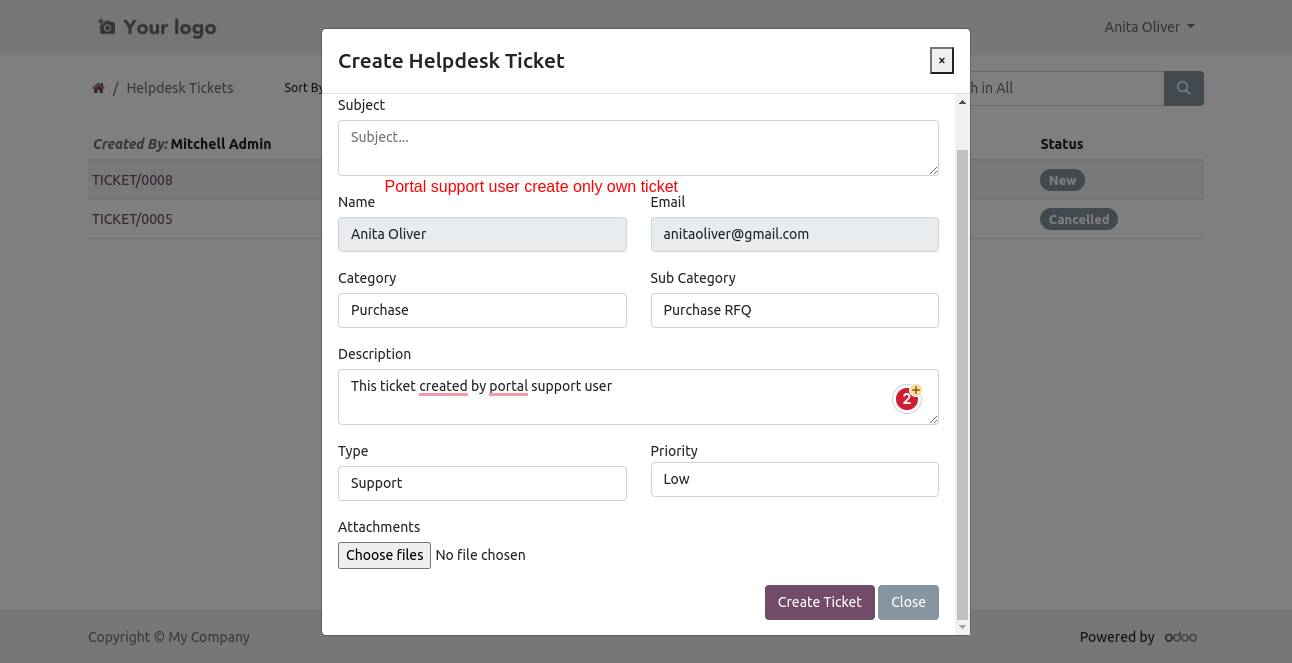
The portal user can create a ticket only.

A colorful dashboard appears as below.
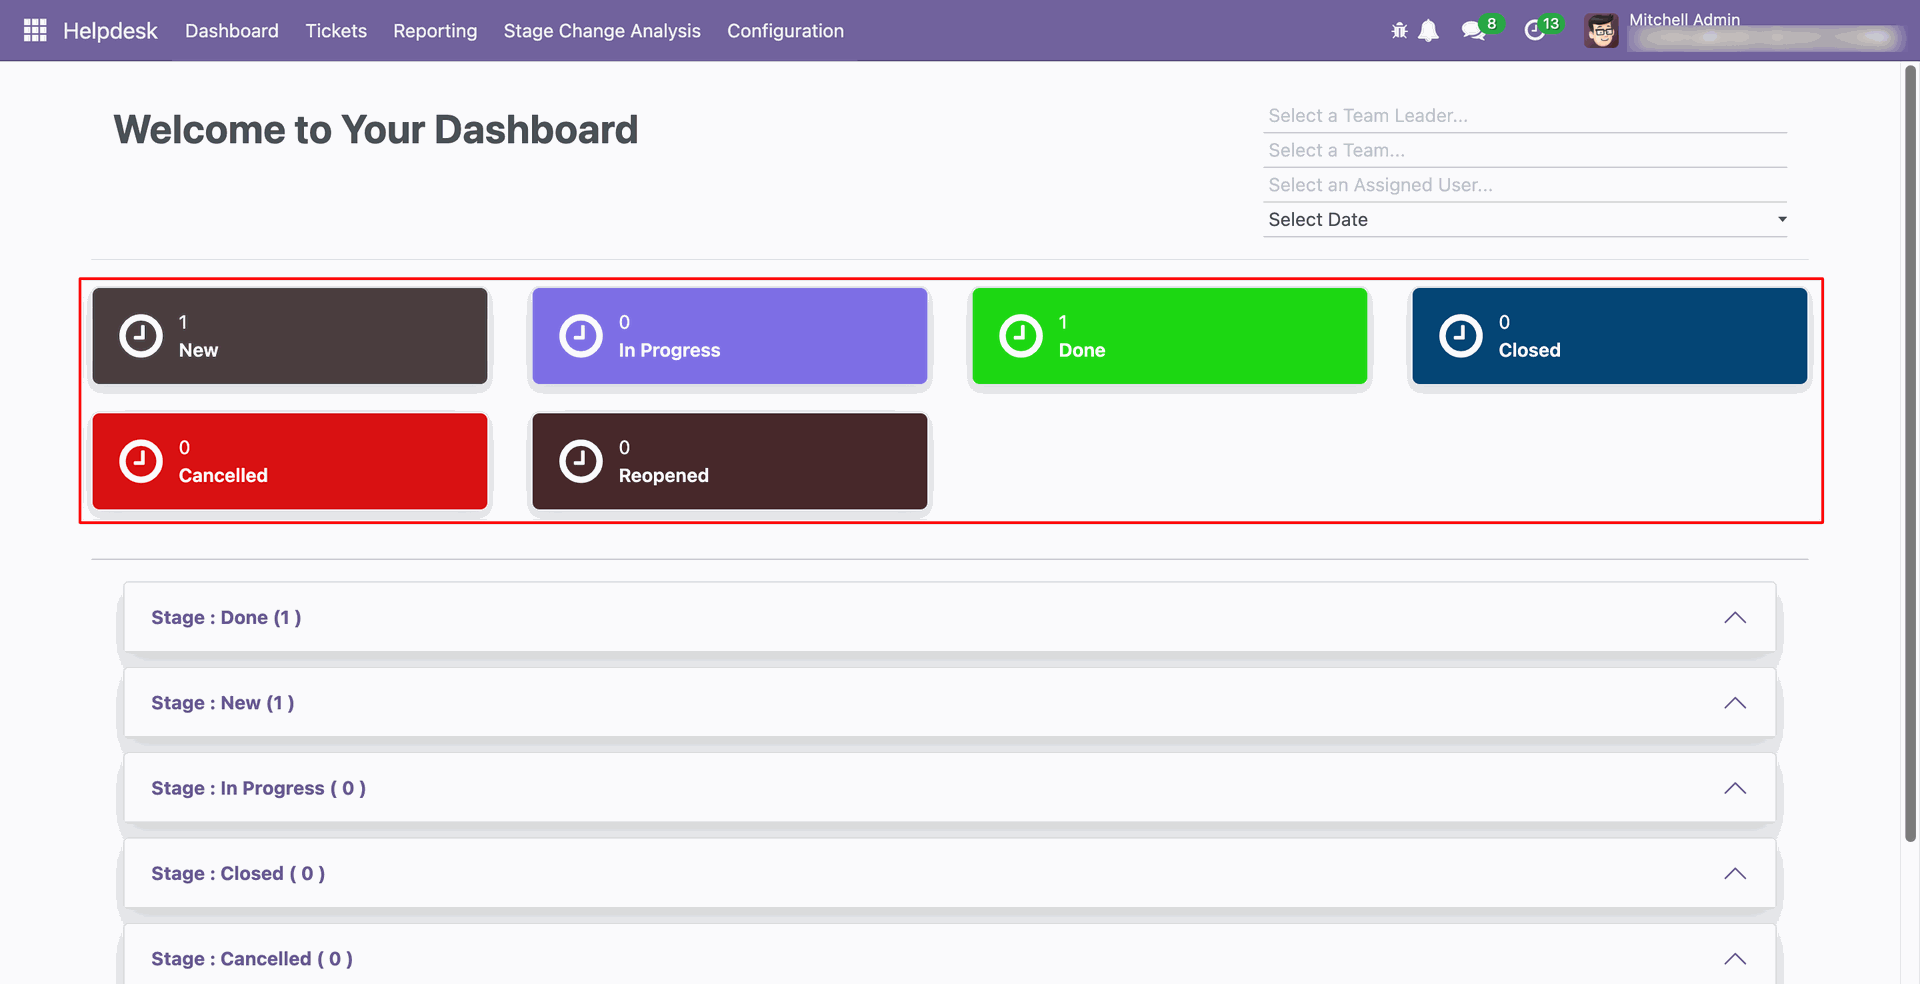
Go to the Helpdesk Stages form view and set the color you wish to display on the dashboard.
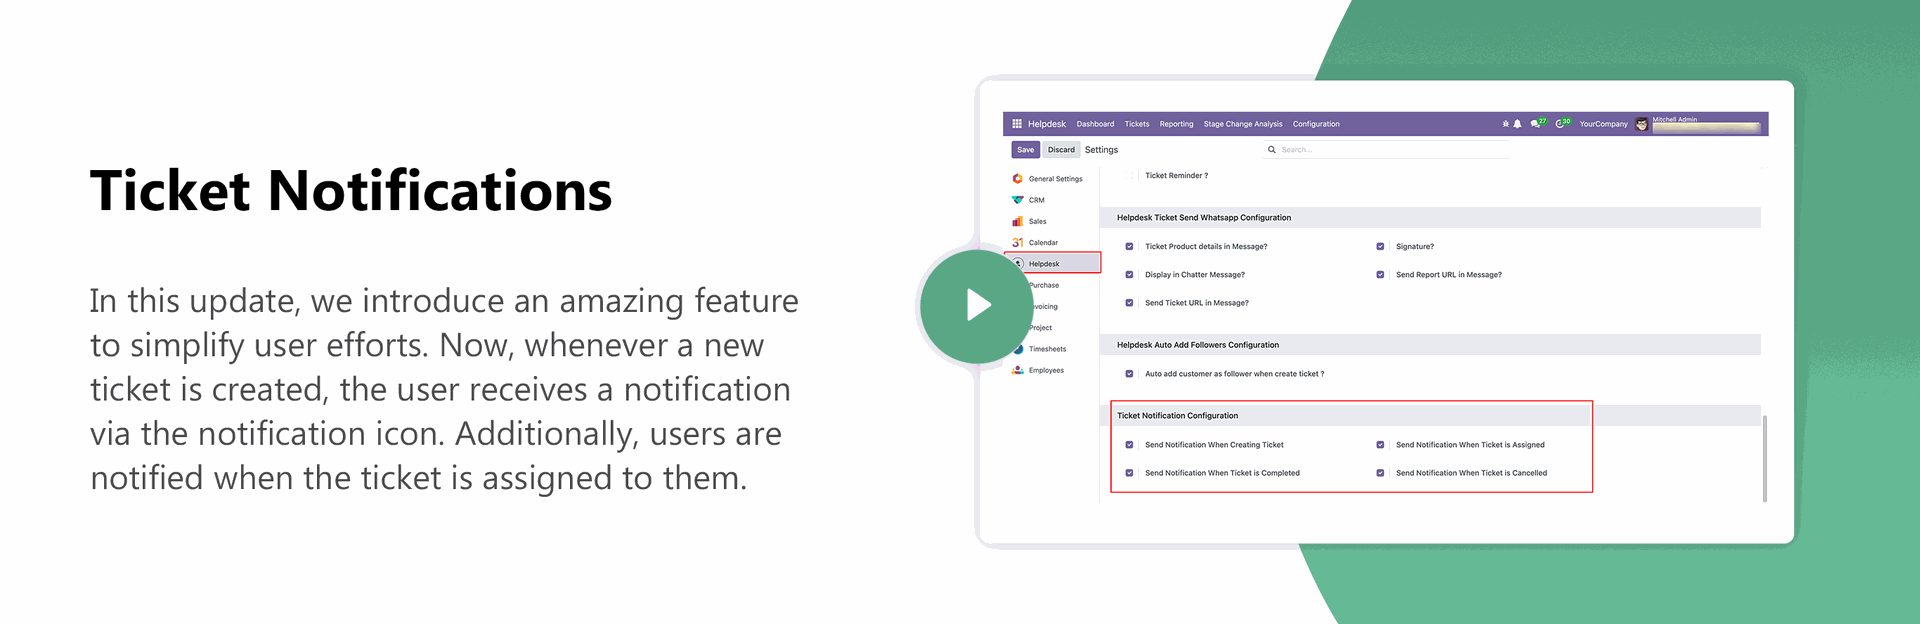
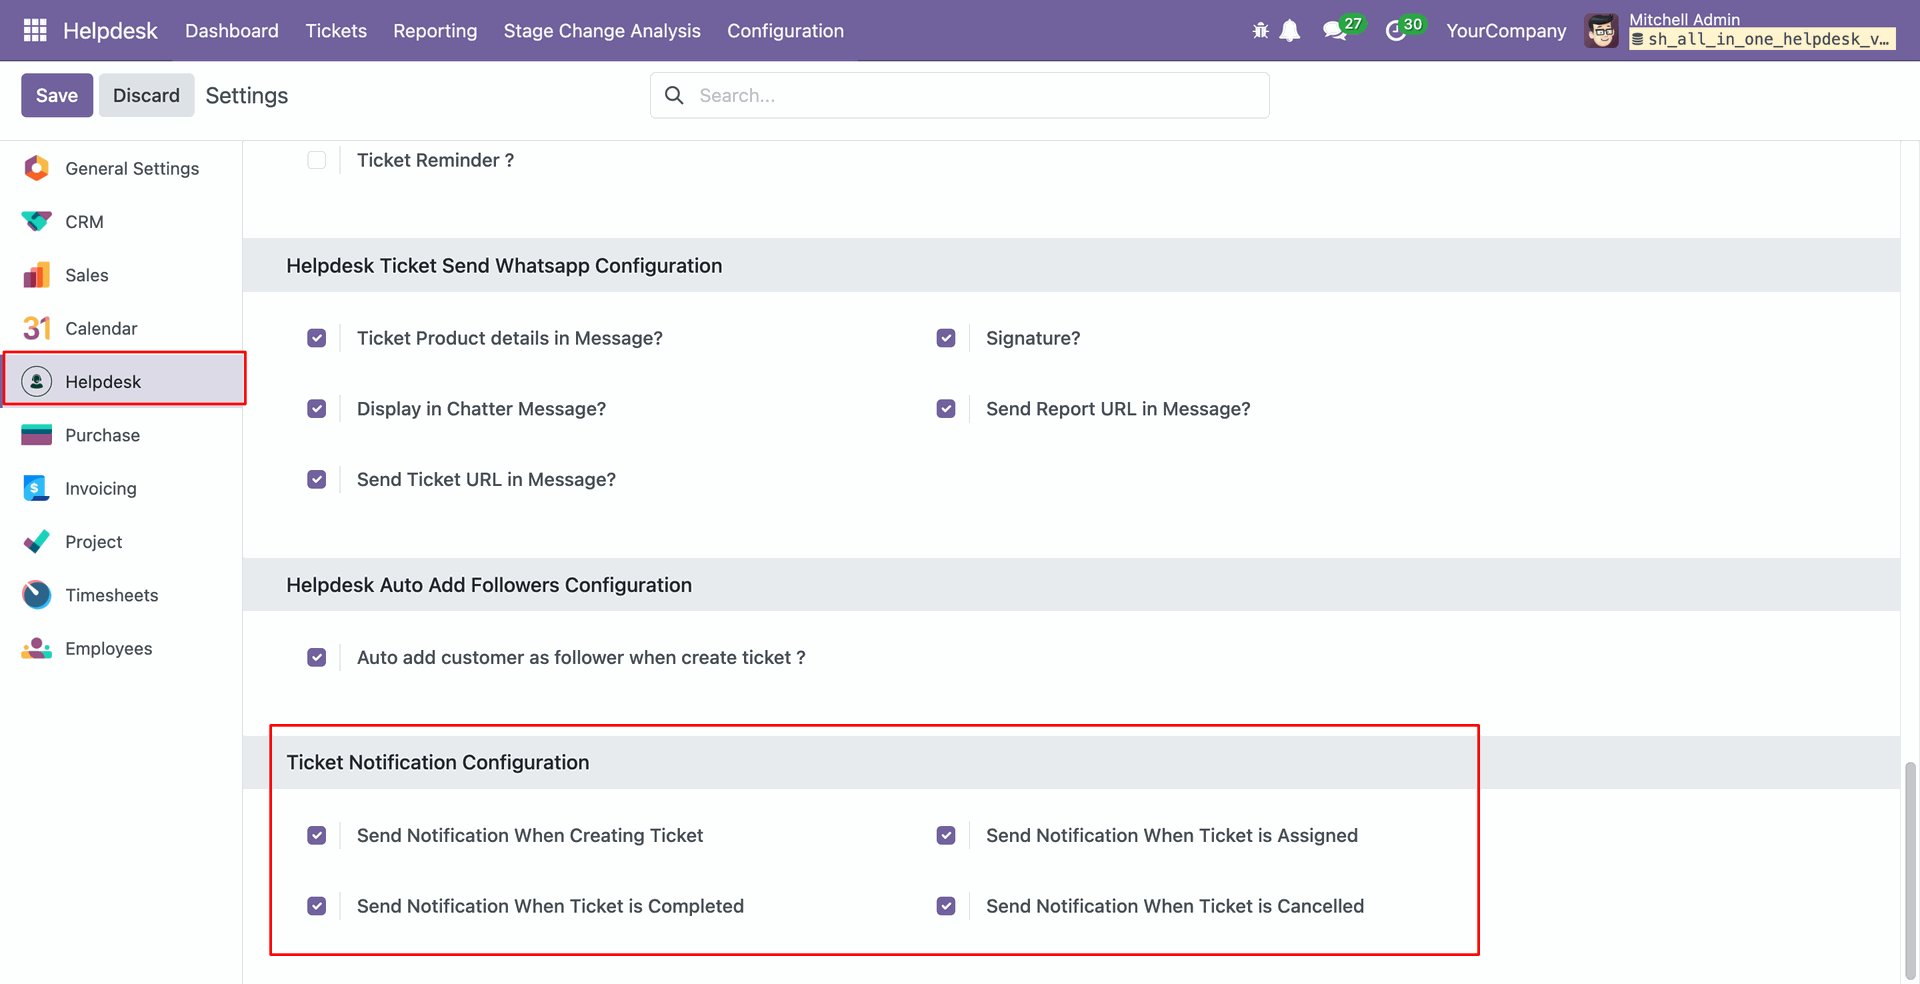
Go to the helpdesk configuration and enable all the 'Ticket Notification Cofiguration'.
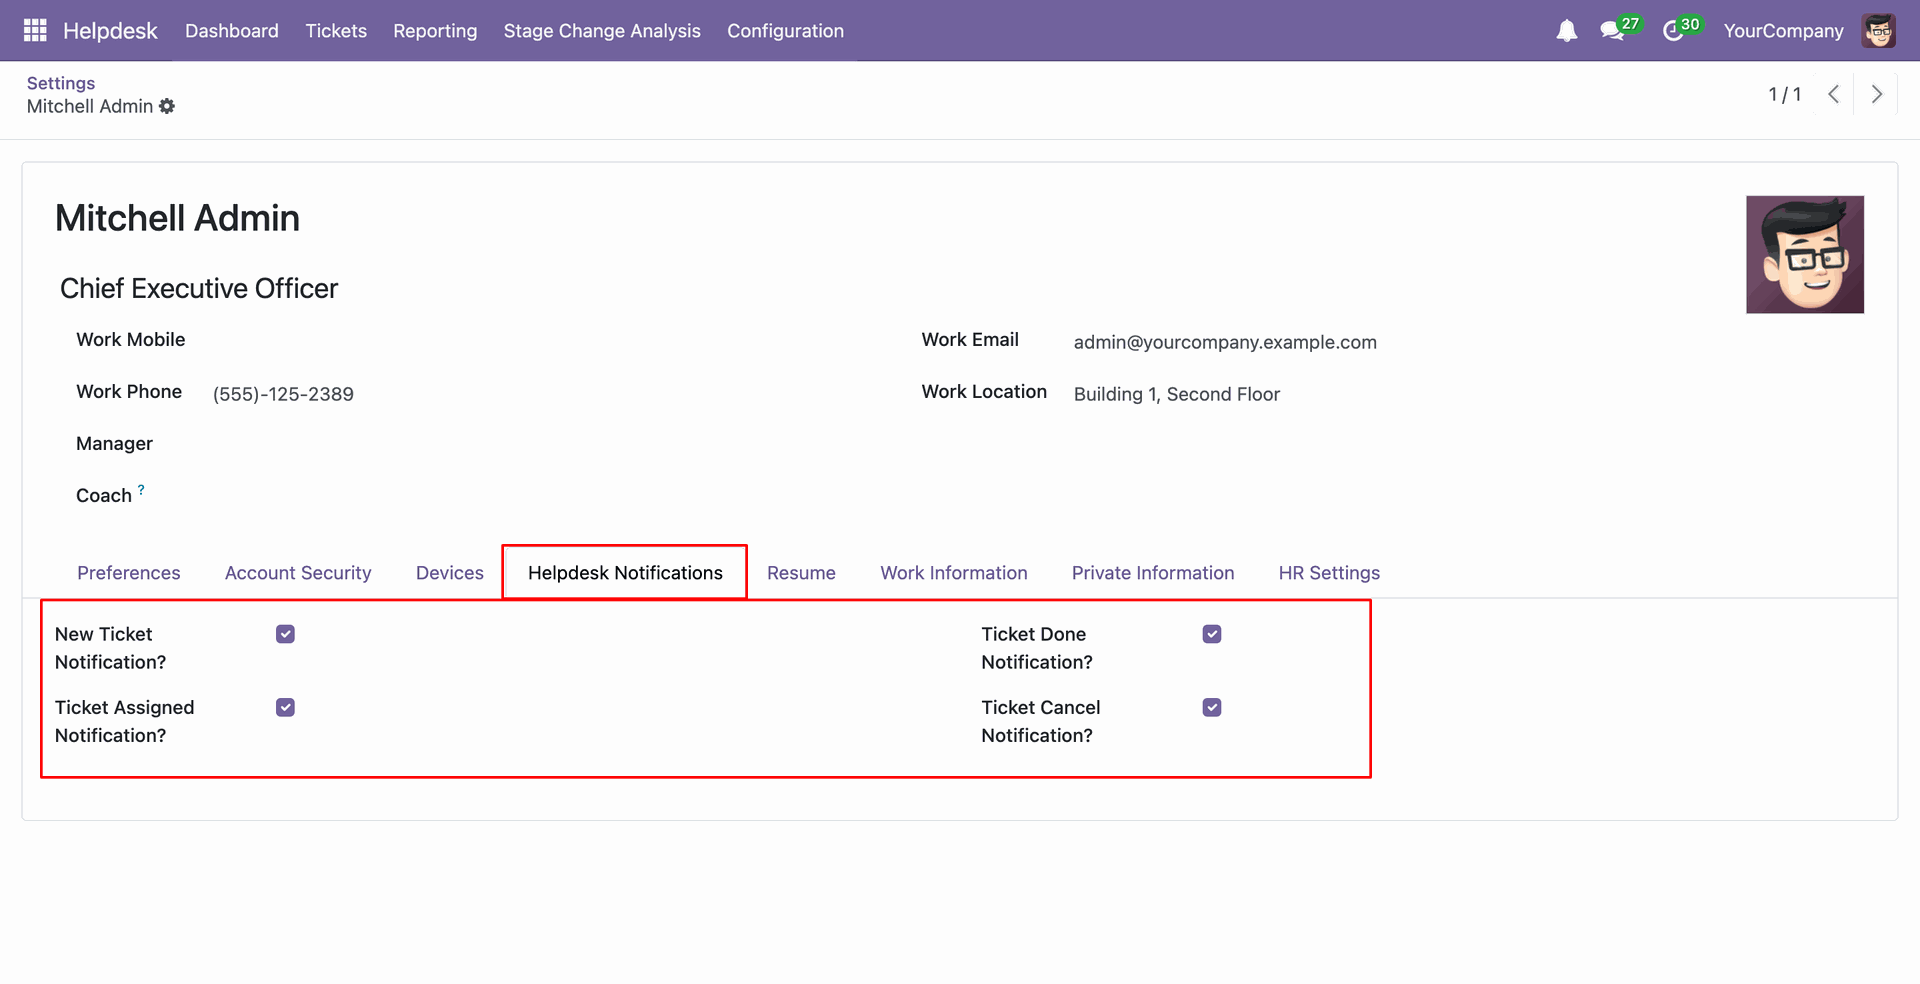
In the users form view, enable all the notifications from the 'Helpdesk notification' tab.
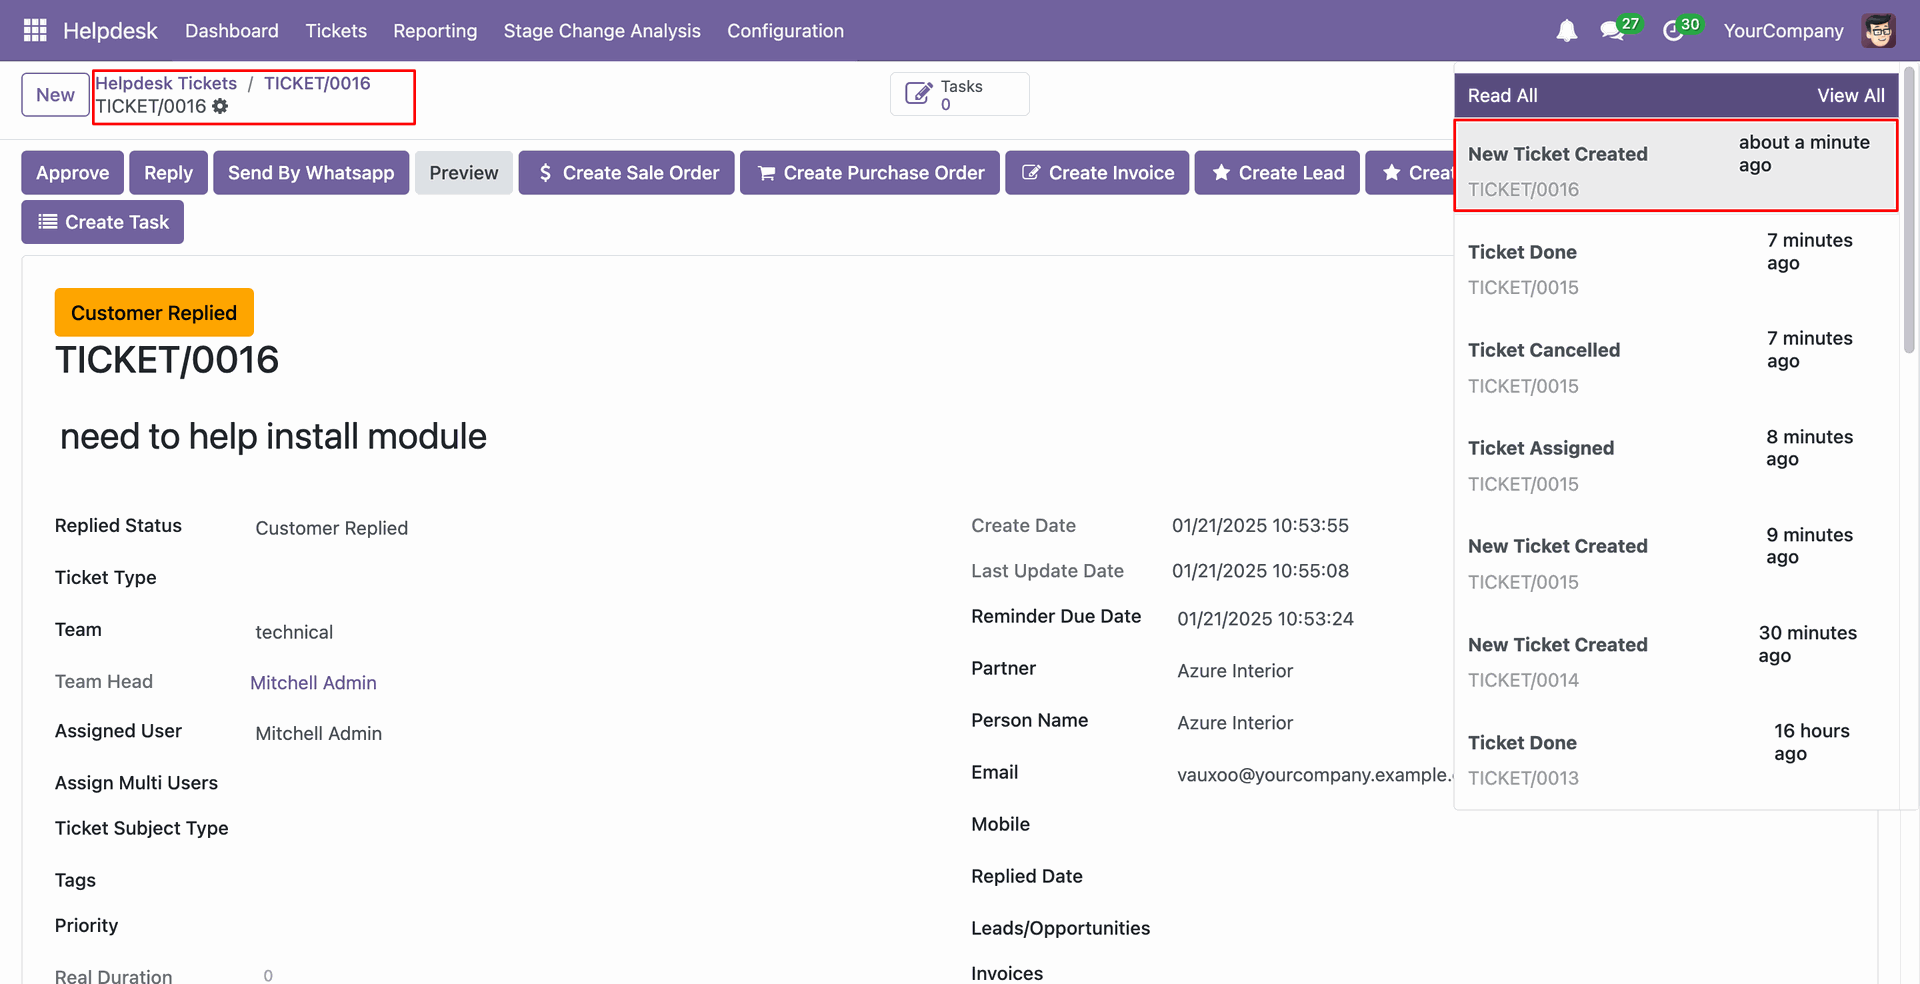
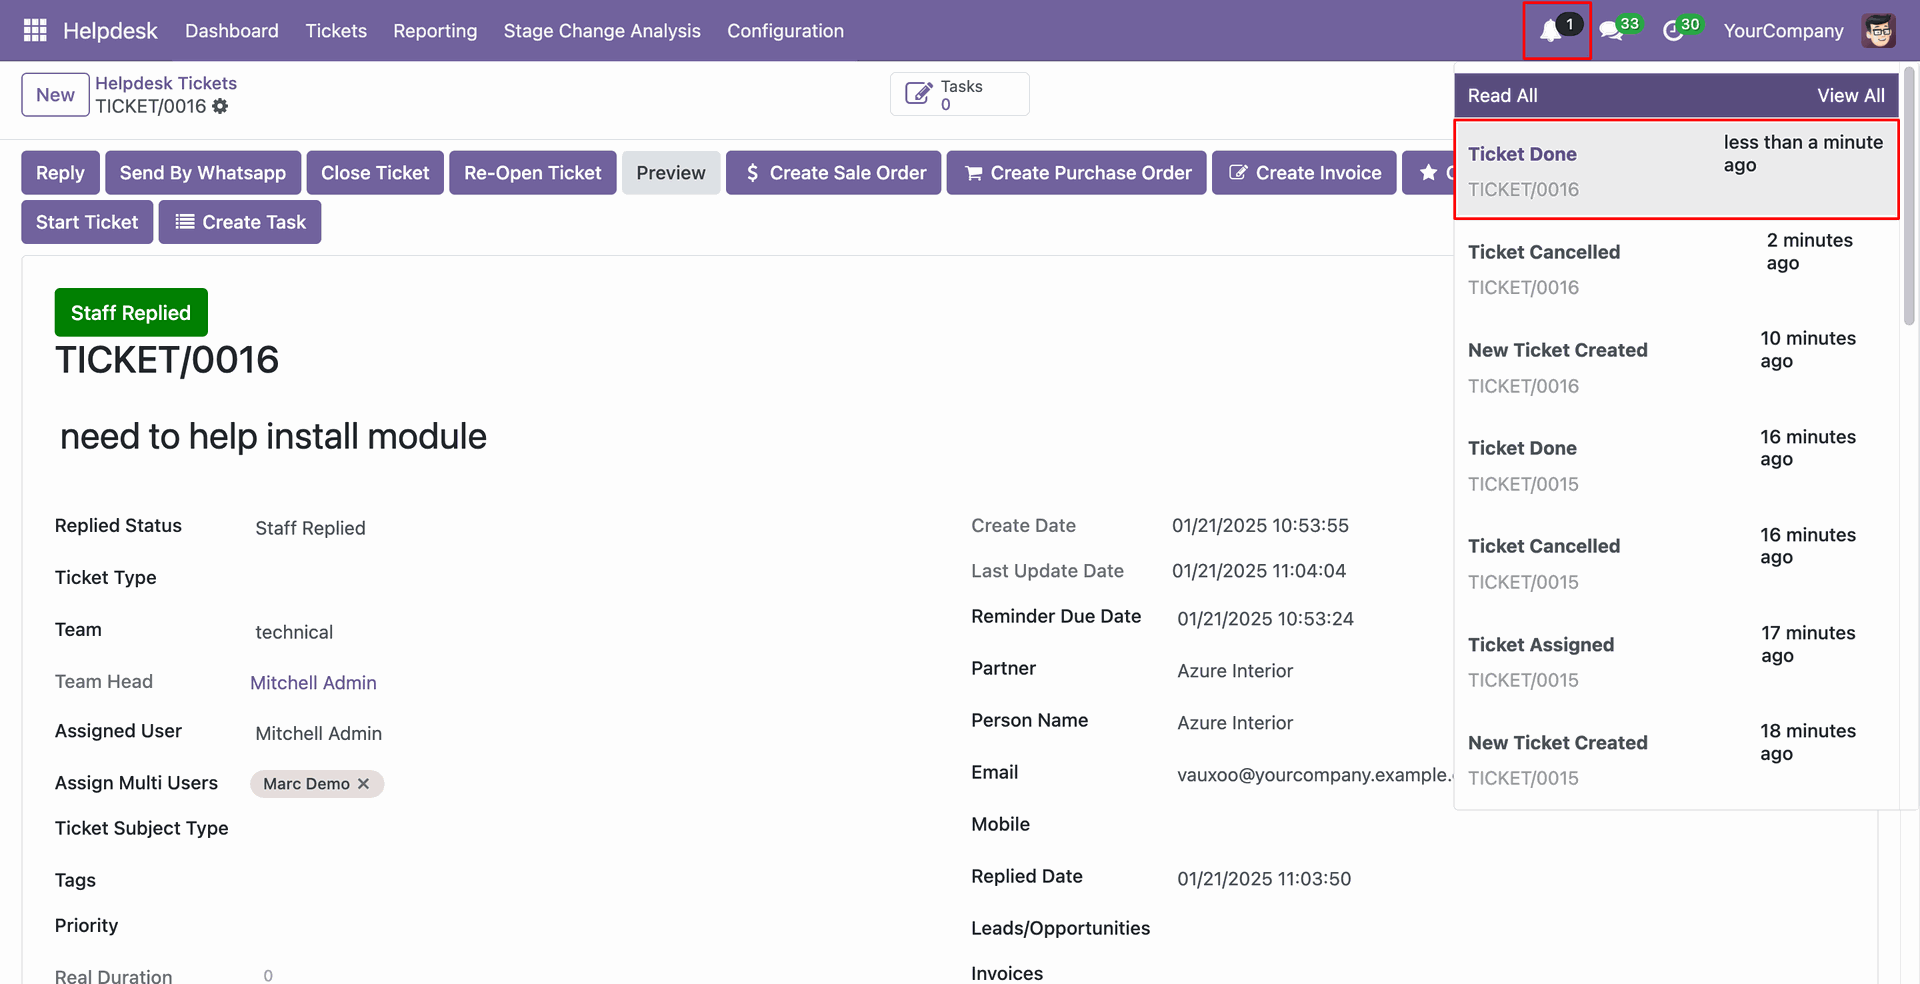
Whenever a new ticket is created, a notification will appear on the notification icon as shown below.
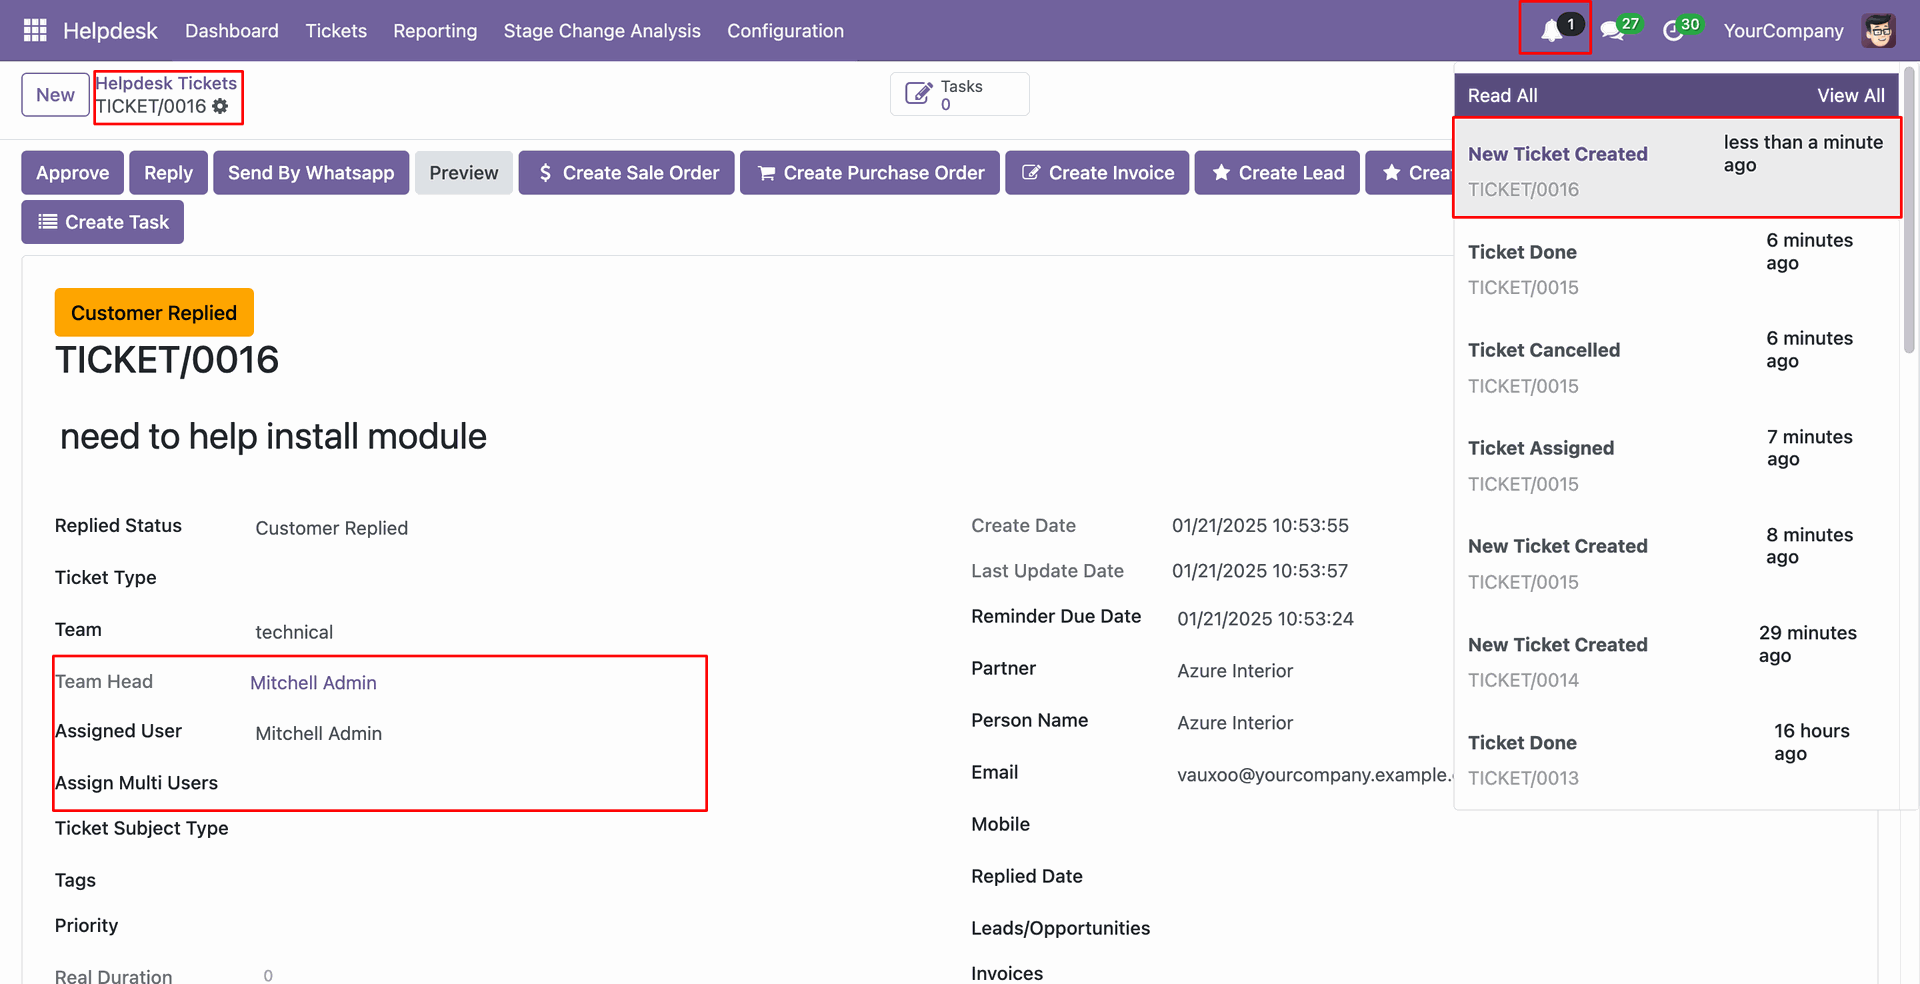
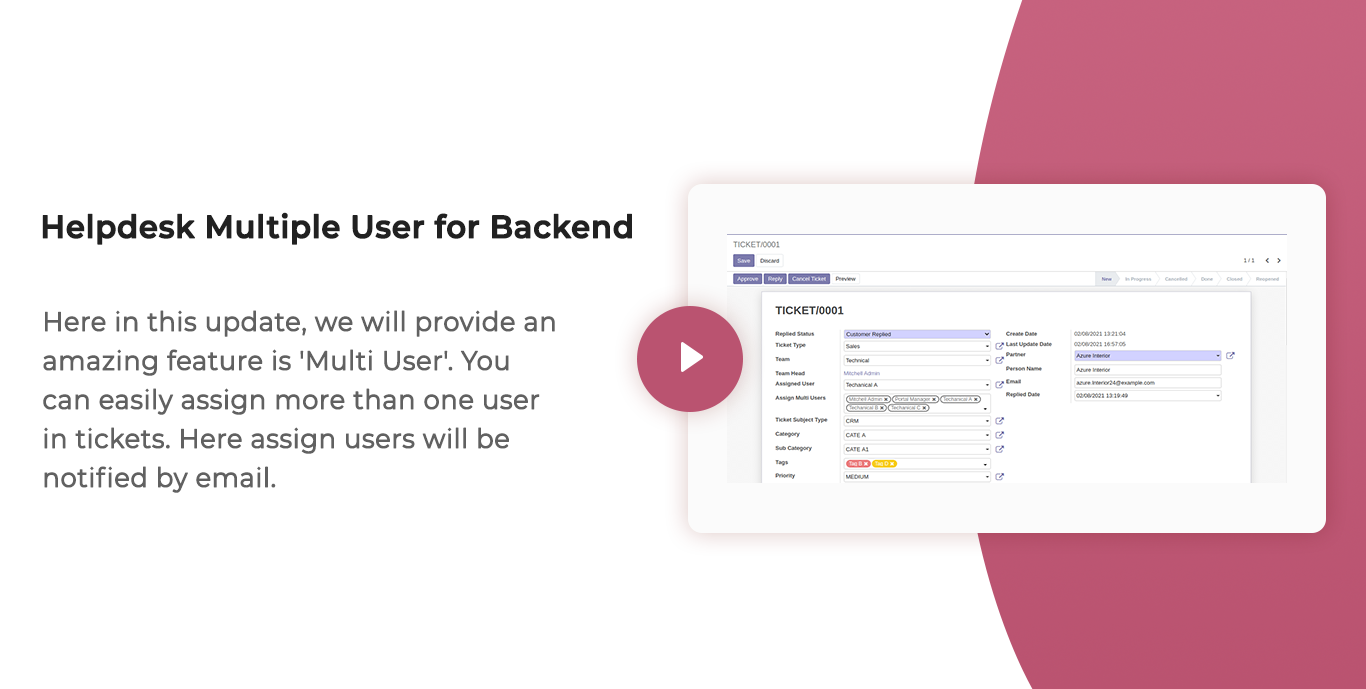
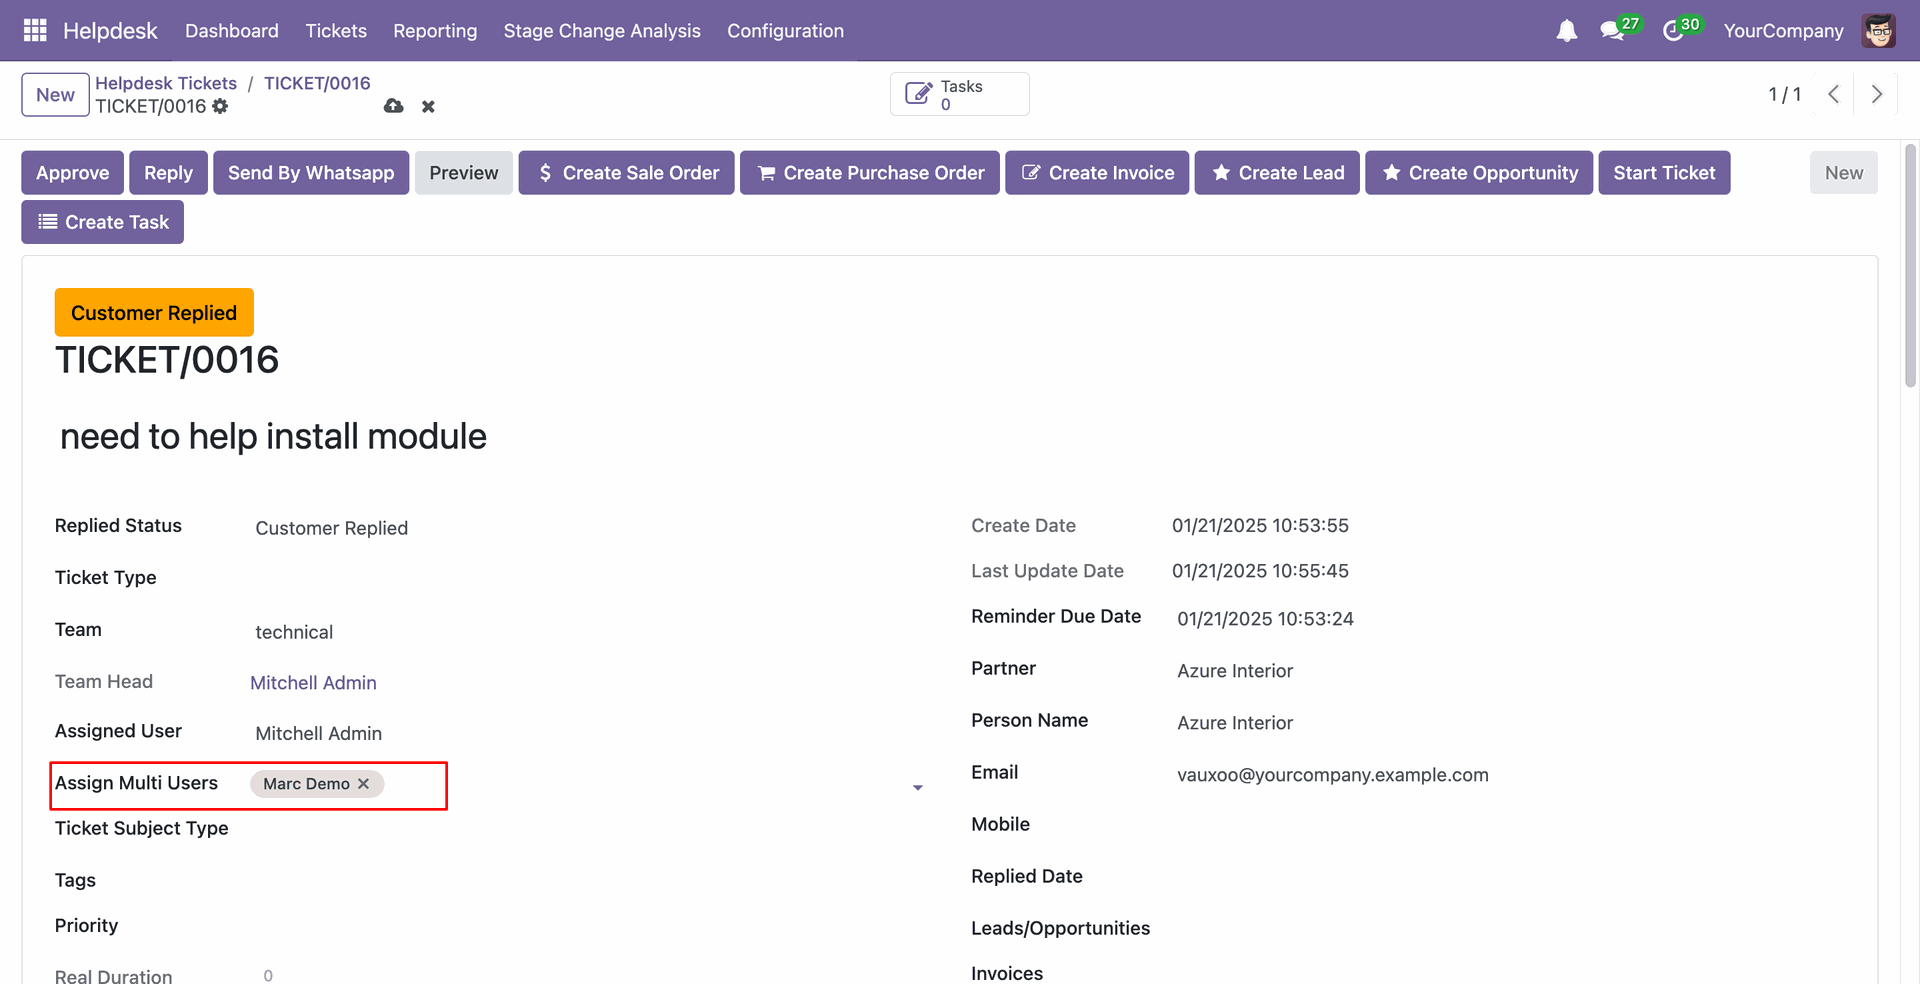
Select the users in the 'Assign multi users' field.
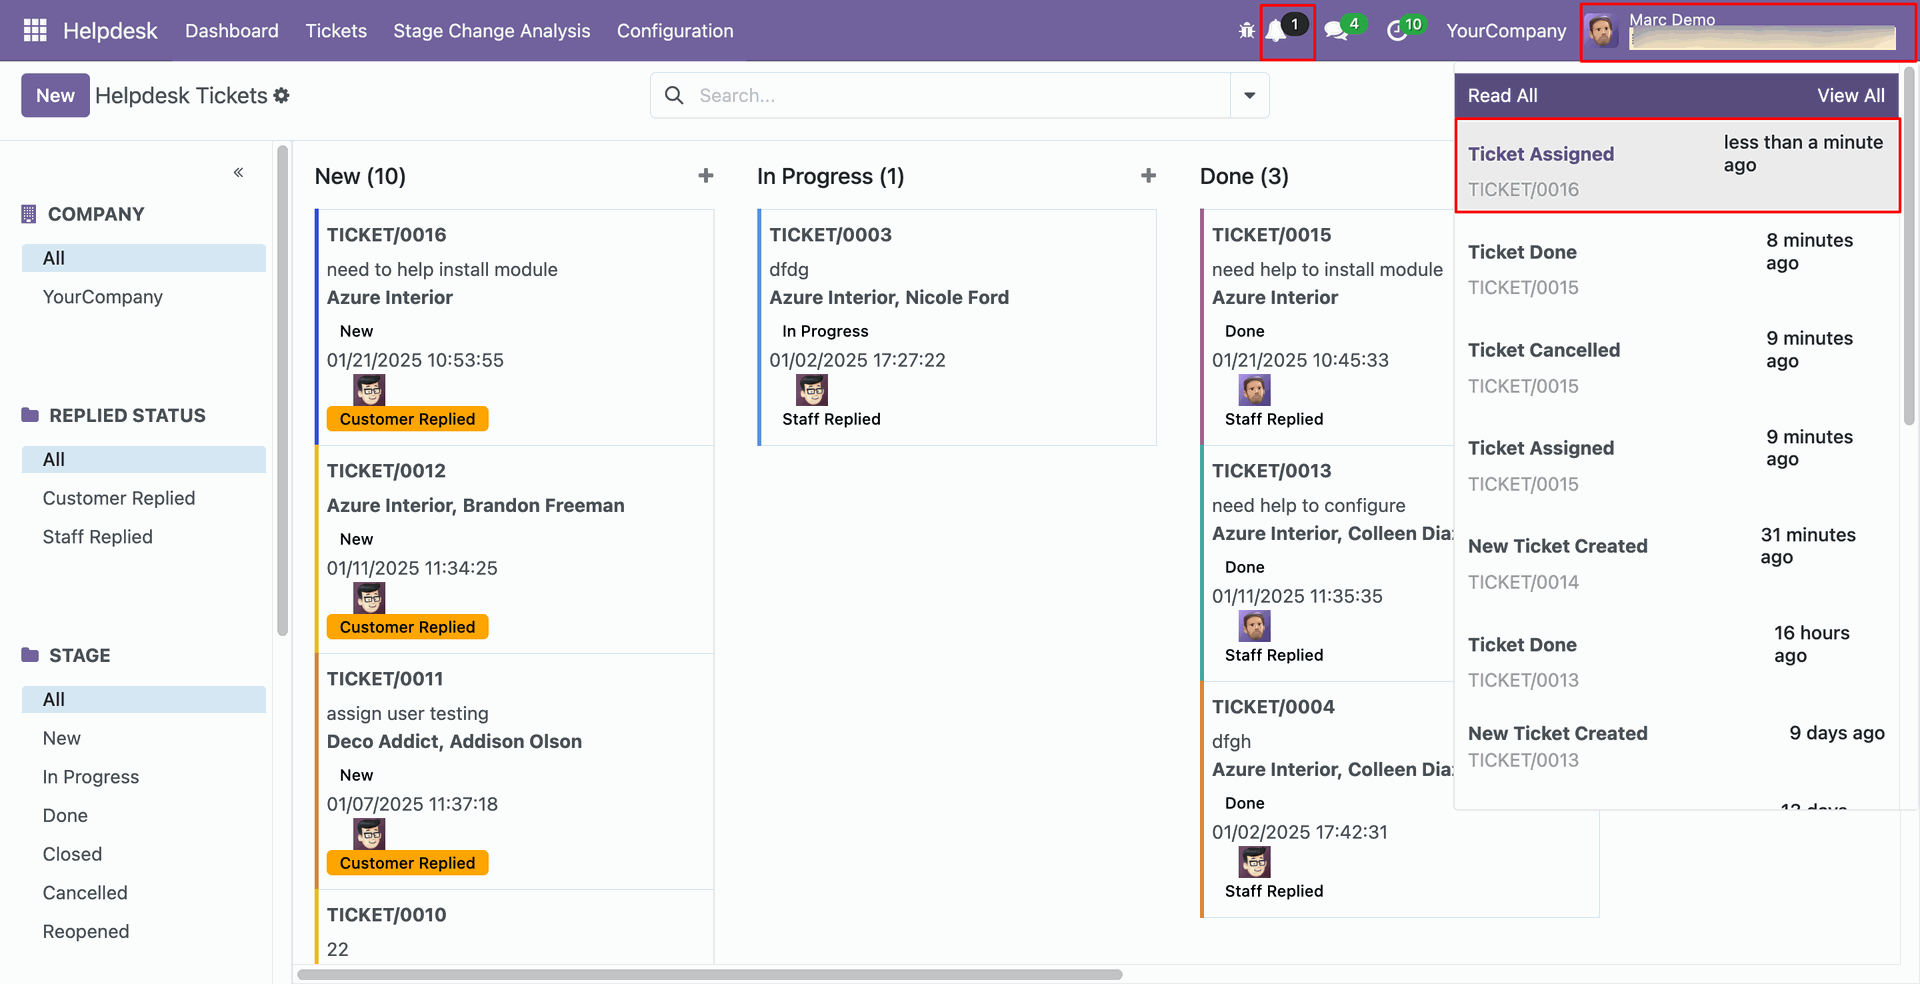
When a user is assigned to a ticket, that specific user will receive a notification about it.
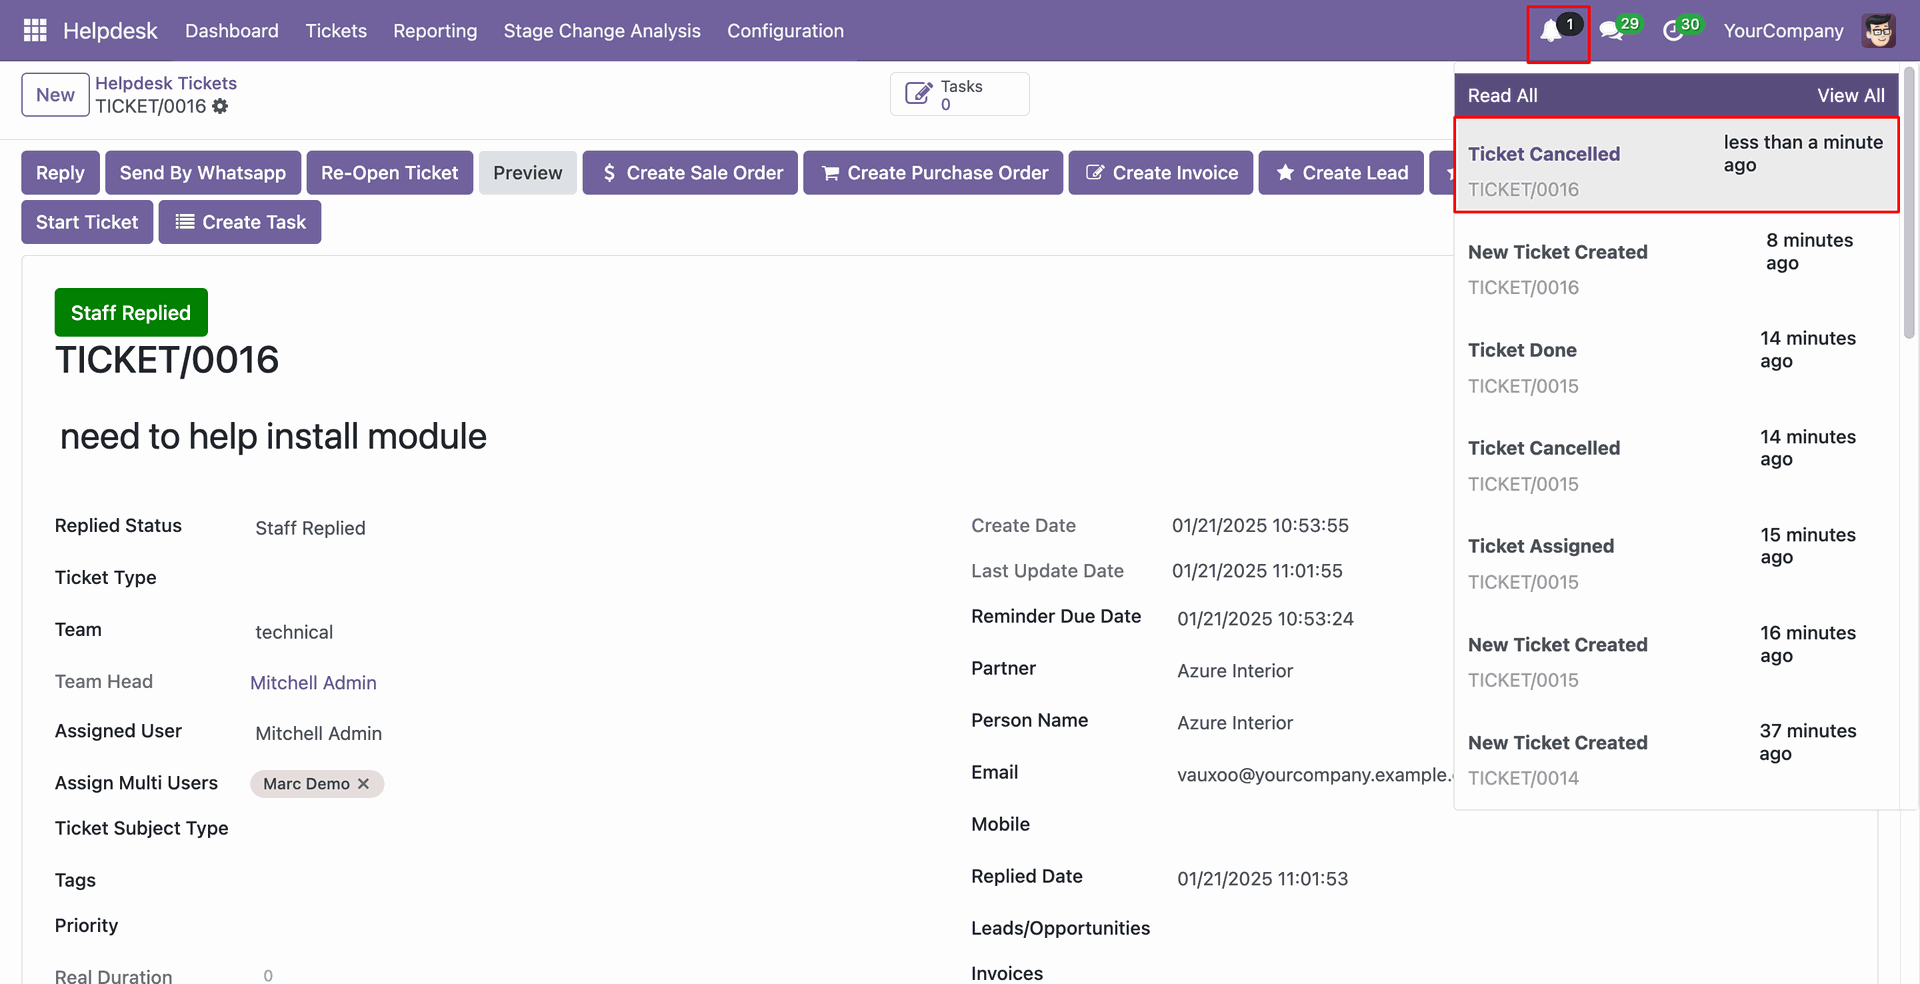
The admin will also receive a notification whenever the ticket's stage is changed.
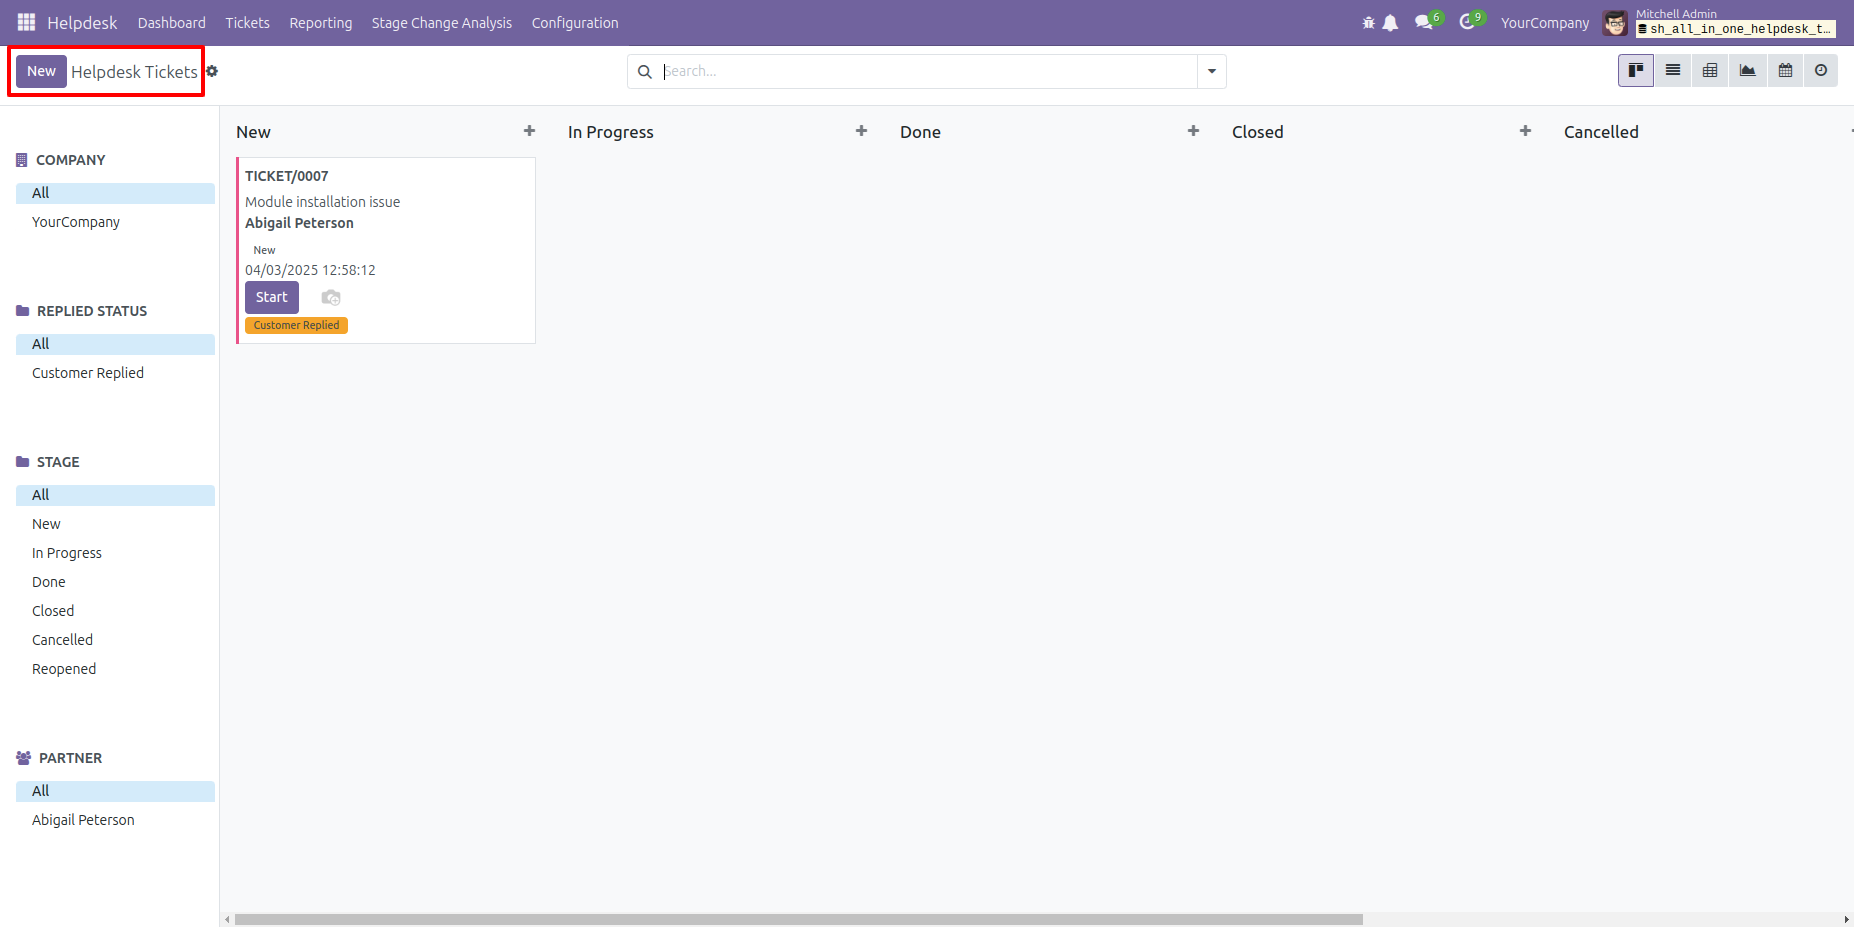
Kanban view of the ticket.
Click on the 'New' button to create a ticket.
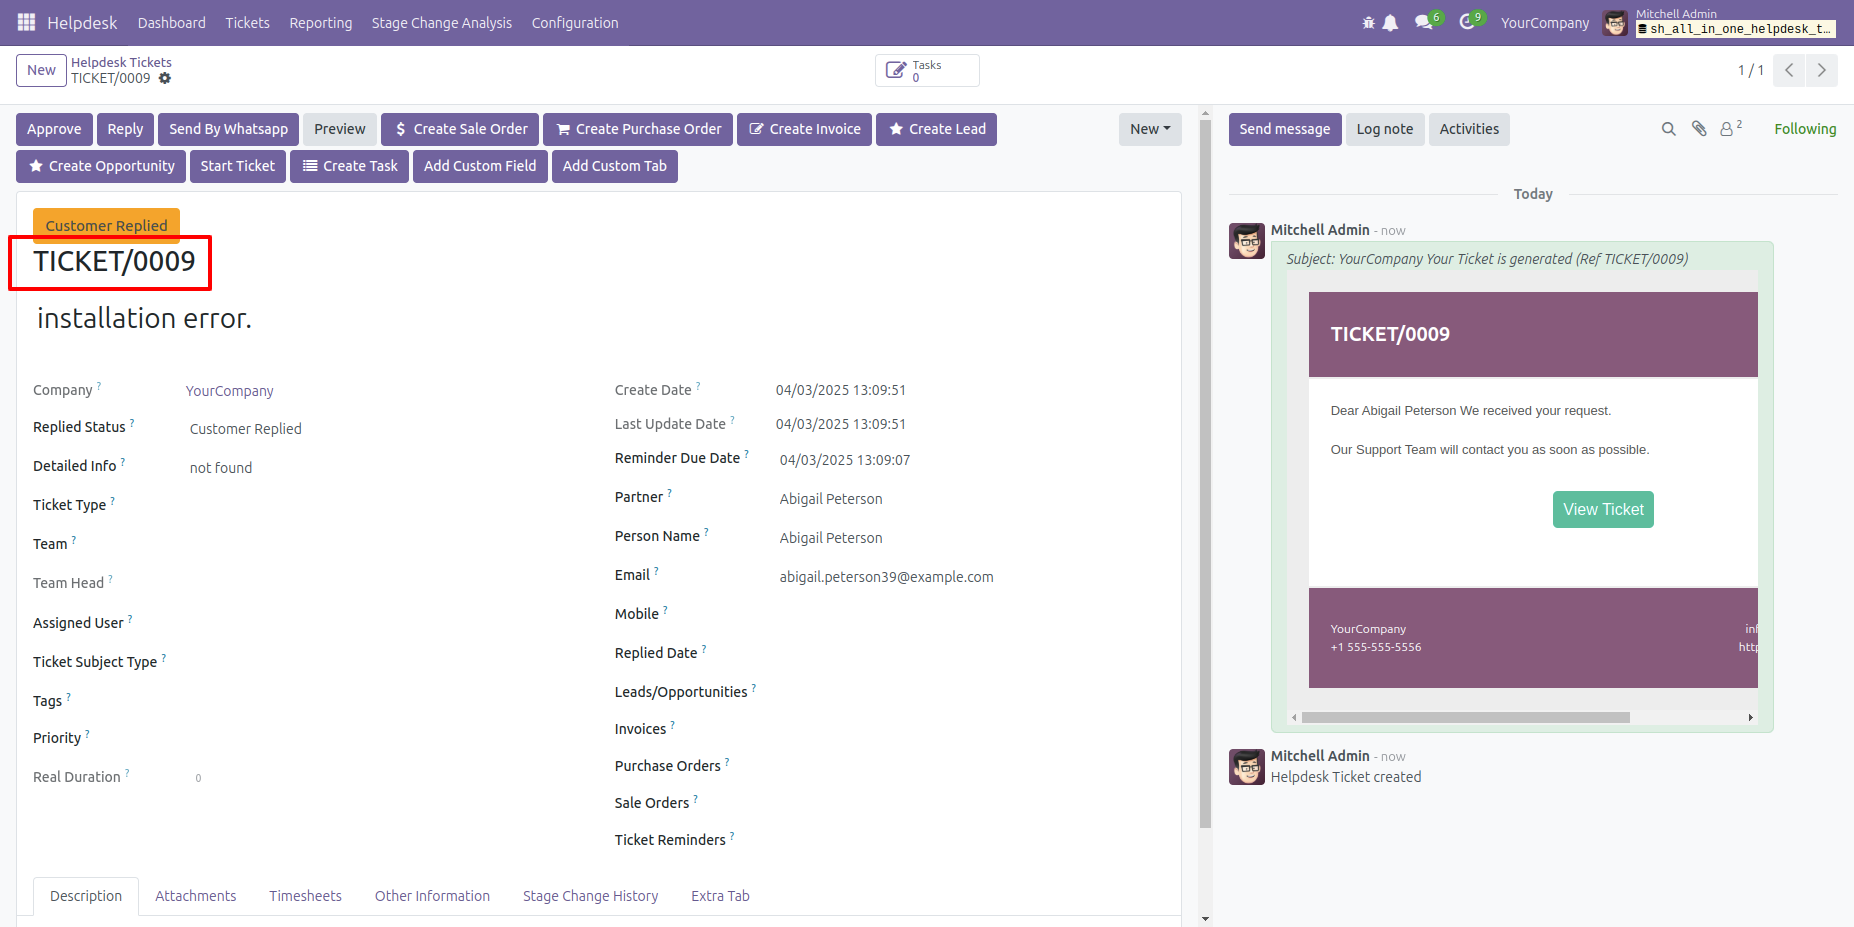
Form view of the ticket.
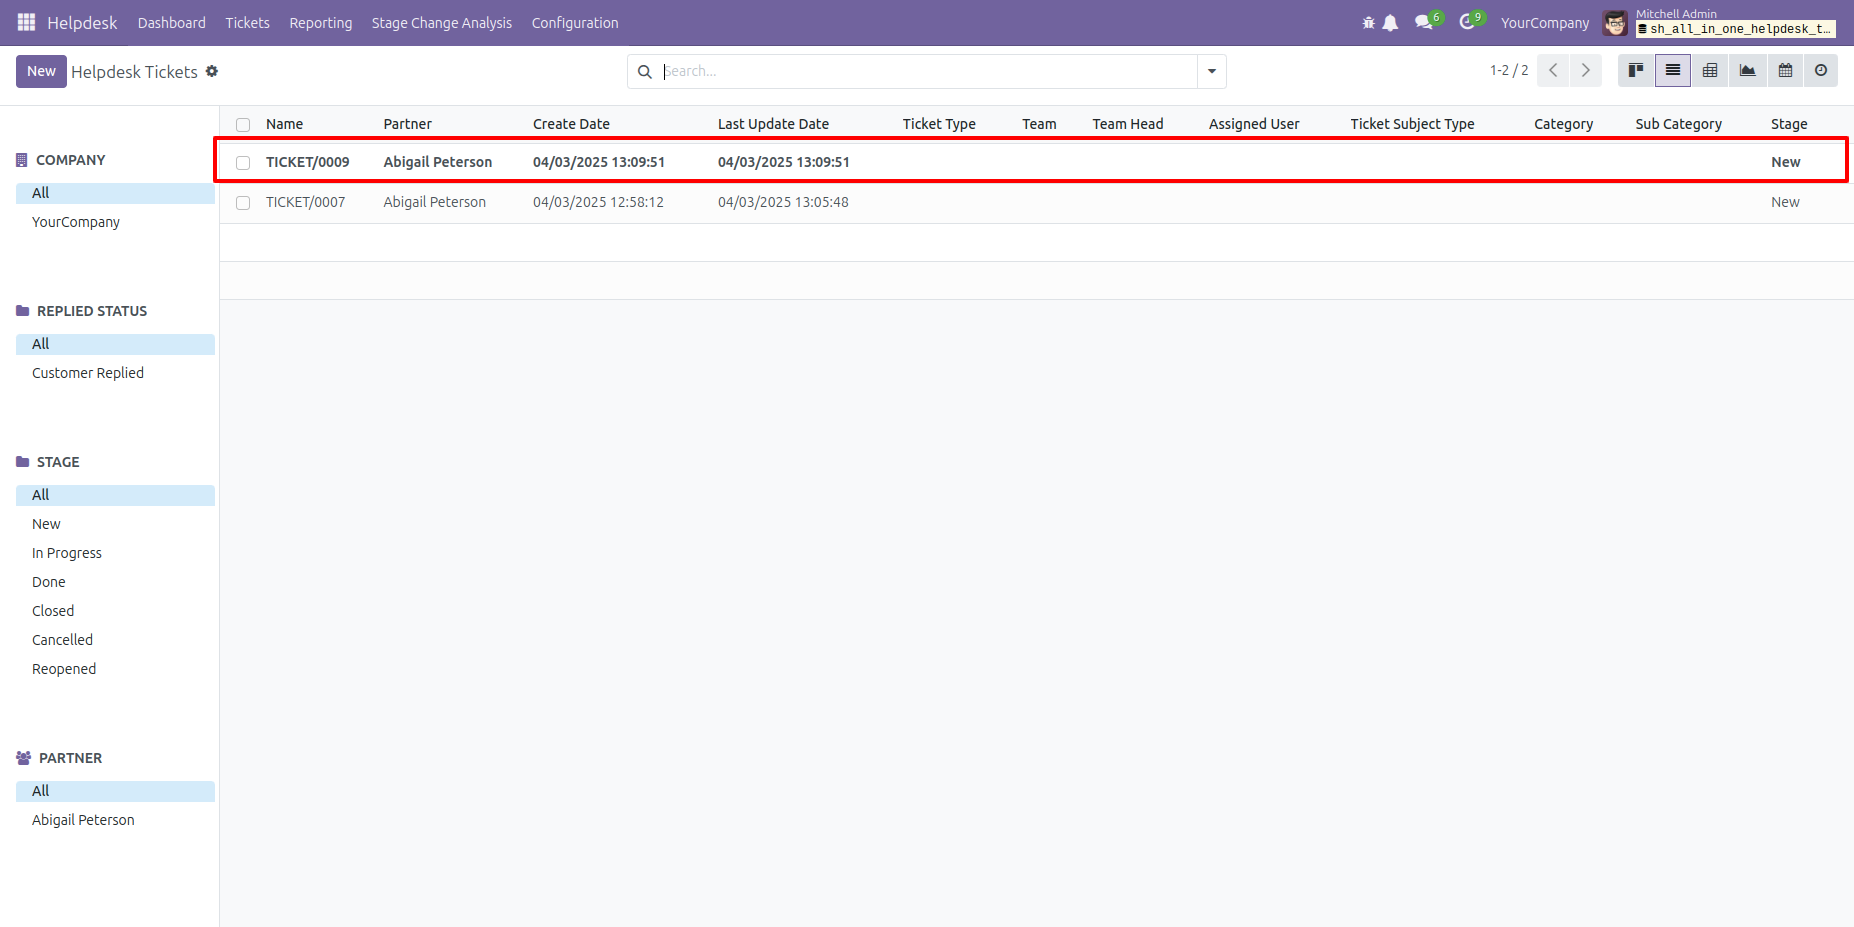
Click on the tree view icon.
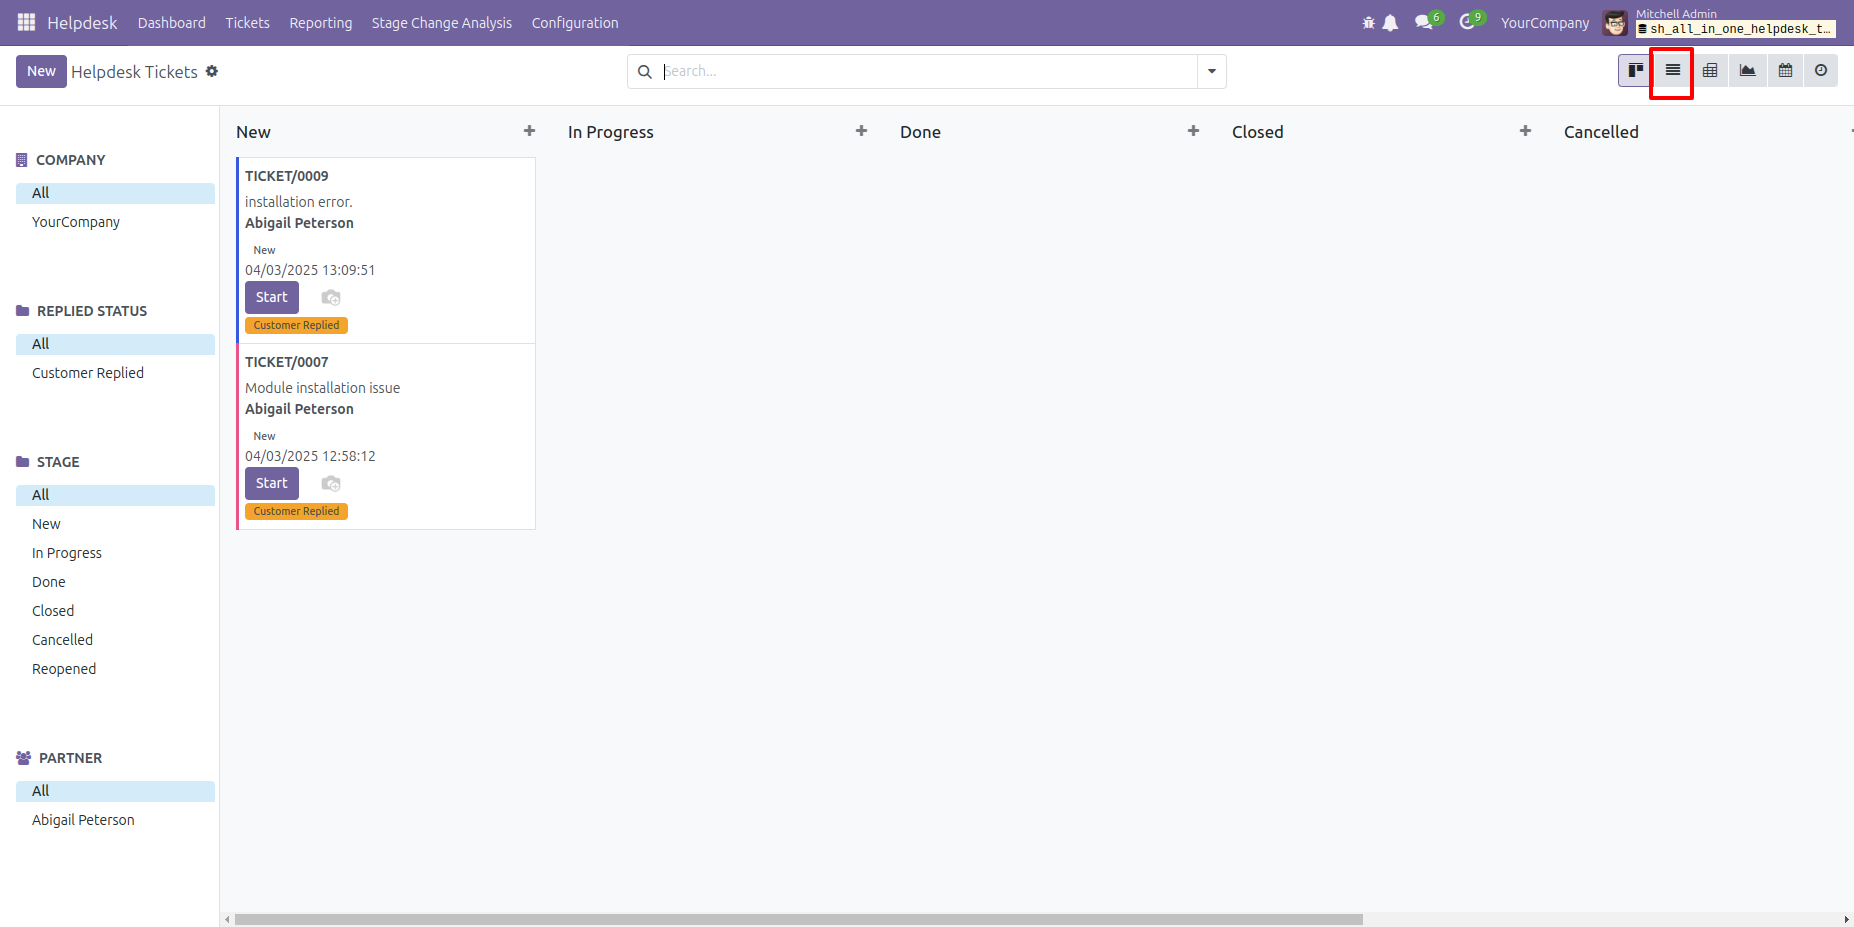
In the tree view, the newly created ticket appears in bold.
Click on that ticket to open it.
Note: Only newly created tickets that you have not
opened yet appear in bold.
Form view of the ticket.
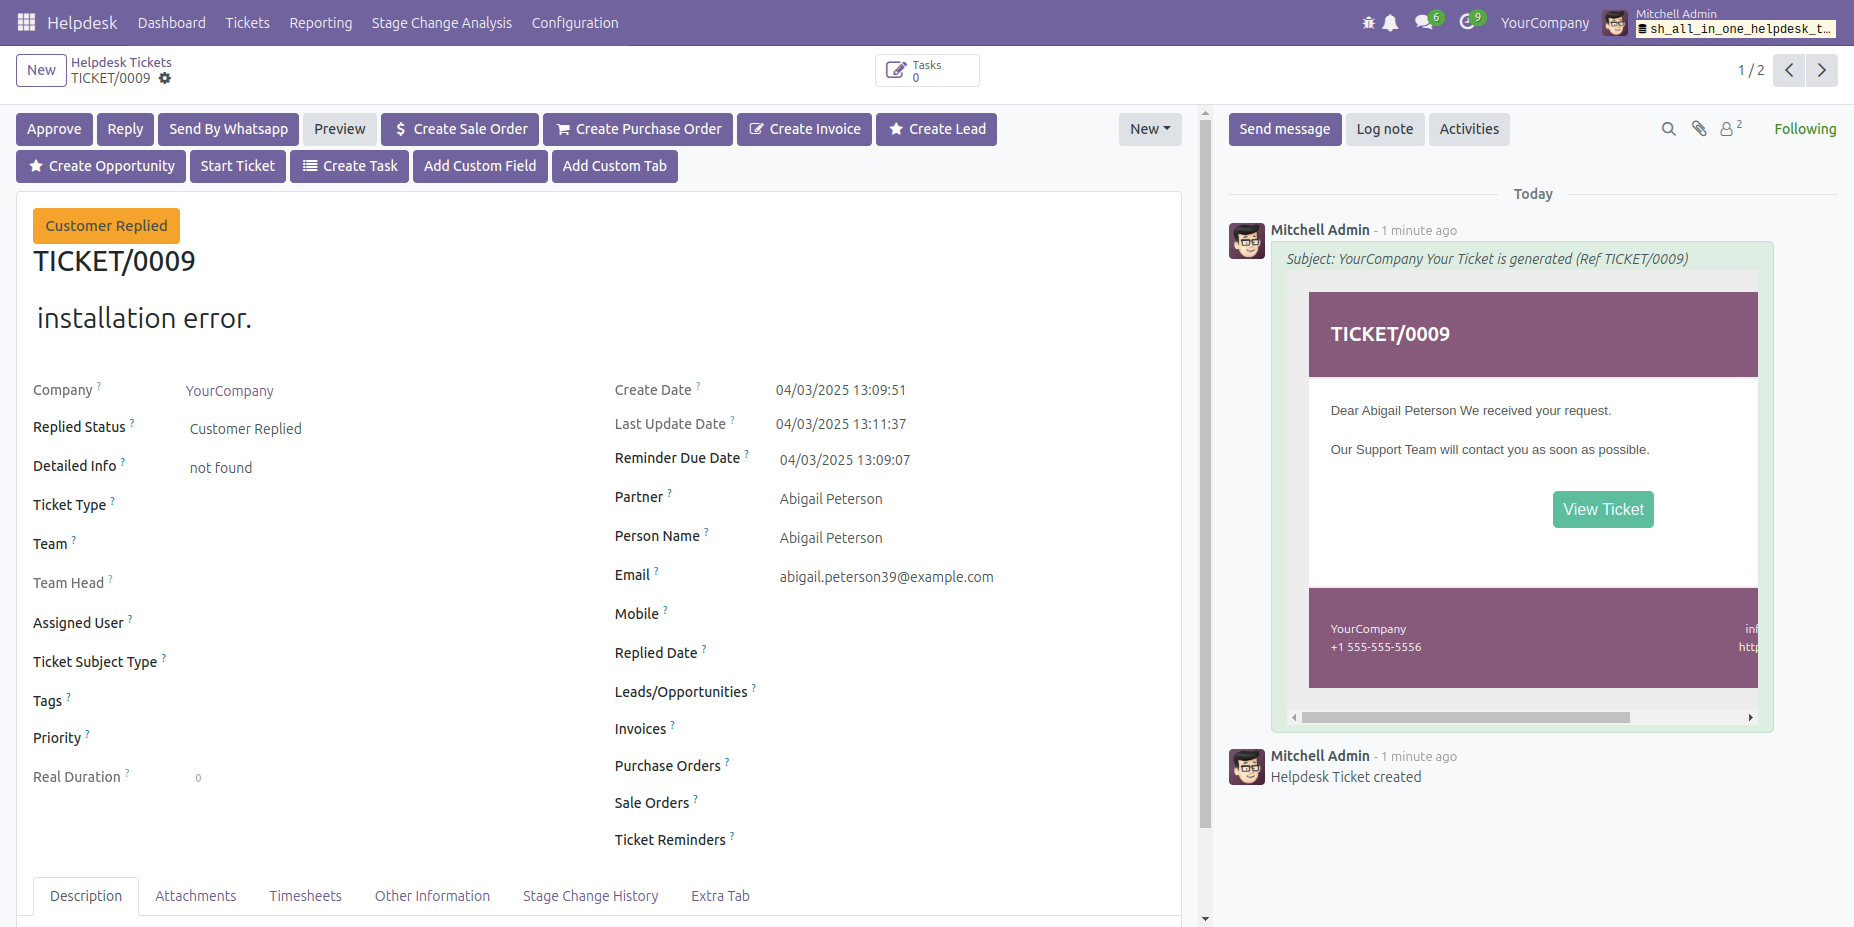
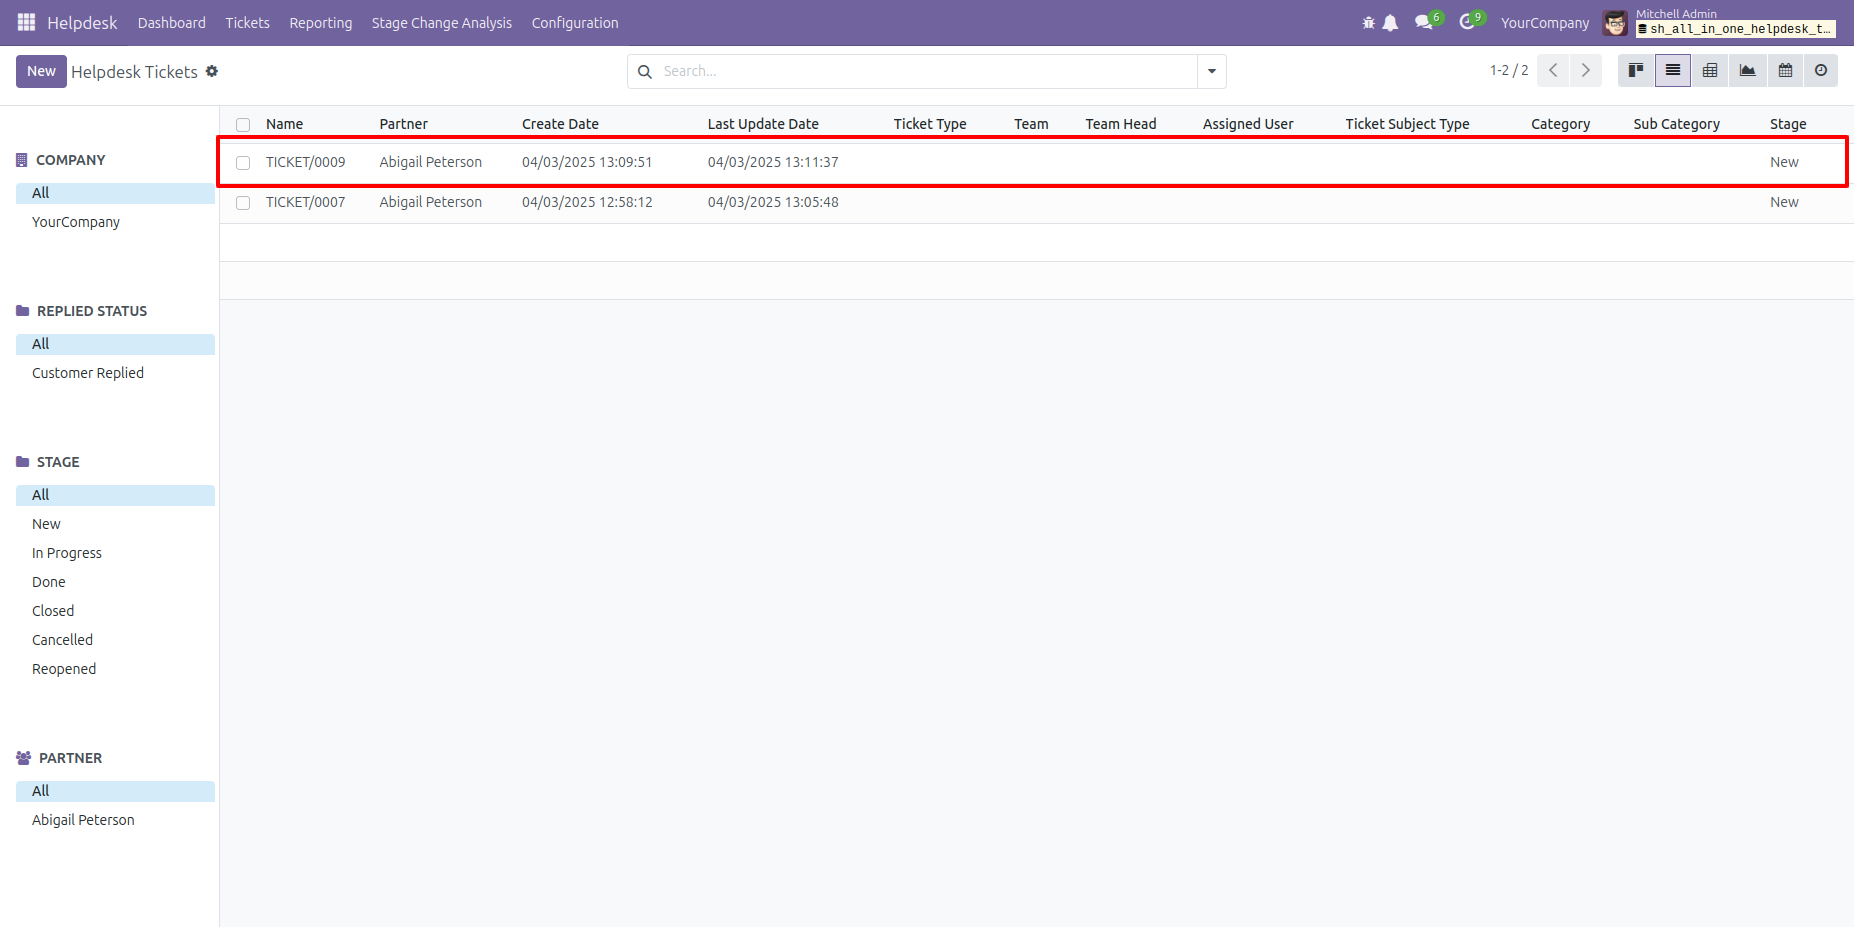
After viewing a ticket, when you return to the tree view, it will appear as a normal ticket rather than in bold.
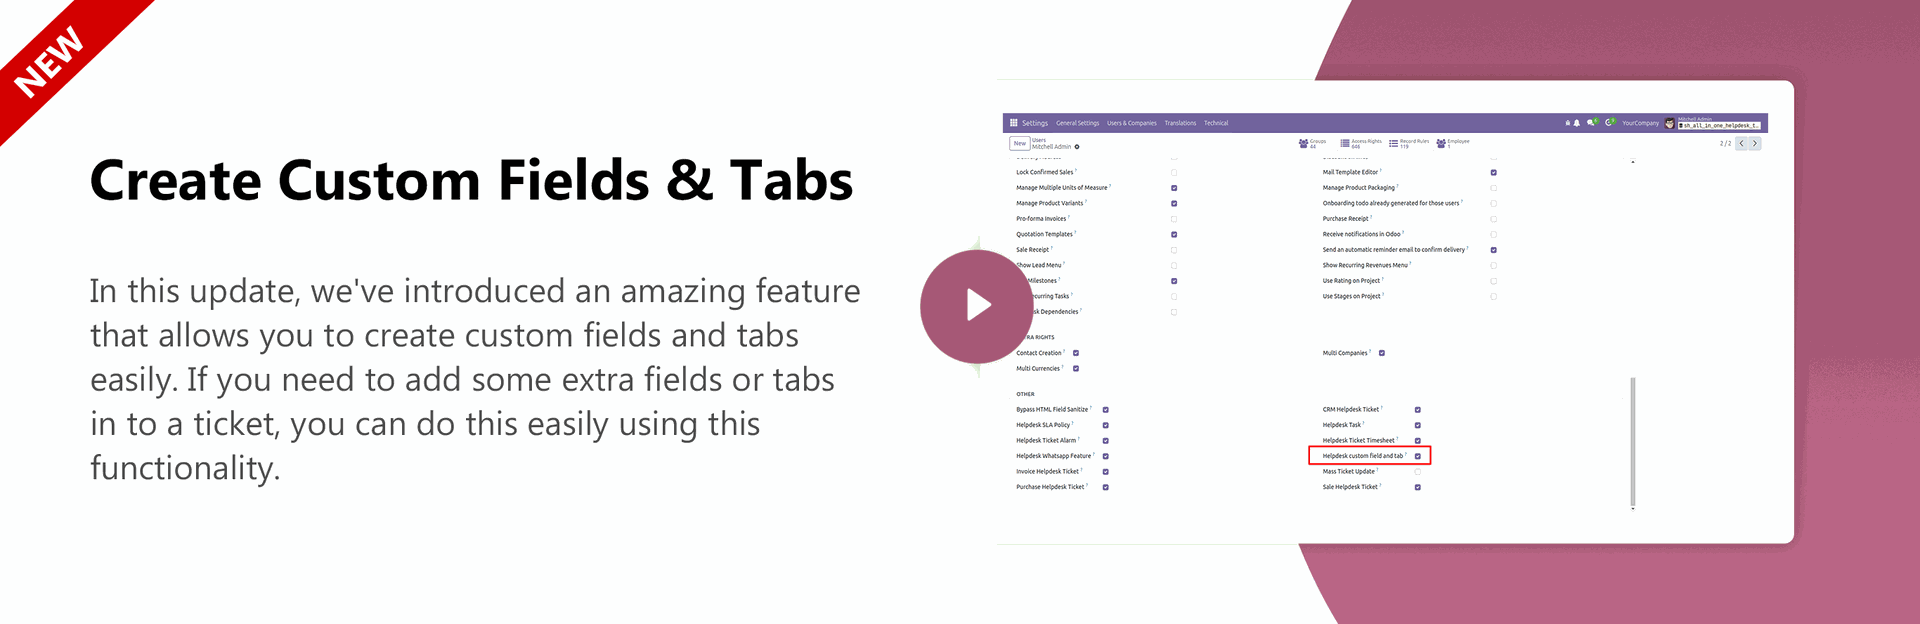
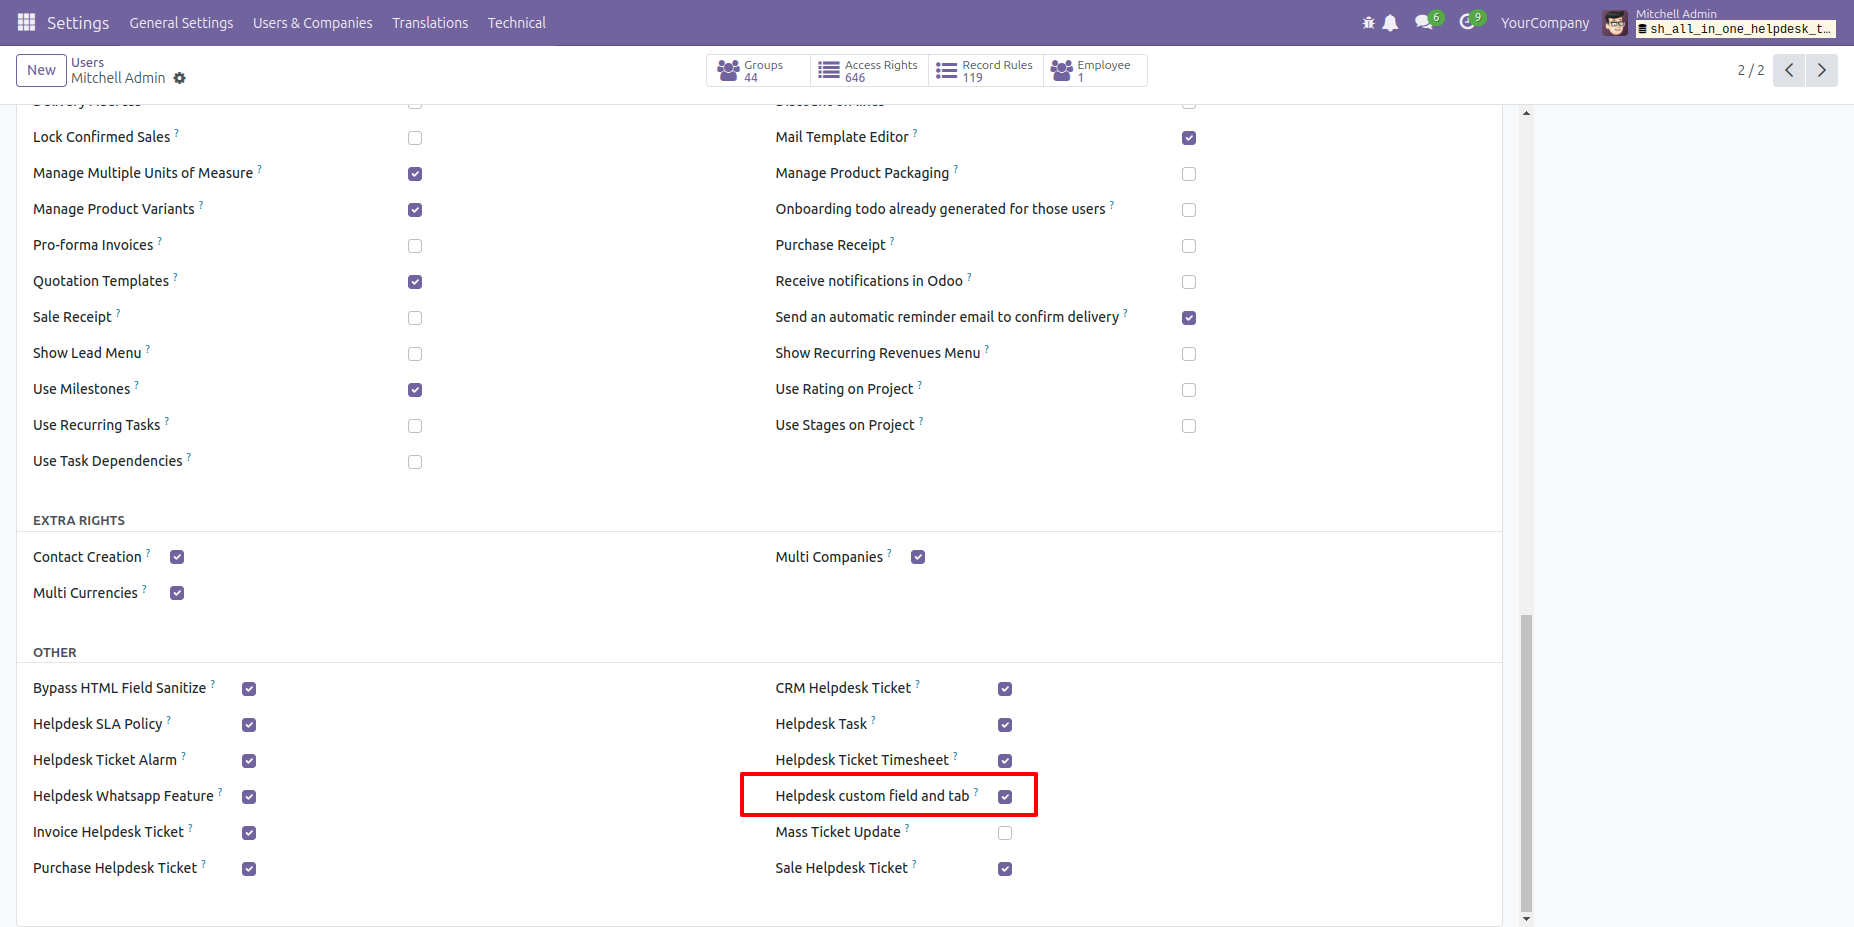
Go to the helpdesk configuration and enable 'Helpdesk Custom Field And Tabs'
Form view of the ticket.
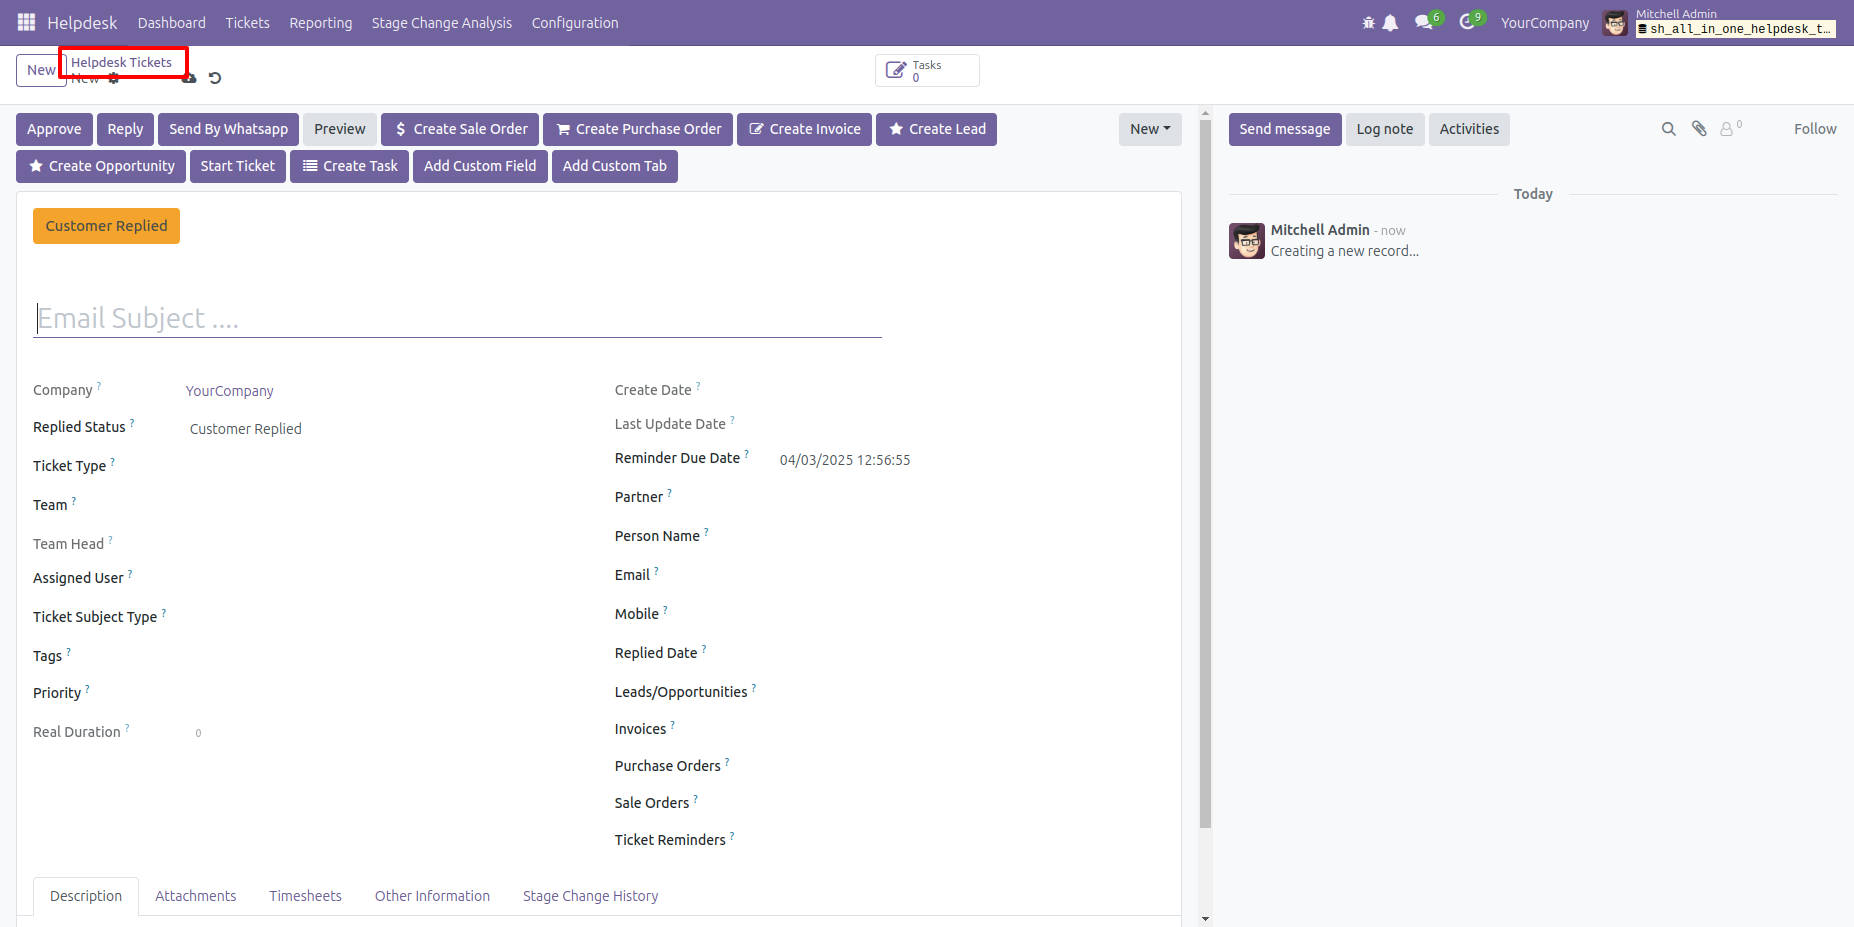
To add a custom tab, Click on the 'Add Custom Tab' button.
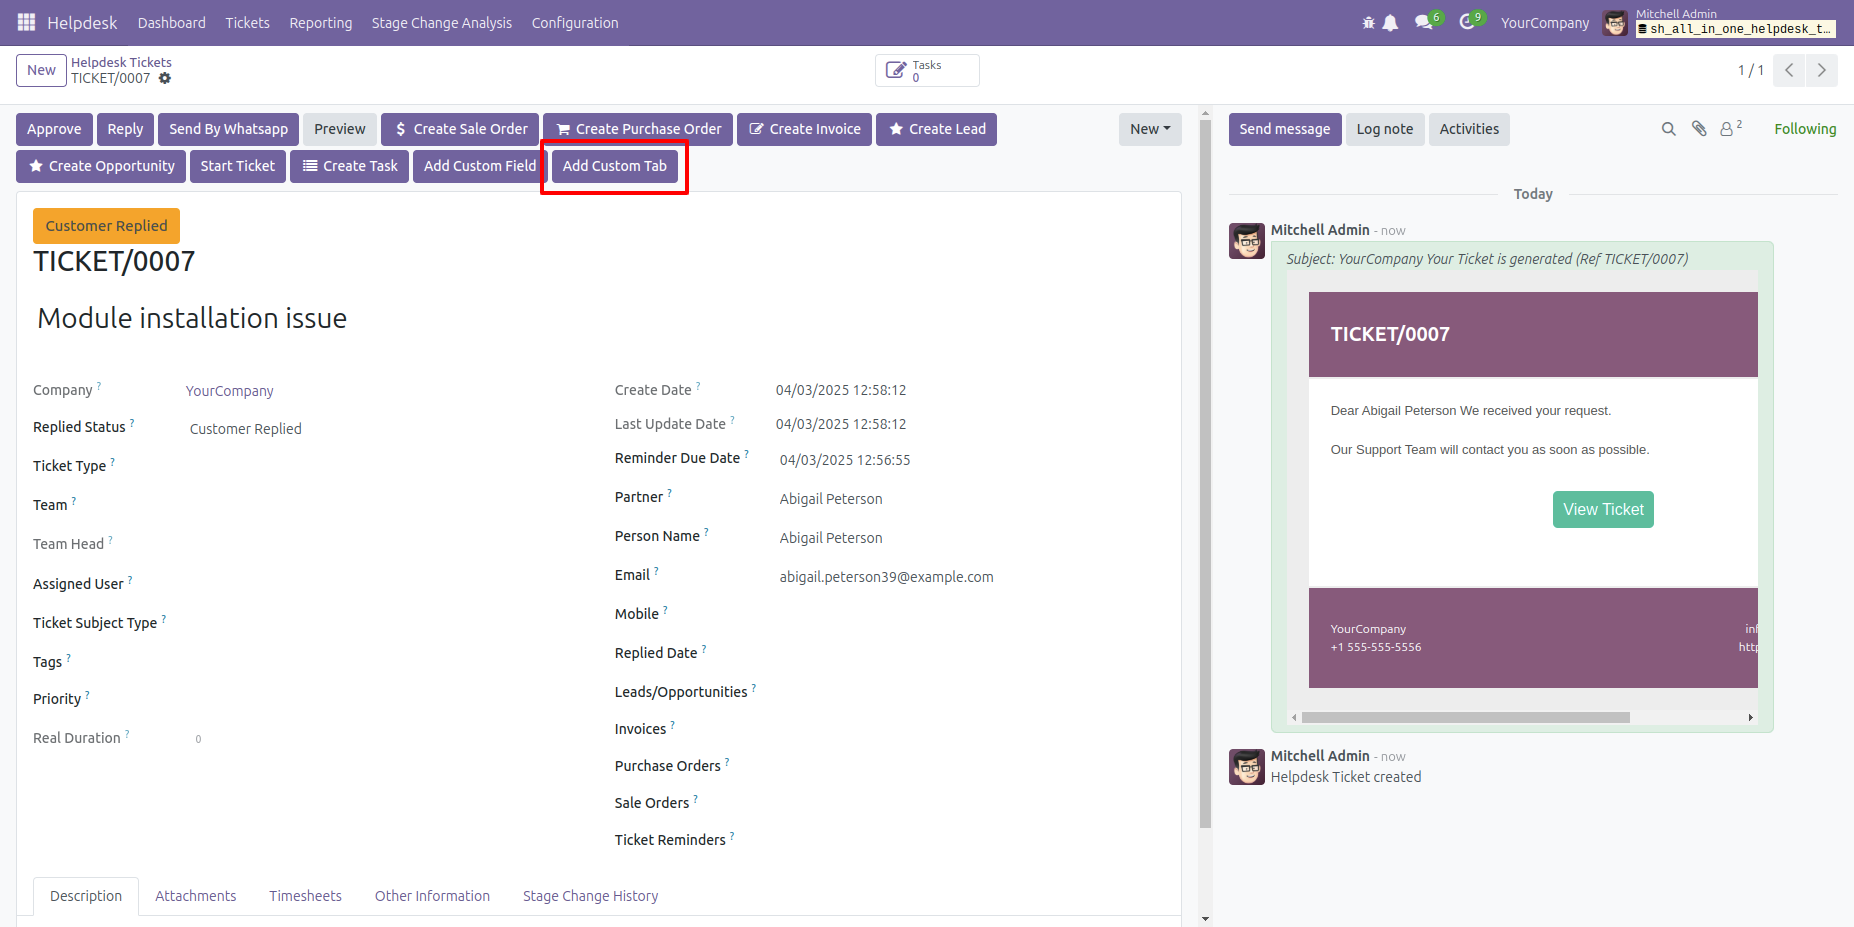
After that, the 'Helpdesk Ticket Custom Tab' wizard will
appear.
Enter the details and click the 'Create Tab' button.
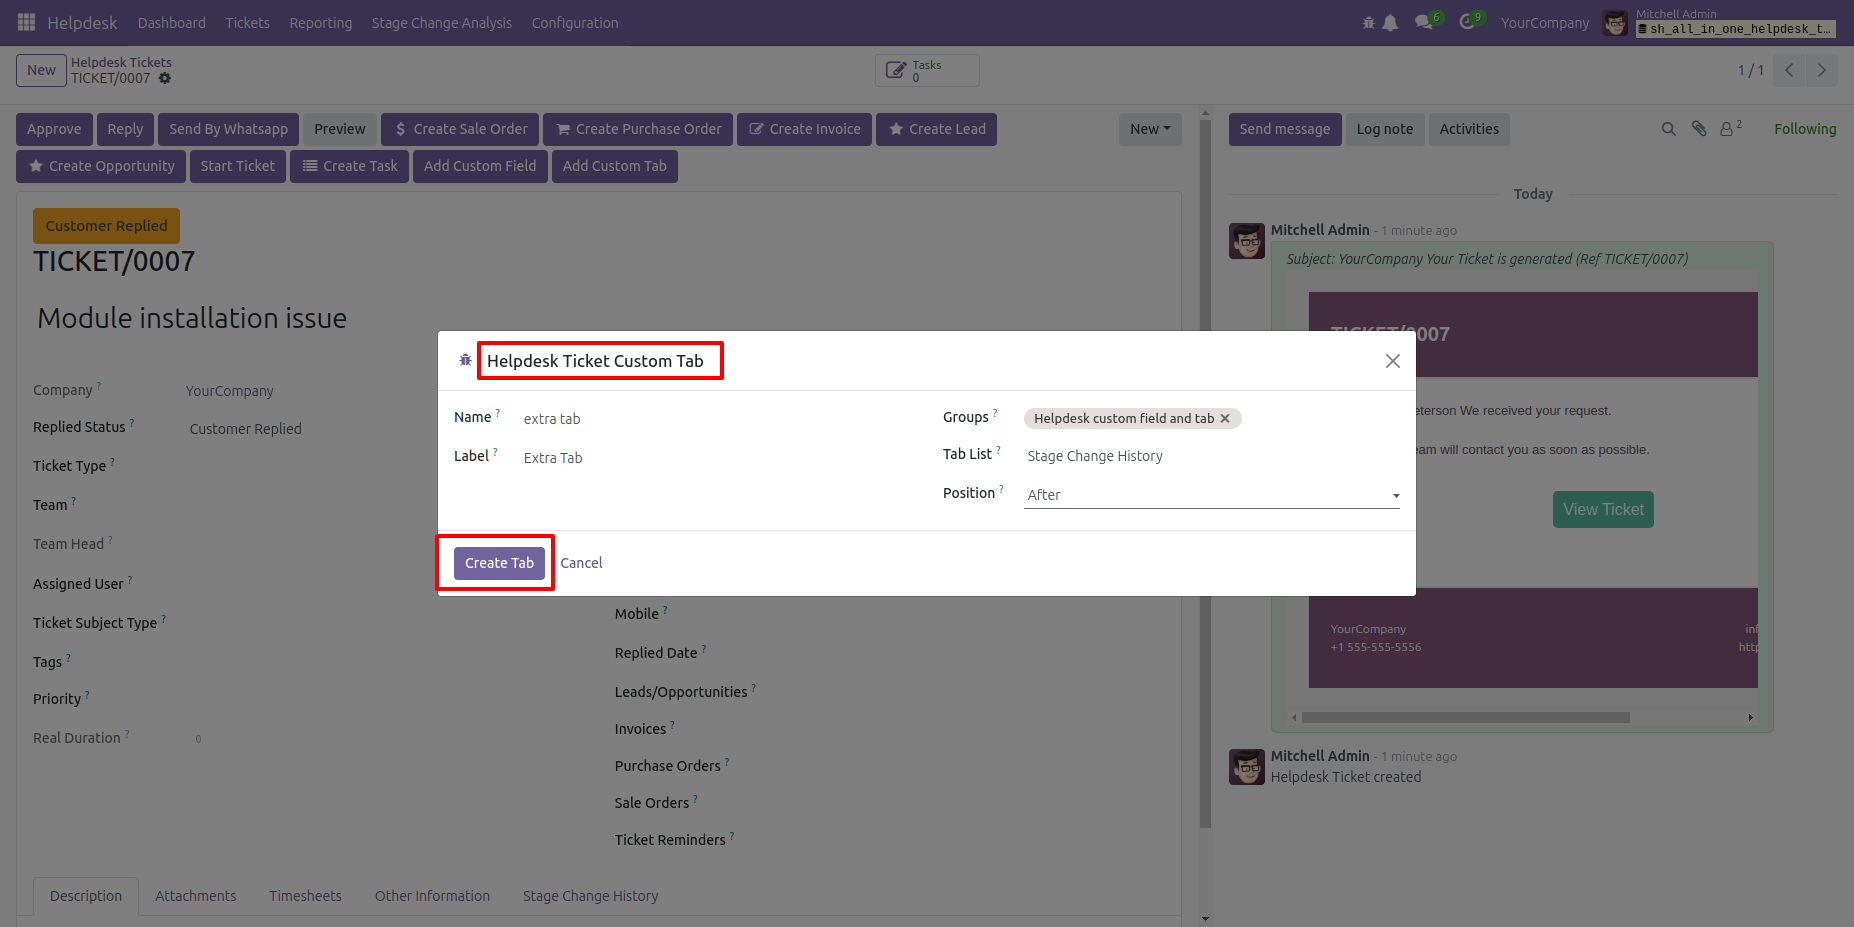
You can now see the newly created tab here ('Extra Tab').
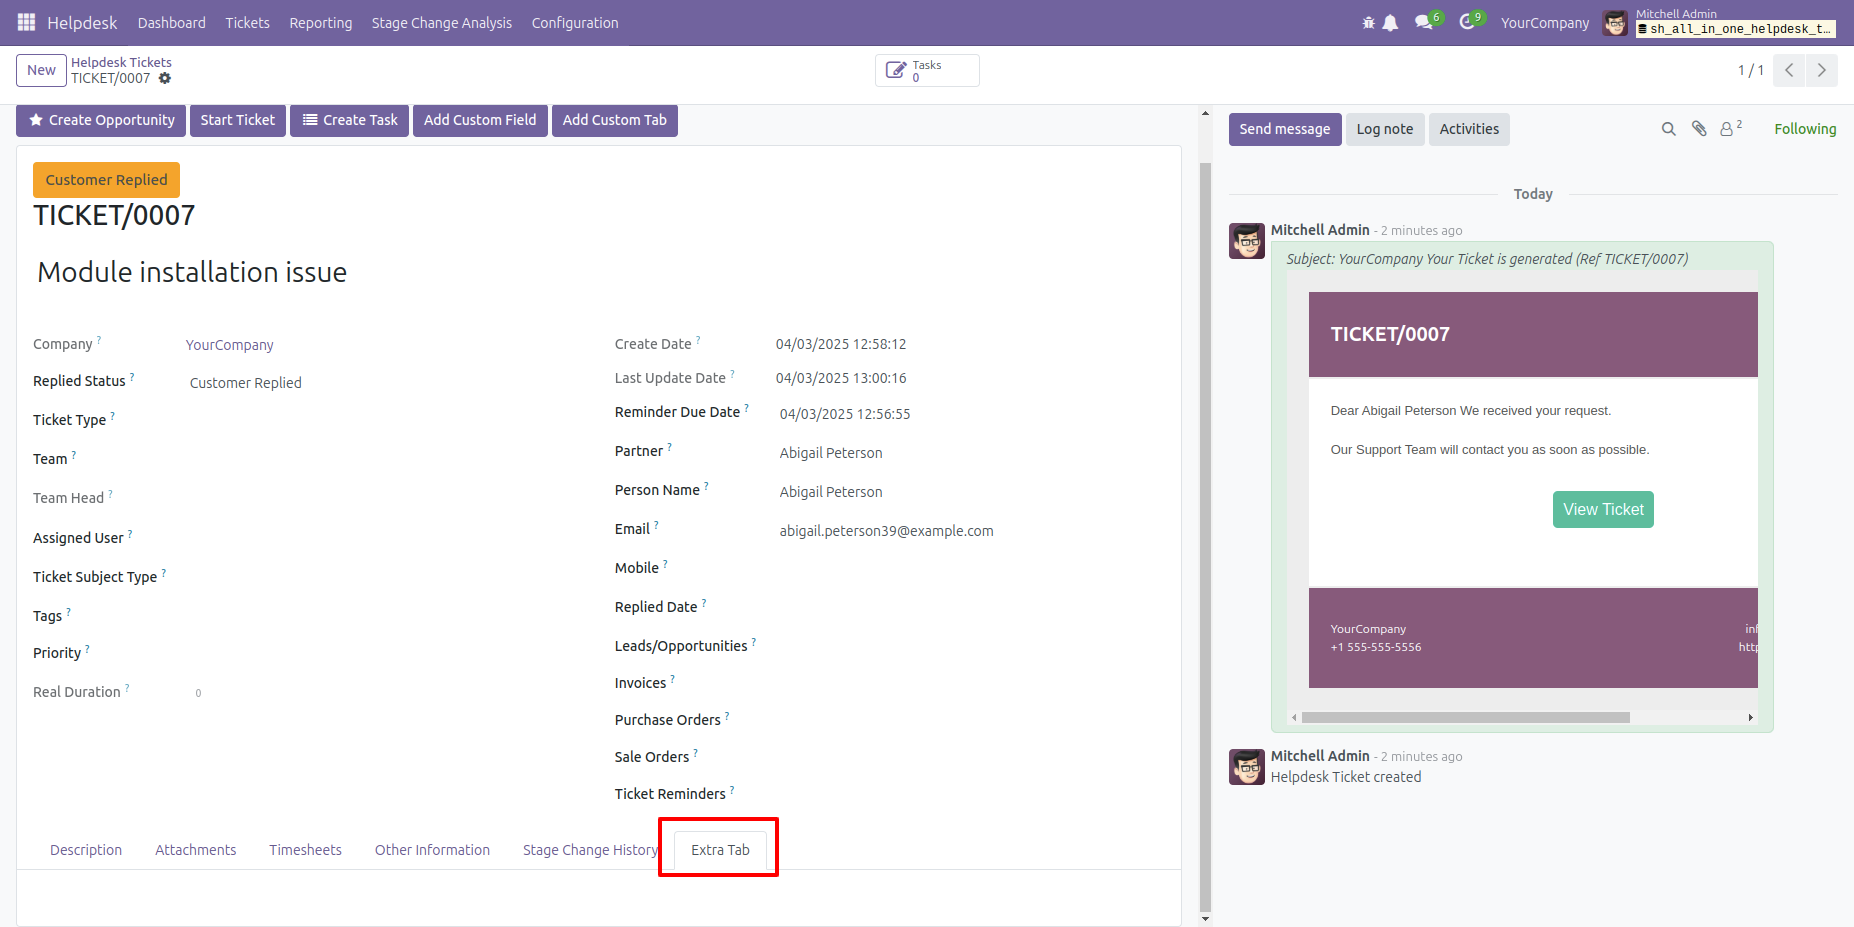
To add a custom field, Click on the 'Add Custom Field' button.
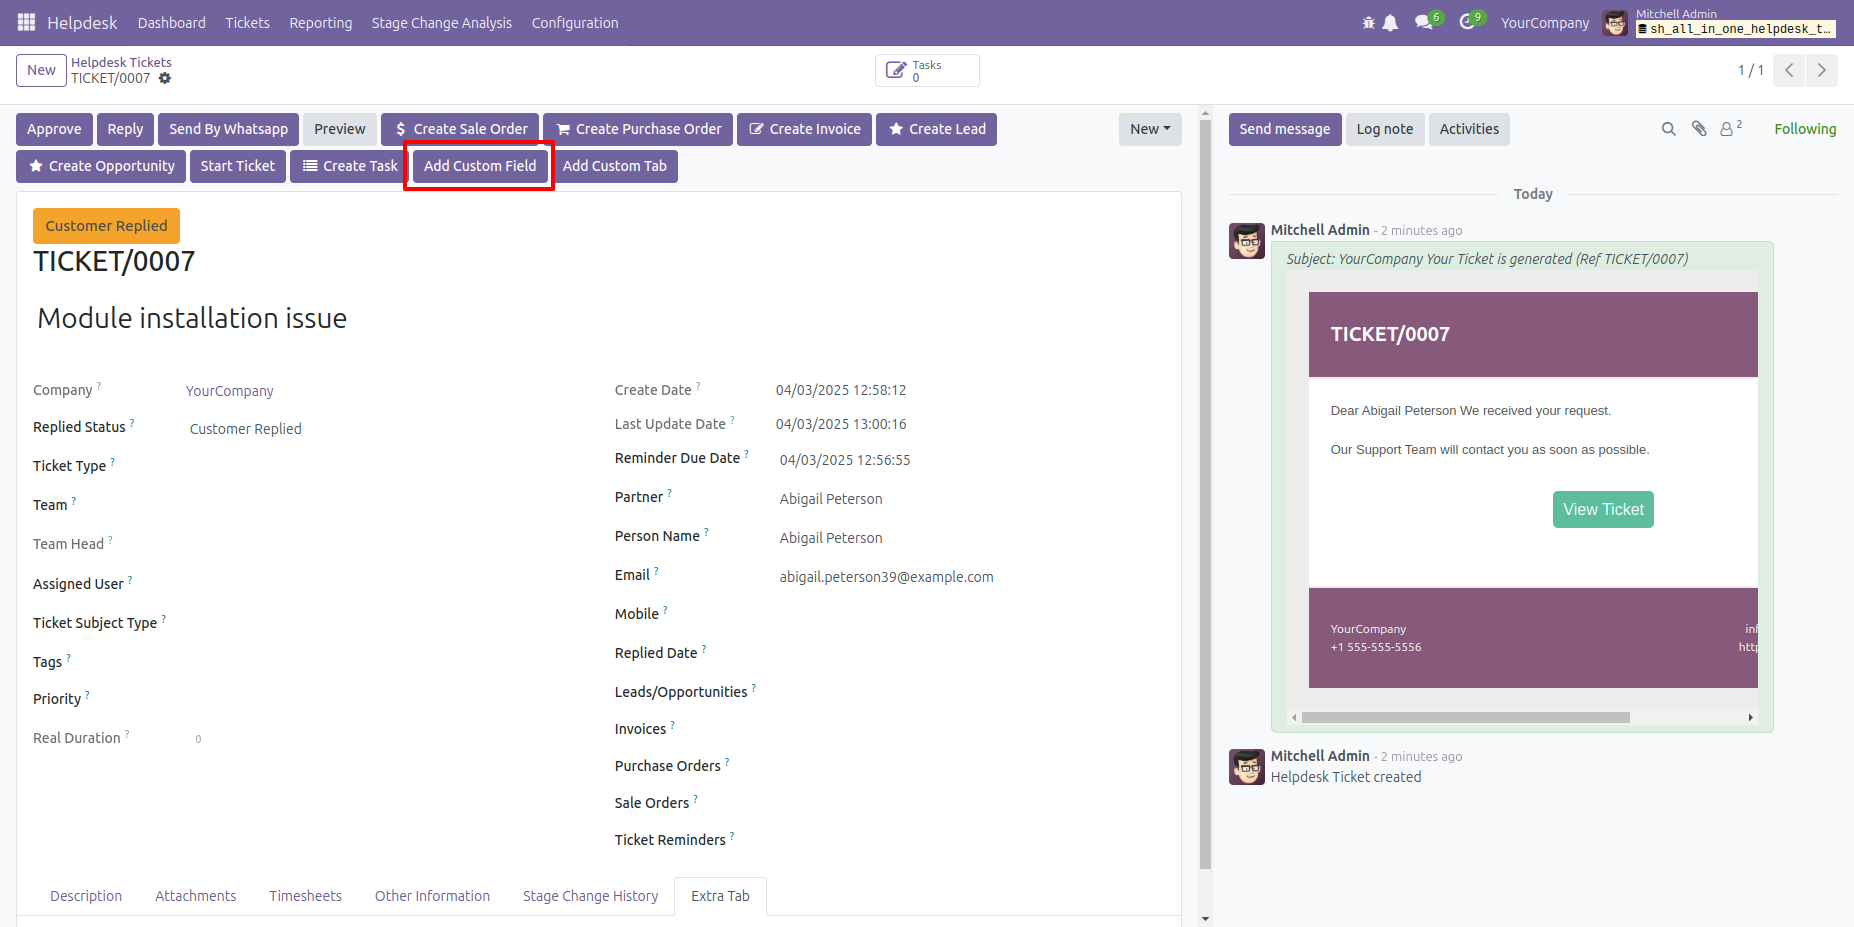
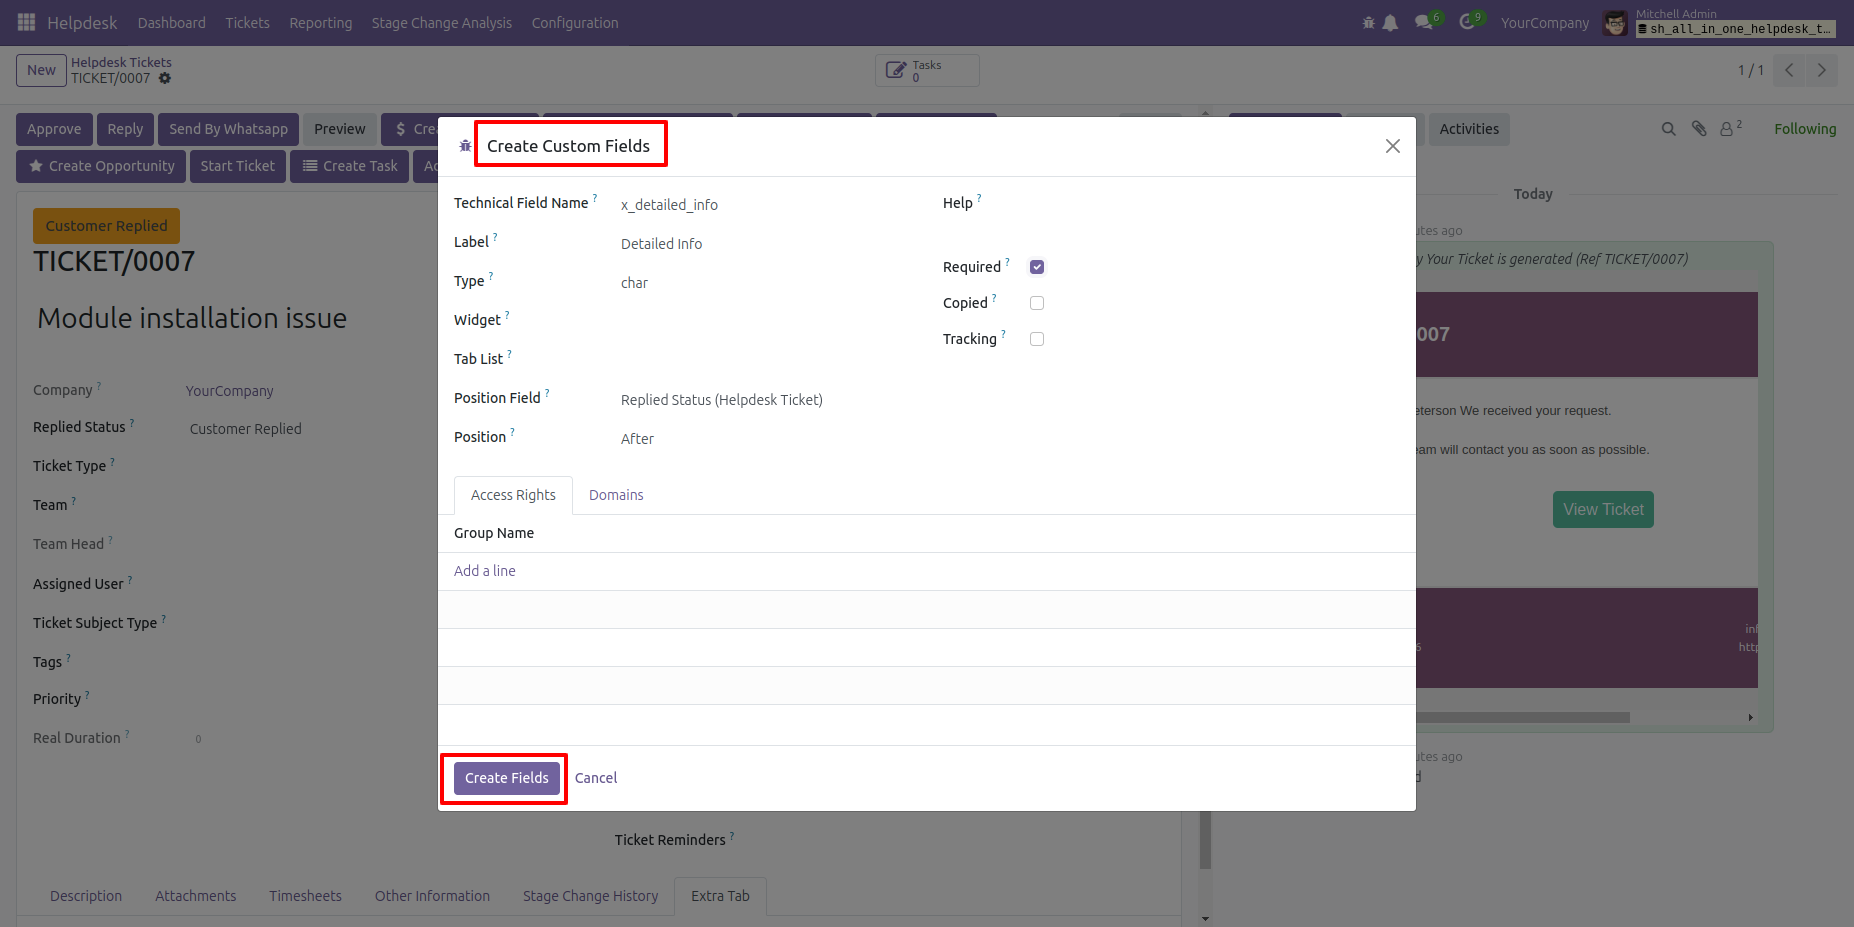
After that, the 'Create Custom Fields' wizard will appear.
Enter the details and click the 'Create Fields' button.
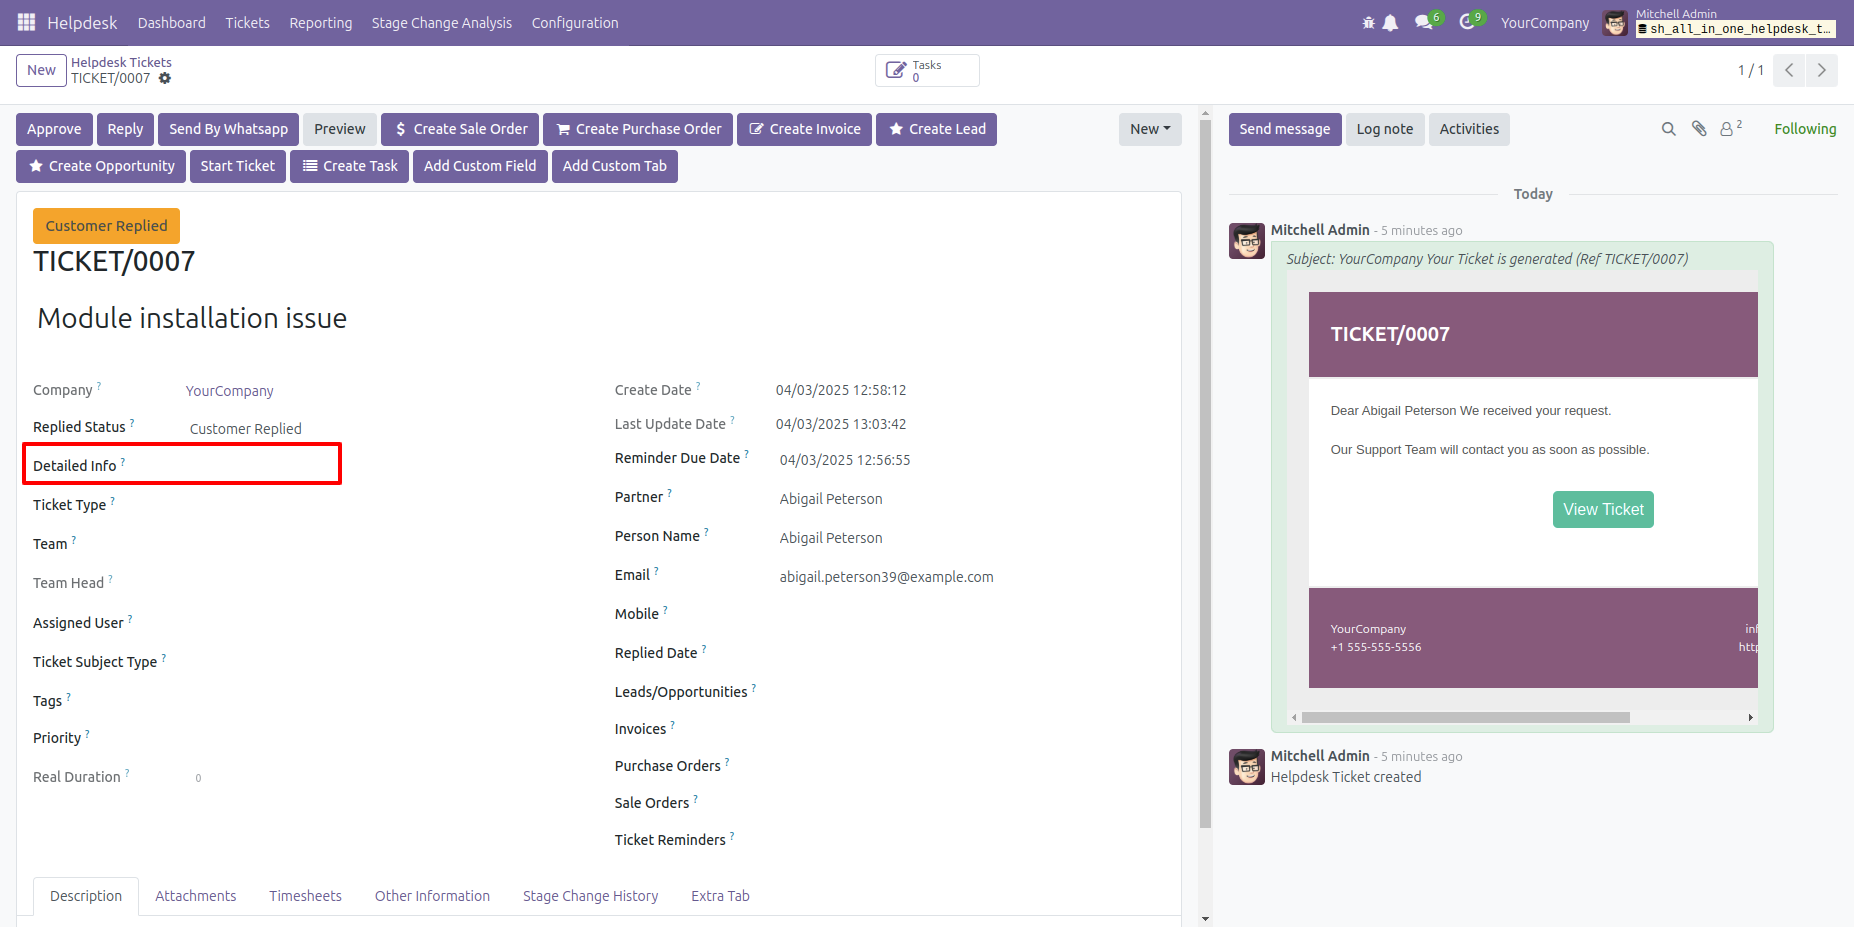
You can now see the newly created custom field here ('Detailed Info').
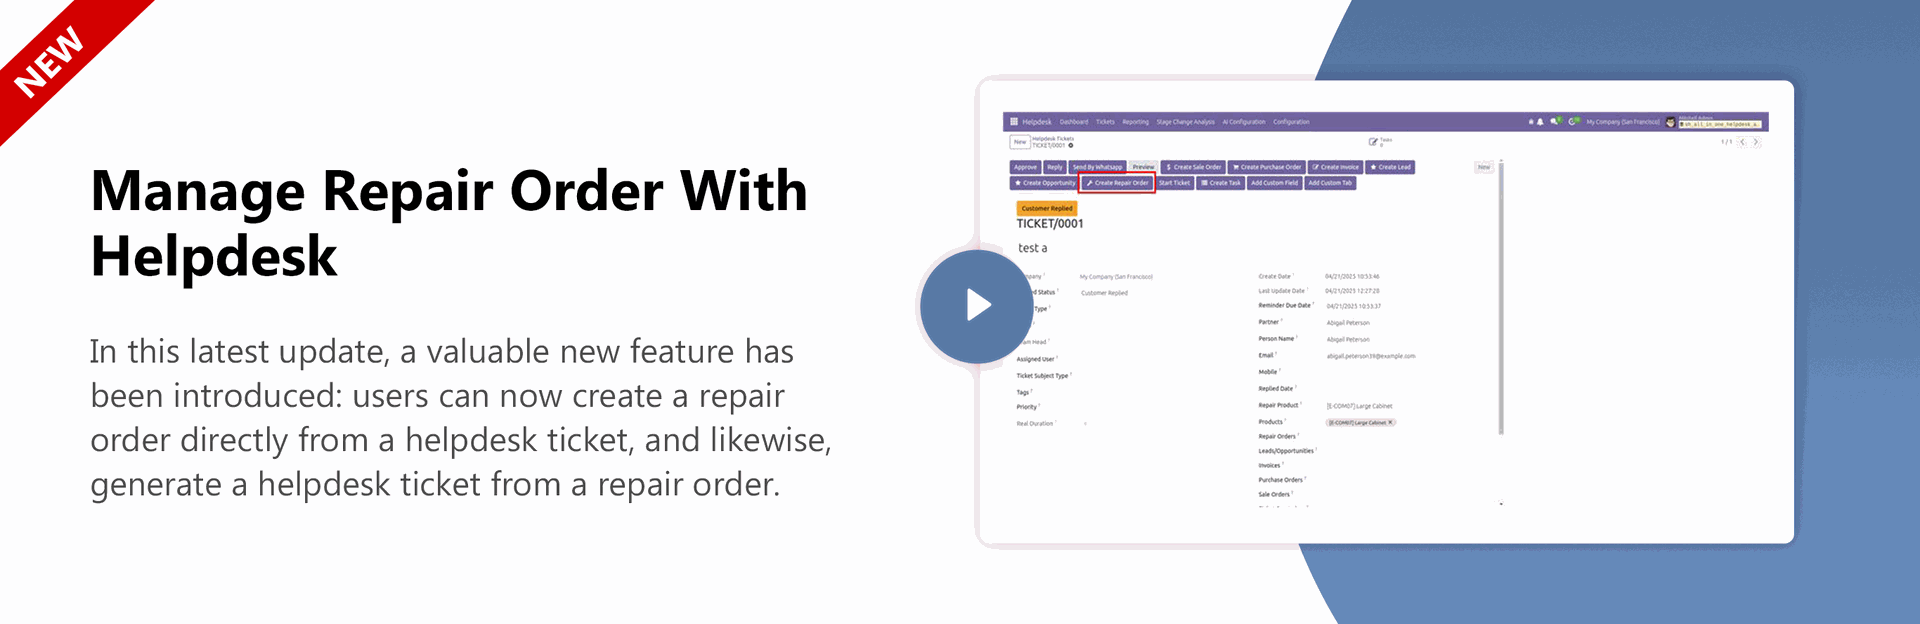
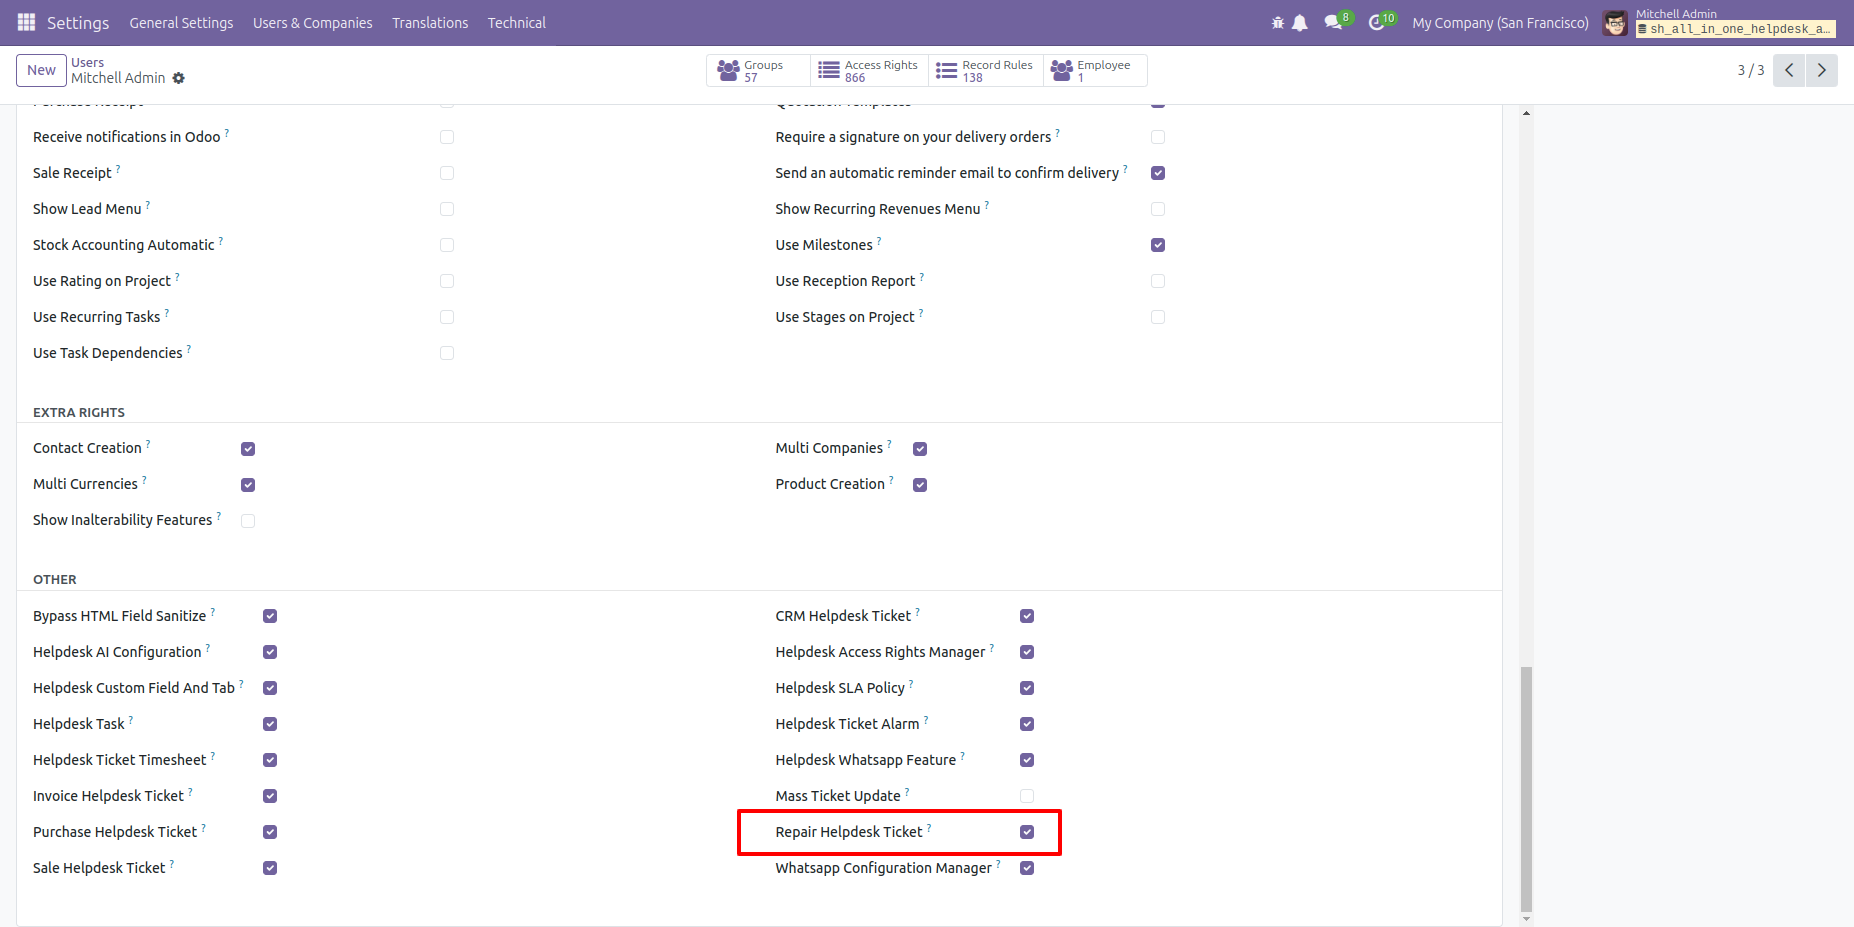
In 'User', enable the 'Repair Helpdesk Ticket' option.
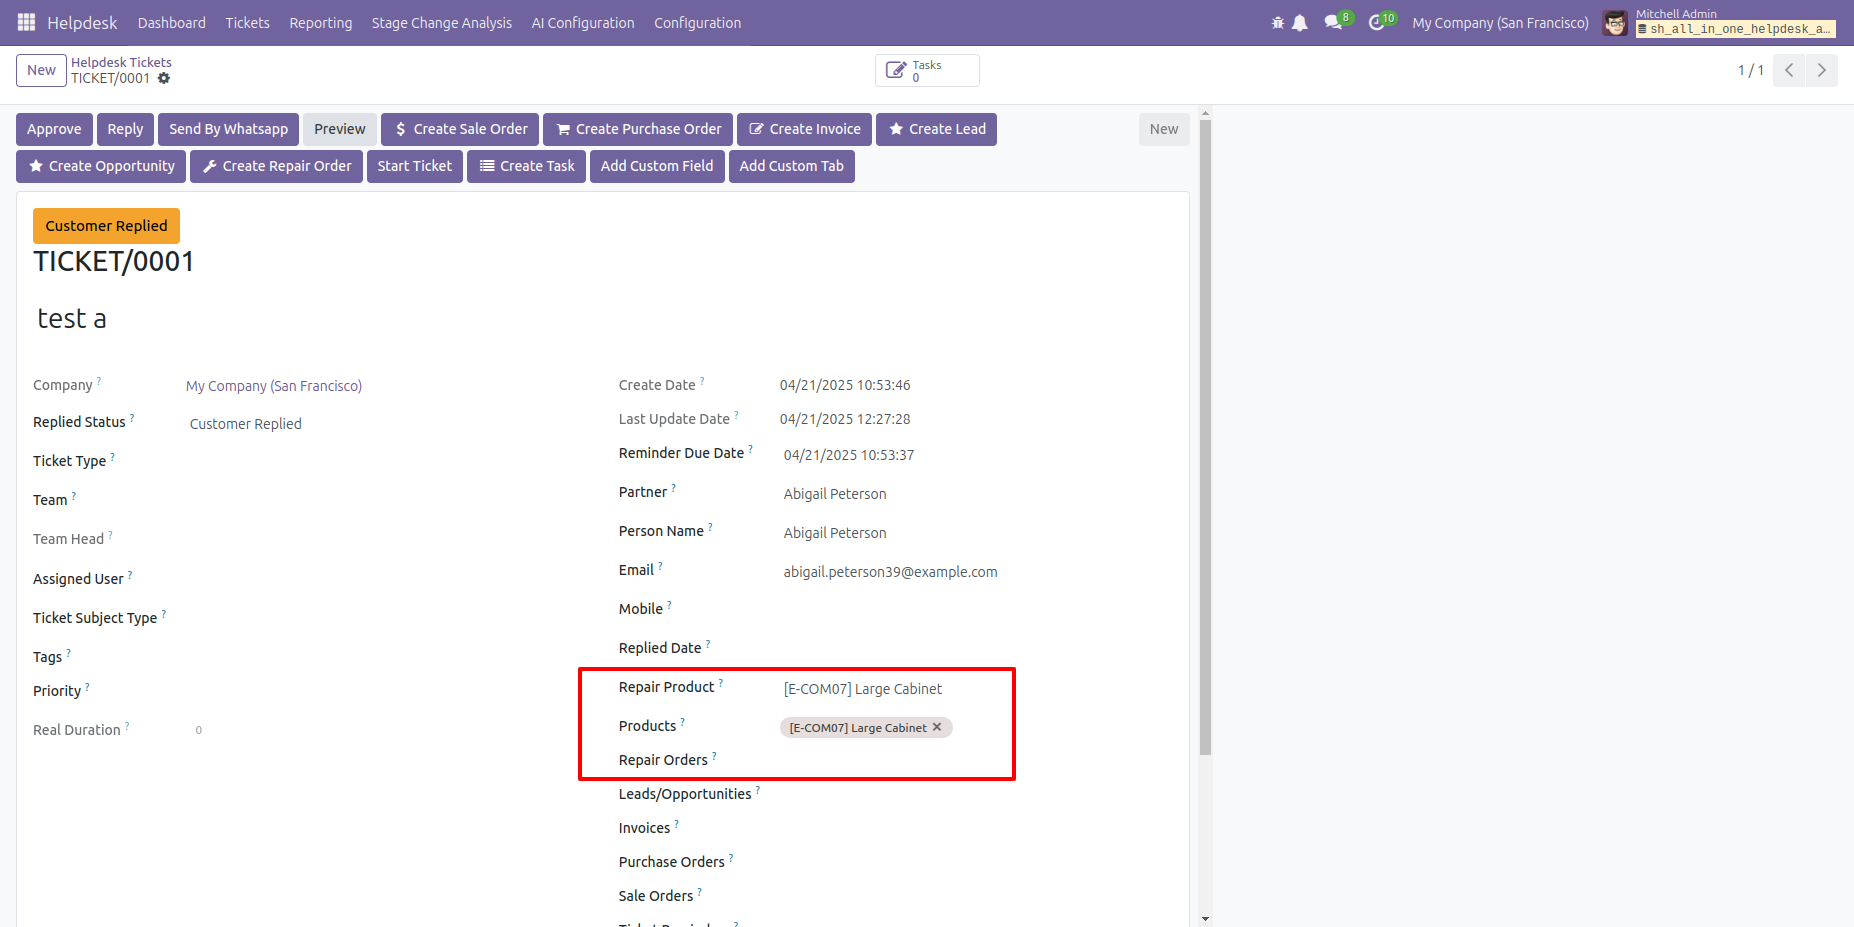
Add repair product and products and click on the 'Create Repair Order' button.
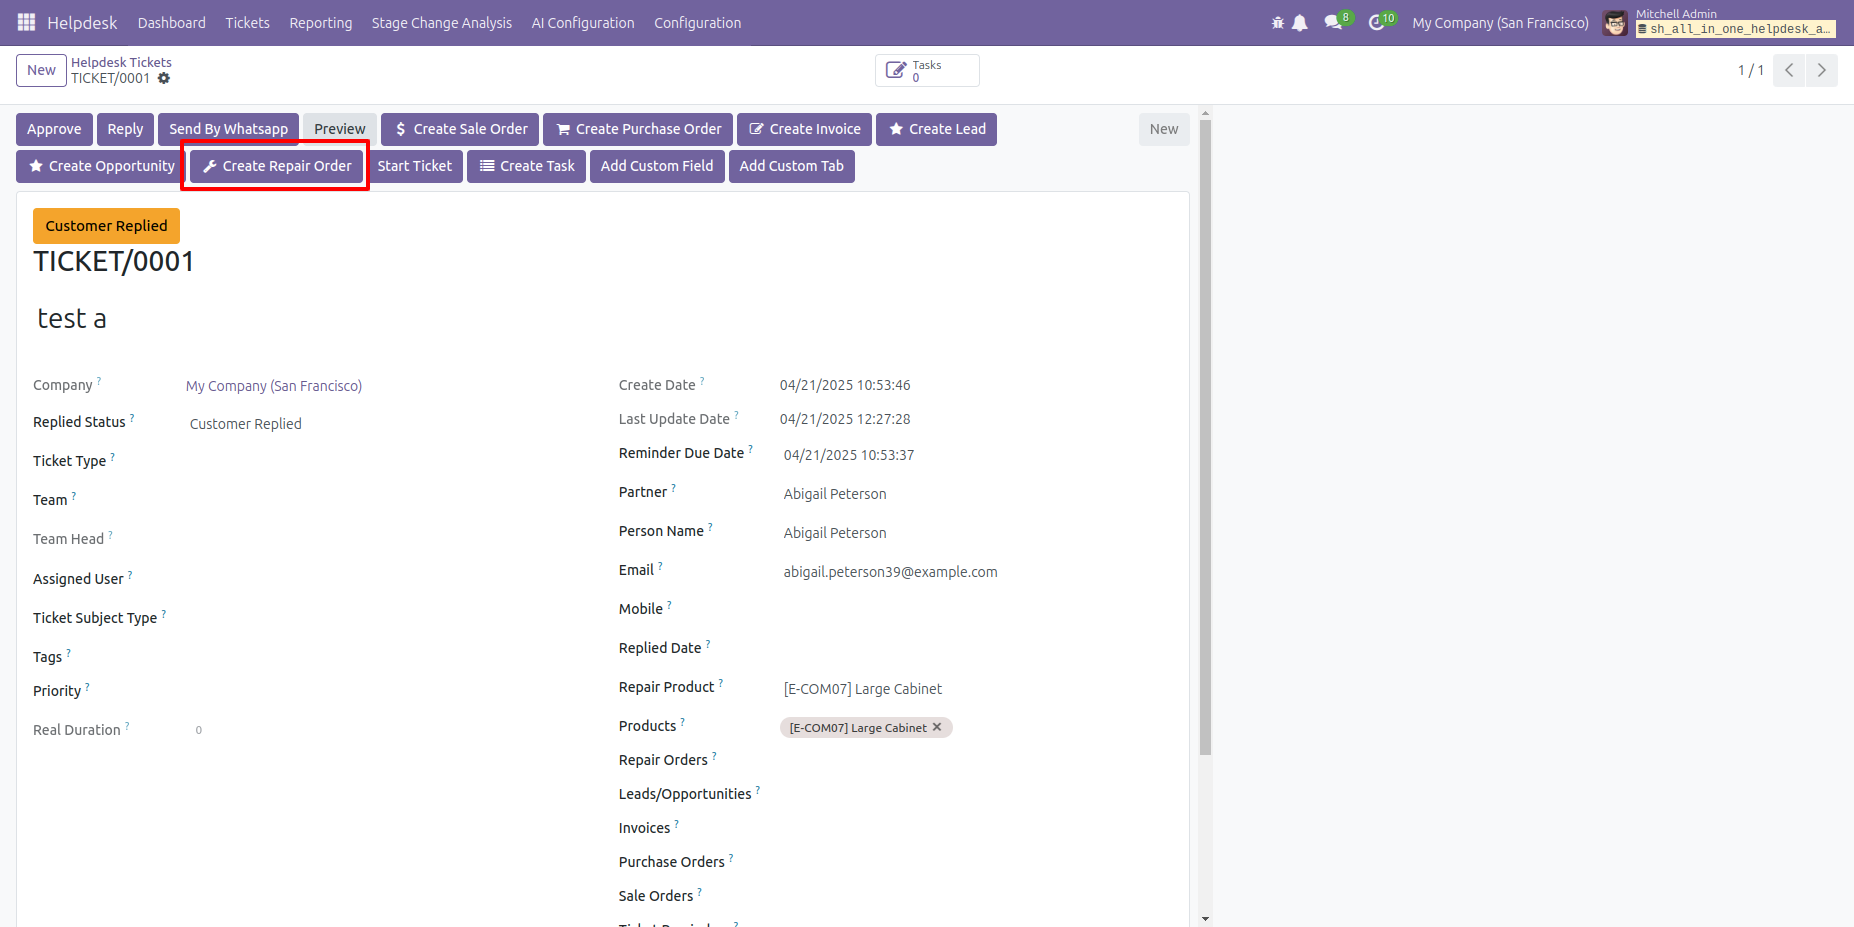
Click on the 'Create Repair Order' button.
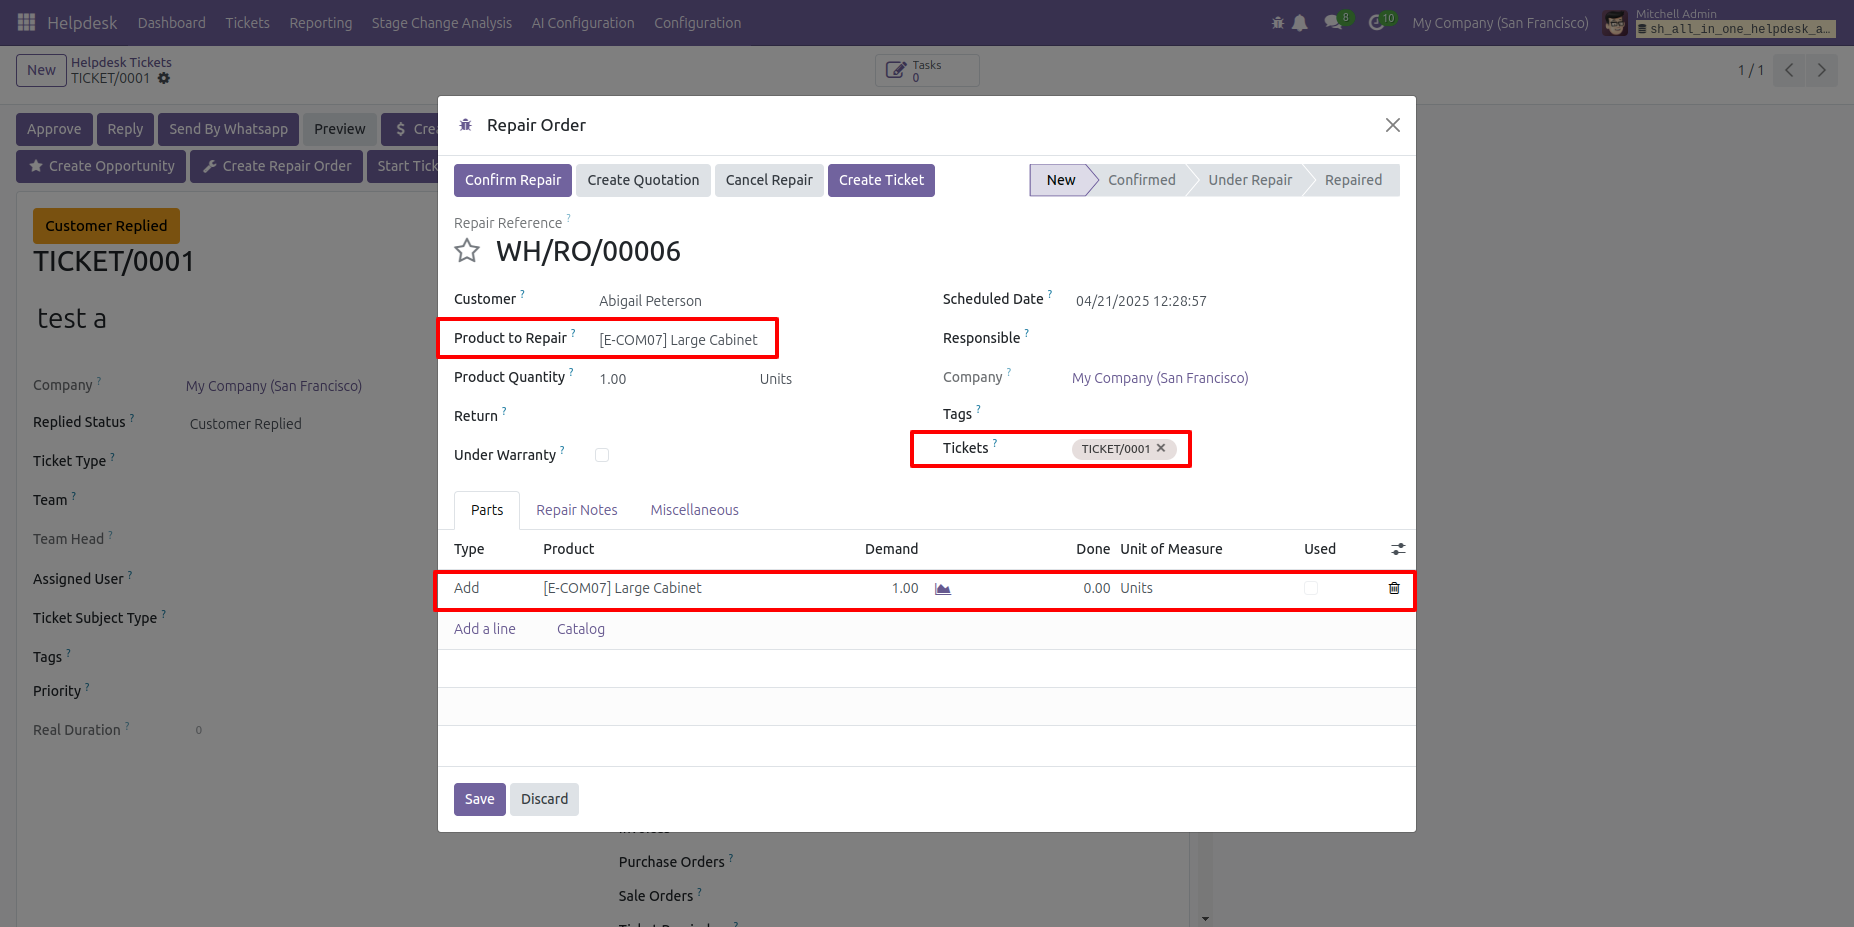
After that, Repair Order wizard will appears. Here you can see the selected repair product and ticket number. Click on the 'Save' button.
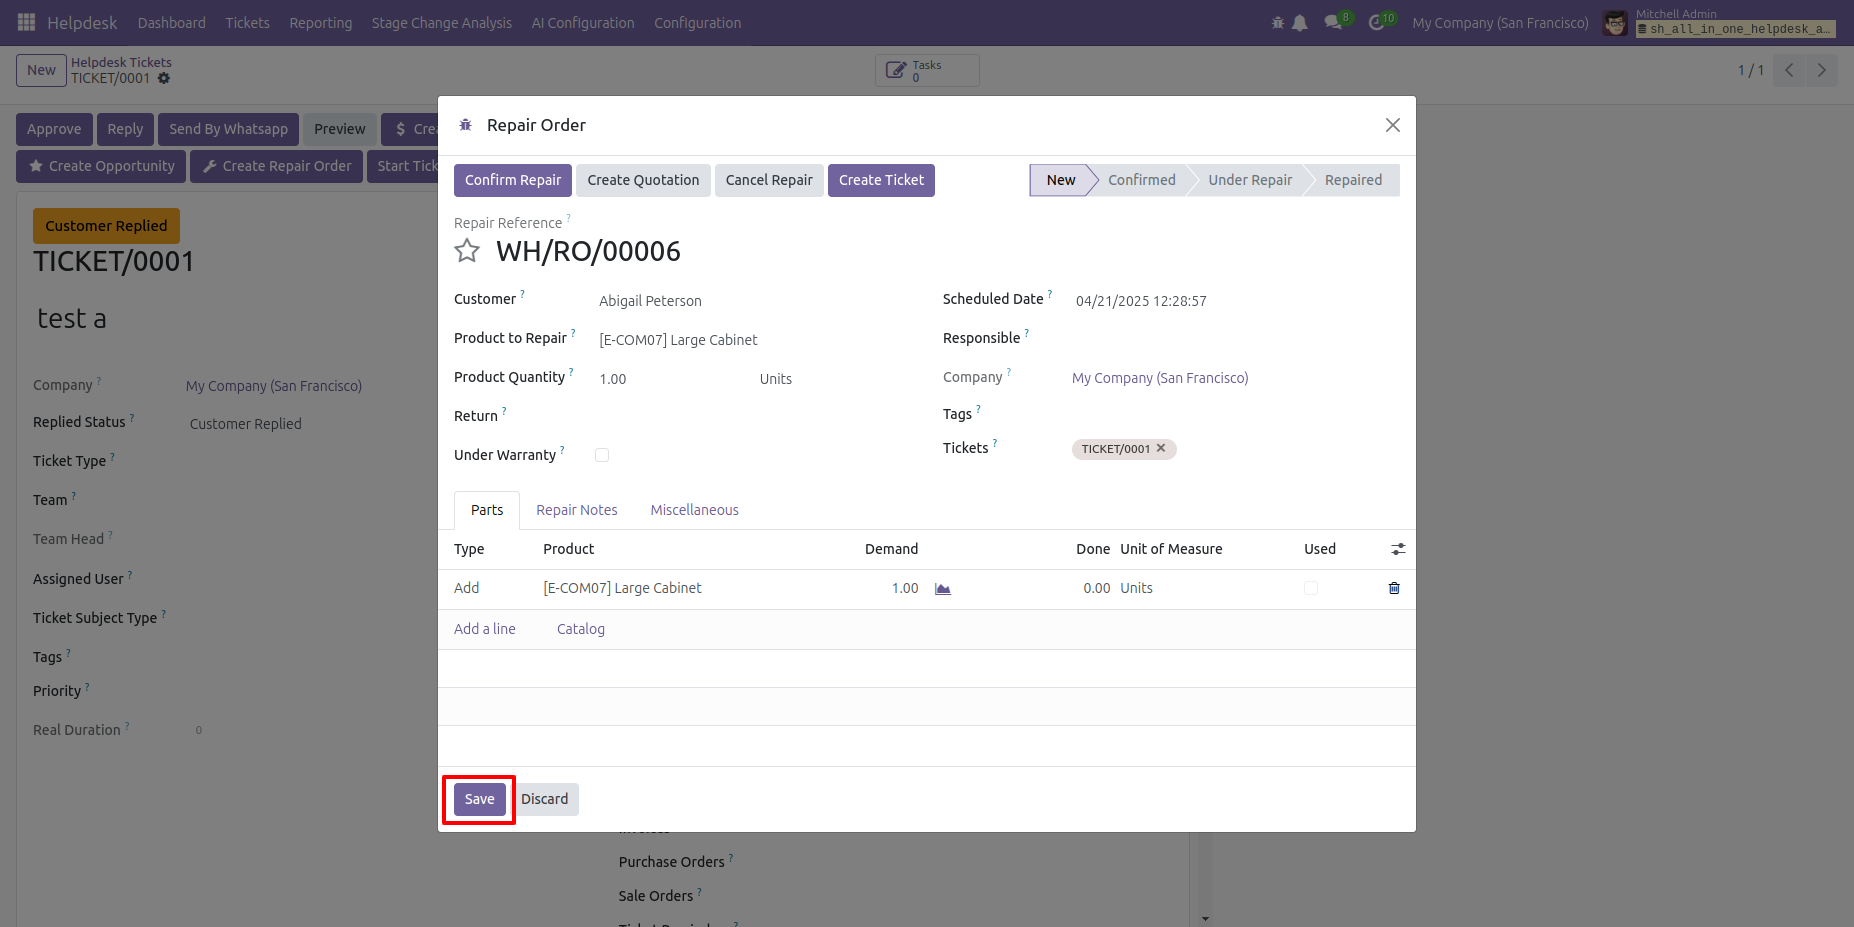
You can view the repair order number here. To access the full details, click on the 'Repair Order' smart button.
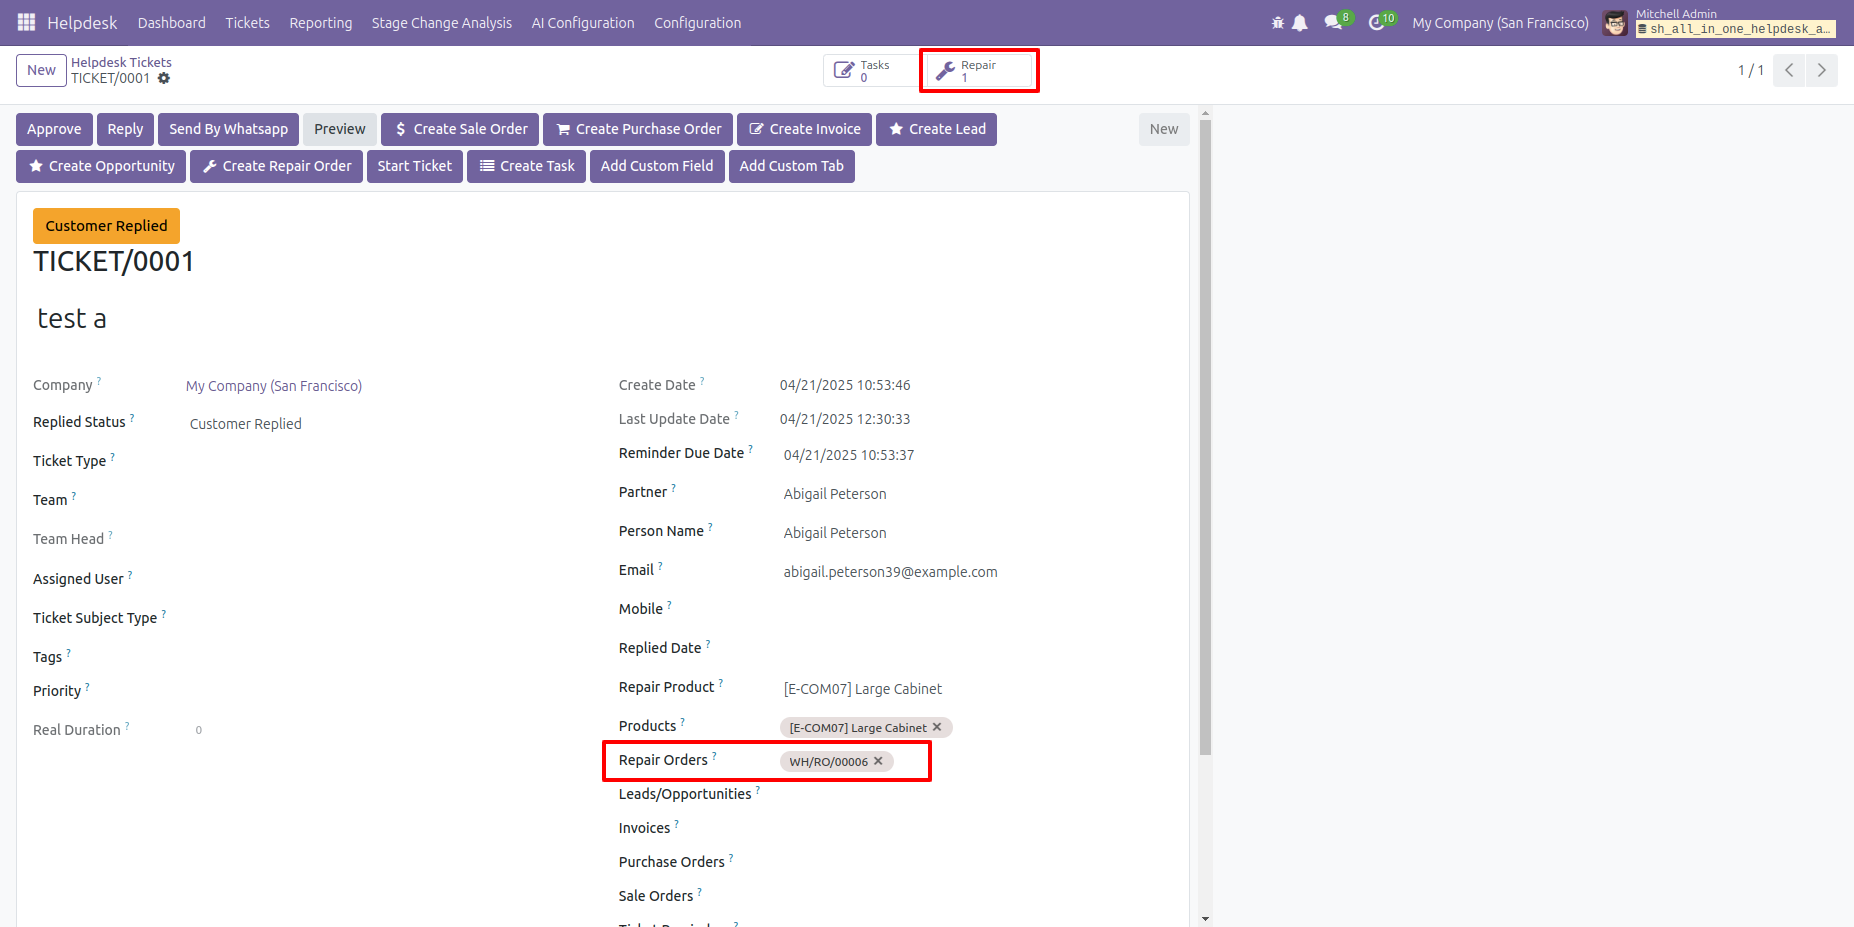
Form view of the repair order.
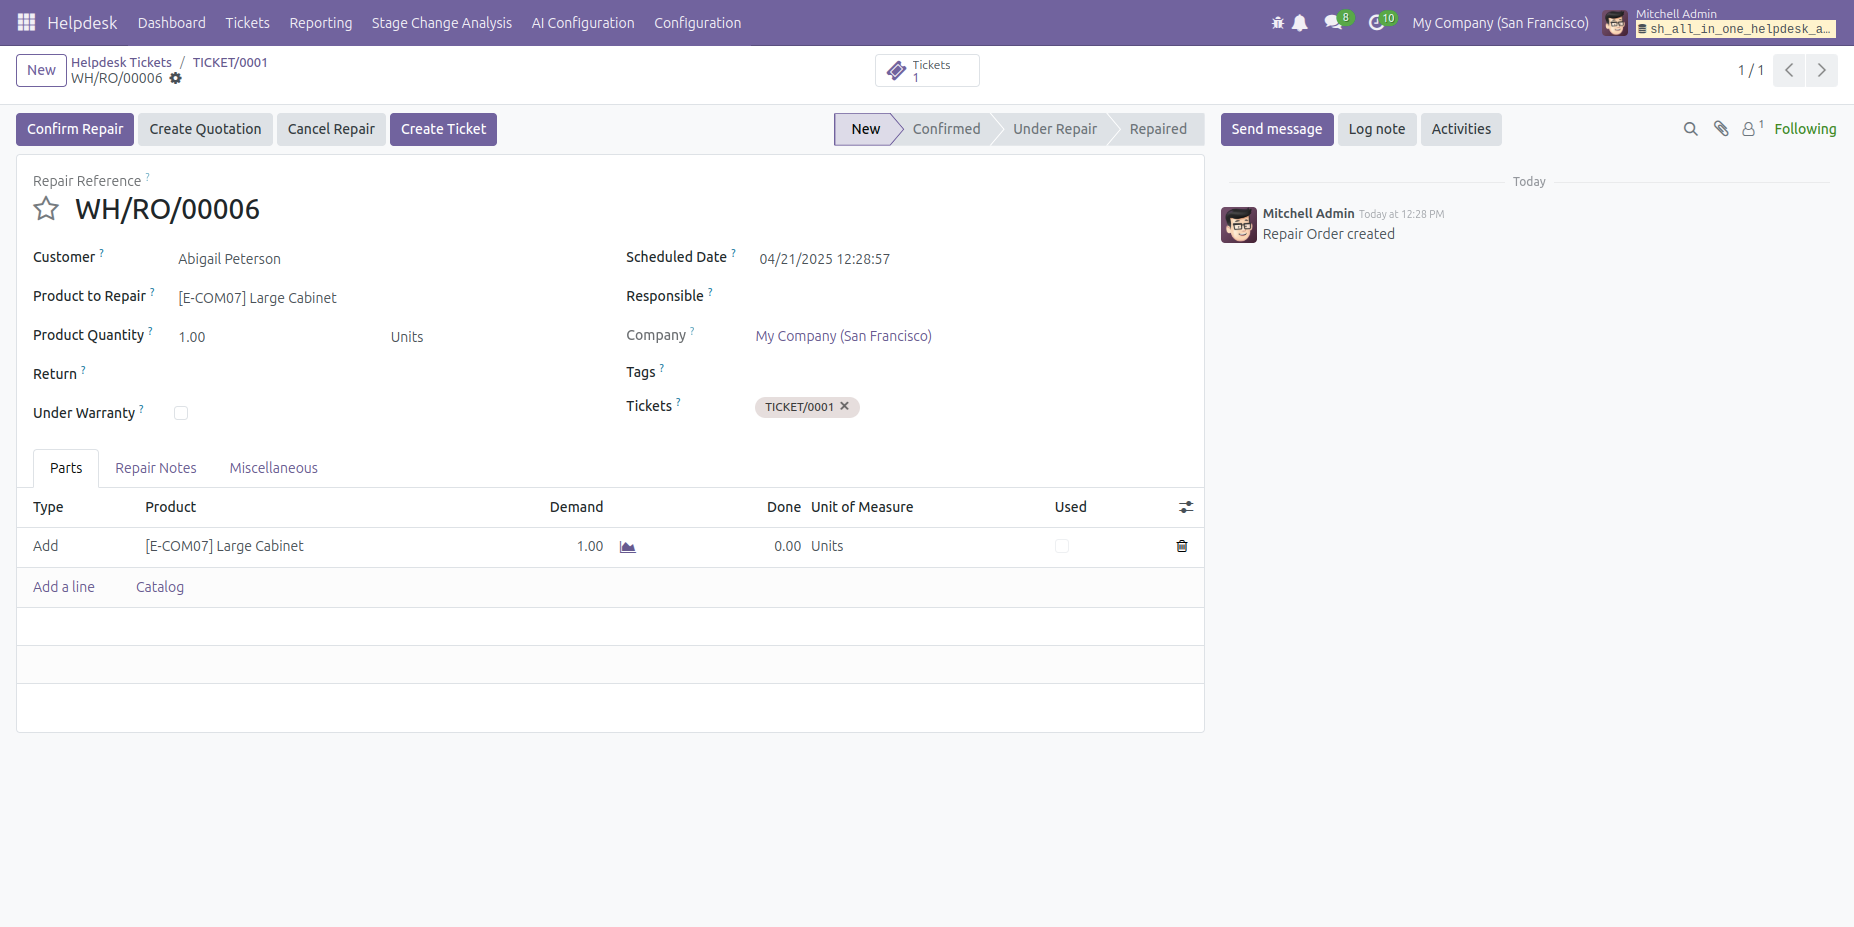
'Repairs' menu.
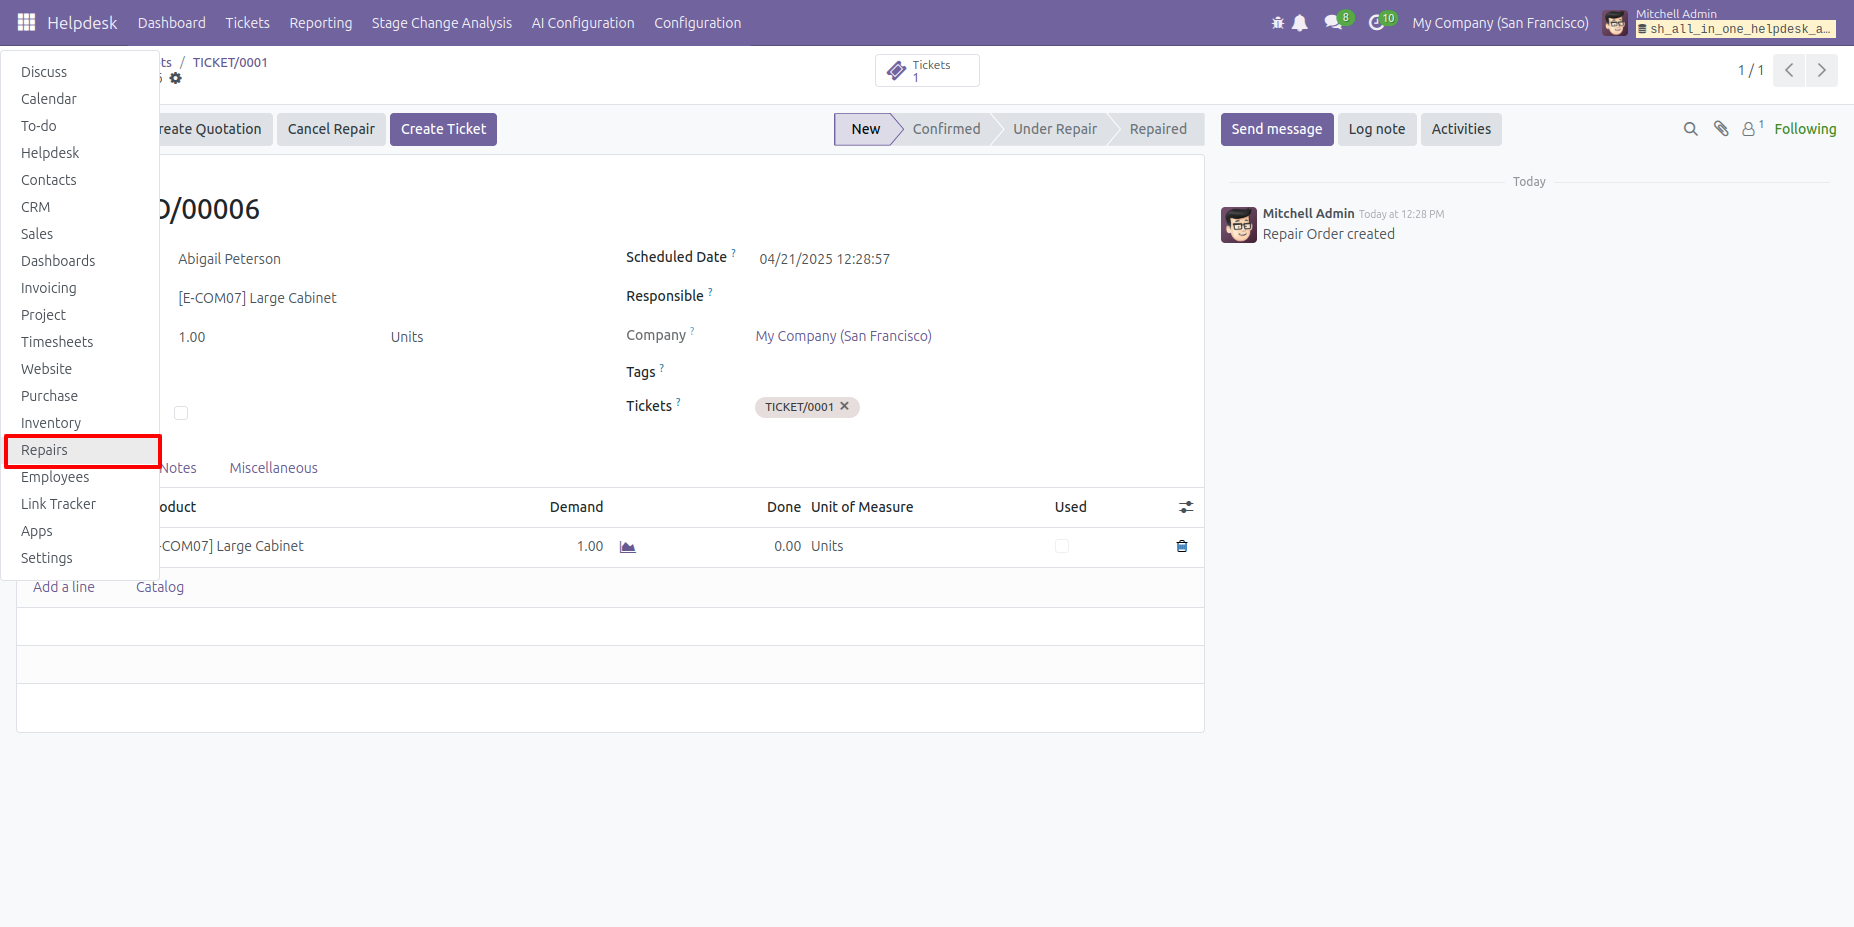
Tree view of the repair order.
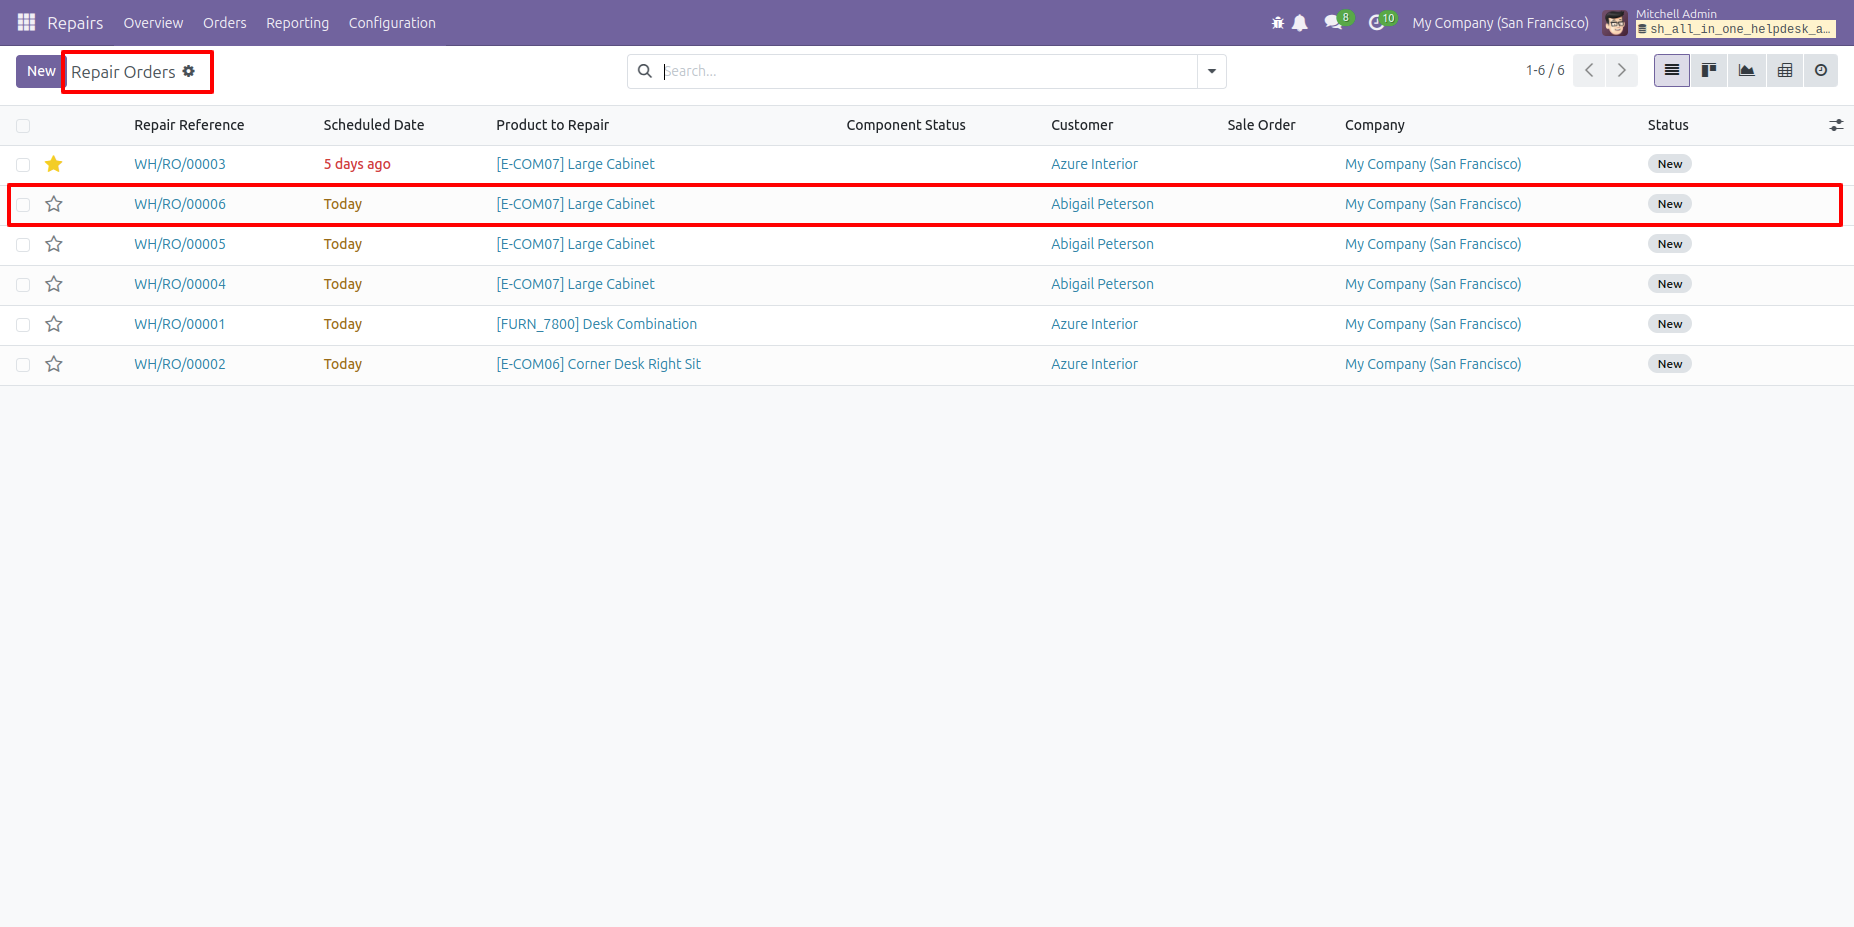
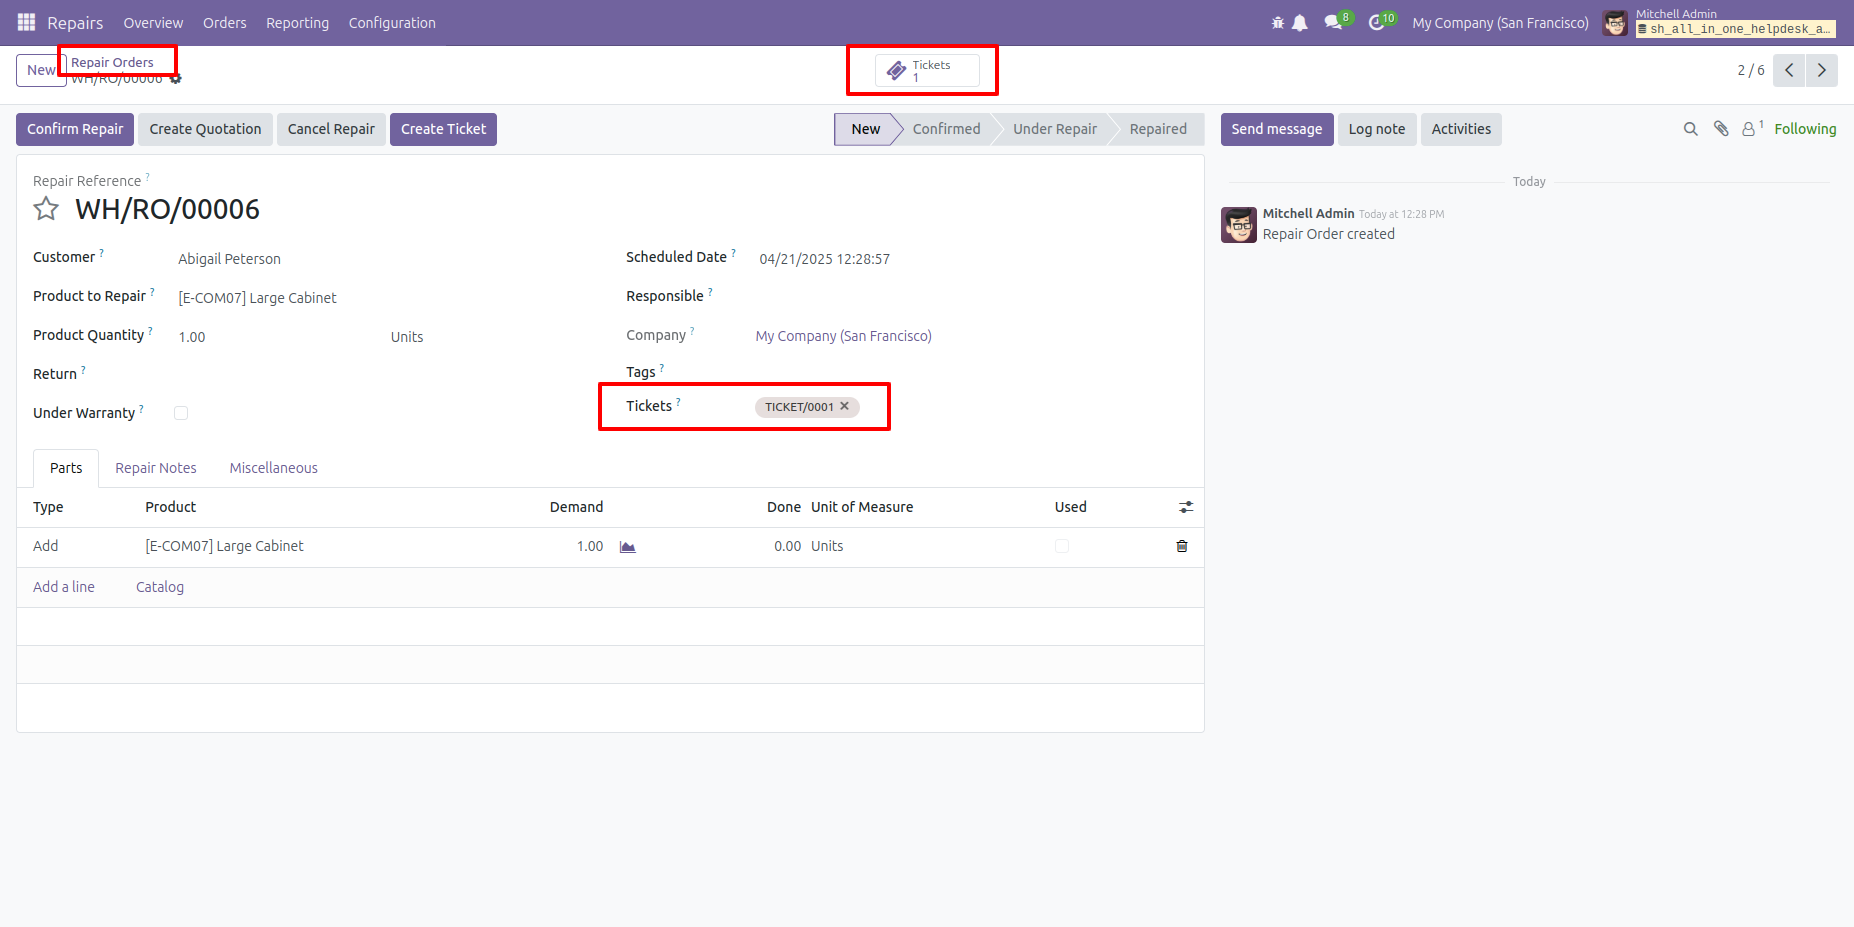
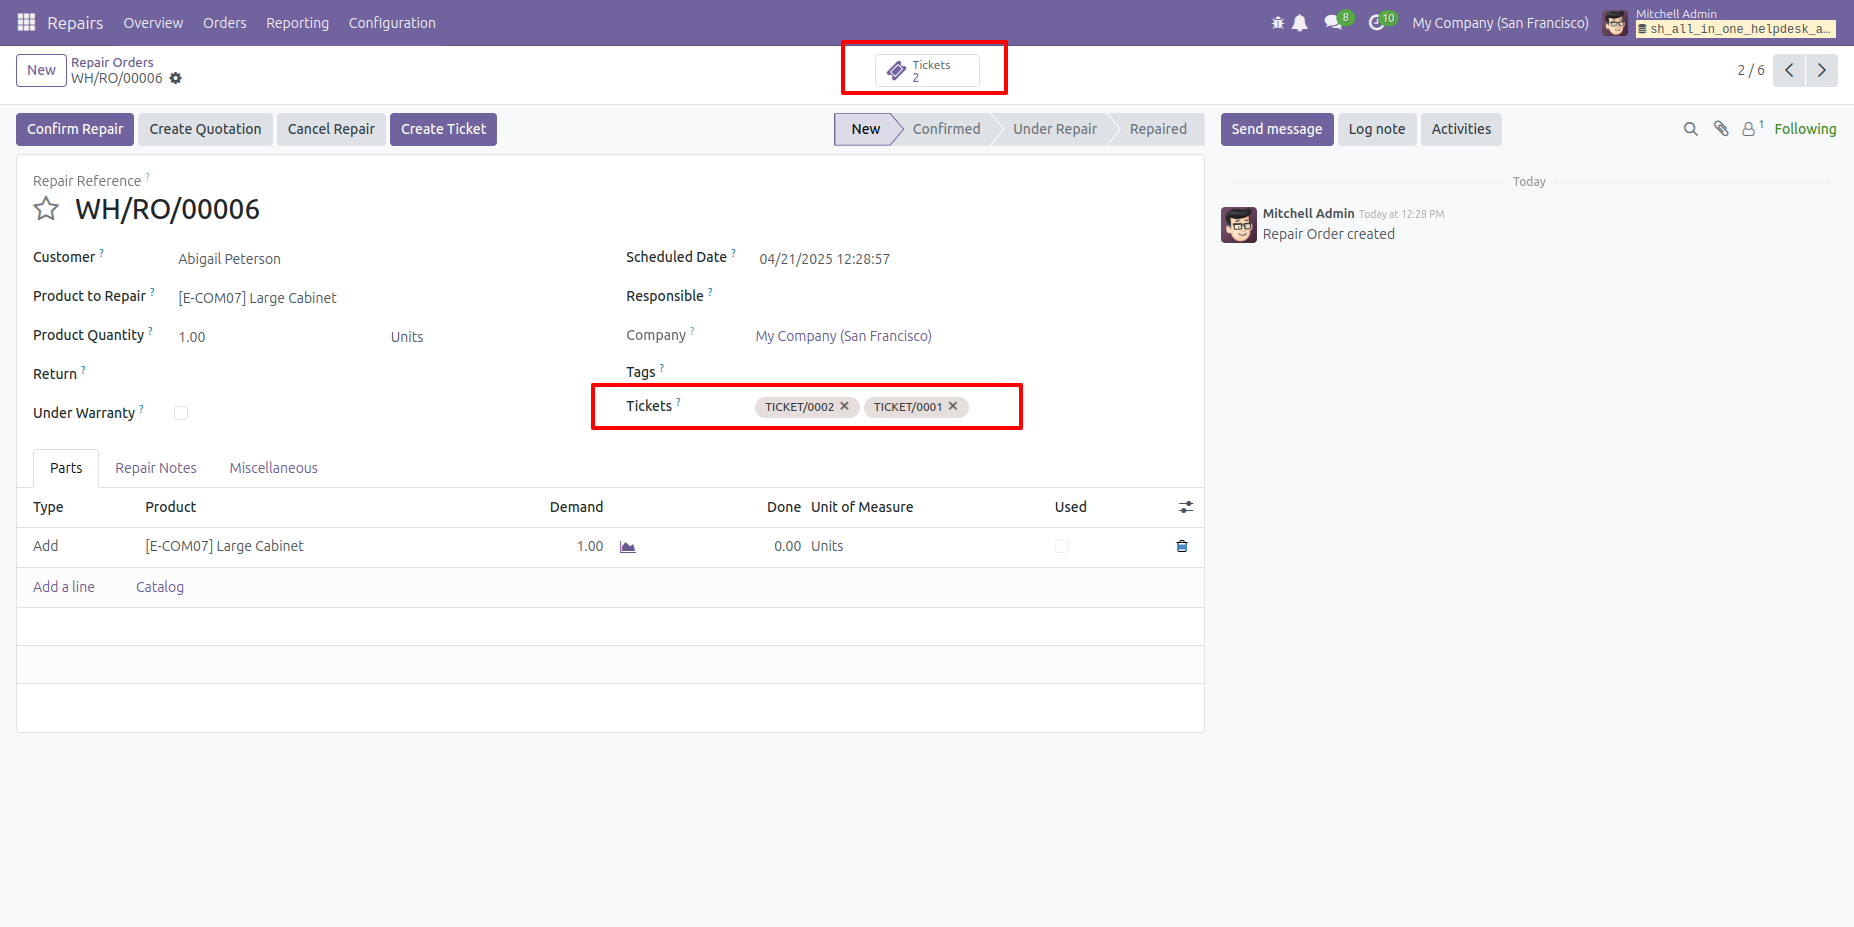
In the Repair Order form view, the associated ticket number is
displayed.
You can also access the ticket directly by clicking the
'Tickets' smart button.
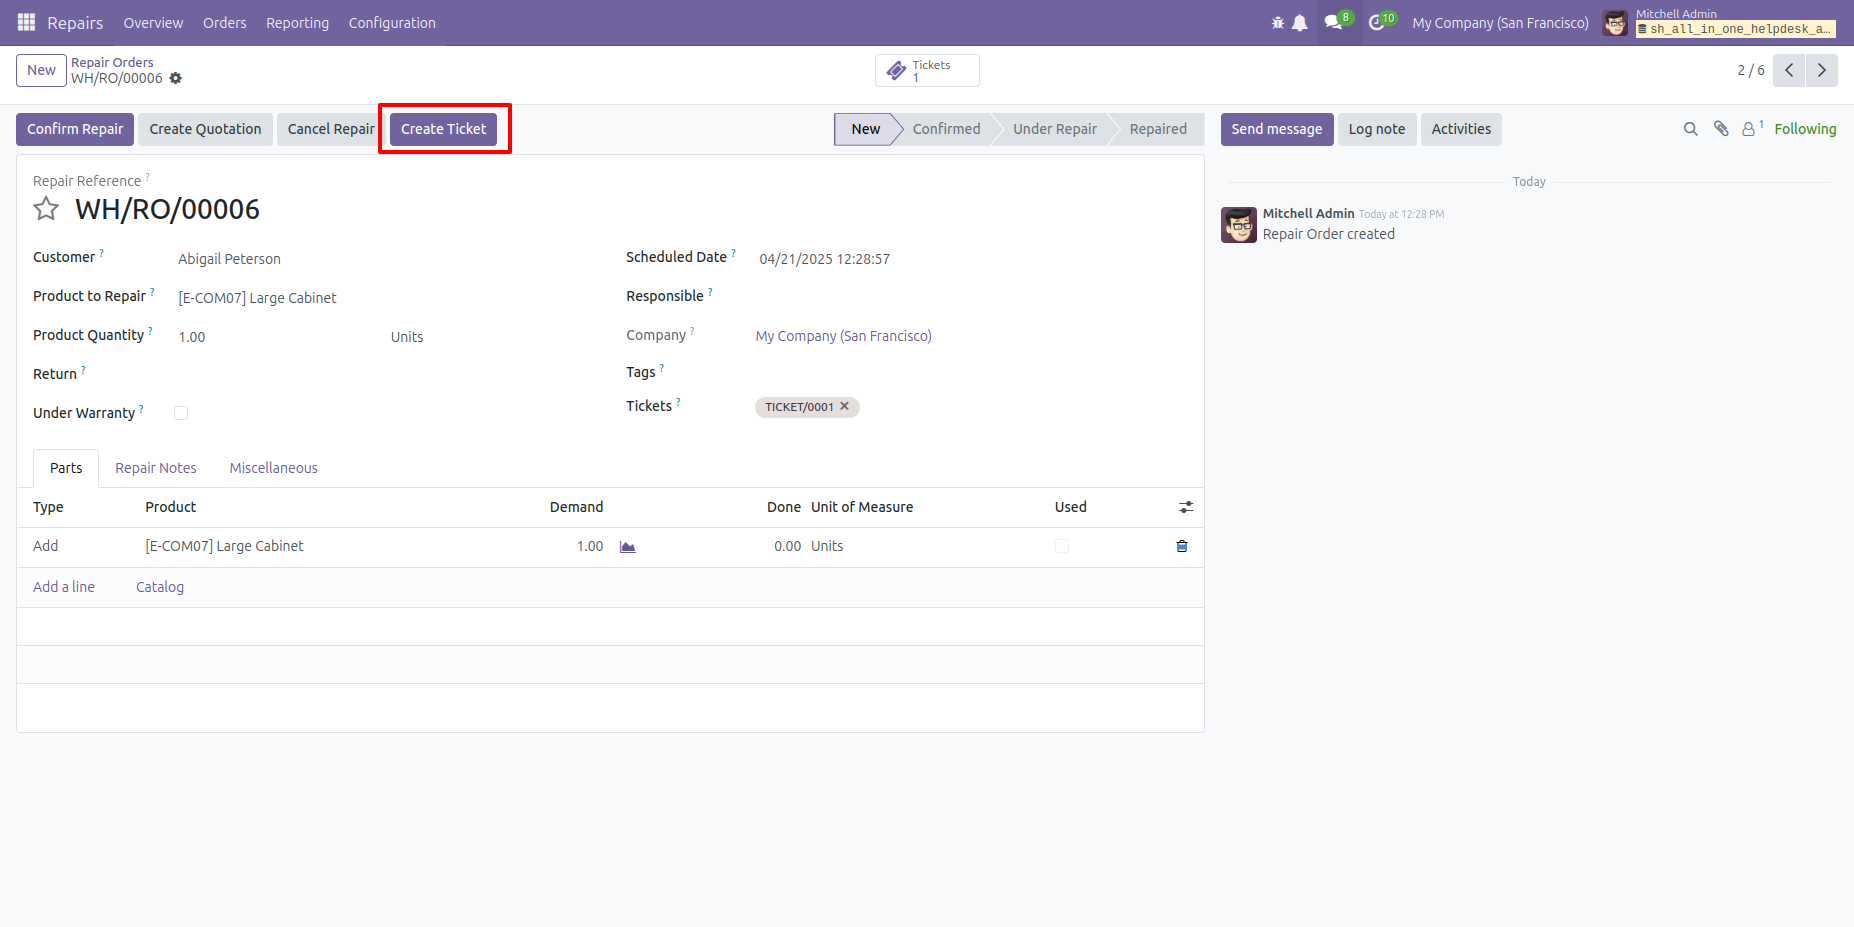
To create a ticket, click on the 'Create Ticket' button.
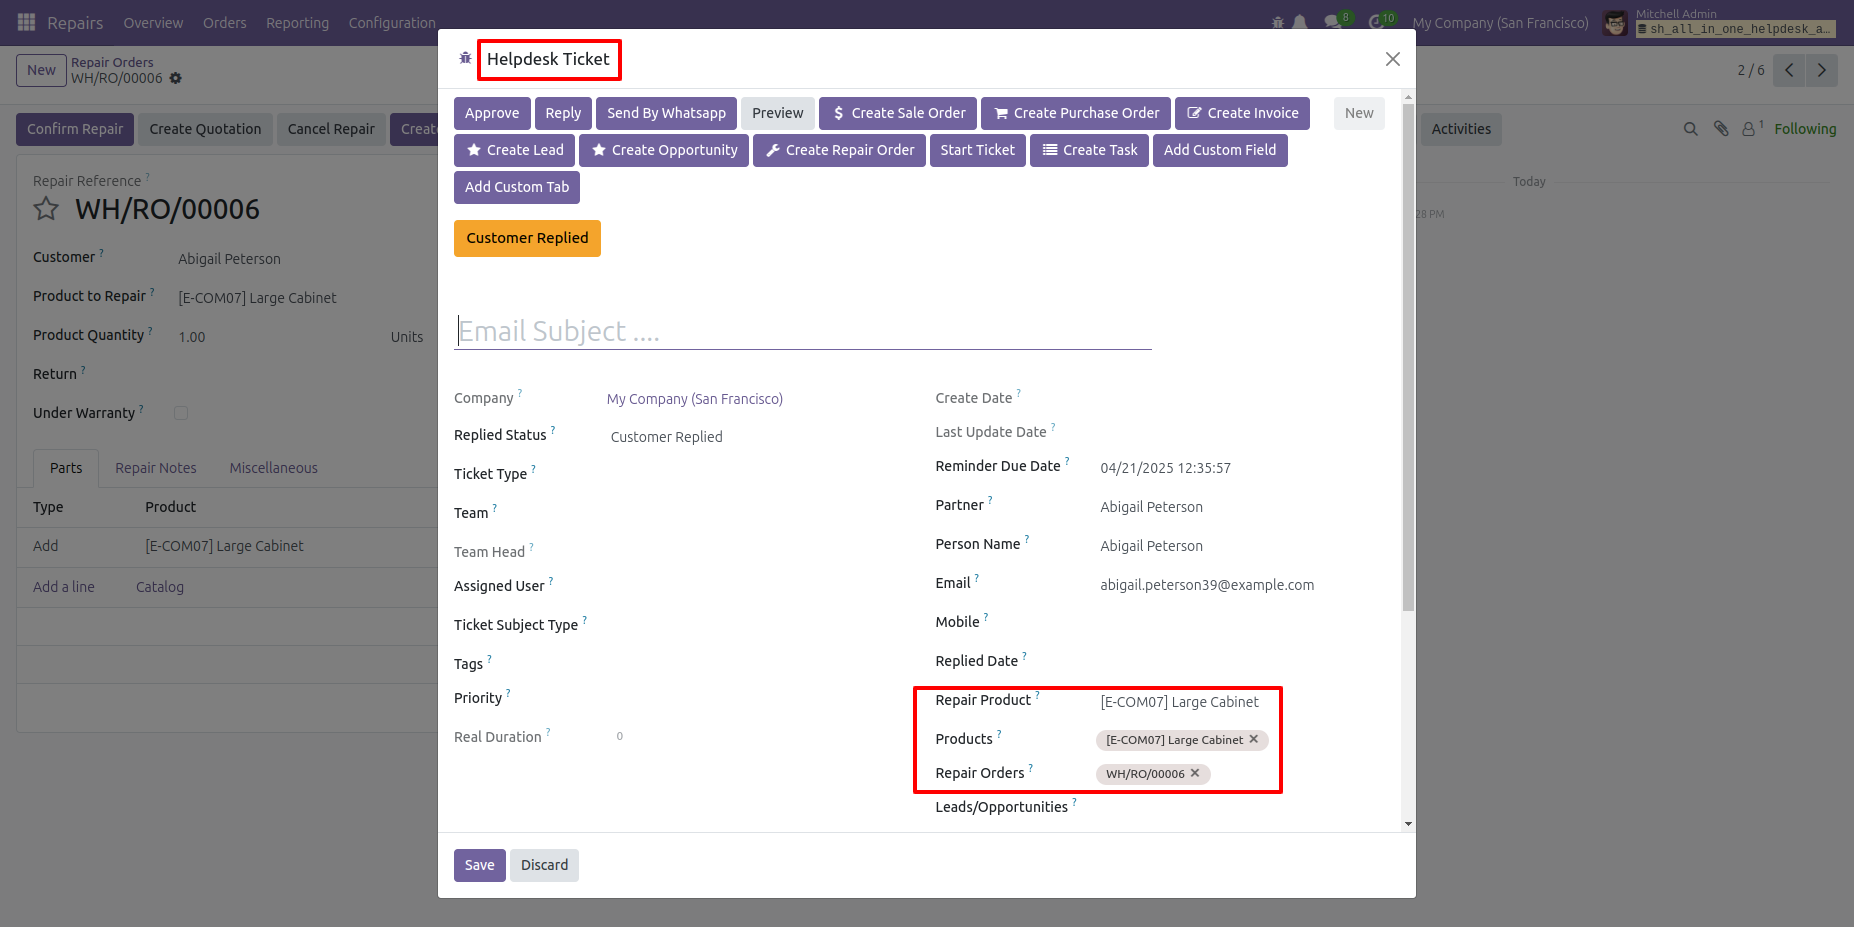
After that, the 'Helpdesk Ticket' wizard will appear, showing the repair product, related products, and the associated repair order. Click the 'Save' button to continue.
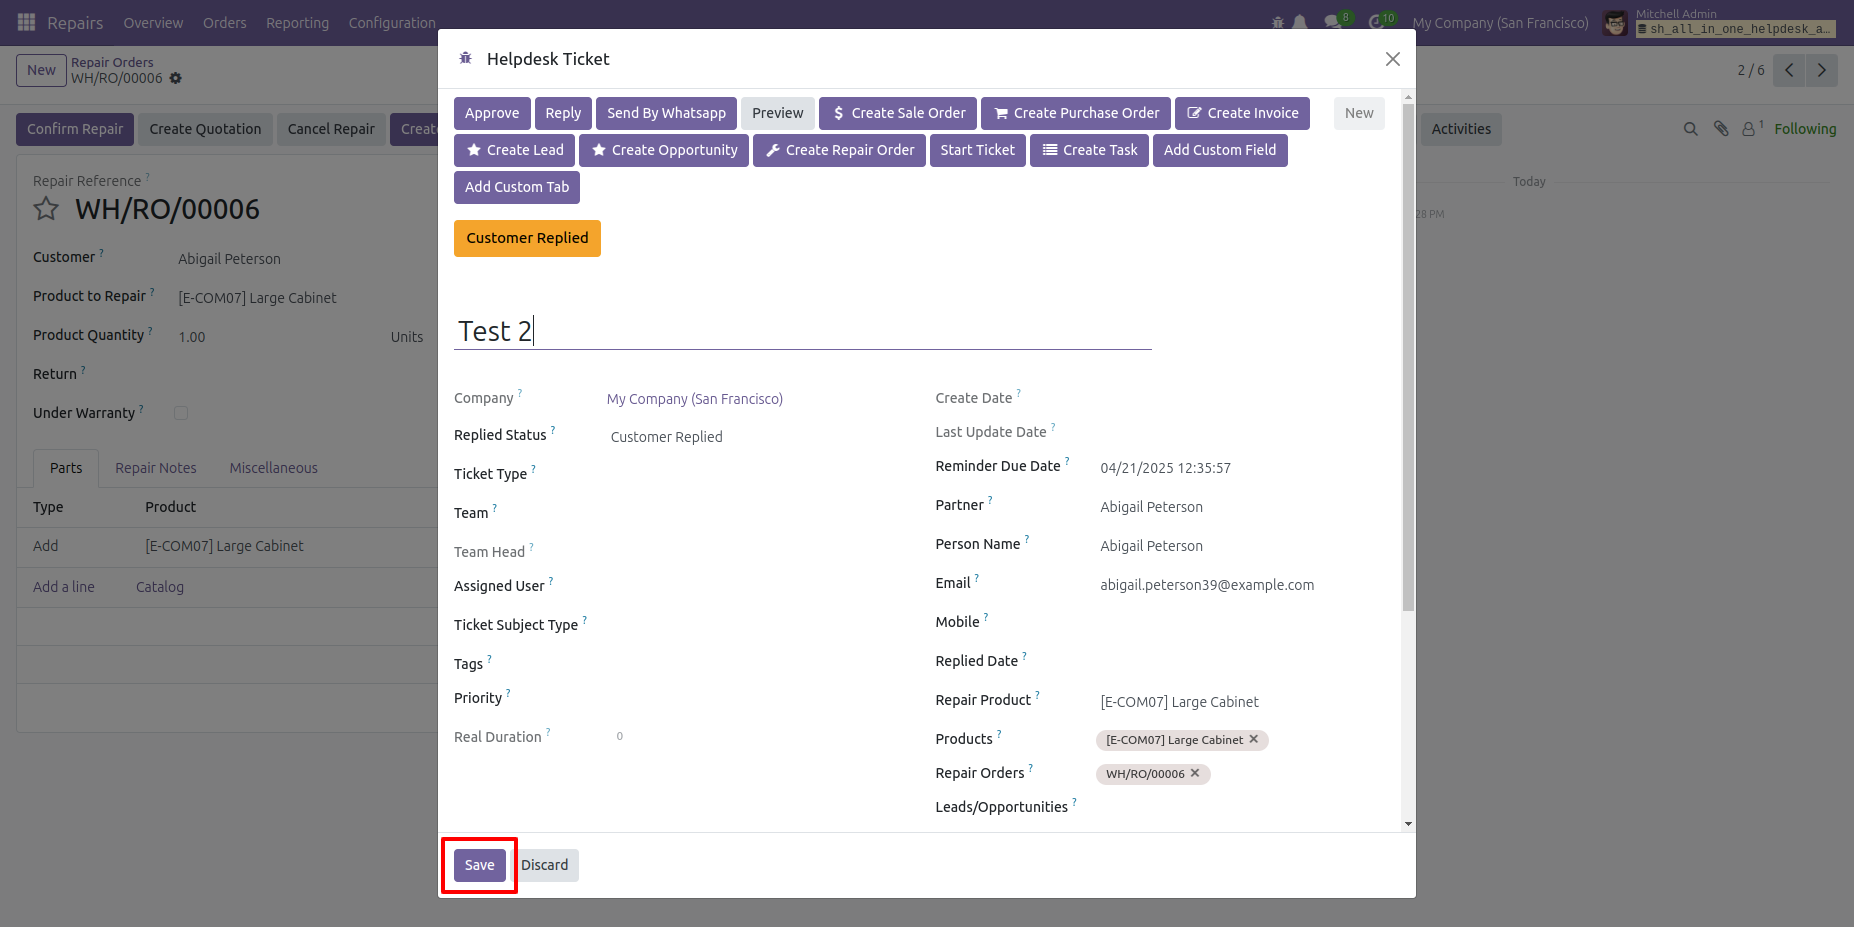
Here, you can see the newly created ticket number is added.
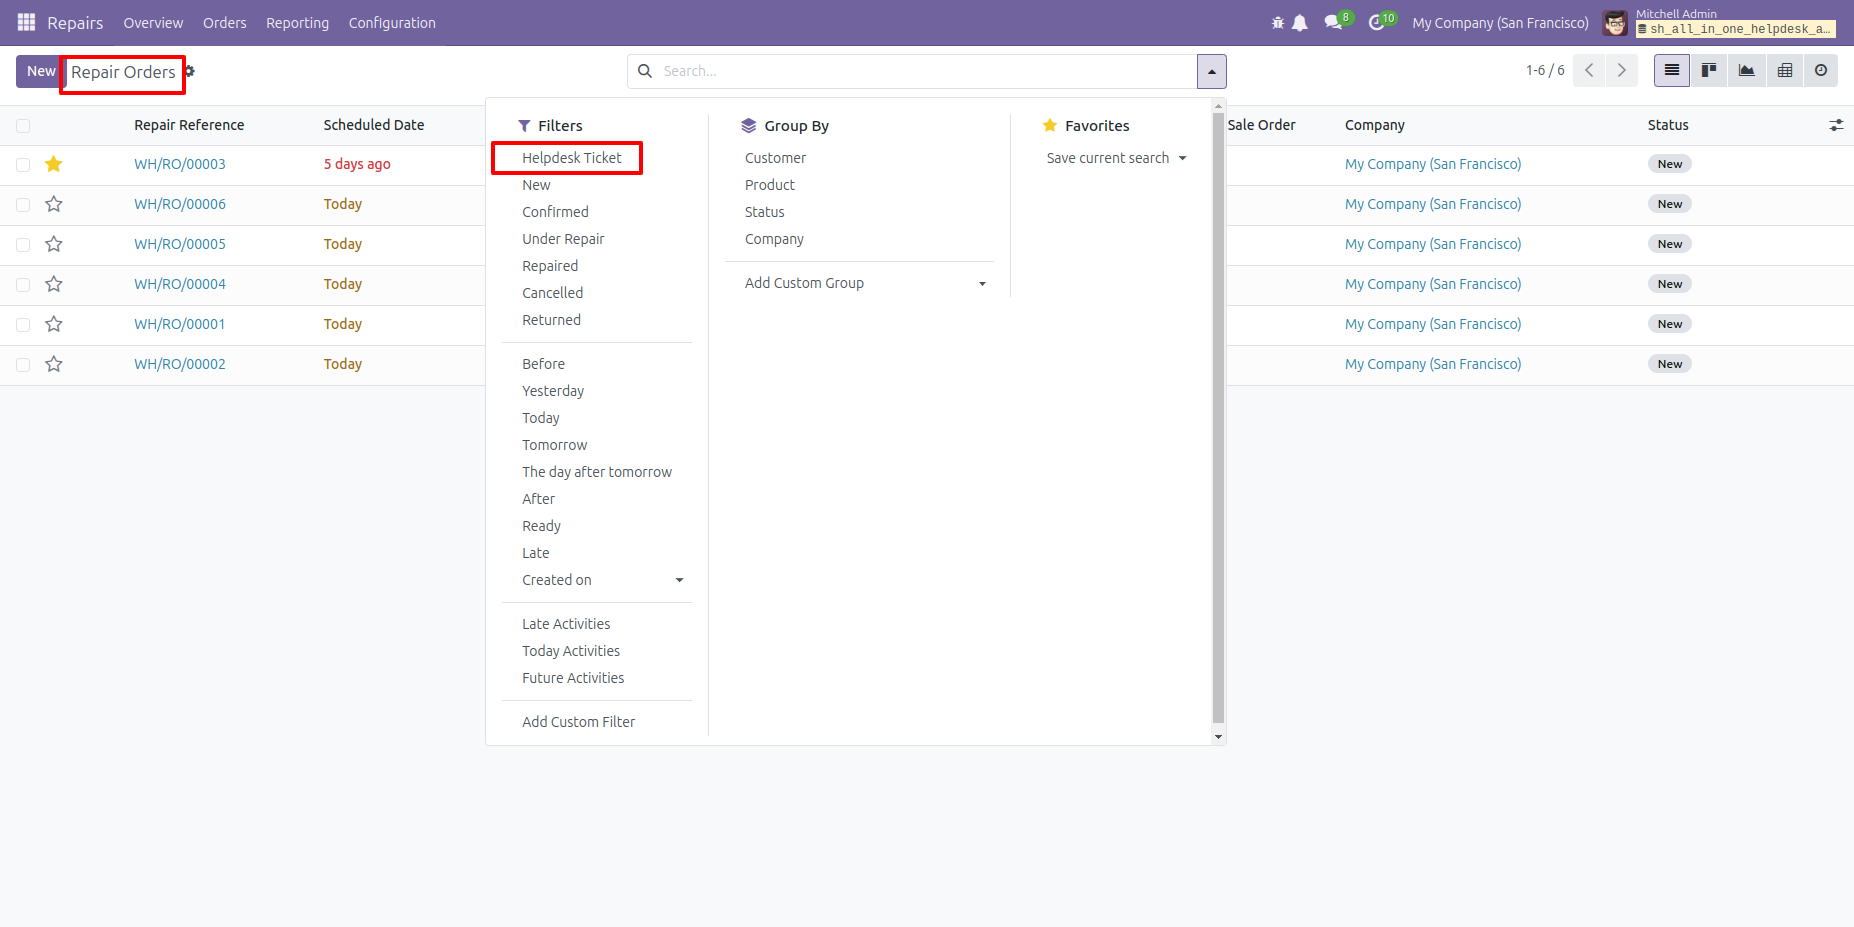
You can filter repair orders by the 'Helpdesk Tickets' option.
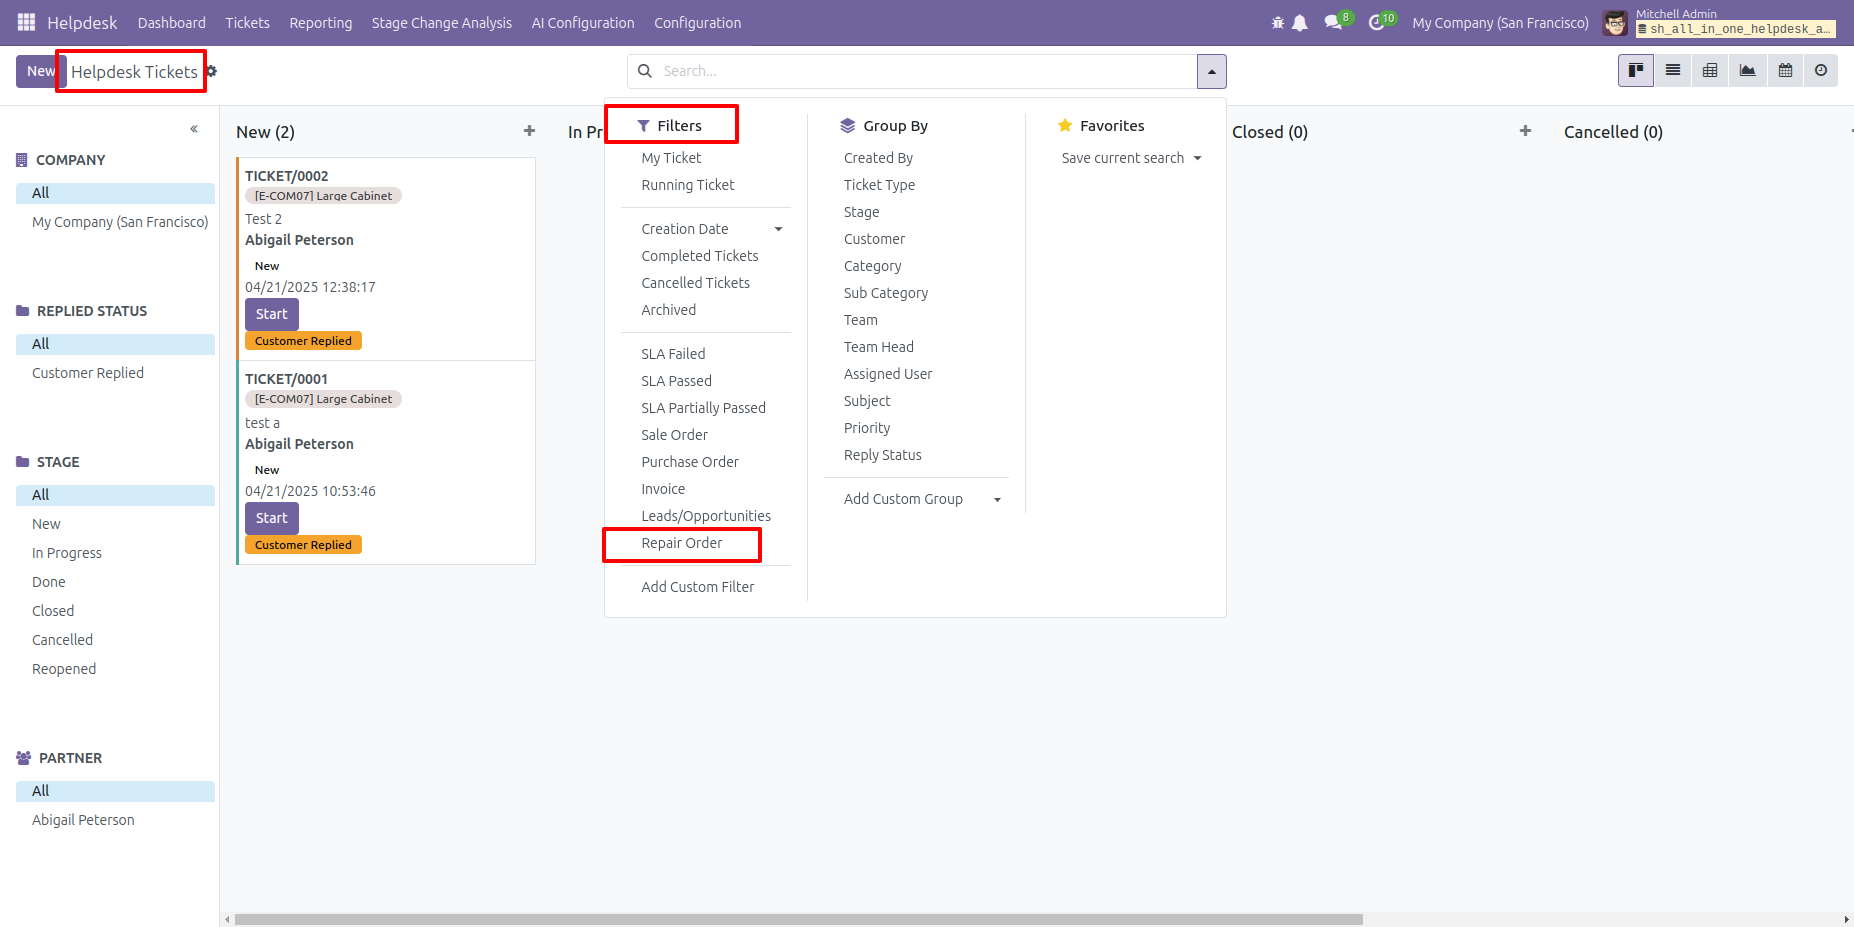
You can filter helpdesk tickets by the 'Repair Order' option.
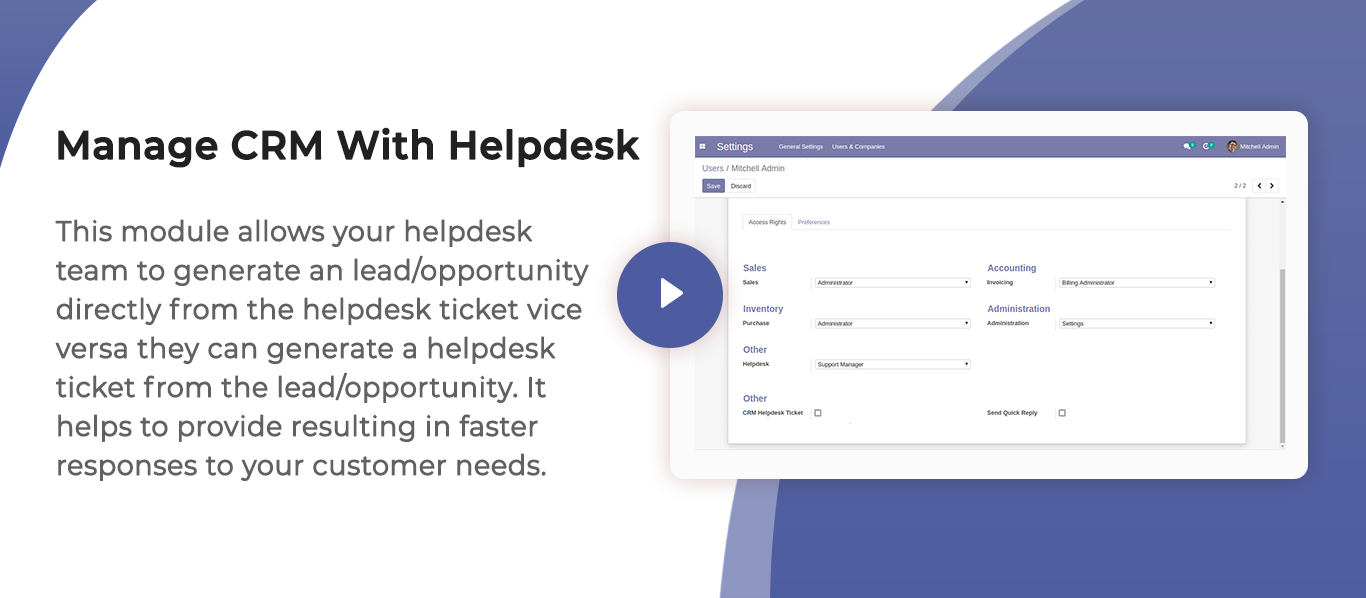
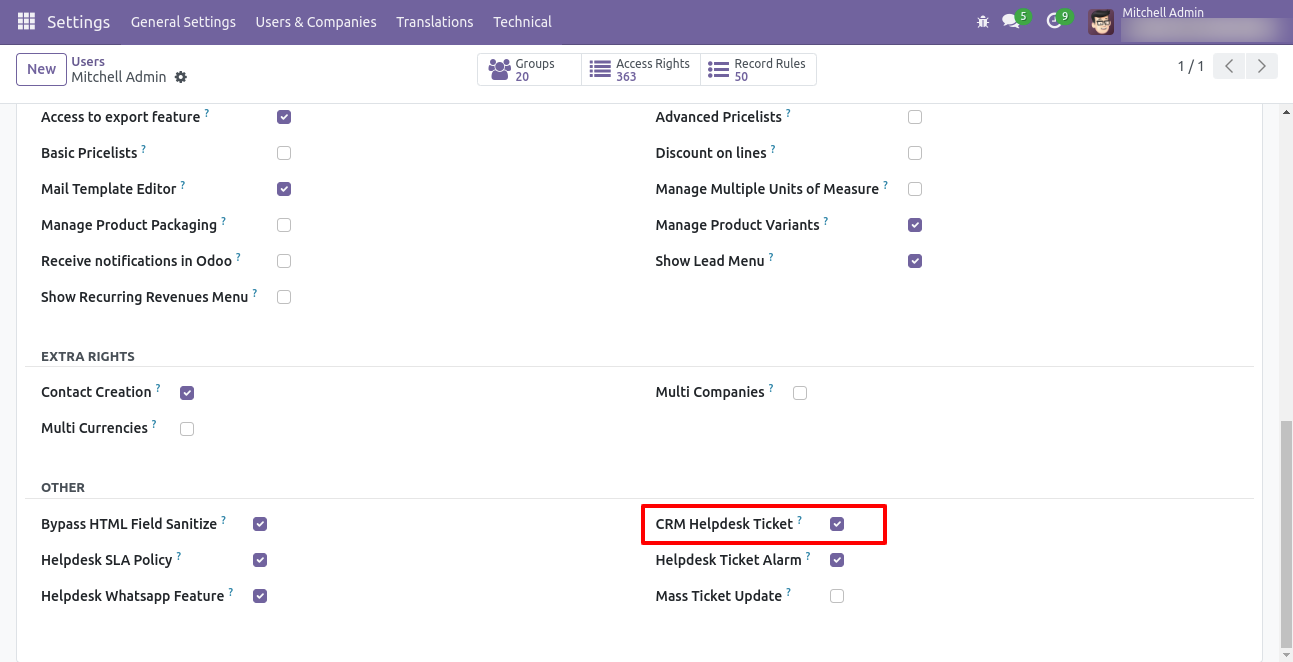
Tick security group "CRM Helpdesk Ticket" to generate lead/opportunity directly from the helpdesk ticket as well generate a helpdesk ticket from the lead/opportunity.
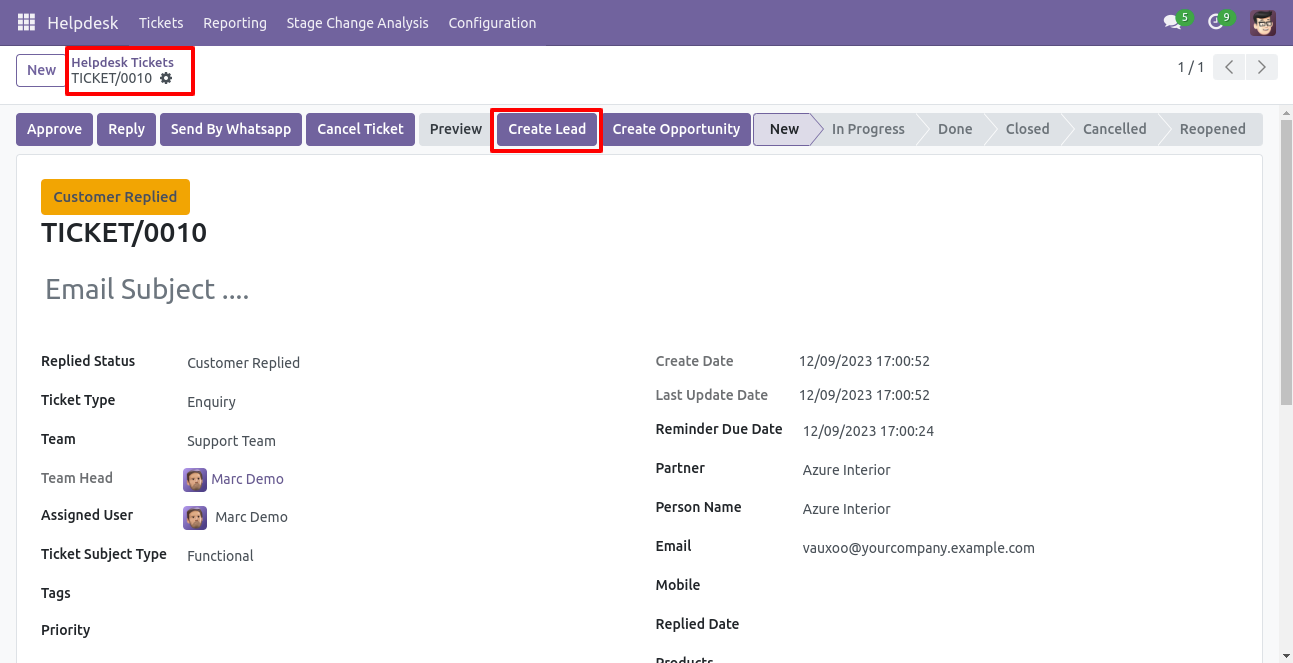
"Helpdesk Ticket" form view, press the "Create Lead" button to create lead directly from the helpdesk ticket.
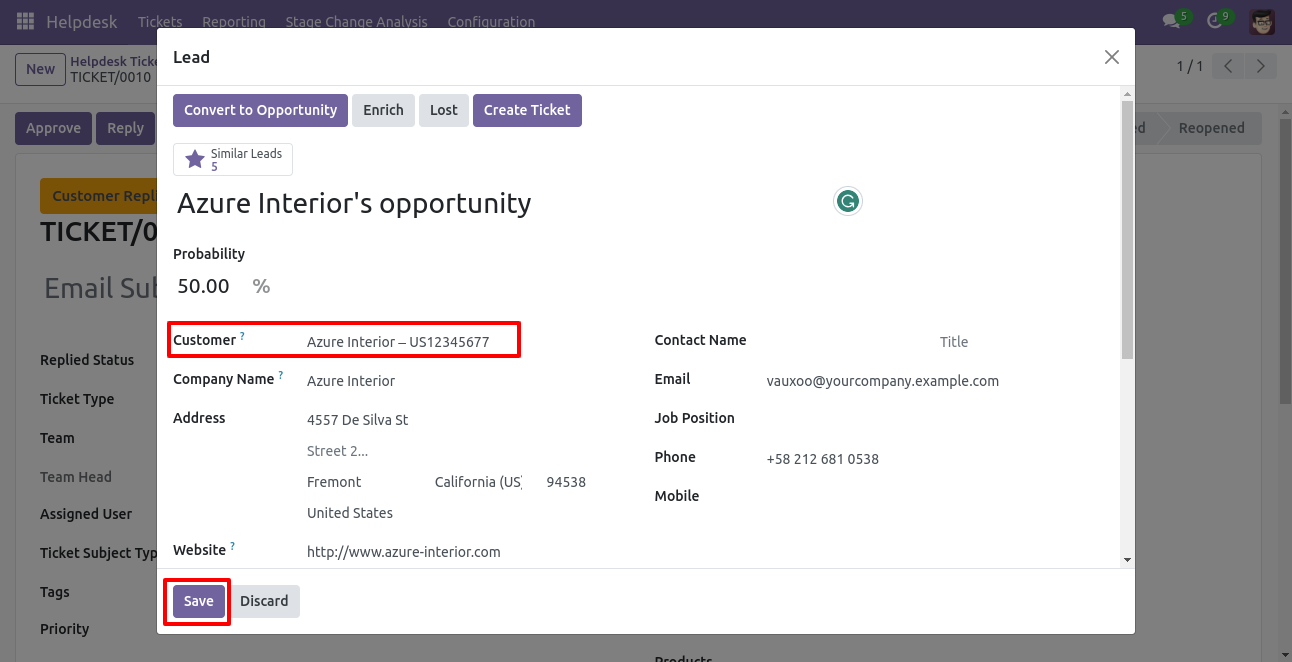
After that one wizard opens, fill the details then press the "Save" button.
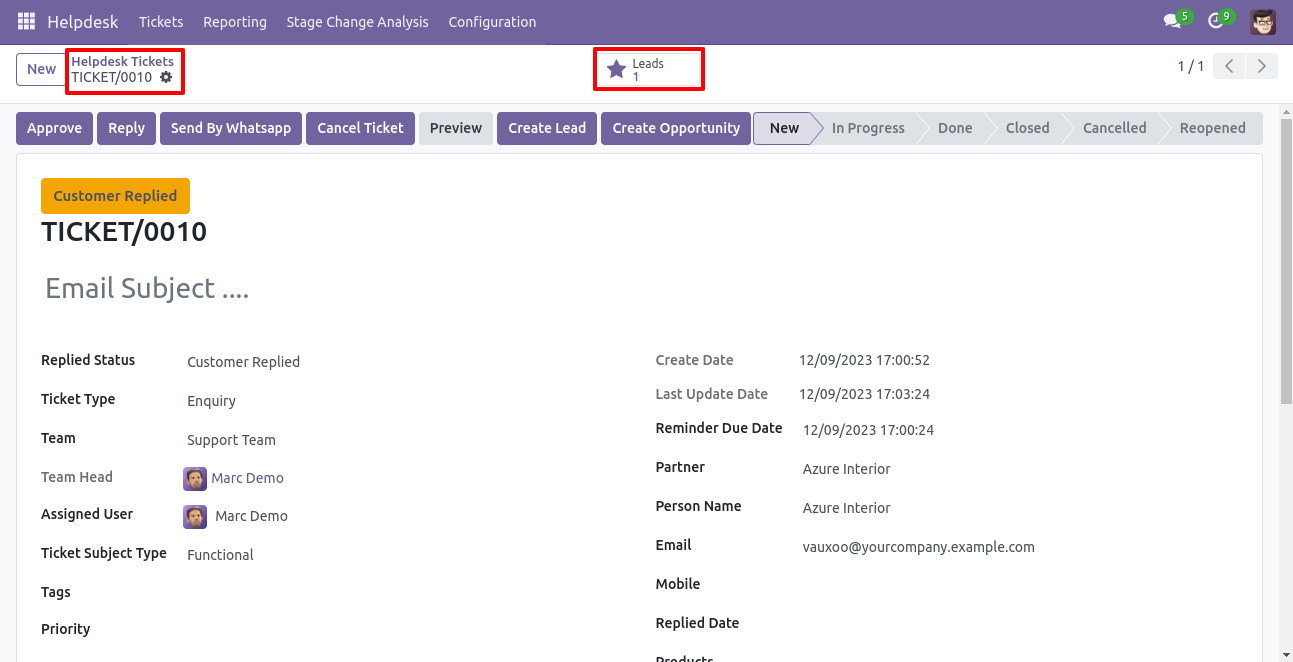
Now, from the ticket, you can see generated leads of that ticket using the "Leads" smart button.
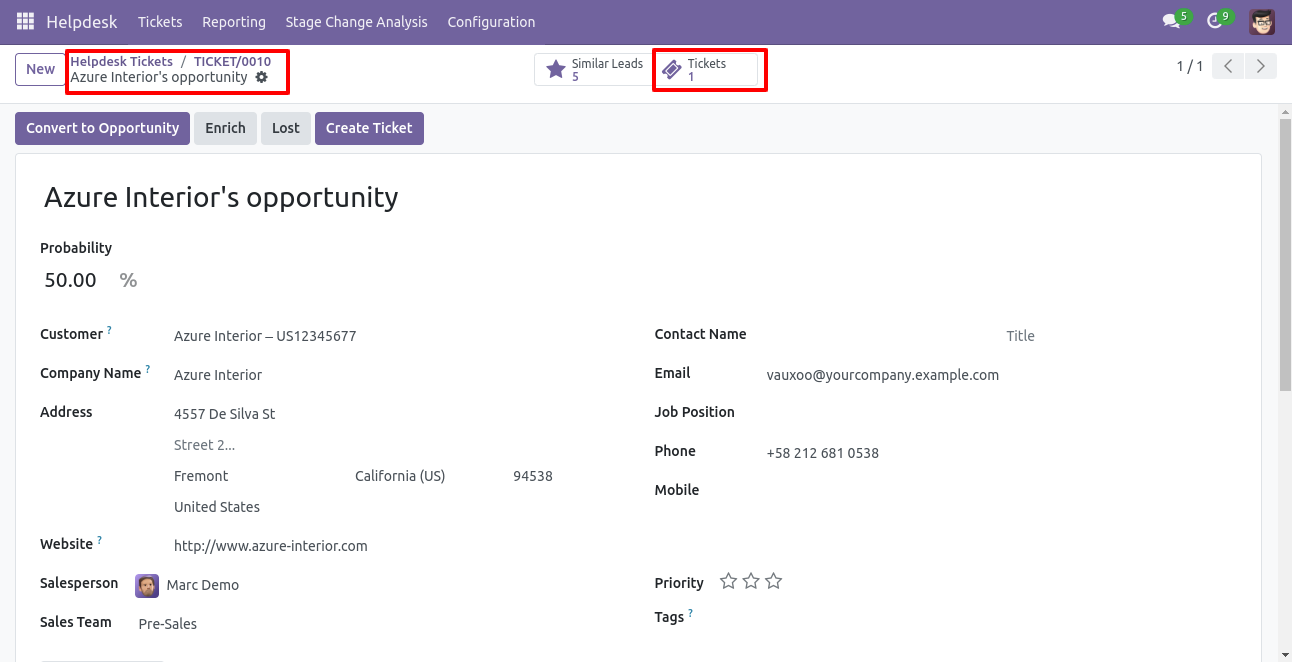
So, from that leads, you can see tickets of that lead using the "Tickets" smart button.
"Helpdesk Ticket" form view, press the "Create Opportunity" button to create an opportunity directly from the helpdesk ticket.
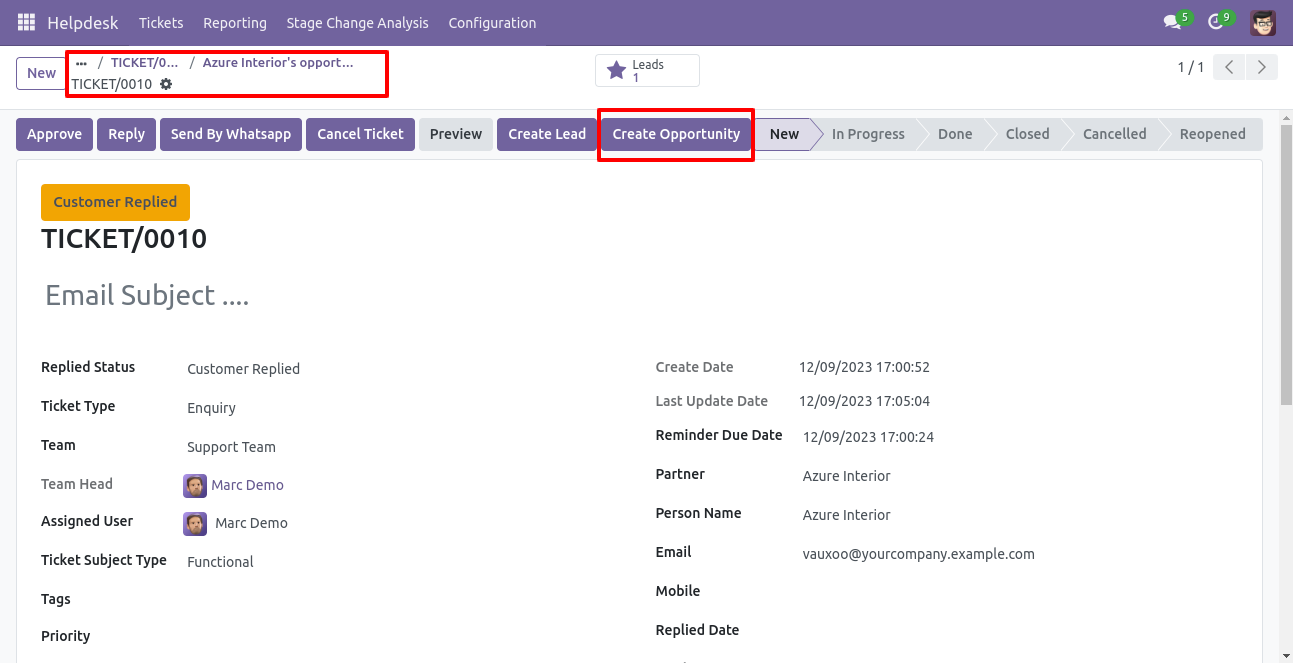
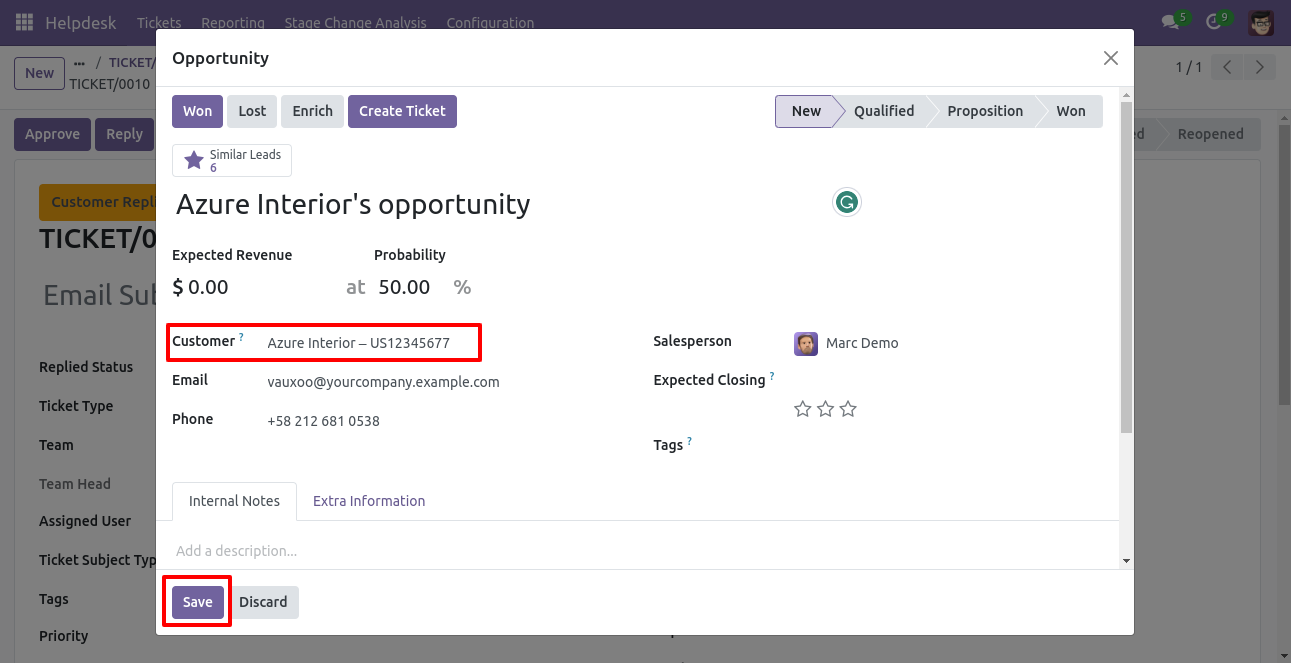
After that one wizard opens, fill the details then press the "Save" button.
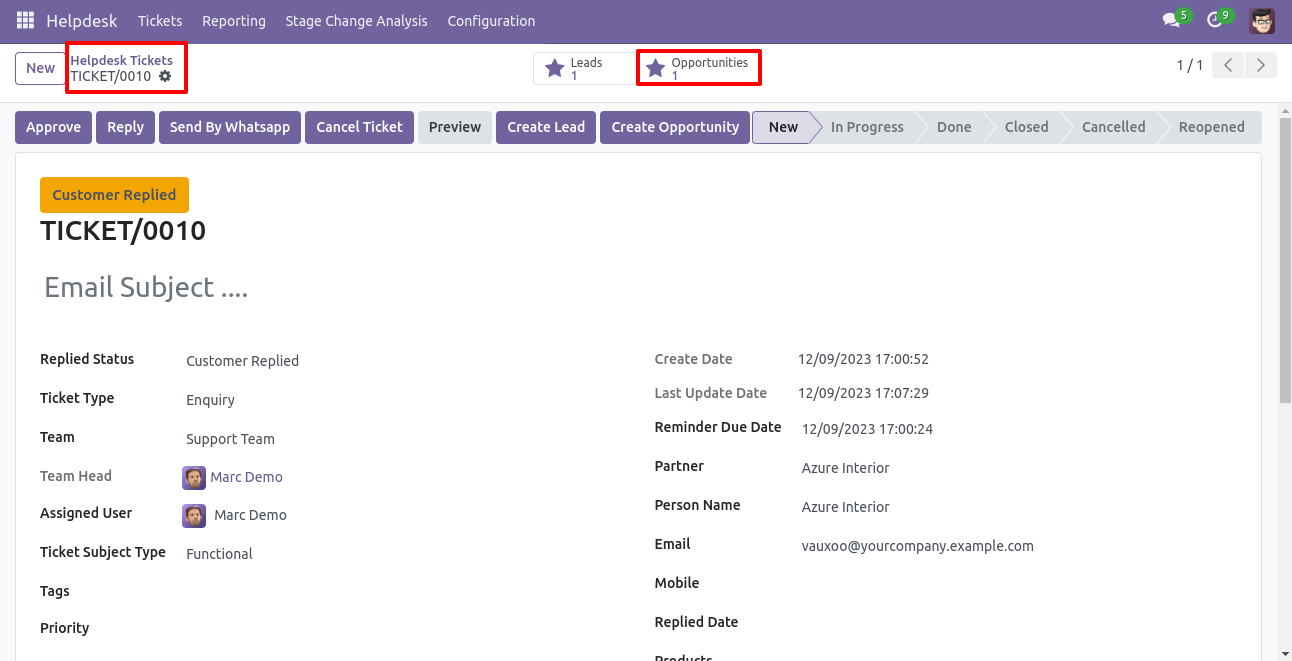
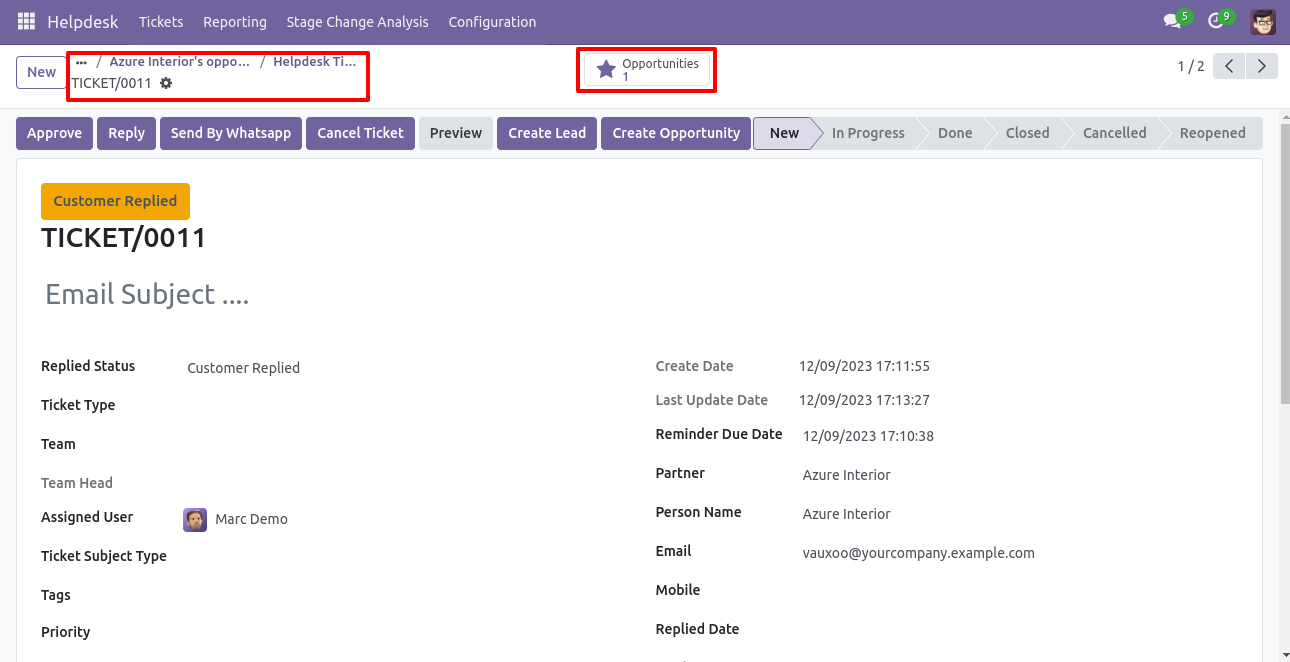
Now, from the ticket, you can see generated opportunities of that ticket using the "Opportunities" smart button.
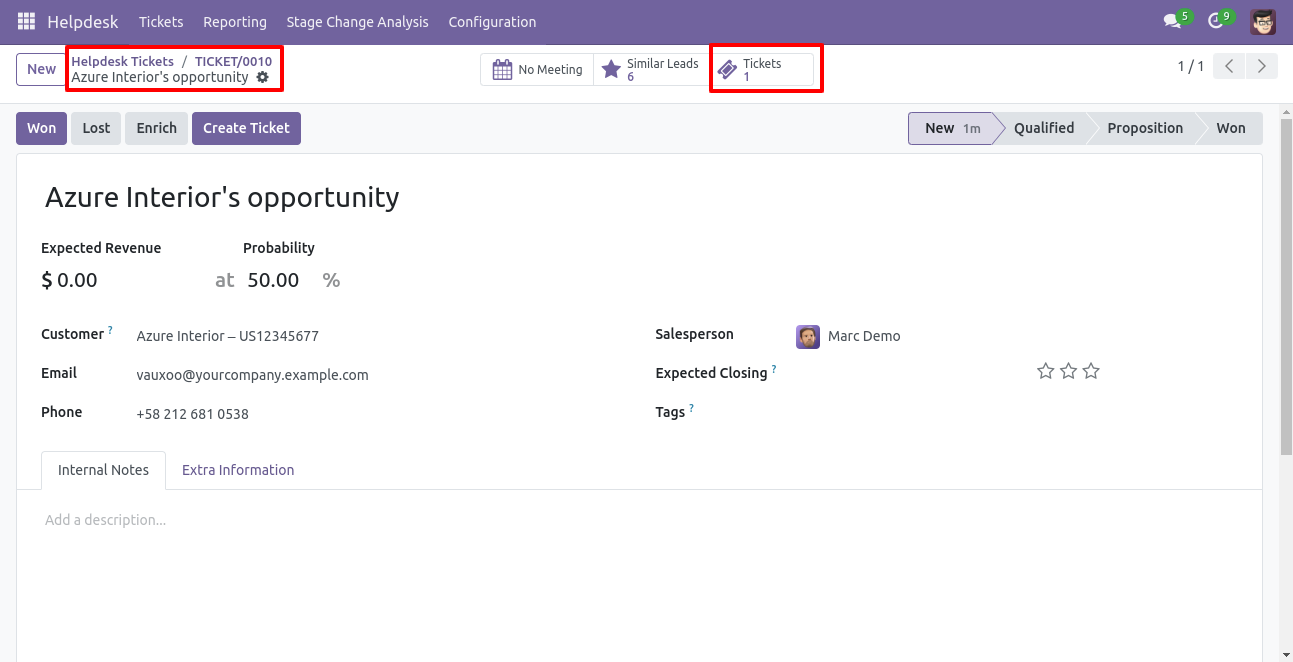
So, from that opportunities, you can see tickets of that opportunity using the "Tickets" smart button.
You can create a helpdesk ticket from the lead/opportunity using the "Create Ticket" button.
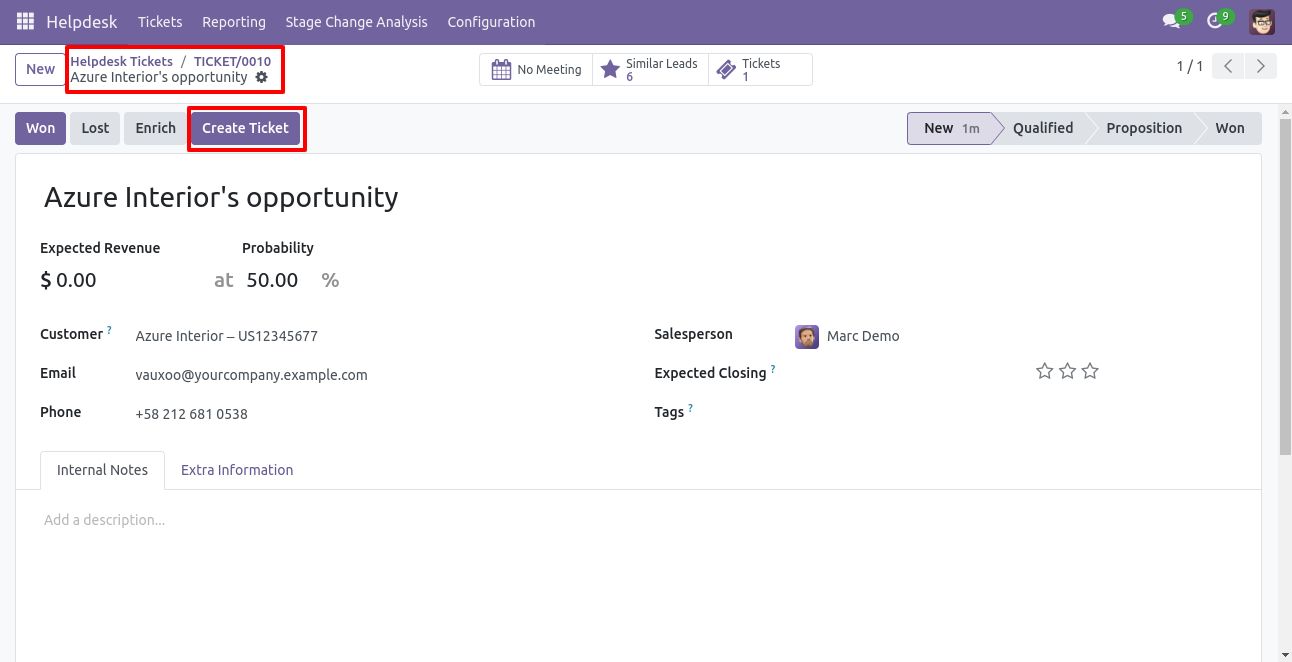
After that one wizard opens, fill the details and save it.
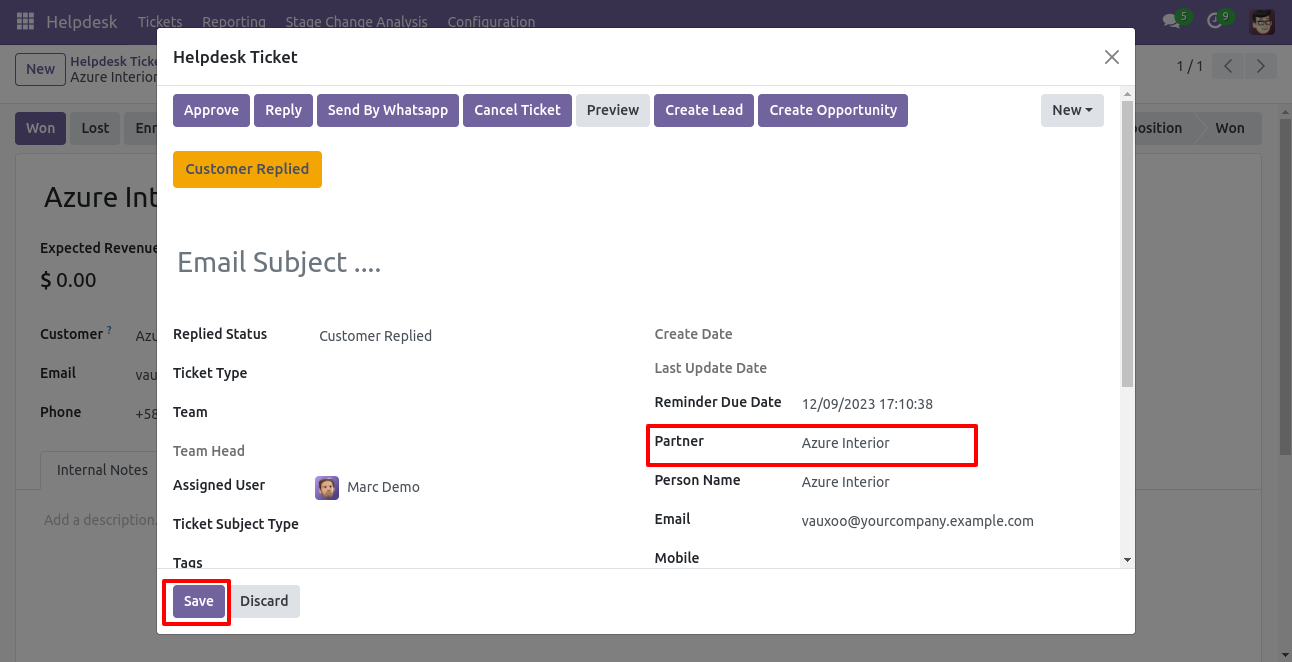
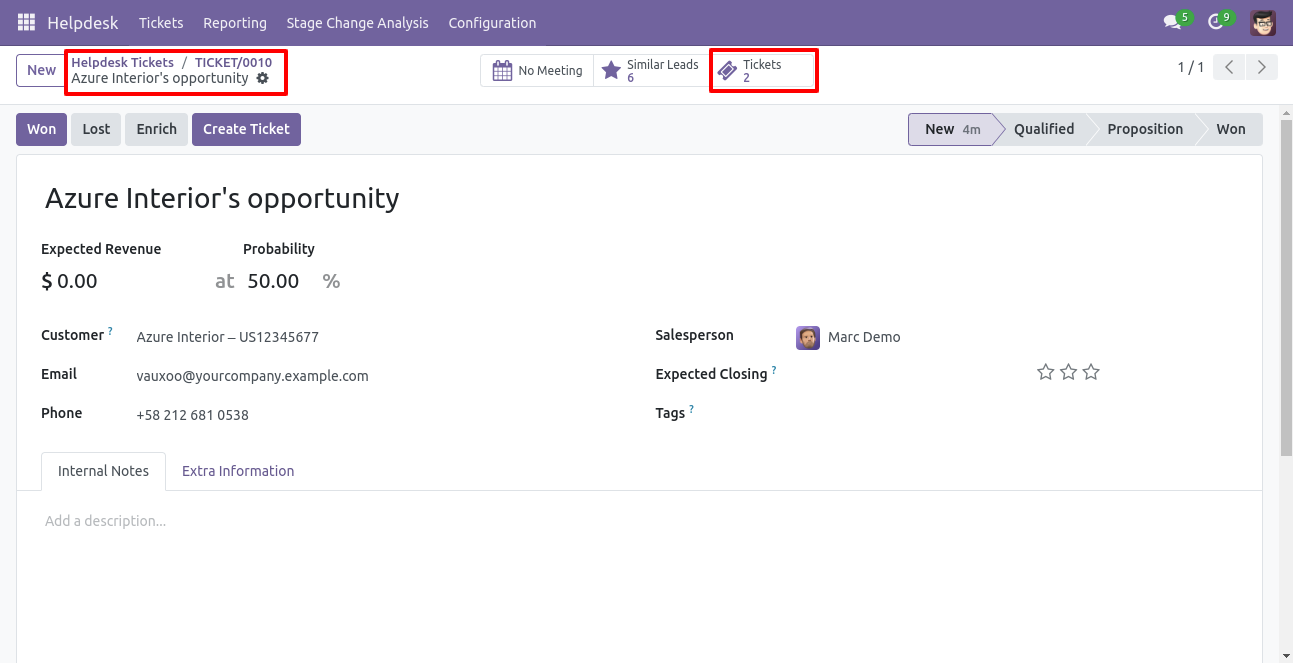
You can see tickets of that lead/opportunity using the "Ticket" smart button.
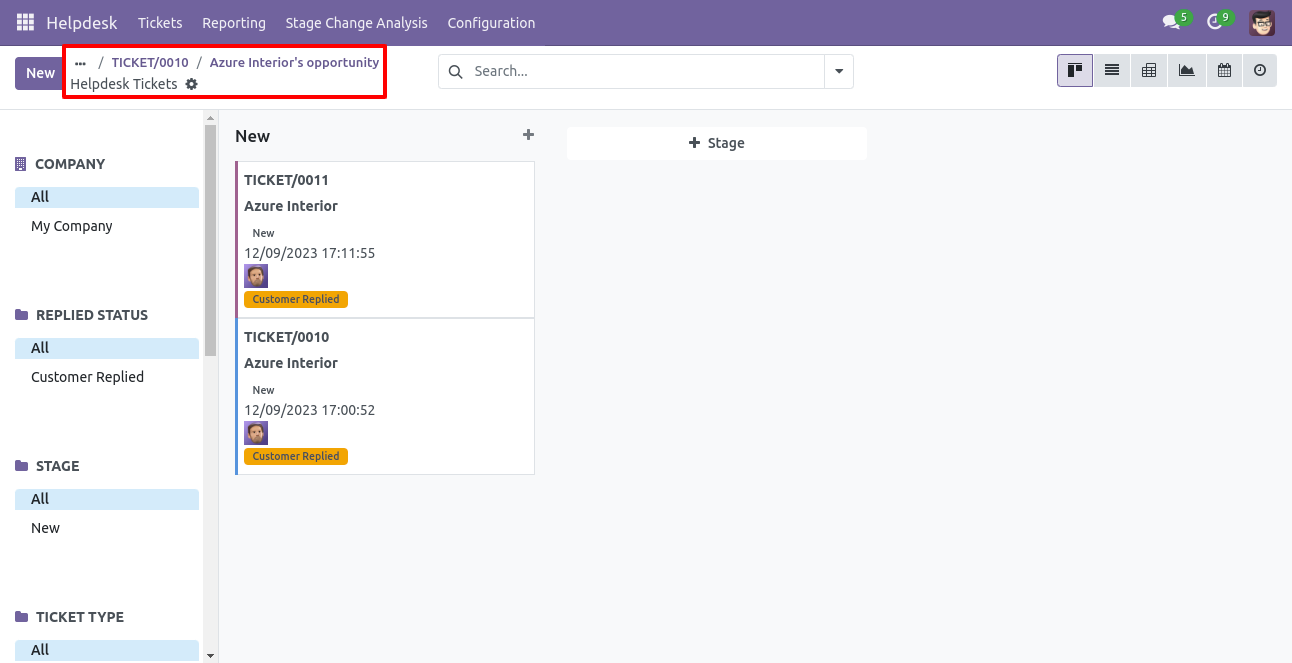
It opens tickets Kanban view.
Created ticket form view looks like this.
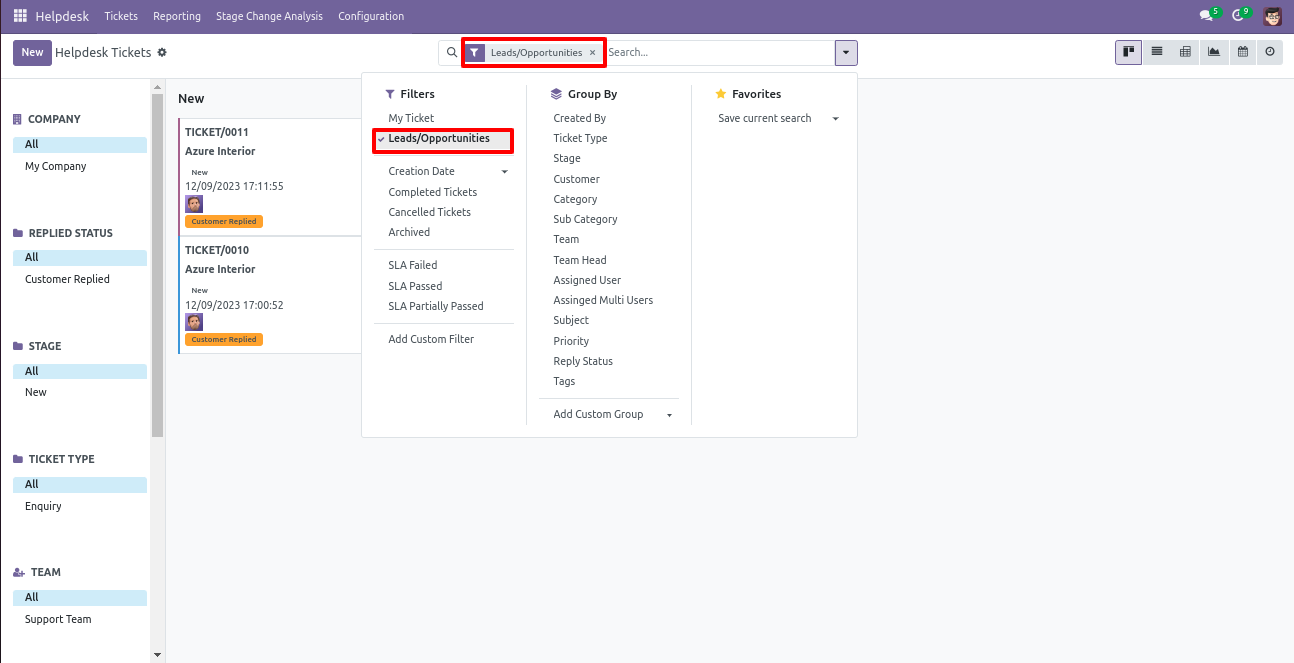
You can filter tickets lead/opportunity wise.
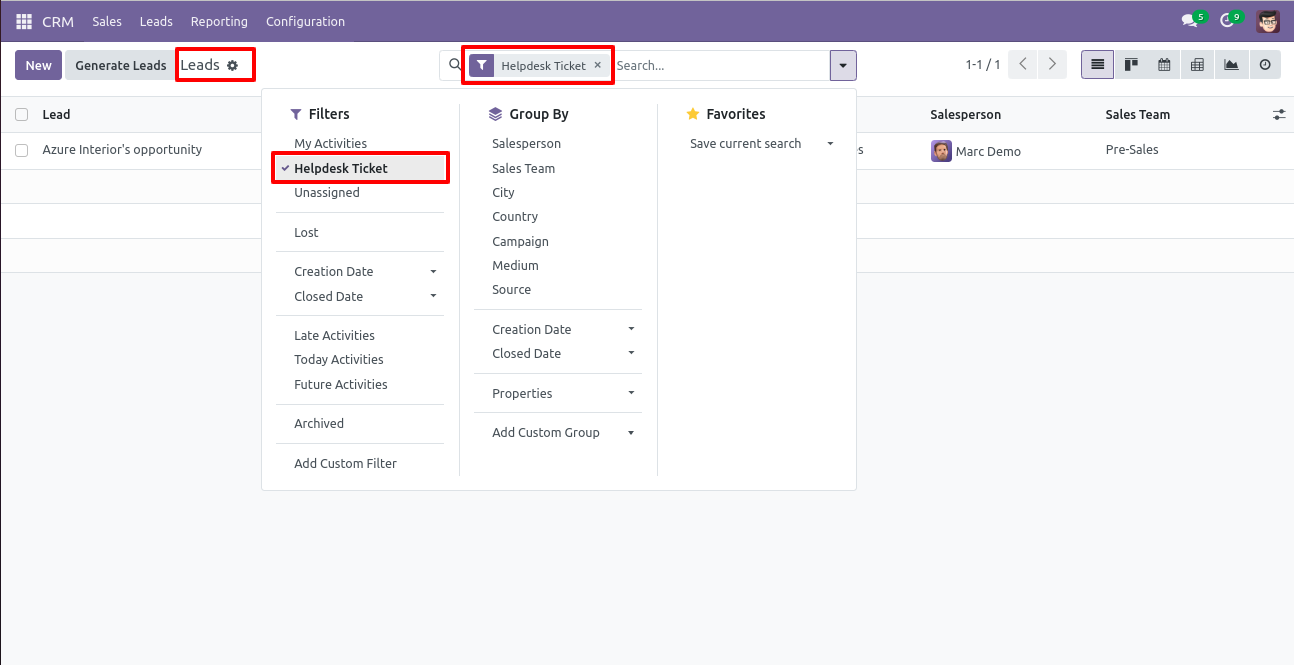
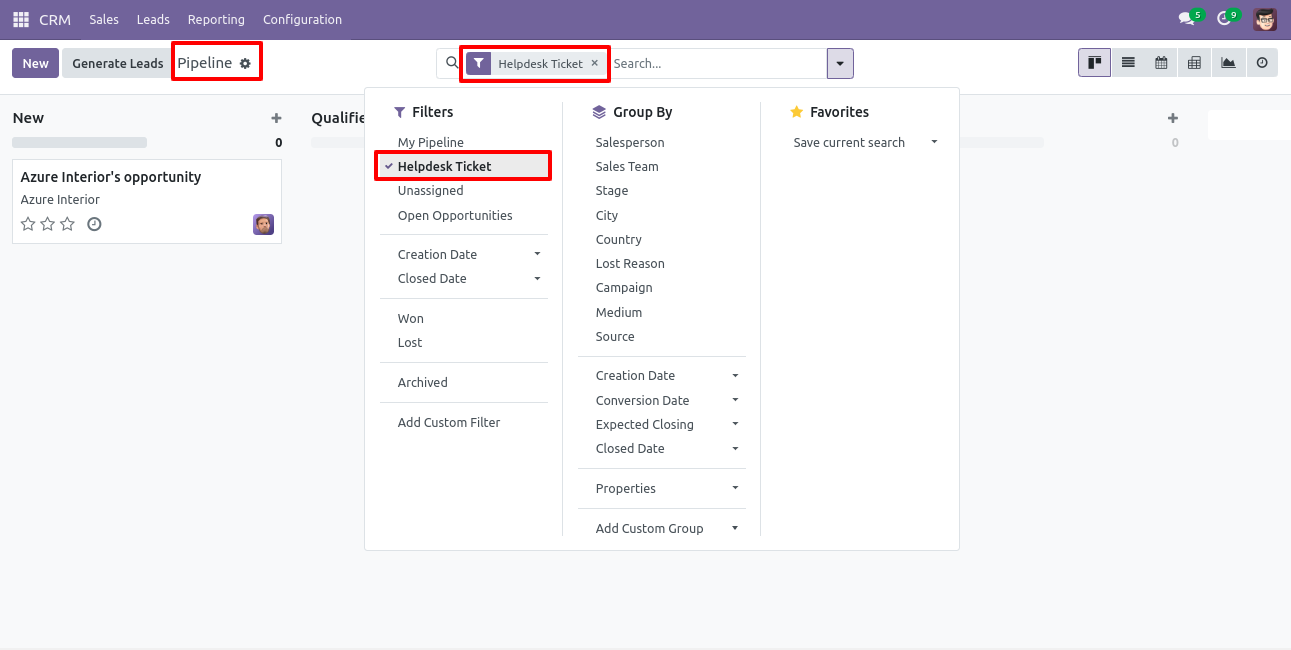
You can filter lead/opportunity ticket wise.
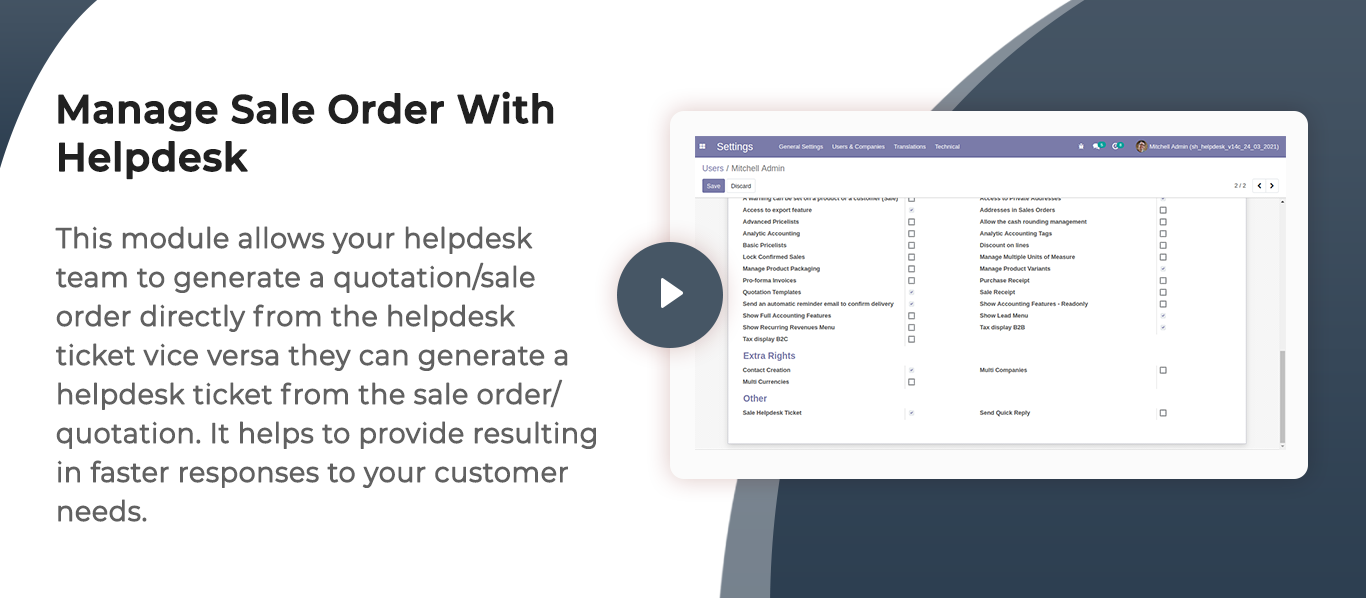
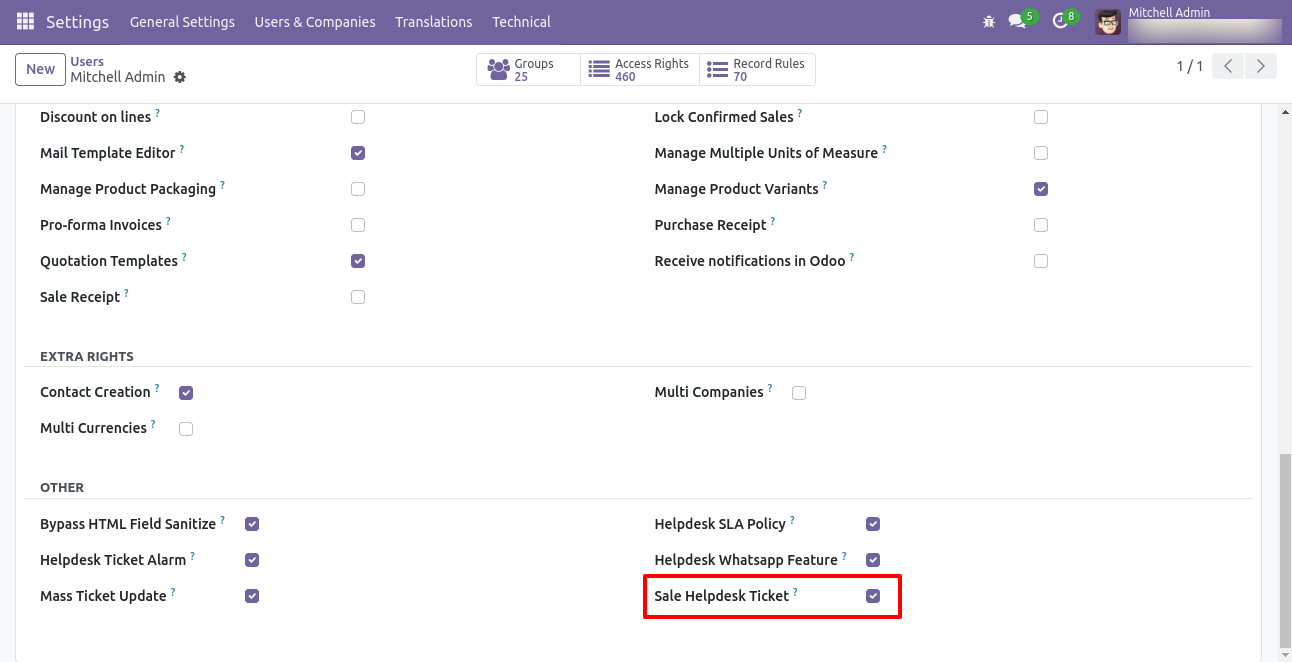
Tick security group 'Sale Helpdesk Ticket' to generate a quotation/sale order directly from the helpdesk ticket as well generate a helpdesk ticket from the sale order/quotation.
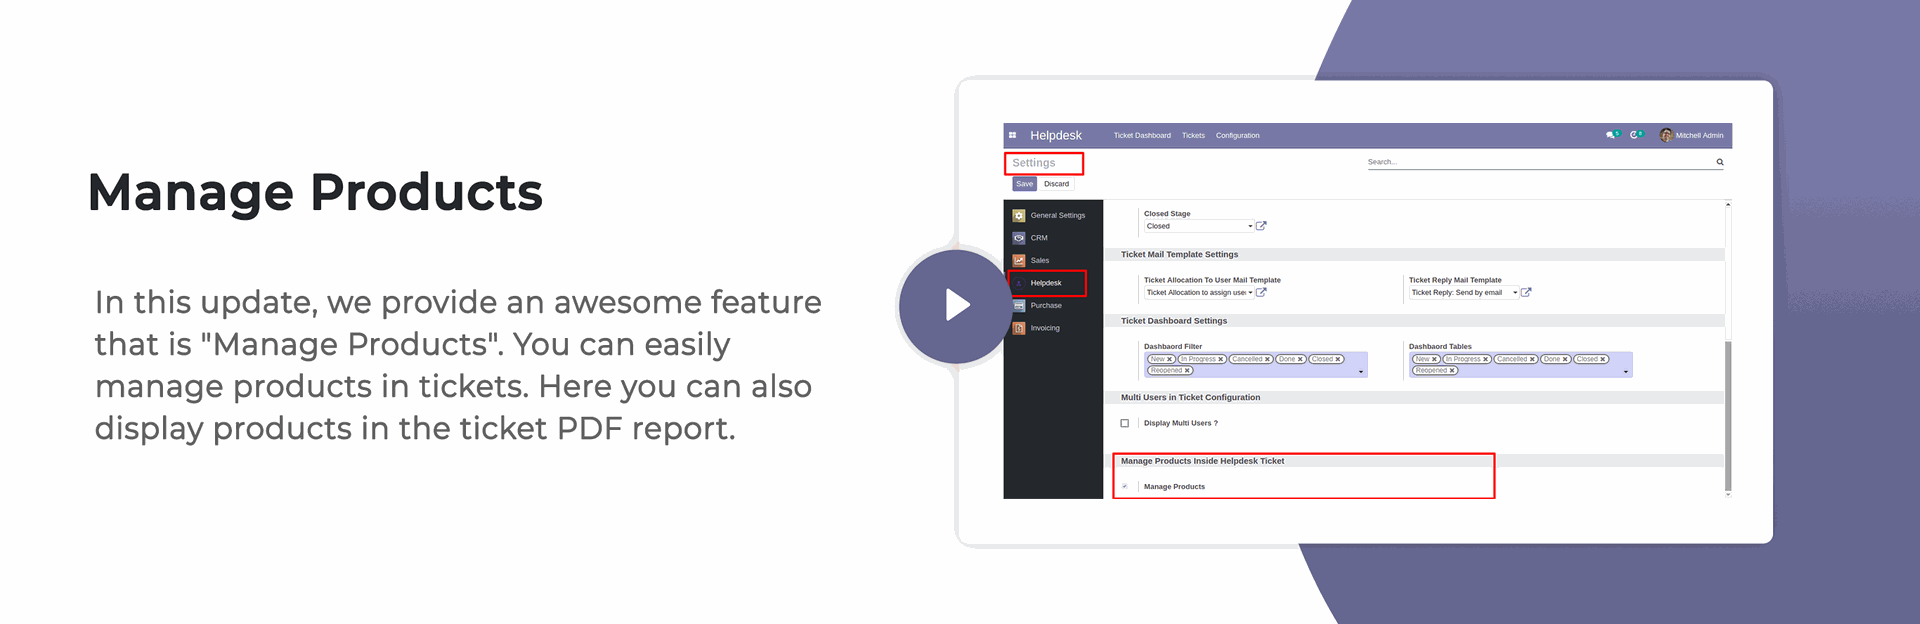
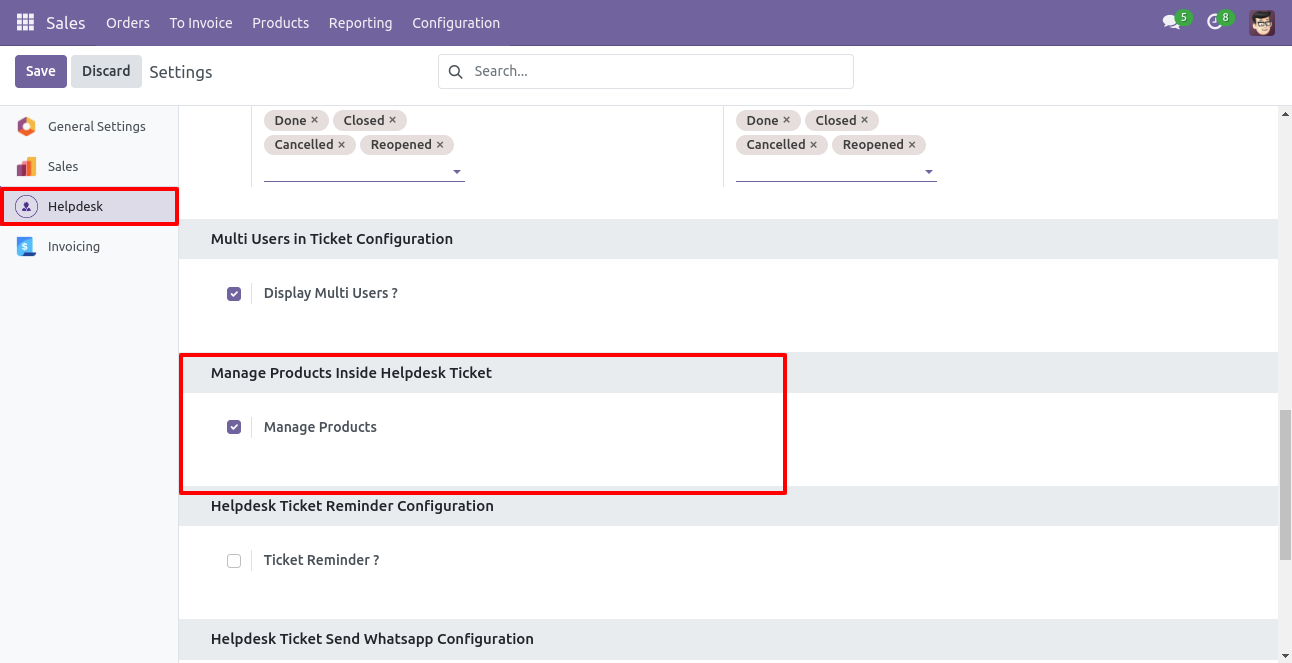
Go to the helpdesk settings and tick 'Manage Products'.
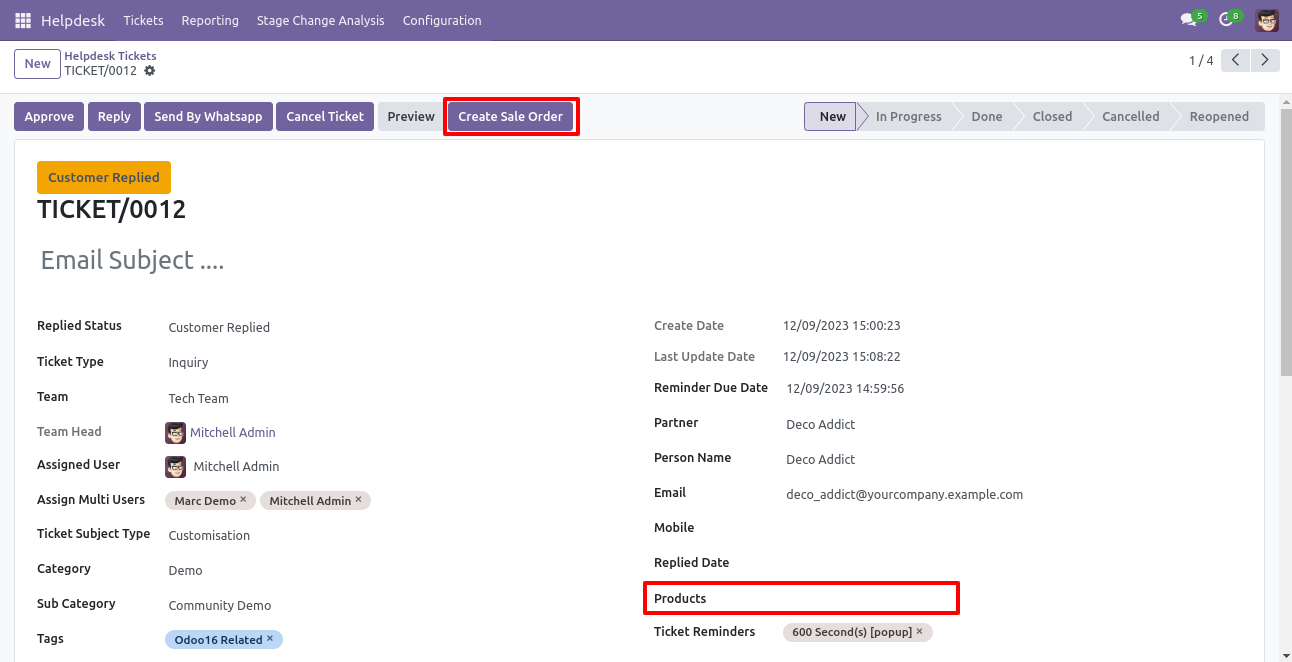
'Helpdesk Ticket' form view, press the 'Create Sale Order' button to create a quotation/sale order directly from the helpdesk ticket.
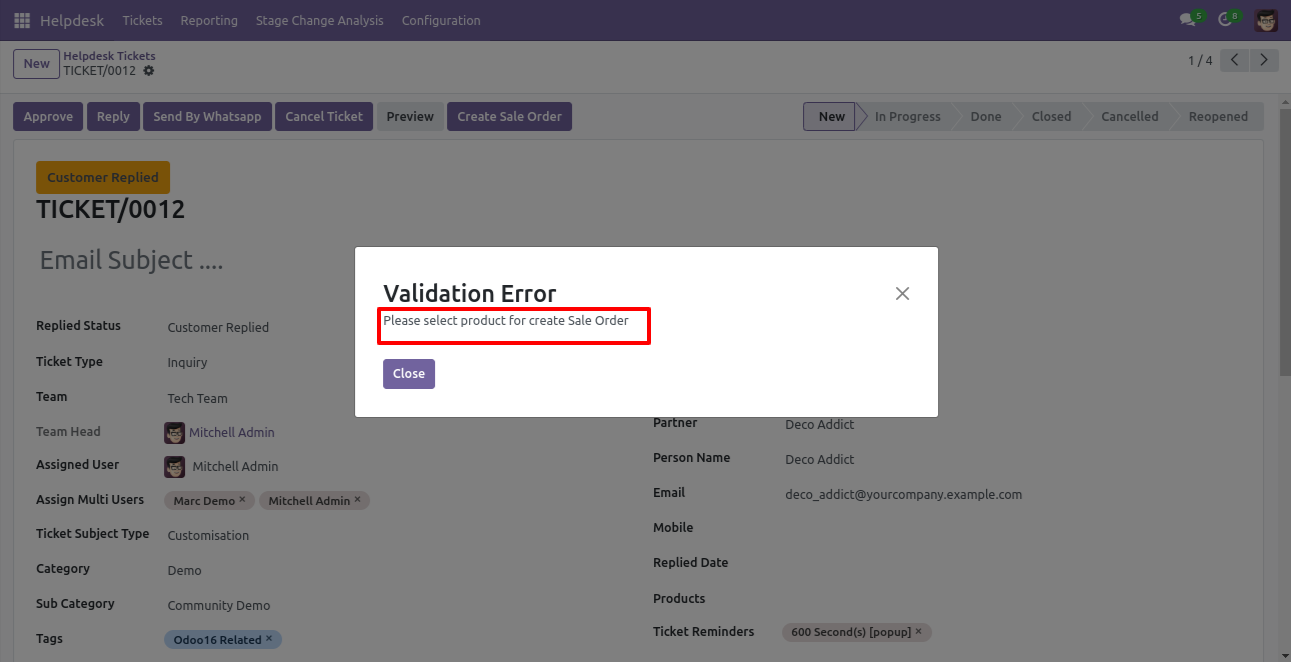
If you you try to create a SO without selecting a product then this error will appears.
Select products and click on the 'Create Sale Order' button.
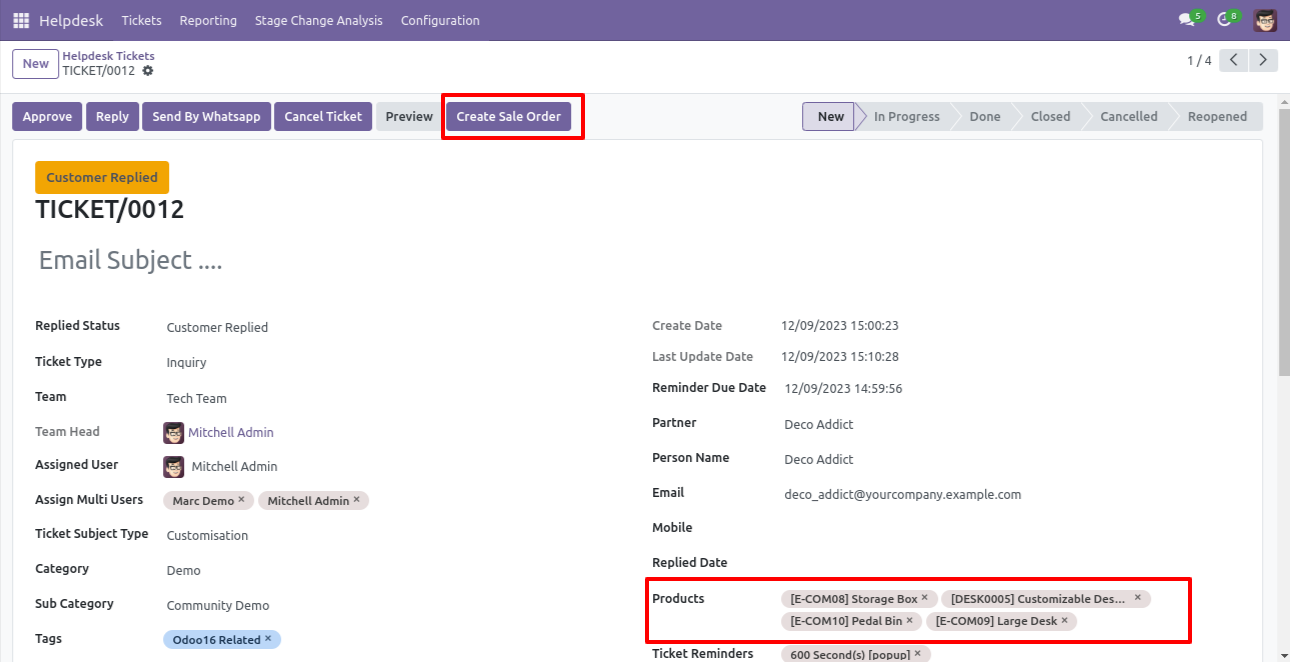
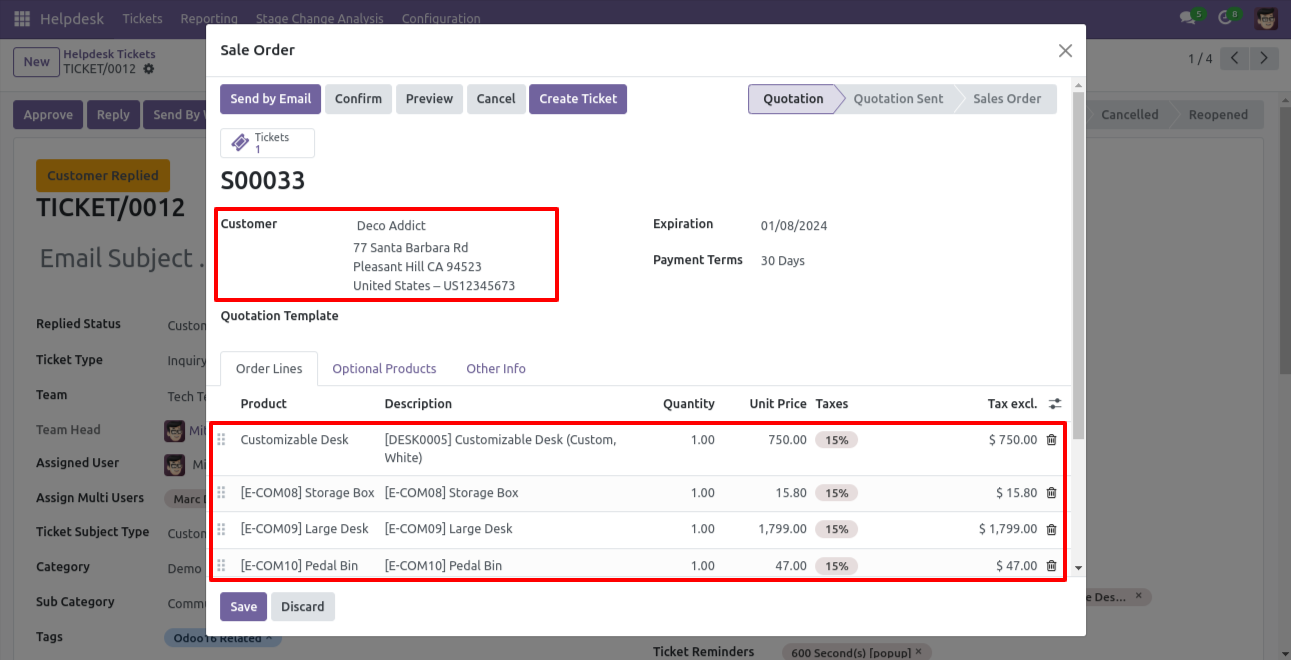
After that one wizard opens, fill the details and save it.
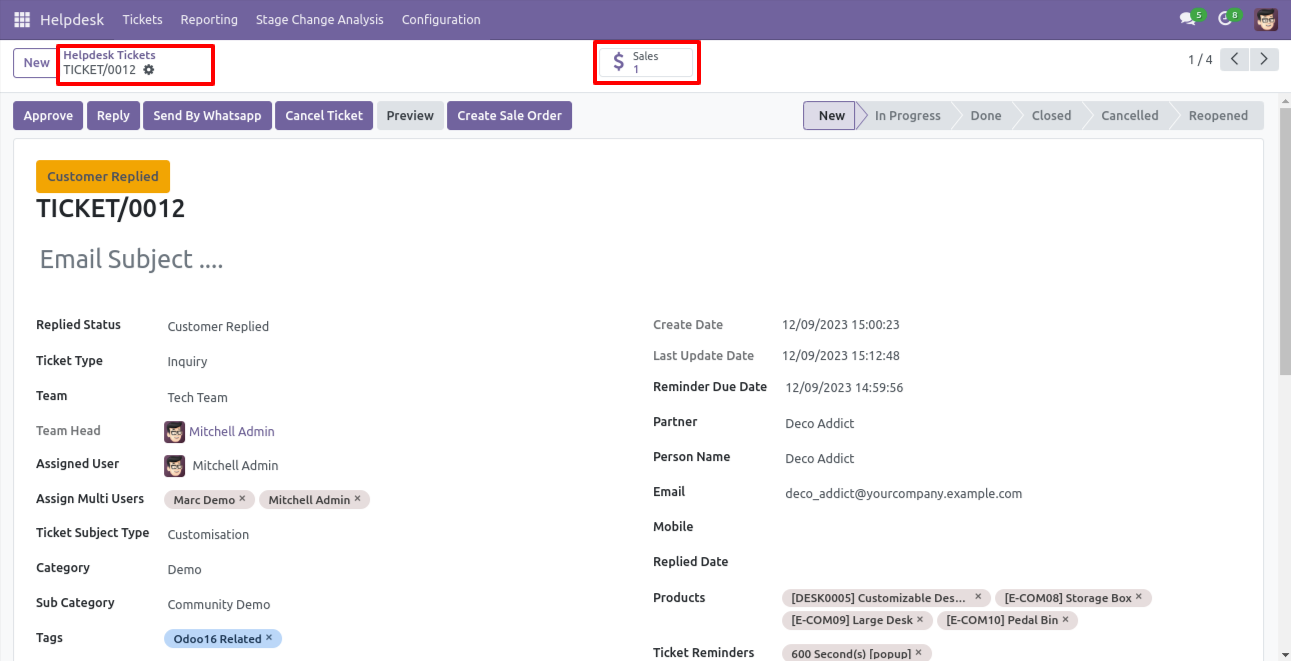
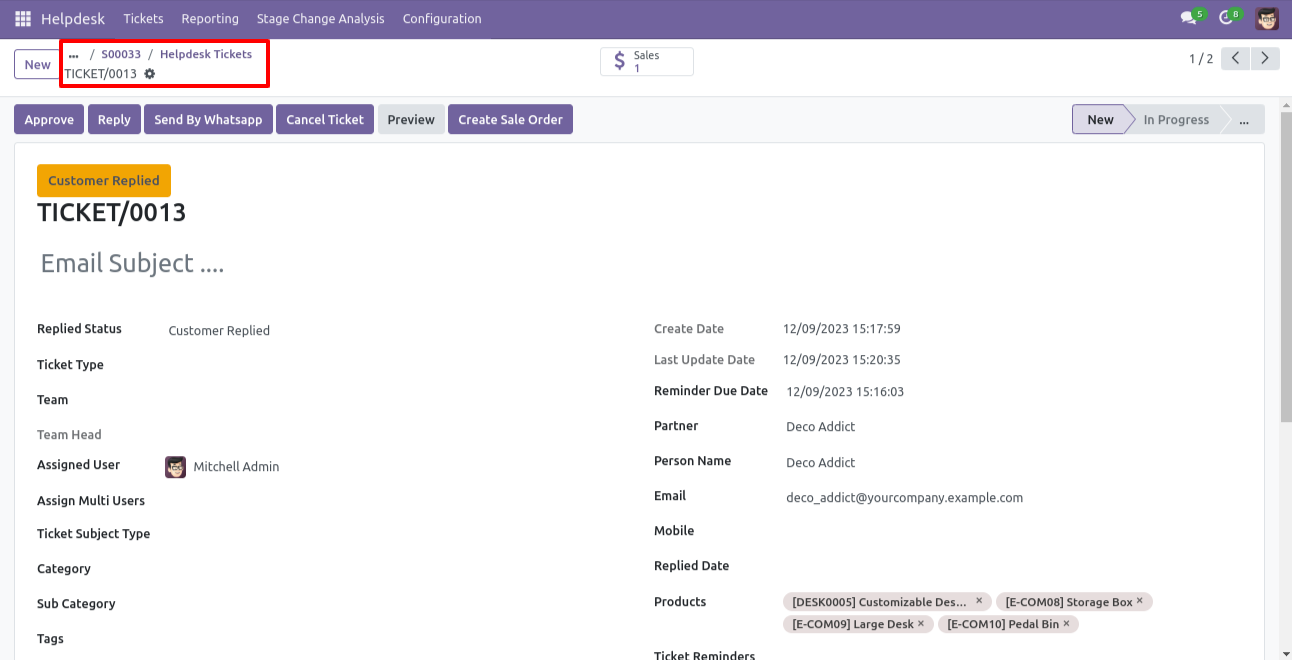
You can see sale order/quotation of that ticket using the 'Sales' smart button.
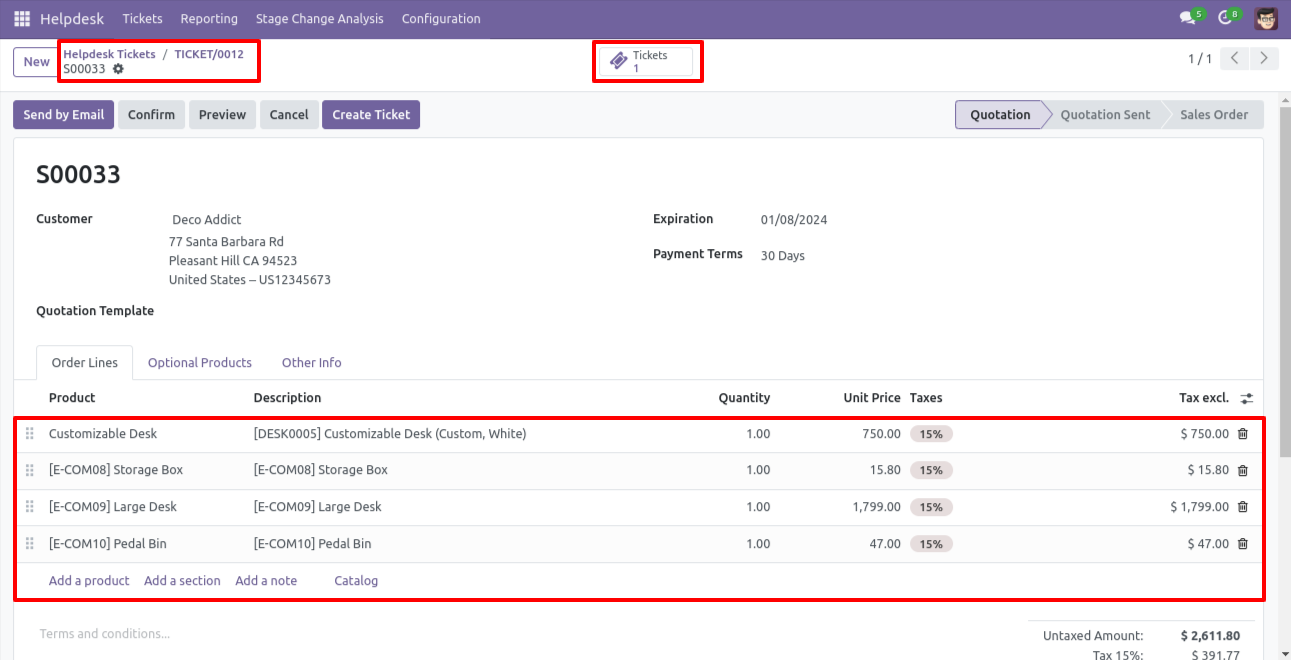
You can see tickets of that sale order/quotation using the 'Tickets' smart button.
You can create a helpdesk ticket from the sale order/quotation using the 'Create Ticket' button.
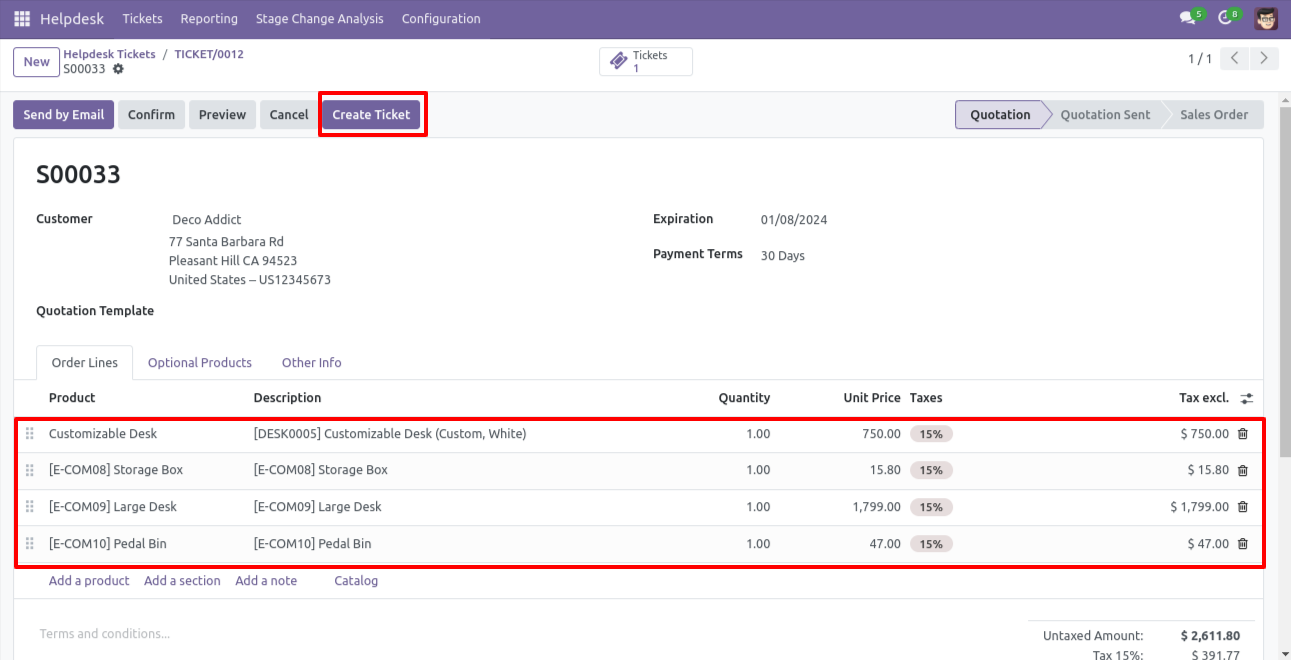
After that one wizard opens, fill the details and save it.
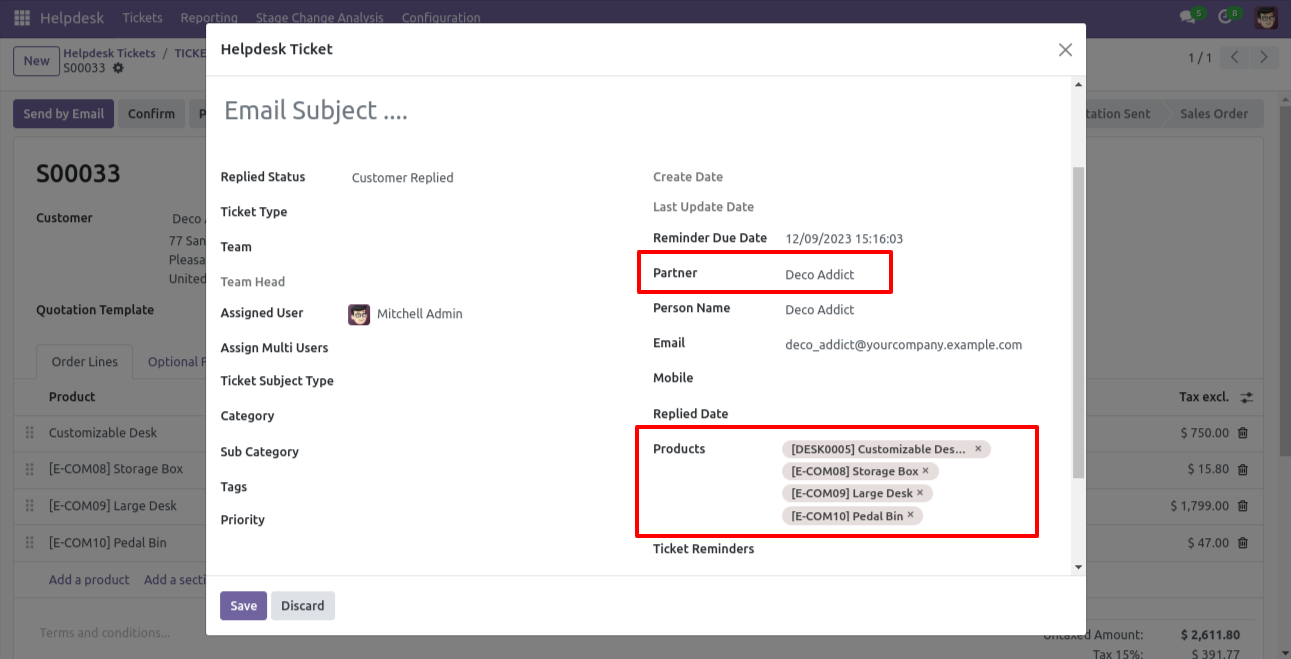
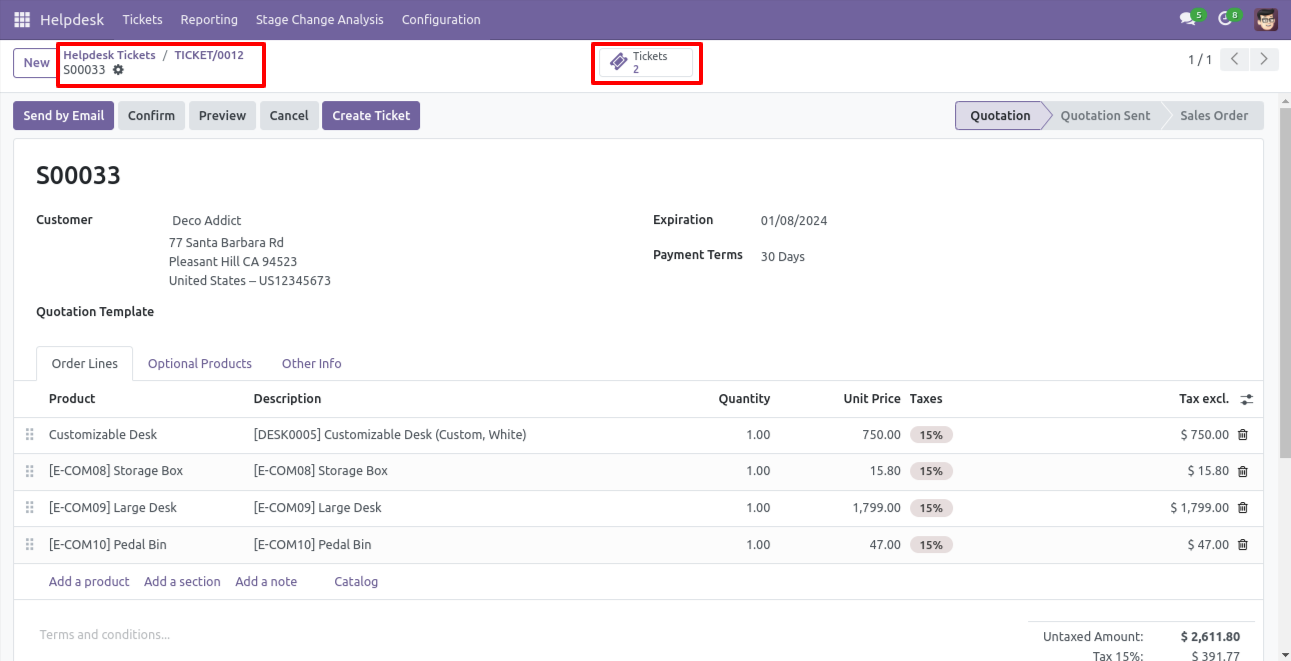
You can see tickets of that sale order/quotation using the 'Tickets' smart button.
It opens tickets Kanban view.
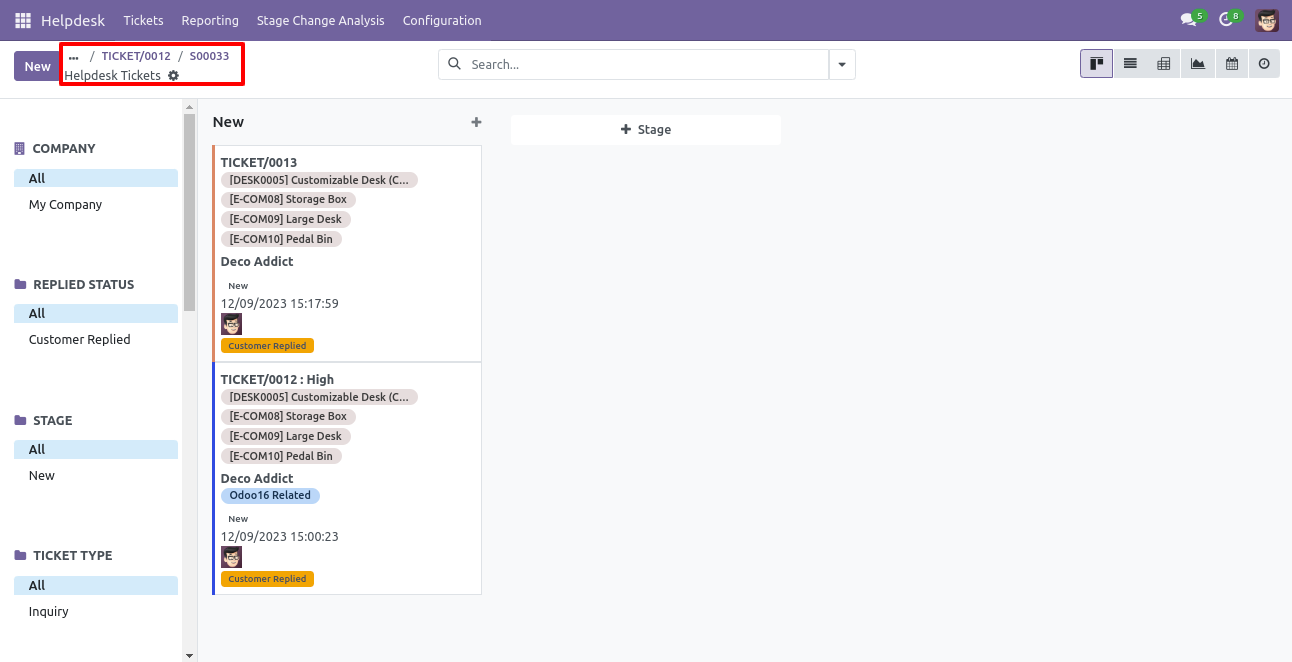
Created ticket form view looks like this.
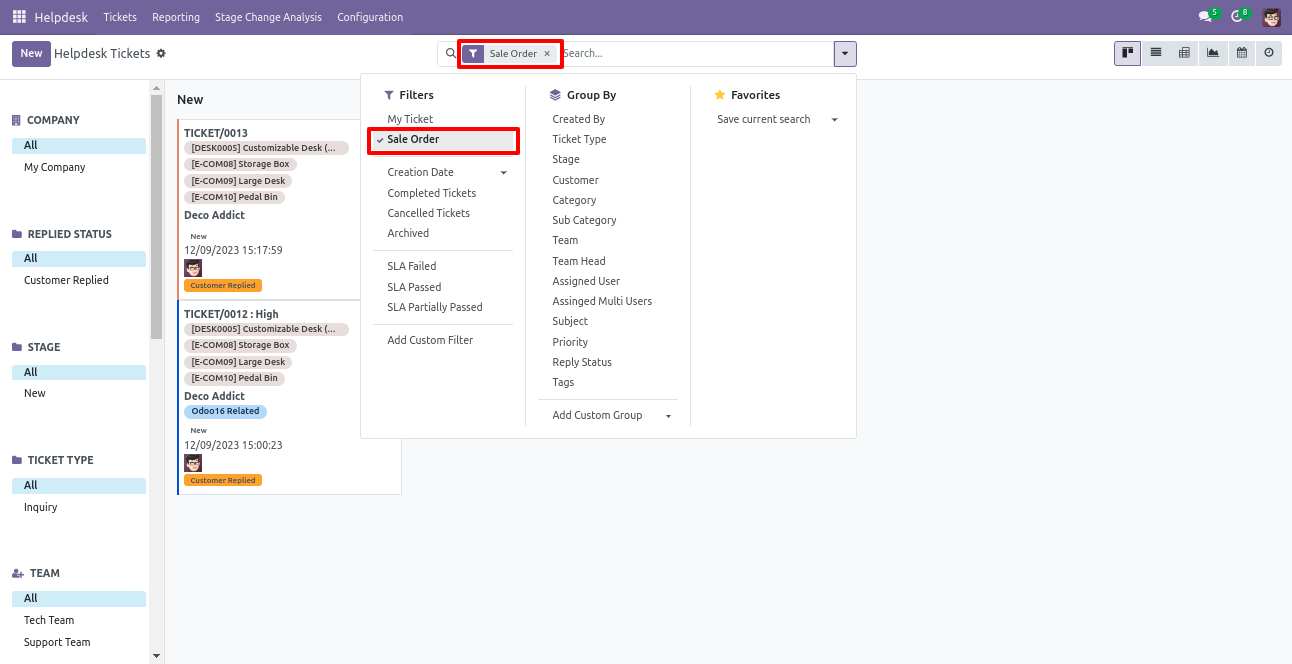
You can filter tickets sale order wise.
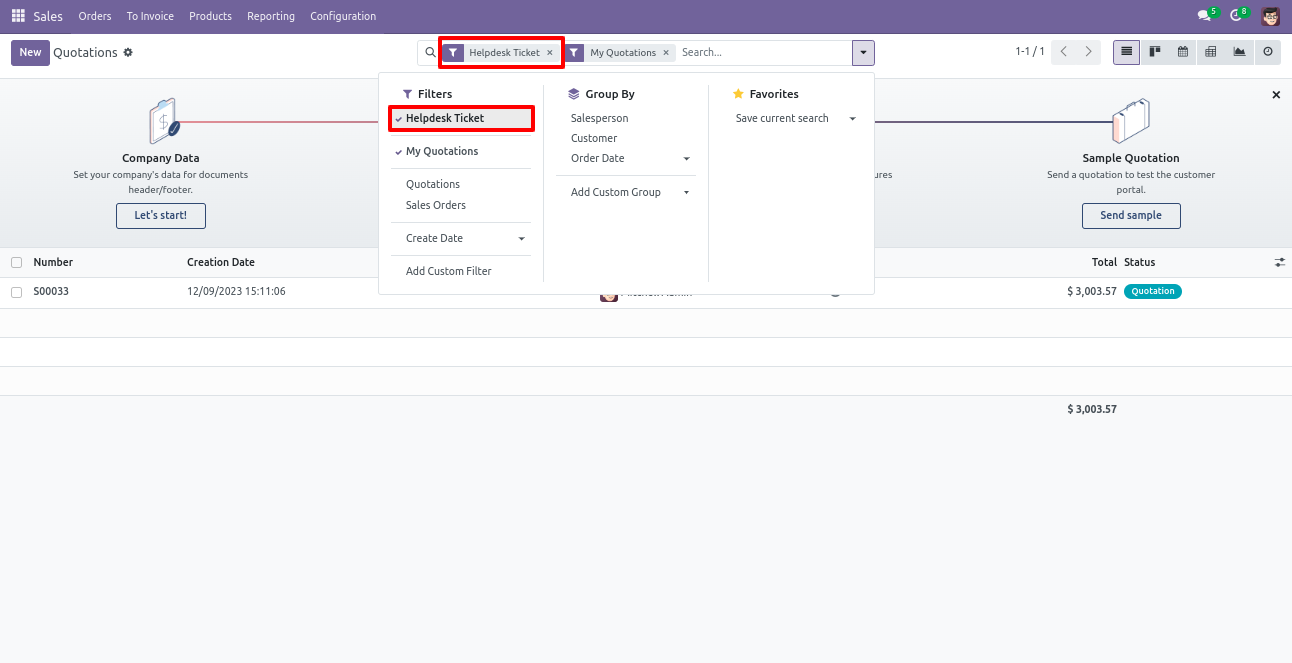
You can filter sale order ticket wise.
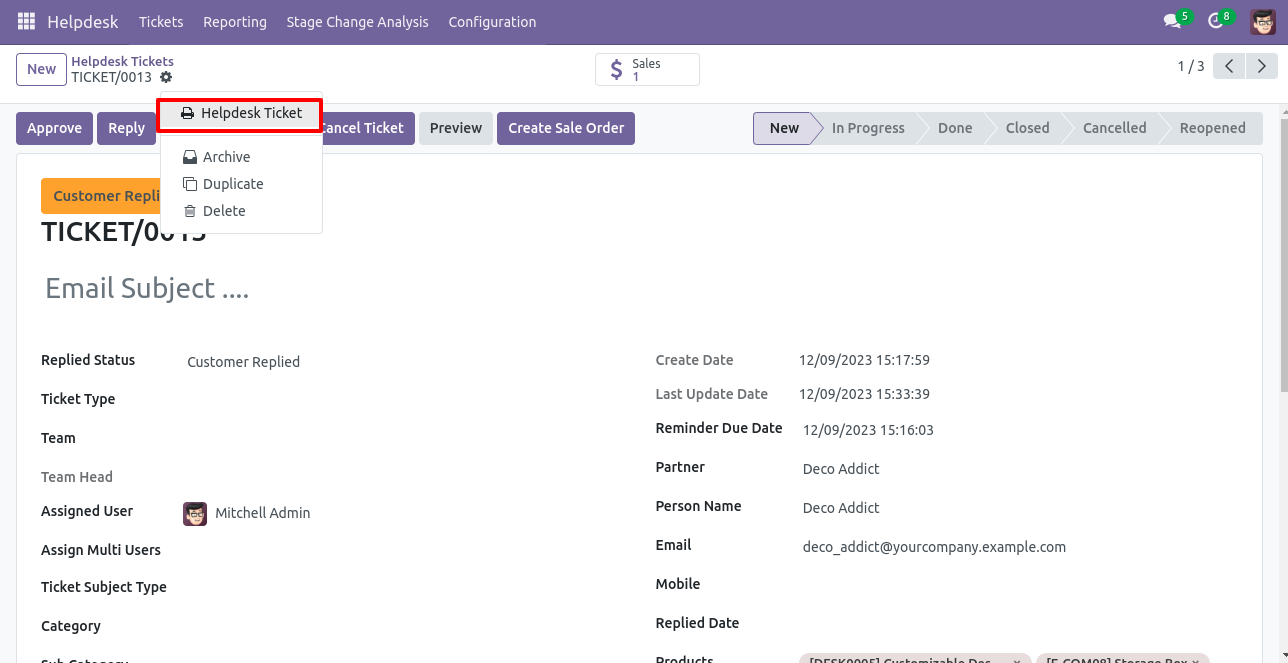
Form view of the helpdesk ticket, Click on the print'Helpdesk ticket' from the action buton.
Ticket PDF report with the products.
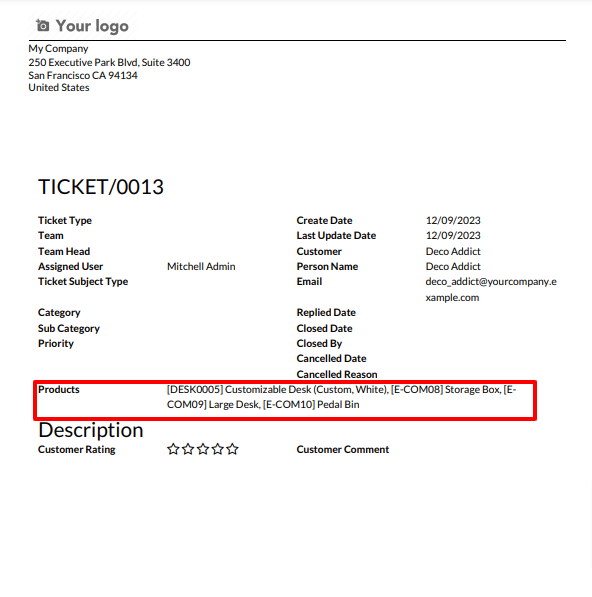
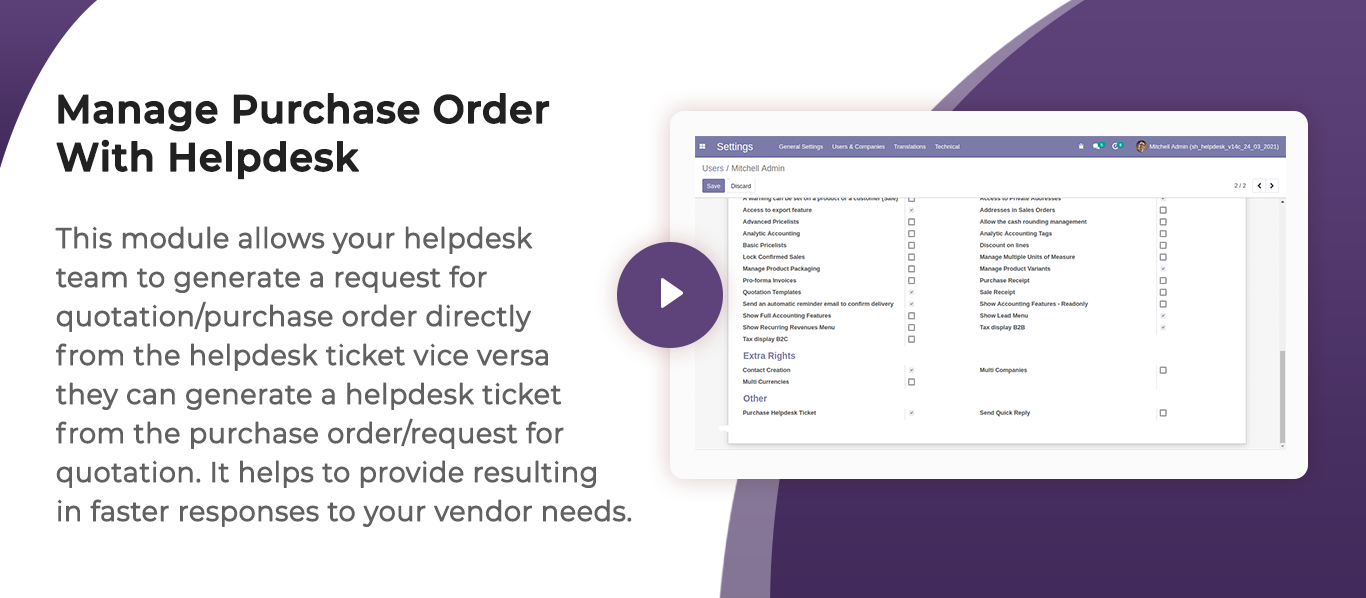
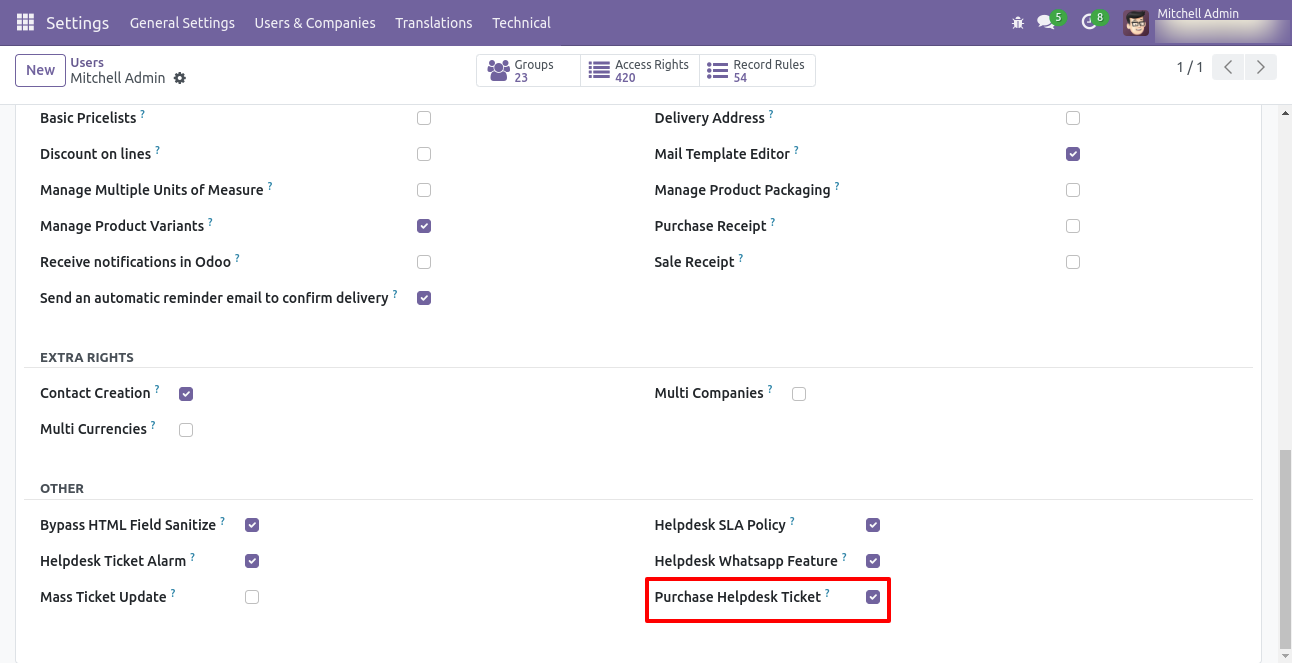
Tick security group 'Purchase Helpdesk Ticket' to generate a request for quotation/purchase order directly from the helpdesk ticket as well generate a helpdesk ticket from the purchase order/request for quotation.
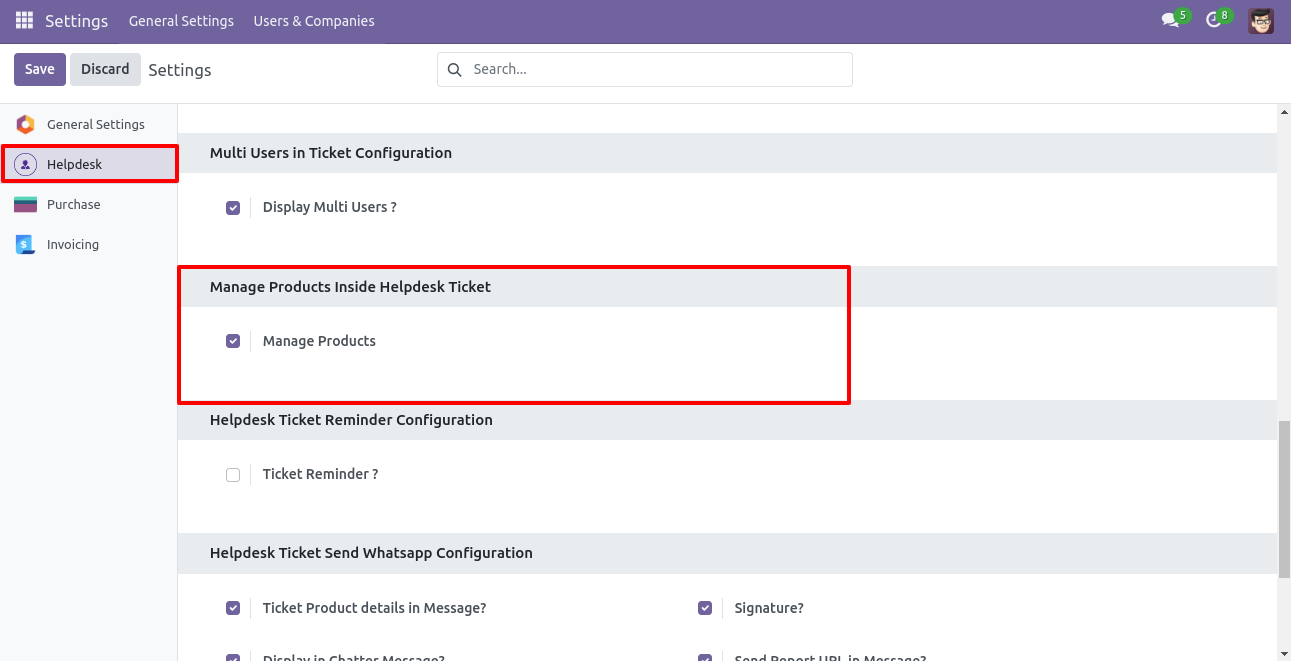
Go to the helpdesk settings and tick 'Manage Products'.
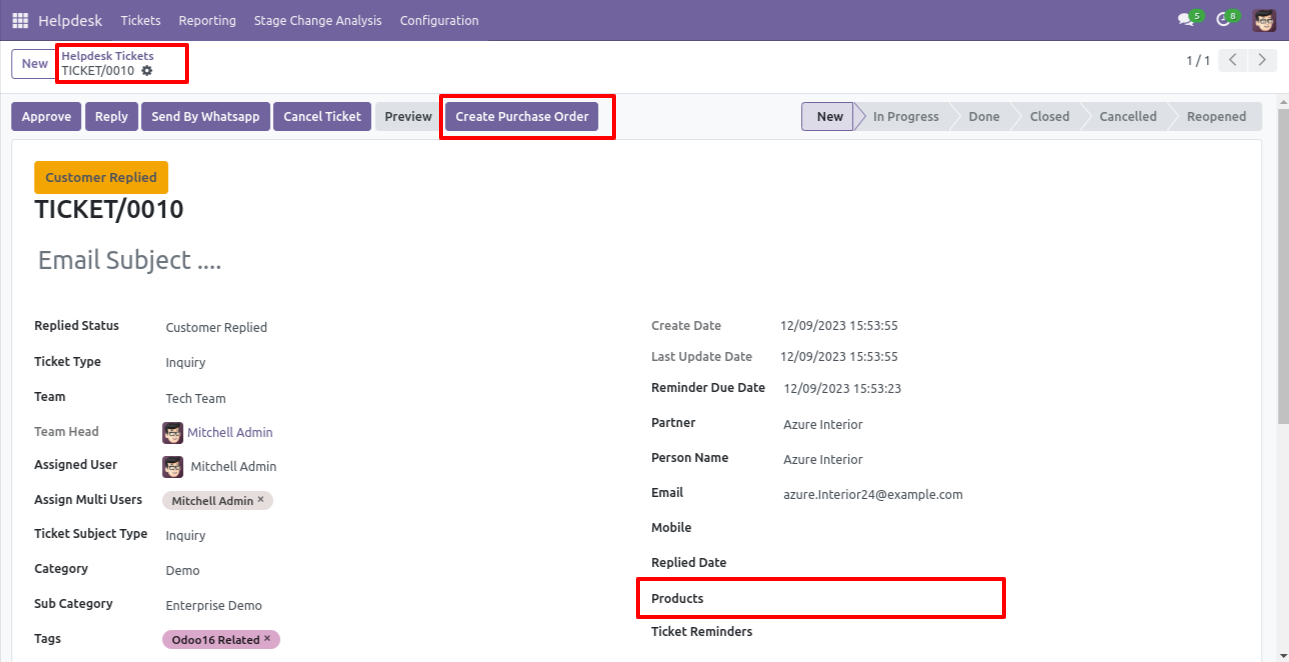
'Helpdesk Ticket' form view, press the 'Create Purchase order' button to create a request for quotation/purchase order directly from the helpdesk ticket.
If you you try to create a PO without selecting a product then this error will appears.
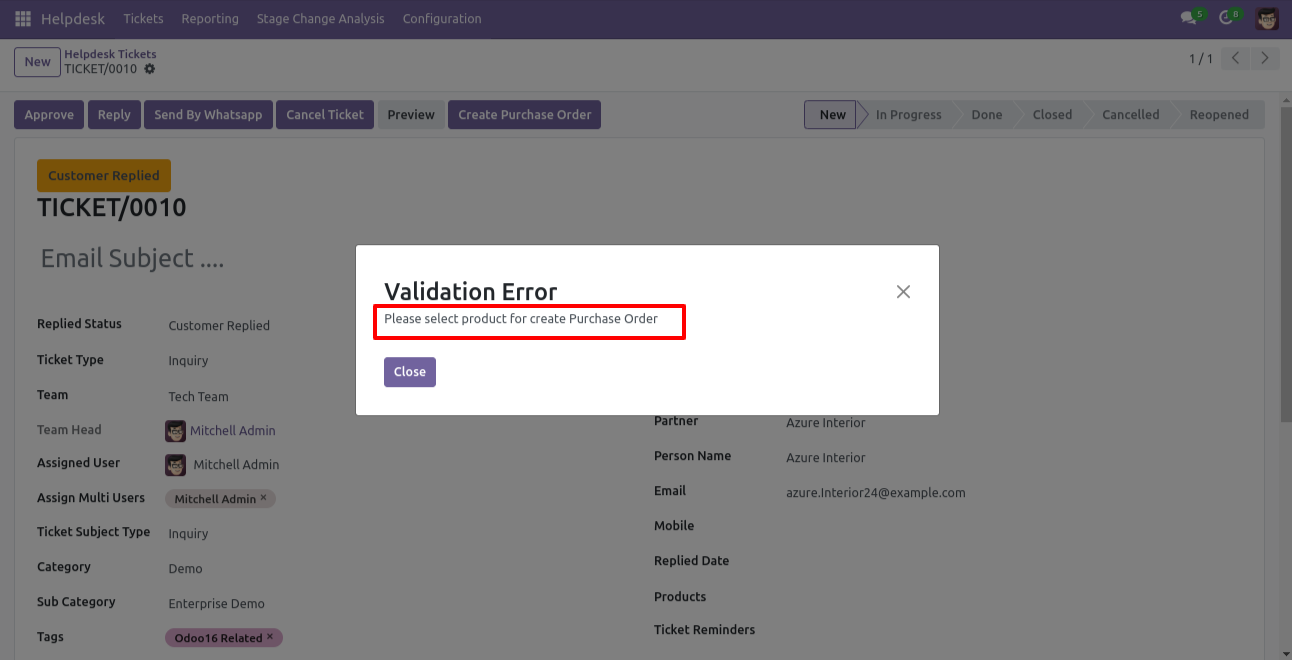
Select products and click on the 'Create Purchase Order' button.
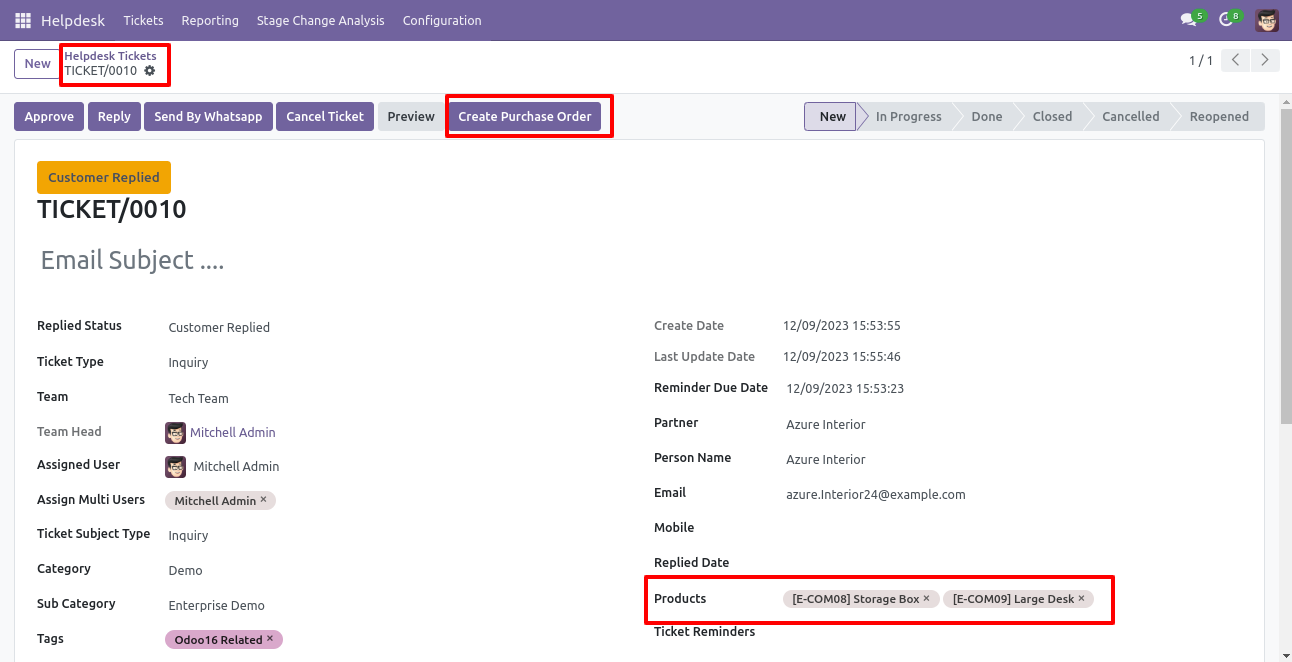
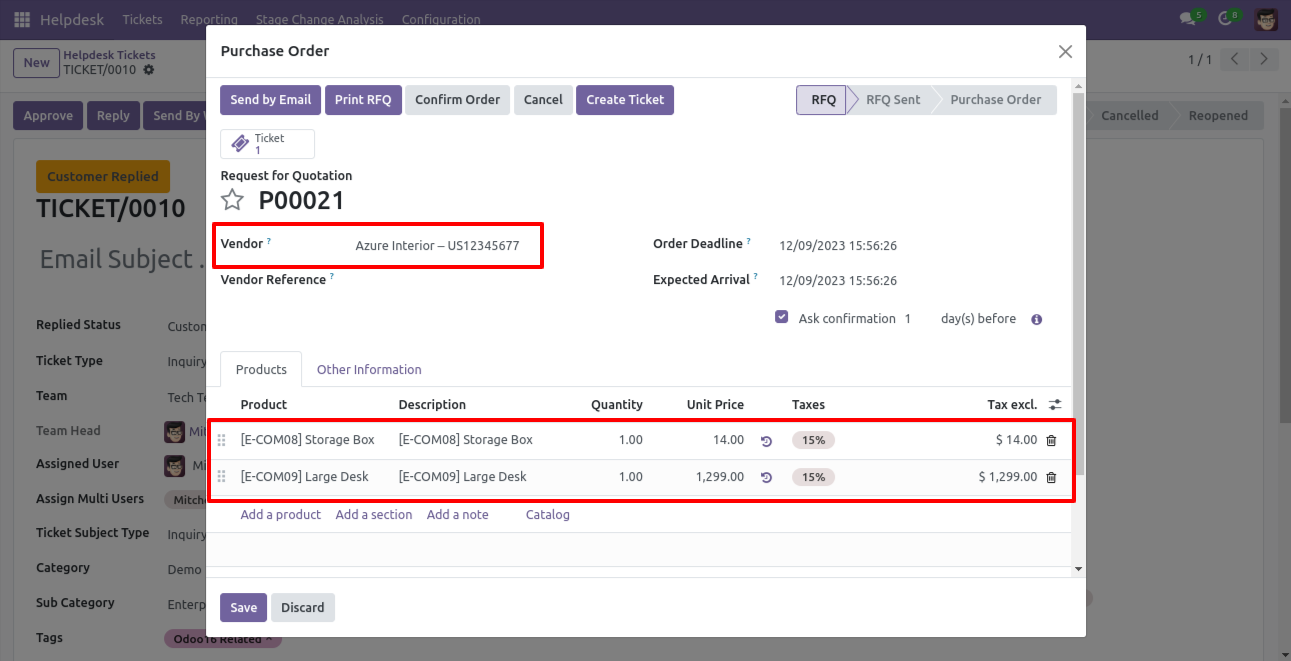
After that one wizard opens, fill the details and save it.
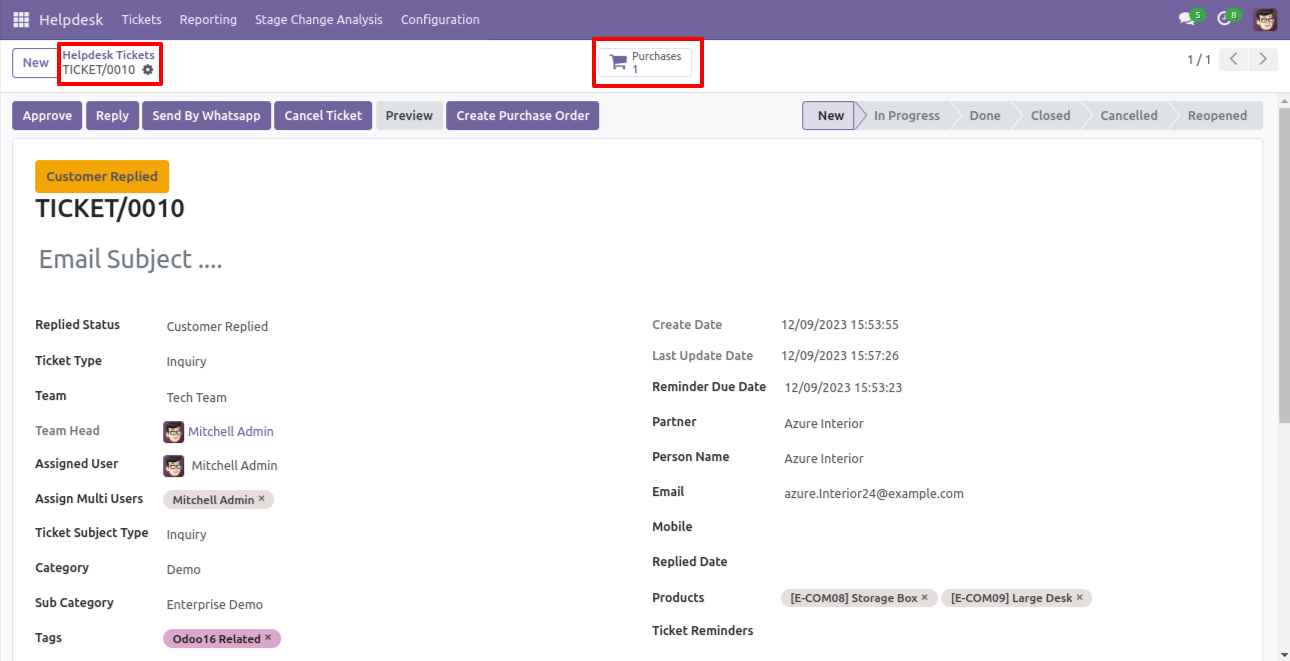
Now, from the ticket, you can see generated purchase orders of that ticket using the 'purchases' smart button.
So, from that purchase order, you can see tickets of that purchase order/request for quotation using the 'Tickets' smart button.
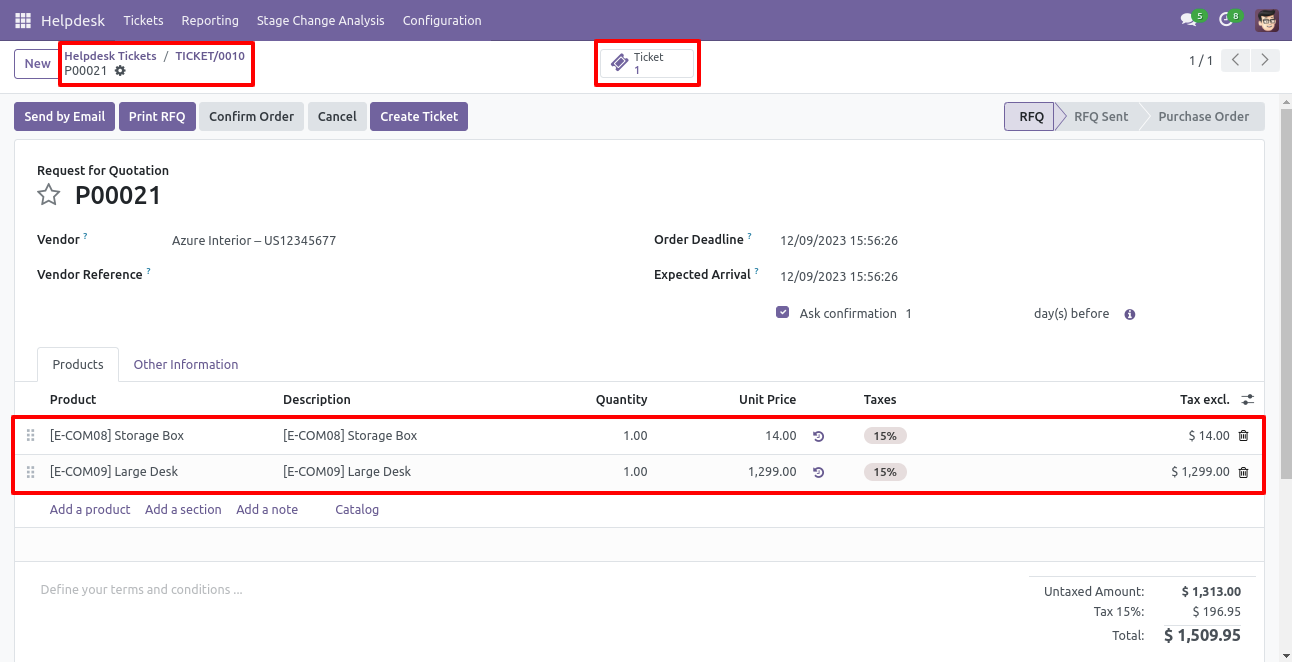
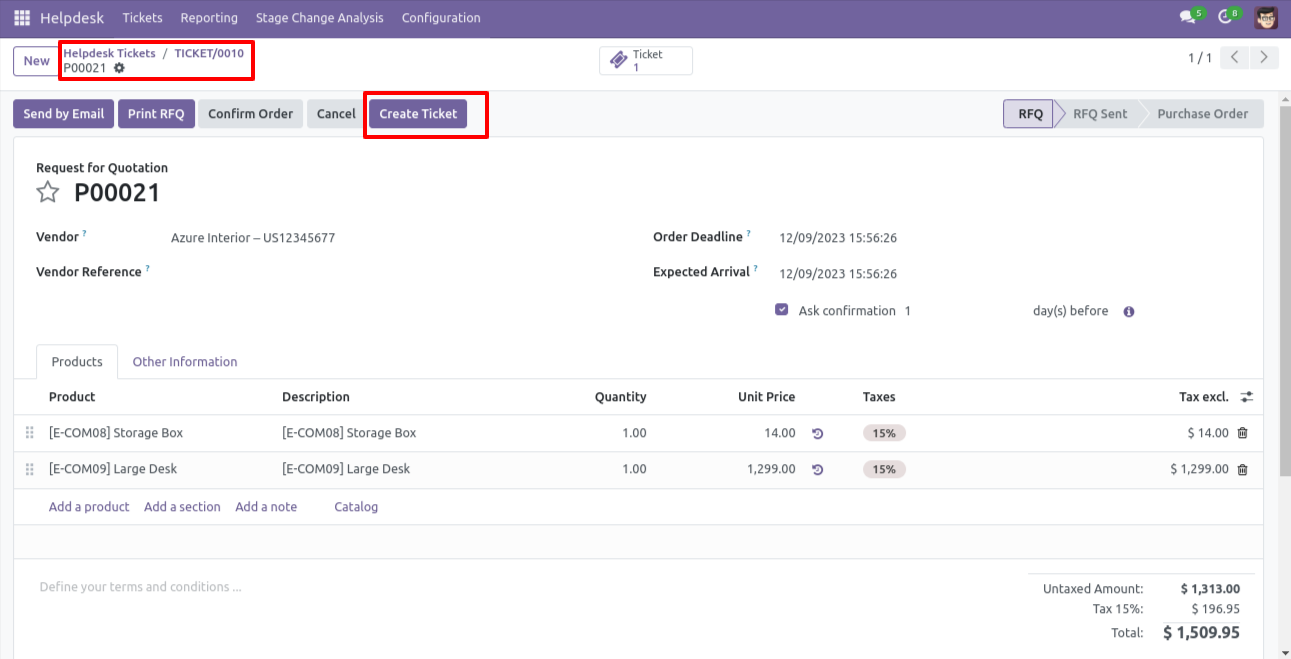
You can create a helpdesk ticket from the purchase order/request for quotation using the 'Create Ticket' button.
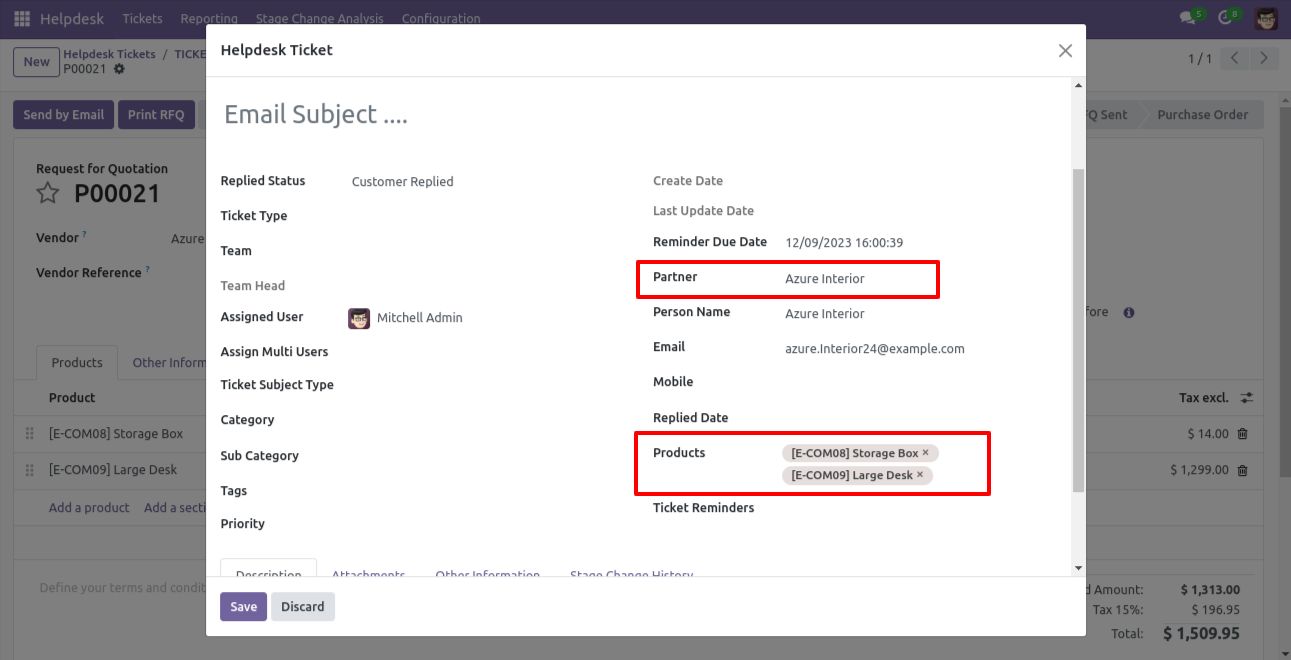
After that one wizard opens, fill the details and save it.
You can see tickets of that purchase order/request for quotation using the 'Ticket' smart button.
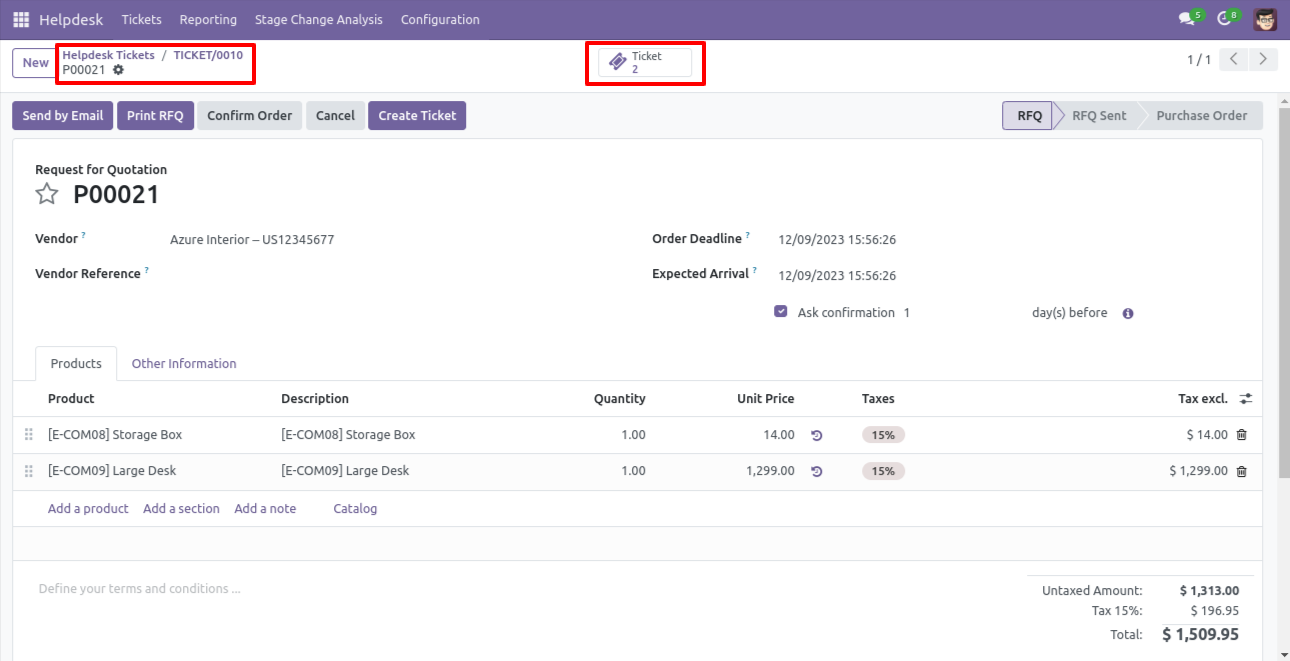
It opens tickets Kanban view.
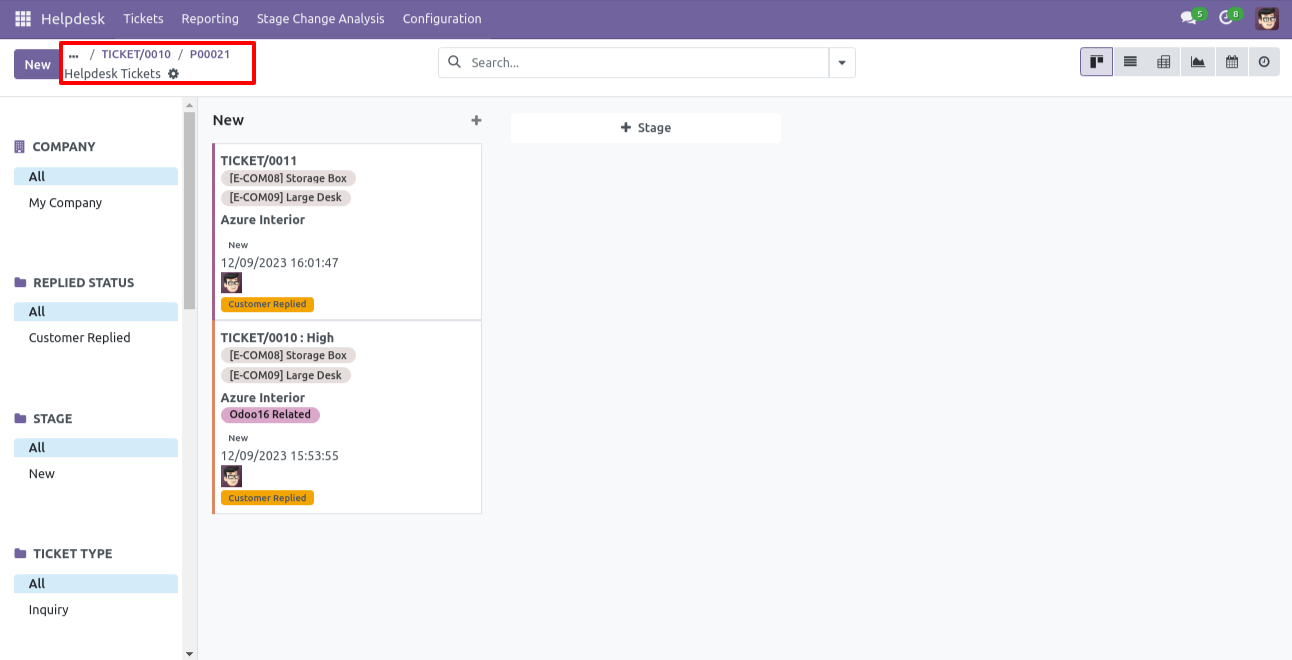
Created ticket form view looks like this.
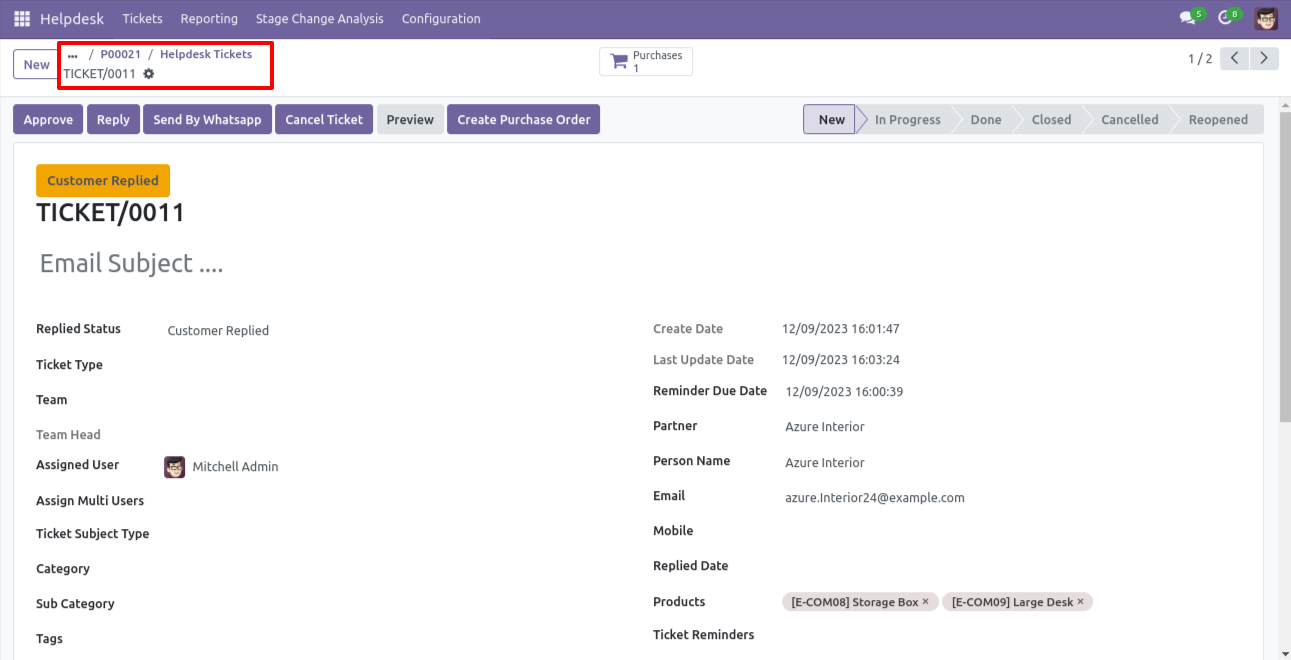
Form view of the helpdesk ticket, Click on the print 'Helpdesk ticket' from the action buton.
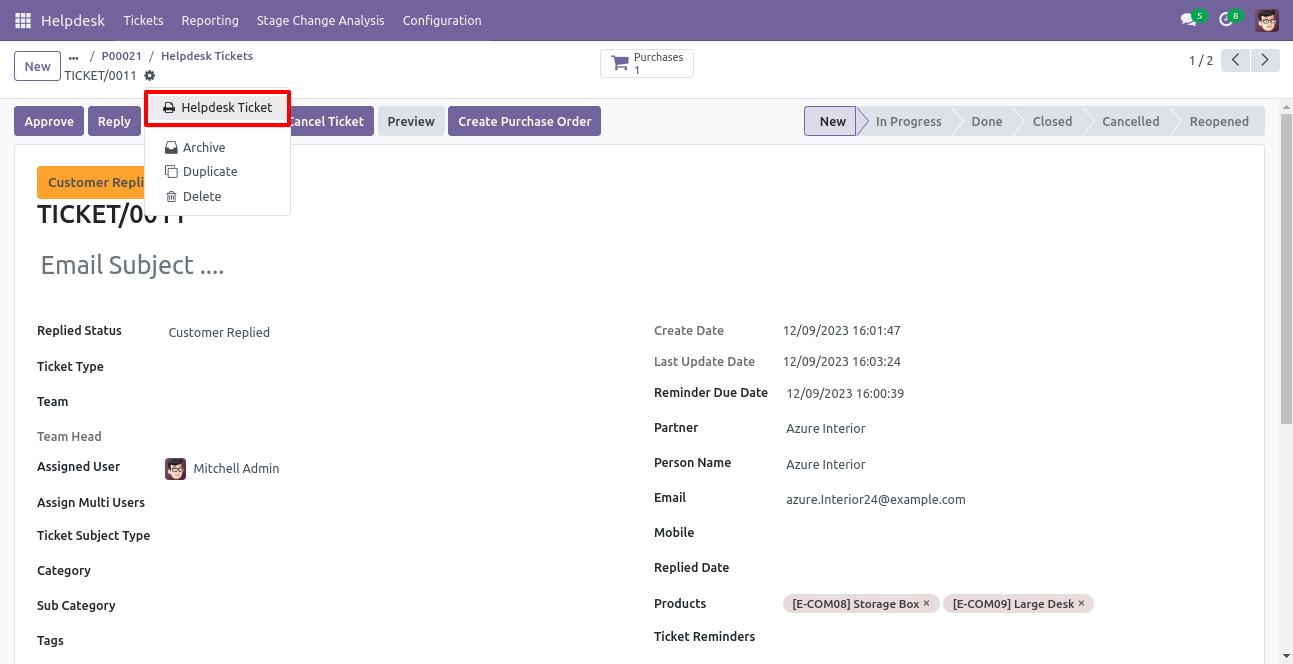
Ticket PDF report with the products.
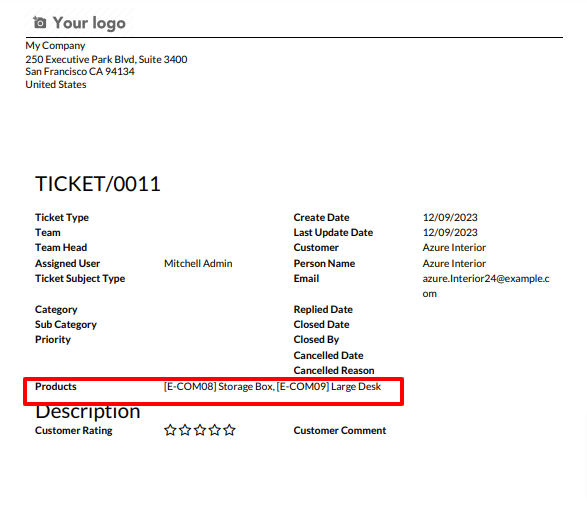
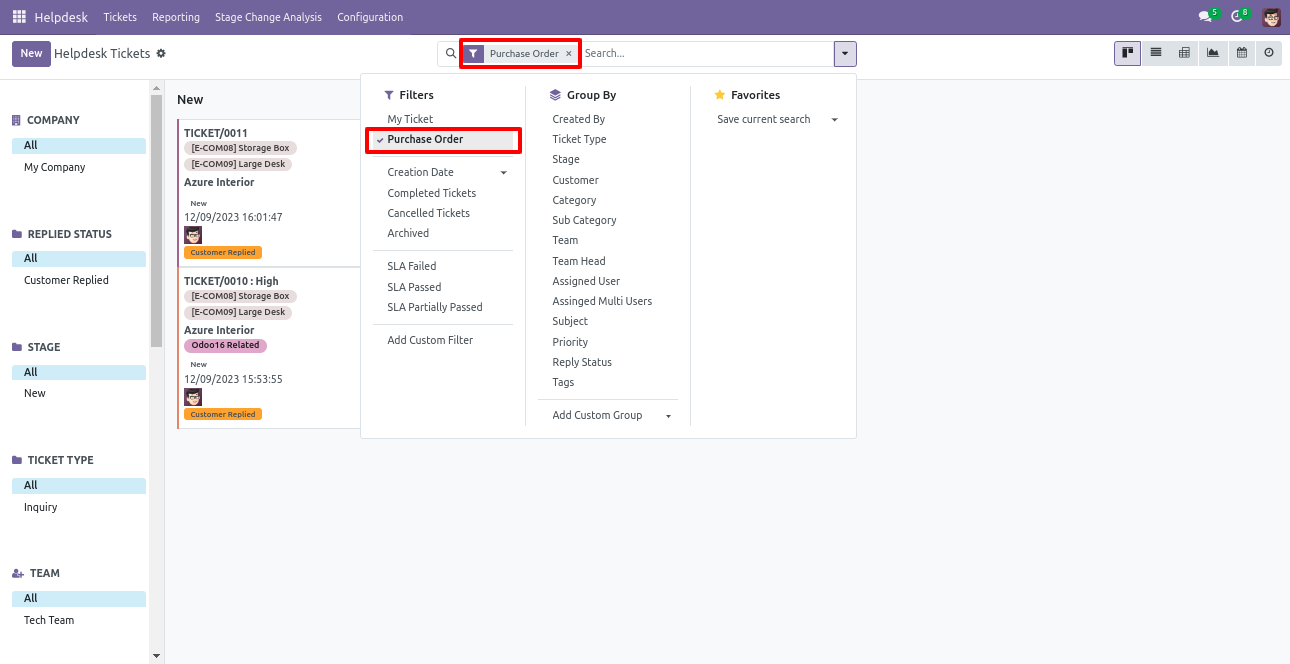
You can filter tickets purchase order wise.
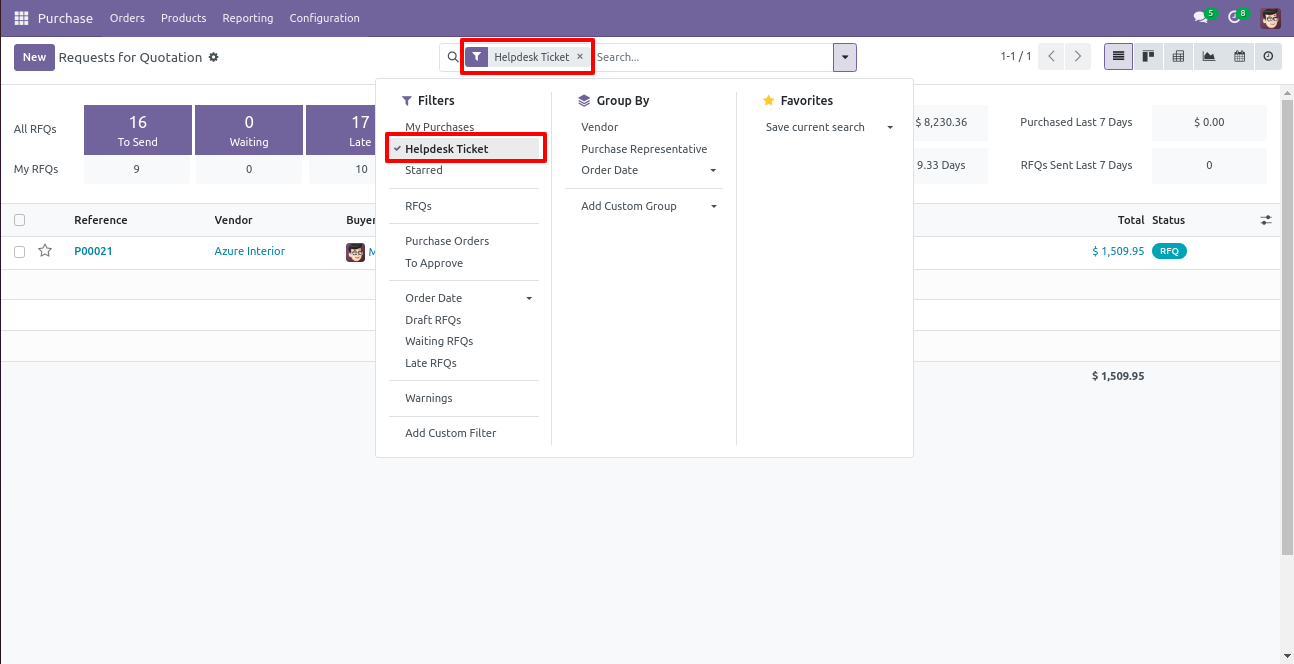
You can filter purchase order ticket wise.
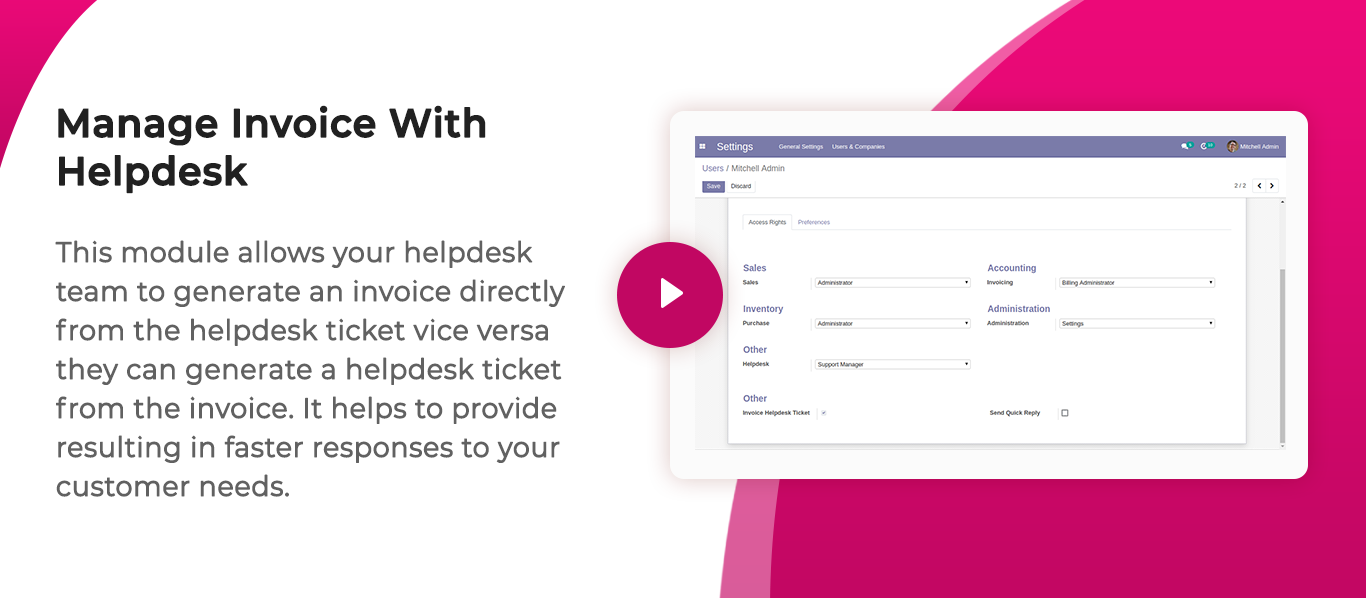
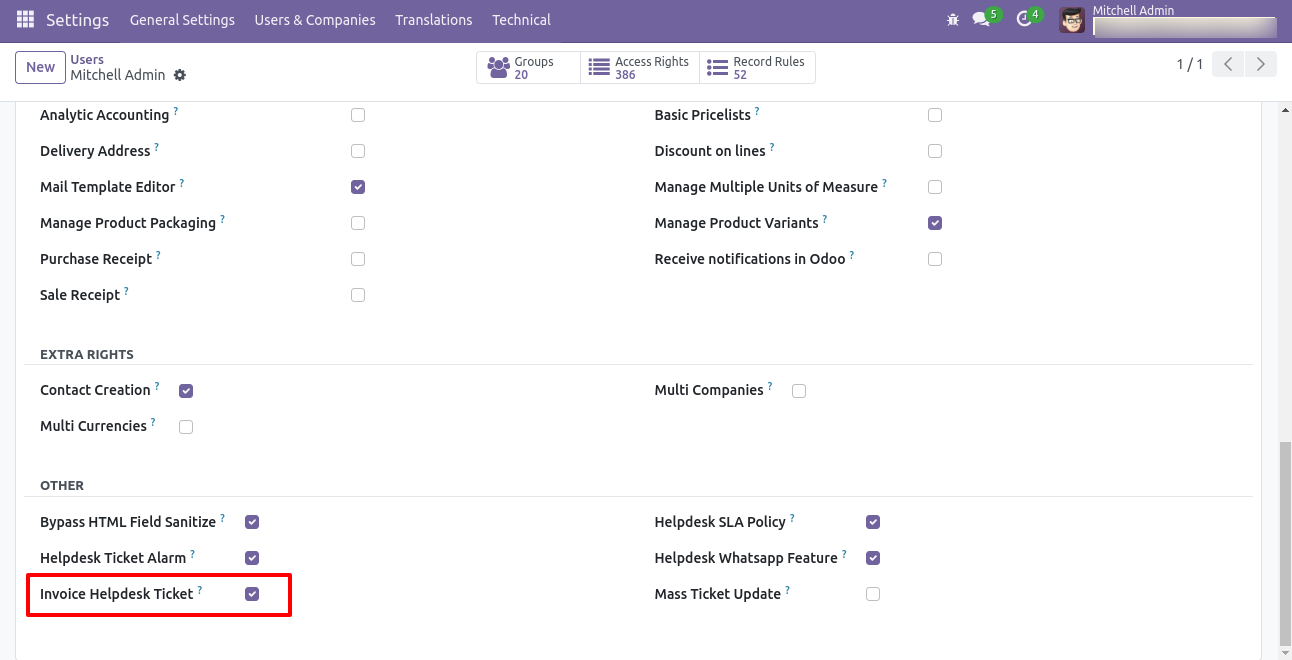
Tick security group 'Invoice Helpdesk Ticket' to generate invoice directly from the helpdesk ticket as well generate a helpdesk ticket from the invoice.
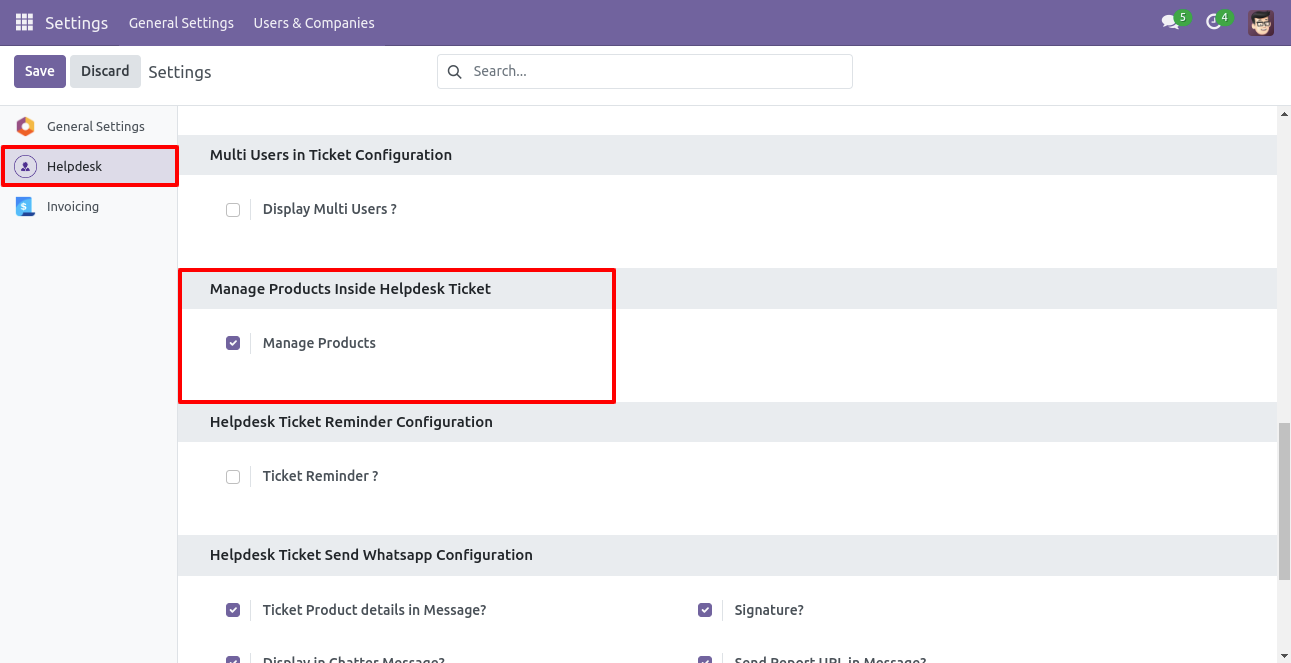
Go to the helpdesk settings and tick 'Manage Products'.
'Helpdesk Ticket' form view, press the "Create Invoice" button to create invoice directly from the helpdesk ticket.
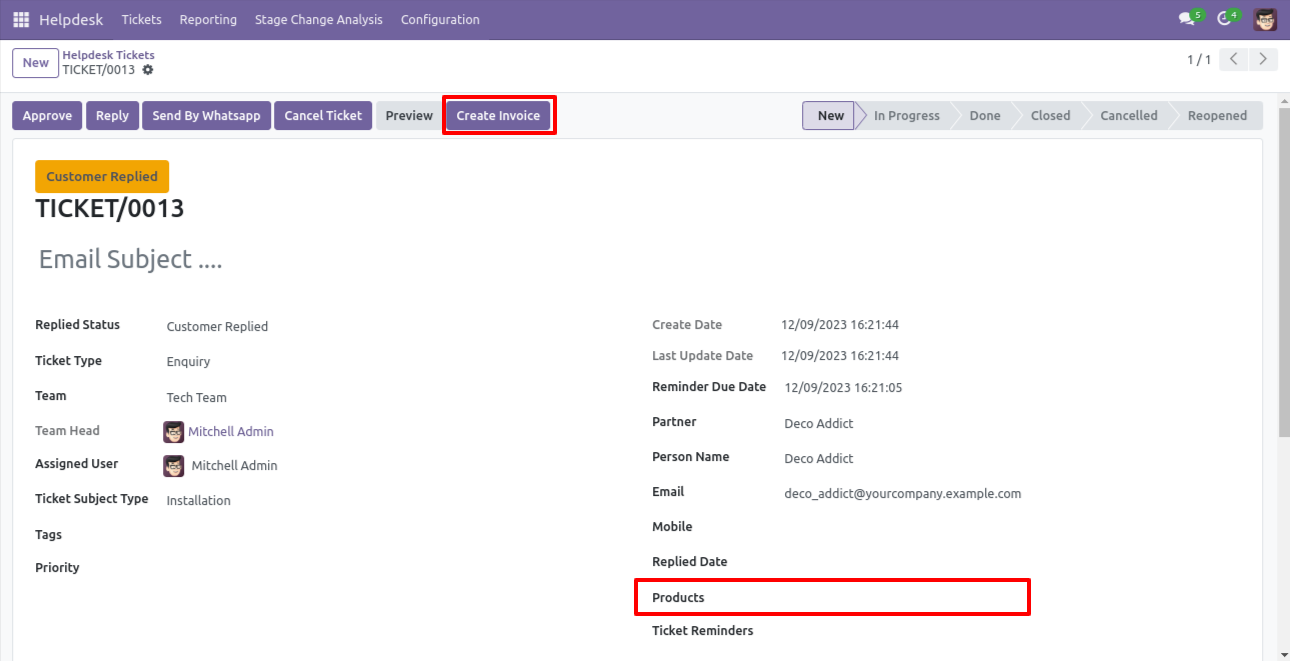
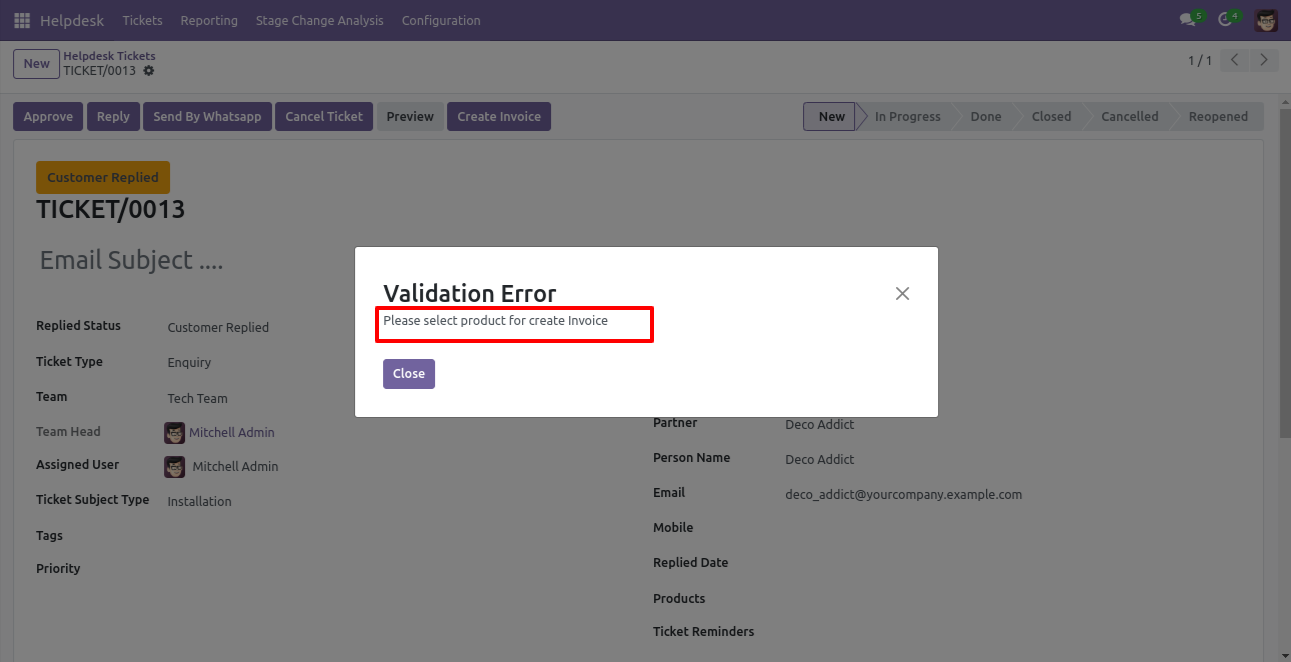
If you you try to create a invoice without selecting a product then this error will appears.
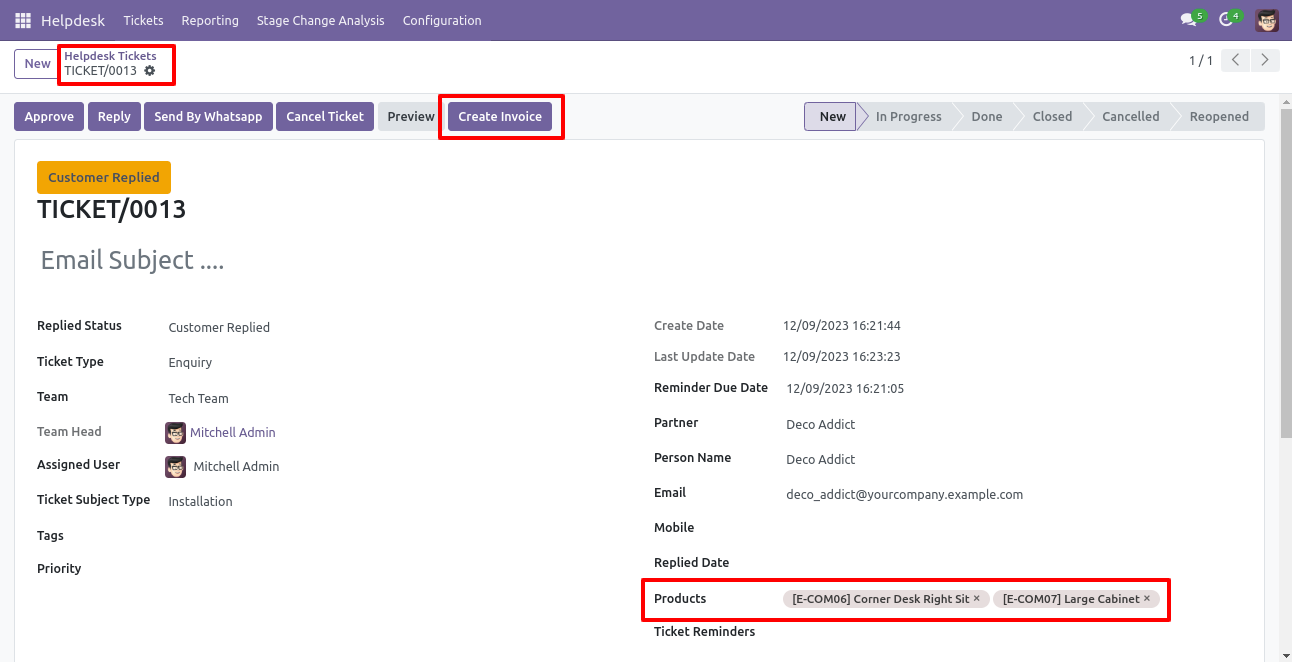
Select products and click on the 'Create Invoice' button.
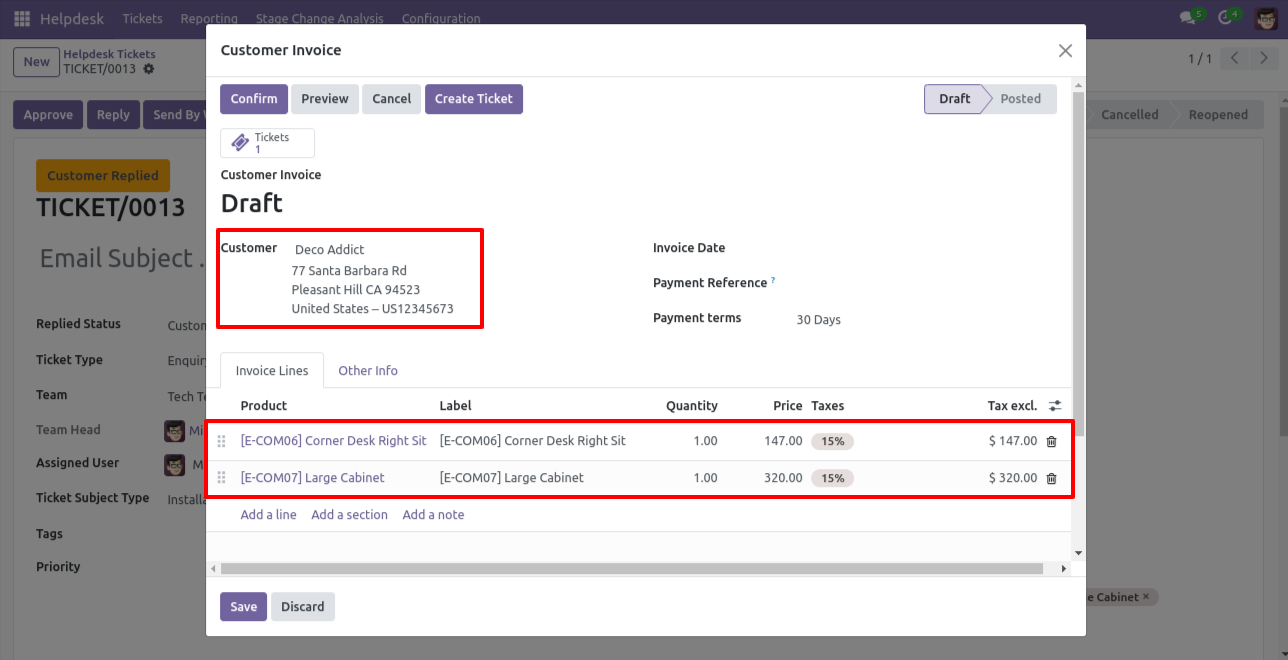
After that one wizard opens, select customer, products, and fill other details then press the 'Save' button.
Now, from the ticket, you can see generated invoices of that ticket using the 'Invoices' smart button.
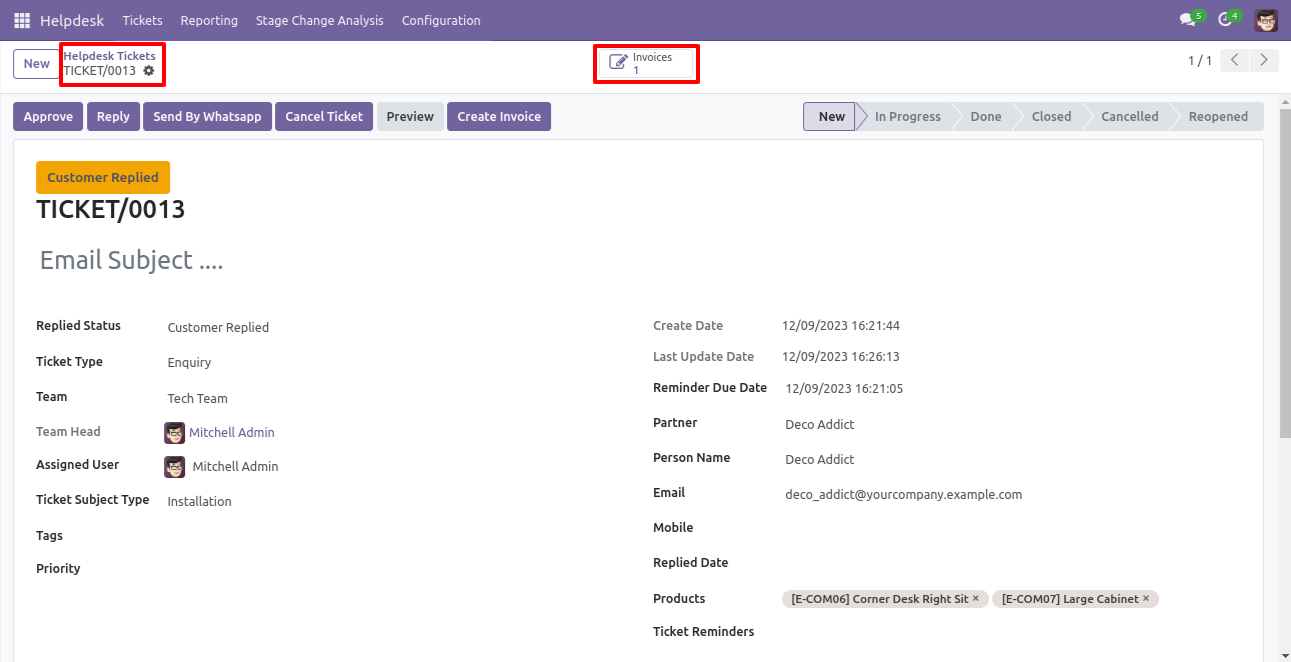
So, from that invoice, you can see tickets of that invoice using the 'Tickets' smart button.
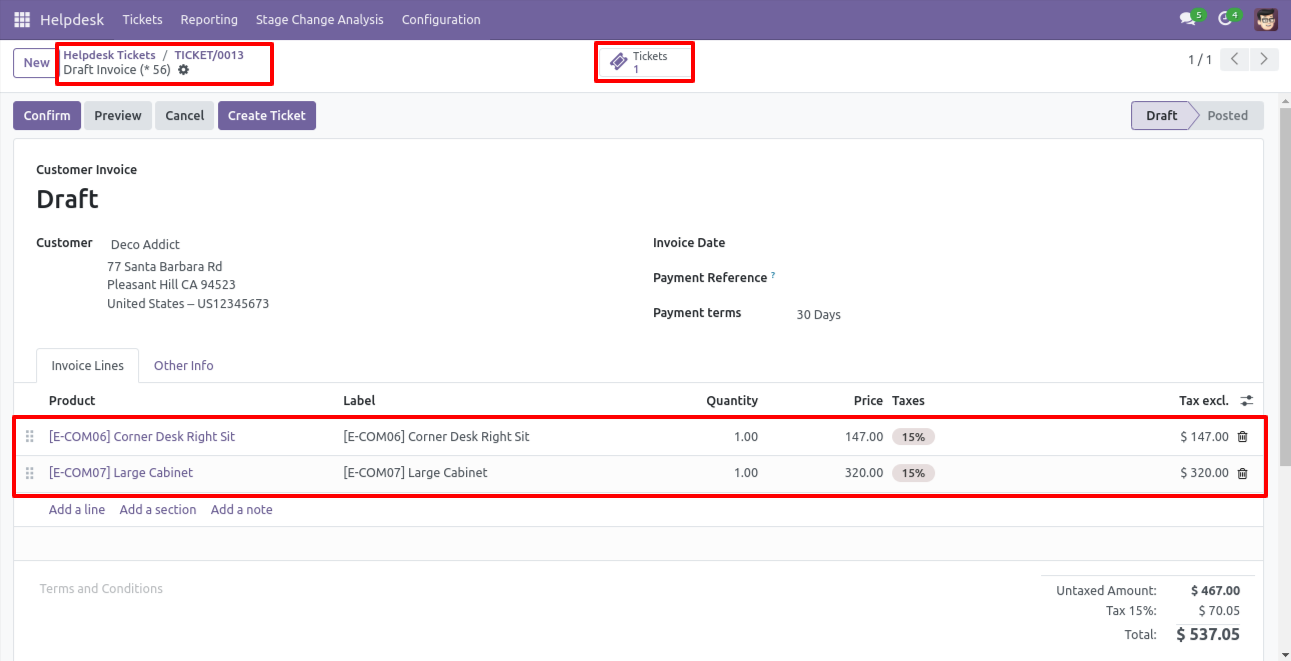
You can create a helpdesk ticket from the invoice using the 'Create Ticket' button.
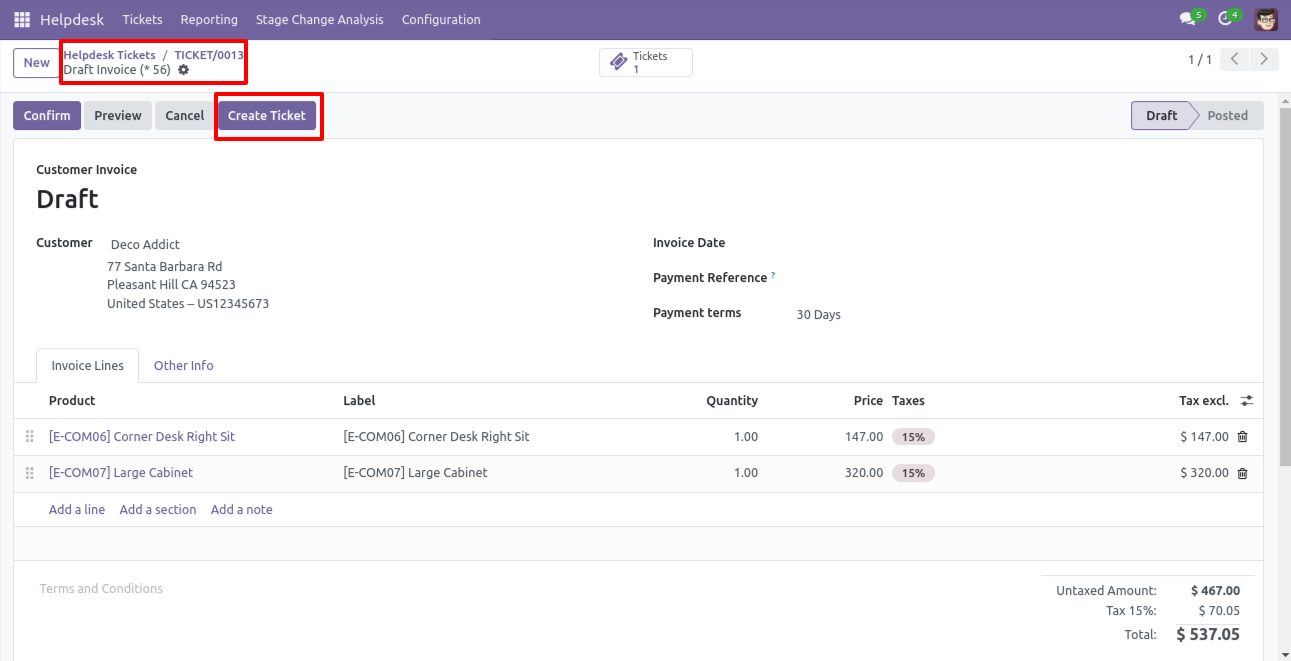
After that one wizard opens, fill the details and save it.
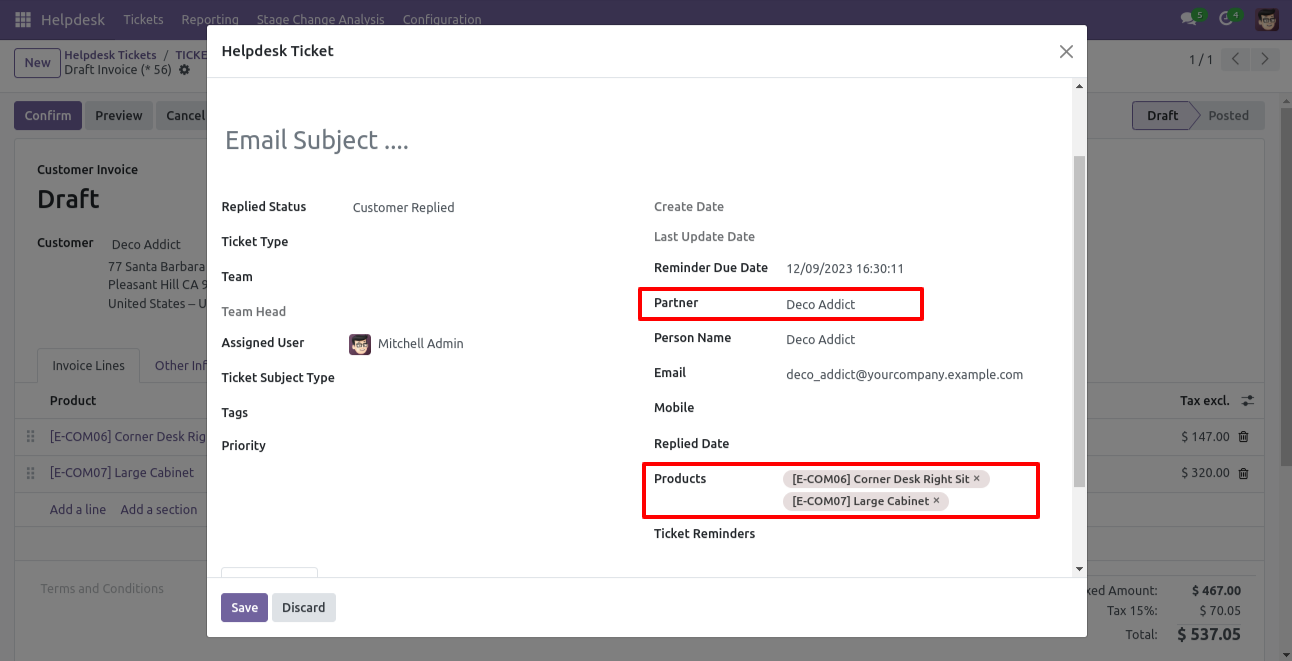
You can see tickets of that invoice using the 'Ticket' smart button.
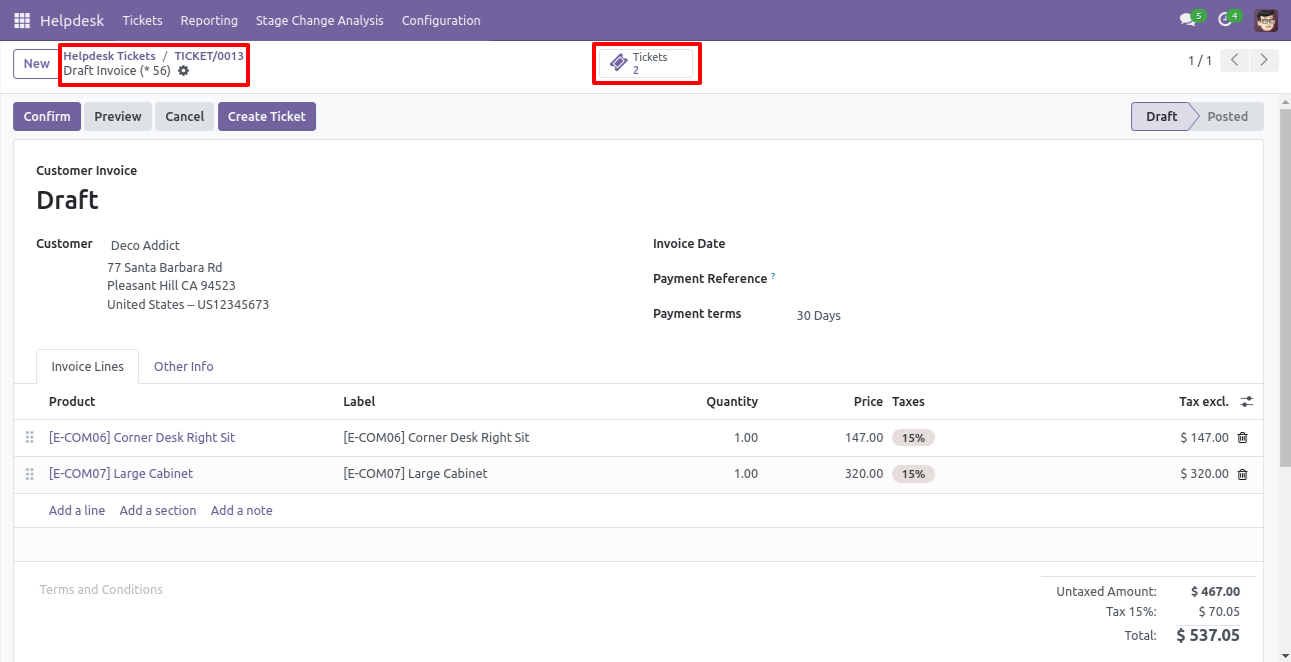
It opens tickets Kanban view.
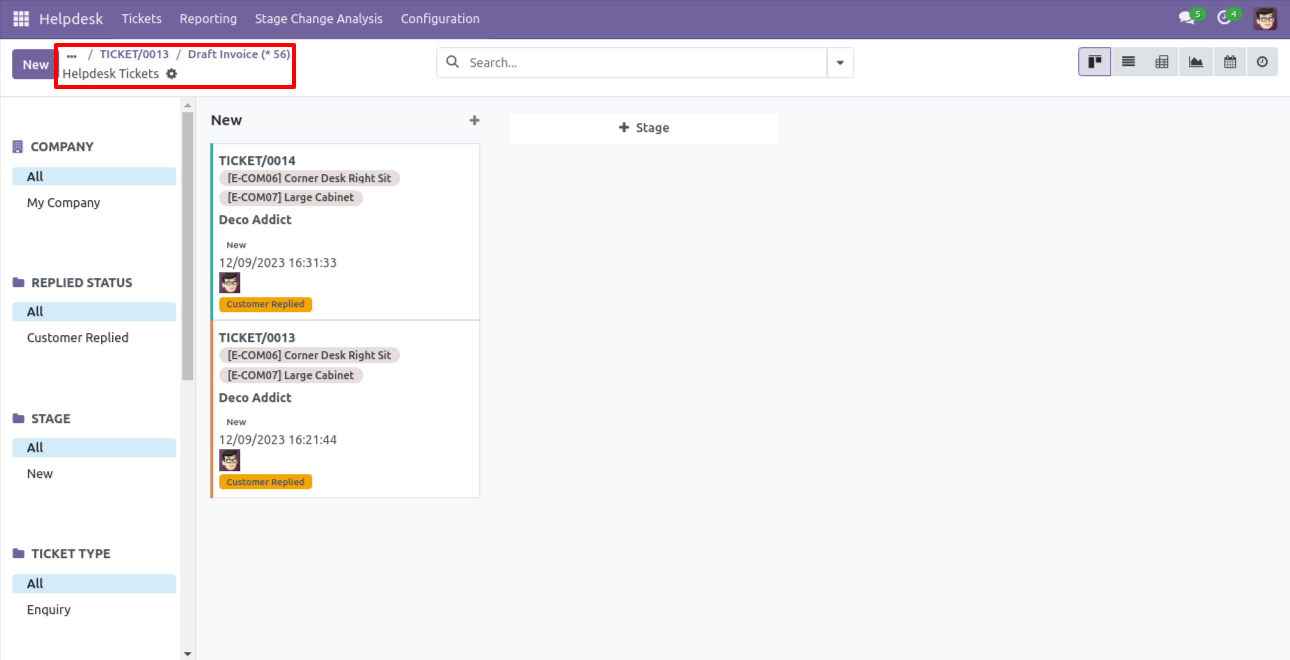
Created ticket form view looks like this.
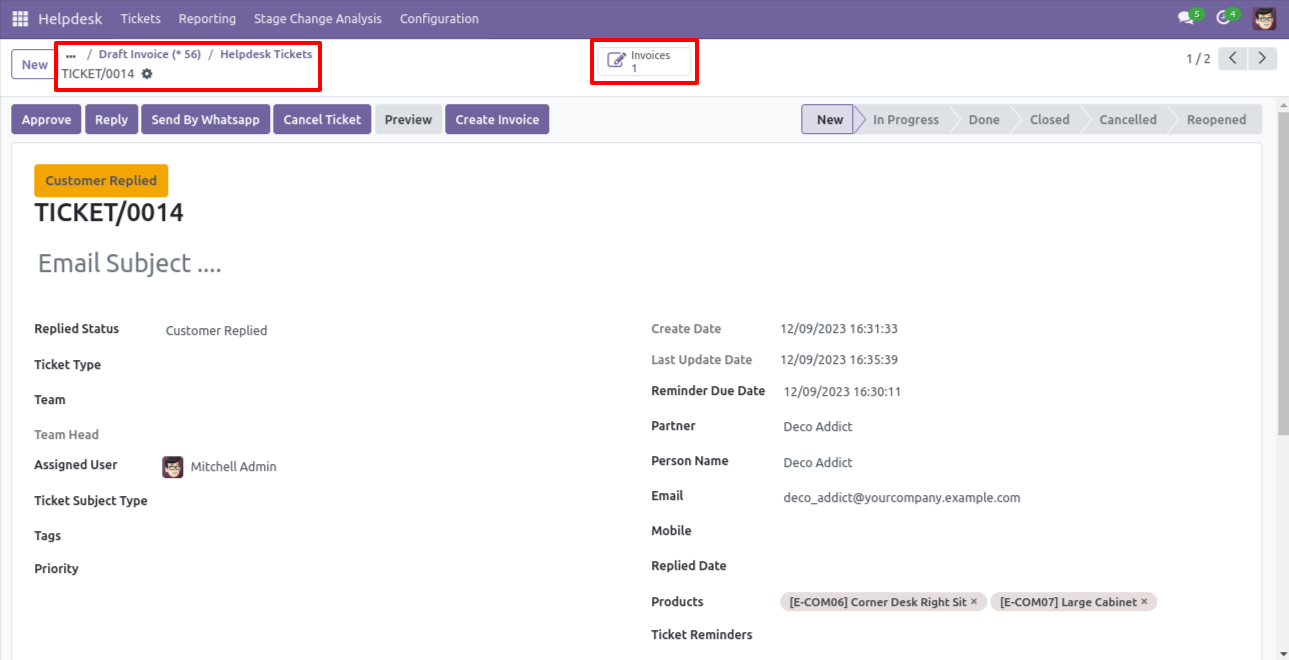
Form view of the helpdesk ticket, Click on the print 'Helpdesk ticket' from the action buton.
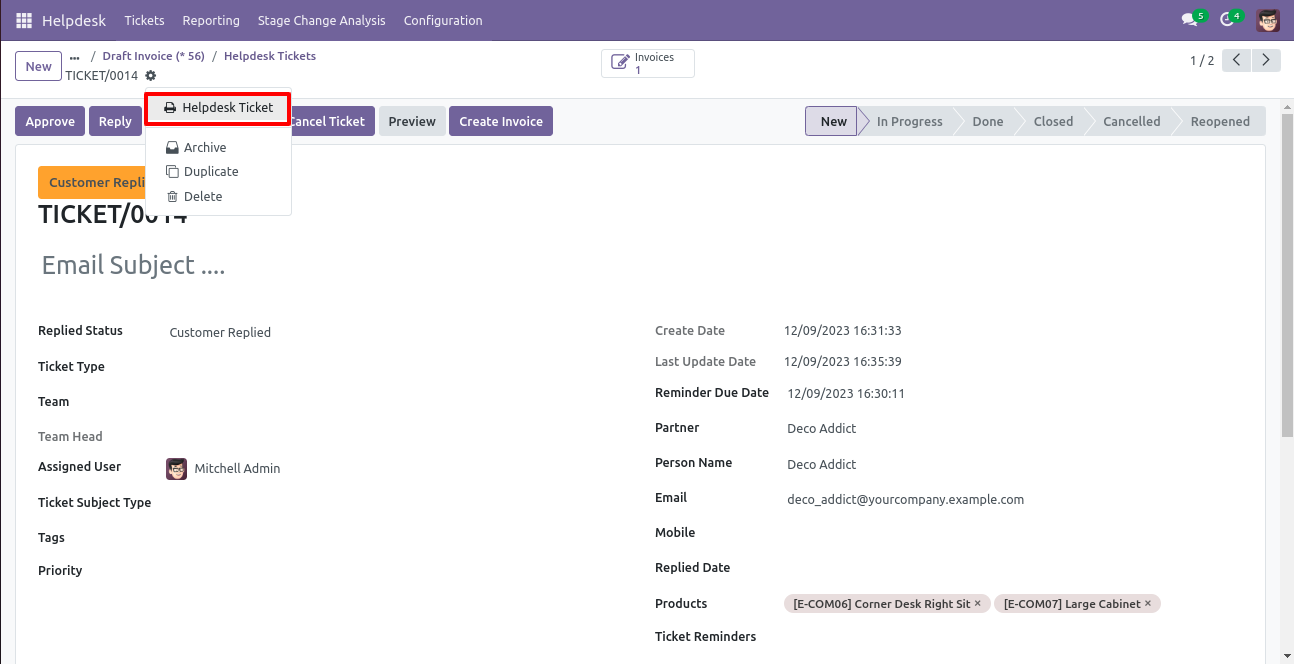
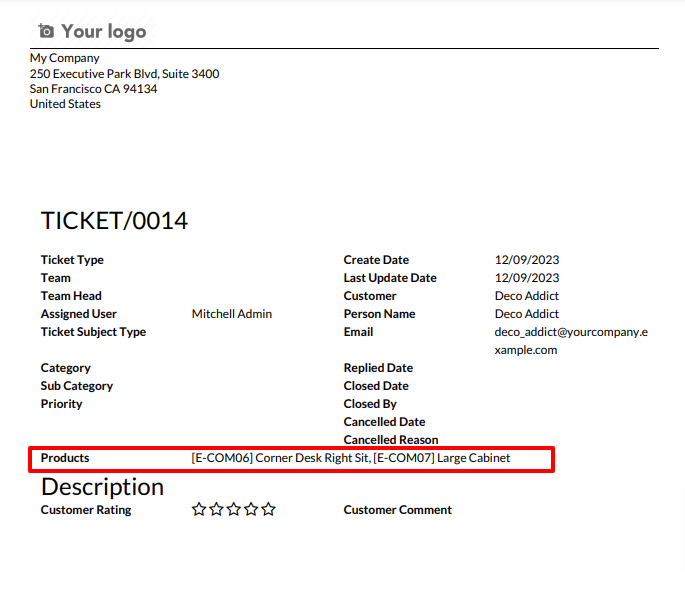
Ticket PDF report with the products.
You can filter tickets purchase order wise.
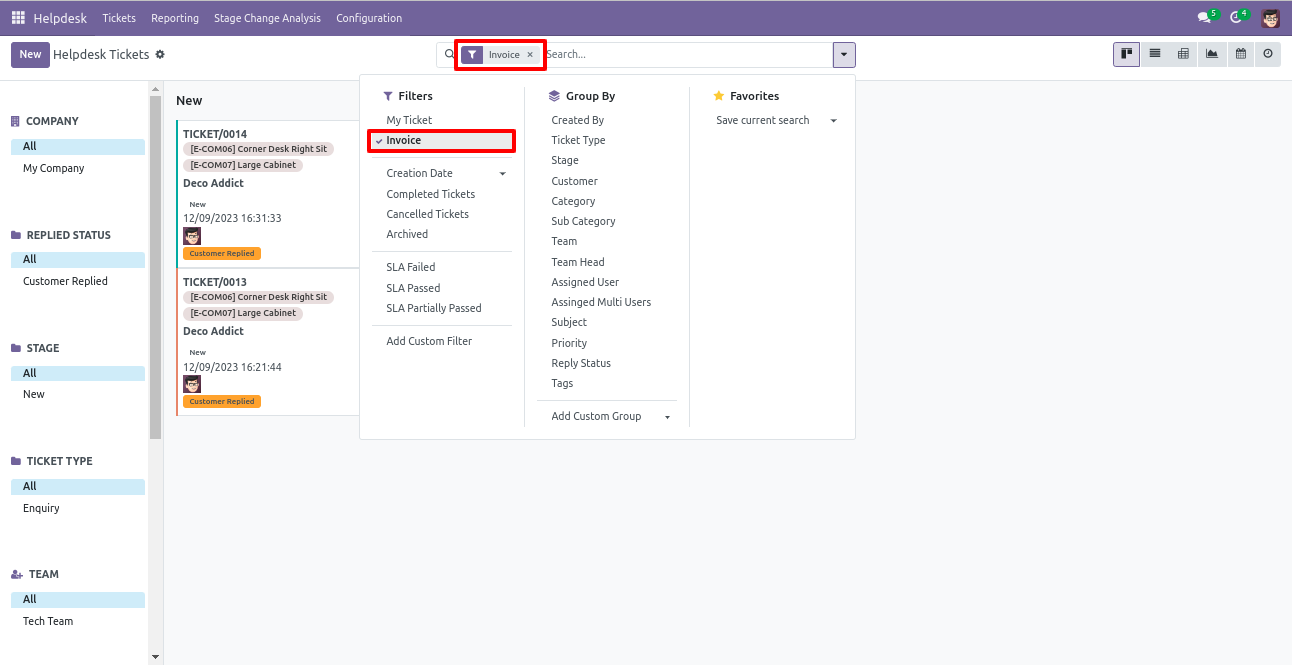
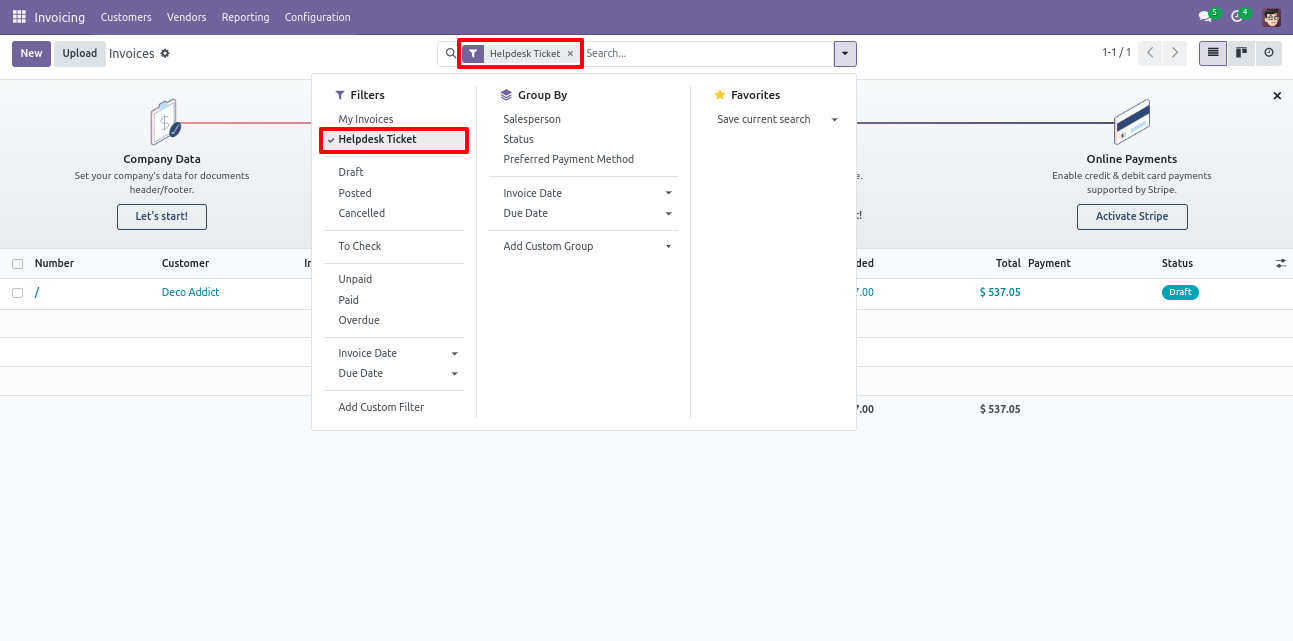
You can filter invoice ticket wise.
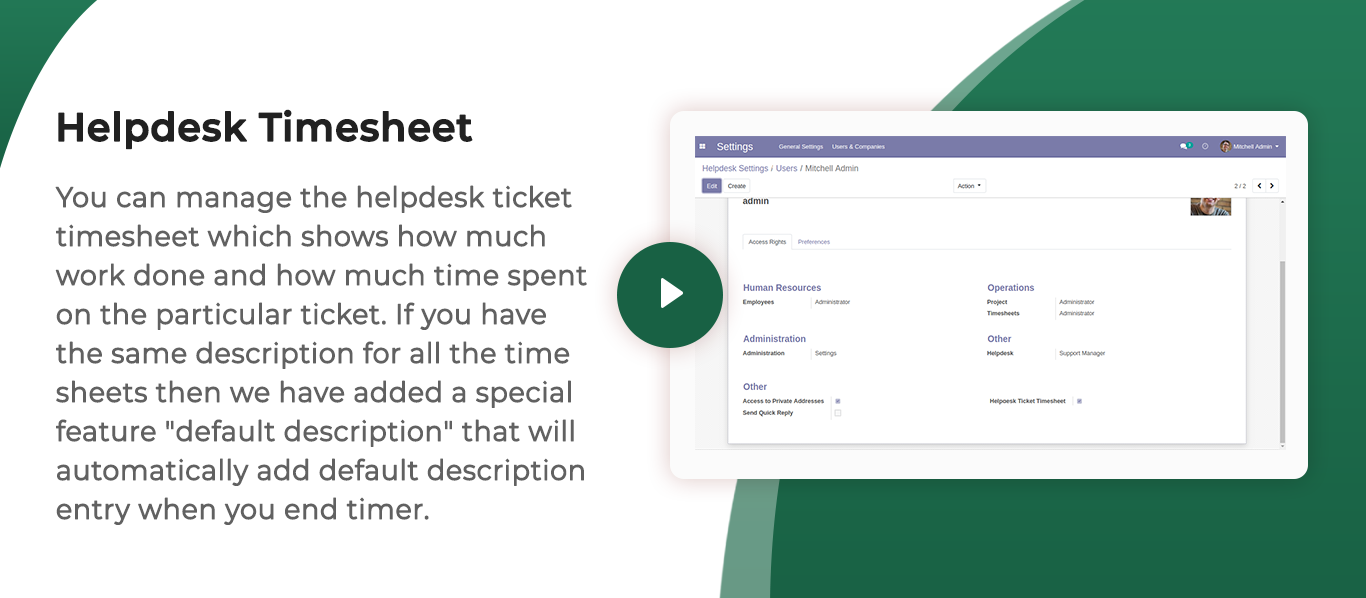
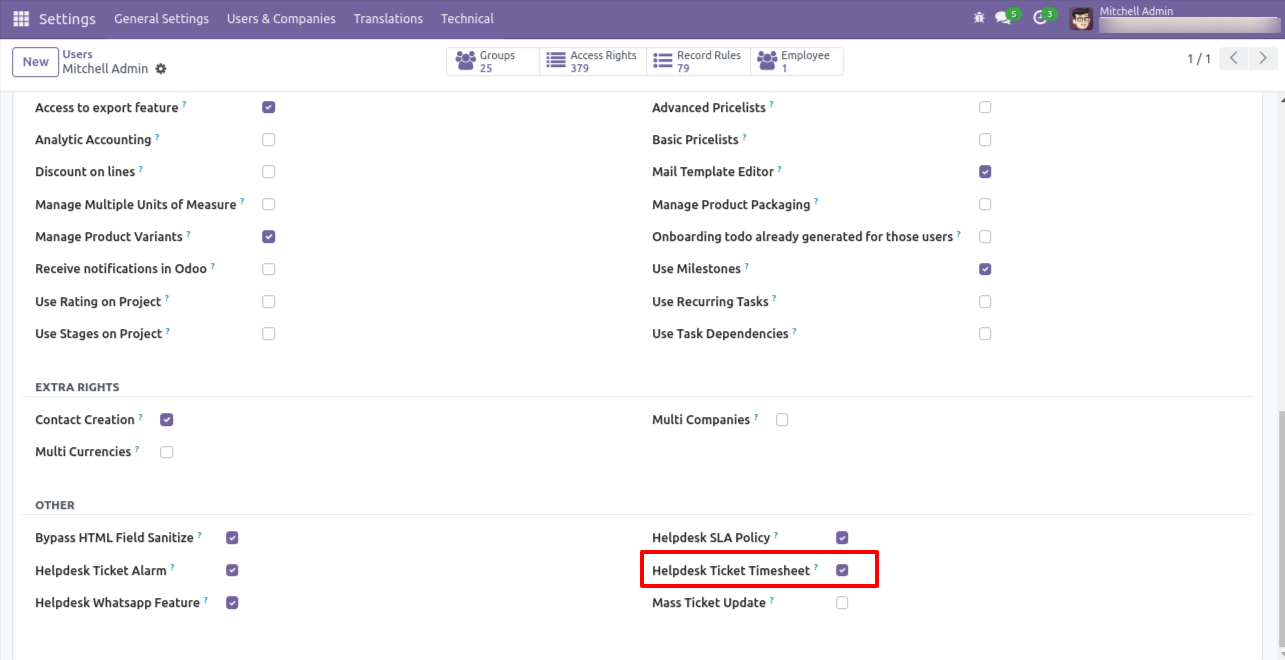
Tick the security group 'Helpdesk Ticket Timesheet'.
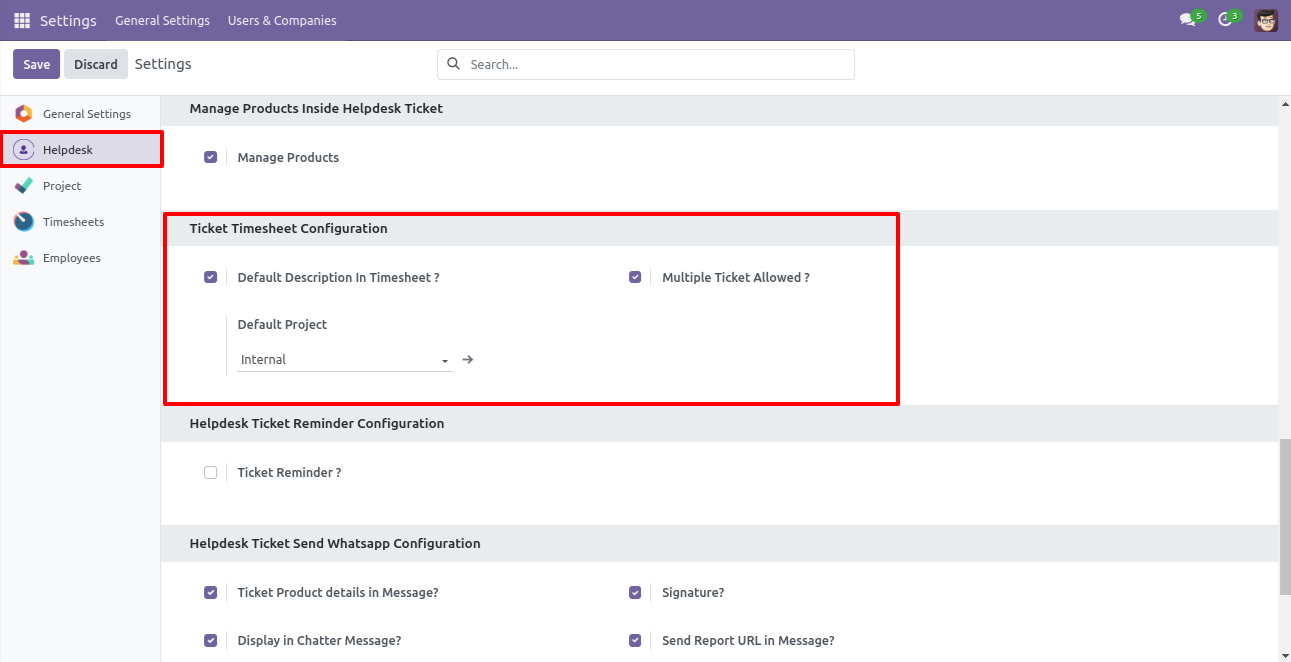
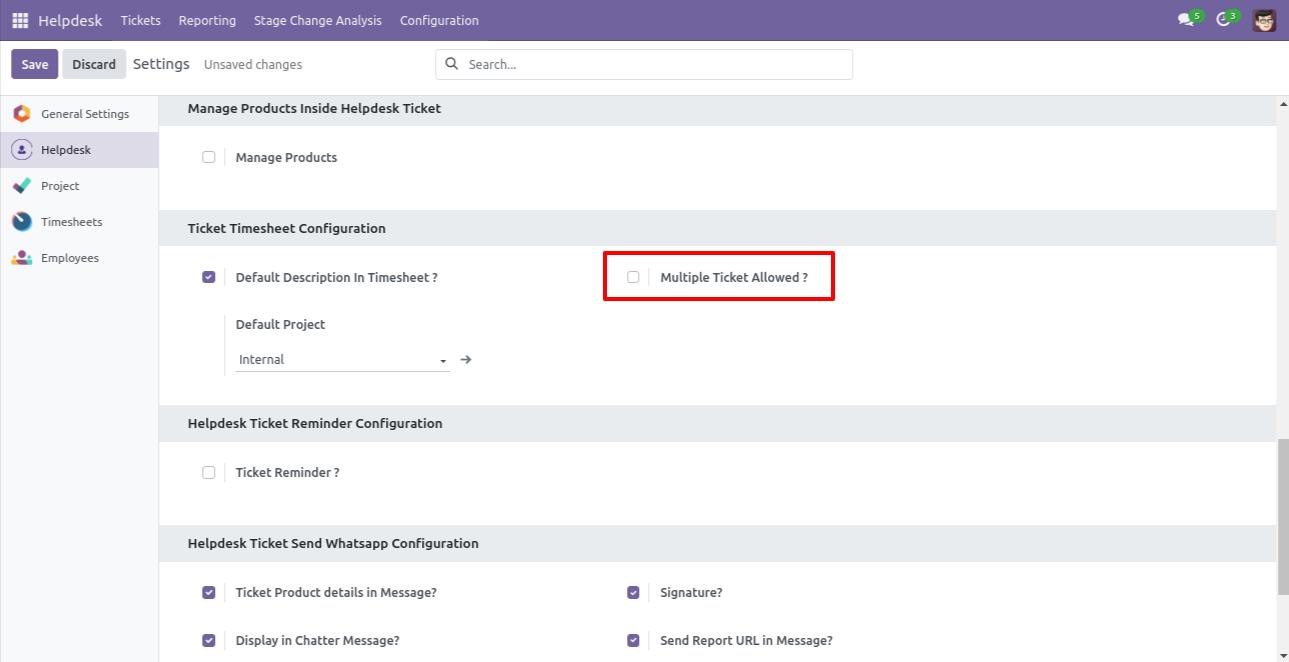
Enable the 'Default Description In Timesheet' to add the default description in the timesheet, and then select default project. Enable 'Multiple Ticket Allowed' to start multiple tickets timer at a time.
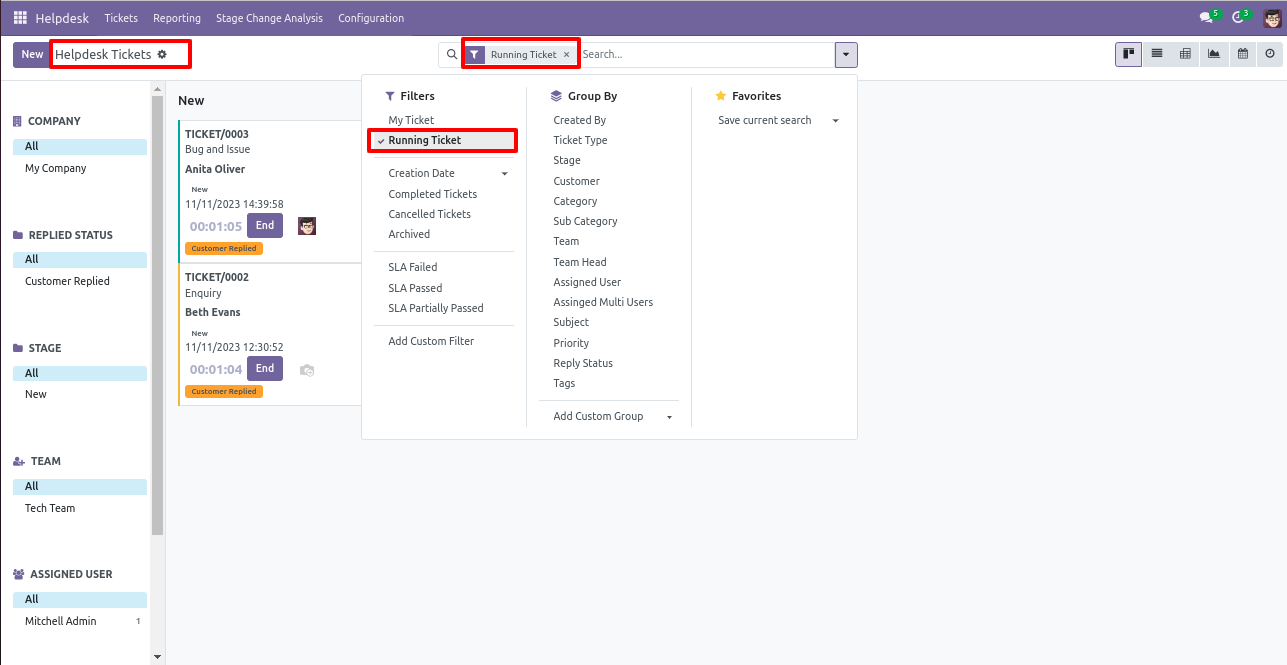
You can filter tickets by 'Running Ticket' which shows which ticket timer is running.
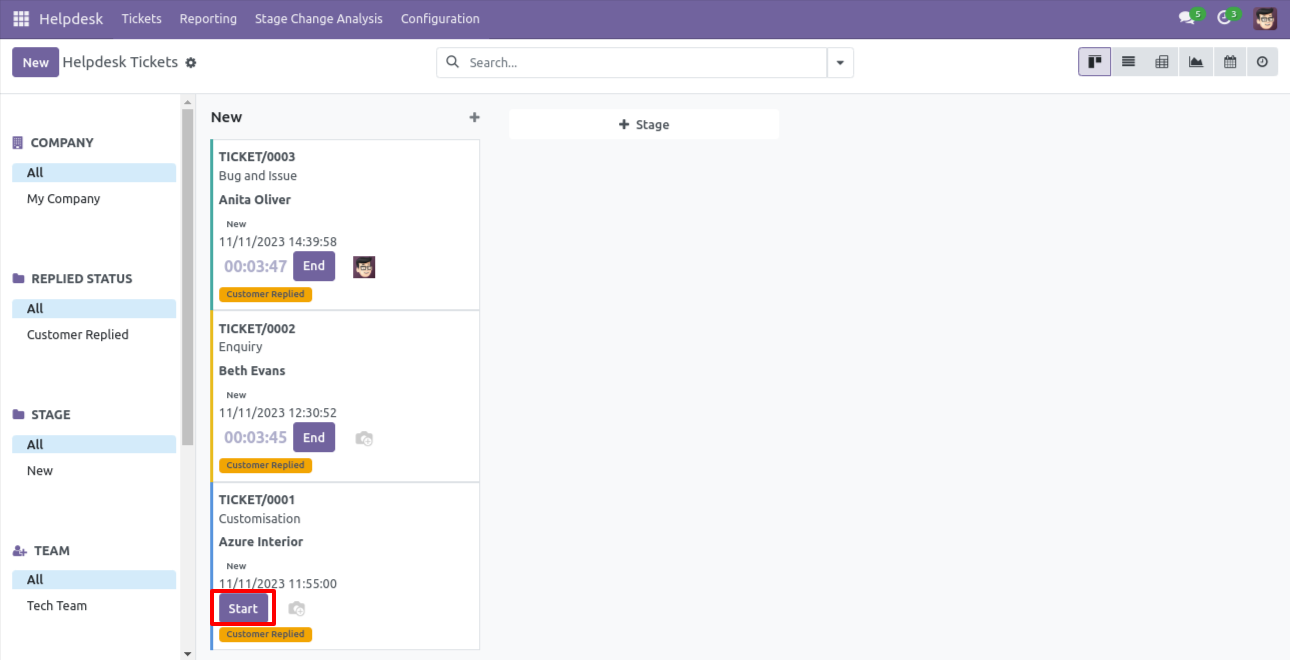
Now we start the timer of the other ticket.
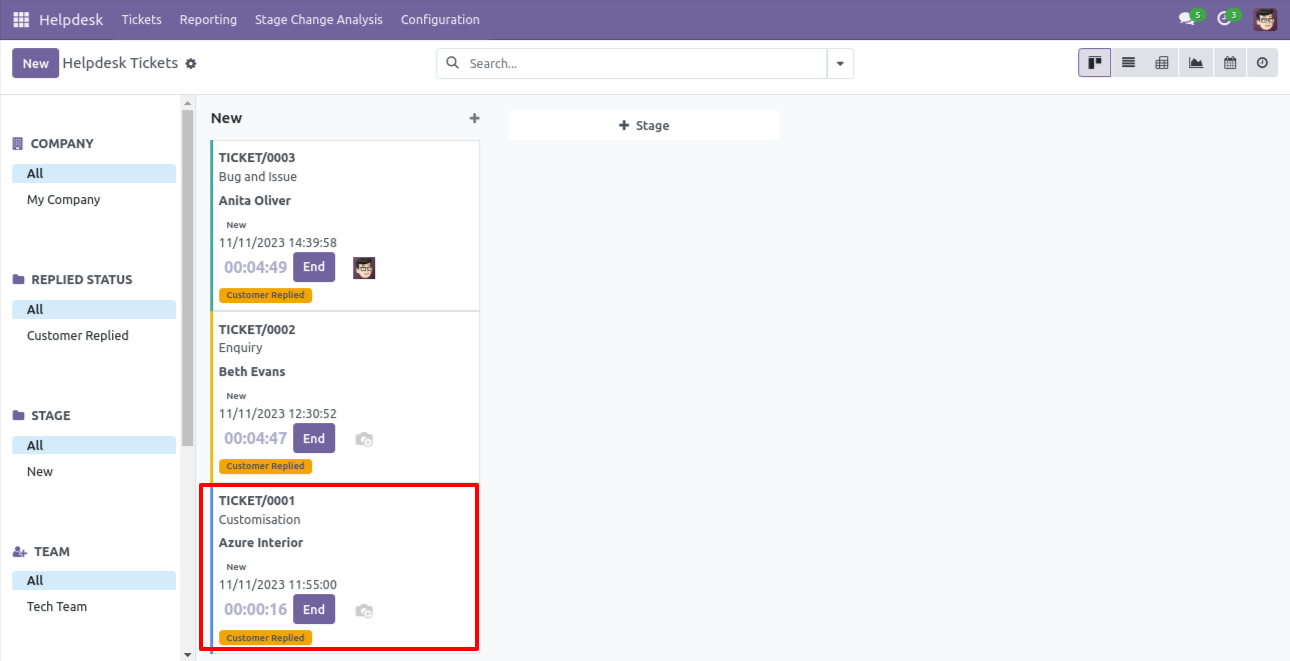
So if you have enabled the 'multiple ticket' group then you can start multiple tickets timer simultaneously.
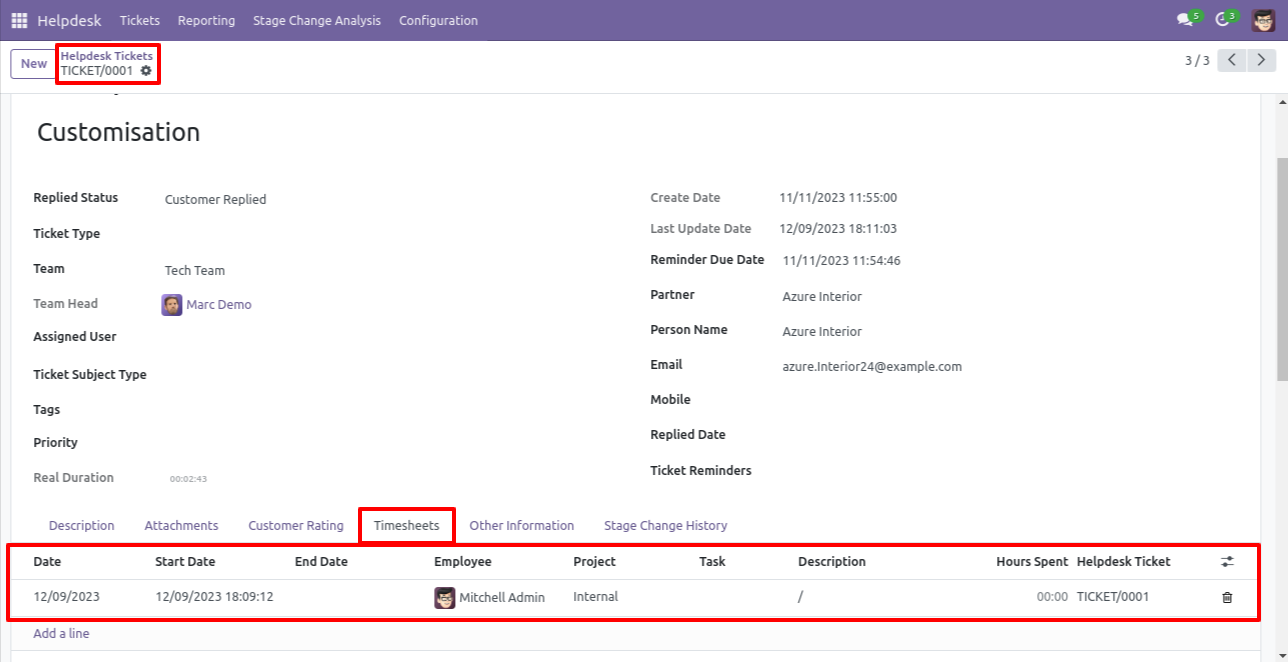
Timesheet entry will look like this, currently one timesheet entry in the ticket.
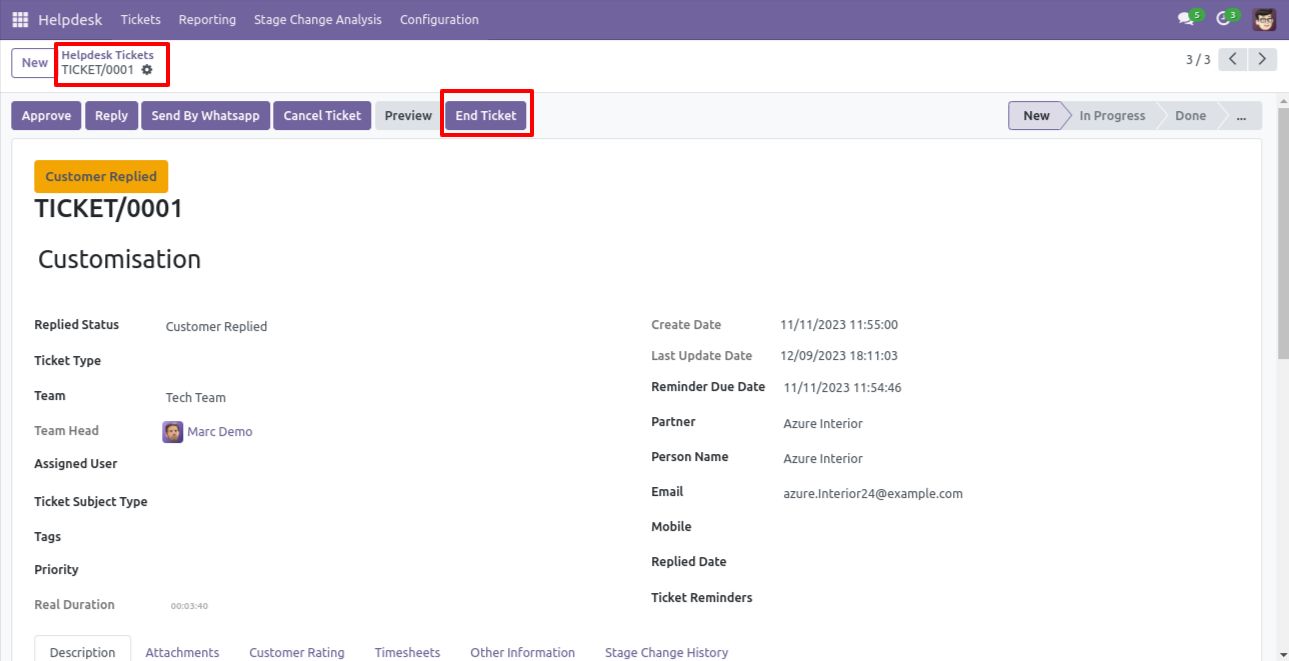
Now we press the 'End Ticket' button to end the timer, you can end the timer as well from the list view using the 'End' button.
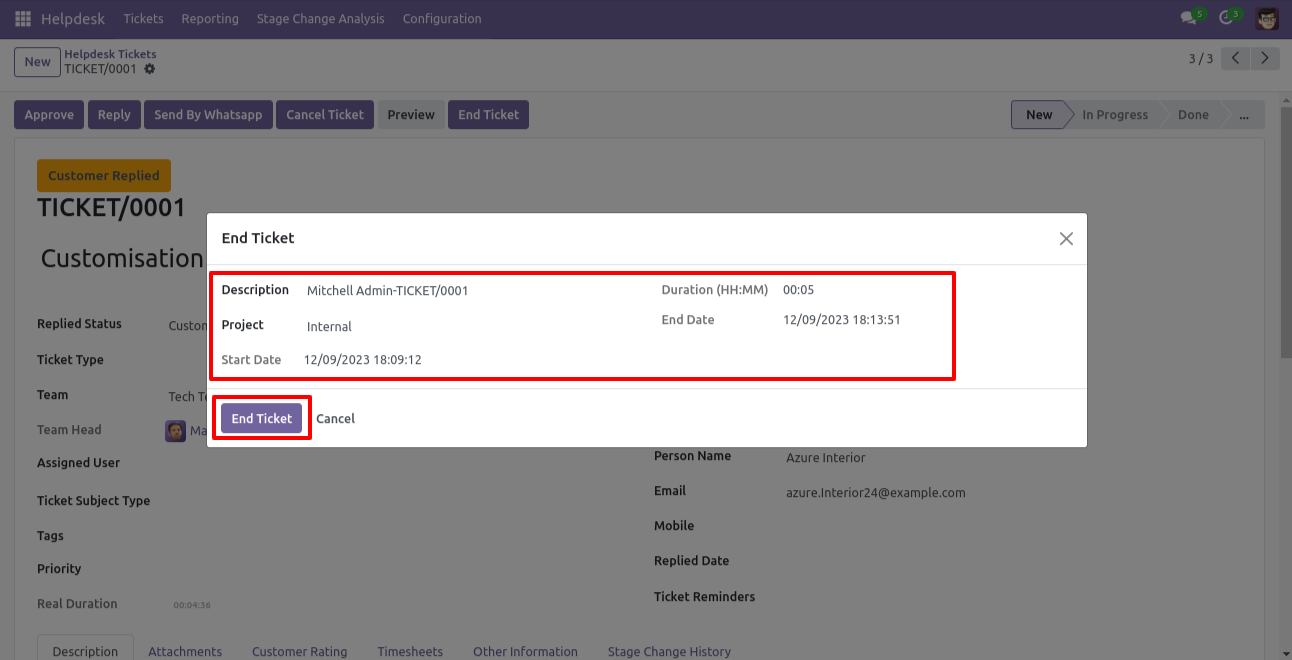
After that one wizard opens, It will automatically add a default description entry when you end the time
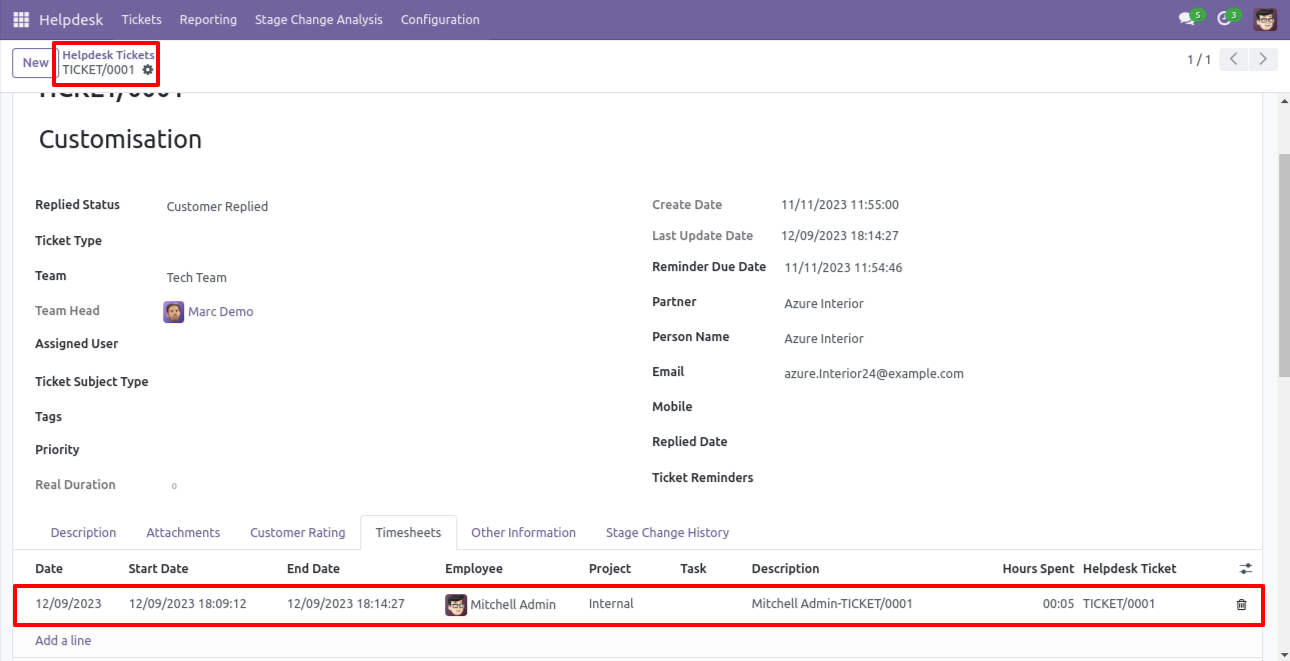
So now after the end timer, our ticket timesheet entry is updated.
Now we disable the 'Multiple Ticket Allowed' group.
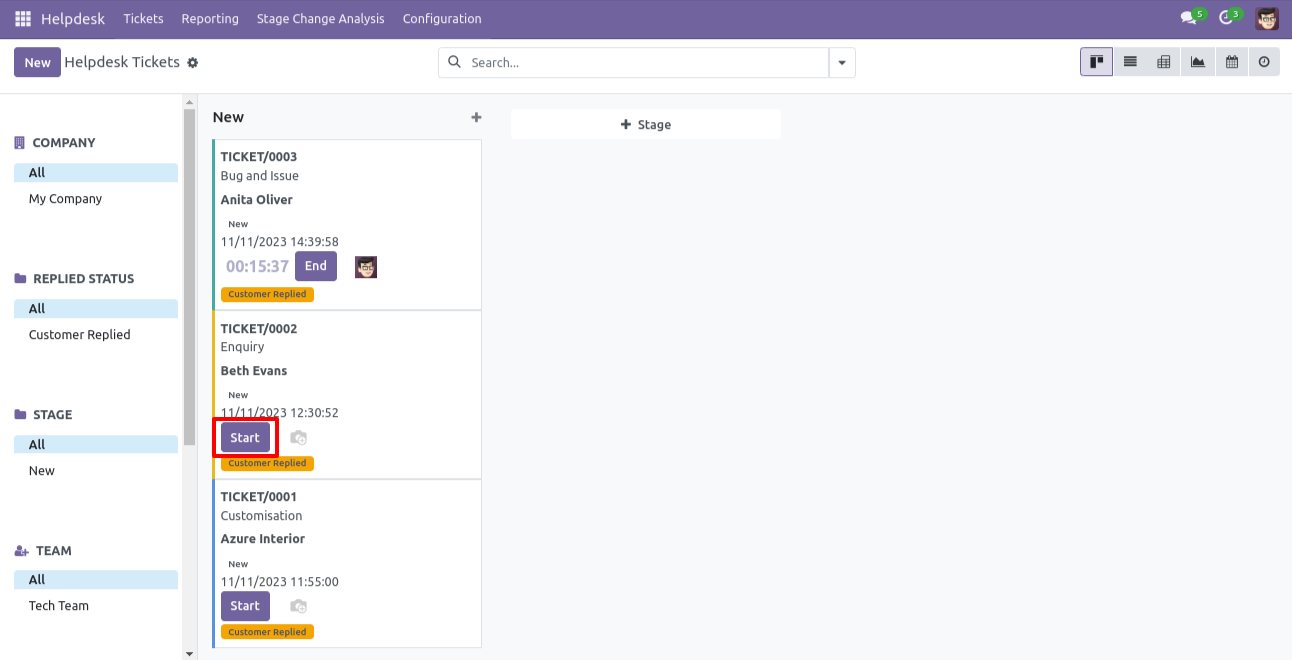
Currently, one ticket timer is running, and start the timer of the other ticket.
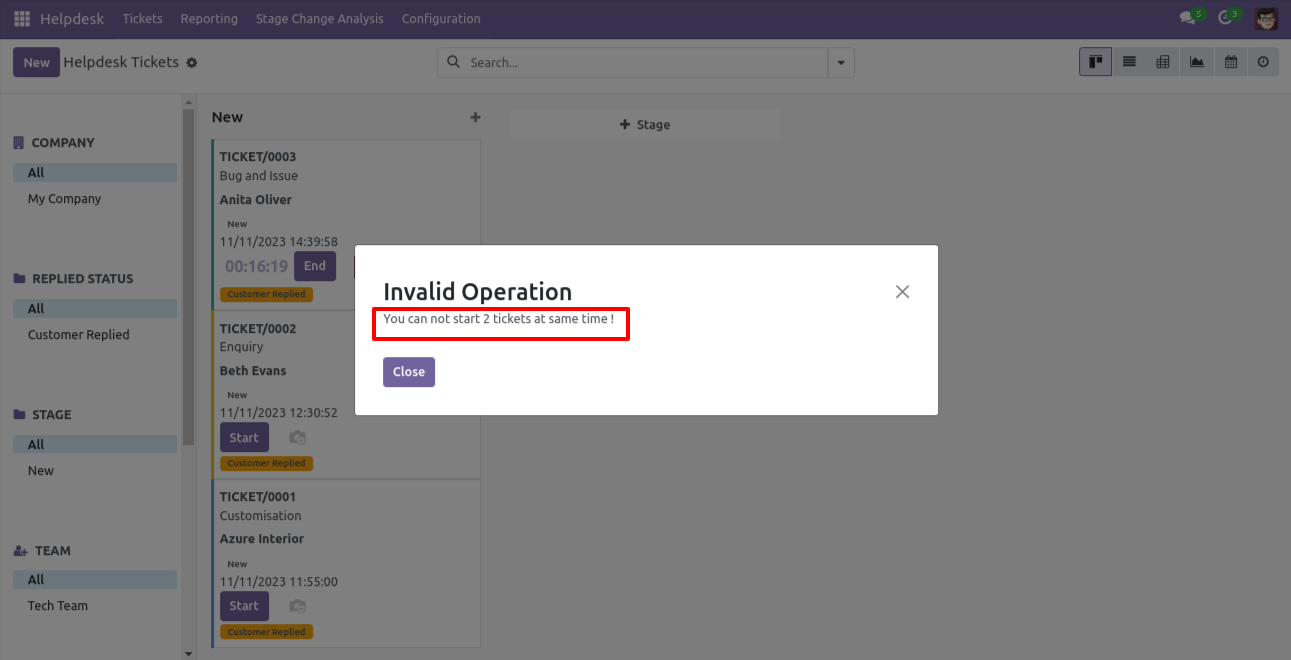
So it shows a warning because we have disabled the 'Multiple Ticket Allowed' group.
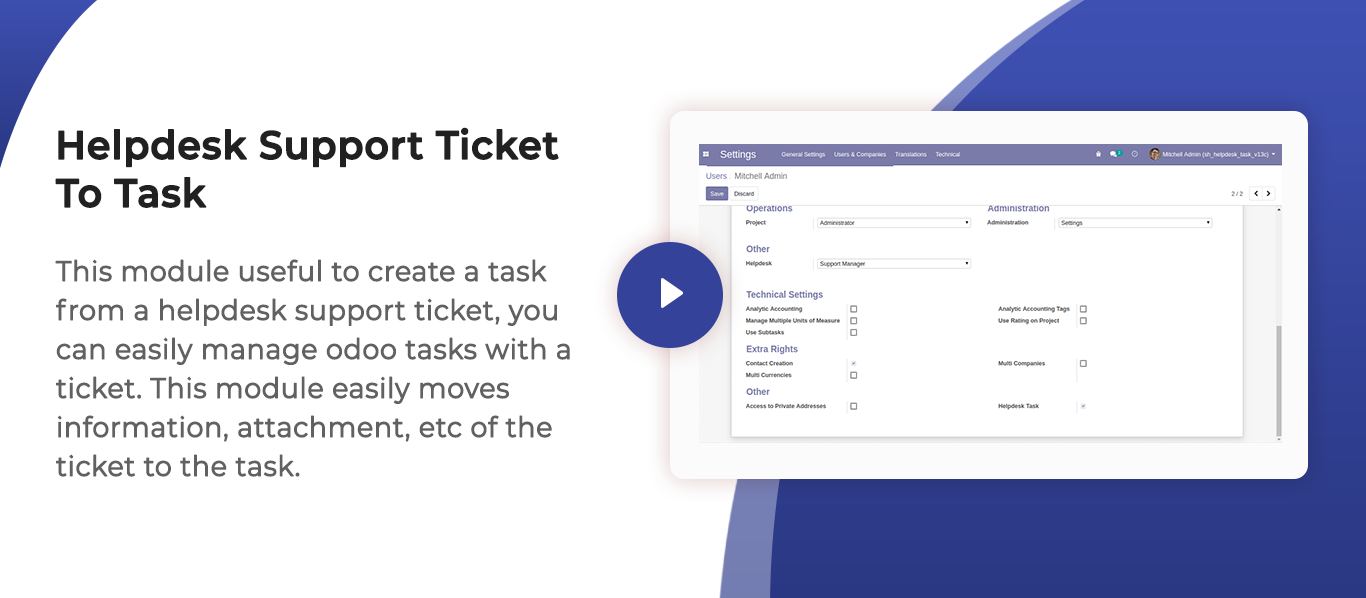
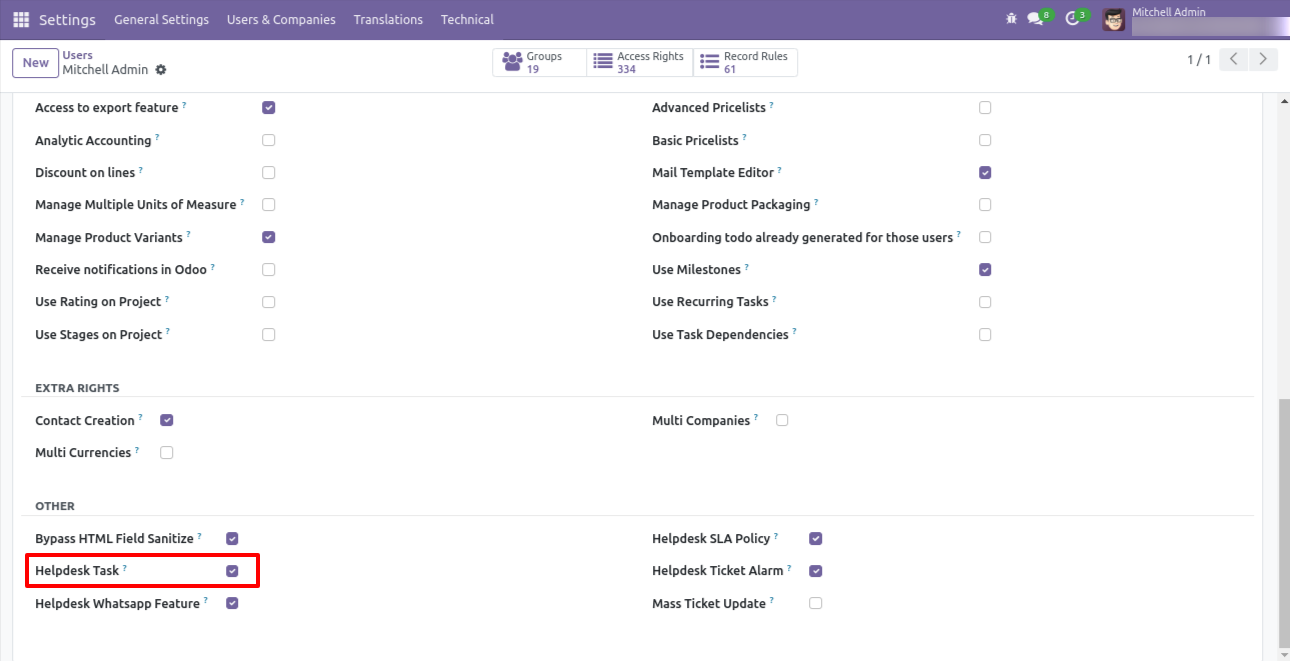
Go to users & companies and tick 'Helpdesk Task'.
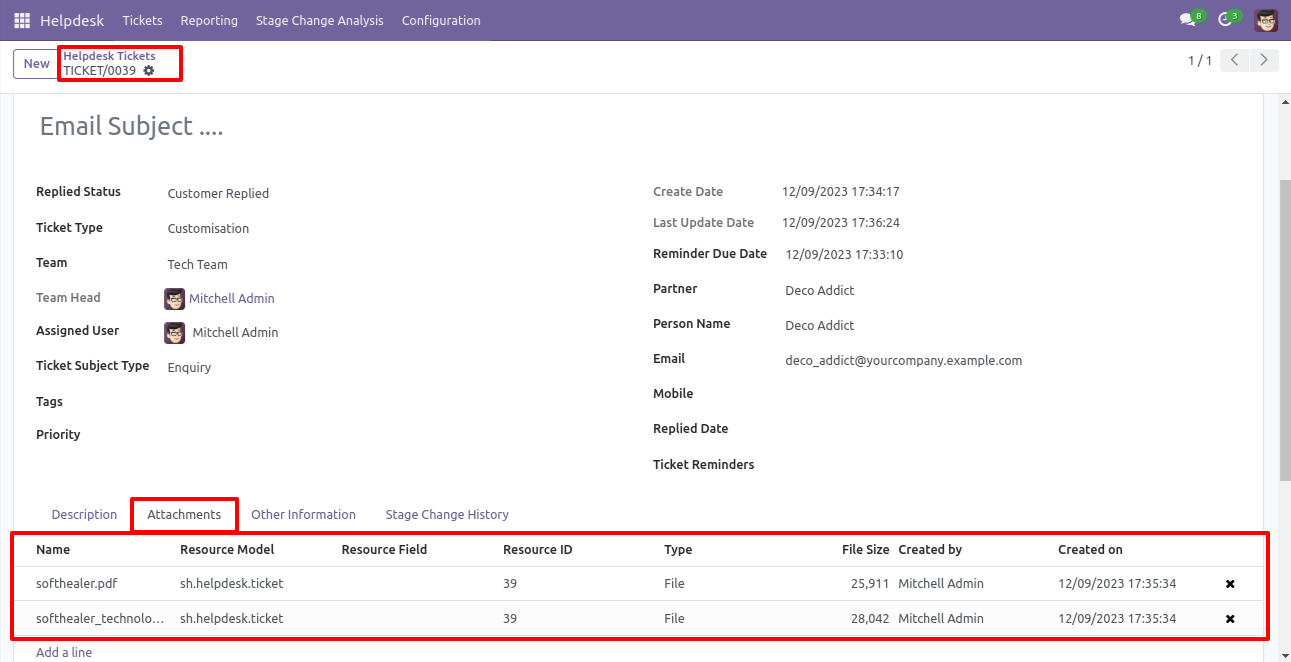
You can attach multiple attachments to the ticket.
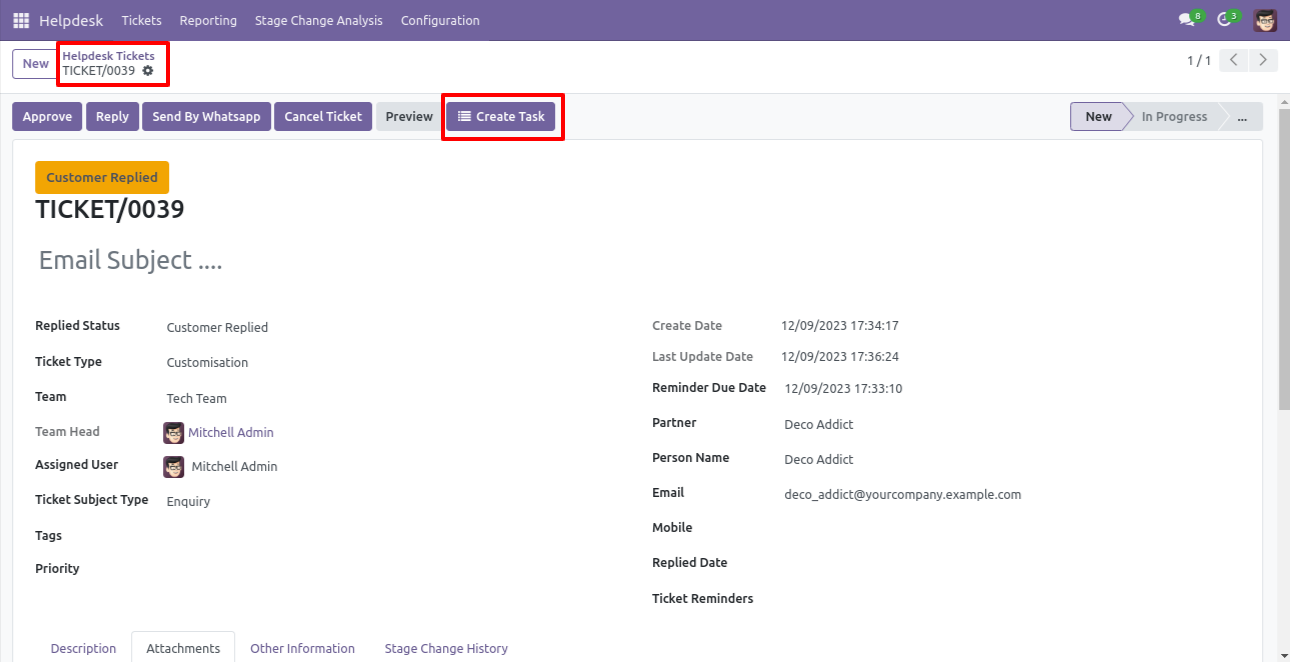
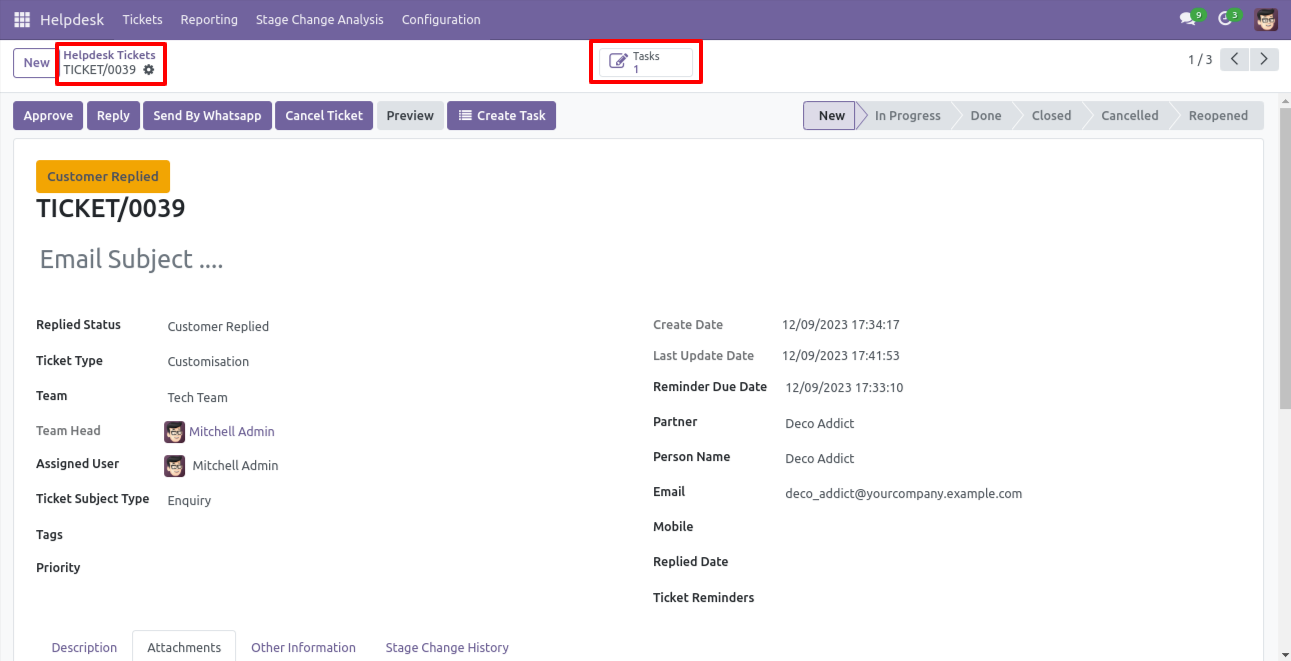
Press the 'Create Task' button to create a task from the ticket.
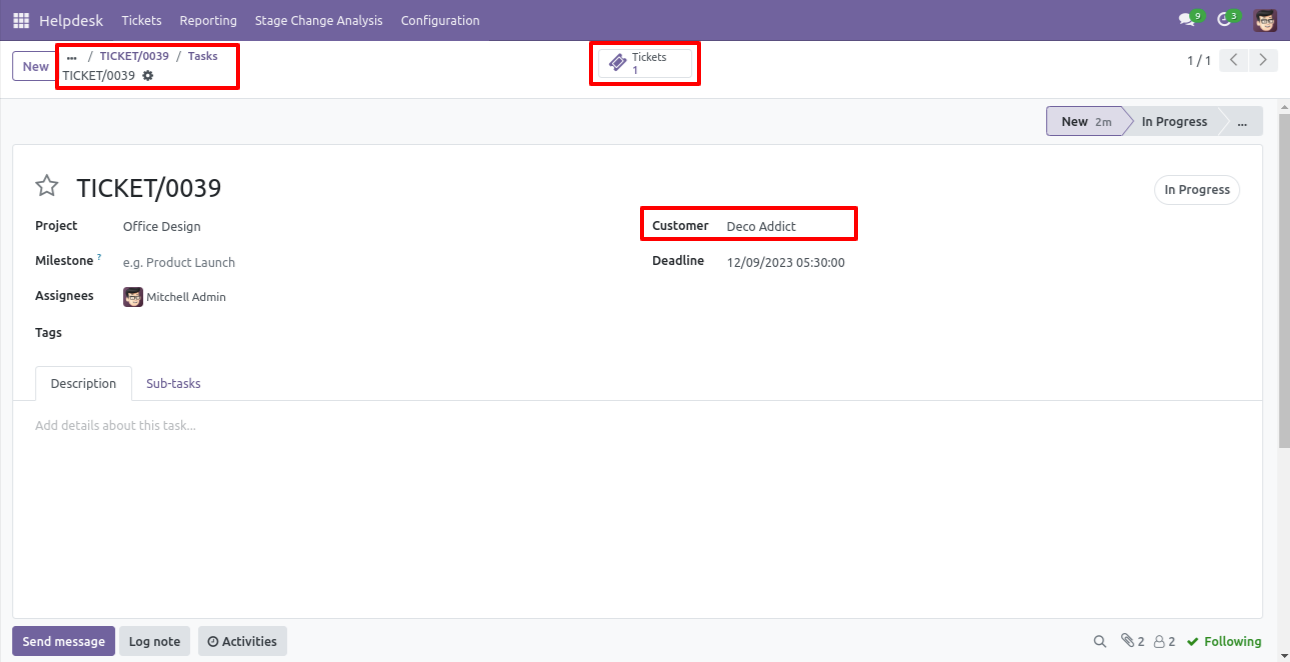
You can assign tasks with responsible persons with the task description.
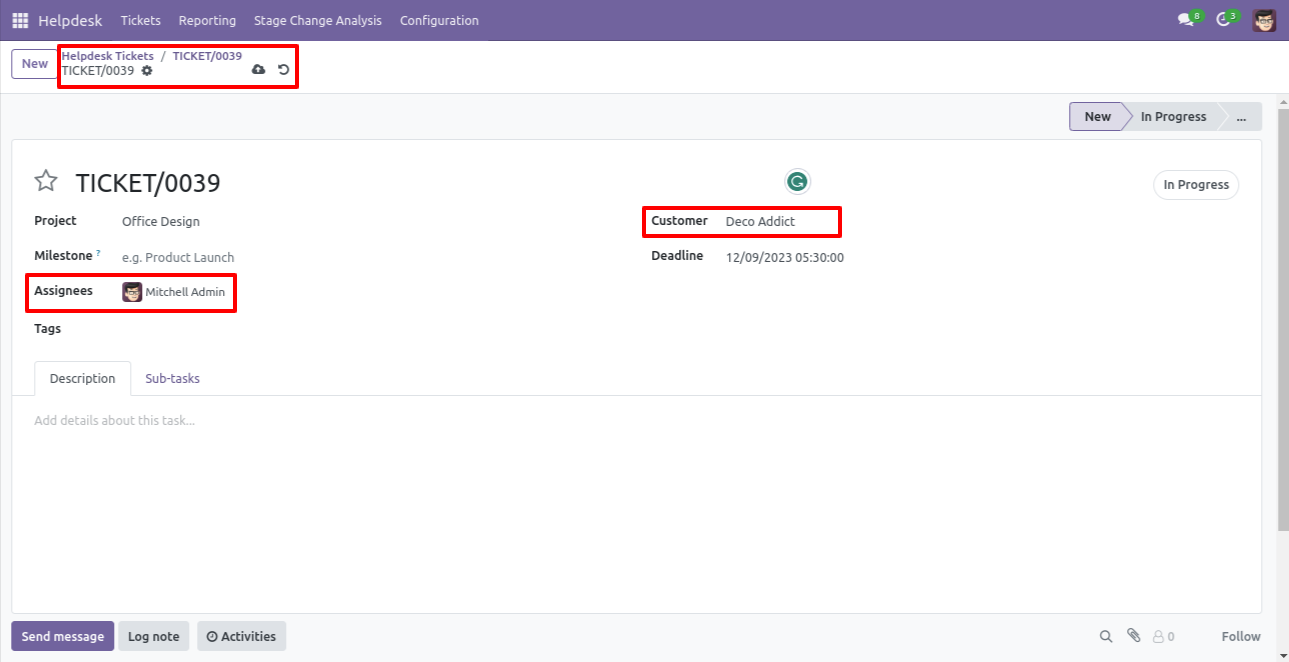
It moves information, attachment, etc of the ticket to the task.
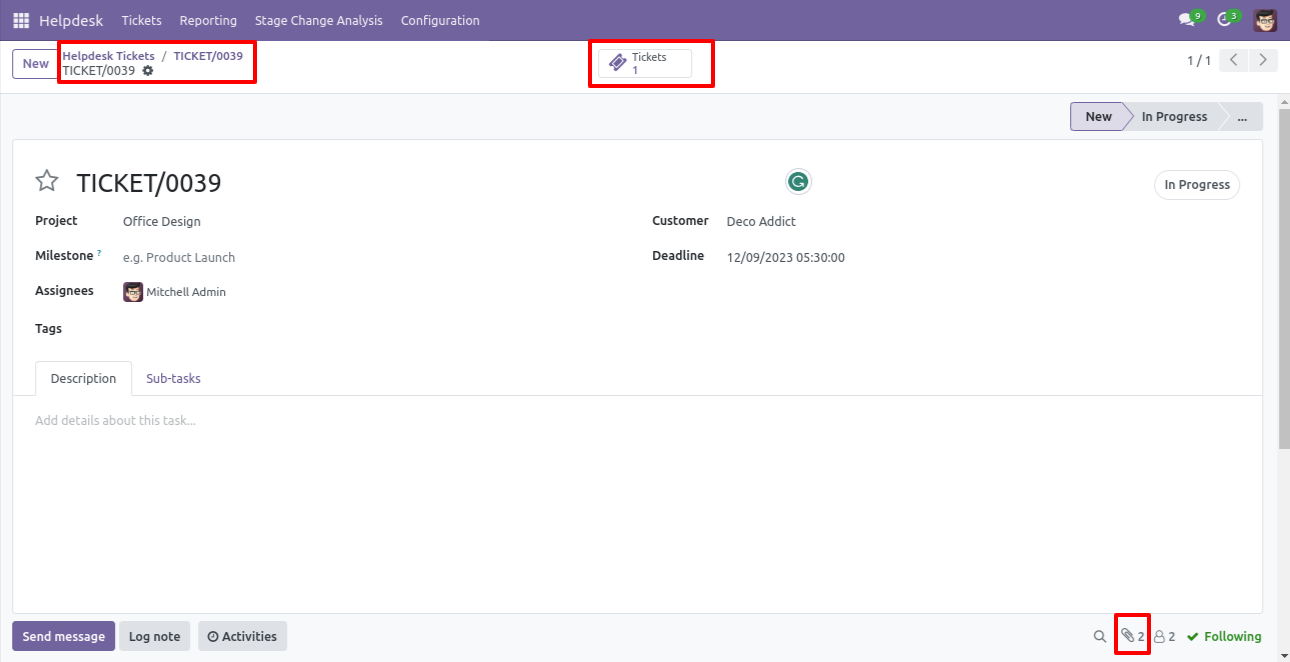
After creating a task, you can see the created task number on the right side of the ticket.
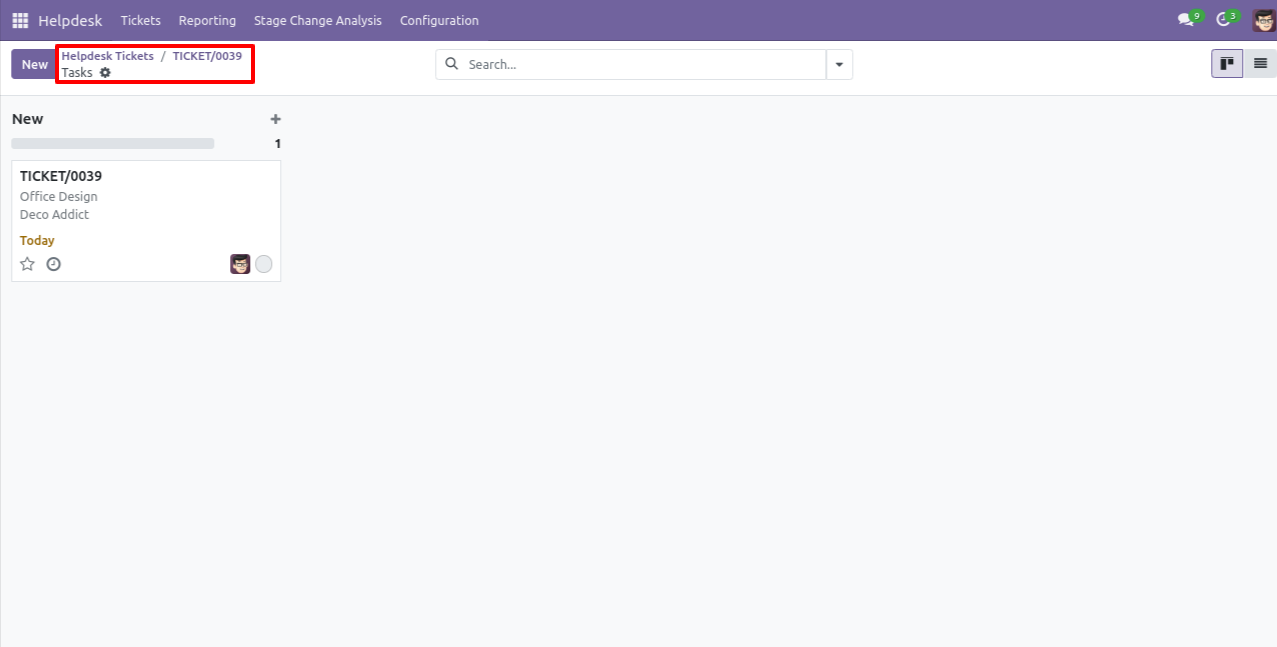
Tasks kanban view.
The assigned task with attachments, information & you can see that task ticket at the right side of the task.
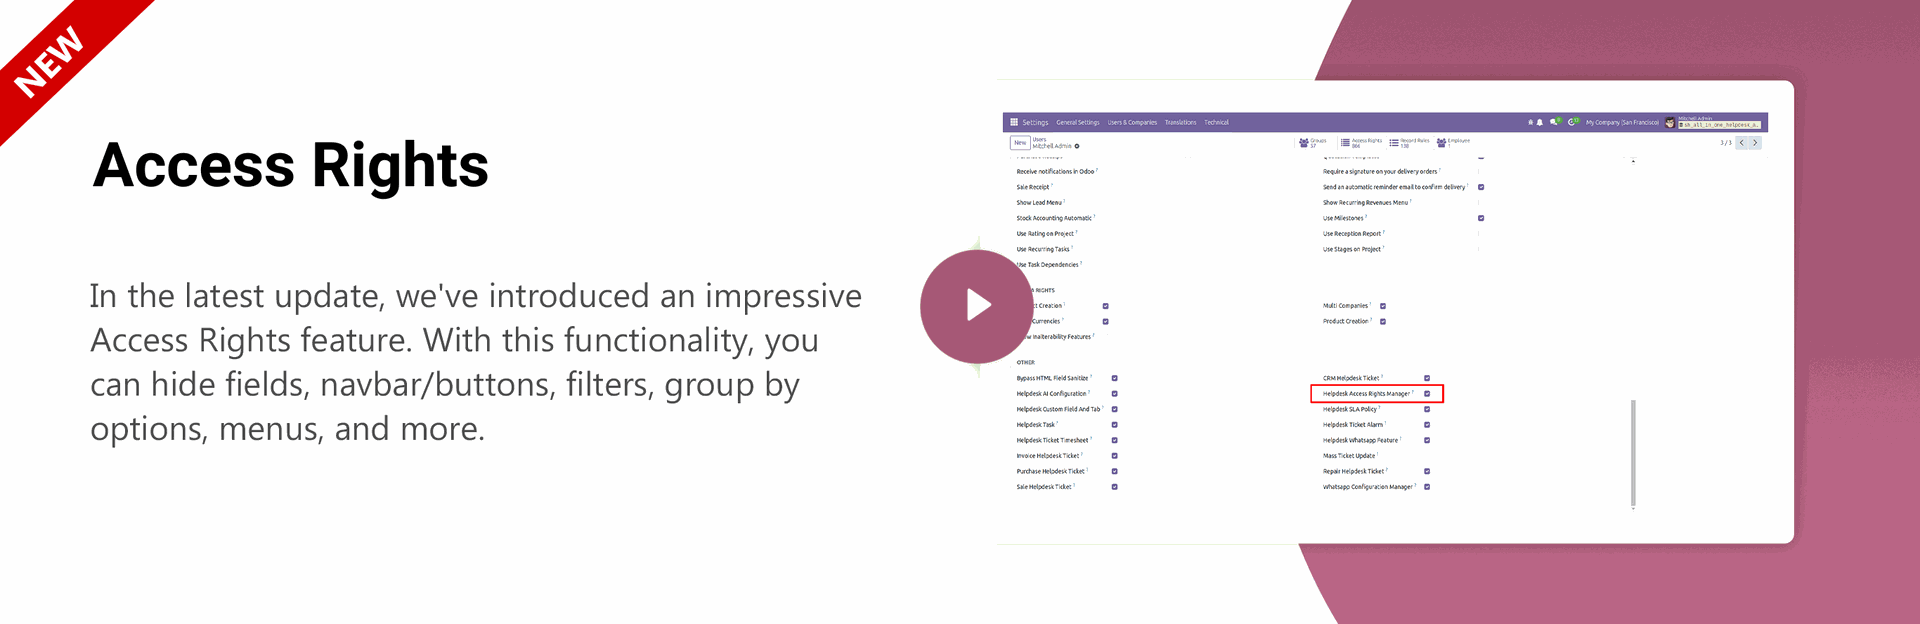
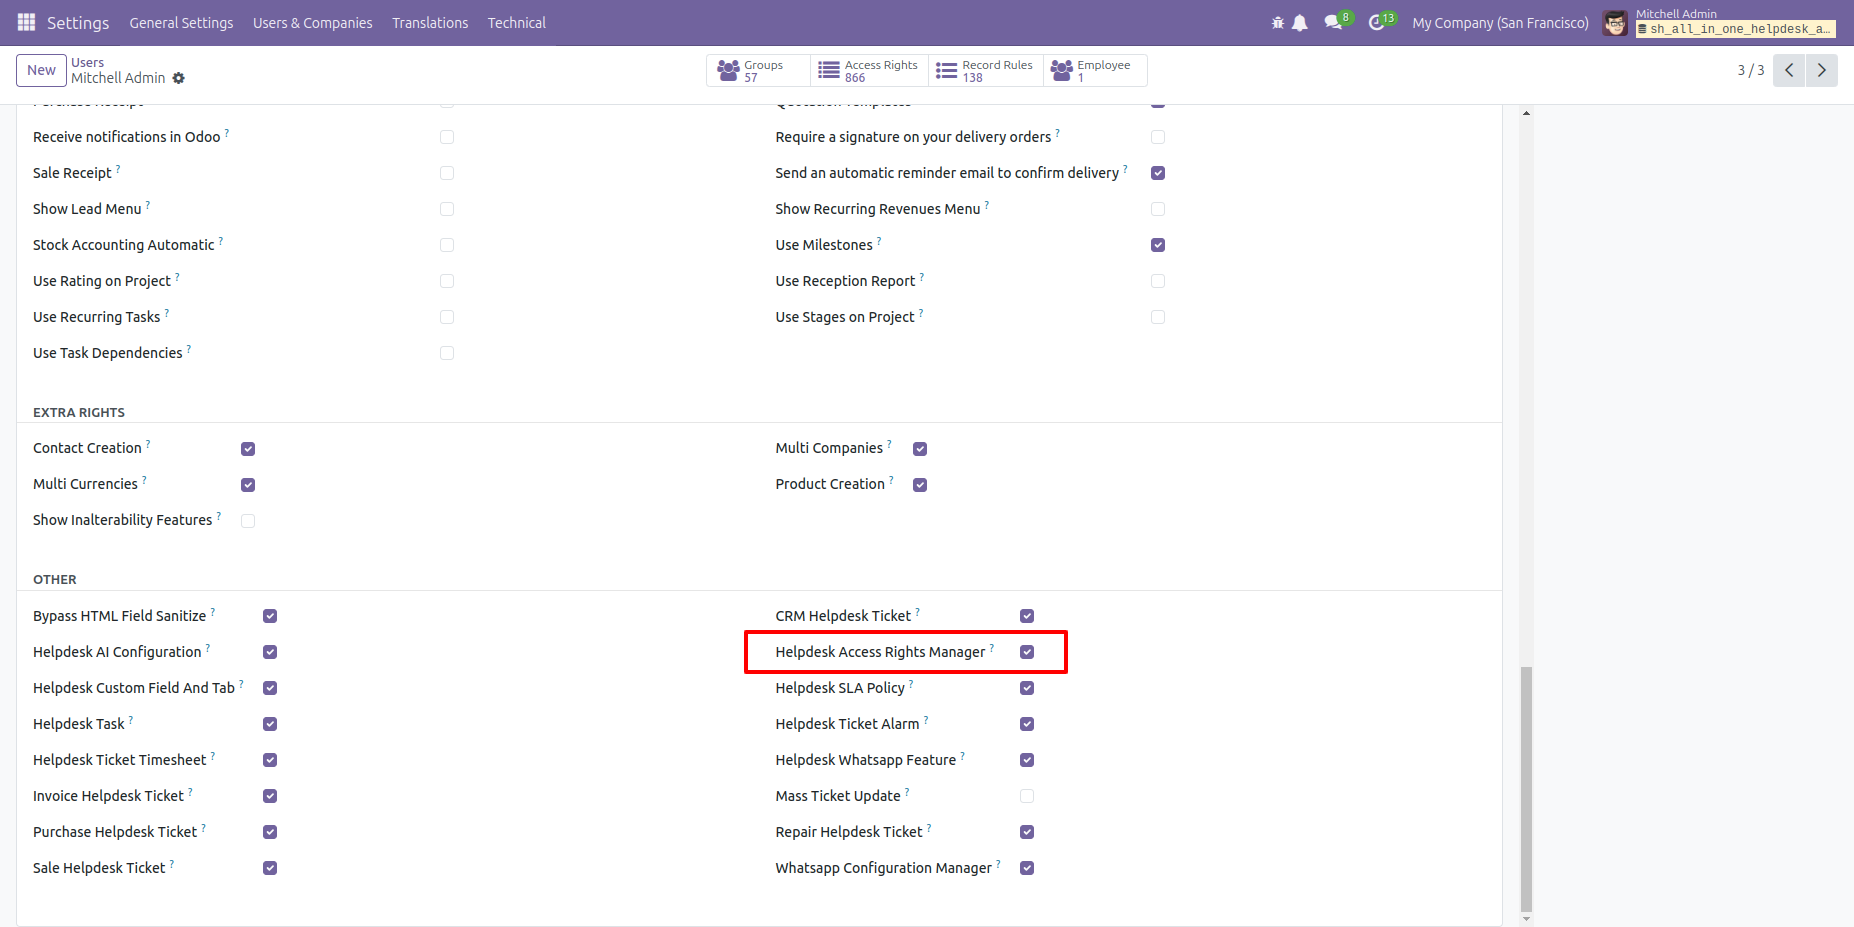
In 'User', enable the 'Helpdesk Access Rights Manager' option.
'Helpdesk SLA Policies' Menu.
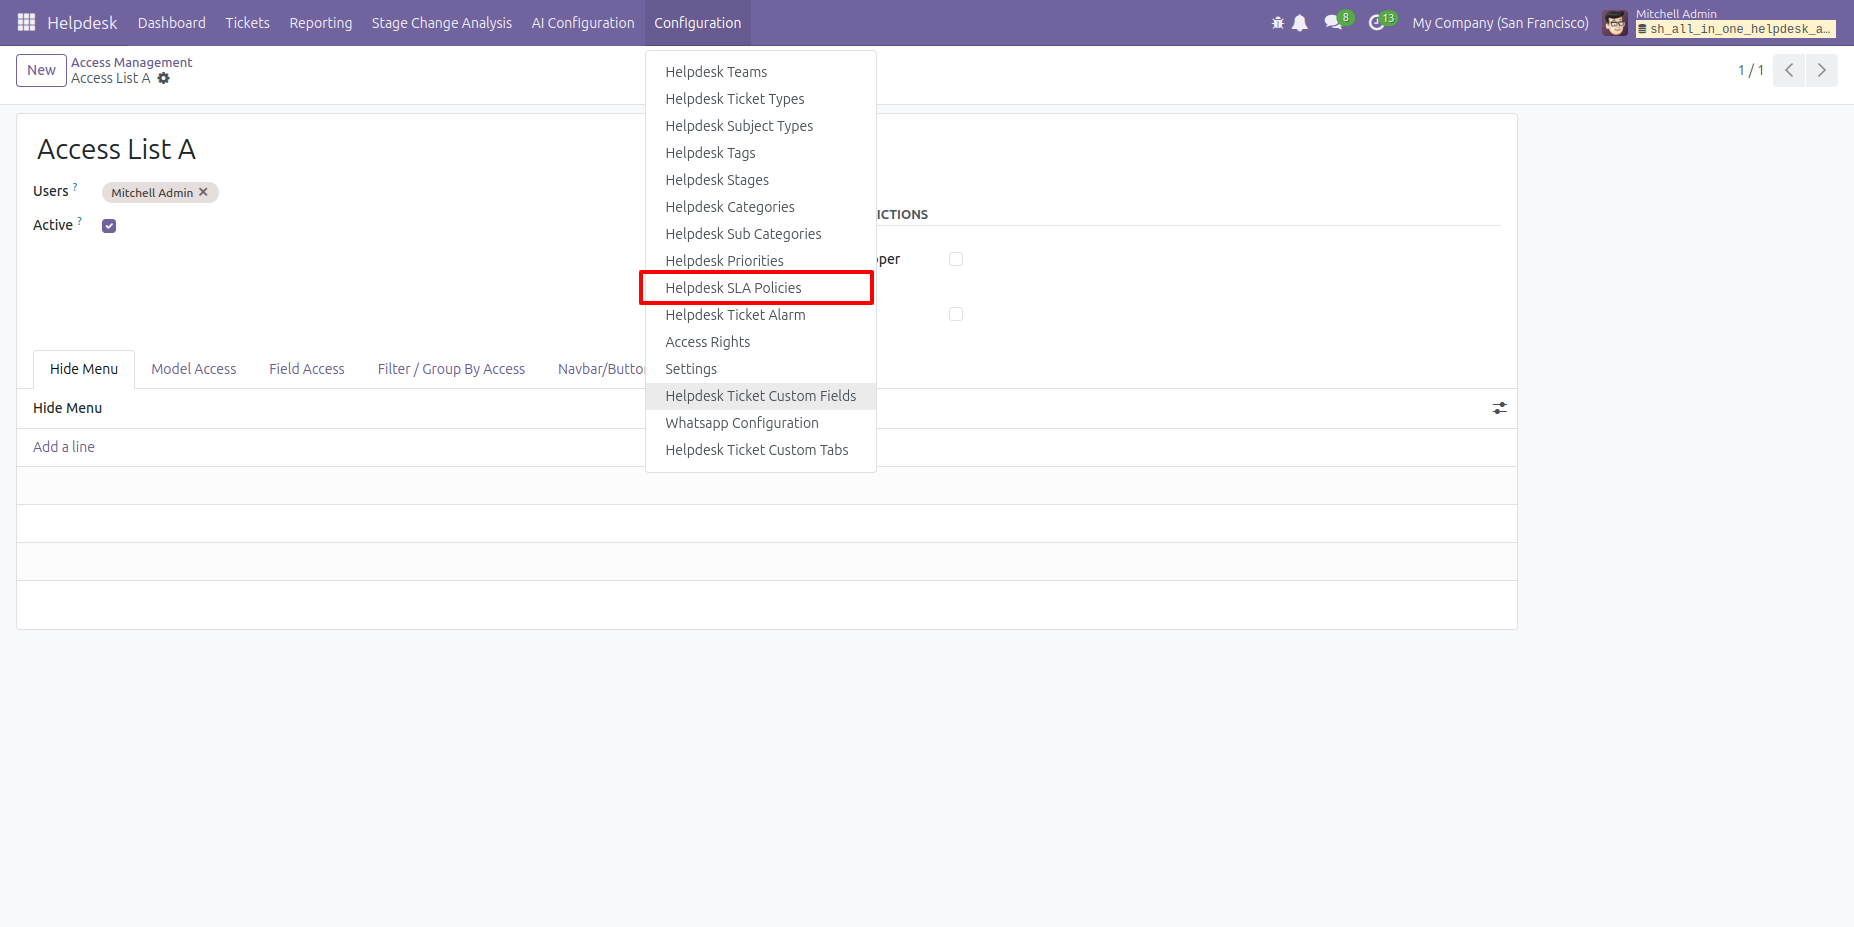
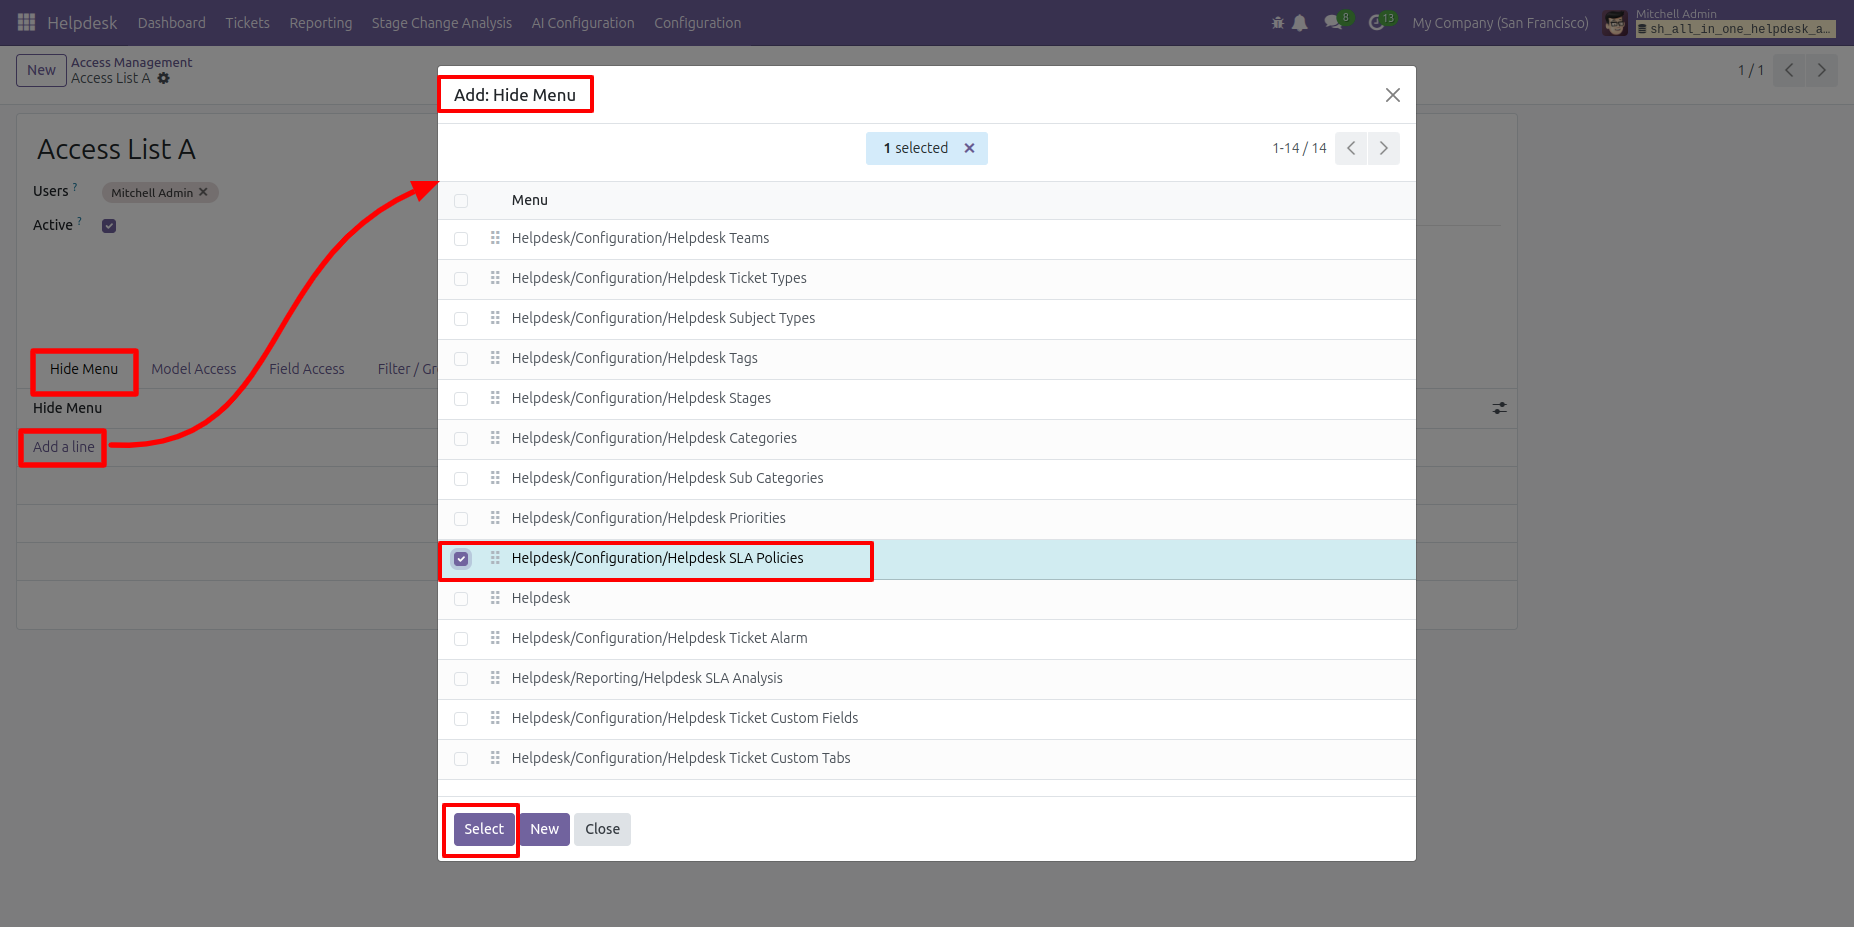
In the Access Management form view, click on the 'Add a line'
in the hide menu tab. This will open the Hide Menu wizard.
Select the menu you wish to hide, then click on the 'Select'
button.
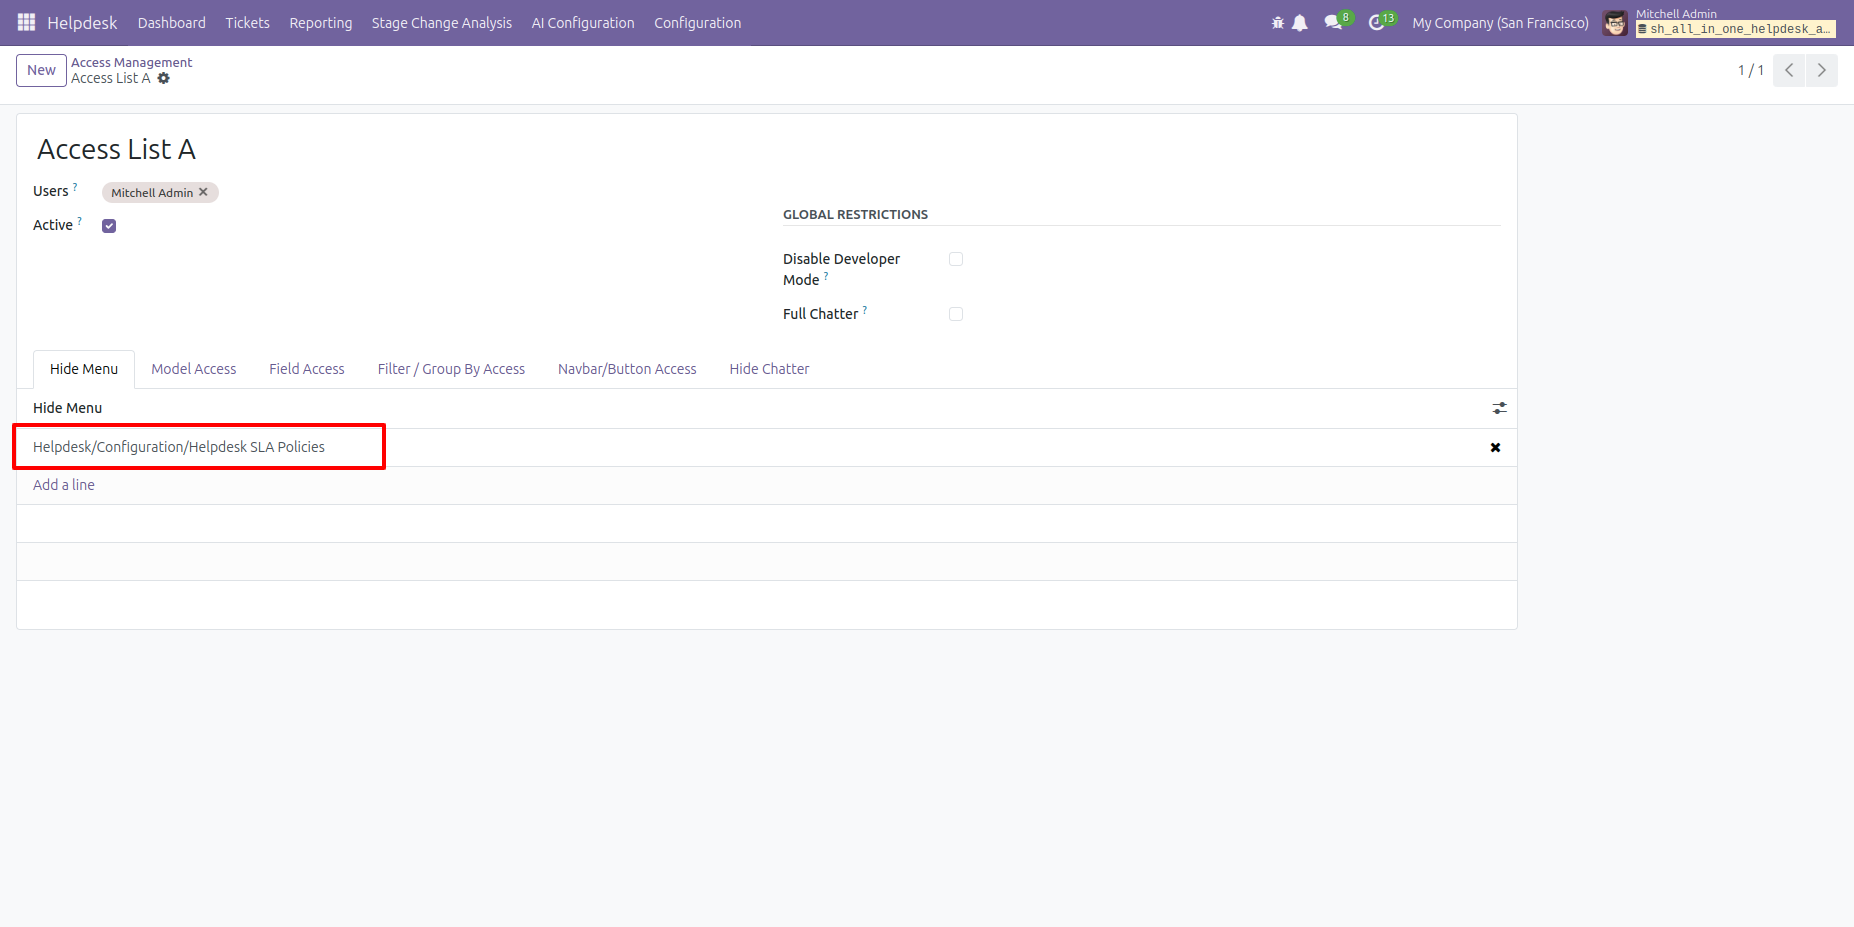
Here you can see the selected menu.
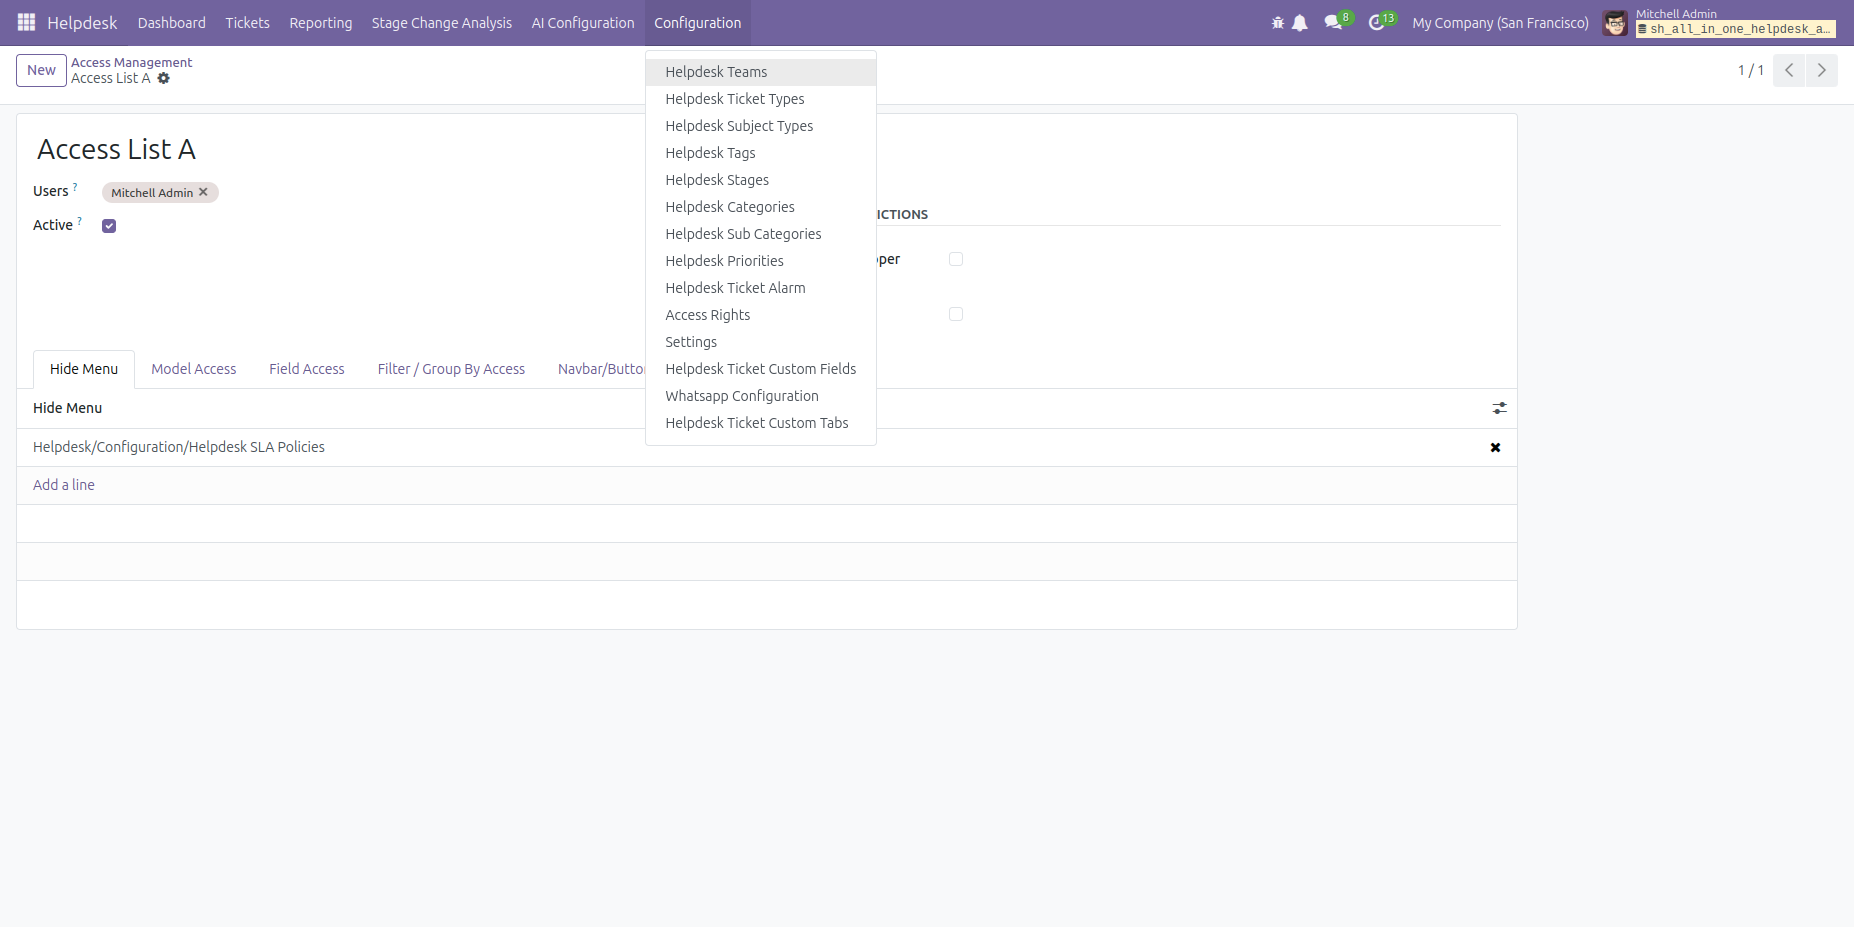
As you can see, the 'Helpdesk SLA Policies' menu is not visible here.
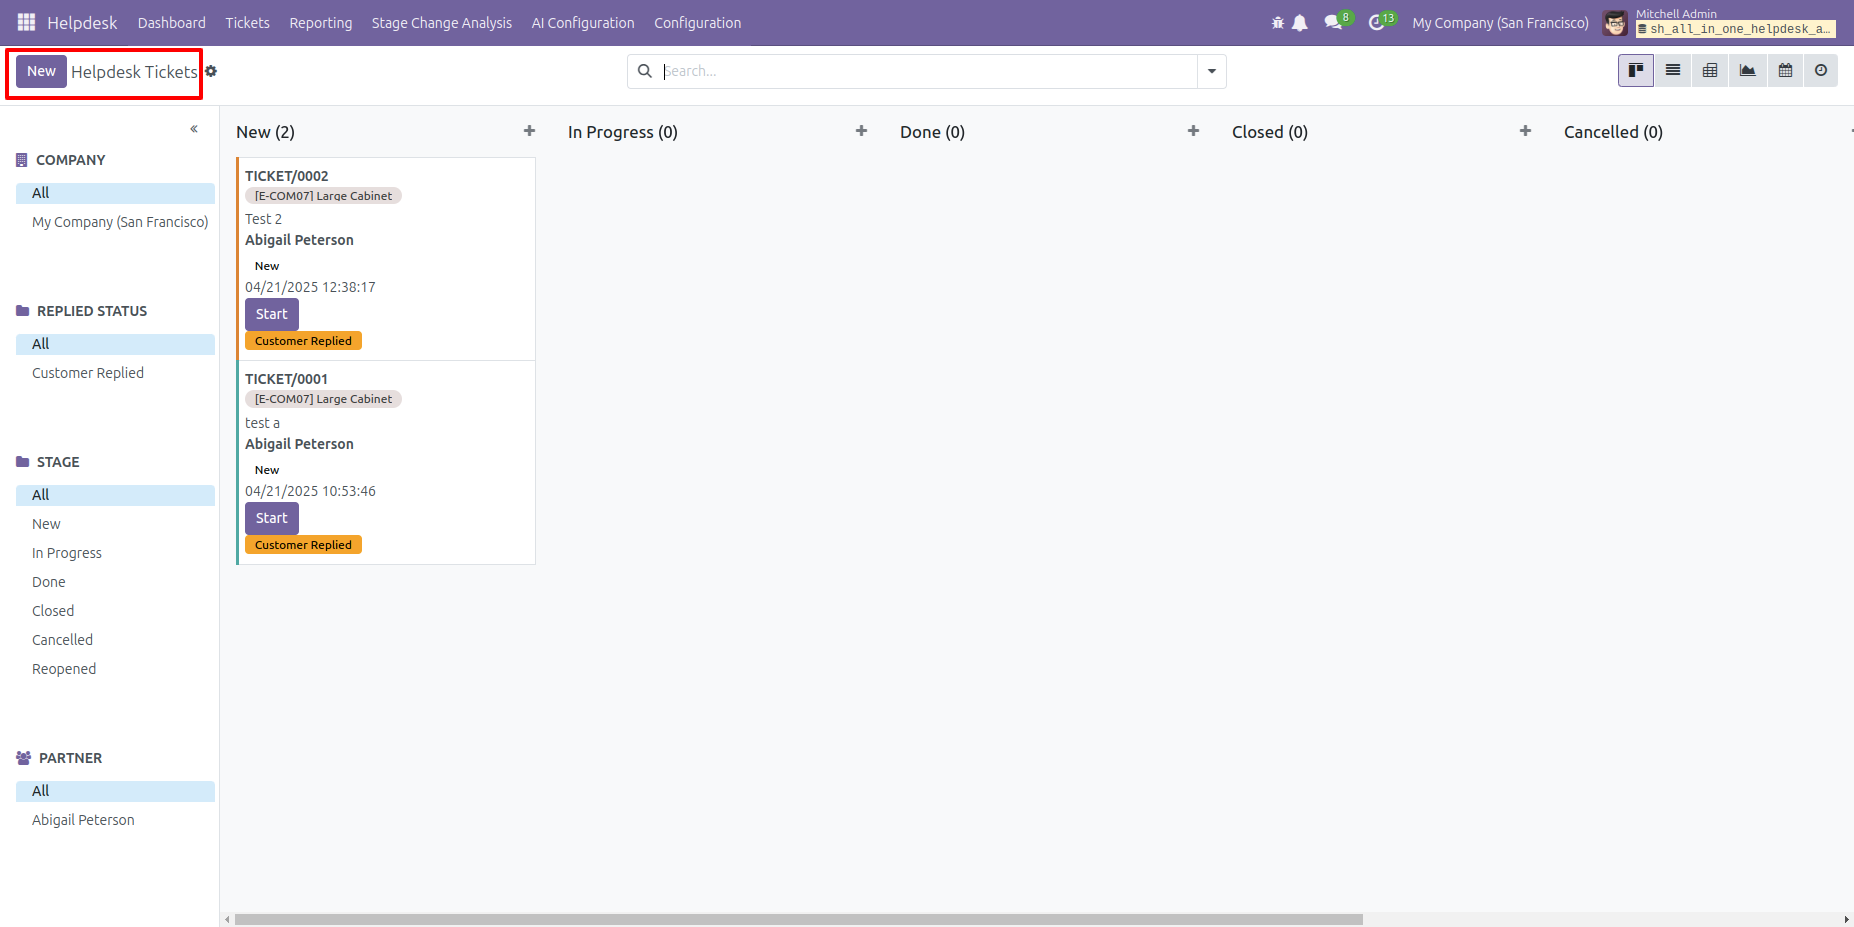
In the Kanban view of the helpdesk tickets, you can see the 'New' button.
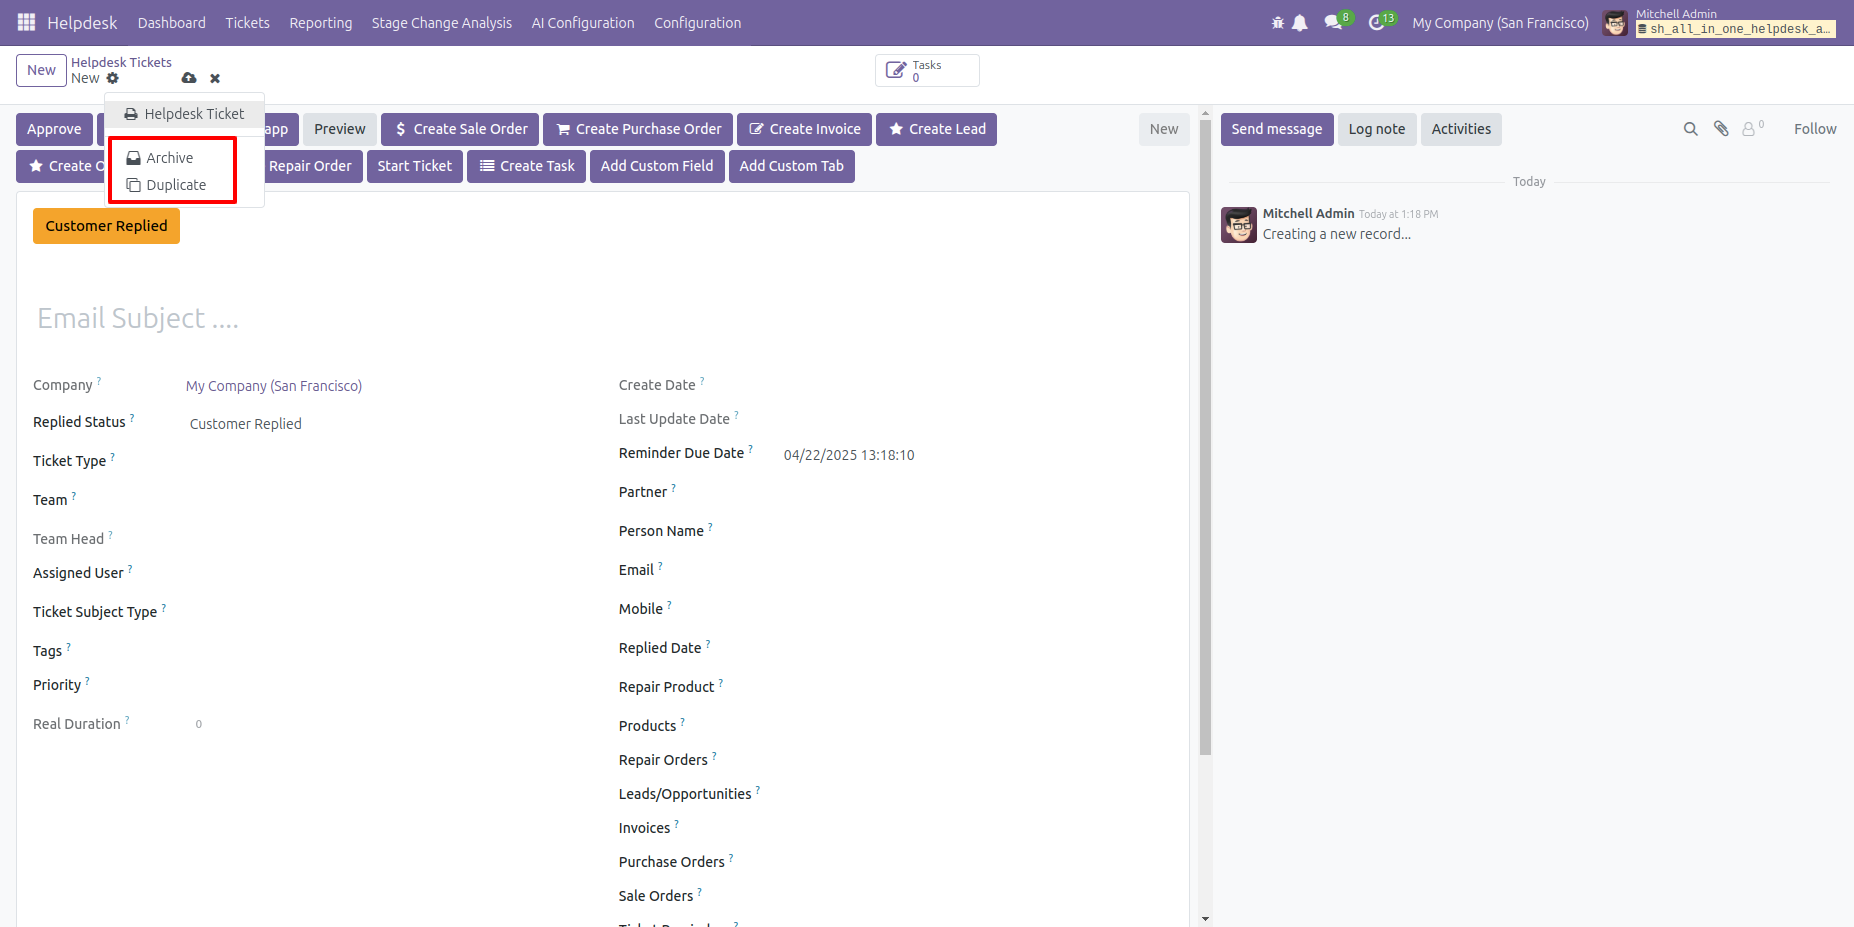
In the ticket form view, you can see the 'New' button, Archive and Duplicate options.
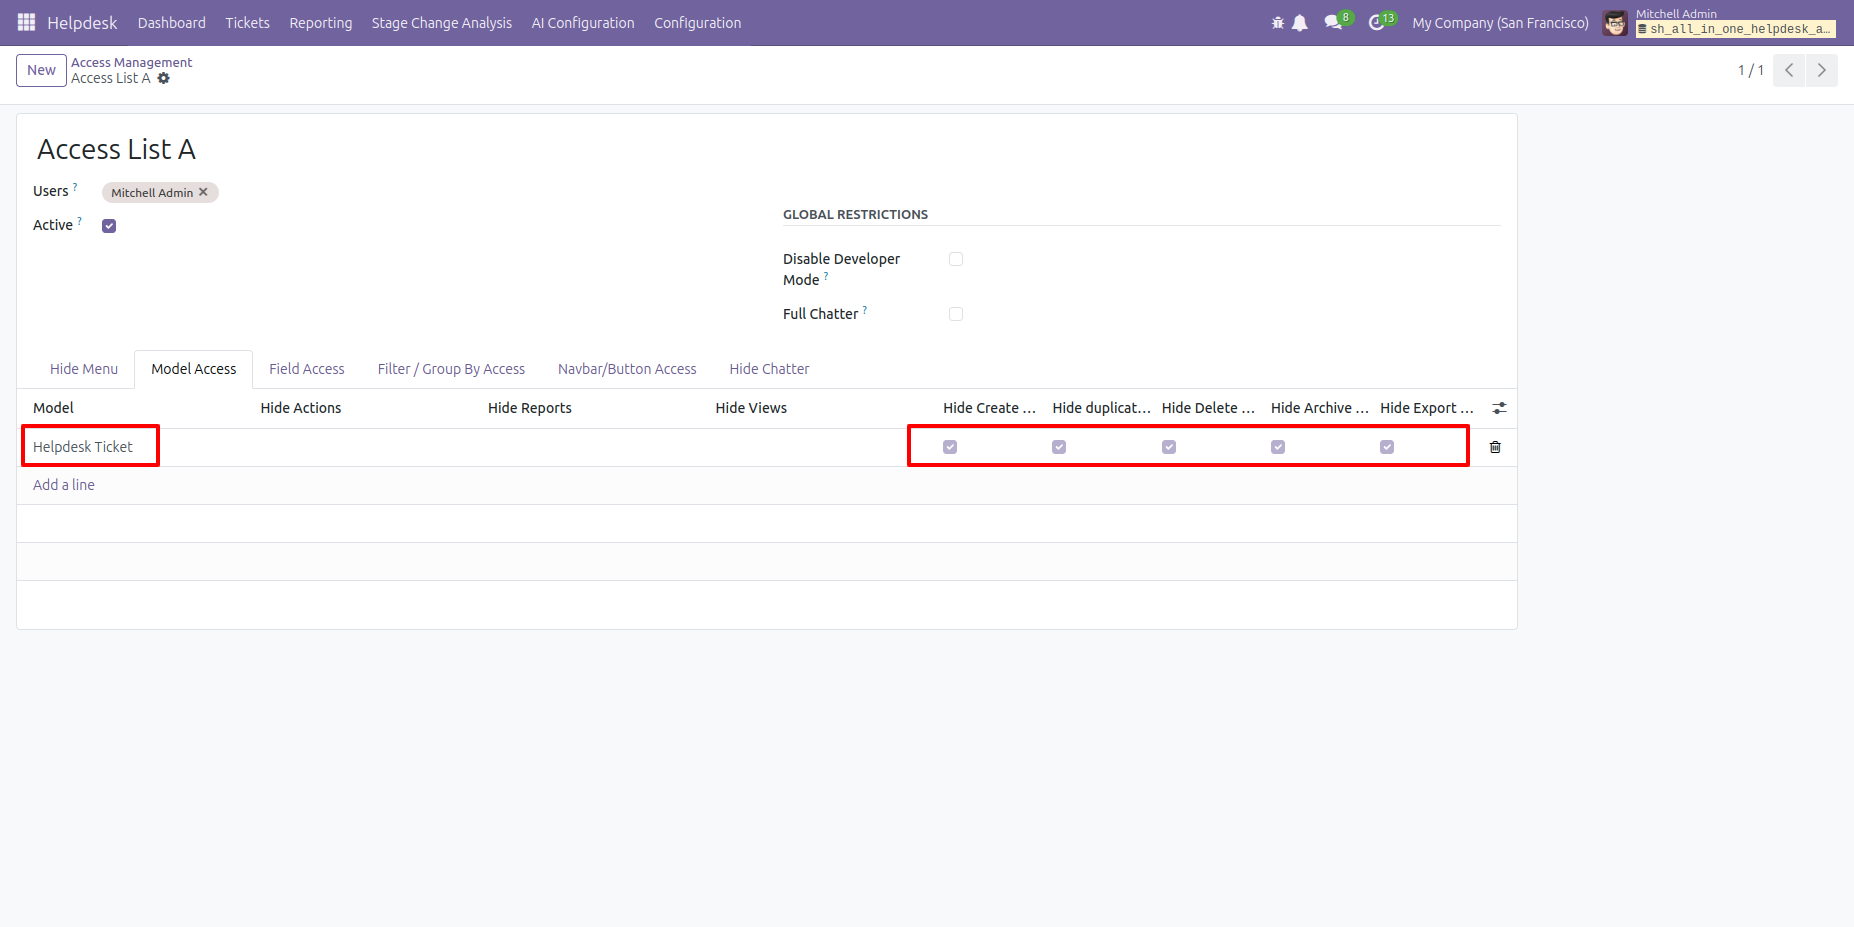
Go to the access Management and tick the model 'Helpdesk' and tick the options which you want to hide (Hide create, duplicate, delete, archive, export).
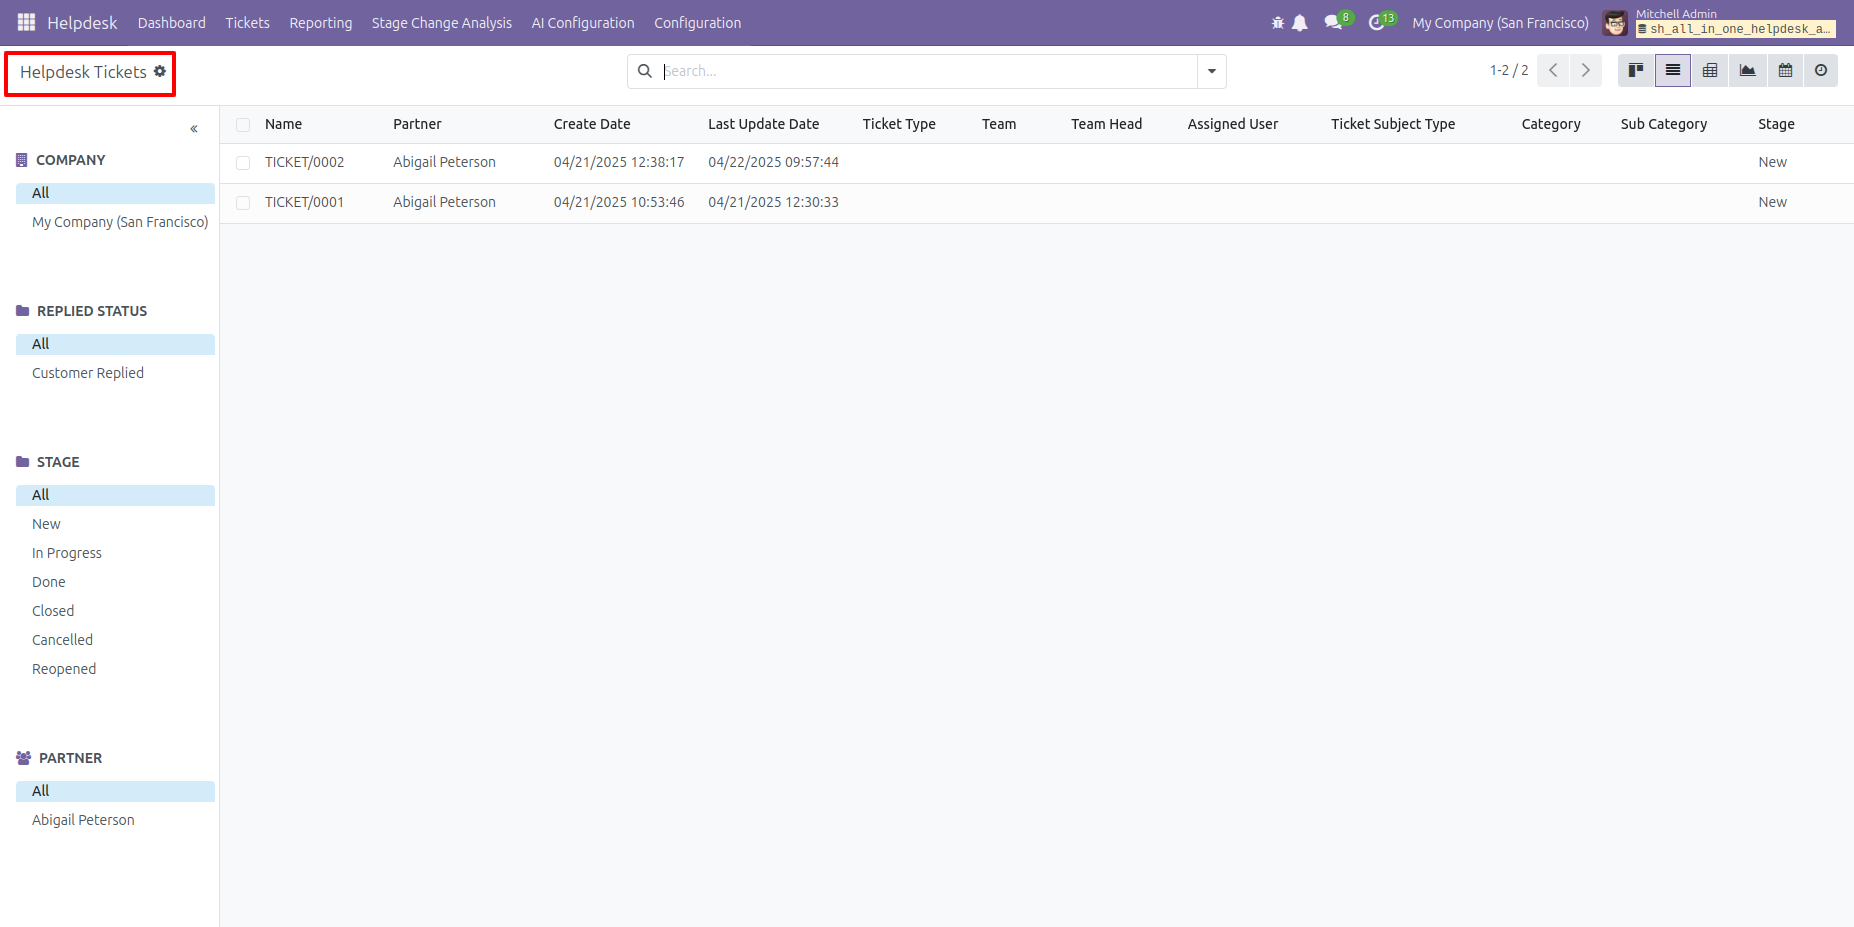
As you can see, the 'New' button is not visible here.
In the form view of the Helpdesk Ticket, the Archive and Duplicate options are not visible.
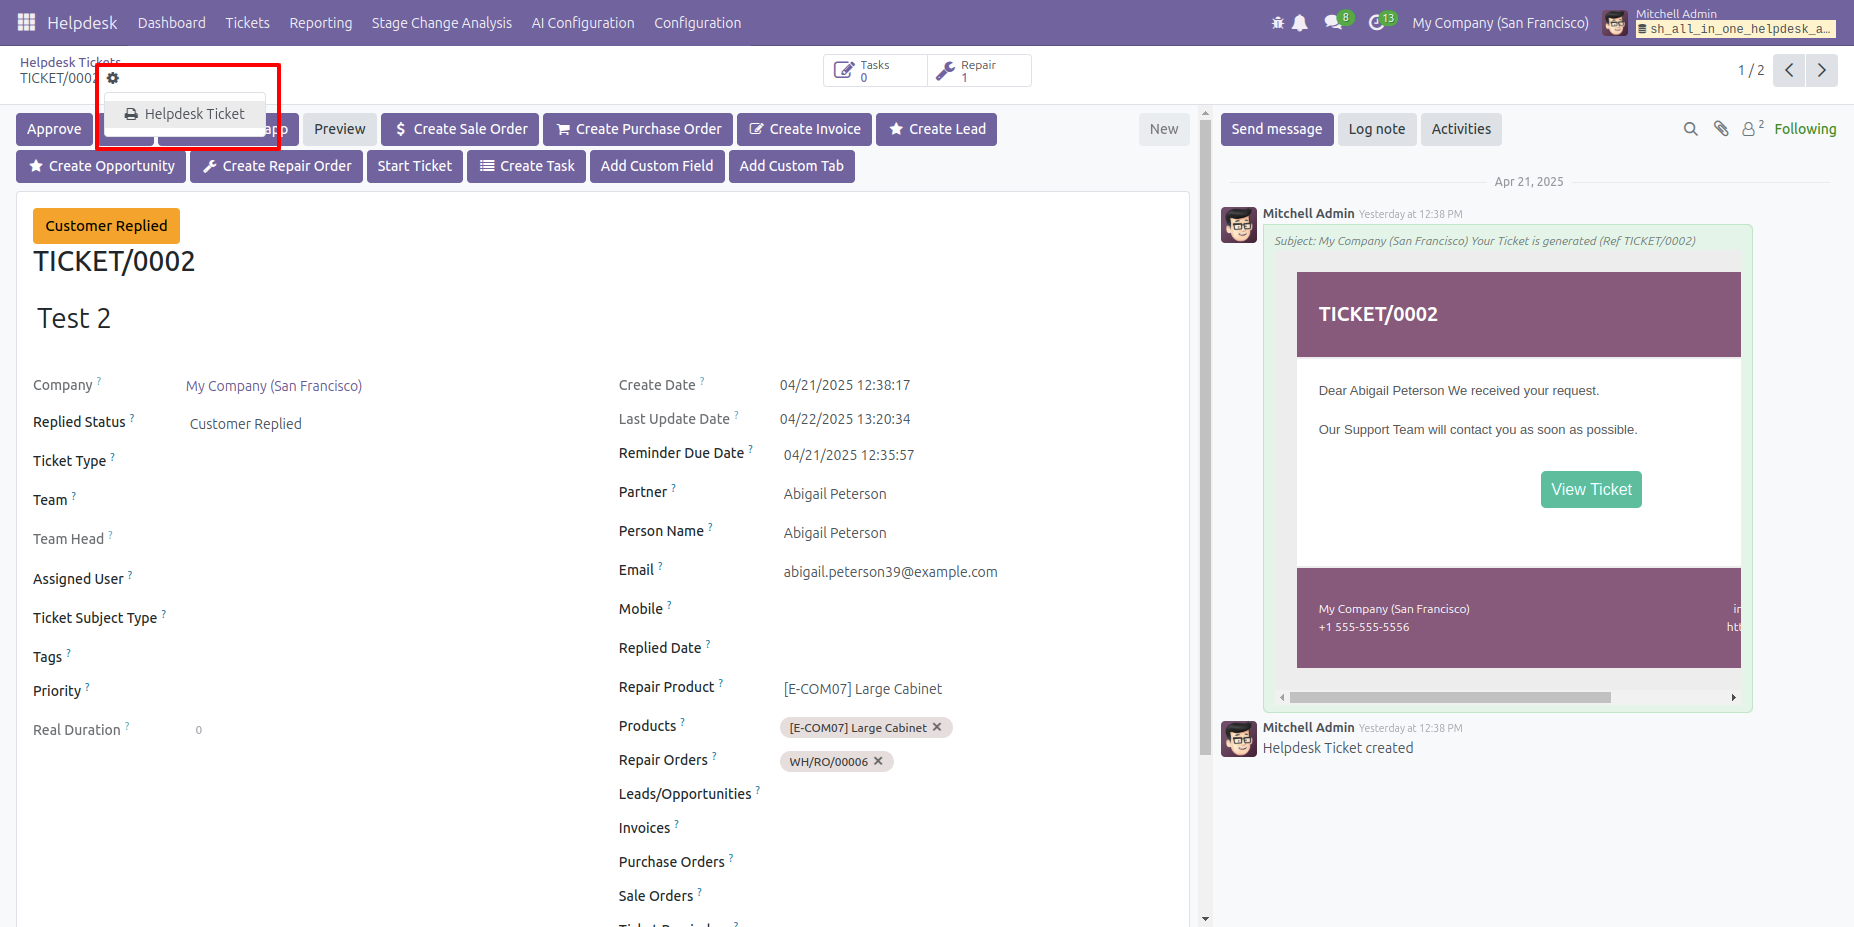
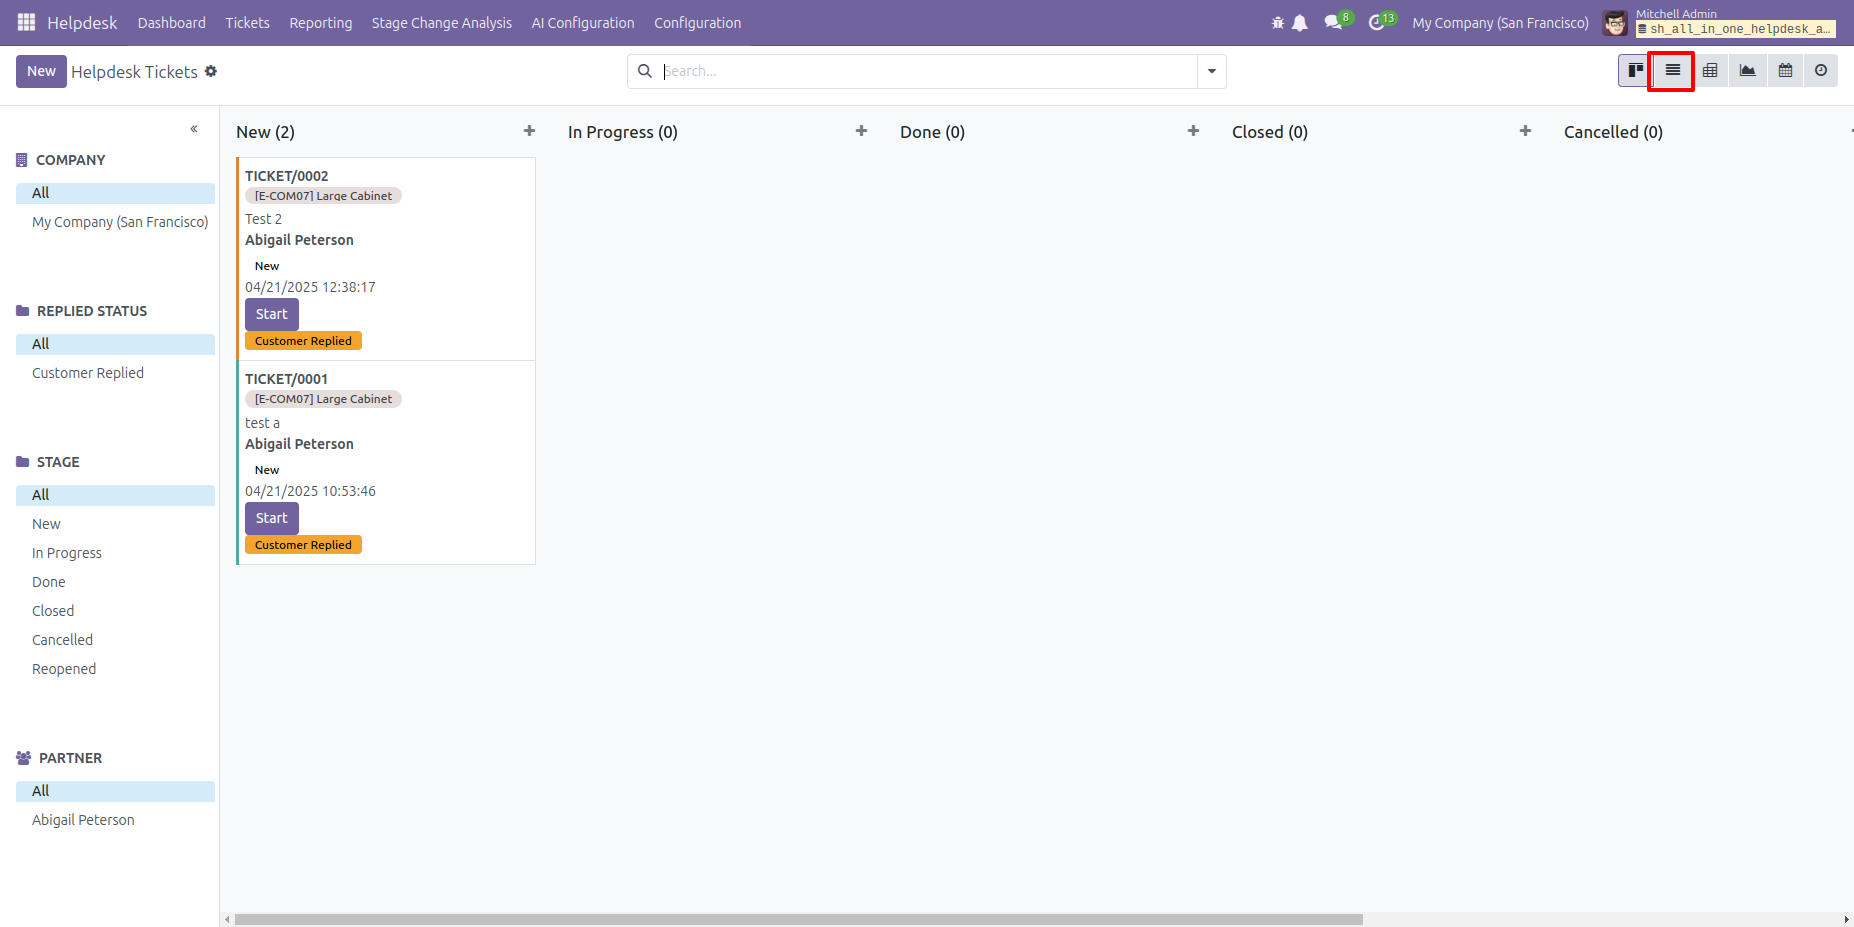
Here, you can see the Tree View option.
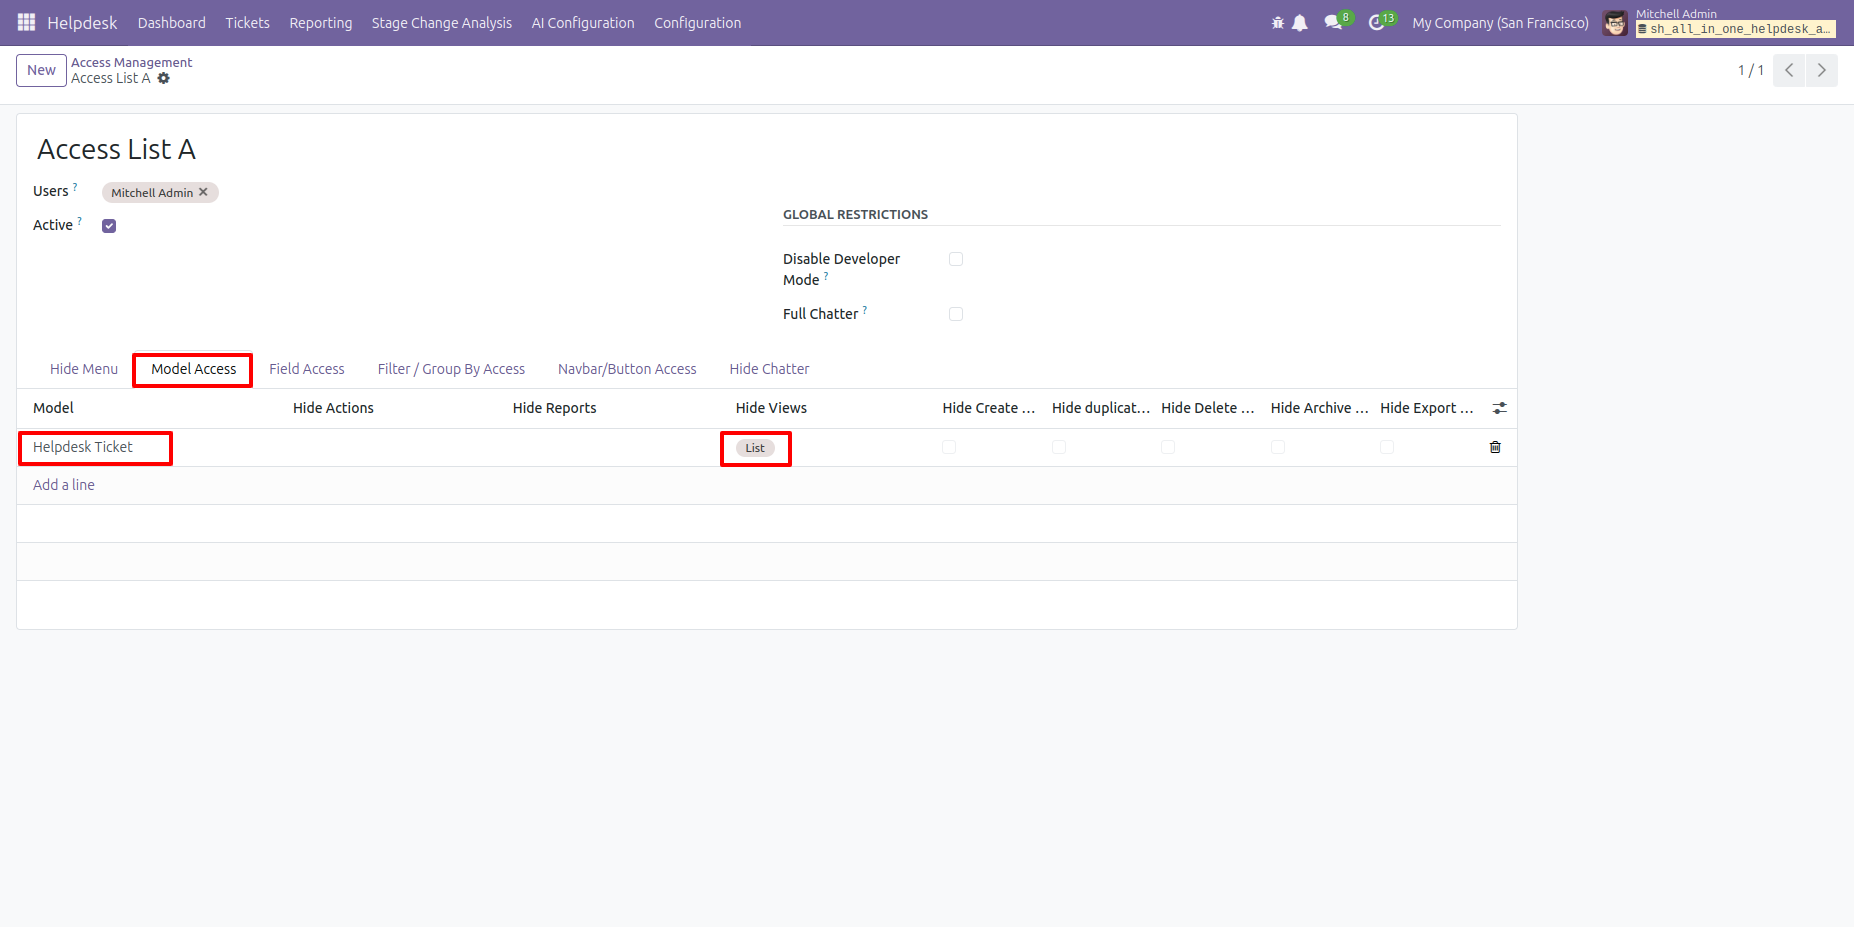
In the Model Access tab, select the Tree View option.
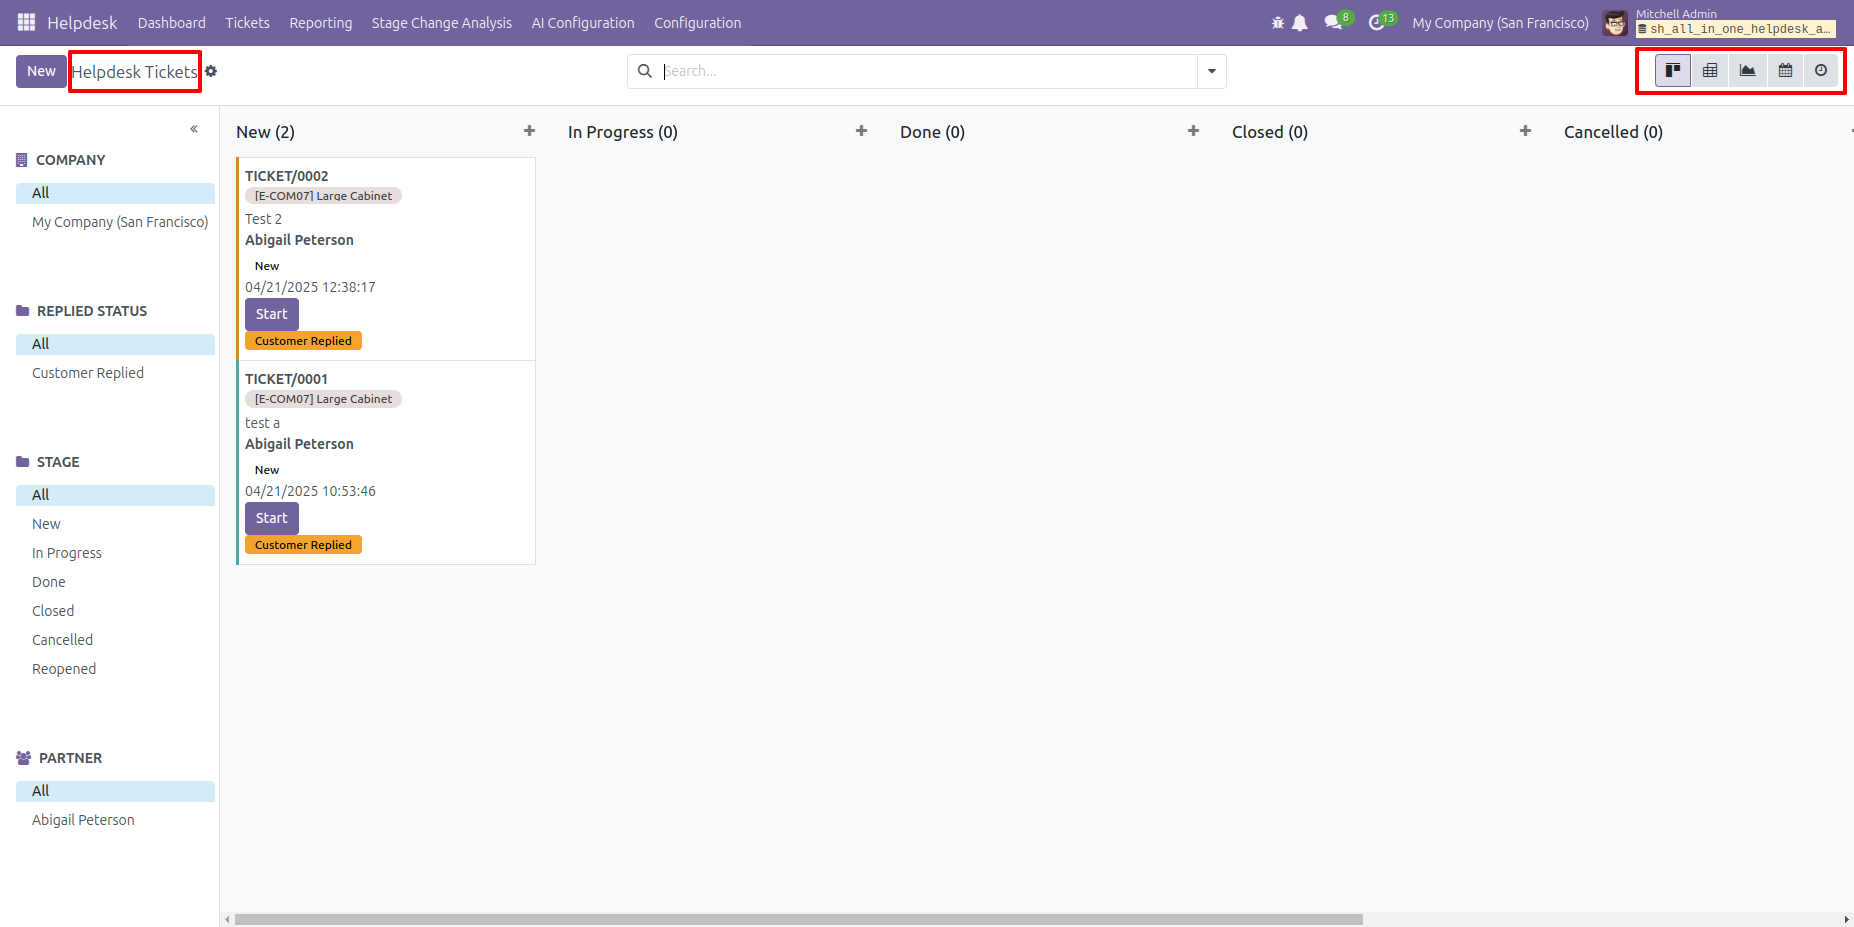
As you can see, the 'Tree' view is not visible here.
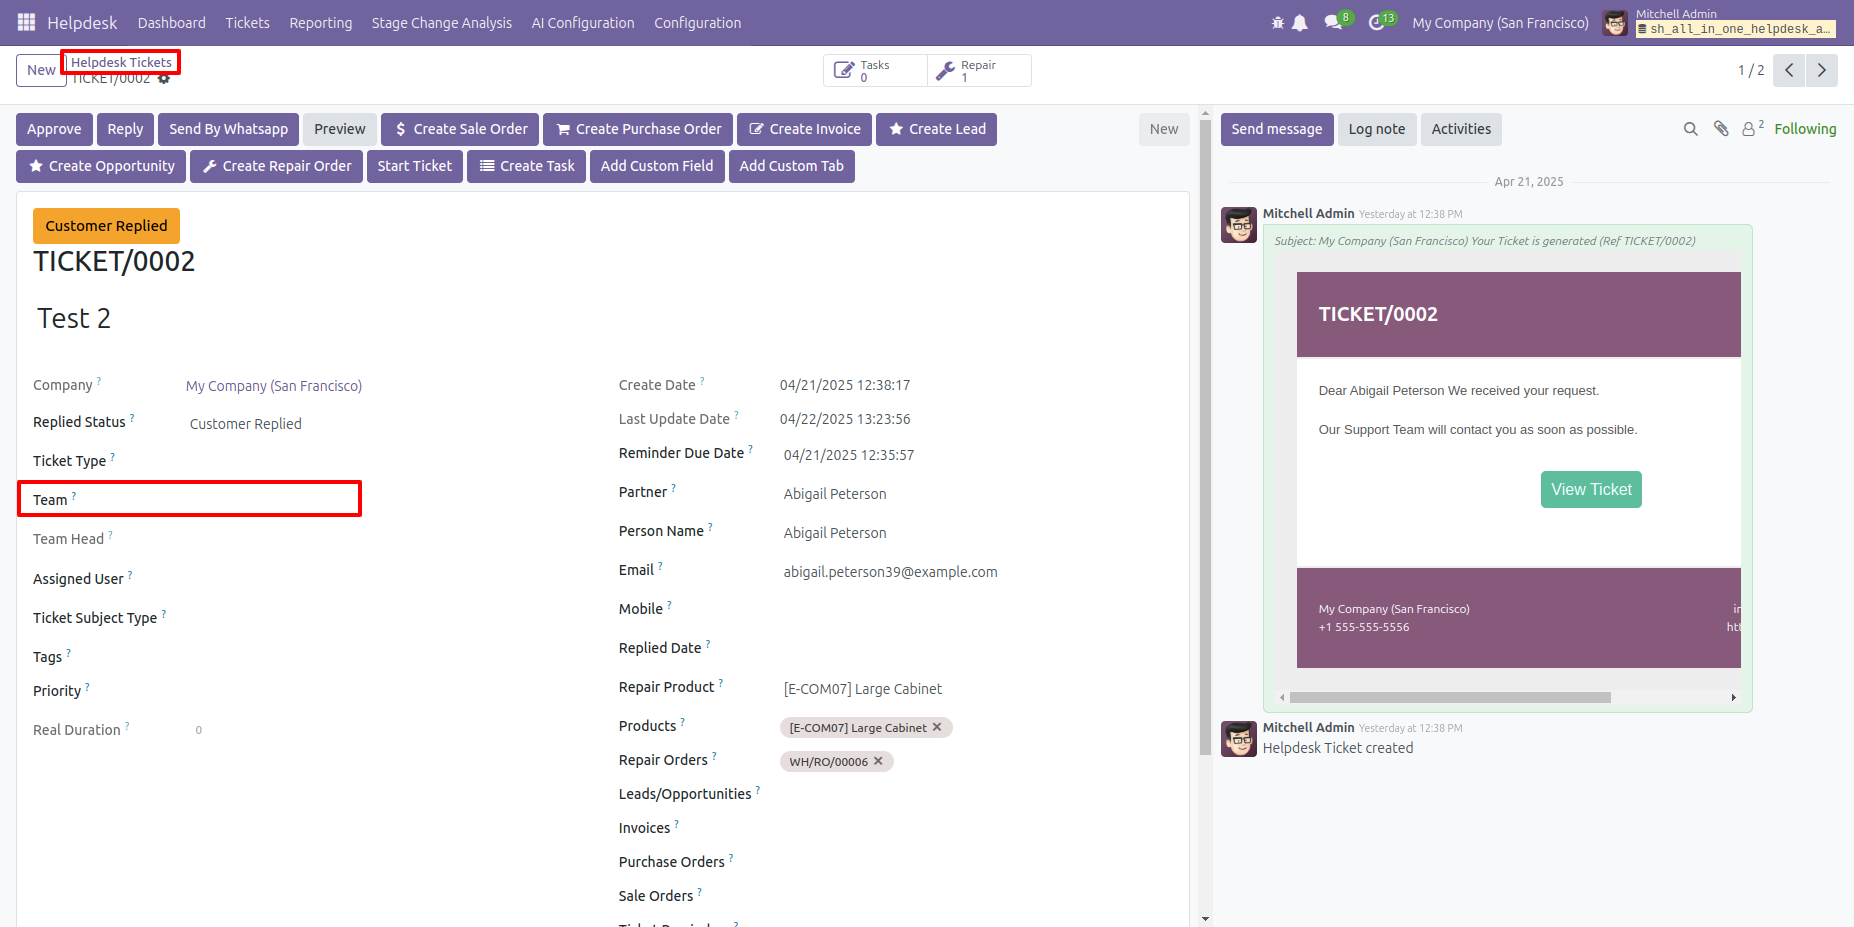
In the helpdesk form view, you can see the 'Team' field.
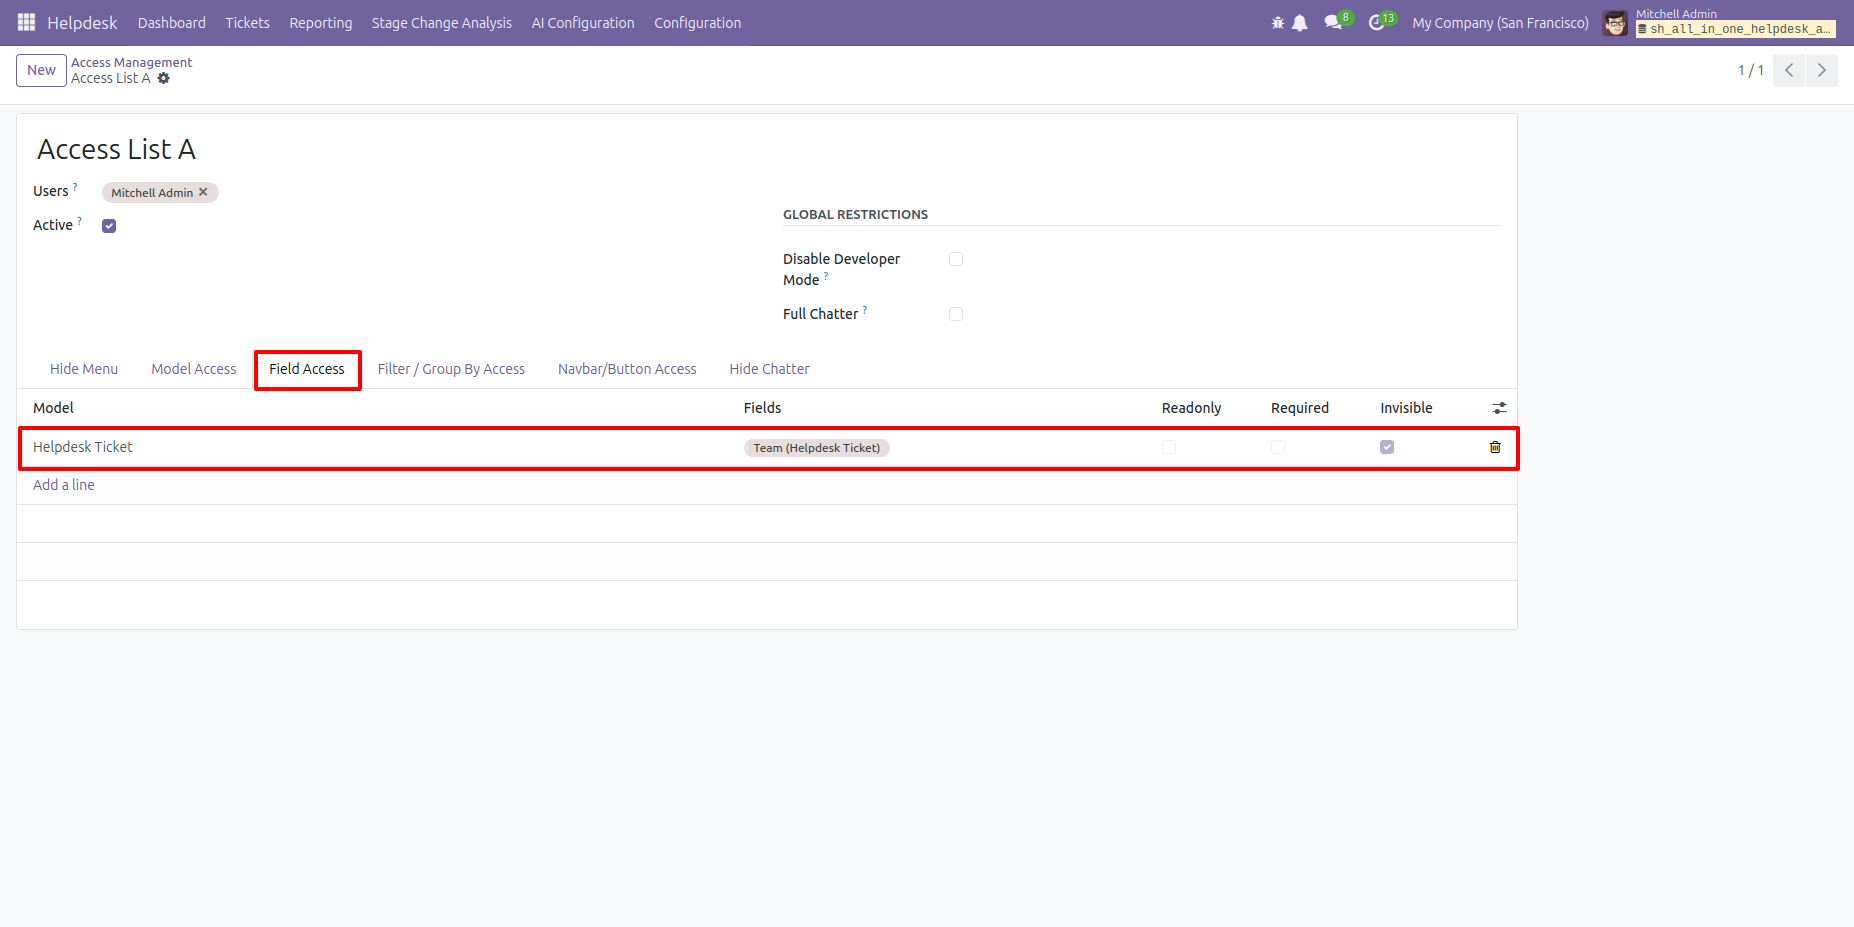
In the Field Access tab, select the Team field option.
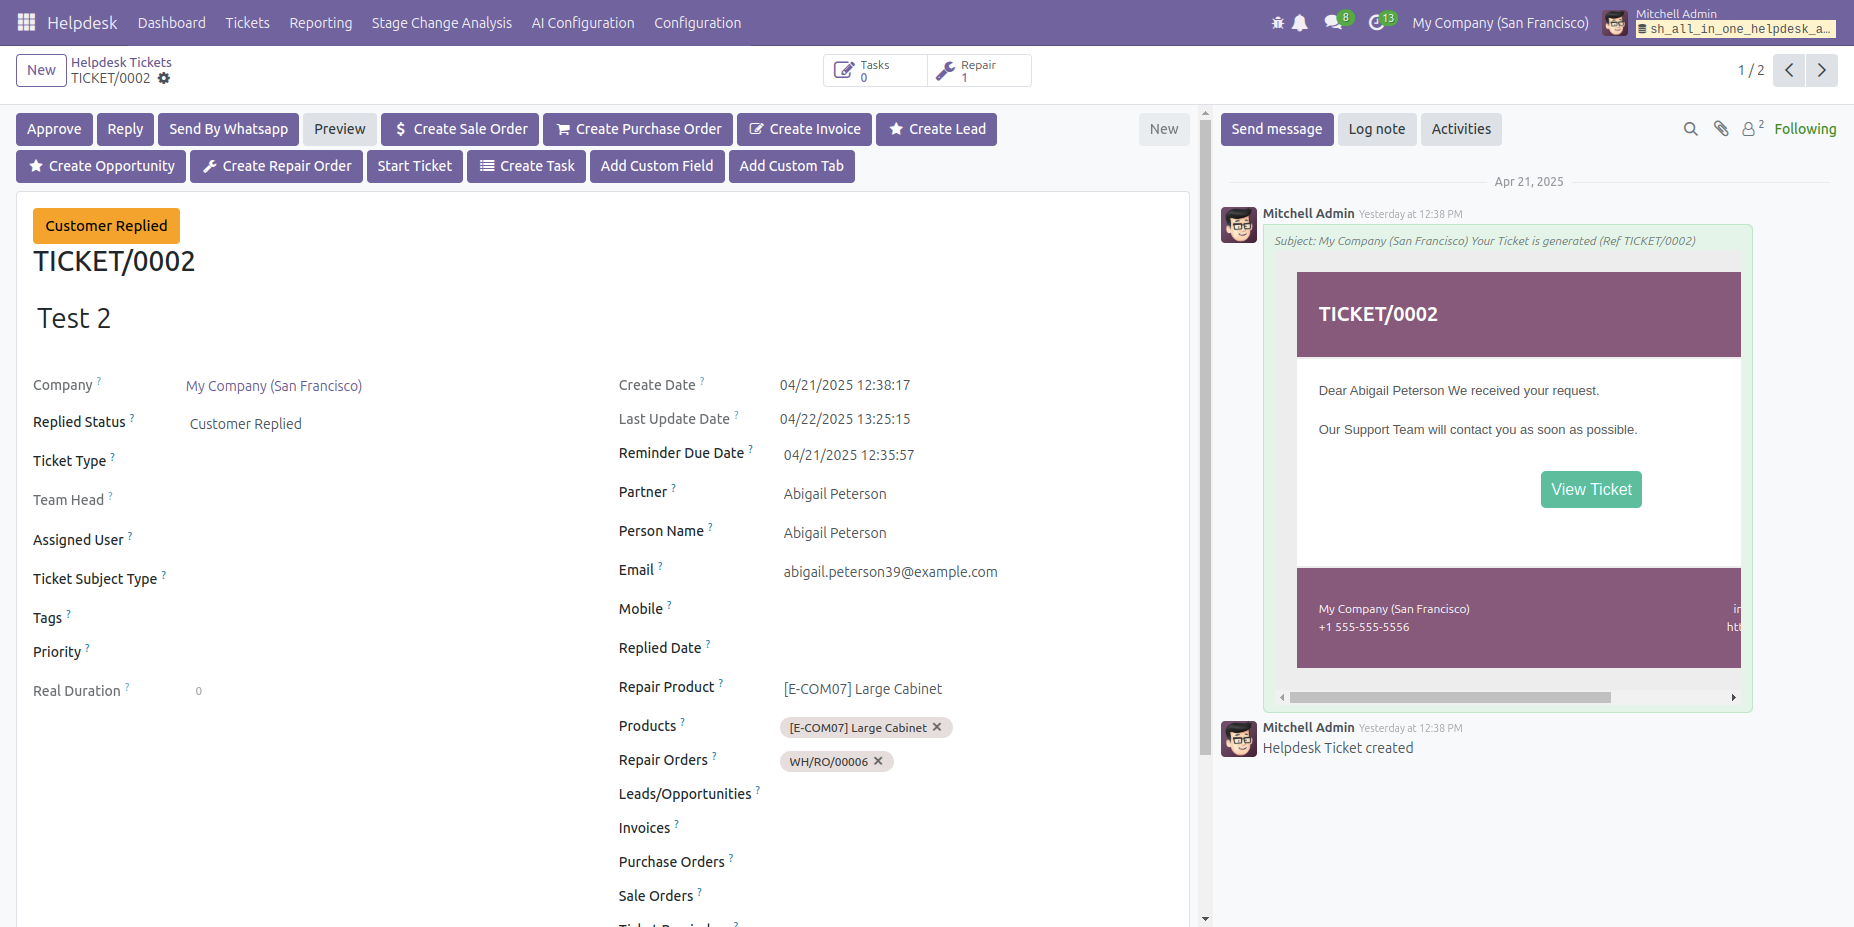
As you can see, the 'Team' field is not visible here.
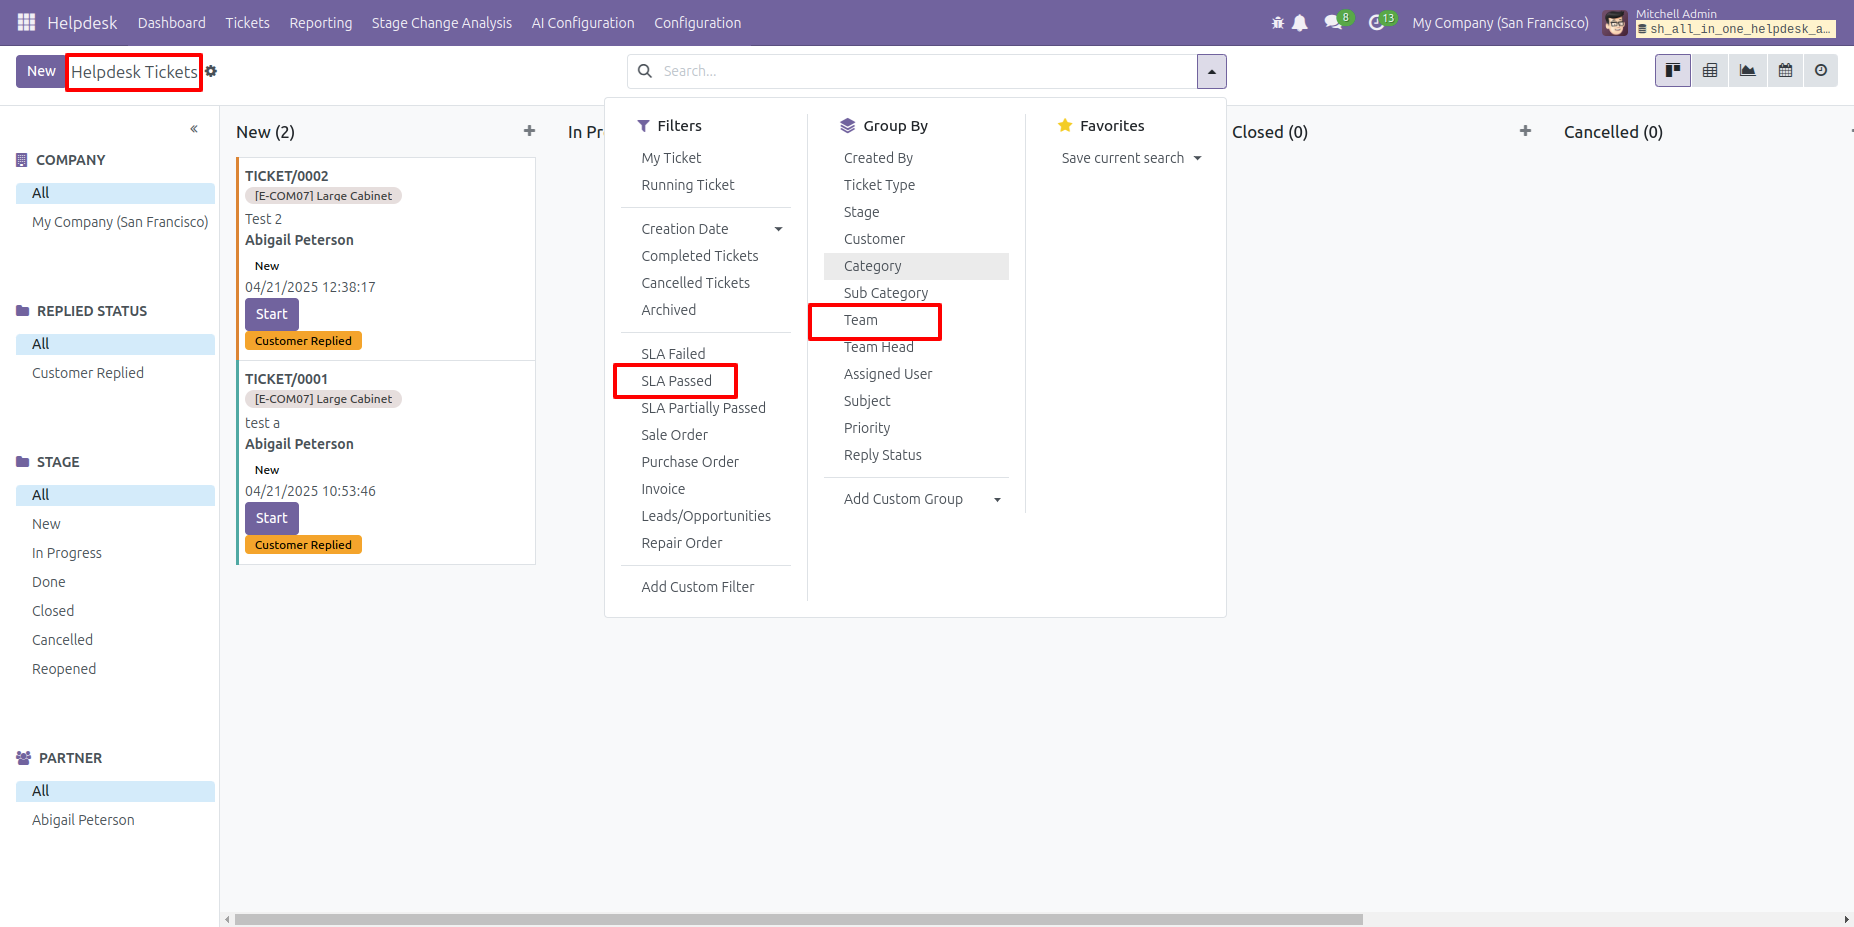
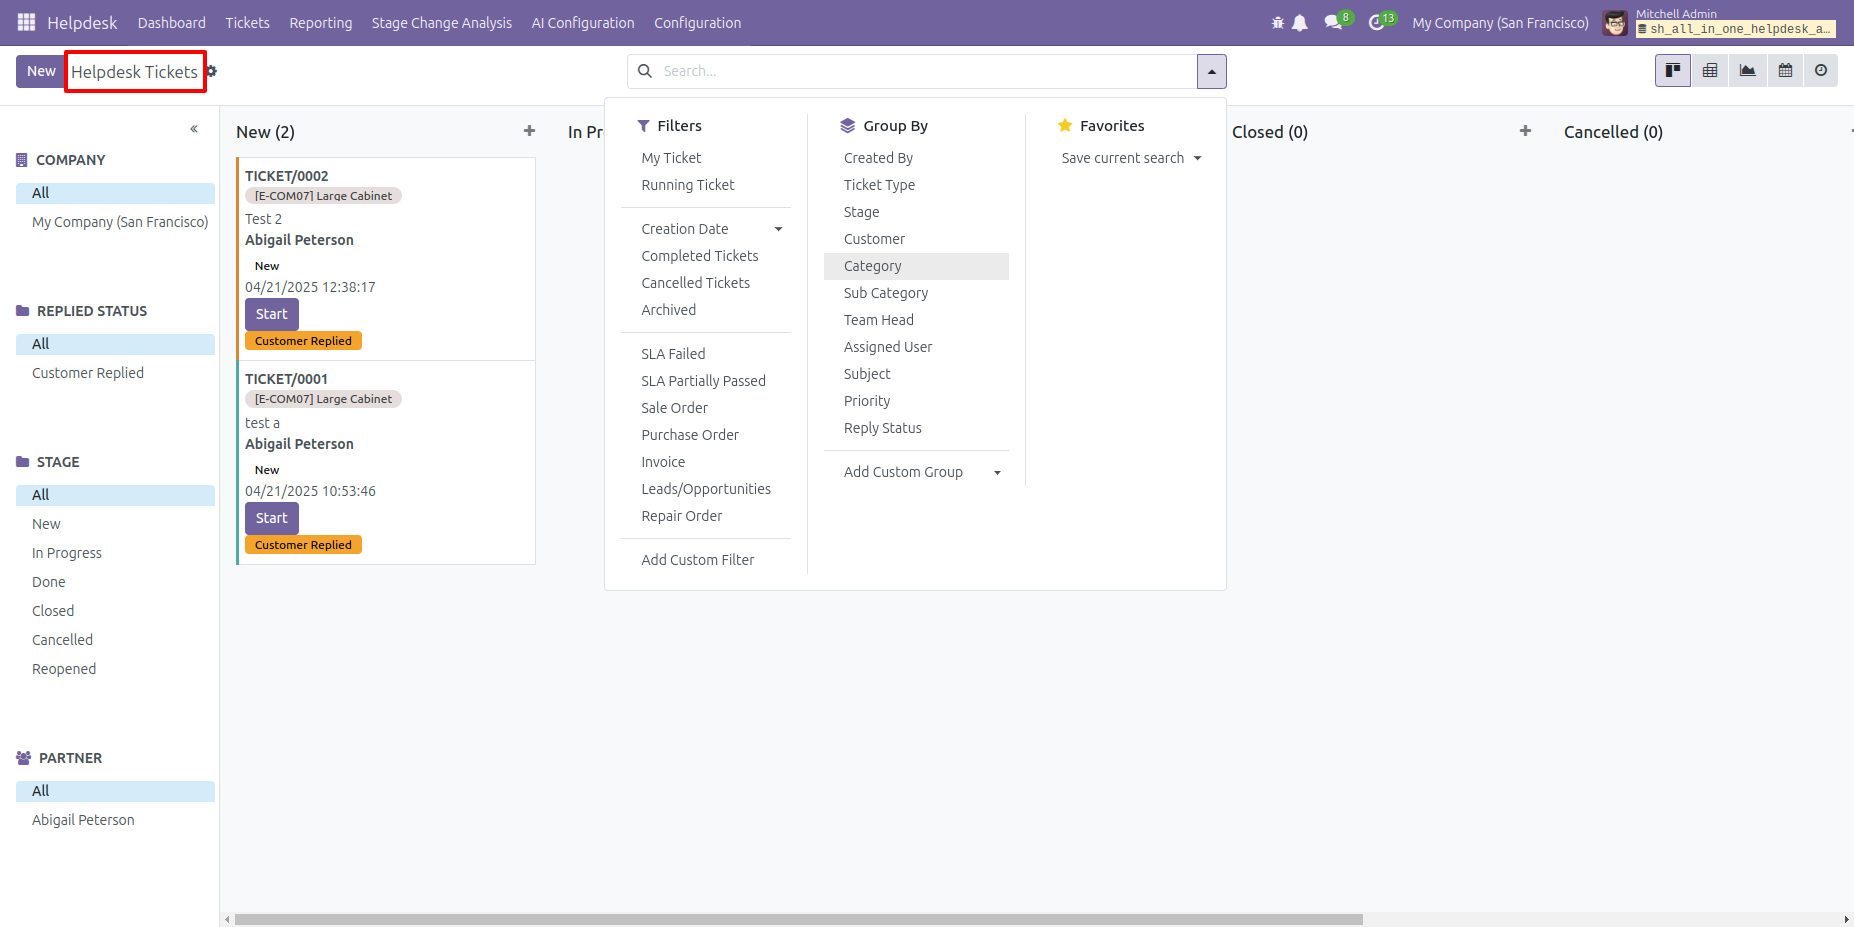
You can Filter and Group by you can see the 'SLA Passed and Team' options.
In the Filter and Group by Access tab, select the select the 'SLA Passed and Team' options.
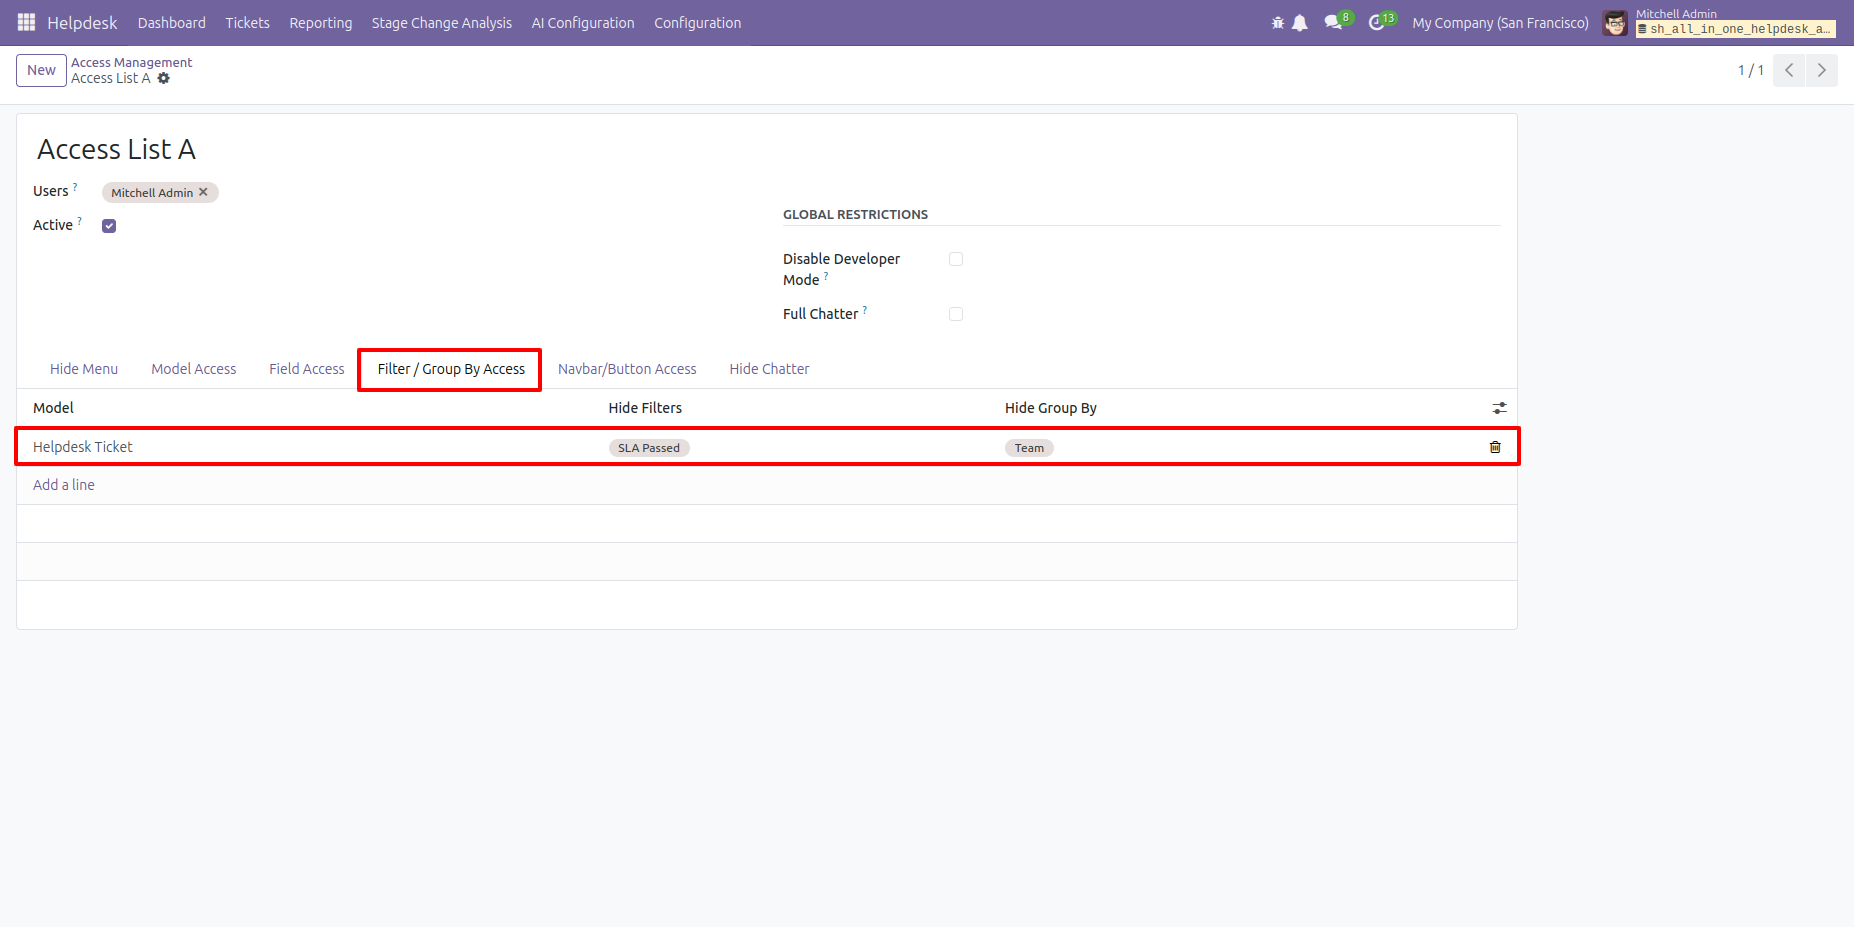
As you can see, the 'SLA Passed and Team' options are not visible here.
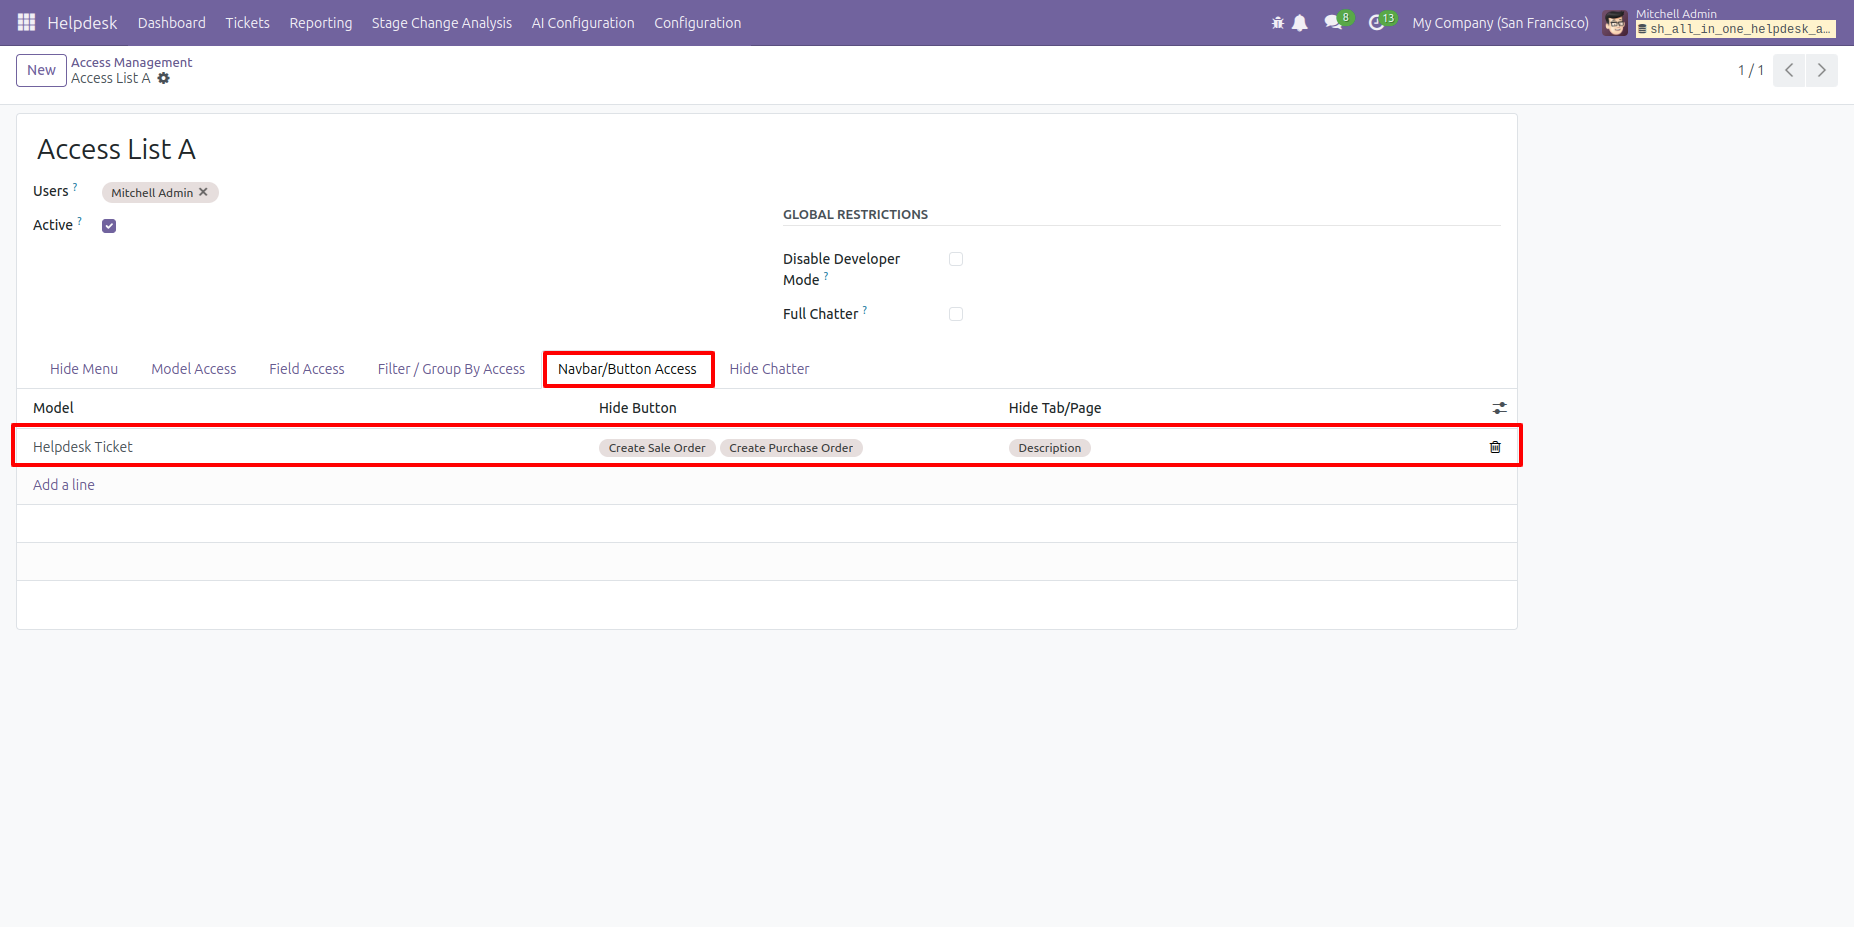
In the form view, you can see the 'Create Sale Order and Create Purchase Order' buttons and Description tab.
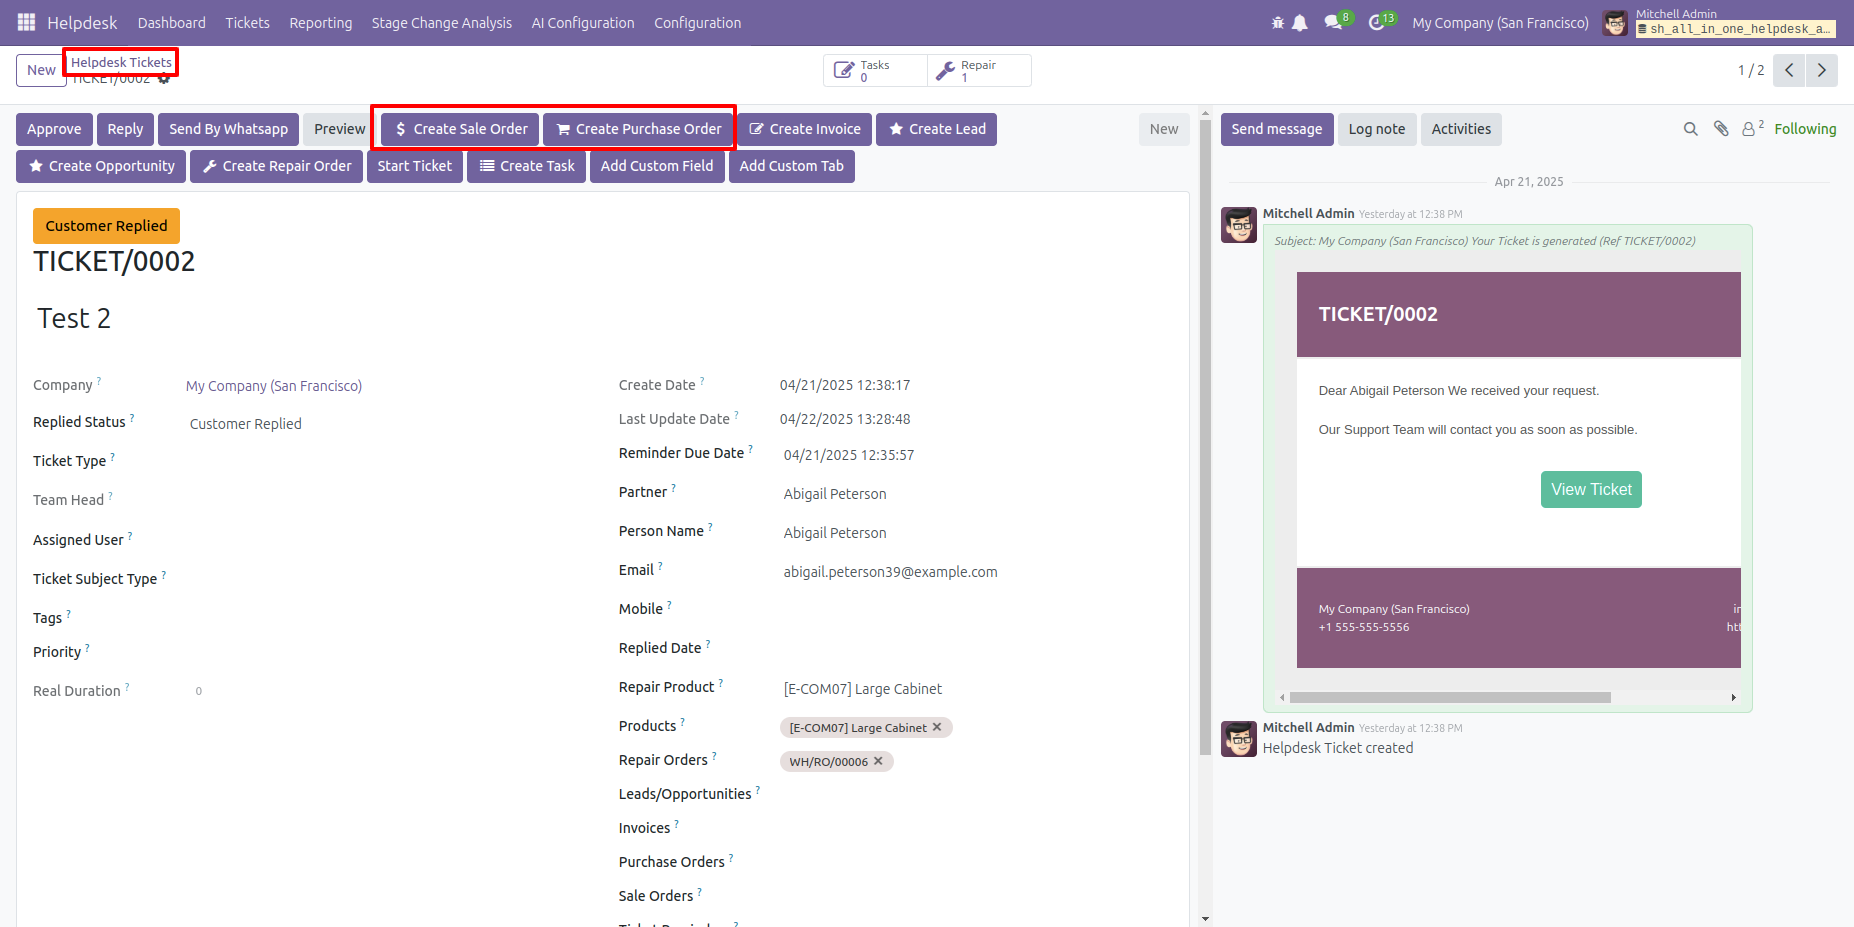
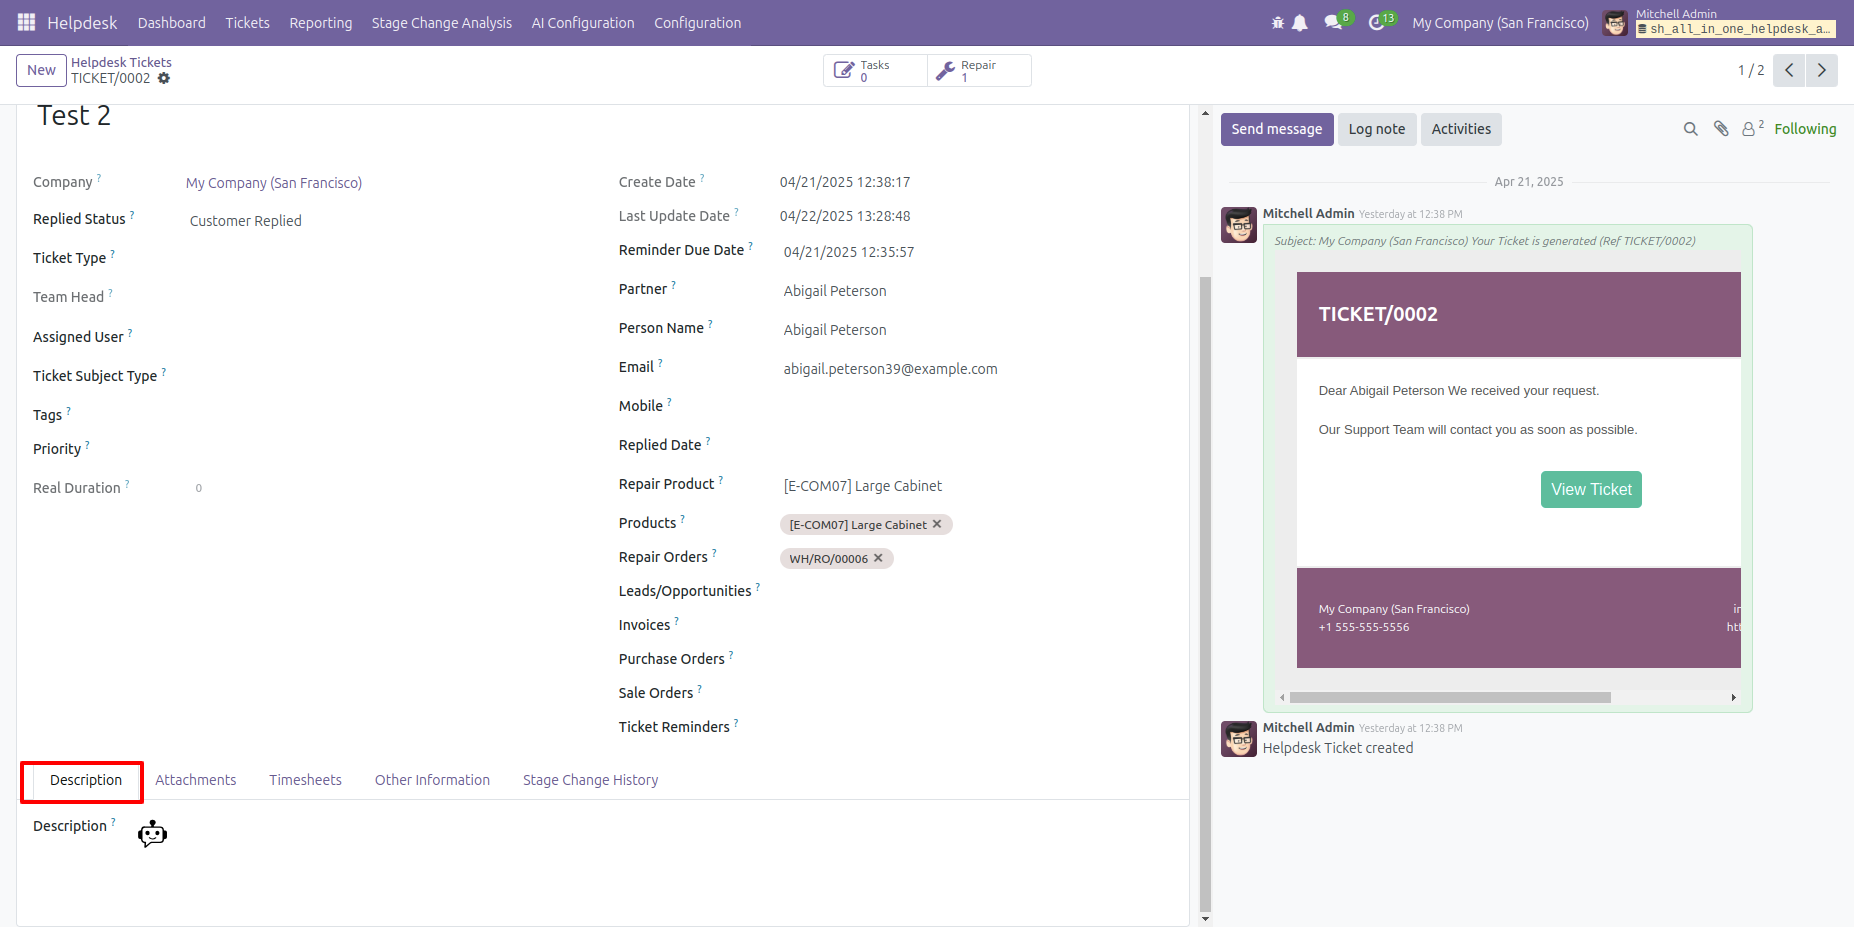
In the Navbar/Button Access tab, select the select the 'Create Sale Order and Create Purchase Order' buttons and Description tab options.
As you can see, the 'Create Sale Order and Create Purchase Order' buttons and Description tab are not visible here.
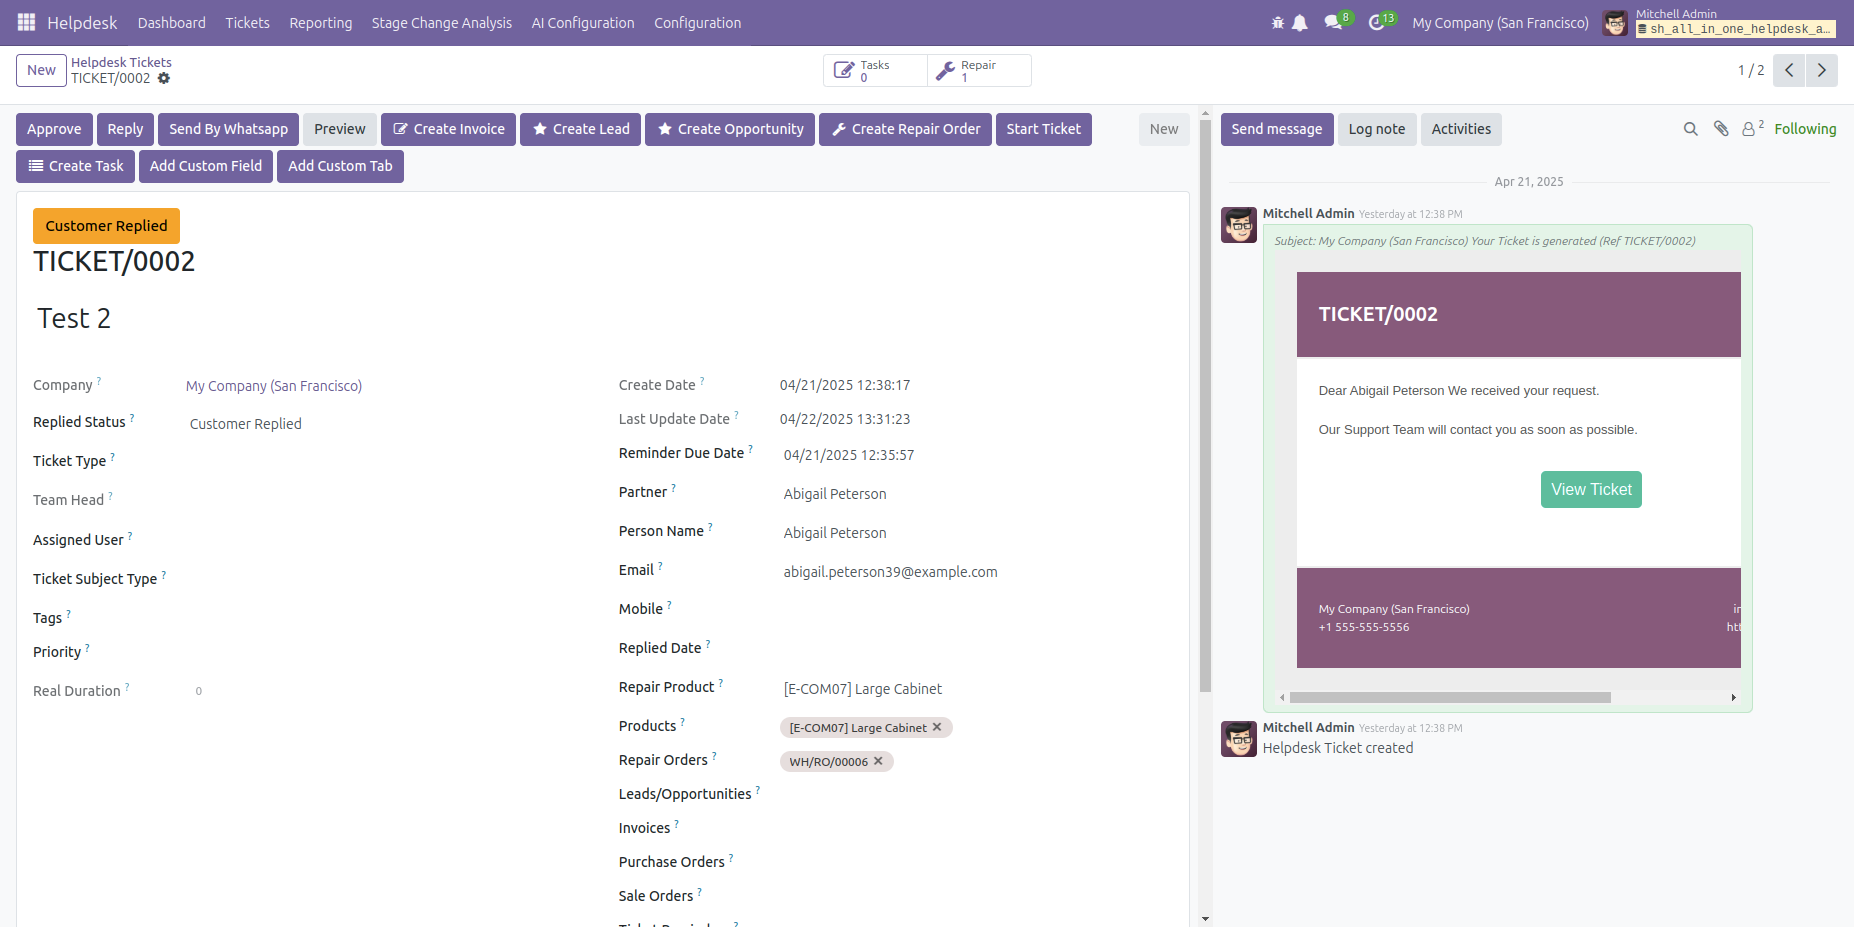
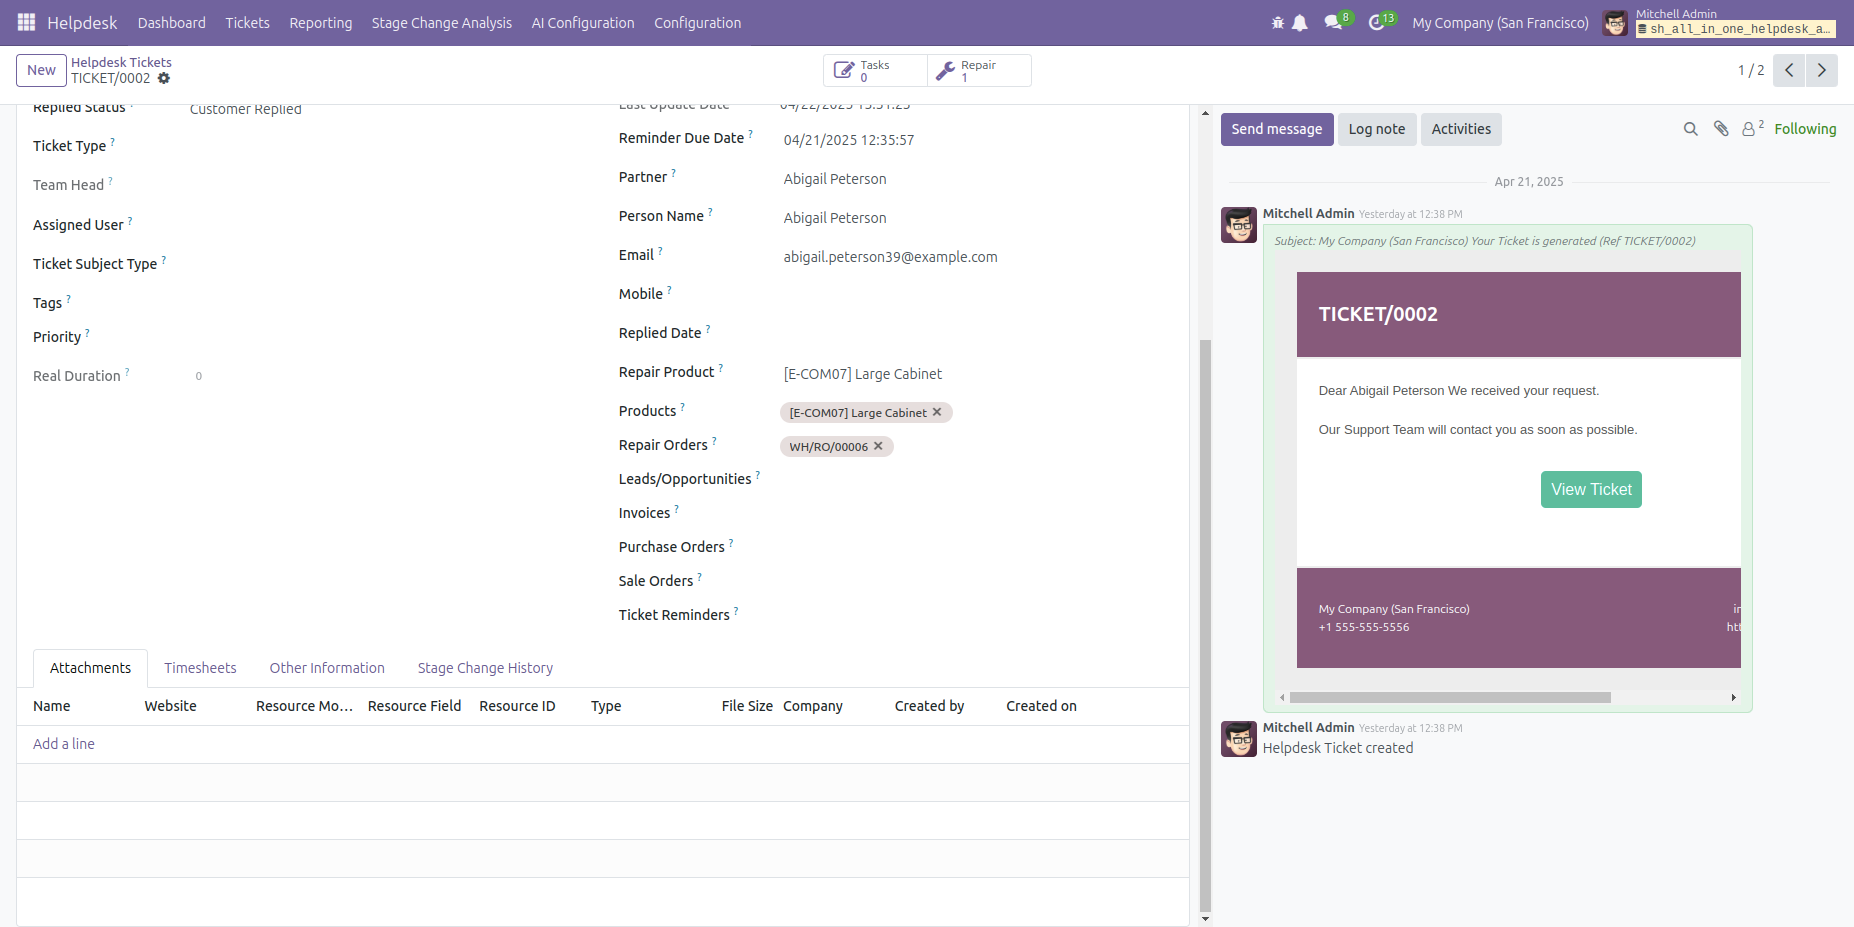
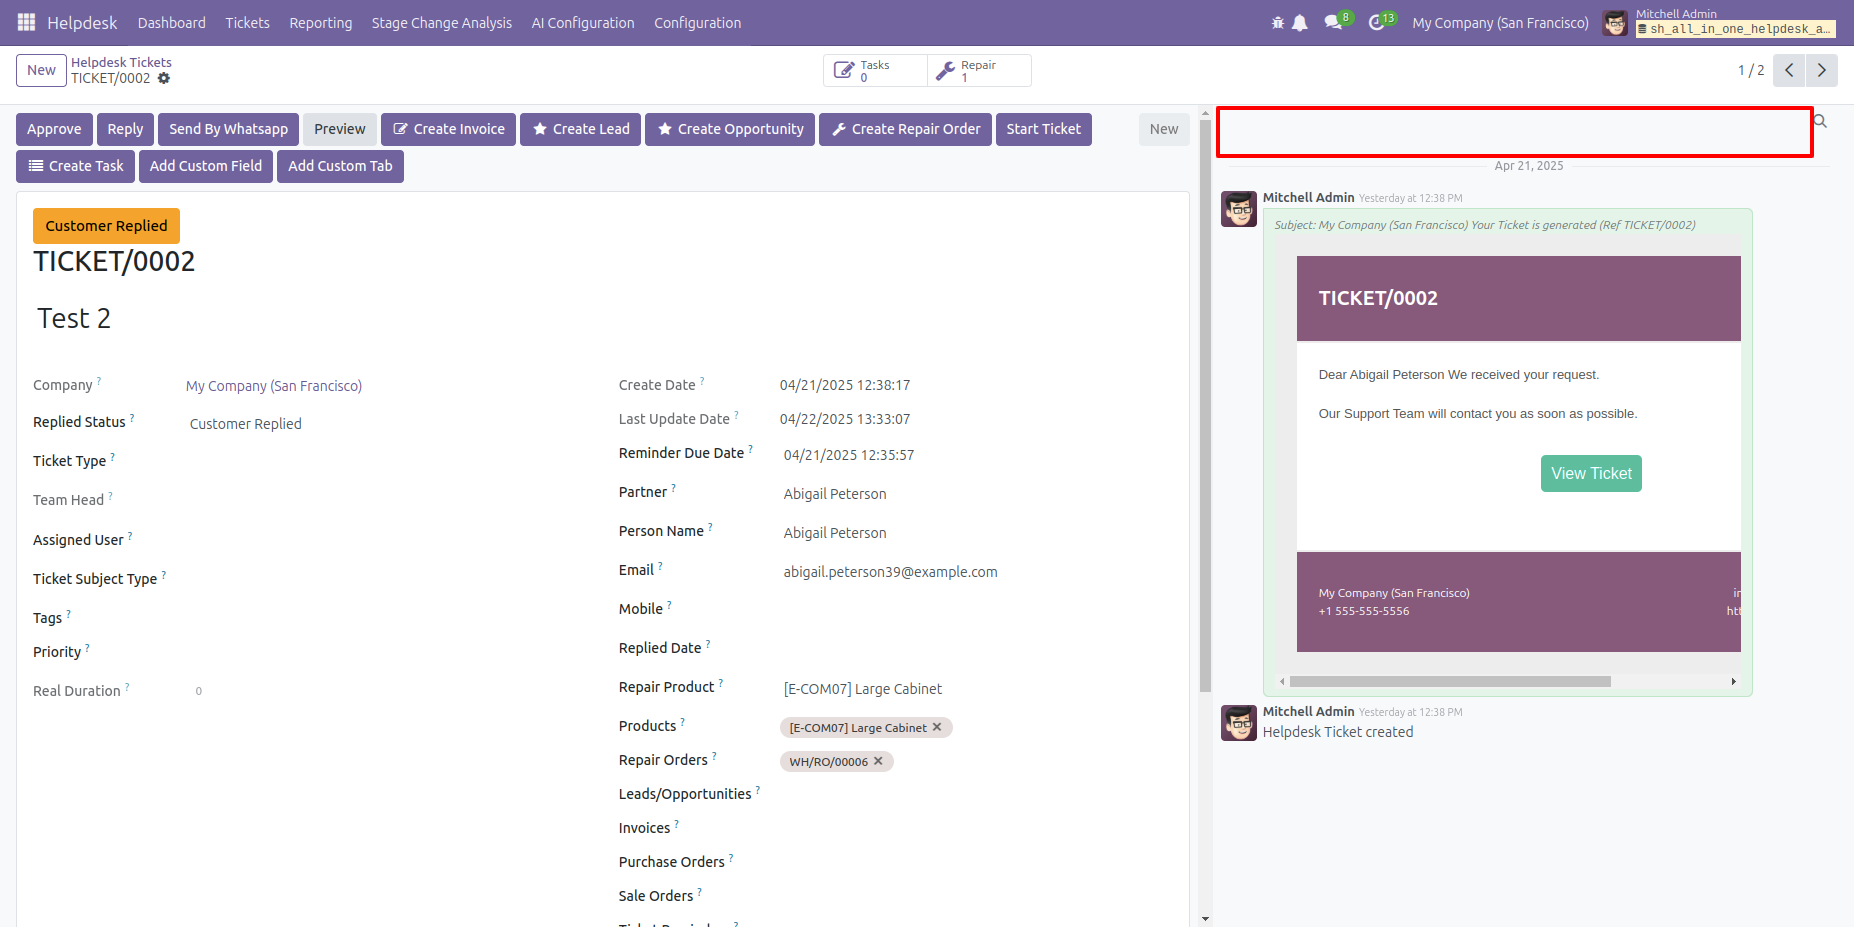
Here you can see the 'Send Message, Log note, and Activities' buttons and 'Followers and Attachments' options in the chatter.
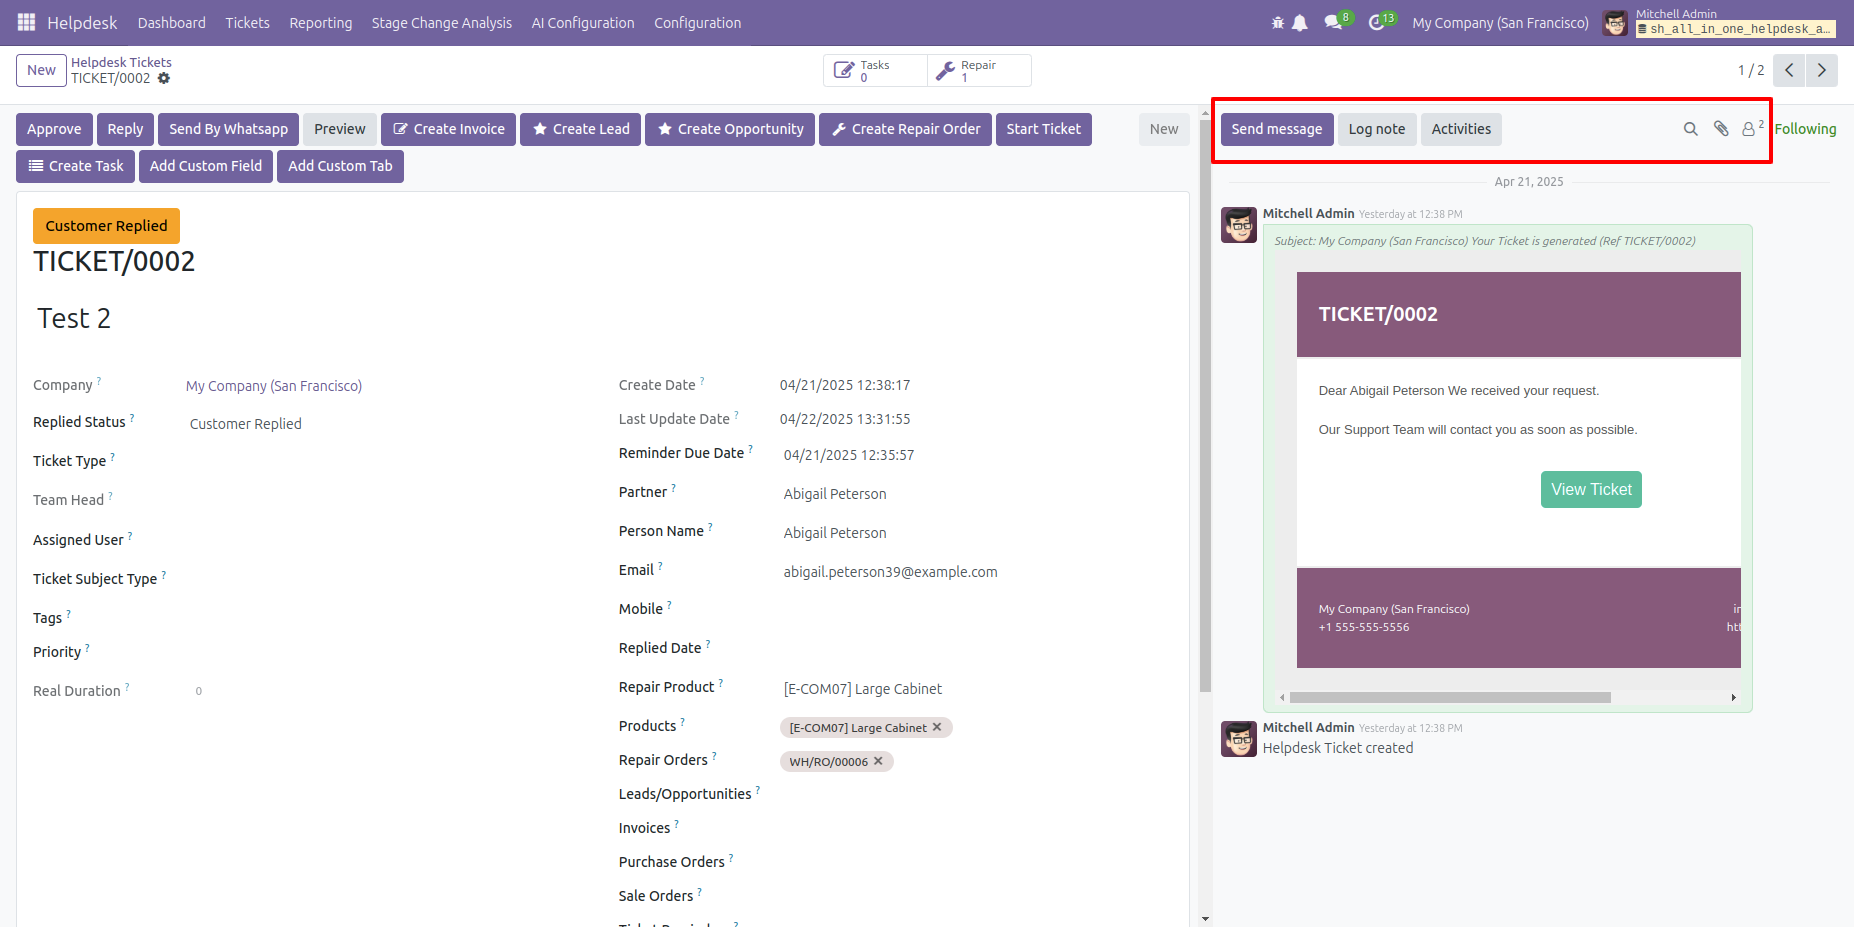
In the Hide Chatter tab, select the select the 'Send Message, Log note, and Activities' buttons and 'Followers and Attachments' options.
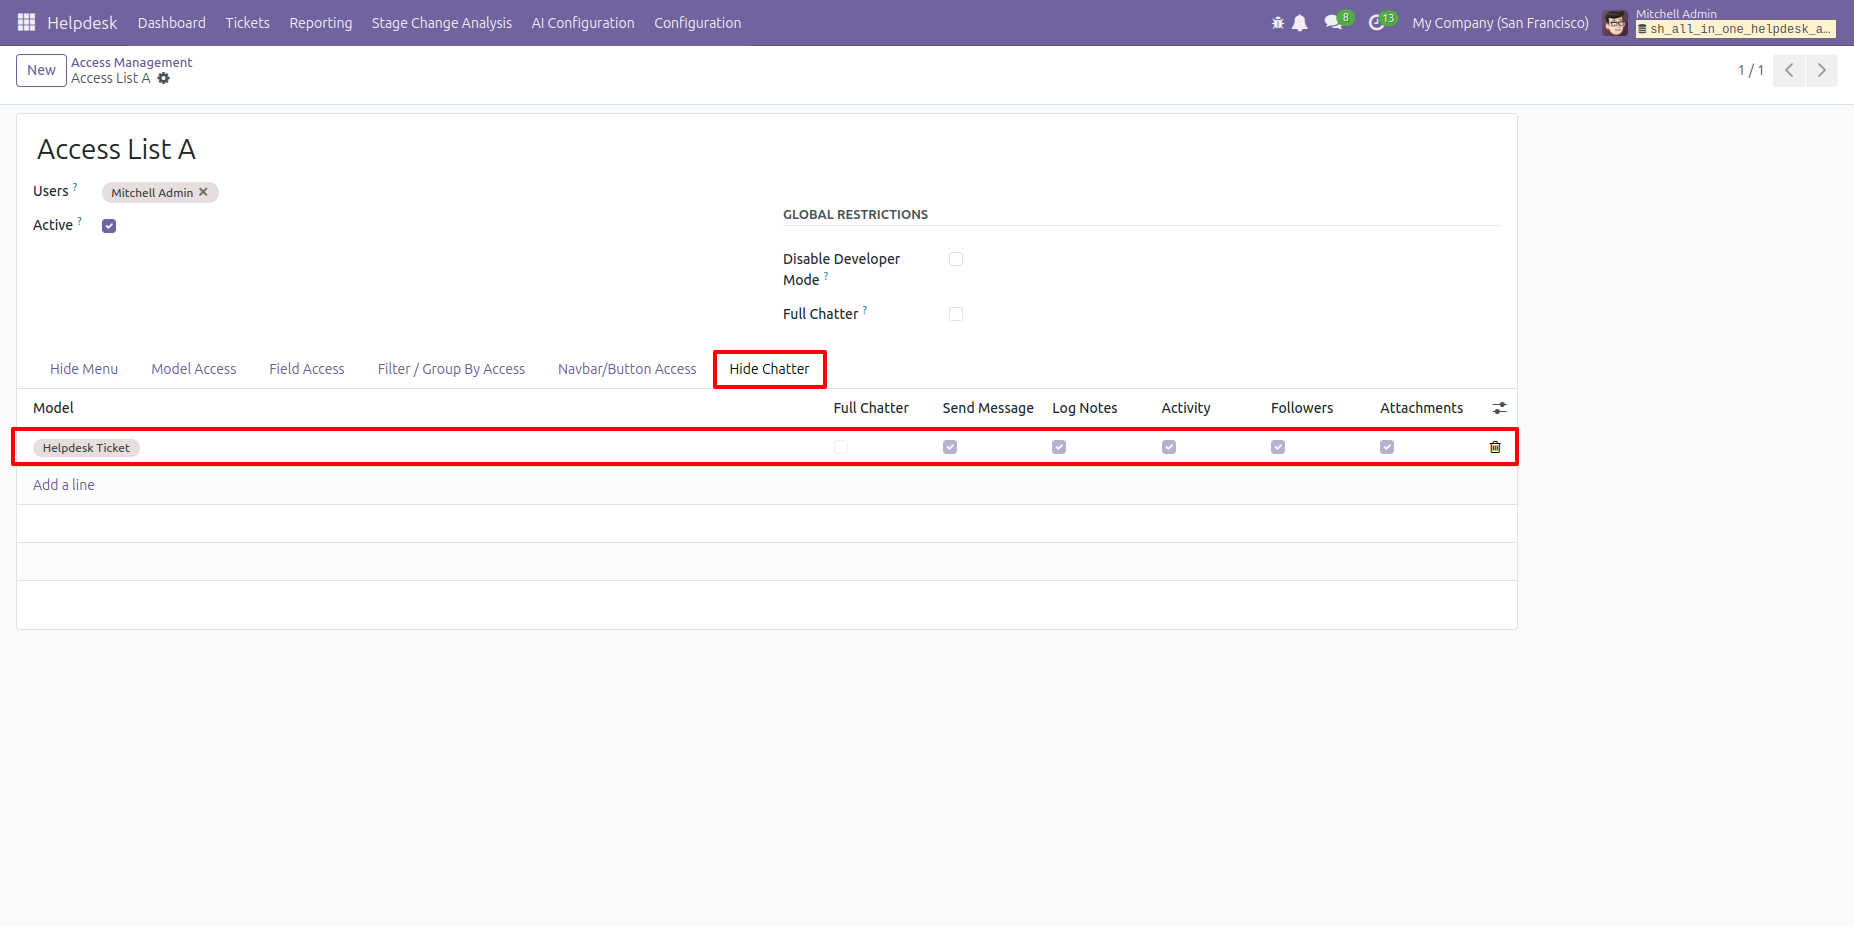
As you can see, the selected options are not visible here.
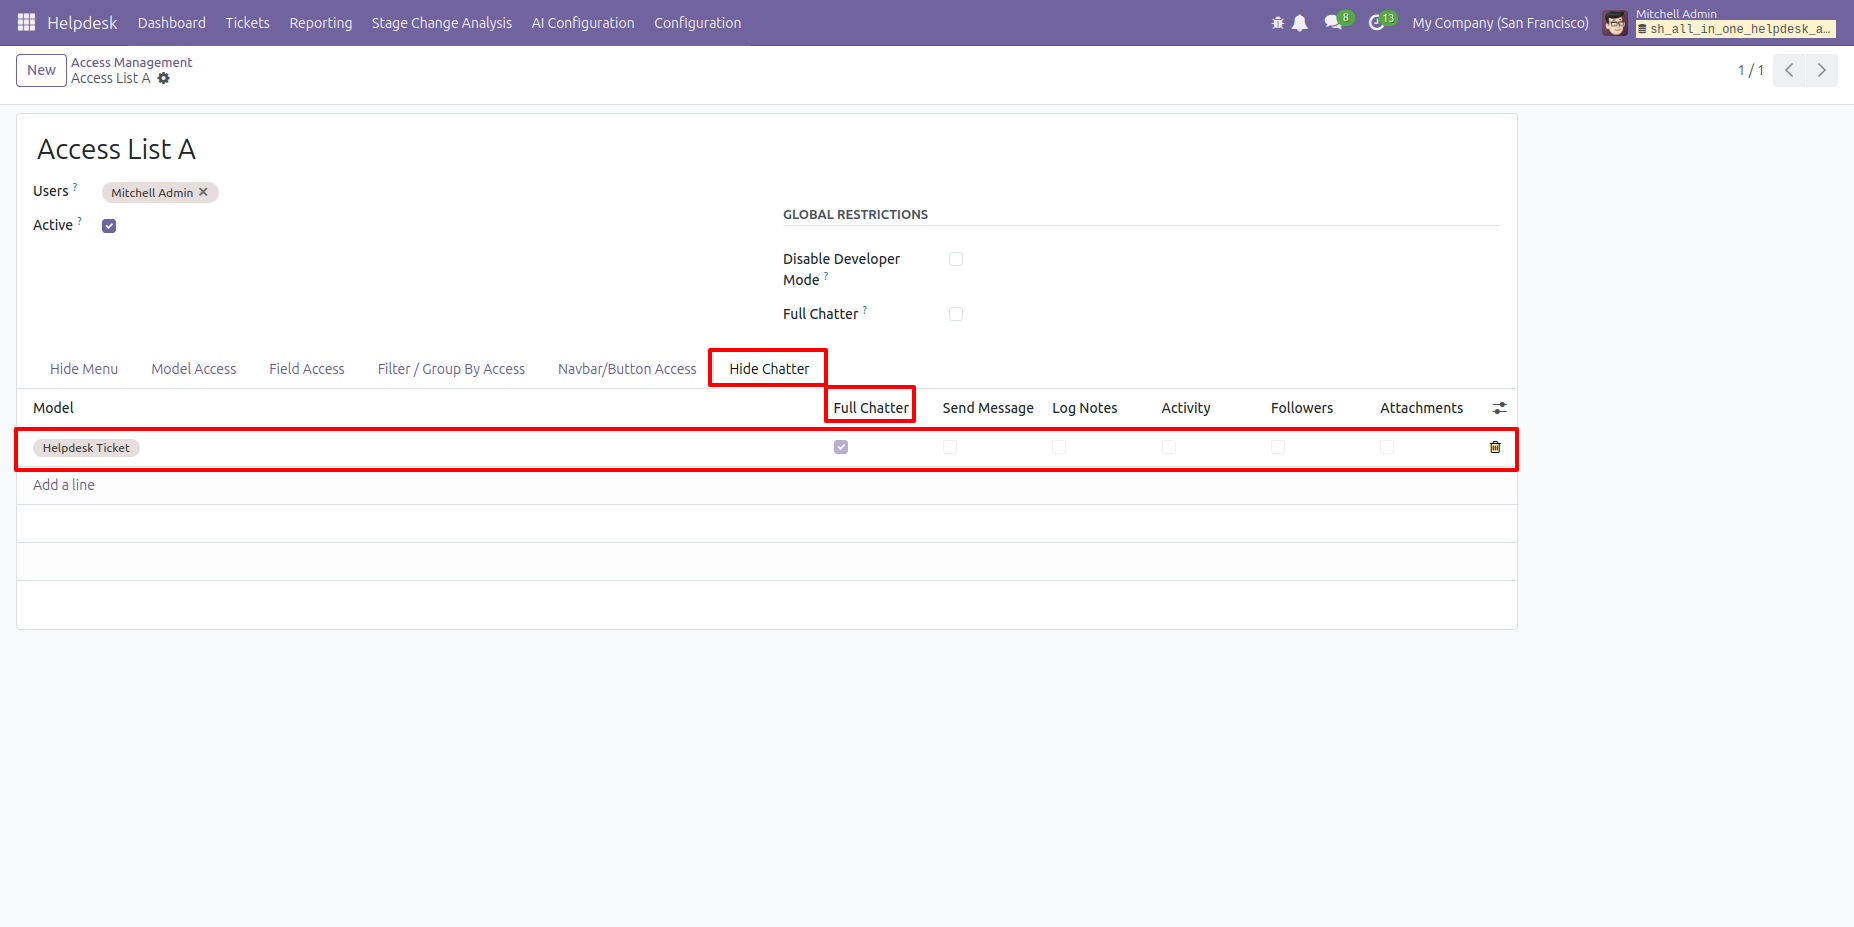
Tick only 'Full Chatter' boolean.
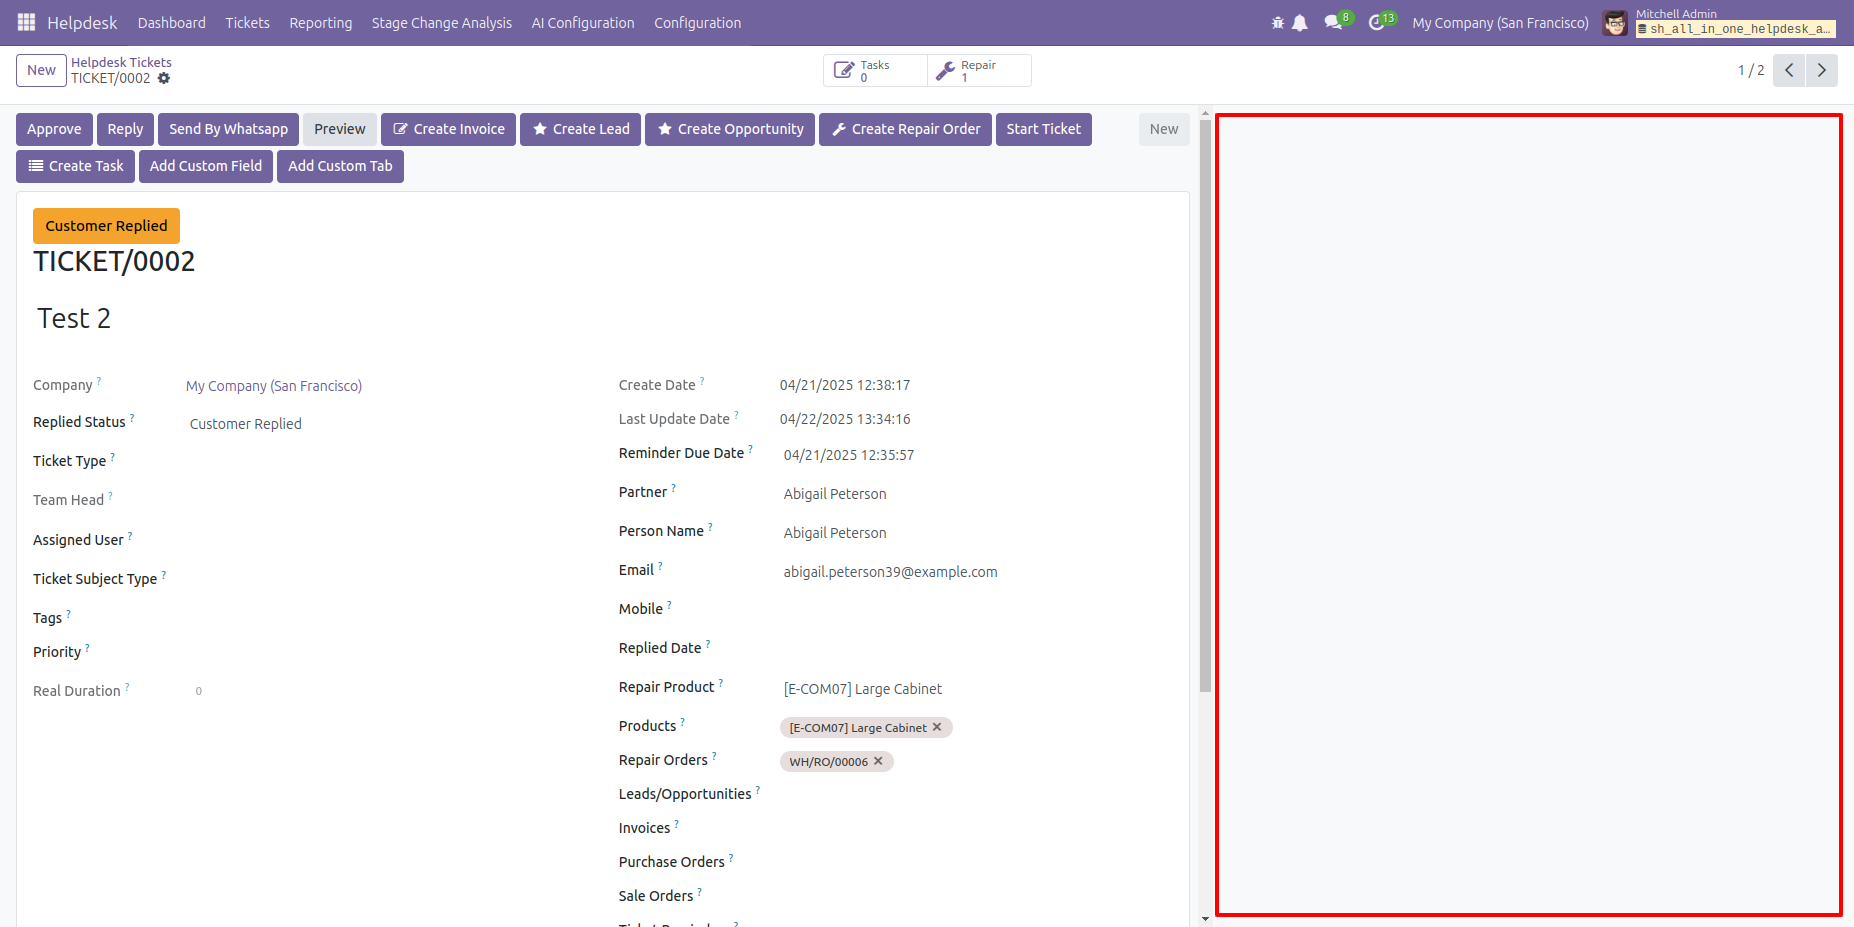
As you can se the Chatter is not visible.
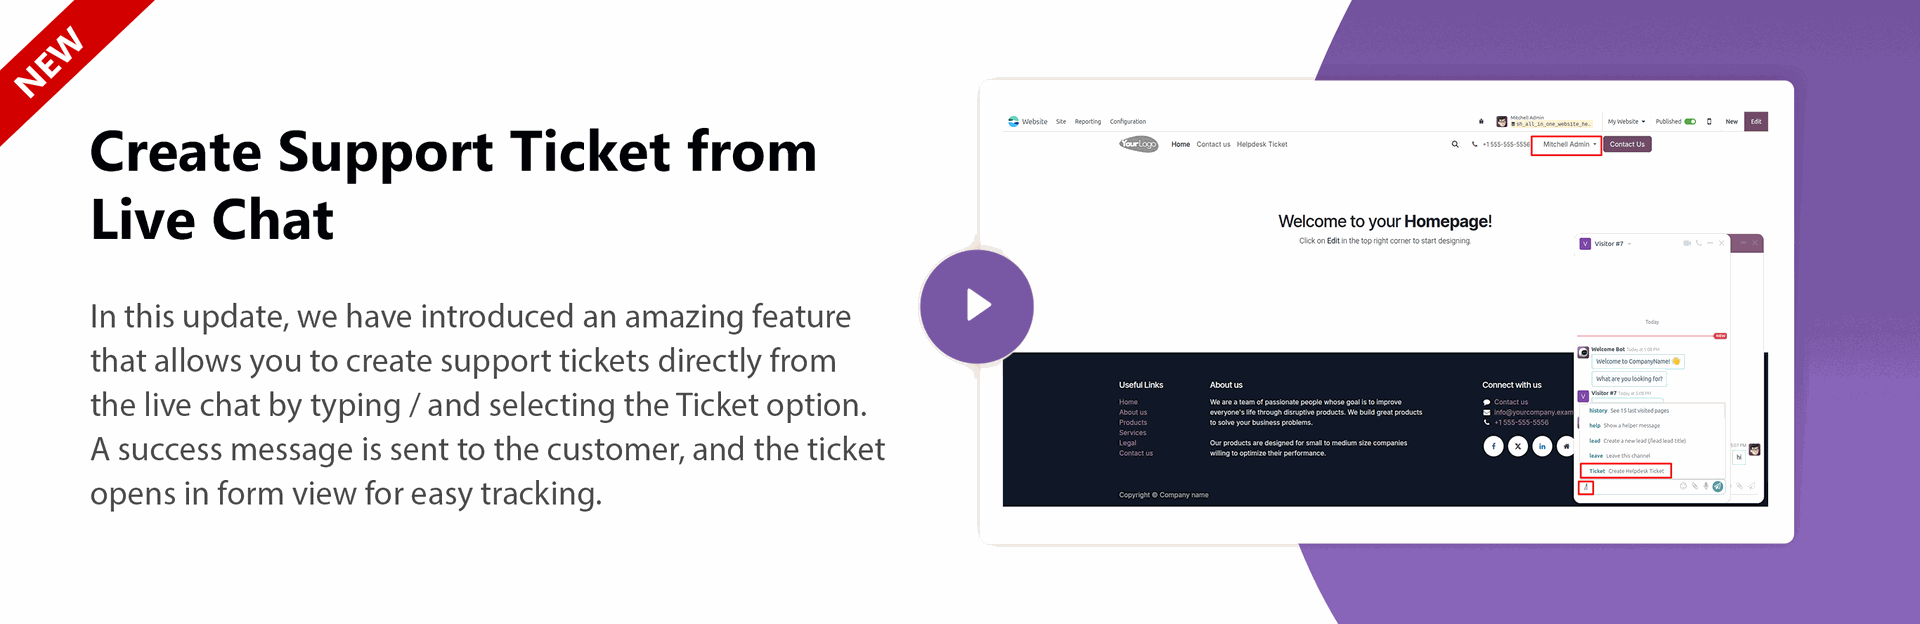
Open the live chat chatter screen.
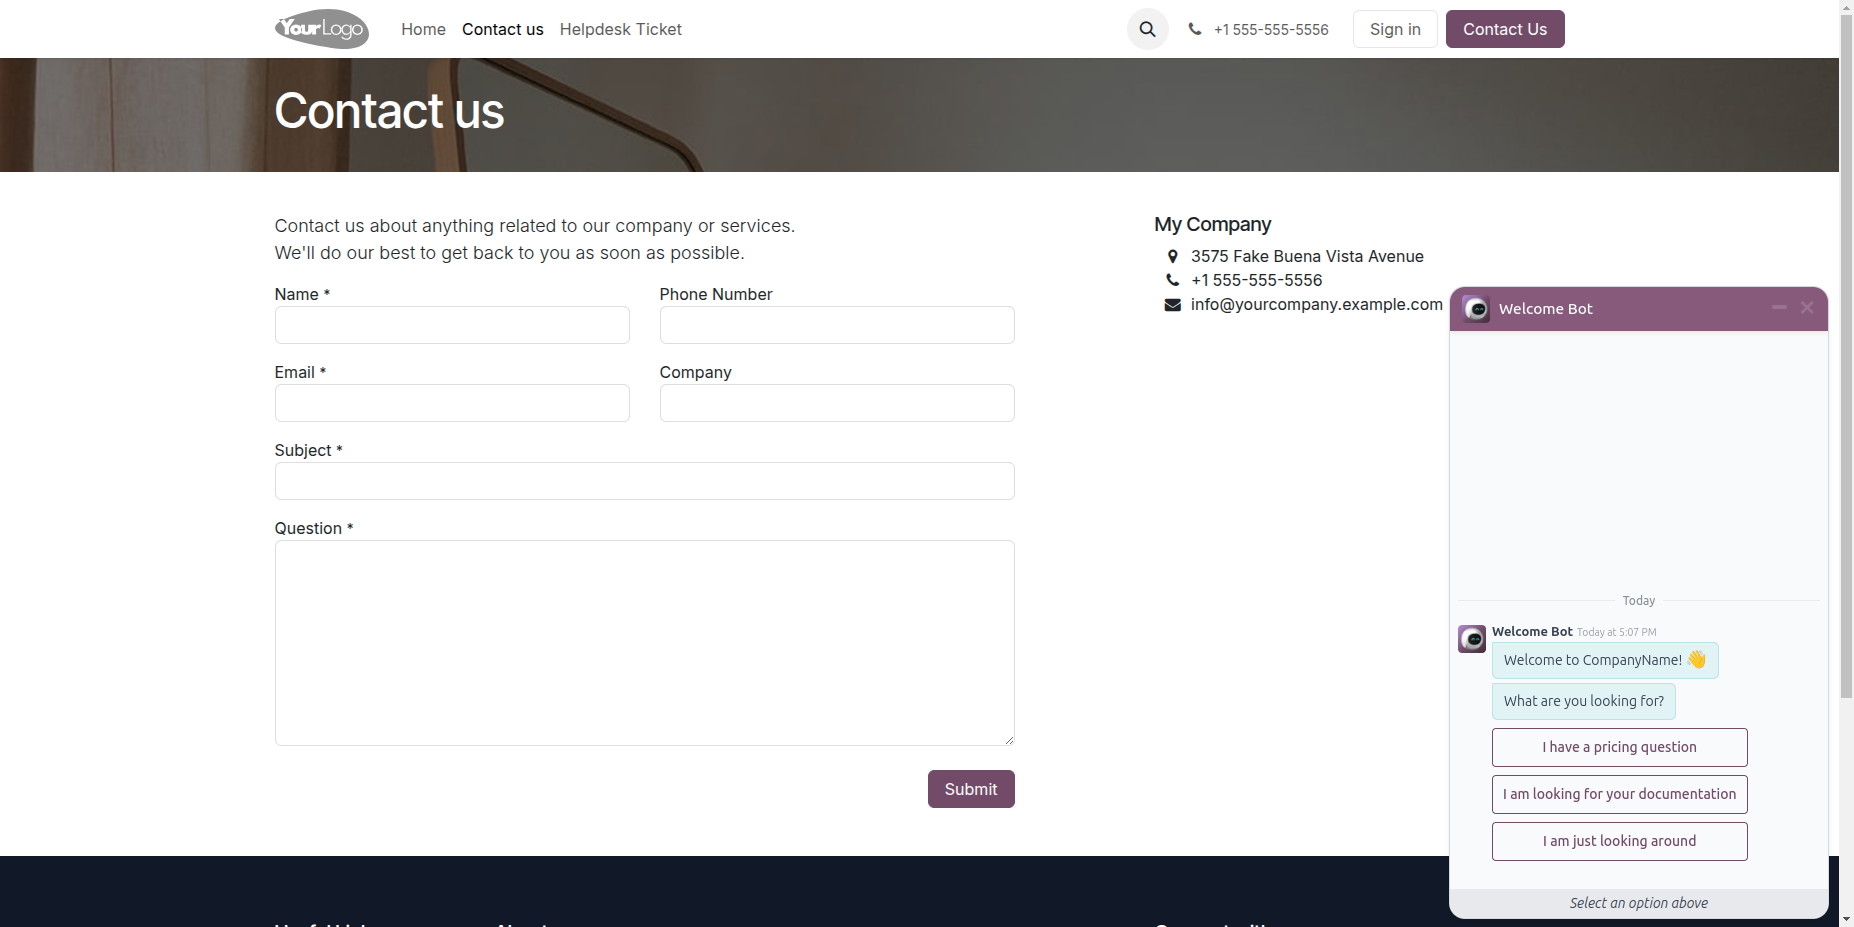
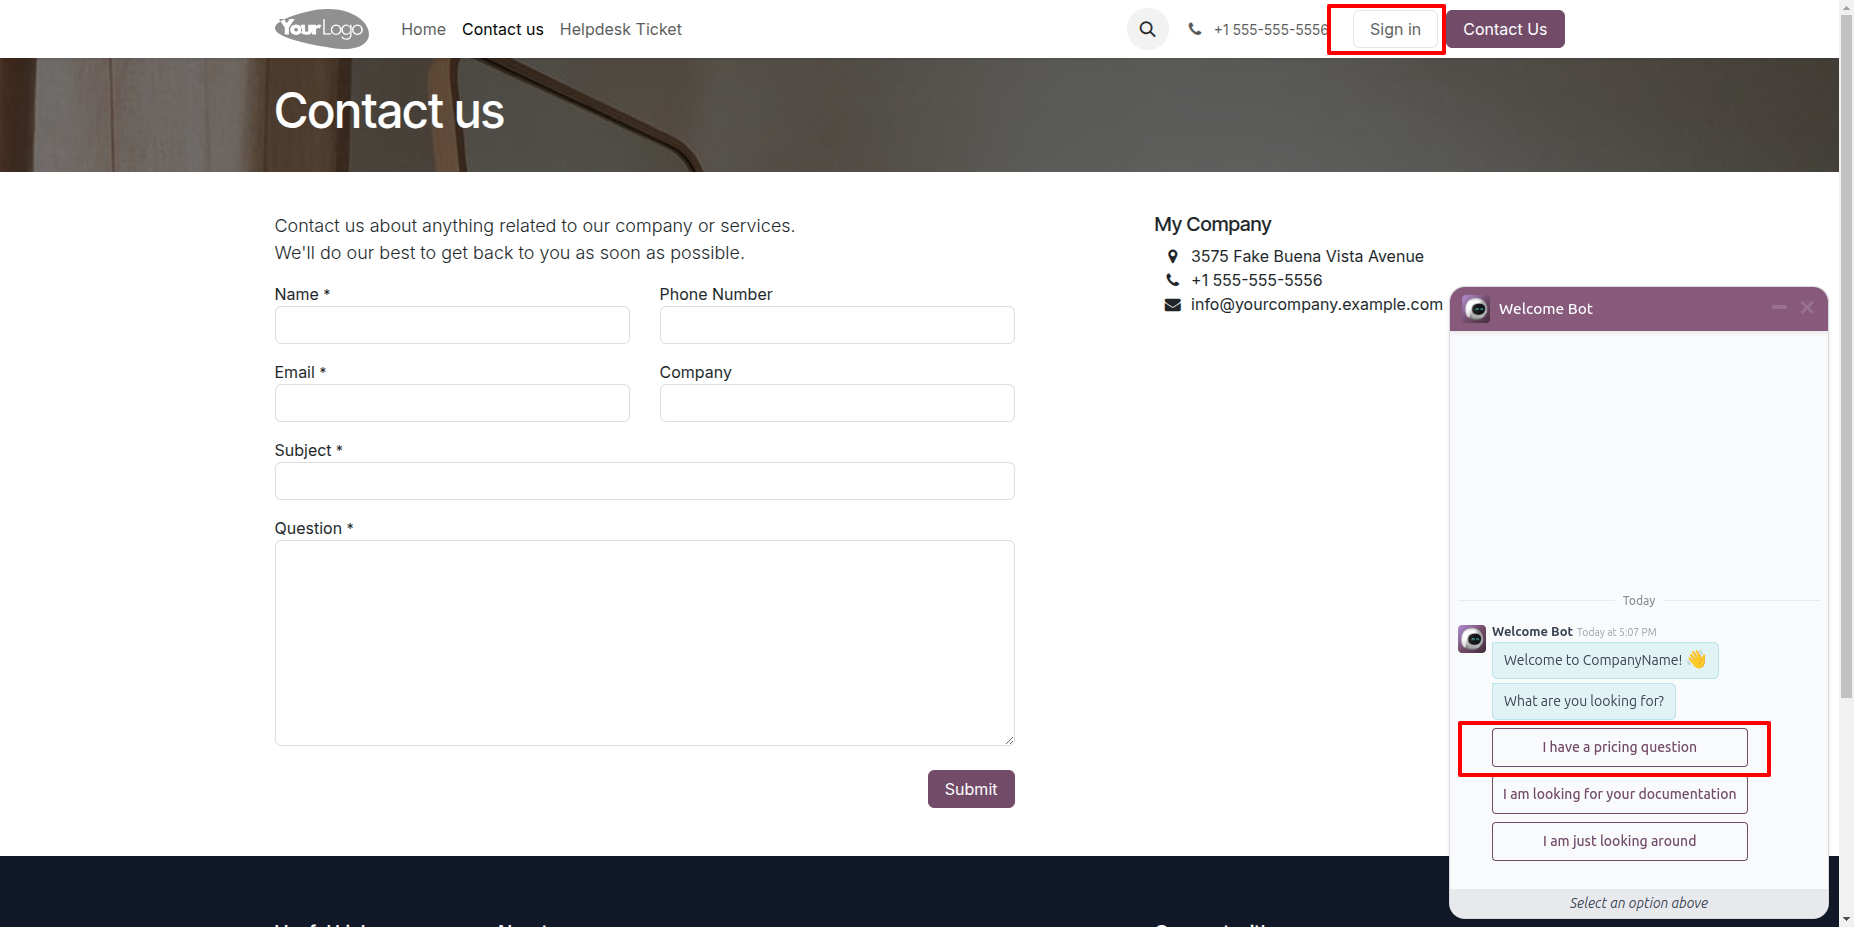
Select the question from the given option.
Sign in as an internal user.
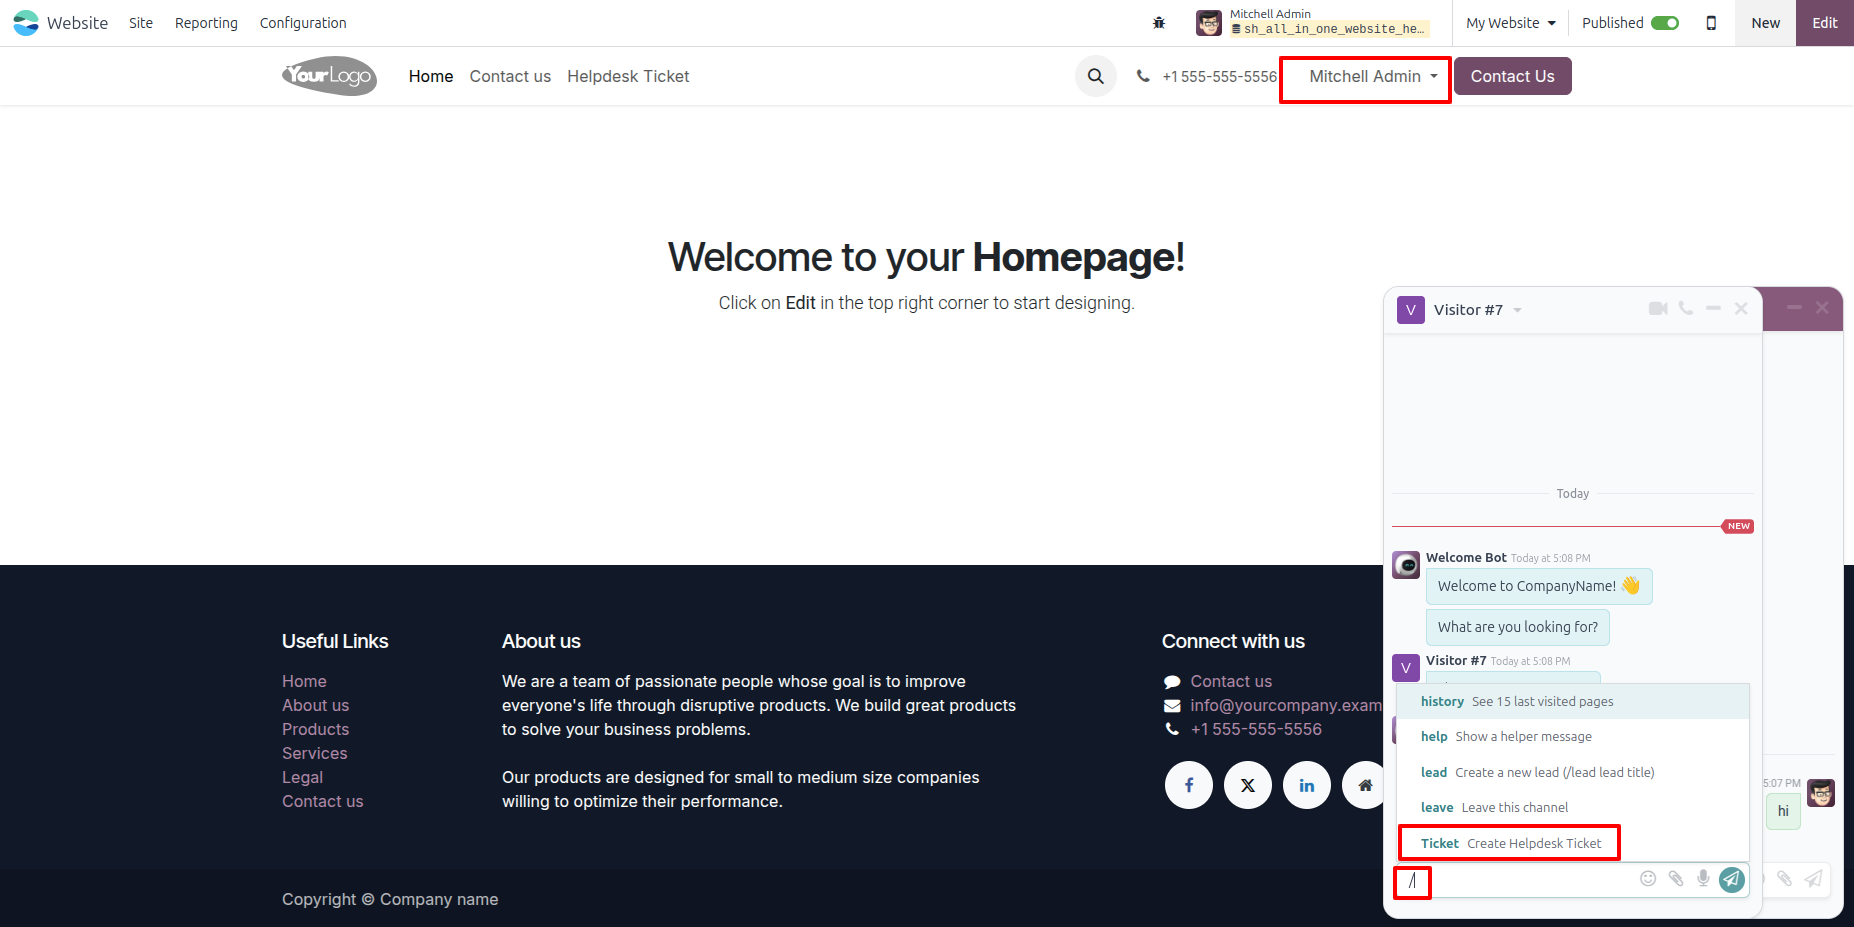
In the chatter input box, type '/'. A list of options will
appear, including History, Help, Lead, Leave, and Ticket.
To create a ticket, click on the Ticket option.
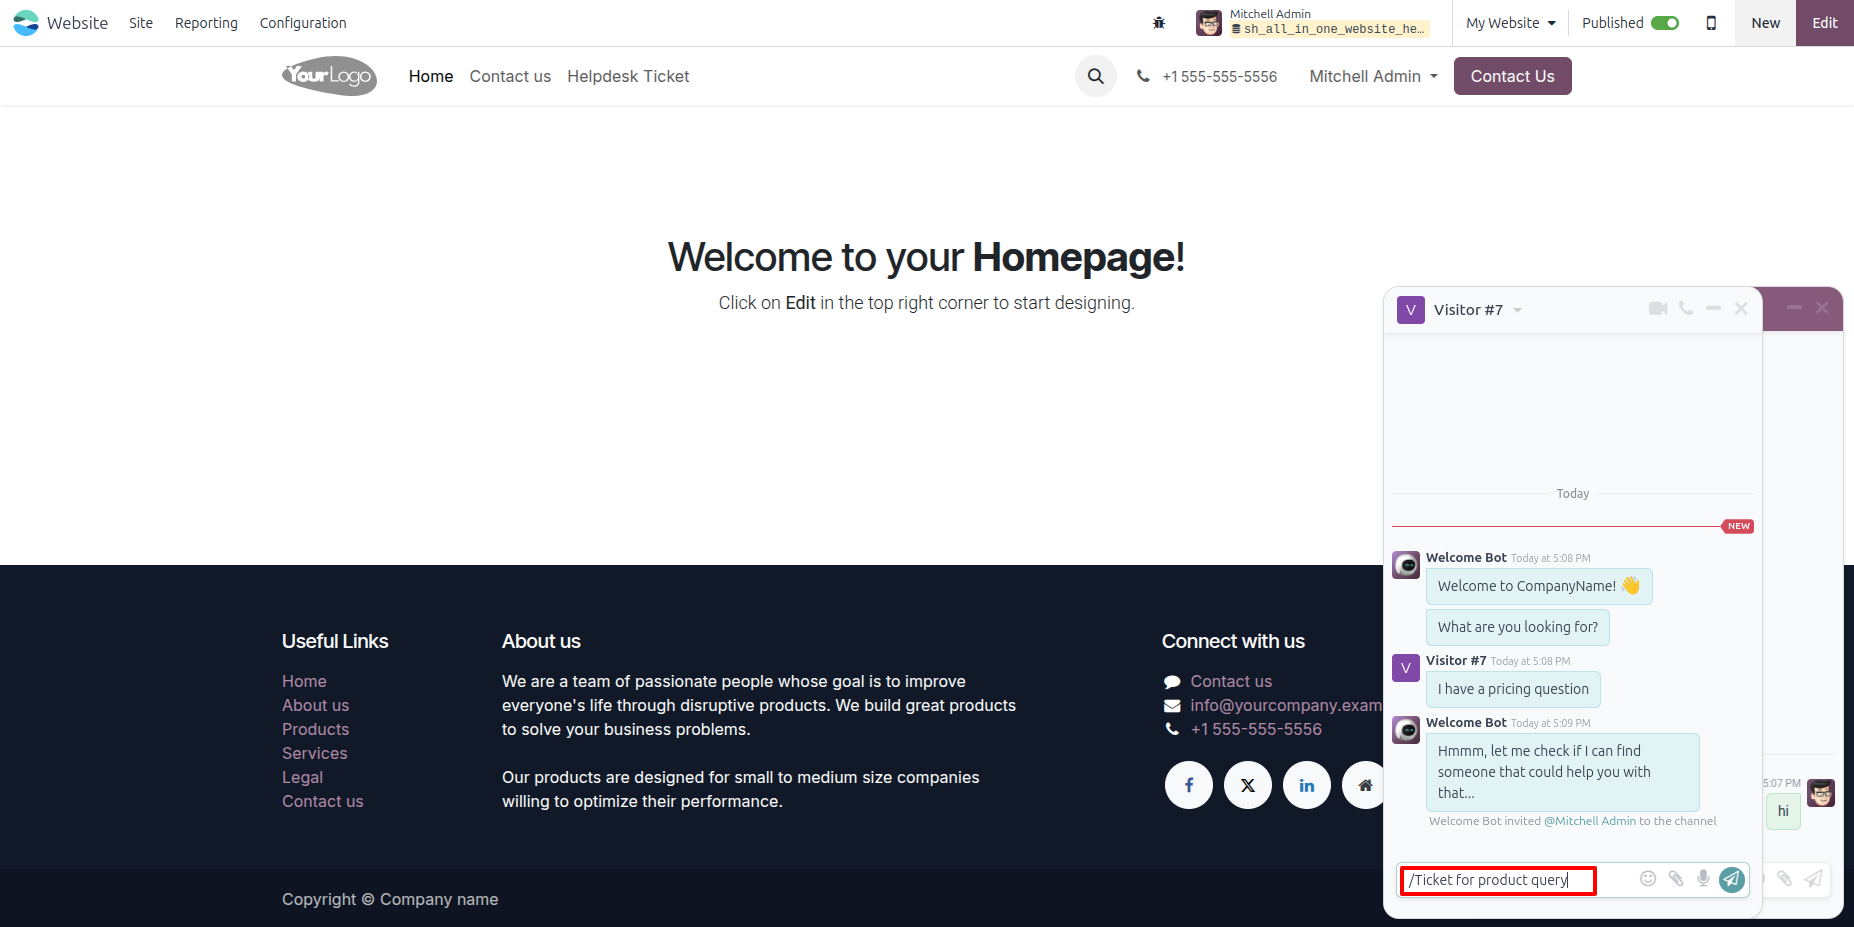
The selected option will appear in the chatter. Press Enter to submit it.
A success message will be displayed in the chatter and sent to the customer.
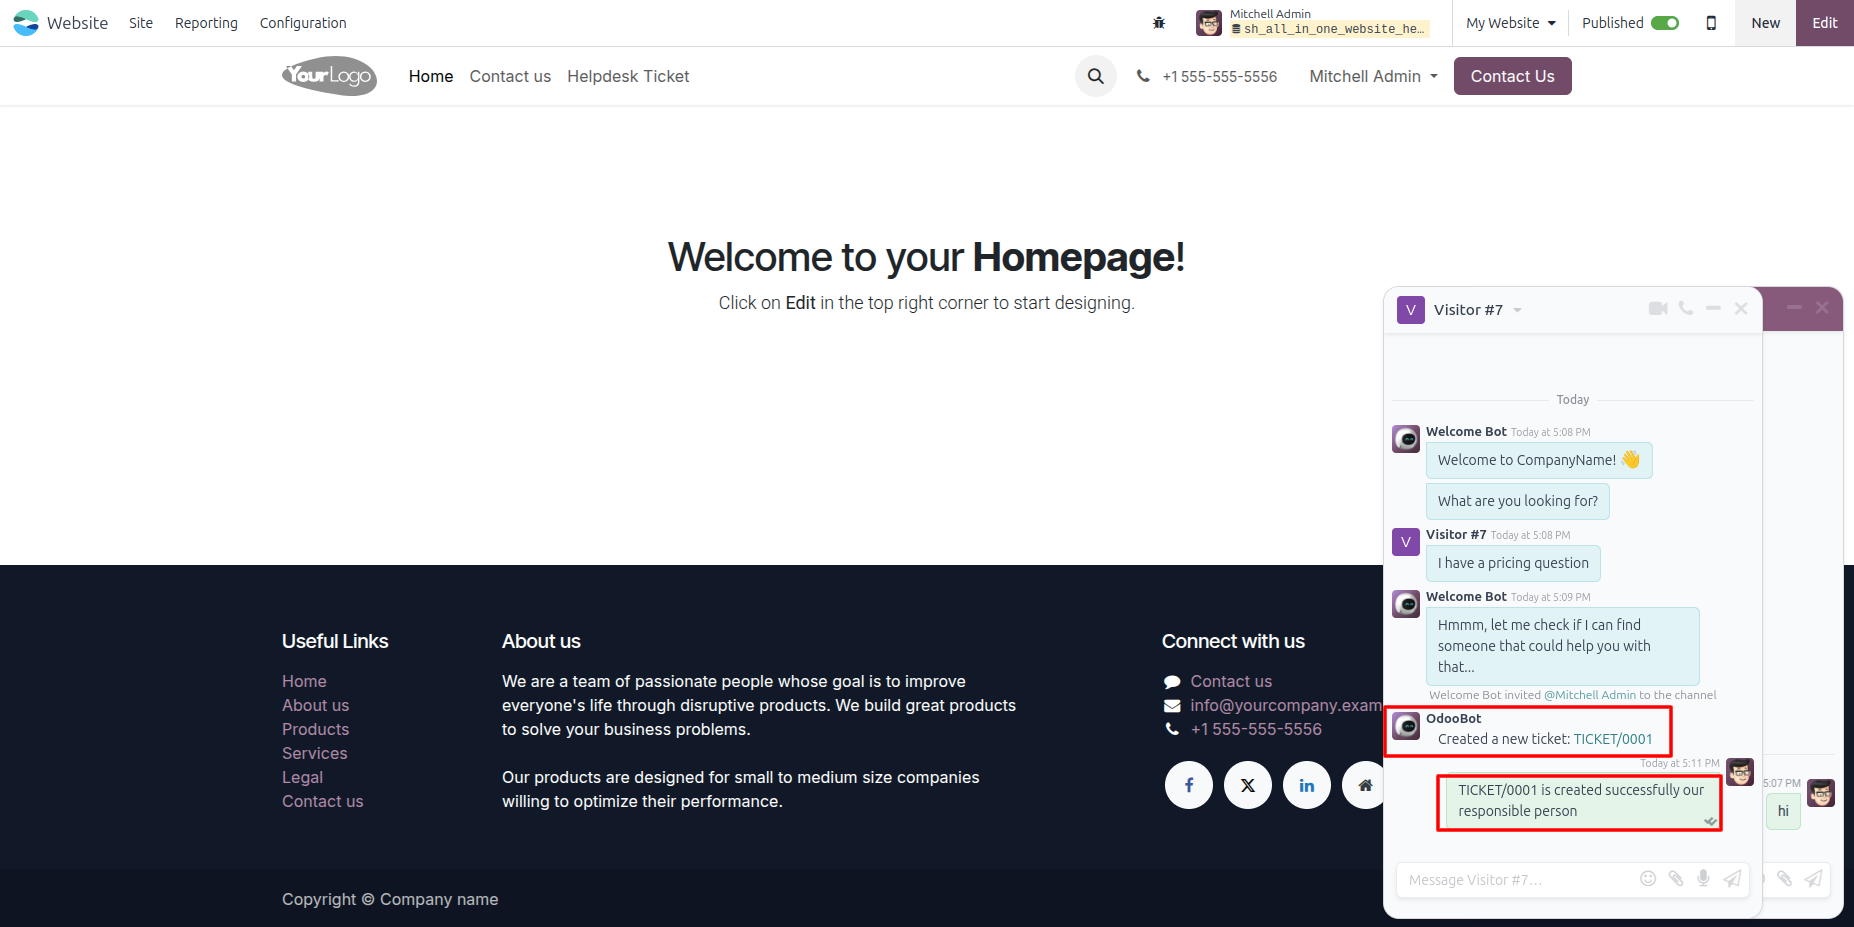
On the customer's screen, the success message will be visible.
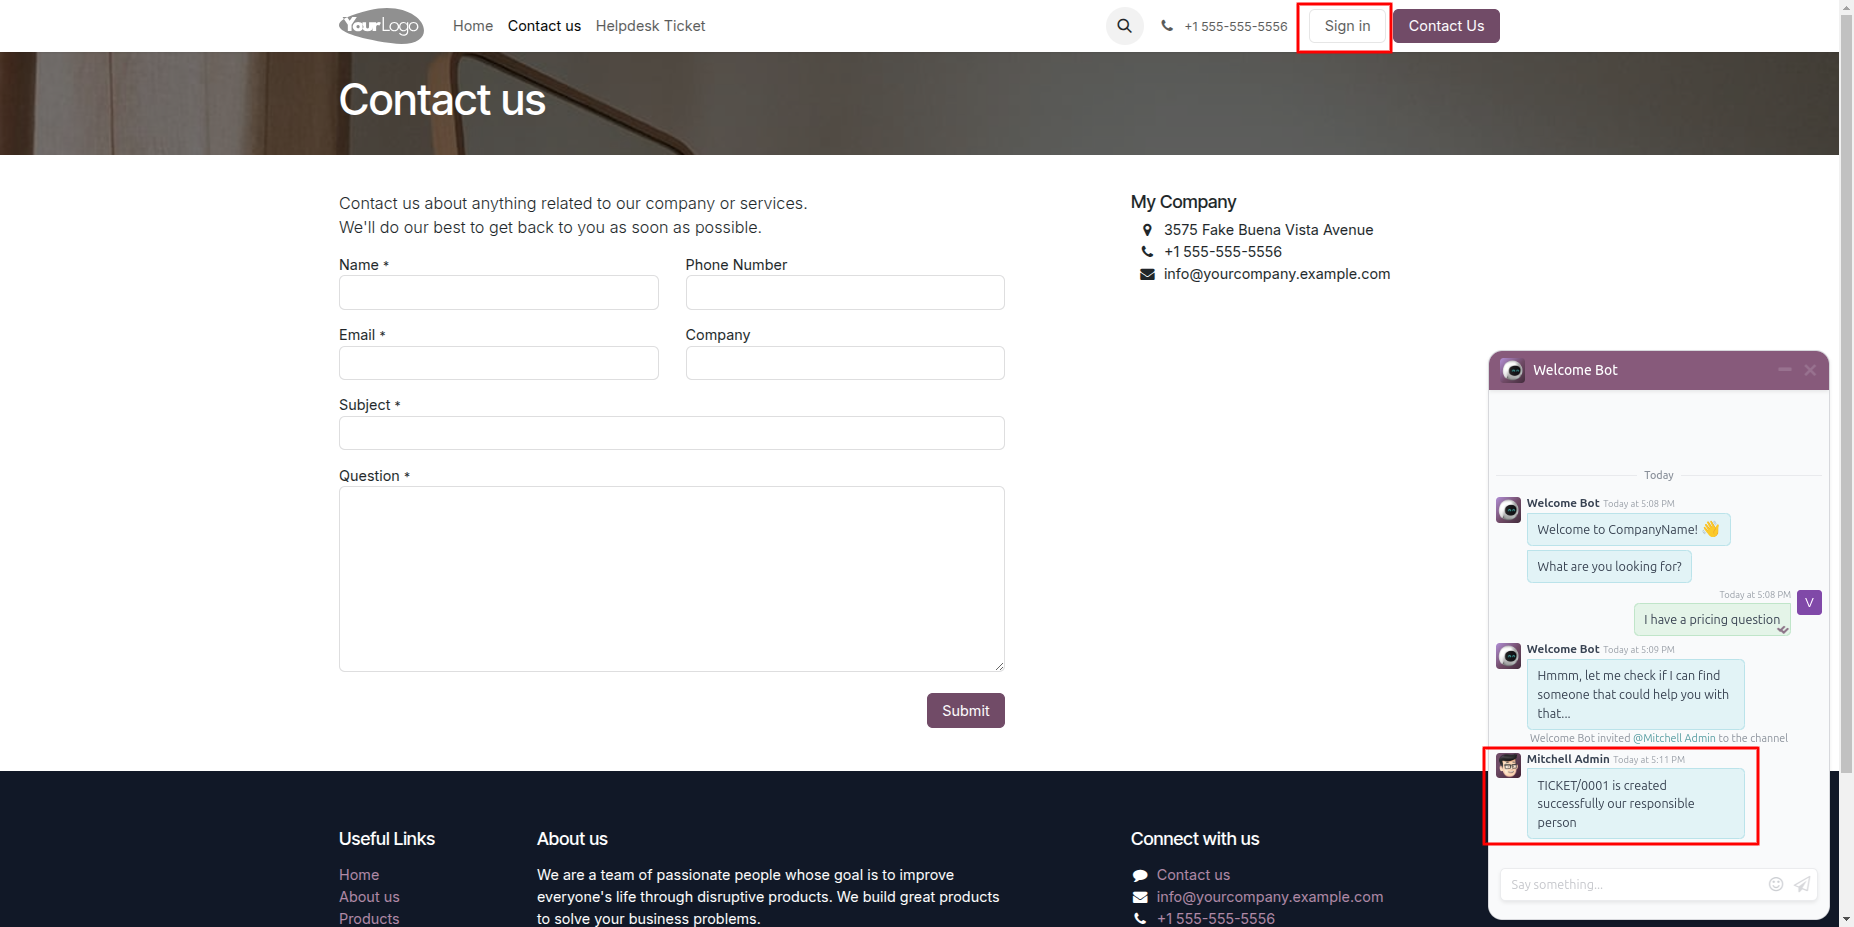
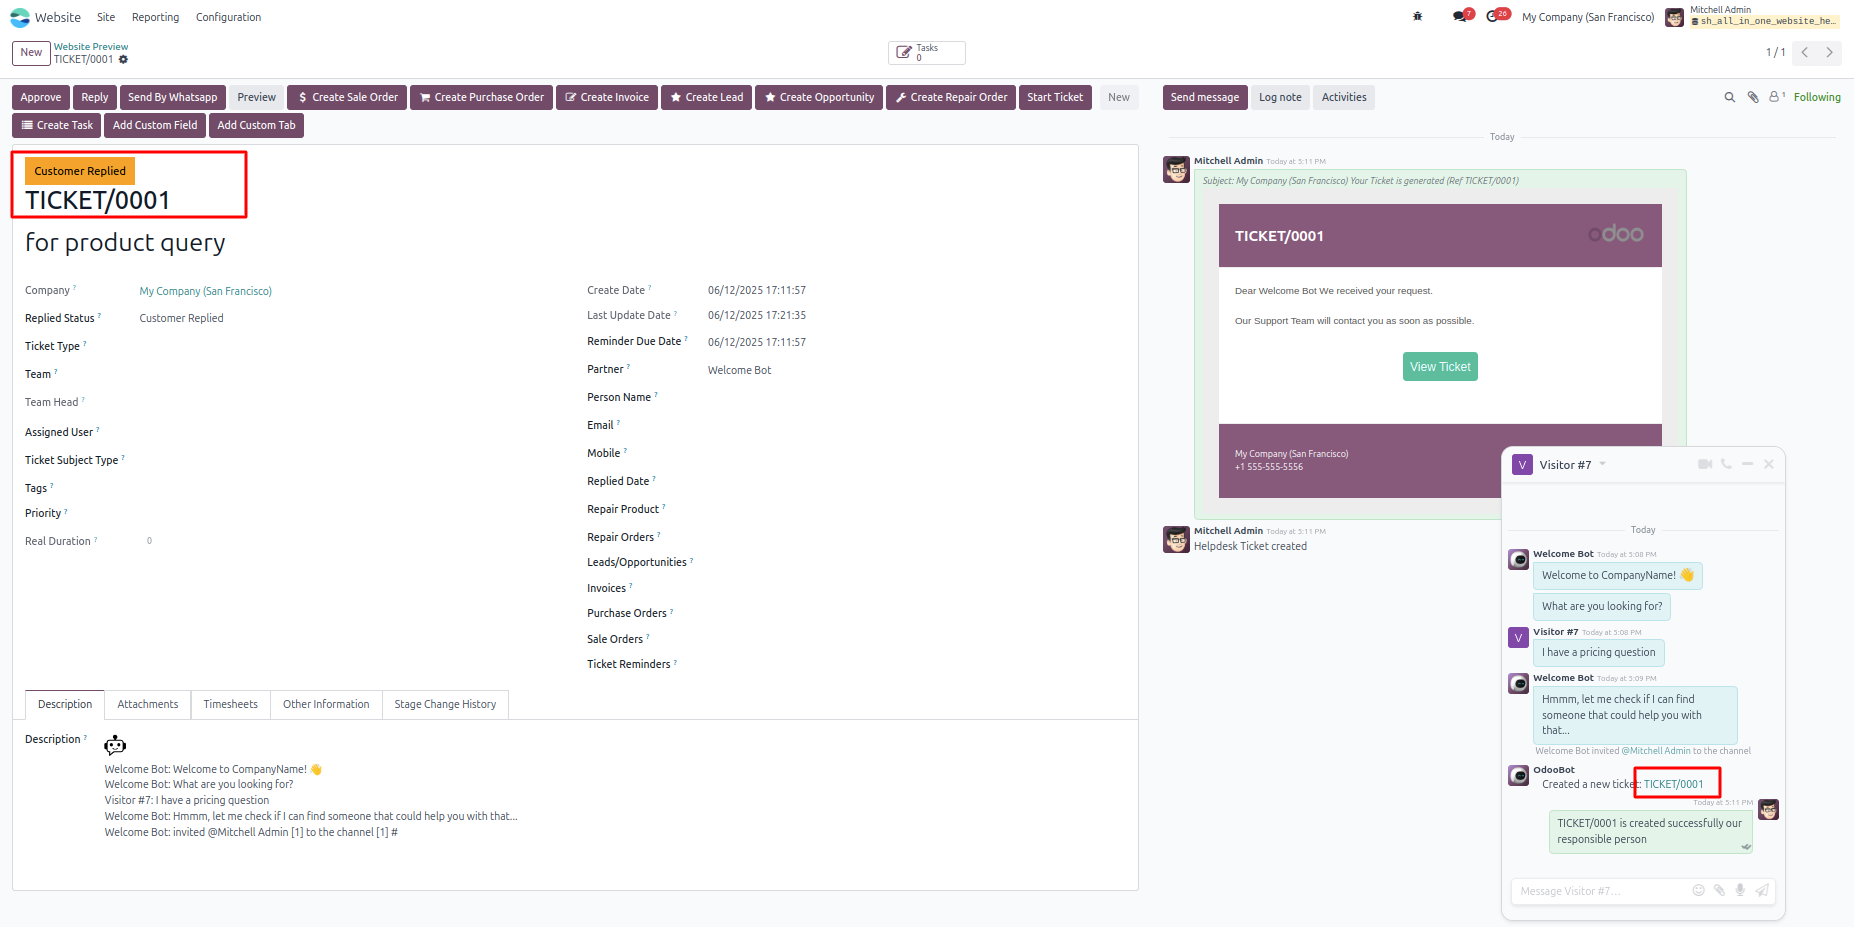
Here you can see the created ticket's form view.
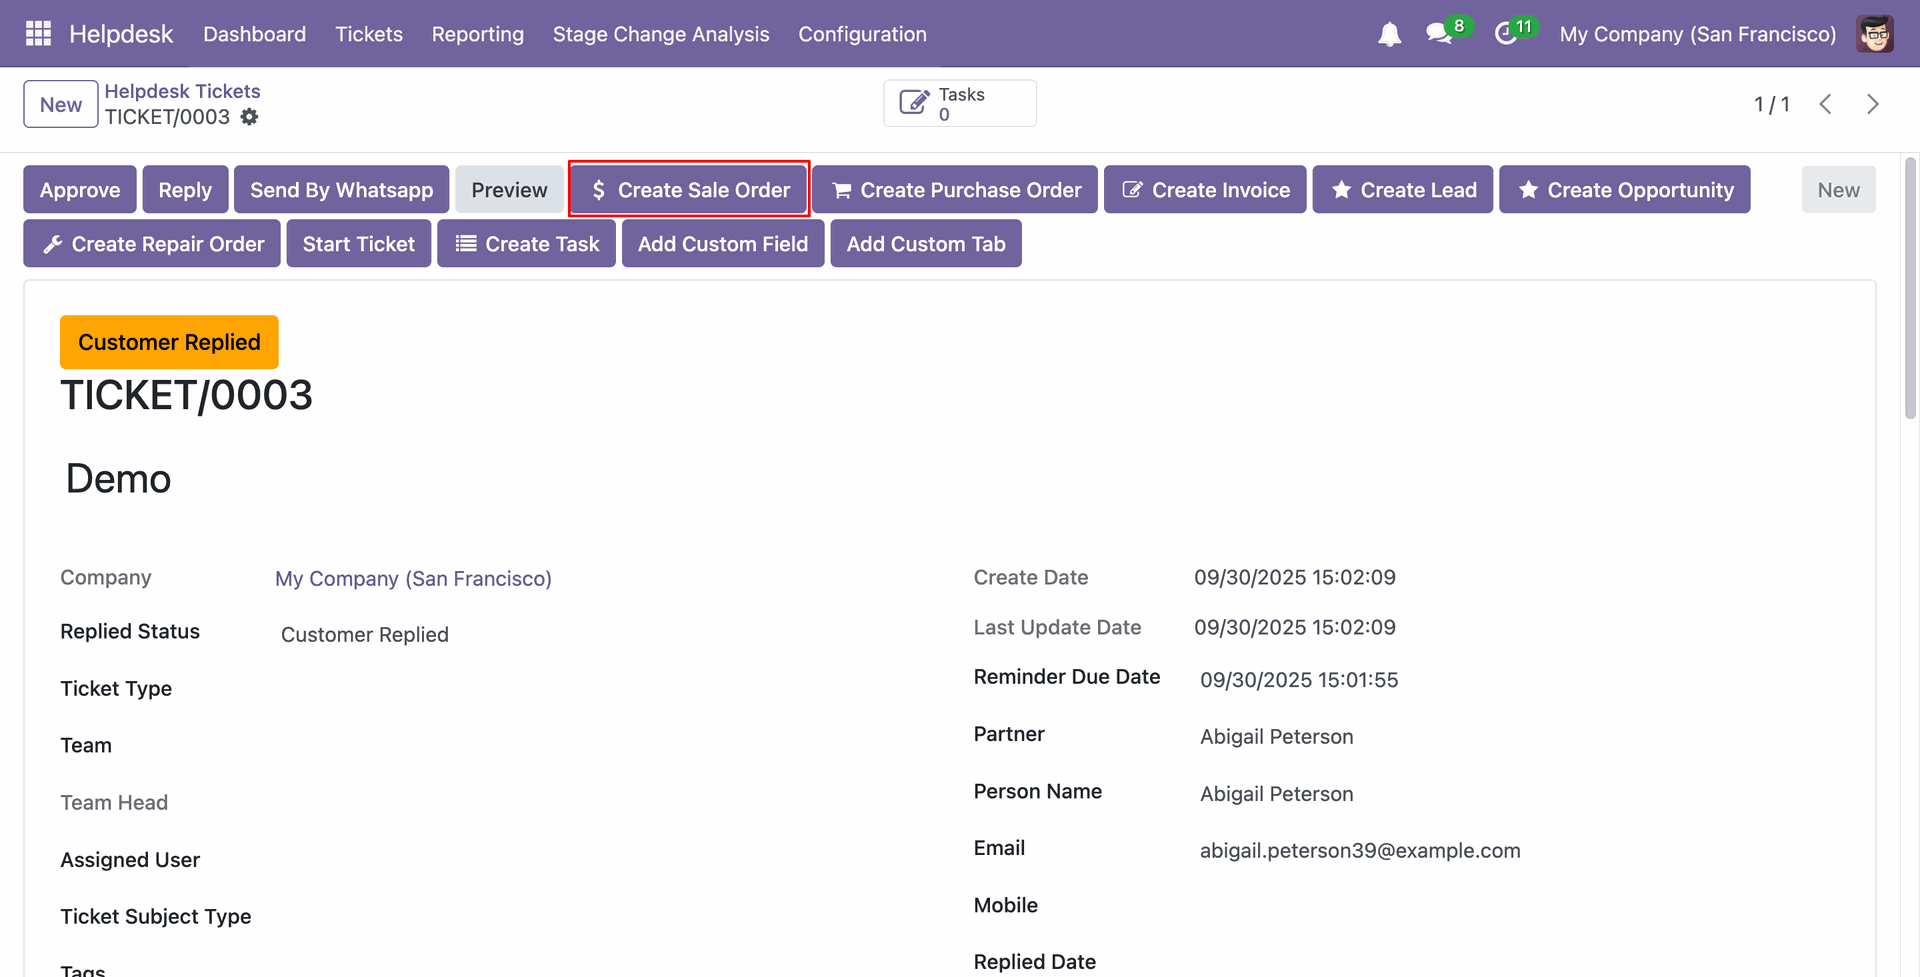
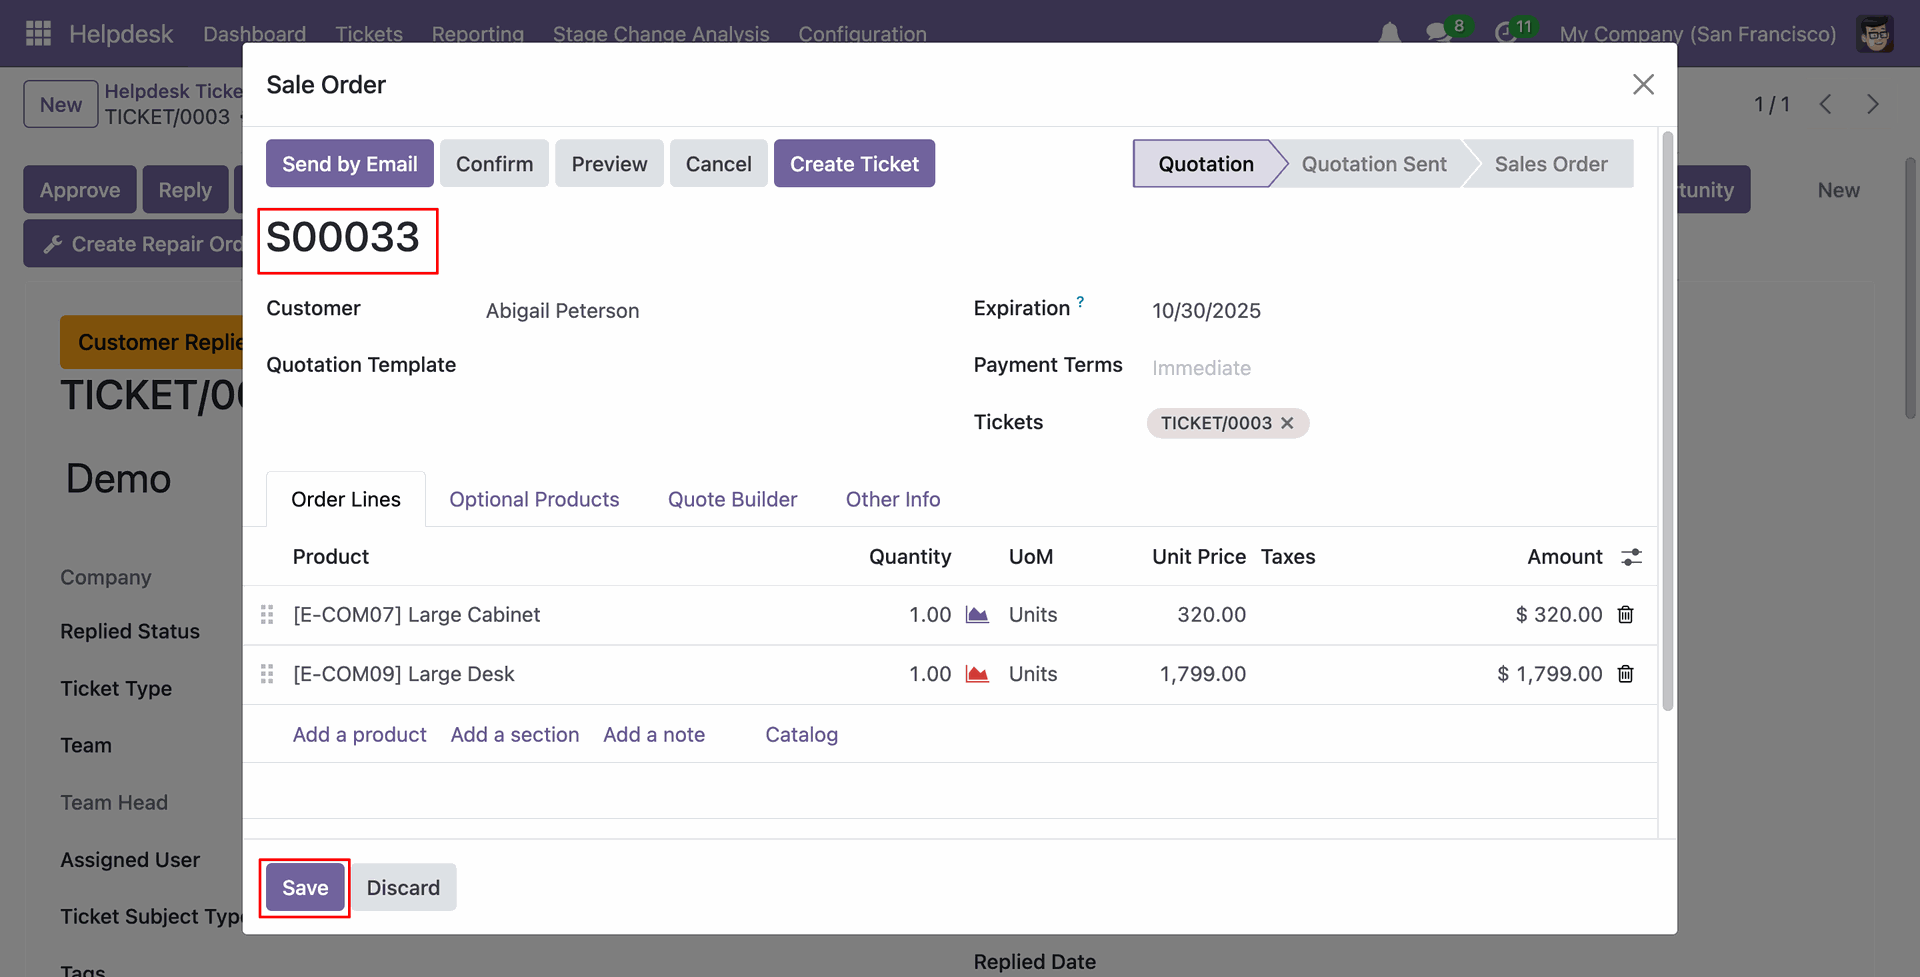
Click on the 'Create Sle Order' button.
Add all the details and click on the 'Save' button.
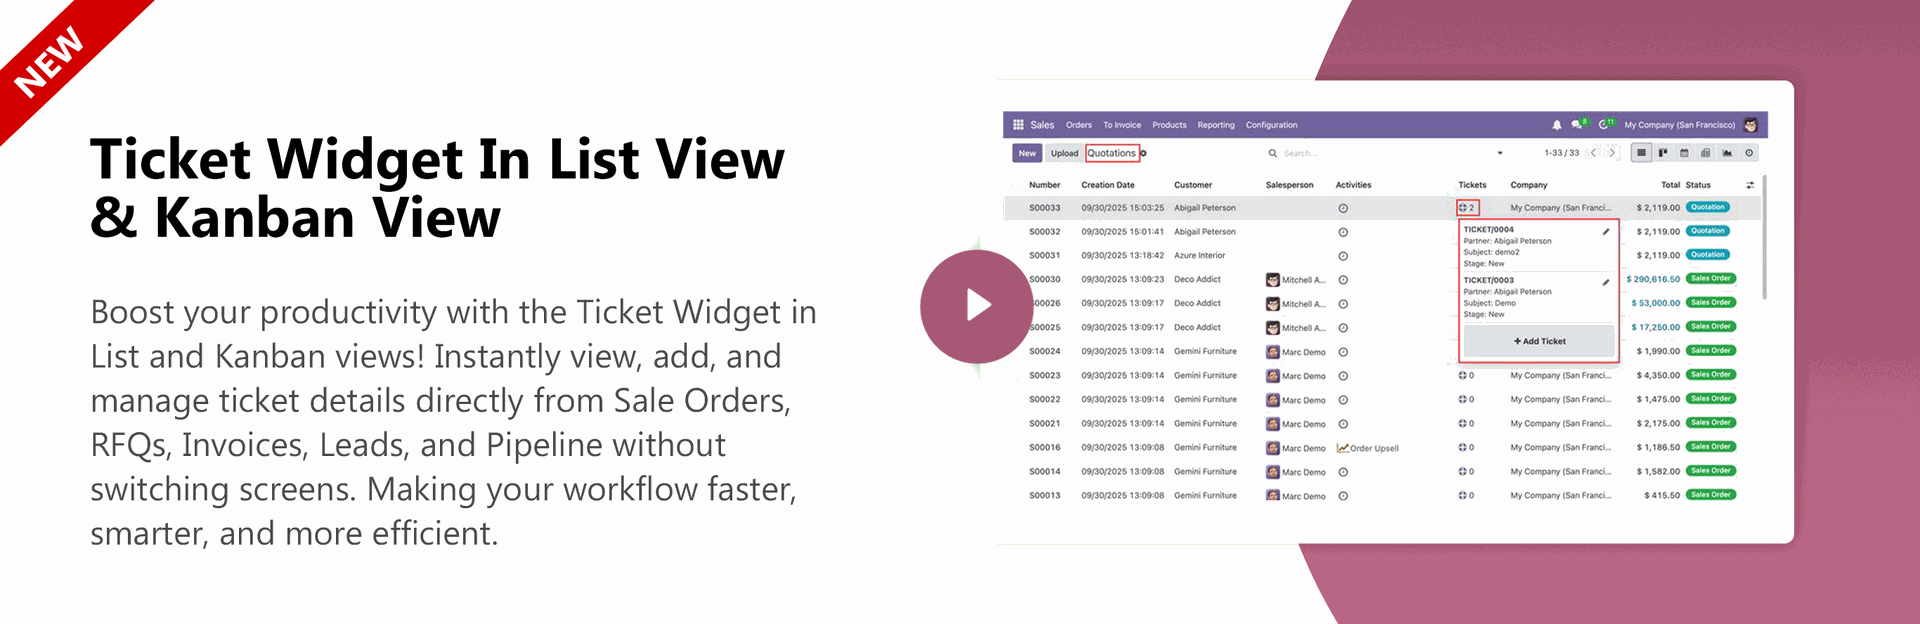
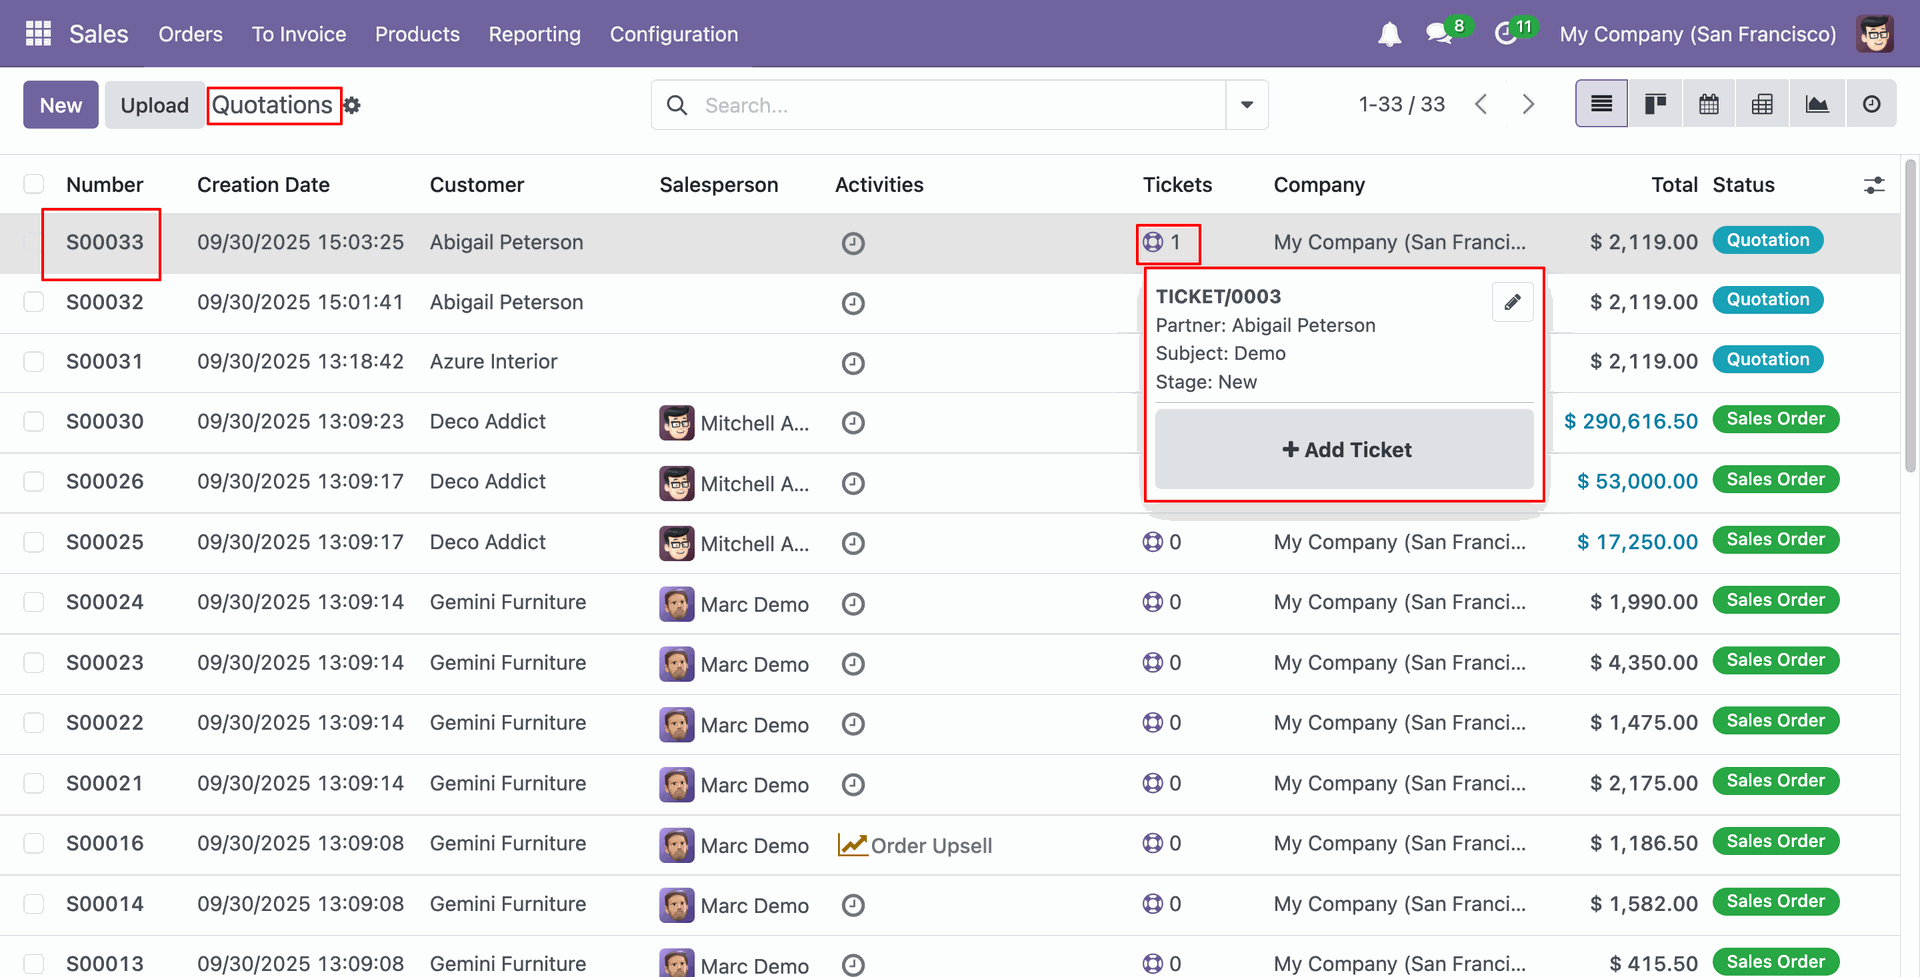
In the Sale Order list view, clicking on the 'Ticket Widget'
icon will display the details of the ticket.
You can add new ticket details by clicking the 'Add Ticket'
button.
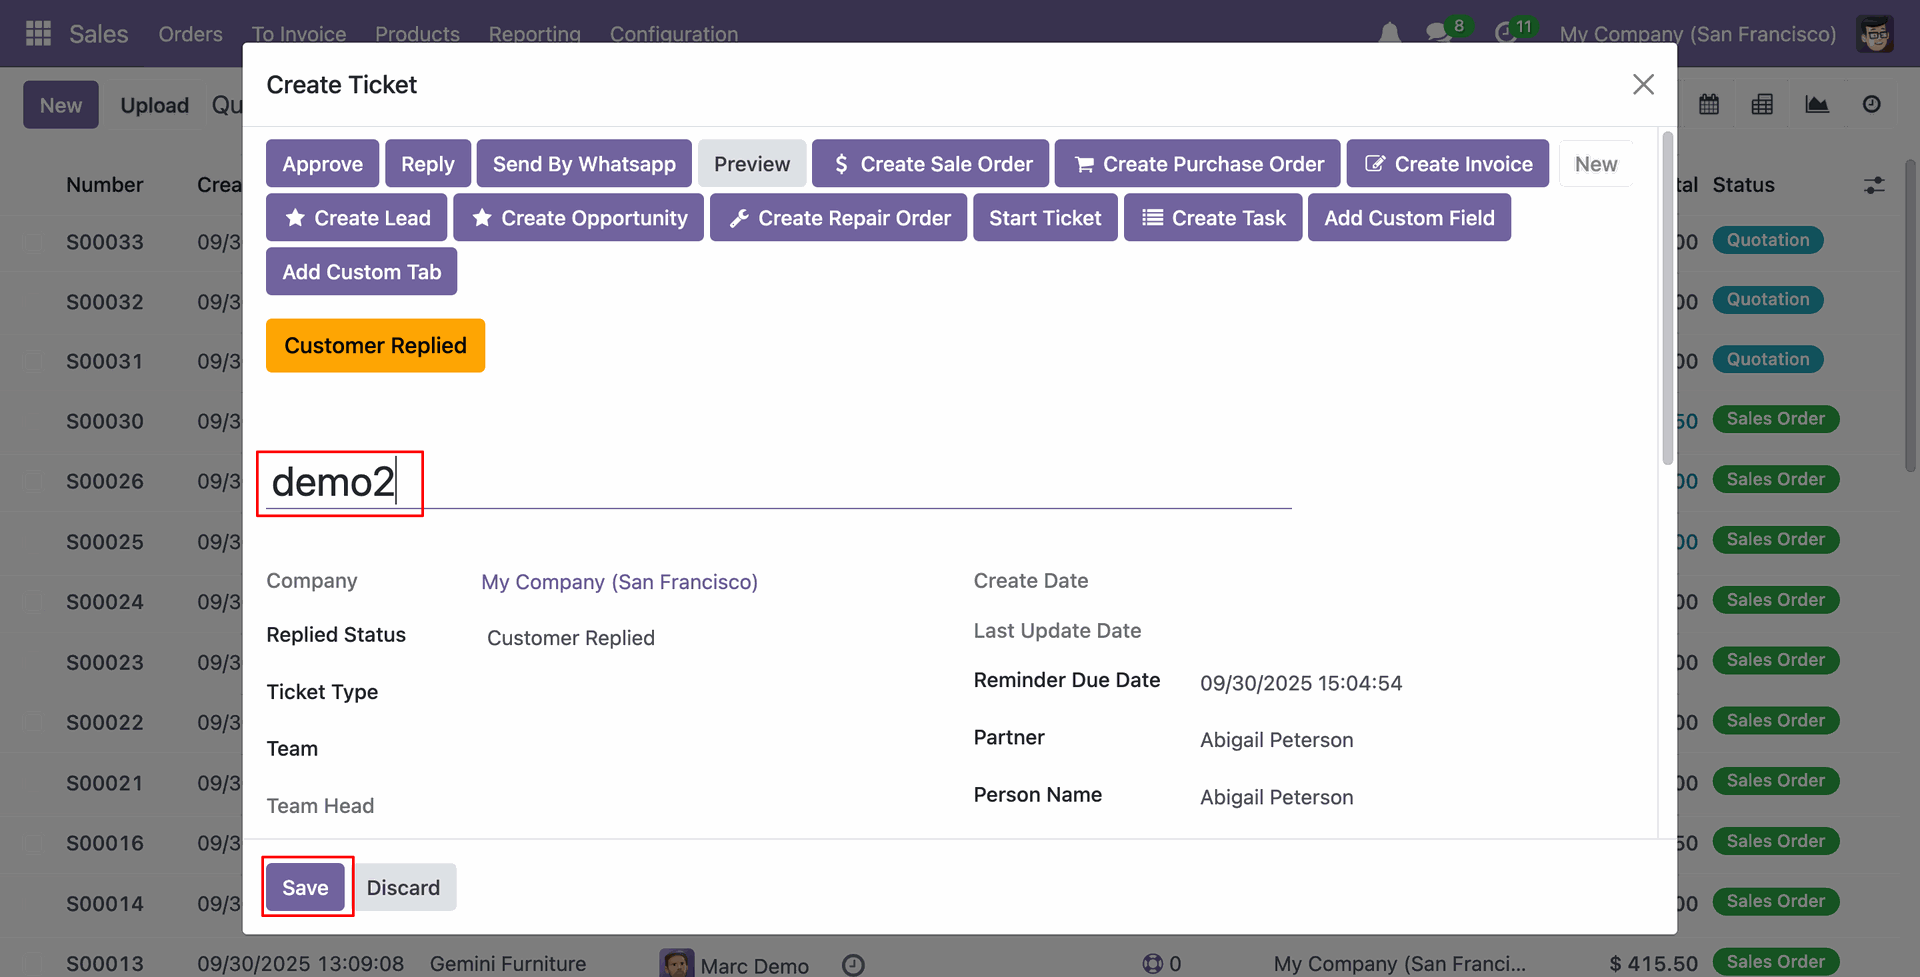
After clicking the 'Add Ticket' button, a wizard will appear. Enter the details and then click on the 'Save' button.
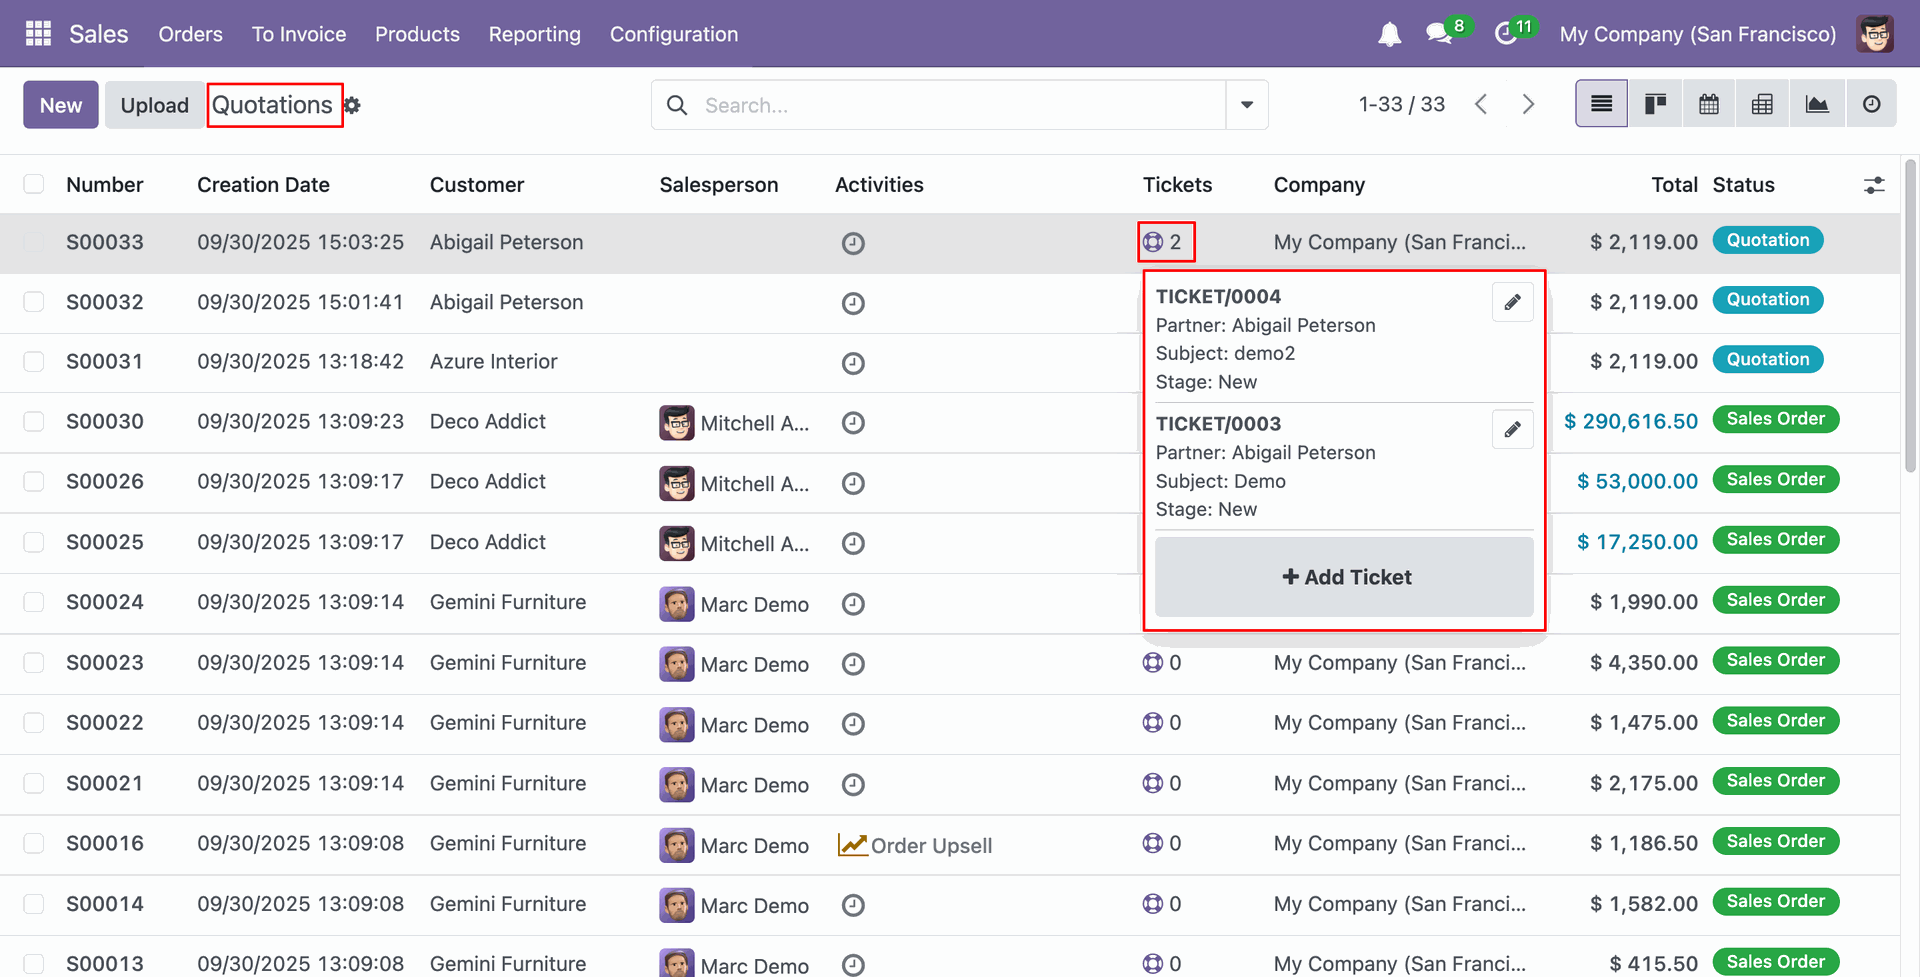
Here you can see both tickets details.
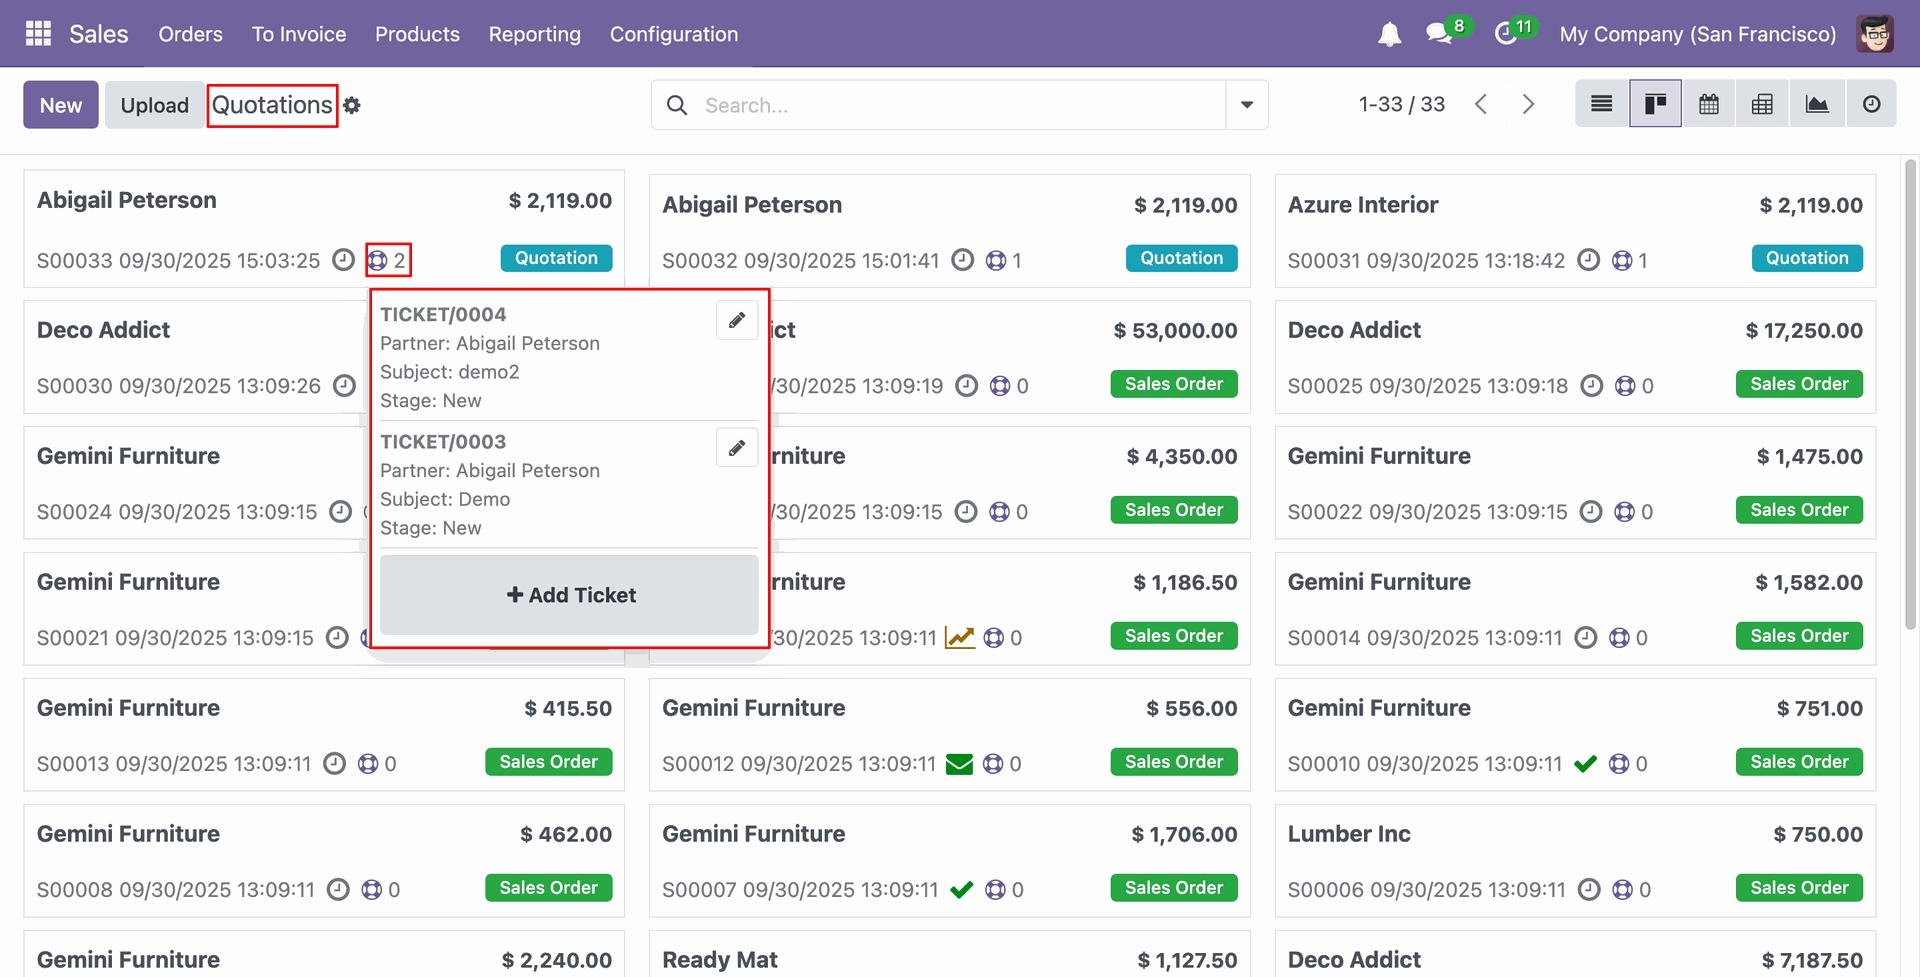
In the Sale Order kanban view, clicking on the 'Ticket Widget' icon will display the details of the ticket.
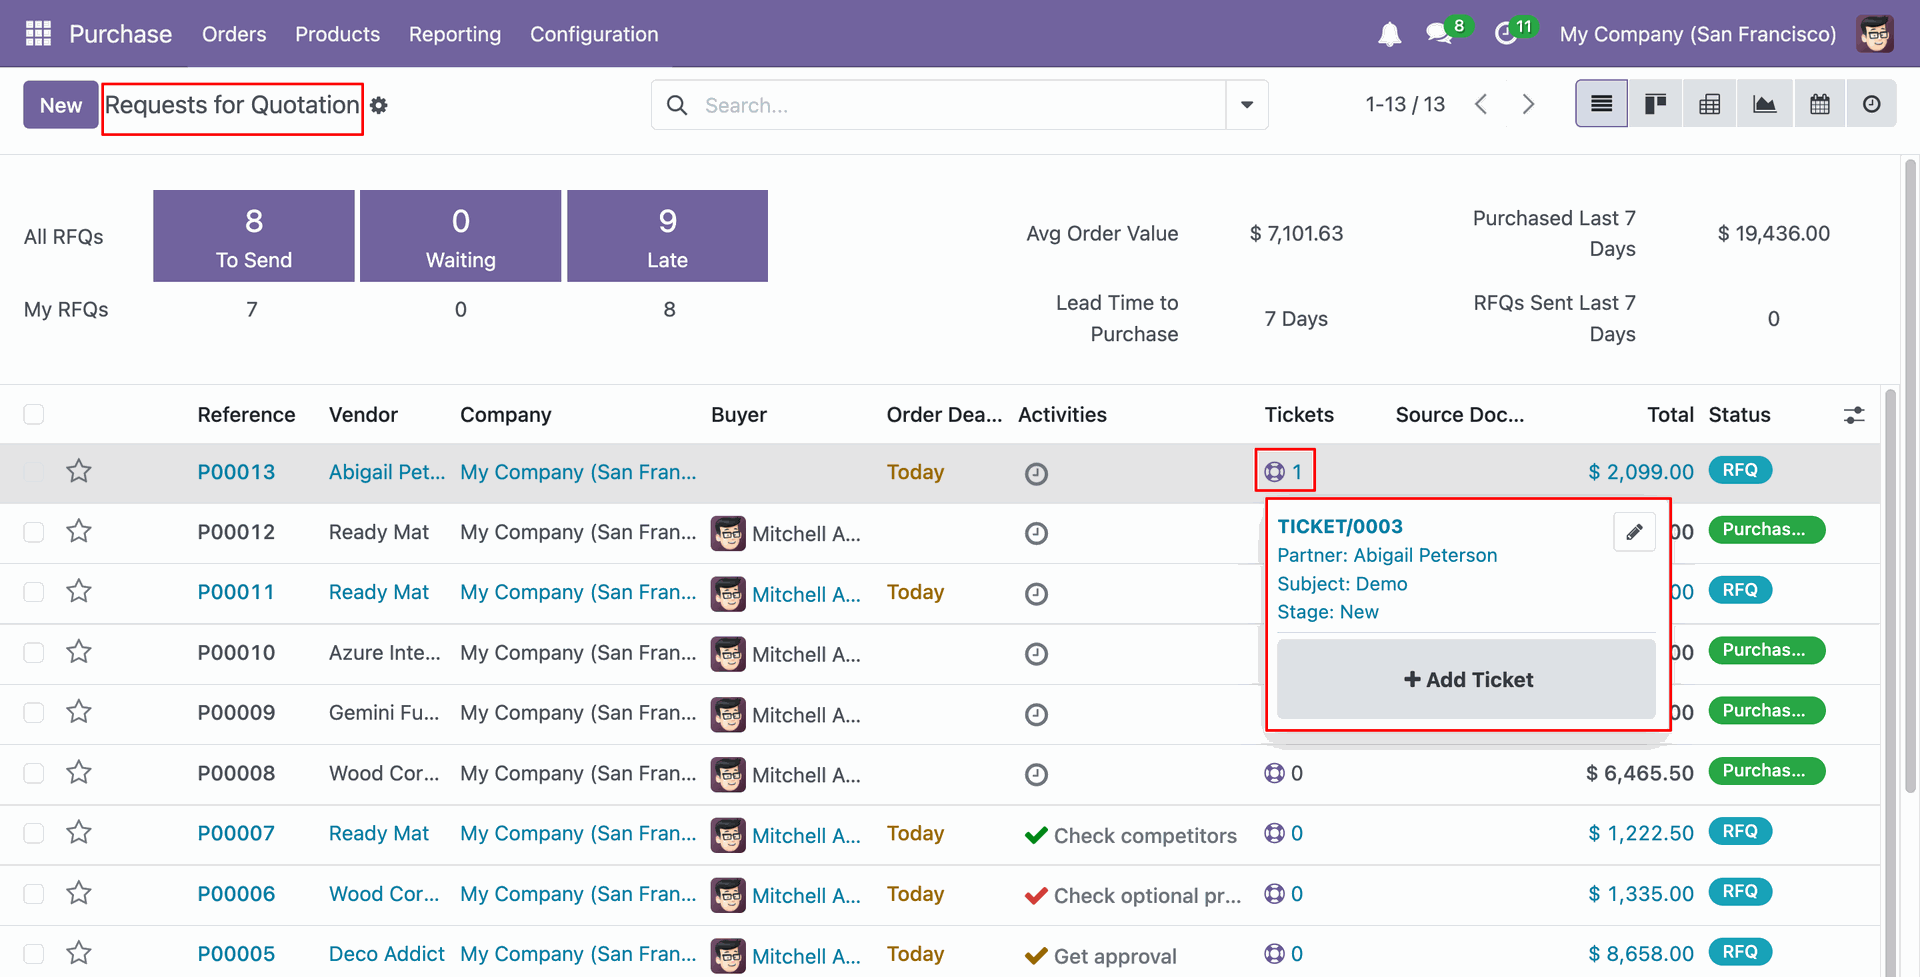
In the RFQ list view, clicking on the 'Ticket Widget' icon will display the details of the ticket.
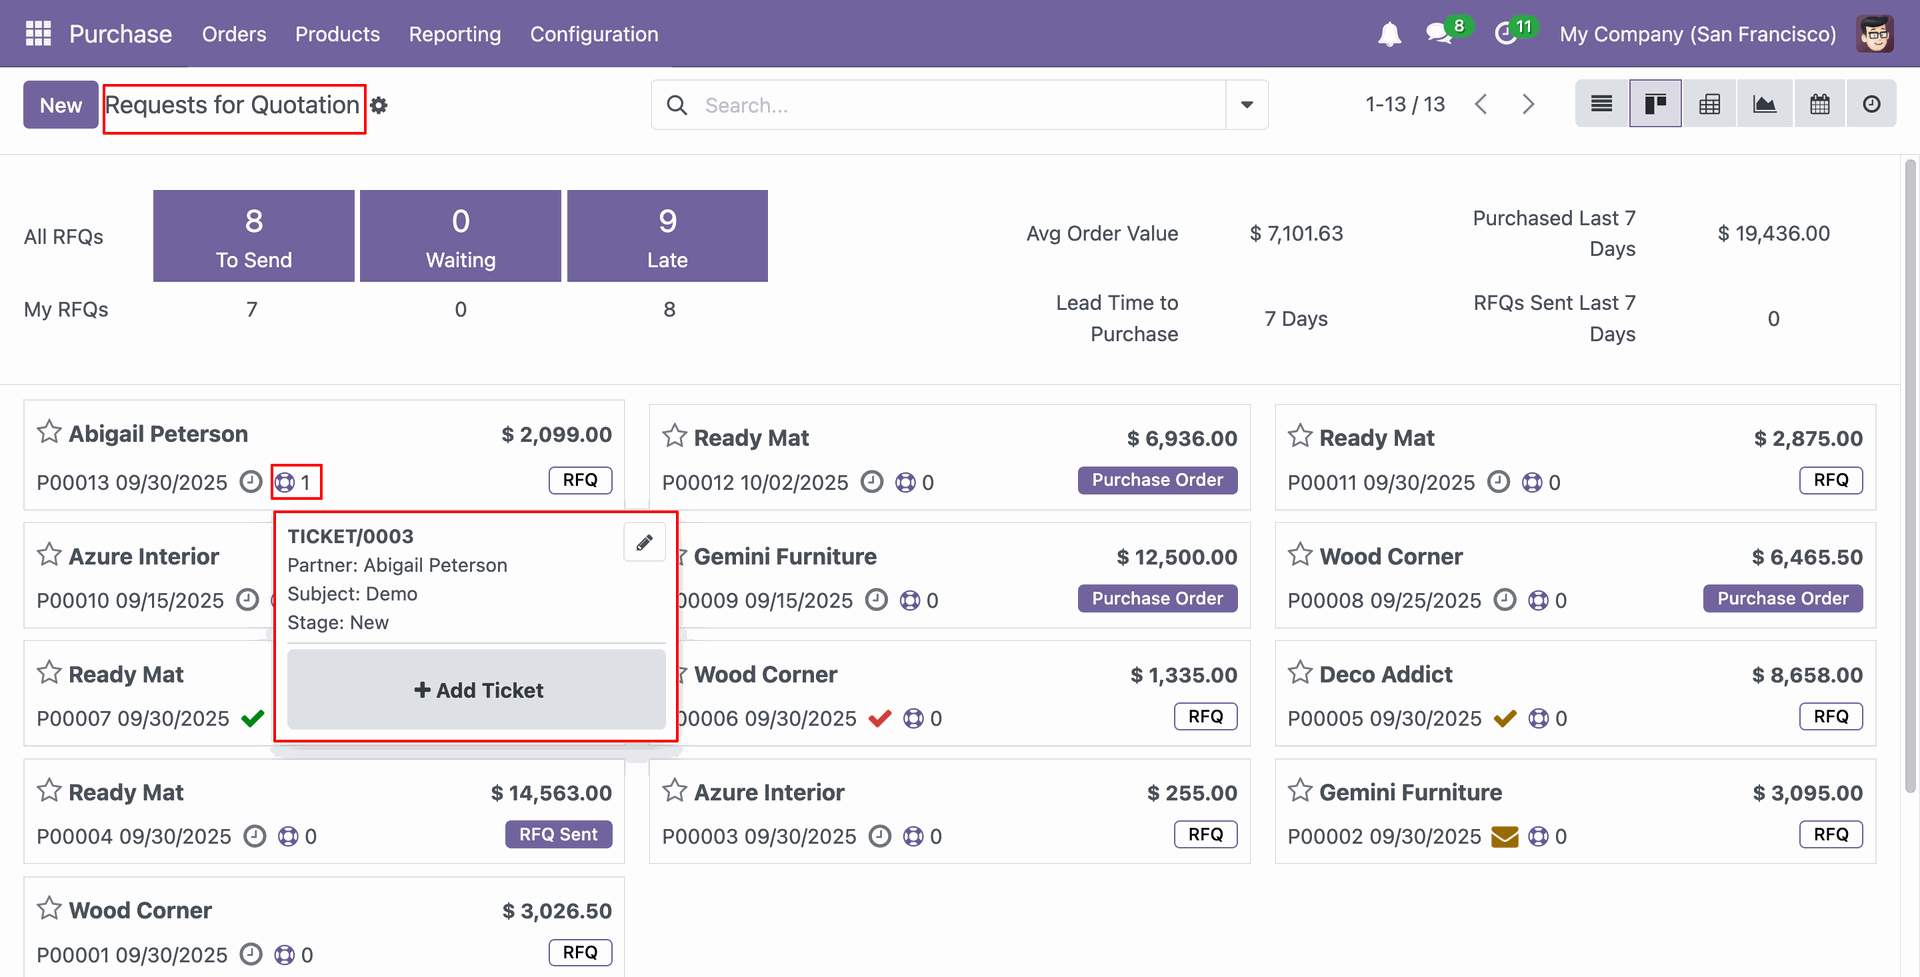
In the RFQ kanban view, clicking on the 'Ticket Widget' icon will display the details of the ticket.
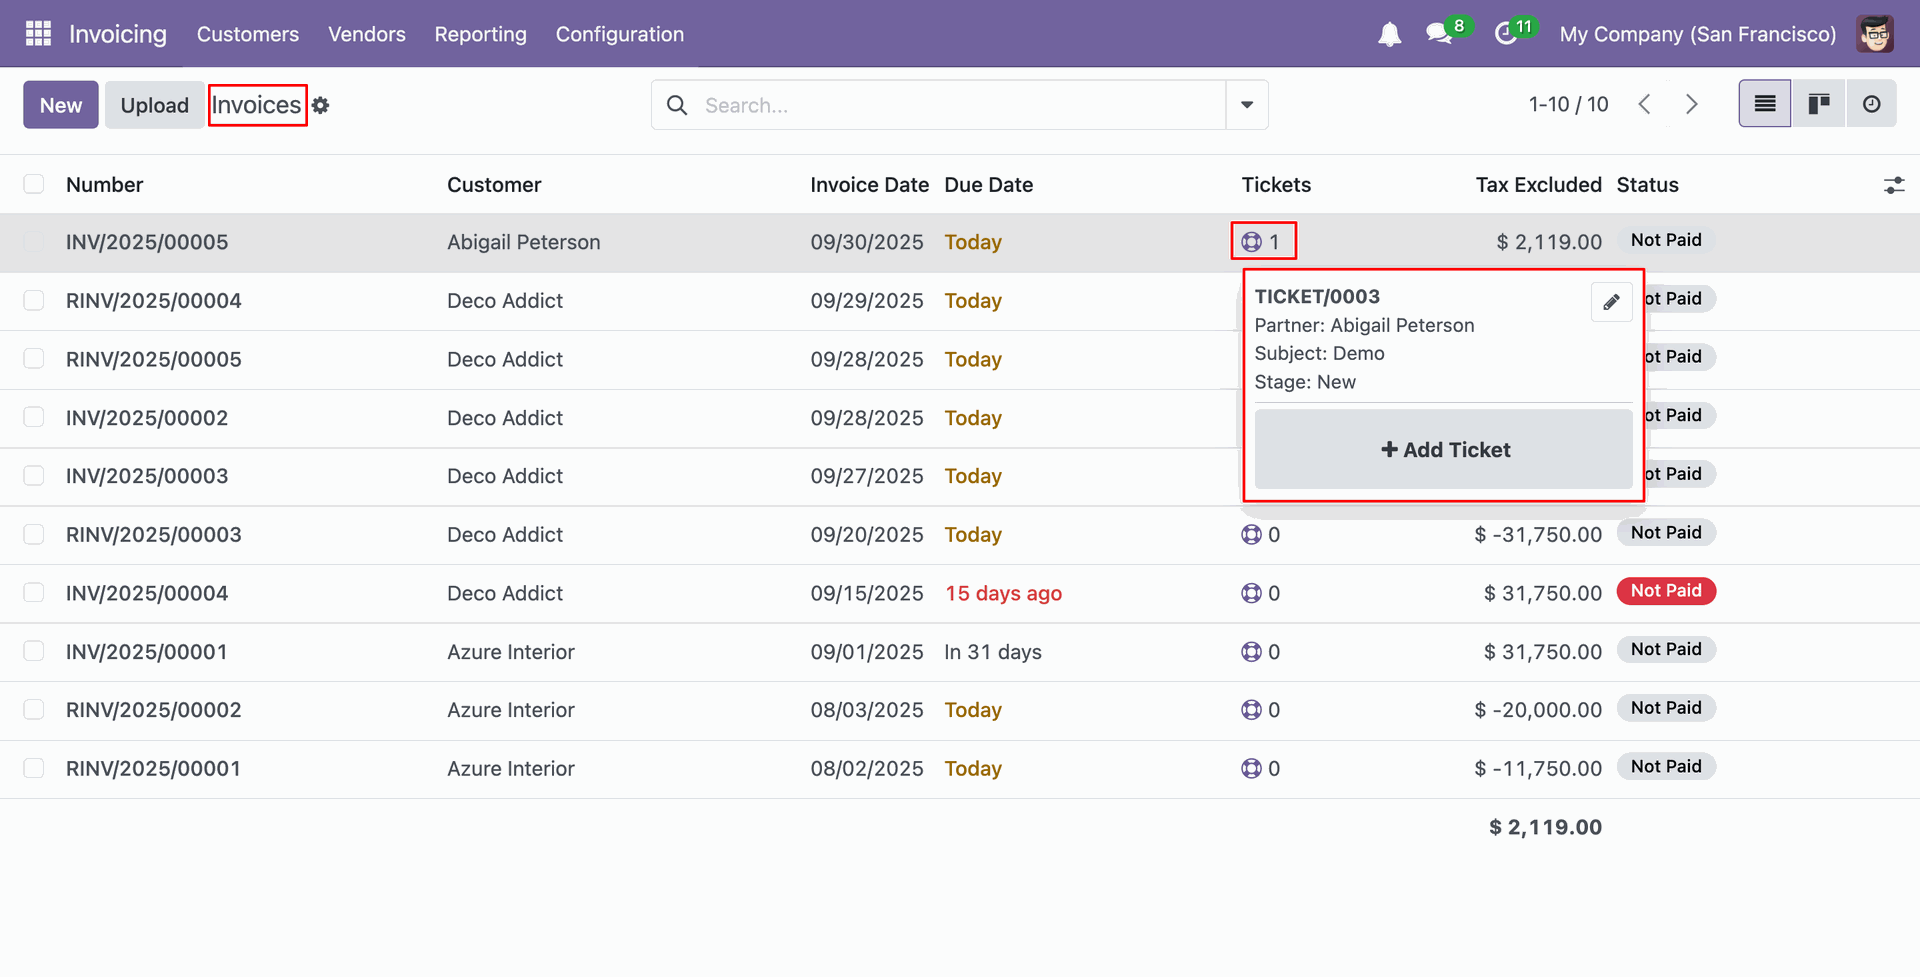
In the Invoices list view, clicking on the 'Ticket Widget' icon will display the details of the ticket.
In the Invoices kanban view, clicking on the 'Ticket Widget' icon will display the details of the ticket.
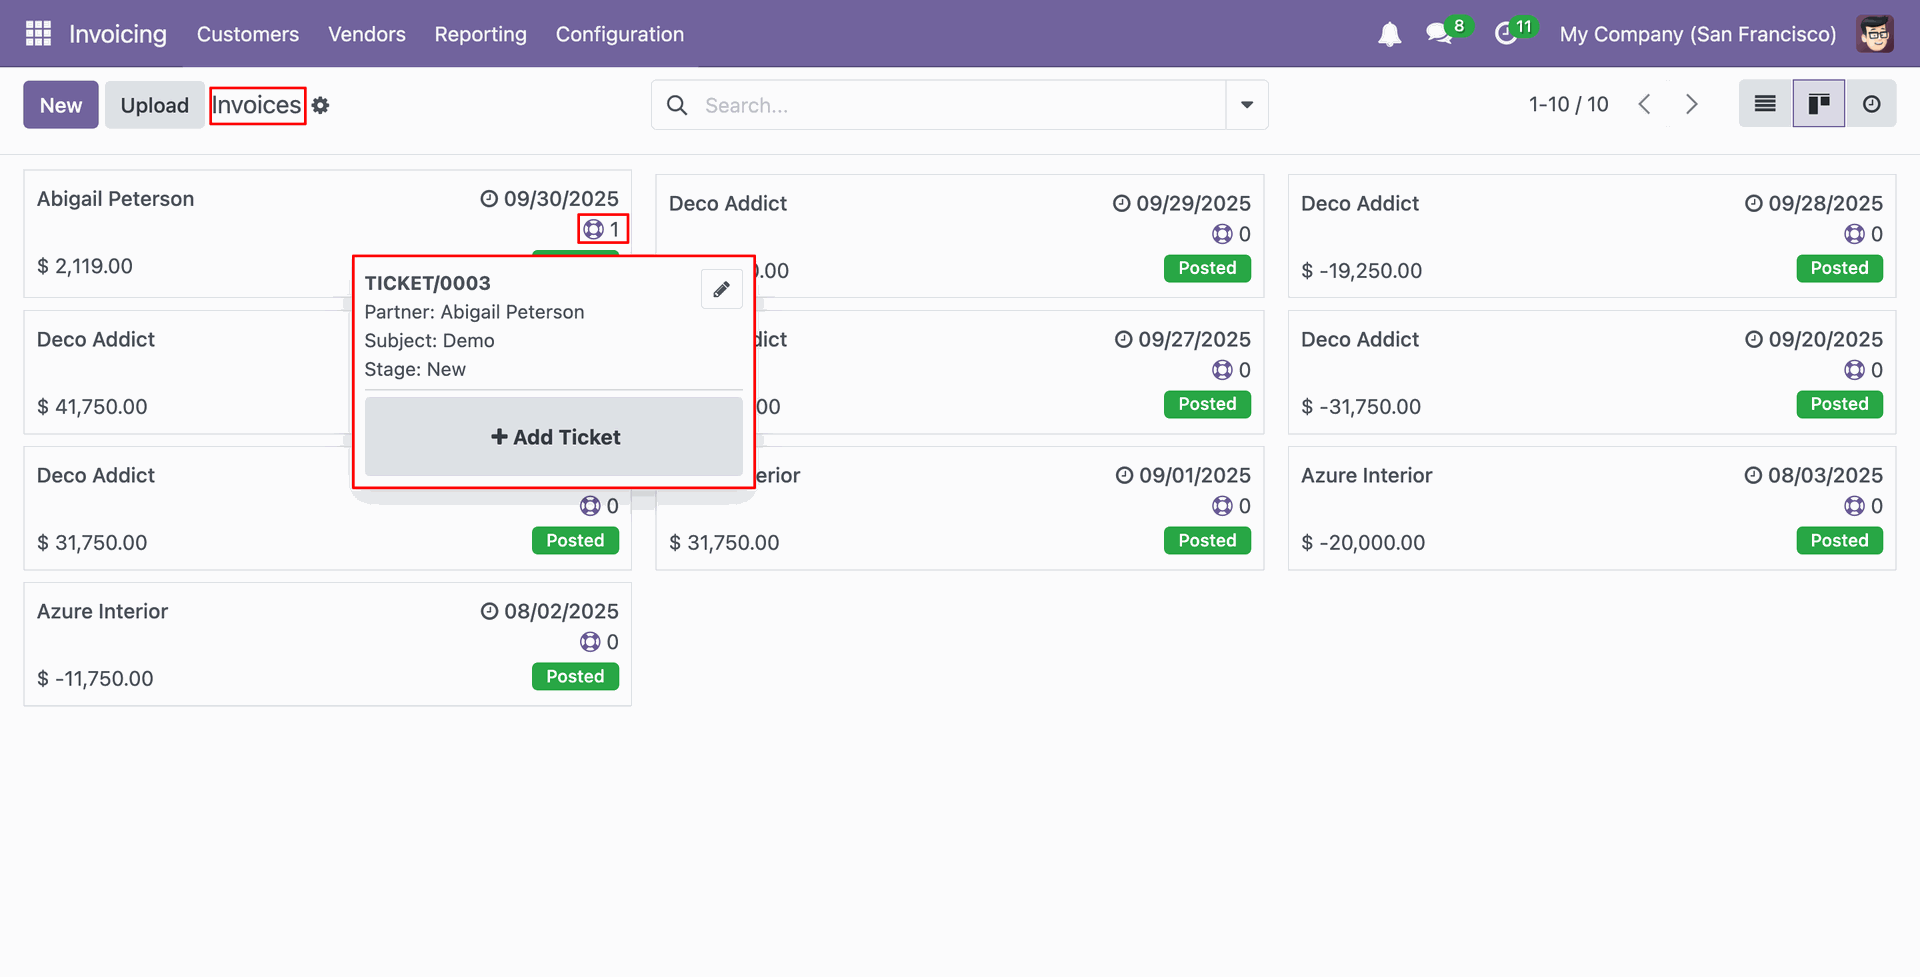
In the Leads list view, clicking on the 'Ticket Widget' icon will display the details of the ticket.
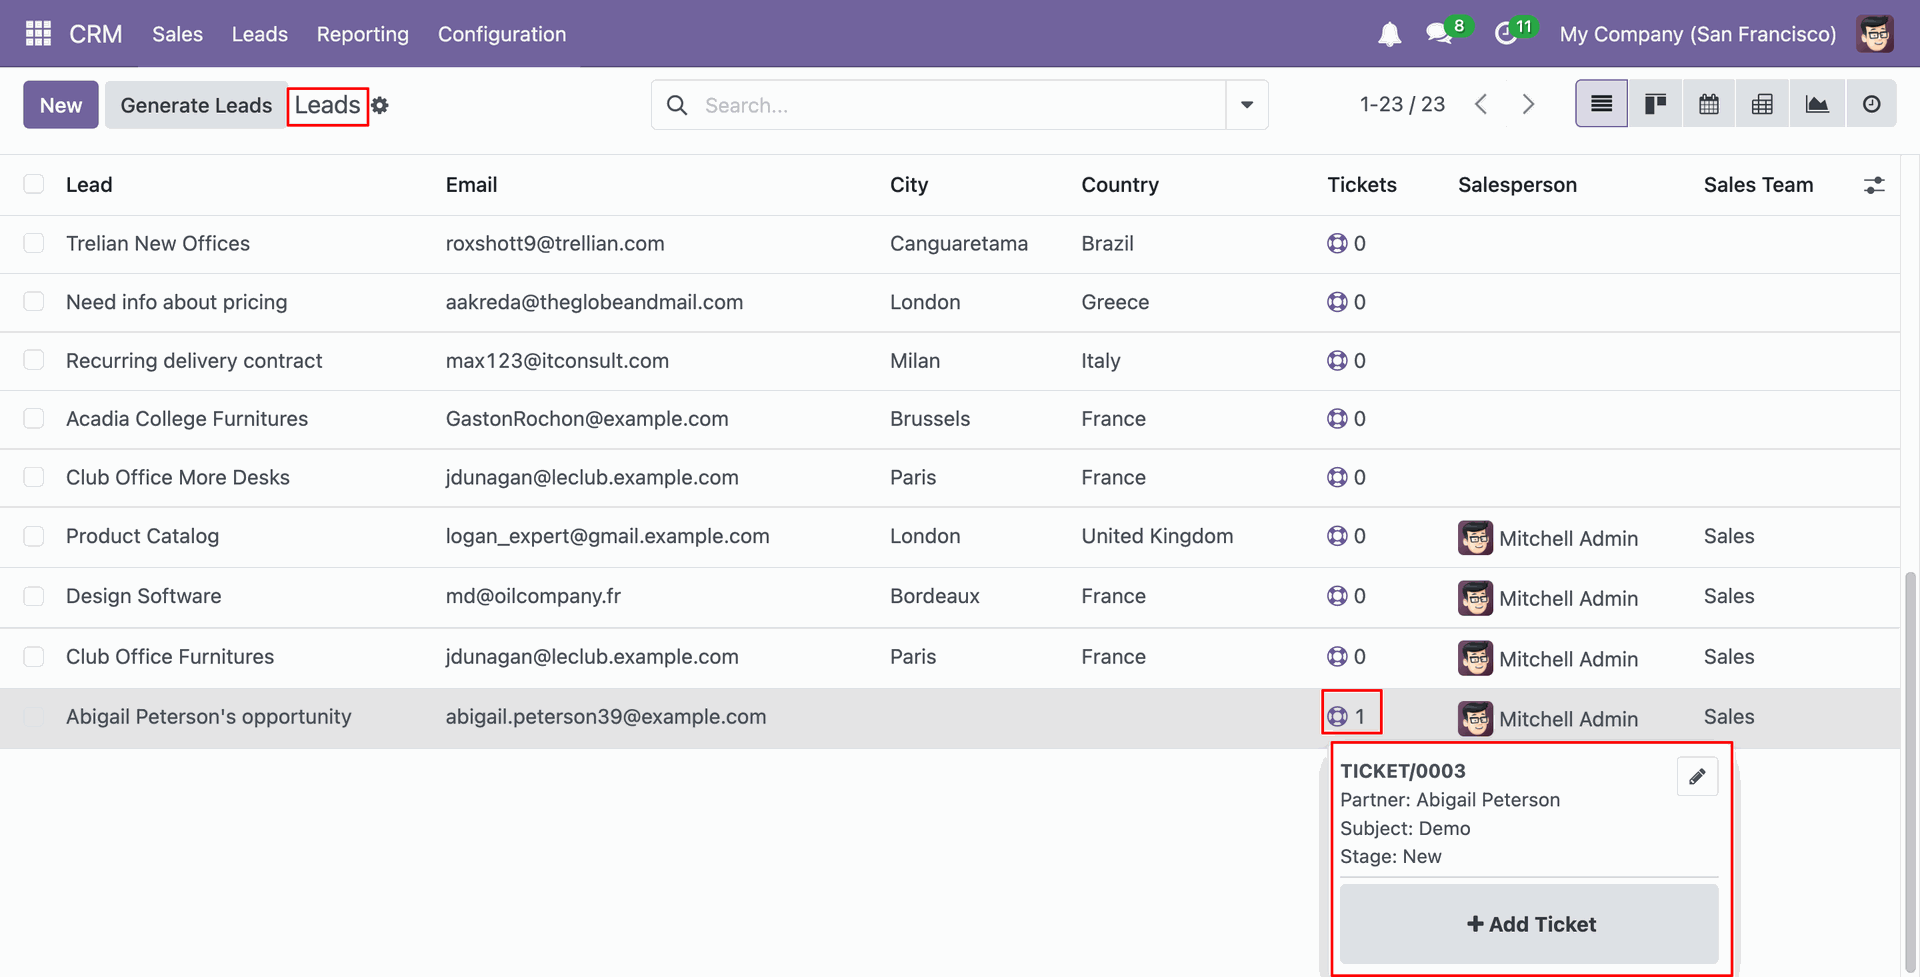
In the Leads kanban view, clicking on the 'Ticket Widget' icon will display the details of the ticket.
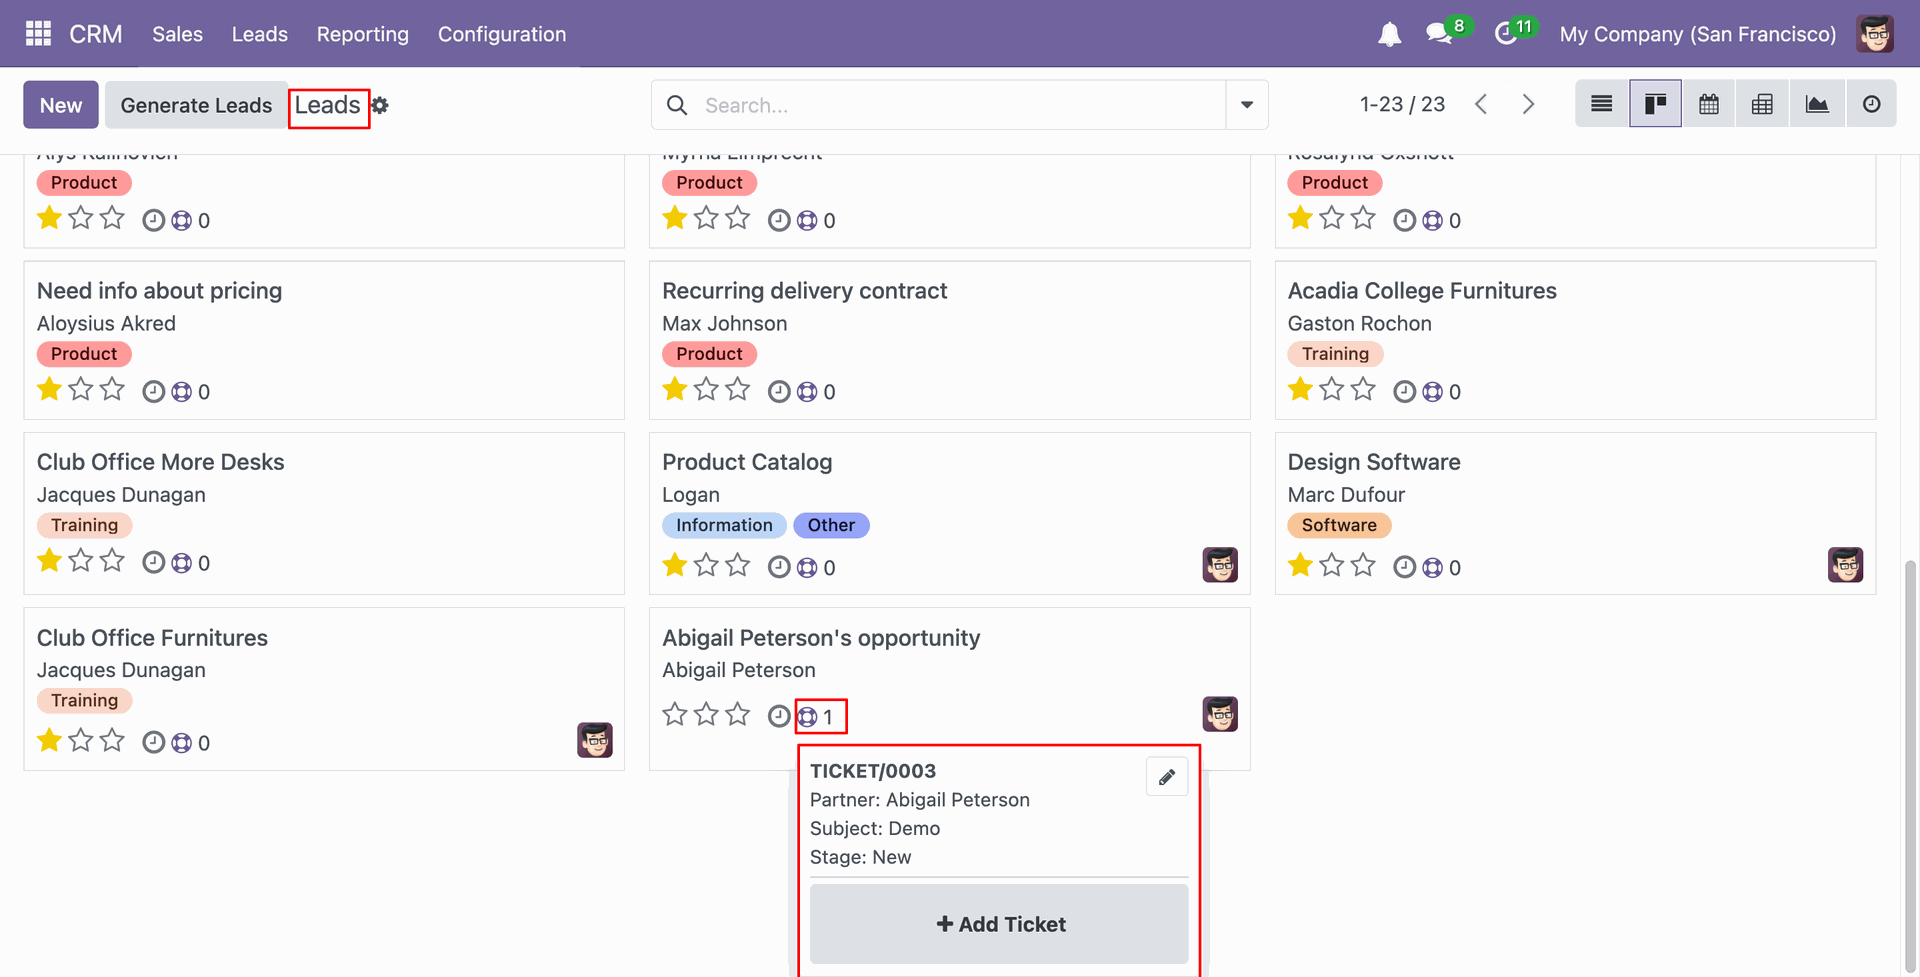
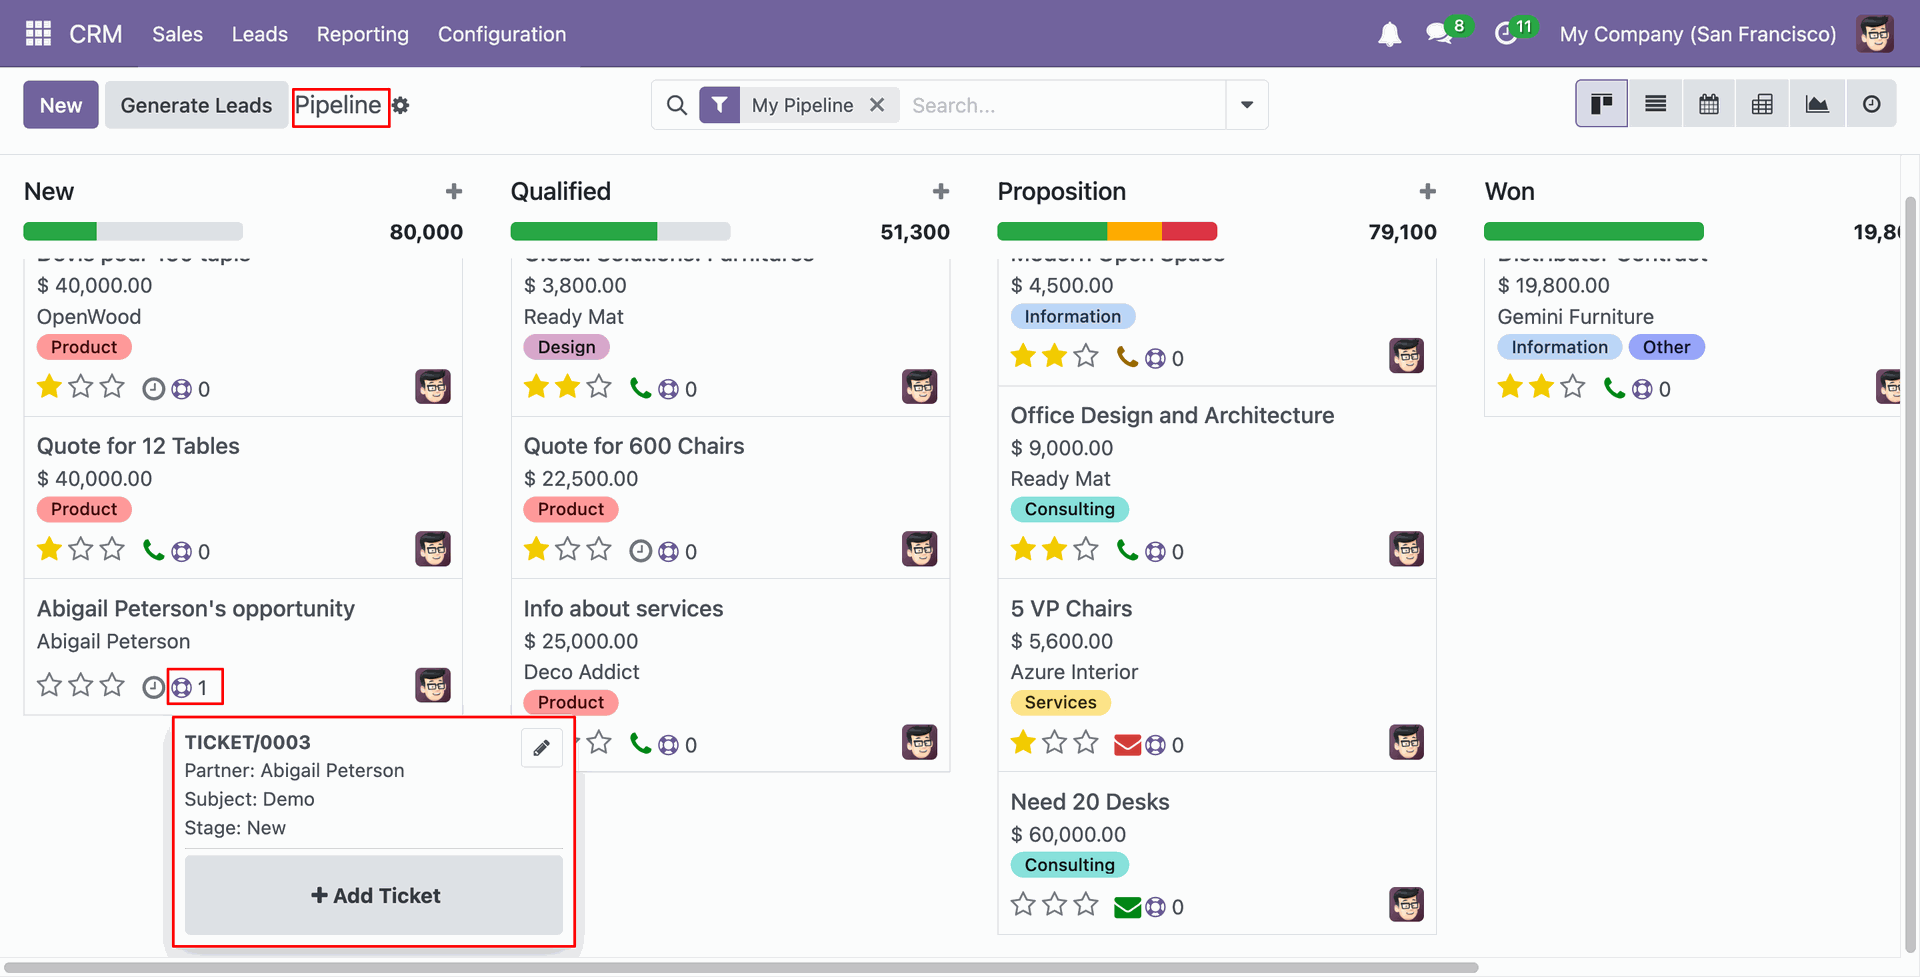
In the Pipeline list view, clicking on the 'Ticket Widget' icon will display the details of the ticket.
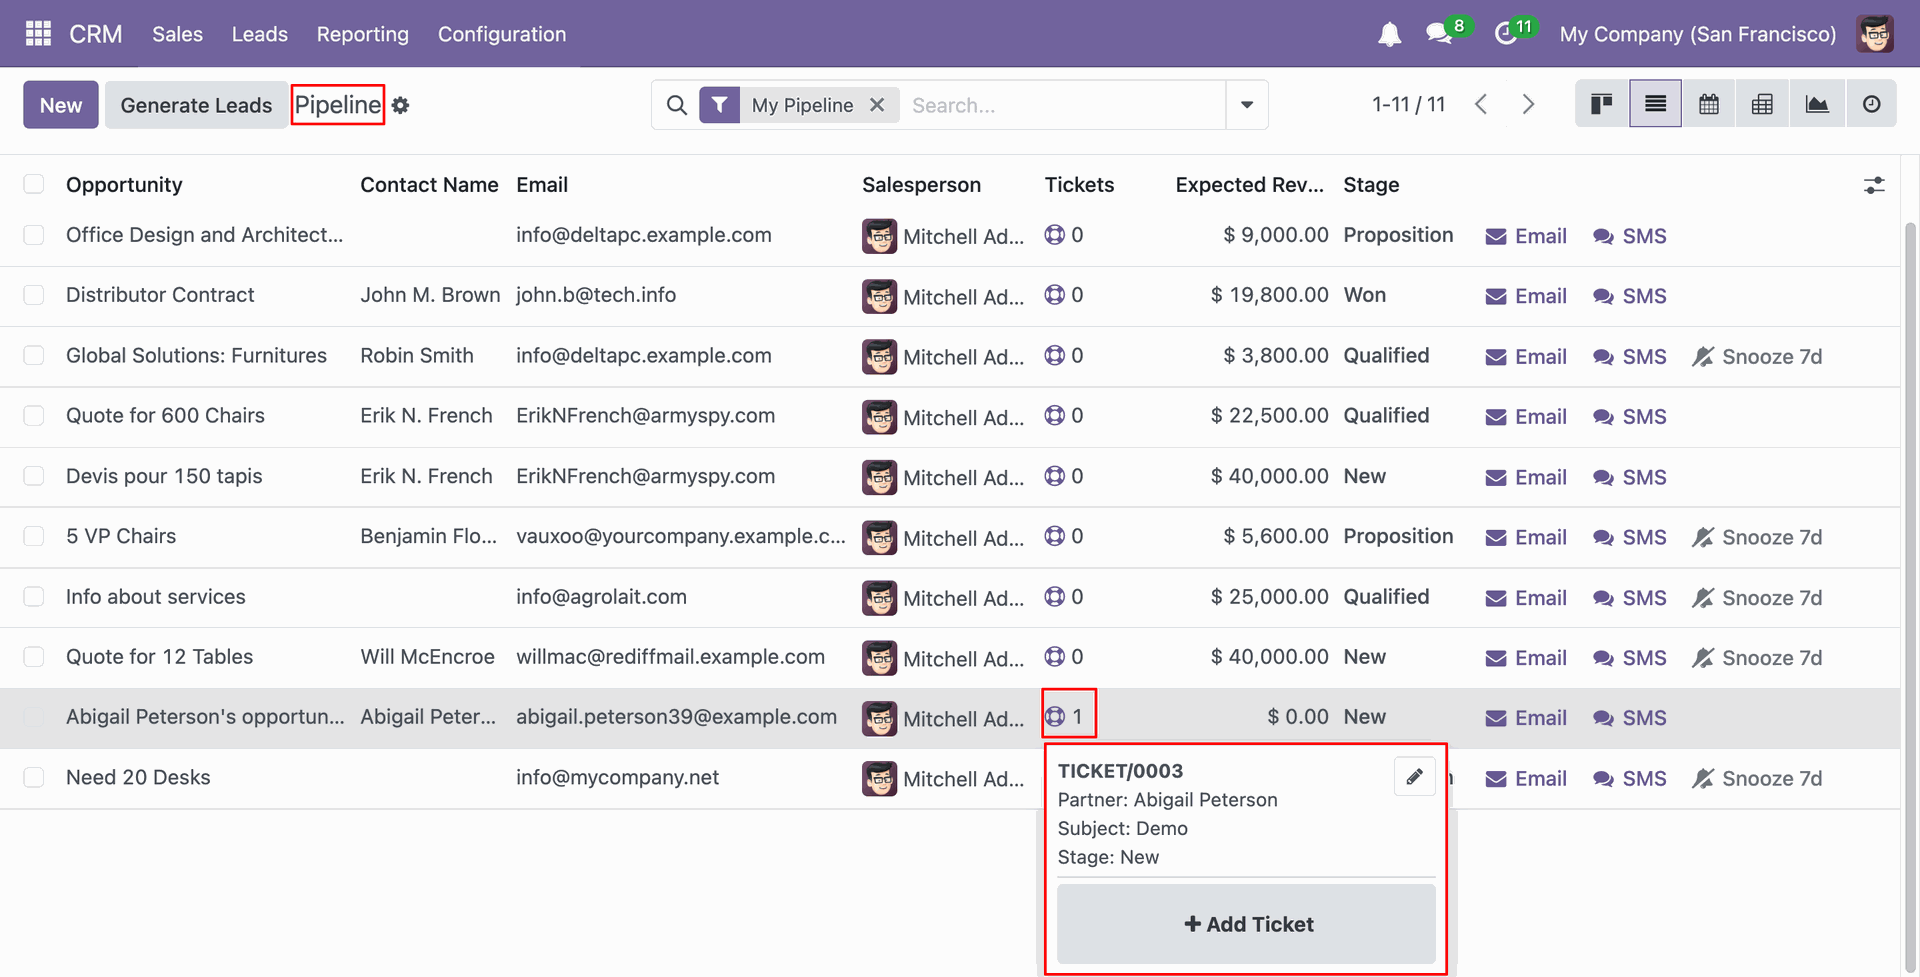
In the Pipeline kanban view, clicking on the 'Ticket Widget' icon will display the details of the ticket.
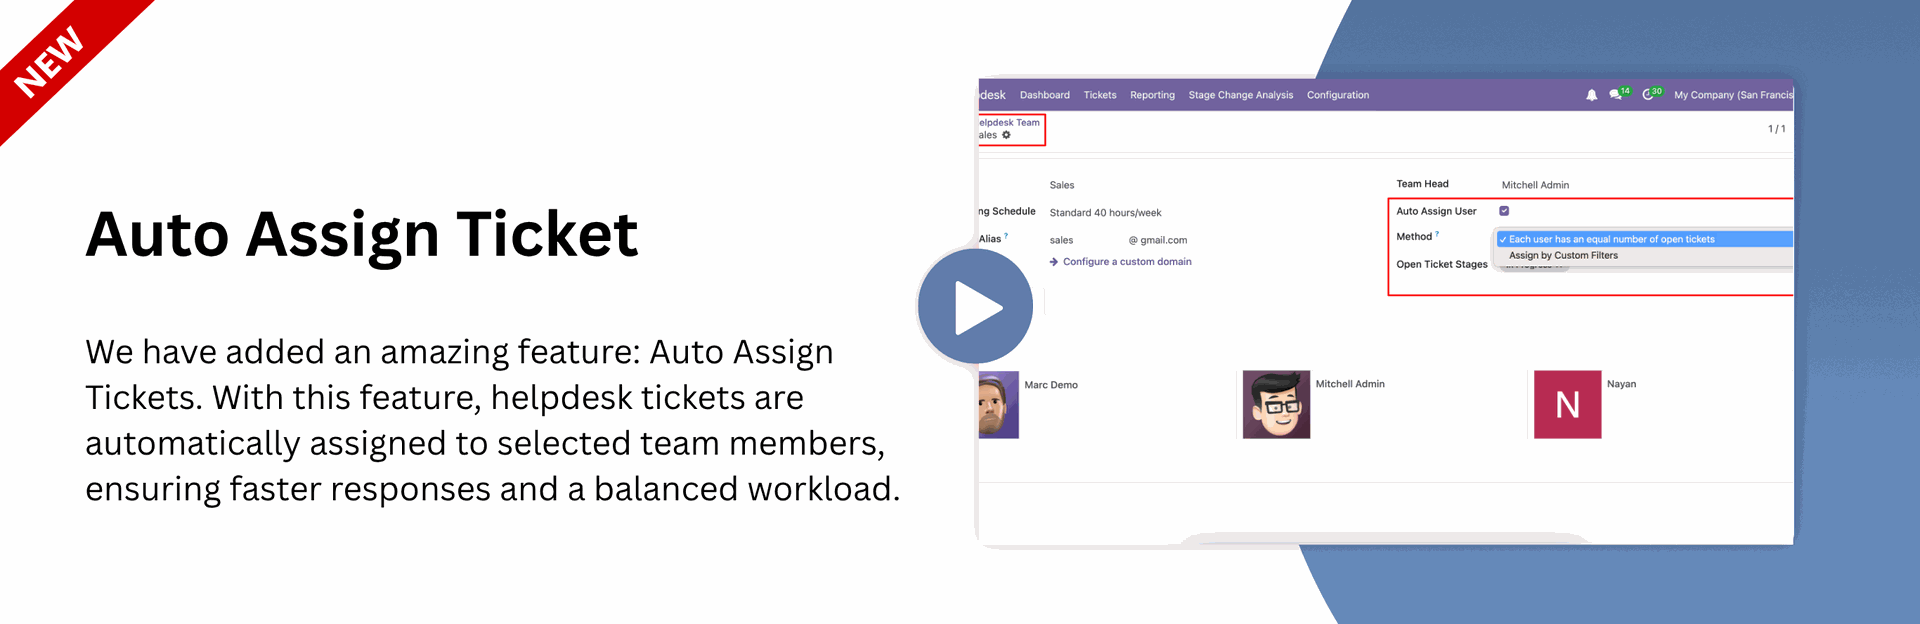
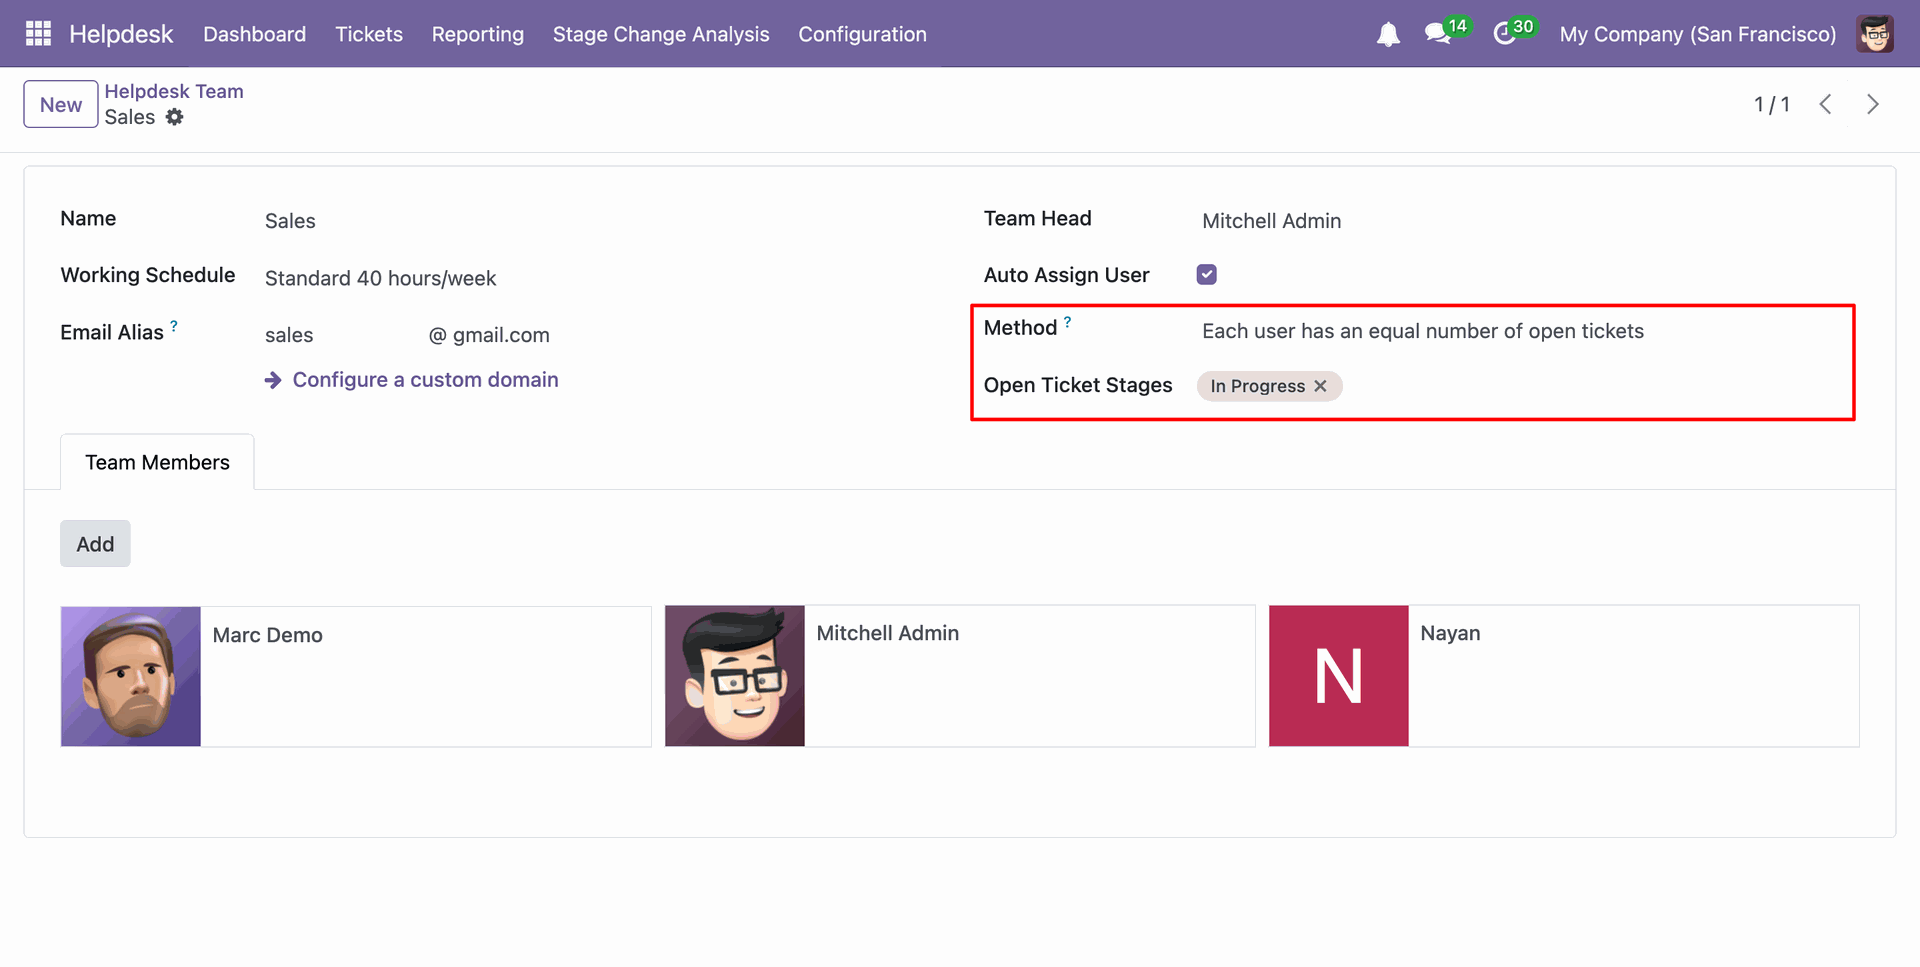
Create a helpdesk team, select the method: Each user has an equal number of open tickets.

Select the Open Ticket Stages.
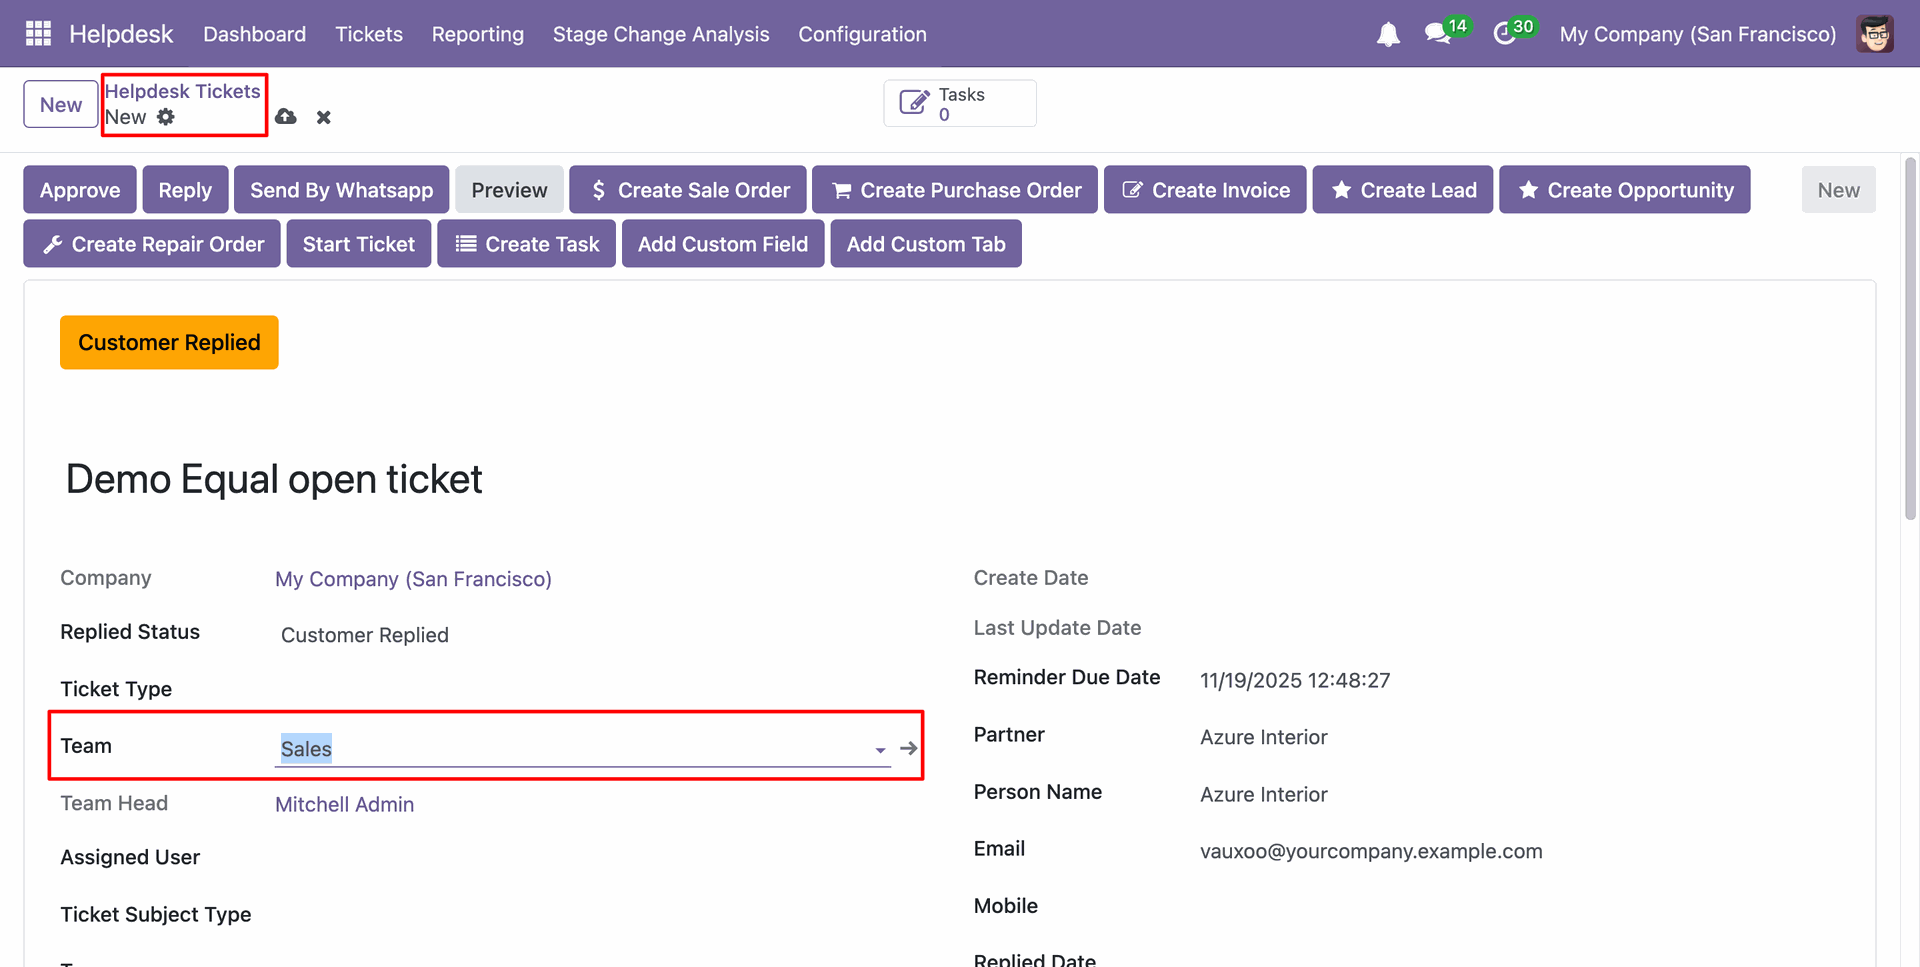
In the ticket form view, select the created Helpdesk Team.
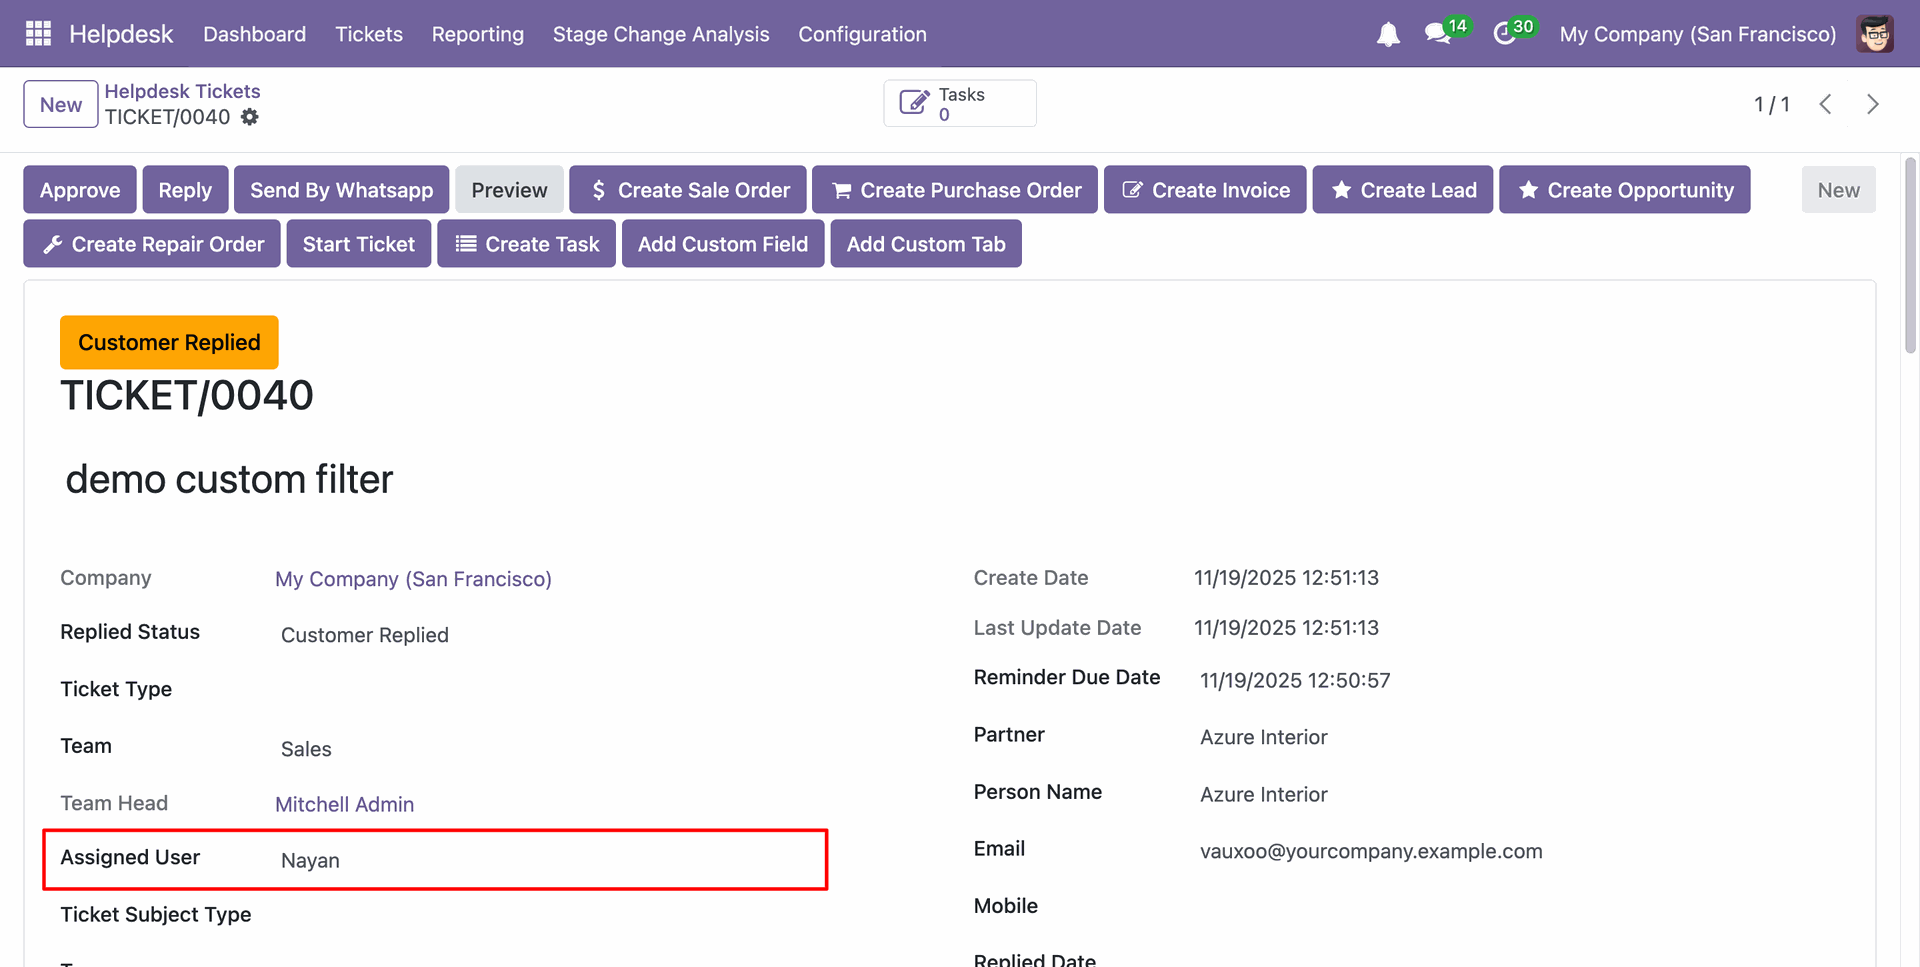
Add the user under “Assign User” to whom you want to assign the ticket.

You can group by the Helpdesk tickets by Assigned User.

select the method: Asign by Customer Filters and fill other details.

Select the created Helpdesk Team.

Add the user under “Assign User” to whom you want to assign the ticket.
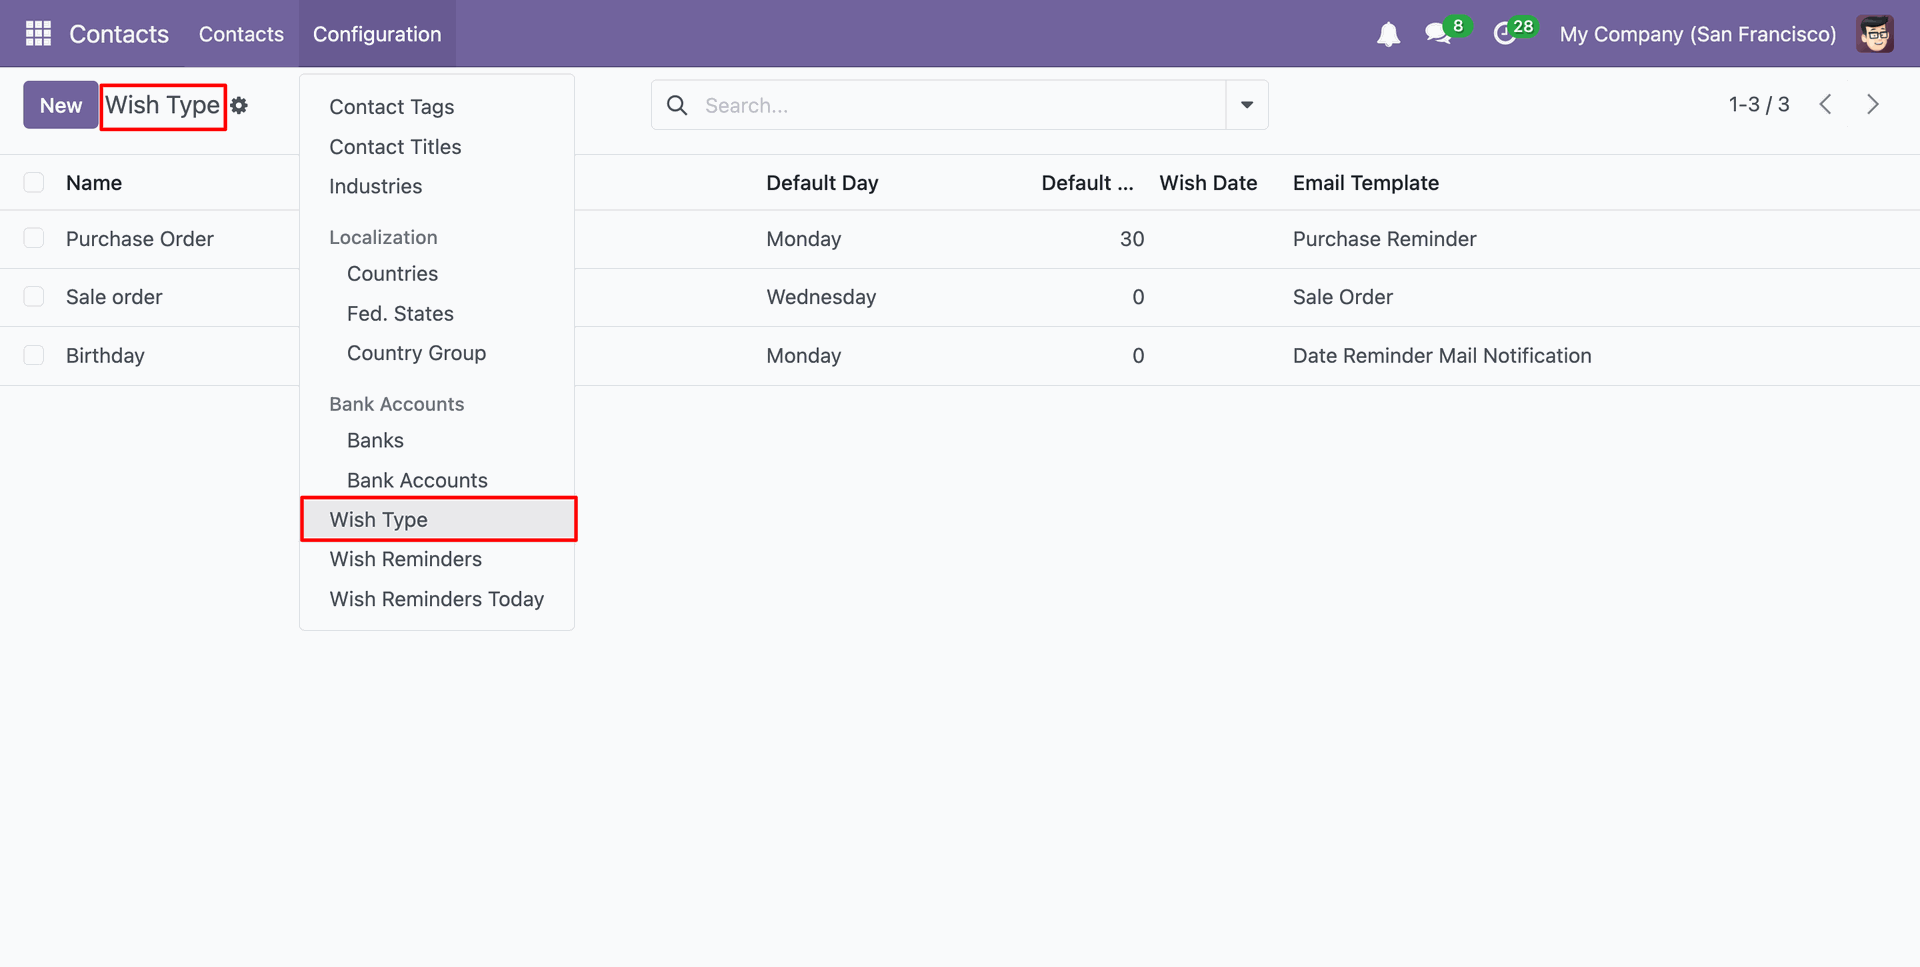
Menu of the "Wish Type".
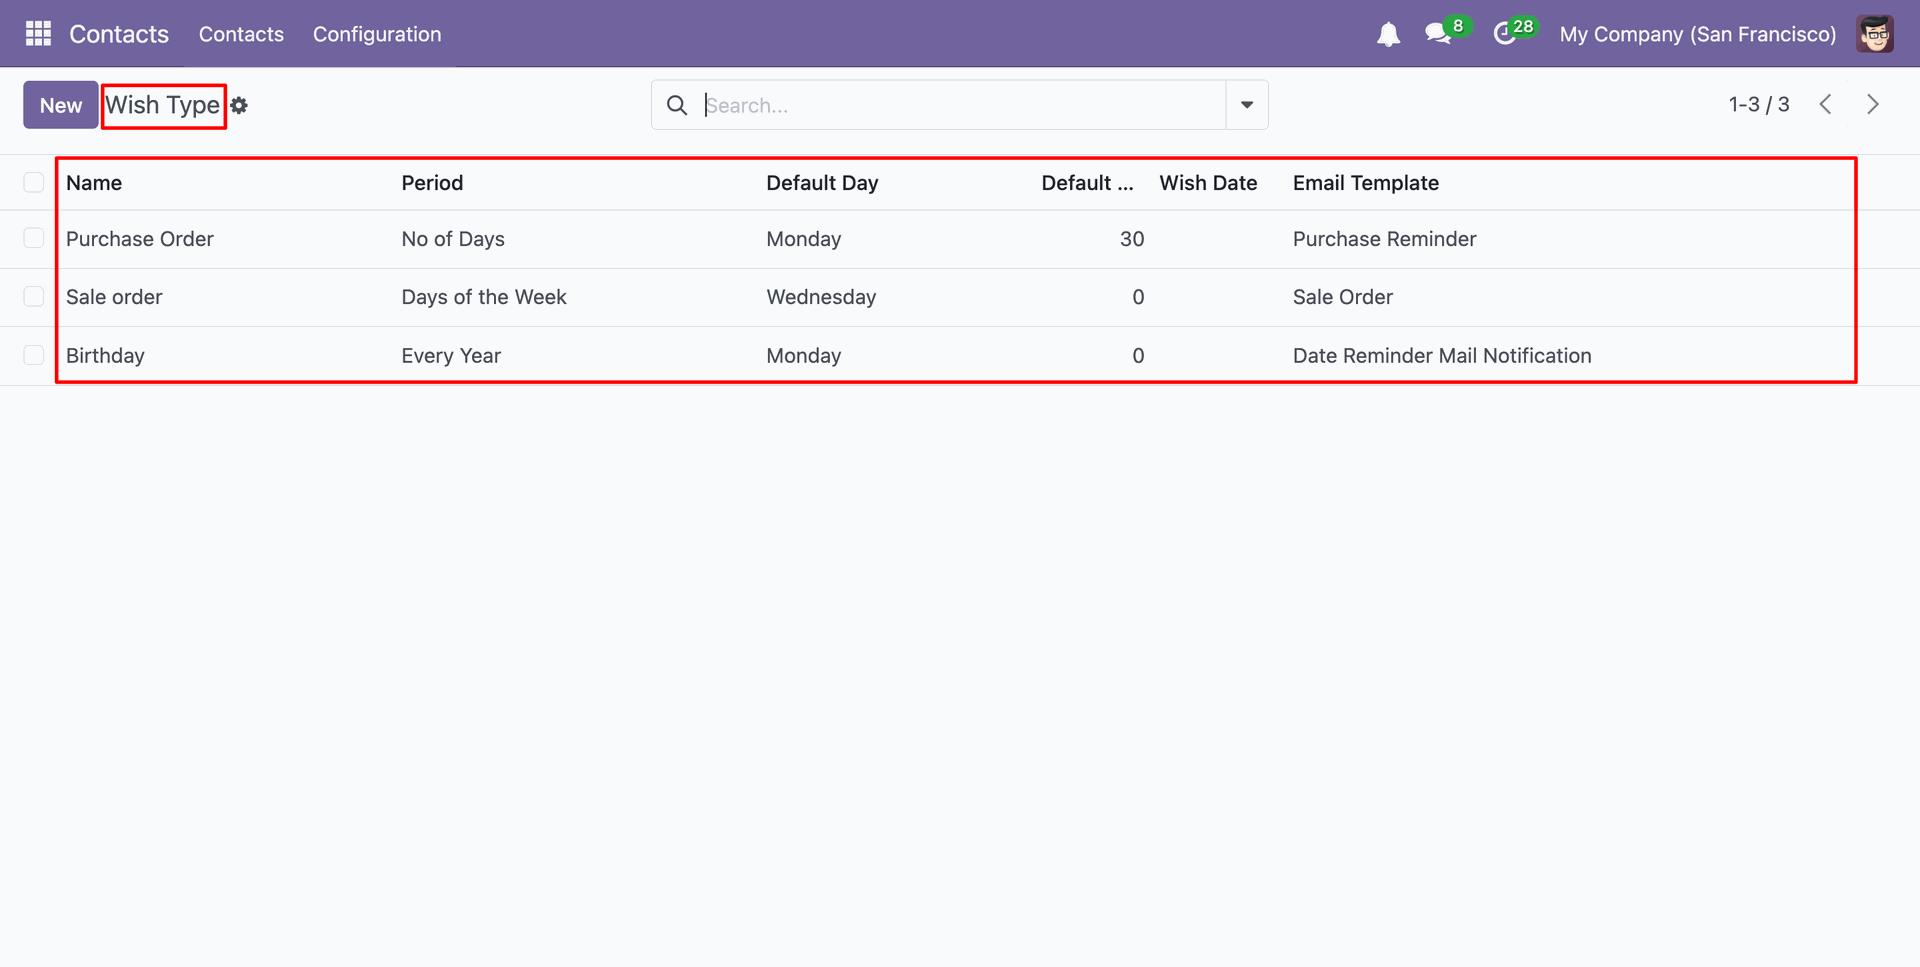
Tree view of the "Wish Type".
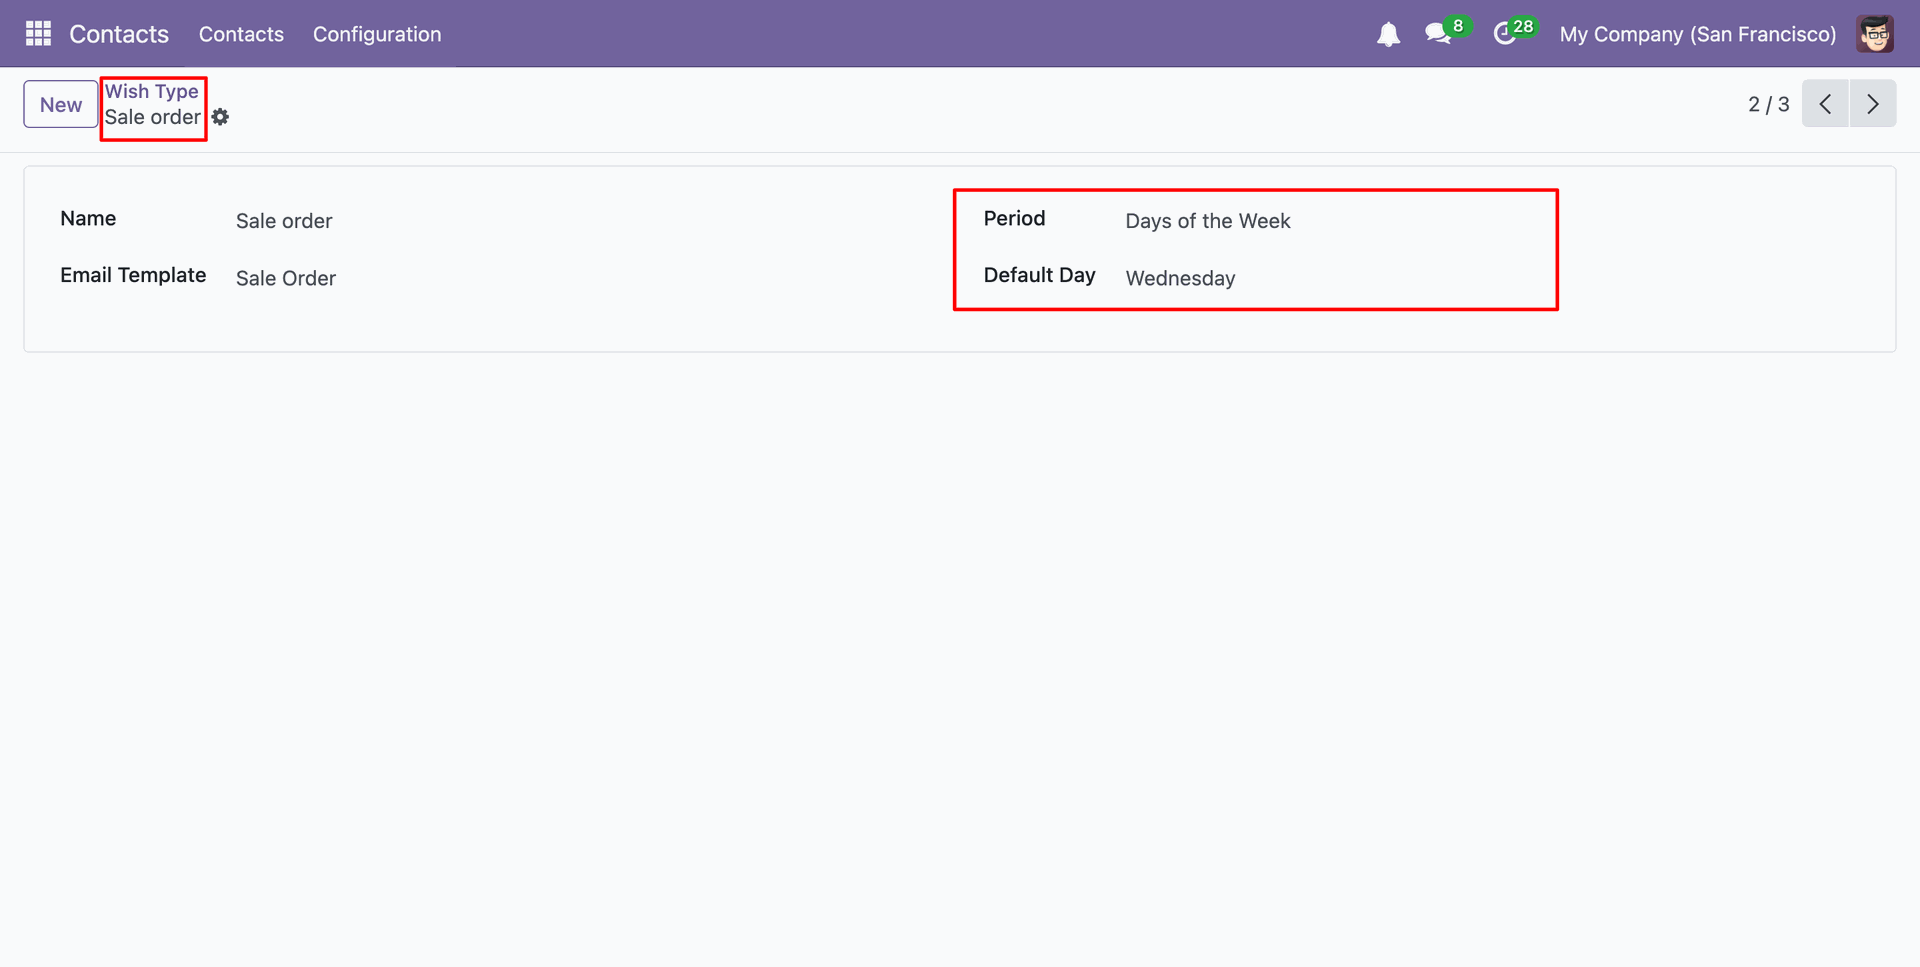
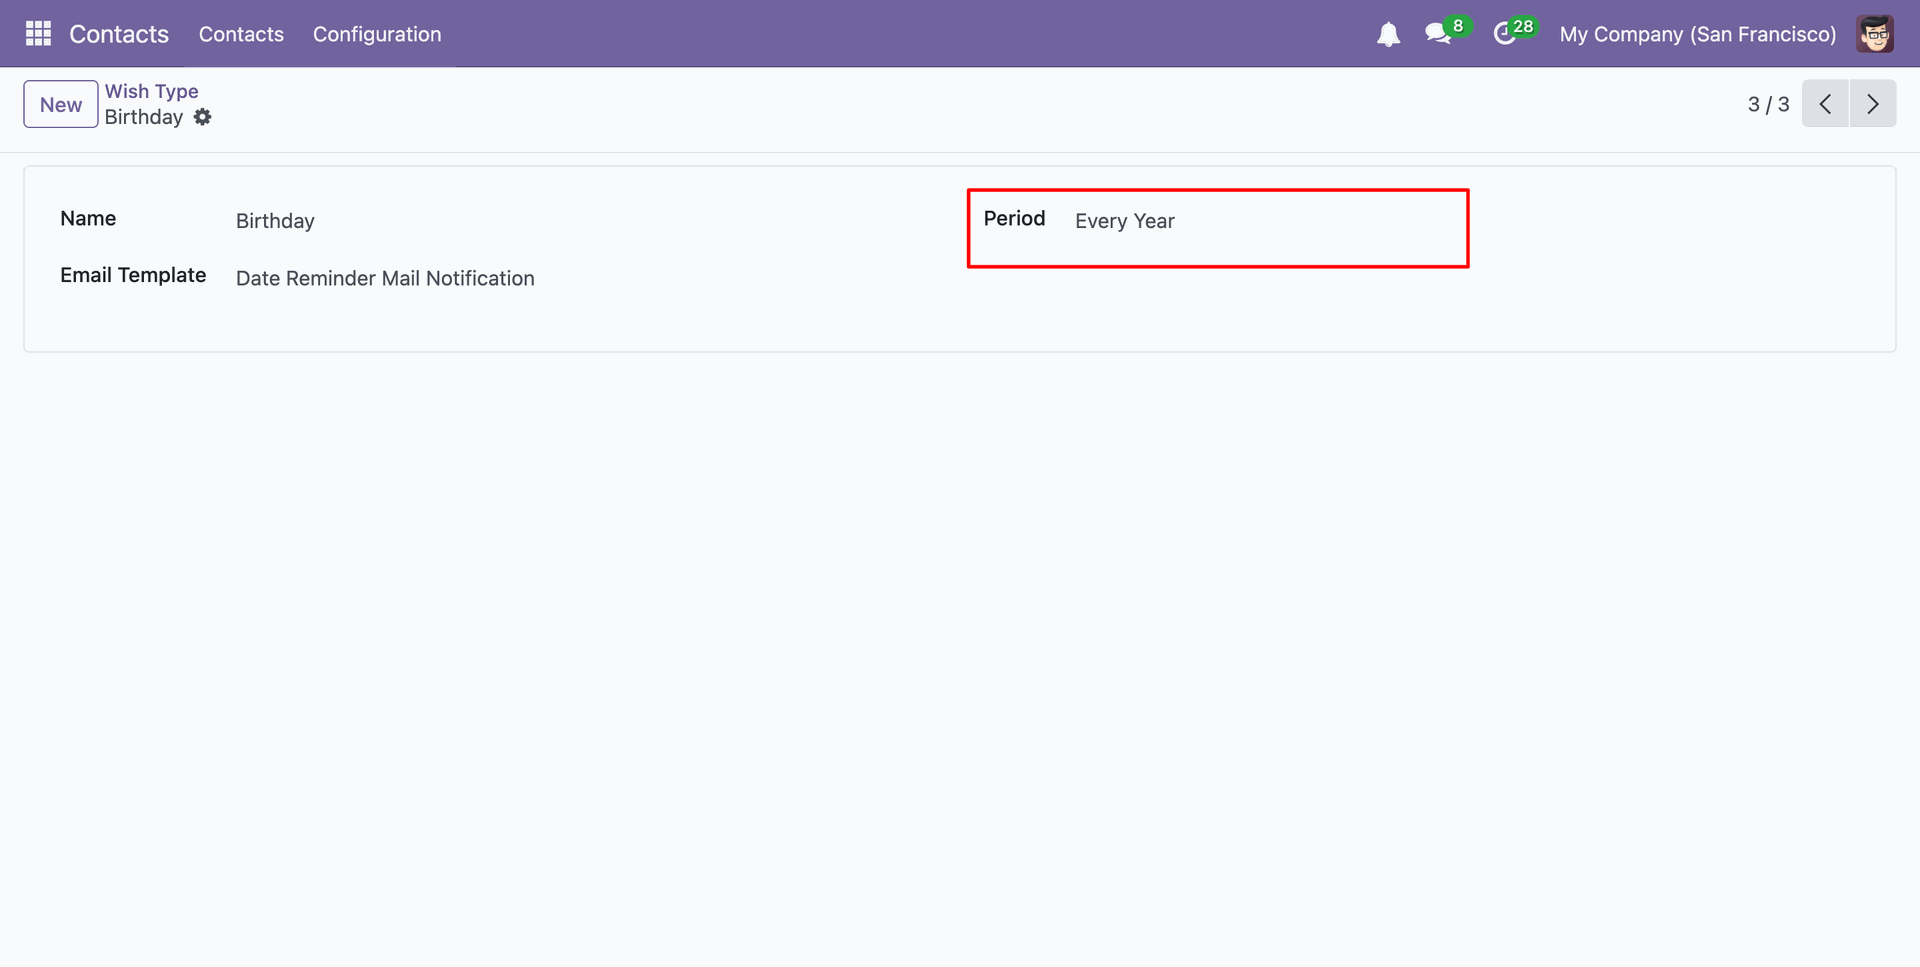
Form view of the "Wish Type".
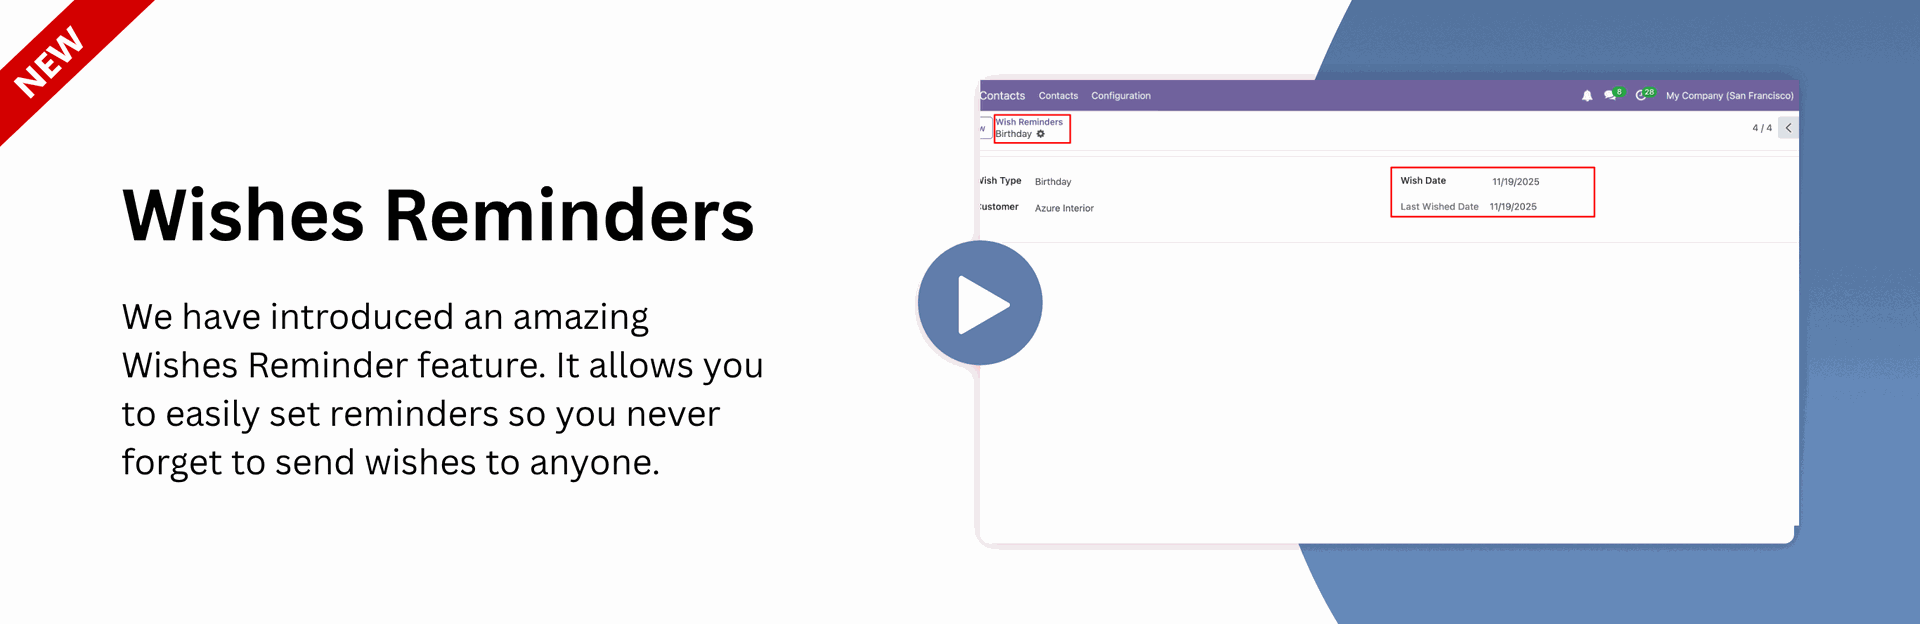
Menu of the "Wish Reminders".

Tree view of the "Wish Reminders".
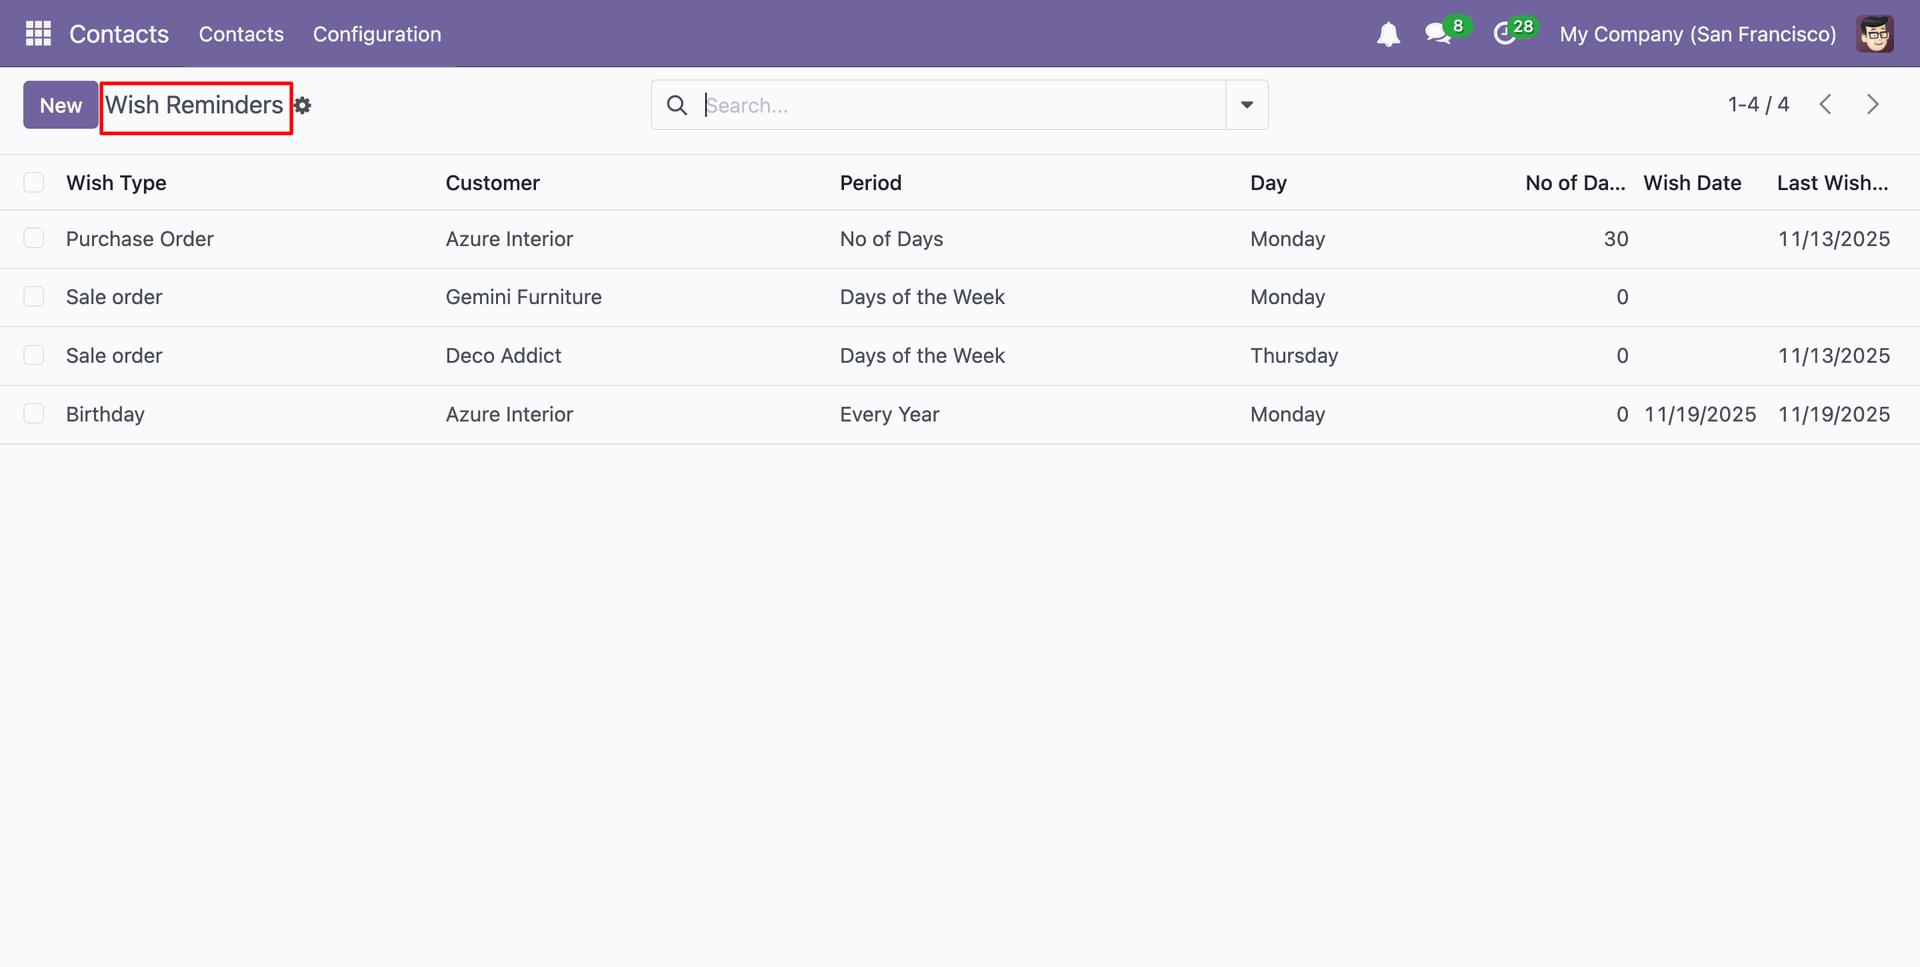
Form view of the "Wish Reminders".

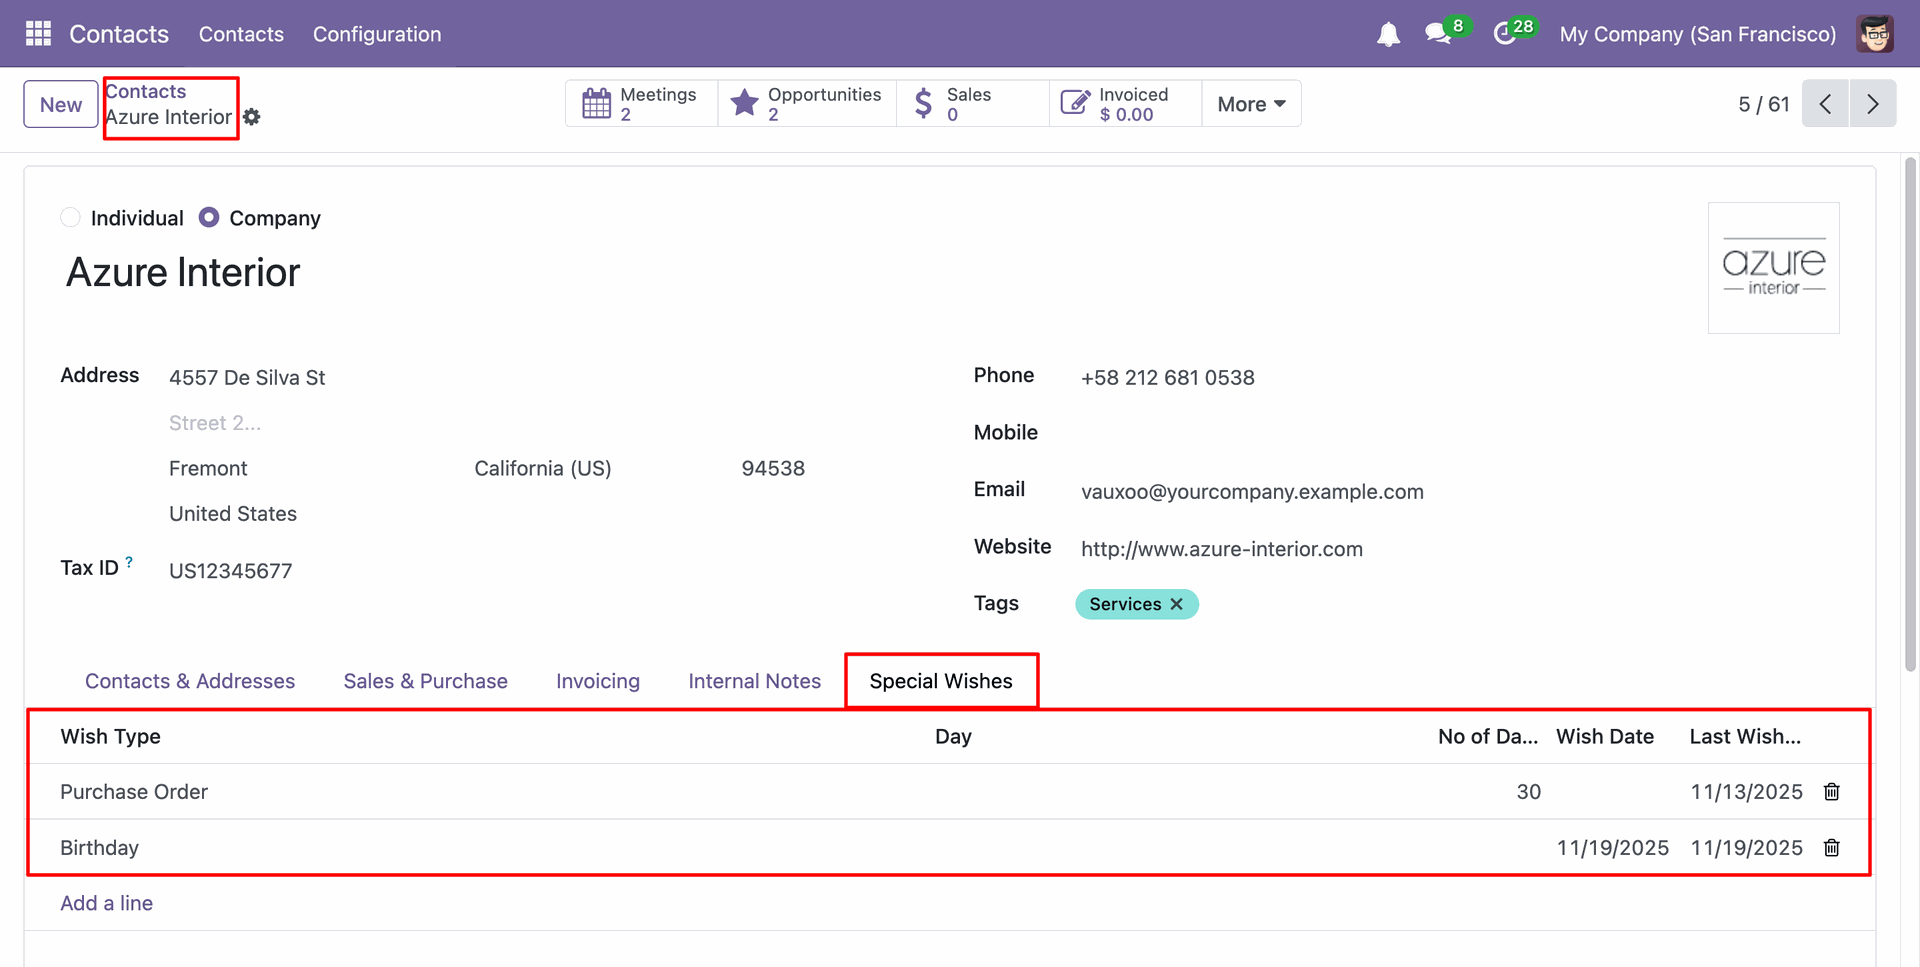
In the form view of the contacts, Wish Type details in the "Special Wishes" tab.
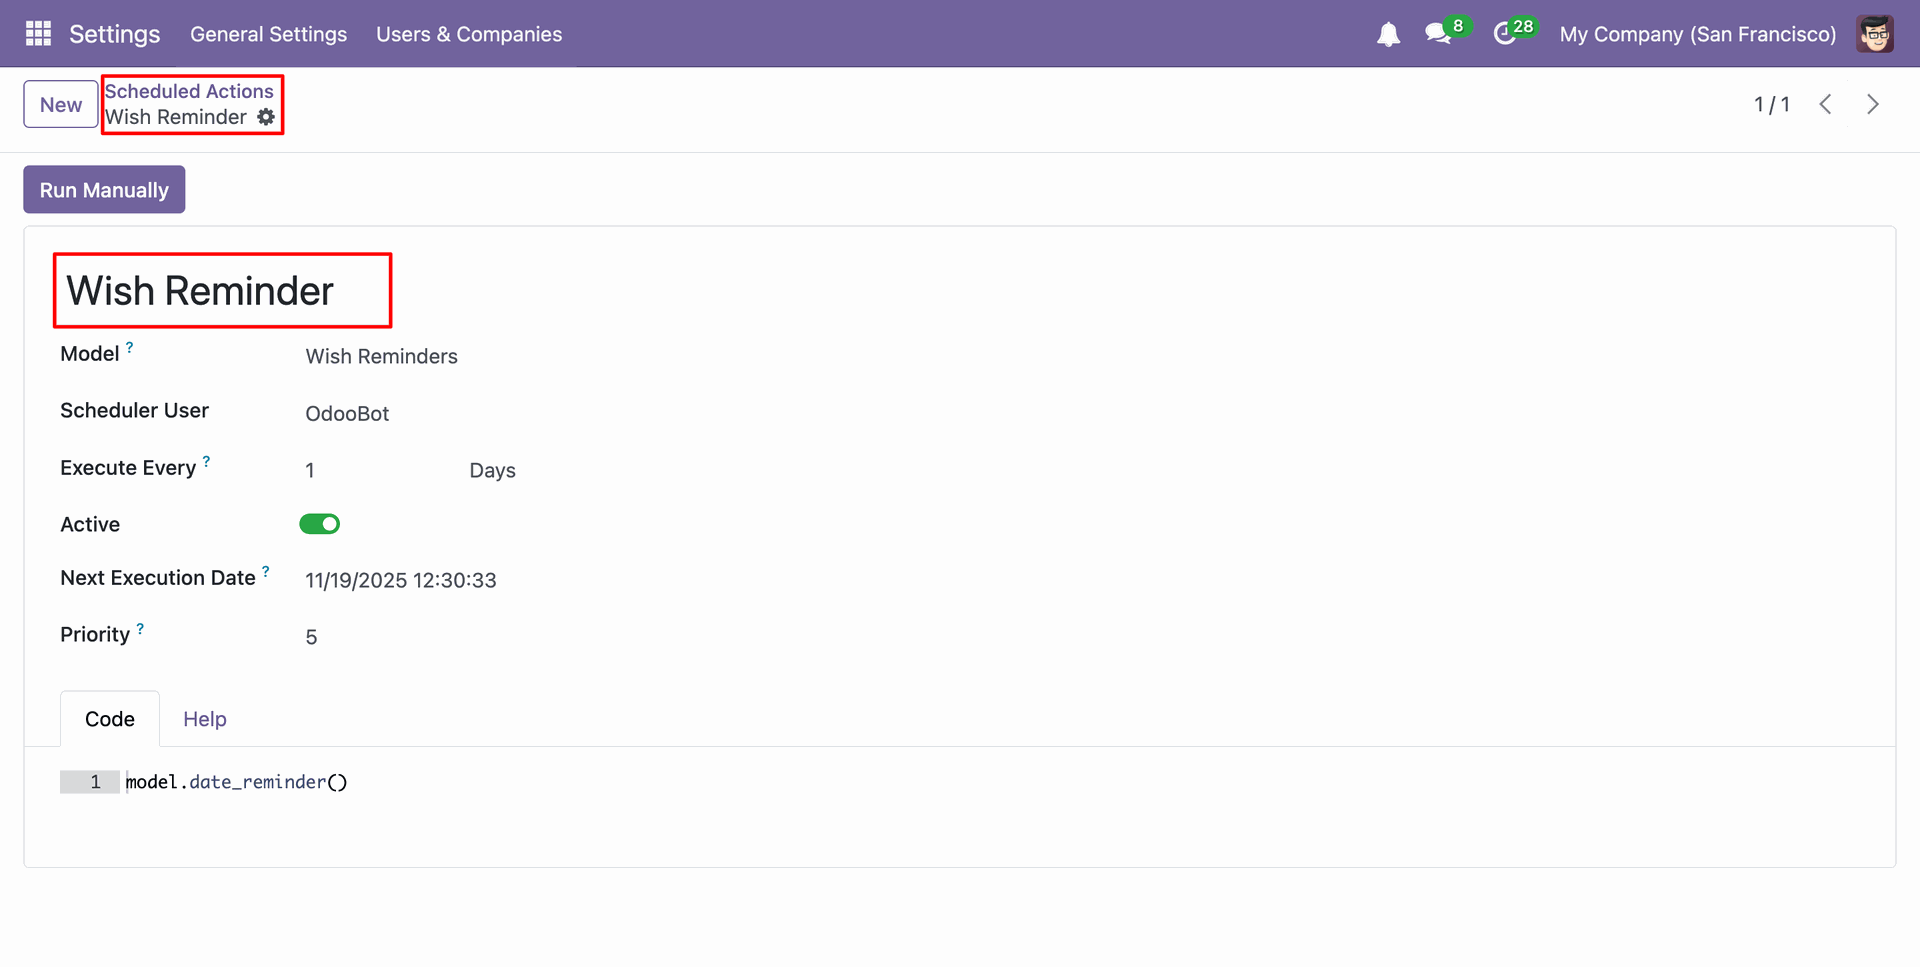
In the form view of the "Scheduled Actions", click on the "Run Manually" buttom.
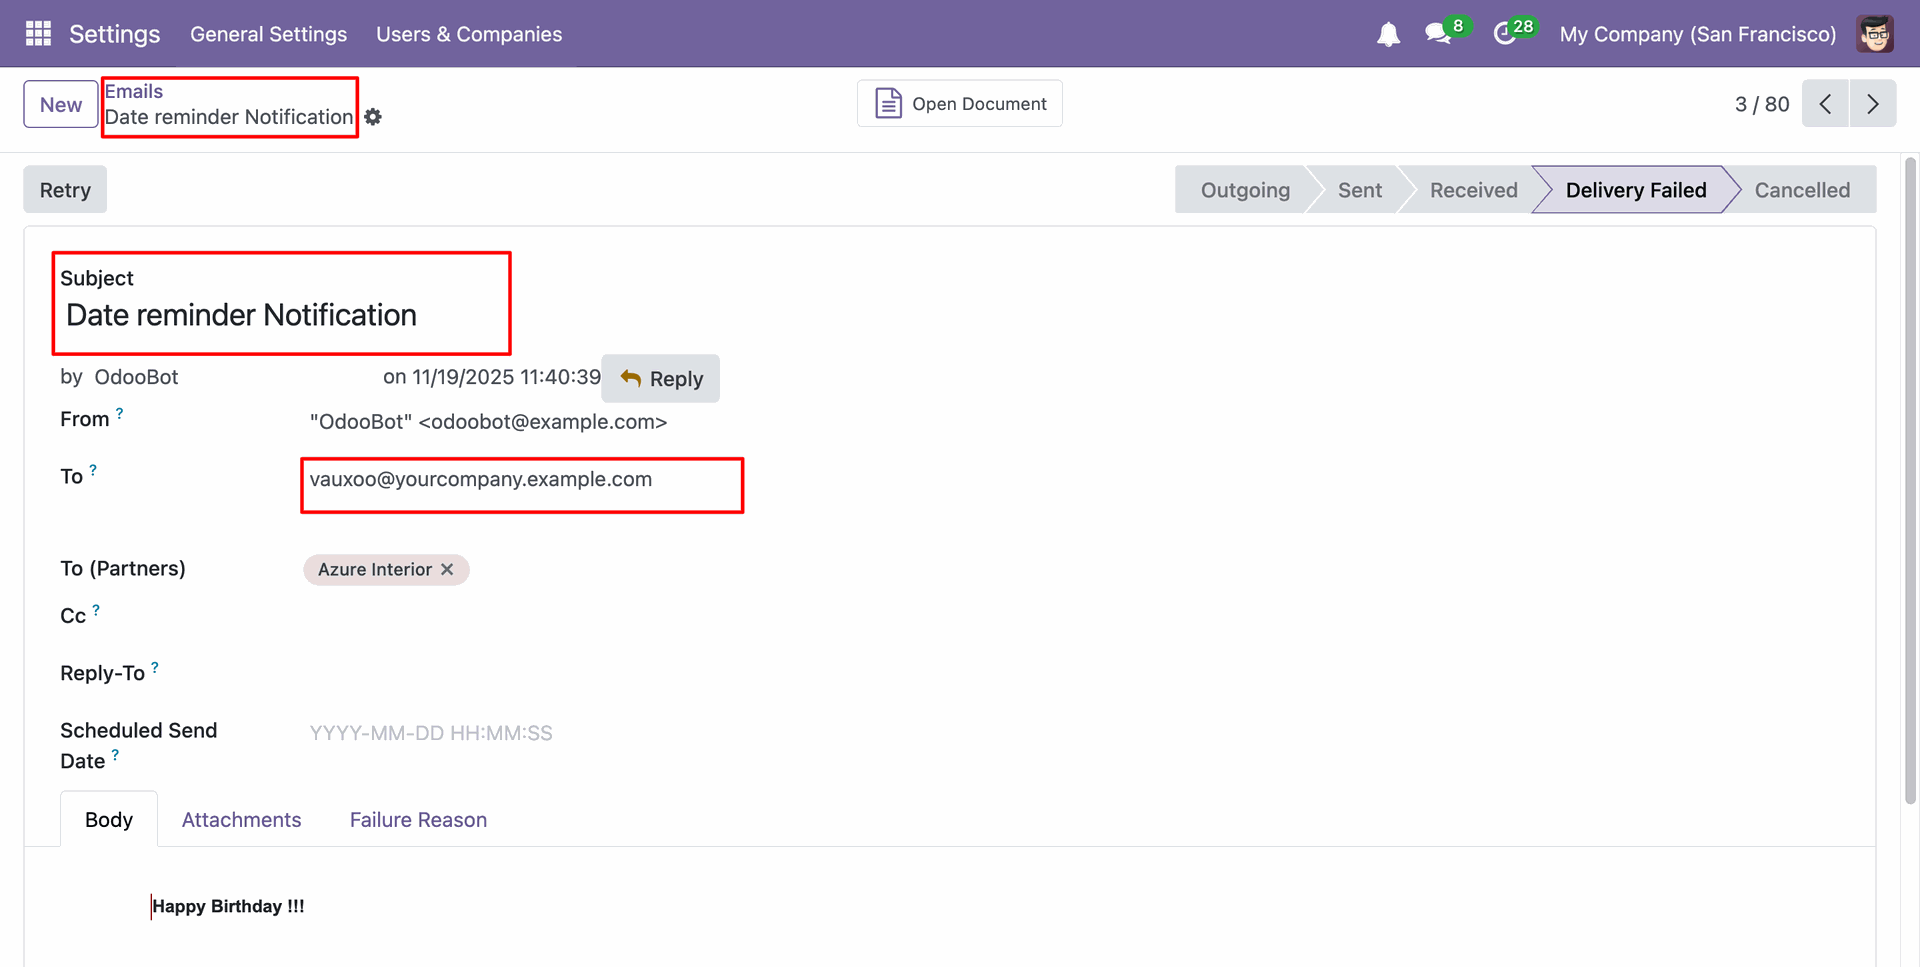
form view of the email.
Menu of the "Wish Reminders Today".
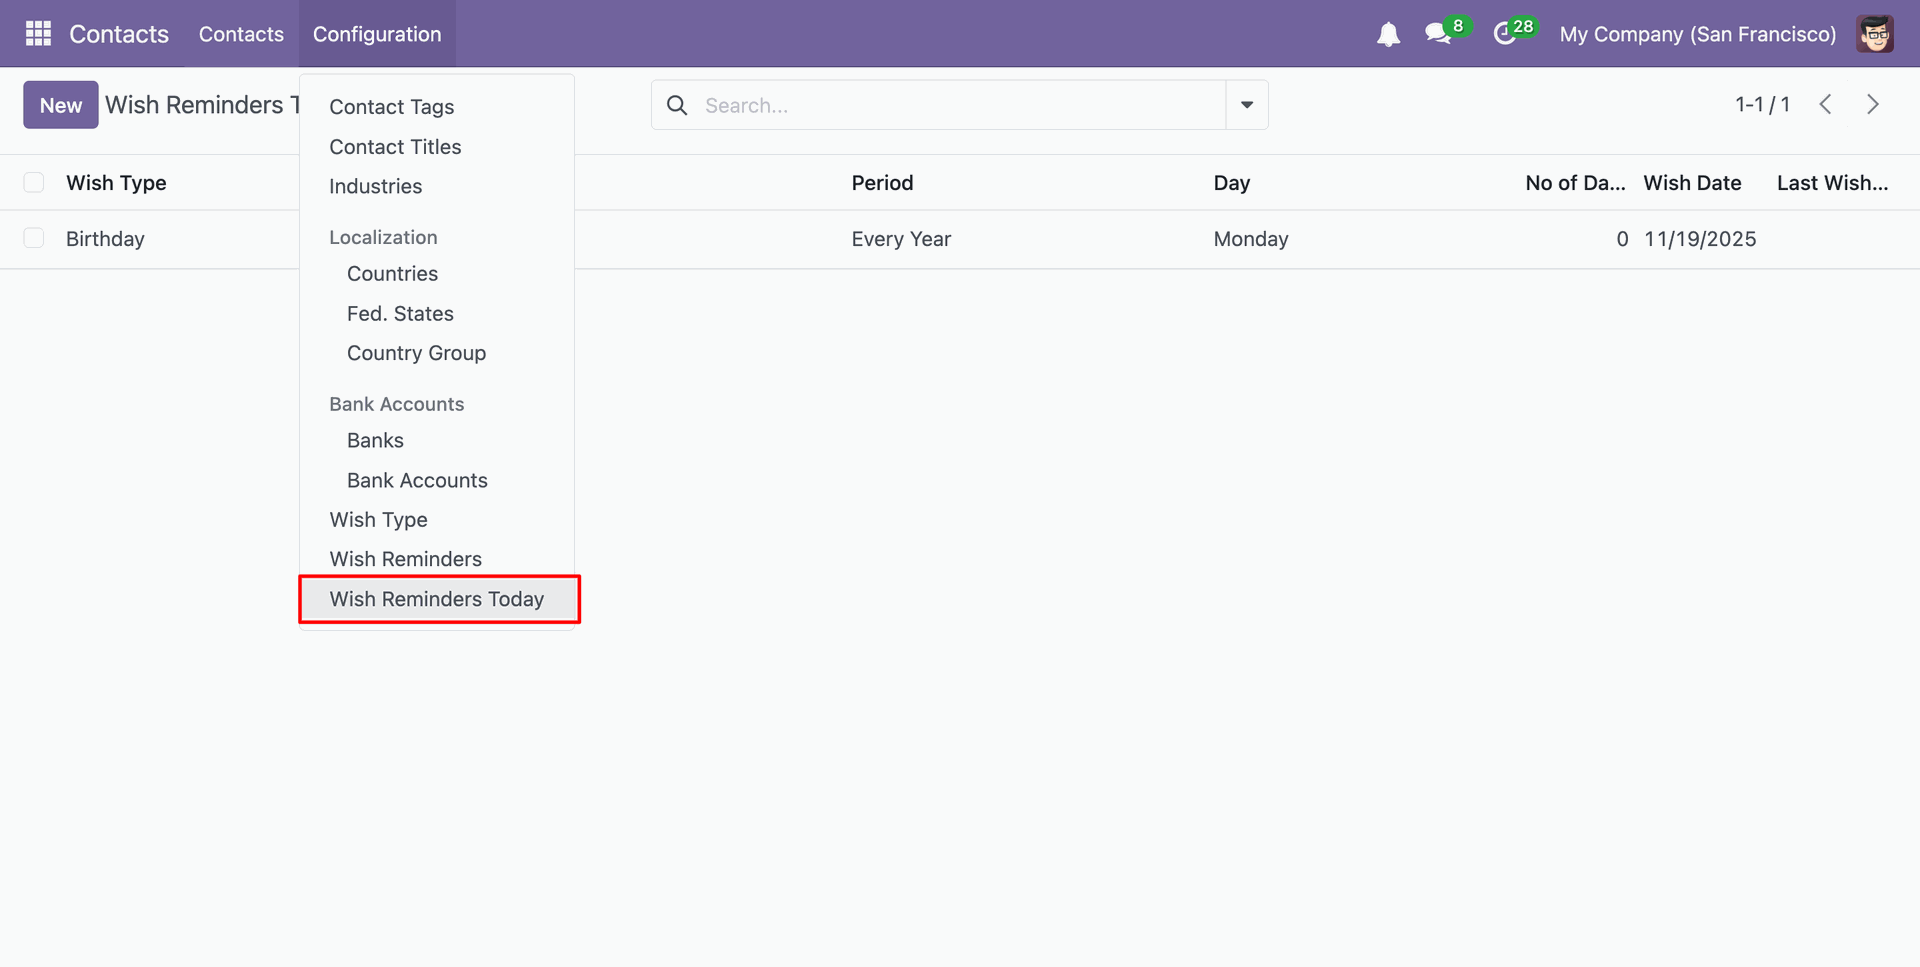
Tree of the "Wish Reminders Today".
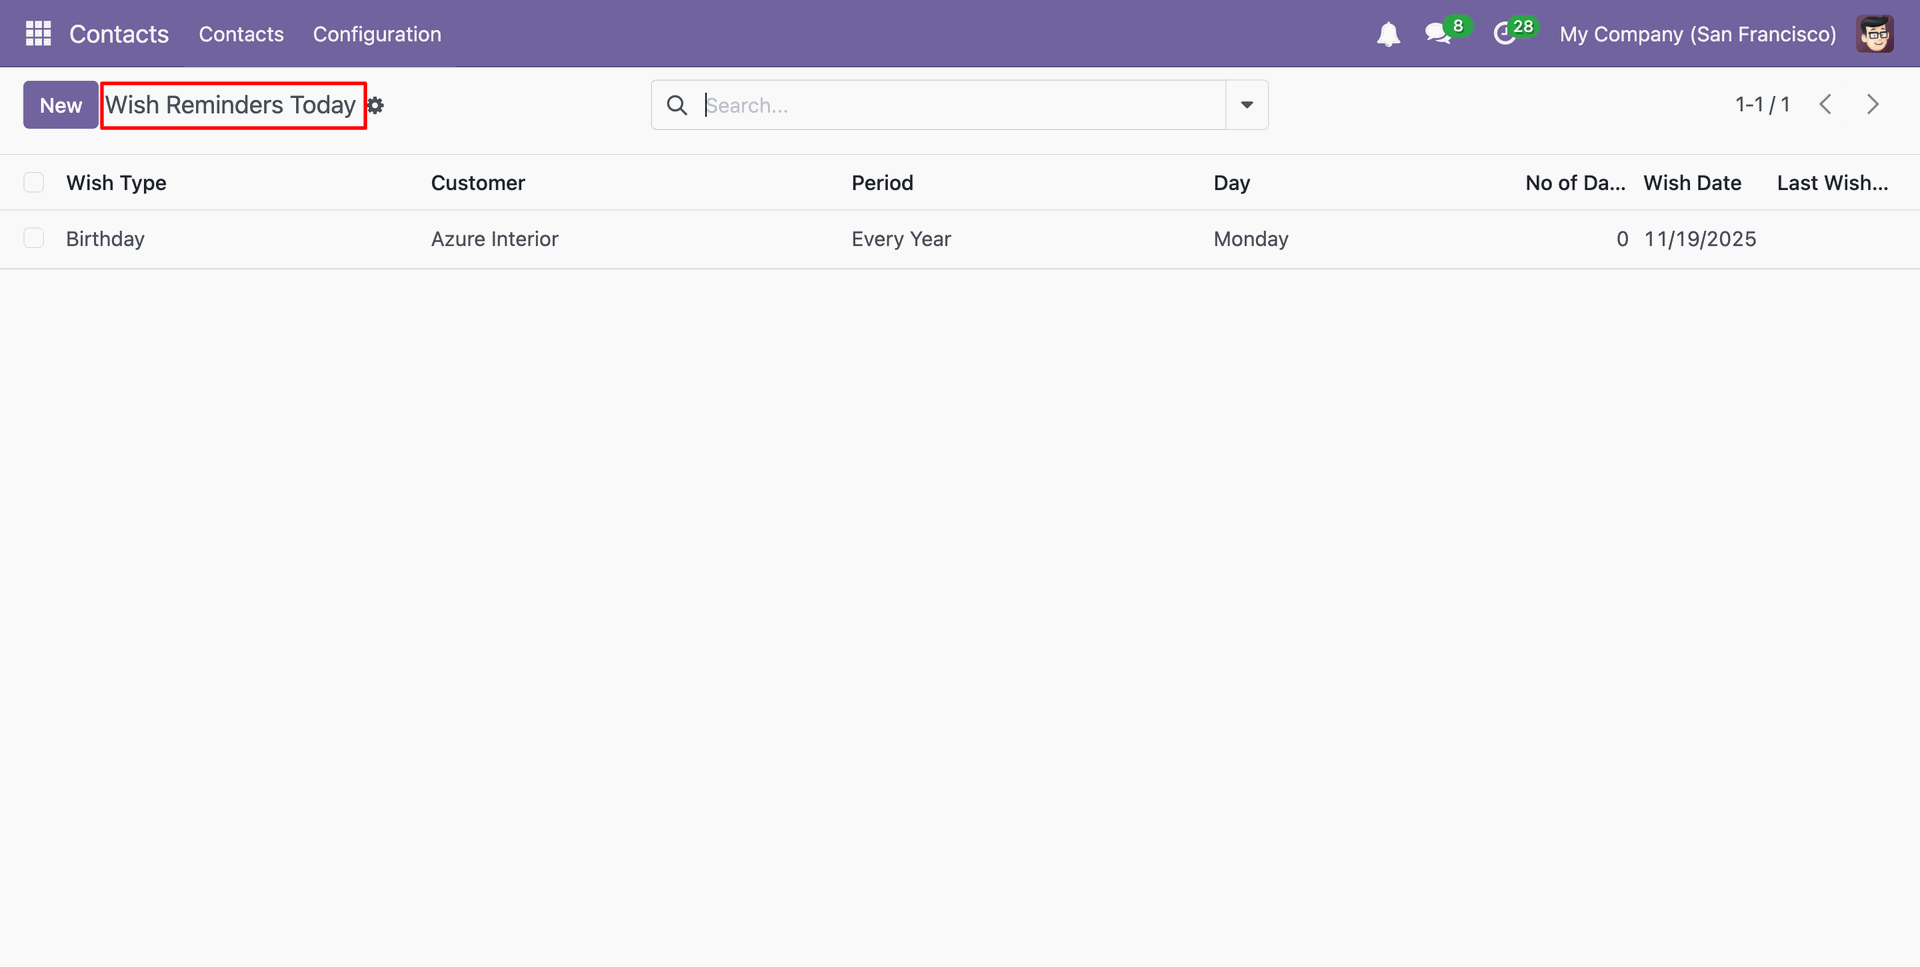
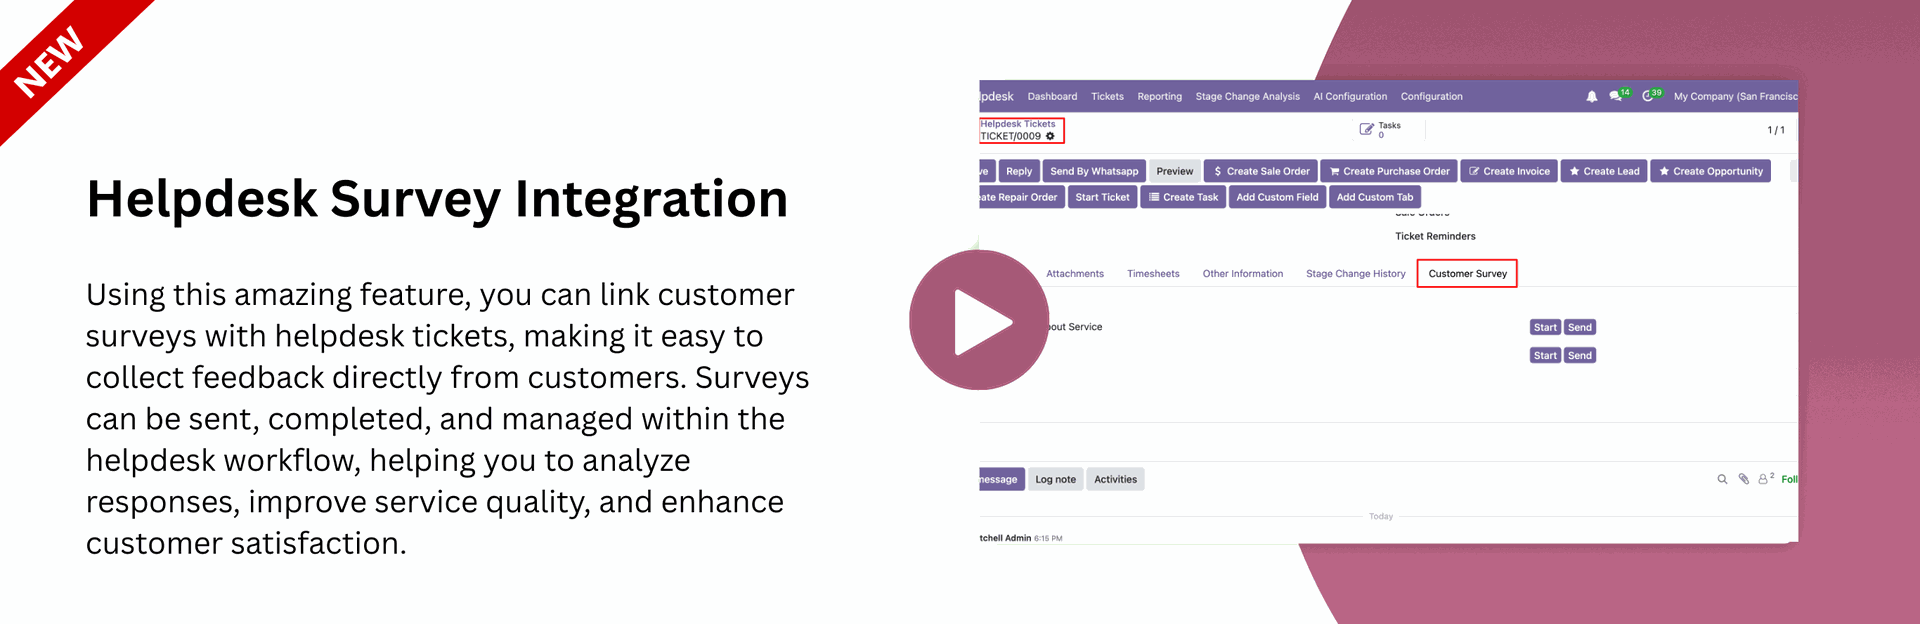
Go to the user settings and tick 'Helpdesk Survey' option.
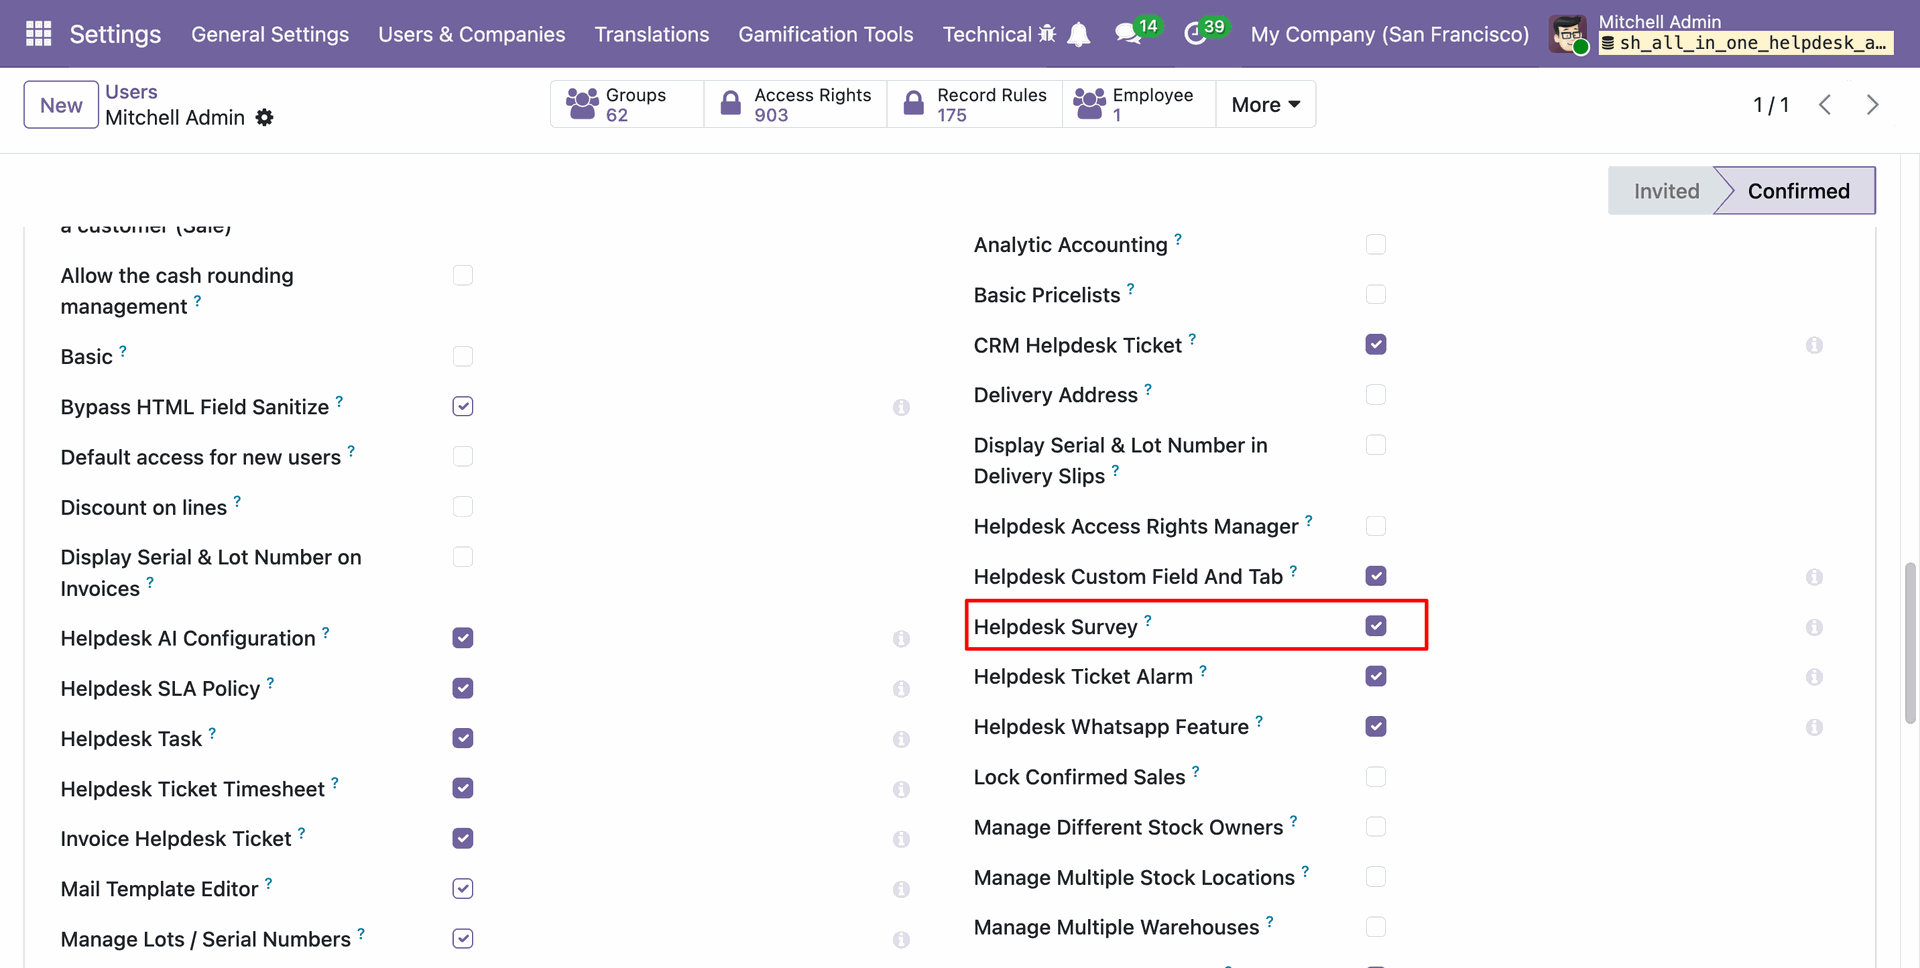
Go to Helpdesk Settings and select Survey: Email Template under the Survey Email Template.
In the Helpdesk form view, choose the survey from the Customer Survey tab.
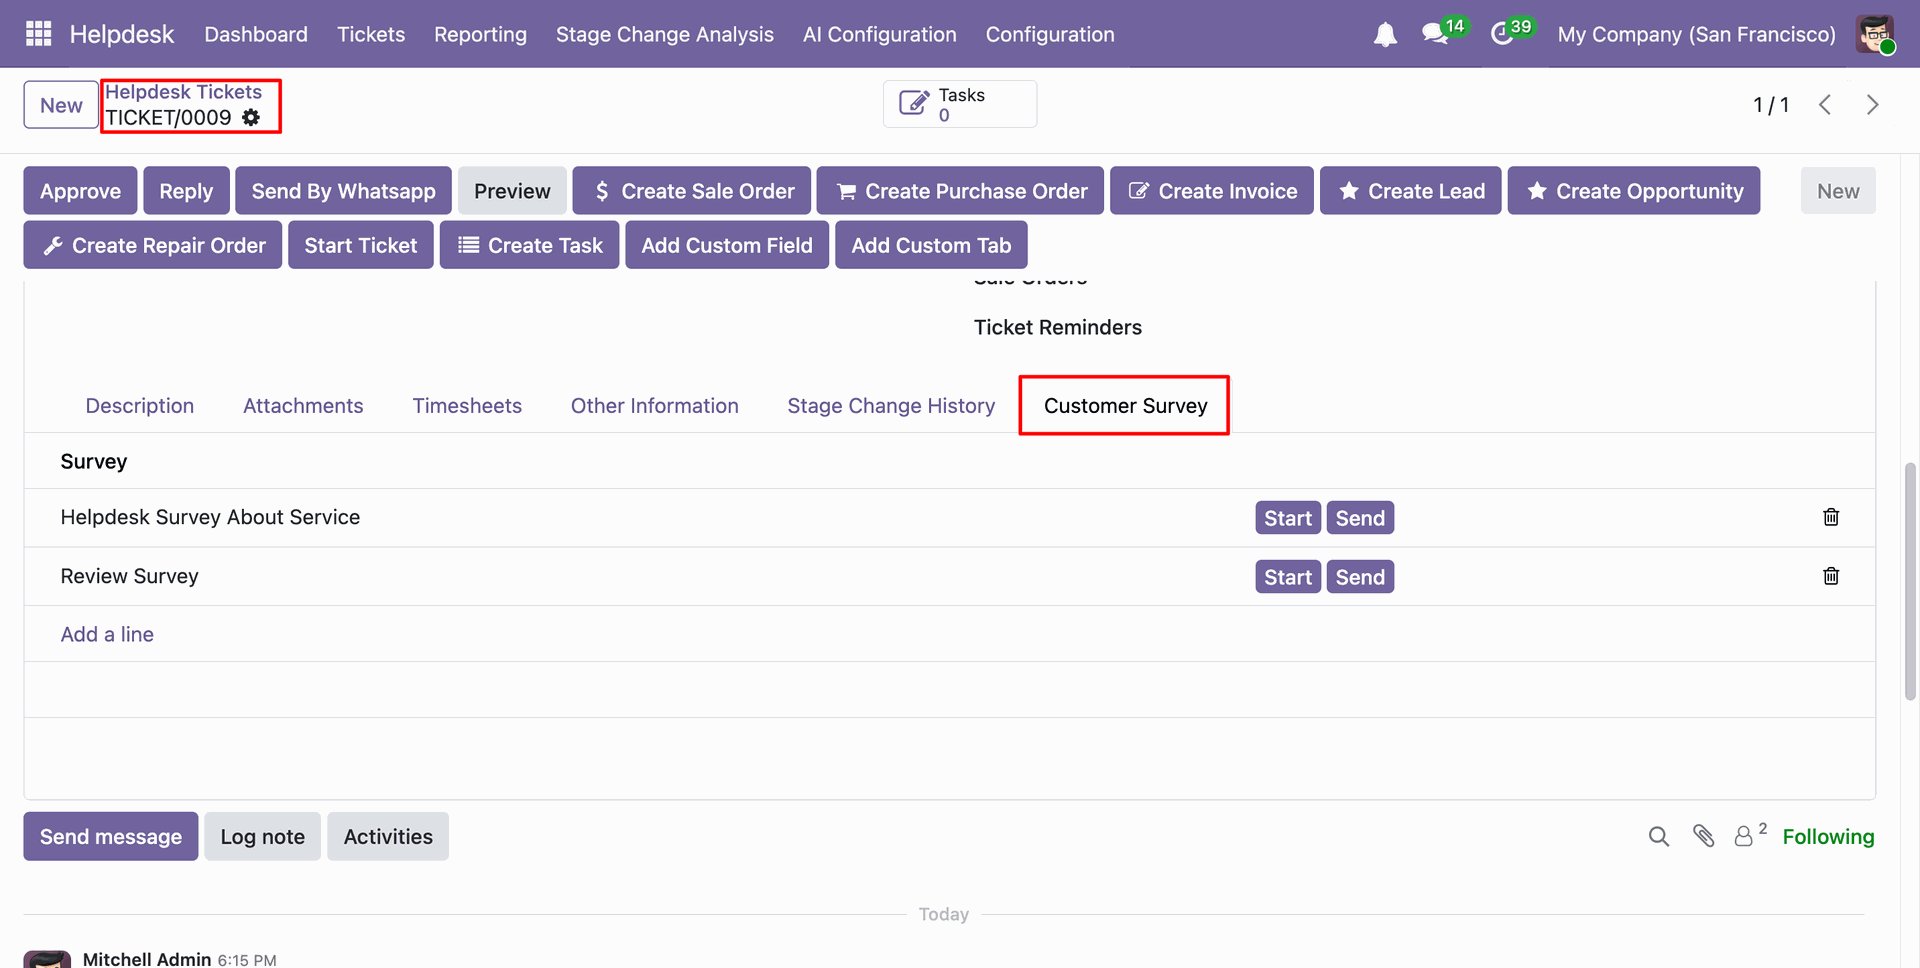
Click on the 'Start' button to begin the survey.
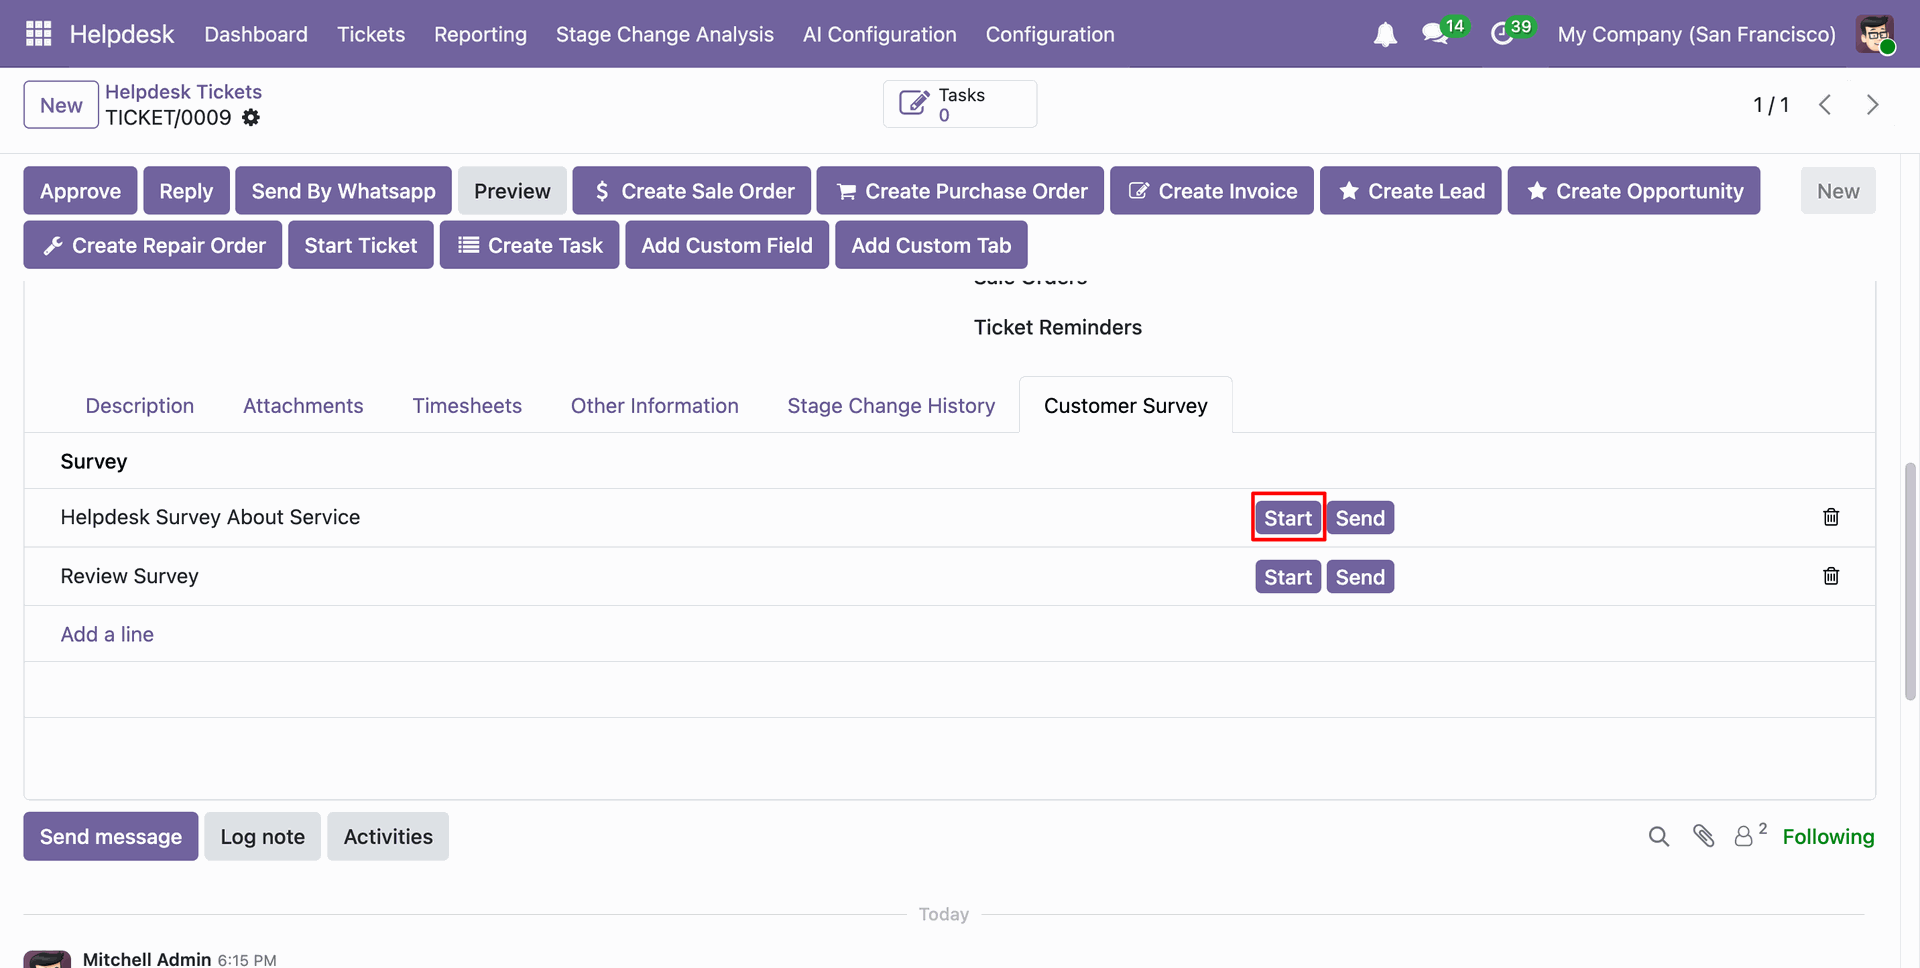
Complete the survey and clickon the 'Submit' button.
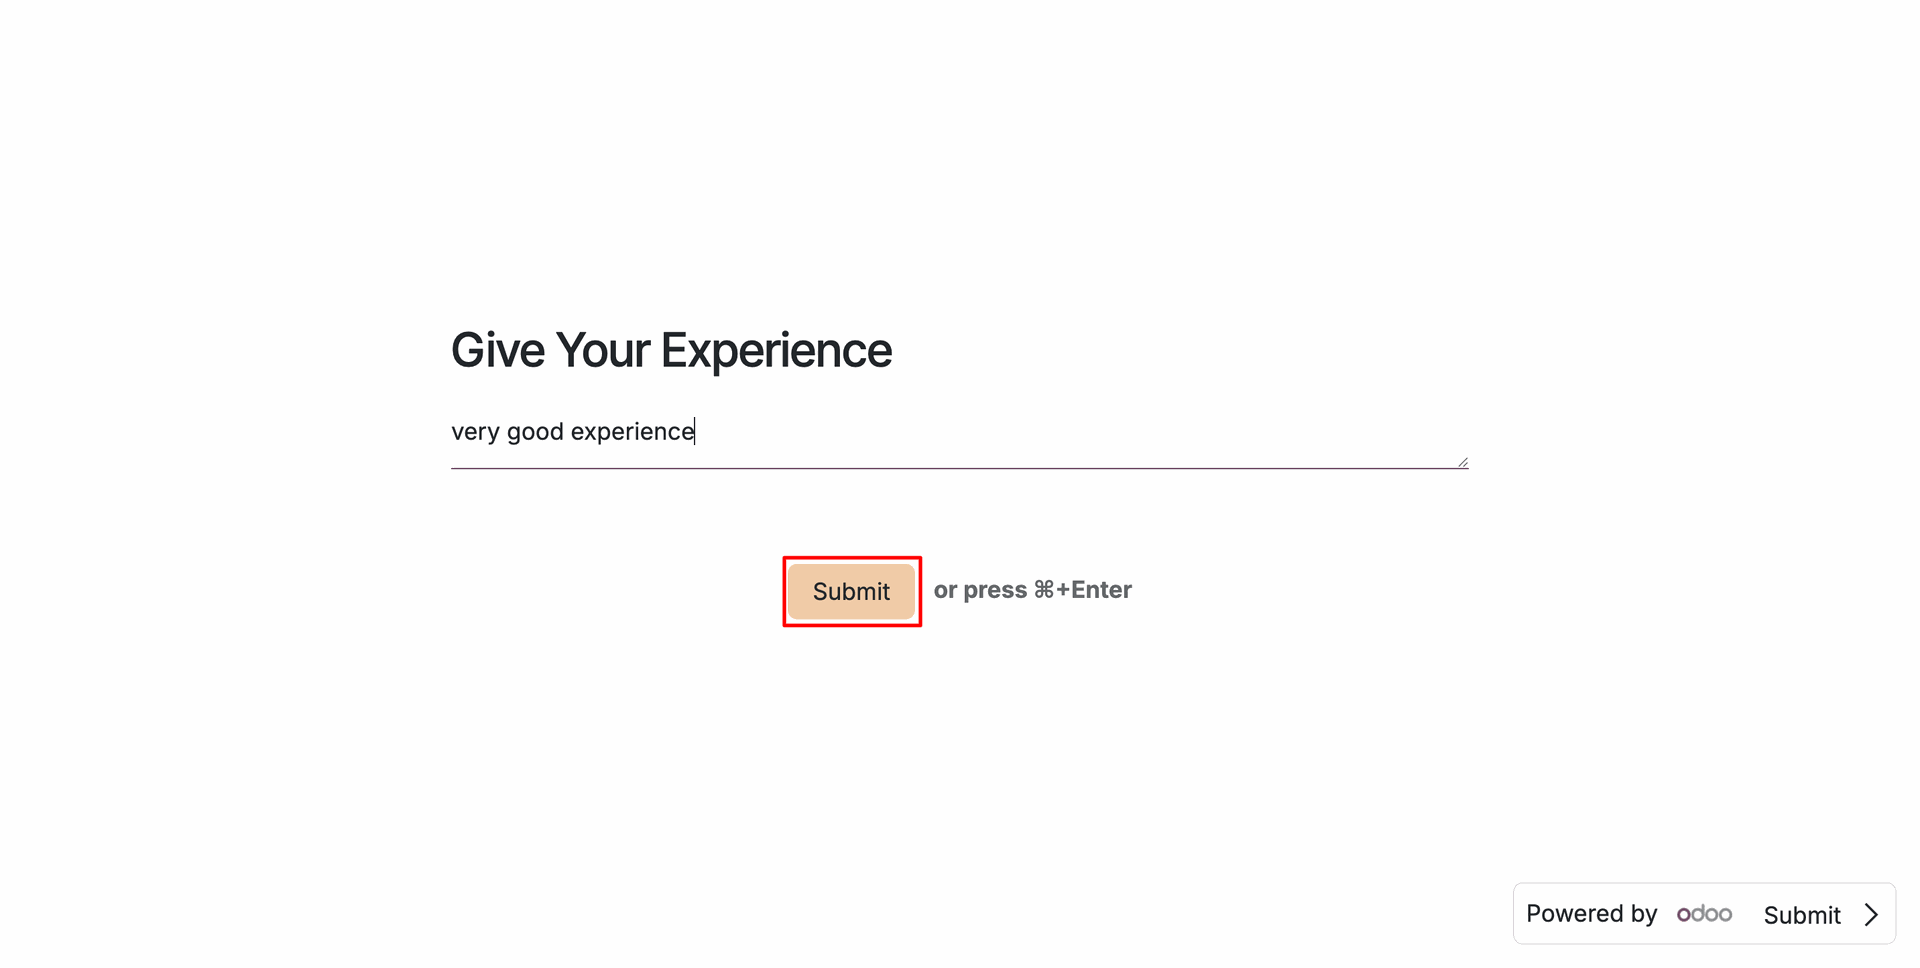
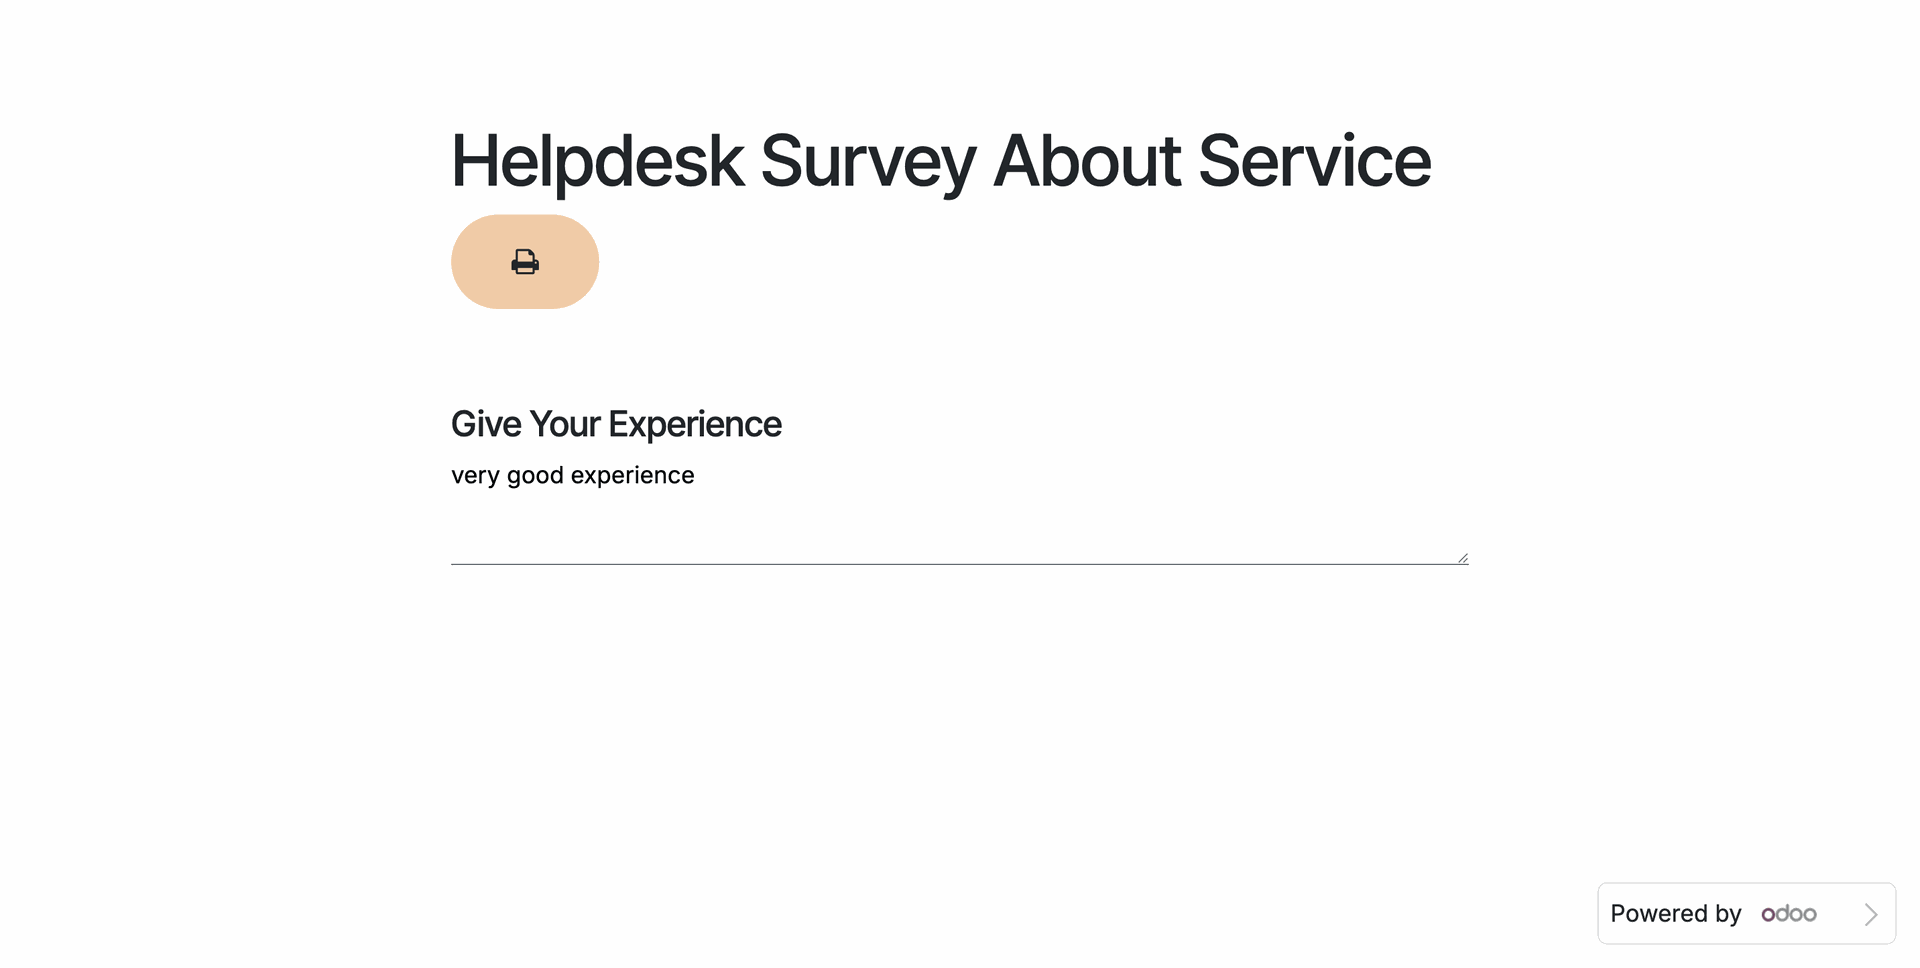
Click on the 'Print Answer' button to print the survey.
Here, you can view the survey responses.
You can print the response PDF by clicking the Print button.
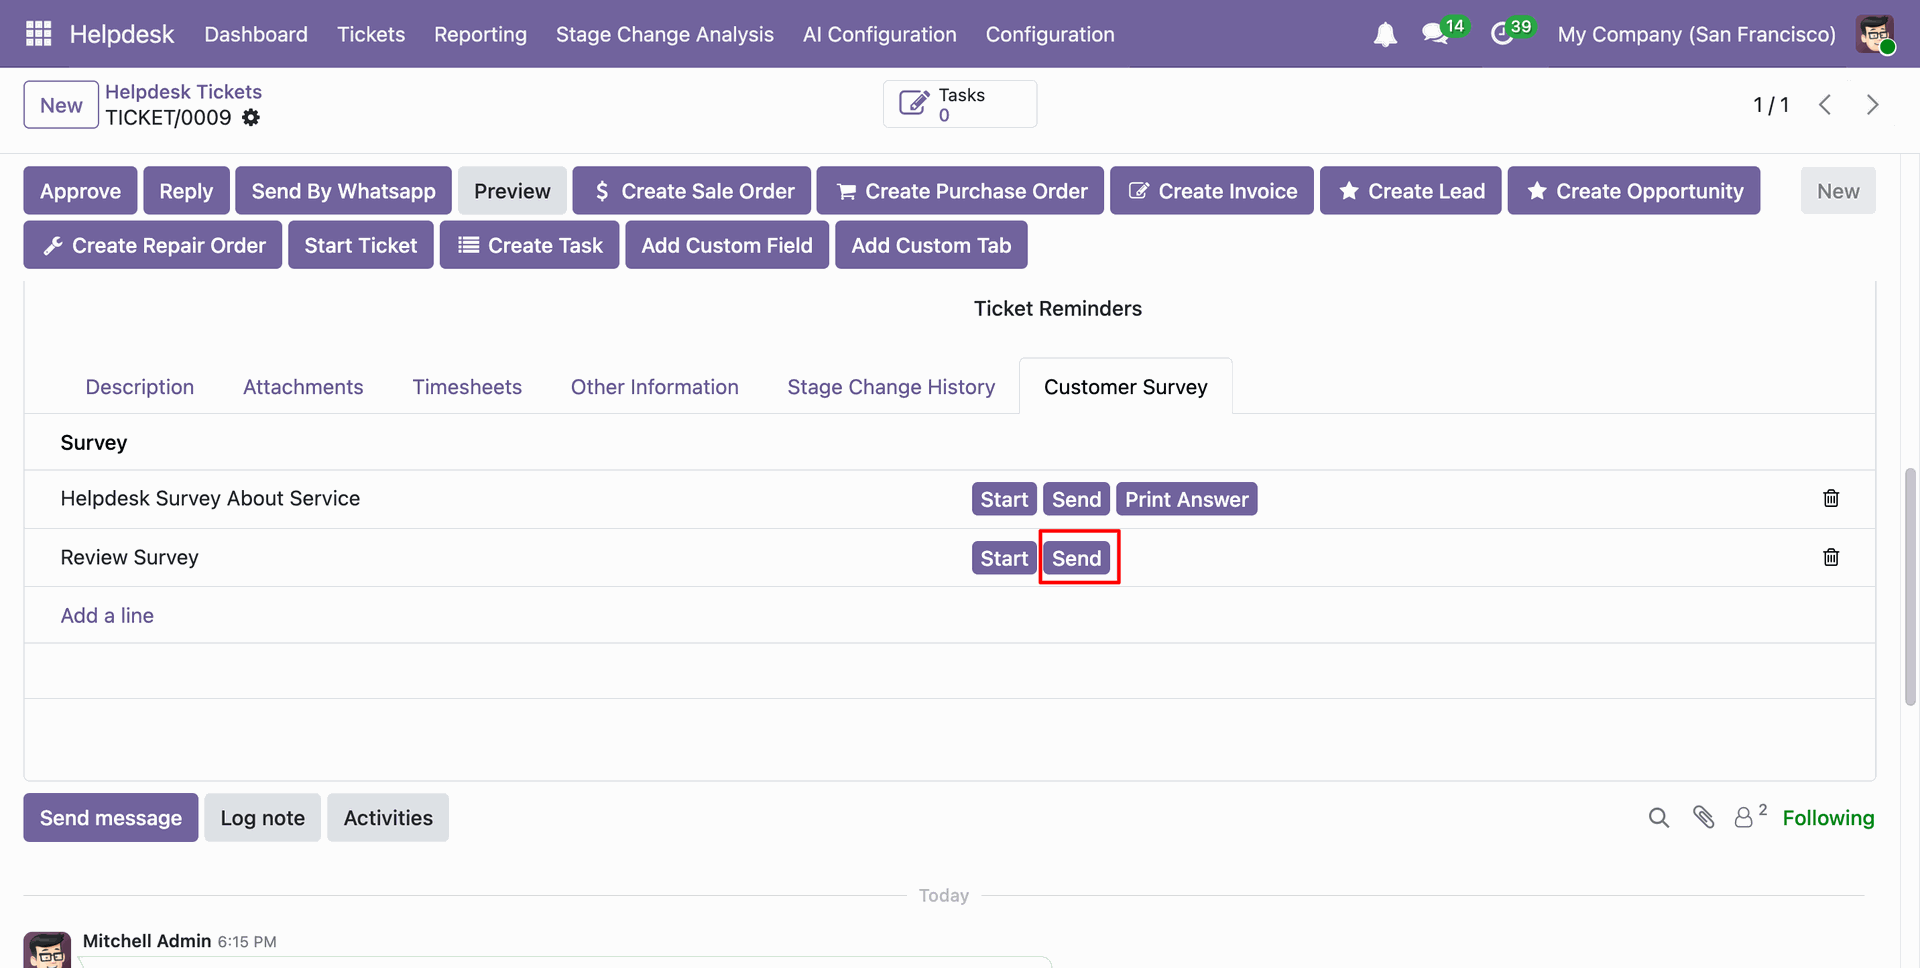
Click on the 'Send' button to send the survey via email.
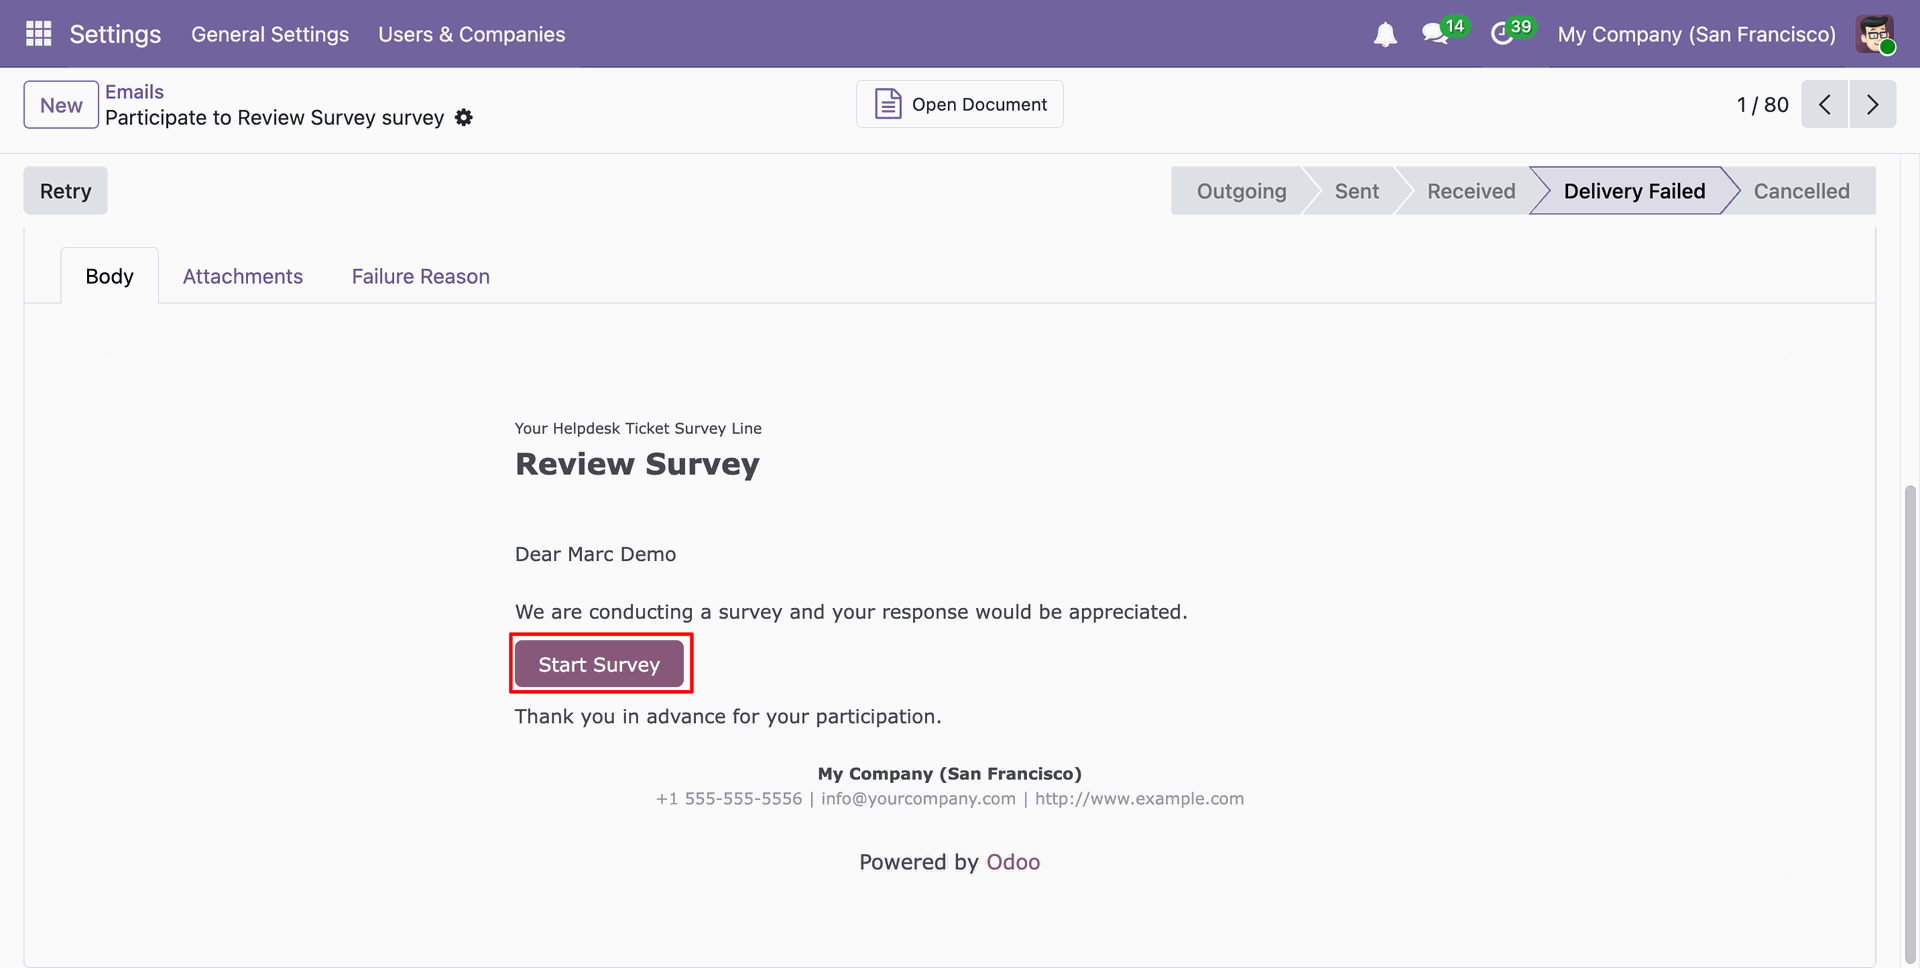
Survey email looks like below.
Click on the 'Start Survey' button to begin the survey.
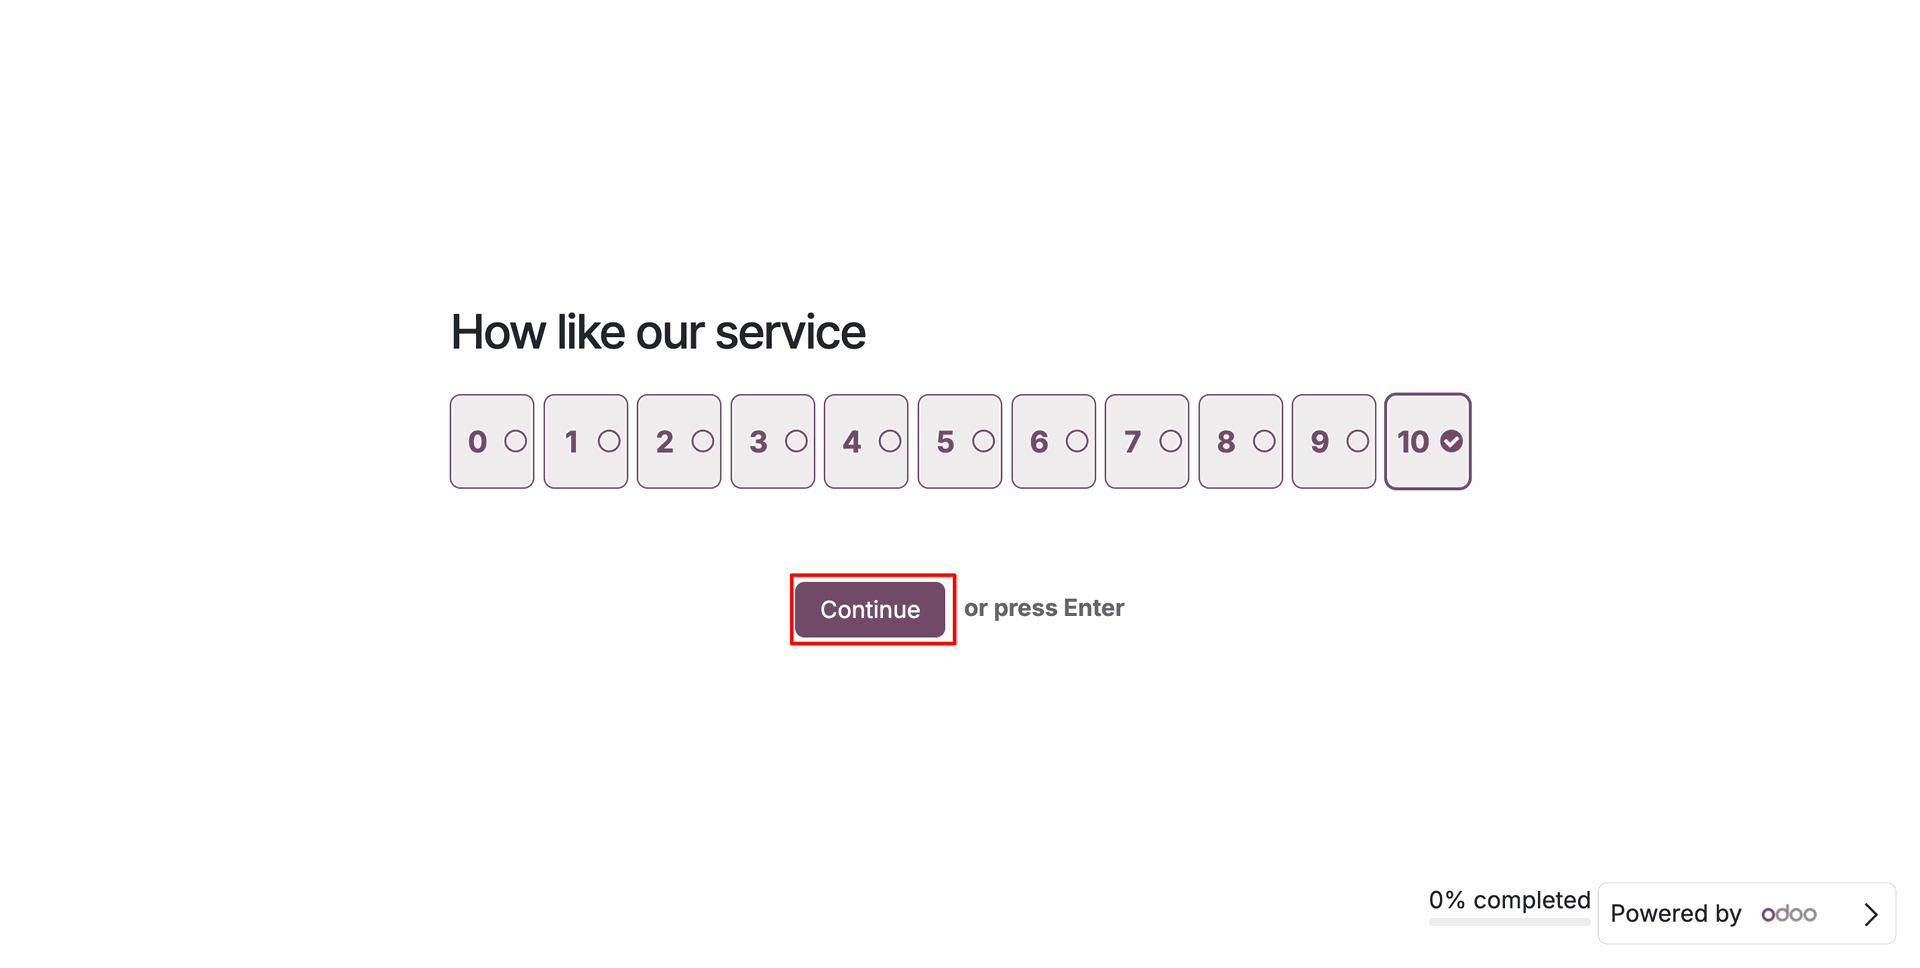
Fill the survey.
Click on the 'Print Answer' button to print the survey.
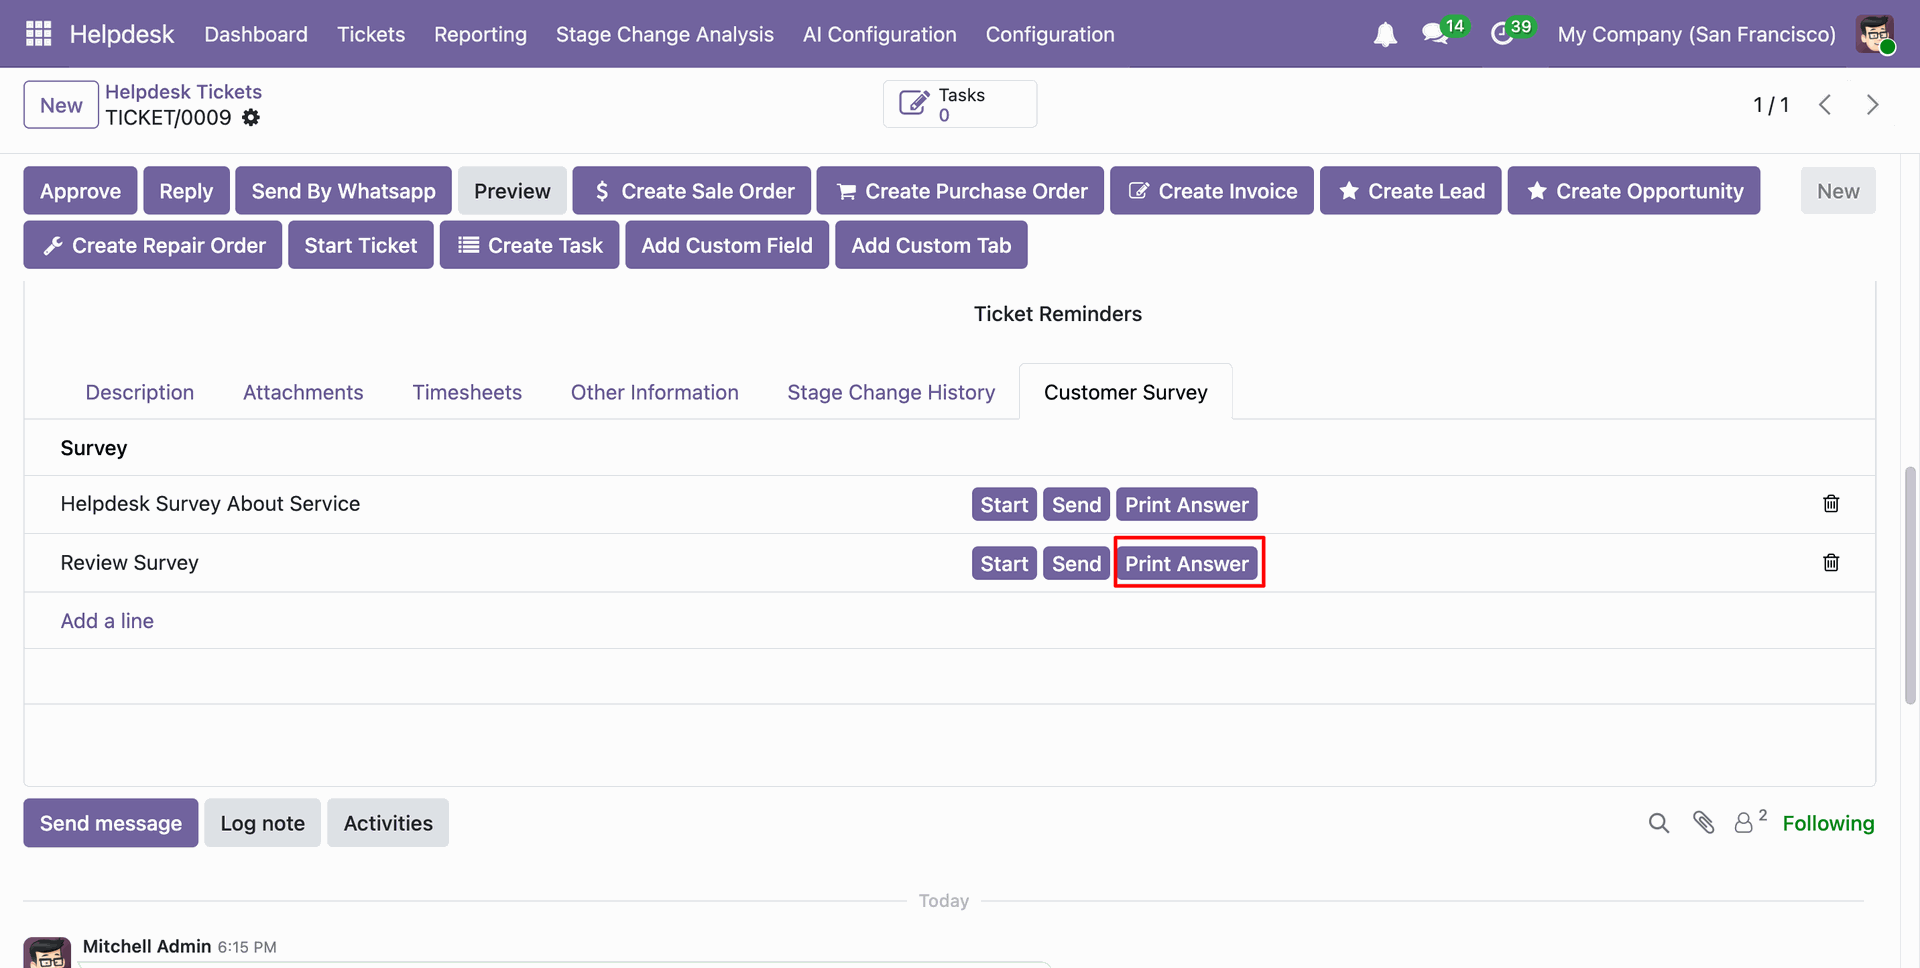
Here, you can view the survey responses.
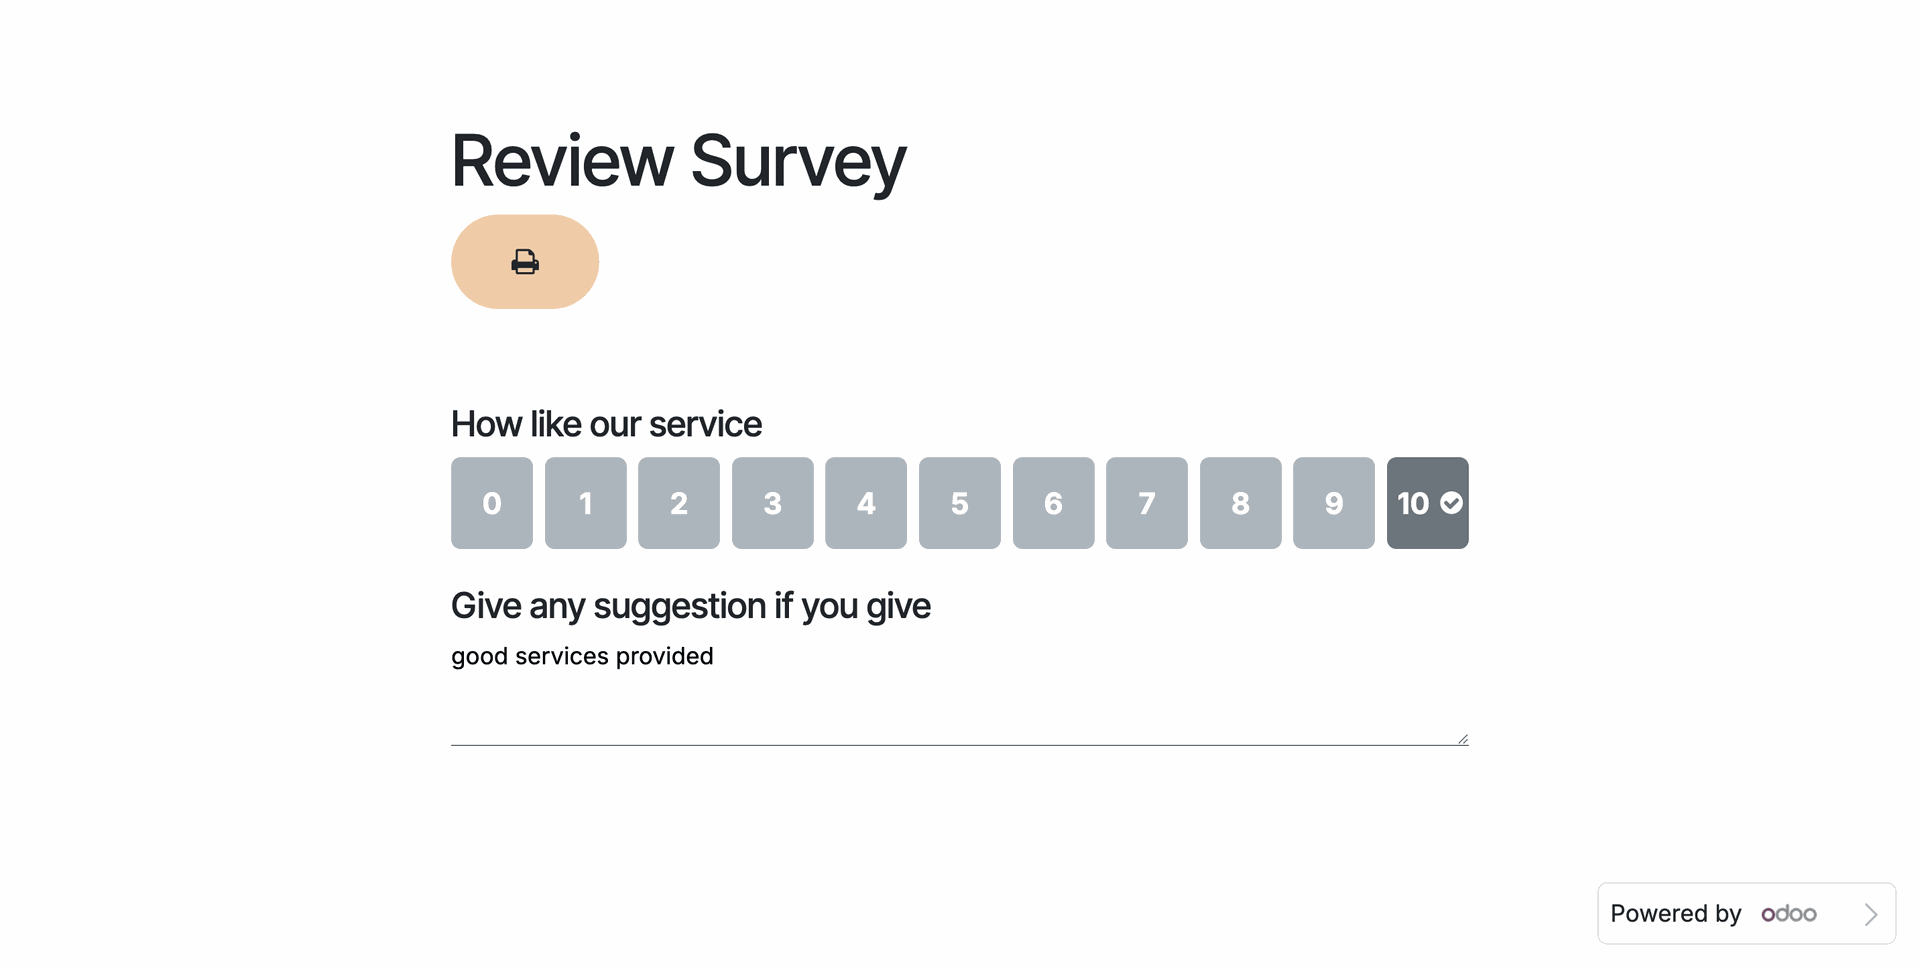
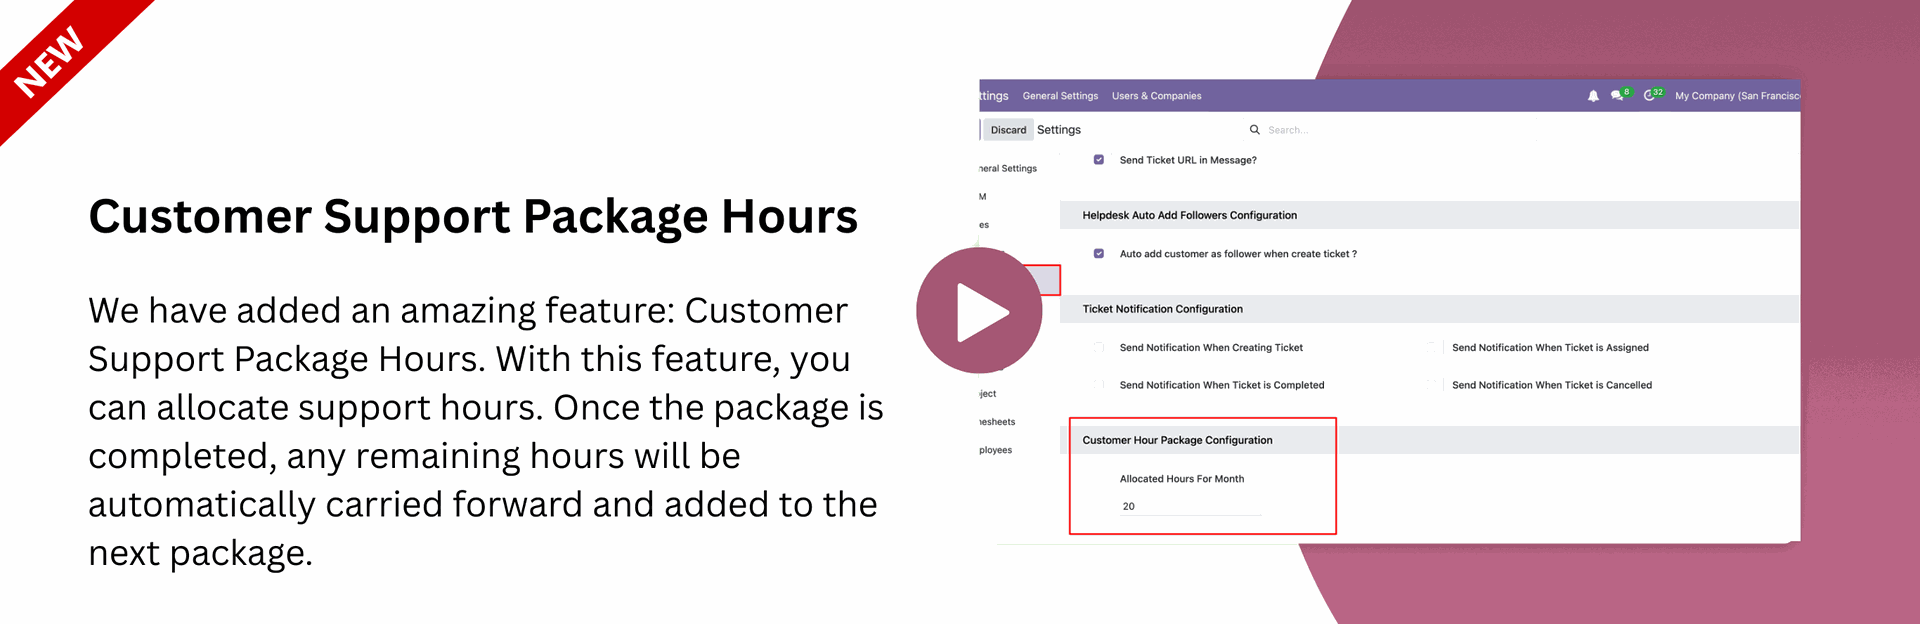
Go to the Helpdesk configuration and add the 'Allocation Hours For Month' under the 'Customer Hour Package Configuration'.
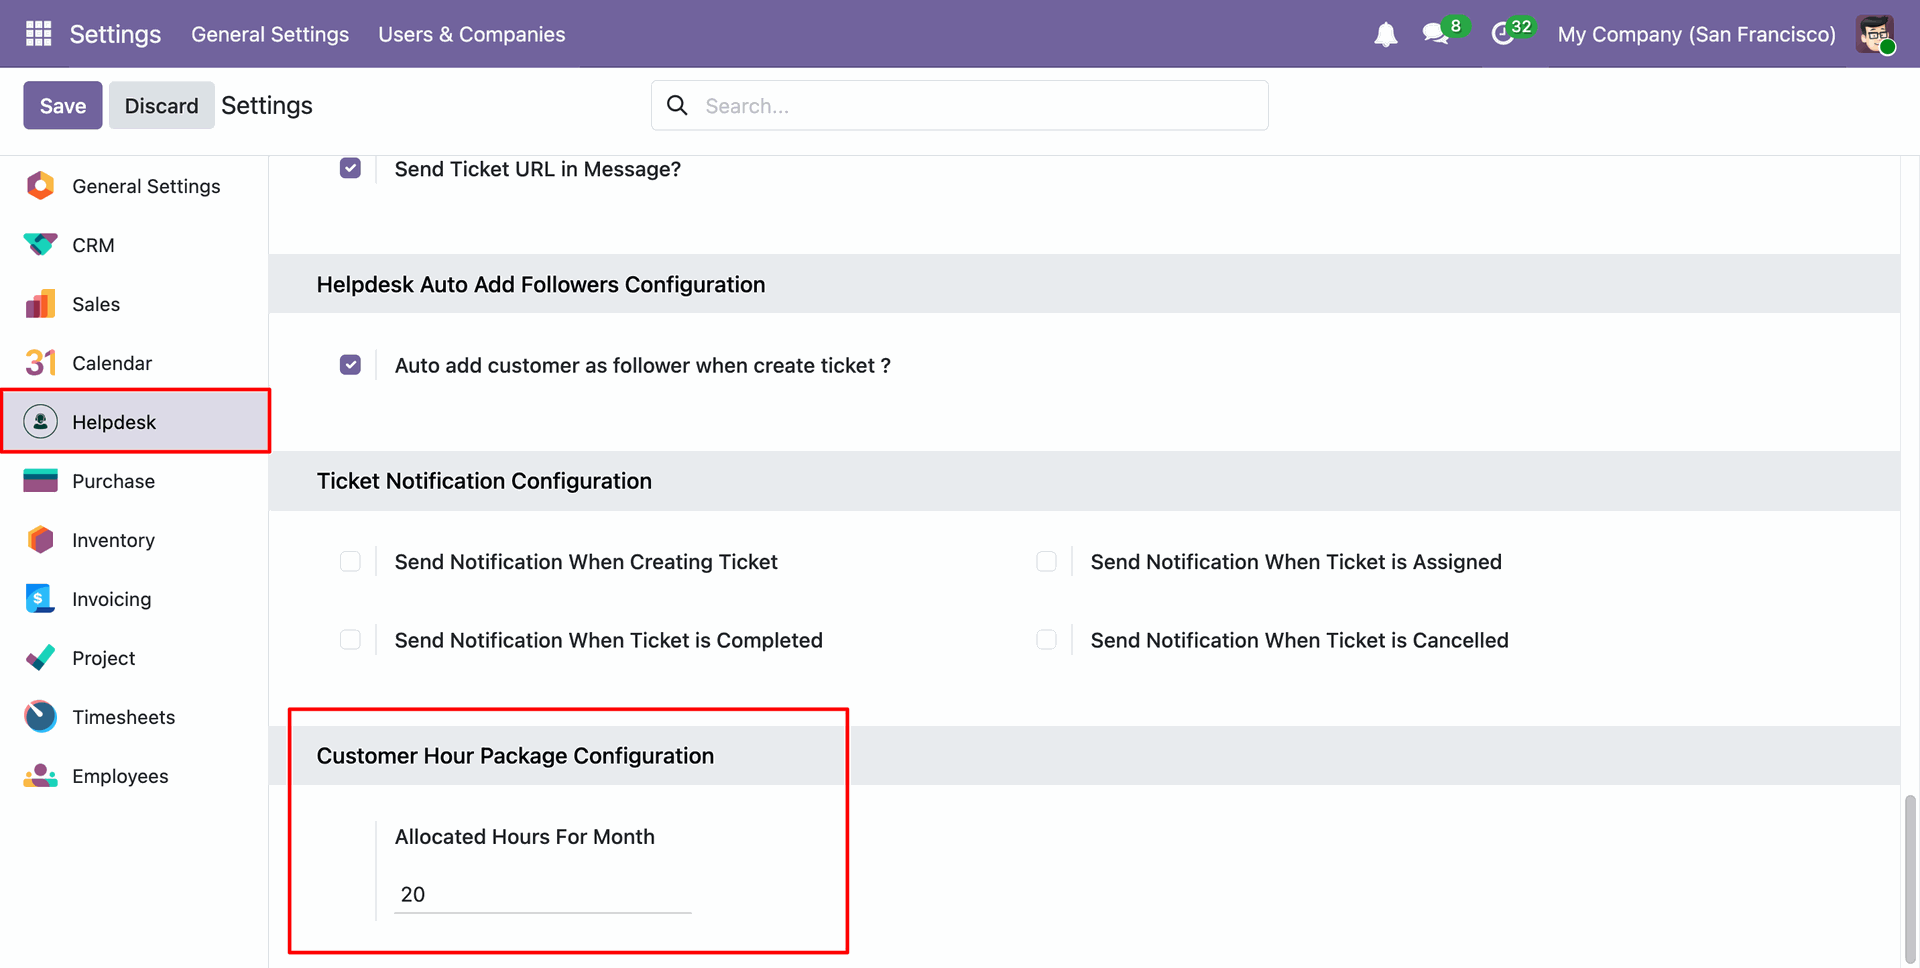
In the Contact form view, you can see the 'Allocated Hours for
the Month' and package details under the 'Hour Packages' tab.
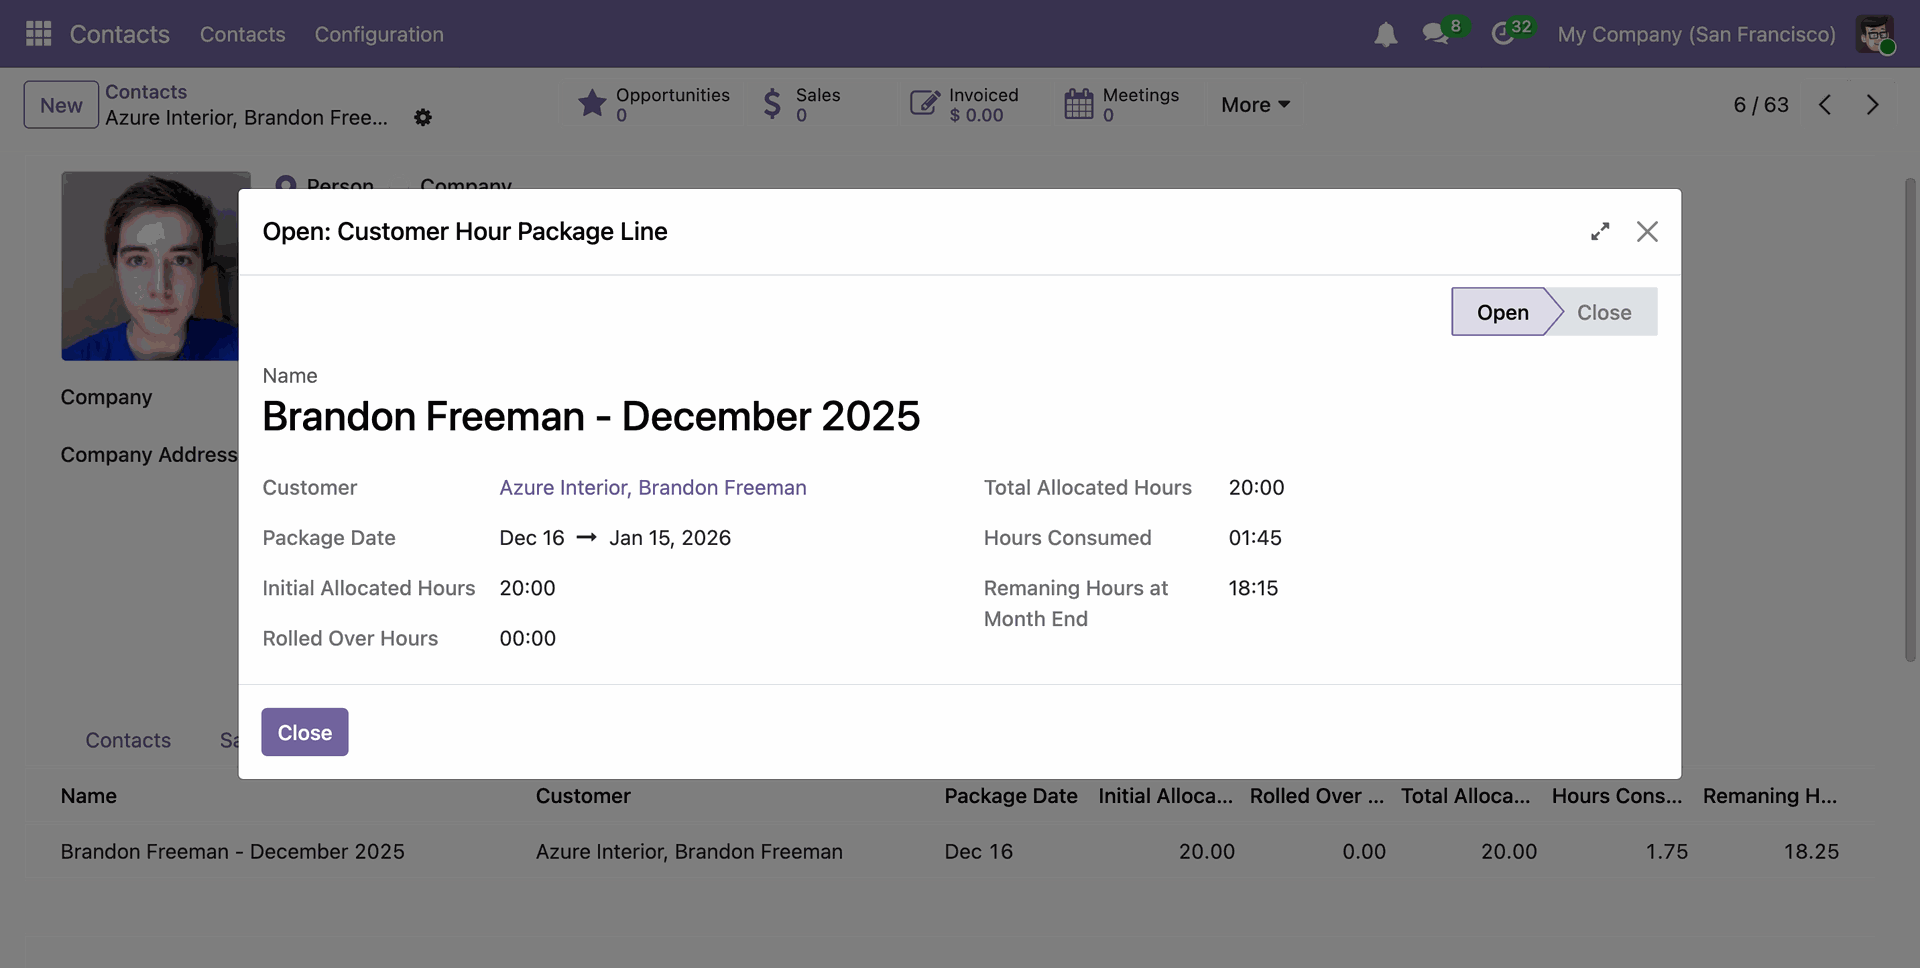
Click on the package
After that, the 'Customer Hour Package Line' pop-up will appear. Here, you can view all the related details.
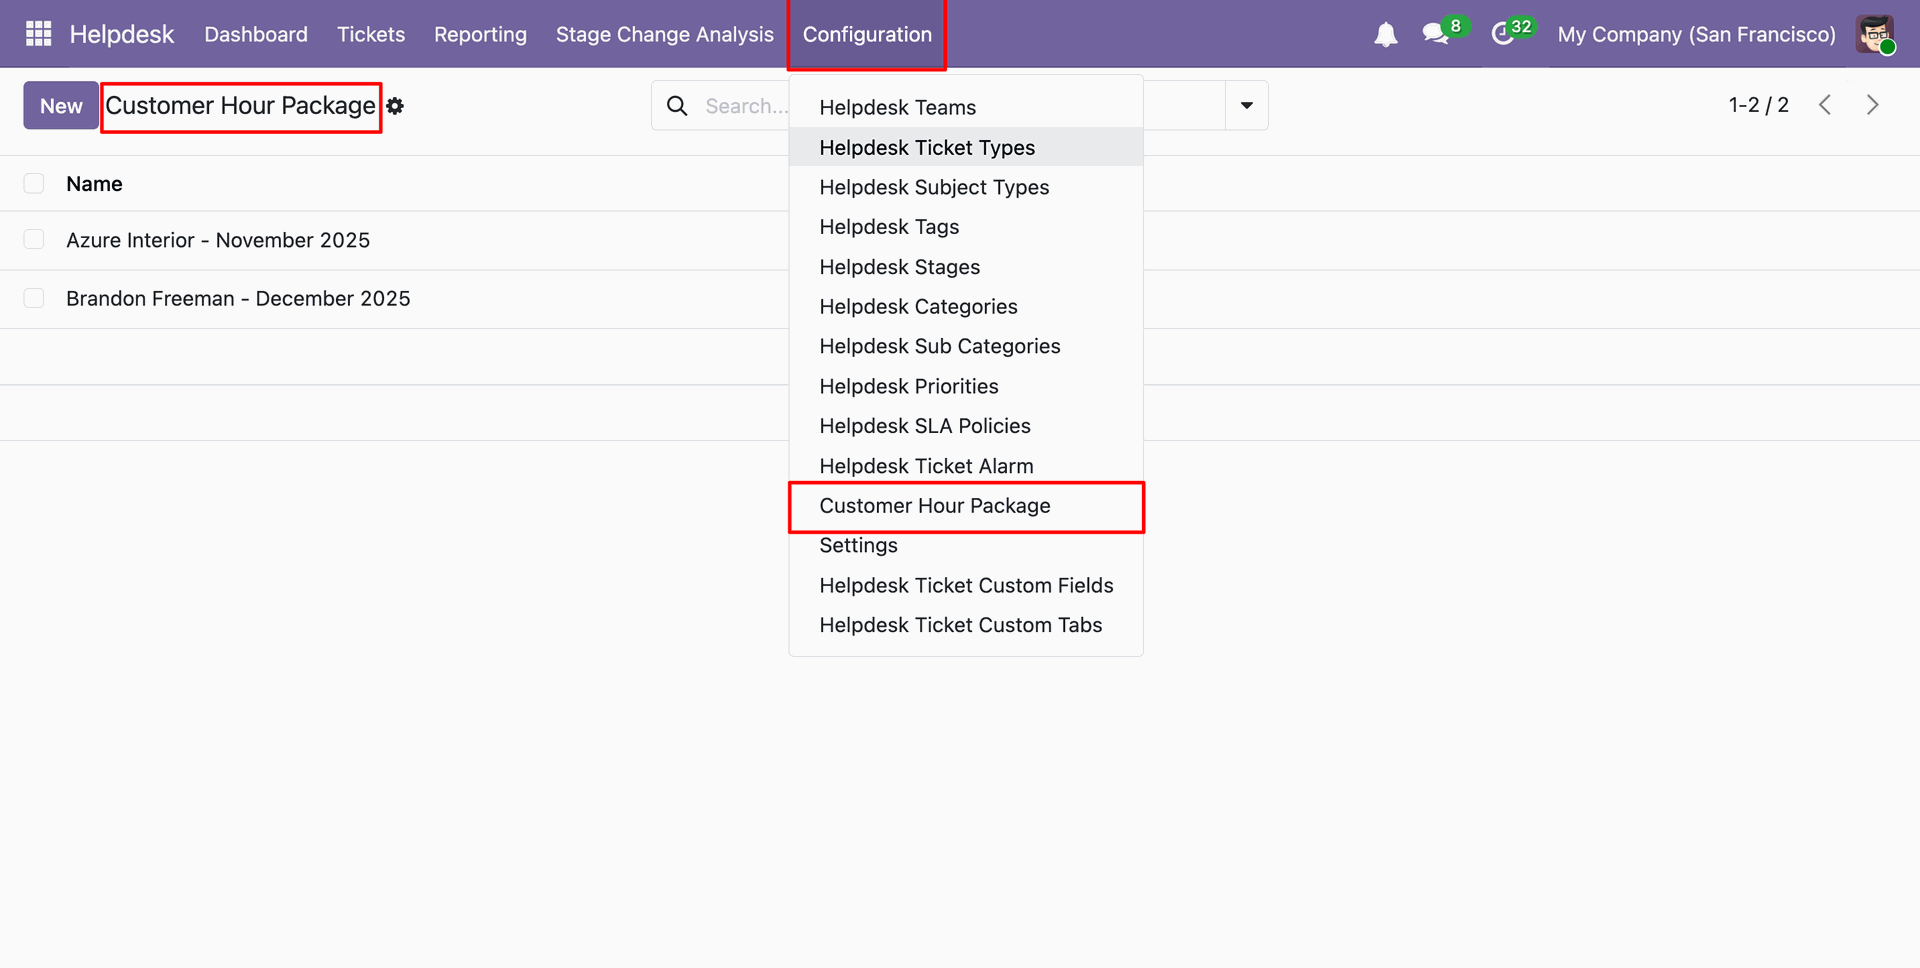
Menu and tree view of the 'Customer Hour Package'.
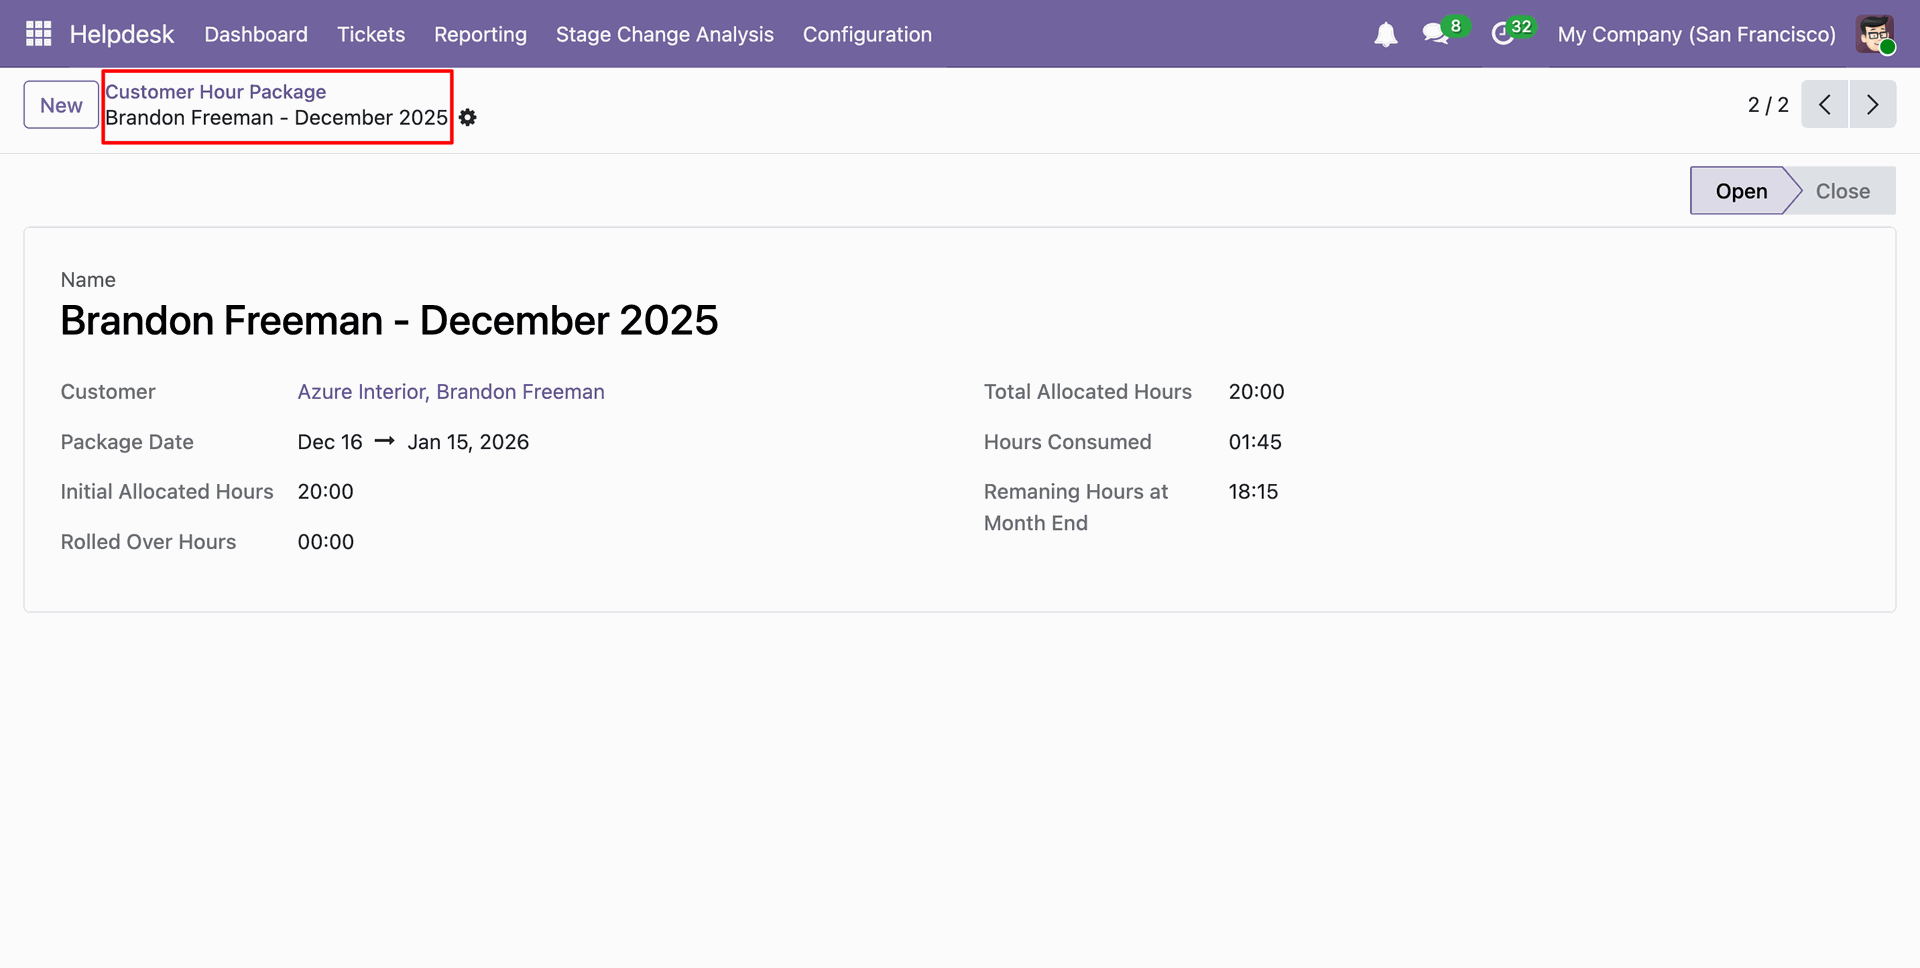
Form view of the 'Customer Hour Package'.
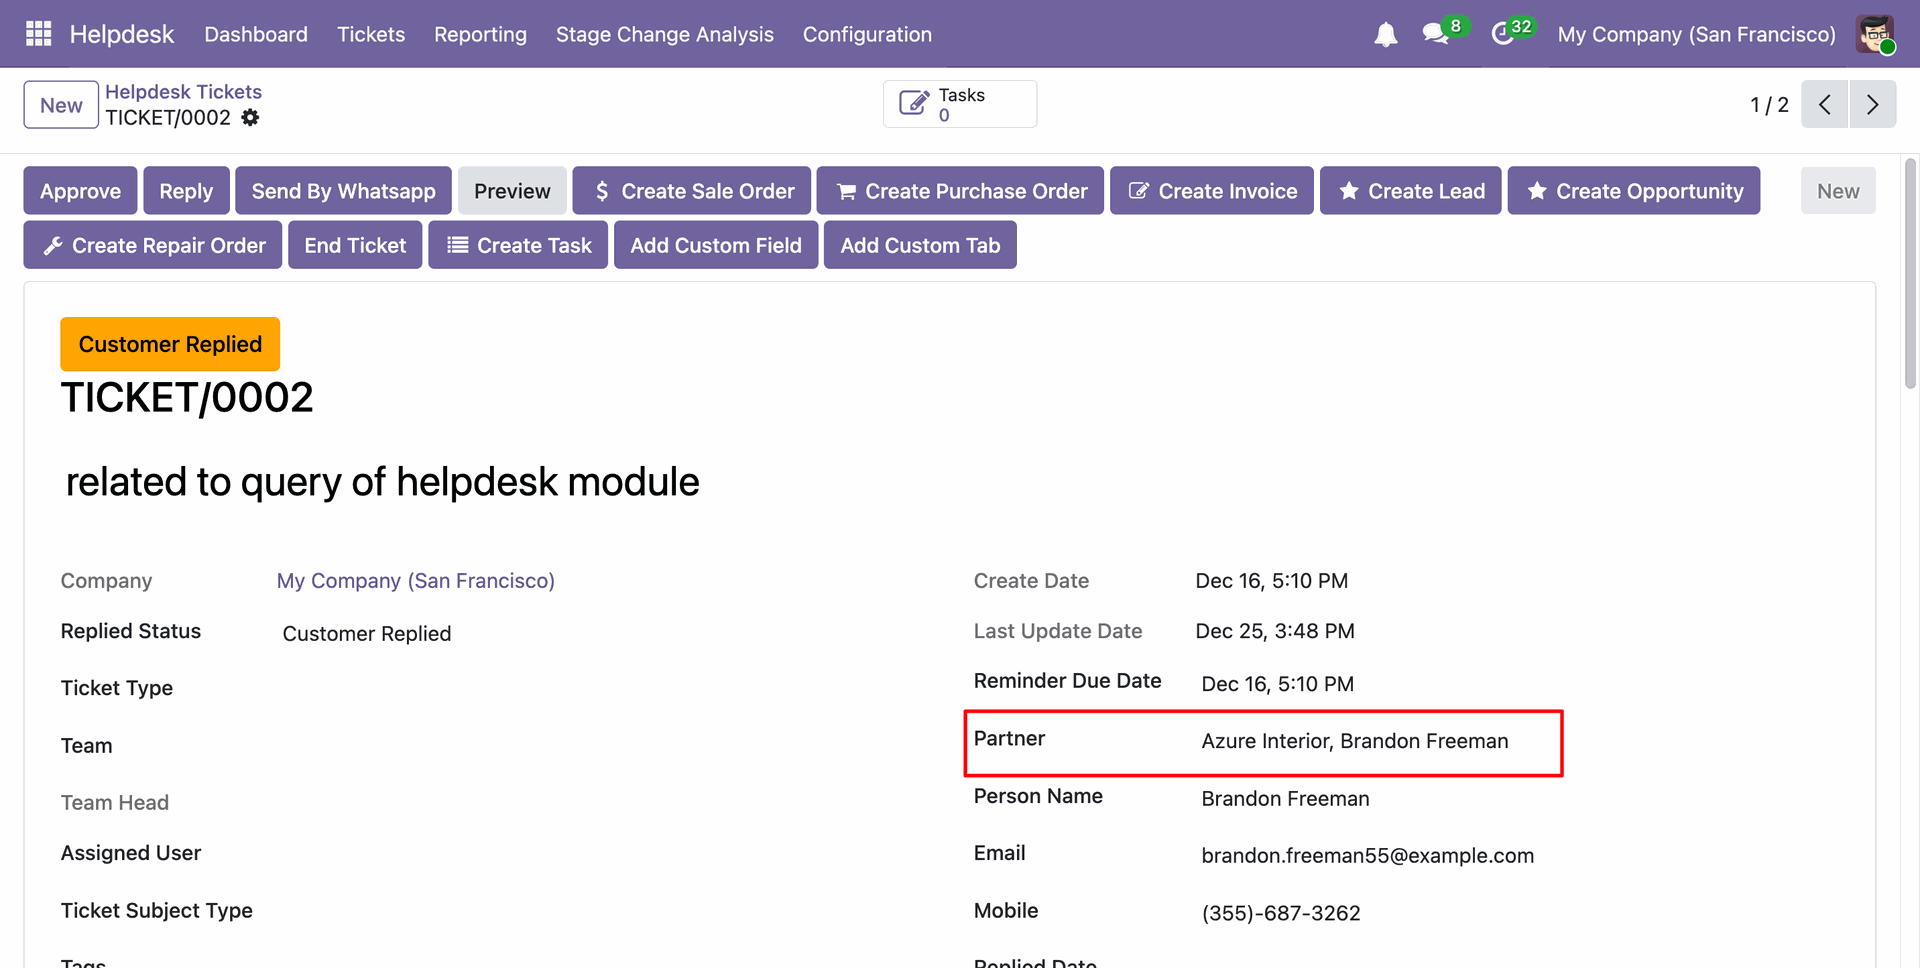
In the ticket form view, you can see the partner name.
You can see the 'Customer Hour Package' under the Timesheets tab.
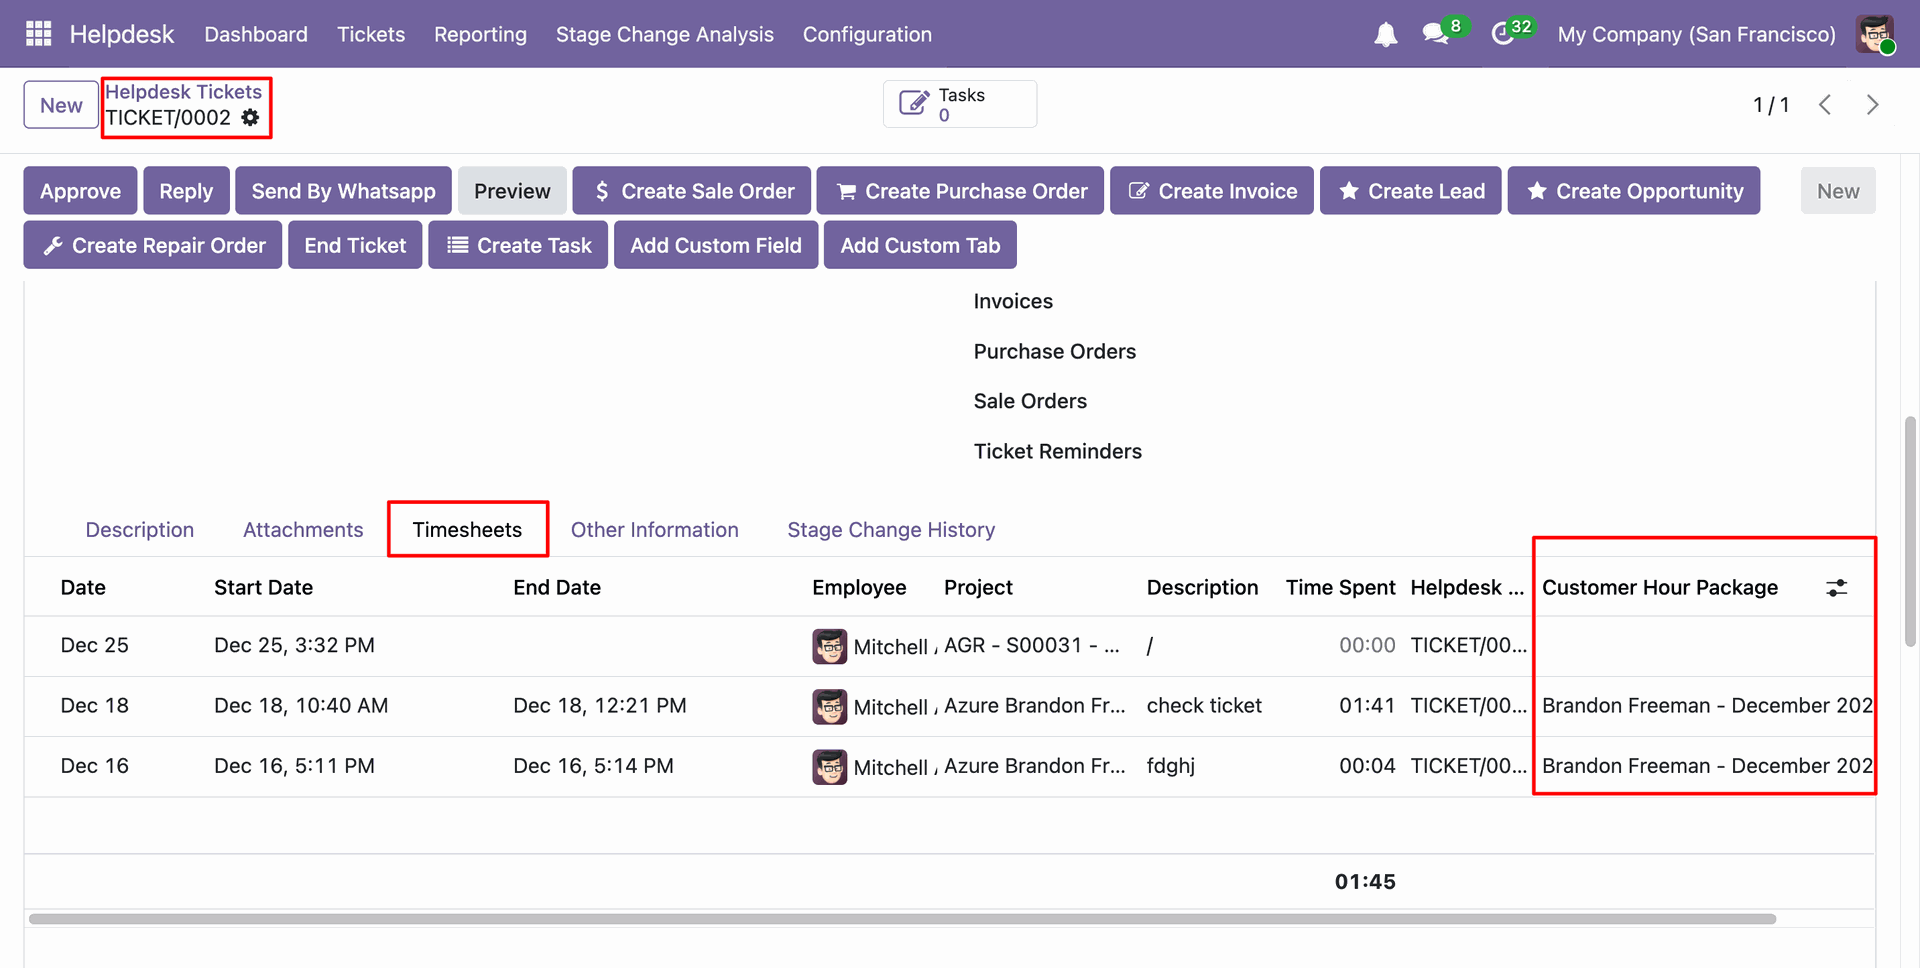
Click on the 'End Ticket' button.
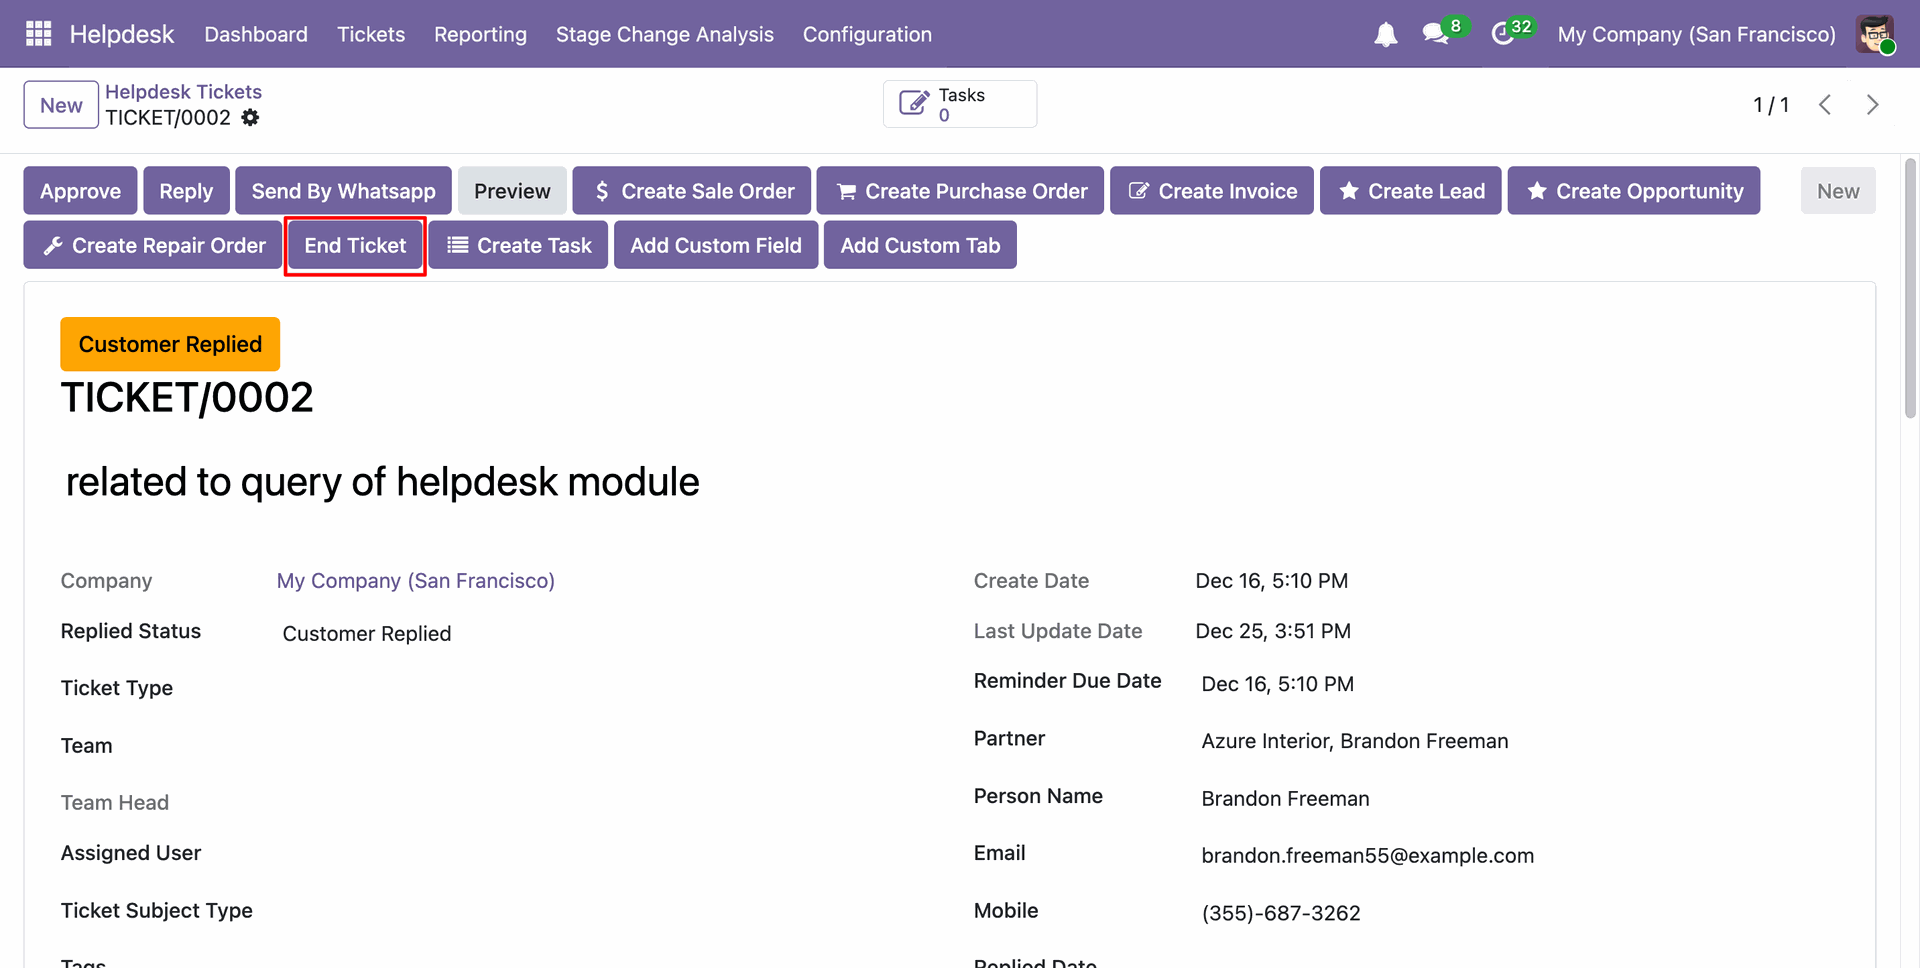
Here, select the project name, and the Customer Hours Package
will be added automatically.
Click on the 'End Ticket' button.
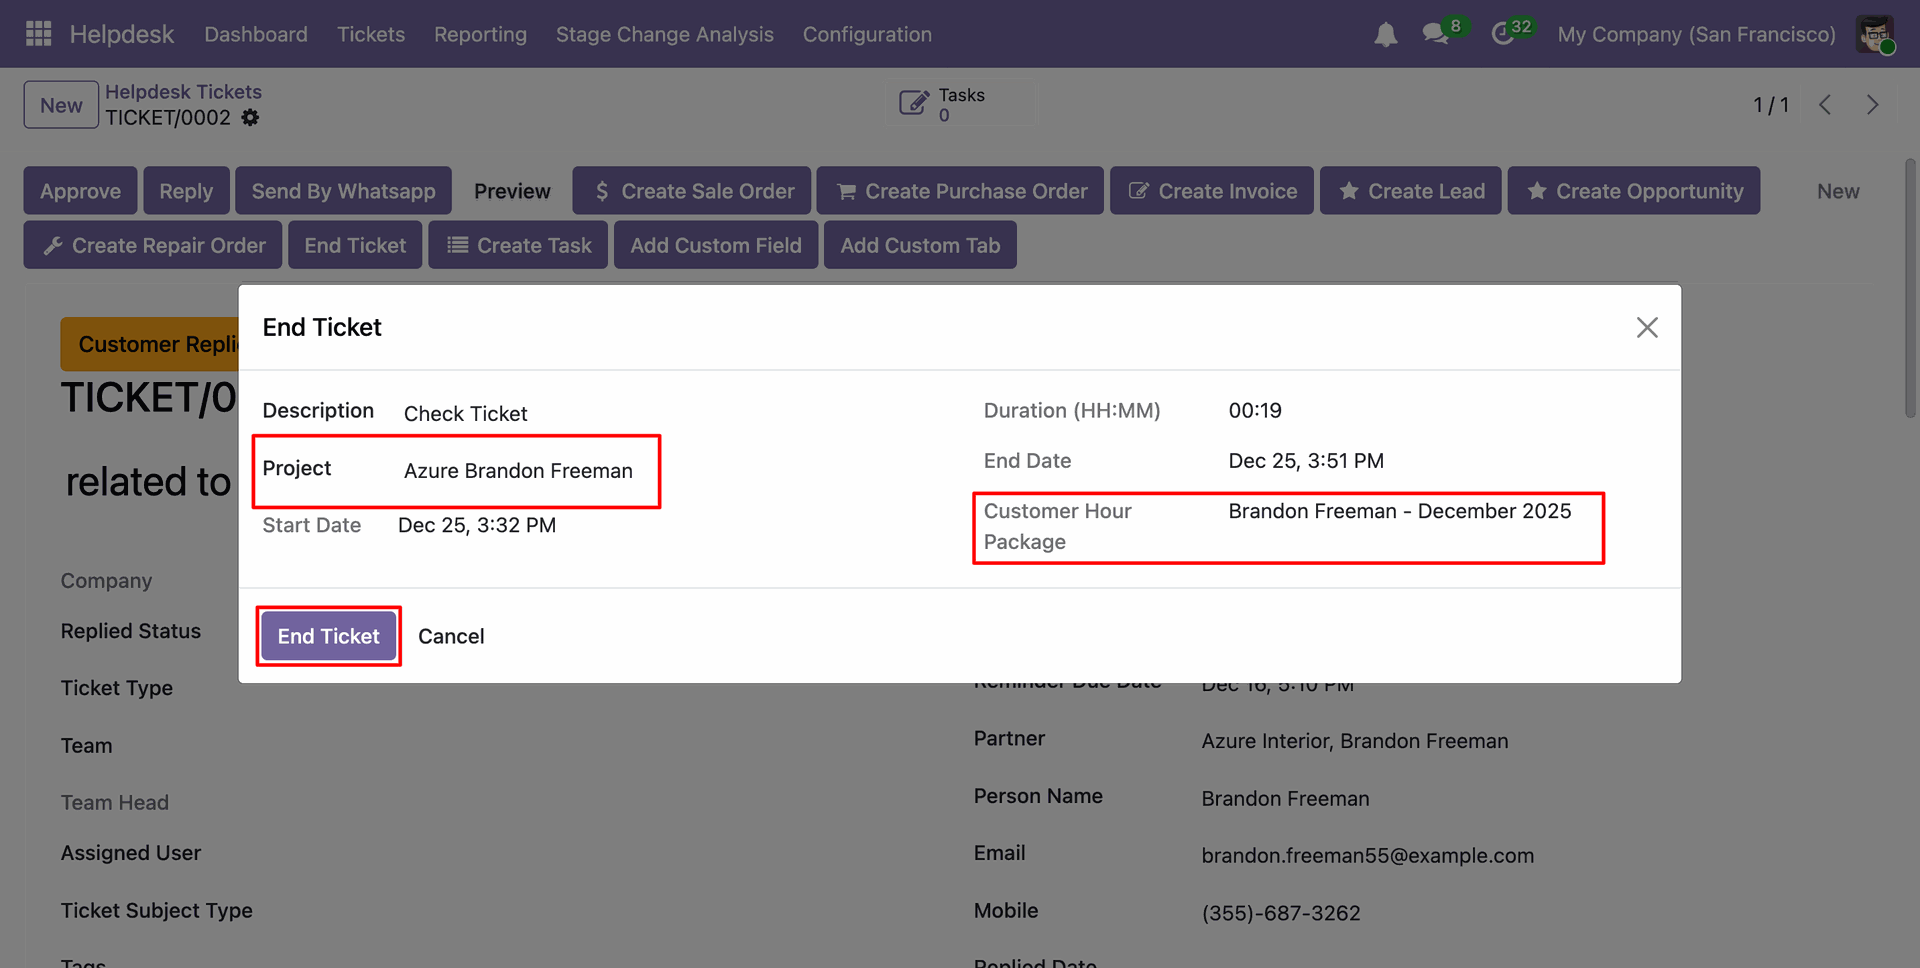
You can see the 'Customer Hour Package' under the Timesheets tab.
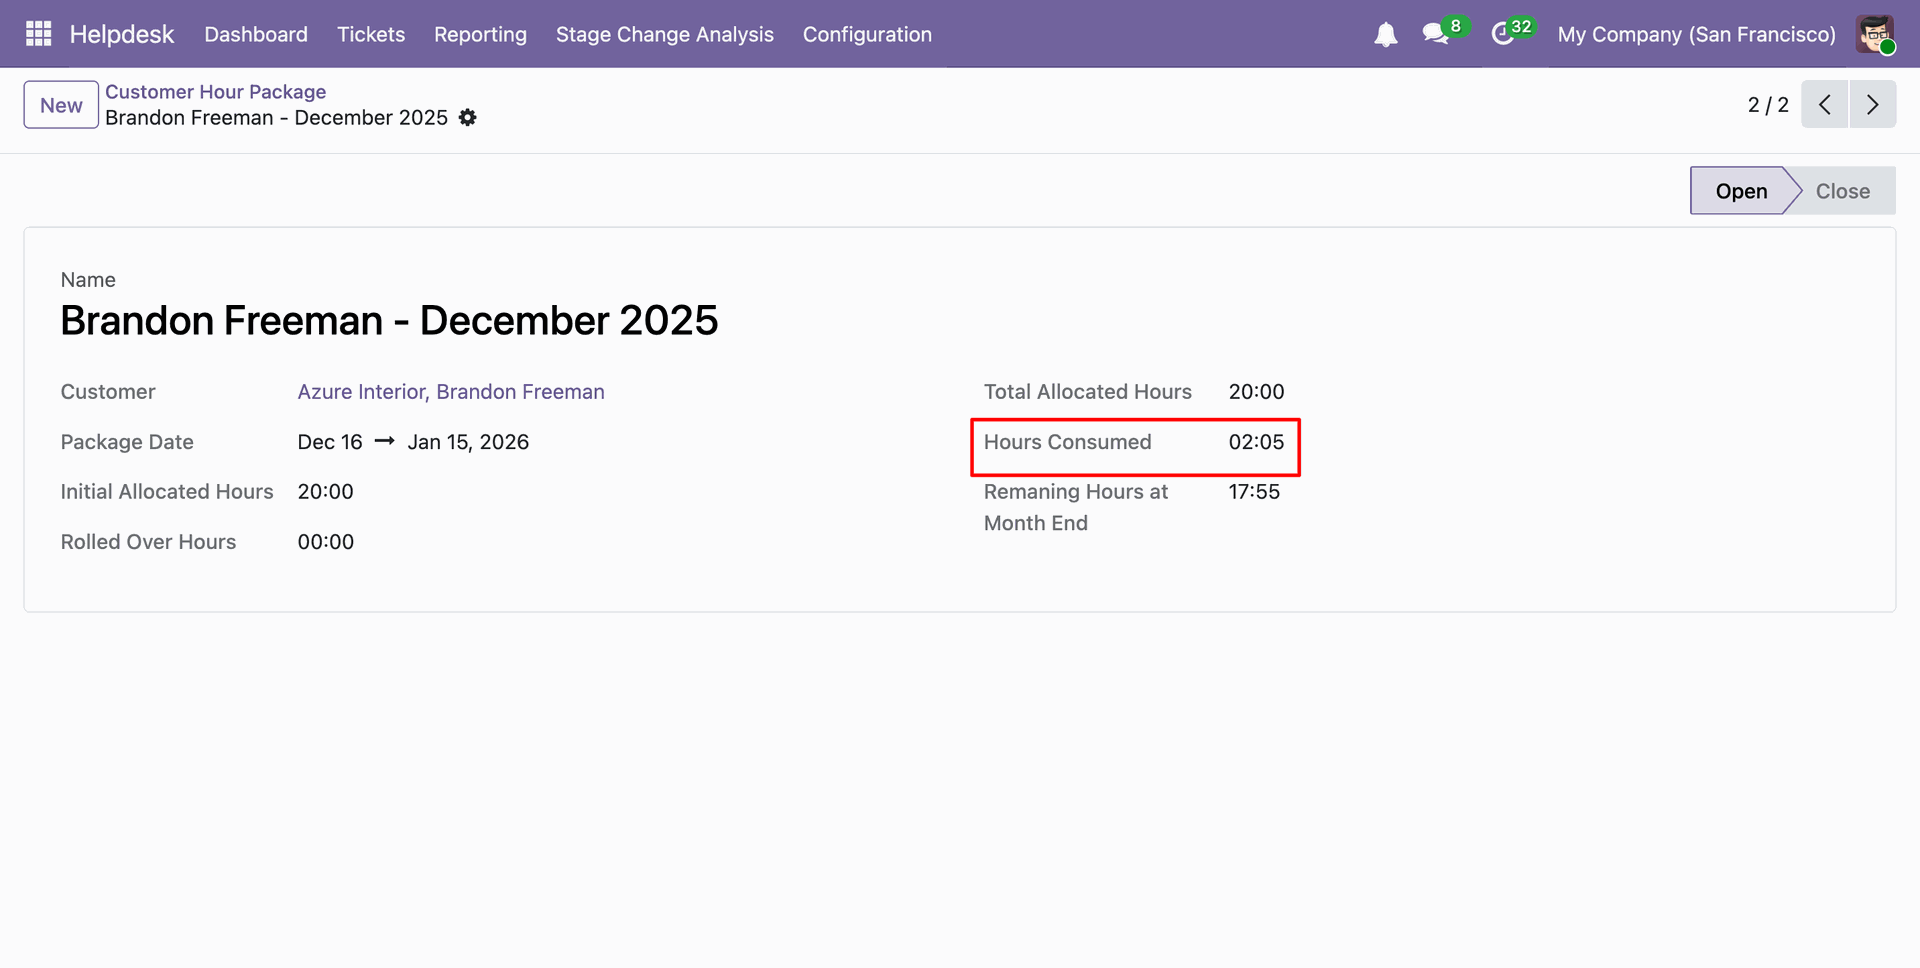
In the 'Customer Hours Package', you can see the 'Hours Consumed'.
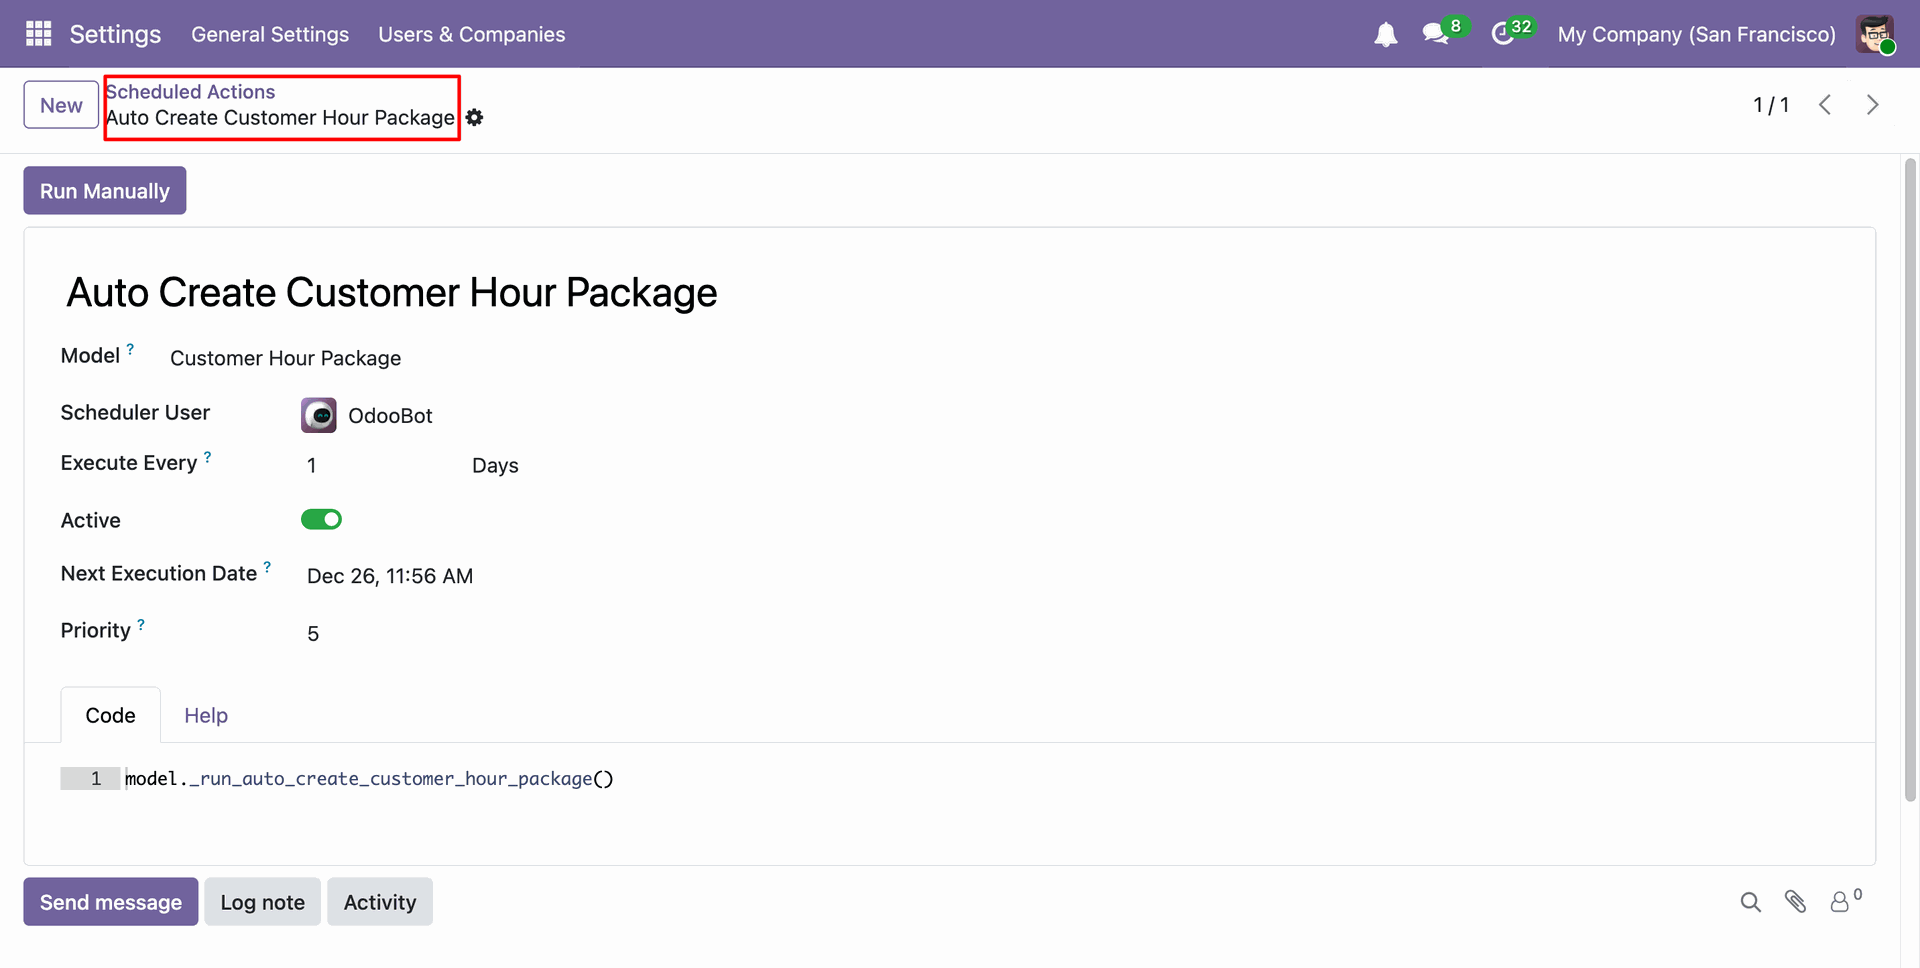
Go to the Scheduled Actions ==> Auto Create Customer Hours
Package.
Click on the 'Run Manually' button.
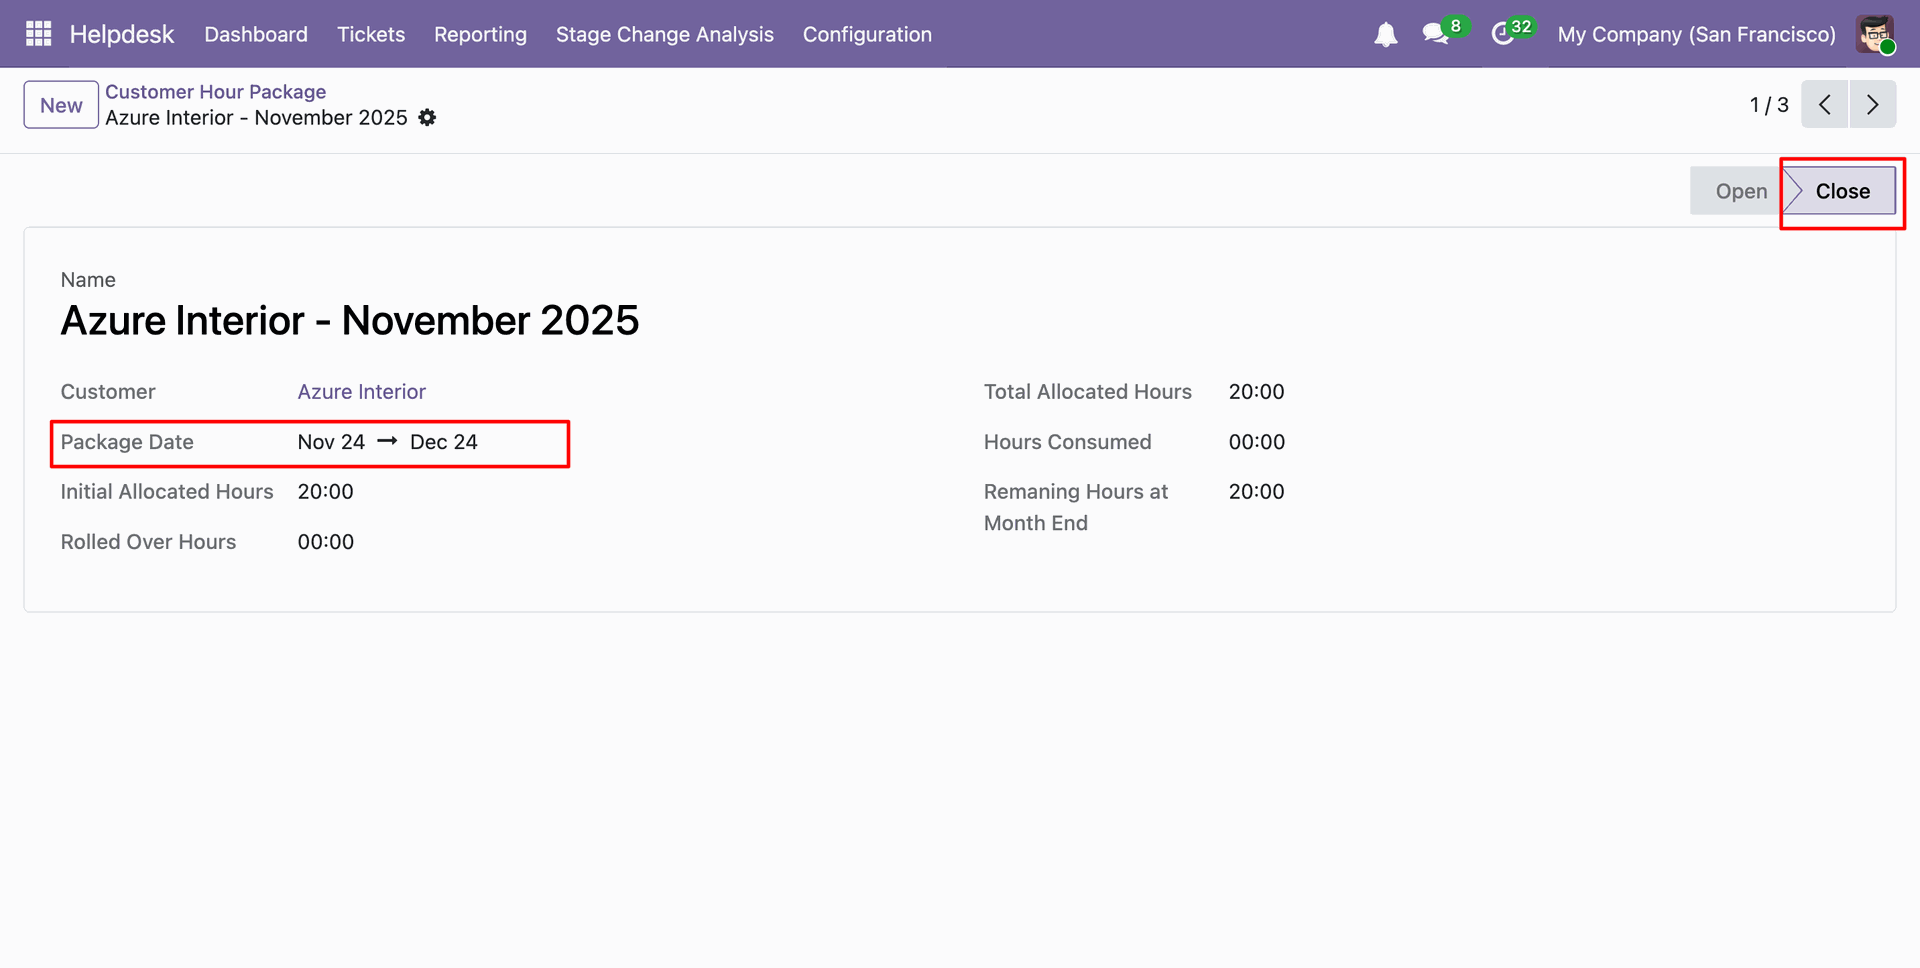
You can view the package date in the 'Customer Hour Package' form view, and the package is now in the closed stage.
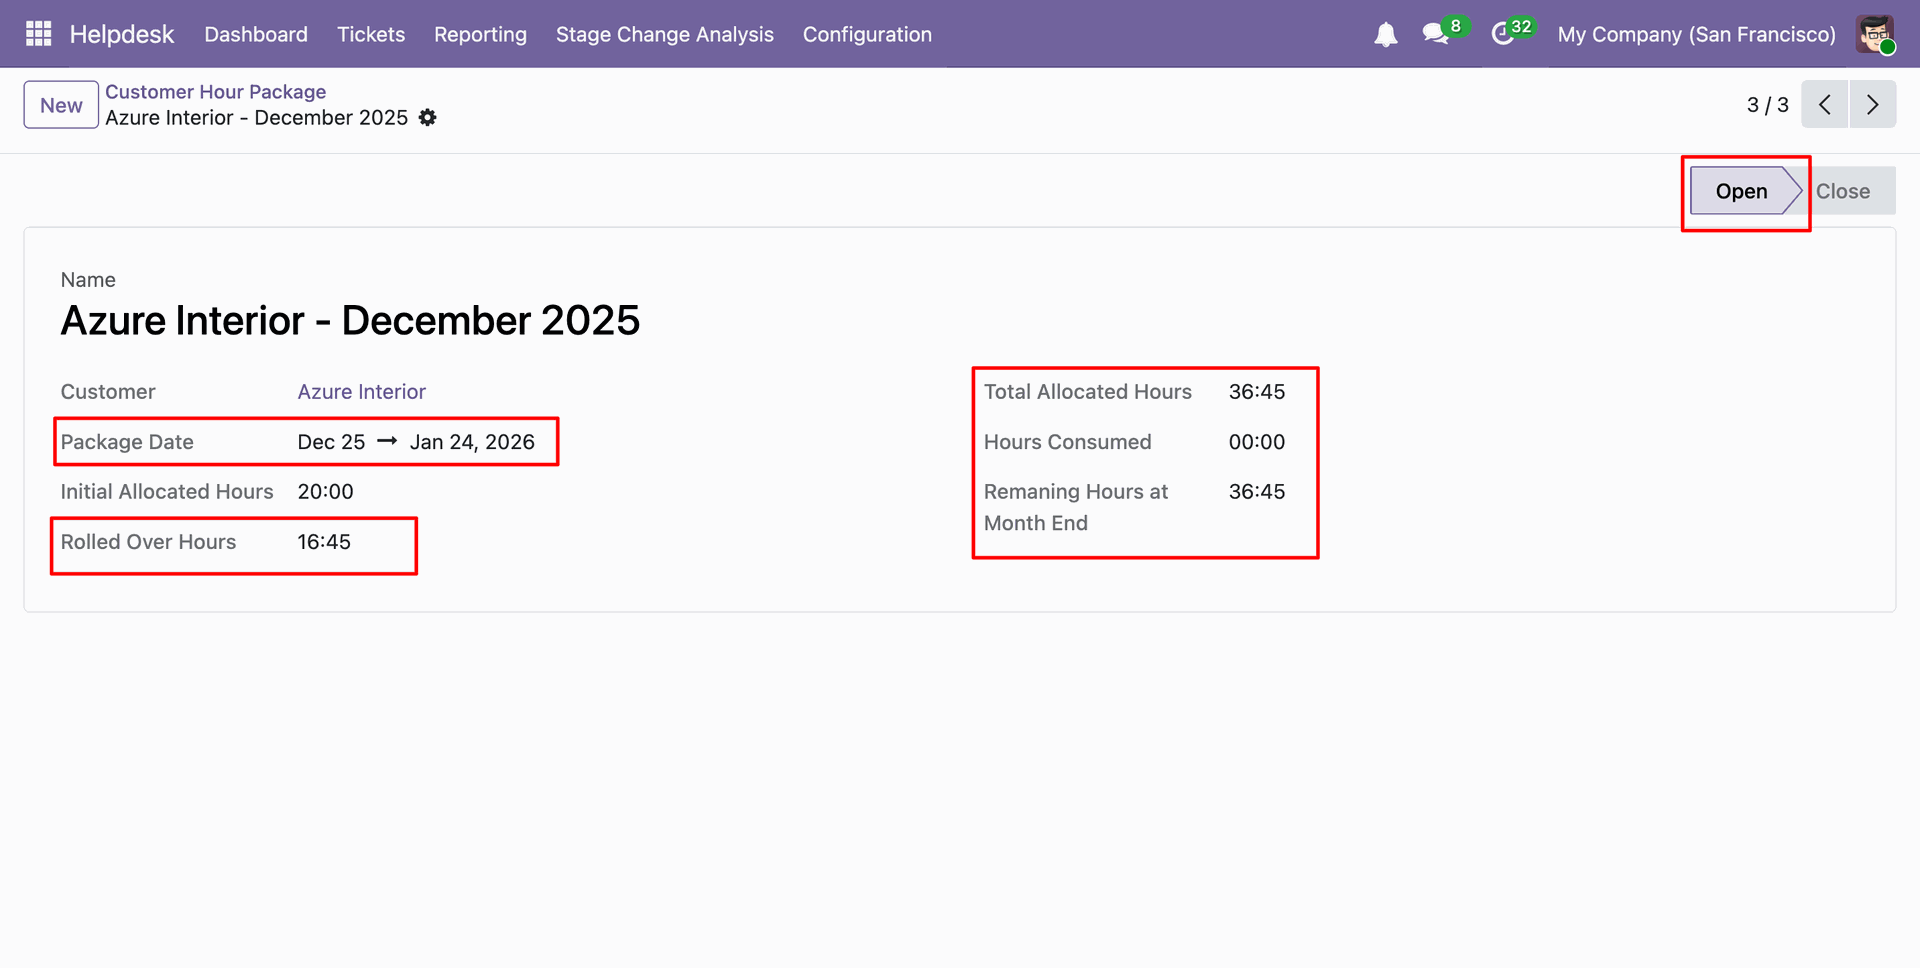
Form view of the 'Customer Hour Package', the package is now in the Open stage.
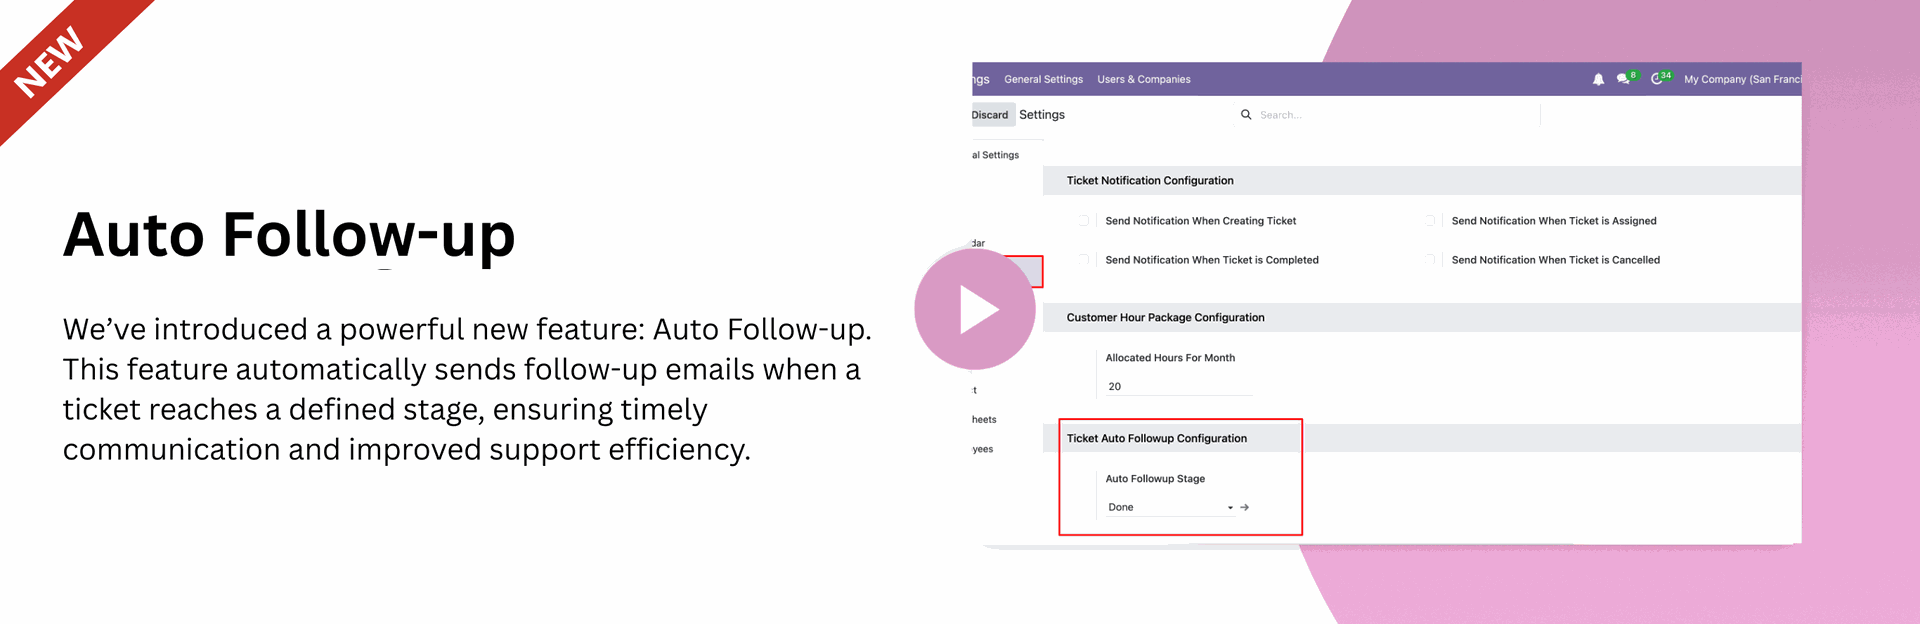
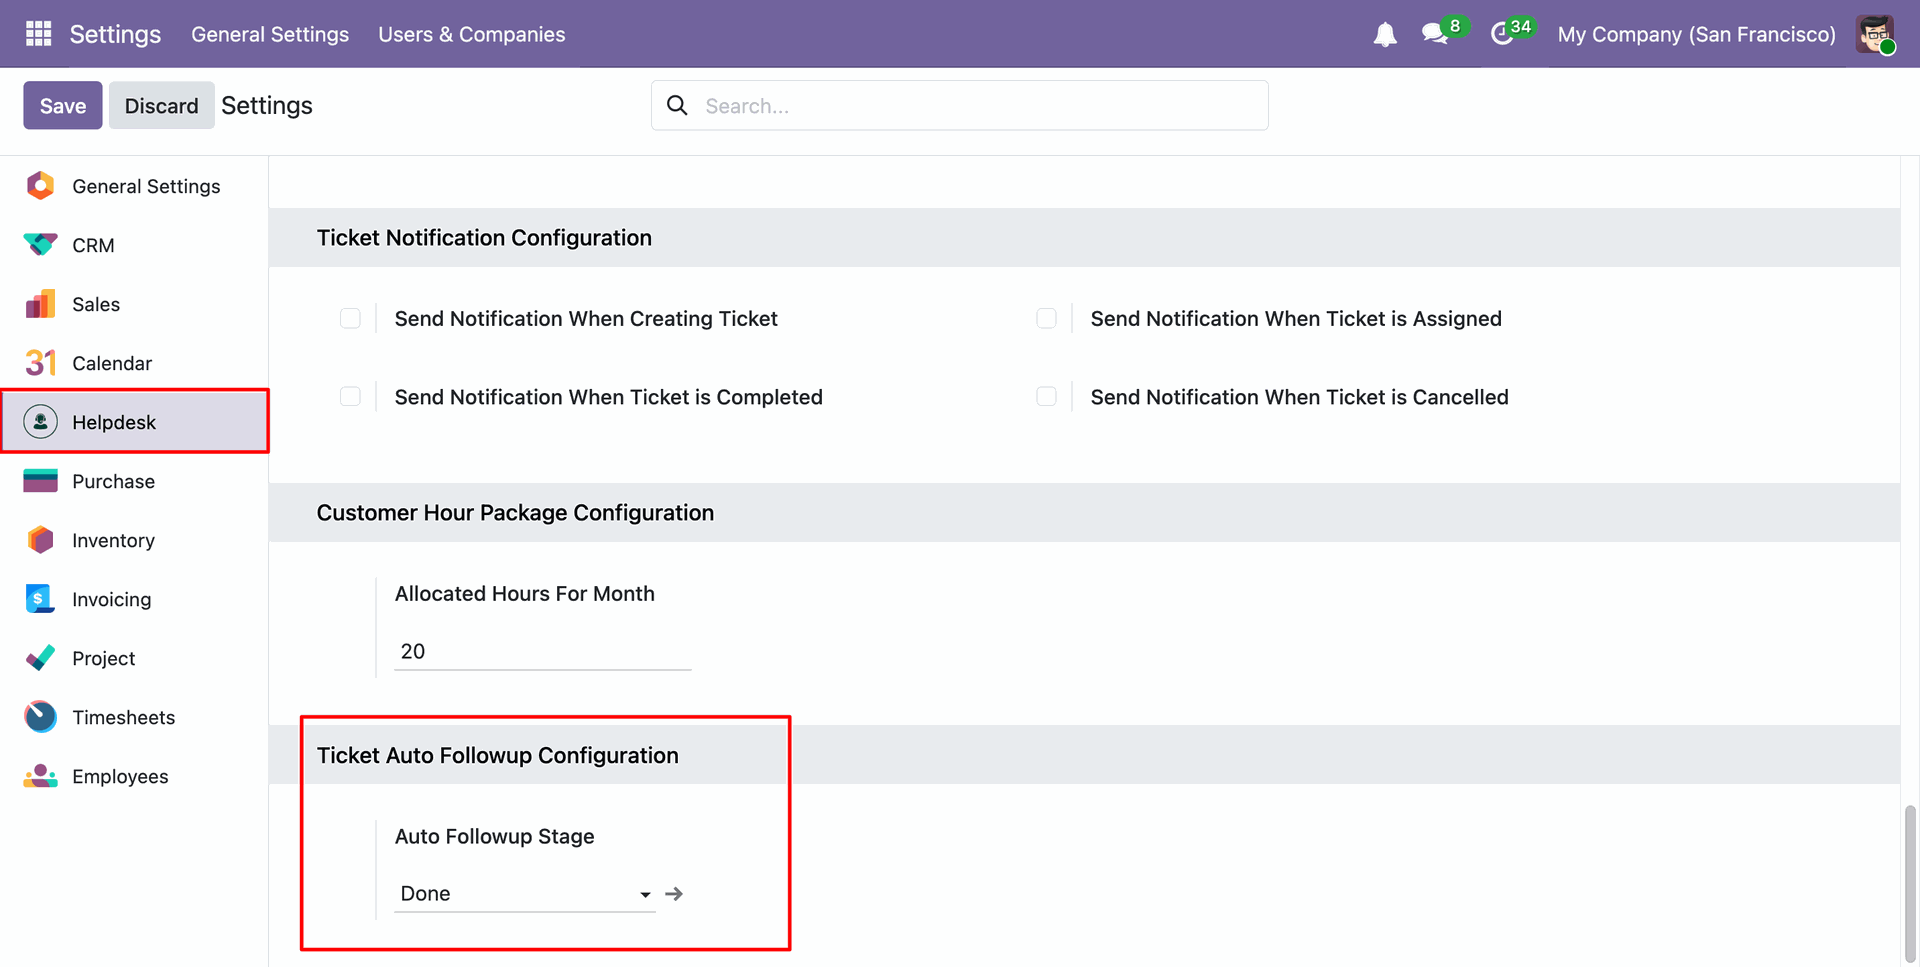
Go to the Helpdesk Settings and select the stage in the 'Auto Followup Stage'.
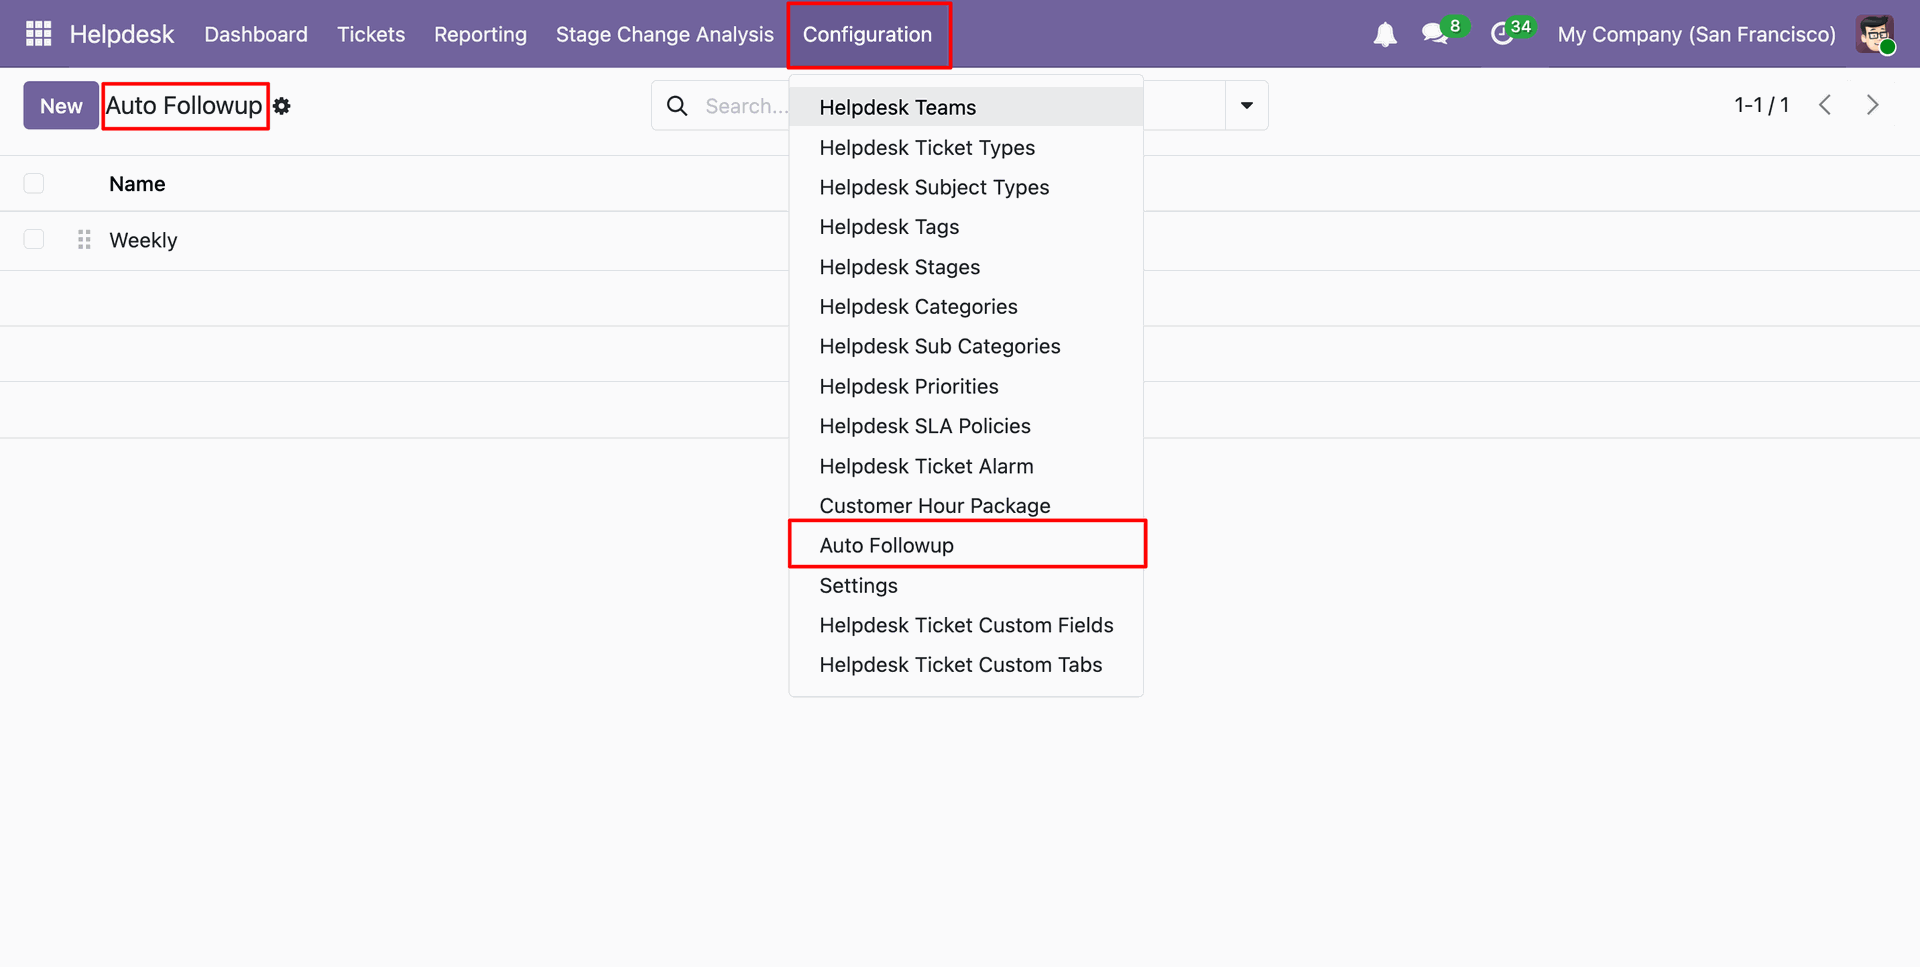
Menu and tree view of the 'Auto Followup'.
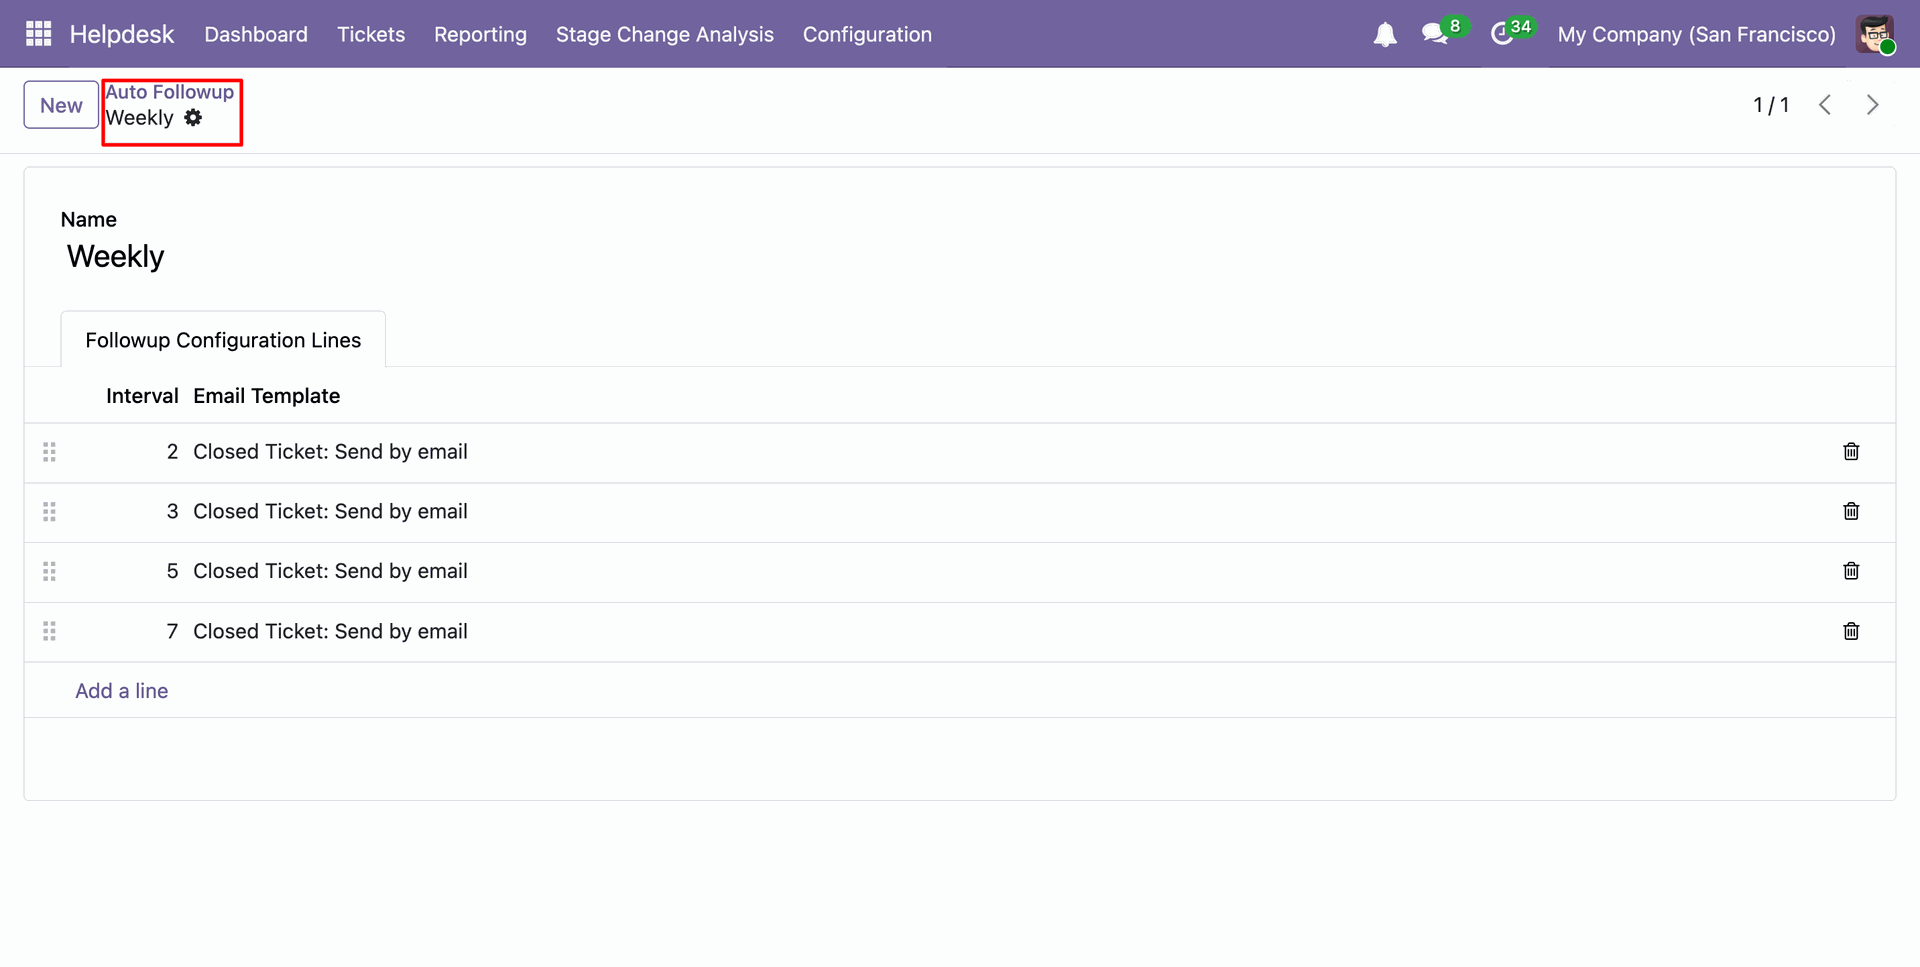
Set the auto email template under Auto Follow-up.
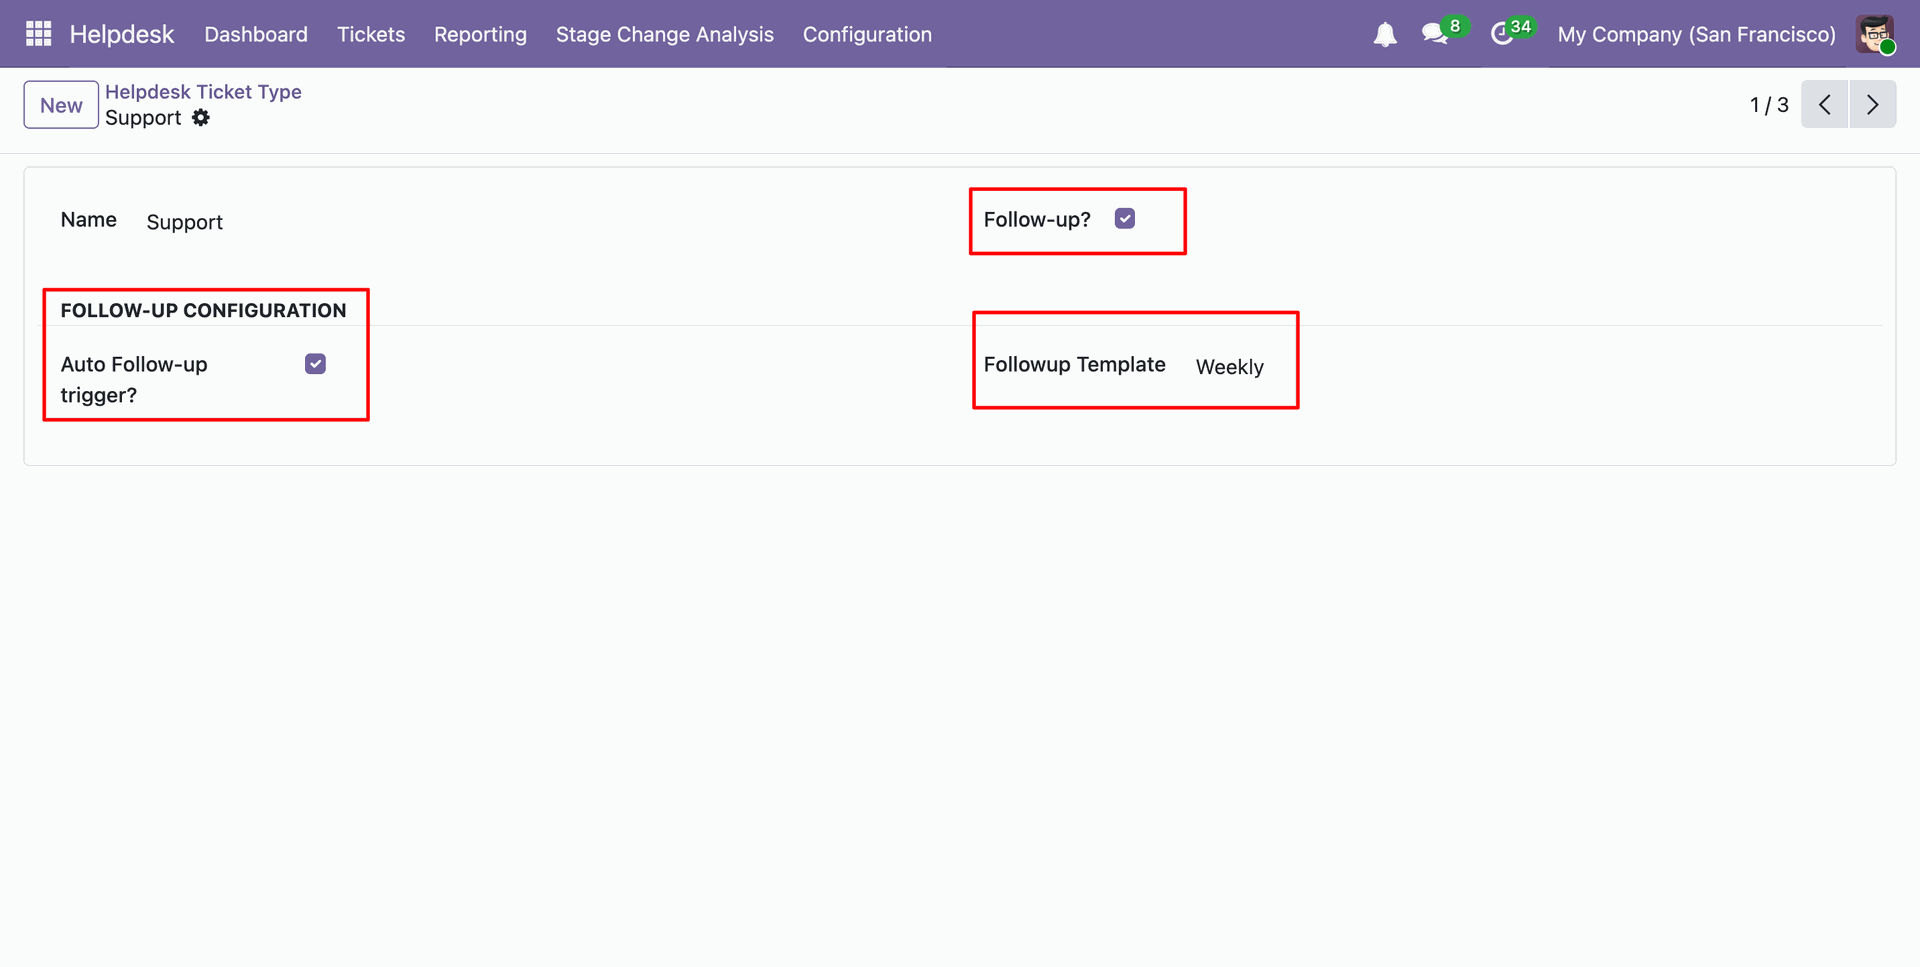
In the Helpdesk Ticket Type form view, enable the 'Follo-up' and 'Auto Follou-up Trigger' options, then select the 'Folloup Template'.
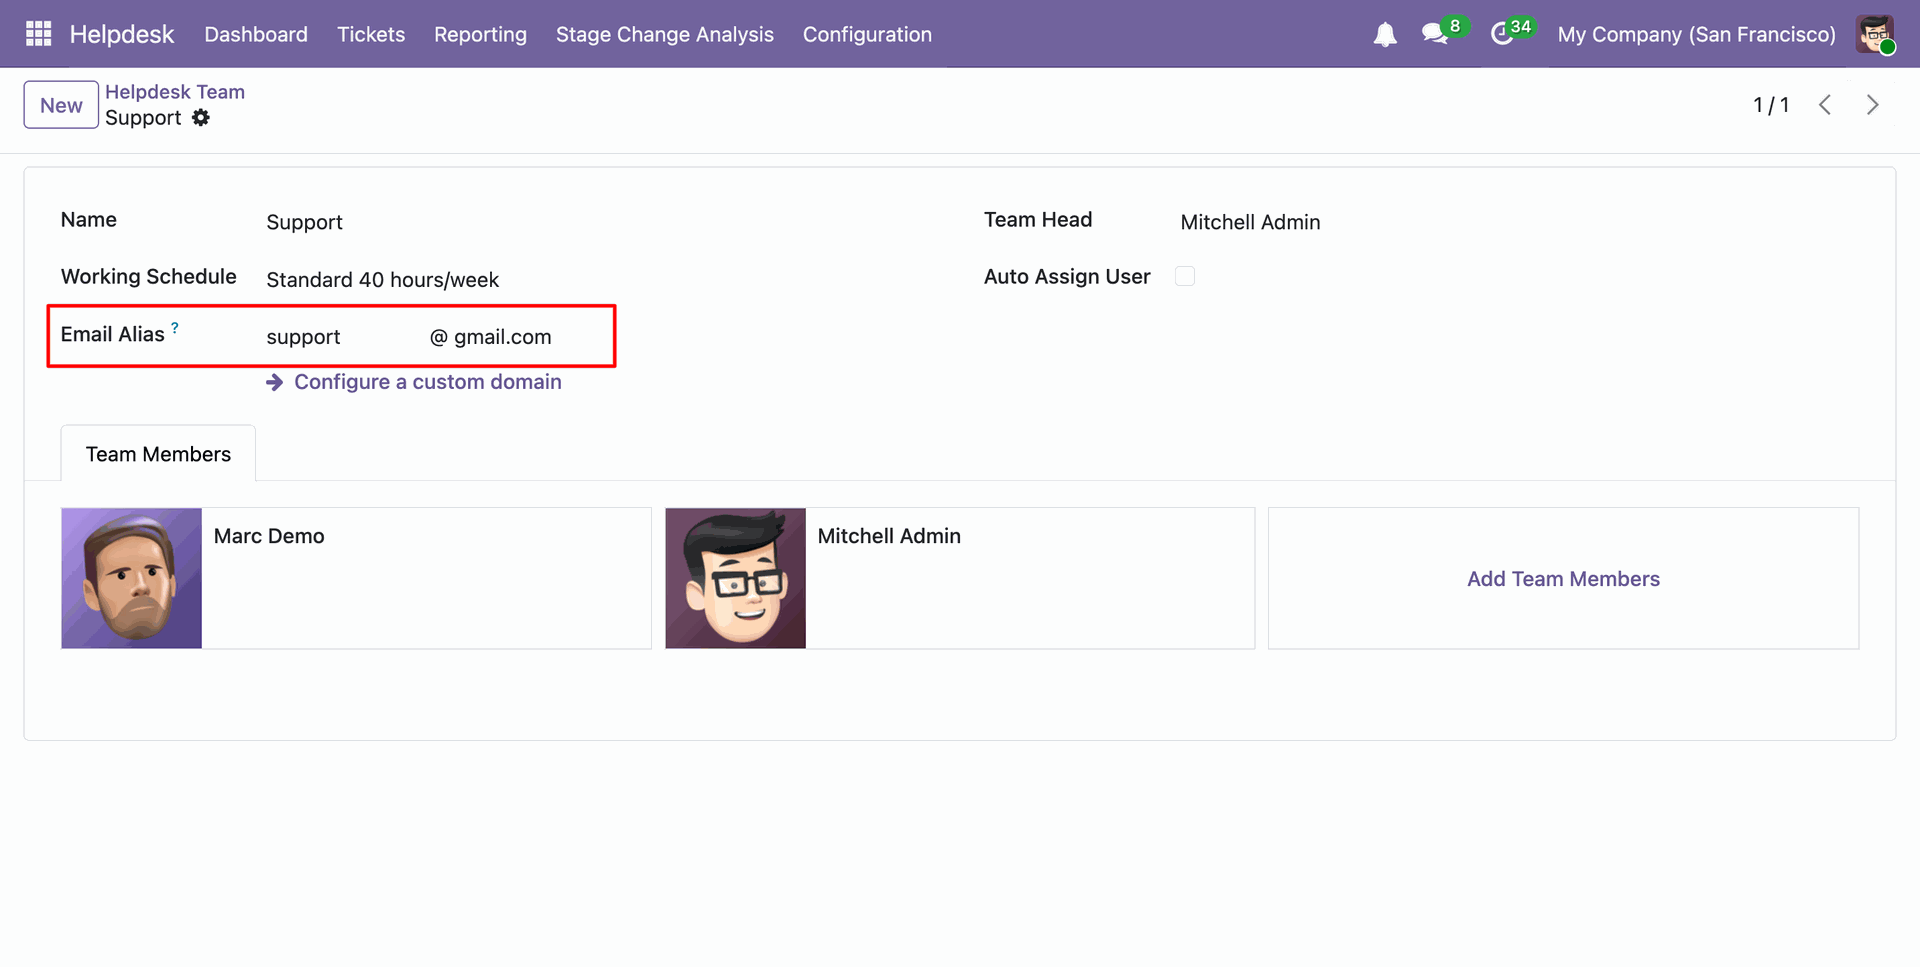
In the Helpdesk Team form view, set the email.
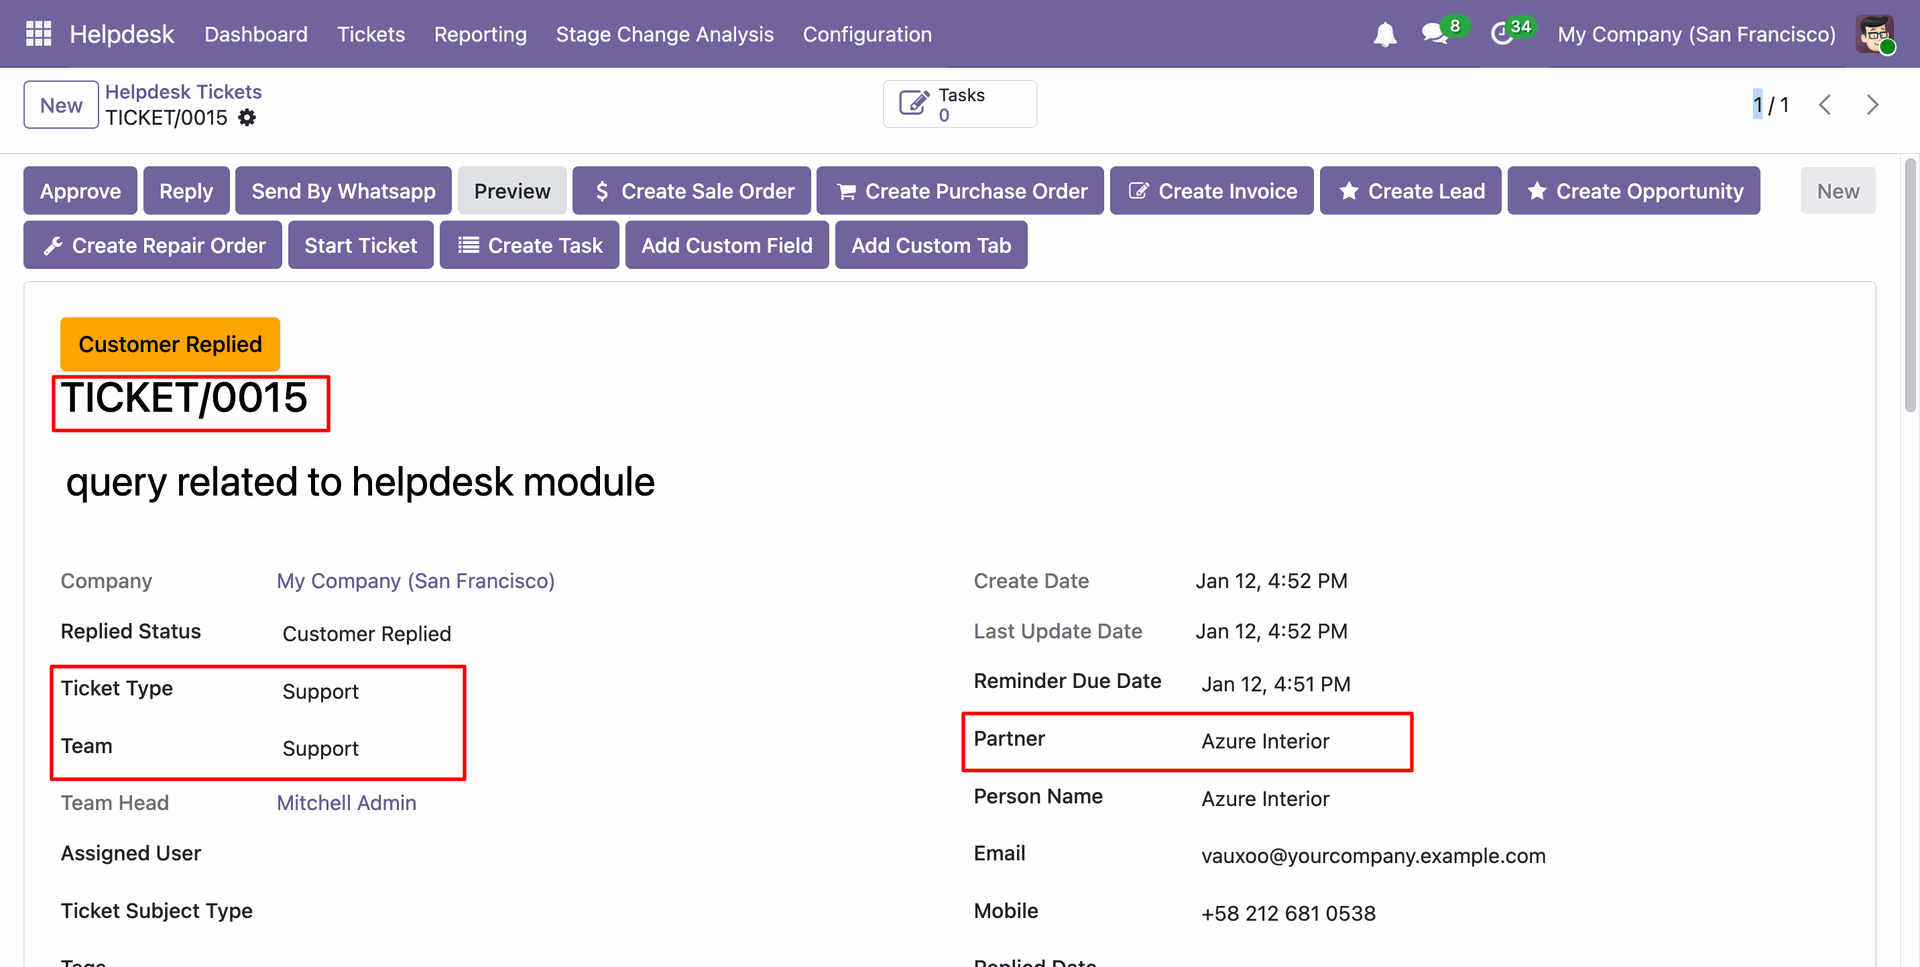
Create a ticket.
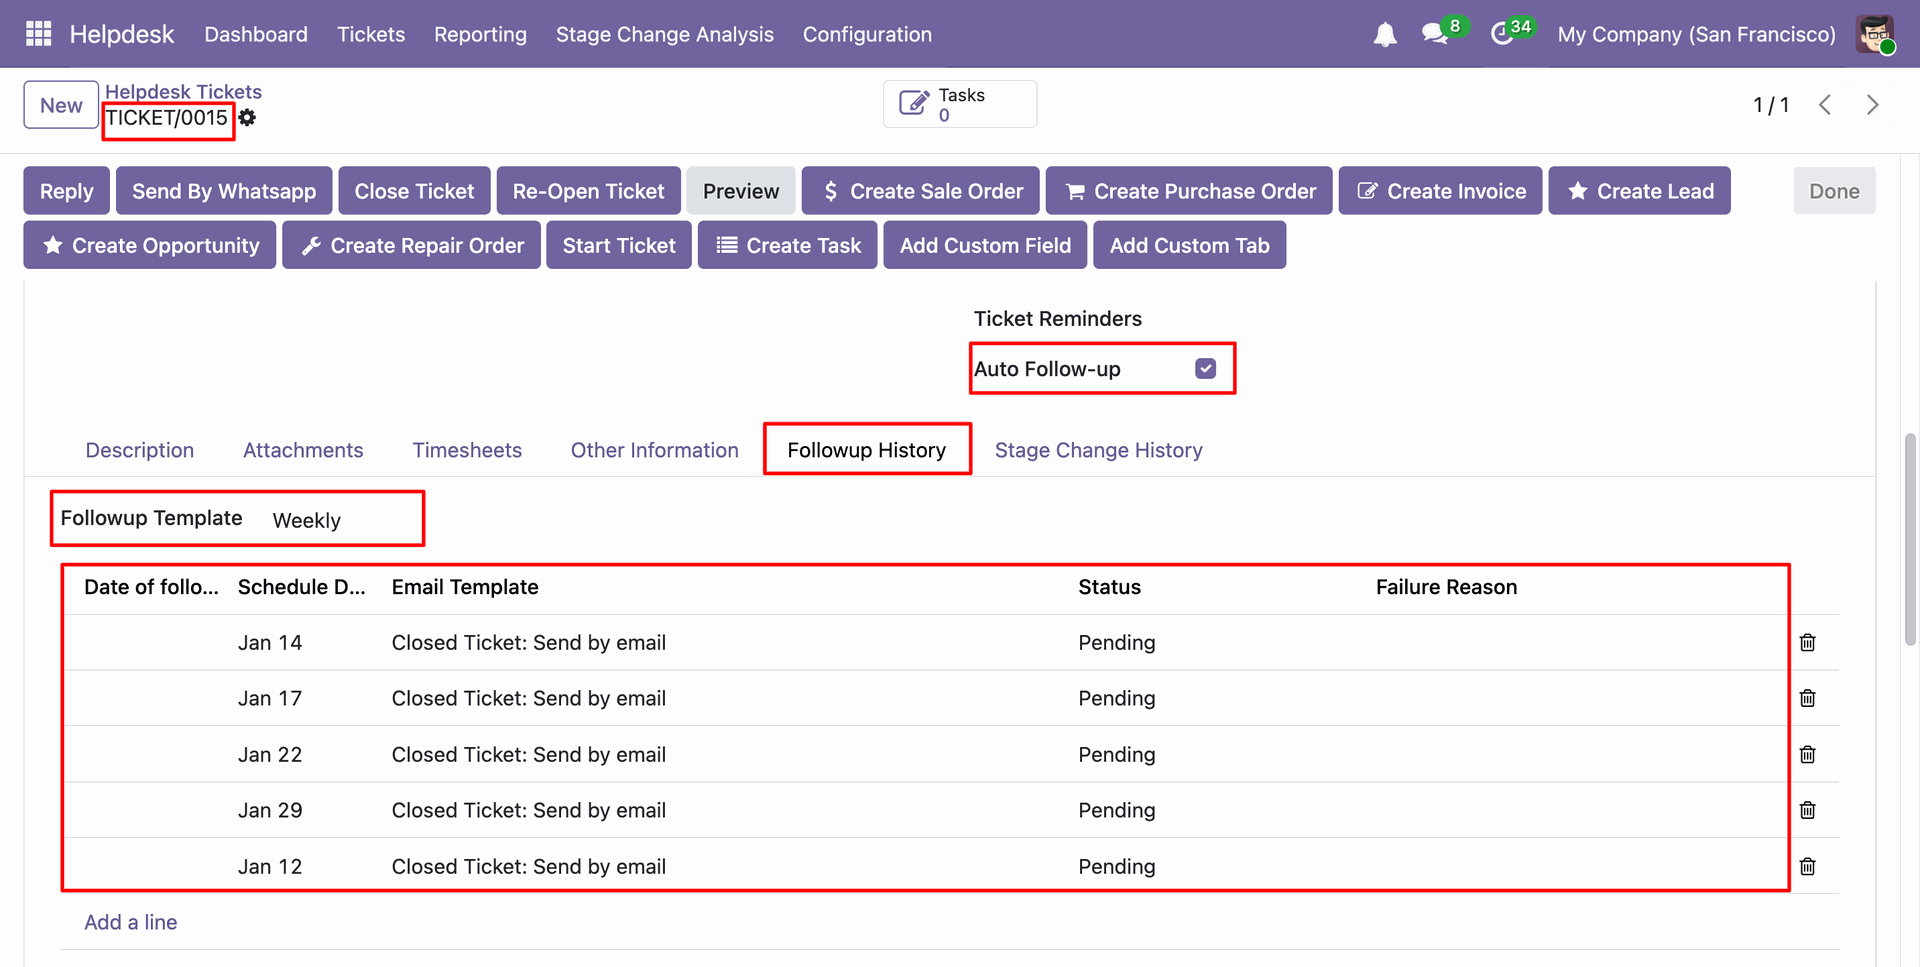
Enable the 'Follo-up' options, then select the 'Folloup Template' under the 'Followuo History' tab.
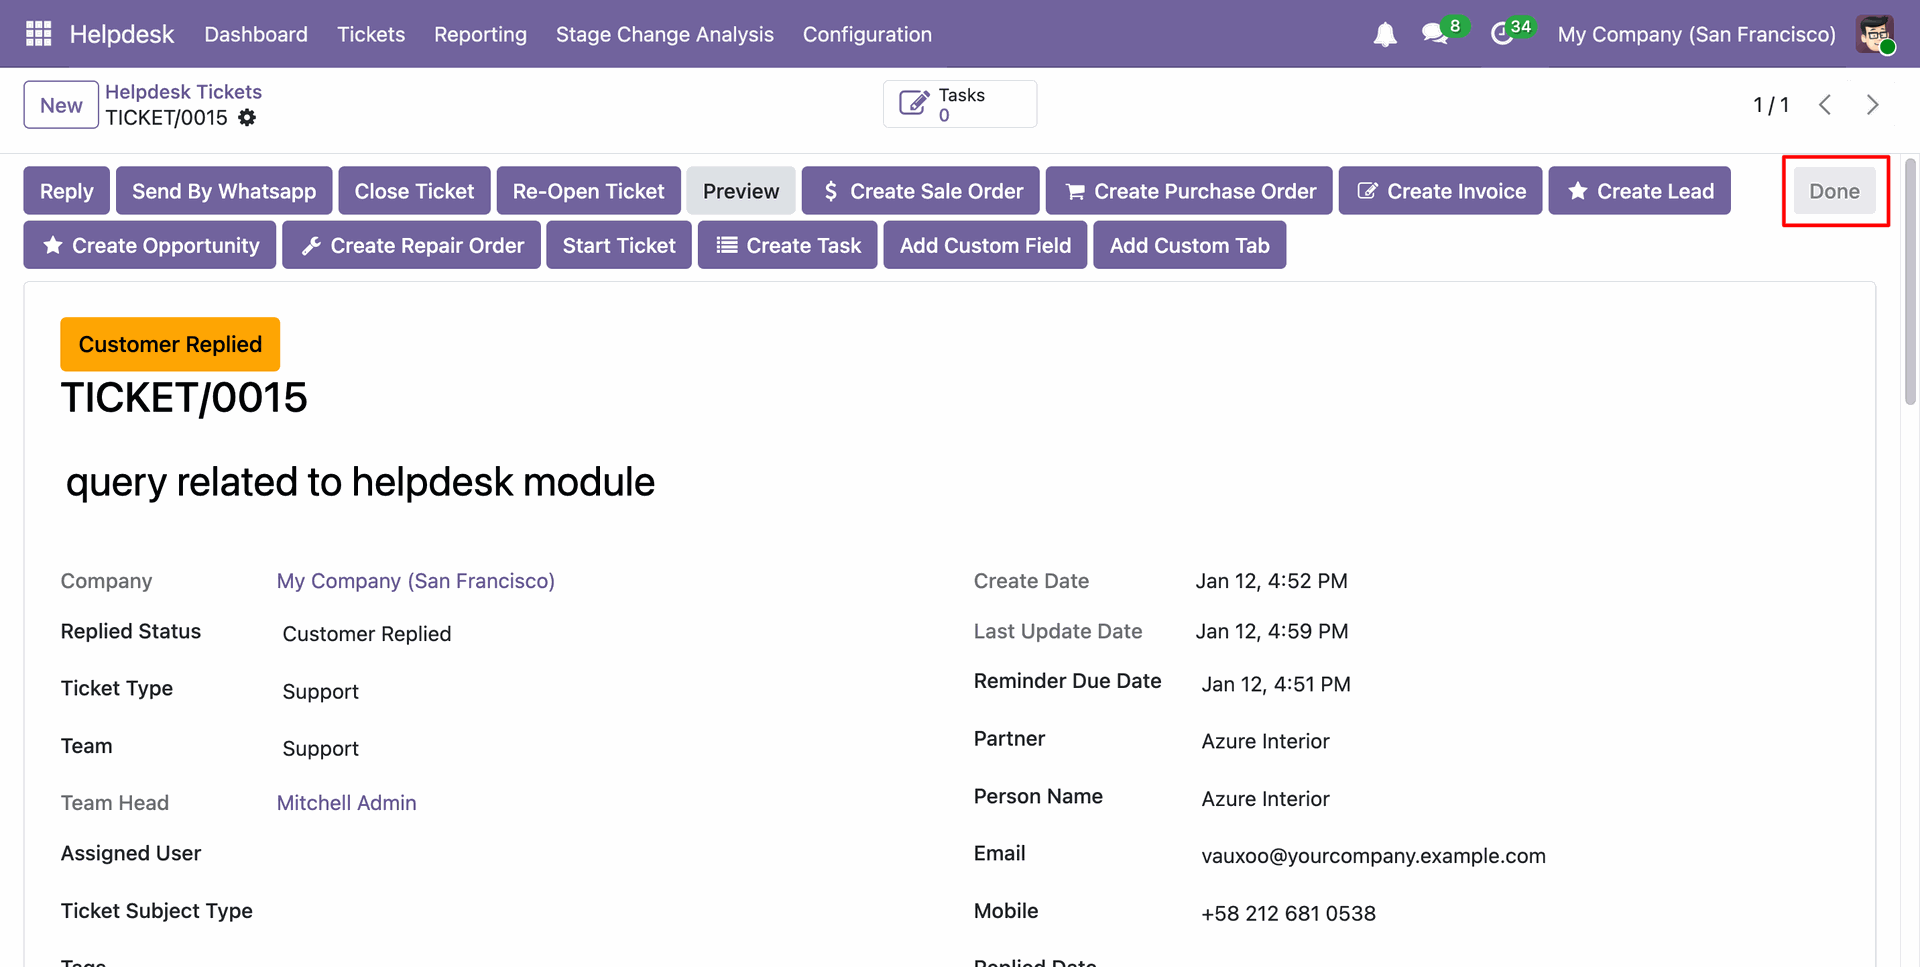
Here you can see the ticket is in the Done stage.
Go to the Scheduled Action (Ticket Auto Followup) and click on the 'Run Manually' button.
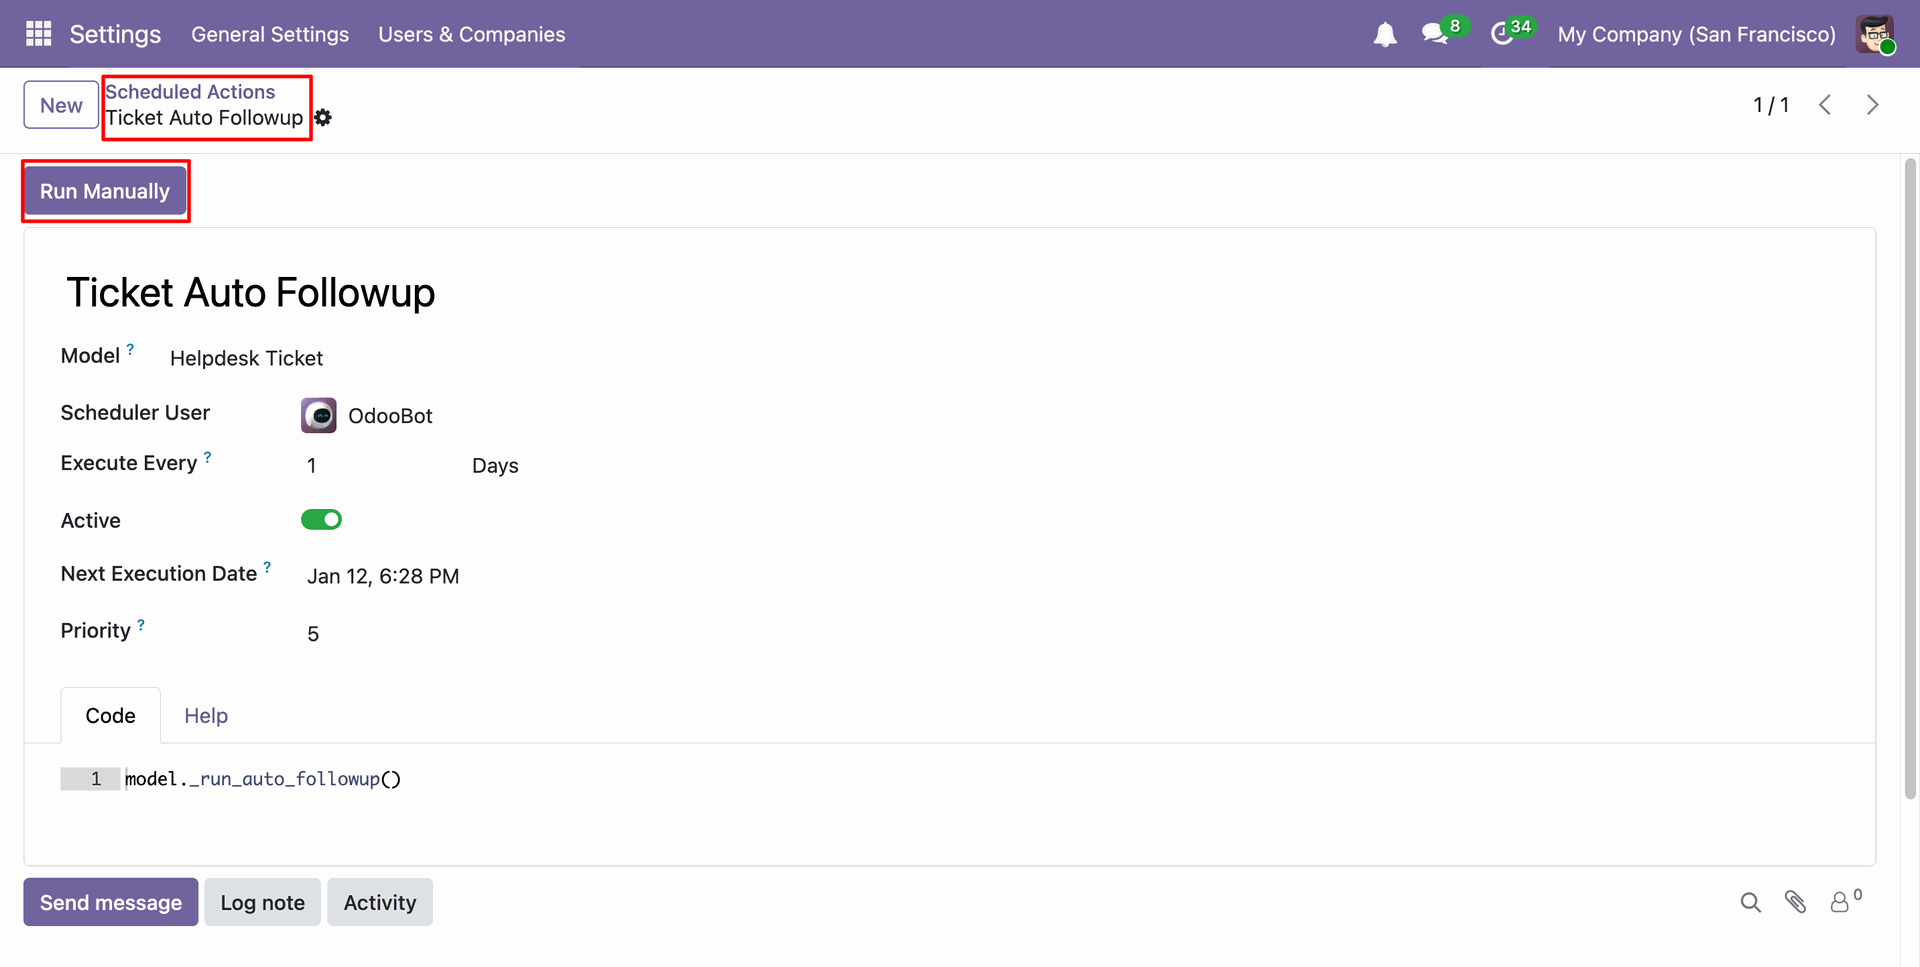
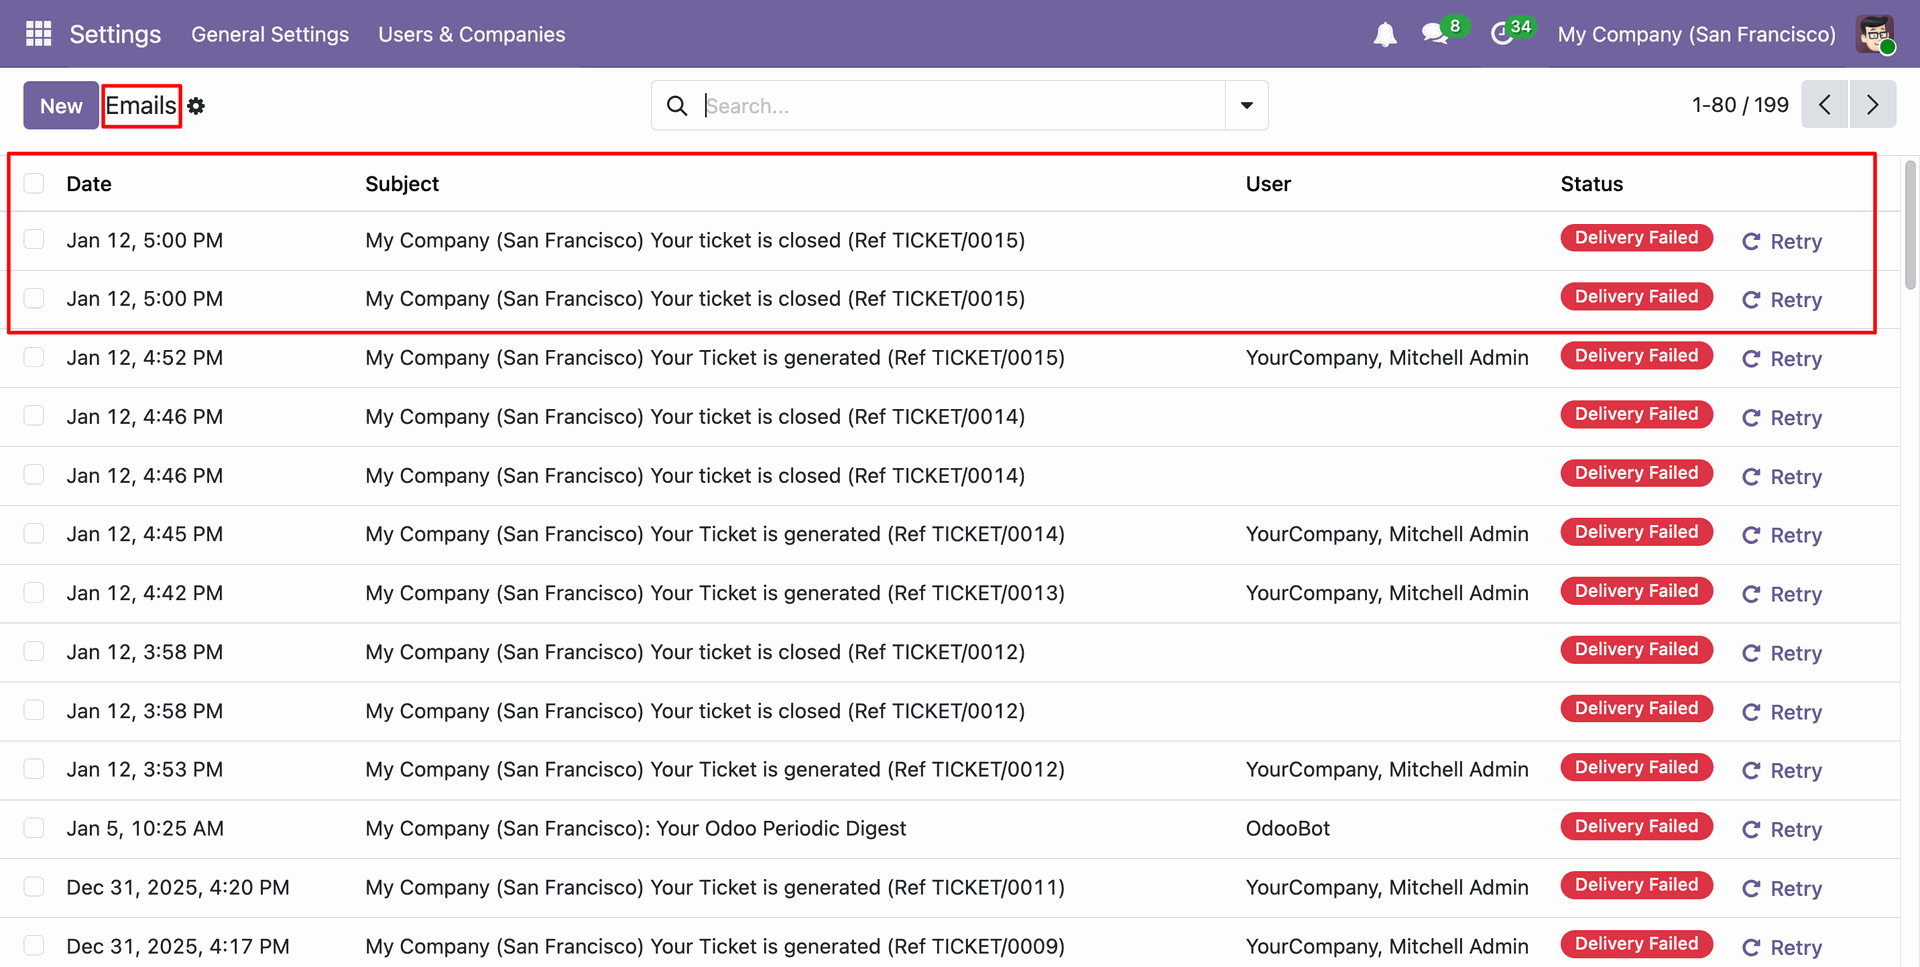
Here you can see that the auto follow-up email has been sent.
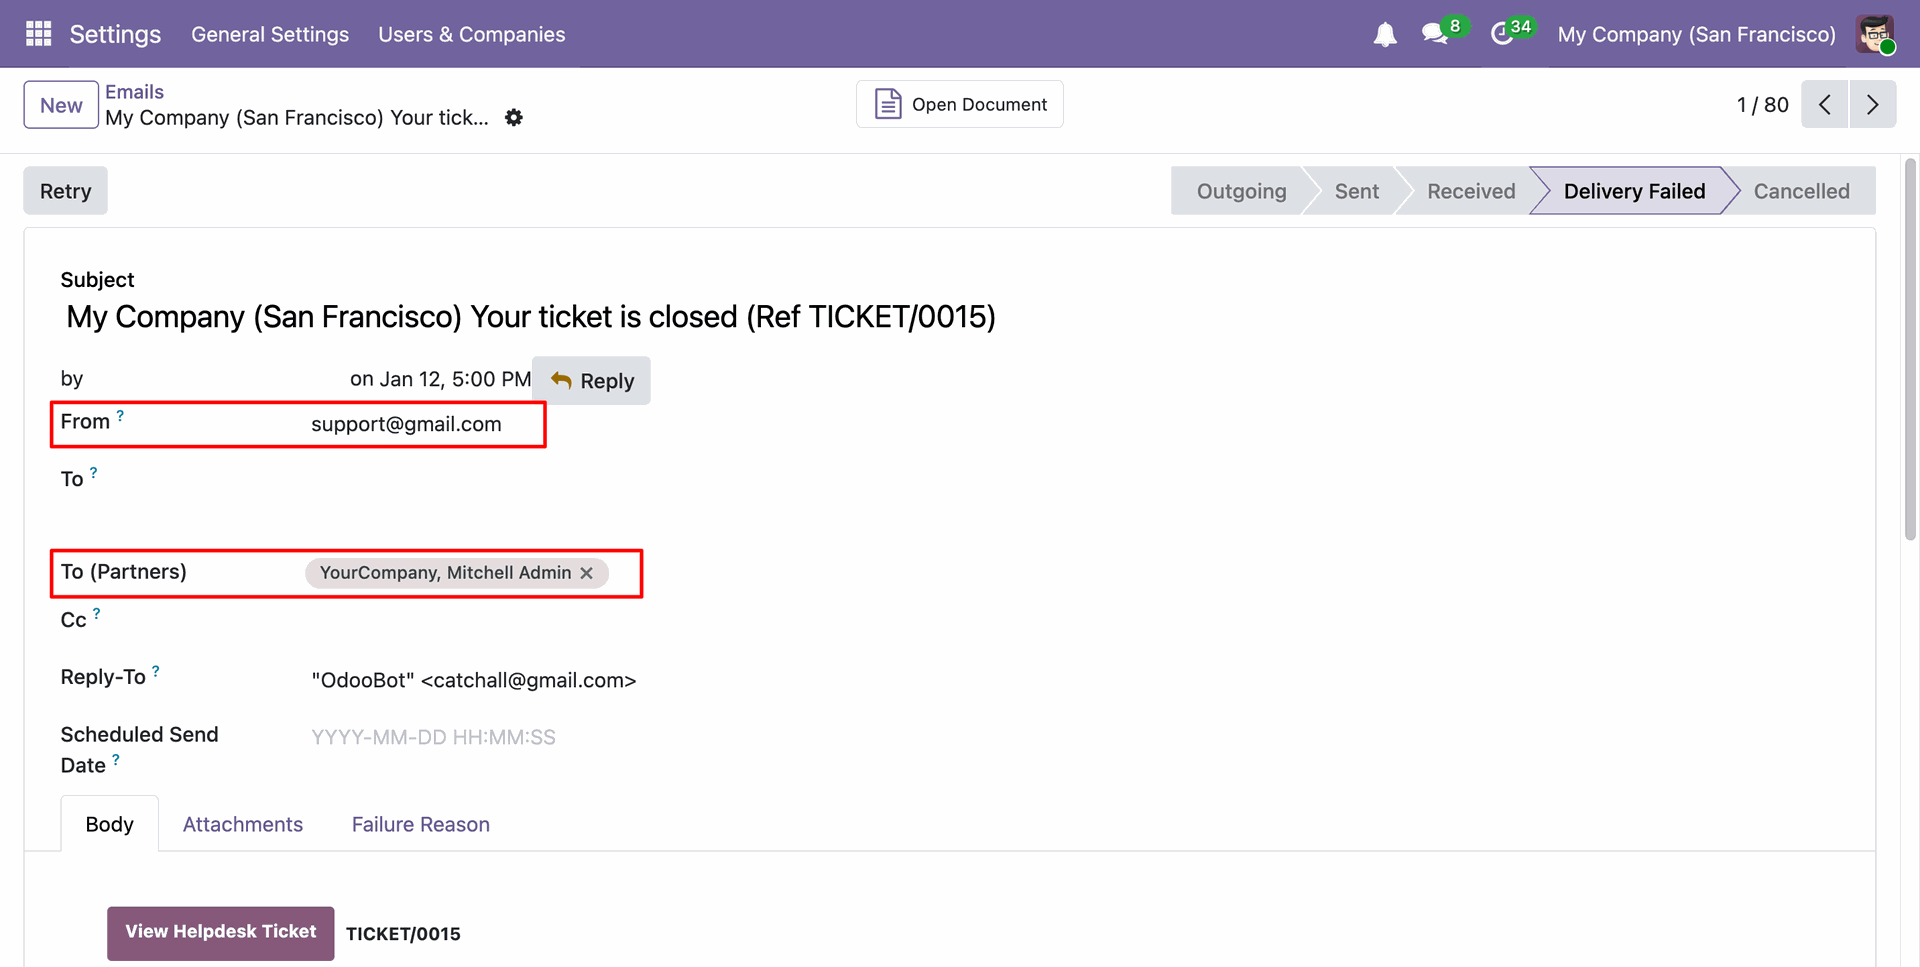
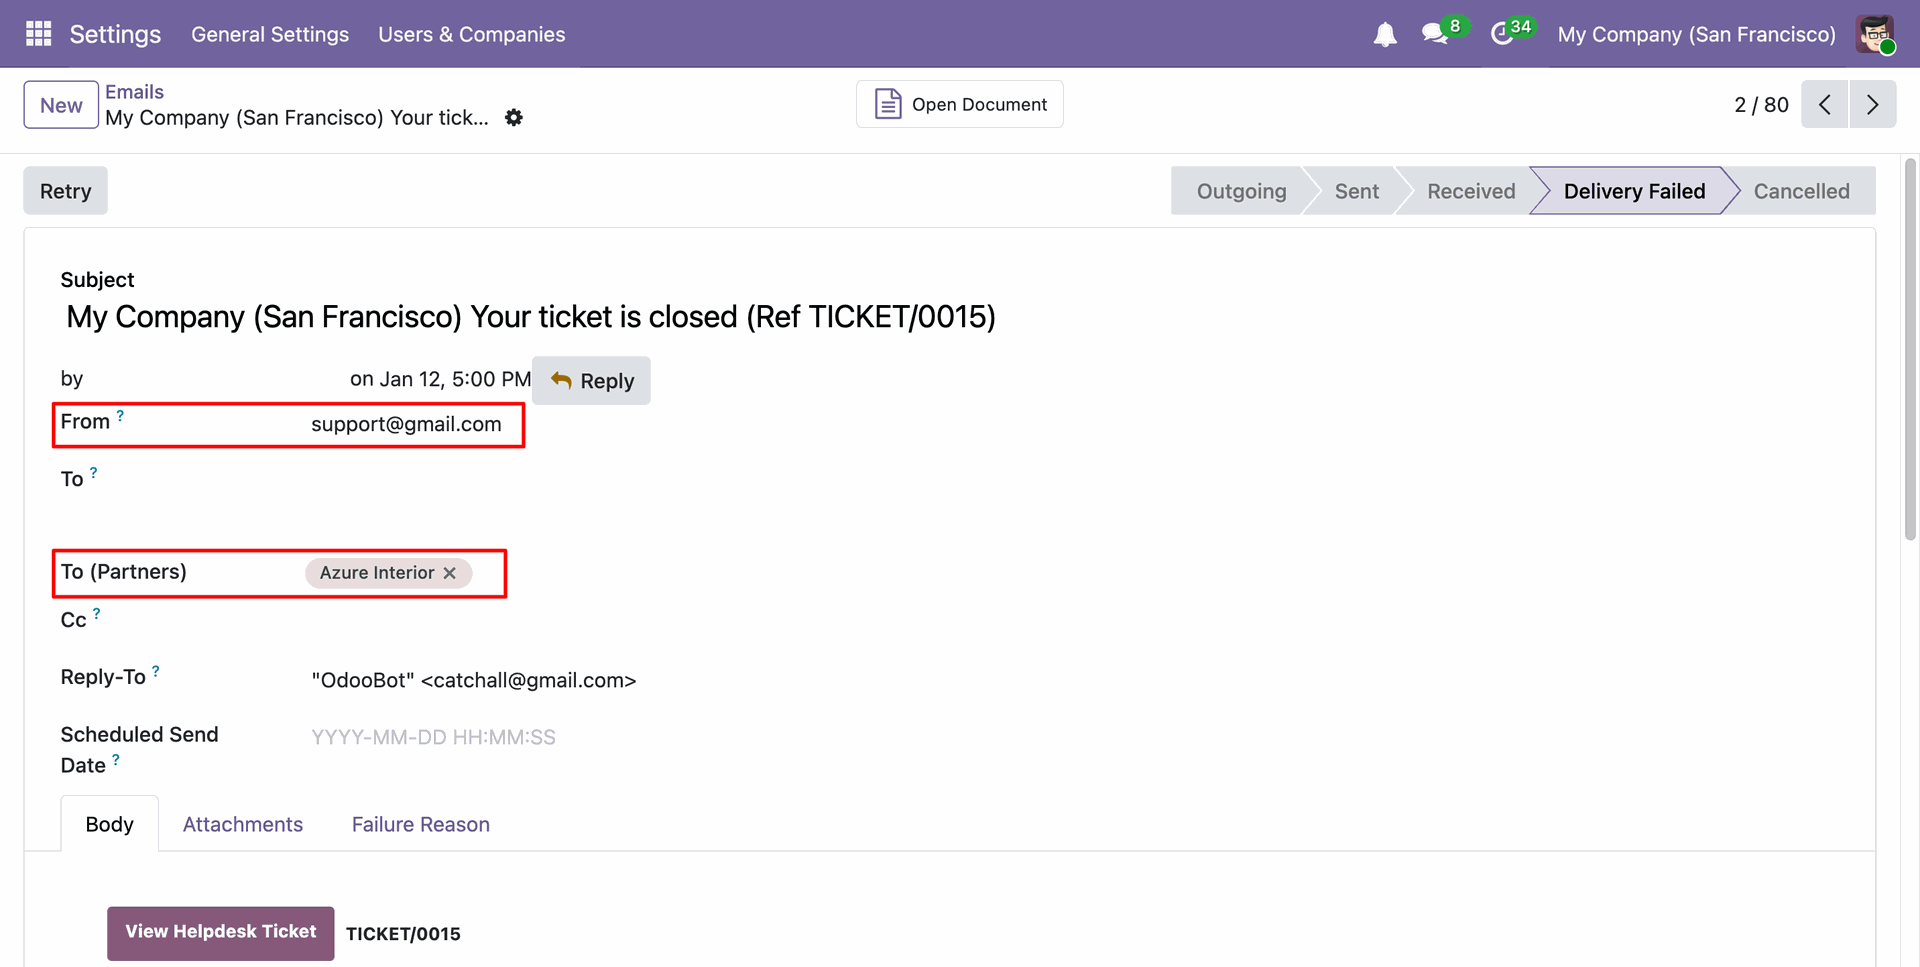
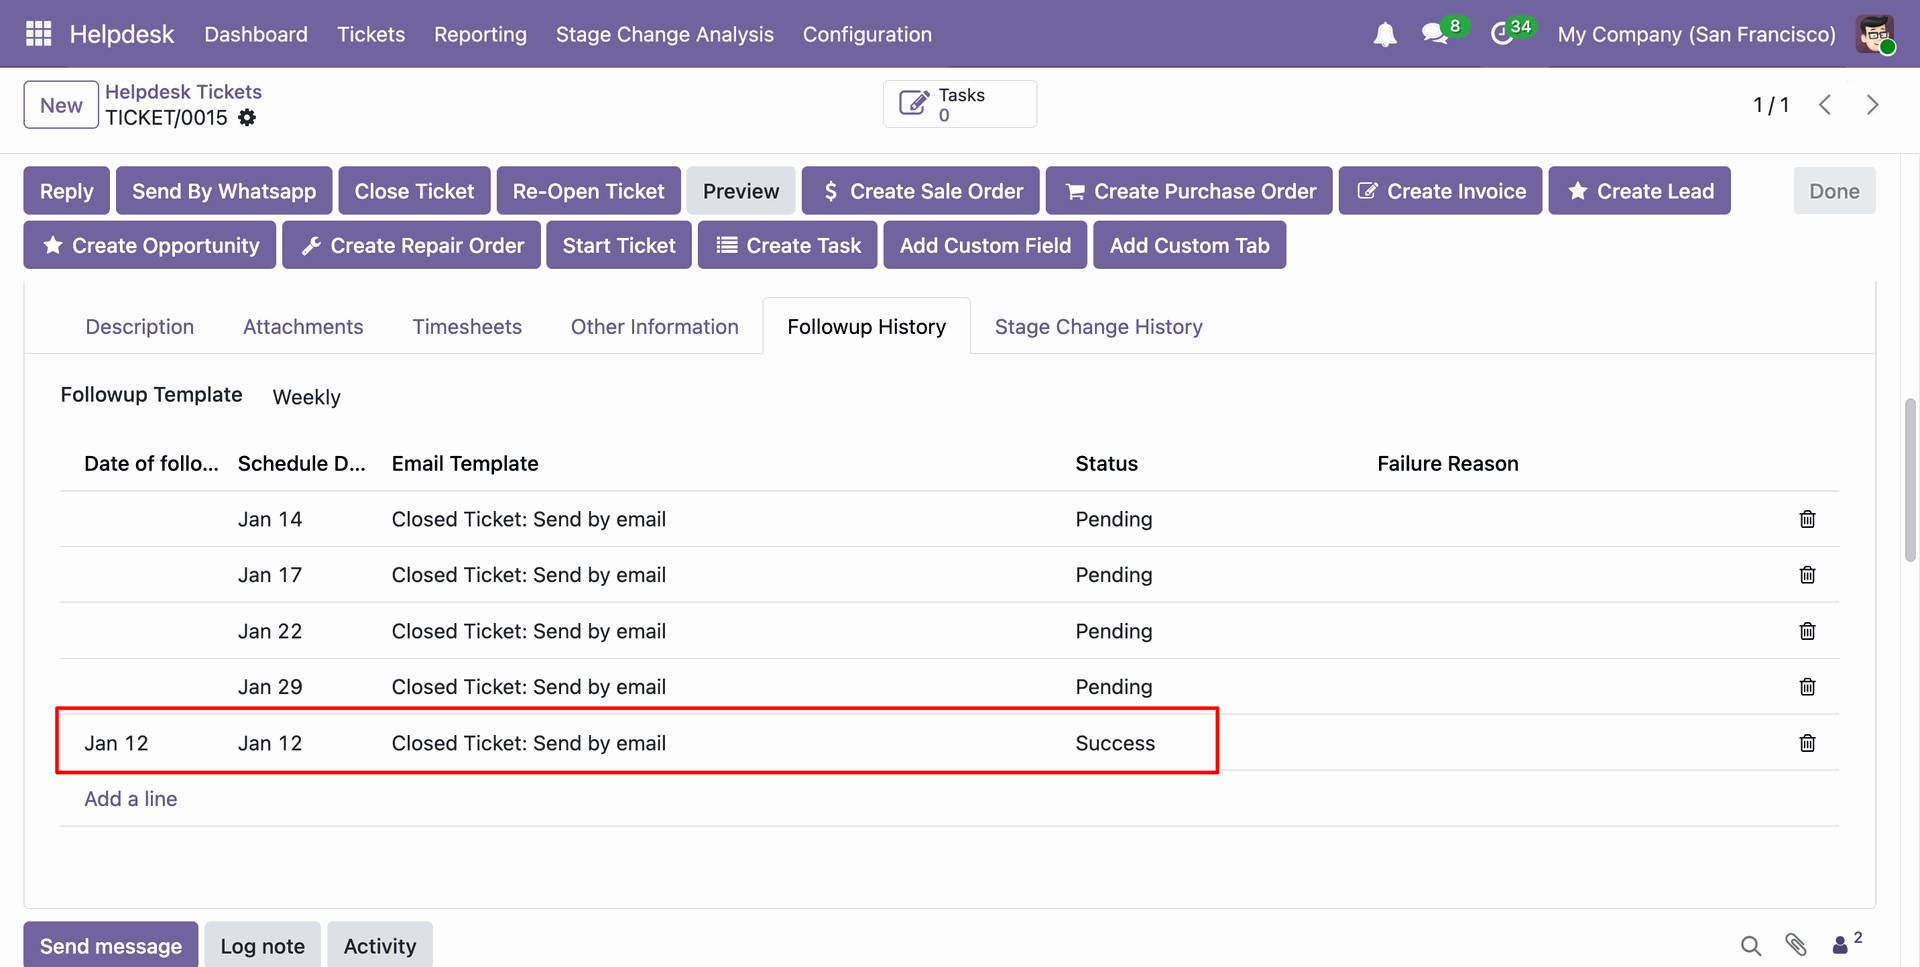
In the helpdesk ticket form view, you can see that the email status has been updated to Success.
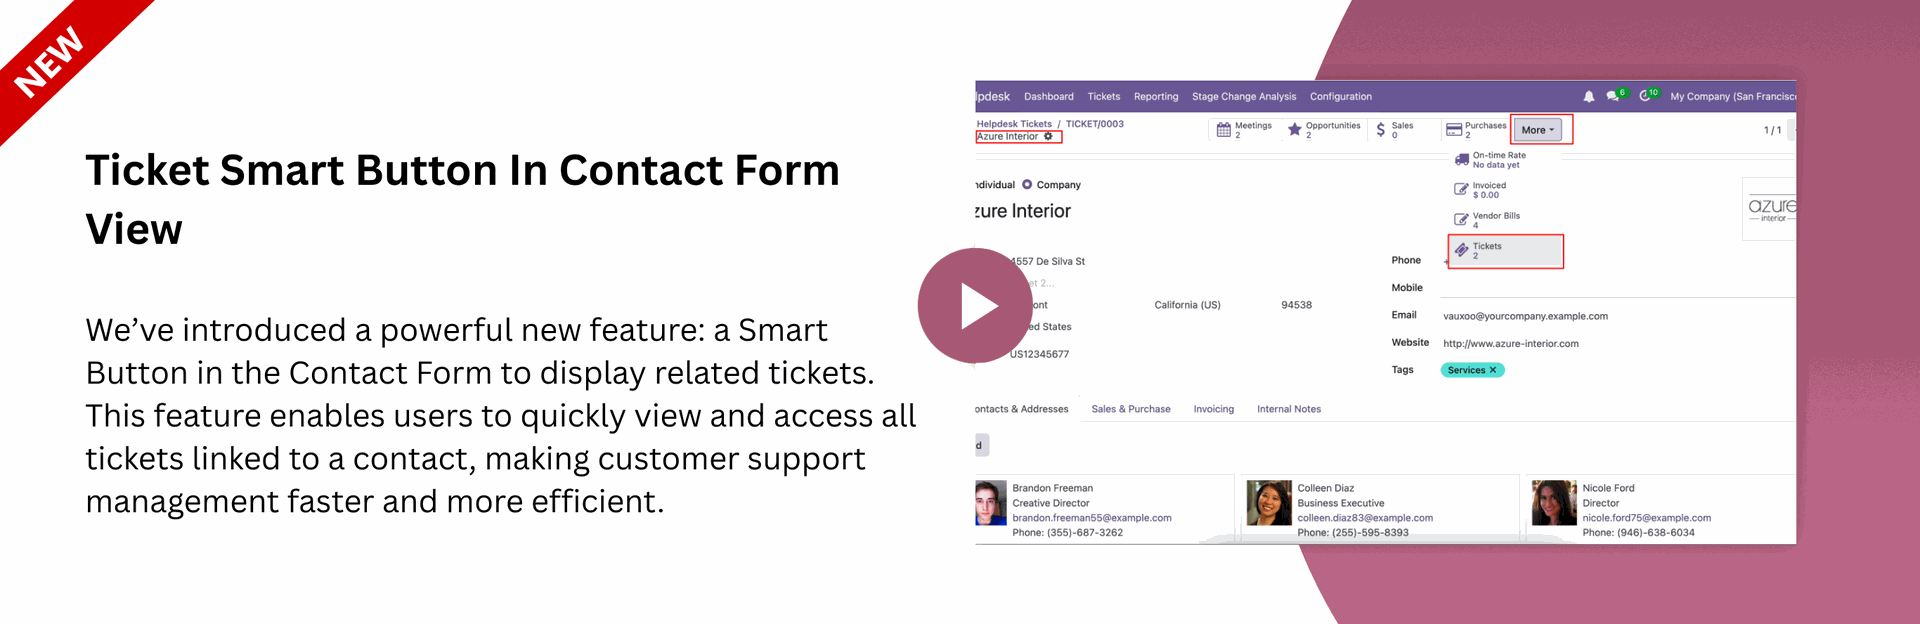
A Smart Button In The Contact Form To Display Related Tickets.
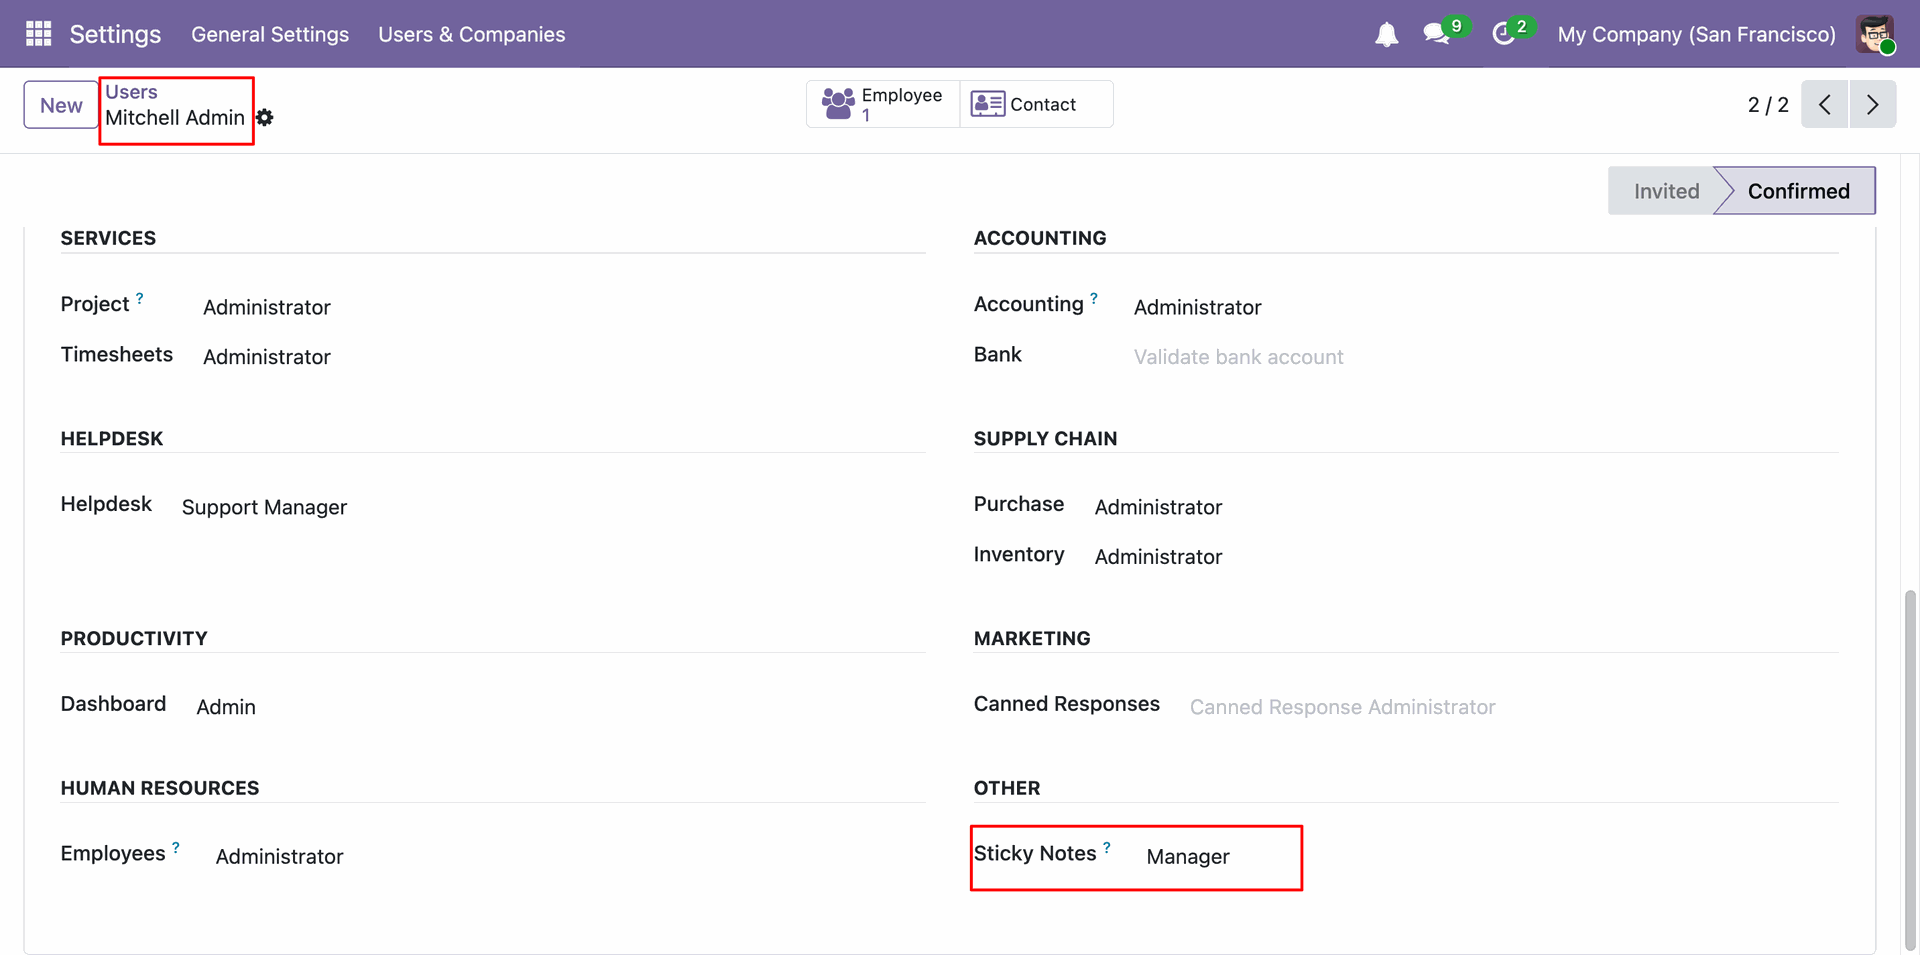
Go to the user configuration and provide a Manager access right to the Mitchell Admin.
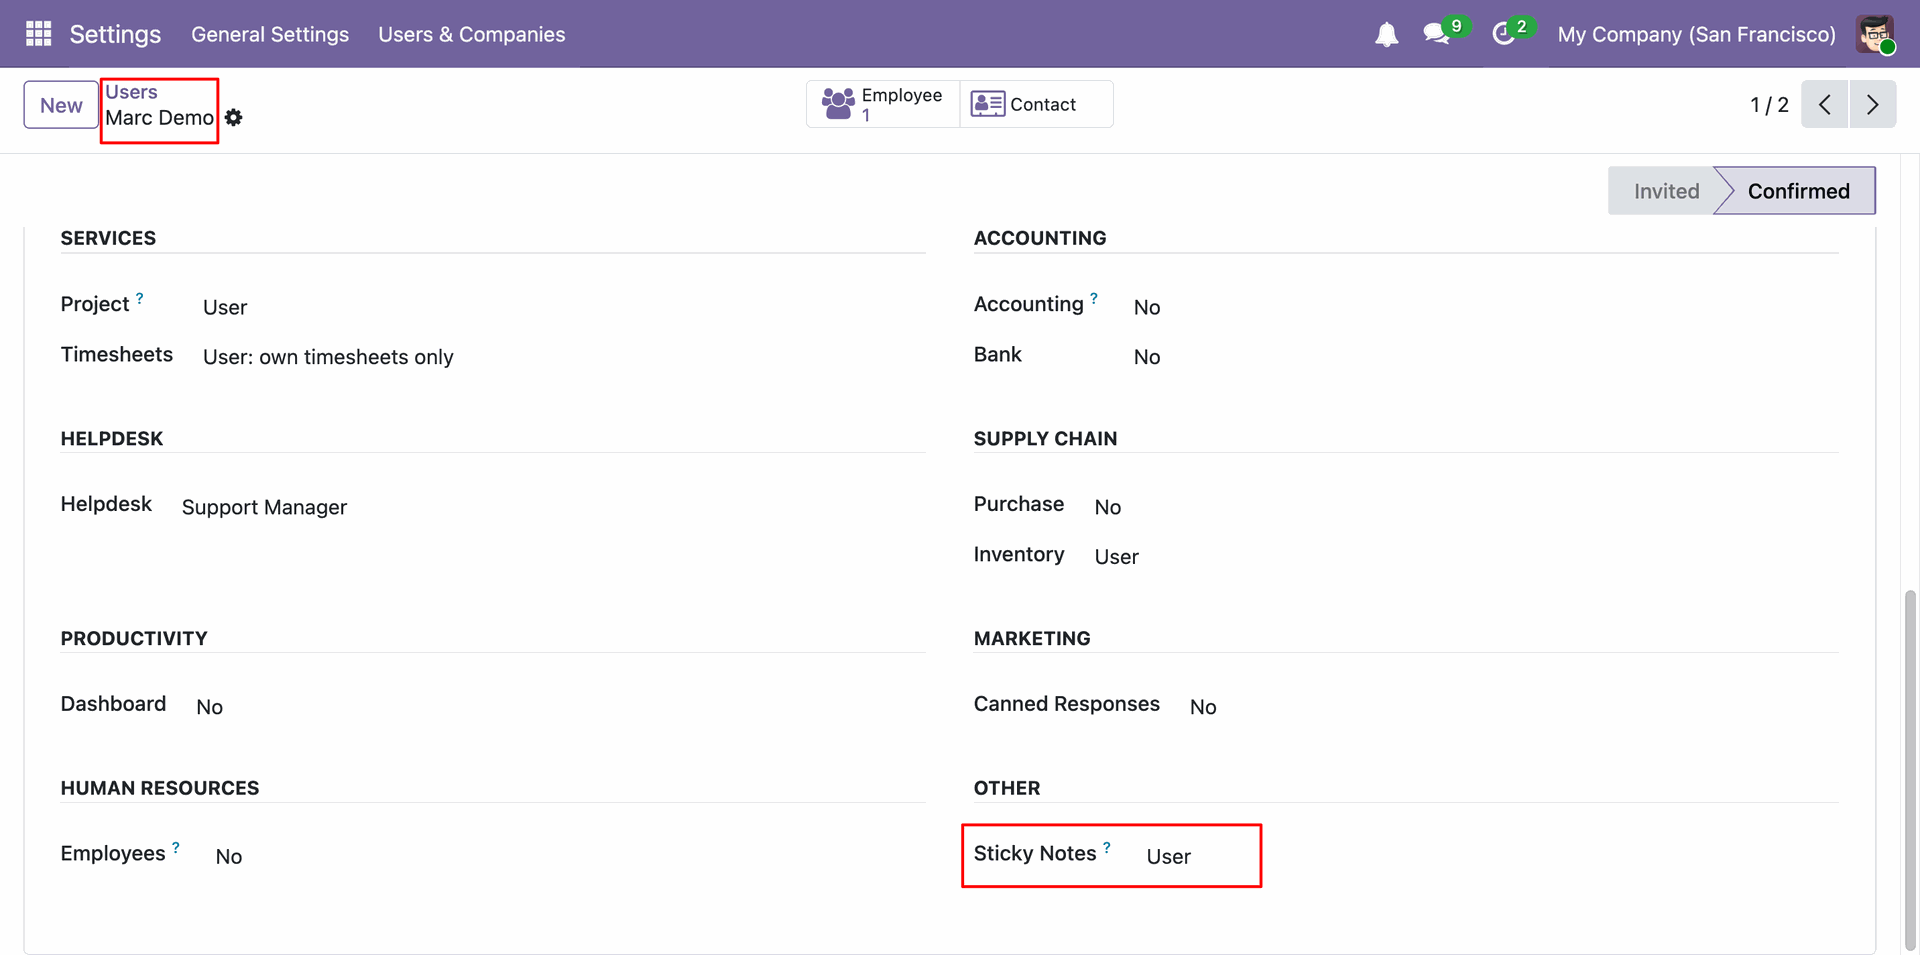
Provide a User access right to the Marc Demo.
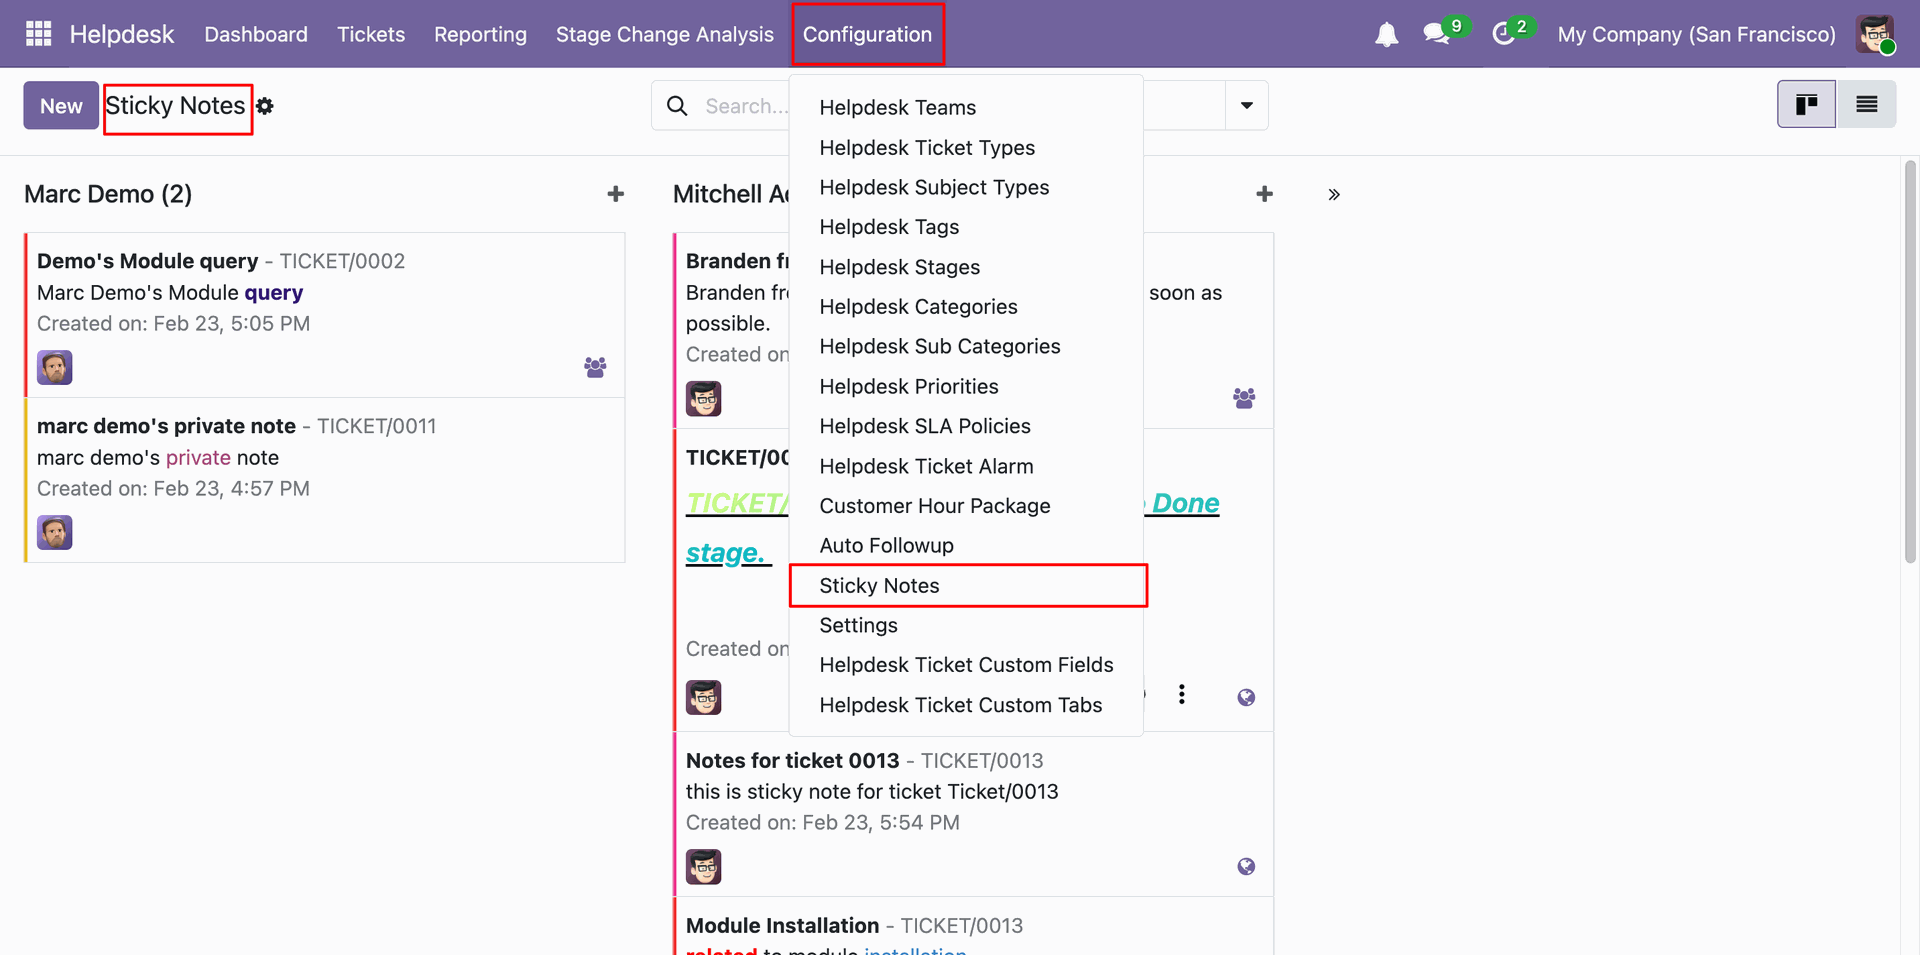
Menu and kanban view of the 'Sticky Notes'.
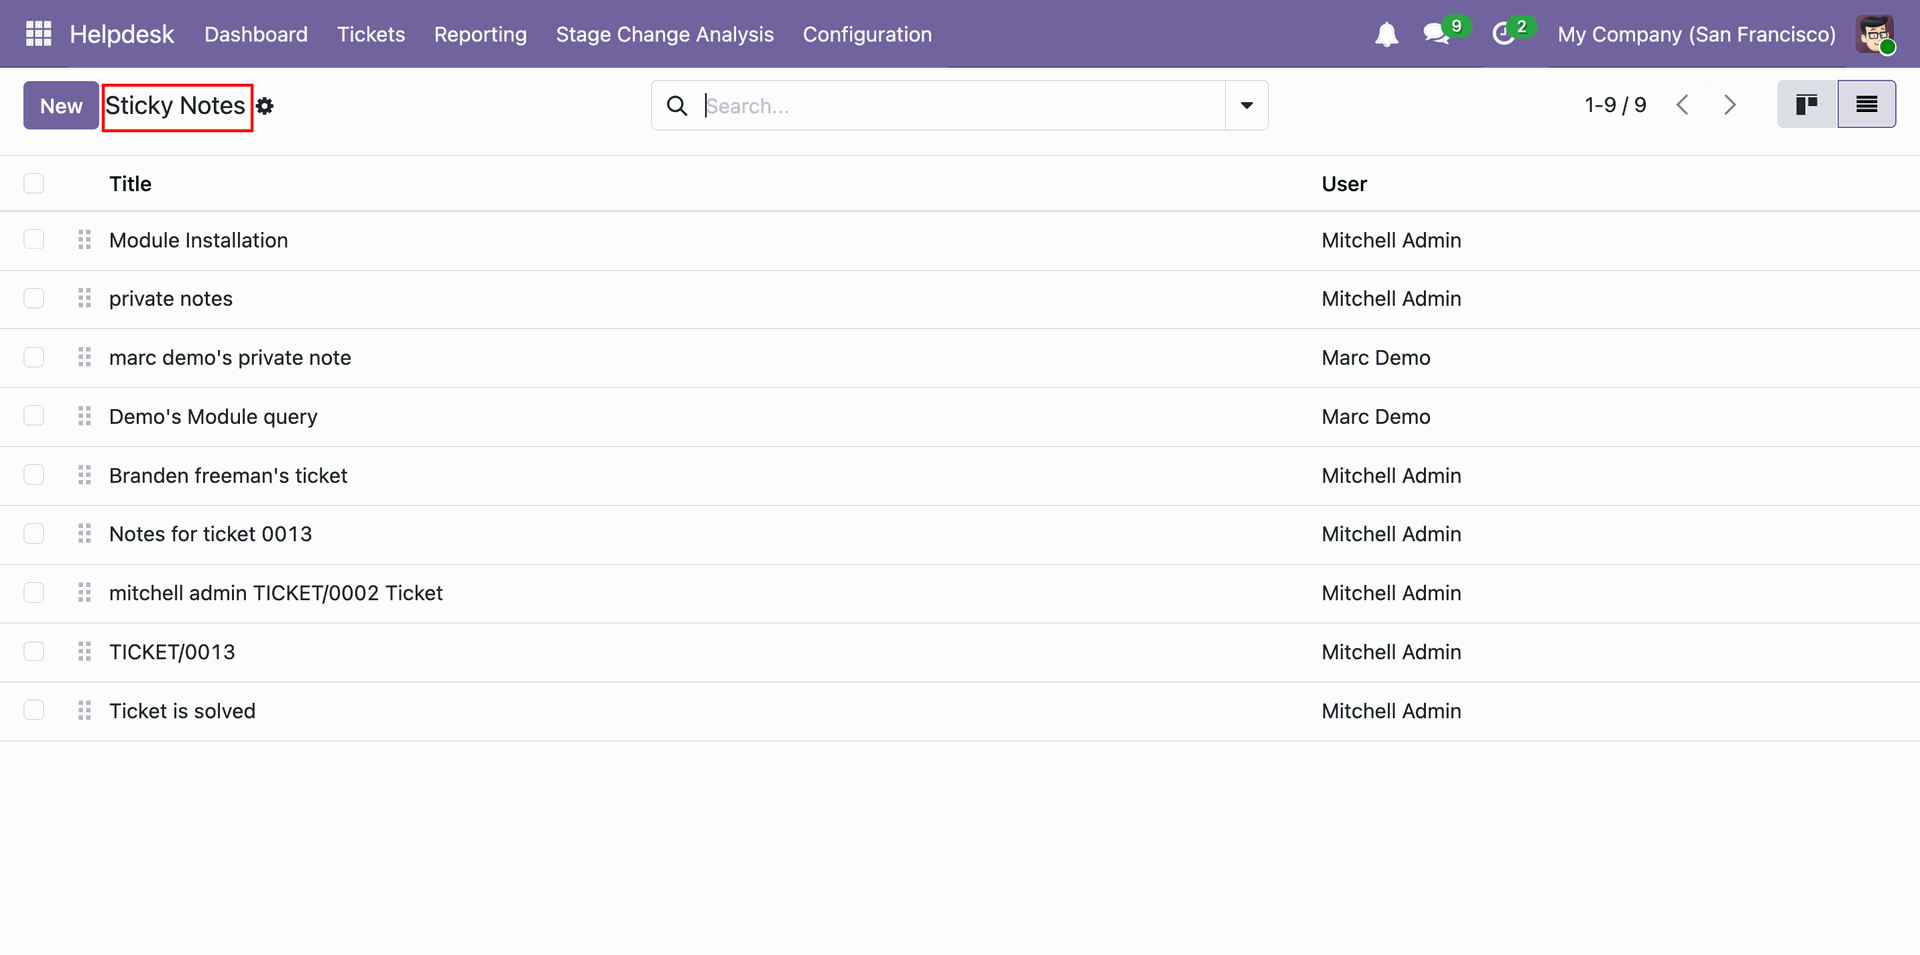
Tree view of the 'Sticky Notes'.
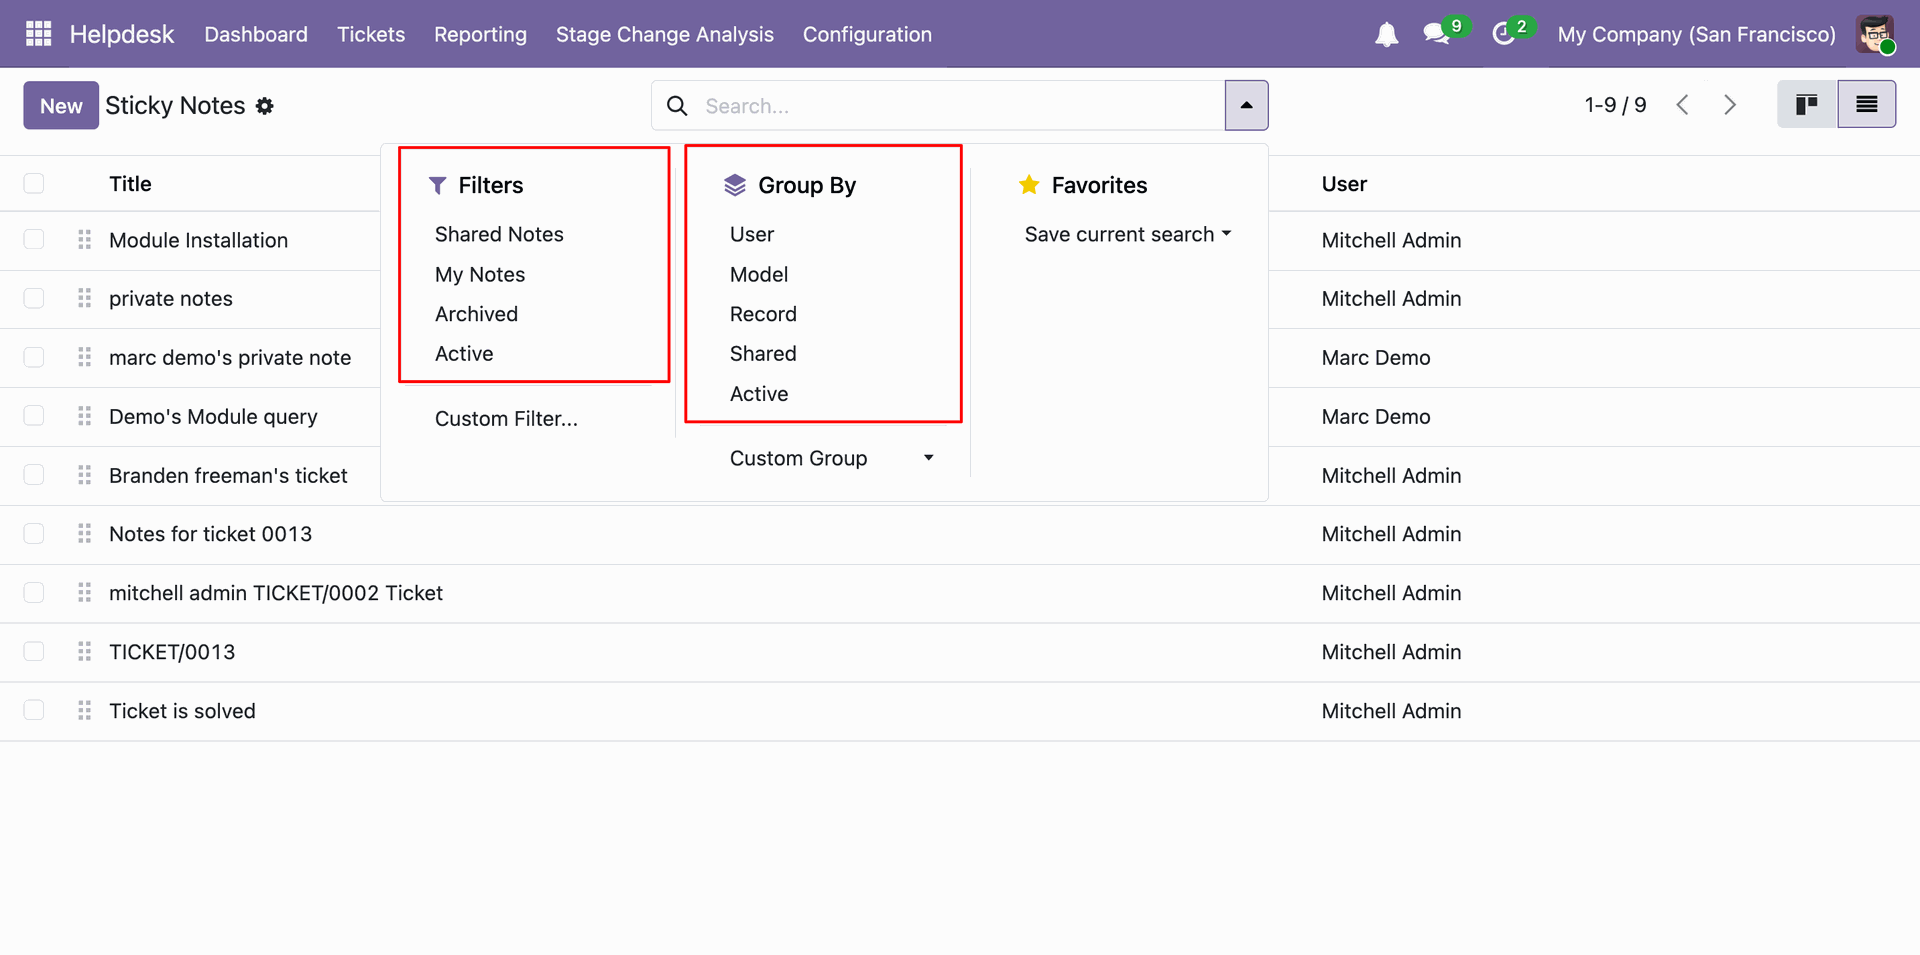
You can easily filter and group by Sticky Notes records as shown below.
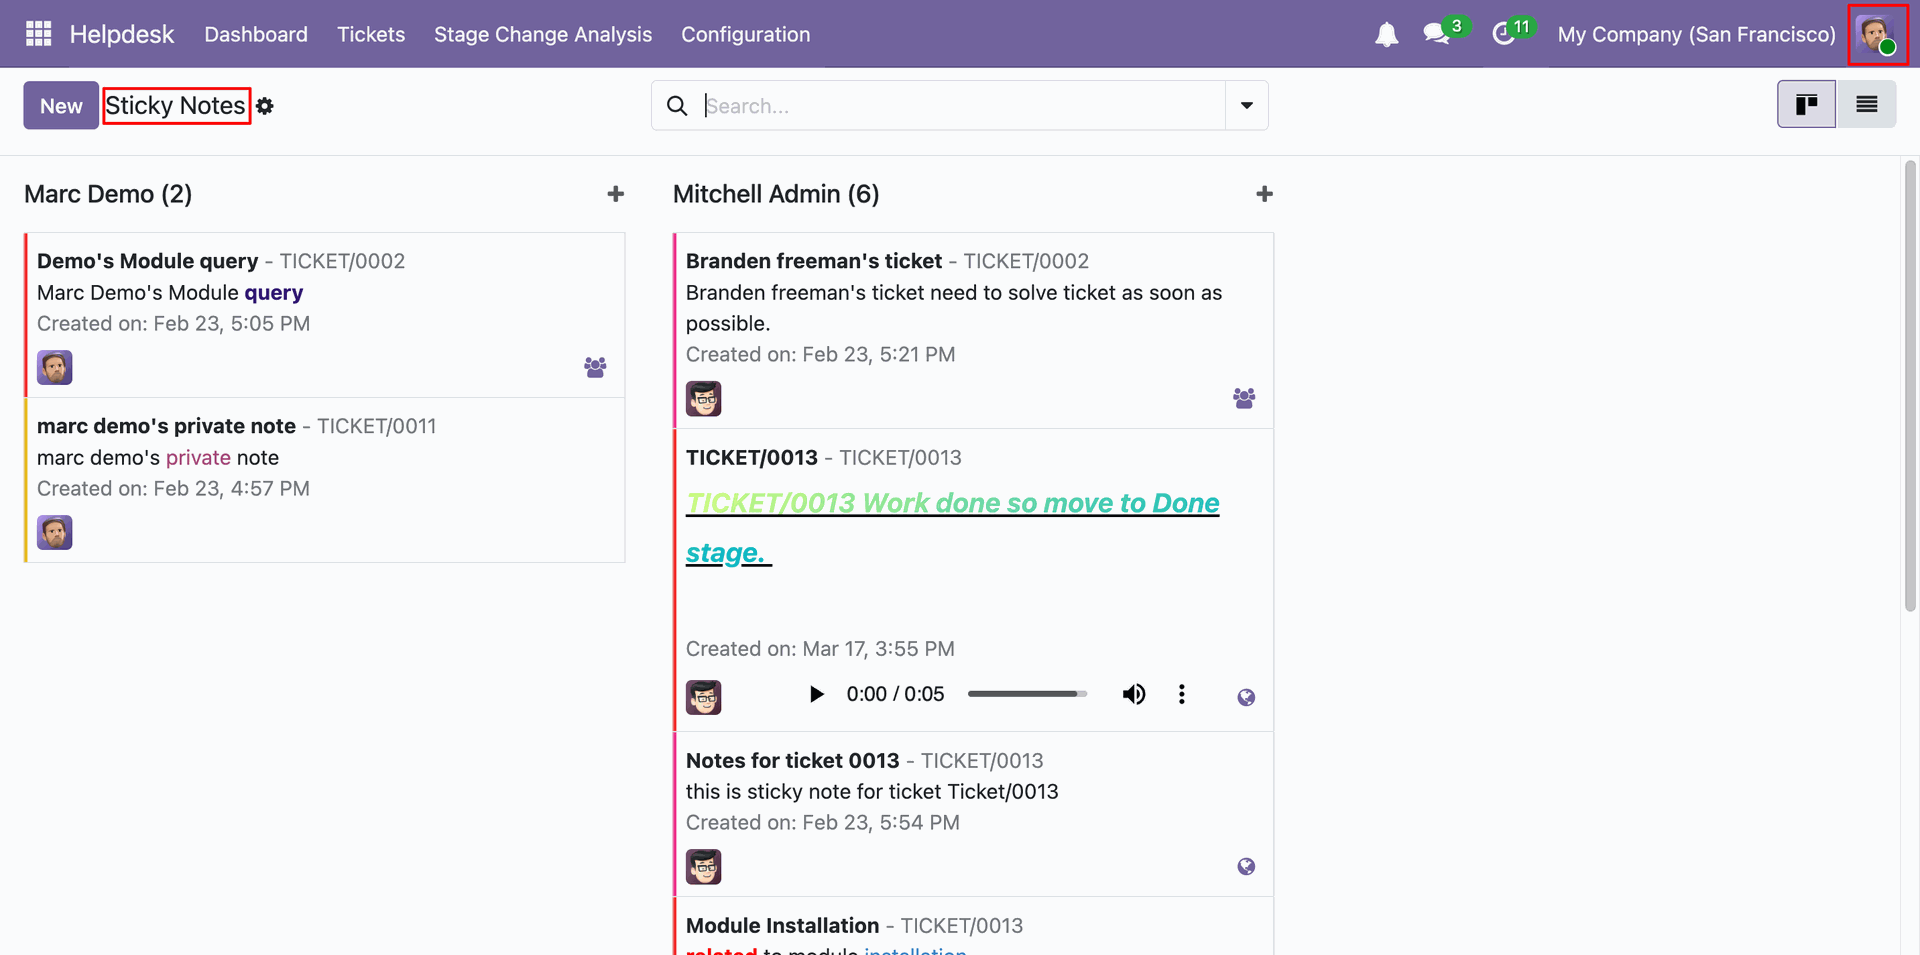
Kanban view of the sticky notes for the Marc Demo user.
Click on the 'Pin' icon.
After that, the 'New Note' wizard will appear.
Add details and click on the 'Save' button.
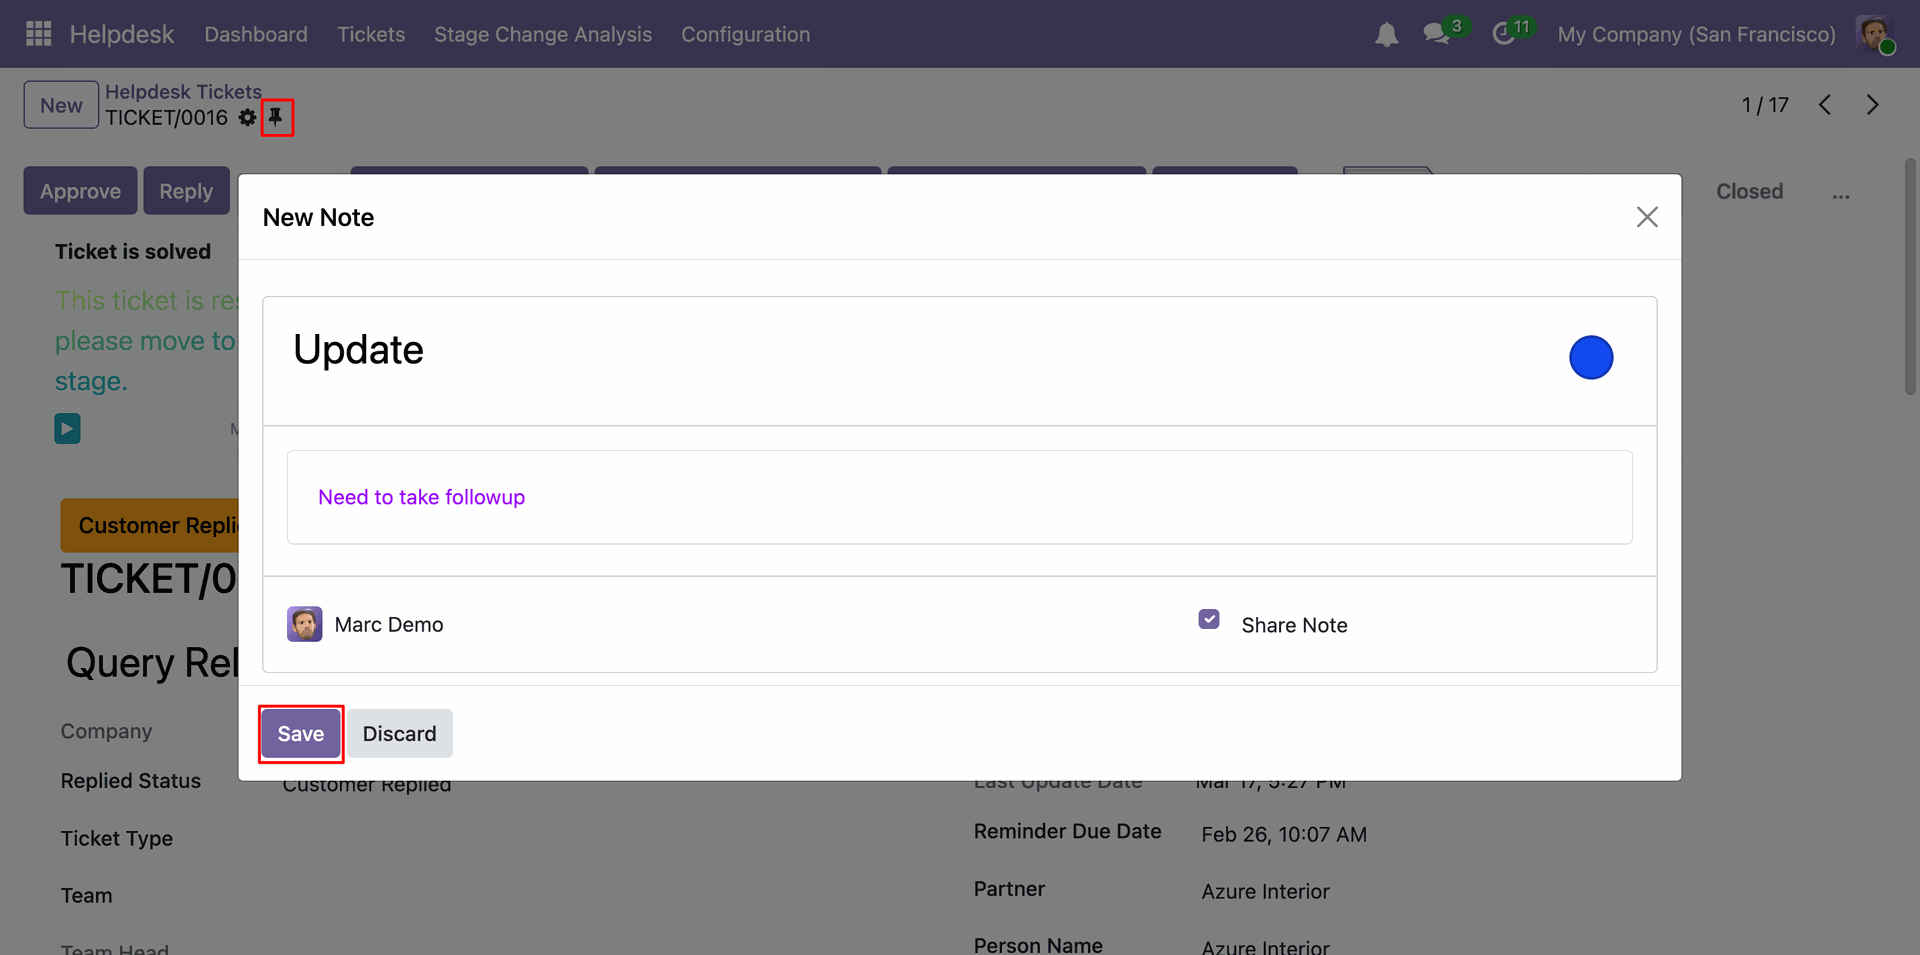
Here, you can see the newly added sticky note.
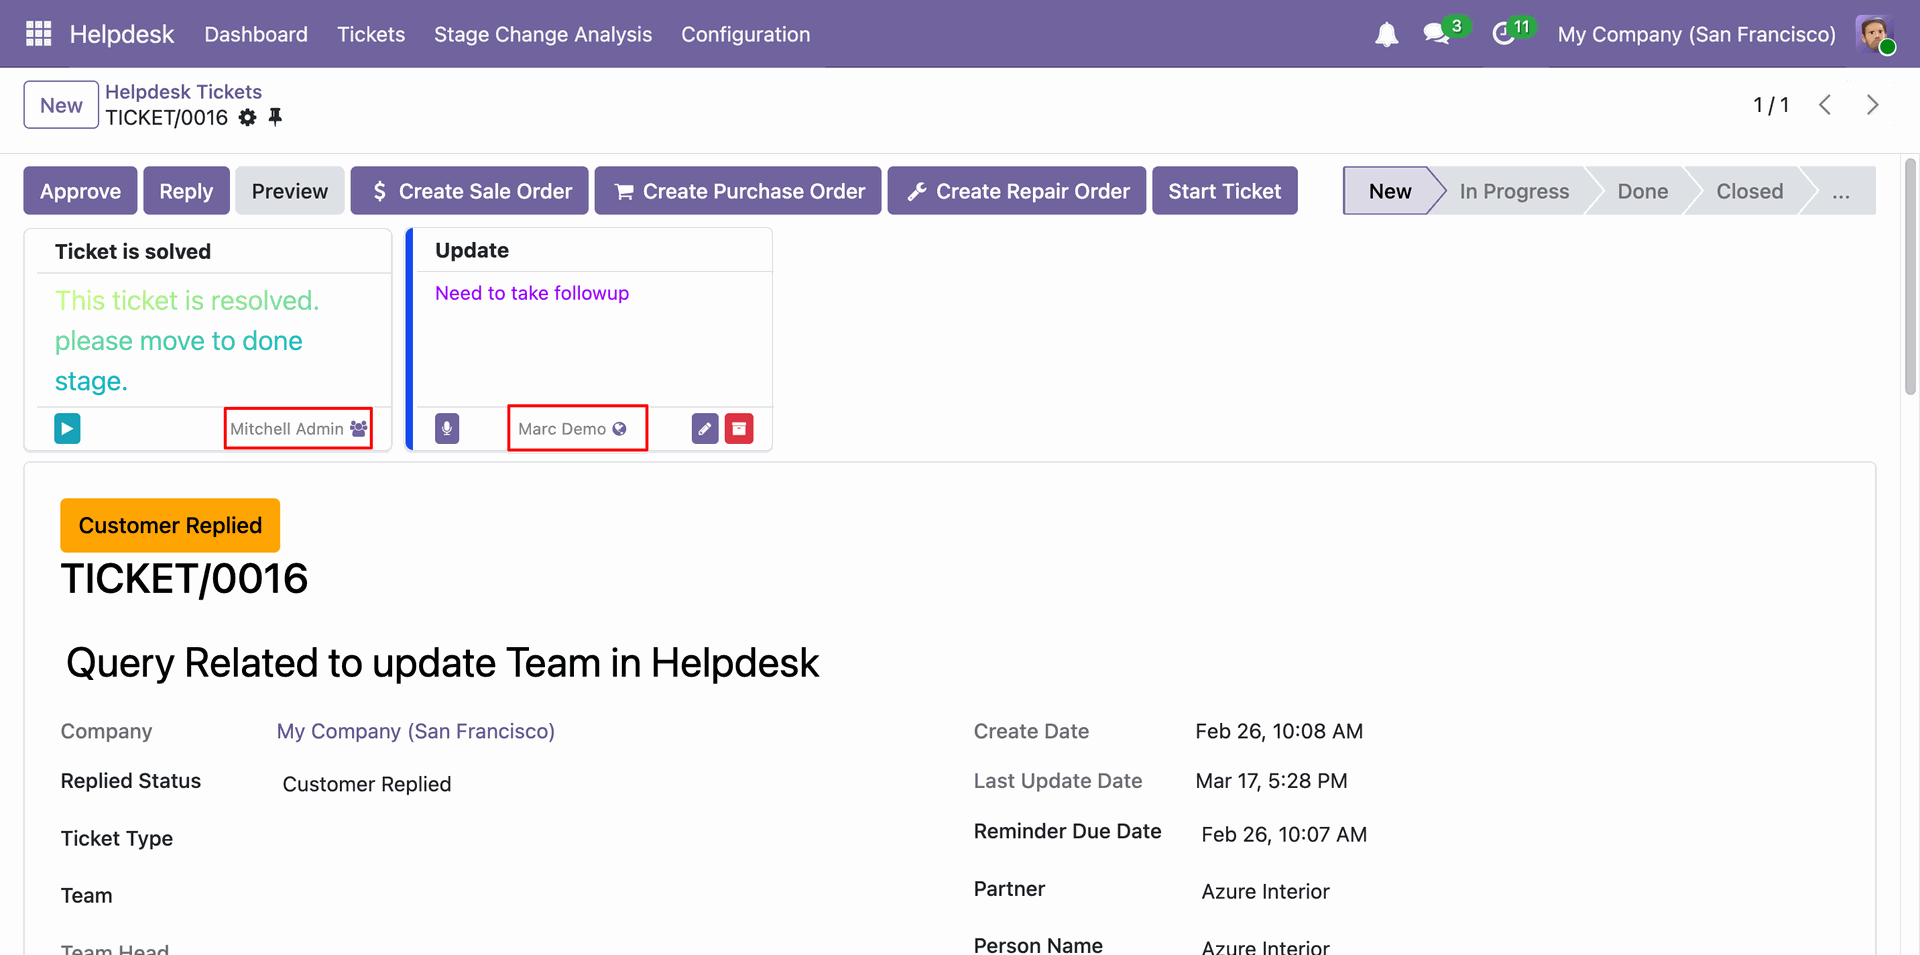
Click on the 'Recording' icon.
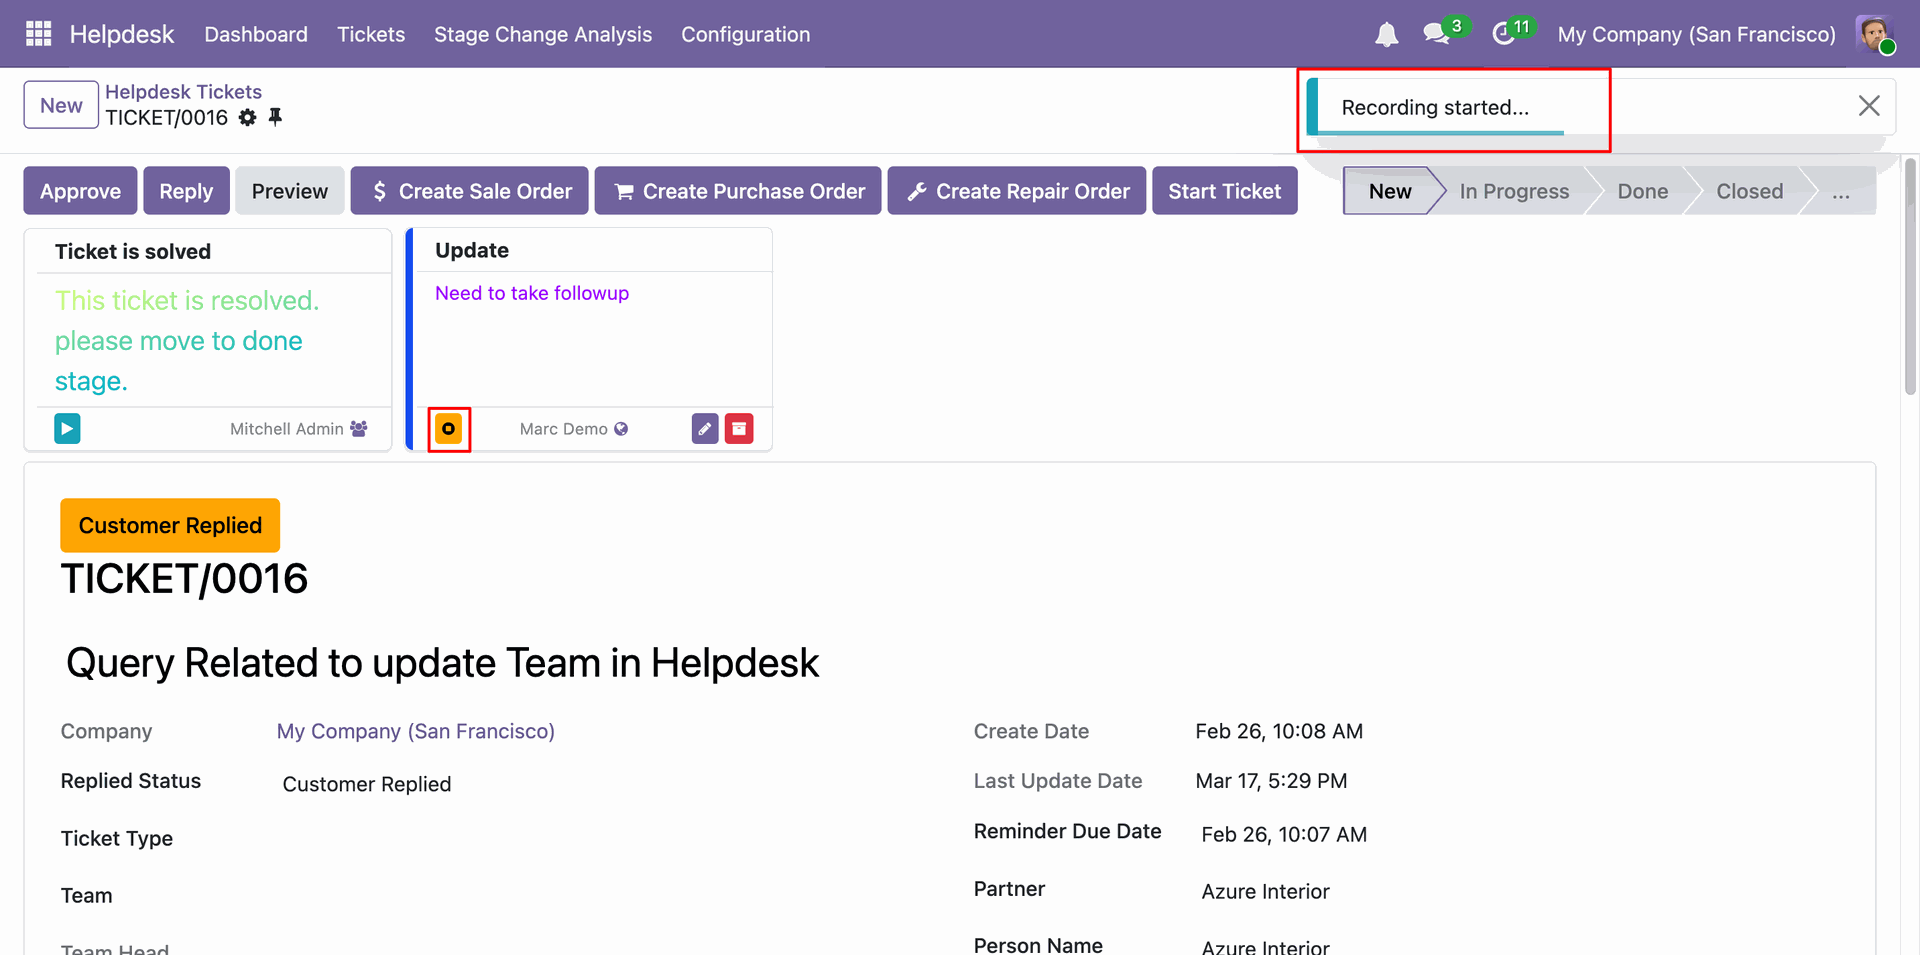
After that, a 'Recording started...' notification will be
displayed.
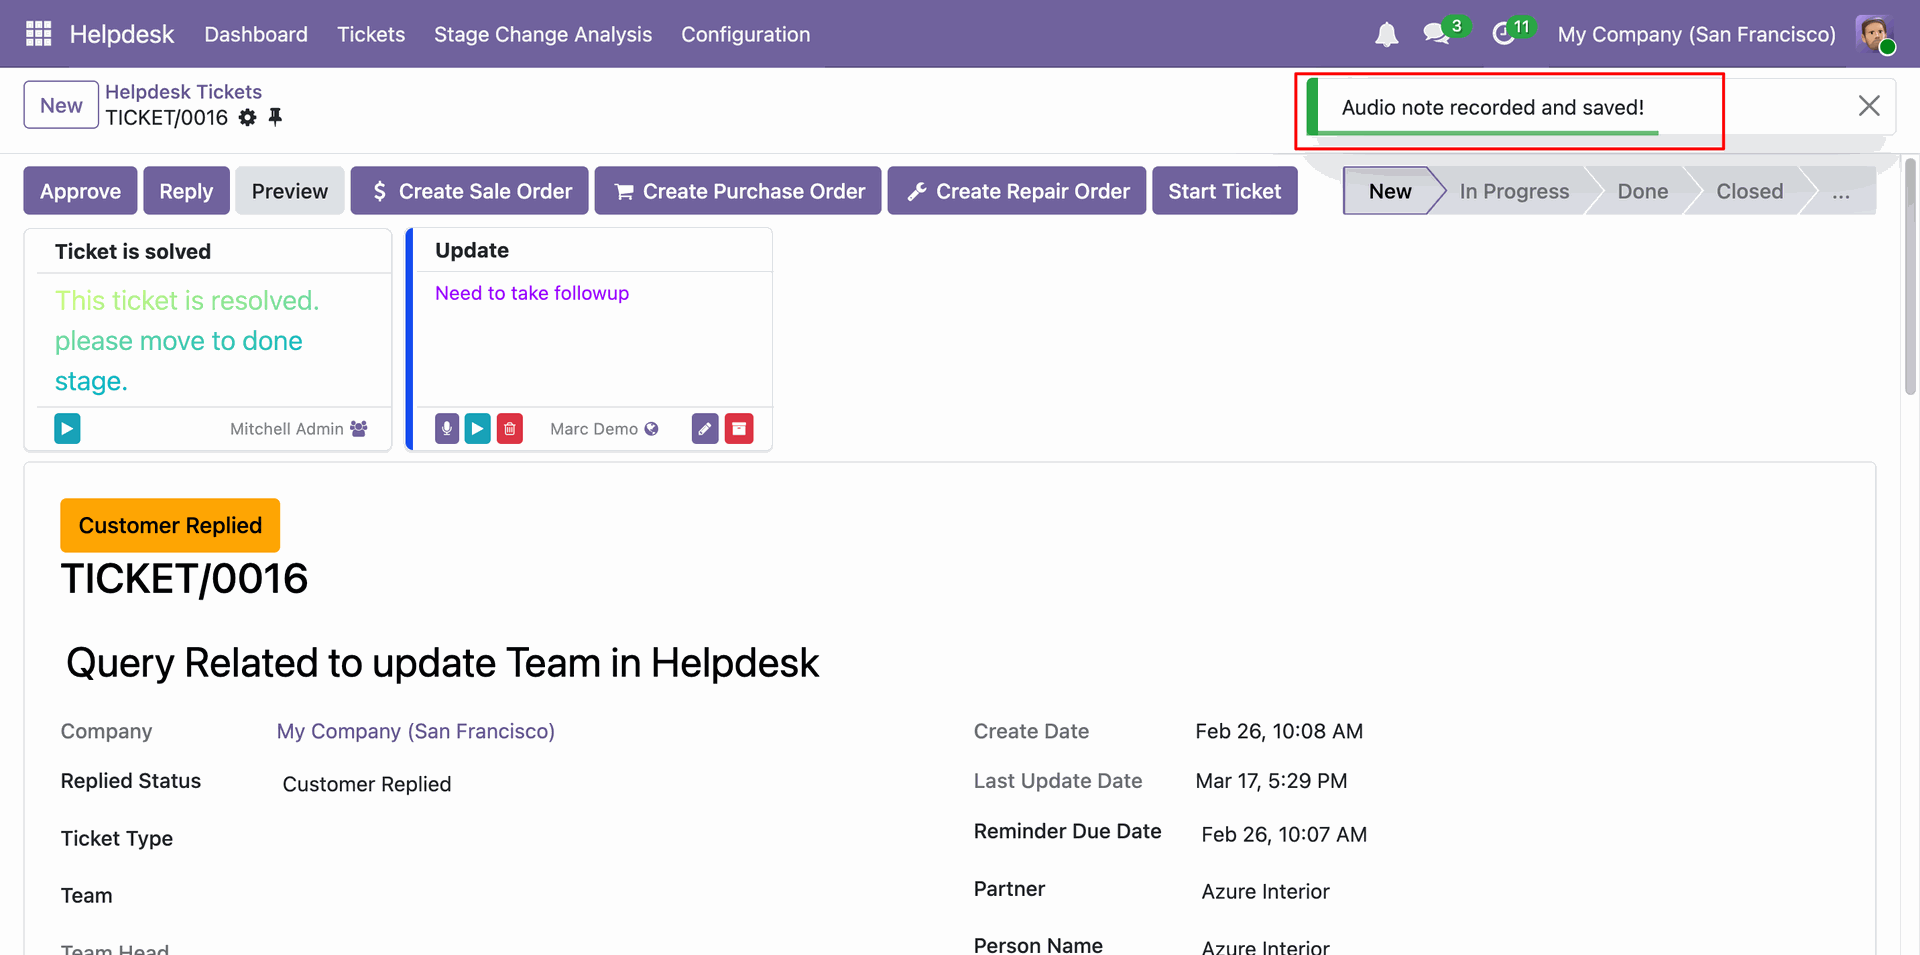
After ending the recording, an 'Audio note recorded and saved!'' notification will be displayed.
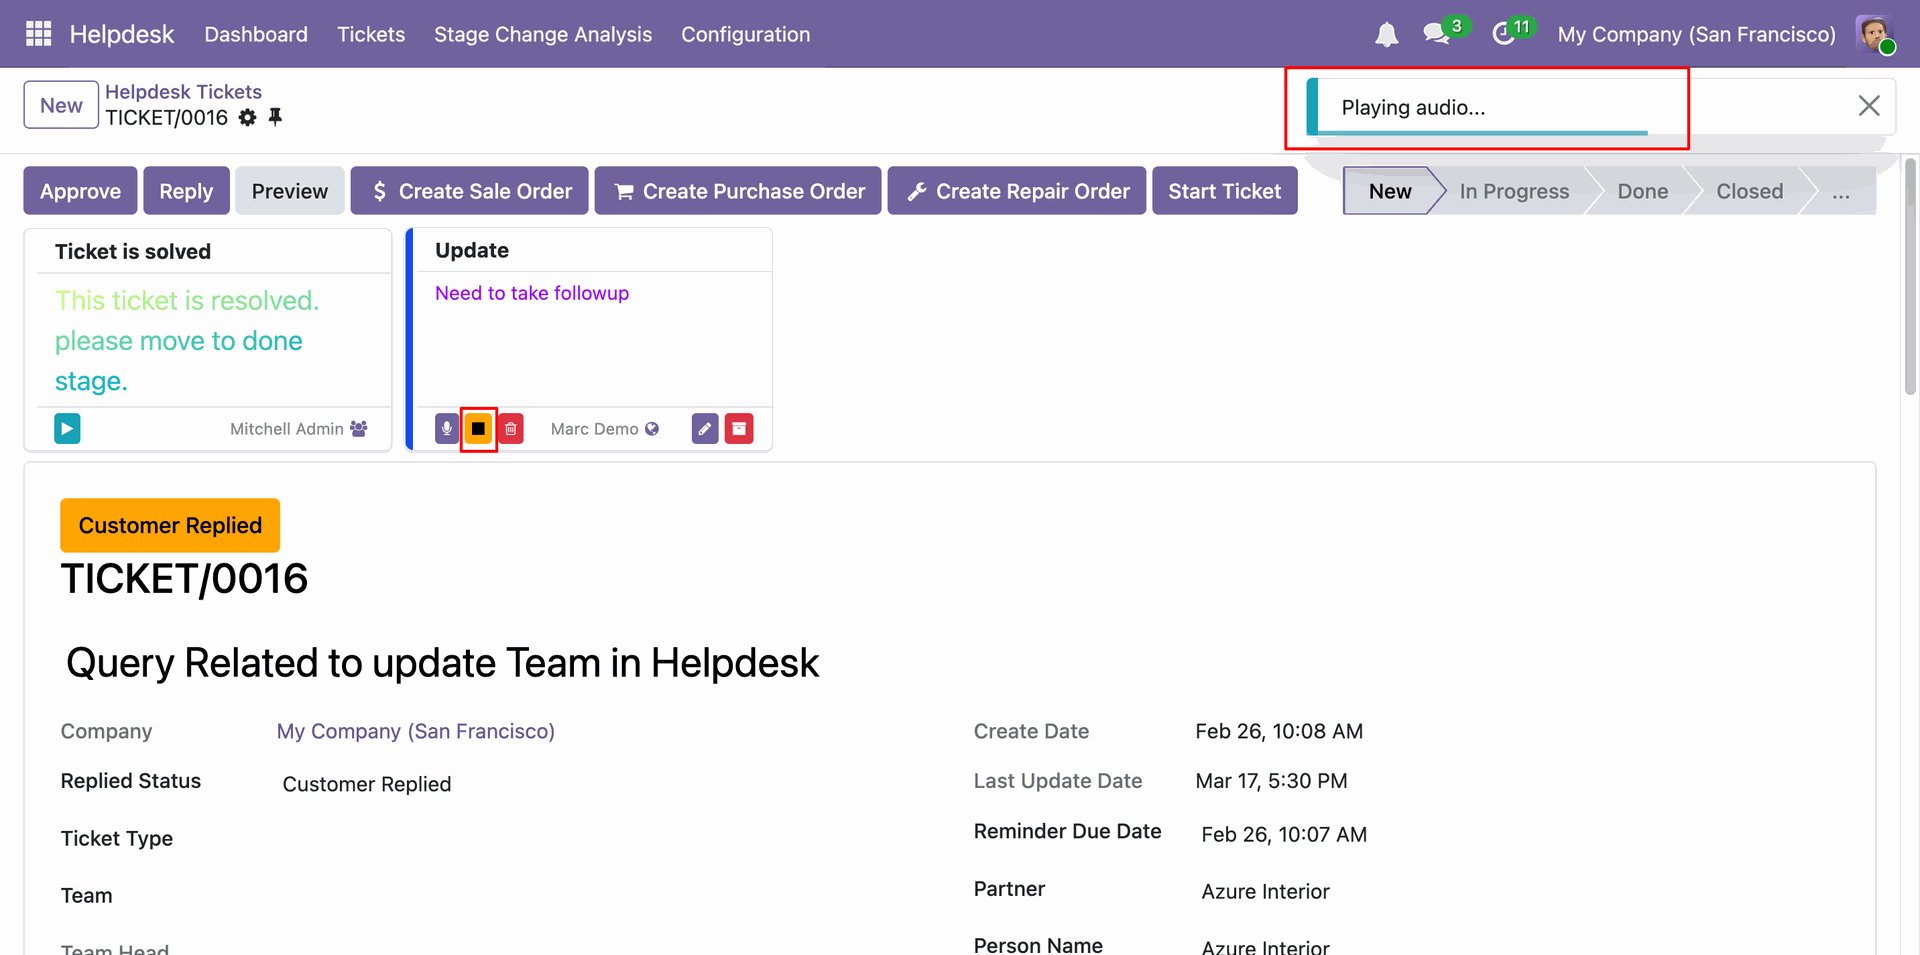
Click on the 'Play' icon.
After that, a 'Play Recording...' notification will be
displayed.
After the recording is completed, an 'Audio playback finished' notification will be displayed.
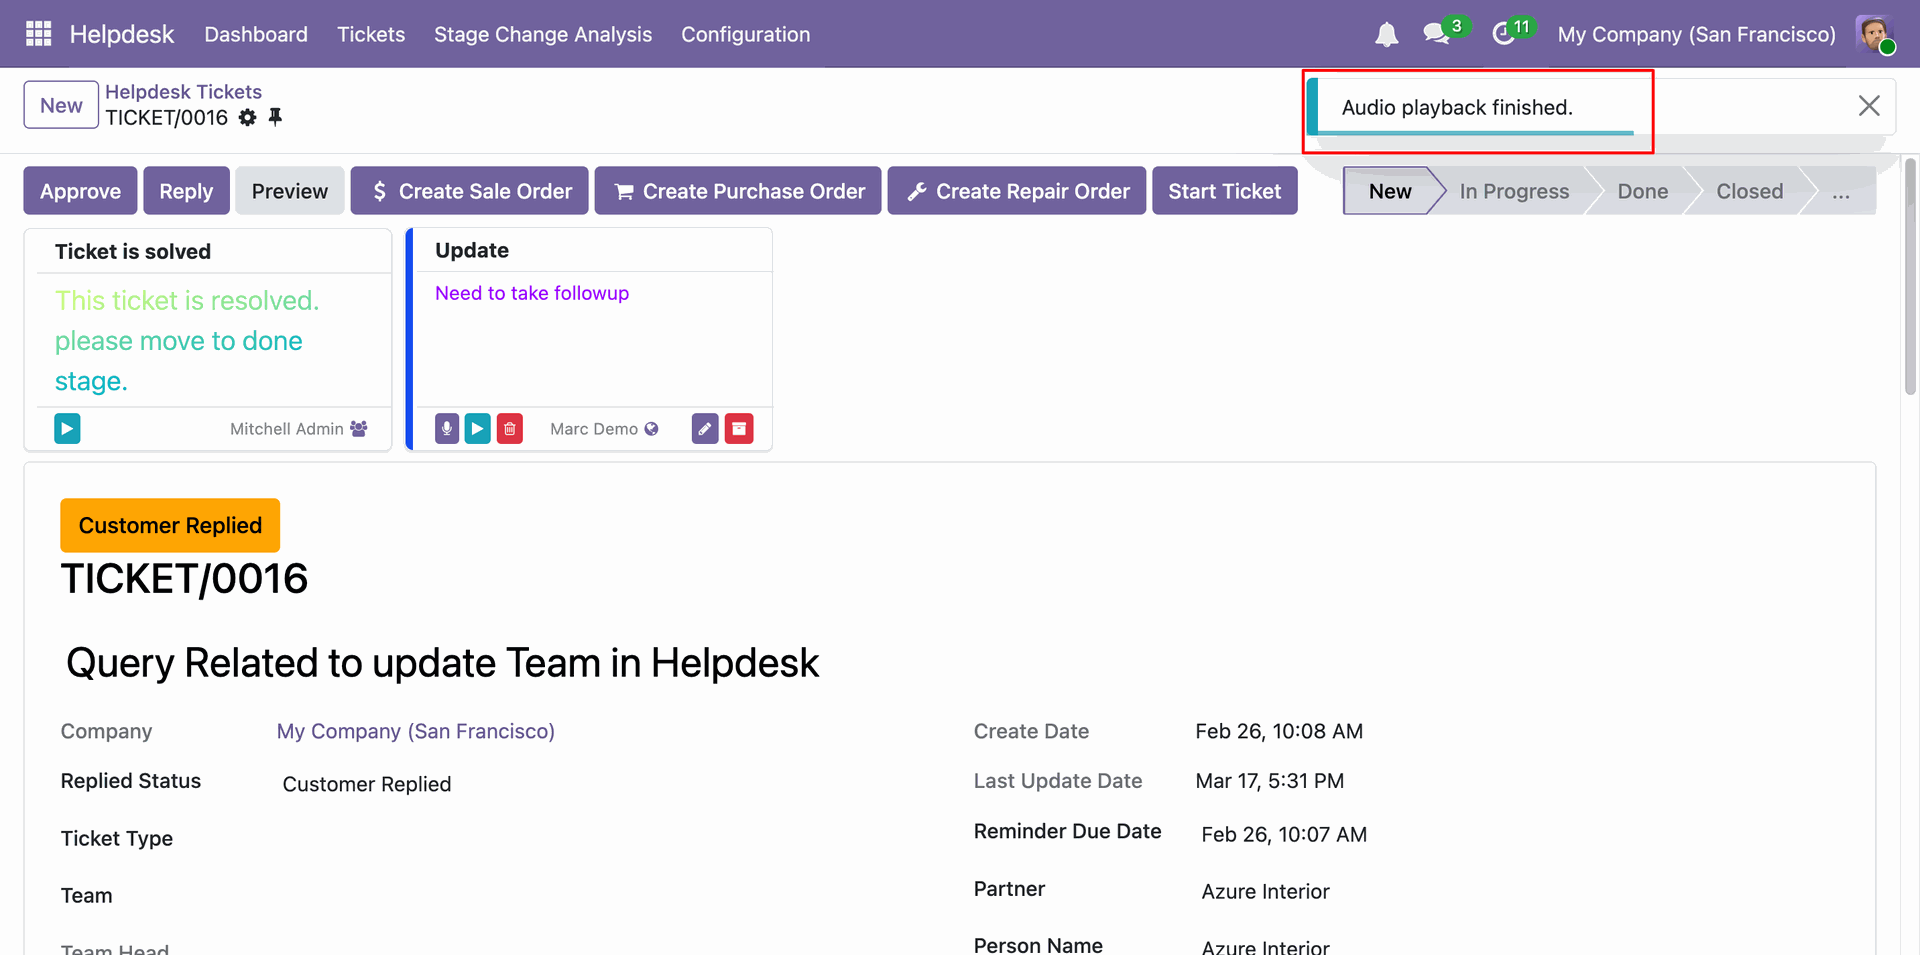
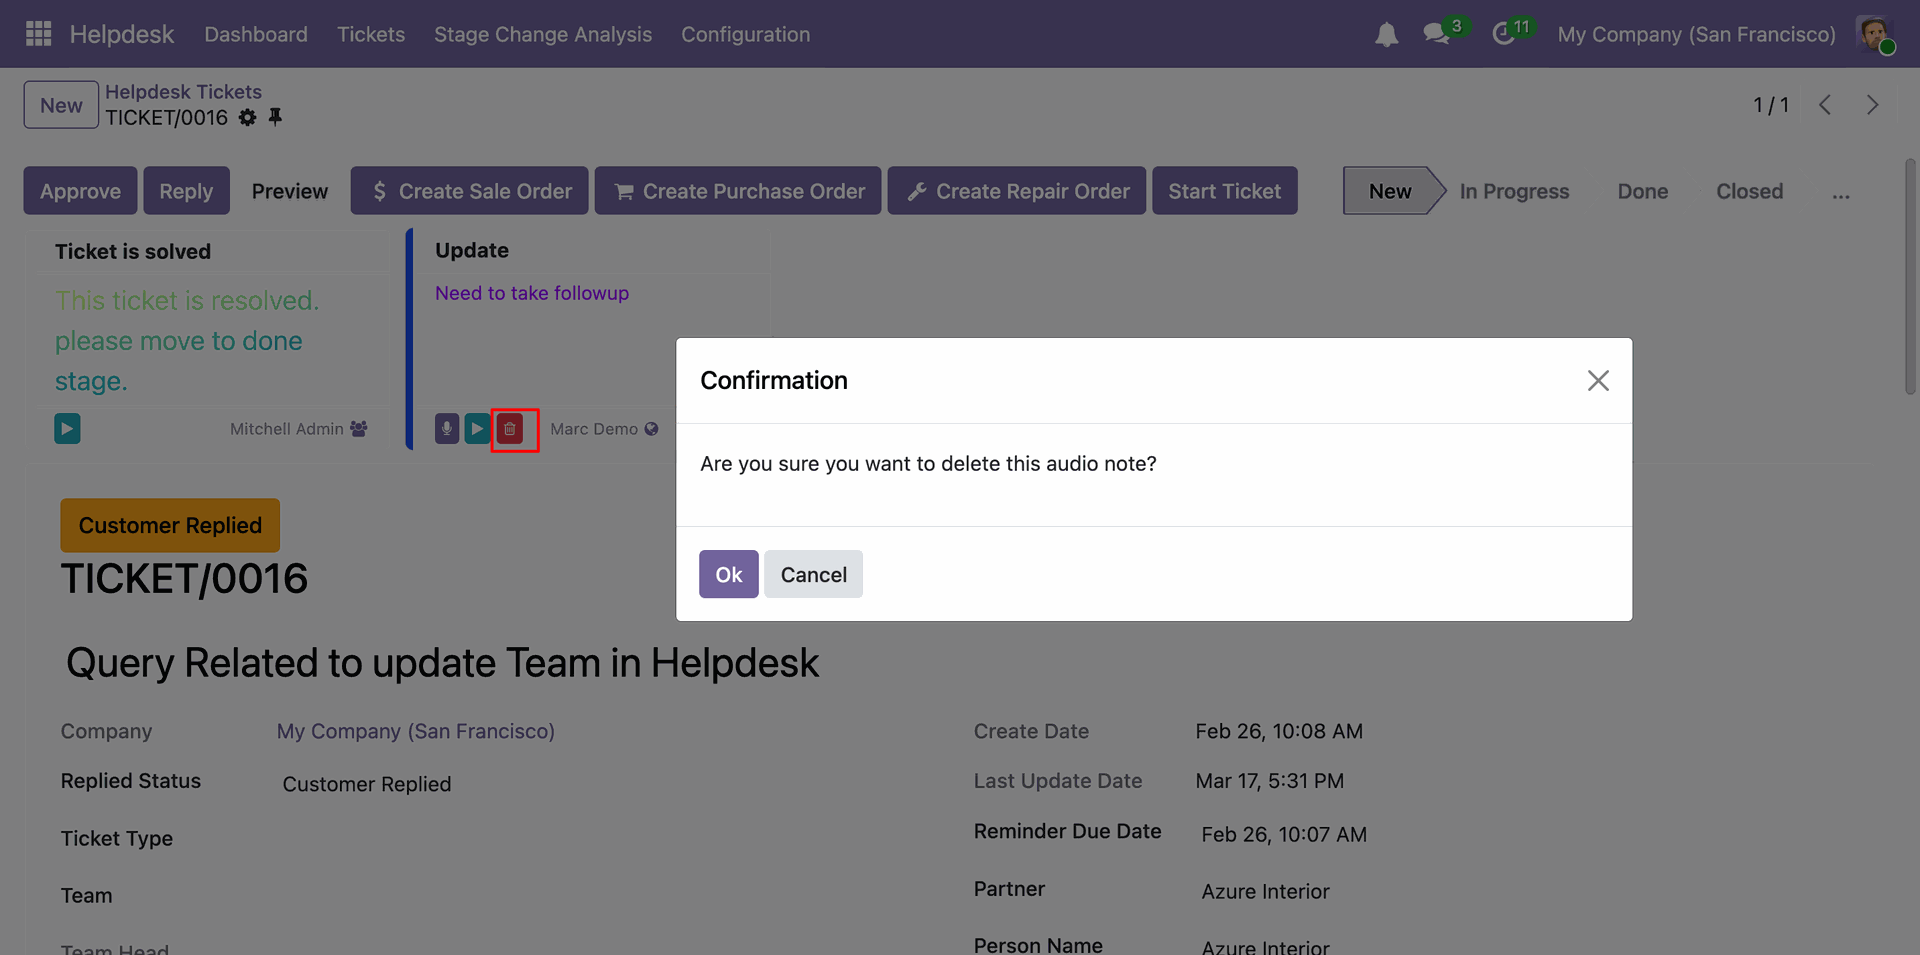
Click the 'Delete' icon to delete the audio recording.
After that, the 'Confirmation' wizard will appear. Click on the
'Ok' button.
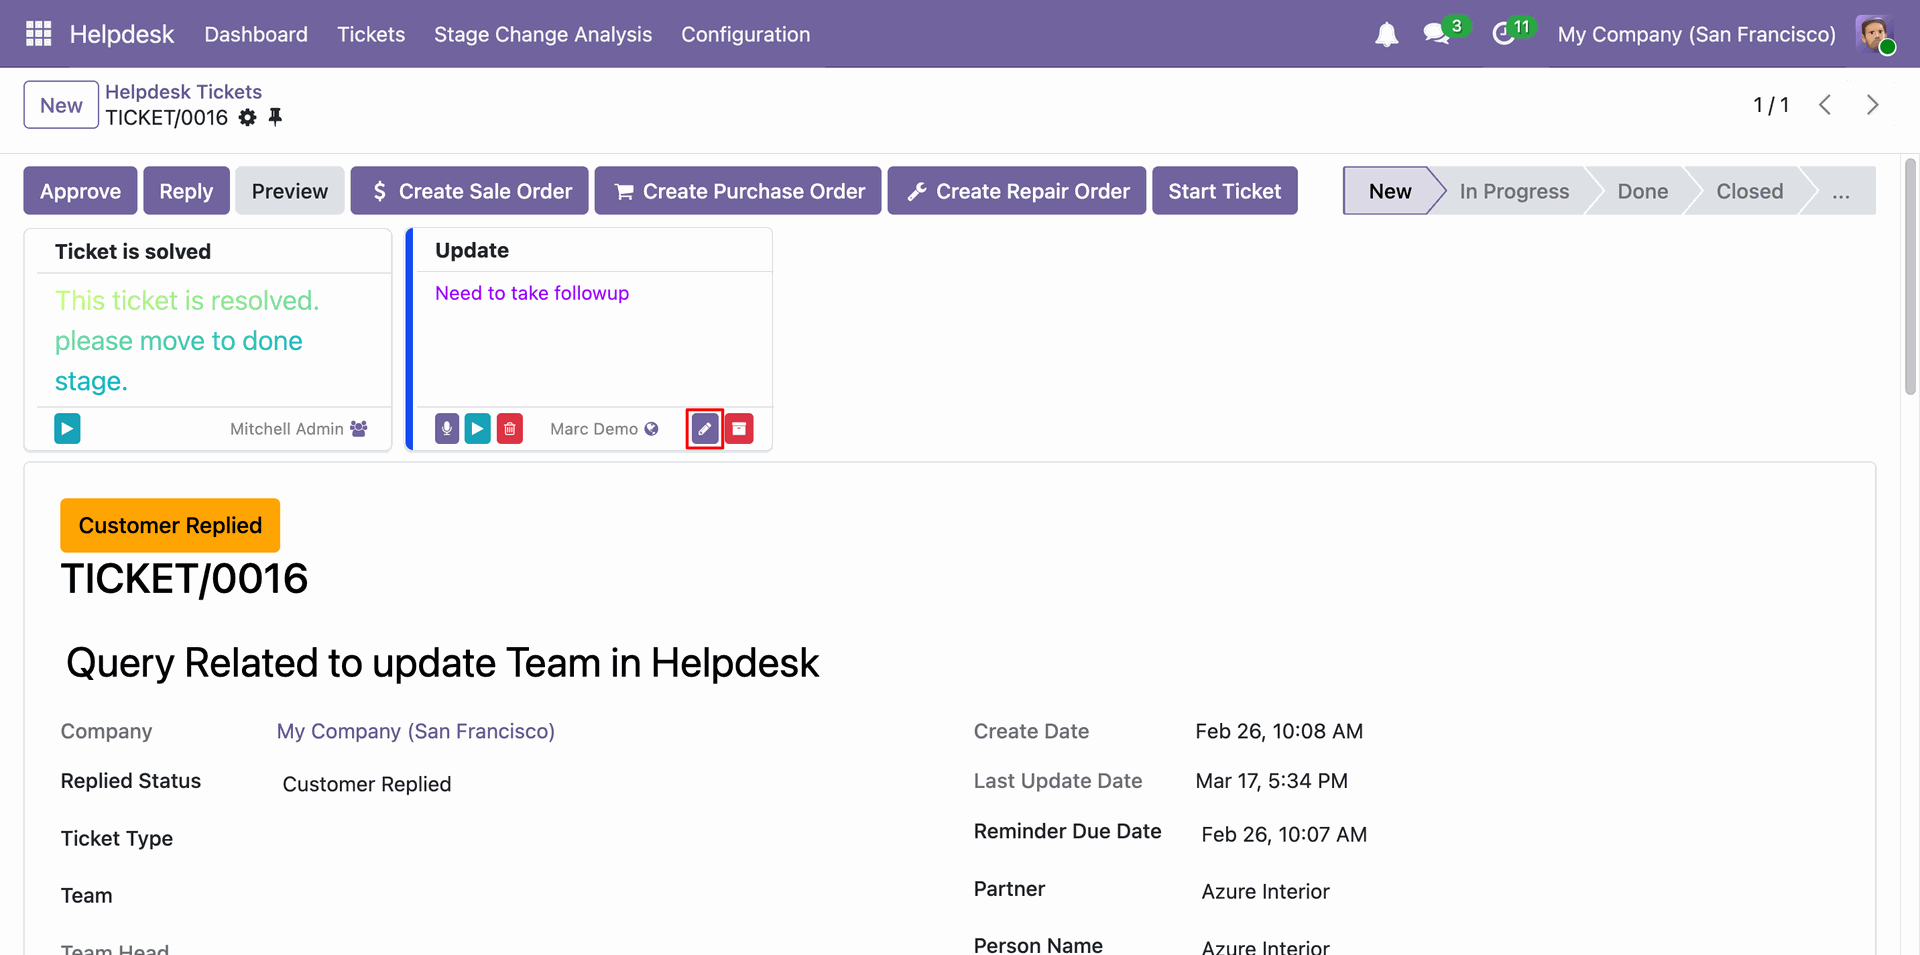
Click on the 'Edit' icon.
Update details and click on the 'Save' button.
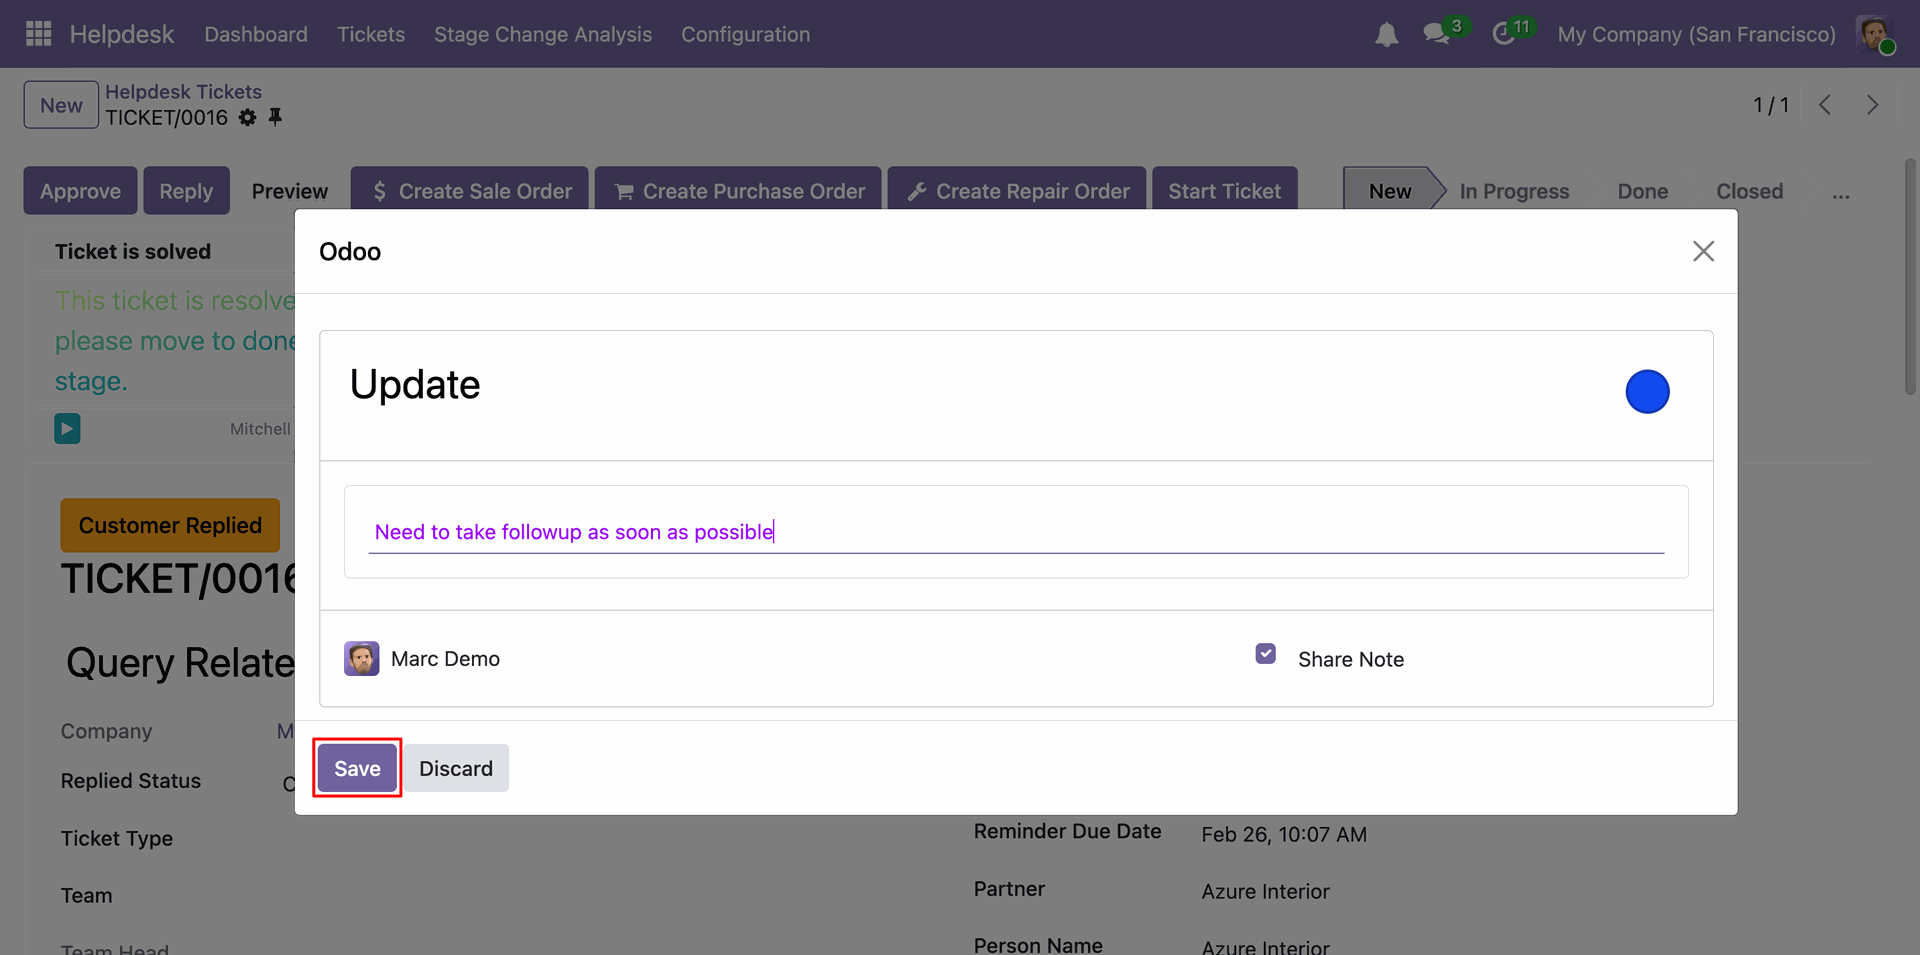
Here, you can see the updated sticky note.
Click the 'Archive' icon to archive the sticky note.
After that, the 'Confirmation' wizard will appear. Click on the
'Ok' button.
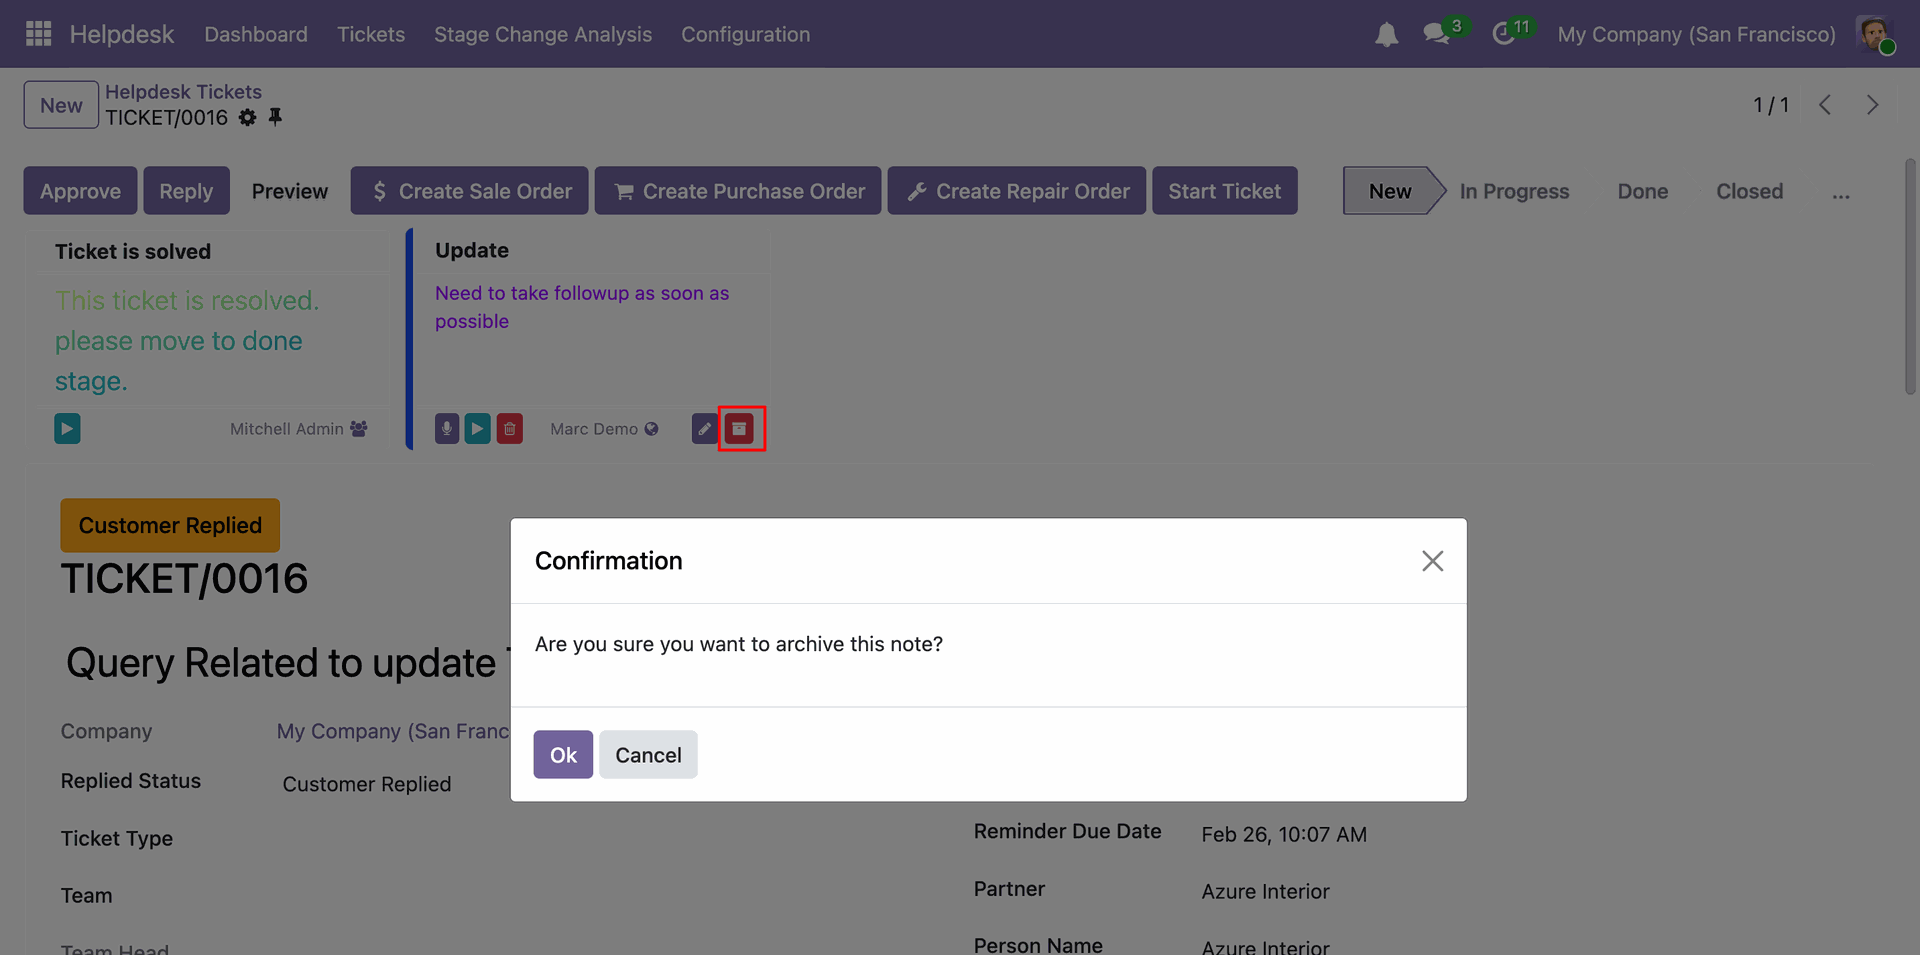
After that, a 'Note Archived' notification will be displayed.
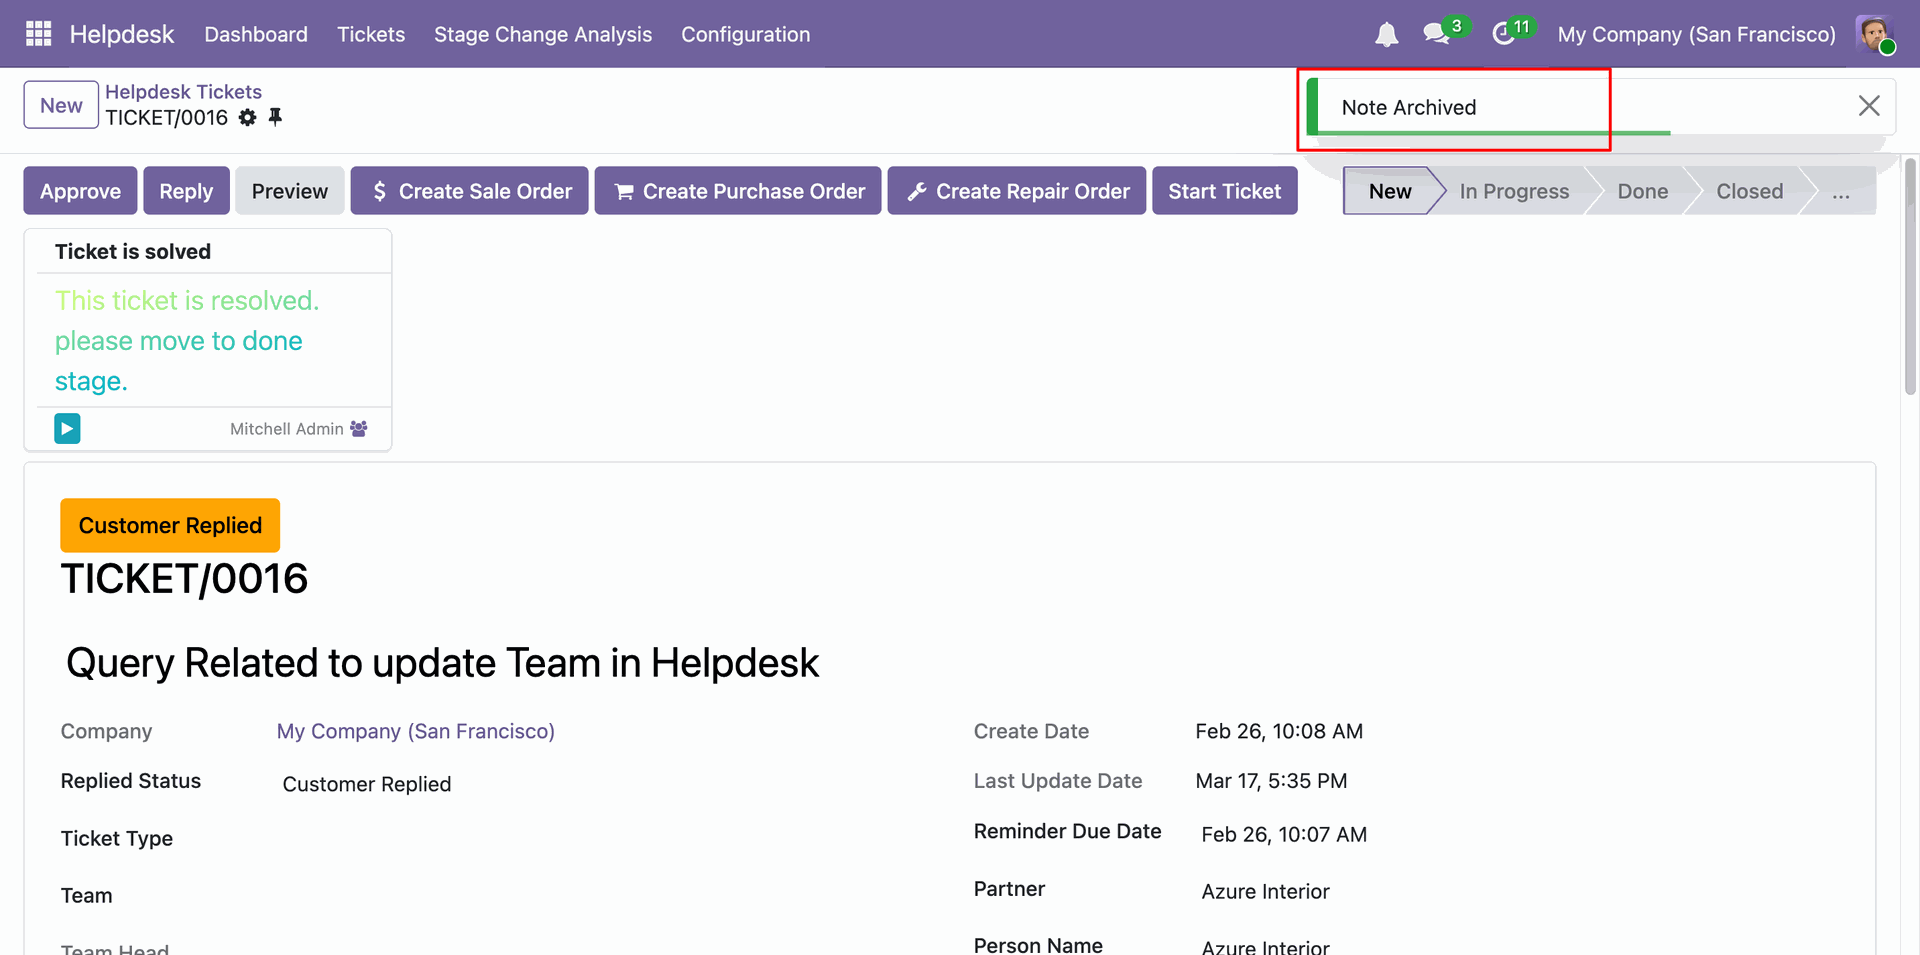
You can easily group by Archived Sticky Notes records as shown below.
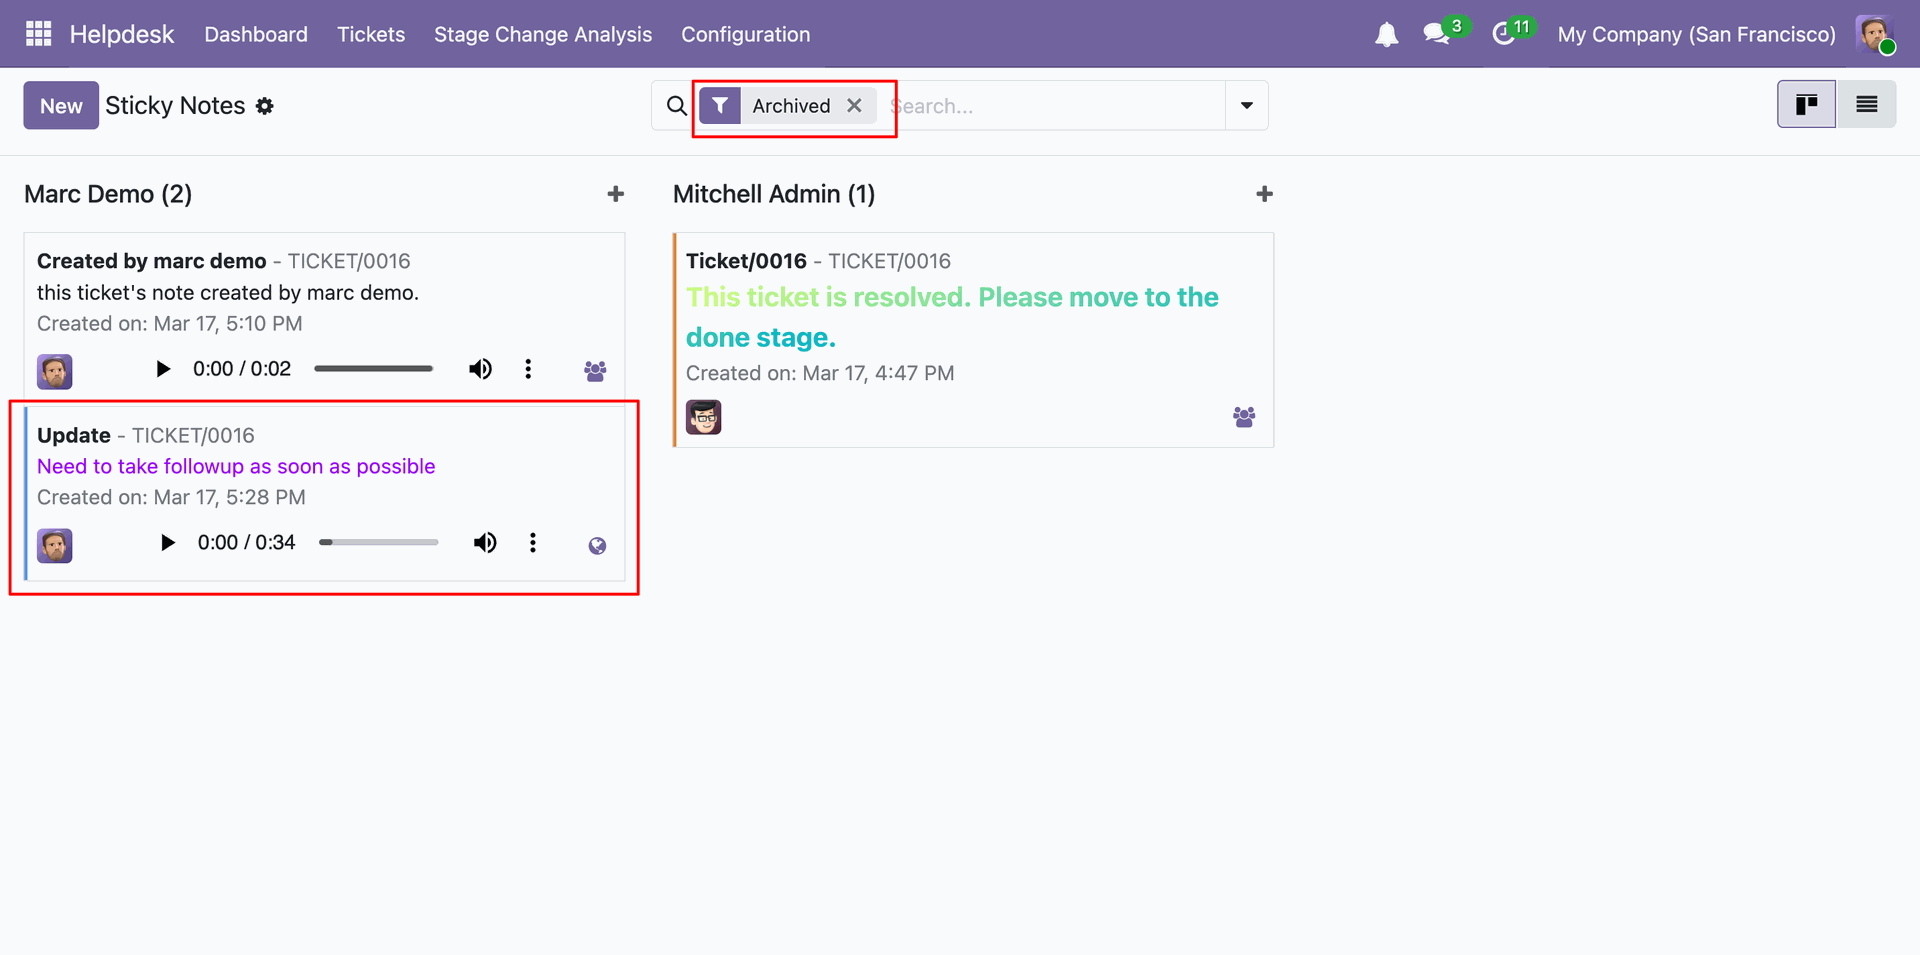
Form view of the sticky note.
Click on the 'Delete' option from the action.
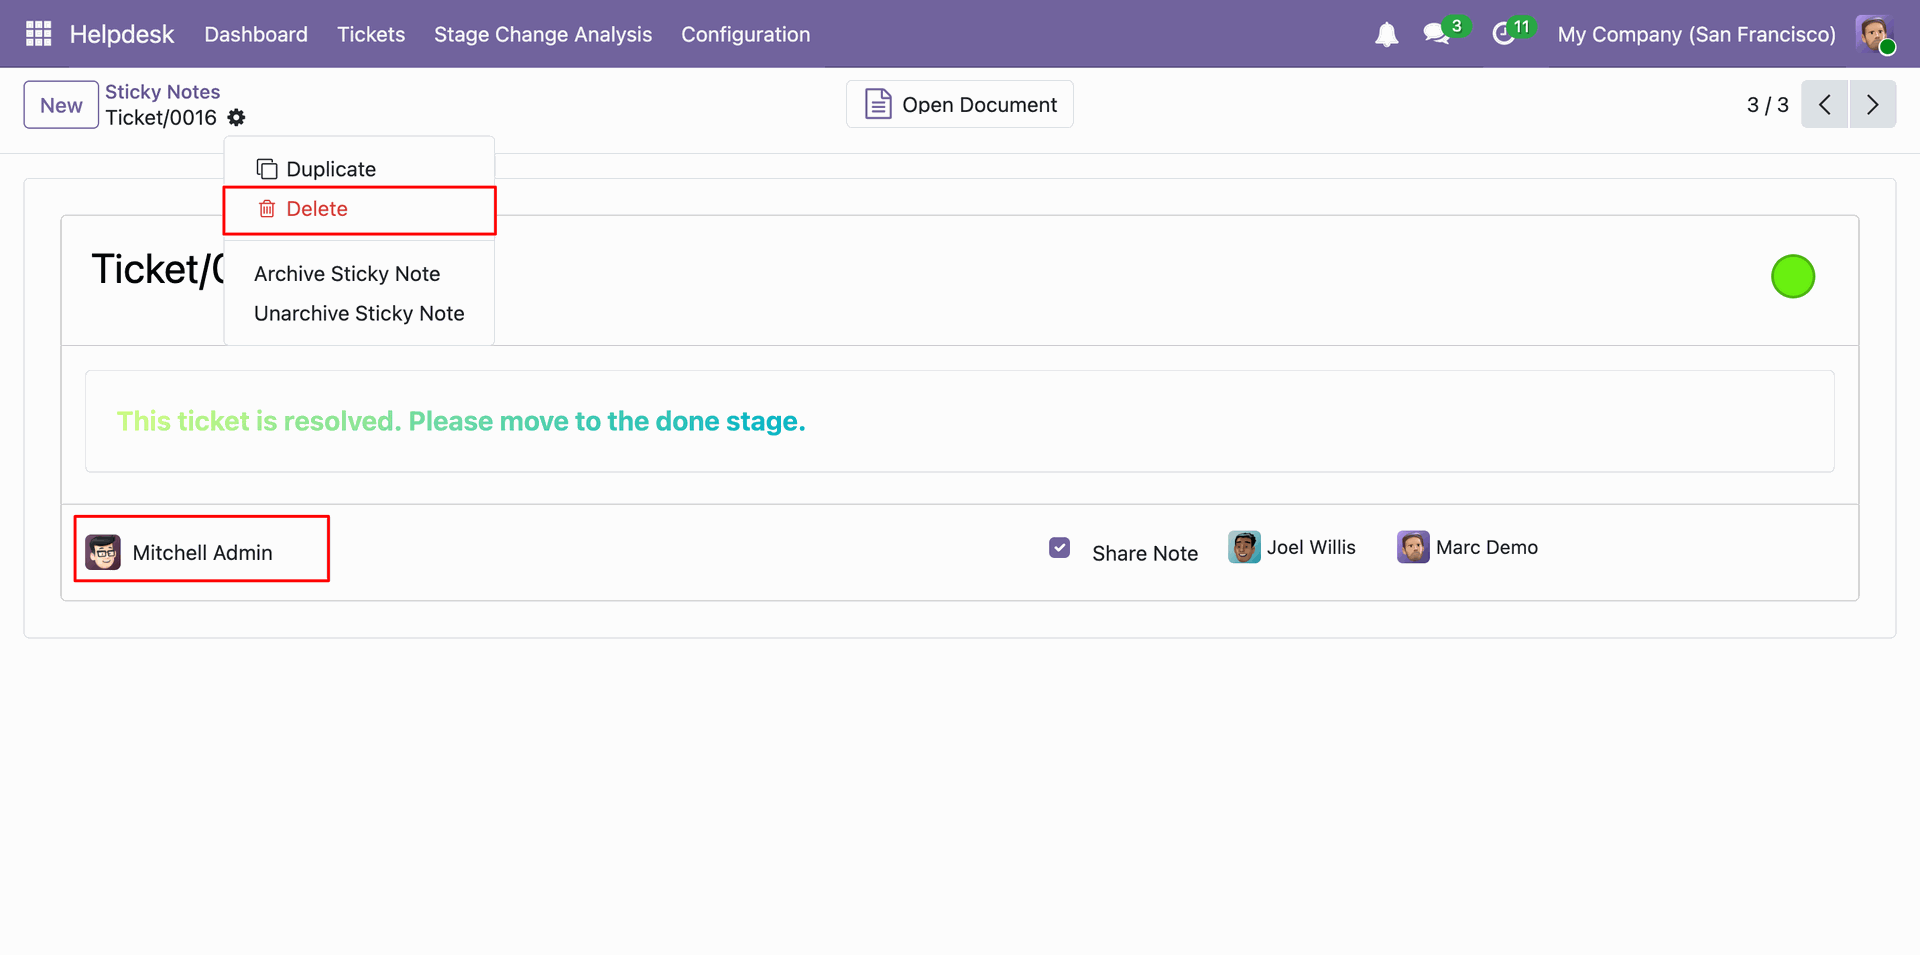
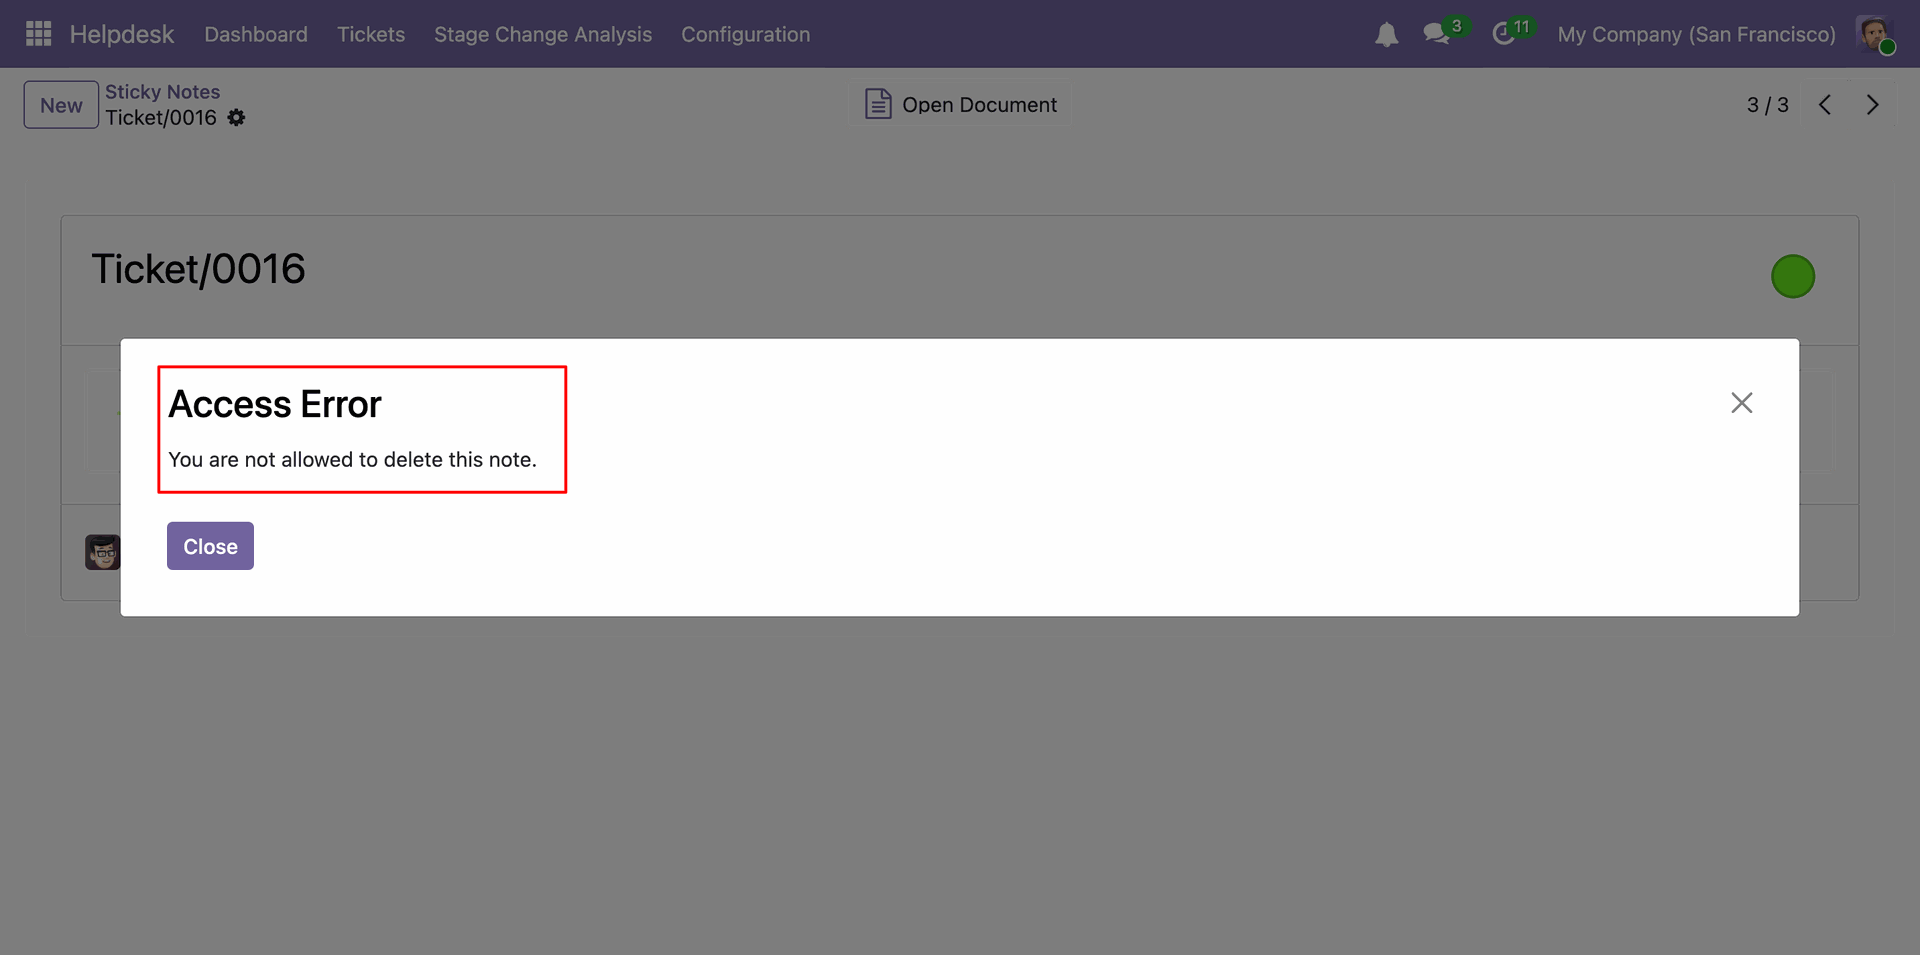
You will receive a warning message if you do not have permission to delete the sticky note.
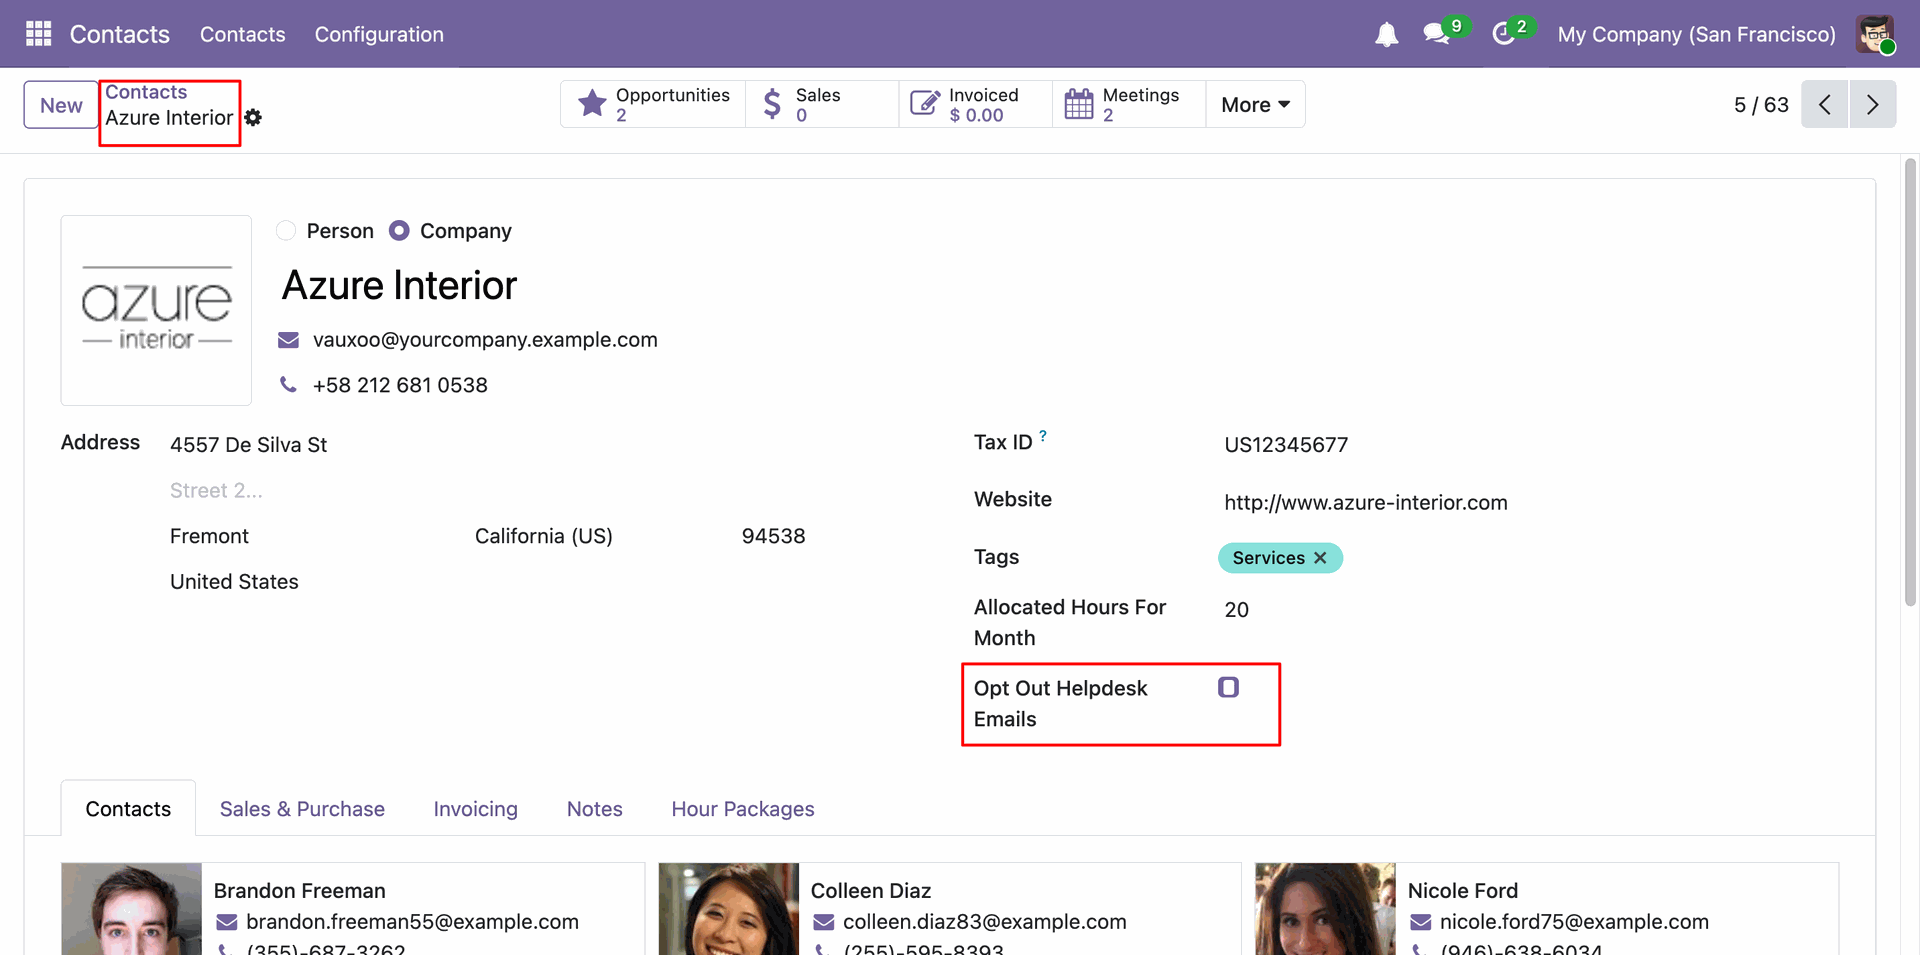
Go to the contact 'Azure Interior' and disable the 'Opt Out Helpdesk Emails' option.
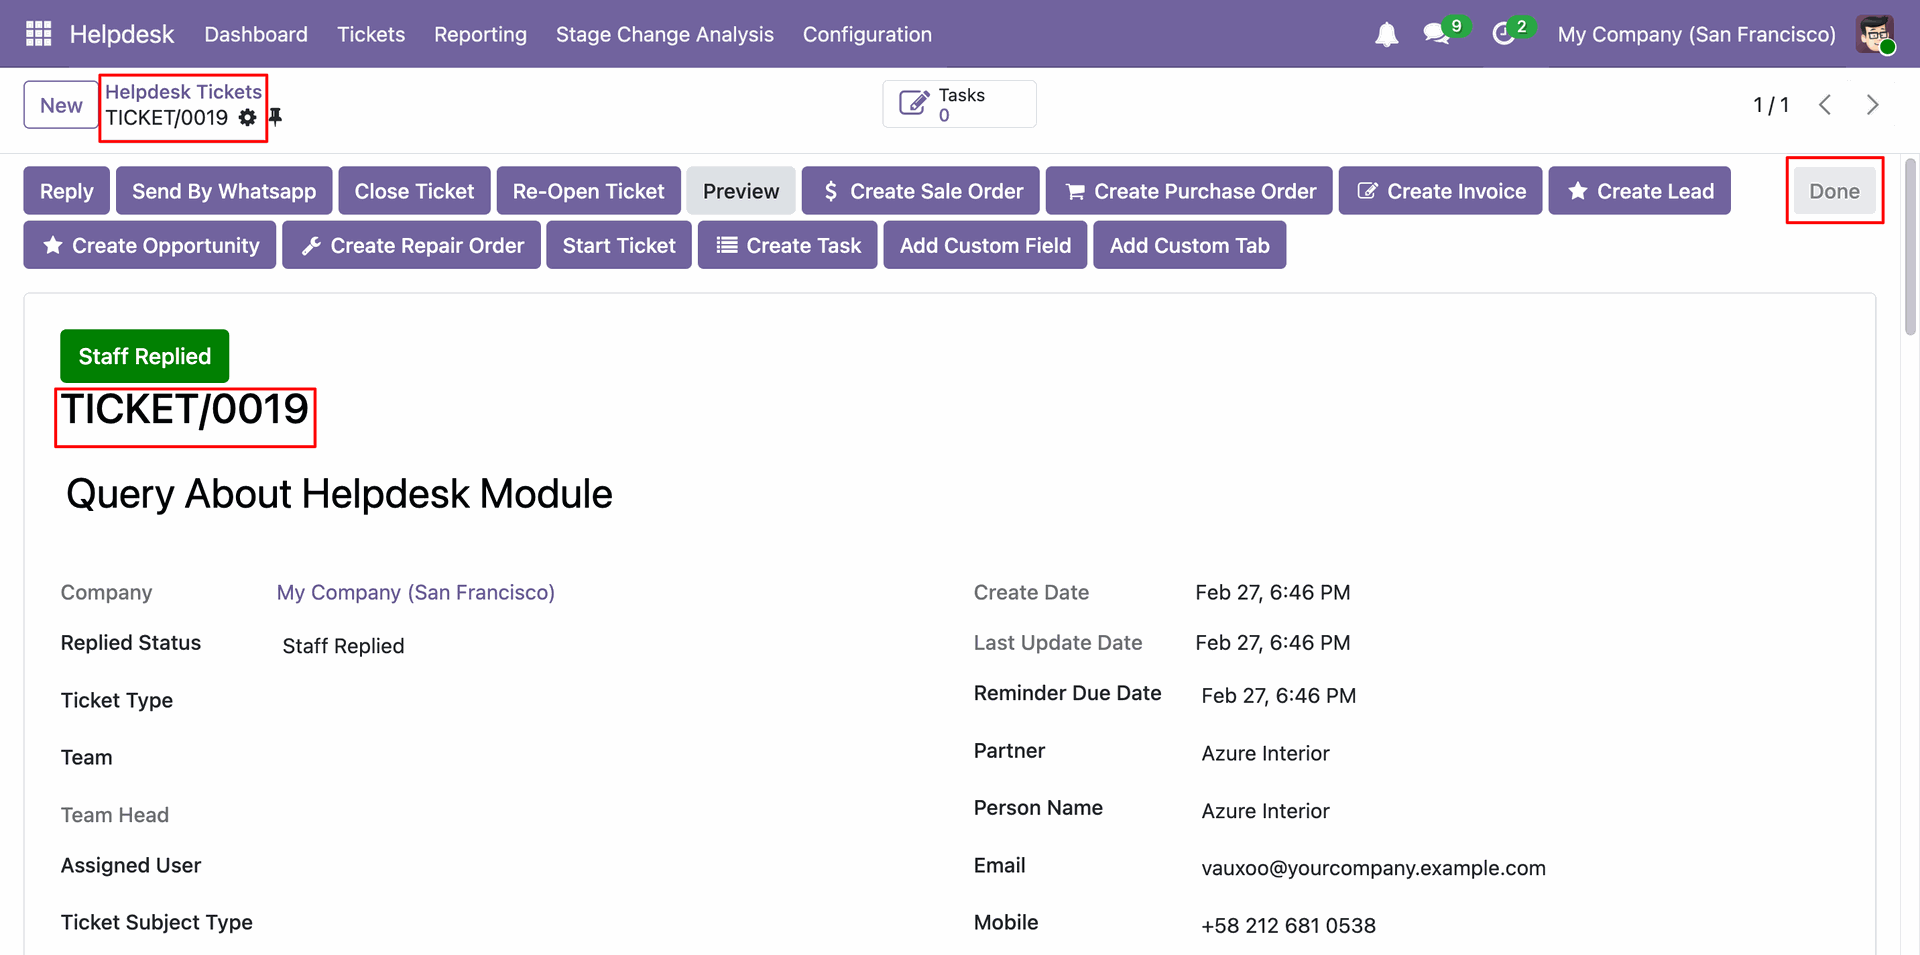
Now we move this ticket to the 'Done' stage.
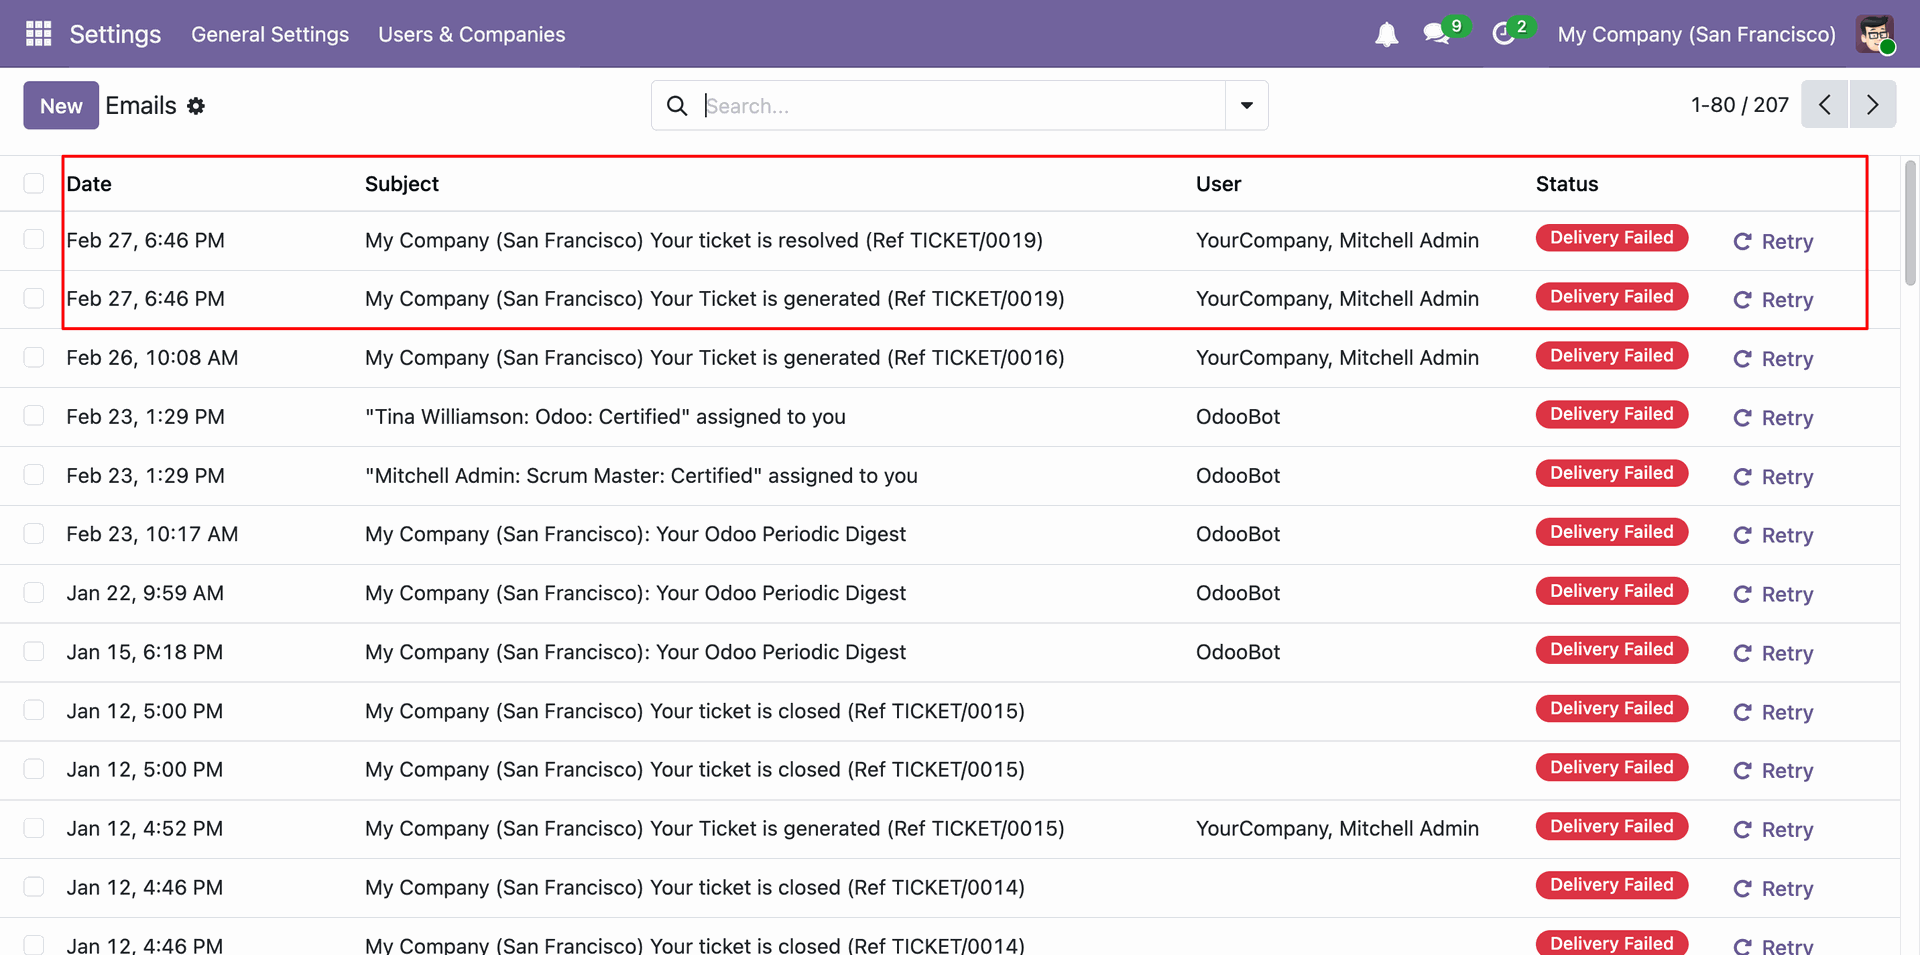
The partner will receive an email notification.
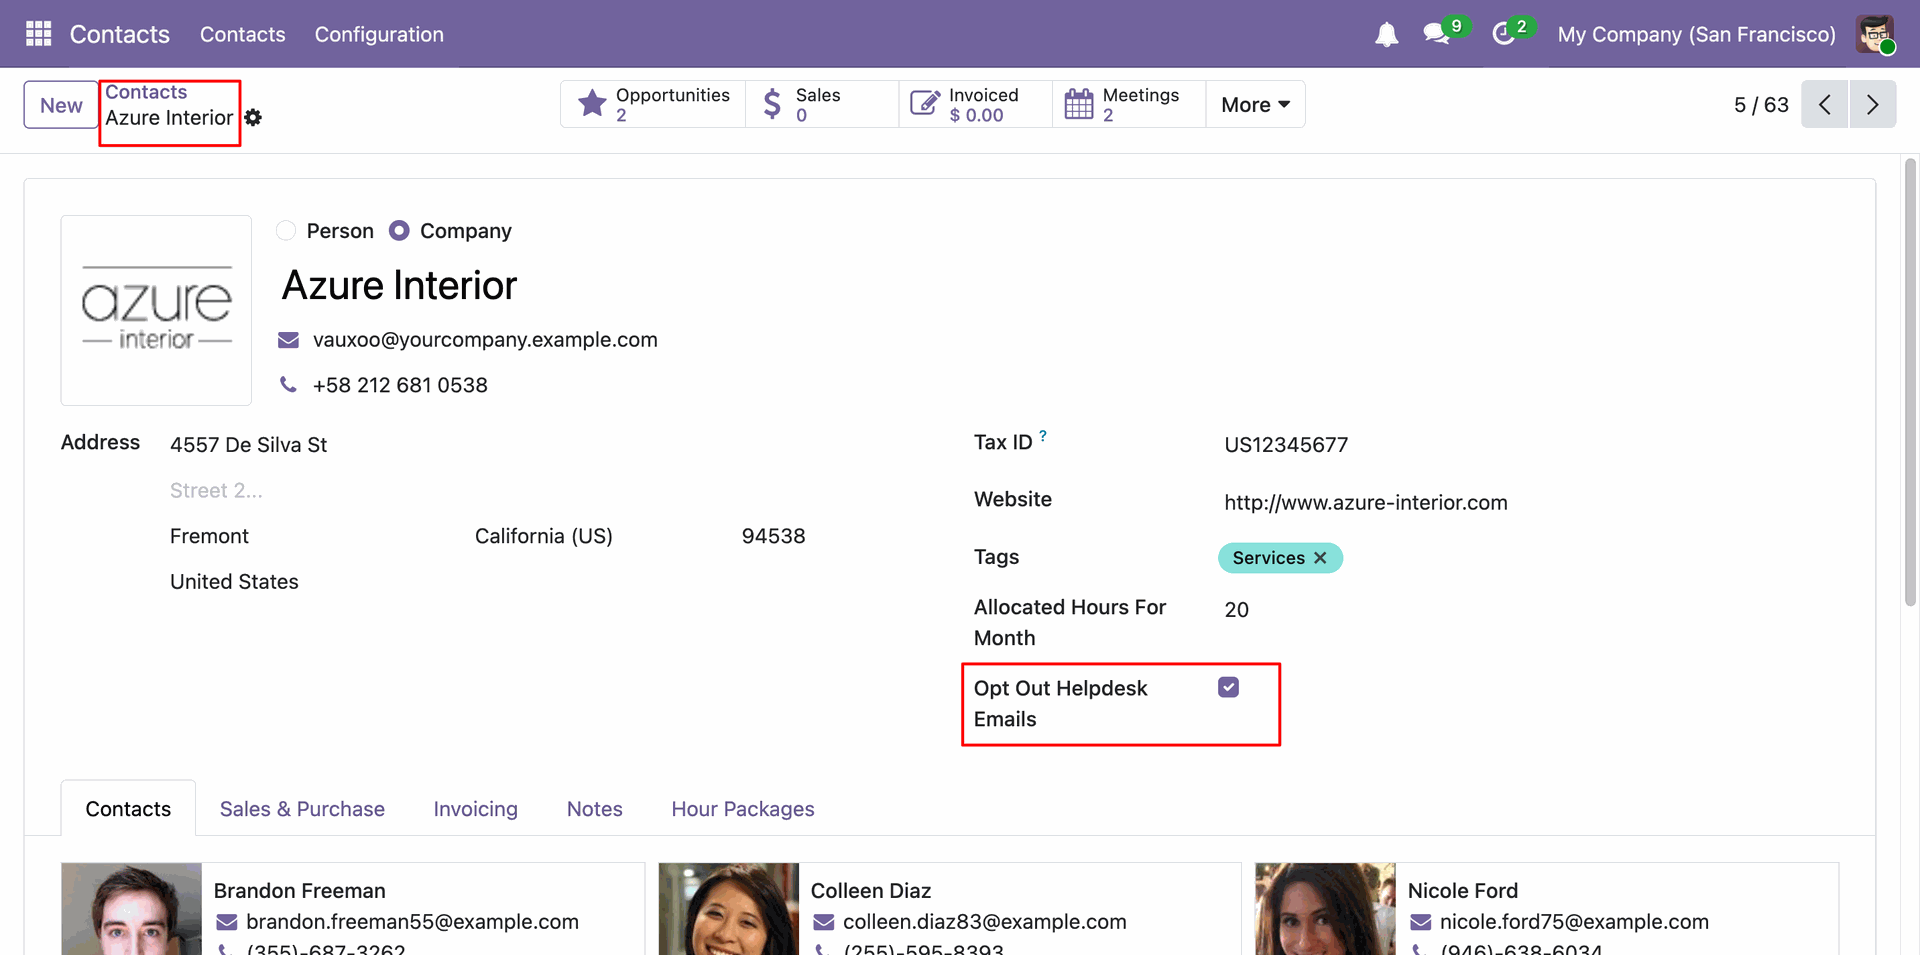
Go to the contact 'Azure Interior' and enable the 'Opt Out Helpdesk Emails' option.
Now we move this ticket to the 'Done' stage.
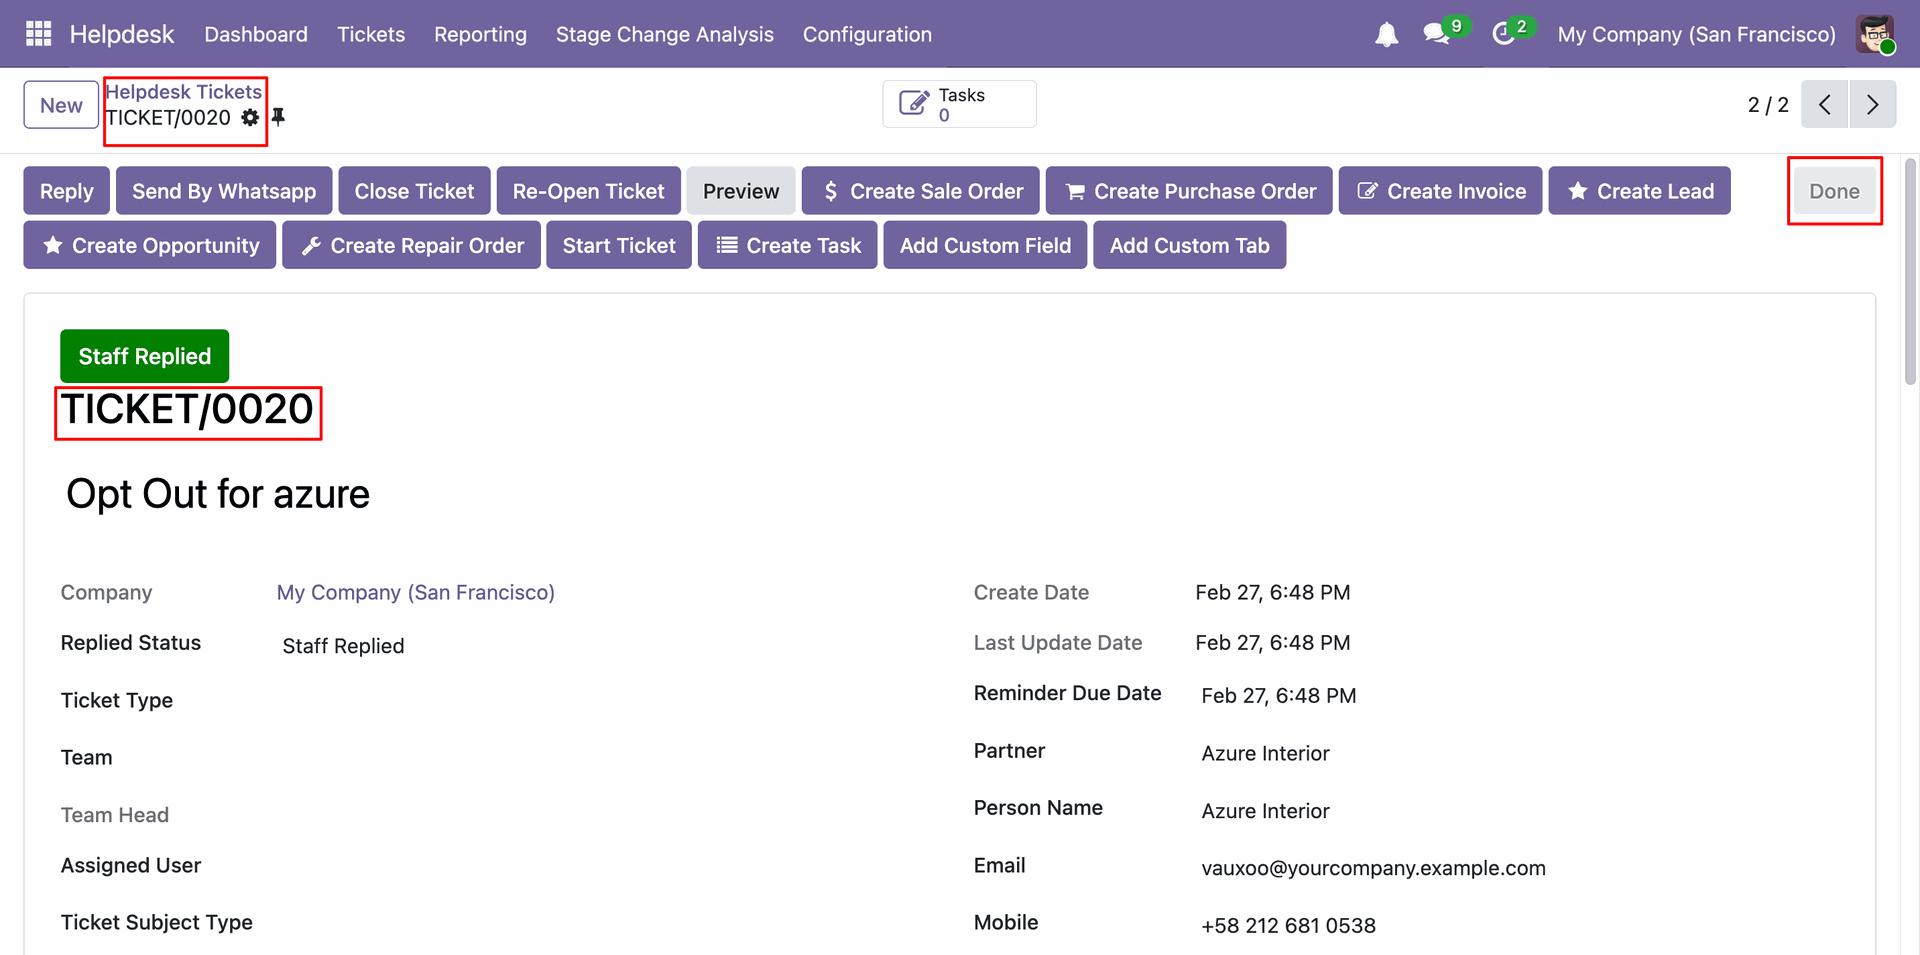
The partner will not receive an email notification because the 'Opt Out Helpdesk Emails' option is enabled for this partner.
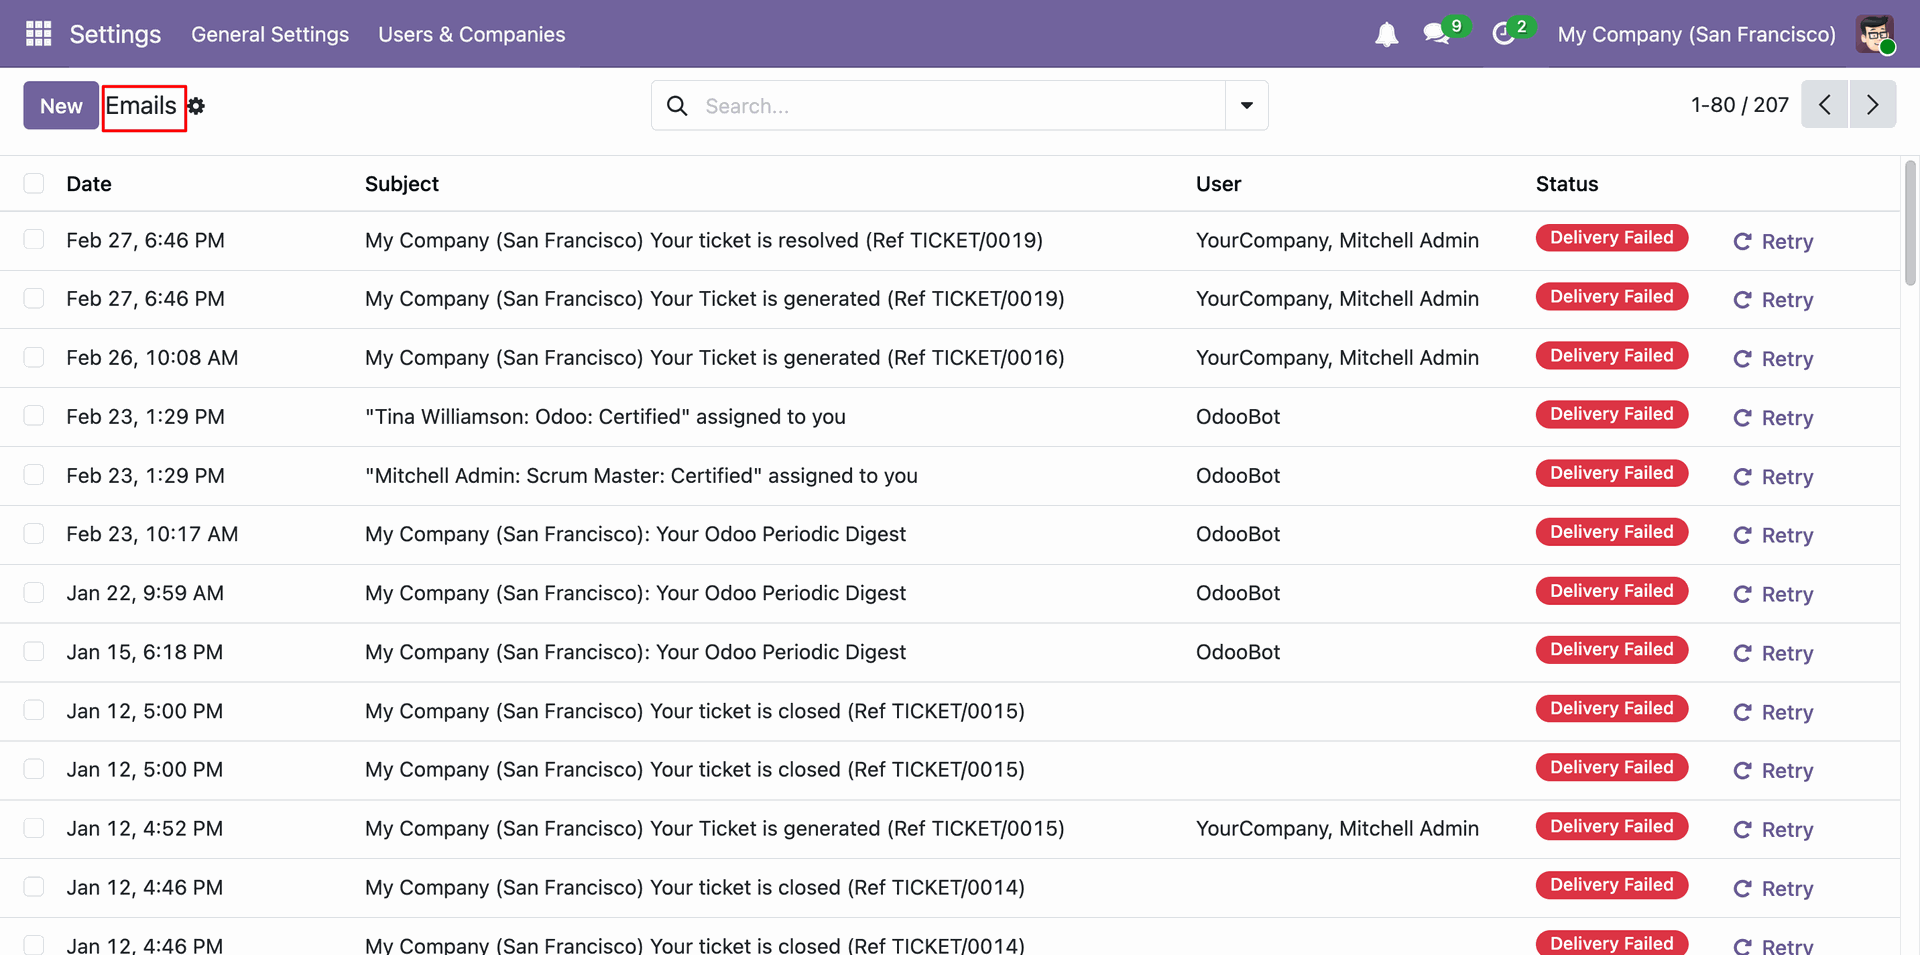
Helpdesk dashboard view.
In this view, you can see the 'New' button. Click on the 'New'
button to create a new Helpdesk ticket.
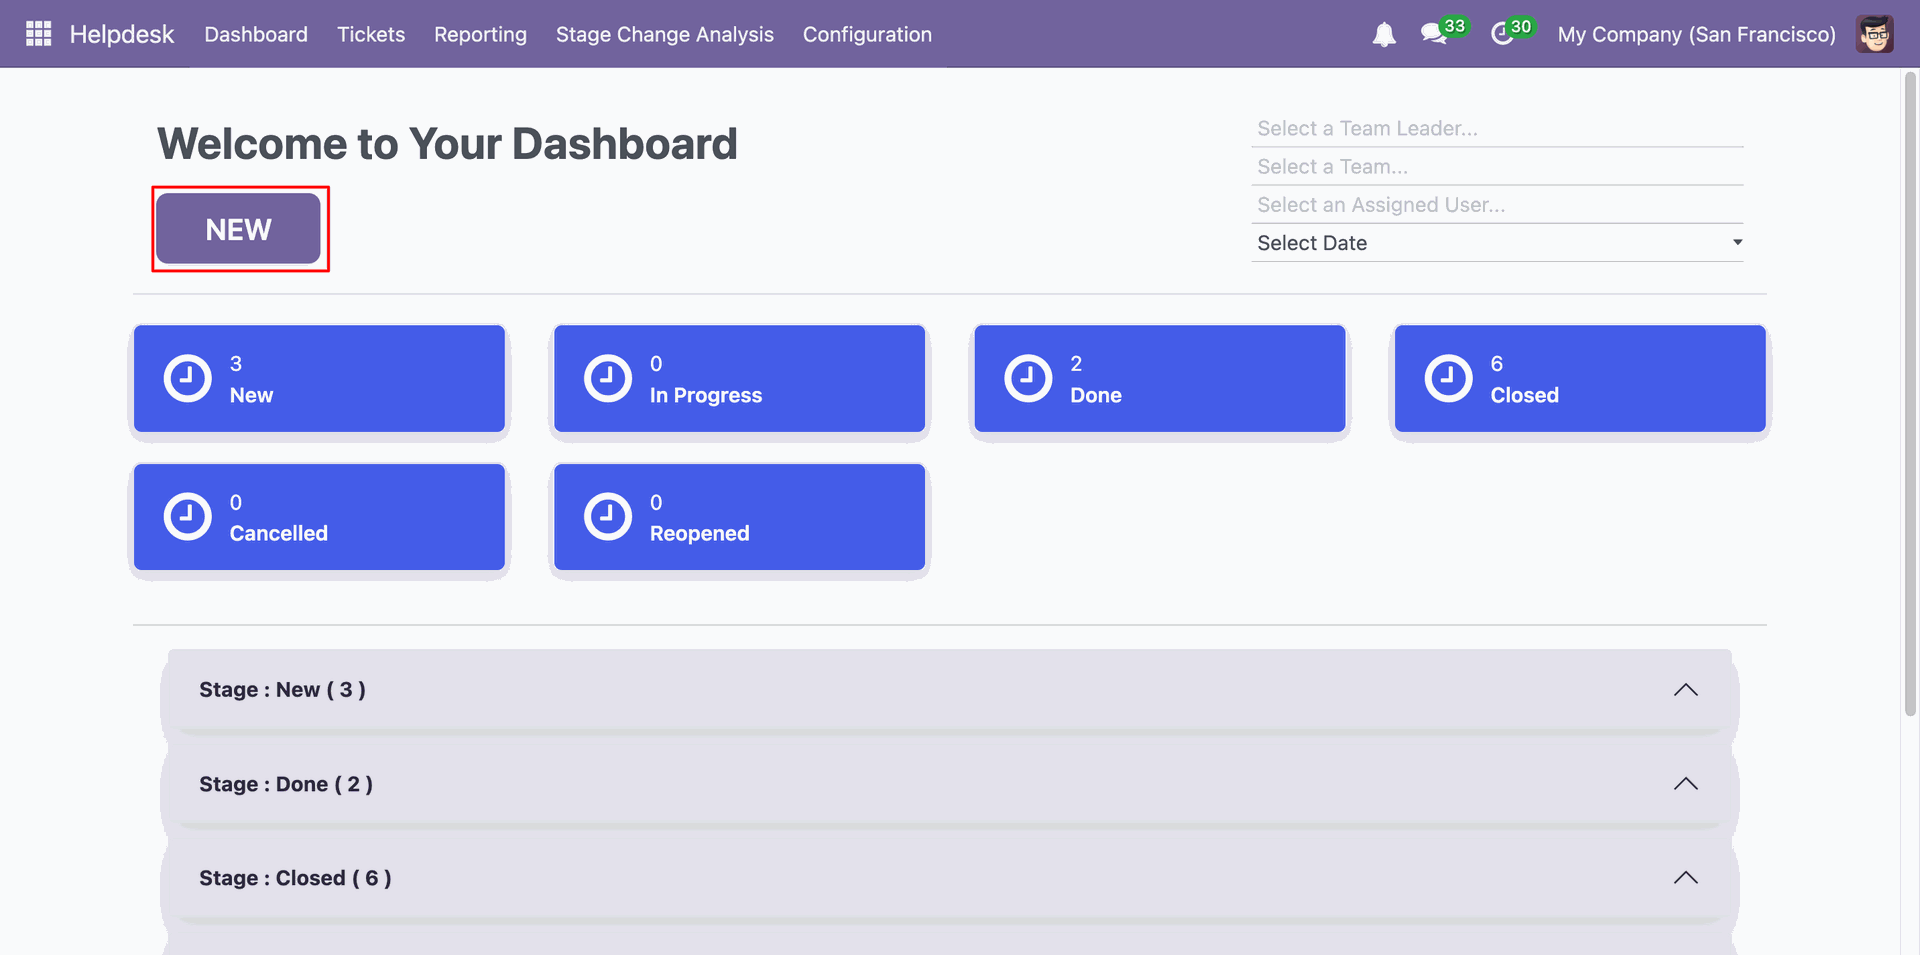
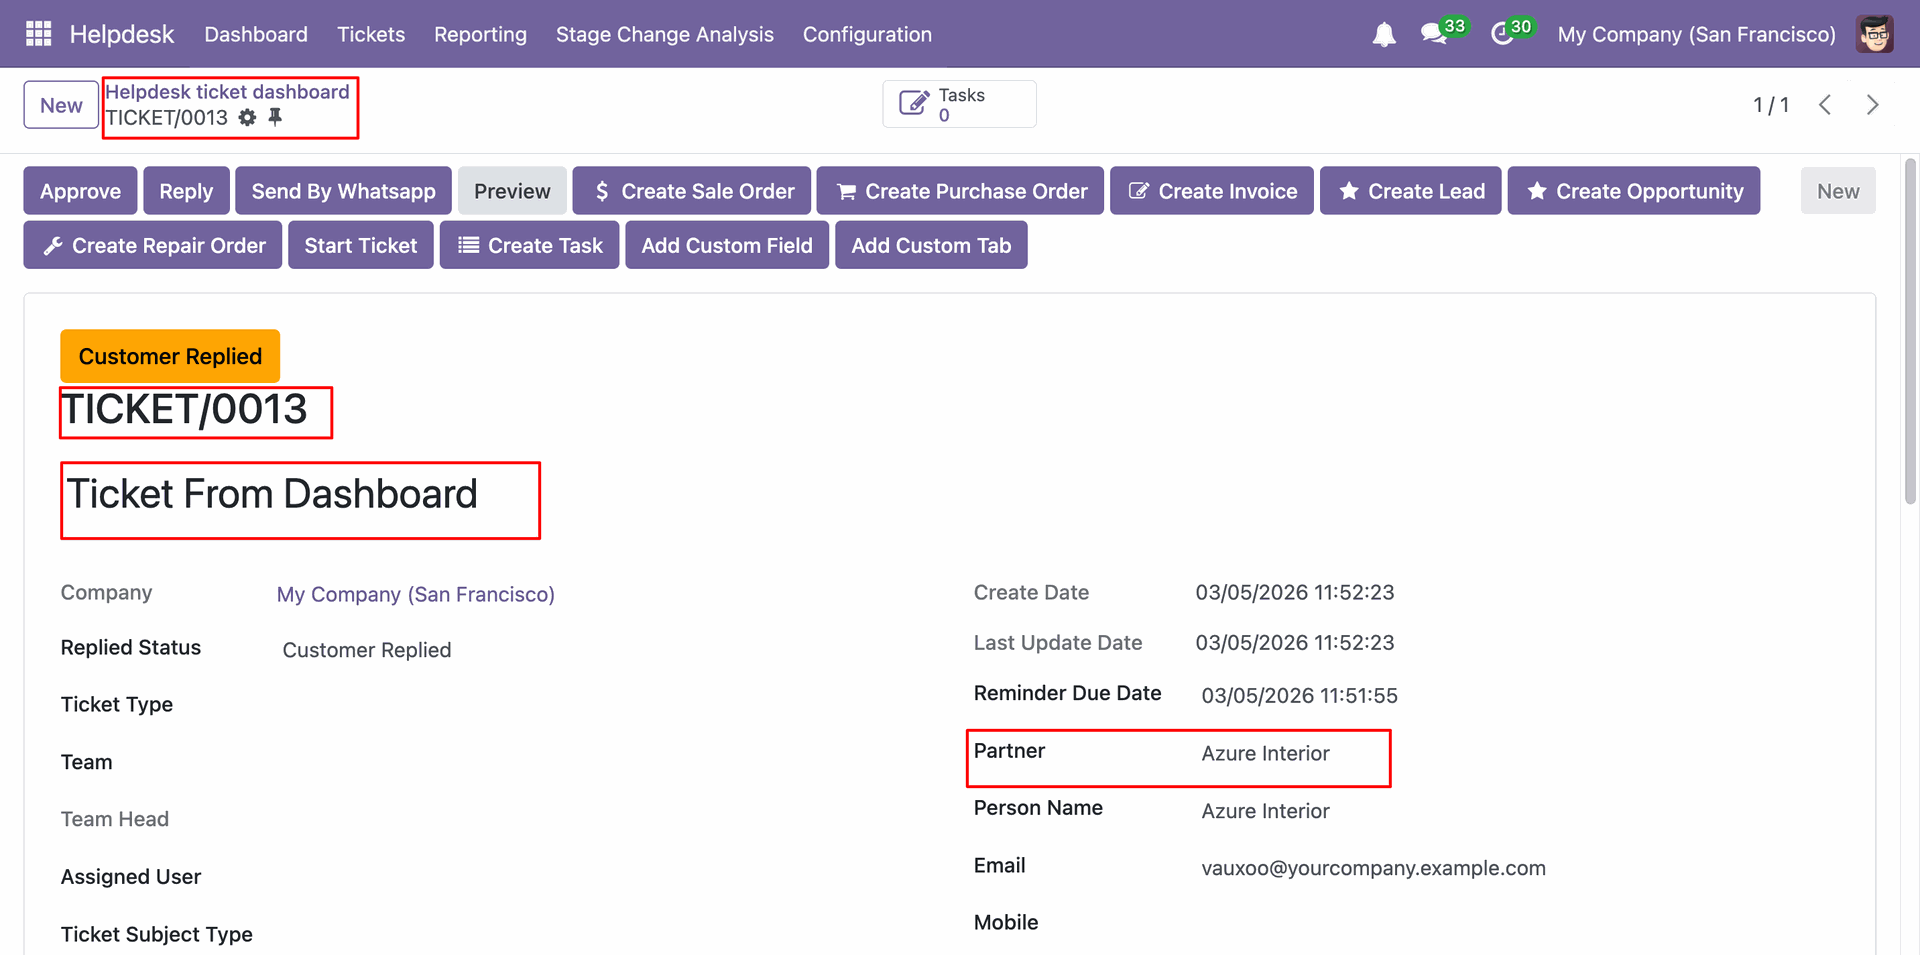
Add details and save it.
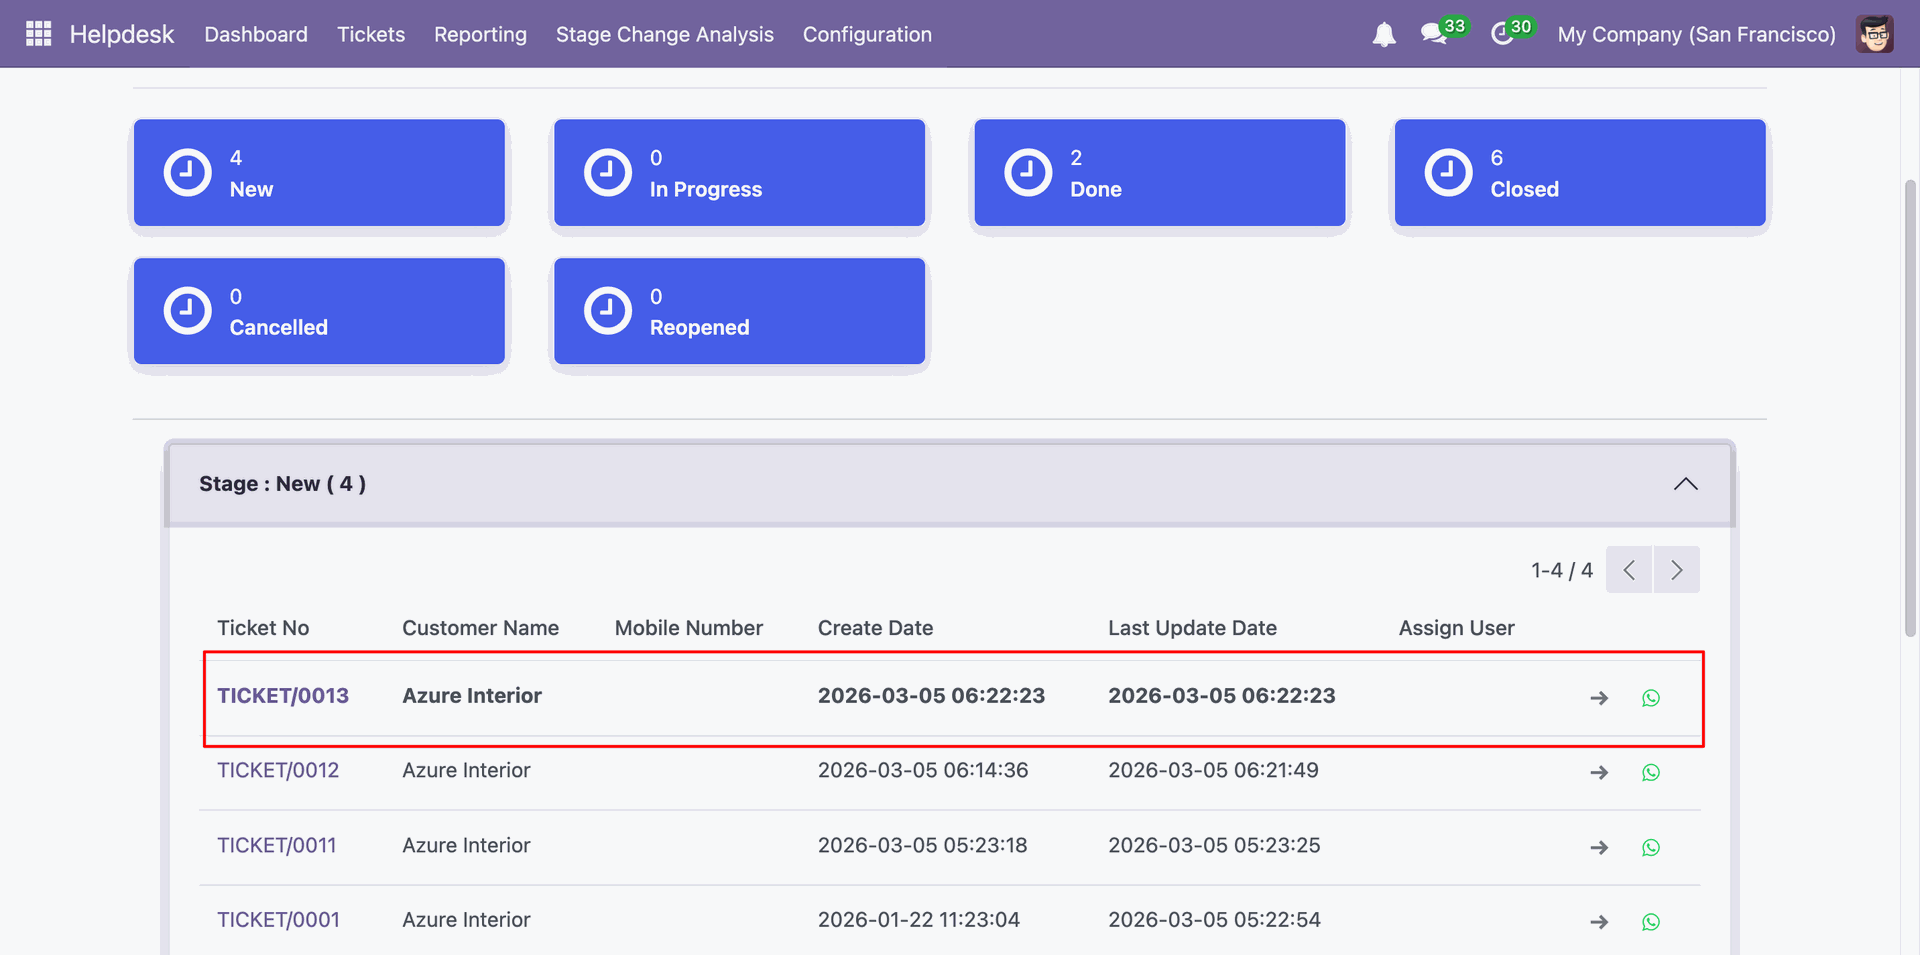
You can see the newly created ticket on the dashboard.
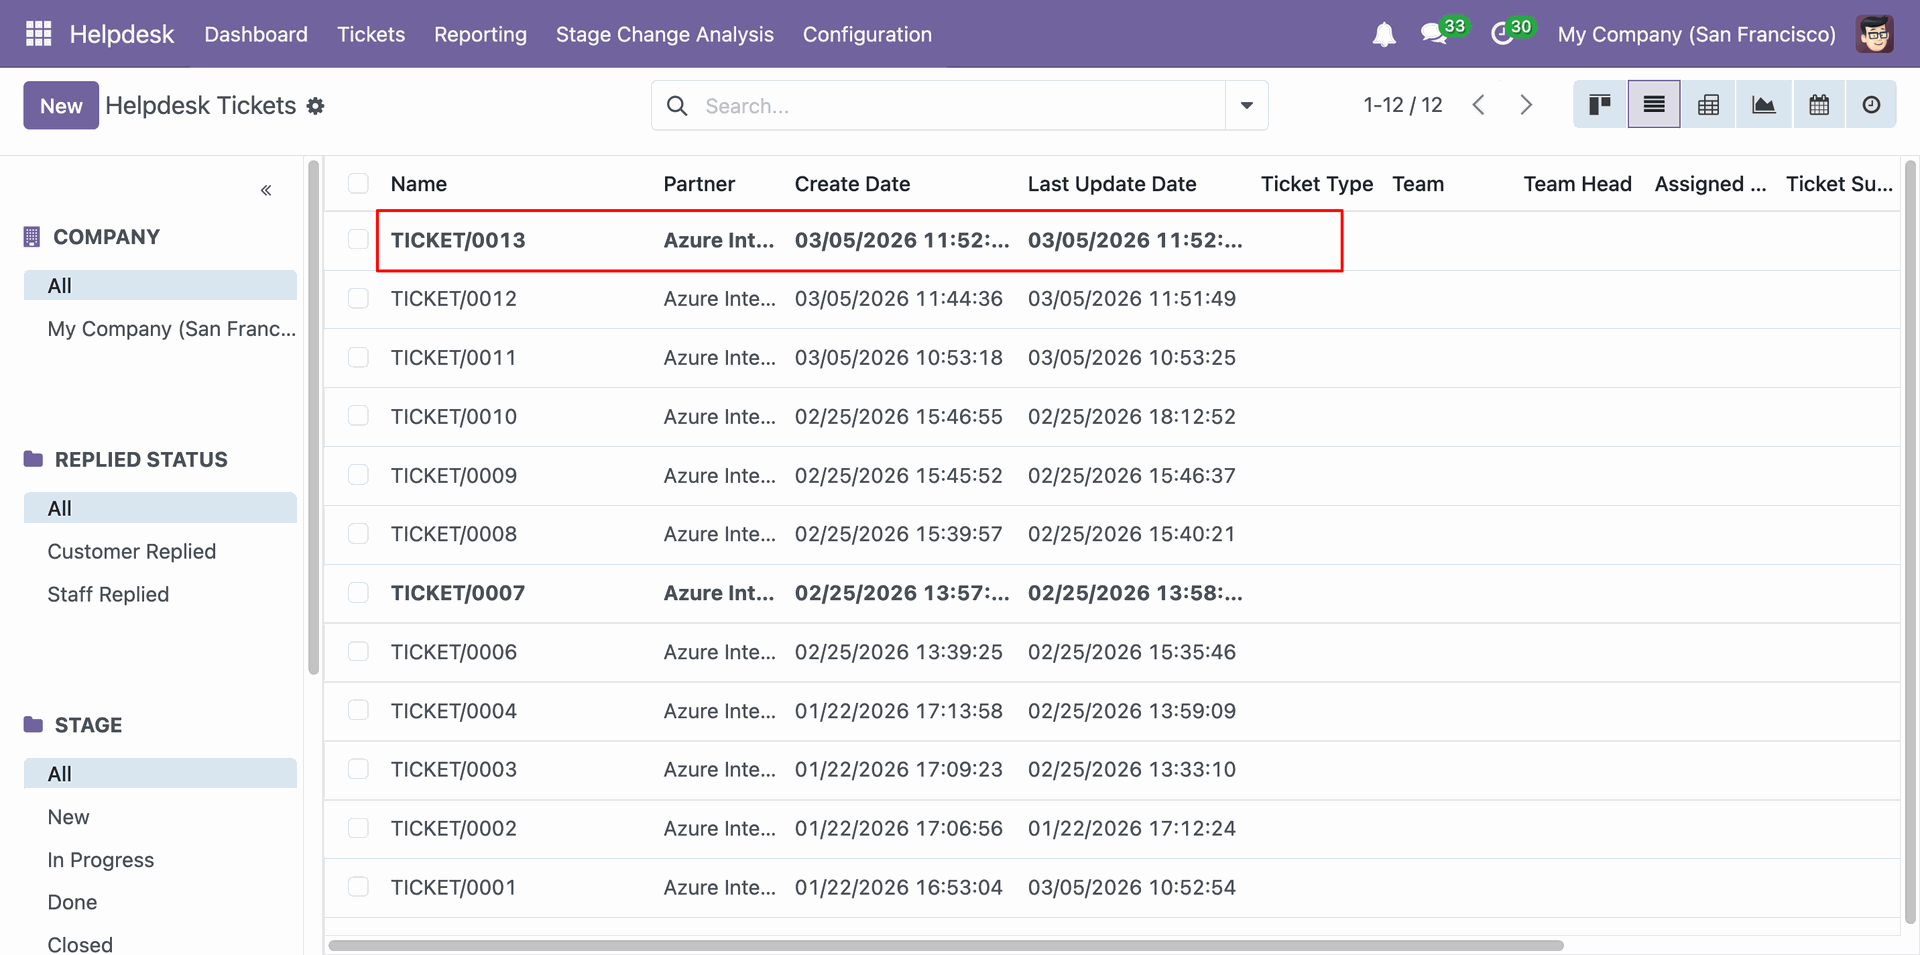
You can also see the newly created ticket in the Helpdesk Tickets tree view.
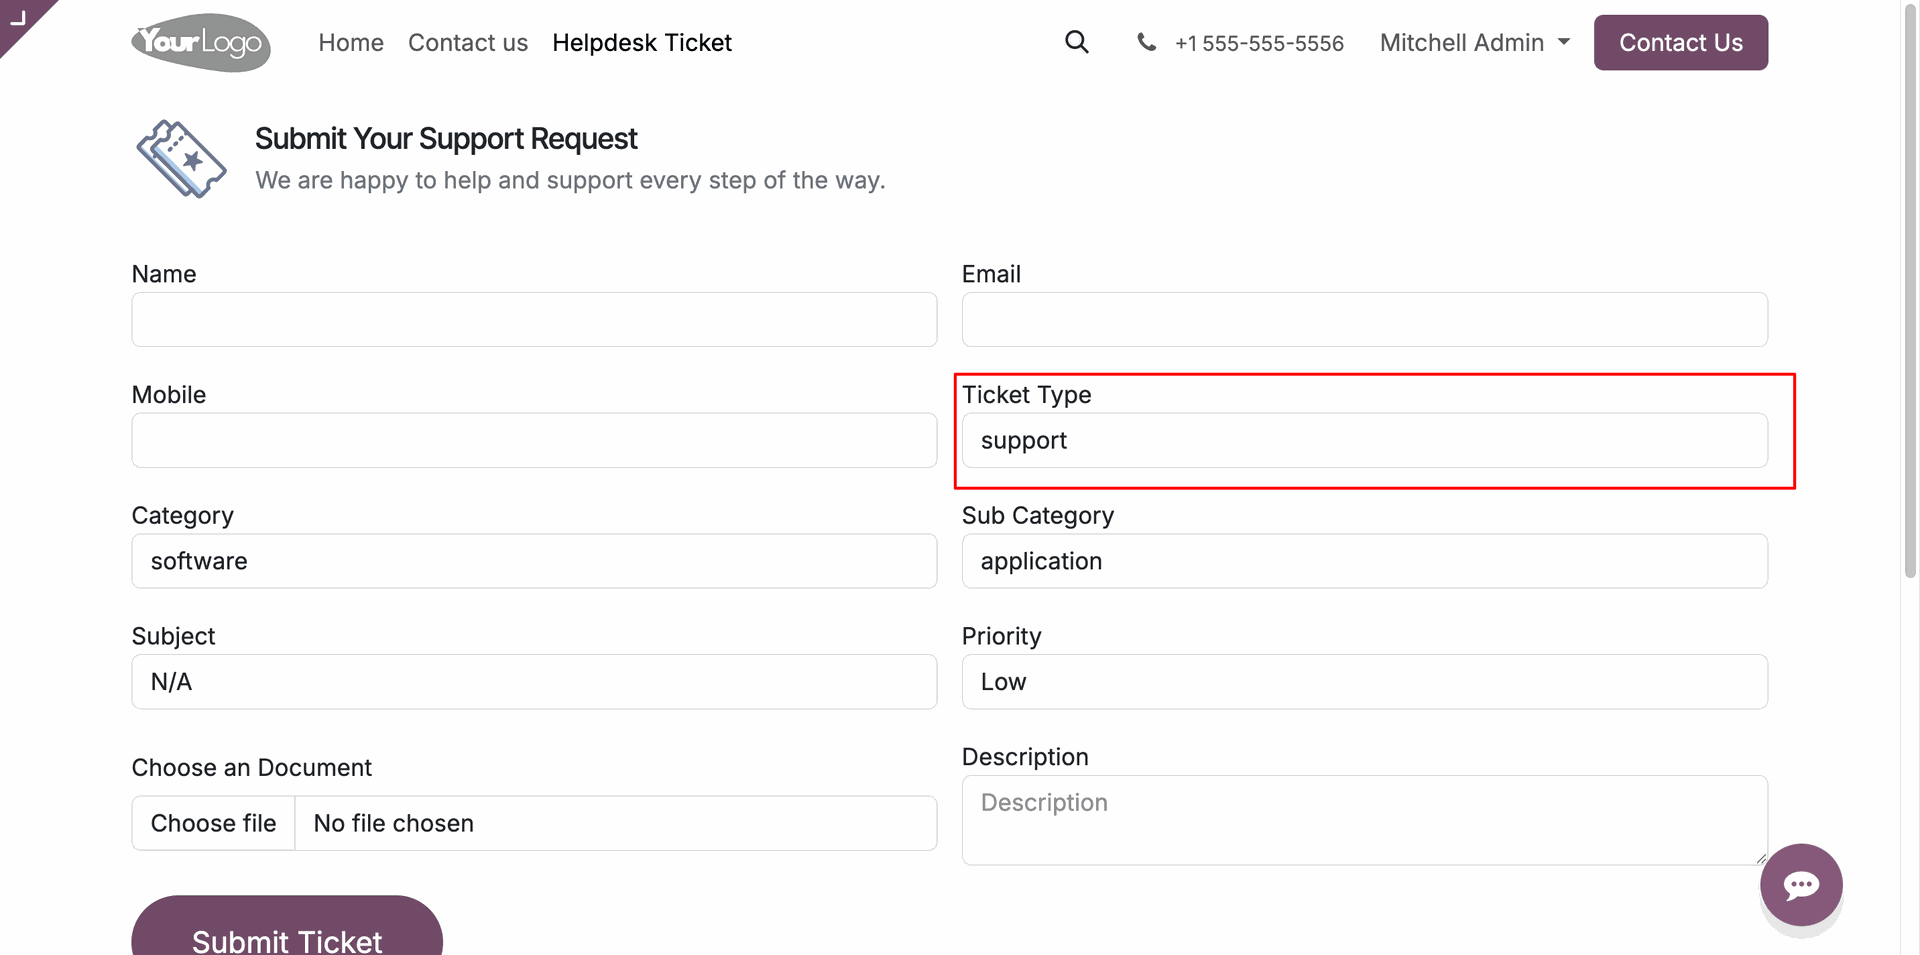
You can add a Ticket Type field to the Helpdesk form view on the website, allowing users to create tickets with a specified ticket type.
Version 18.0.17.0.0 | Released on : 23rd July 2026
Version 18.0.16.0.0 | Released on : 9th April 2026
Version 18.0.15.0.0 | Released on : 12th March 2026
Version 18.0.14.0.0 | Released on : 6th March 2026
Version 18.0.13.0.0 | Released on : 27th February 2026
Version 18.0.12.0.0 | Released on : 2nd February 2026
Version 18.0.11.0.0 | Released on : 26th January 2026
Version 18.0.10.0.0 | Released on : 31st December 2025
Version 18.0.9.0.0 | Released on : 26th December 2025
Version 18.0.8.0.0 | Released on : 19th December 2025
Version 18.0.7.0.0 | Released on : 19th November 2025
Version 18.0.6.0.0 | Released on : 29th August 2025
Version 18.0.5.0.0 | Released on : 28th August 2025
Version 18.0.4.0.0 | Released on : 13th June 2025
Version 18.0.3.0.0 | Released on : 16th April 2025
Version 18.0.2.0.0 | Released on : 2nd April 2025
Version 18.0.1.0.0 | Released on : 26th February 2025
- Yes, this app works perfectly with Odoo Enterprise (Odoo.sh & Premise) as well as Community.
- No, this application is not compatible with odoo.com(odoo saas/Odoo Online)
-
No, Our helpdesk app works independently.
Here is the link where you can purchase our helpdesk enterprise app.
Helpdesk Enterprise
- Yes, to test this module, please contact us at sales@softhealer.com.
- Please contact us at sales@softhealer.comto request customization.
- Yes, we provide free lifetime support for the version you purchased.
- Yes, you will receive lifetime free updates for the version of the module you purchased.
- No, there is no need to install any additional libraries.
- Yes, for version 12 and above, you need to purchase the module separately for each version you intend to use.
- No, exchanges or refunds are not allowed. Please make sure to select the correct version before purchasing.
- You can contact us at support@softhealer.com for language translation support. We use Google Translator tools to provide translations in multiple languages, so the accuracy may vary. We welcome your suggestions to help improve translations.
Discover Our Latest Apps