












All In One Email Toolkit

One email toolkit to send through your own SMTP, auto-CC/BCC the right people, organize your inbox your
way (snooze, folders, tags, themes), never lose a message, and keep your newsletter list clean with
double opt-in verification.
It's built for businesses that want more control and less manual work - smarter inbox management for your
whole team. No more scattered tools or missed messages; everything you need to run professional email
communication lives in one place. Simple to set up, easy to use, and built to scale as your business
grows.
Features

Email CC and BCC Management
 Default
CC & BCC in Email
Default
CC & BCC in Email
- Editable
CC & BCC While Composing
- Multi-Company
Support
- CC
Email Transparency Control
- BCC
Privacy Email Support
- Default
Reply-To Option in Email

Dynamic Mailbox Interface
- Email
Snoozing
- Vibrant
Email Tagging
- Theme
Customization
- Split-Pane
View
- Custom
Folder Management

Lost Messages Routing
- Manual
Re-routing
- Bulk
Message Routing
- Attachment
Preservation
- Real-time
Notifications
- Discussion
Styling

Outgoing Mail Server Configuration
- User-Wise
Mail Server
- Model-Wise
Email Server
- Company
Wise Email server

Double Opt-In for Email Marketing
- Subscriber
Tracking
- Email
Verification Before Subscription
Platform Walkthrough
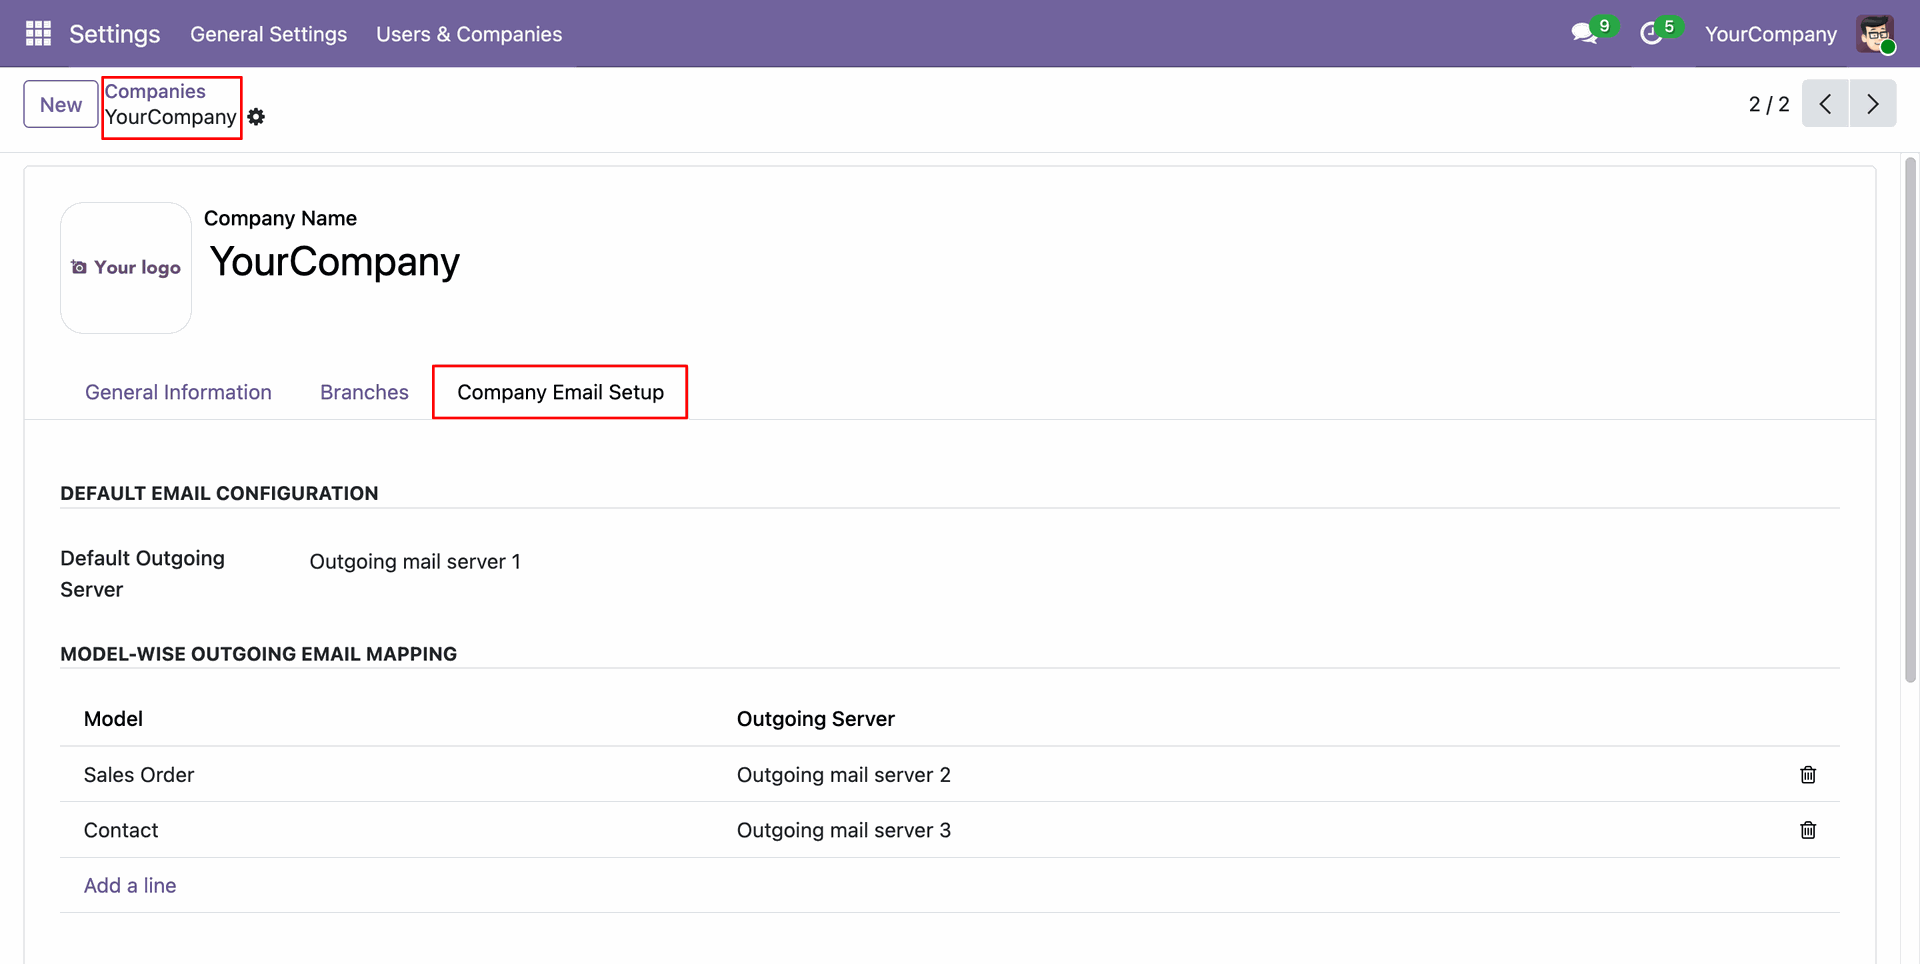
Set up the email server as per the company and model wise.
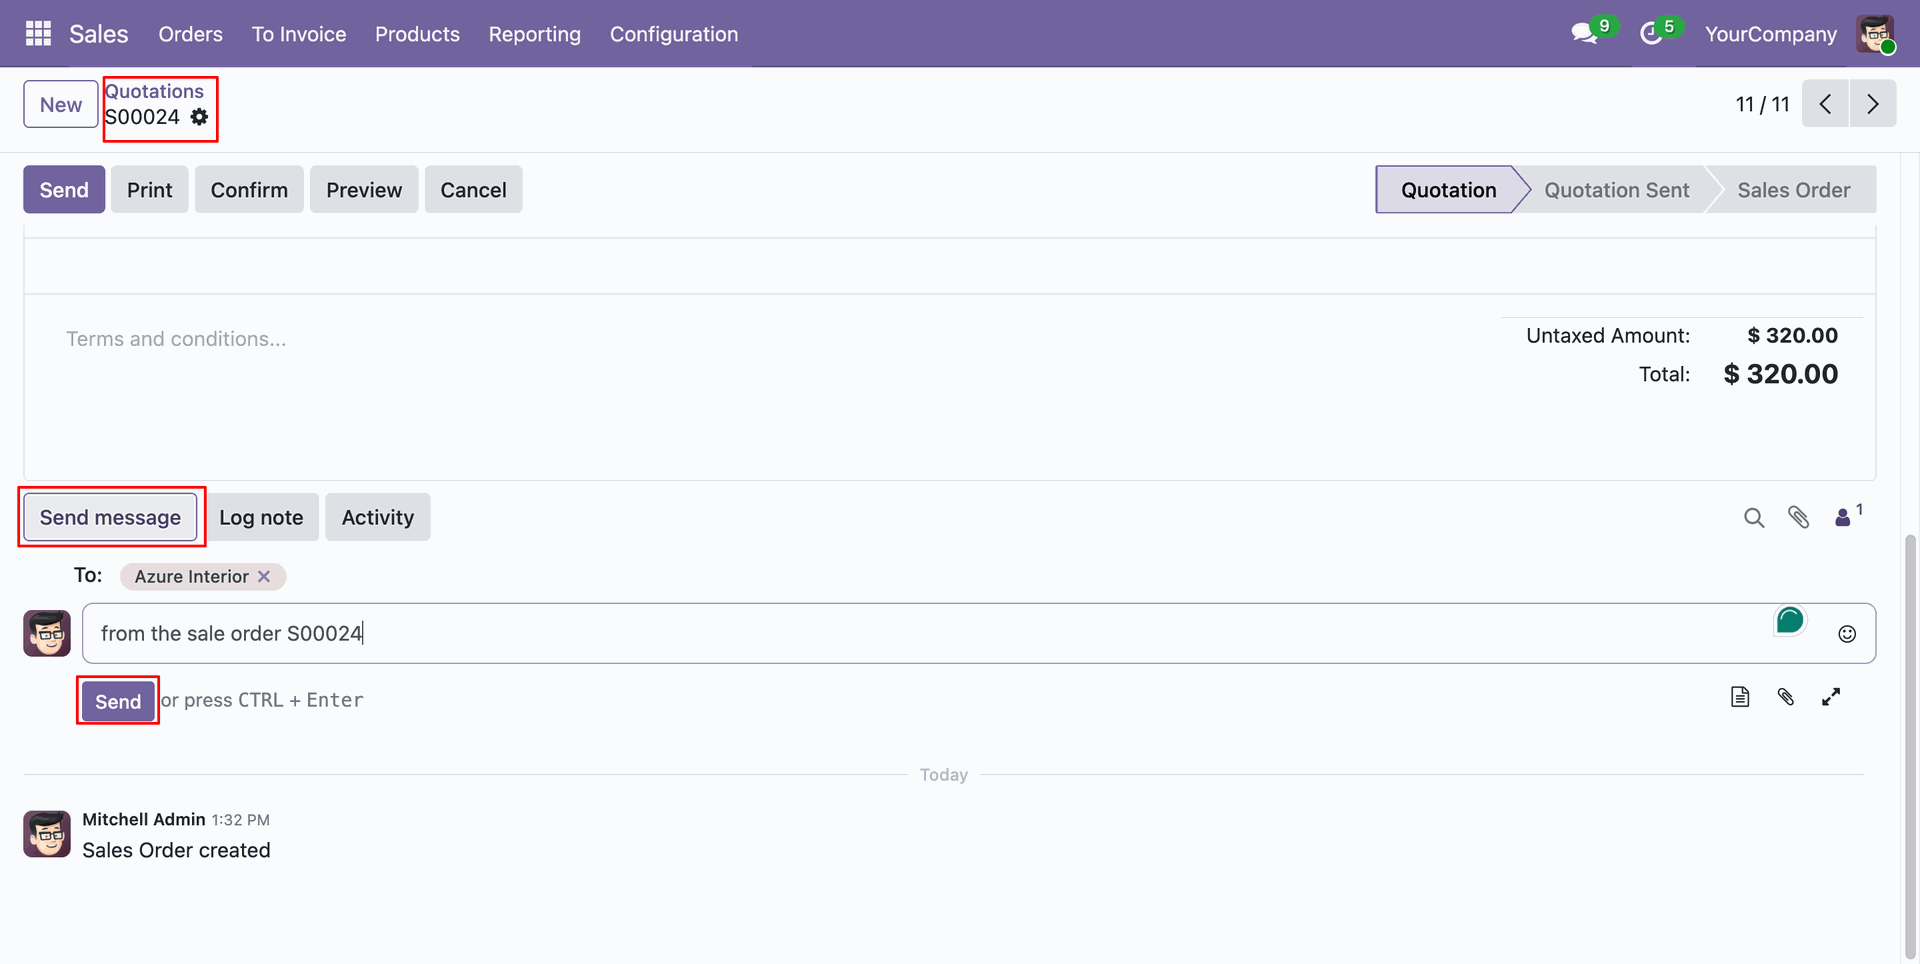
Create a quotation and send a message.
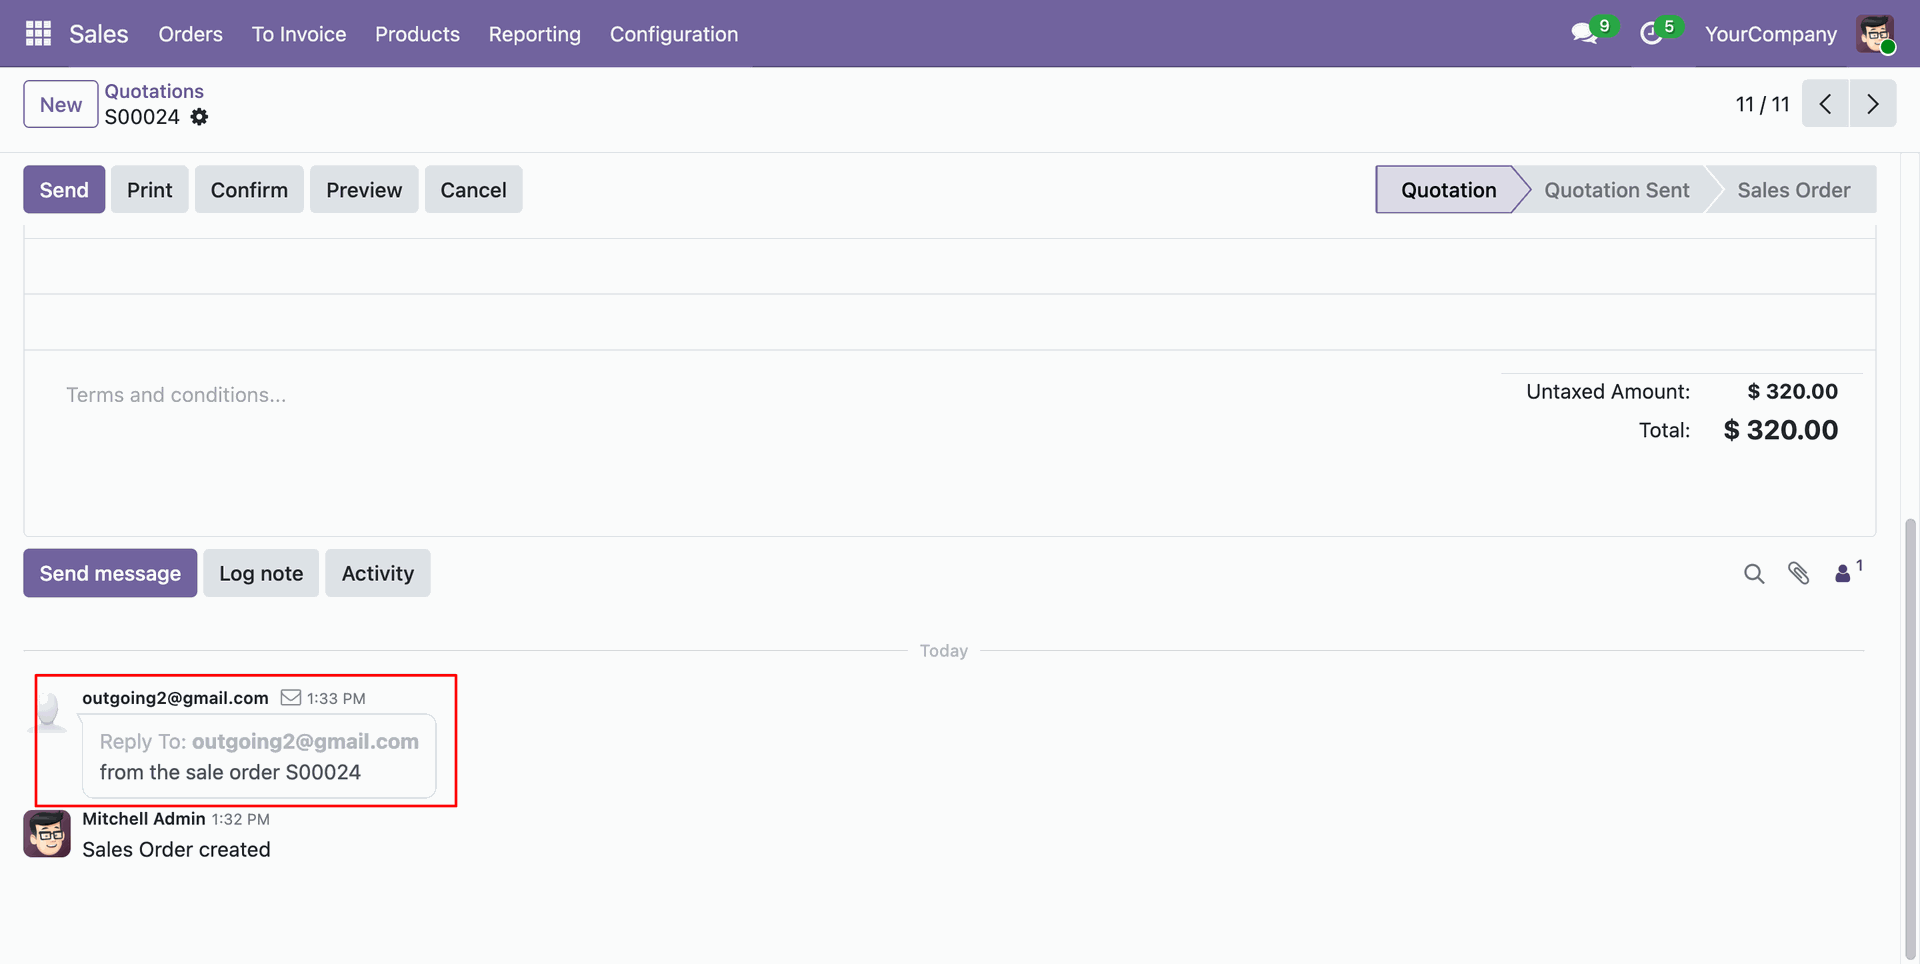
Email sent as per the configured email server.
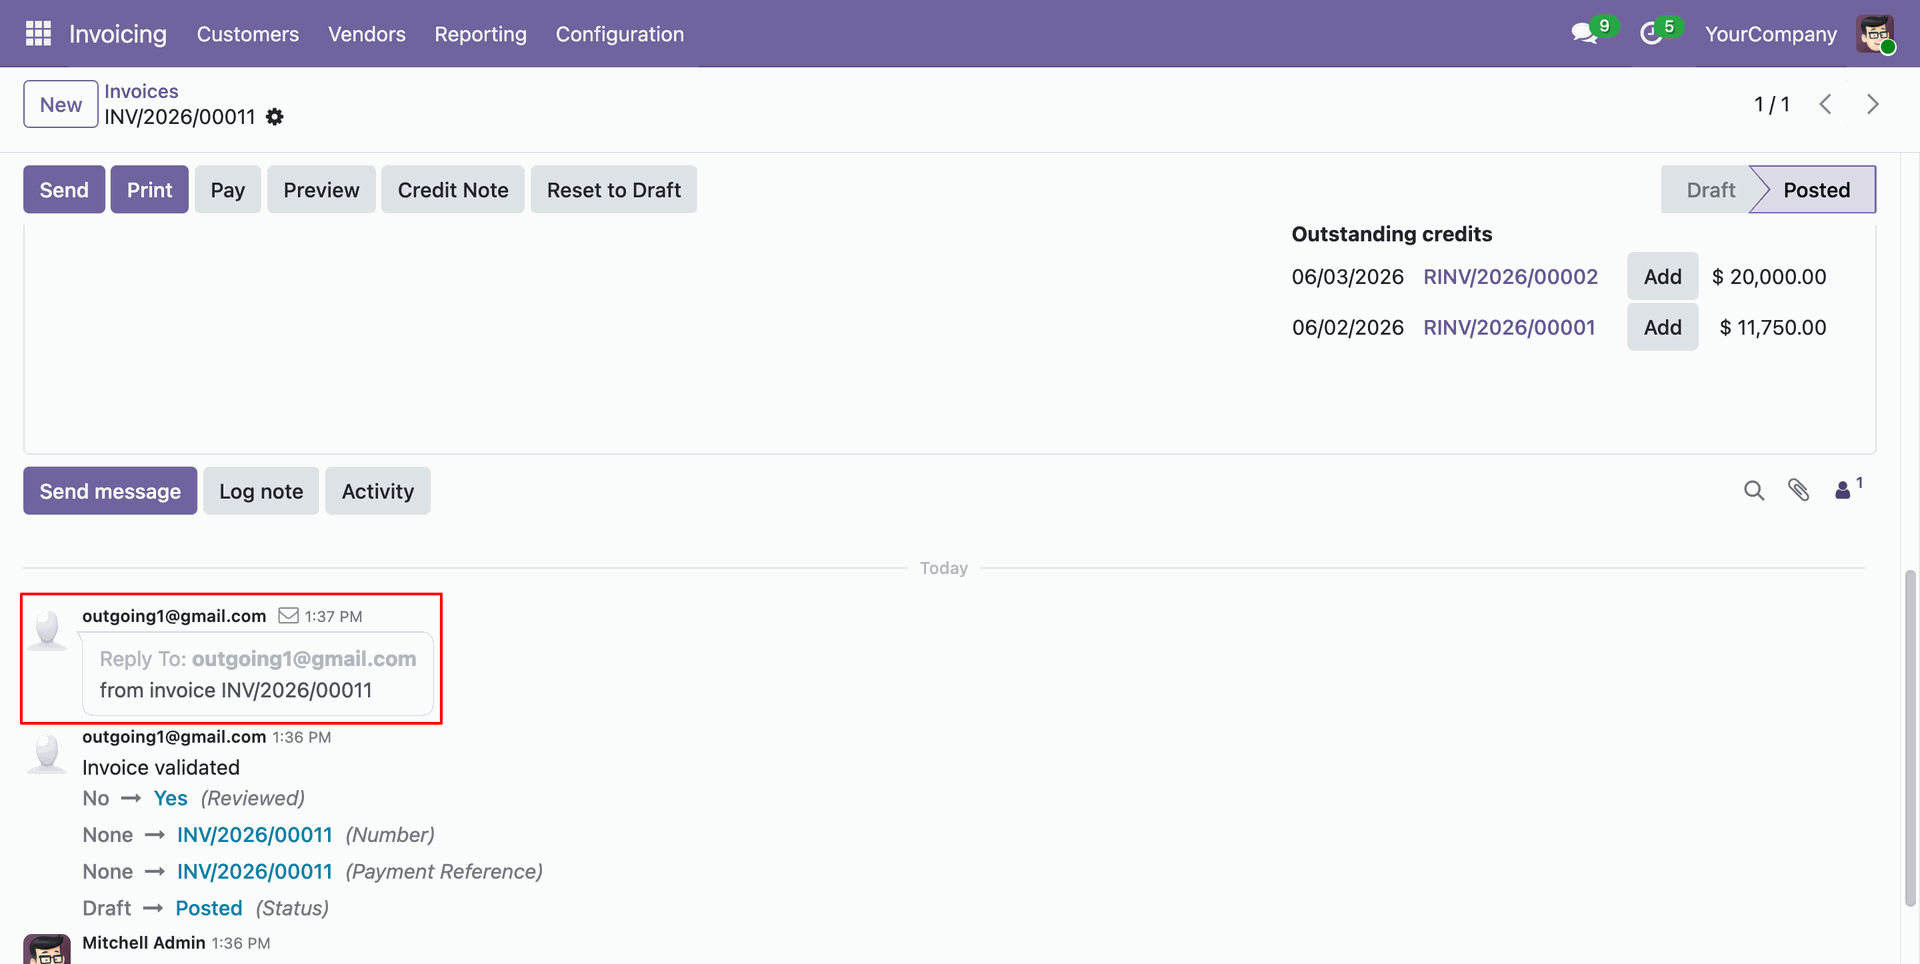
Now send mail from the invoice.
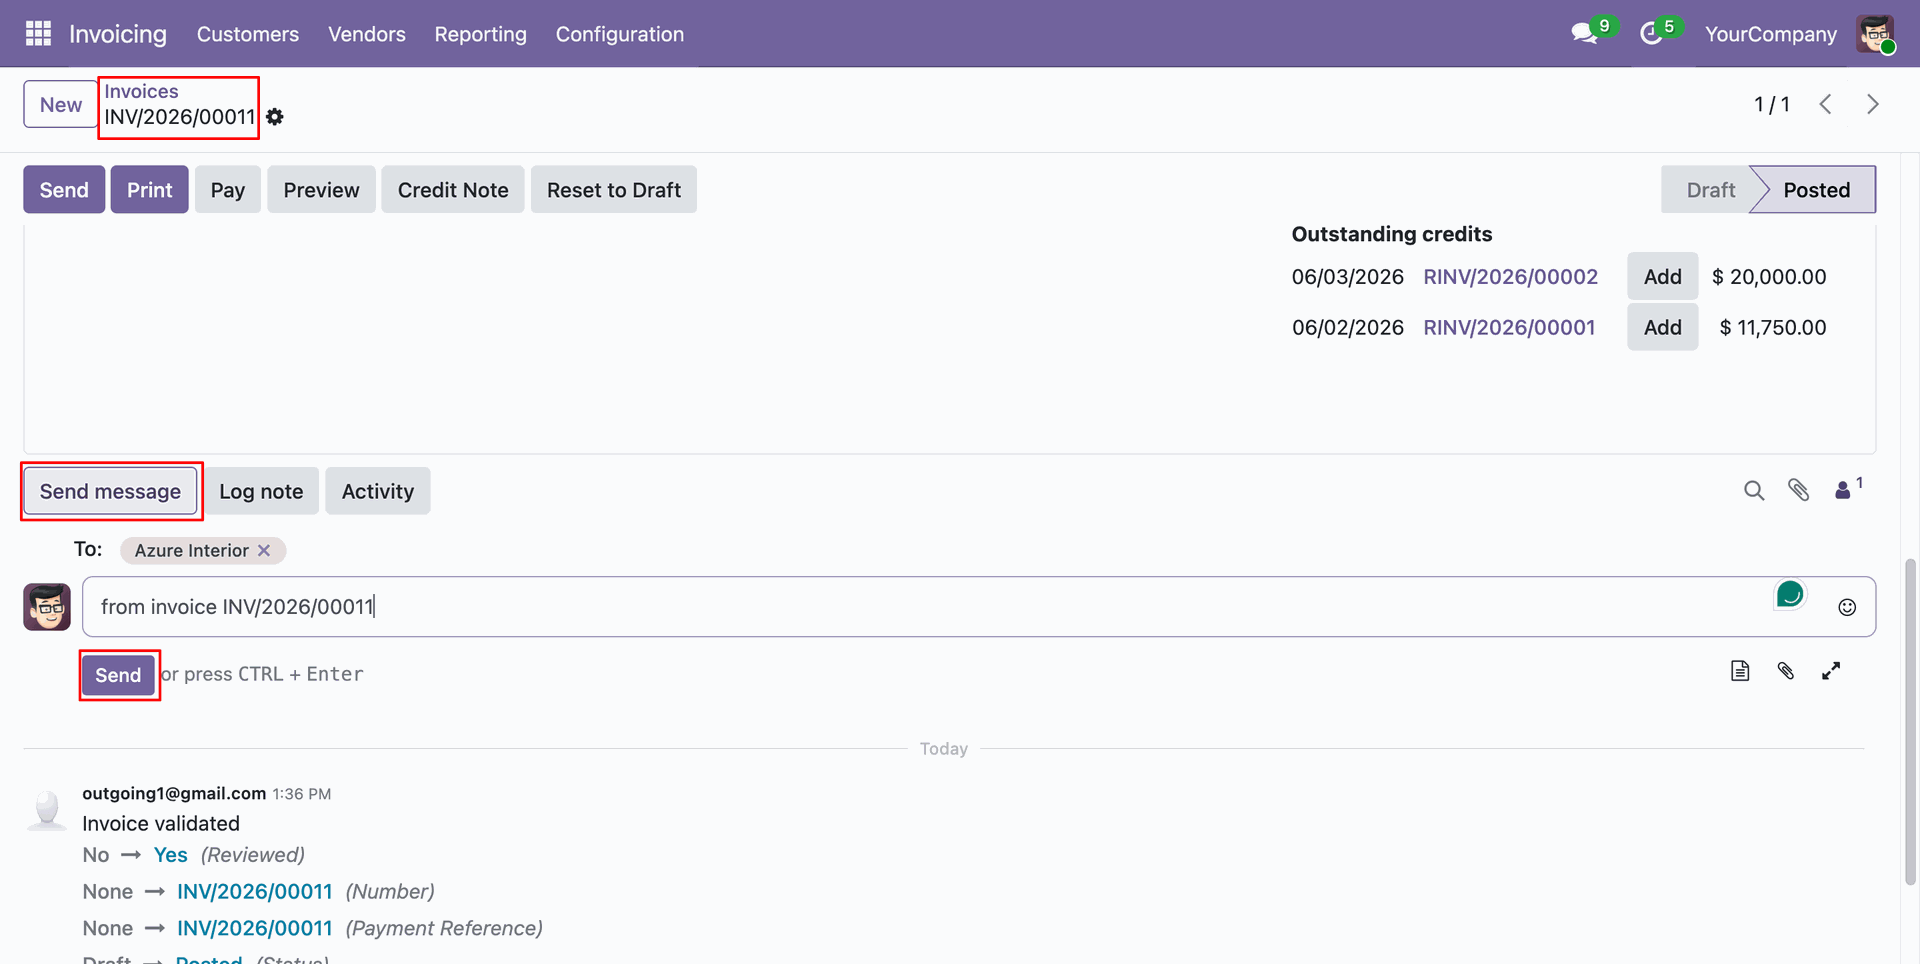
Email sent as per the configured email server.

Workflow
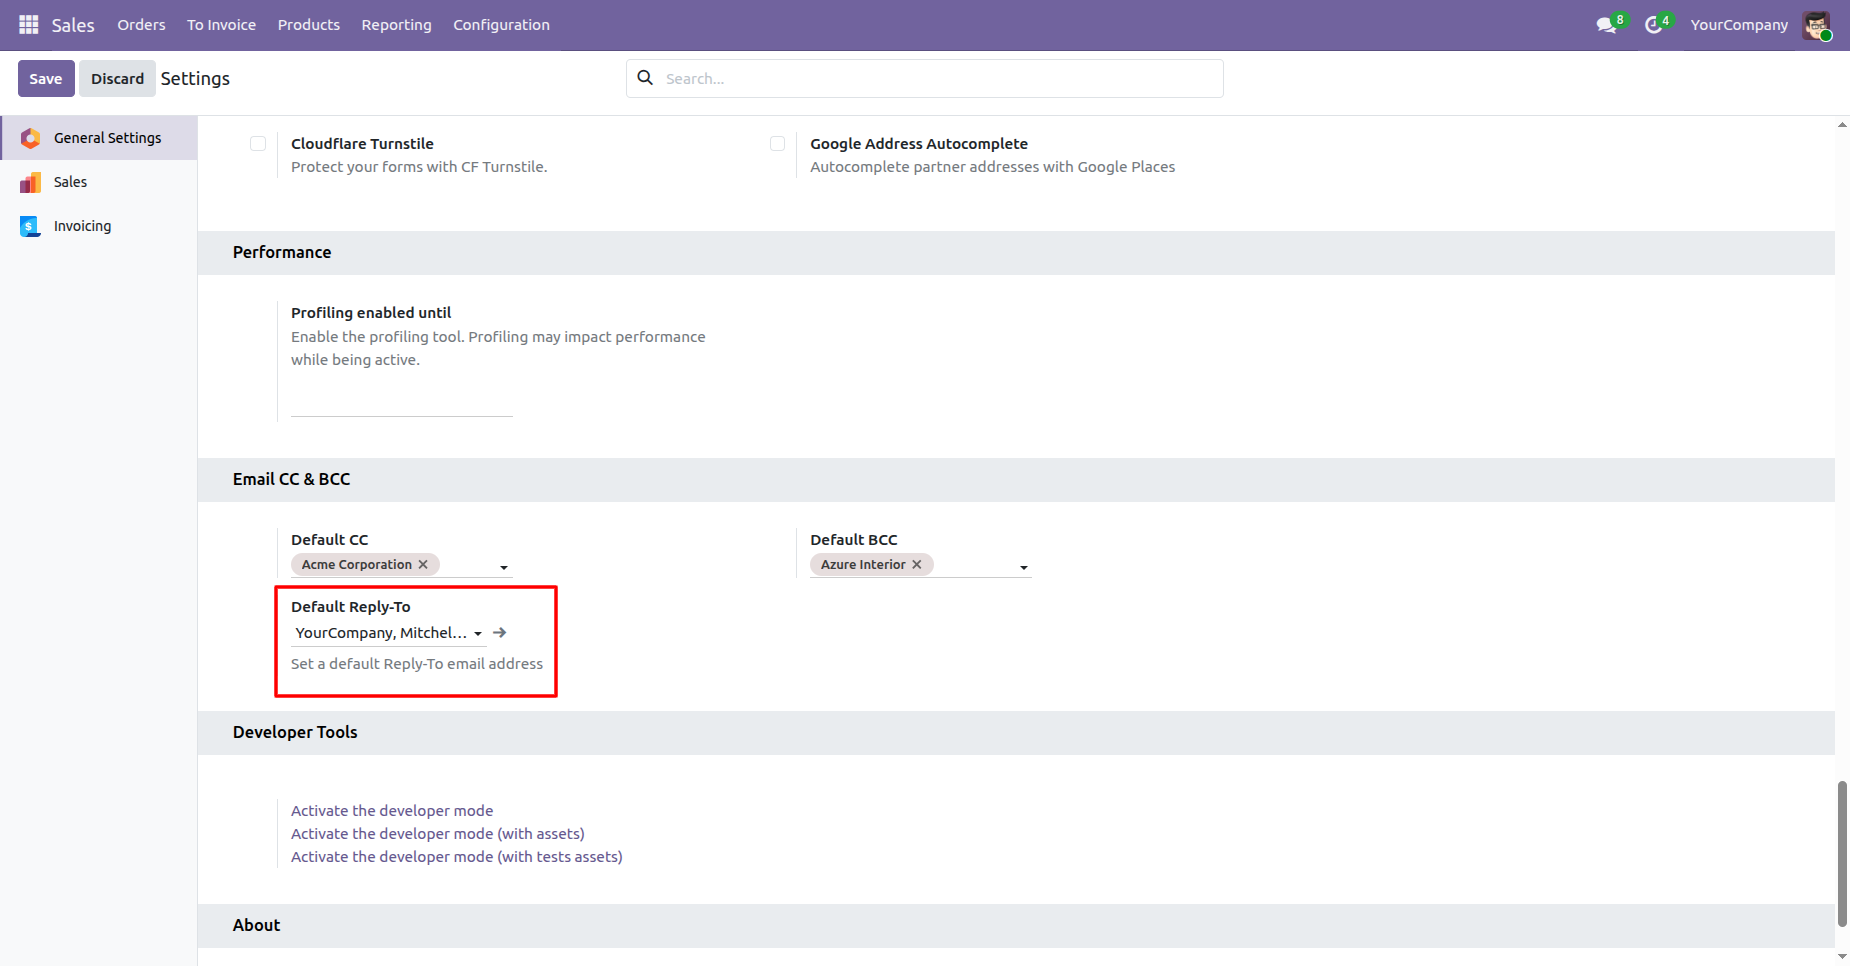
Select default email CC & BCC from settings. Here you can see that the activate company is 'Your Company'.
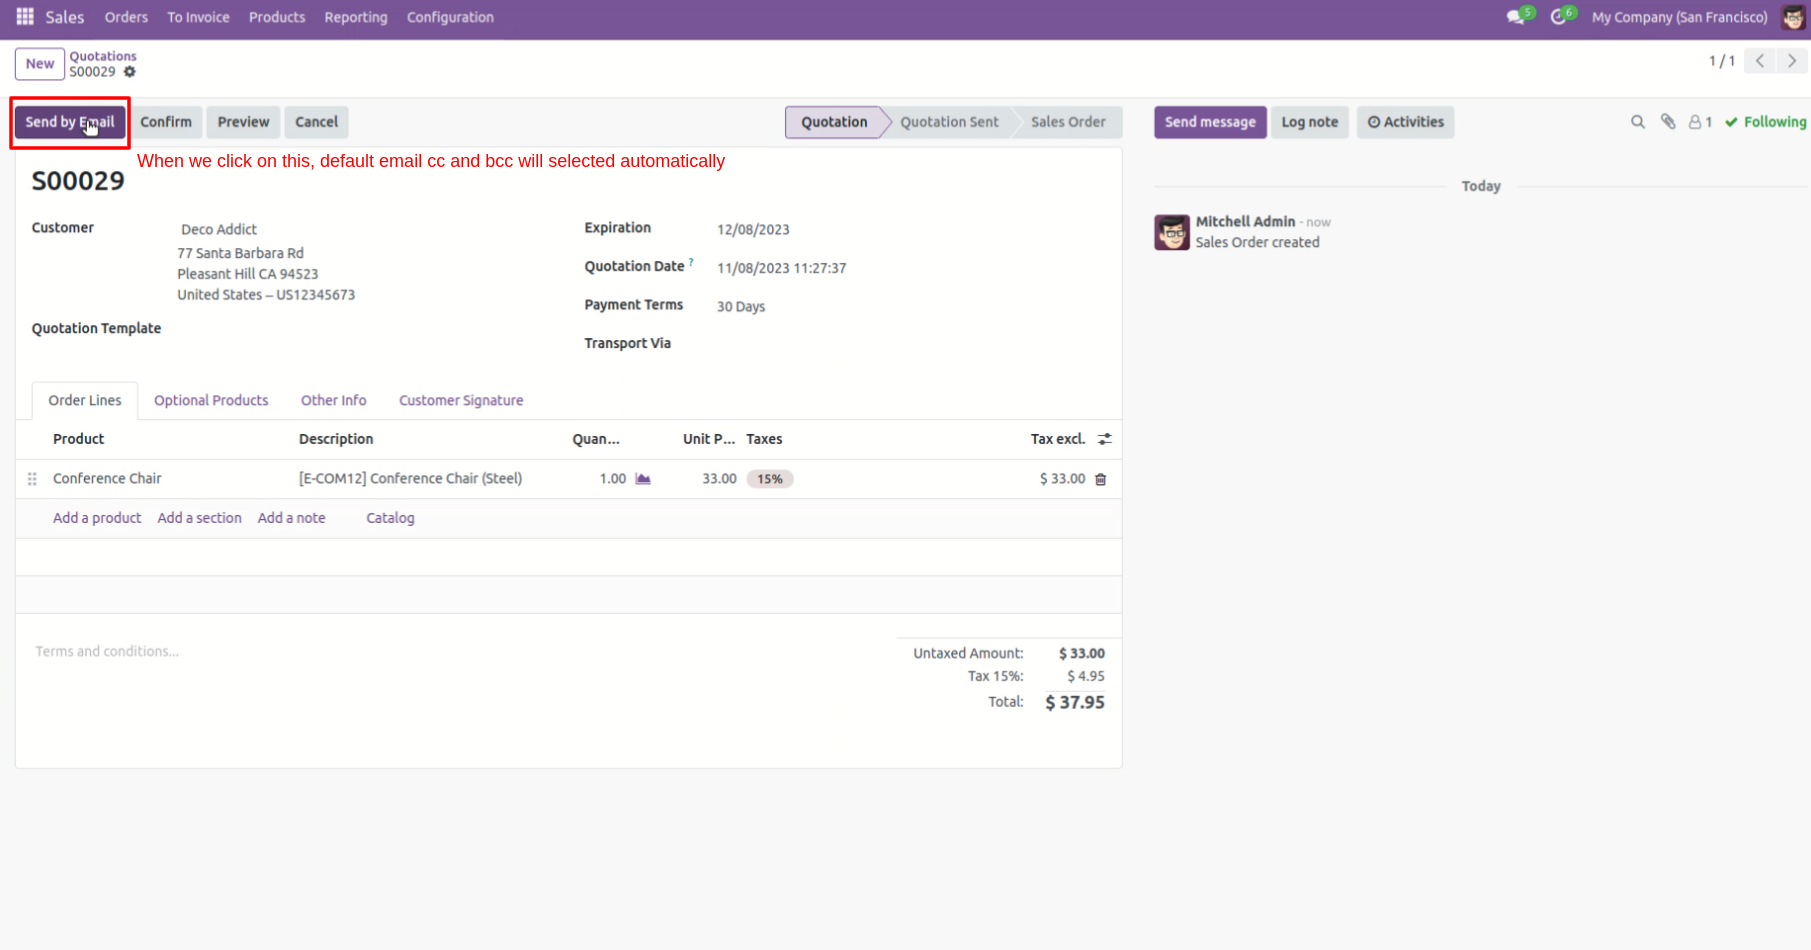
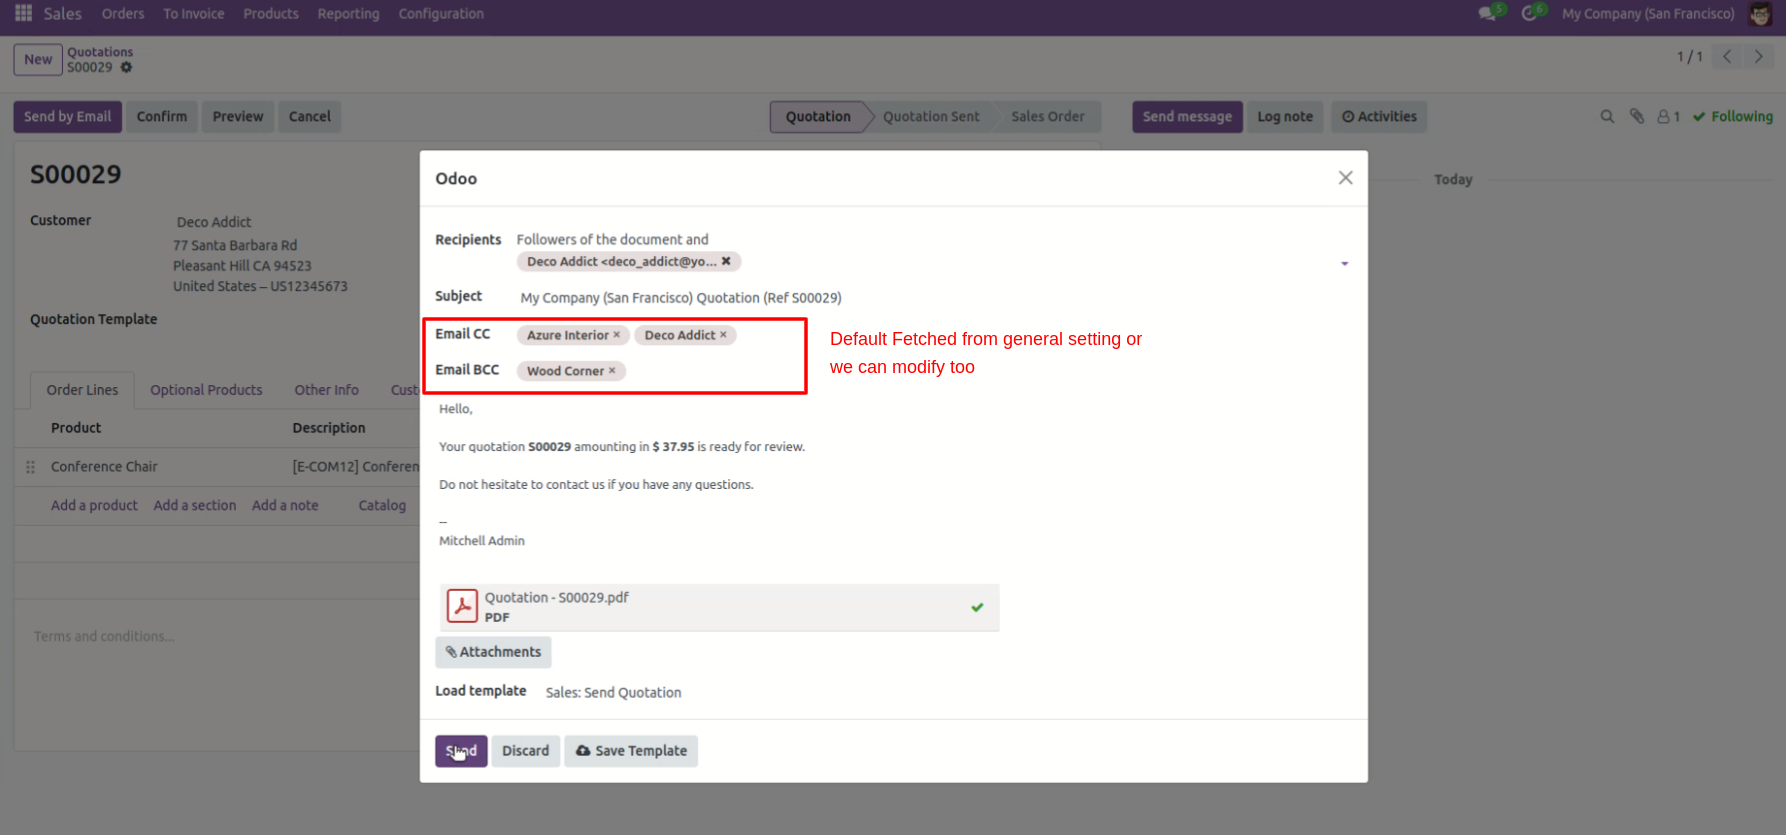
Press 'Send by Email' to send email and you got default CC & BCC.
Default CC & BCC automatically comes when you compose the email, you also can change that from the email.
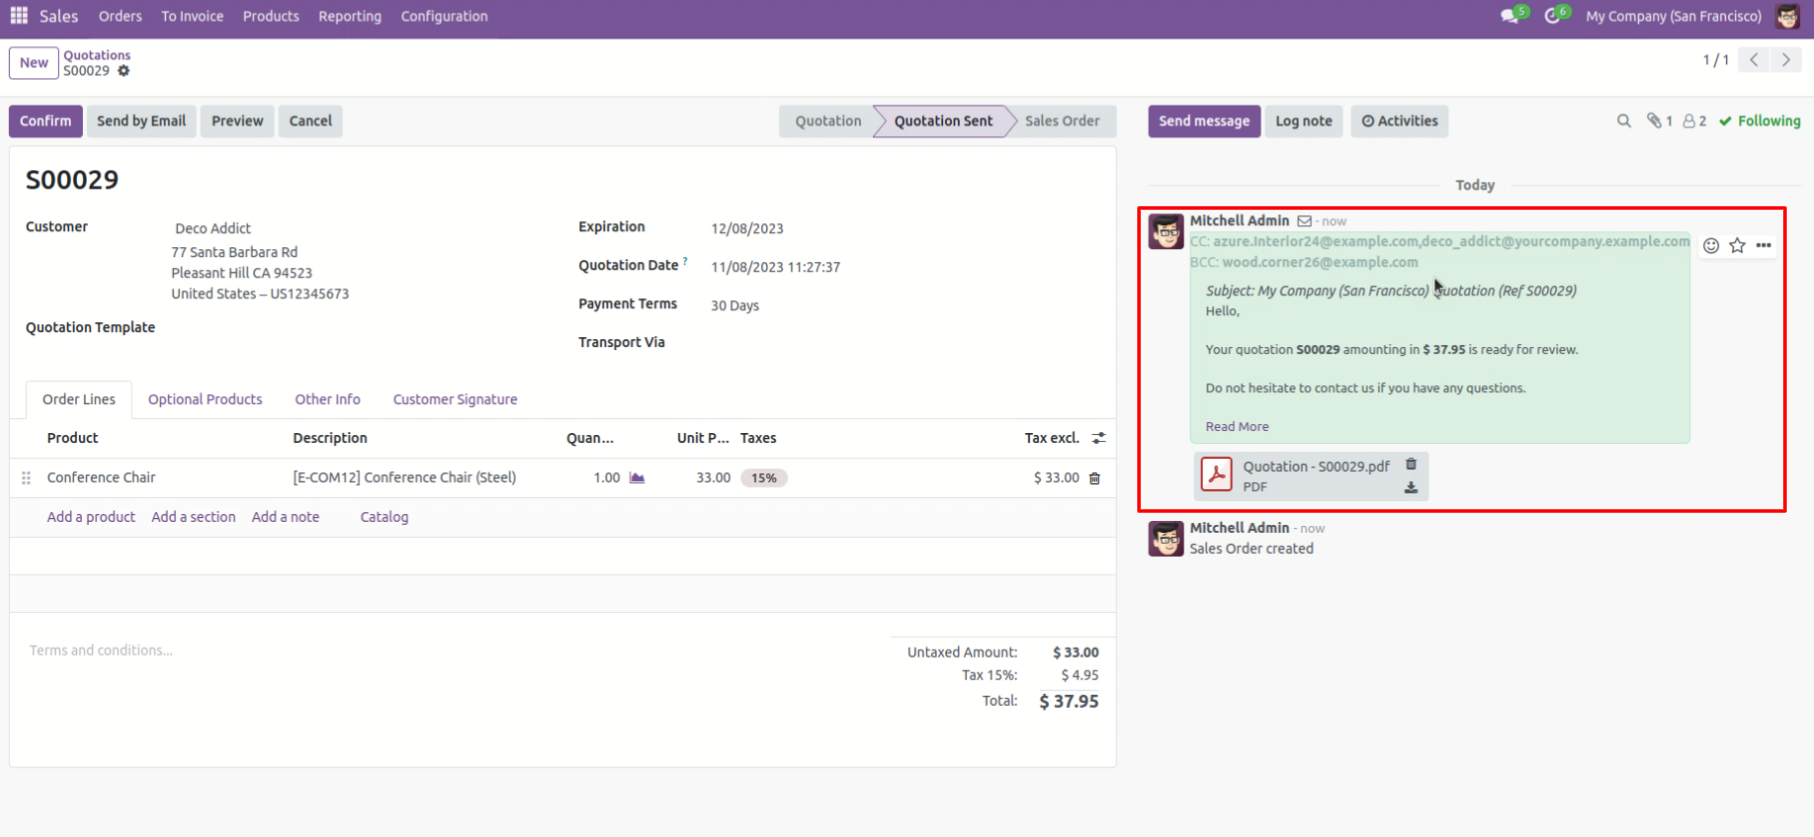
You can see sent email in chatter with default CC & BCC.
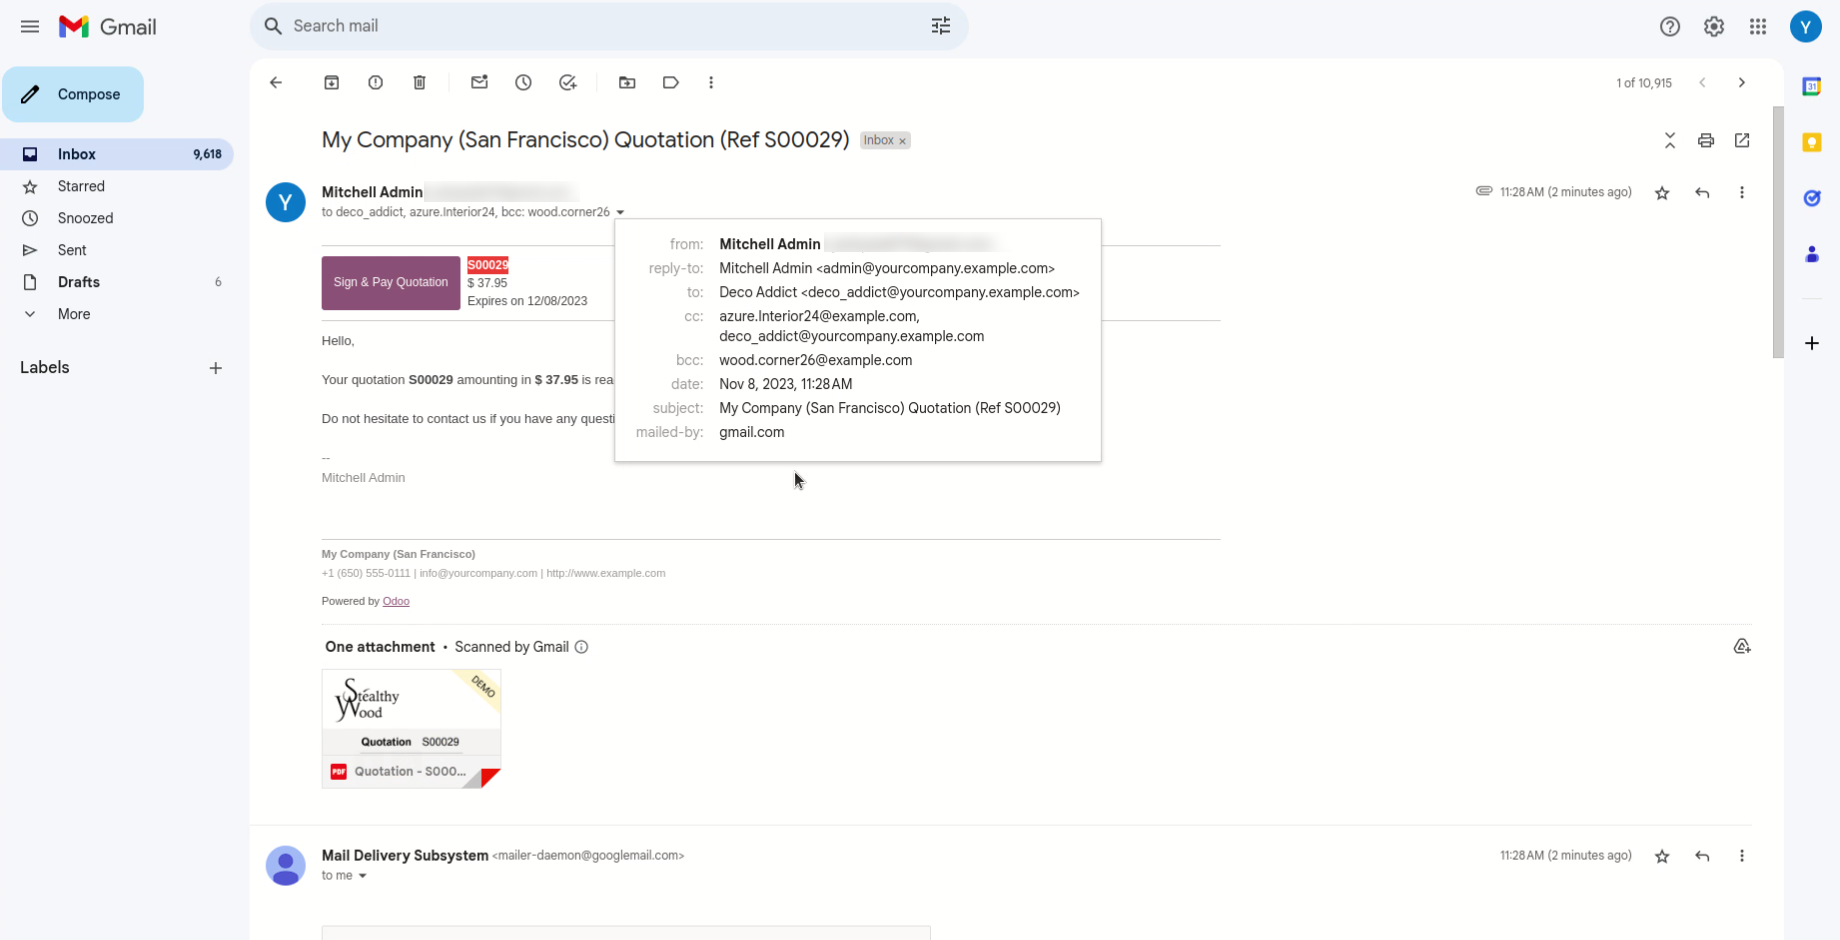
You can see sent email with default CC & BCC.
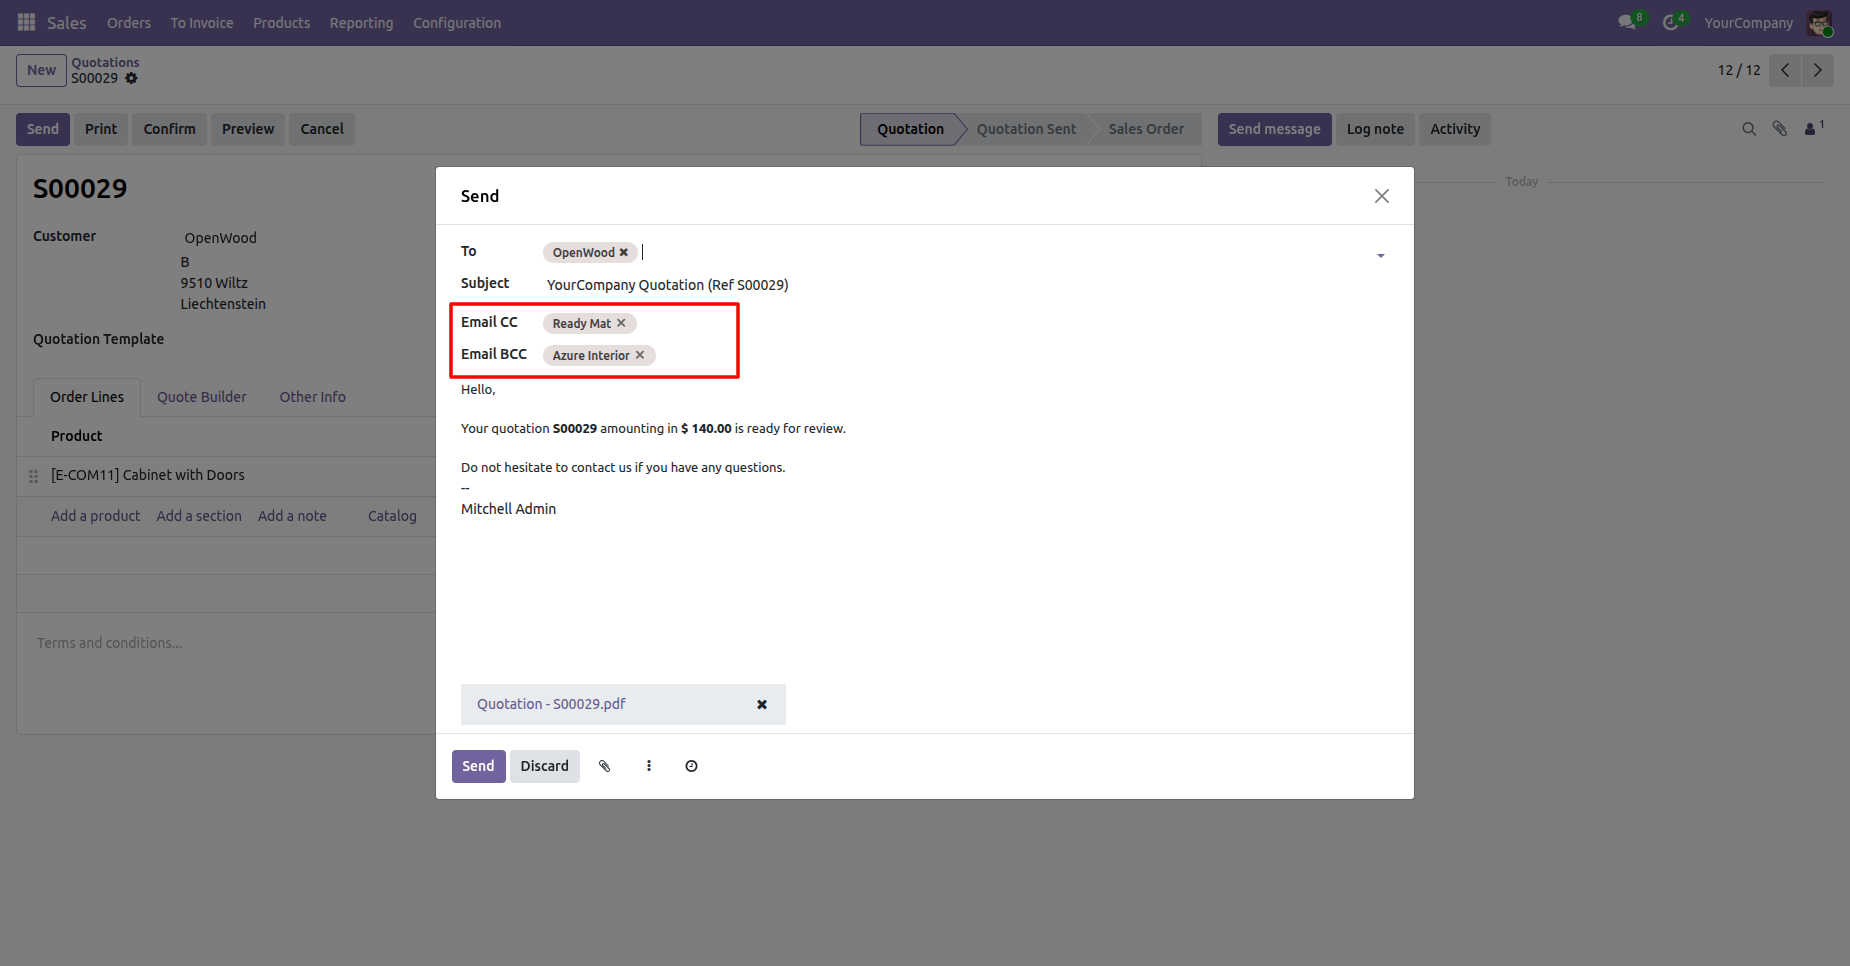
Press 'Send by Email' to send email and you got default CC & BCC.
Default CC & BCC automatically comes when you compose the email, you also can change that from the email.
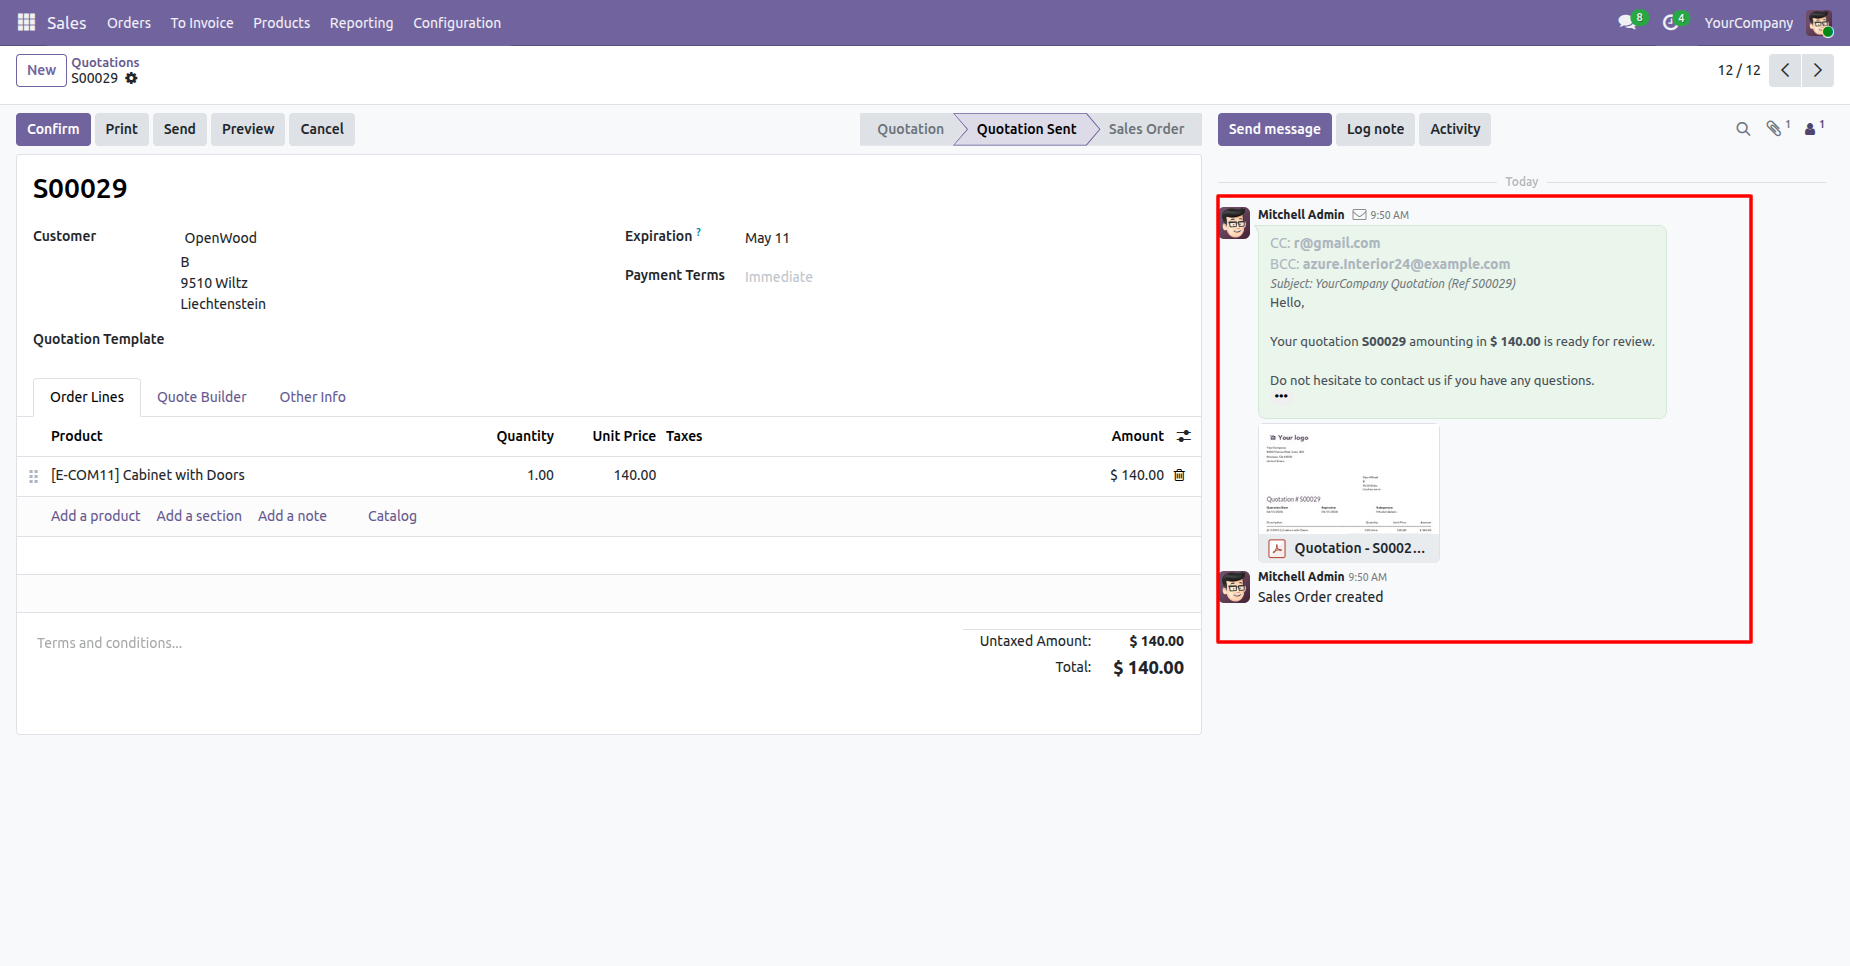
You can see sent email in chatter with default CC & BCC.
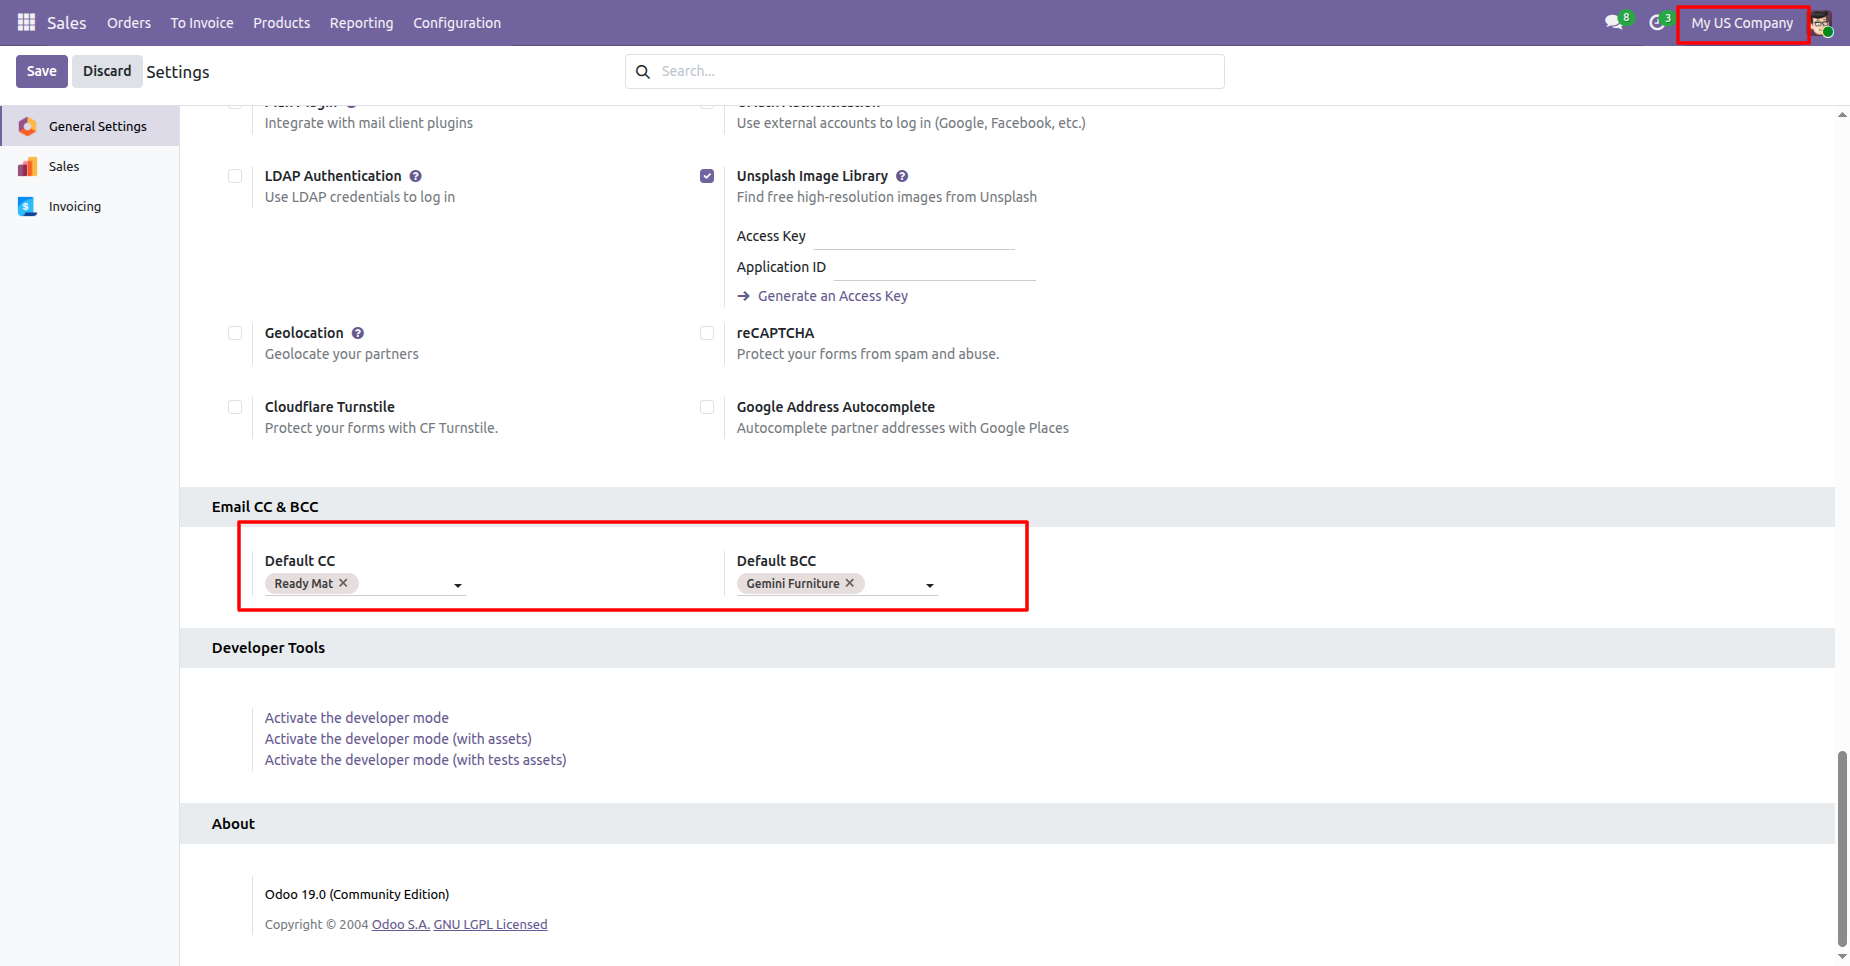
Select default email CC & BCC from settings.
Here you can see that the activate company is 'My US Company'.
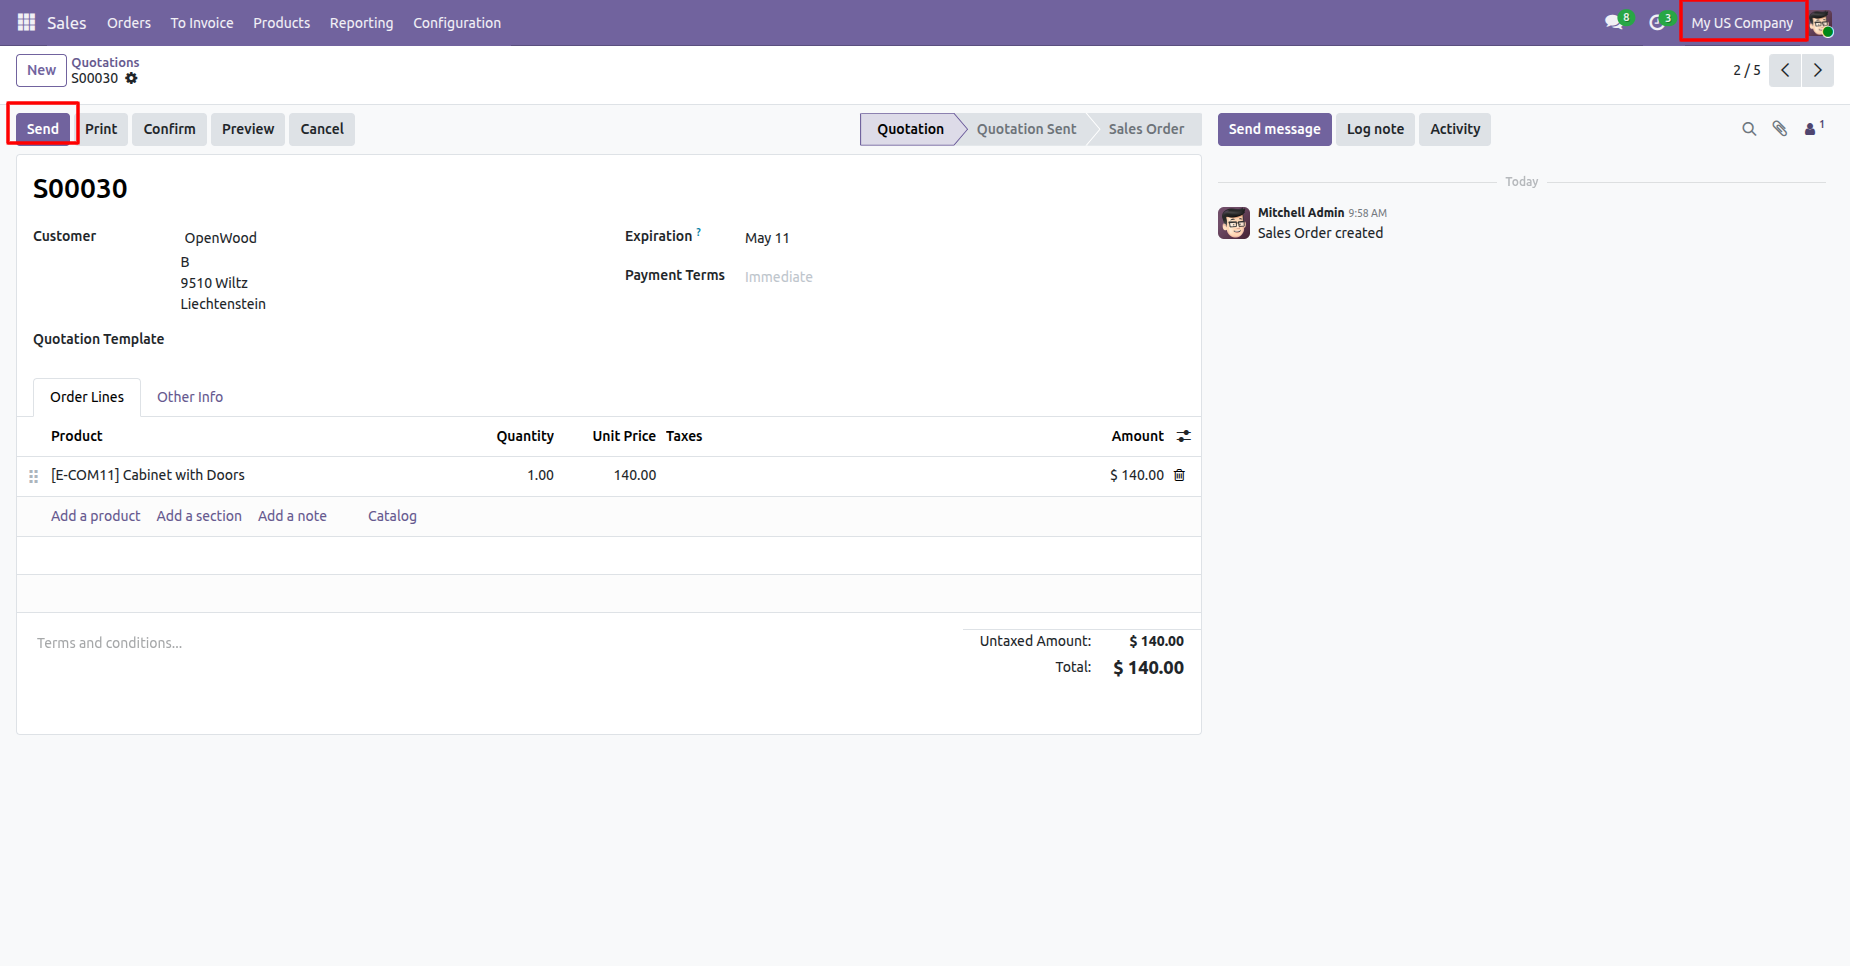
Press 'Send by Email' to send email and you got default CC & BCC.
Default CC & BCC automatically comes when you compose the email, you also can change that from the email.
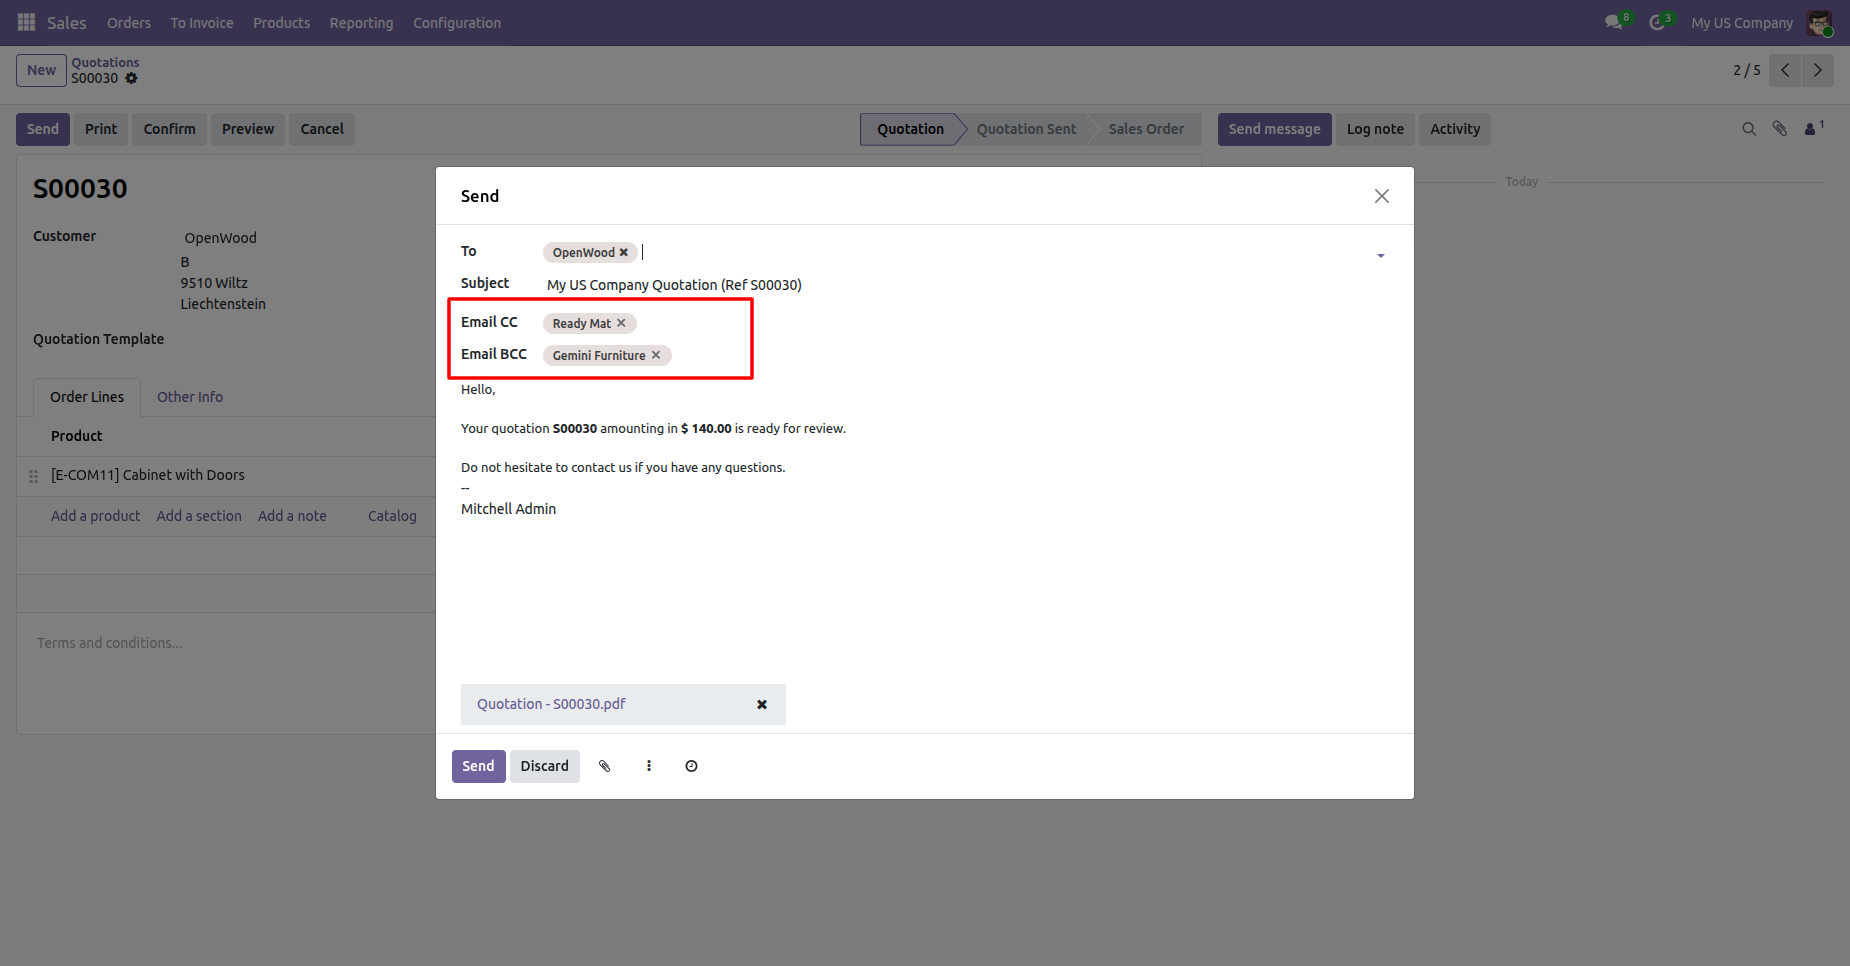
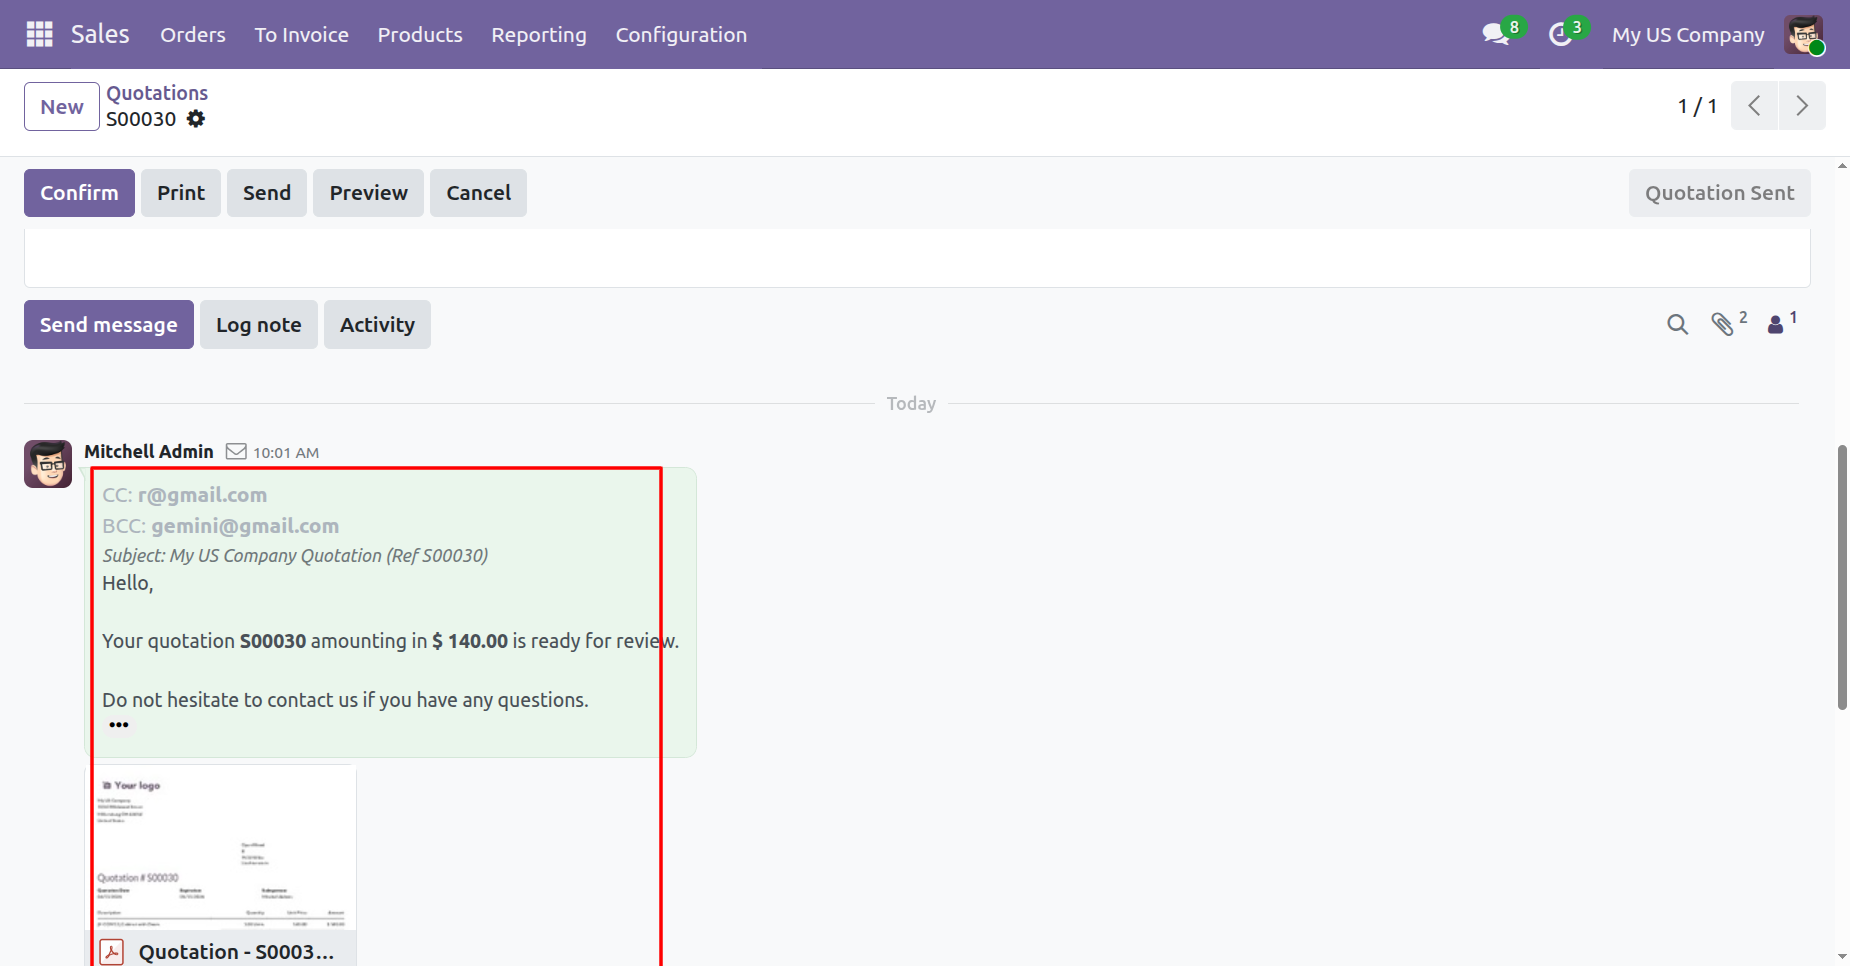
You can see sent email in chatter with default CC & BCC.
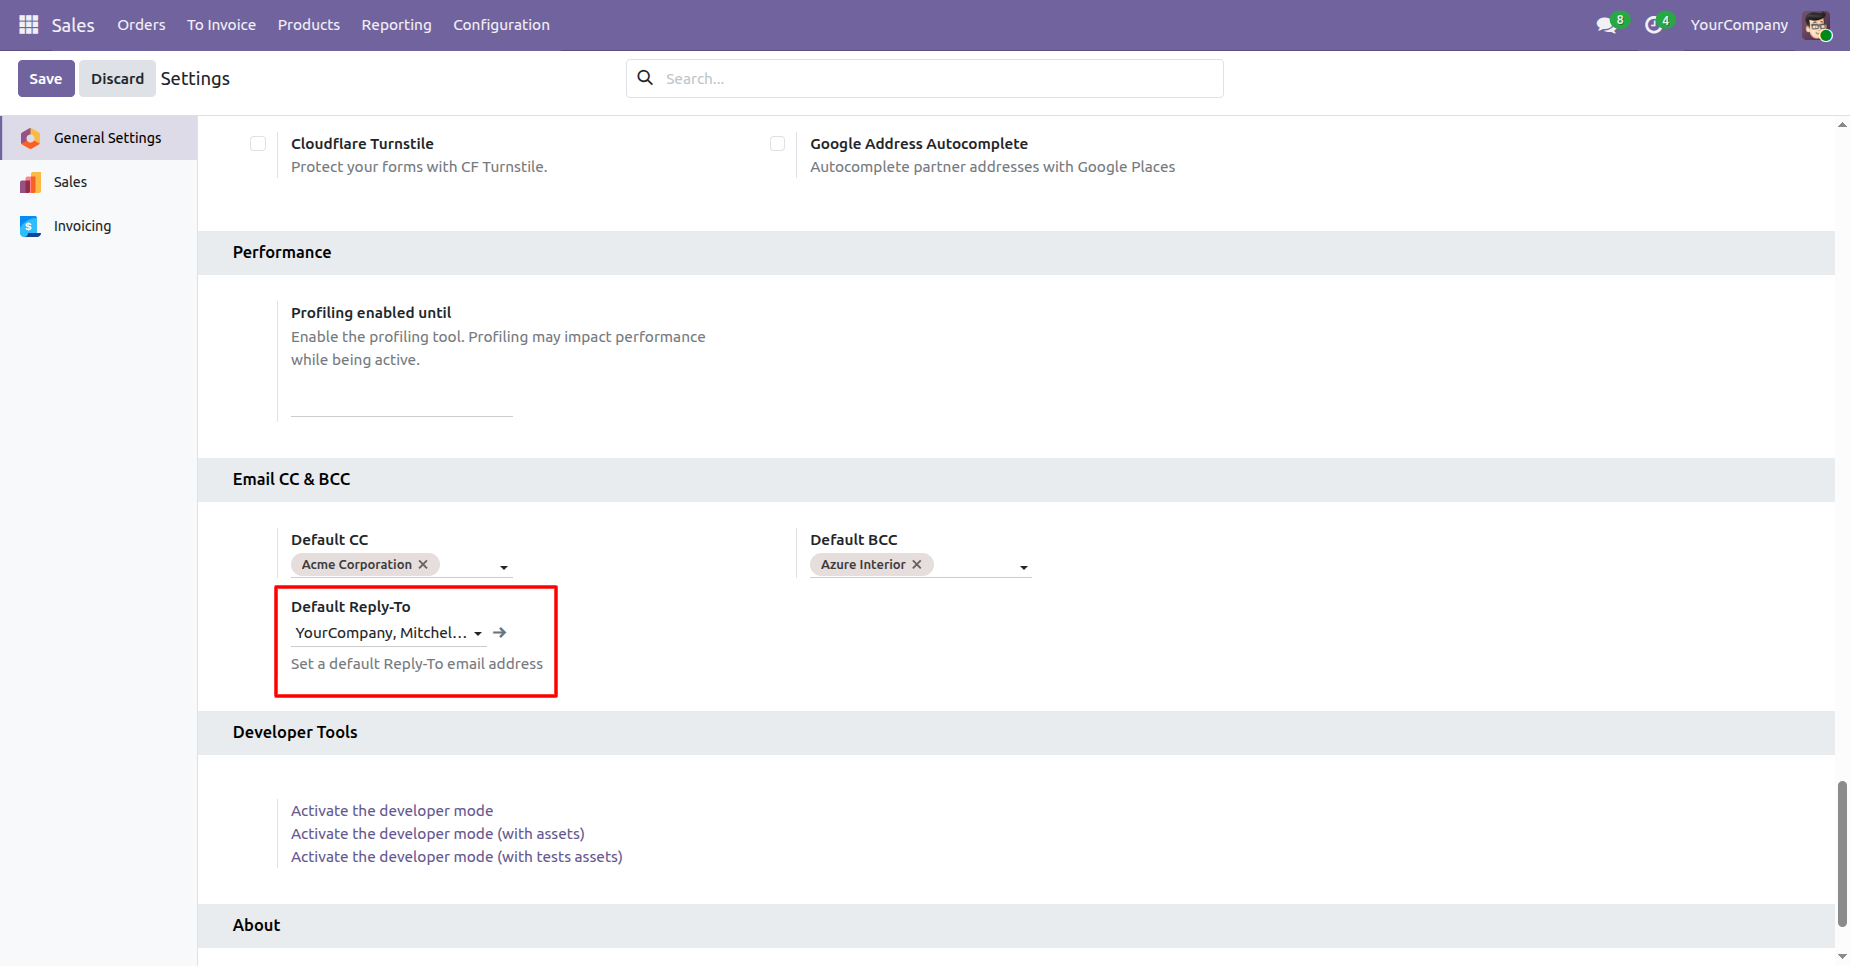
Go to User Settings and set the default reply-to email address in General Settings.
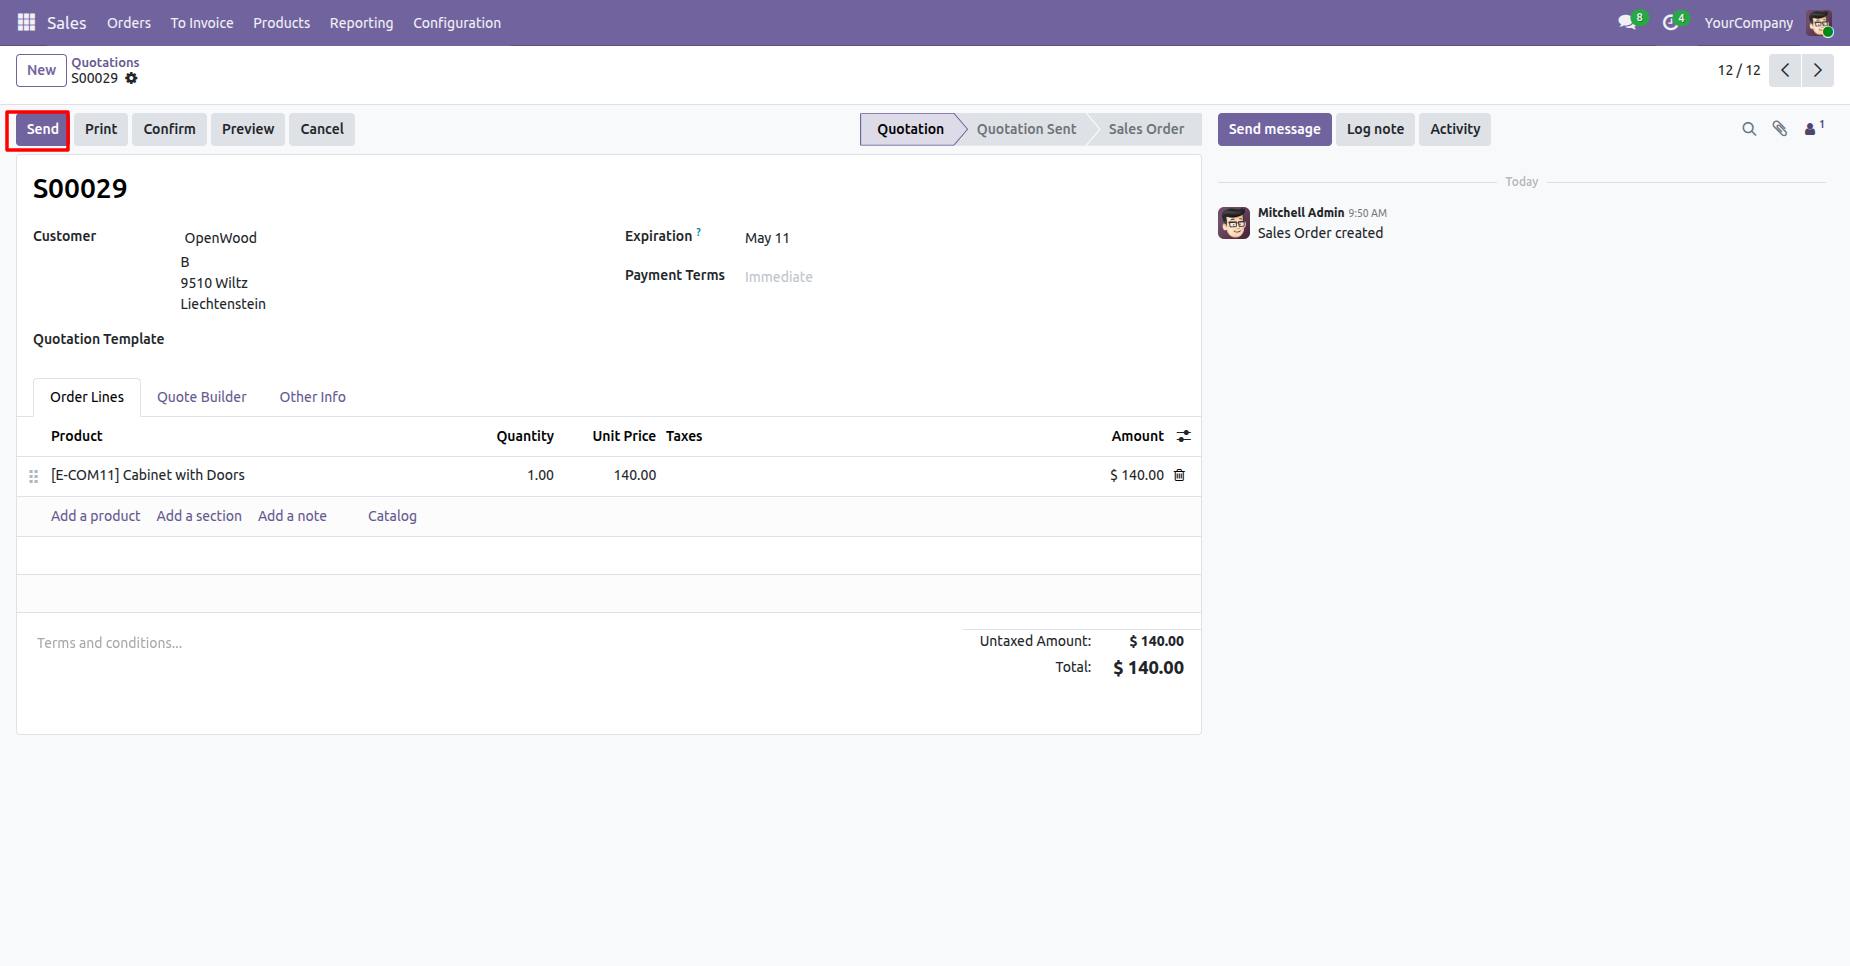
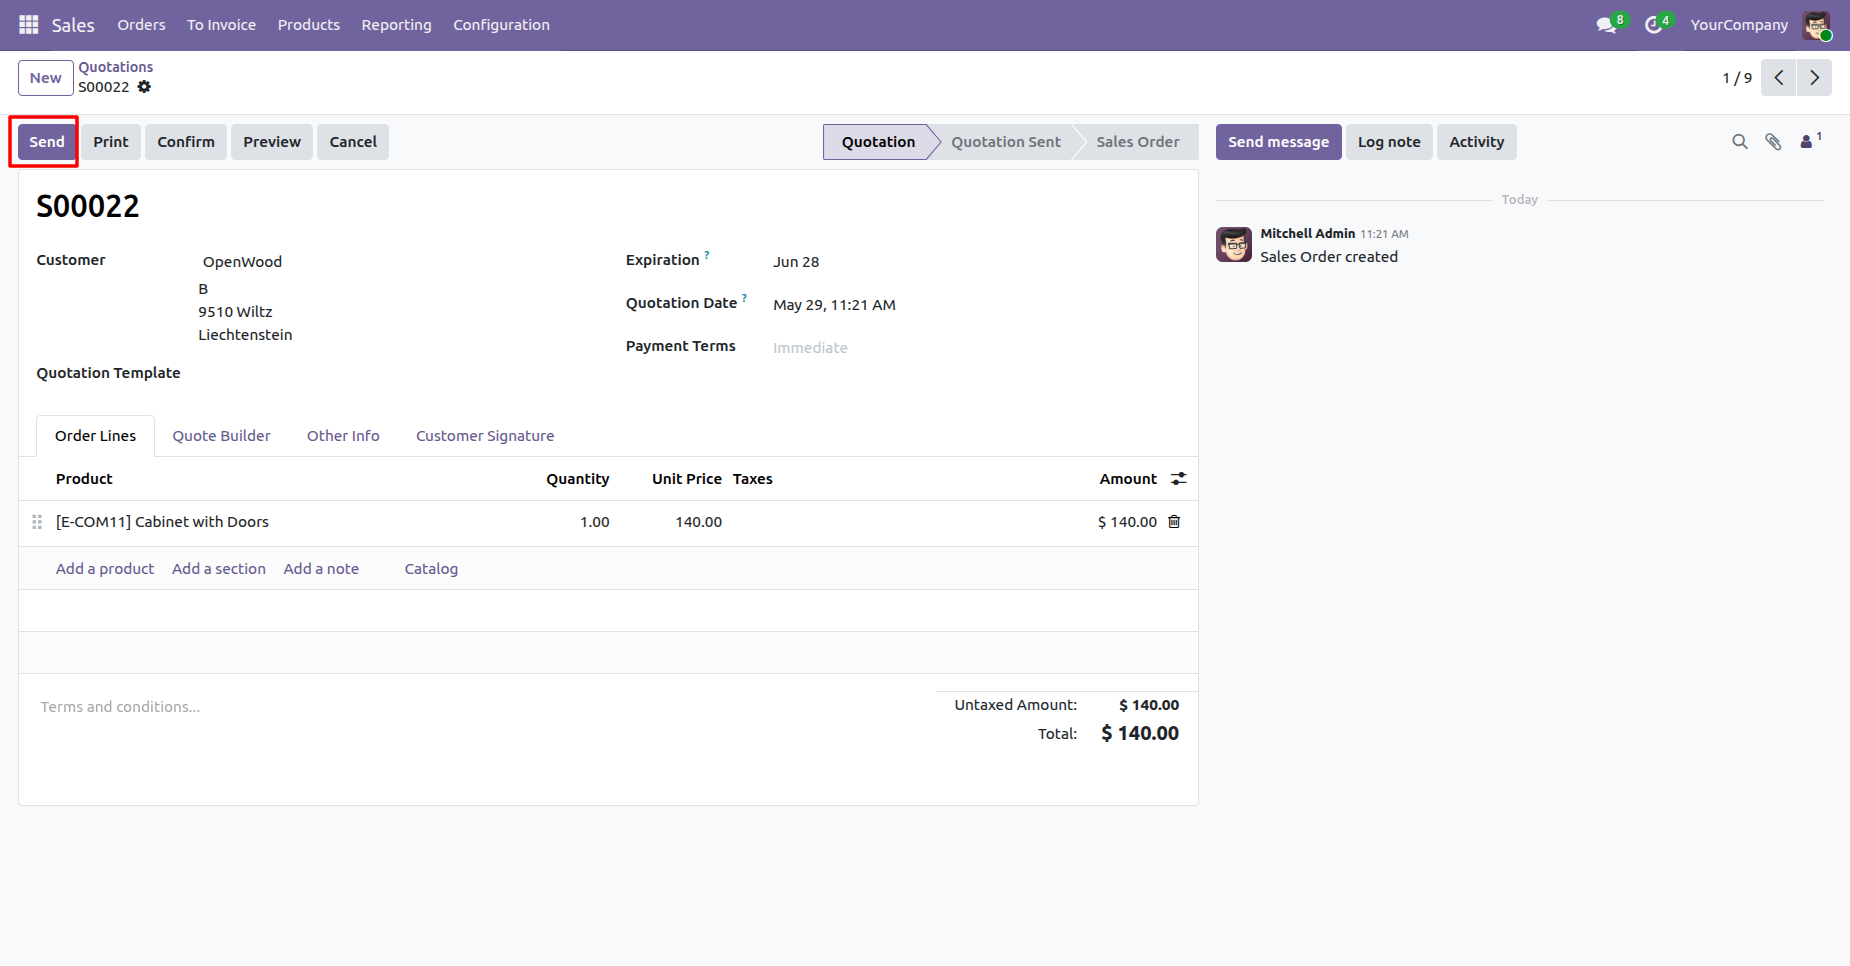
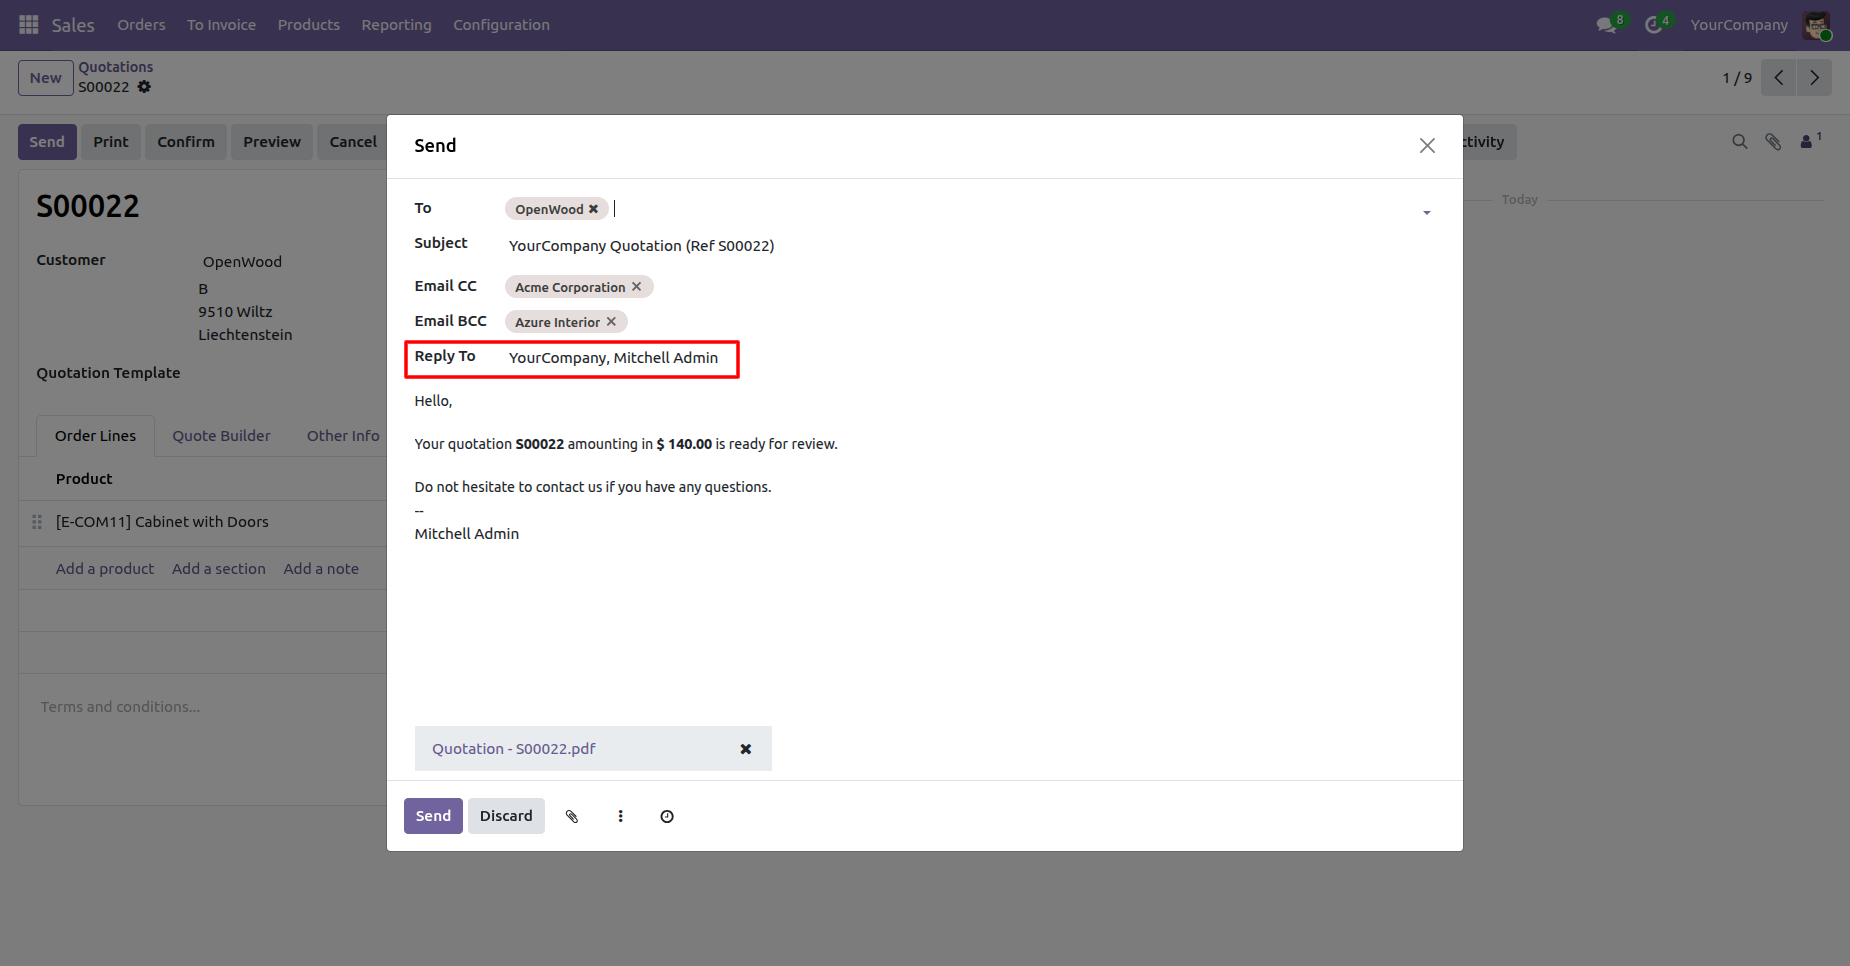
Go to Quotations and click the Send button to send the email.
By clicking the Send button, a wizard will open where you can see the default reply-to email address configured in the settings.
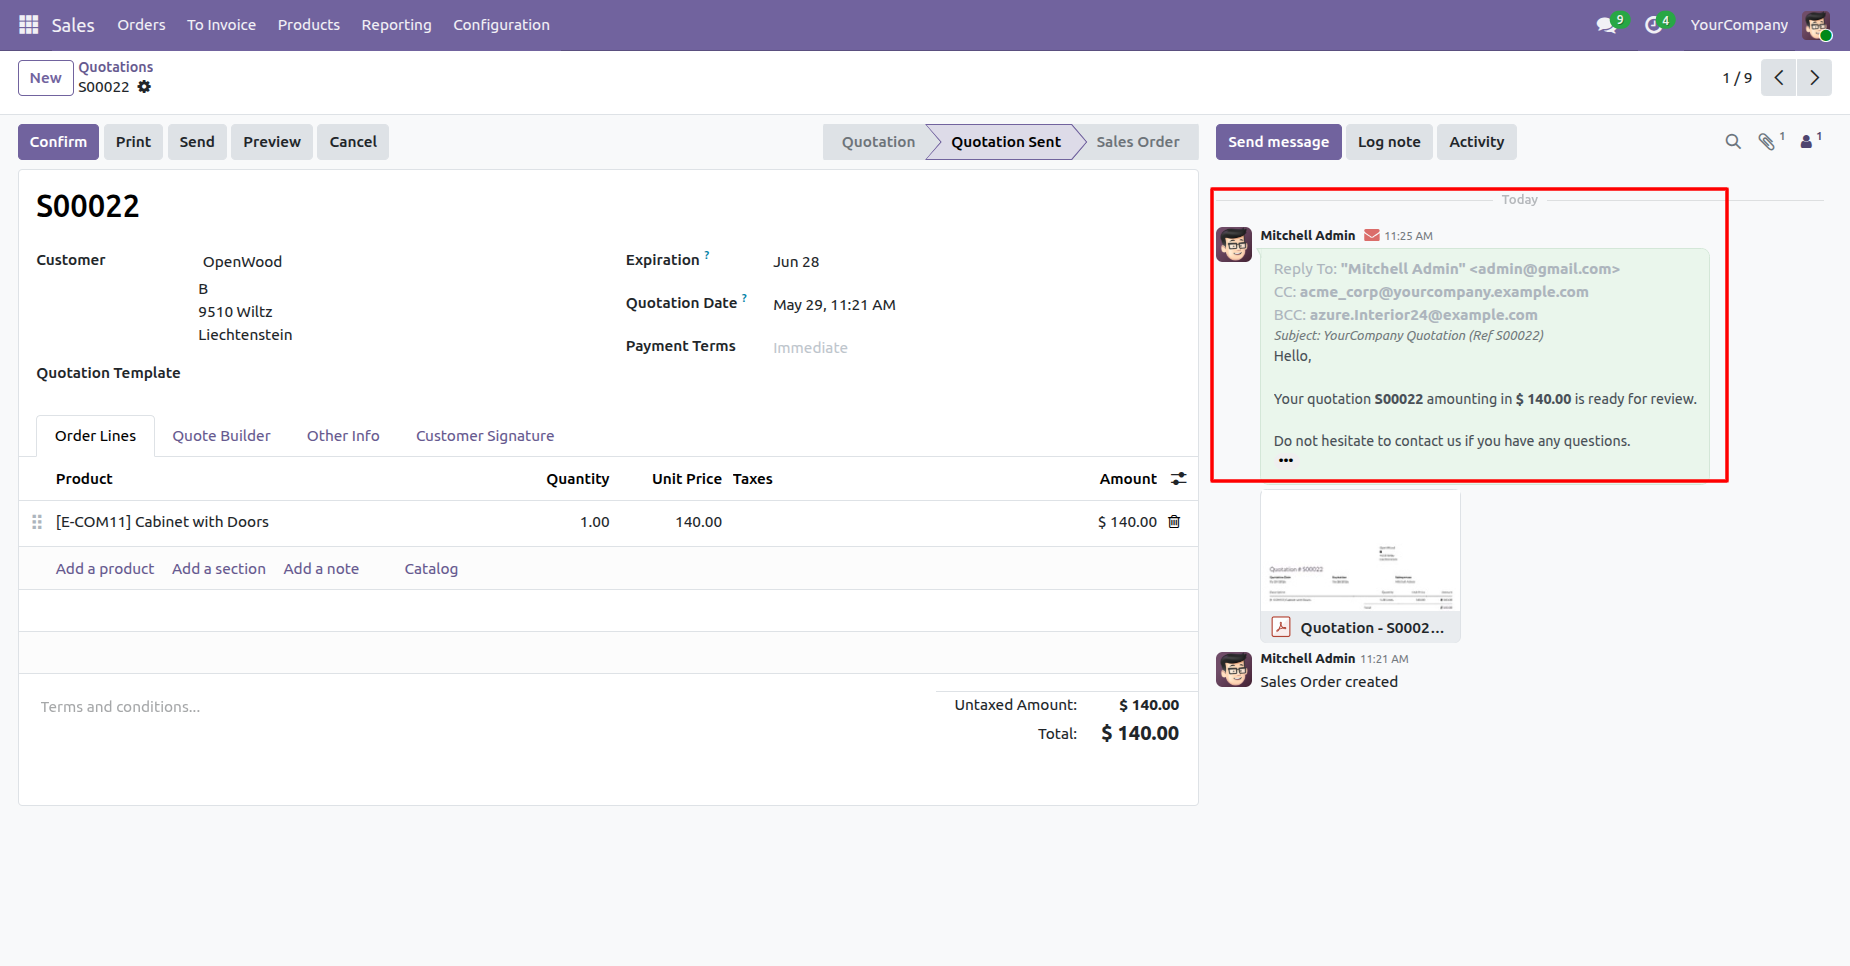
The email has been sent to the reply-to email address, and you can also verify it in the chatter.
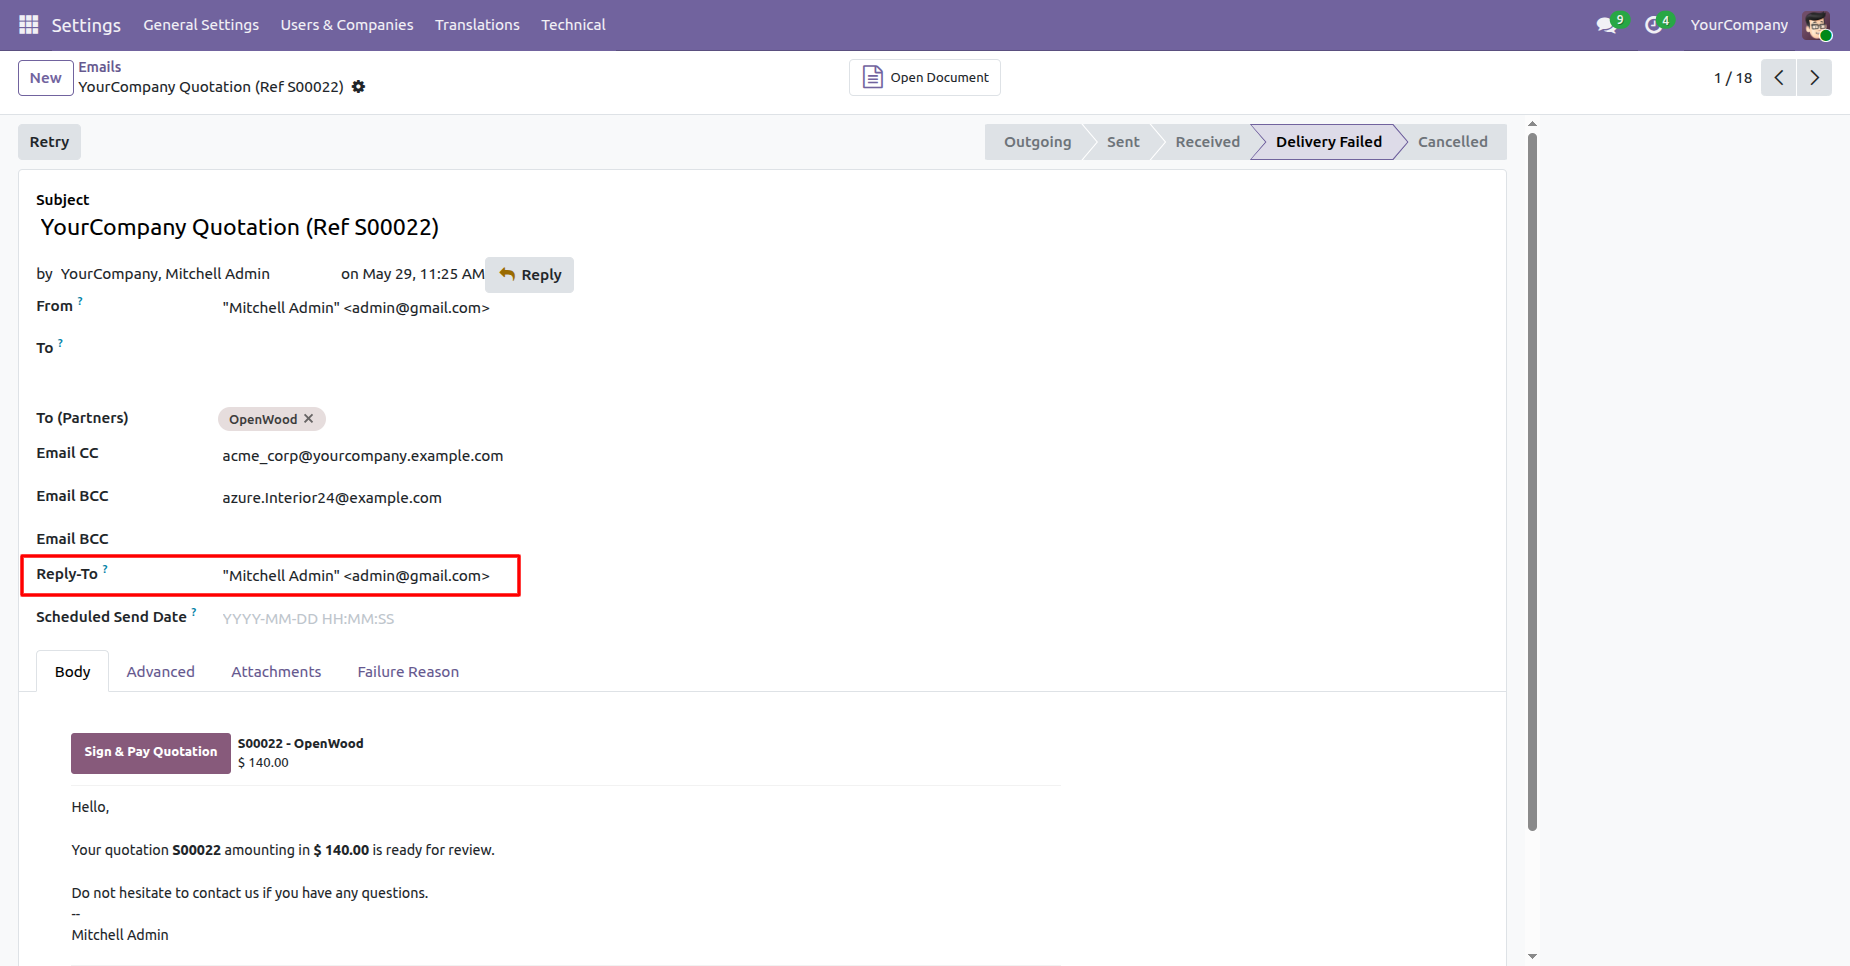
Go to the email; the reply-to field is also visible there.
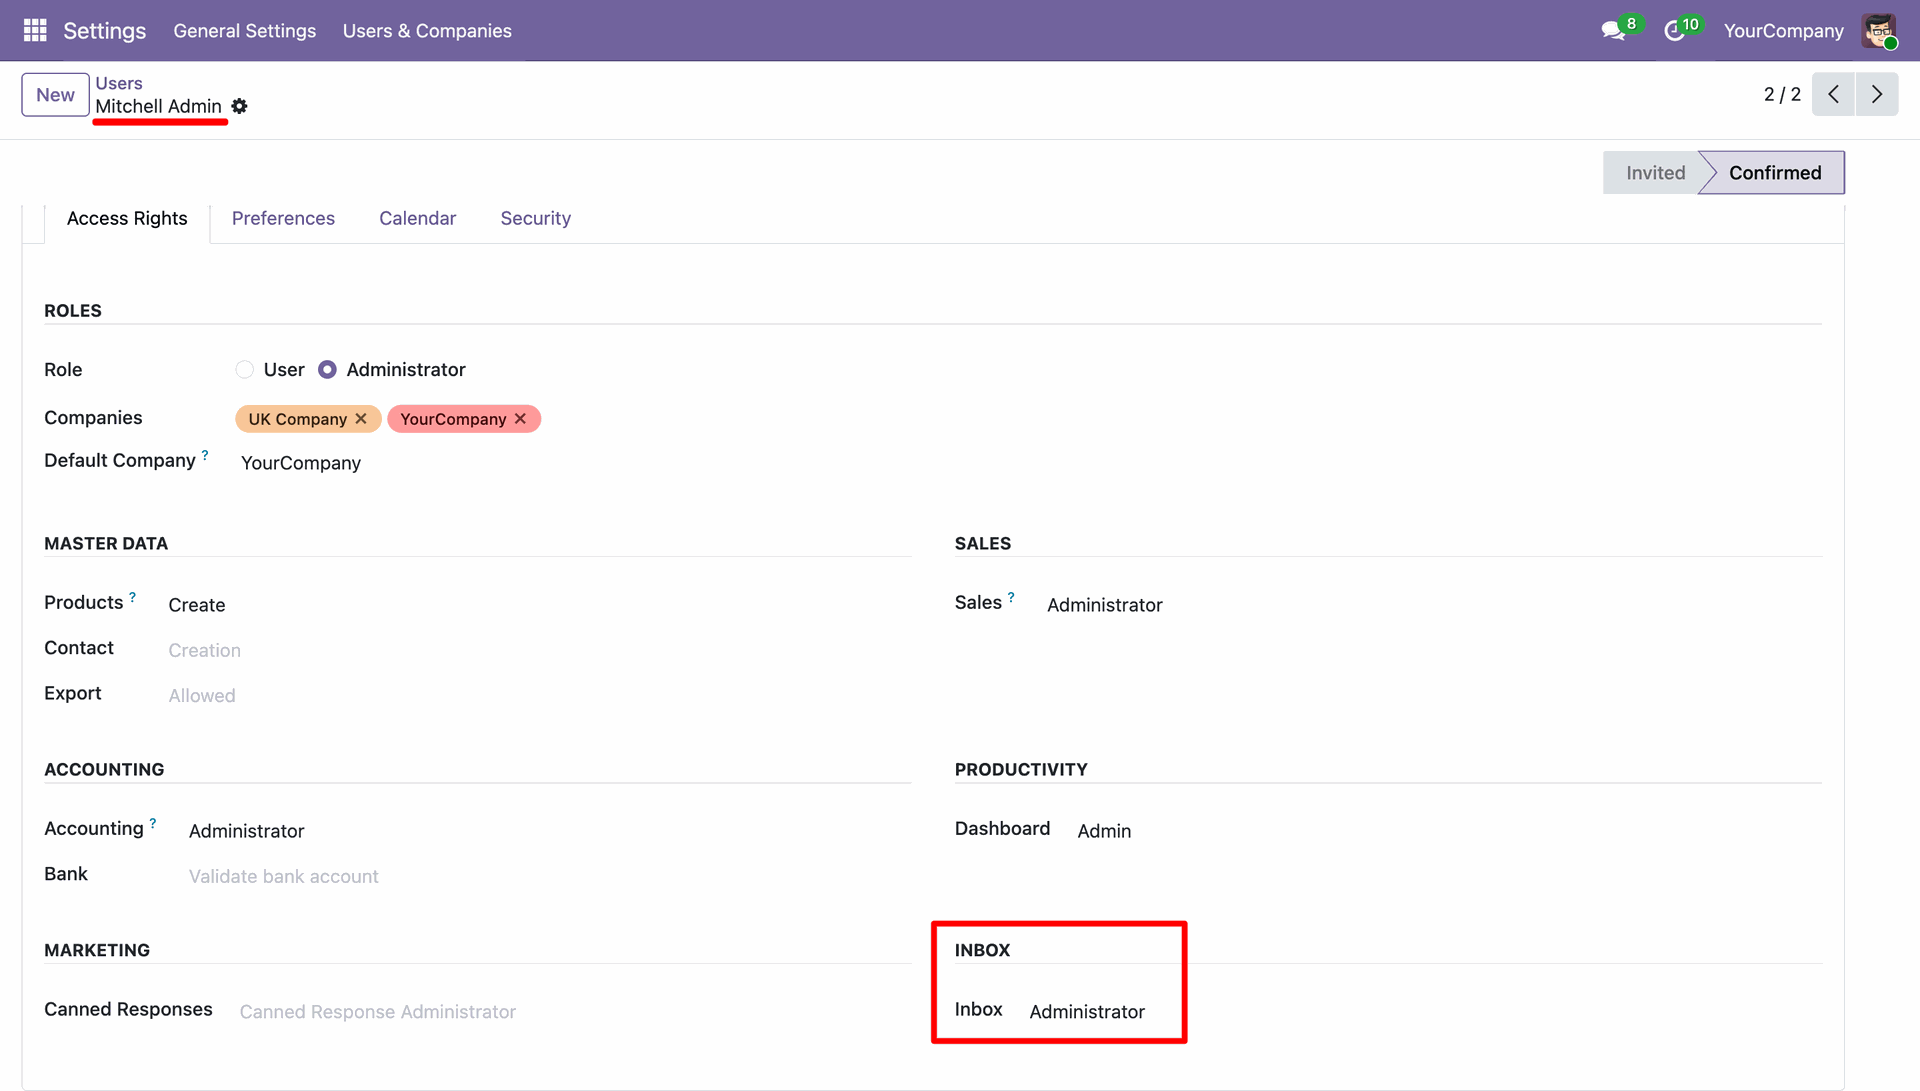
Set the user as the Inbox Administrator.
Mail Inbox View.
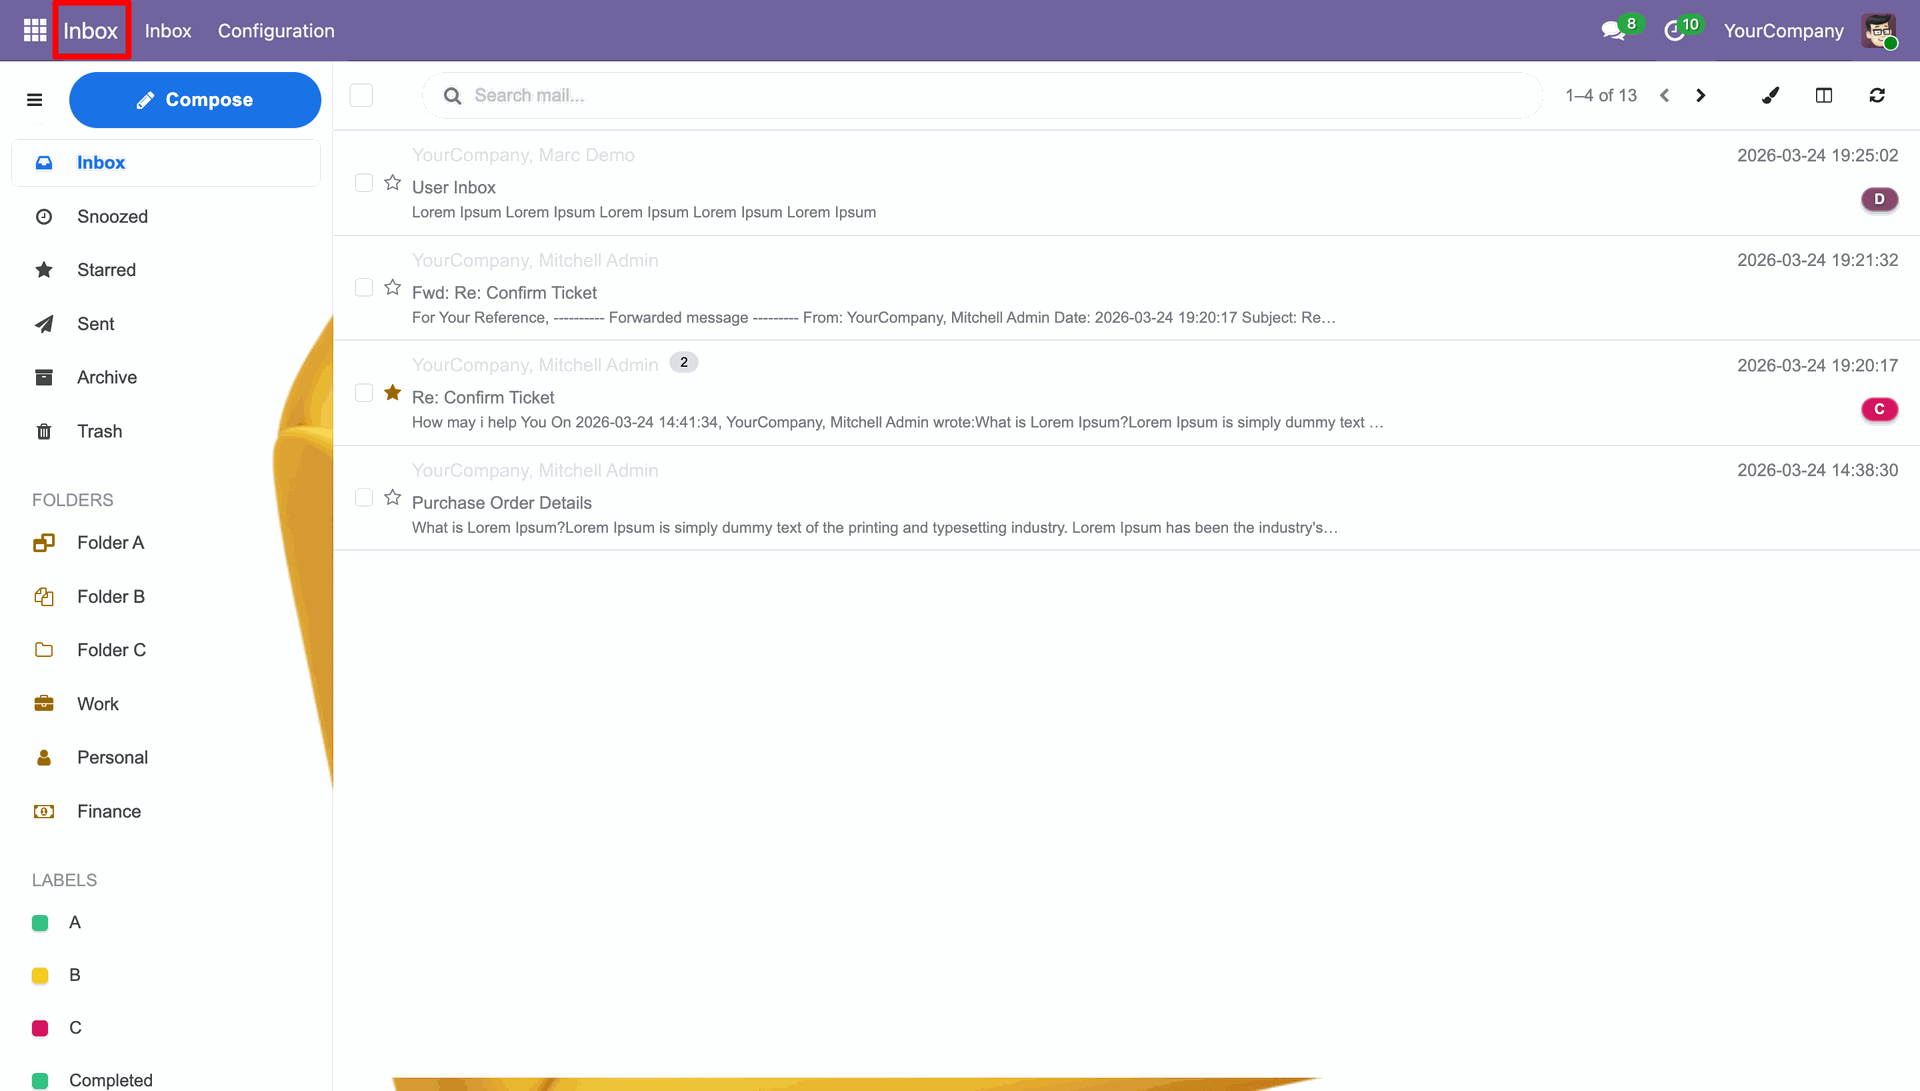
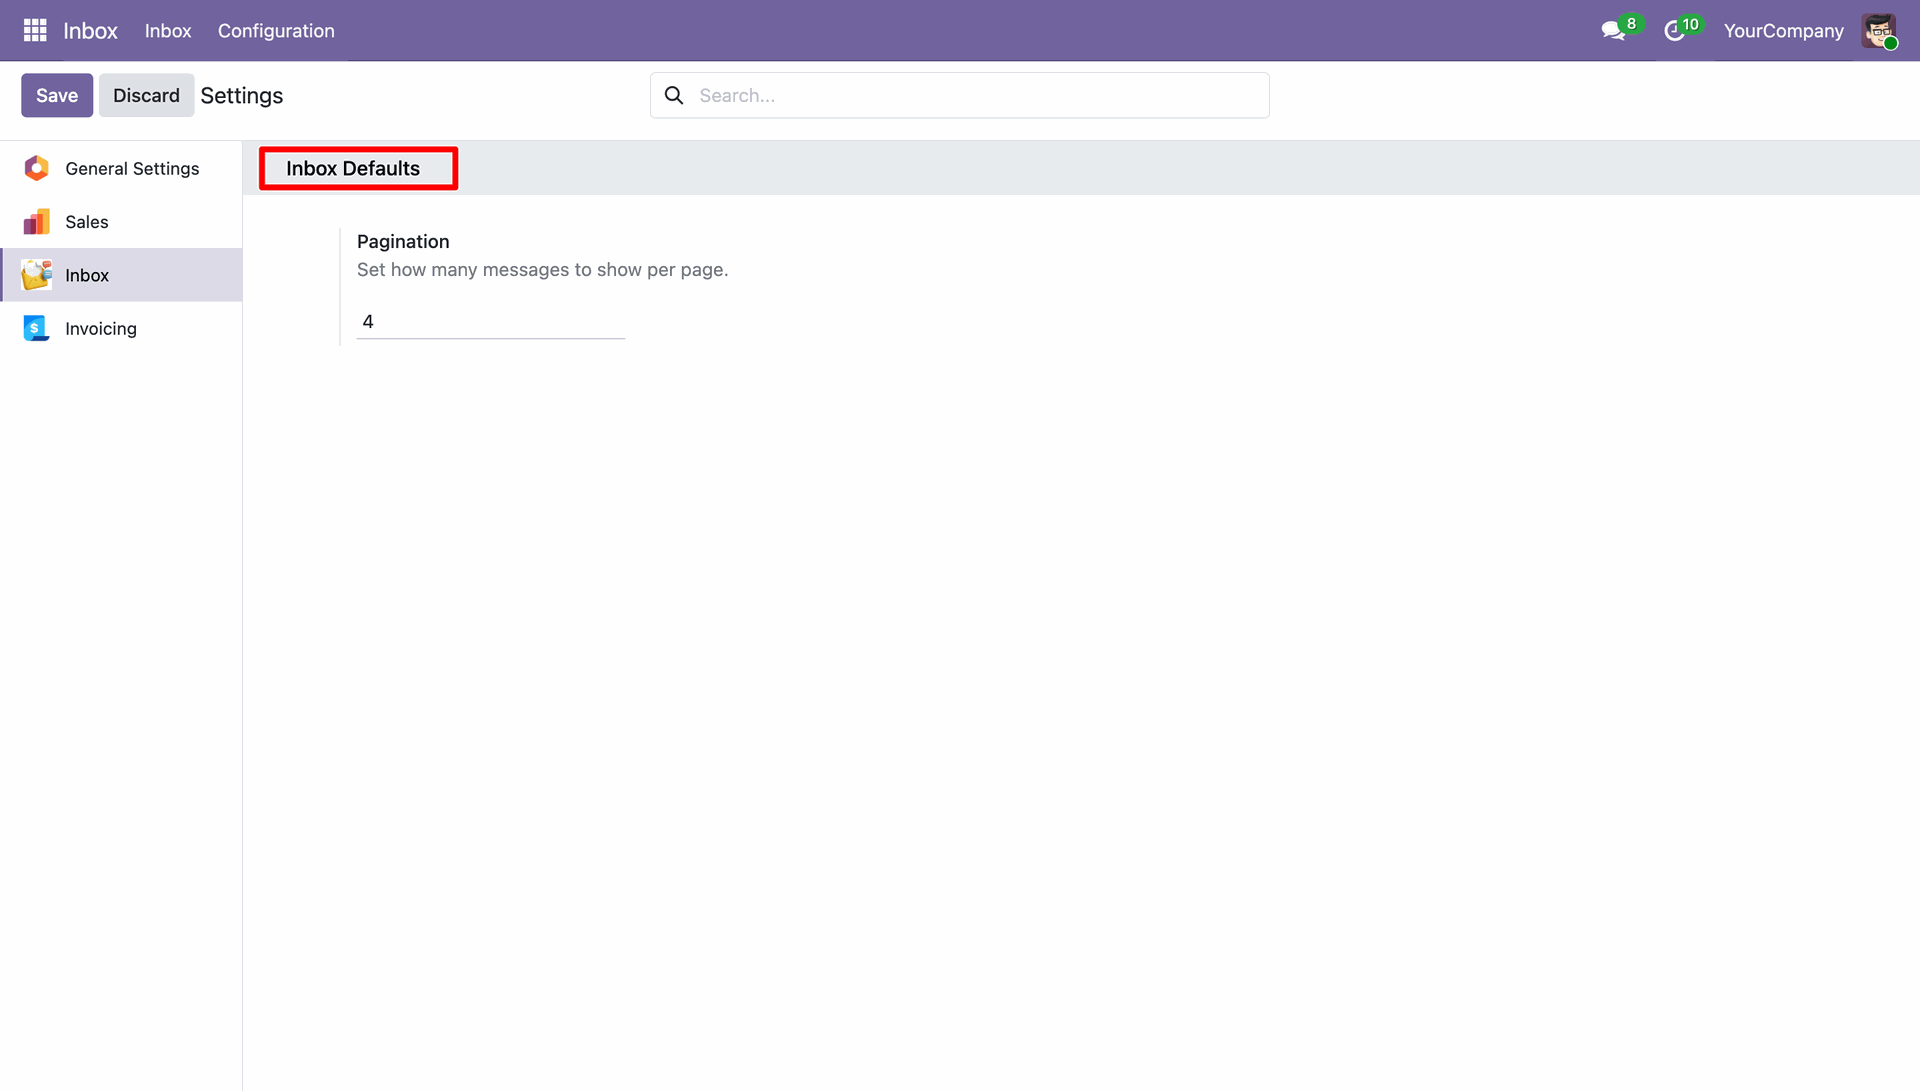
You can set how many messages to show per page in settings.
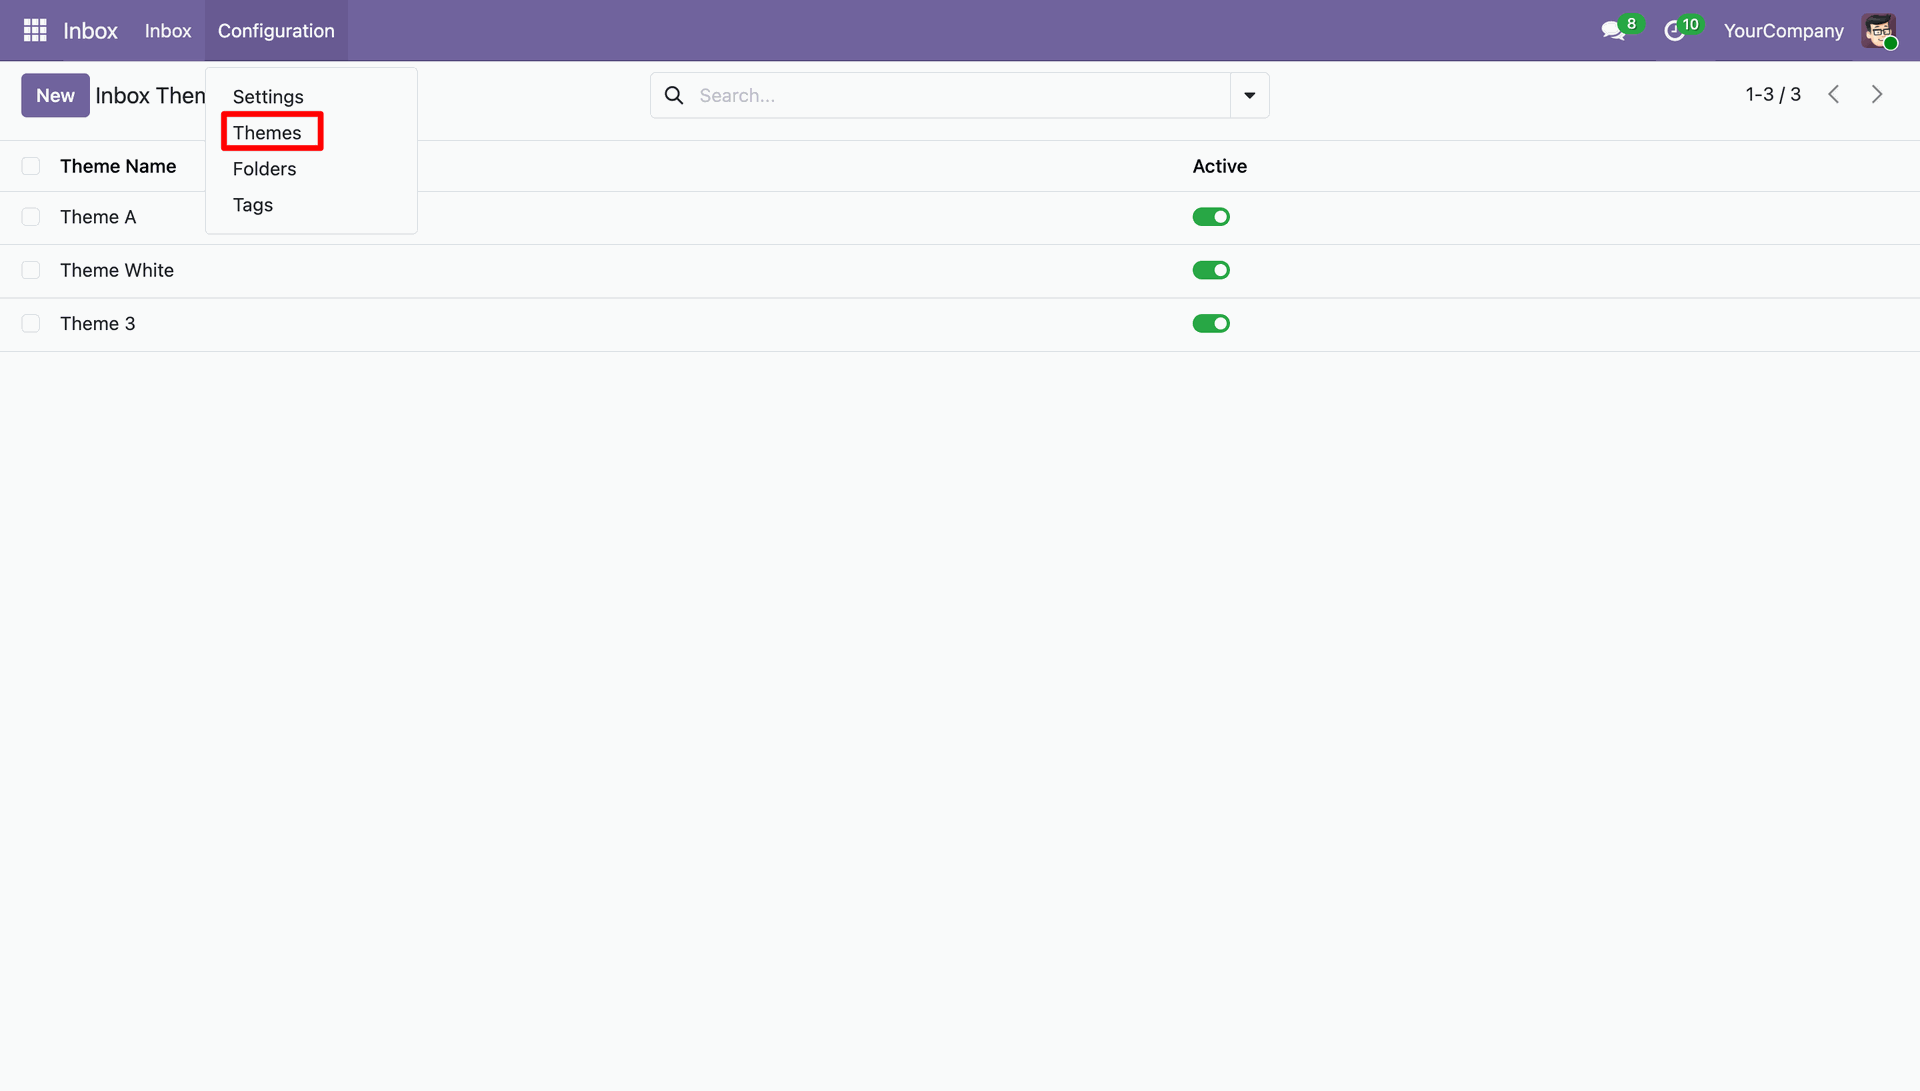
Navigate to Configurations => Themes.
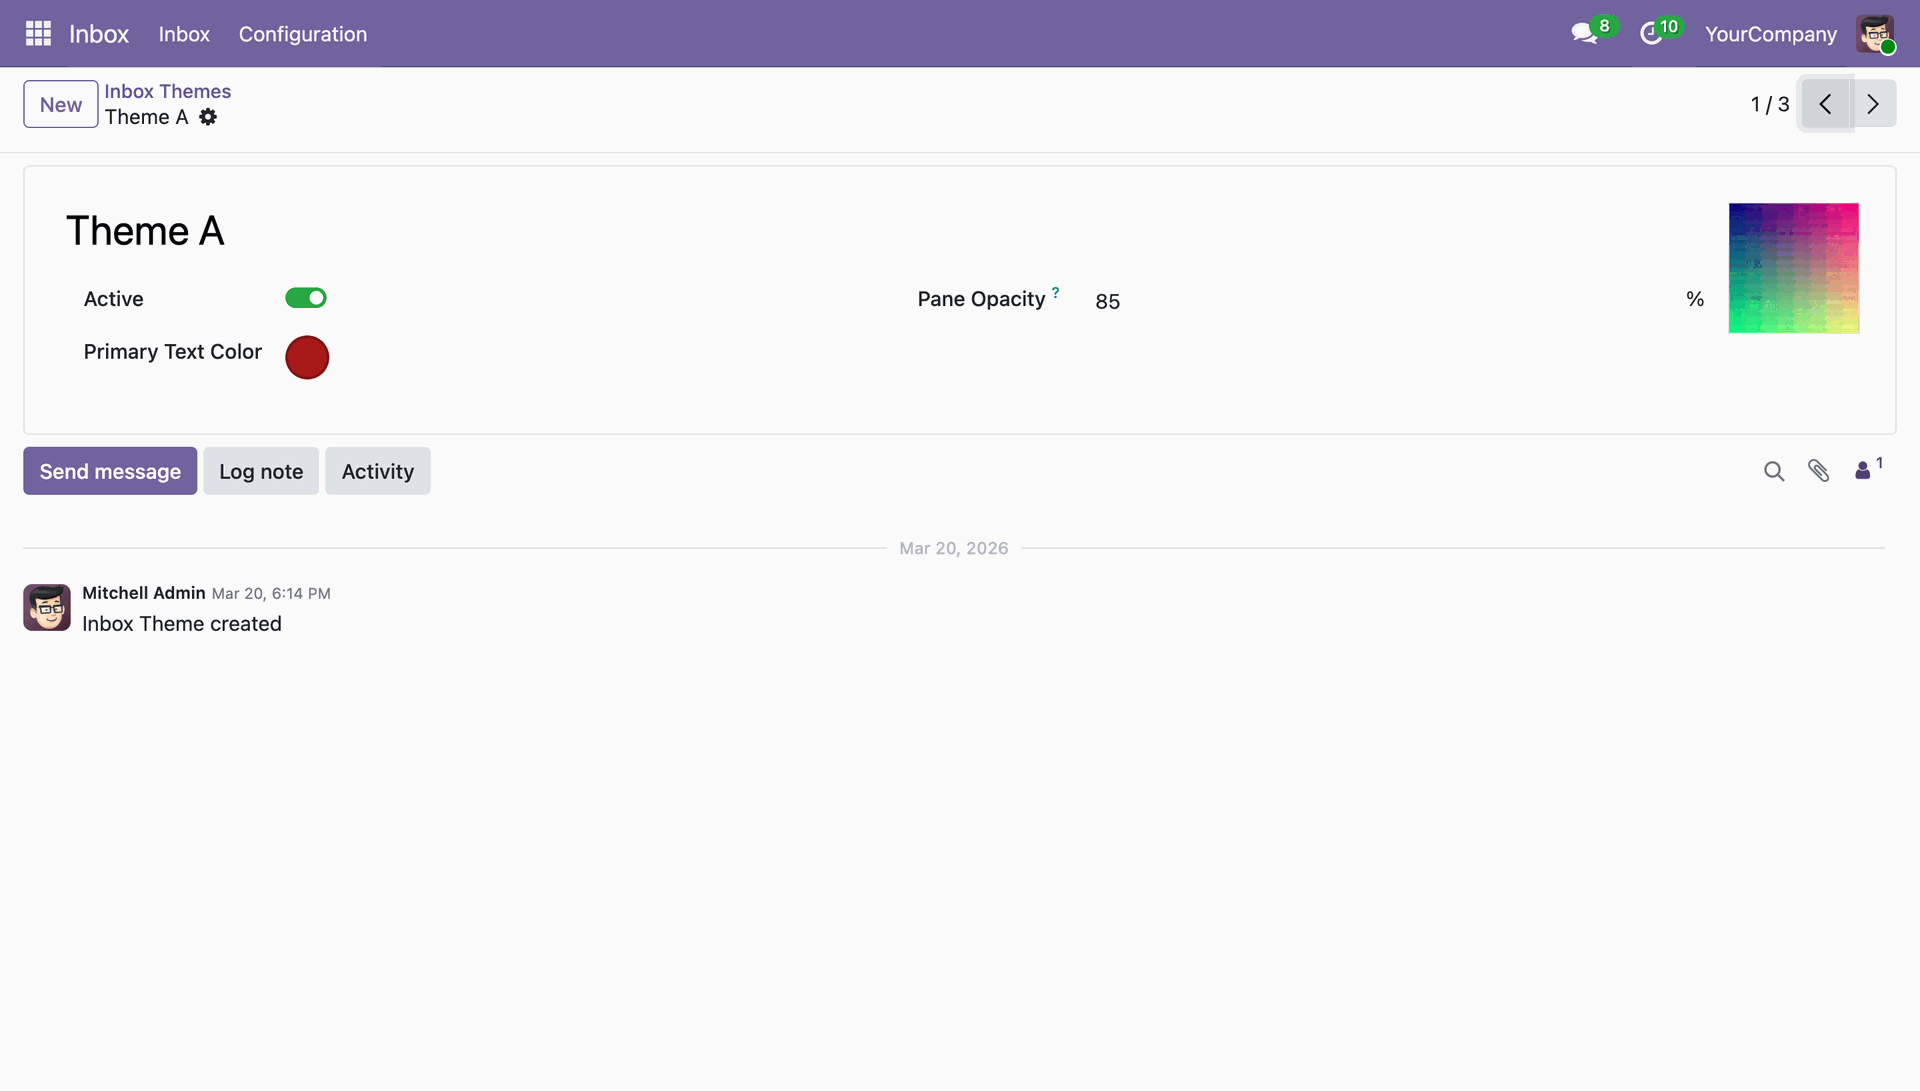
Here you can create a new theme by setting its opacity, colour and name.
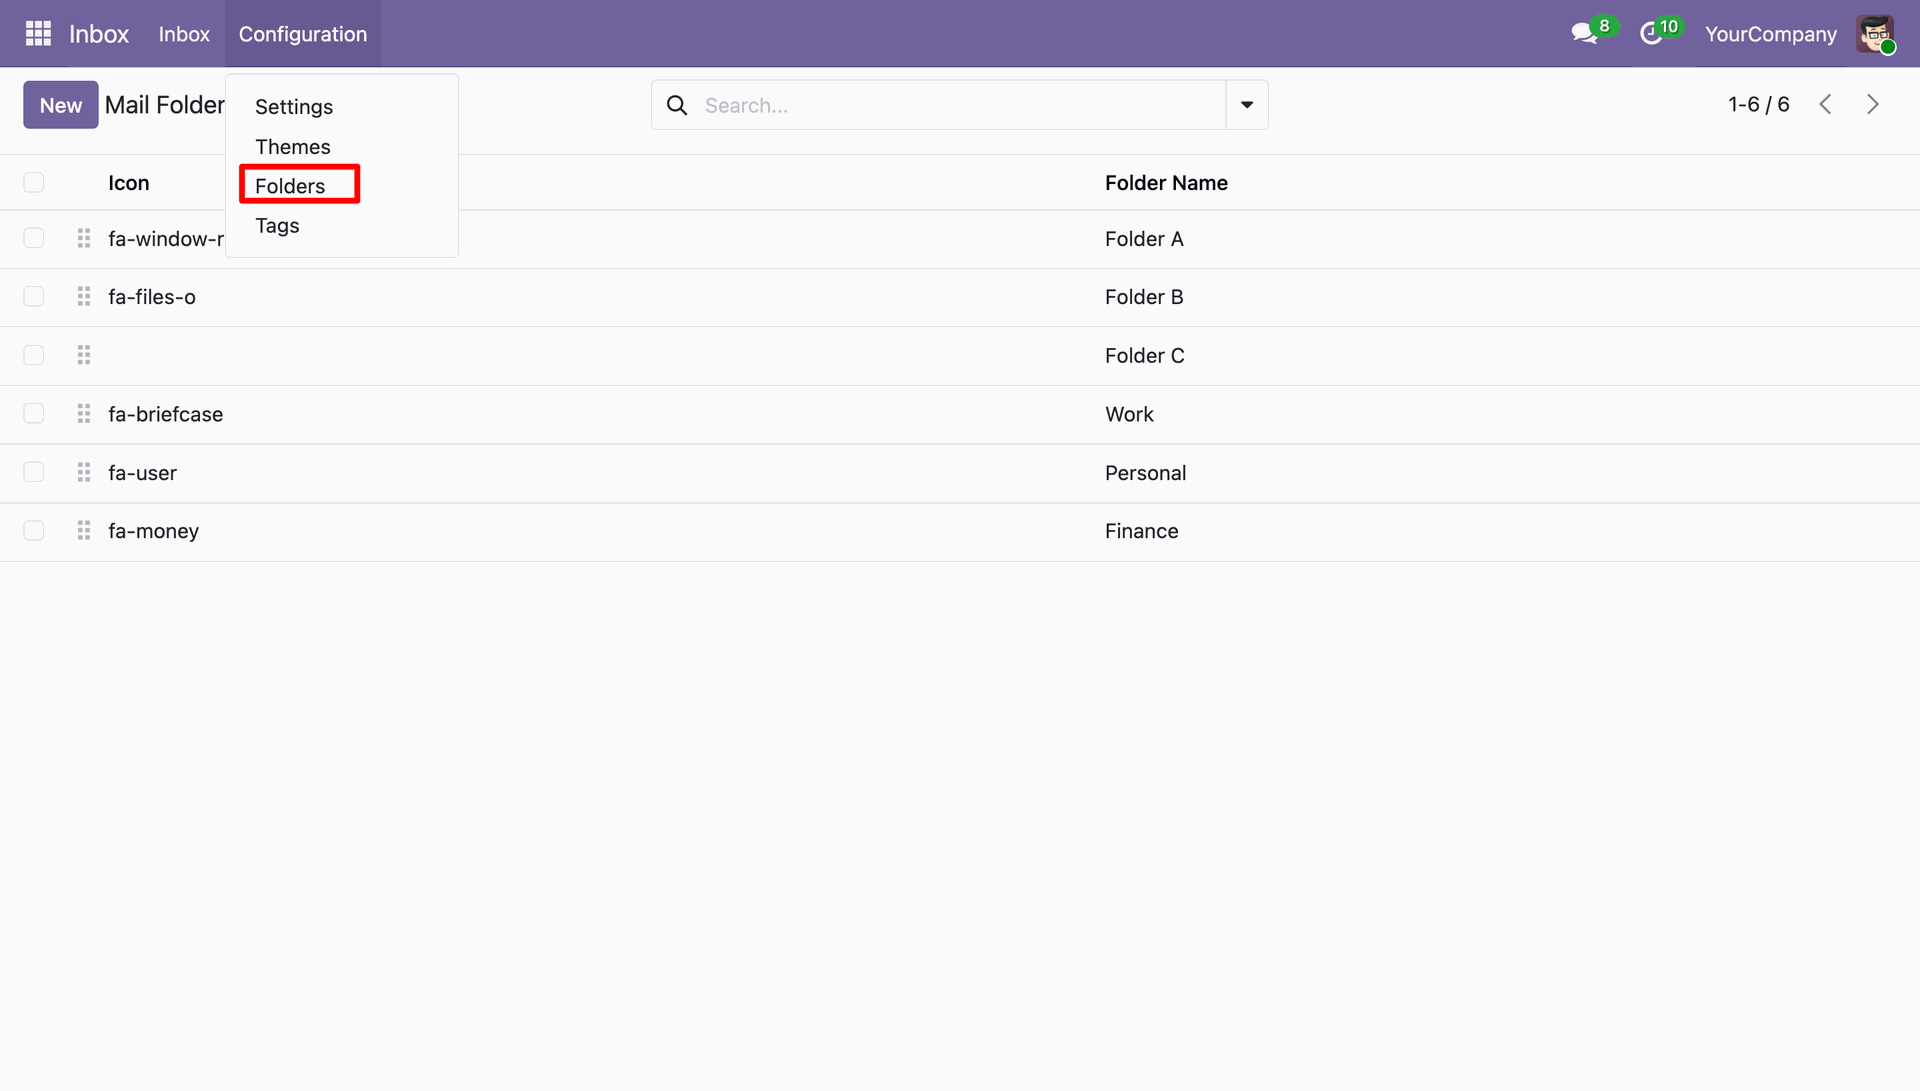
Navigate to Configurations => Folders.
Navigate to Configurations => Tags.
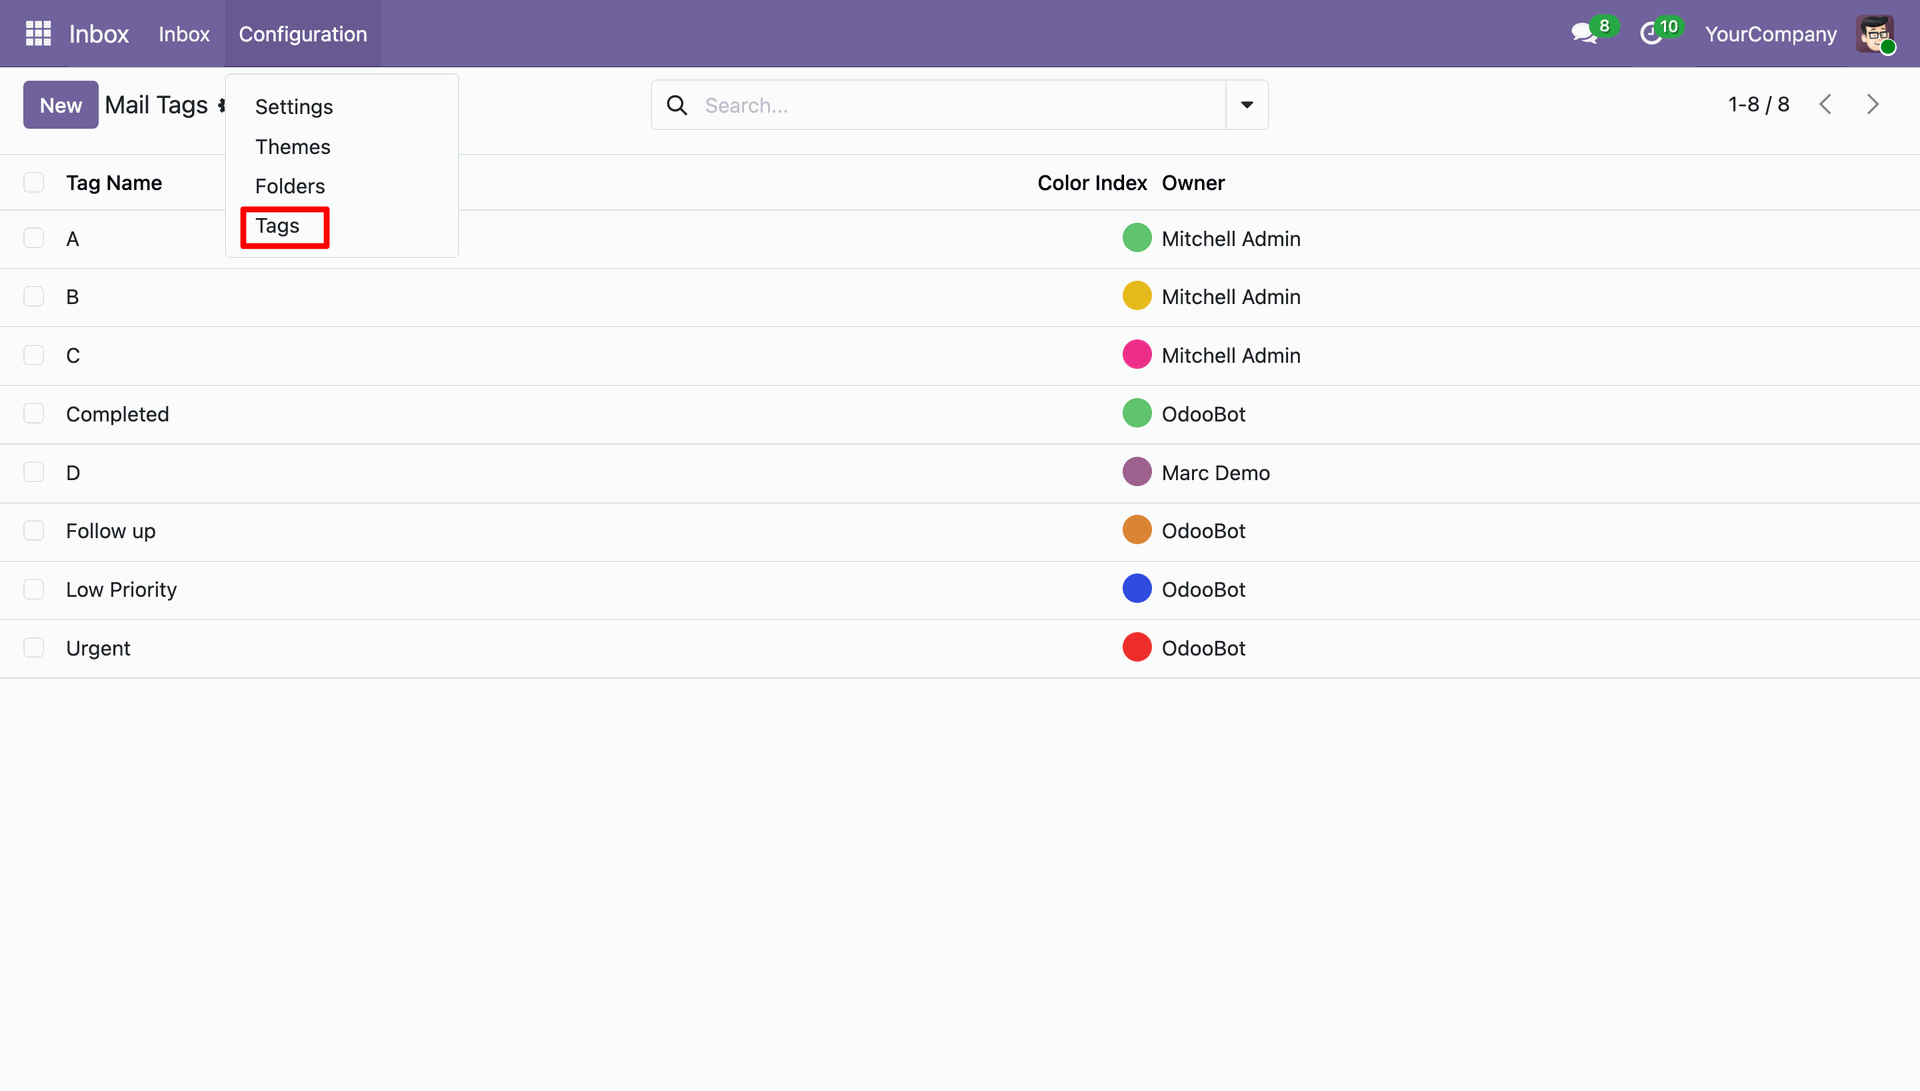
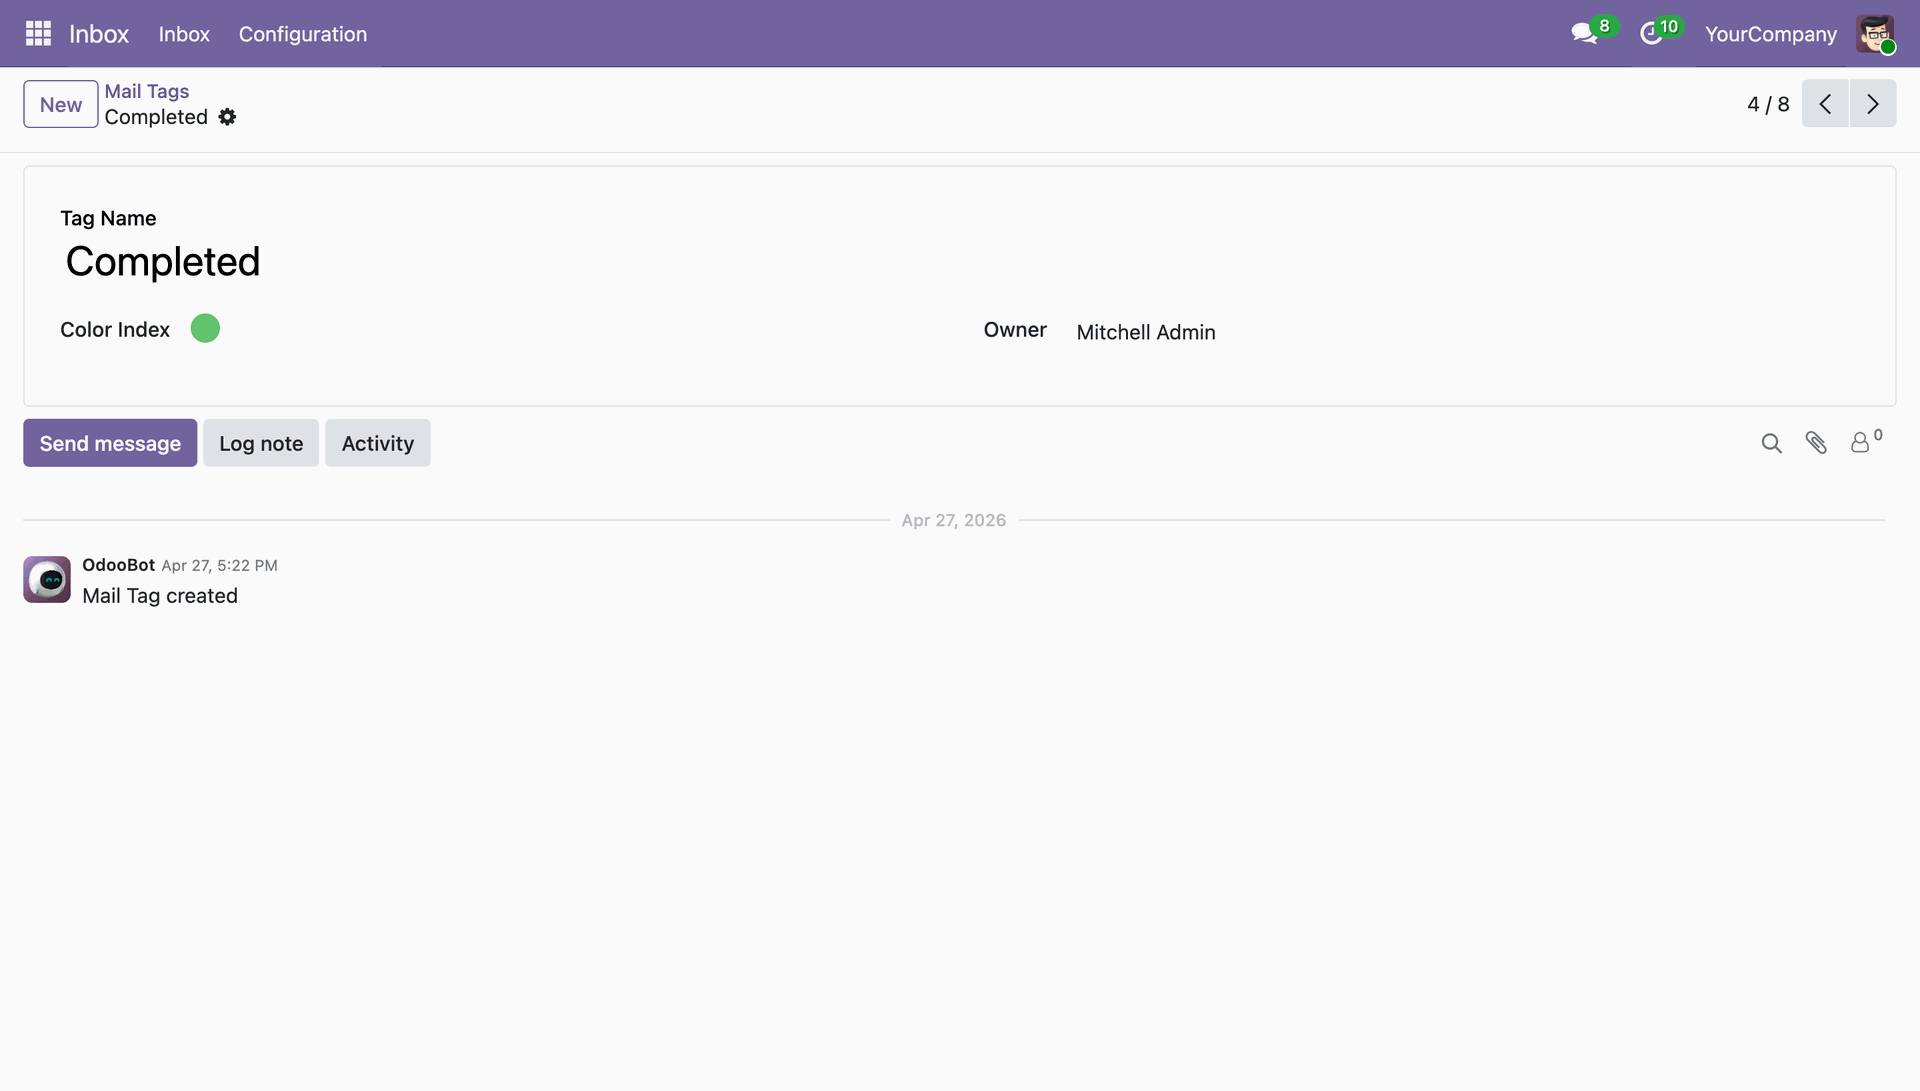
You can create tags based on colour, name and owner.
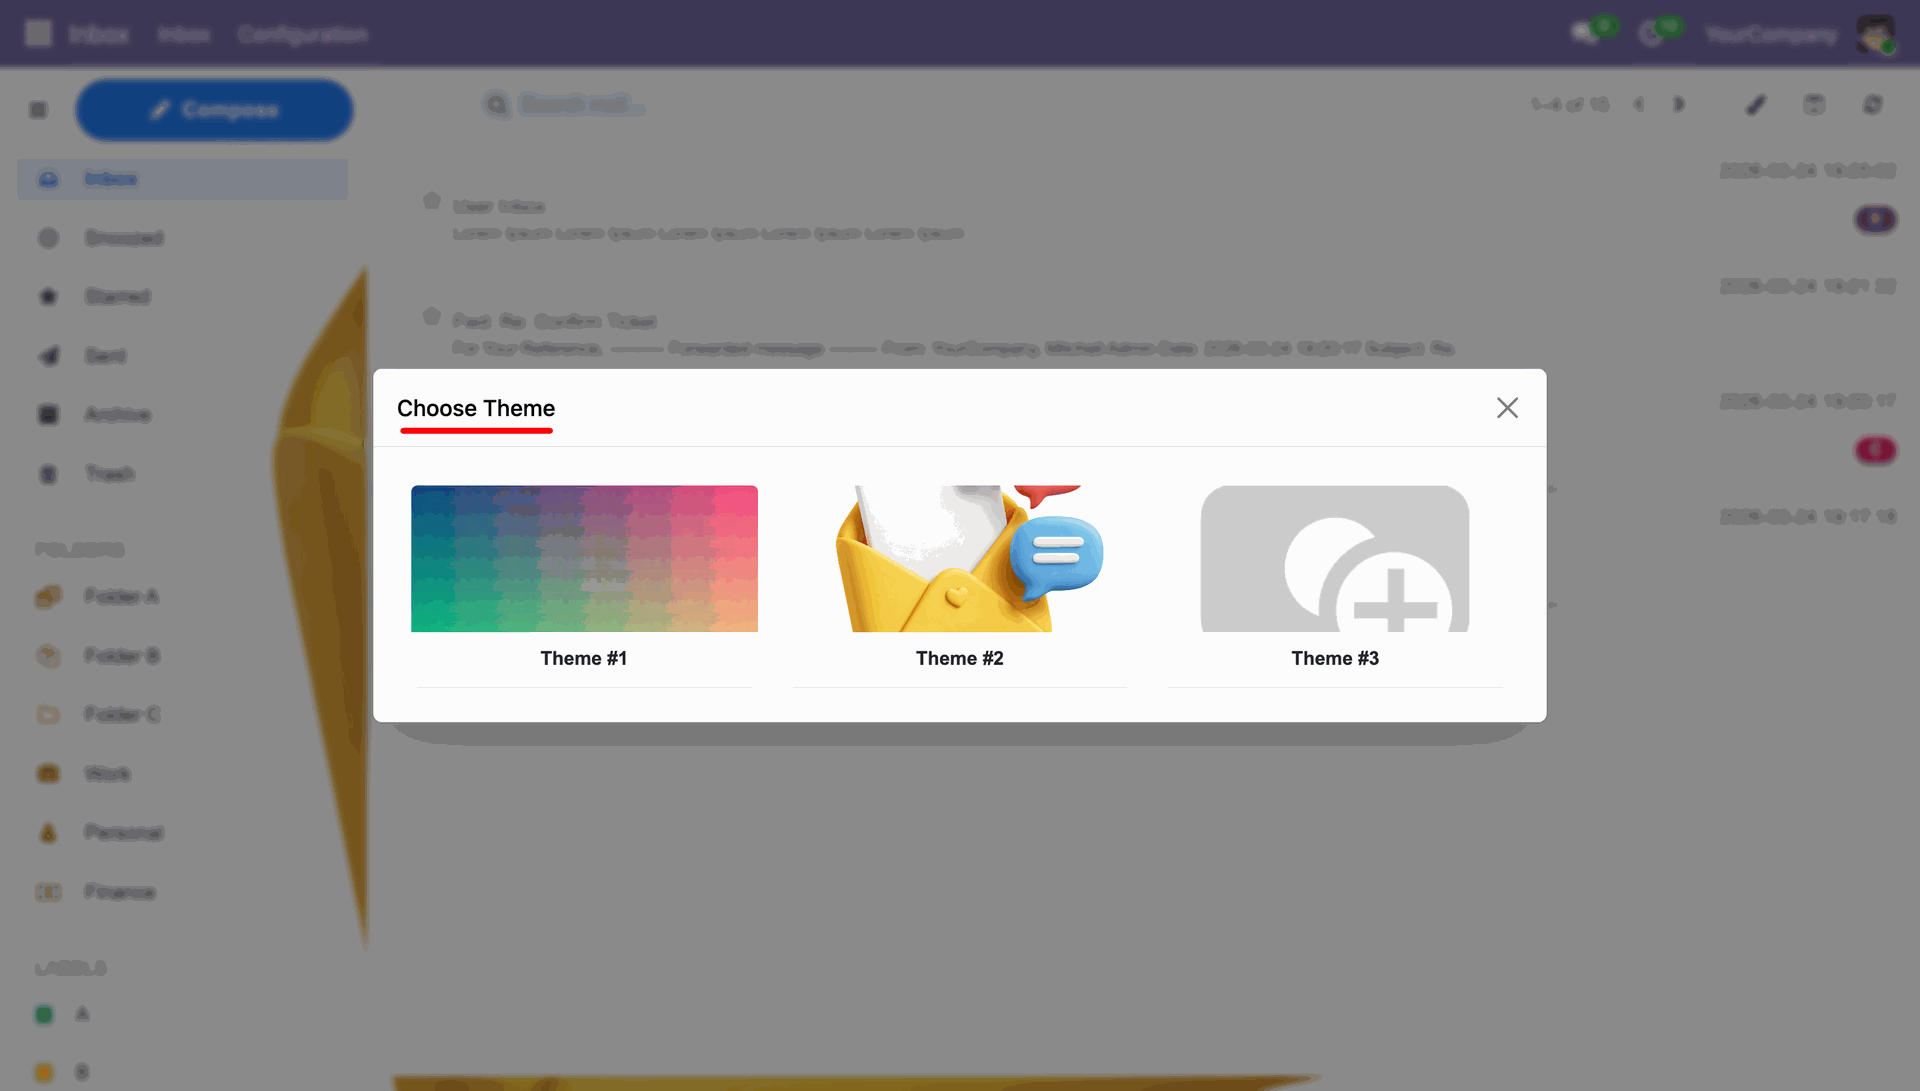
Click on the paint brush icon to select the theme.
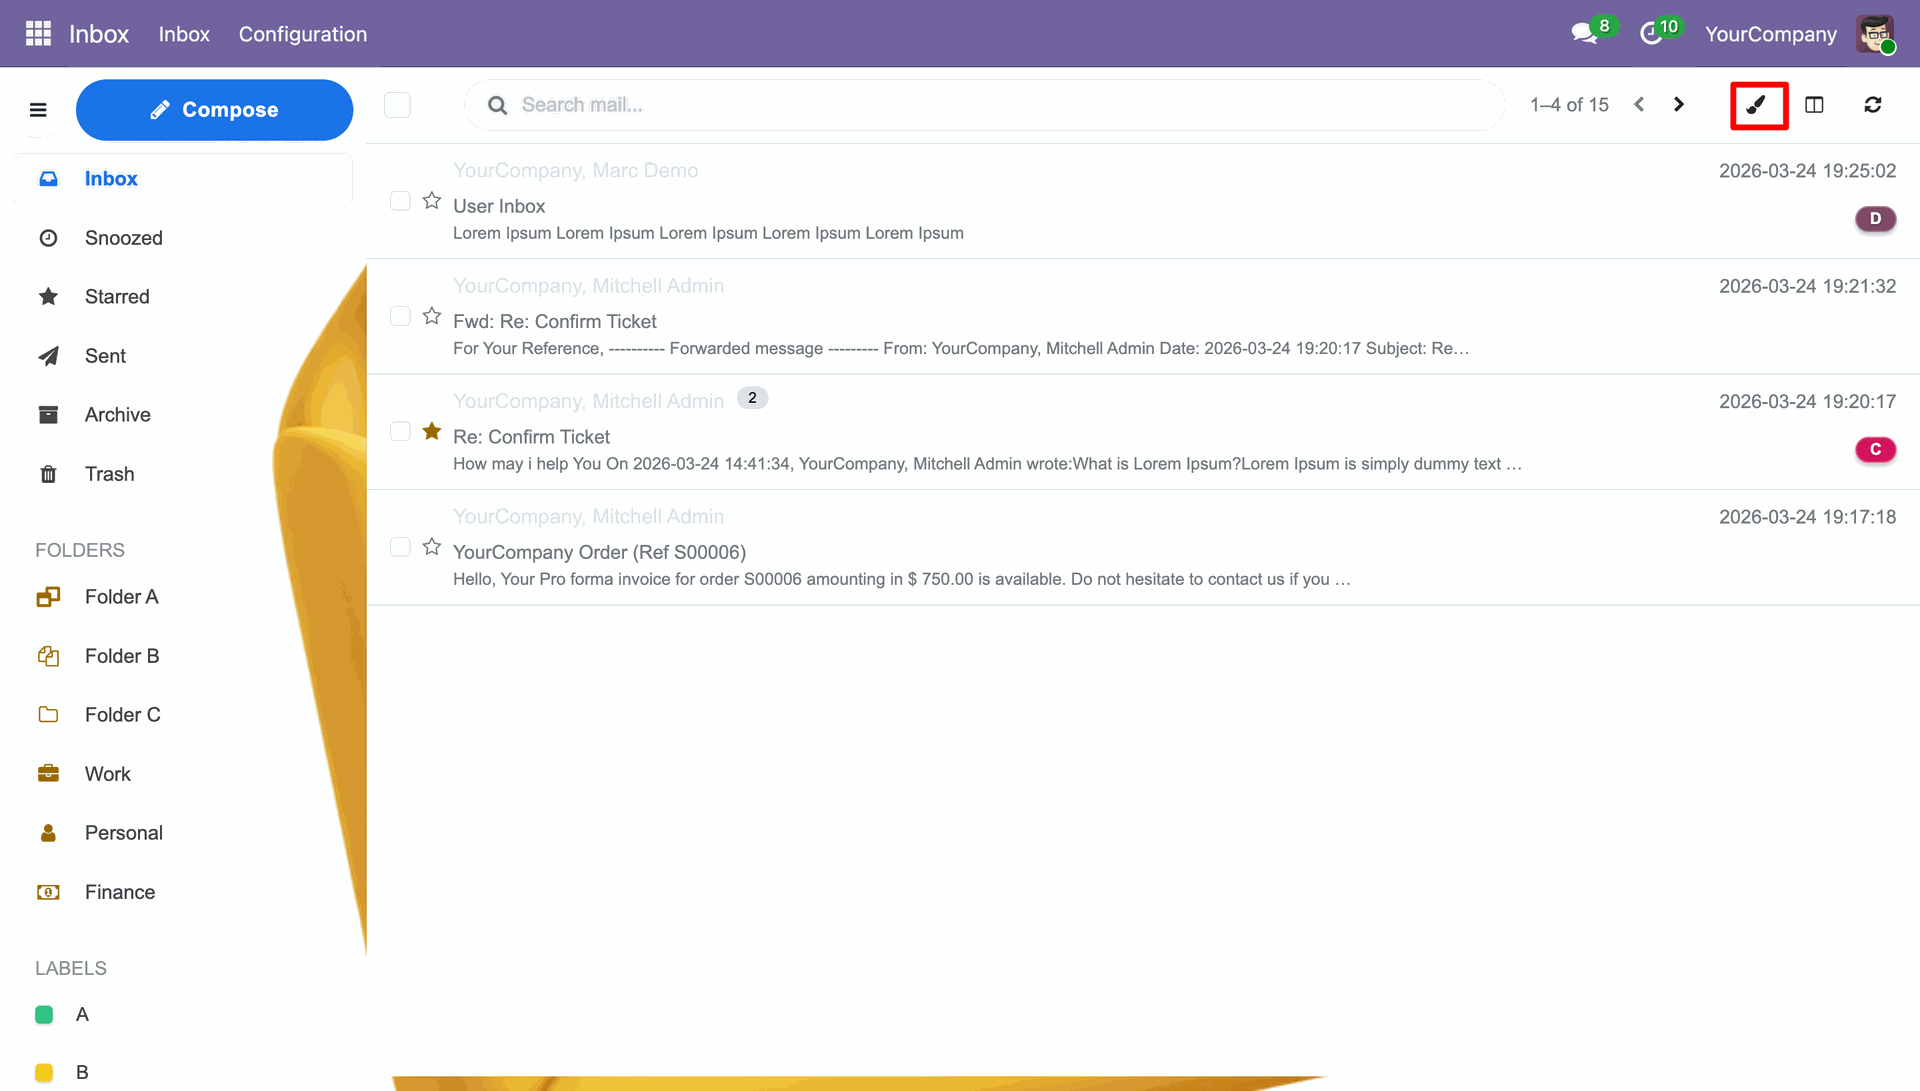
Choose the desired theme from the available themes.
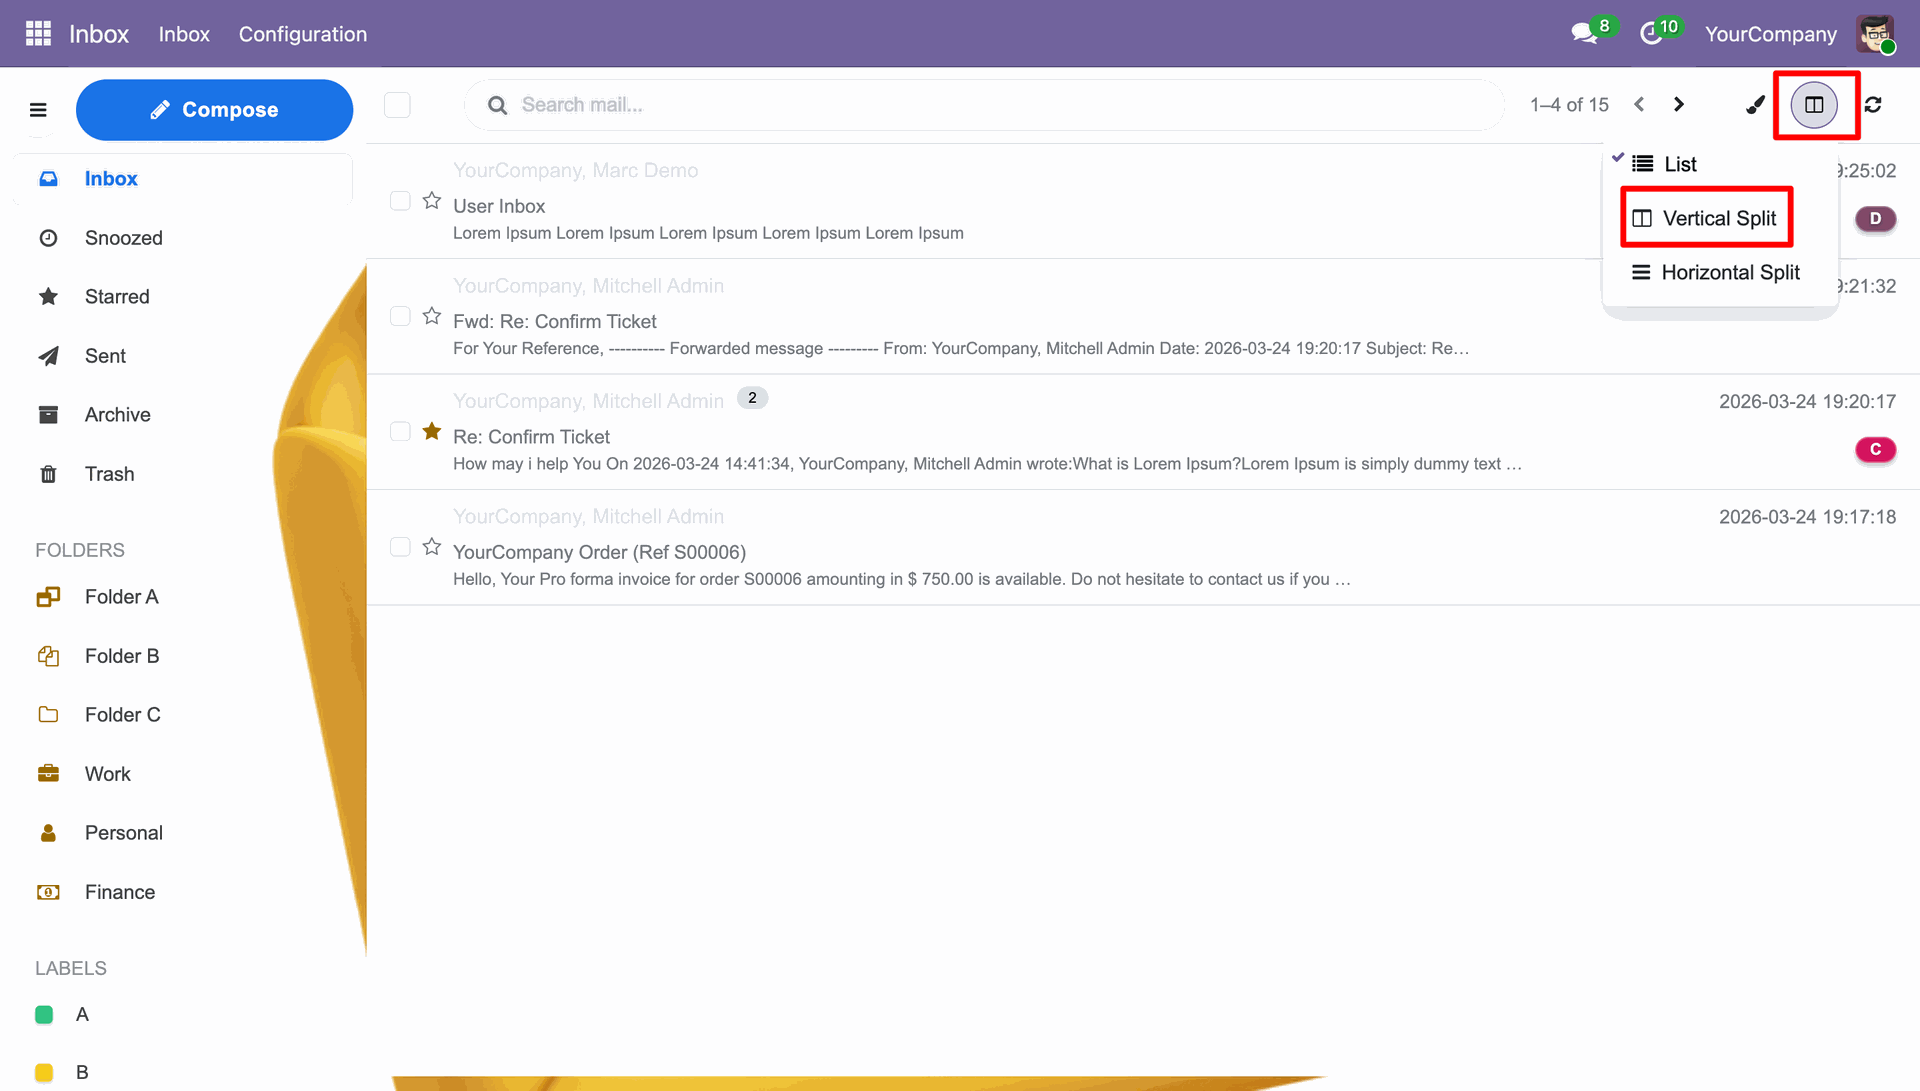
Click the split icon on the top right corner and you can select from either Vertical or Horizontal Split.
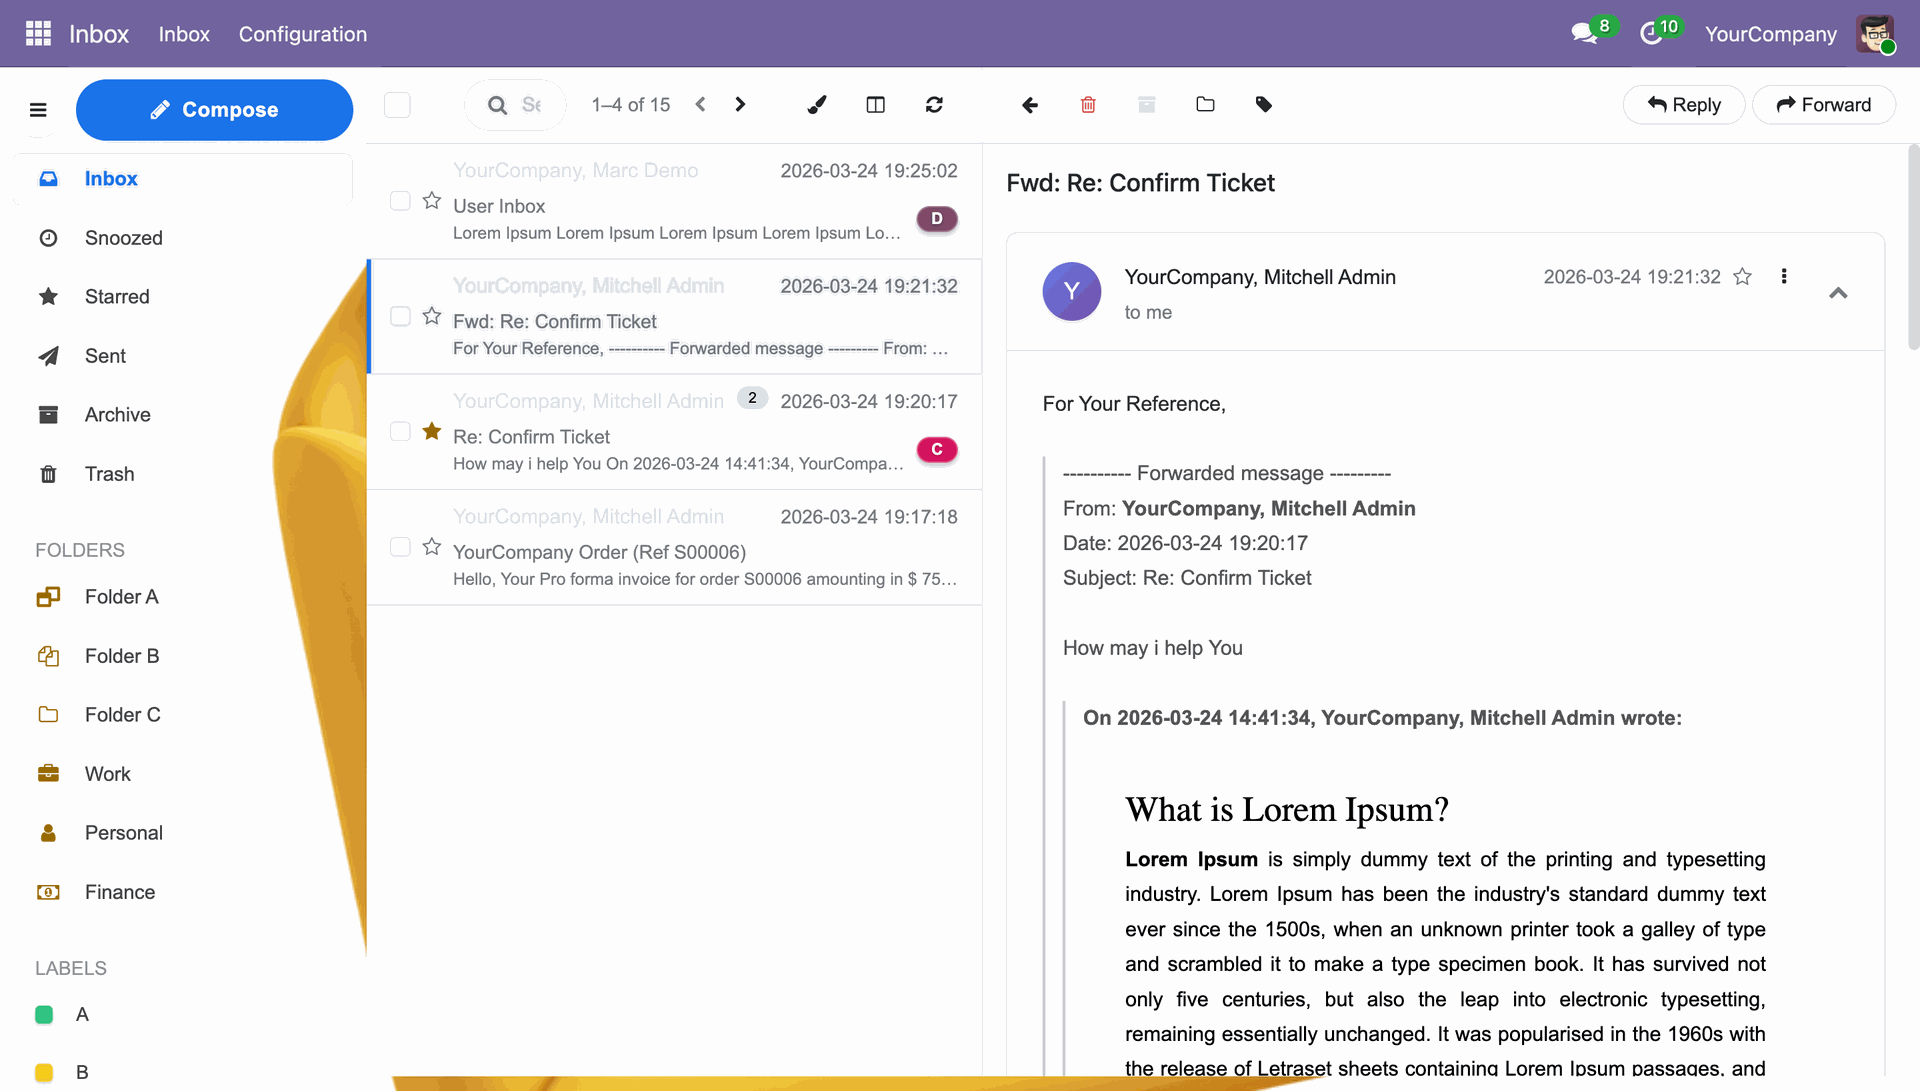
Vertical Split View.
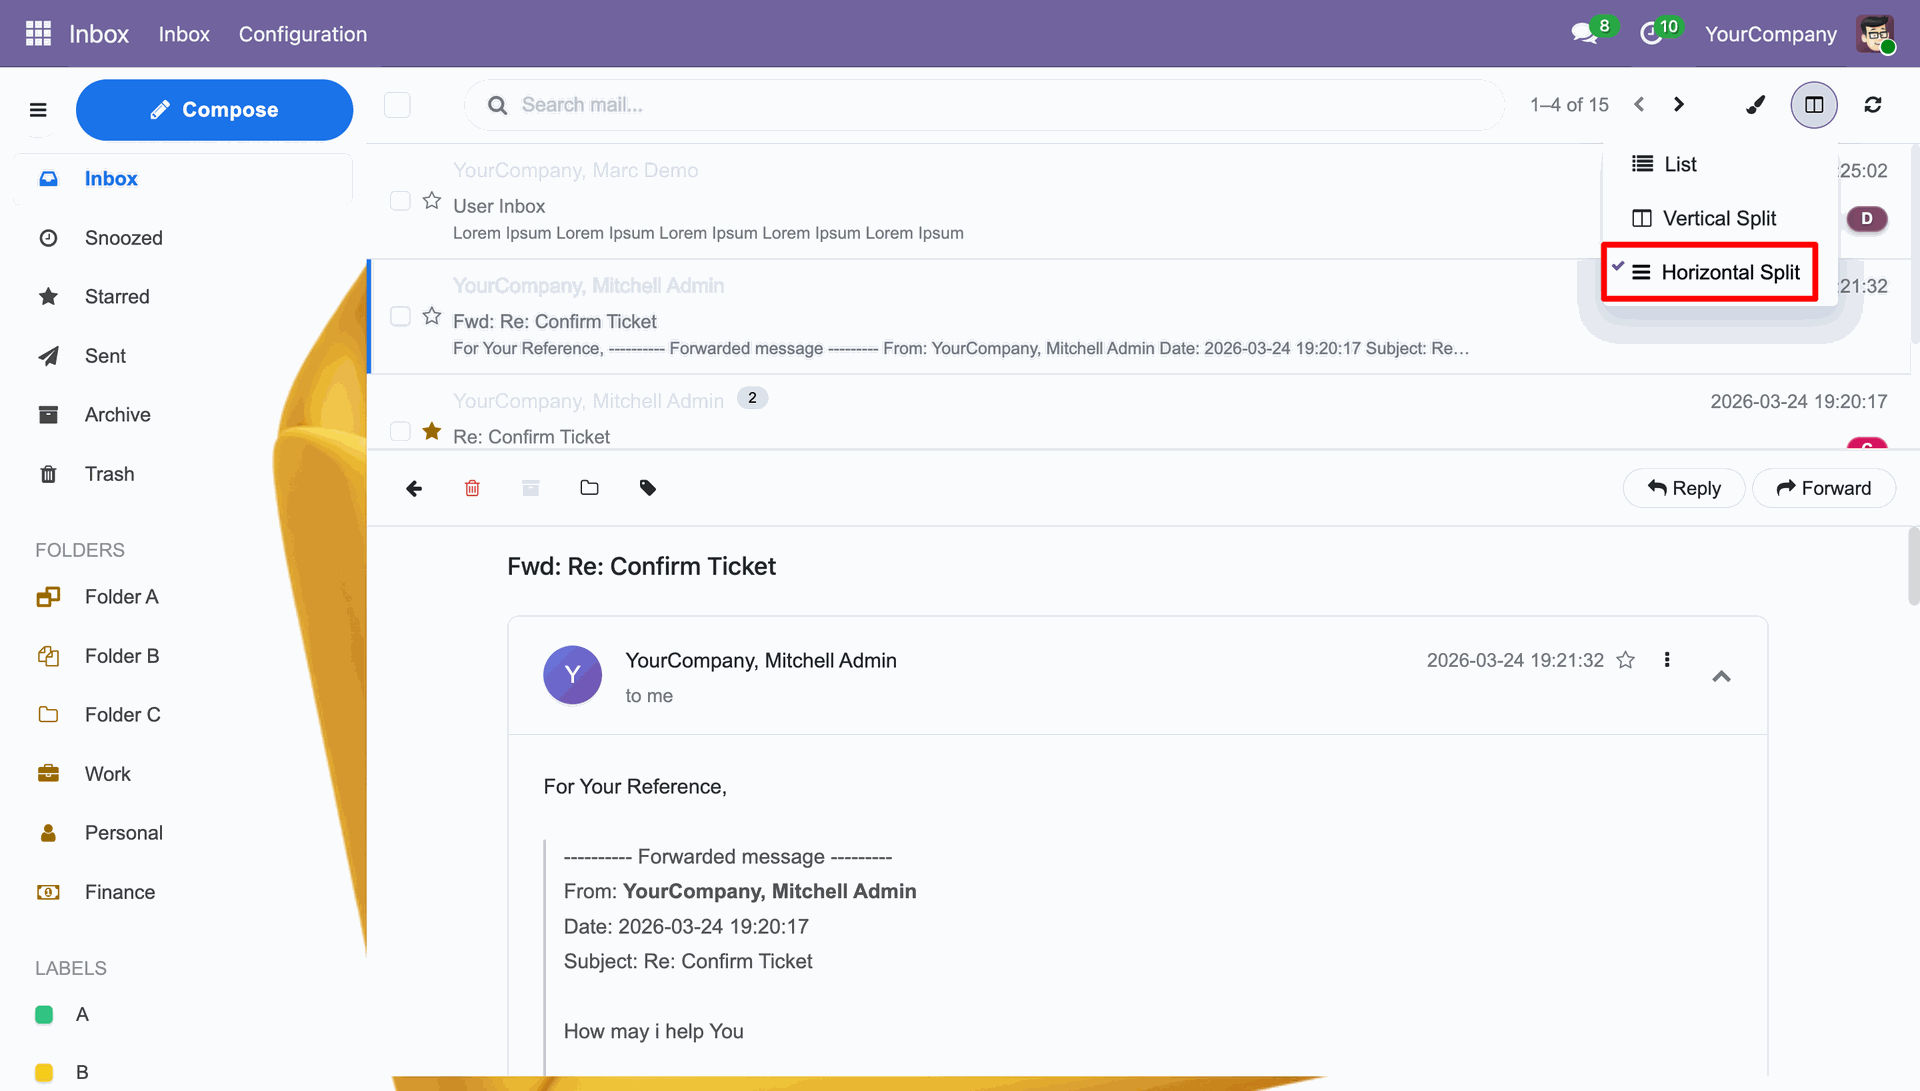
Horizontal Split View.
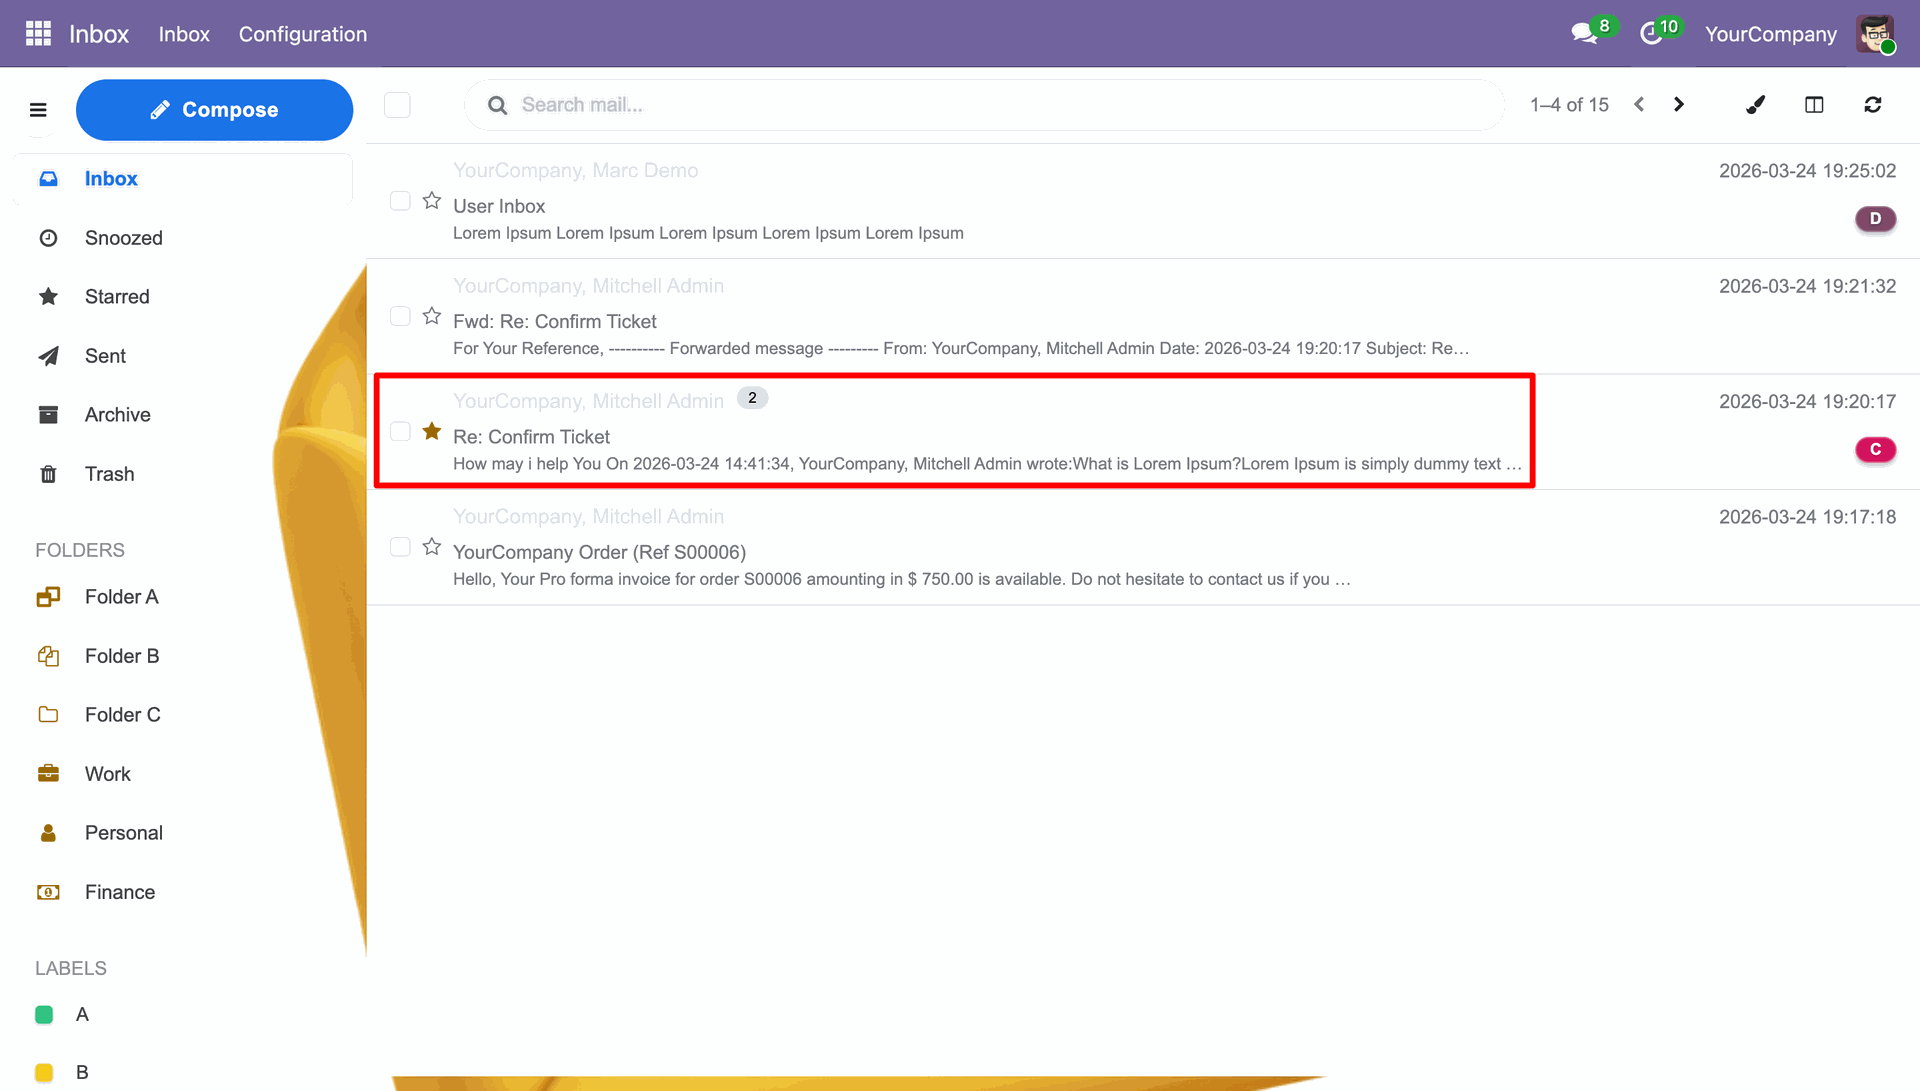
Opening a mail.
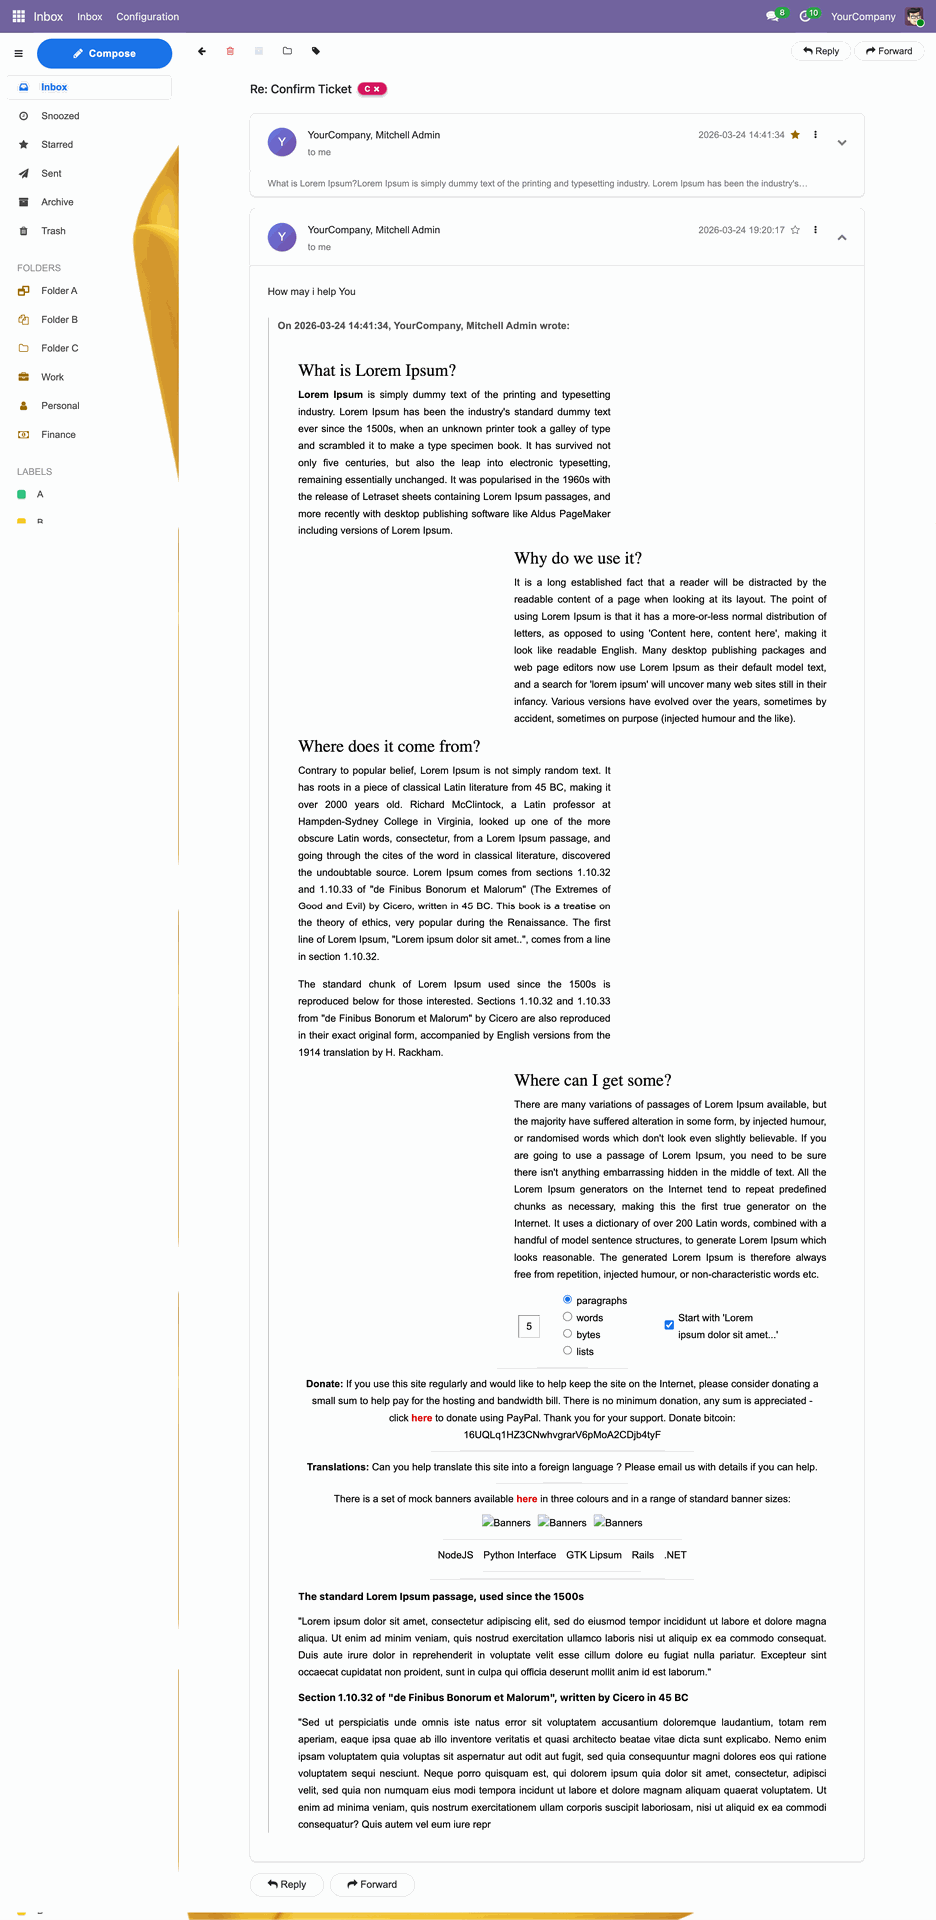
Mail View.
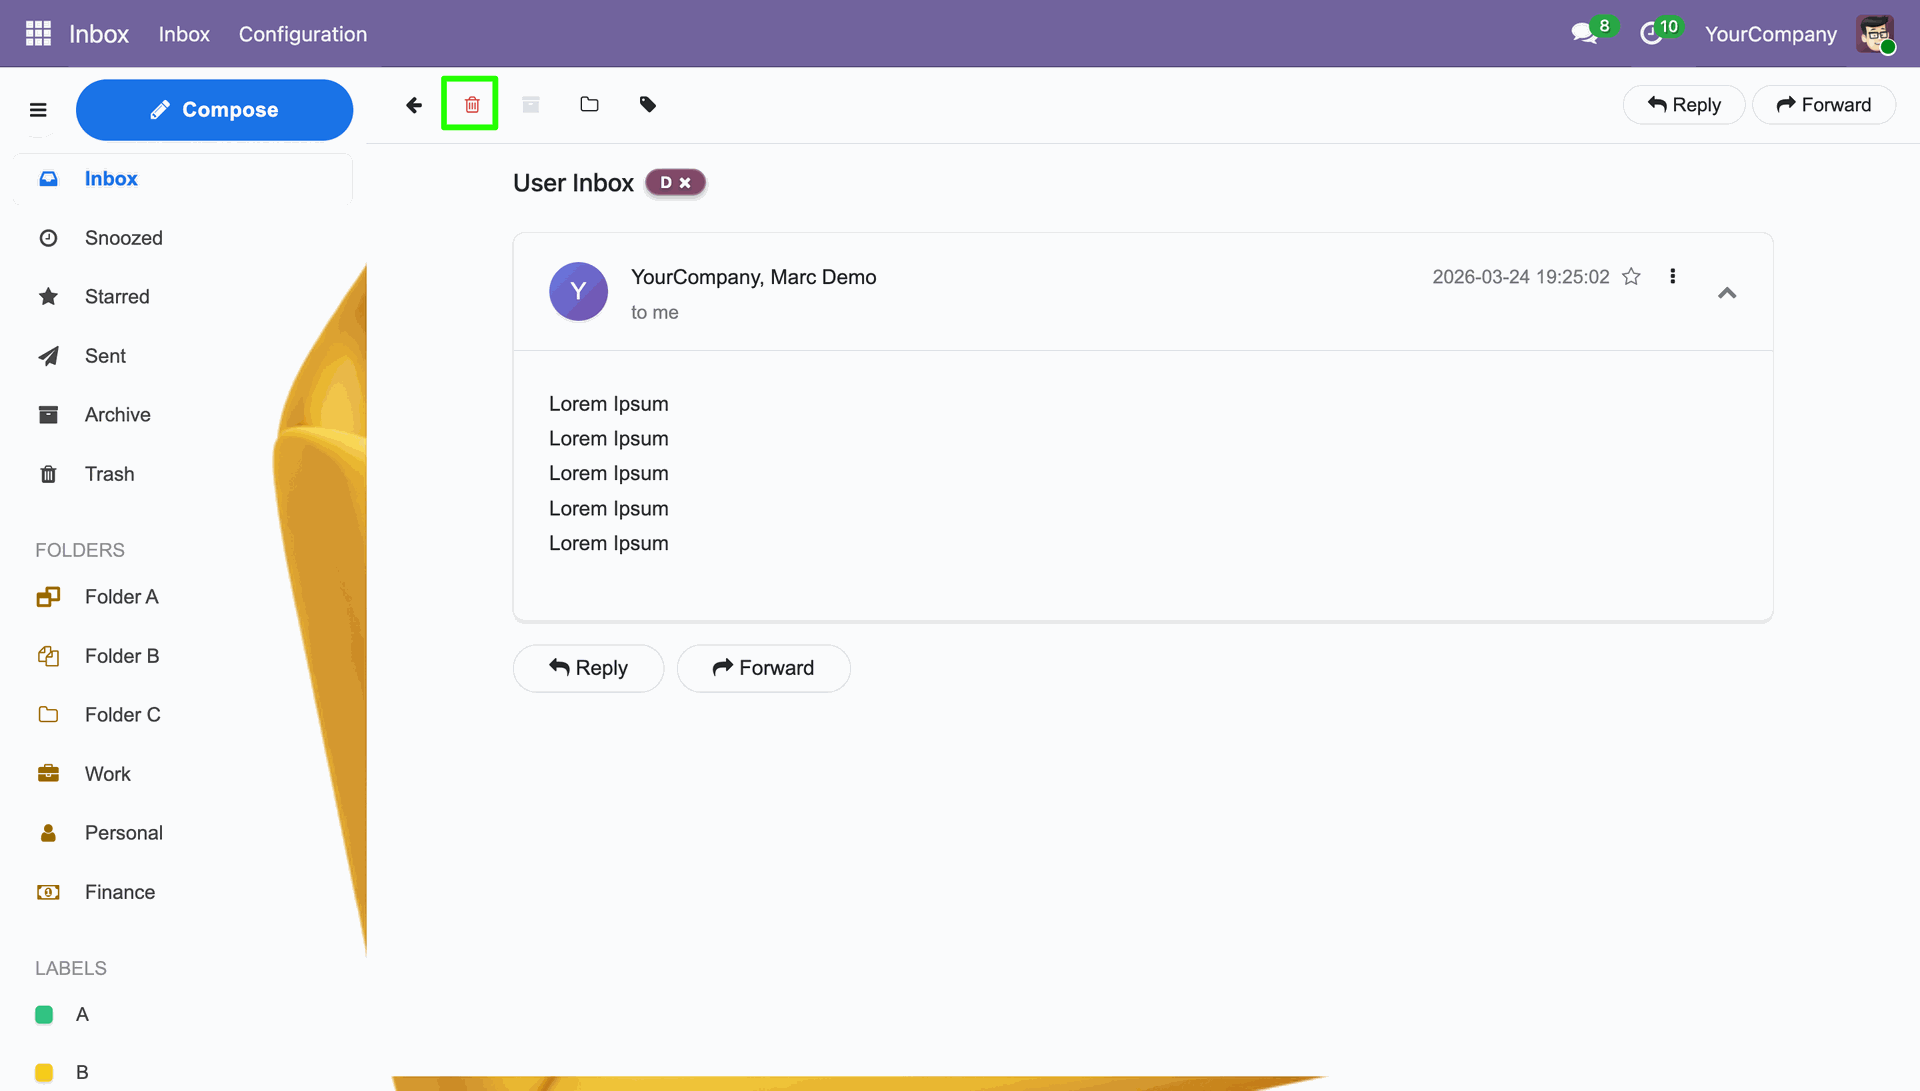
Deleting a mail.
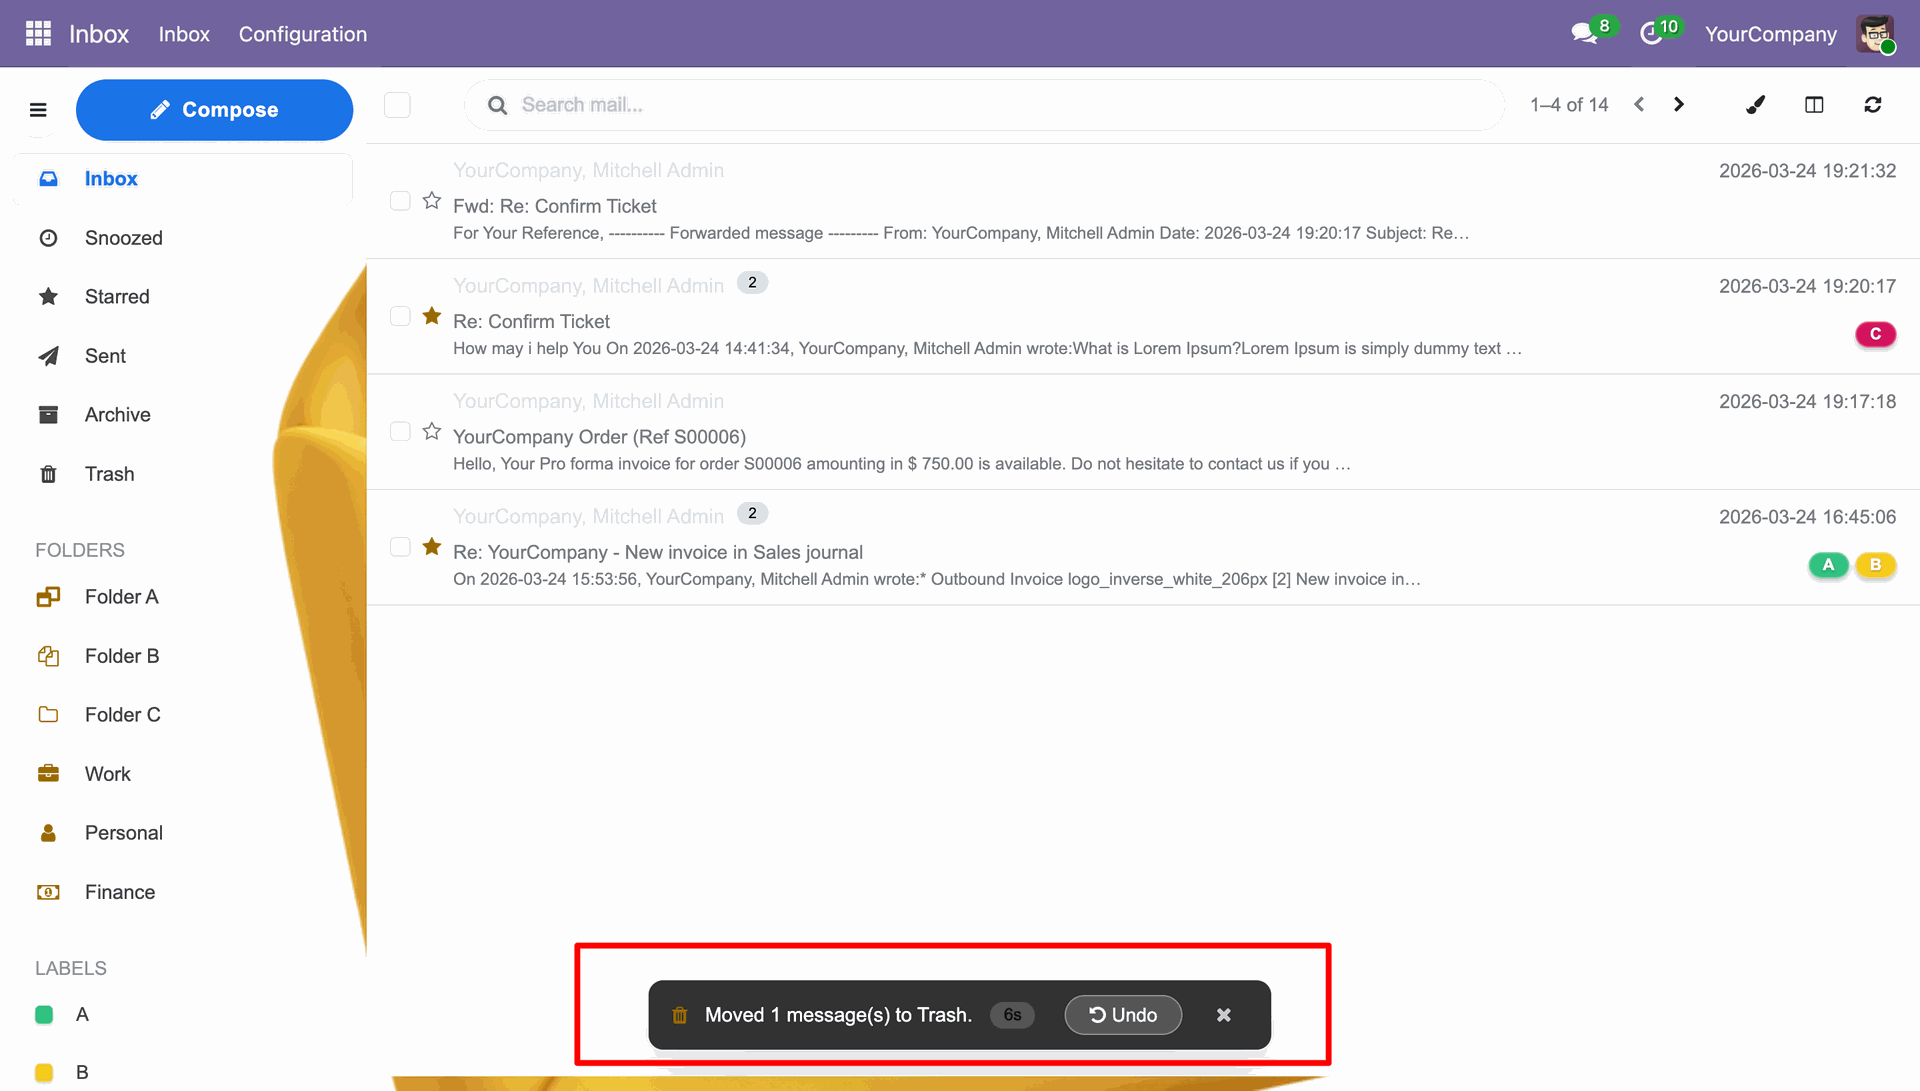
Mail deleted with a deletion message.
Archiving a mail.
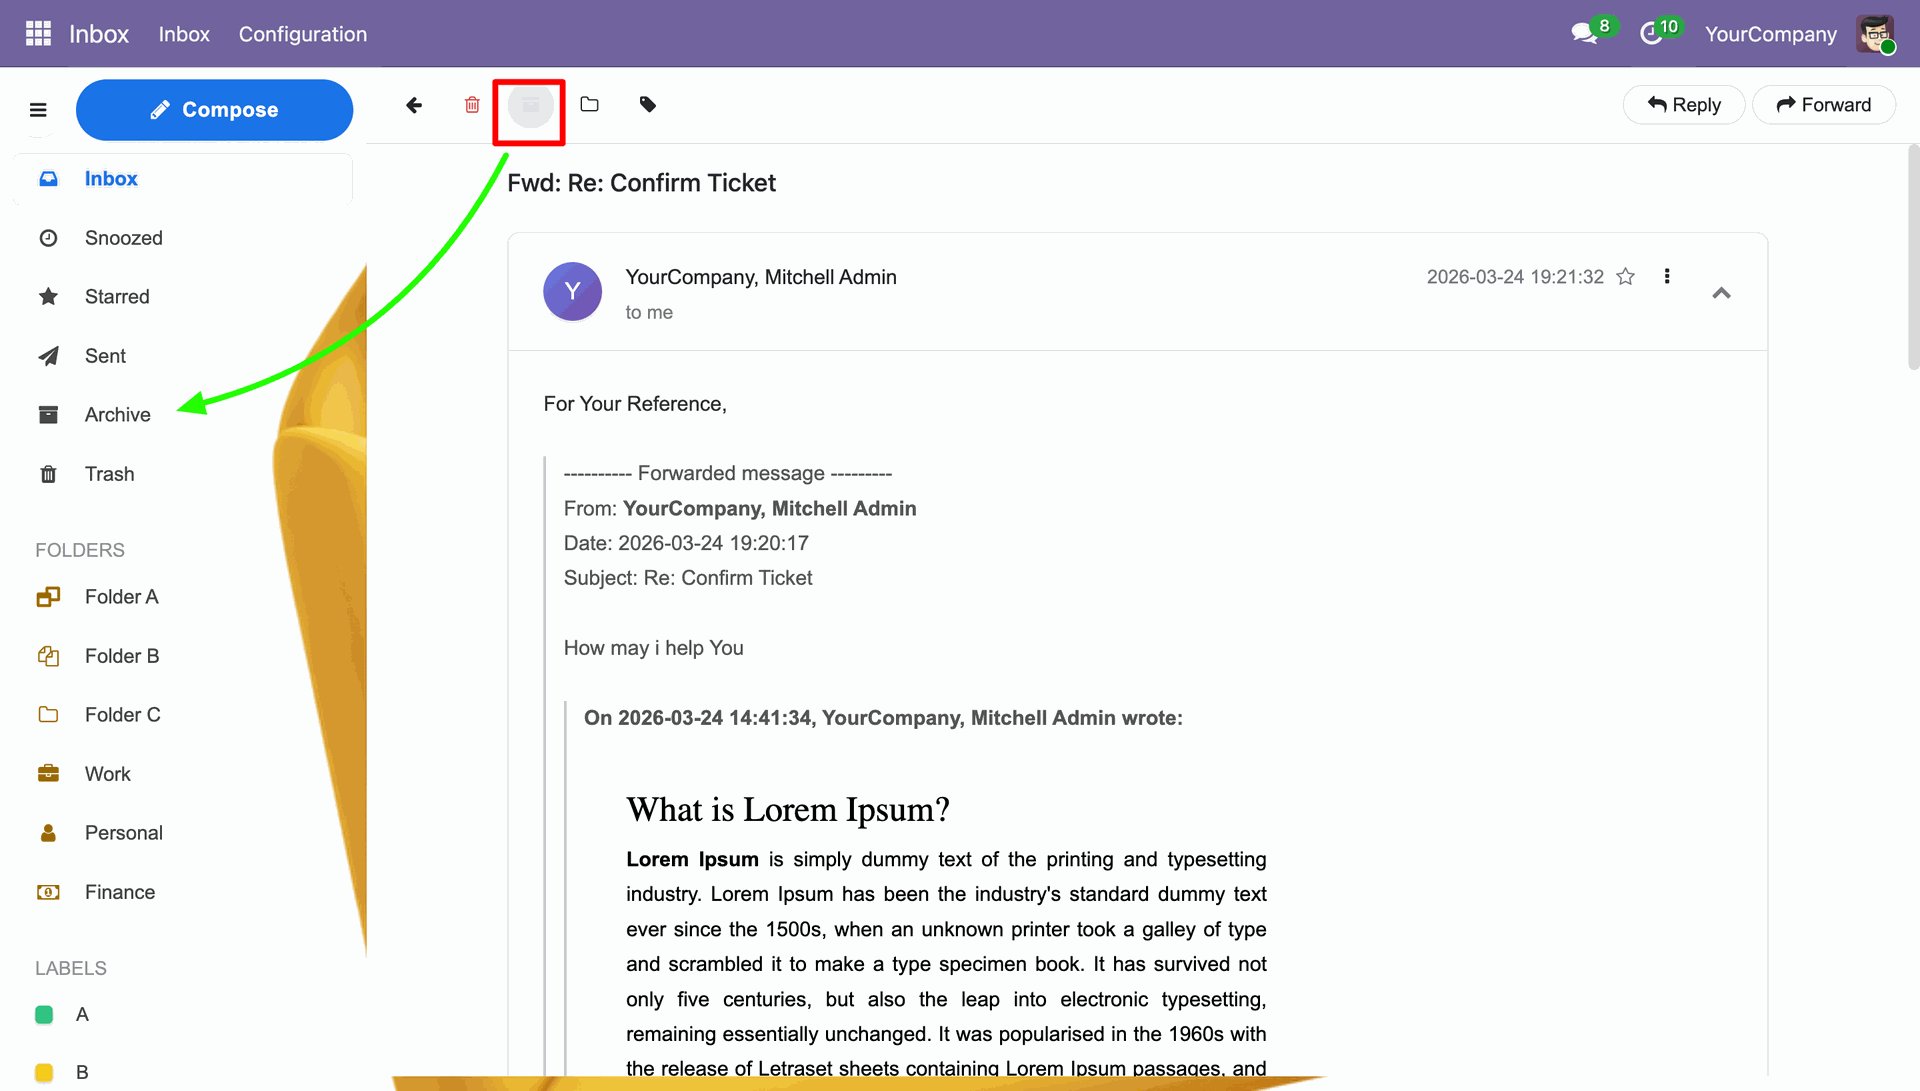
Mail archived with an undo option.
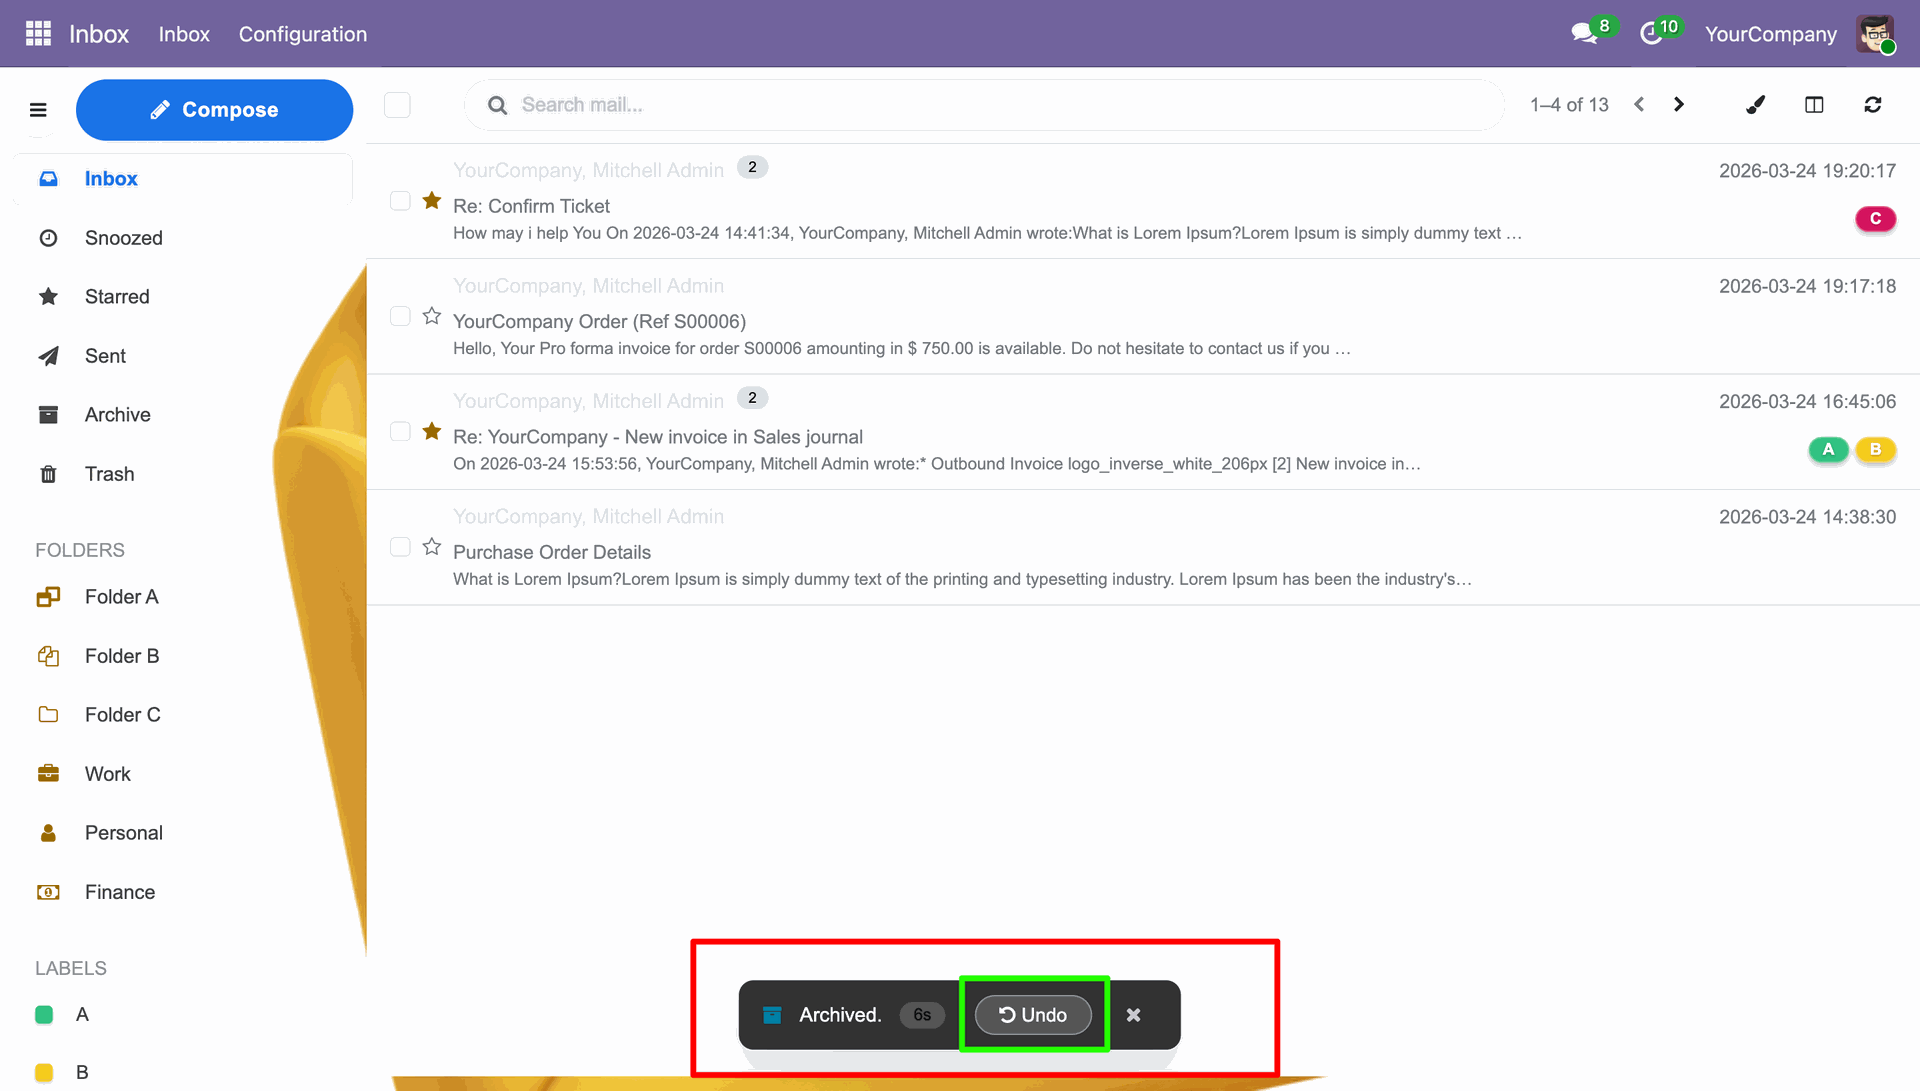
The archiving of the mail cancelled.
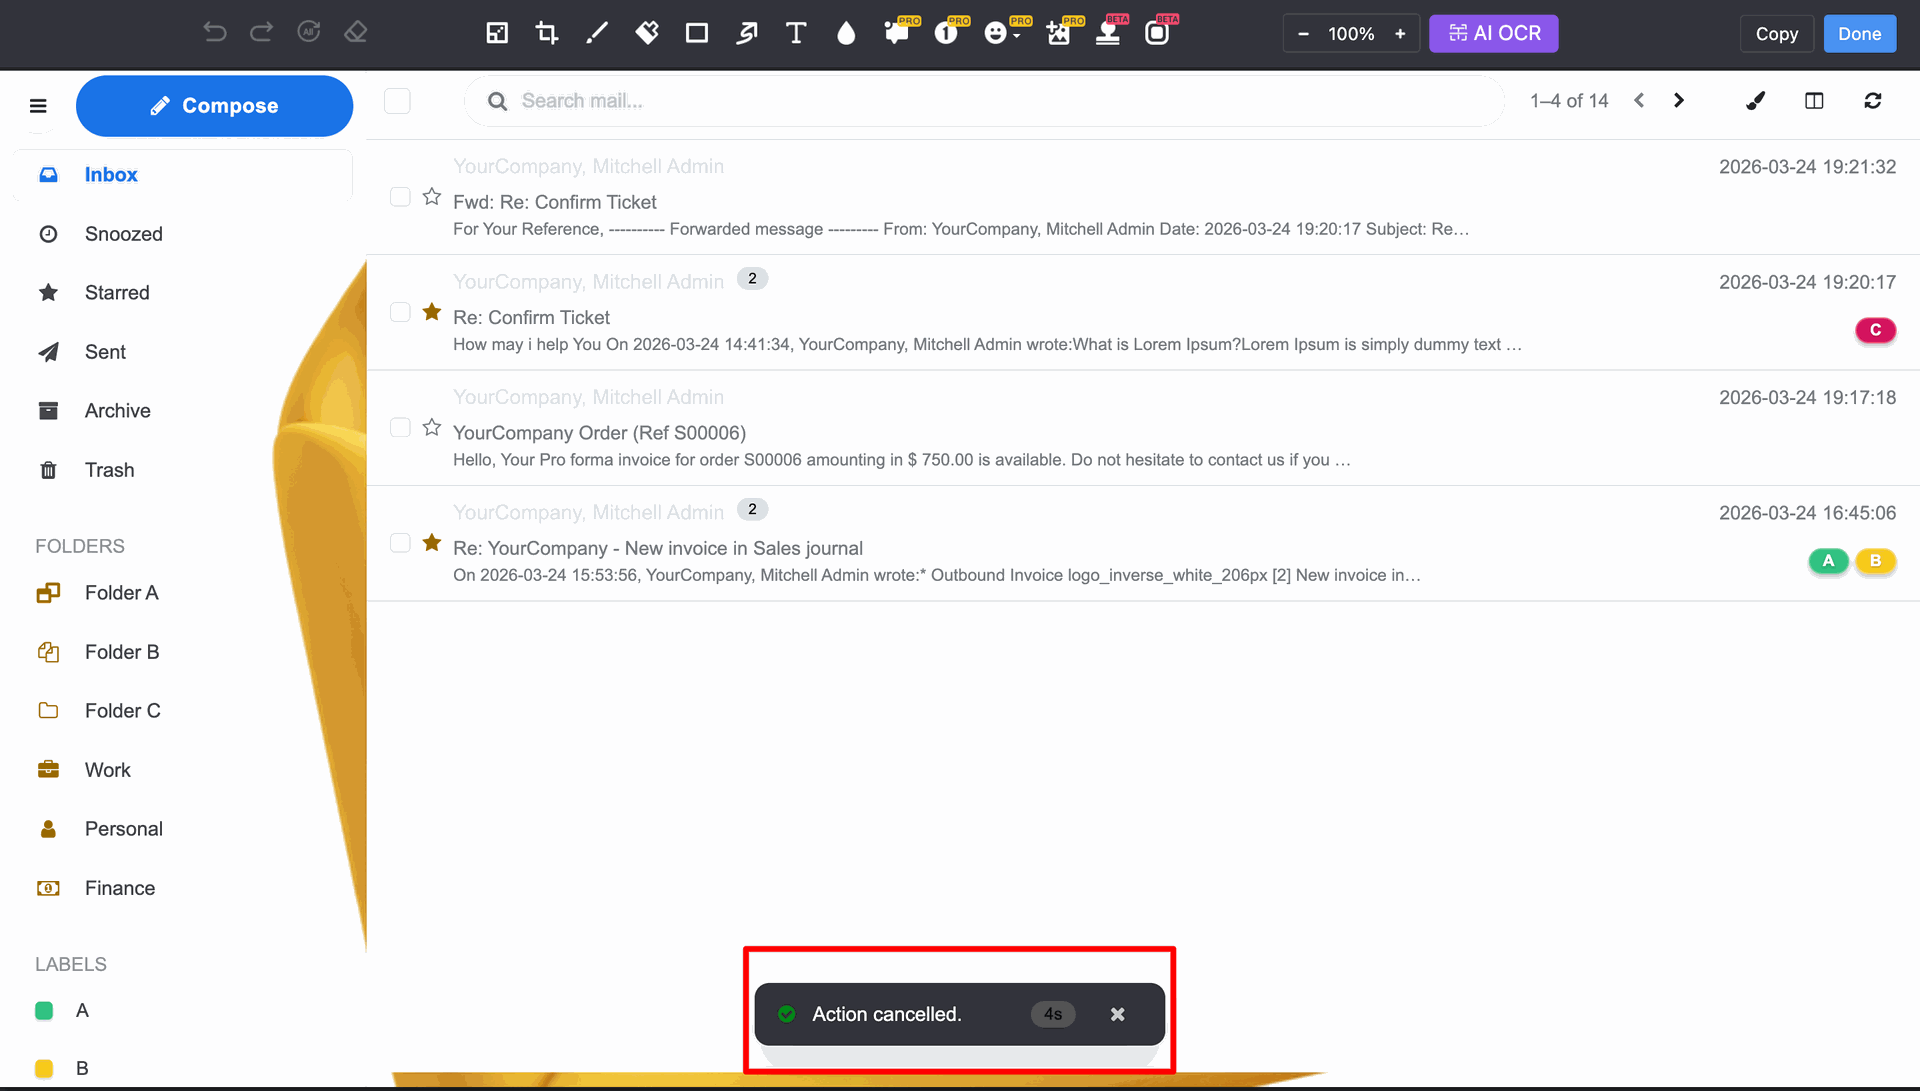
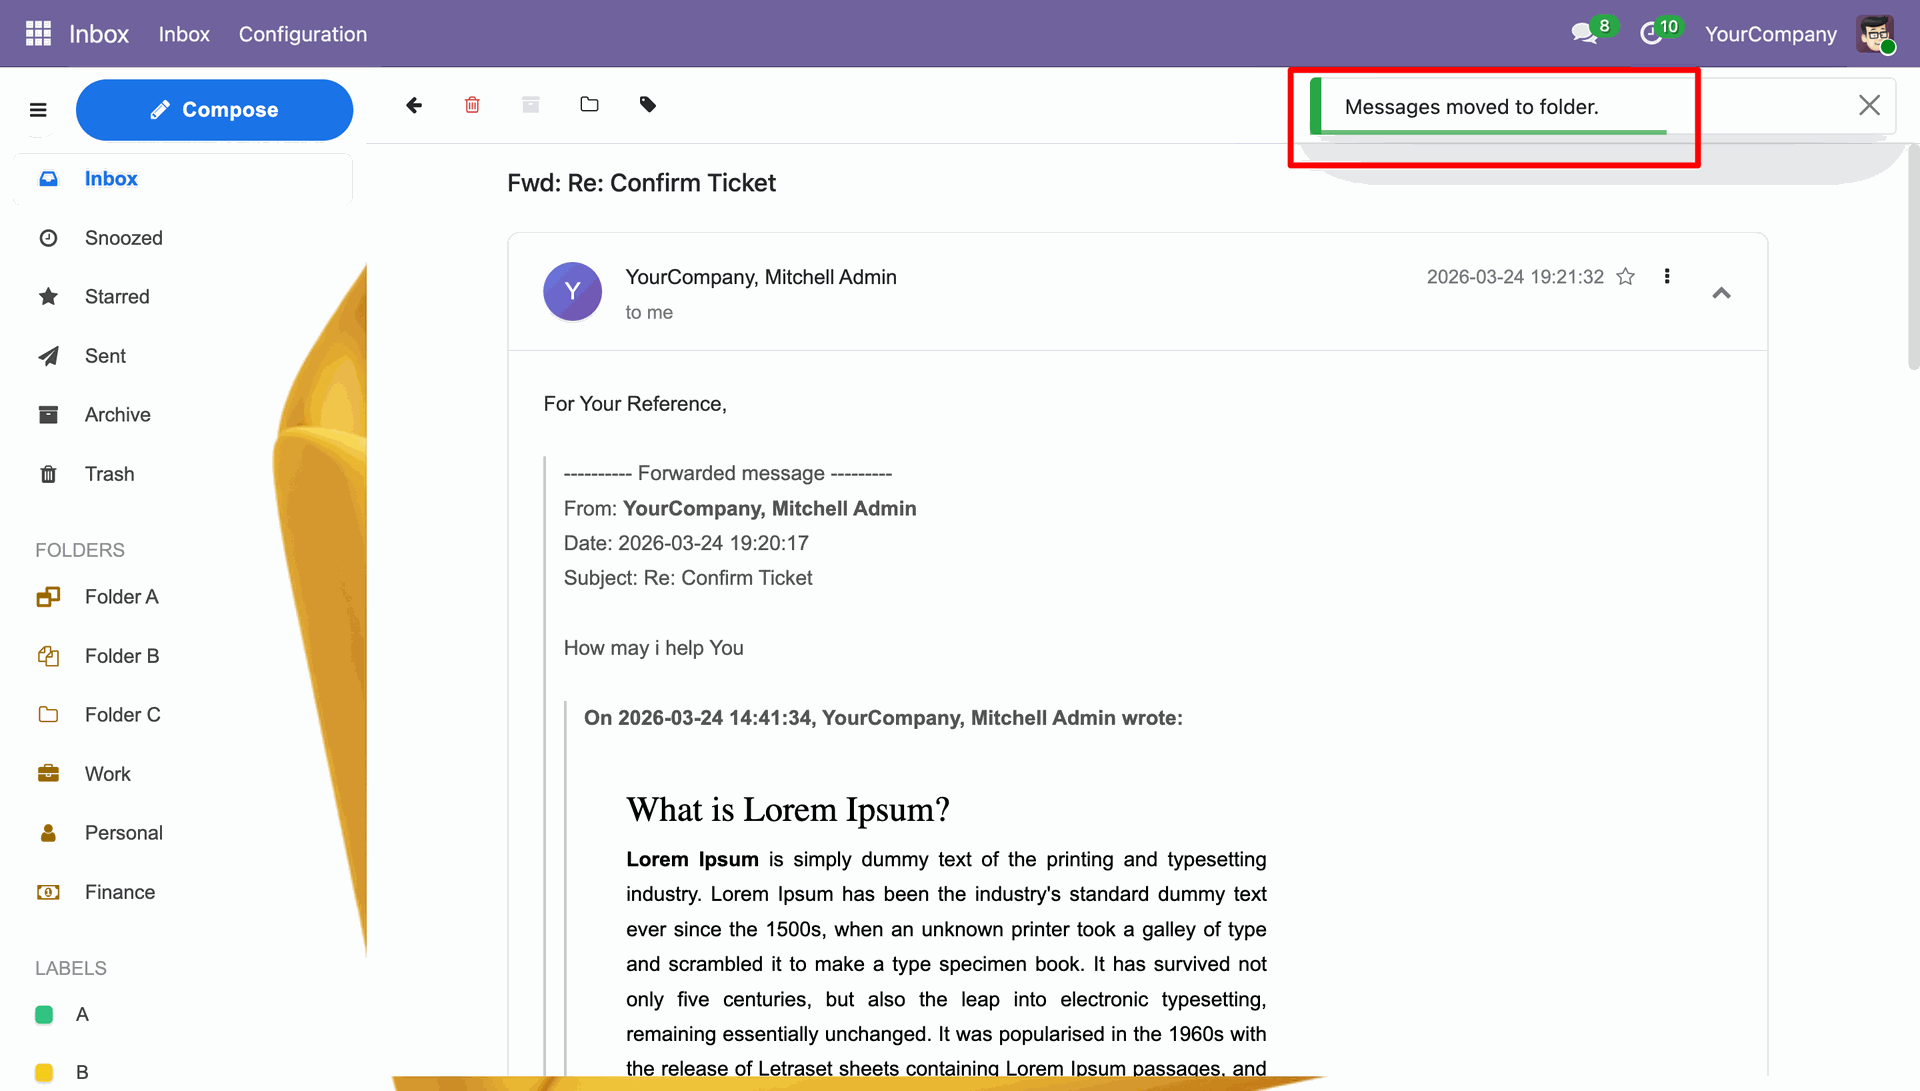
You can move the mails to a particular folder.
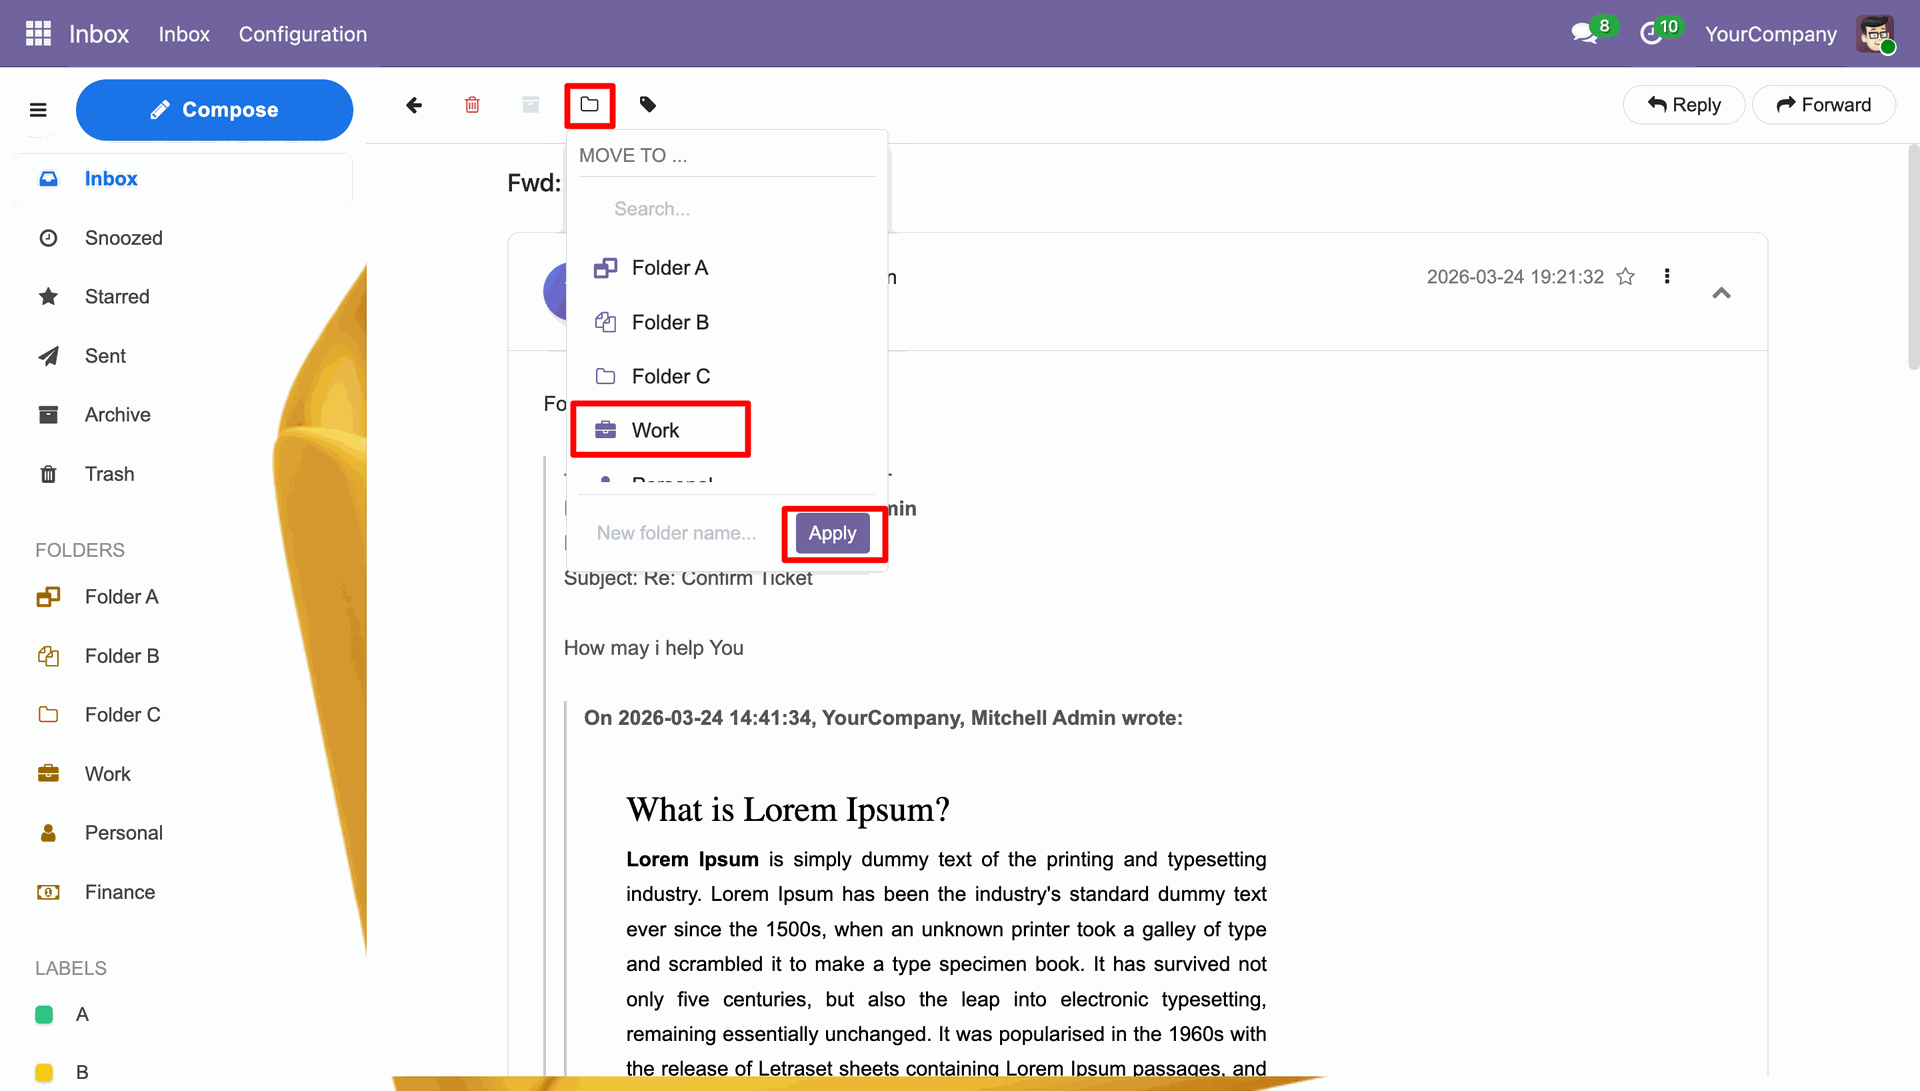
Notification stating that the message moved to a folder.
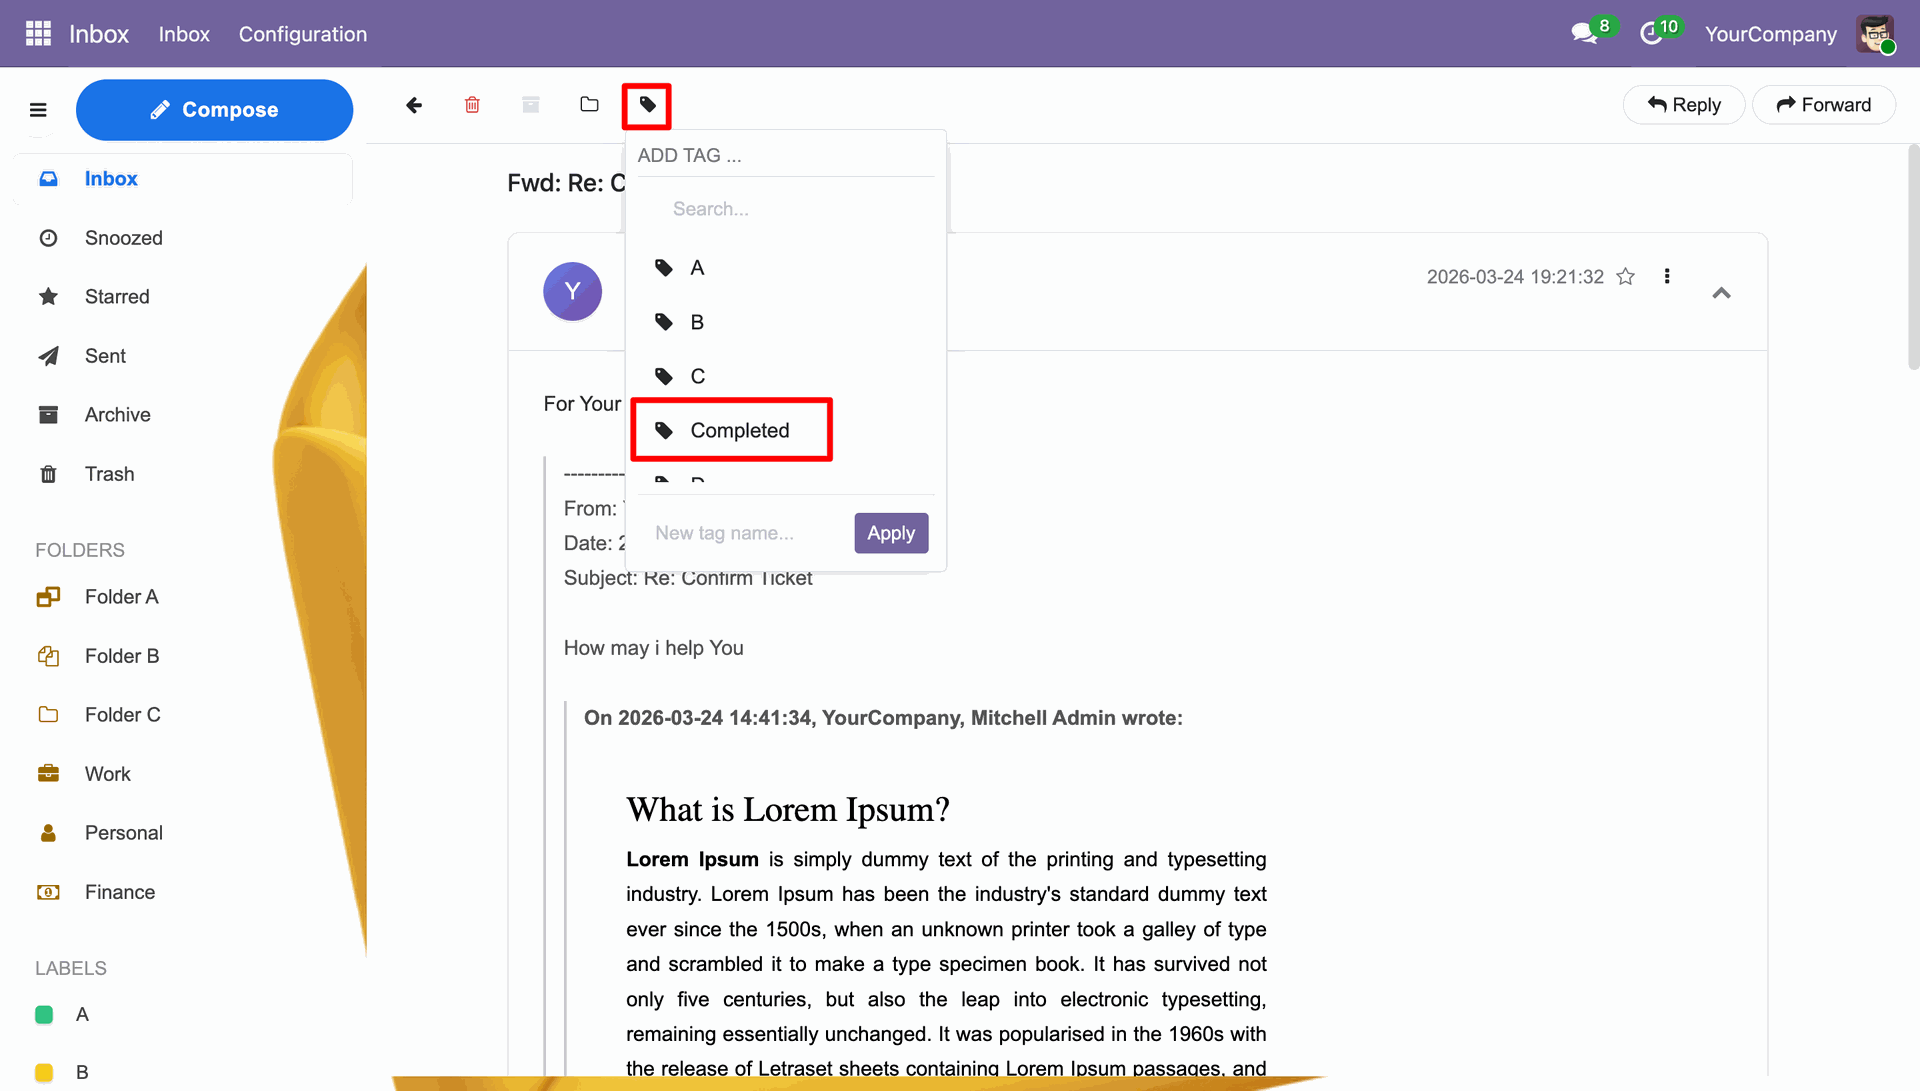
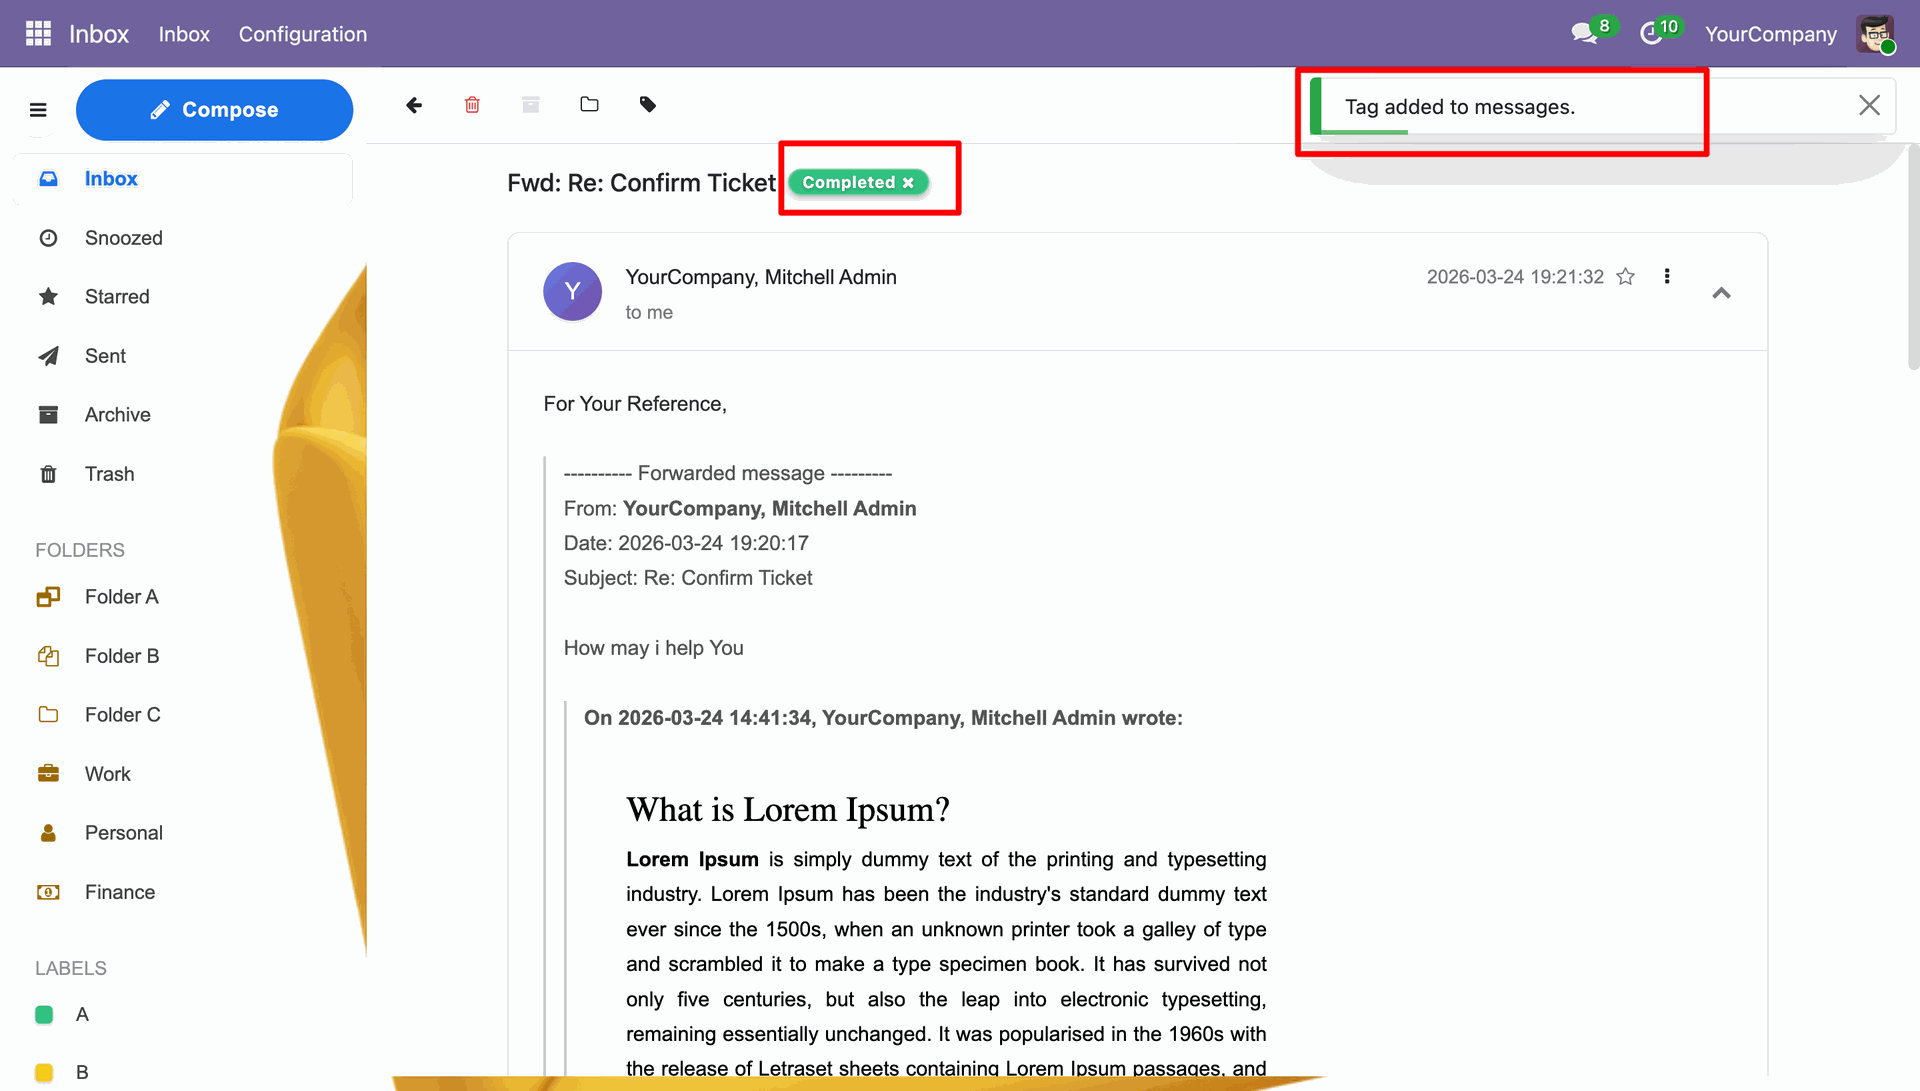
You can add a tag to the mail.
Tag added notification.
Click the Reply to reply the mail in current mail thread.
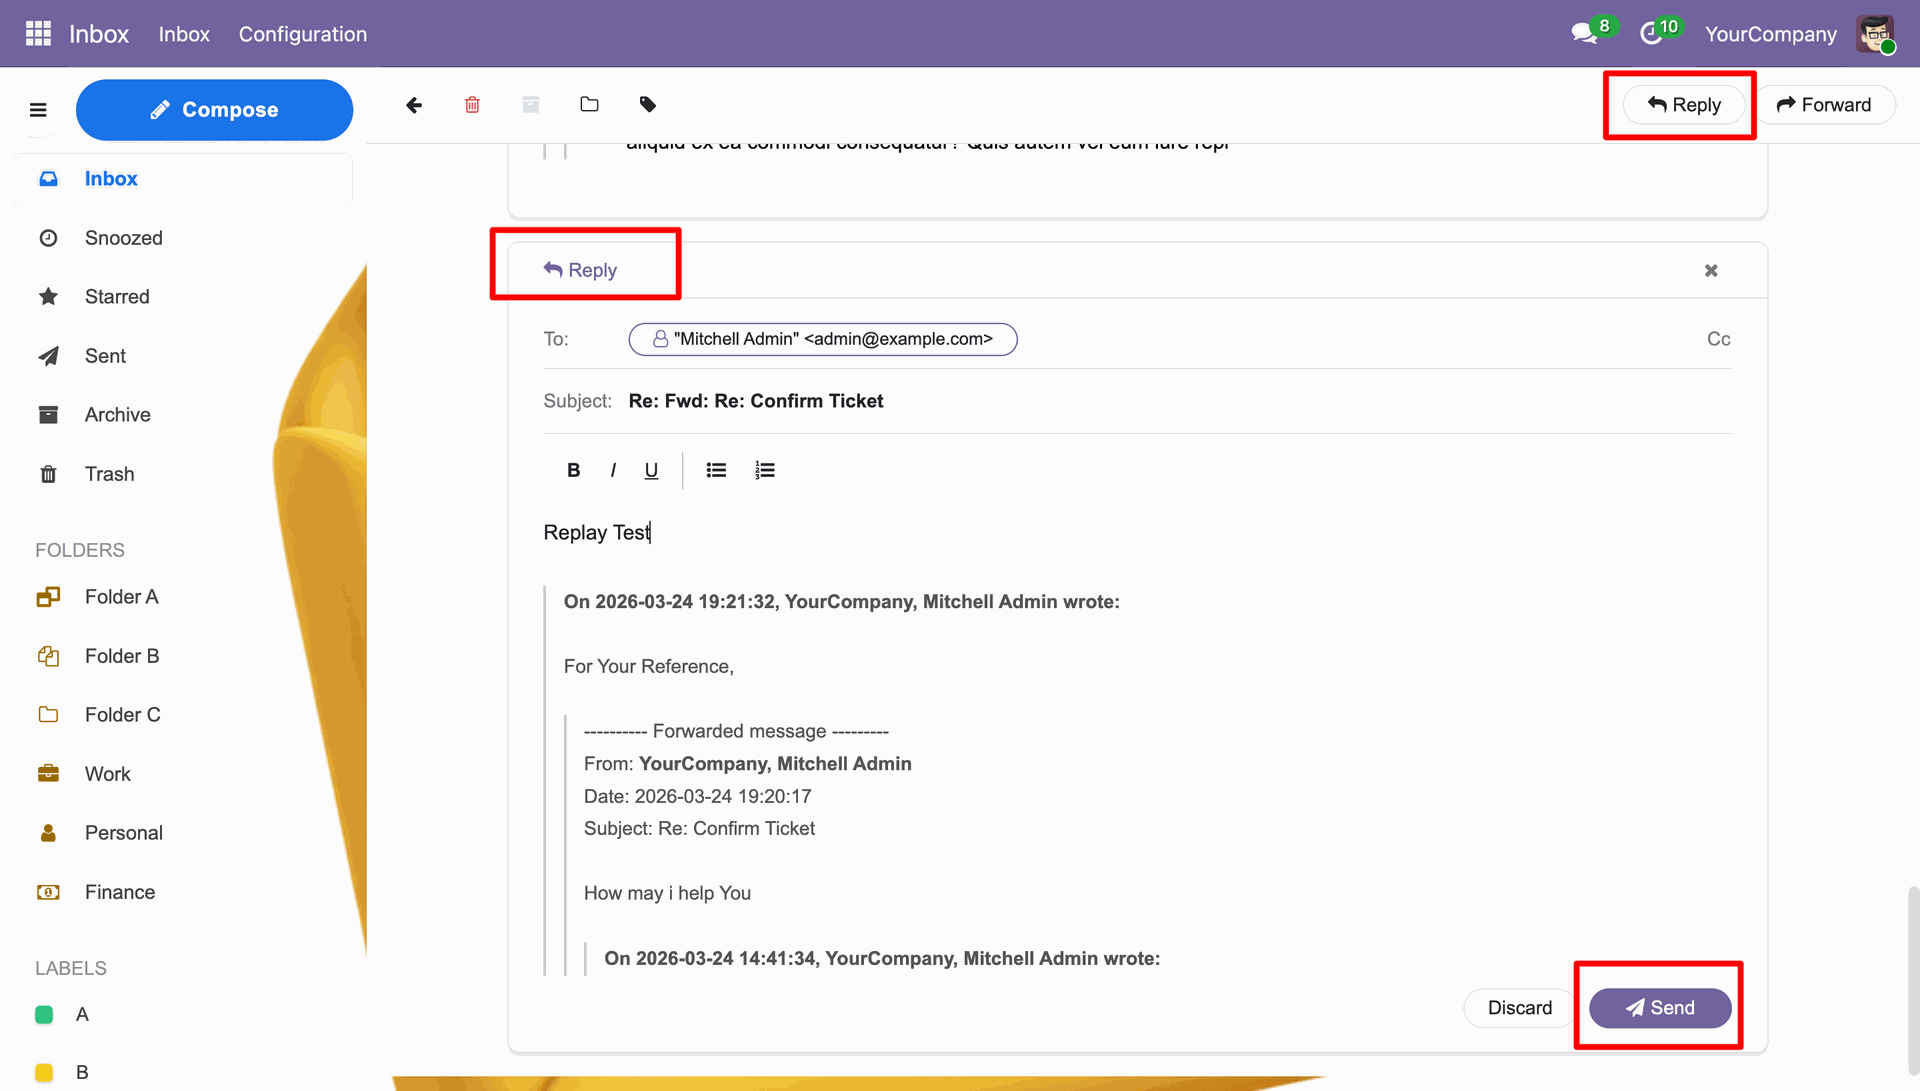
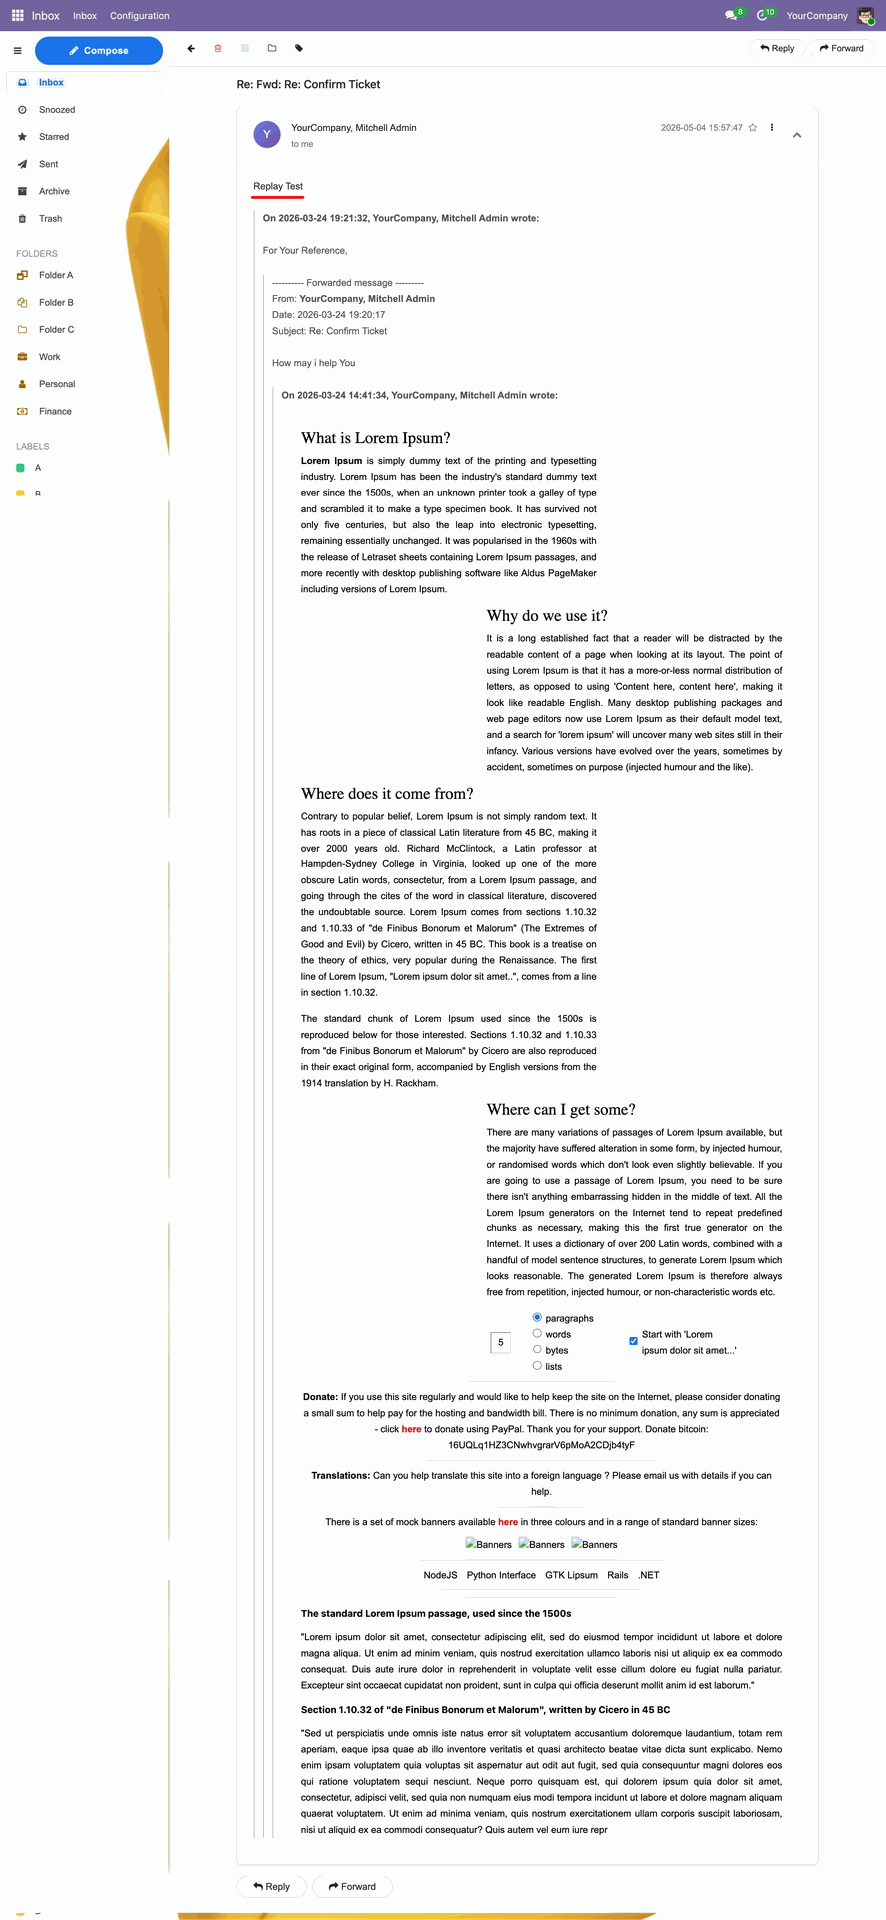
Reply mail view.
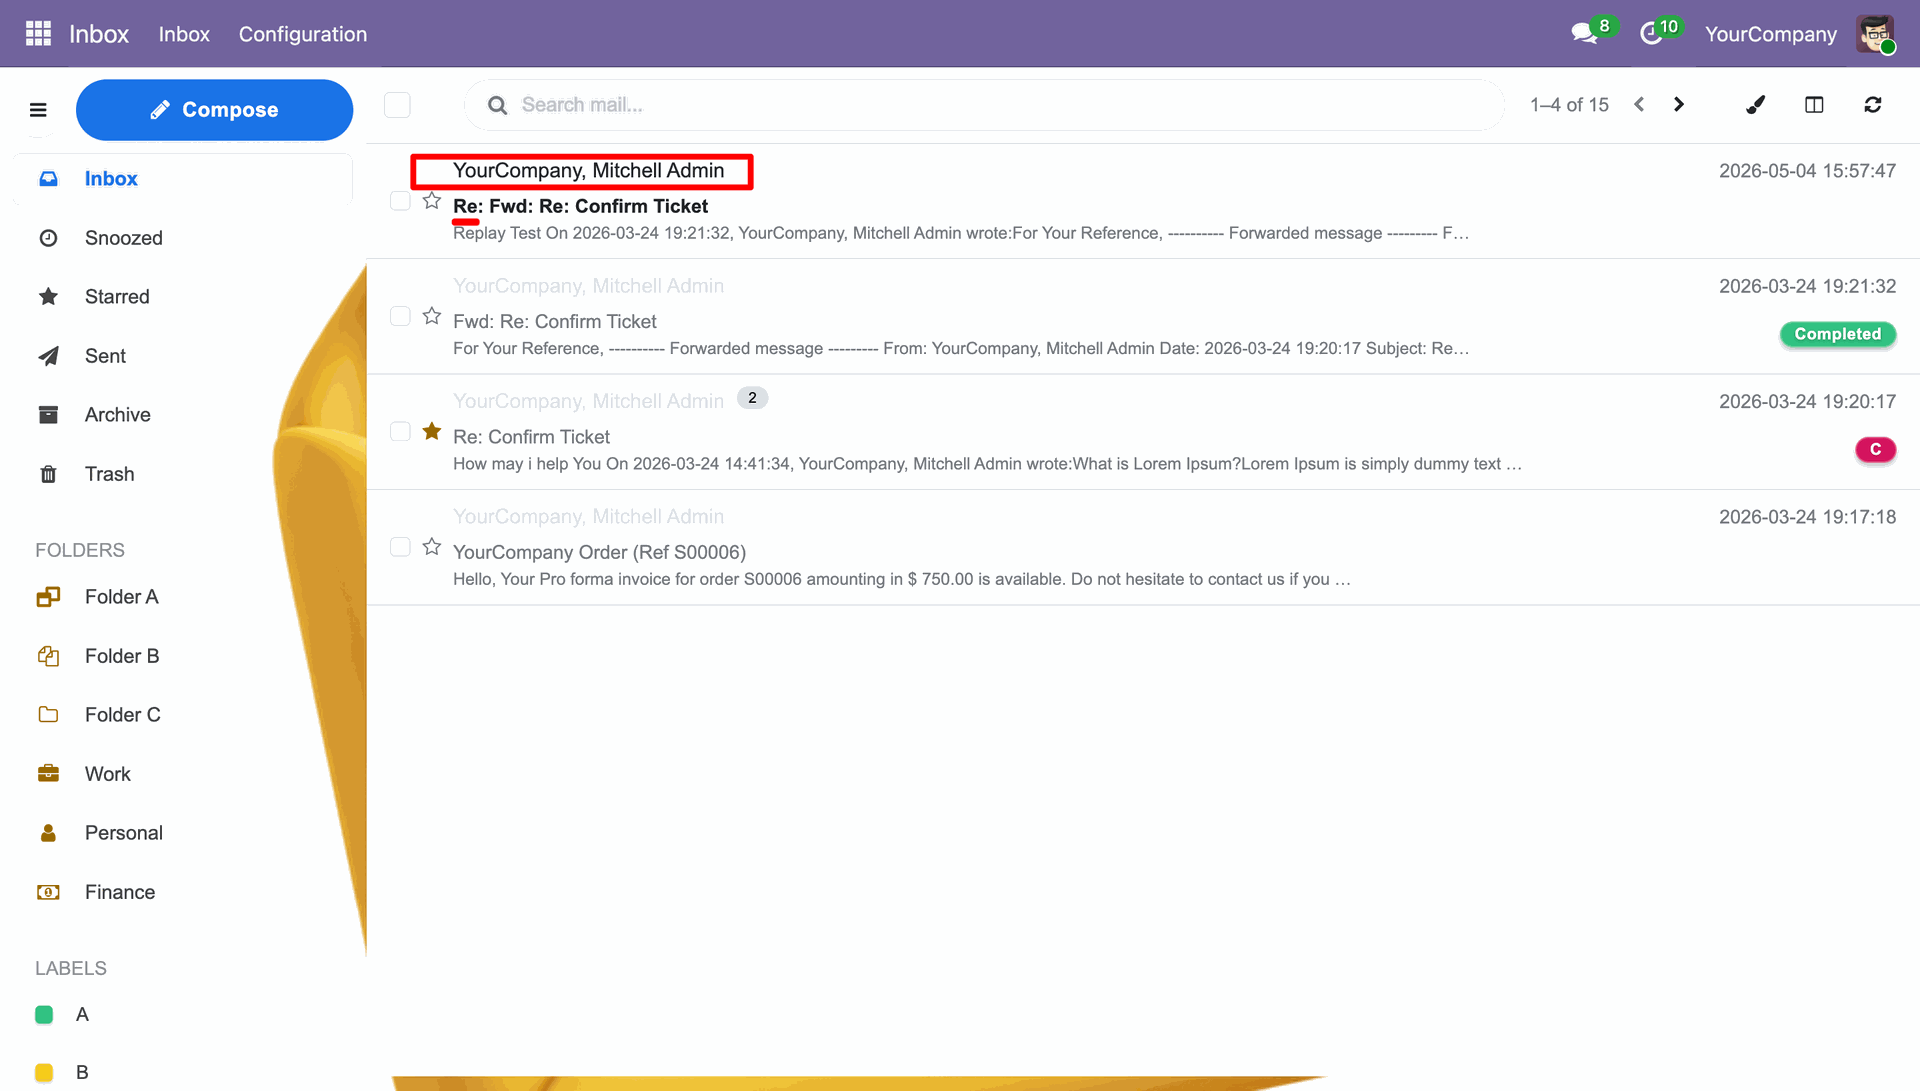
Replied message in the mail.
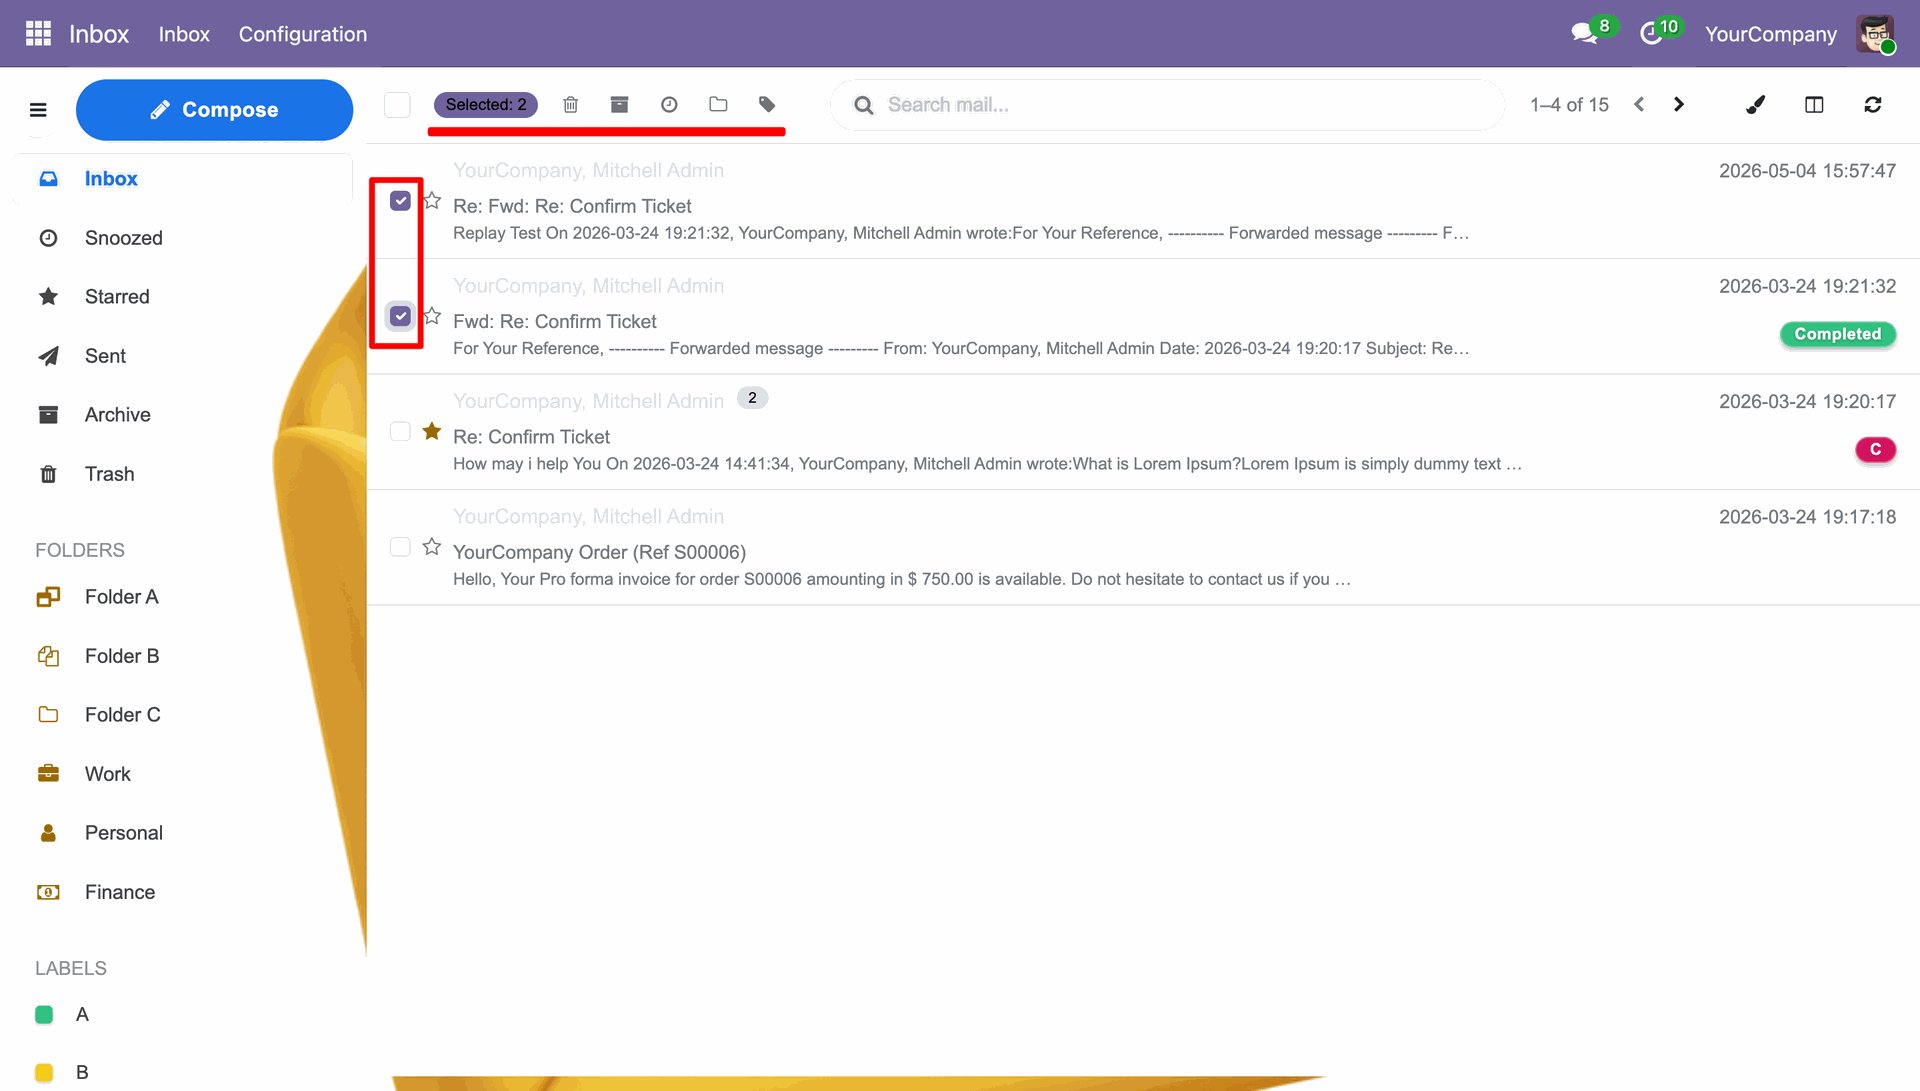
You can multi-select the mails and you can delete, archive, add theme, add tags, etc. at once.
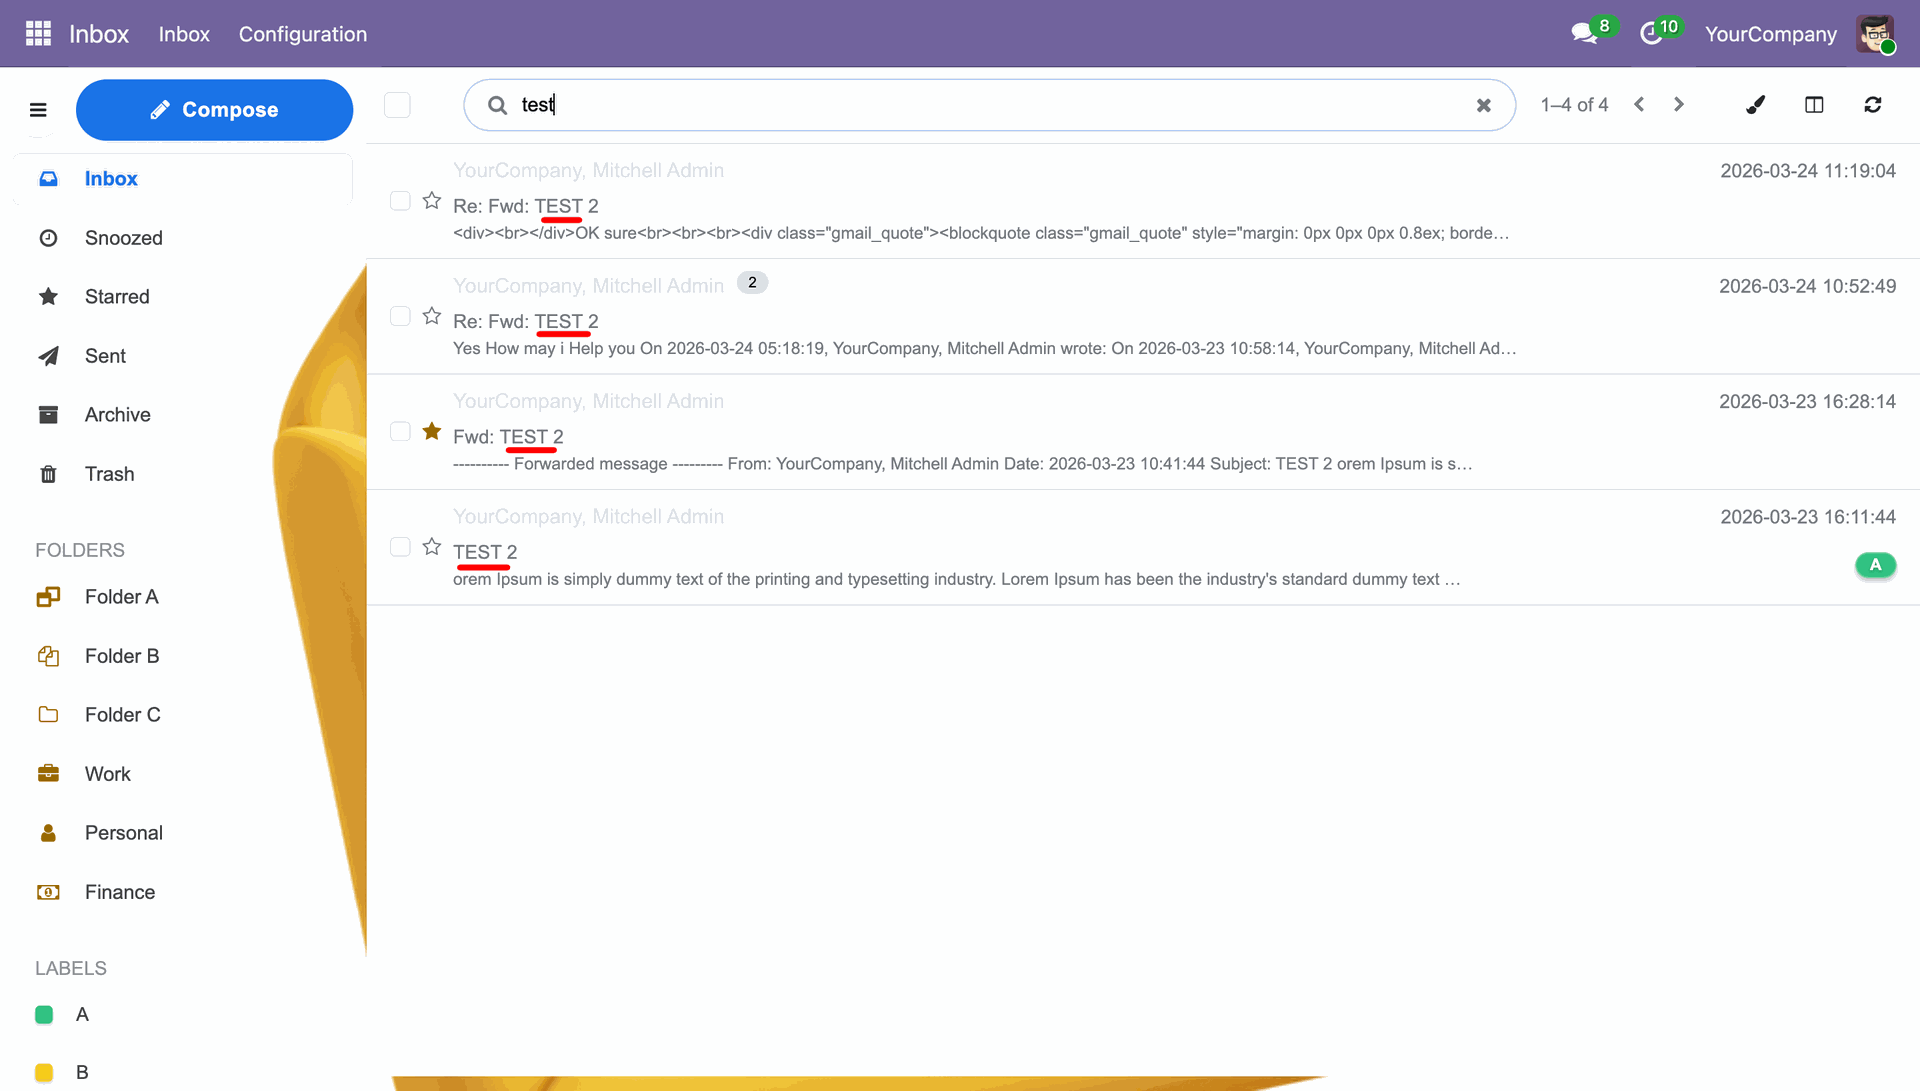
You can search the mail by the words used in the mail.
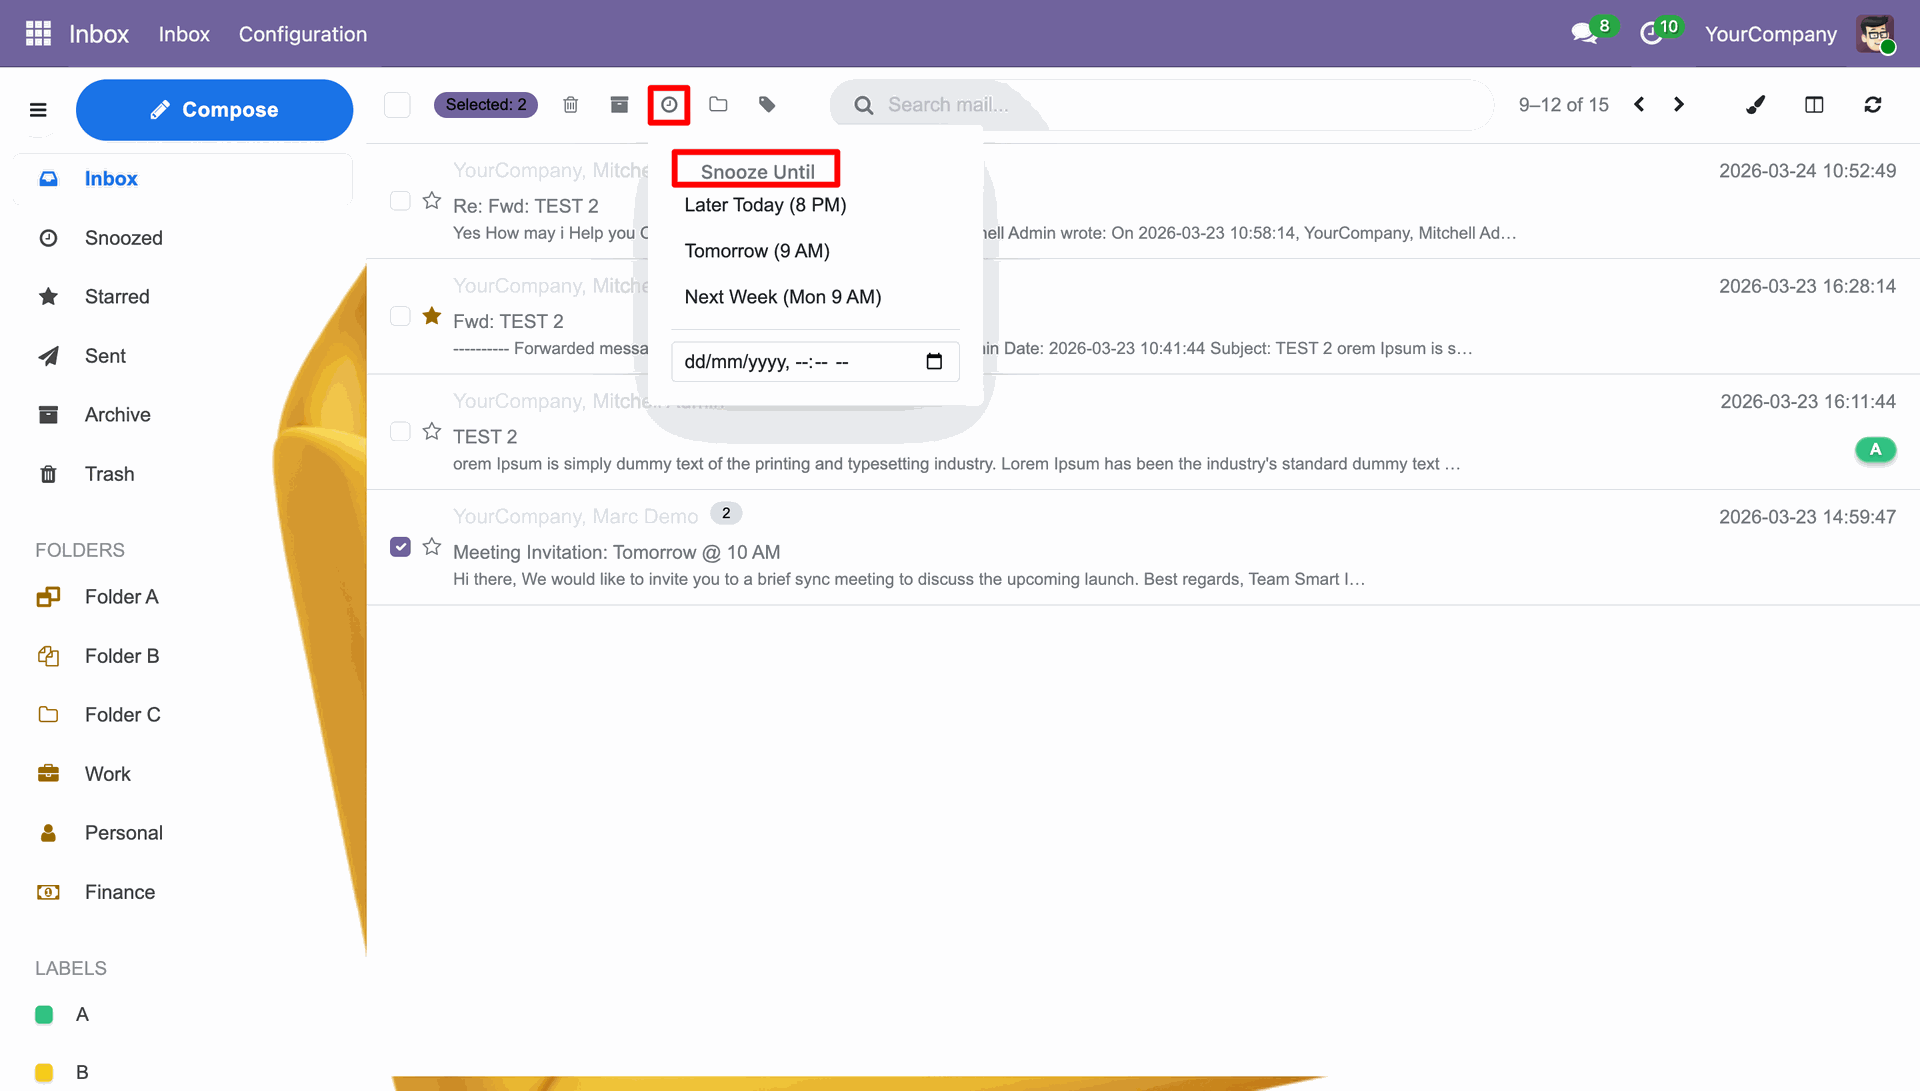
Selecting the Snooze Until option for selected emails to temporarily remove them from the inbox until a later date or time..
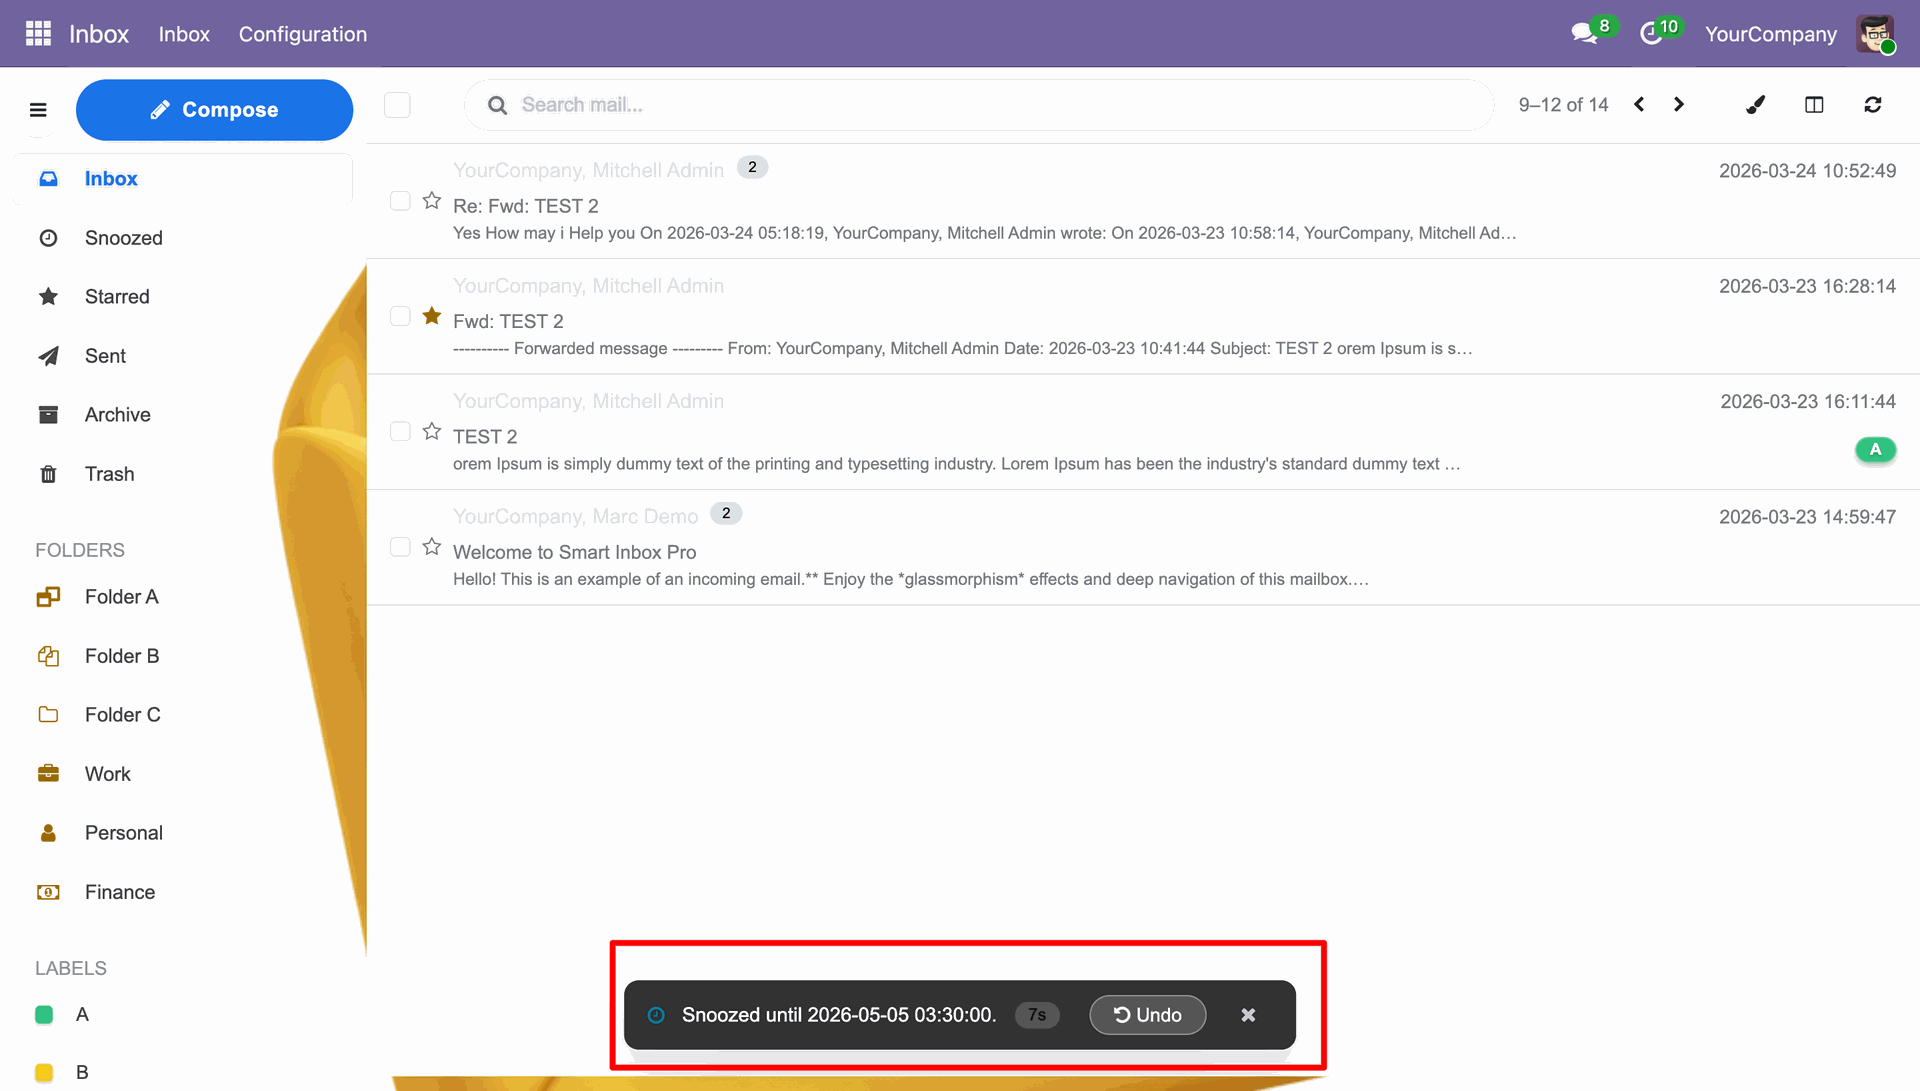
You can see the snooze message once the snooze time is set.
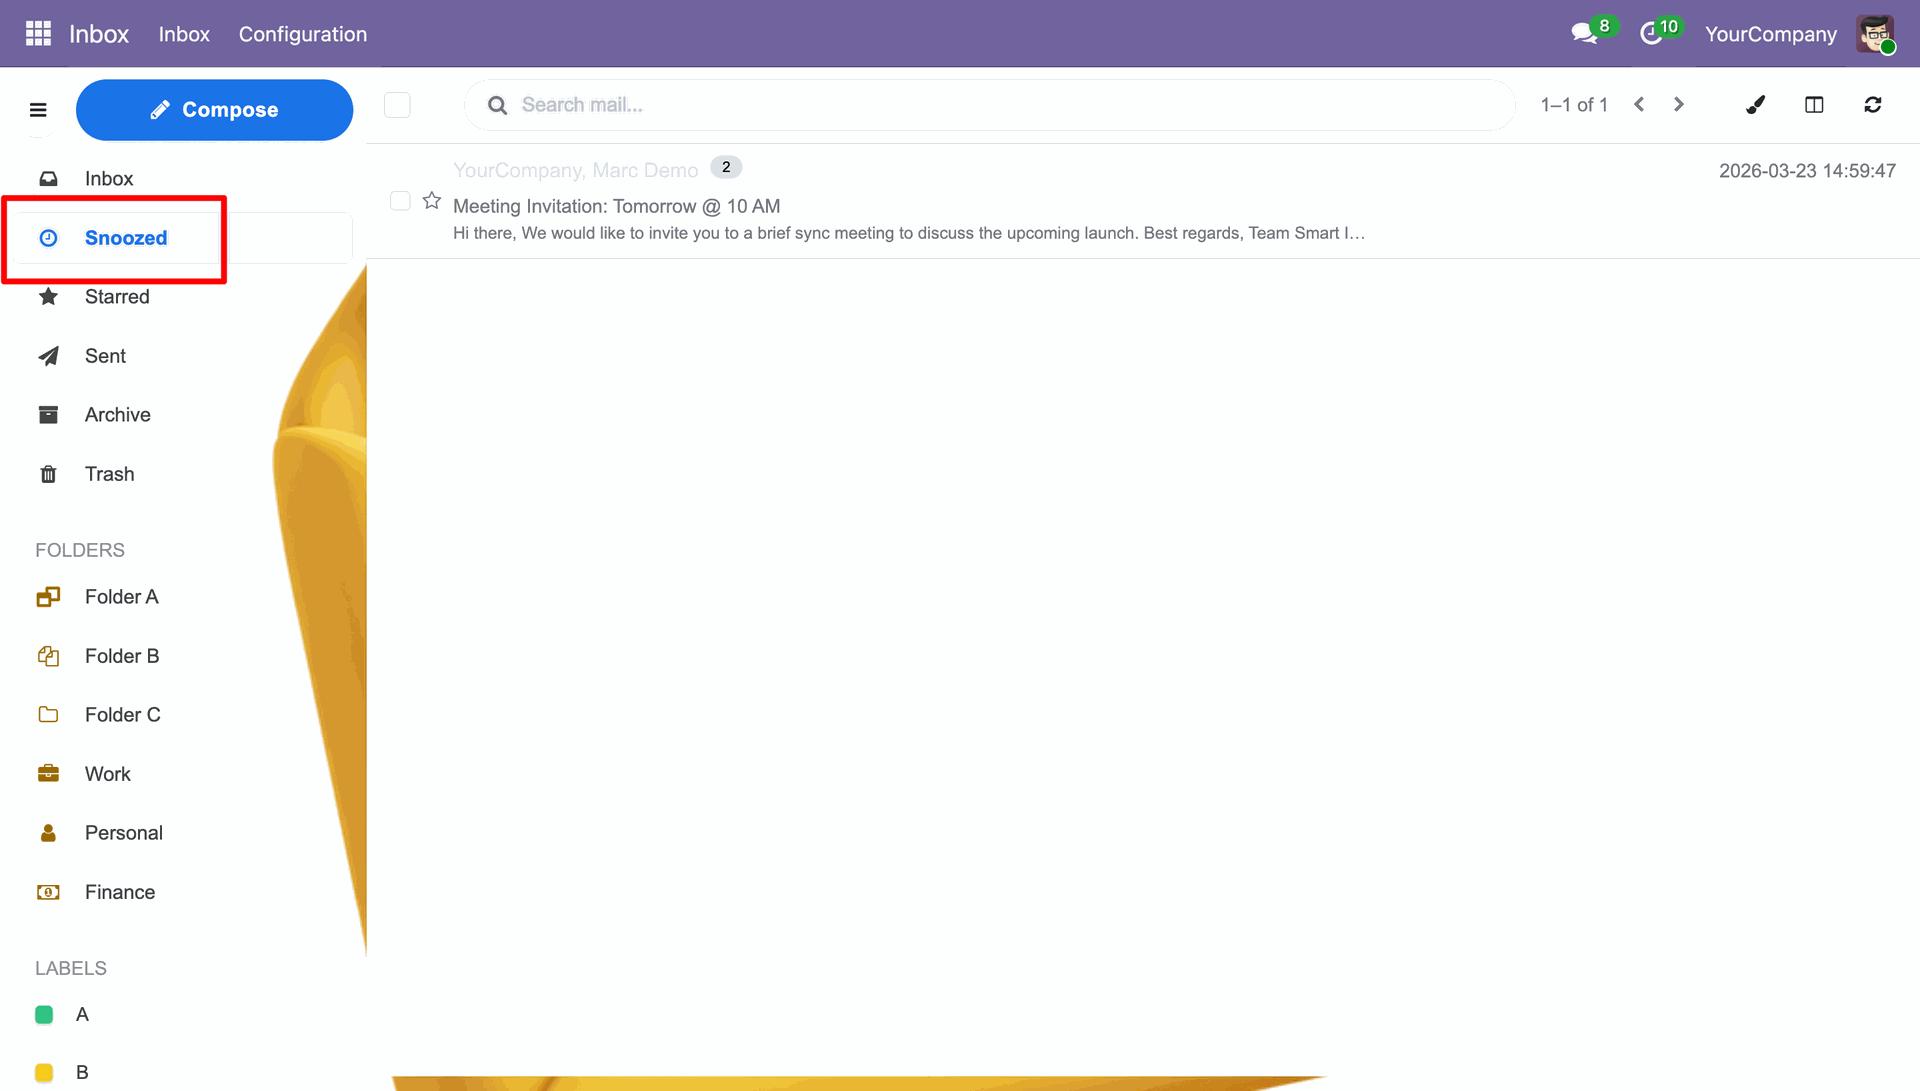
Accessing the Snoozed folder to review and manage emails that have been temporarily hidden from the main inbox.
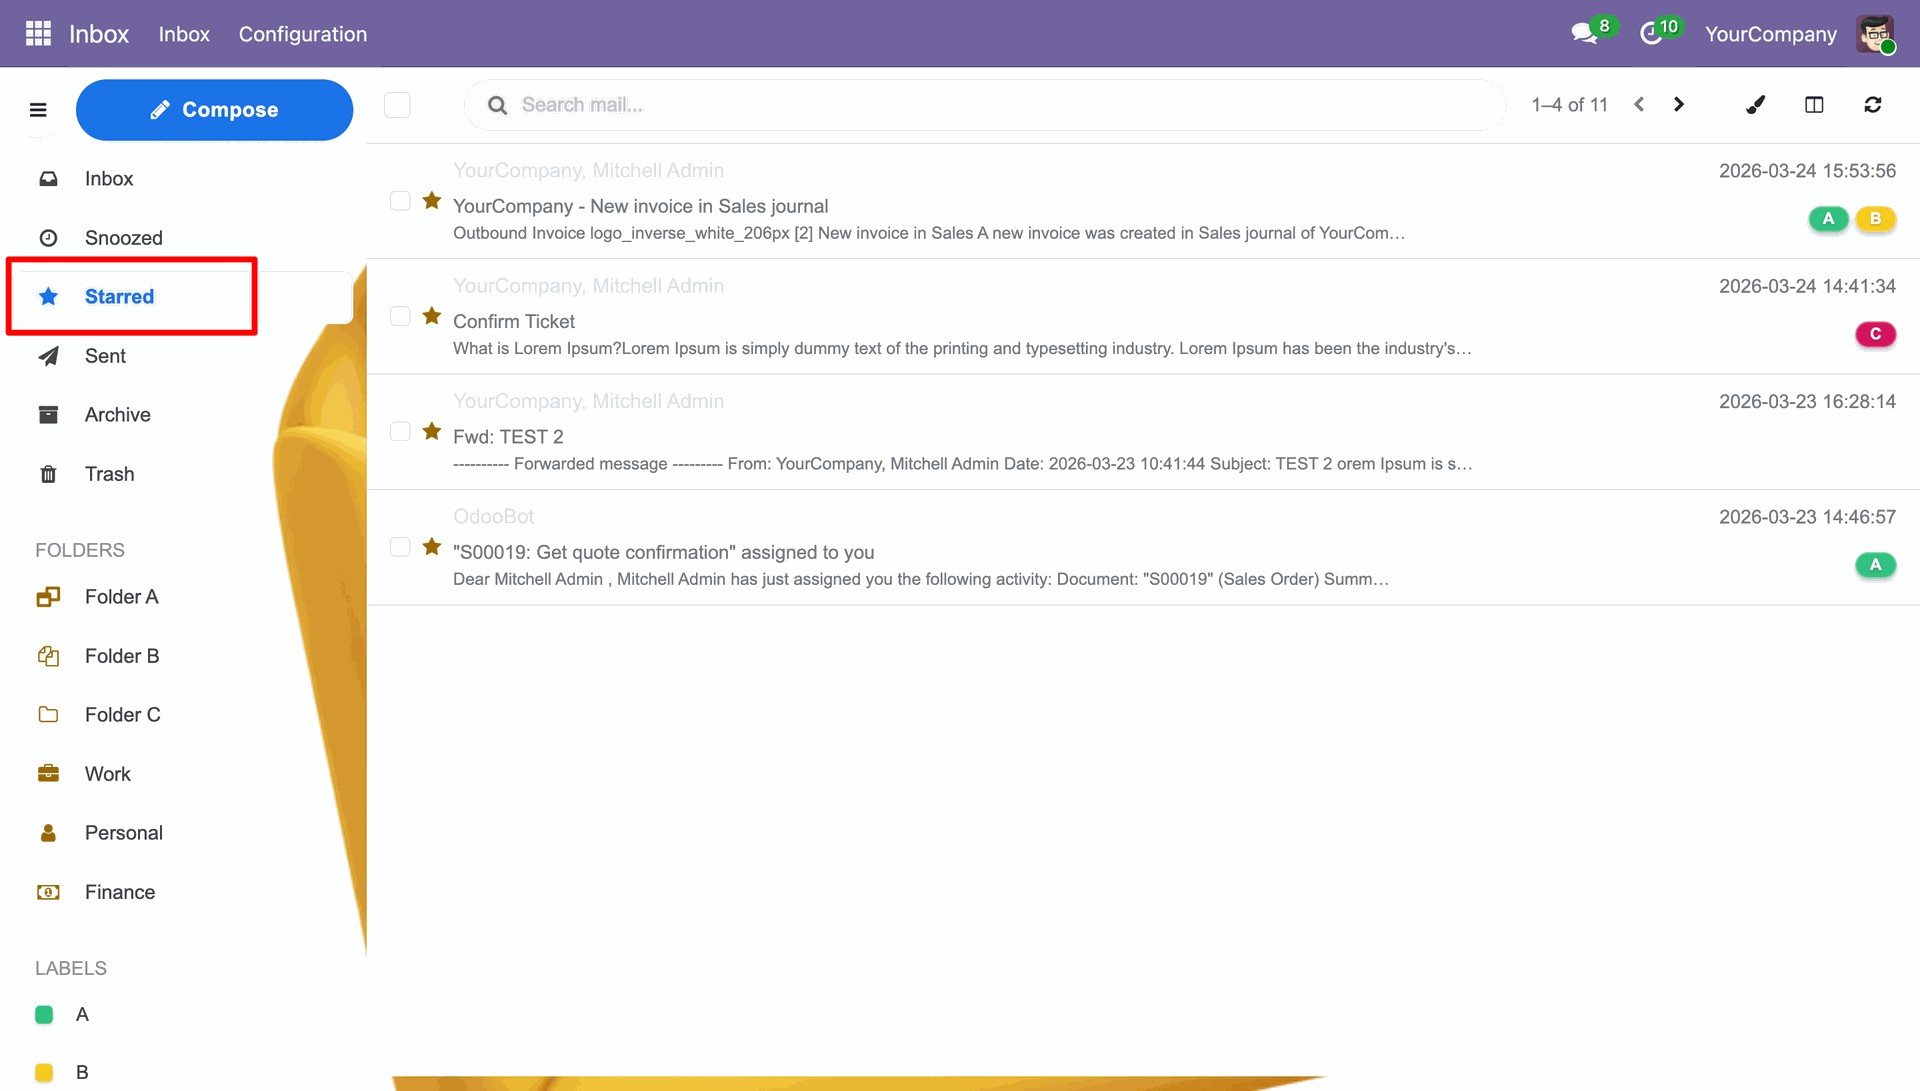
You can review the Starred mails in the Starred Folder.
You can review the Sent mails in the Sent Folder.
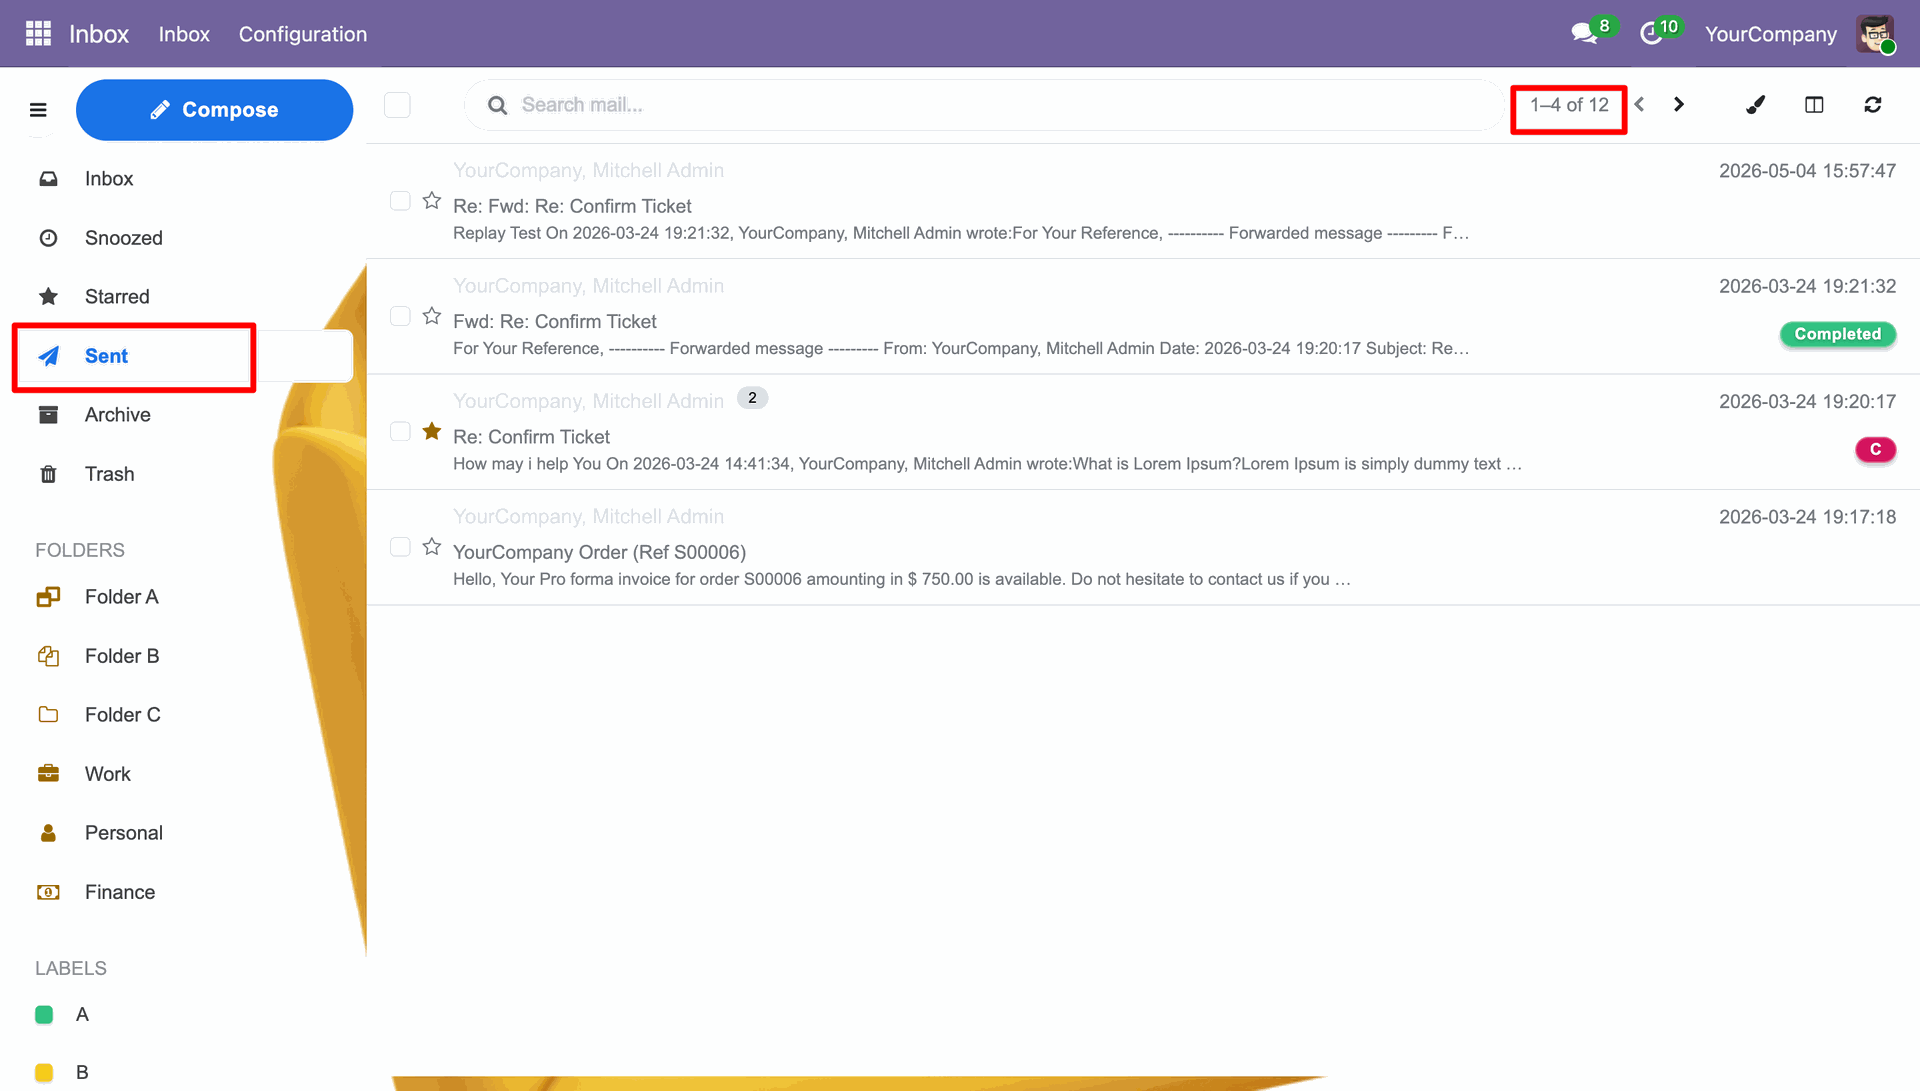
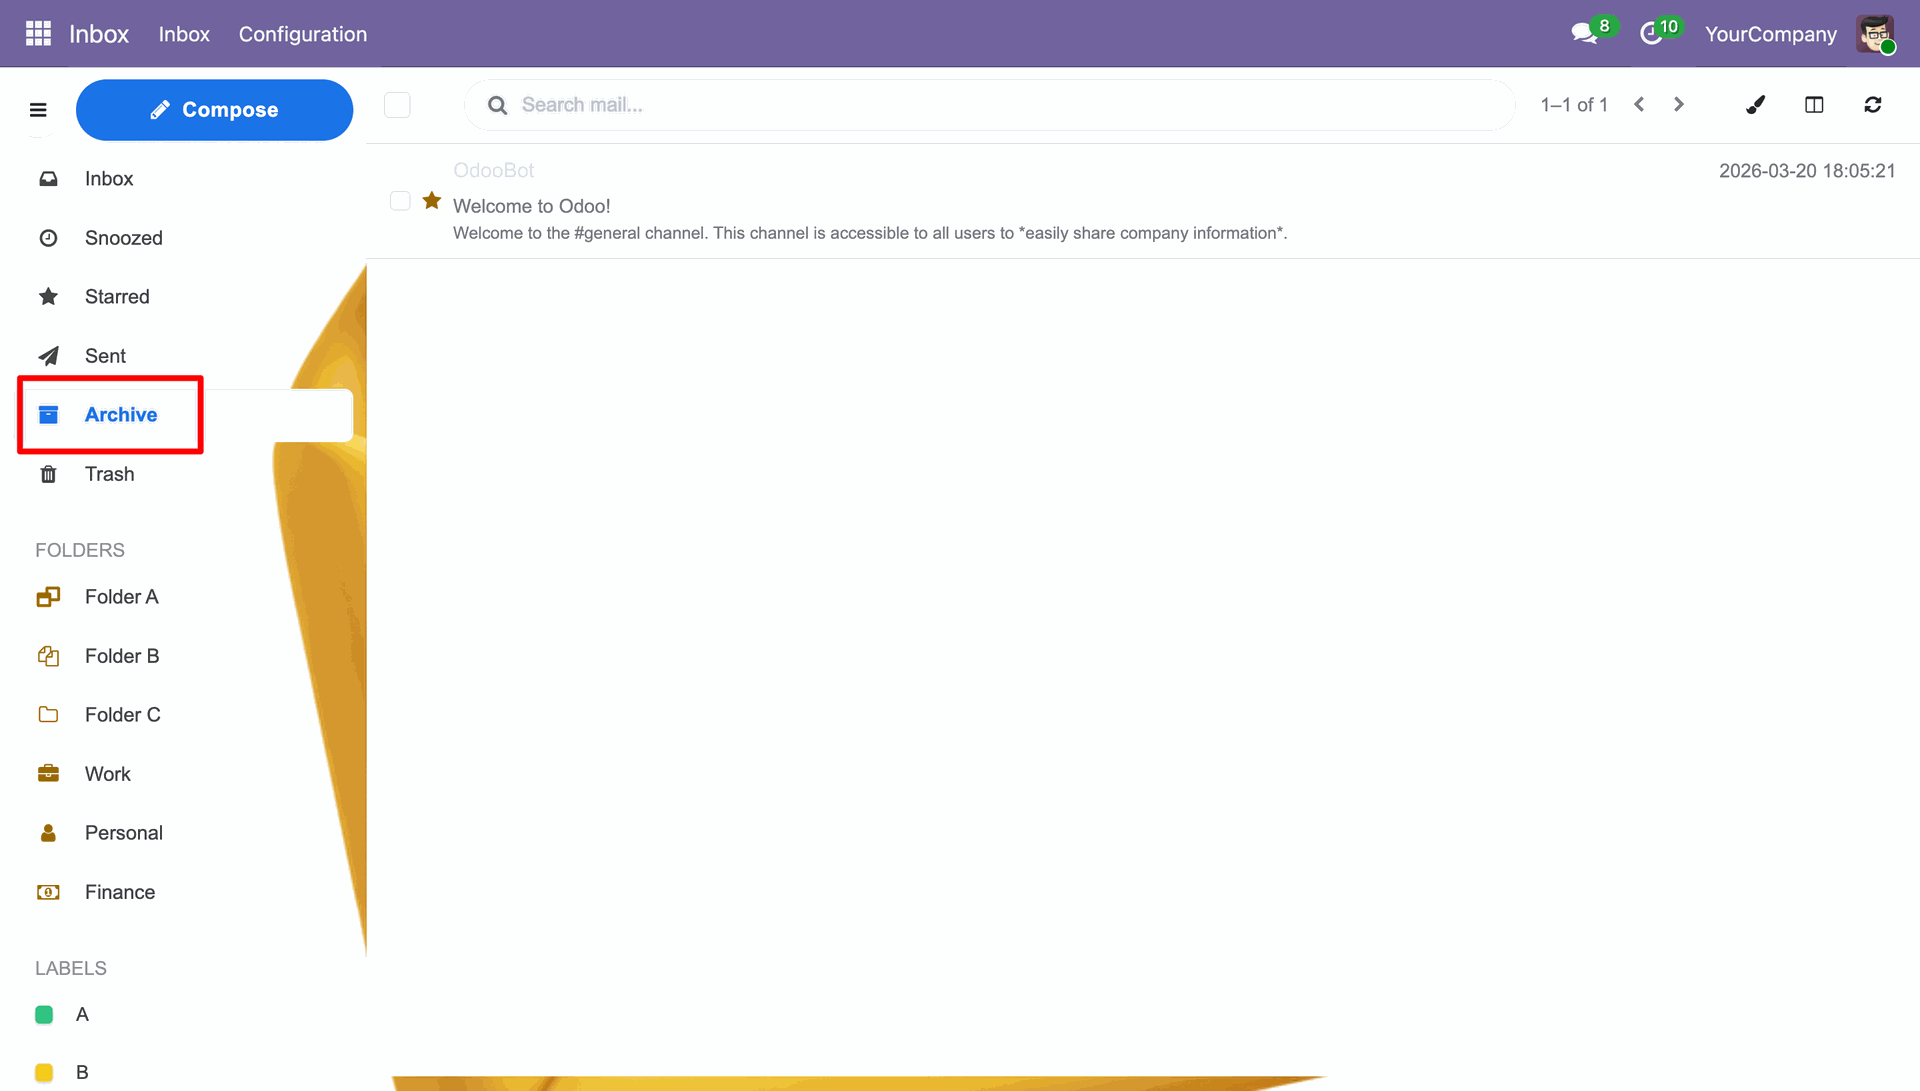
You can review the Archive mails in the Archive Folder.
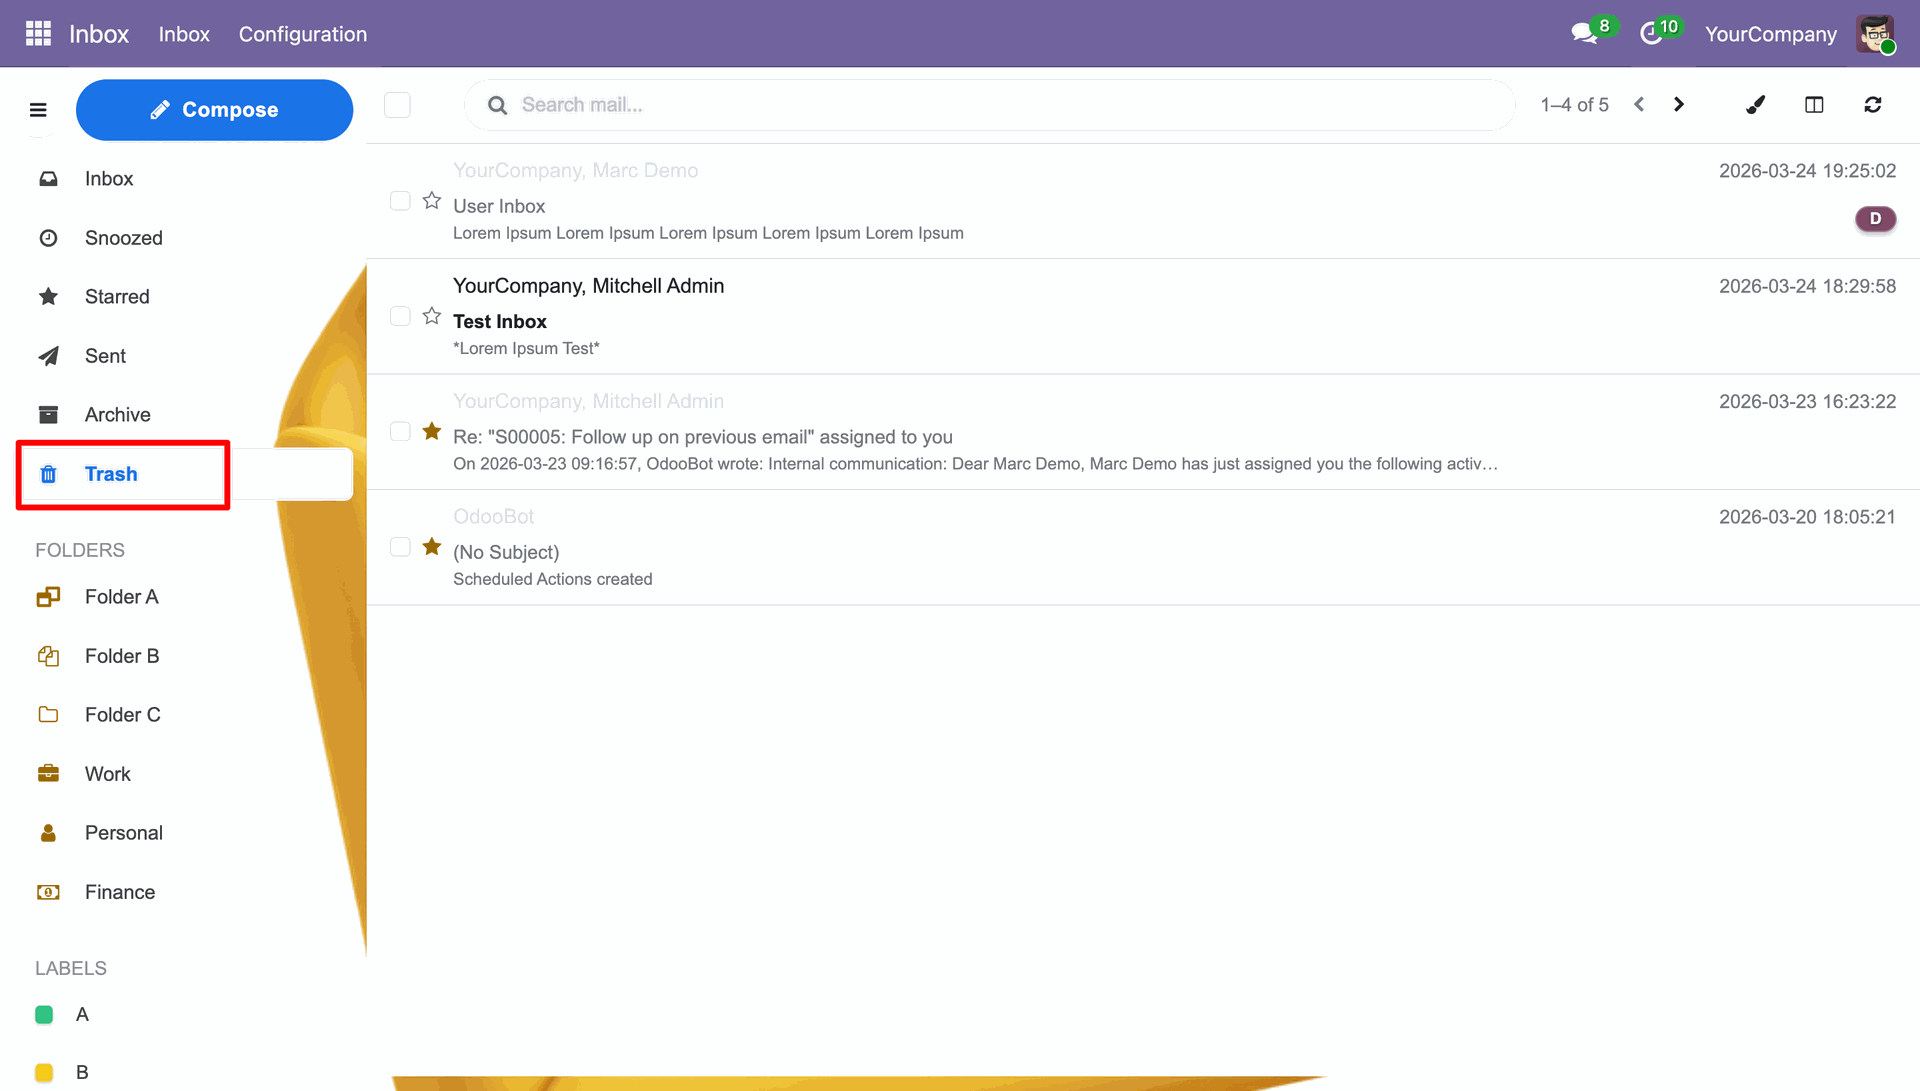
You can review the Trash/Deleted mails in the Trash Folder.
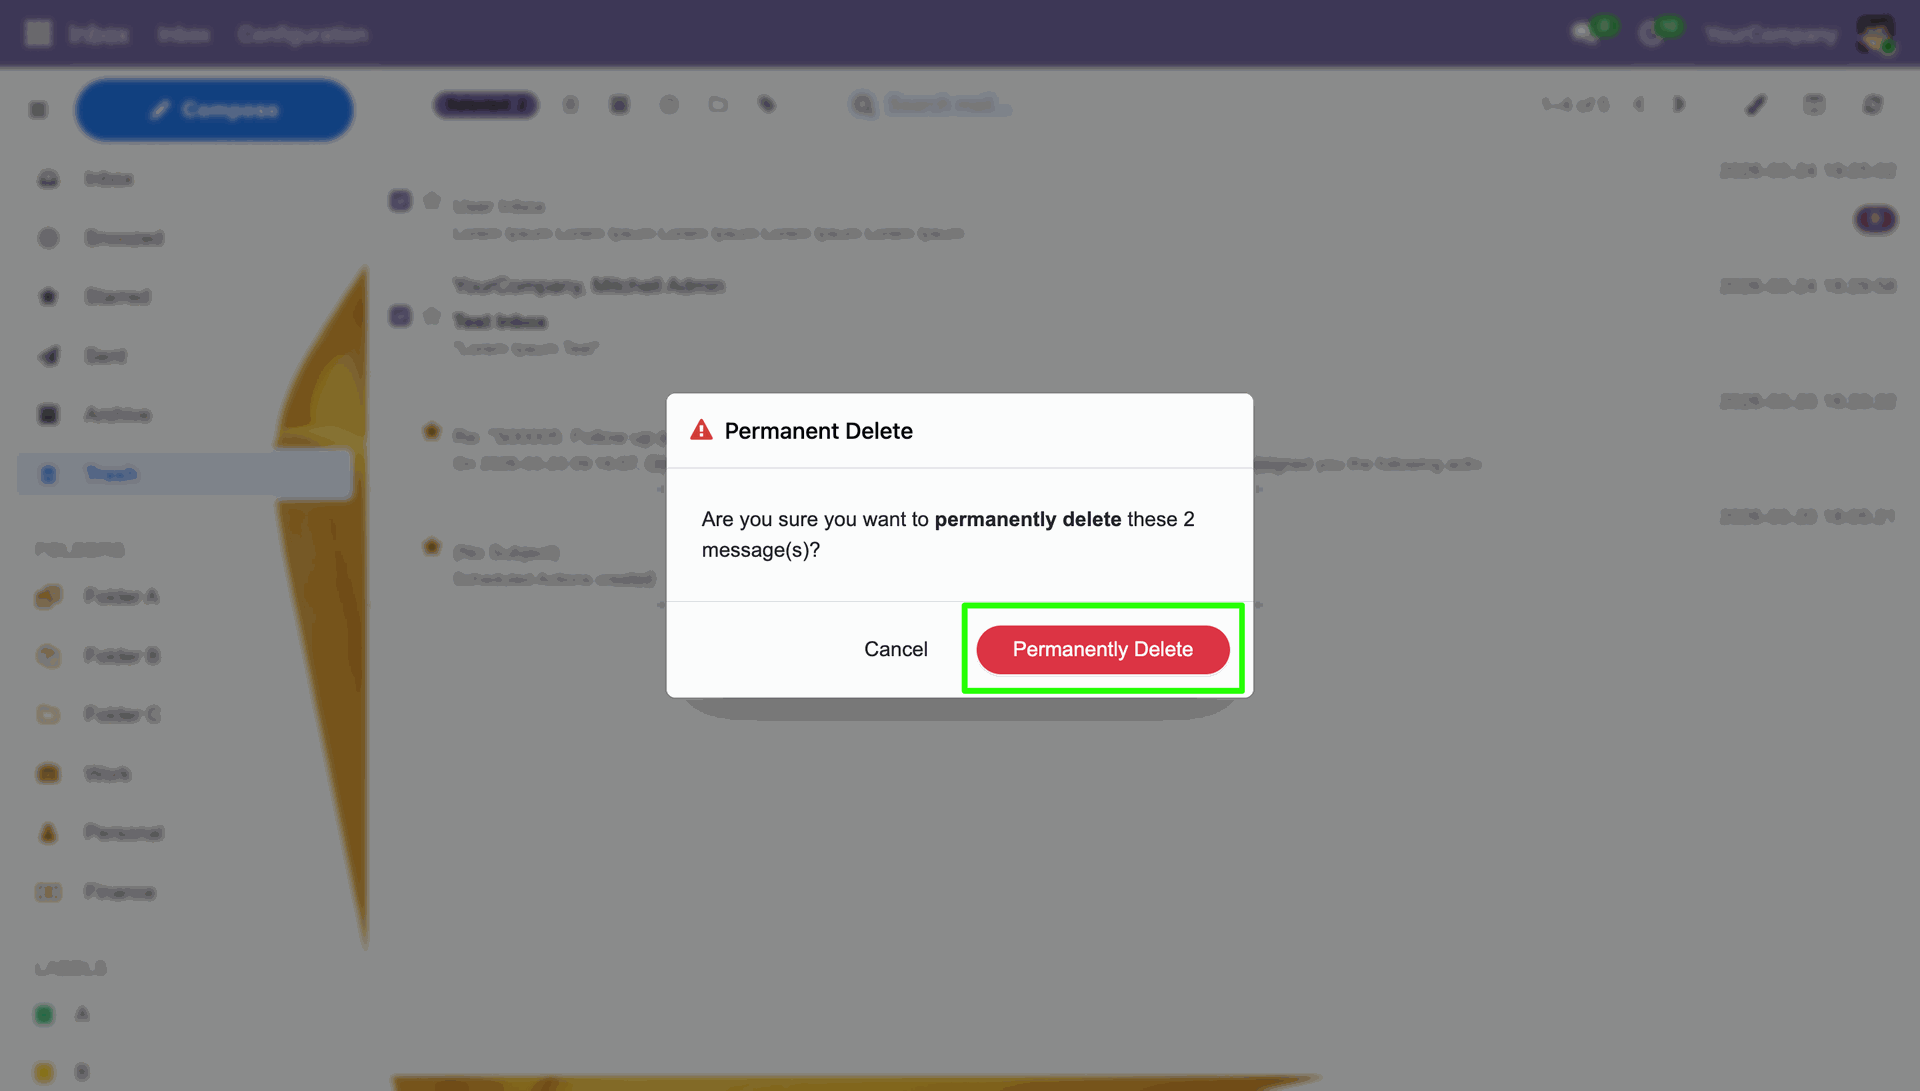
You can also delete the mail from the Trash Folder to permanently delete it.
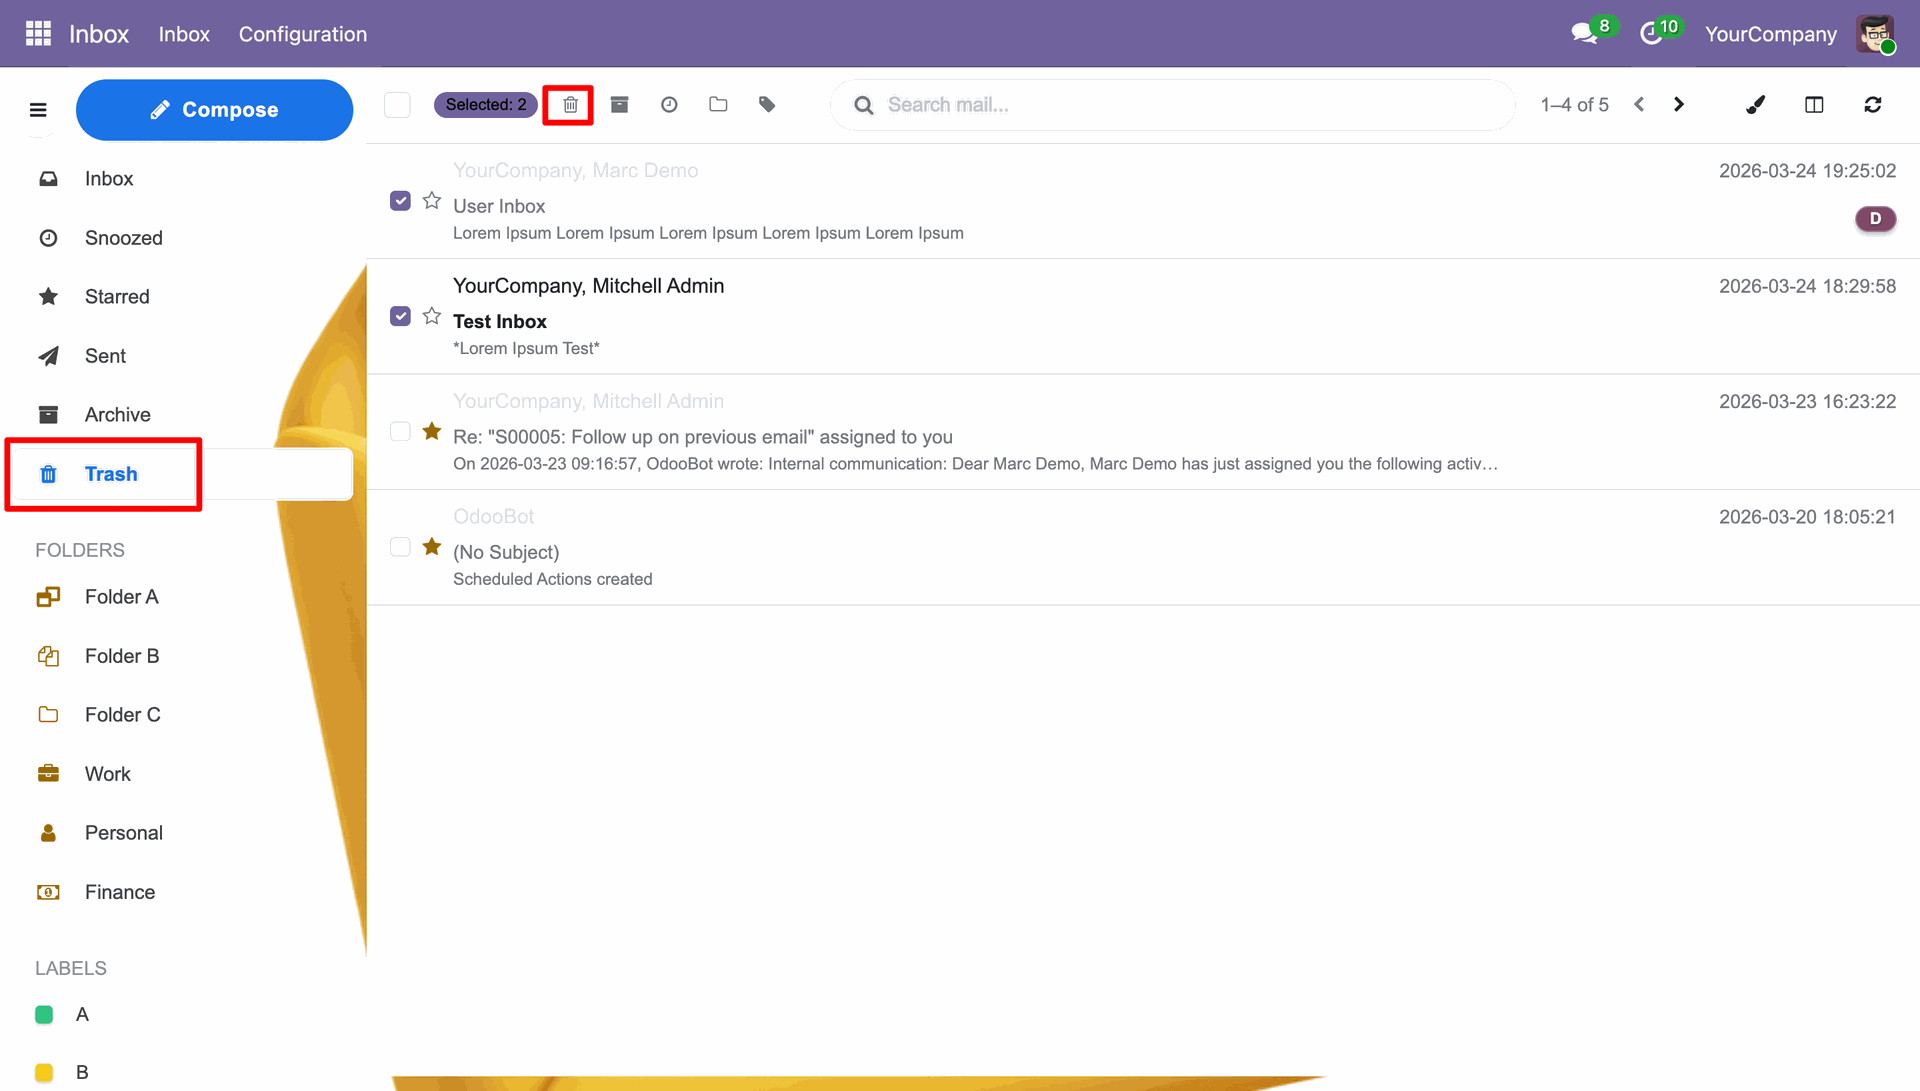
Click the Permanently Delete button to permanently delete the mail.
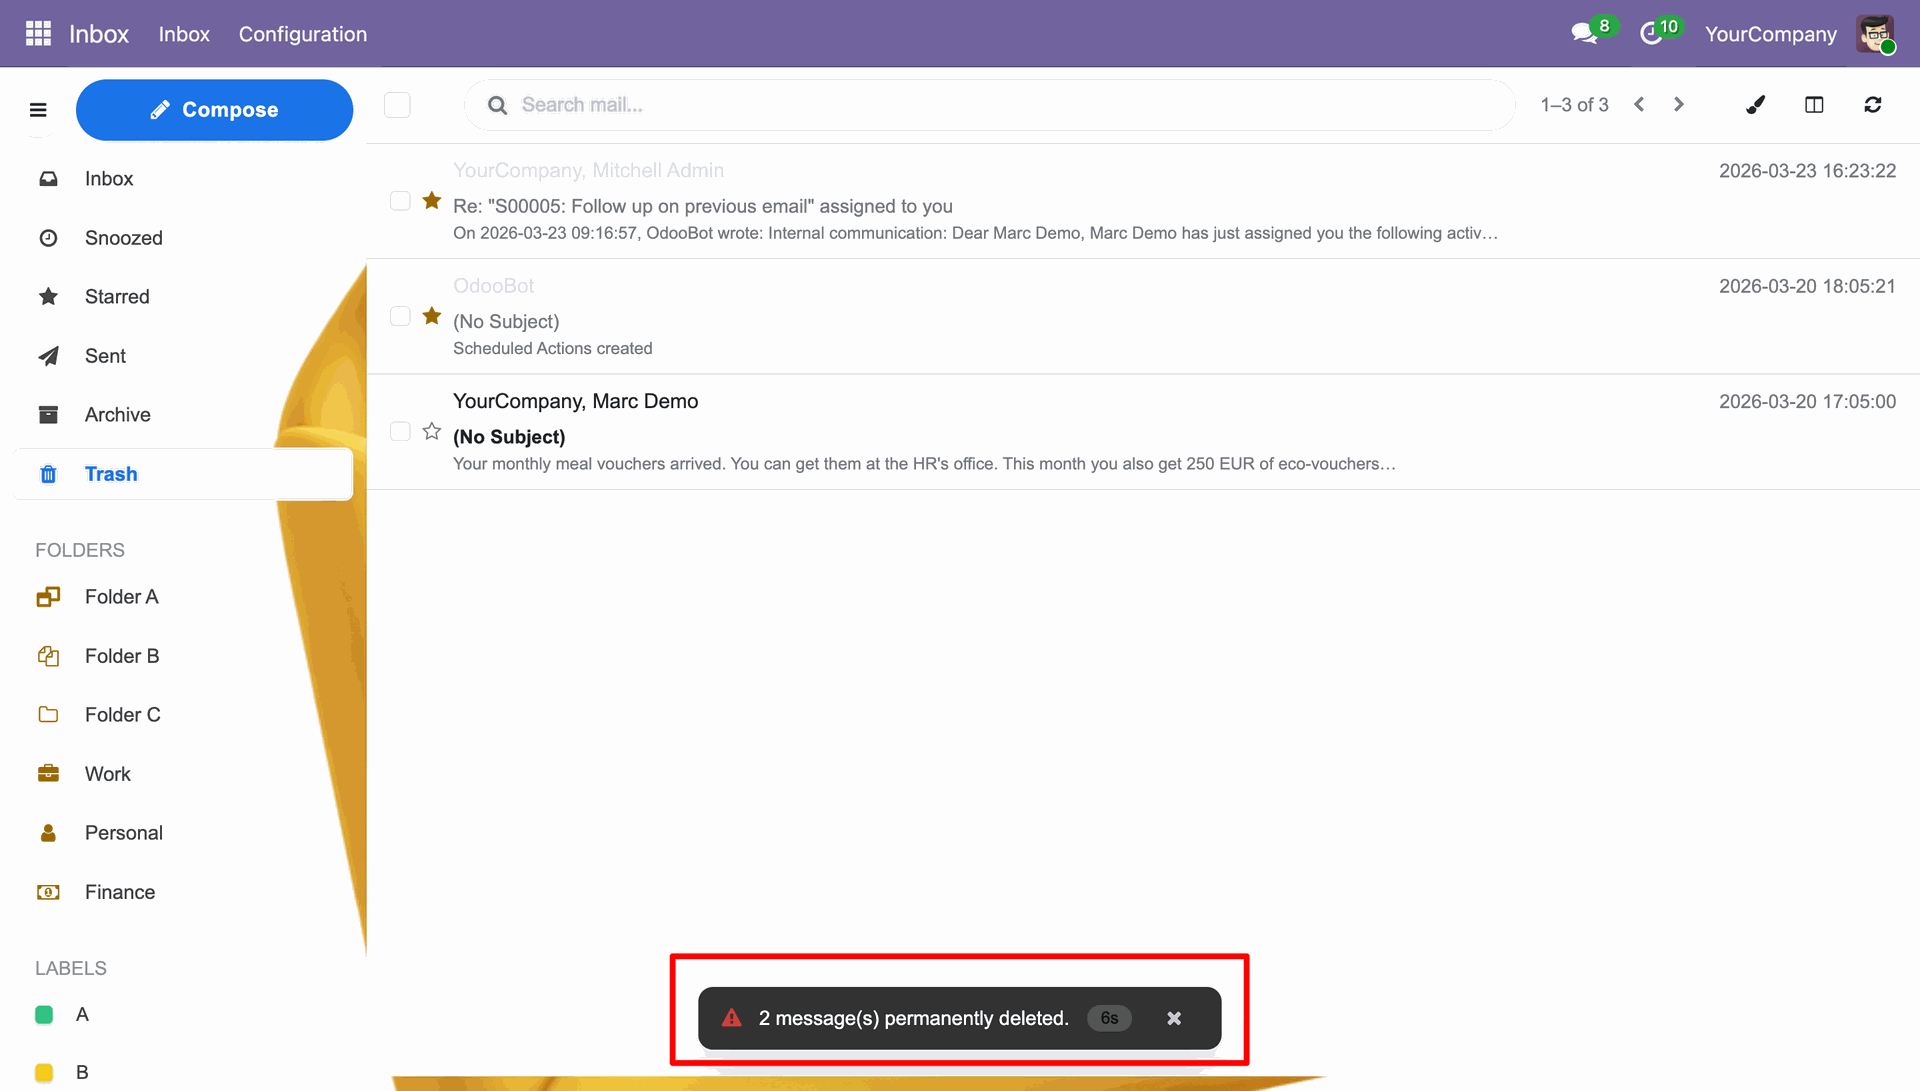
Notification stating that the mail have been permanently deleted.
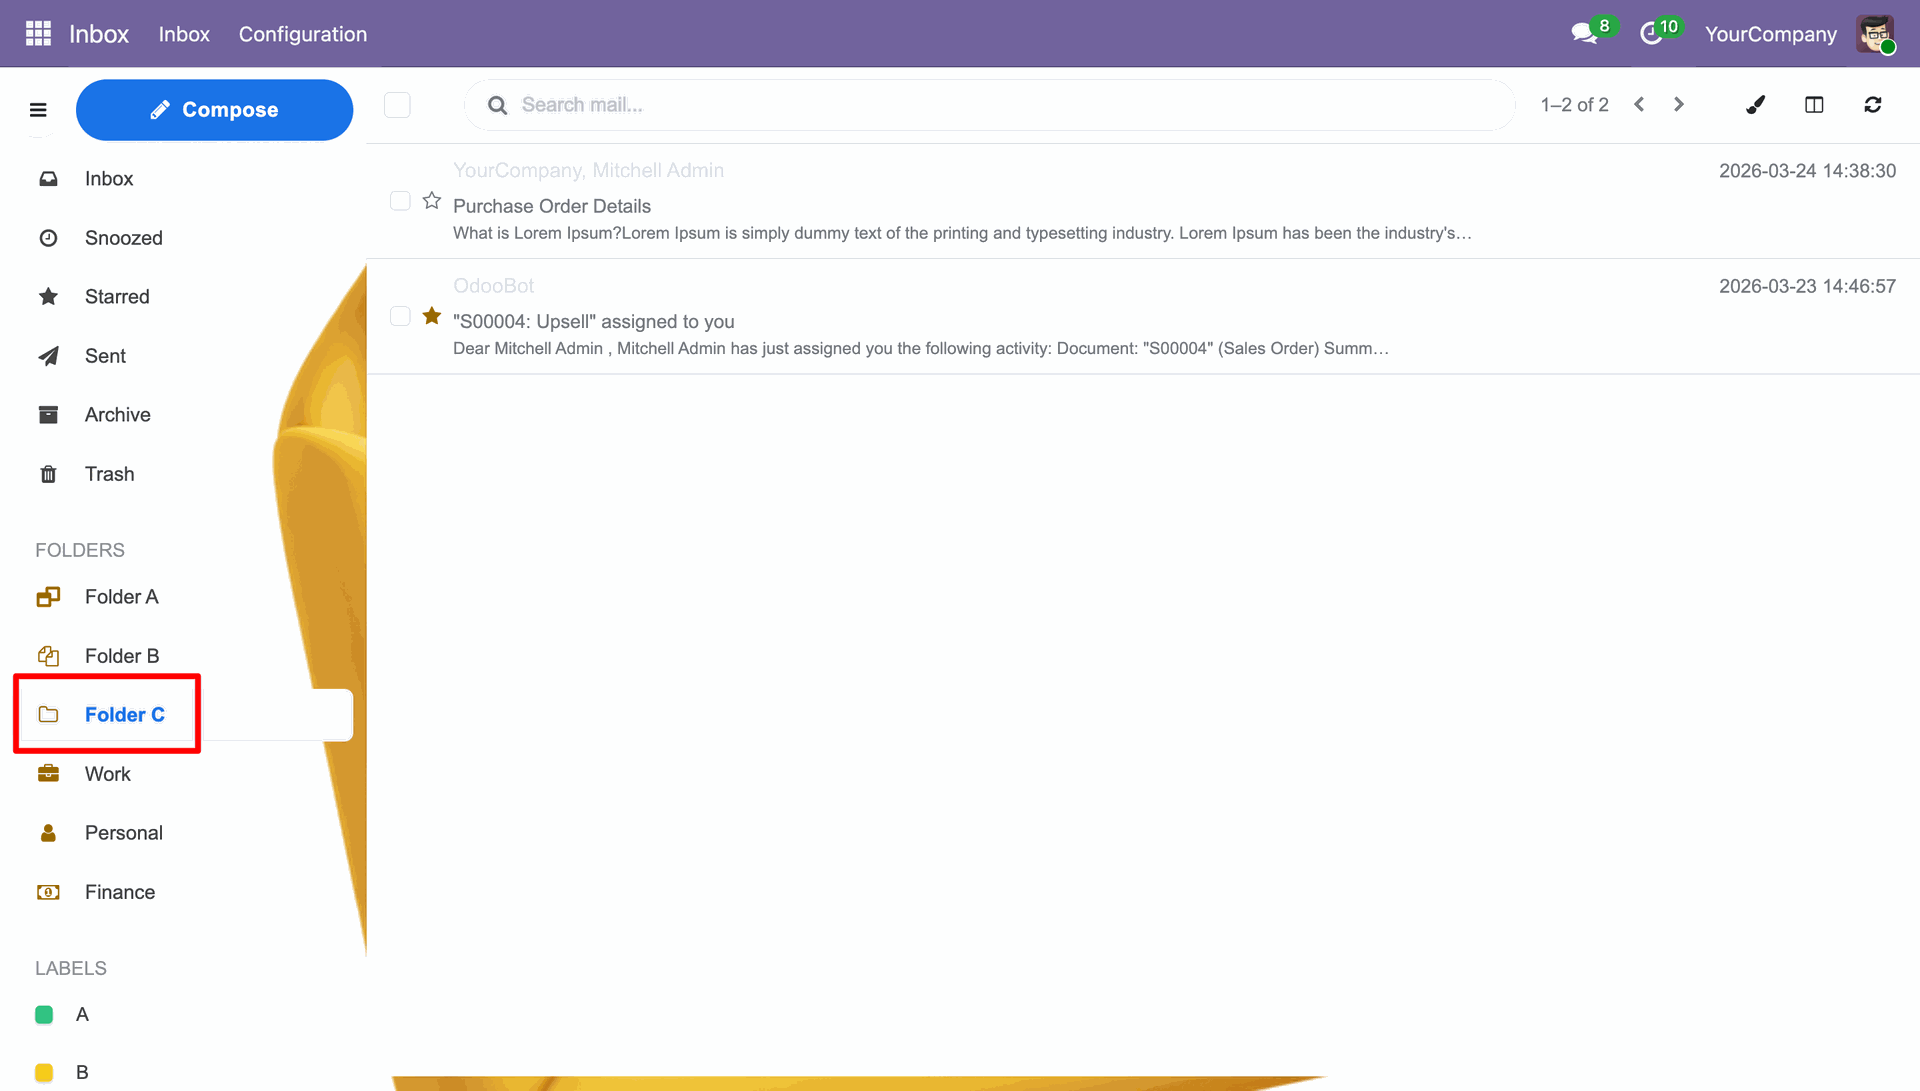
You can review the Folders in the Folders section.
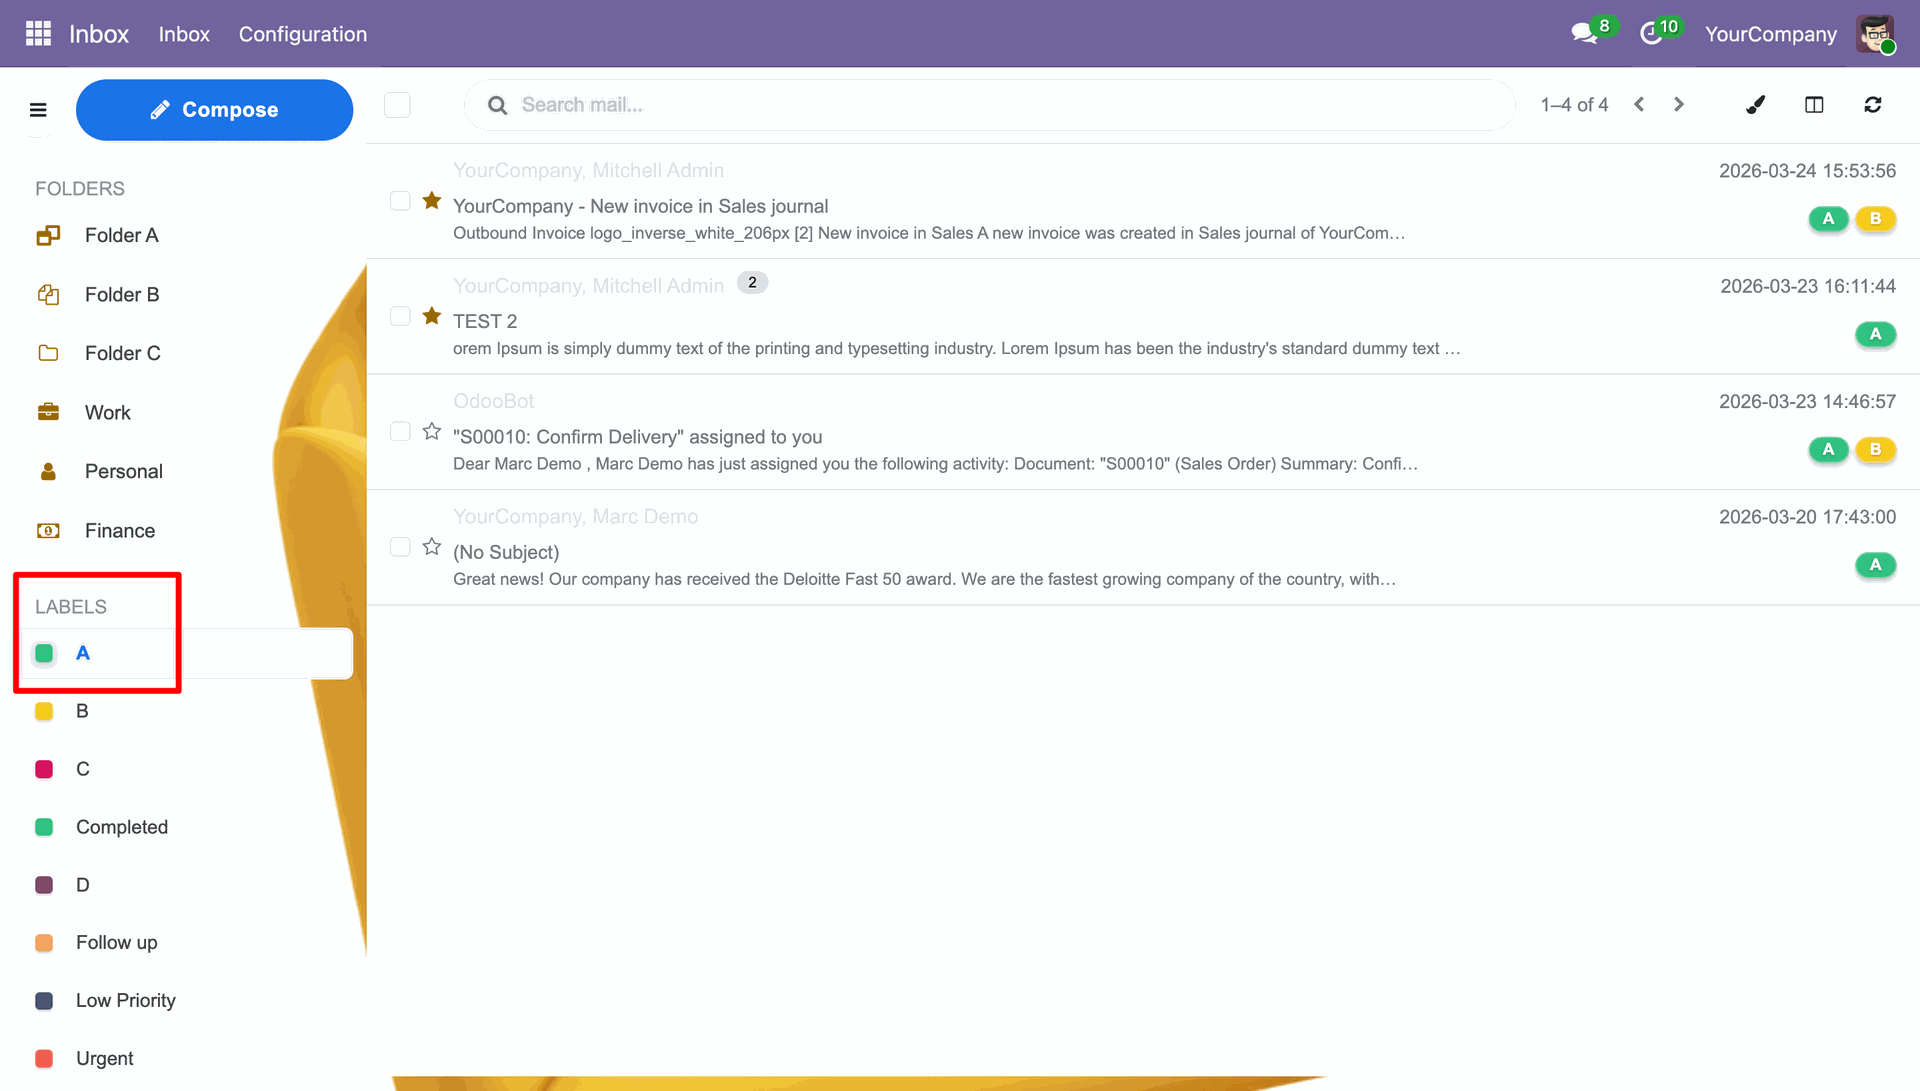
You can review the Labels in the labels section.
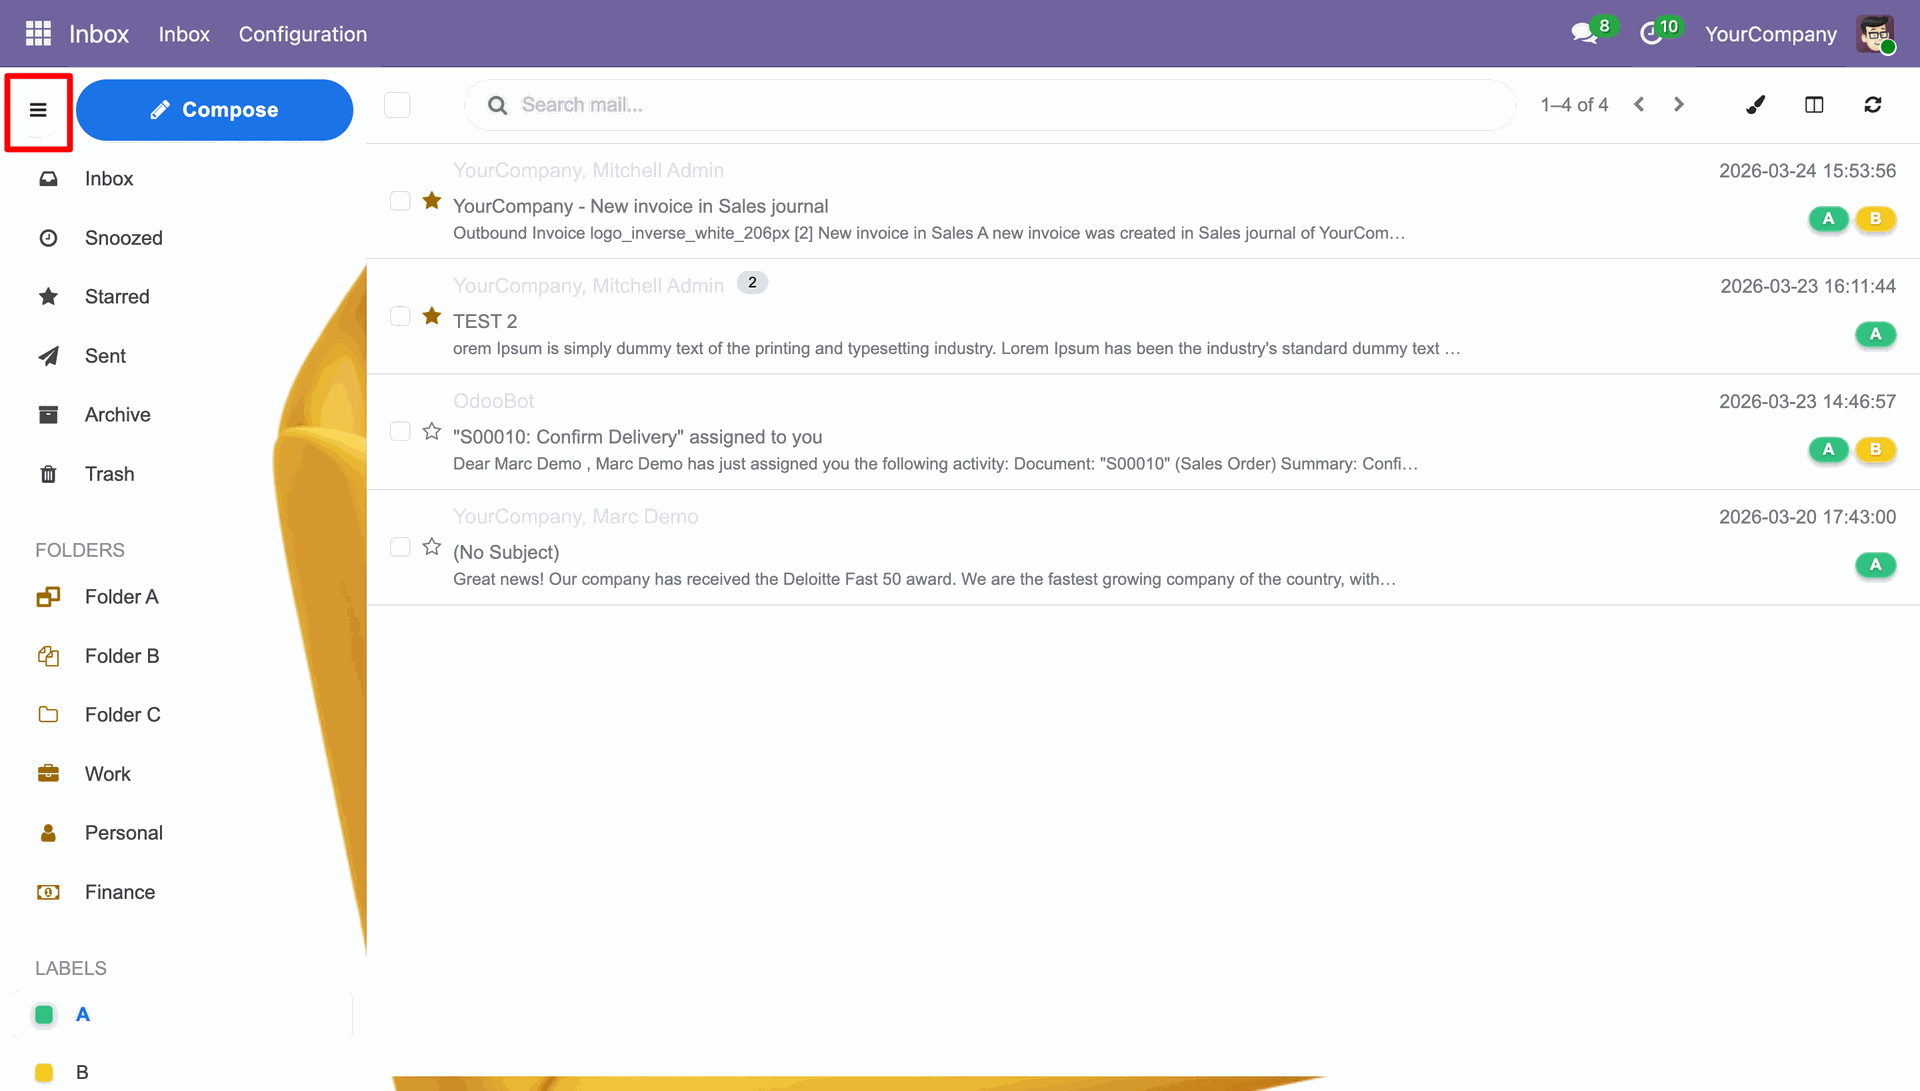
Click the three line button in the top left corner to close the side menu.
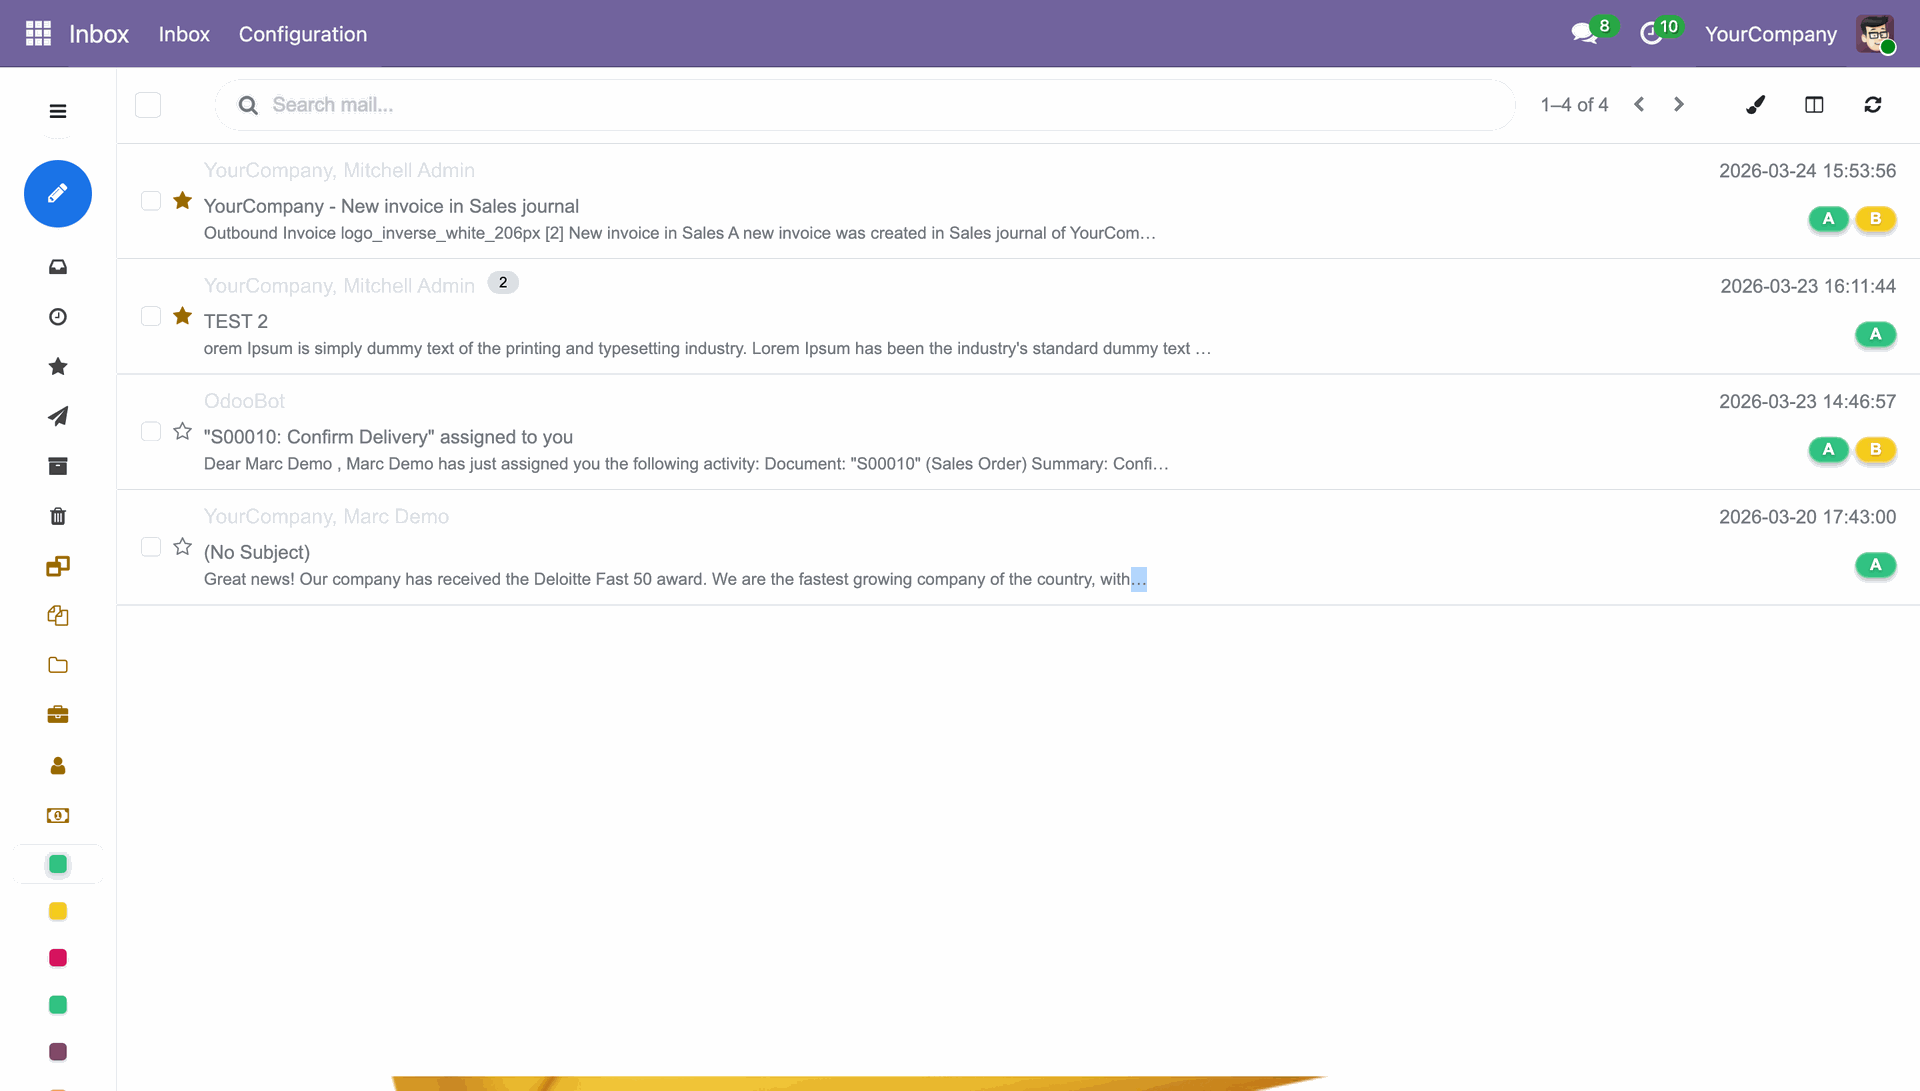
Side menu closed which showcases the full inbox view.
Workflow
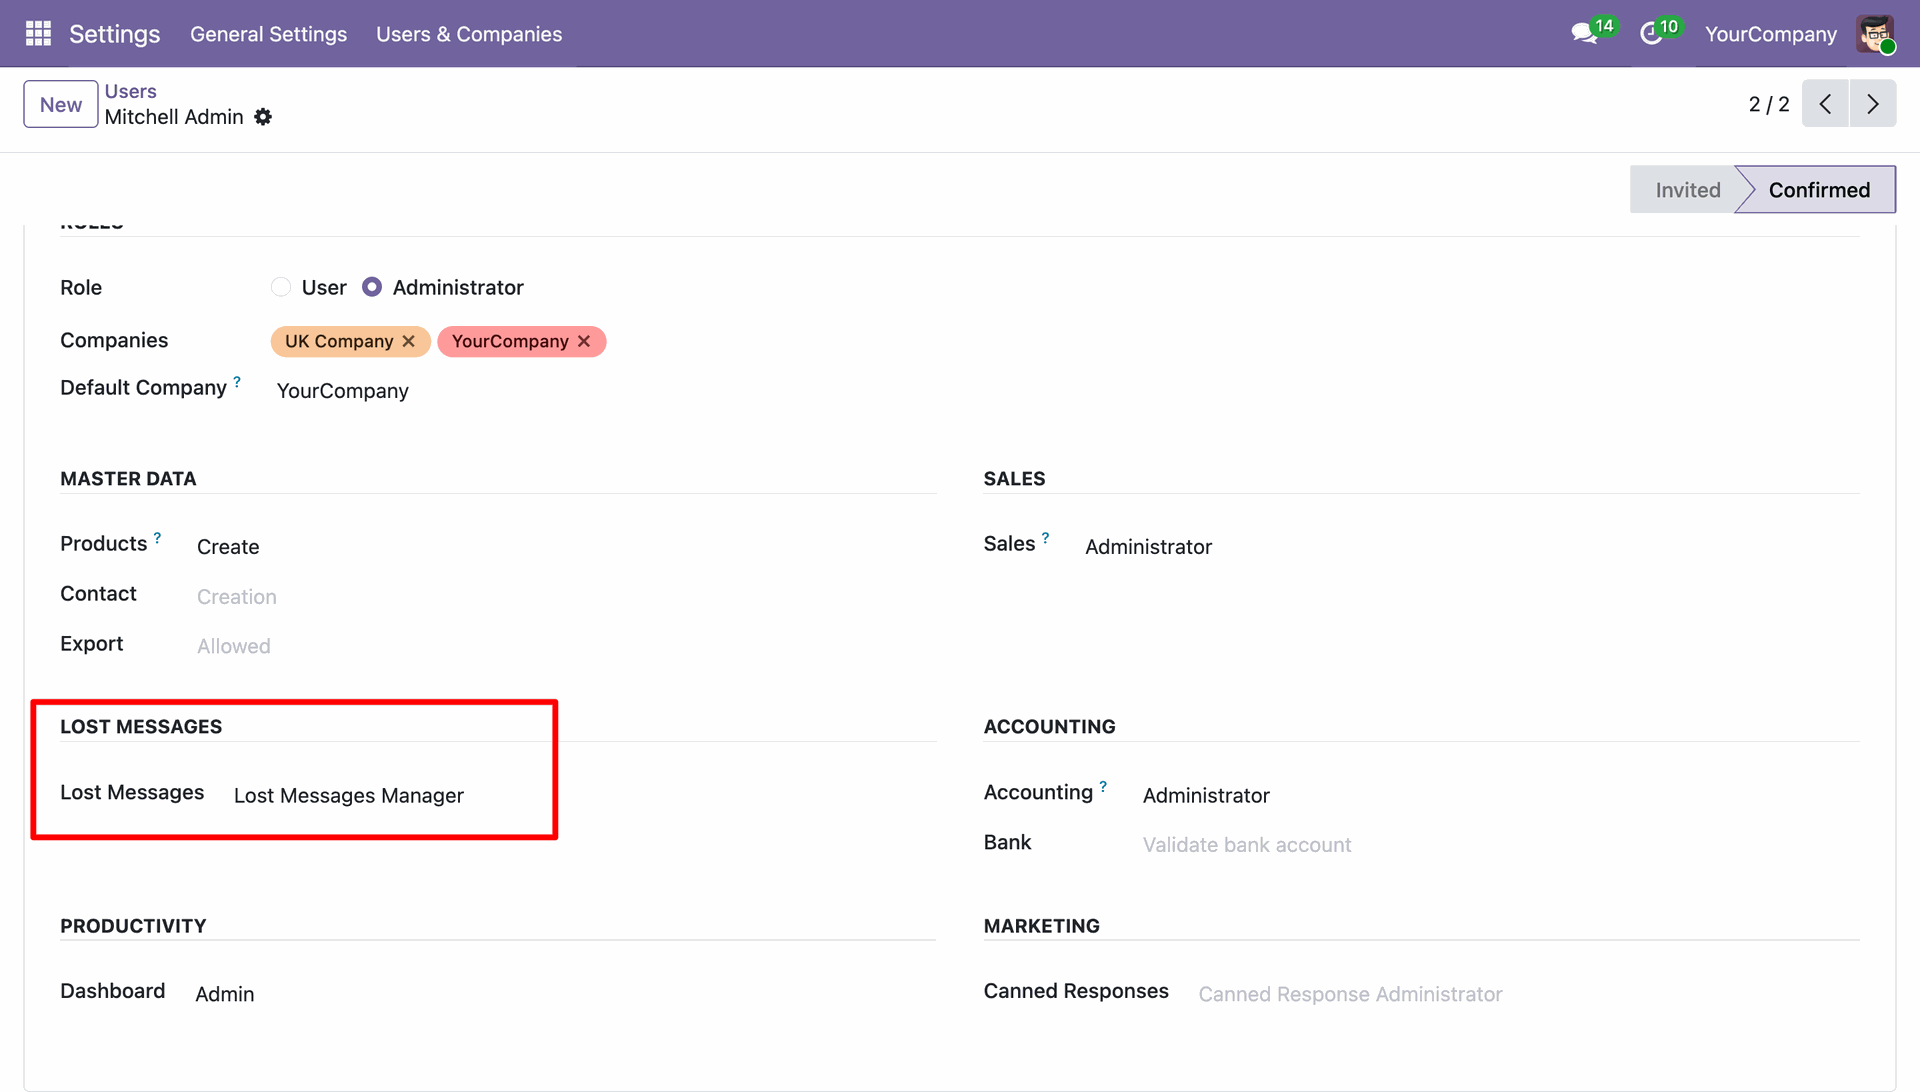
Assign the 'Lost Messages Manager' group to the authorized users to manage and route unattached emails.
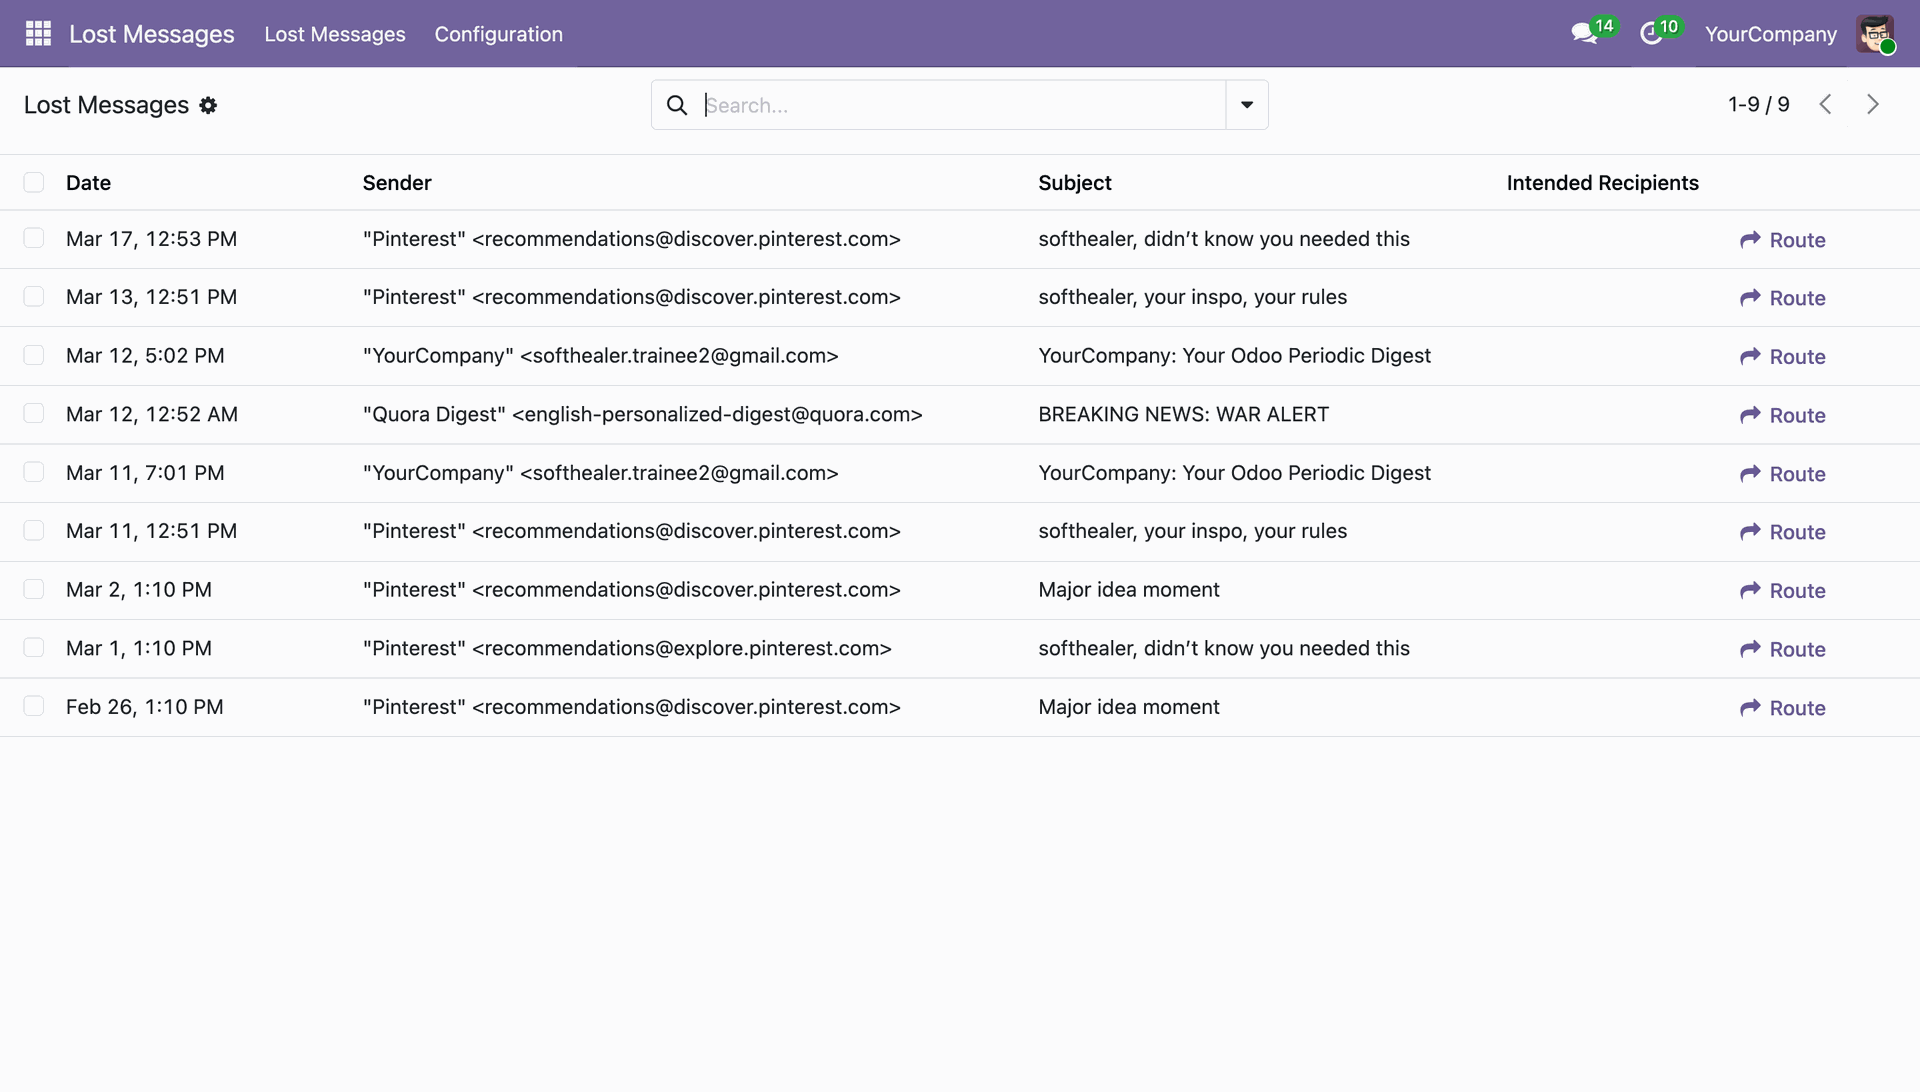
Access the 'Lost Messages' menu under the main Lost Messages app to see all unrouted emails.
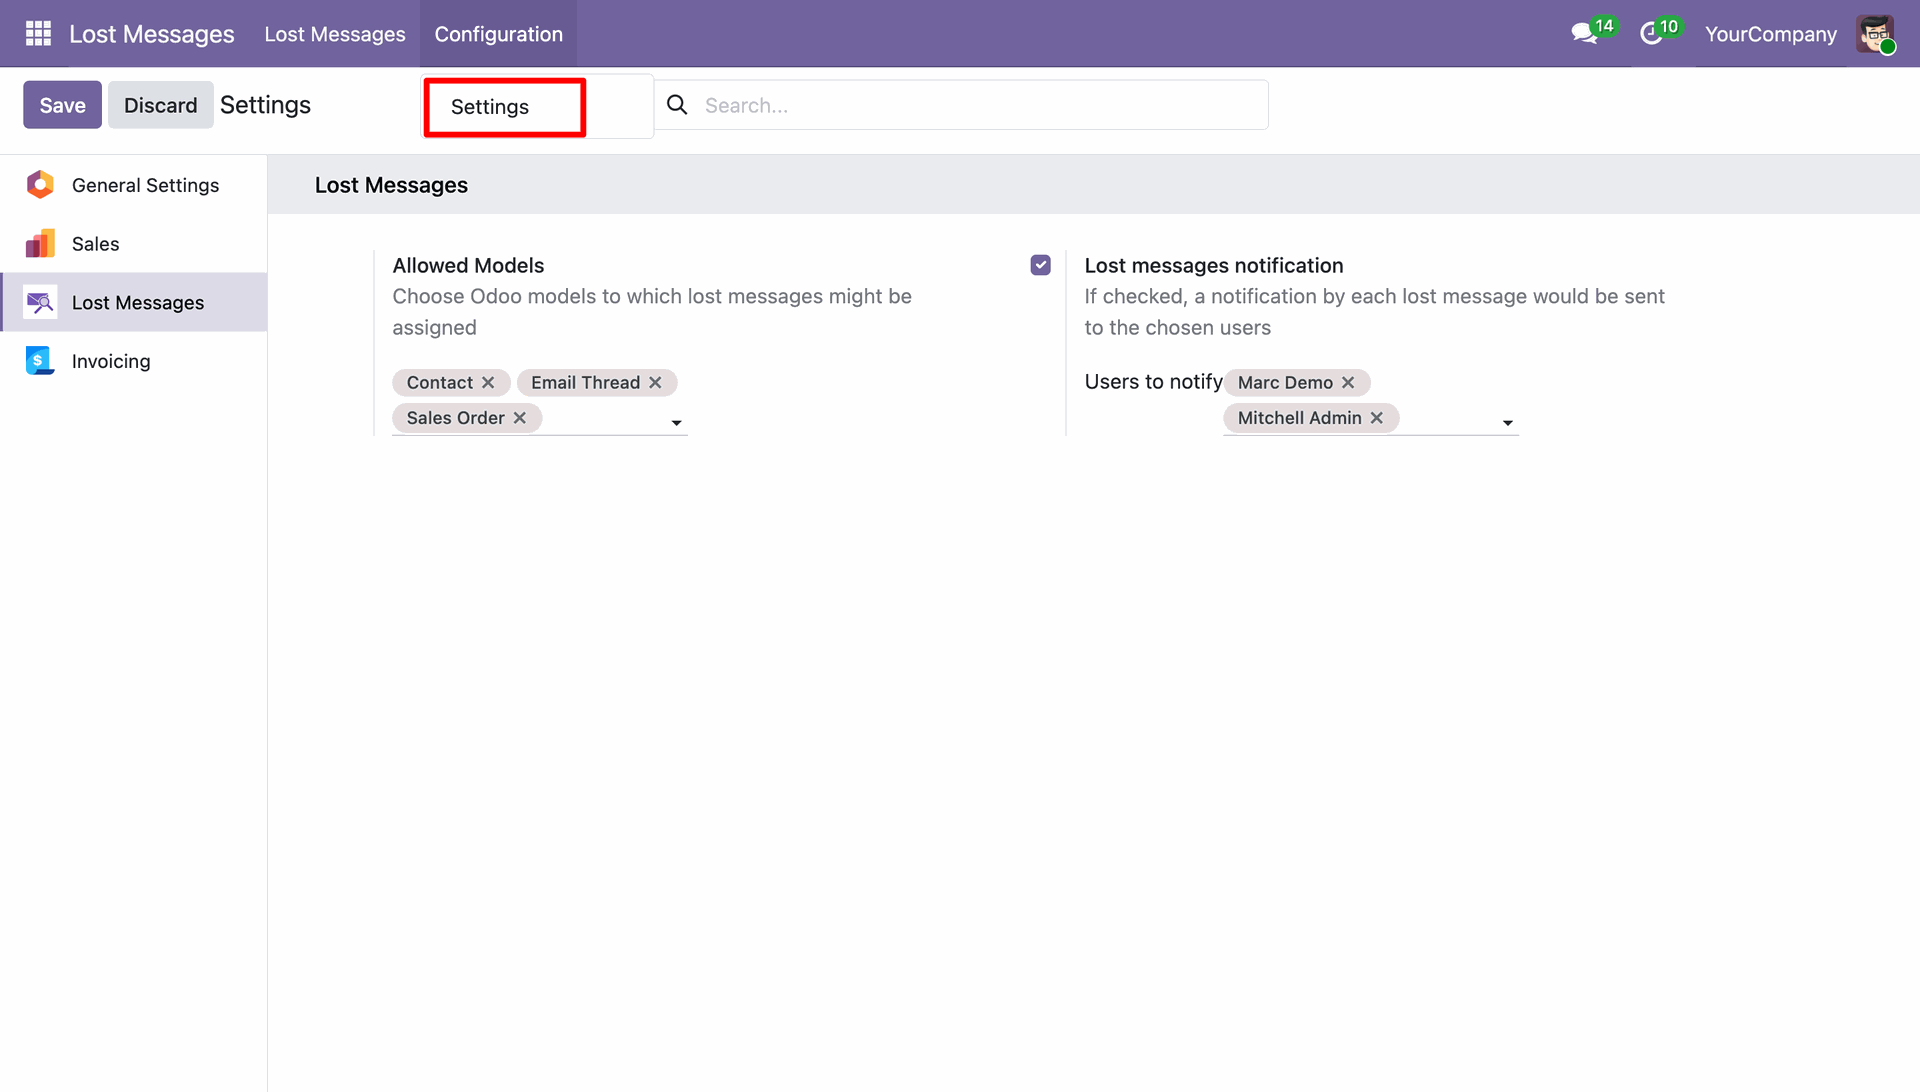
Effortlessly configure allowed models for routing and select internal users to receive notifications for new lost messages.
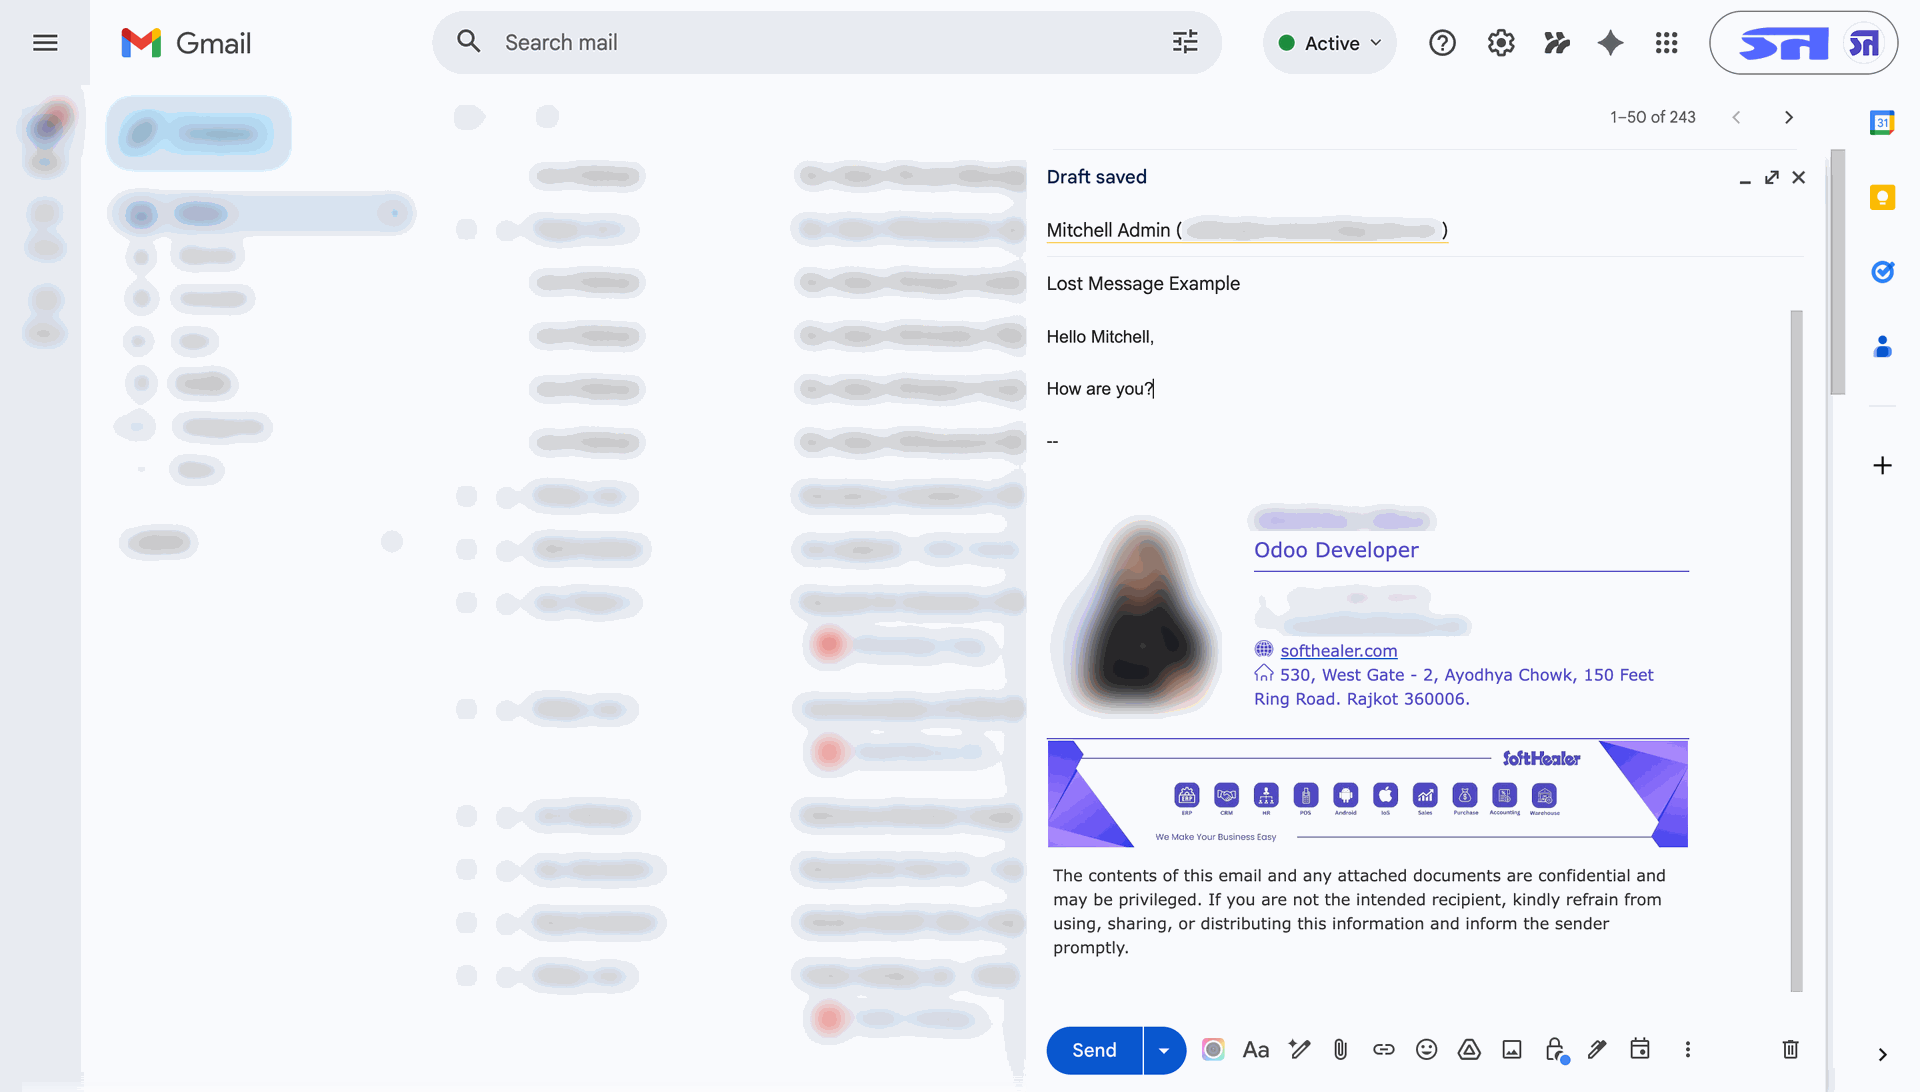
When an incoming email doesn't match any existing Odoo record, it is captured as a 'Lost Message'.
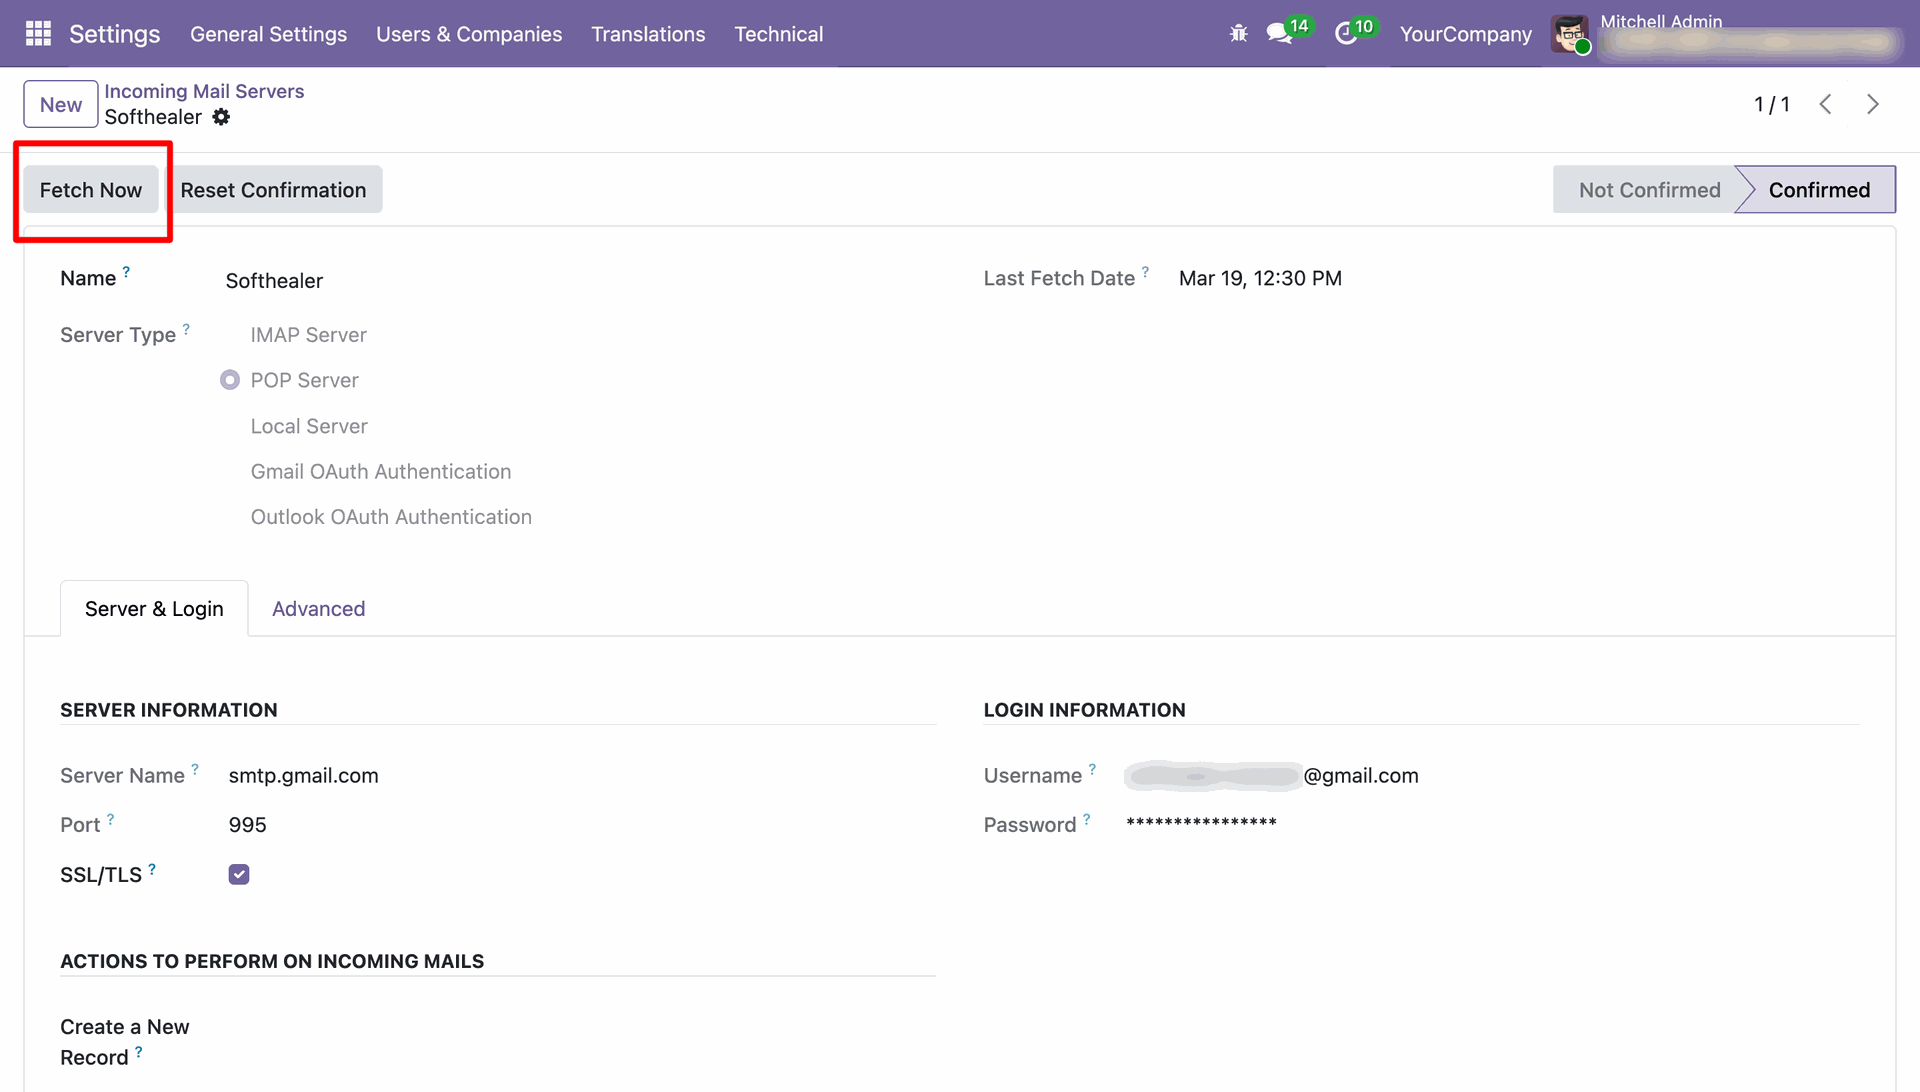
Manually fetch emails or wait for the scheduled action to process incoming communications.
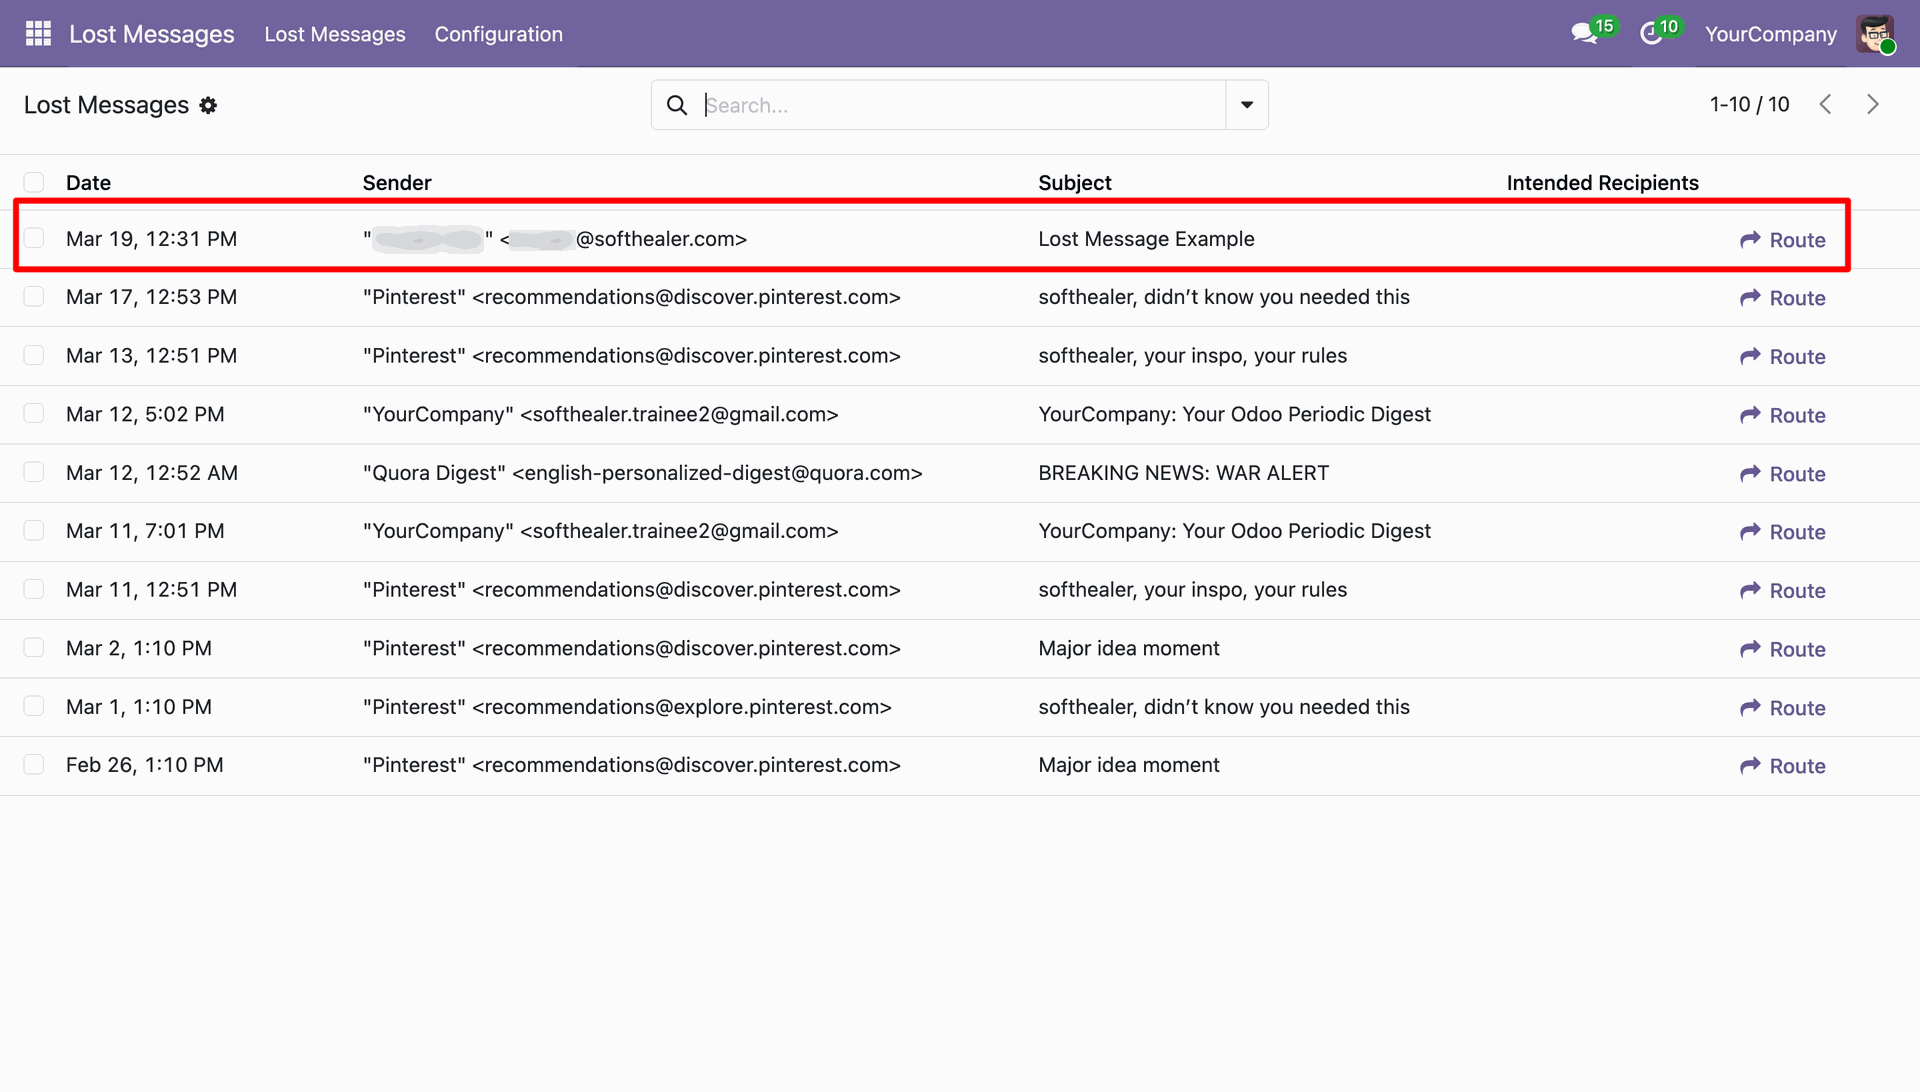
The captured lost email now appears in the Lost Messages list, ready for manual intervention.
Open any lost message to review its full content, attachments, and intended recipients before routing.
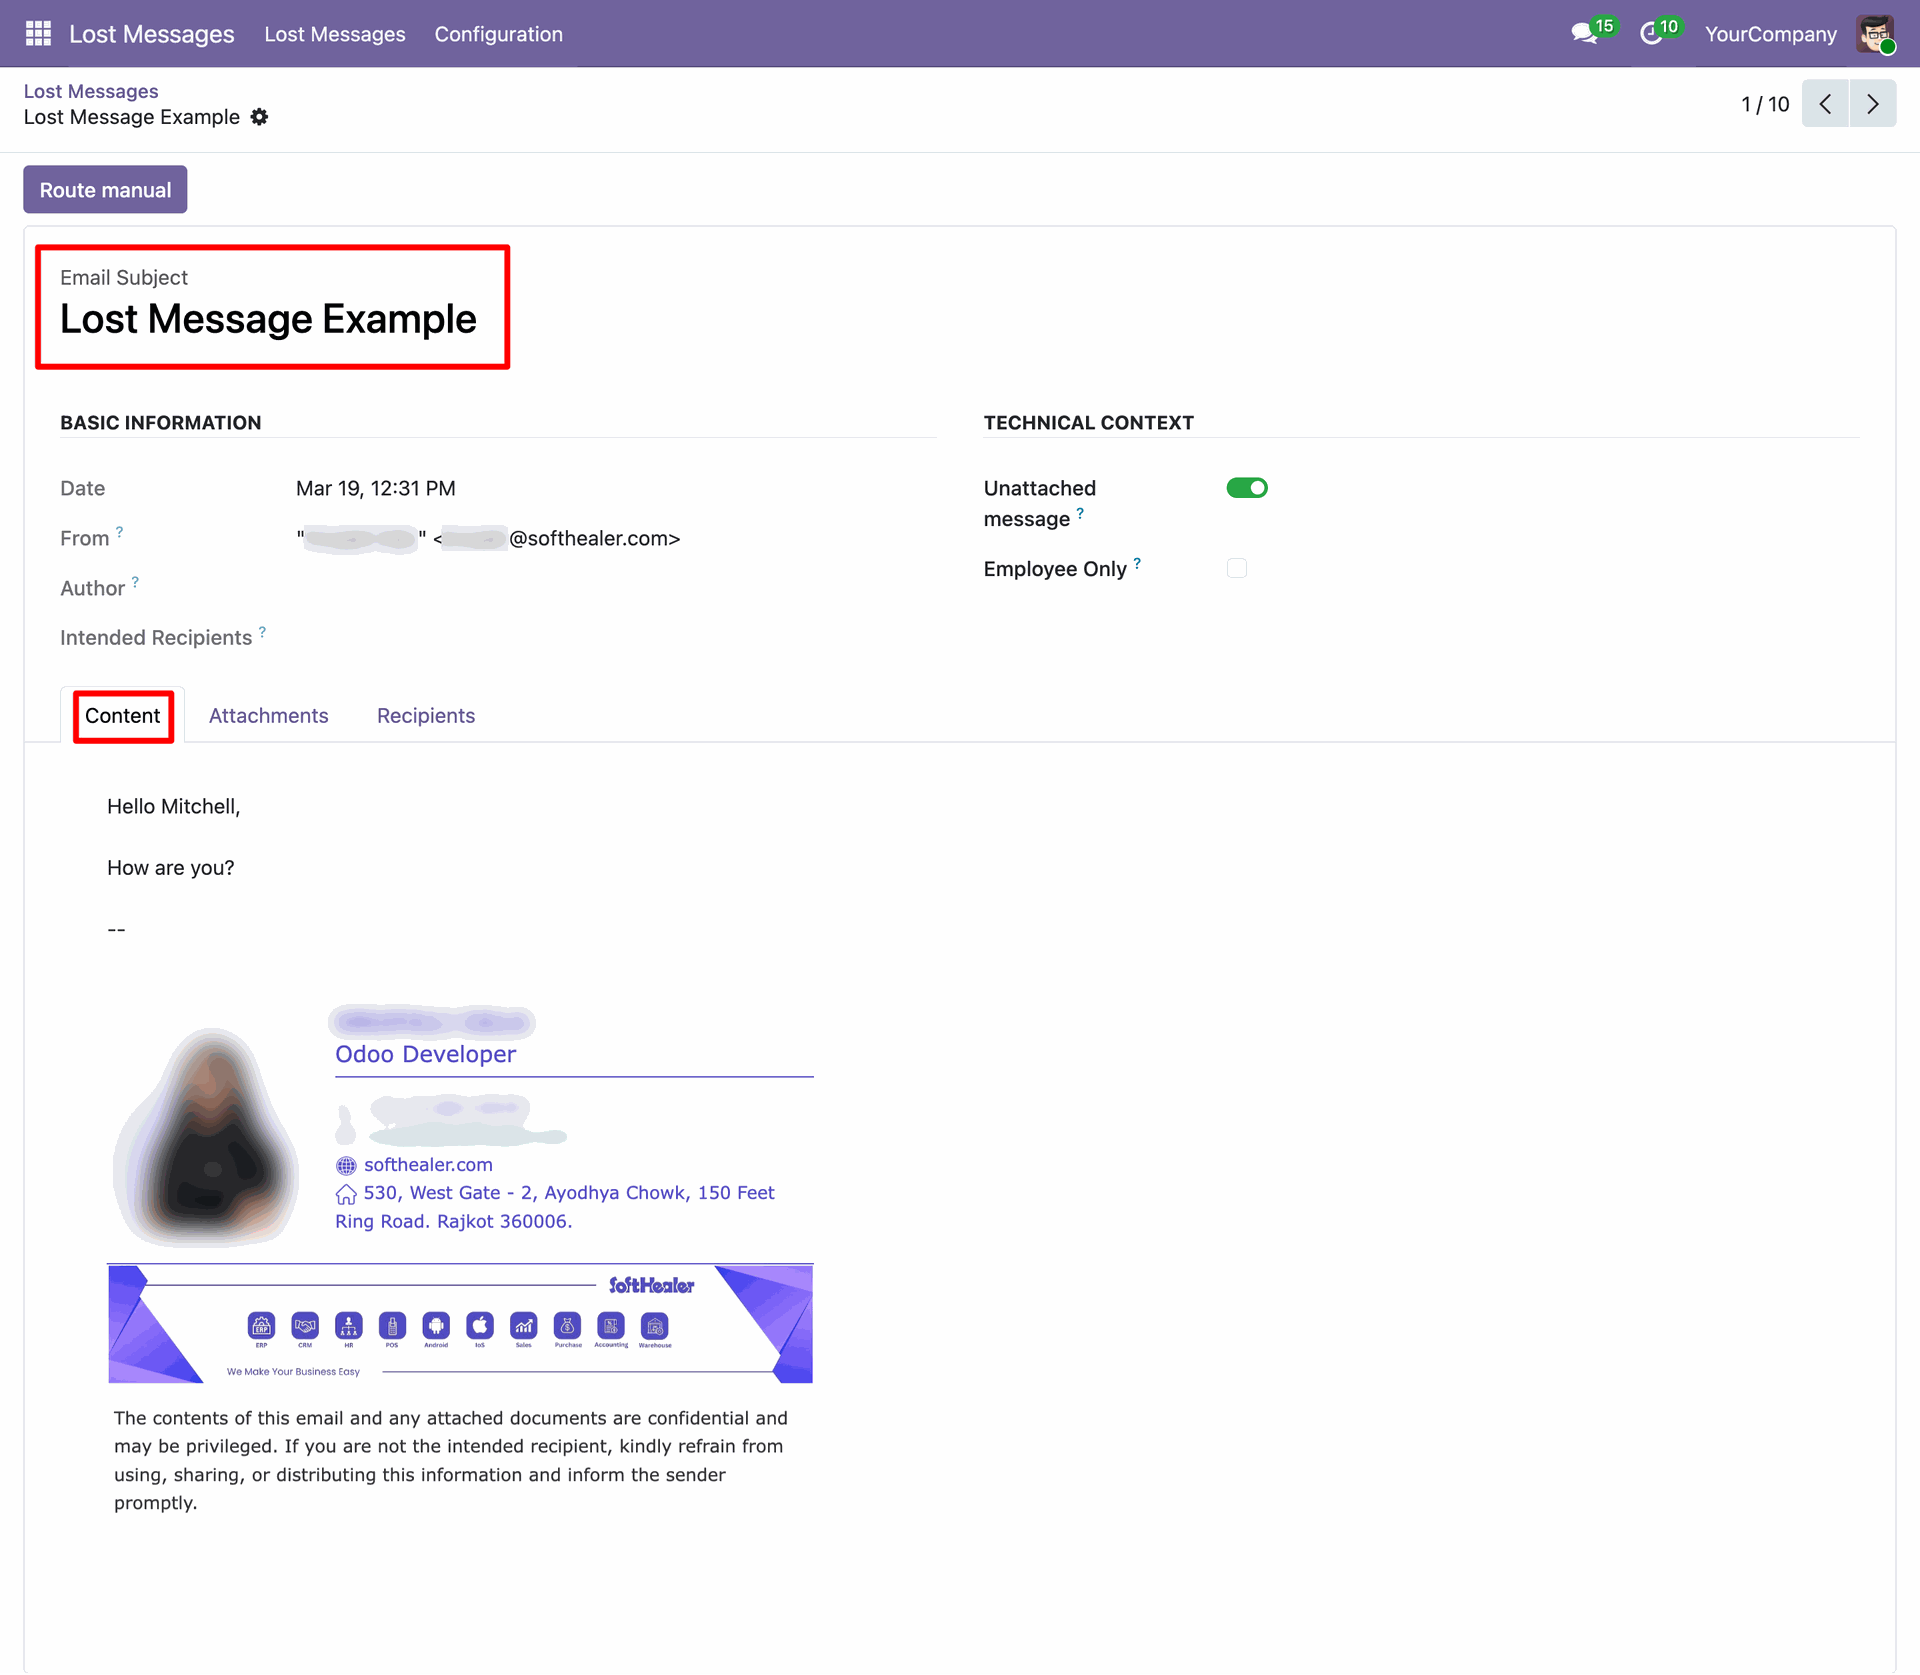
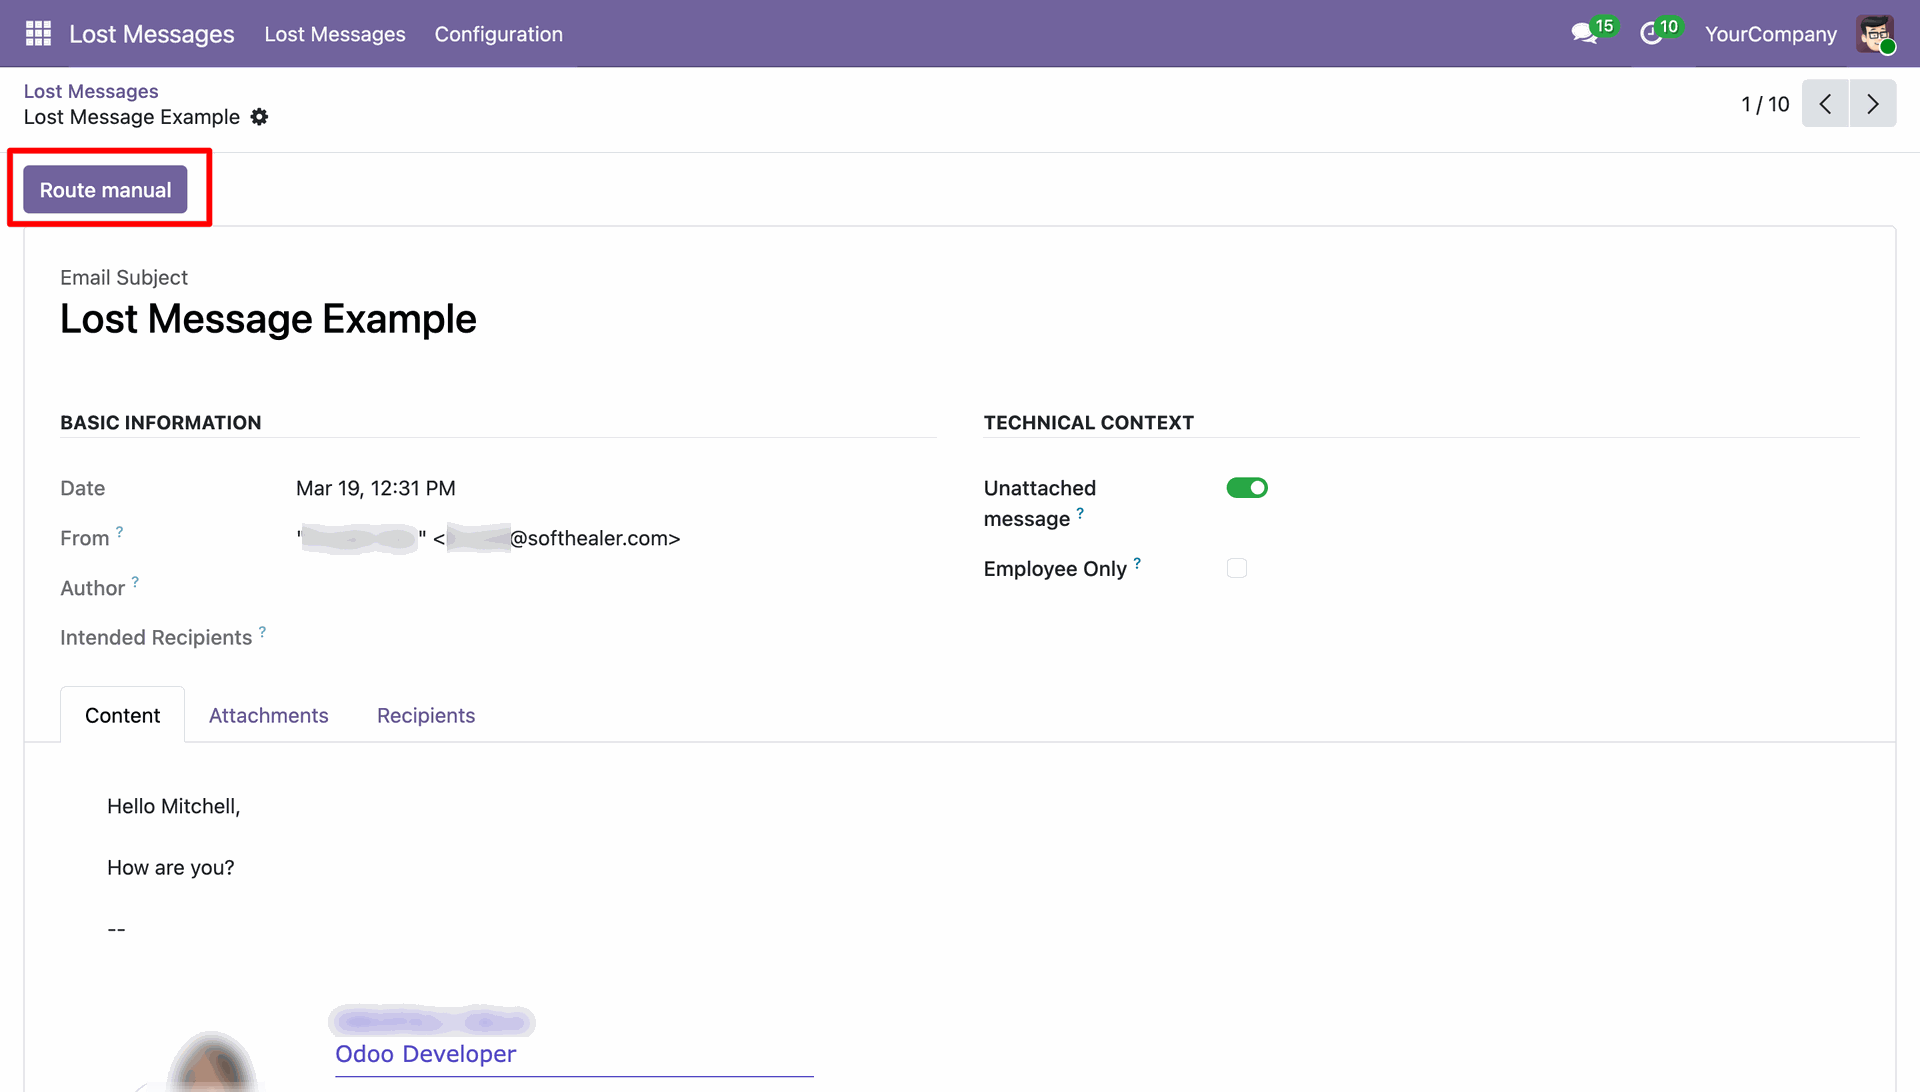
Click the 'Route manual' button to initiate the process of attaching the message to a specific Odoo record.
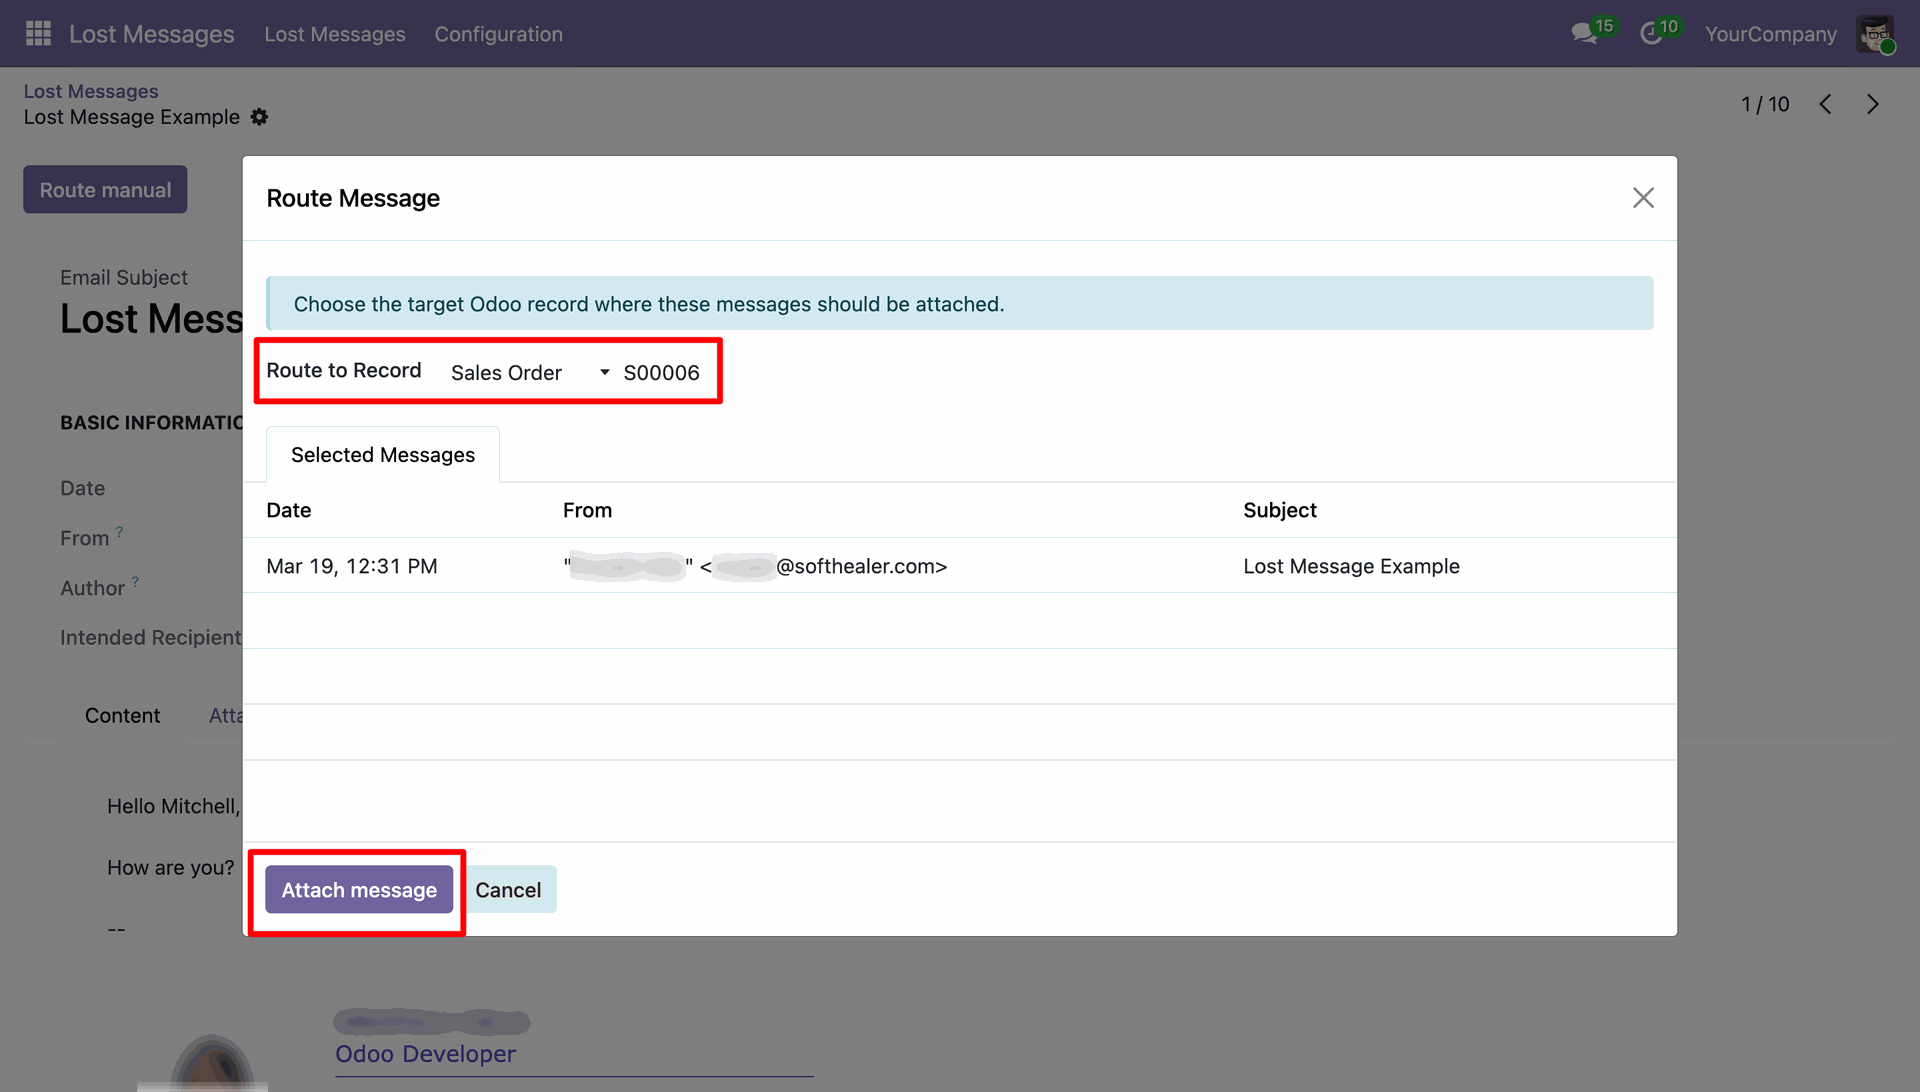
Select the target Odoo model (e.g., Sales Order) and the specific record where the message should be attached.
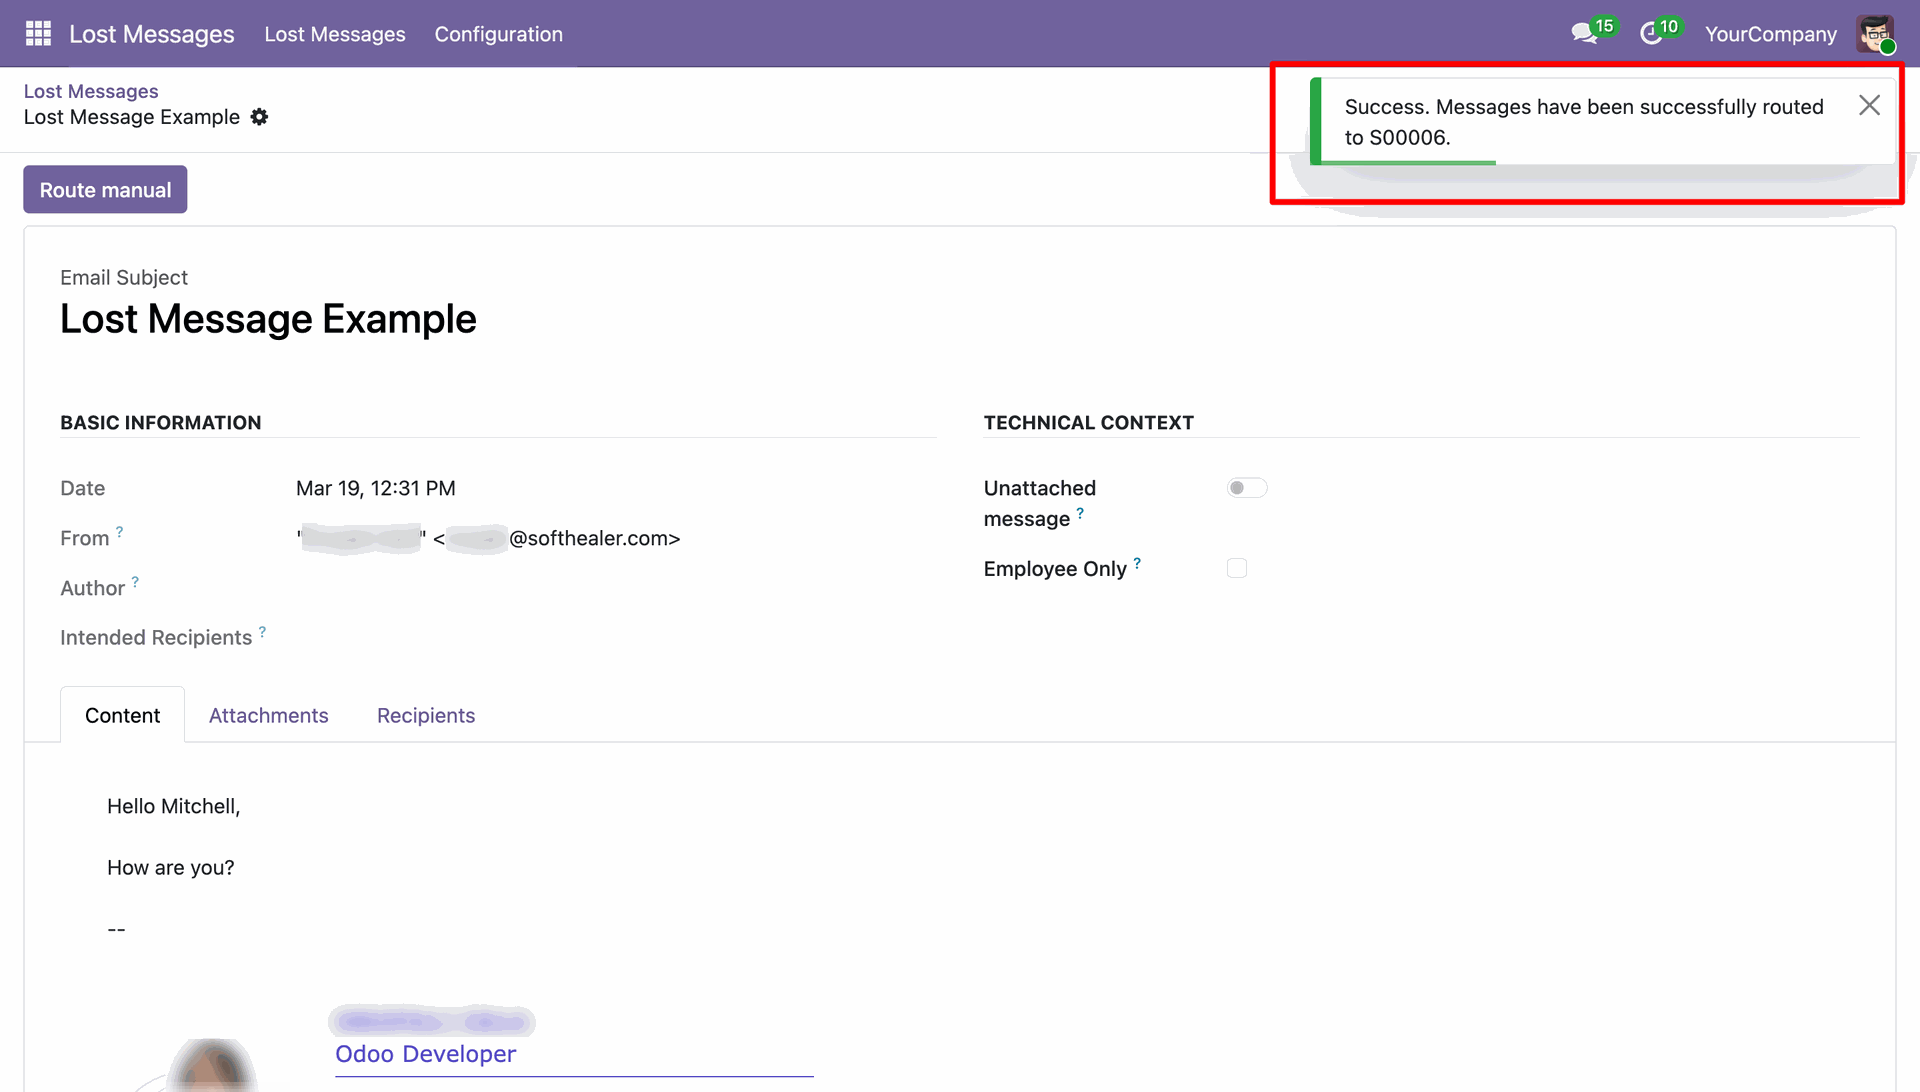
A success notification confirms that the message has been accurately routed to the selected record.
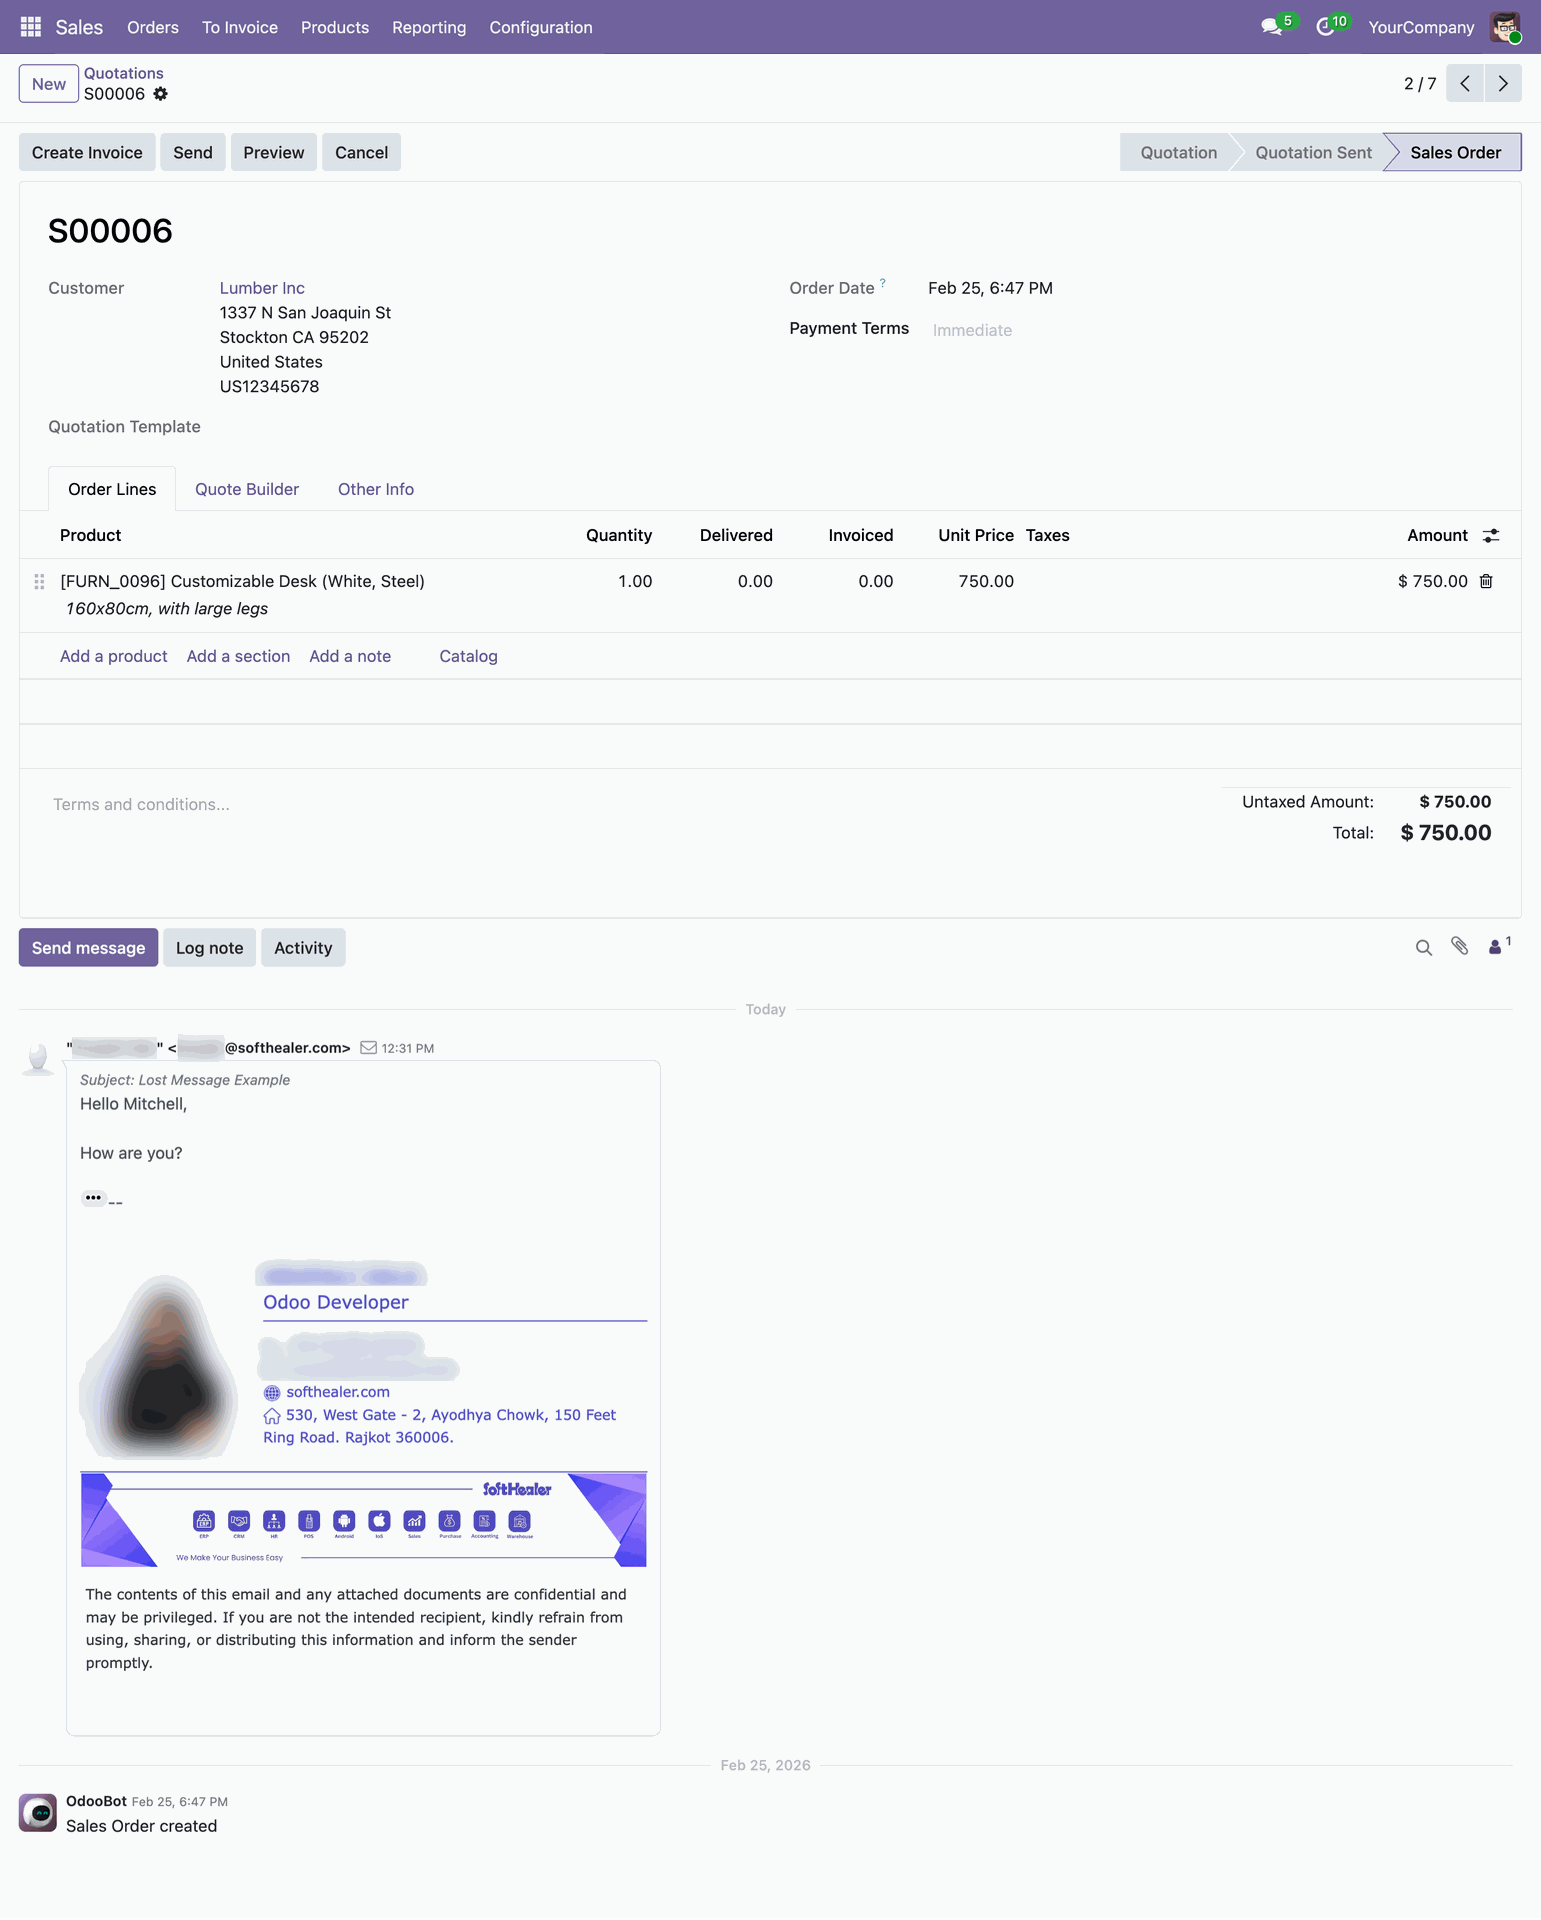
The message is now perfectly integrated into the chatter of the destination record for future reference.
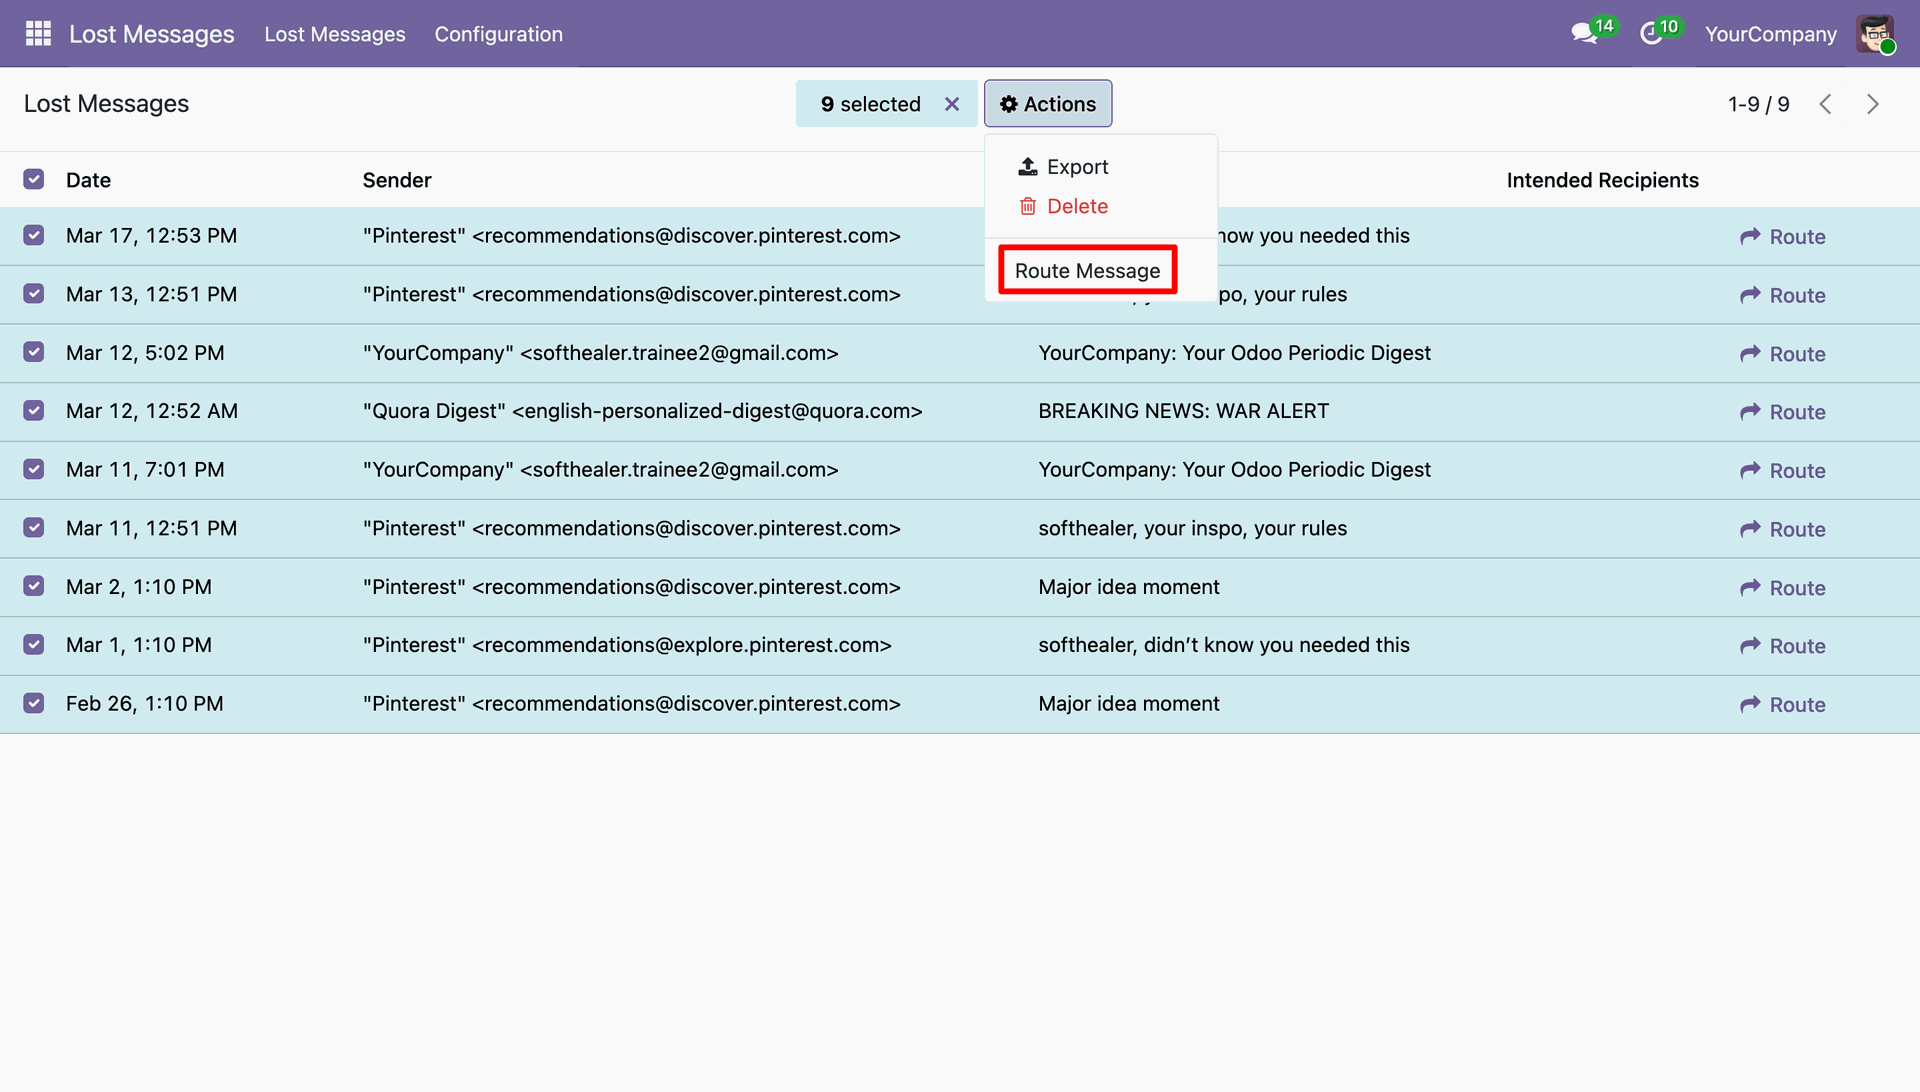
Scale your productivity by selecting multiple lost messages and using the 'Route Message' mass action.
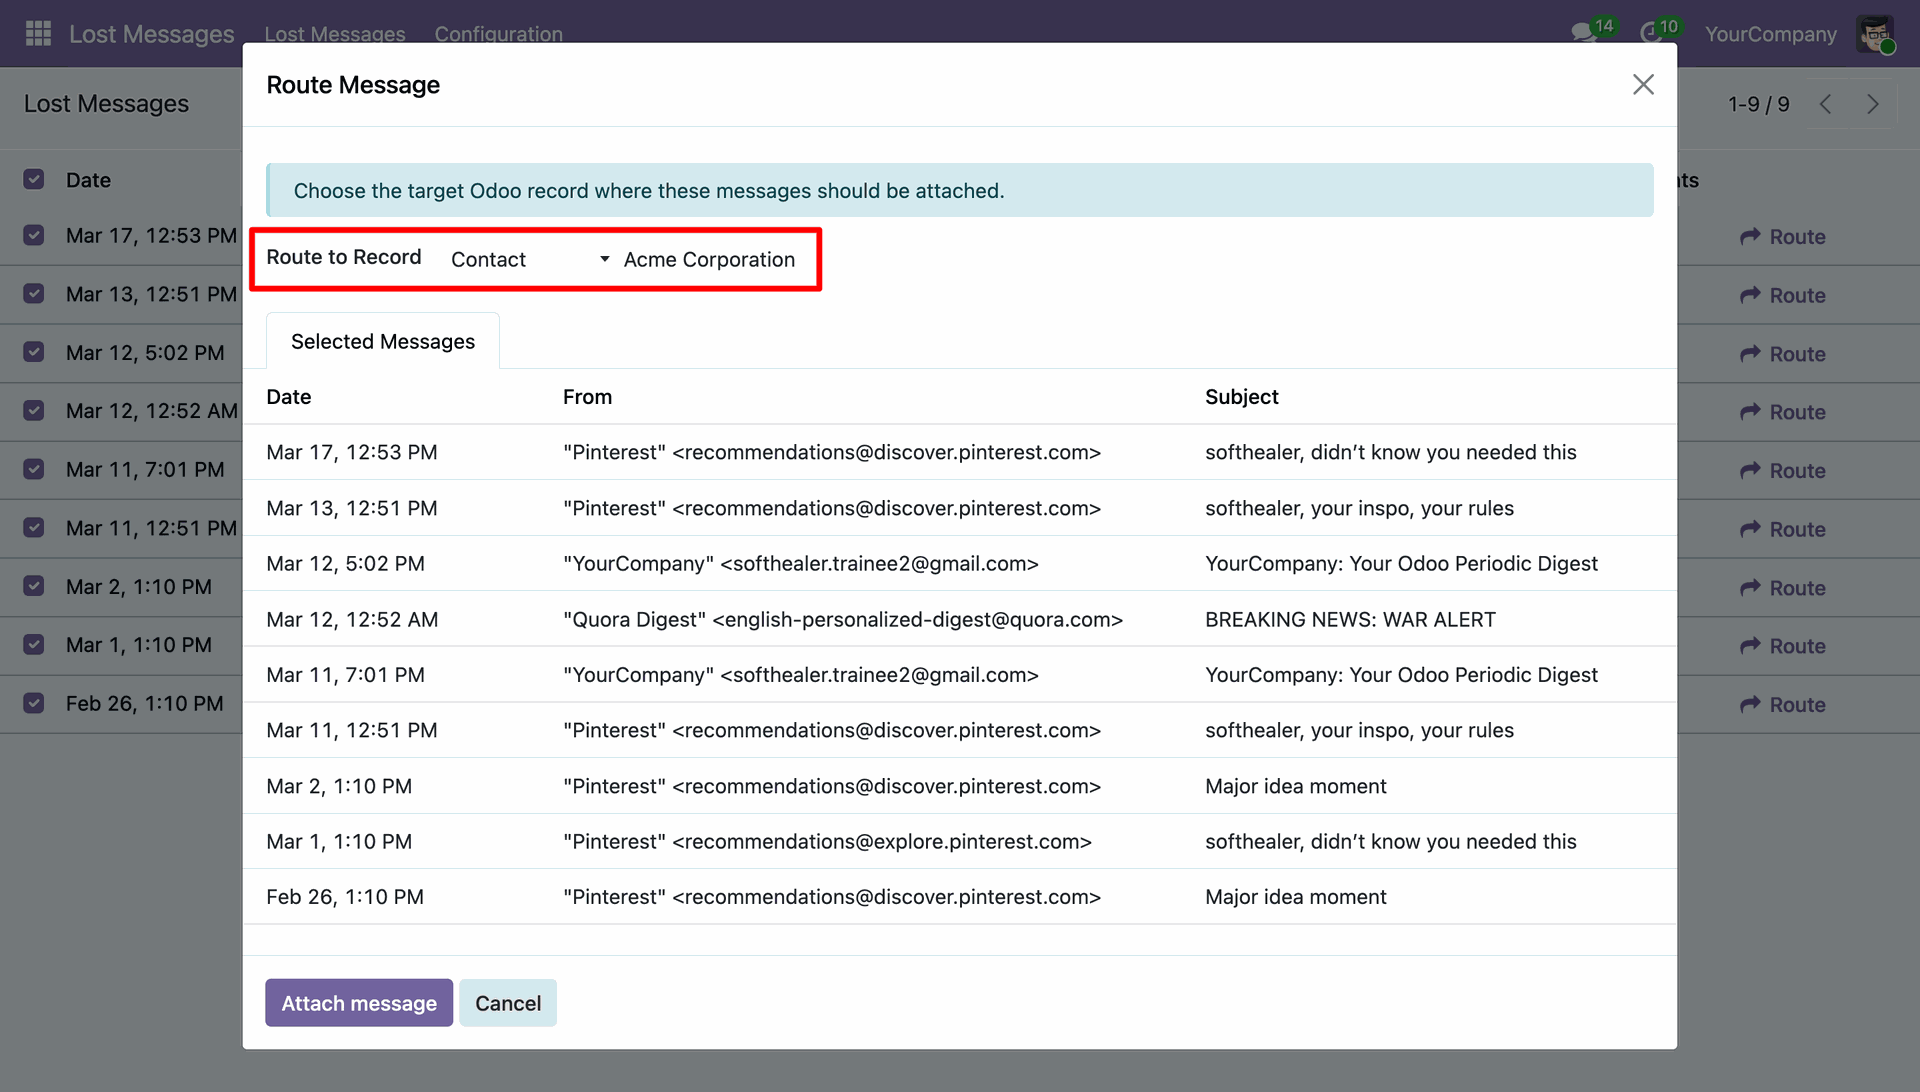
In the mass routing wizard, choose the target record where all selected messages will be attached simultaneously.
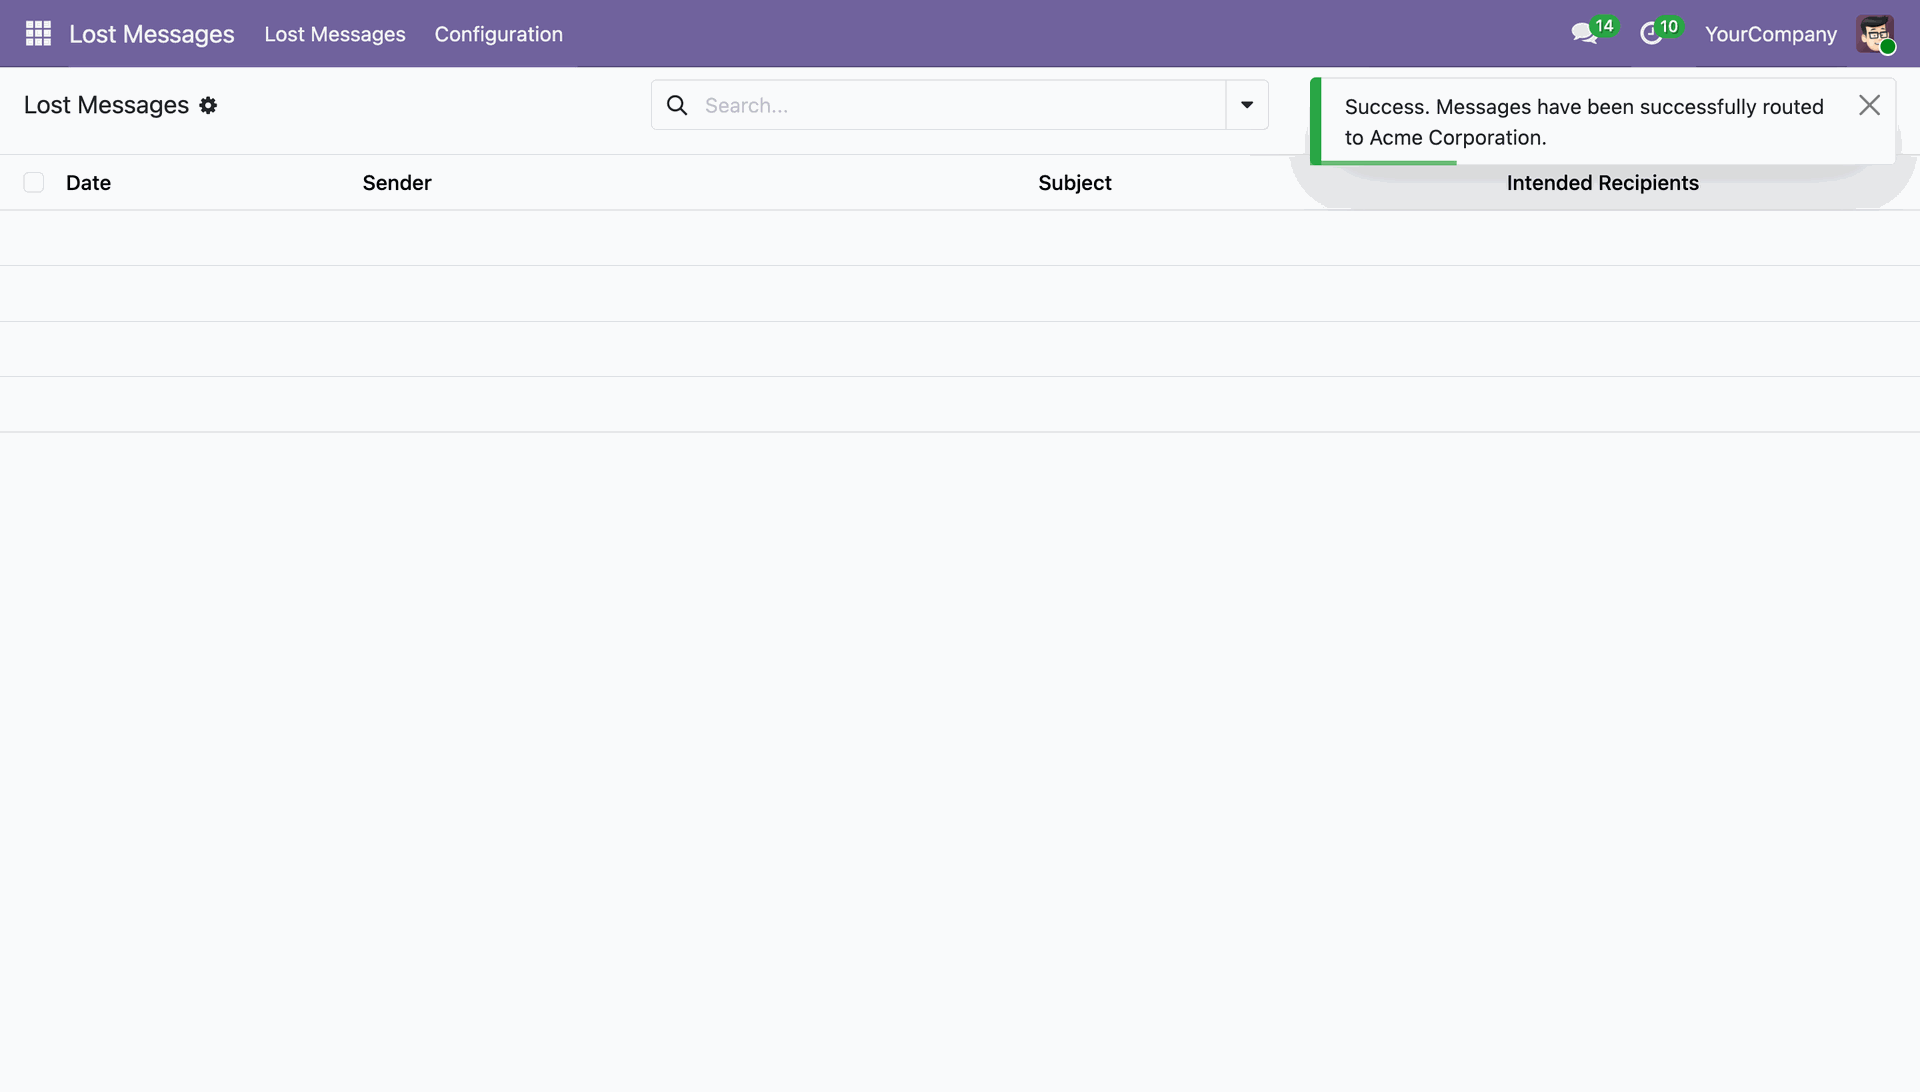
Receive instant confirmation as multiple lost messages are successfully routed in a single click.
Workflow
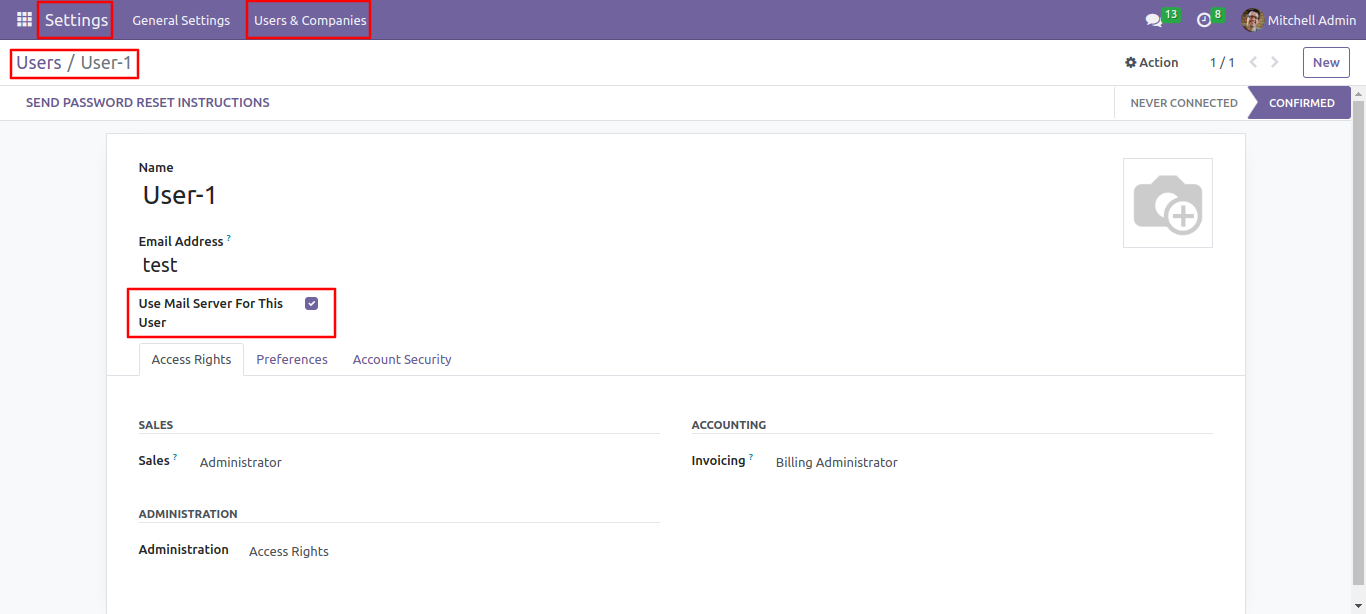
Go to the user and tick 'Use mail server for this user'.
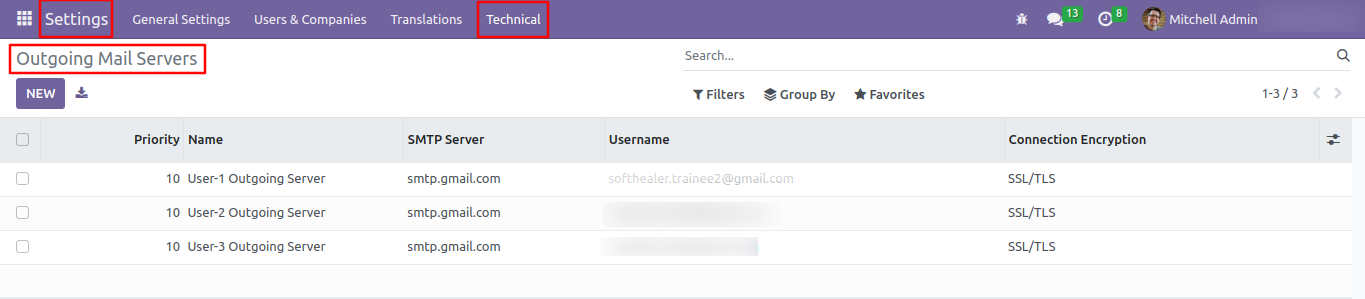
Go to the general settings and open the outgoing mail server from the technical menu.
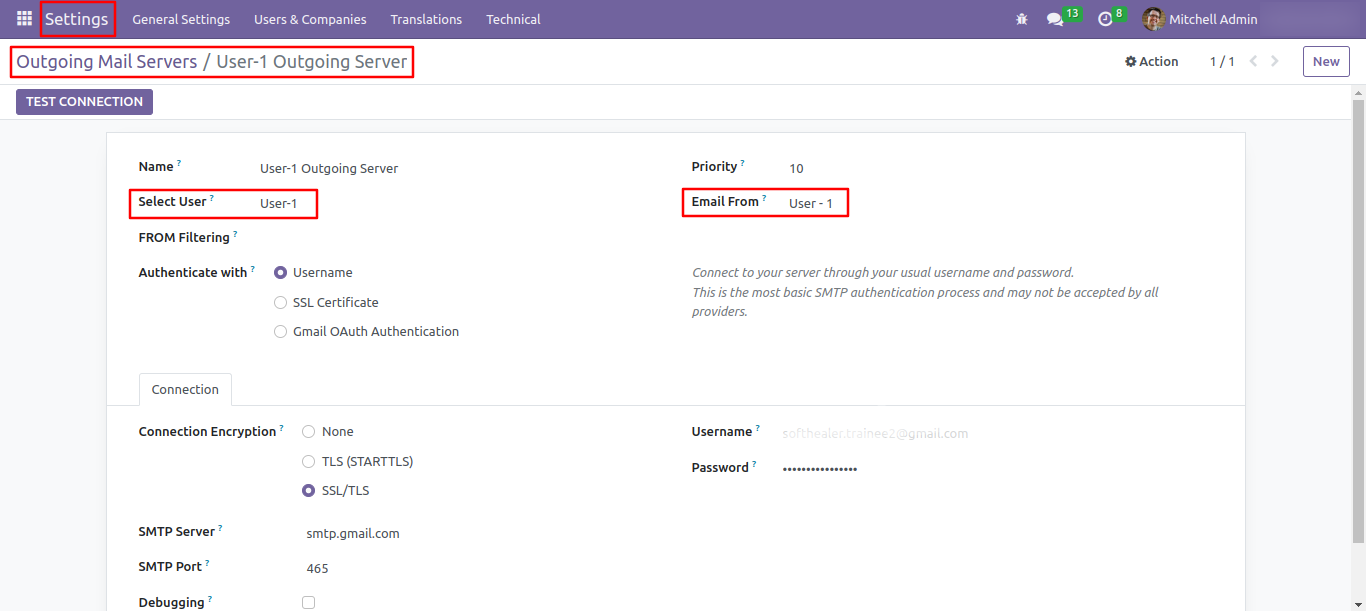
Form view of the outgoing mail server, select the user.
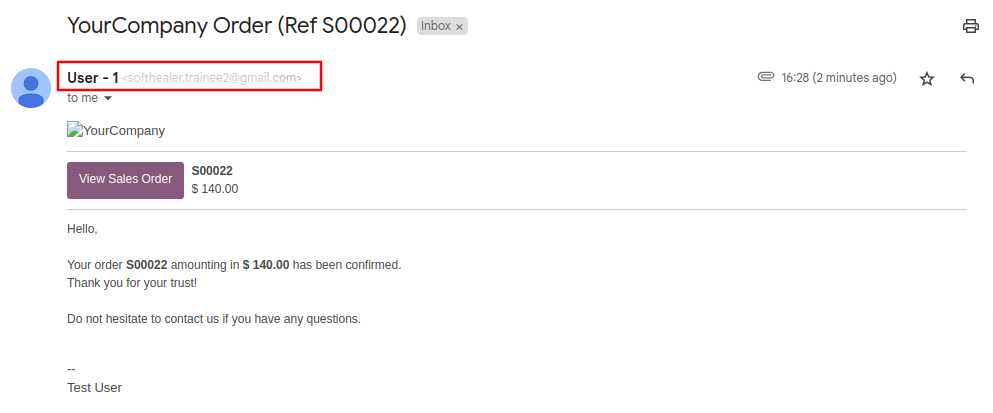
Selected user is visible in the outgoing mail.
Workflow
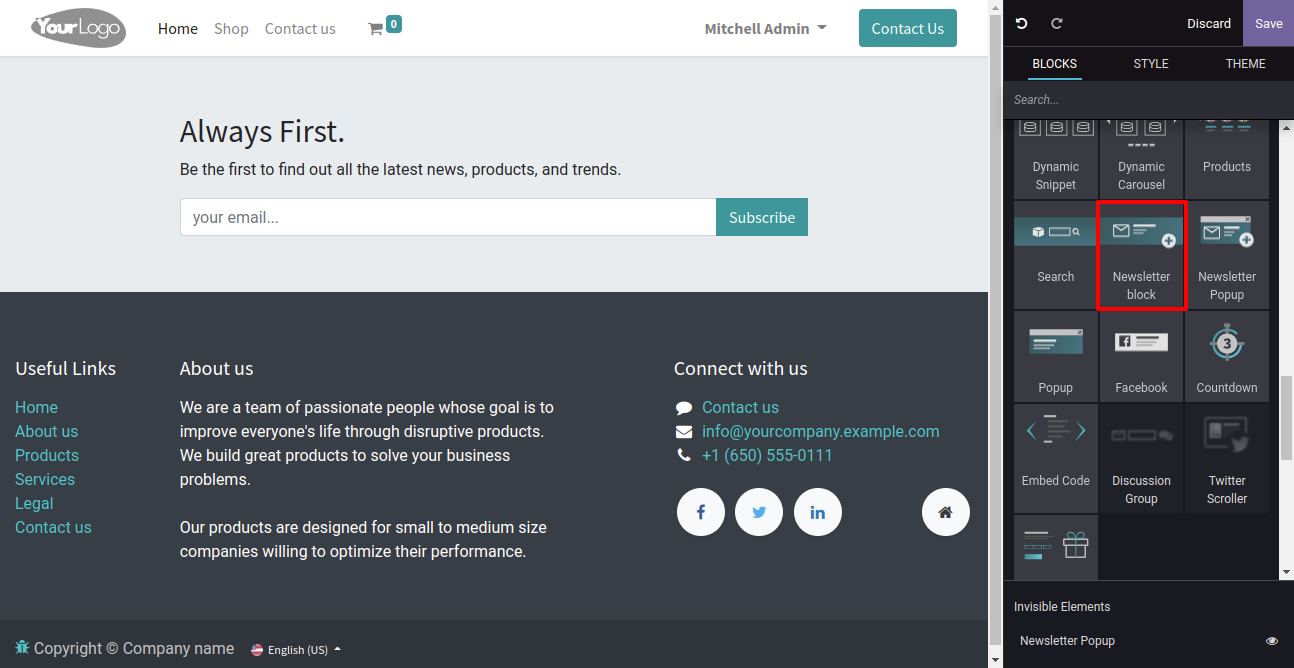
Add NewsLetter in the website.
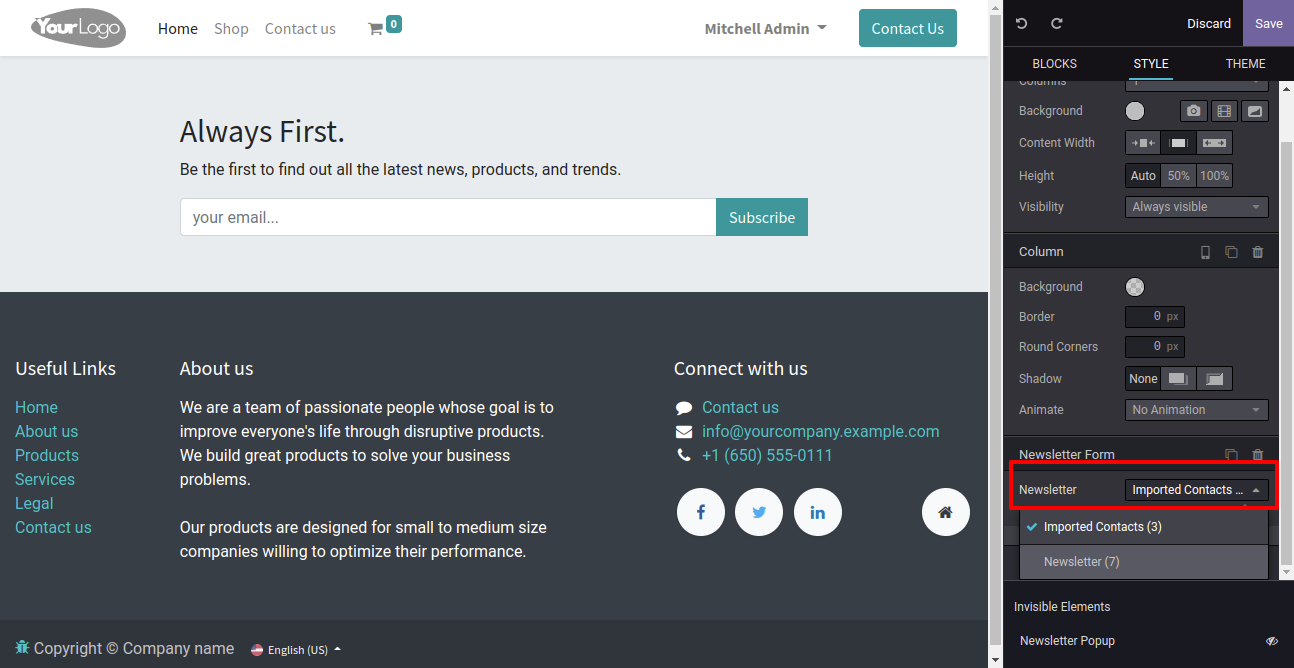
After that select "Imported Contacts" in the NewsLetter.
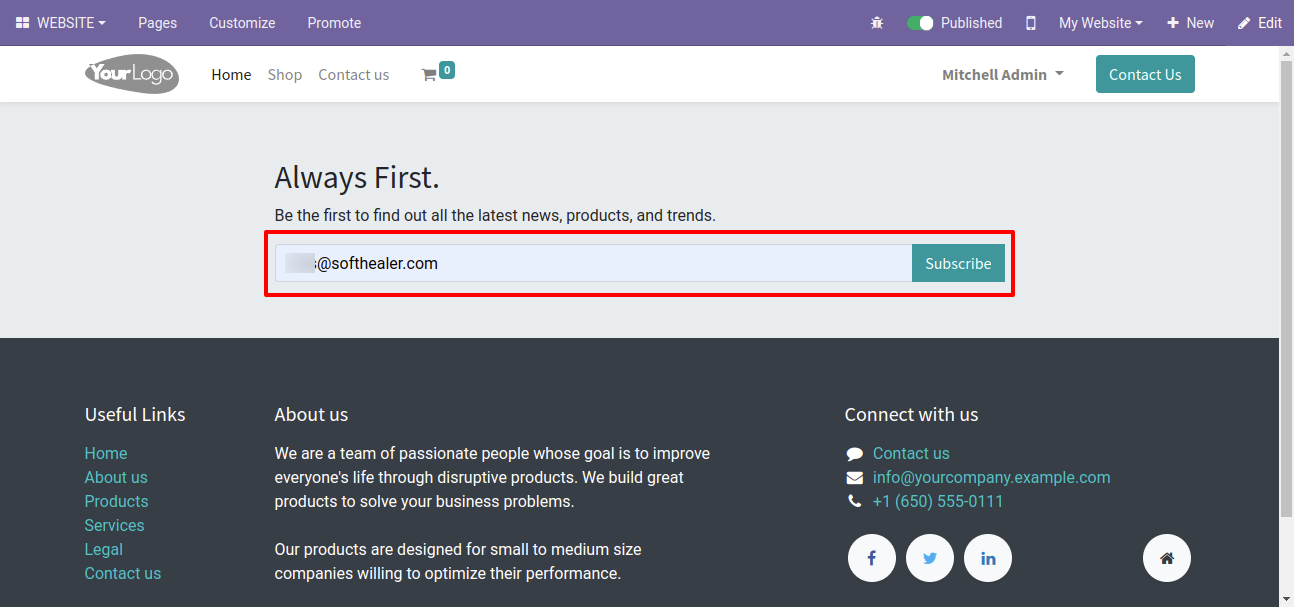
See the mail fill automatic in Newsletter.
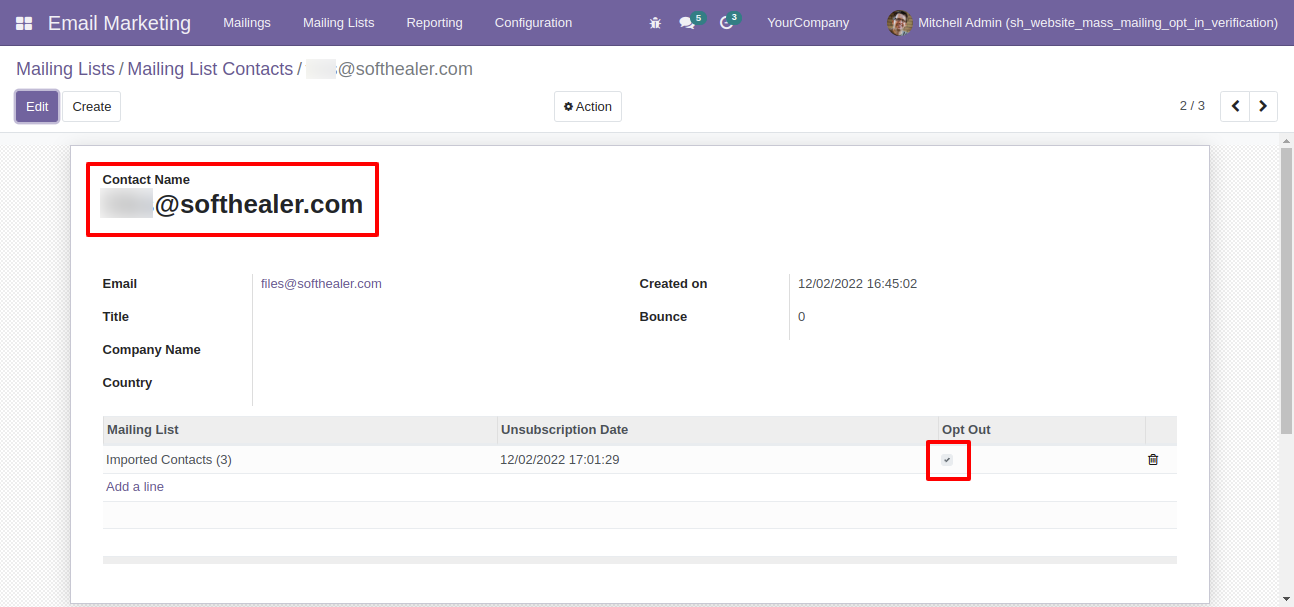
Mailing list with subscriber mail.
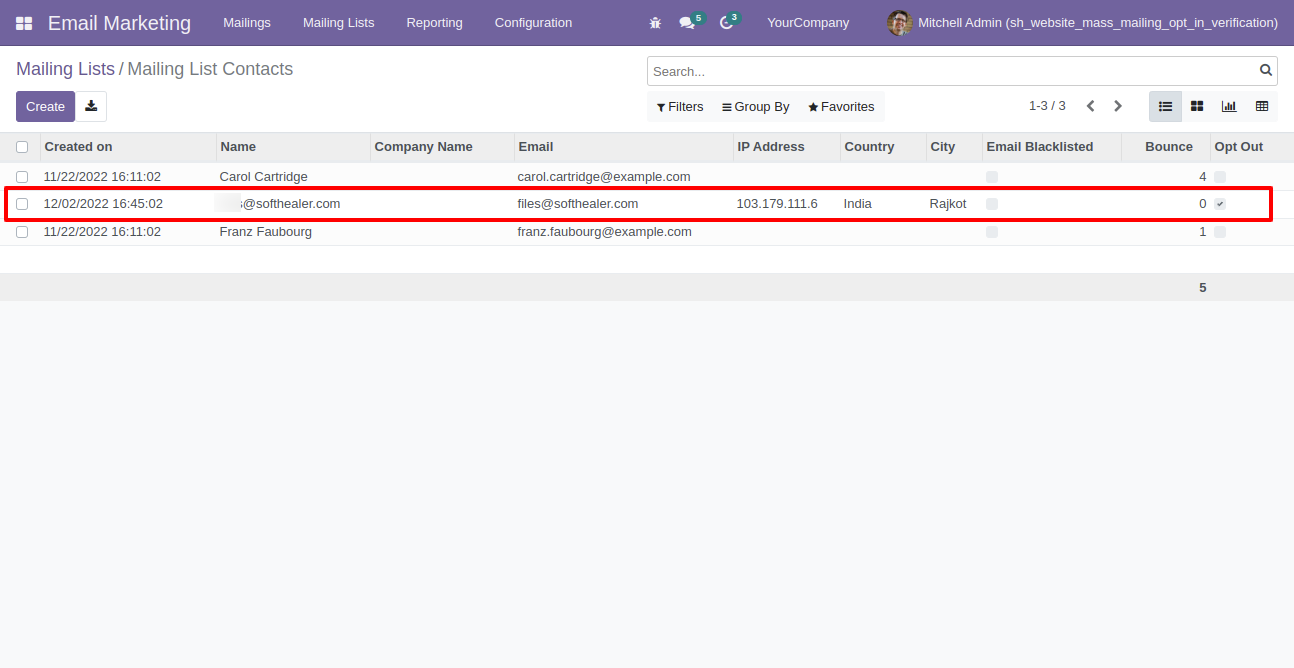
Inside the mail "opt-out" ticked.
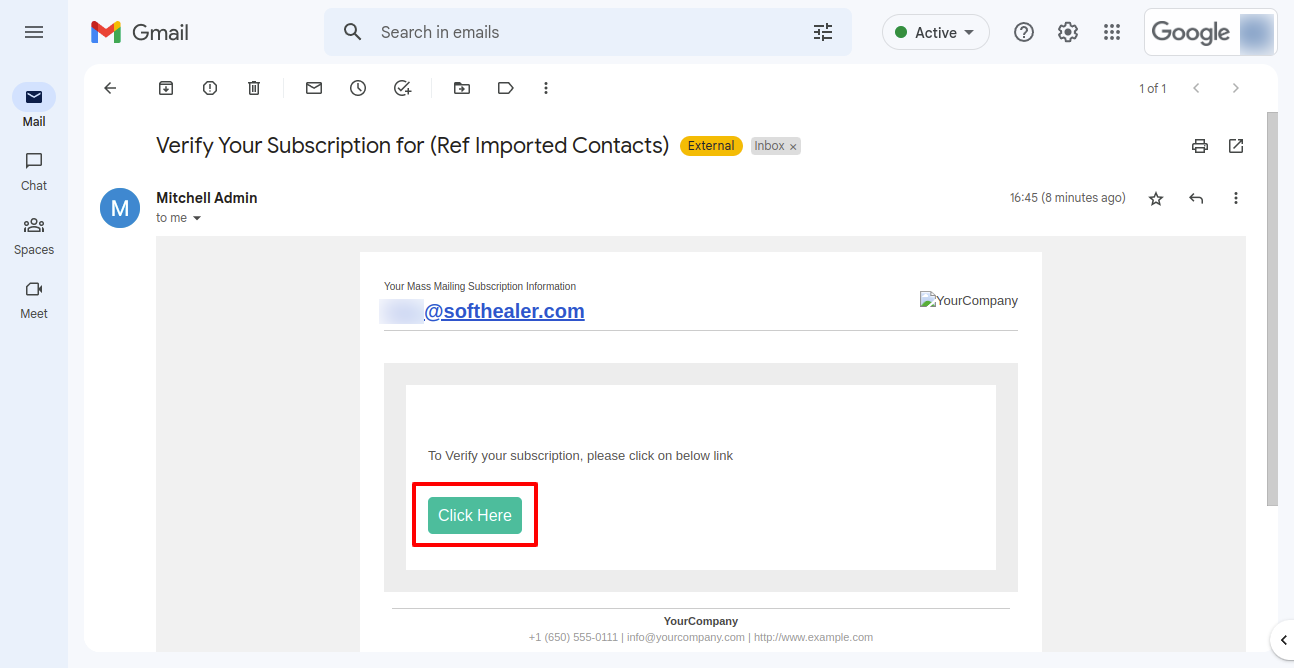
The subscriber needs to click the button.
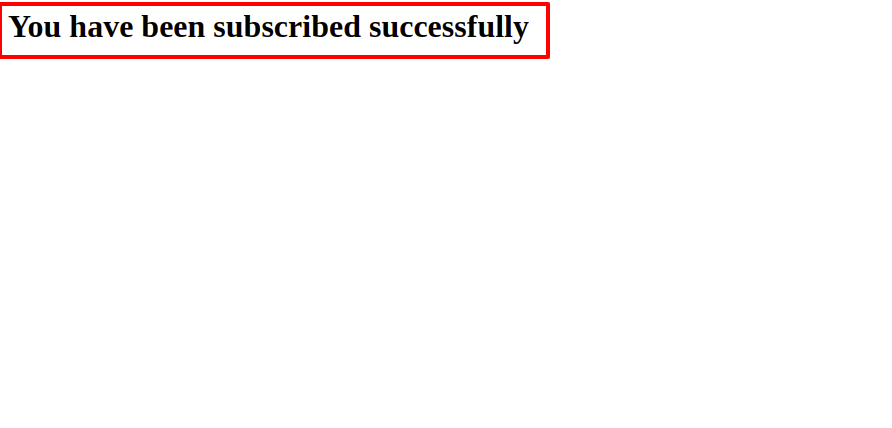
The success message looks like below.
Version 19.0.1.0.0 | Released on : 23rd July 2026
- Yes, this app works perfectly with Odoo Enterprise (Odoo.sh & Premise) as well as Community.
- No, this application is not compatible with odoo.com(odoo saas/Odoo Online)
- Yes, to test this module, please contact us at sales@softhealer.com.
- Please contact us at sales@softhealer.comto request customization.
- Yes, we provide free lifetime support for the version you purchased.
- Yes, you will receive lifetime free updates for the version of the module you purchased.
- No, there is no need to install any additional libraries.
- Yes, for version 12 and above, you need to purchase the module separately for each version you intend to use.
- No, exchanges or refunds are not allowed. Please make sure to select the correct version before purchasing.
- You can contact us at support@softhealer.com for language translation support. We use Google Translator tools to provide translations in multiple languages, so the accuracy may vary. We welcome your suggestions to help improve translations.
Discover Our Latest Apps