












All-in-One Auto Parts Management with POS

Do you want to search for auto parts easily in your Point of Sale? This module adds powerful search filters to the POS screen, allowing you to find products by vehicle make, model, year, and type. It helps you serve customers faster by accurately identifying the right parts for their specific vehicle.

Features
Auto Parts Dashboard Overview
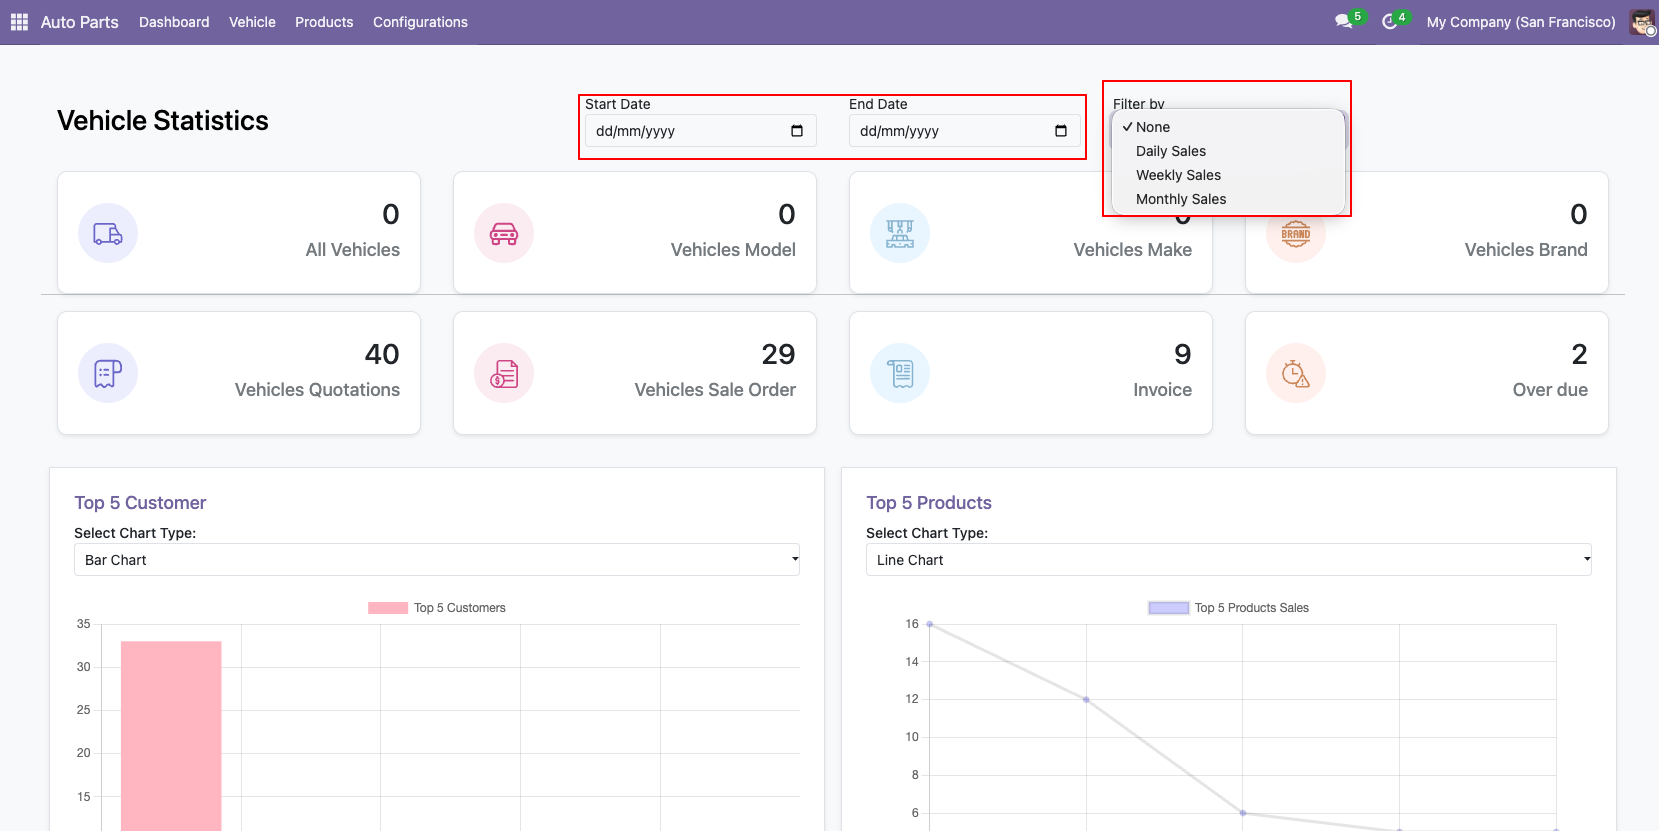
An Auto Parts Dashboard that displays sales data by daily, weekly, or monthly ranges, with support for custom date selection using filters.
Vehicle Year Range Management
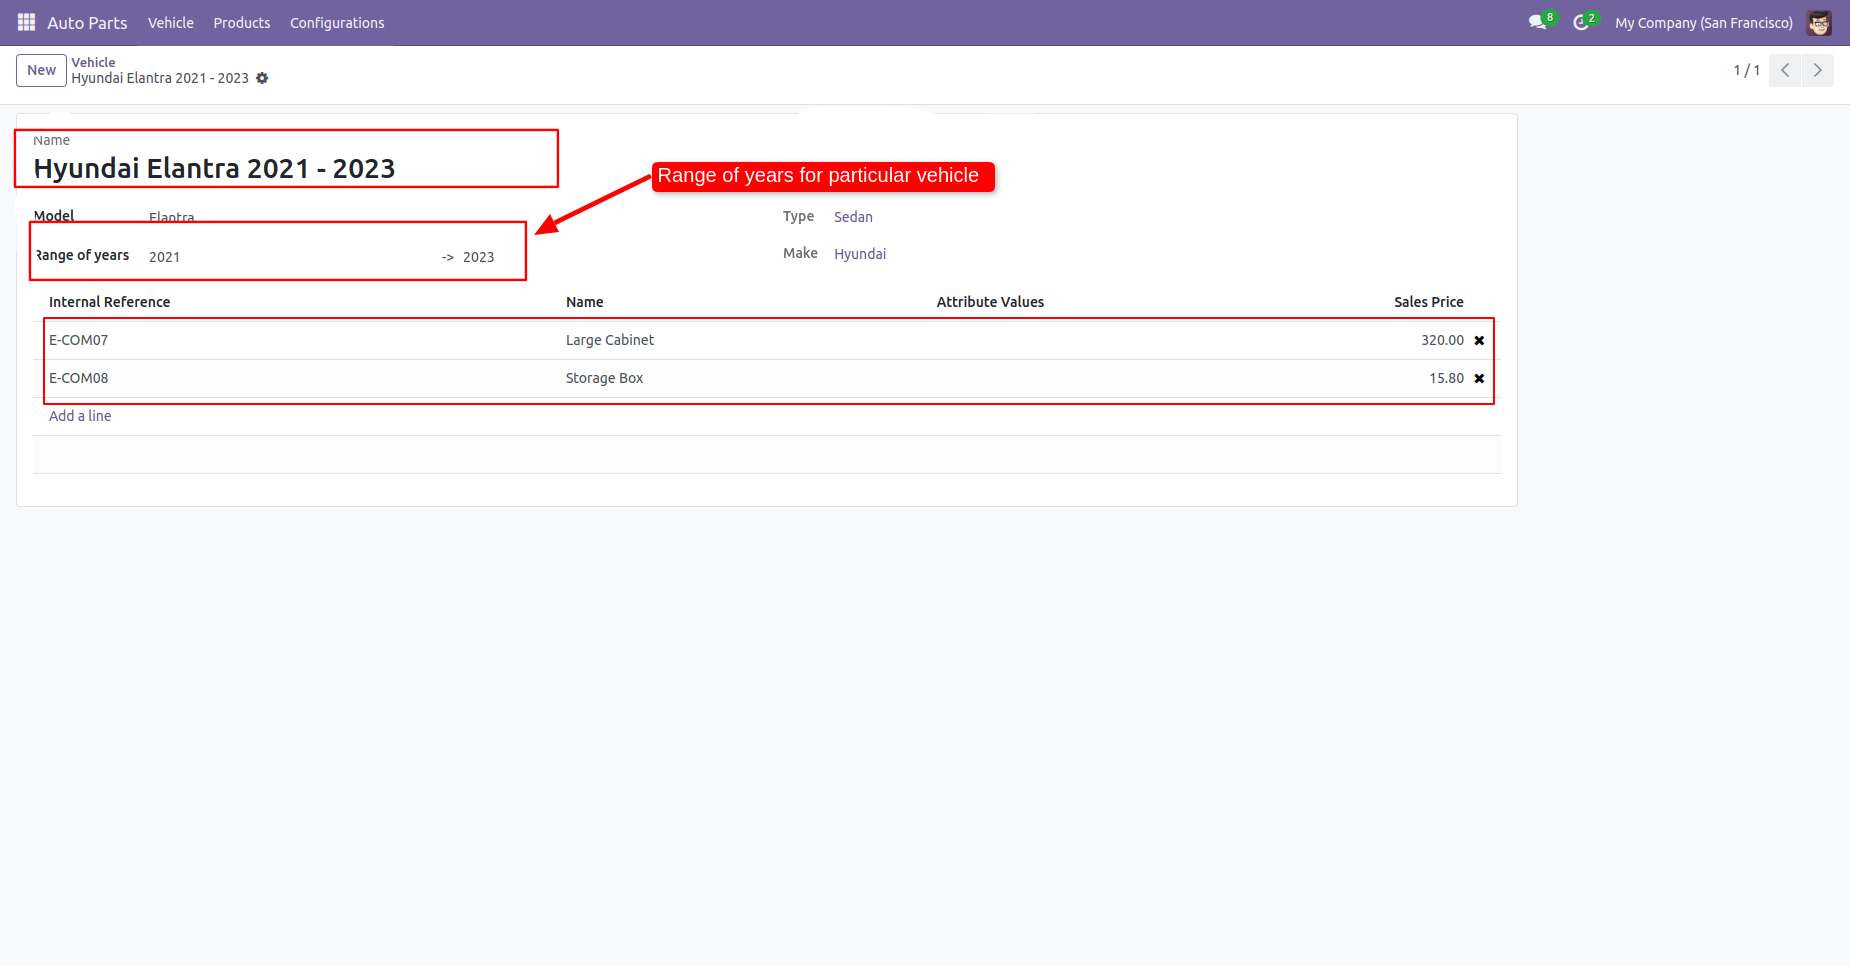
Easily define a vehicle by setting start and end years for each vehicle.
Common Products
Add and manage common auto parts products that apply to all vehicle configurations.

Common Products for All Vehicles
Easily add and manage common auto part products that are compatible with all vehicles.

Auto Parts Access Rights Management
Configure user and manager-level access rights specifically for auto parts operations.
Advanced Attribute Management
Manage auto parts using detailed attributes like make, model, year, type, grade, engine, transmission, brand, product type, and country.
Optional & Related Products
Easily configure optional and related auto parts to suggest compatible or alternative products for vehicles.

Sales Report By Salesperson
Analyze sales performance and revenue generated by individual salespersons.
Top Customers report
Identify and analyze top customers based on sales volume and revenue contribution.

Top Selling Products Report
View the most frequently sold and highest-performing products.
Multi-Company & Website Supported
You can add and manage the associated website and company for the type, model, year, grade, engine, transmission, brand, product type, and vehicle.
Dashboard for Sales Analysis & Insights
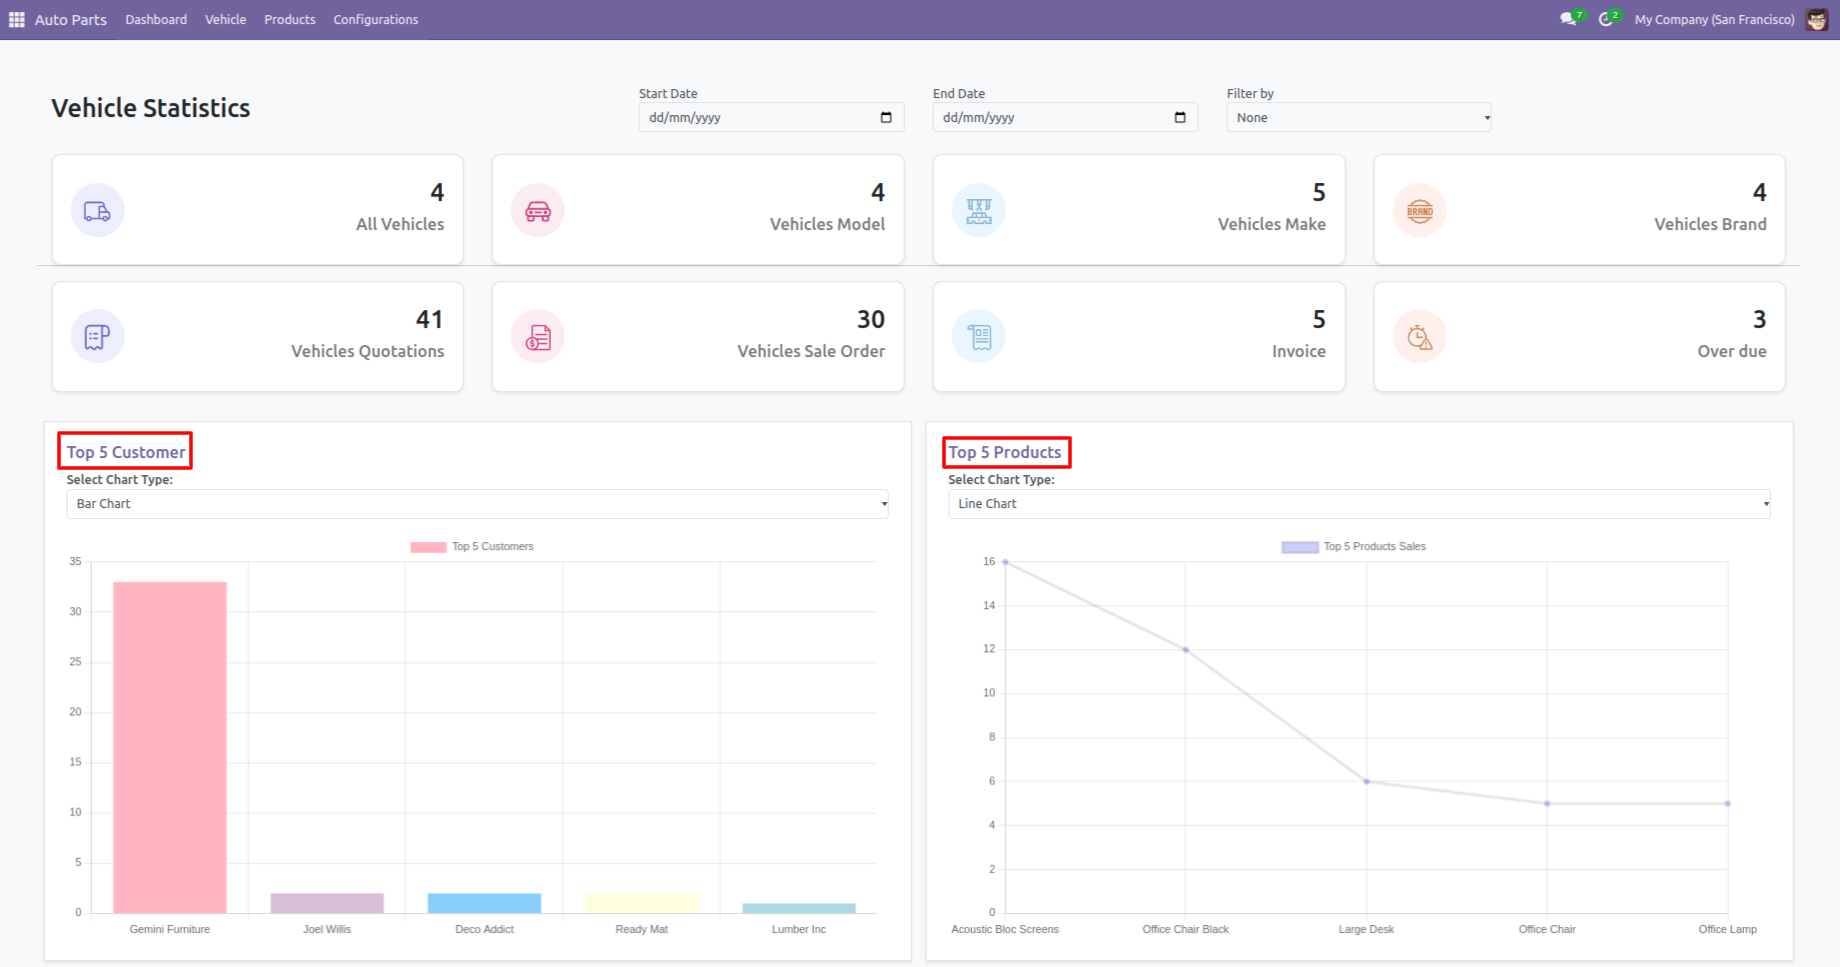
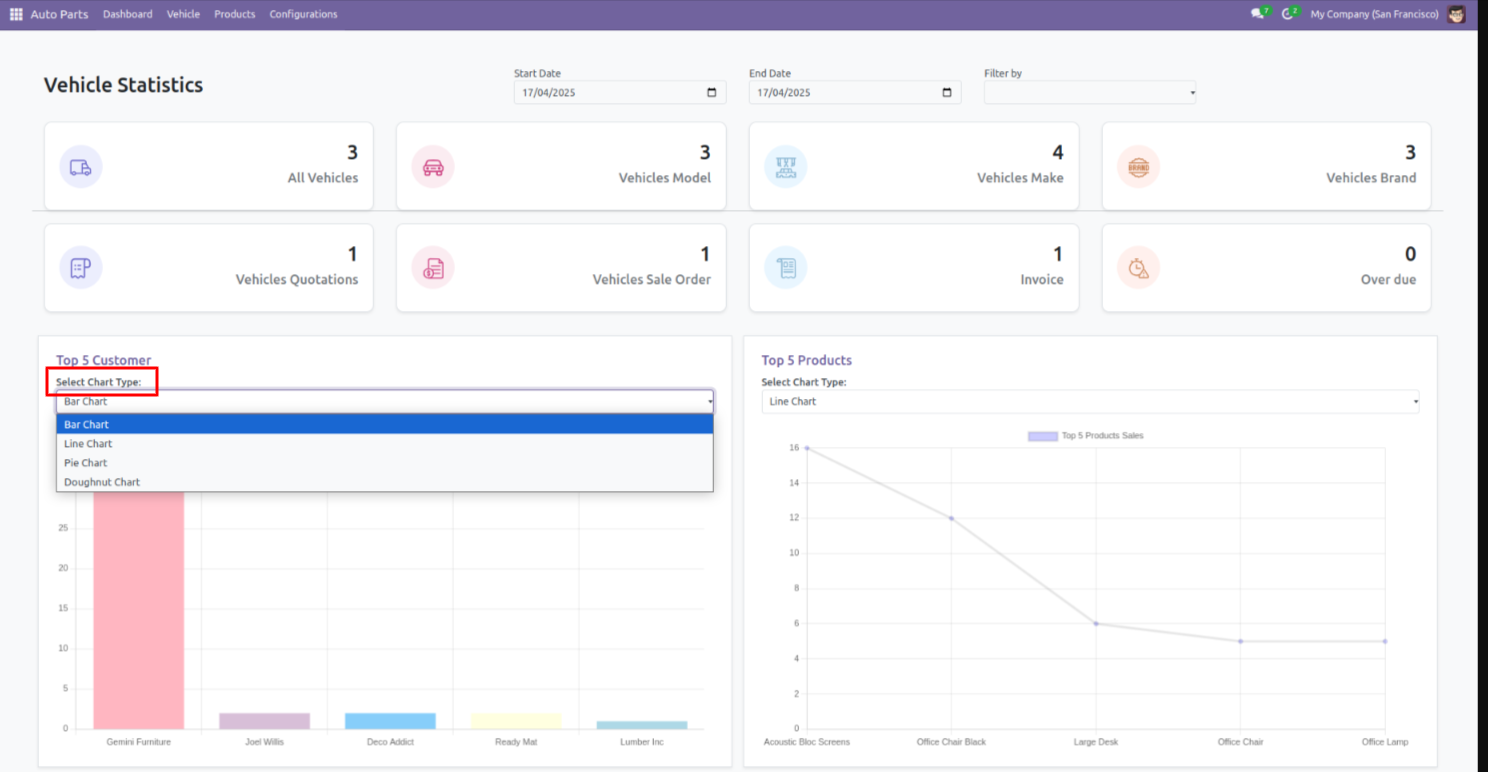
View sales data in multiple chart formats (bar, line, pie, doughnut) and analyze the top 5 customers and top 5 products.

Easy Parts Search
Quickly find the right auto parts products using make, model, type, and year for a faster, more accurate shopping experience.

Easy Auto Parts Management
Easily manage auto parts in your POS using part types, makes, models, and model years for accurate inventory and streamlined sales.
Smart Grouping of Auto Parts
Quickly group and view auto parts by vehicle make, model, year, and vehicle type.
Advanced Product Filtering
Filter products using more than six different product attributes for precise search results.

My Garage - Save Vehicles Easily
Allow users to save complete vehicle details in the My Garage option for quick access.
OEM Details Management
Enable or disable OEM (Original Equipment Manufacturer) details on the website directly from the OEM Details page.
Sales Details Report
Generate comprehensive sales reports with detailed transaction and order information.
Daywise Sales Report
Track and review sales performance on a daily basis with detailed breakdowns.
Sector Report
Analyze sales performance across different business sectors or customer segments.
Invoice Payment Report
Track invoice payments, outstanding balances, and payment statuses in a detailed report.
Auto parts Dashboard looks like below.
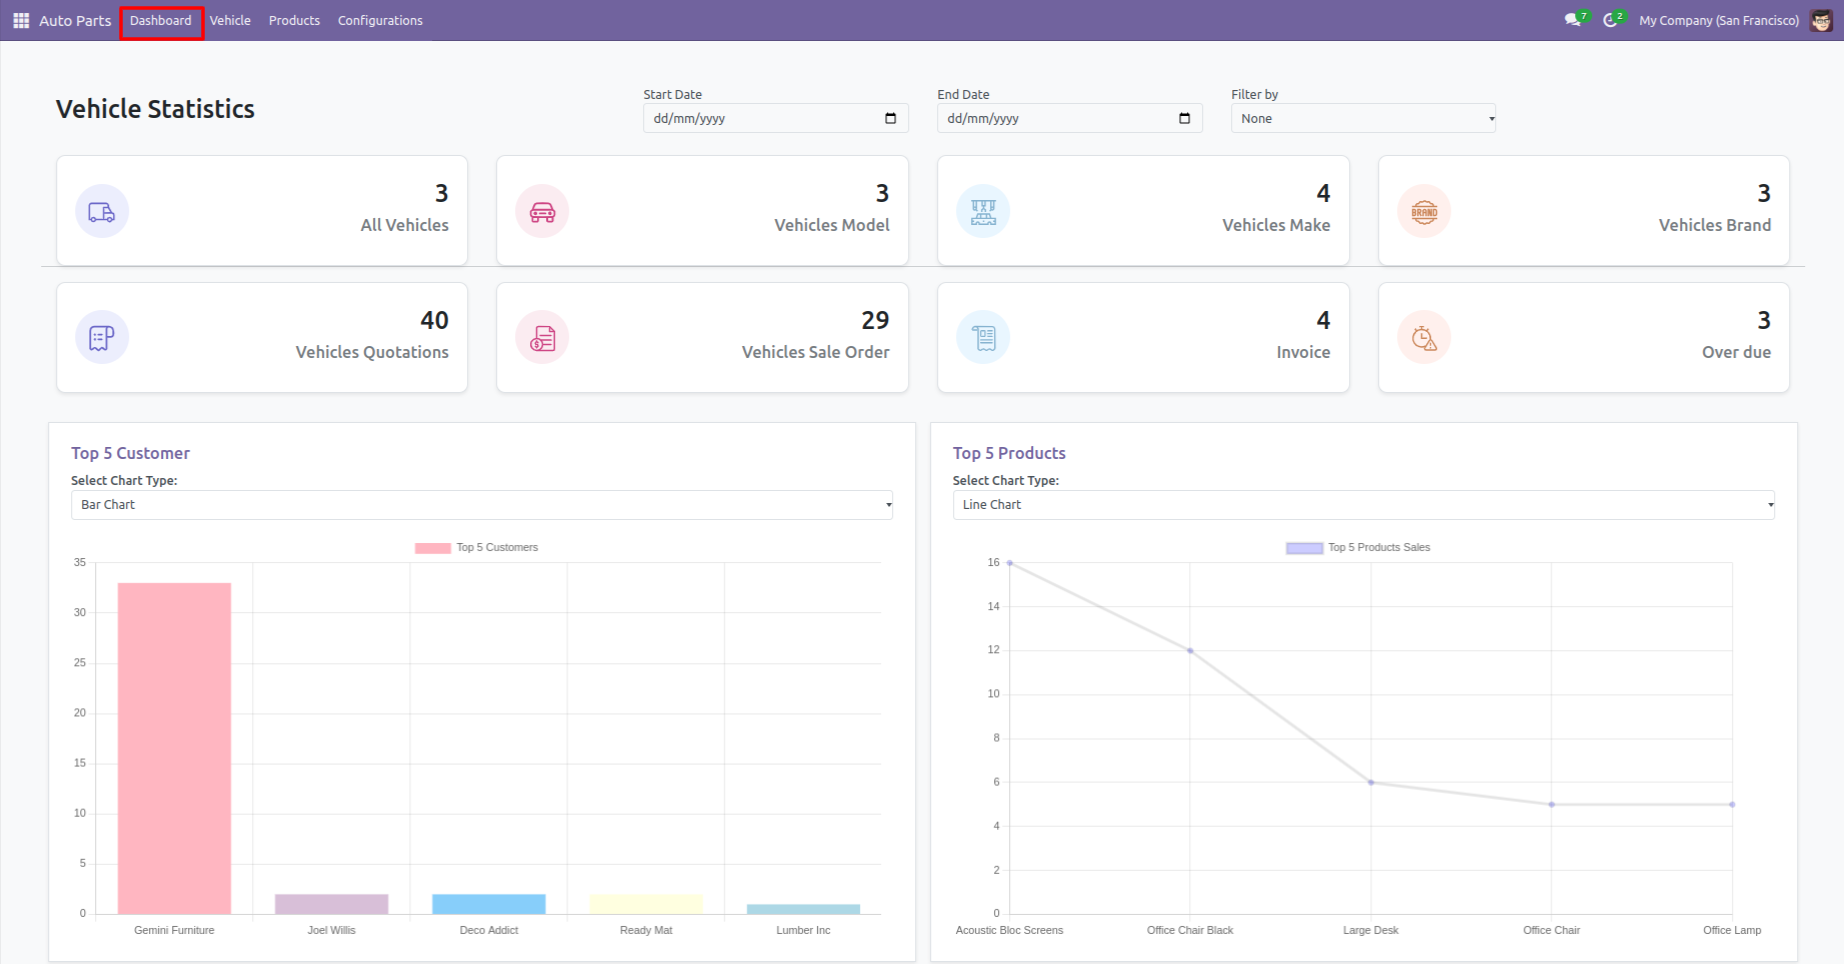
Users can filter auto parts performance with specific date range as well with daily, weekly, and monthly data insights.
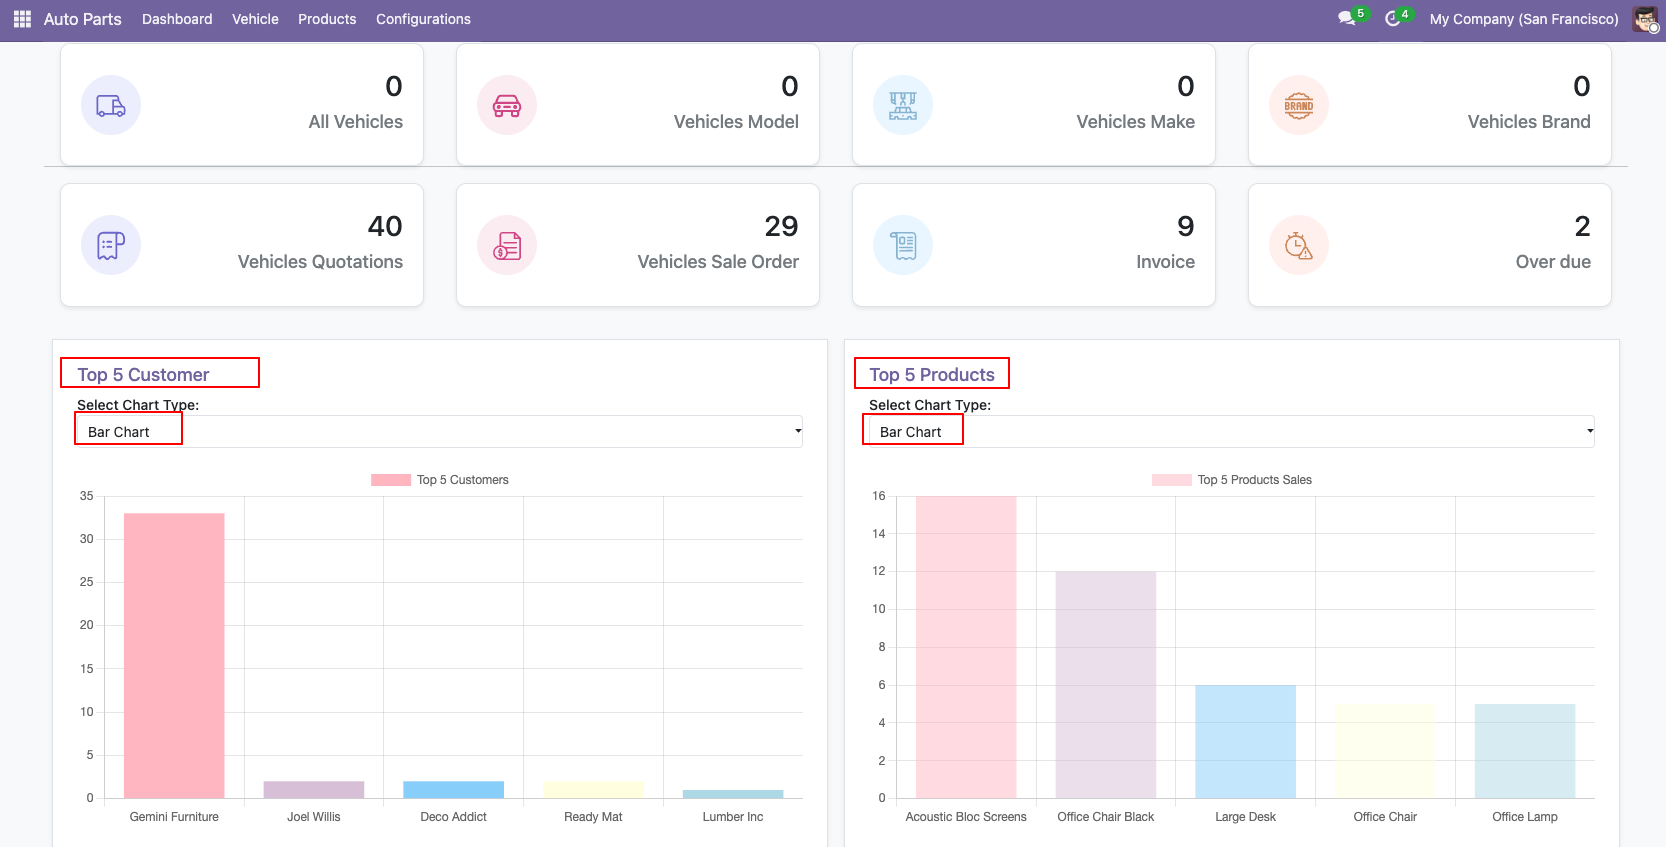
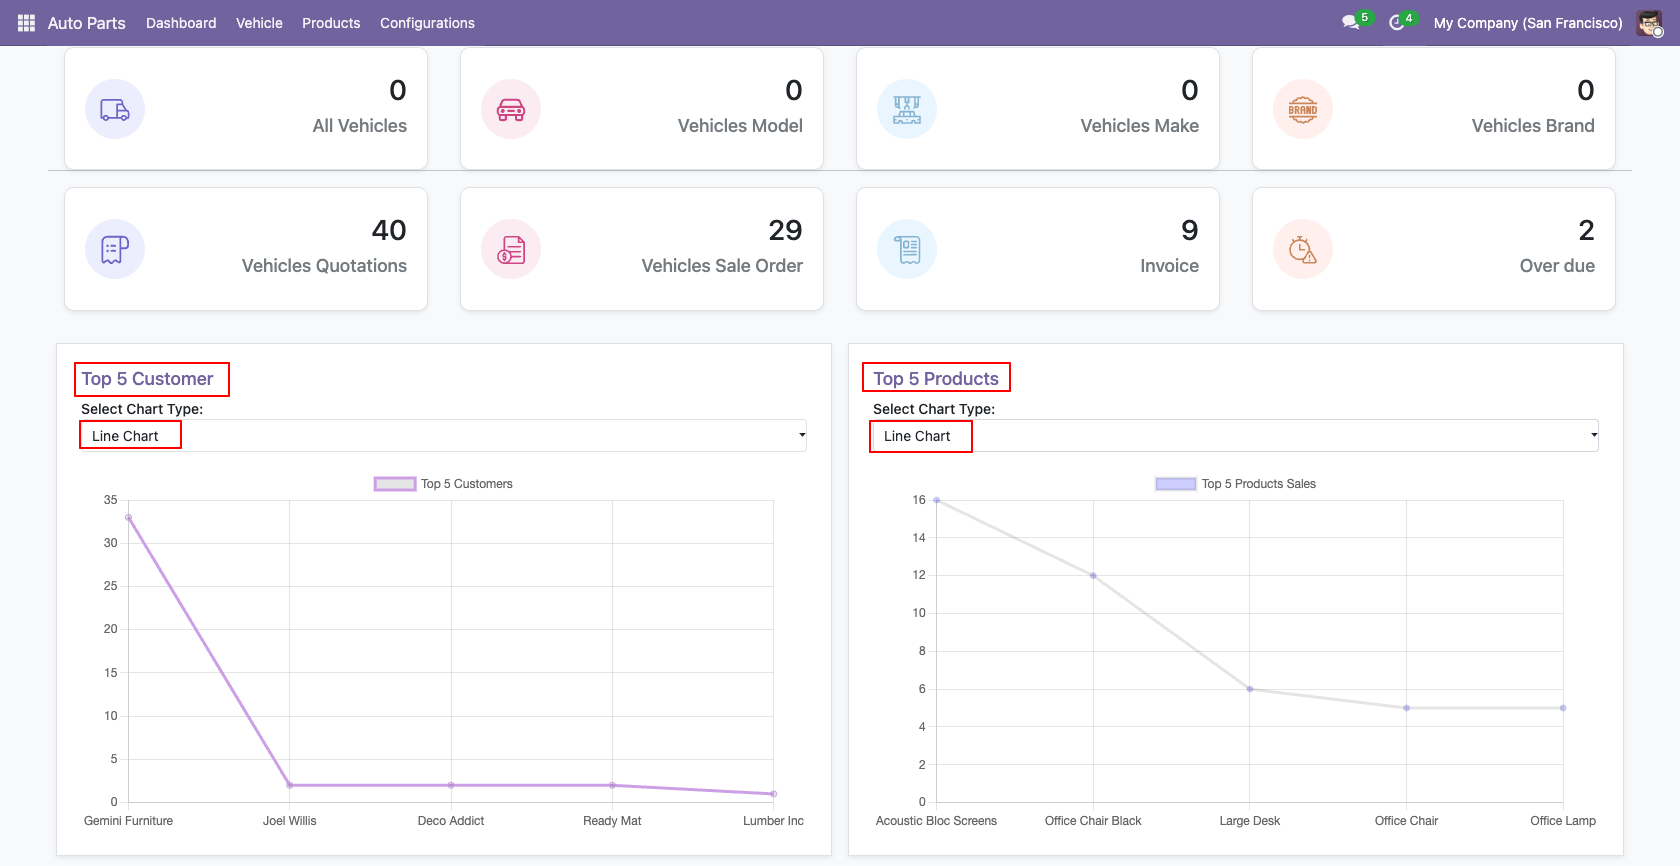
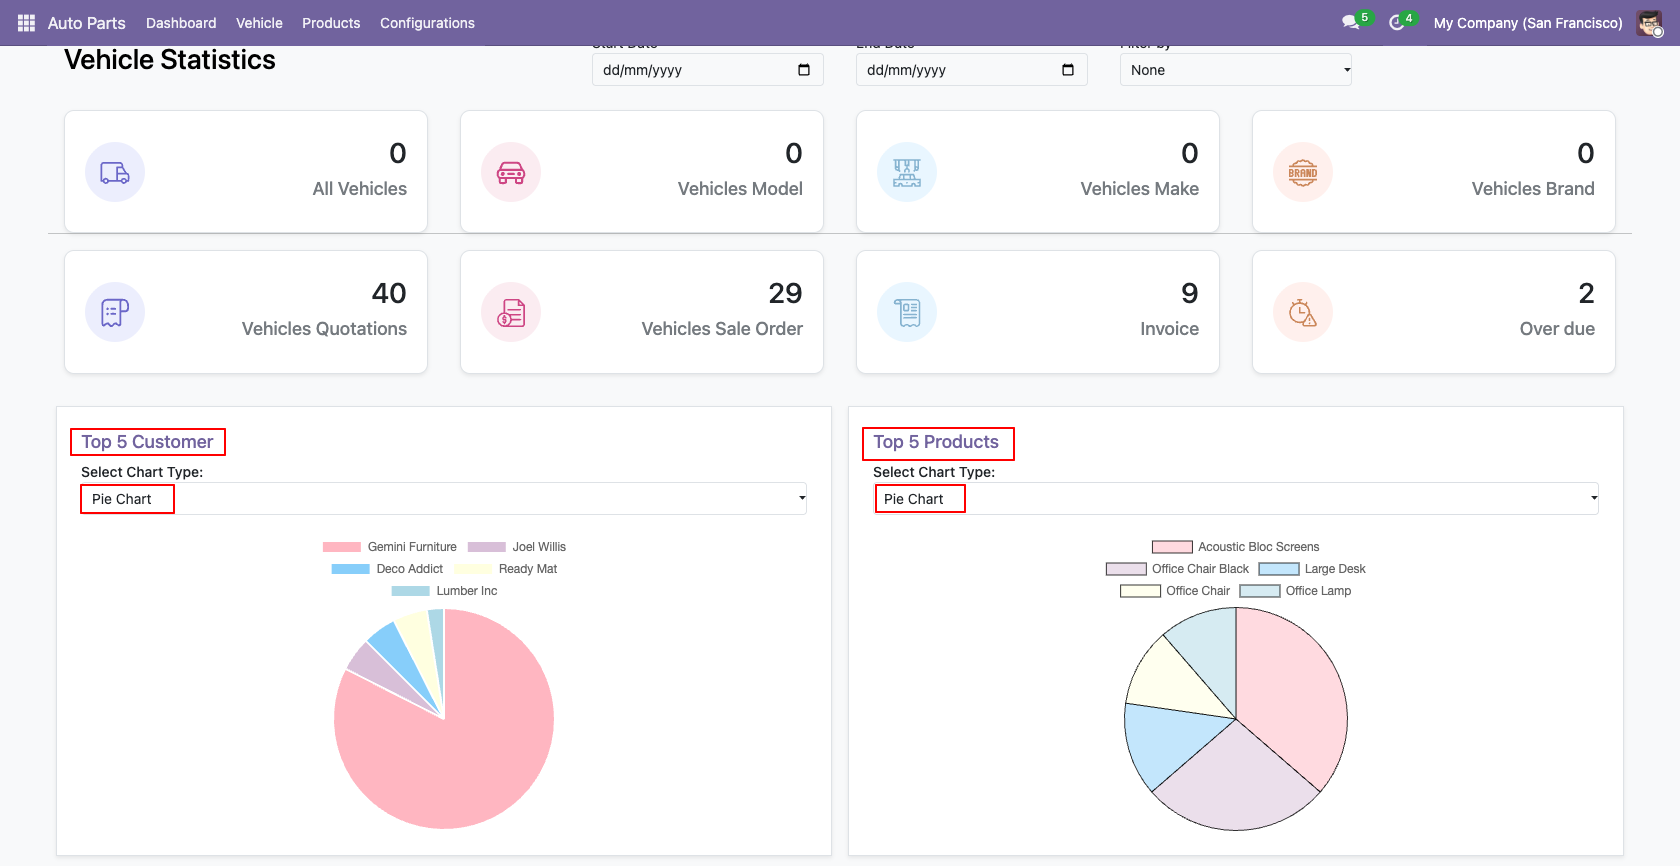
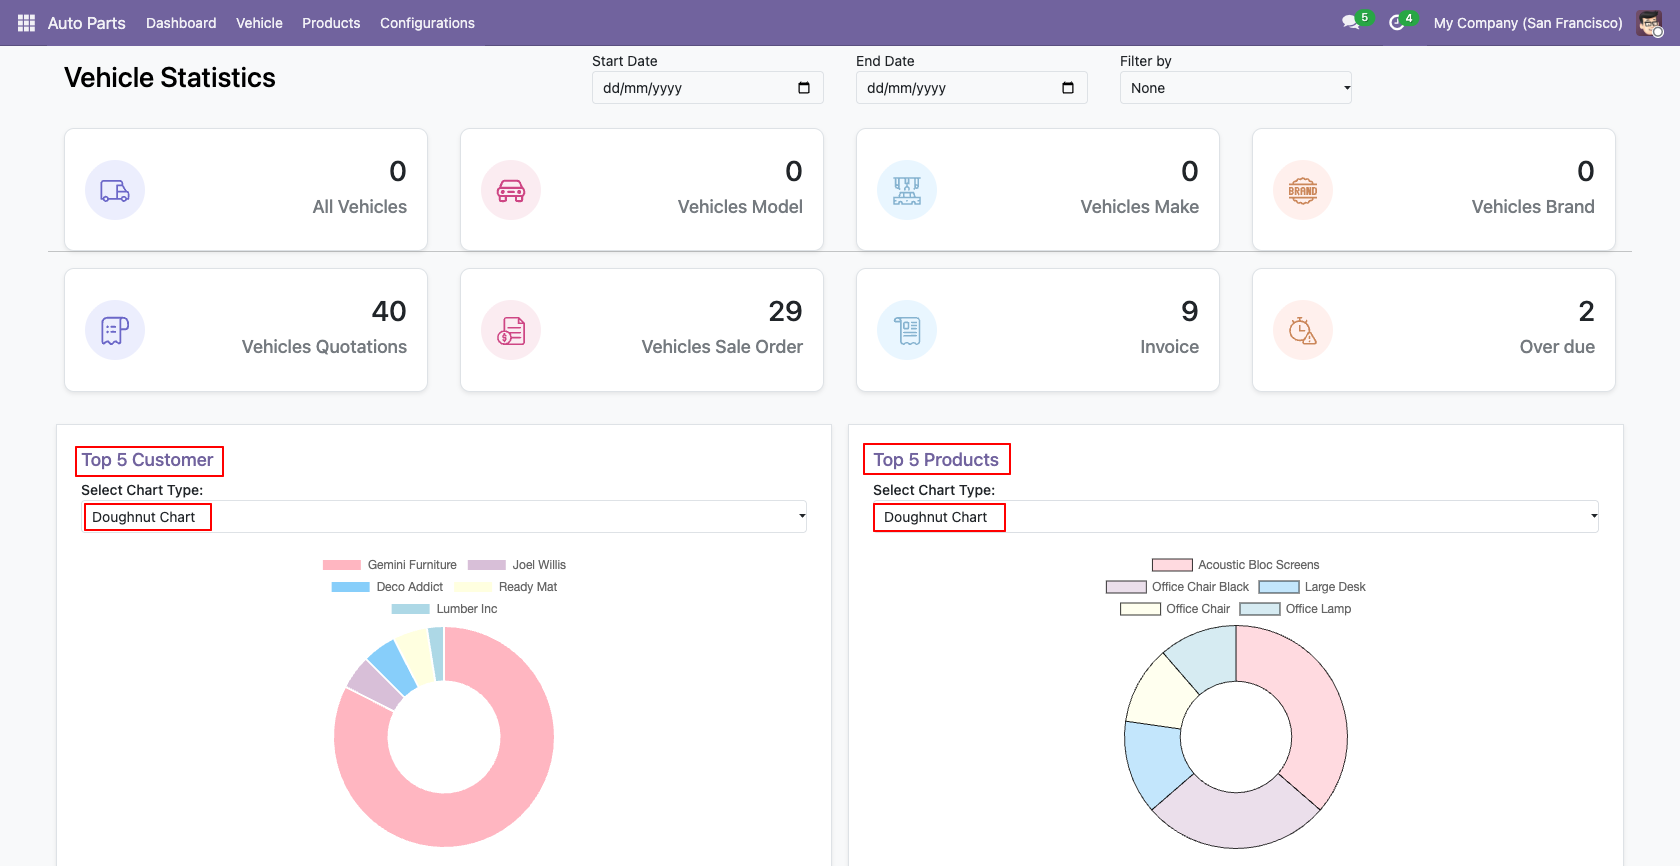
Here, you can view charts displaying the top 5 customers and the top 5 products.
You can select the chart format which you wish to view.
Bar Chart of the customer and product looks like below
Line Chart of the customer and product looks like below.
Pie Chart of the customer and product looks like below.
Doughnut Chart of the customer and product looks like below.
When a ticket is created that time customer will notify via email.

When a ticket is created that time assigned users will notify via email.

When you click on the 'Reply' button on the form, this wizard will appear where you can set an email template as per reply. In Email, there is one link 'View Ticket', Where customer can see the ticket status.

'Replied Date' added after reply and replied status will change 'Staff Replied'.

While the ticket is closed, customers will notify via email with a feedback link.

After click on link customer will see this view, where customer give feedback with comment.

Thank you message after submit feedback.

Customer feedback.

Customer ratings visible to only manager & team leader.
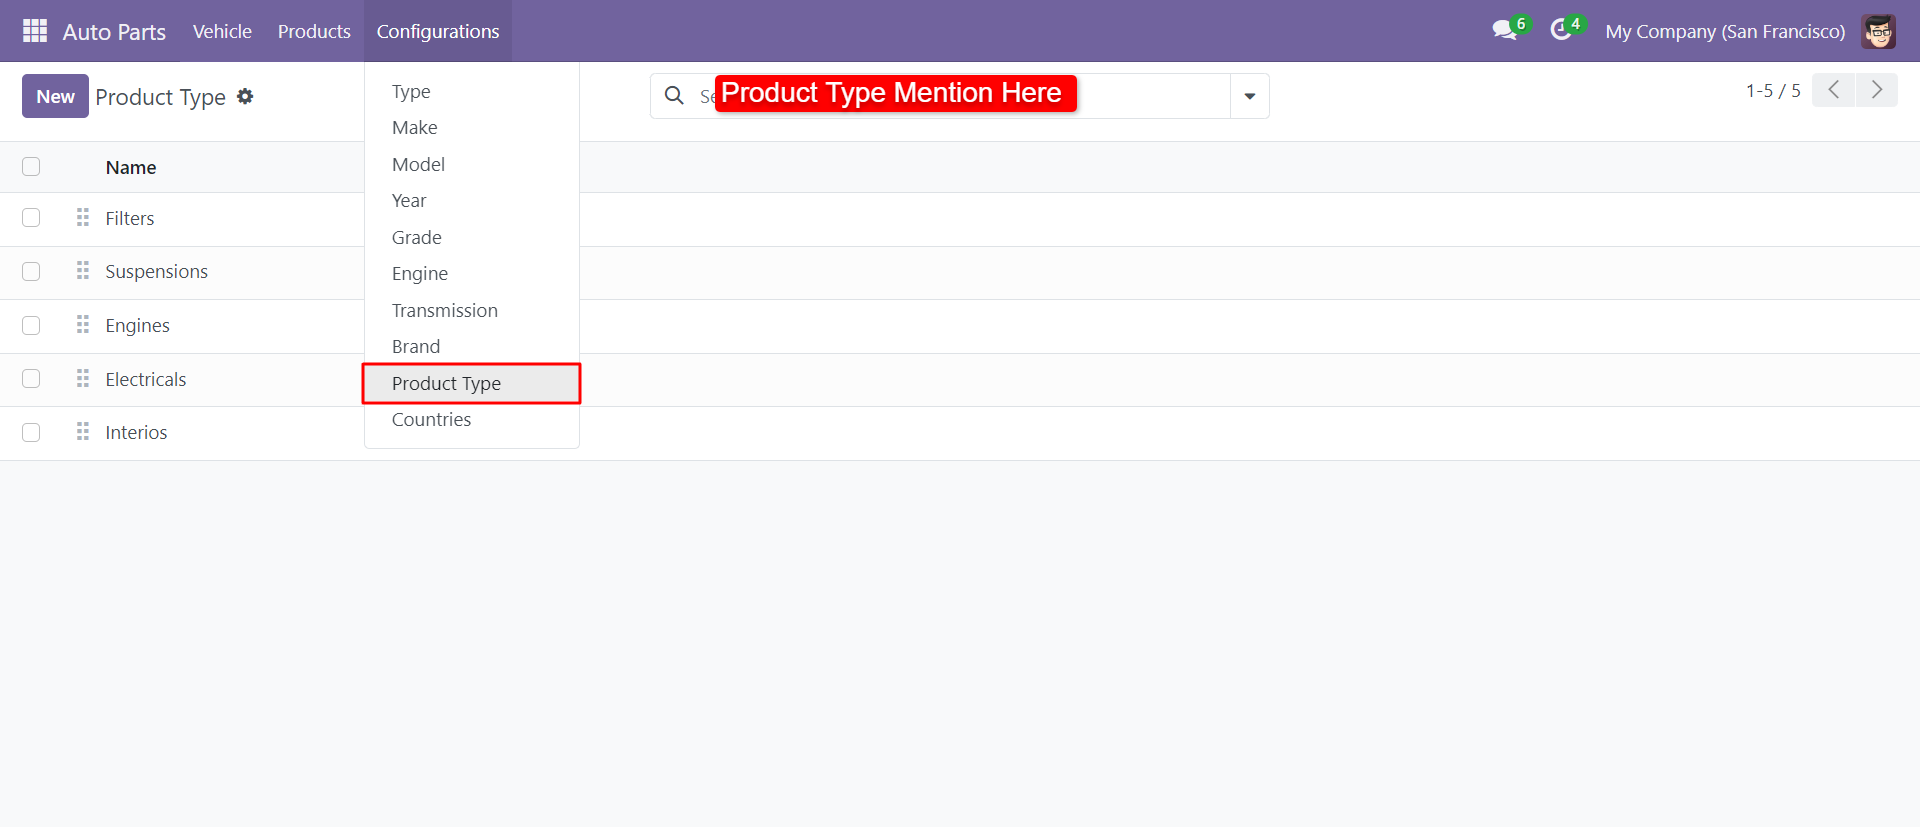
Auto Part Product Type View.
When stage is change then add line here.

Ticket PDF report looks like below.

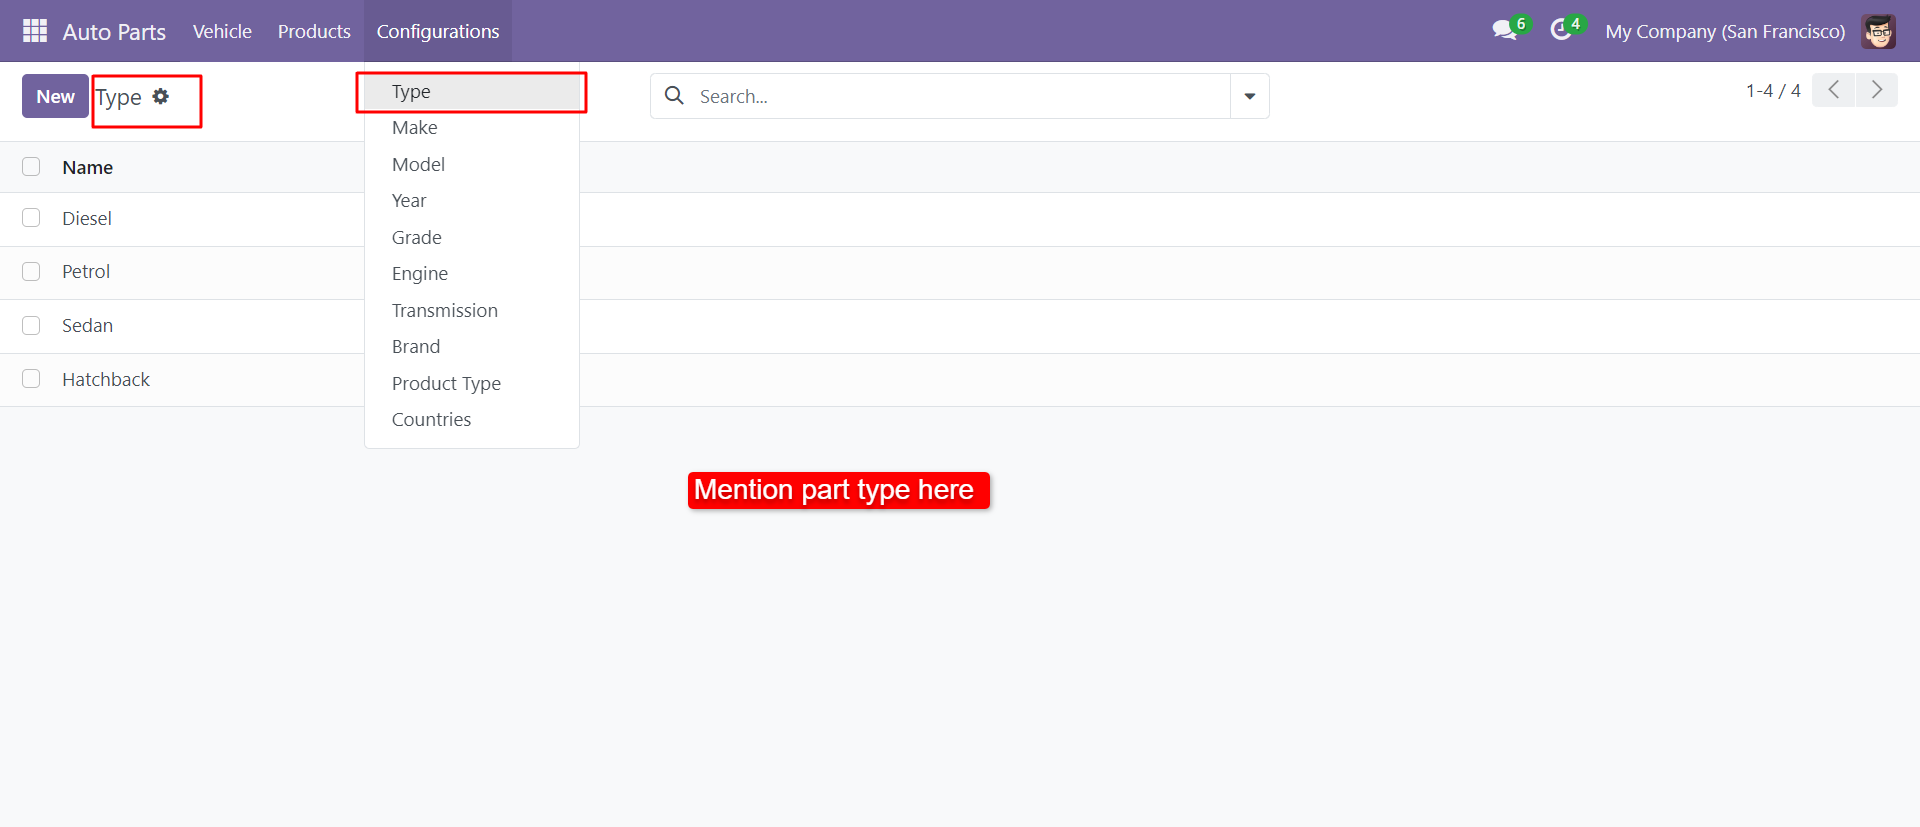
You can configure the auto part type as shown in the attached screenshot.
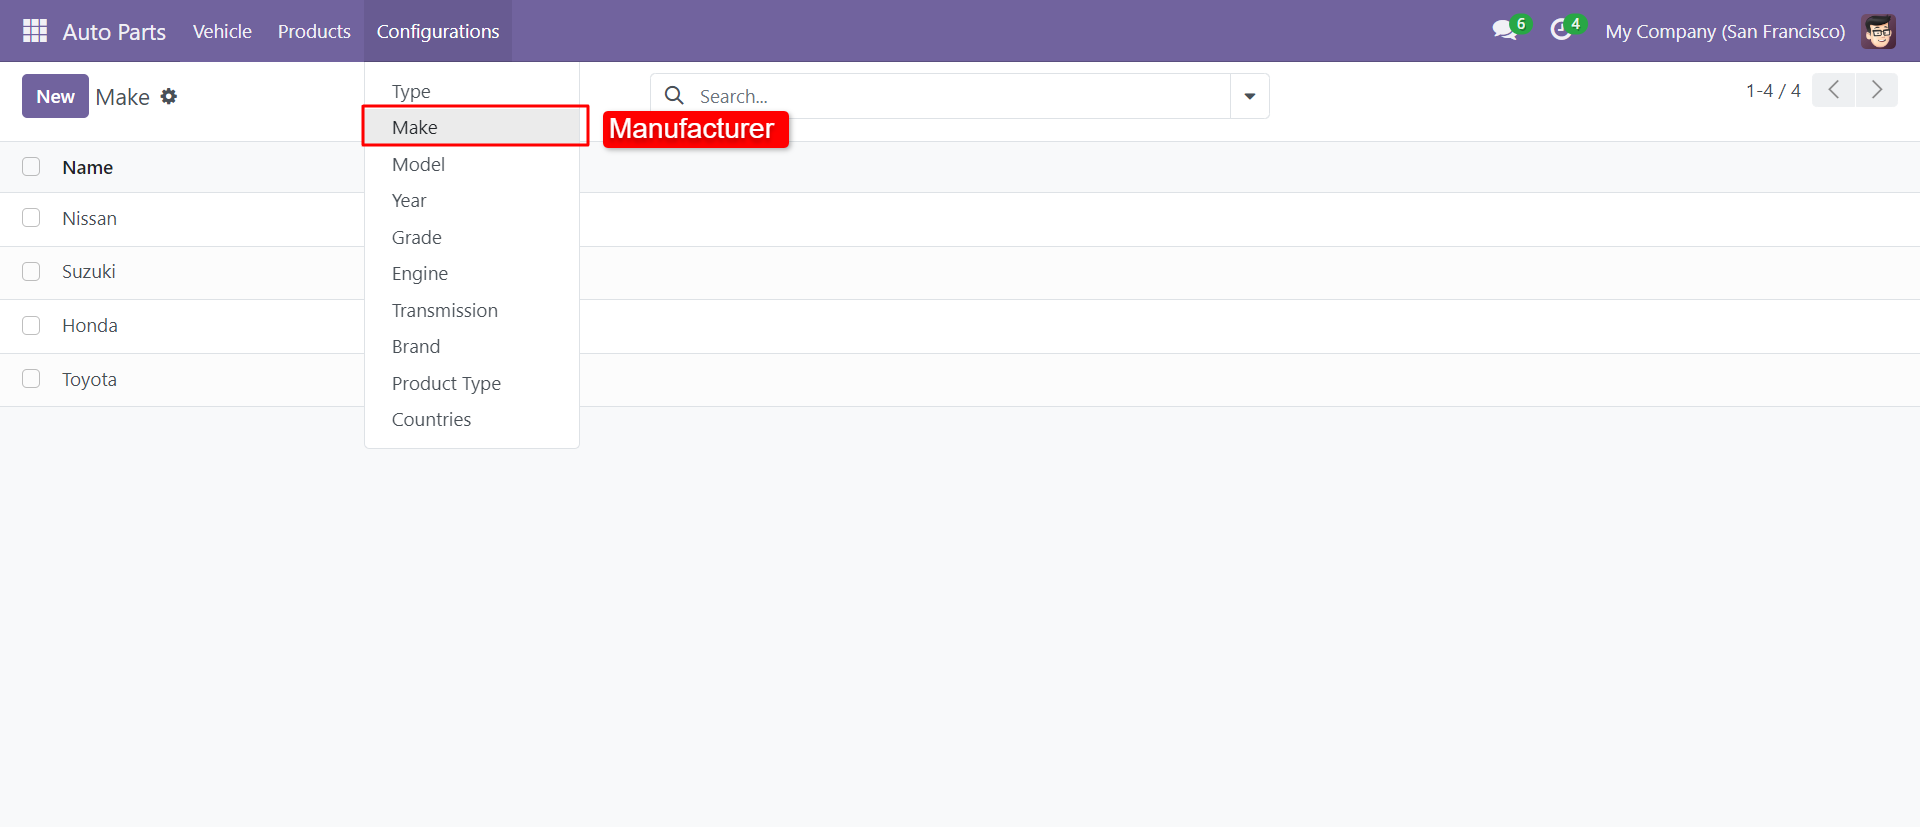
You can configure the manufacturer details.
You can start the activity timer directly from the Kanban view by clicking the 'Start' button.

You can see that the ticket timer for 'Mitchel Admin' has started.

You can see that the ticket timer for 'Jerry' has started for the same ticket.


In the ticket form view, the running timer is visible in the timesheet tab.

Assign the ticket to another user, 'Doe'.

Start the ticket timer by clicking the 'Start' button.

You can see that three users started the same ticket timer simultaneously.

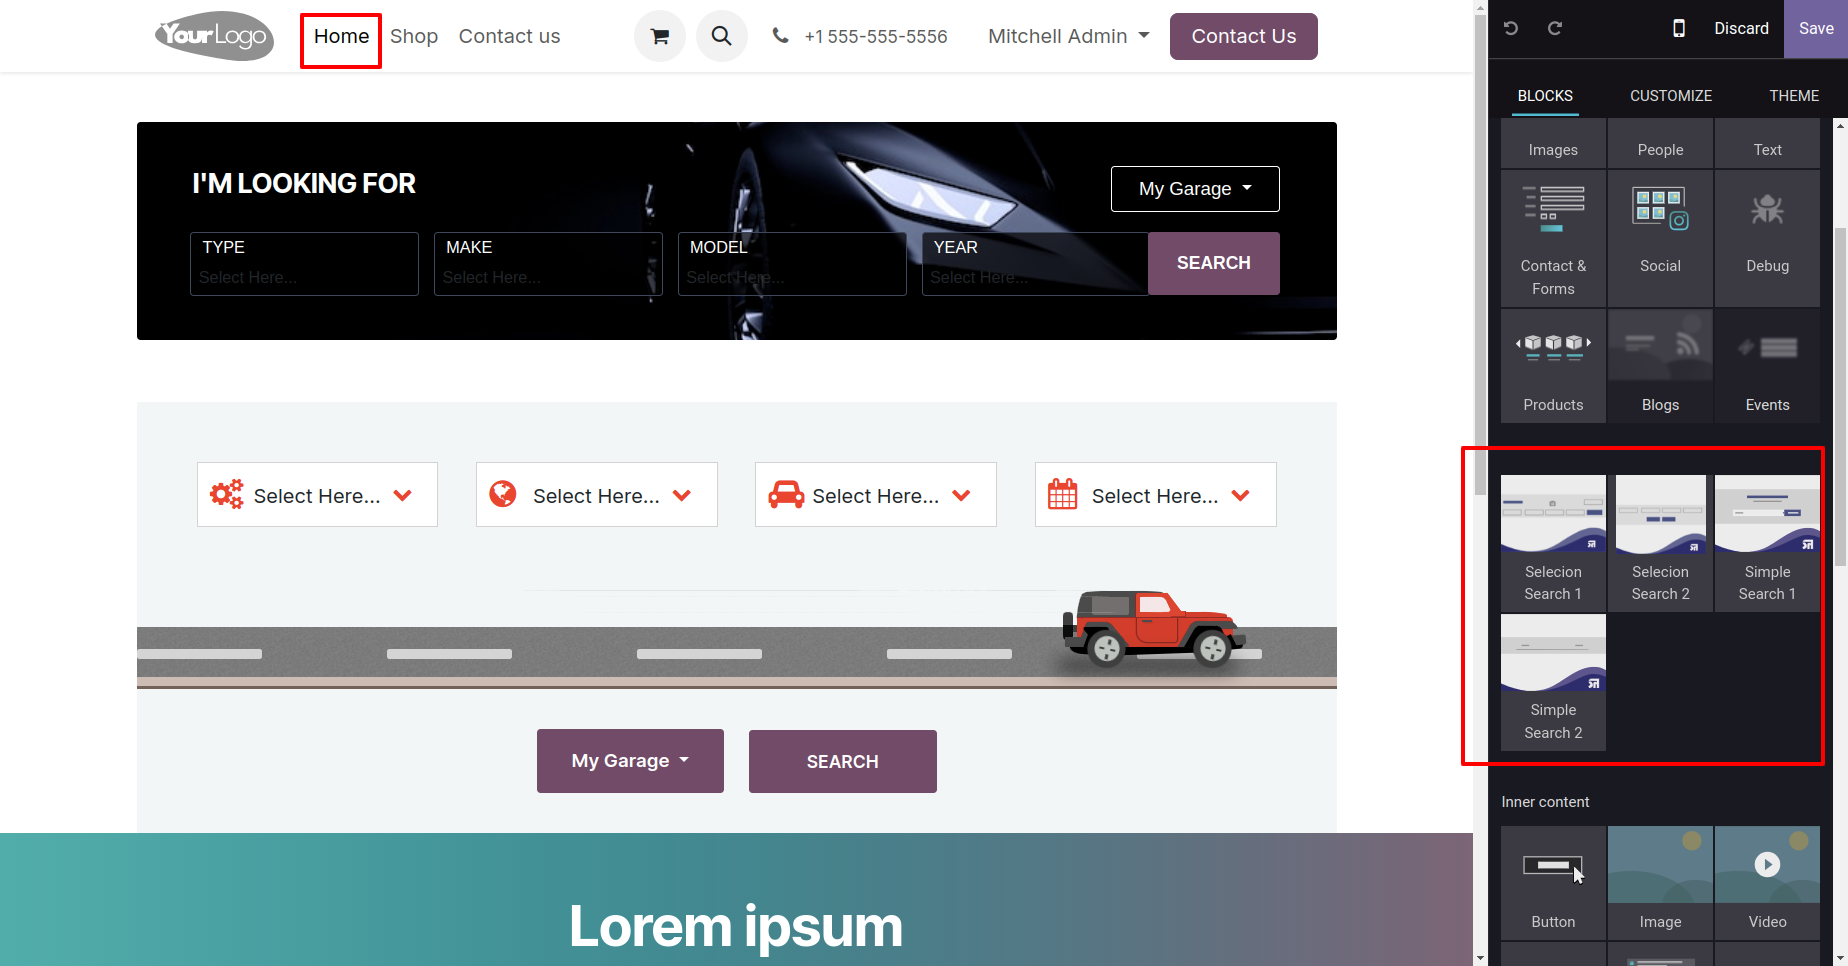
You can add a selection search on the homepage in various layouts.
Go to the helpdesk setting and enable the 'Manual Add Timesheet' feature.

Form view of the ticket. Add the timesheet in the timesheets tab.

Configuration to give attachment size limit on portal.

Alert comes when attachment size larger then configuration.

Schedule activity in helpdesk ticket form view.
Whenever any customer/staff replied, the stage changes according to configurations. You can find tickets easily by customer/staff reply based on tags.
'Auto Update Replied Status & Replied Date Based On Customer/Staff Replied To Ticket'.
We have updated the auto-close mechanism based on the last replied date of staff.
'Ticket Close' information will added here.

Customer ratings visible to only manager & team leader.
You can filter tickets by creation date.

You can search tickets by product name from the search bar.
We were by default adding customers as followers on ticket create, to make this better we have given configuration to on/off these auto-add followers.
Chat with customer in chatter.

In 'User', enable the 'Helpdesk Whatsapp Feature' option.

Whatsapp message description with the configuration setting.

Set the signature in the message,
1) Go to Preferences.

2) Add Signature.

Click 'Send By WhatsApp' Button in helpdesk tickets.

If partner mobile number is not added then this error popup will be appears.

Click 'Send By WhatsApp' Button in helpdesk tickets.

Click on the 'Send By Whatsapp' button.

This is the output shown in the WhatsApp messenger.

In helpdesk ticket chatter you can see the message which is sent.

You can send a Whatsapp message direct from the dashboard.

After that one wizard opens, select details and press 'Send by whatsapp'.

This is the output shown in the WhatsApp messenger.


When you click 'Send By WhatsApp' Button in helpdesk tickets, this wizard opens choose details and if you click send then mail is sent. If you click send by WhatsApp it sends the message on WhatsApp.

The sent email looks like this.

Helpdesk SLA Policy group.

Go to the configuration => 'Helpdesk SLA Policies'.

The 'Helpdesk SLA Policy' form view looks like this.

'SLA Tickets' form view looks like this.

You can see helpdesk SLA tickets also from the helpdesk ticket types using the smart button 'Helpdesk SLA'.

'Helpdesk Teams' form view. Where you can define working schedule as well as see helpdesk SLA ticket using the smart button 'Helpdesk SLA'.

The search panel in the helpdesk tickets looks like this, you
can filter SLA
using different filters.
Note: Search panel and multi-edit option available in
only v13,v14 &
v15.


You can edit multiple records from the helpdesk tickets list
view.
Note: Search panel and multi-edit option available in
only v13,v14 &
v15.

'Helpdesk Ticket' form view, create a ticket and save it.

In the helpdesk ticket form view, you can see SLA deadline, Now we press the 'Approve' button.

When press on the 'Approve' button and all policies are approved then stage change to 'Done'.

You can do helpdesk SLA analysis from the 'Reporting' menu.

Enable 'Ticket Reminder'.

Go to the configuration => 'Helpdesk Ticket Alarm'.

Helpdesk ticket alarm form view looks like this.

Helpdesk ticket alarm form view with the ticket reminder.

Helpdesk ticket reminders email looks like this.

Helpdesk ticket alarm form view with the ticket reminder.

Helpdesk ticket reminders popup looks like this.

'Ticket Dashboard' for Helpdesk Manager. Where you can filter data with various filters and see data in well organized table formate.

'Ticket Dashboard' for Helpdesk Team Leader. Where leader can see only his team data and filter data with various filters, see data in well organized table formate.

'Ticket Dashboard' for Support User.

'Helpdesk Ticket' Kanban view.

'Helpdesk Ticket' List view.

'Helpdesk Ticket' Pivot view.

'Helpdesk Ticket' Graph view.


'Helpdesk Ticket' Calender view.

'Helpdesk Ticket' Activity view.

Helpdsk form view of the support manager.

Helpdsk form view of the team leader.

Helpdsk form view of the support user.

'Helpdesk Ticket' form view.

'Helpdesk Ticket' form attachment tab. Where you can attach documents received from customers.

In User configuration there is access rights for only portal users.(Only visible when portal user true)

Login with manager and click on 'Helpdesk Tickets'.

Click on 'Create'.

This Wizard will popout after click on create. Here Only Portal Manager,Leader, Manager can select partners.

You can group by tickets.

New customer created and it will automatically added to followers.

In portal you can download ticket in PDF formate also. Just click 'Download'.

Ticket in PDF formate.

'Portal Support User'

Login with Portal Support User and click on 'Create'.

The portal user can create a ticket only.

A colorful dashboard appears as below.

Go to the Helpdesk Stages form view and set the color you wish to display on the dashboard.

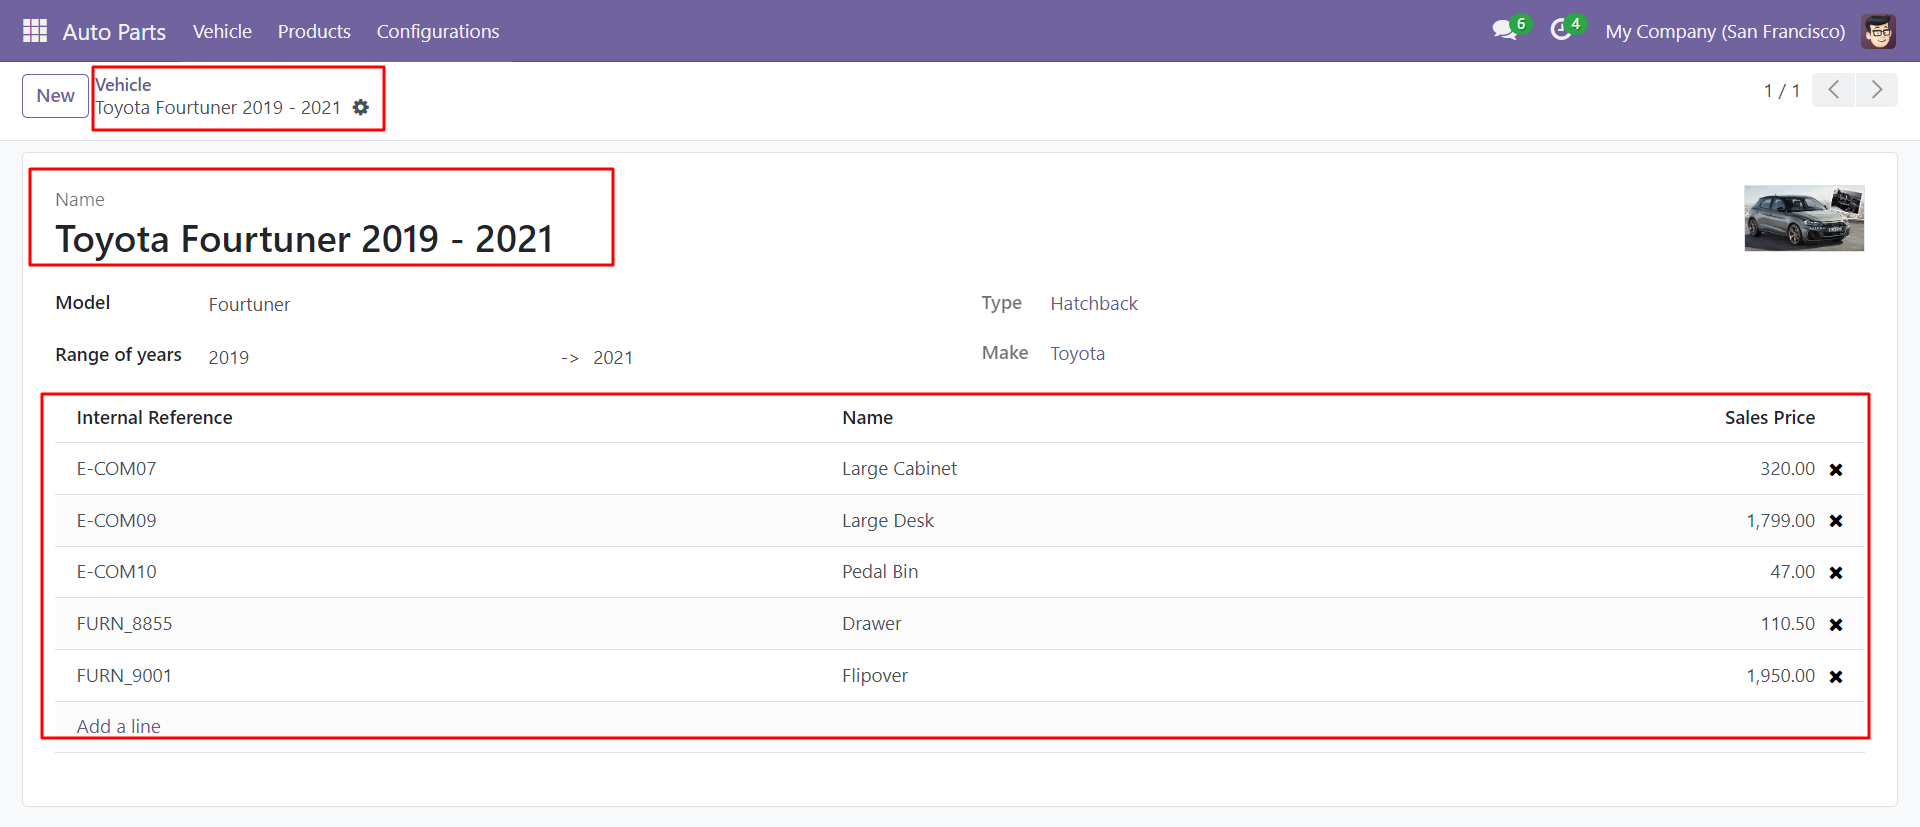
Vehicle form view, Here you can fill all required parts and many things.
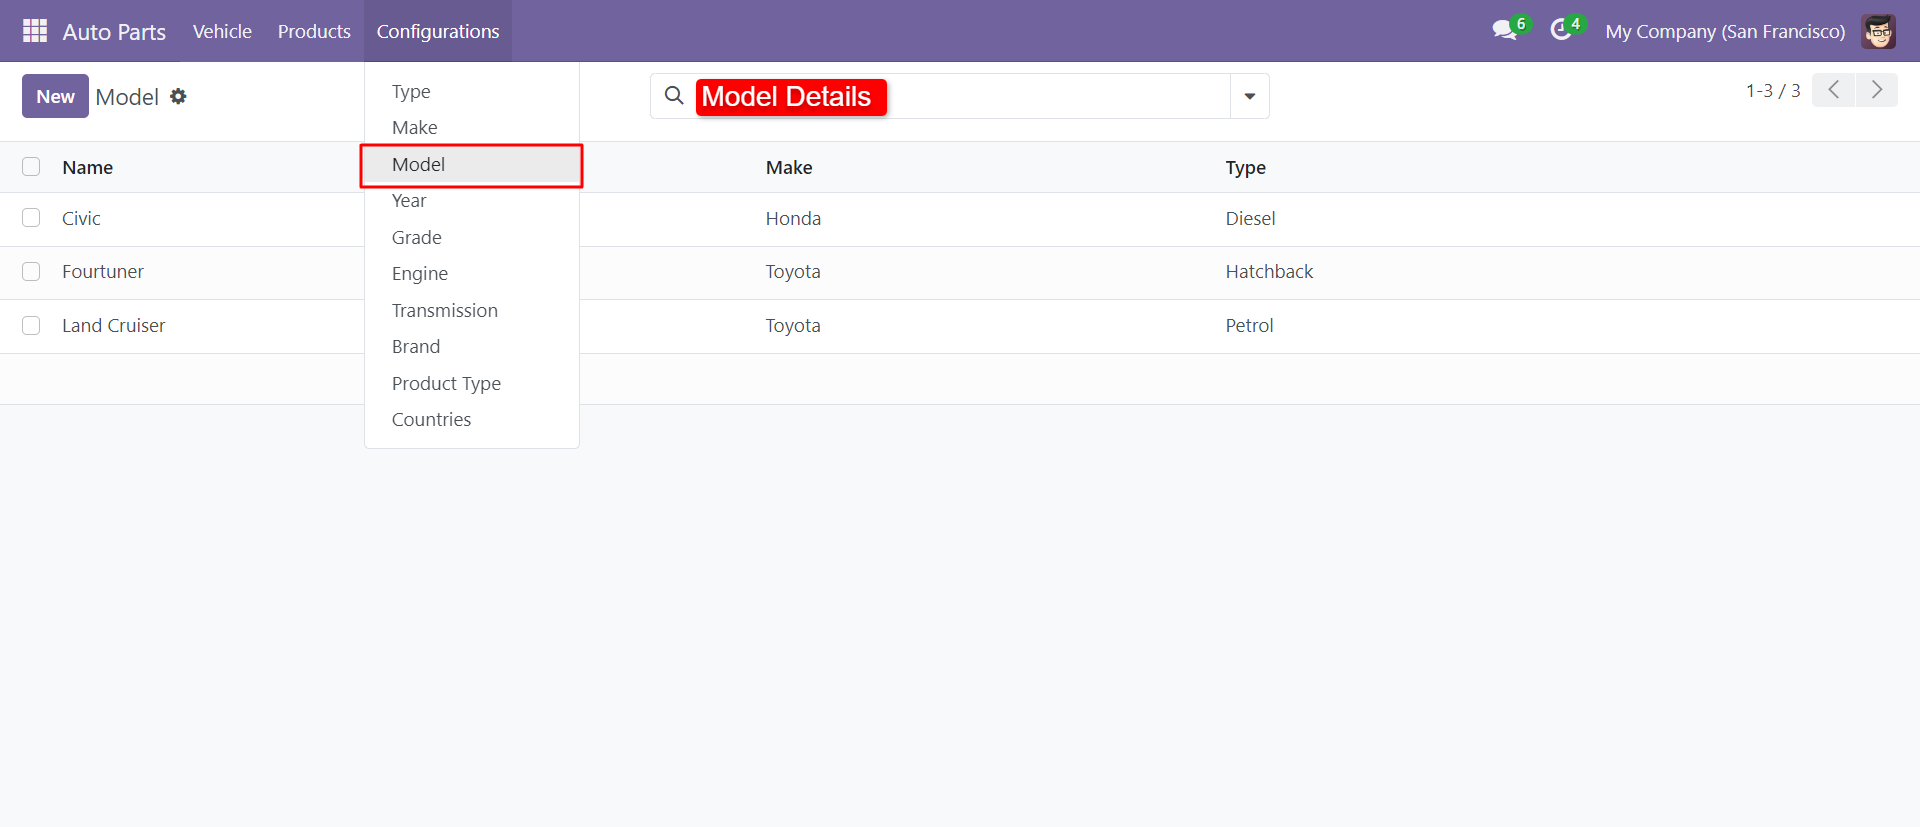
You can configure the model details.
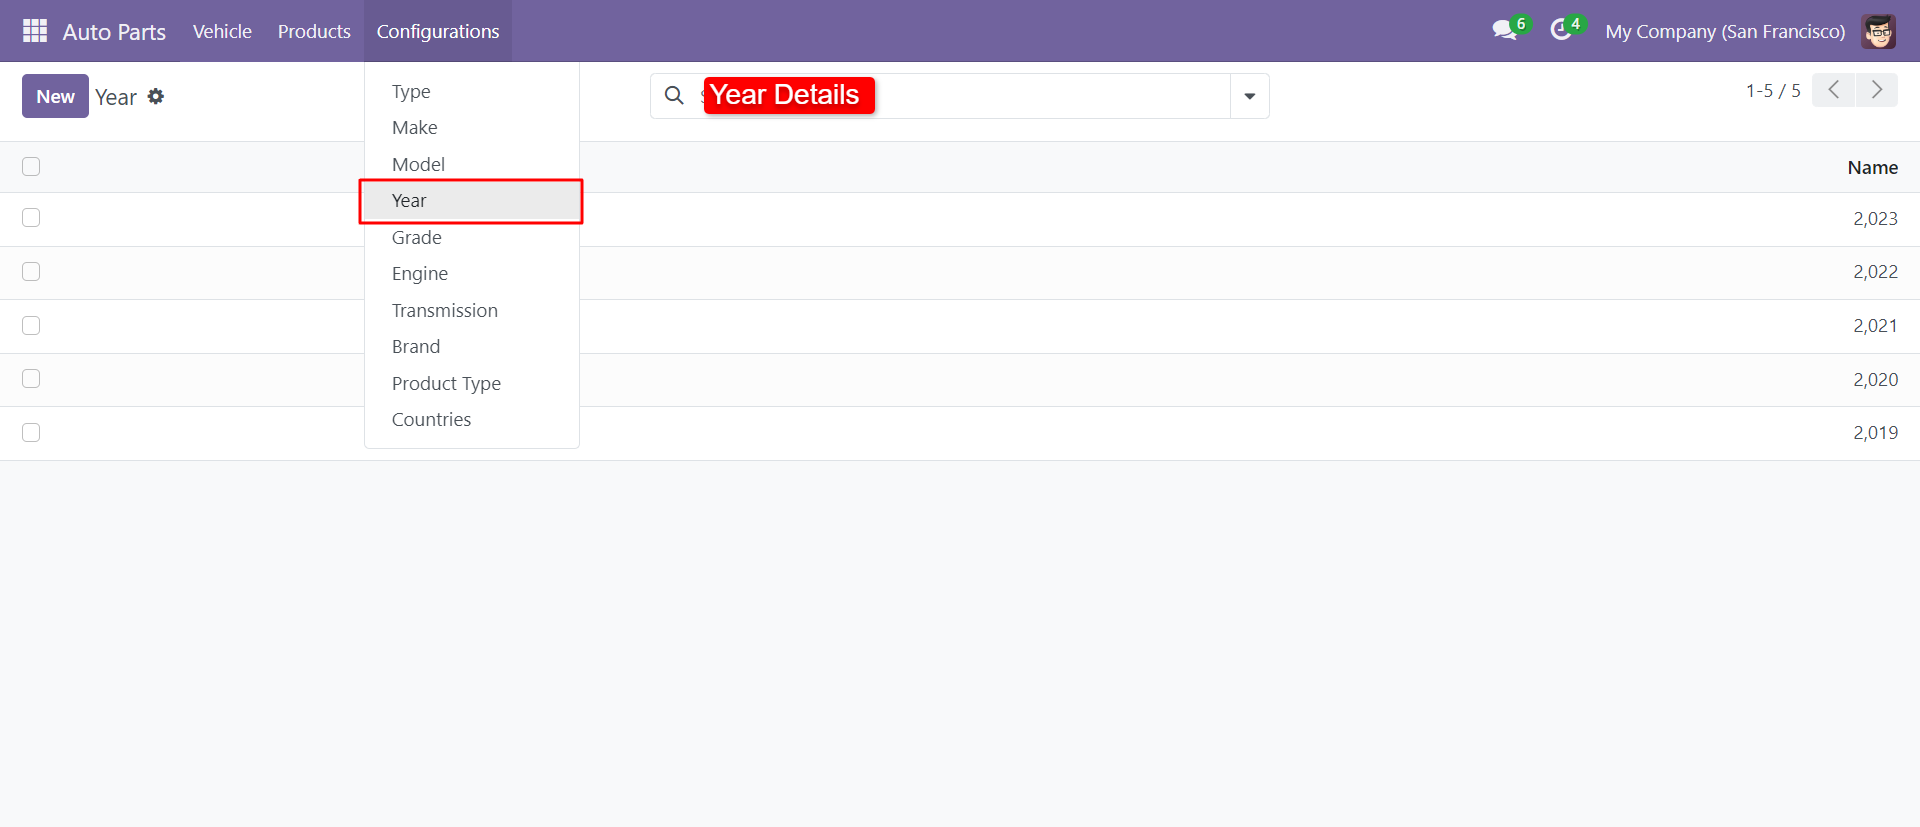
Auto Part Year View.
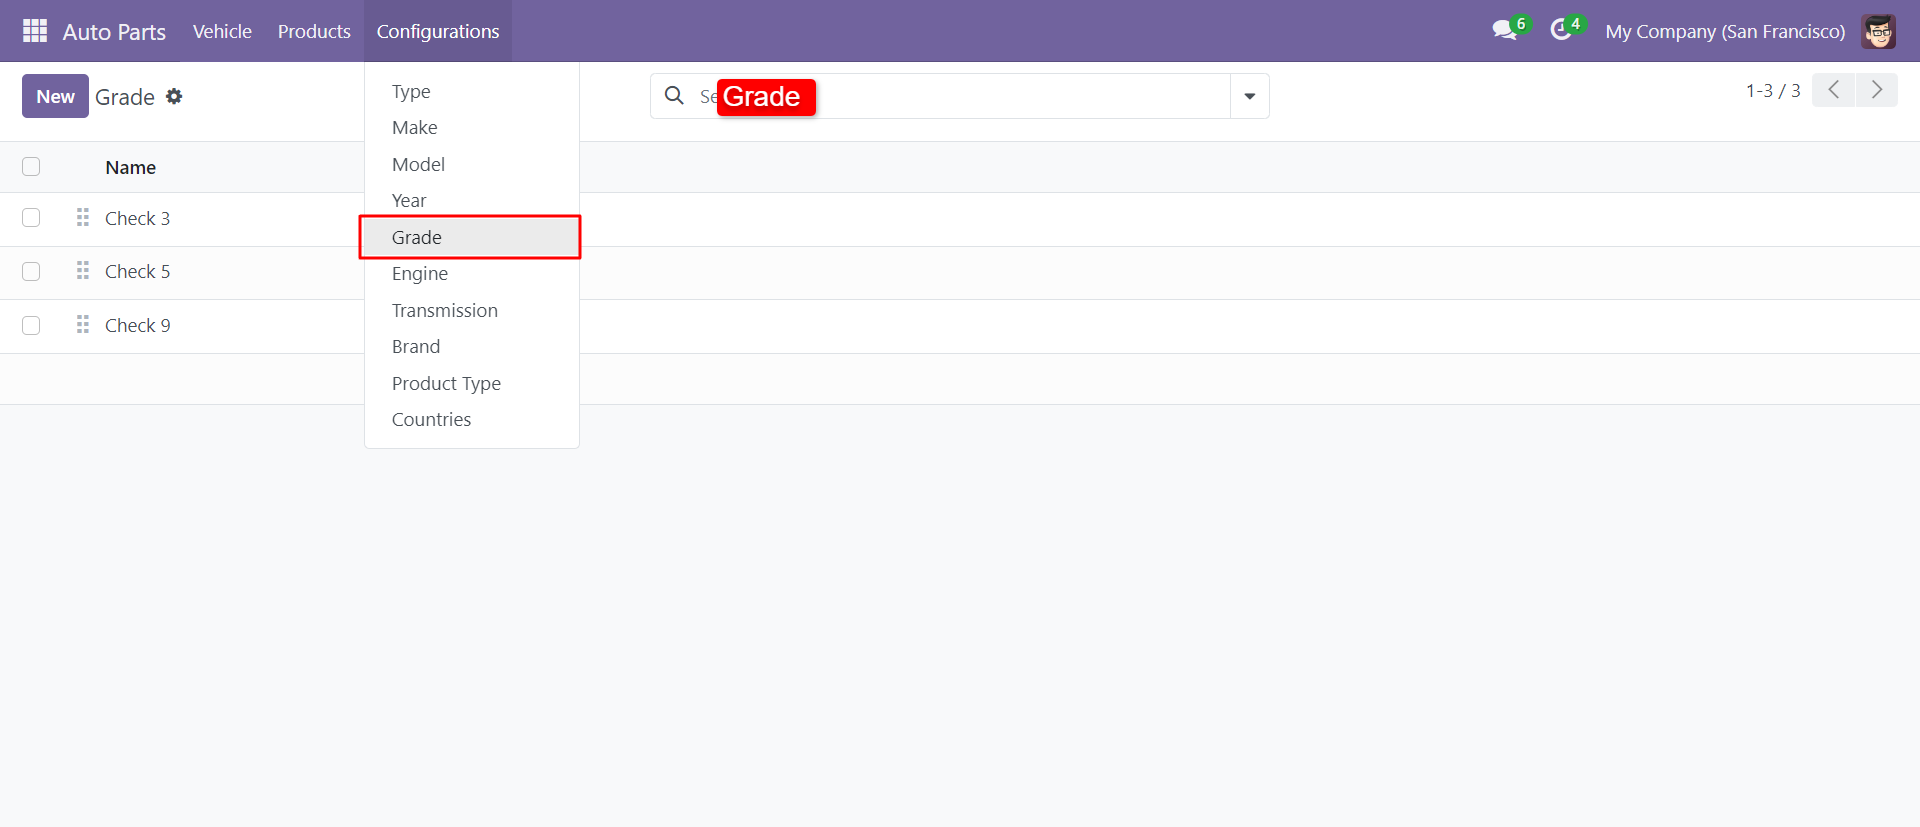
You can configure the Grade for auto parts.
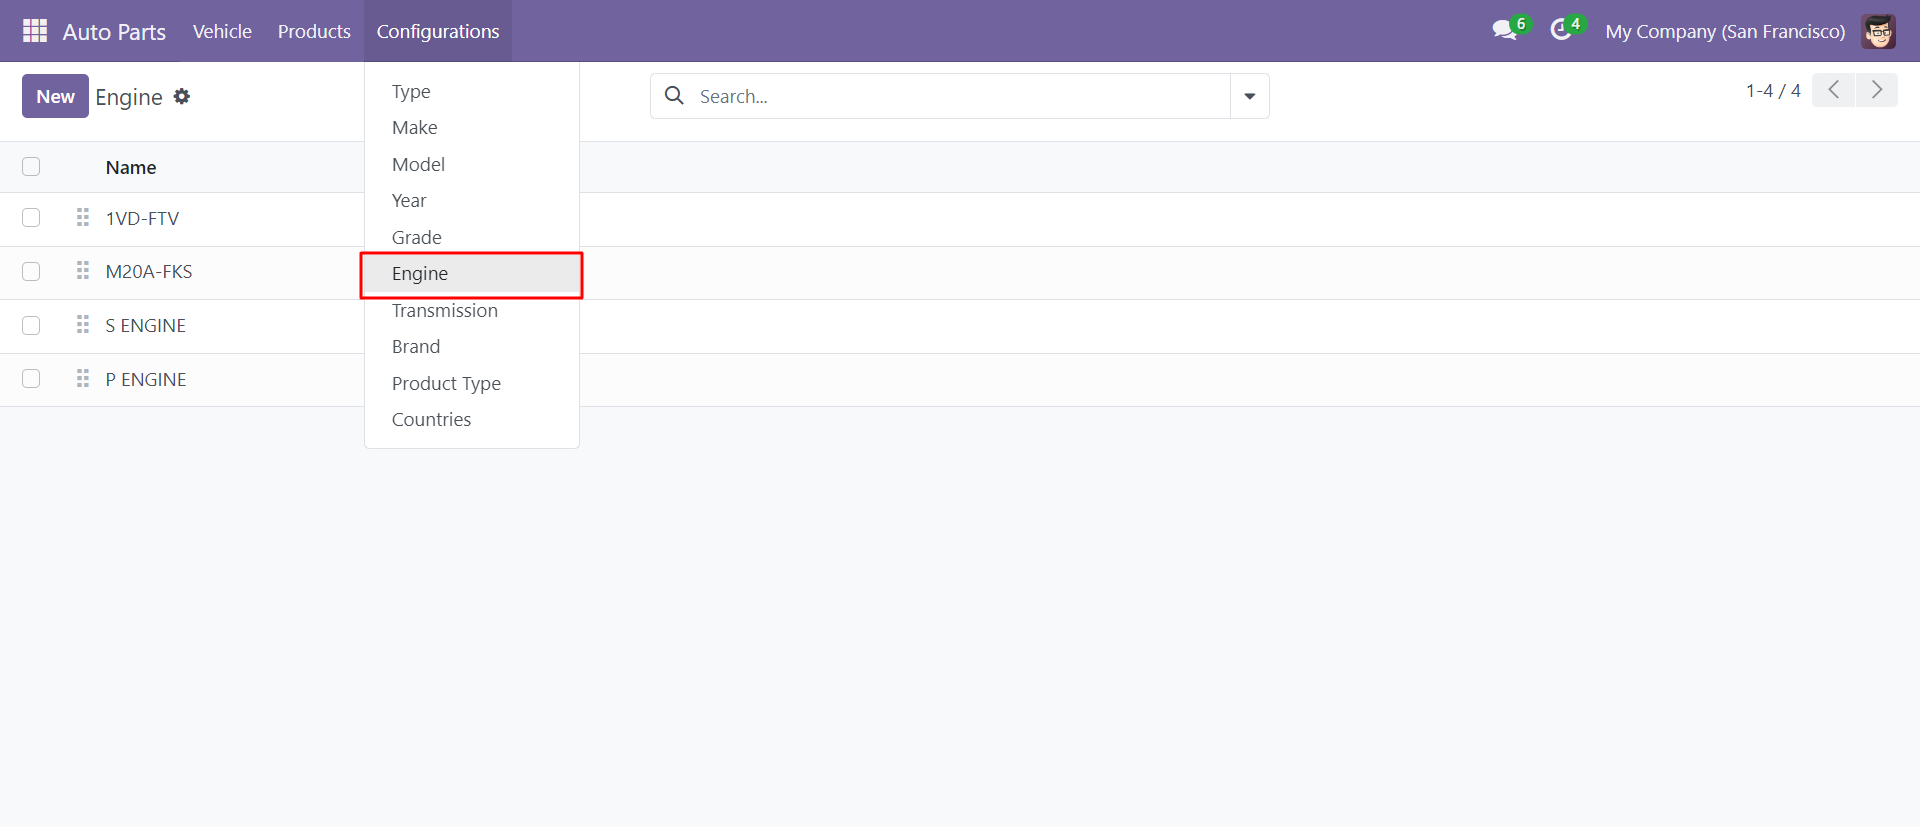
Auto Part Engine View.
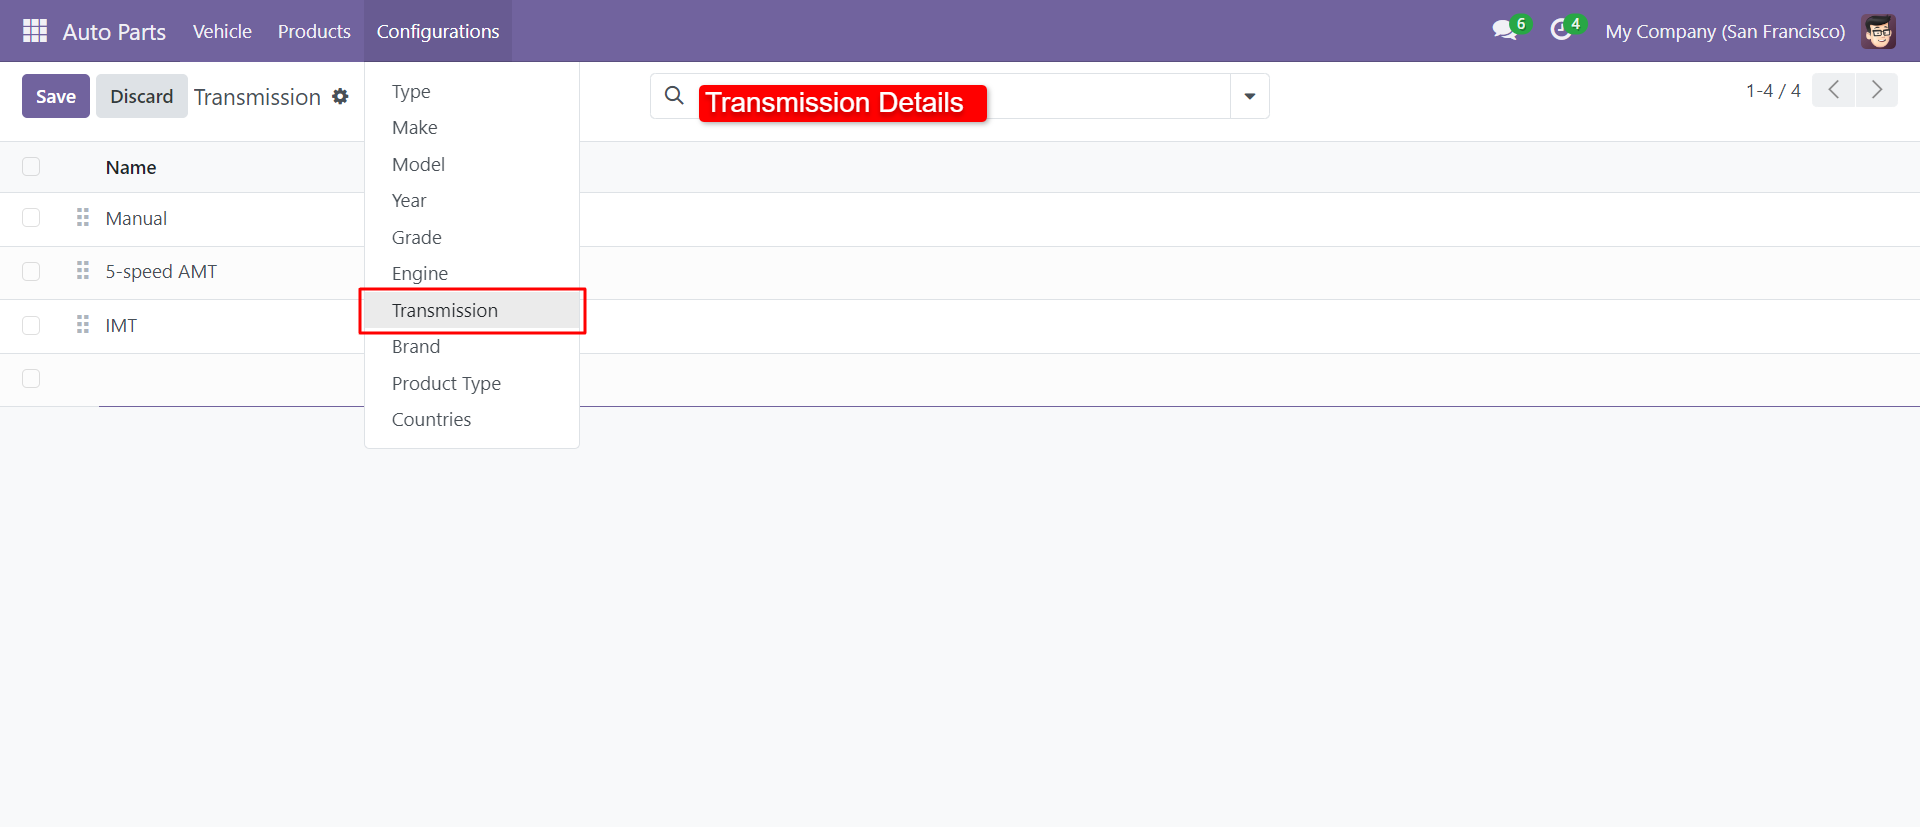
Transmission details.
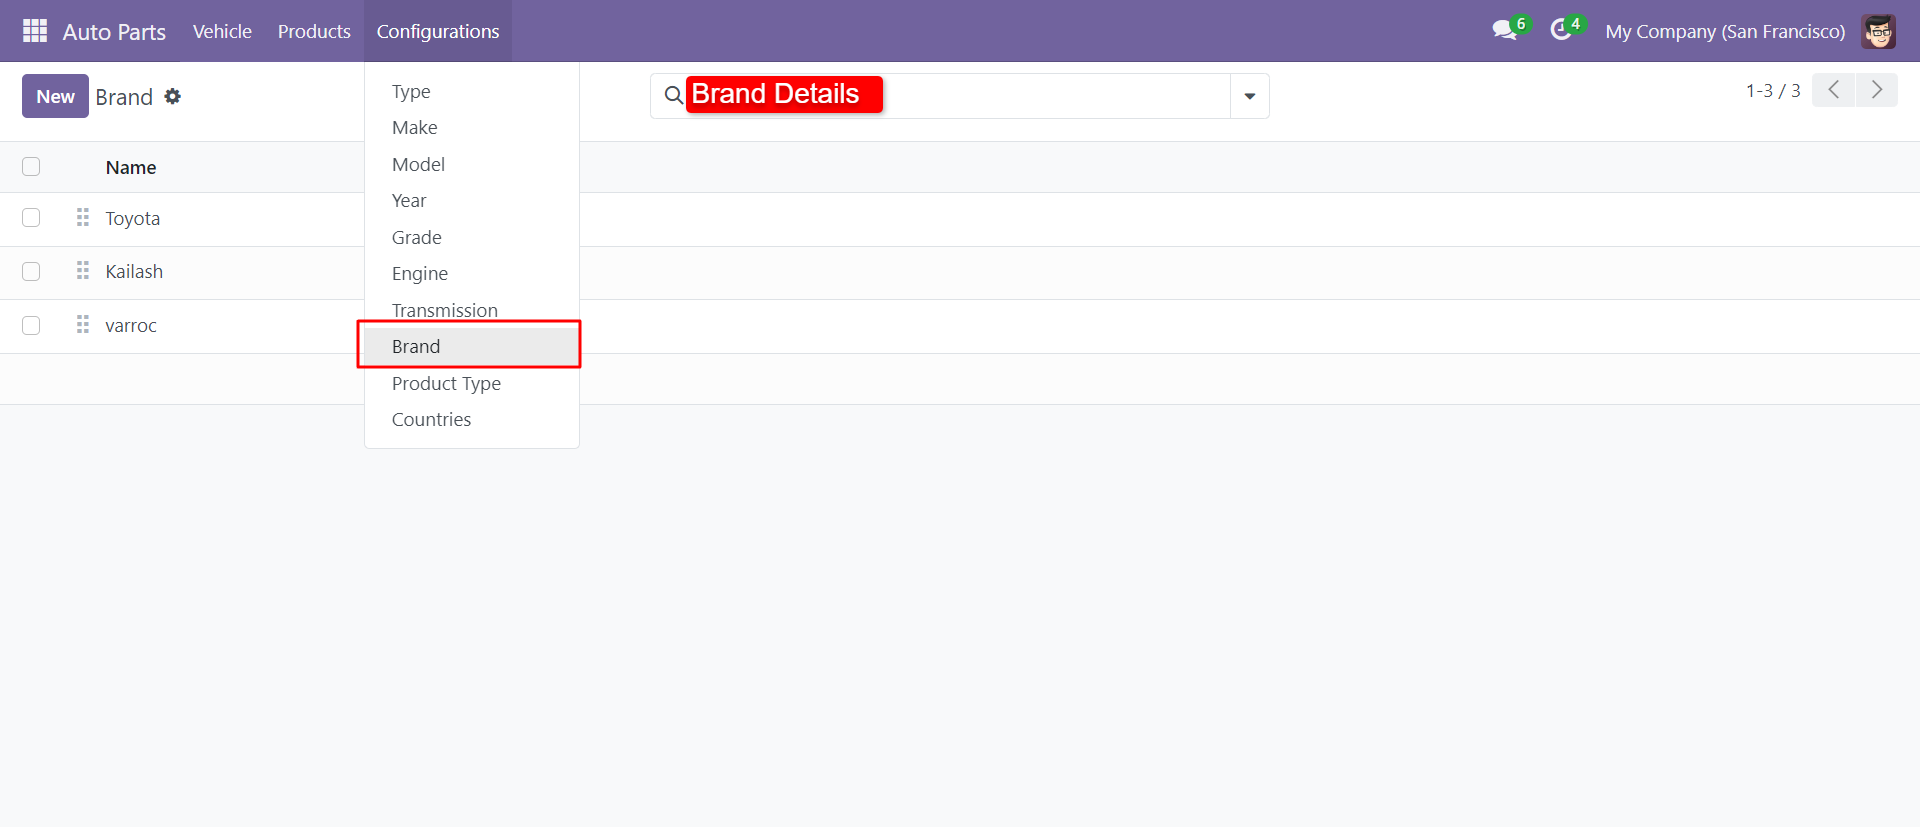
Brands of cars makers.
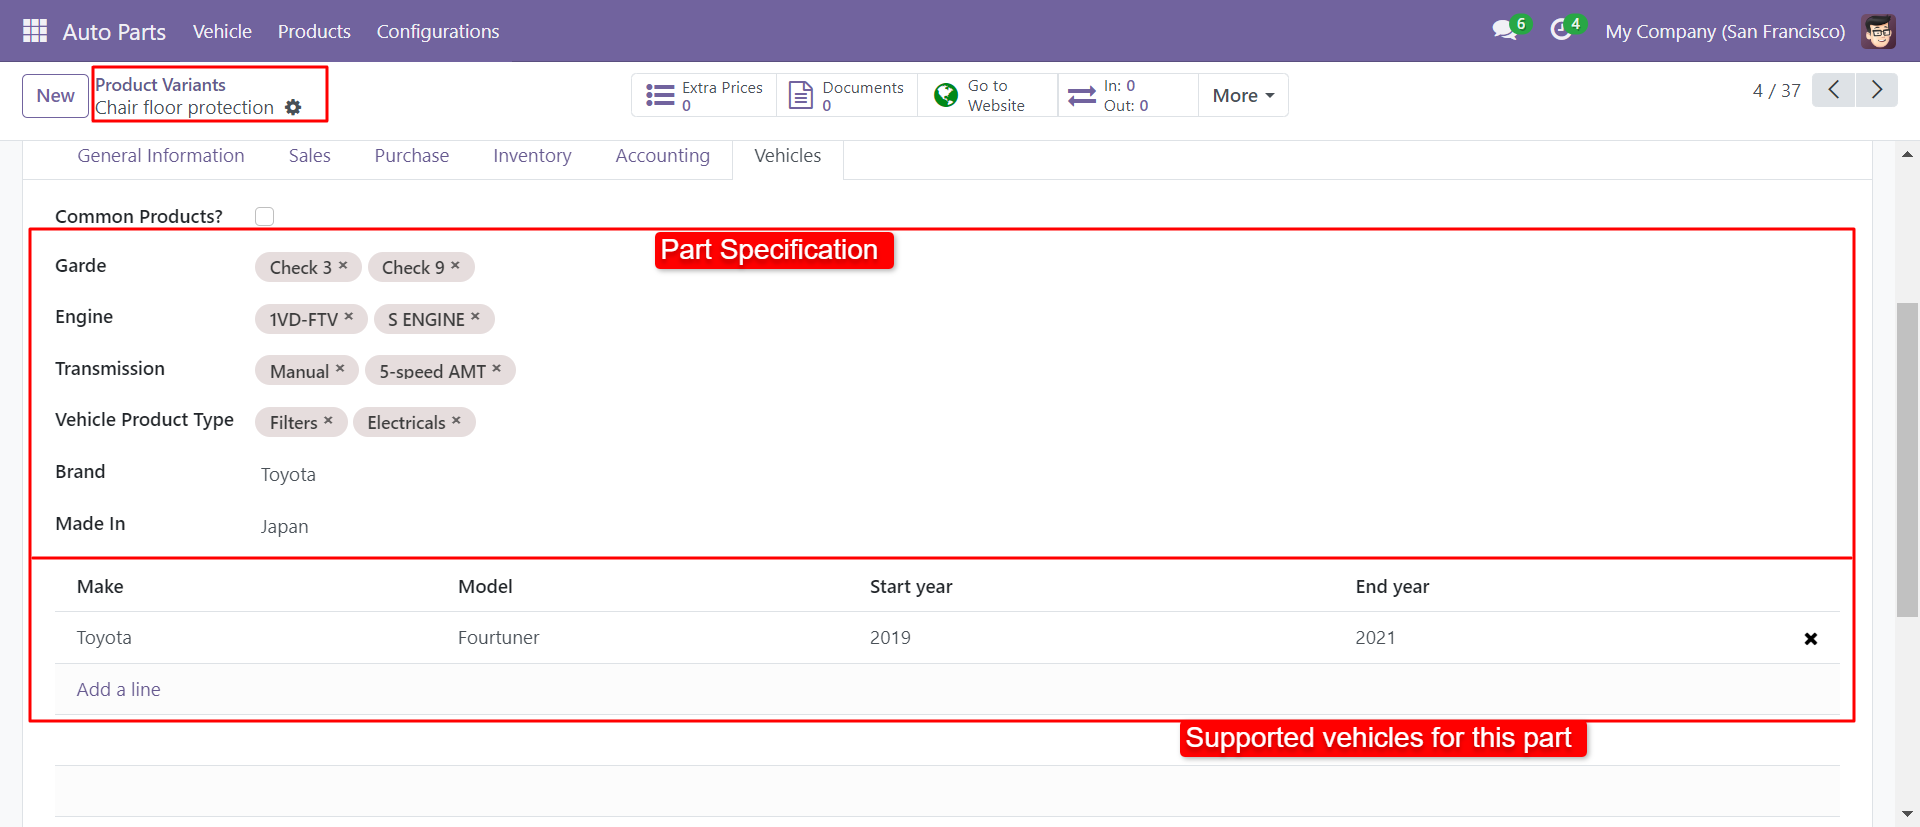
Define supported vehicles all details in products variants (vehicle parts).
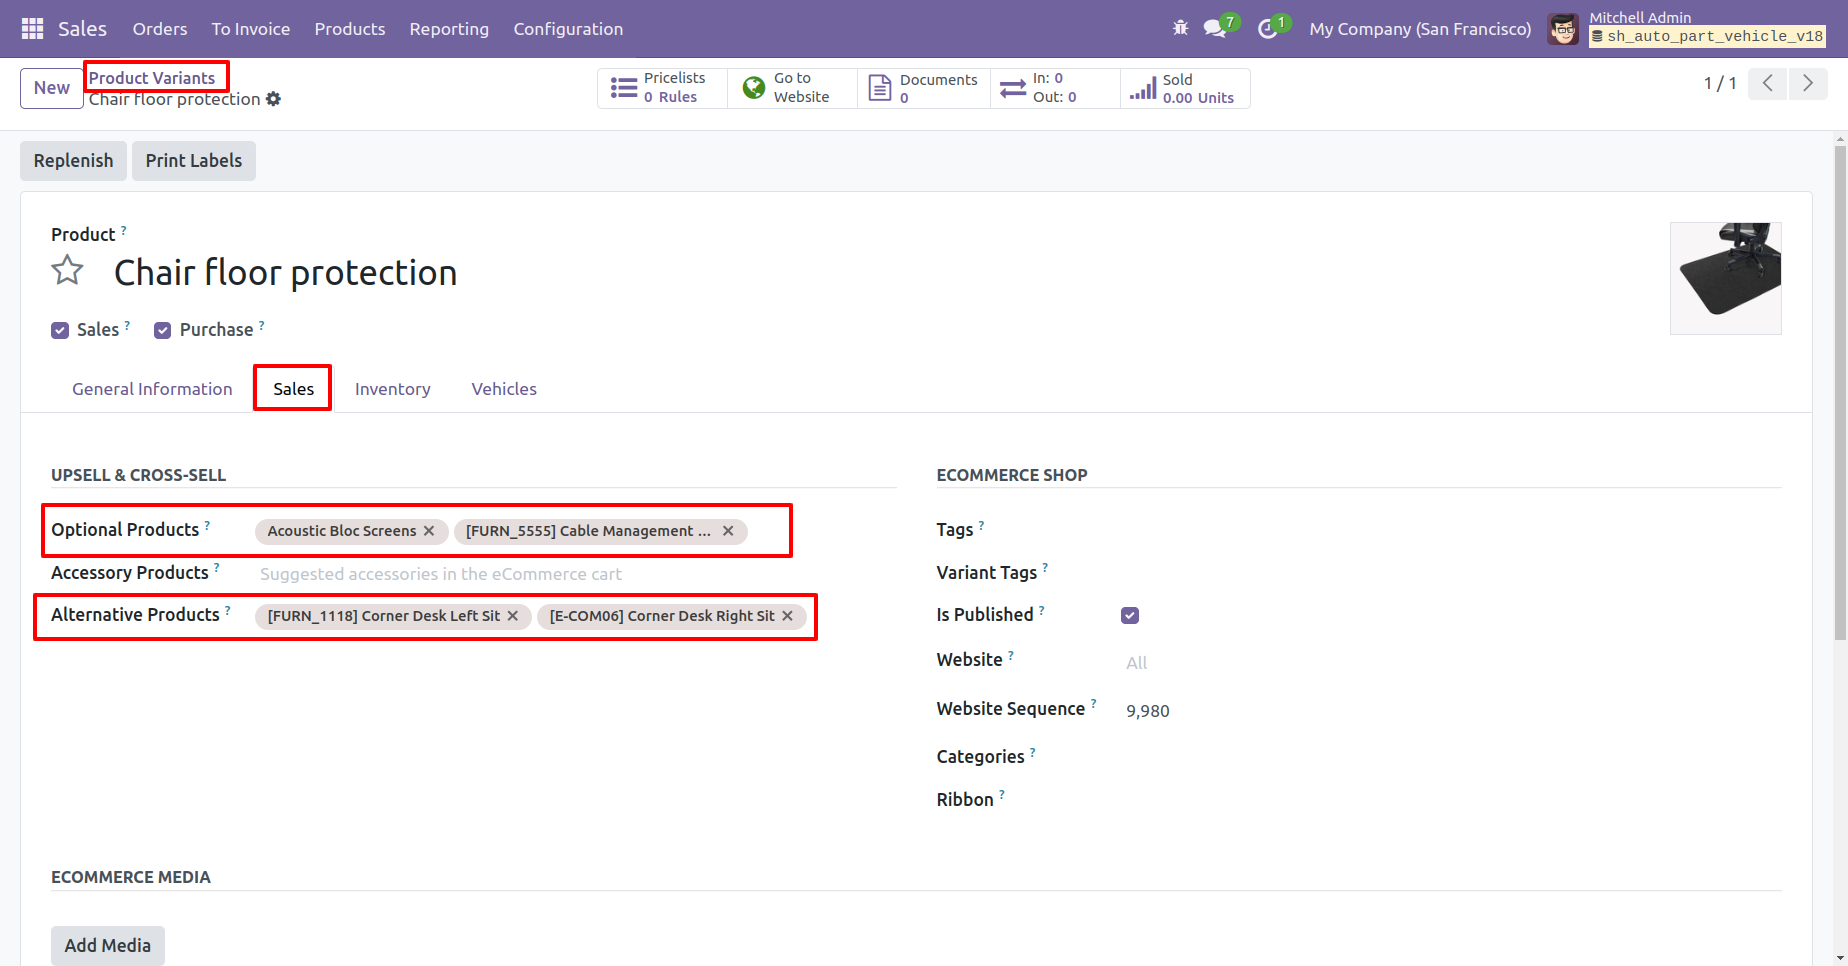
Add optional and alternative products in product variant sales tab.
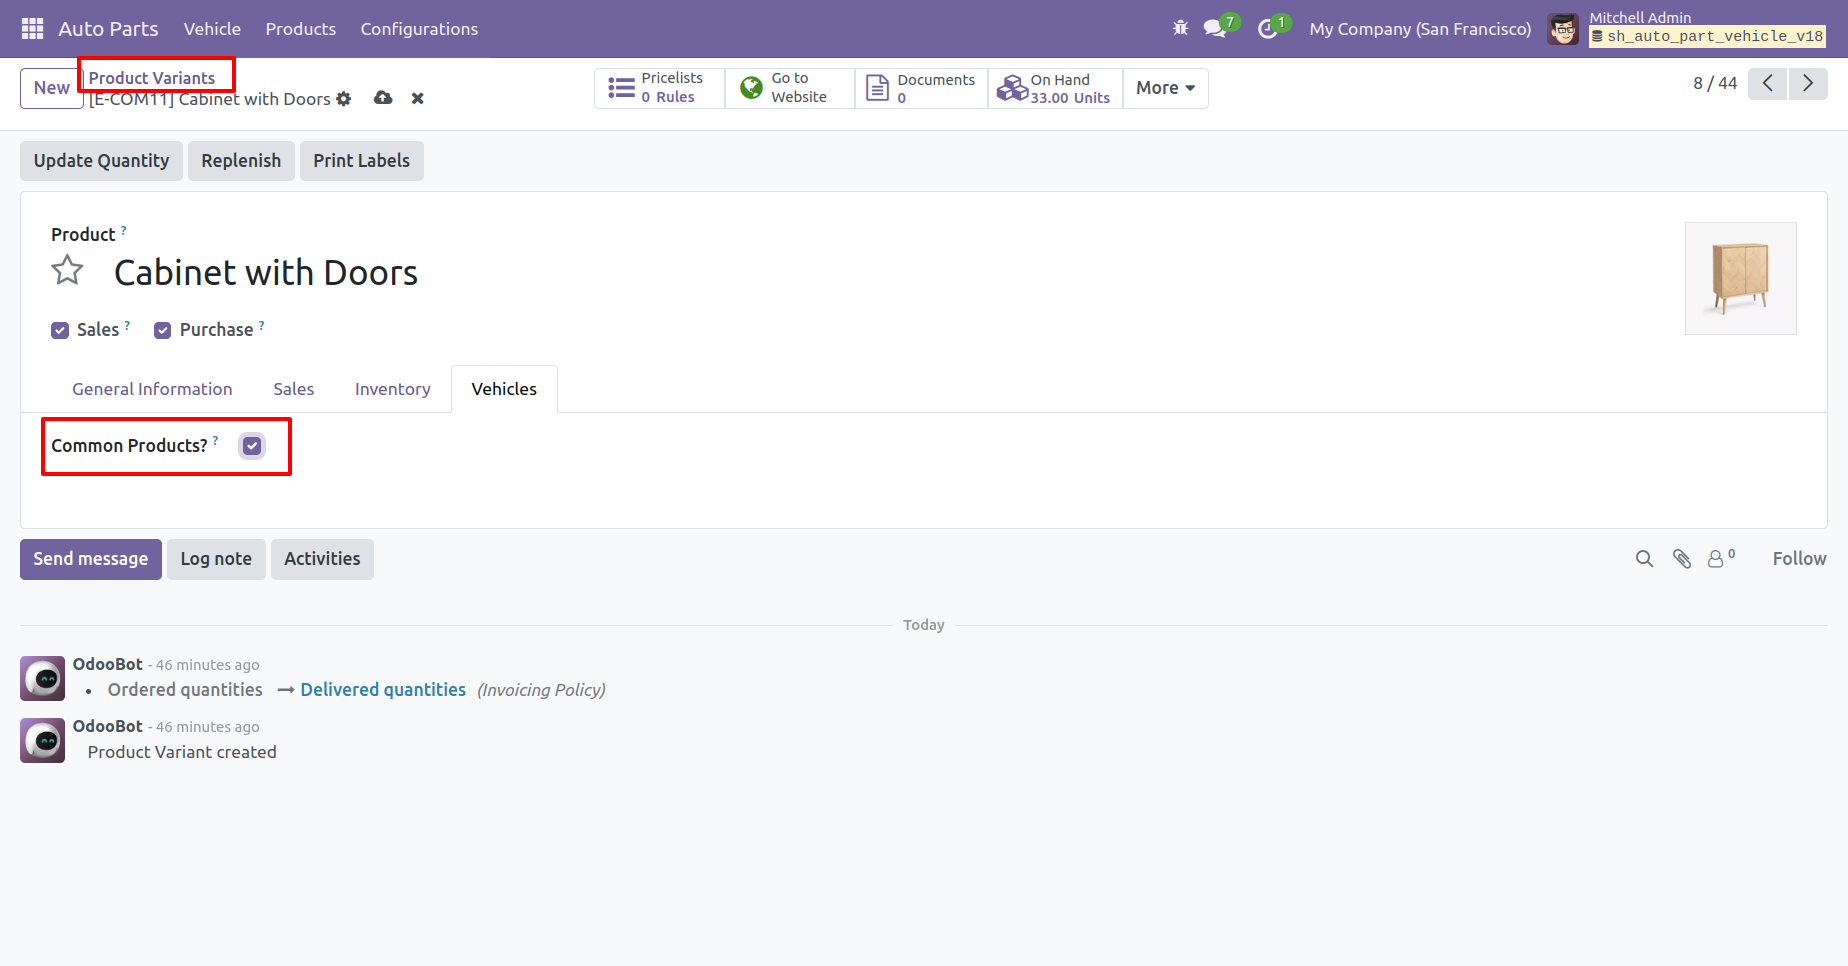
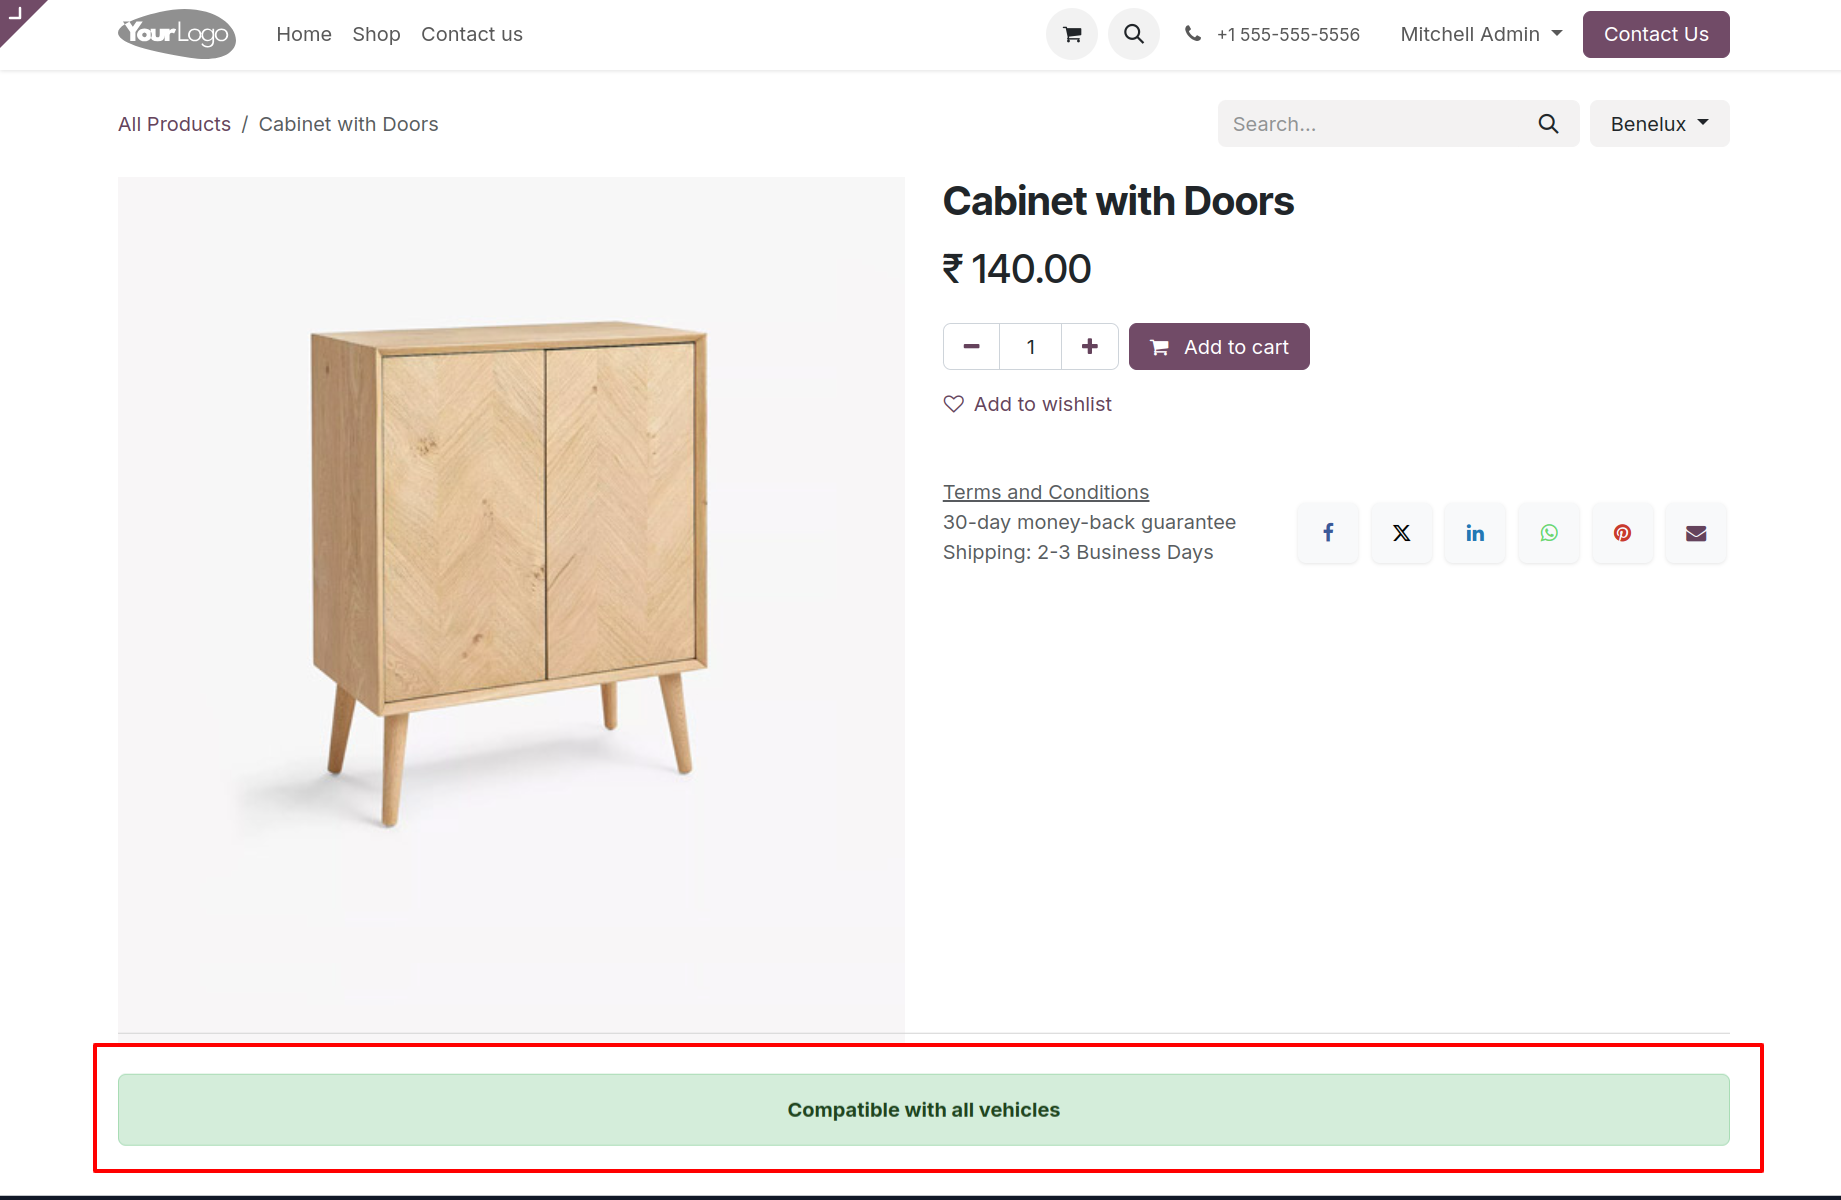
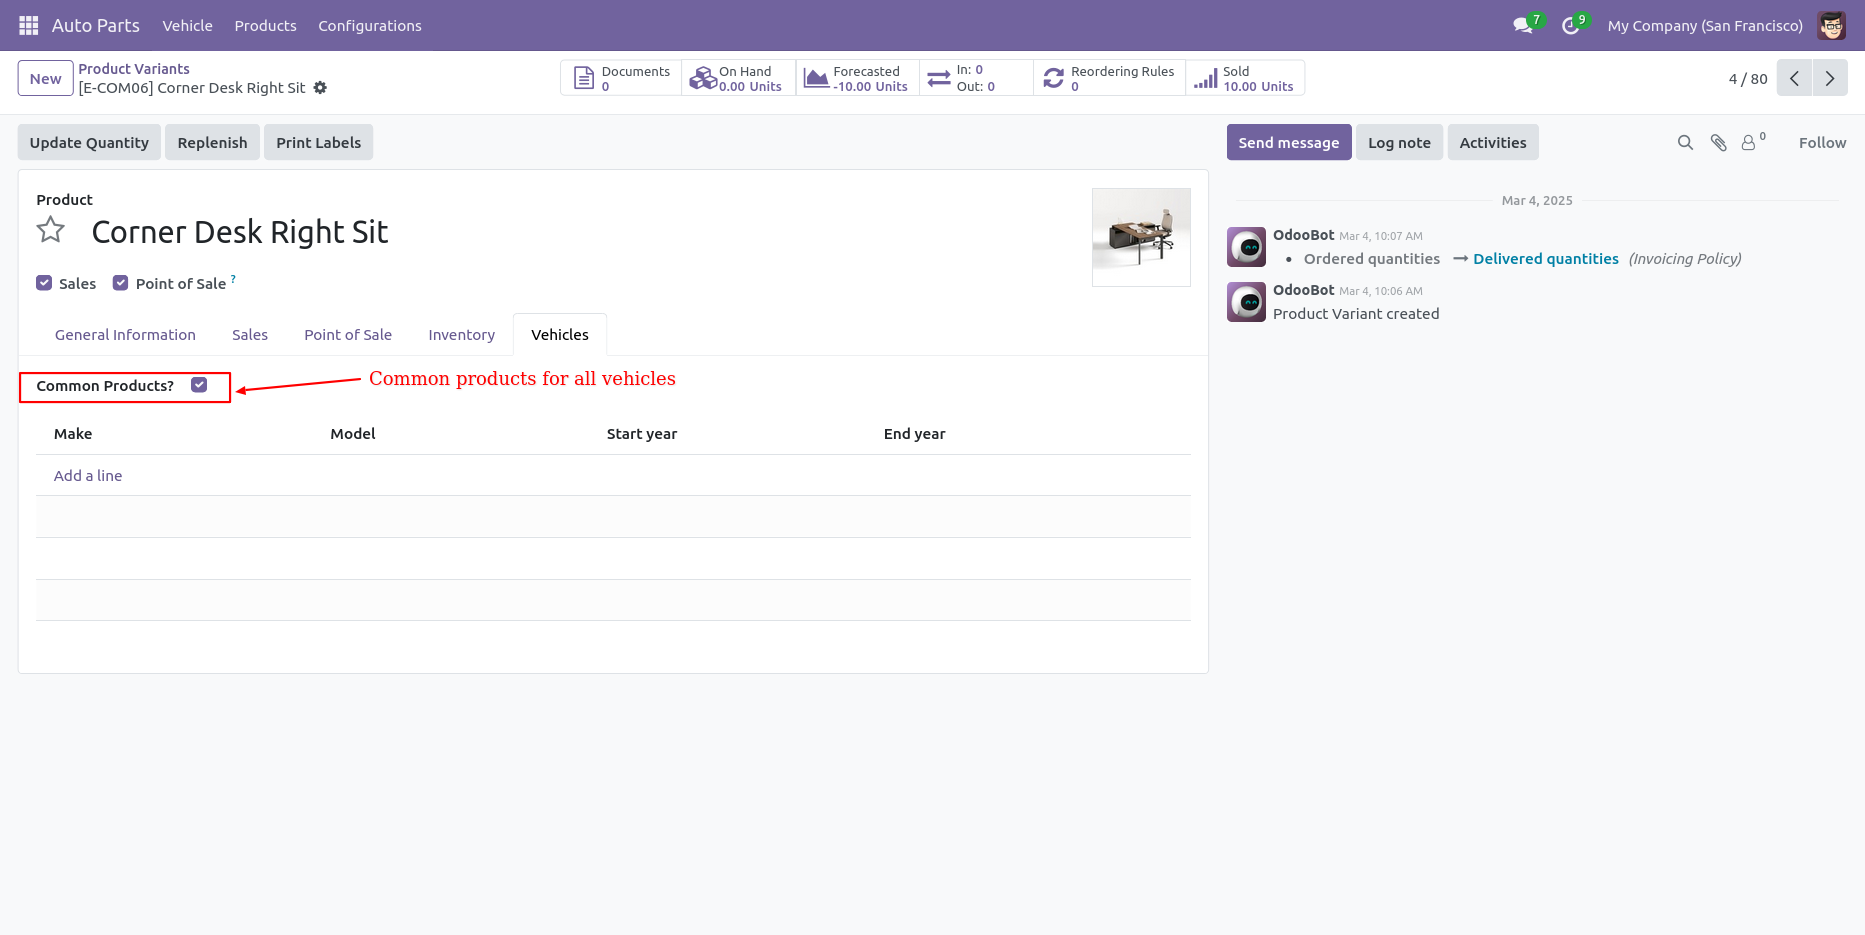
If the product is compatible with all vehicles, enable the 'Common Product' option.
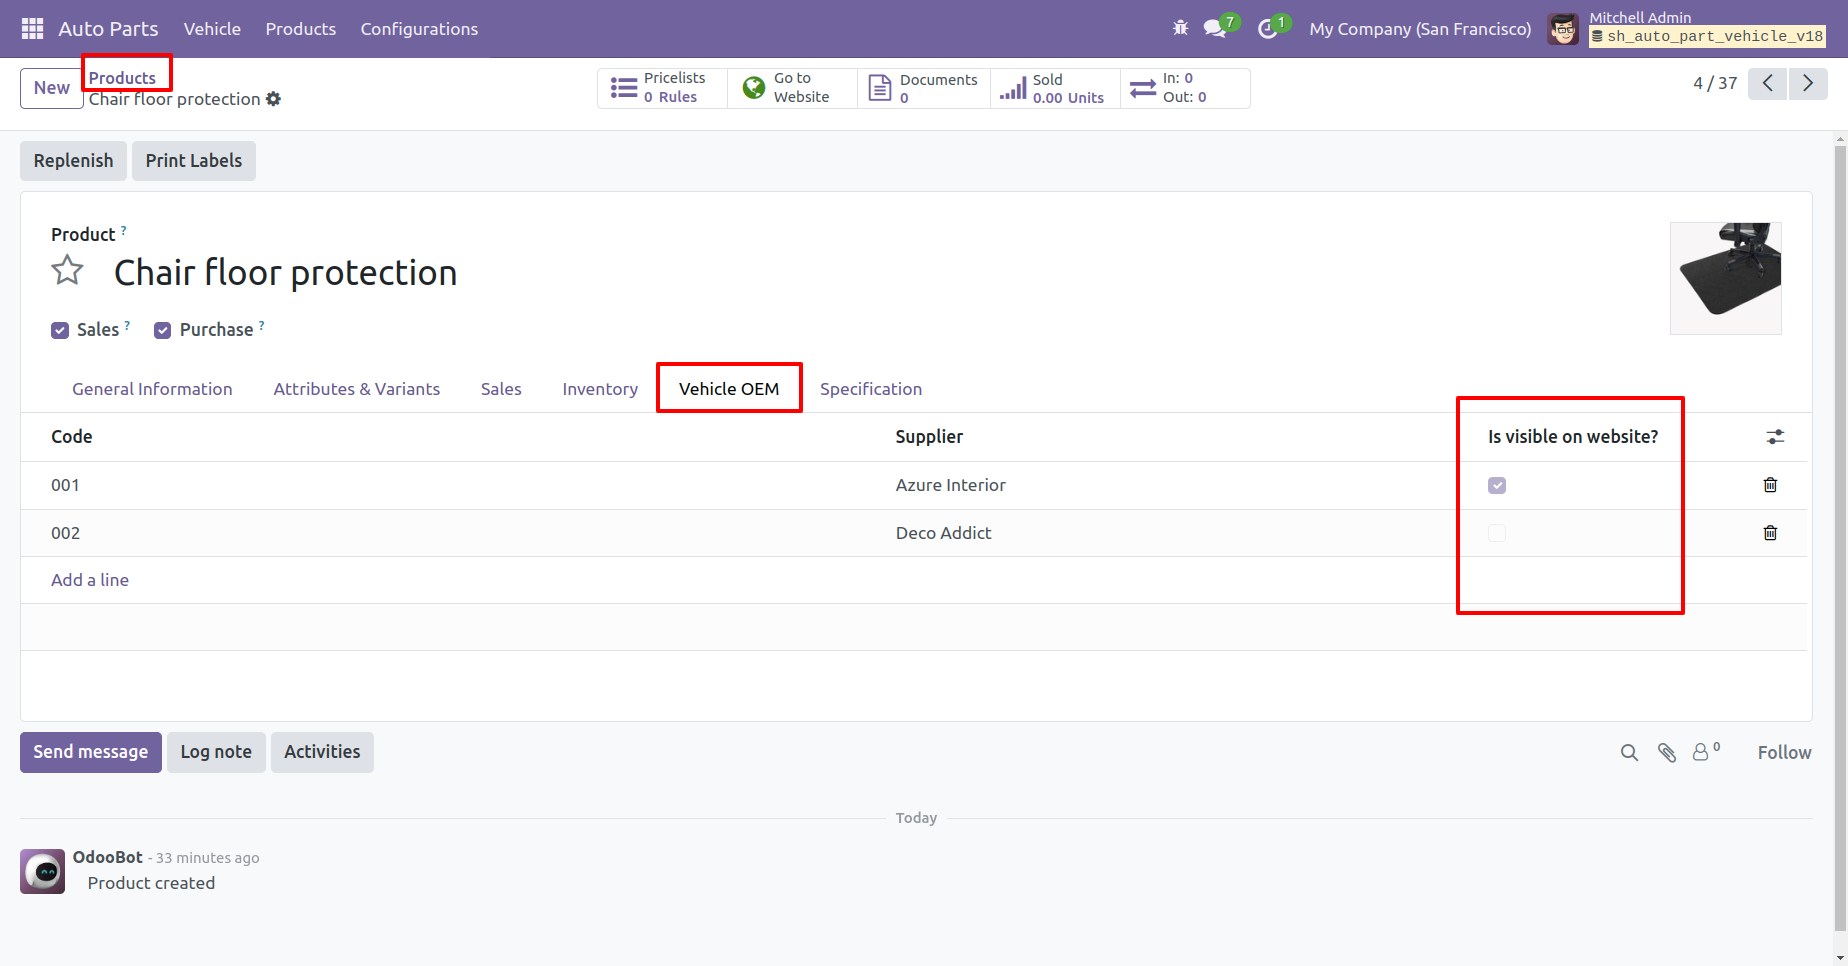
Add vehicle OEM, and enable or disable its visibility based on whether 'Show on Website' is selected."
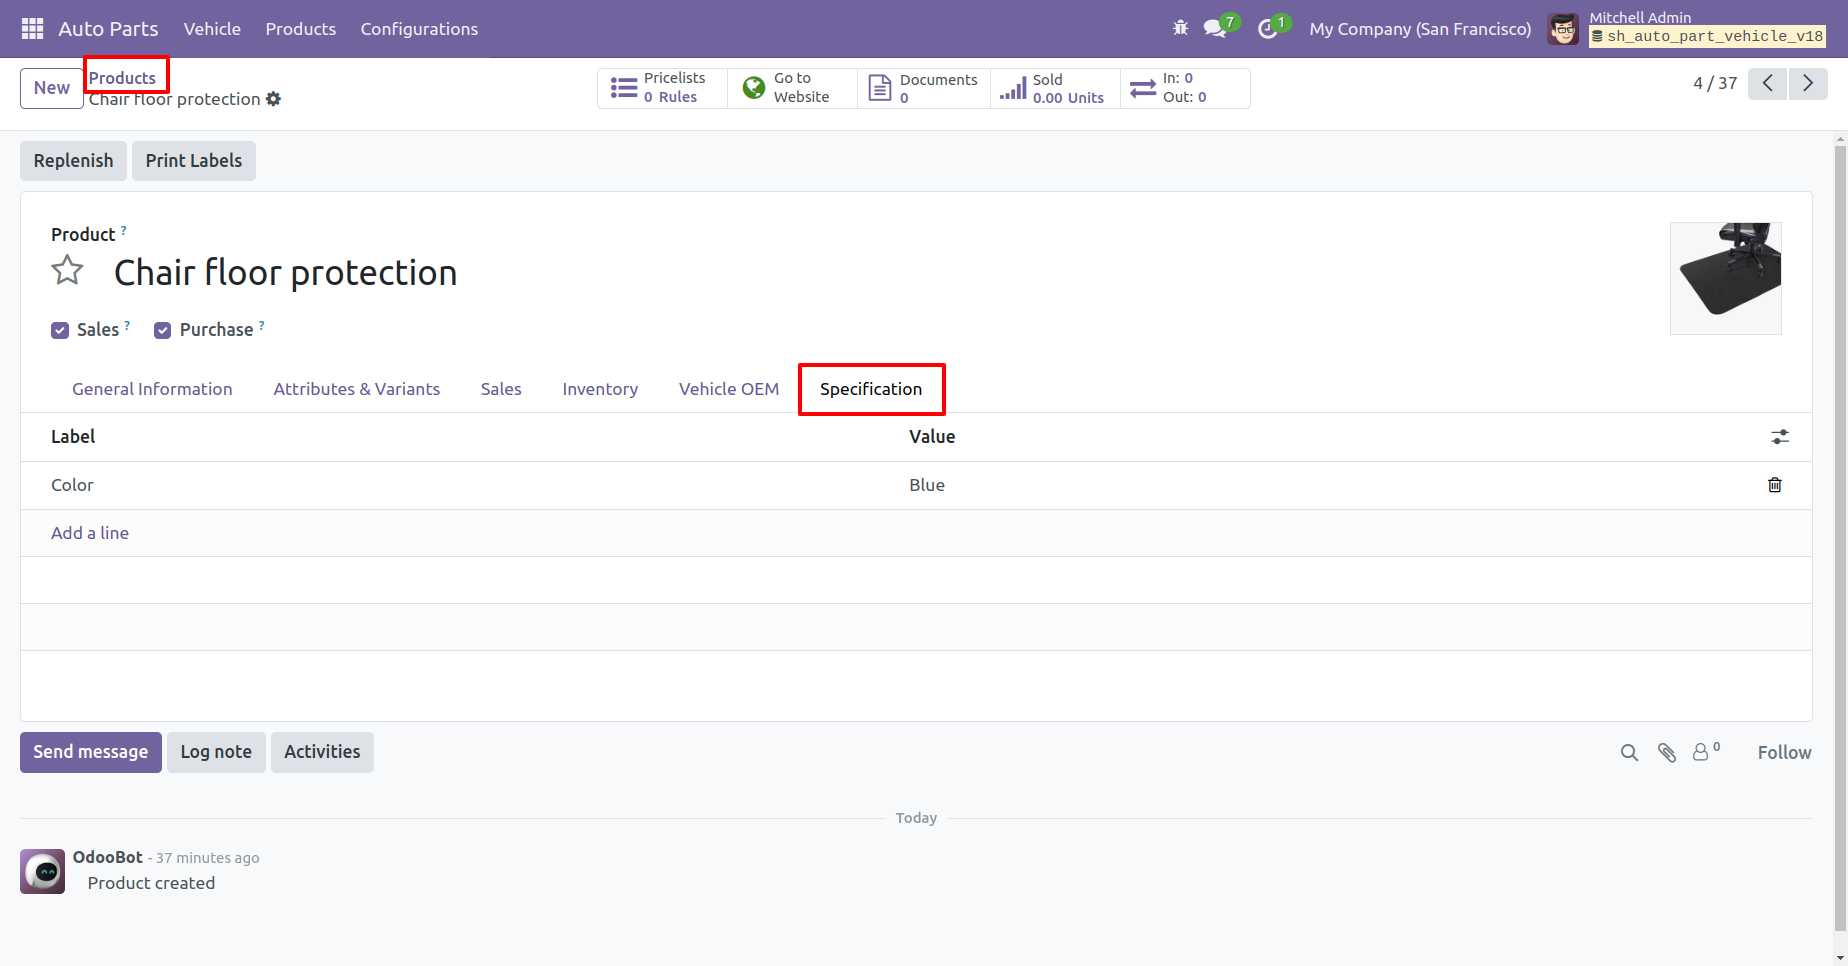
Add vehicles specifications.
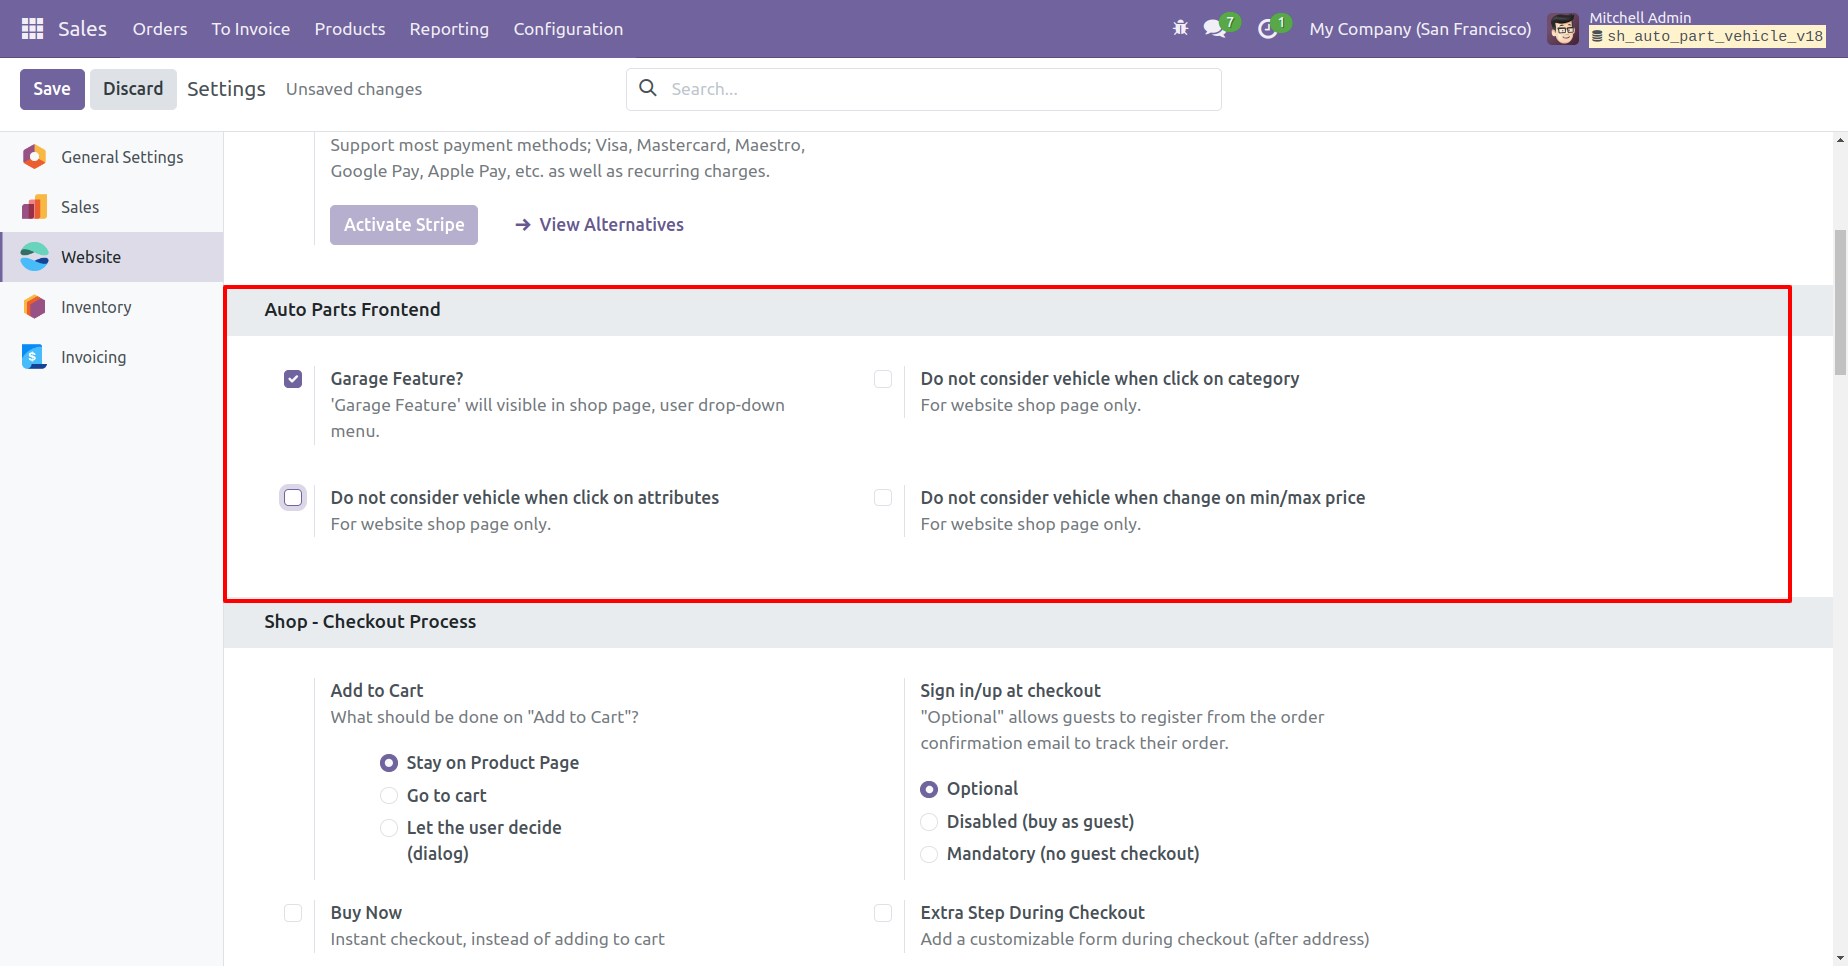
Go to website general settings and enable settings for shop page.
You can add a selection search on the homepage in various layouts.
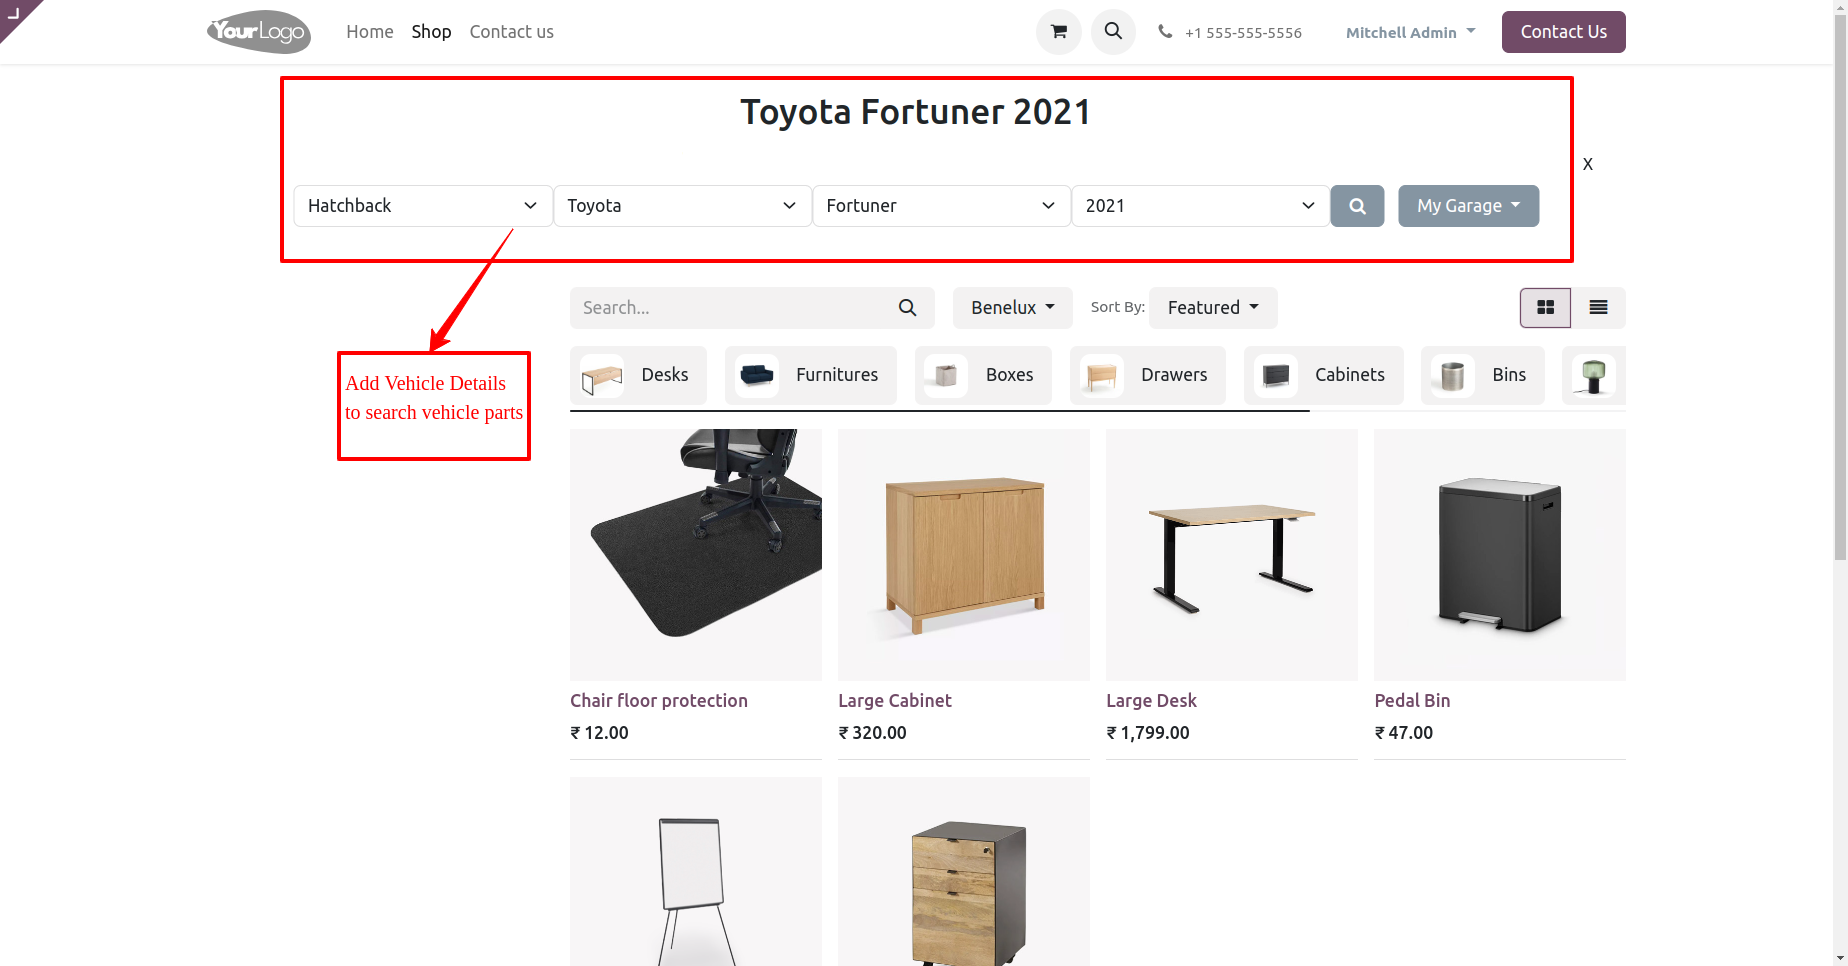
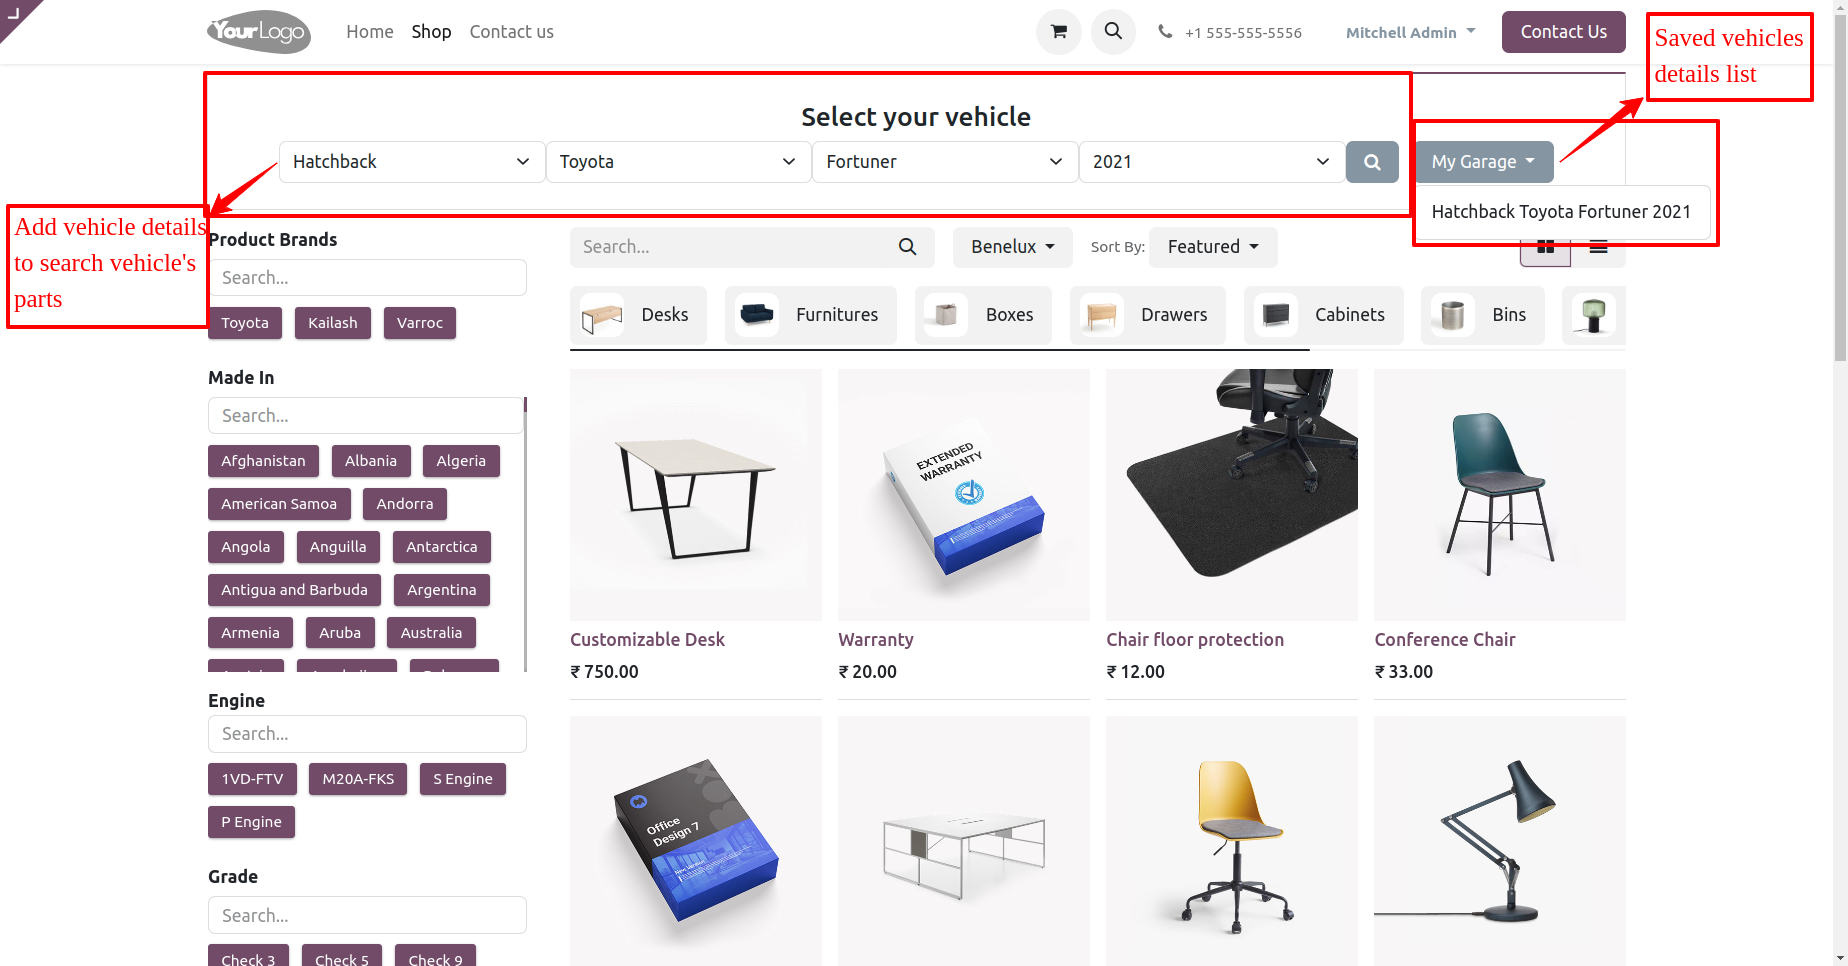
Add vehicle details to search vehicle parts on shop page.
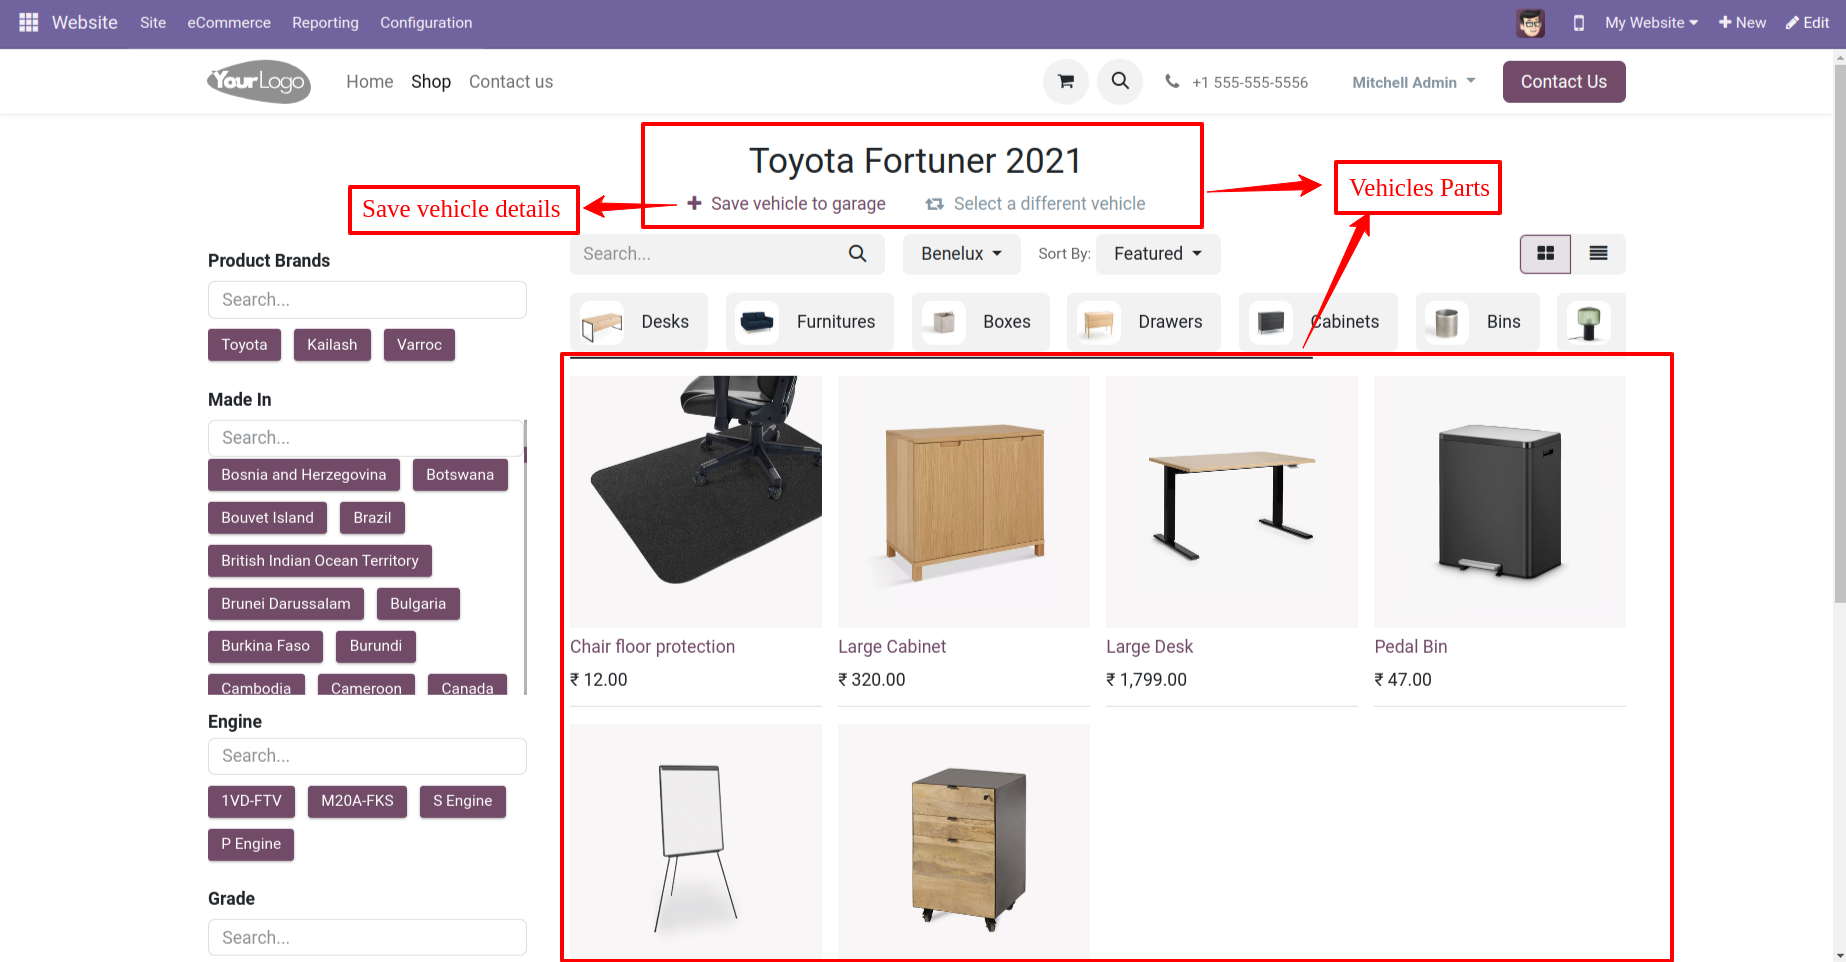
Save searched vehicles to the garage and you can see vehicles parts.
By clicking on "My Garage" you can see saved vehicles.
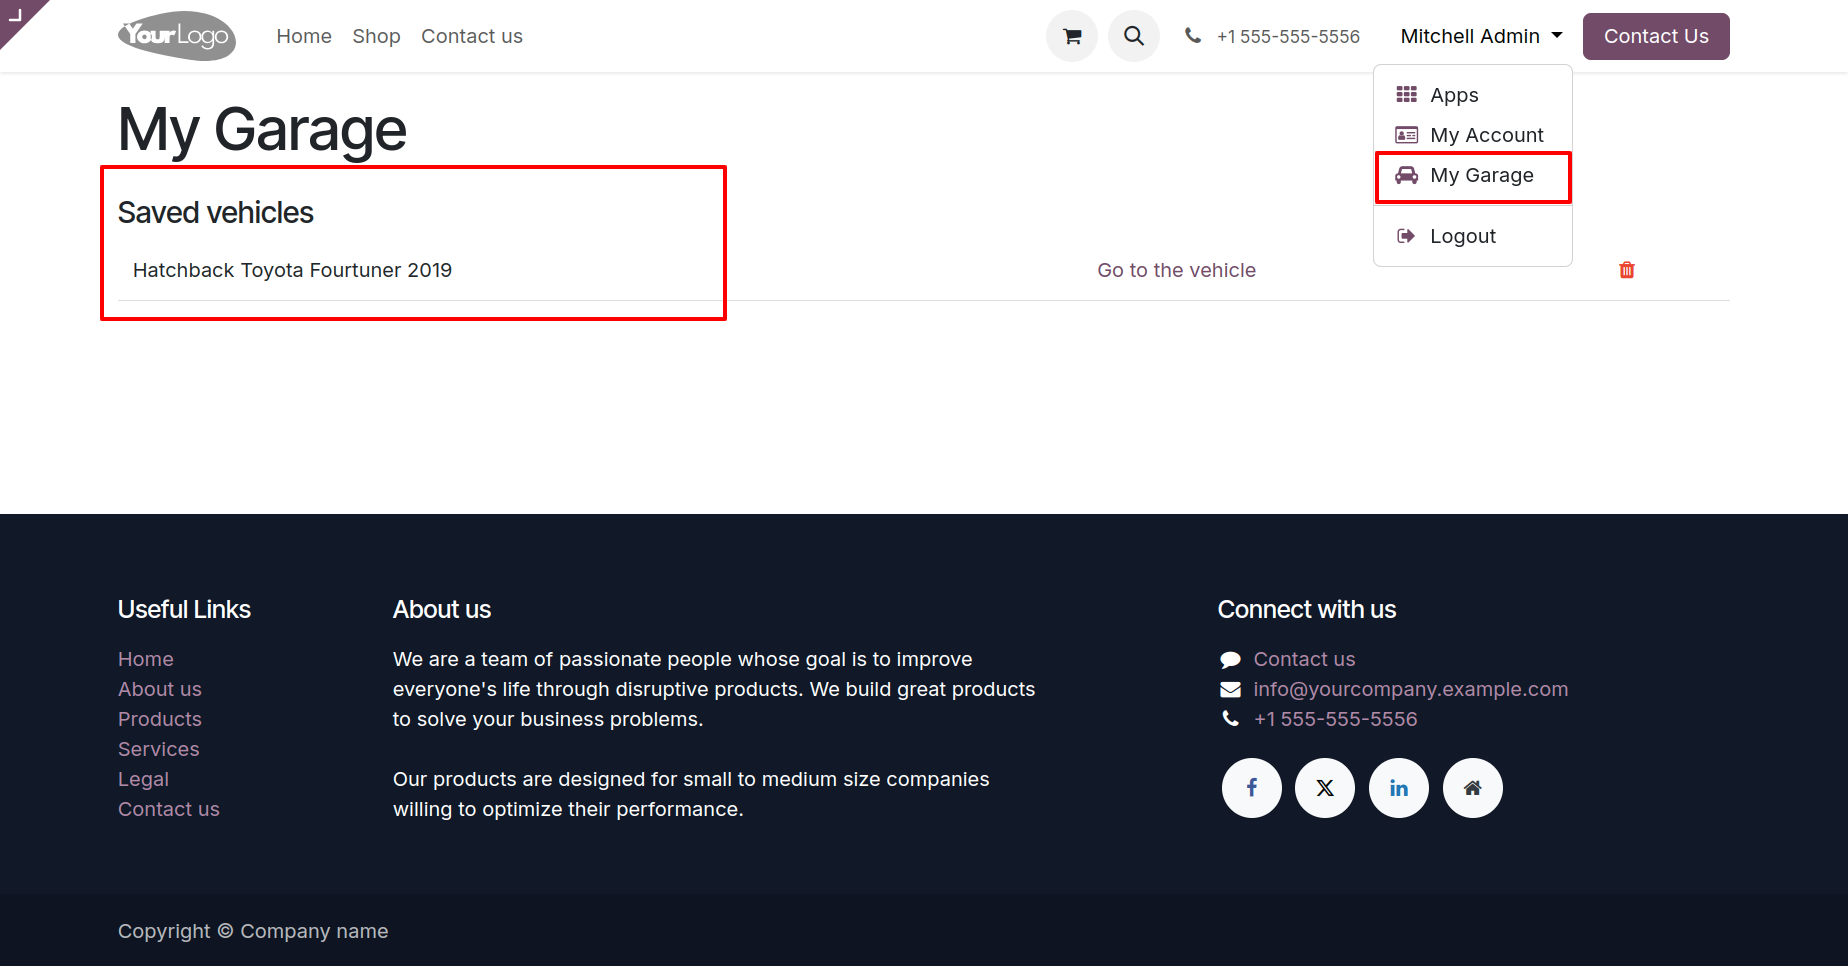
You can also see my garage seprate menu, click on it and you will redirect to the saved vehicles.
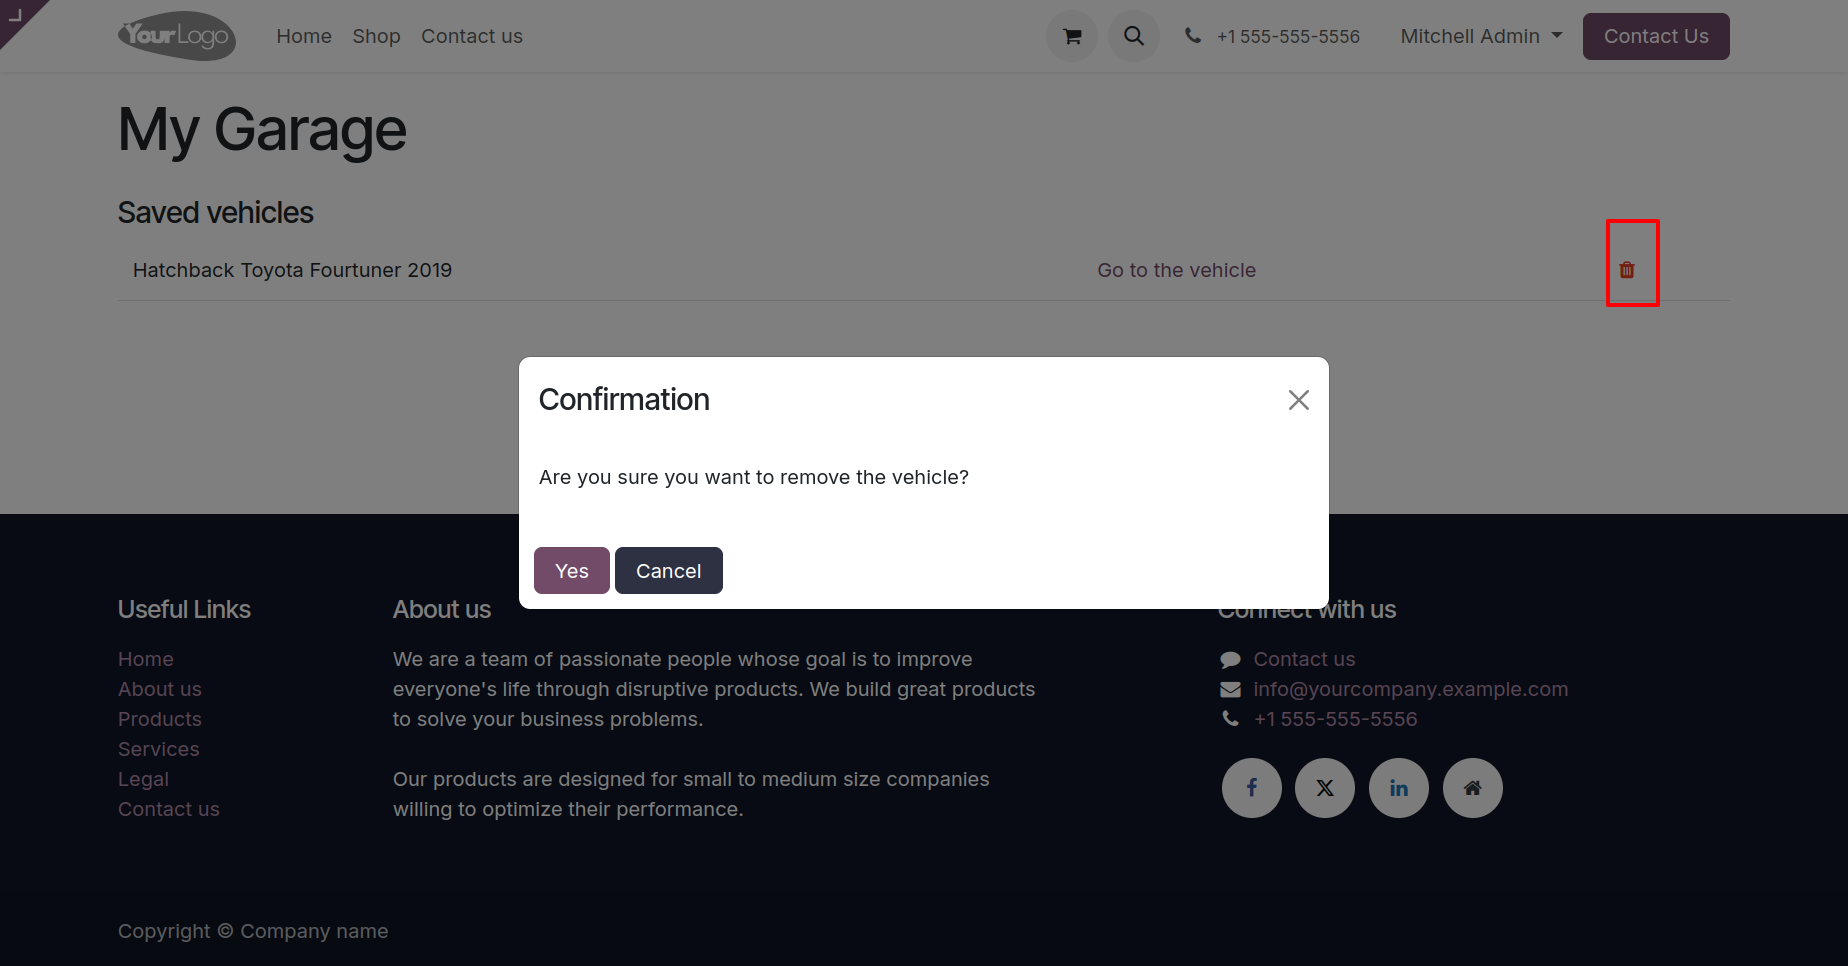
You can delete saved details from here.
Common products.
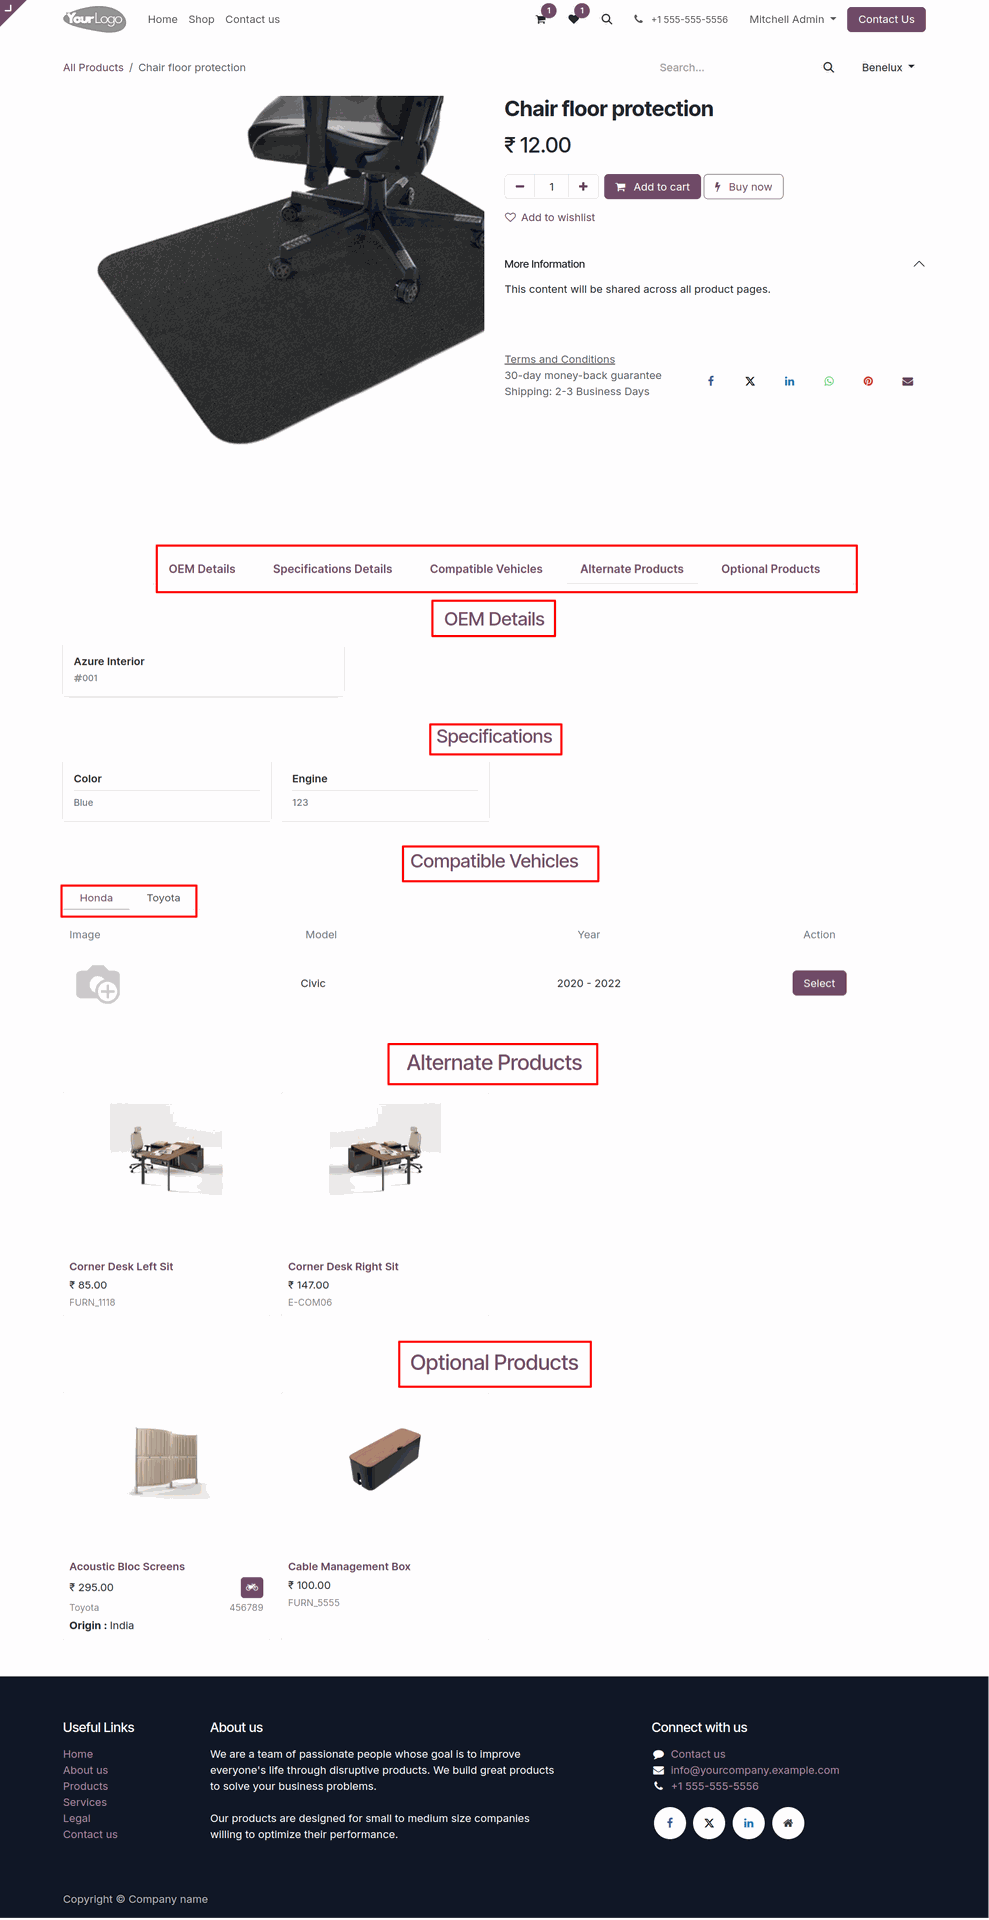
You can see Vehicles OEM details, Specifications, Compatible vehicles, Alternate products and Optional products on the product detail page.
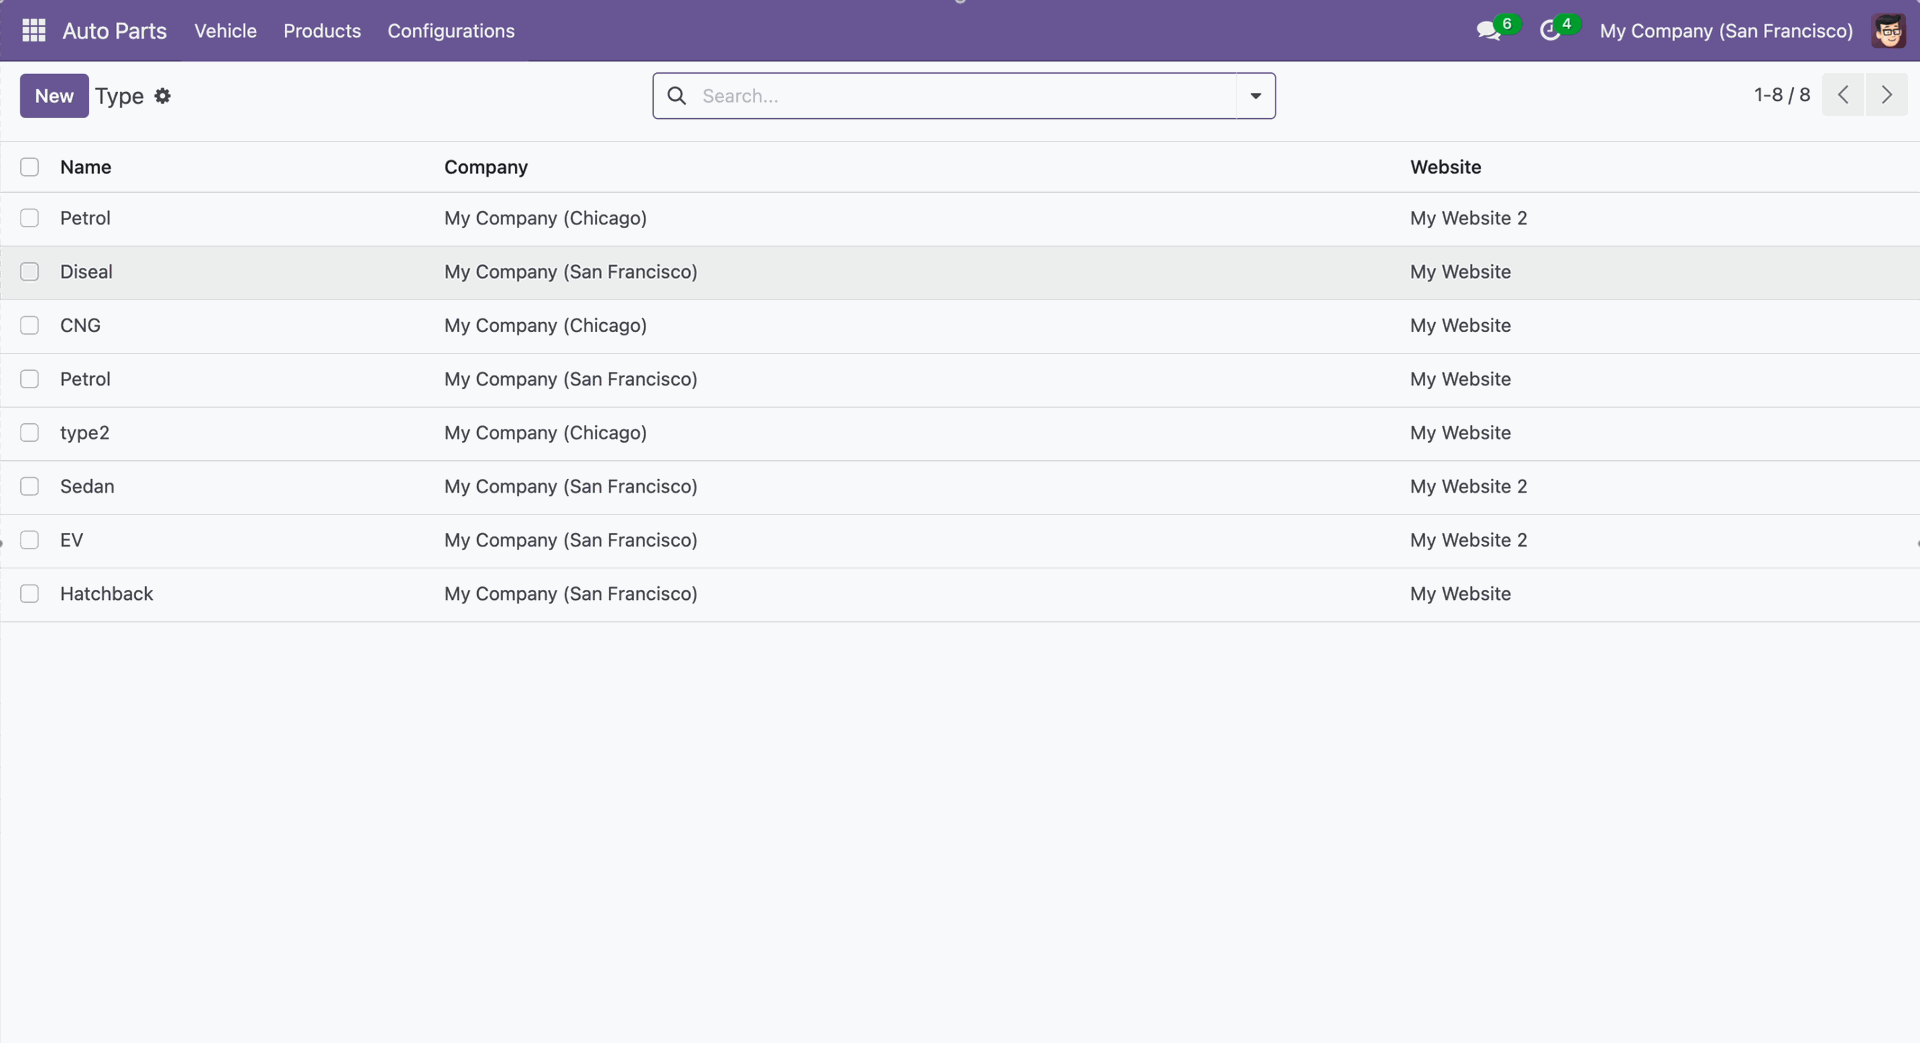
In the Auto Part Type Tree view, you can see the associated website and company.
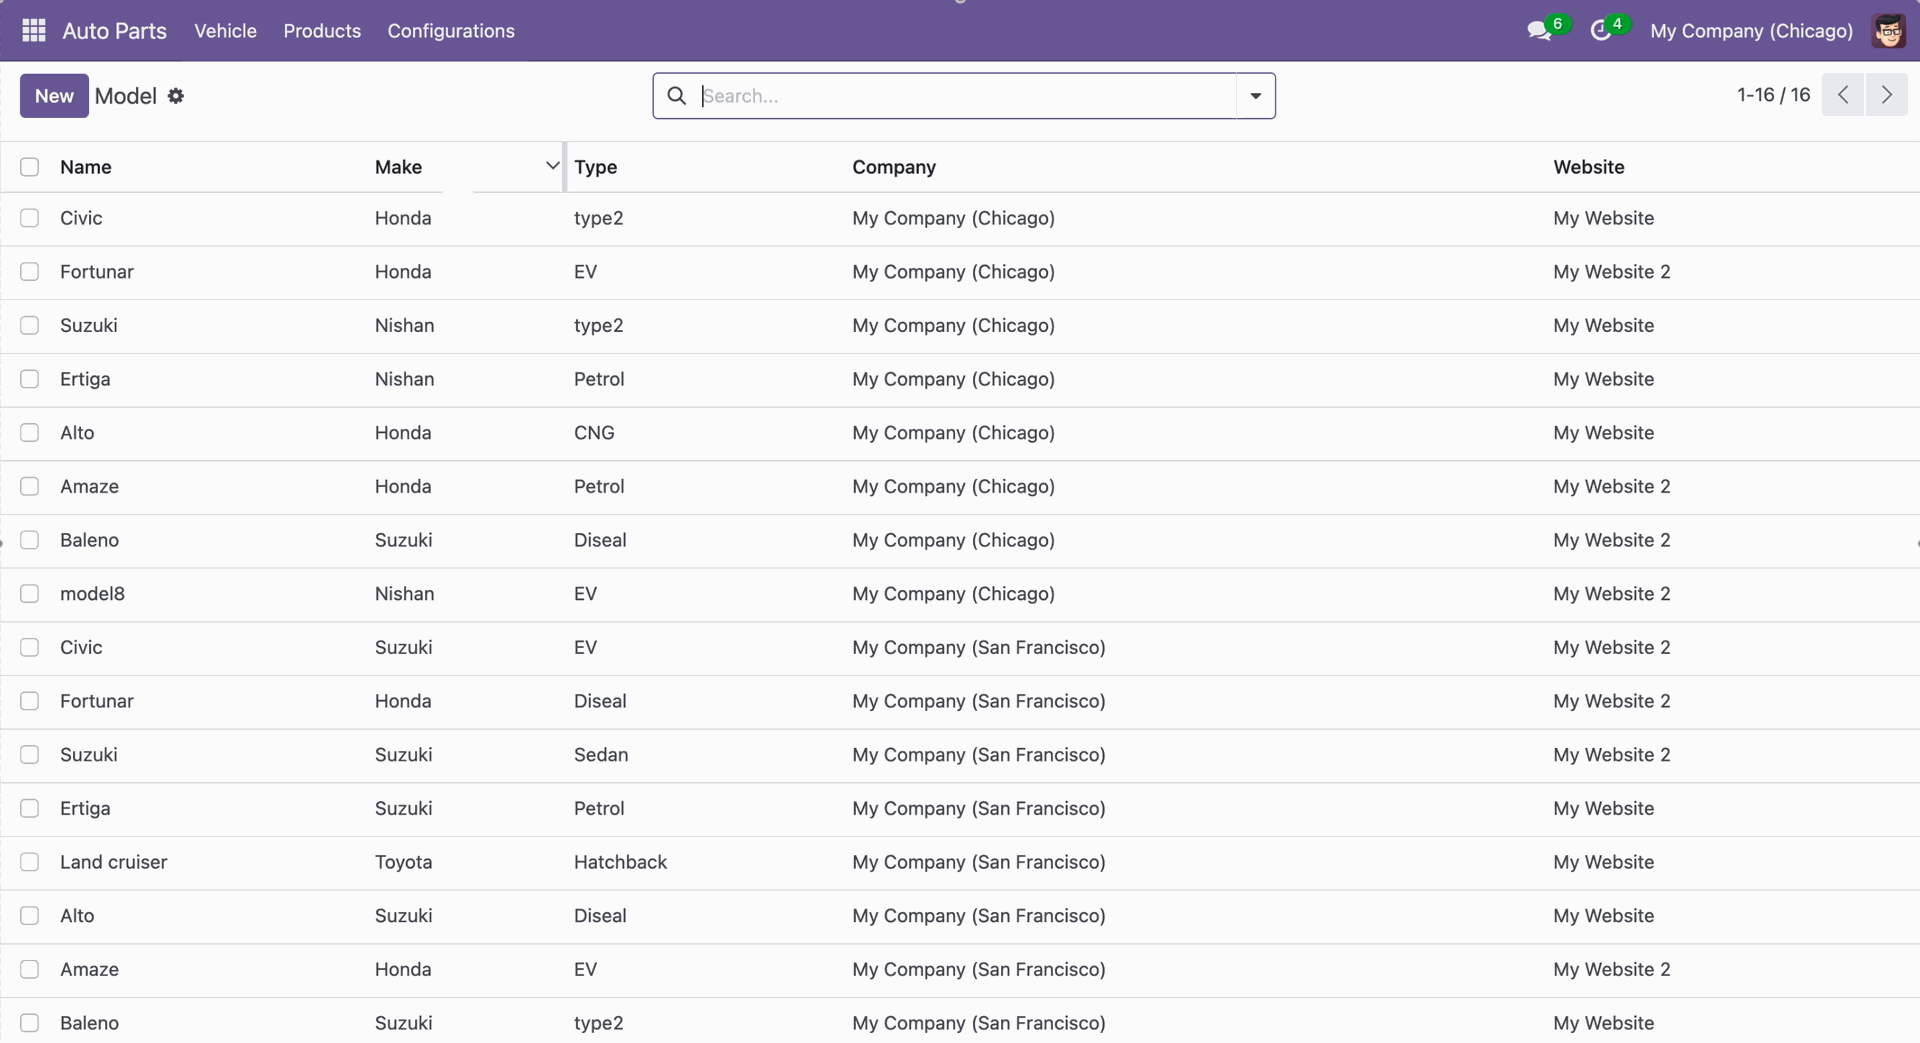
In the Auto Part Model Tree view, you can see the associated website and company.
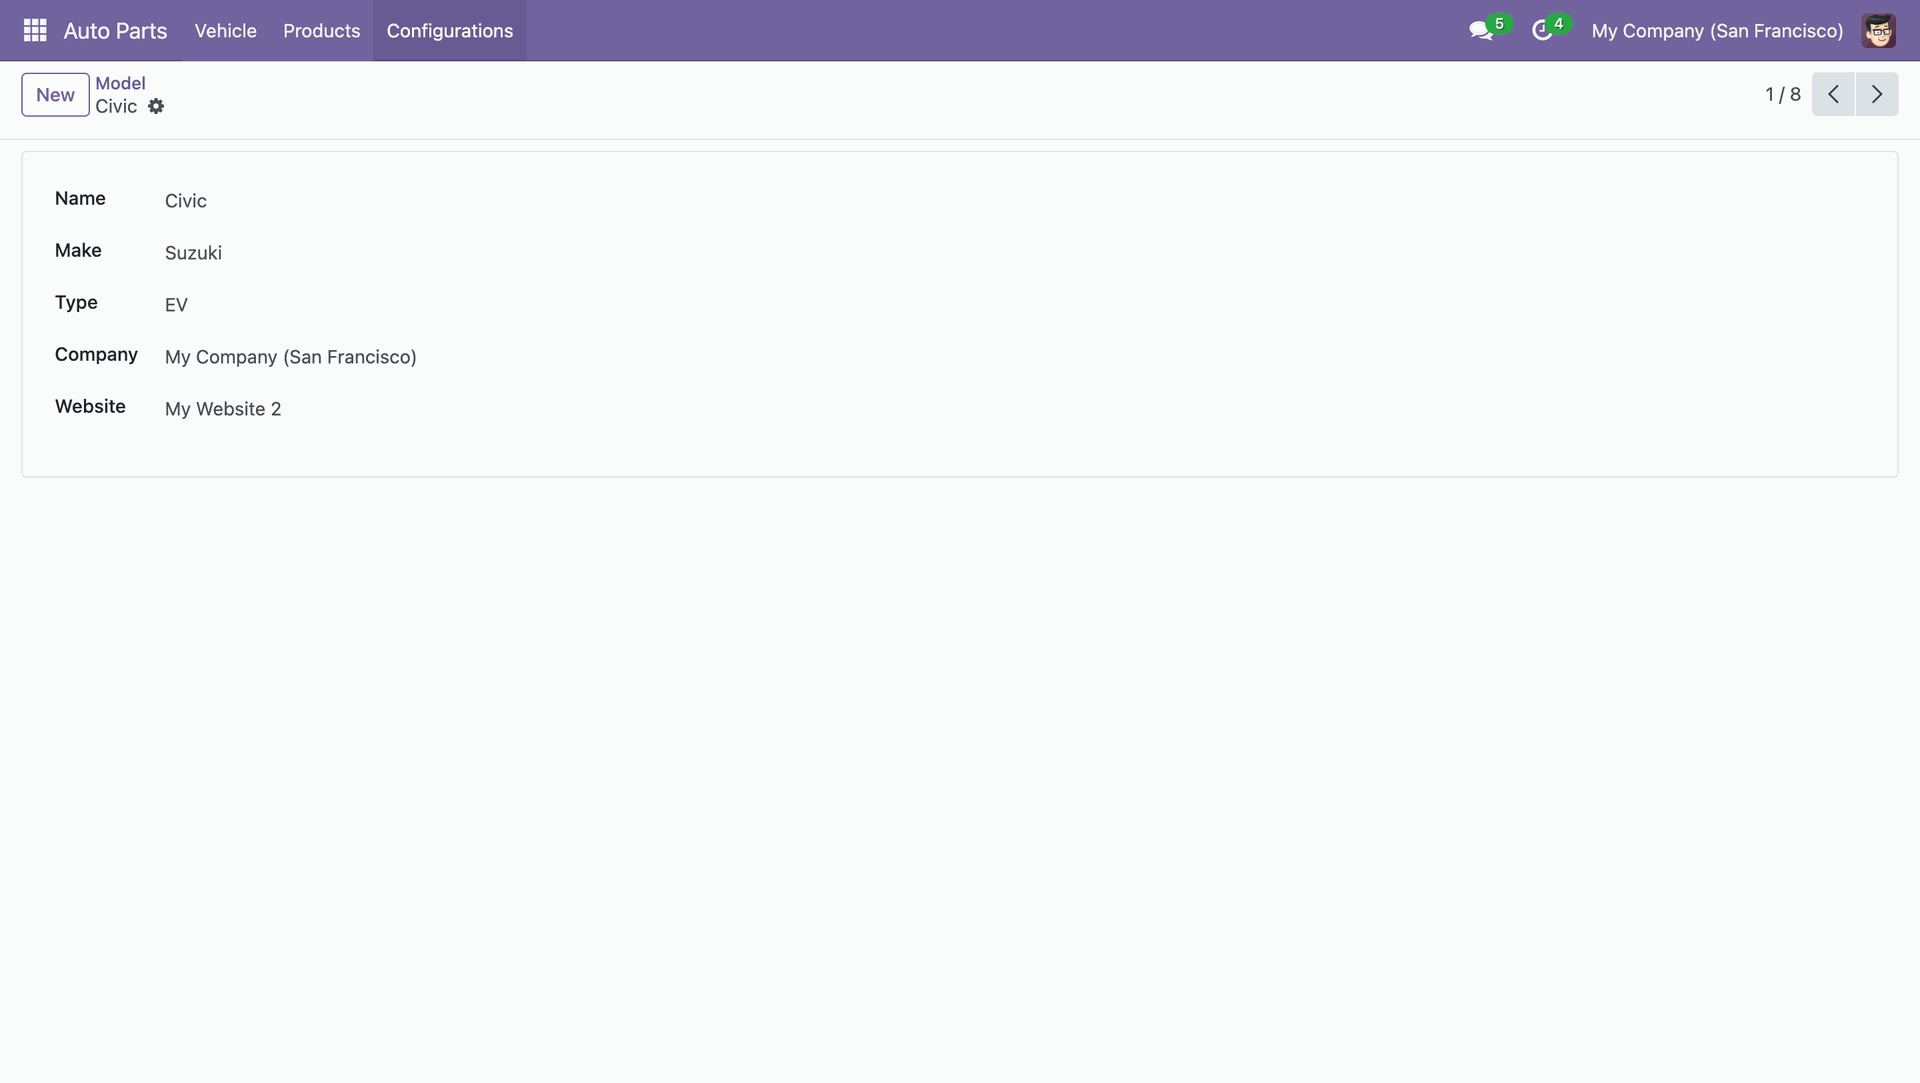
In the Auto Part model form view, you can add the associated website and company.
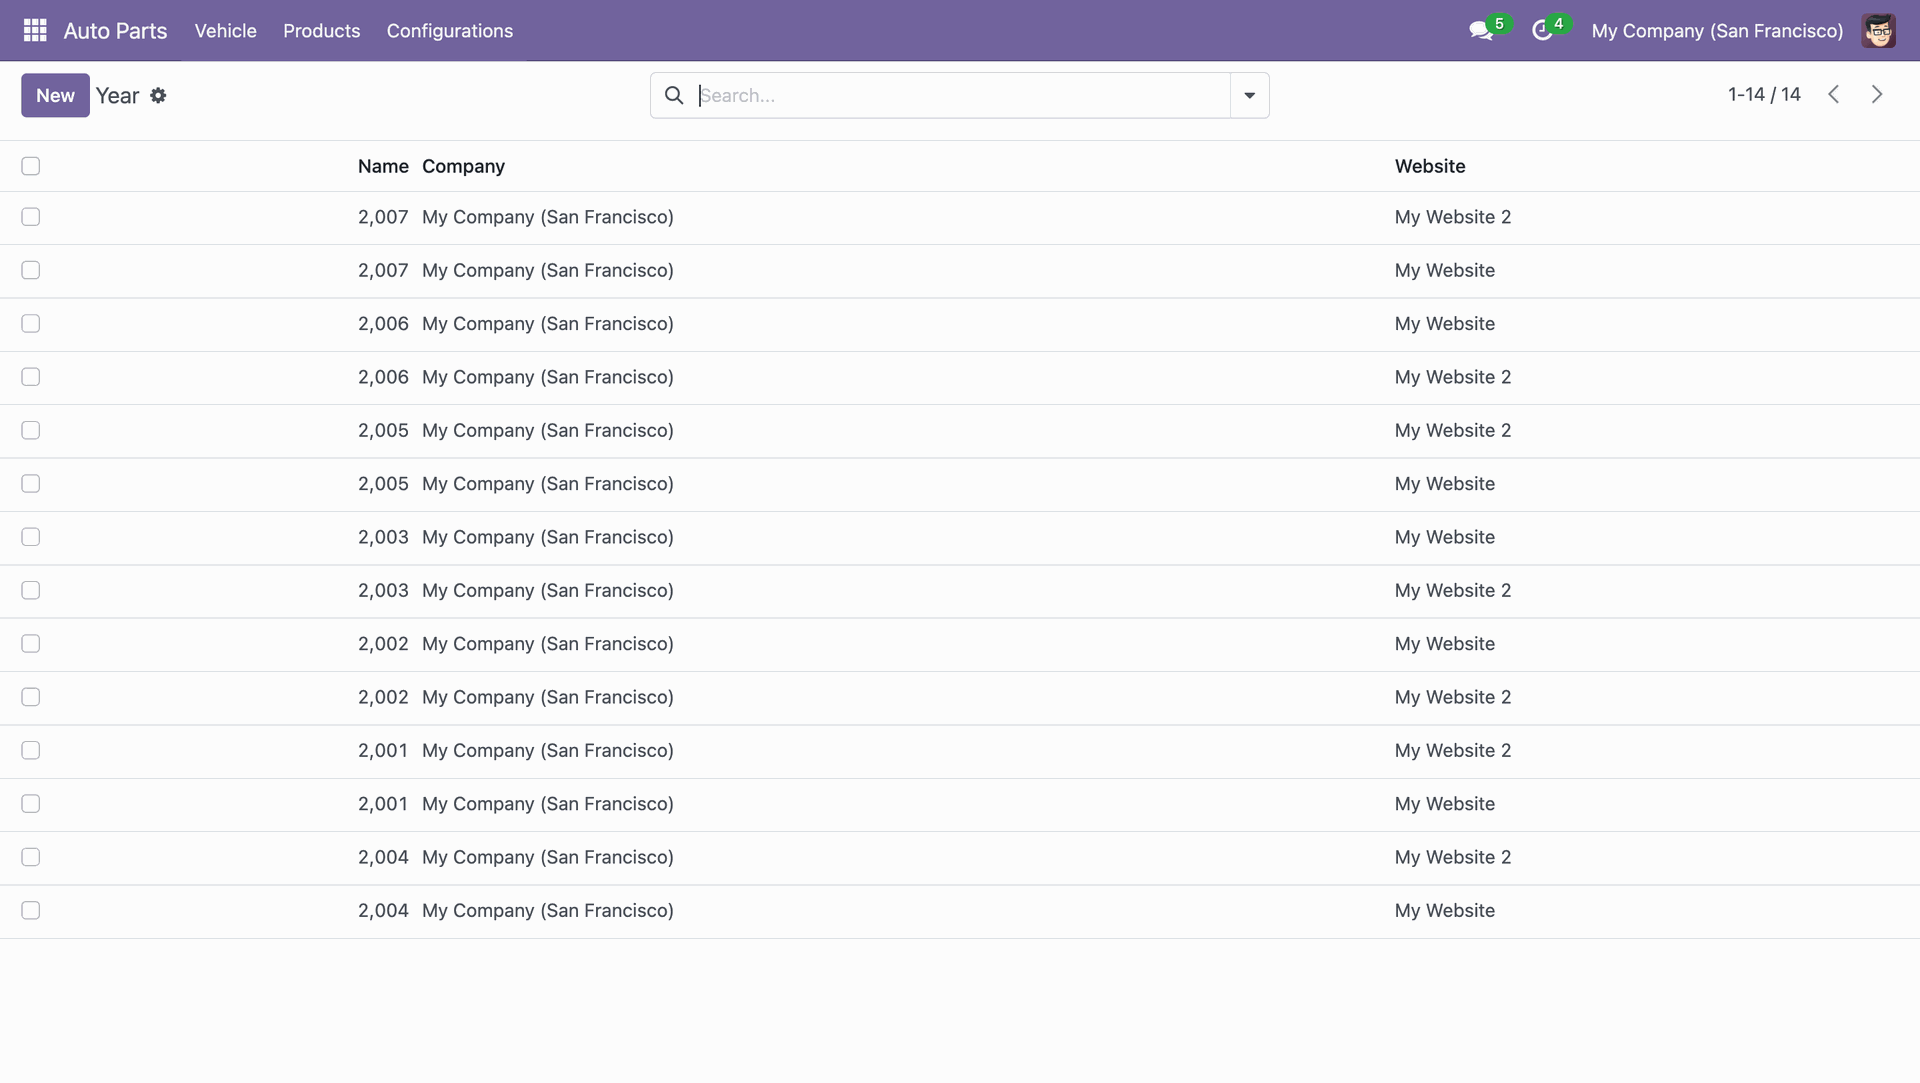
In the Auto Part Tree Year view, you can see the associated website and company.
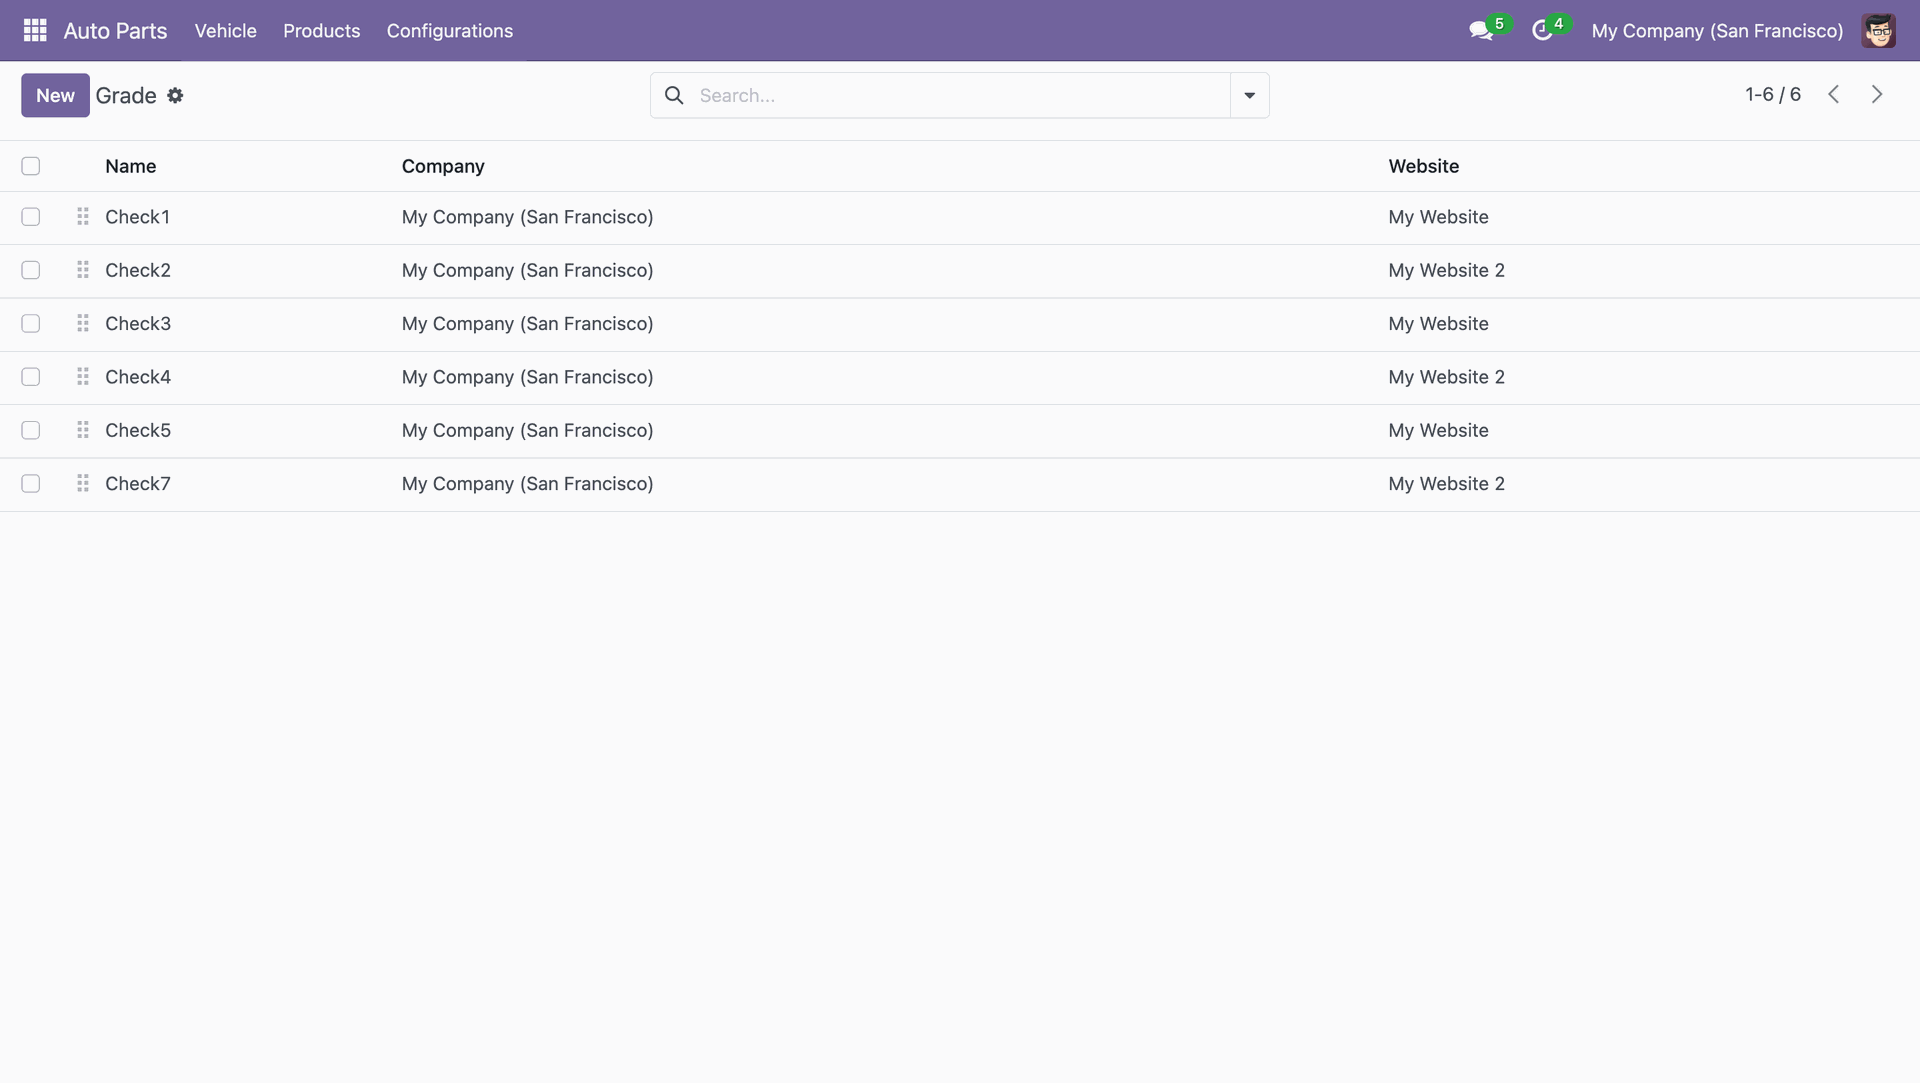
In the Auto Part Tree Grade view, you can see the associated website and company.
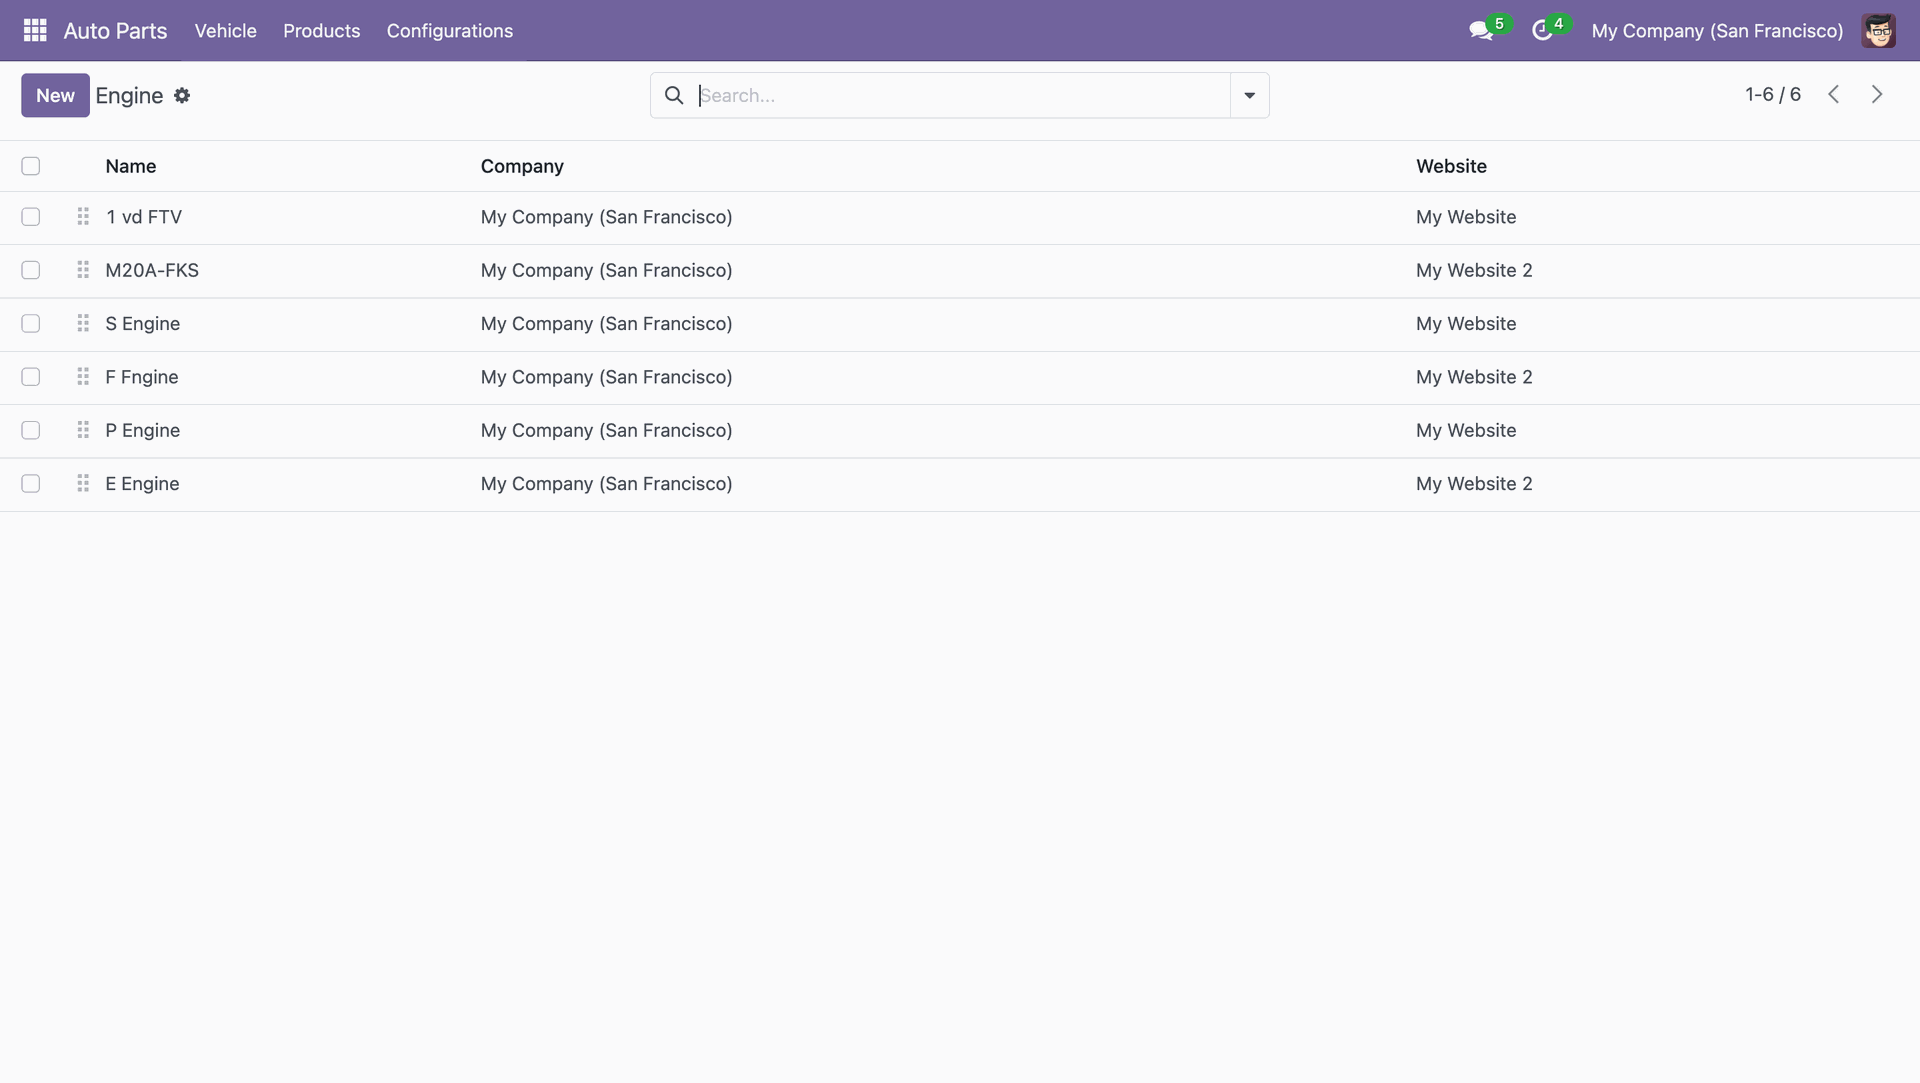
In the Auto Part Tree Engine view, you can see the associated website and company.
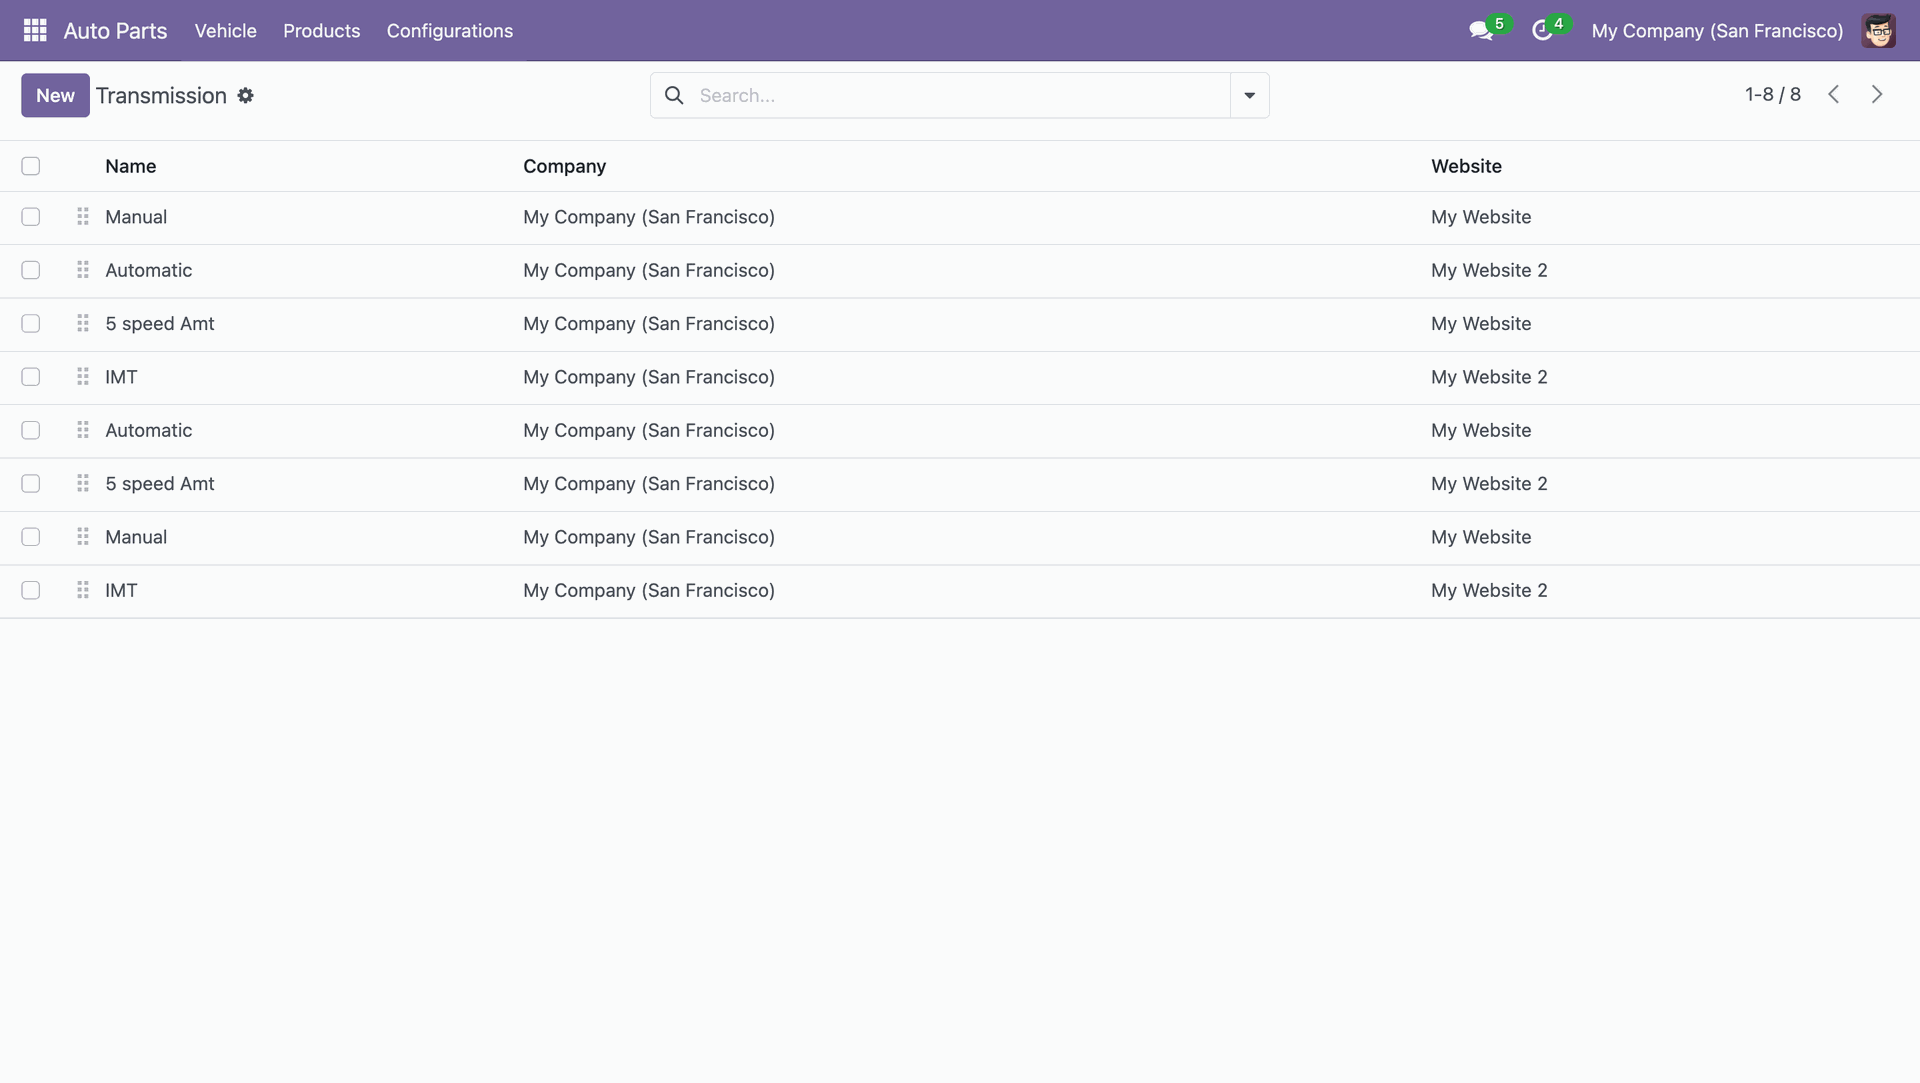
In the Auto Part Tree Transmission view, you can see the associated website and company.
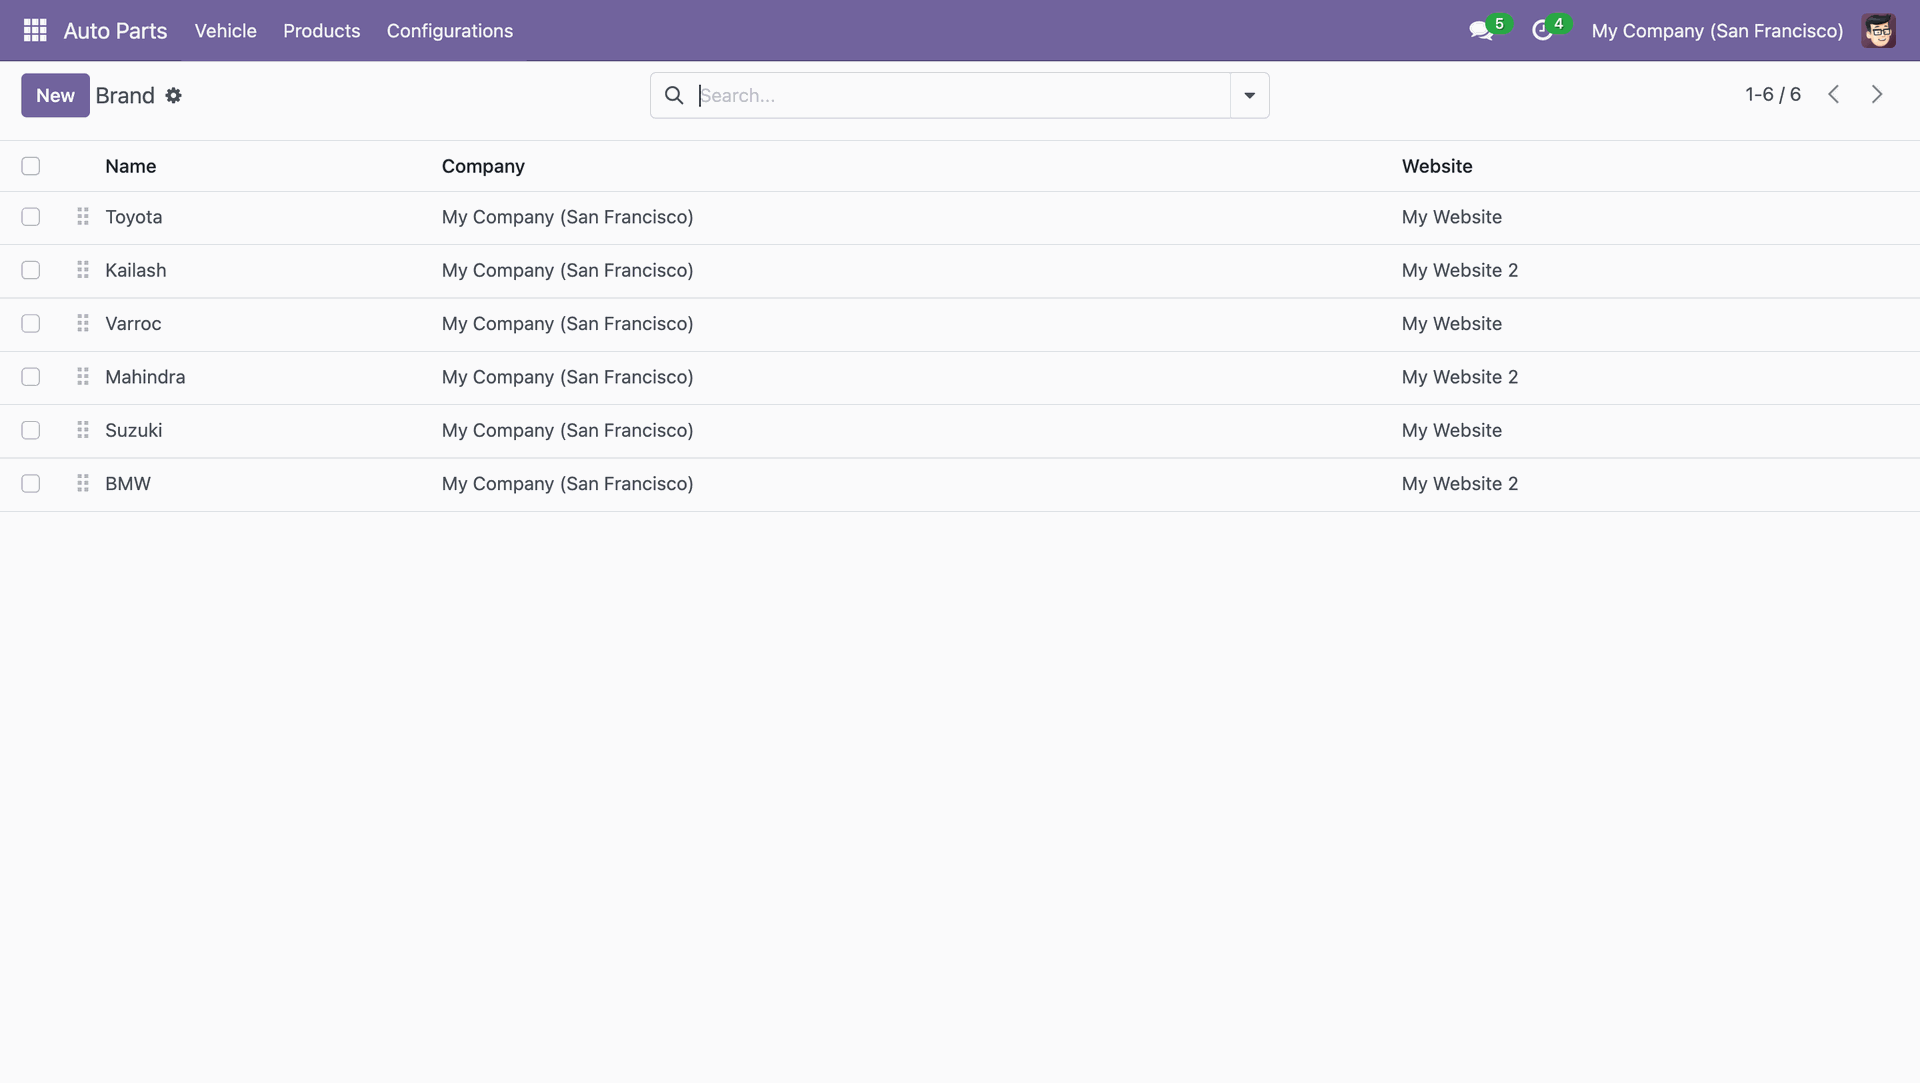
In the Auto Part Tree Brand view, you can see the associated website and company.
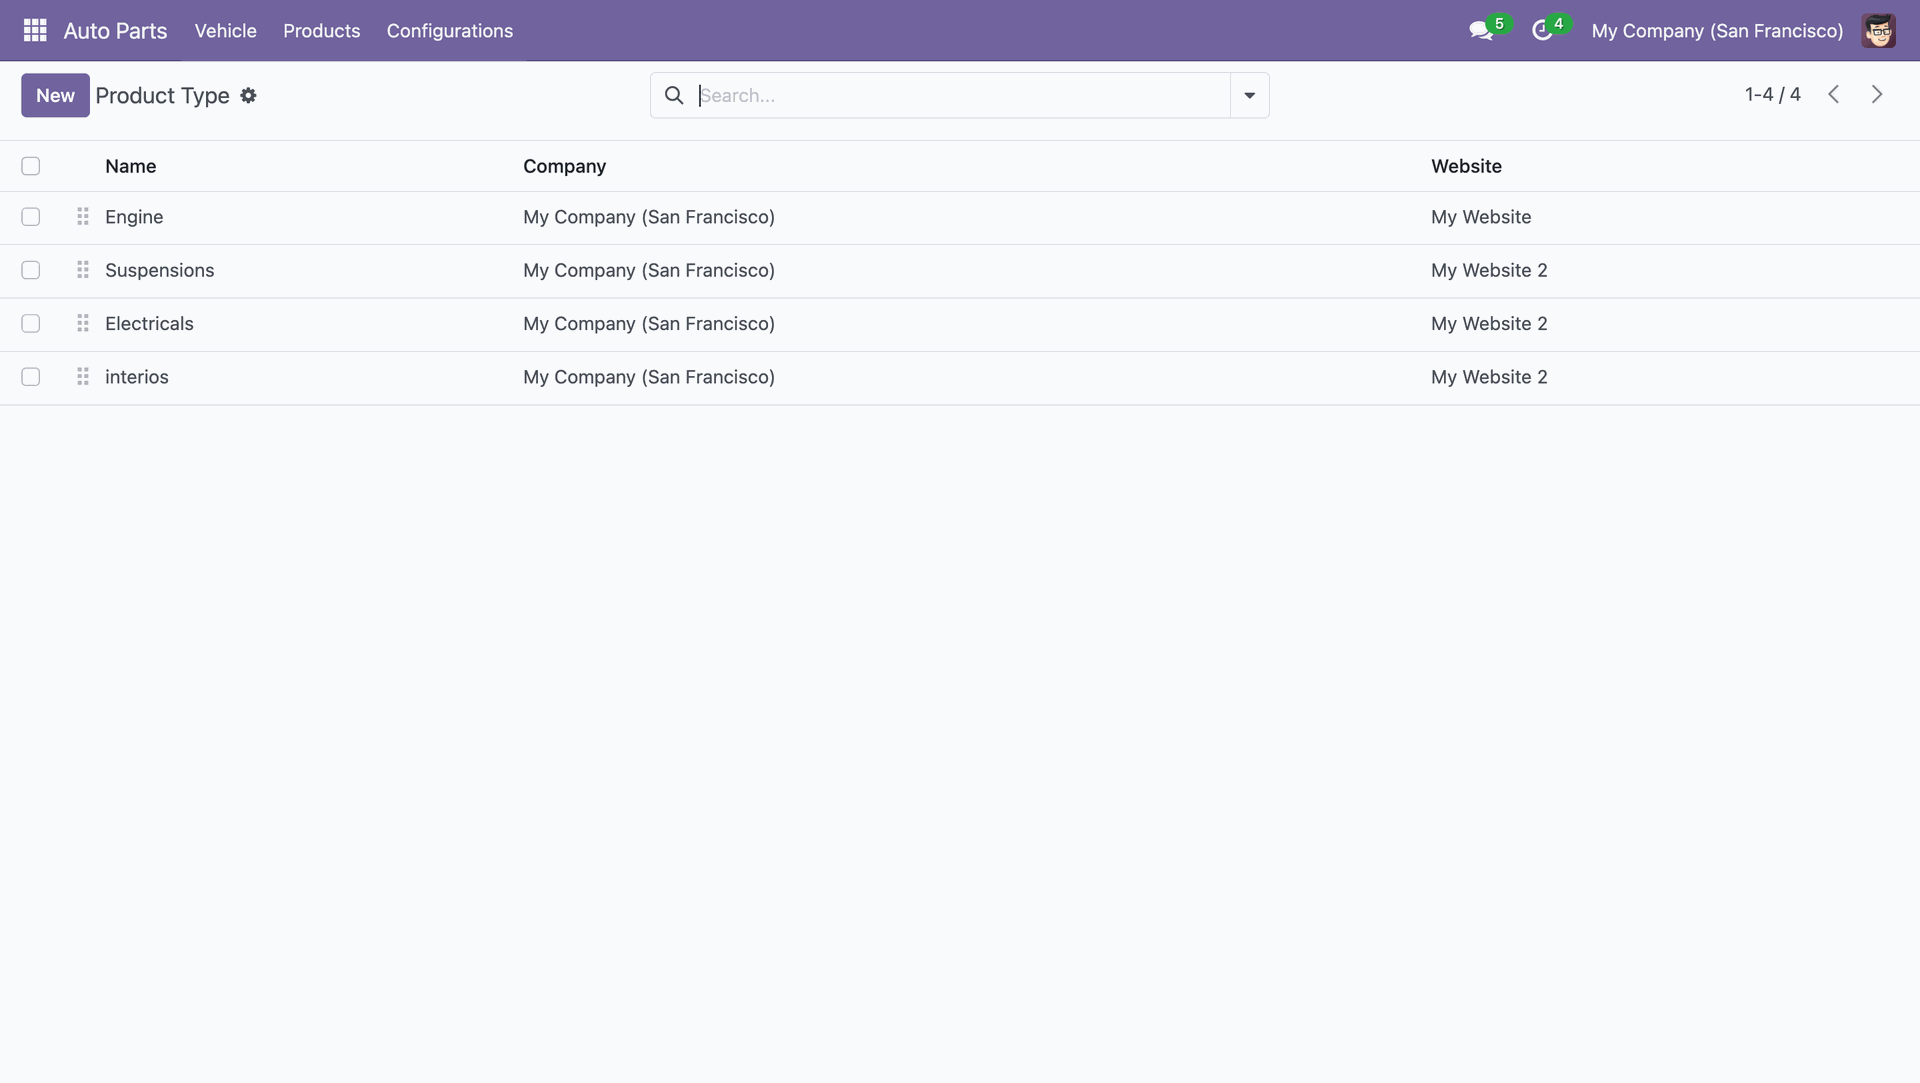
In the Auto Part Tree Product Type view, you can see the associated website and company.
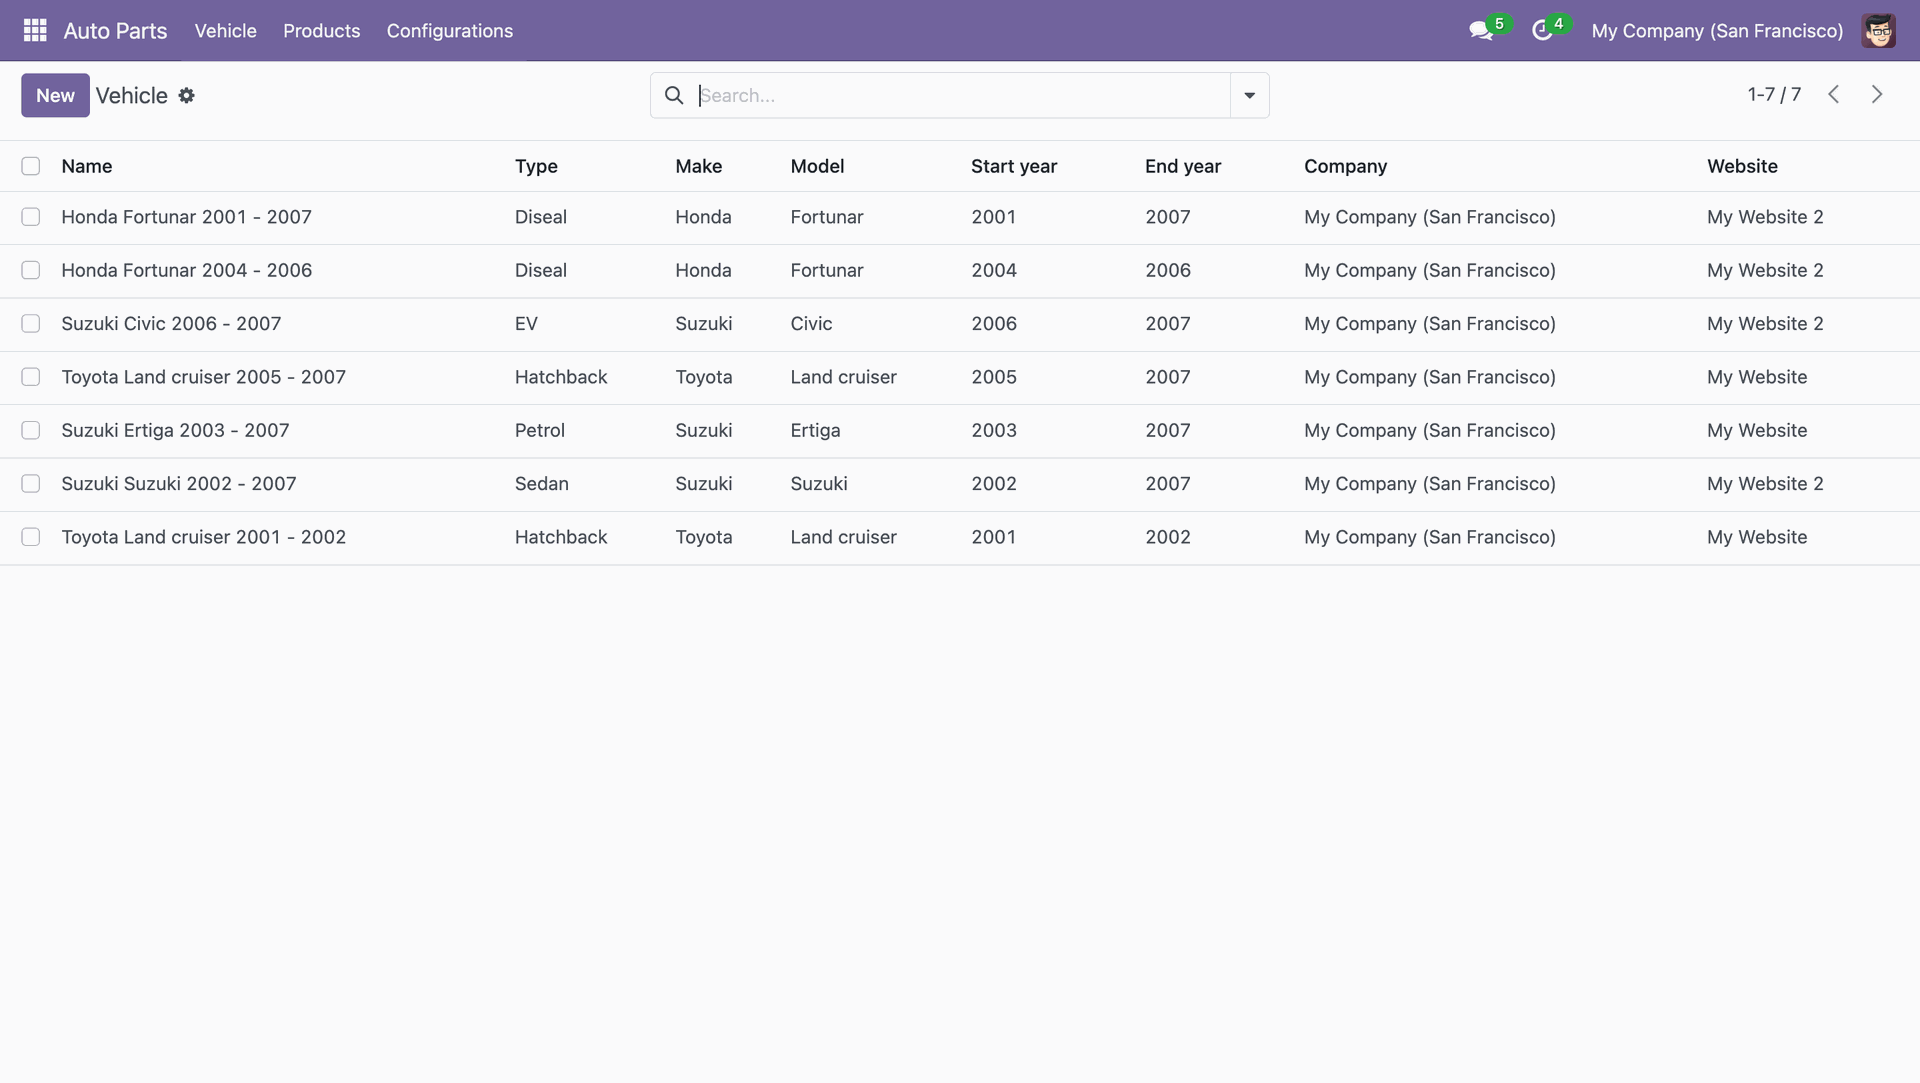
In the Auto Part Tree Vehicle view, you can see the associated website and company.
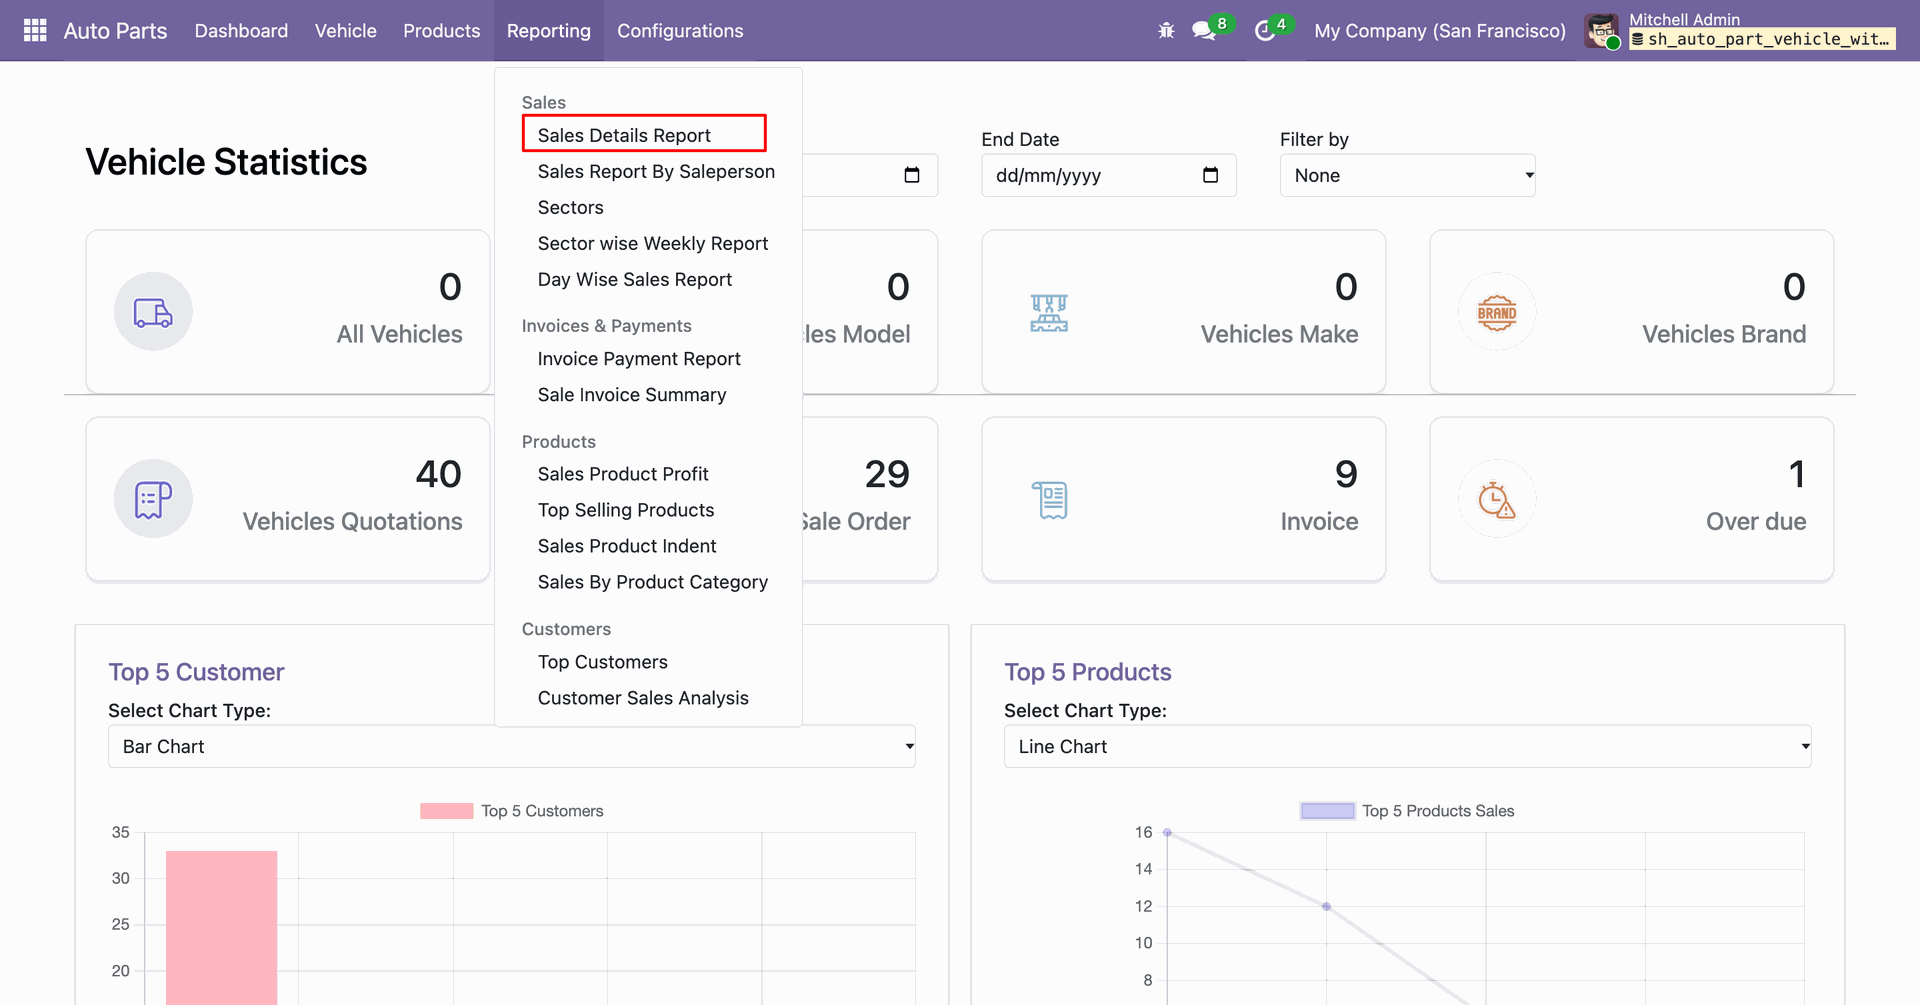
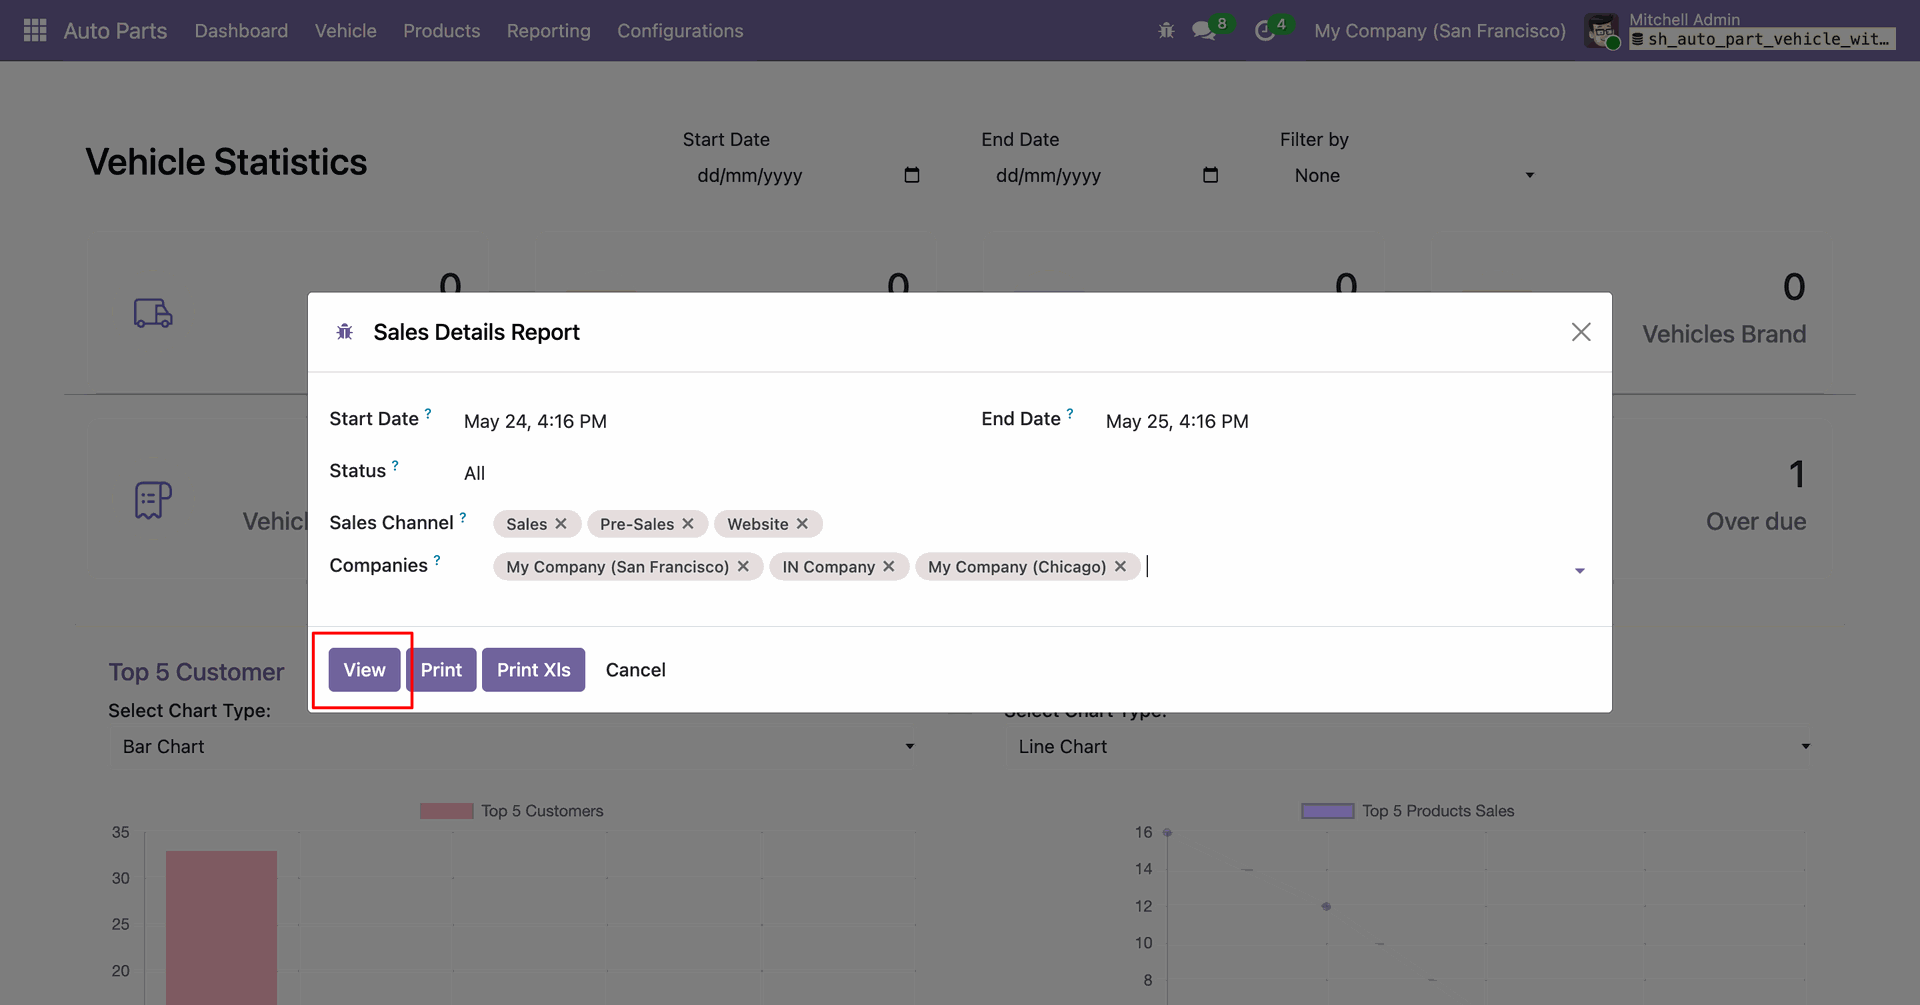
Go to Auto Parts Reporting and select the Sales Details Report option to generate detailed sales reports.
The Sales Details Report wizard will open. Enter the required details and click the View button to generate and display the report.
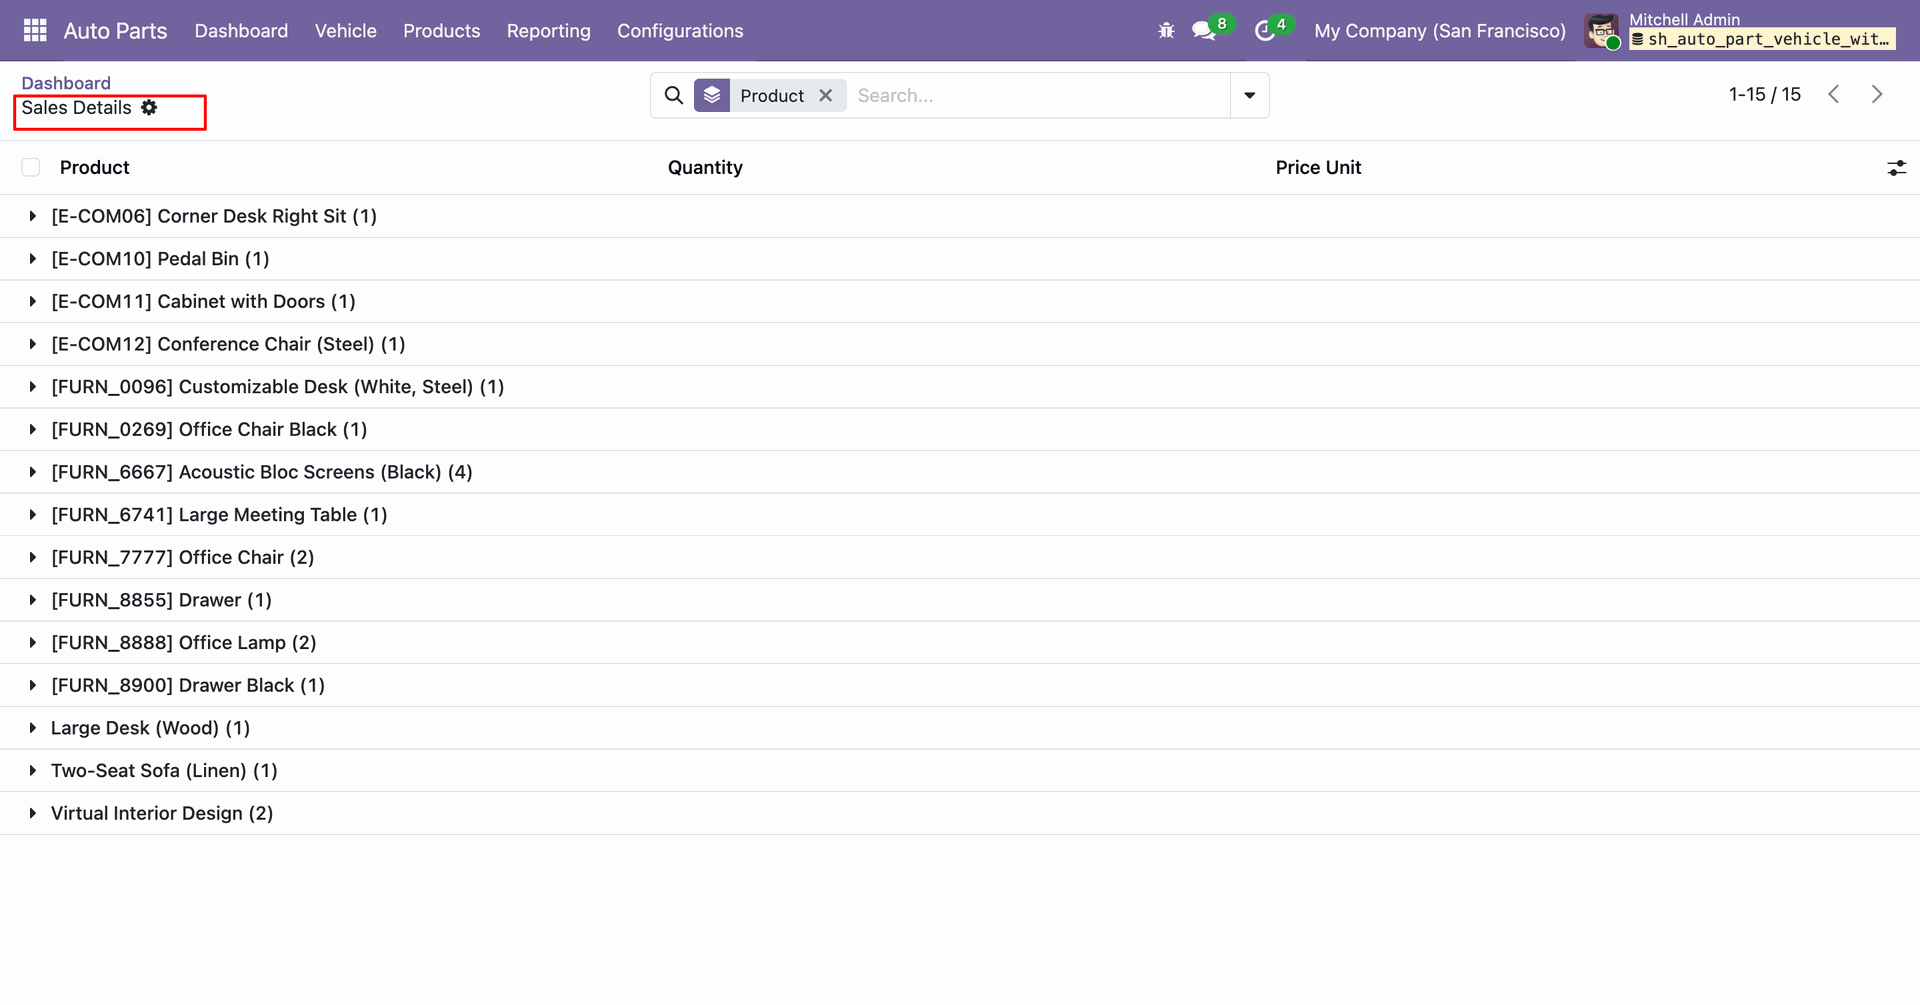
The Sales Details Report will be displayed, showing the generated sales details based on the selected criteria.
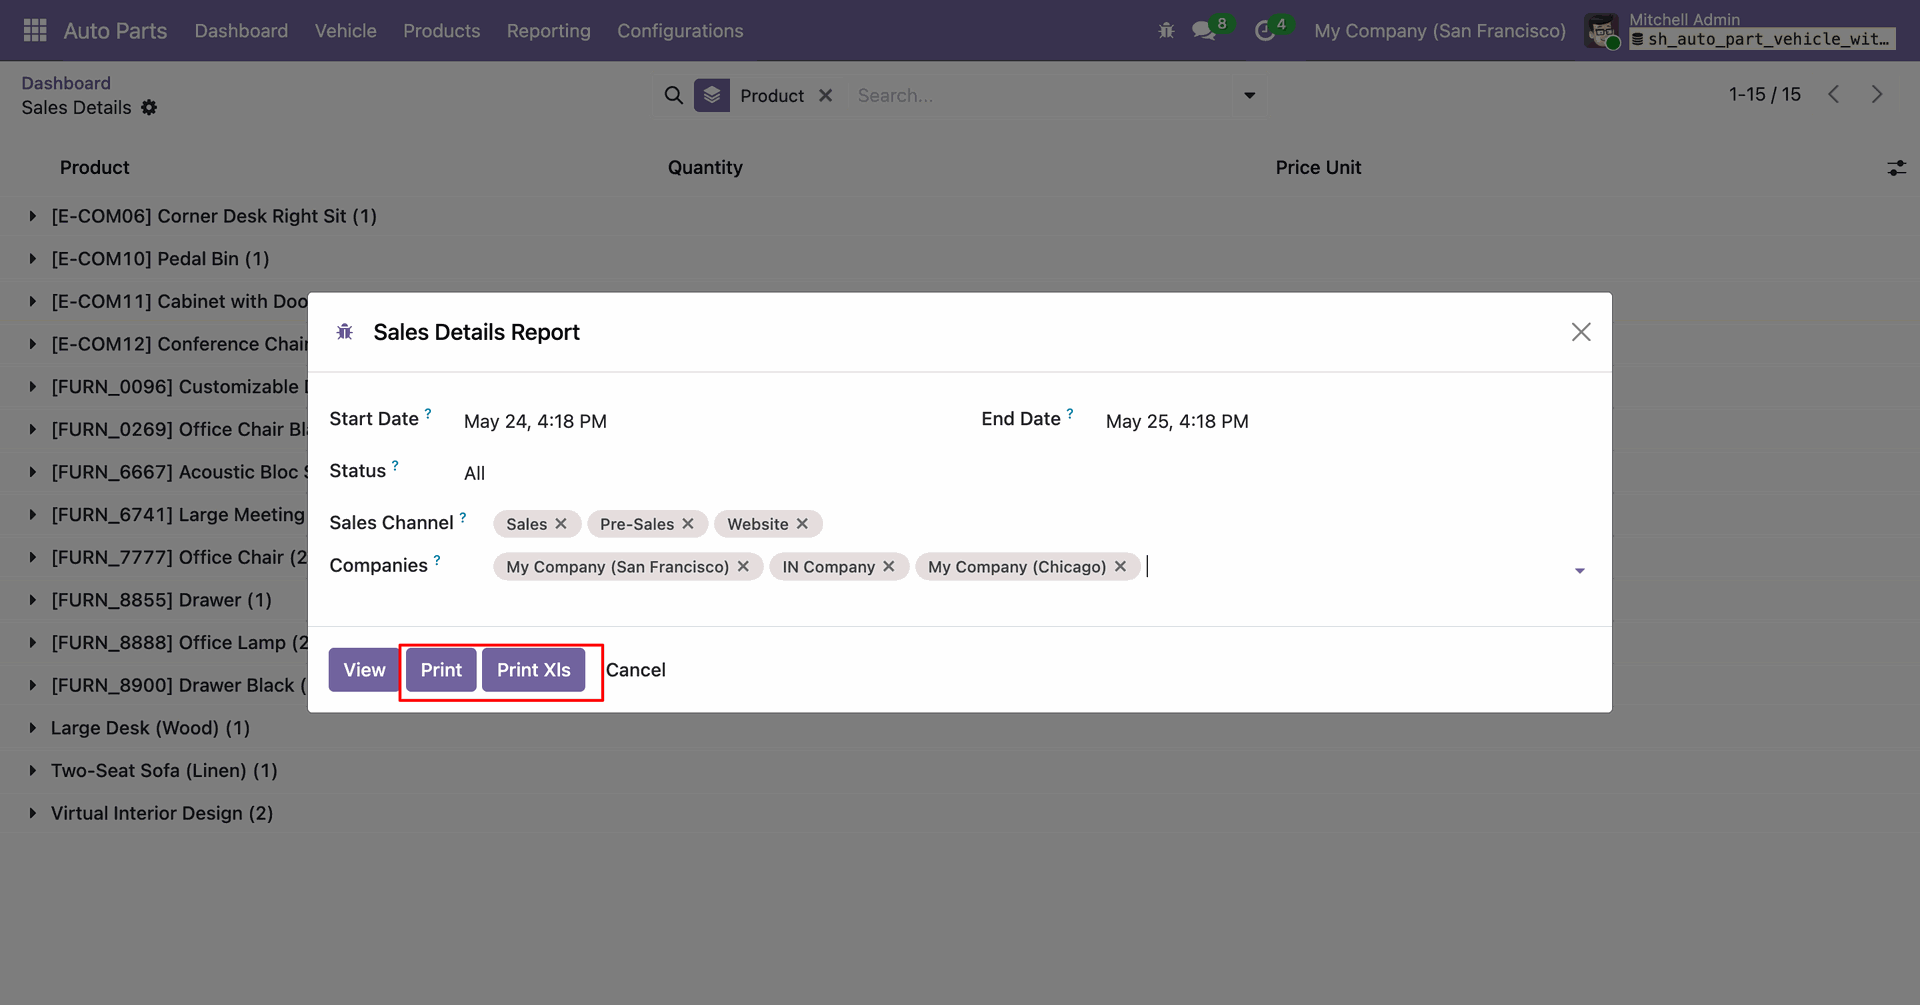
The Sales Details Report wizard will open. Enter the required details and click the Print or Print XLS button to generate and download the report in the desired format.
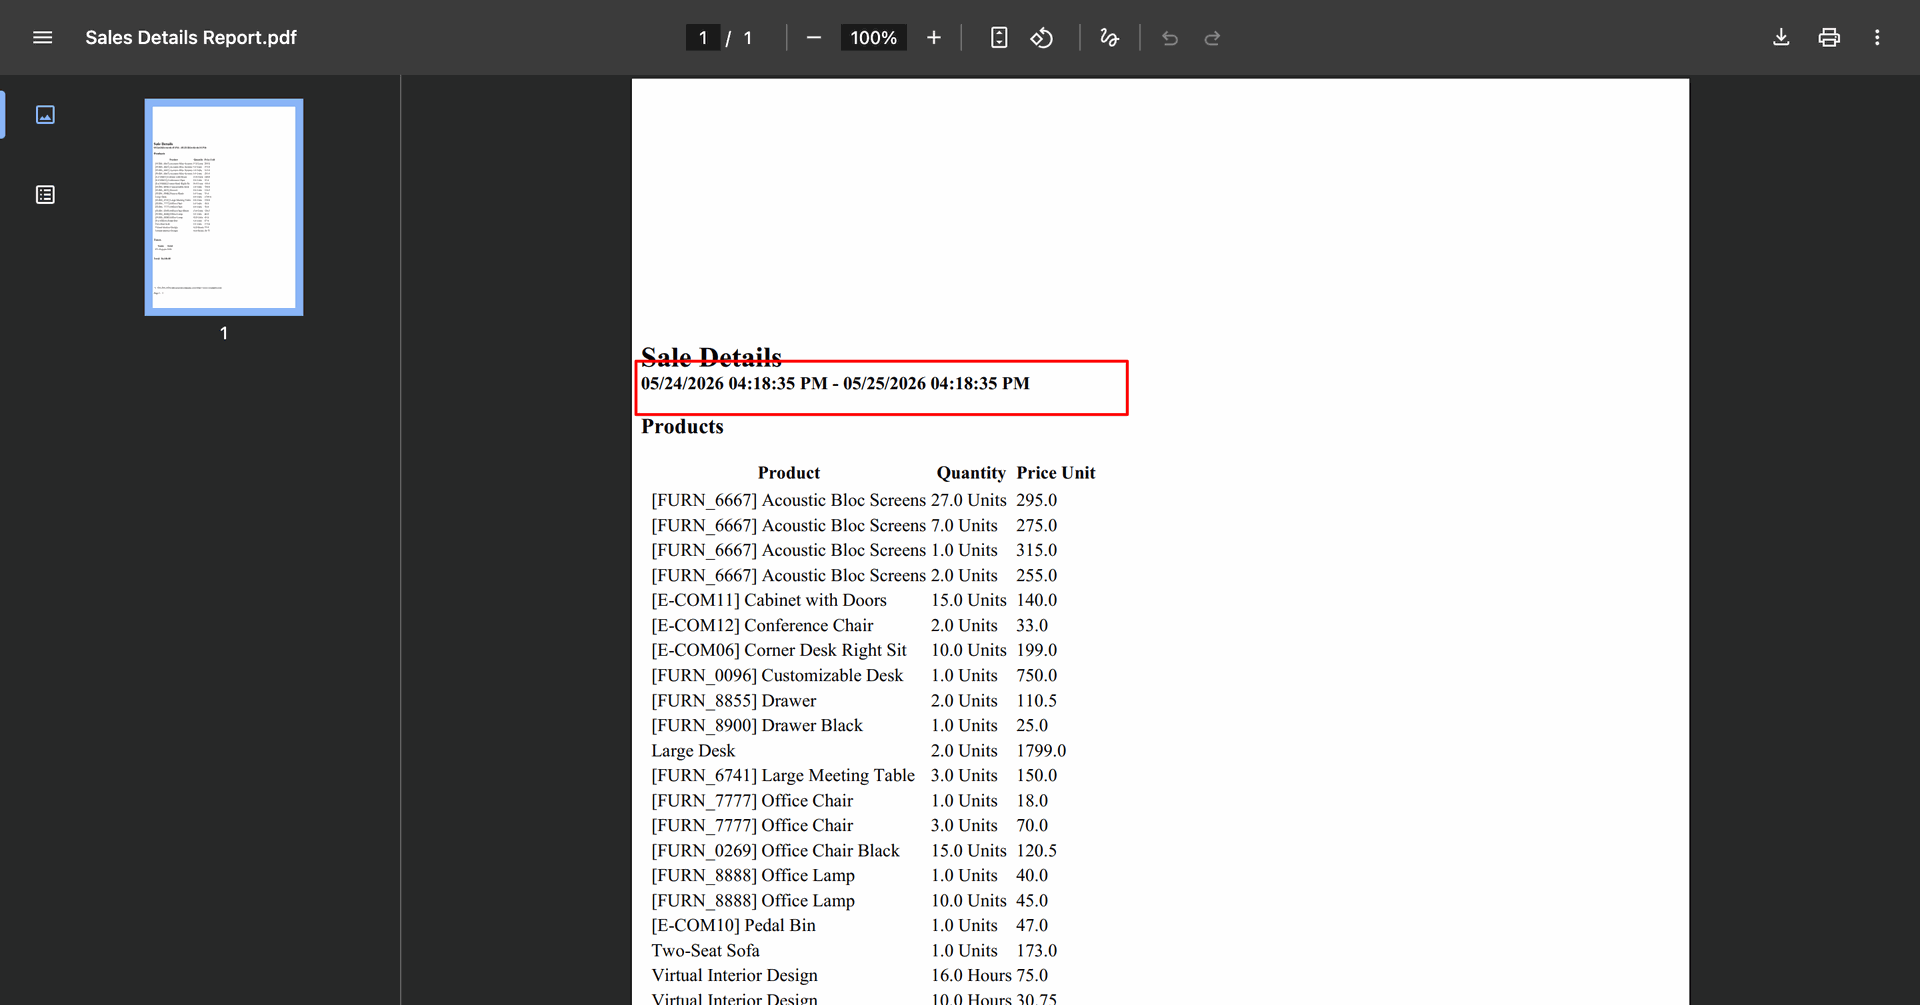
The Sales Details Report will be generated and downloaded in PDF format.
The Sales Details Report will be generated and downloaded in Excel format.
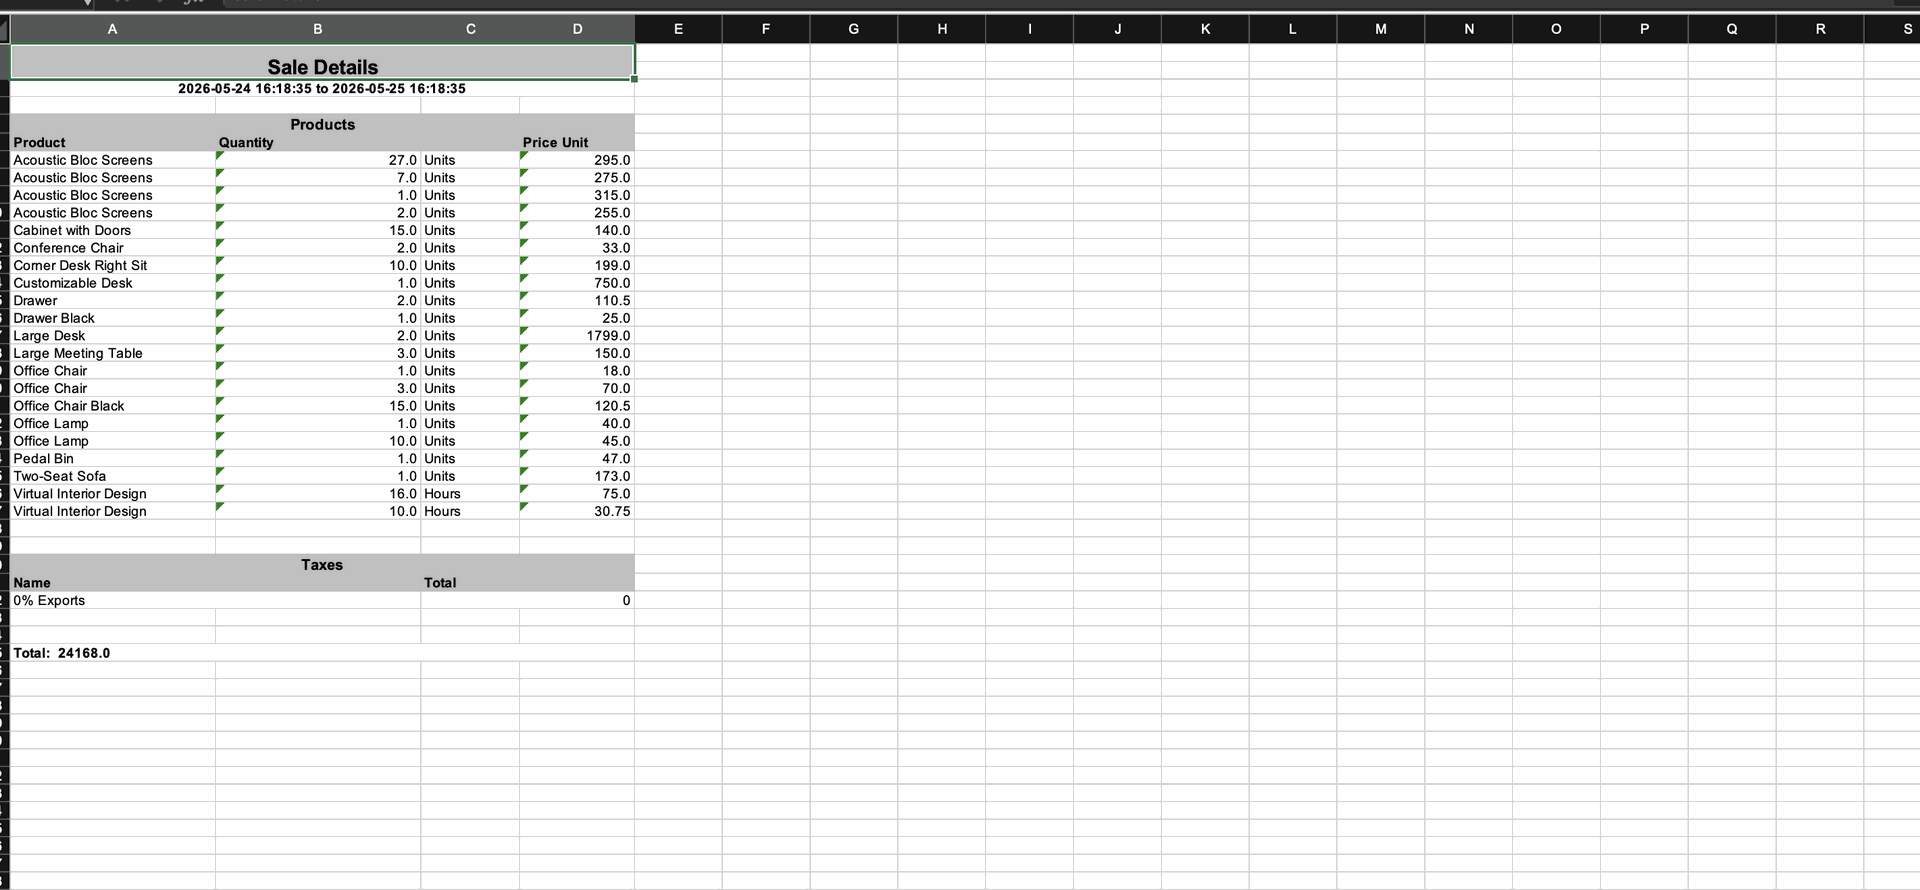
Go to Auto Parts Reporting and select the Sales Report by Salesperson option to generate detailed sales reports categorized by salesperson.
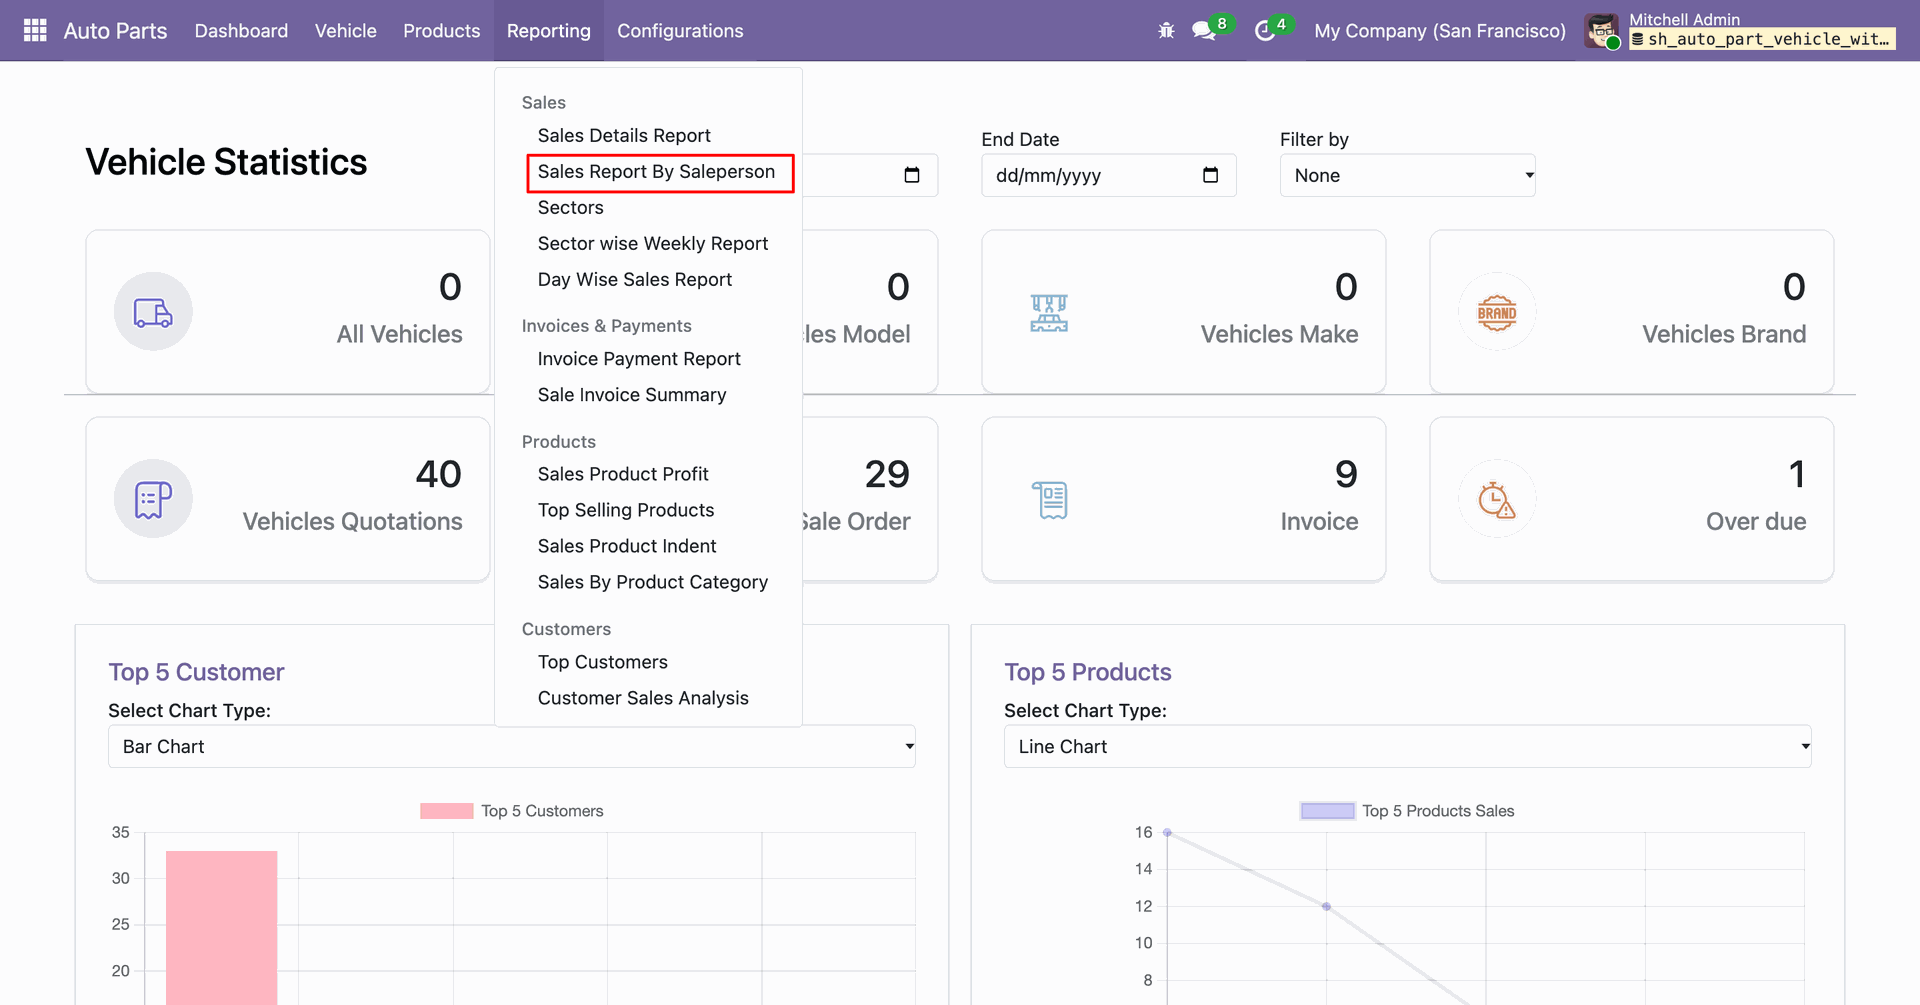
The Sales Report By Salesperson wizard will open. Enter the required details and click the View button to generate and display the report.
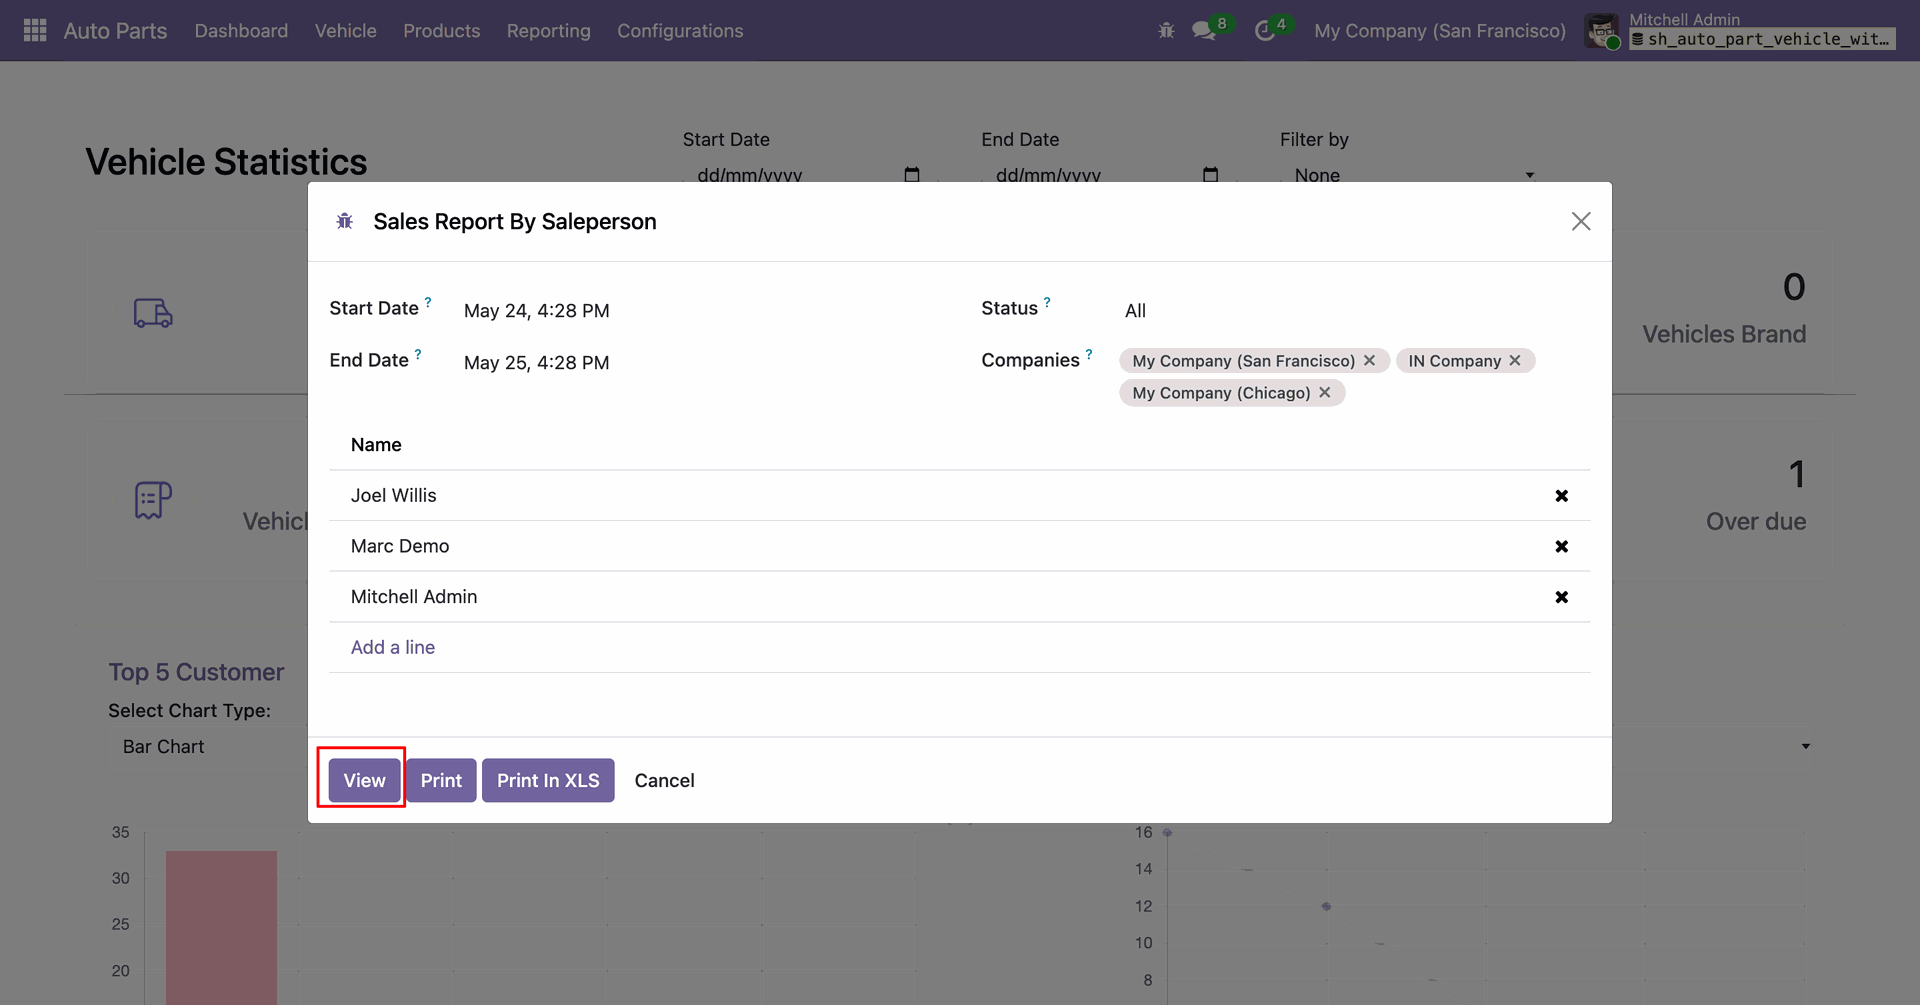
The Sales Report by Salesperson will be displayed, showing detailed sales information based on the selected criteria and the salesperson.
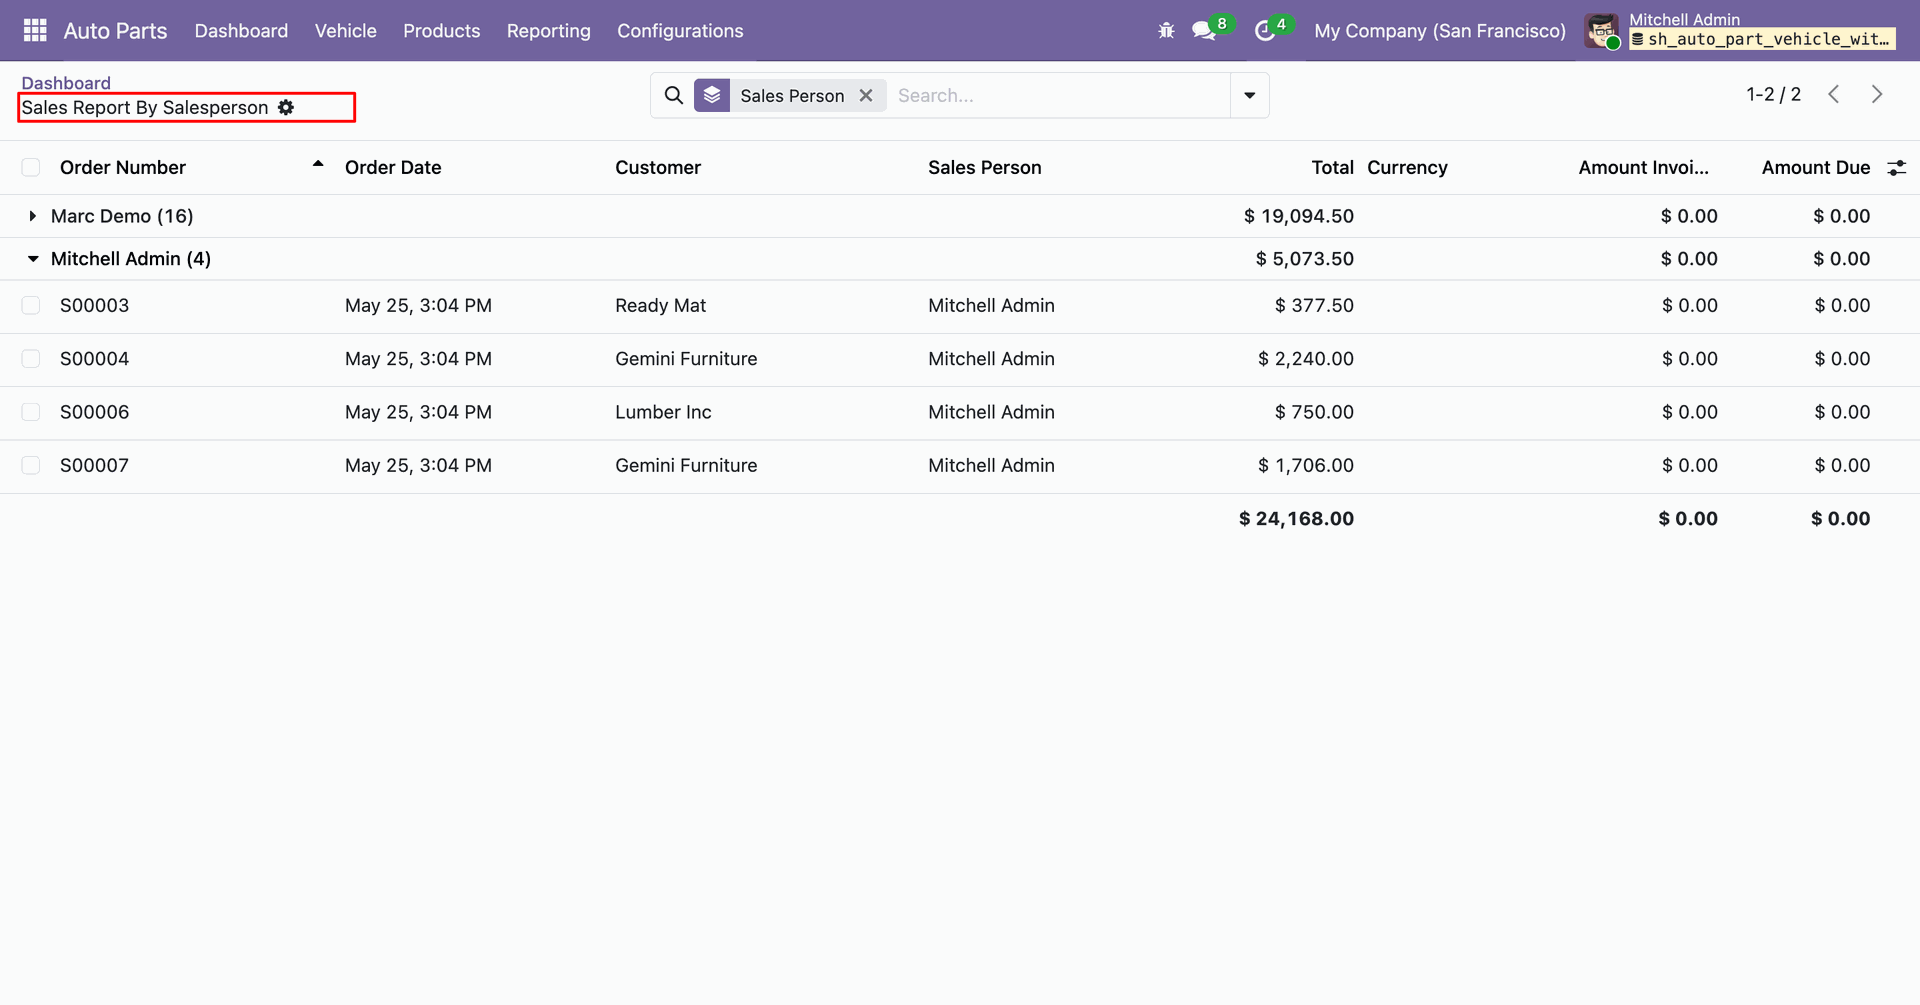
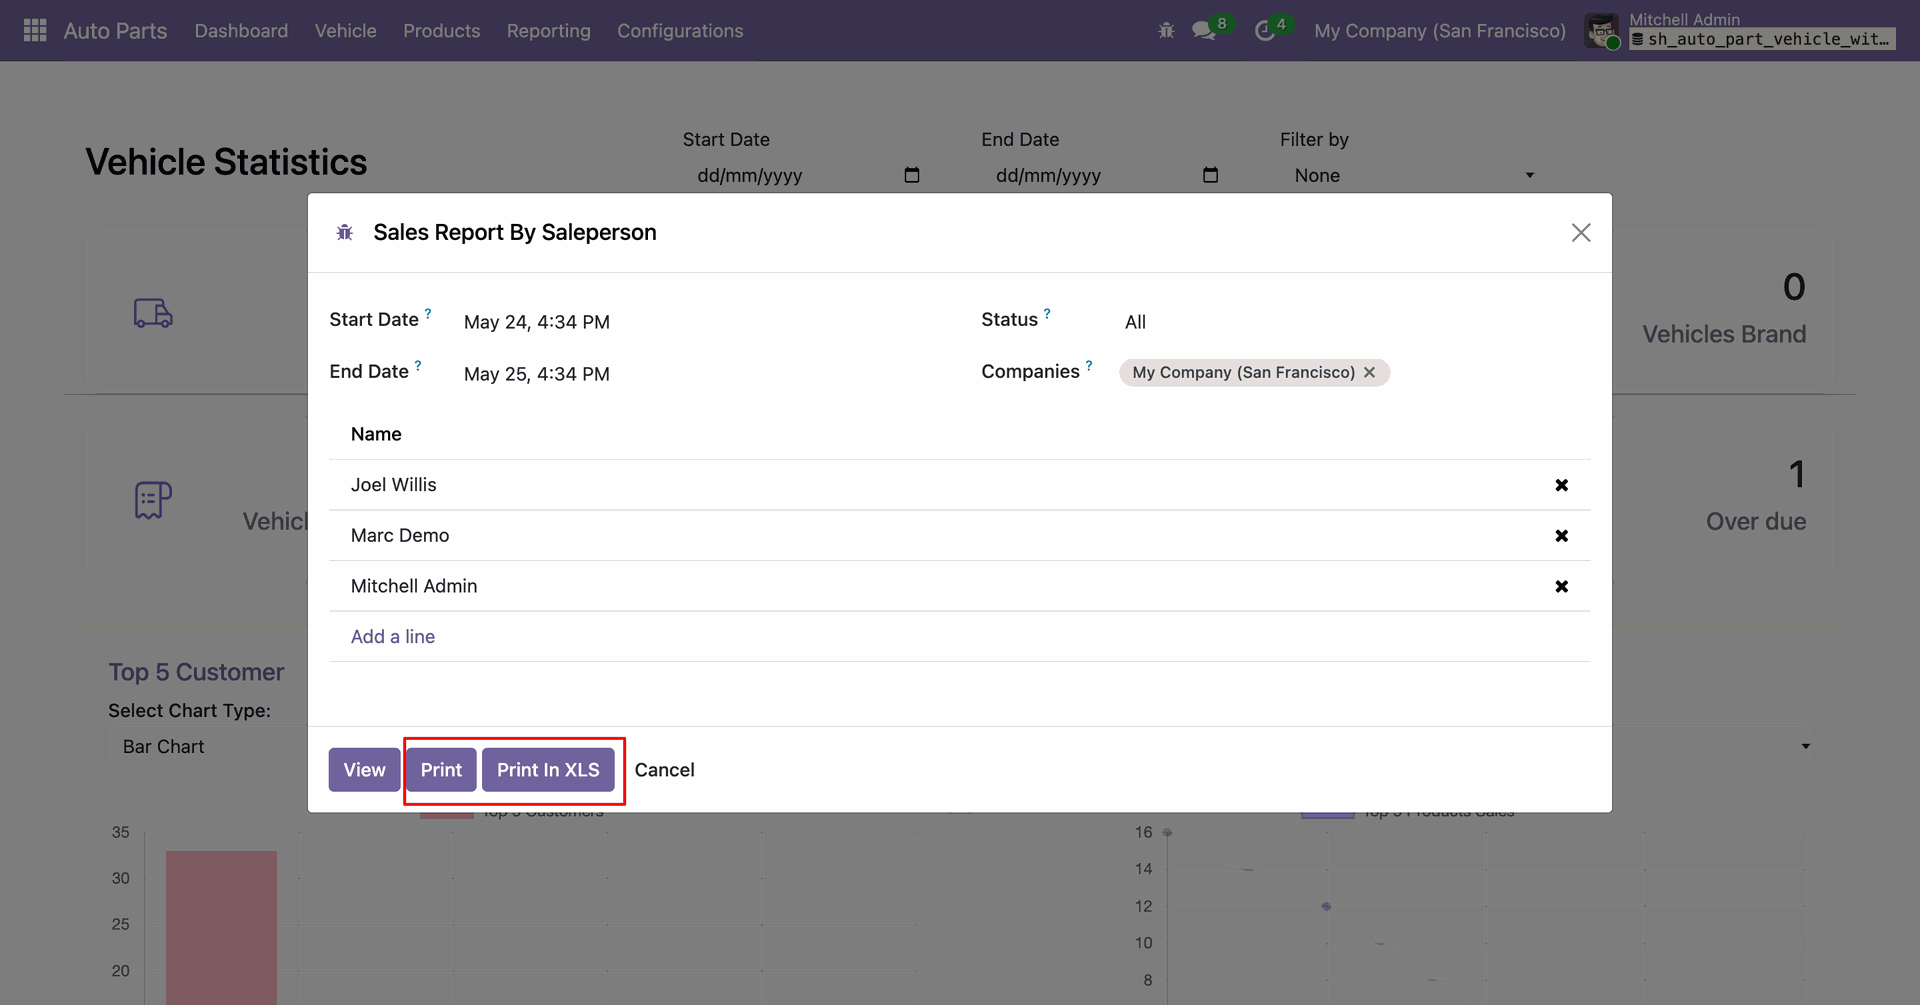
The Sales Report by Salesperson wizard will open. Enter the required details and click the Print or Print XLS button to generate and download the report in the desired format.
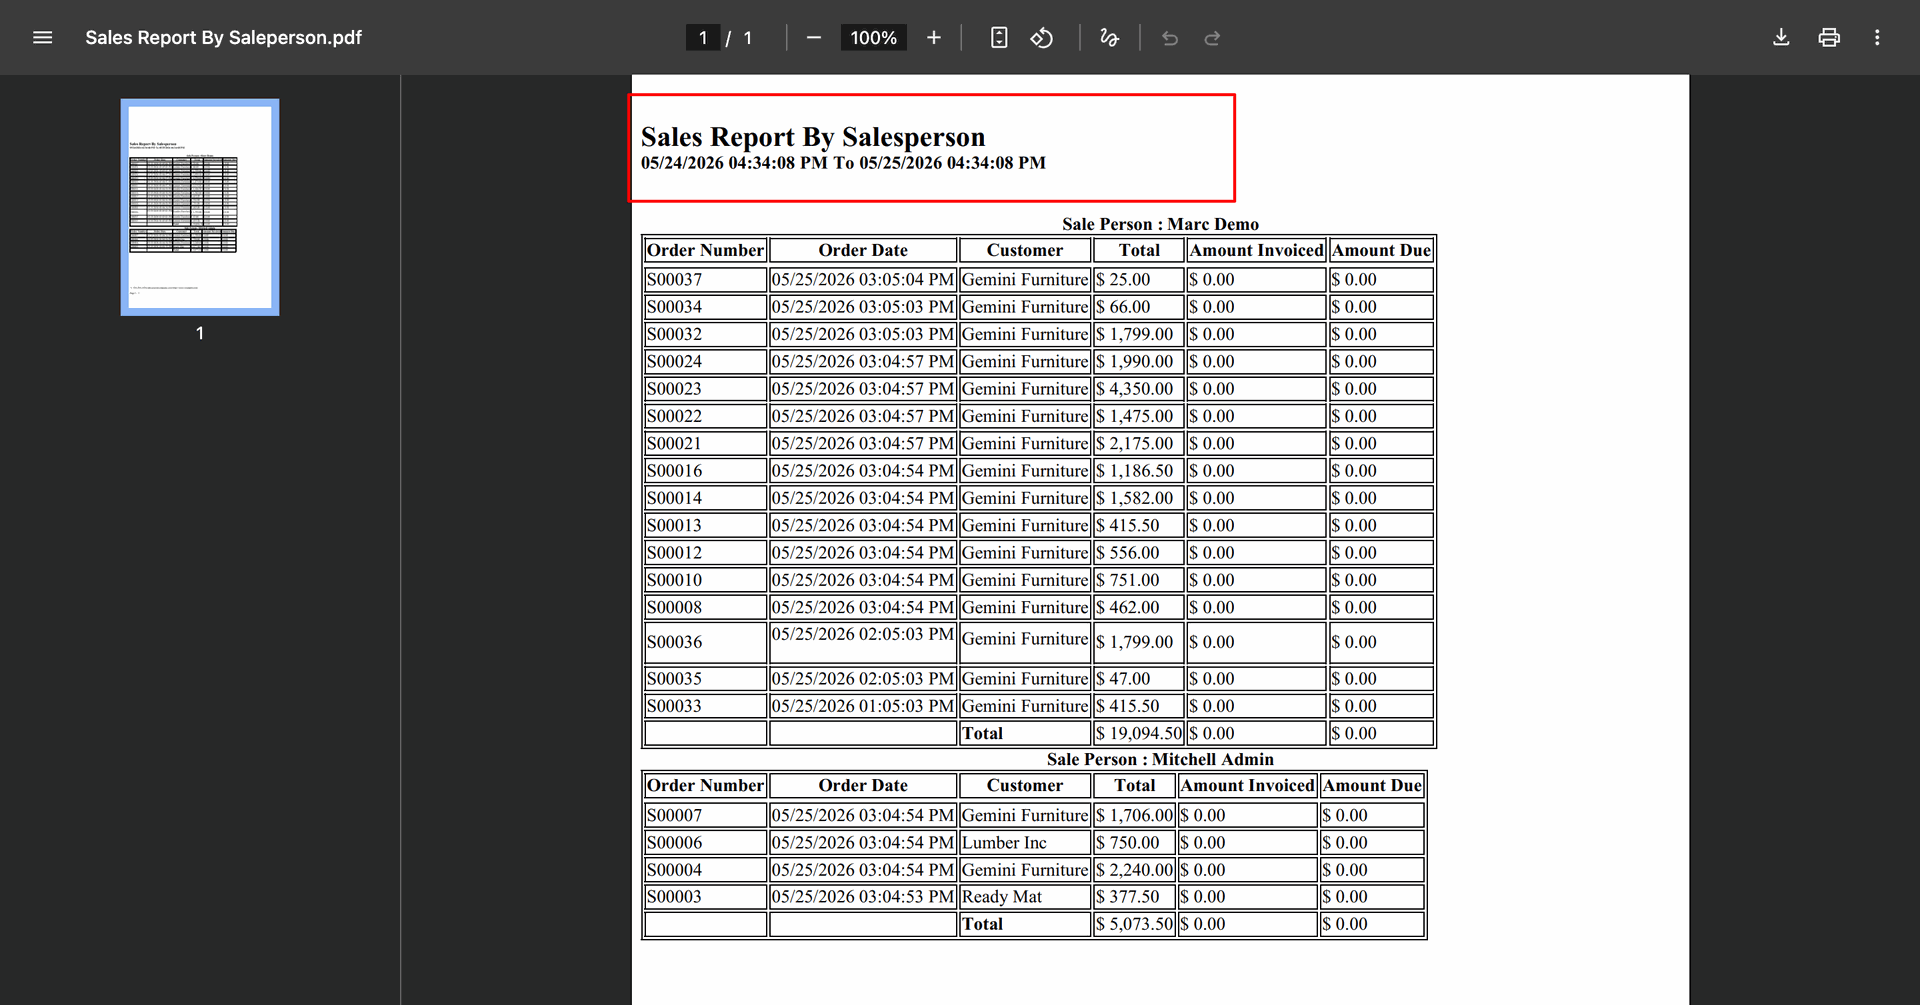
The Sales Report by Salesperson will be generated and downloaded in PDF format.
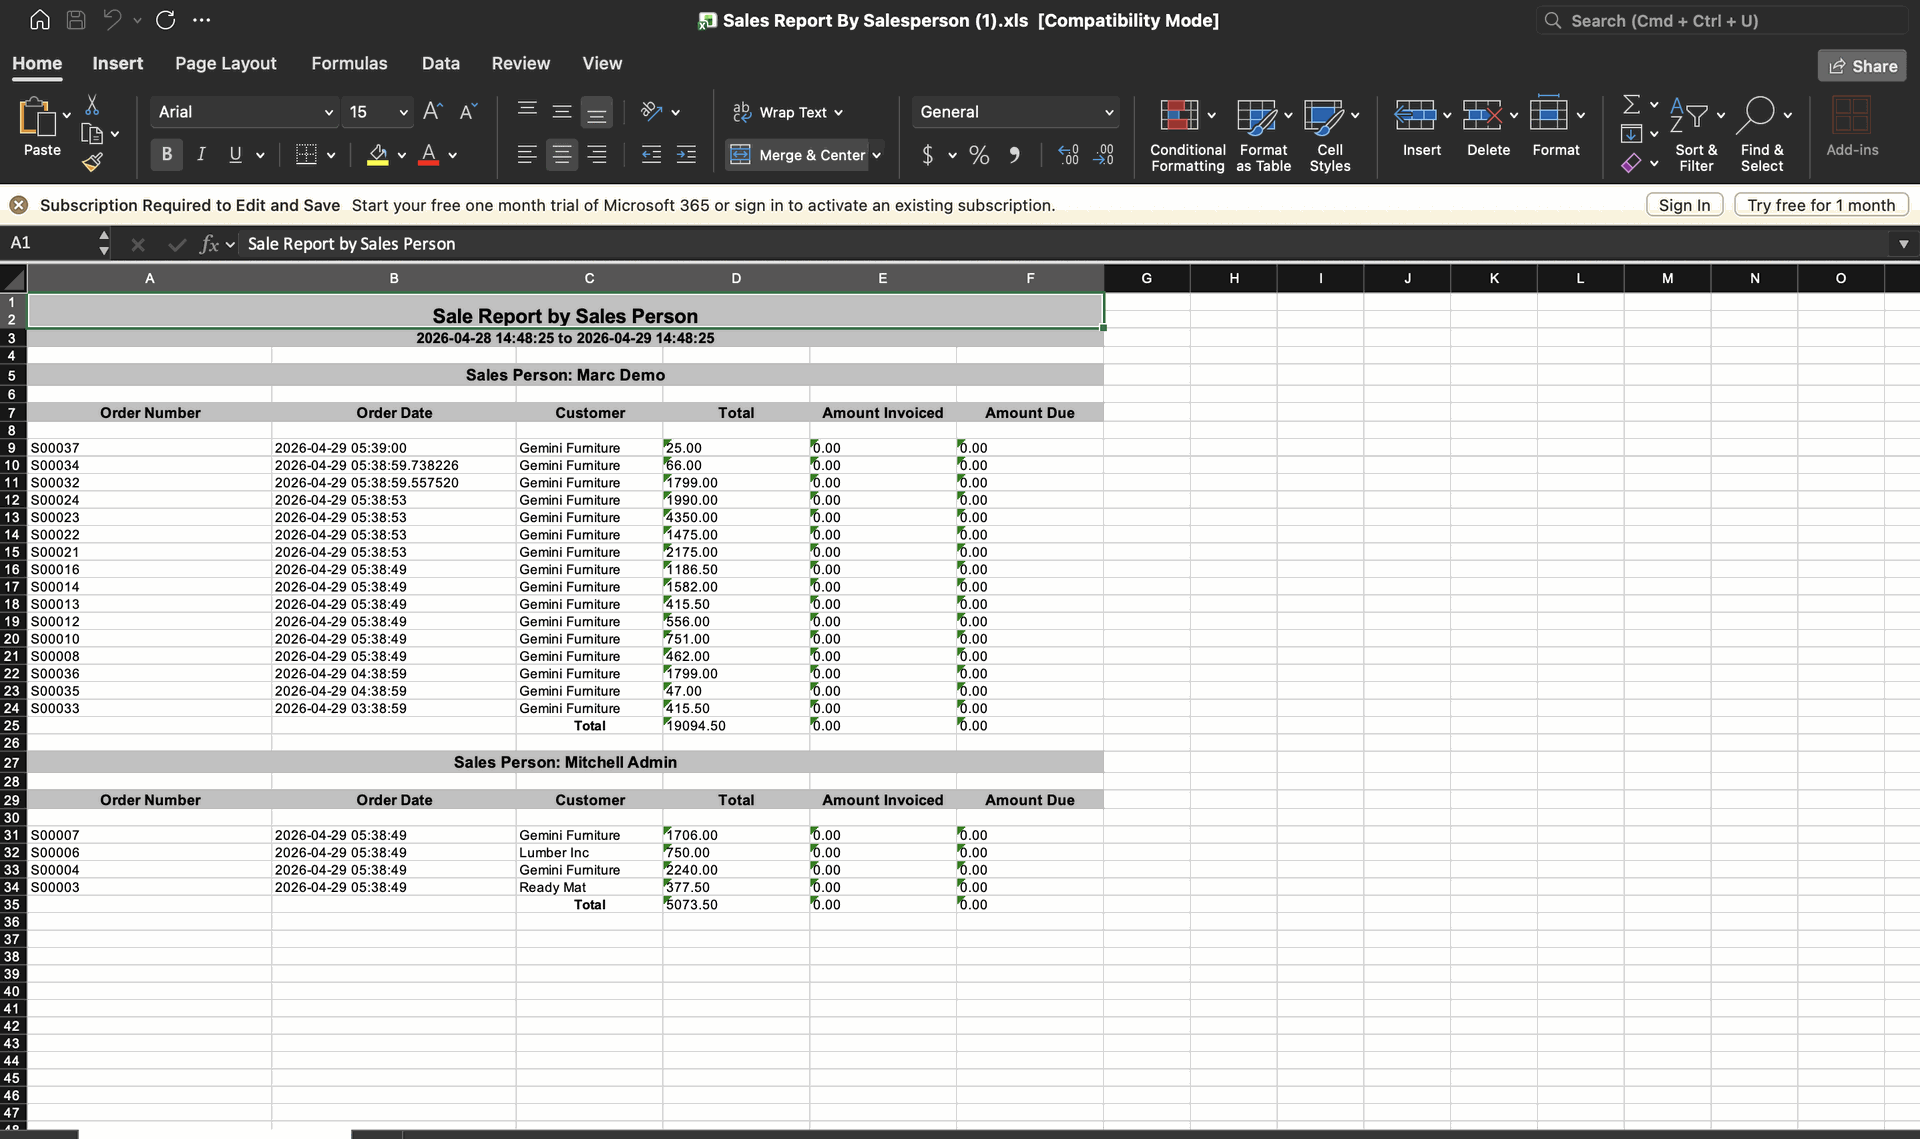
The Sales Report by Salesperson will be generated and downloaded in Excel format.
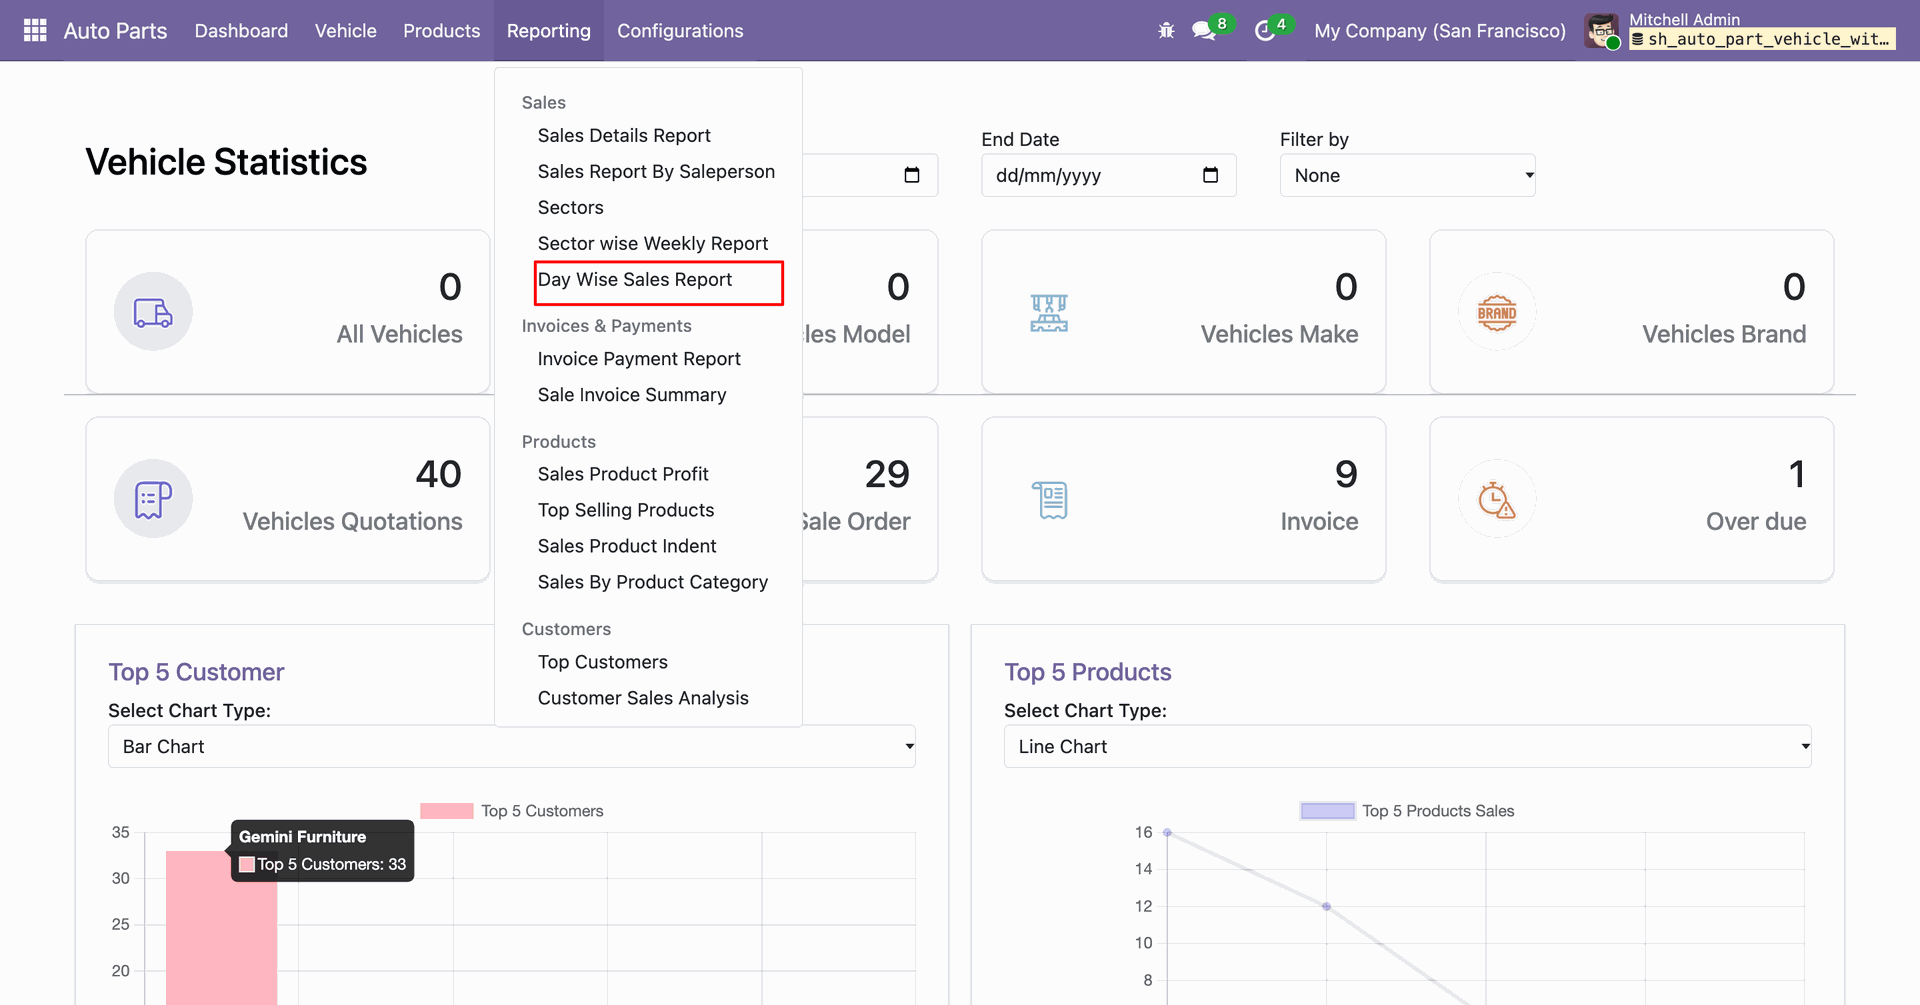
Go to Auto Parts Reporting and select the Day Wise Sales Report option to generate sales reports based on daily sales data.
The Day Wise Sales Report wizard will open. Enter the required details and click the View button to generate and display the report.
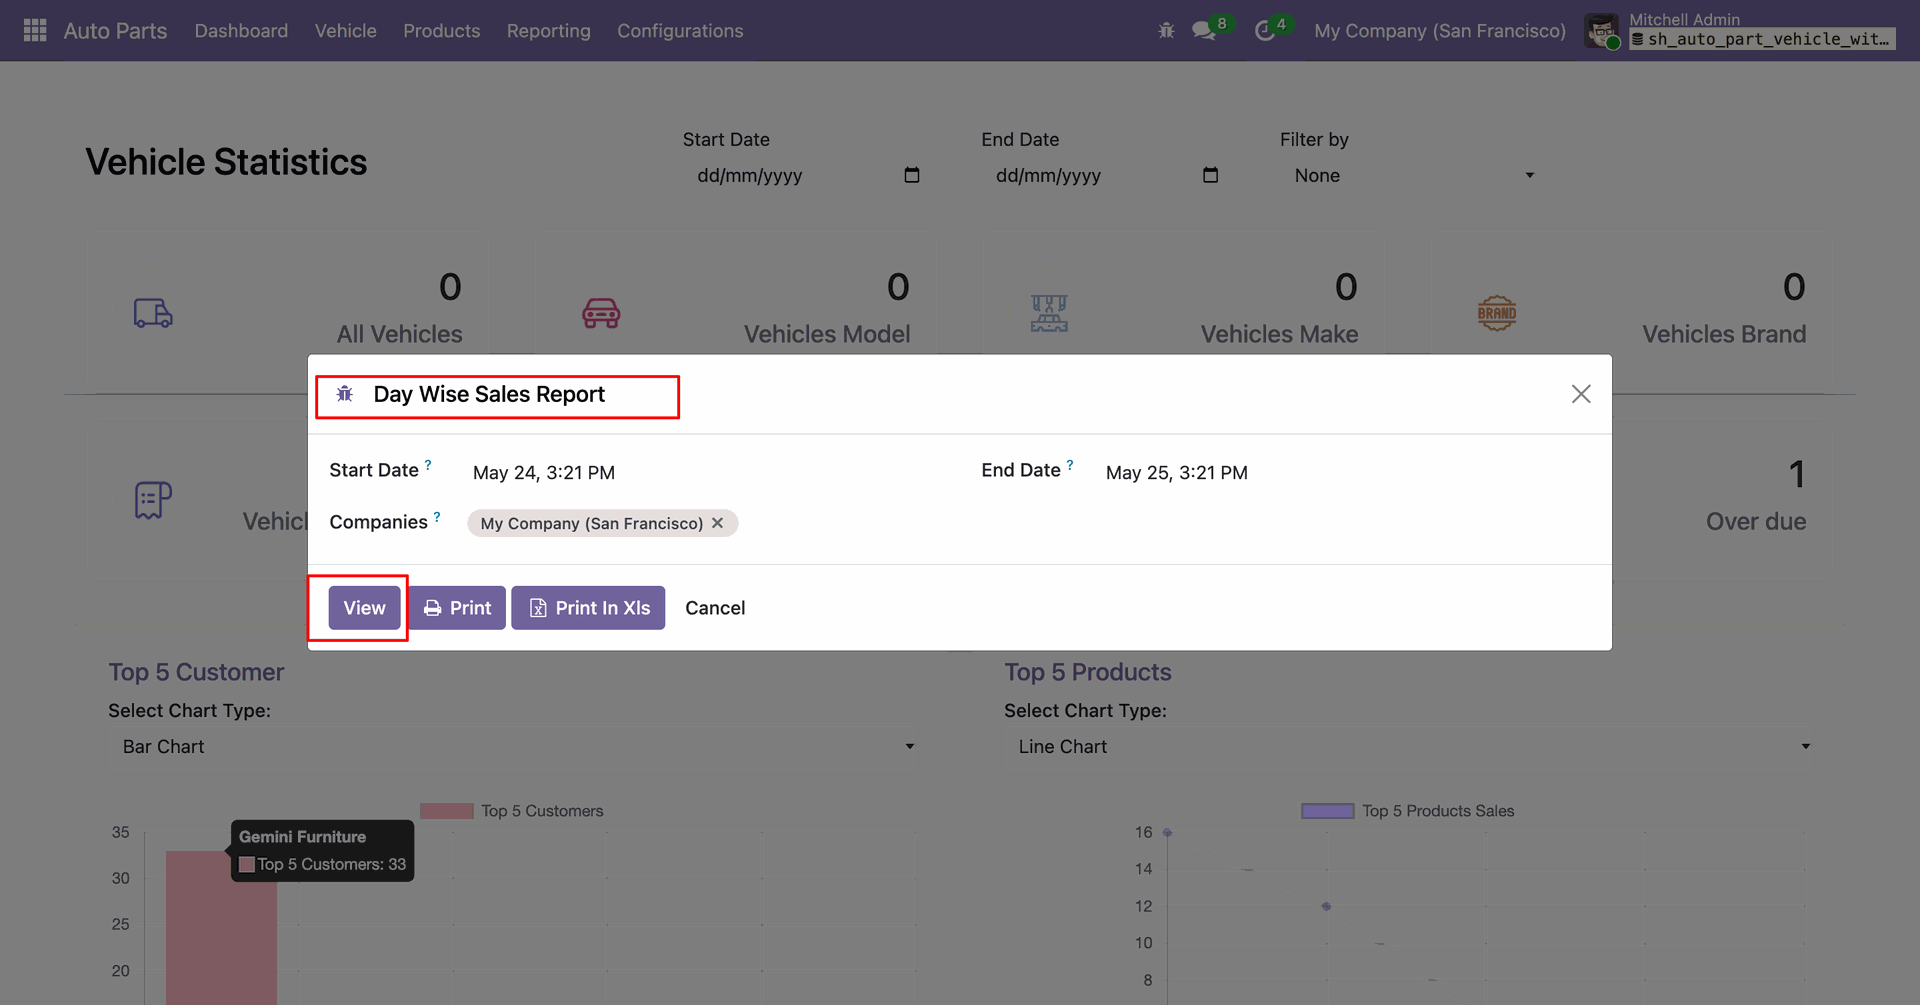
The Day Wise Sales Report will be displayed, showing the generated sales details based on the selected date range and filters.
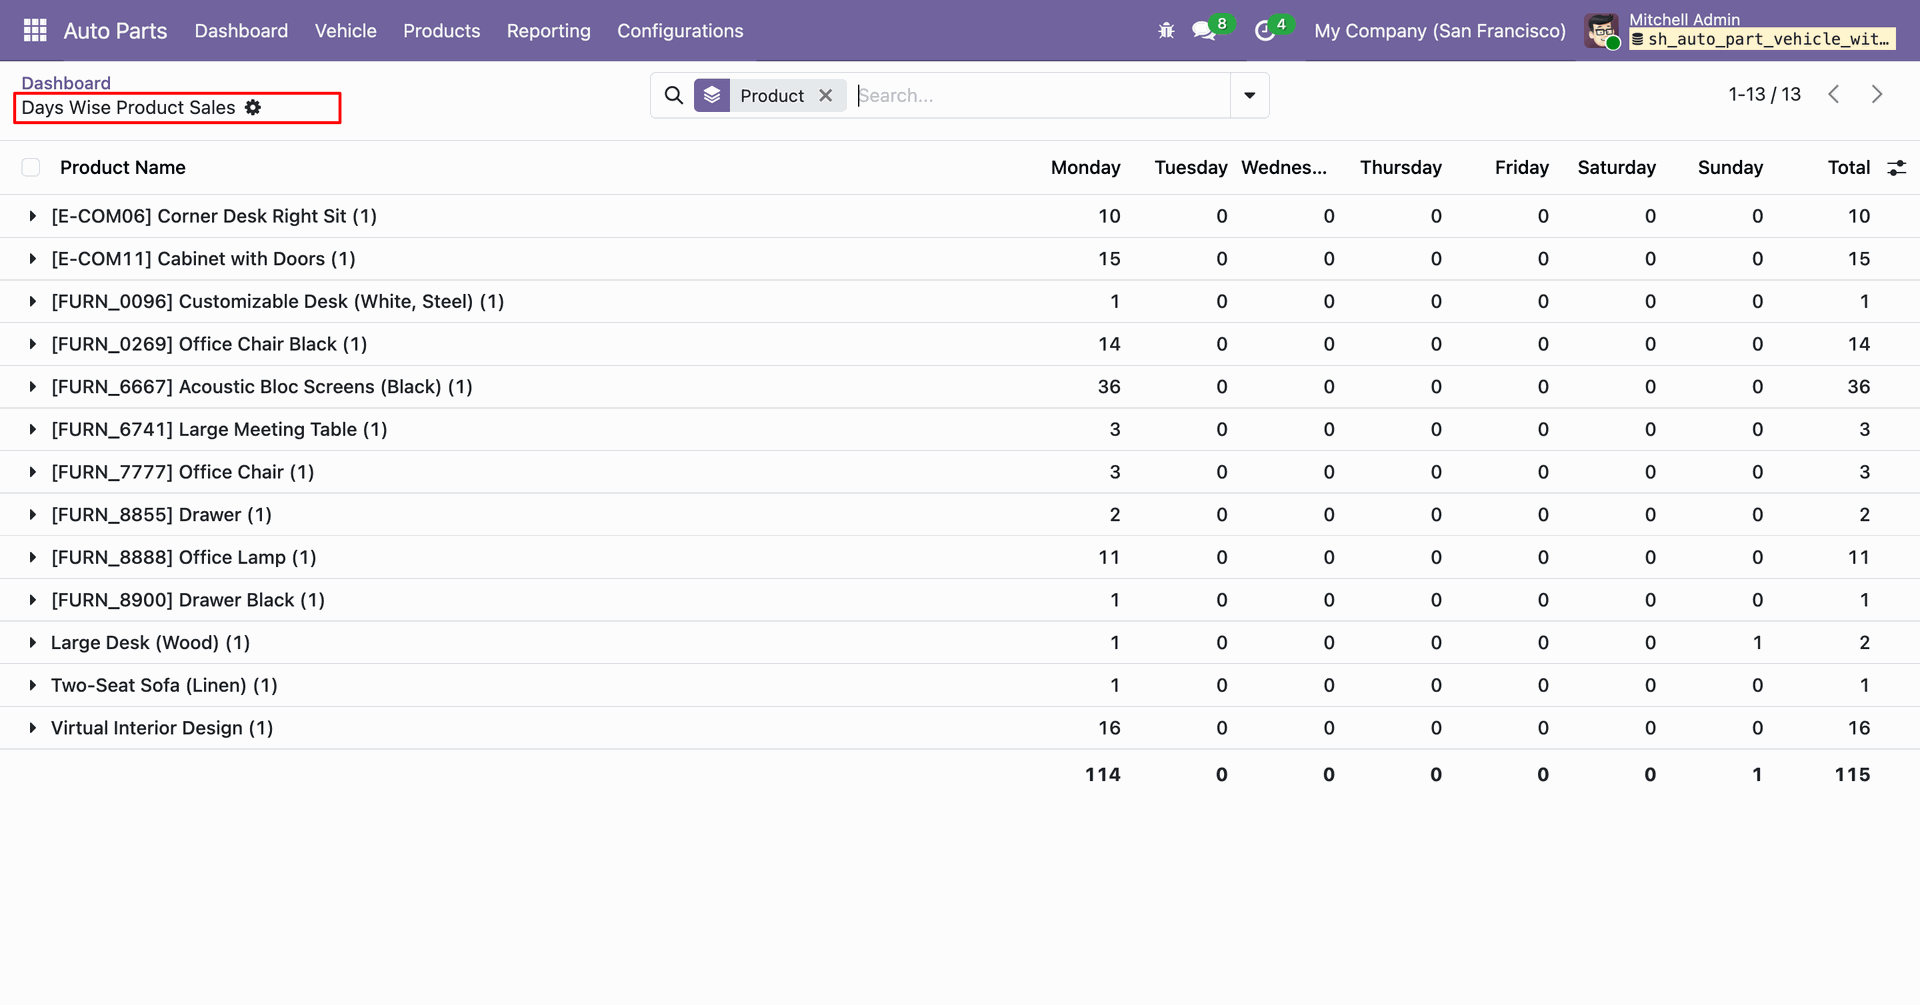
The Day Wise Sales Report wizard will open. Enter the required details and click the Print or Print XLS button to generate and download the report in the desired format.
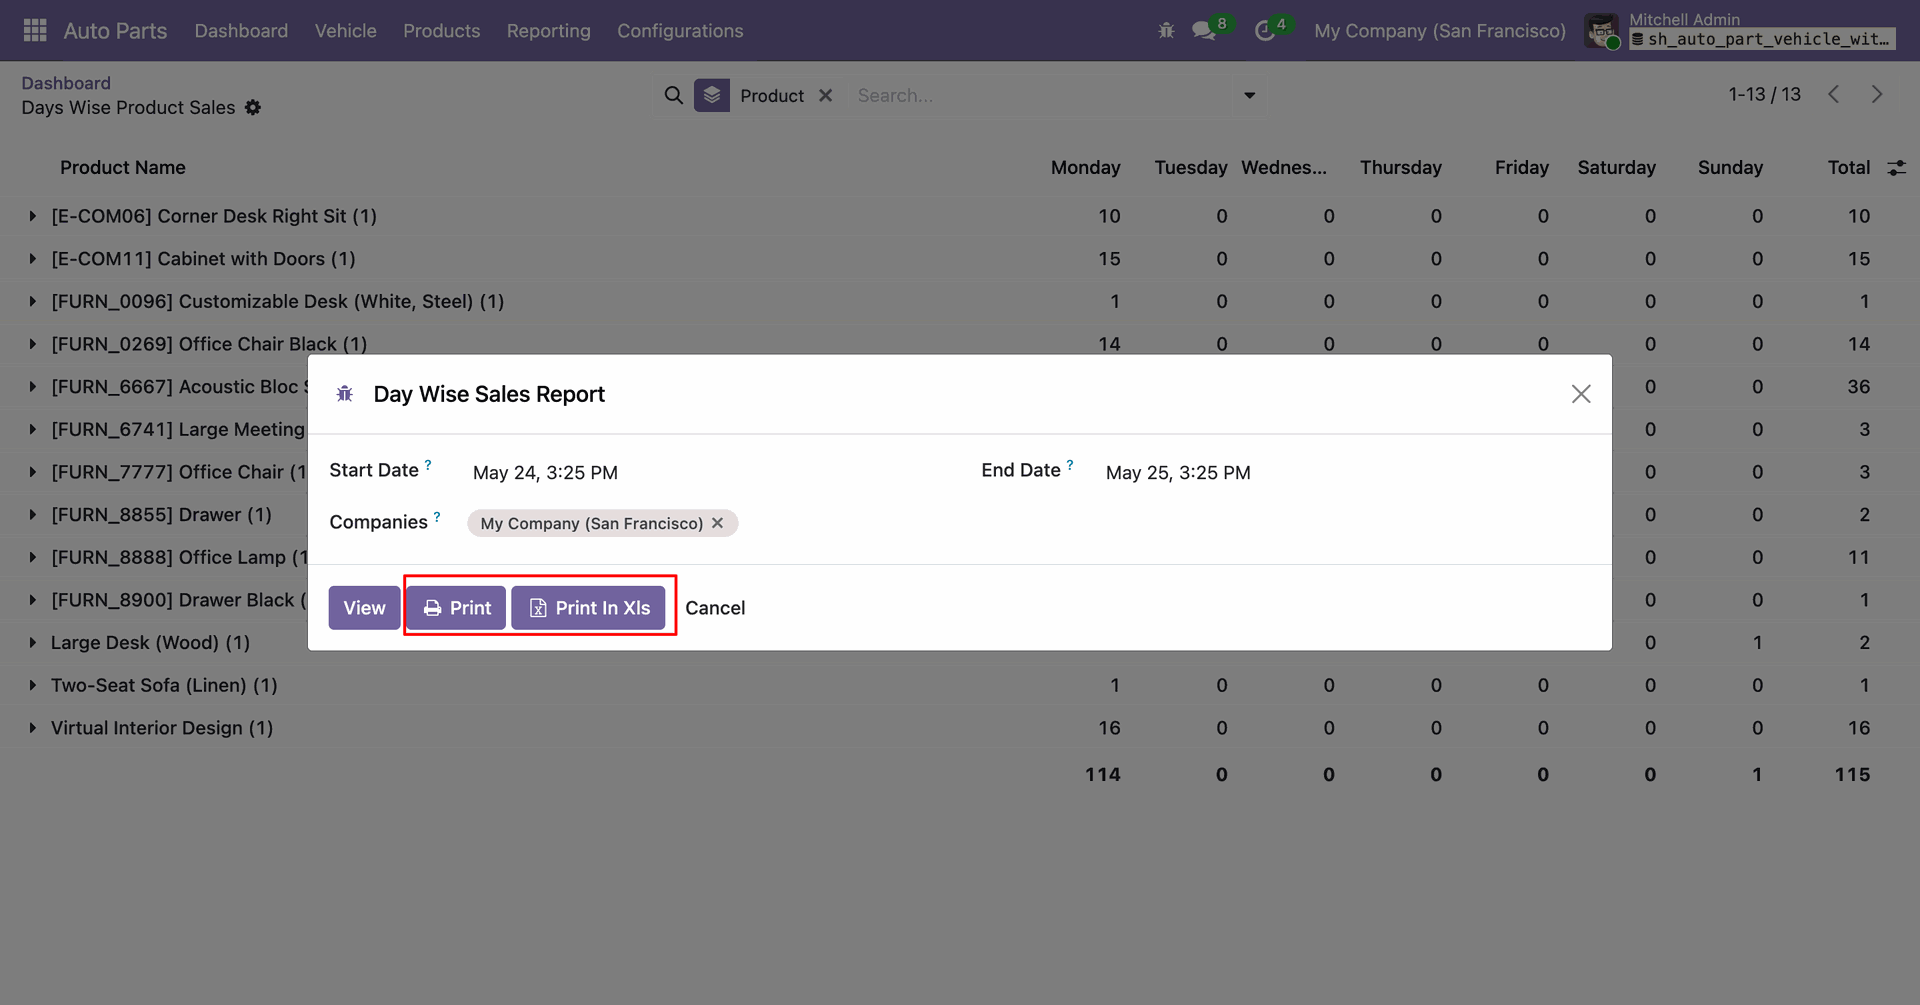
The Day Wise Sales Report will be generated and downloaded in PDF format.
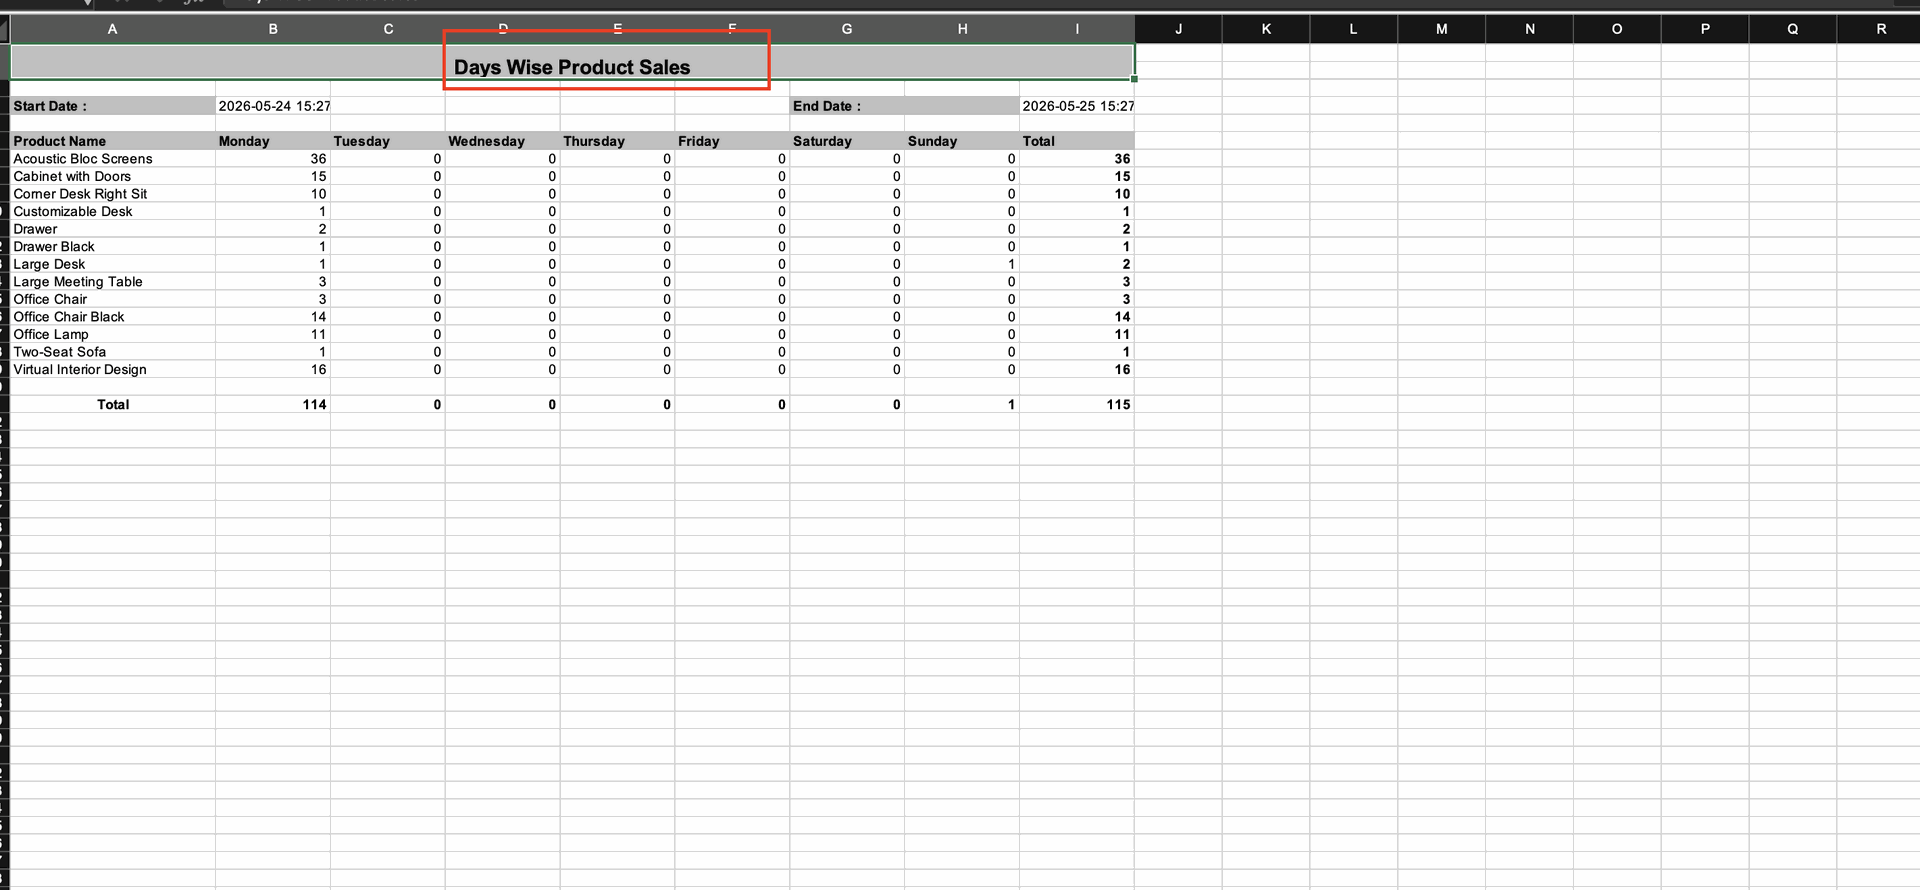
The Day Wise Sales Report will be generated and downloaded in Excel format.
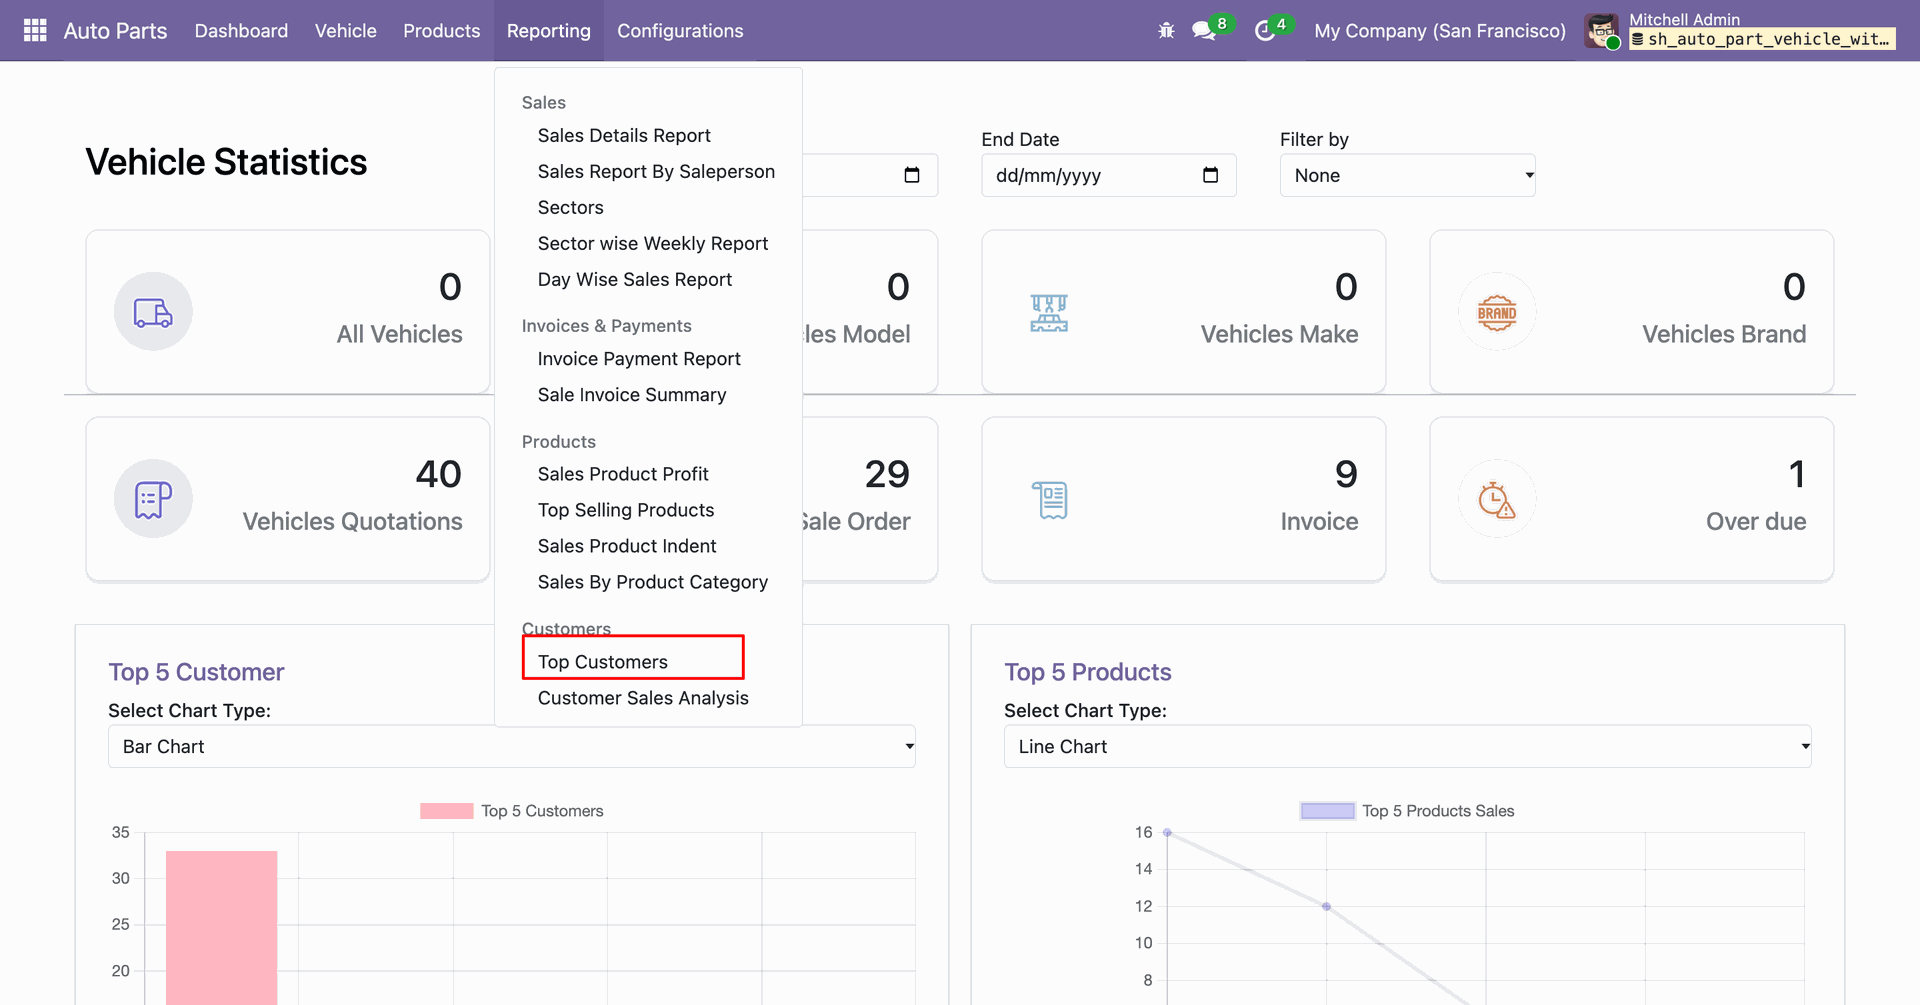
Go to Auto Parts Reporting and select the Top Customers Report option to generate detailed reports of top customers based on sales performance.
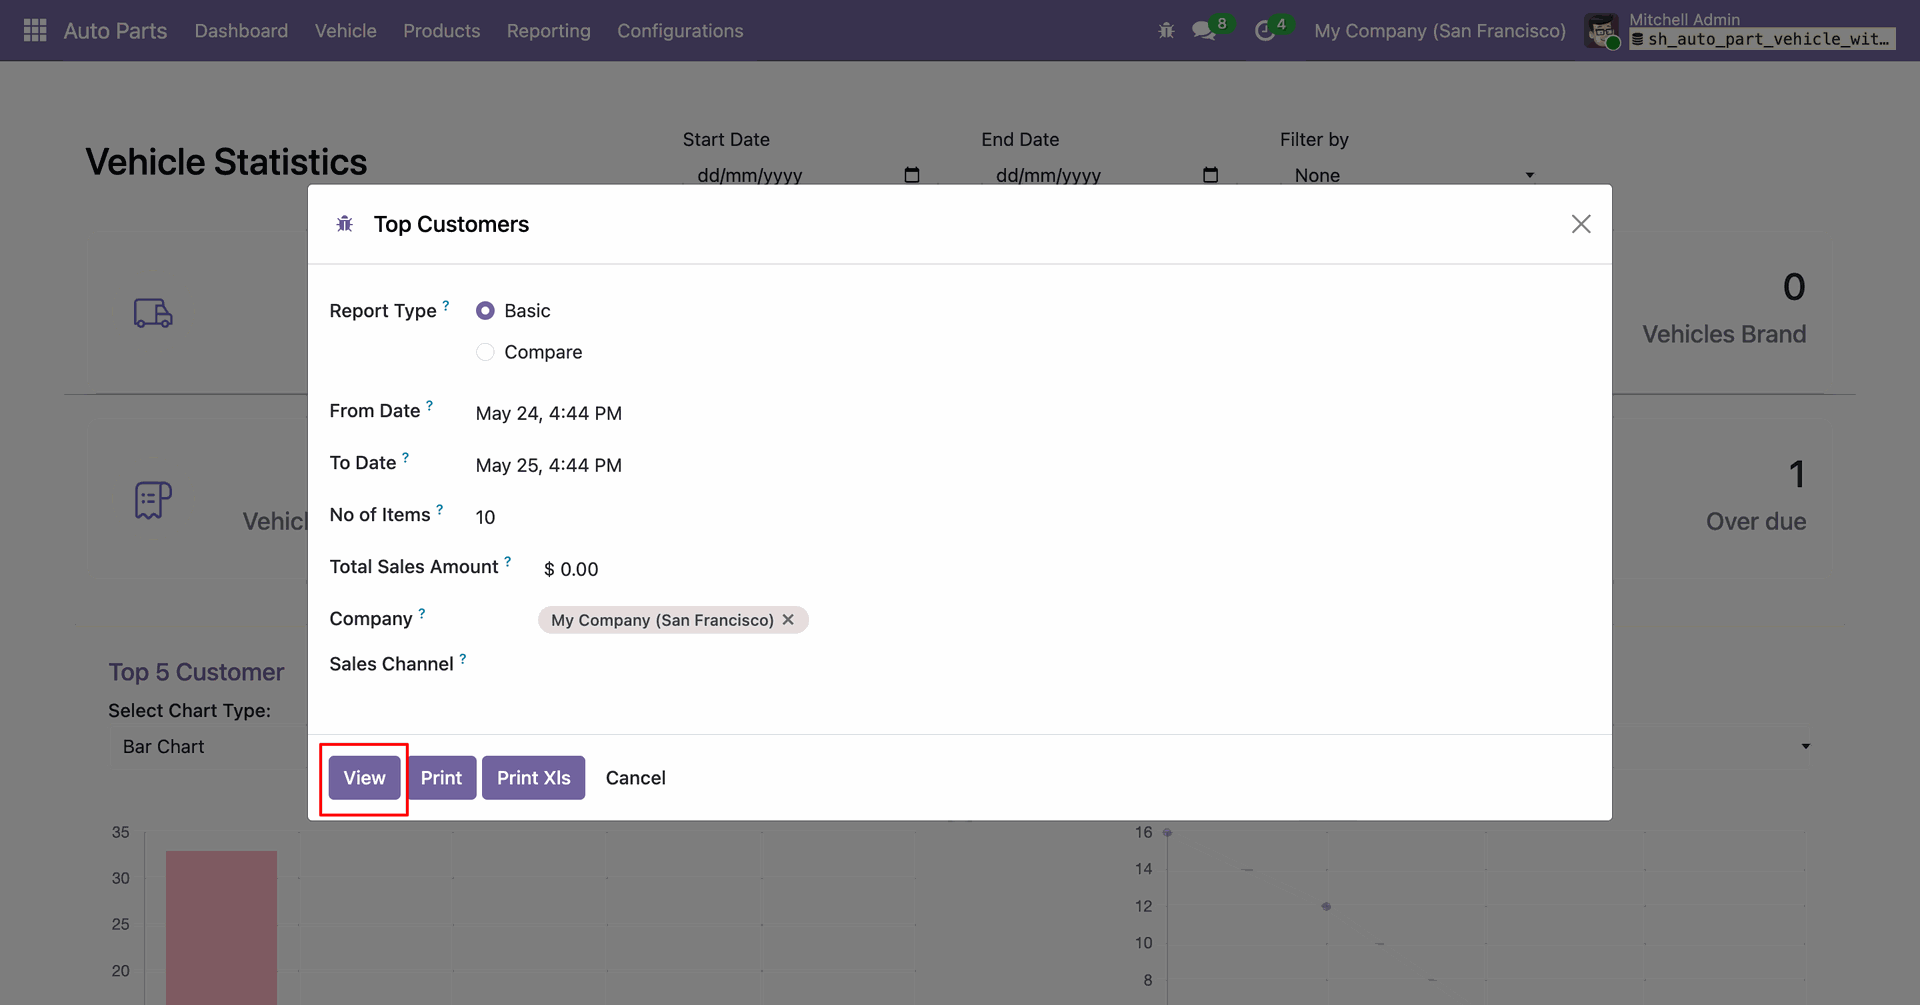
The Top Customers Report wizard will open. Enter the required details and click the View button to generate and display the report showing top customers based on sales performance and transaction history.
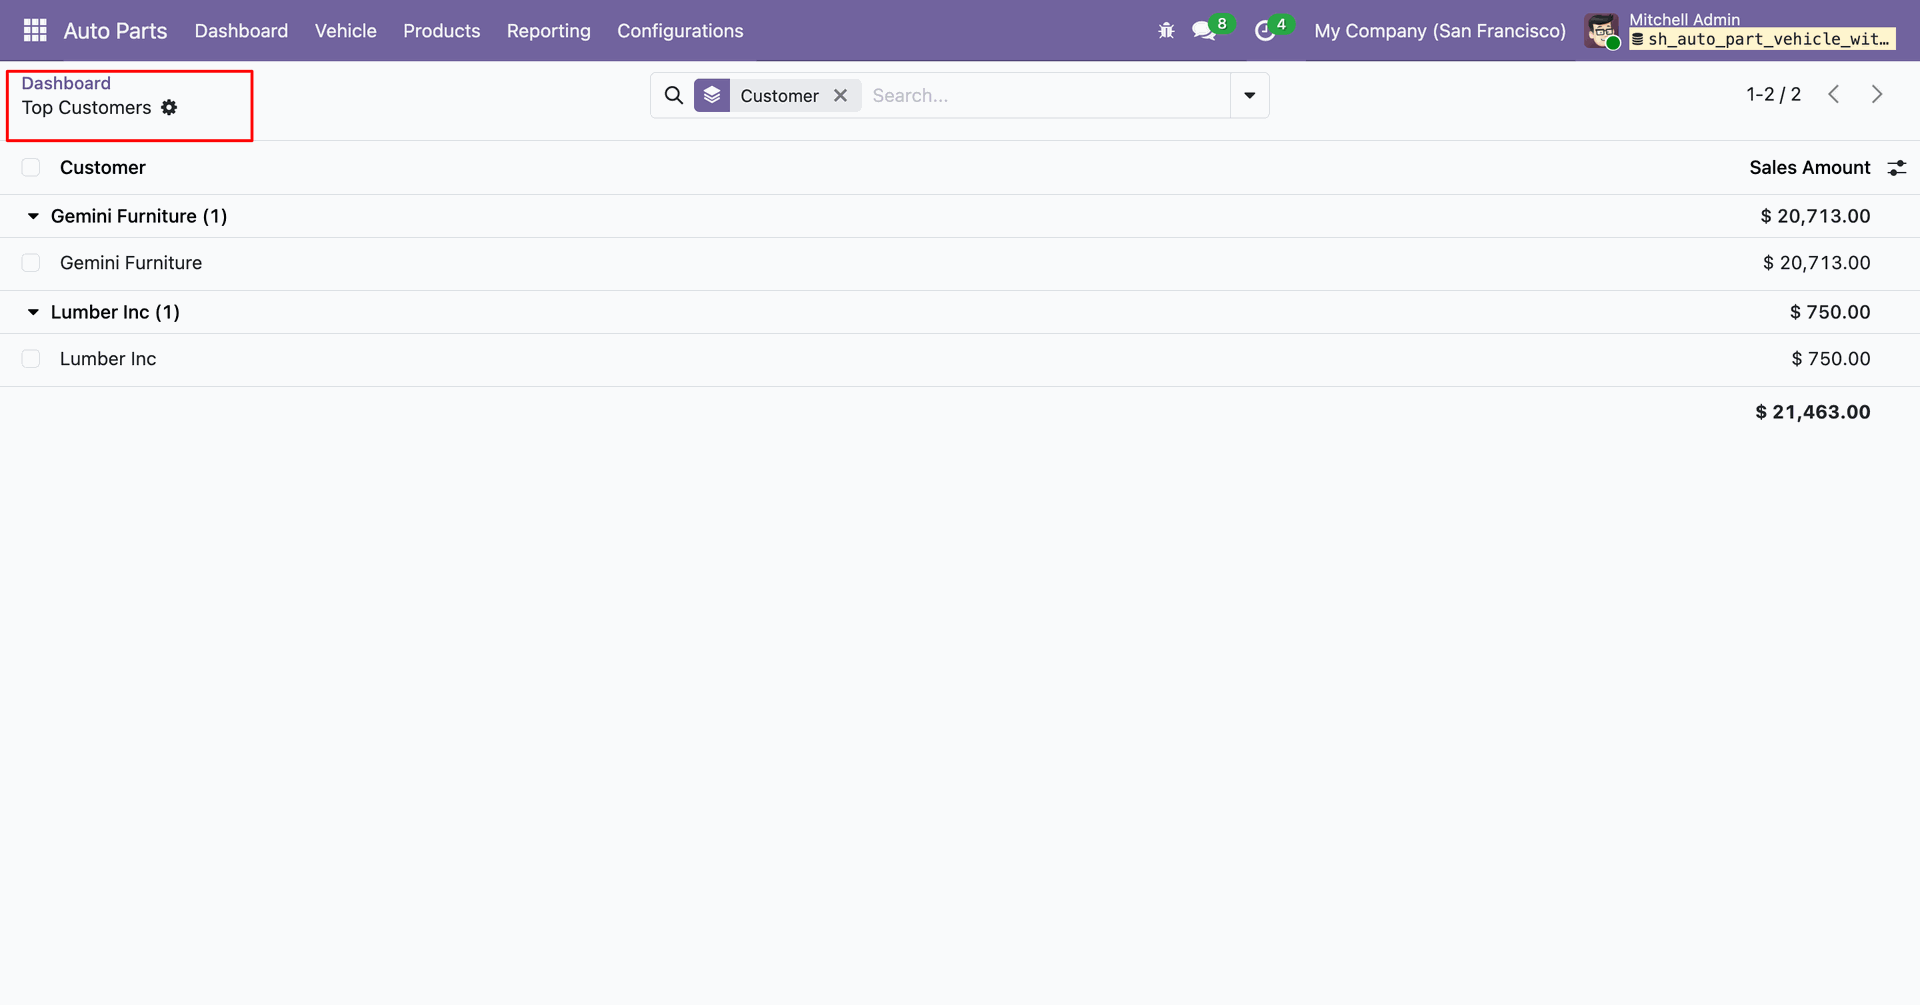
The Top Customers Report will be displayed, showing the generated sales details based on the selected date range and applied filters.
The Top Customers Report wizard will open. Enter the required details and click the Print or Print XLS button to generate and print the report.
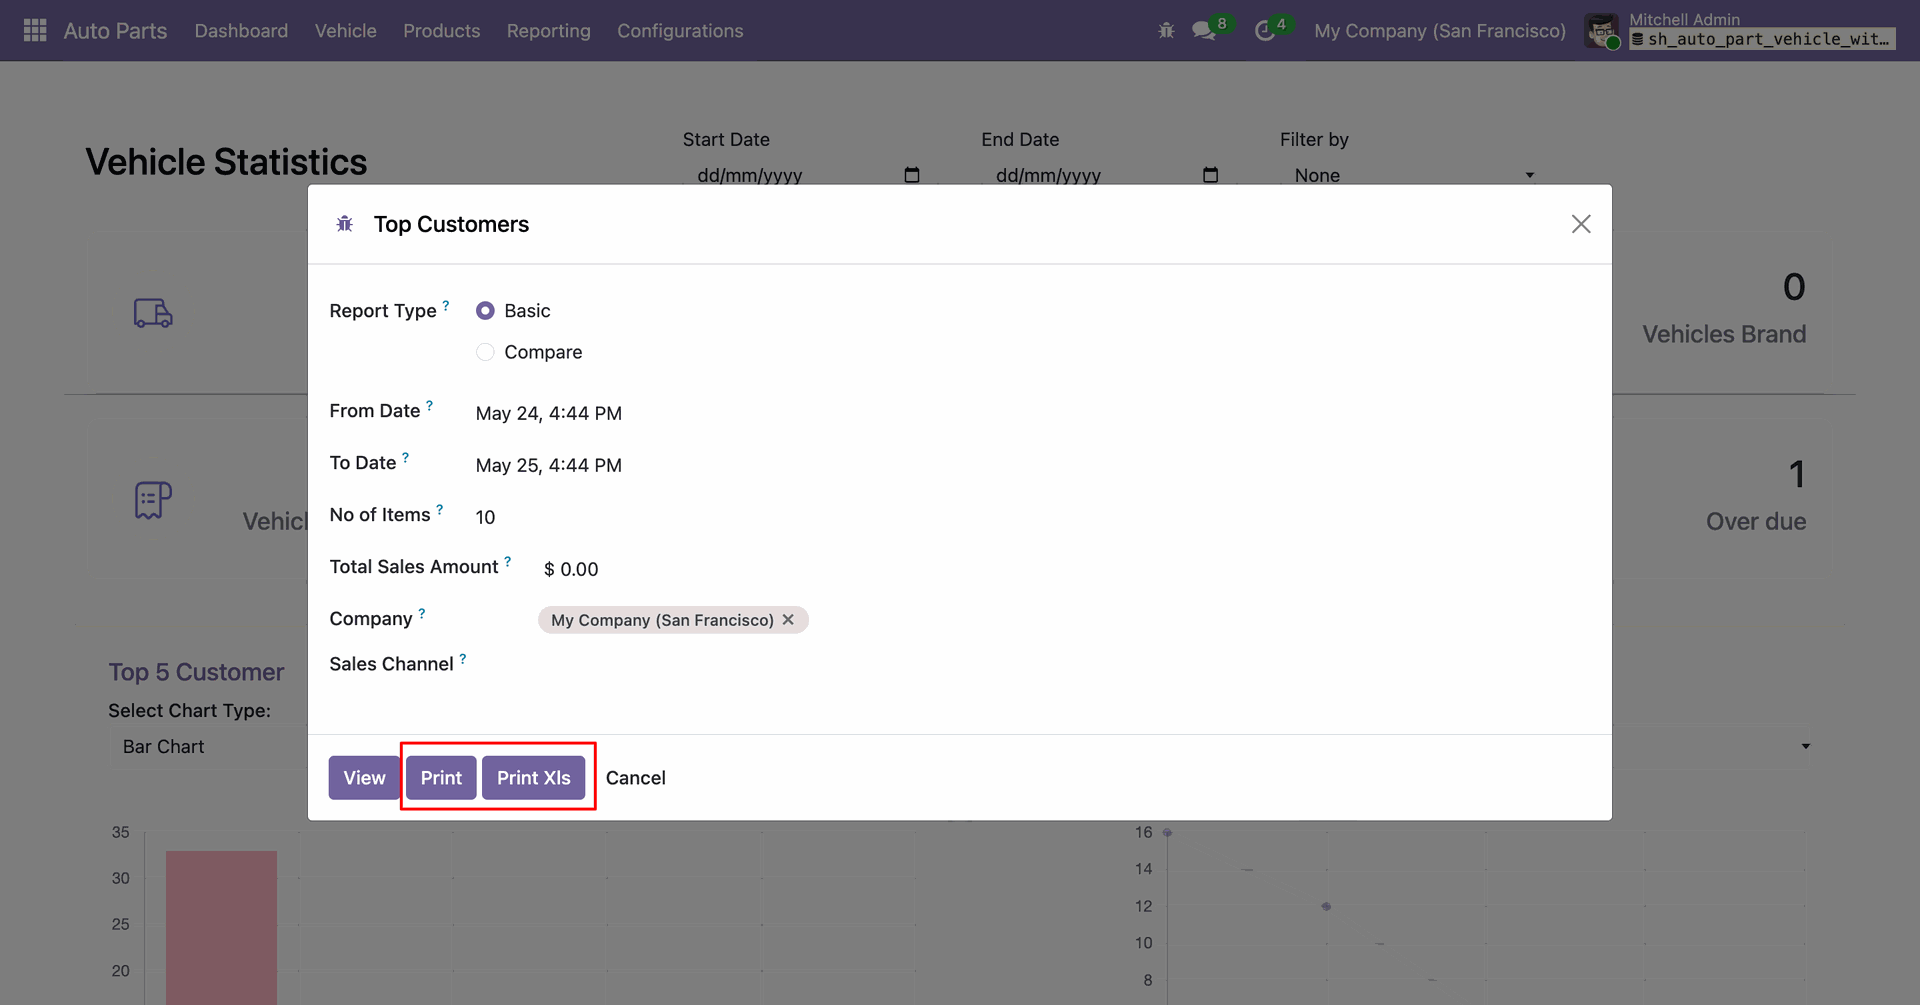
The Top Customers Report will be generated and downloaded in PDF format.
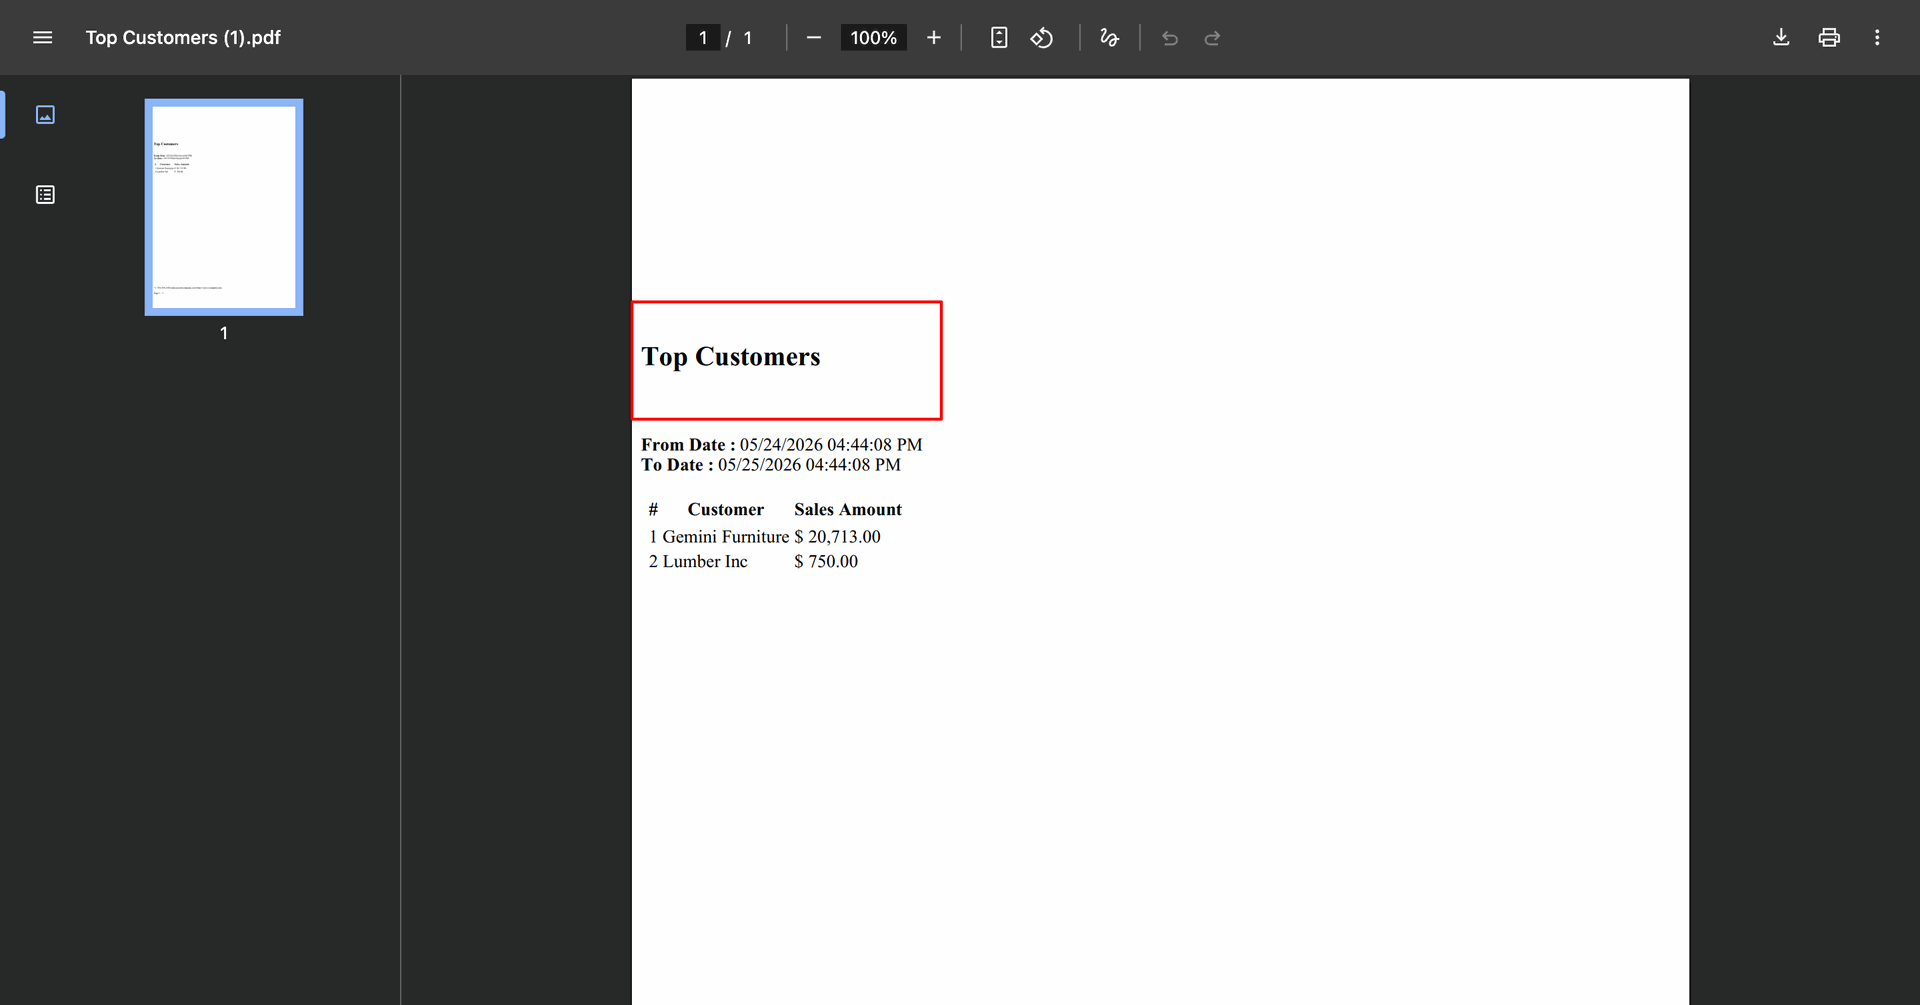
The Top Customers Report will be generated and downloaded in Excel format.
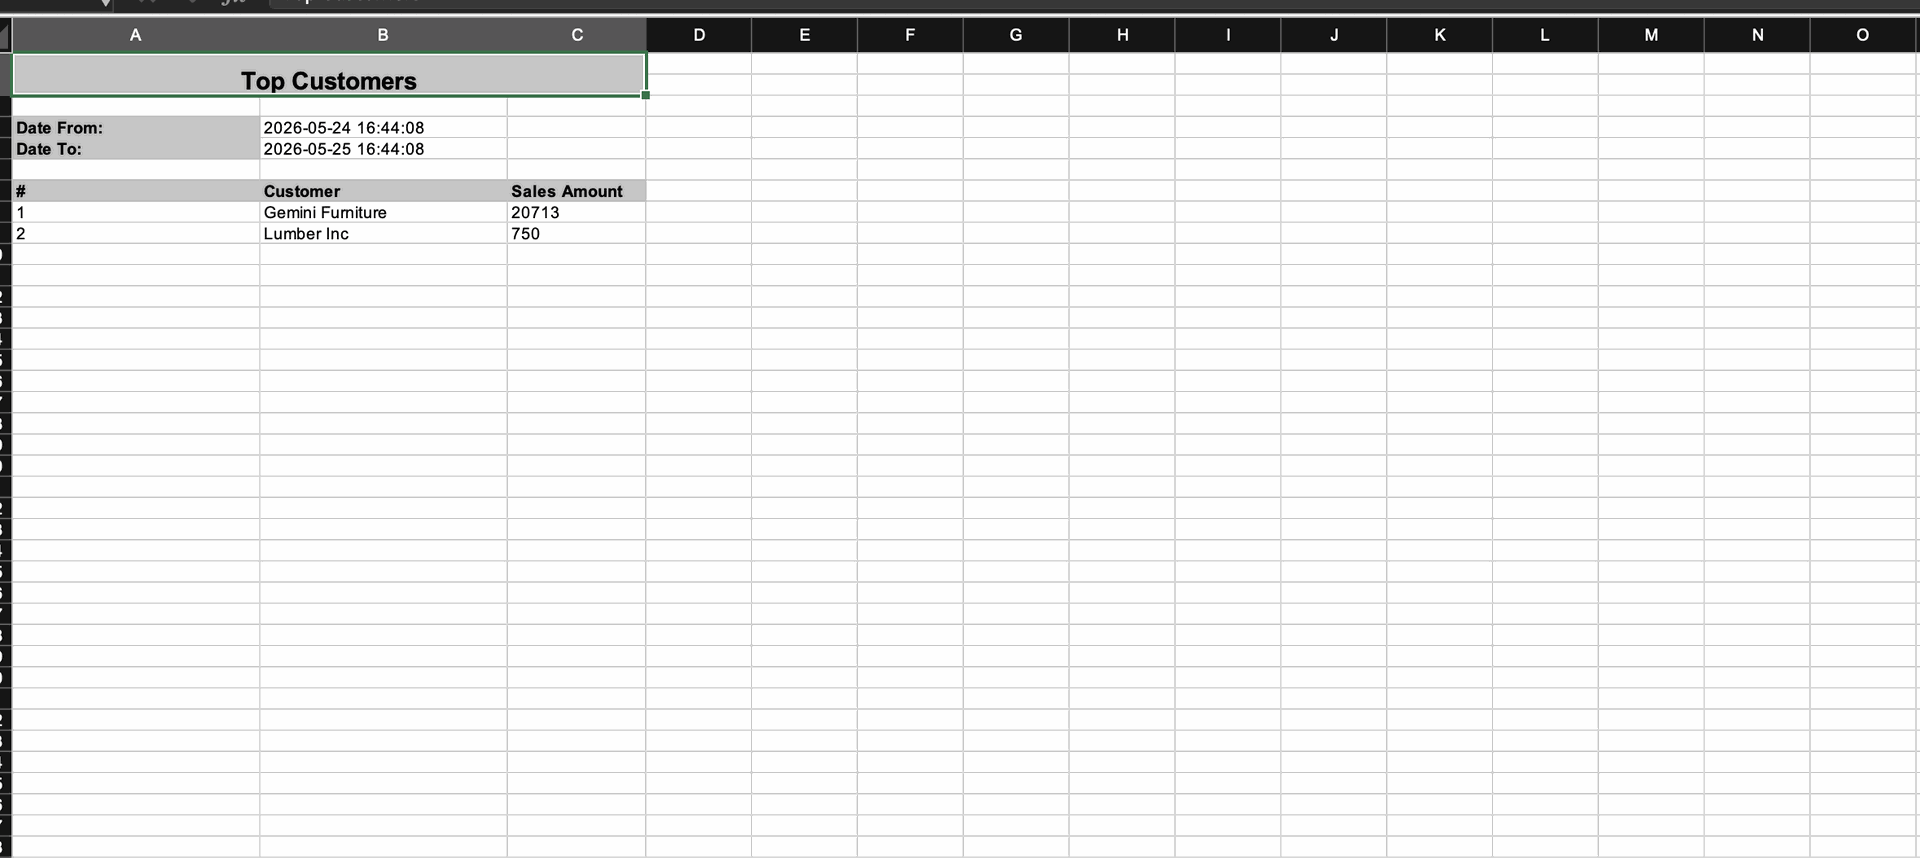
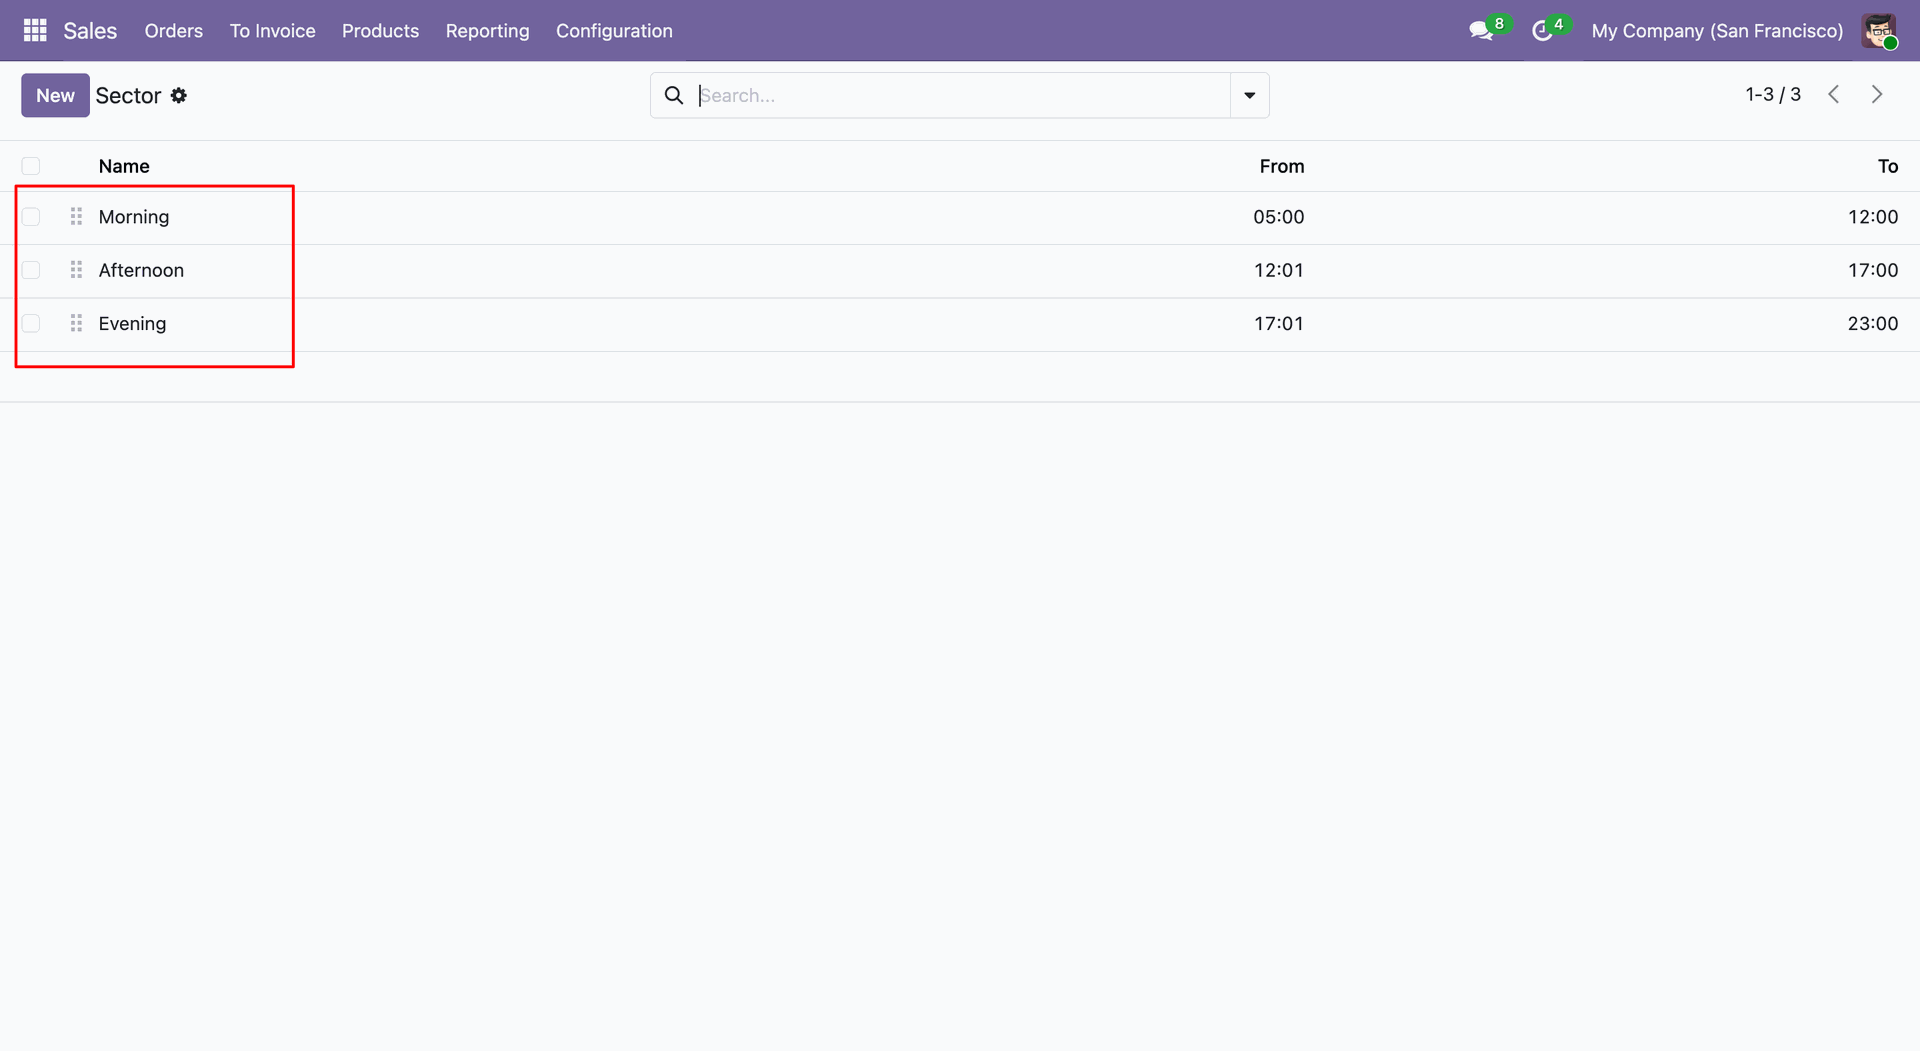
Go to Auto Parts Reporting and select the Sector option.
The created sectors will be displayed in the list view, allowing you to view and manage all sector records.
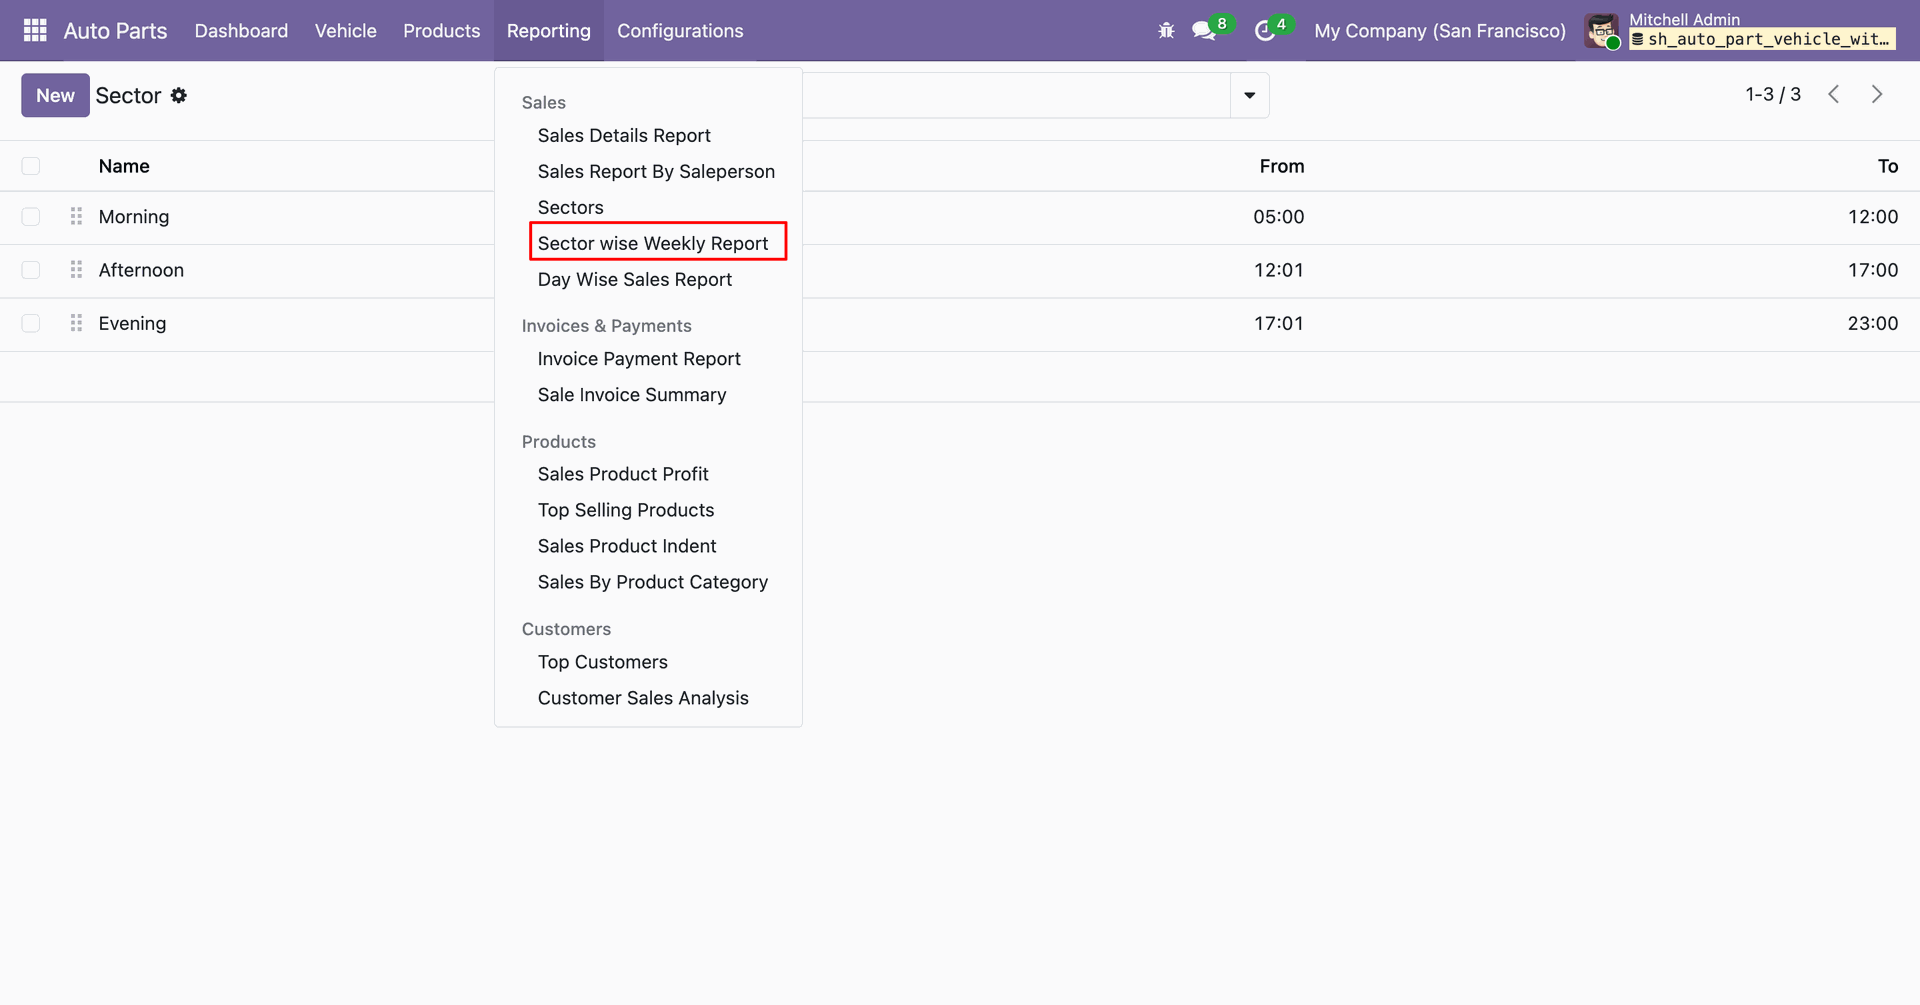
Go to Auto Parts Reporting and select the Sector Wise Sales Report option to generate detailed sales reports categorized by sector.
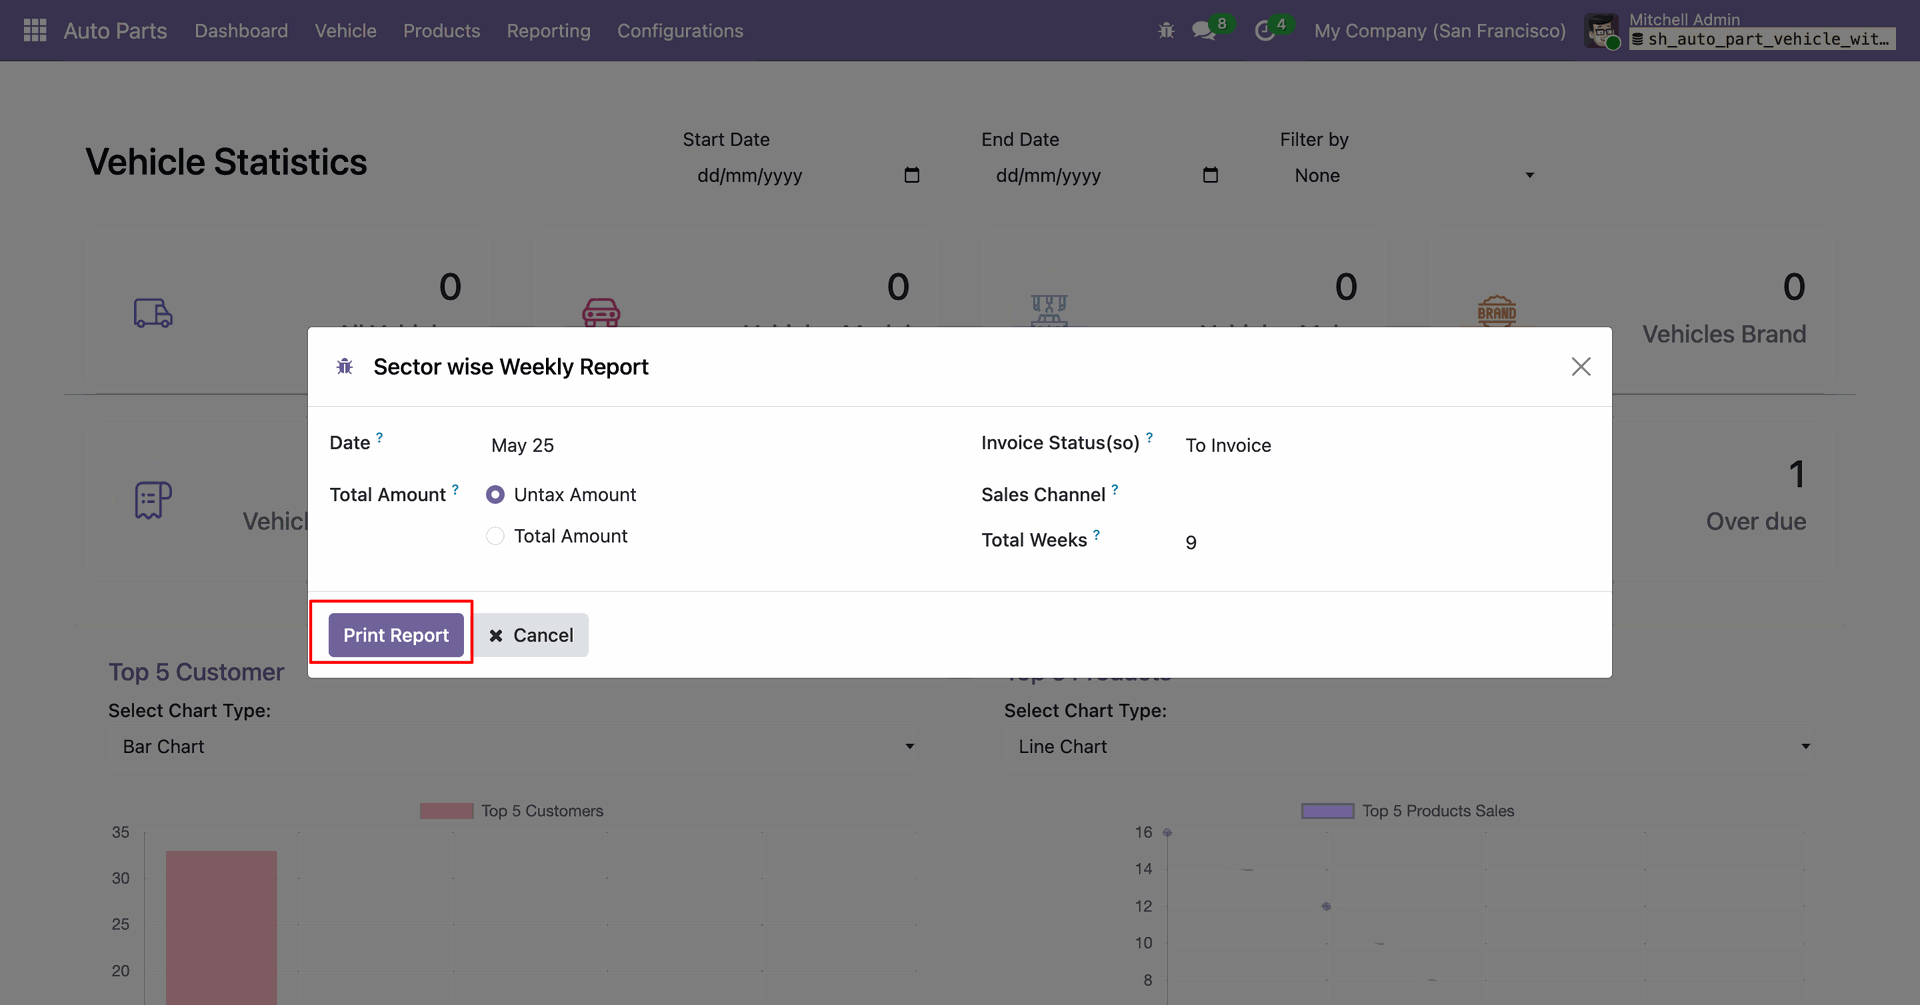
The Sector-Wise Sales Report Wizard will open. Enter the required details and click the Print Report button to generate and print the report.
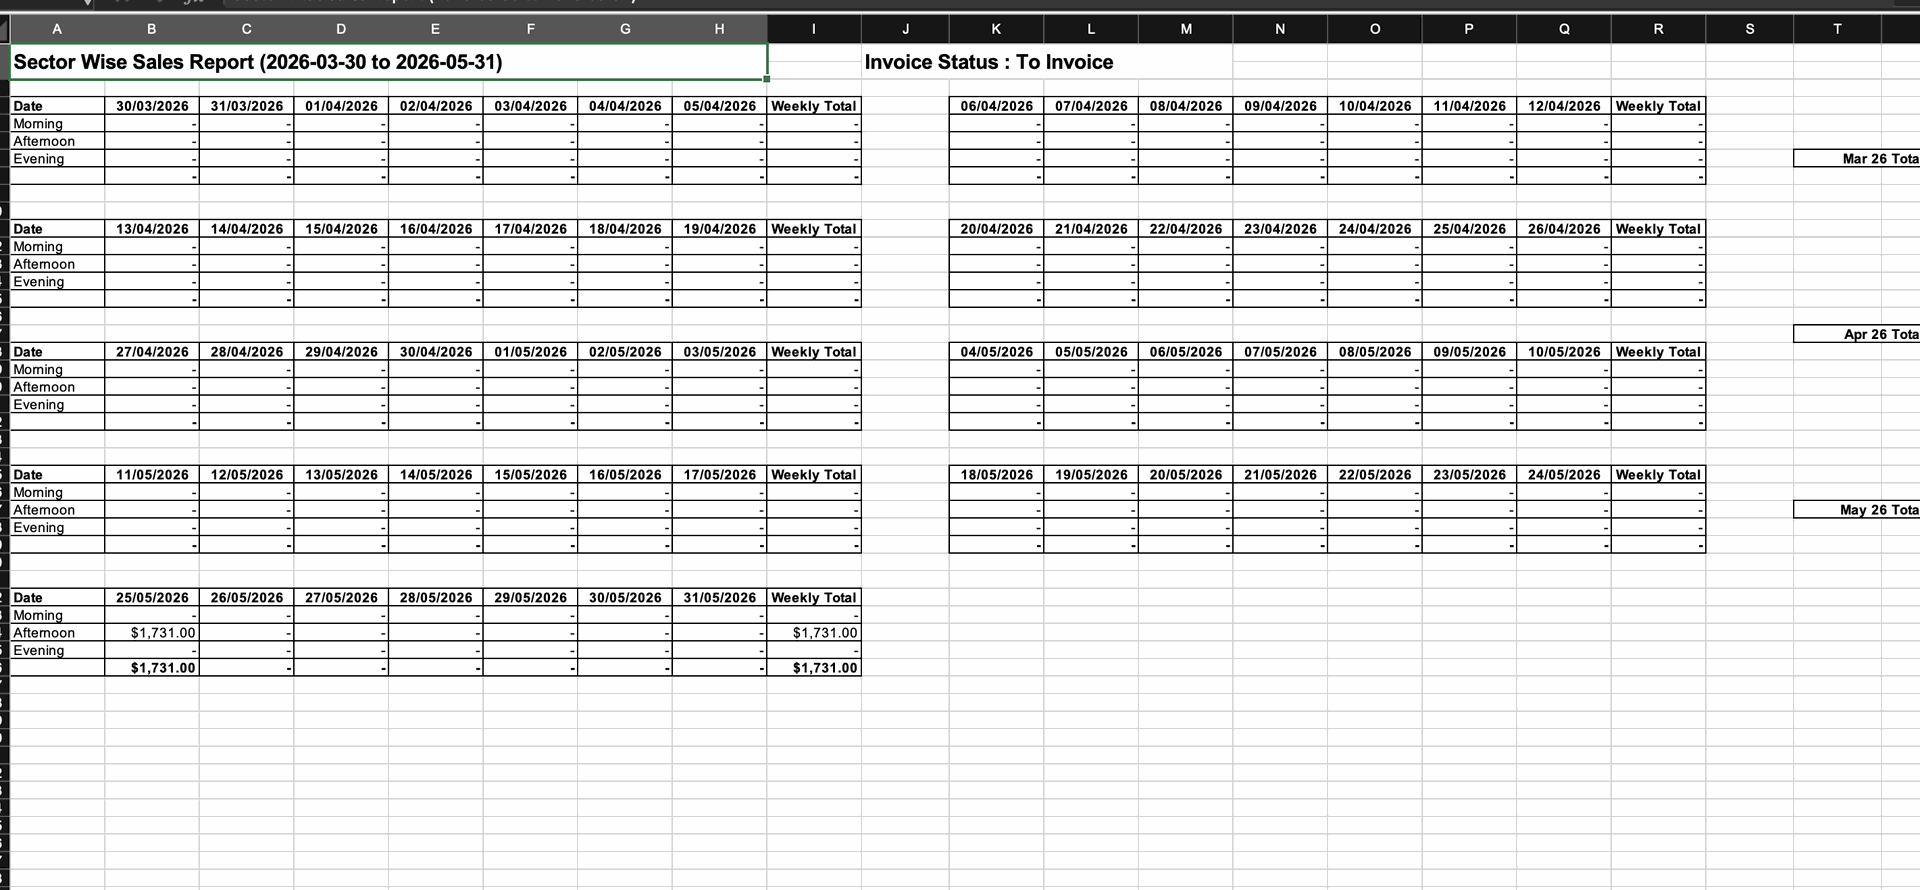
The Sector-Wise Sales Report will be generated and downloaded in Excel format.
Go to Auto Parts Reporting and select the Top Selling Products Report option to generate a report showing the best-performing products based on sales volume and revenue.
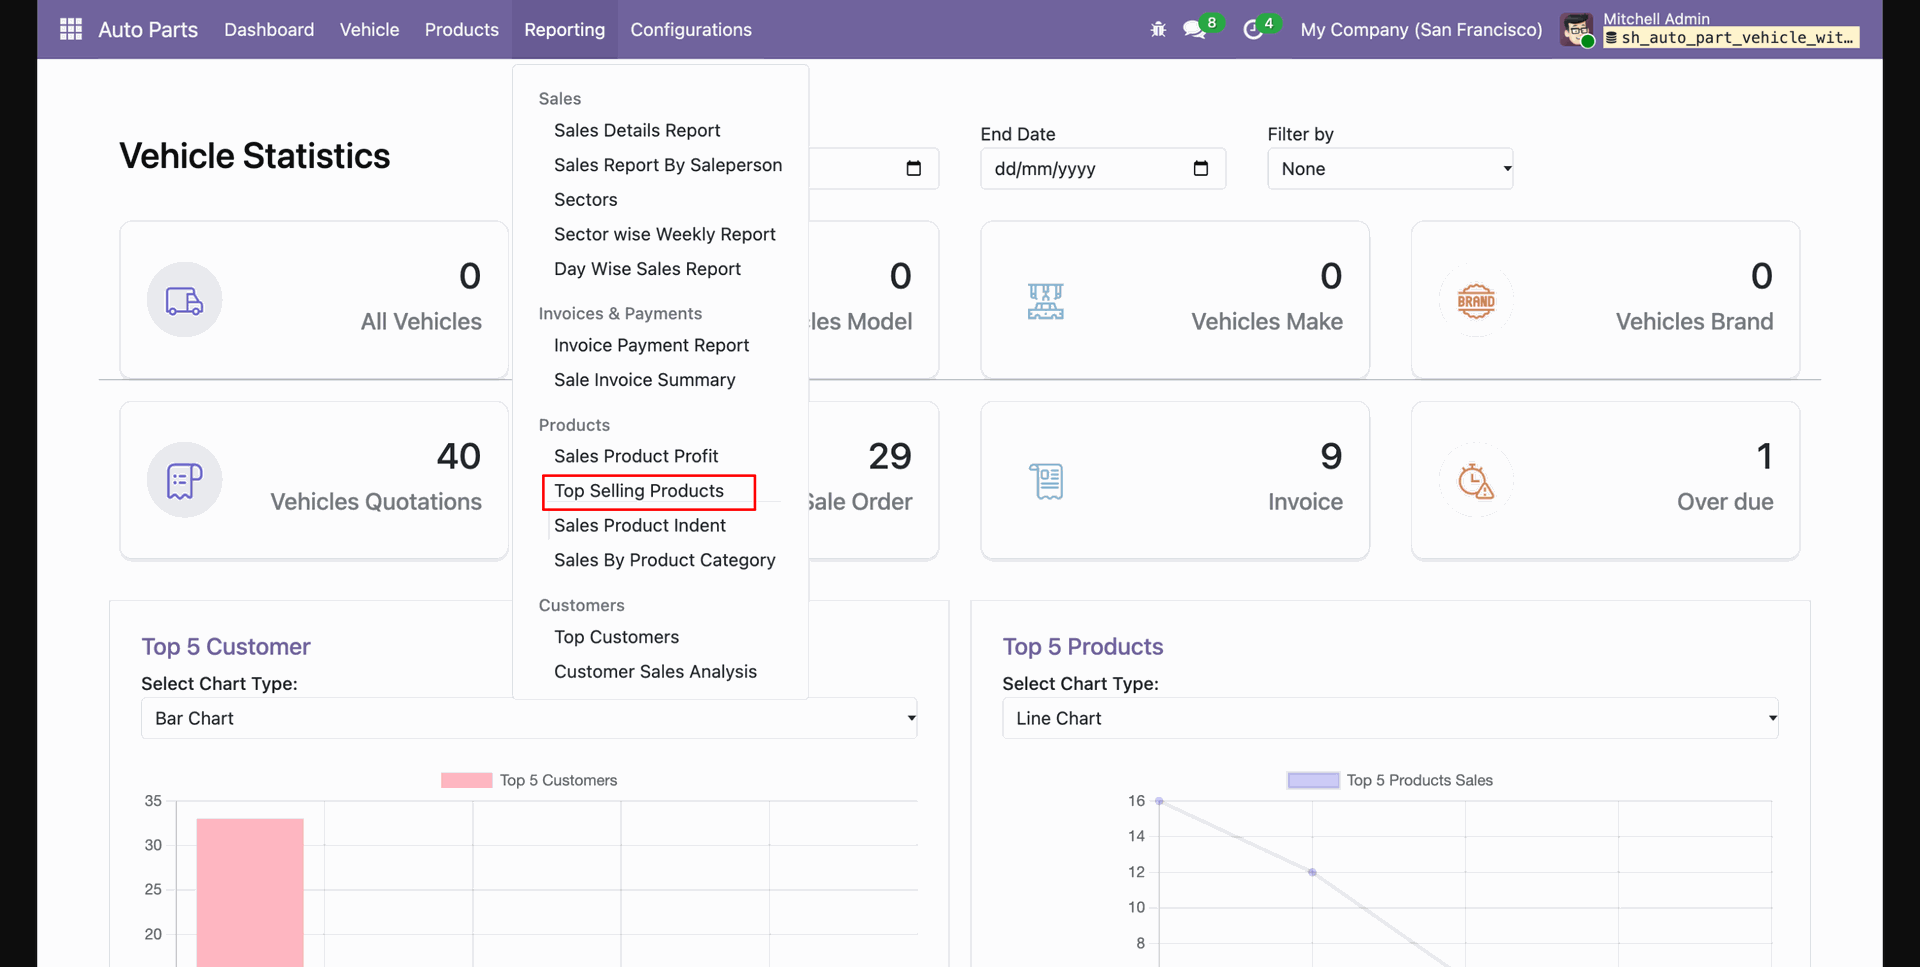
The Top Selling Products Report wizard will open. Enter the required details and click the View button to generate and display the report showing the best-performing products.
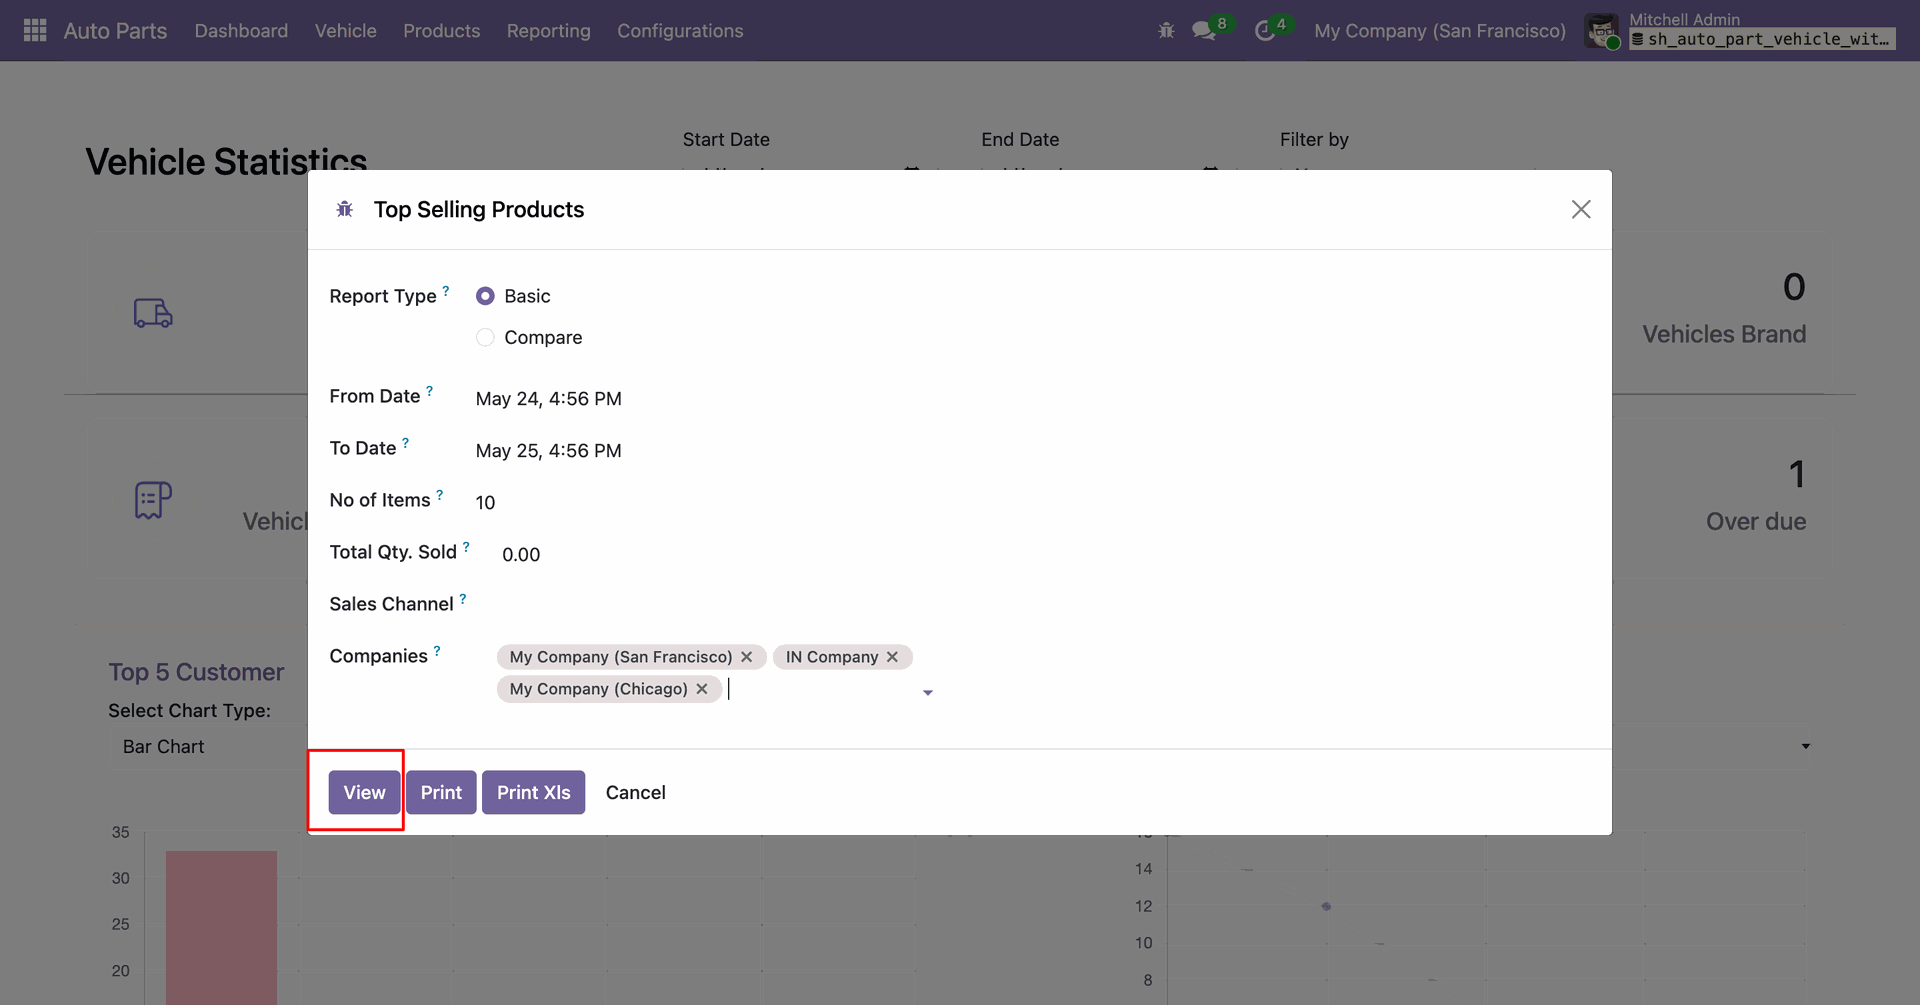
The Top Selling Products Report will be displayed, showing the generated product details based on the selected date range and applied filters.
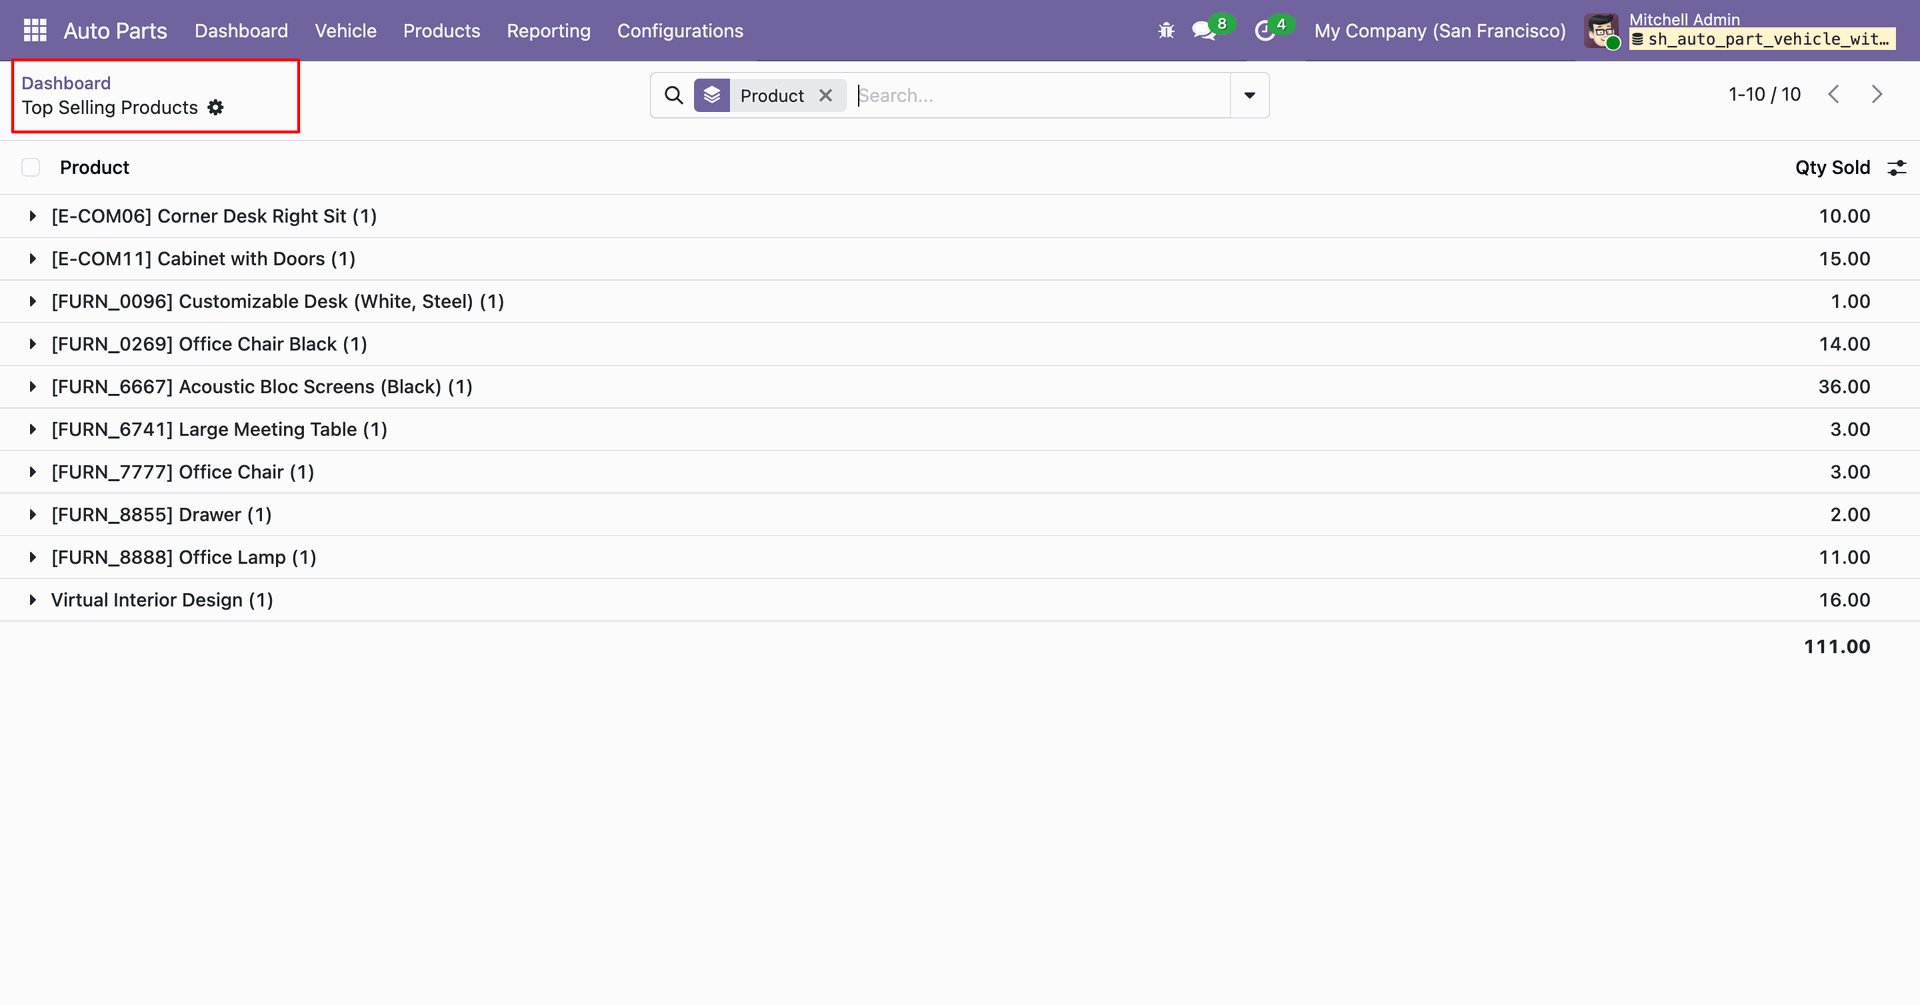
The Top Selling Products Report will open. Enter the required details and click the Print or Print XLS button to generate and print the report.
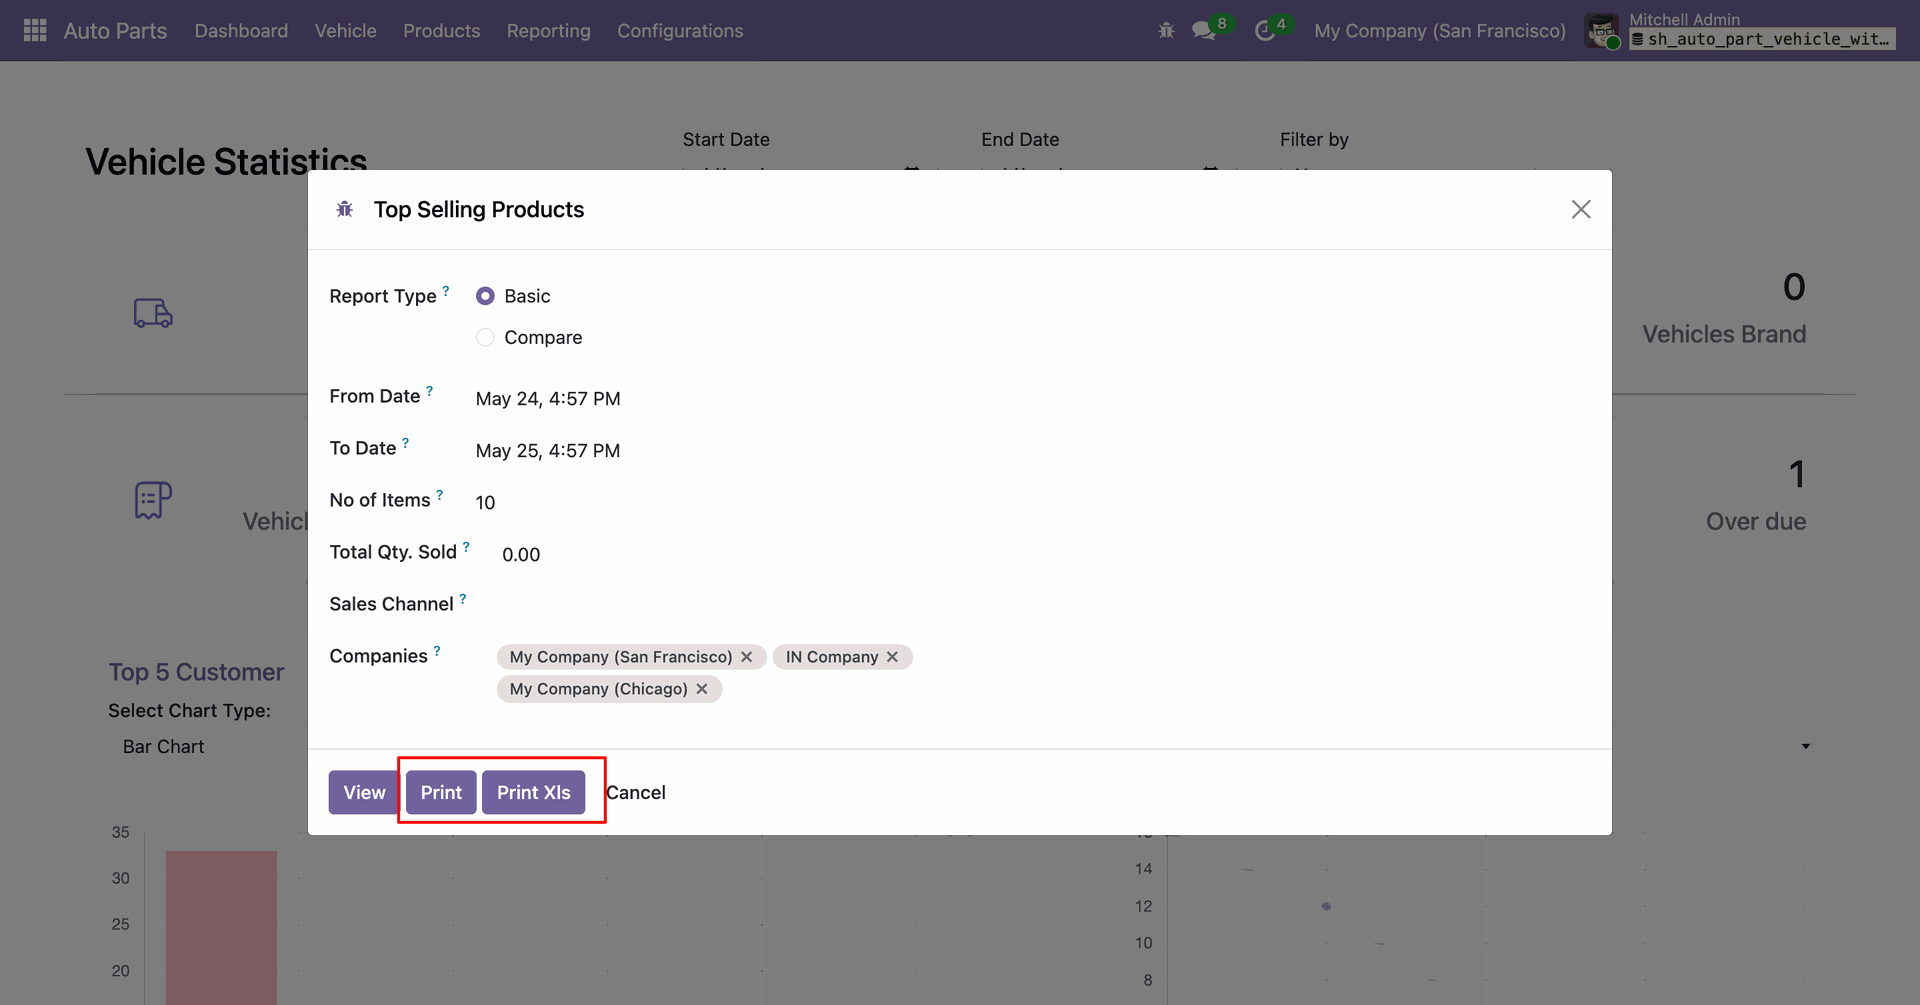
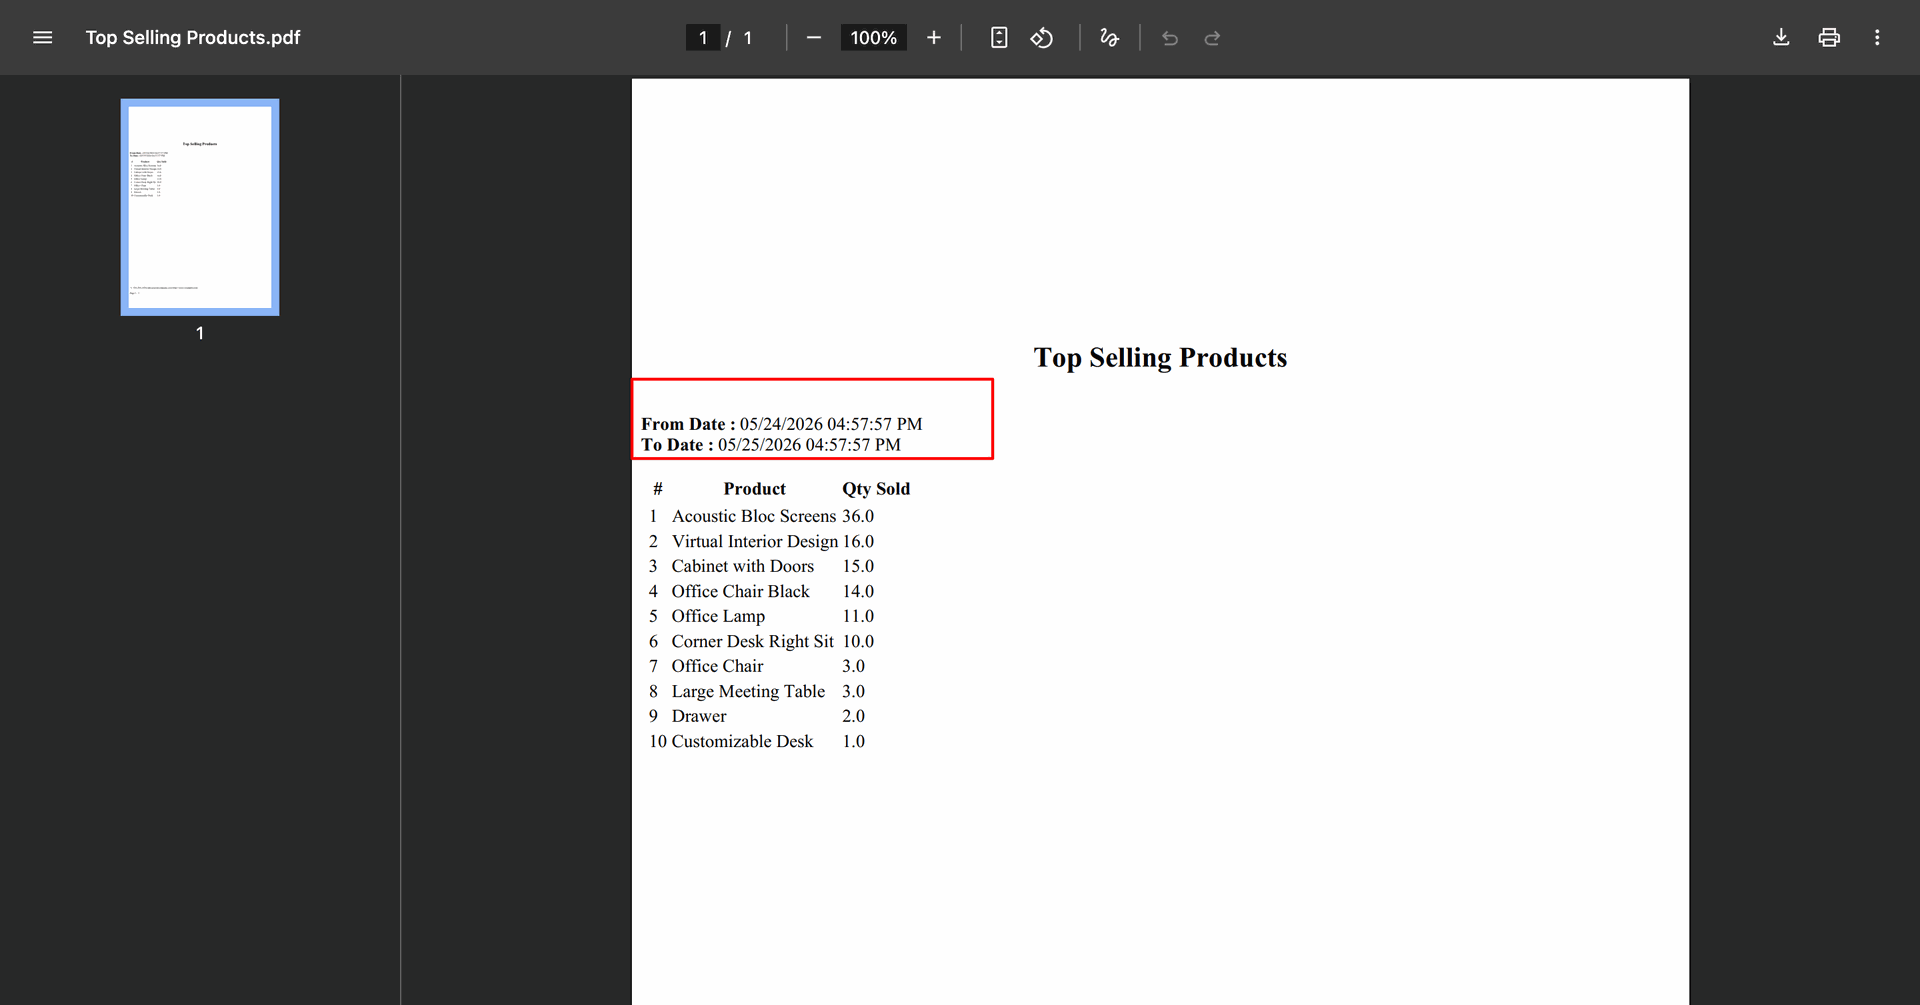
The Top Selling Products Report will be generated and downloaded in PDF format.
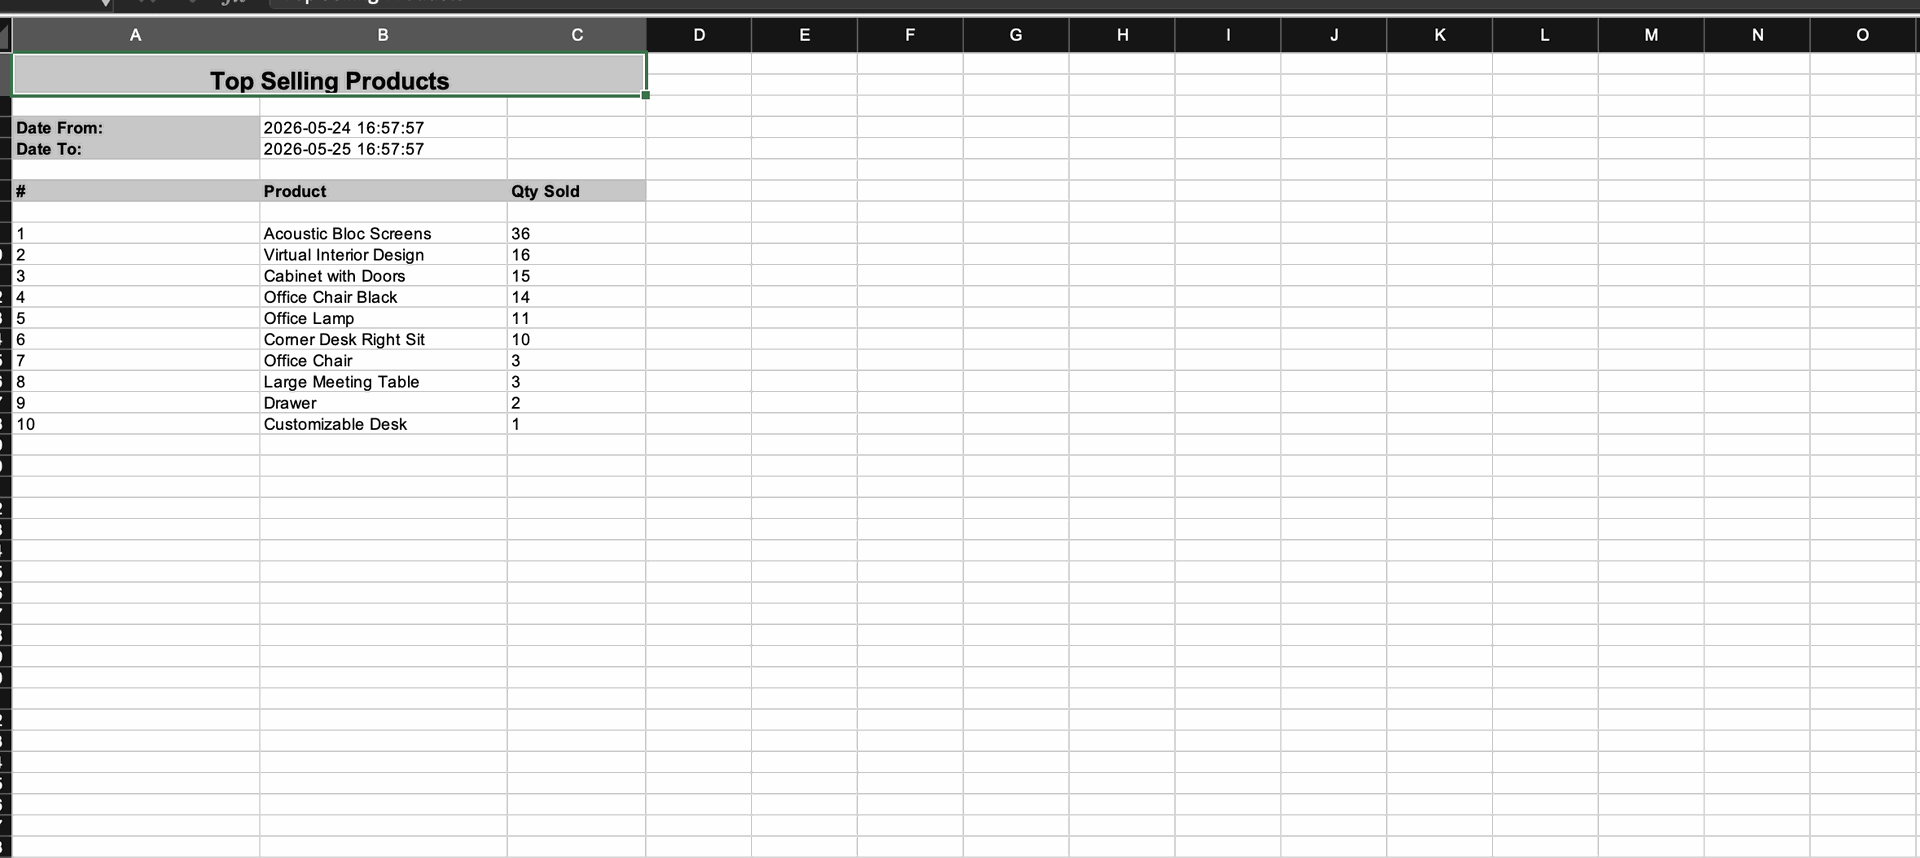
The Top Selling Products Report will be generated and downloaded in Excel format.
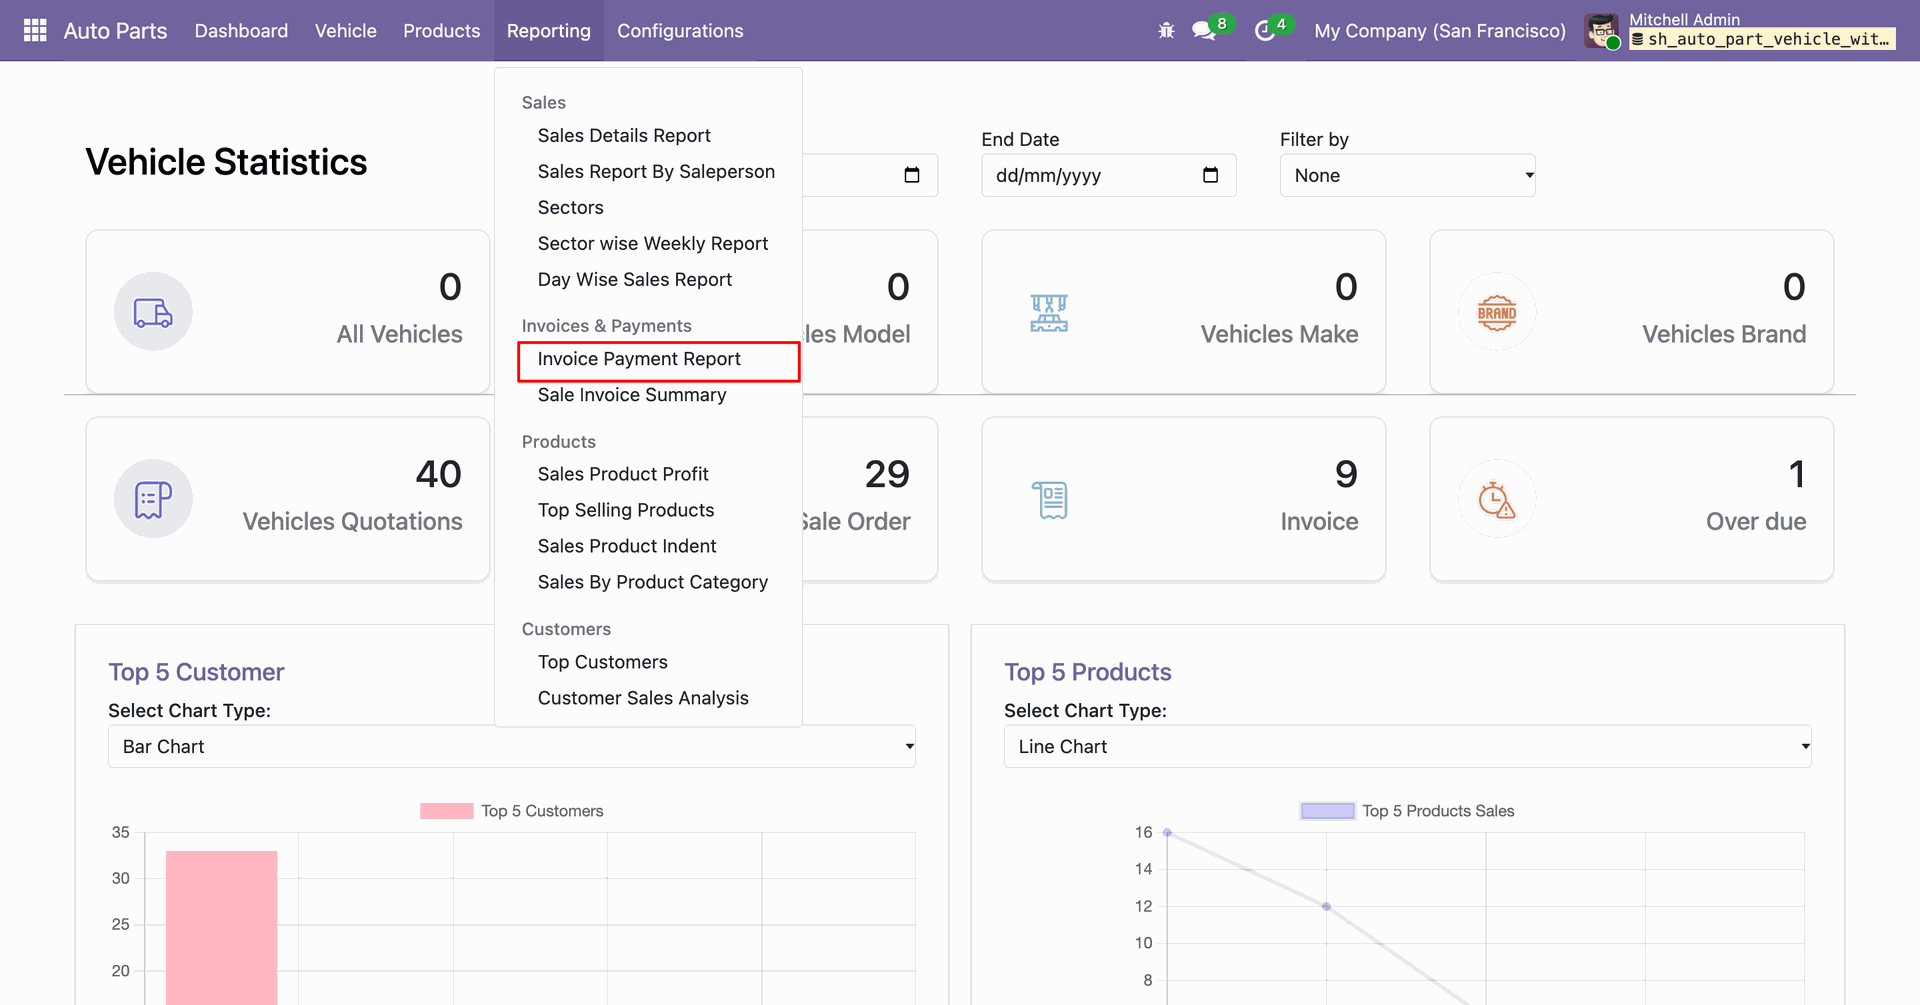
Go to Auto Parts Reporting and select the Invoice Payment Report option to generate a detailed report of invoice payments, including payment status, amounts, and related customer transactions.
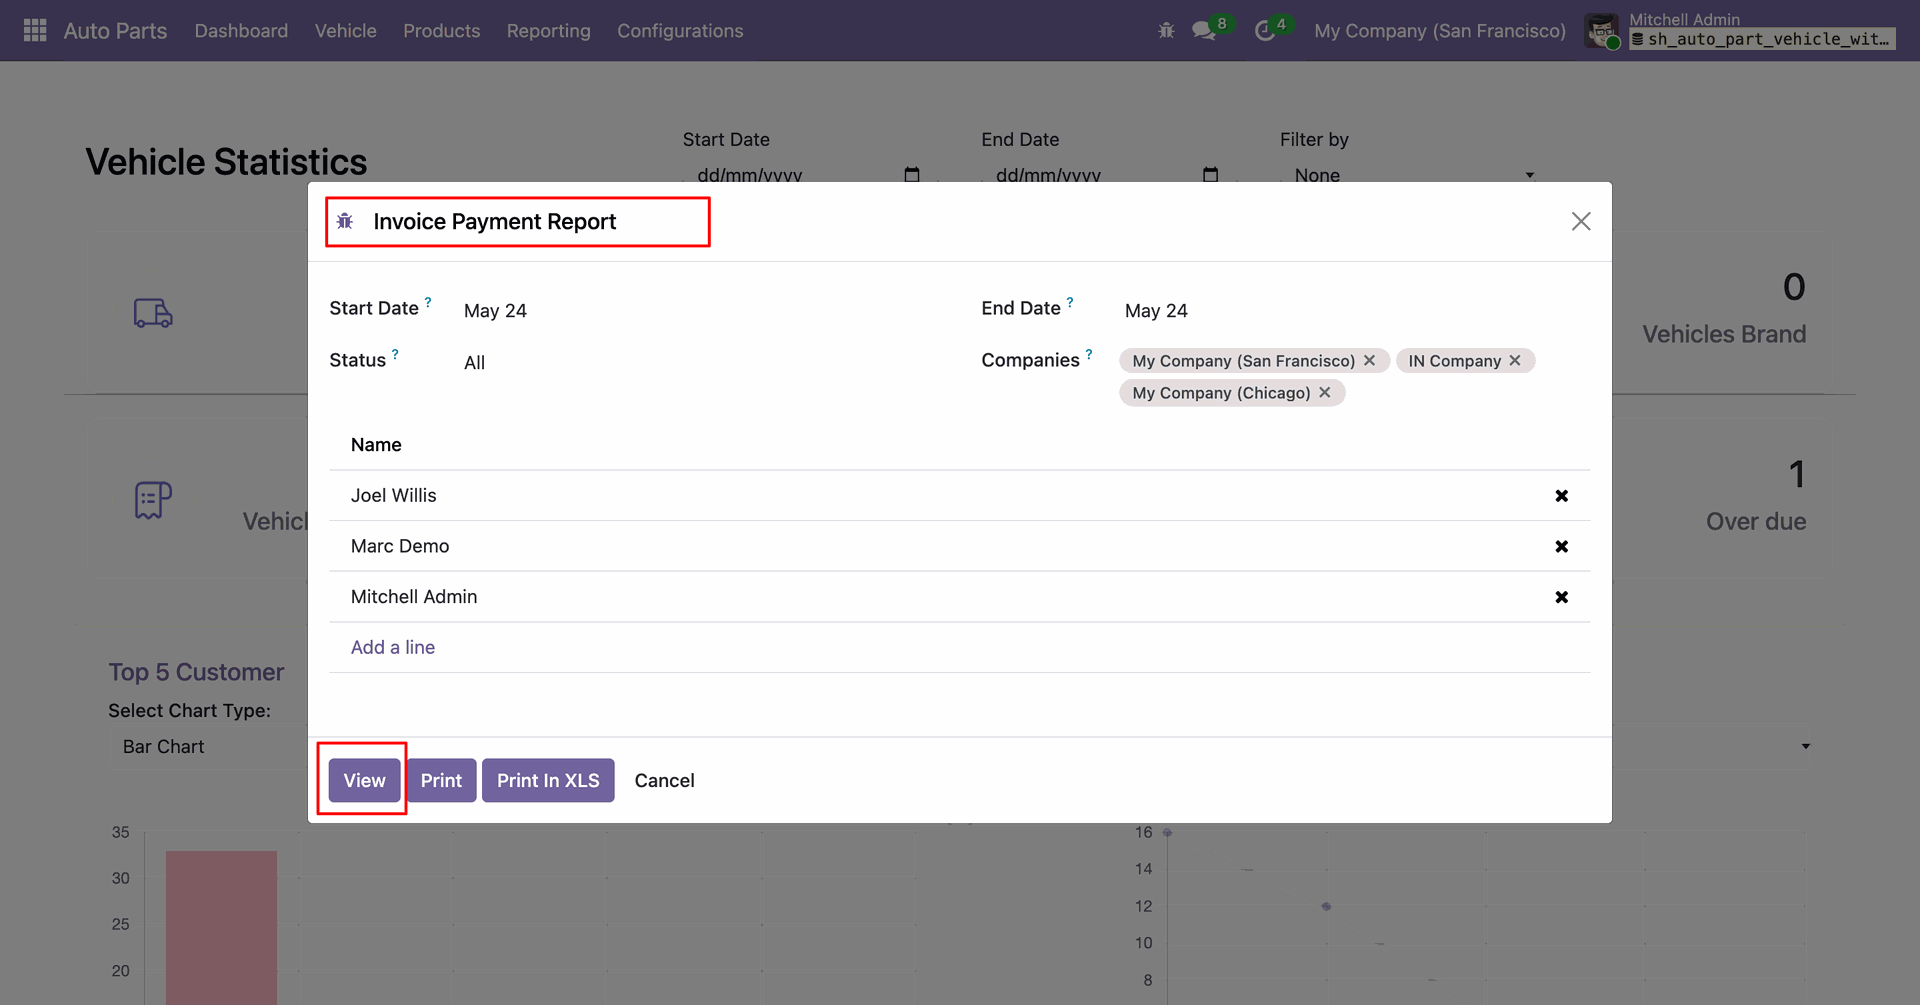
The Invoice Payment Report wizard will open. Enter the required details and click the View button to generate and display the report containing invoice payment details and statuses.
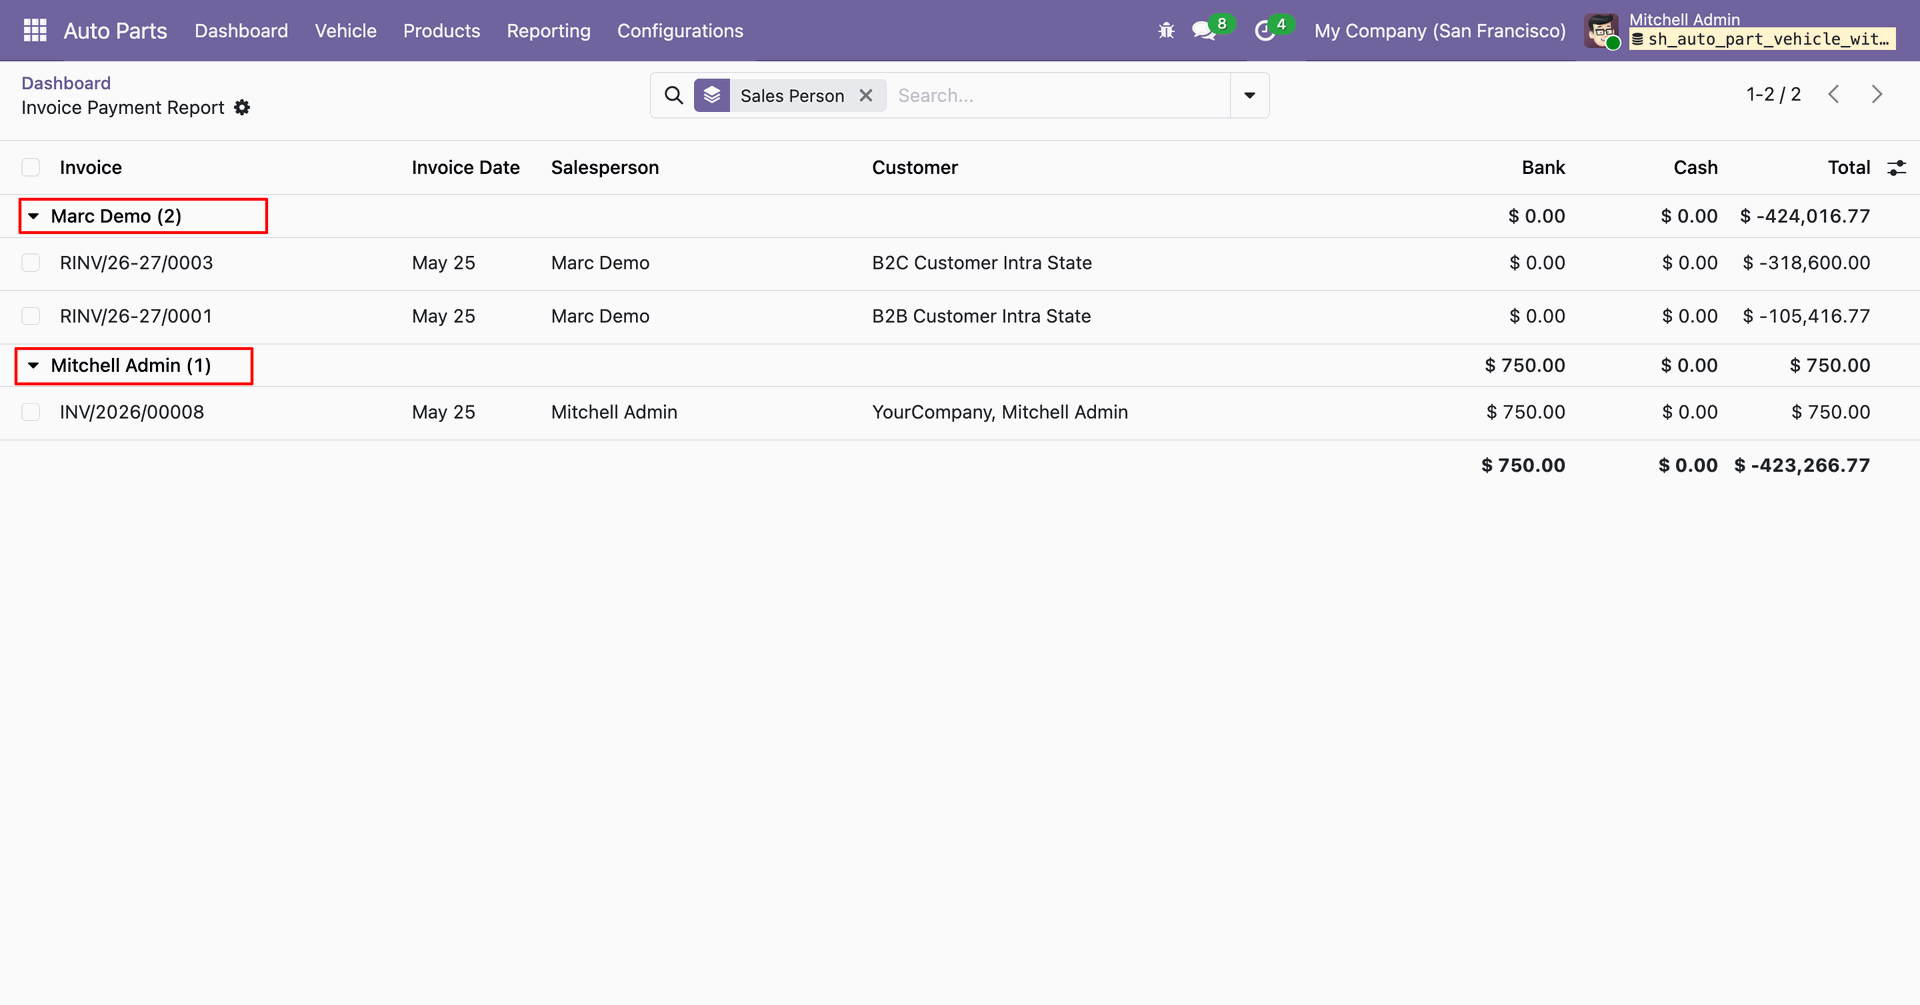
The Invoice Payment Report will be displayed, showing the generated invoices details based on the selected date range and applied filters.
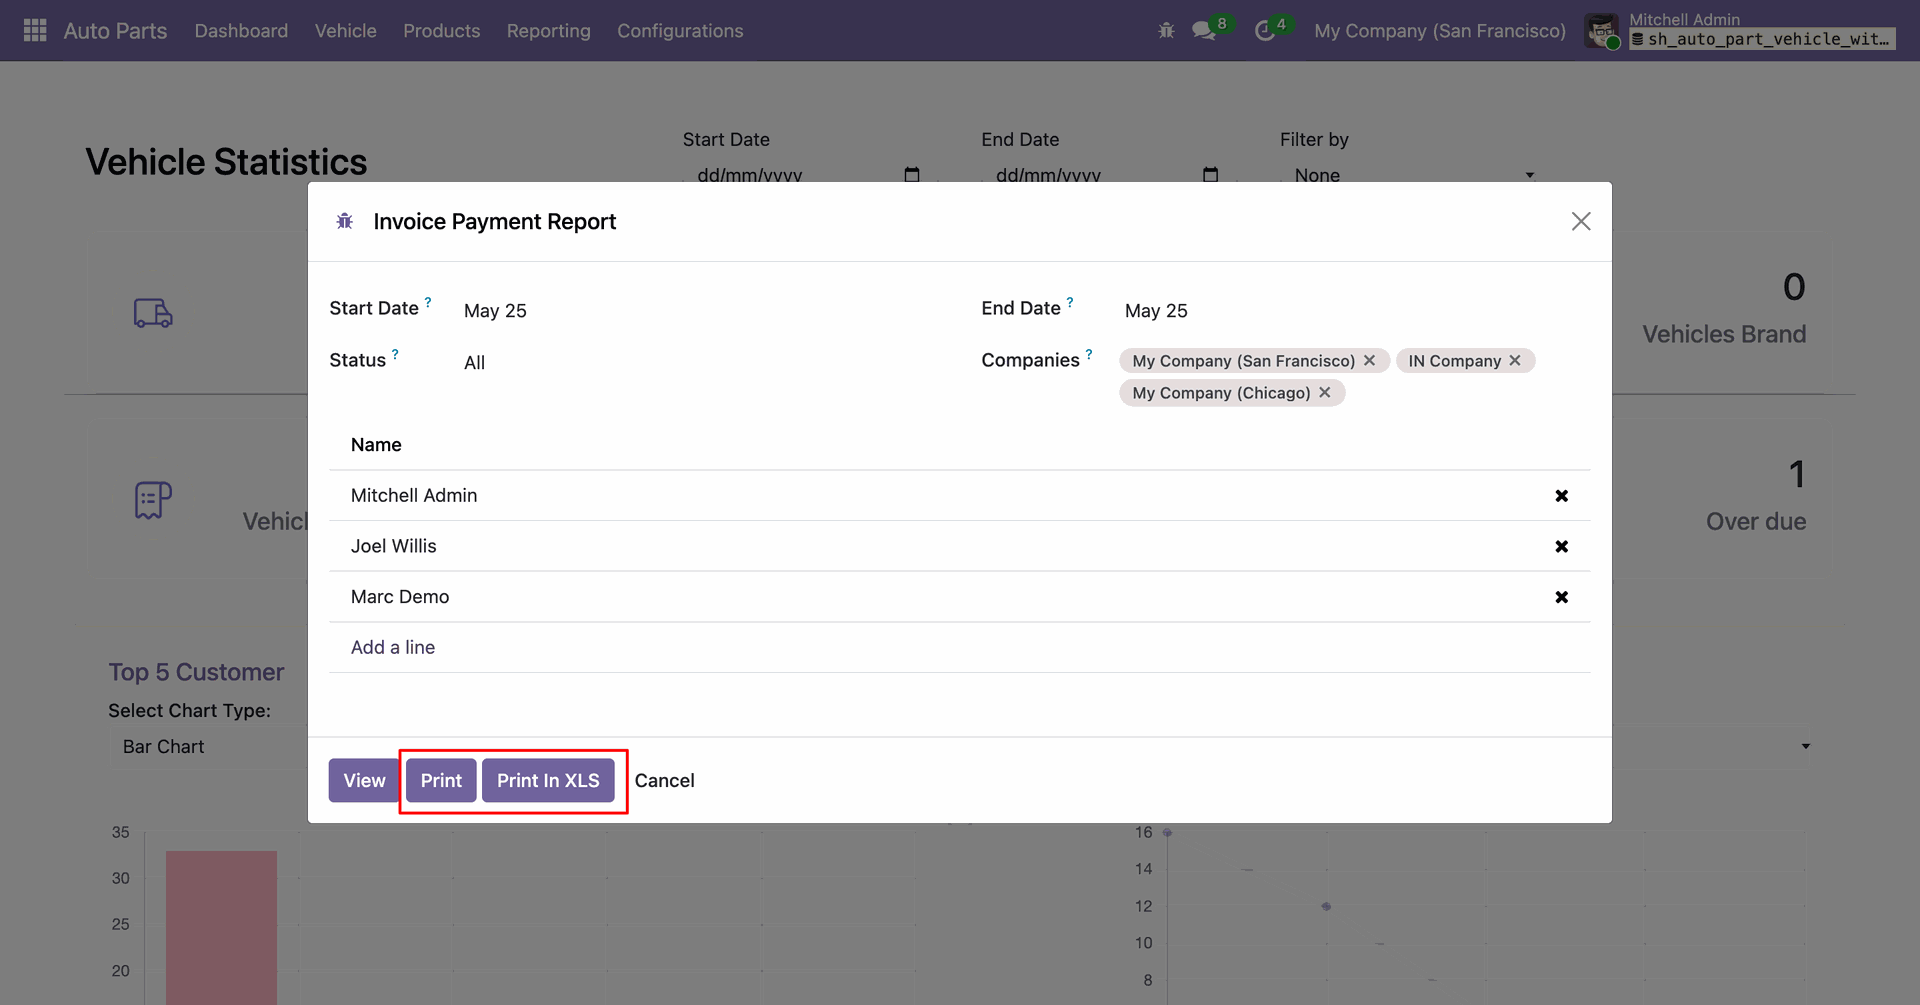
The Invoice Payment Report will open. Enter the required details and click the Print or Print XLS button to generate and print the report.
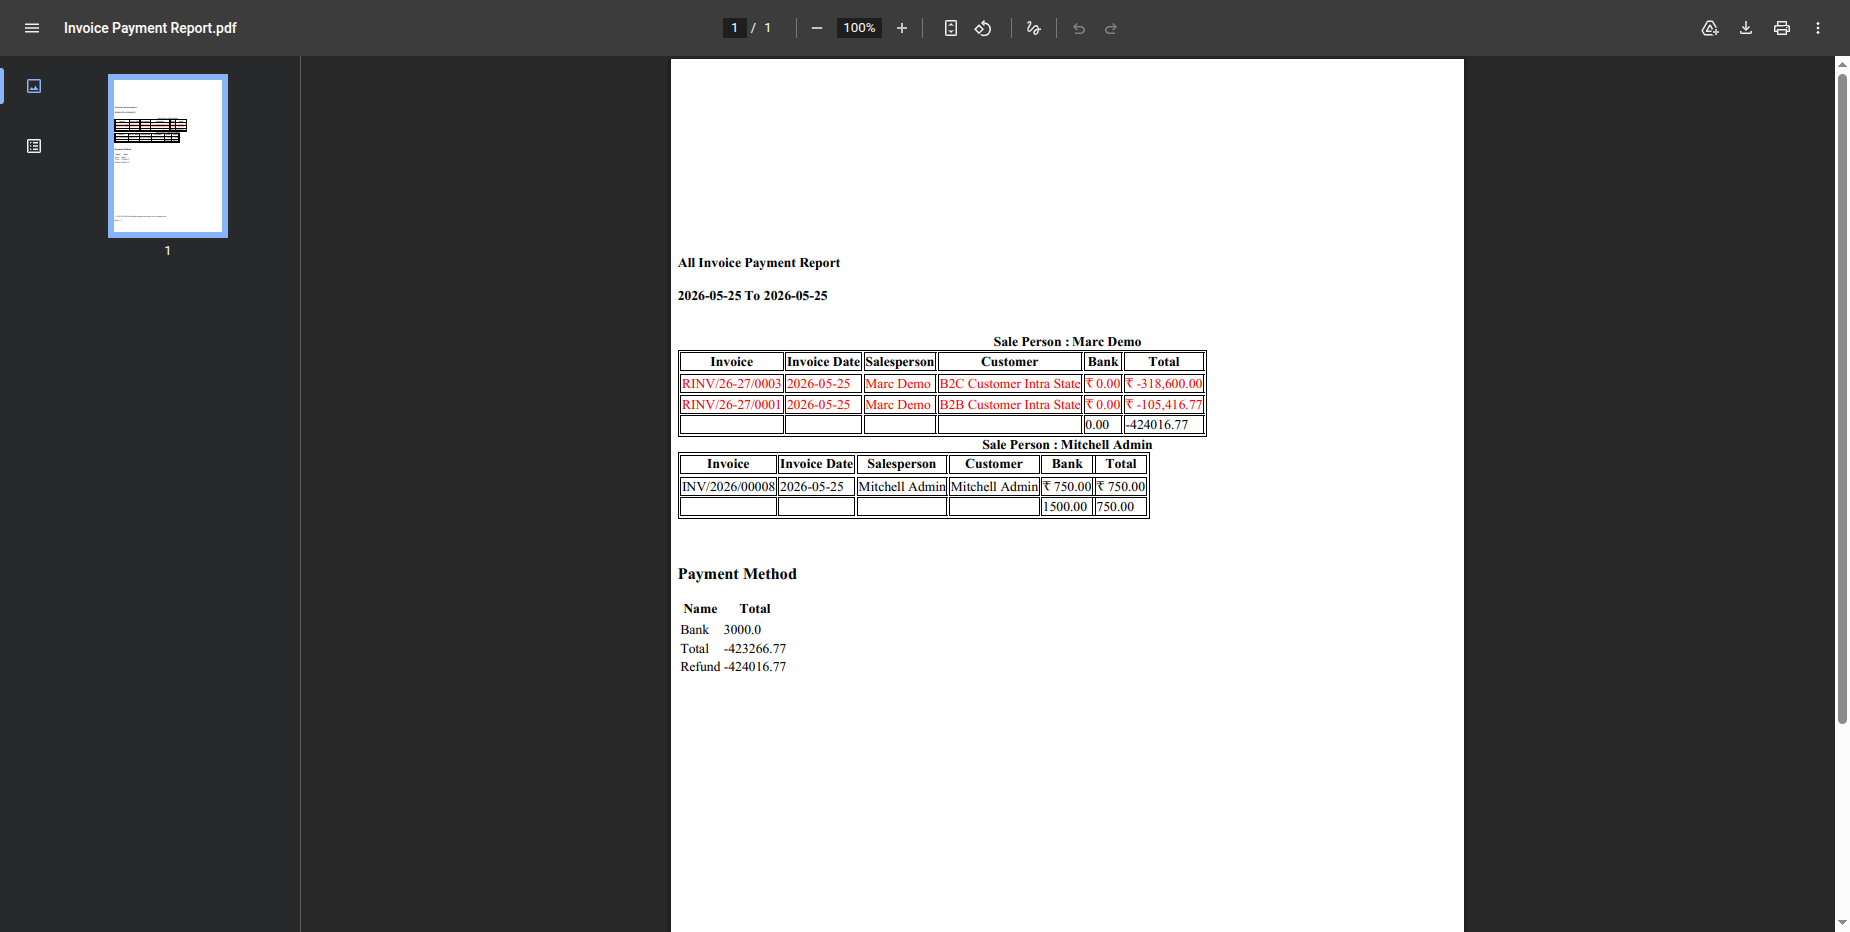
The Invoice Payment Report will be generated and downloaded in PDF format.
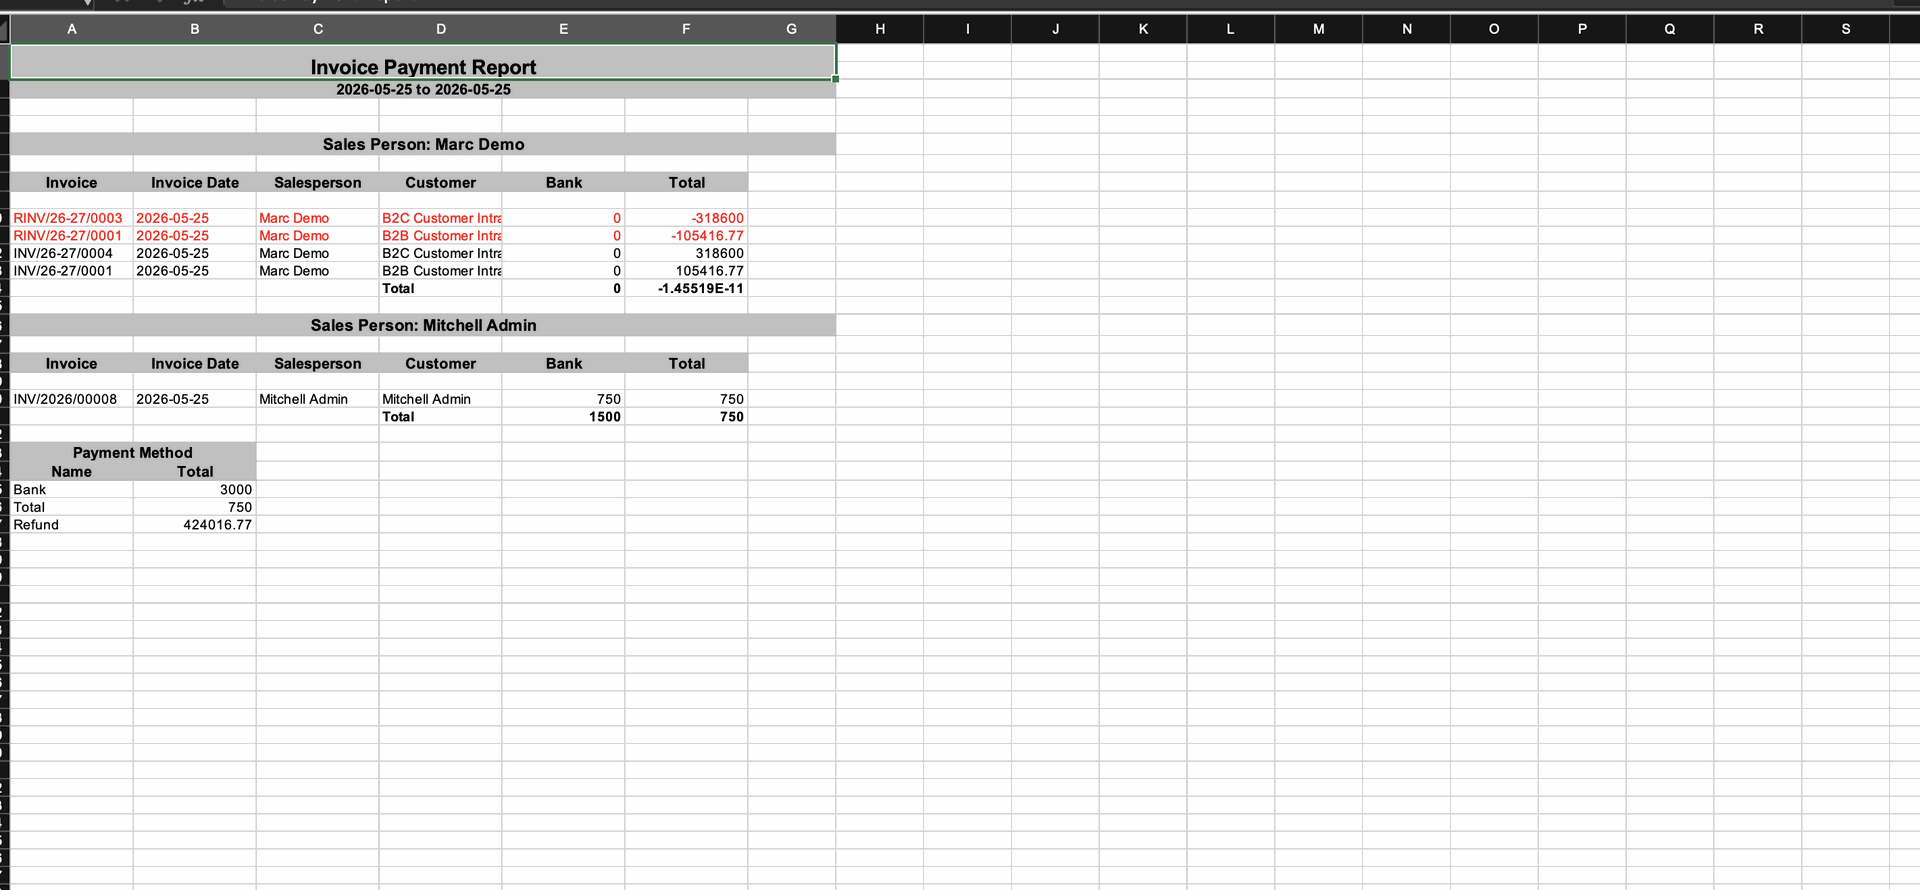
The Invoice Payment Report will be generated and downloaded in Excel format.
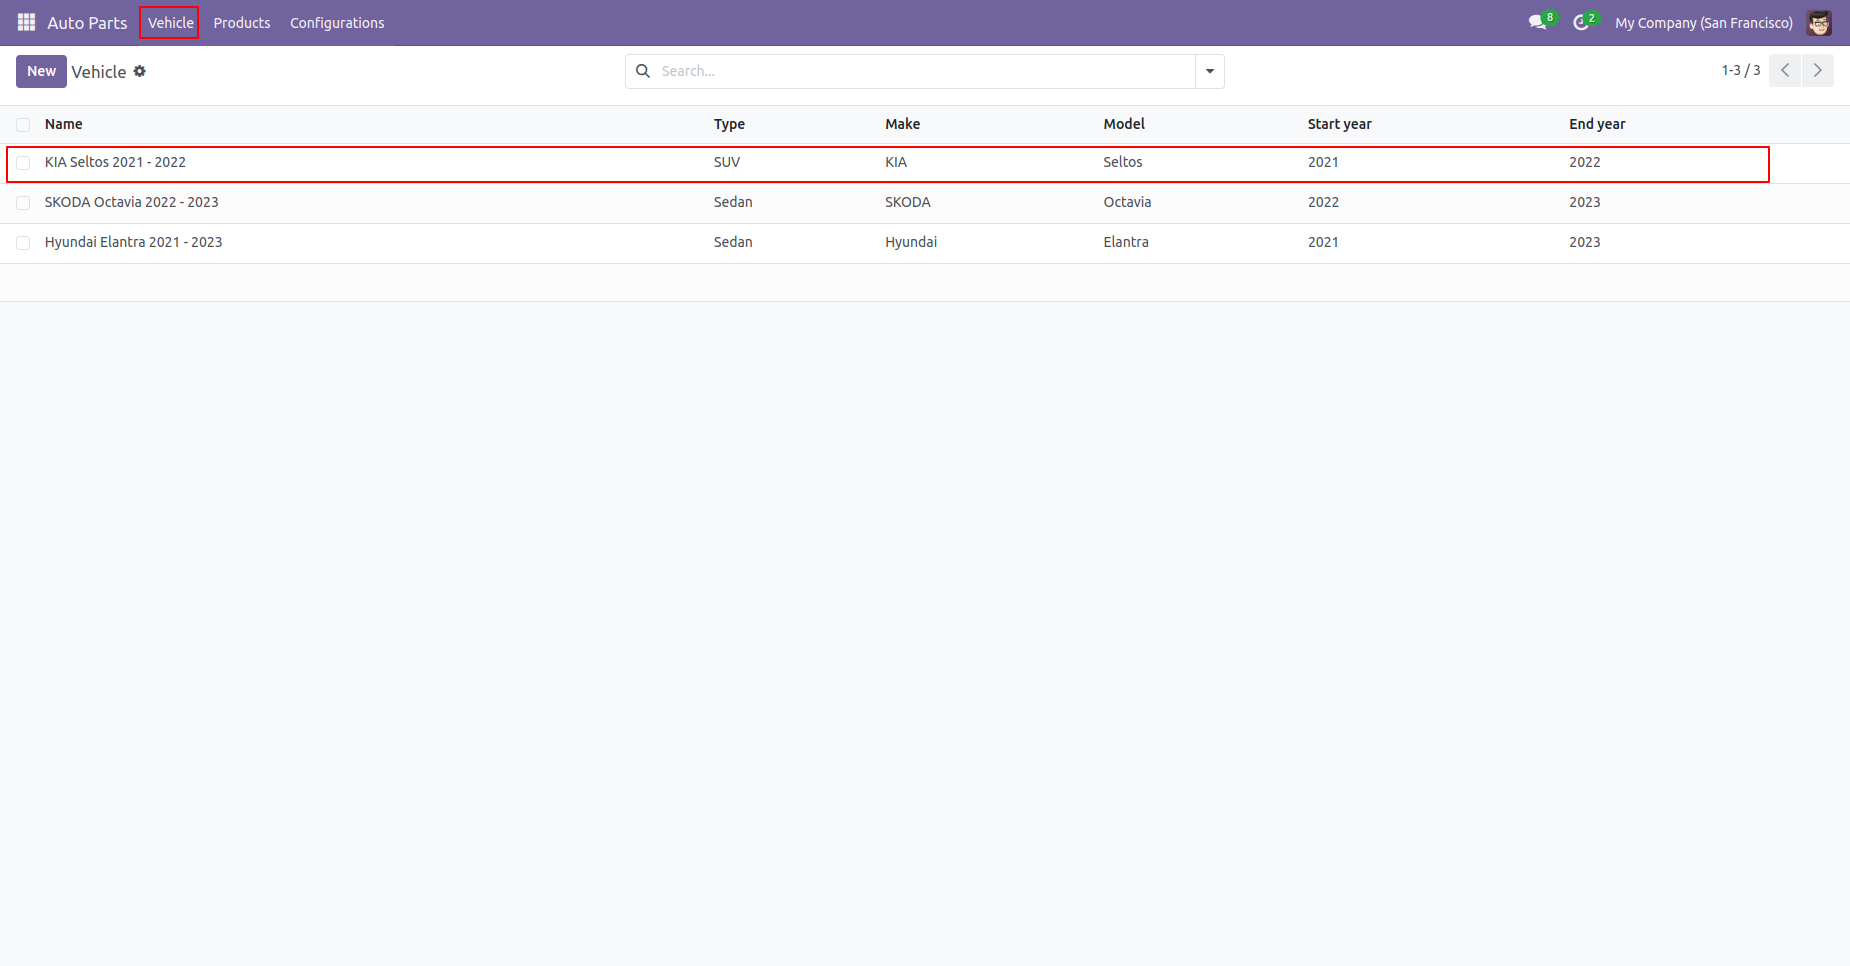
List view of the Vehicle.
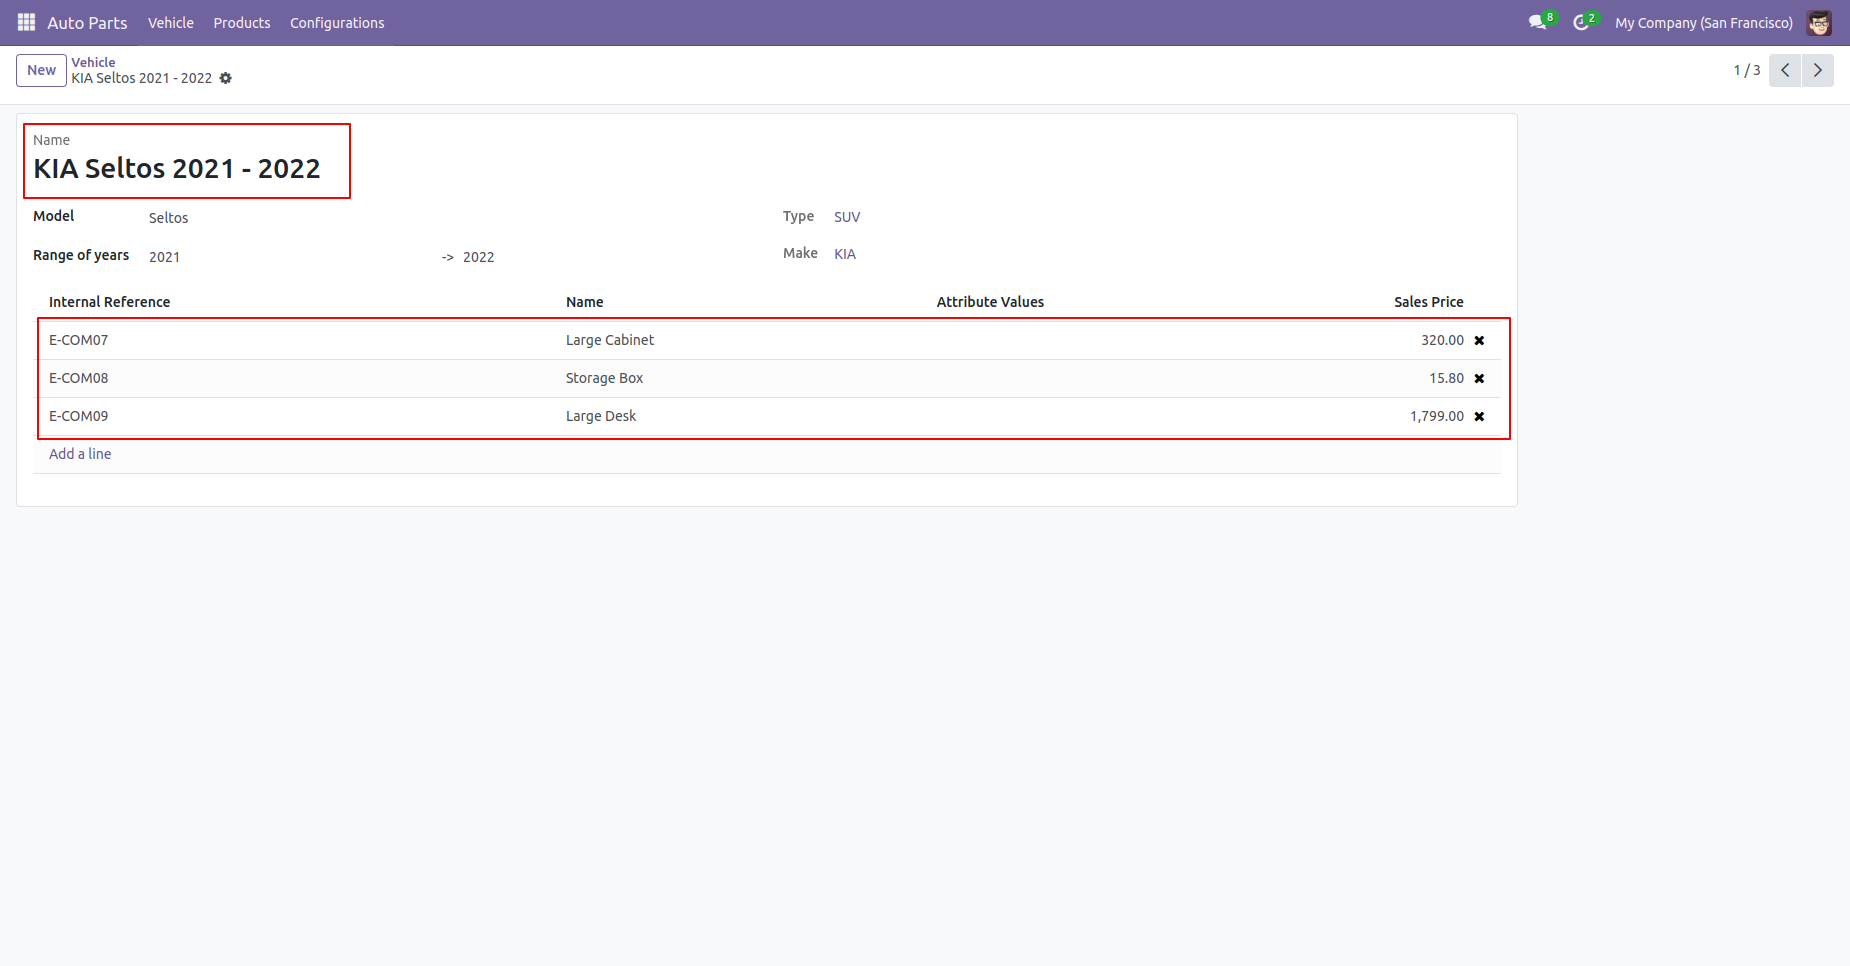
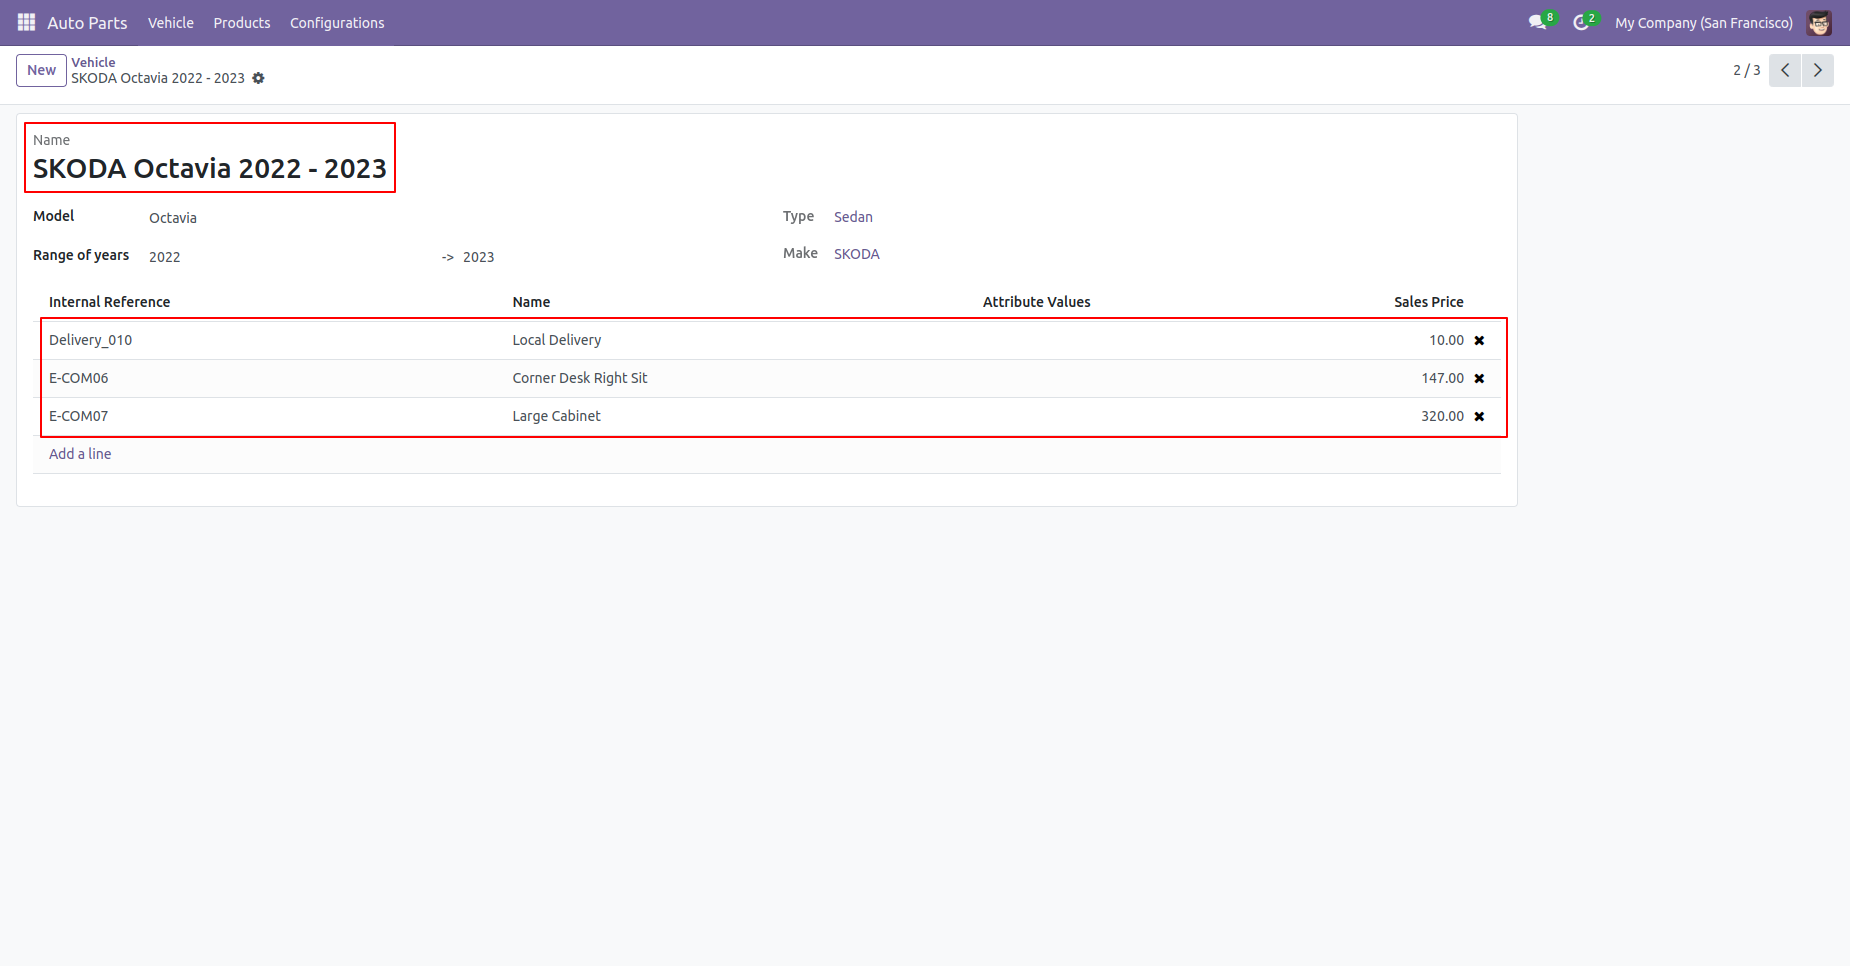
Form view of the Vehicle.
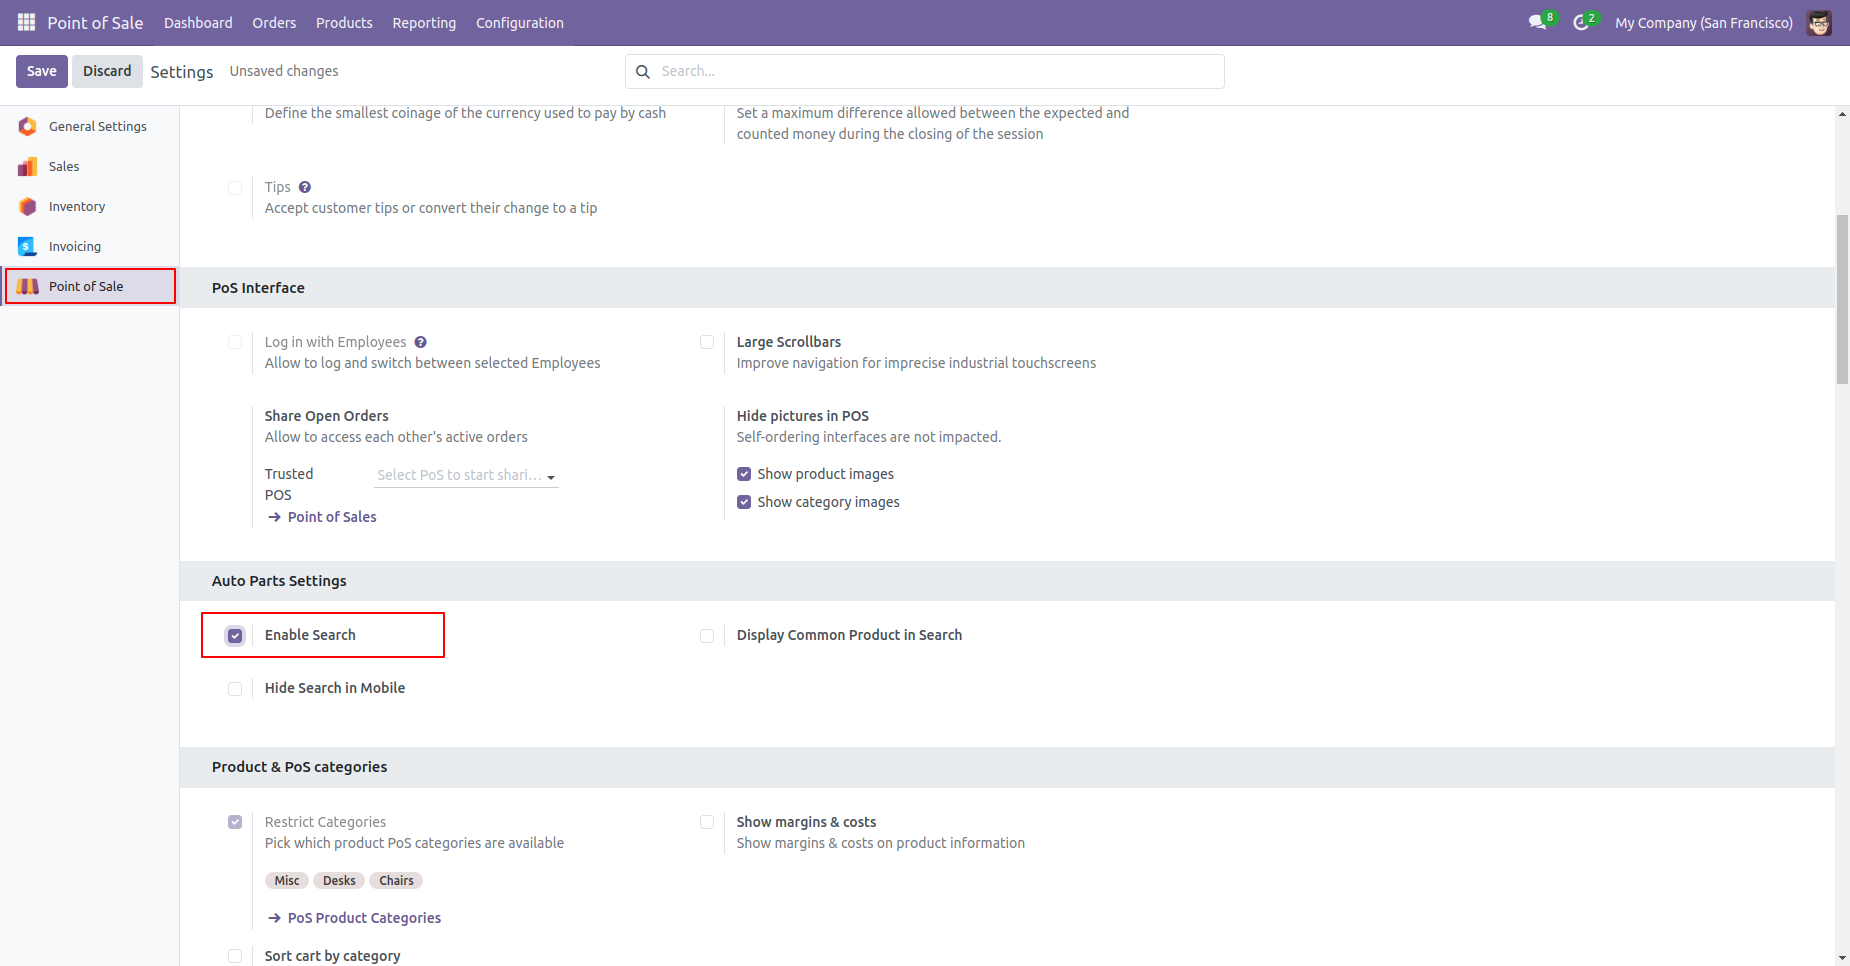
Go to the POS settings and enable 'Enable Group'.
Select your motorcycle parts by selecting types, makes, models and year in POS.
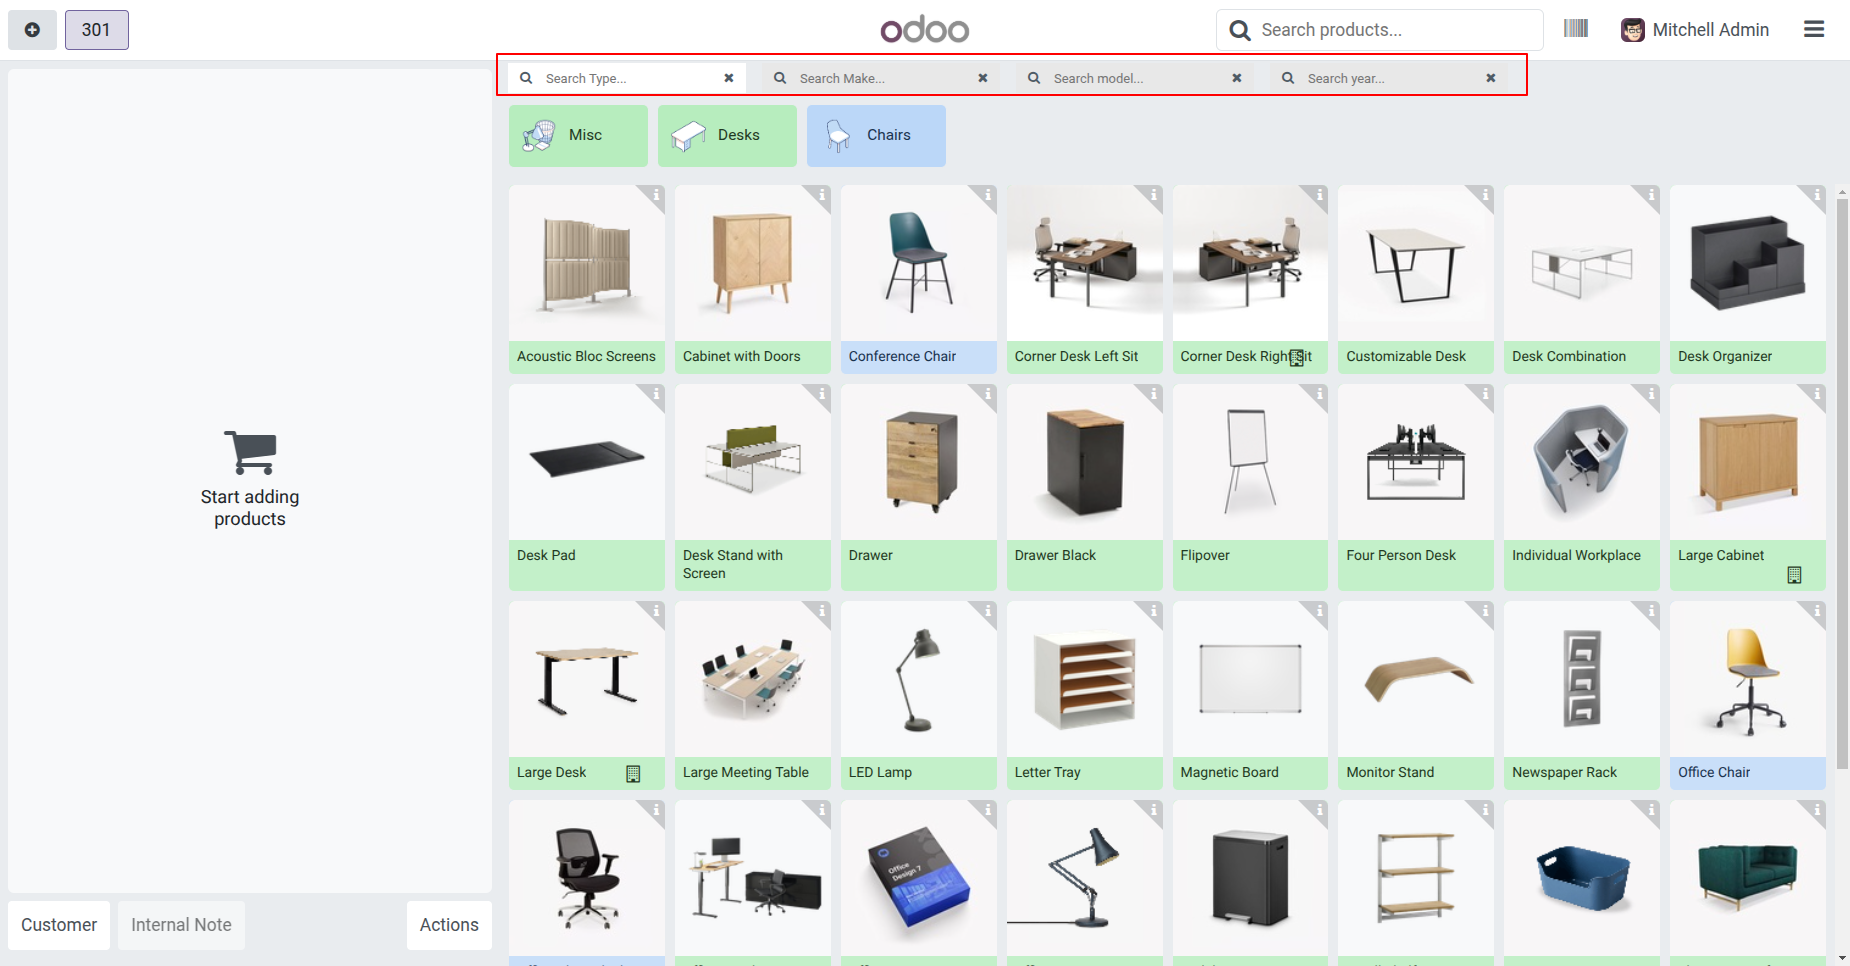
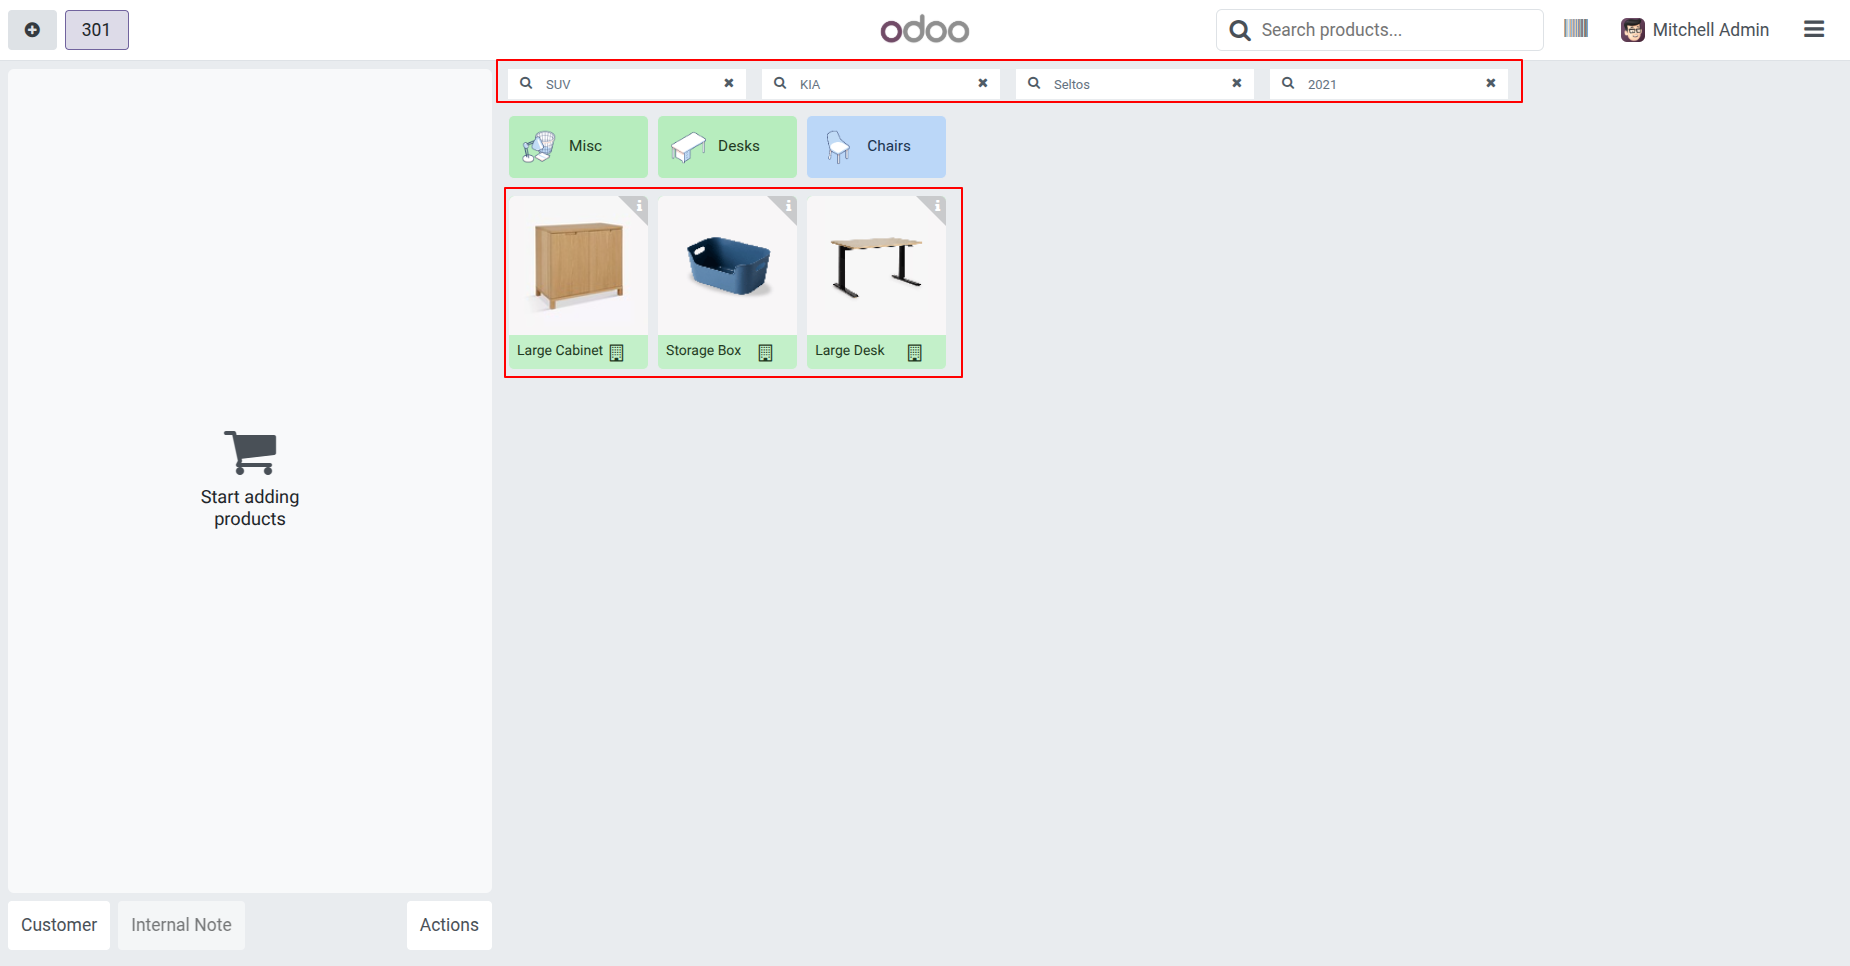
After selecting the type, make, model and year you can find products using the search bar. So the searched products come in the product screen.
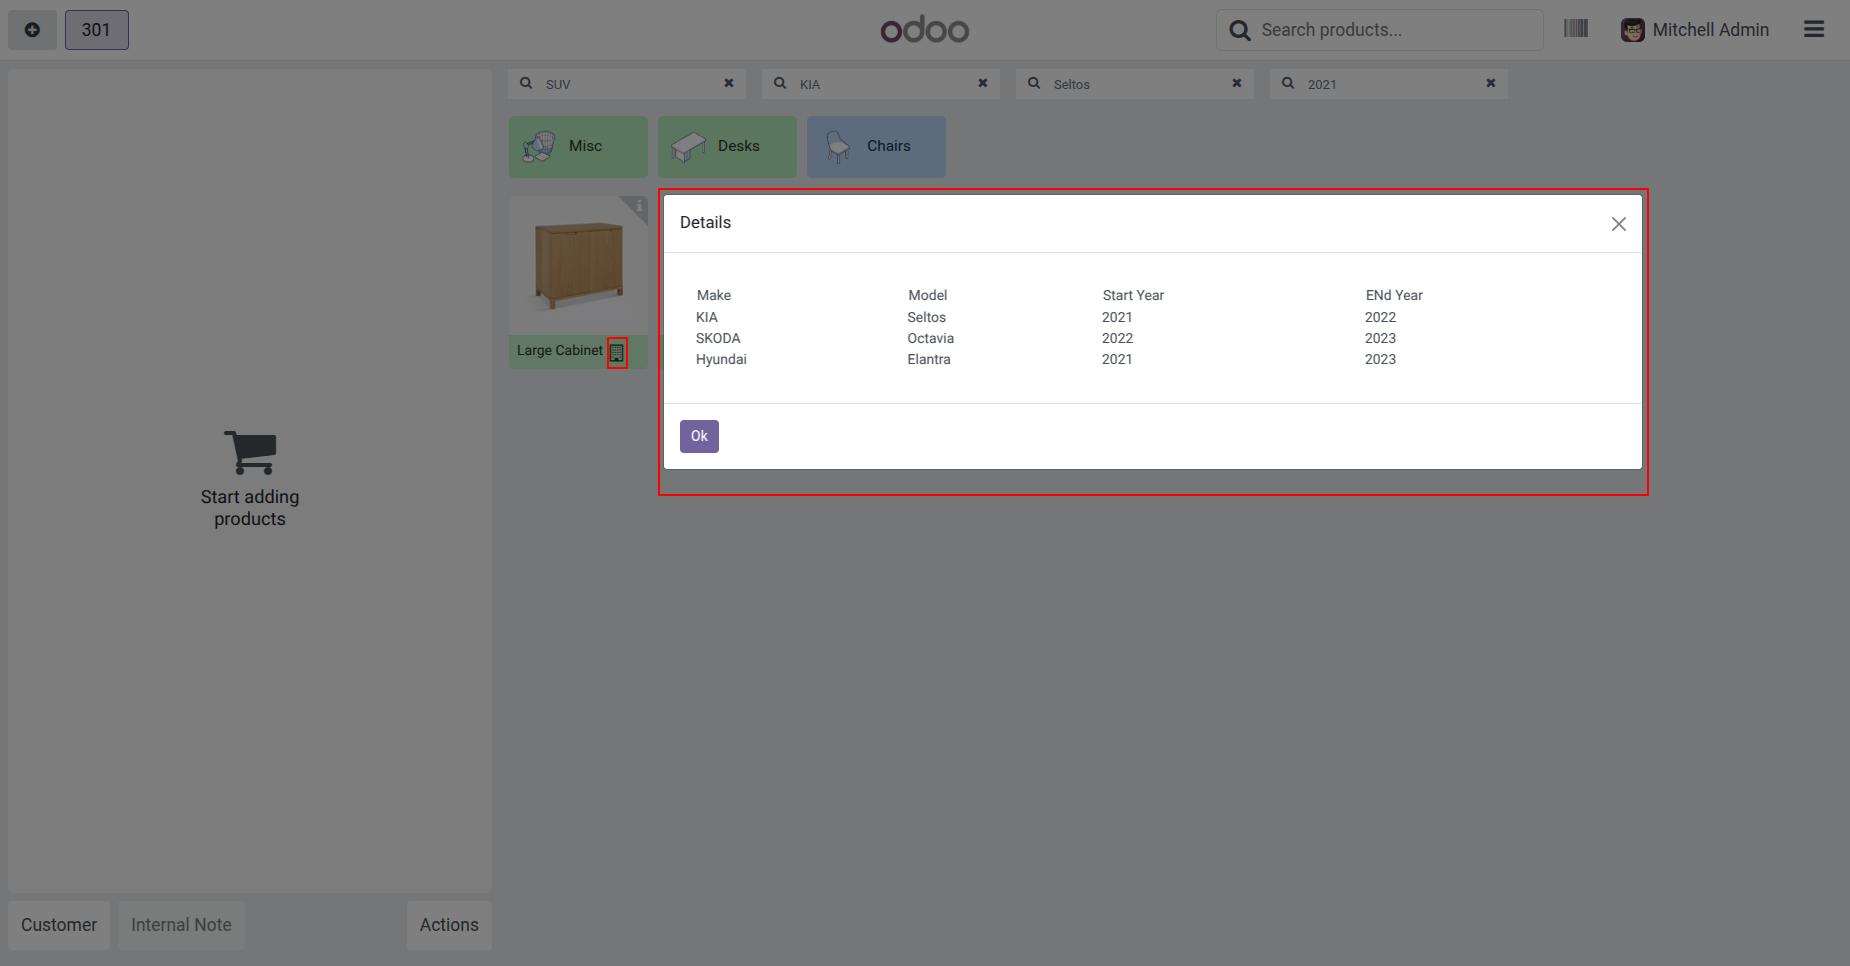
You can see product details using the provided button.
Click on the
button.
The product detail popup looks like this.
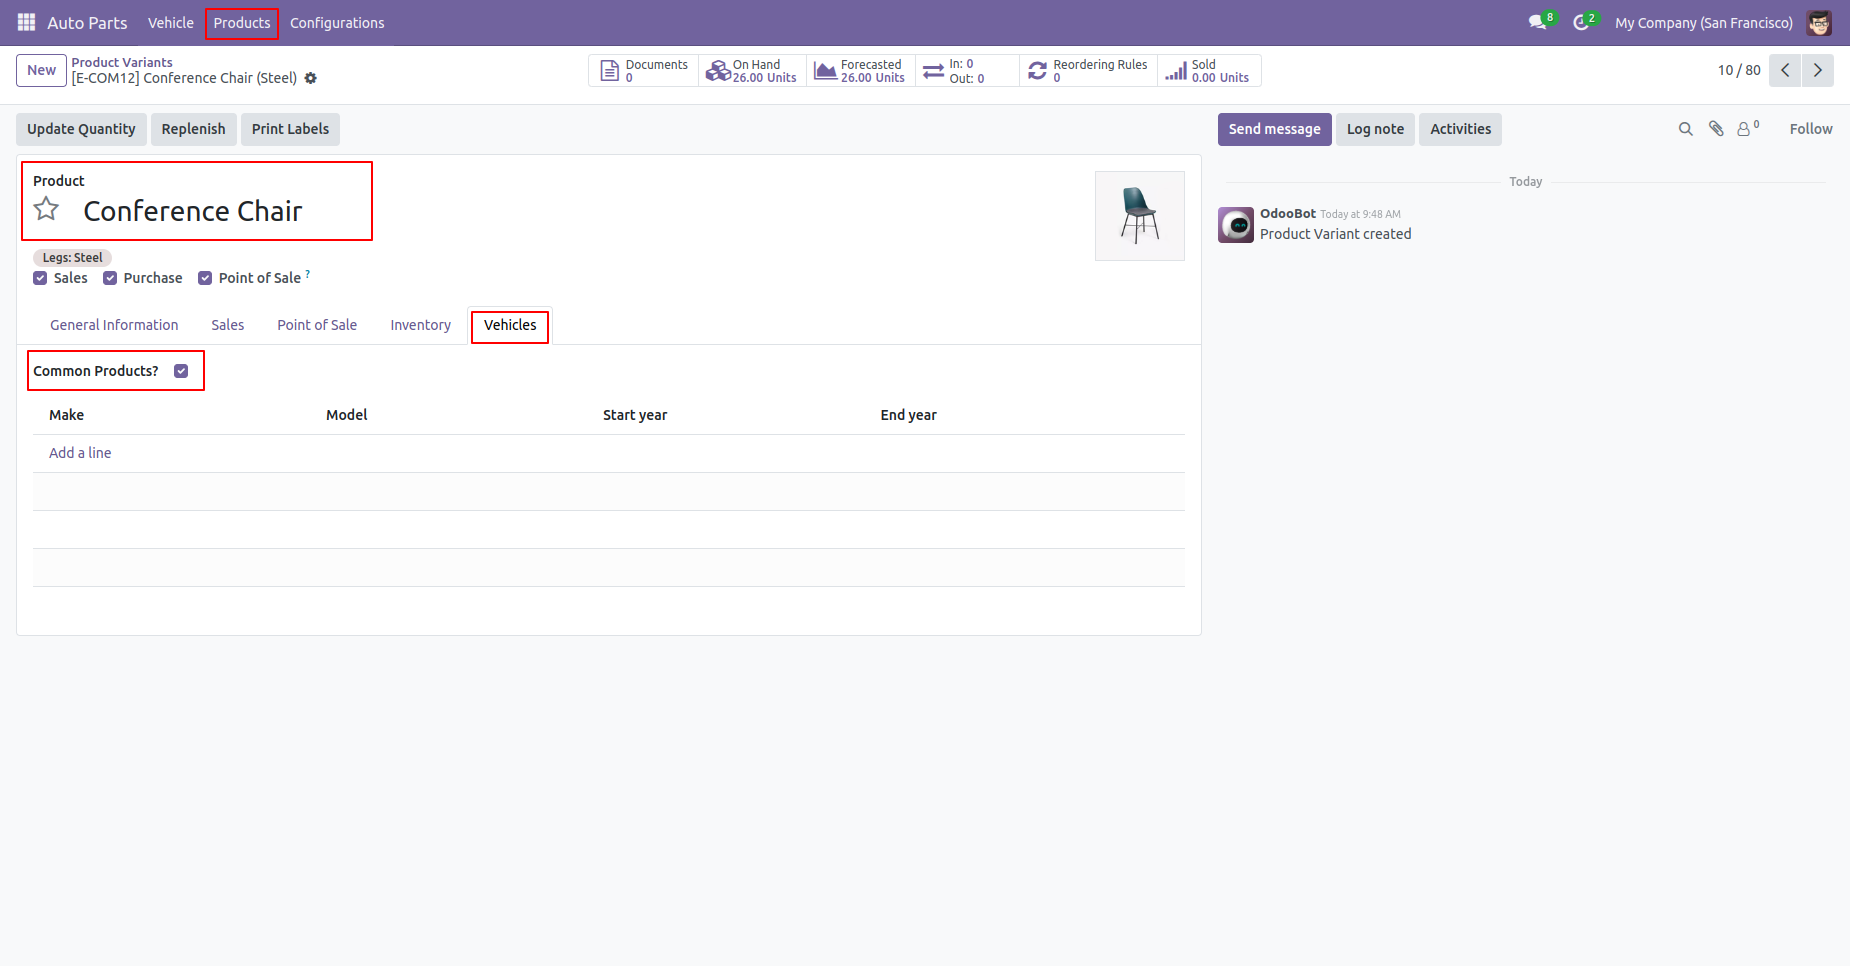
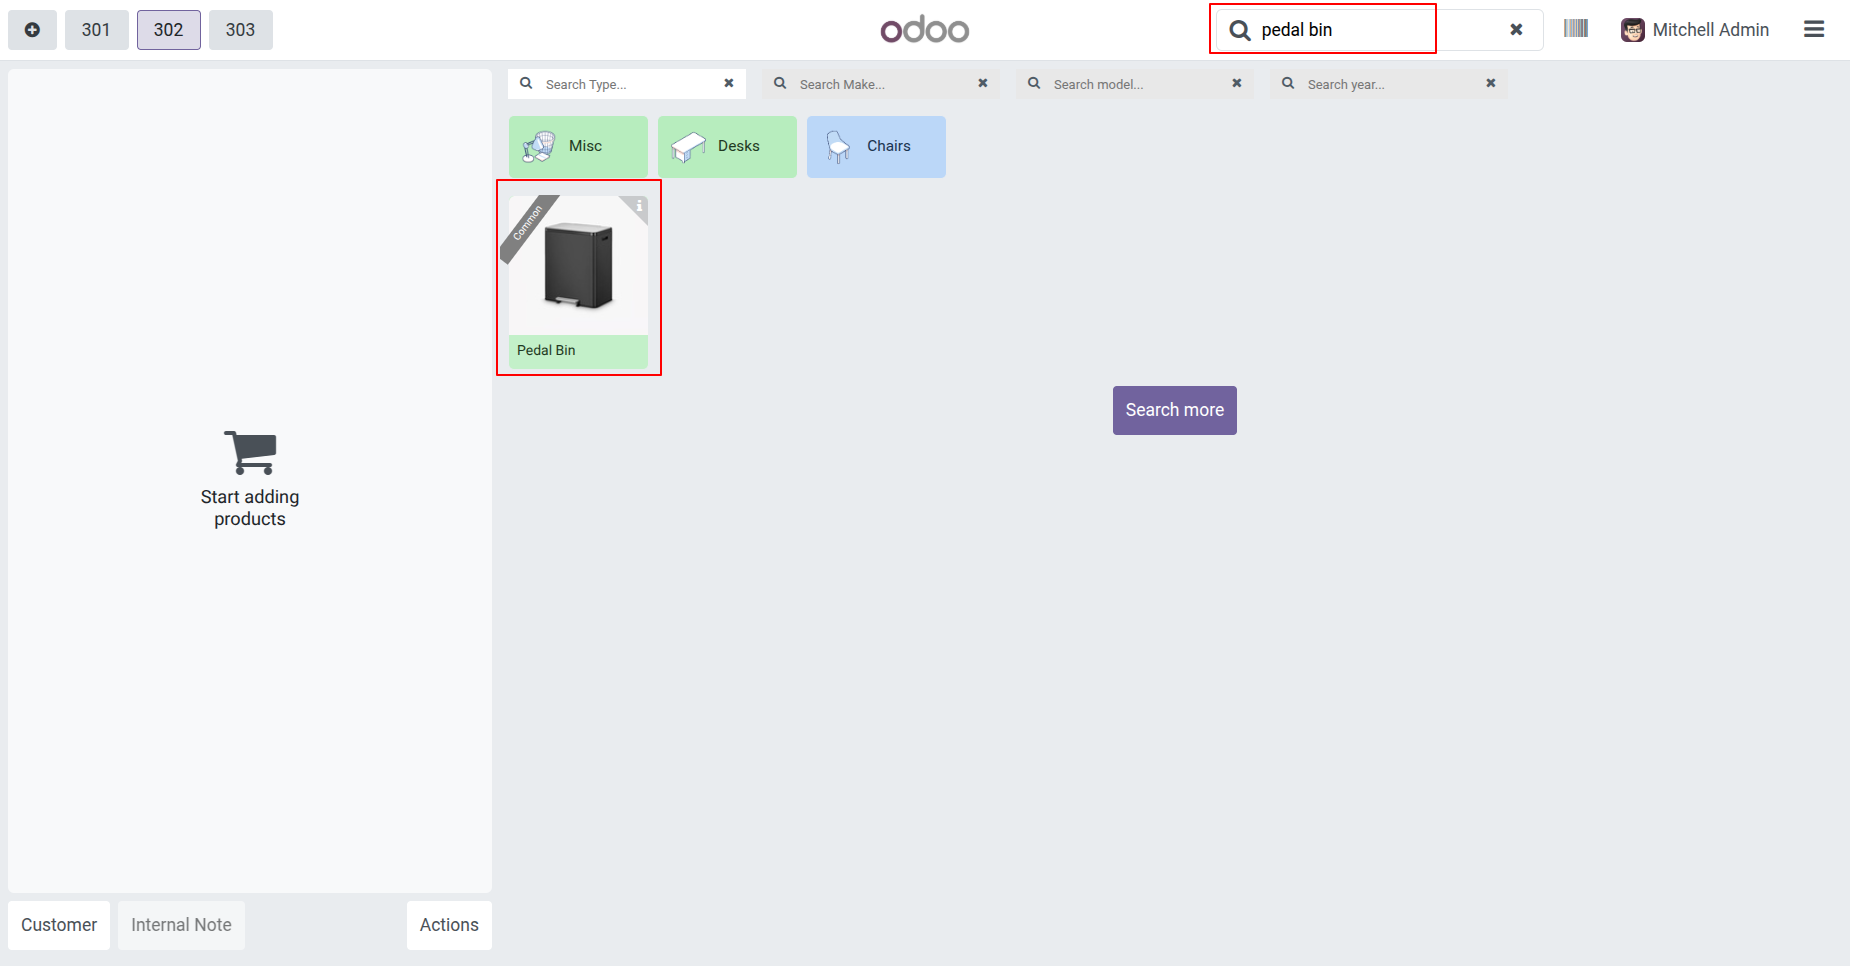
You can add "Common Products" for all vehicles from the product form view and from the main configurations.
The common products at the POS product screen.
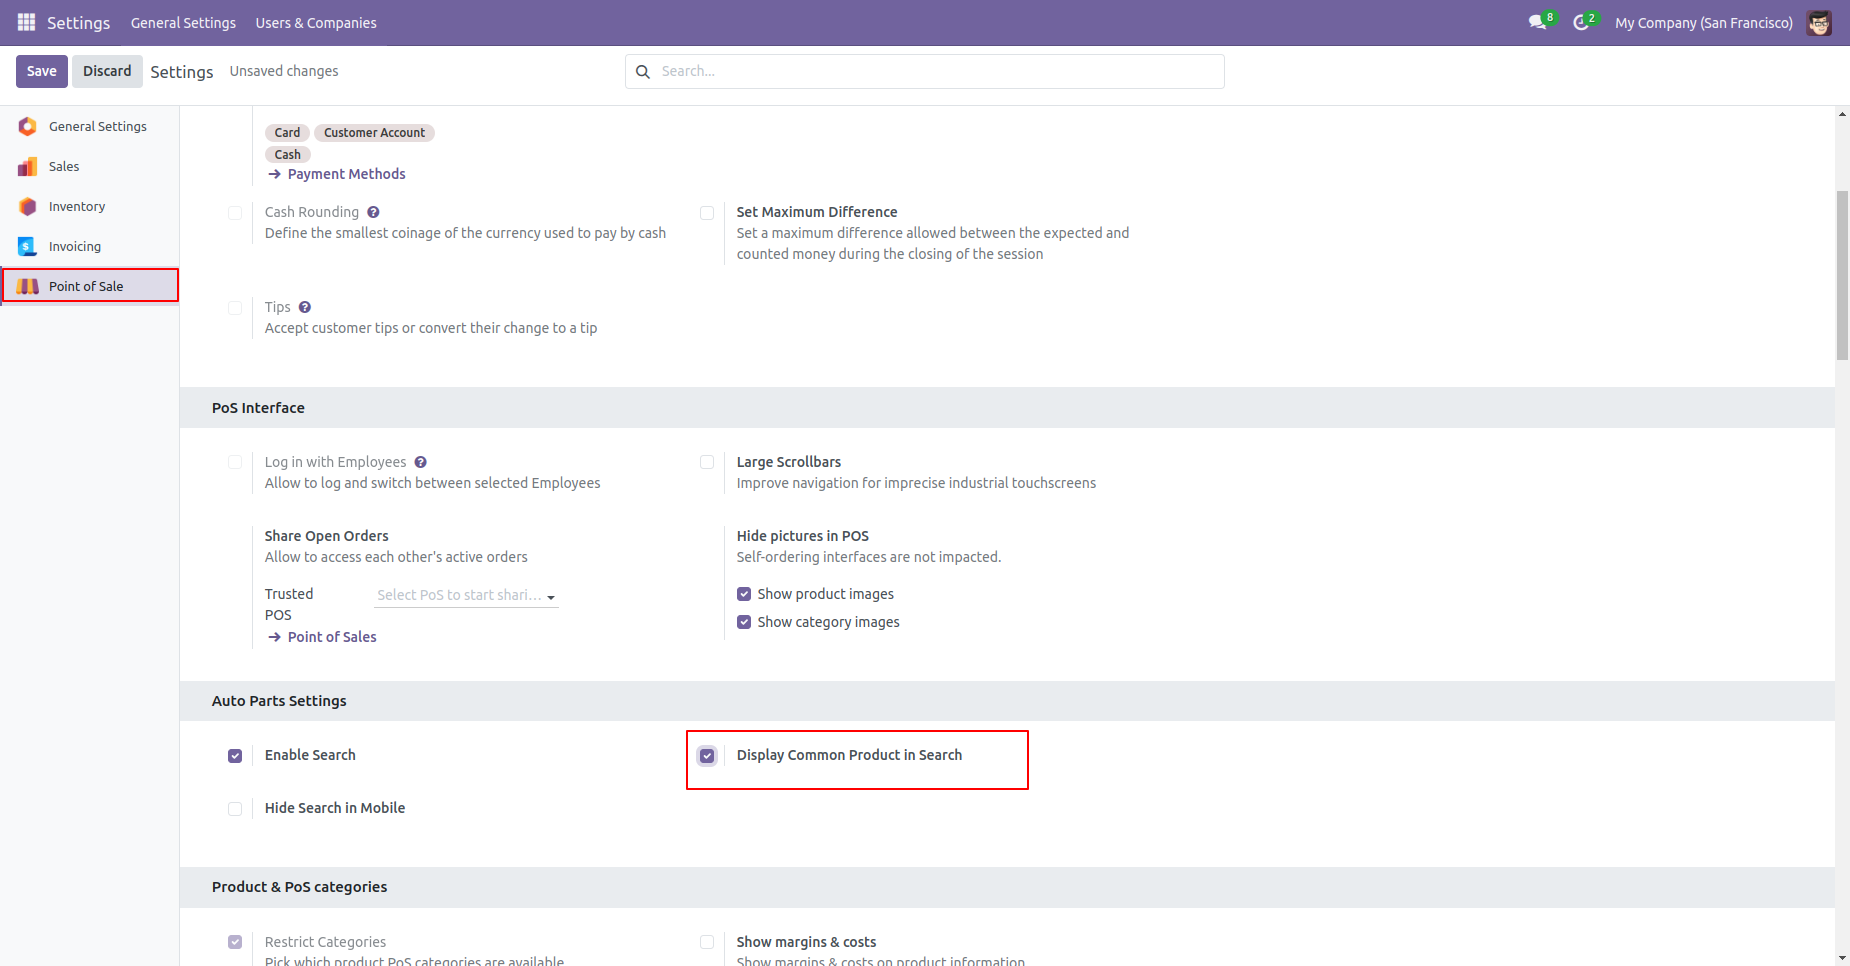
Go to the POS settings and enable 'Display Common Products In POS'.
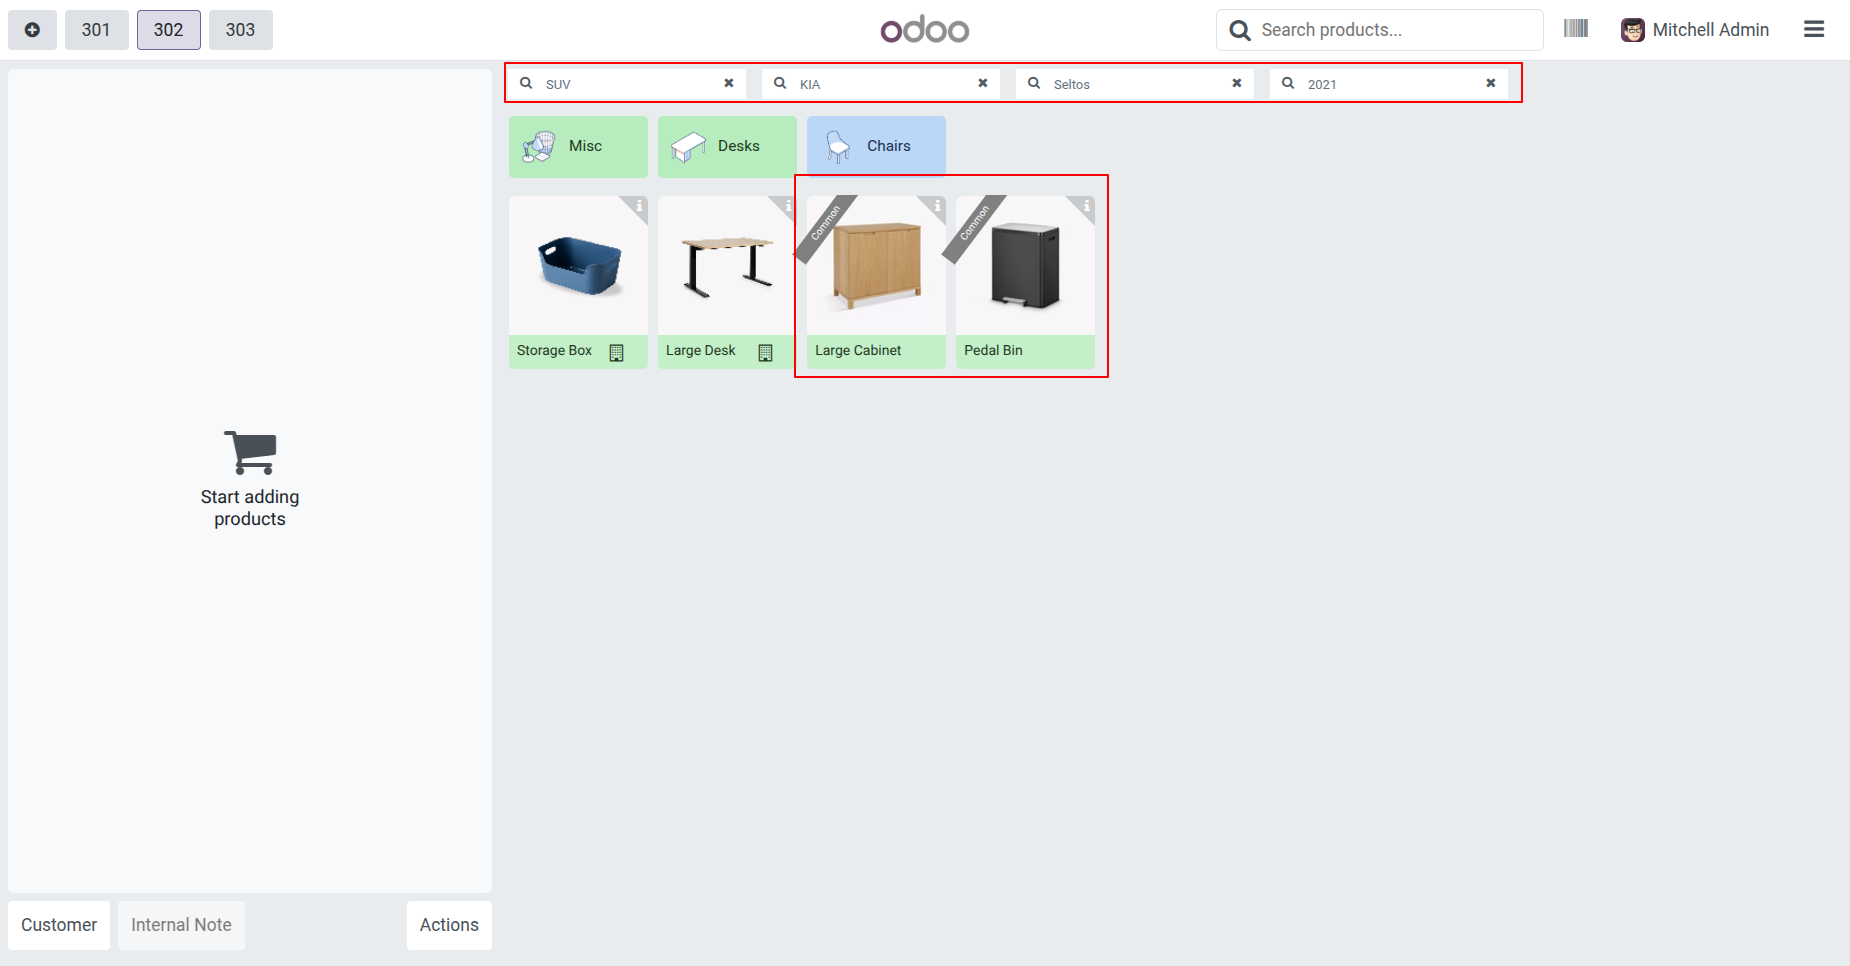
Select your motorcycle parts by selecting types, makes, models and year in POS.
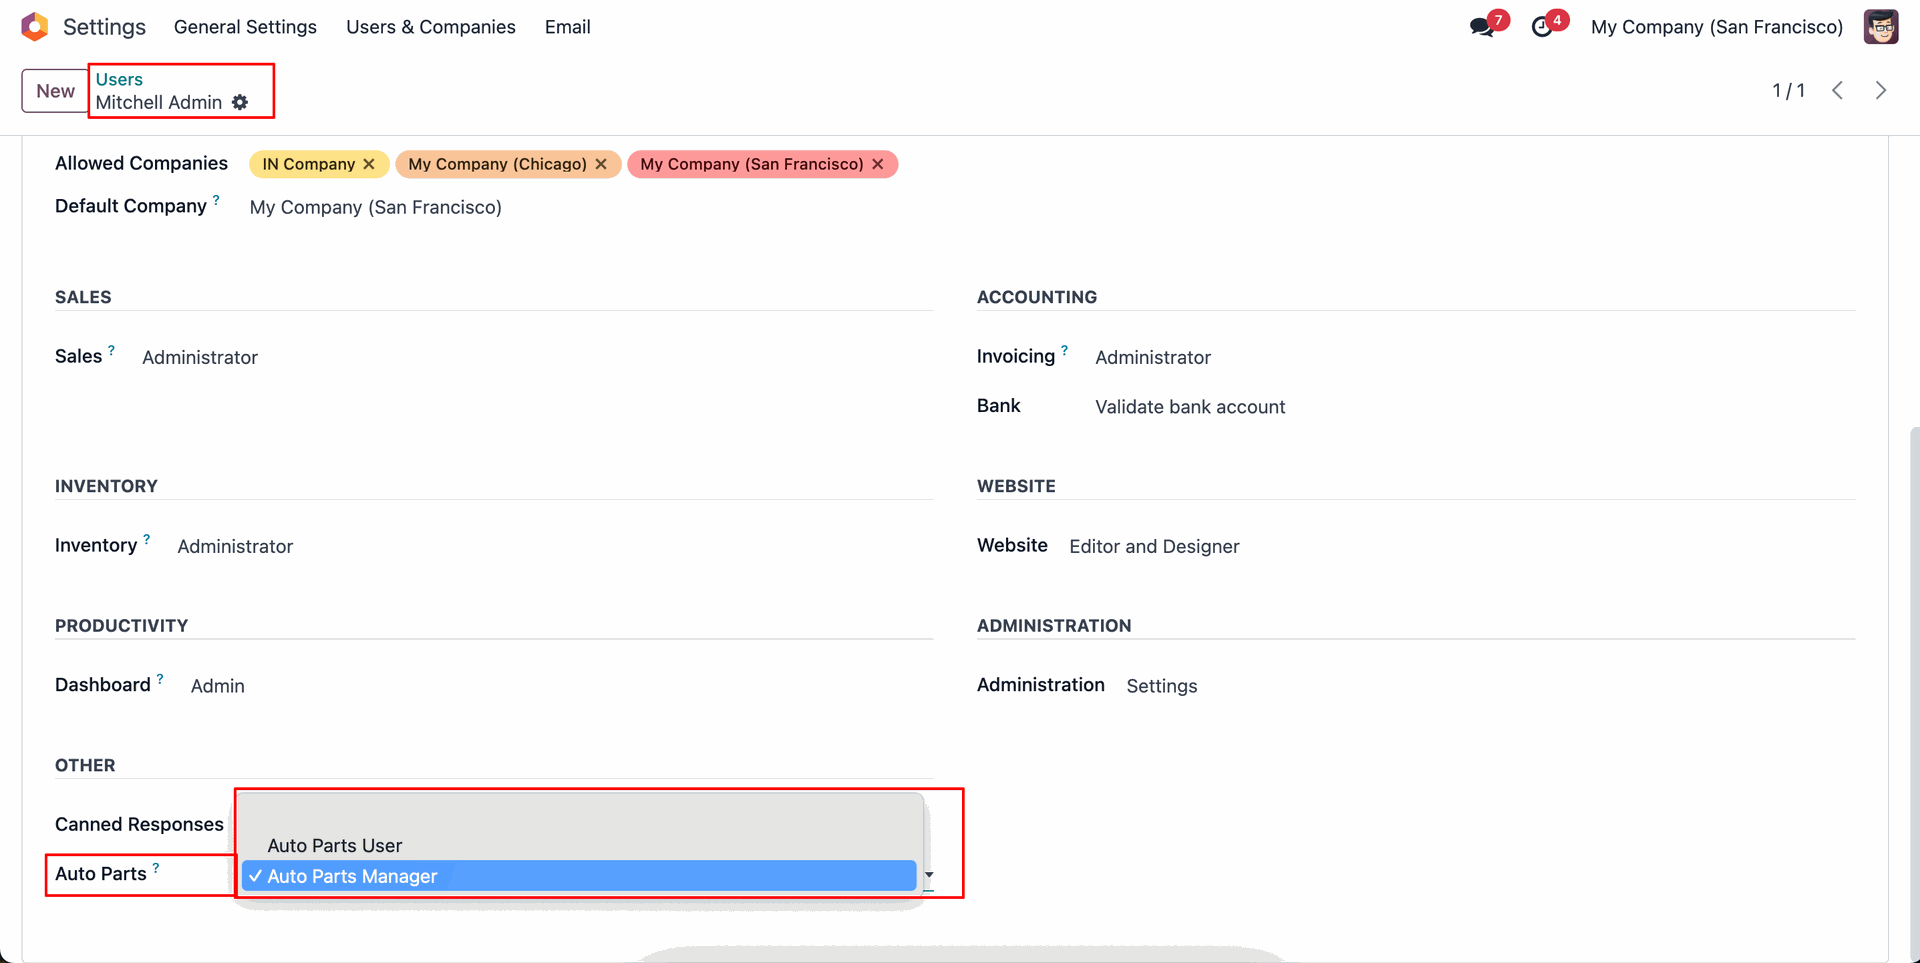
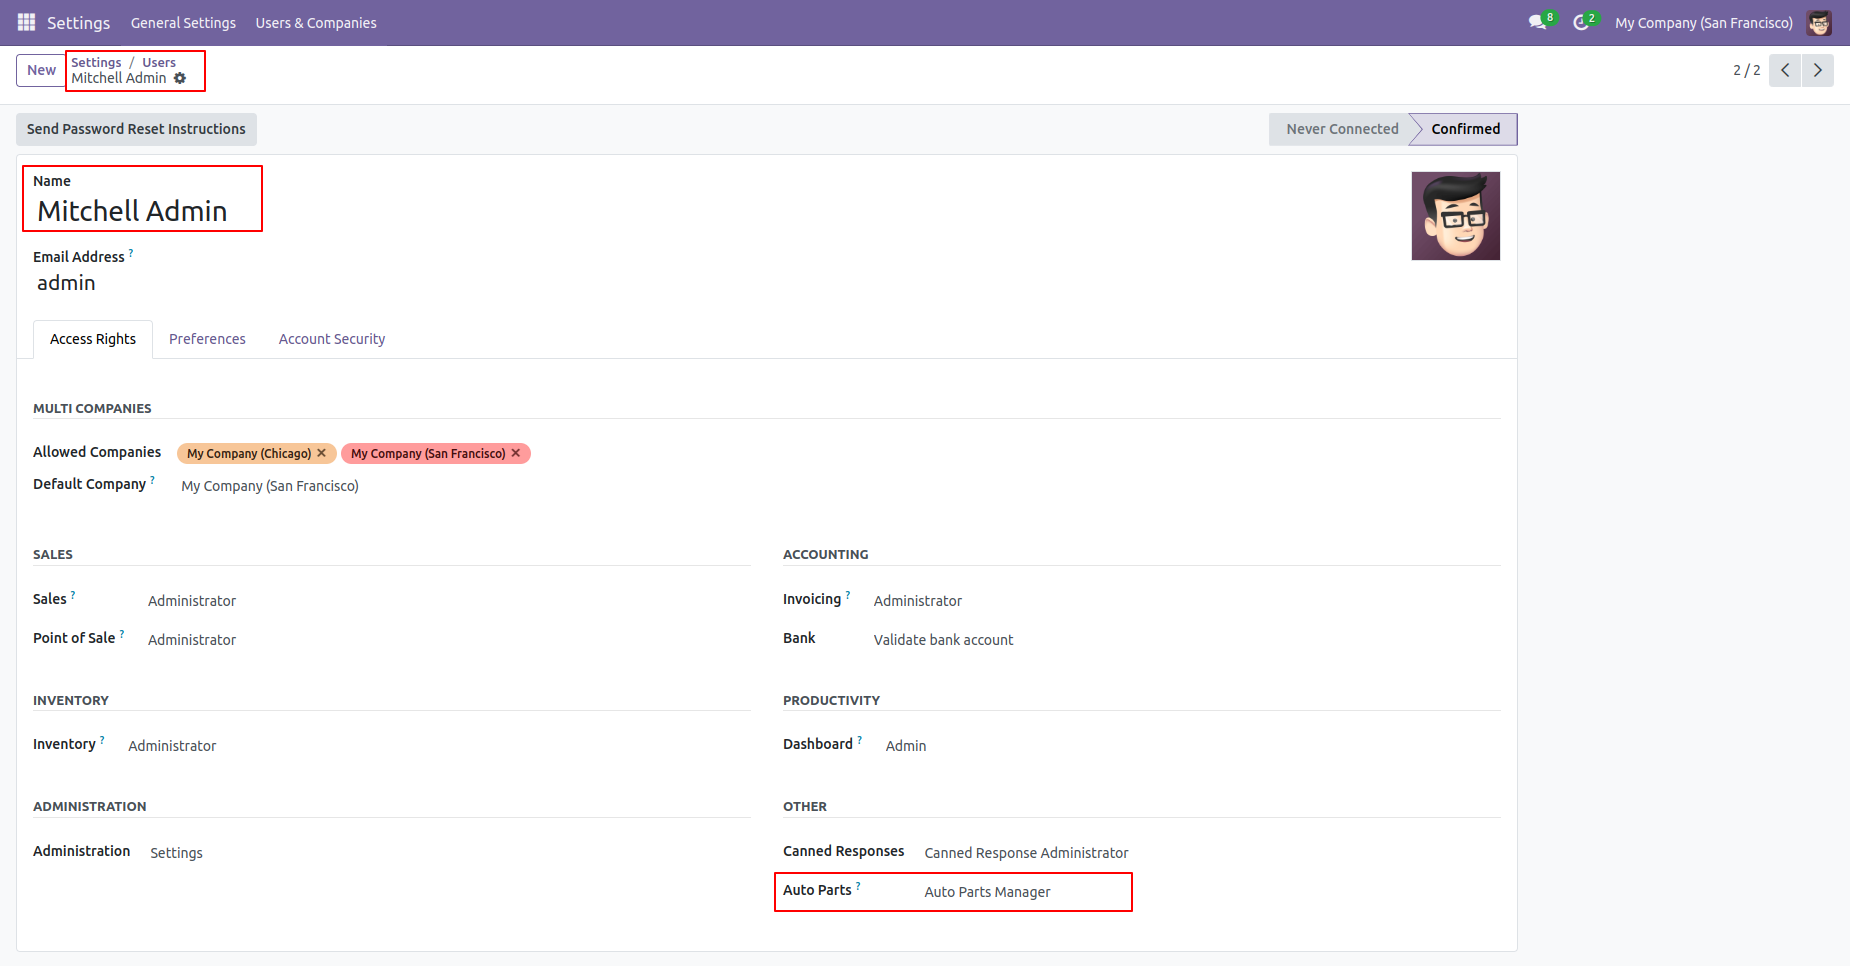
Select Auto Parts user or Auto parts manager.
Auto Parts Type Menu and tree view.
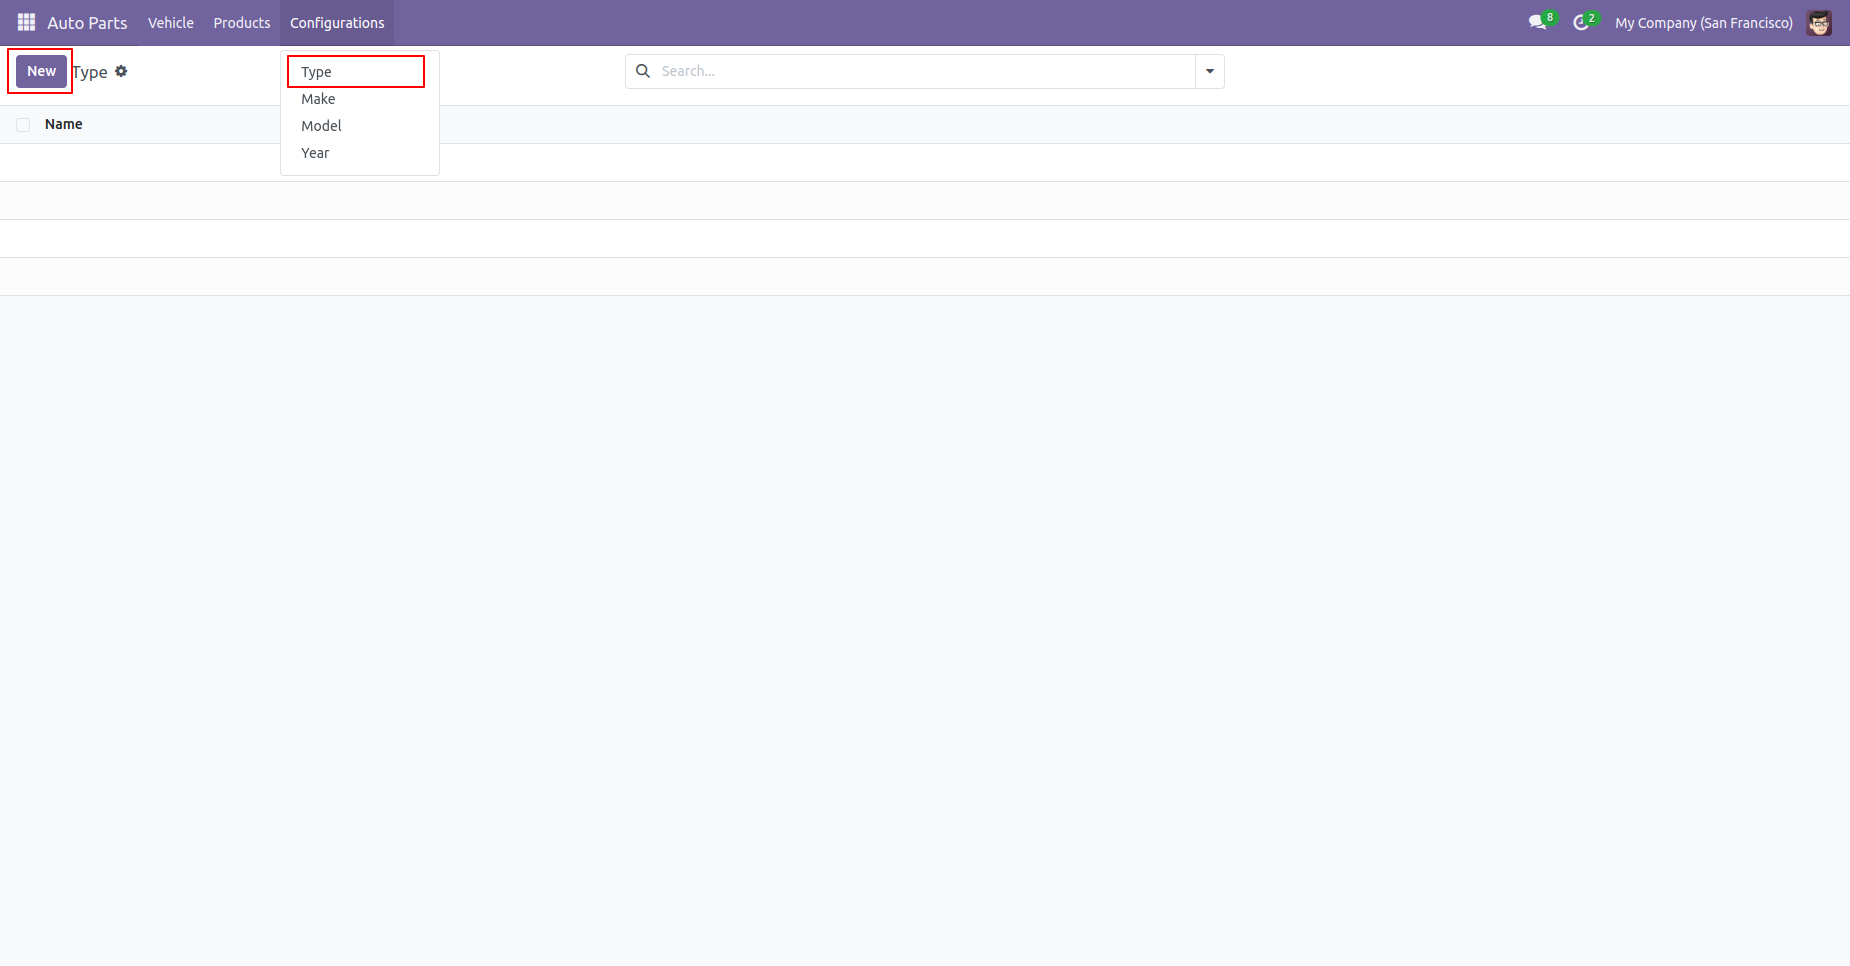
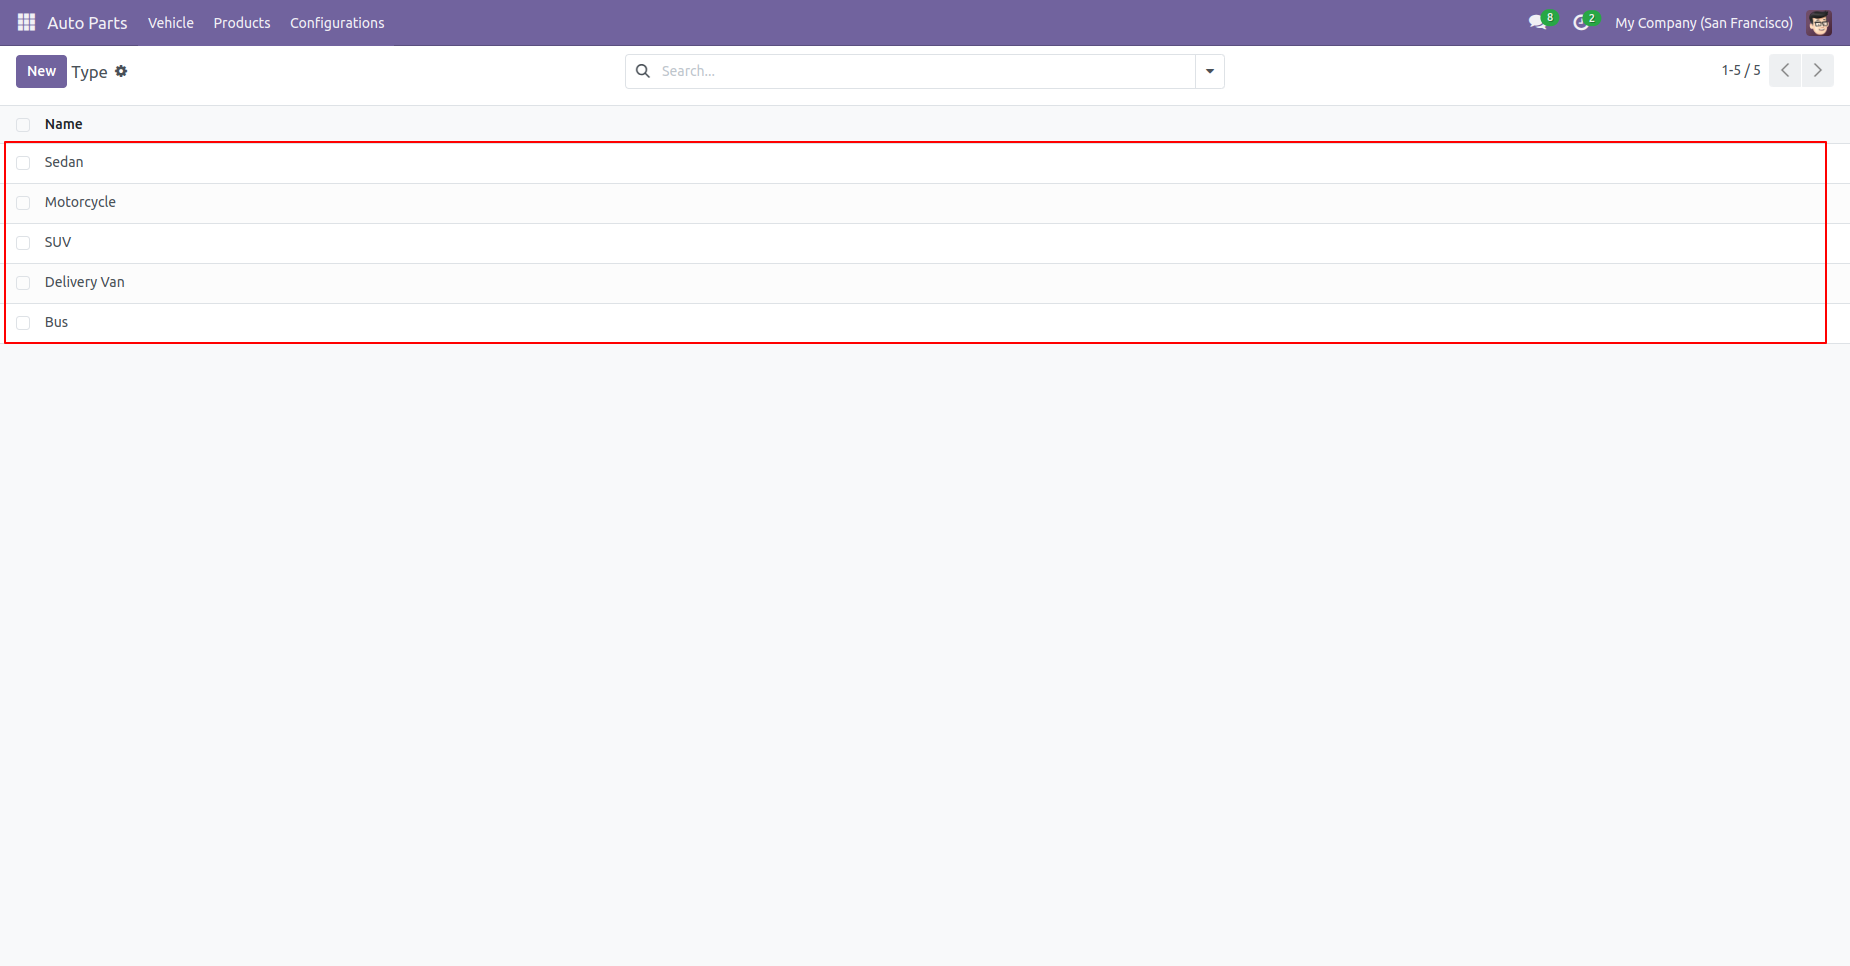
Auto Parts Make Menu and tree view.
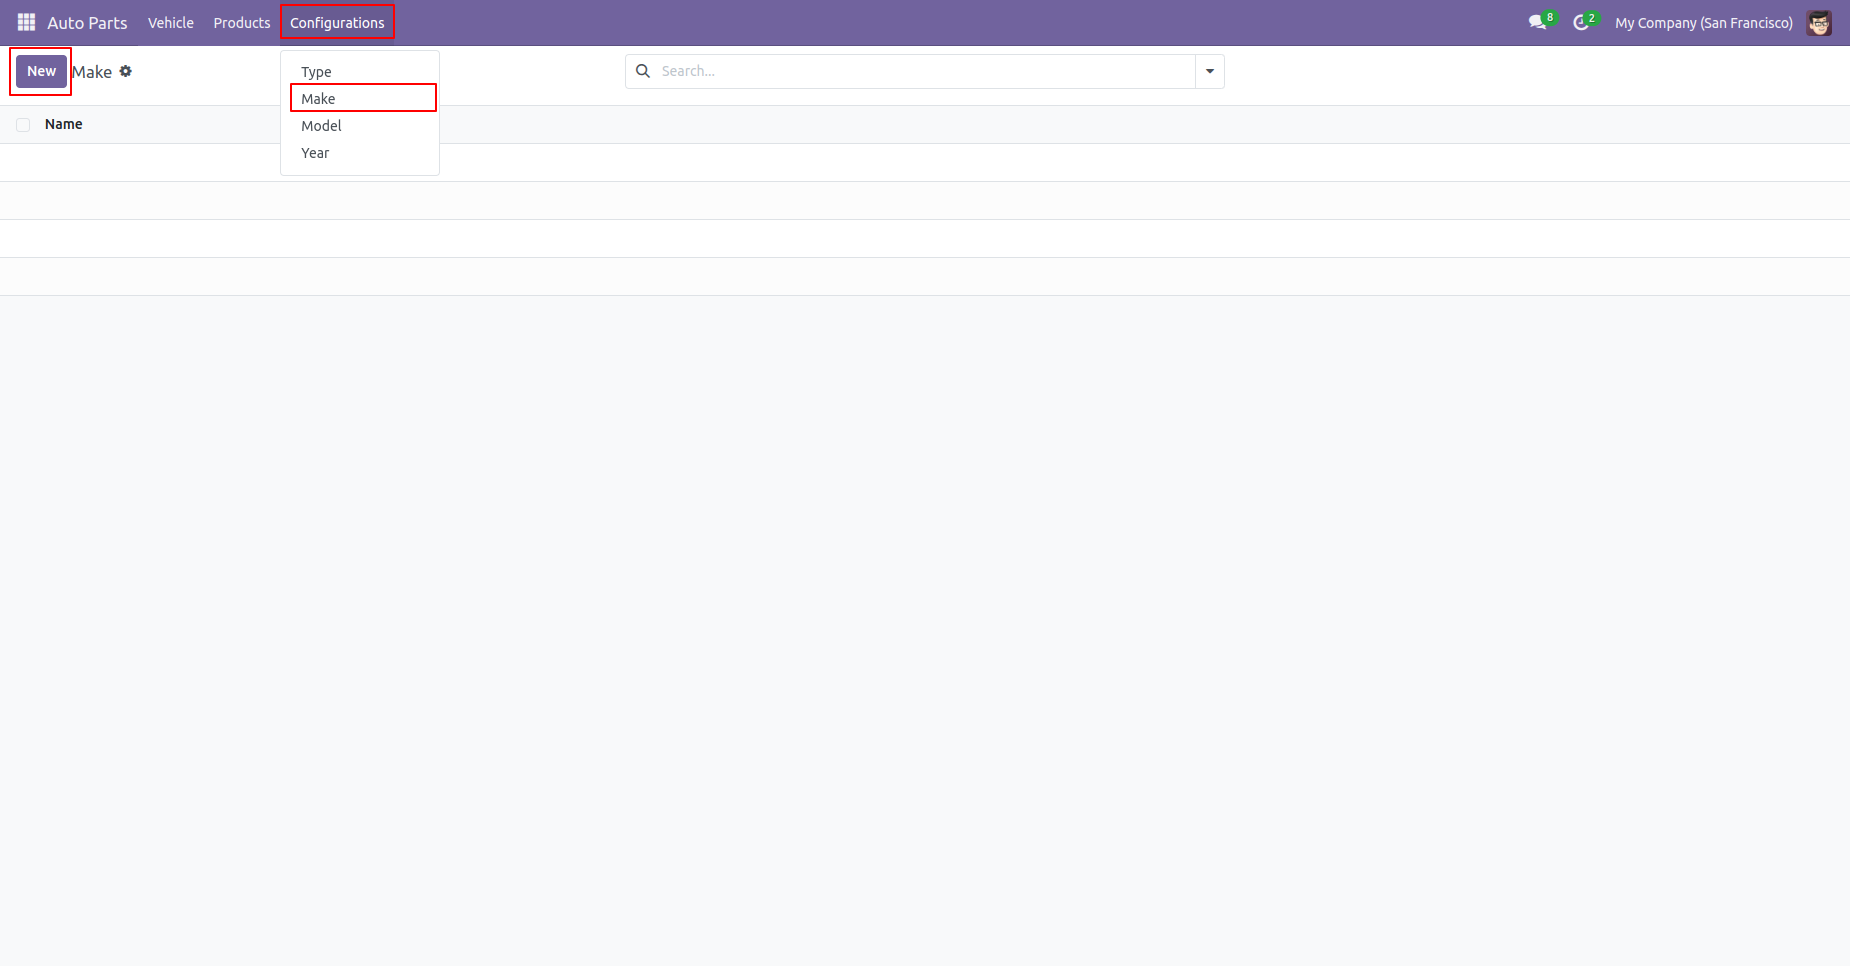
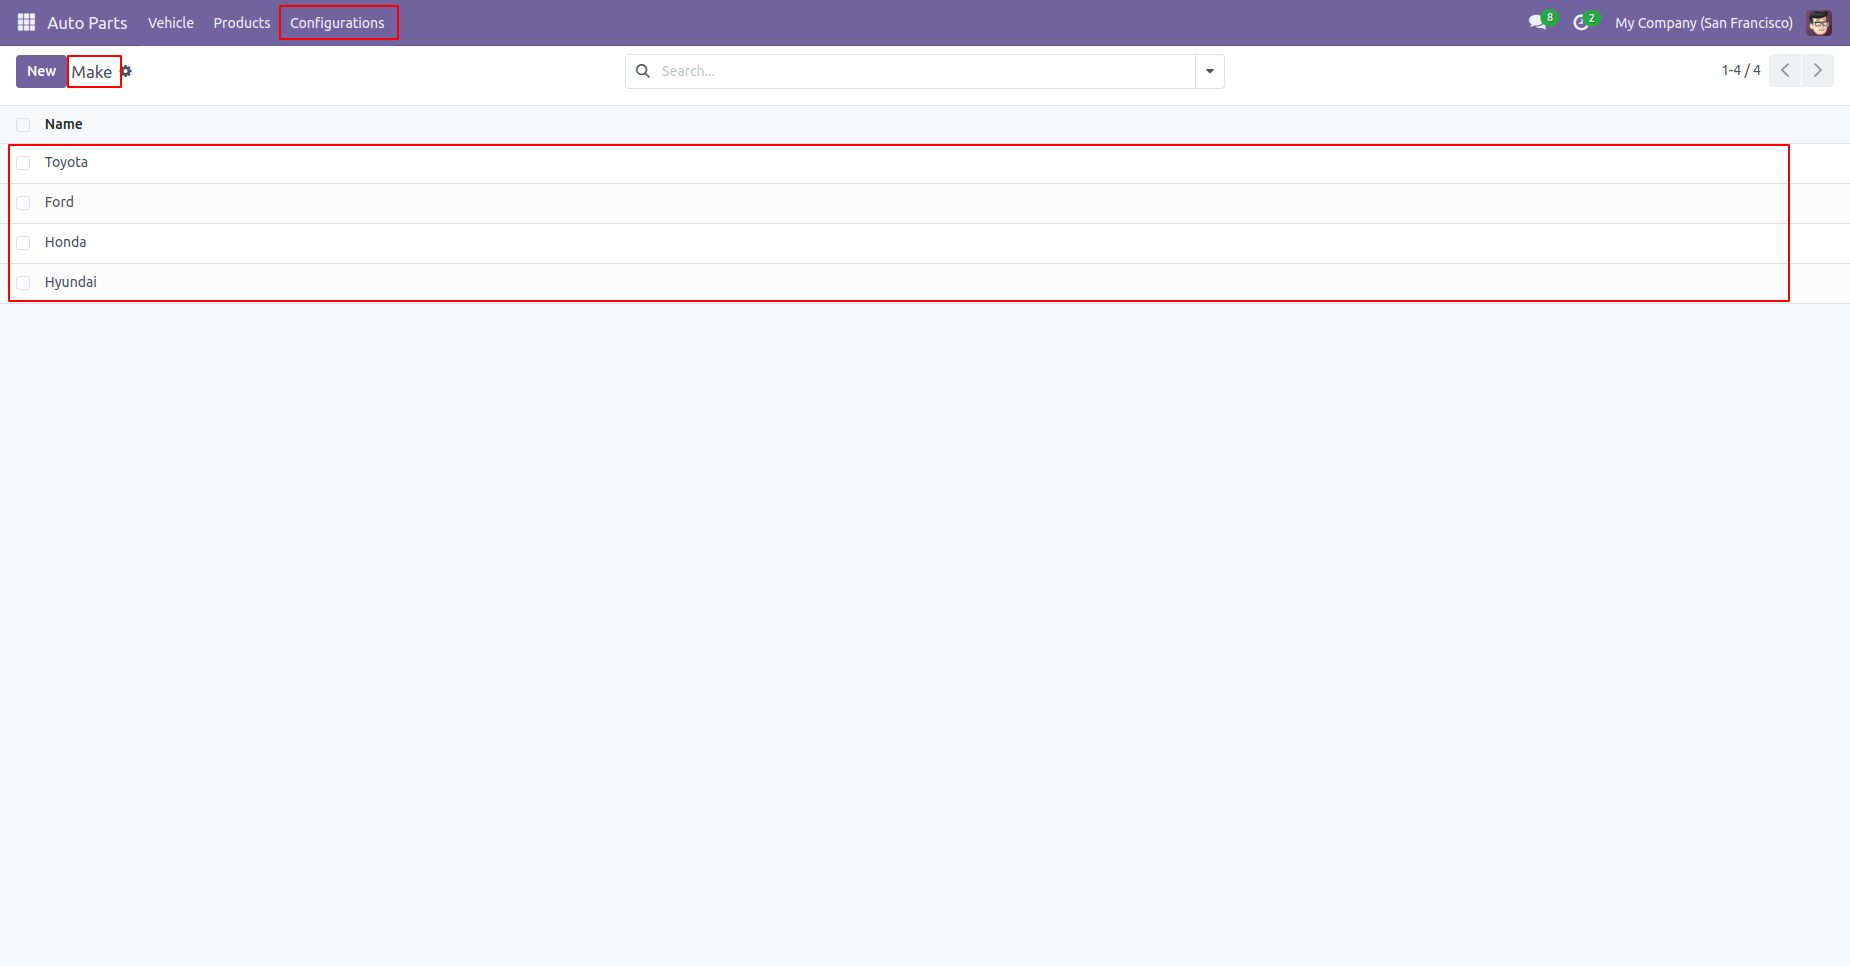
Auto Parts Model Menu and tree view.
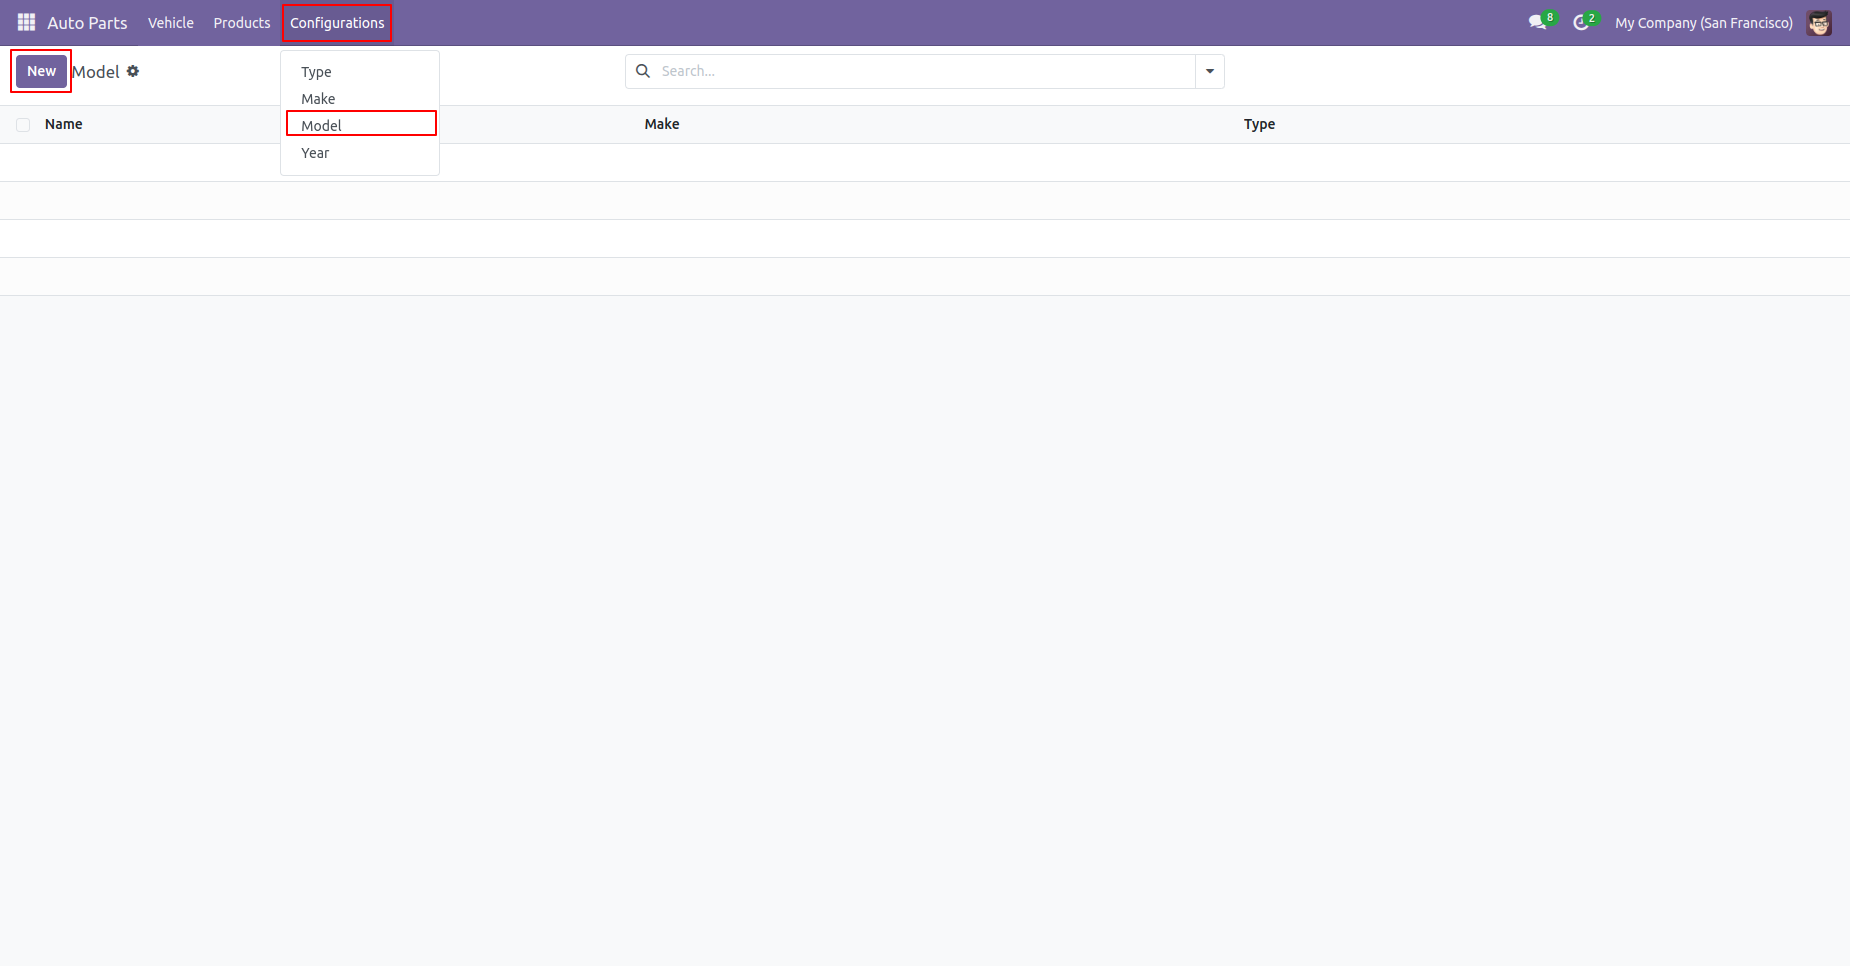
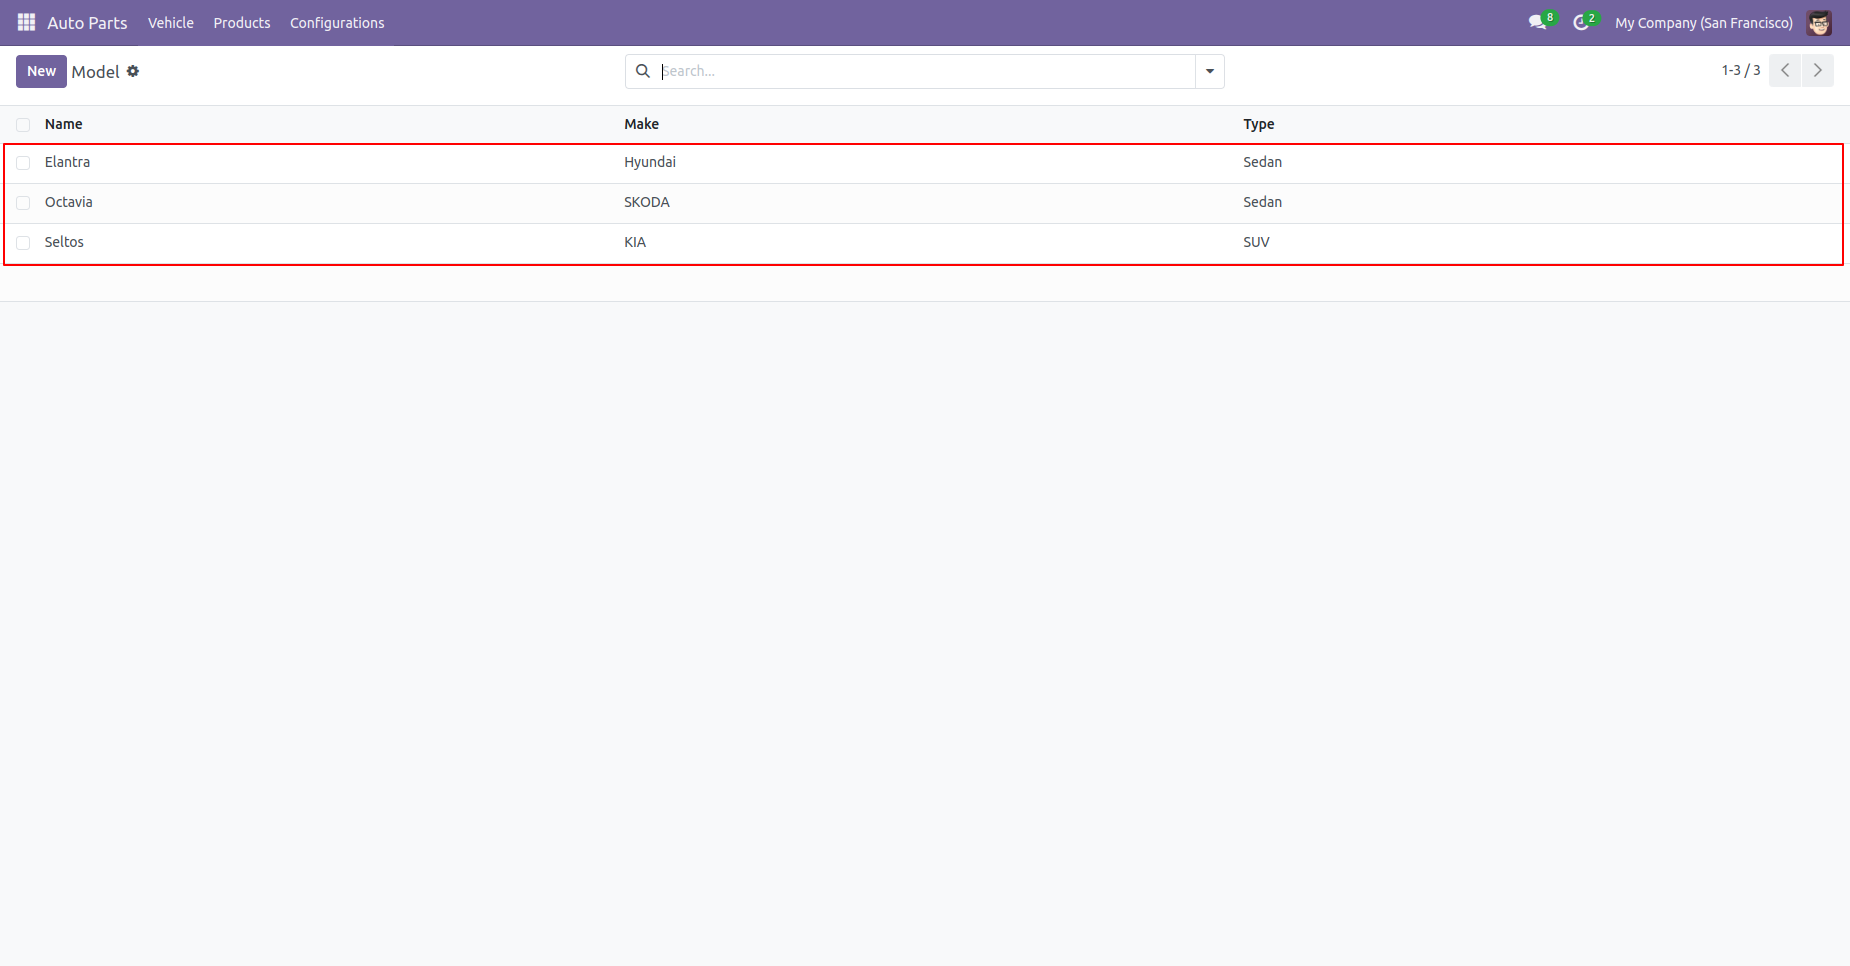
Auto Parts Model Menu and form view.
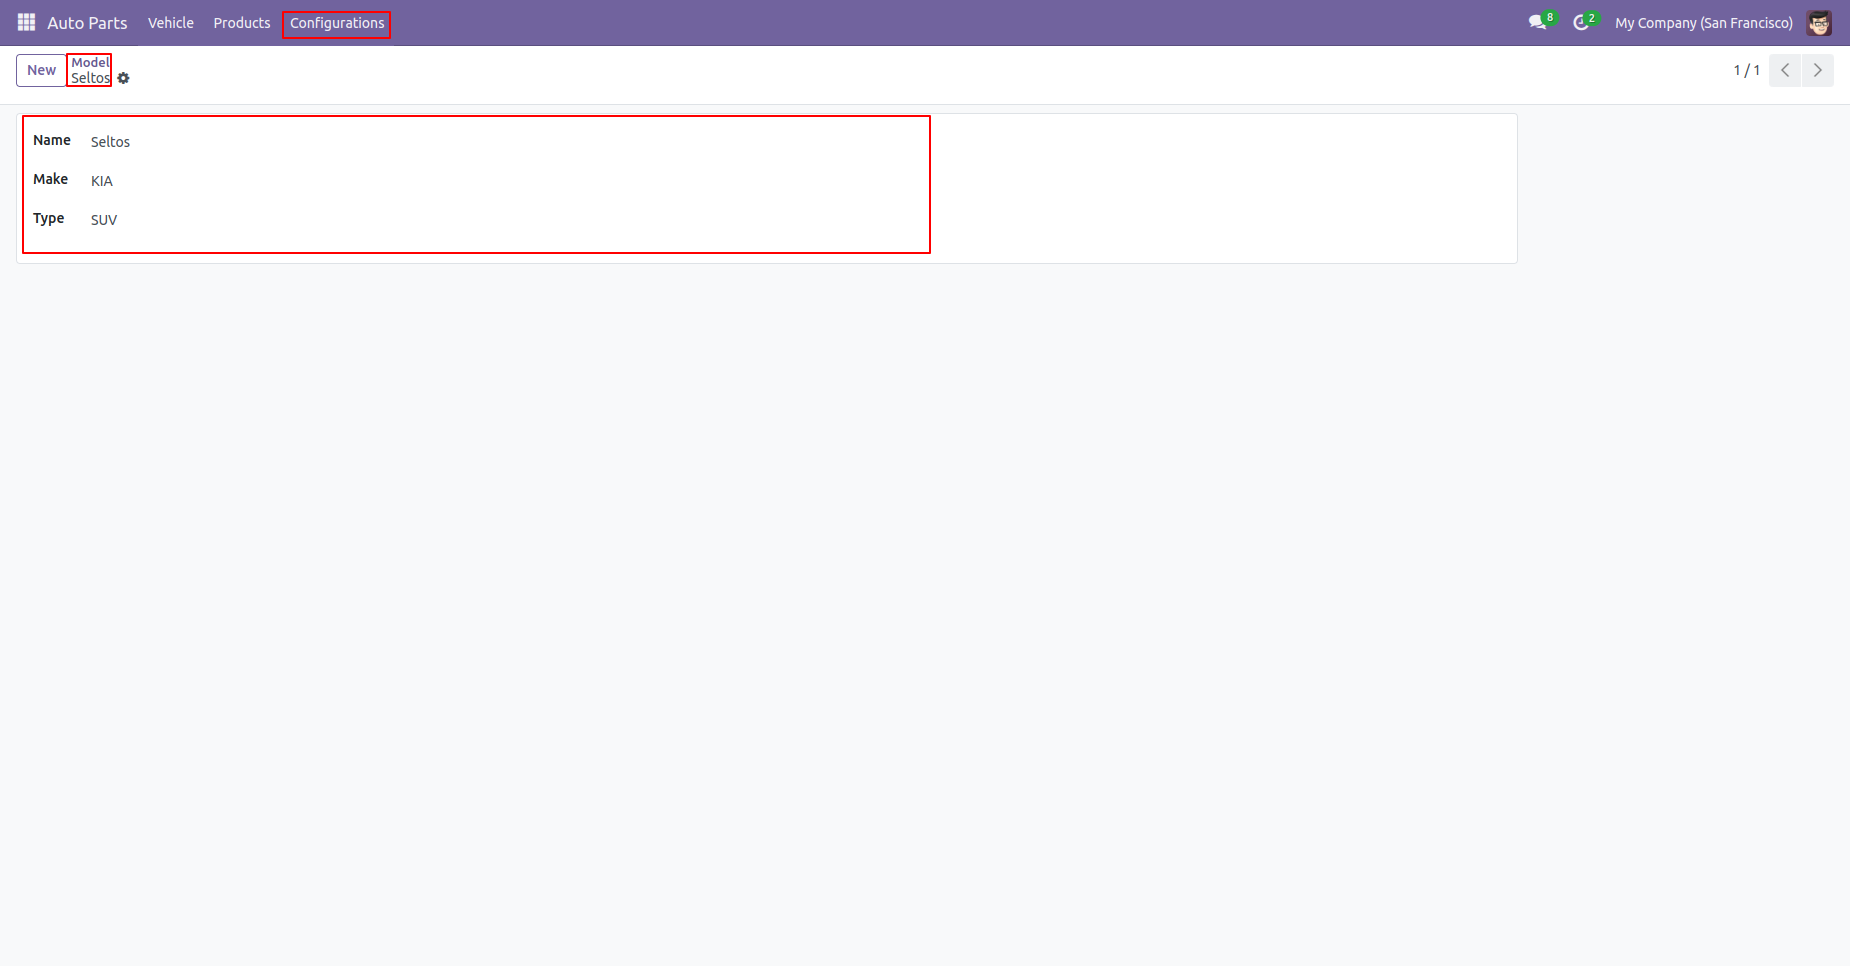
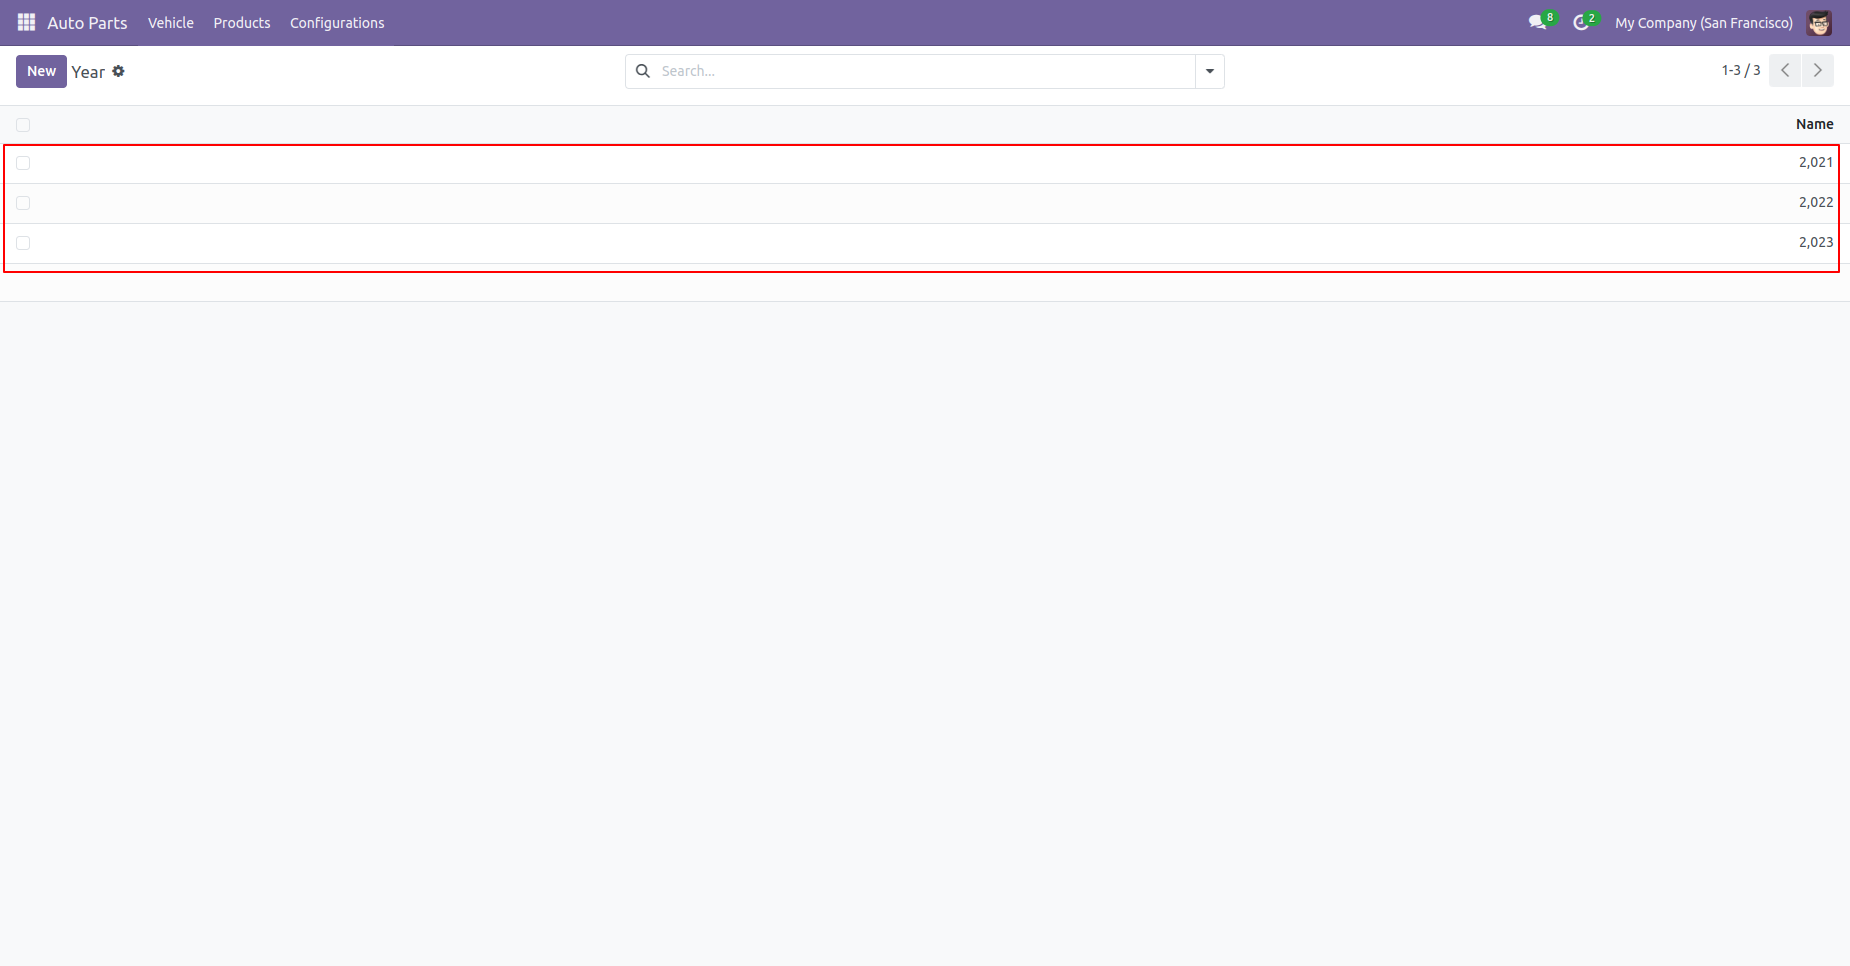
Auto Parts Year Menu and tree view.
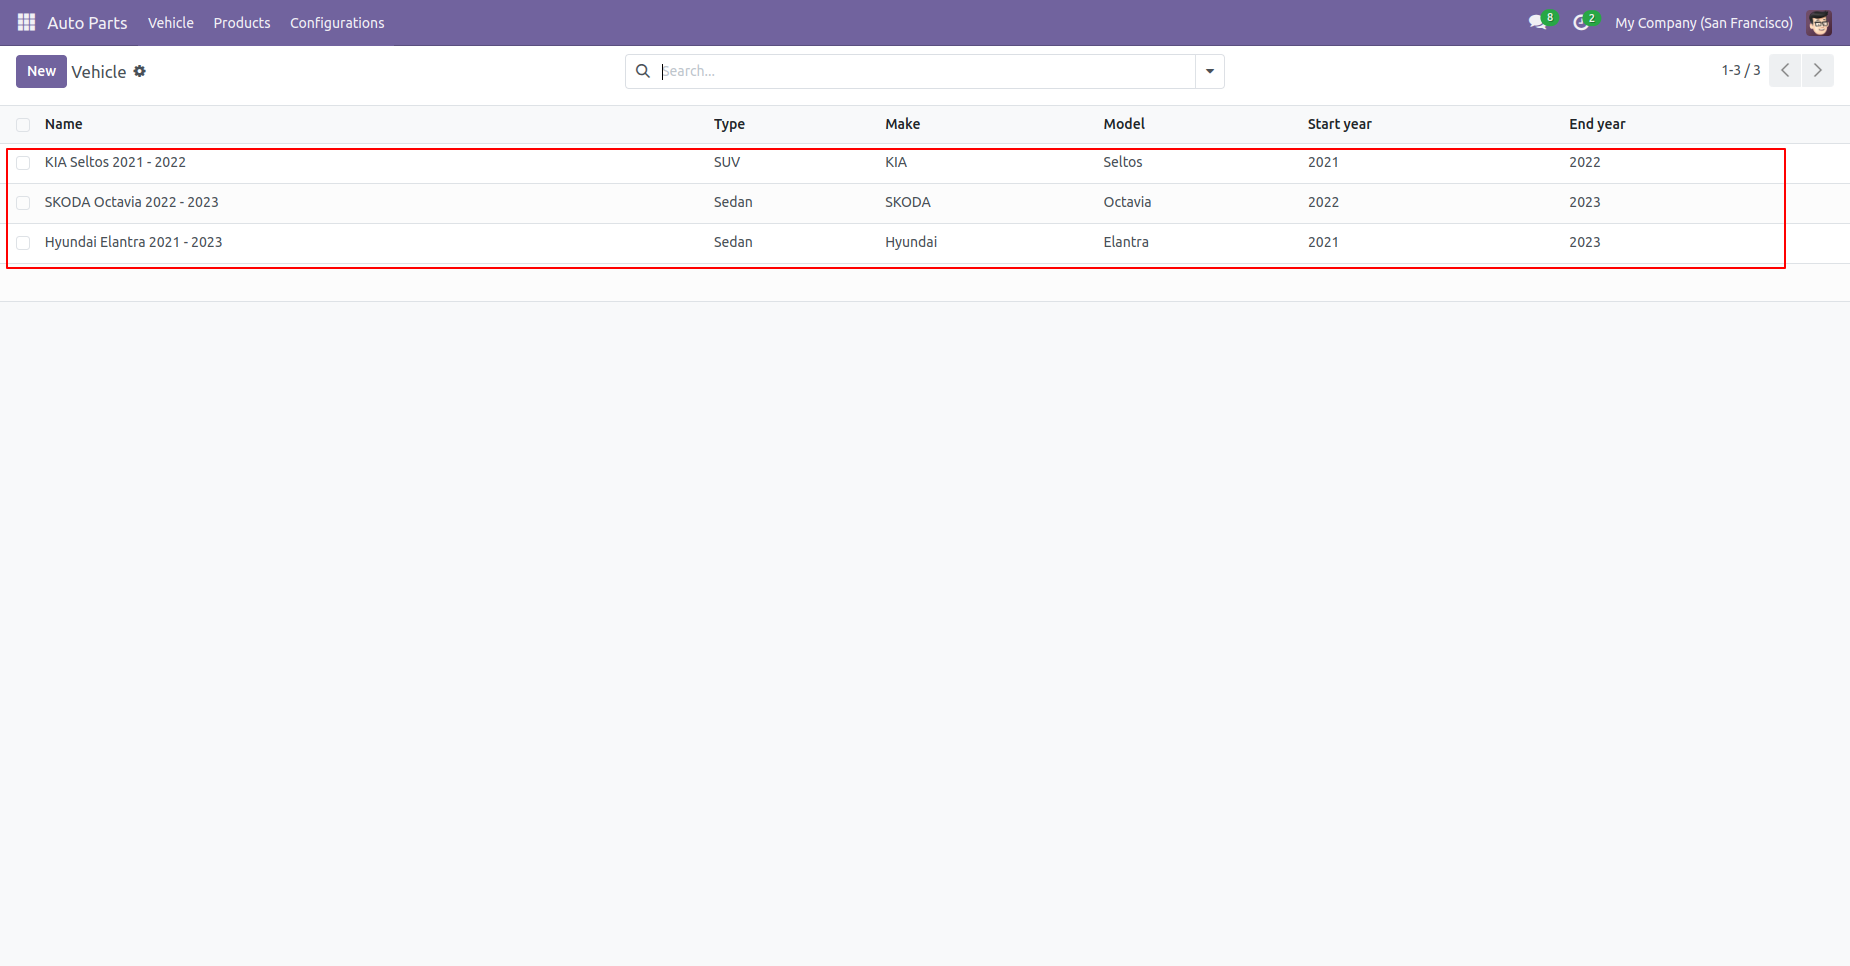
Vehicle menu and tree view.
Vehicle form view. You can add vehicle range using start
& end year.
Note: You have to add the start & end year in the old
vehicles.
Auto parts list view with start & end year.
Vehicles tab in product variant form view.
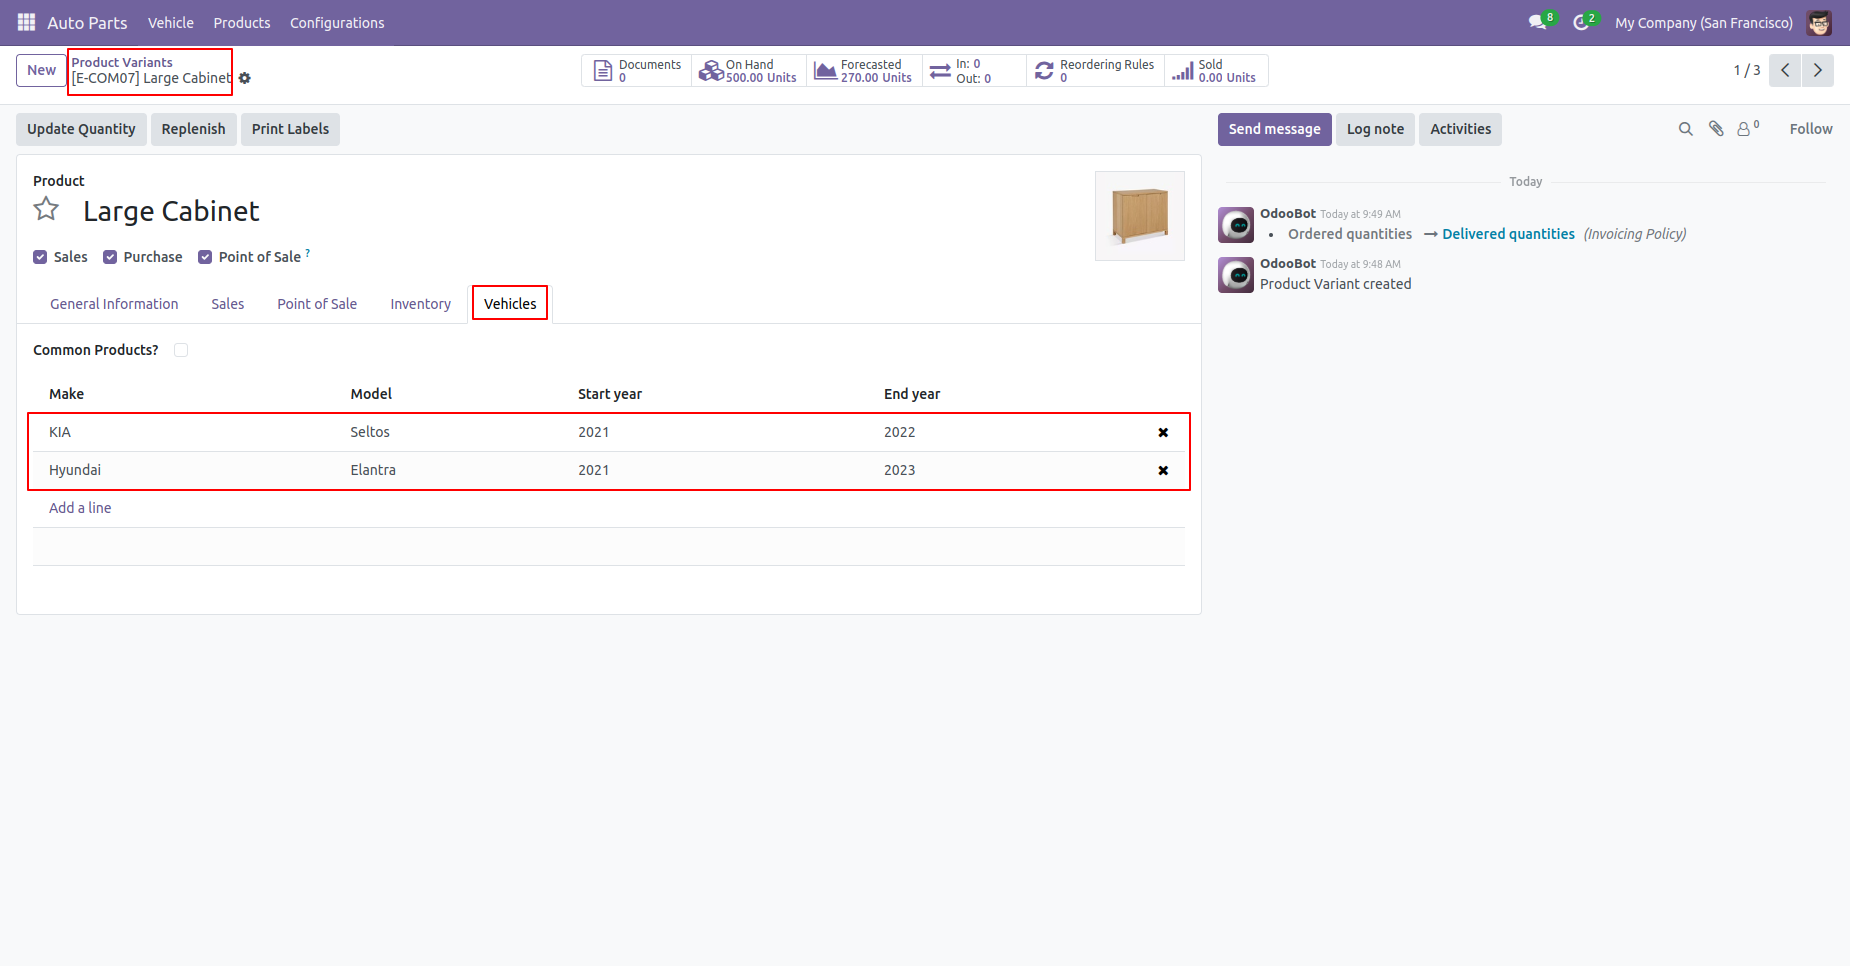
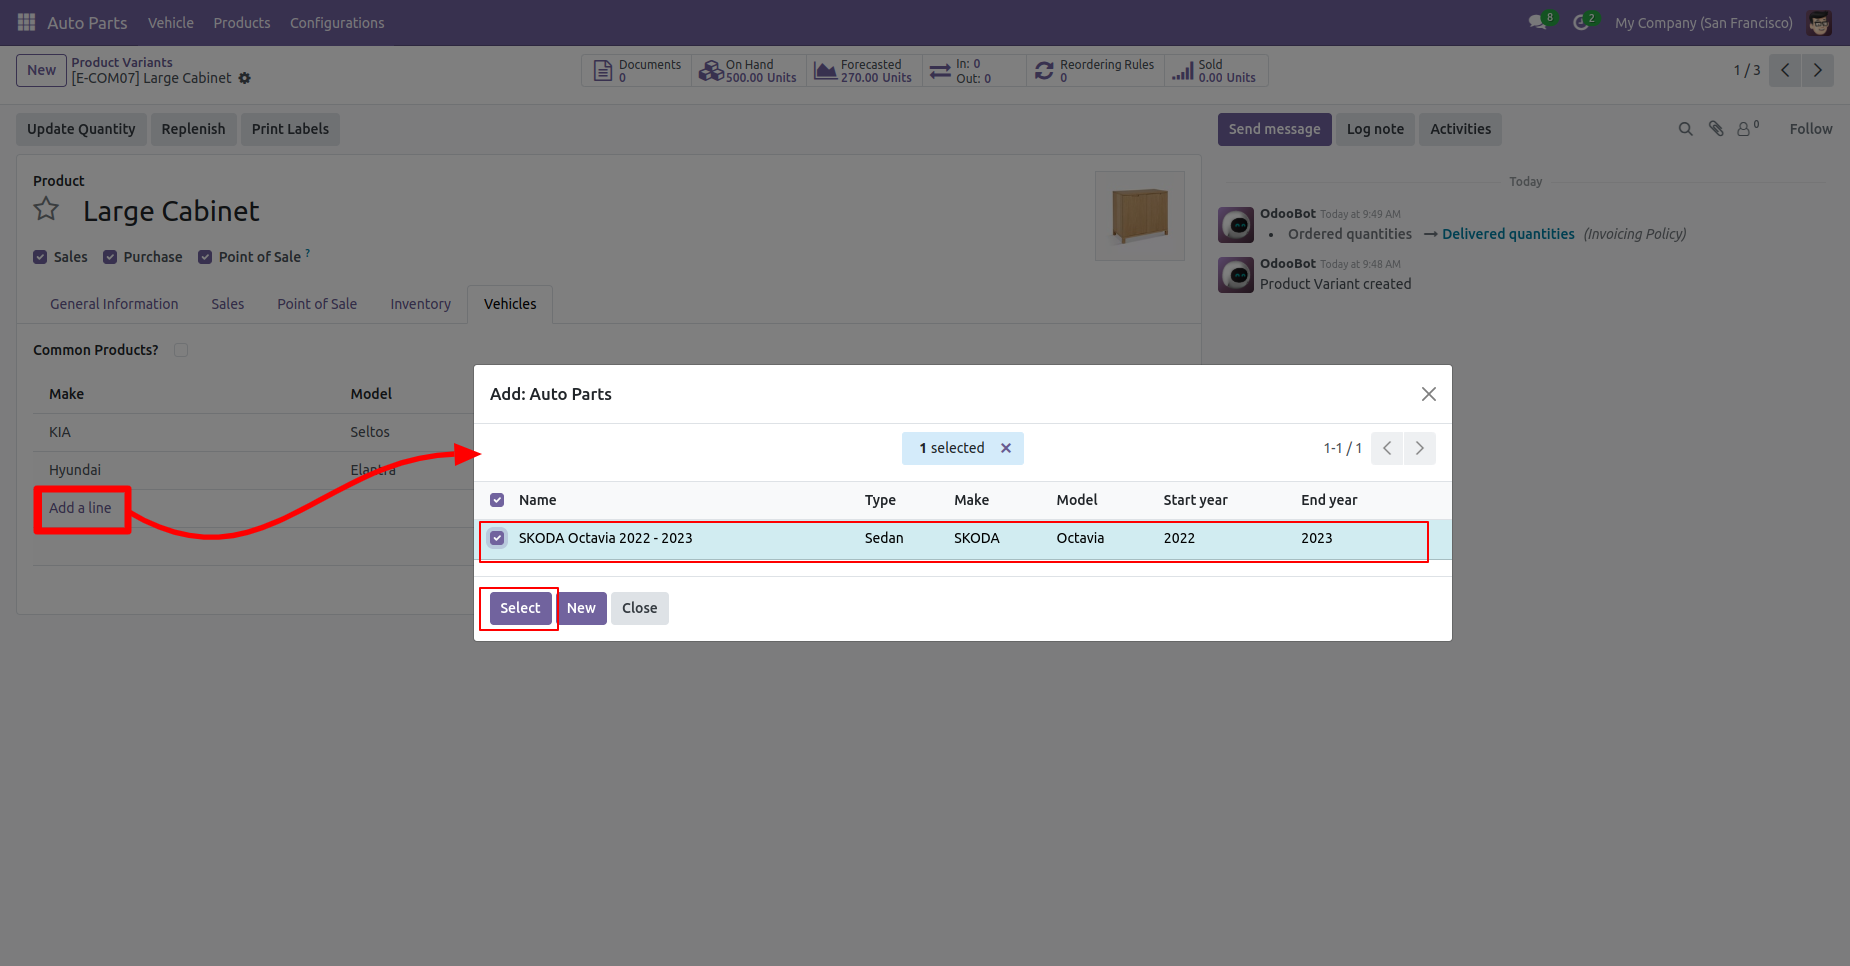
Click on the 'Add a line'. Add vehicle and click on the 'Select' button.
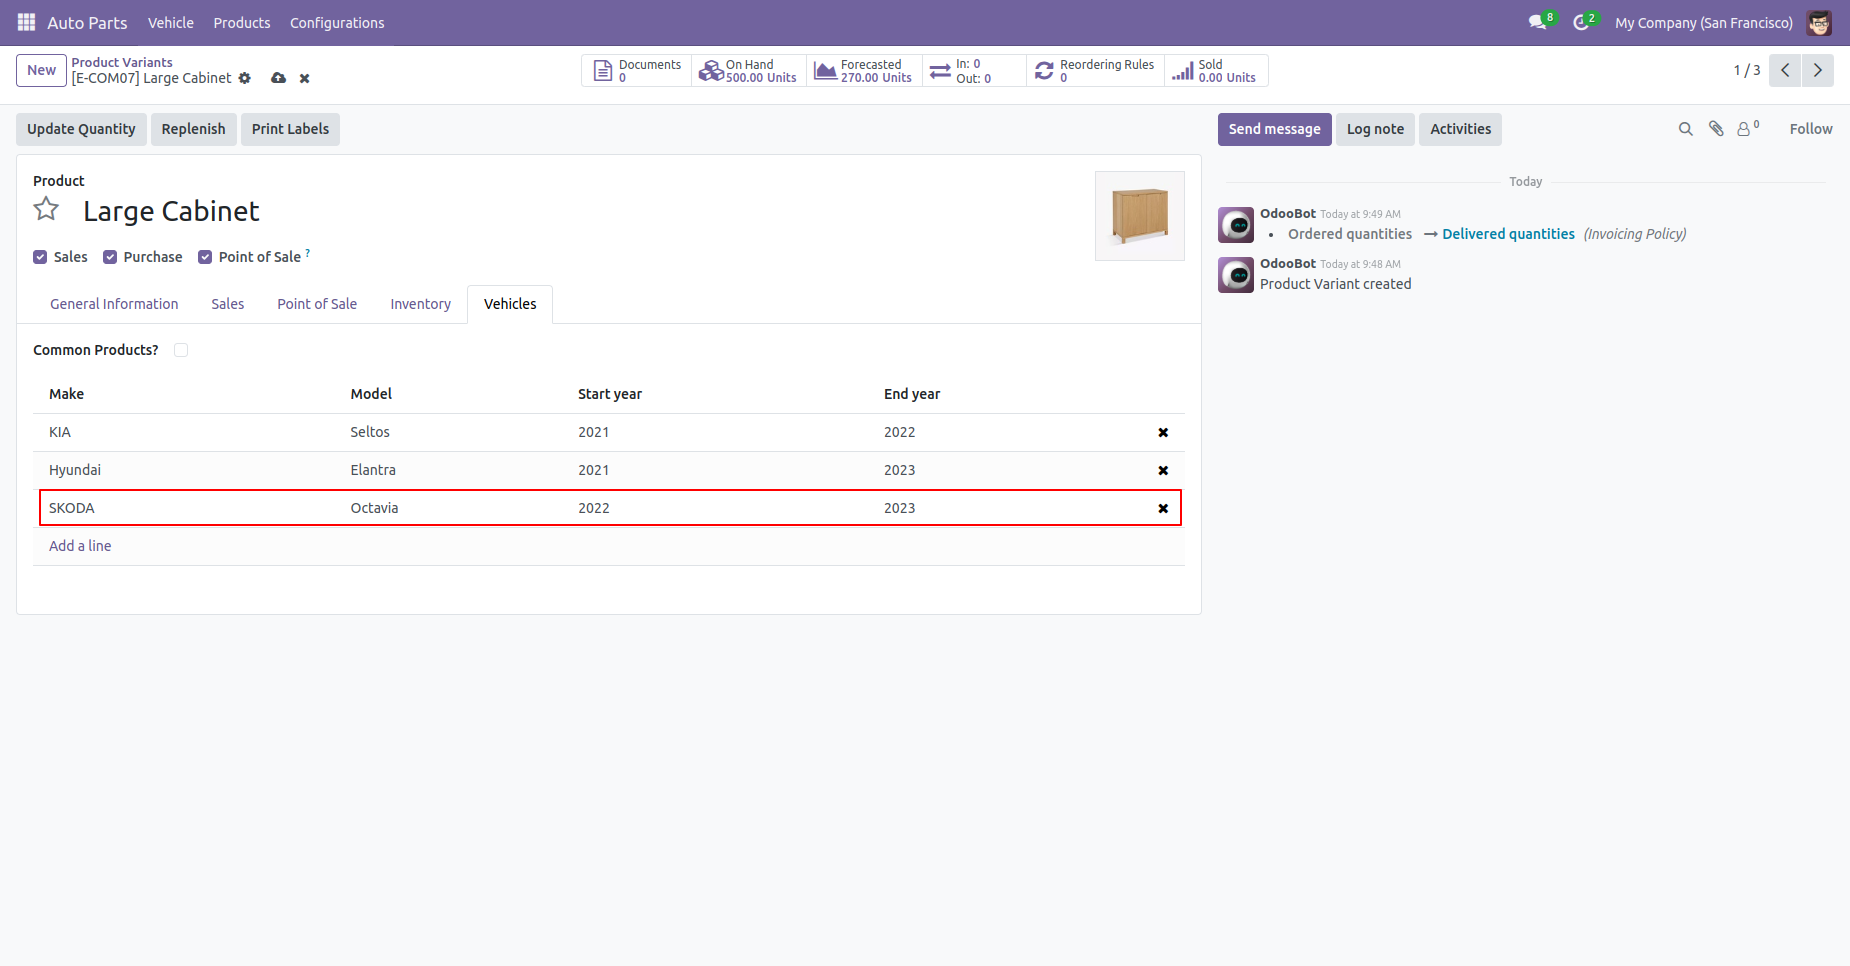
Here you can see the selected product.
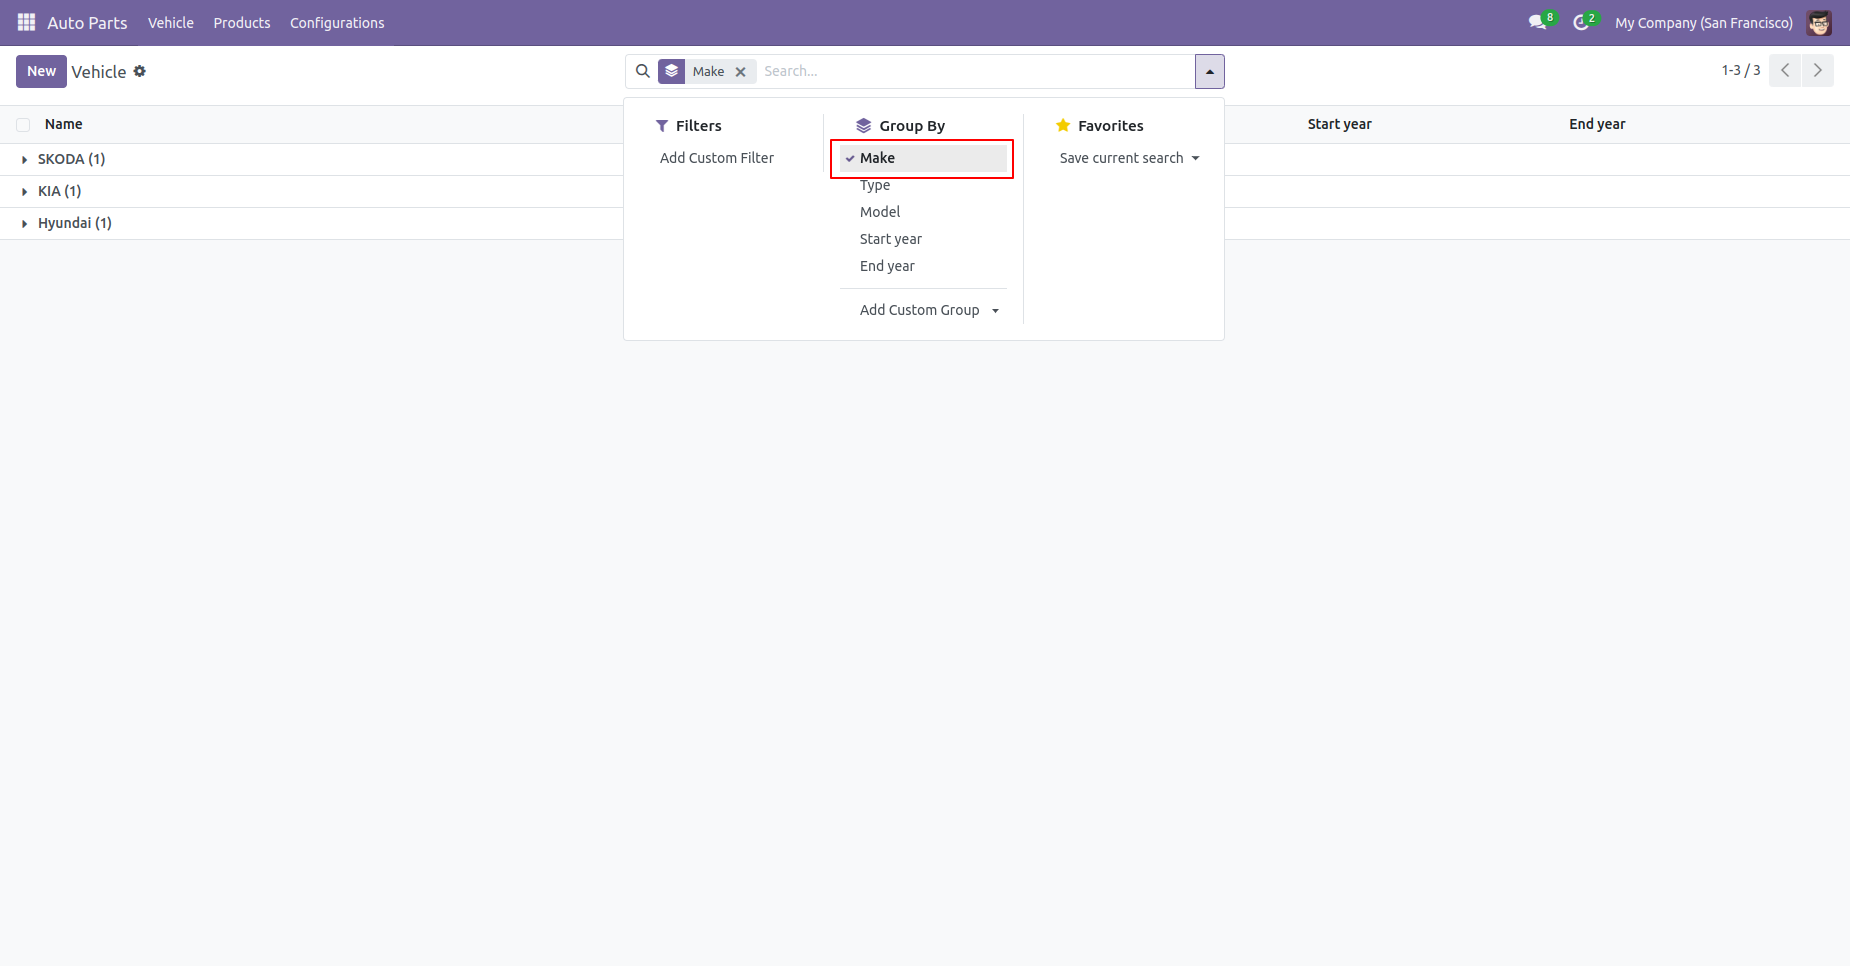
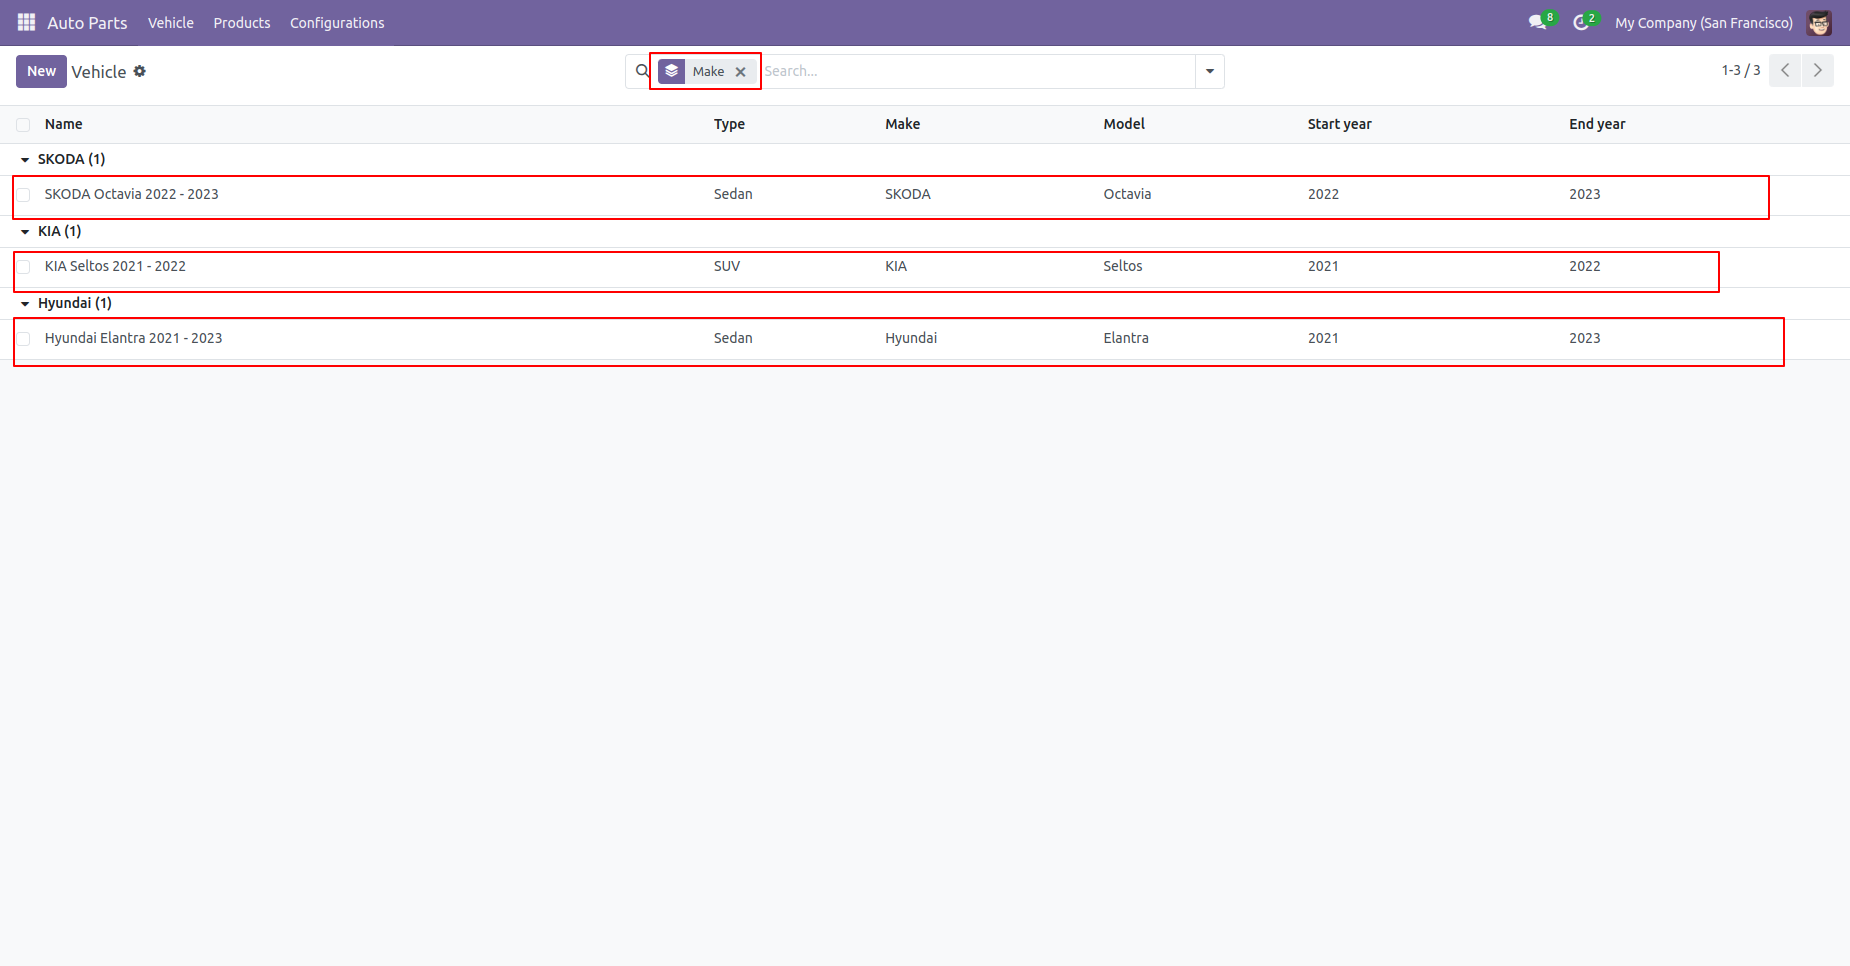
Group By vehicle by 'Make'.
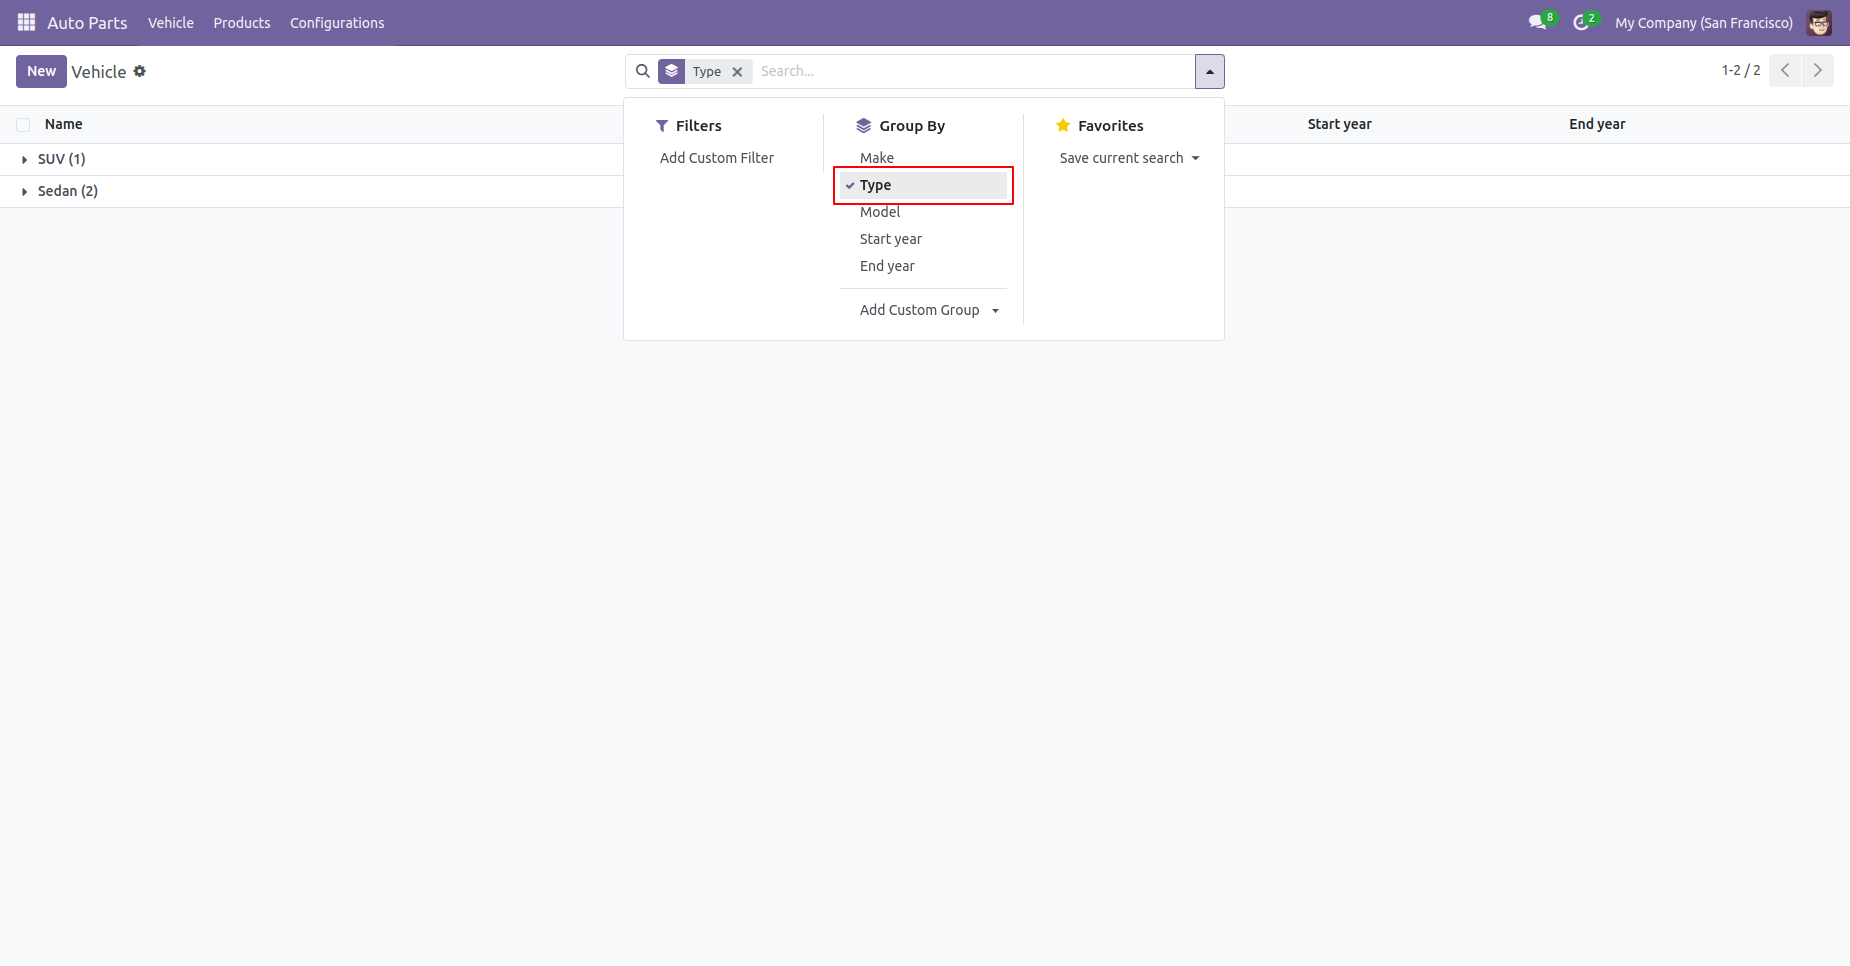
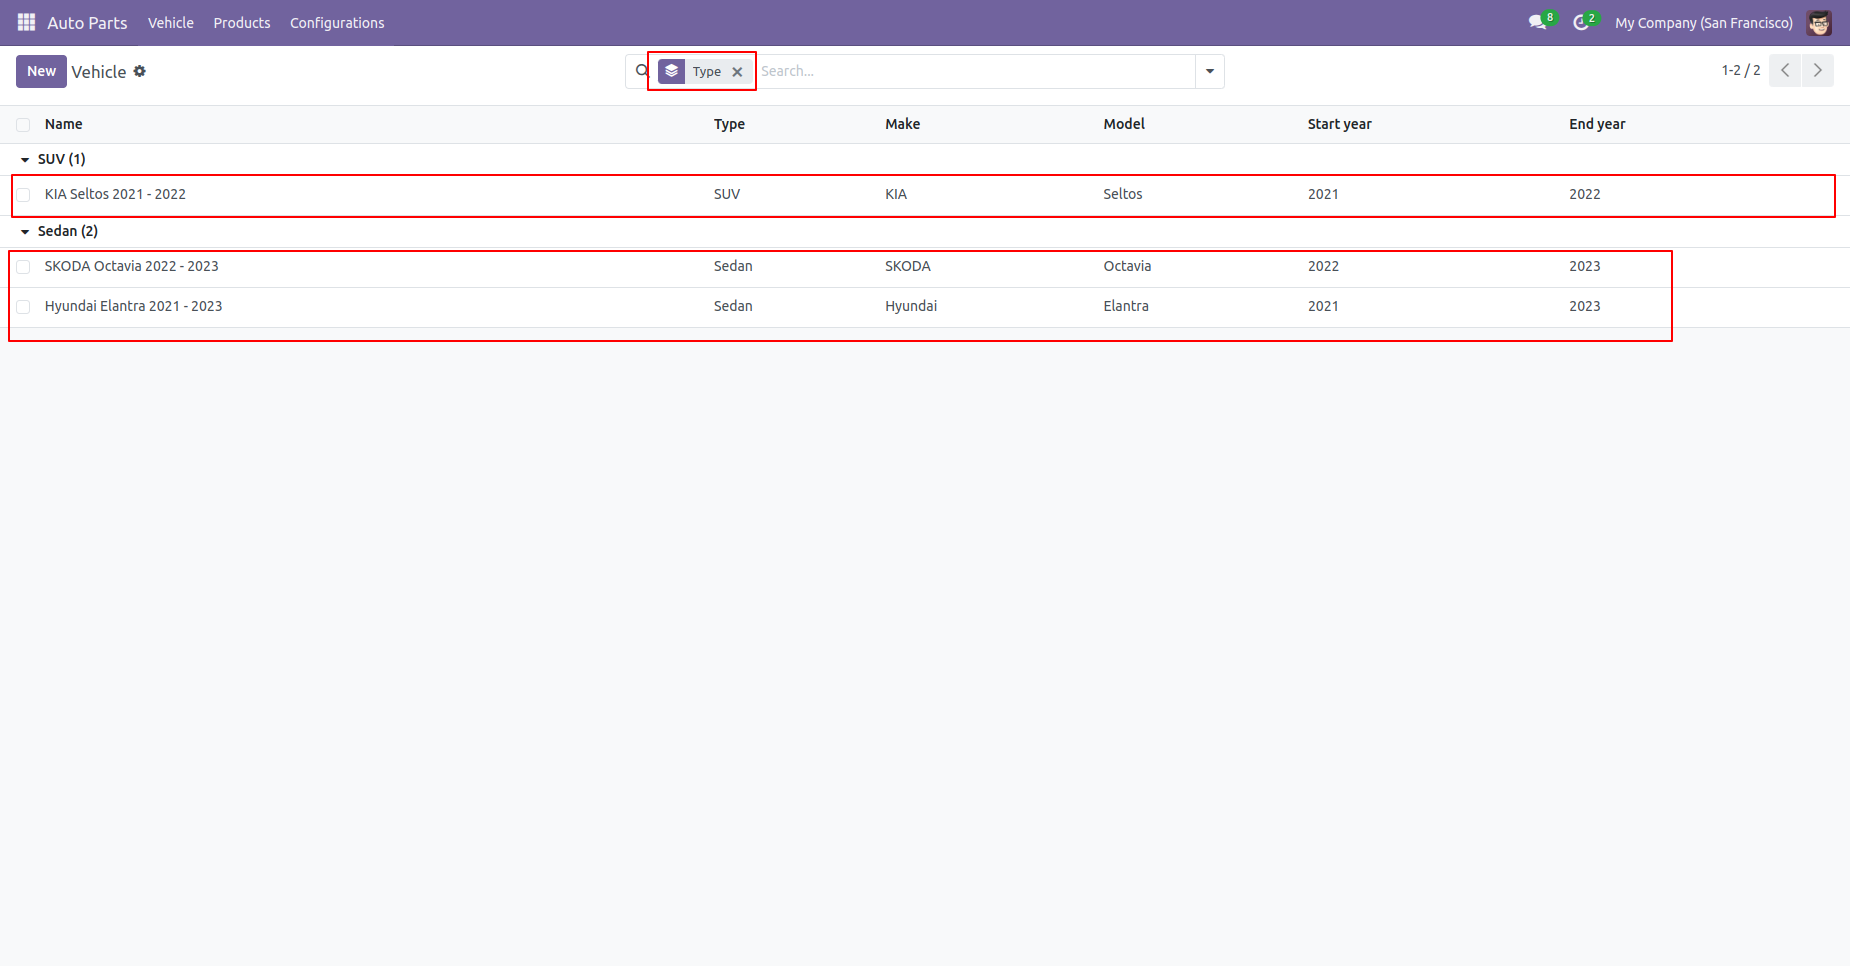
Group By vehicle by 'Type'.
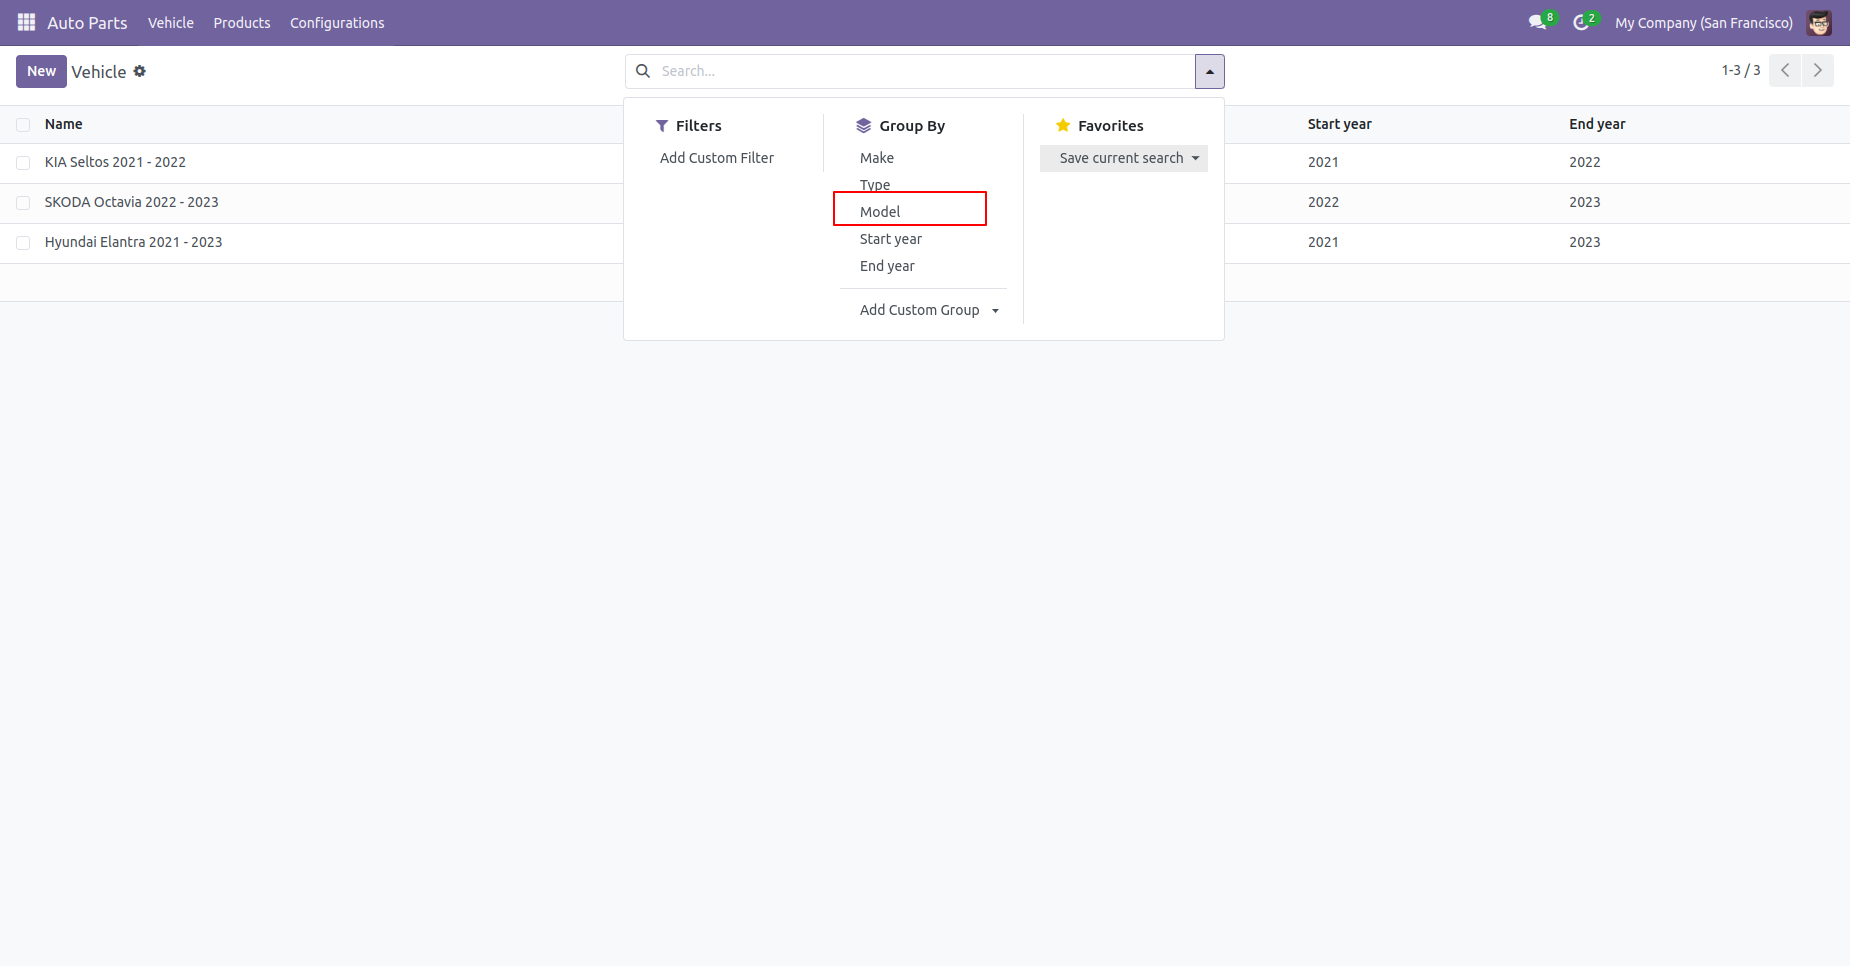
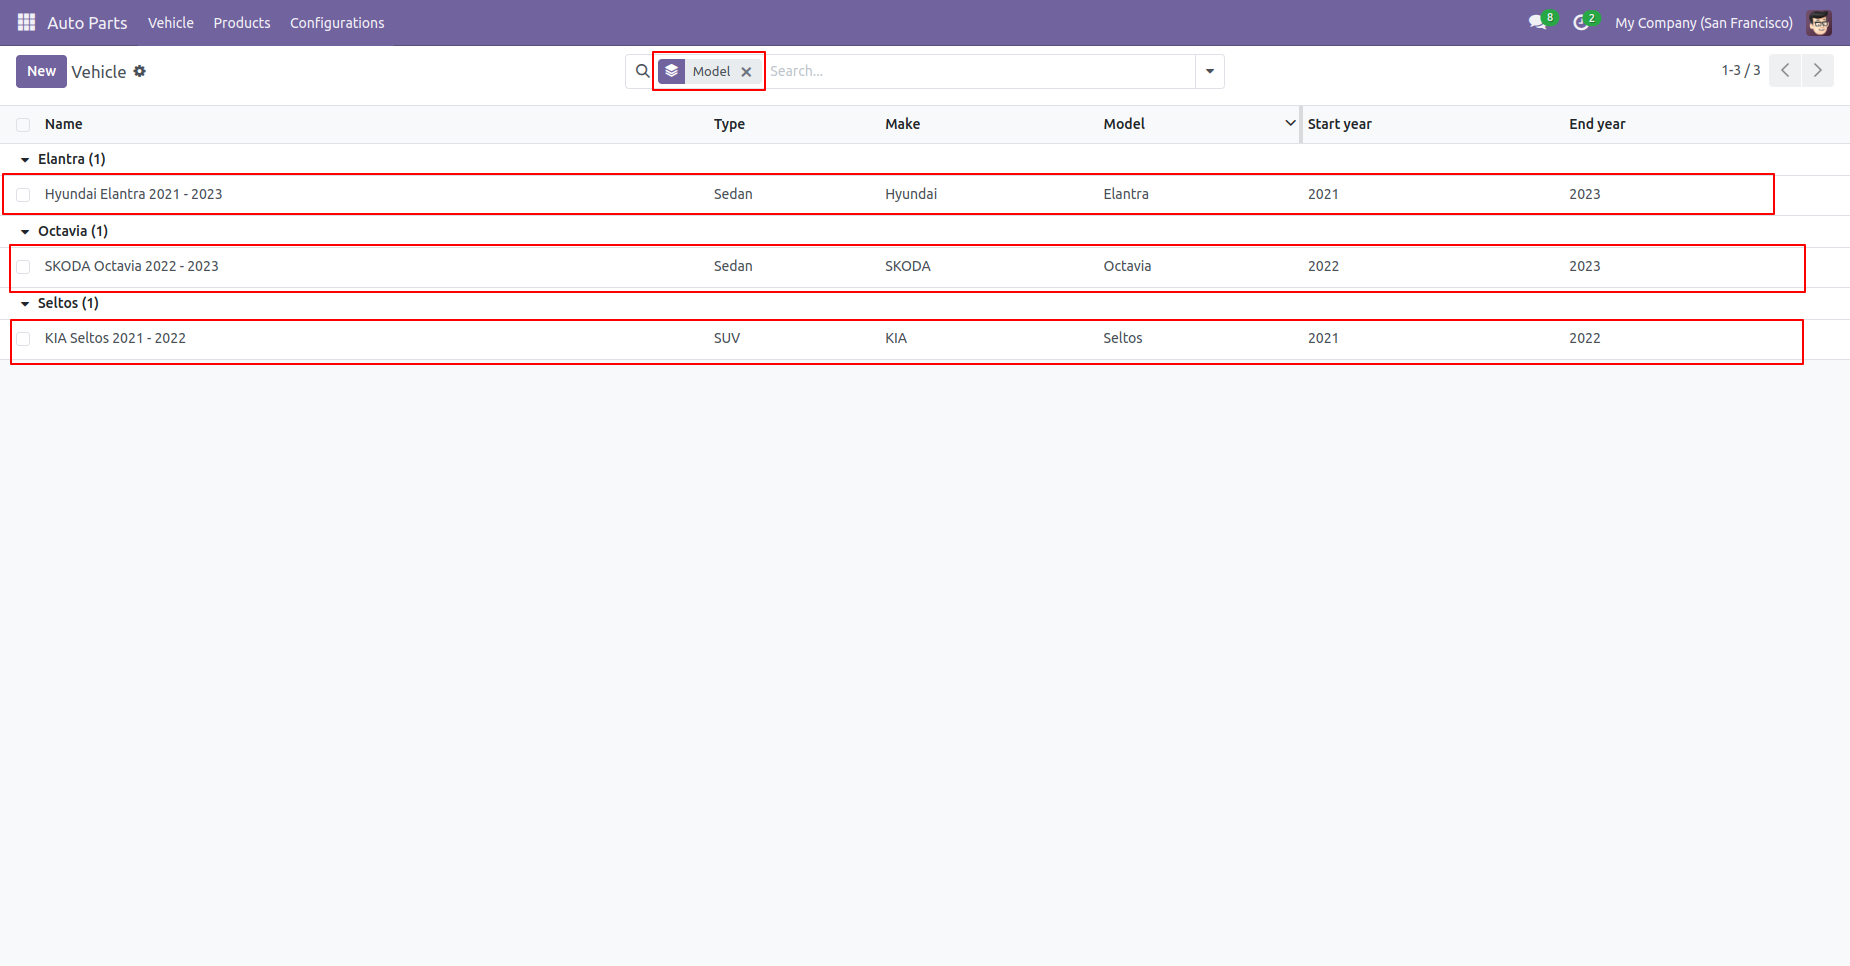
Group By vehicle by 'Model'.
Vehicles tab in product variants form view.
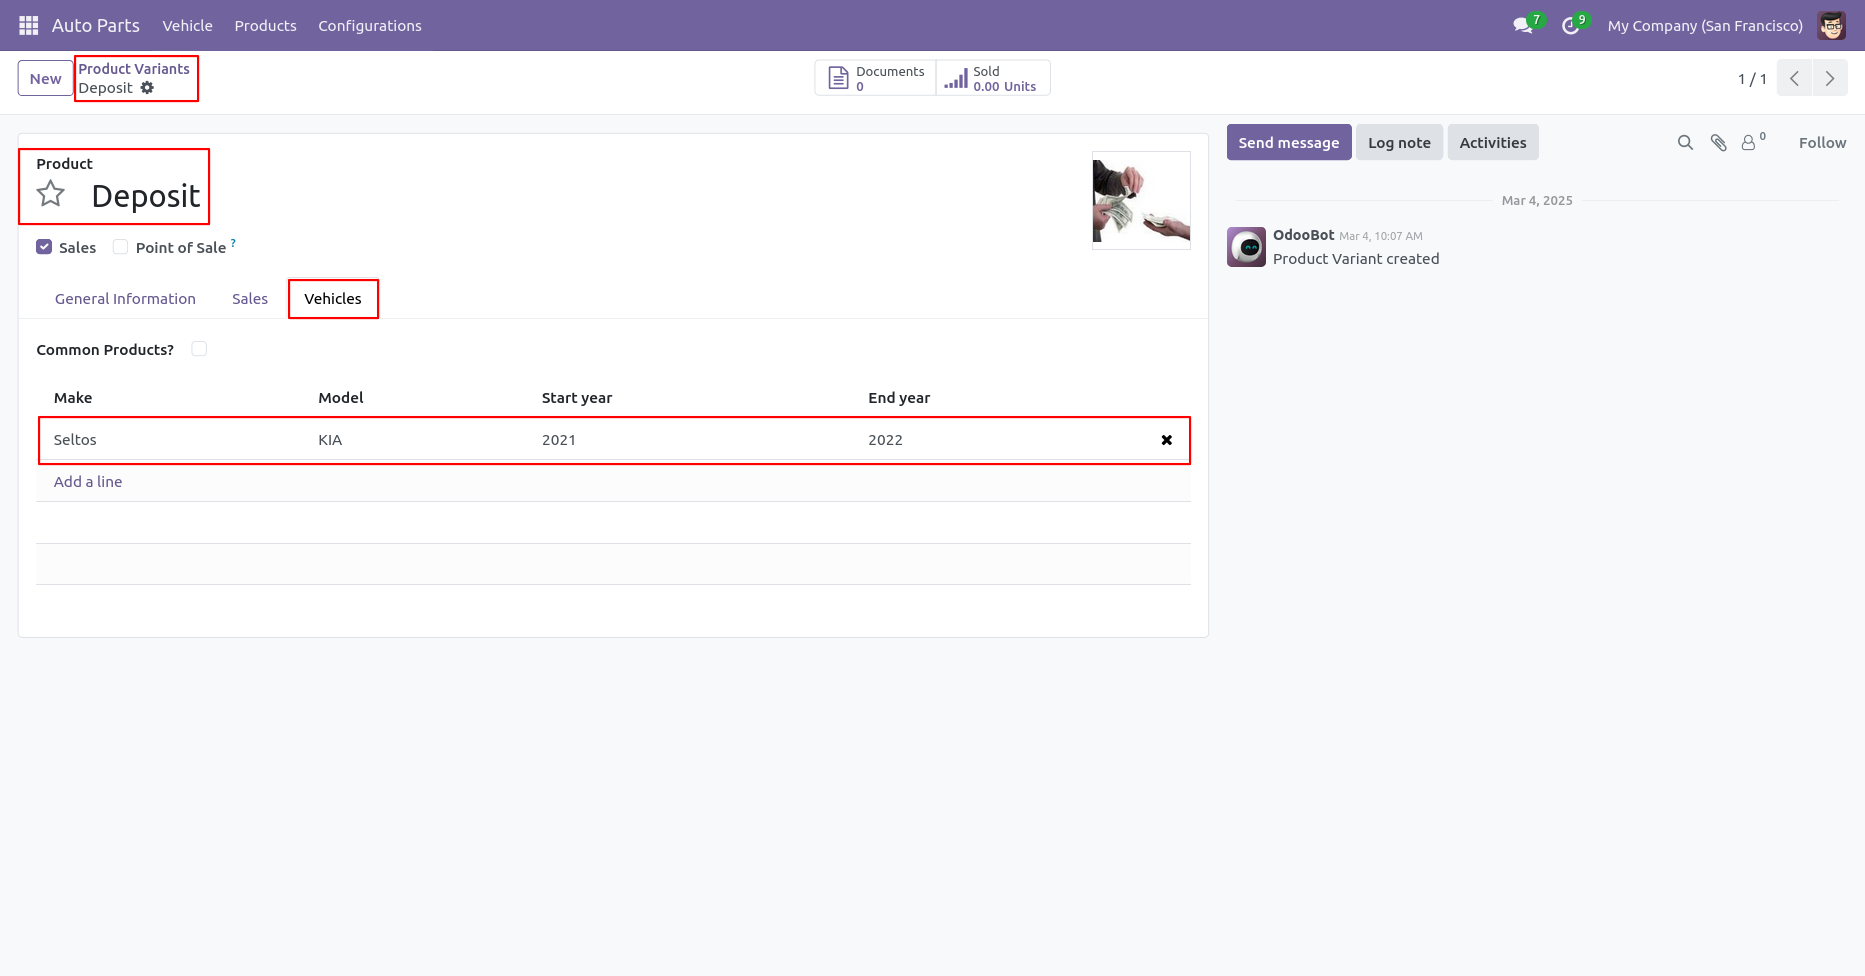
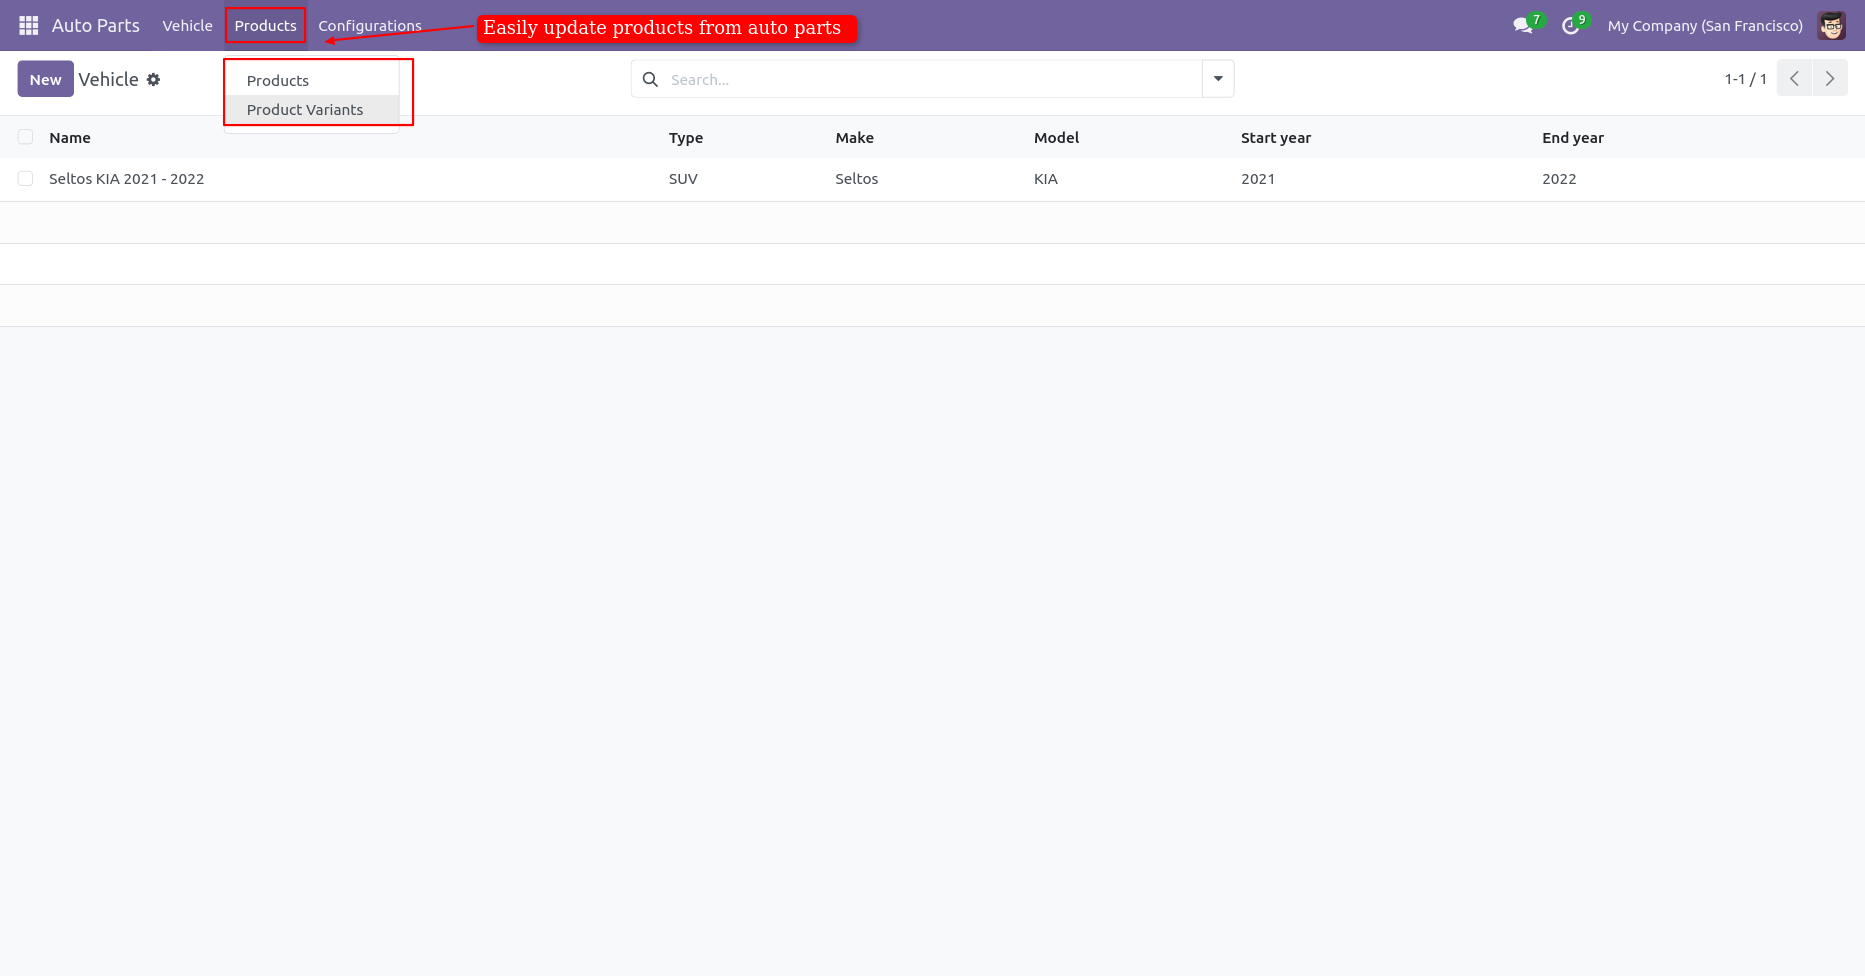
The product menu helps to update products in auto parts.
Tick "Common Products" to add common products for all vehicles.
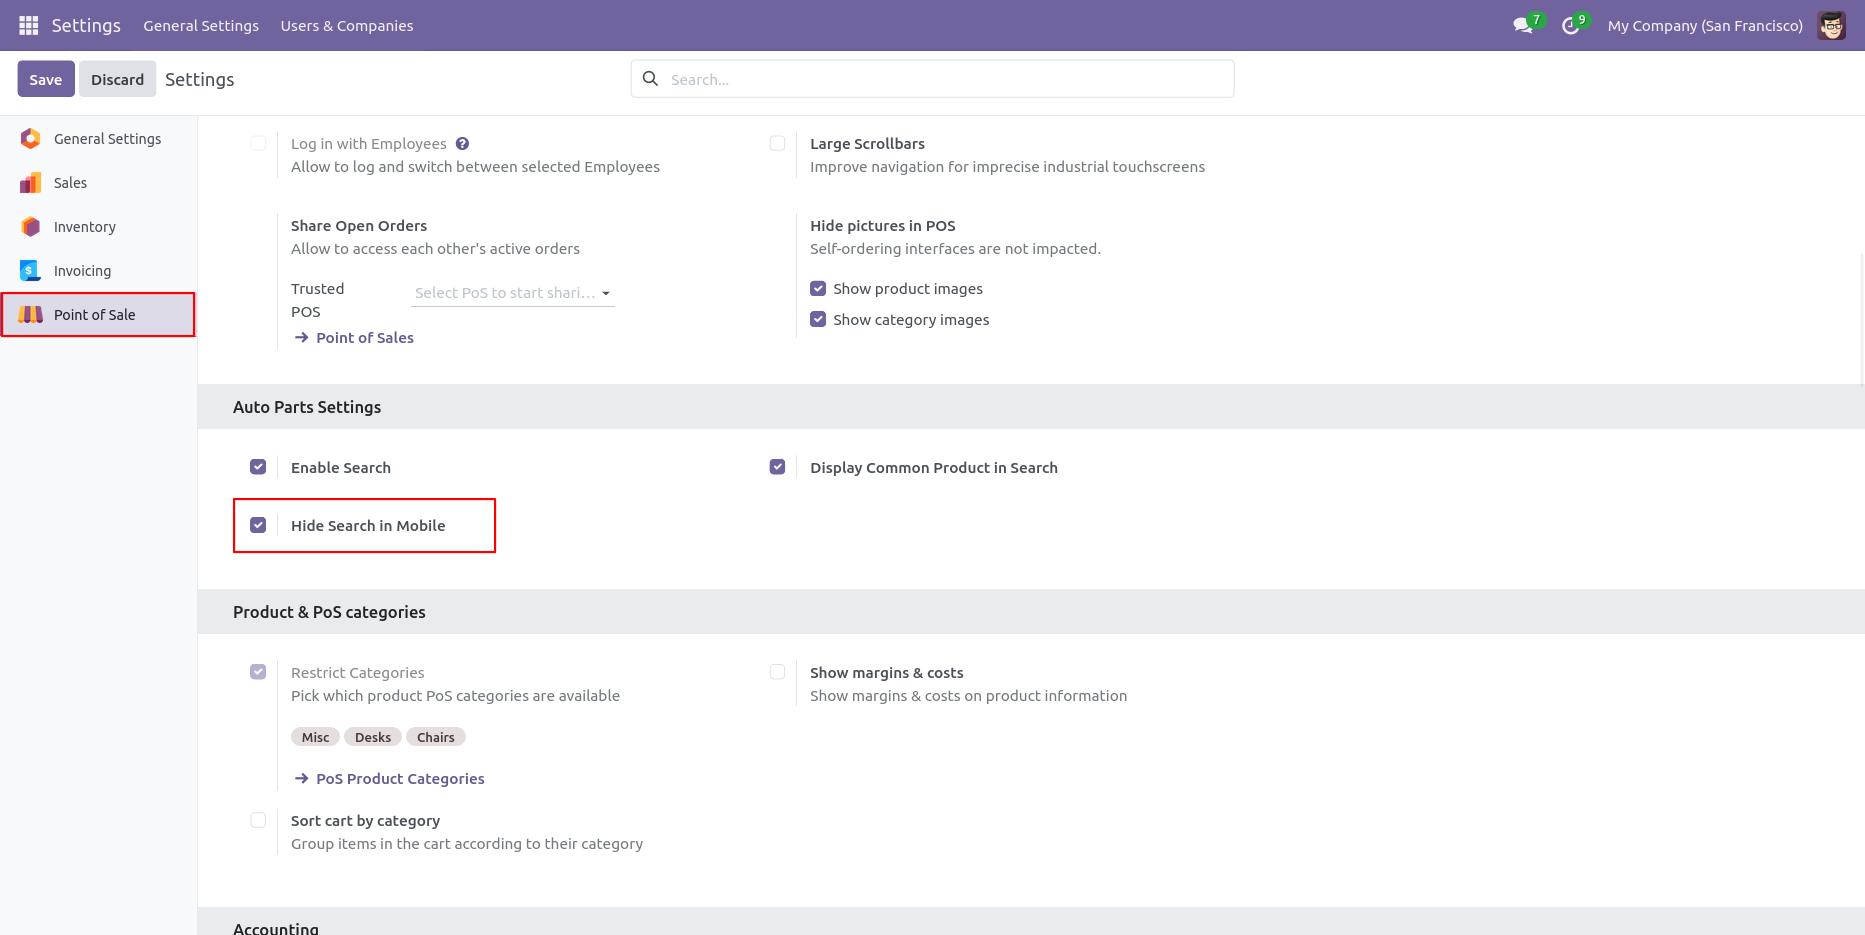
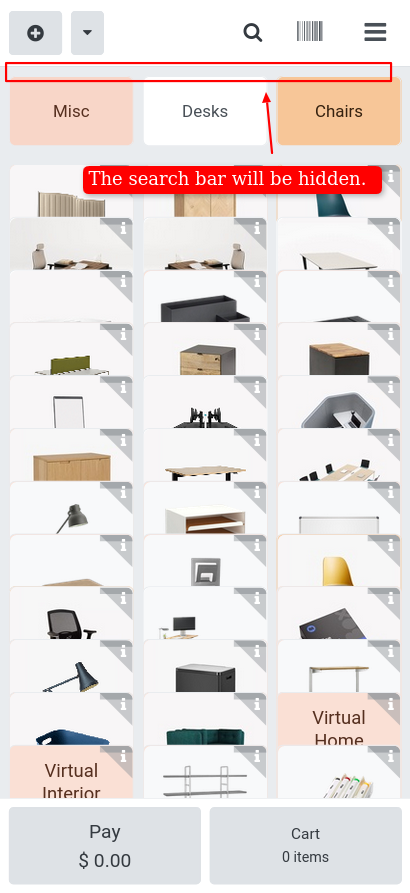
Go to the POS settings and enable 'Hide Search In Mobile'.
Mobile view with hidden search bar.
Version 19.0.1.0.0 | Released on : 26th August 2026
- Yes, this app works perfectly with Odoo Enterprise (Odoo.sh & Premise) as well as Community.
- No, this application is not compatible with odoo.com(odoo saas/Odoo Online)
- Yes, to test this module, please contact us at sales@softhealer.com.
- Please contact us at sales@softhealer.comto request customization.
- Yes, we provide free support for 365 days from the date of purchase.
- Yes, you will receive lifetime free updates for the version of the module you purchased.
- No, there is no need to install any additional libraries.
- Yes, for version 12 and above, you need to purchase the module separately for each version you intend to use.
- No, exchanges or refunds are not allowed. Please make sure to select the correct version before purchasing.
- You can contact us at support@softhealer.com for language translation support. We use Google Translator tools to provide translations in multiple languages, so the accuracy may vary. We welcome your suggestions to help improve translations.
Discover Our Latest Apps