


All in one Accounting Tool - Enterprise Edition

A powerful module designed for Odoo Enterprise that combines multiple essential accounting features in one package. It streamlines PDC management, Accounting Reports, Bank Statement Reconciliation, Multiple Outstanding Payments, Accounting Fiscal Year, Account Dynamic Approval and more making financial management faster and easier.
Related Modules
Key Features
Post Dated Cheque Management
- PDC For Multiple Invoice/Bill & Chatter
- Bank Journal From Payment
- Manage Customer/Vendor PDC Payments
- PDC Payments In Journal
- PDC Payments With Stages
- PDC Cheque Partial Payments
- PDC Payments PDF Report
Accounting Fiscal Year
- Manage Fiscal Year Based On Financial Rule
- Generate Opening & Closing Entries
- Default Income Account & Expense Account
- Journal With Default Debit & Credit Accounts
- Restrict Record Creation for Closed Fiscal Year
All in one Accounting Reports
- Customer Invoice Analysis Report
- Invoice Report By Product Category / ales Person
- Invoice Details / Summary Report
- Invoice/Bill Product Profit Report
- Product Invoice Indent Report
- Top Customer Invoices / Vendor Bill
- Top Invoice/Bill Product
Bank Statement Reconciliation
- Reconcile Bank Statement
- Add Payment Lines In Reconciliation Form
- Manage Payment Lines From Reconciliation Form
Account Dynamic Approval
- Invoice/Bill Dynamic Approval
- Approved By Particular User
- Approved By Particular Group
- Approve Based On Total Amount
- Approve Based On Untaxed Amount
Multiple Outstanding Payments
- Advance Payment For Invoice/Bill
- Multiple Advance Payments
- Journal For Advance Payments
Period Lock - Enterprise Edition
- Lock Journal For Some Period
- Unlock Period If Need
- Prevent Wrong Transactions
- Chart of Account Column in List View

Features
- You can create PDC payment of multiple invoice/bill using multi action.
- PDC is allowed to be deleted only when the status is "Draft".
- PDC form will be editable in the "Returned" state.
- You can communicate using chatter.
- You can do multi-action for all states of the PDC cheque (Register, Return, Deposit, Bounce, Done & Cancel).
- You can see the sum of all payments in the list view.
- You can manage partially payment for the PDC cheque.
- You can send the PDC cheque due date notification to the customer, vendor & internal user.
- Easy to manage PDC Payment of customers.
- Easy to manage PDC Payment of Vendor.
- Easy to track PDC Payment in journal entries or items.
- Easy to manage Attachments, Journal Entries or Journal Items in PDC form view.
- Easy to manage PDC Payment with different stages like deposit, return, bounce, etc.
- Easy to print PDF reports of PDC Payment.
- You can set up a multi-company for the PDC account.
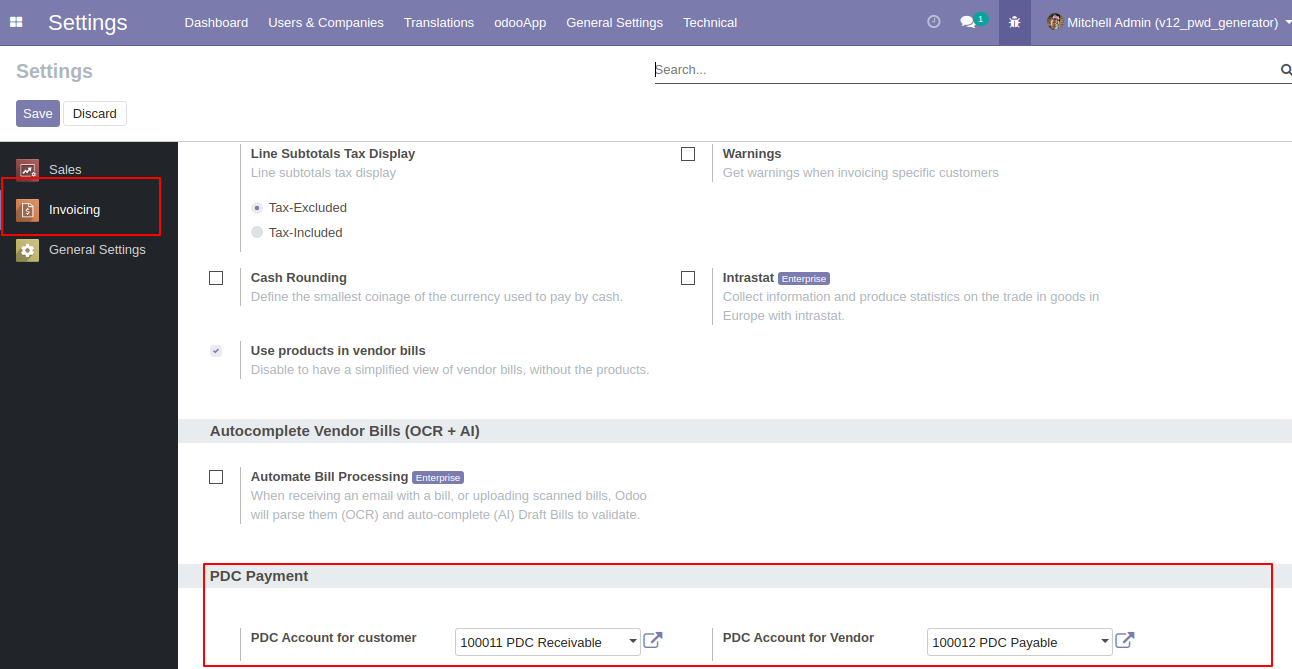
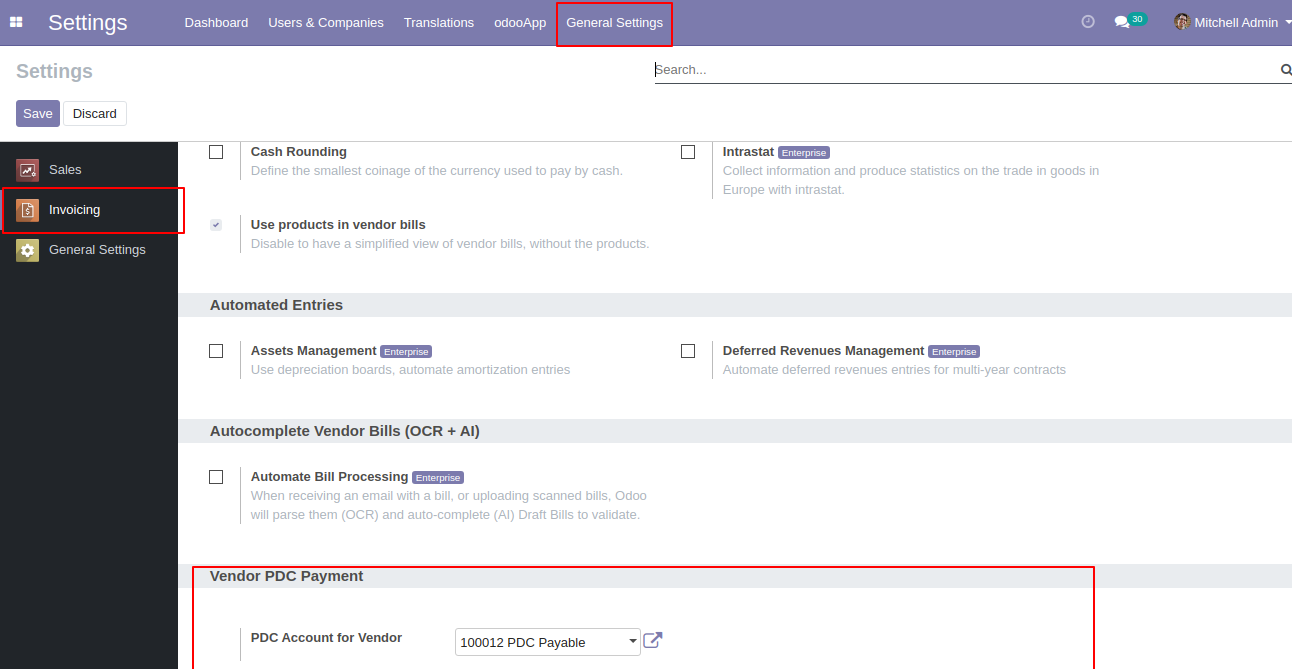
You have to set up both PDC account for each company.
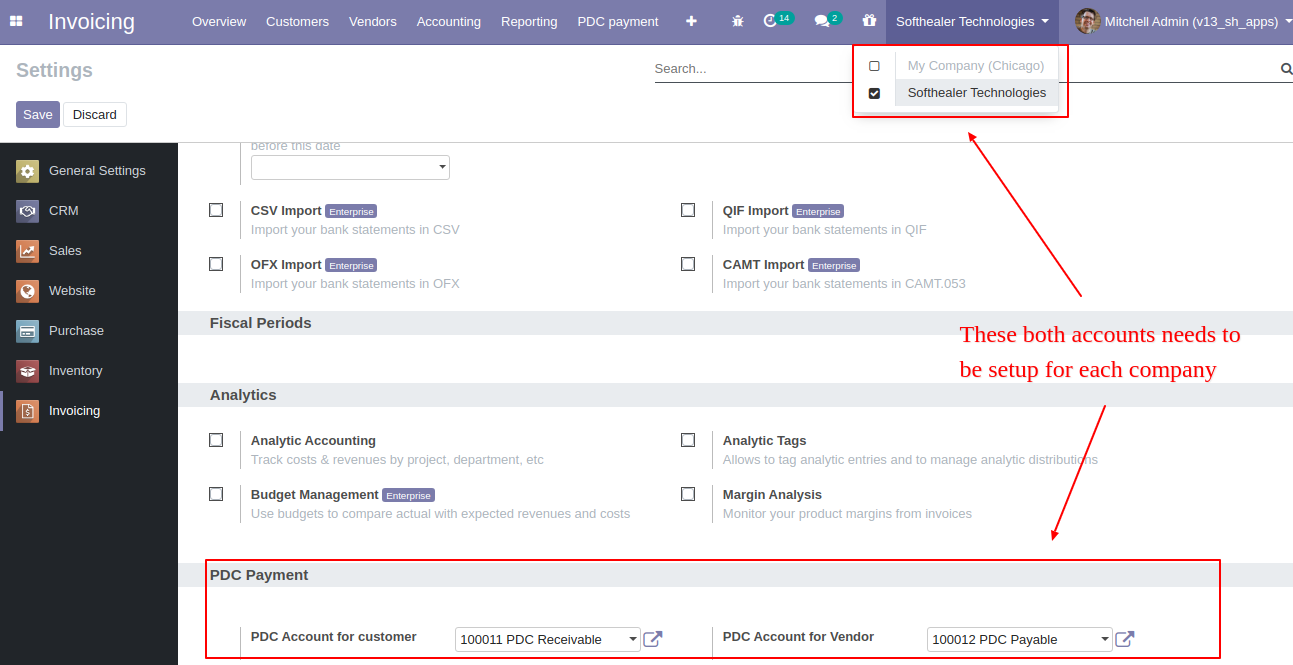
Goto Invoice config setting and select PDC account for customer and the vendor.
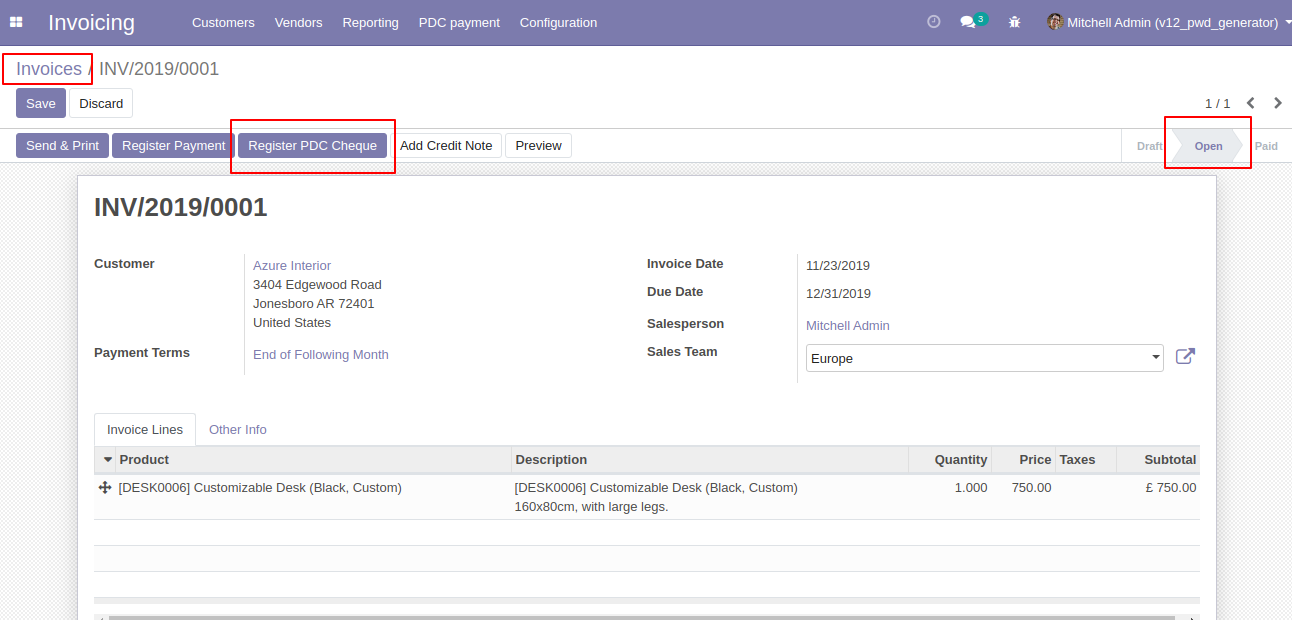
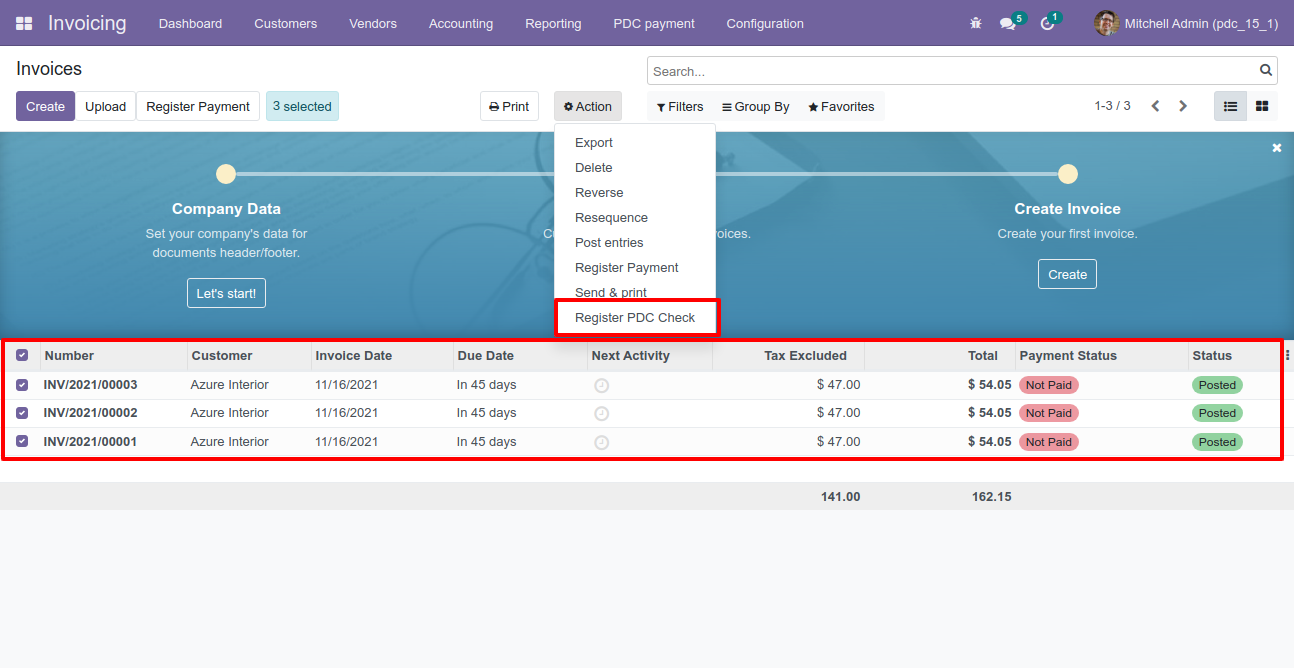
'Register PDC cheque' button in invoice form view *(Only visible in open state).
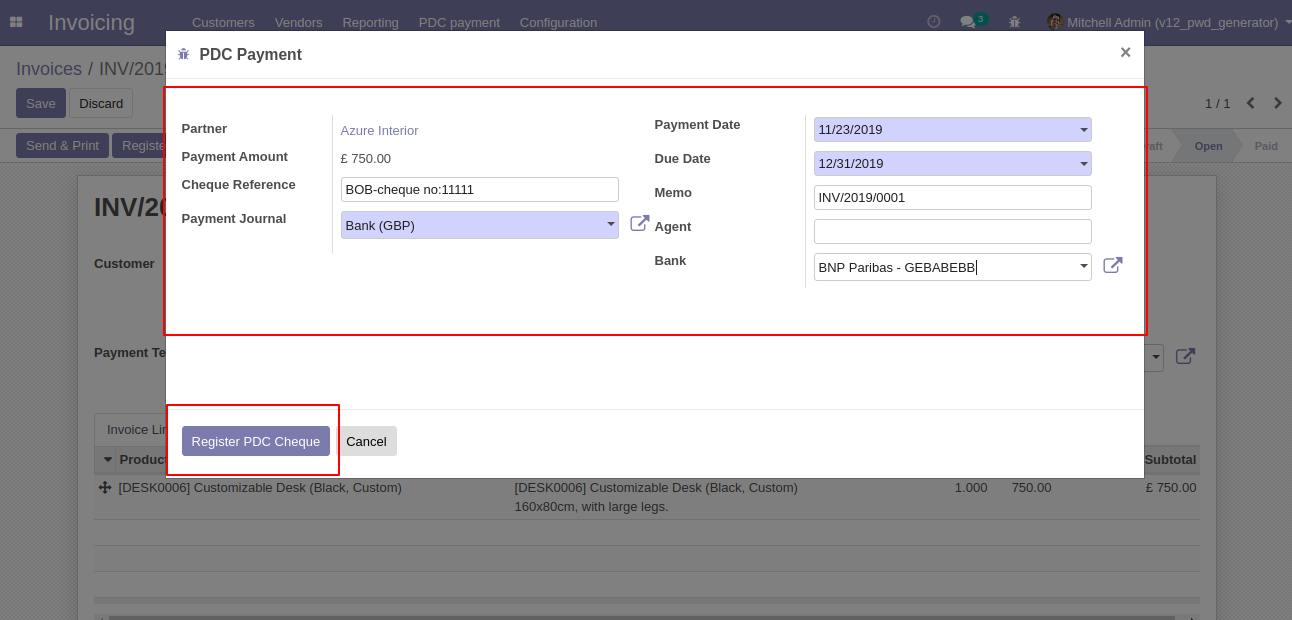
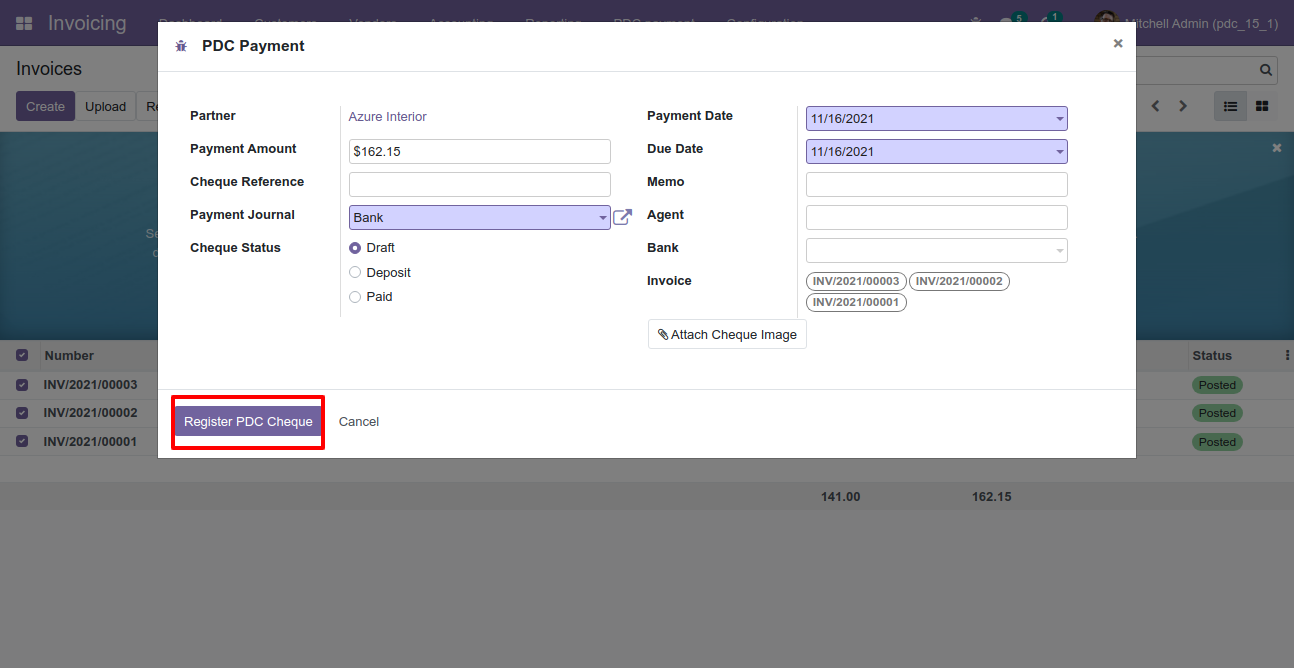
'Register PDC cheque' wizard will popup after clicking the 'Register PDC cheque' button.
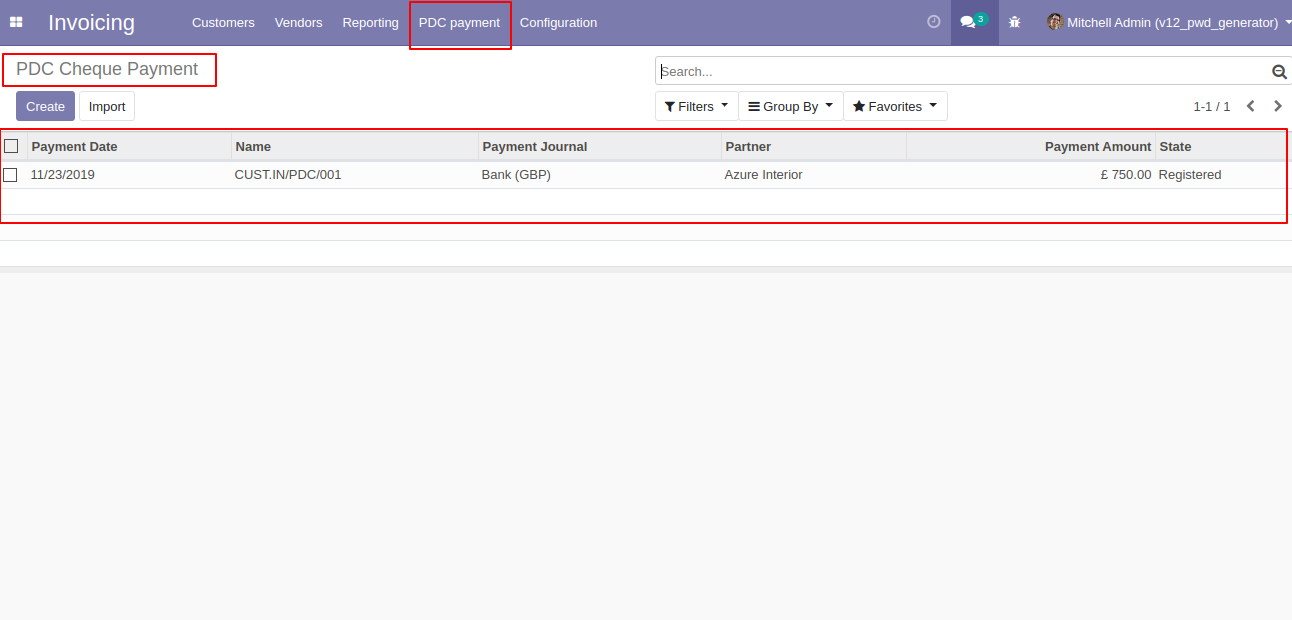
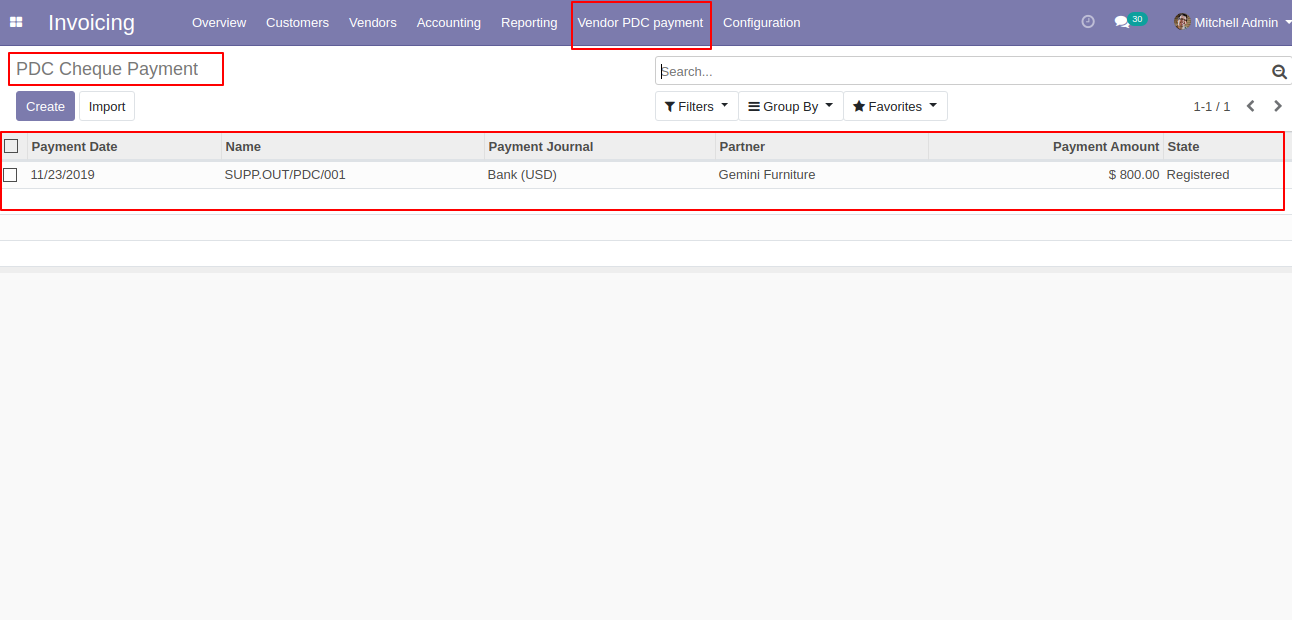
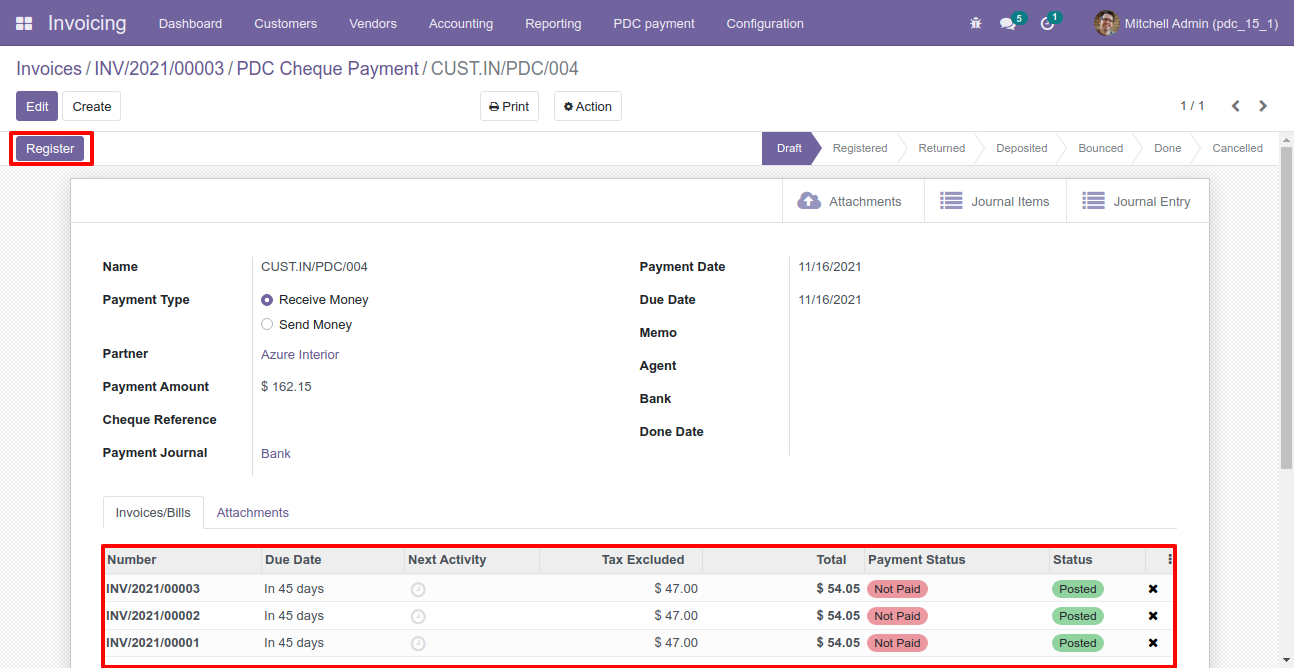
'PDC Payment' menu where you can see the list of register PDC cheque list.
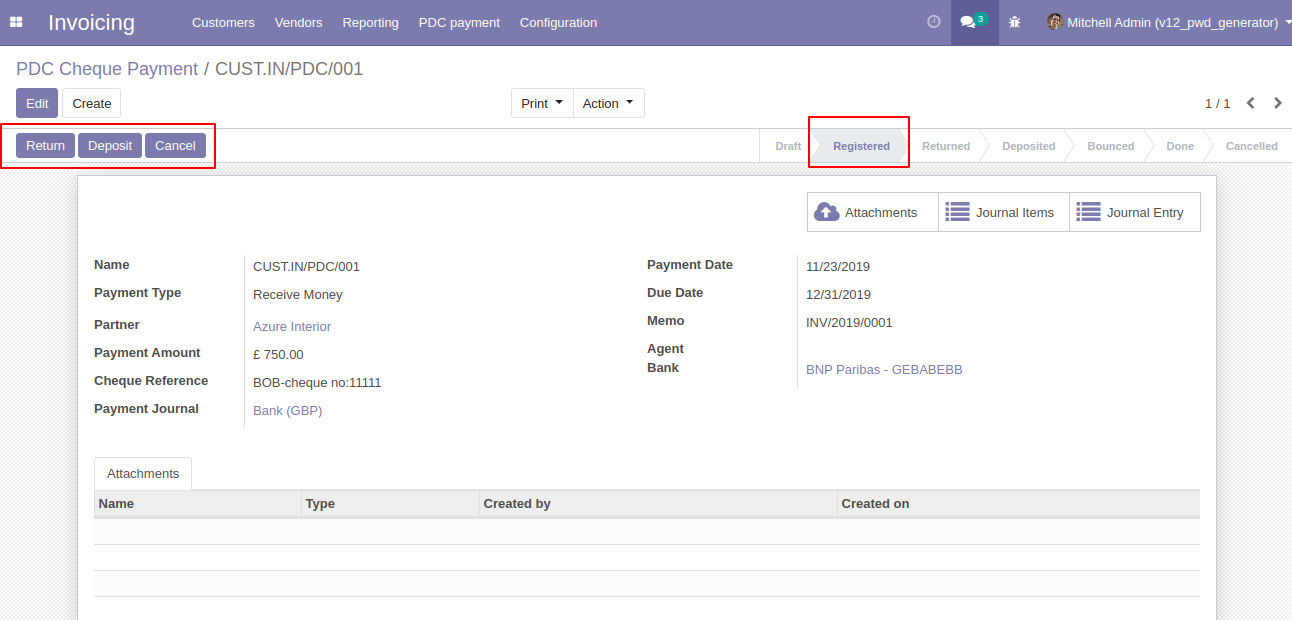
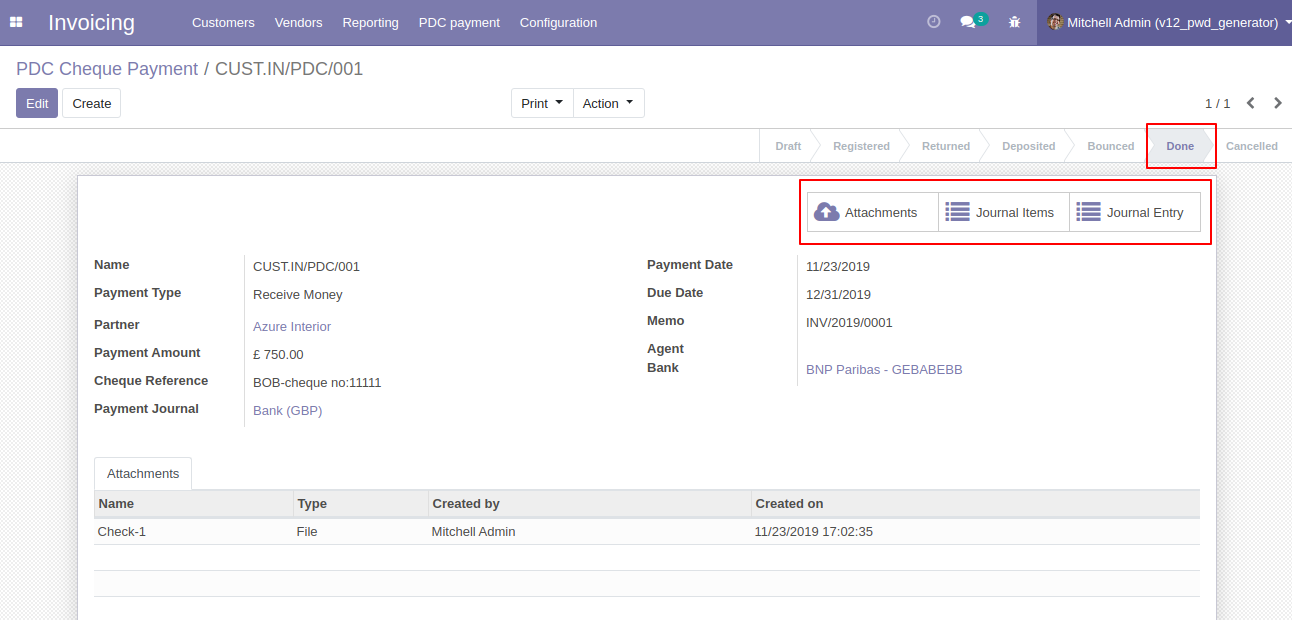
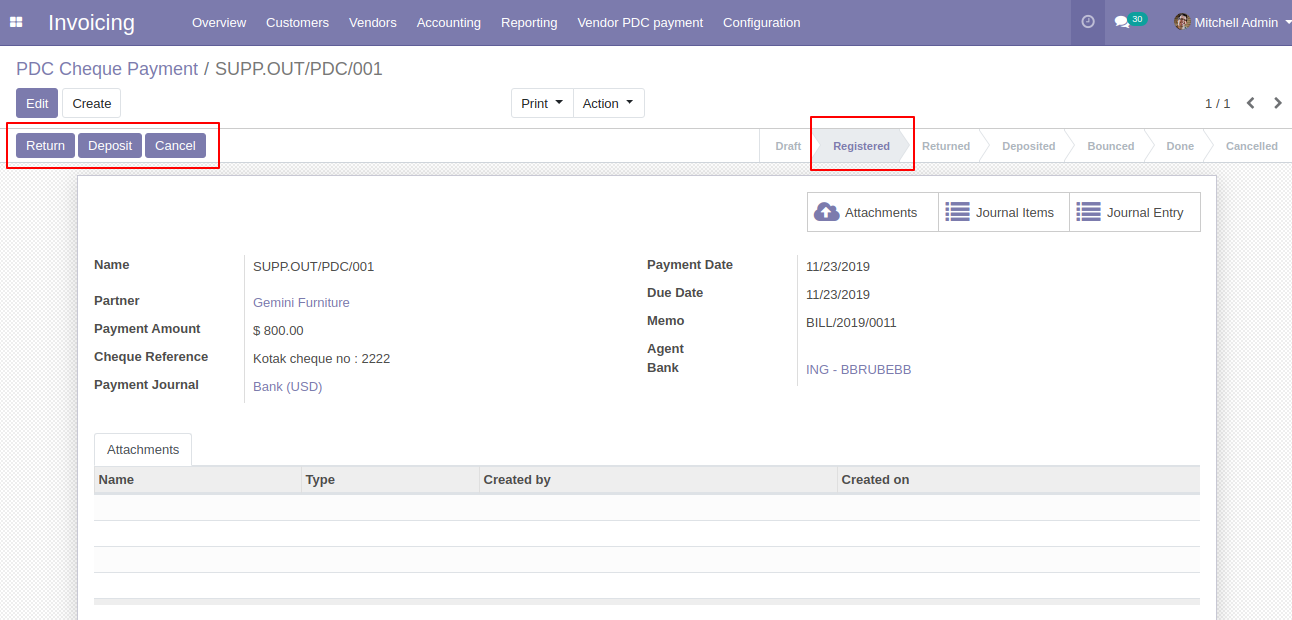
PDC Payment form view. where you can deposit or return that cheque.
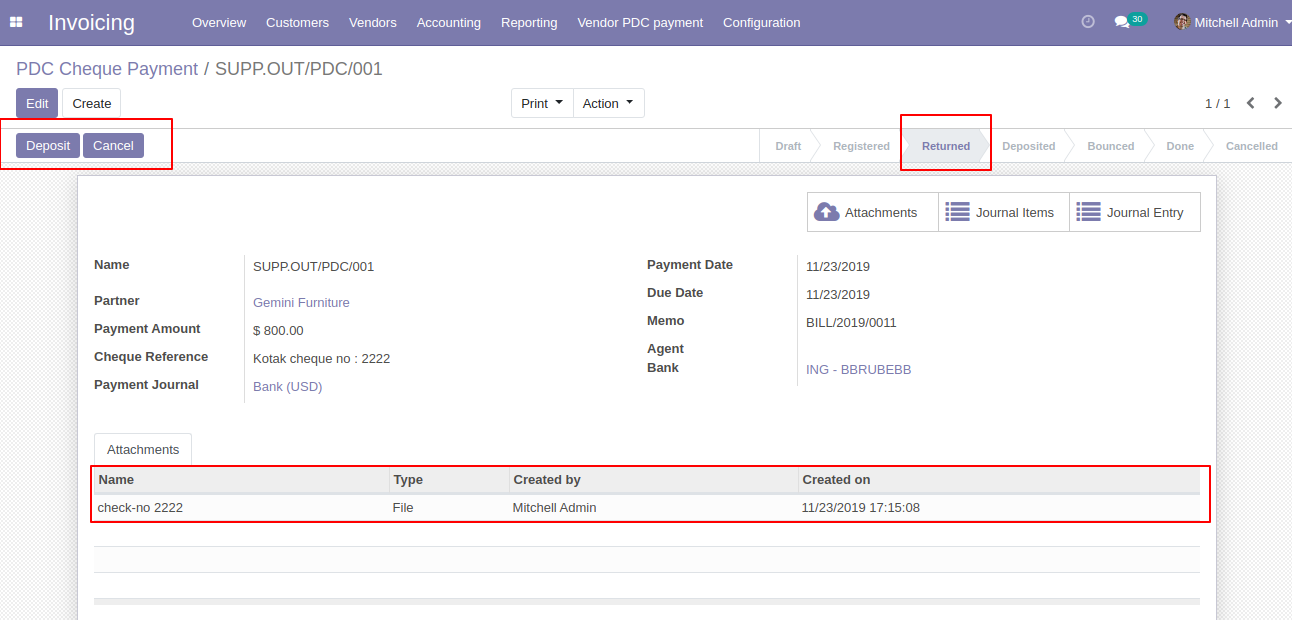
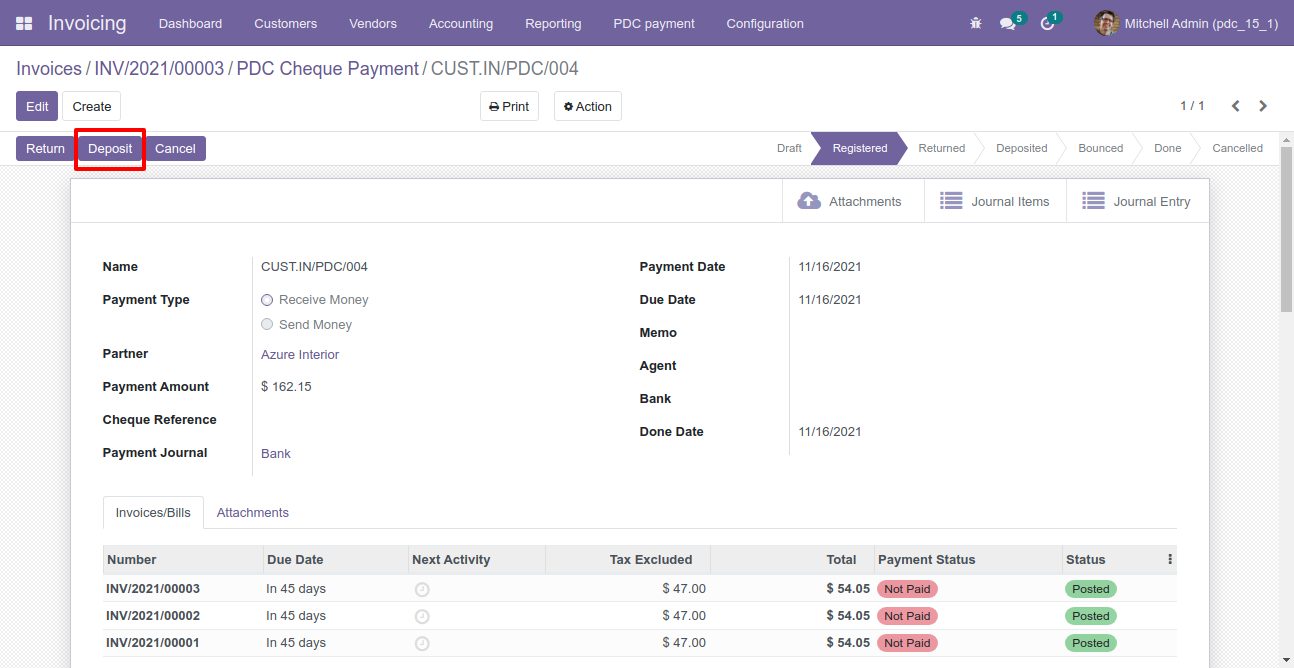
After click on 'Return' that cheque set in 'return' state.

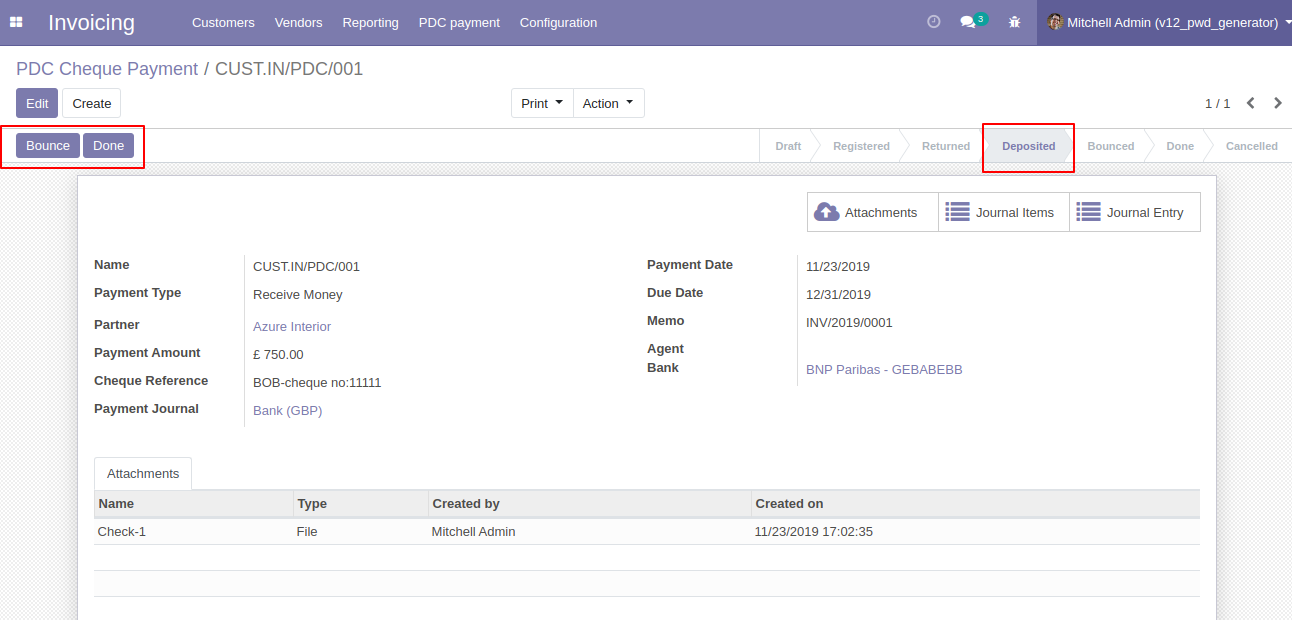
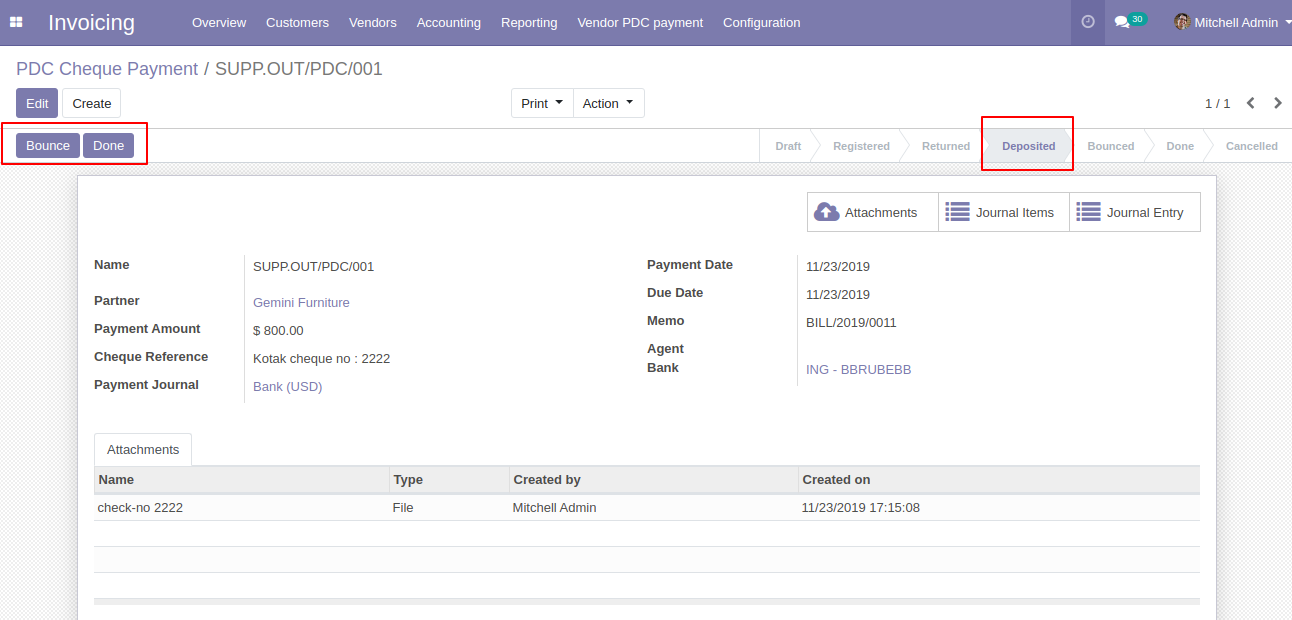
After click on 'Deposit' then that cheque set in 'Deposited' state and you can see two buttons 'Bounce', 'Done'.
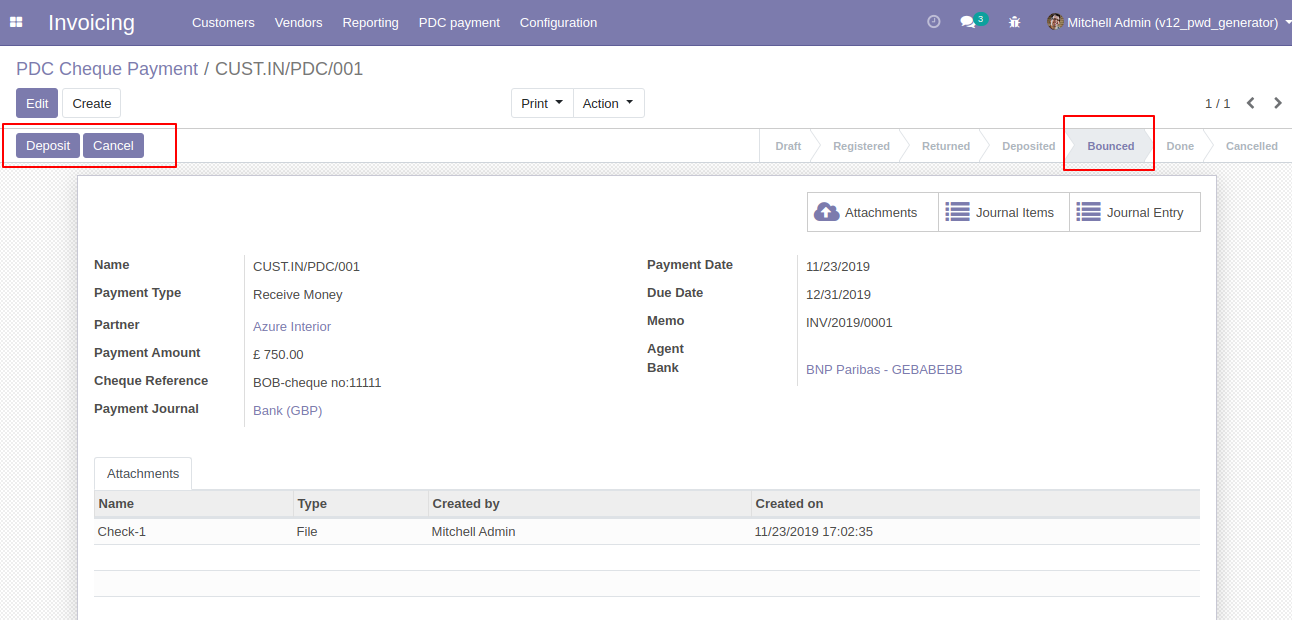
If cheque bounce. so click 'Bounce' and that cheque will set in 'Bounced' state.
If cheque deposit successfully. so click 'Done' and that cheque will set in 'Done' state.
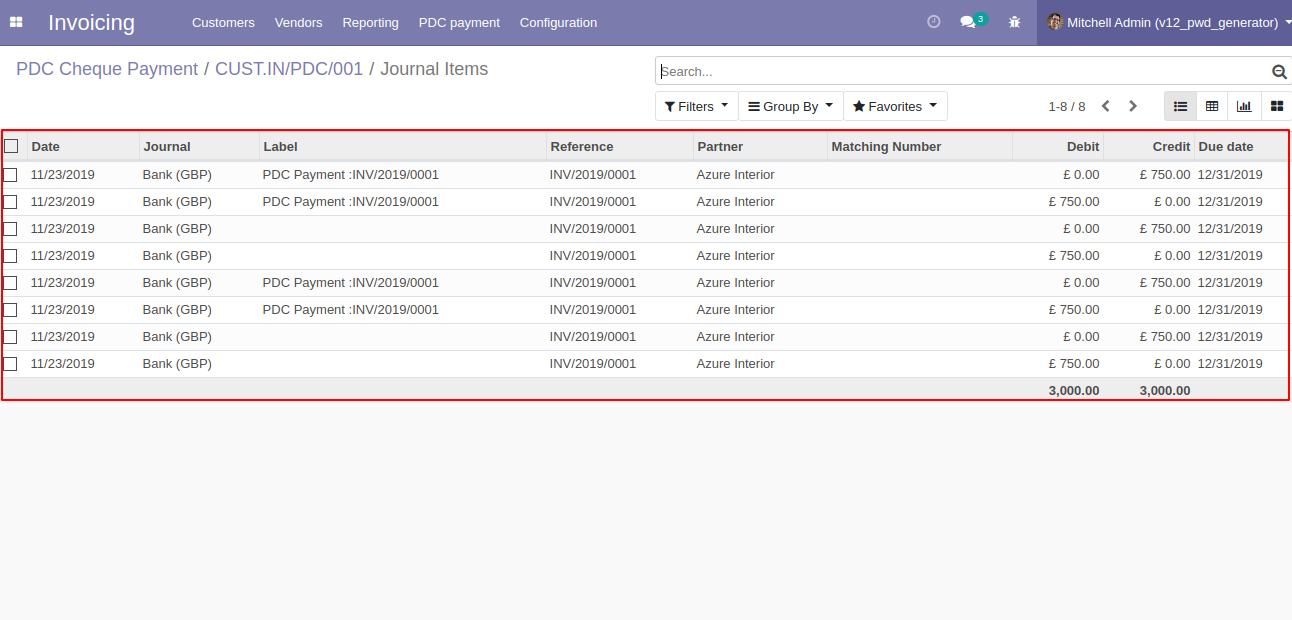
In Journal Items you can see the PDC payment entries. In the below image all entries created during all operations performed like bounce, returned, etc.
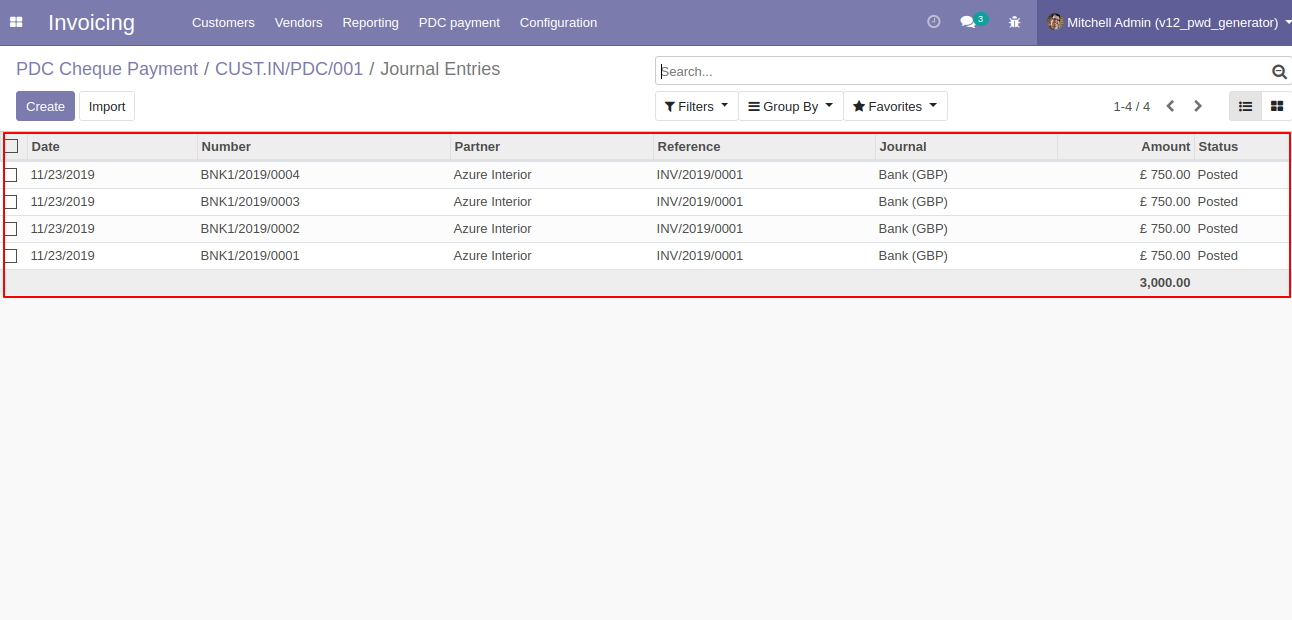
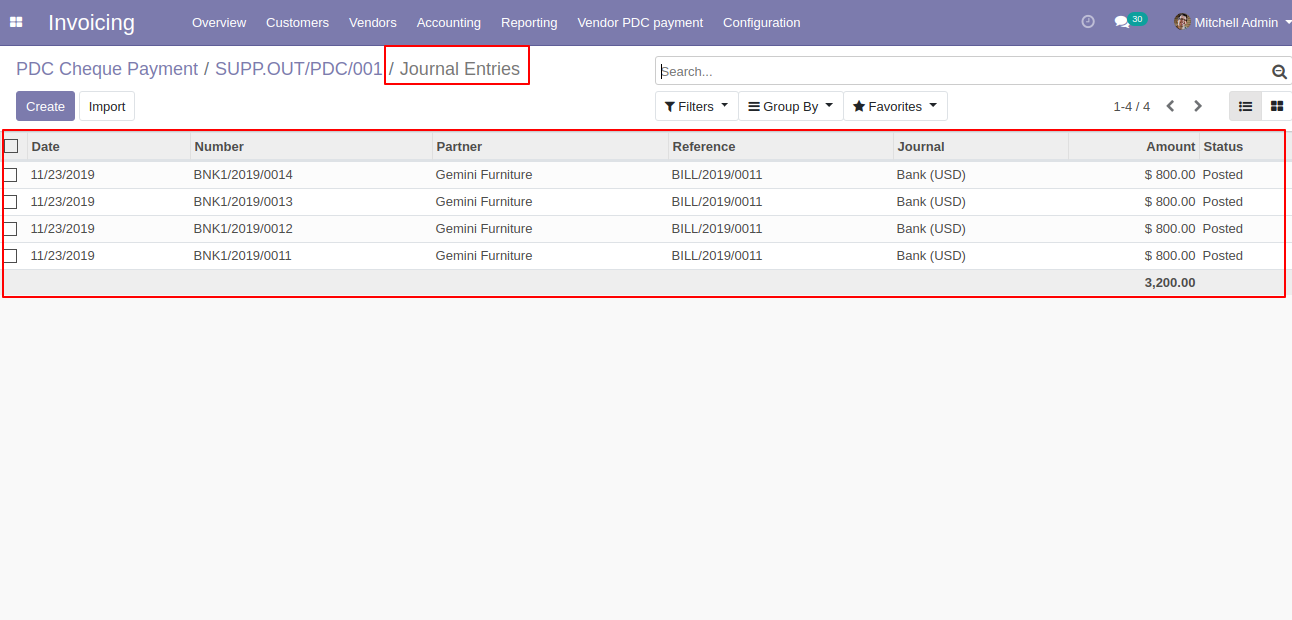
In Journal Entries you can see the PDC payment all operations entries.
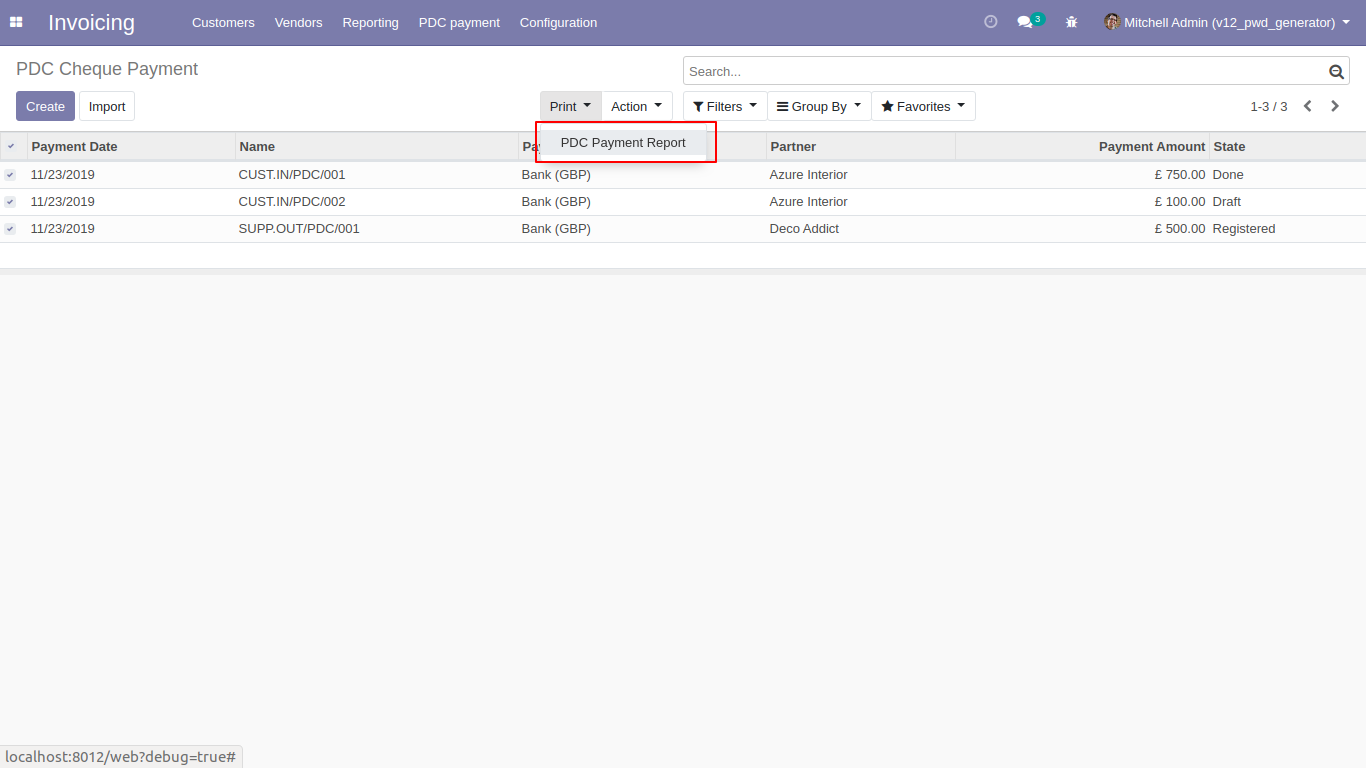
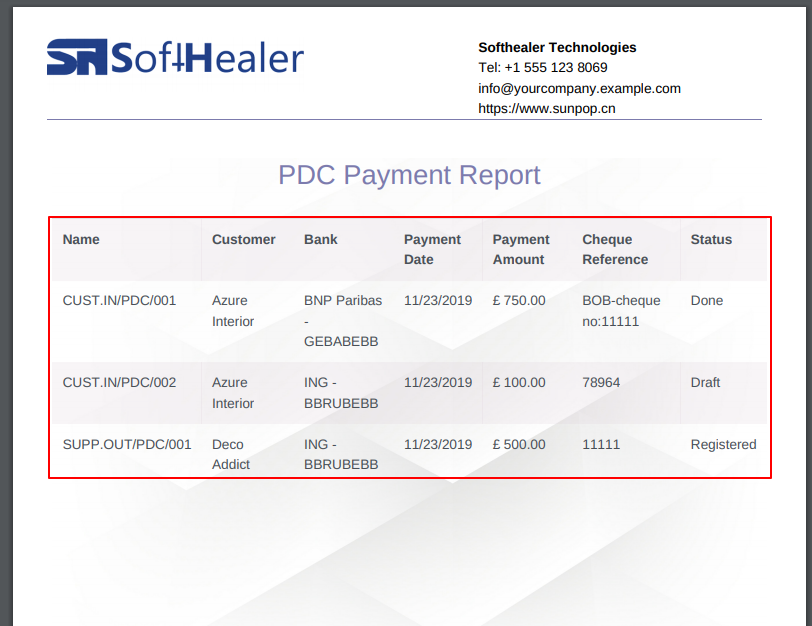
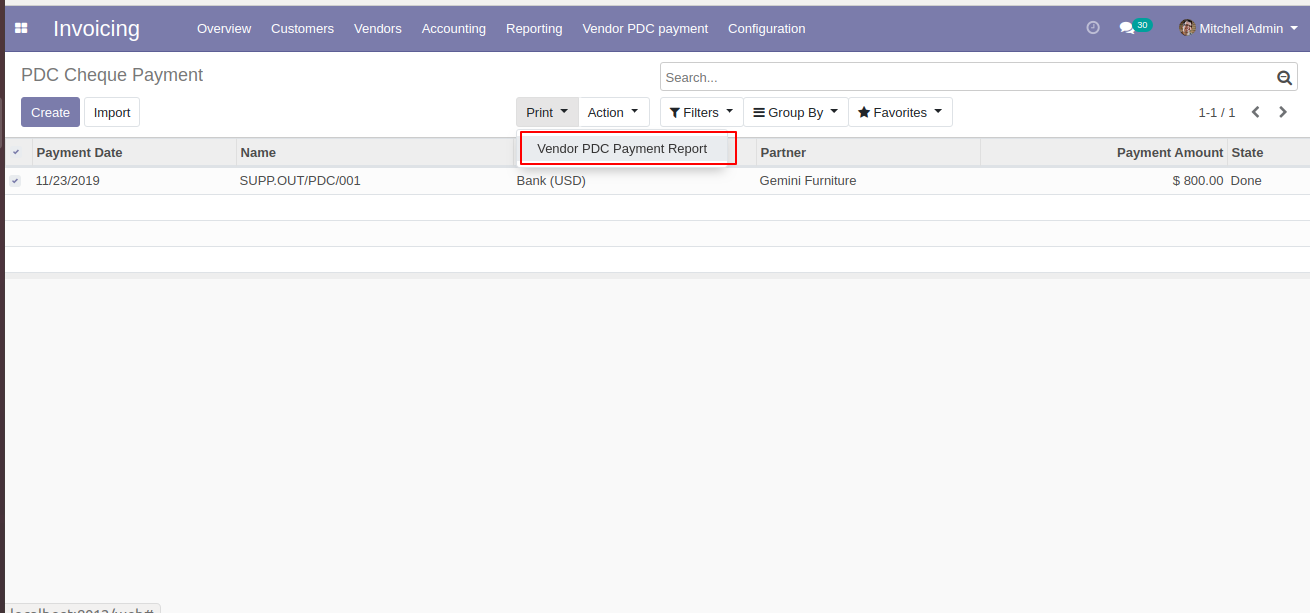
'PDC Payment Report' for print PDF report of multiple PDC cheque payments.
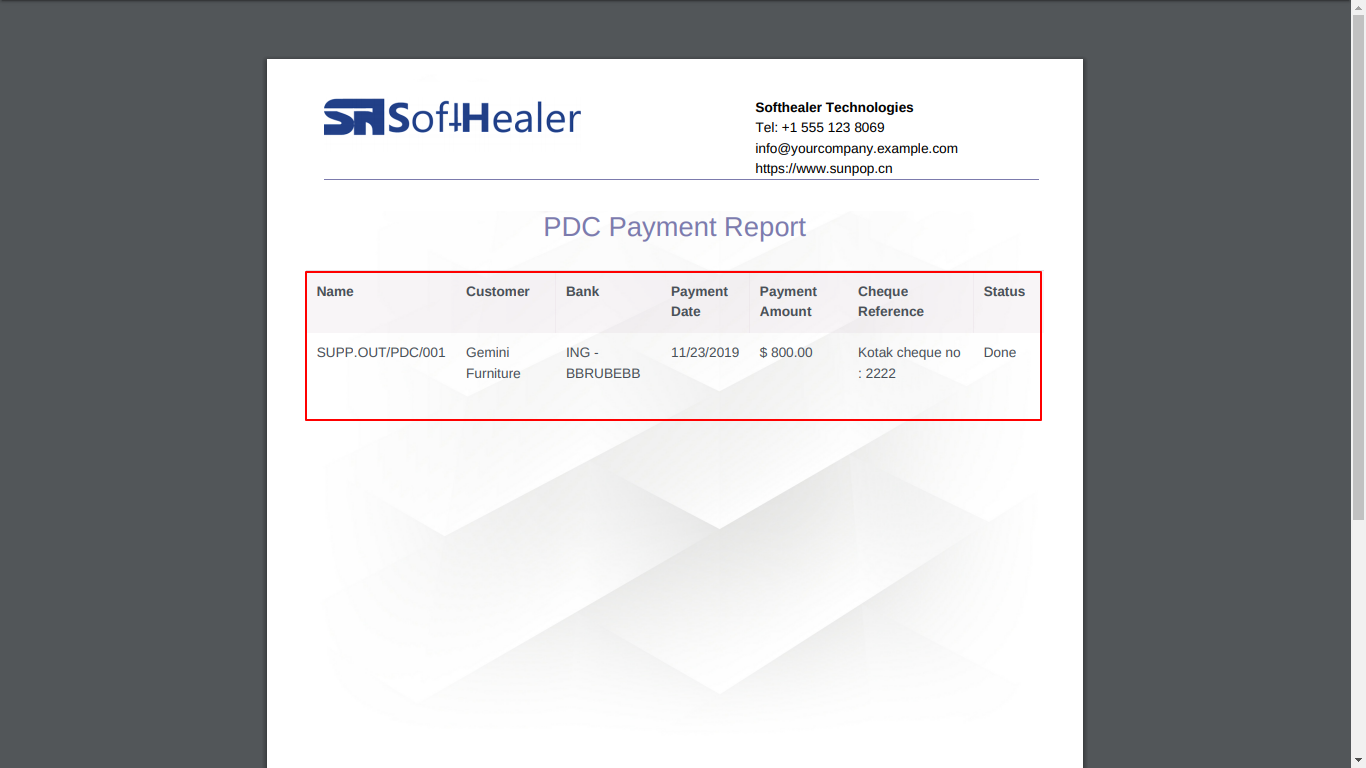
PDF PDC Payment Report.
You have to set up both PDC account for each company.
Goto Invoice config setting and select PDC account for the vendor.
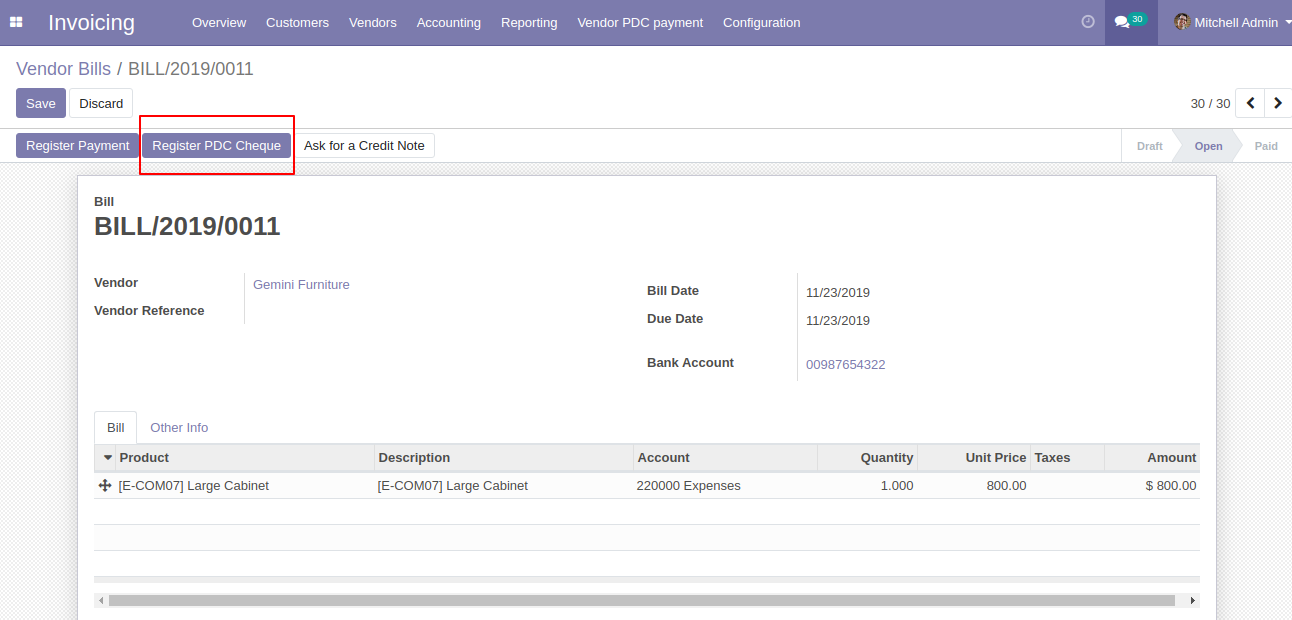
'Register PDC cheque' button in bill form view *(Only visible in open state).
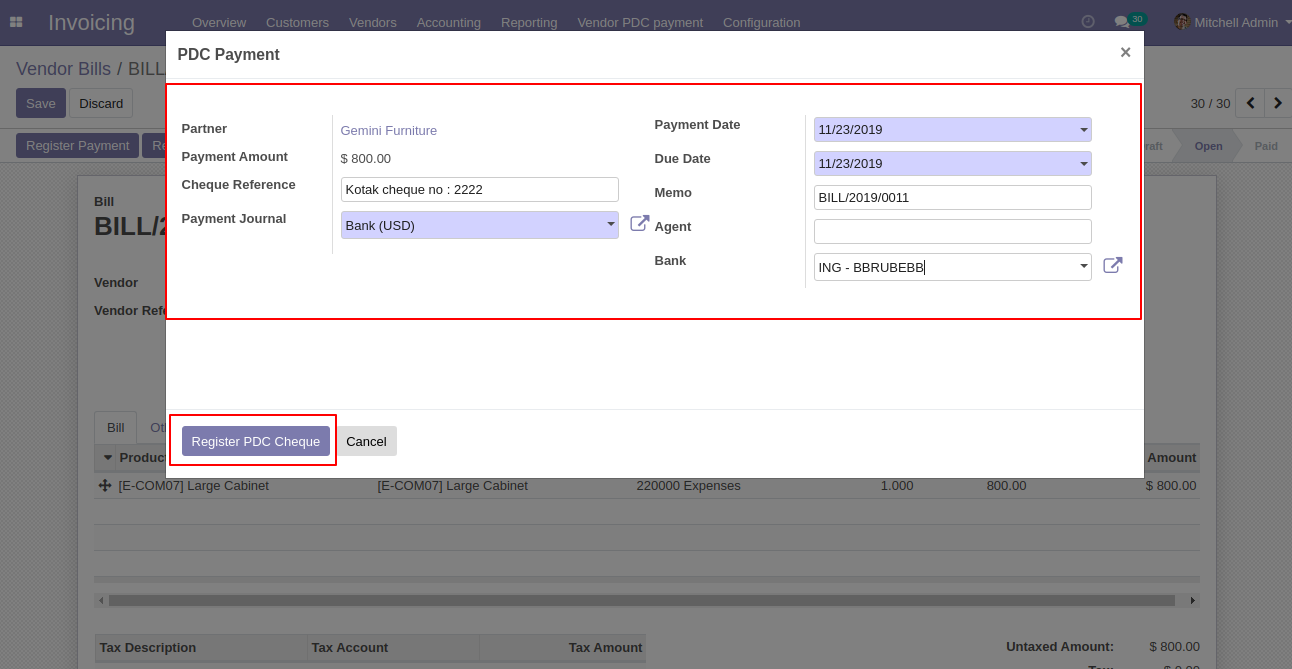
'Register PDC cheque' wizard will popup after clicking the 'Register PDC cheque' button.
'PDC Payment' menu where you can see the list of register PDC cheque list.
PDC Payment form view. where you can deposit or return that cheque.
After click on 'Return' that cheque set in 'return' state.
After click on 'Deposit' then that cheque set in 'Deposited' state and you can see two buttons 'Bounce', 'Done'.
If cheque bounce. so click 'Bounce' and that cheque will set in 'Bounced' state.
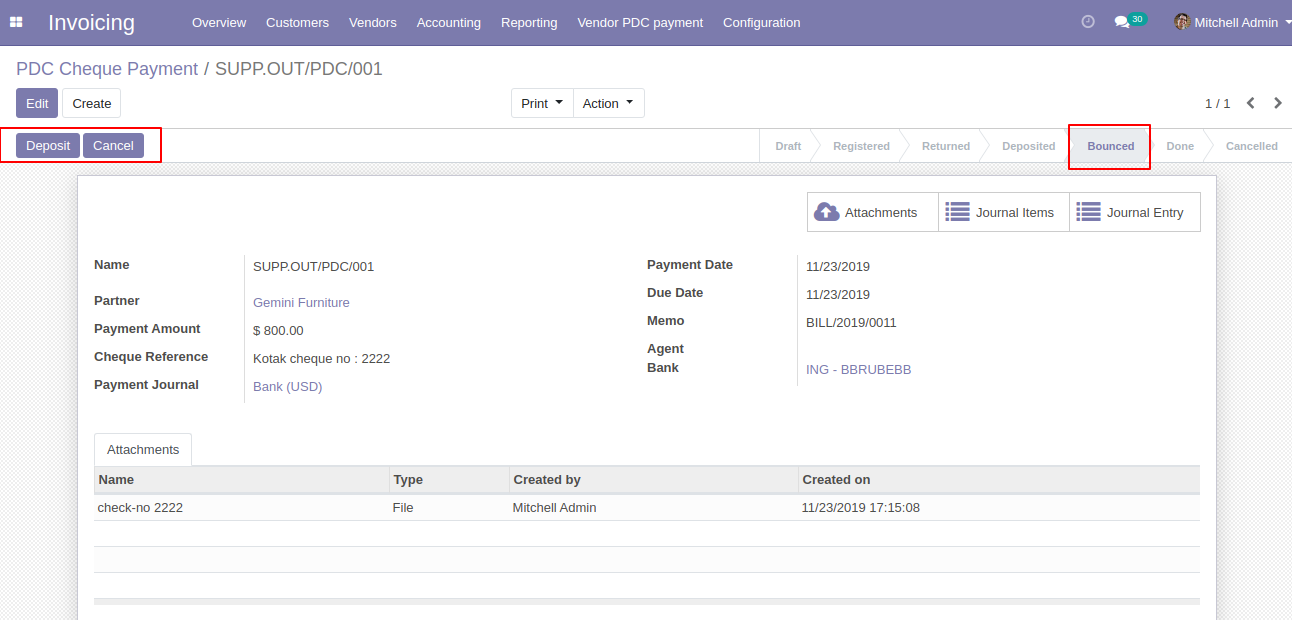
If cheque deposit successfully. so click 'Done' and that cheque will set in 'Done' state. In the form view, as you see there are three smart buttons where you can see the 'Attachment', 'Journal Items', 'Journal Entries'.

In Journal Items you can see the PDC payment entries. In the below image all entries created during all operations performed like bounce, returned etc.

In Journal Entries you can see the PDC payment all operations entries.
'PDC Payment Report' for print PDF report of multiple PDC cheque payment.
PDF PDC Payment Report.
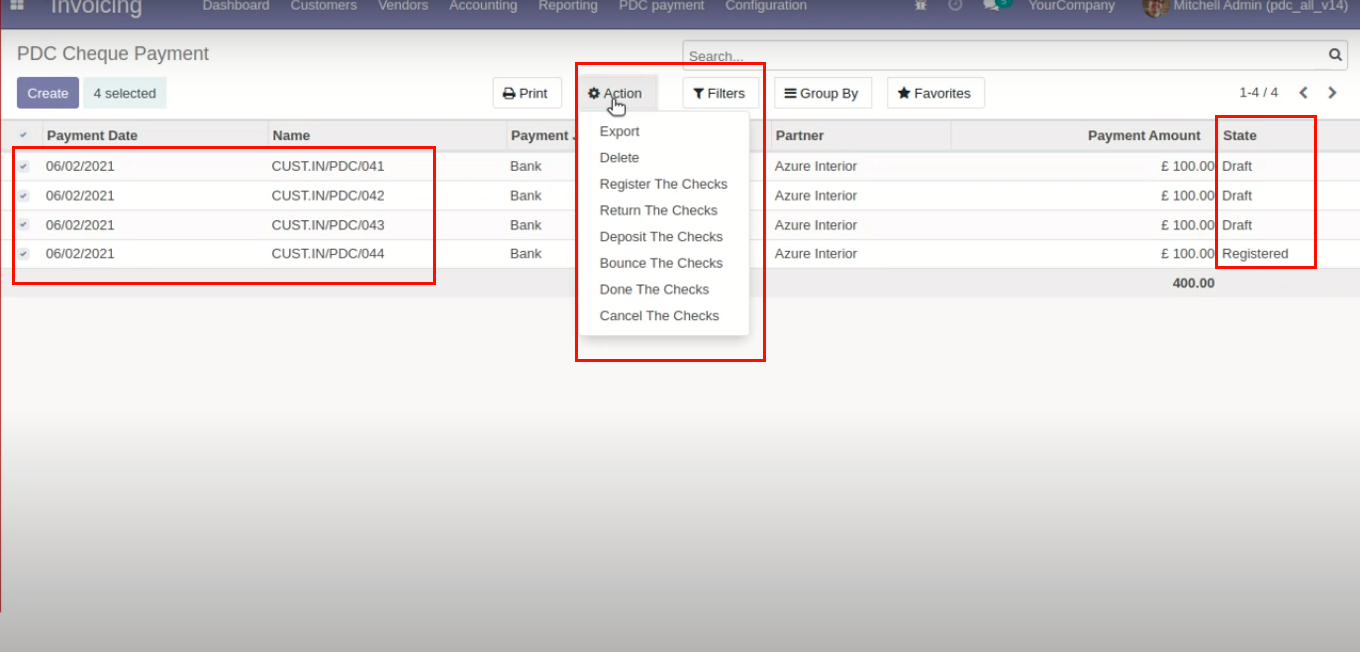
You
can
do
multi-action
for
all
states
using
the
"Action"
button.
Select
the
PDC
cheque
from
the
list
view
and
then
from
the
"Action"
menu
select
option
as
per
need.
You
can
see
the
sum
of
all
payments
in
the
list
view.
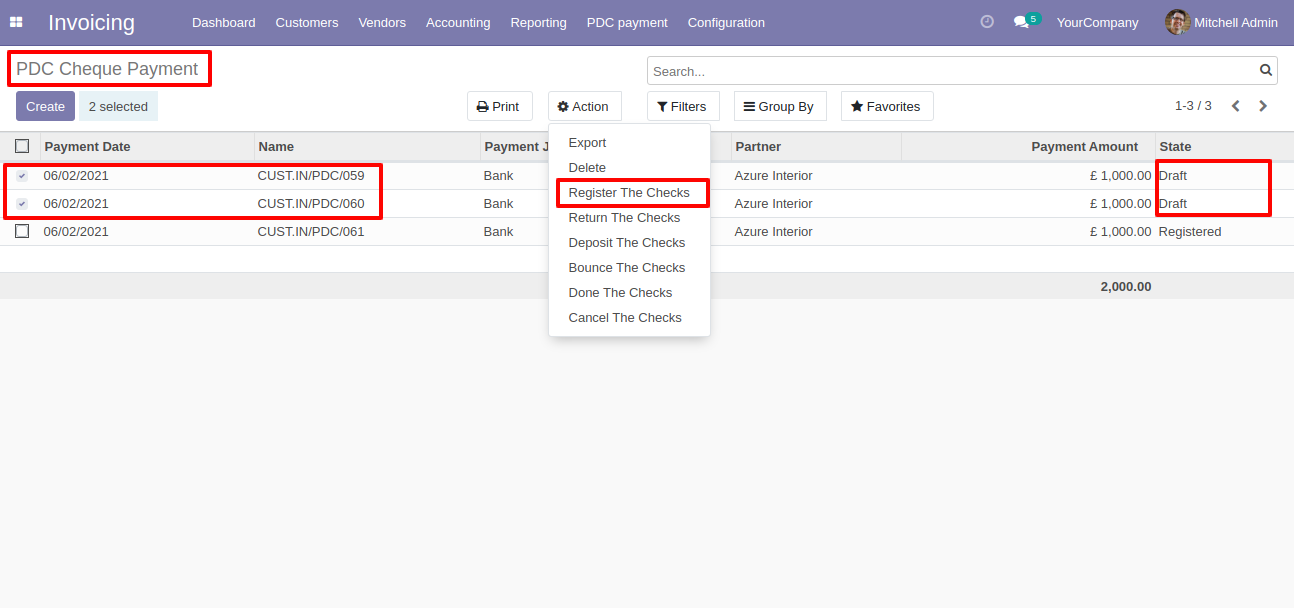
Now we change multiple cheque states to the "Register".
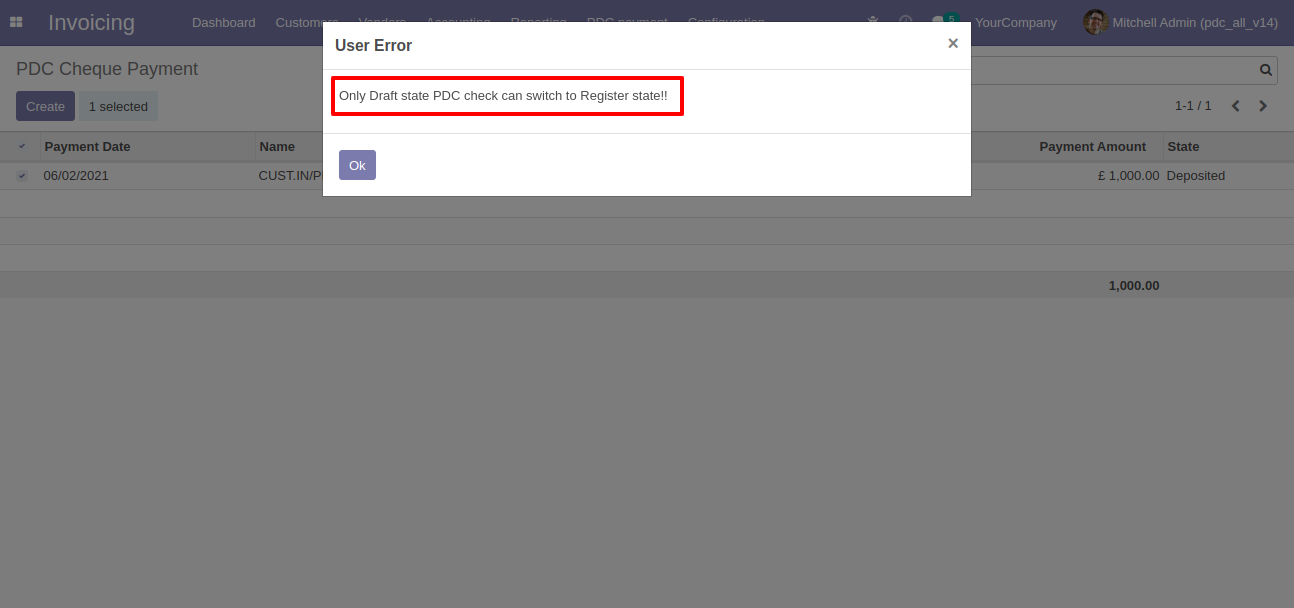
It shows an alert if you try to change the wrong states.
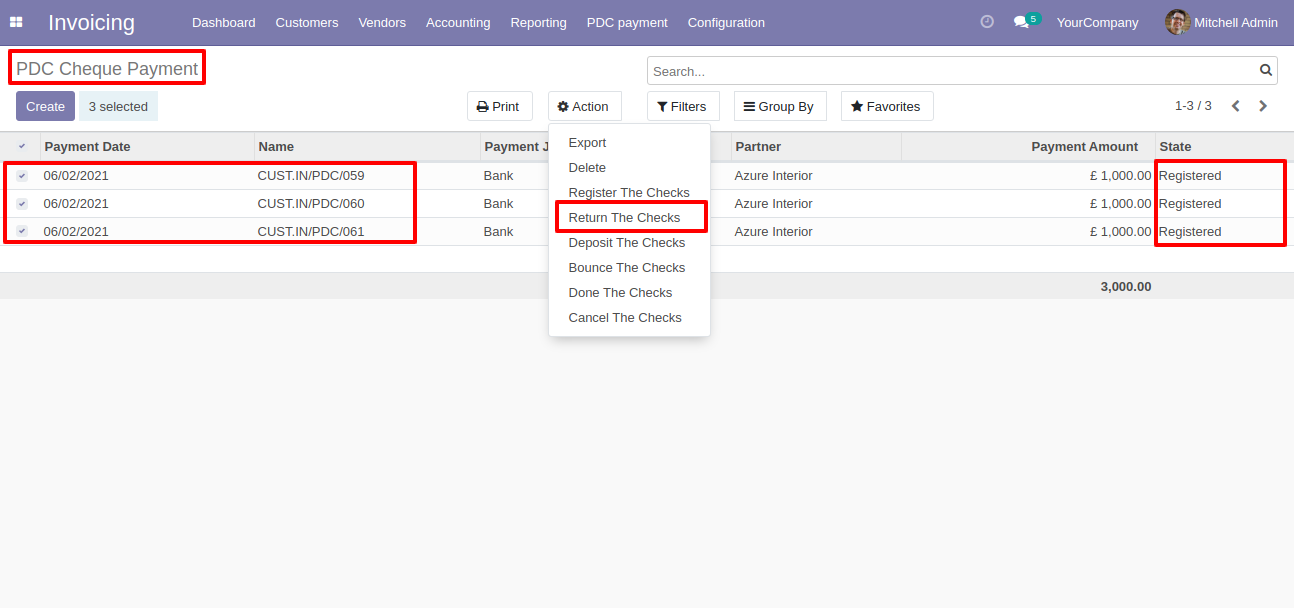
Now we change multiple cheque states to the "Return".
It shows an alert if you try to change the wrong states.

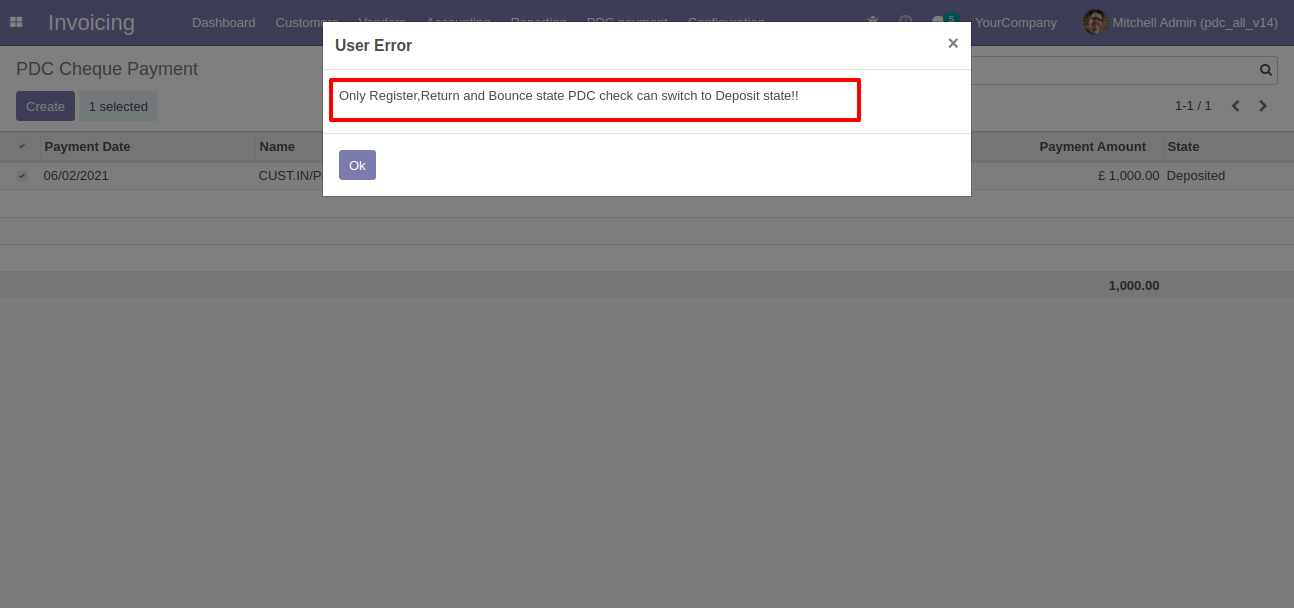
Now we change multiple cheque states to the "Deposit".
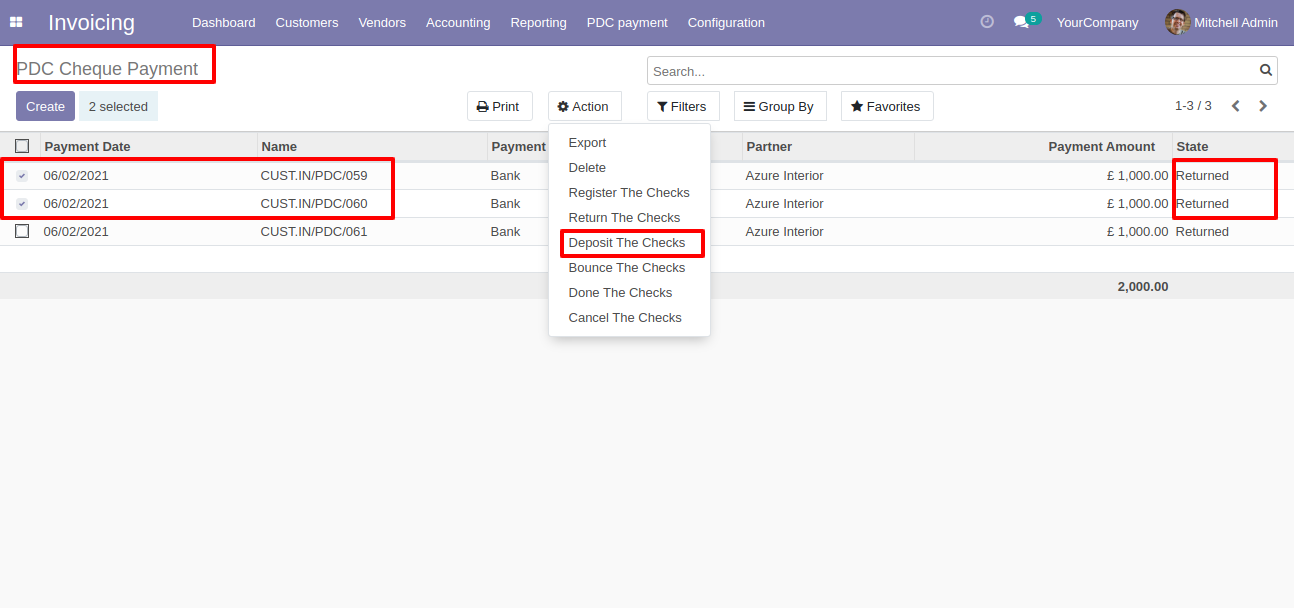
It shows an alert if you try to change the wrong states.
Now we change multiple cheque states to the "Bounce".
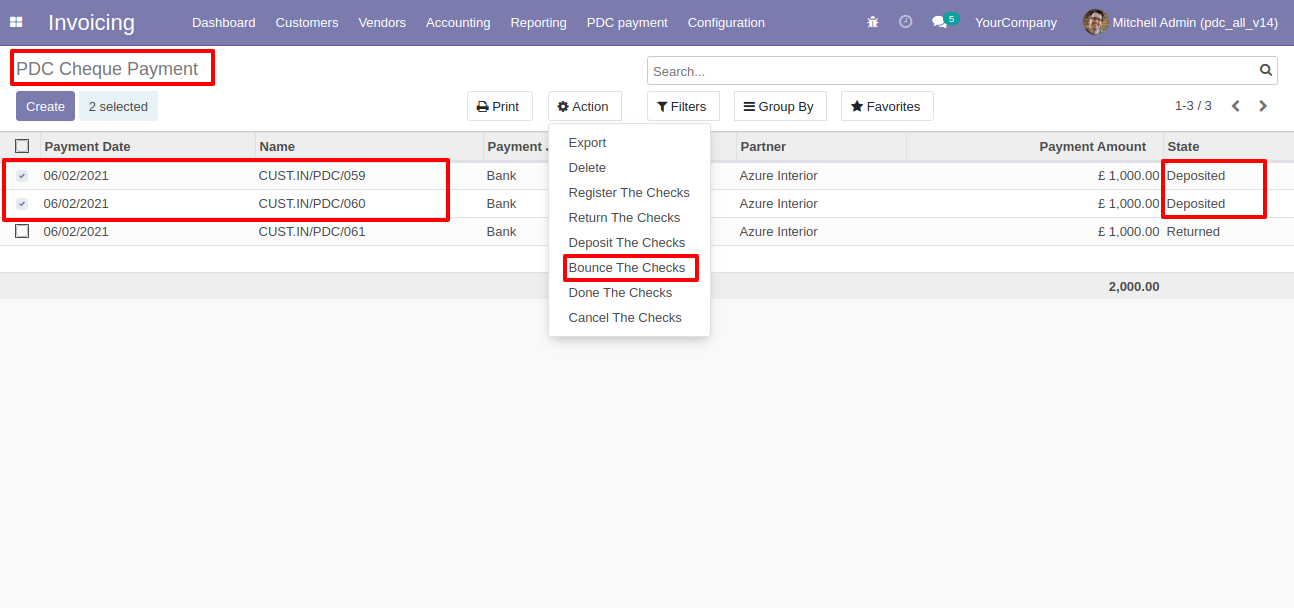
It shows an alert if you try to change the wrong states.

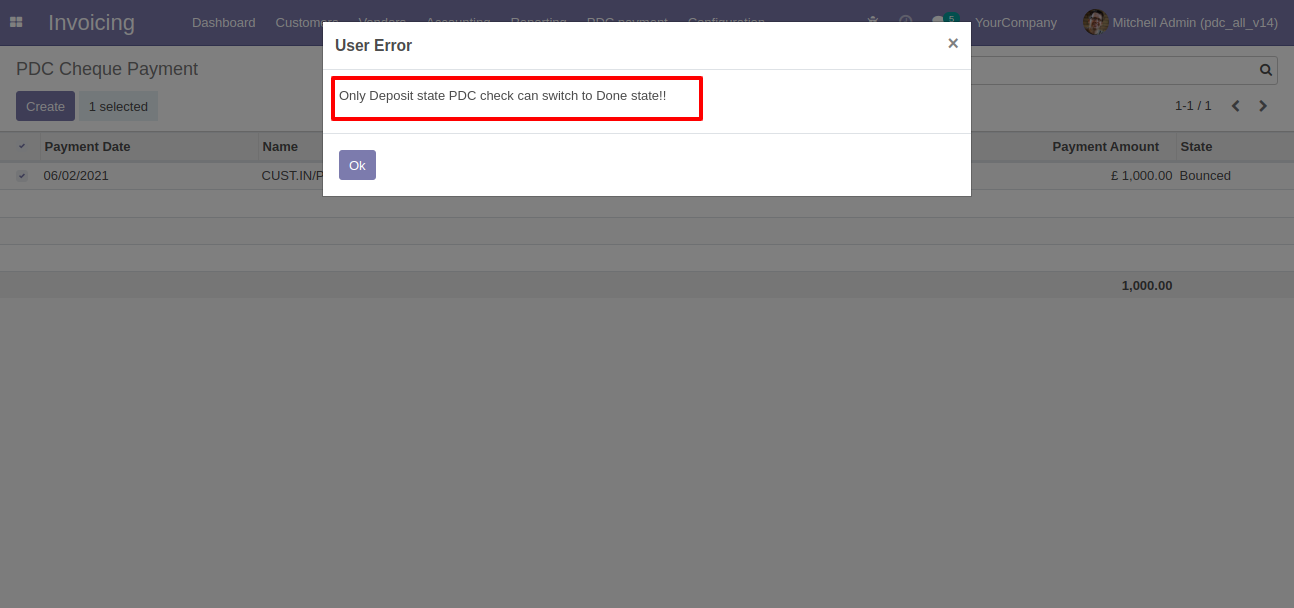
Now we change multiple cheque states to the "Done".
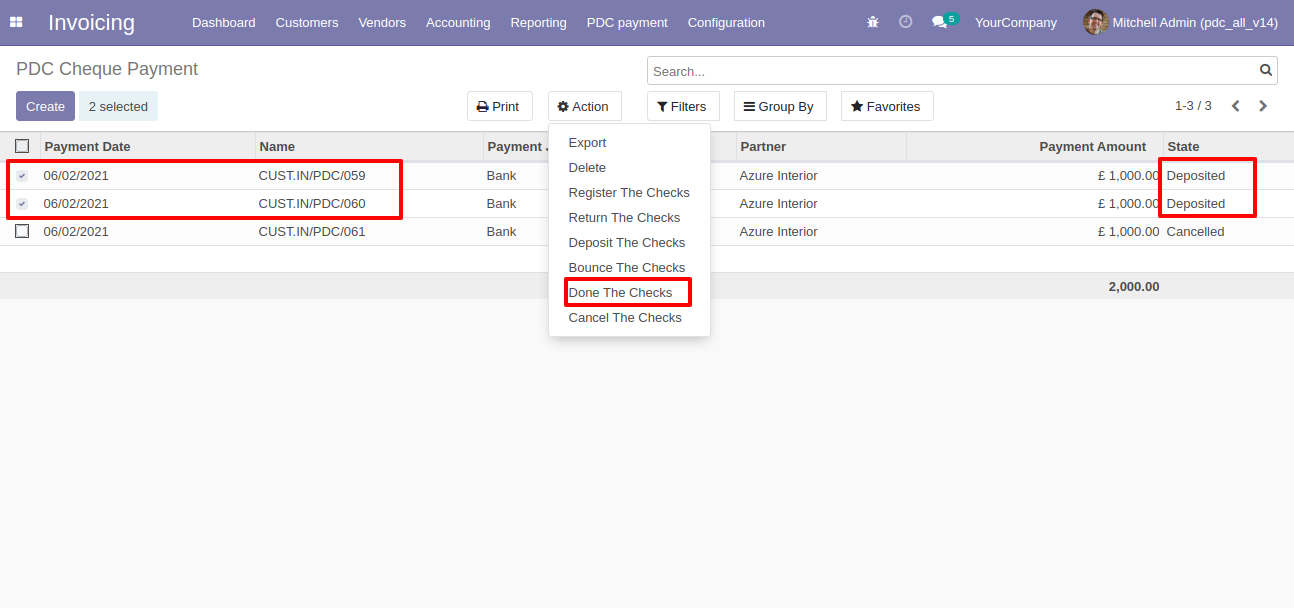
It shows an alert if you try to change the wrong states.
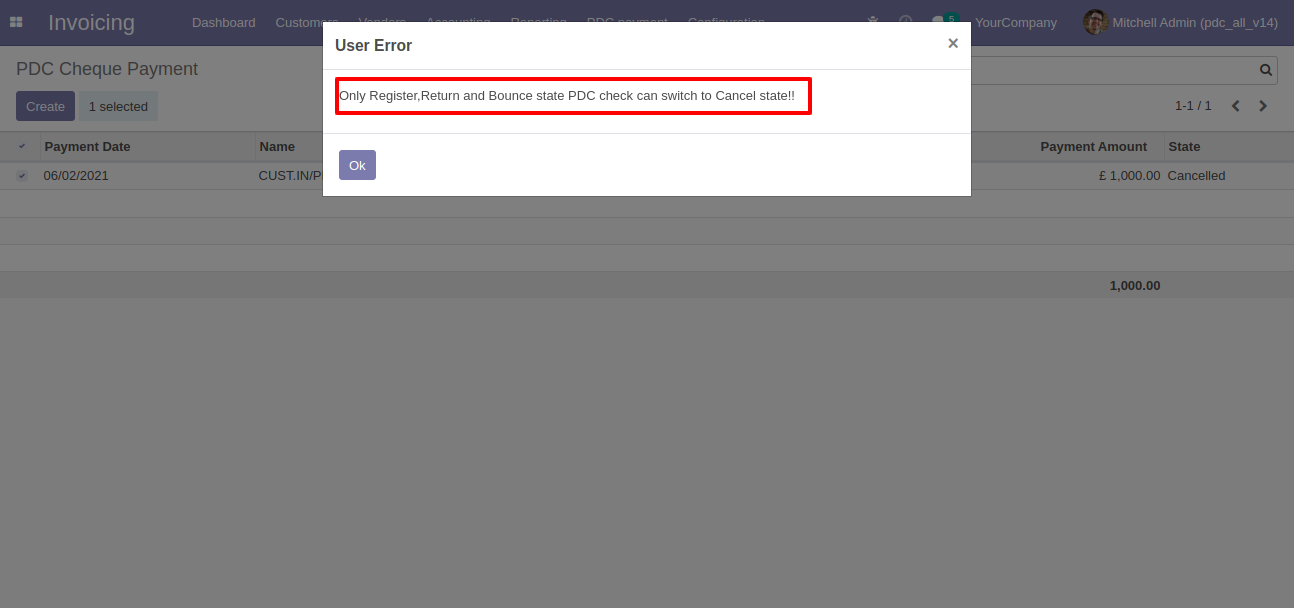
Now we change multiple cheque states to the "Cancel".
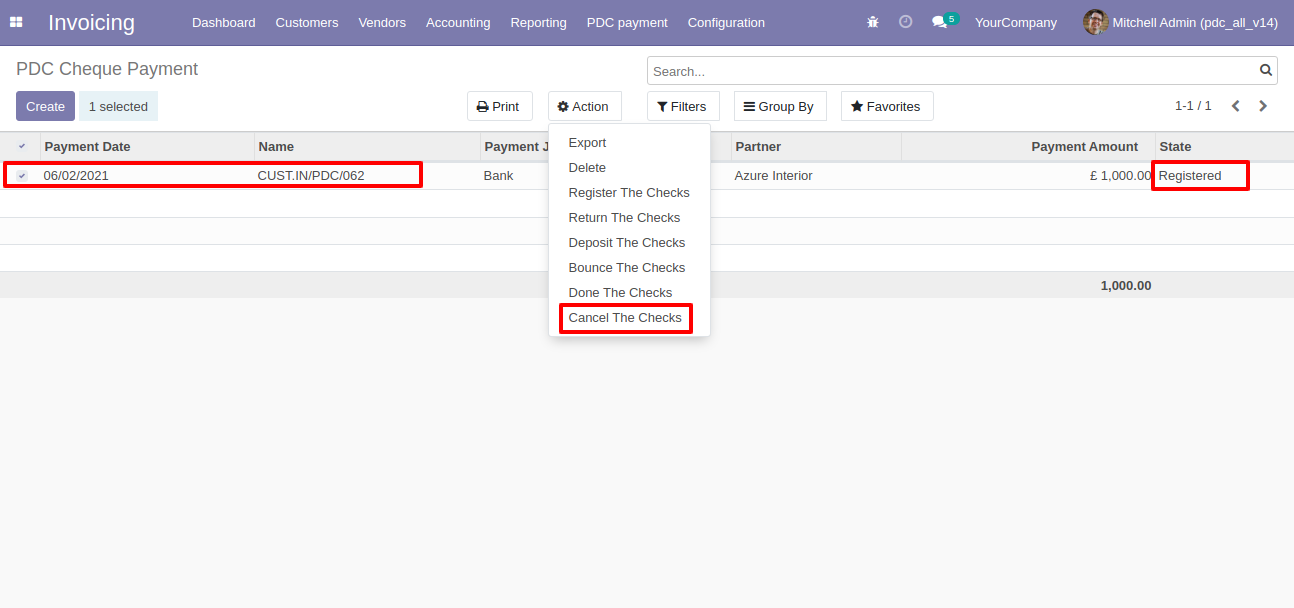
It shows an alert if you try to change the wrong states.

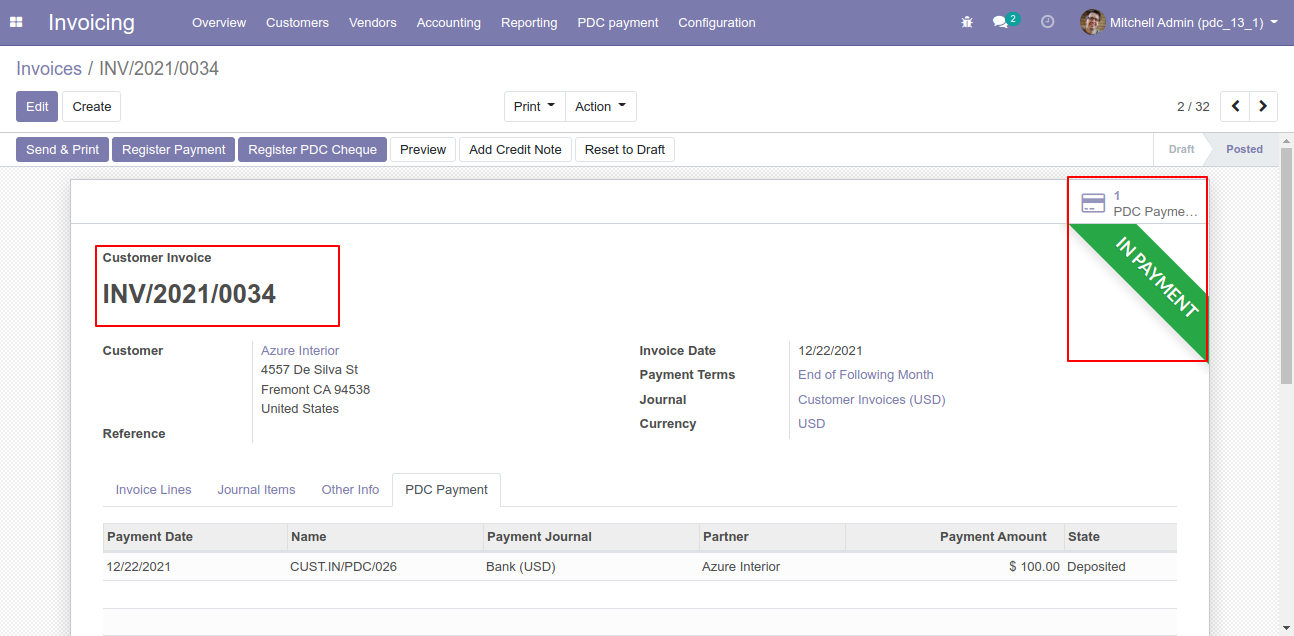
Invoice with the "in payment" state.
Select invoice from list view, and click 'Register PDC cheque'.
'Register PDC cheque' wizard will popup after clicking the 'Register PDC cheque' button.
Now we change stage "Registered" by clicking on "Register" button.
Now we change stage "Deposited" by clicking on "Deposit" button.
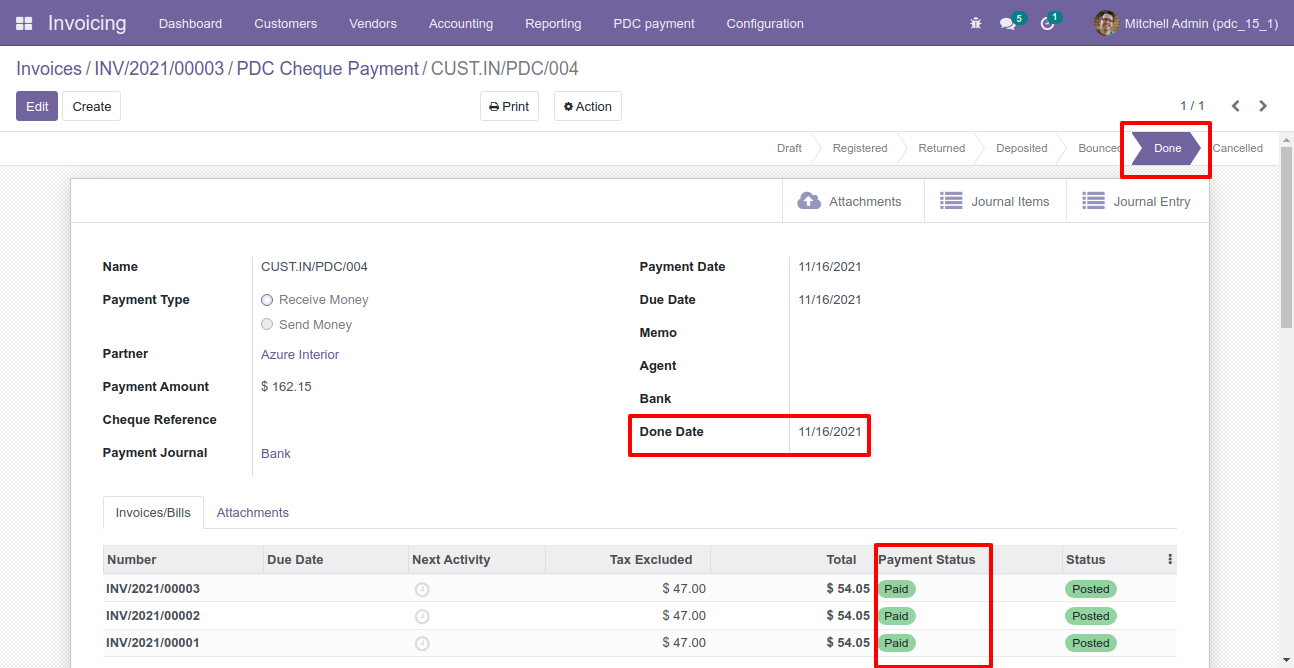
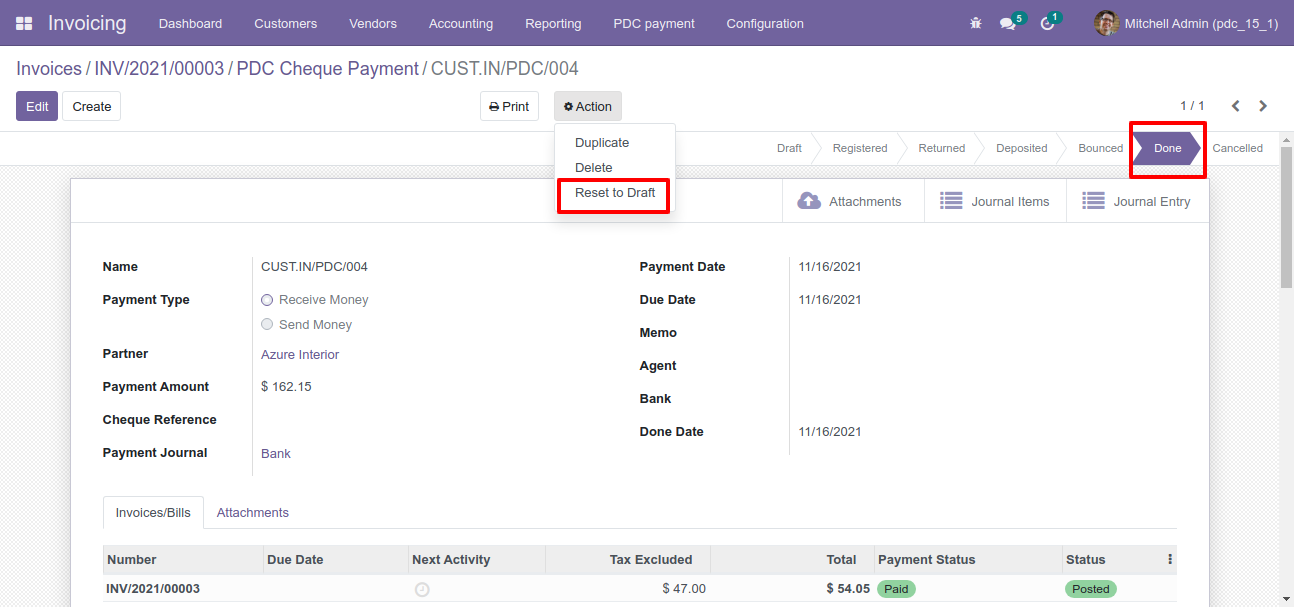
Now we change stage "Done" by clicking on "Done" button.
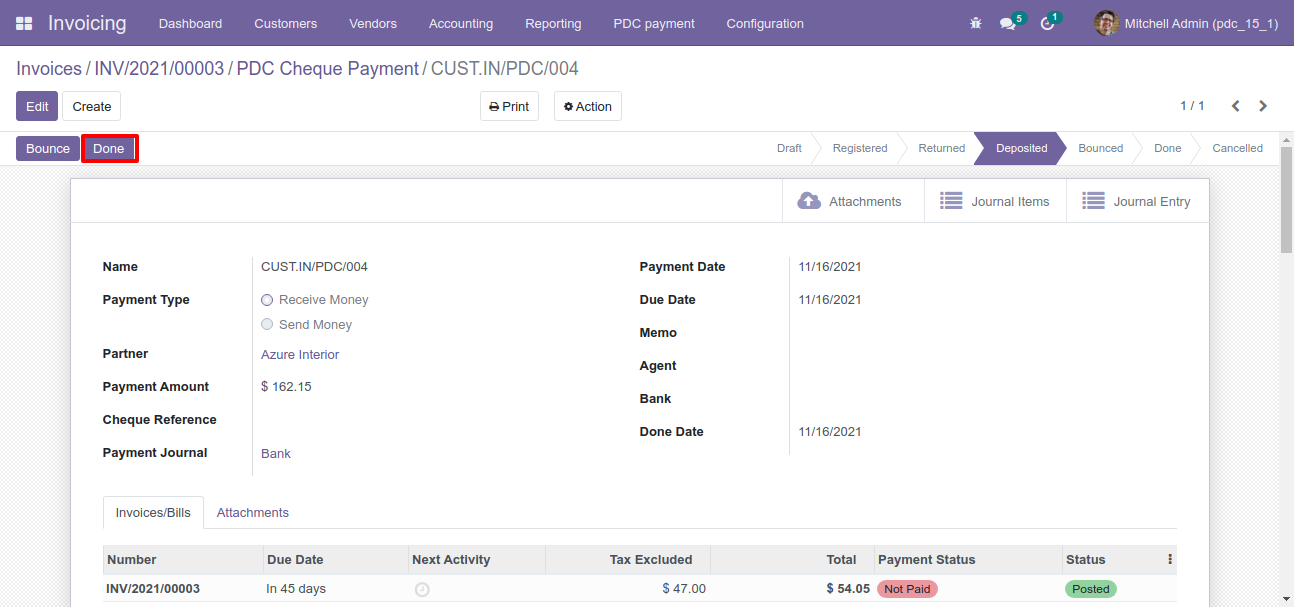
So our stage is changes, you can see done date with payment status.
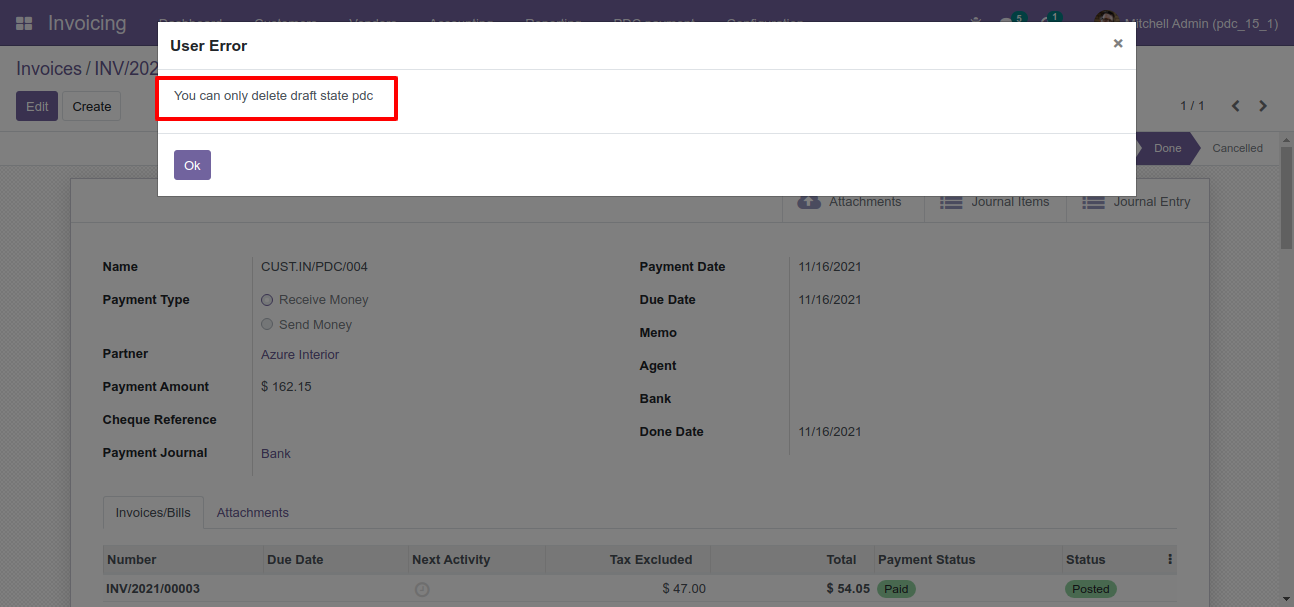
Now we try to delete PDC.
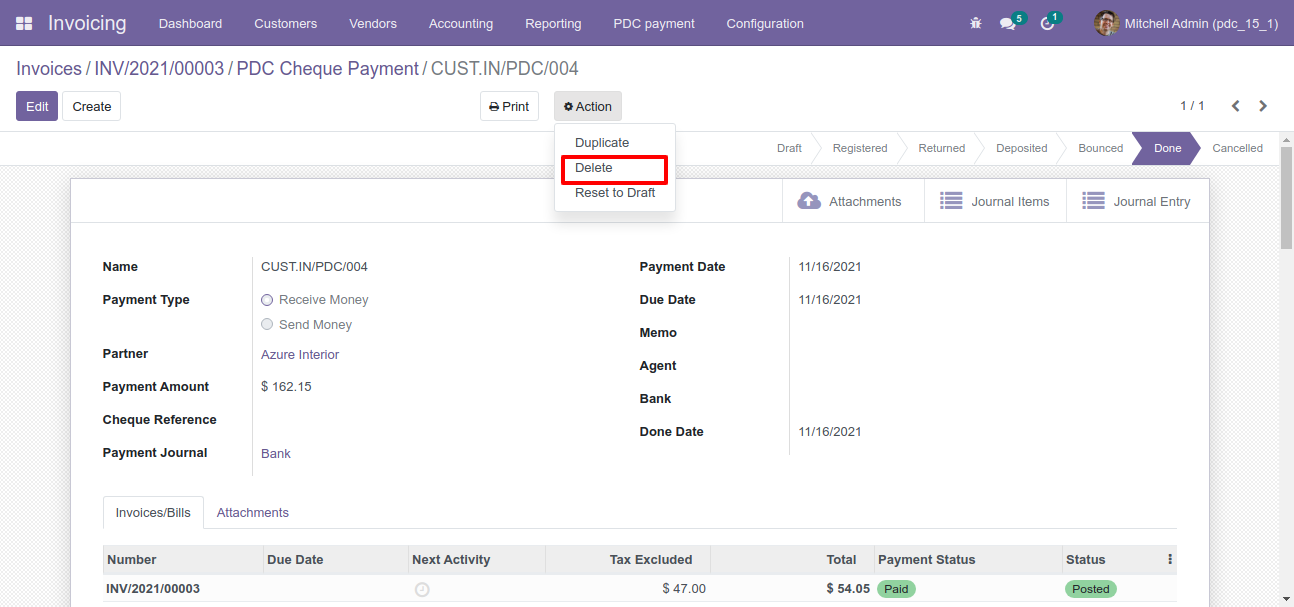
So it generates alert because PDC is allowed to be deleted only when the status is "Draft".
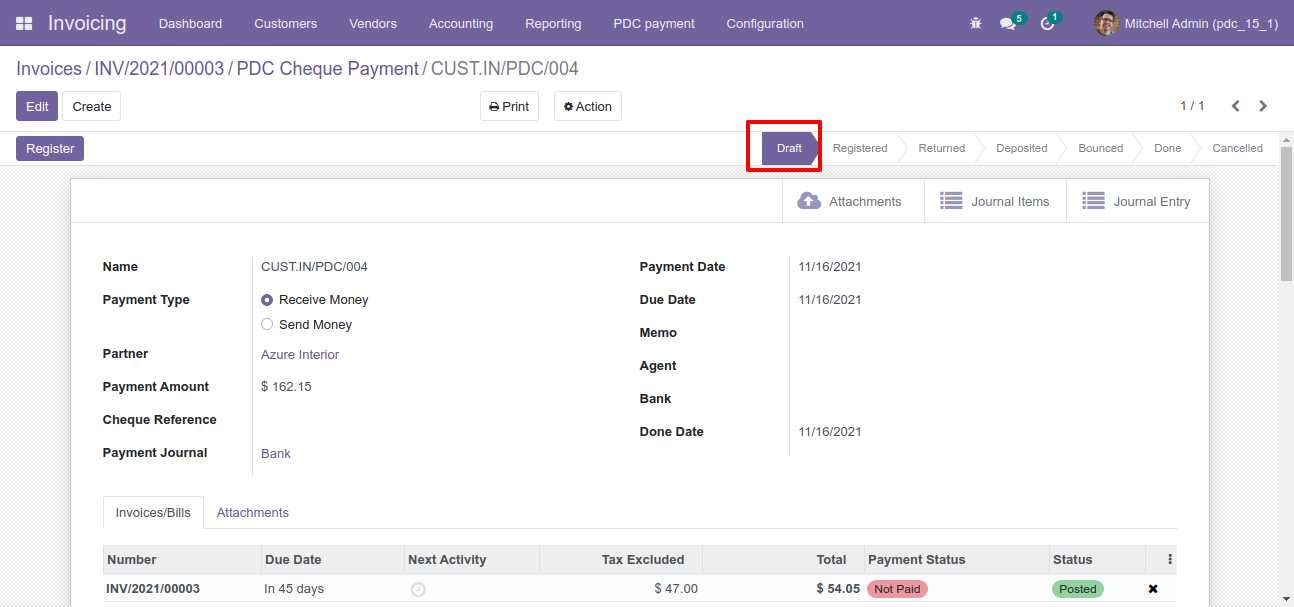
Now we set "Reset To Draft".
So our stage is "Draft".
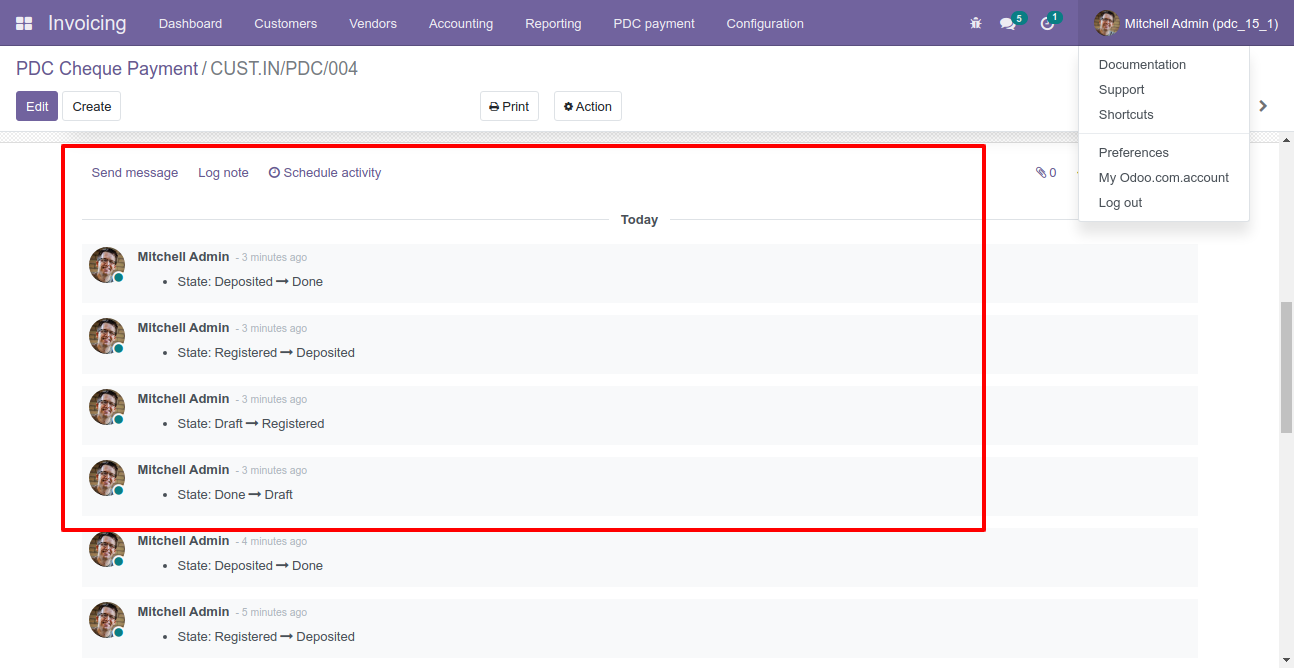
You can communicate using chatter.
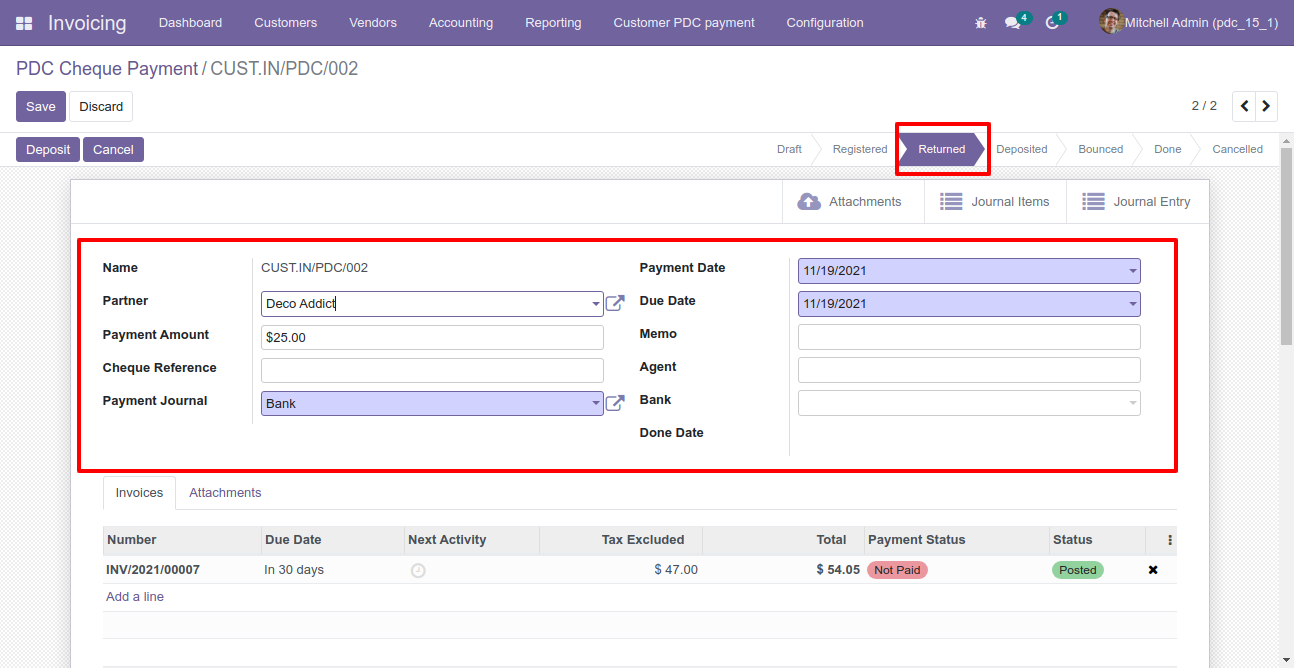
PDC form will be editable in the "Returned" state.
Features
- You can generate and print the customer's or vendor's invoice analysis report.
- You can generate the report between any date range.
- You can generate report based on the invoice status & type.
- You can generate a report by account moves or products.
- Report can be generated in PDF and XLS format.
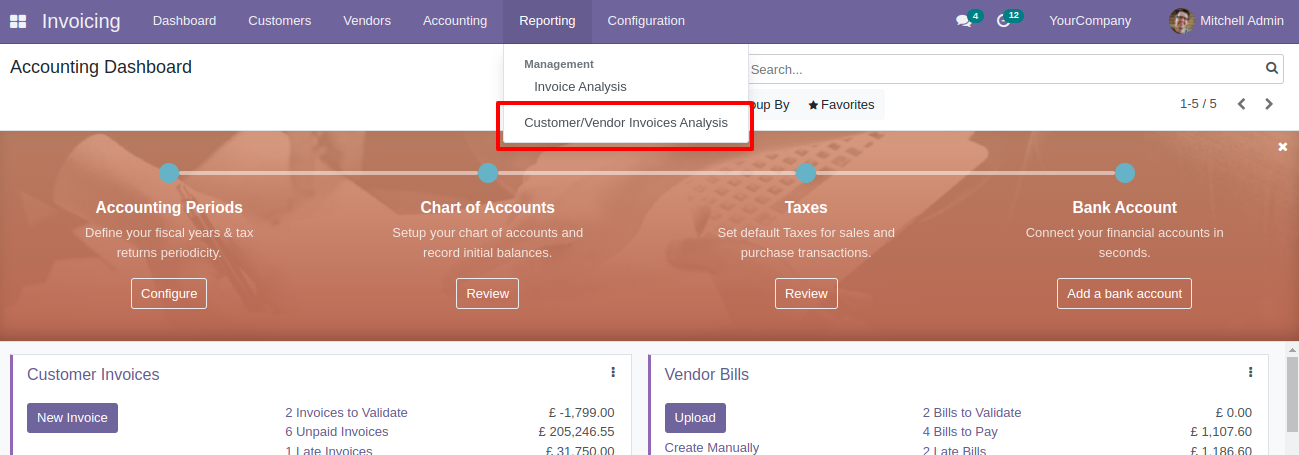
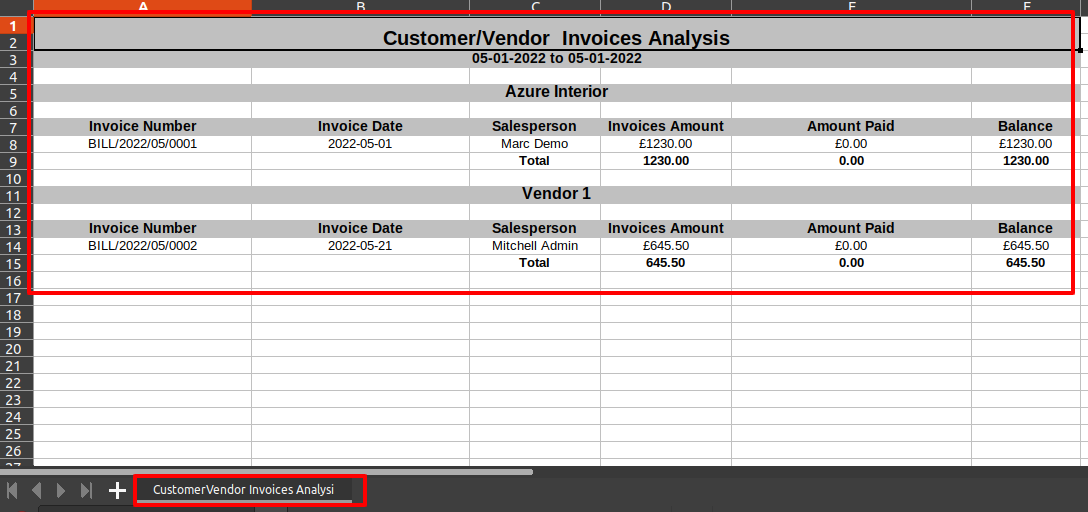
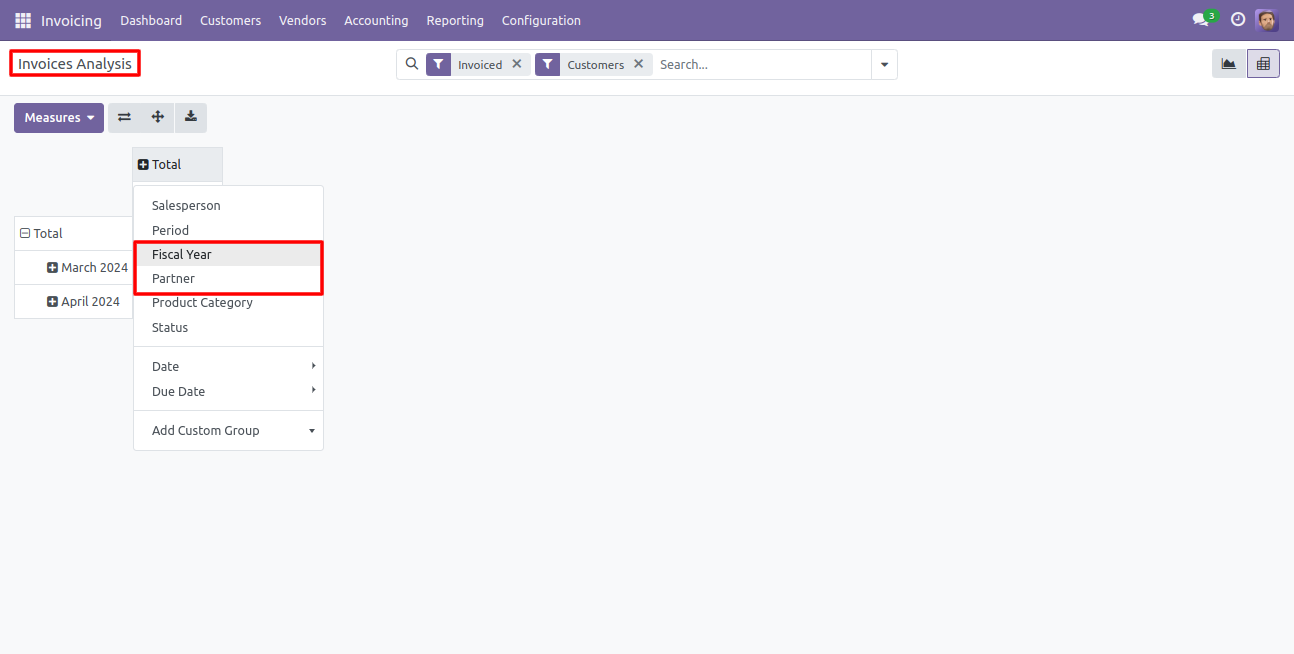
"Customer/Vendor Invoices Analysis" menu.
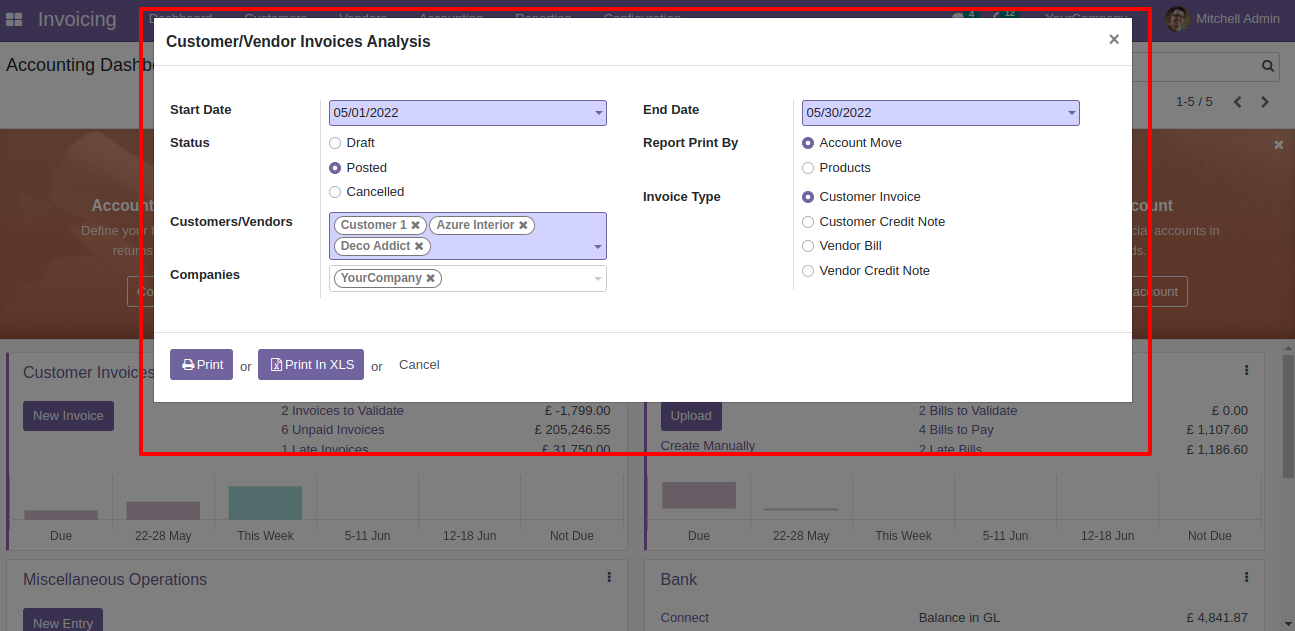
Invoice analysis PDF/Excel report wizard.
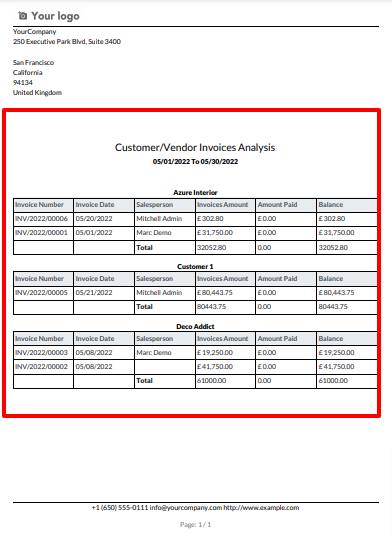
Invoice analysis PDF report looks like below.
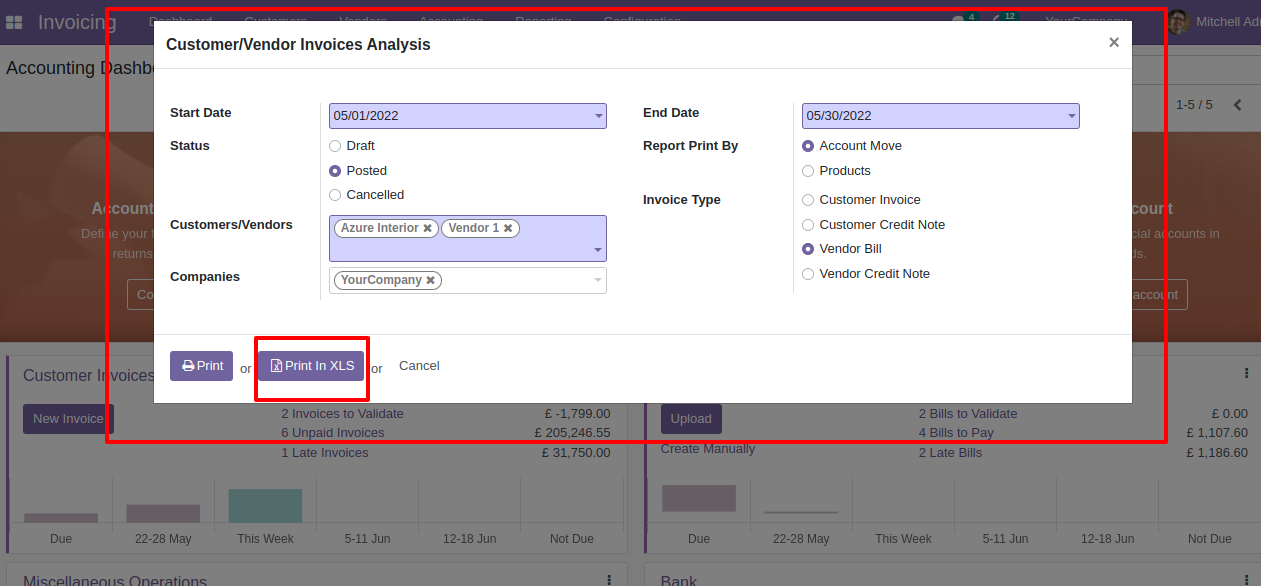
Now we print the "Invoice Analysis" excel report.
Invoice analysis XLS report looks like below.
Features
- You can generate invoice/bill/credit note/debit note reports by product category.
- Report can be generated in PDF and XLS format.
- You can generate reports between a specific date range.
- Easy to print a report of more than one company.
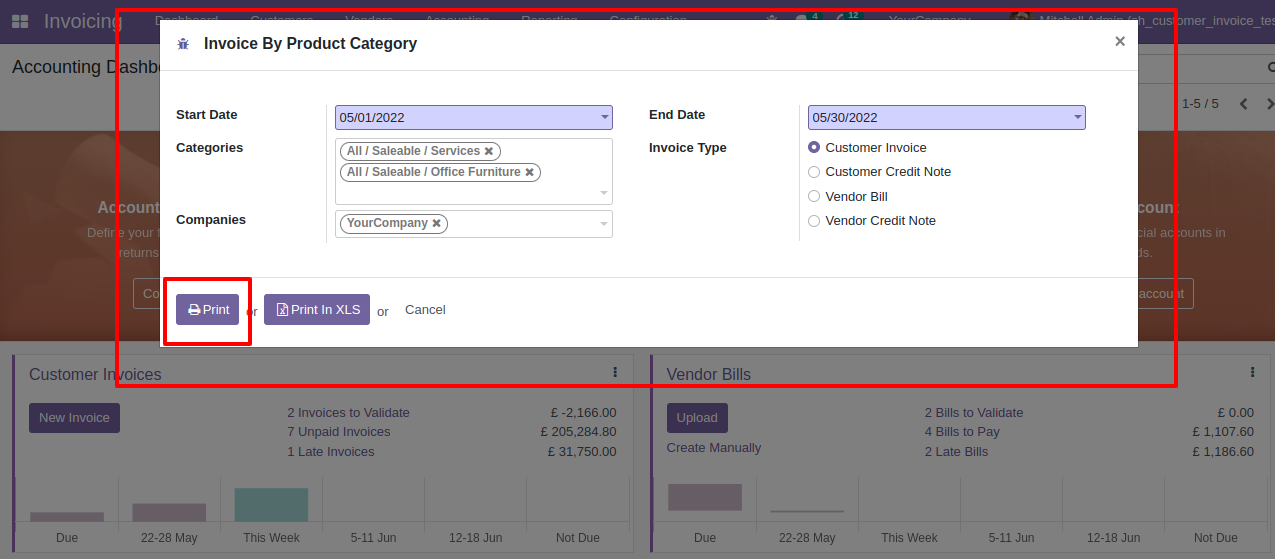
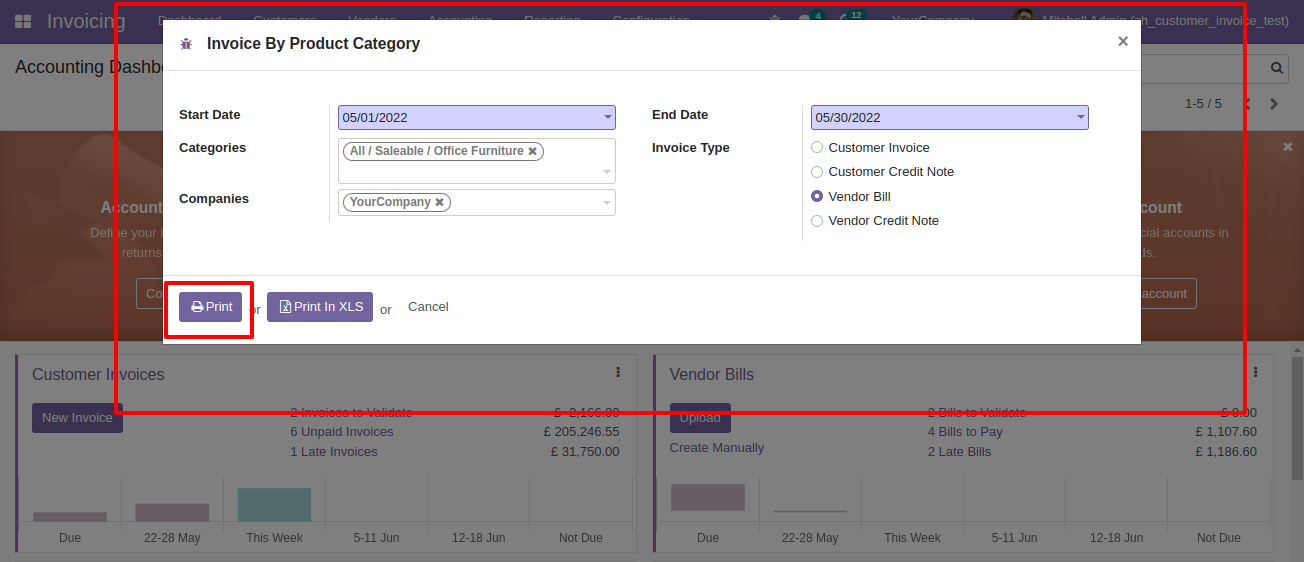
"Invoice By Product Category" menu.

Invoice by product category PDF/Excel report wizard.
Invoice by product category PDF report looks like below.


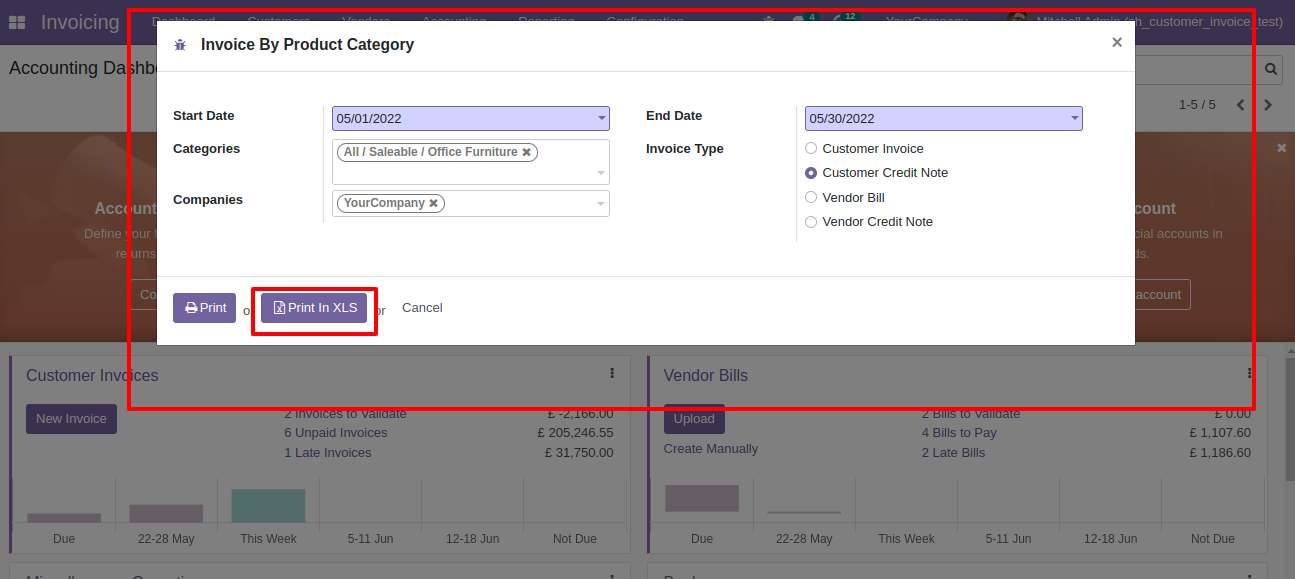
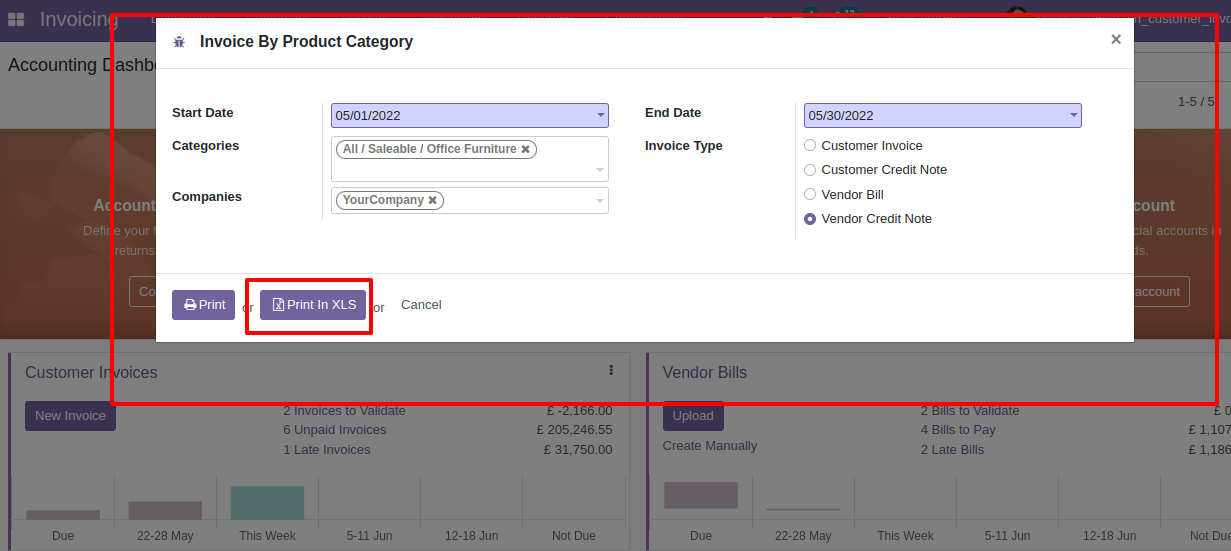
Now we print the "Invoice By Product Category" excel report for credit notes.
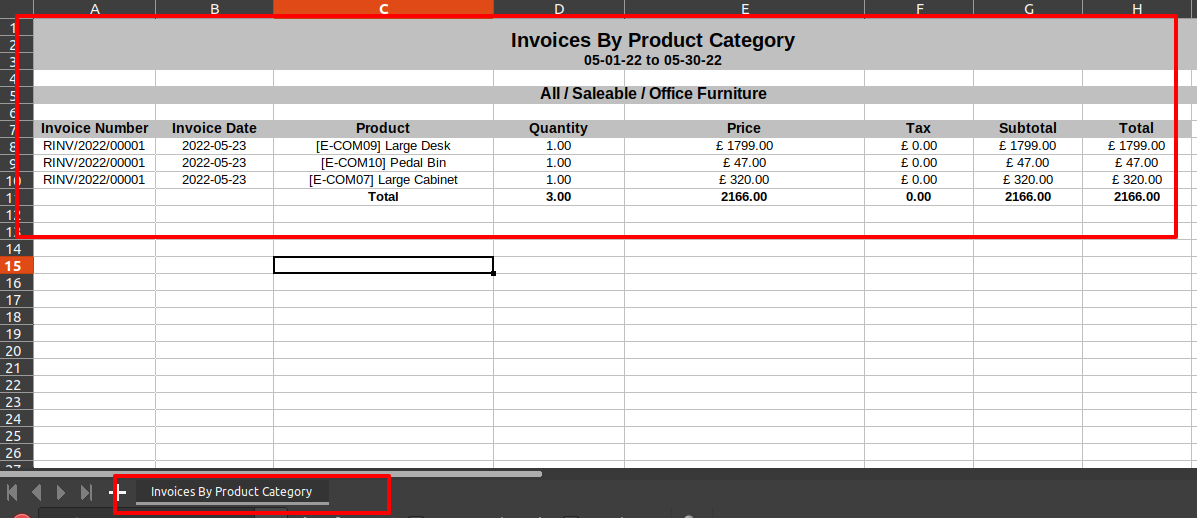
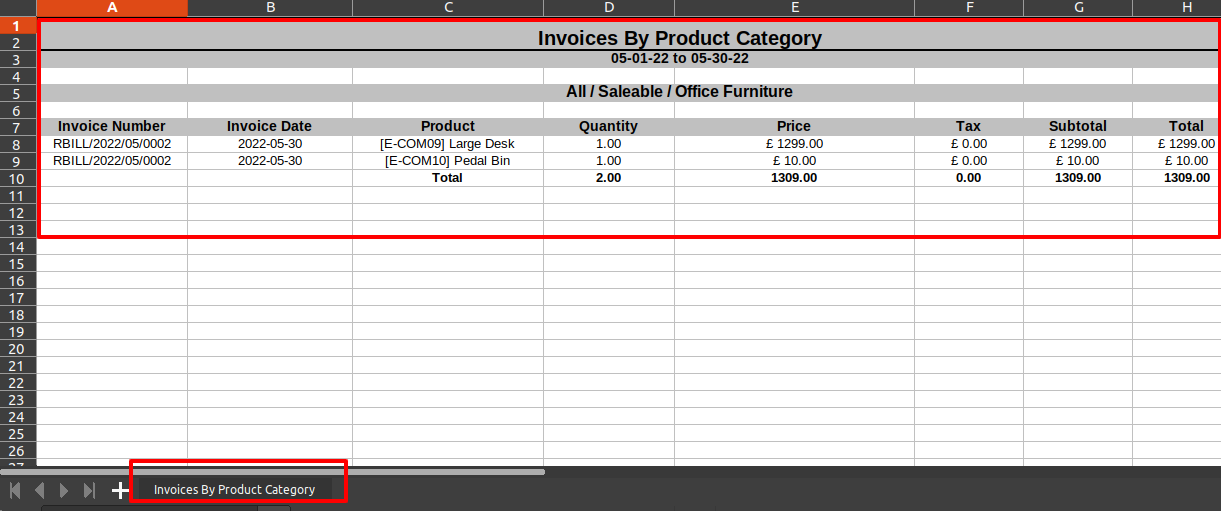
Invoice by product category XLS report looks like below.
Now we print the "Invoice By Product Category" PDF report for bills.
Vendor bills by product category PDF report looks like below.

Now we print the "Invoice By Product Category" excel report for vendor credit notes (debit notes).
XLS report looks like below.
Features
- You can generate invoice, bill, credit note, debit note detail reports.
- You can generate report for a specific dates.
- You can print report by different state.
- Generate report for single company as well as multi-companies.
- You can print report in PDF as well as excel report.
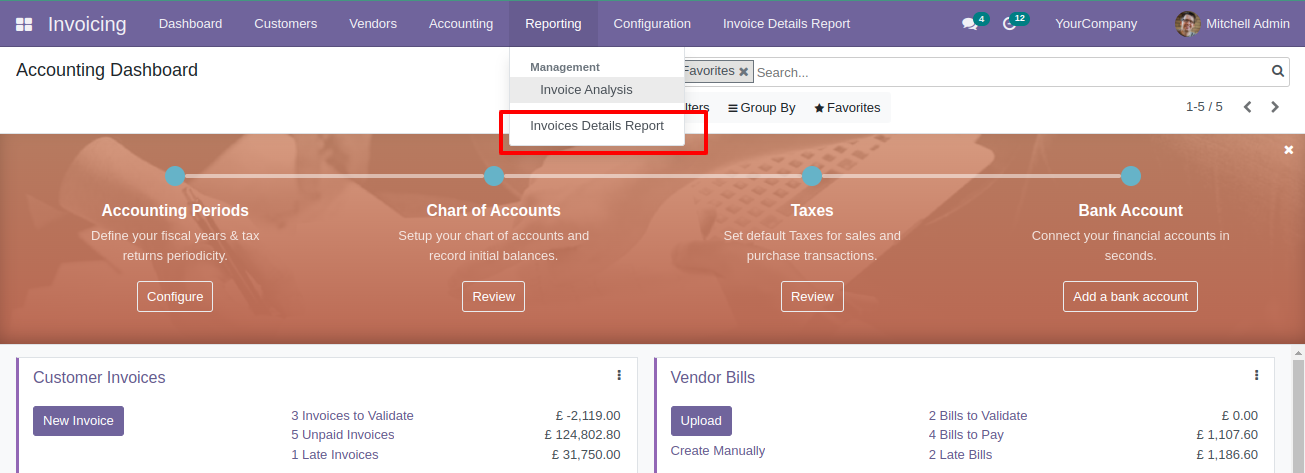
Go to the "Invoice Details Report".
Enter start date/end date, choose invoice state & invoice type to get report.
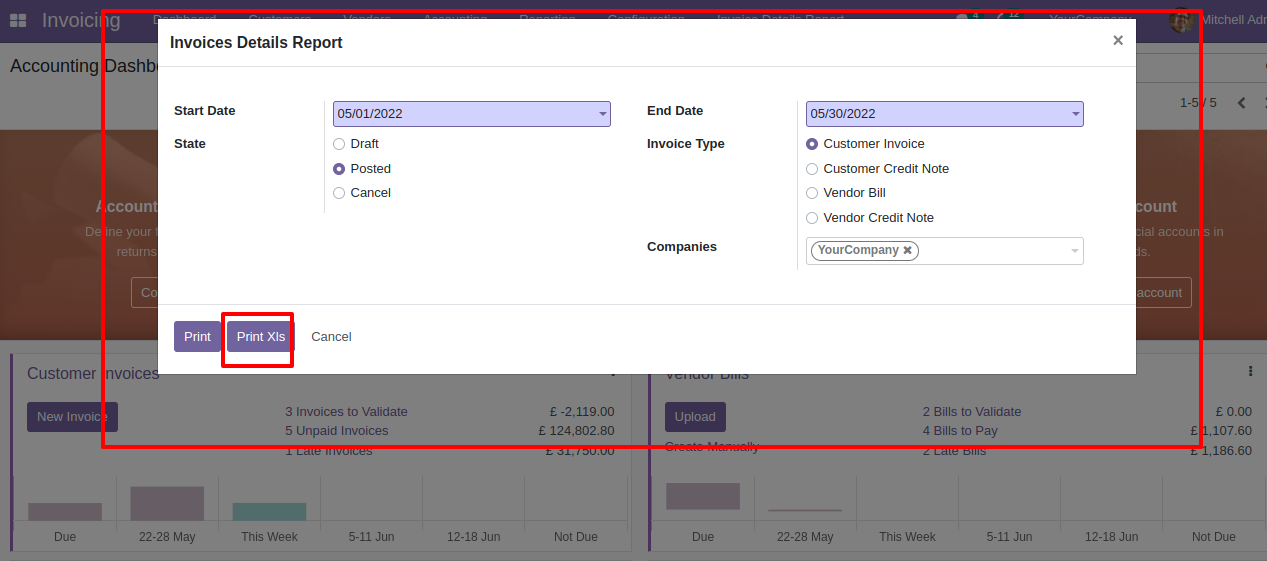
Excel report based on given dates.

Now we generate PDF report.
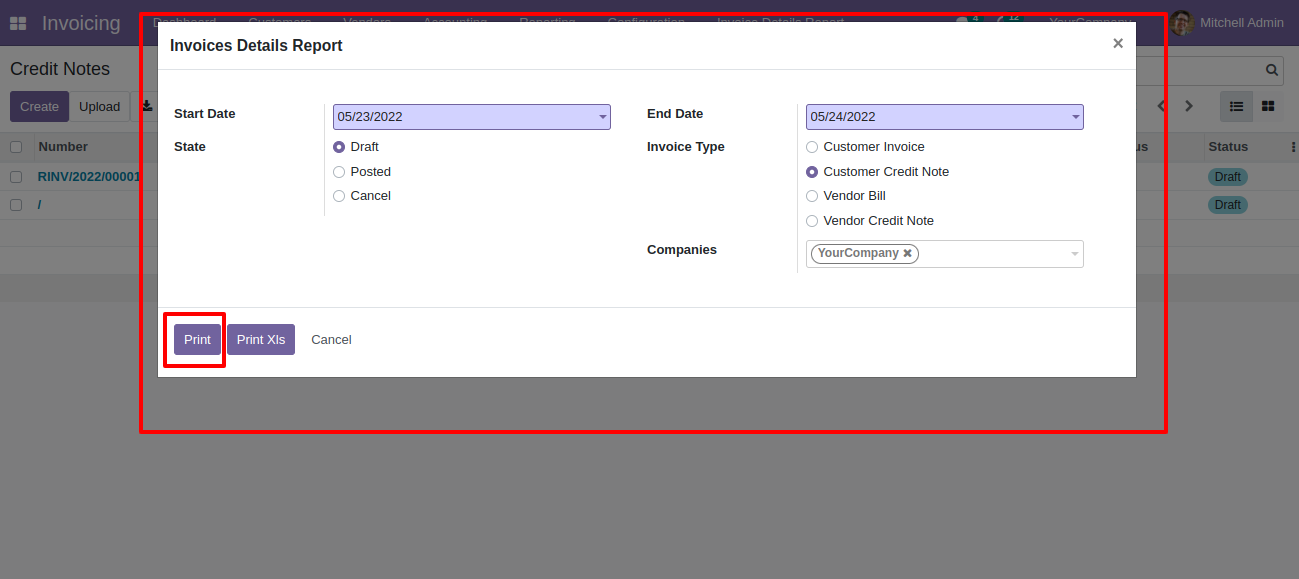
PDF report looks like this.

Features
- You can generate and print the invoice product profit reports.
- You can generate reports between a specific date range.
- Report can be generated in PDF and XLS format.
- You can generate a report based on customers, products or both.
- You can easily calculate Invoice profit.
- Easy to print a report of more than one company.
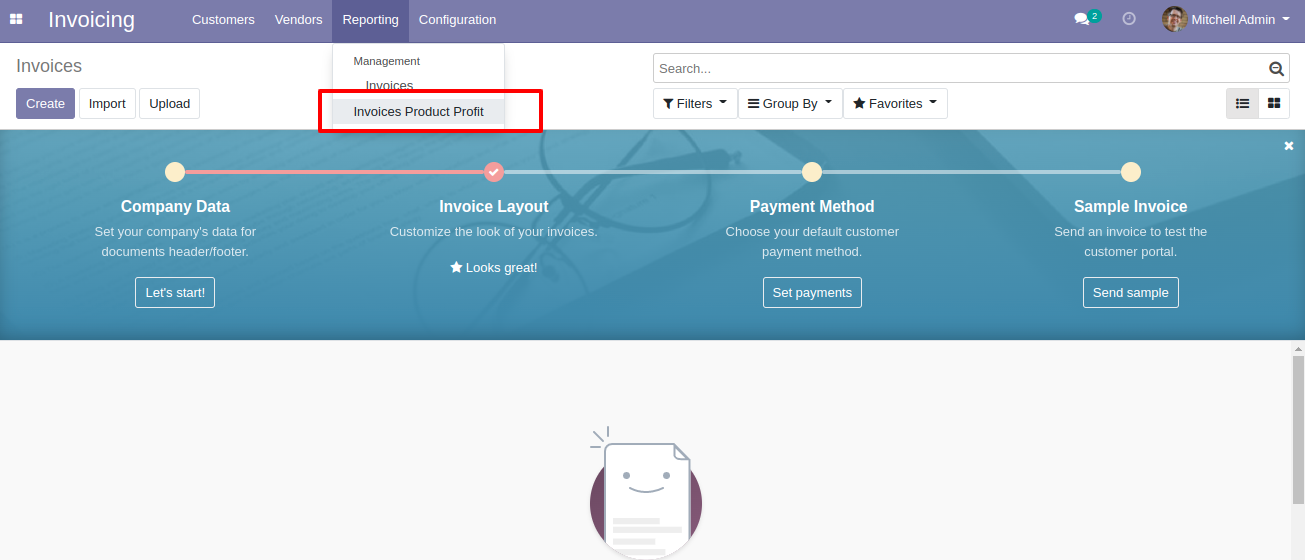
"Invoice Product Profit" menu.
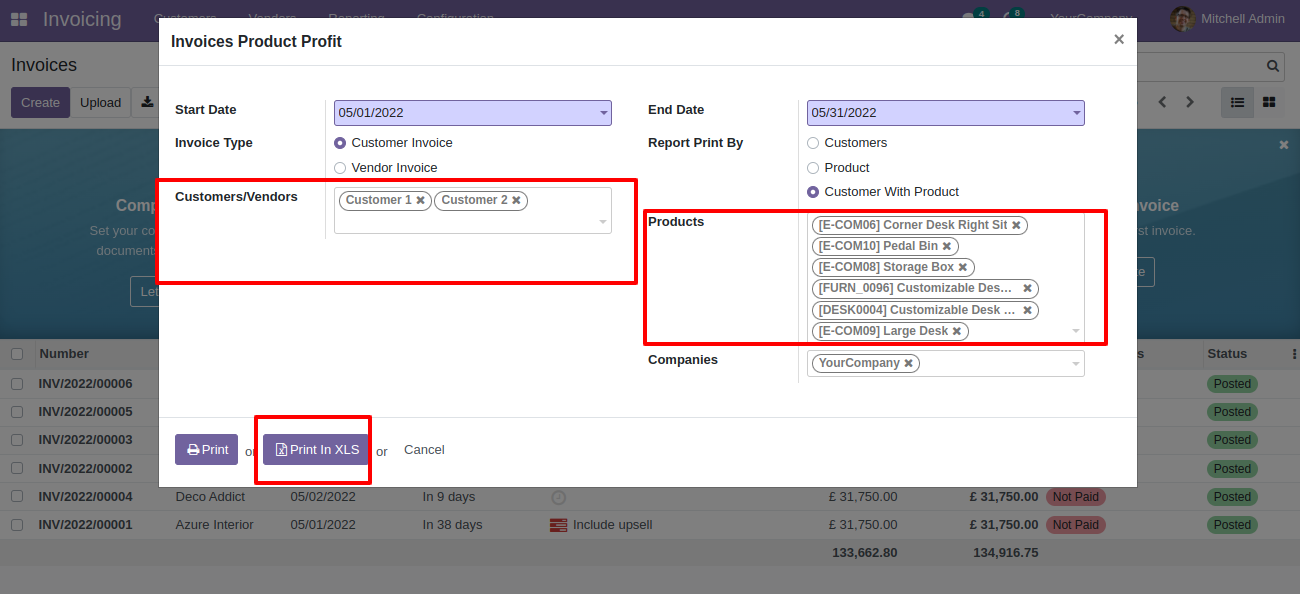
Invoice product profit PDF/Excel report wizard, we print the report based on customers.
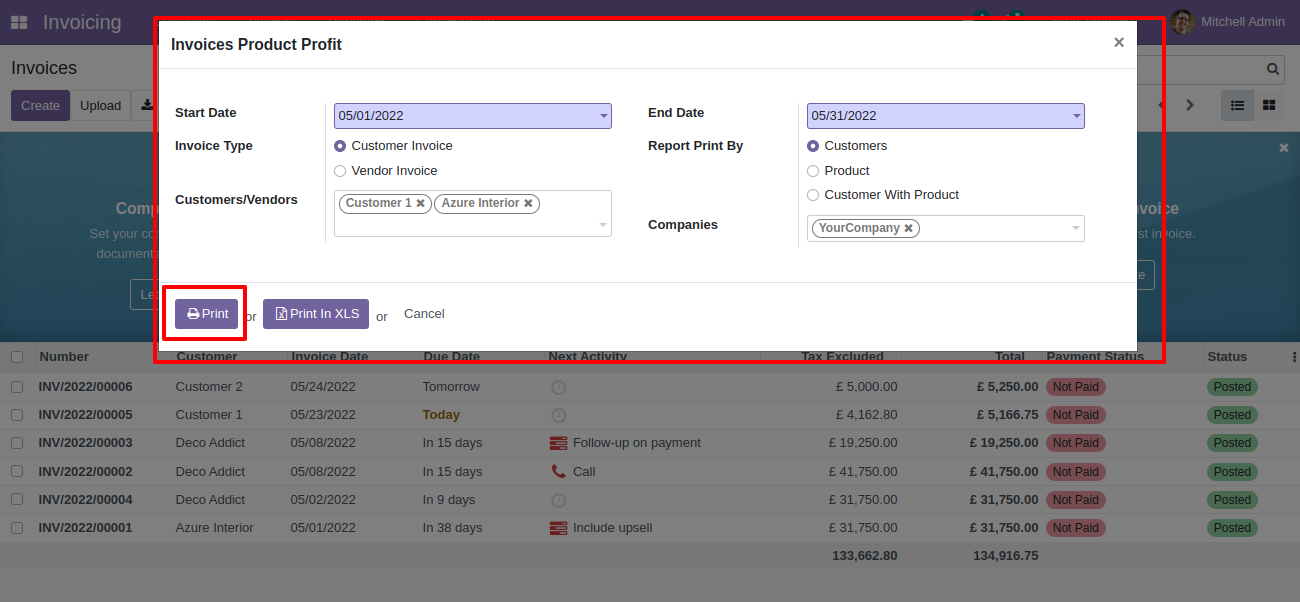
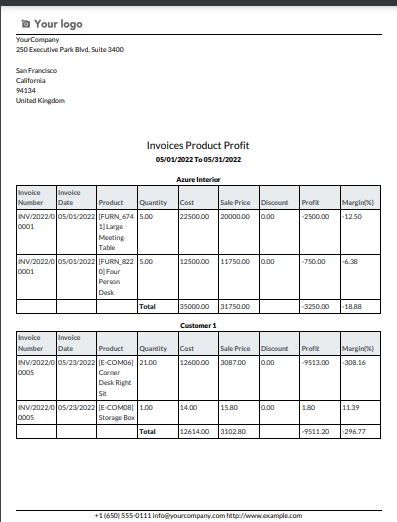
Invoice product profit PDF report looks like below.
Now we print the "Invoice Product Profit Report" excel report based on customer with products.
Invoice product profit XLS report looks like below.

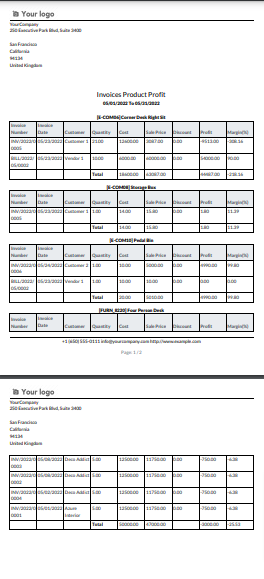
Now we print the report based on products.
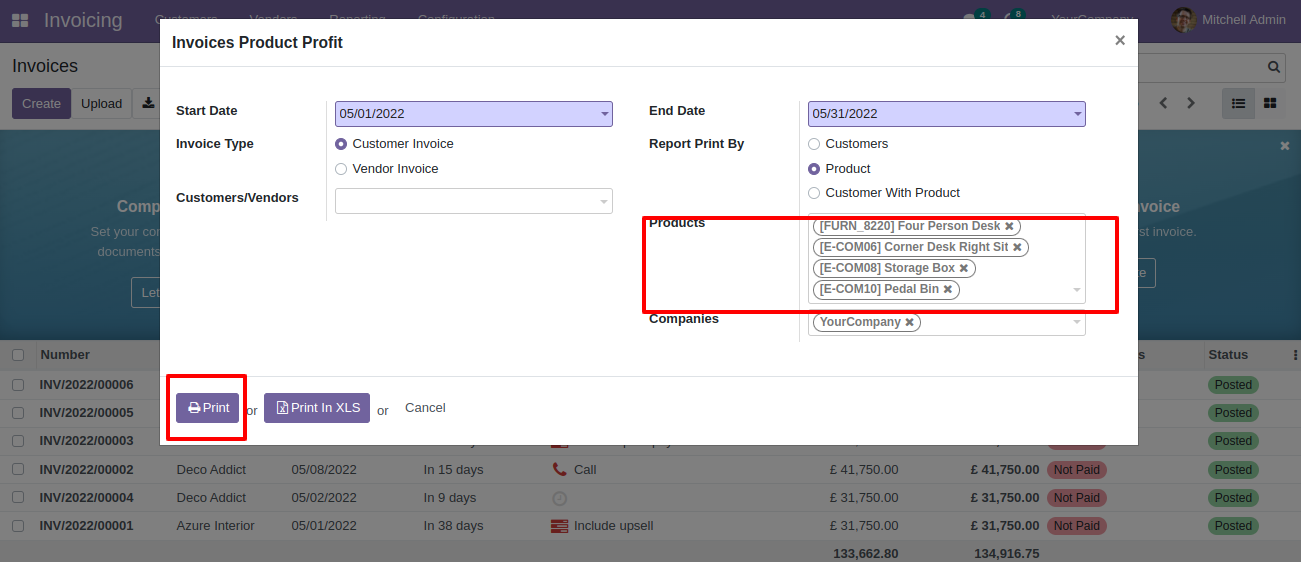
PDF report based on products.
Features
- You can generate and print invoice report by sales person.
- You can generate reports between a specific date range.
- You can generate a report based on any status of the invoice (Draft,Posted,Cancelled).
- You can generate a report based on invoice type.
- Report can be generated in PDF and XLS format.
- Easy to print a report of more than one company.
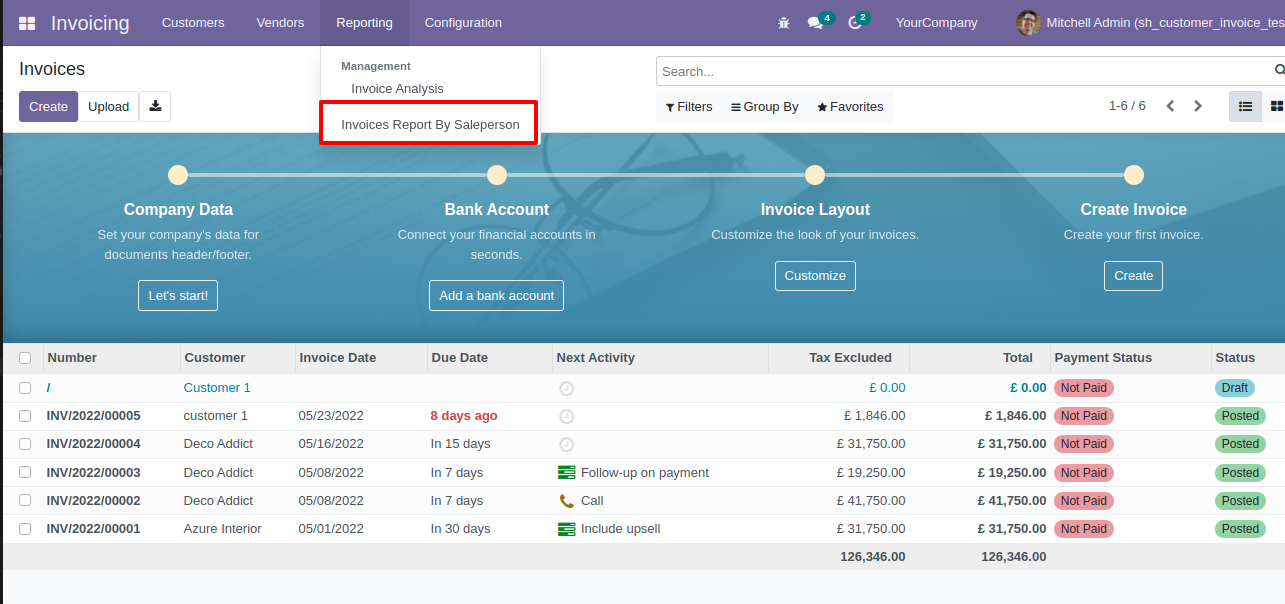
"Invoice Report By Salesperson" menu.
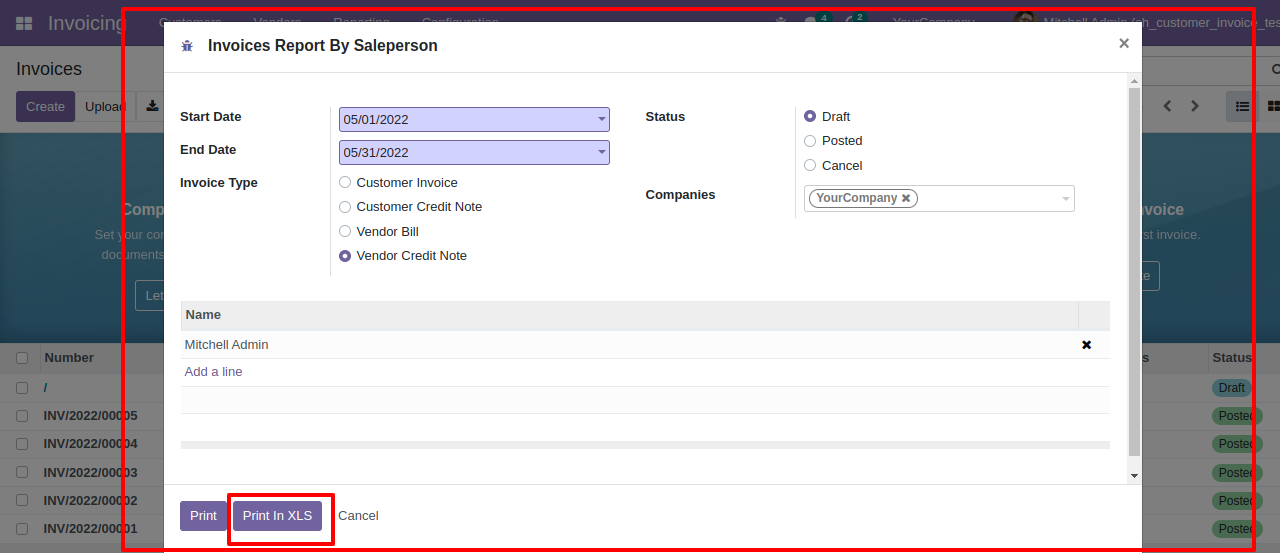
Set the start and end date, set salesperson ,set status, select company, invoice type and print.

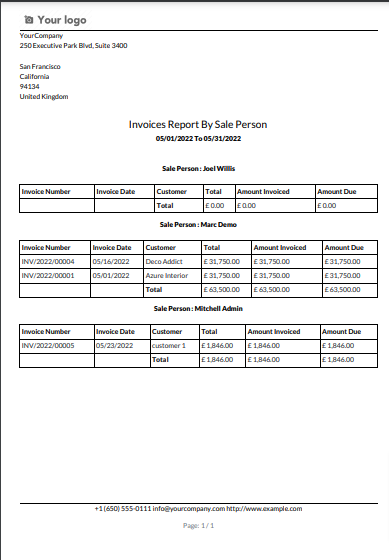
"Invoice Report By Salesperson" PDF report looks like below.
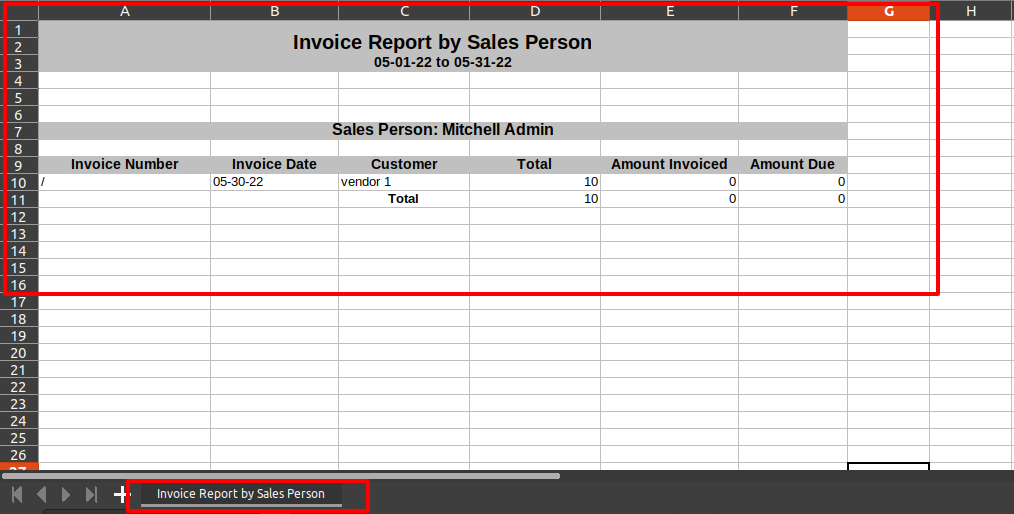
Now we print the "Invoice Report By Salesperson" excel report.
XLS report looks like below.
Features
- You can generate and print product invoice indent report of customers.
- You can generate reports between a specific date range.
- You can generate a report based on product categories.
- You can generate a report based on any status of the invoice (Draft,Posted,Cancelled).
- You can generate a report based on invoice type.
- Report can be generated in PDF and XLS format.
- Easy to print a report of more than one company.
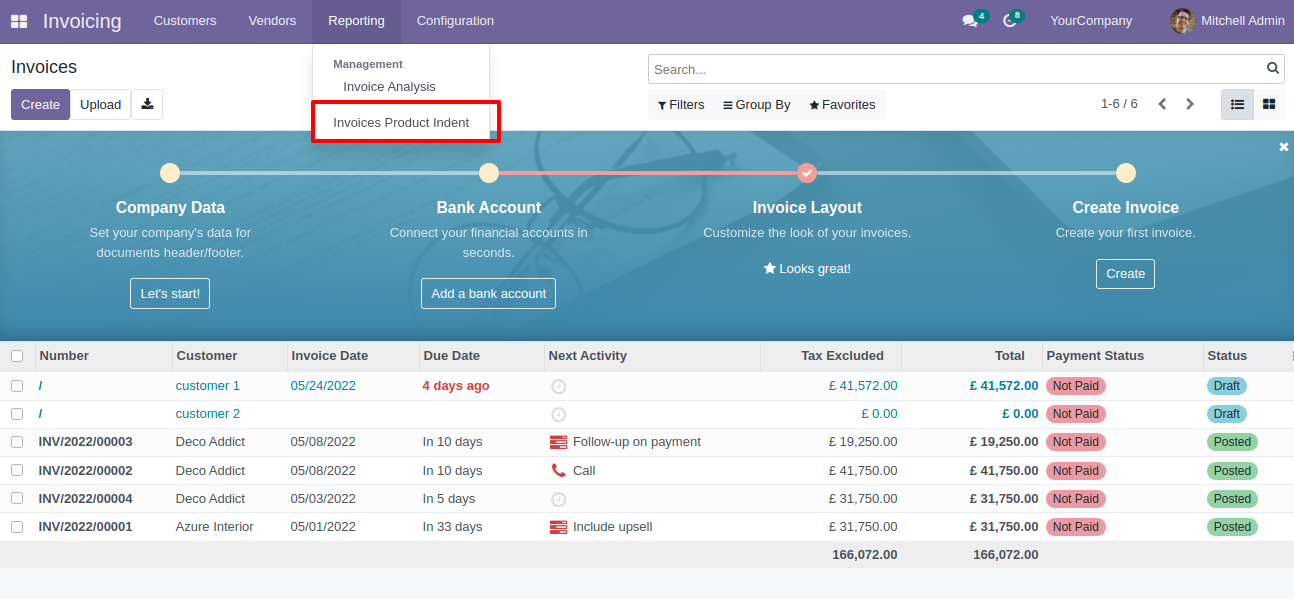
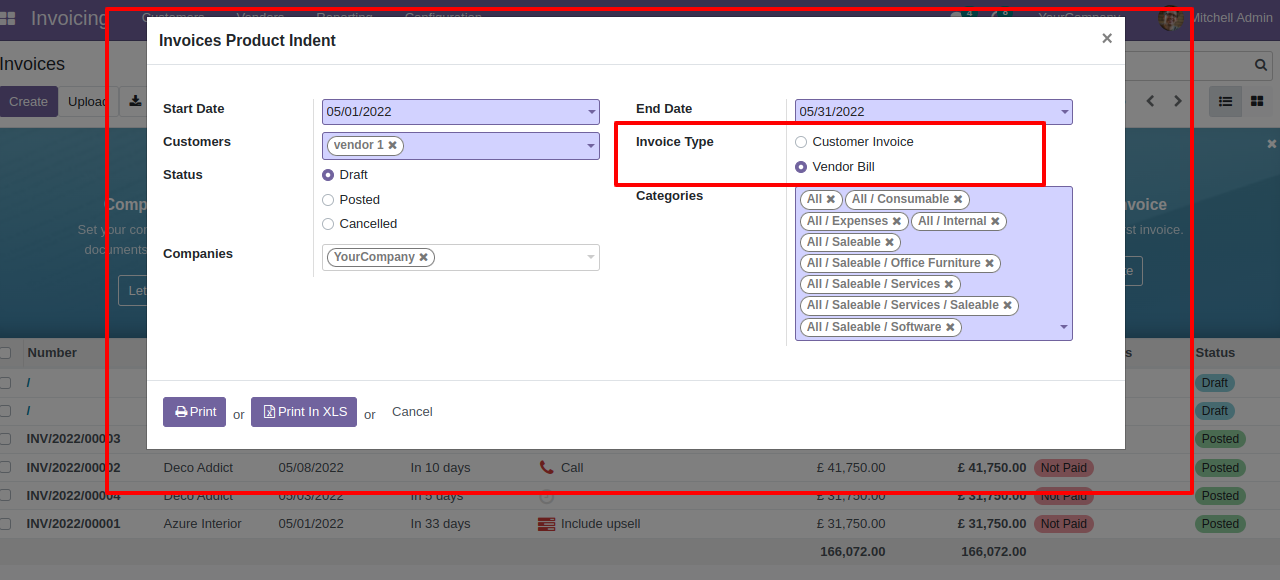
"Invoice product Indent" menu.
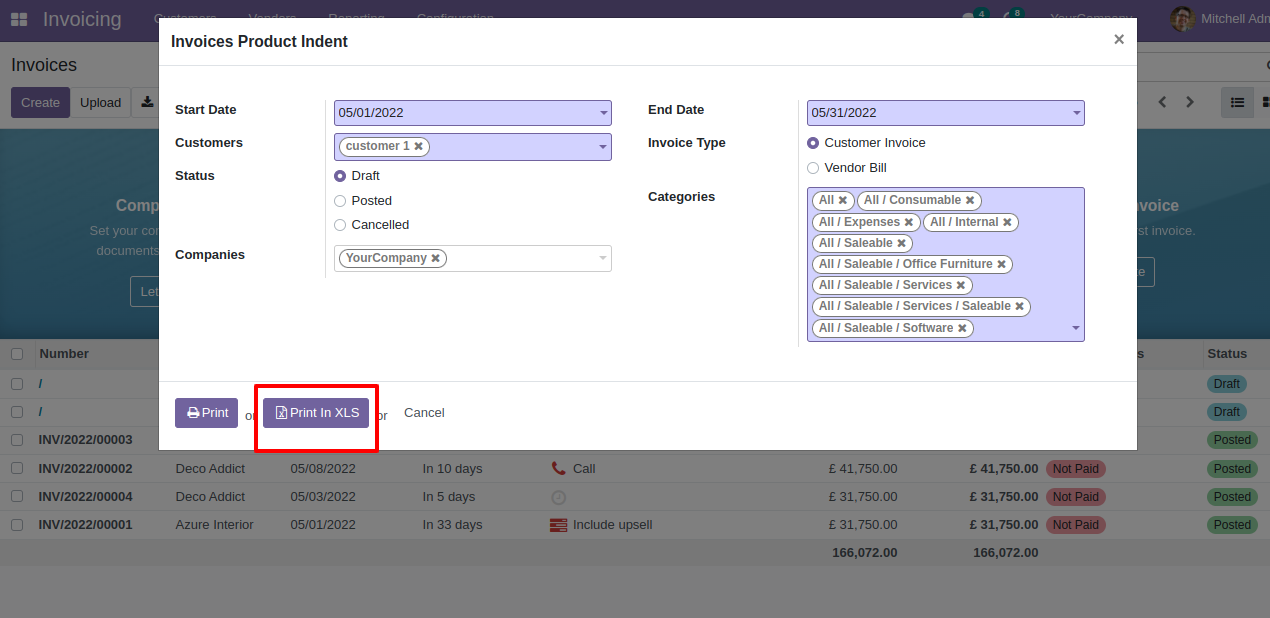
Set the start and end date, set customer,set status,select company,invoice type and set categories and print.

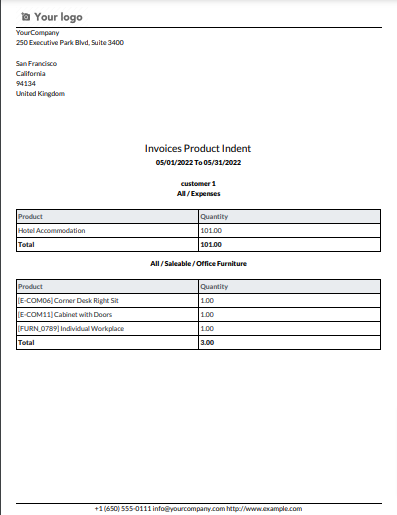
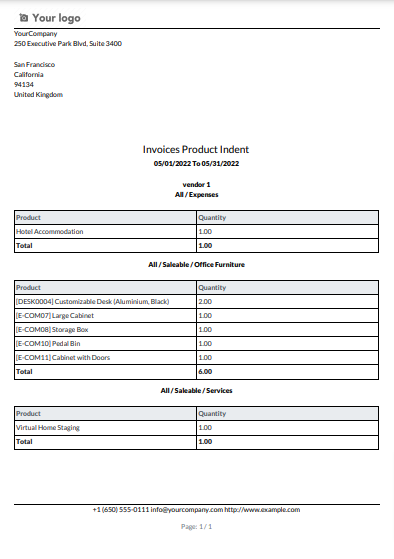
Product indent PDF report looks like below.
Now we print the "Invoice Product Indent" excel report.
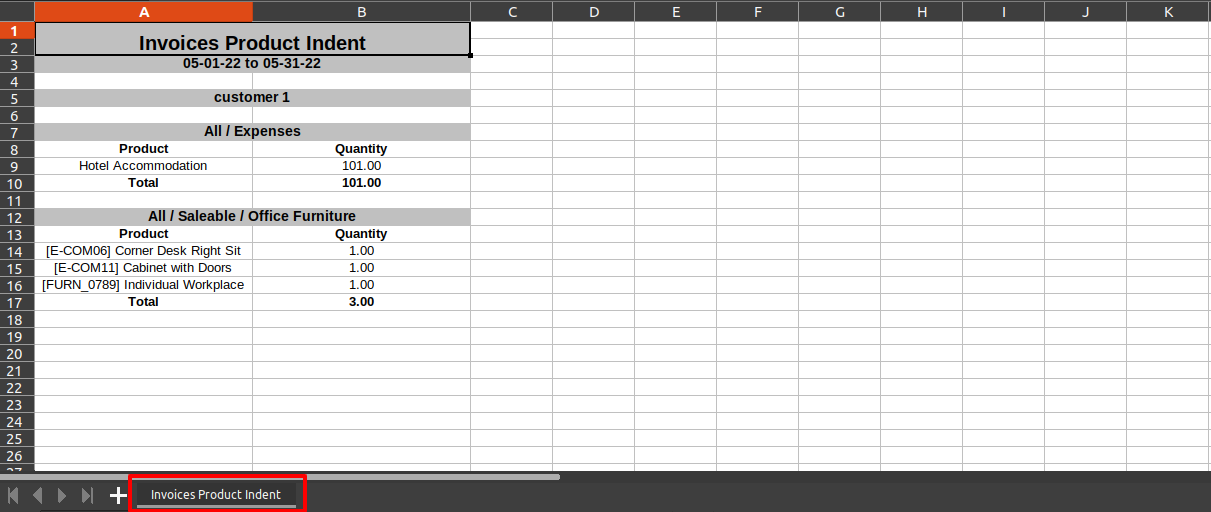
Product indent XLS report looks like below.
Now we print bill indent report.
Select Report looks like this.
Features
- Easy to analysis the top Customer invoice/vendor bill of your specified period dates.
- You can print the report in PDF and Excel sheets.
- Easily identify records by no of items, total qty sold & invoice types.
- You can compare top customers/vendors between a specific period.
- Generate report for single company as well as multi-companies.
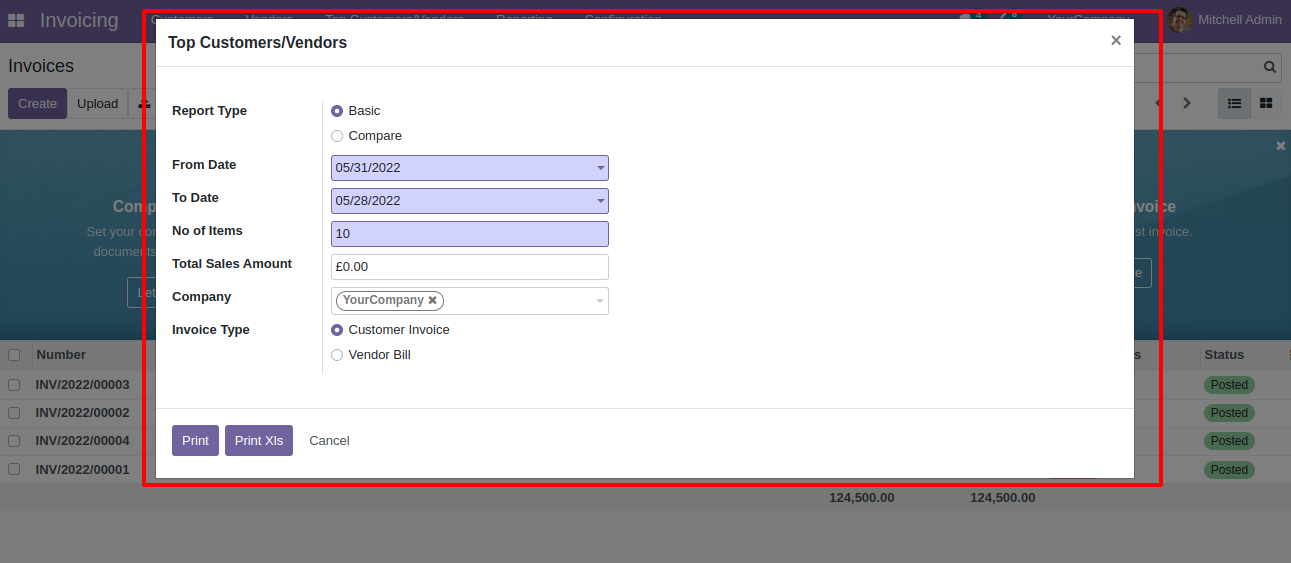
Top customers/vendors menu.

Top customer/vendor report wizard and report type select "Basic".
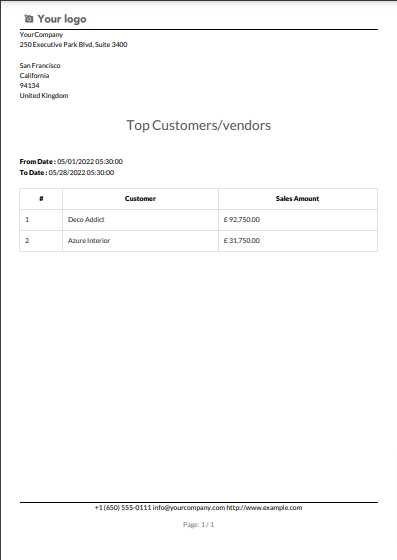
Top customer/vendor basic type PDF Report look like below.
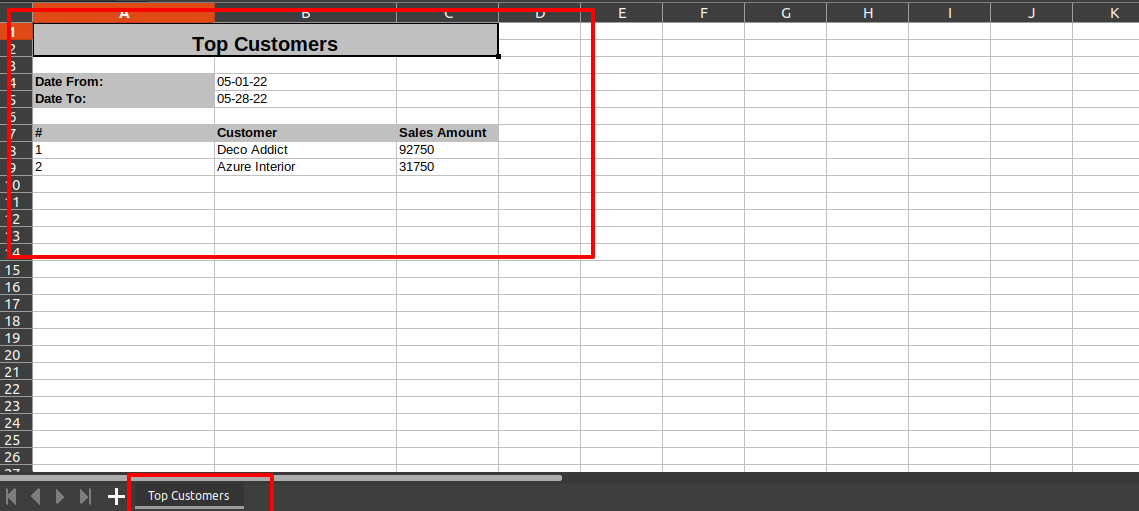
Top customer/vendor basic excel report looks like below.
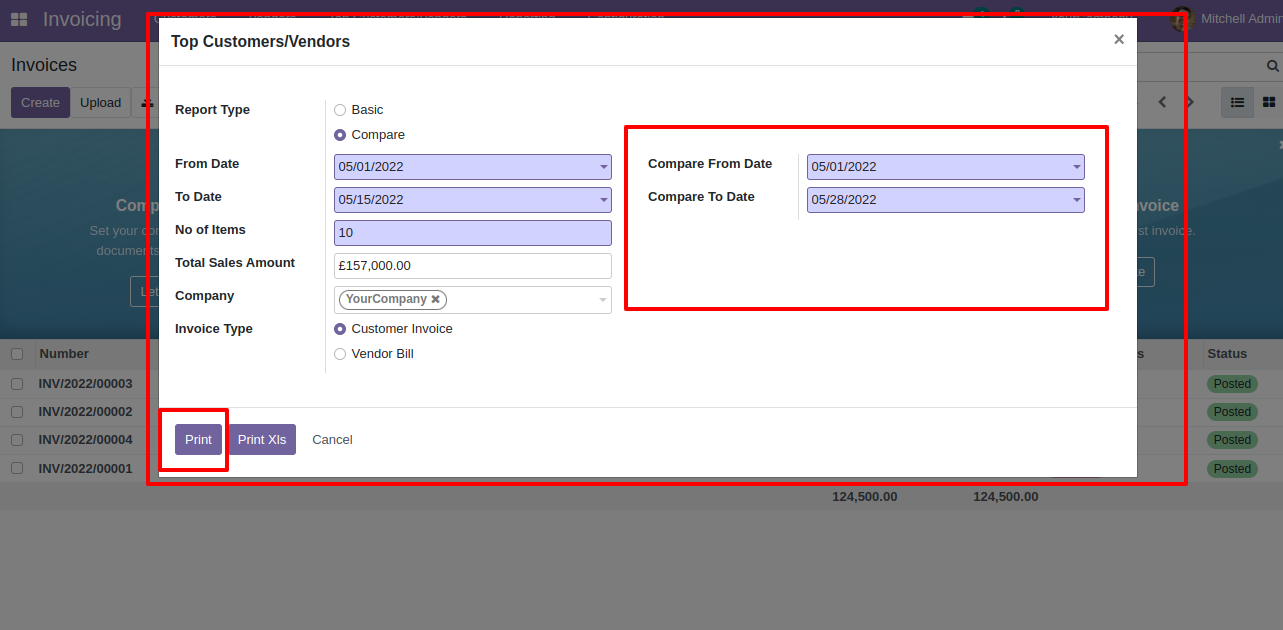
Now select compare type & dates and print report.
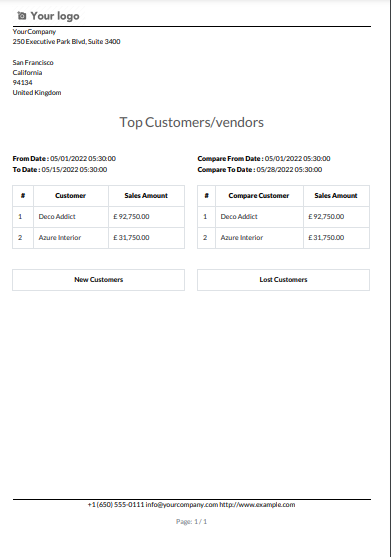
Top customer/vendor compare report looks like below.
Features
- Easy to analysis the top invoice/bill with specified period dates.
- You can print the report in PDF and Excel sheets.
- You can compare top invoice/bill between a specific period.
- Easy to apply different kinds of filters like no of products, total qty sold, from date, to date, etc.
- Generate report for single company as well as multi-companies.
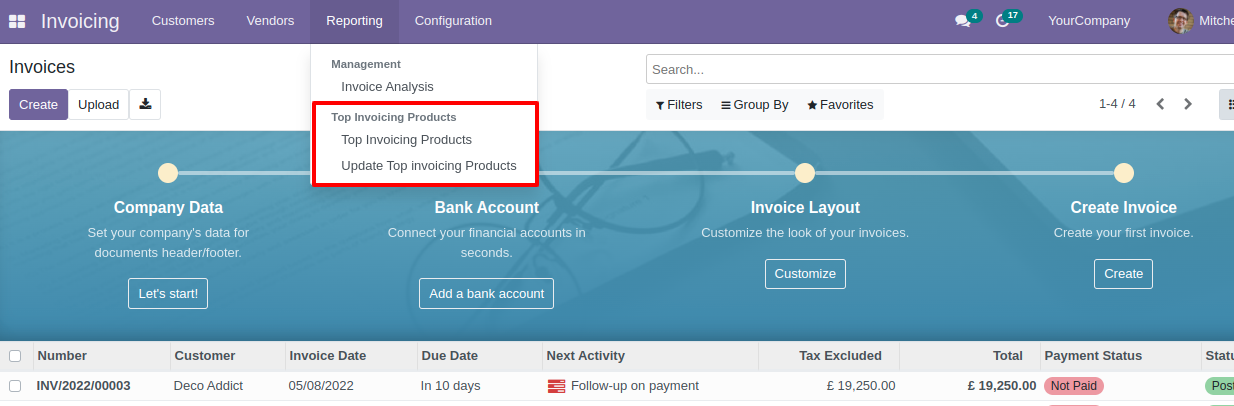
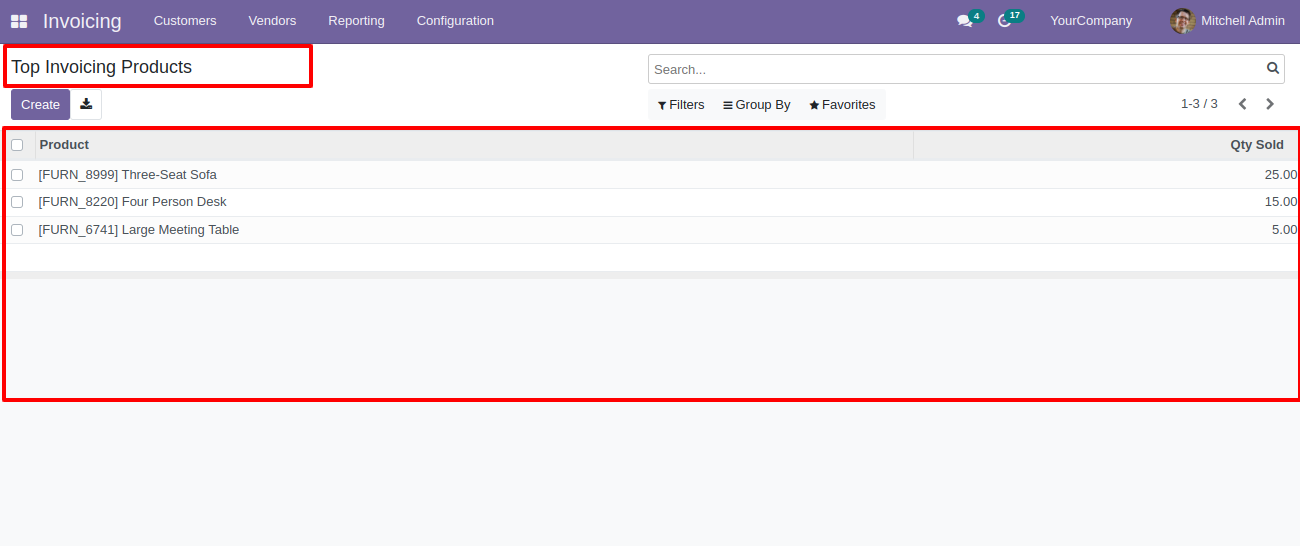
Top invoicing products menu.
Top invoicing products tree view.
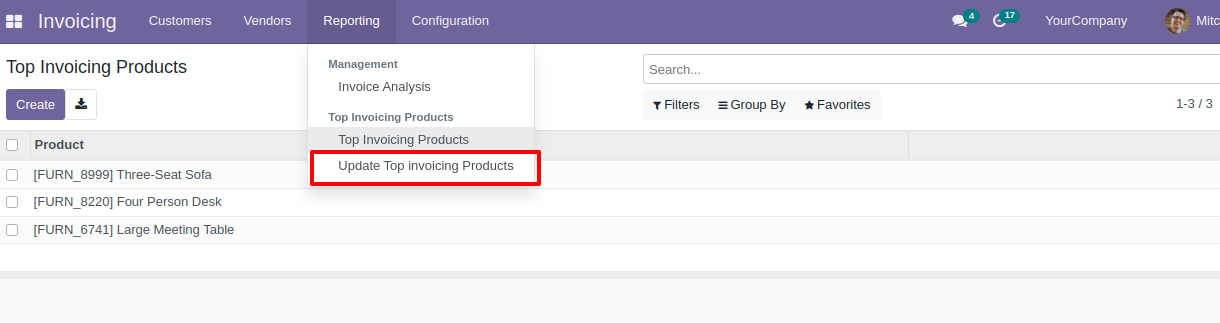
Update top invoicing products menu.
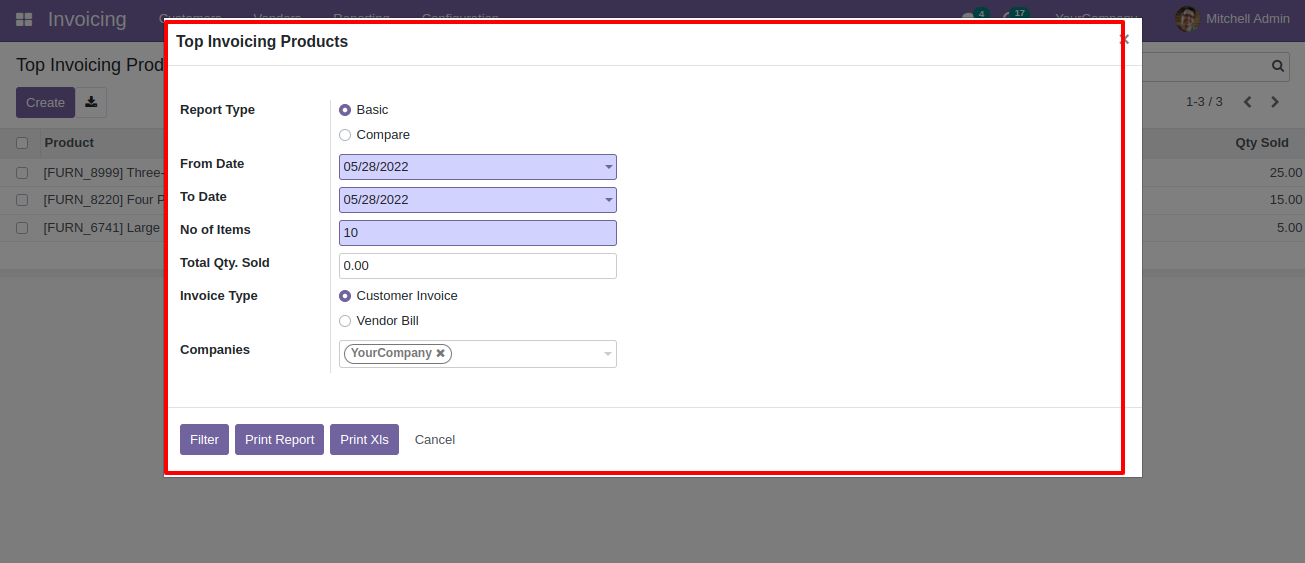
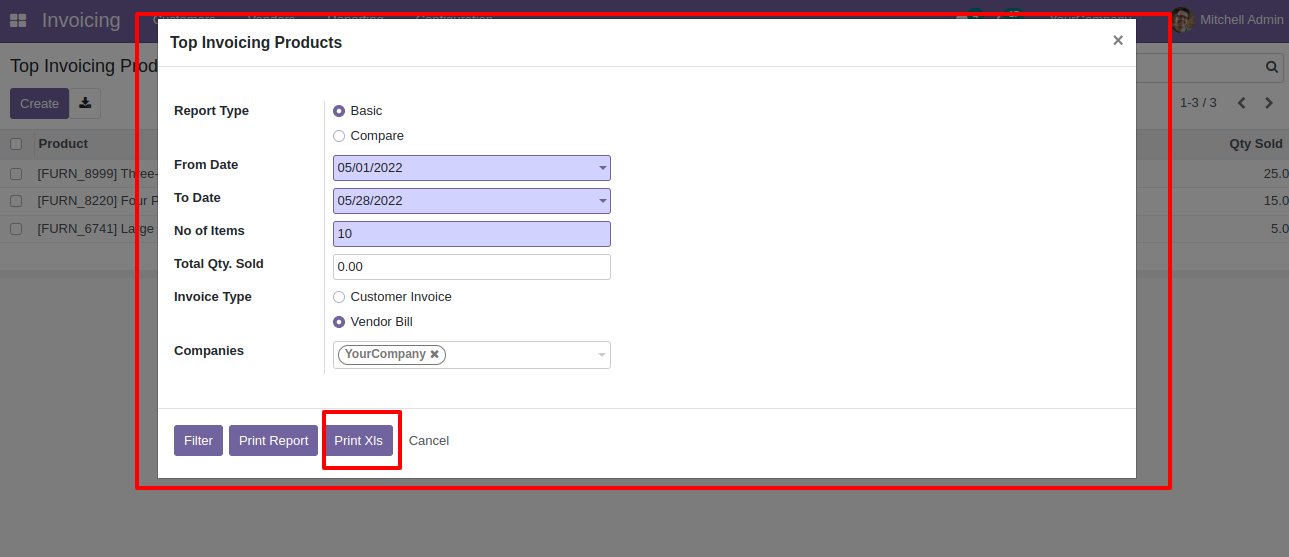
Top invoicing products report wizard and report type select "Basic".
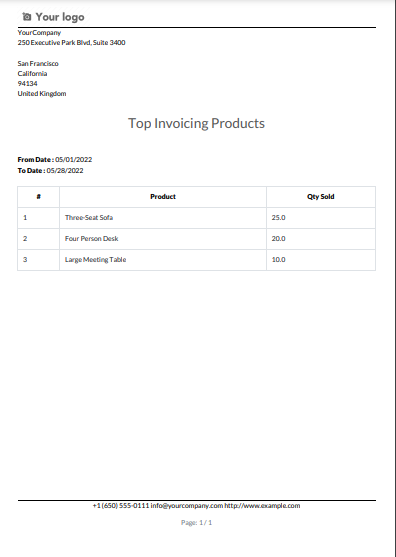
Top invoicing products basic PDF report look like below.
Top invoicing products report wizard and report type select "Basic".
Top Invoicing product XLS report look like below.

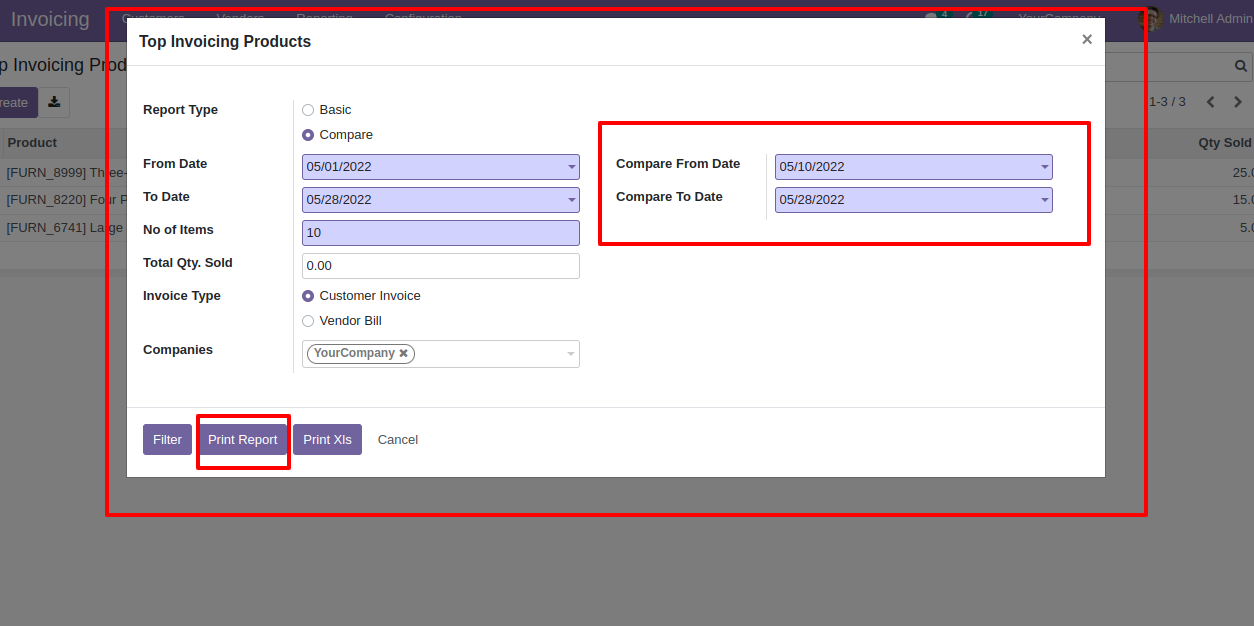
Now select compare type & dates and print report.
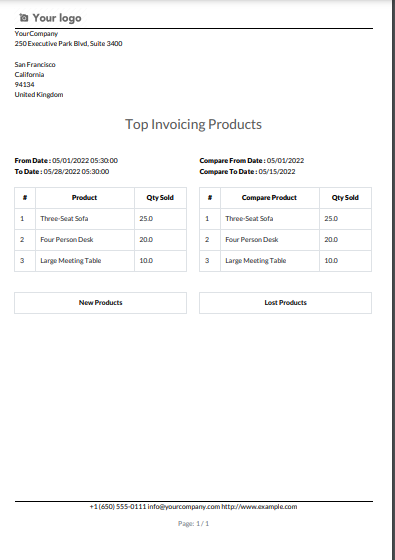
Top invoicing product compare report looks like below.
Features
- You can generate and print invoice summary reports.
- You can generate reports between a specific date range.
- Report can be generated in PDF and XLS format.
- You can generate a report based on invoice status (draft/ posted/ cancel).
- You can generate a report based on invoice type(invoice/ bill/ credit note/ debit note).
- Easy to print a report of more than one company.
- This module saves your important time.
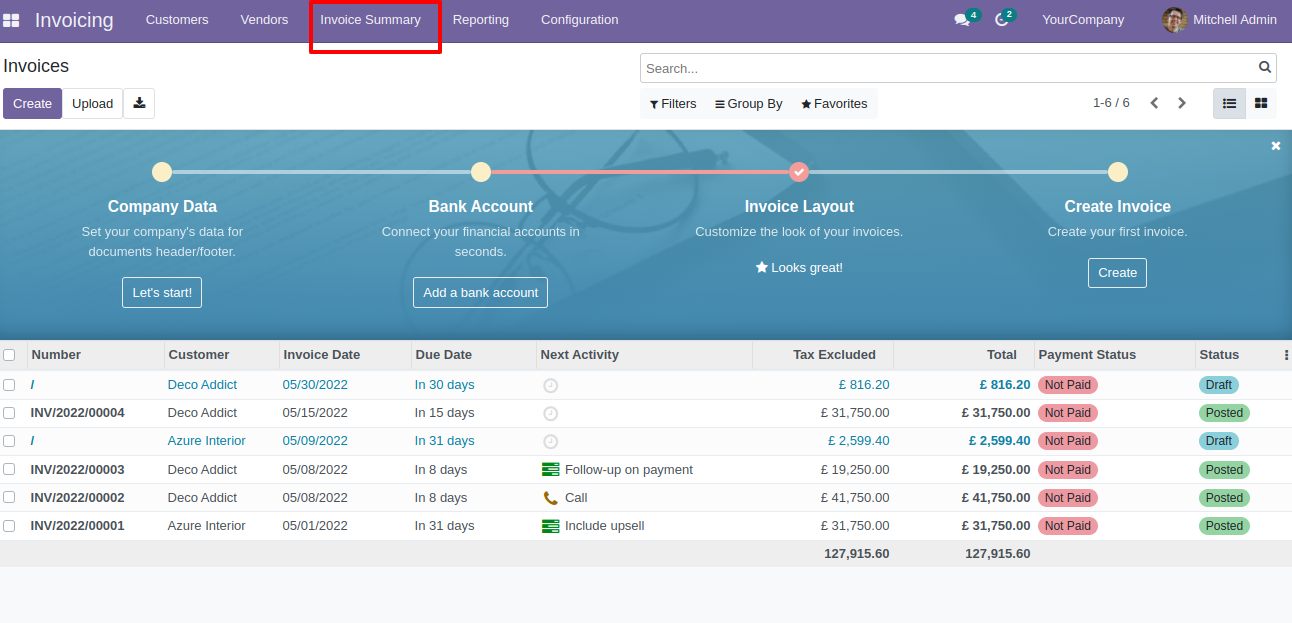
"Invoice Summary" menu.
Invoice summary PDF/Excel report wizard.
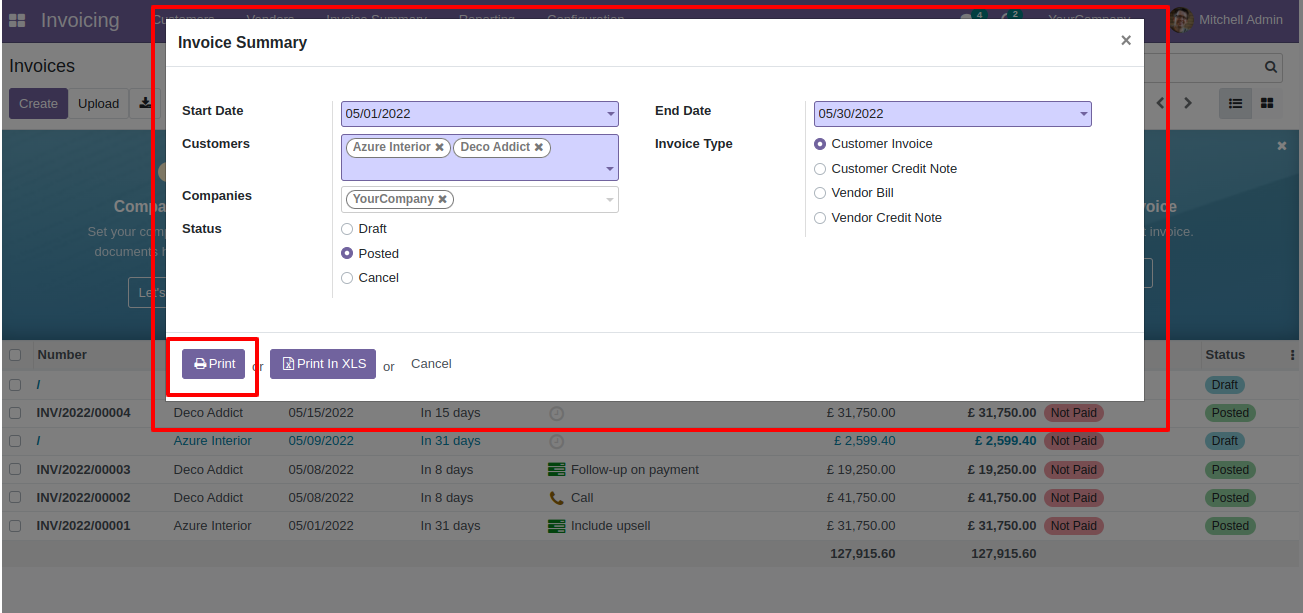
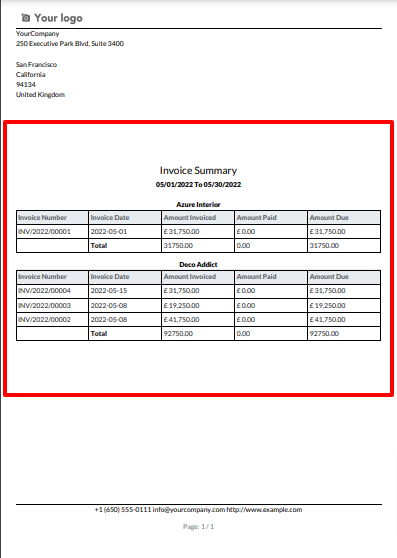
Invoice summary PDF report looks like below.
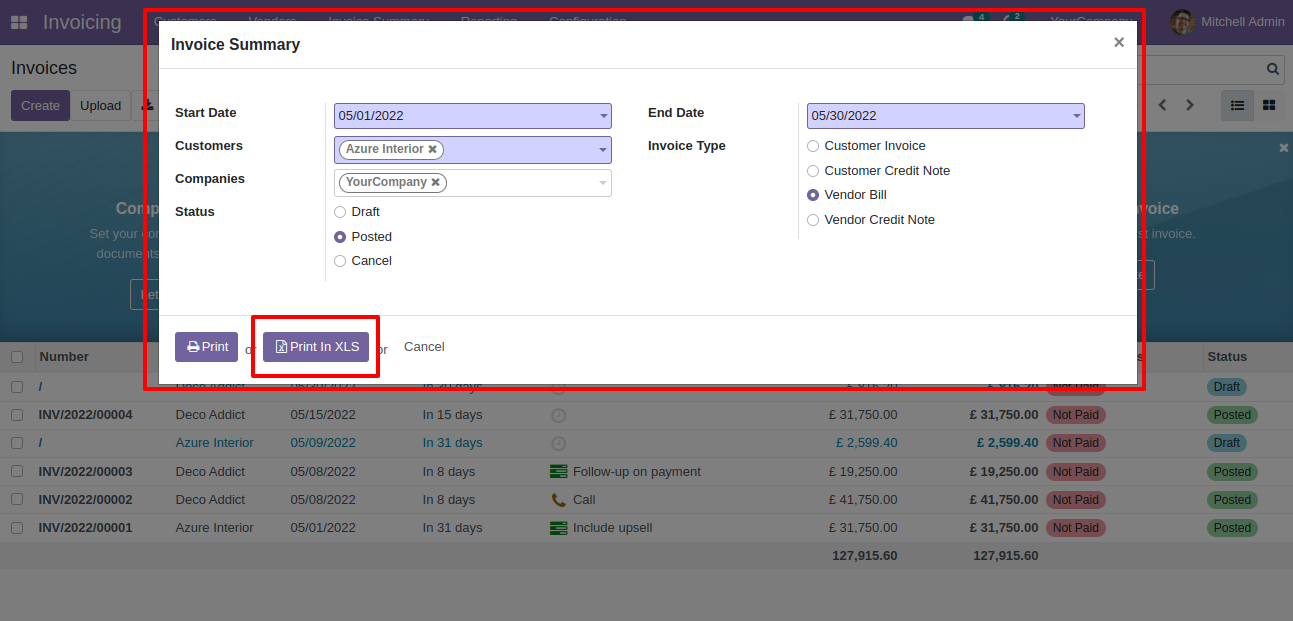
Now we print the "Invoice Summary" excel report.
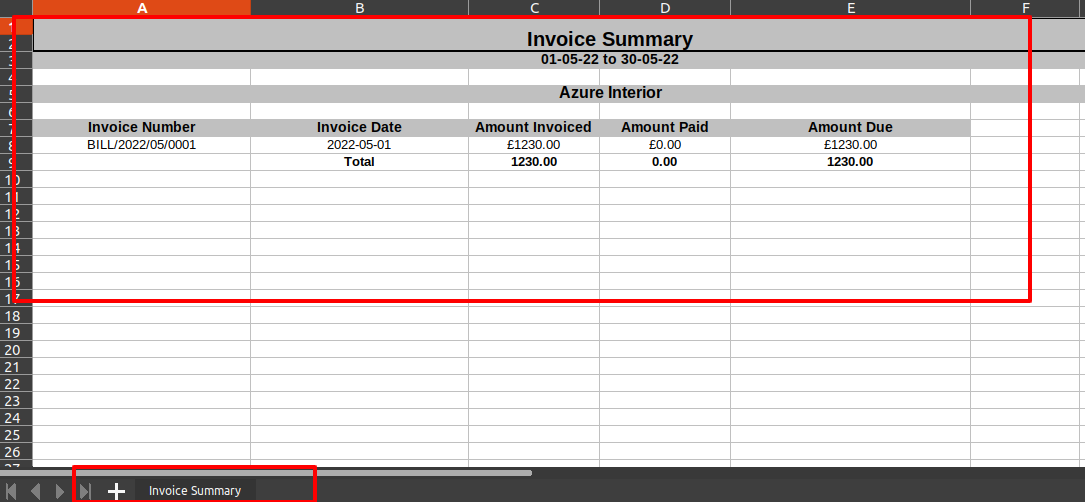
Invoice summary XLS report looks like below.
Features
- Easy to reconcile the bank statement.
- Unreconciled & Reconciled closing balances update automatically when you reconciled the payment.
- Add and manage payment lines directly in the reconciliation form.
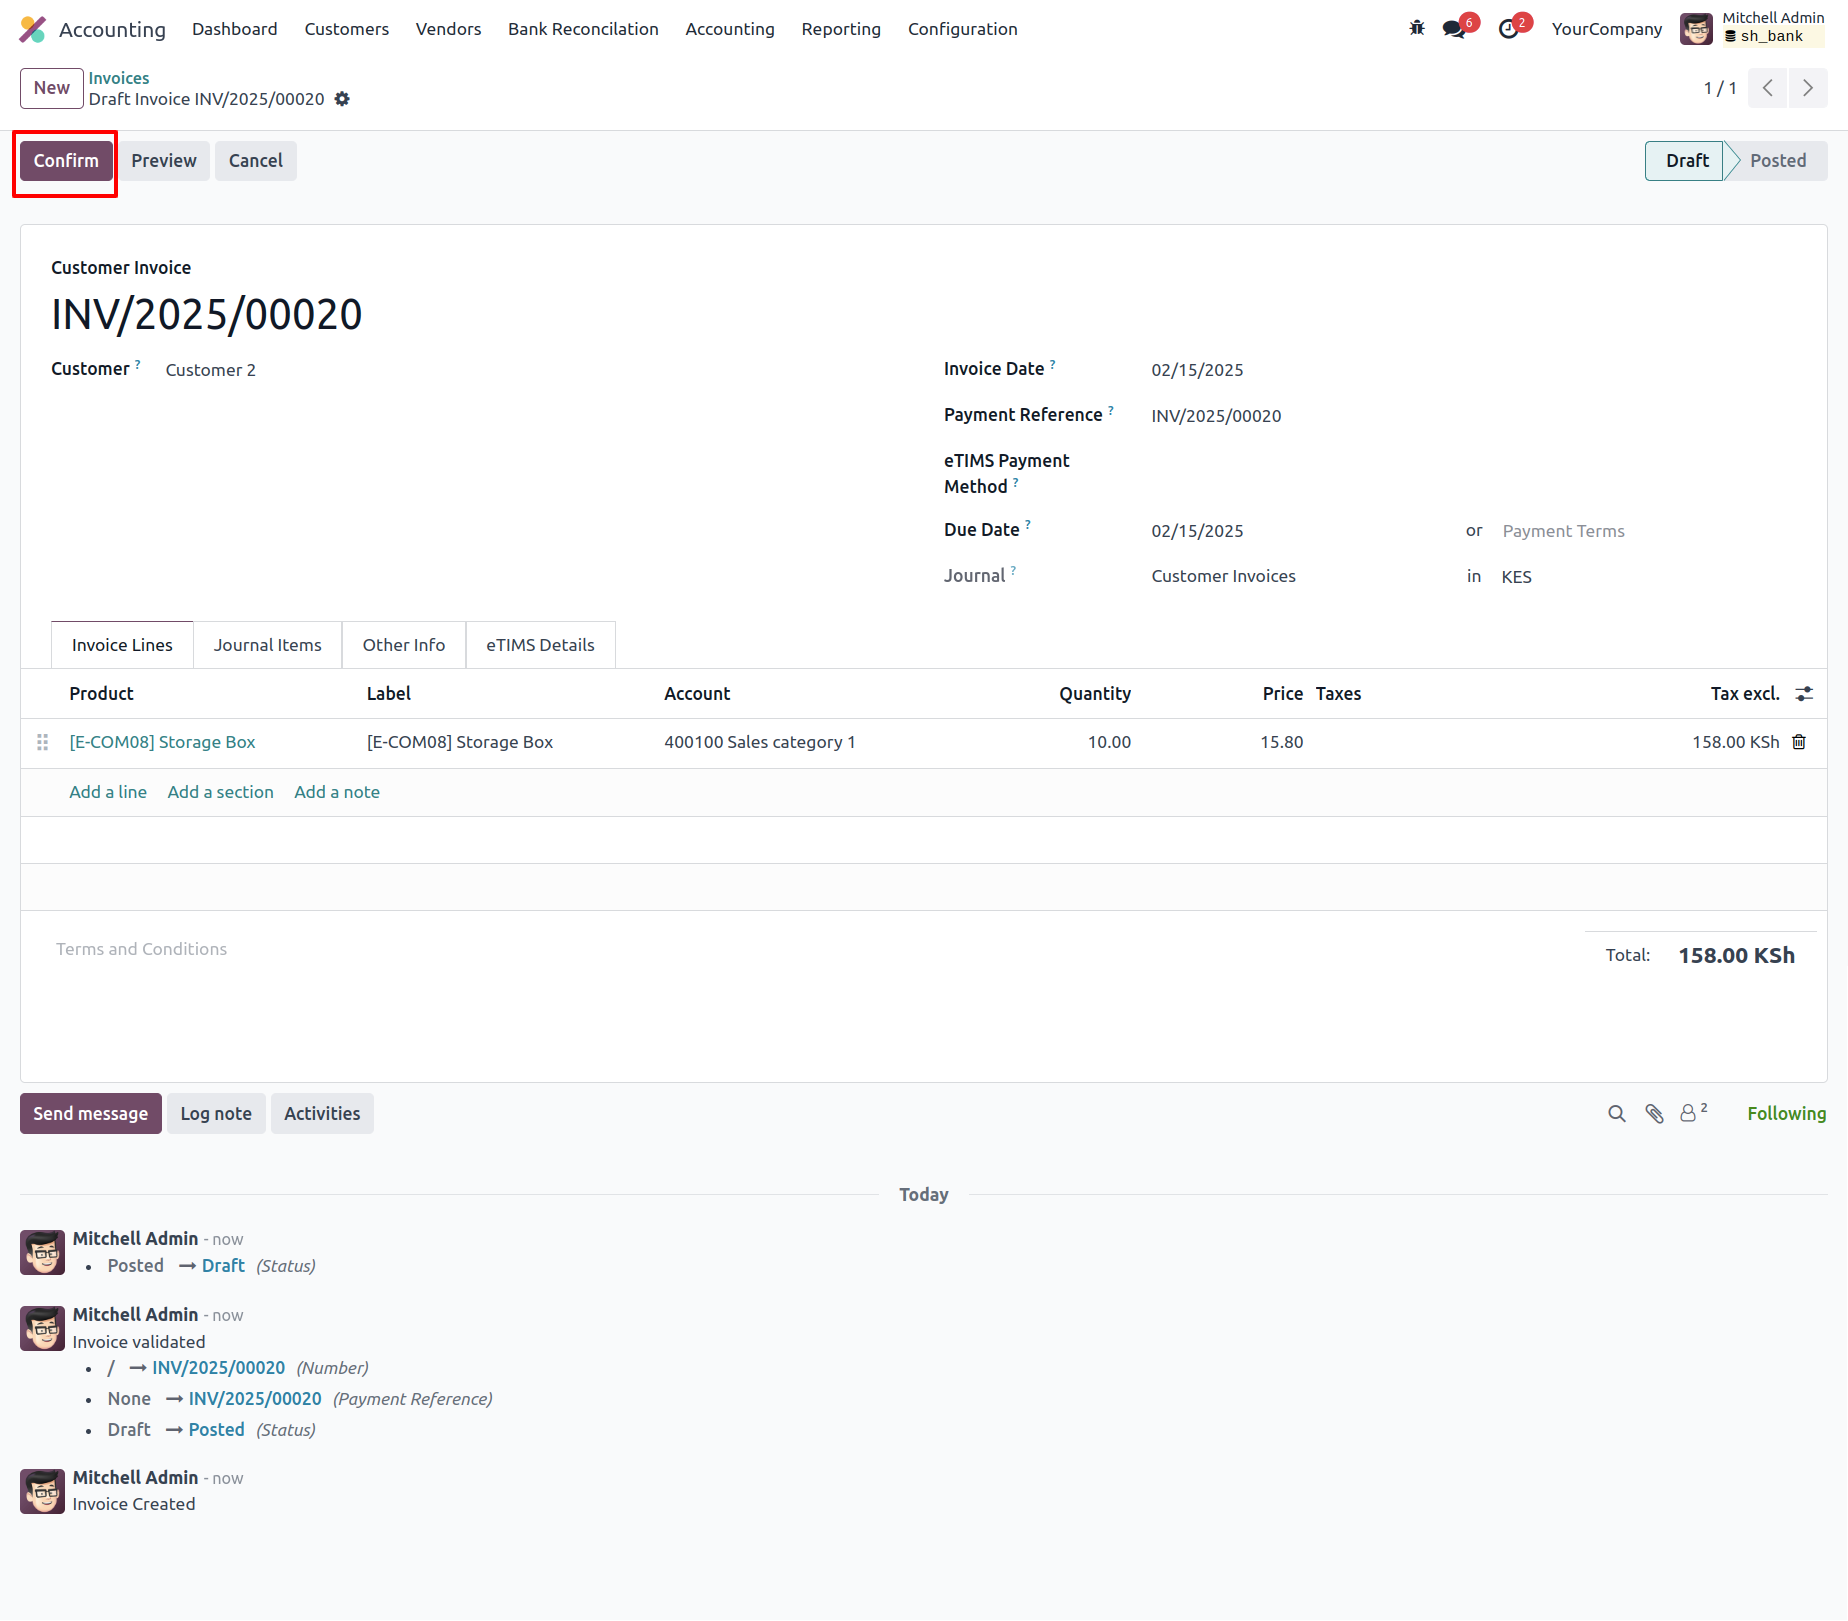
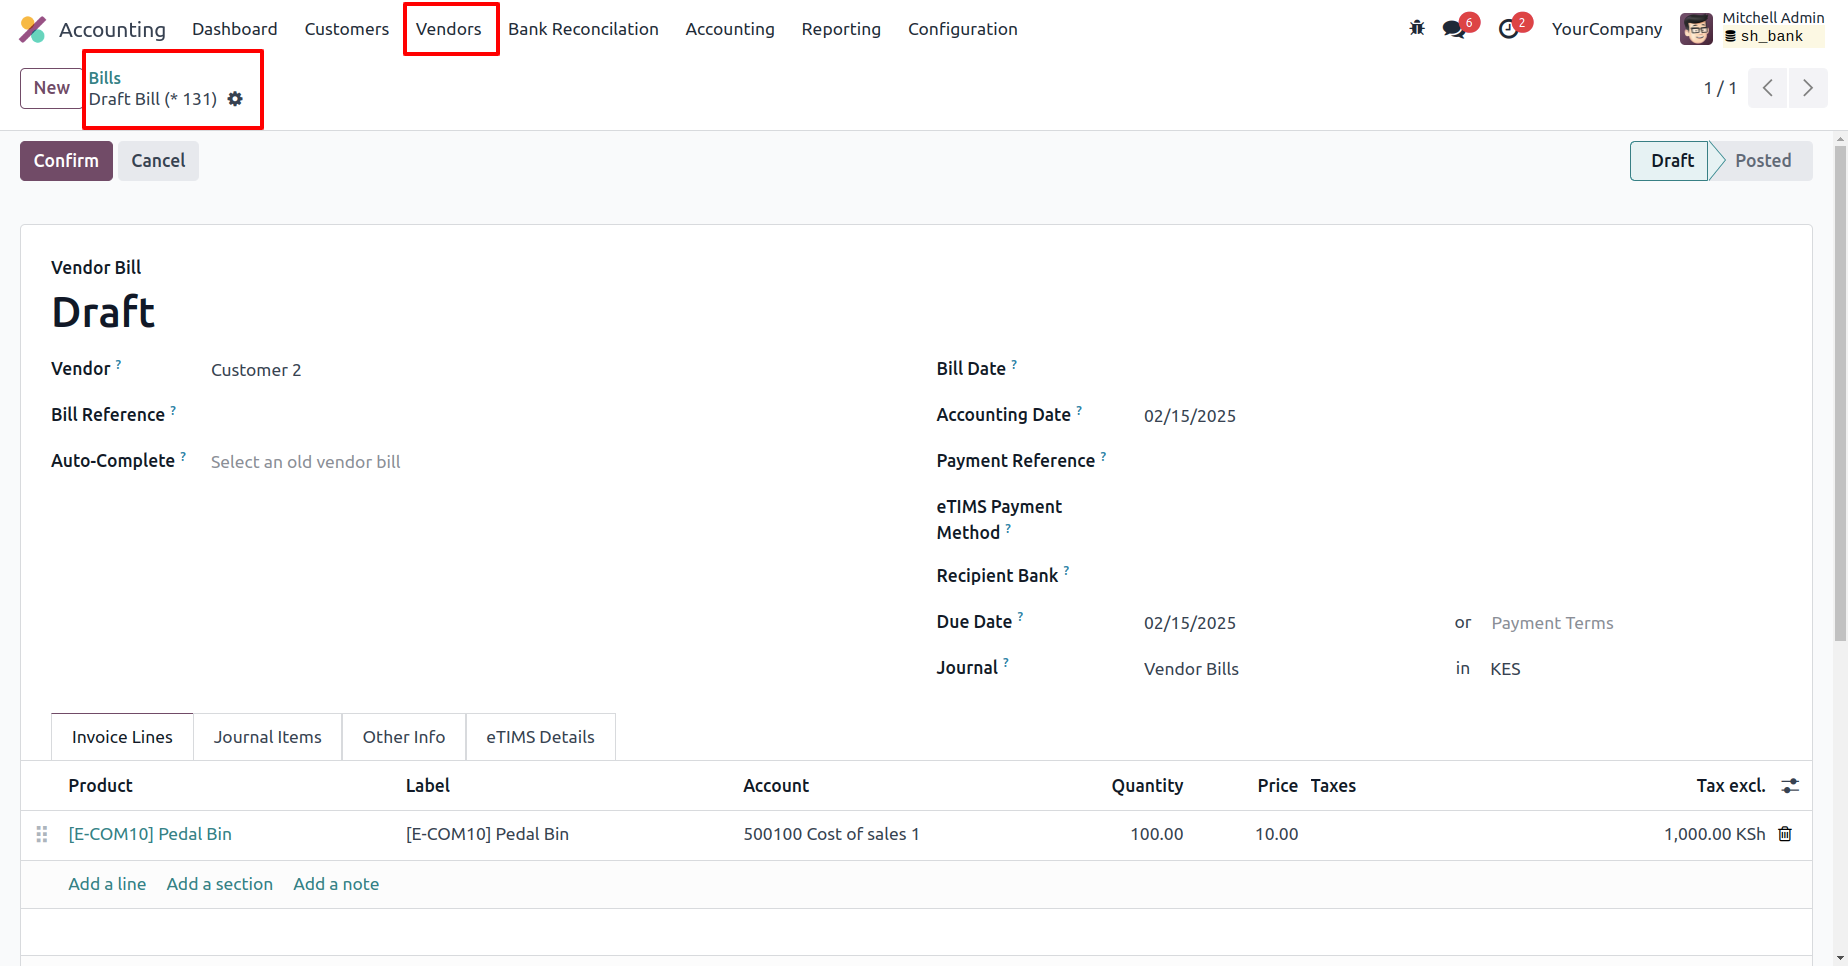
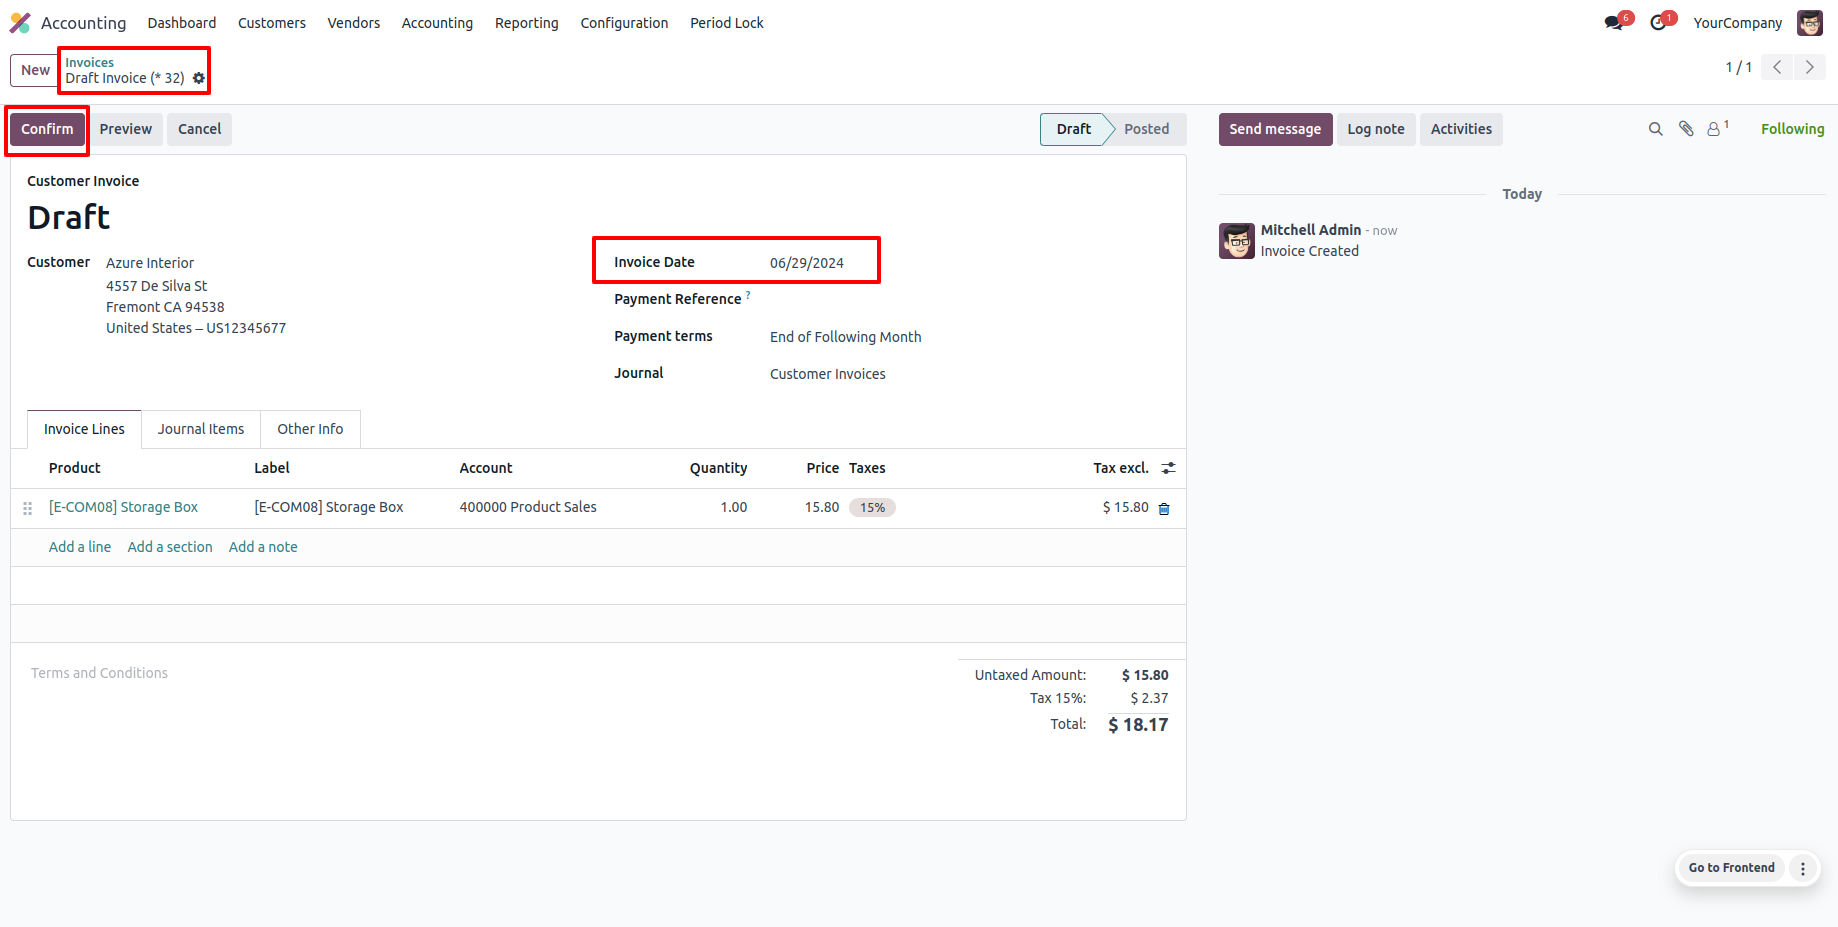
Generate an invoice and confirm it by clicking on the 'Confirm' button.
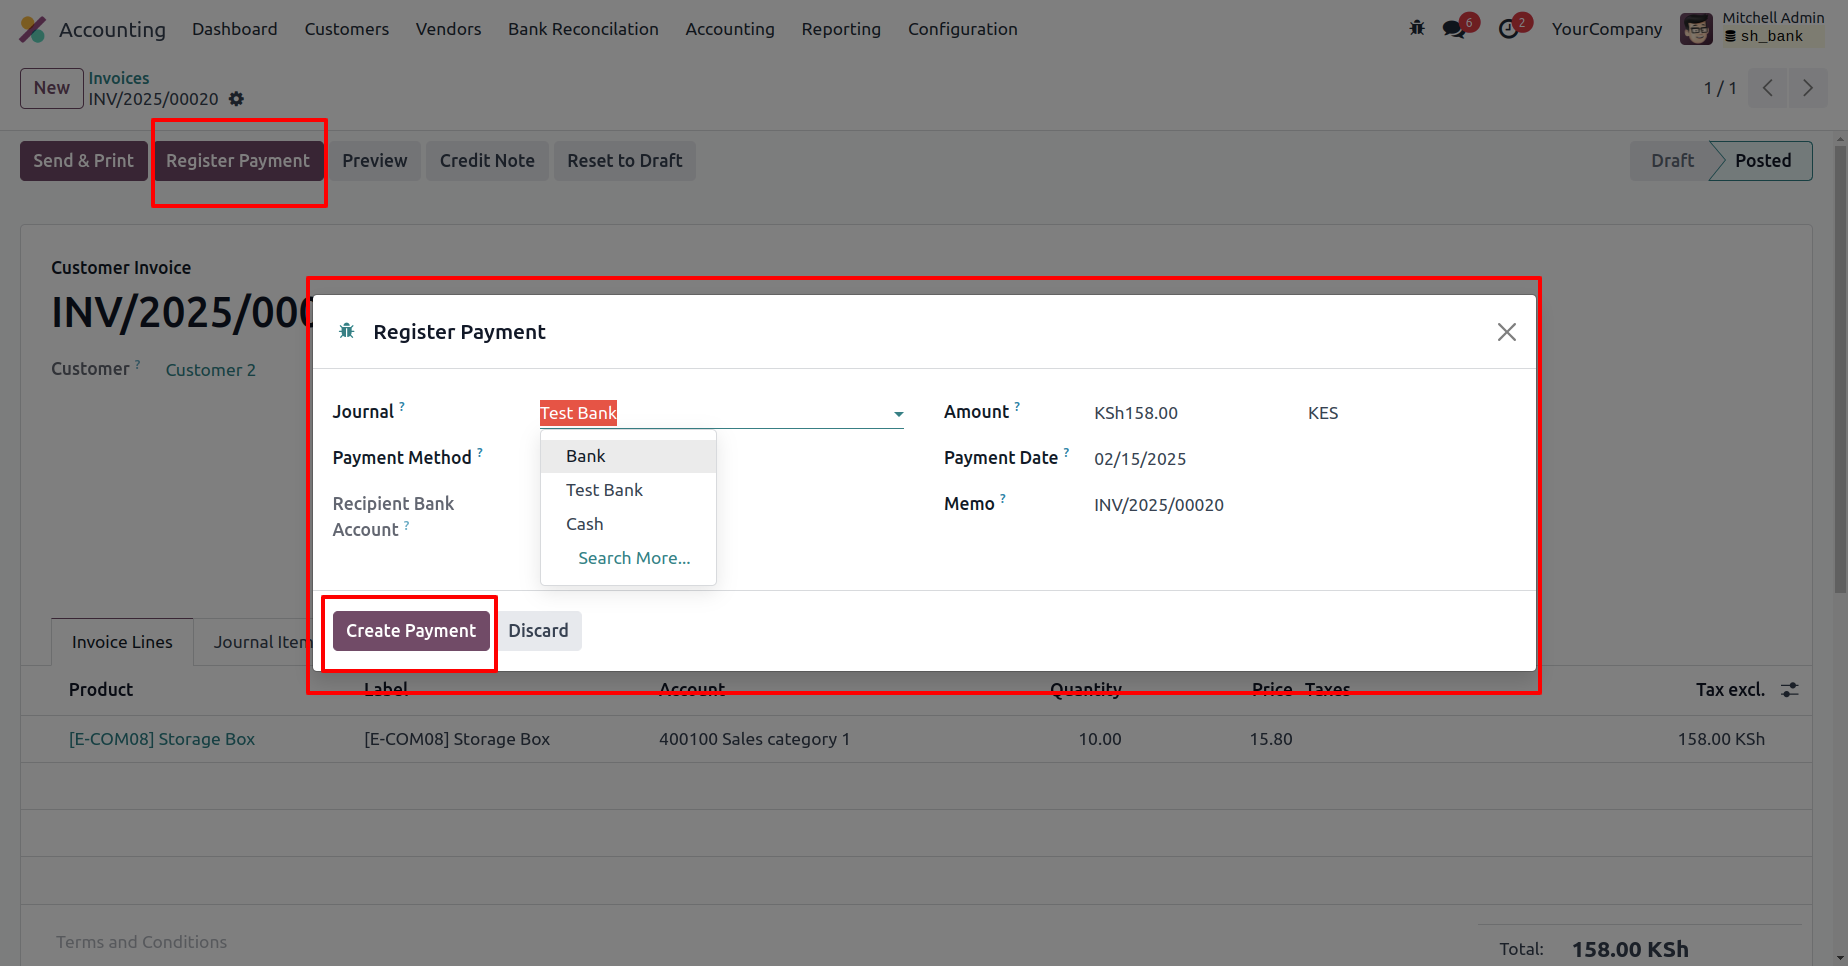
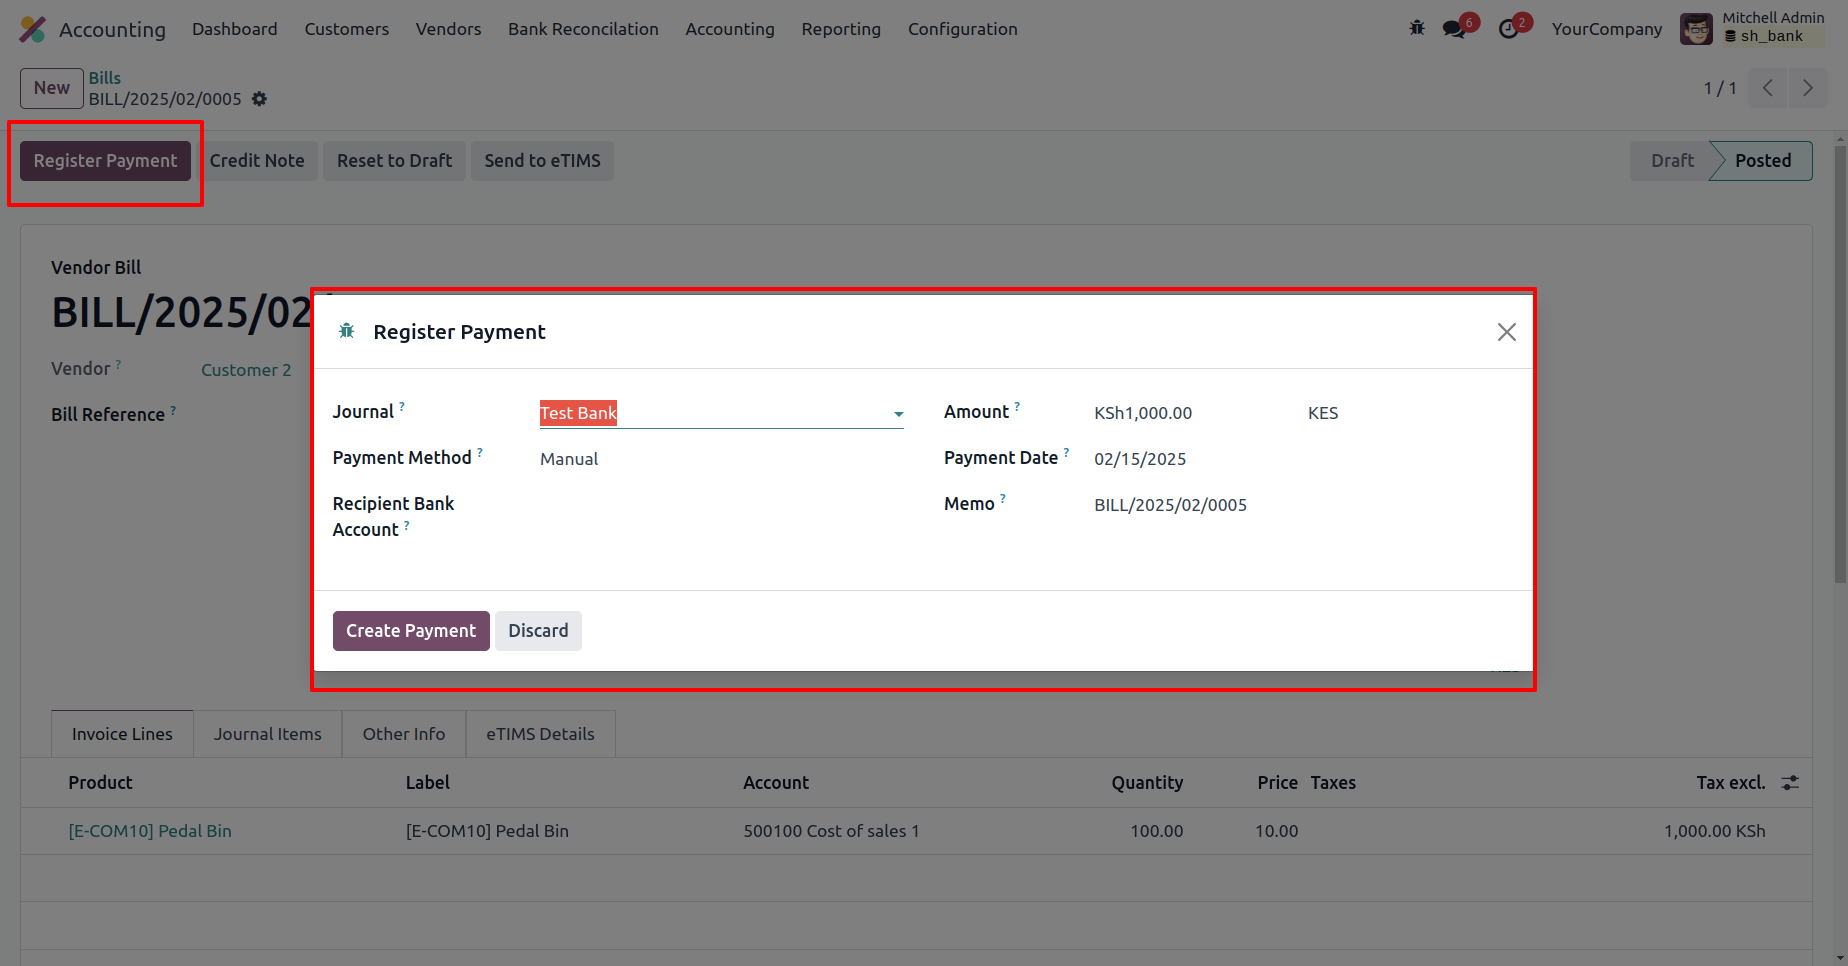
Click the 'Register Payment' button, enter the required details in the Register Payment wizard, and then click on 'Create Payment'.
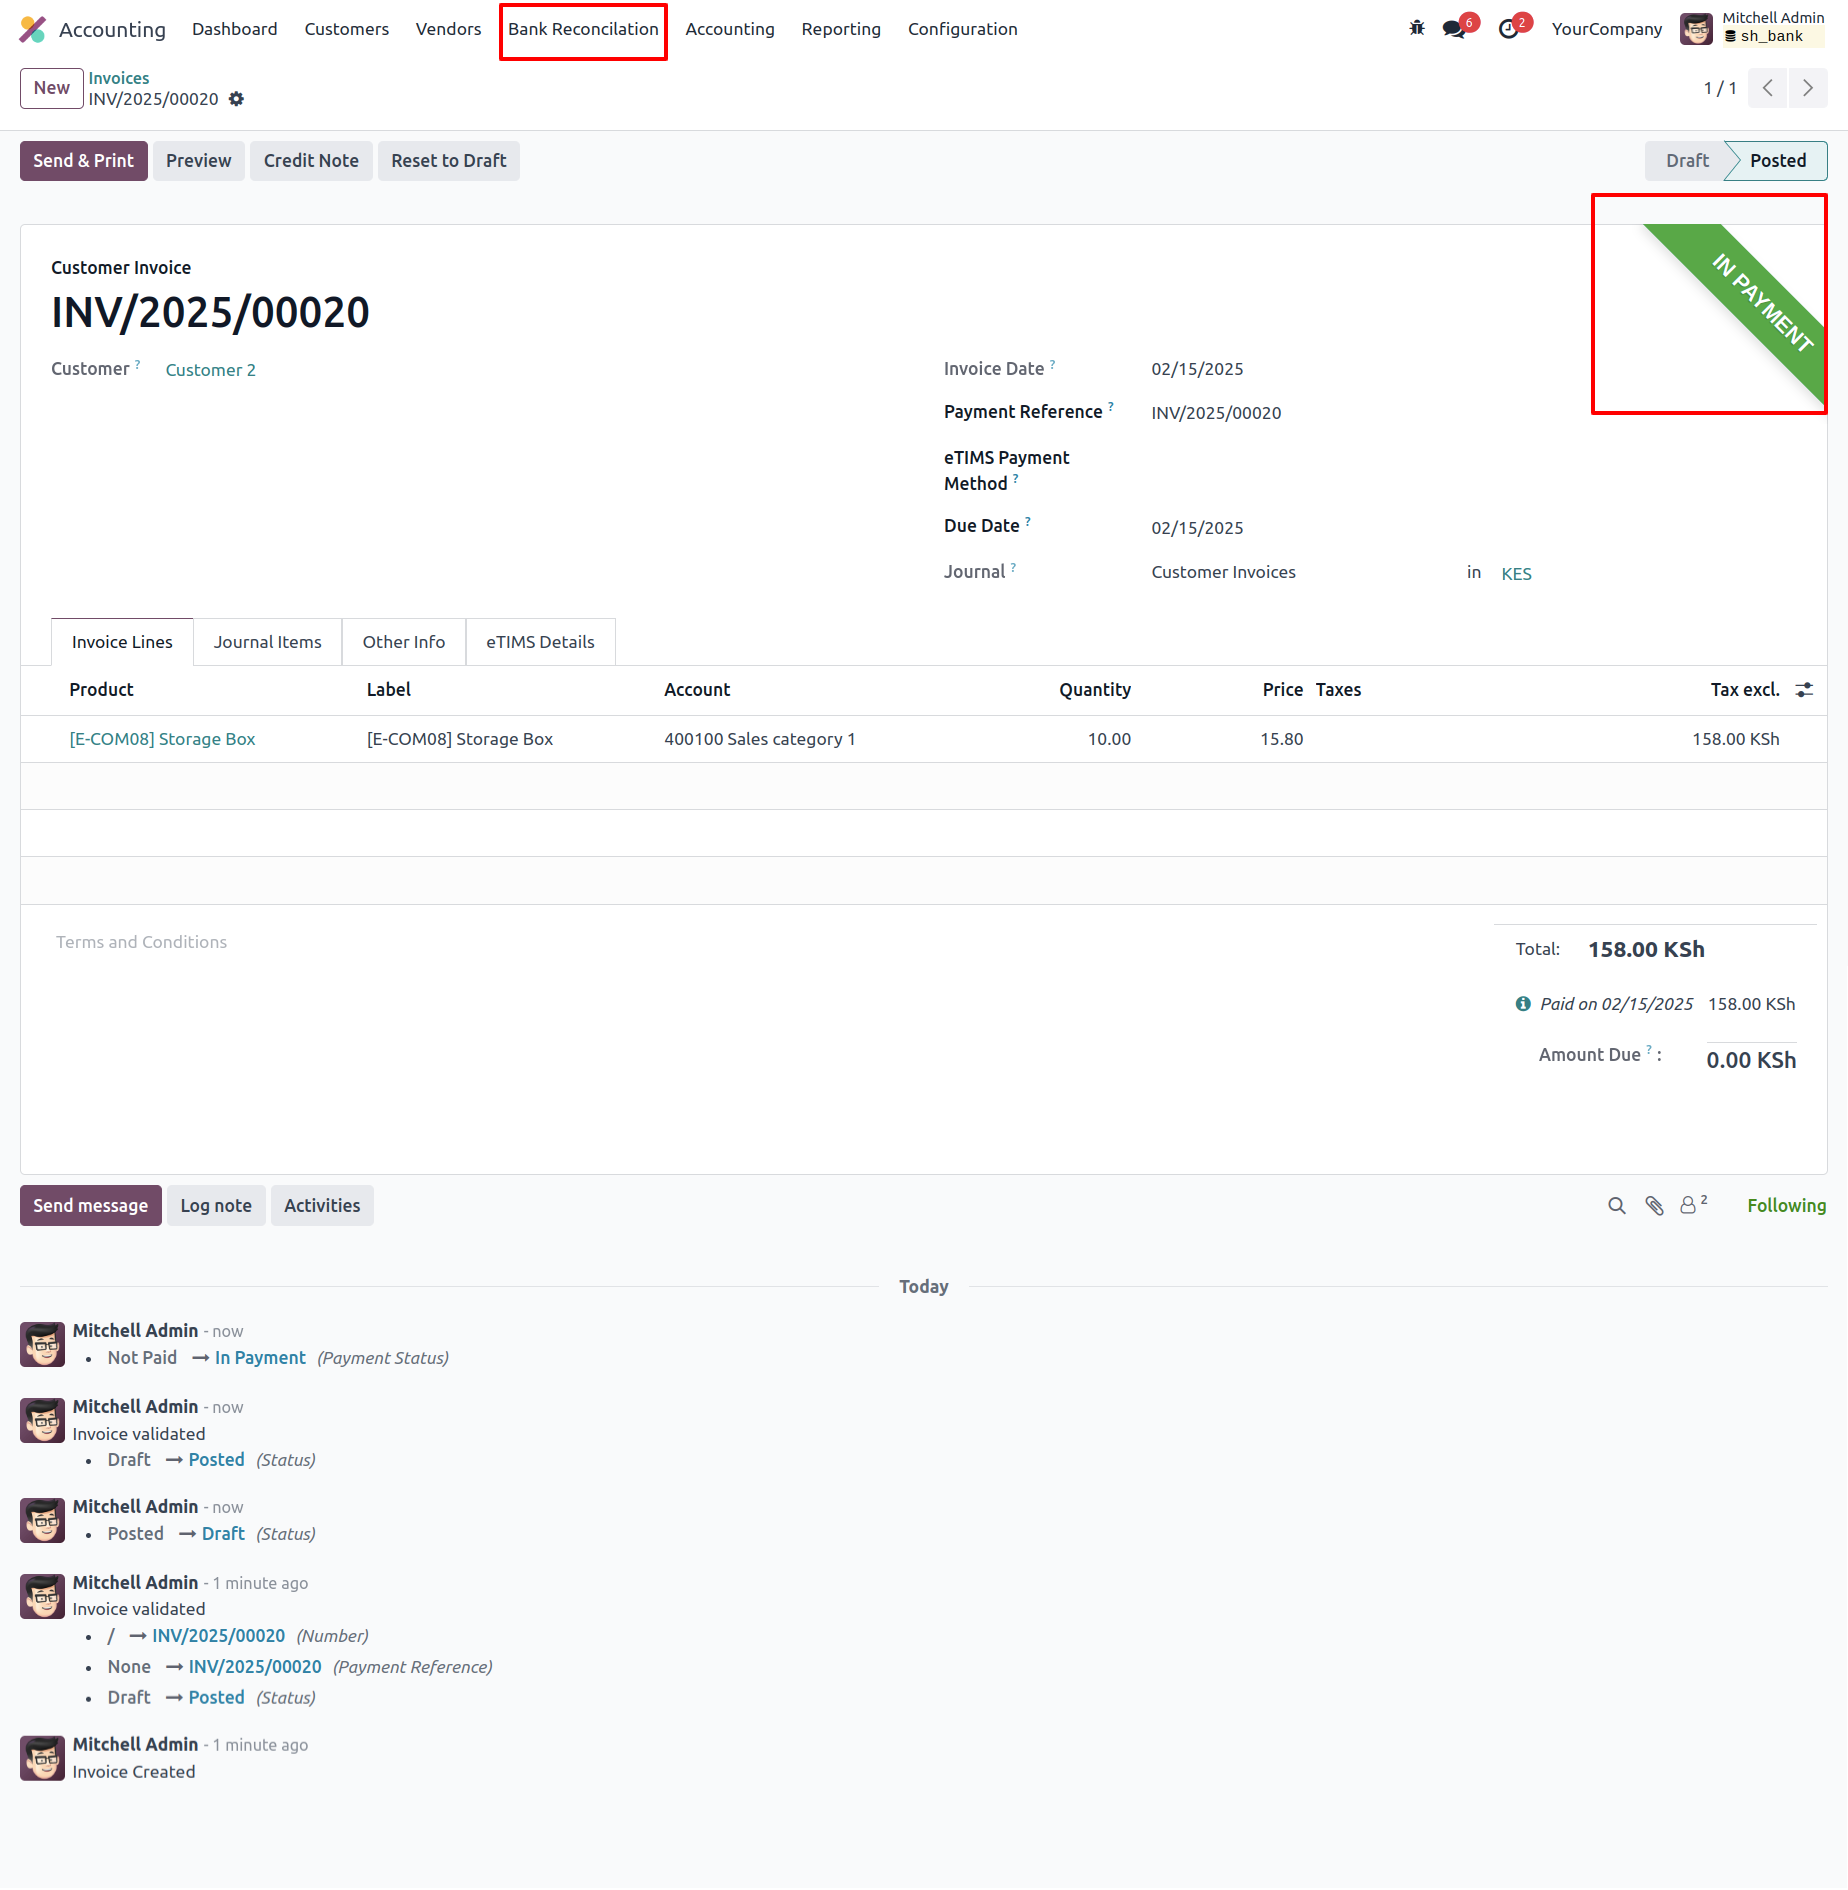
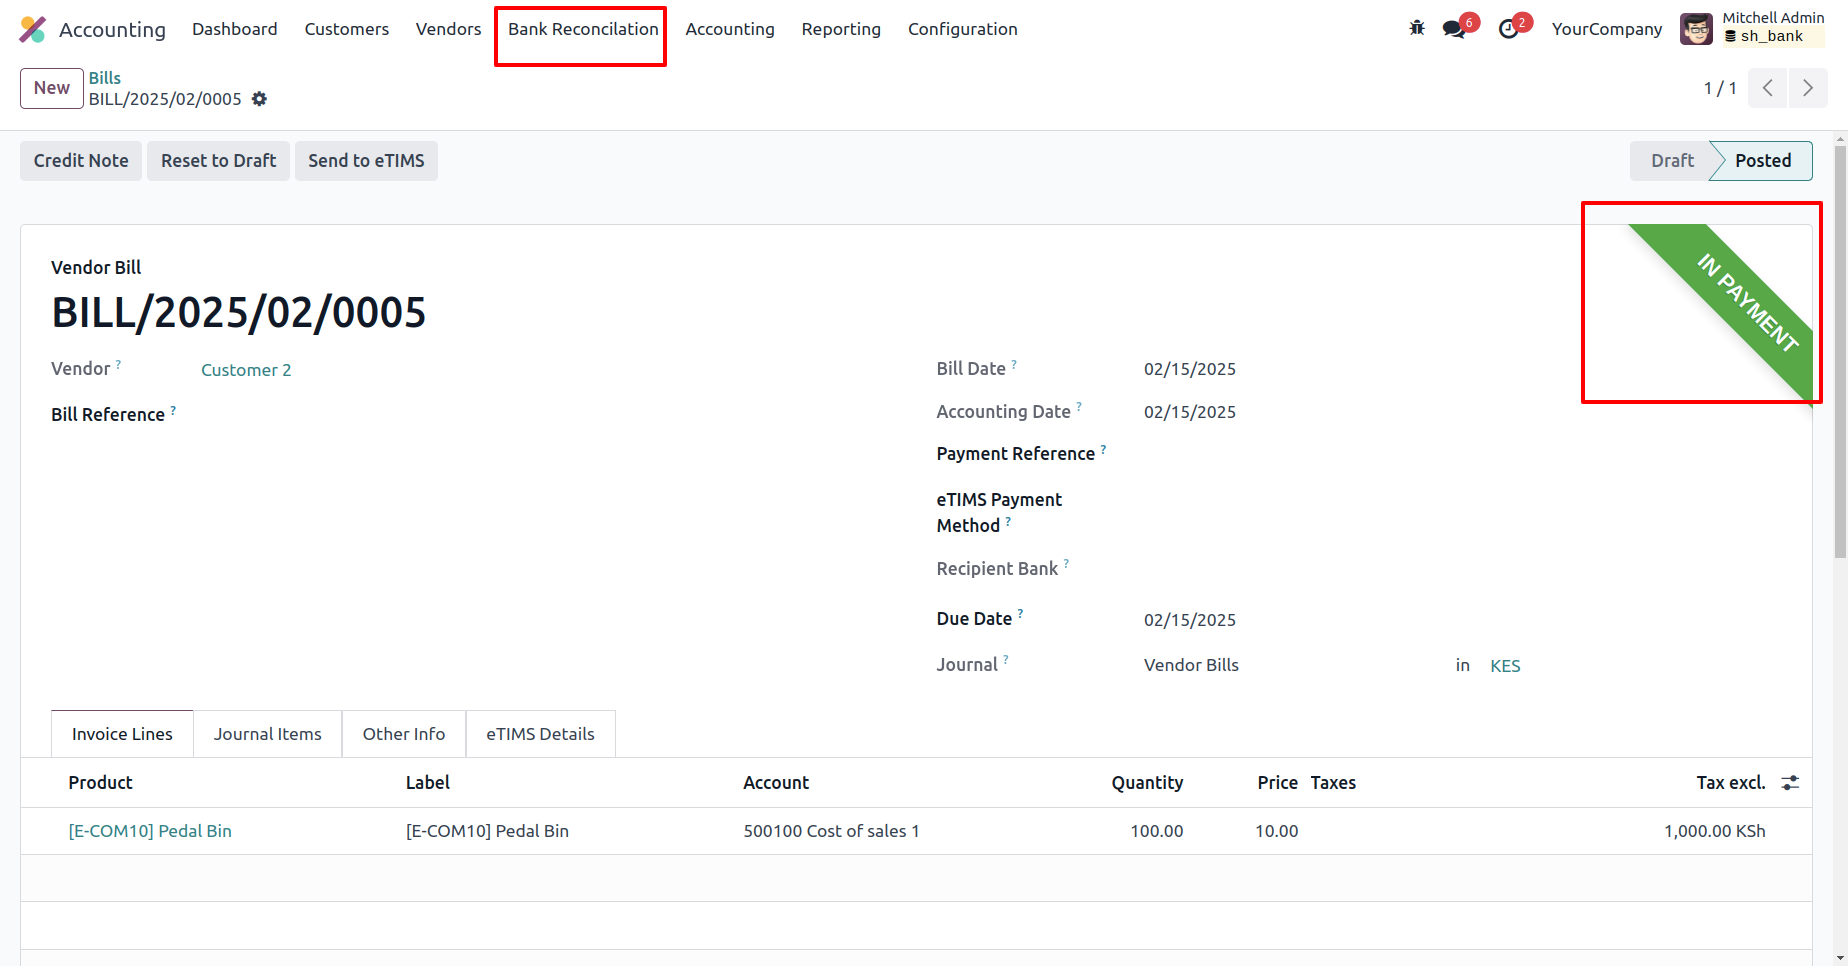
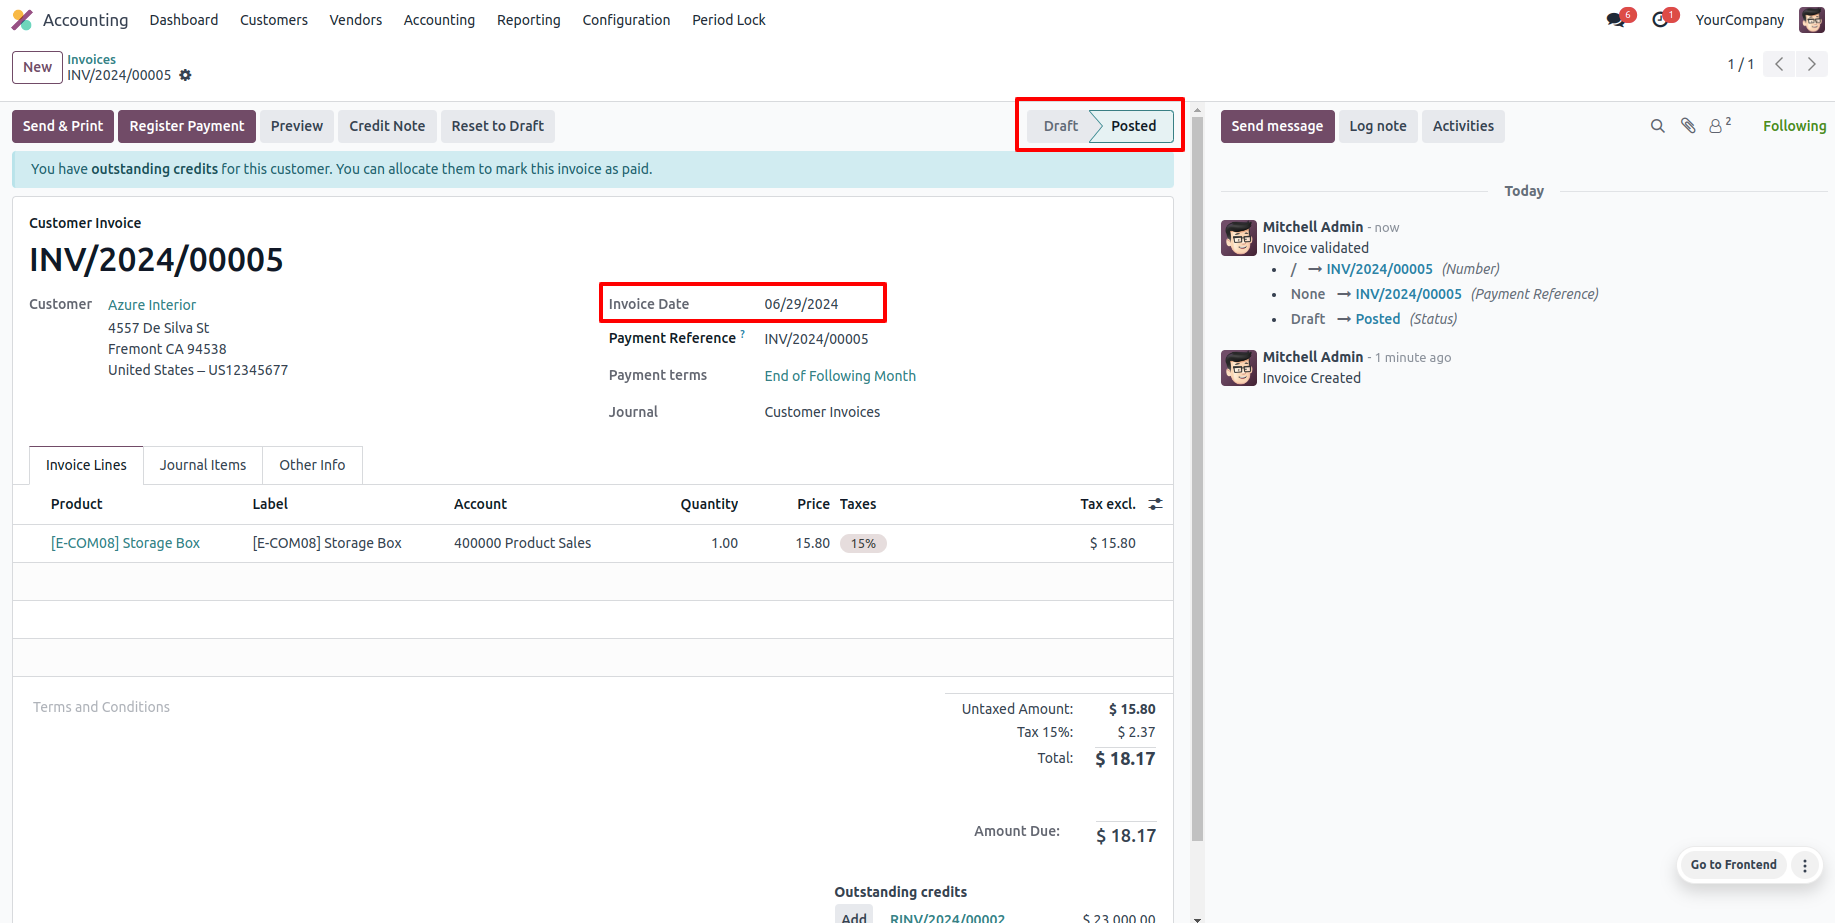
The invoice is currently in the 'In Payment' stage.
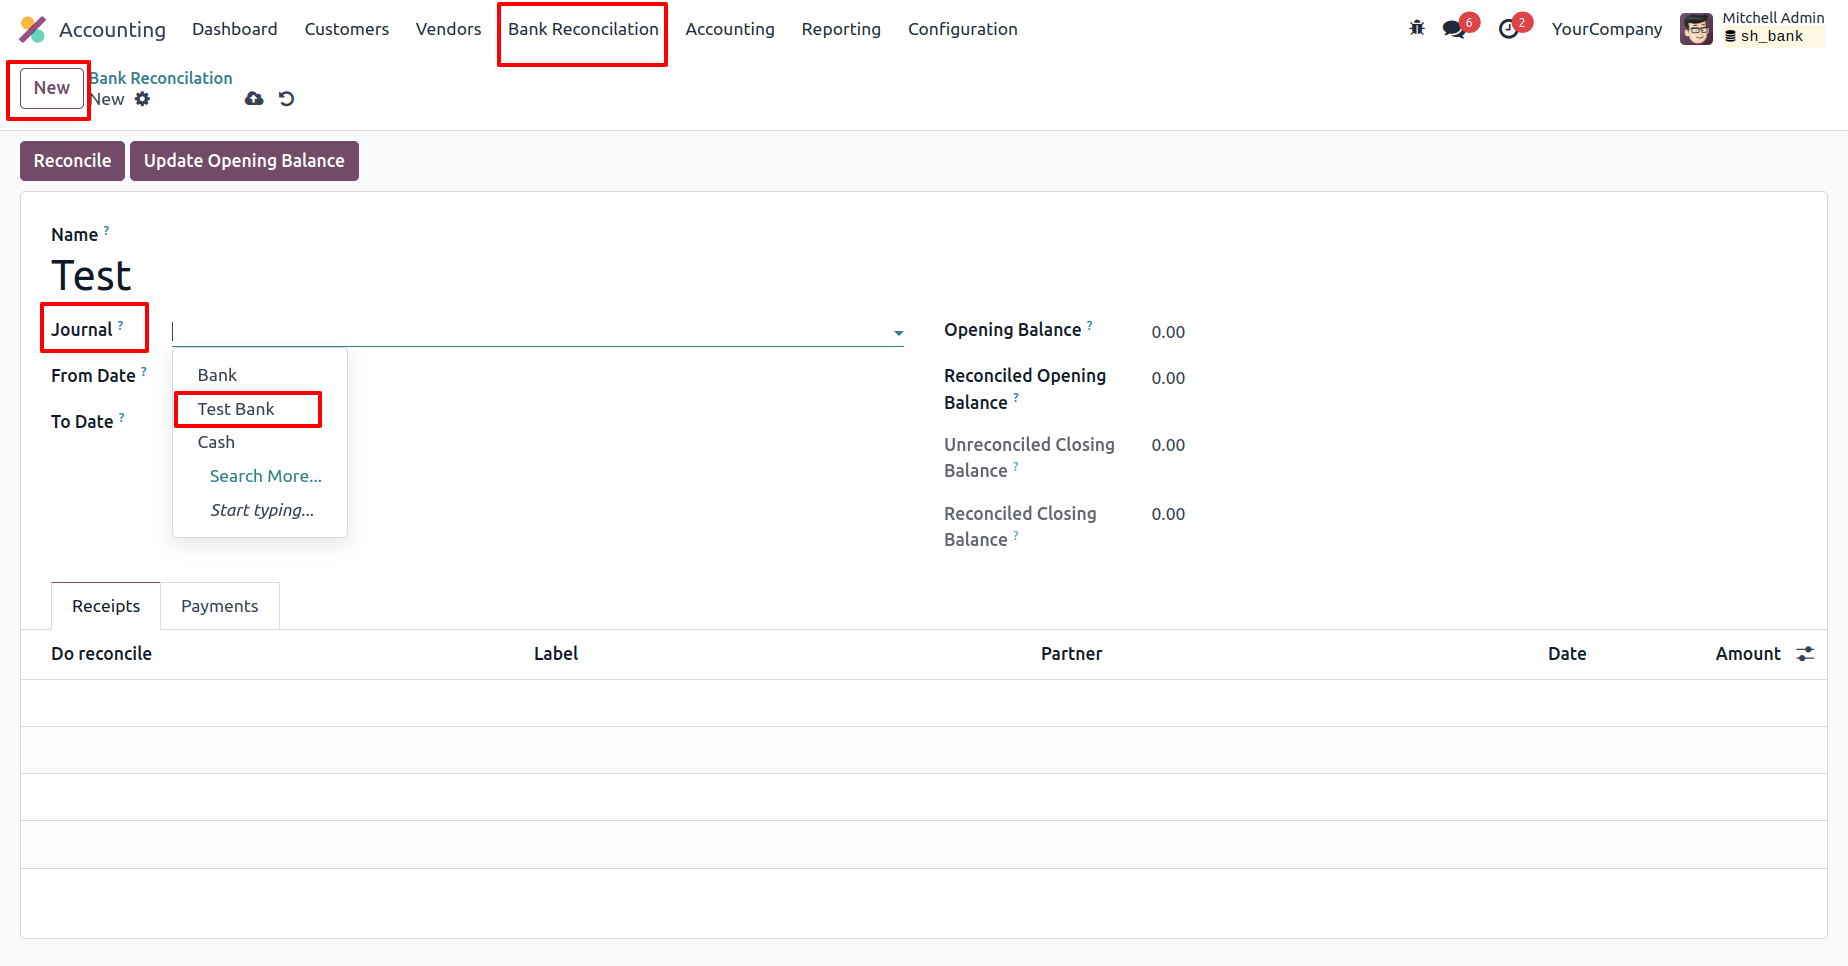
Go to the Bank Reconciliation menu, create a new Bank Reconciliation, and select the journal.
Enter the 'From' and 'To' dates and add receipts in the 'Receipts' tab.
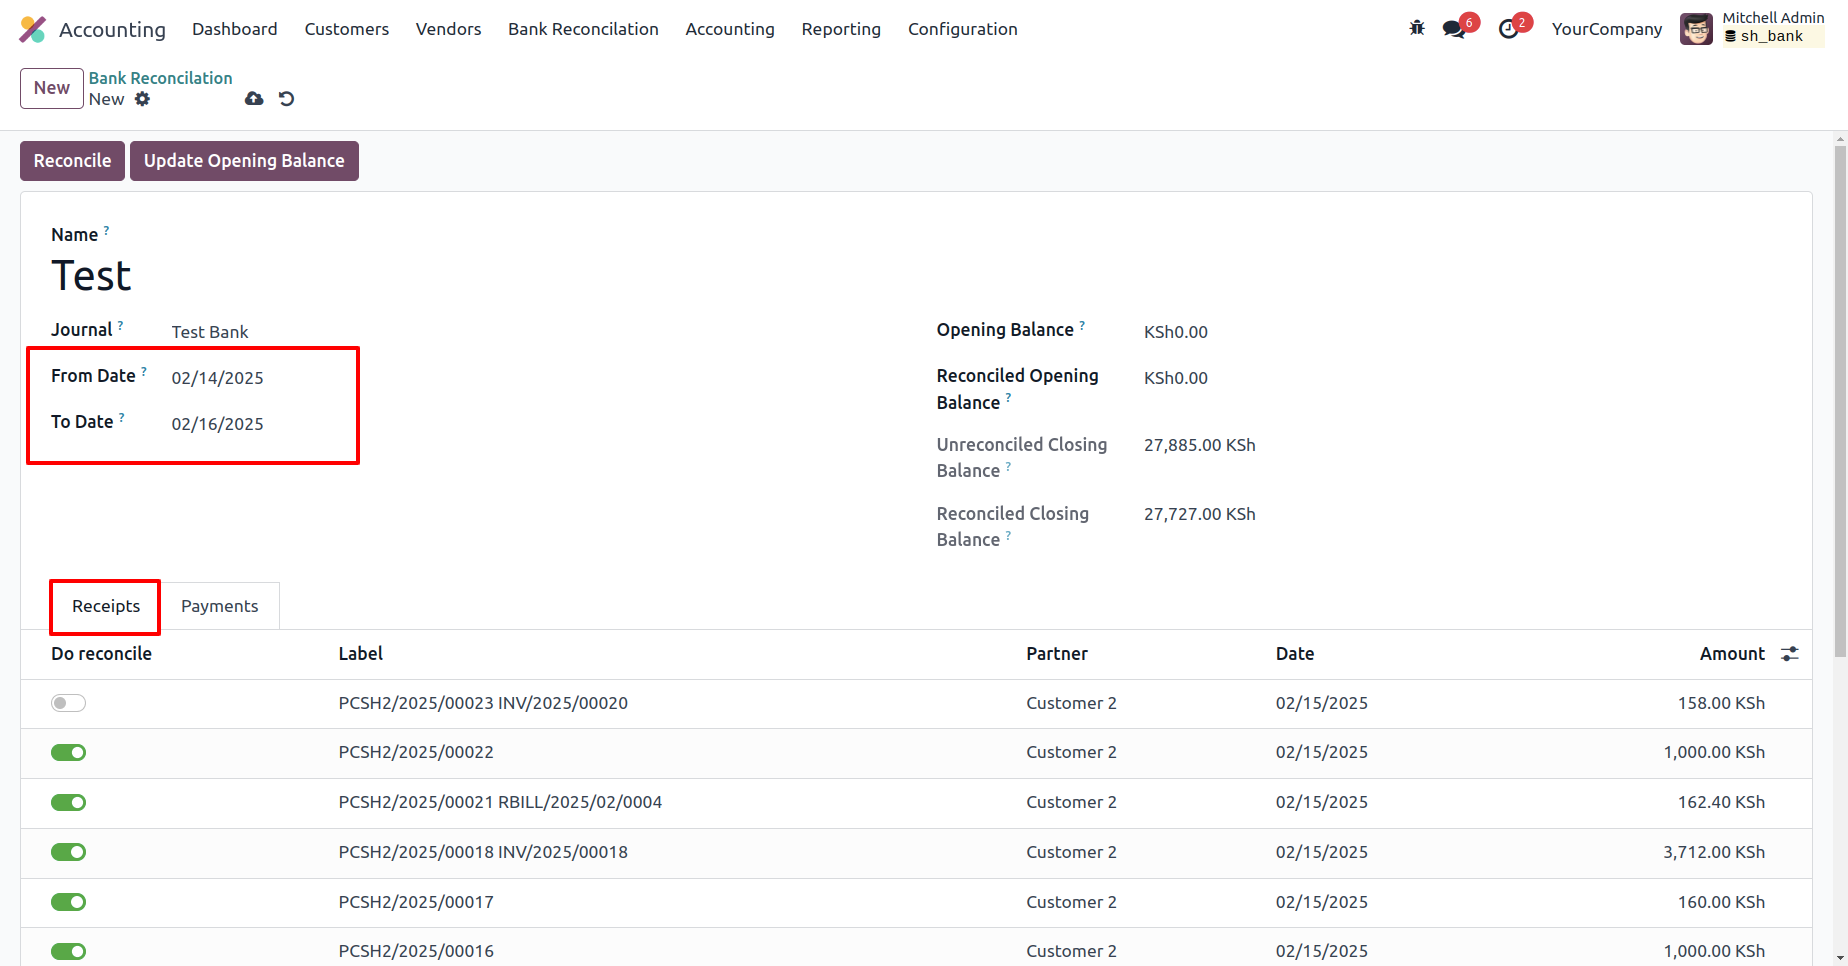
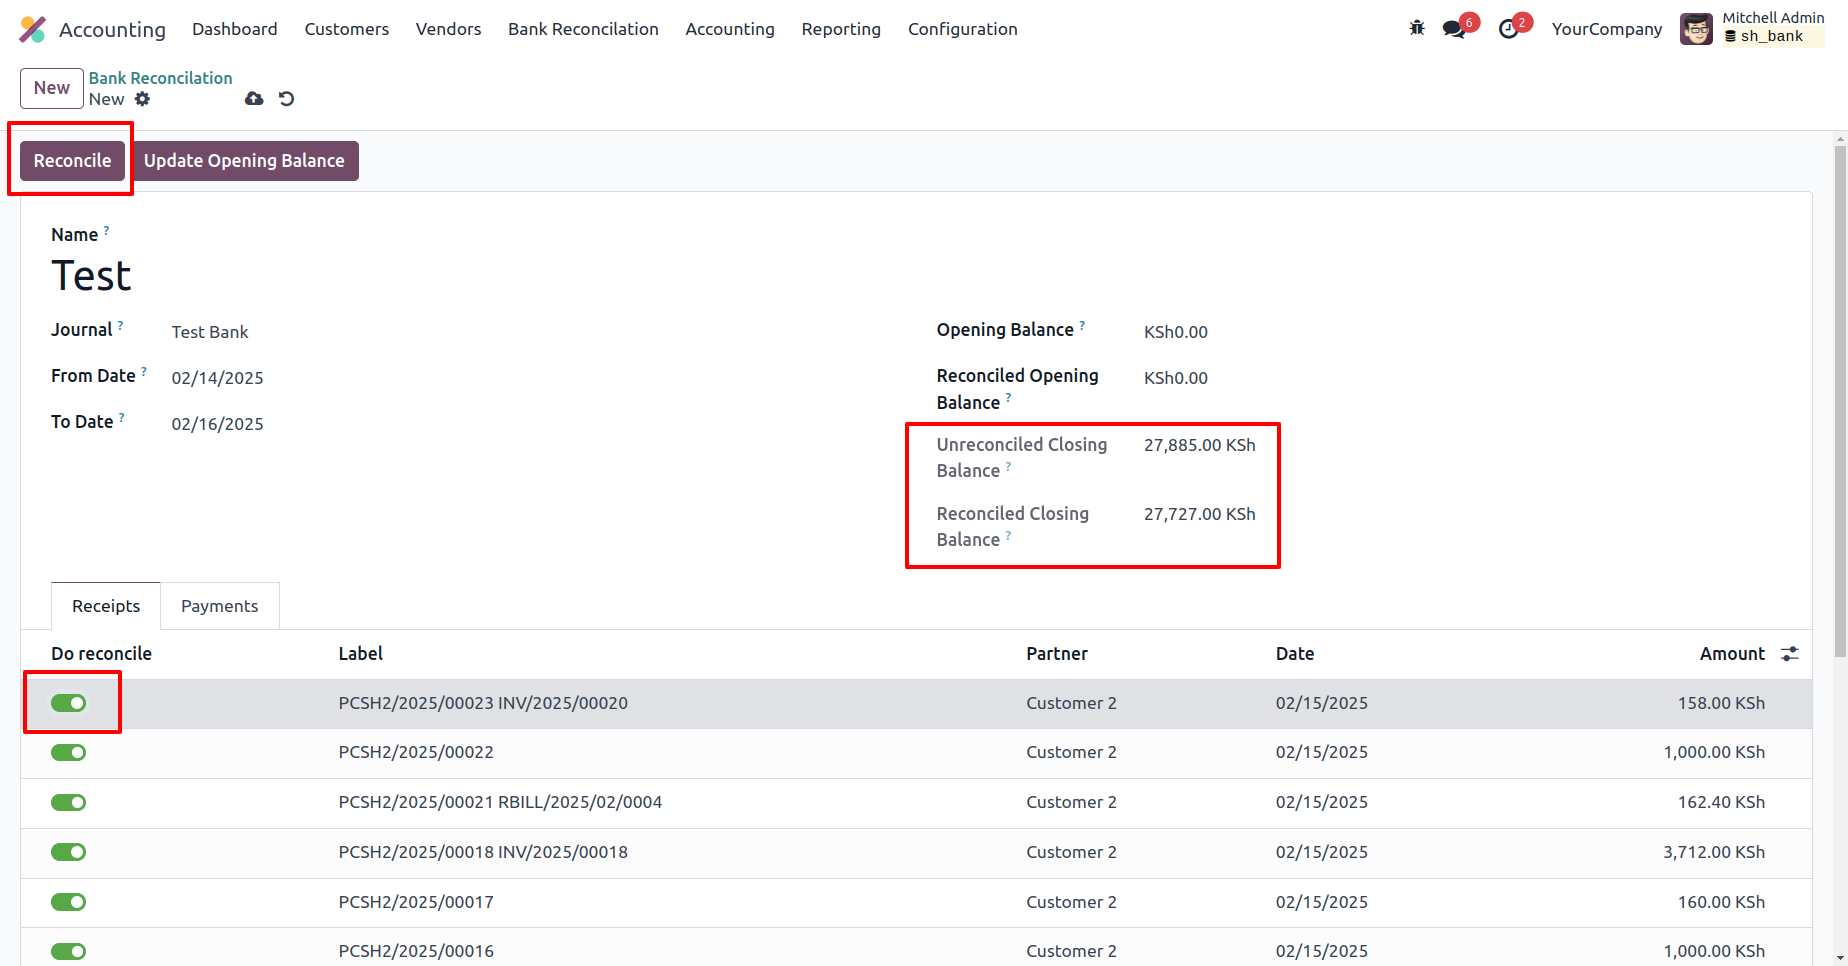
Enable the 'Do Reconciliation' boolean and click the 'Reconciliation' button.
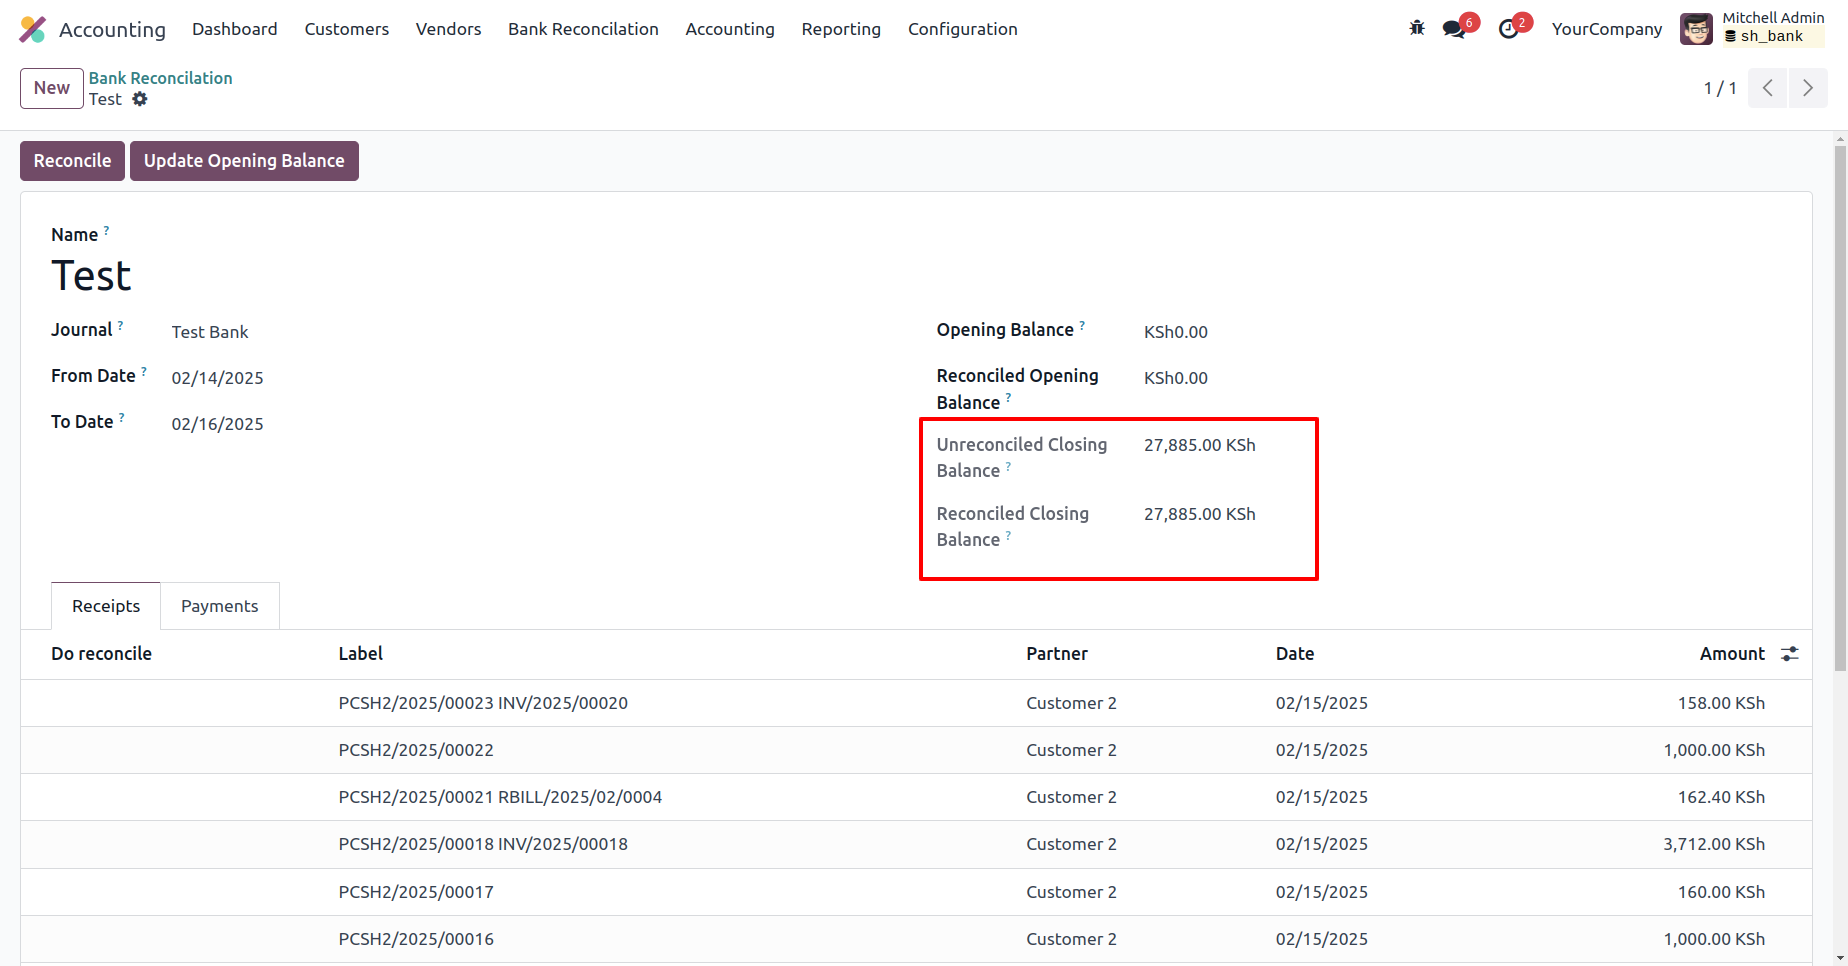
The reconciled closing balance has been updated.
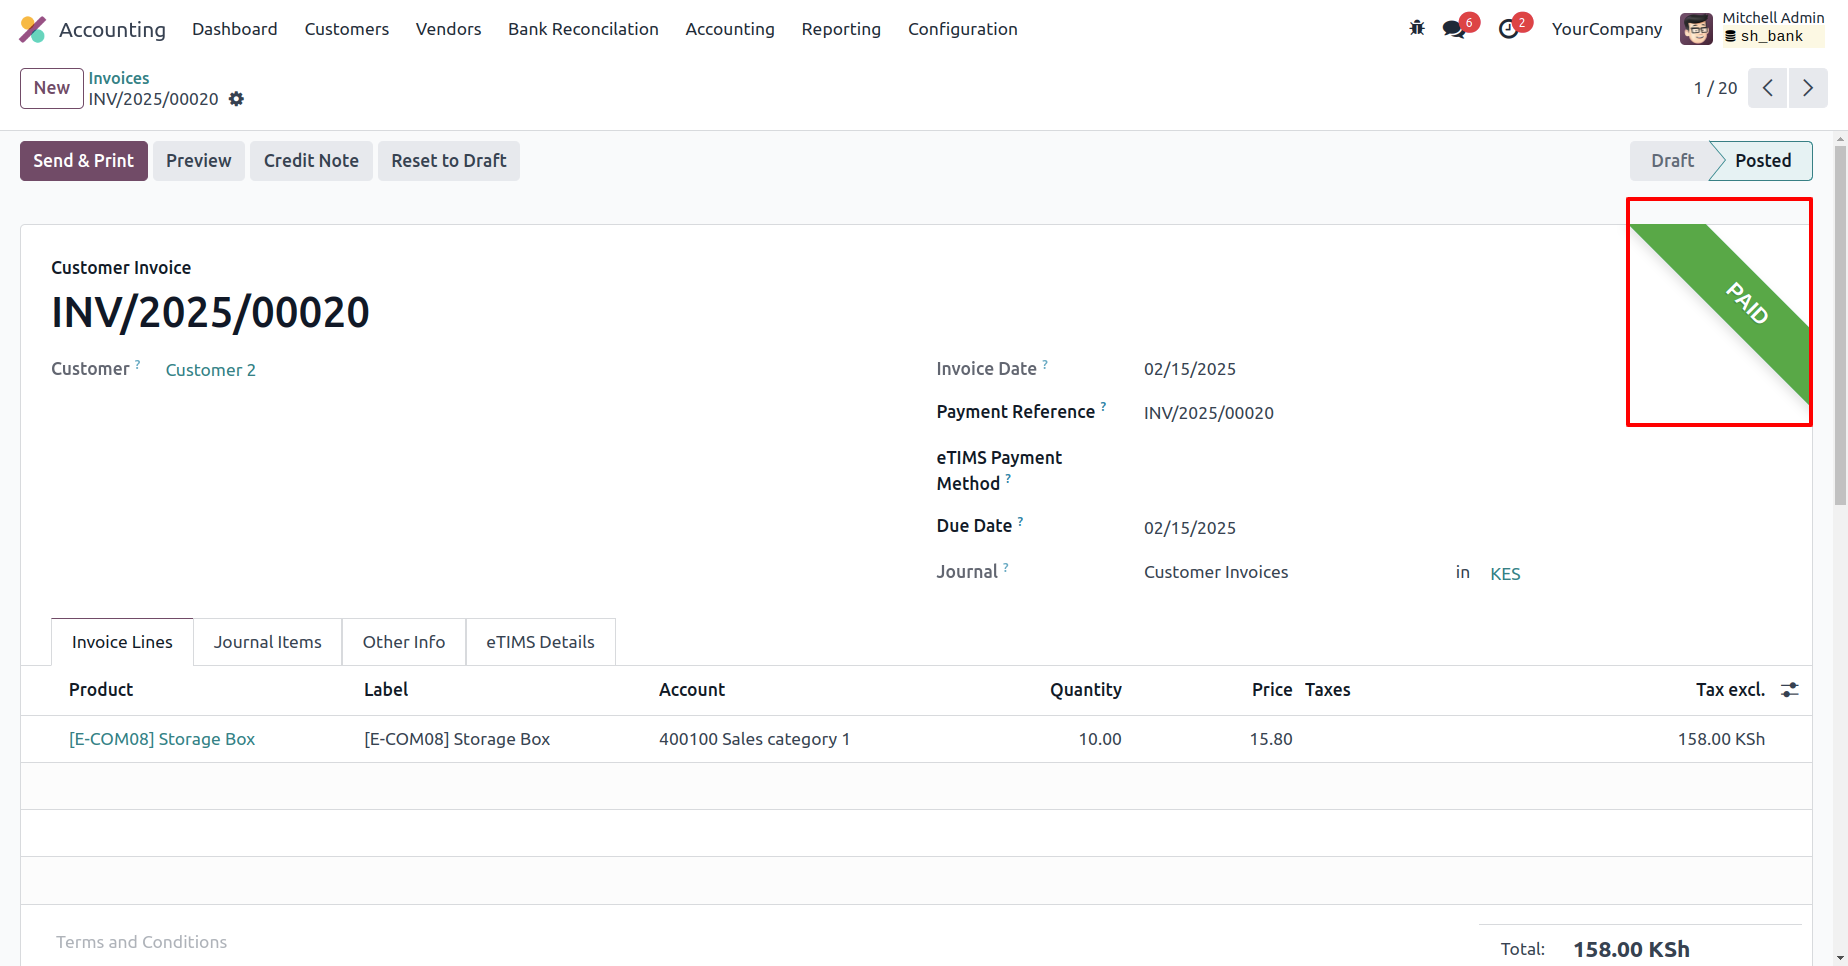
The invoice is now 'Paid'.
In the vendor bill form view, click the 'Confirm' button.
Click the 'Register Payment' button, enter the required details in the Register Payment wizard, and then click the 'Create Payment' button.
The bill is now in the 'In Payment' stage.
In the Bank Reconciliation form view, add lines in the 'Payments' tab.
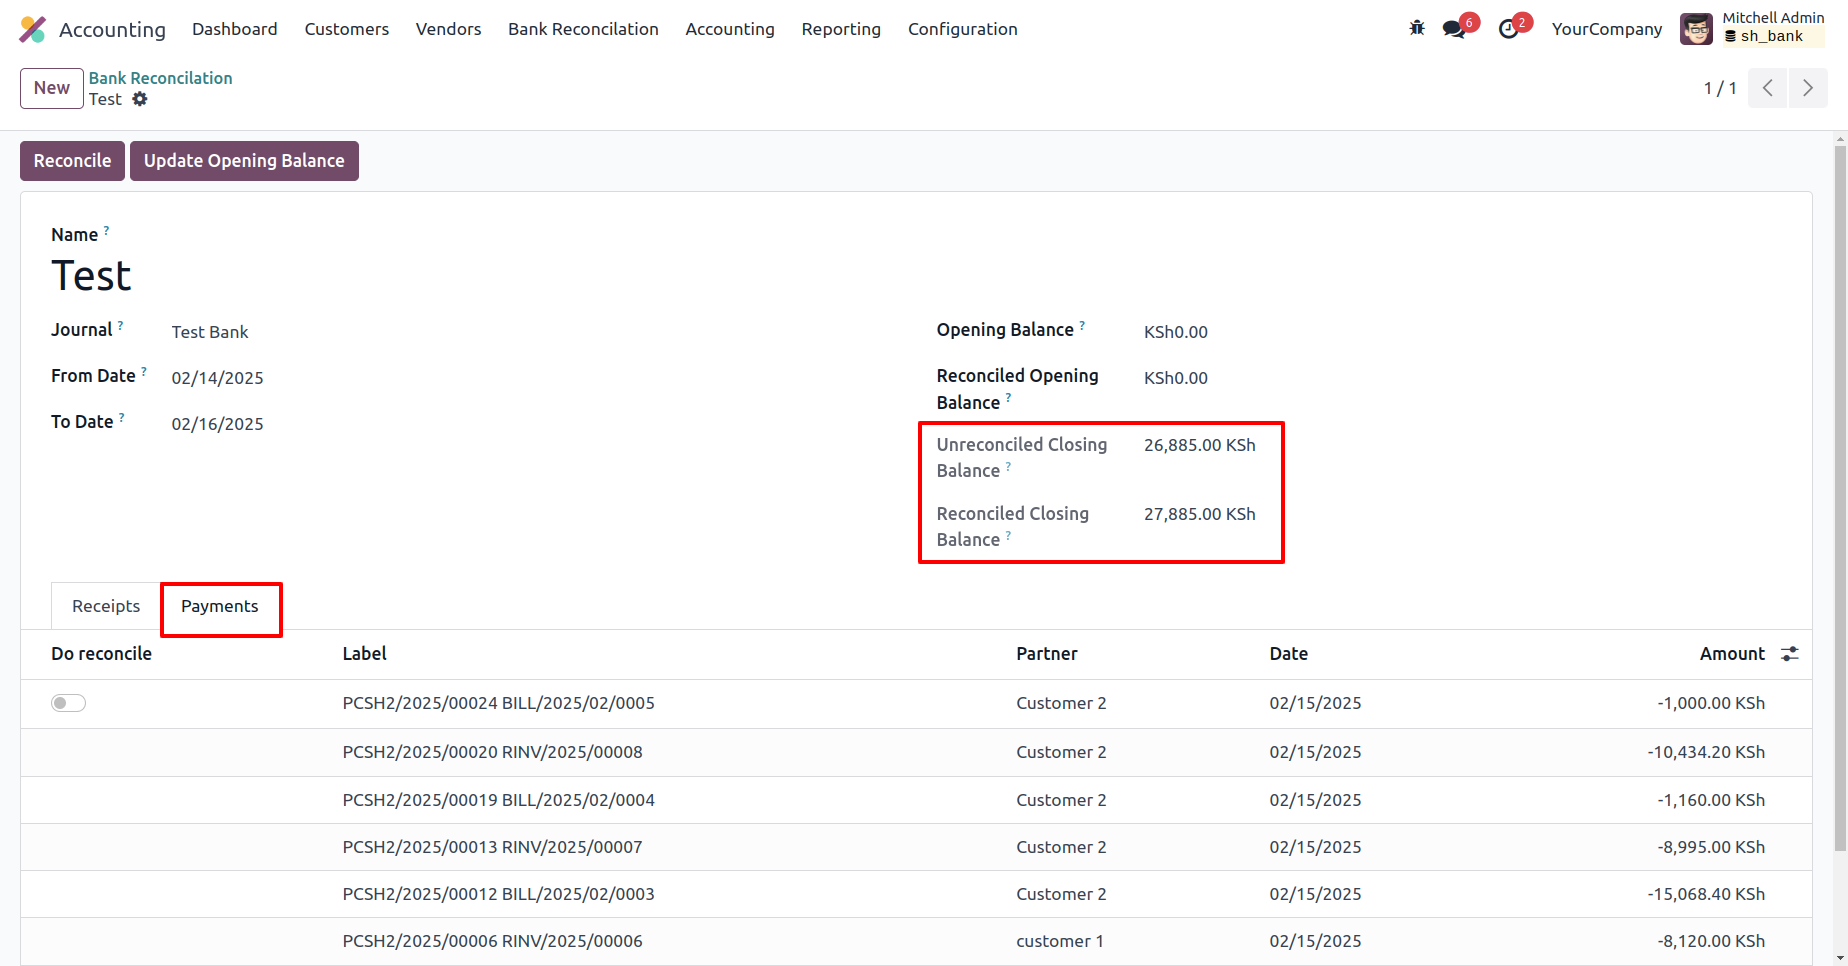
Enable the reconciliation label and click the 'Reconciliation' button.
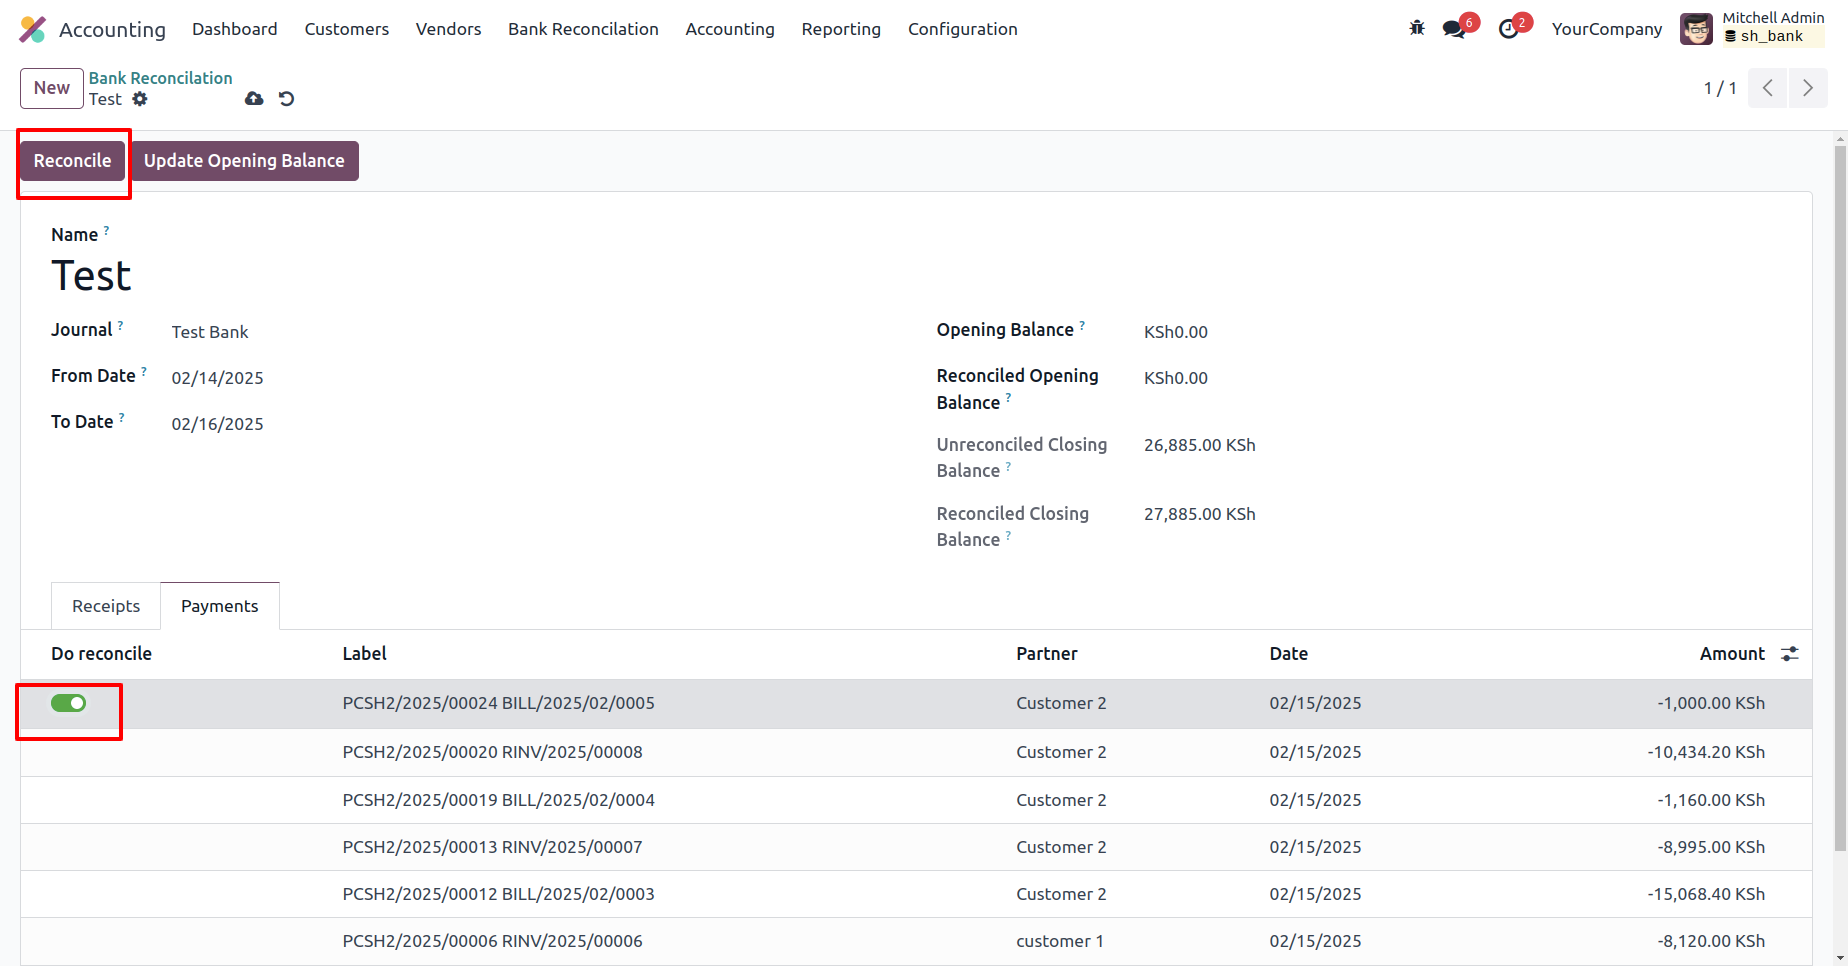
The reconciled closing balance has been successfully updated.

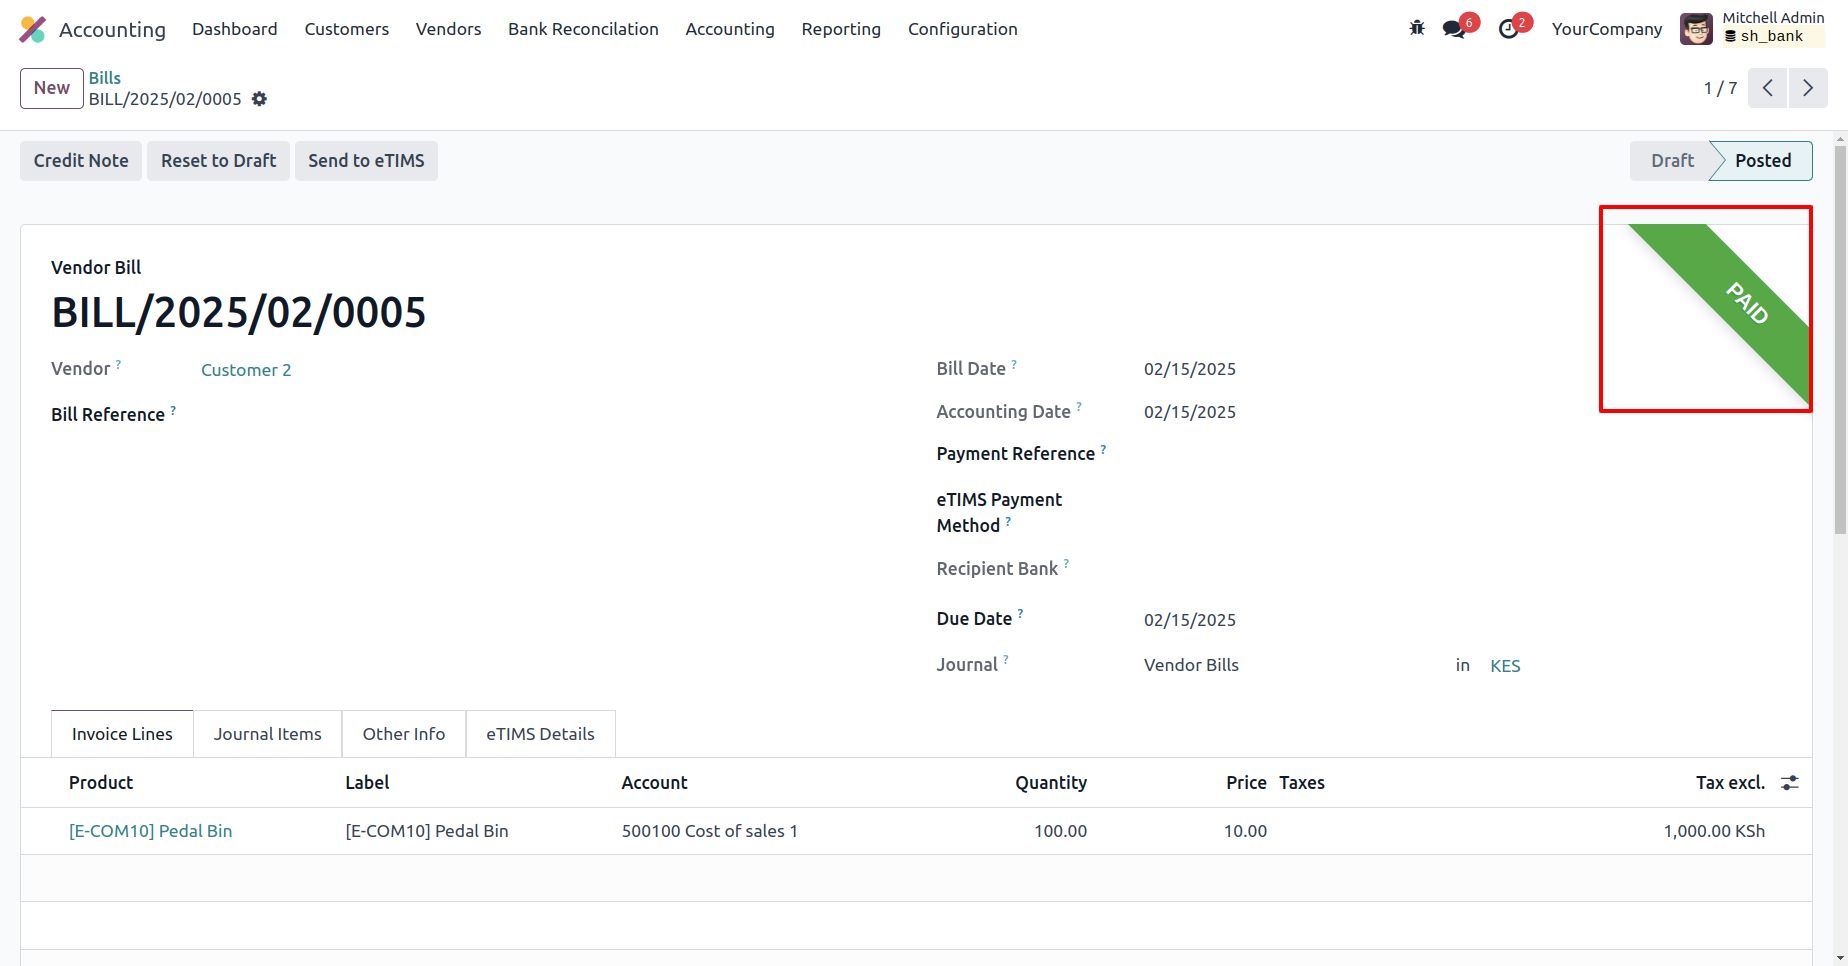
The bill status is now marked as 'Paid.'
Features
- You can make advance payments for invoices/bills.
- You can make multiple advance payments with a single click.
- It generates a journal for payments.
- Easy to maintain outstanding payments of the customers/vendors.
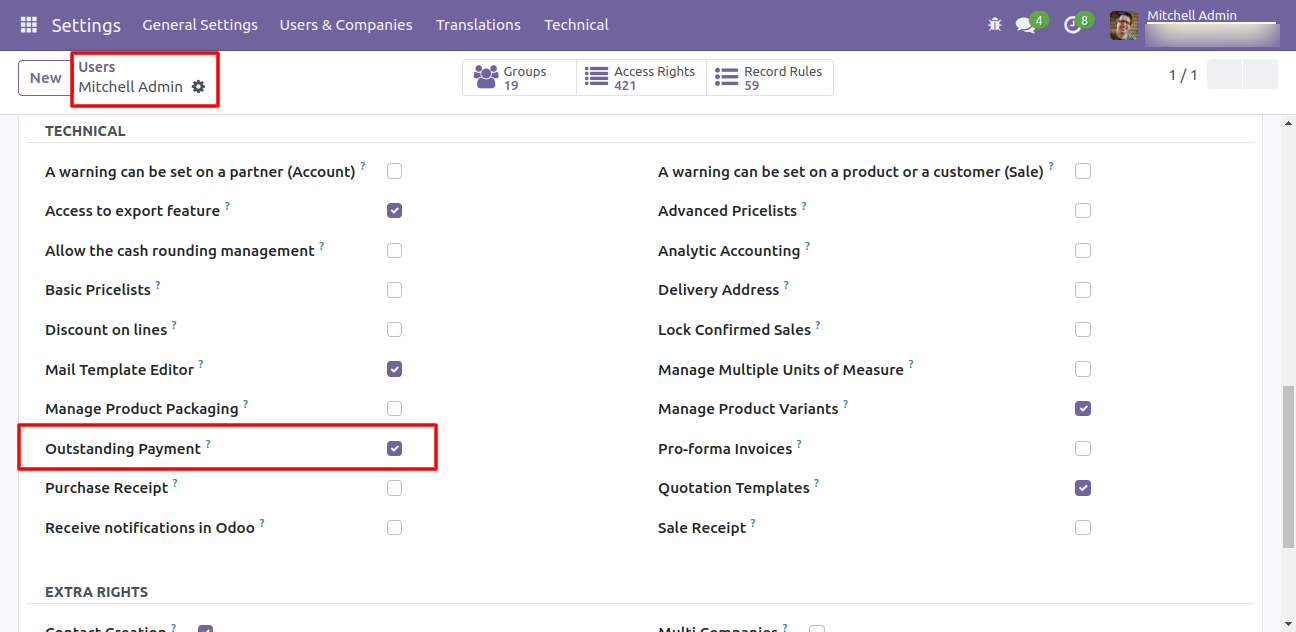
Tick the 'Outstanding Payment' group.
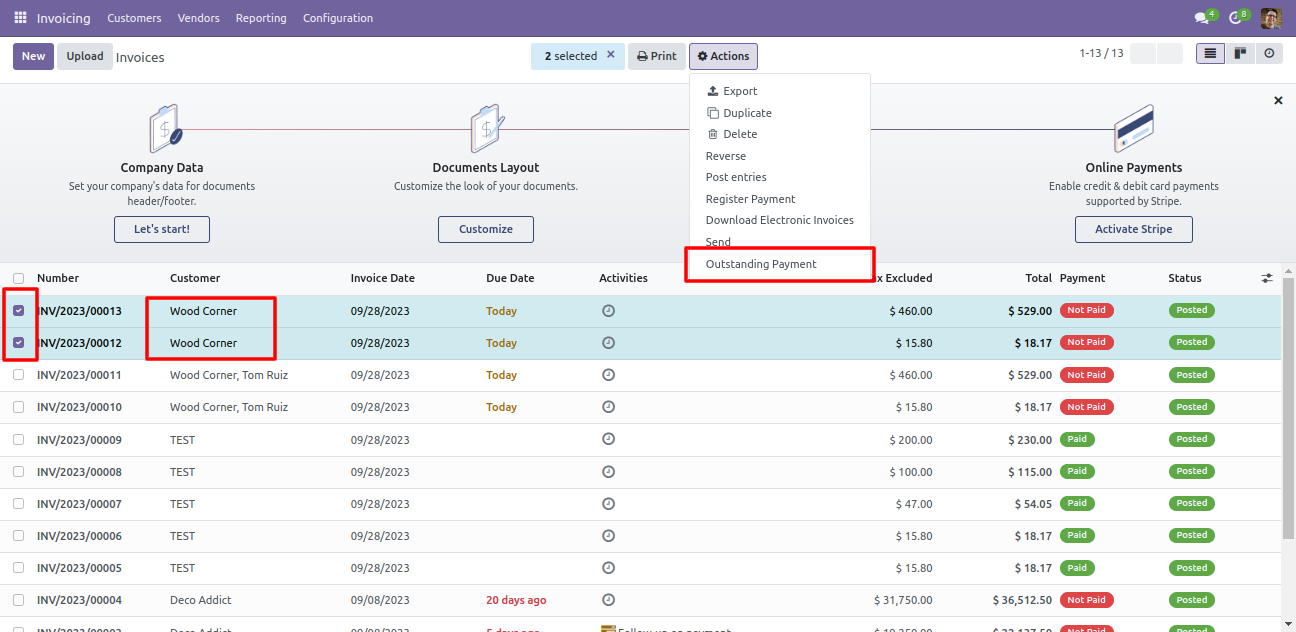
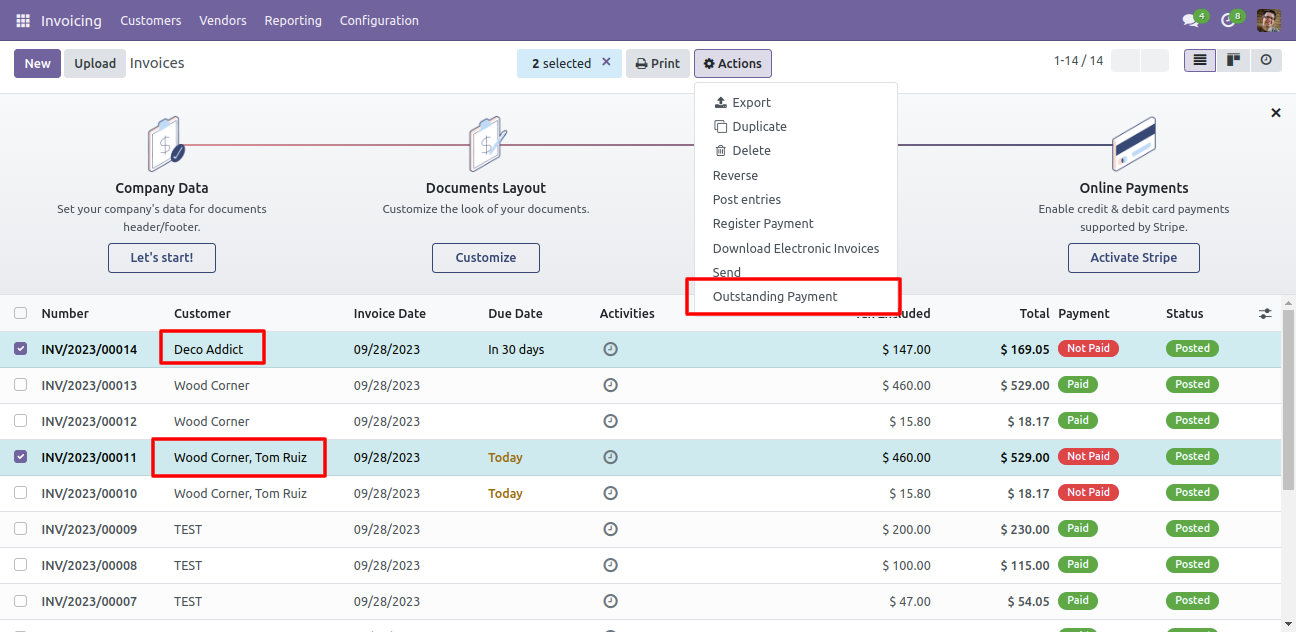
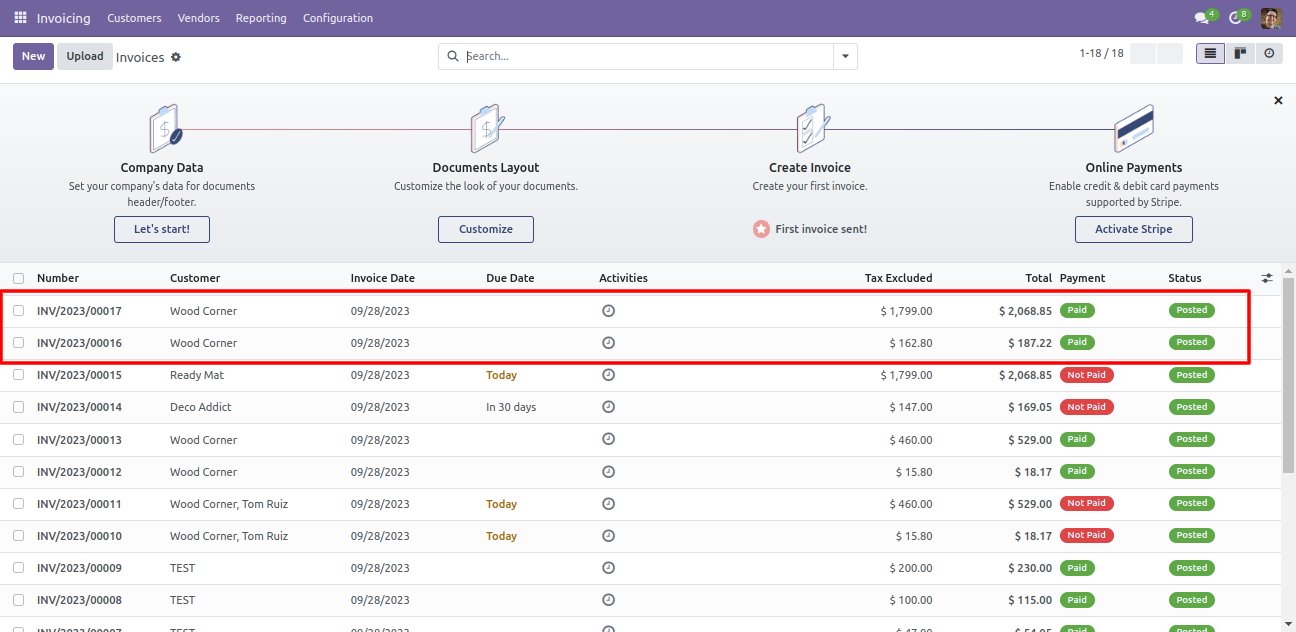
Now select the invoices from the list view and then go to 'Action' and click 'Outstanding Payment'.
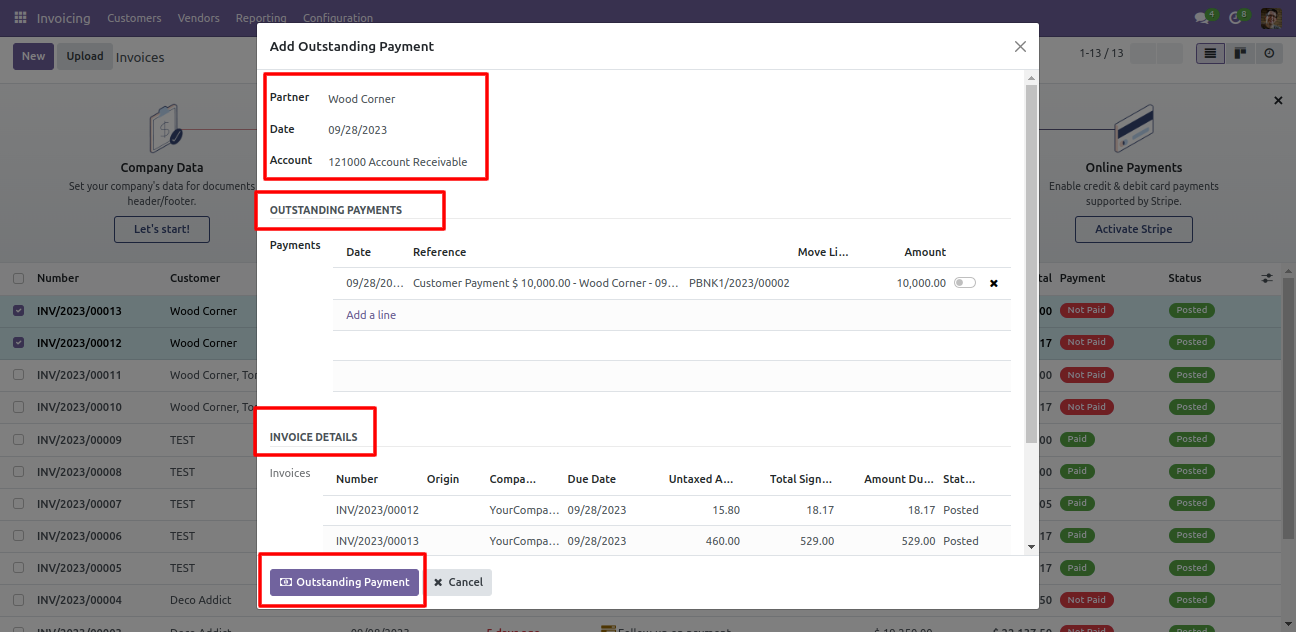
After that one wizard opens, select partner, date, account, outstanding payments & press the 'Outstanding Payment' button.
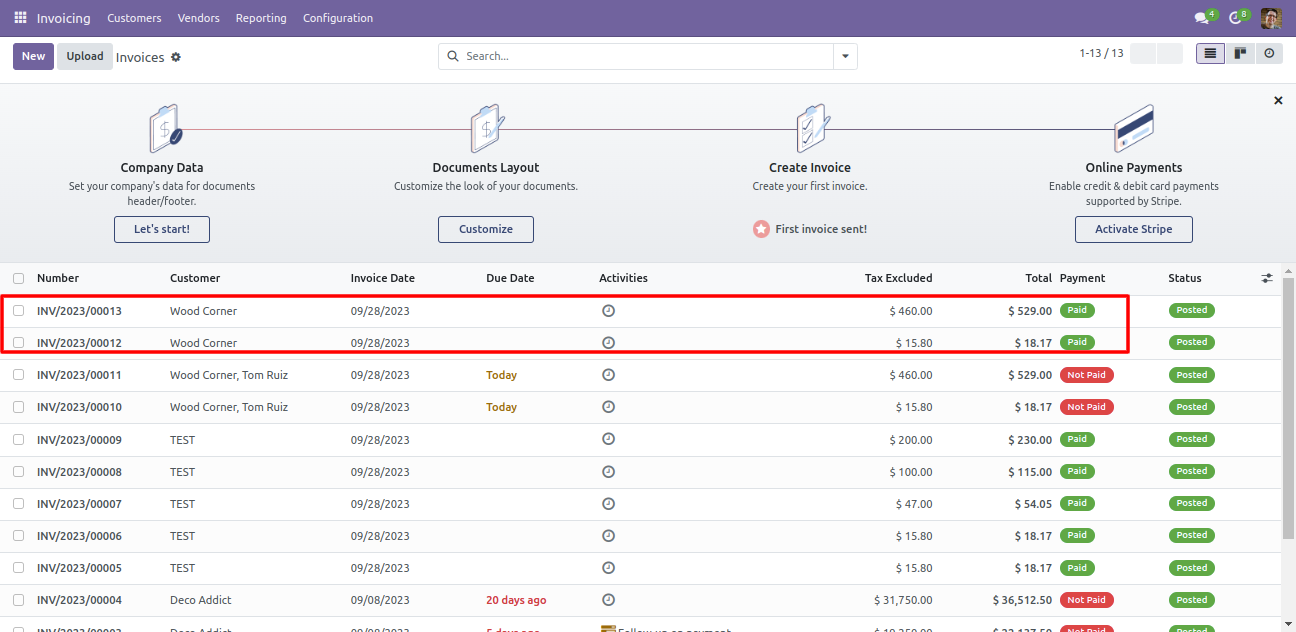
So after that payment status changed to 'Paid'.
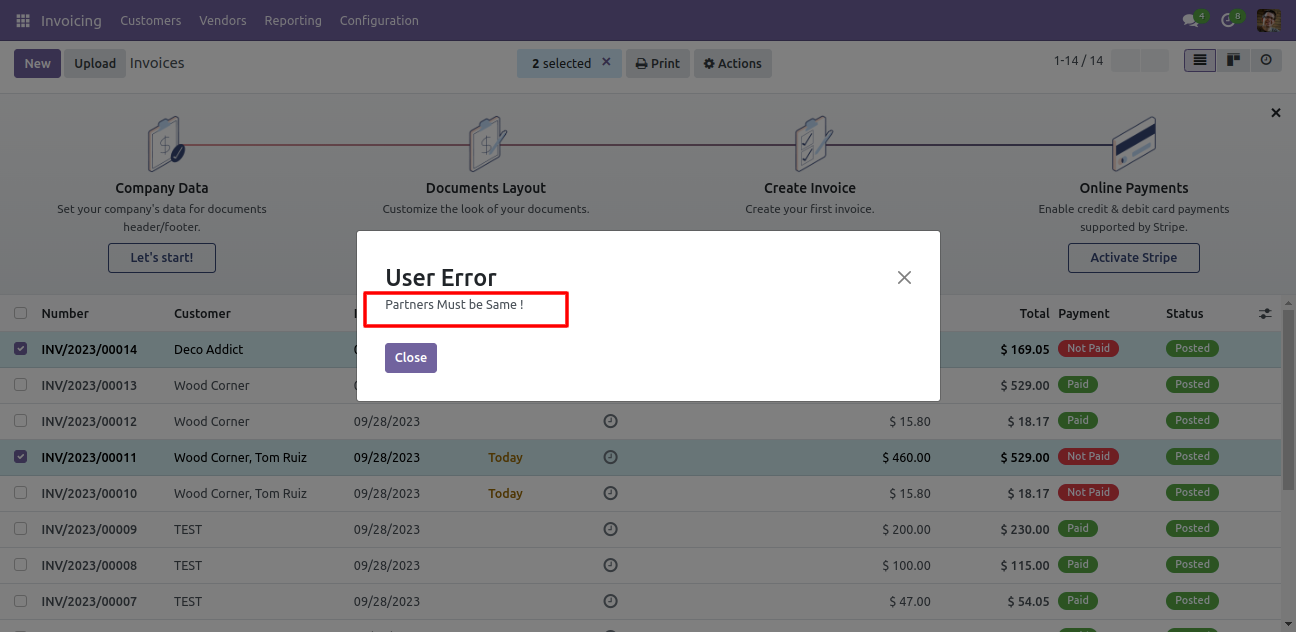
Now we try to make multiple outstanding payments of different partners.
So it gives a warning.
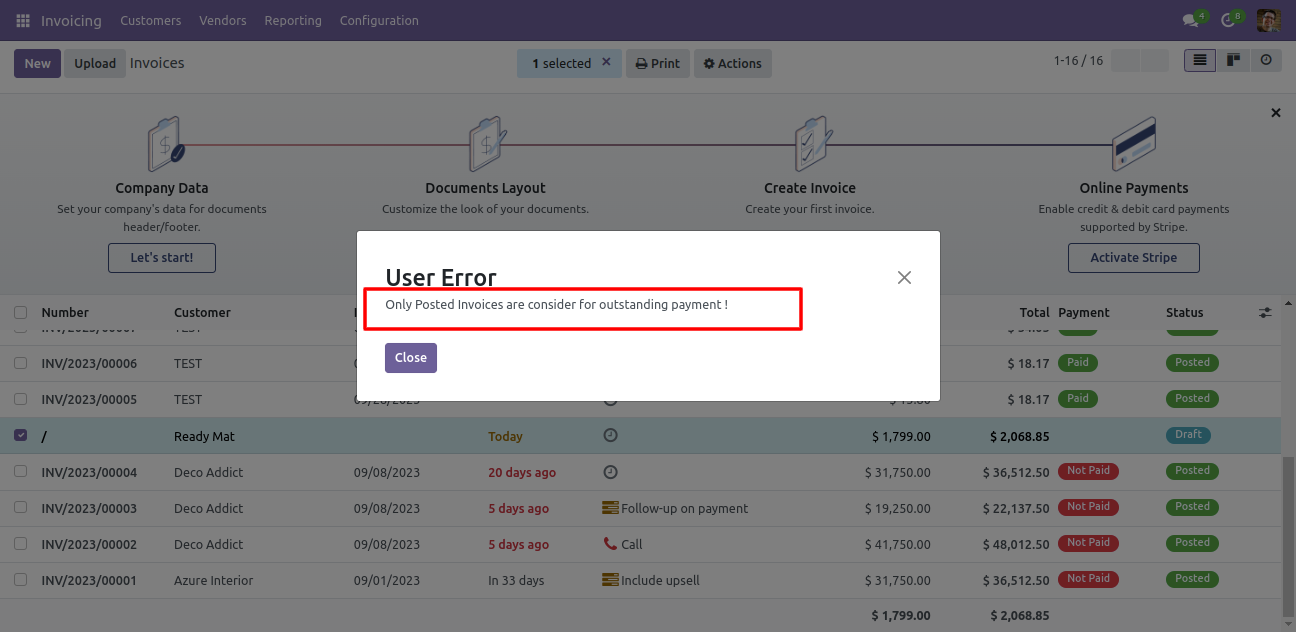
Now we make outstanding payment of the draft invoice.
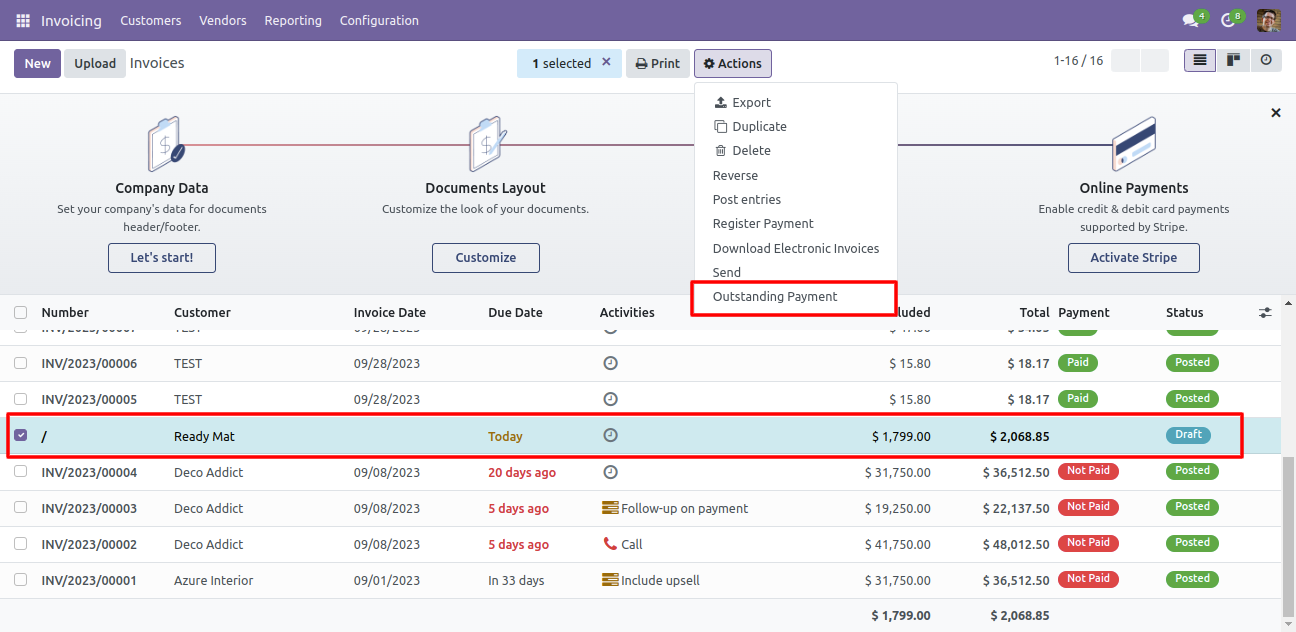
So it gives a warning because posted invoice only considers for the outstanding payment.
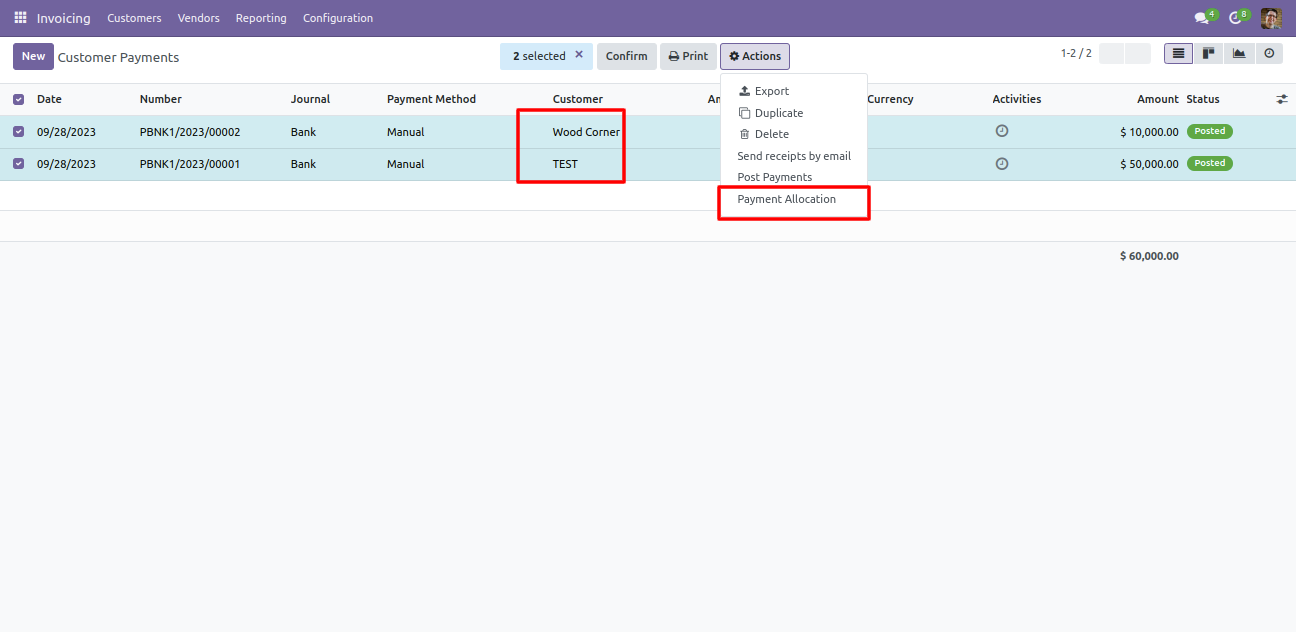
Select the payments and then go to 'Action' and click 'Payment Allocation'.
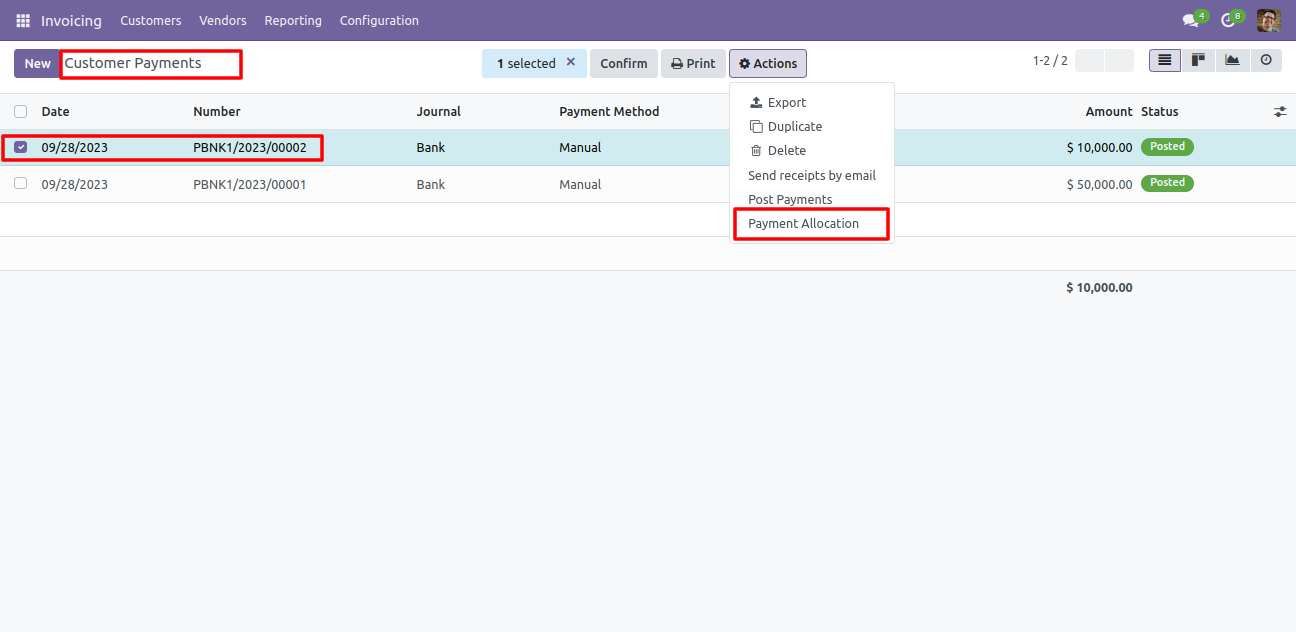
After that one wizard opens, select details and press the 'Make Payment' button.
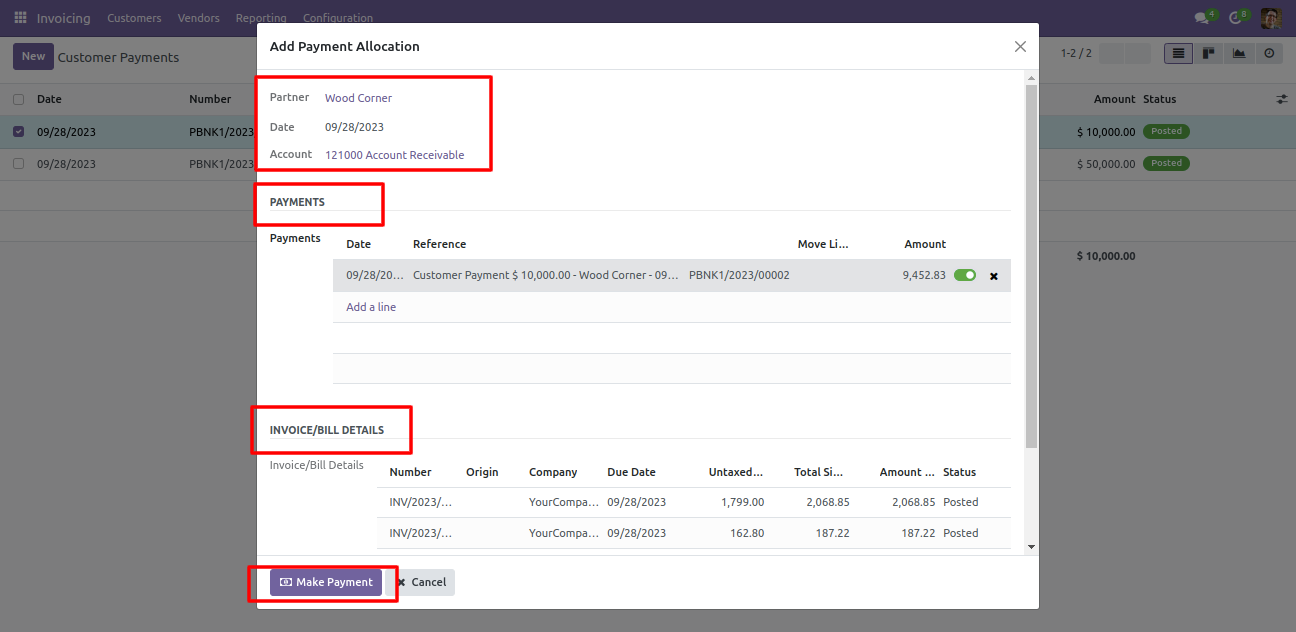
So after that payment status changed to "Paid".
Now we try to make multiple payments of different customers.
So it gives a warning.

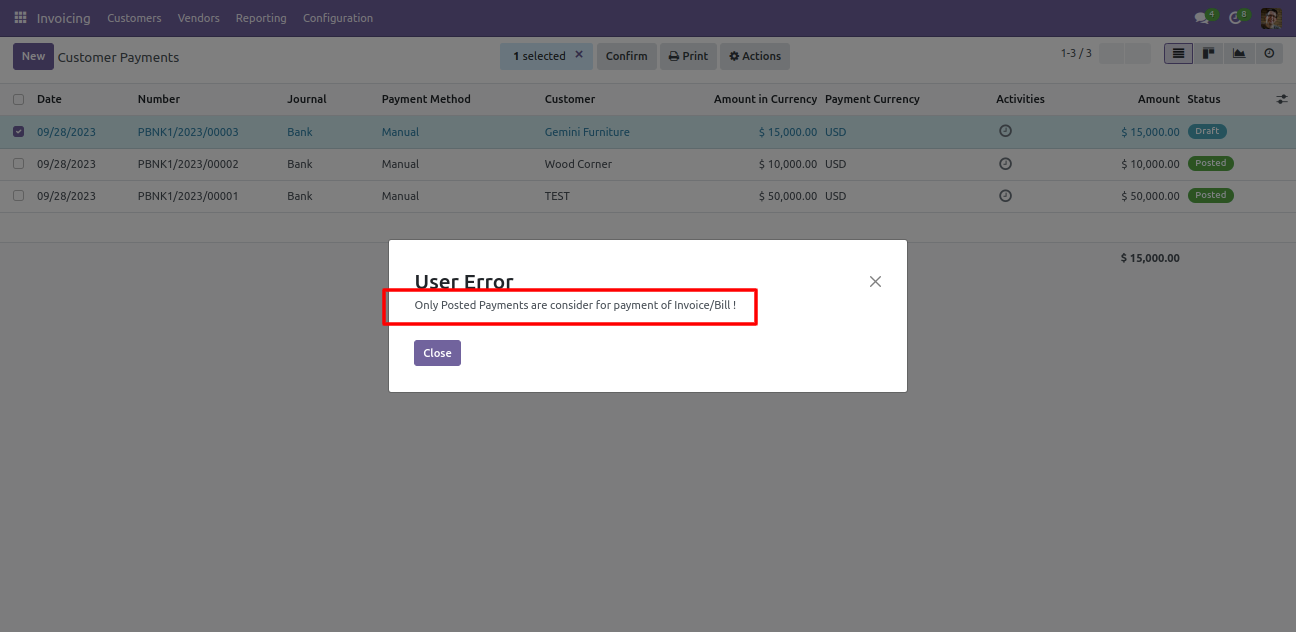
Now we make payment of the draft state.
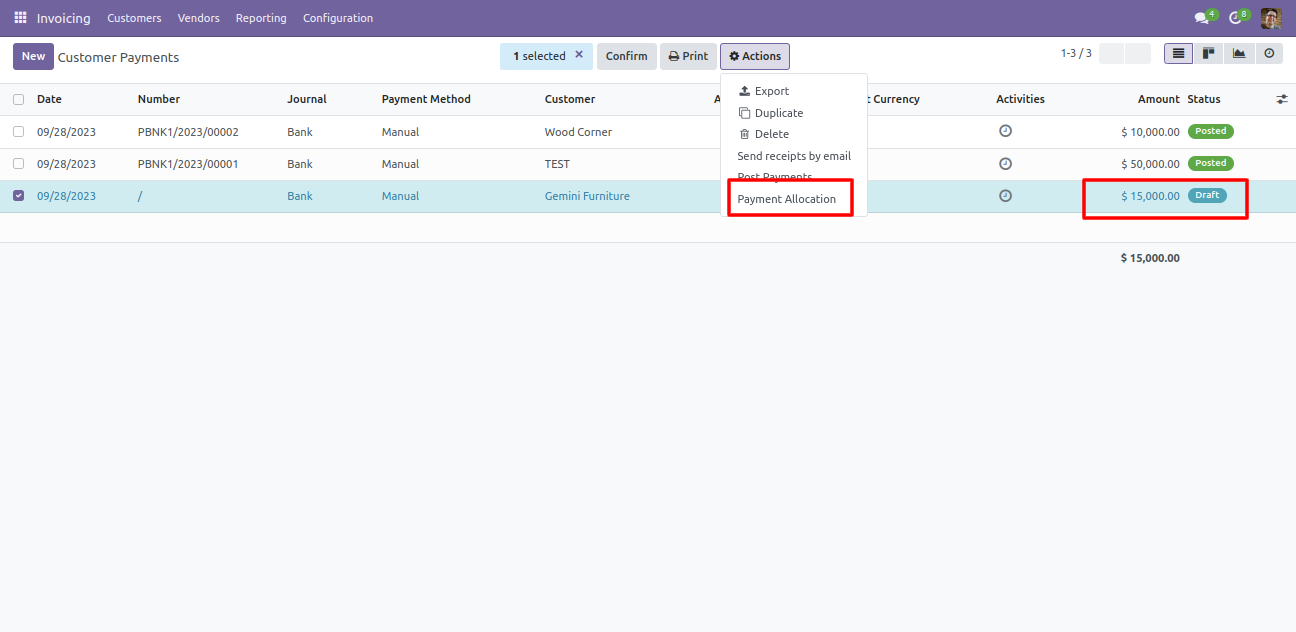
So it gives a warning because posted invoice/bill only considers for the payment.
Features
- You can manage the fiscal year based on your financial rule.
- You can generate opening and closing entries for the fiscal year.
- You can create your own fiscal year.
- You can generate a monthly or three month period for the fiscal year.
- You can restrict record creation for the closed fiscal period and closed fiscal year.
- Enable approval for fiscal year closing and fiscal year re-opening.
- Enable approval for fiscal year period closing and fiscal year period re-opening.
- You can close a fiscal year, cancel closing entries, or can close a particular period.
- Income account & expense account default created for centralization.
- Journal created with default debit and credit accounts.
- You can group by entries based on the fiscal year or period.
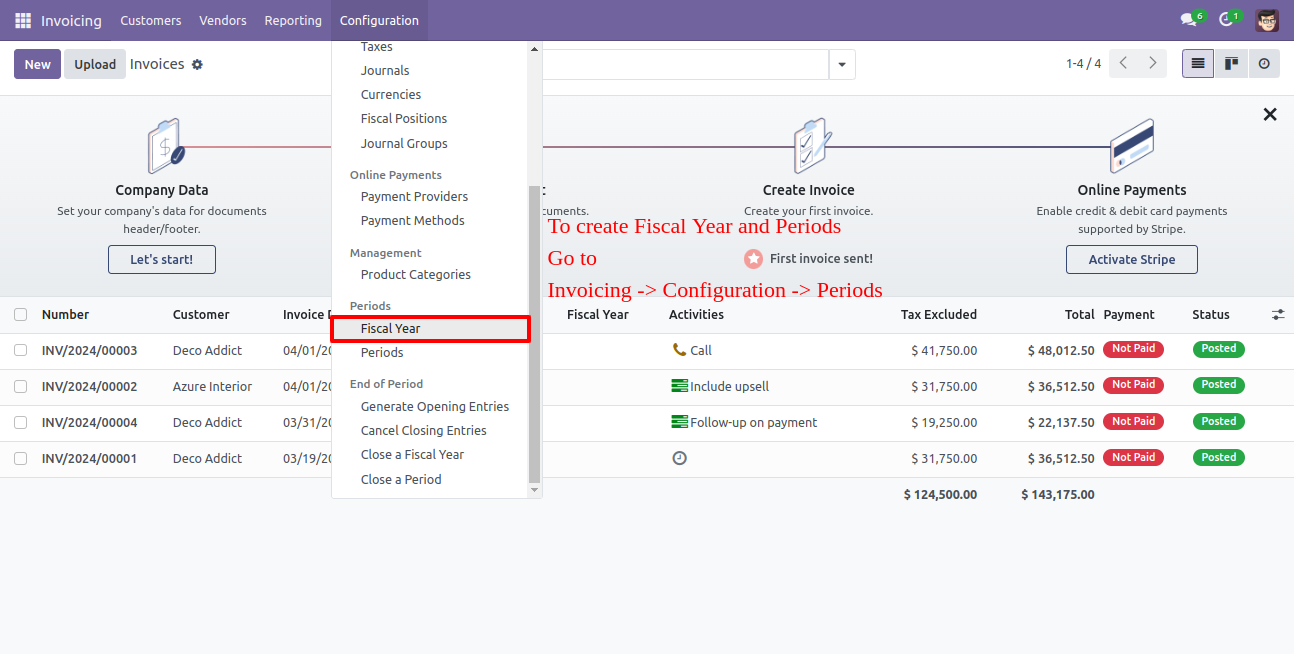
Go to invoice => configuration, select the fiscal year to create fiscal year and periods
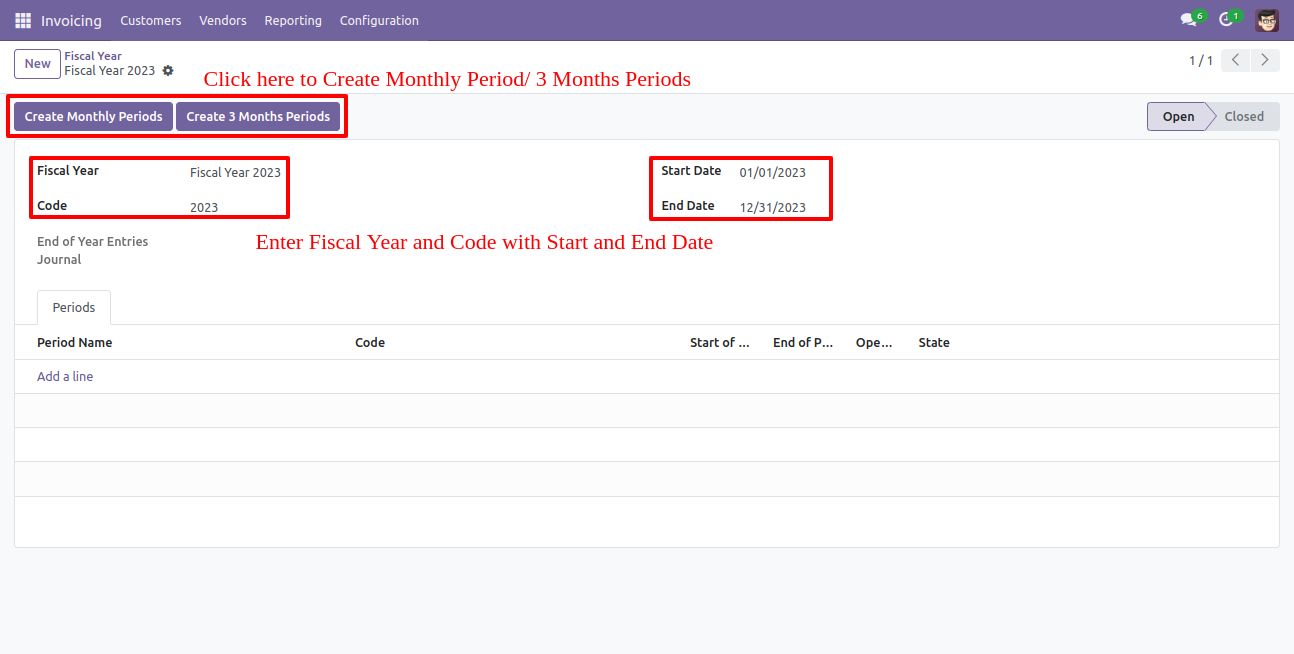
You can generate a monthly or three month period for the fiscal year. Click the button and enter the fiscal year and code with start and end date.
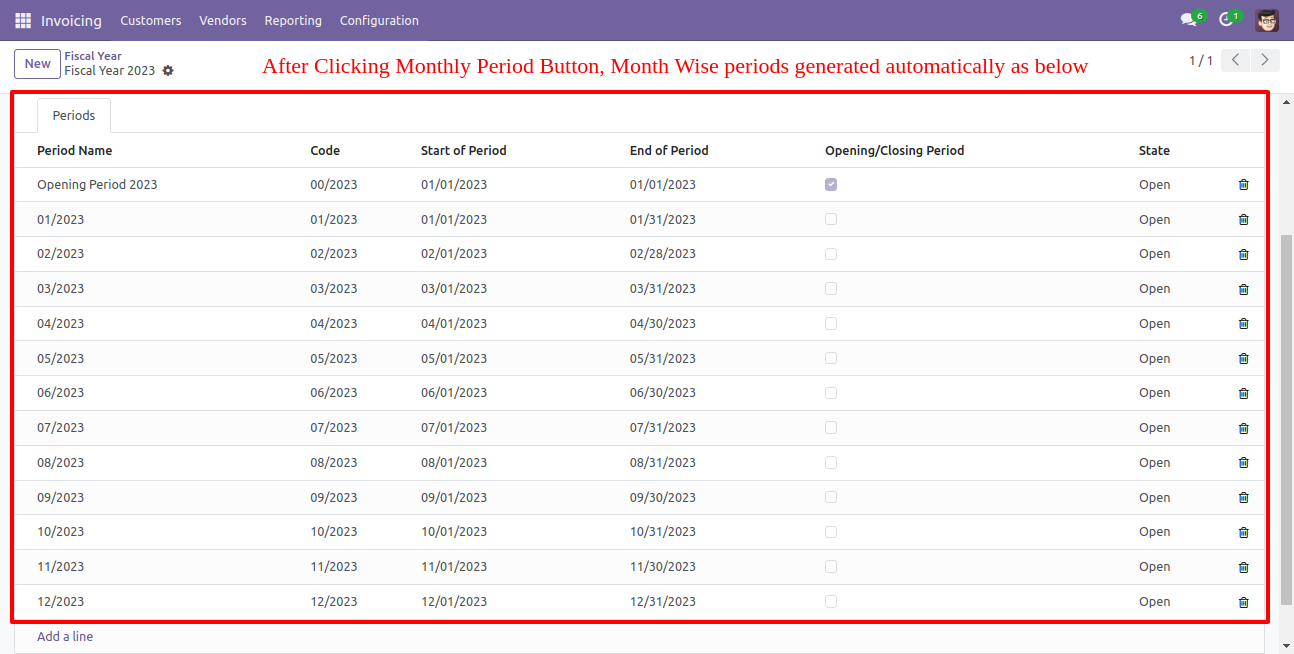
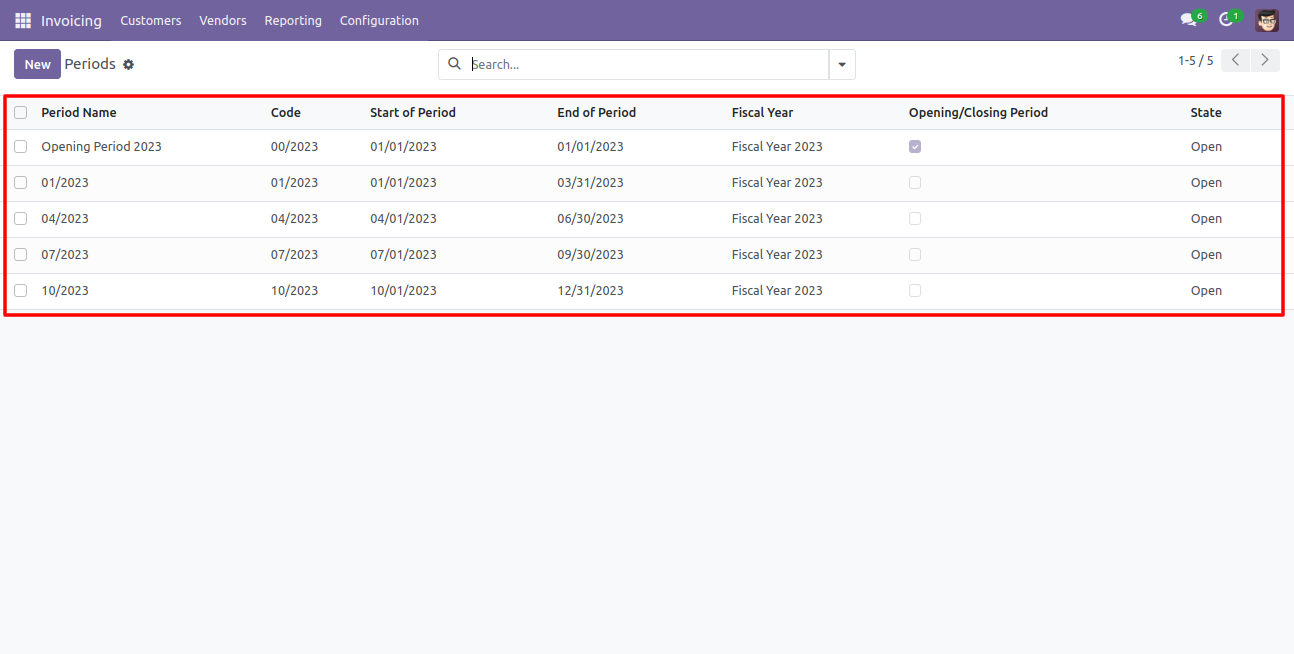
Month wise period generated, list view of periods looks like below.
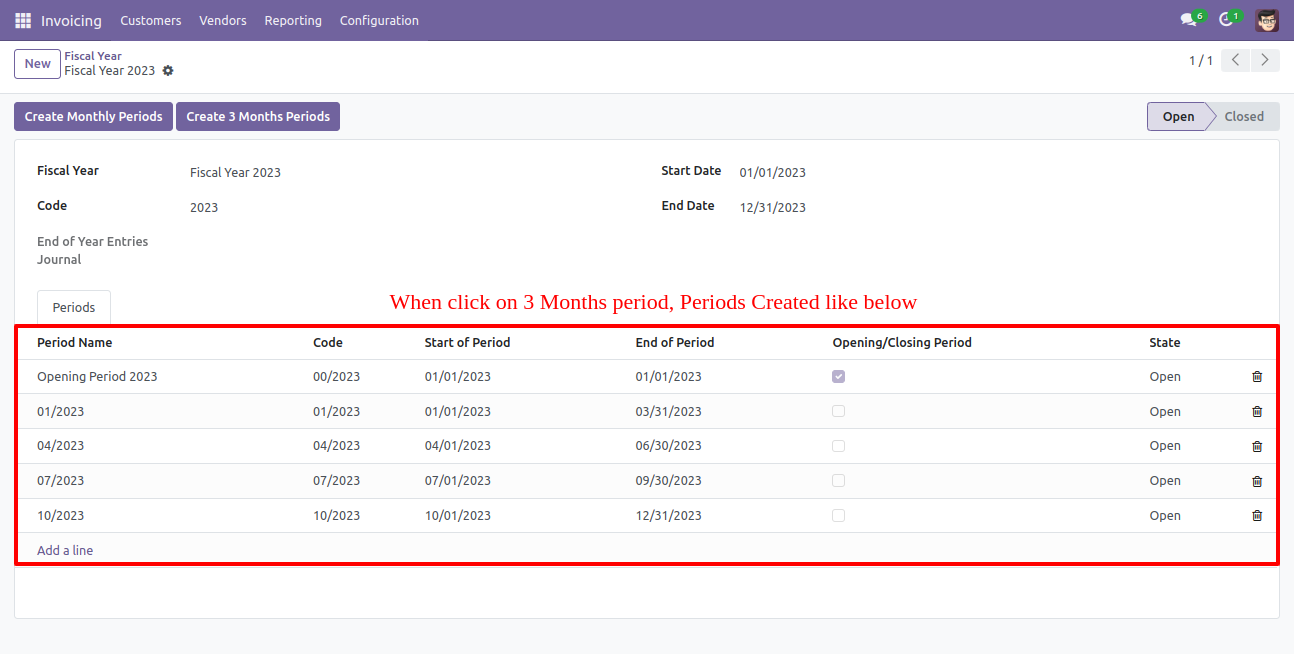
Three month-wise periods generated, list view of periods looks like below.
The list view of the fiscal year looks like below.
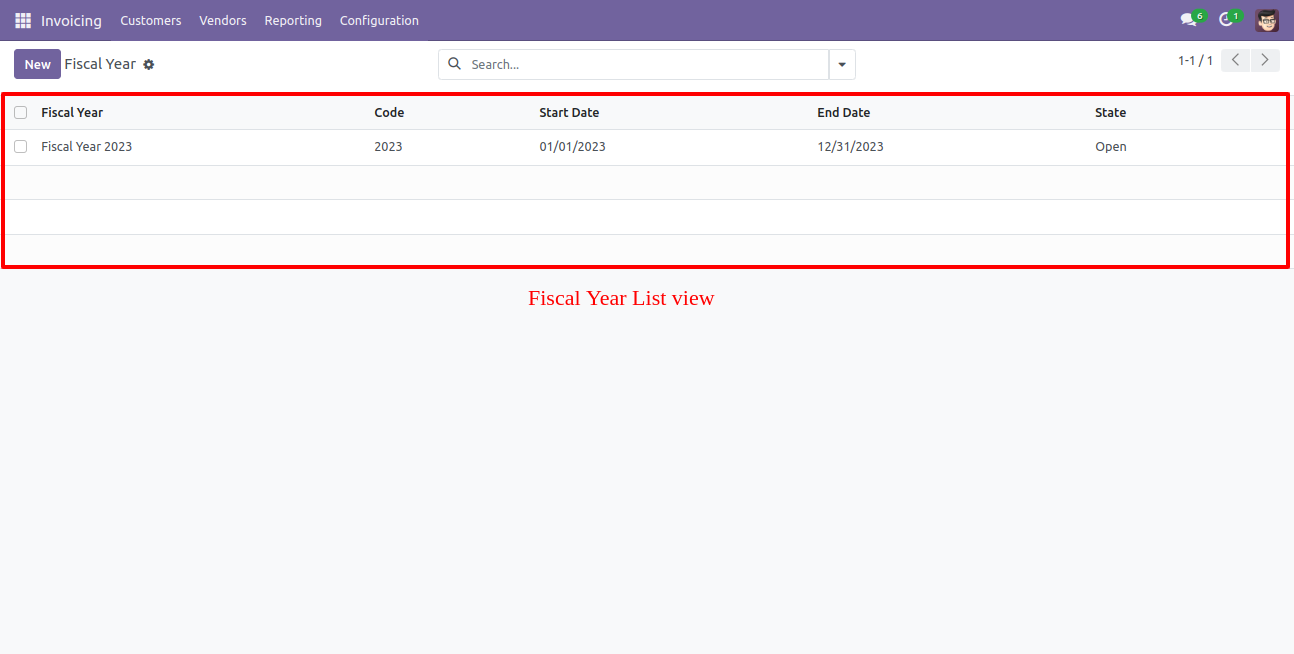
The list view of all periods looks like below.
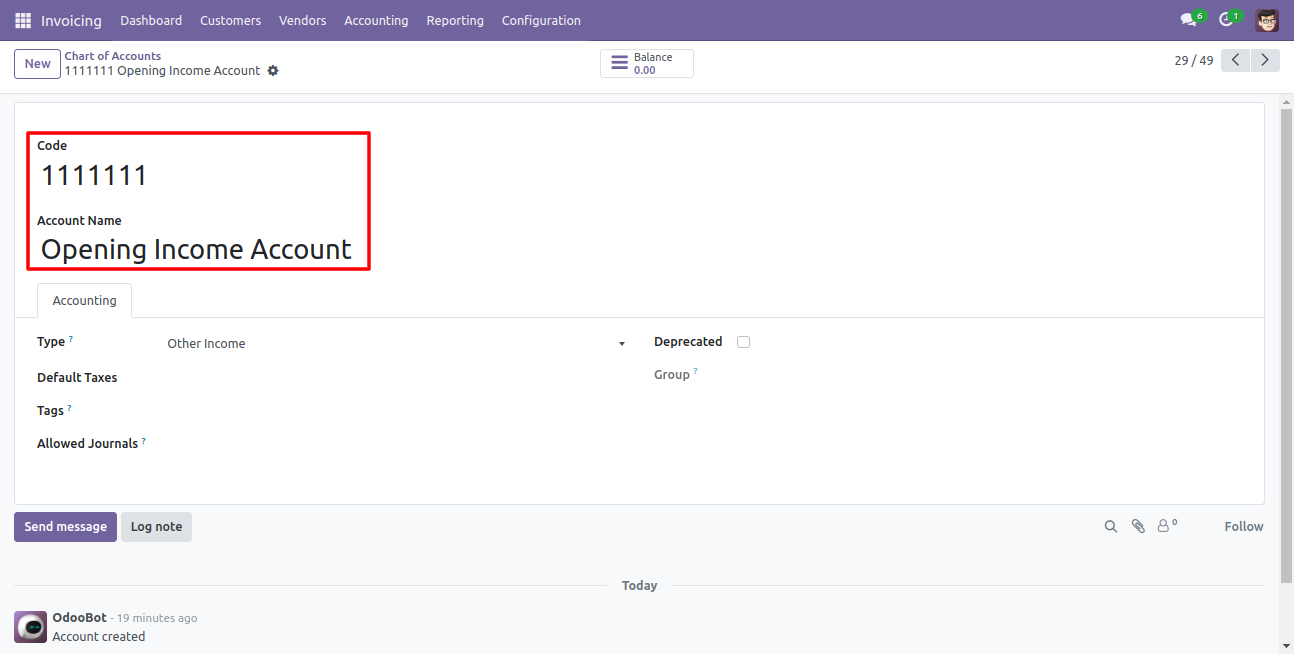
Opening income account default created for centralization.
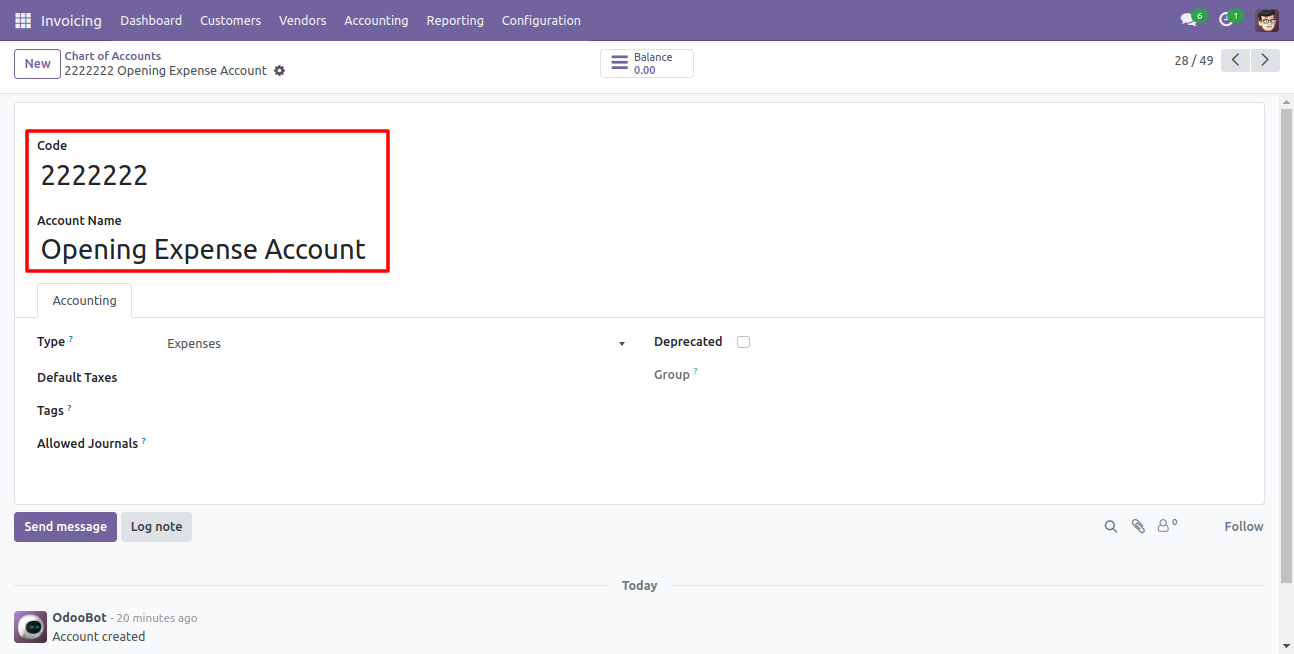
Opening expense account default created for centralization.
Journal created with default debit and credit accounts.
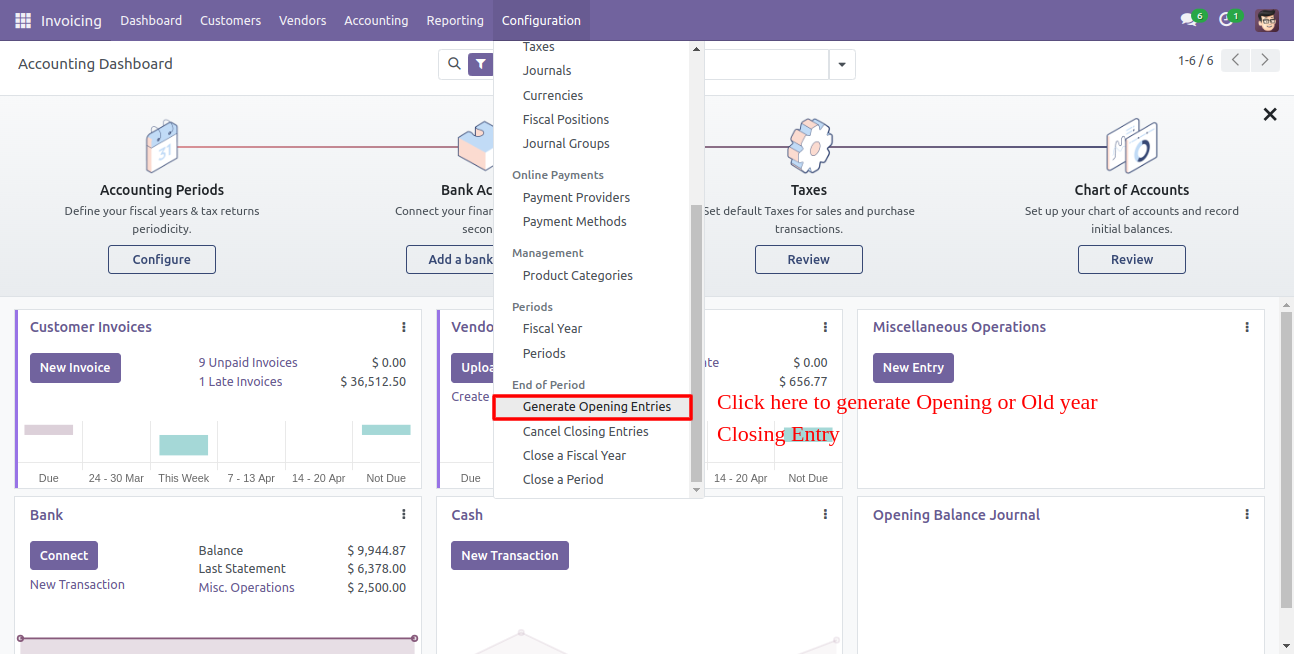
Go to invoice => configuration, select "Generate Opening Entries" to generate opening or old year closing entries.
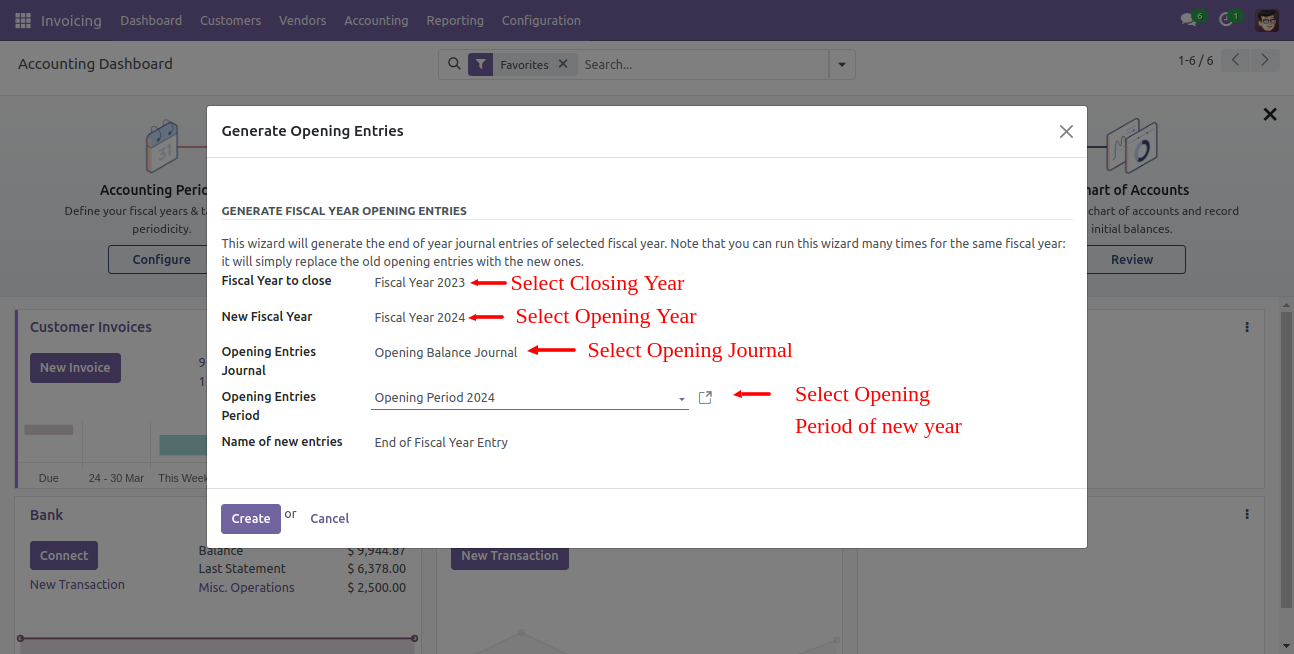
After that one wizard open, select opening/closing year, opening journal & period of the new year.
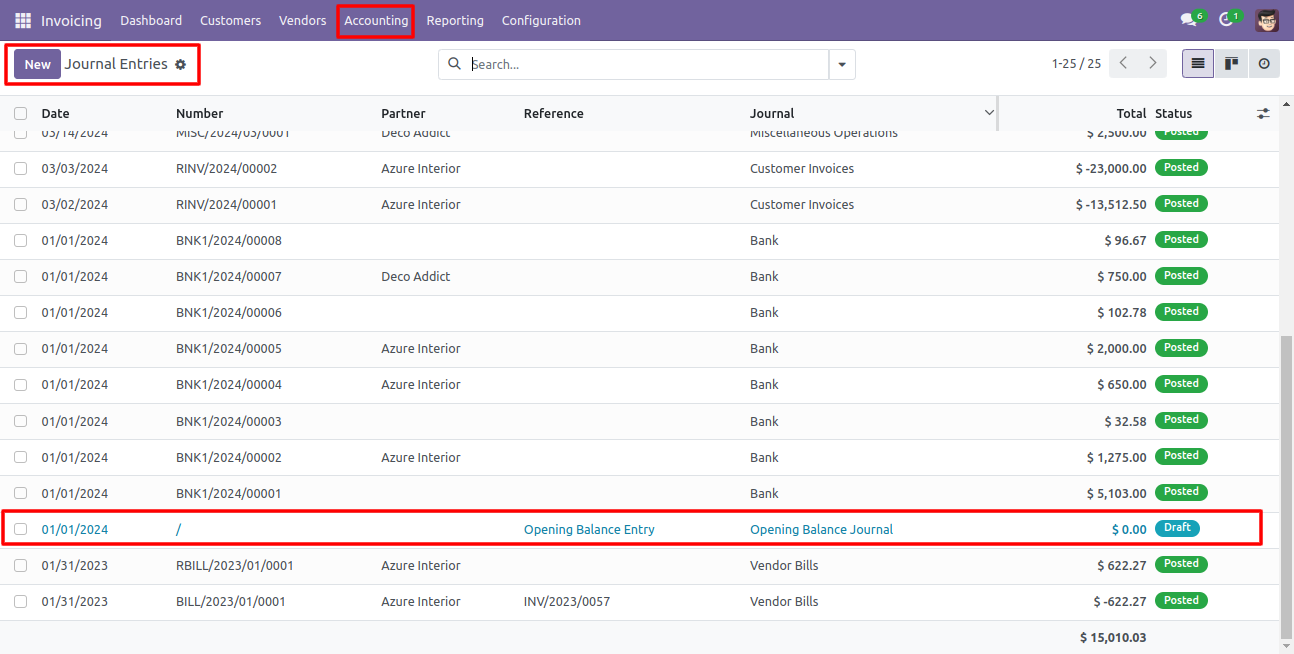
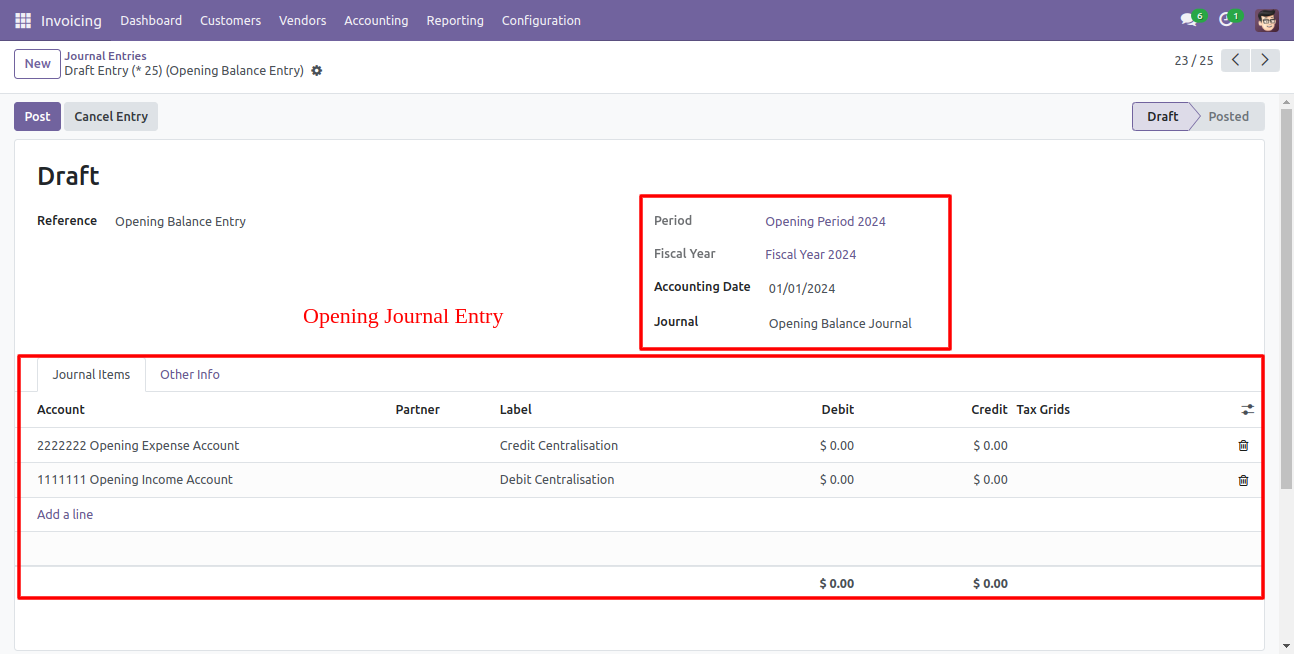
Opening journal entry created in the journal entries.
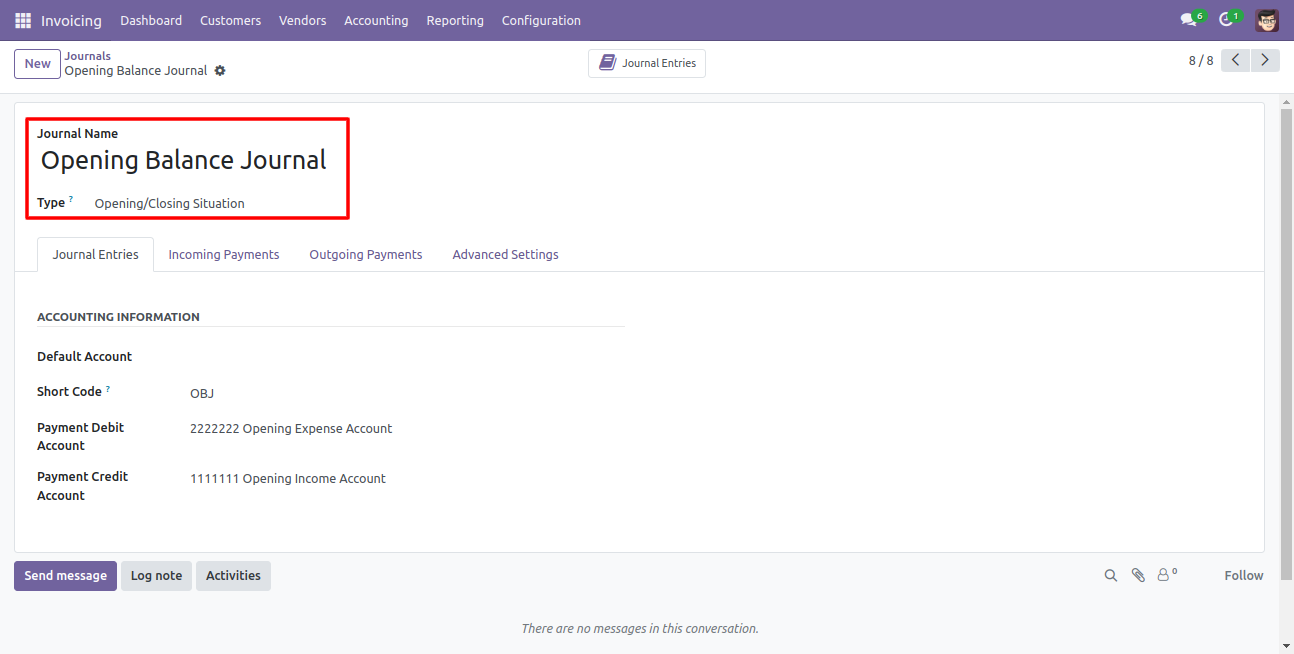
The opening journal entry form view looks like below.
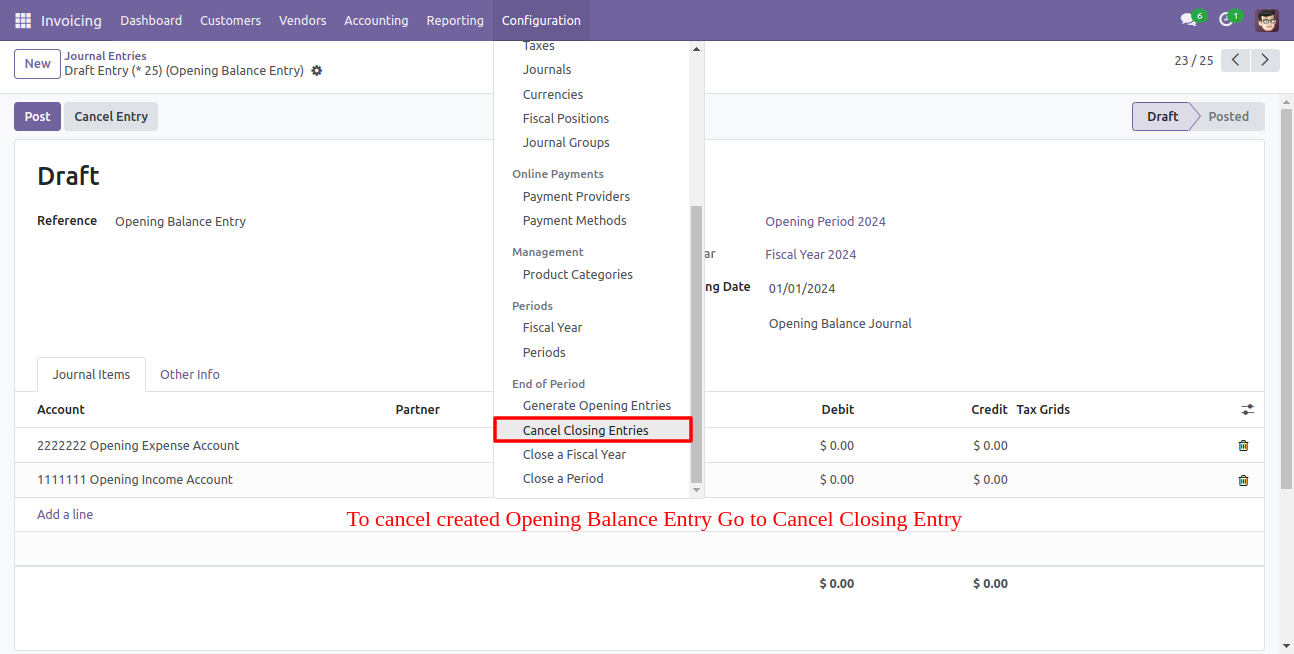
Go to invoice => configuration, select "Cancel Closing Entries" to cancel created opening balance entry.
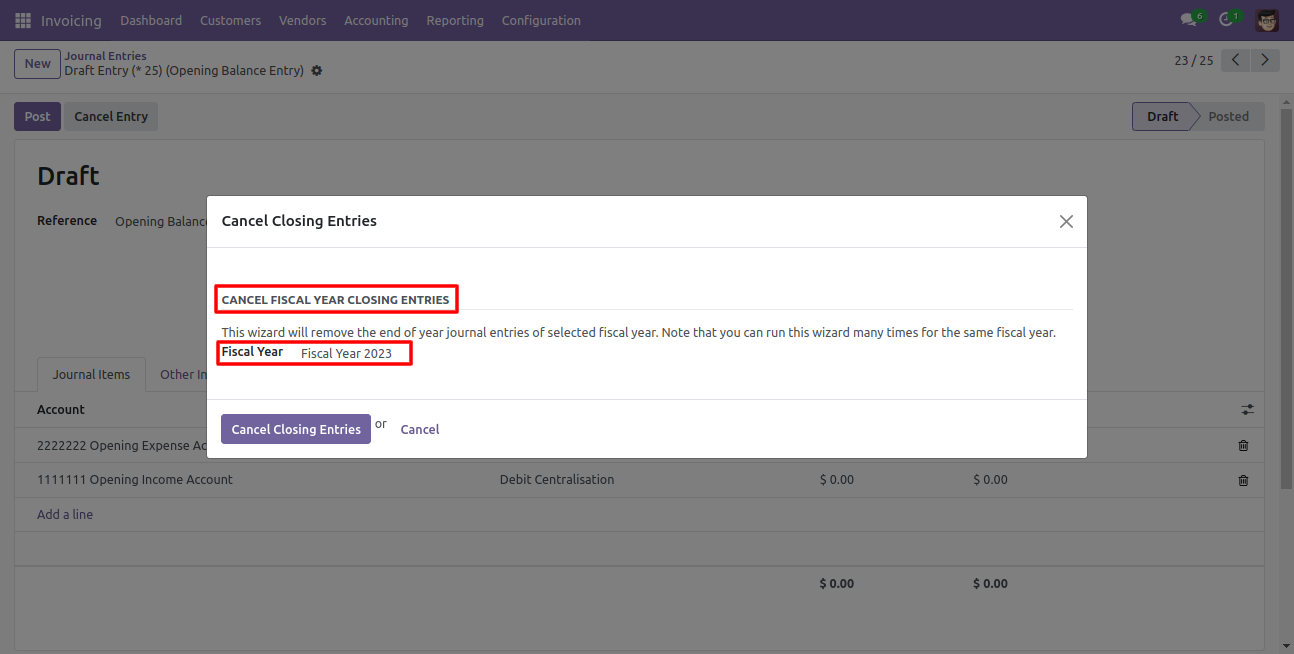
After one wizard opens, select the fiscal year which journal entry you want to remove.
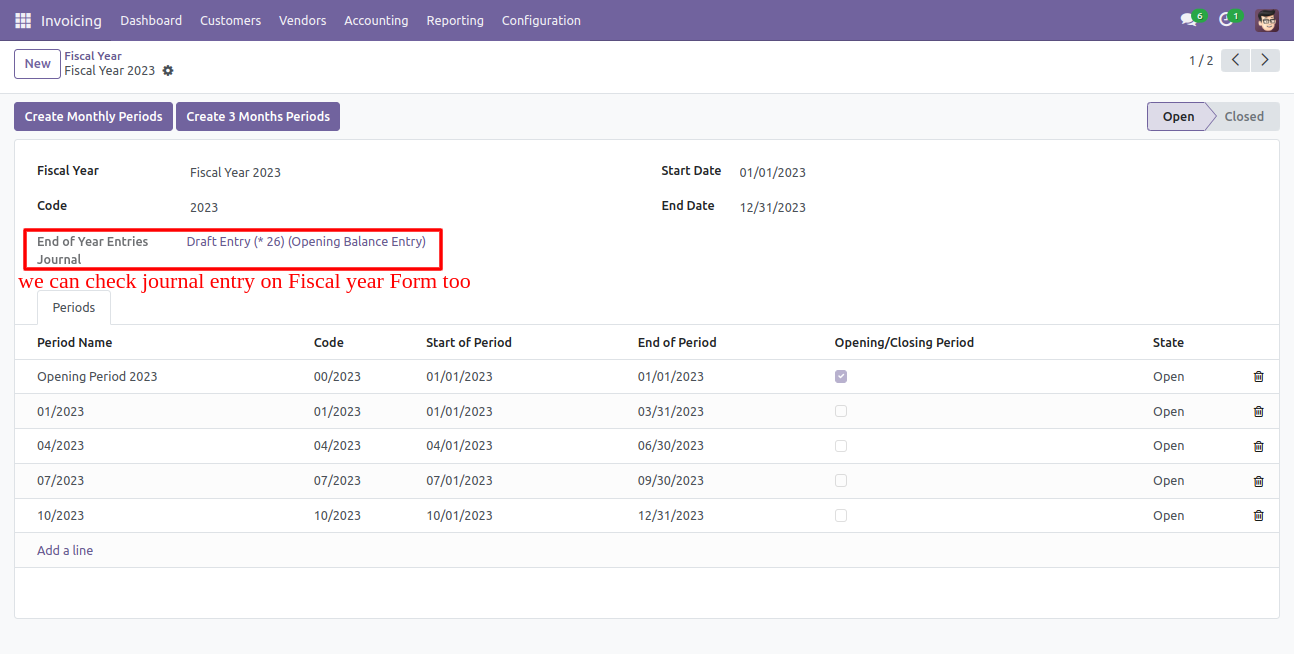
The fiscal year form view look like below, you can see journal entries here.
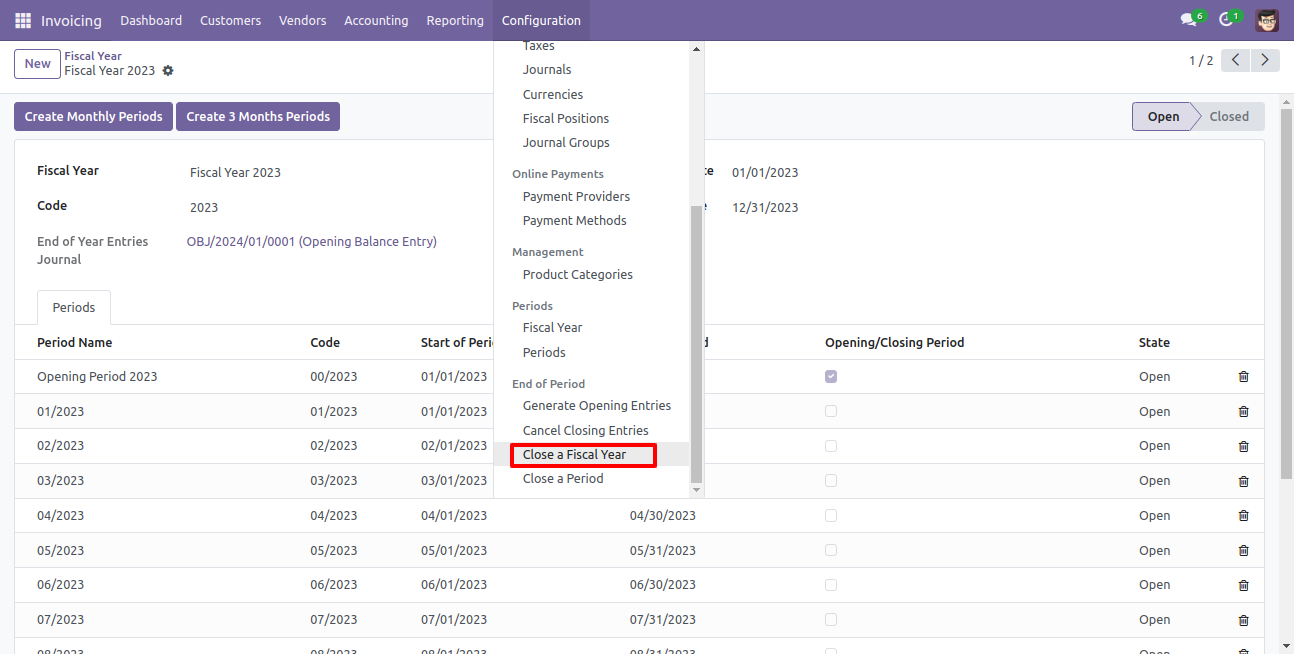
Go to invoice => configuration, select "Close a Fiscal Year" to close the fiscal year.
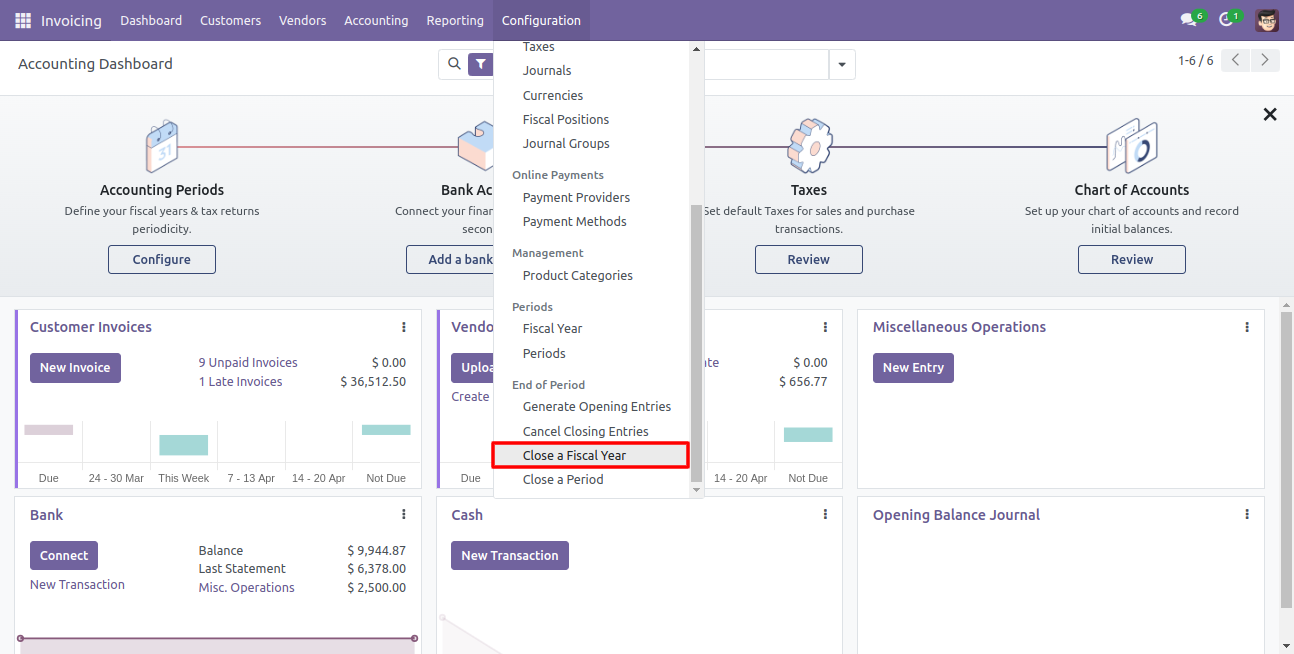
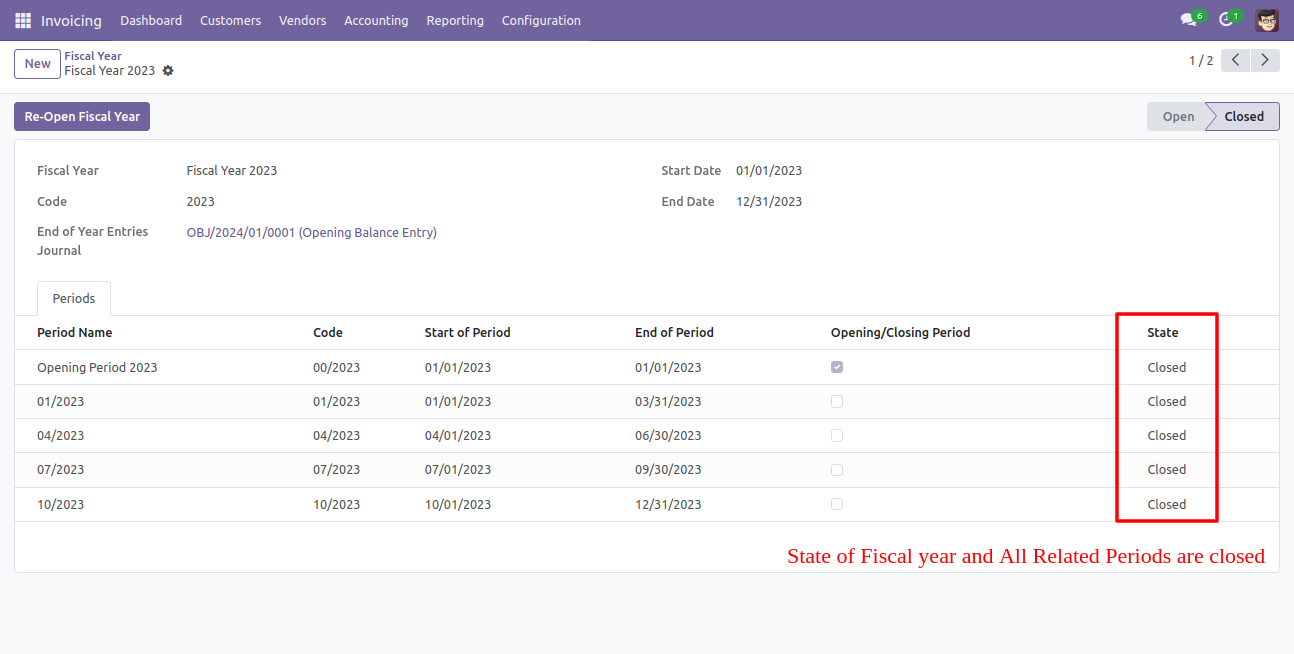
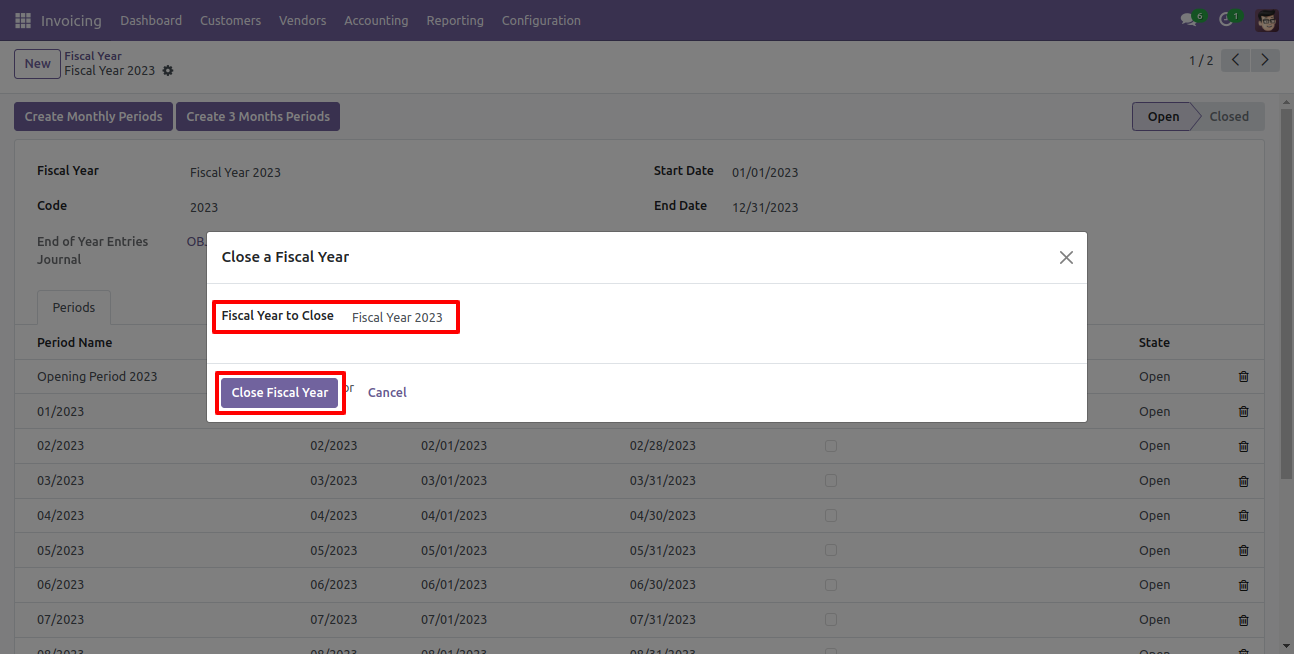
After one wizard opens, select the fiscal year and click the close button.

All the periods and state of the fiscal year closed.
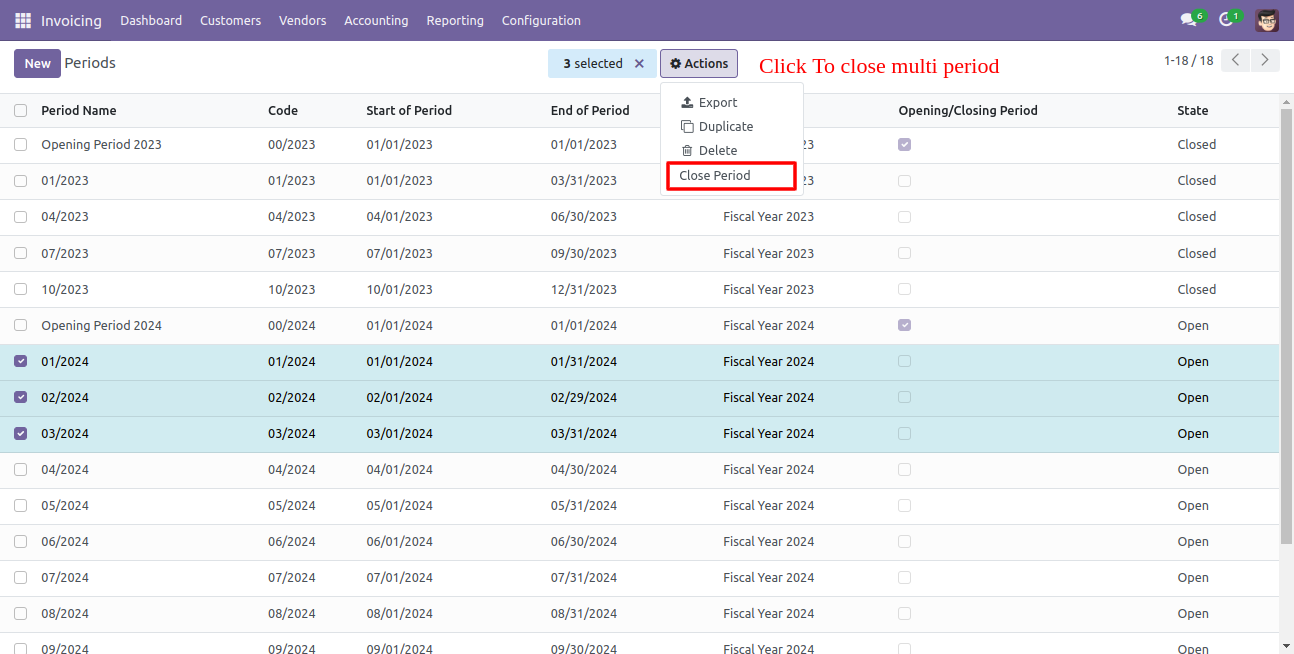
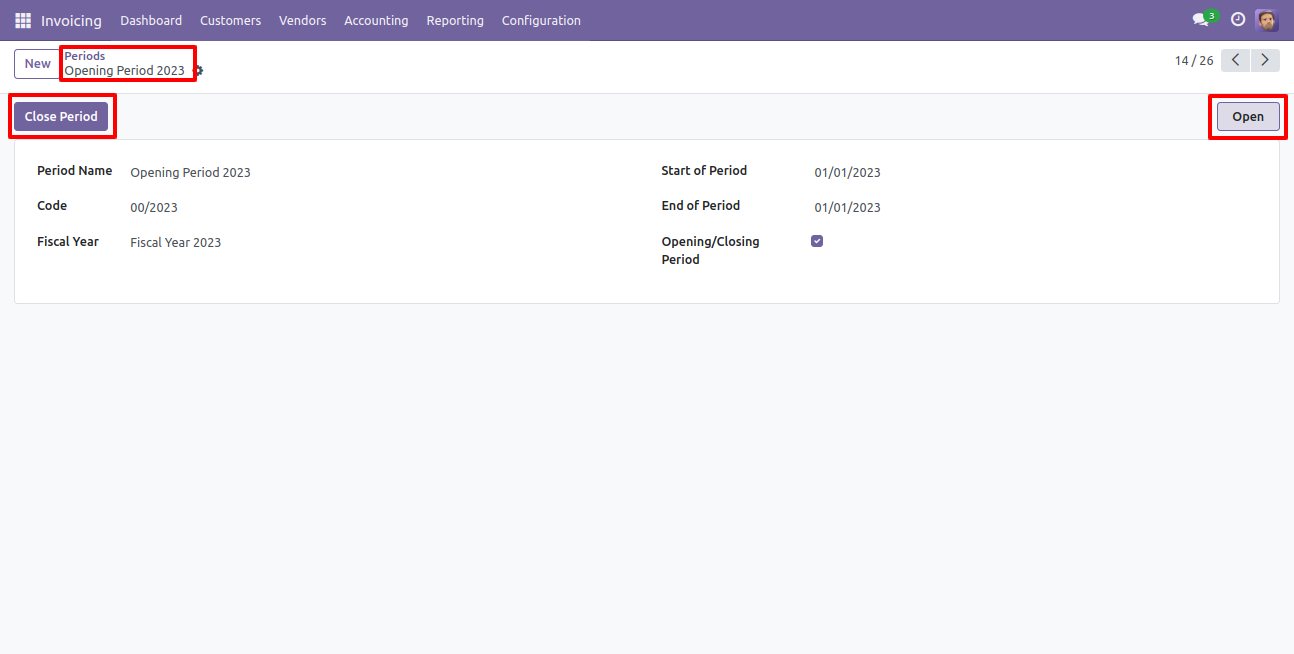
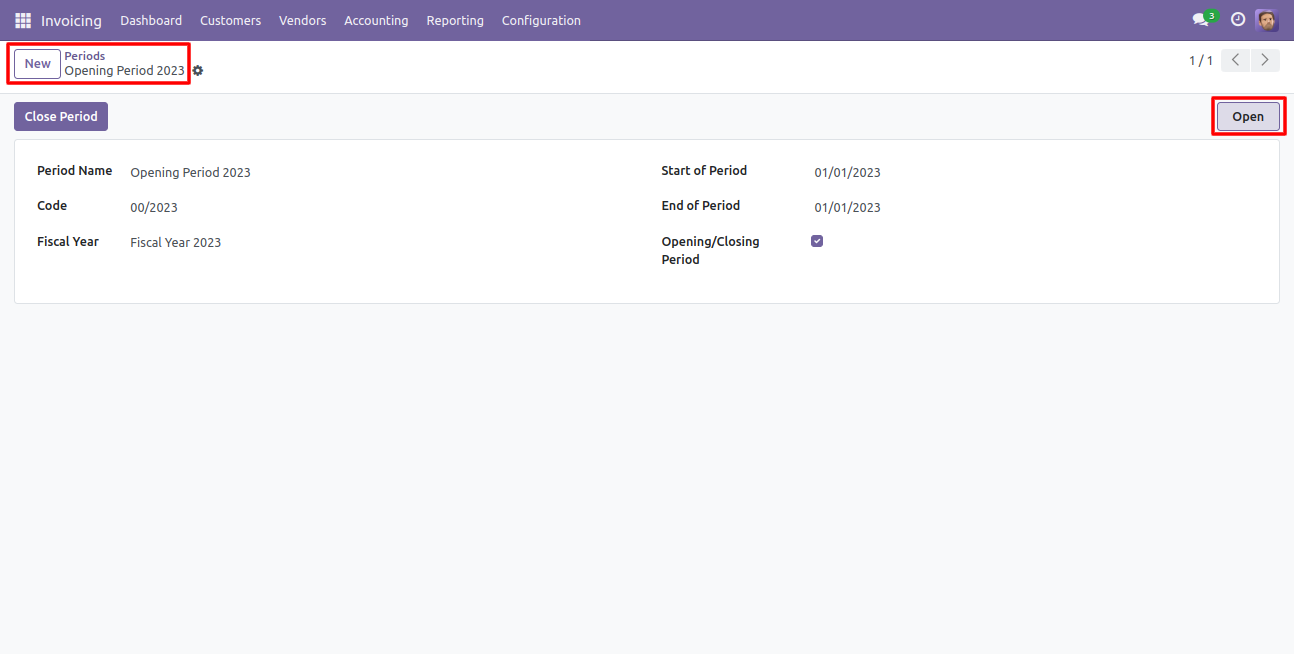
Go to invoice => configuration, select "Close Period" to close the particular period.
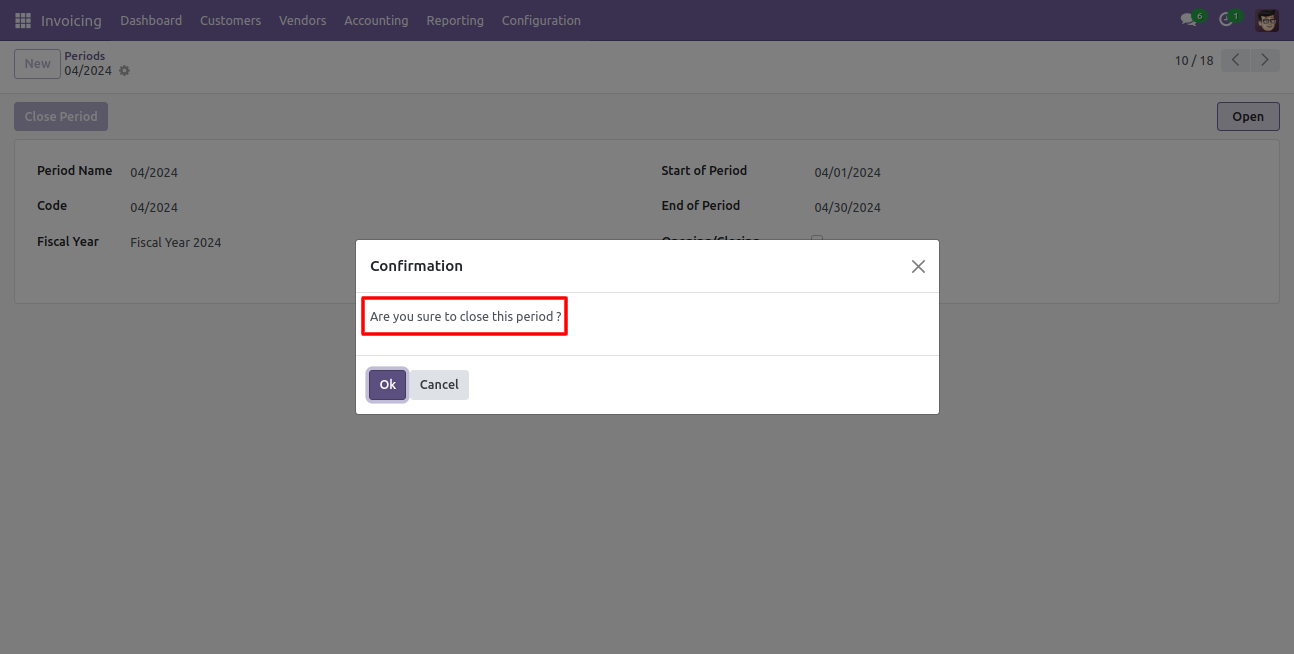
If you want to close a particular period from the form view then click the "Close Period" button.
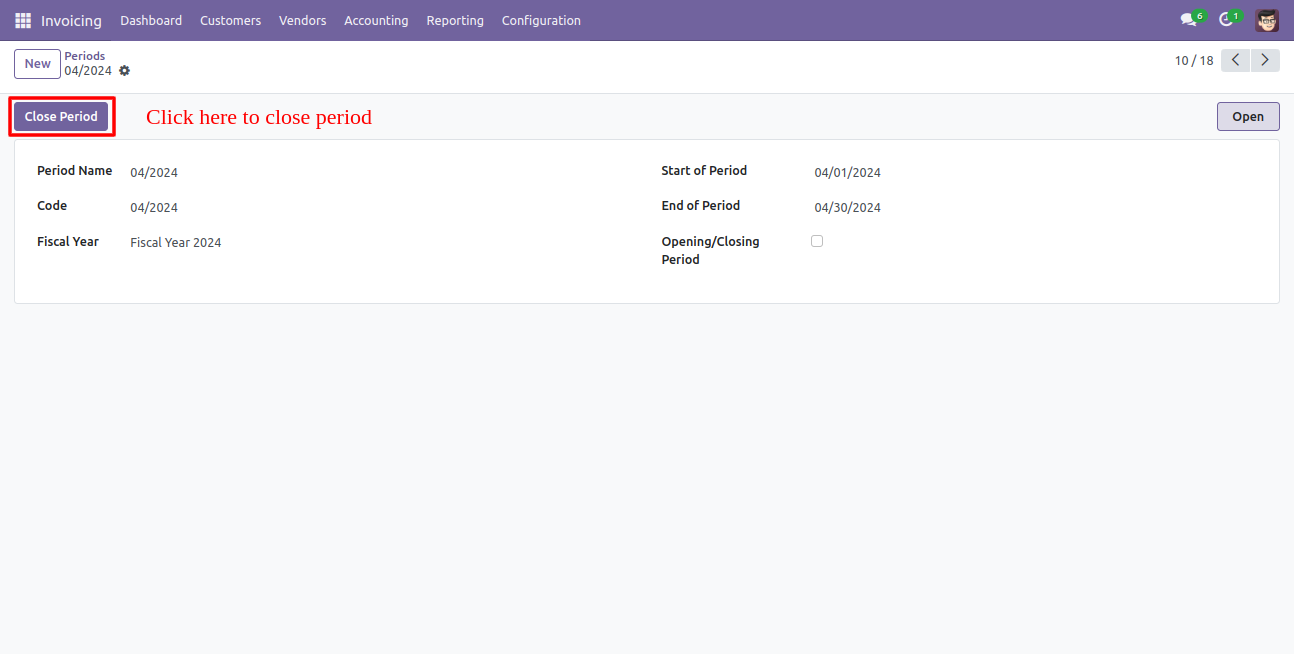
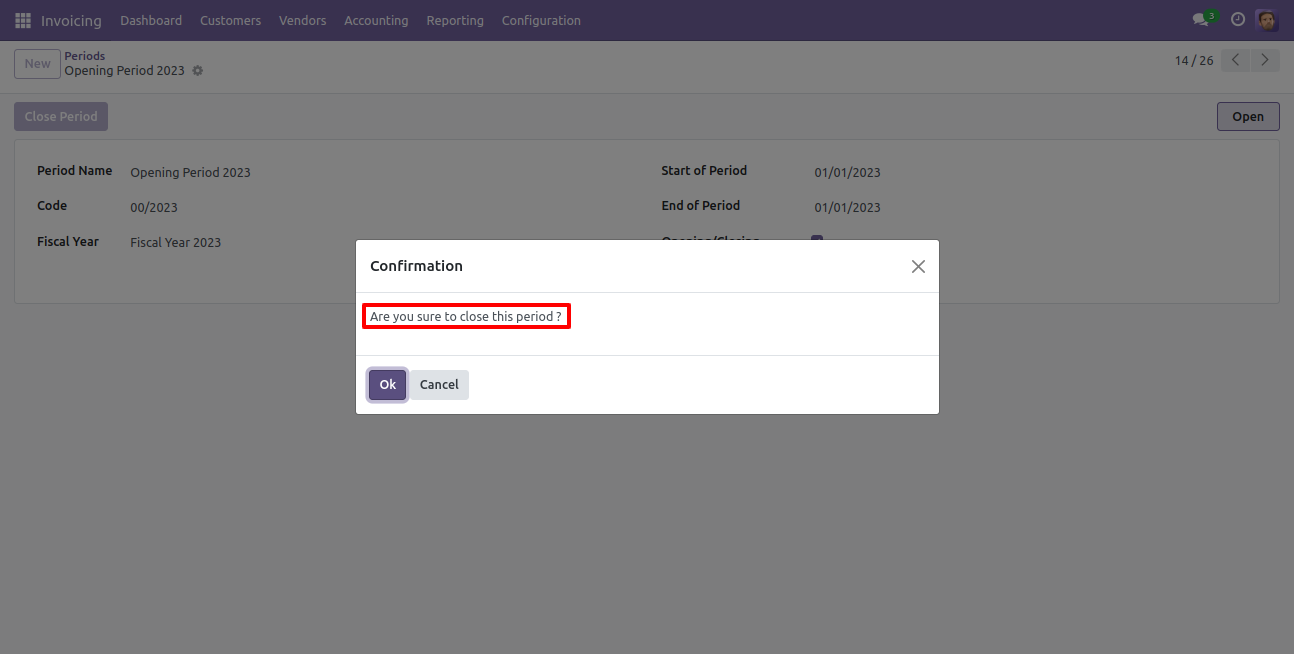
After that notification occurs, click "Ok" to close that period.
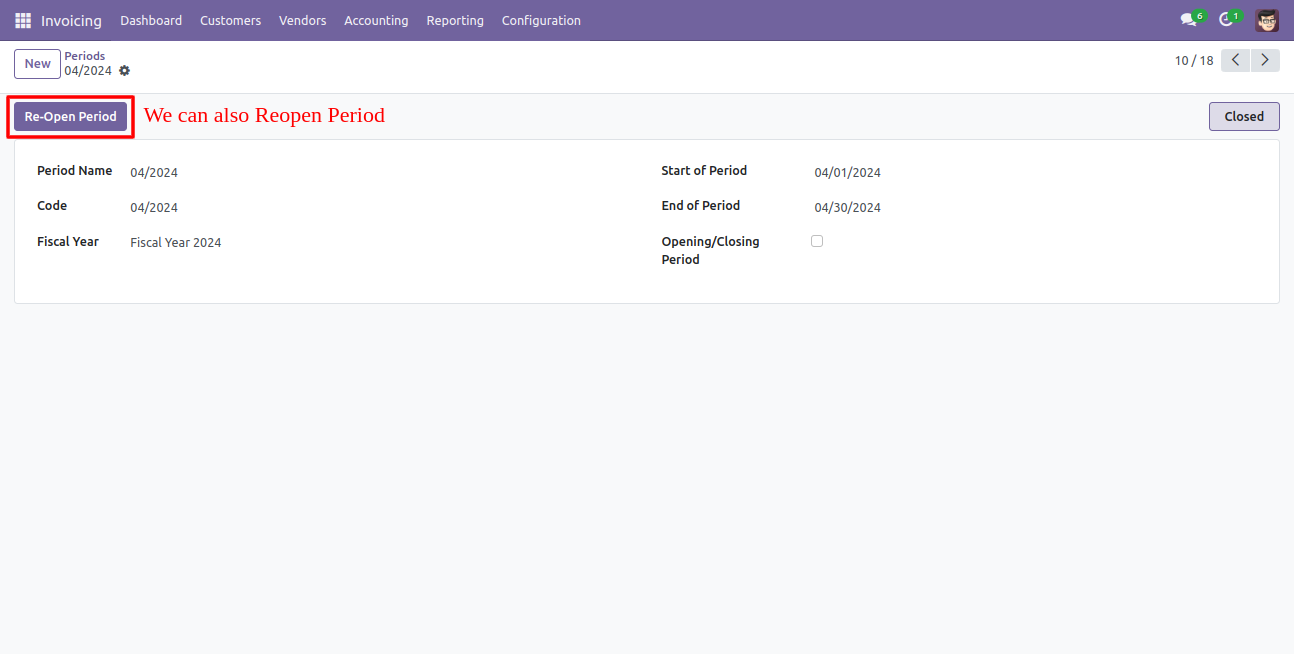
If you want to reopen the closed period then click "Reopen Period" in period form view.
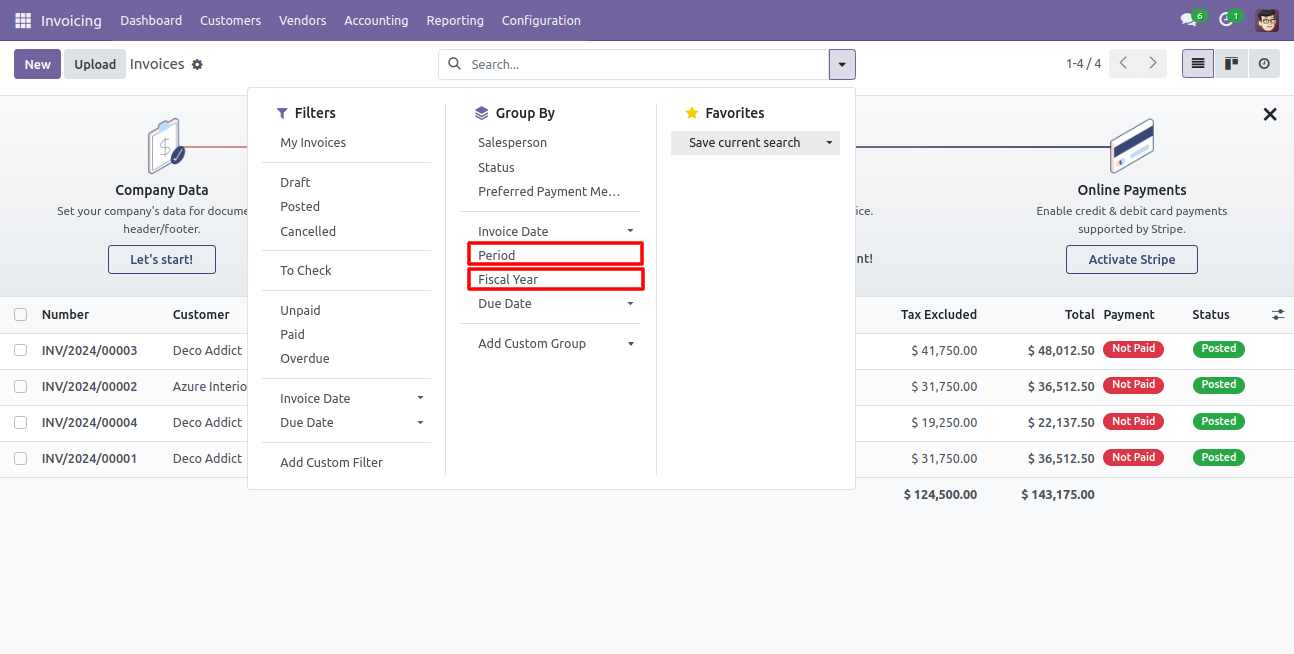
You can group by entries based on the period and fiscal year.
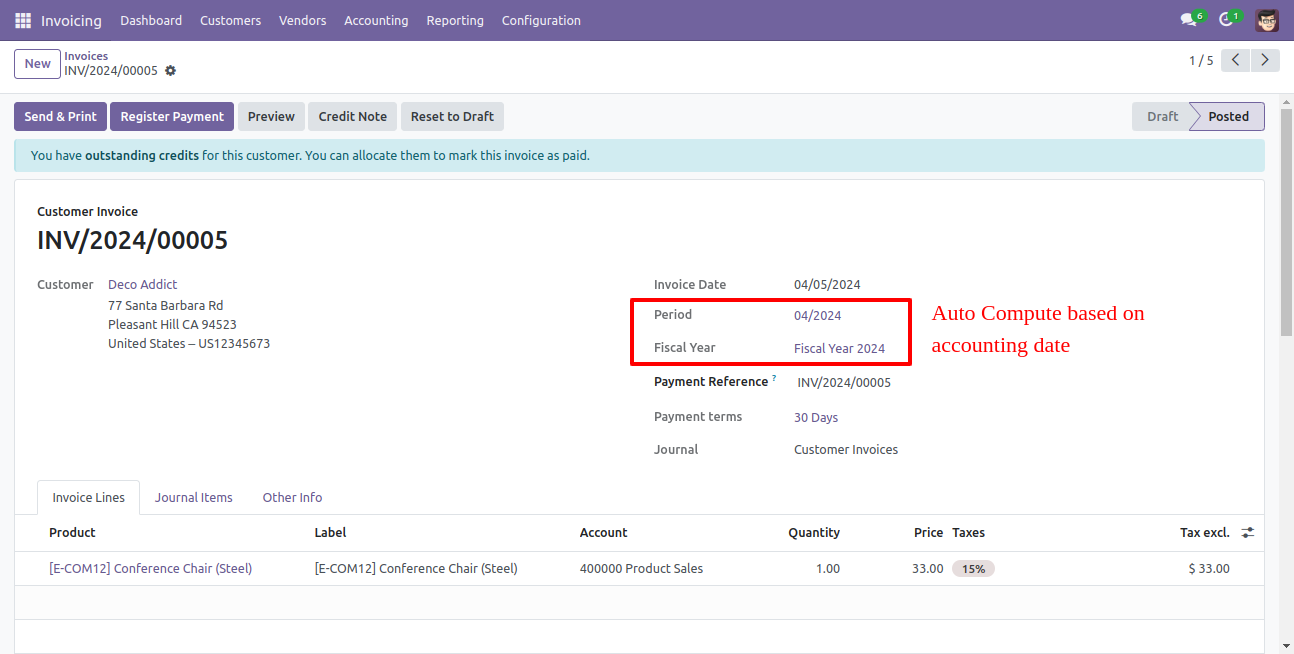
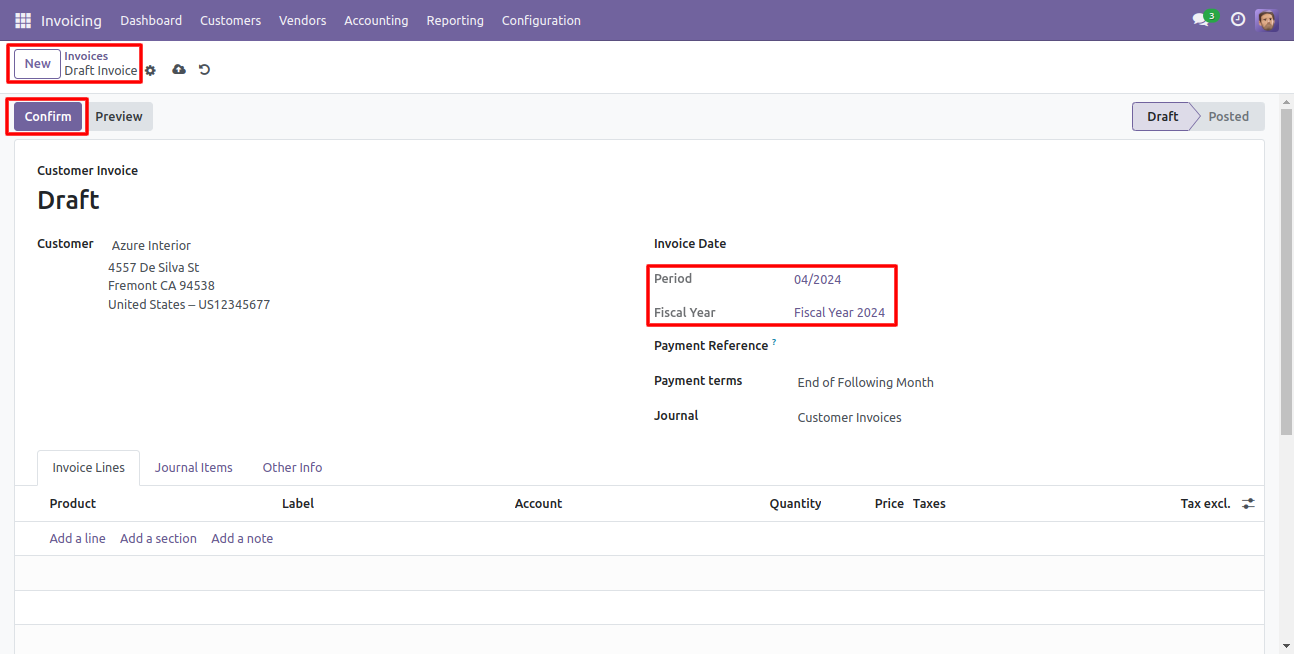
If you make any invoice then auto computes period and fiscal year based on the accounting date.
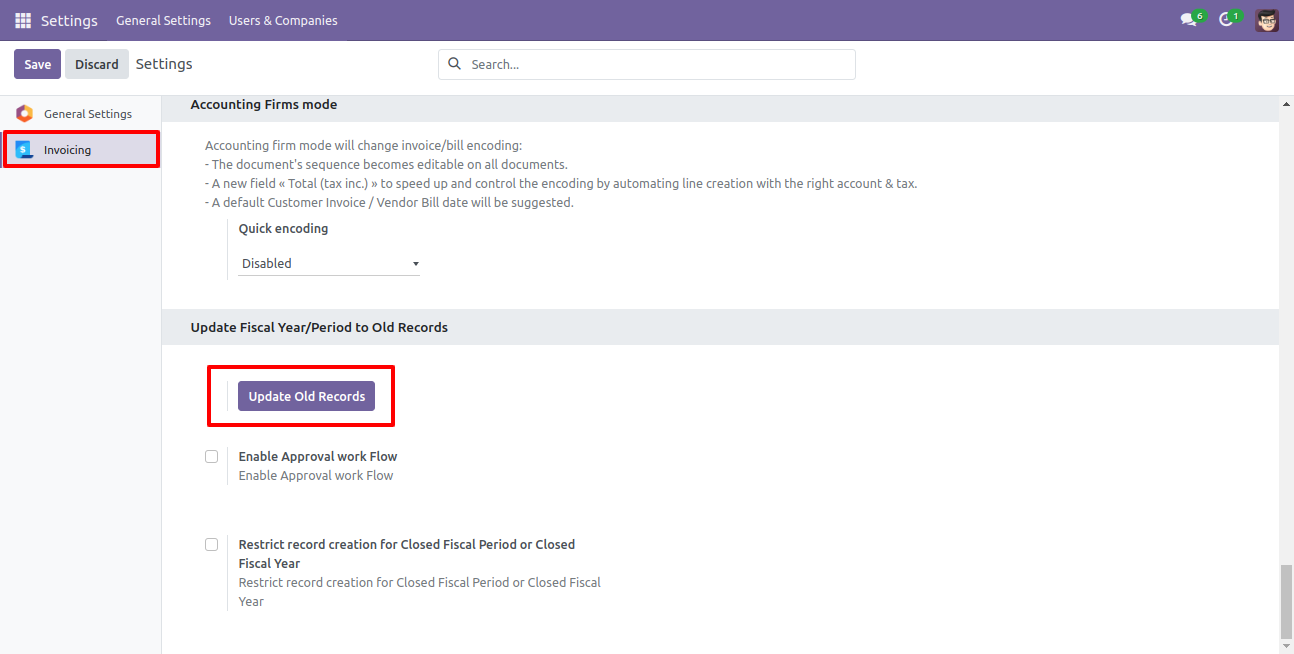
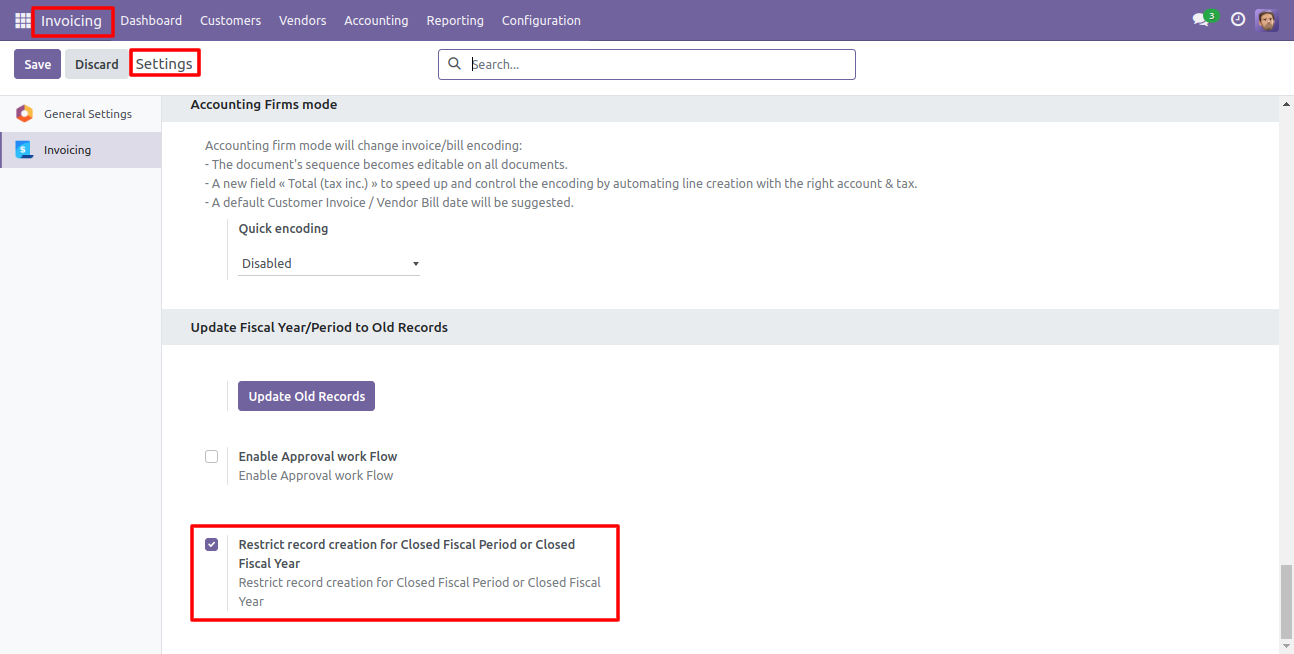
You can update the fiscal year and periods on old records using the "Update Old Records" button.
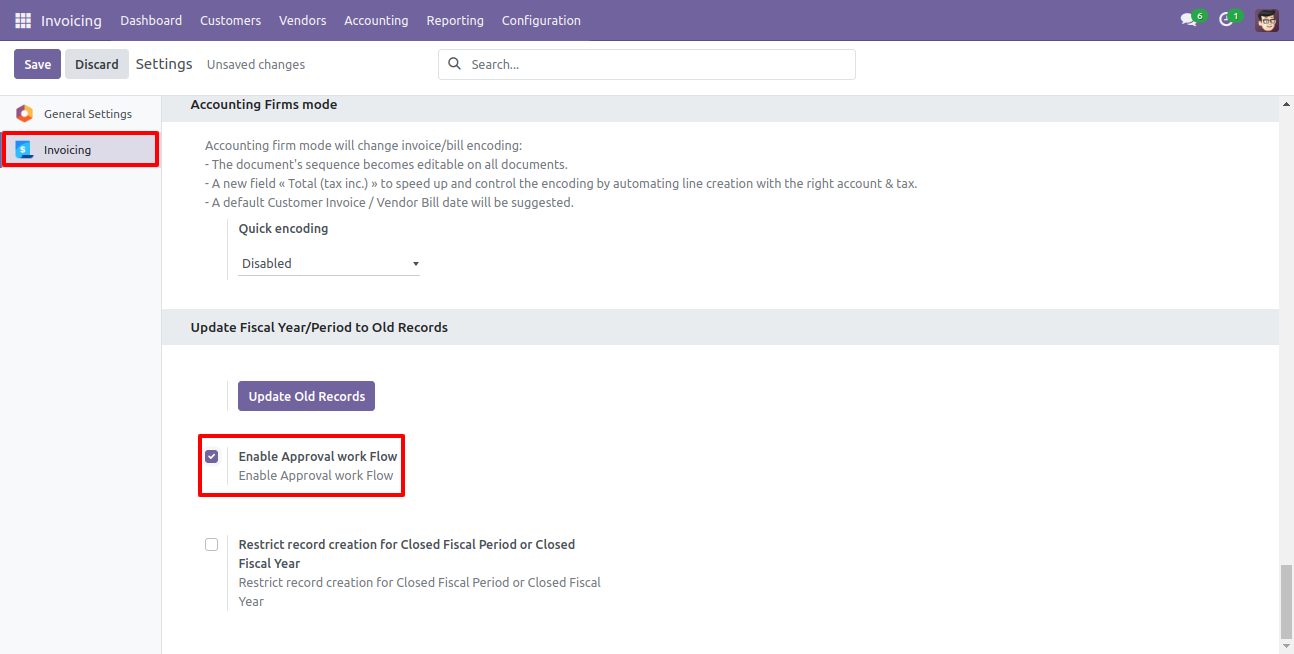
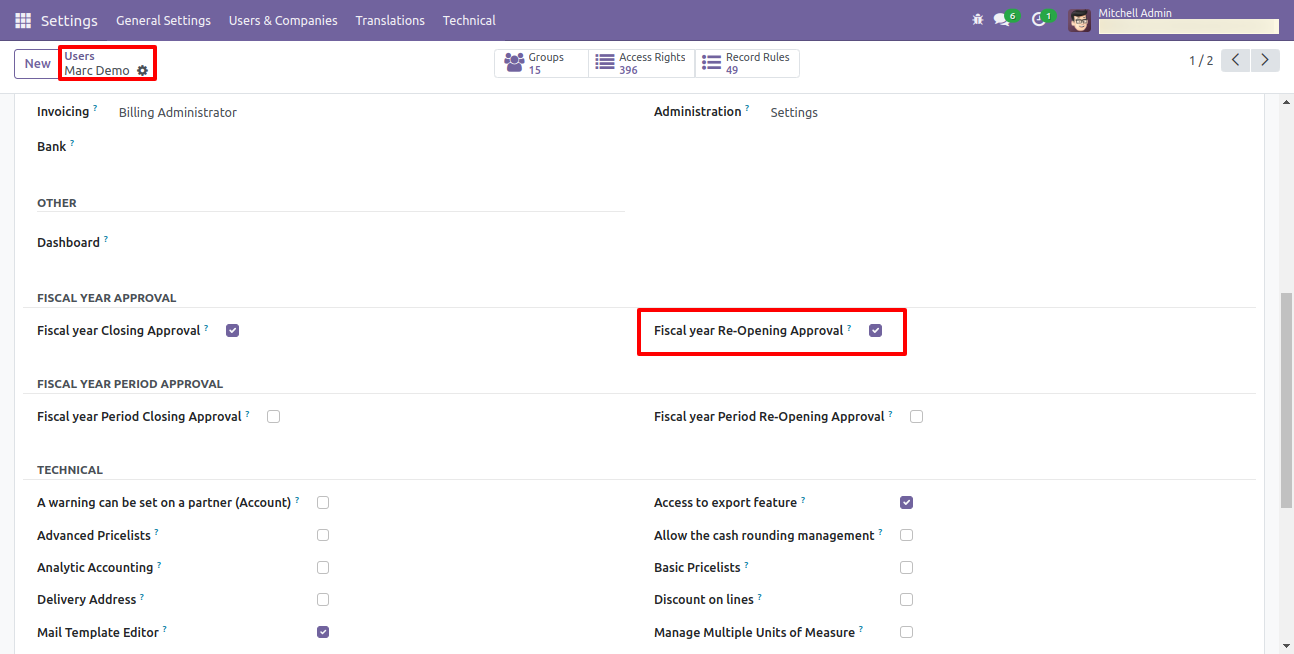
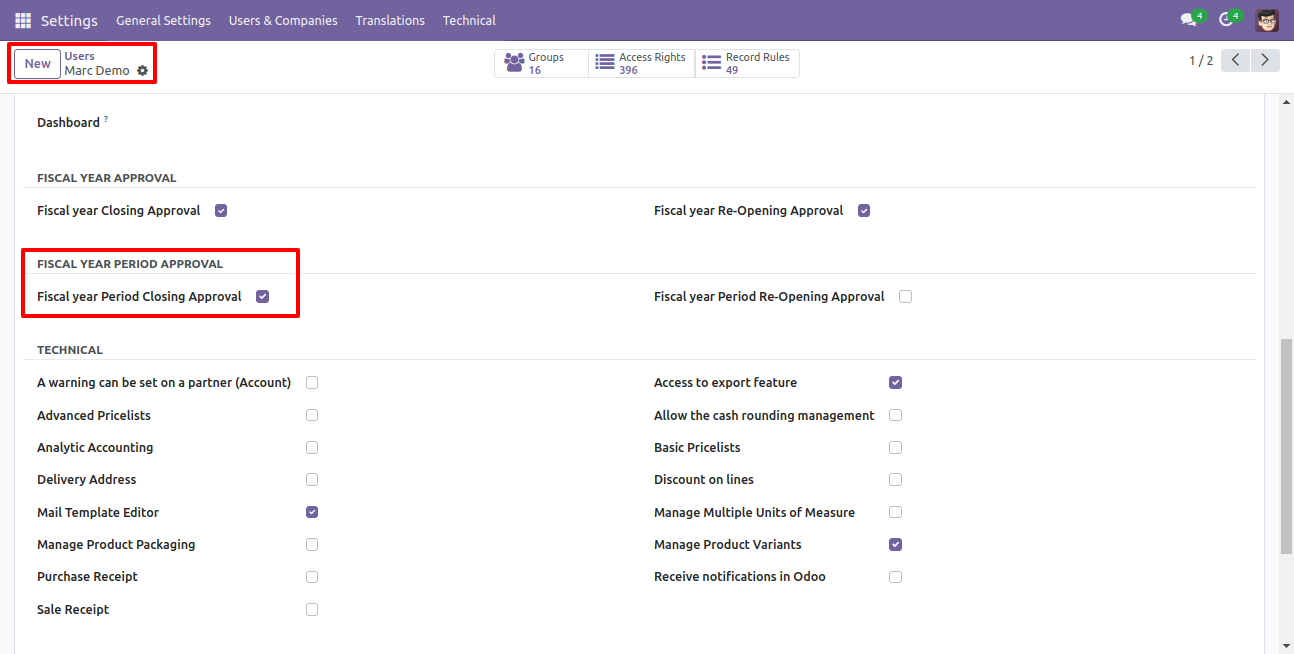
Tick "Enable Approval work Flow" for approval flow for fiscal year closing and fiscal year re-opening & fiscal year period closing and fiscal year period re-opening.
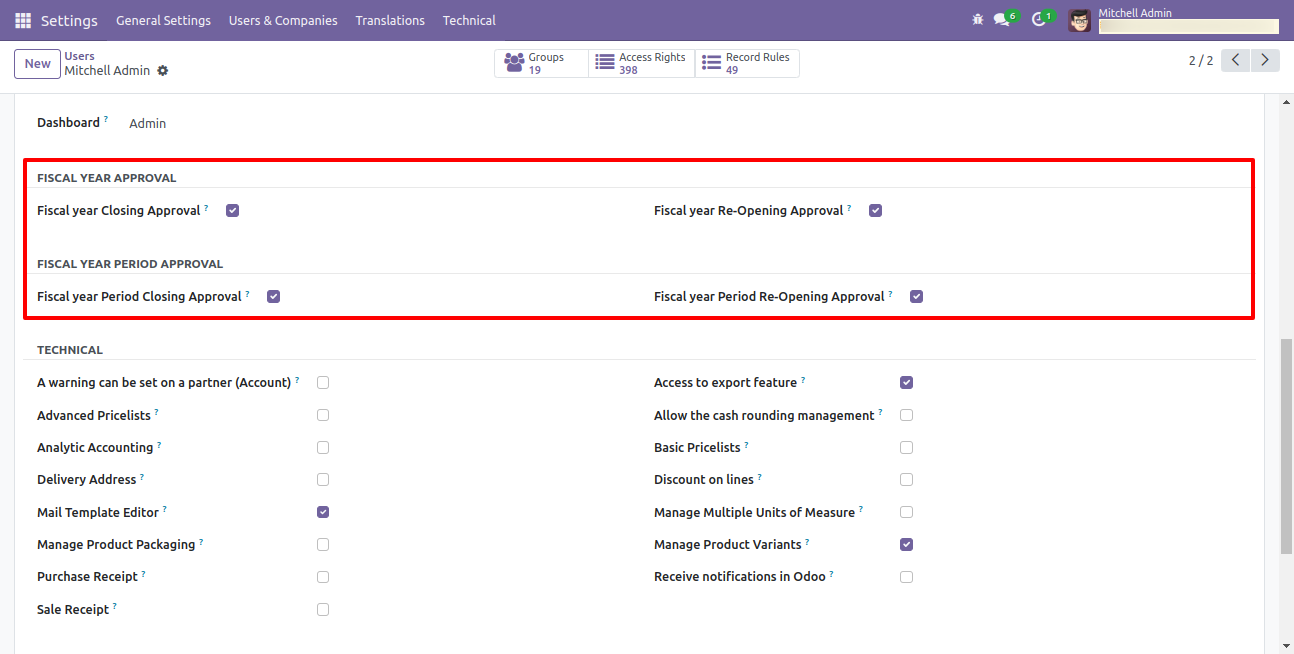
Configuration for approval workflow in fiscal year and period.
Enable Approval Fiscal Year Flow
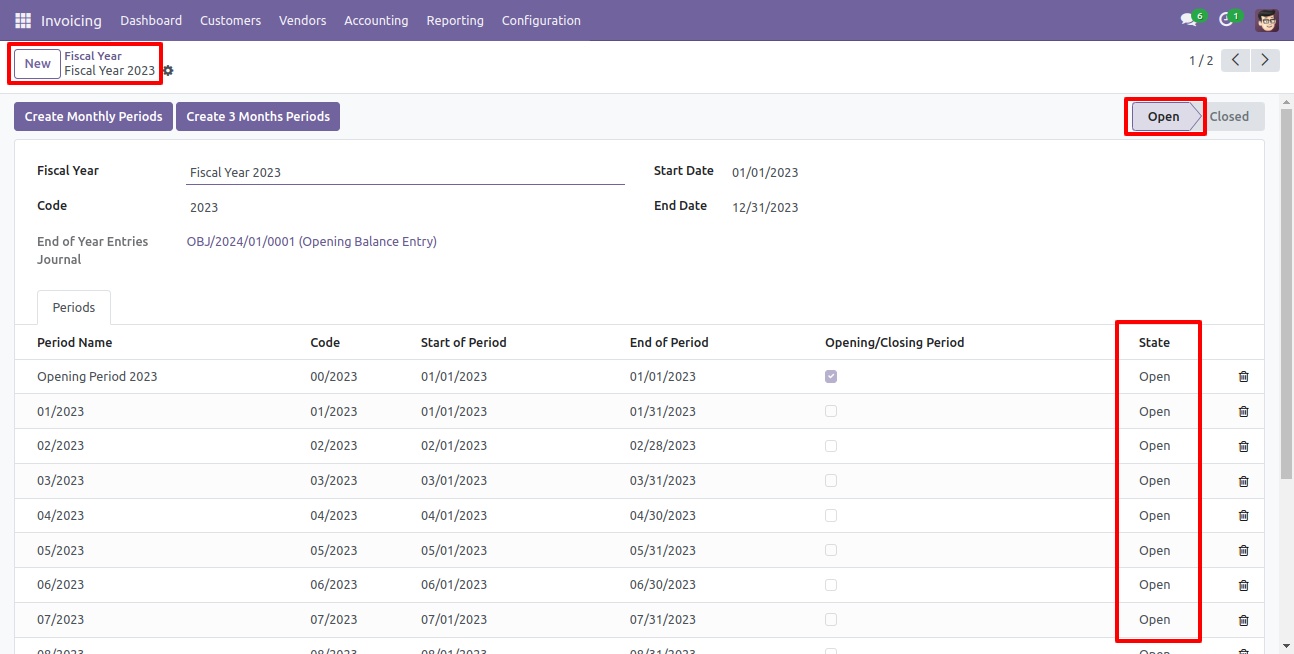
Go to invoice => configuration, select the fiscal year to create fiscal year.
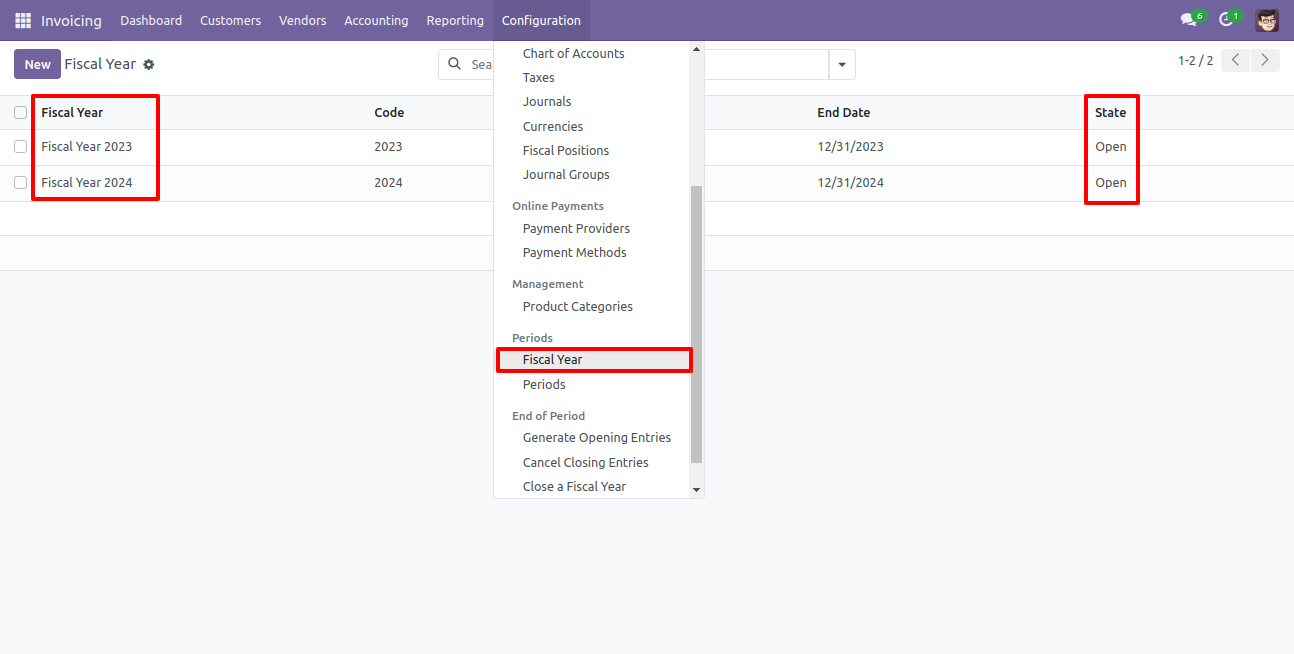
State of the fiscal year is "Open".
Go to invoice => configuration, select "Close a Fiscal Year" to close the fiscal year.
After one wizard opens, select the fiscal year and click the close button.
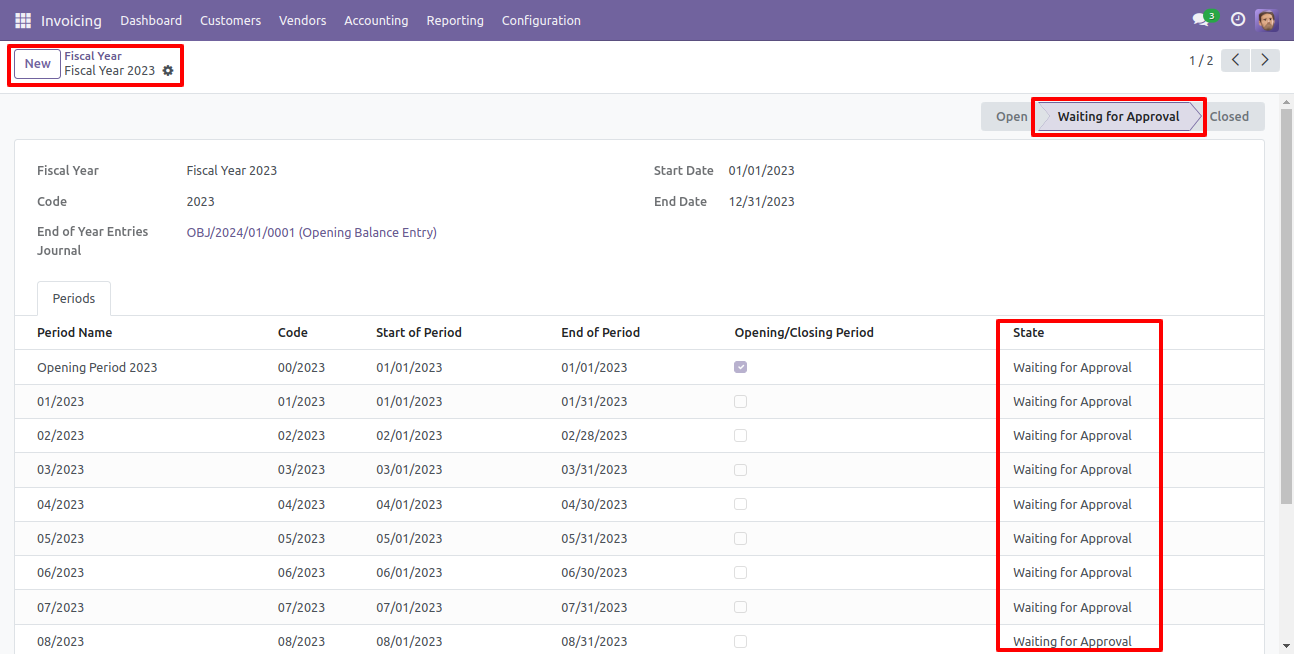
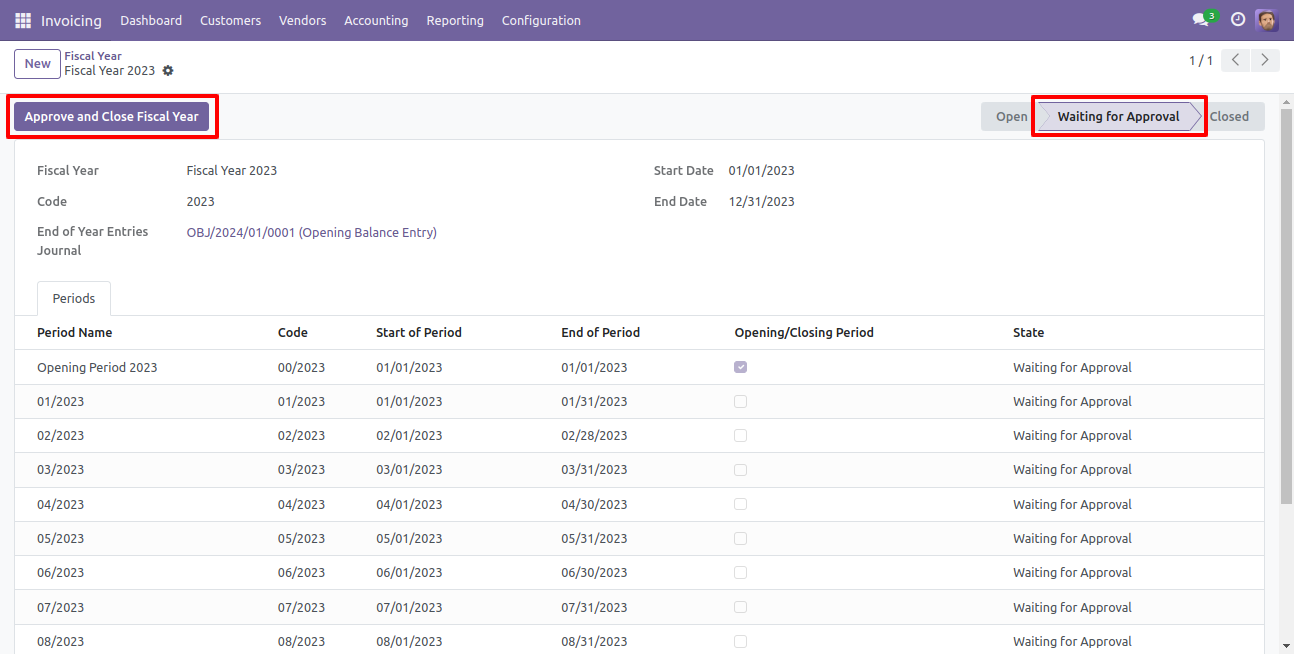
Now state of the fiscal year is "Waiting for Approval".
Which user has access rights of the "Fiscal year Closing Approval" that user can approve for fiscal year closing.

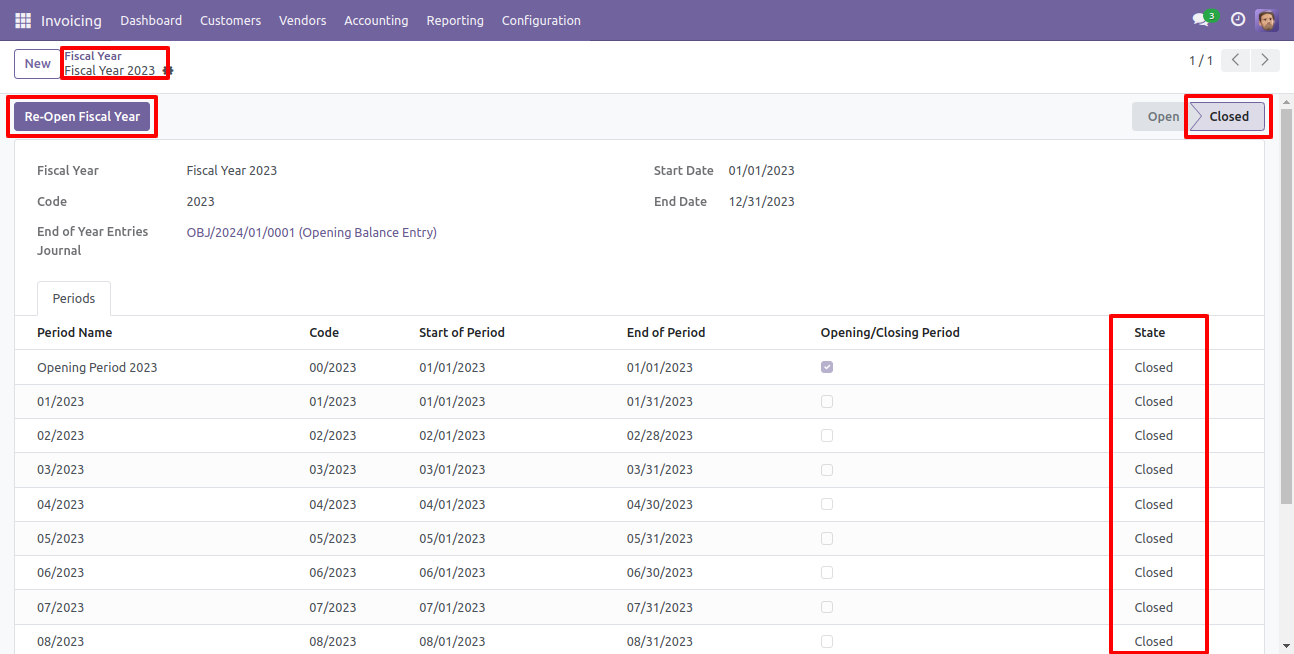
When that user press the "Approve and Close Fiscal year" button, state of the fiscal year is "Close".
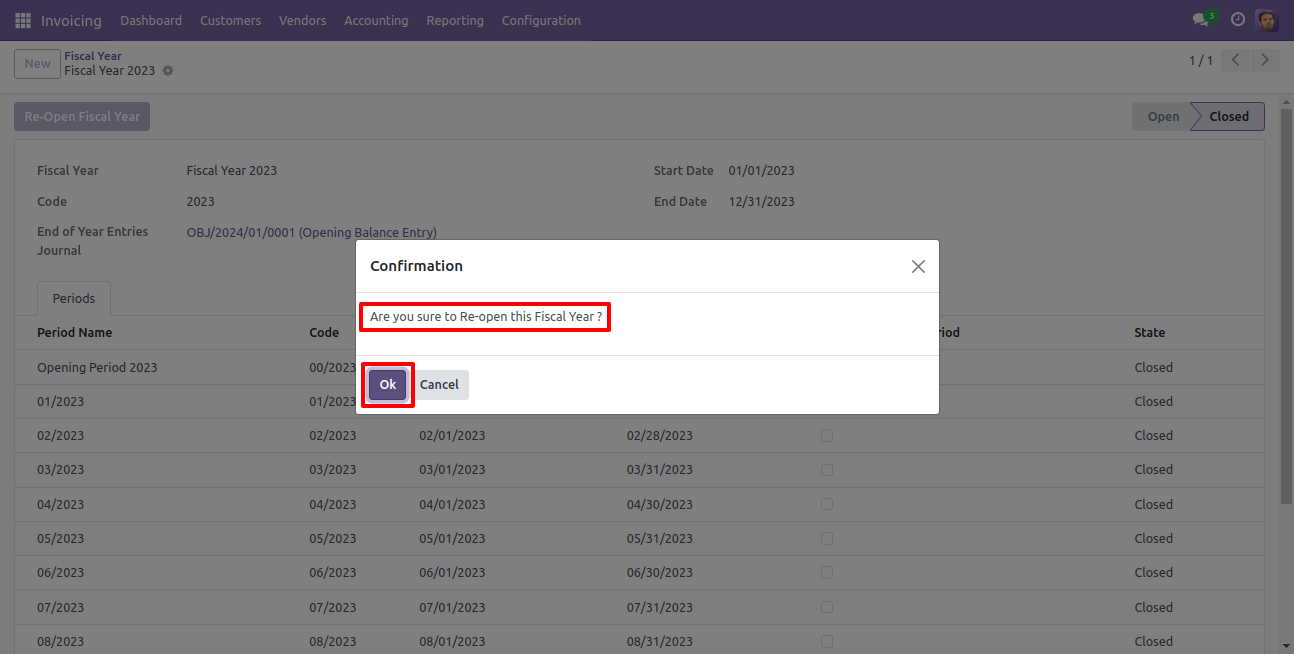
So after that, state of the fiscal year are "Close" and then the "Re-Open Fiscal Year" button press for the reopen the closed fiscal year.
After one popup opens, press "Ok" for the re-open fiscal year.
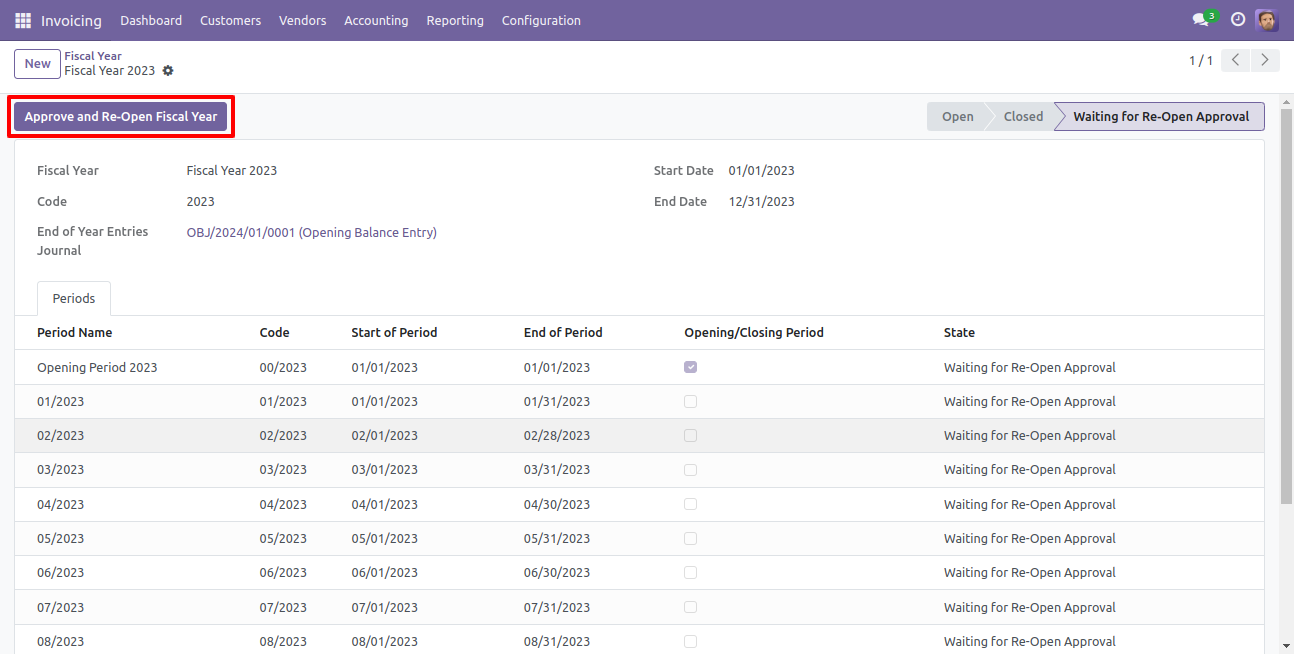
Now state of the fiscal year is "Waiting for Re-Open Approval".
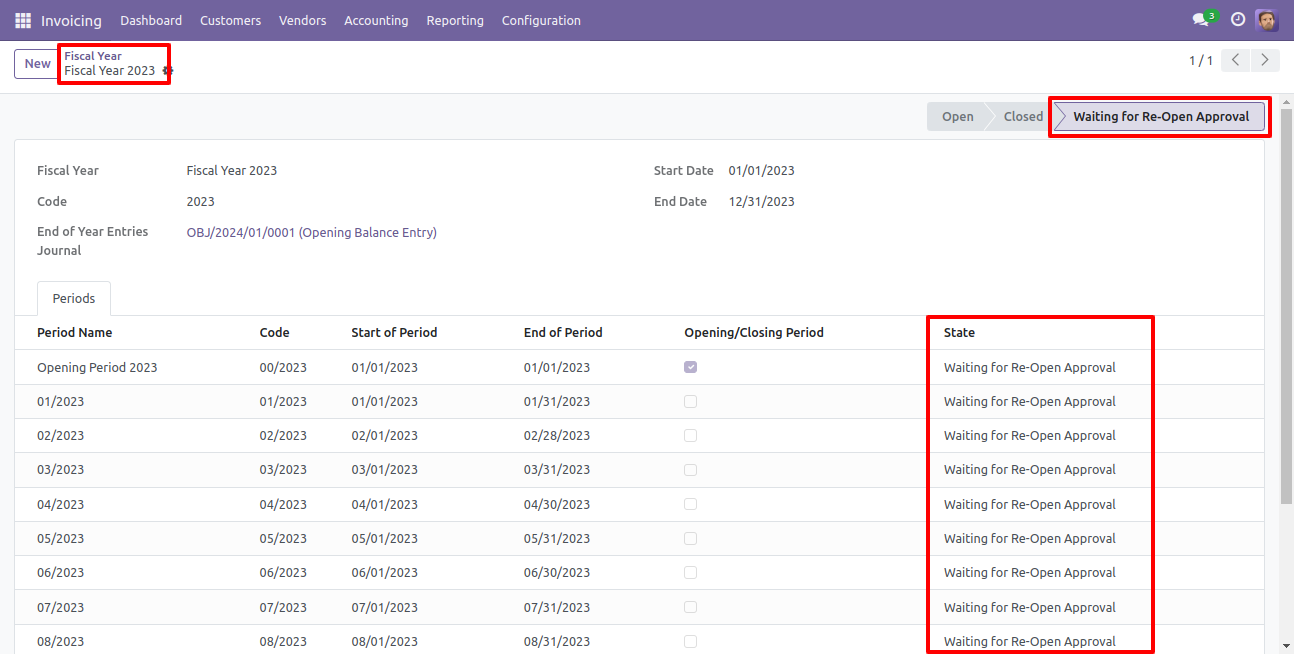
Which user has access rights of the "Fiscal year Re-opening Approval" that user can approve for fiscal year re-opening.
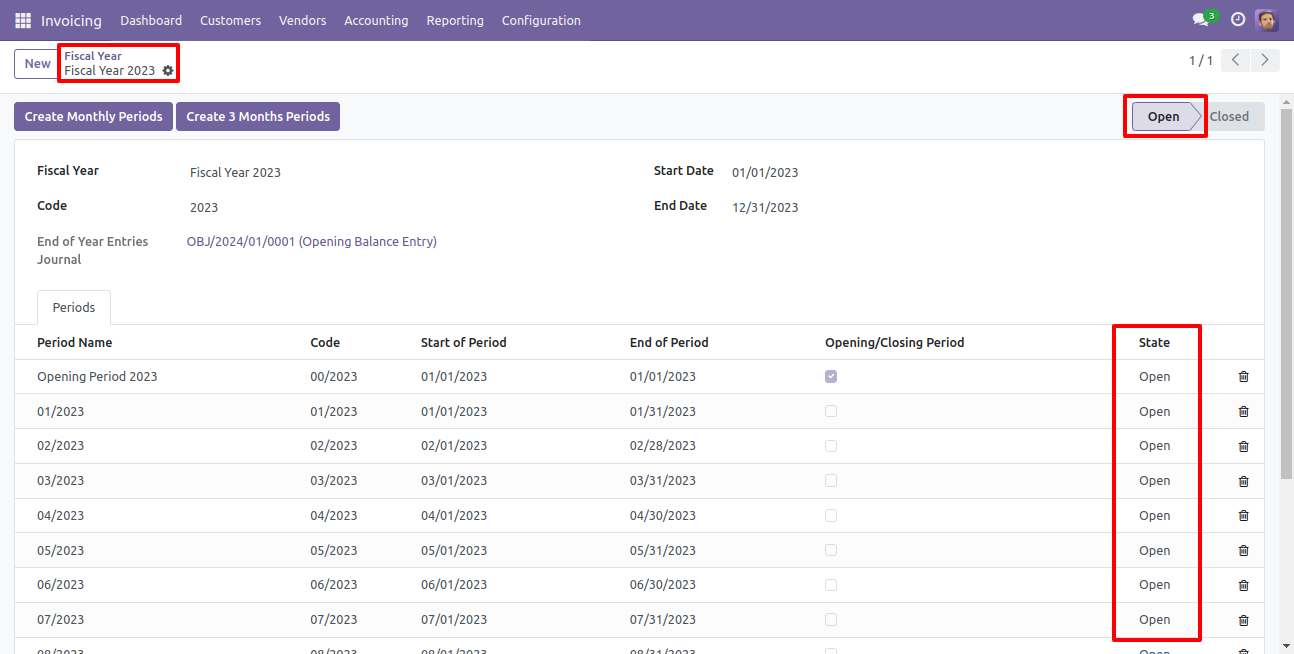
When that user press the "Approve and Re-Open Fiscal year" button, the state of the fiscal year changes to the "Open".
Now the state of the fiscal year is "Open".
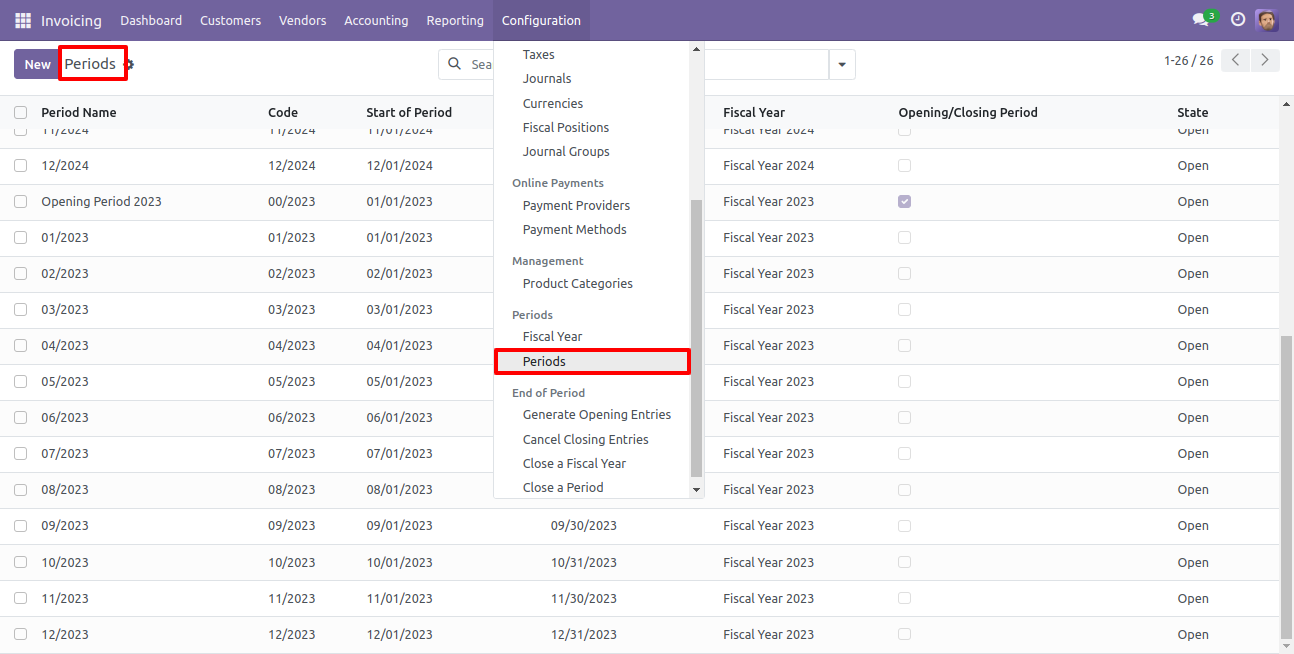
Enable Approval Periods Flow
Go to invoice => configuration, select "Periods".
The state of the periods is "Open", press the "Close Period" button to close the periods.
After one popup opens, press "Ok" to close the periods.
Now the state of the periods is "Waiting for Approval".

Which user has access rights of the "Fiscal year Period Closing Approval" that user can approve for fiscal year period closing.
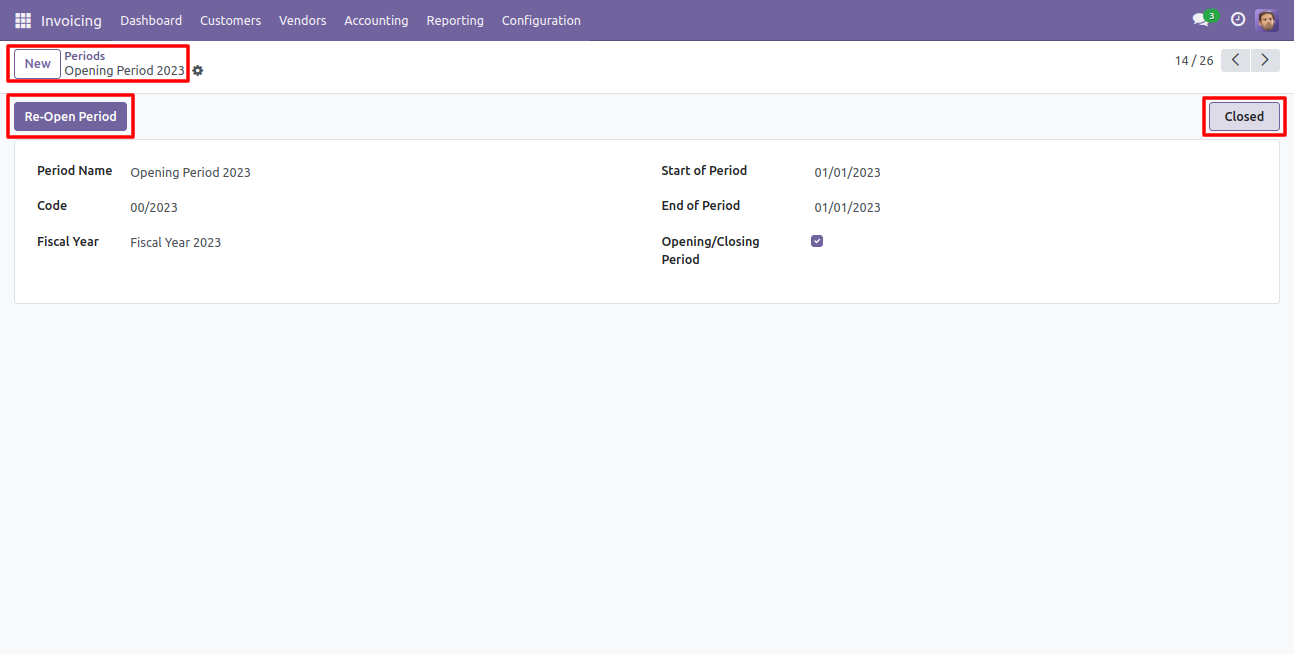
When that user press the "Approve and Close This Period" button, the state of the period is "Closed".

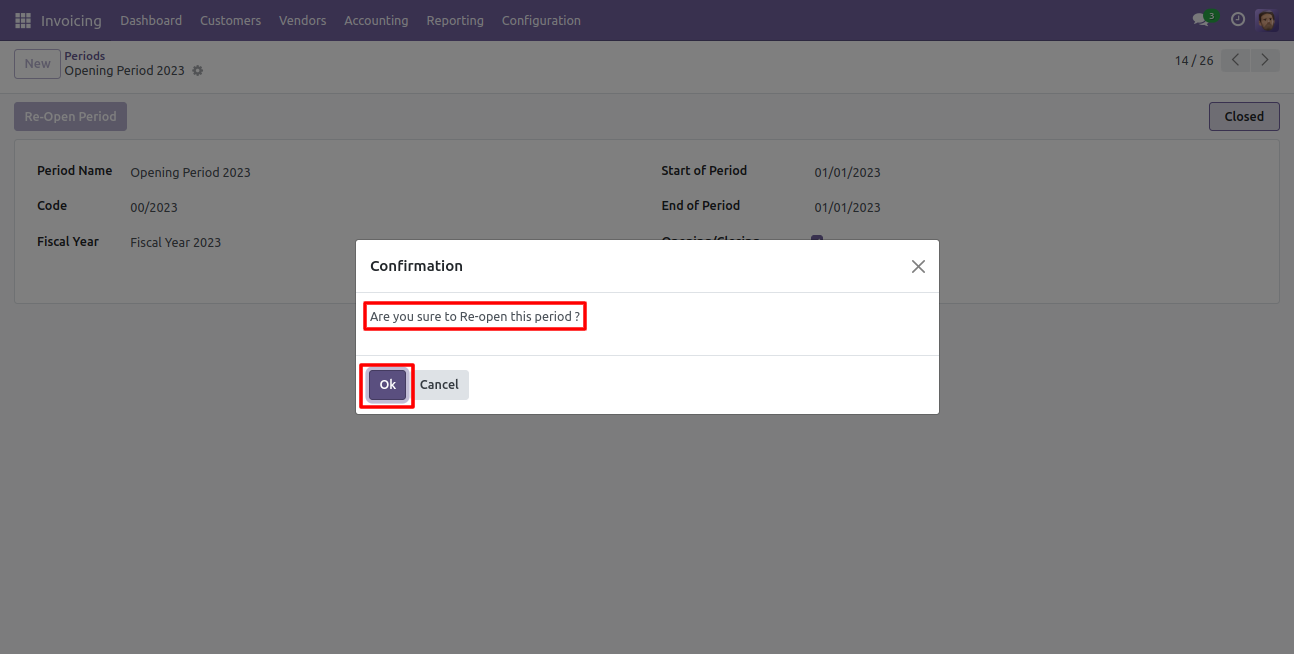
So after that, the state of the period is "Closed" and then the "Re-Open Period" button press for the reopen the closed period.
After one popup opens, press "Ok" for the re-open period.
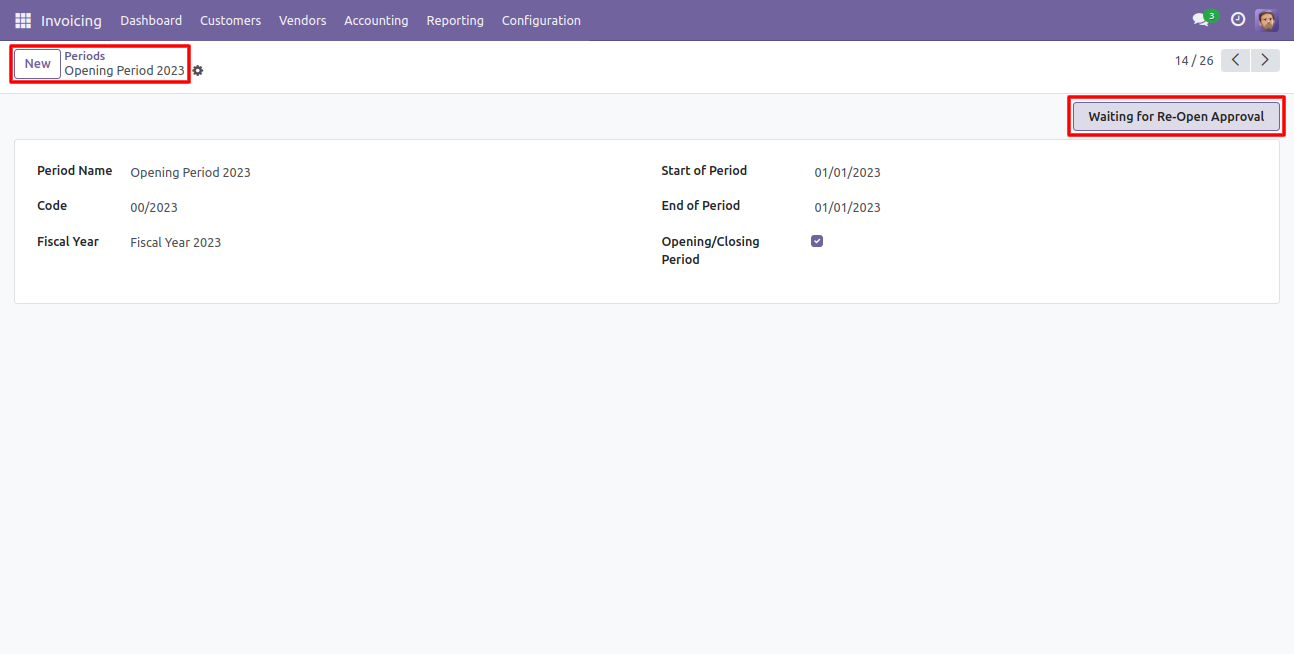
Now state of the period is "Waiting for Re-Open Approval".
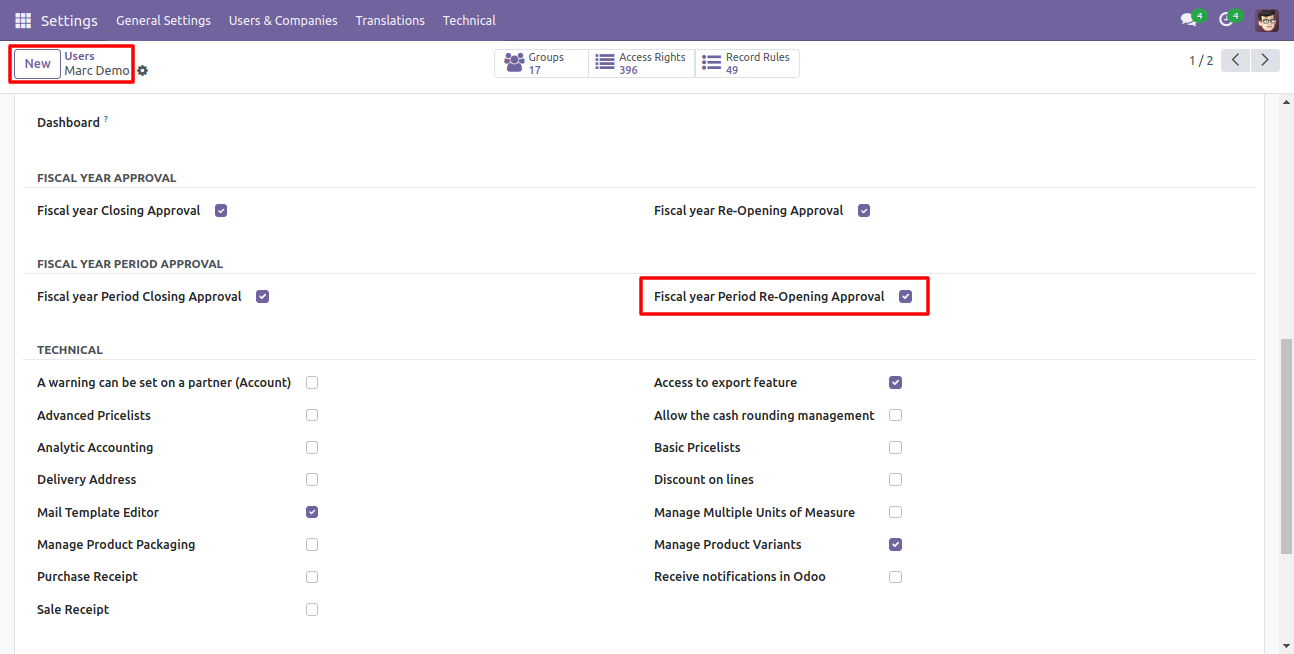
Which user has access rights of the "Fiscal year Period Re-opening Approval" that user can approve for fiscal year period re-opening.
When that user press the "Approve and Re-Open this period" button, the state of the fiscal year period changes to the "Open".
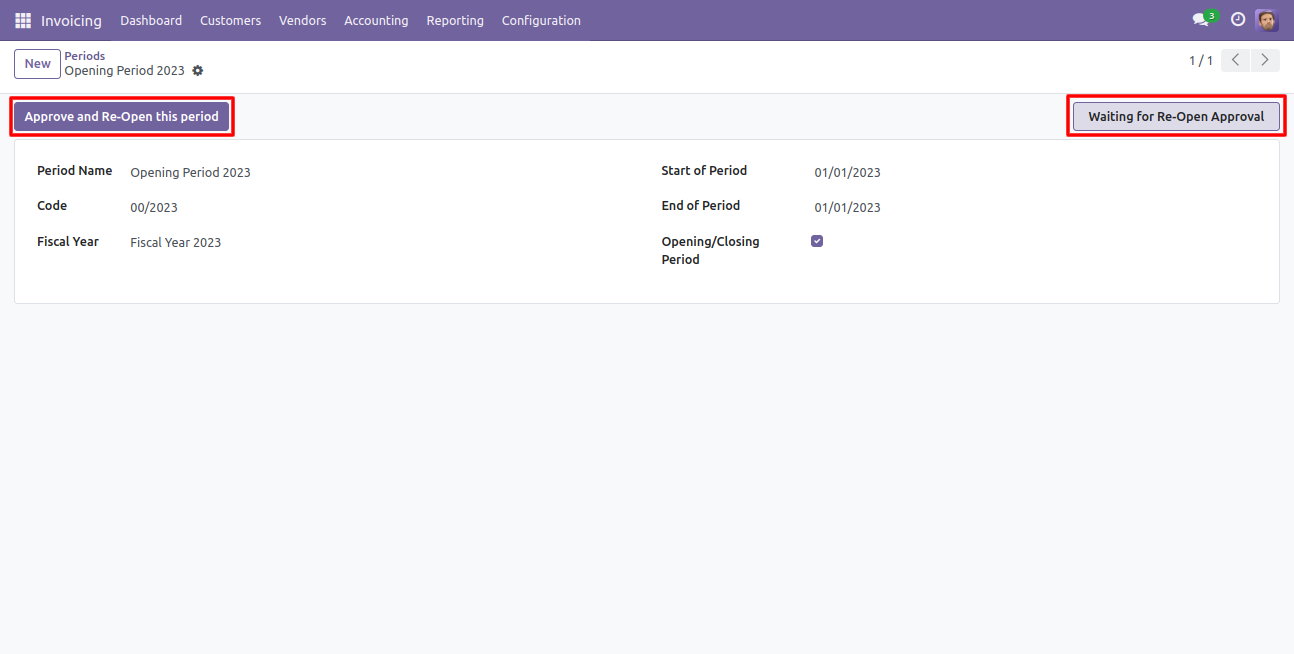
Now the state of the period is "Open".
Tick "Restrict Record Creation For Closed Fiscal Period Or Closed Fiscal Year" to restrict record creation for closed fiscal year & period in the invoice, bill, credit note & debit note.
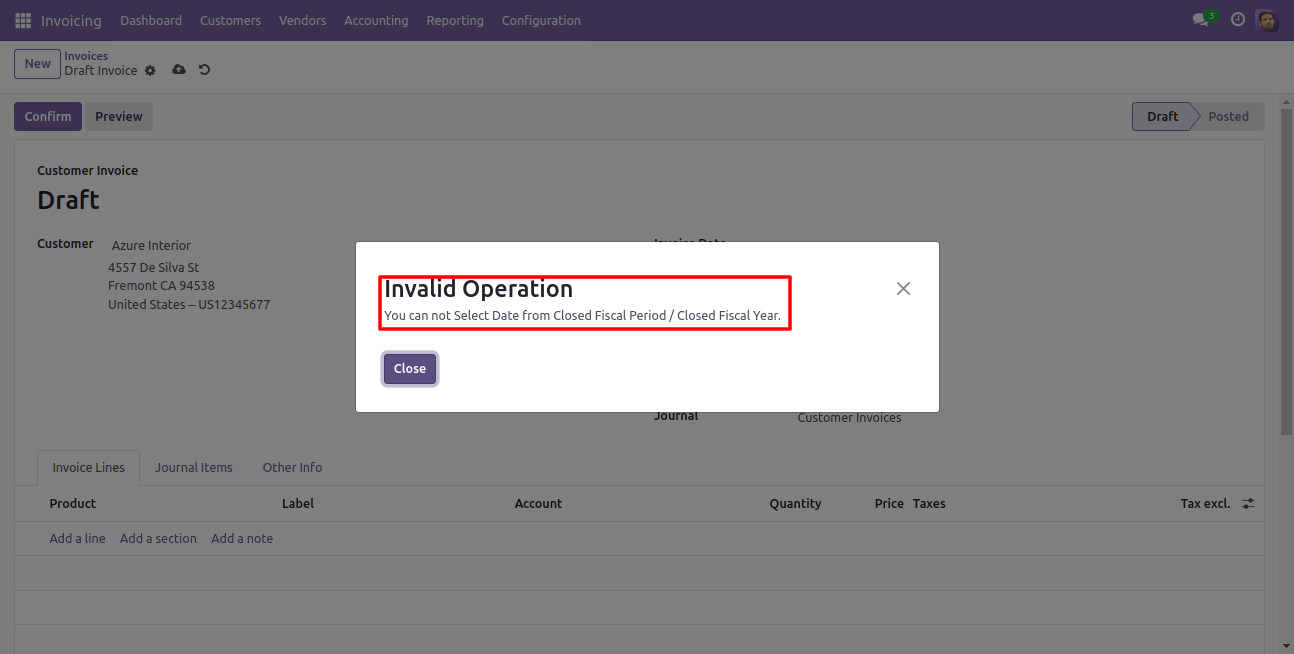
Now we make a record of that closed fiscal year period.
So it shows an alert for that.
Pivot view with fiscal year and period.
- You can set dynamic approvals on invoice/bill.
- You can set different approvals on different invoices/bills.
- Invoice/bill can approve based on untaxed/ total amount.
- Invoice/bill can be approved by a particular user or group.
- Users get a notification when the invoice/bill approves or rejects.
- You can create a flexible approval process.
- No special configuration required, install it, use it.
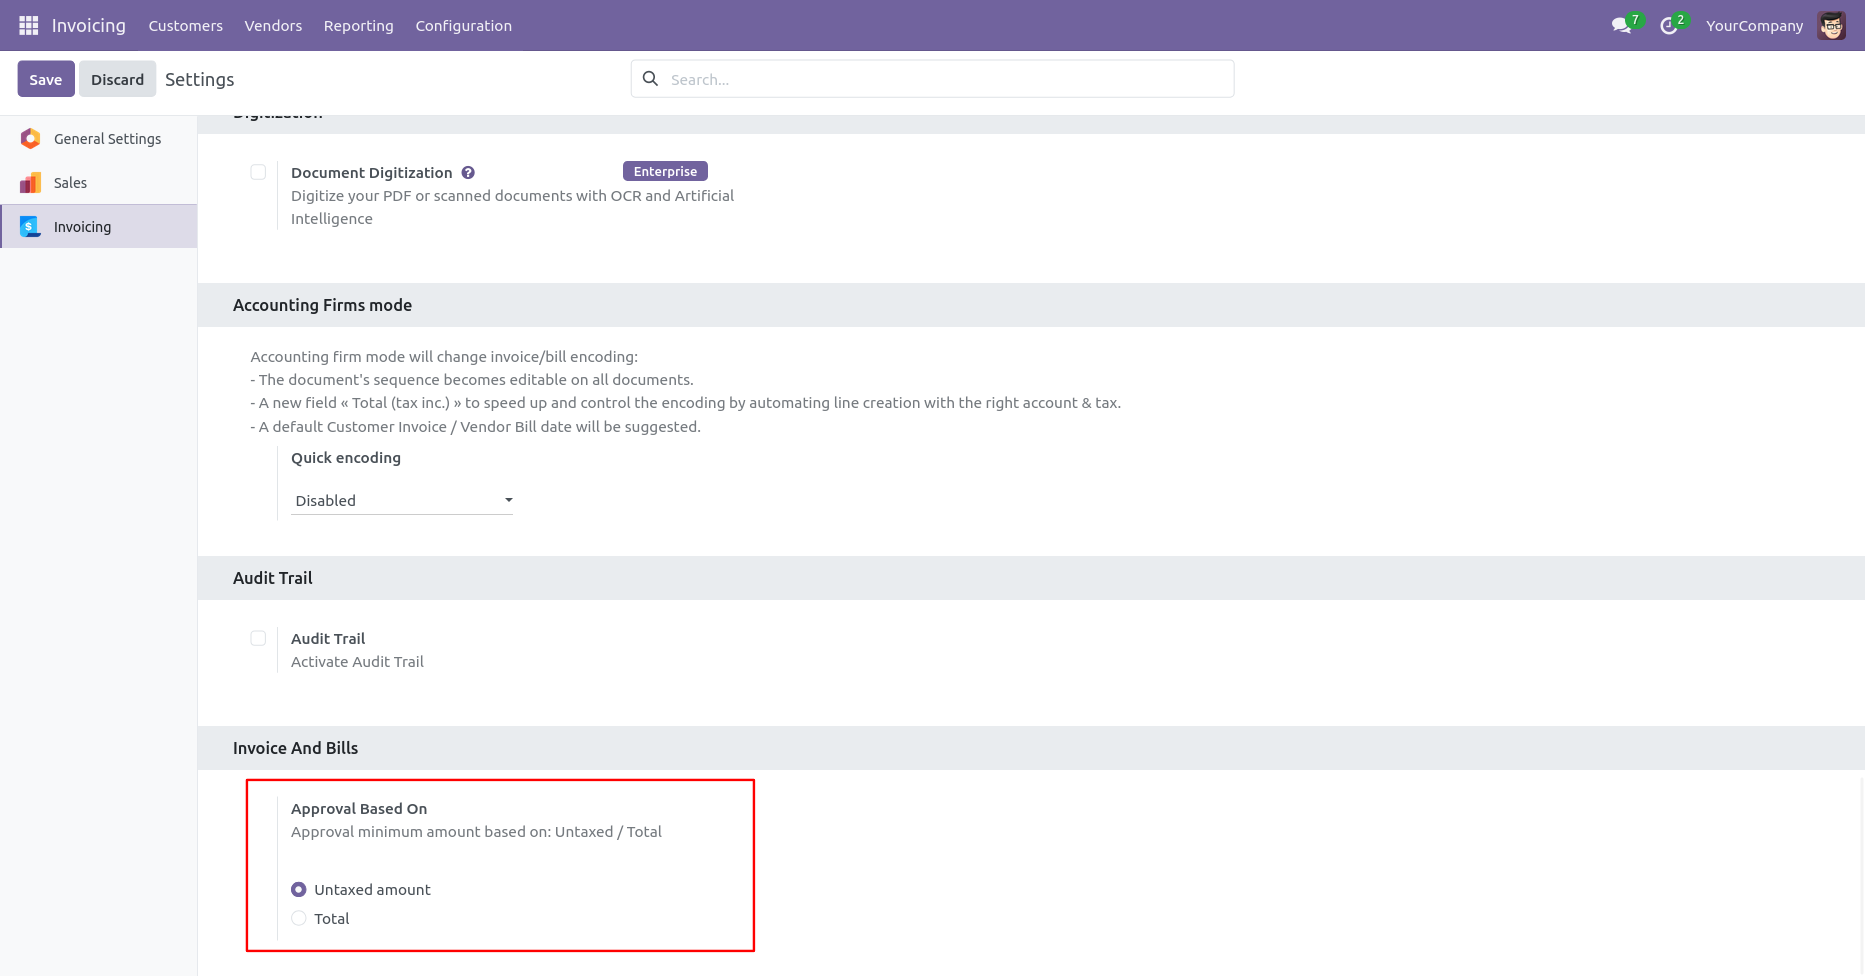
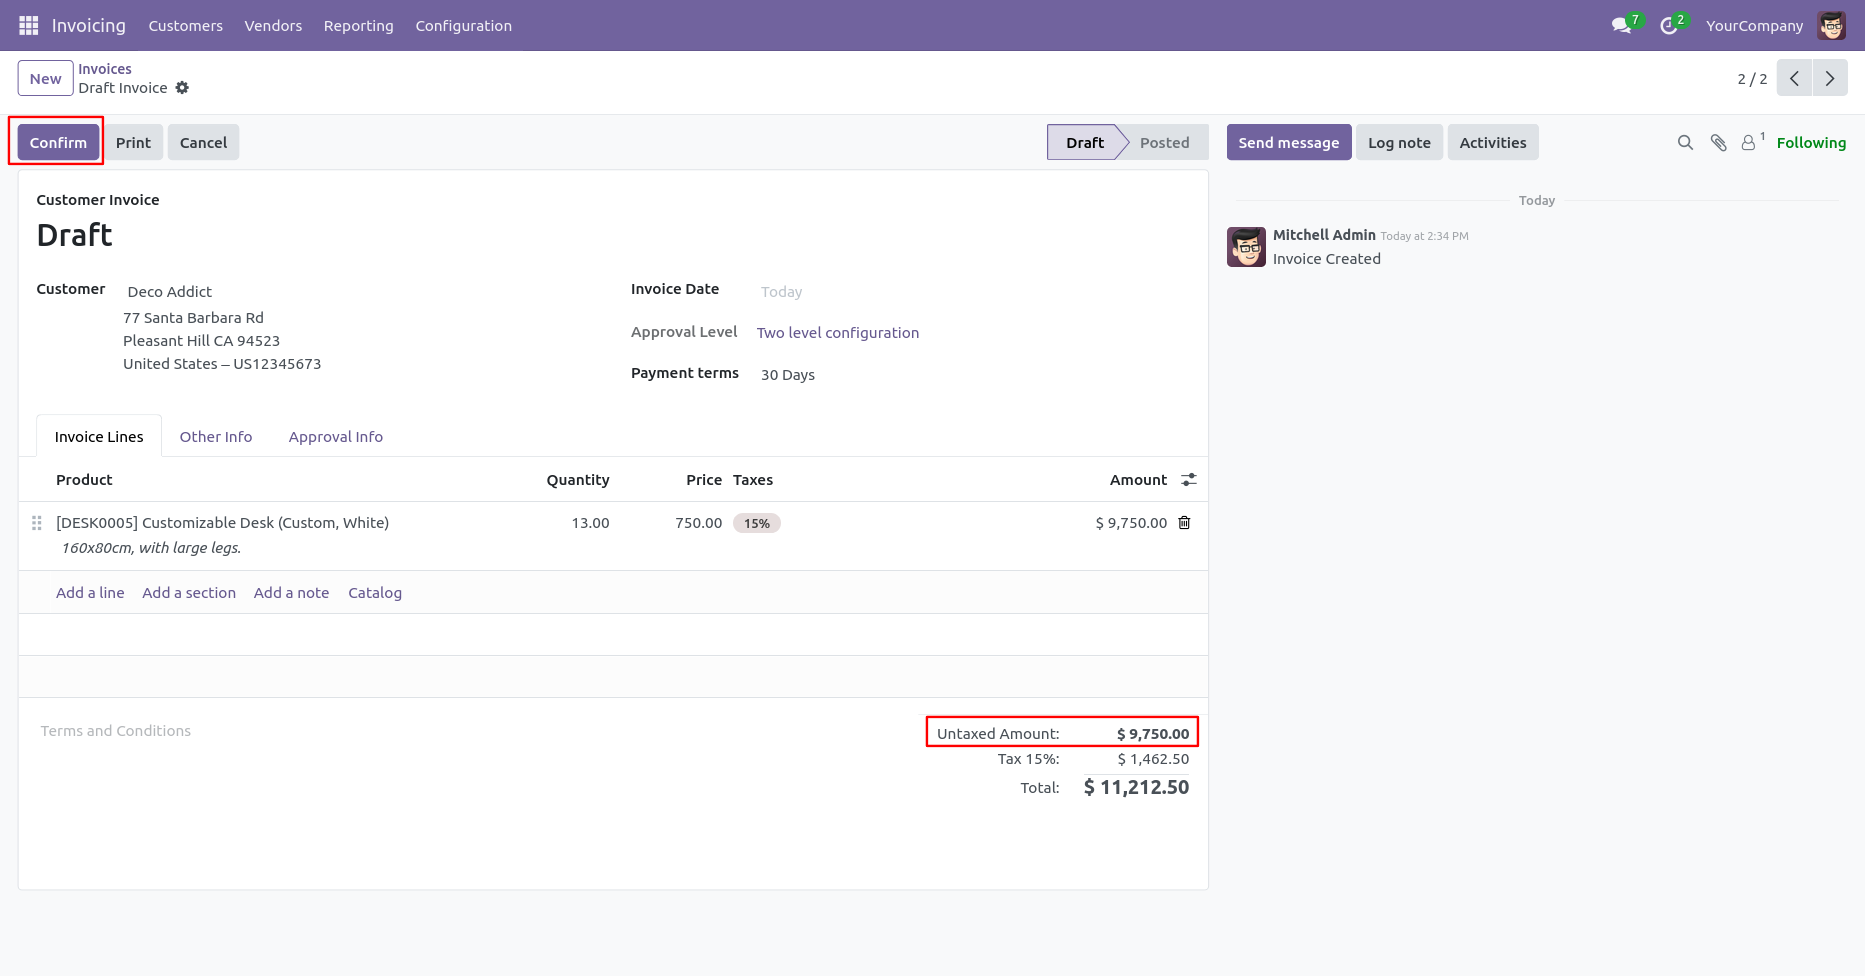
You have to define the minimum amount based on tax amount or without tax amount.
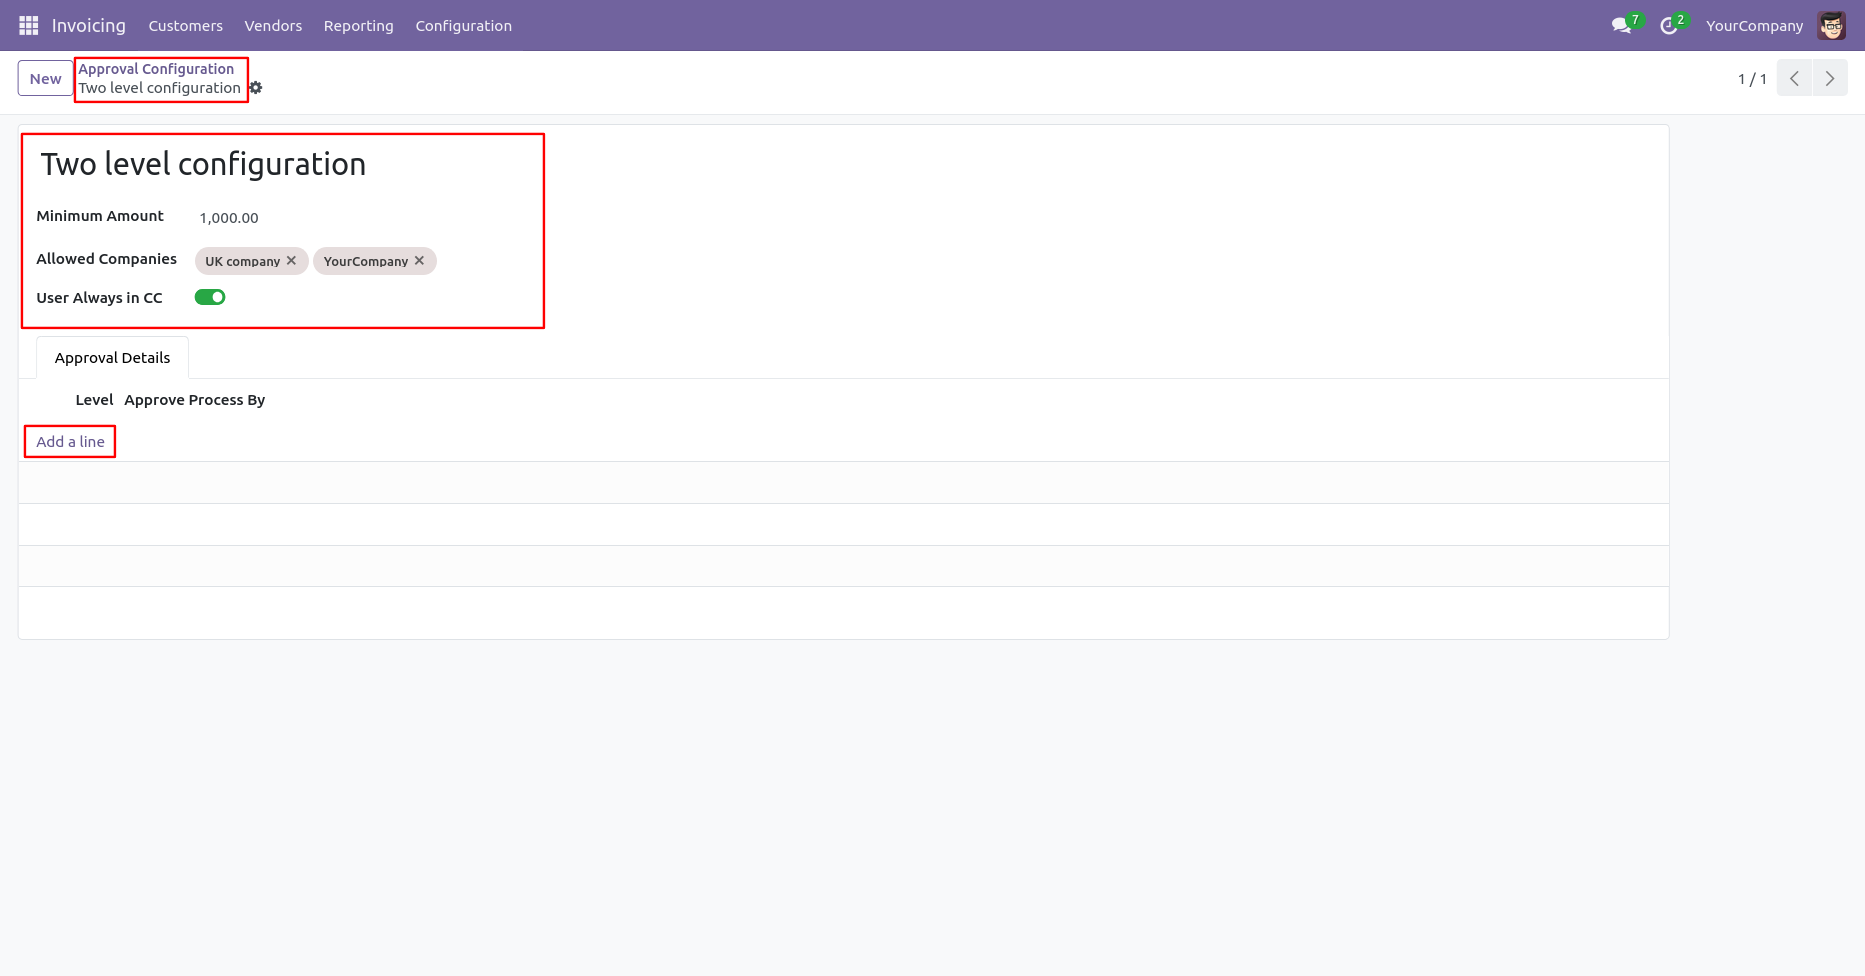
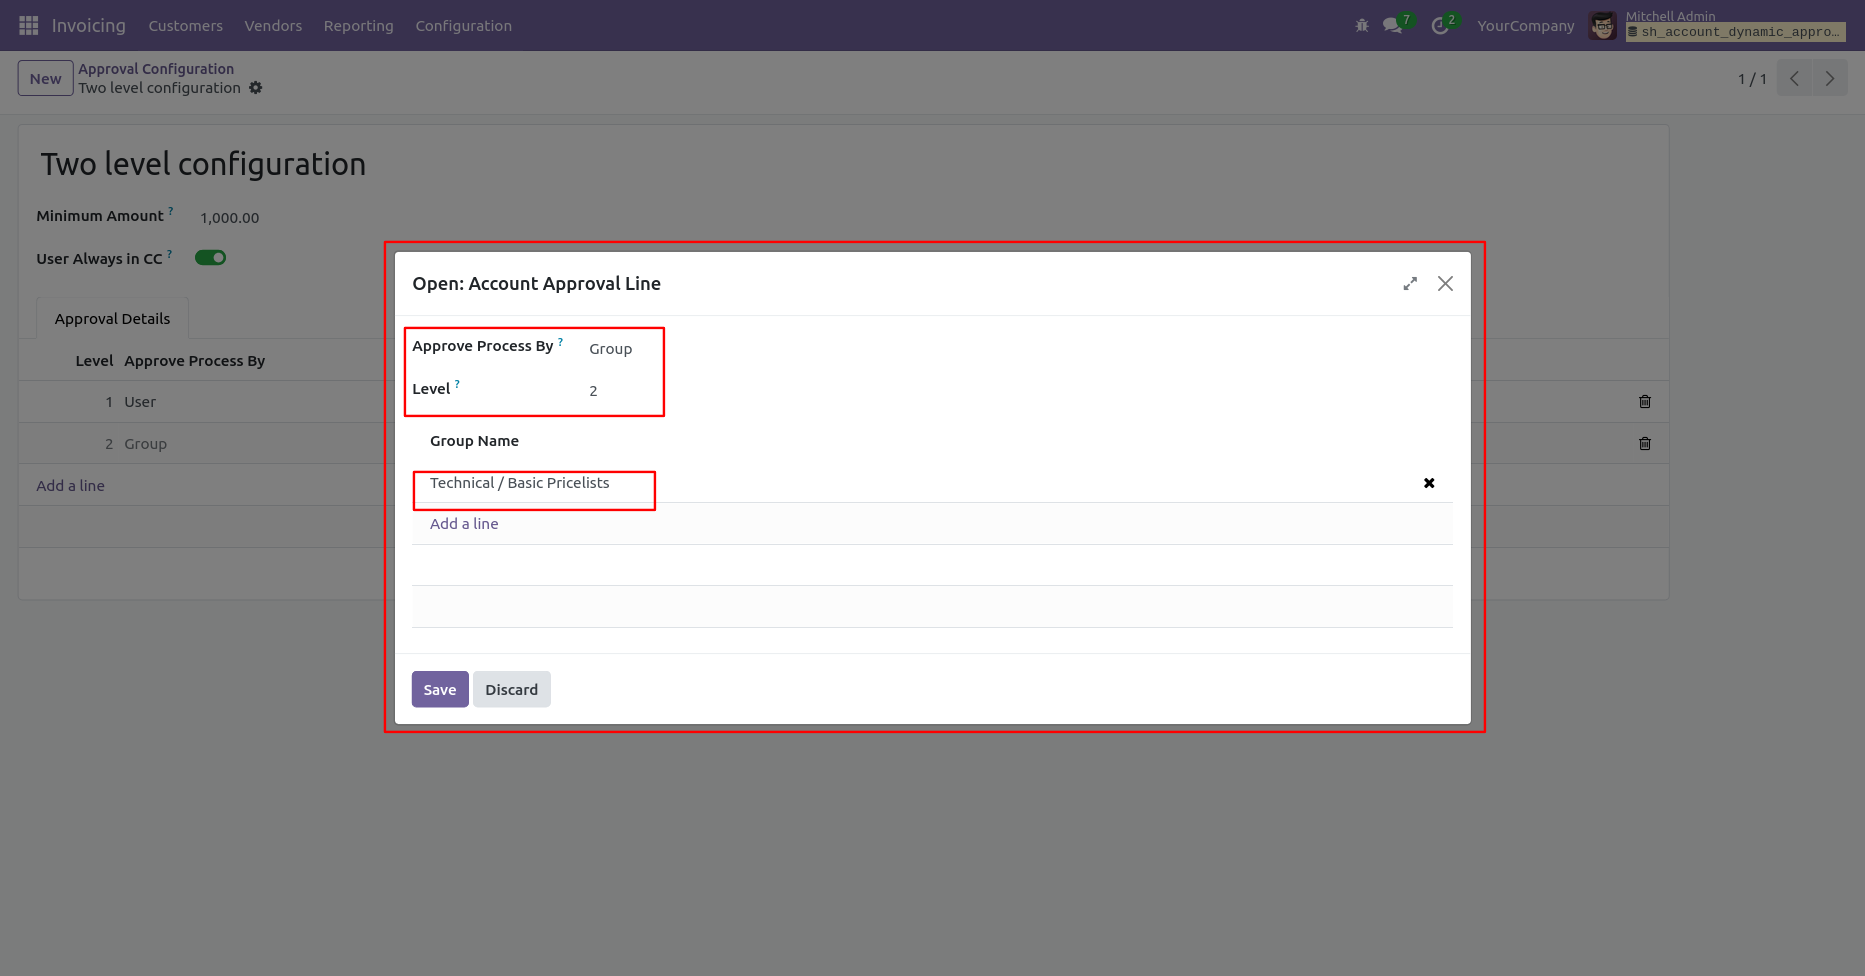
Approval Configuration: Setup approval levels based on minimum amount and users level. Also select companies.
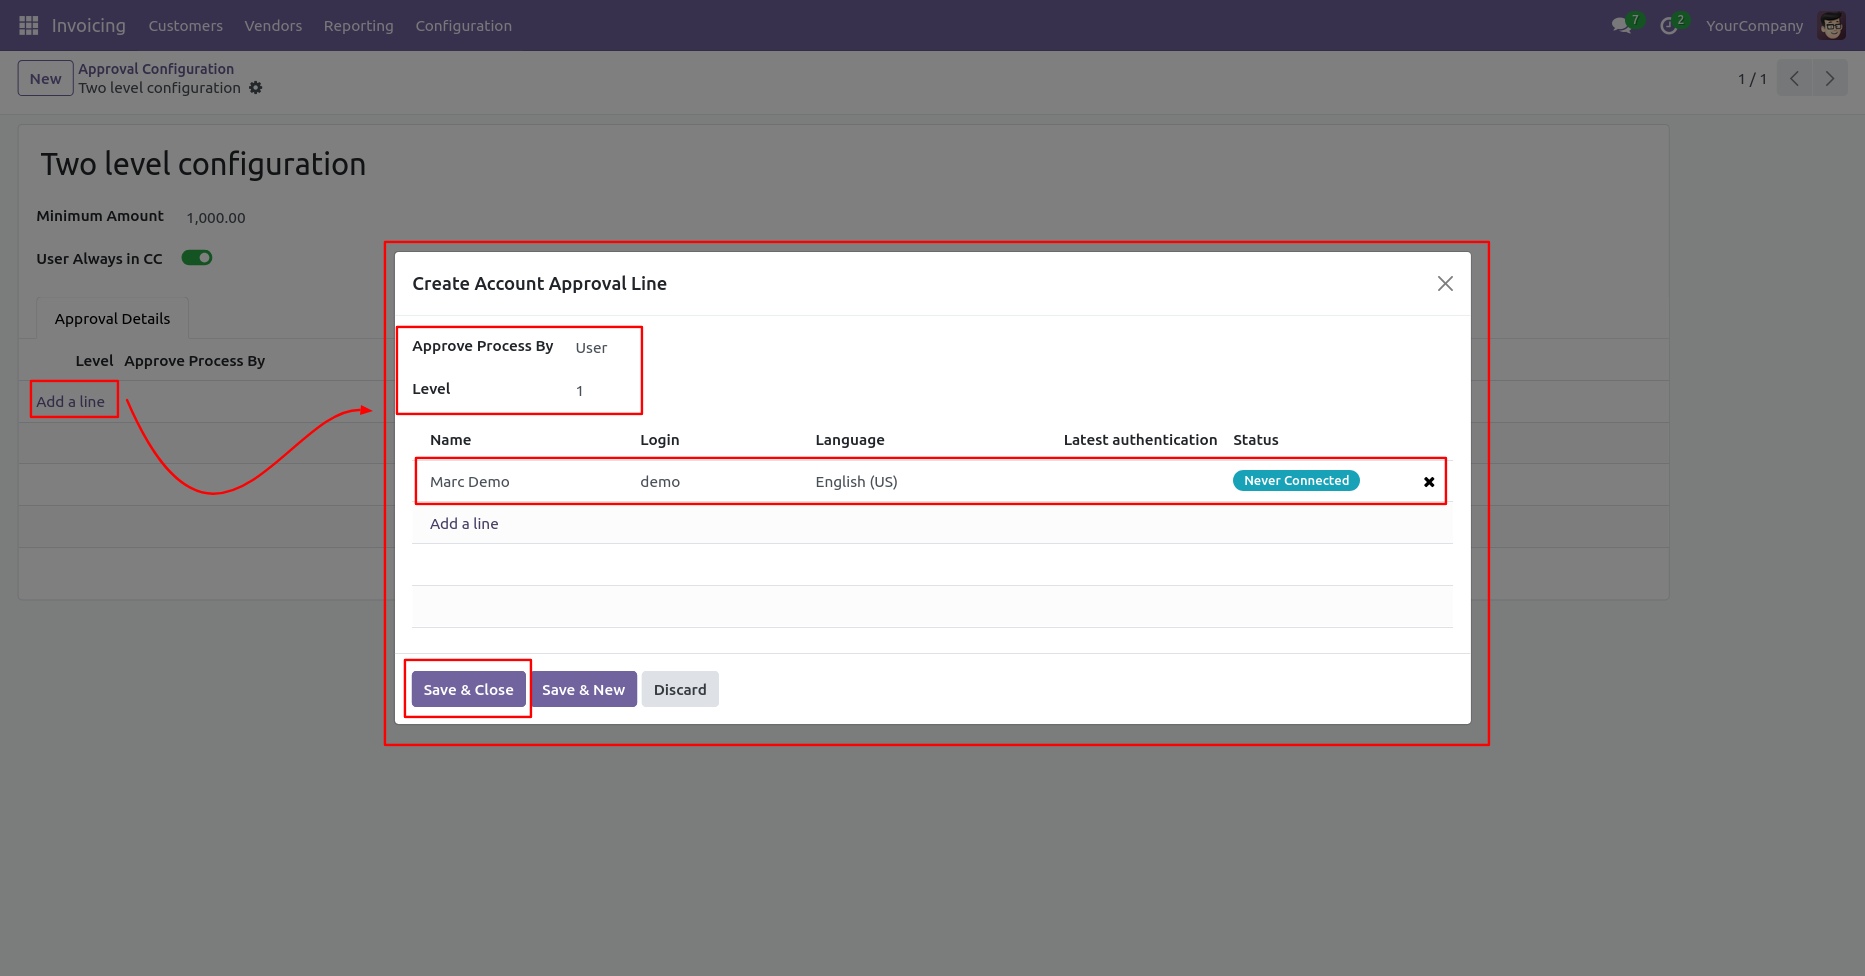
Approved Process By, there are two types 1. User , 2. Group. Userwise means to define that person who approved the invoice/bill, in this wizard select the user.
Approve type 2. Group that means only specific groups users will give approval.
User submits invoice/bill for approval by pressing the 'Confirm' button. so that will automatically set the 'Waiting for Approval' stage. Auto fetch Approval Level based on configured approvals setup and minimum limit.
After confirmed by the users, Auto set next level approvers in the Approval Info tab. If next approval is required.
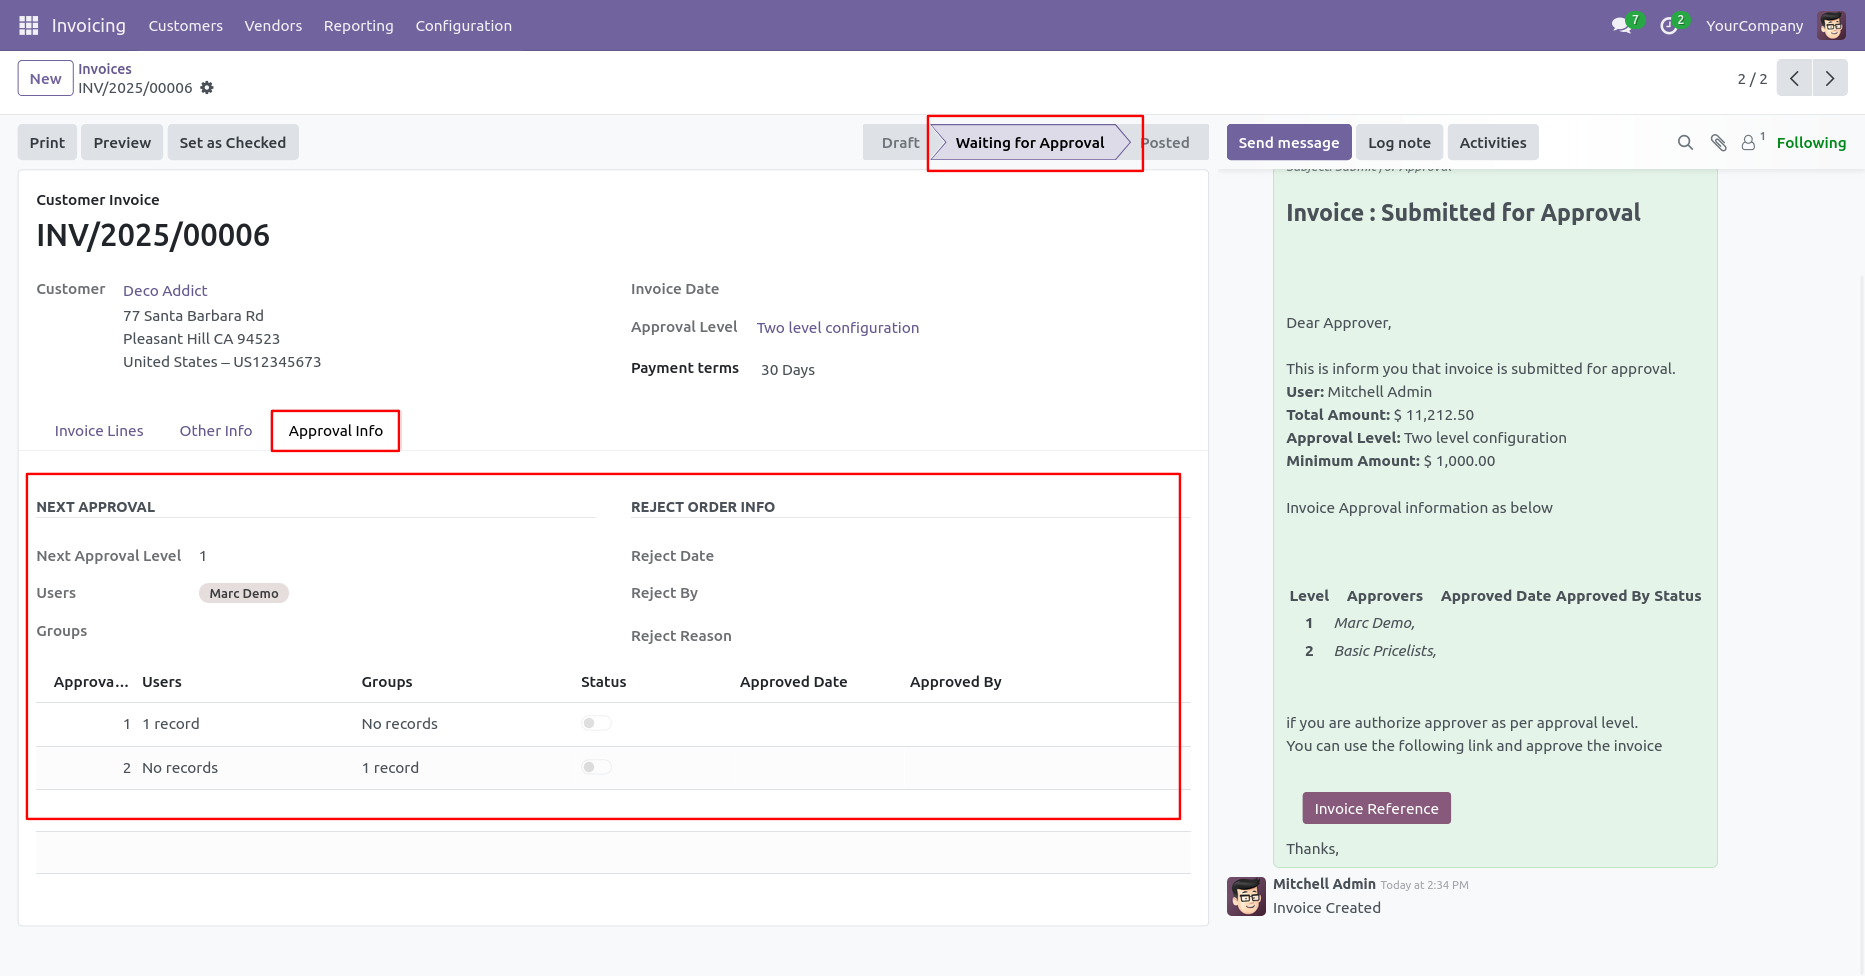
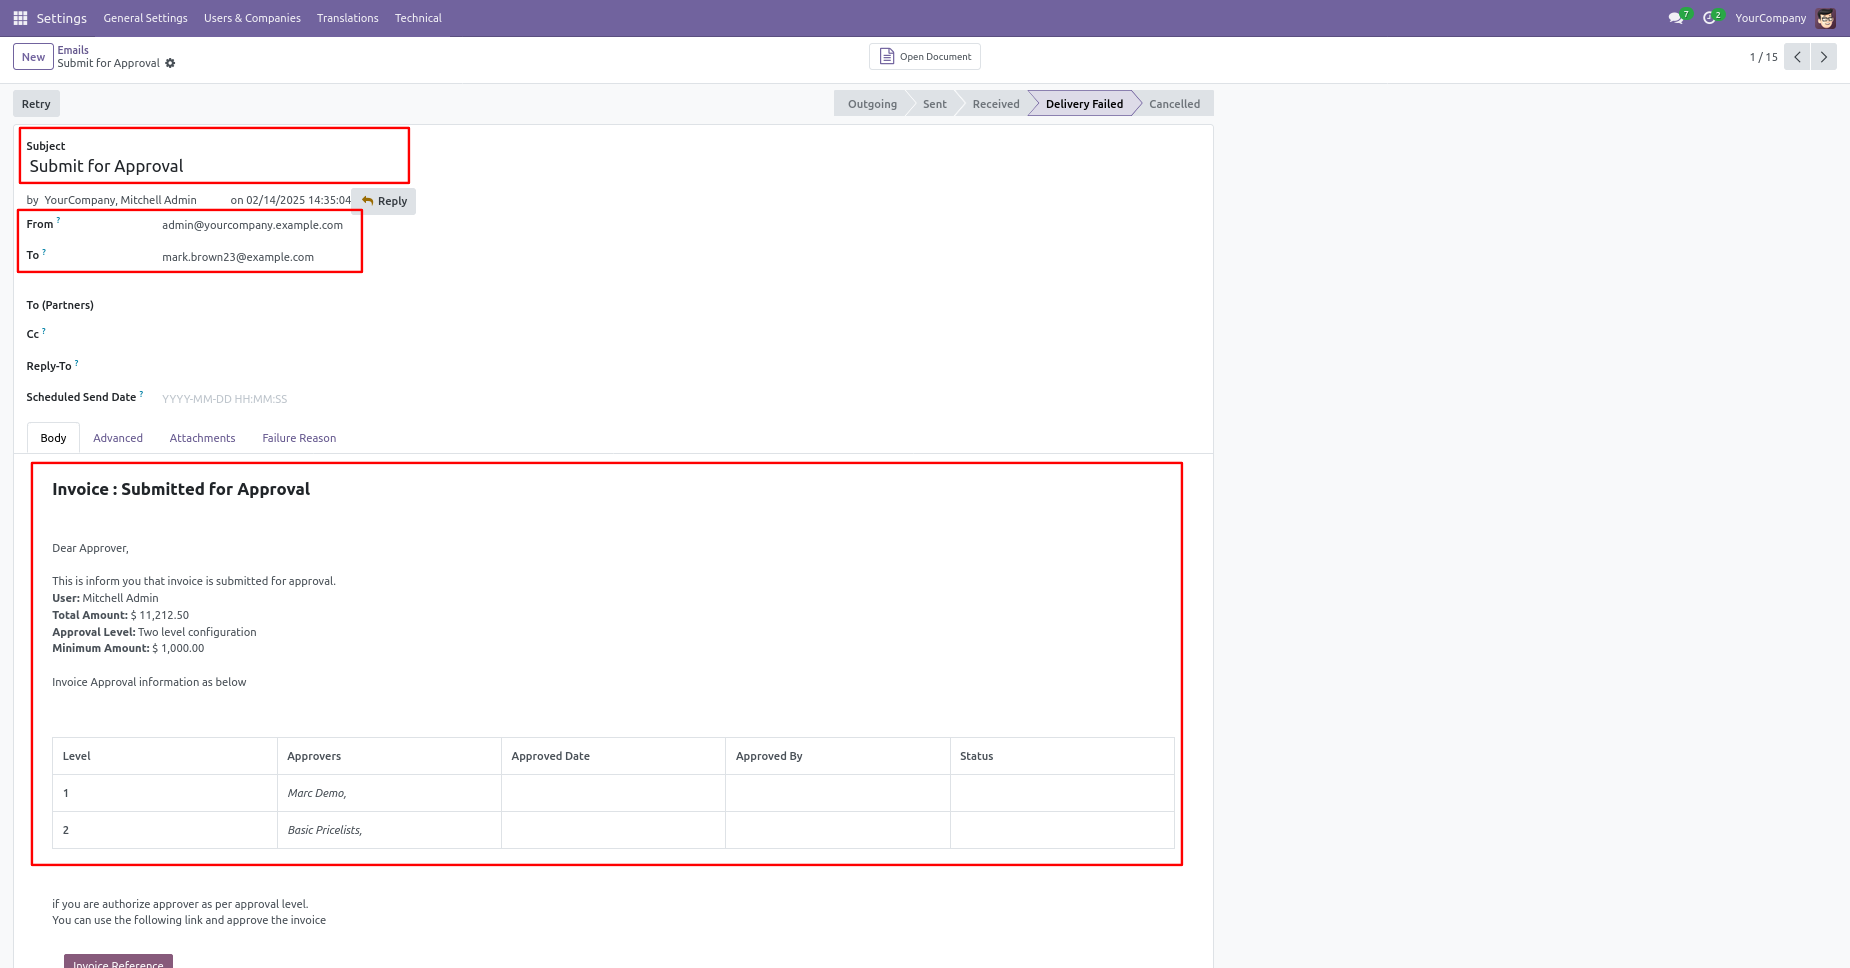
Email notification sent to approvers for approval invoice/bill.
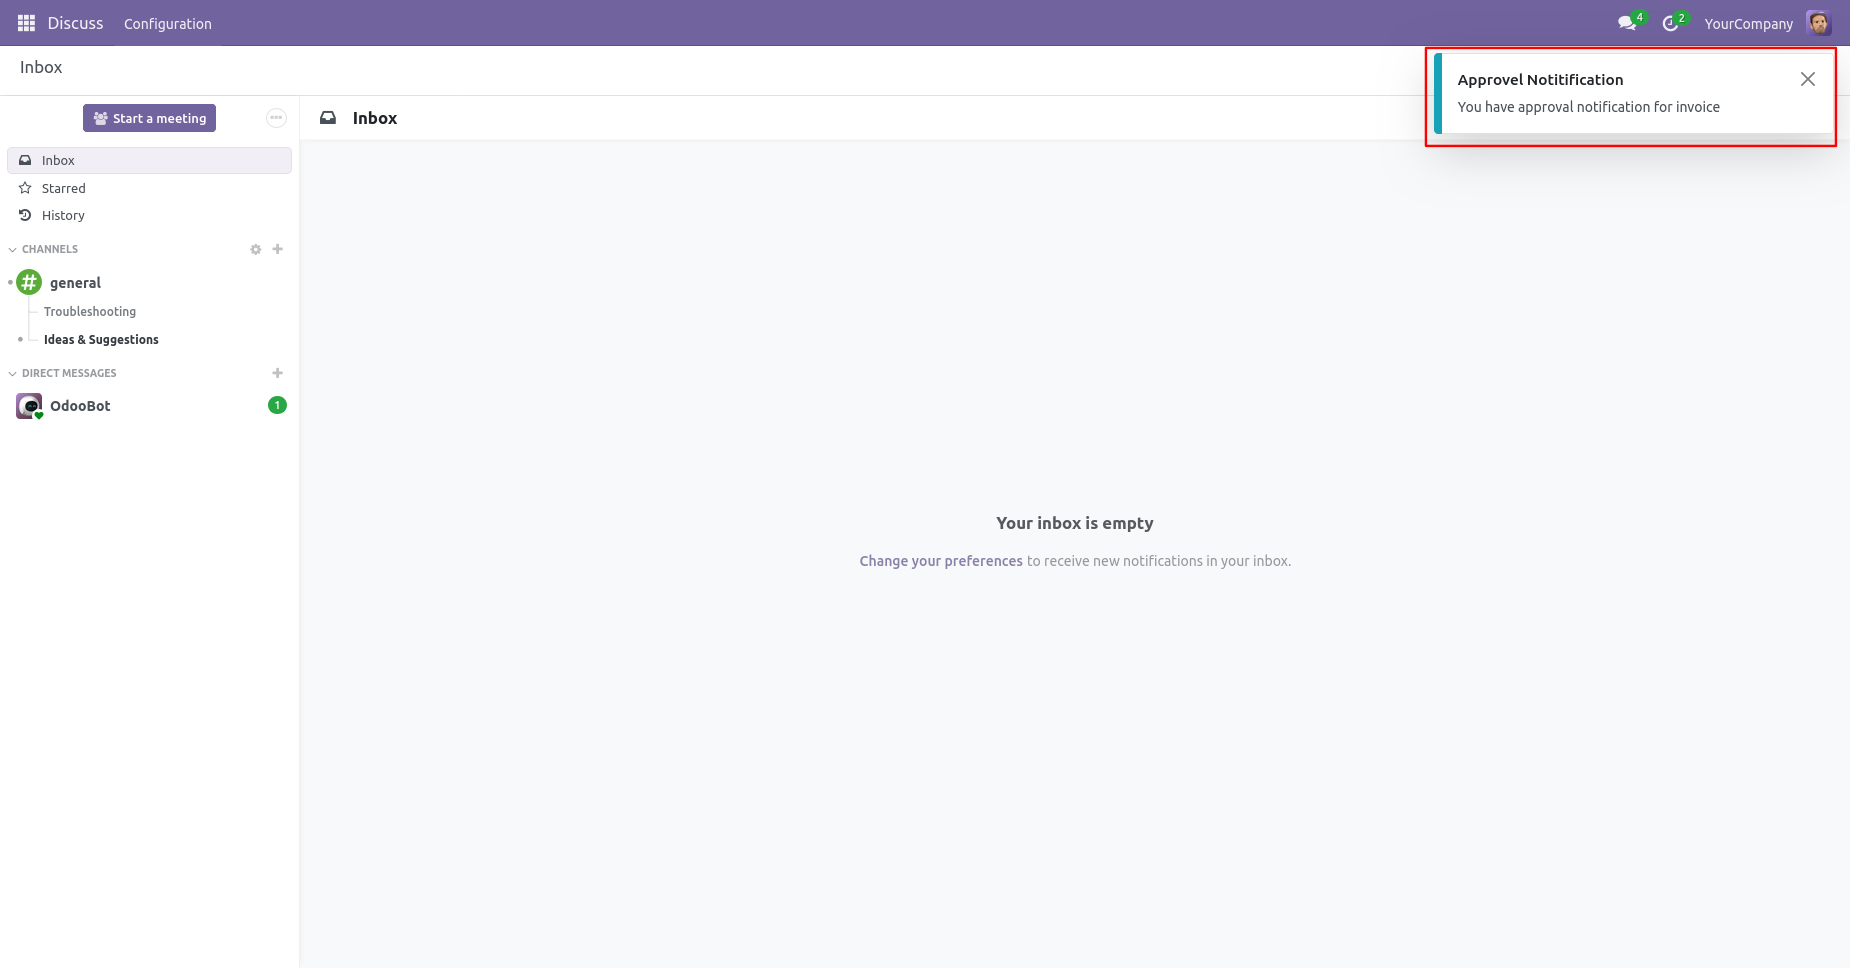
Approval person get the approval notification popup.
Approval Flow
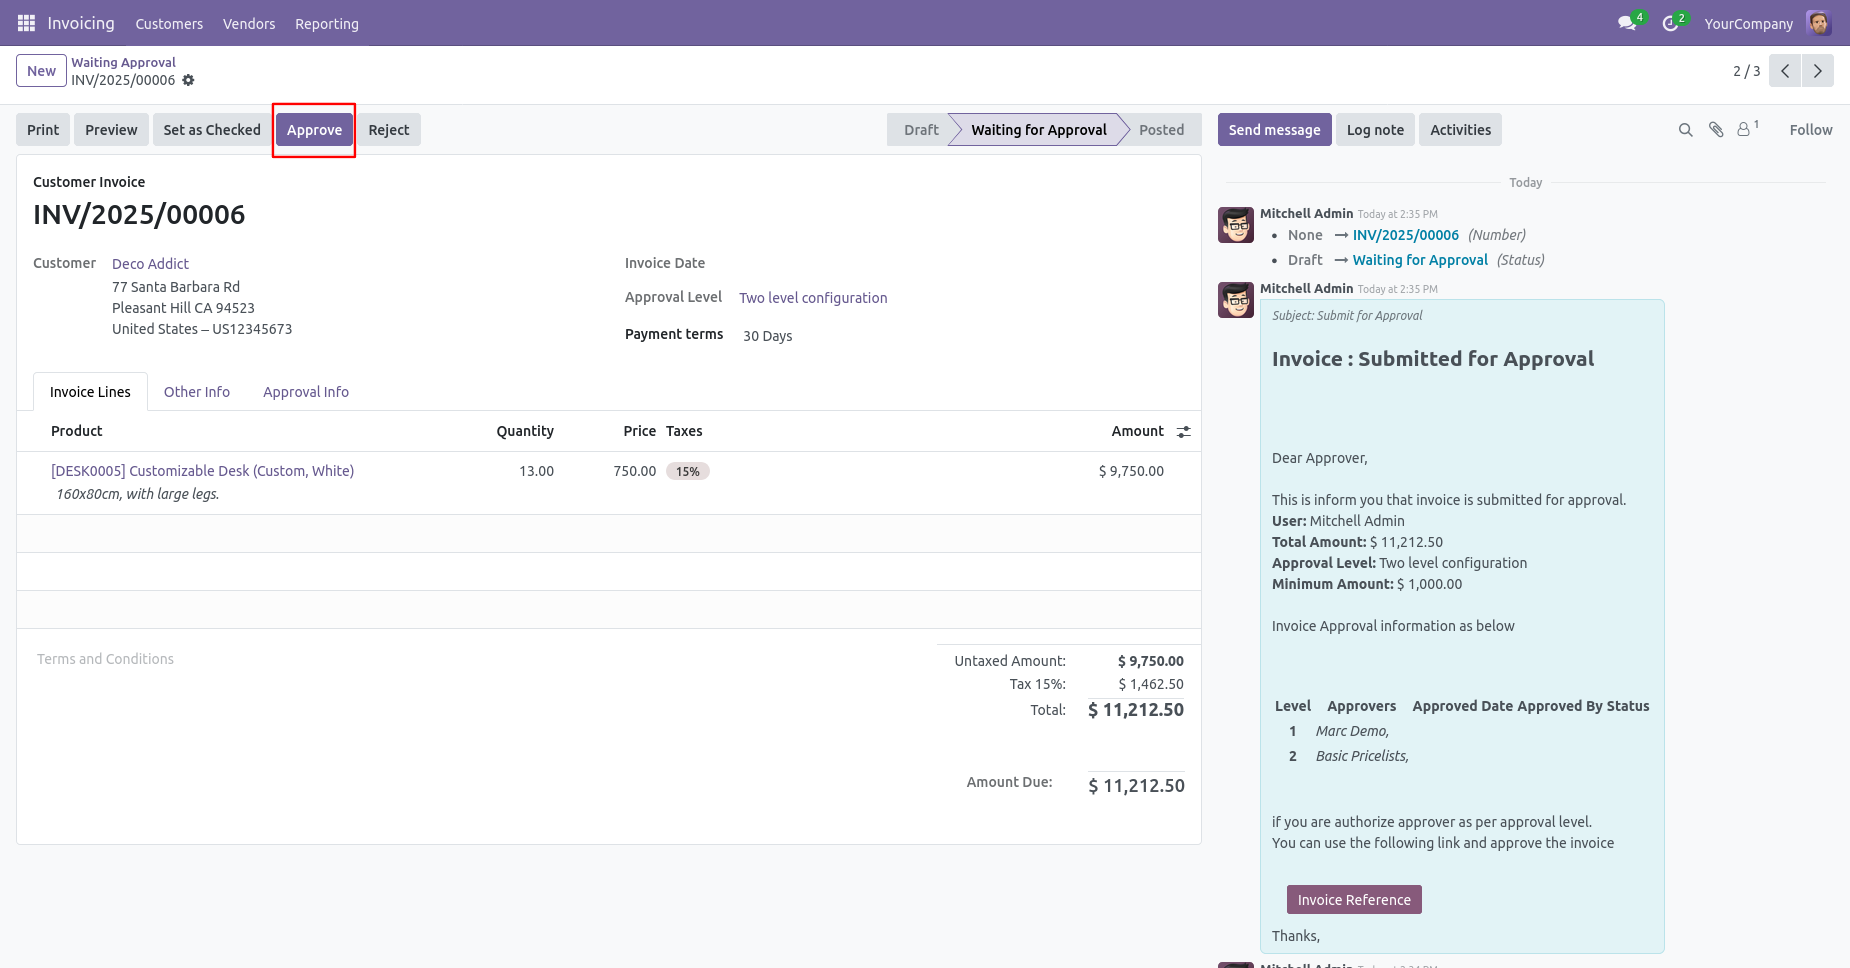
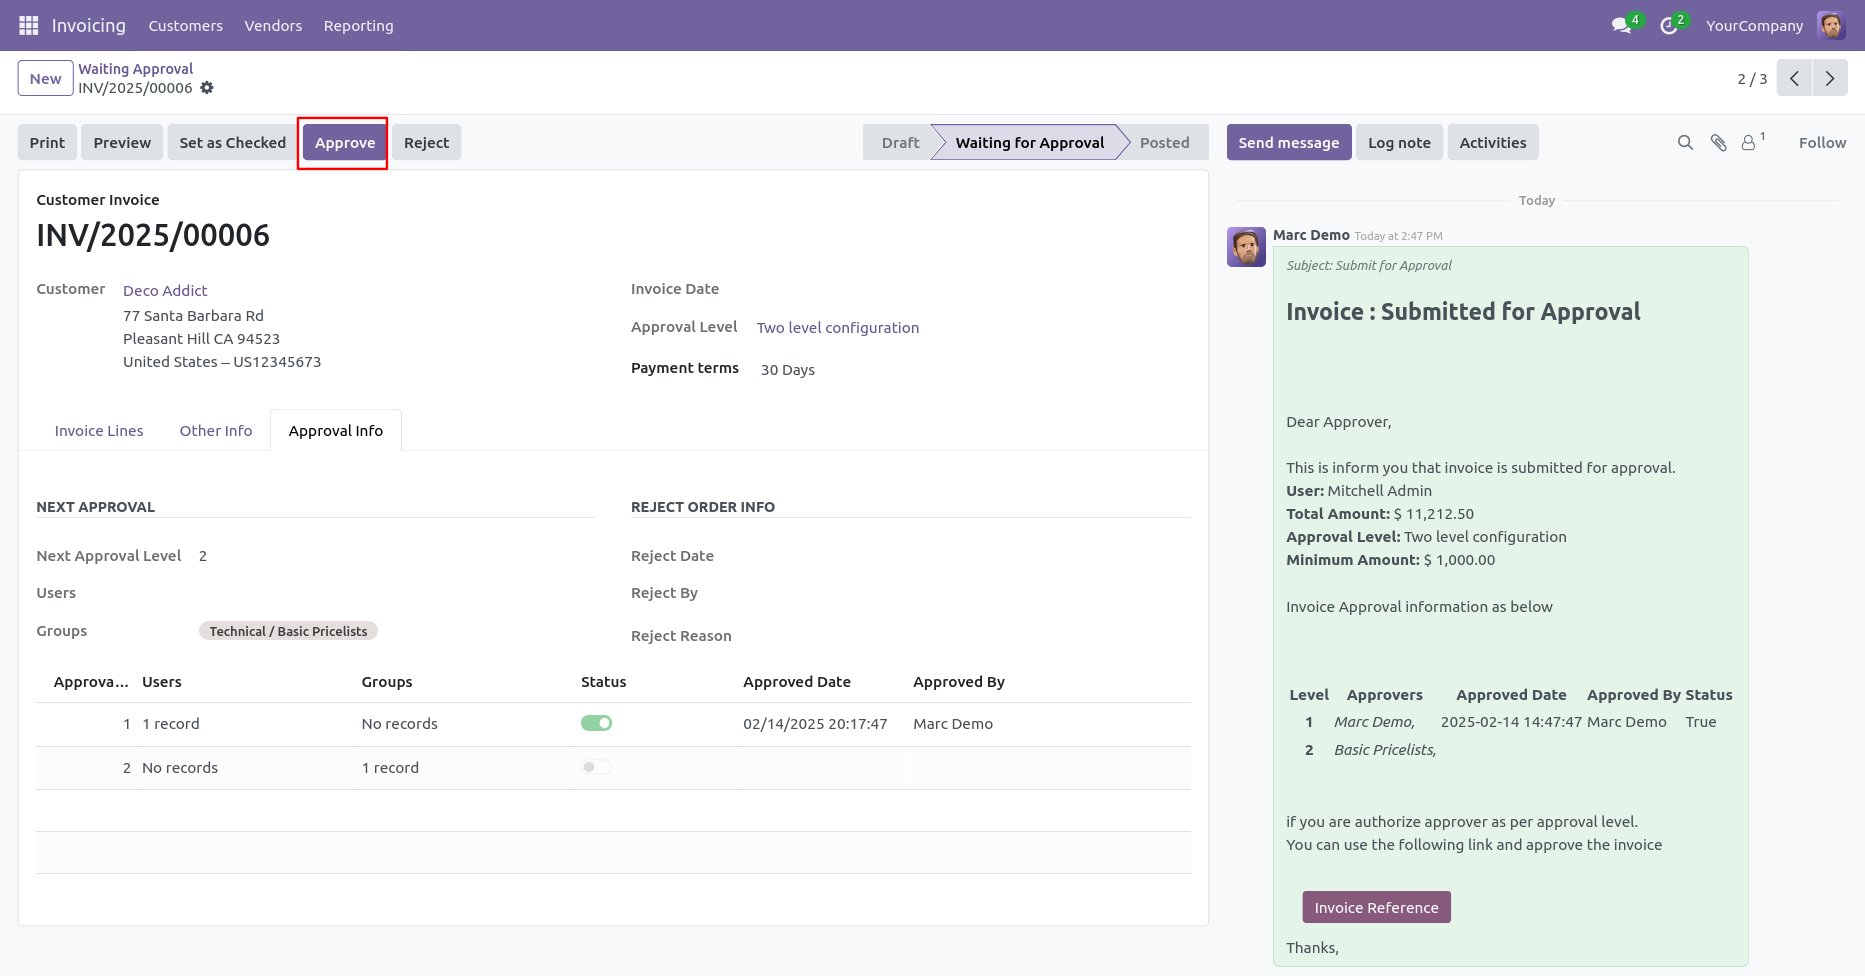
There are 2 approvers the first approver approves the invoice/bill.
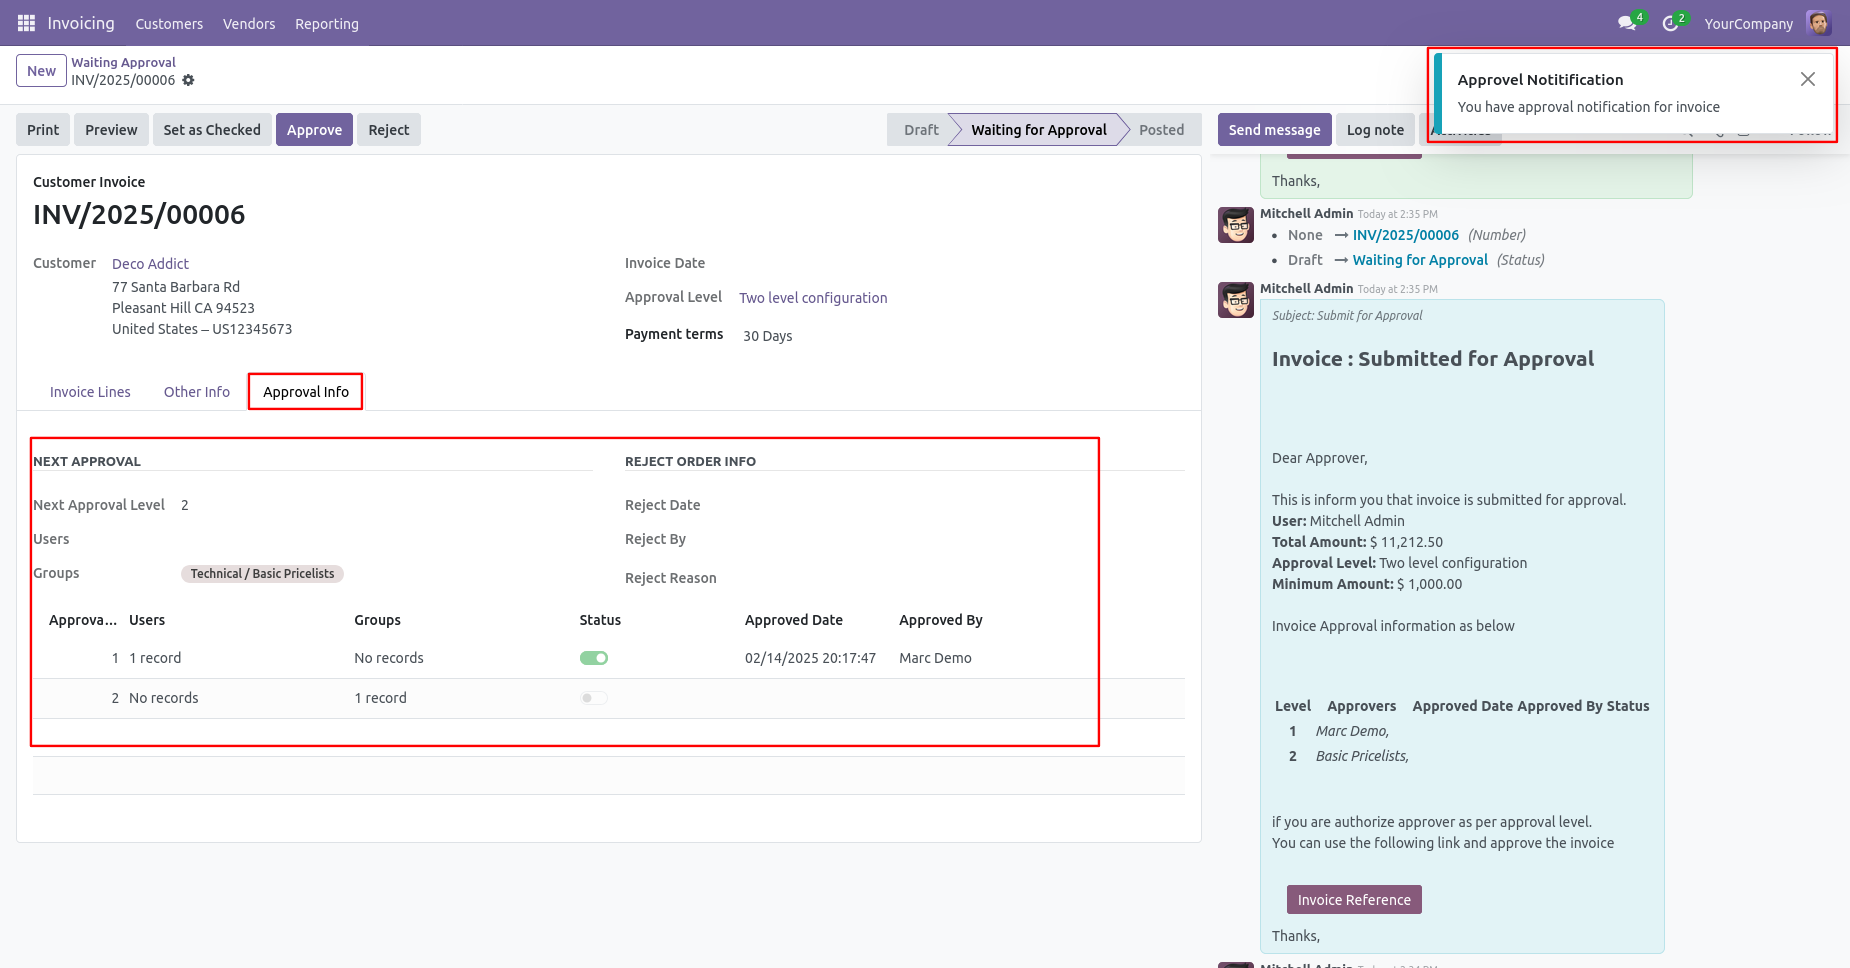
After approved by the approved person, Auto set the next level approvers in the Approval Info tab. If next approval is required.
Email notification sent to approvers for approval invoice/bill.
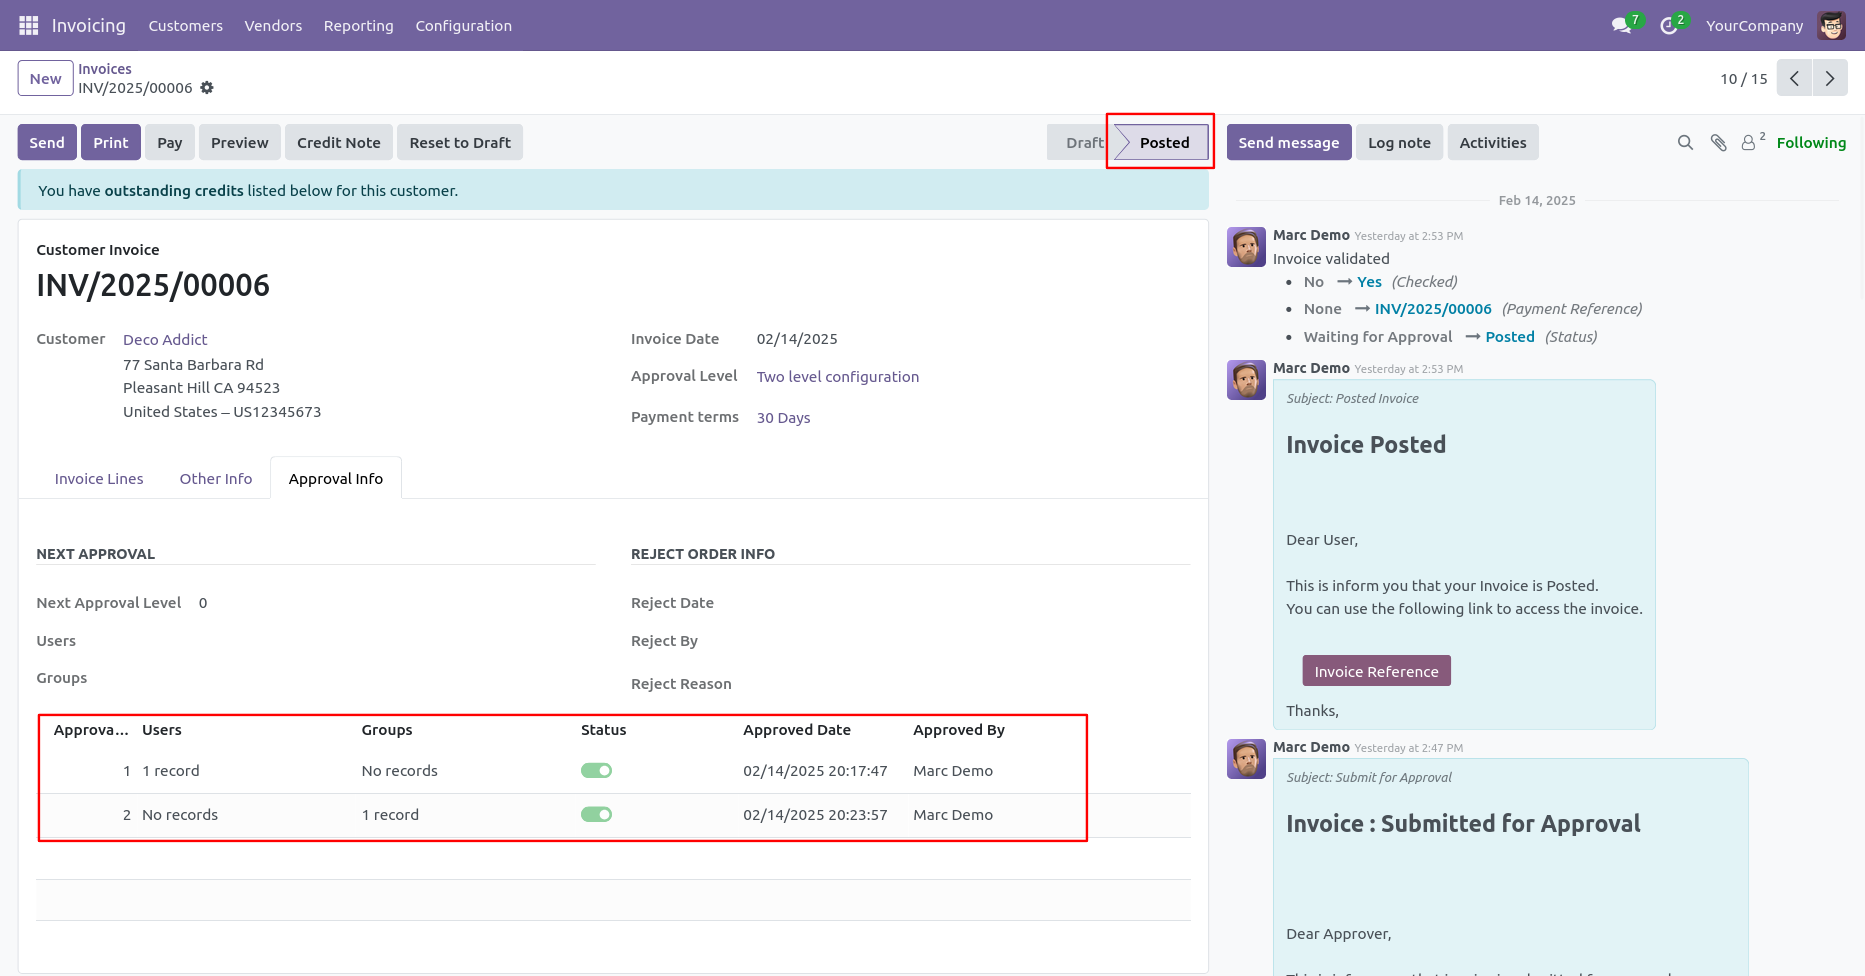
Now the second approver approves the invoice/bill.
So invoice/bill is posted.
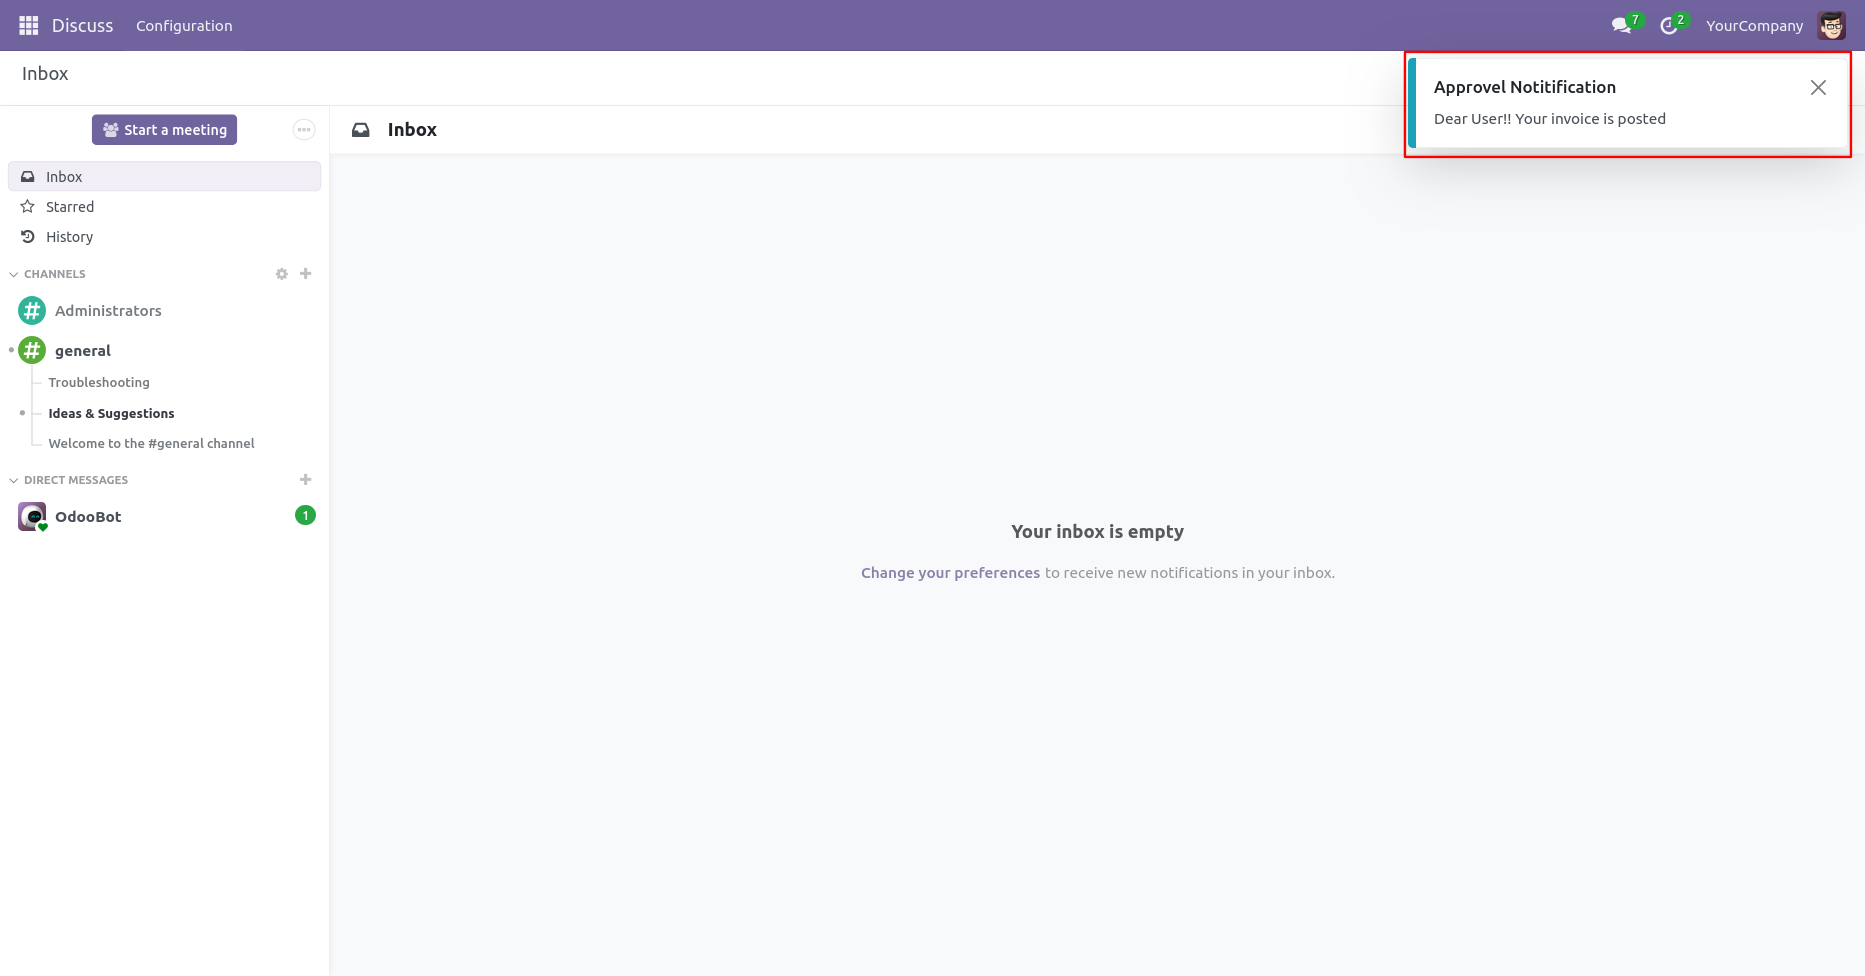
Approval notification popup looks like below.
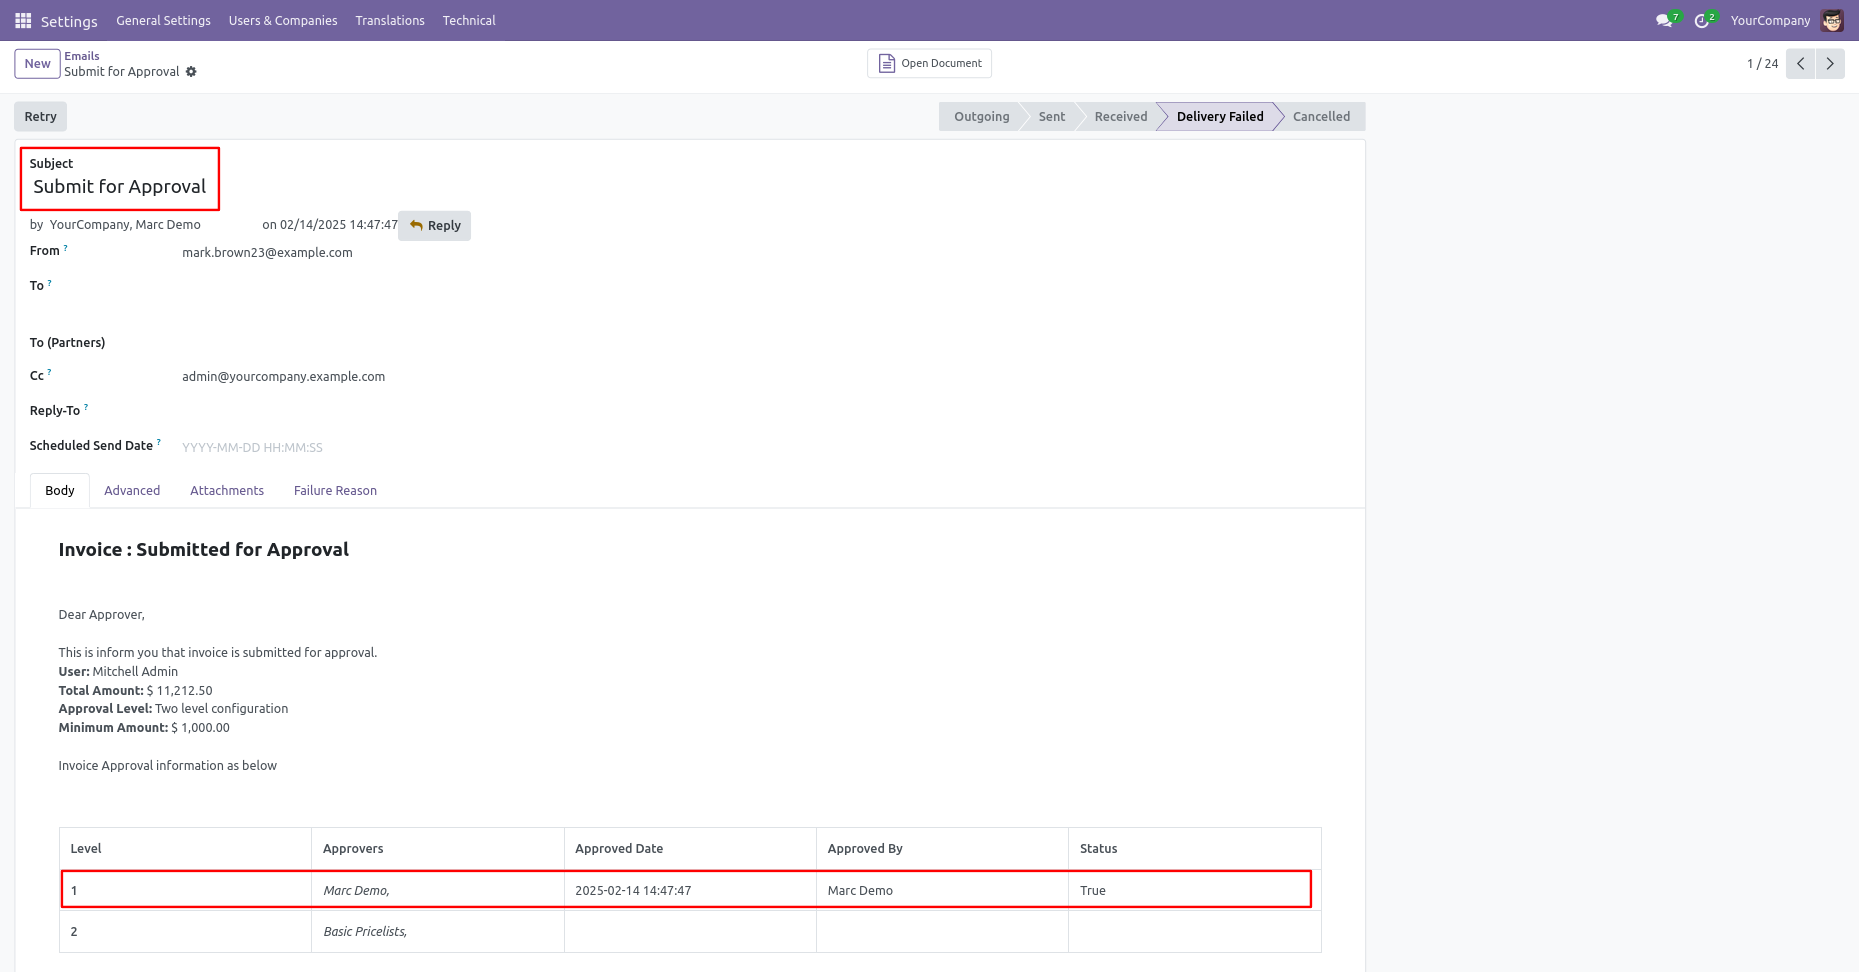
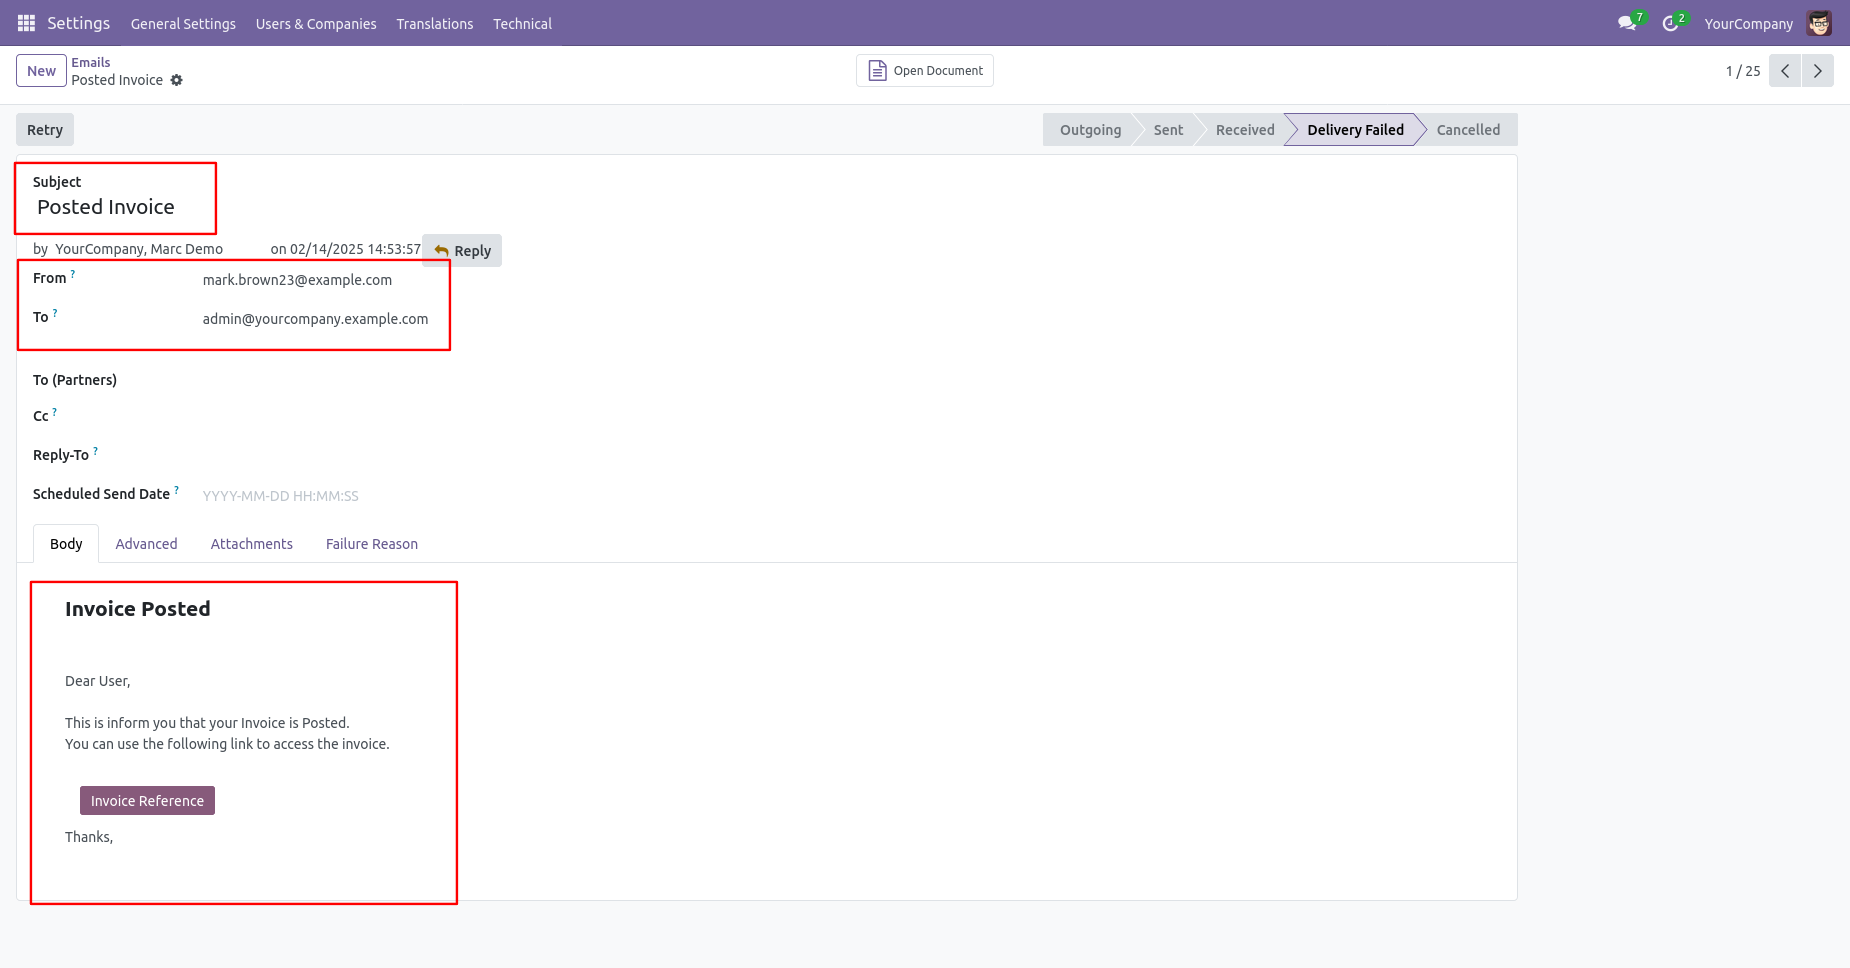
Email notification of approval looks like this.
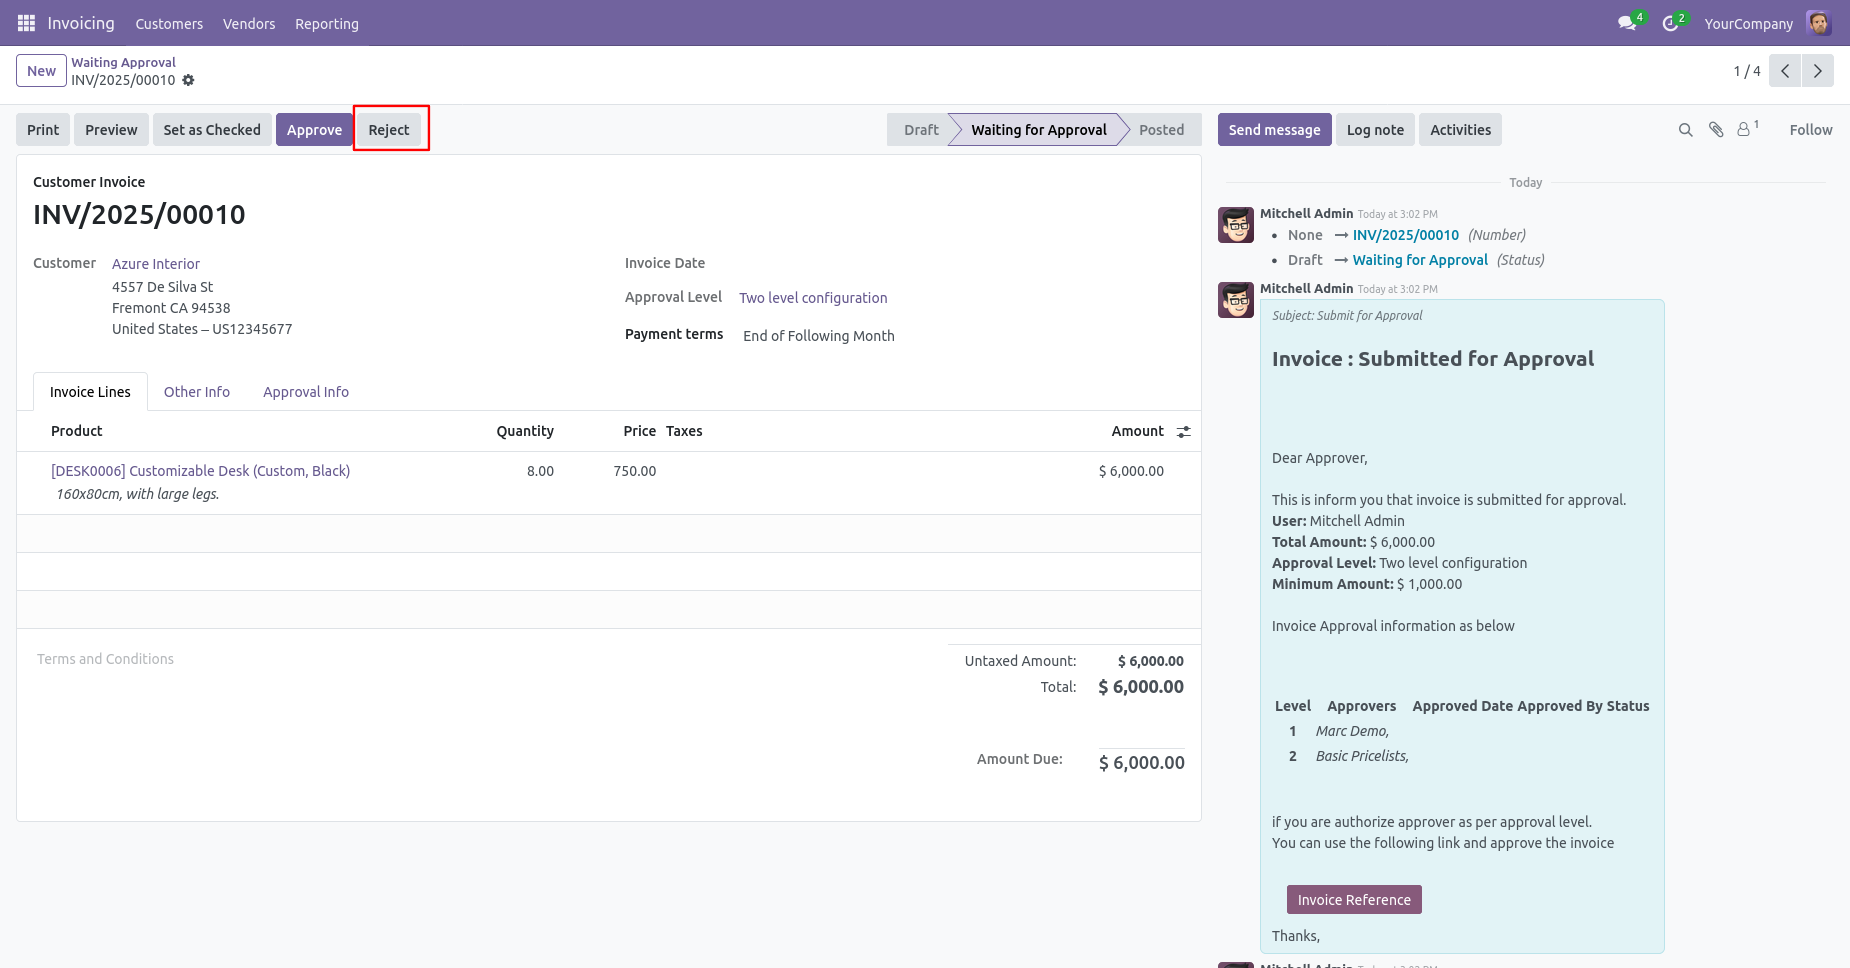
Rejection Flow
There are 2 approvers If the first approver rejects the invoice/bill that means that invoice/bill will be canceled no more second approver is needed.
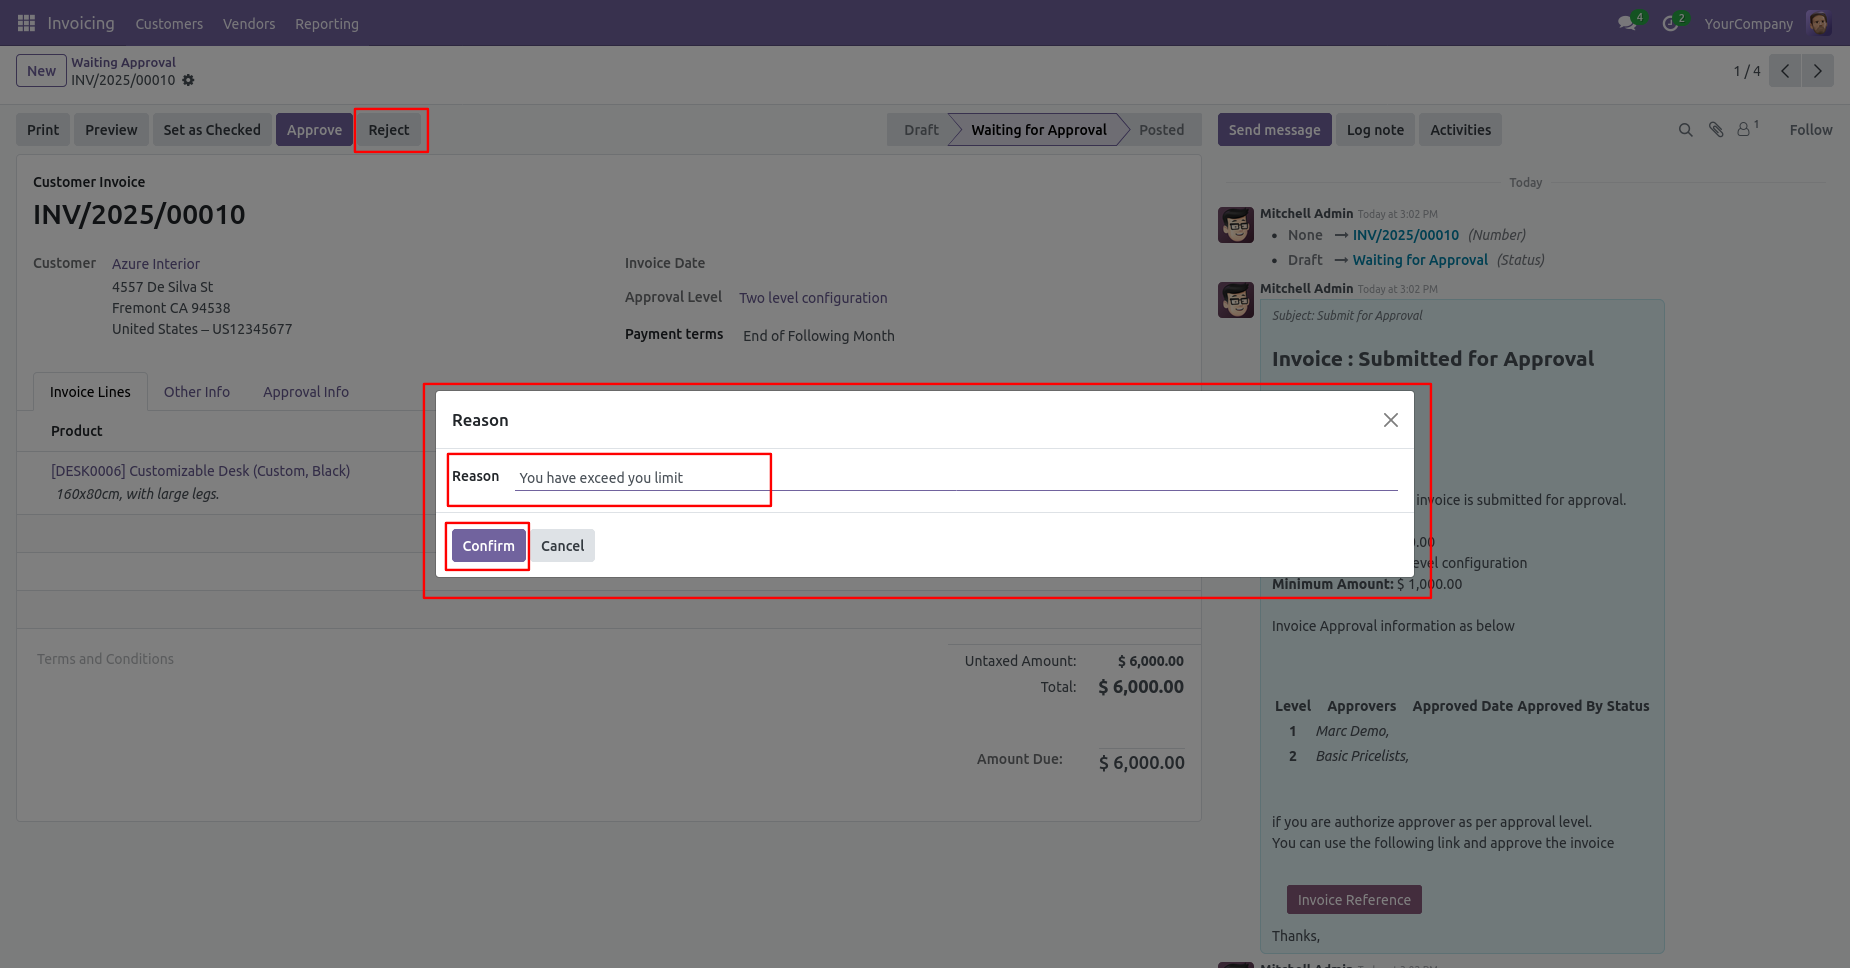
After click on the "Reject" button, this wizard will pop up, here the approver has to add a reason for rejecting the invoice/bill.
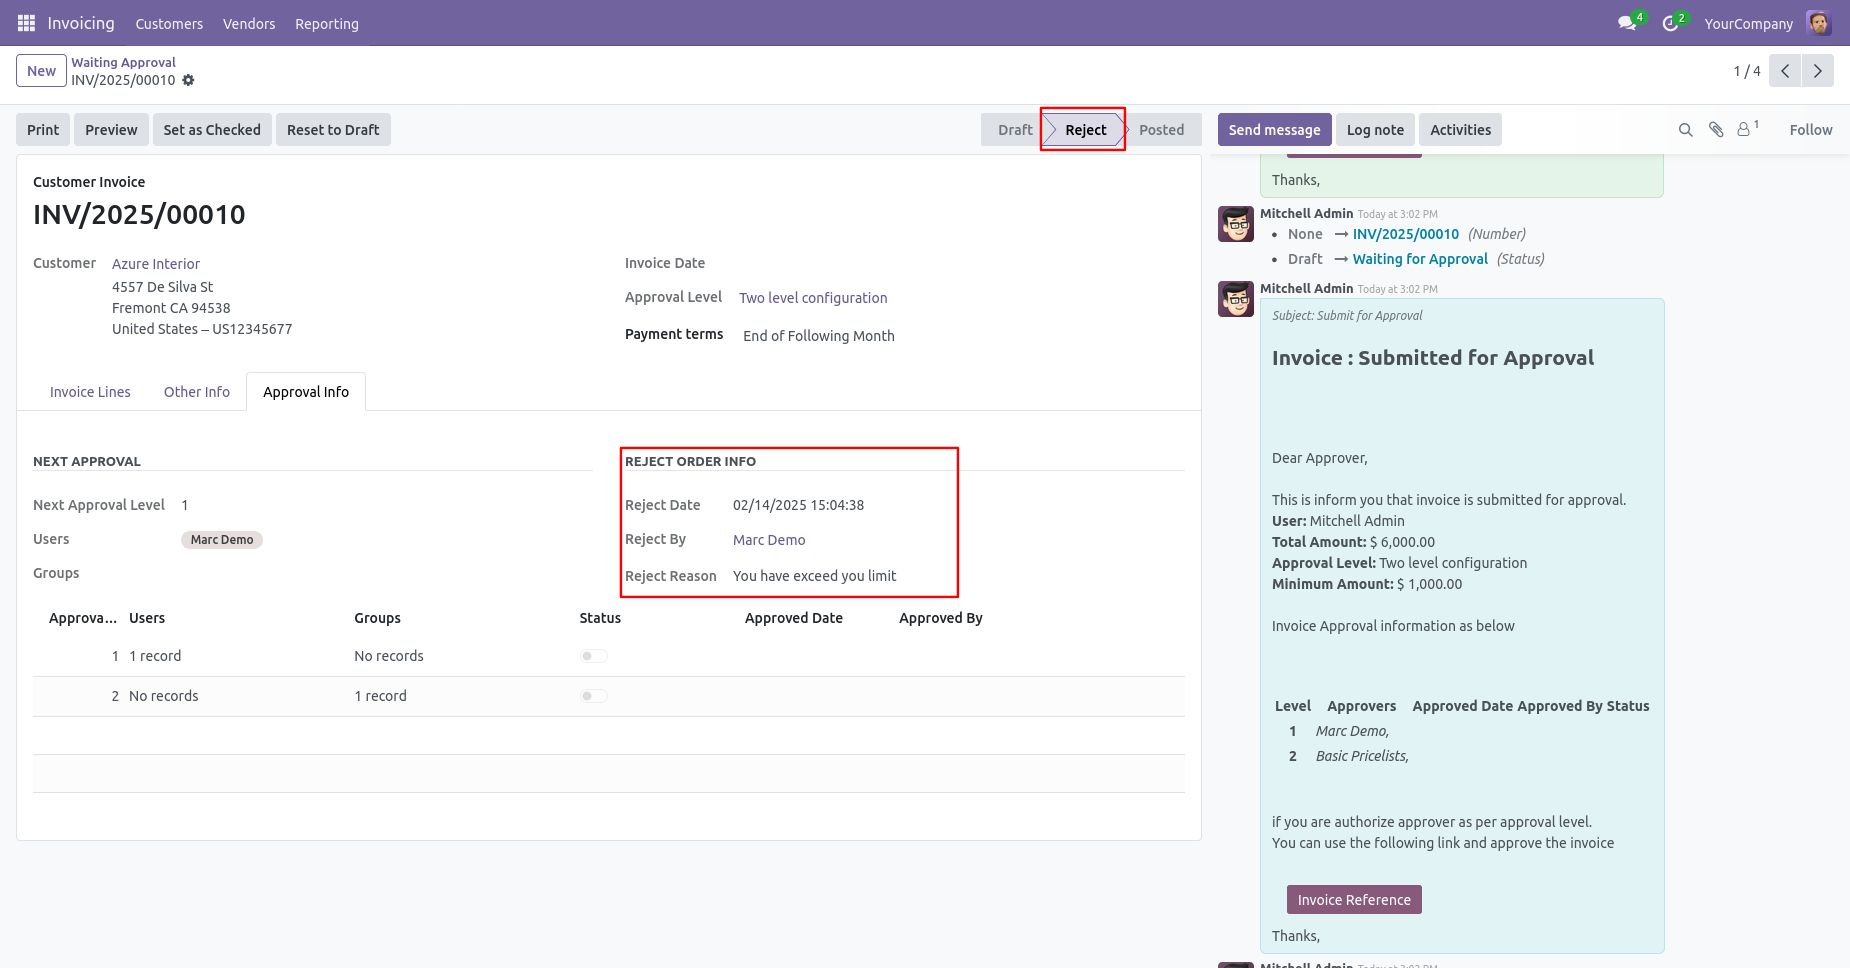
After rejection, it auto set the rejection information in the "Reject Order Info".
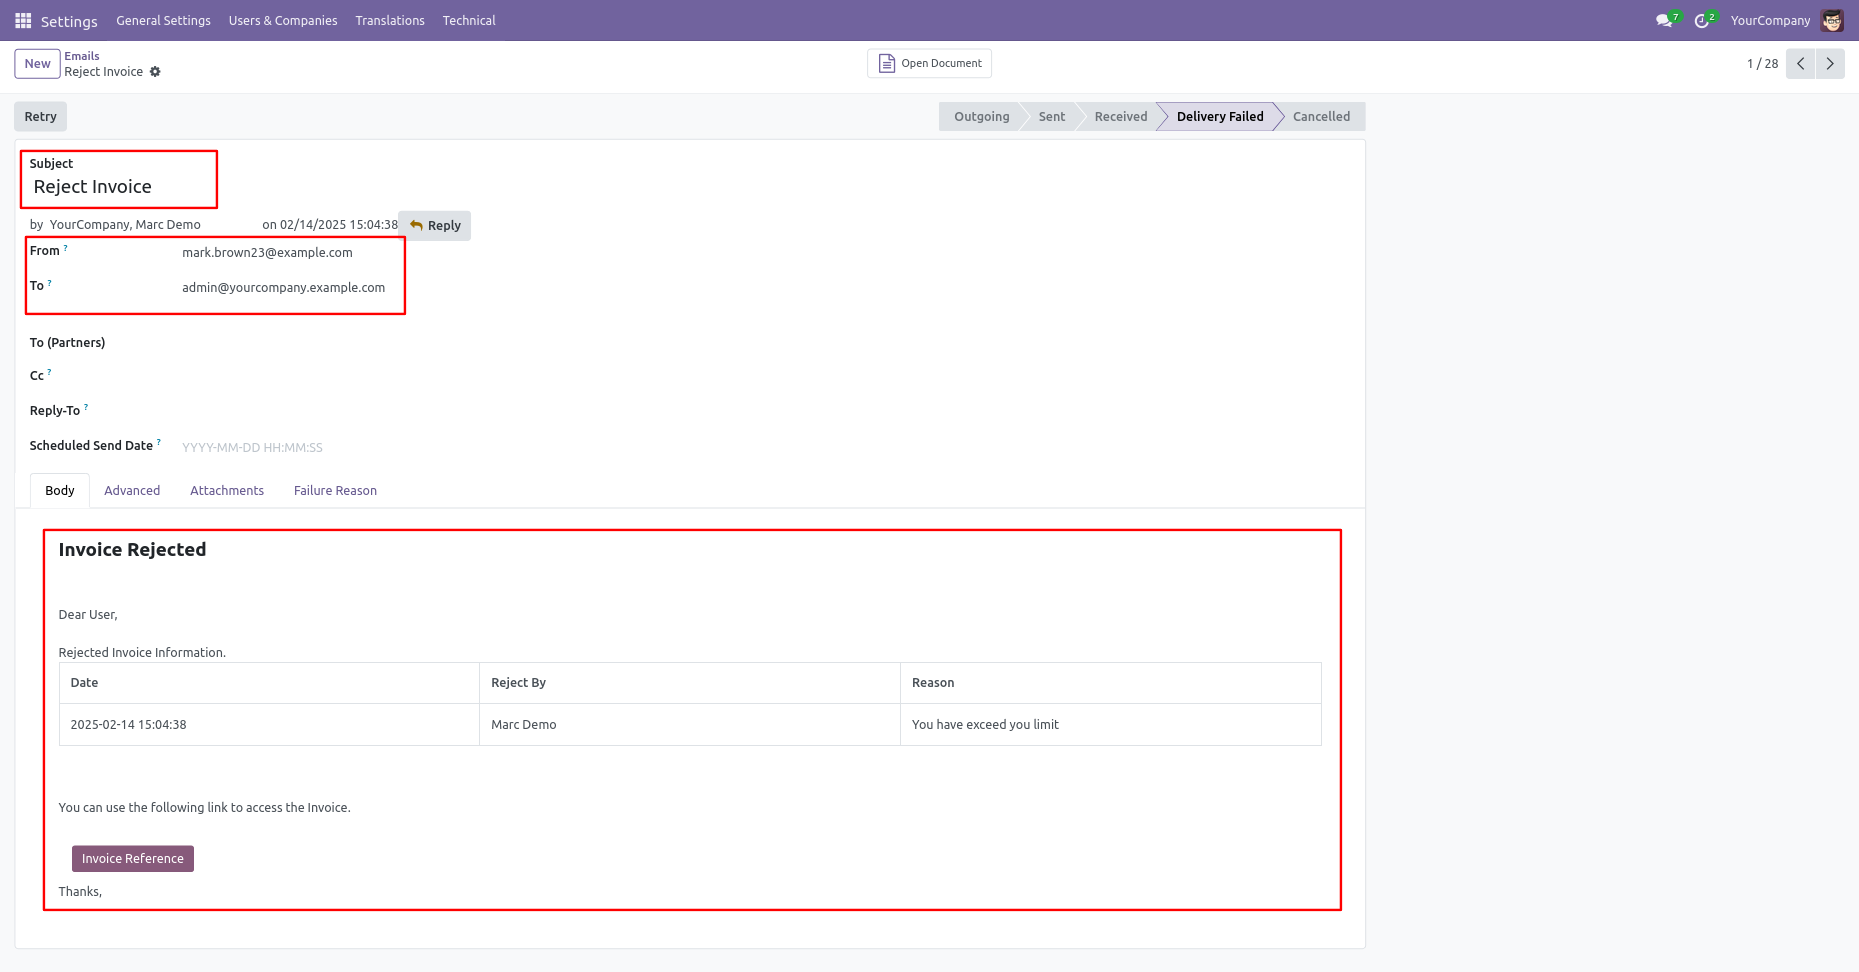
Email notification of rejection looks like this.
- You can give access rights to specific users for unlock period.
- You can lock journals for certain period of time.
- By locking the date you can prevent users from posting wrong transactions.
- When necessary, the 'Unlock' option is provided to revert the lock.
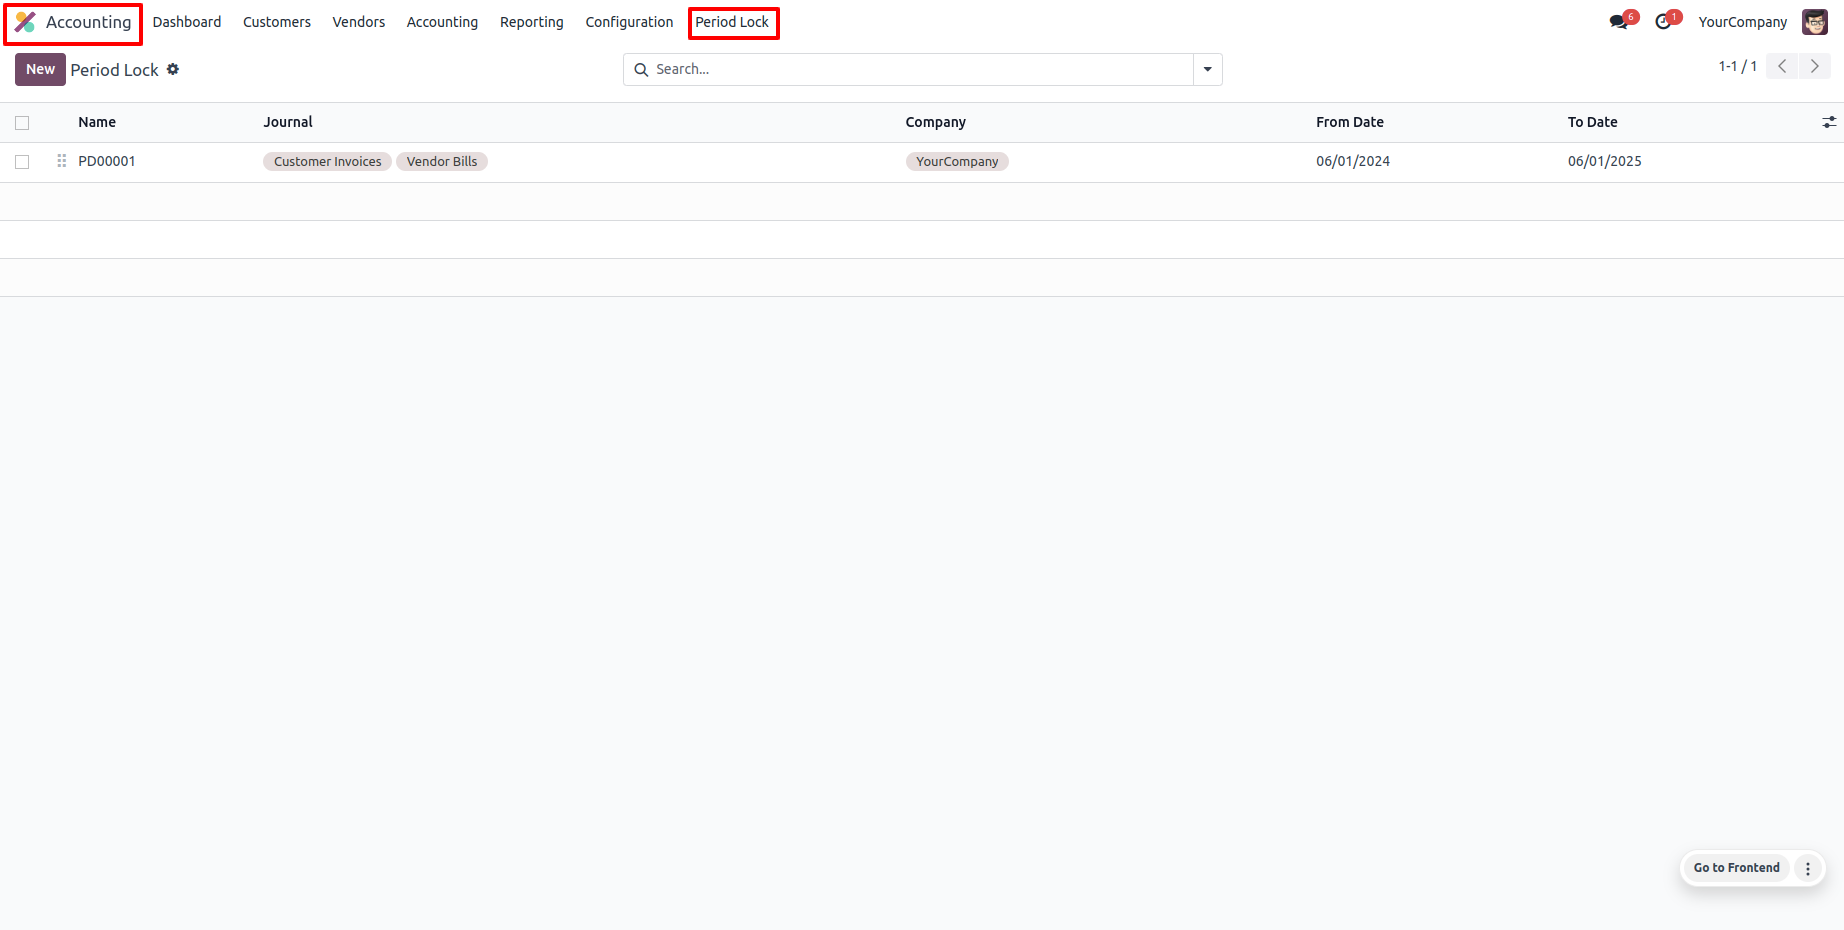
Go to the "Period Lock" menu.
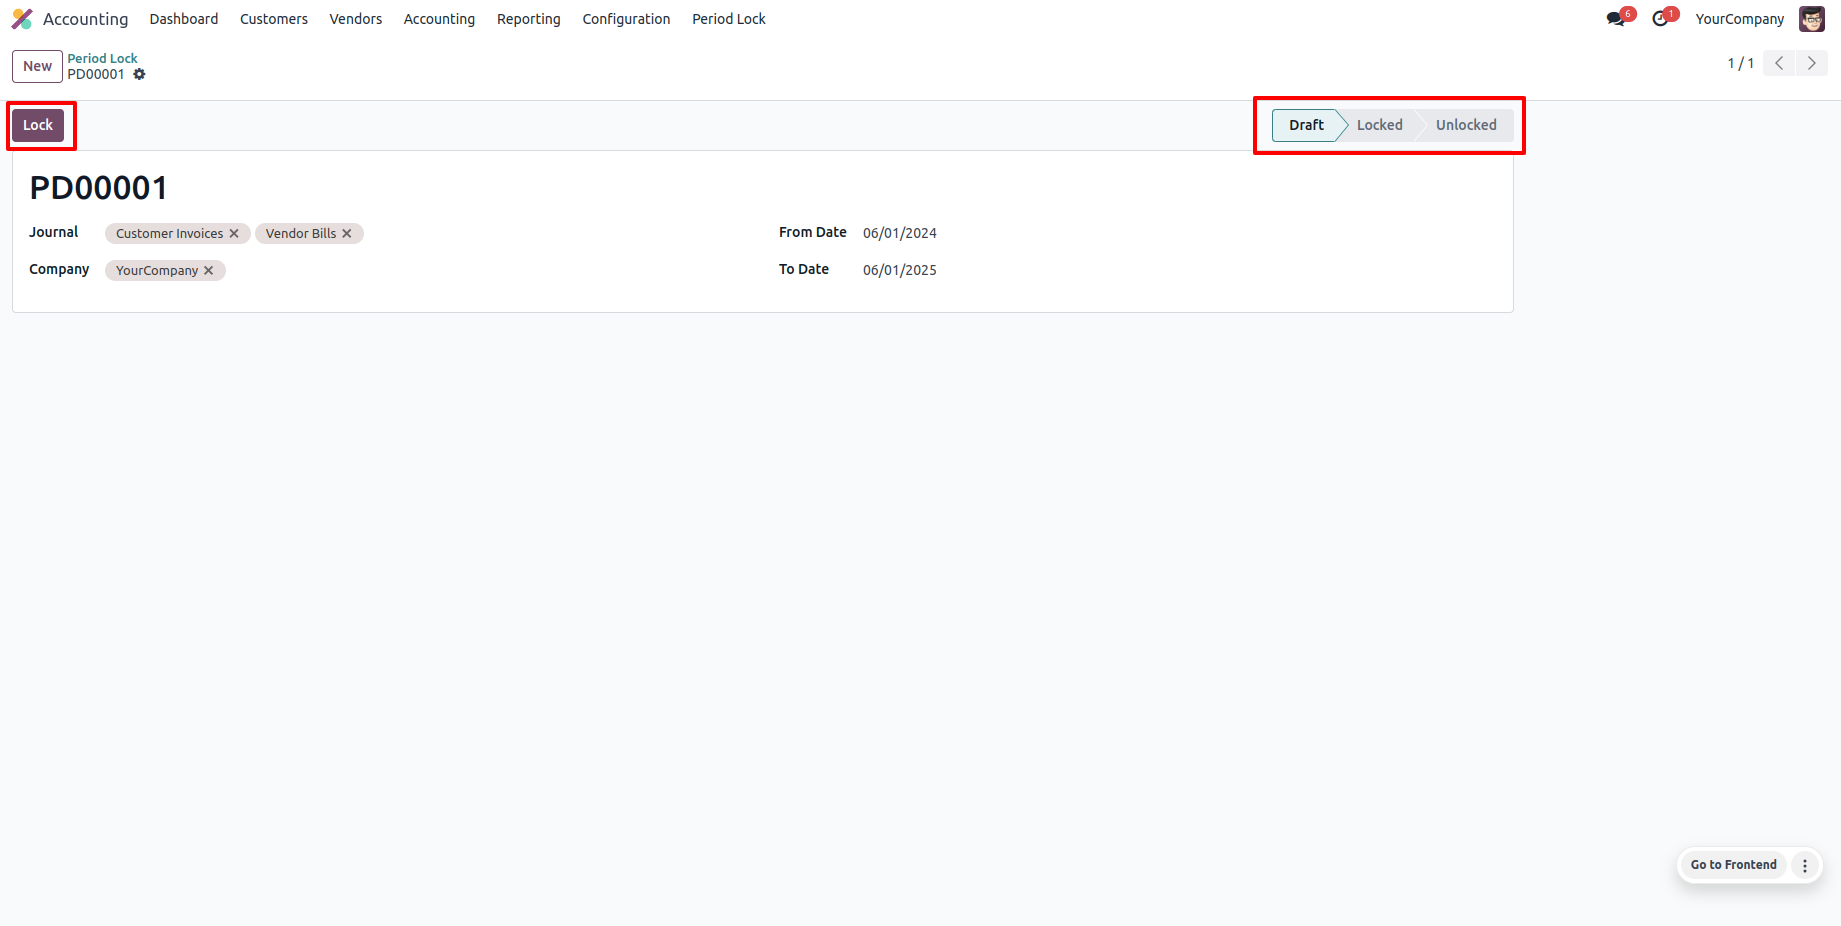
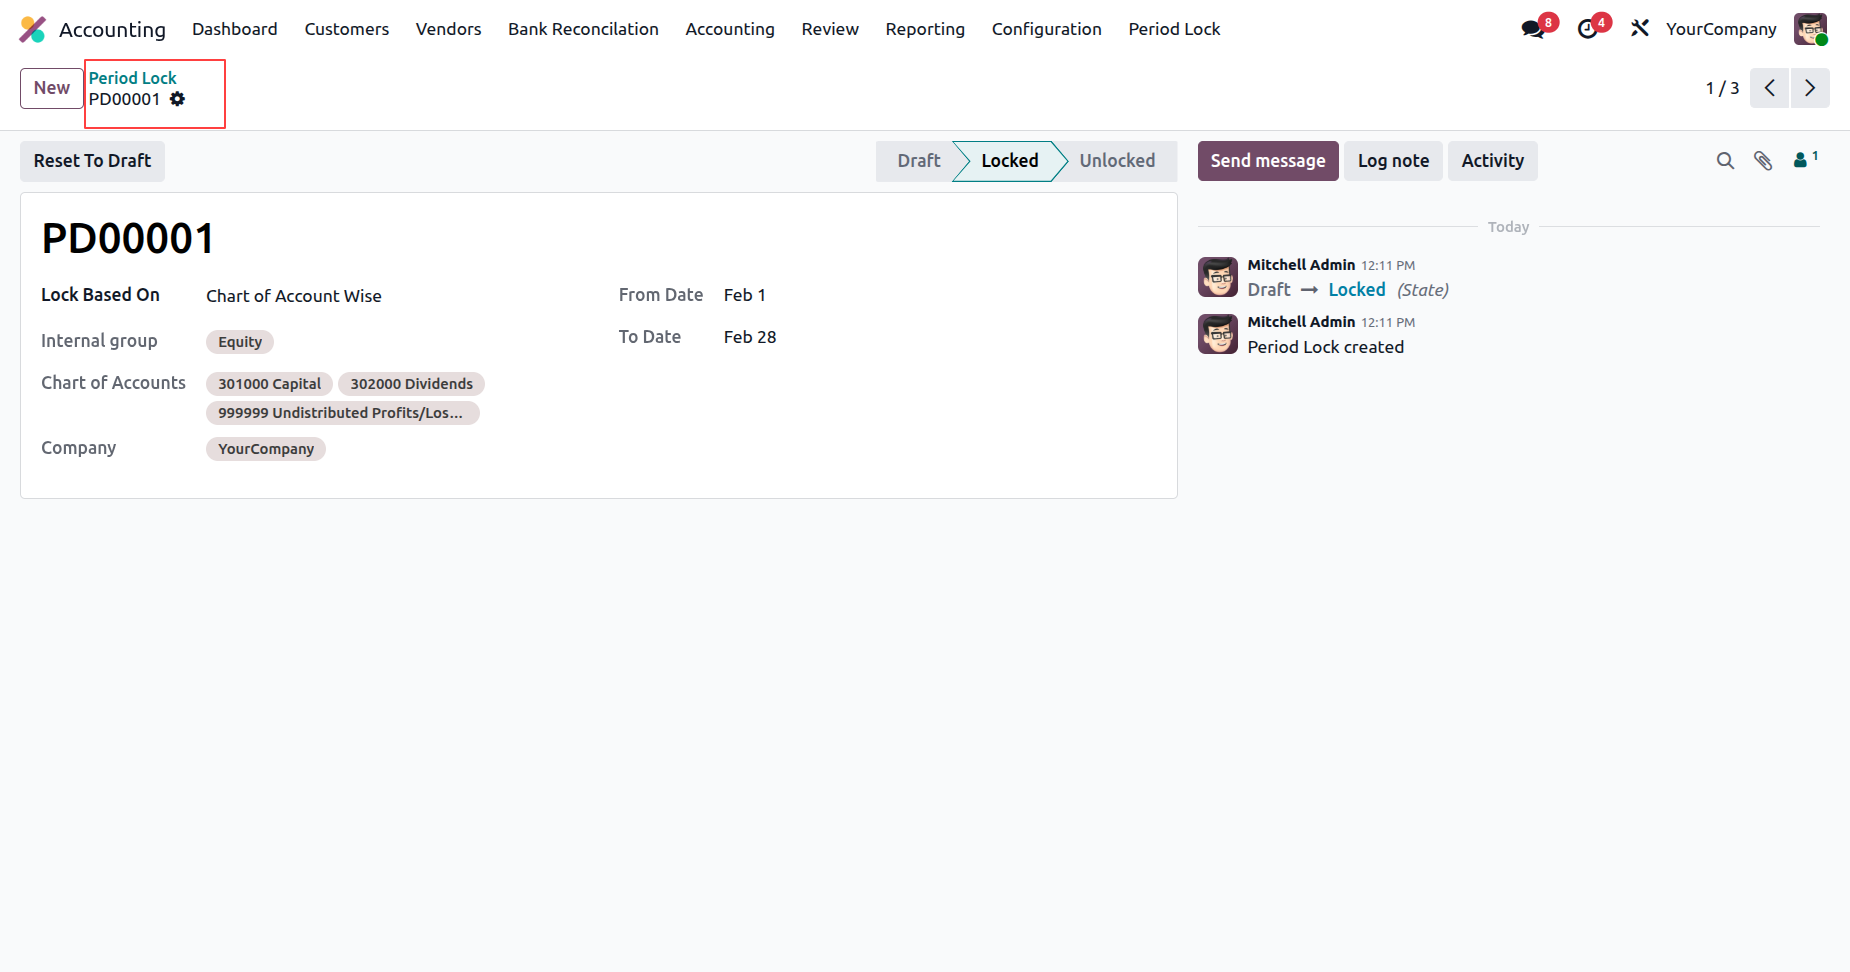
Period lock form view looks like this, Enter details and lock it.
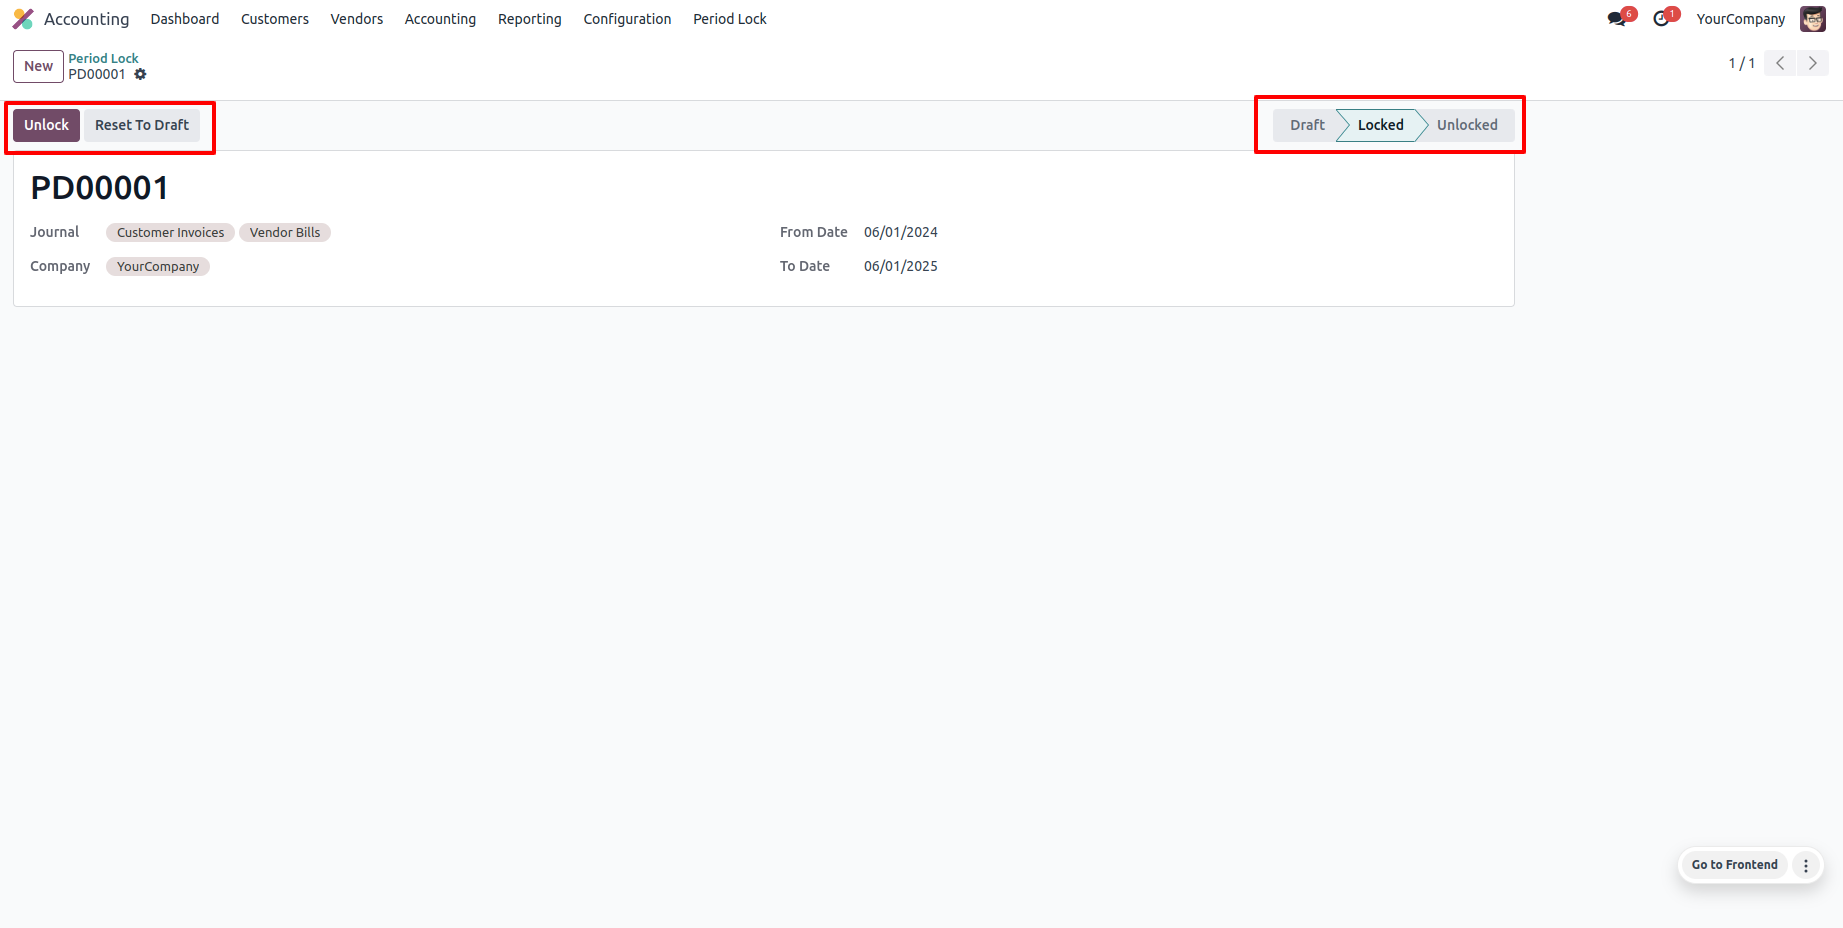
We provide unlock option to revert the lock when required.
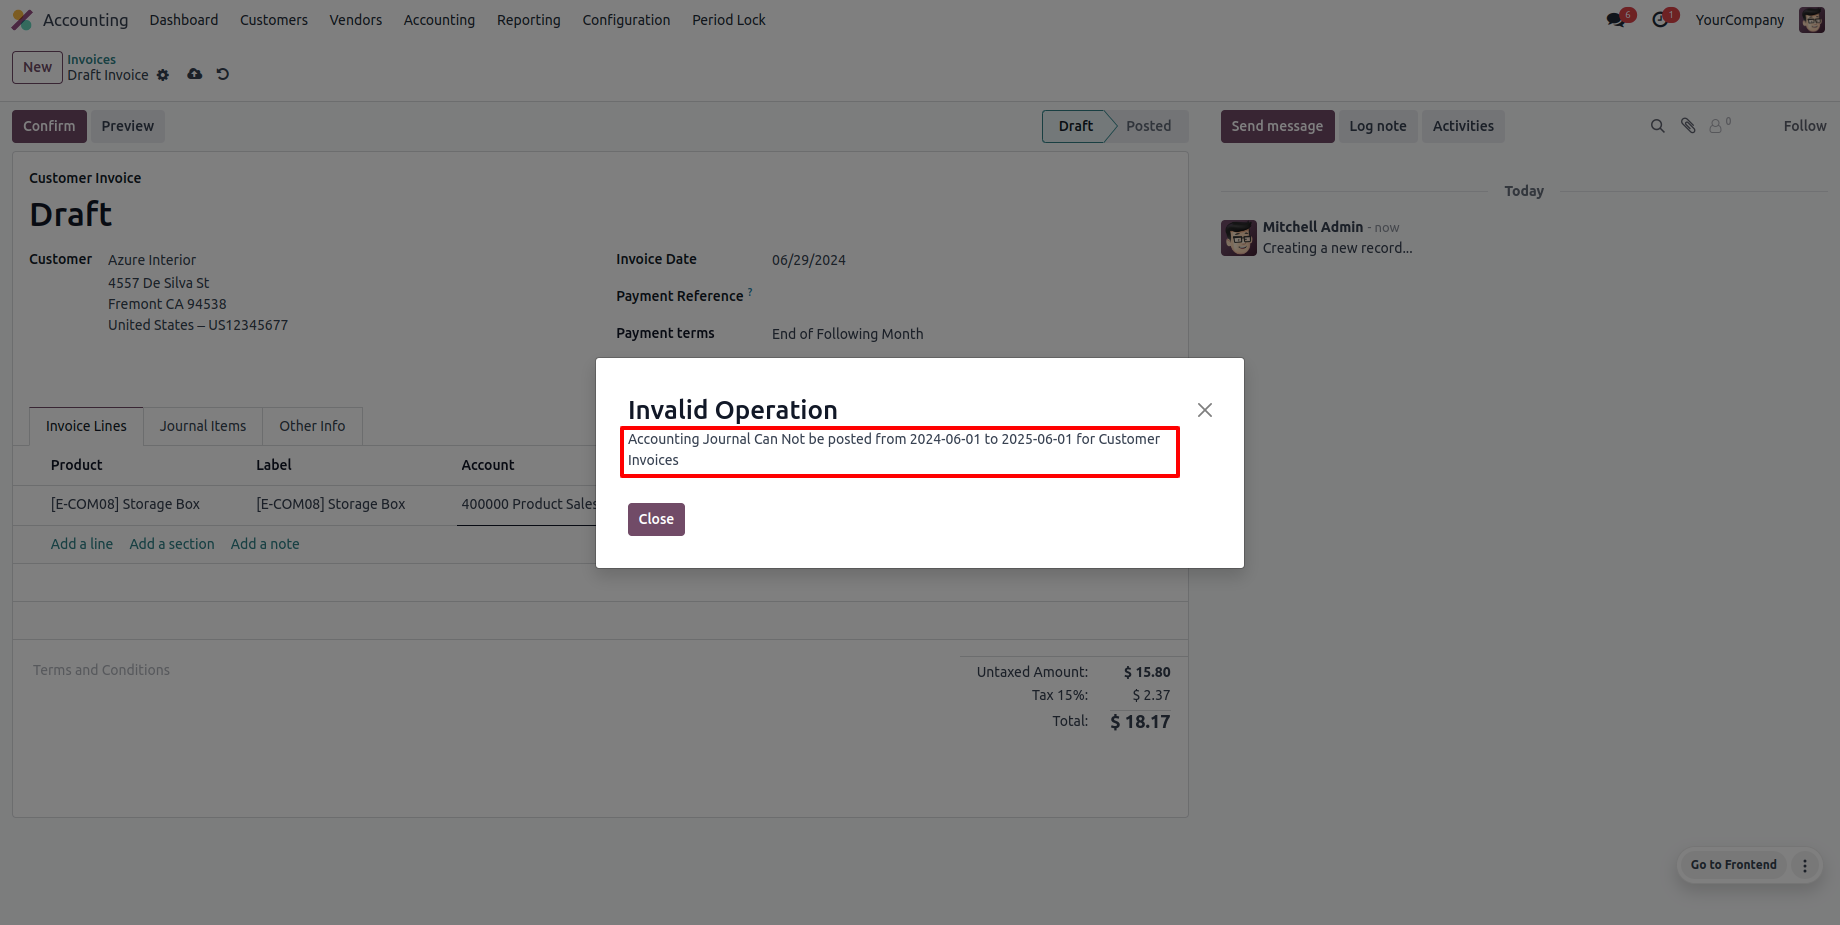
Now we make an invoice which period is locked.
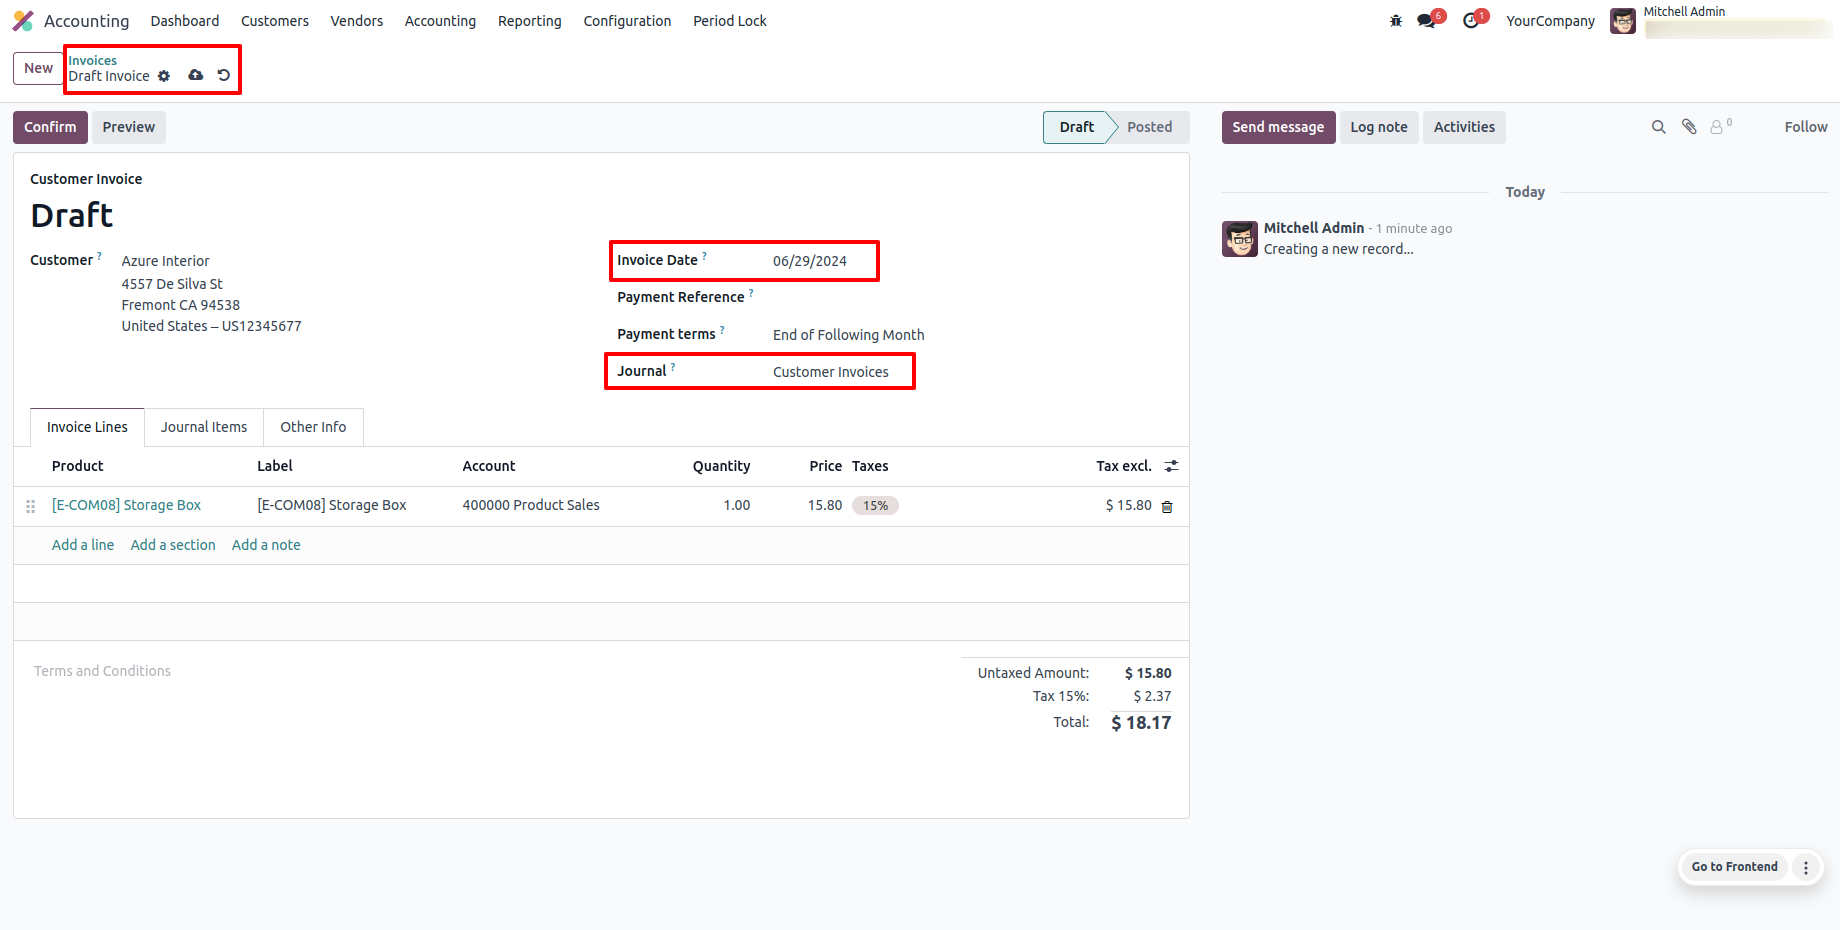
So it generates an alert for that.
Now we confirm an invoice which period is locked.
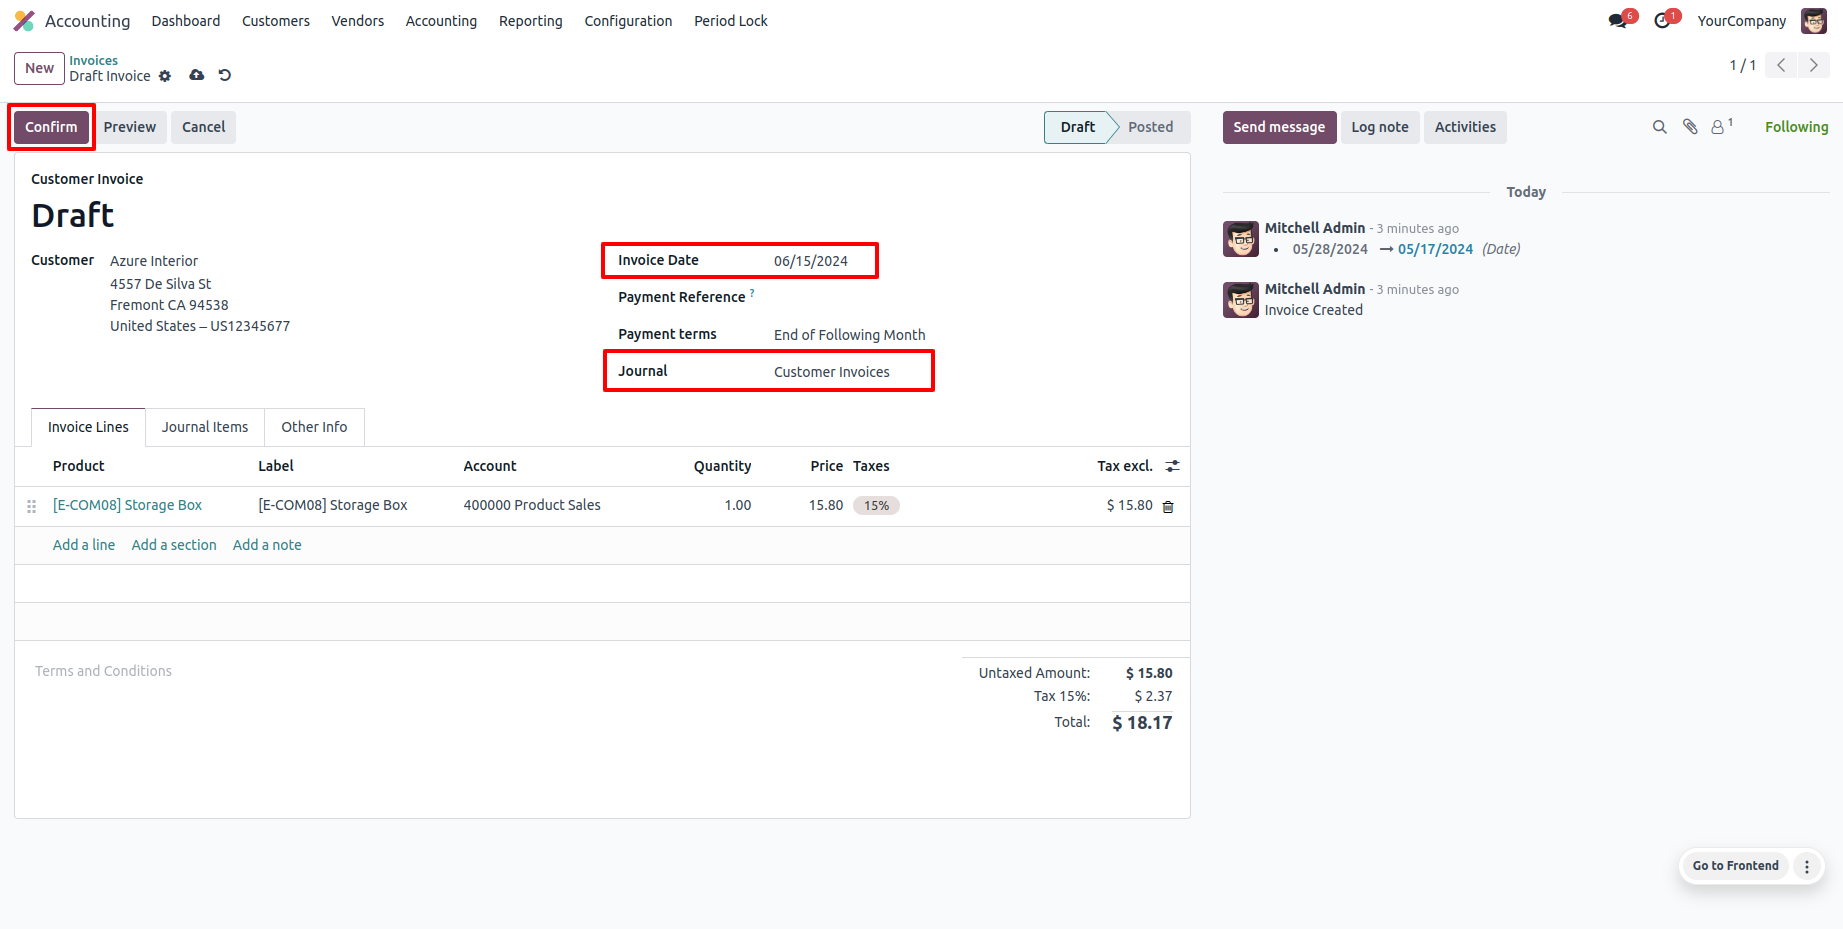
So it generates an alert for that.
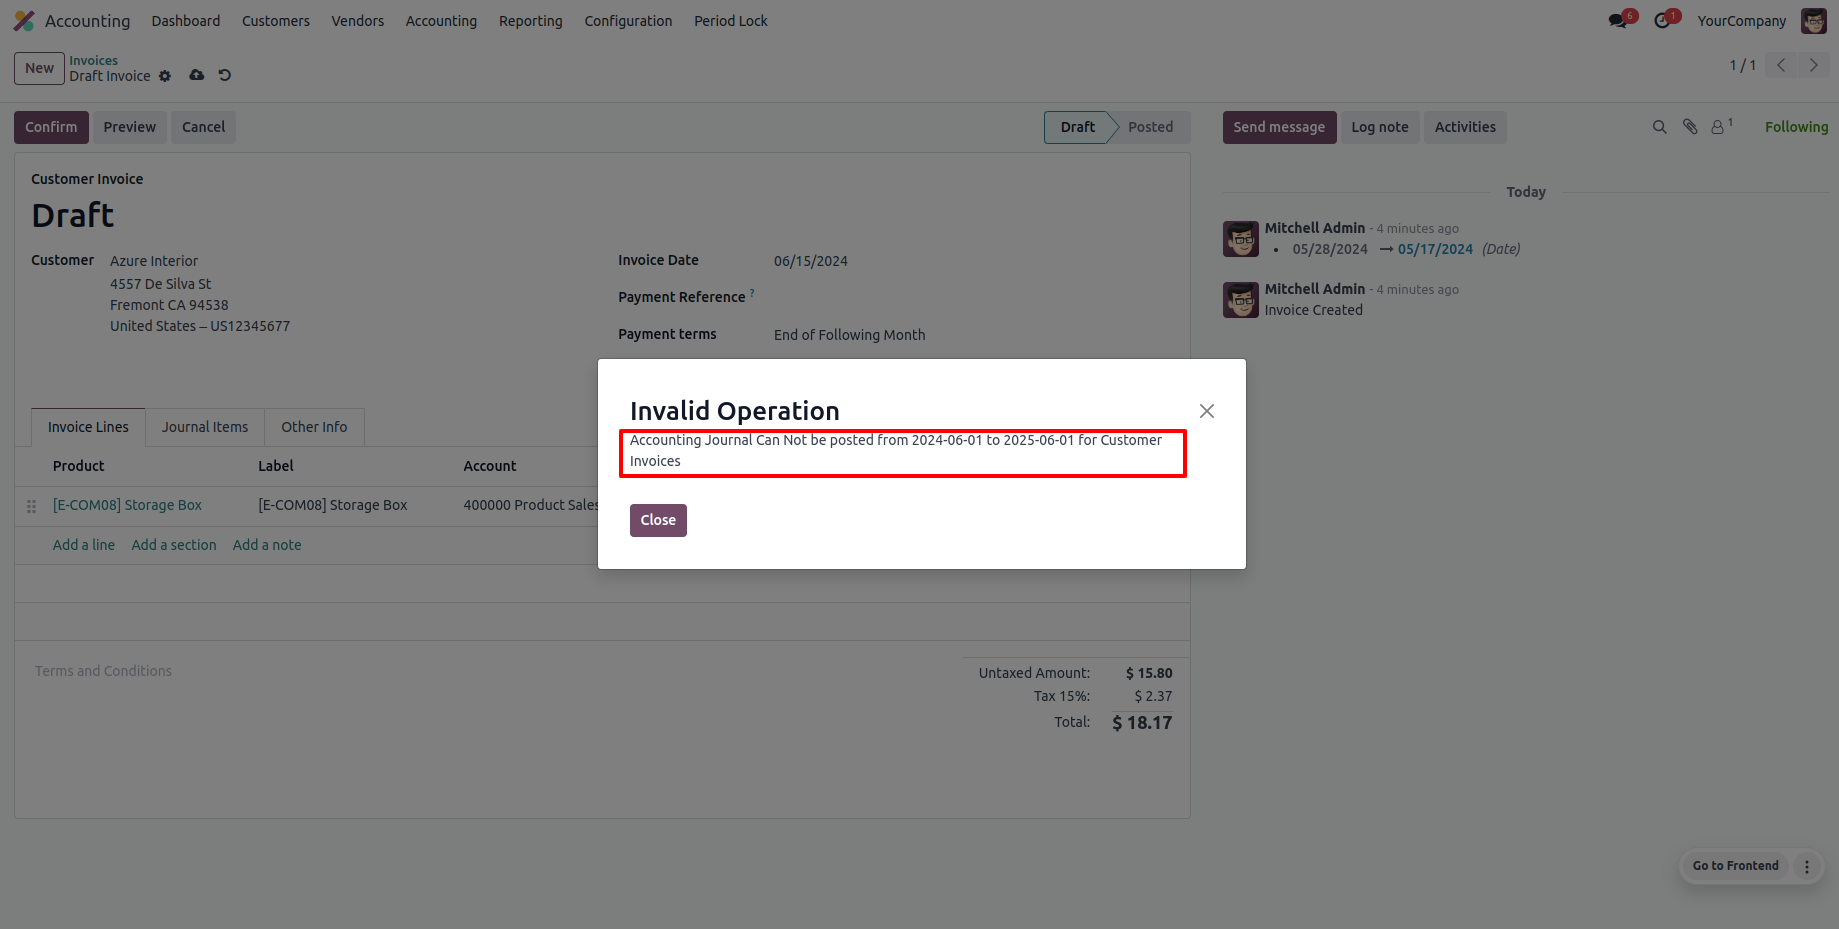
Now we create a new period lock.
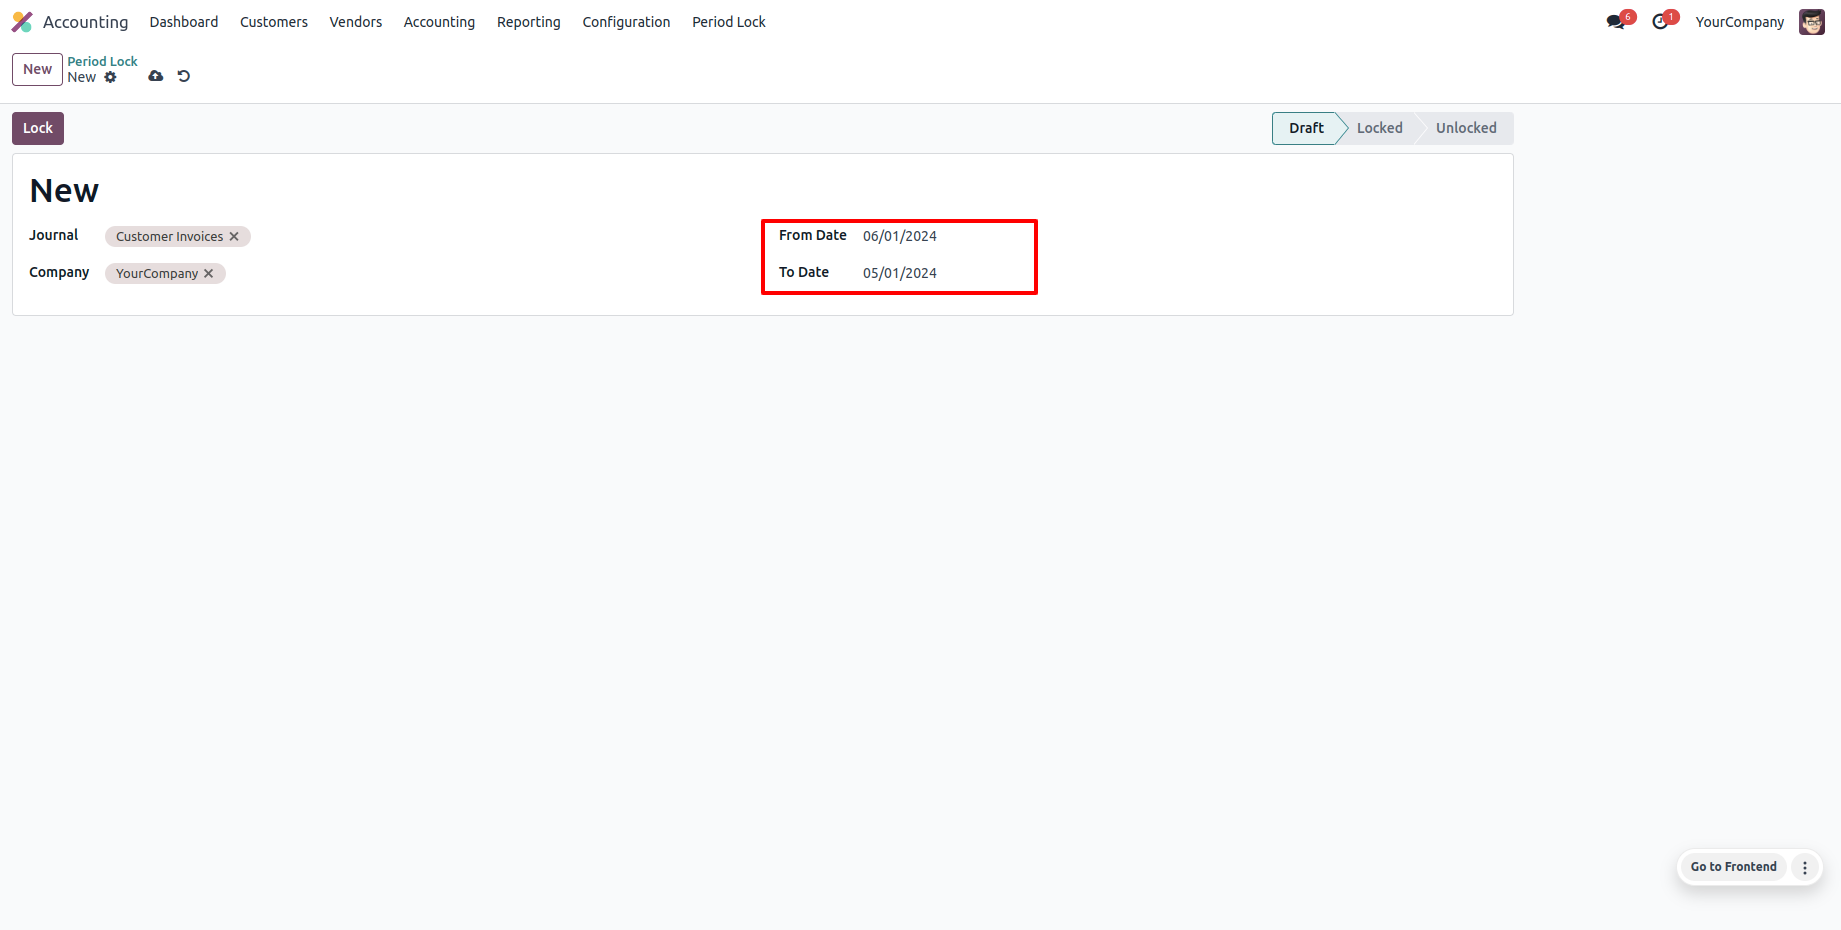
It generates an alert if your "From Date" & "To Date" are not proper.

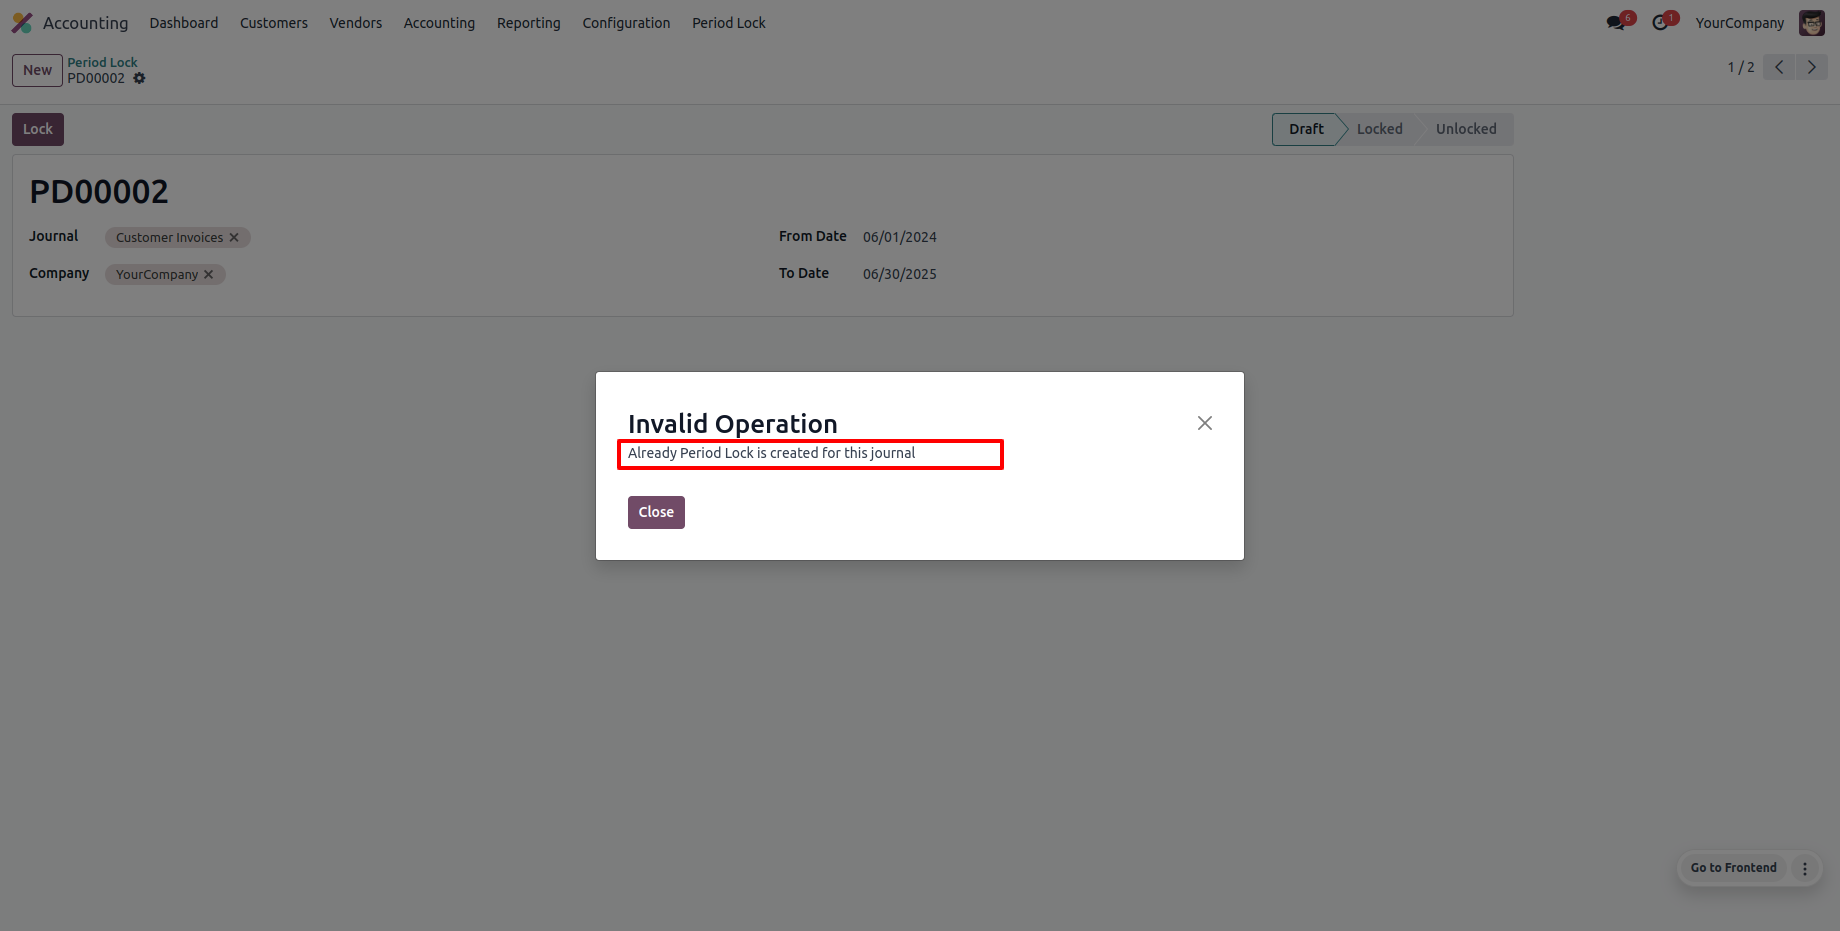
Now we create a new period lock.
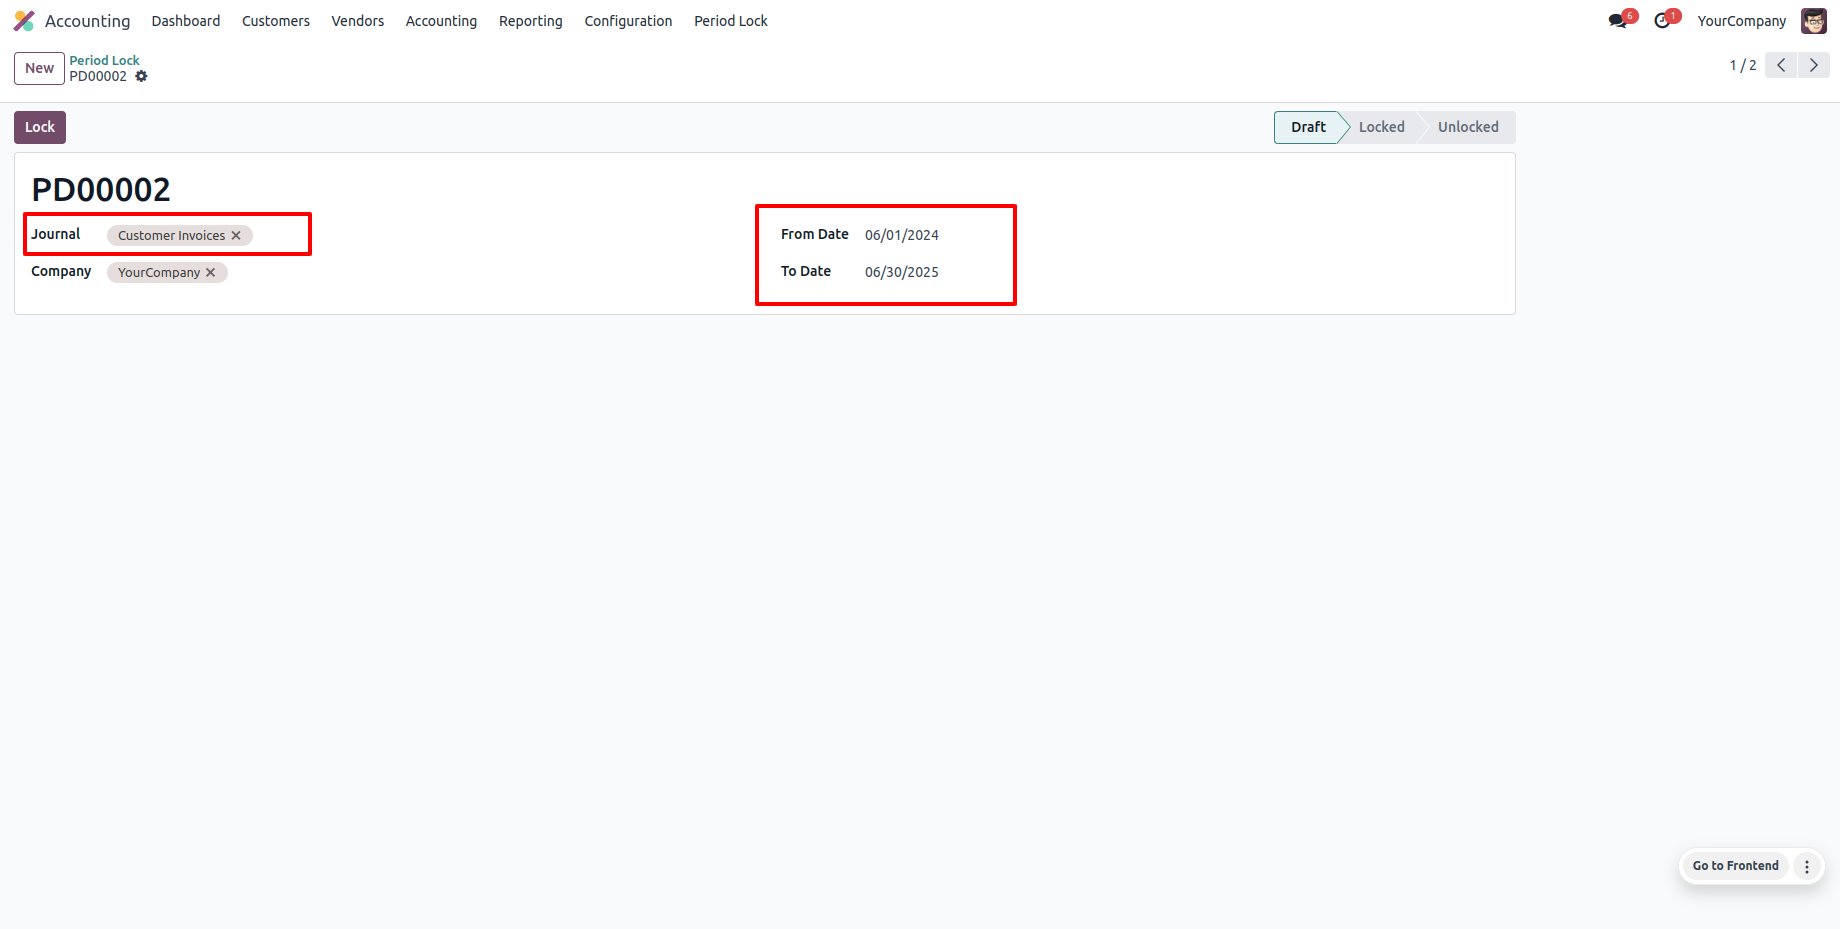
It generates an alert if you try to make a period lock which is already created.
Enable group "Special Permission For Period Lock".
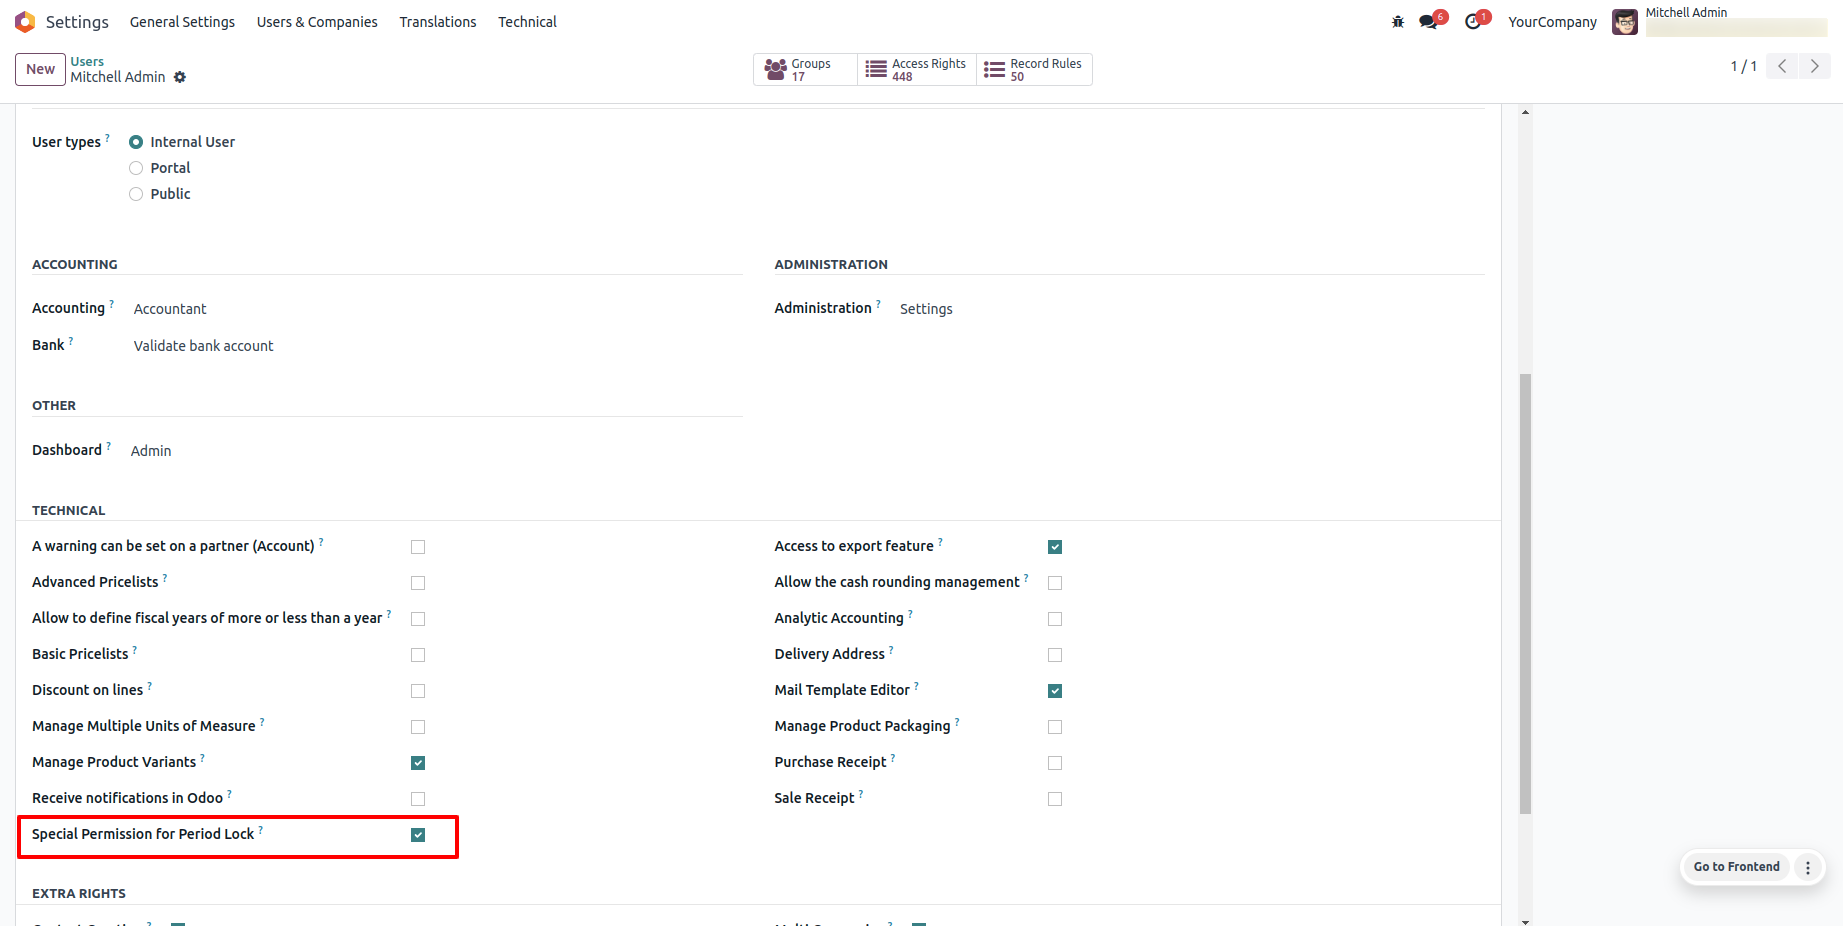
Specific users can unlock periods when required.
Now we make an invoice and confirm which period is locked.
So the invoice is posted.
Features
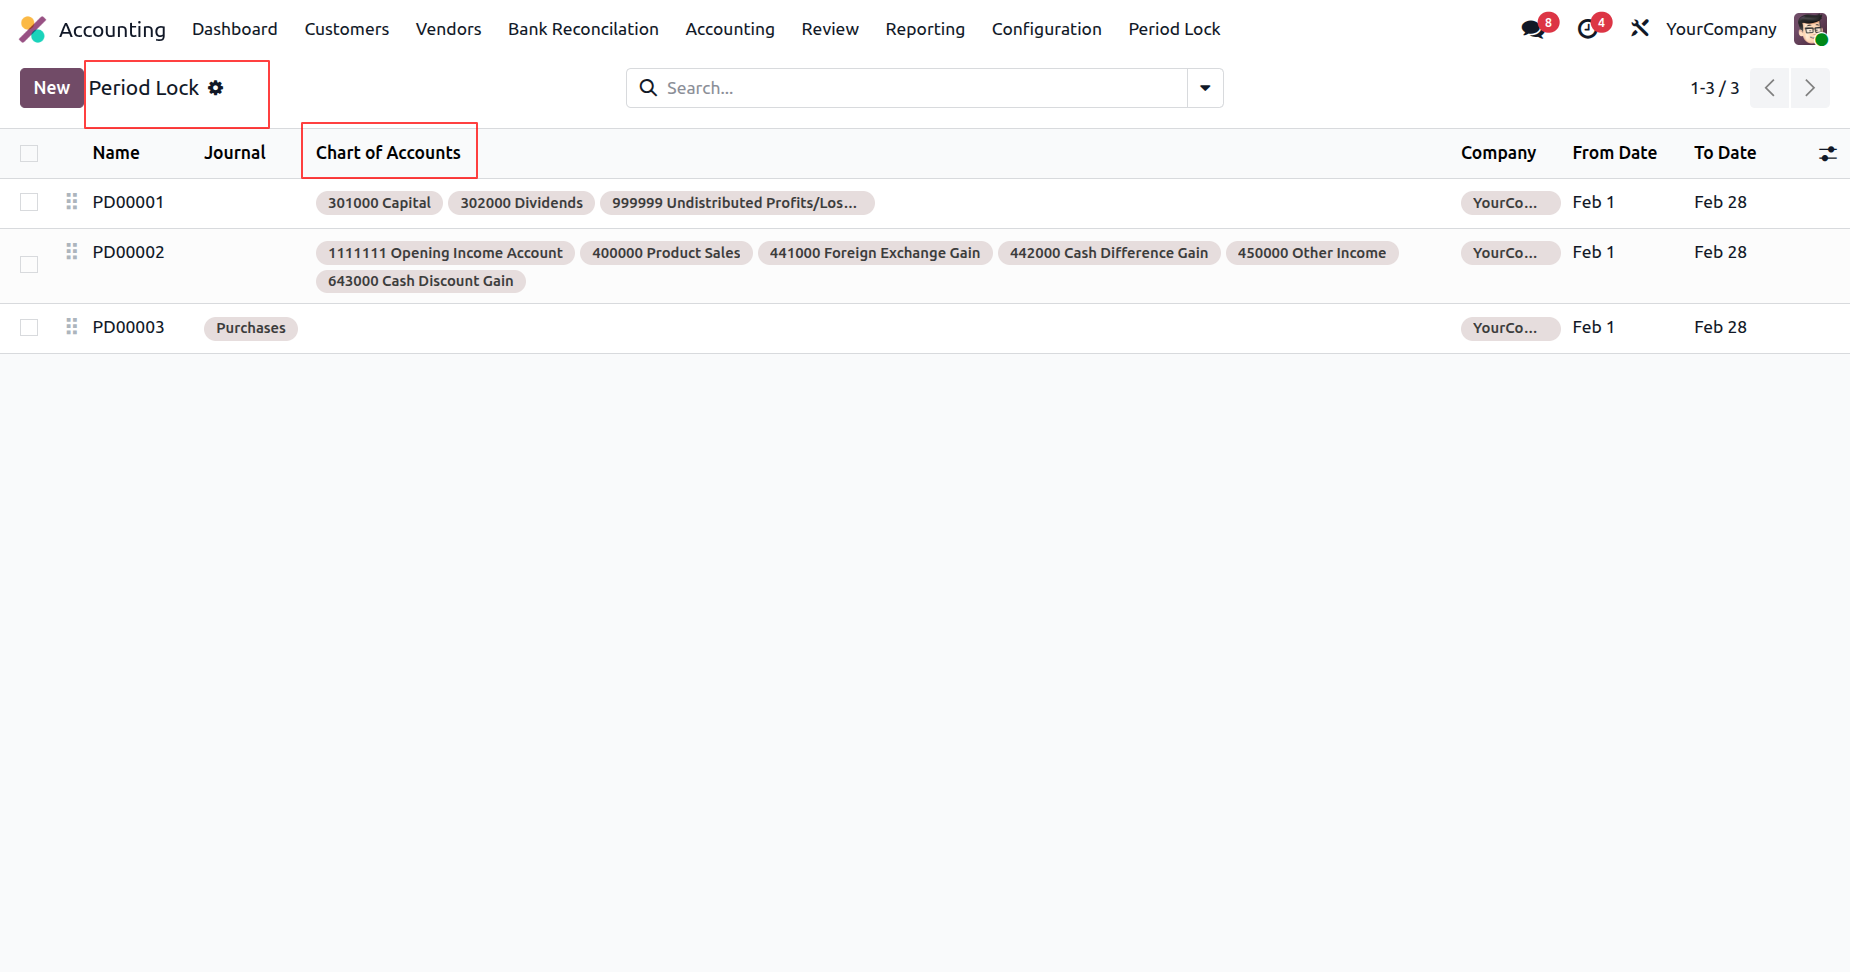
- You can easily view and manage account information directly from list.
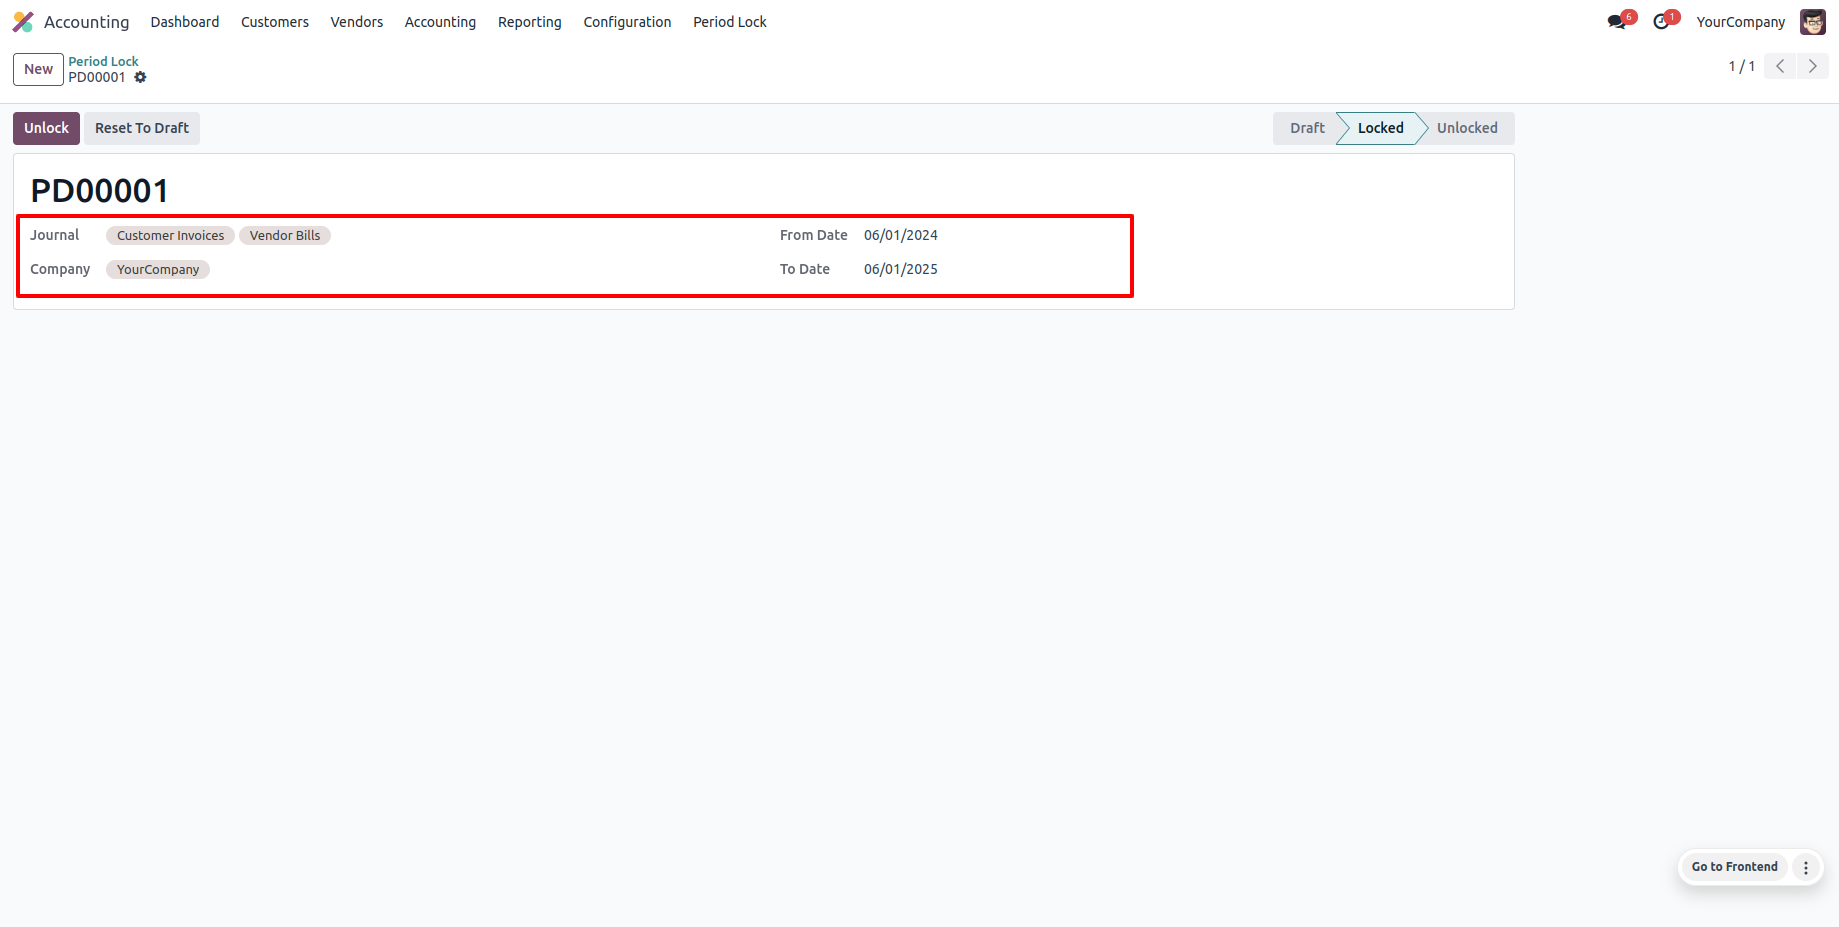
The period lock is in the 'Lock' stage.
You can view the Chart of Account column in the list view of the Period Lock.
Version 18.0.2.0.0 | Released on : 25th February 2026
Version 18.0.1.0.0 | Released on : 13th June 2025
- No, this app works perfectly with Odoo Enterprise (Odoo.sh & Premise) only.
- No, this application is not compatible with odoo.com(odoo saas).
- Yes, we are deleting the valuation layer history as part of the process
- In this module we have consider Average cost method & Standard cost price. but we have not considered FIFO method.
- Please Contact Us at sales@softhealer.comto request customization.
- Yes, we provide free support for 100 days.
- Yes, you will get free update for lifetime.
- No, you don't need to install additional libraries.
- For version 12 or upper, you will need to purchase the module for each version that you want to use.
- No, We do not provide any kind of exchange.
