












Airtable Odoo Connector

Integrate Odoo with Airtable to seamlessly synchronize customer, product and sale orders data between both platforms. Manage Airtable operations directly from Odoo with manual and automated synchronization and detailed logs.
Key Features
Import/Export Operations

Customers Synchronization (Import & Export)
-
 Name
Name
-
Email

Product Synchronization (Import & Export)
-
Name
-
Price

Sale Orders Synchronization (Import & Export)
-
Customer Name
-
Order Date
-
Sale Order Lines (Product Name, Description, Qty, Price)
Automation, Dashboards & Core Infrastructure

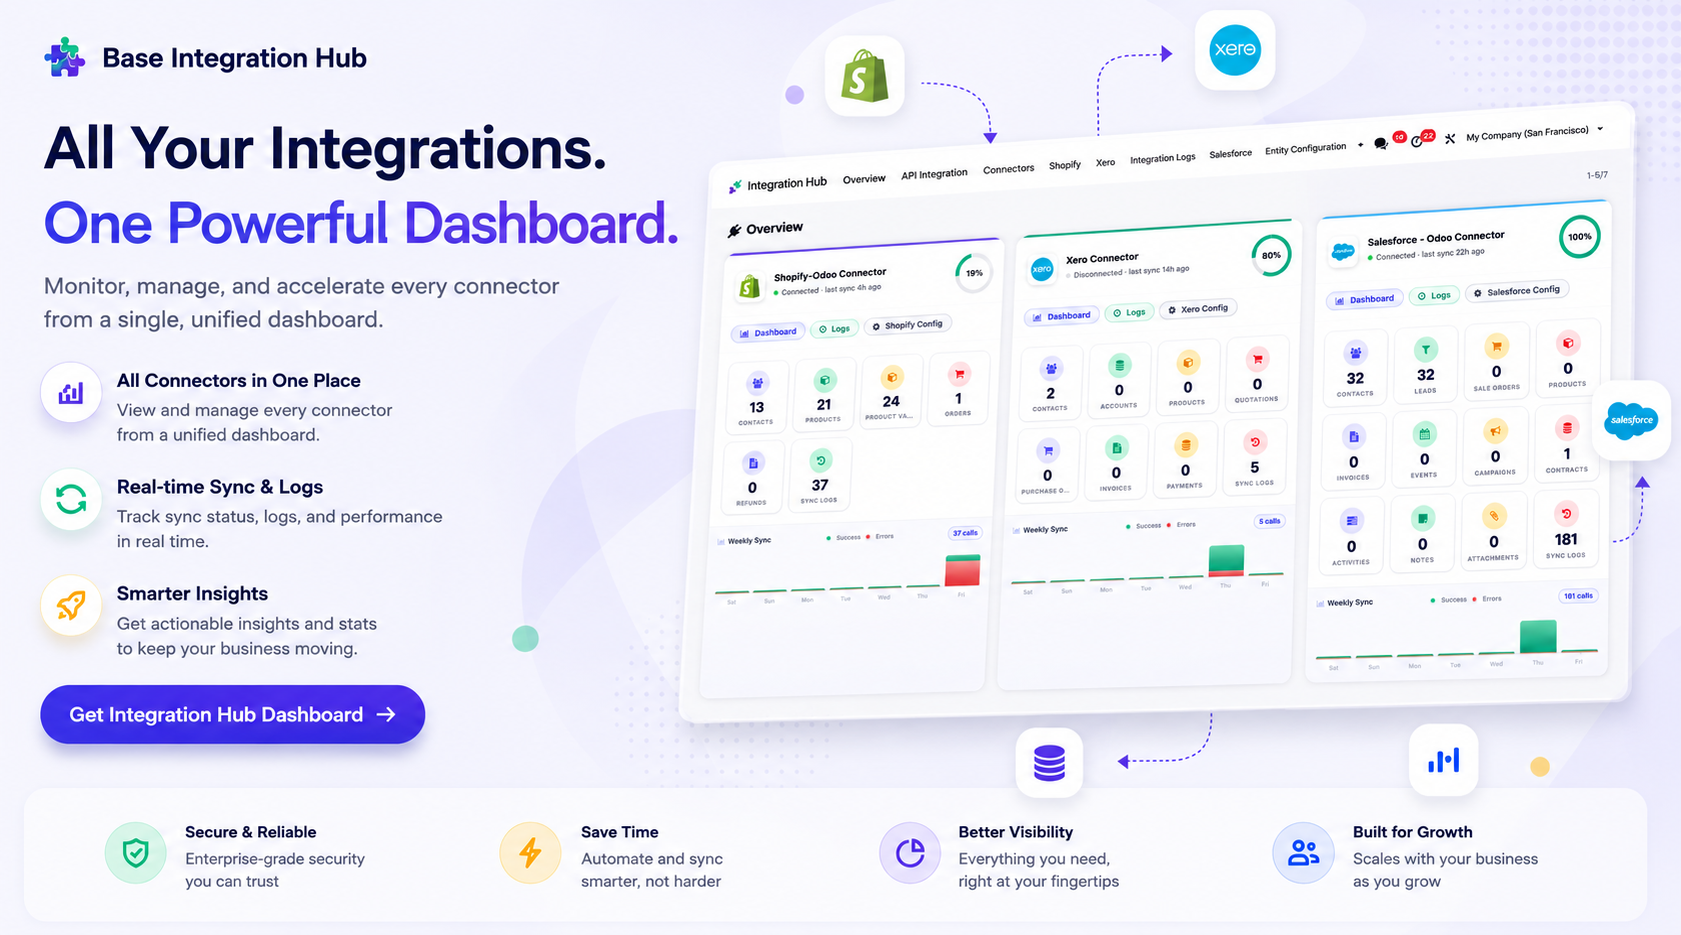
Integration Hub Dashboard
-
Manage all Odoo integrations from one centralized dashboard.
-
Monitor connectors, view sync activity, and track logs.
-
Get real-time insights across every integration.

Interactive Sync Dashboard
-
Per-entity synced / pending counts
-
Recent activity log feed
-
Health checks & Record Links
-
Quick access to records, mappings, webhook, logs & queue

Queue-Based Processing
-
Process synchronization jobs through queues for reliable and efficient data handling.

Synchronization Logs
-
Track
every synchronization activity with detailed logs, including successful and failed
operations.
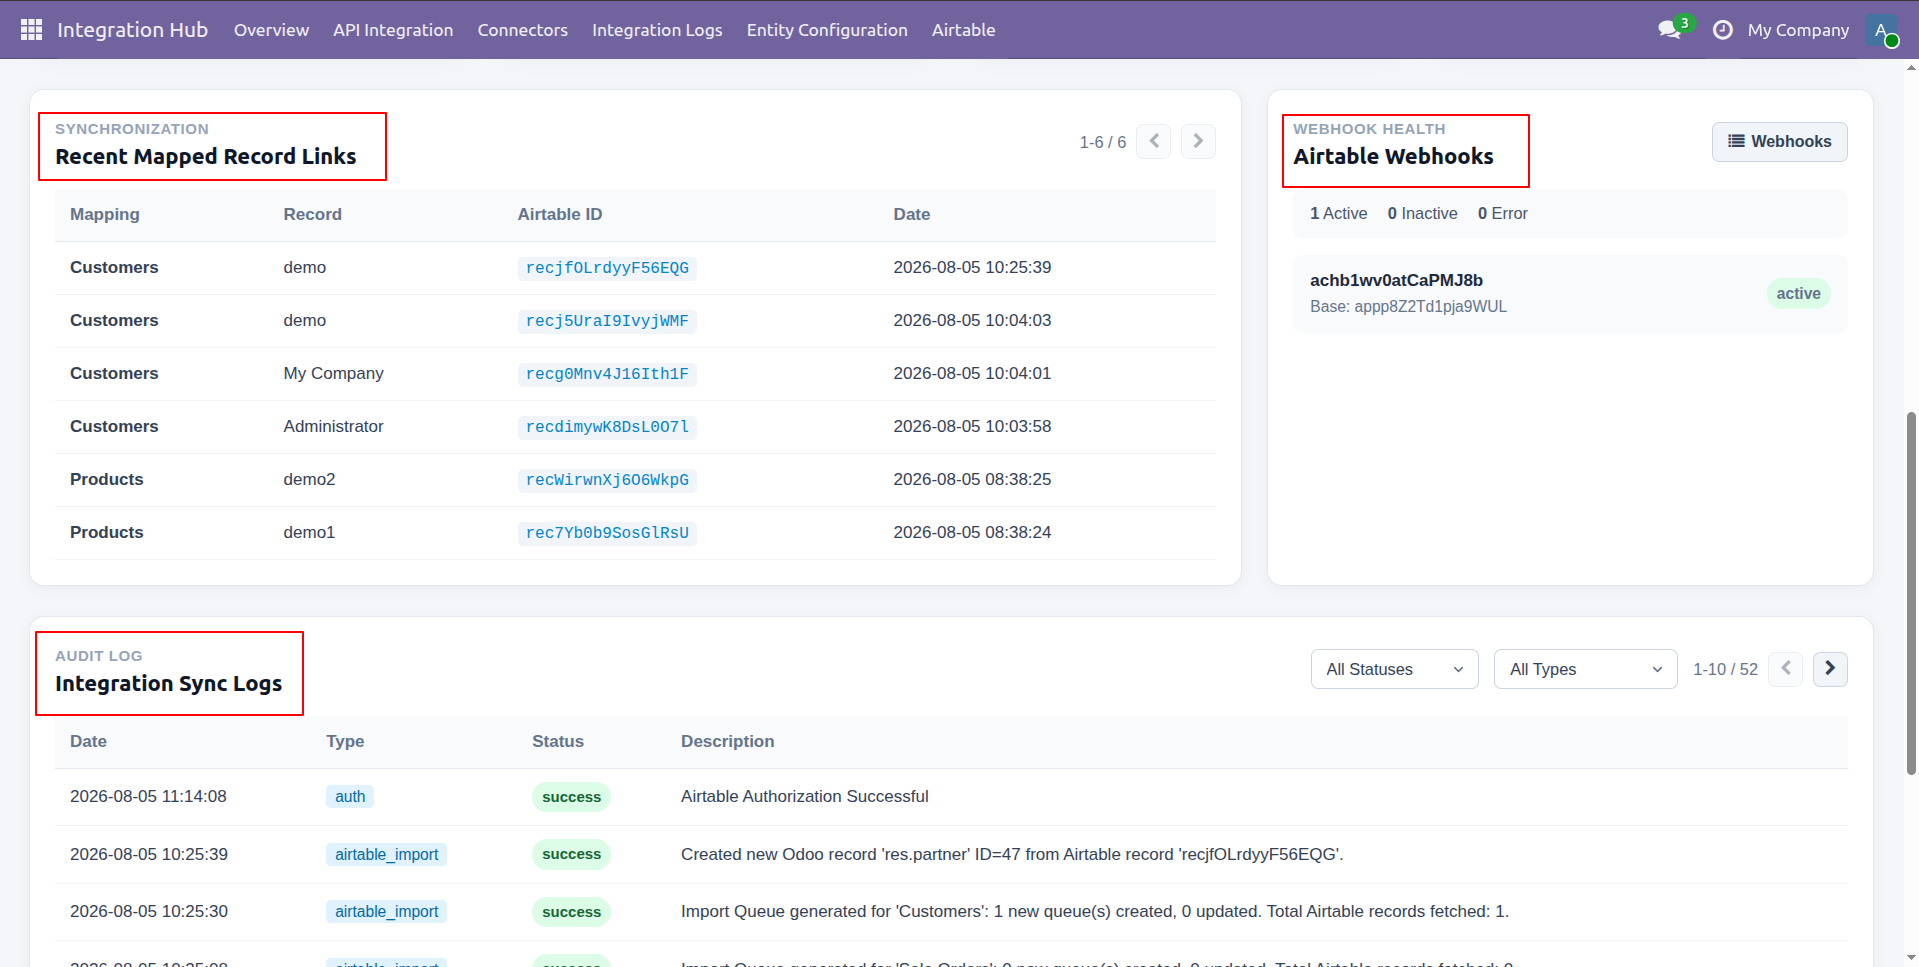
Centralized dashboard to manage and monitor all connectors from one place. Quickly access sync summary, activity logs, and configuration controls with improved visibility.
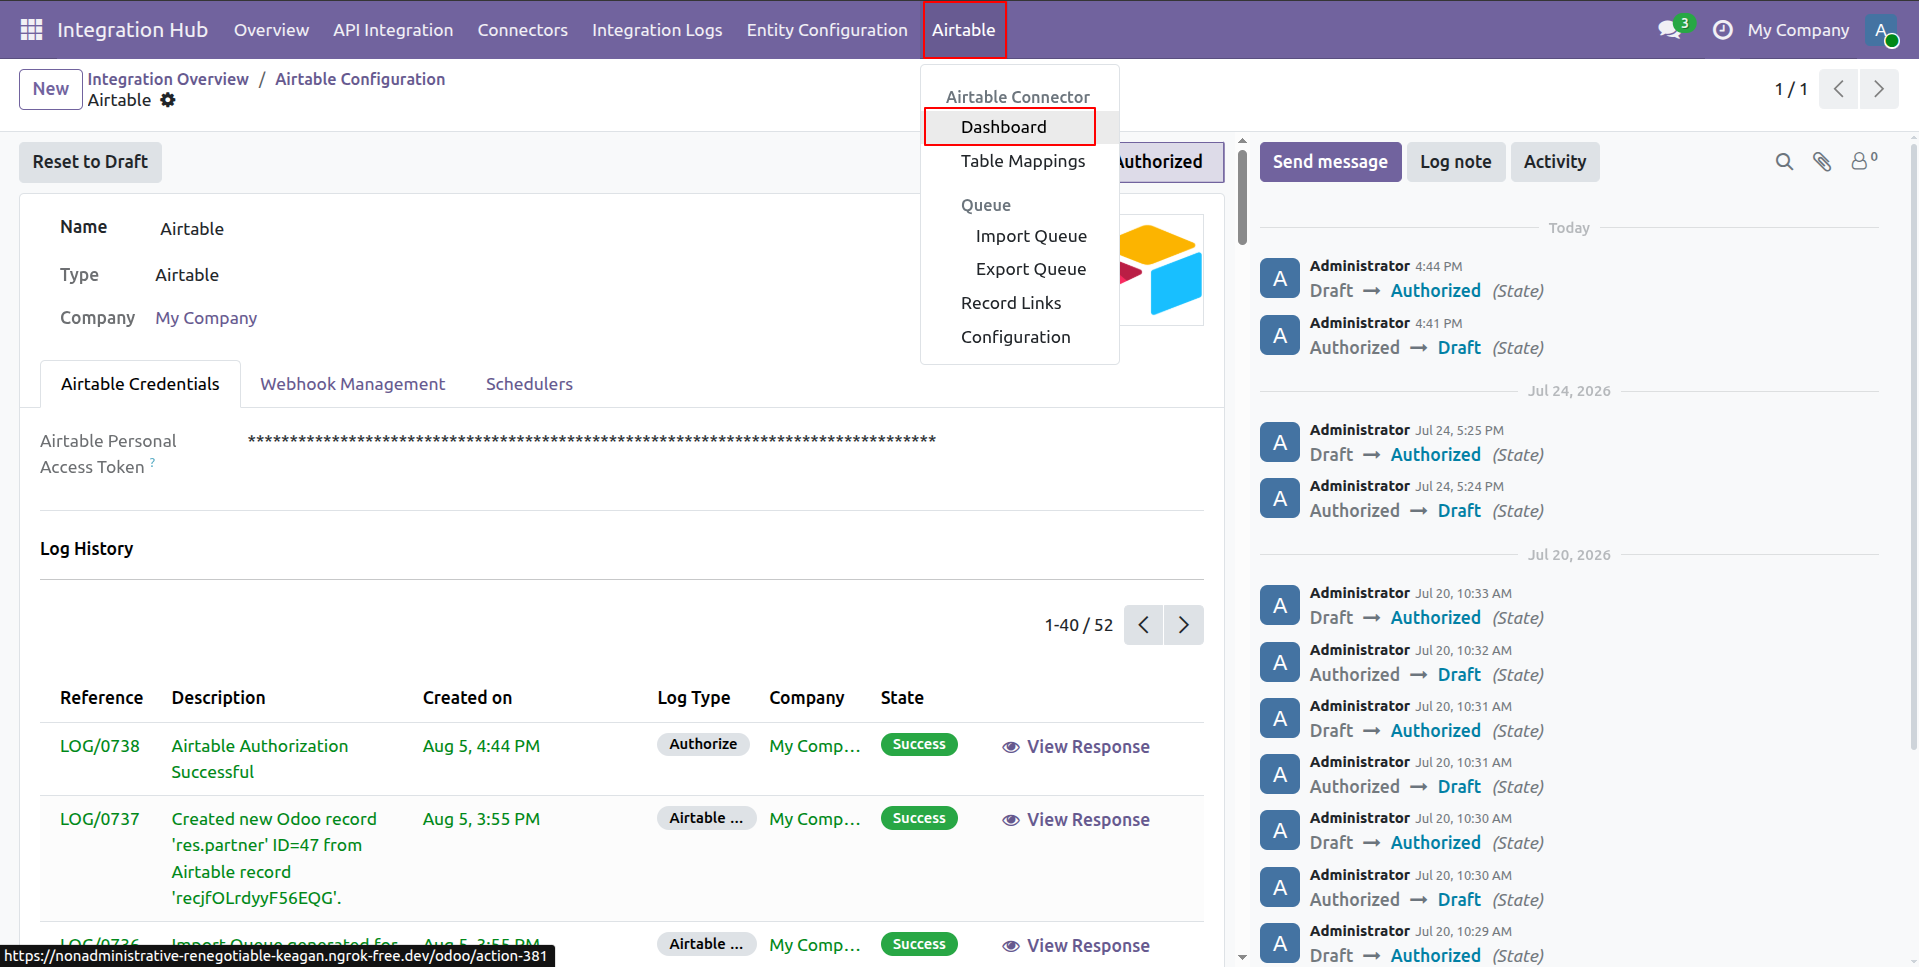
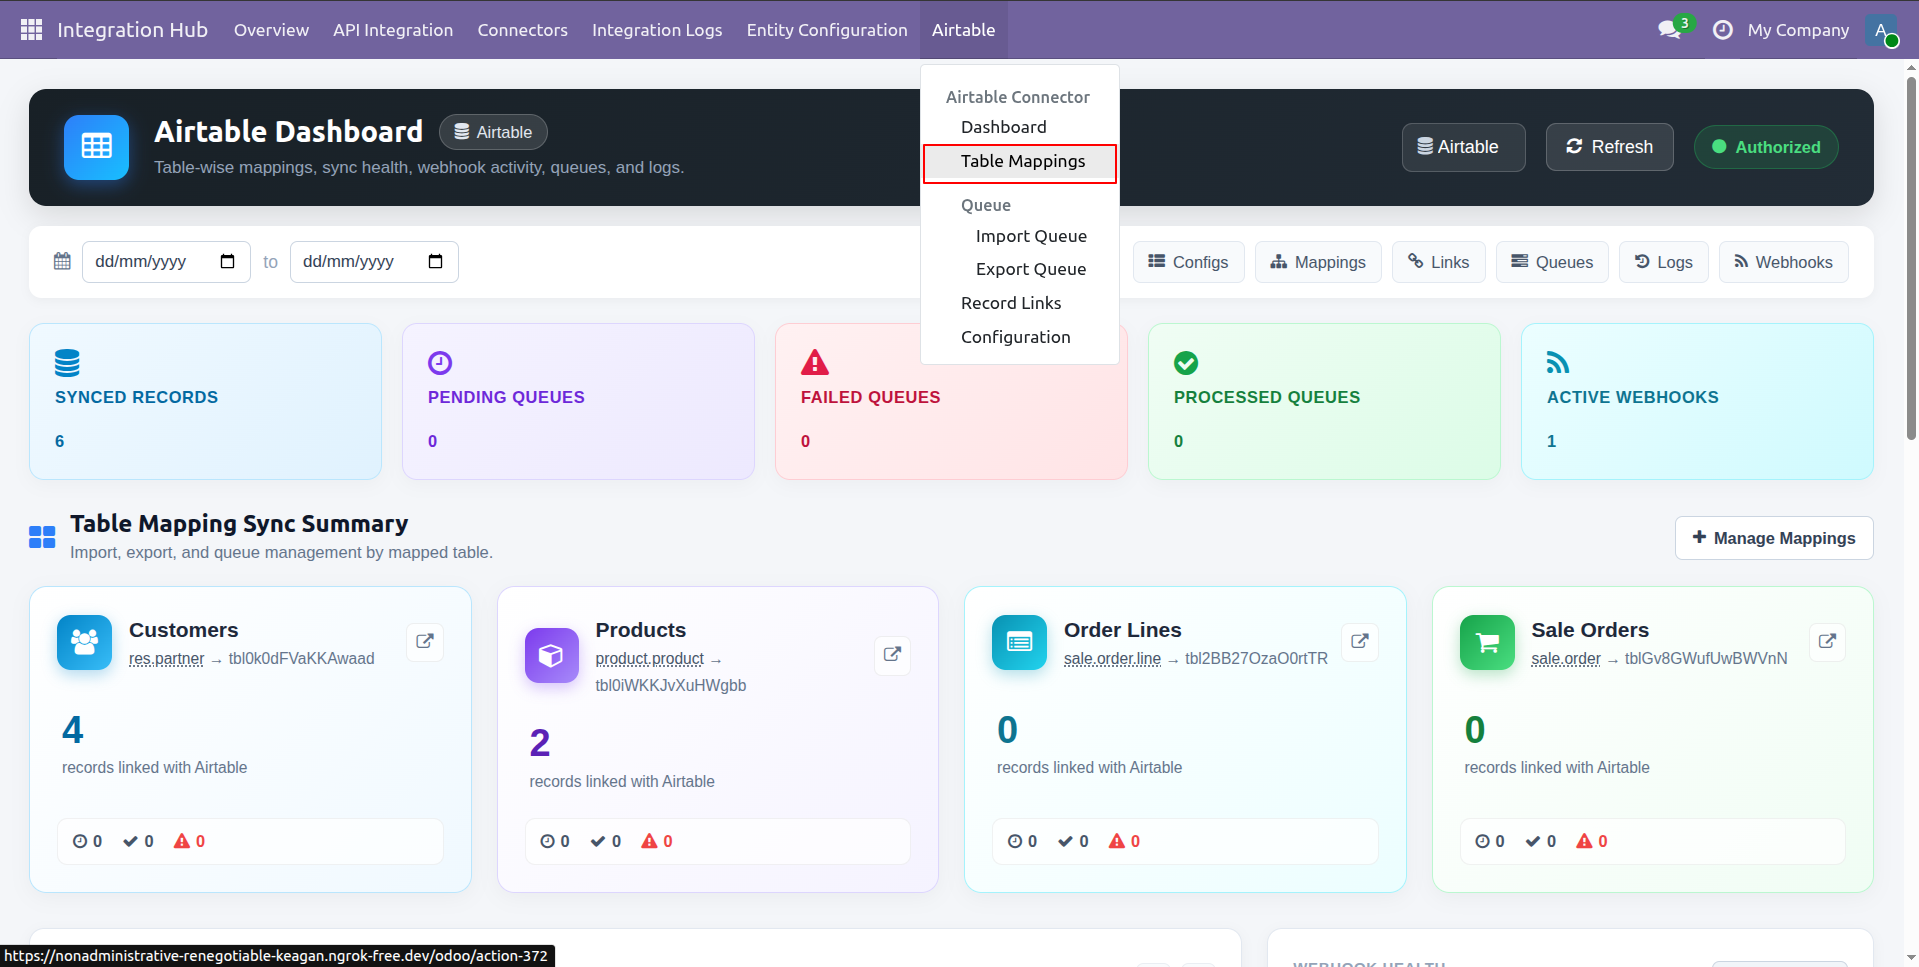
Navigate to the Airtable menu and select Dashboard to open the Airtable integration overview.
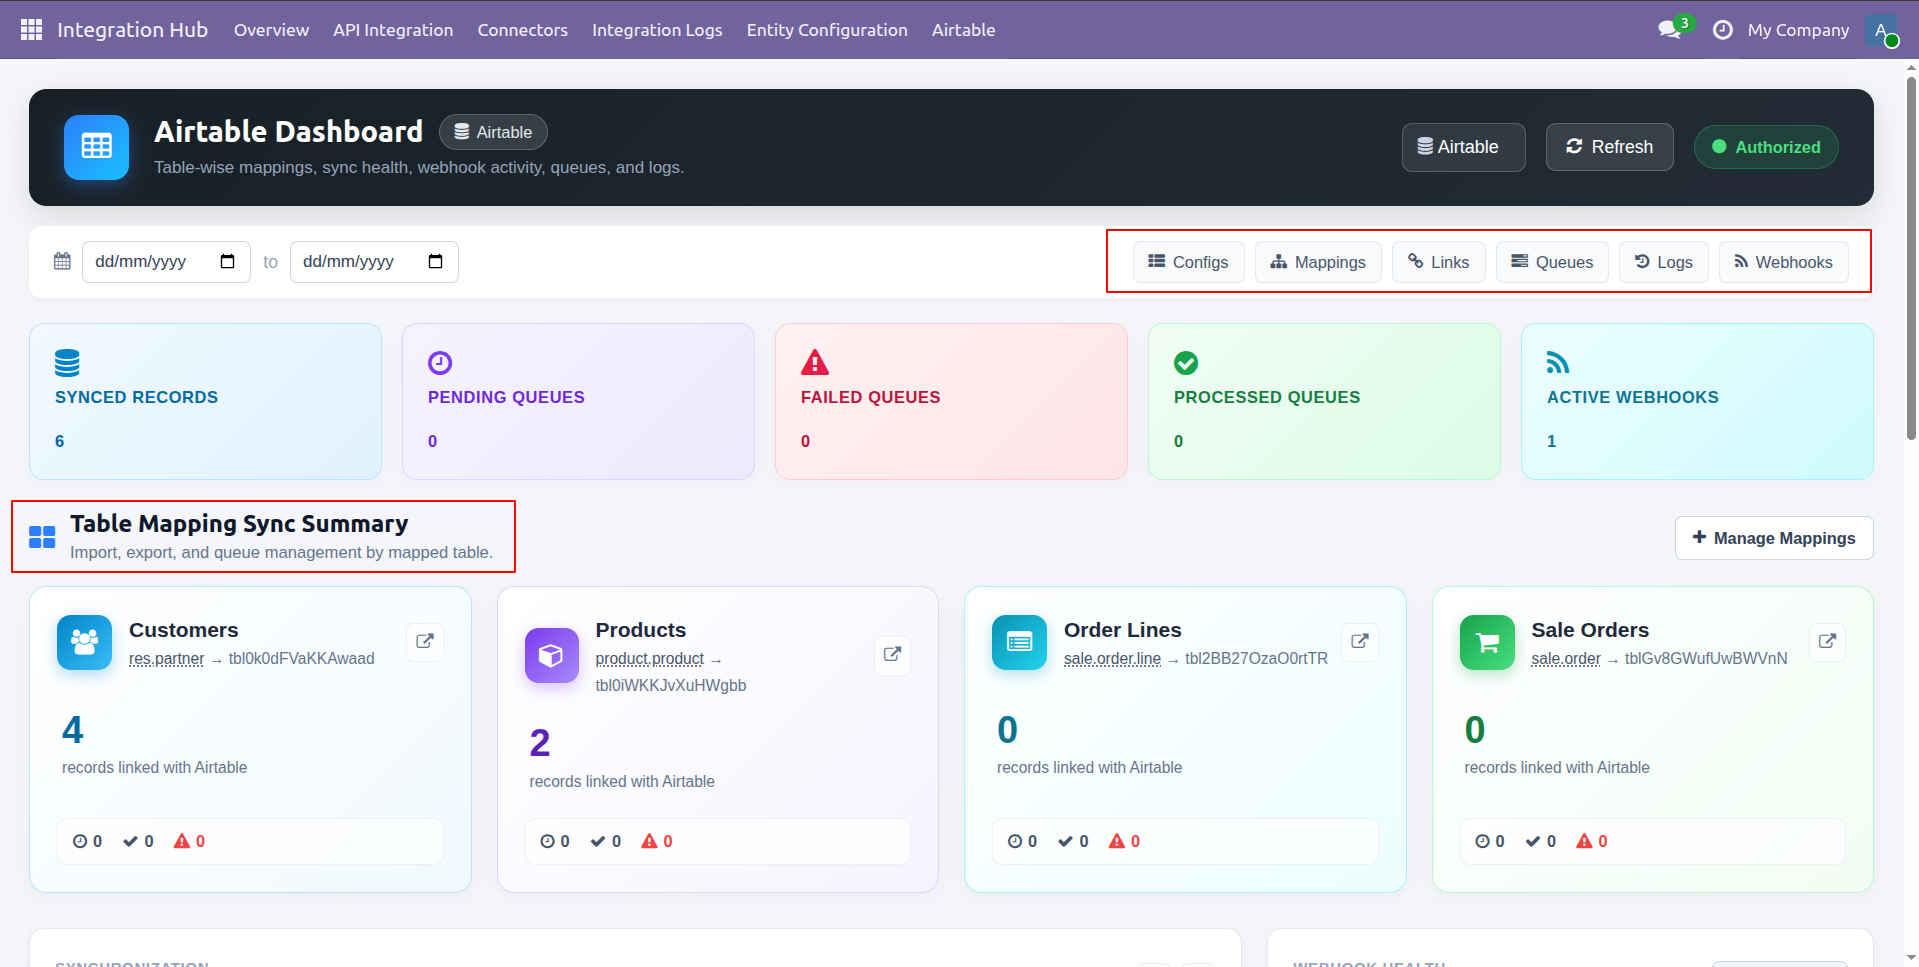
View quick navigation buttons and inspect the Table Mapping Sync Summary cards on the dashboard.
Review recent mapped record links, check webhook health status, and monitor integration sync logs.

Workflow
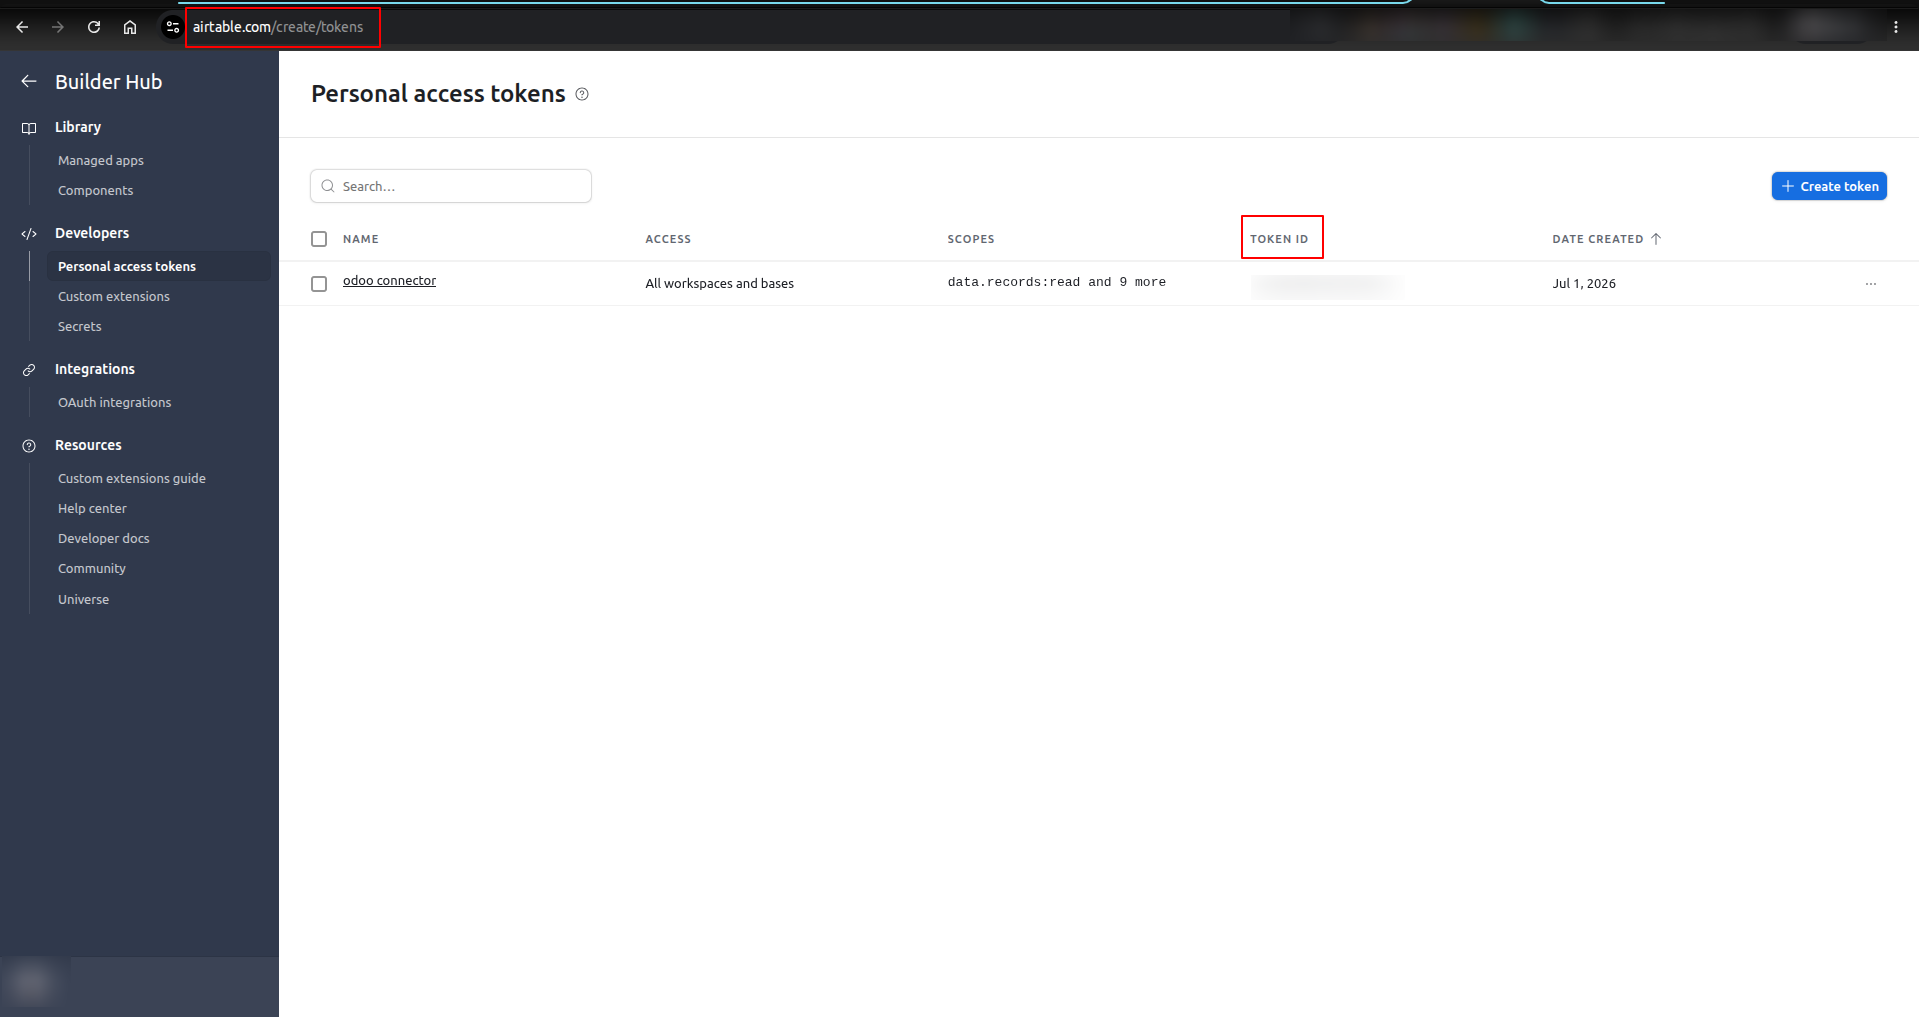
Access Airtable Personal Access Tokens page and copy the generated token ID for Odoo setup.
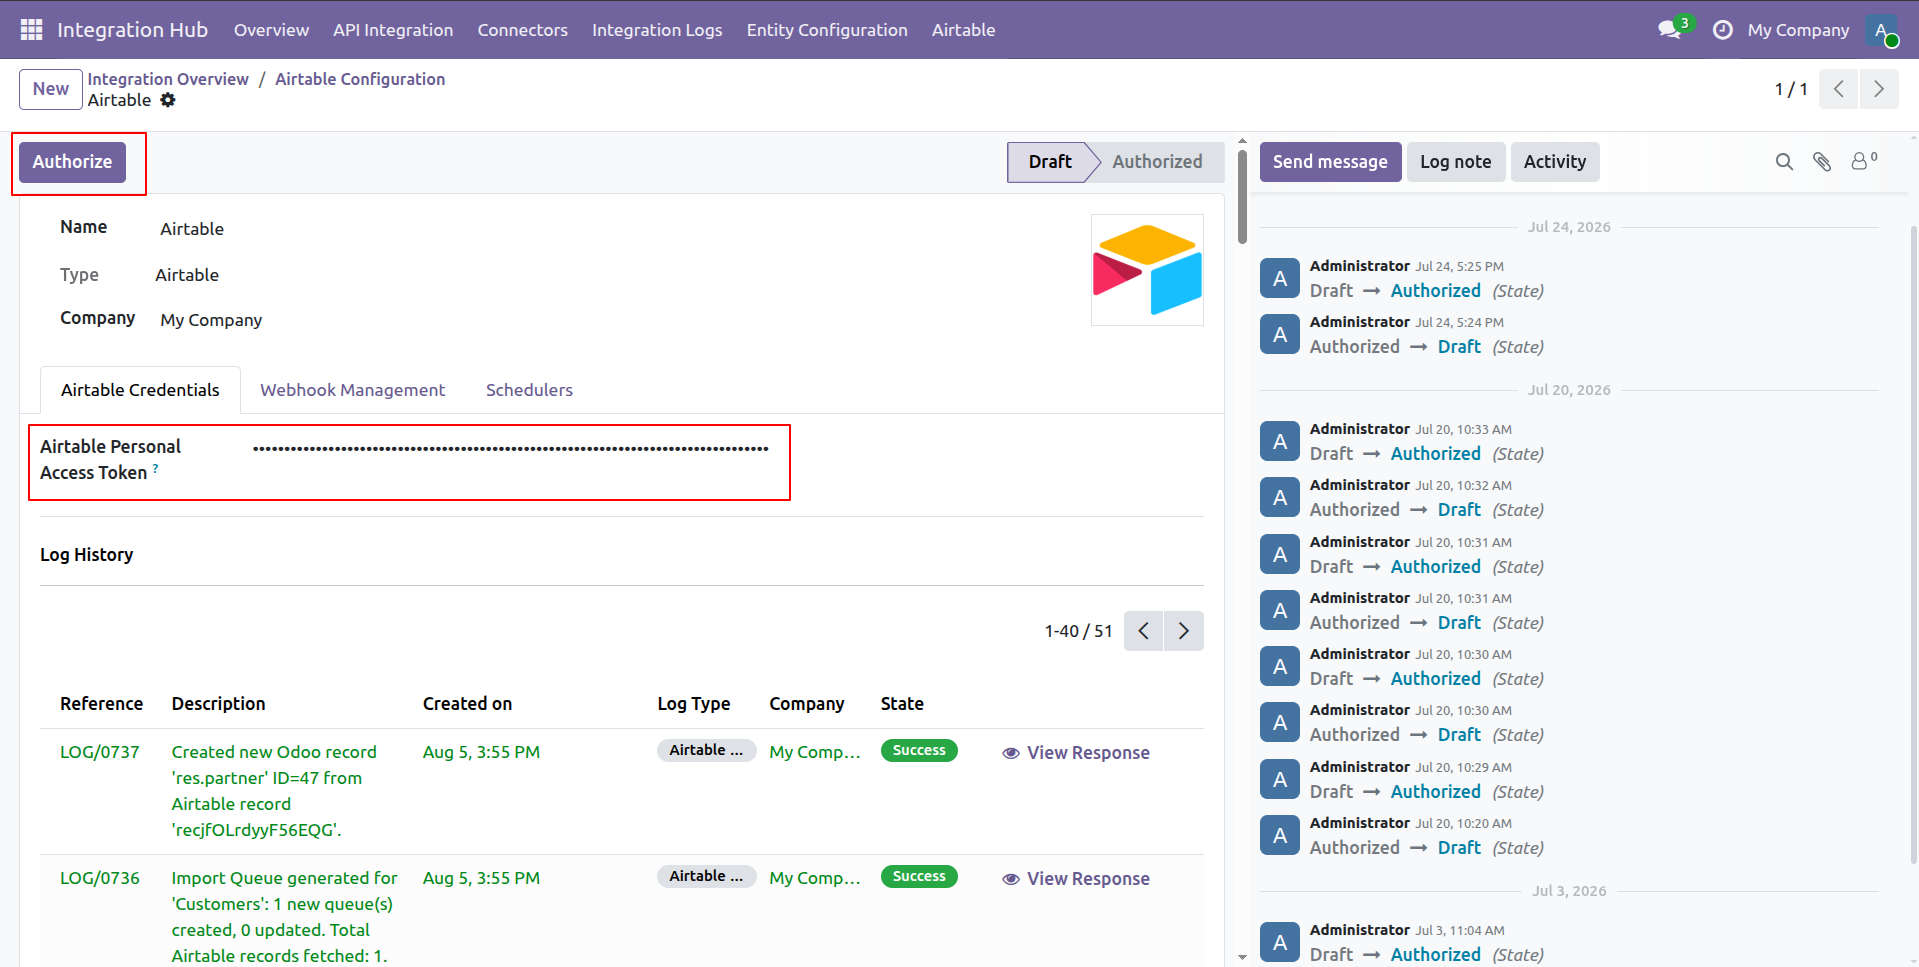
Enter your Personal Access Token in the field and click Authorize to connect with Airtable.
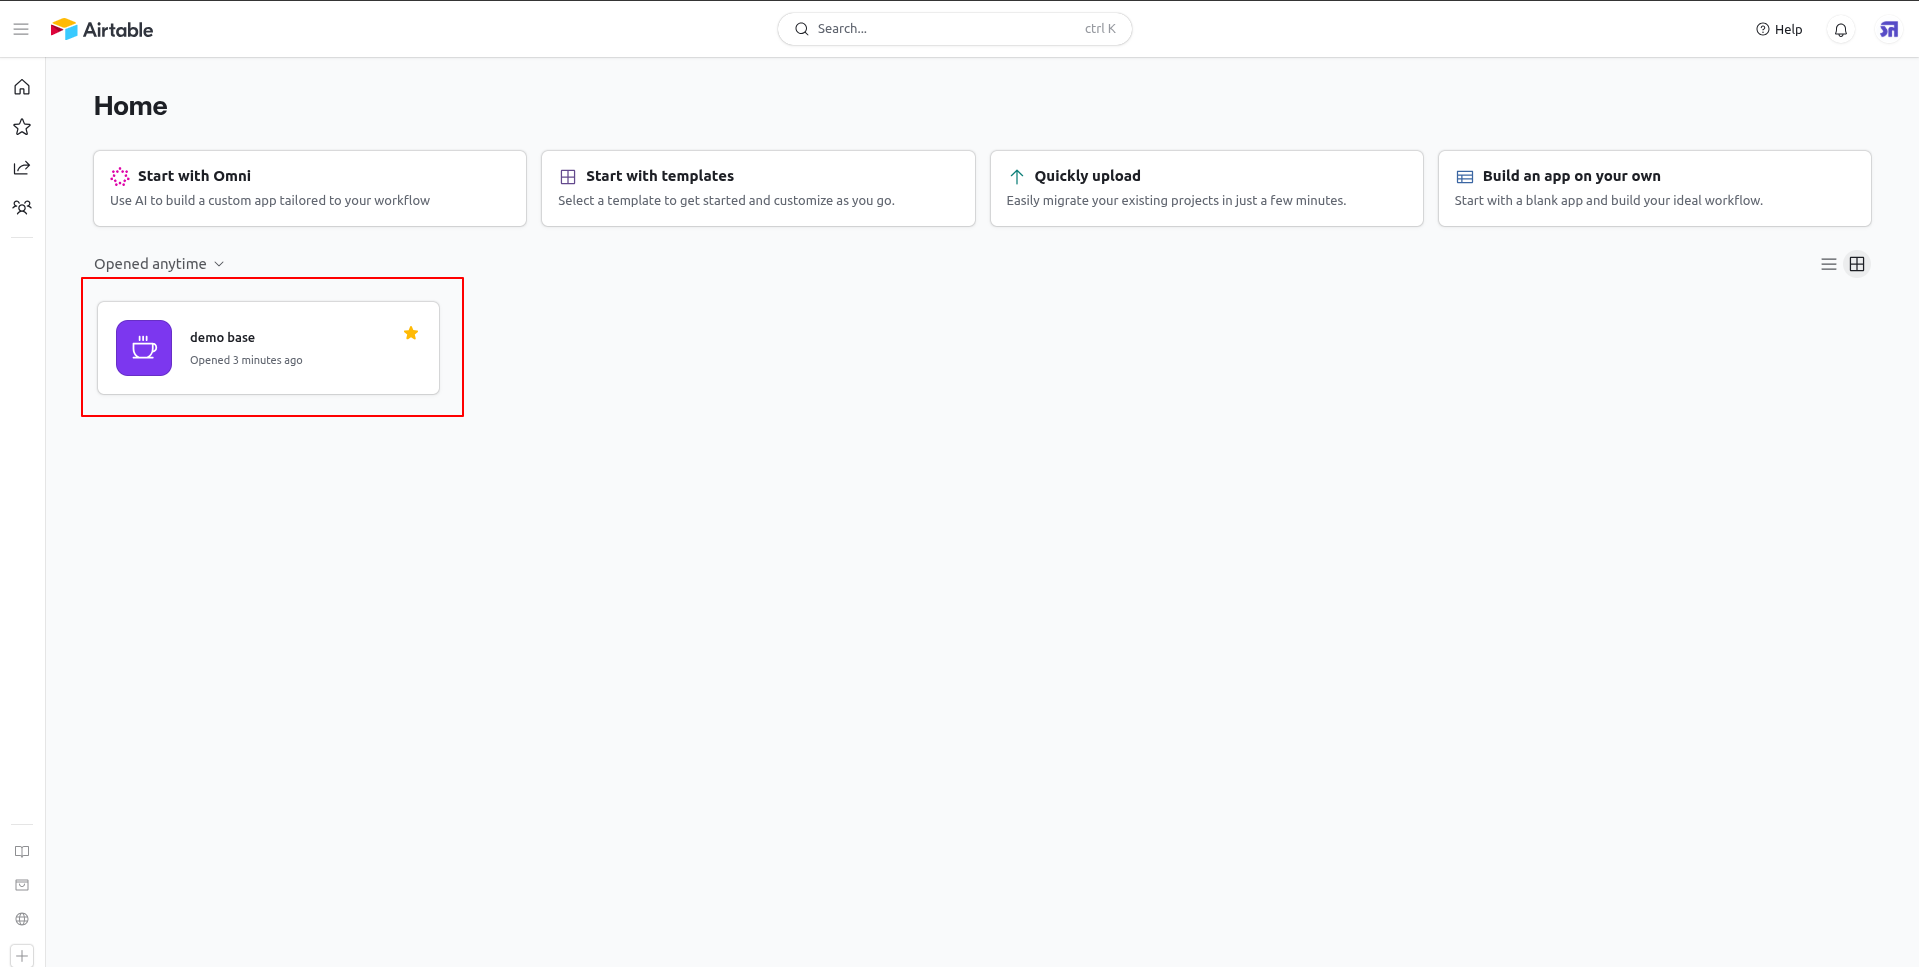
Open the target base card from the Airtable home screen to view its structure.
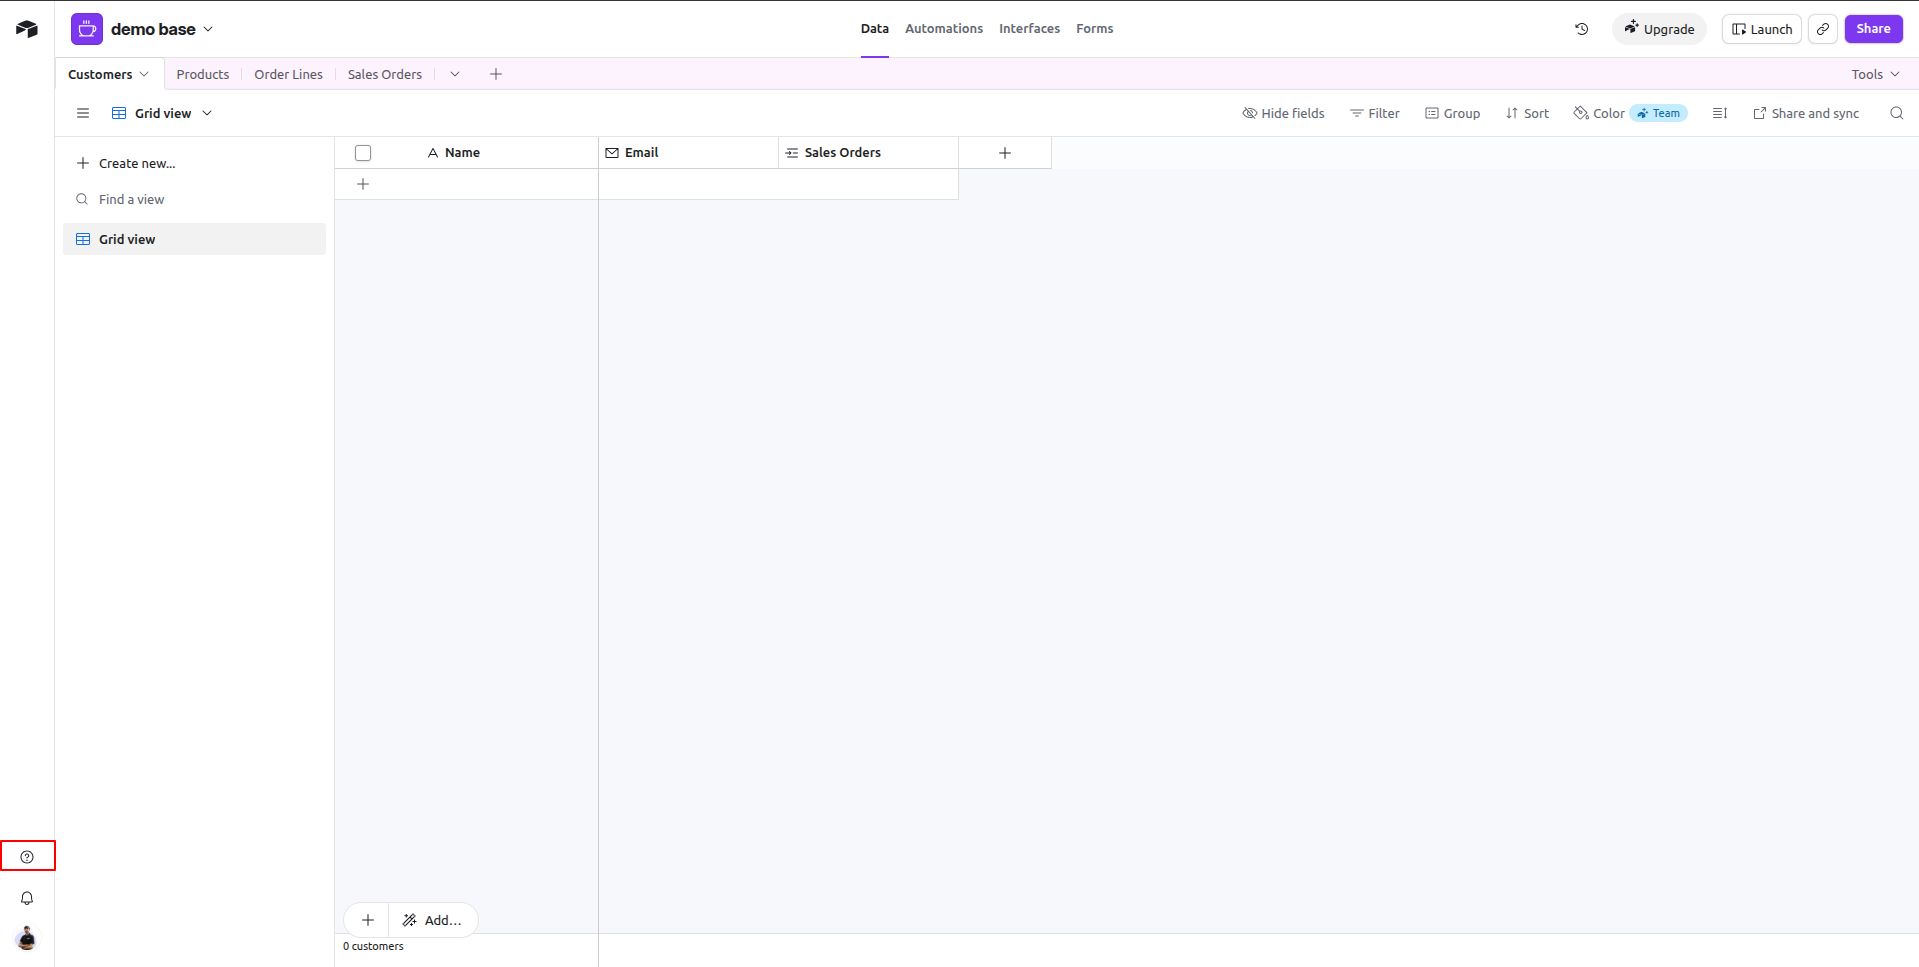
Click the help question mark icon on the lower left toolbar in Airtable.
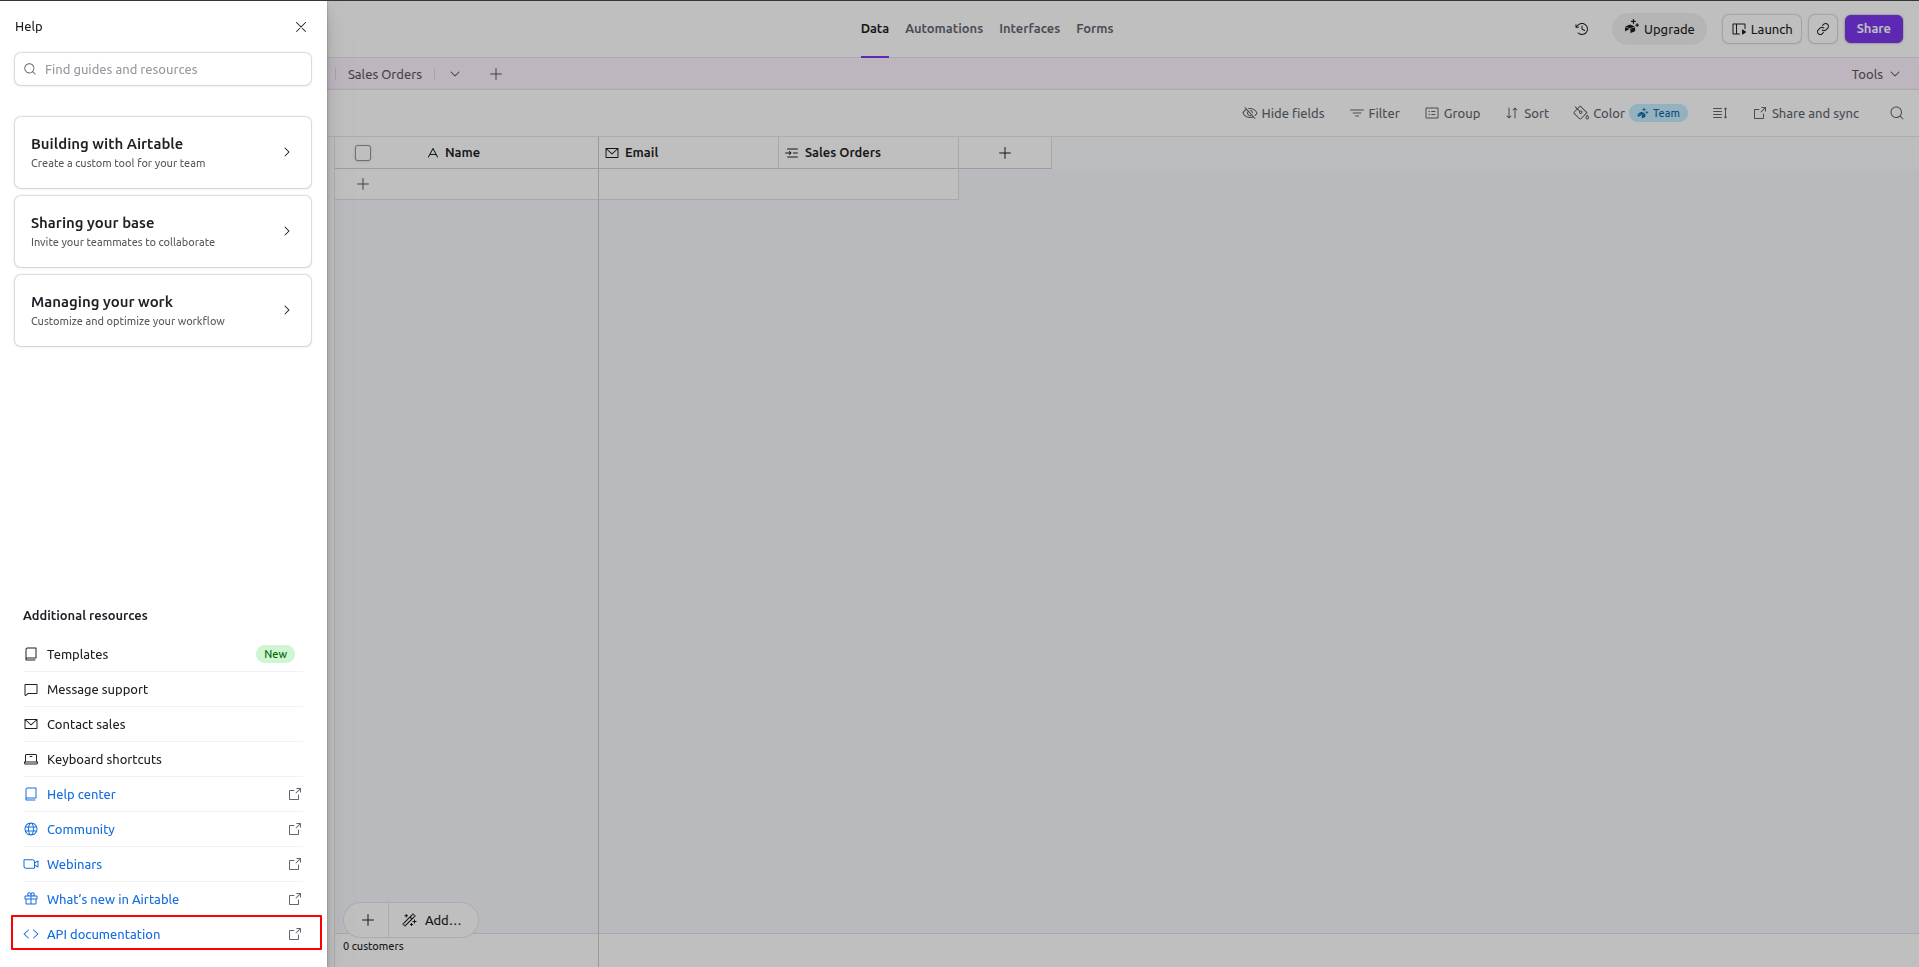
Select the API documentation option from the Help side panel to retrieve API details.
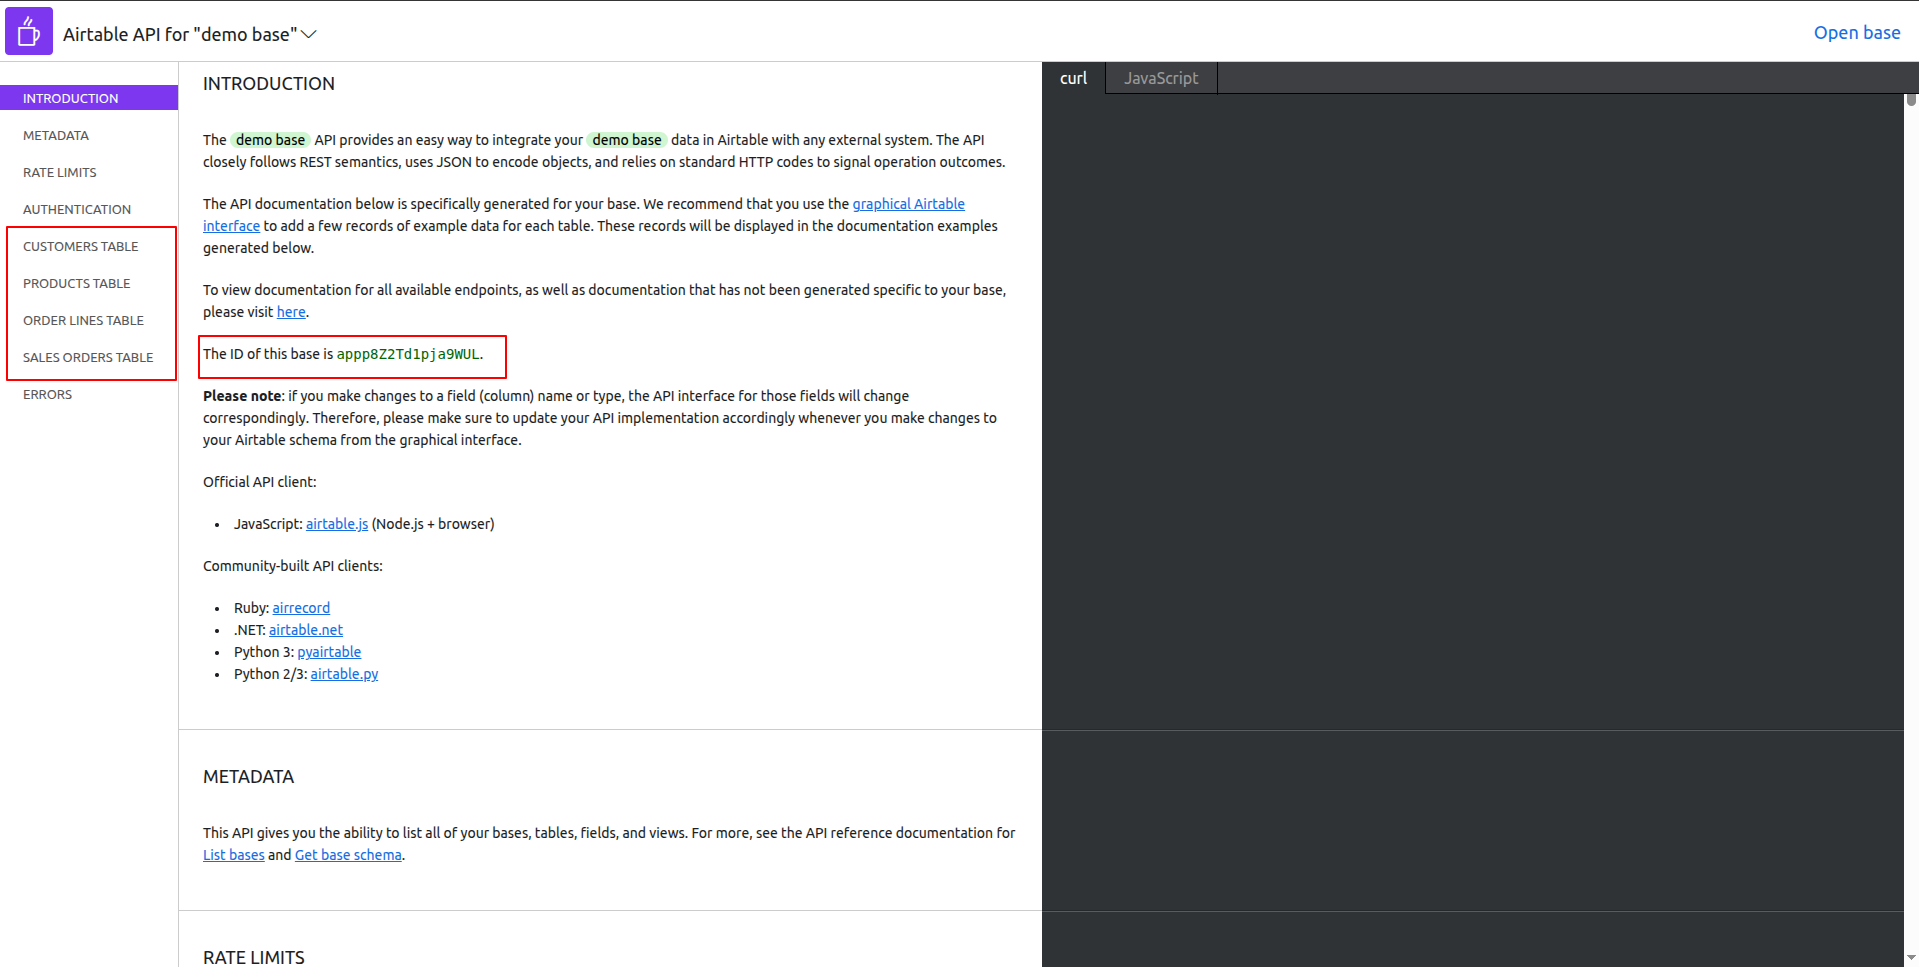
Locate the Airtable Base ID and table names displayed inside the API documentation page.
Select Table Mappings from the Airtable menu to access and manage table mapping configurations.
Open the Field Mappings tab to configure field level mapping rules between Odoo and Airtable.
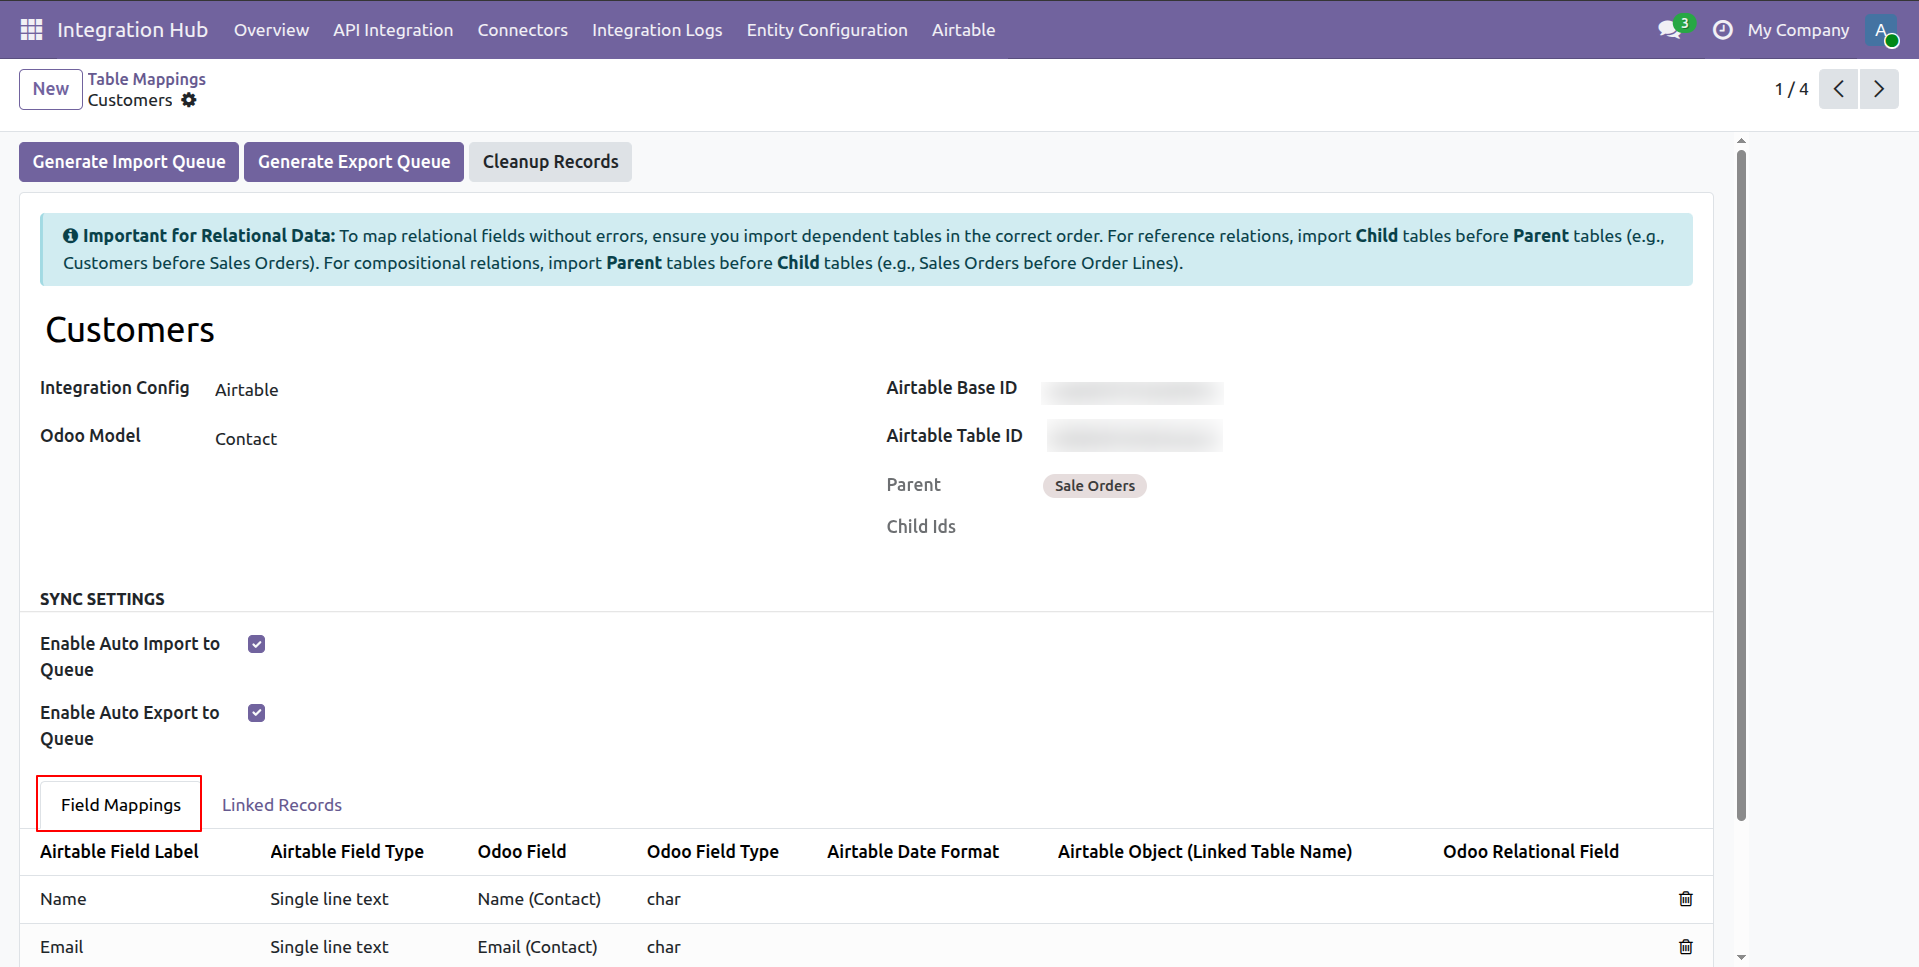
Switch to the Linked Records tab to inspect synchronized Odoo IDs and corresponding Airtable record IDs.
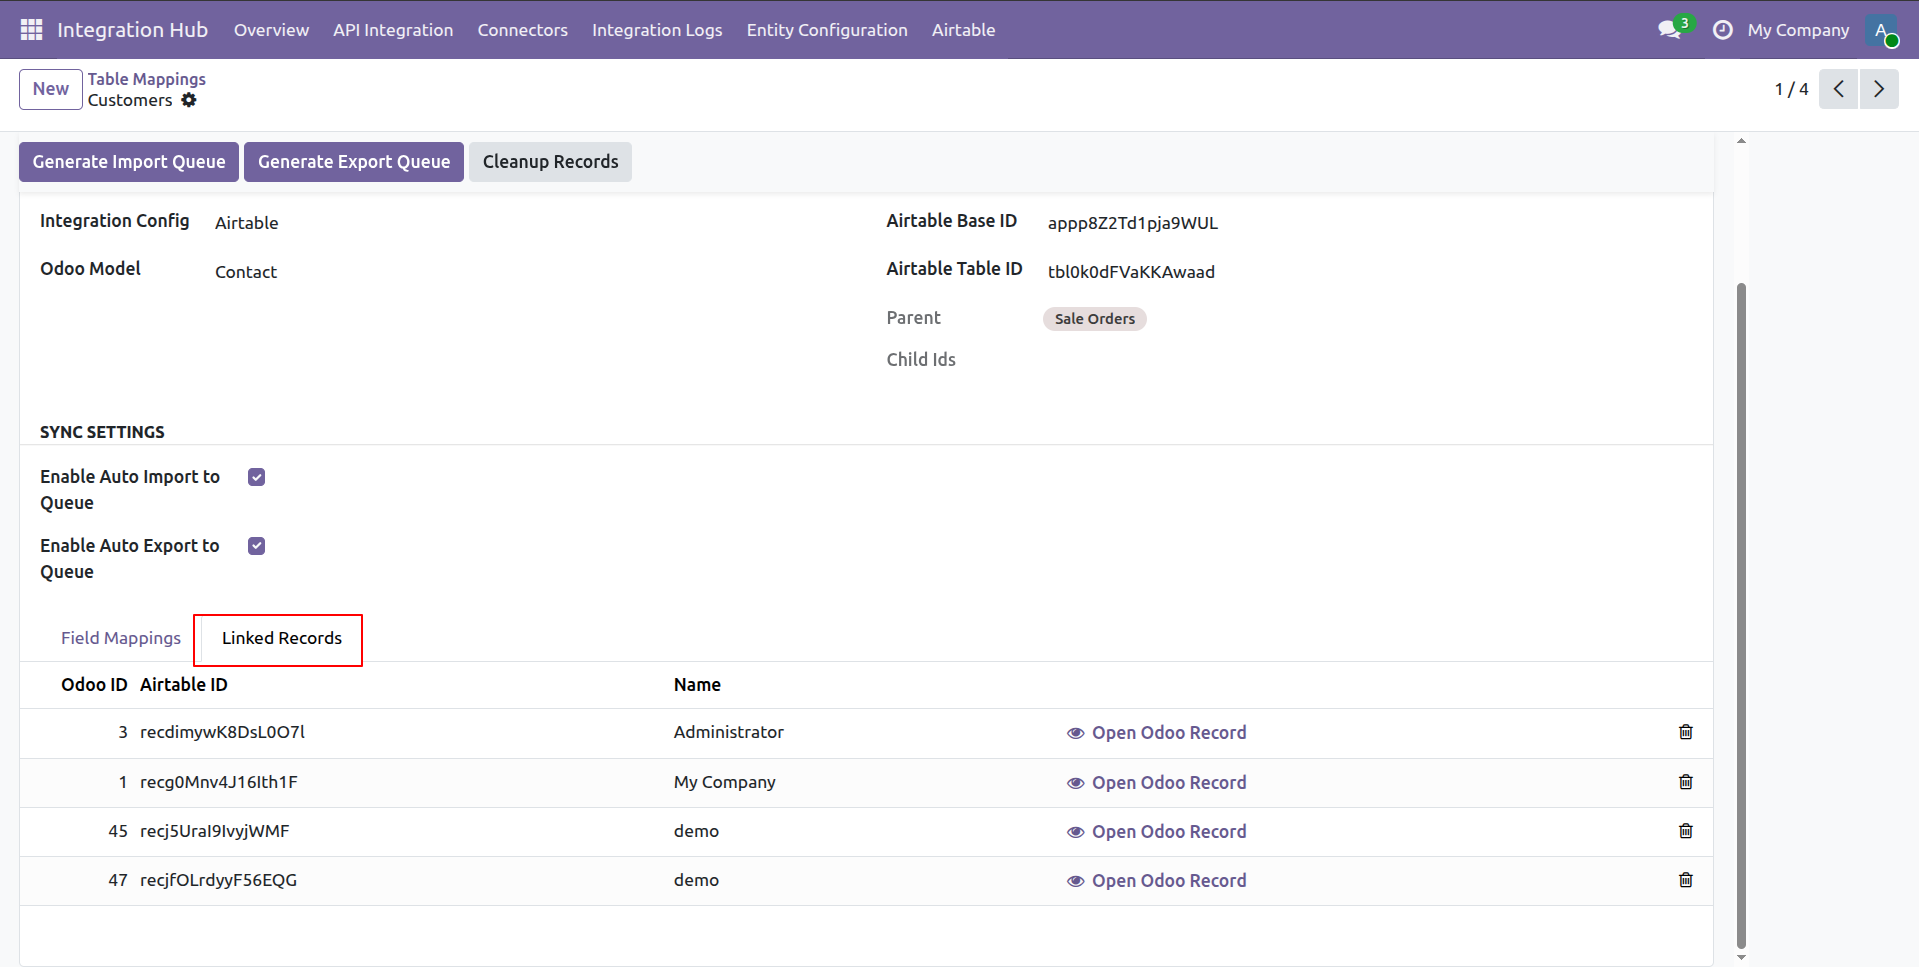
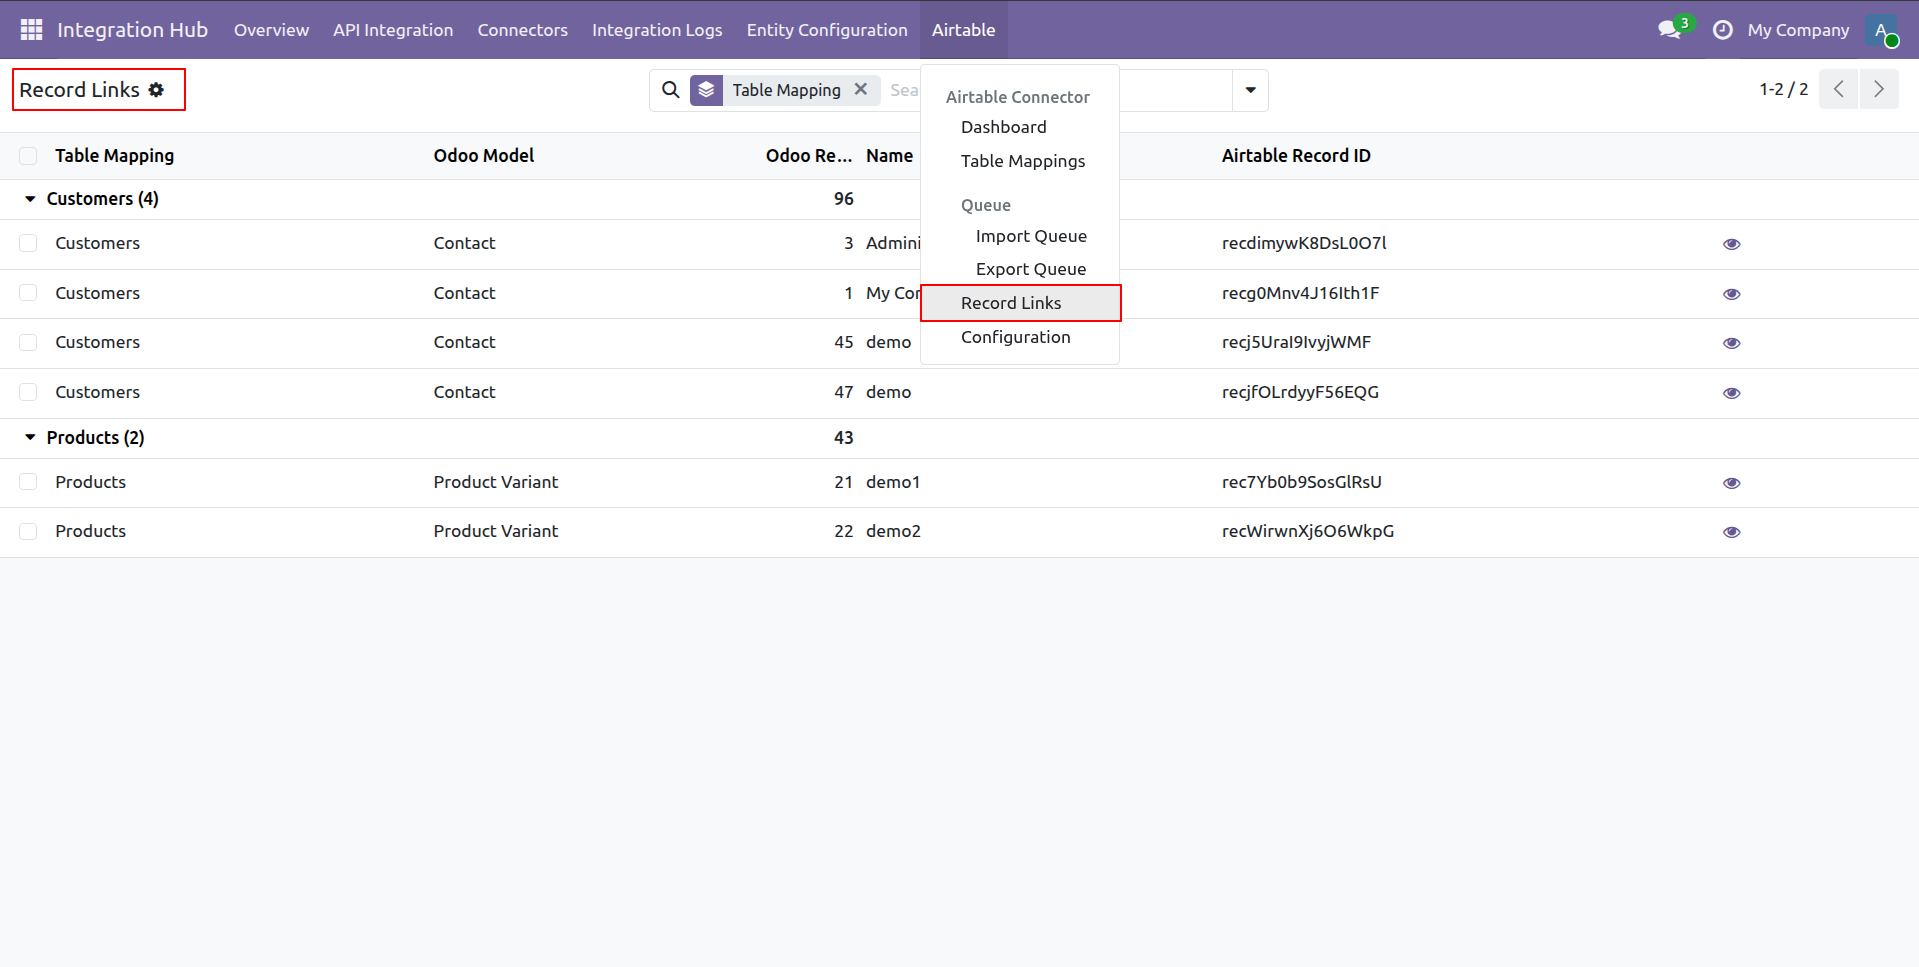
Select Record Links from the menu to view all mapped record relationships grouped by model.
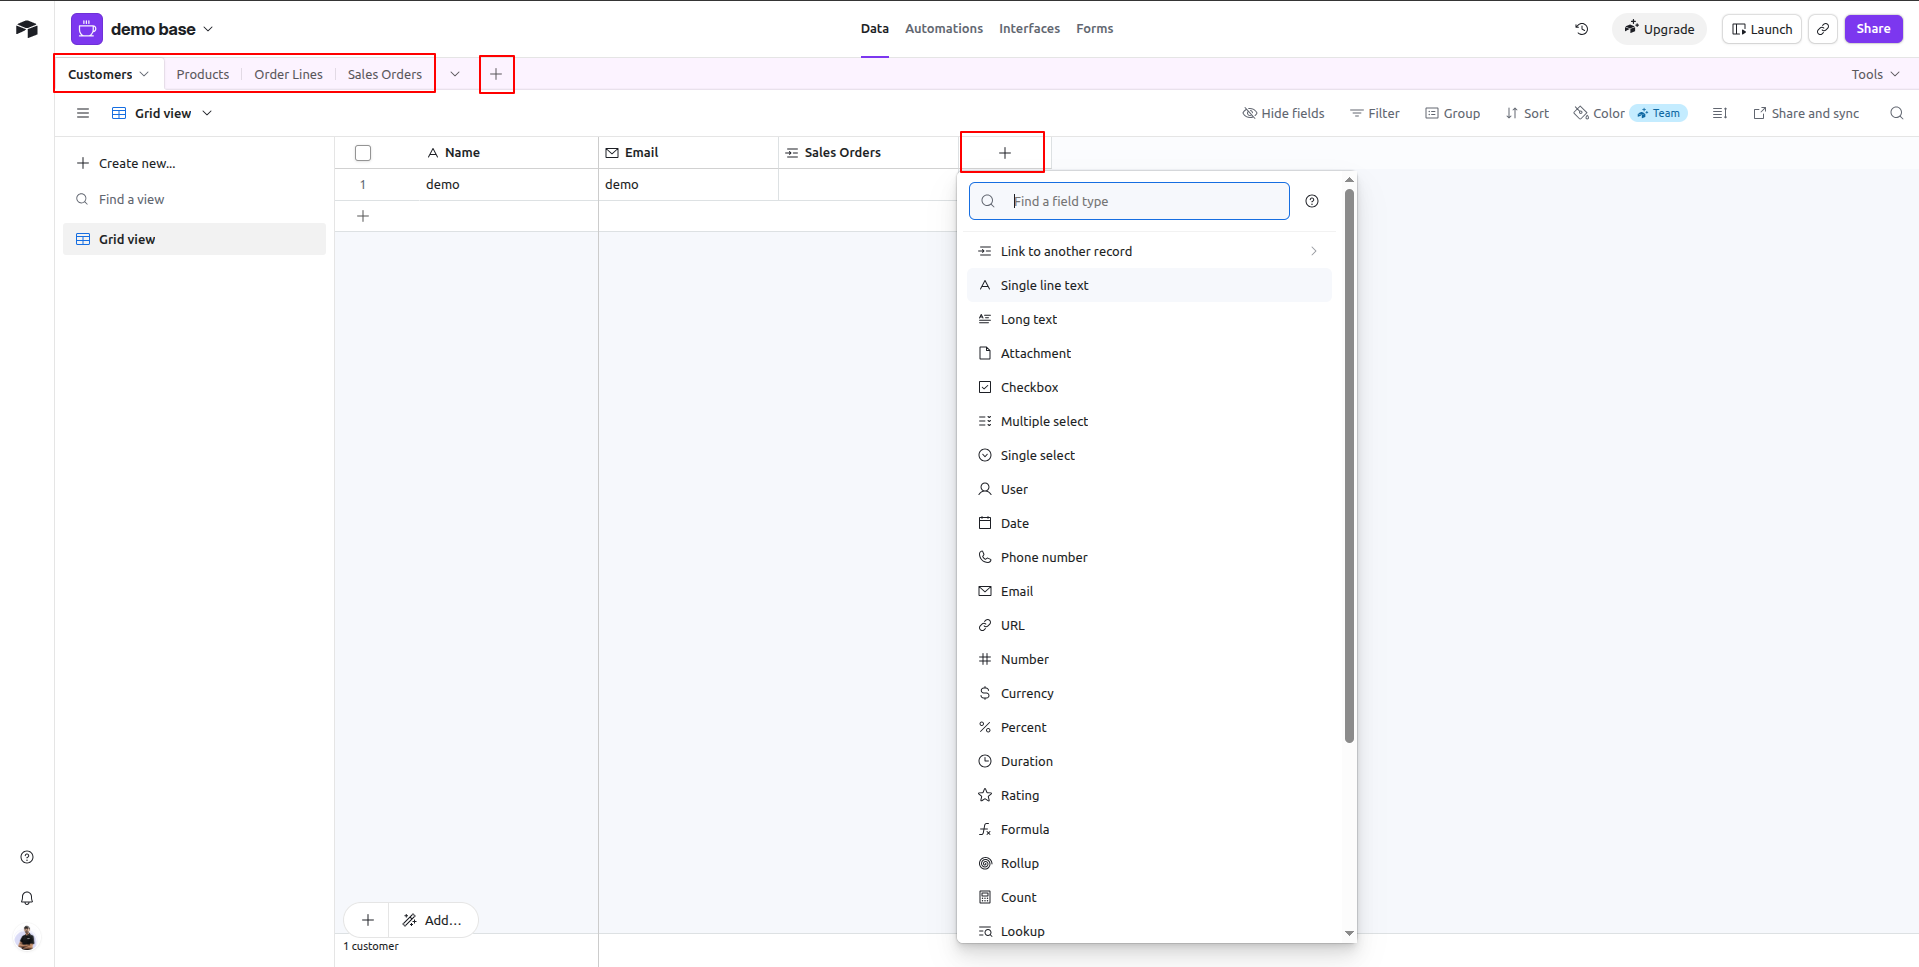
Click the plus column button in Airtable base to select and add a new field type.
Workflow
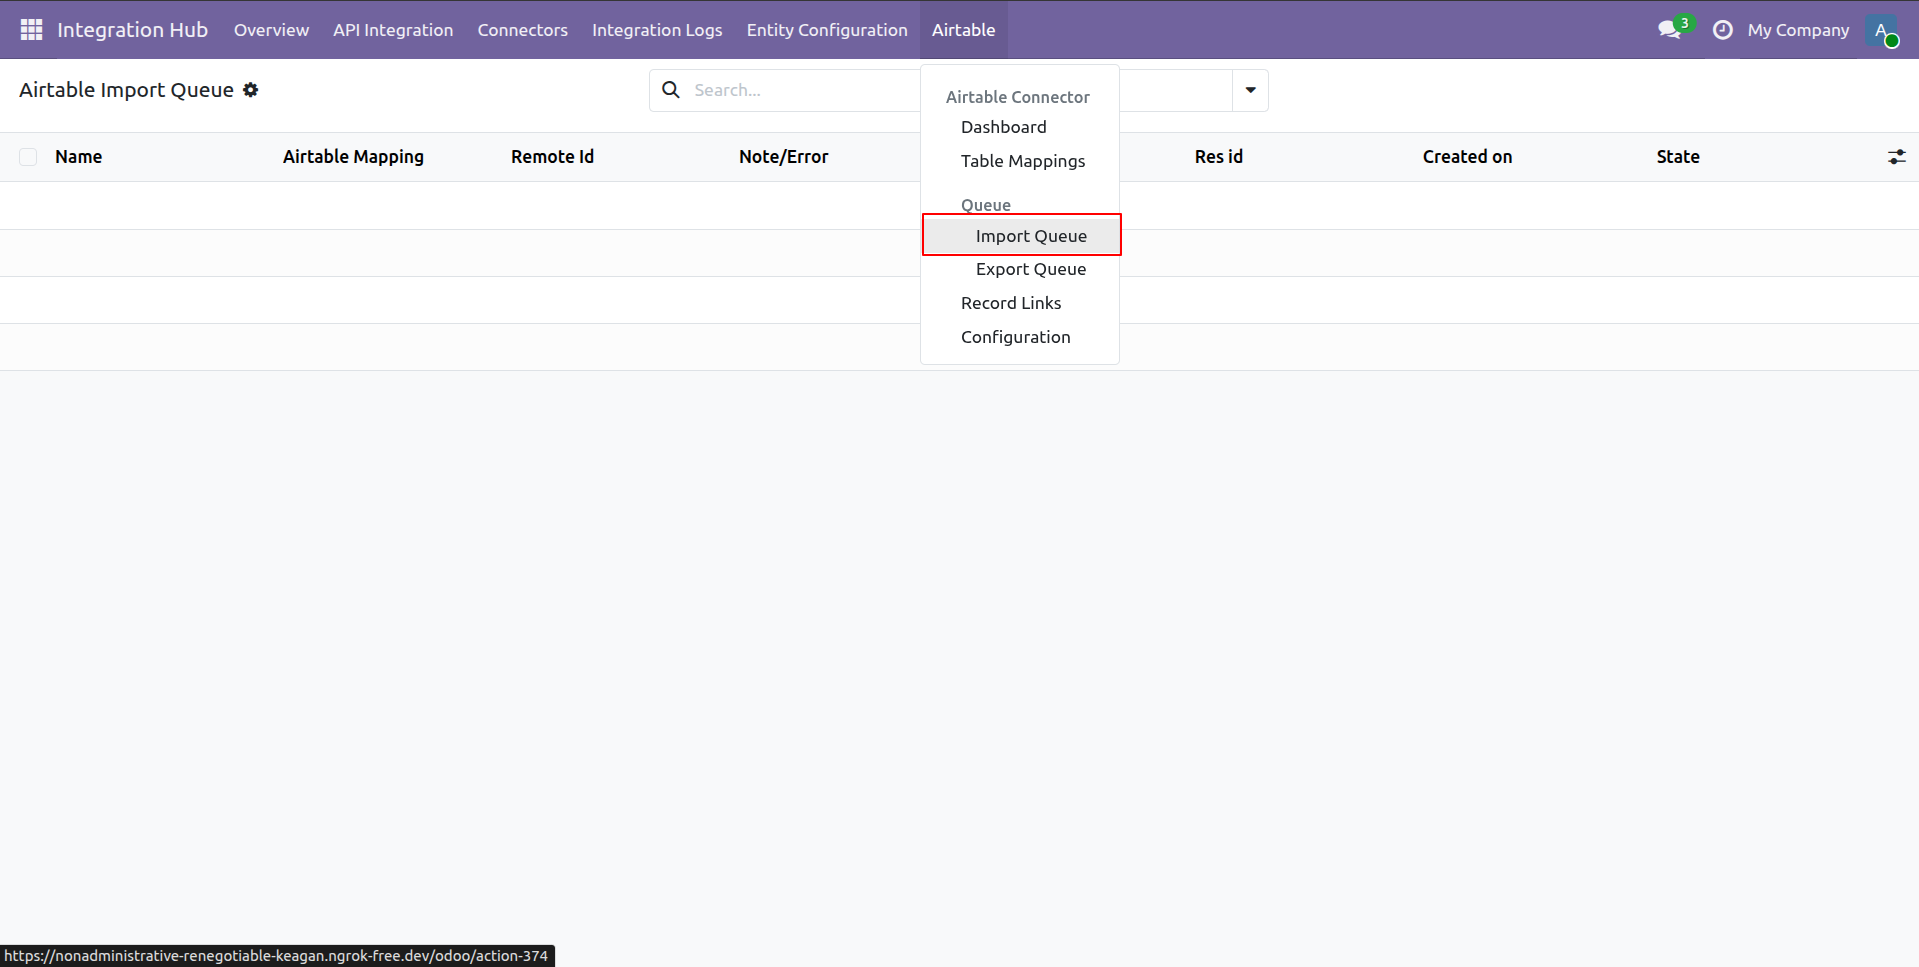
Select Import Queue from the Airtable menu dropdown to open the import queue list.
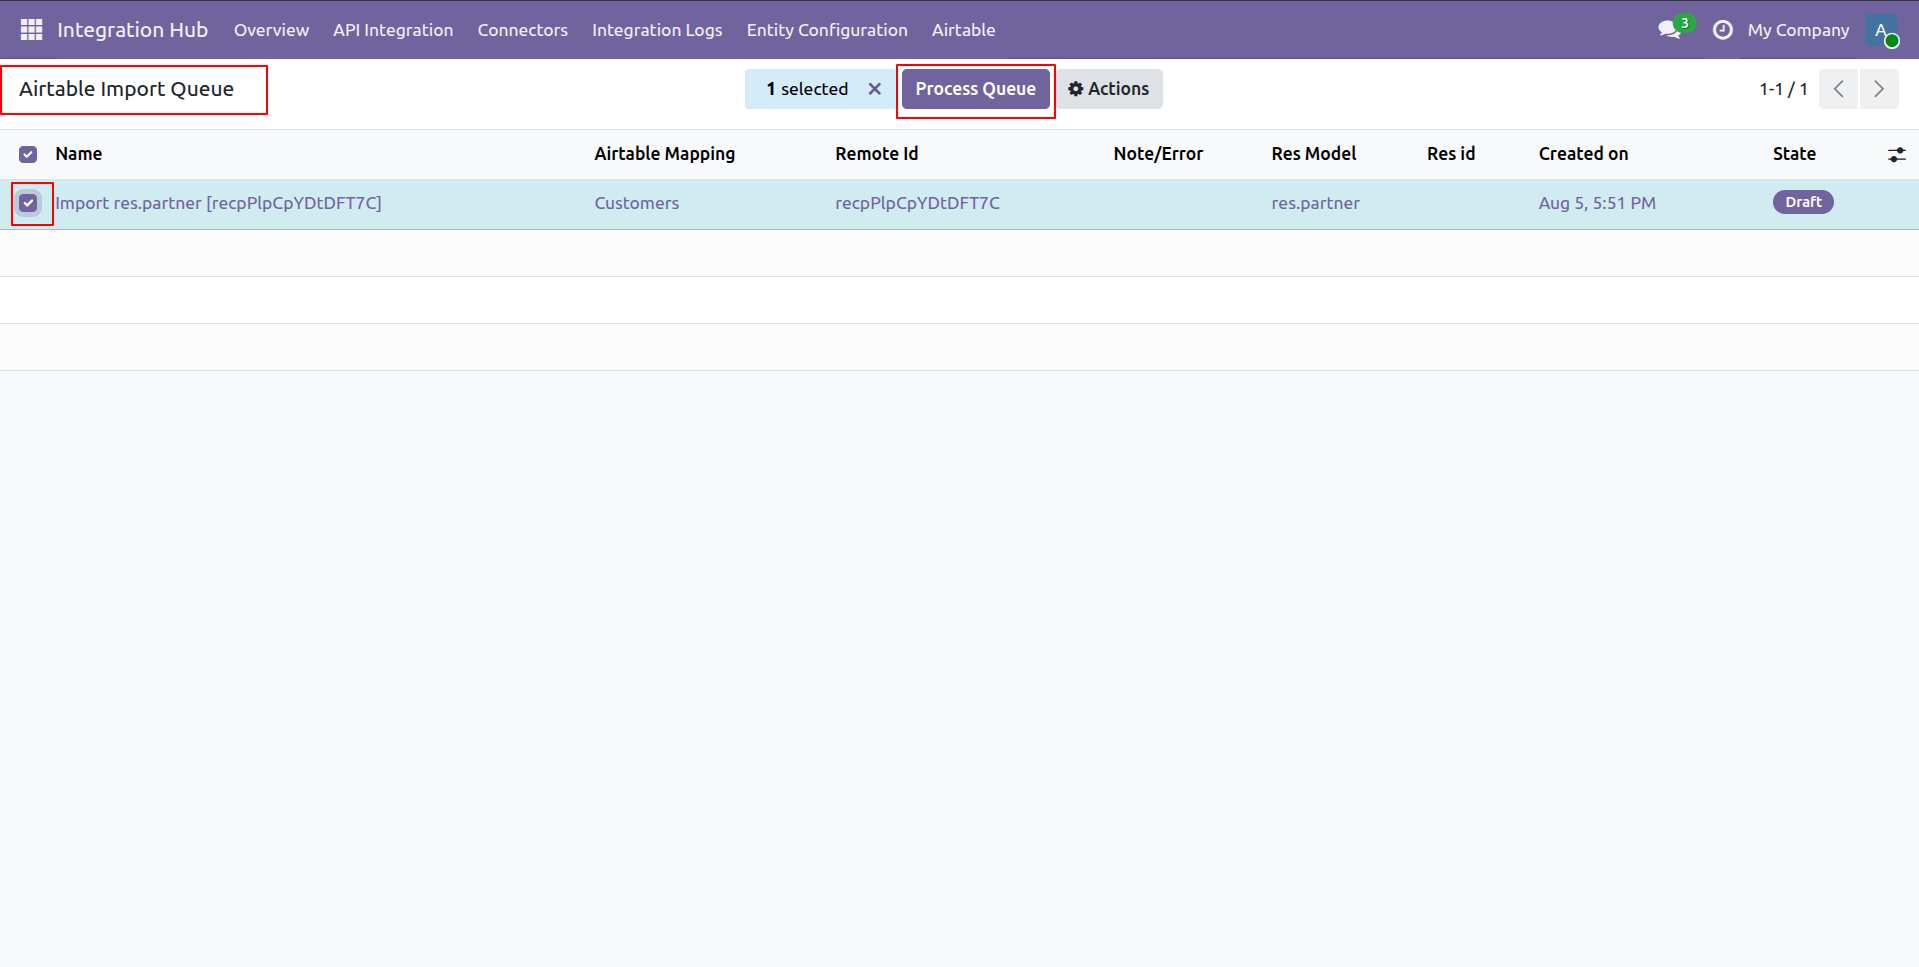
Select the pending import queue record and click Process Queue to execute data import.
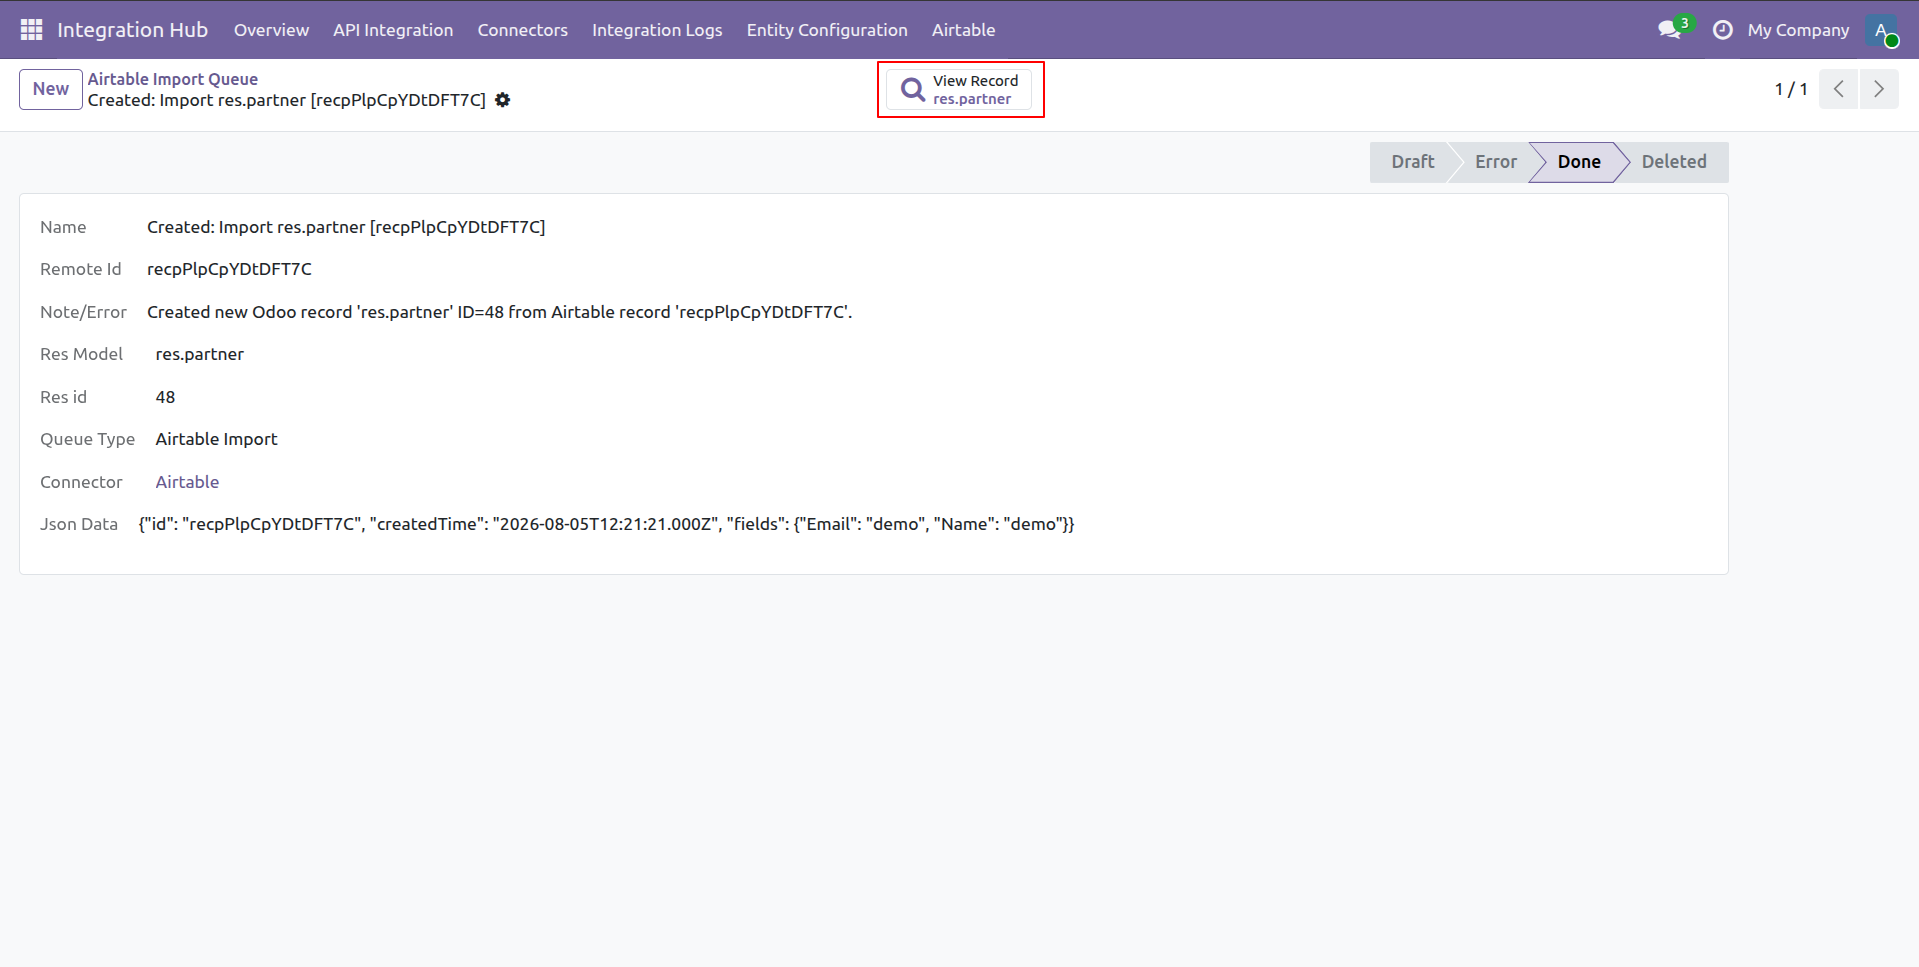
Click the View Record smart button on the completed import queue record form.
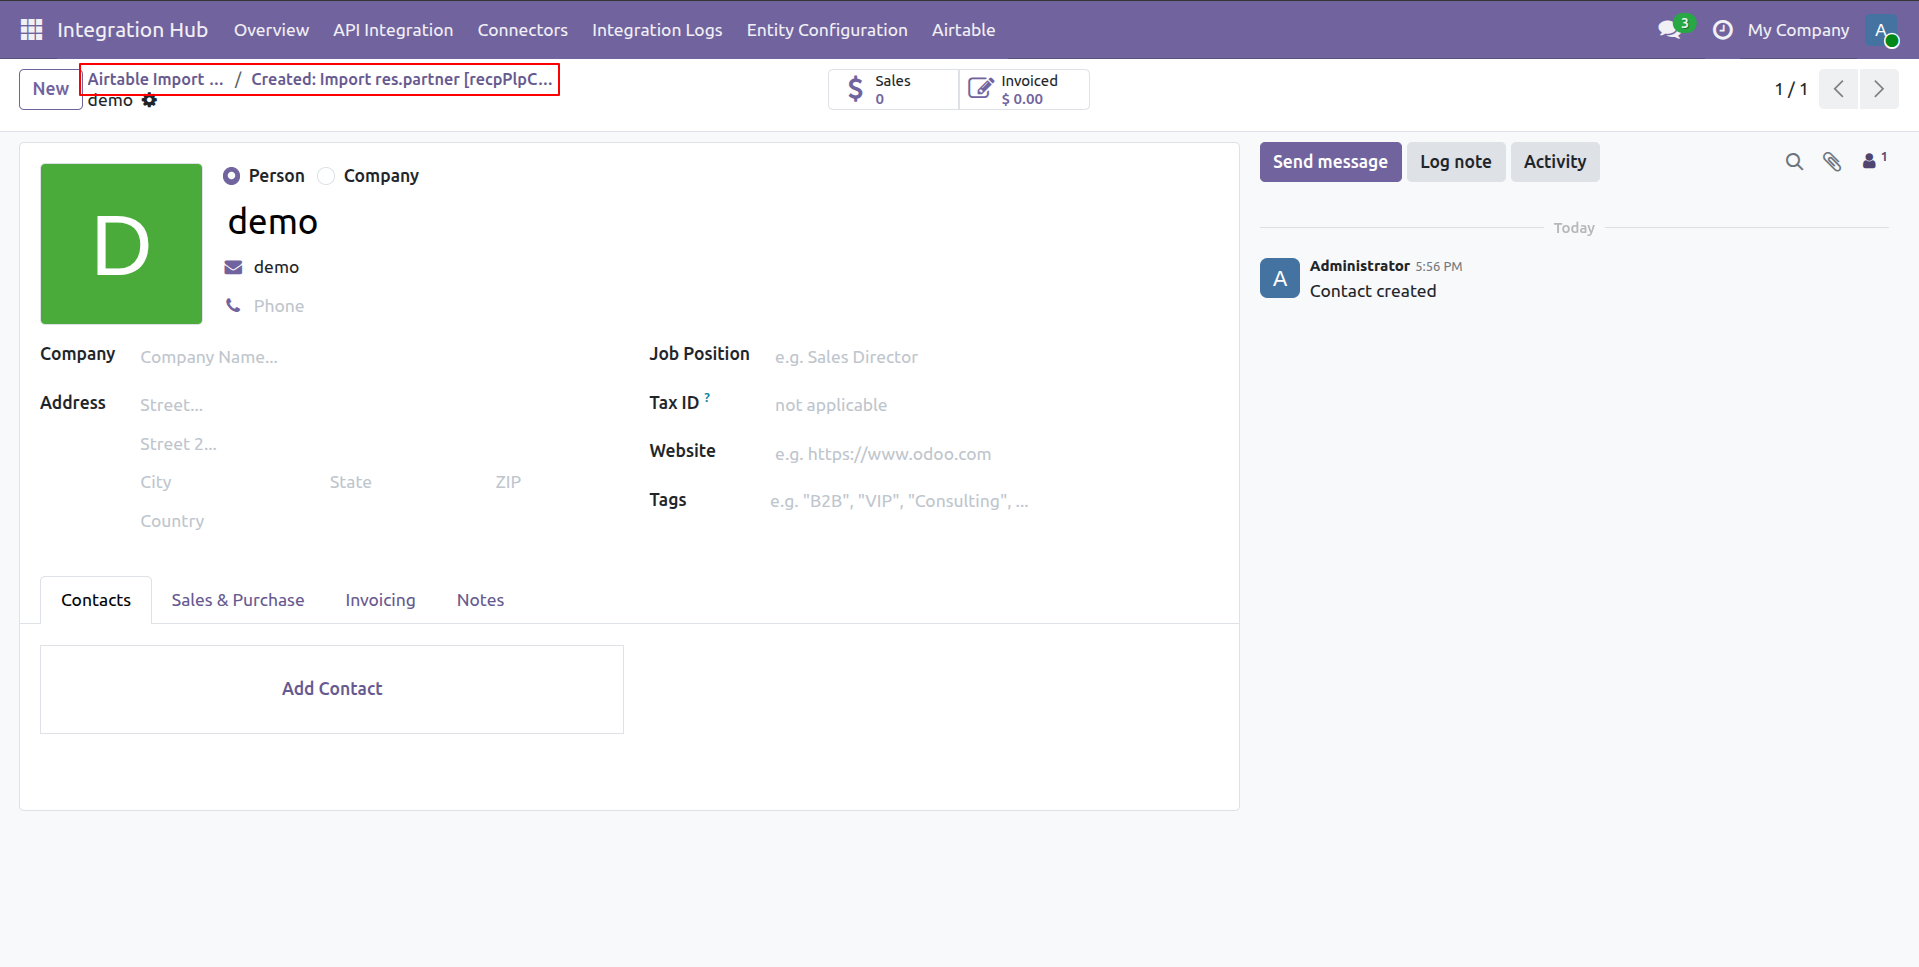
Verify the imported contact details created in Odoo from the Airtable import queue.
Workflow
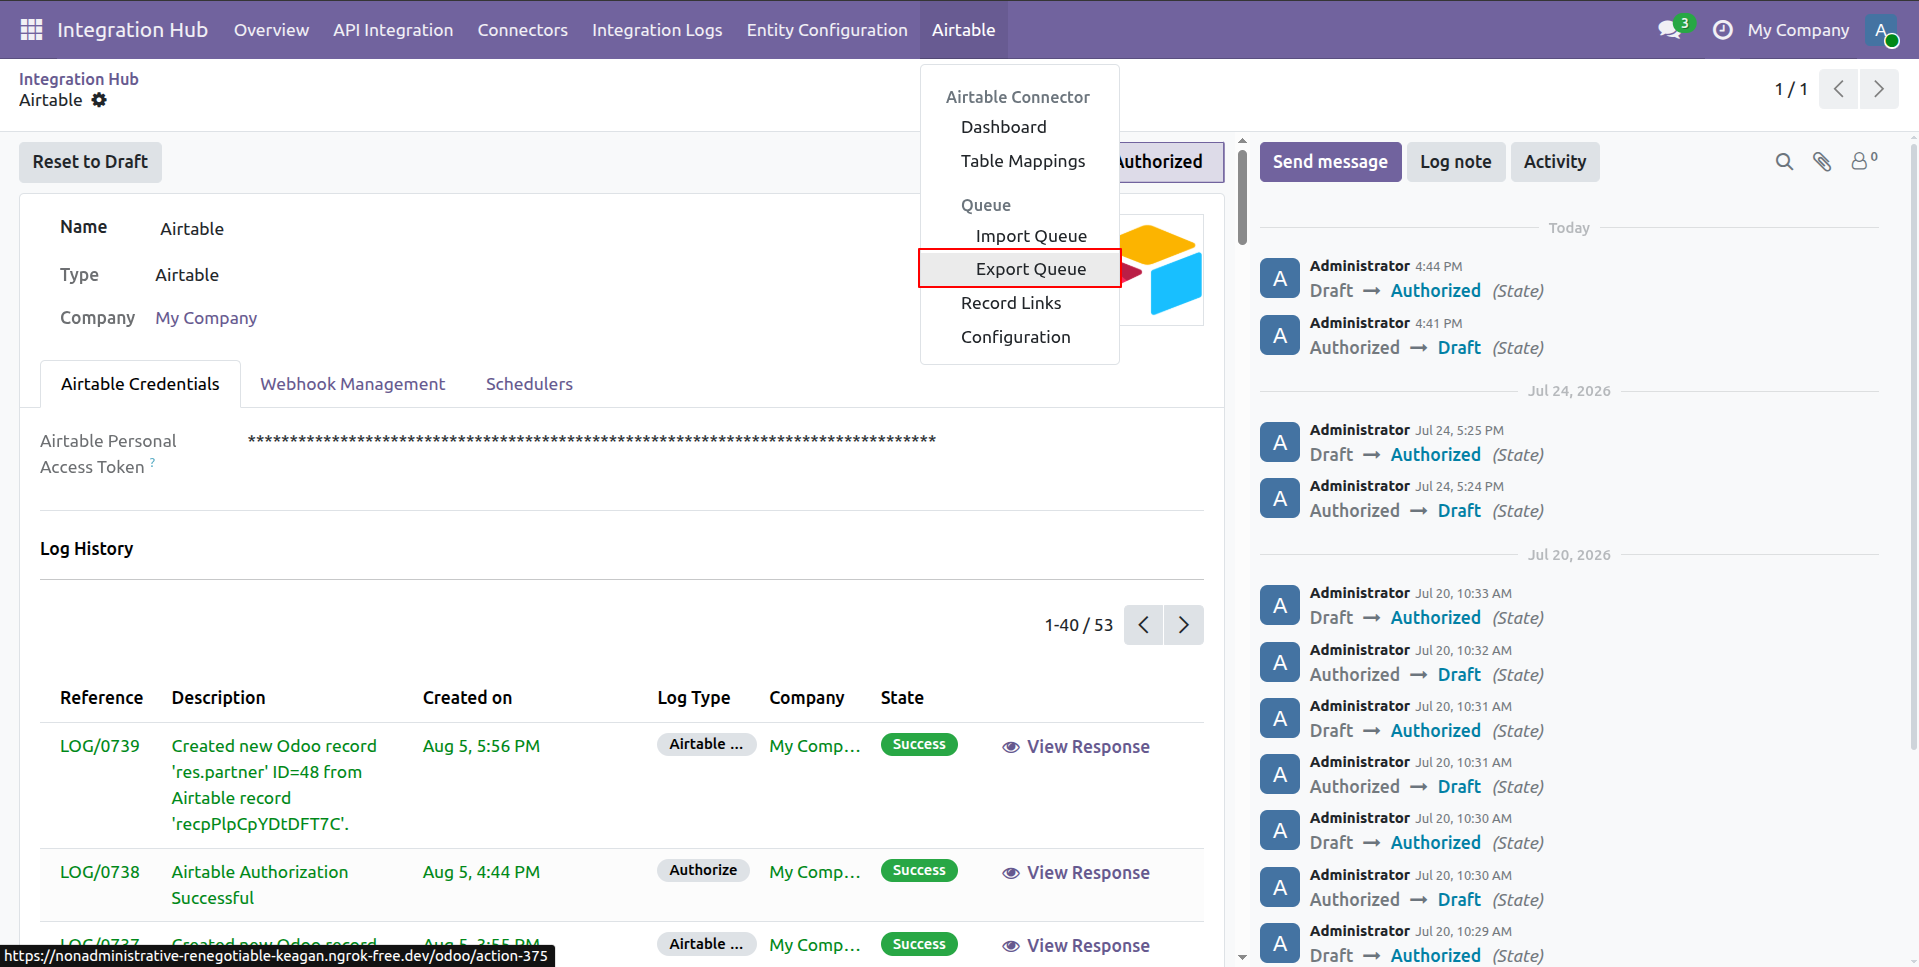
Choose Export Queue from the Airtable menu dropdown to access pending export records.
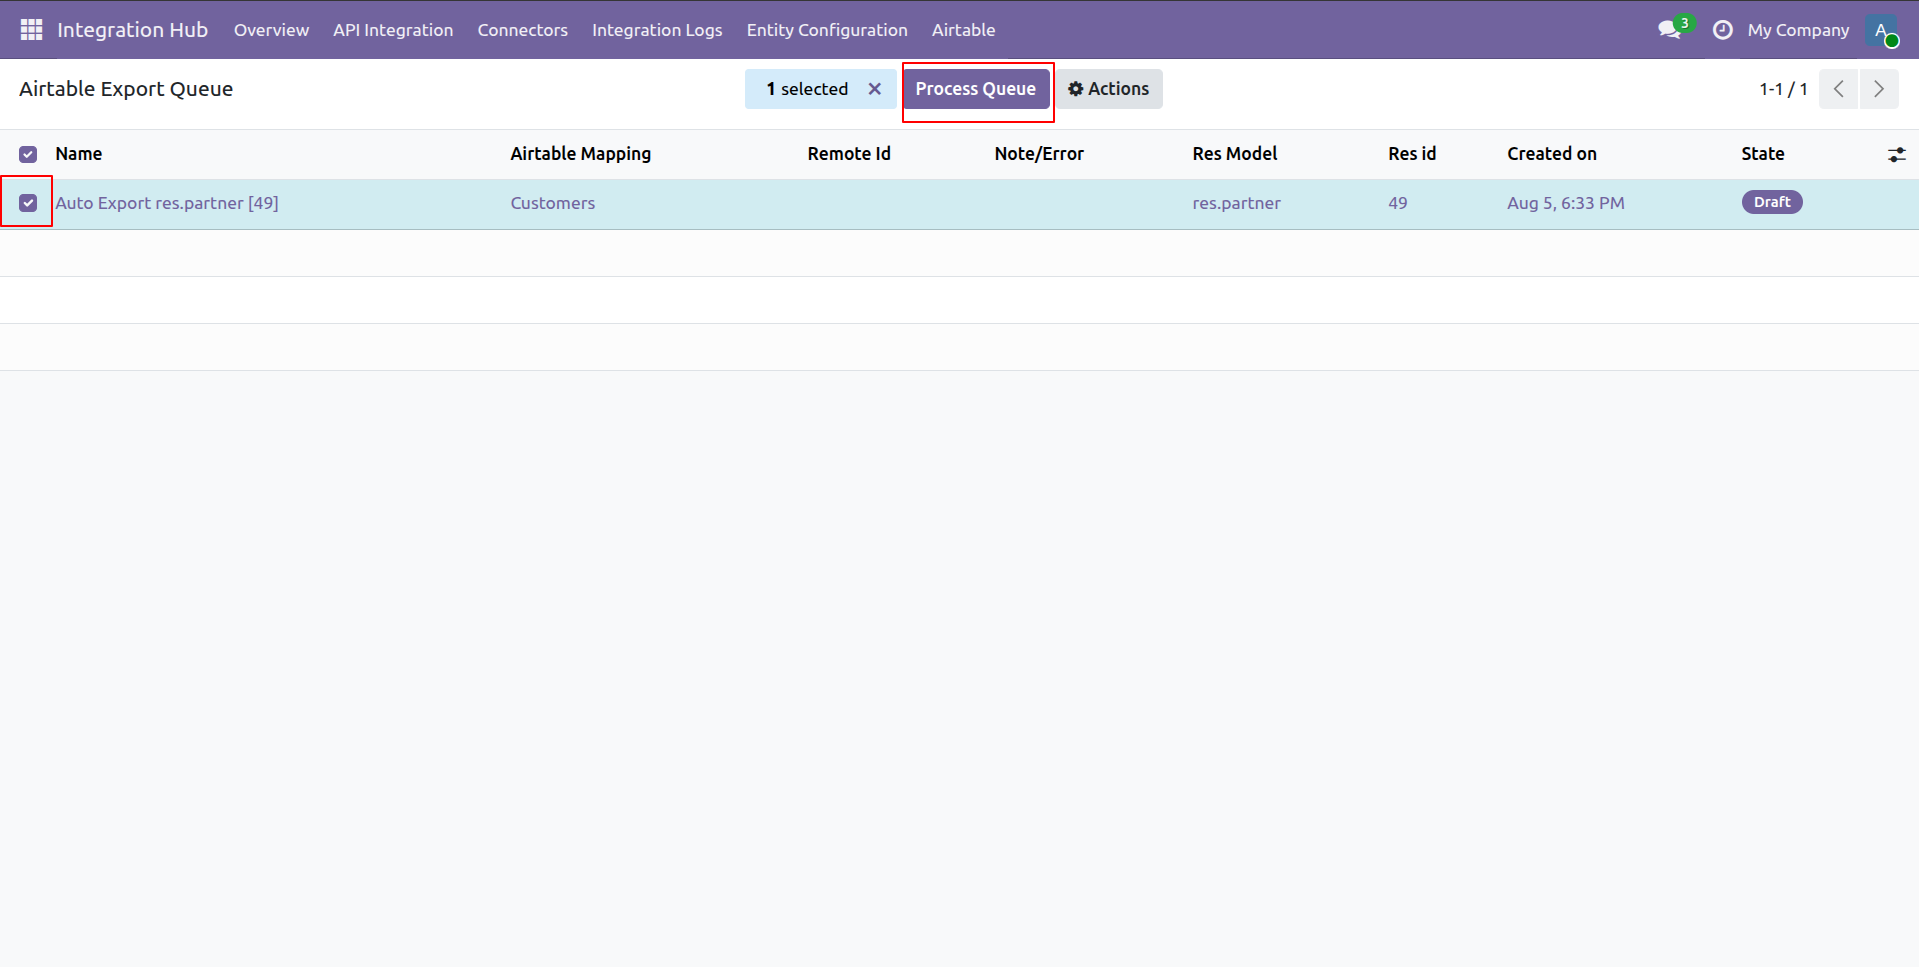
Mark the export queue entry and click Process Queue to transfer data to Airtable.
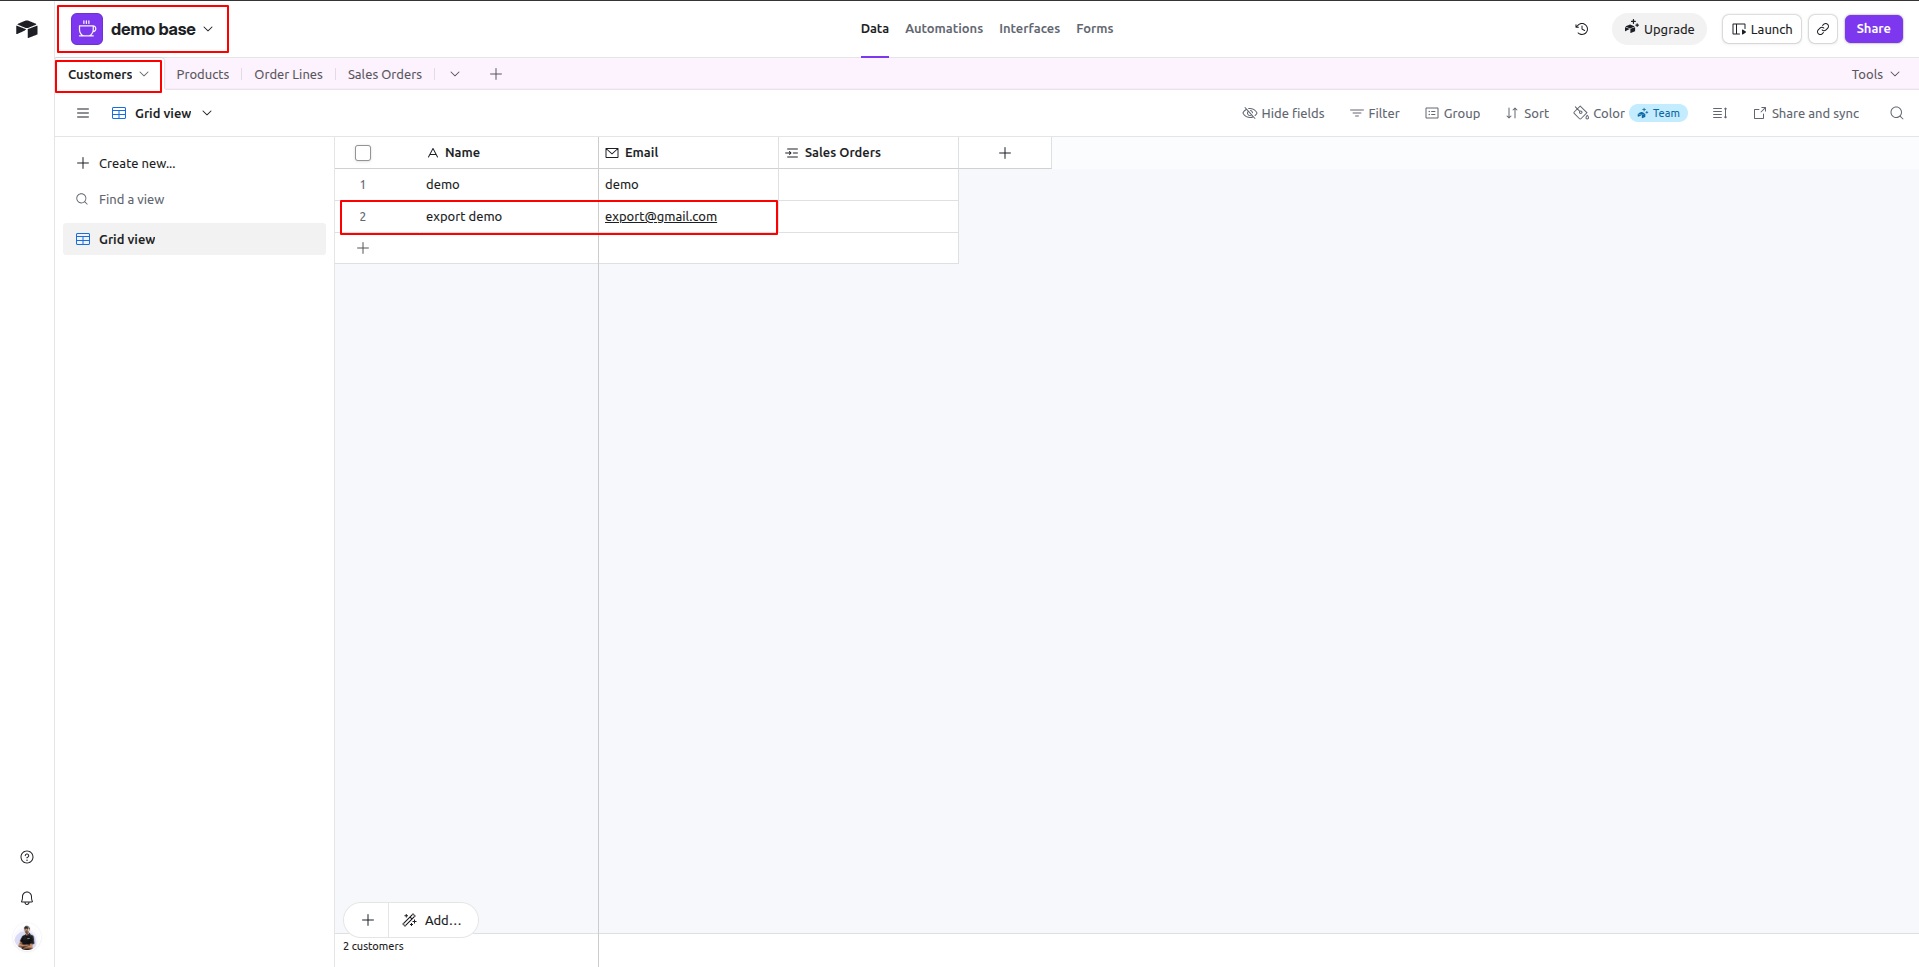
Check the Customers table in Airtable to confirm the newly exported record row.
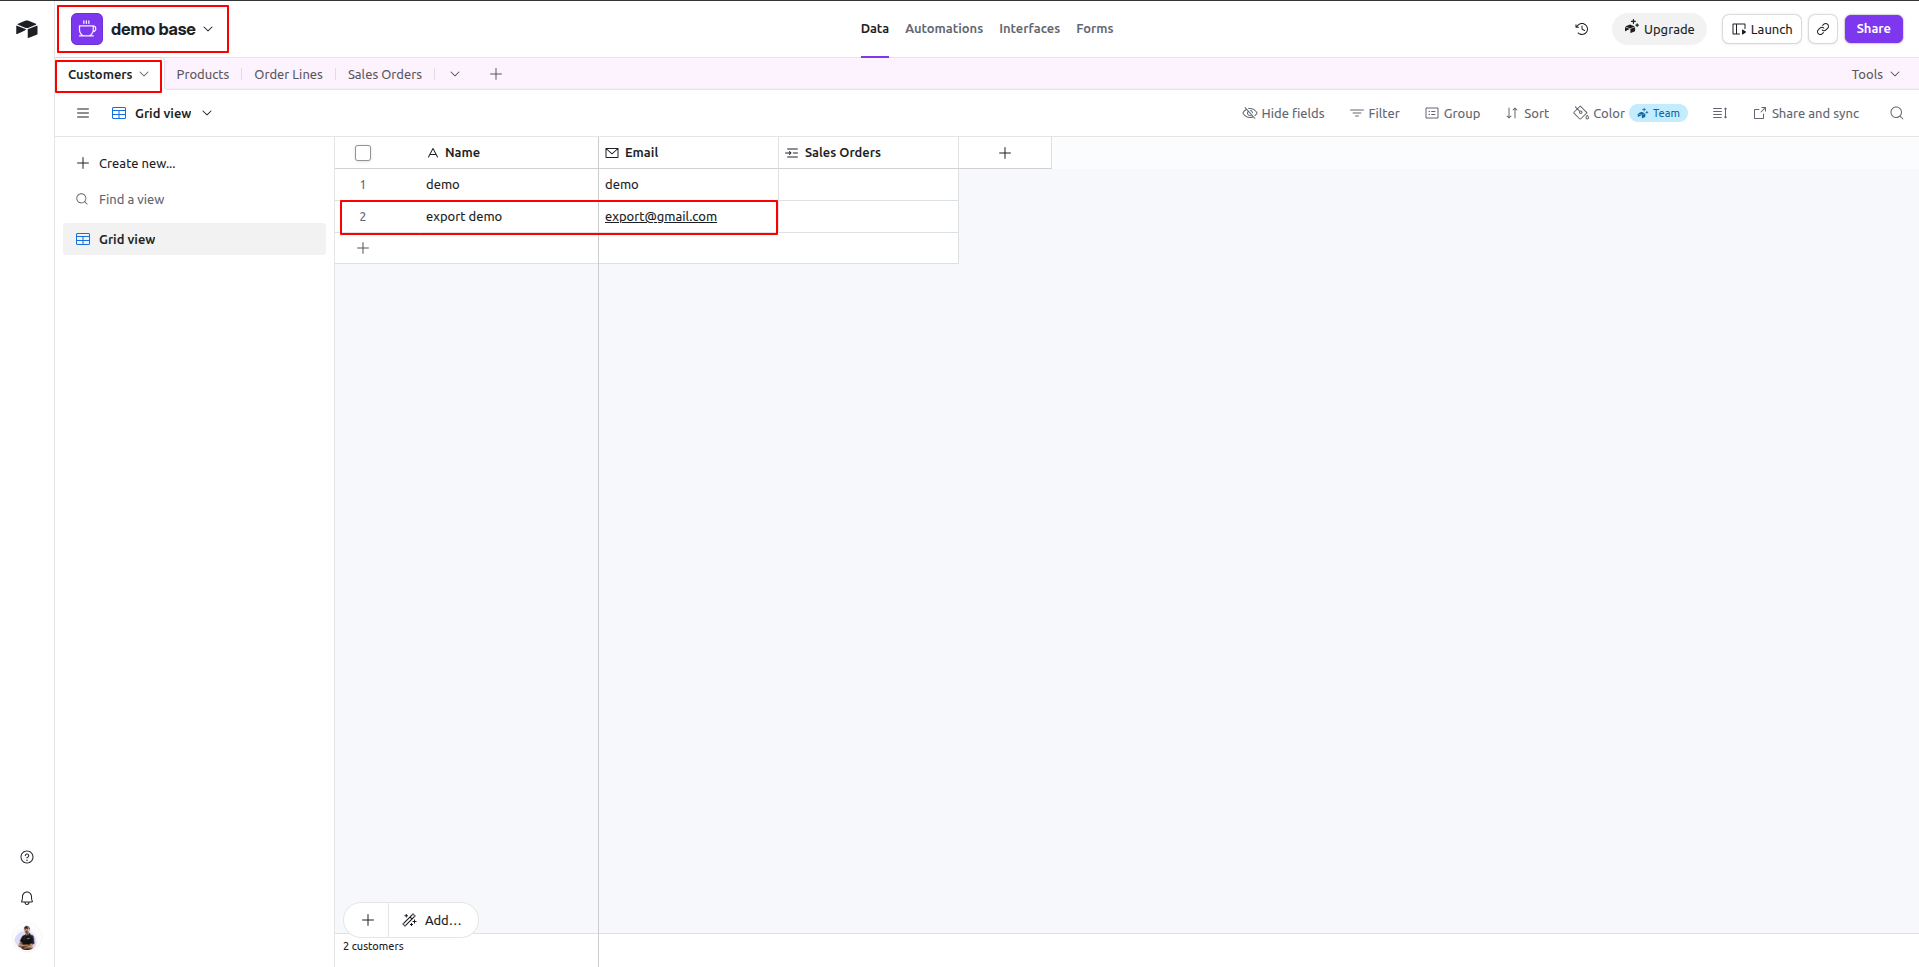
Review the updated customer grid in Airtable to verify exported fields and data values.
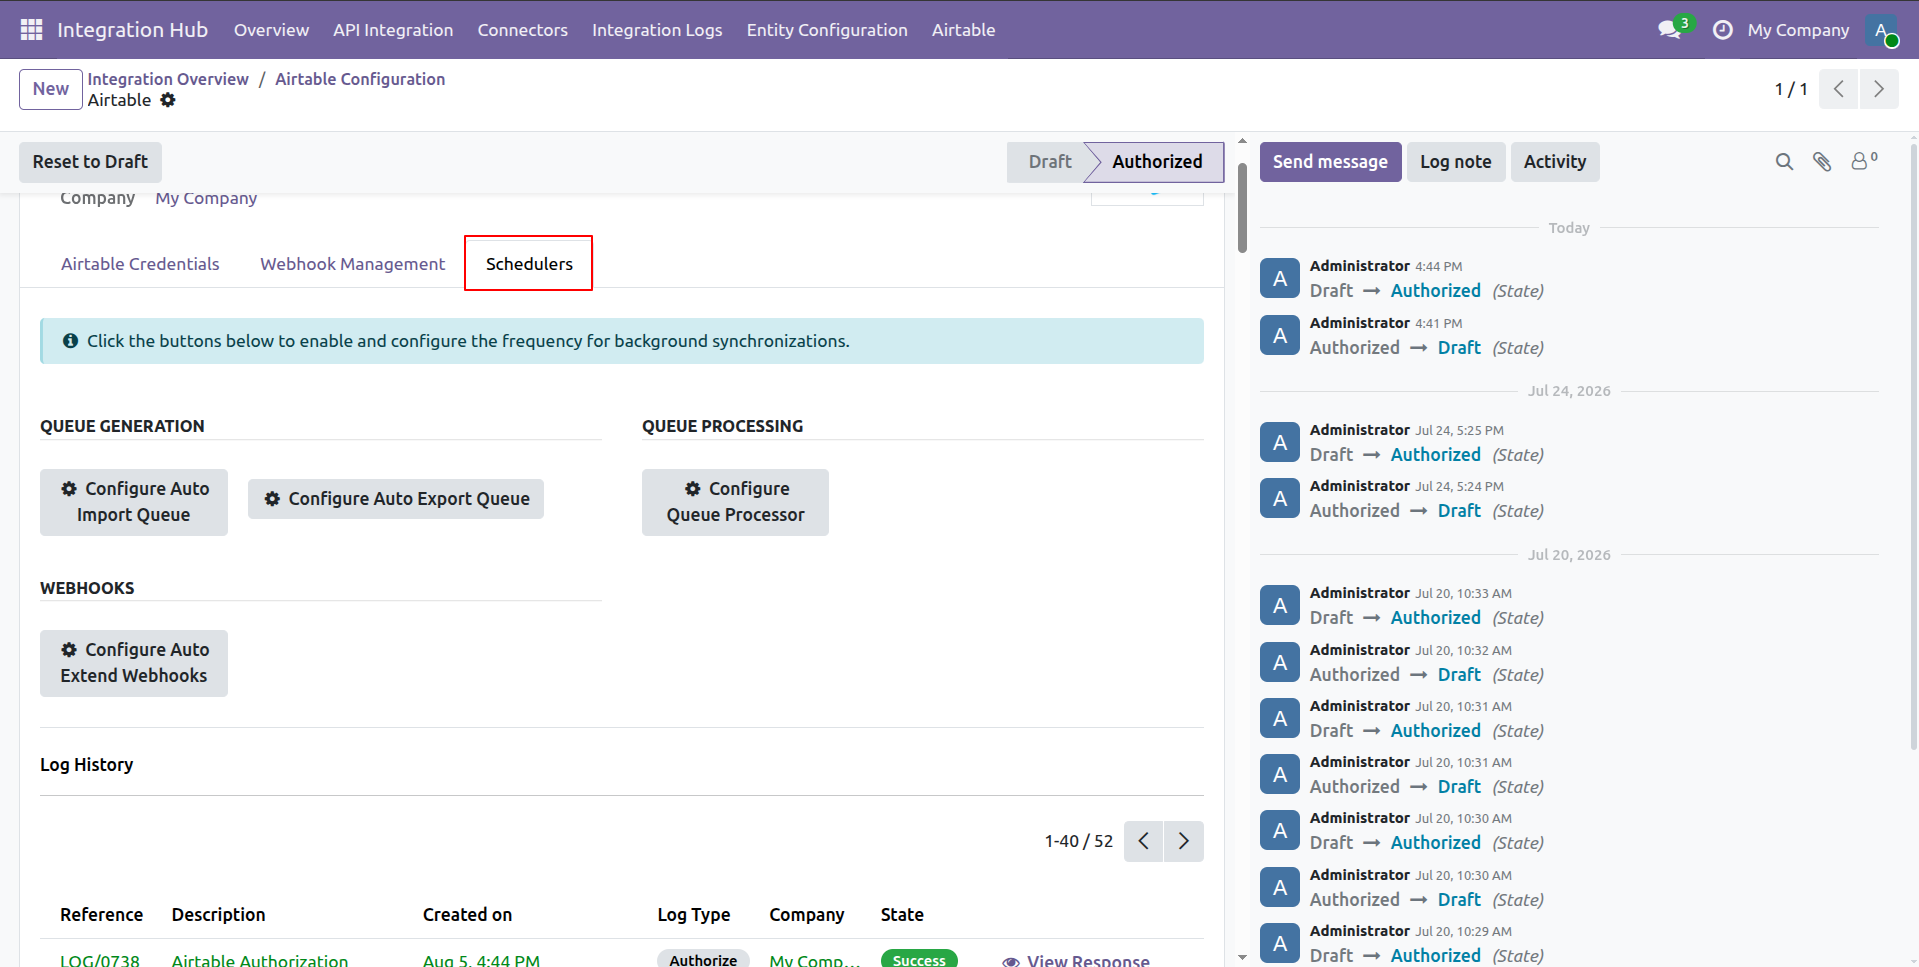
Open the Schedulers tab to access automated queue generation and processing configuration buttons.
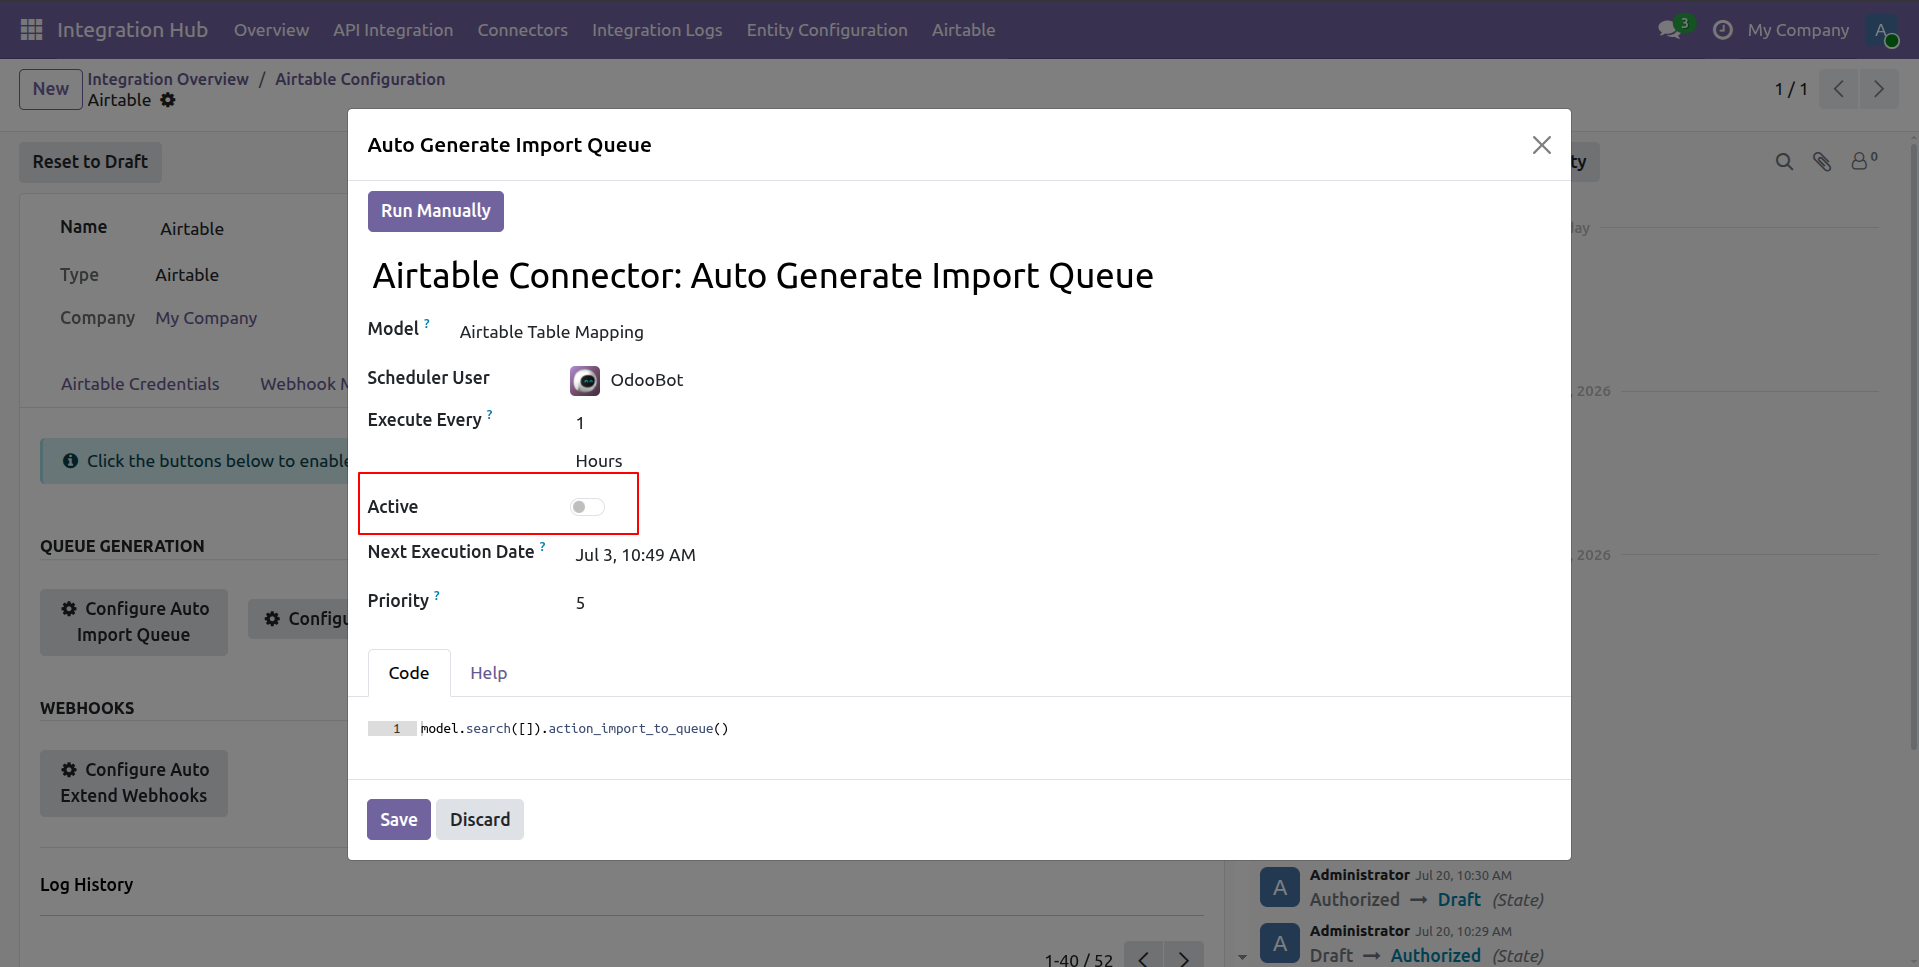
Toggle the Active switch inside the popup modal to enable automatic import queue scheduling.
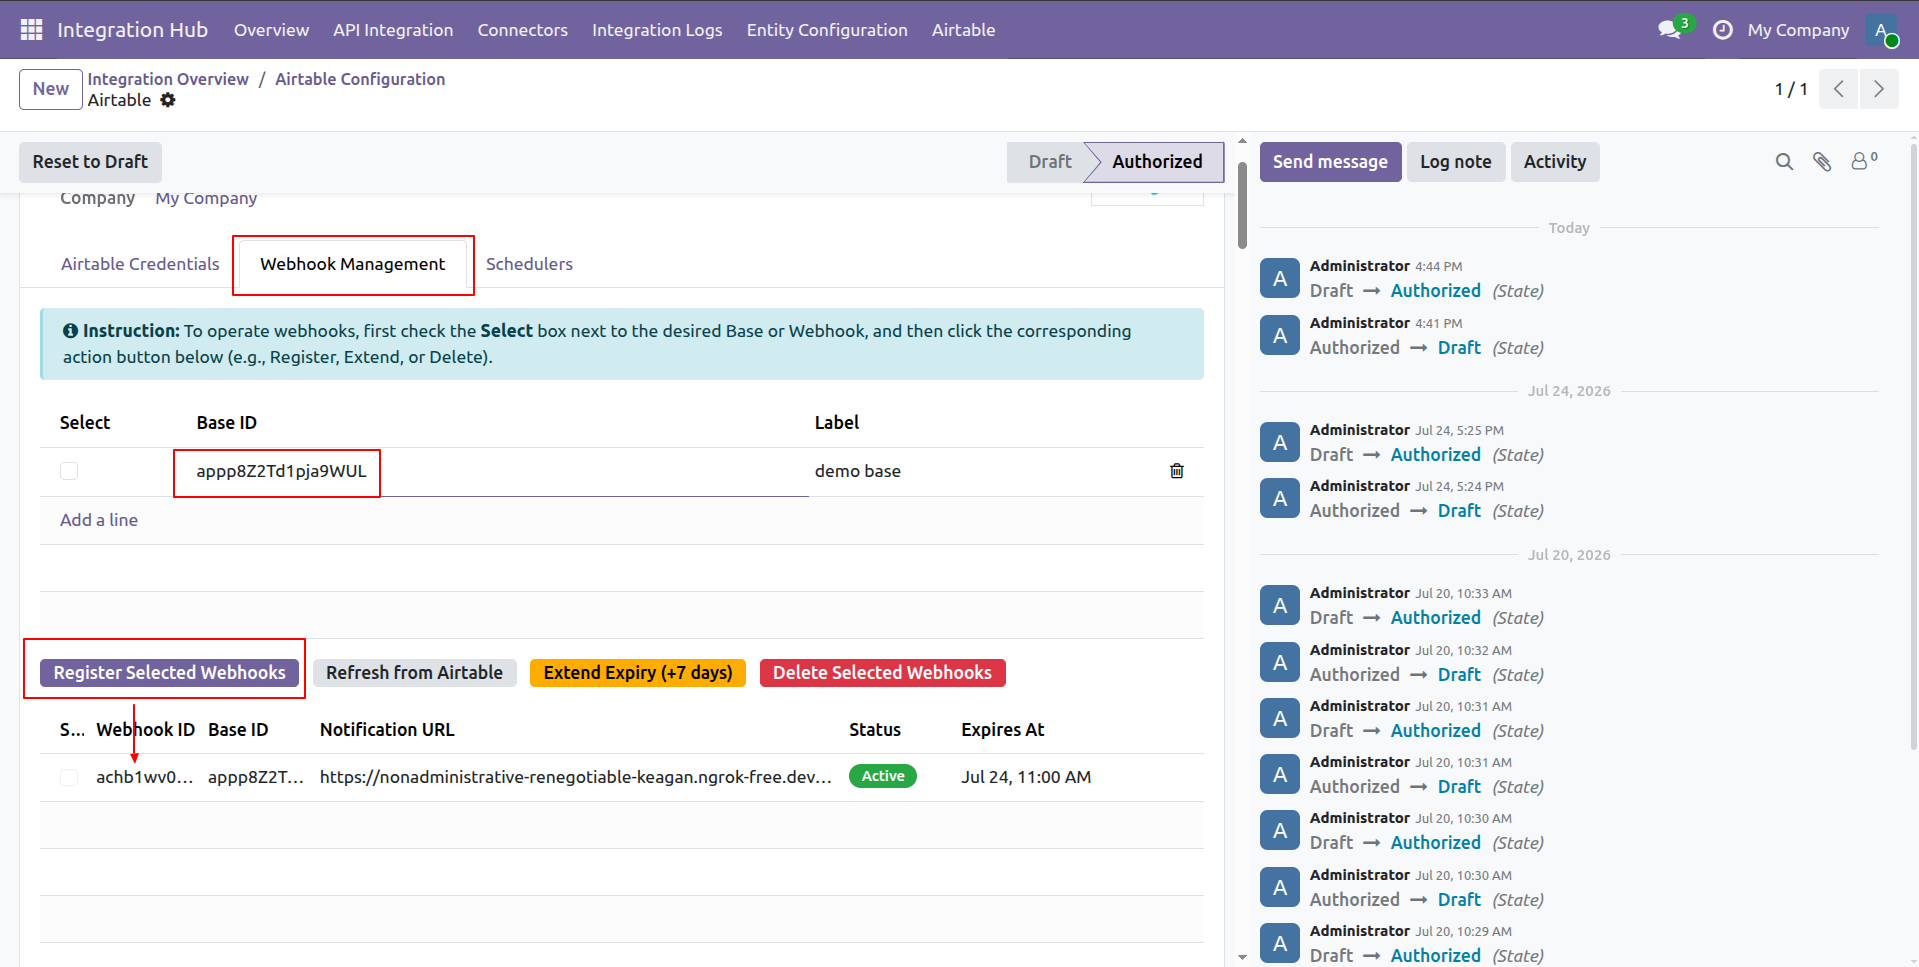
Select your Base ID and click Register Selected Webhooks to activate real-time webhooks.
Version 18.0.1.0.0 | Released on : 10th September 2026
- Yes, this app works perfectly with Odoo Enterprise (Odoo.sh & Premise) as well as Community.
- No, this application is not compatible with odoo.com(odoo saas/Odoo Online)
- Yes, to test this module, please contact us at sales@softhealer.com.
- Please contact us at sales@softhealer.com to request customization.
- Yes, we provide free support for 365 days from the date of purchase.
- Yes, you will receive lifetime free updates for the version of the module you purchased.
- No, there is no need to install any additional libraries.
- Yes, for version 12 and above, you need to purchase the module separately for each version you intend to use.
- No, exchanges or refunds are not allowed. Please make sure to select the correct version before purchasing.
- You can contact us at support@softhealer.com for language translation support. We use Google Translator tools to provide translations in multiple languages, so the accuracy may vary. We welcome your suggestions to help improve translations.
Discover Our Latest Apps