








Advanced Mailchimp Odoo Connector

Experience seamless marketing automation with our Odoo Mailchimp Connector. Effortlessly synchronize contacts, audiences, and mailing lists between Odoo and Mailchimp. Track campaign performance with real-time statistics on our interactive dashboard. Manage segments and templates directly from Odoo, and leverage automated cron jobs for consistent data sync. Enhance your marketing reach today!
Features

Import From Mailchimp
 Audience
/ Lists
Audience
/ Lists- Contact
/ Members
- Segment
- Campaign
- Template

Export from Odoo to Mailchimp
- Audience
/ Lists
- Contact
/ Members
- Segment
- Campaign
- Template
Webhook Automation
-
Automatically sync audience updates in real time using Mailchimp webhook
automation.
Dashboard
-
Monitor Mailchimp synchronization activities, connection status, queue
operations, and integration performance from a centralized dashboard.

Synchronization Logs
-
Track Mailchimp synchronization activities with detailed logs for imports,
exports, automation events, and sync status monitoring.

Integration Hub
-
A centralized view to track the status of all connectors, recent activities, and
synchronization stats.

Access Rights
-
Security groups to control who can manage credentials, sync data, or view system
logs.
Platform Walkthrough
Explore the intuitive interface designed for maximum efficiency.

Workflow
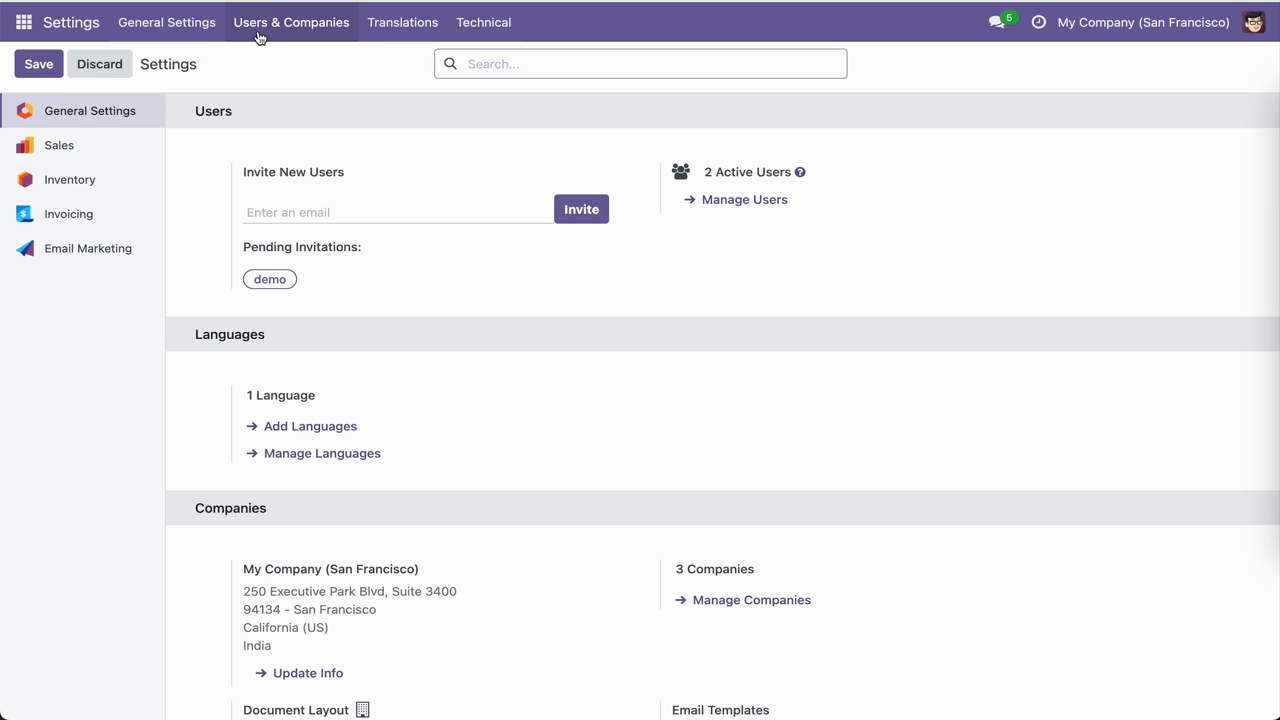
Open Users & Companies settings to review available users and company access.
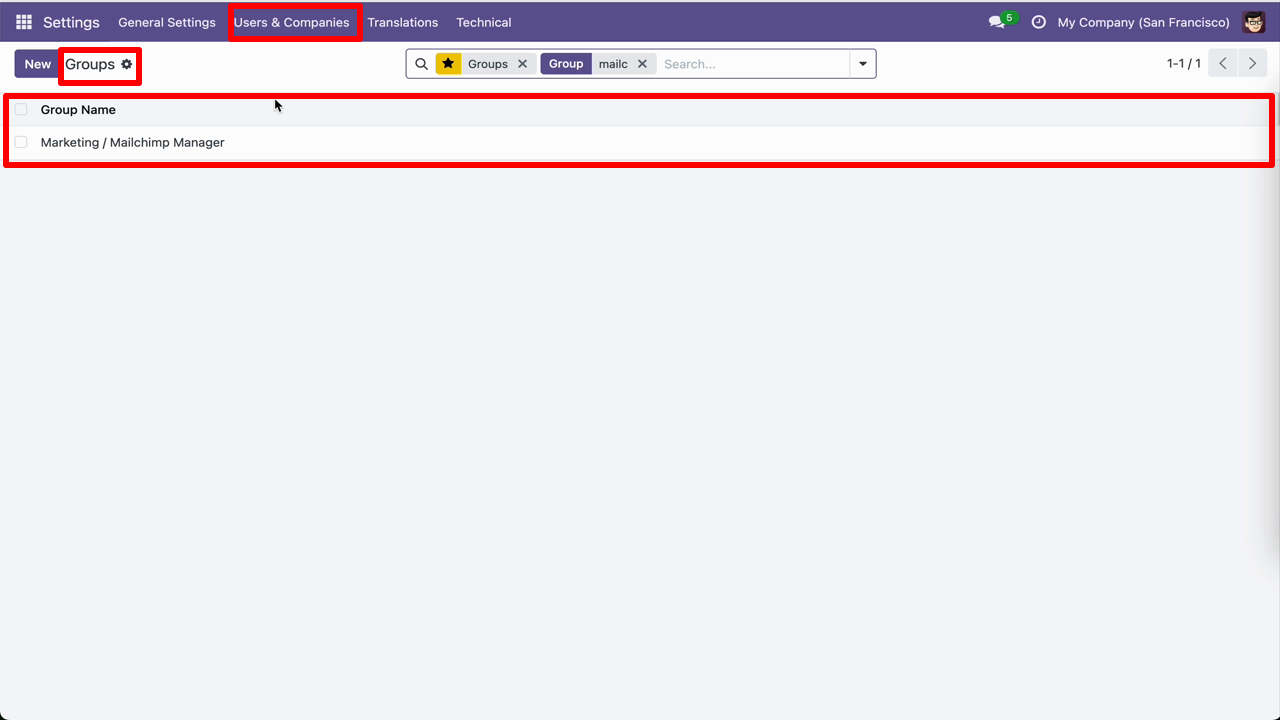
Open the Groups list to review the Marketing / Mailchimp Manager group.
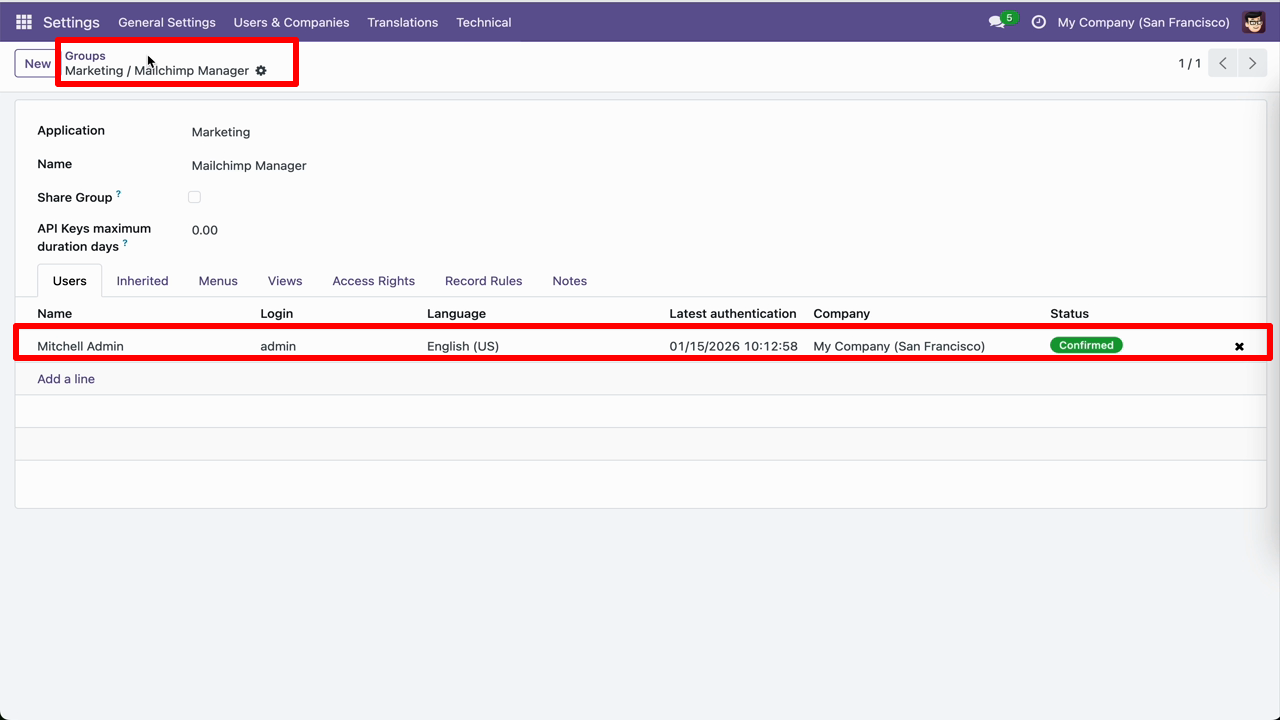
Review users assigned to the Mailchimp Manager group from the Users tab.
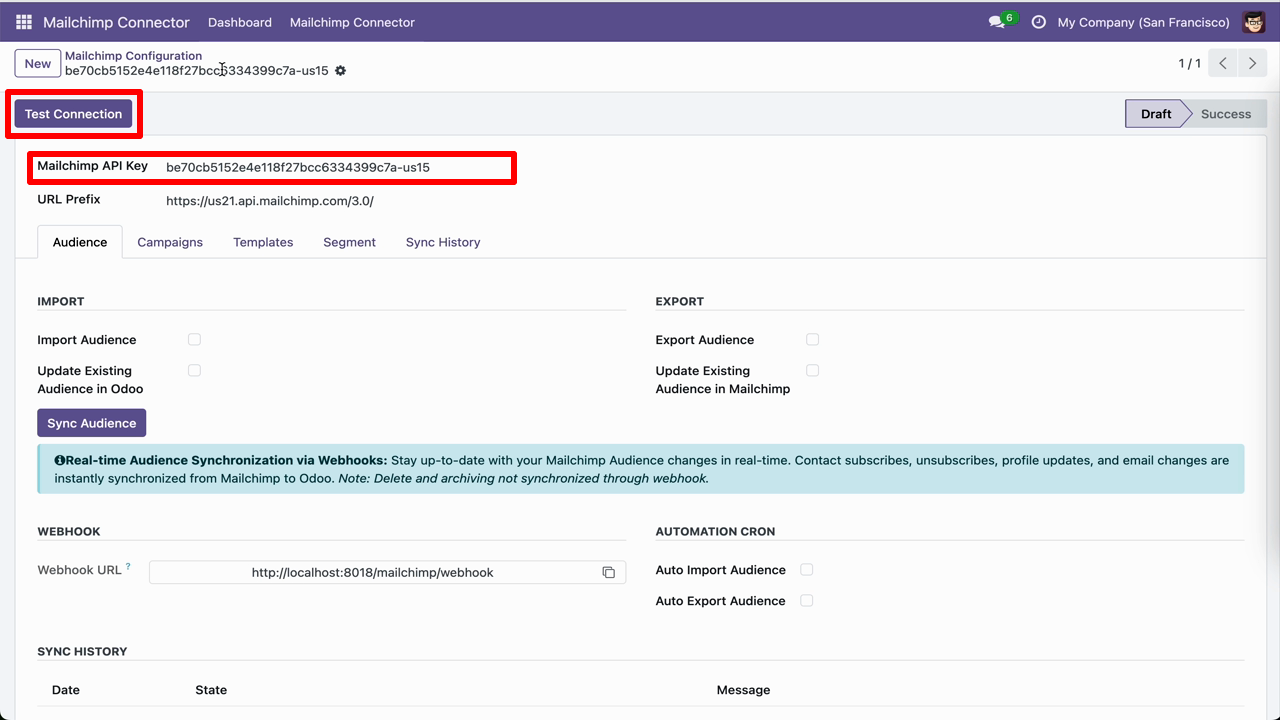
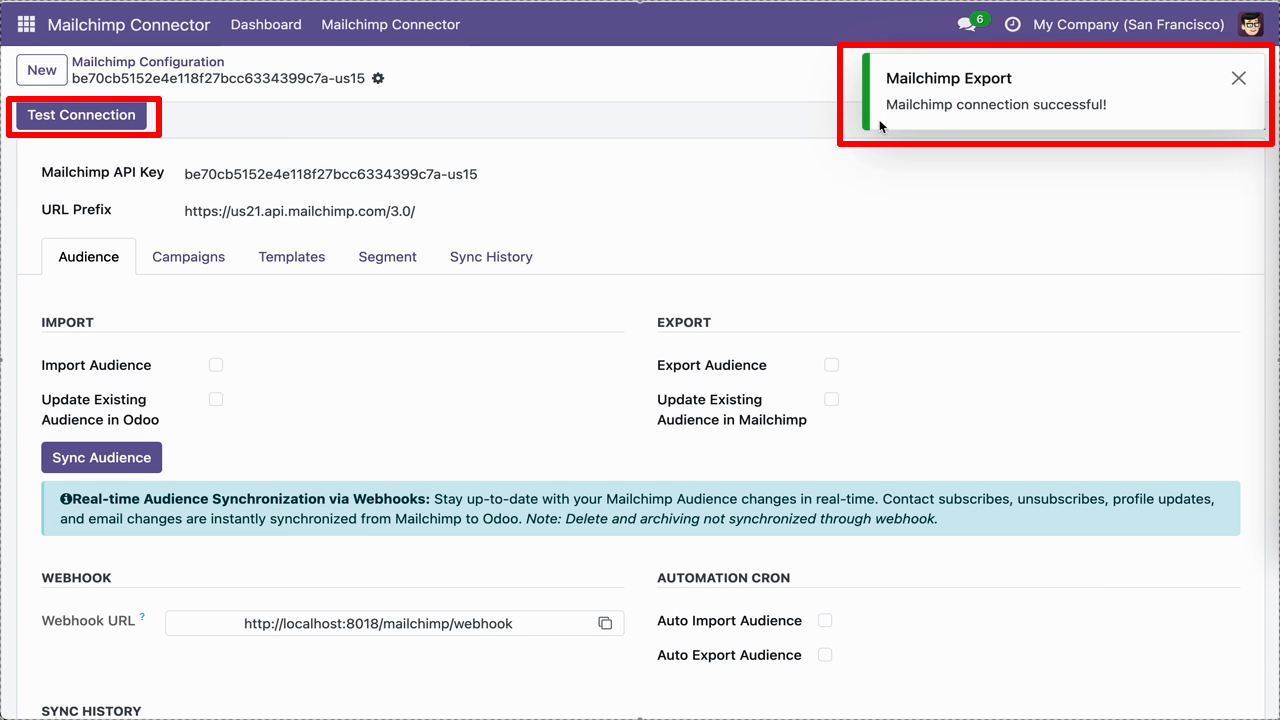
Enter the Mailchimp API Key and click Test Connection to validate access.
Review the success notification after testing the Mailchimp connection.
Workflow
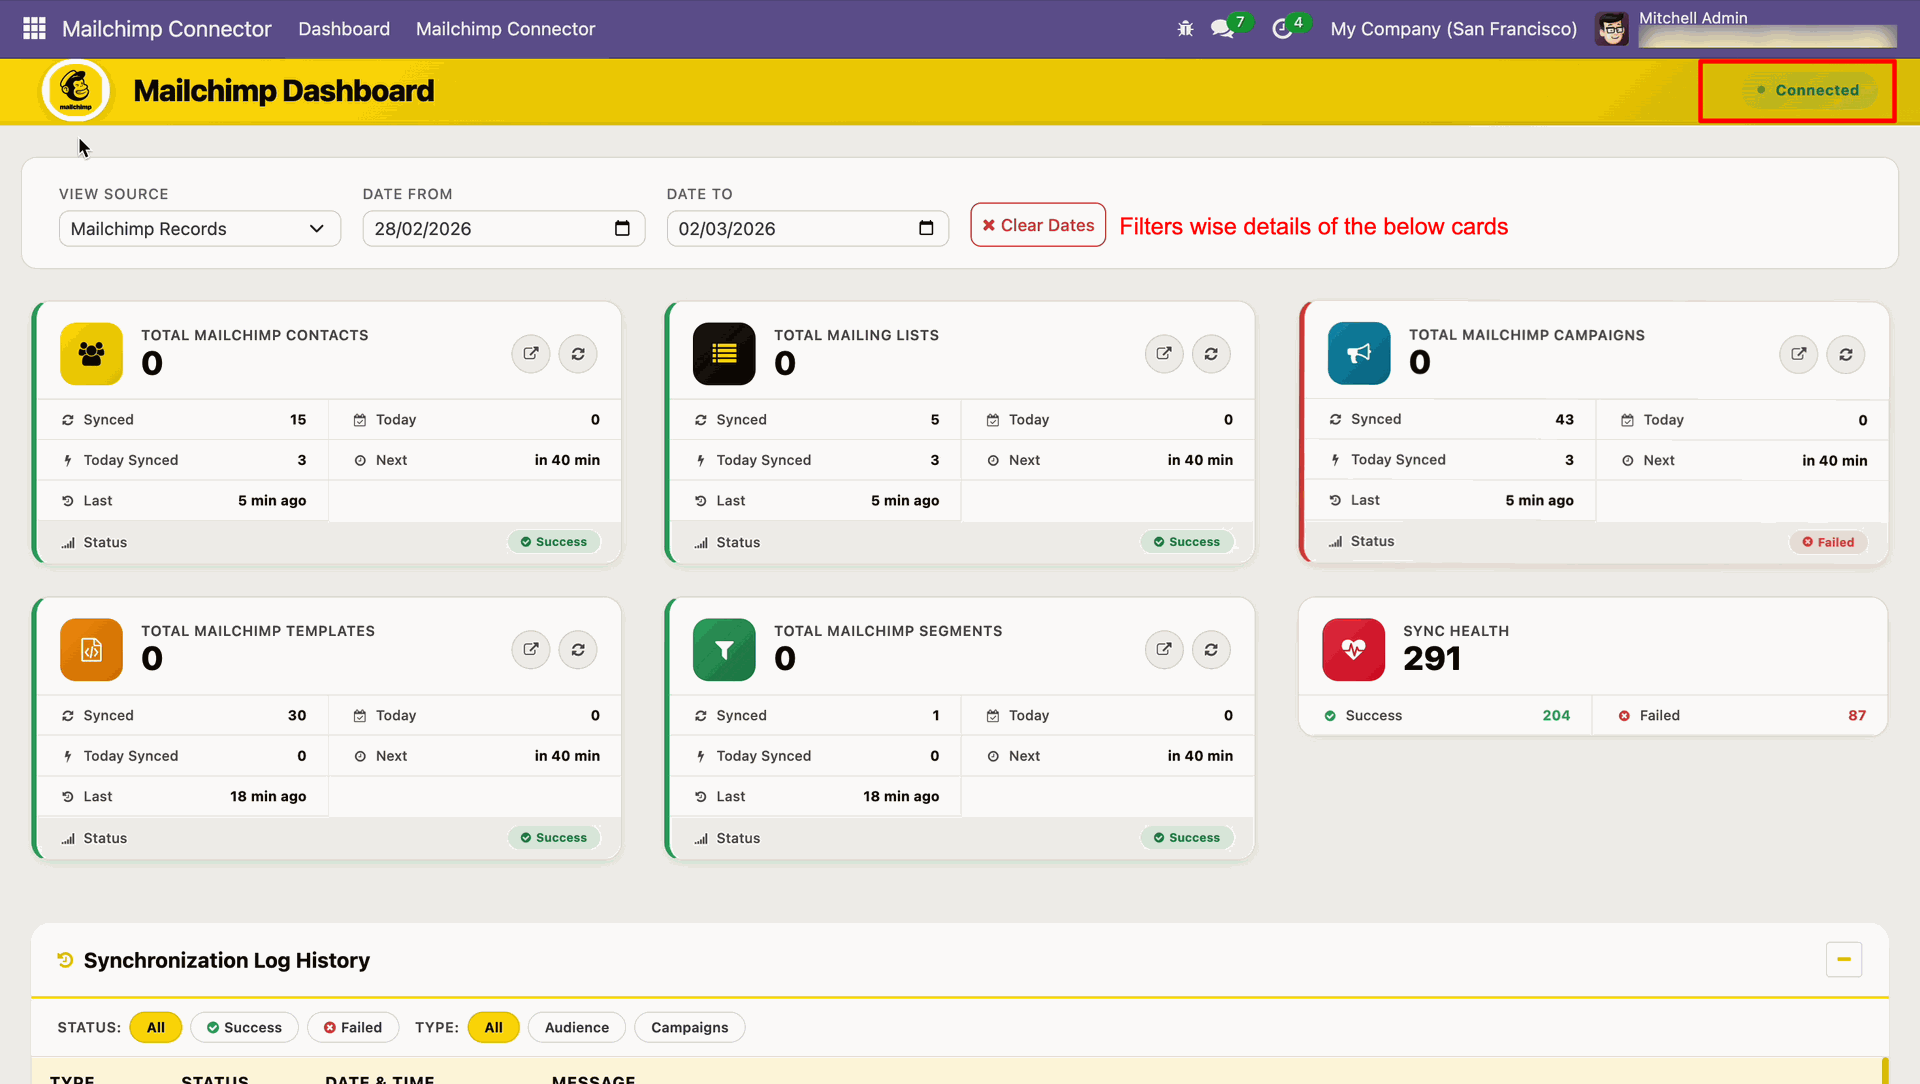
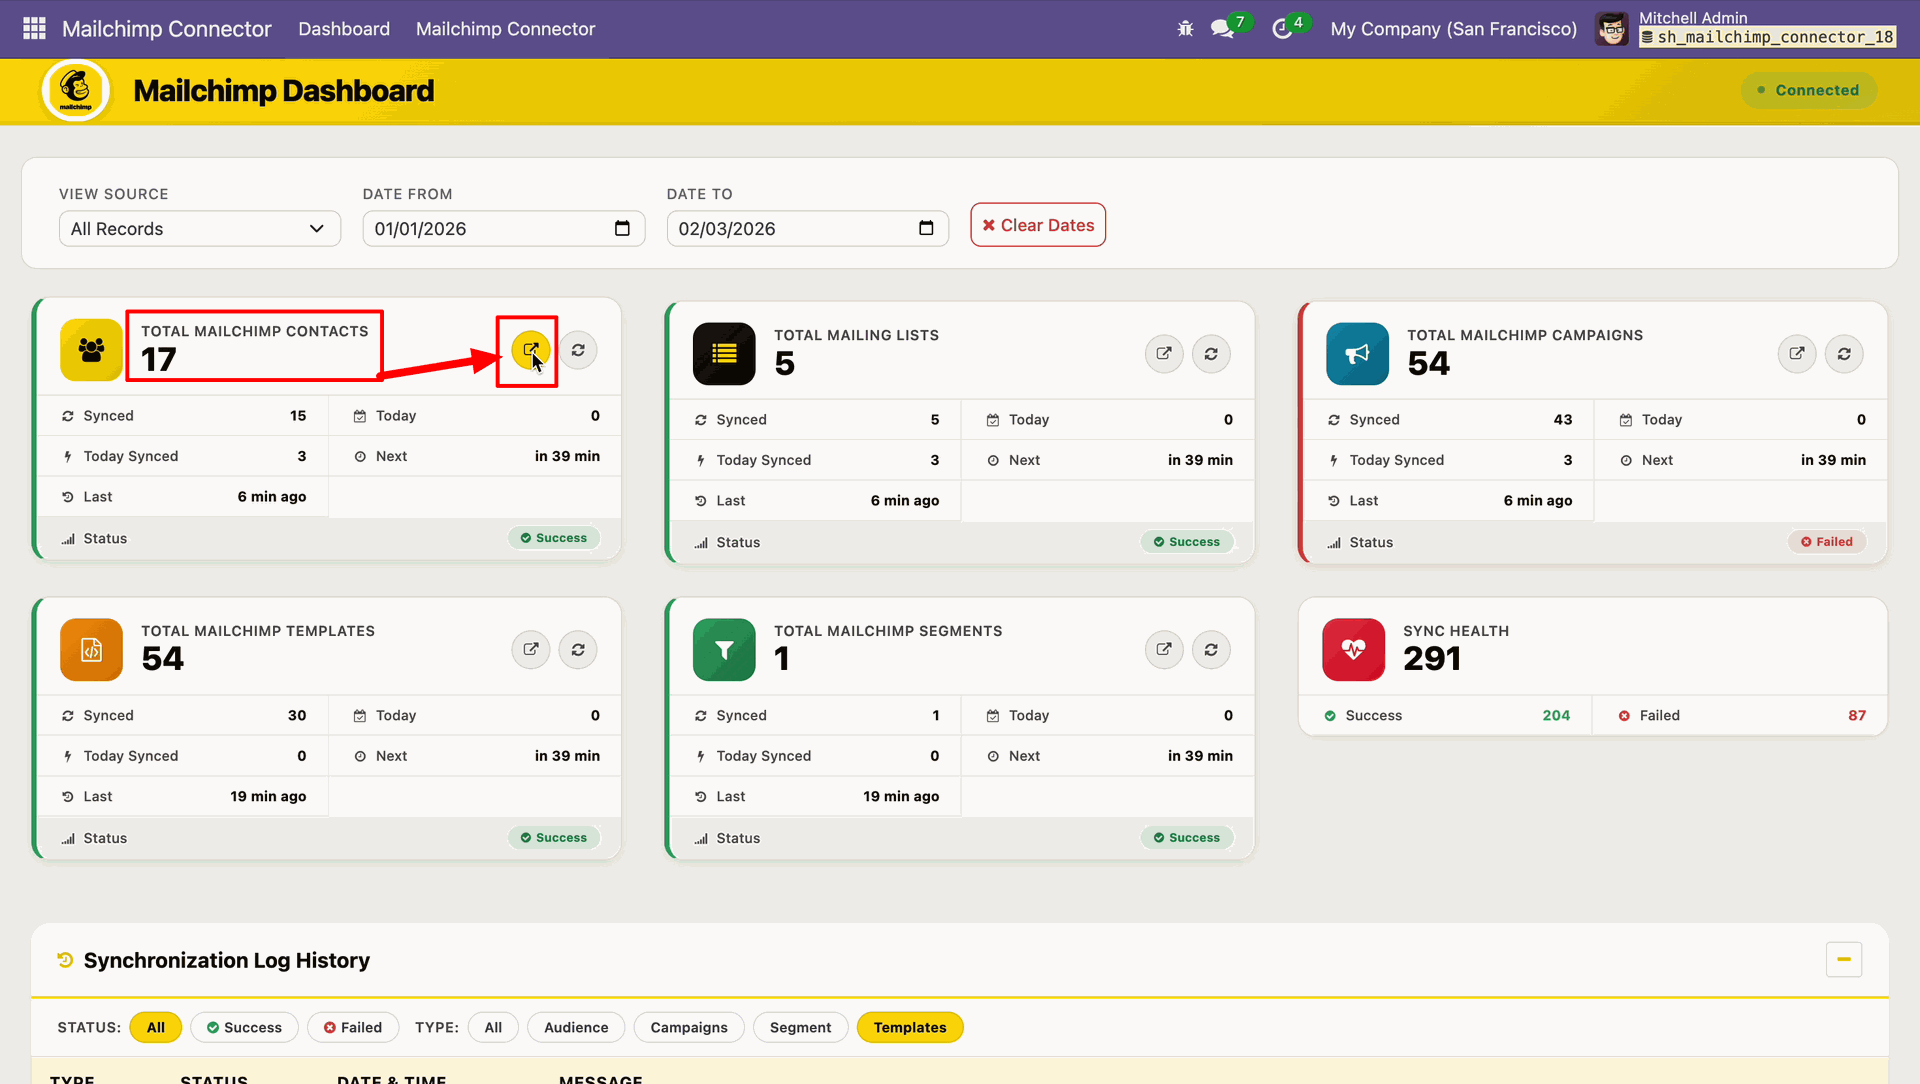
Review dashboard cards after connecting the Mailchimp dashboard successfully.
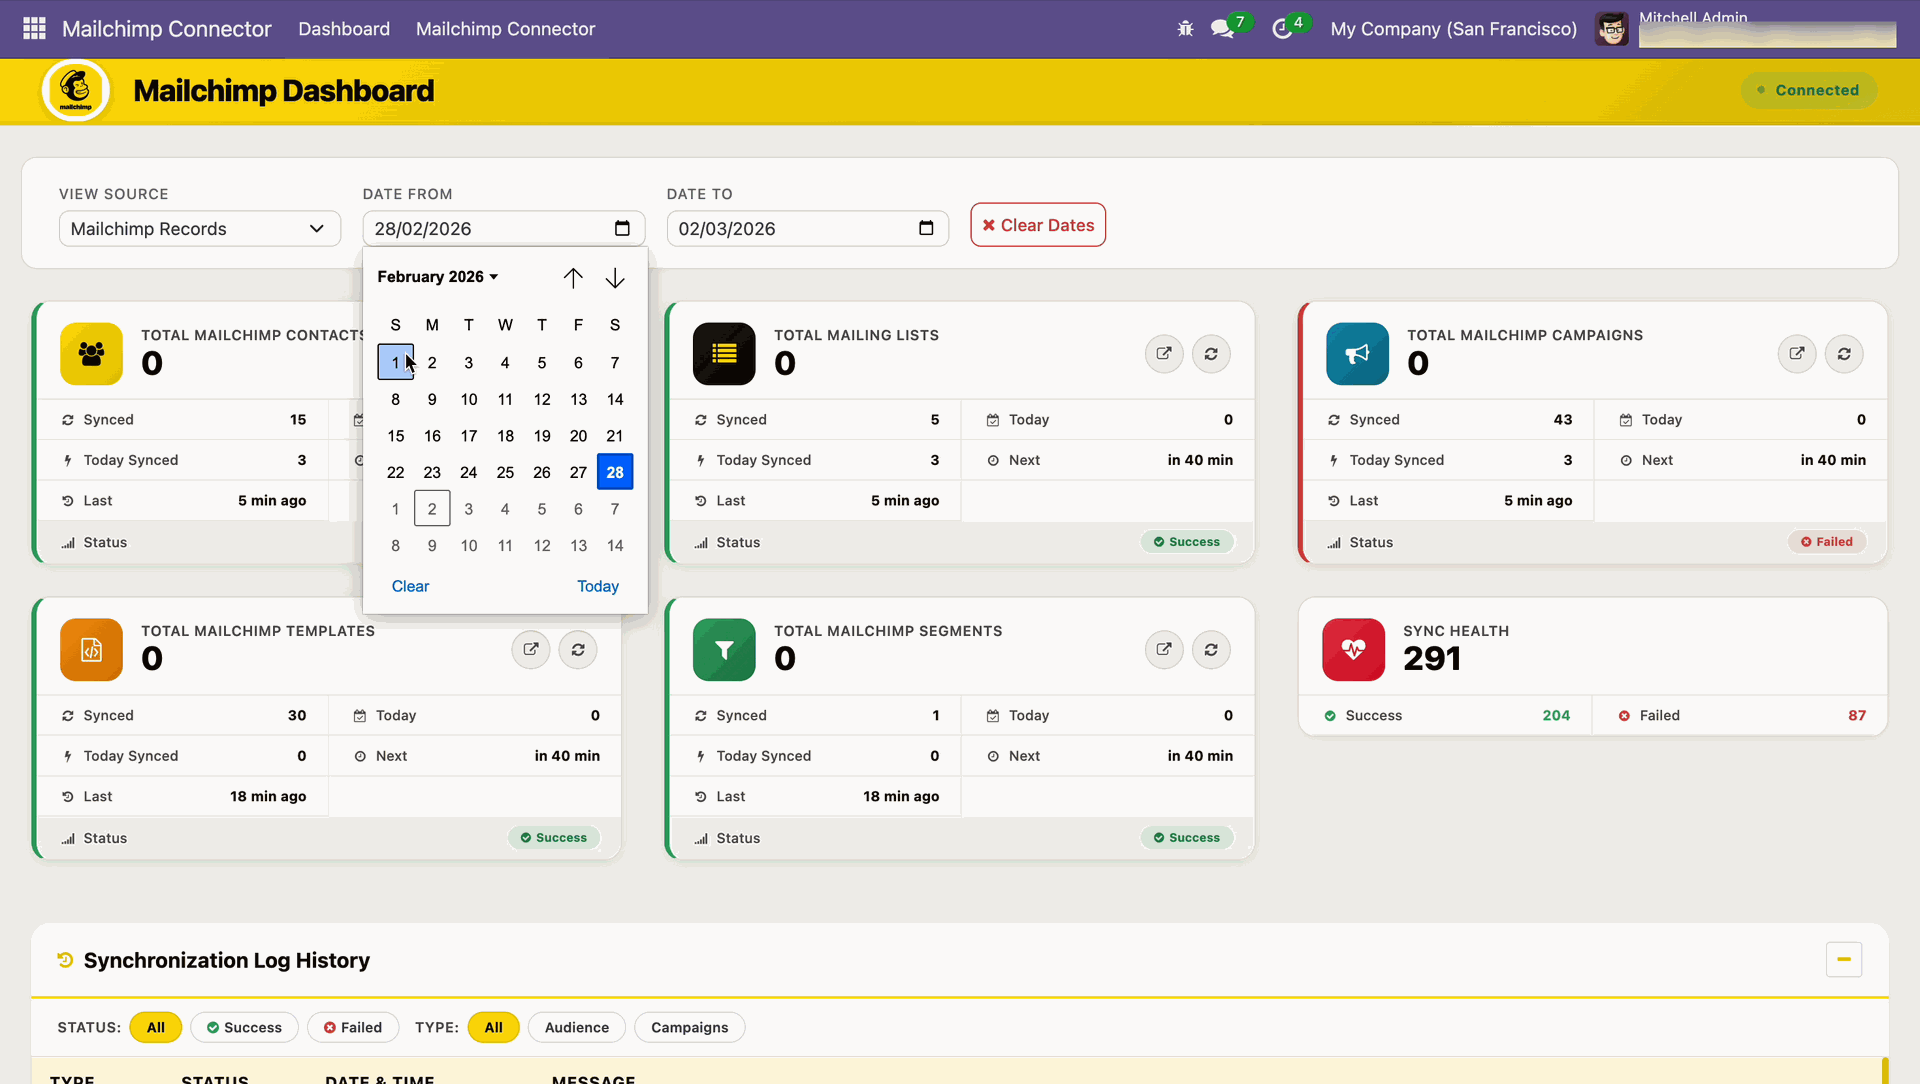
Select the Date From value to filter dashboard metrics by period.
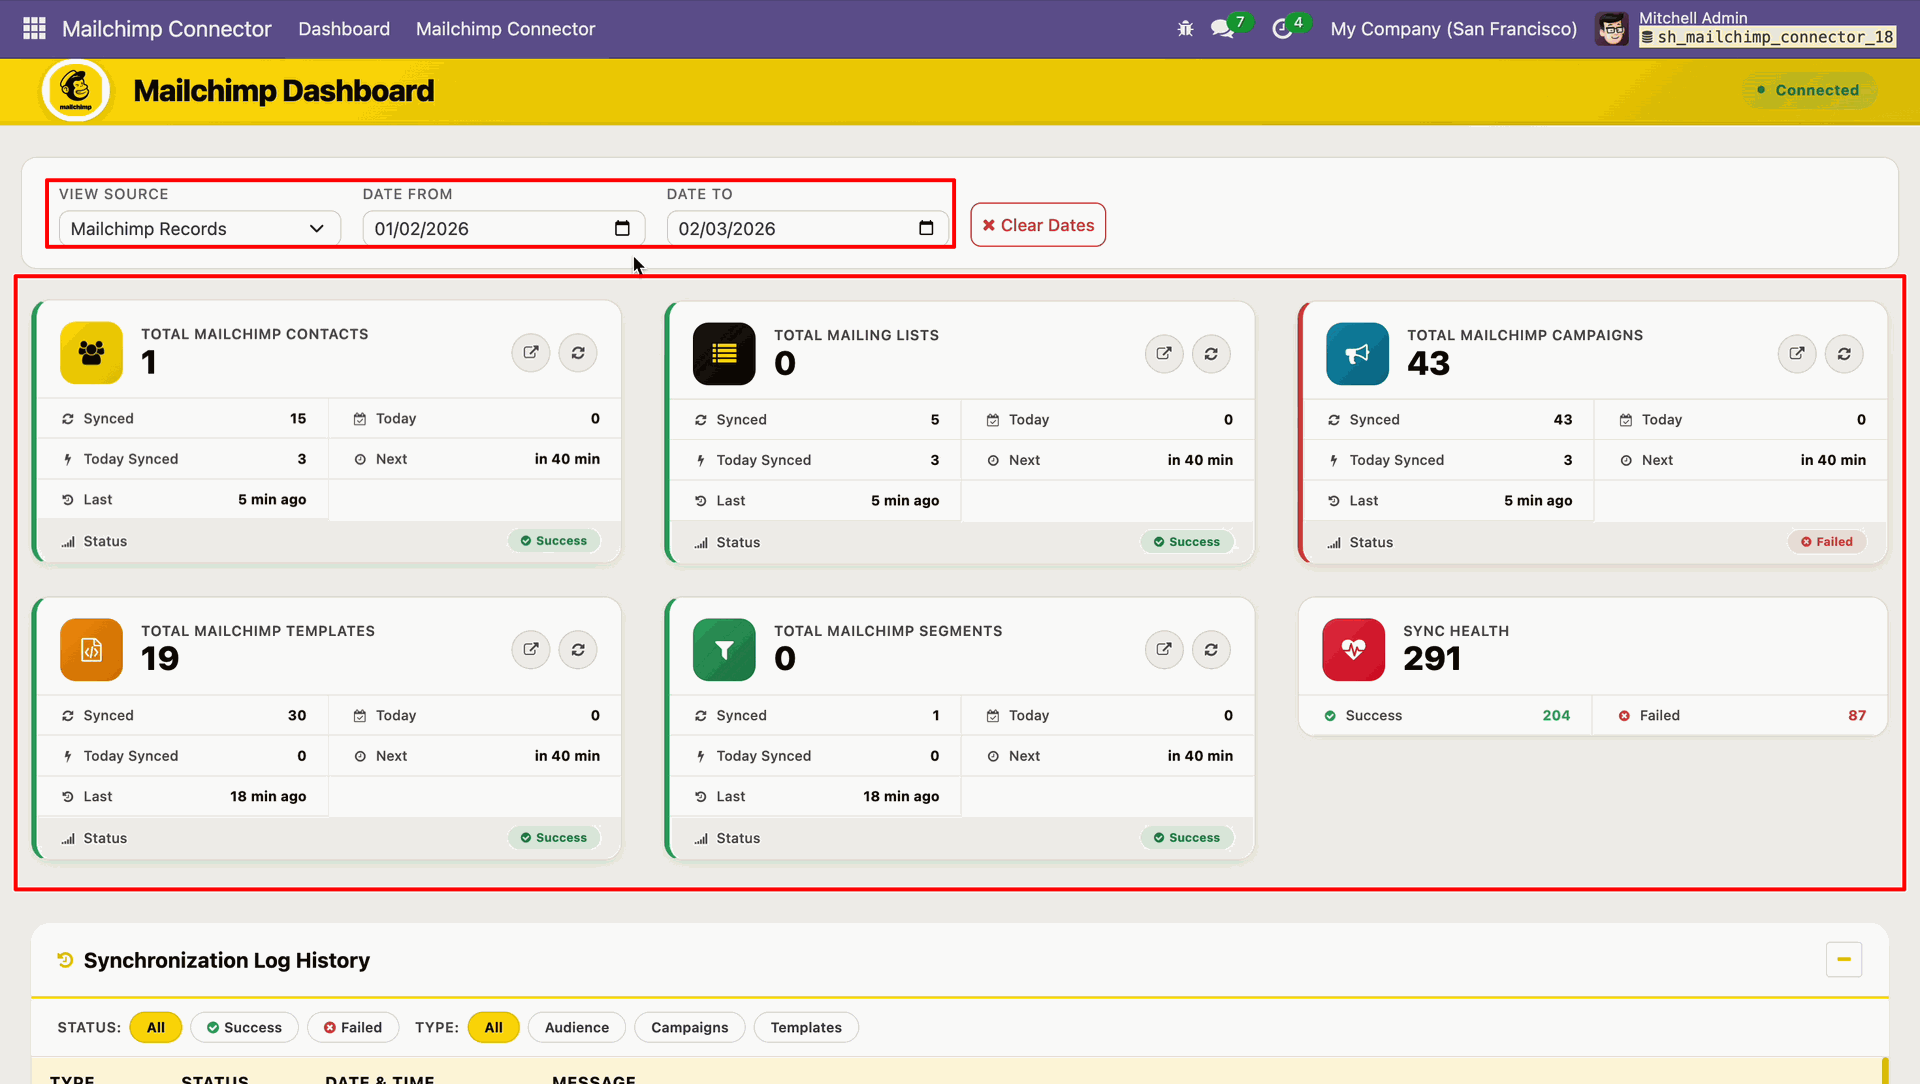
Apply source and date filters to refresh the dashboard summary cards.
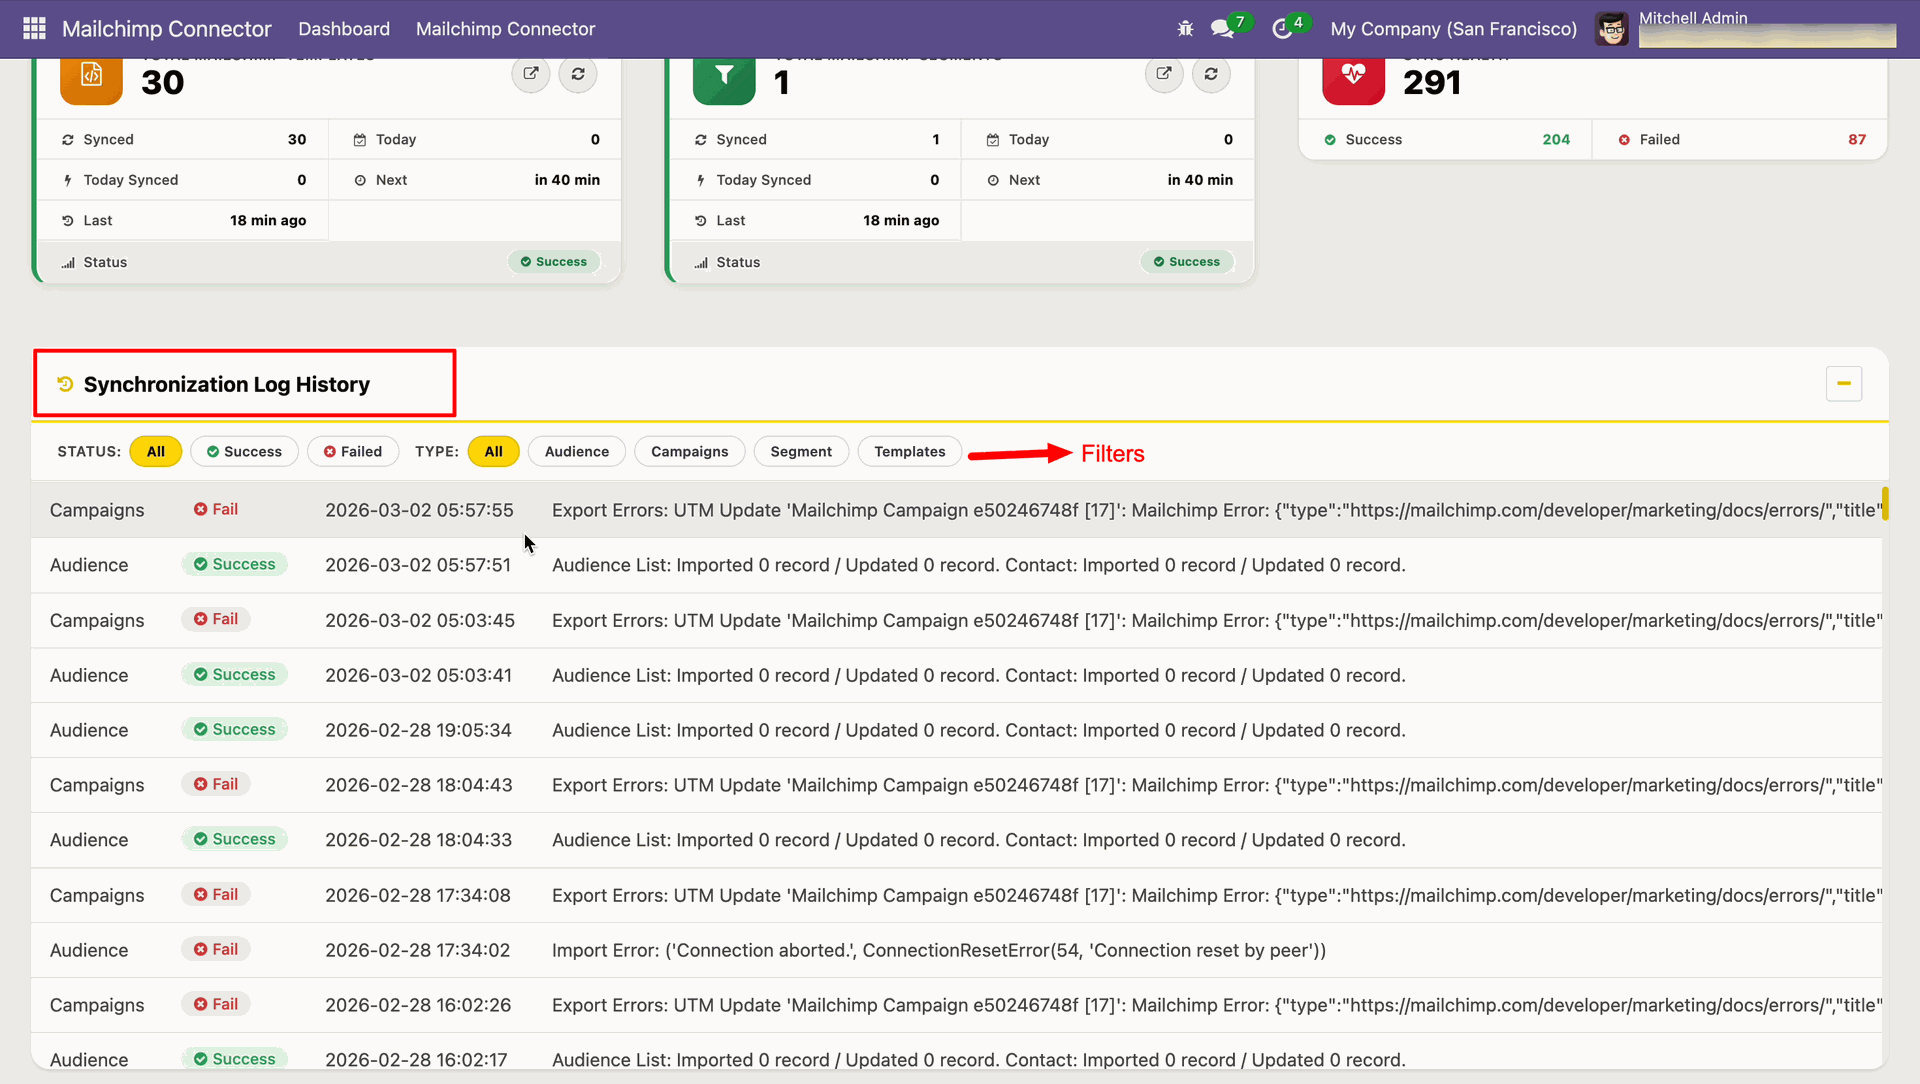
Review Synchronization Log History filters and recent processing messages.
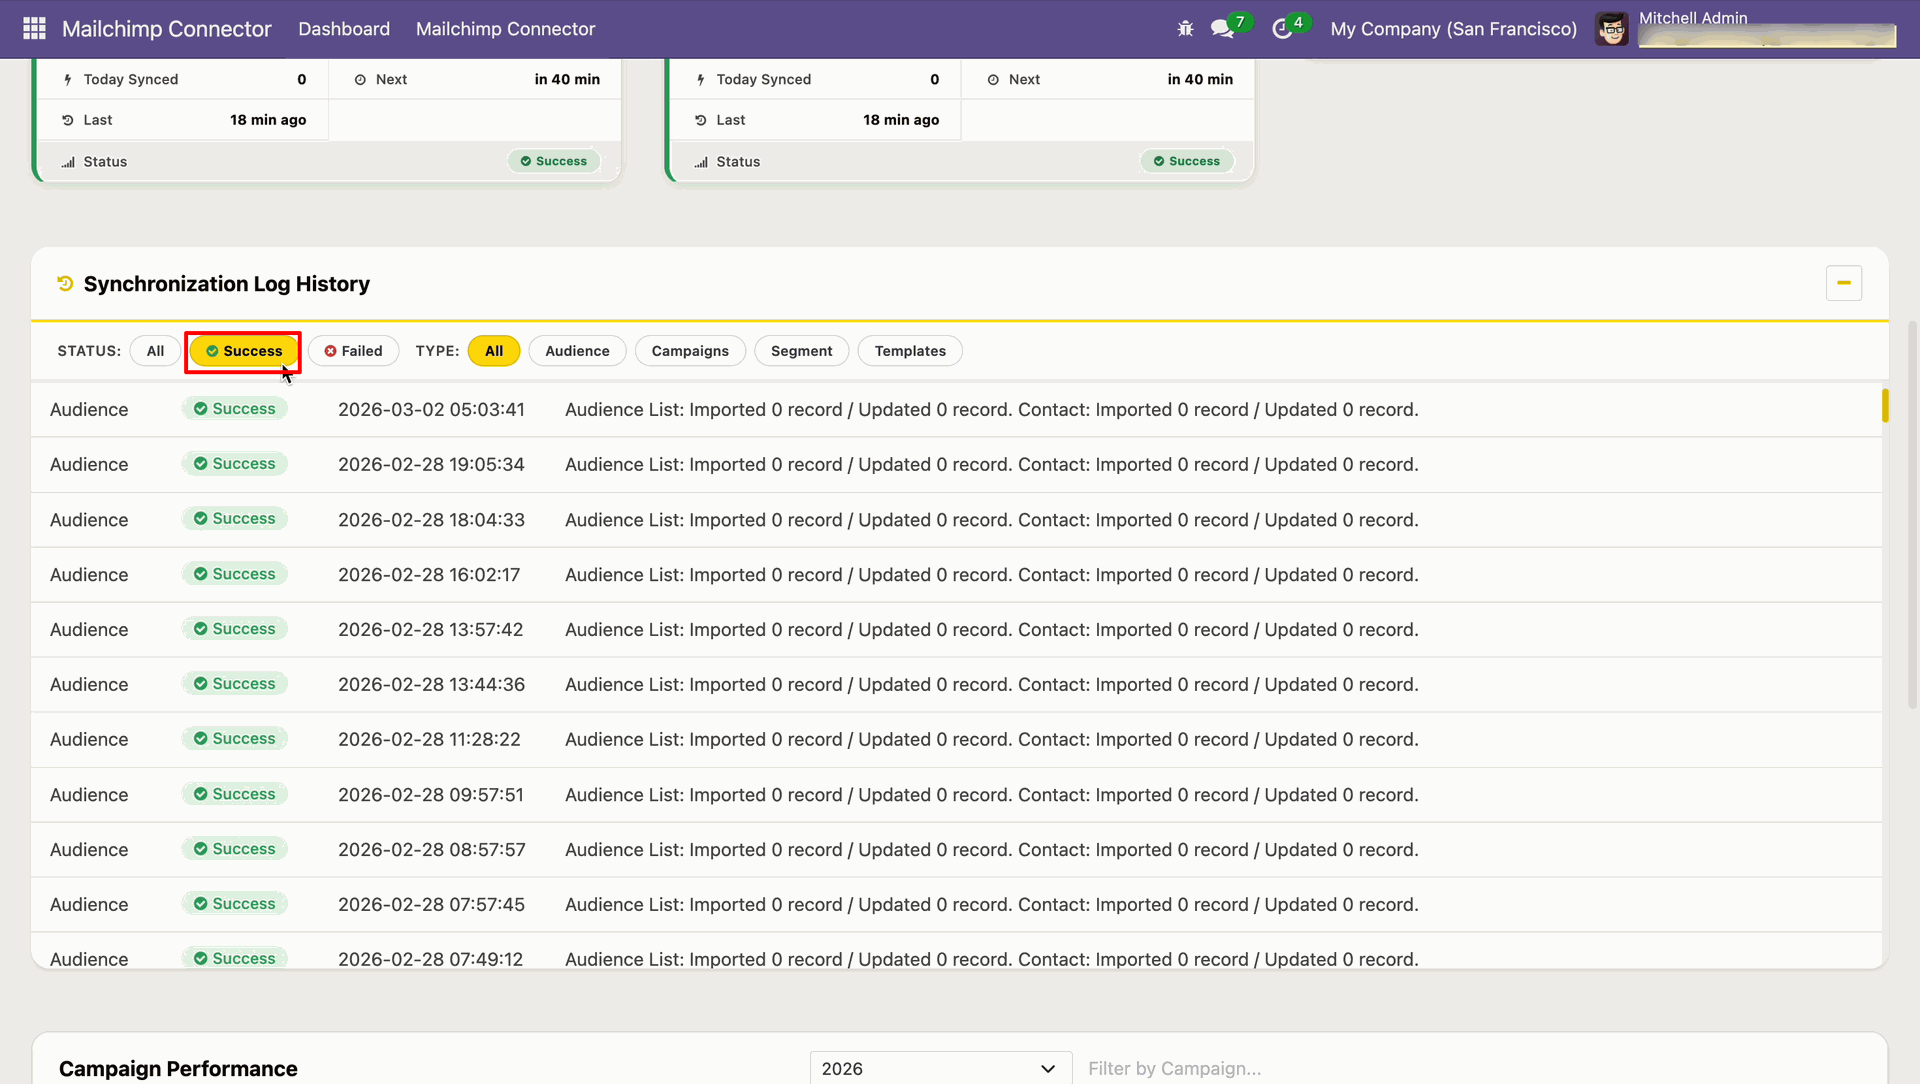
Filter synchronization logs to display only successful records.
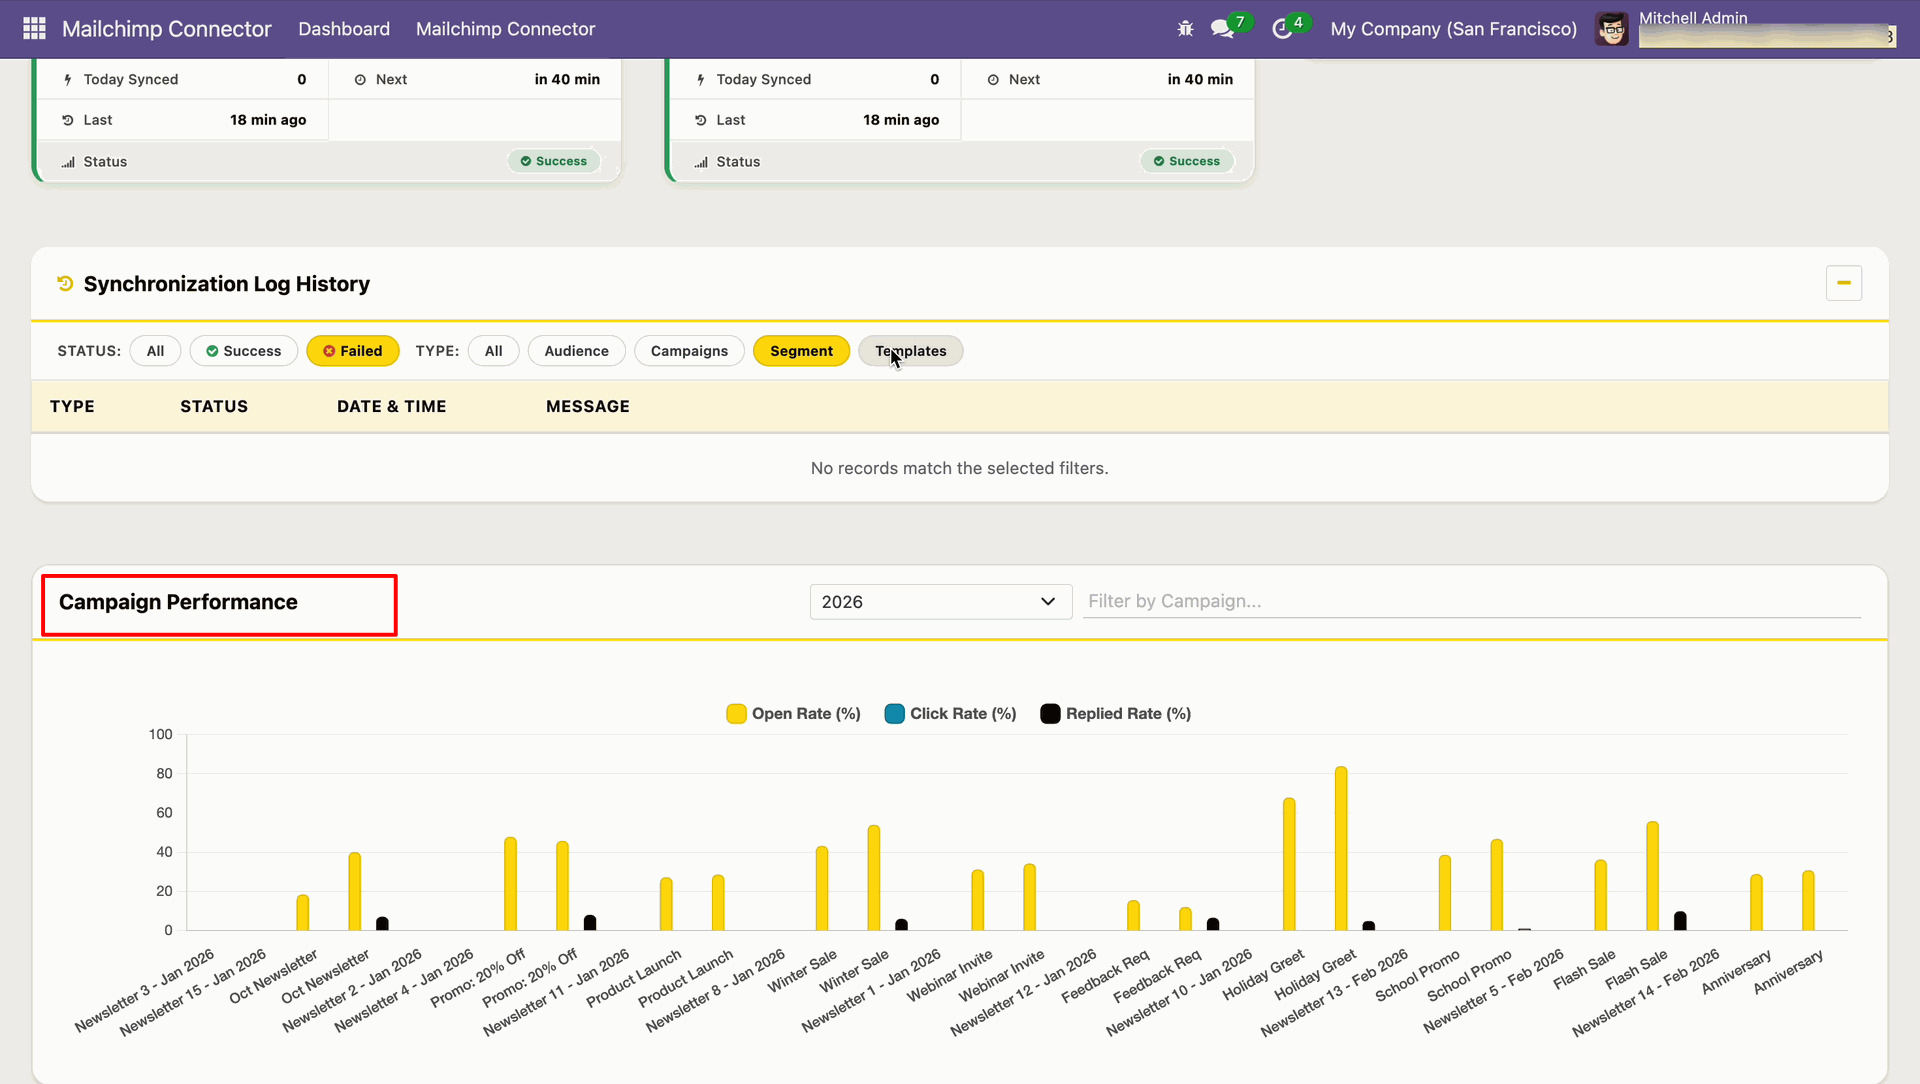
Review the Campaign Performance chart for the selected log filters.
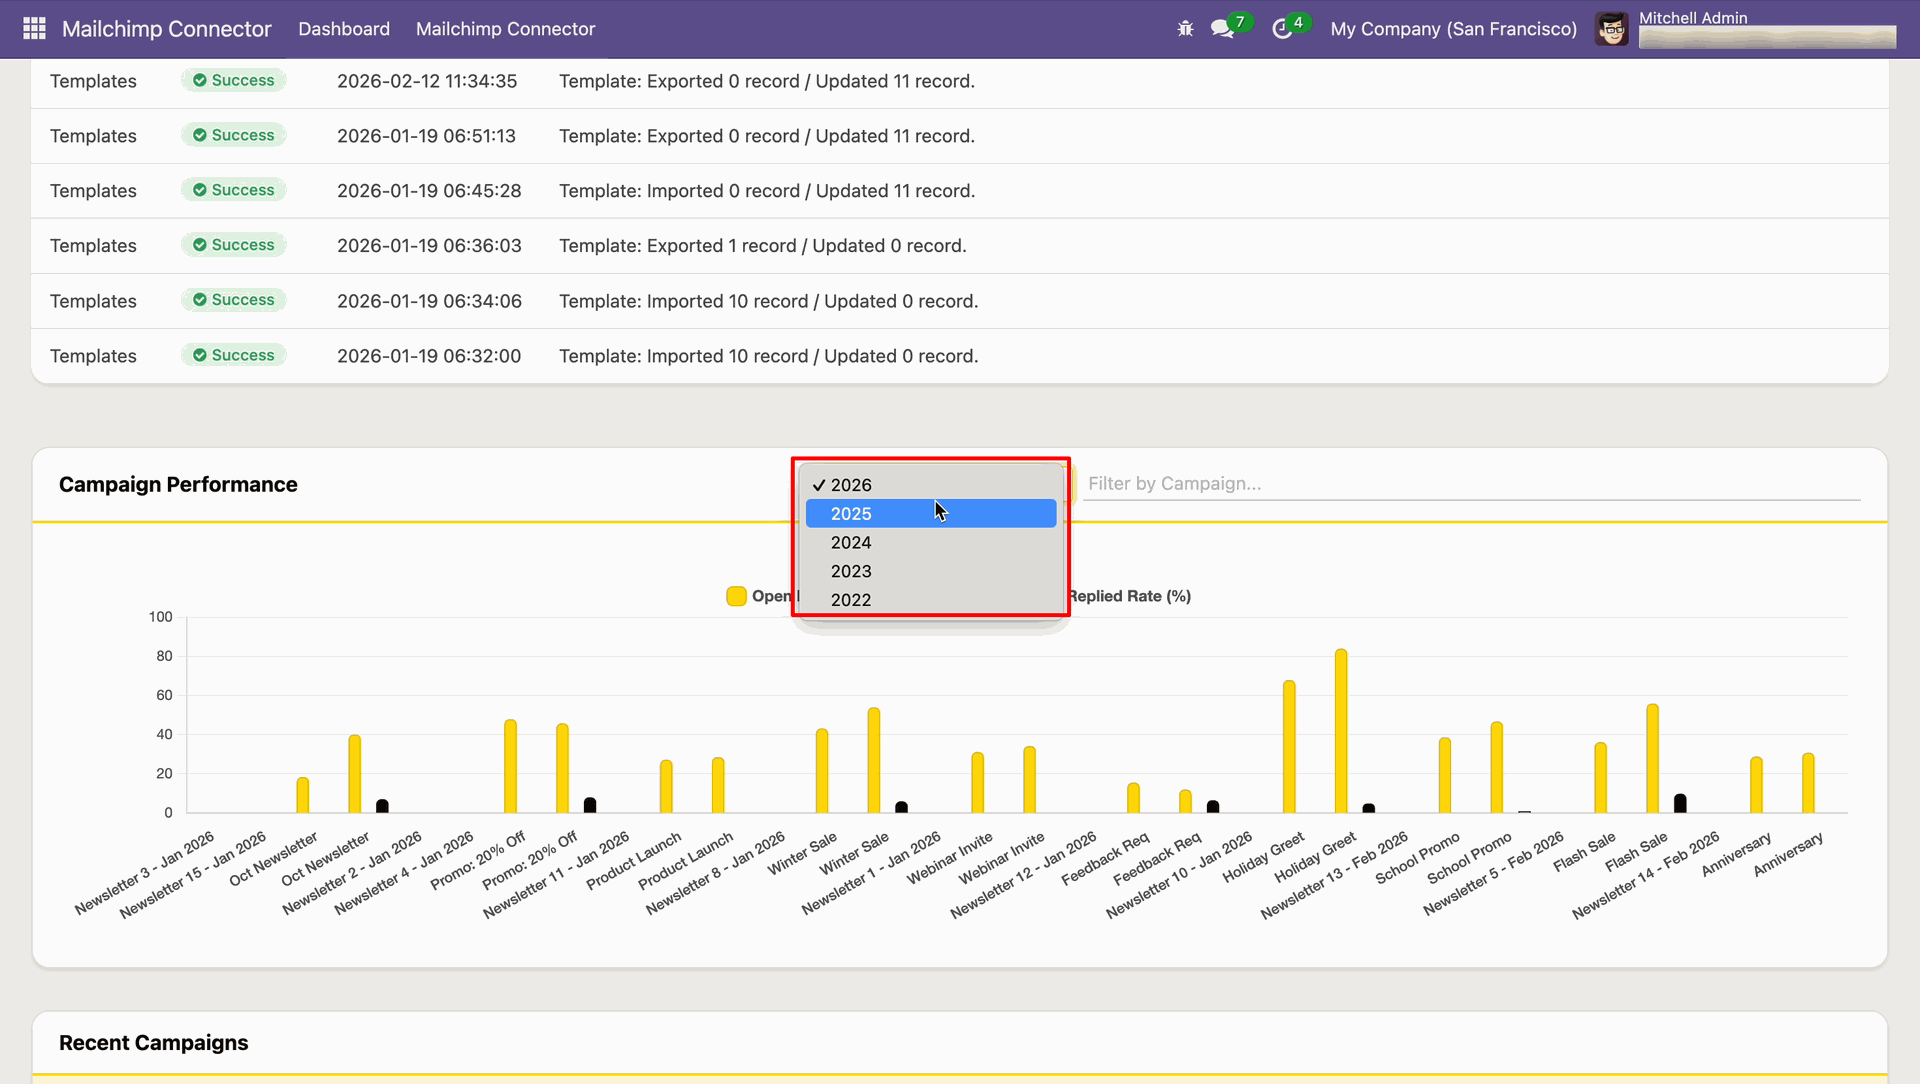
Choose a reporting year from the Campaign Performance dropdown.
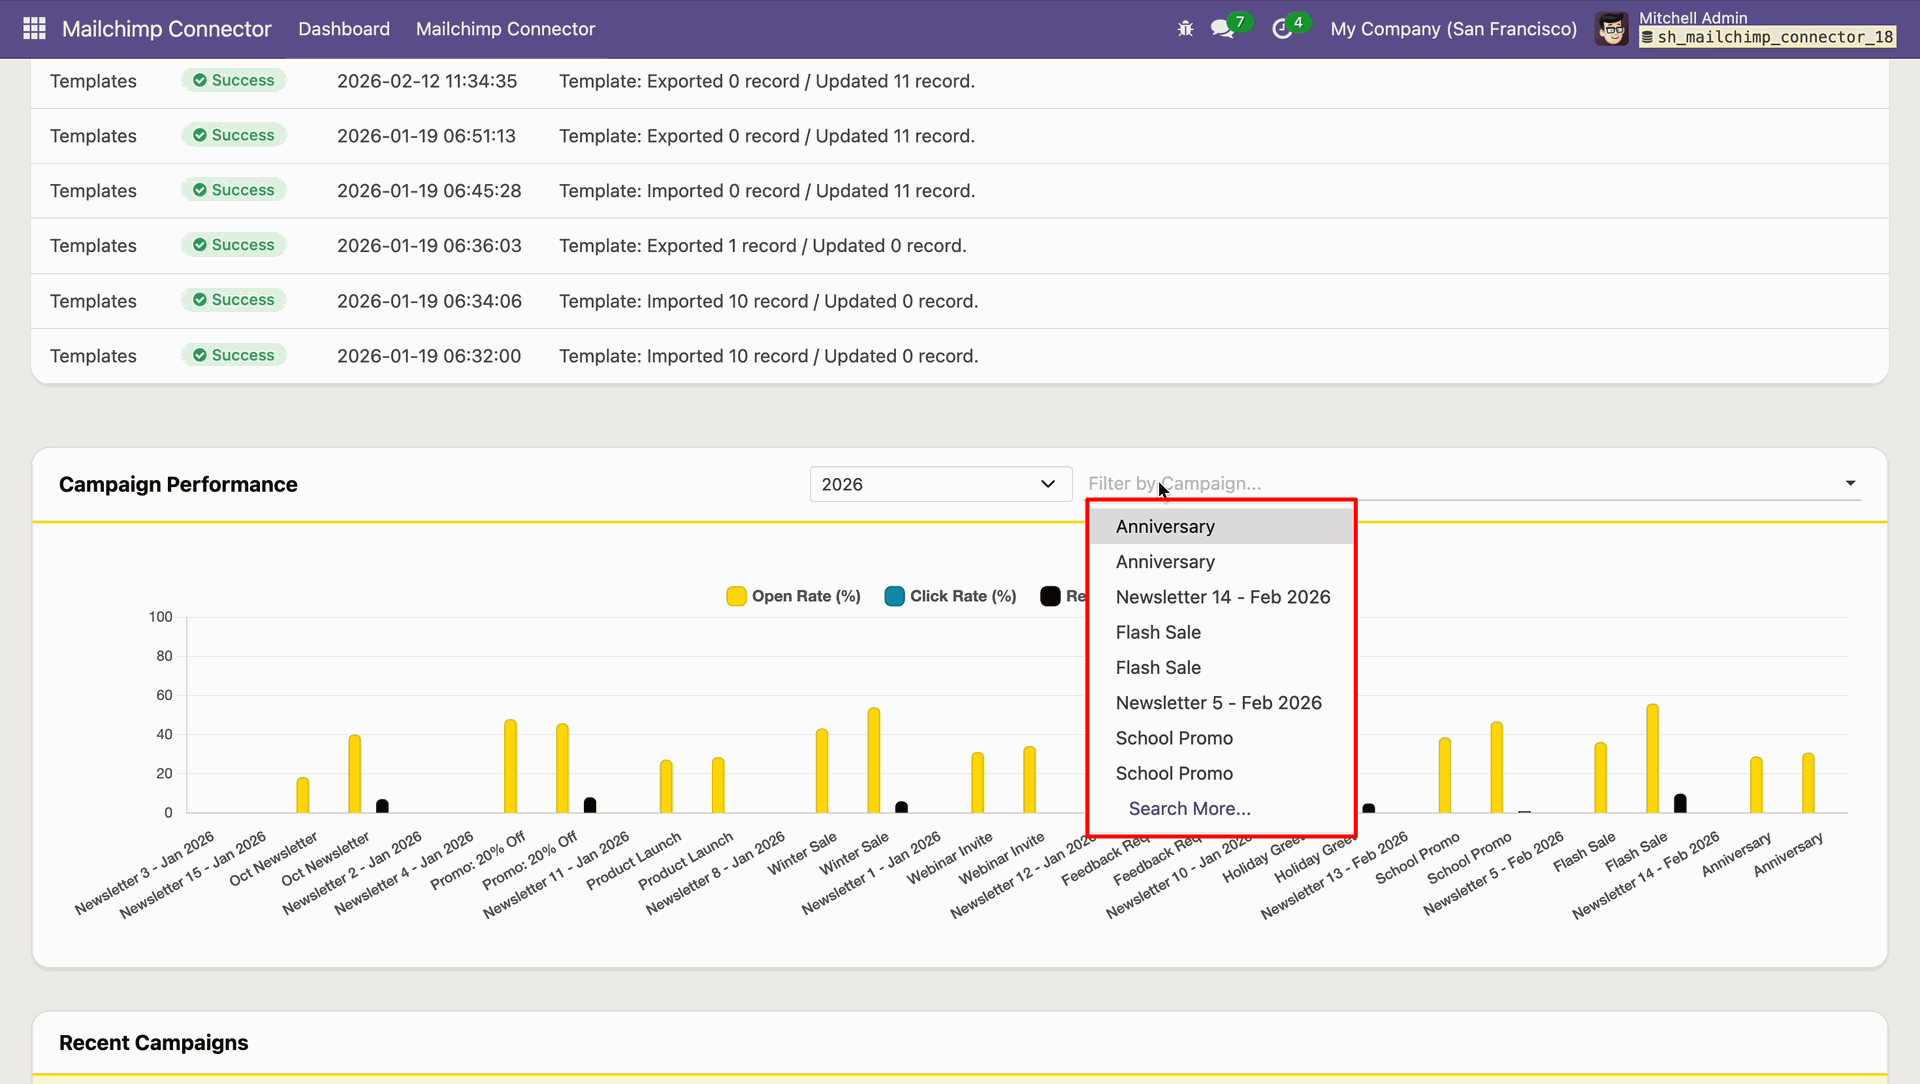
Select a campaign from the filter list to narrow chart results.
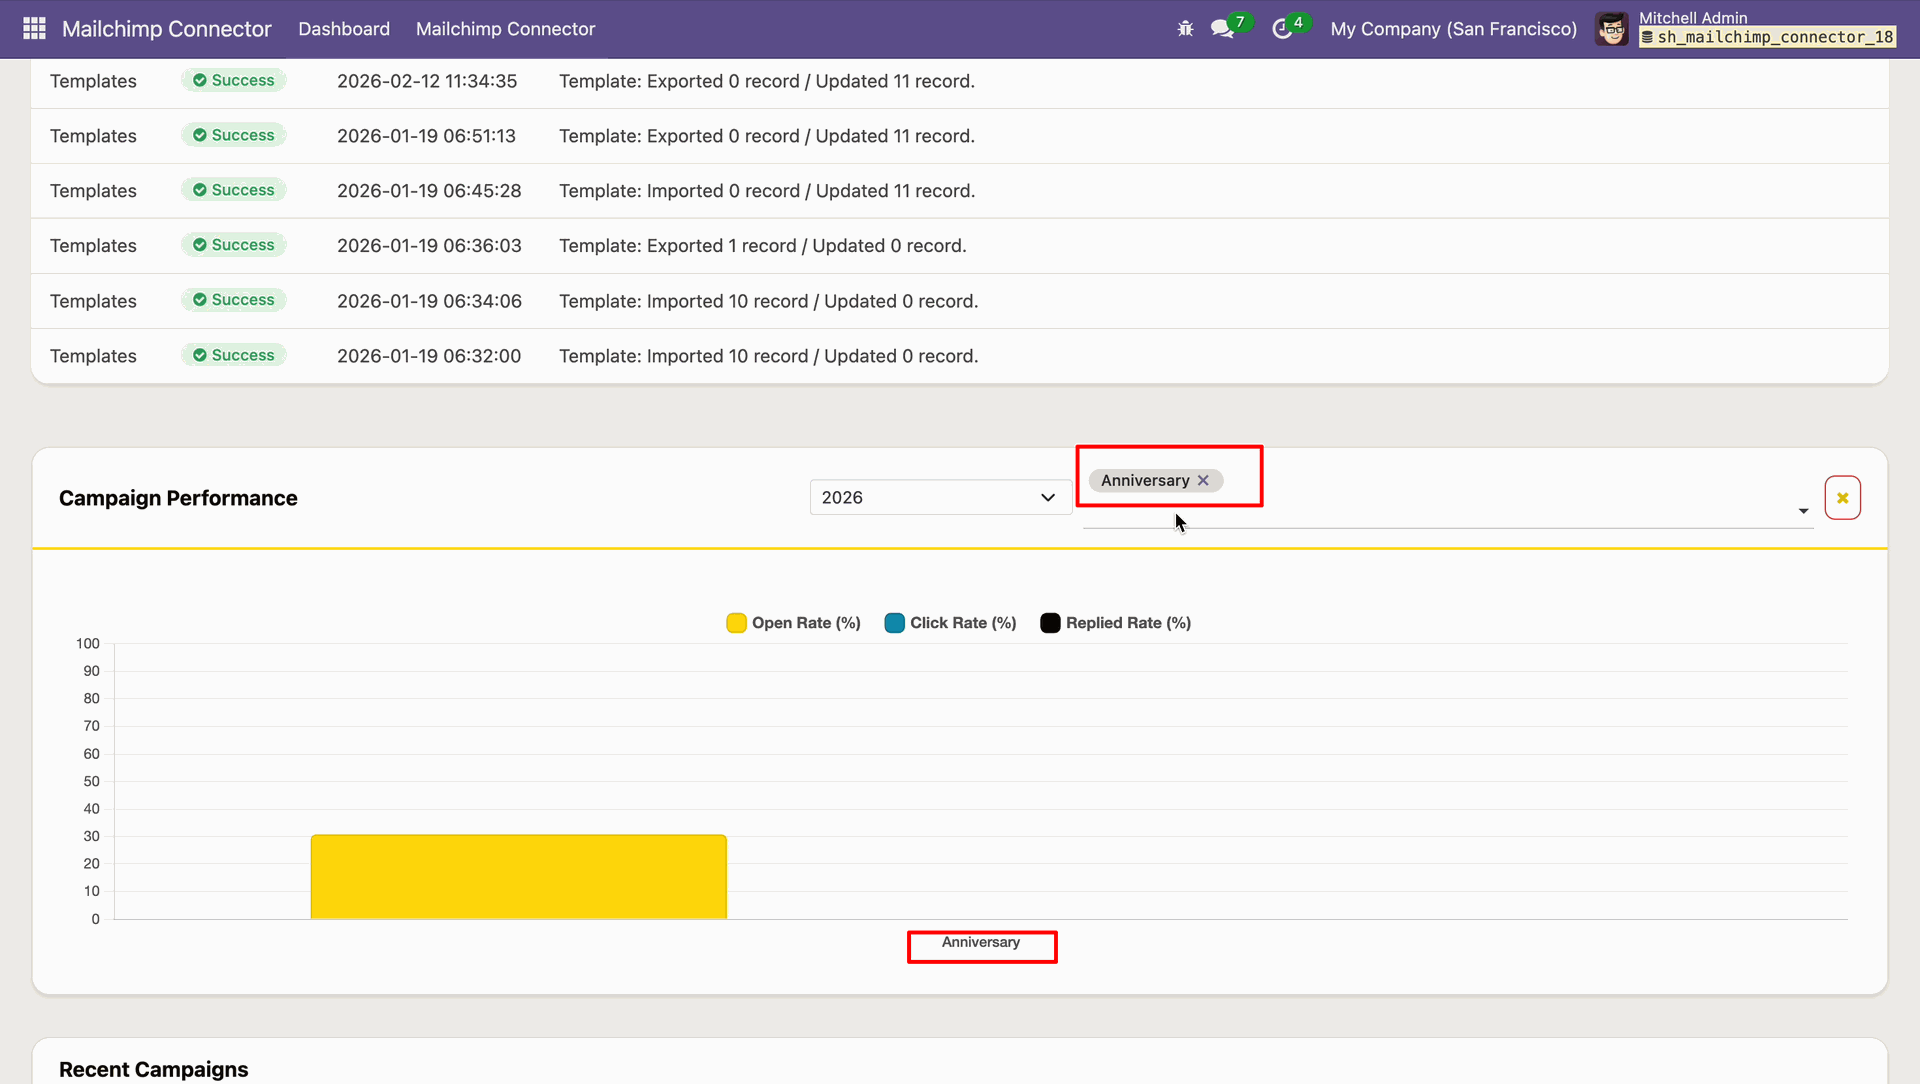
Review chart metrics after filtering Campaign Performance by the Anniversary campaign.
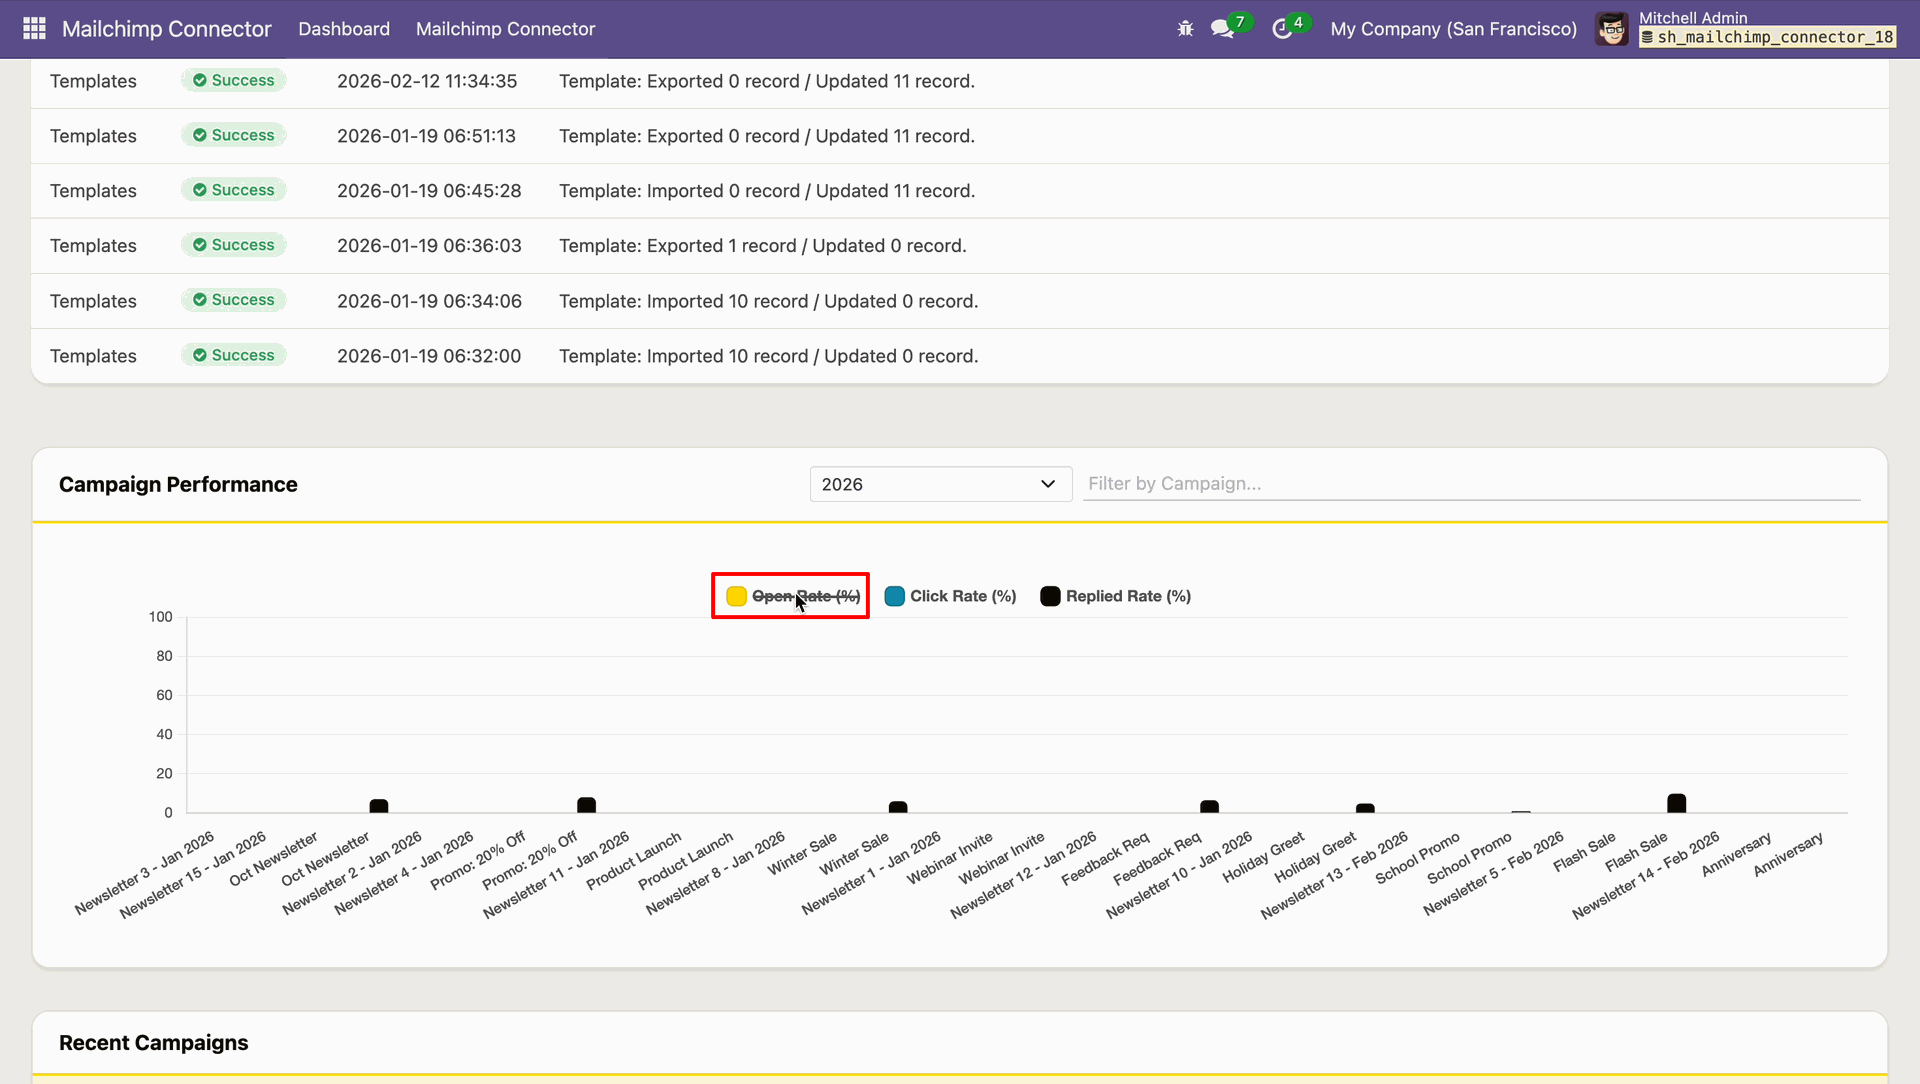
View only the Open Rate (%) series in the Campaign Performance chart.
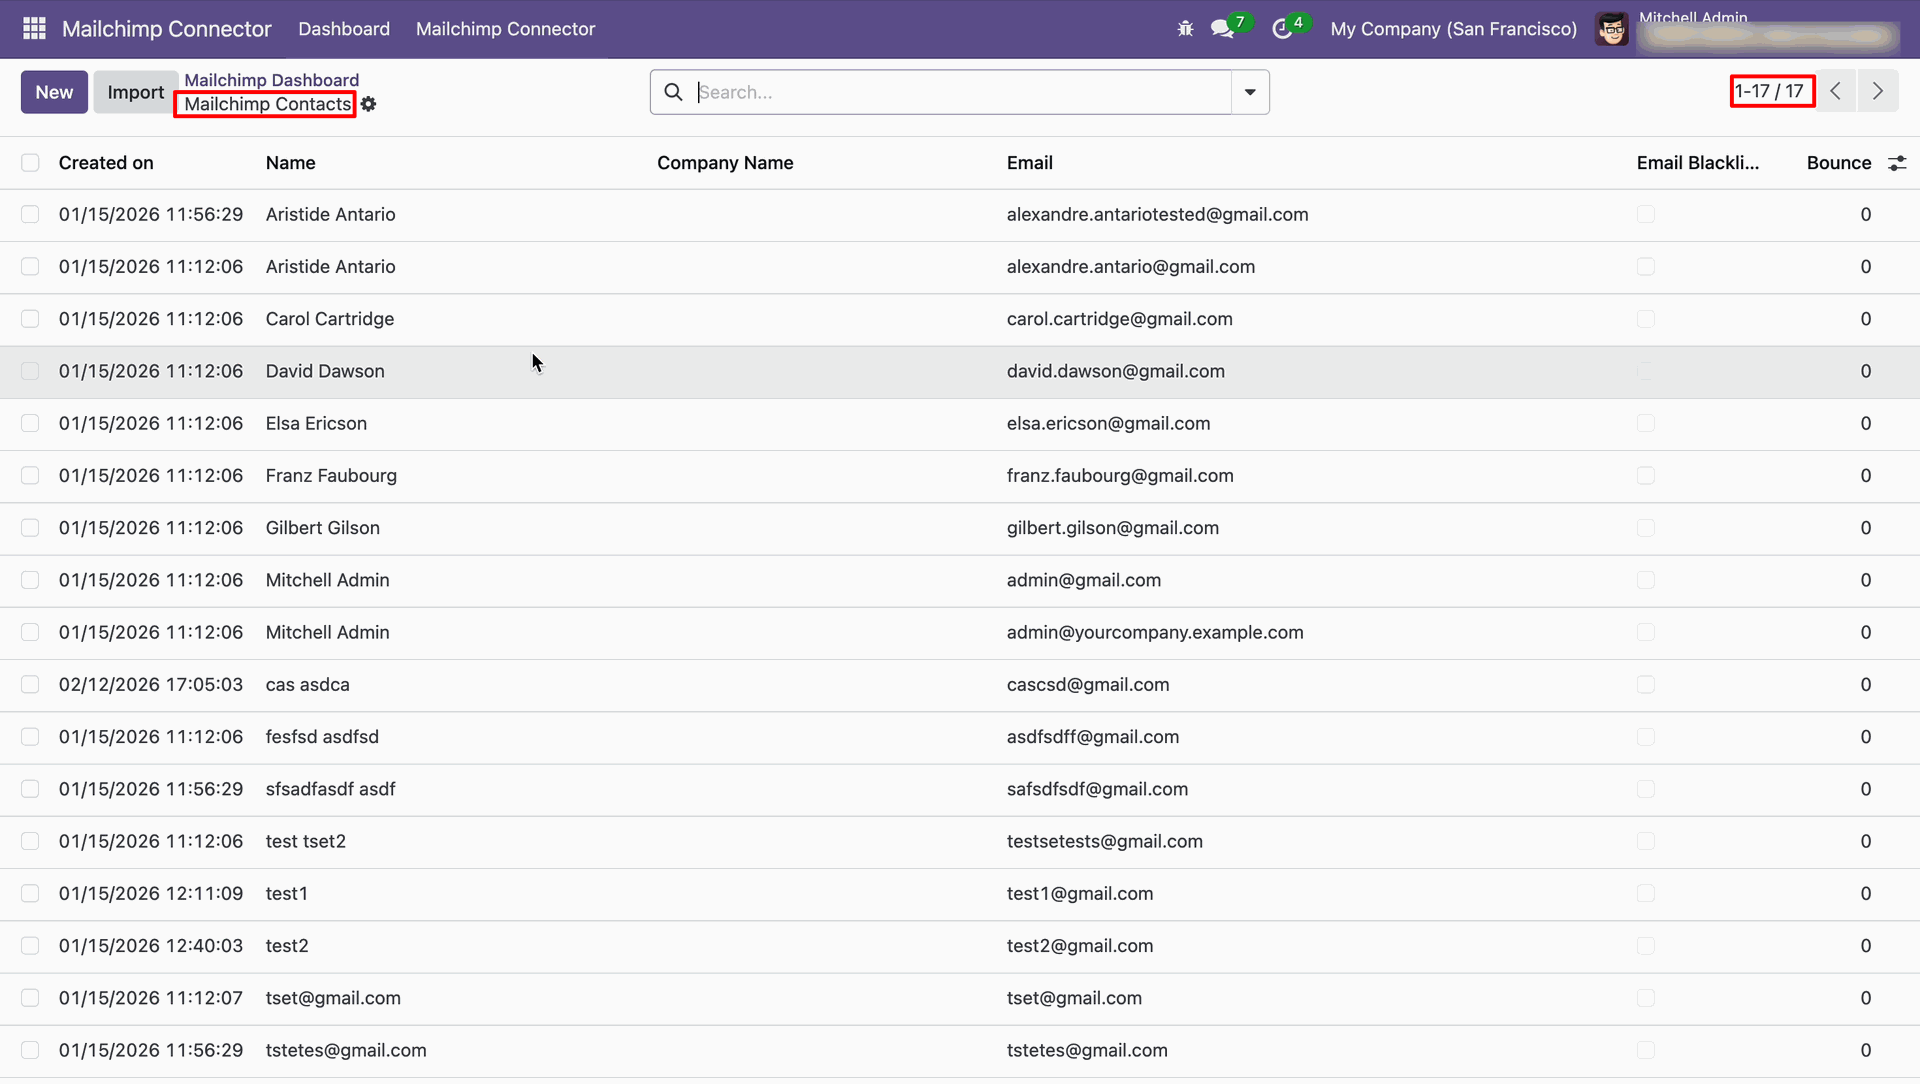
Open the Total Mailchimp Contacts card to review imported contact records.
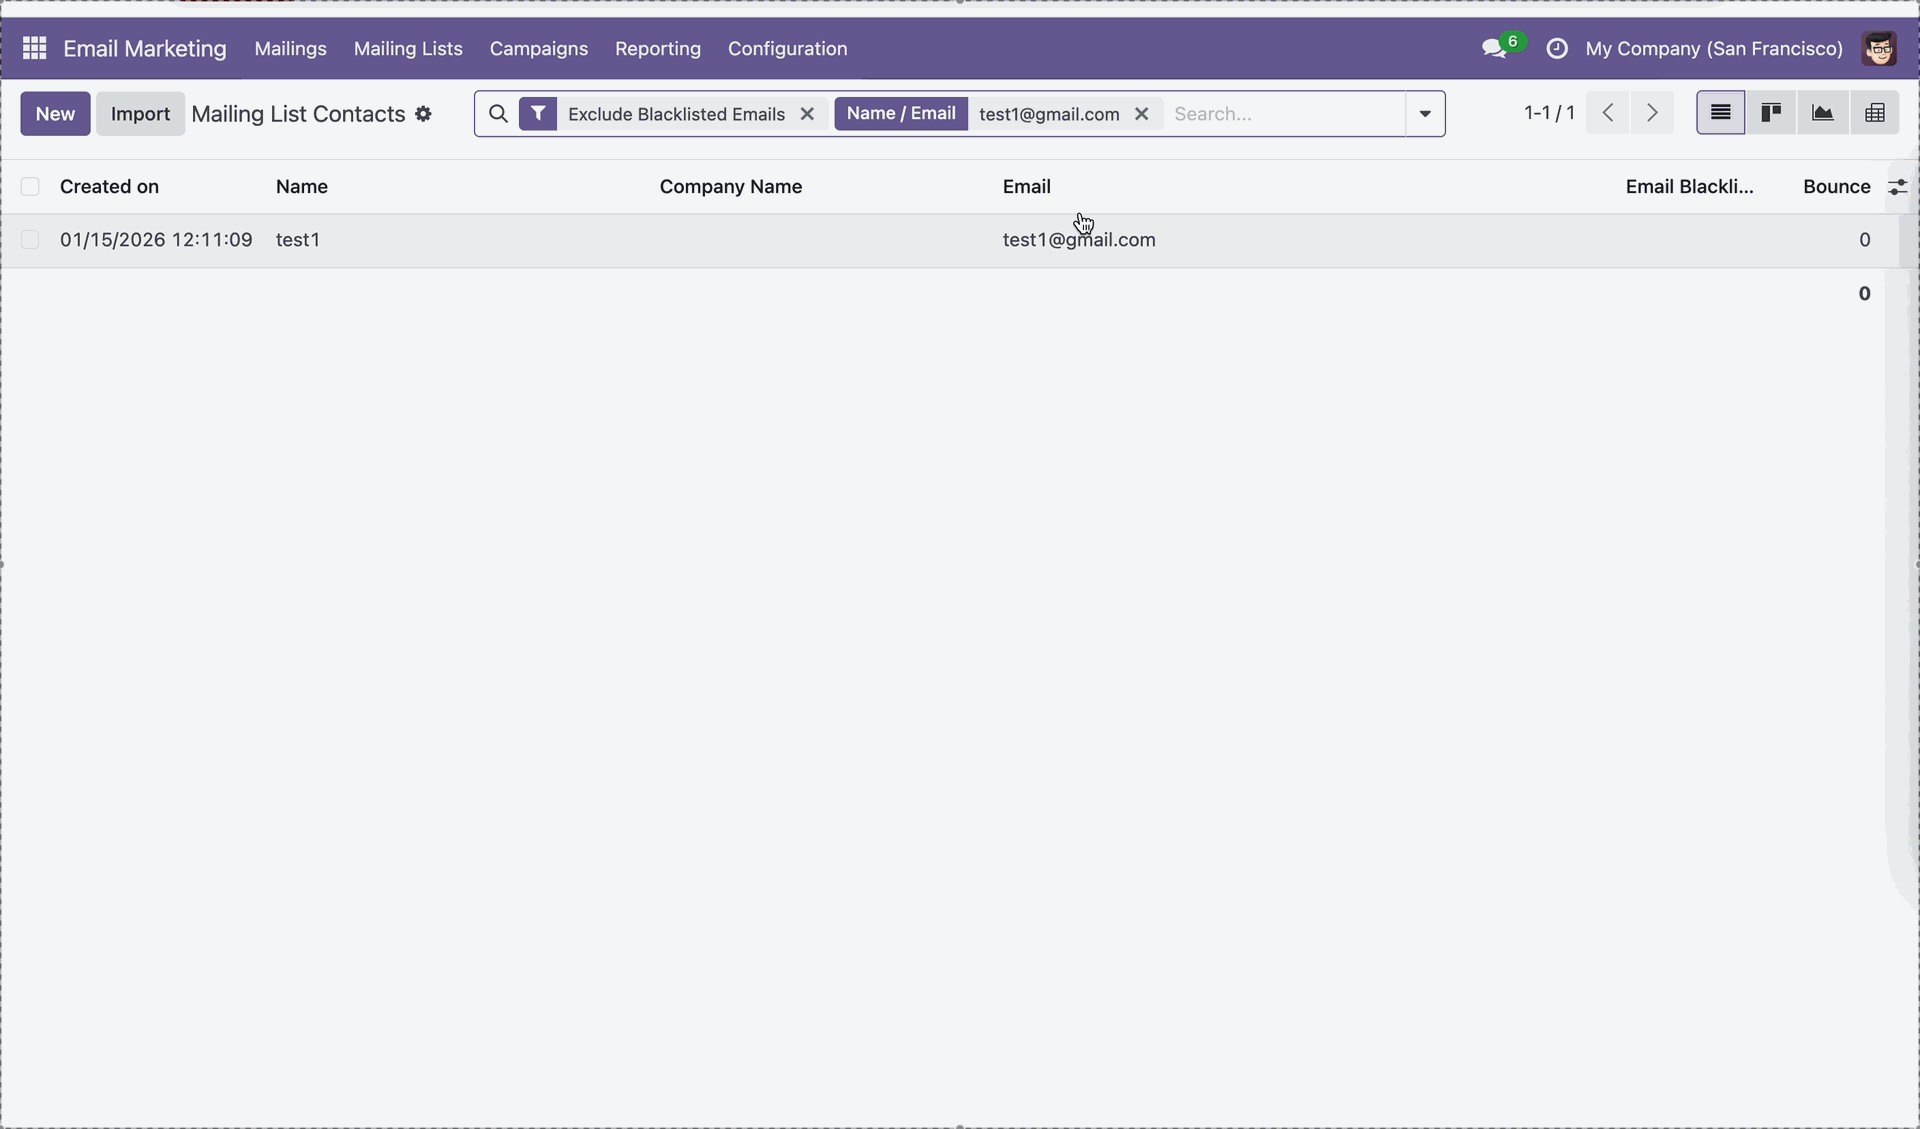
Review imported Mailchimp Contacts records and pagination totals in Odoo.
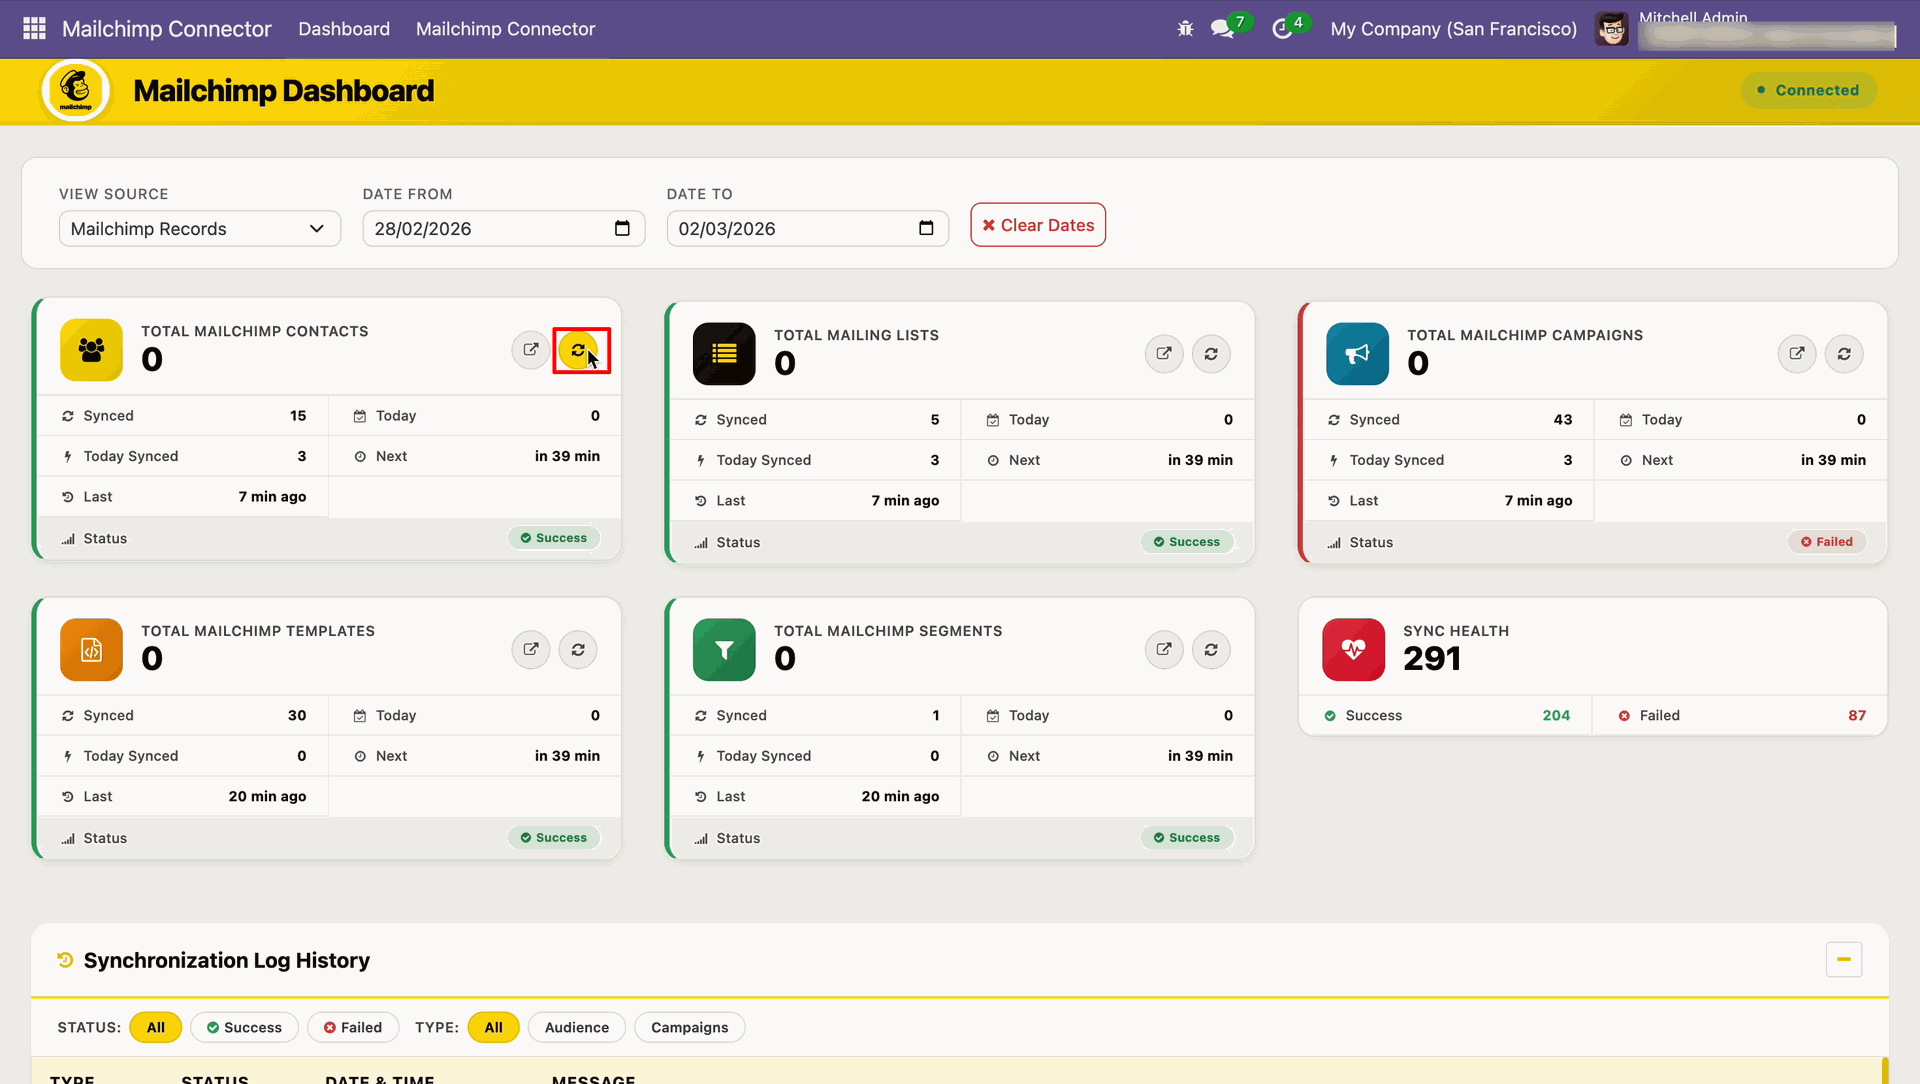
Click the refresh icon on the contacts card to reload contact totals.
Workflow
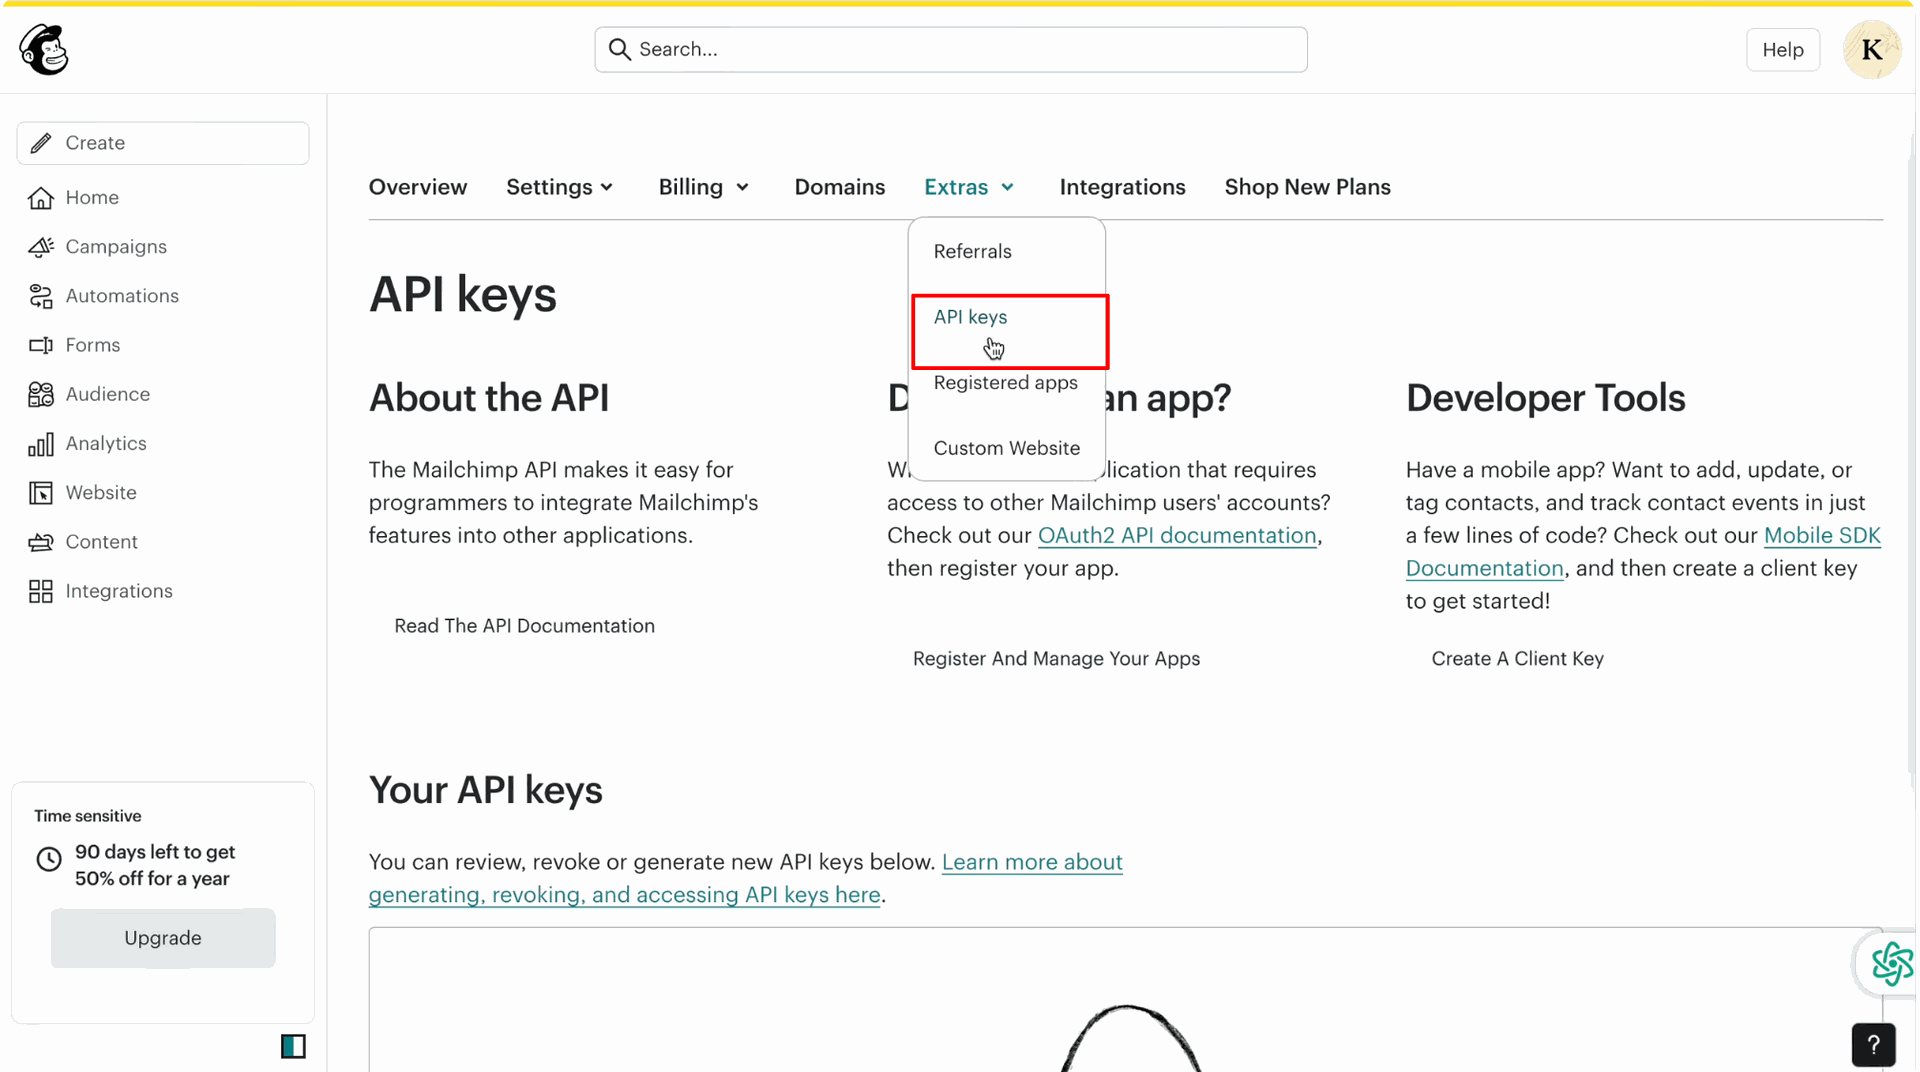
Go to the 'Extras' -> 'API Keys'.
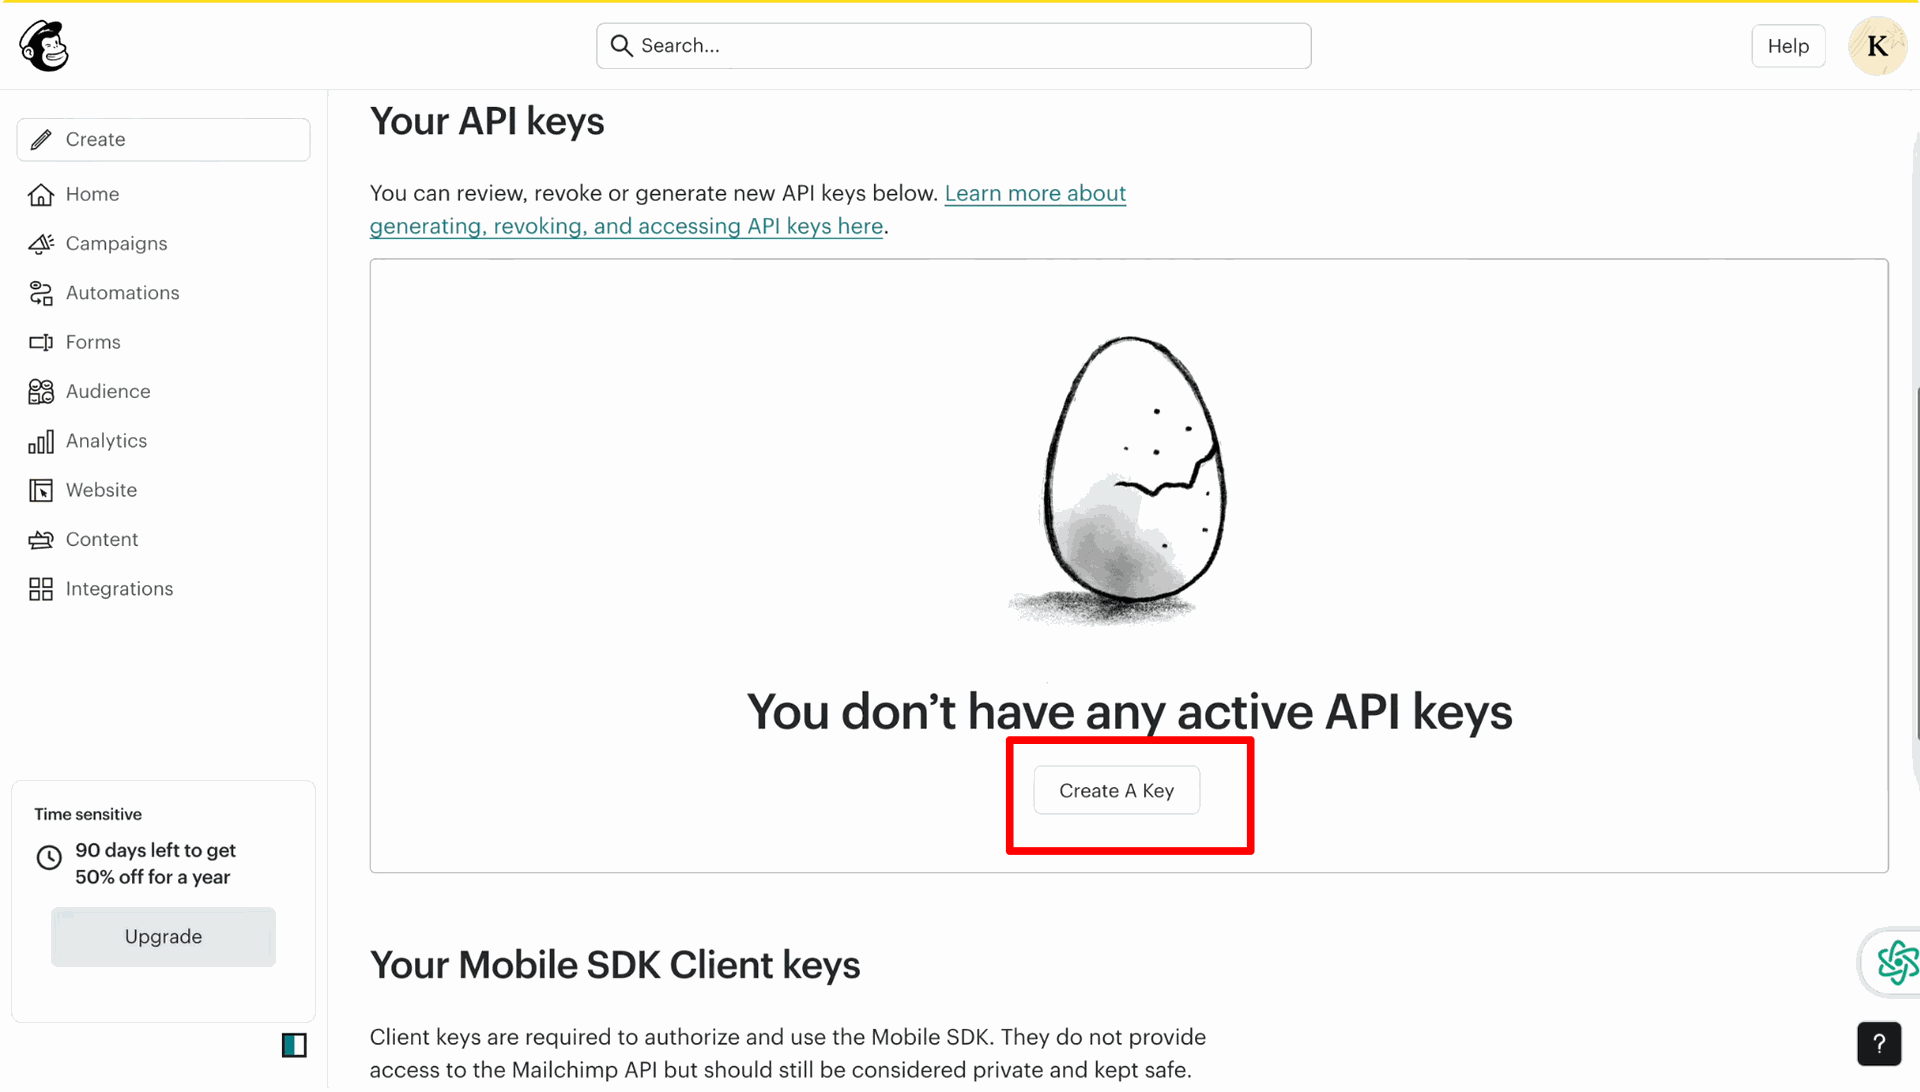
Click 'Create A Key'.
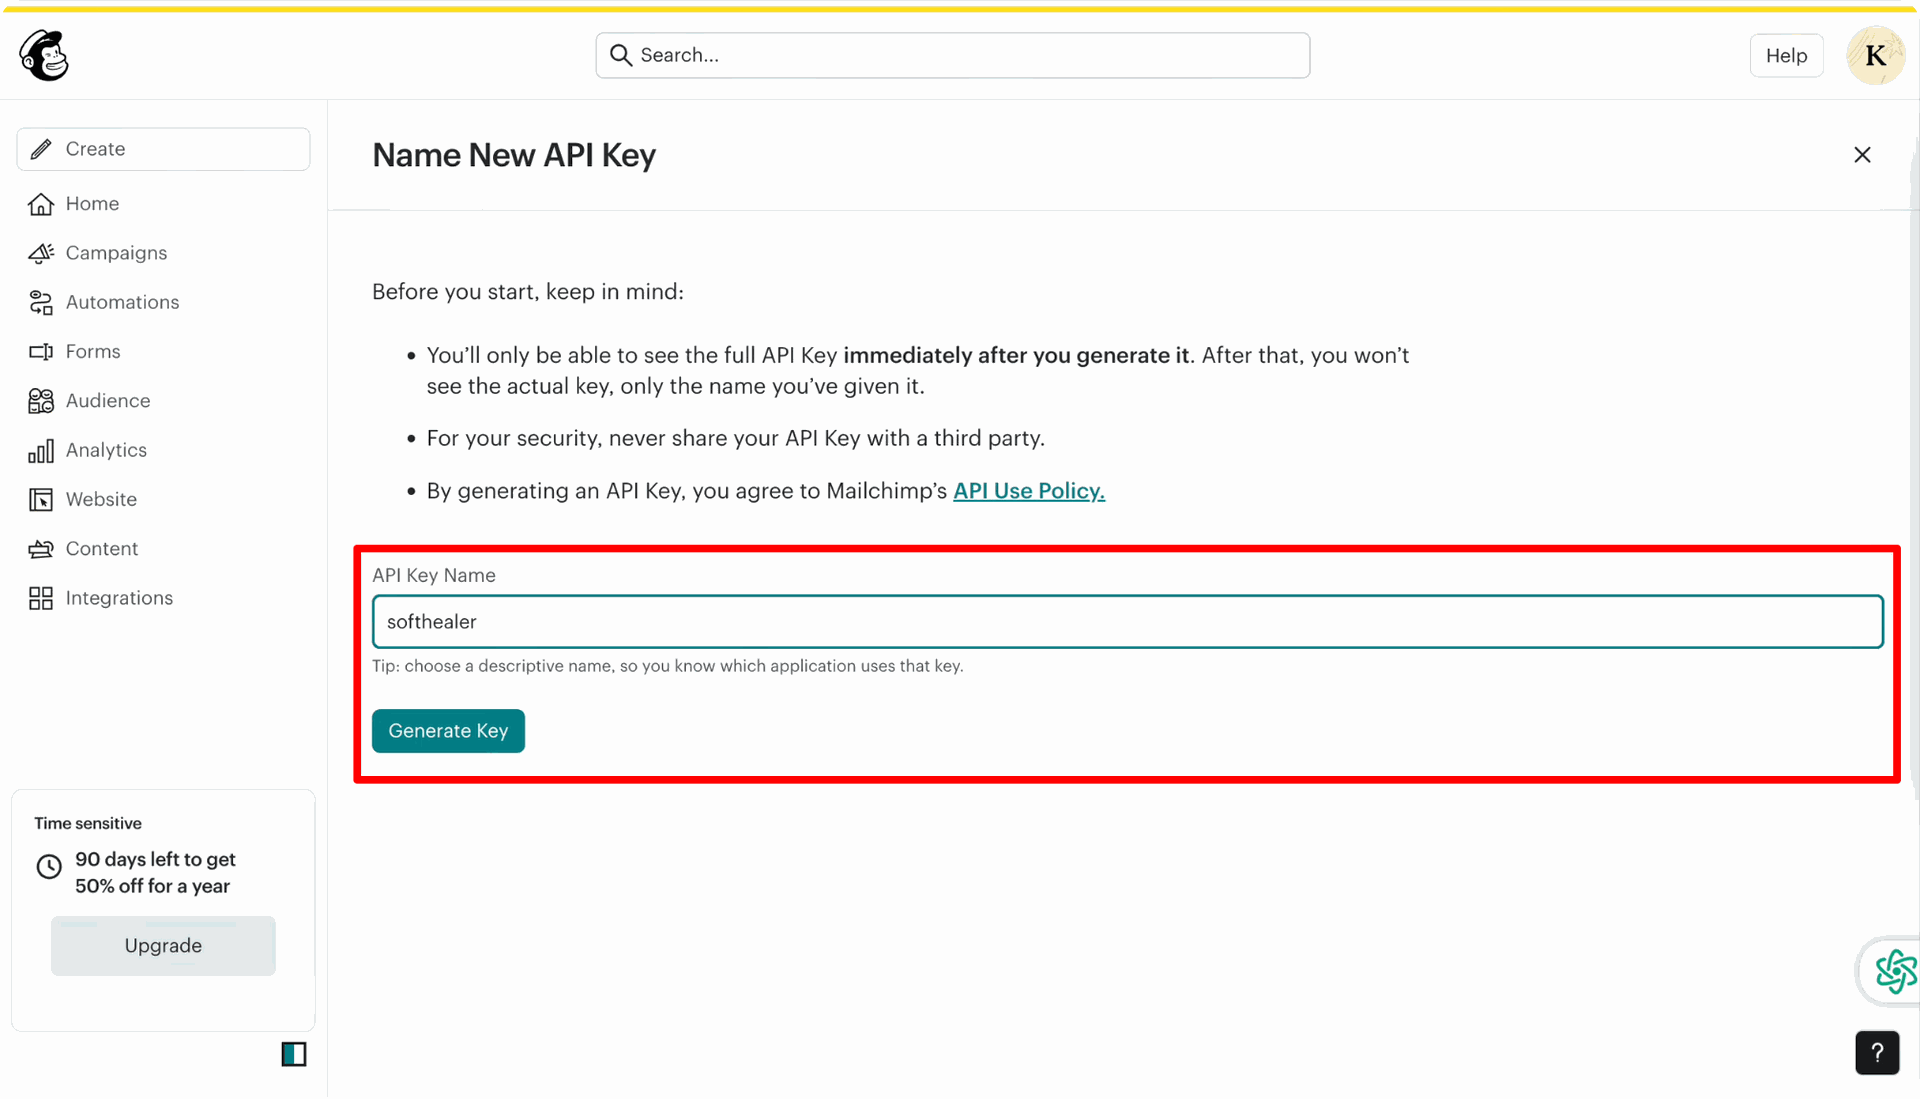
Enter the key name and press the 'Generate Key' button.
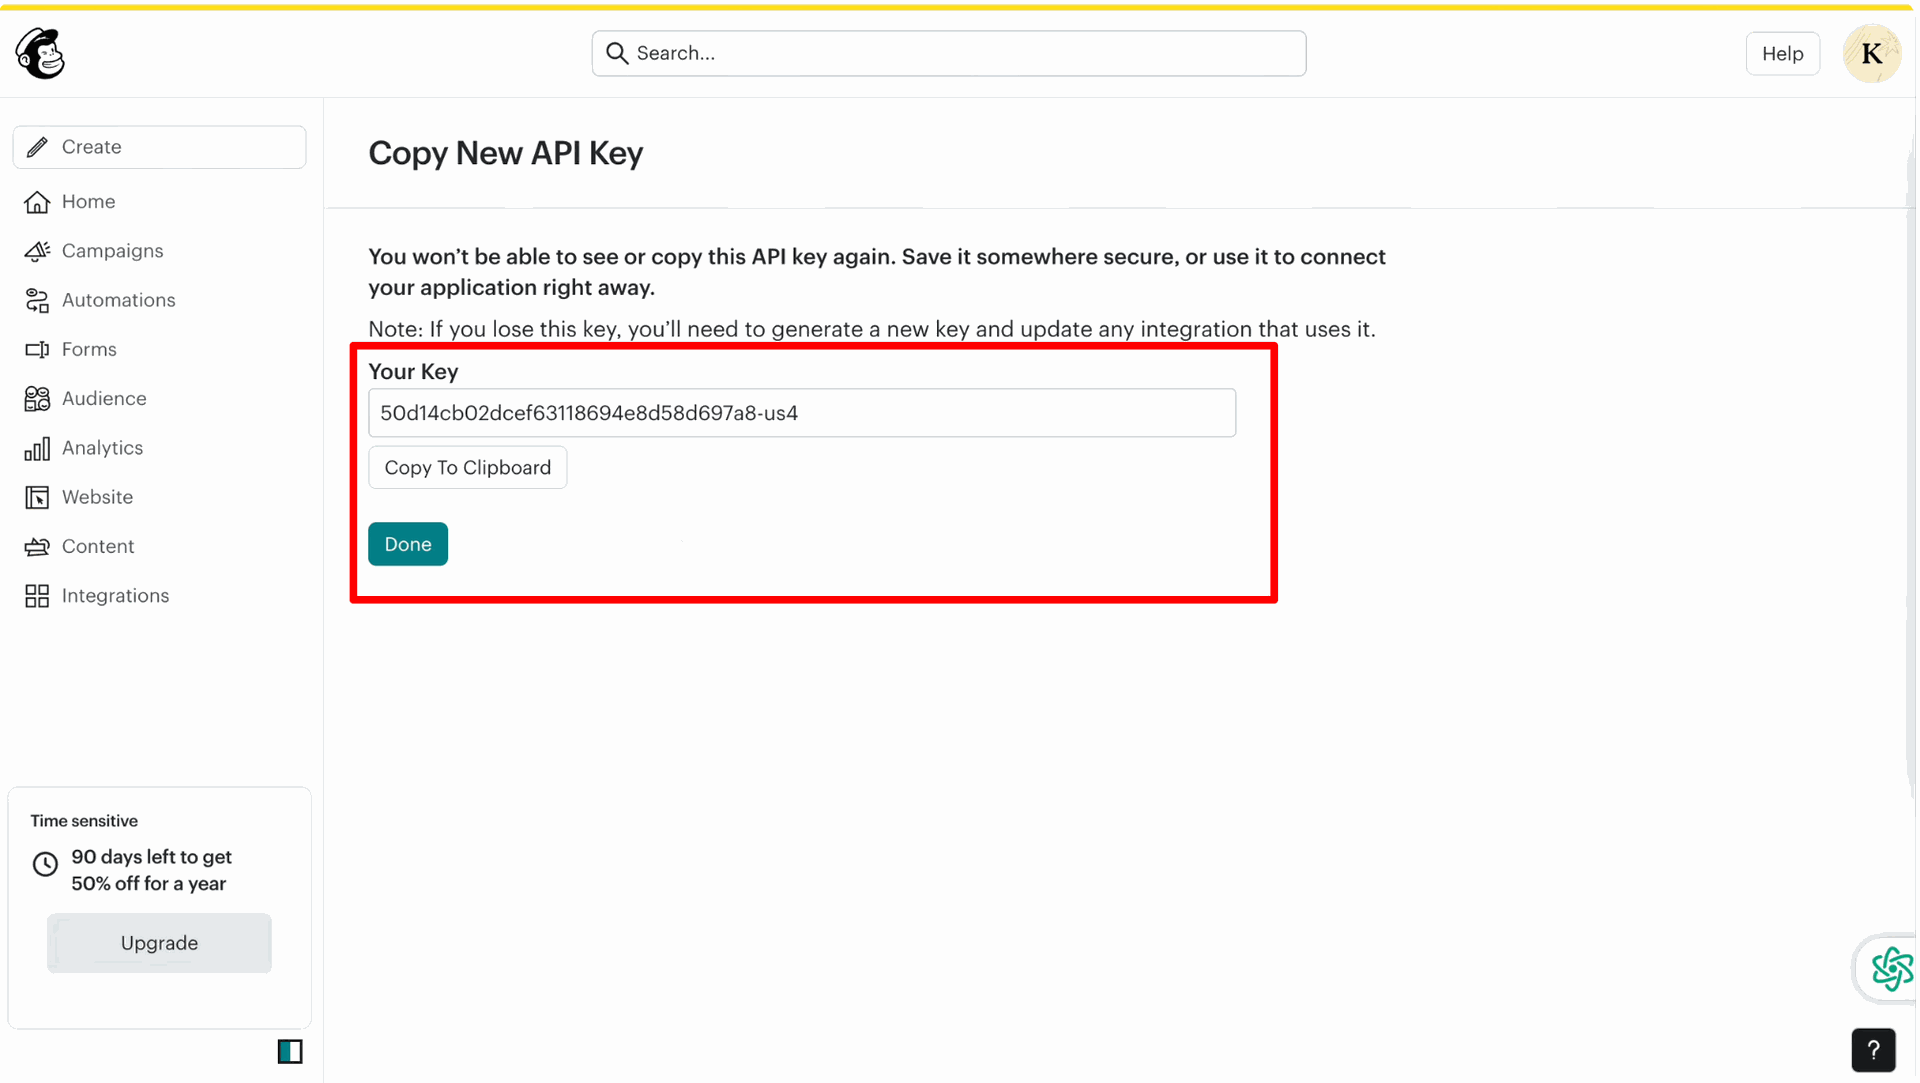
Copy the generated key and paste it into Odoo.
Workflow
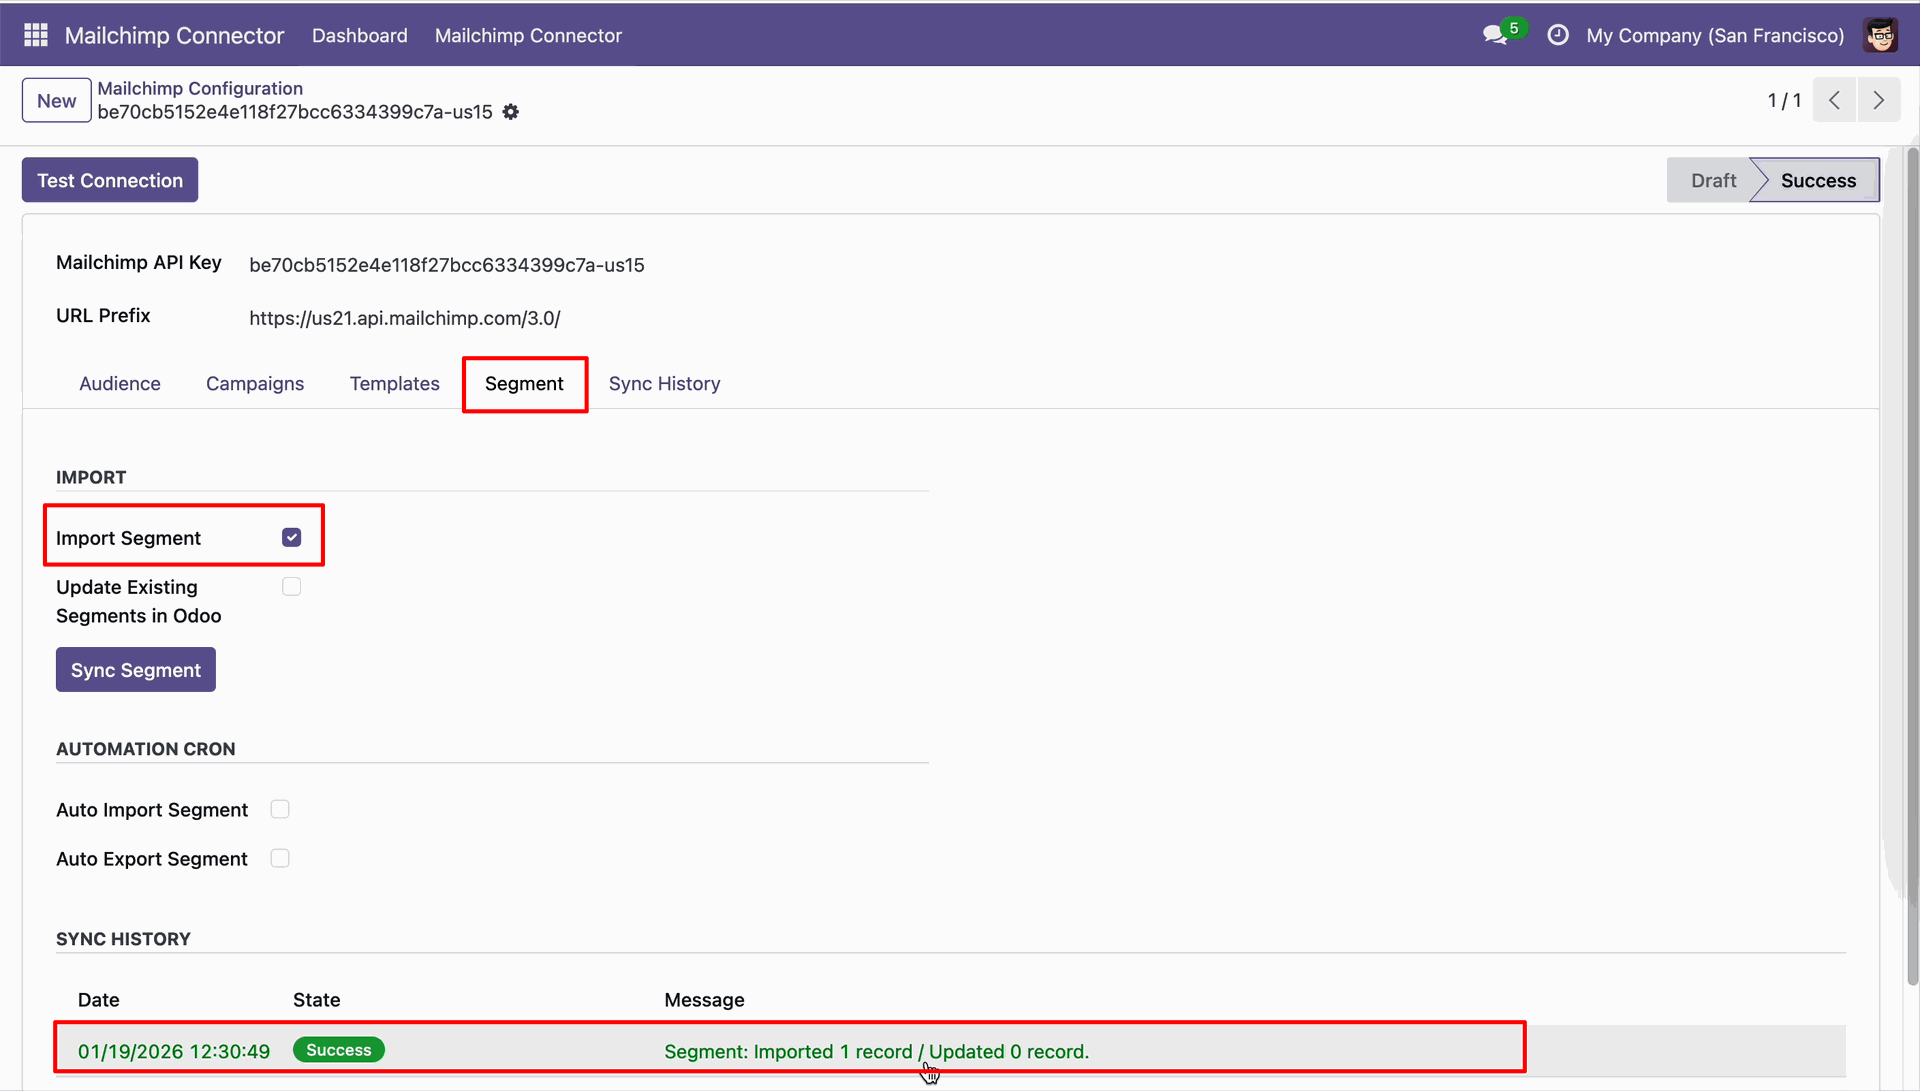
Open the Segment tab and enable Import Segment before clicking Sync Segment.
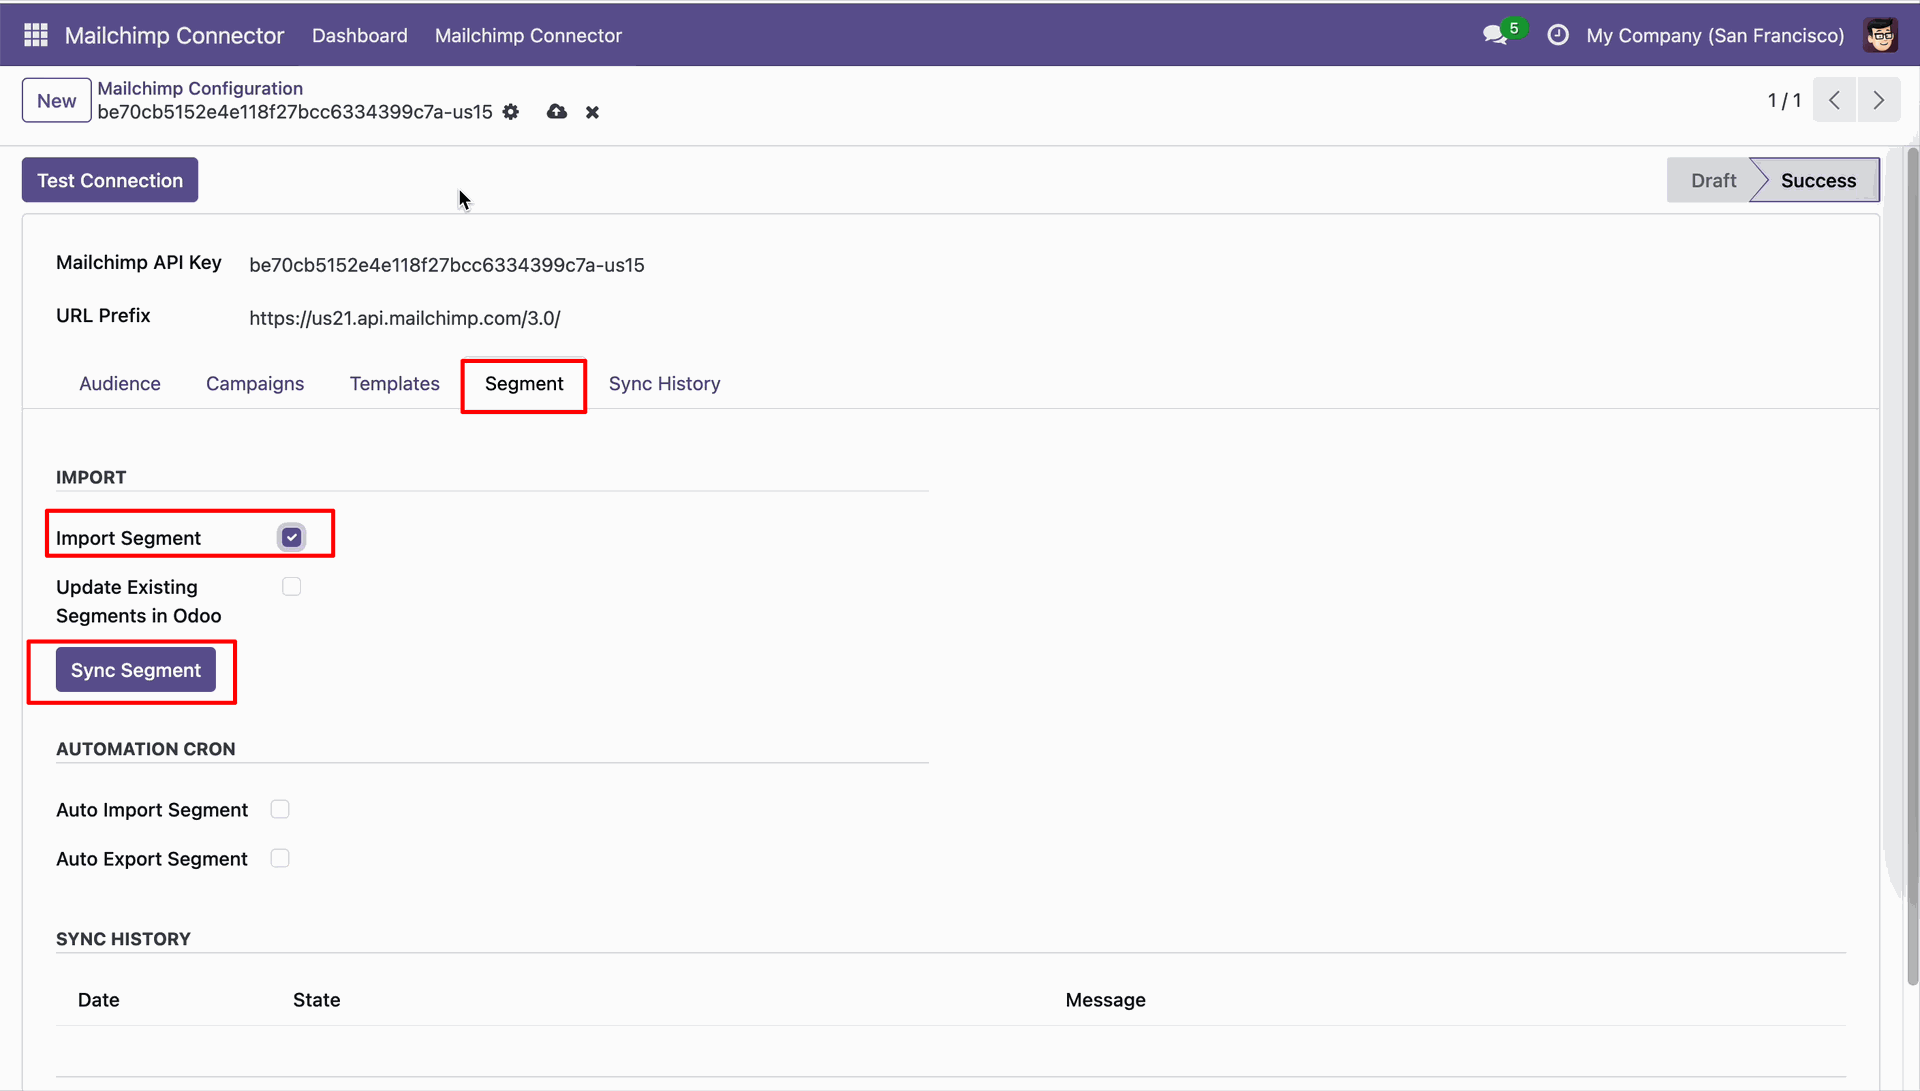
Click Sync Segment to import selected segment records into Odoo.
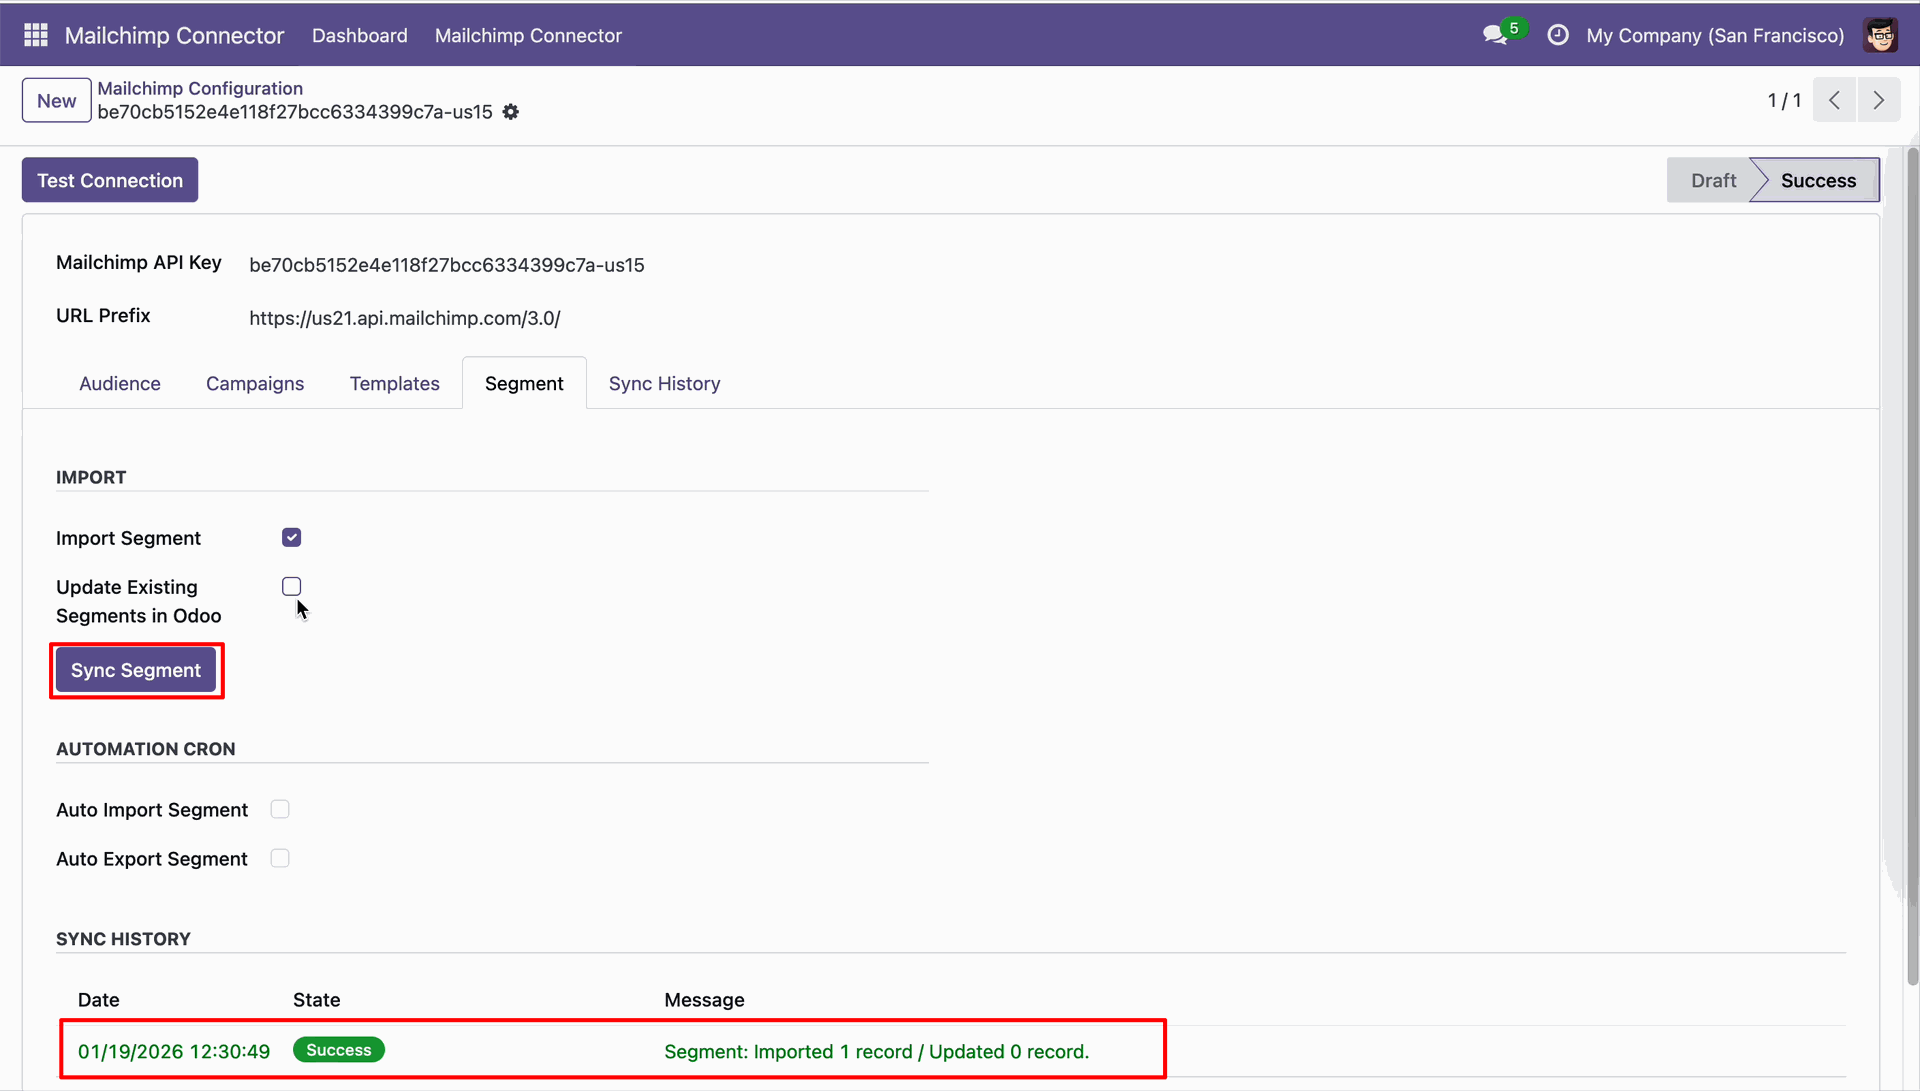
Review the sync history entry confirming one segment was imported successfully.
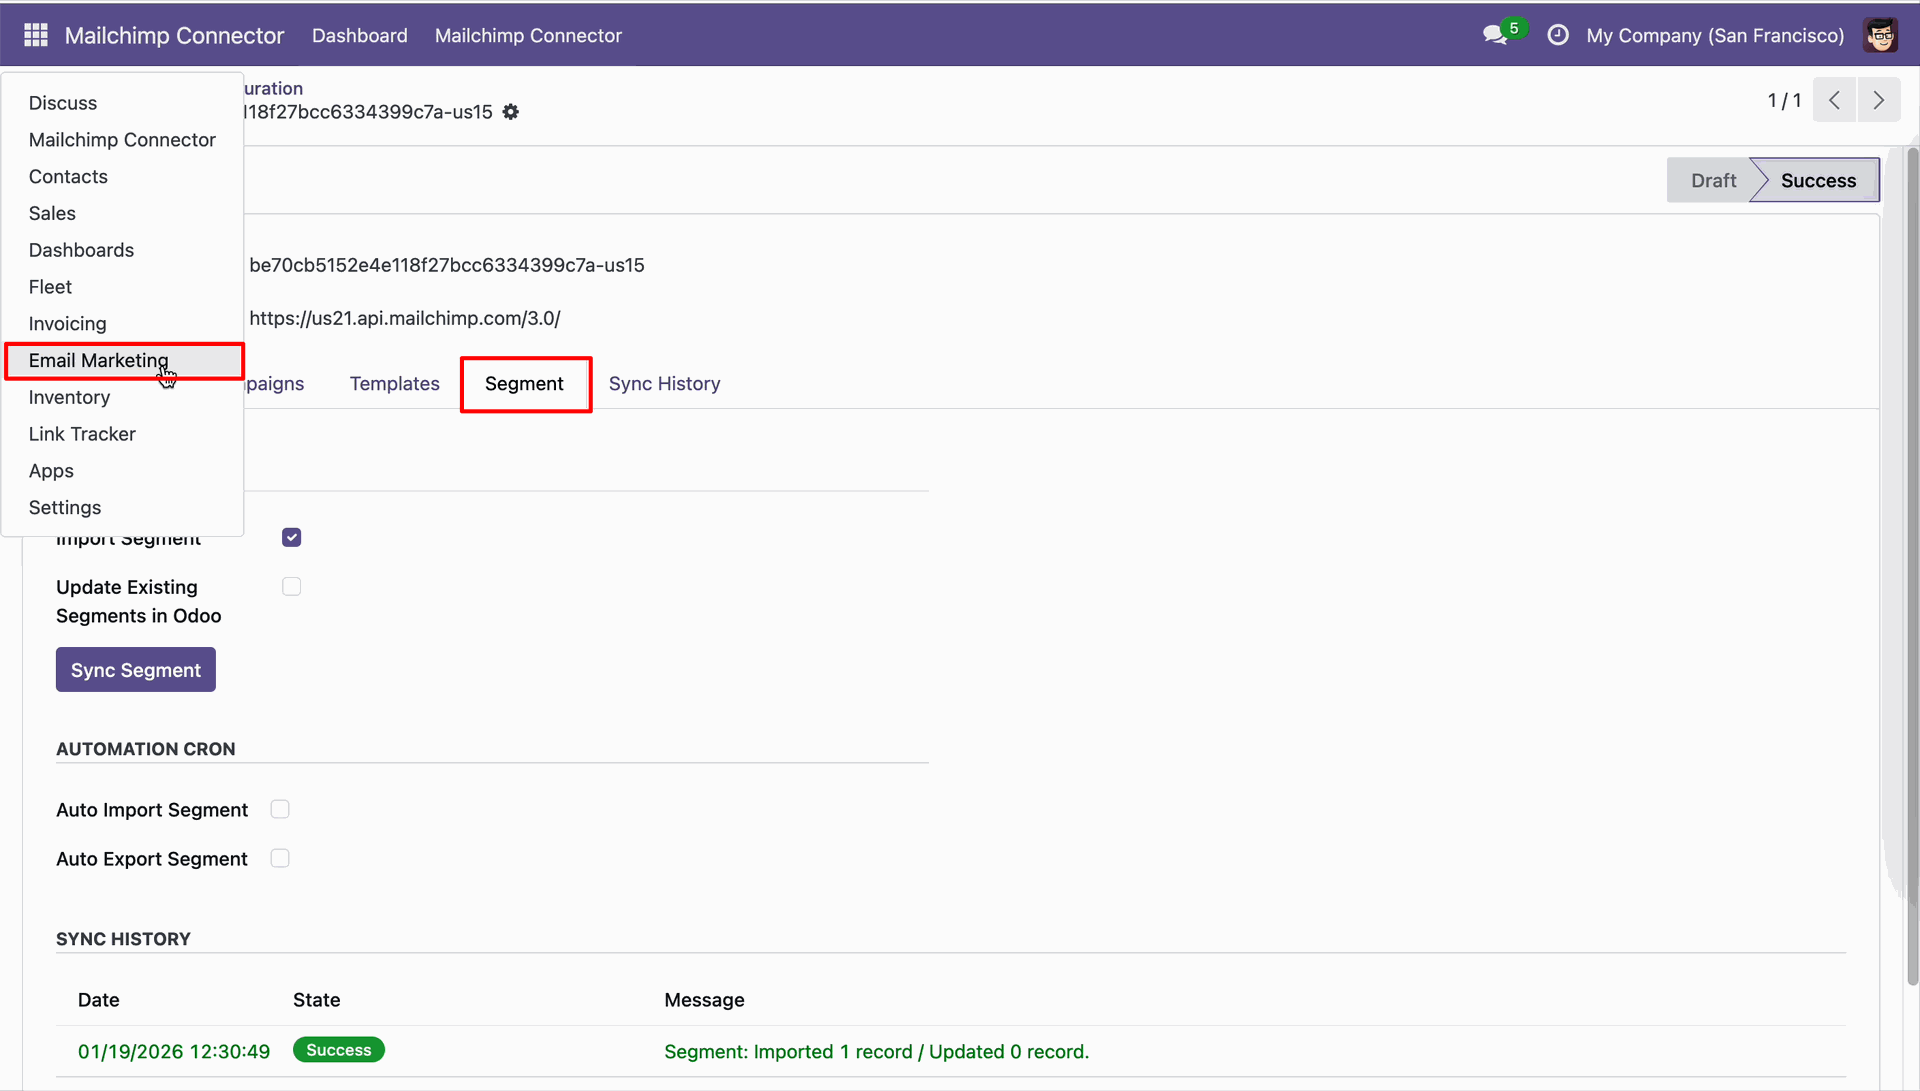
Open Email Marketing and select Favorite Filters from the Configuration menu.
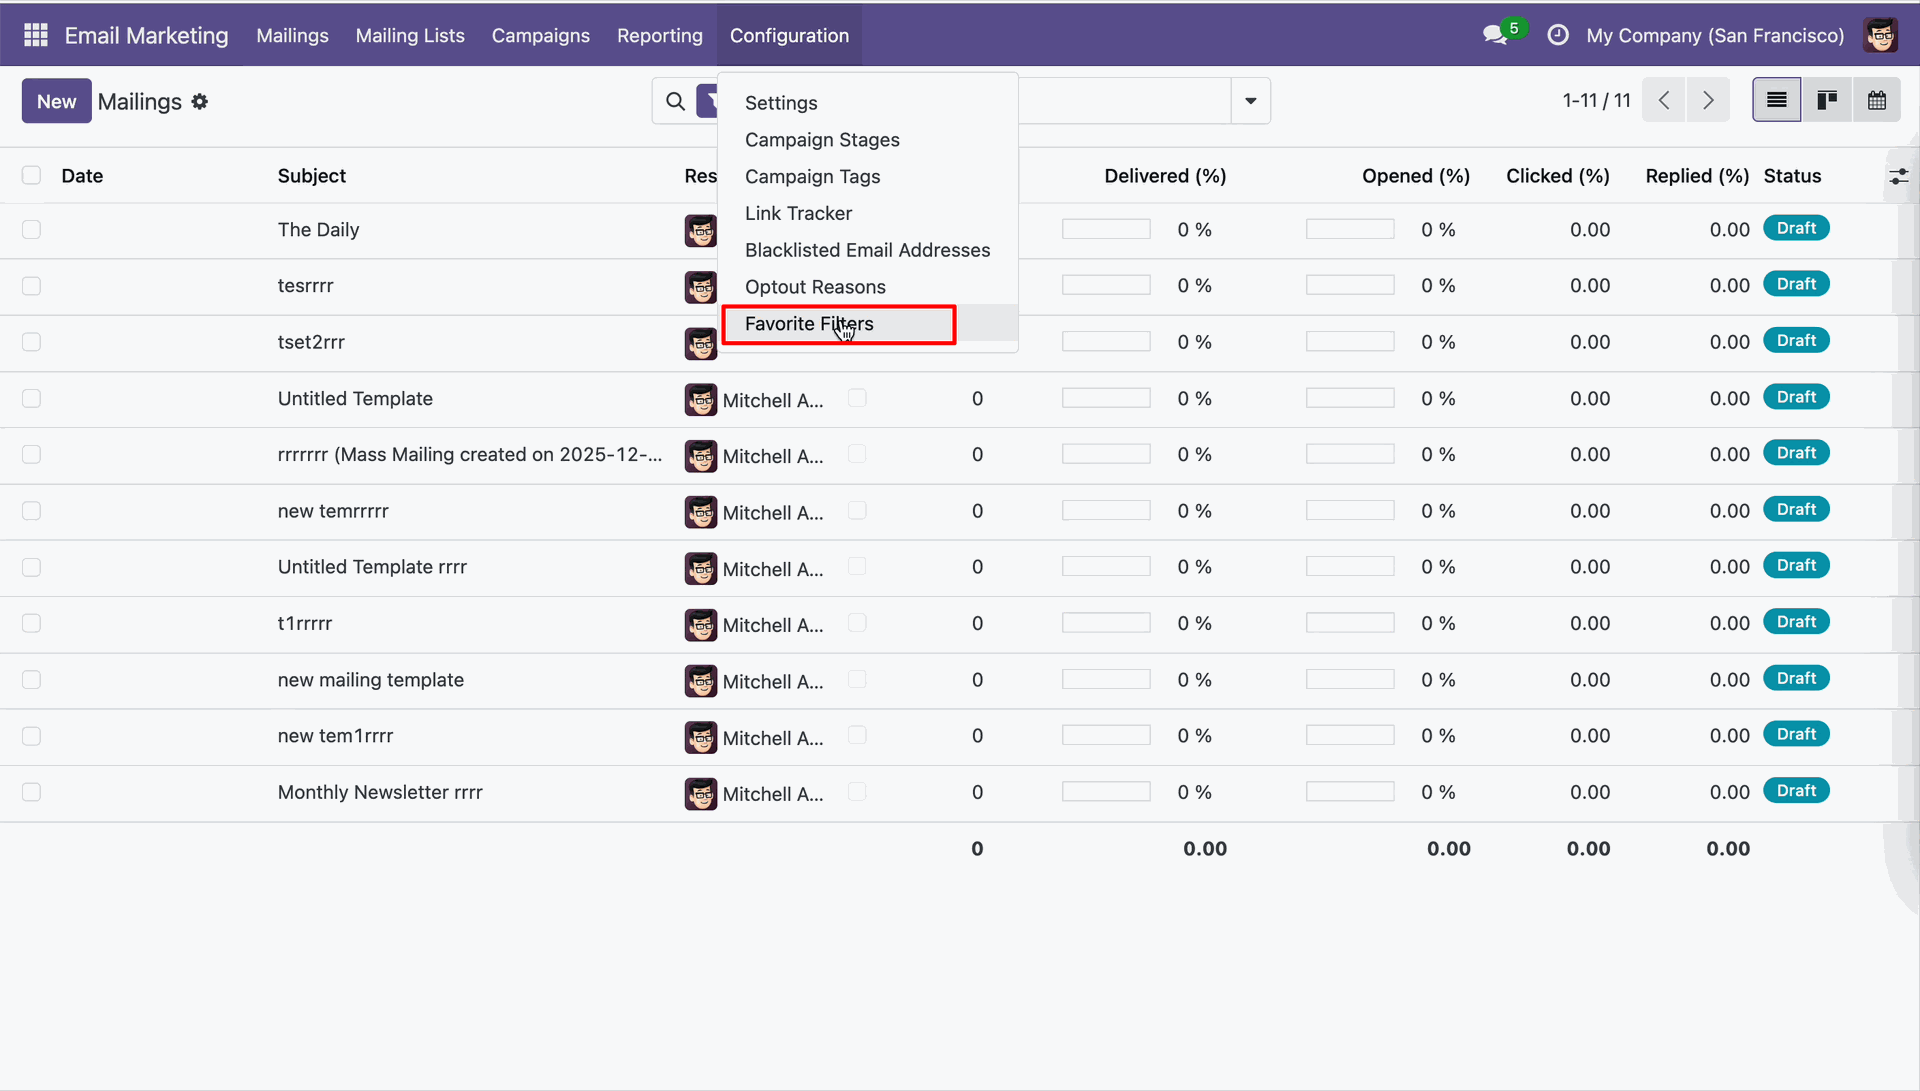
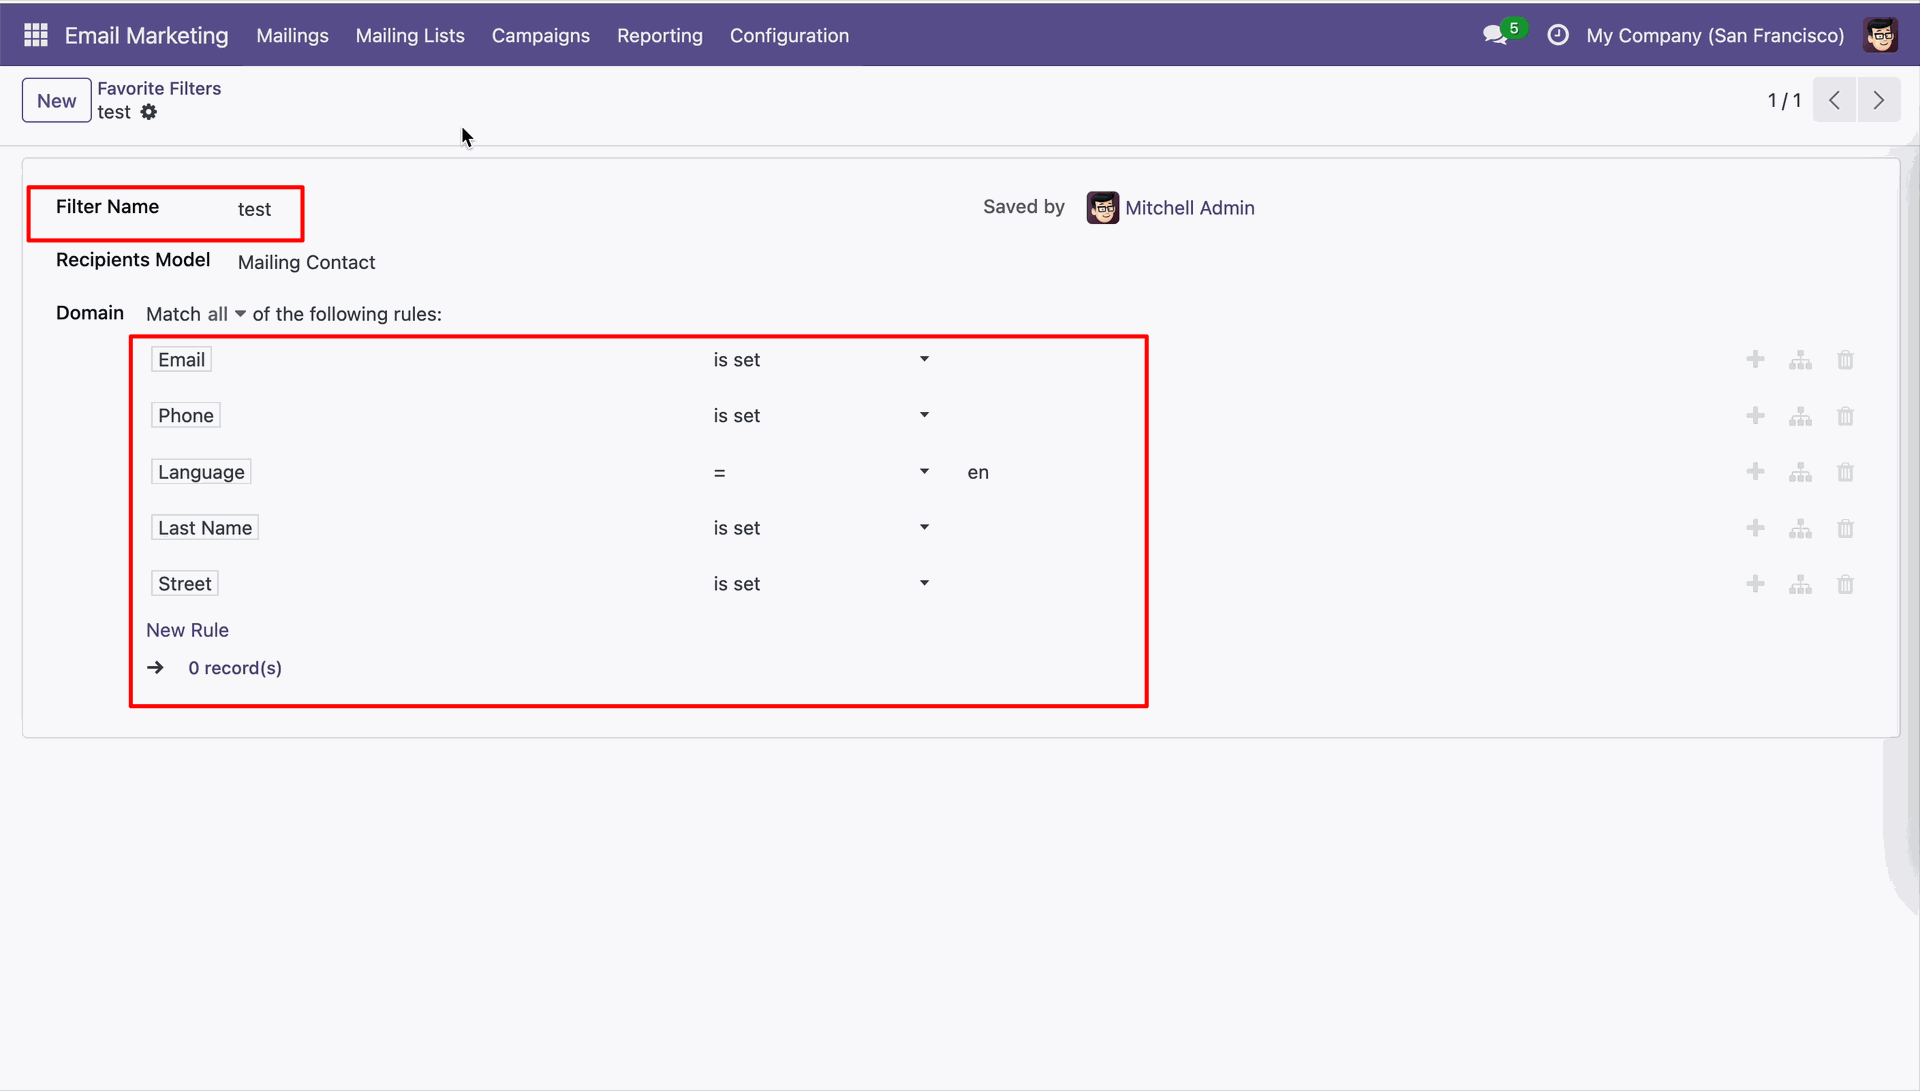
Review the Favorite Filters form and the configured filter name.
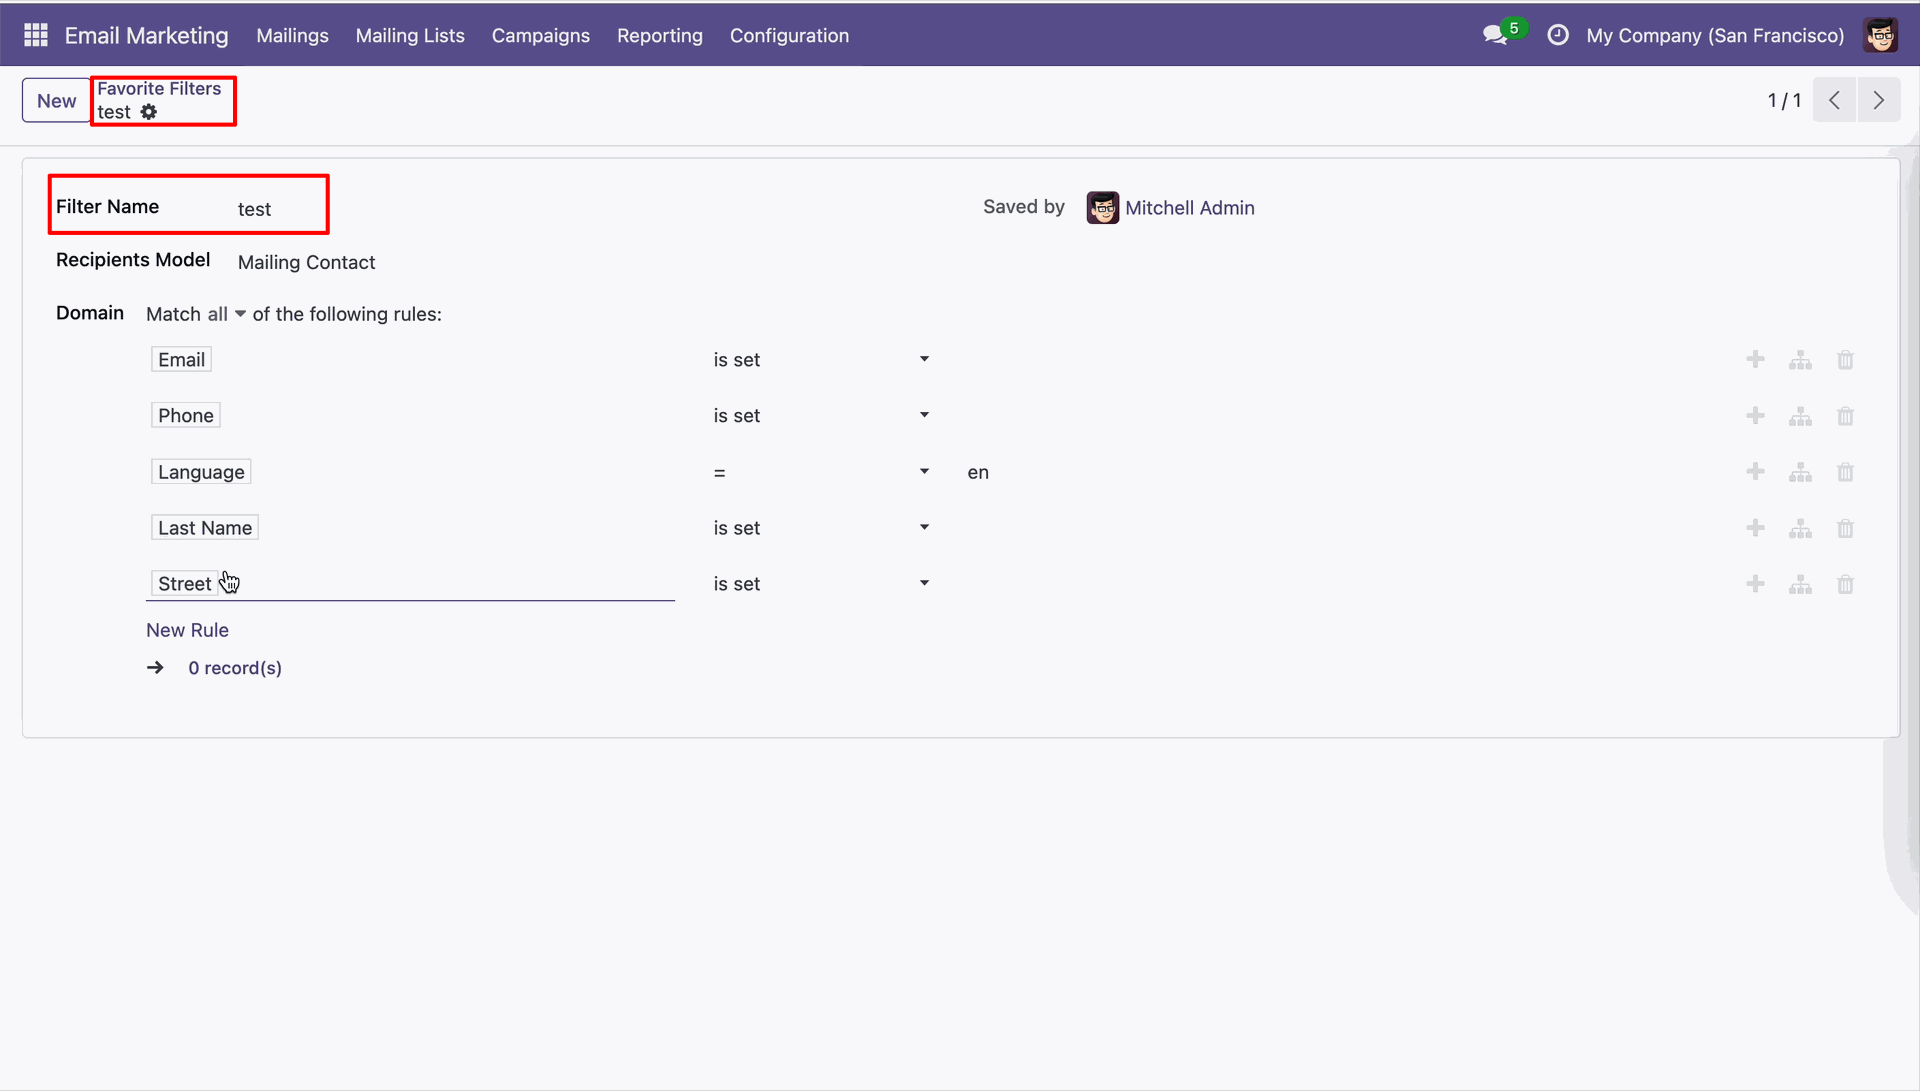
Review the filtered segment identifier saved under Favorite Filters.
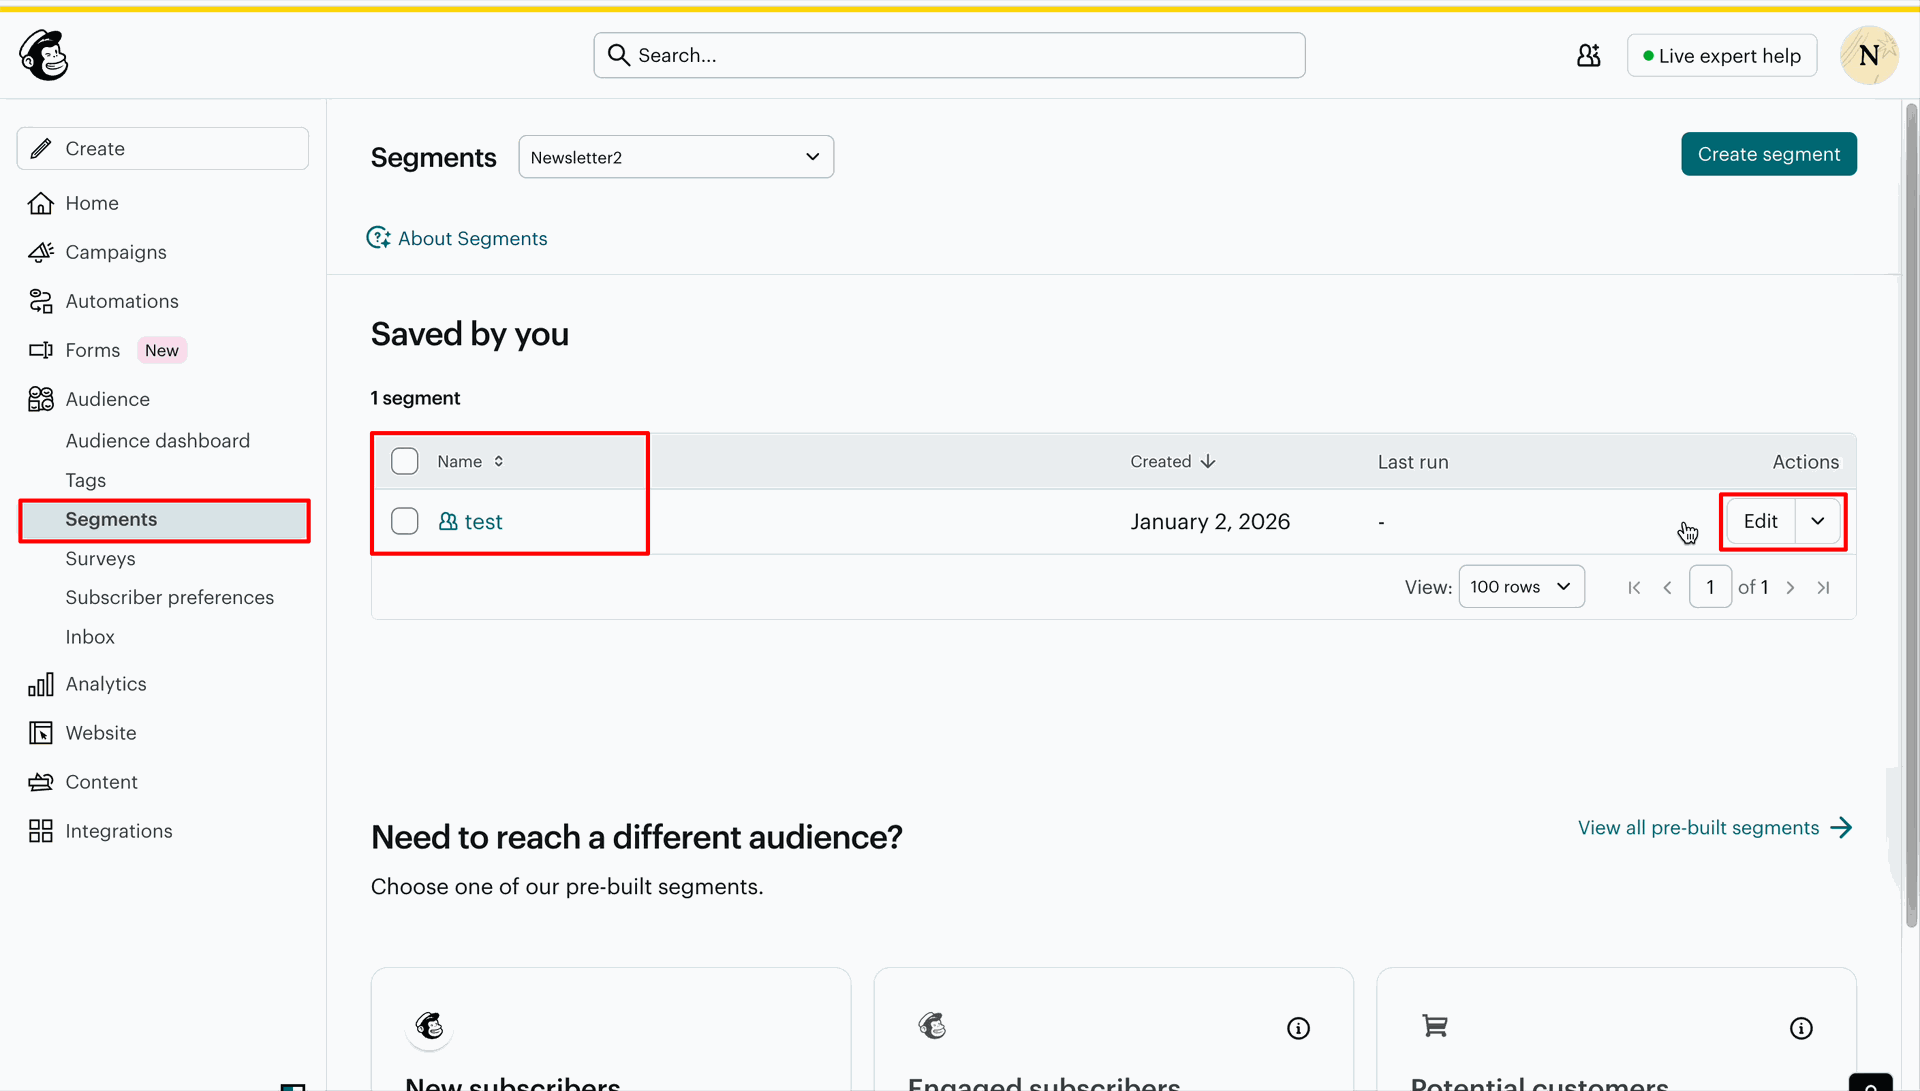
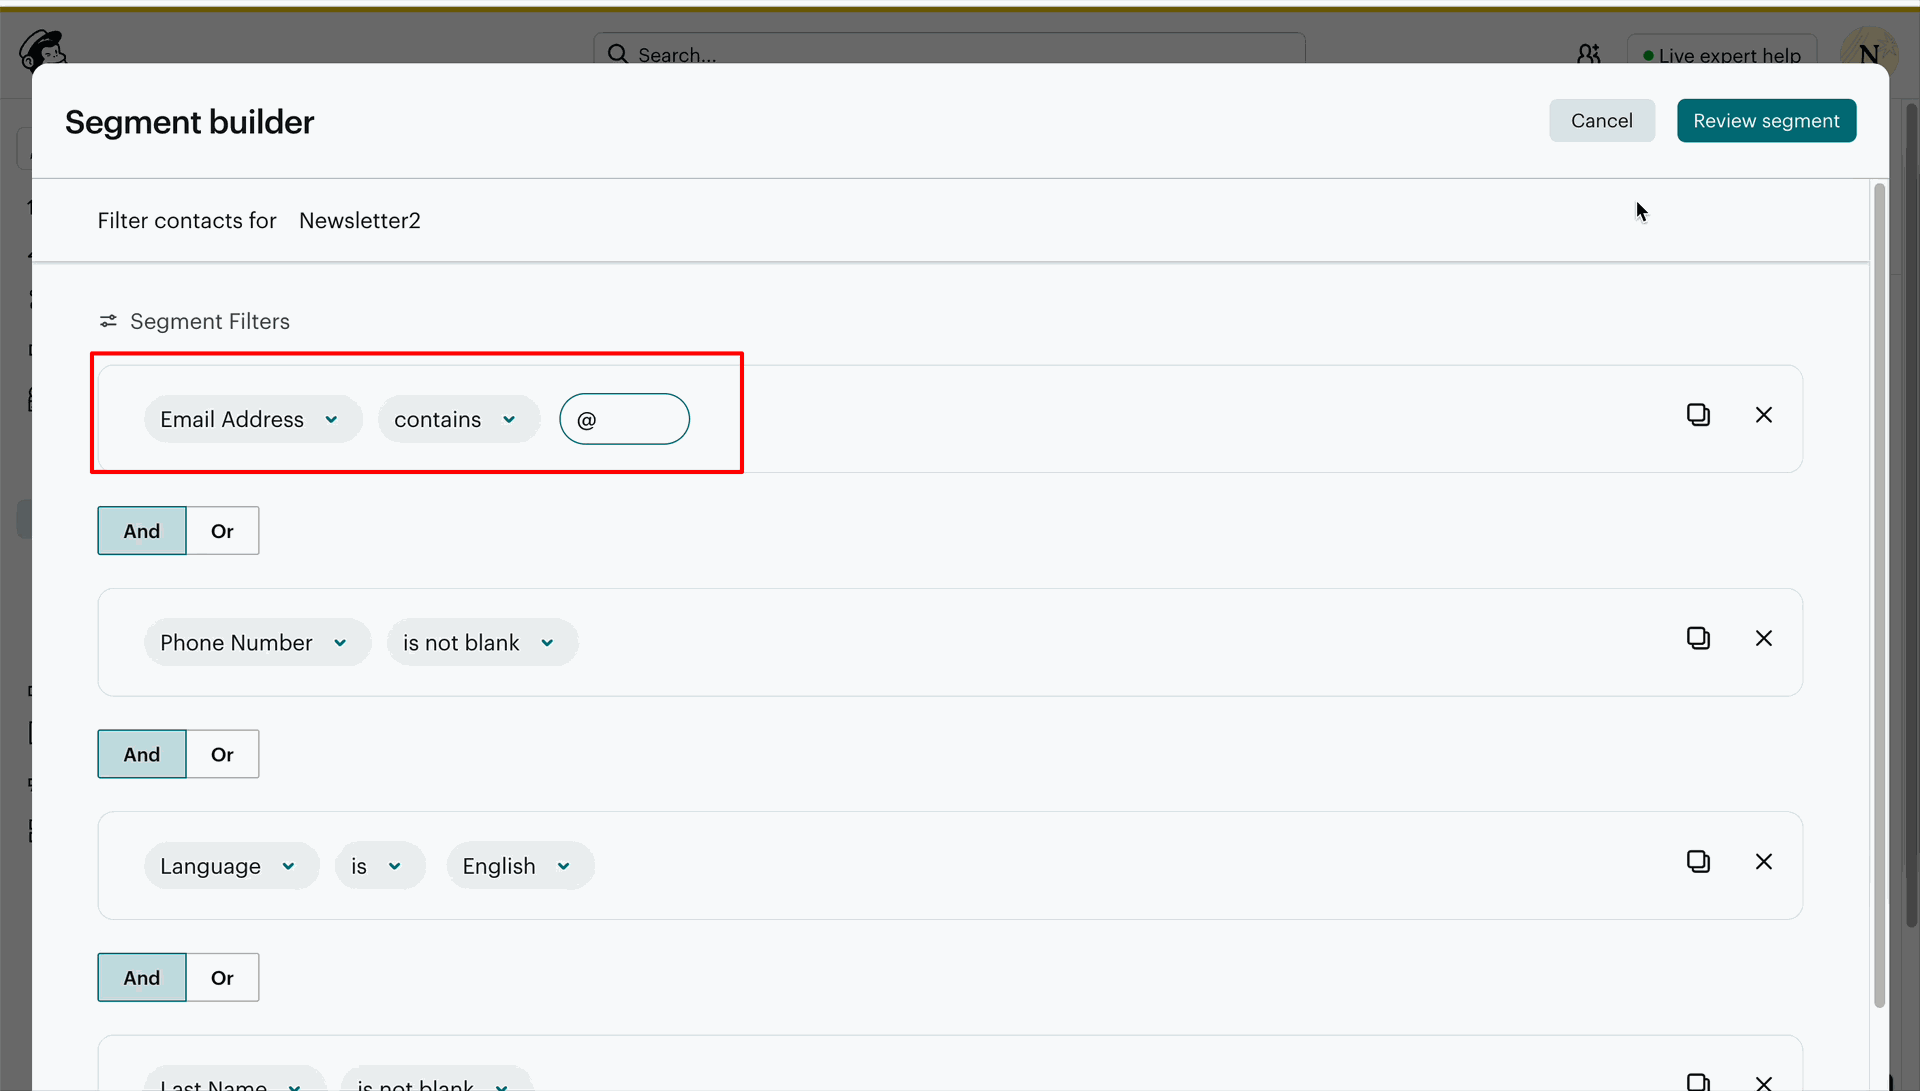
Open the Segments page in Mailchimp and review the saved segment record.
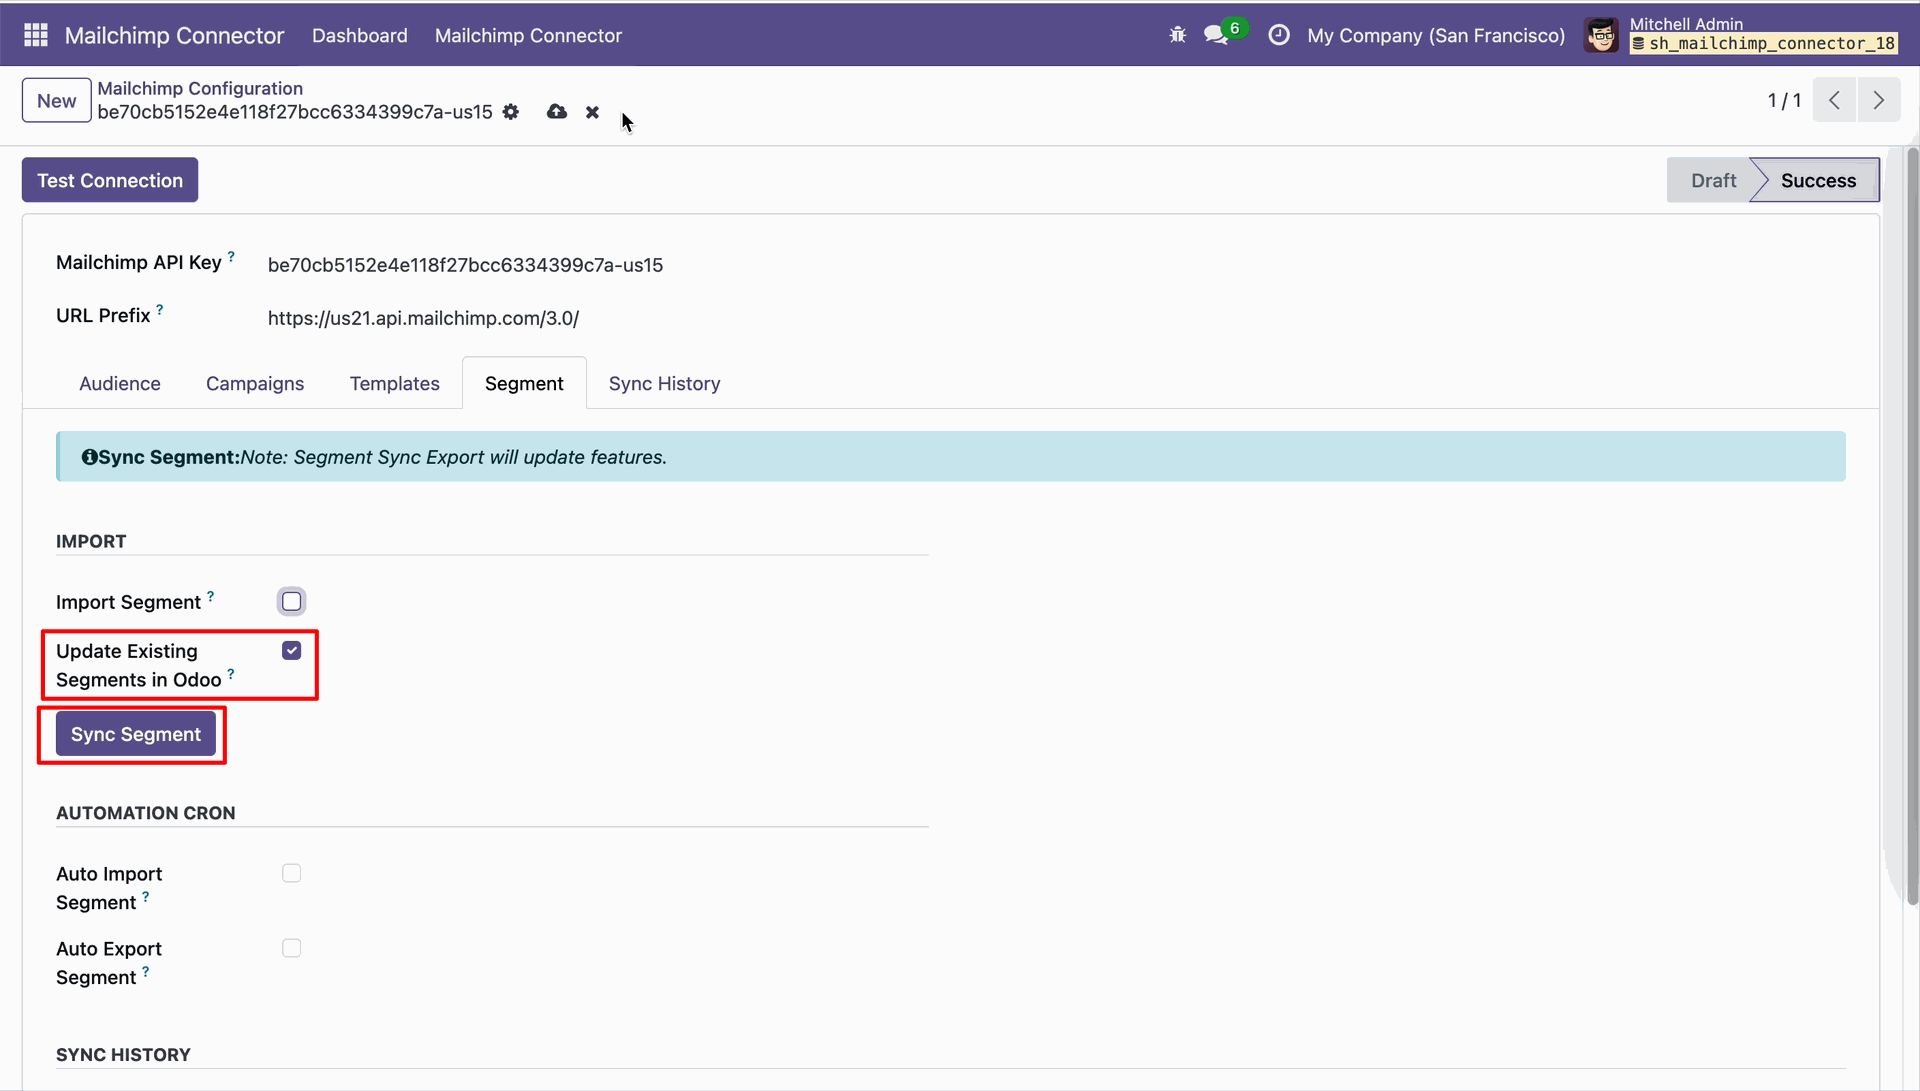
Enable Update Existing Segments in Odoo before clicking Sync Segment.
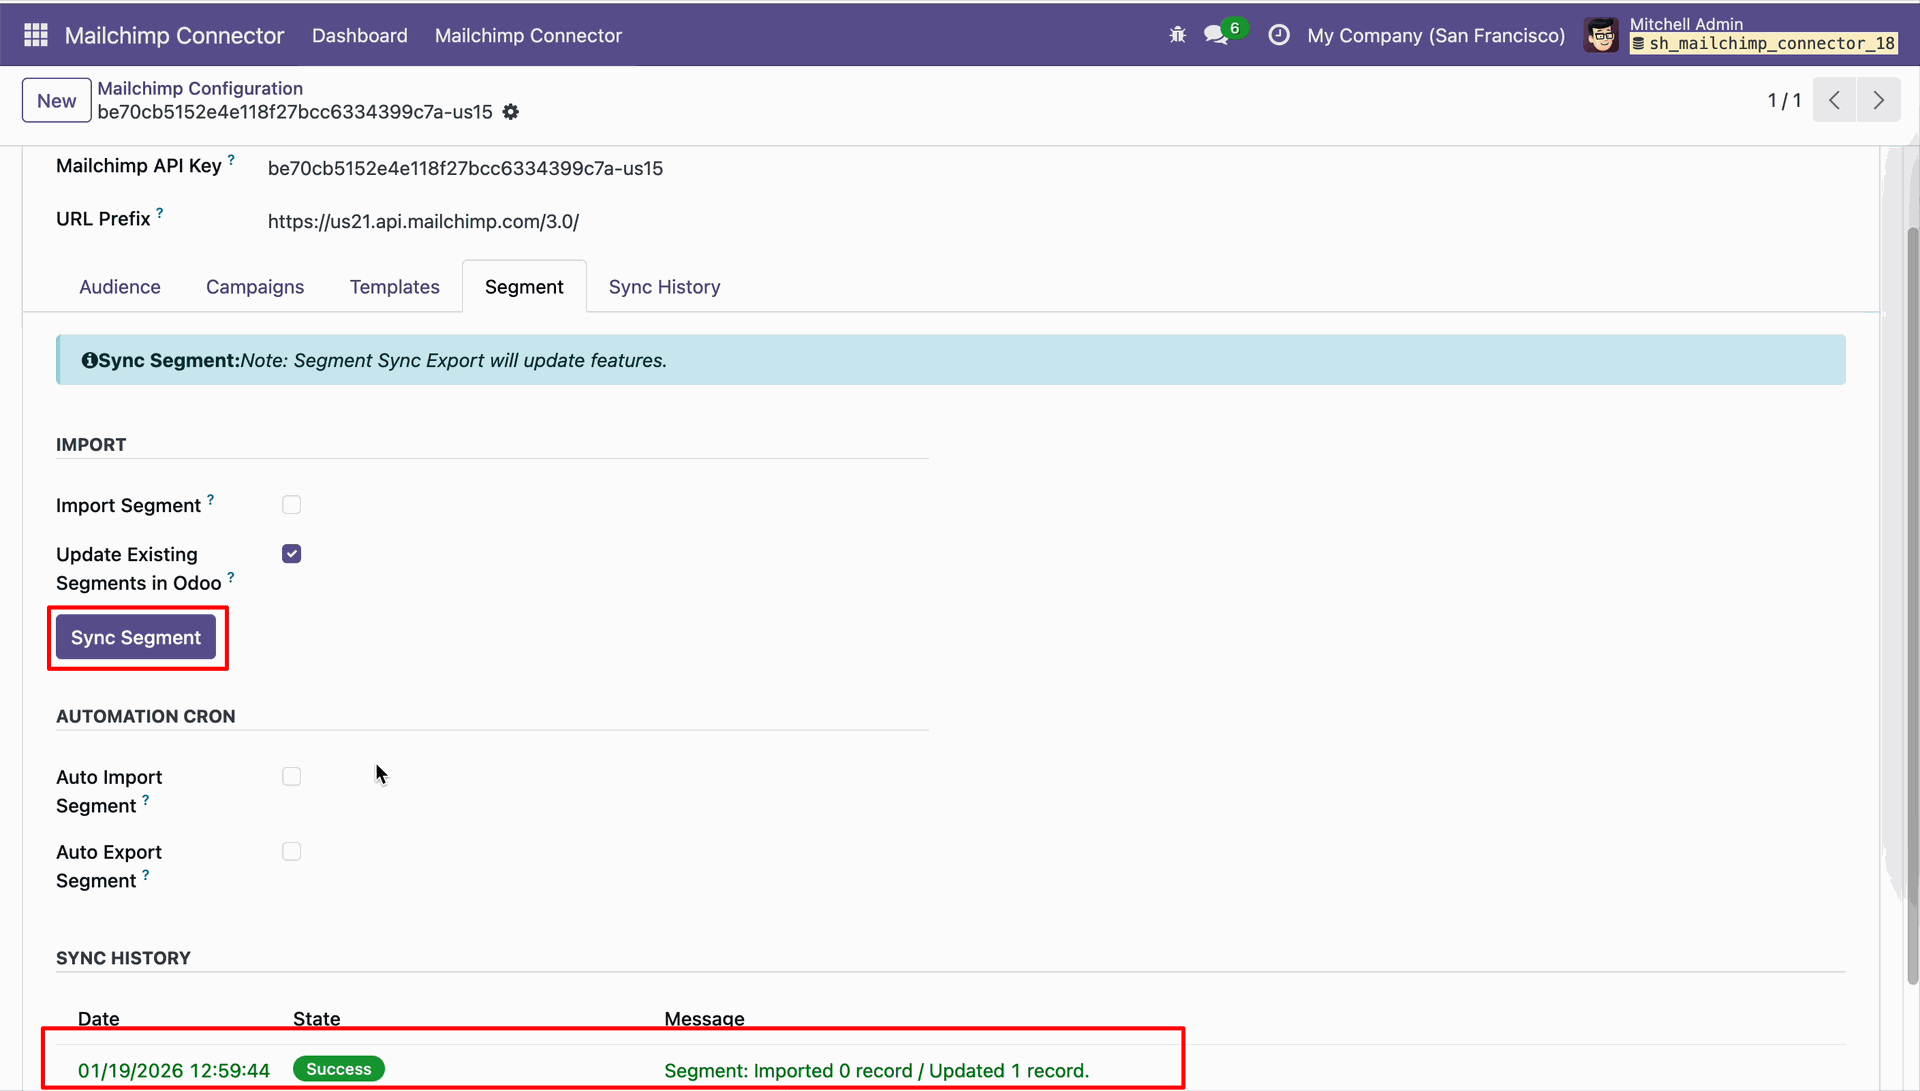
Review the sync history entry confirming one existing segment was updated.
Click Sync Segment to update existing segment records from Mailchimp.
Enable Import Segment and review the success message in Sync History.
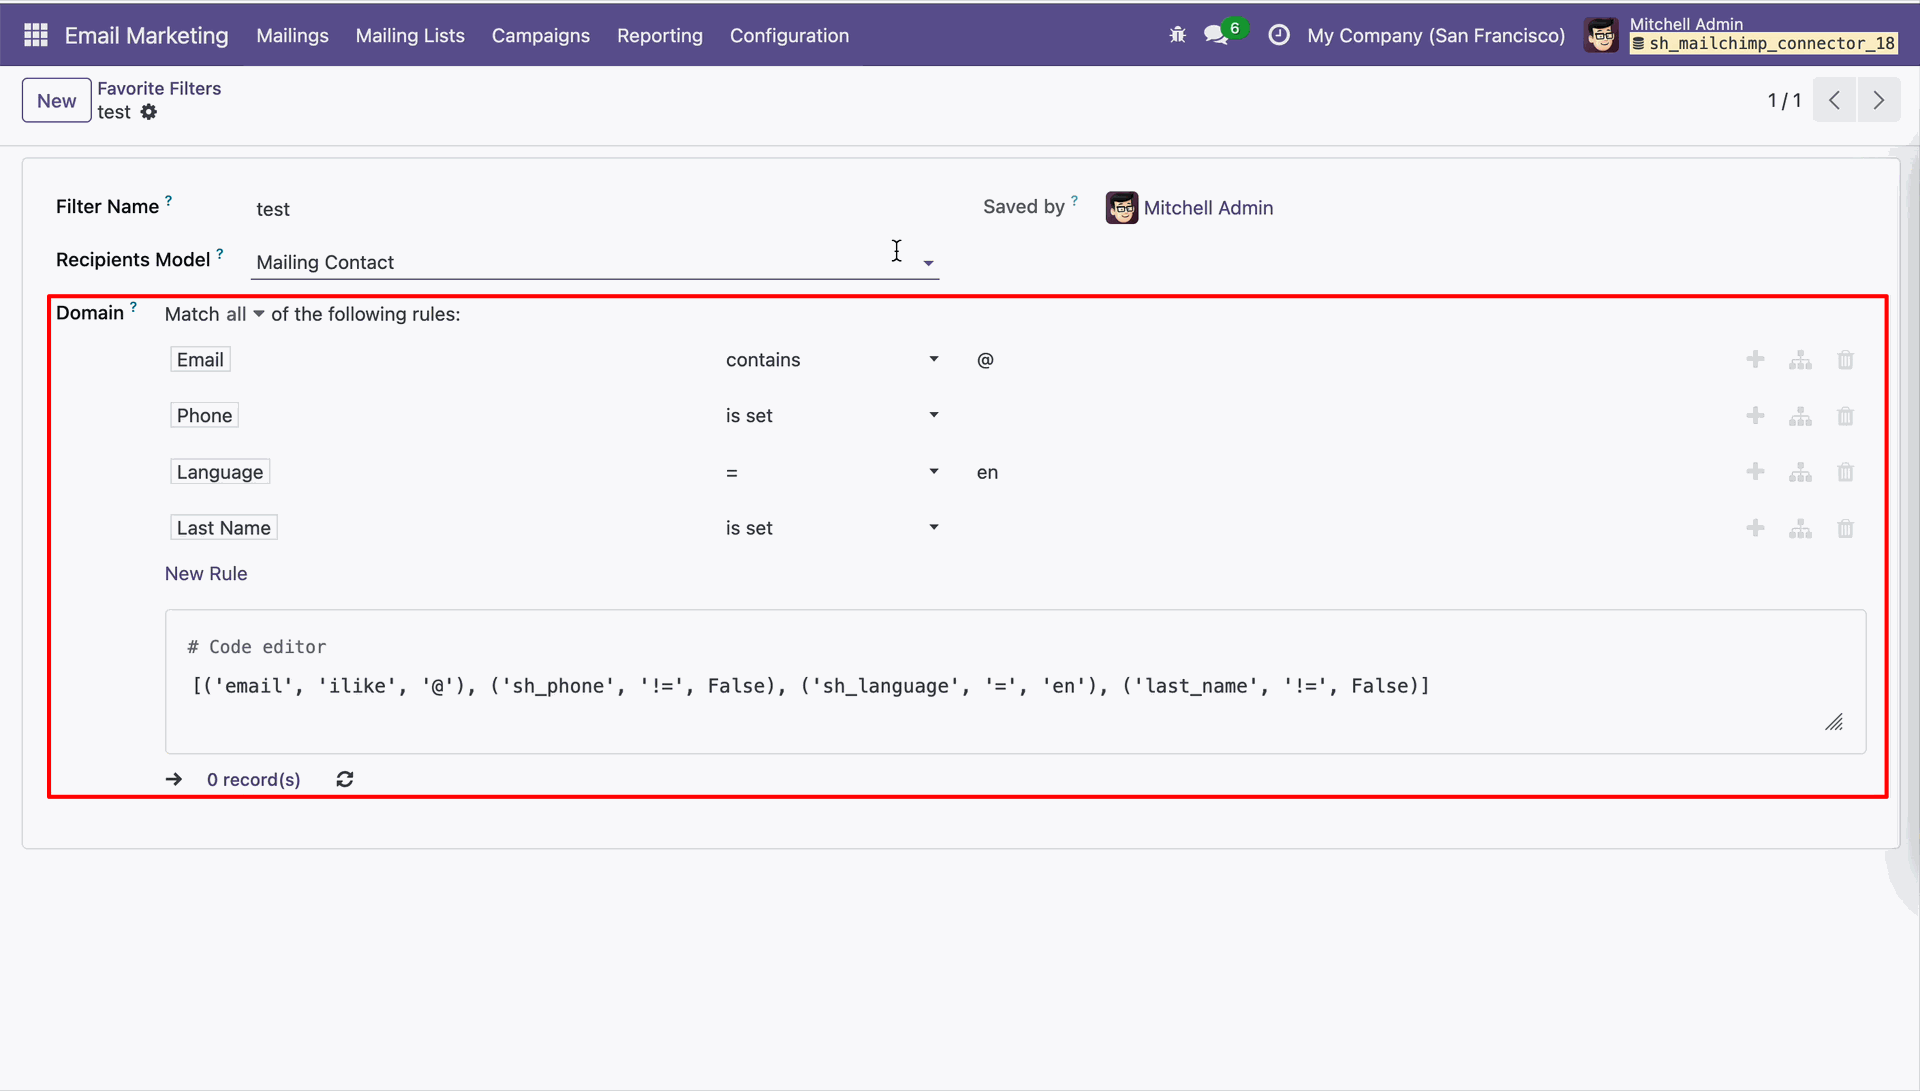
Review the Favorite Filters domain rules created for segment synchronization.
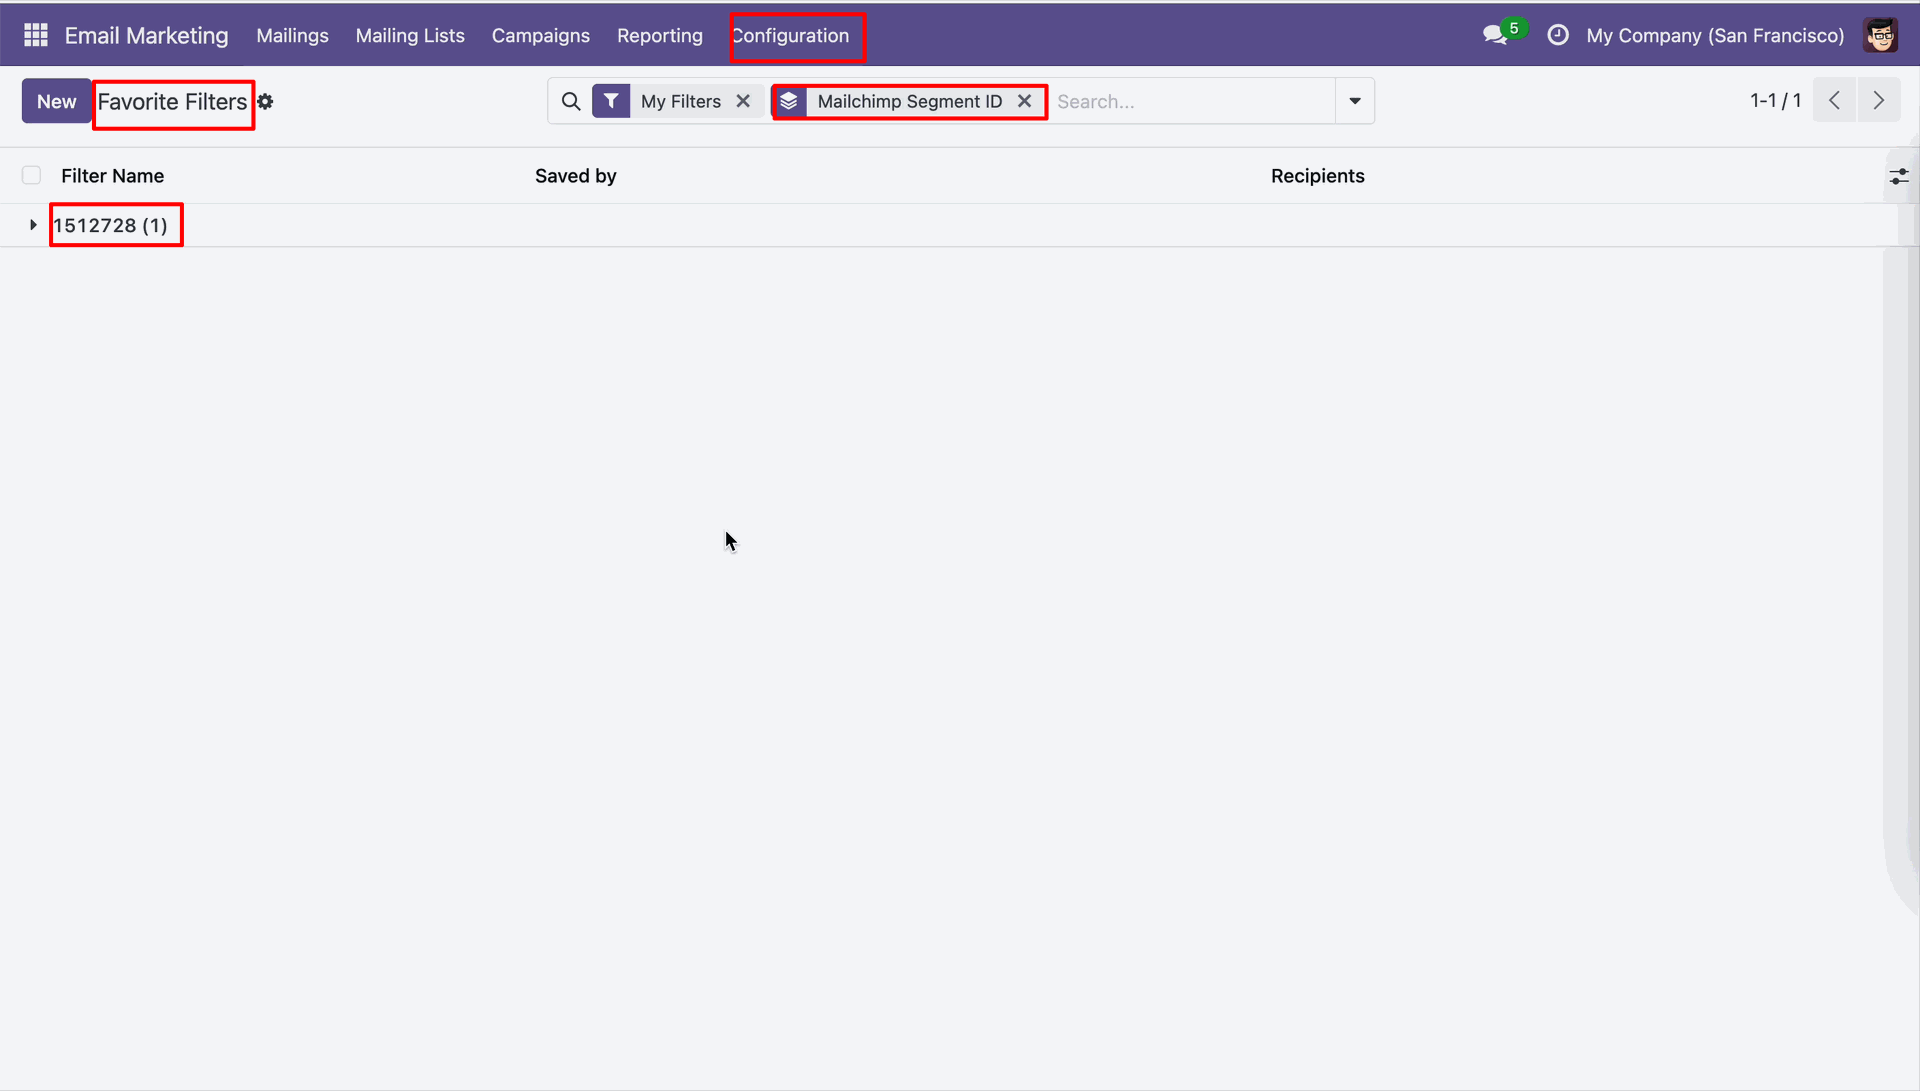
Open the Favorite Filters list filtered by Mailchimp Segment ID values.
Review the Favorite Filters list filtered by Mailchimp Segment ID records.
Workflow
Open the Audience tab and enable Import Audience before clicking Sync Audience.
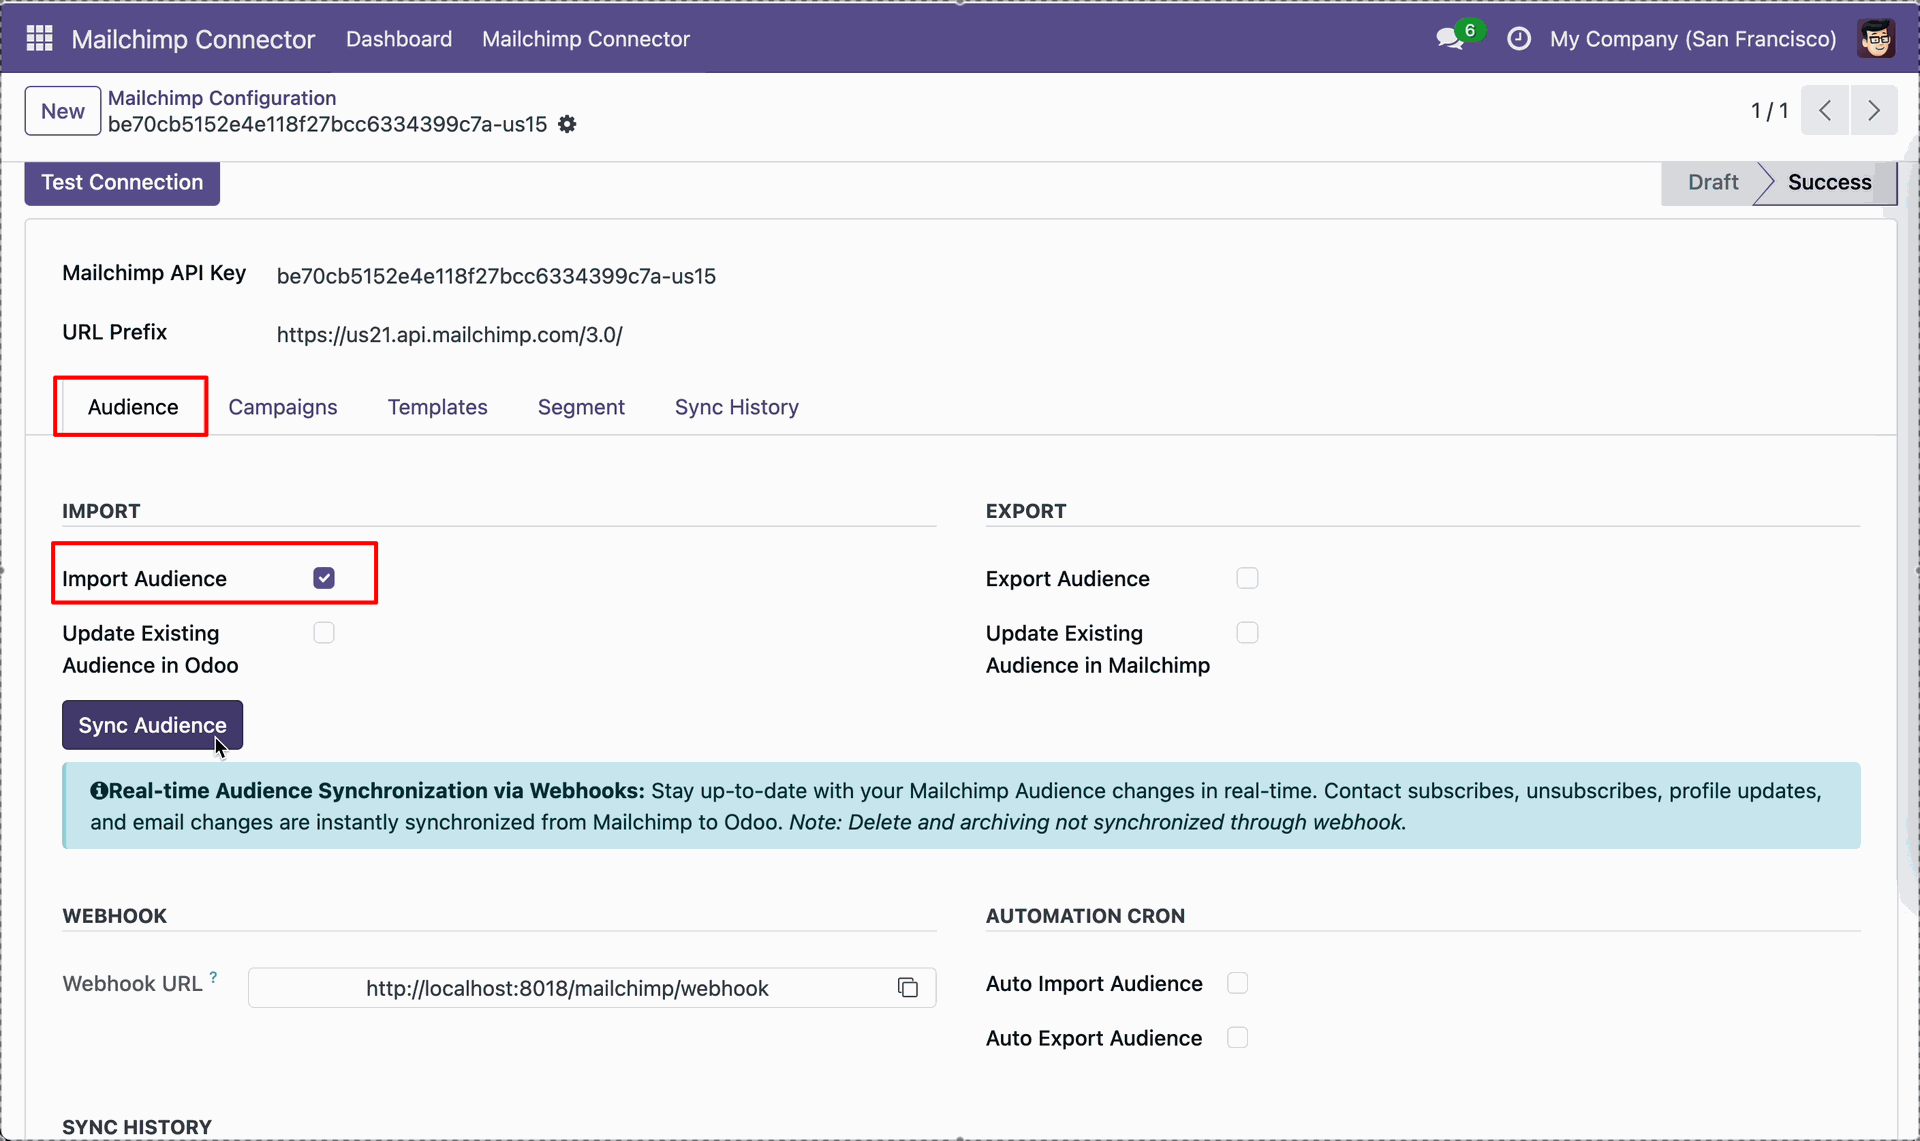
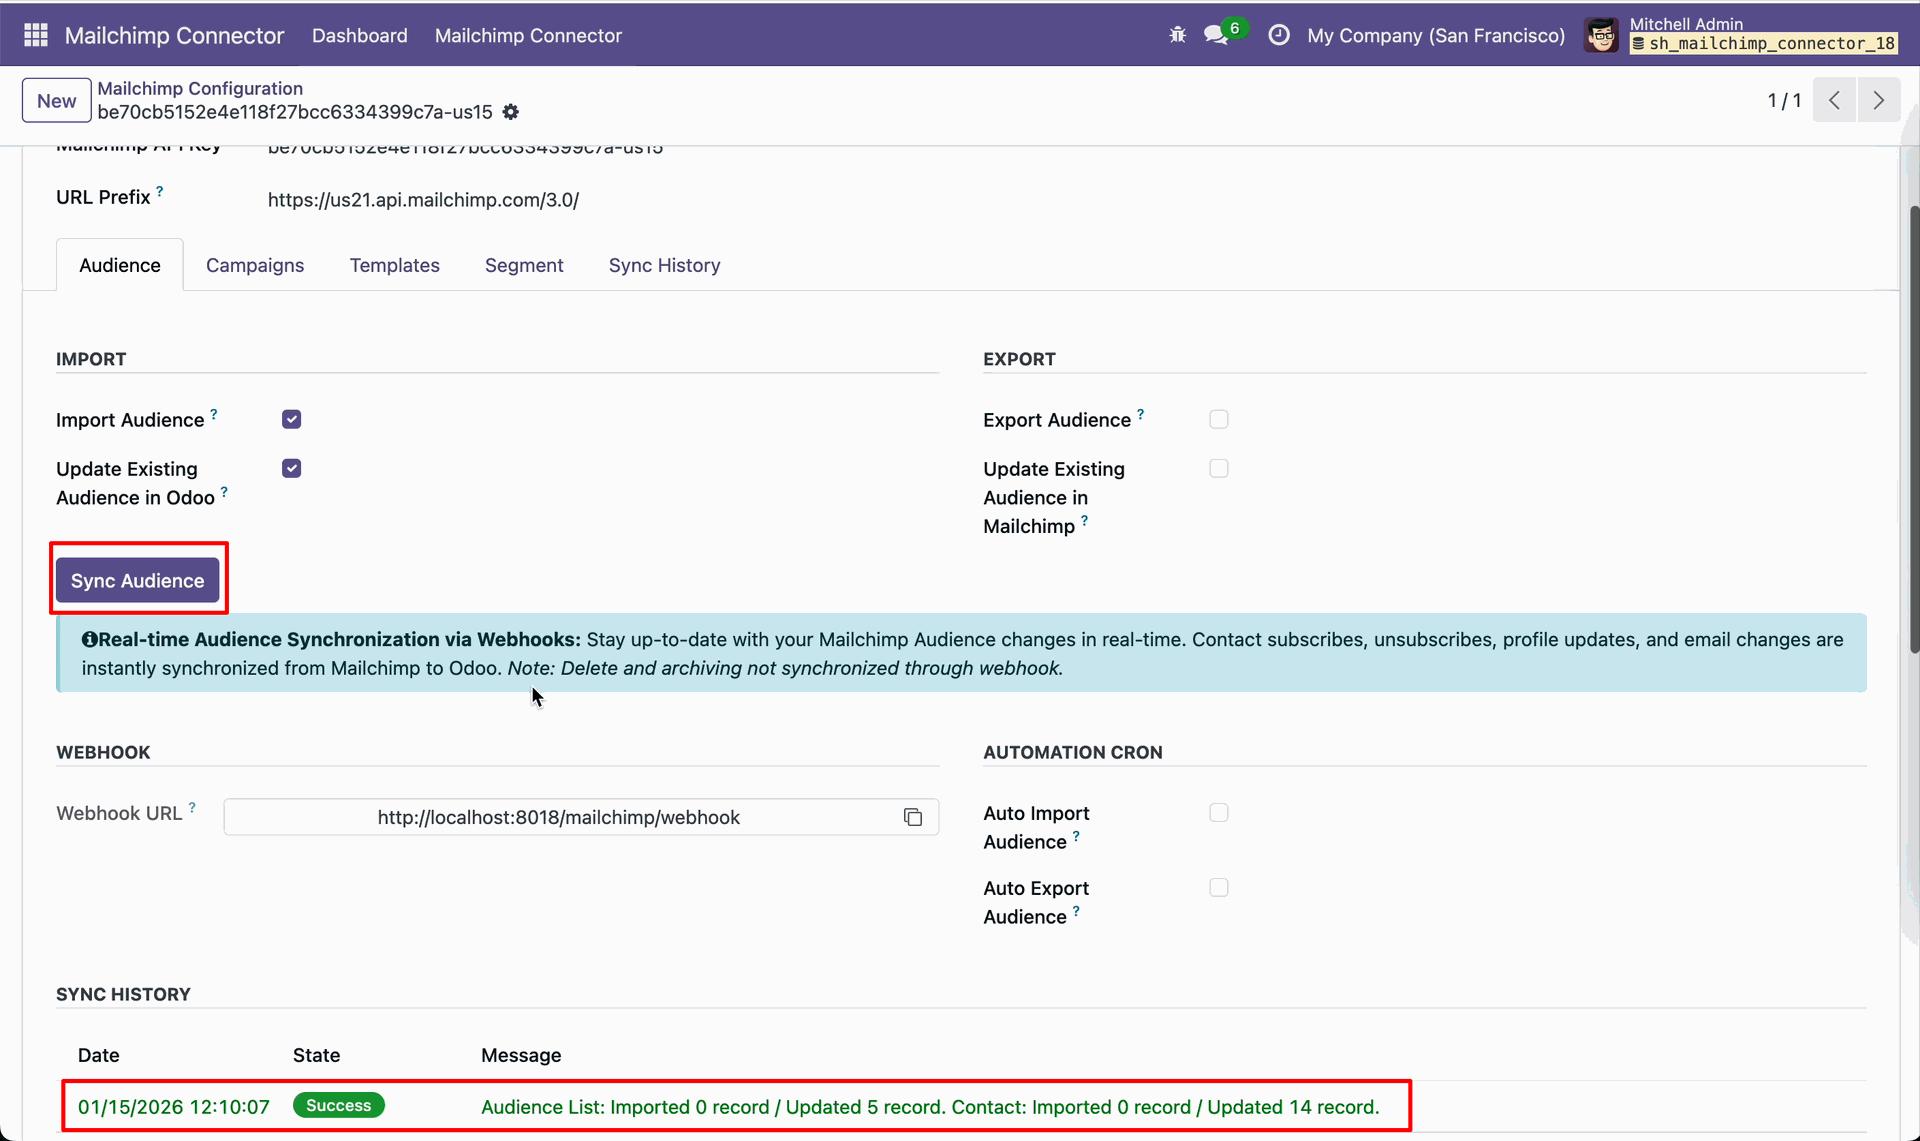
Click Sync Audience to import audience and contact records from Mailchimp. Review Sync History to confirm audiences and contacts were imported successfully.
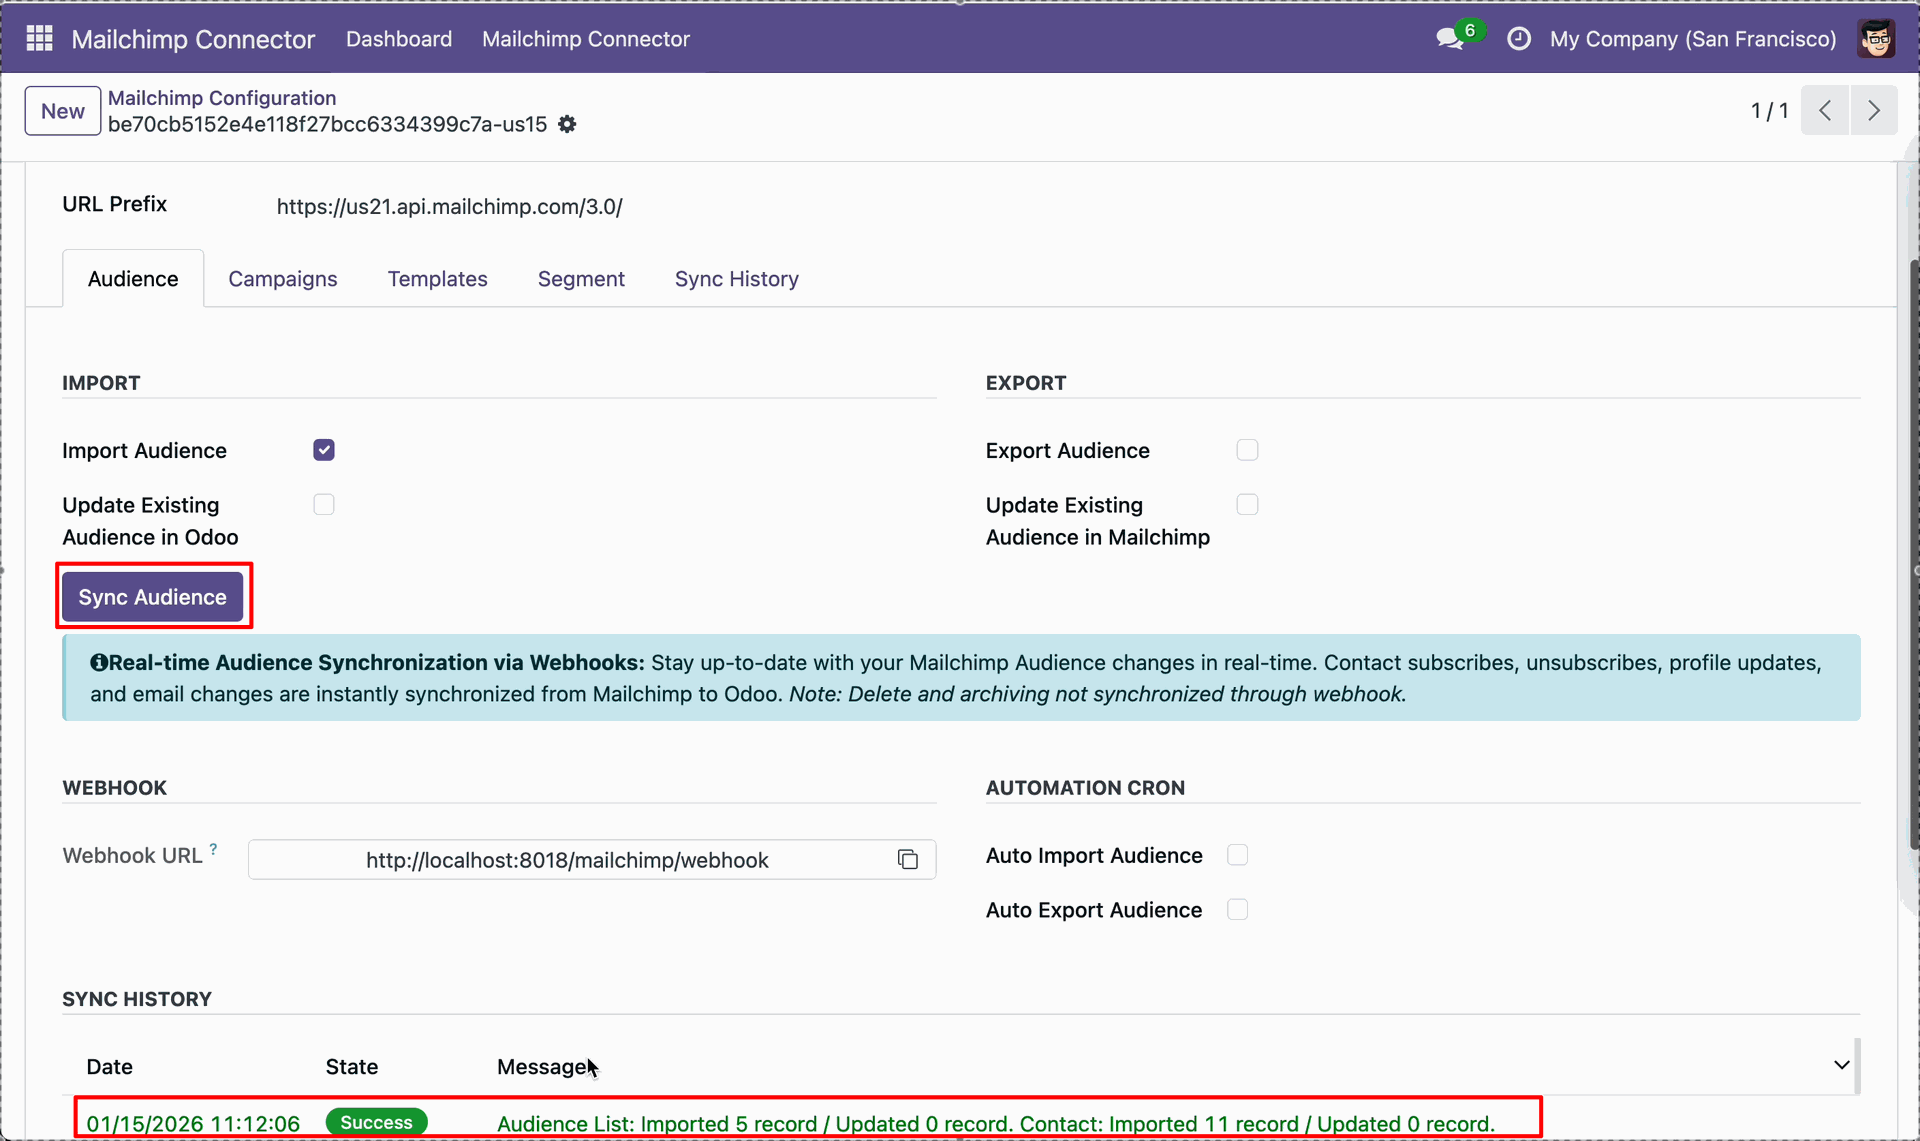
Open the Mailing Lists page filtered by Mailing Lists in Email Marketing.
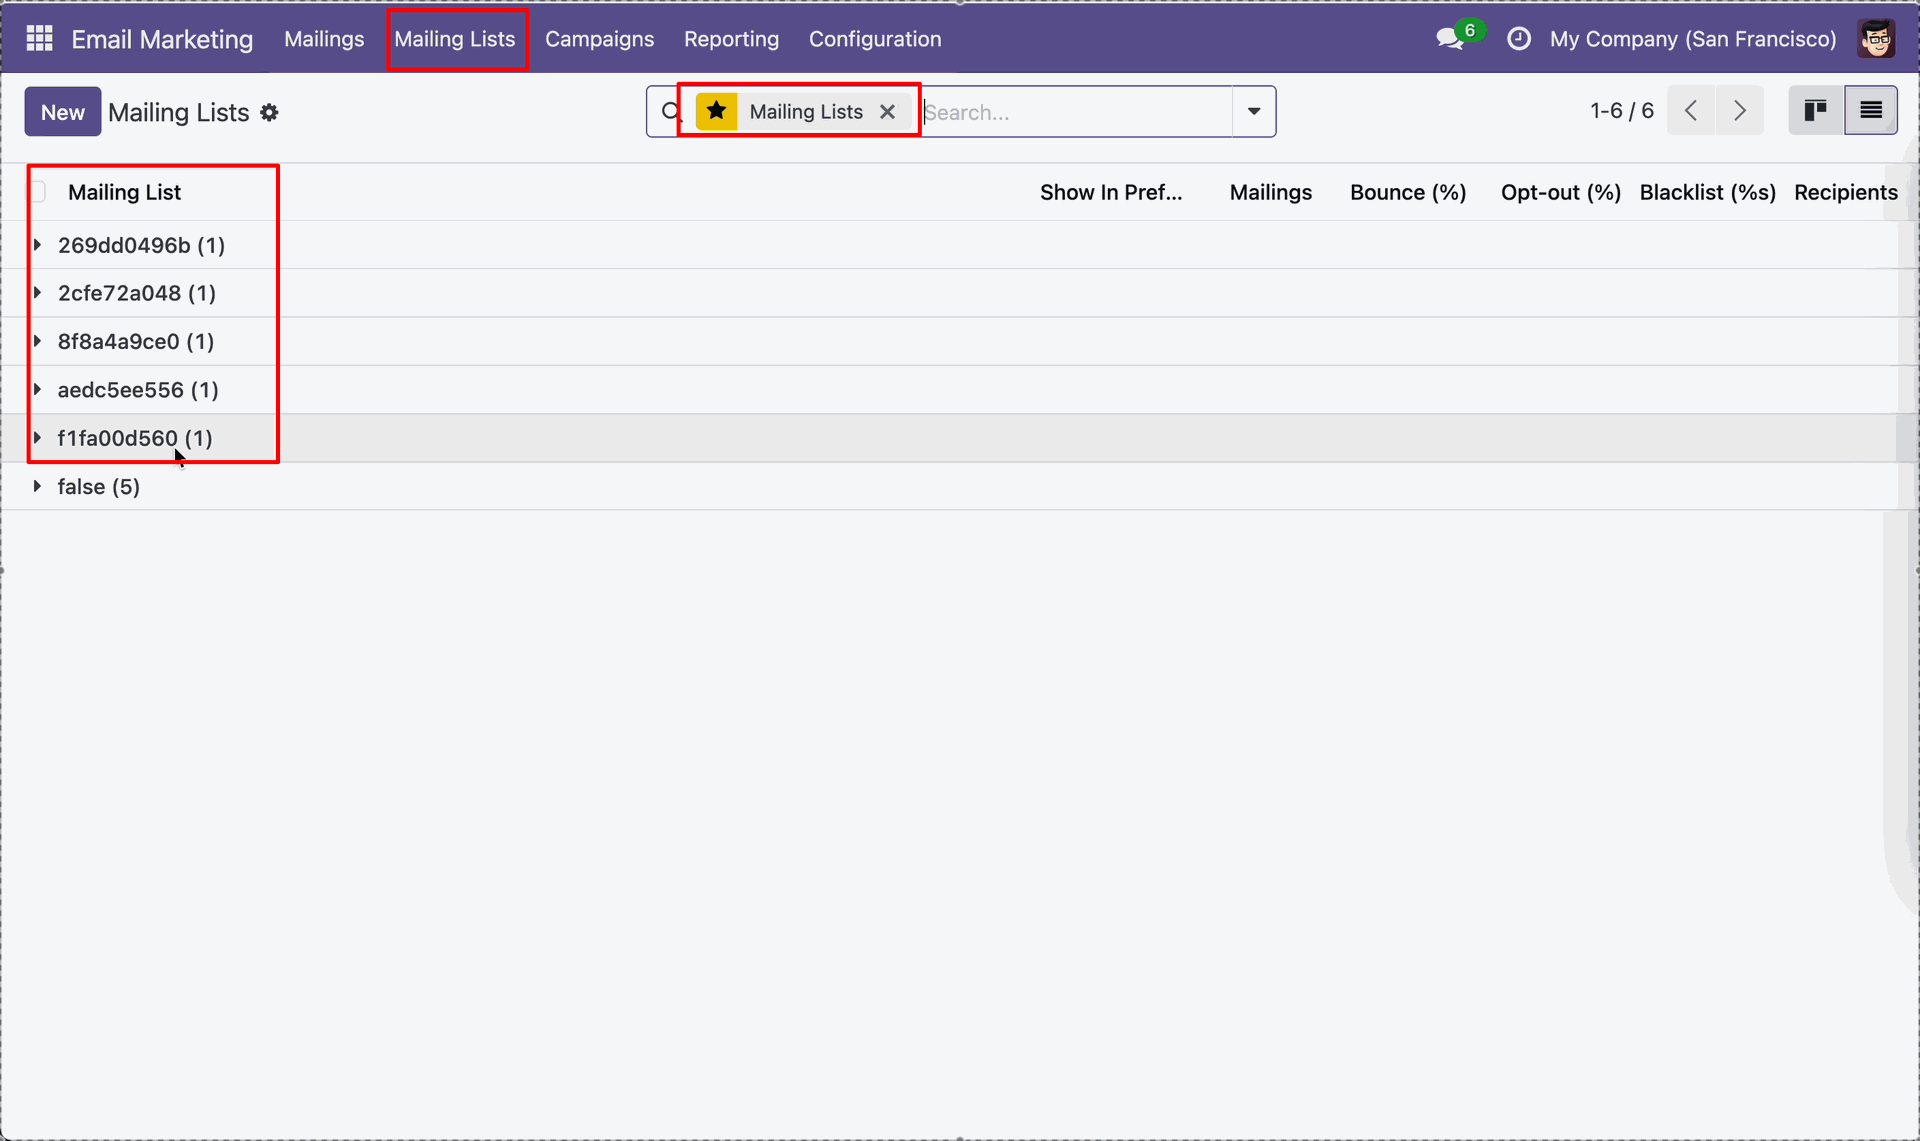
Review audience member records filtered by Mailchimp Member ID values.
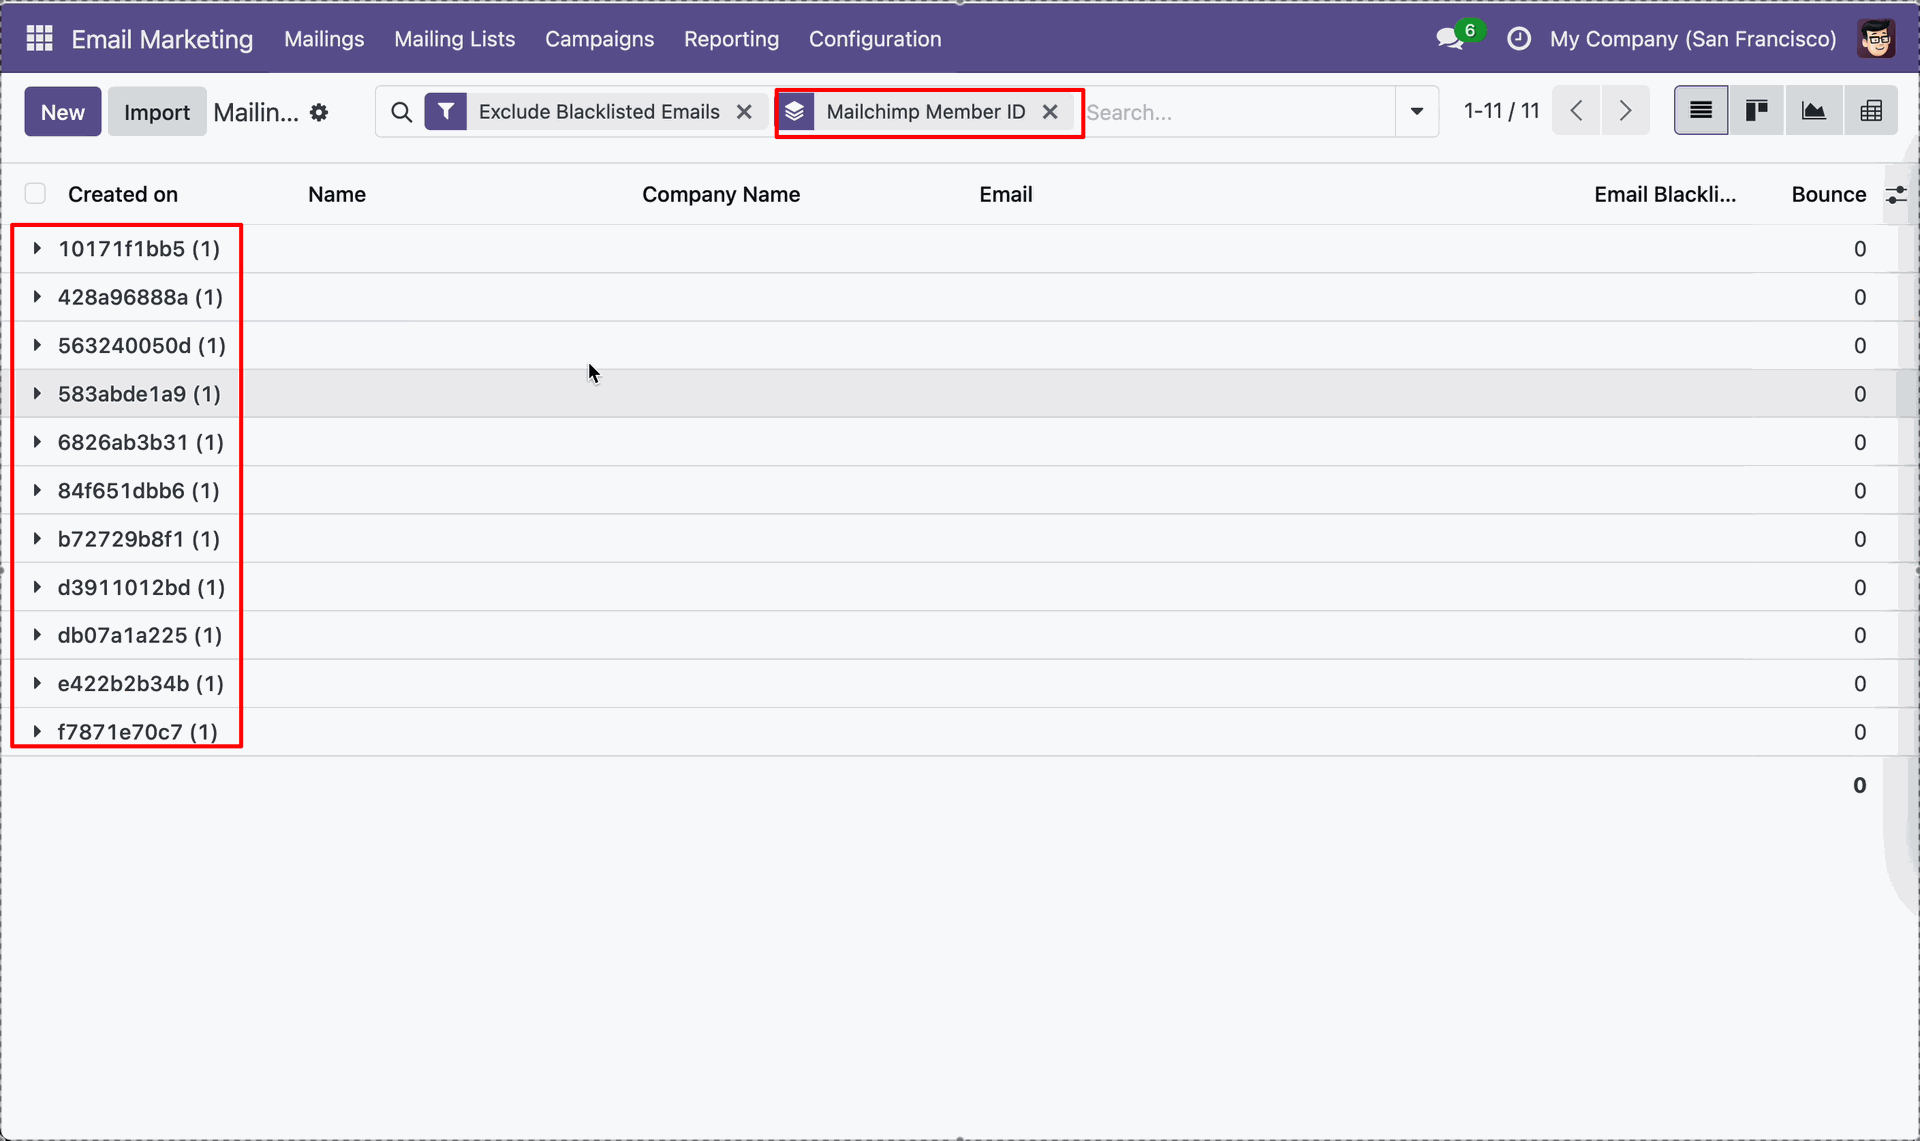
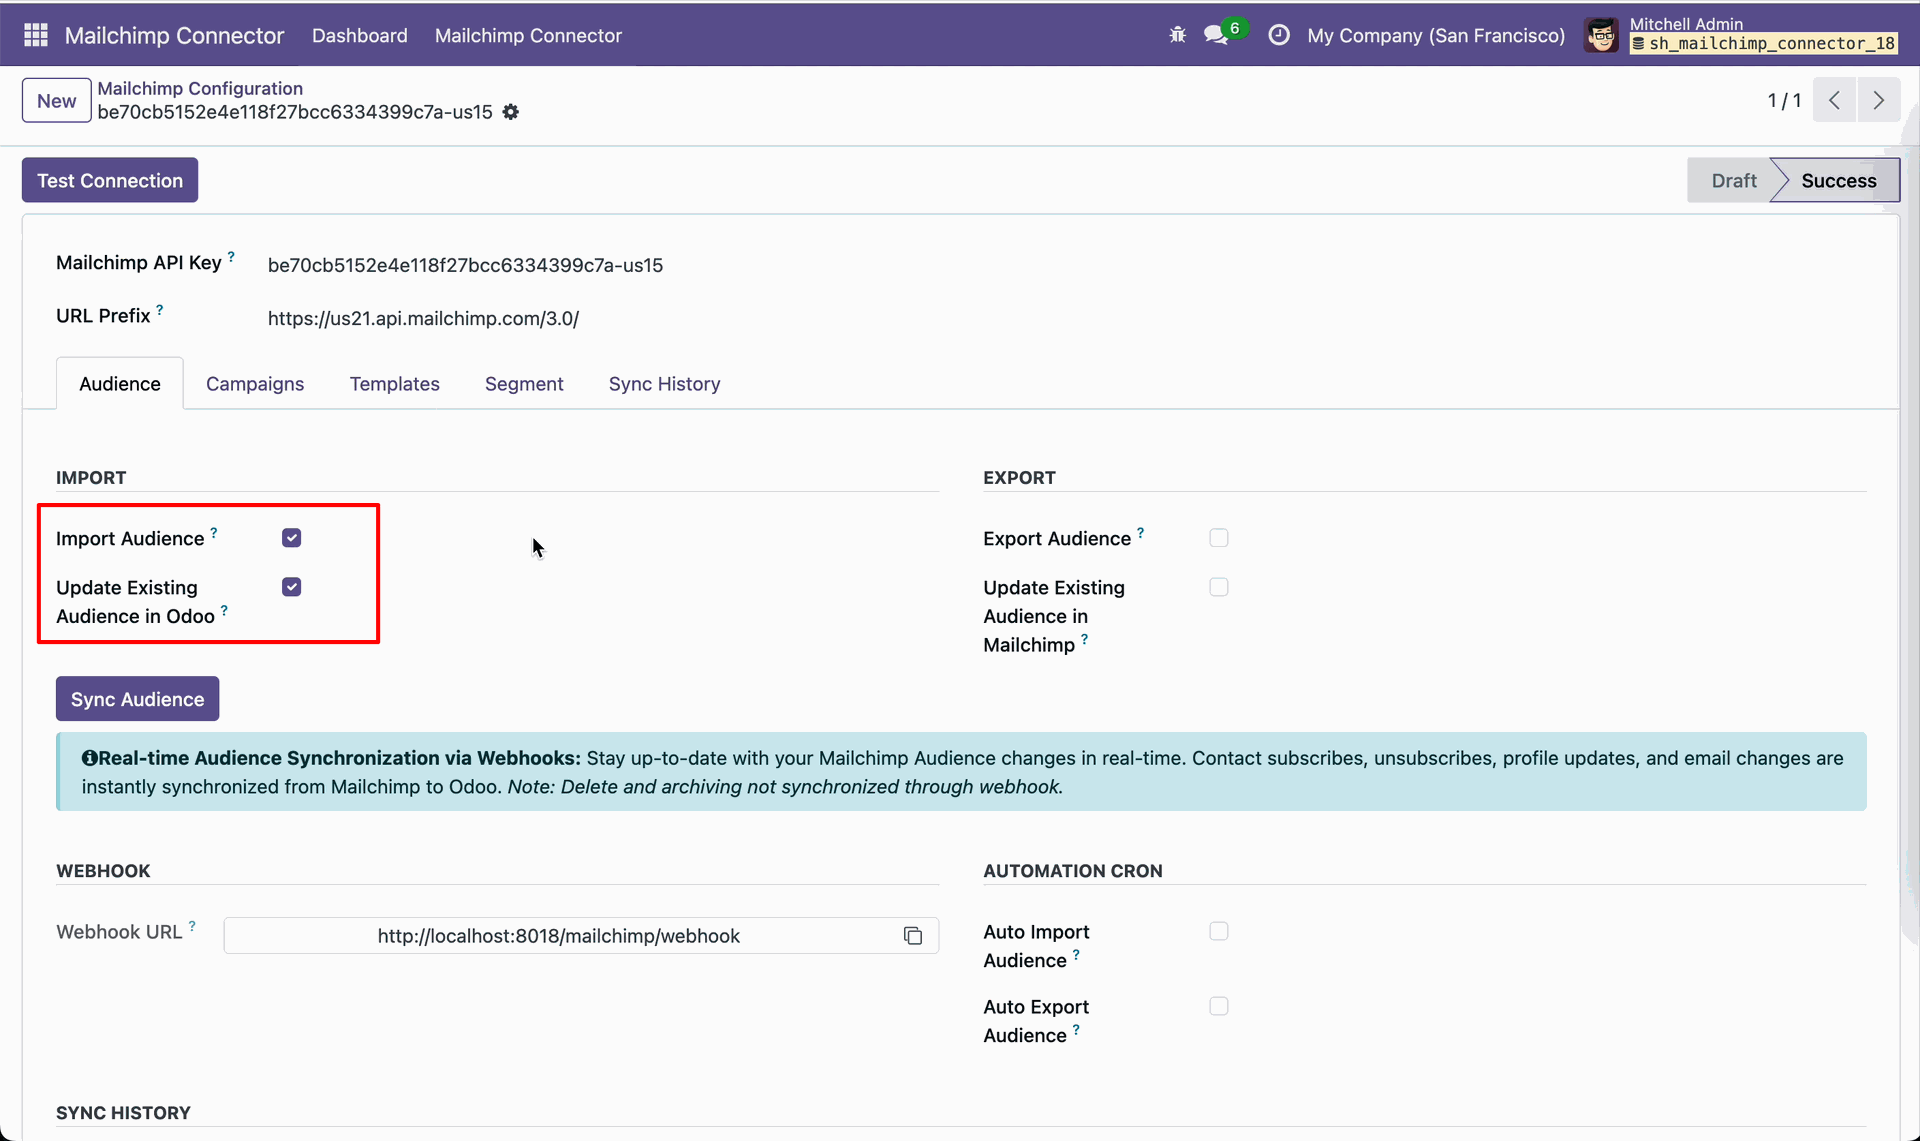
Enable Import Audience and Update Existing Audience in Odoo for synchronization.
Review Sync History after importing one audience record to Mailchimp.
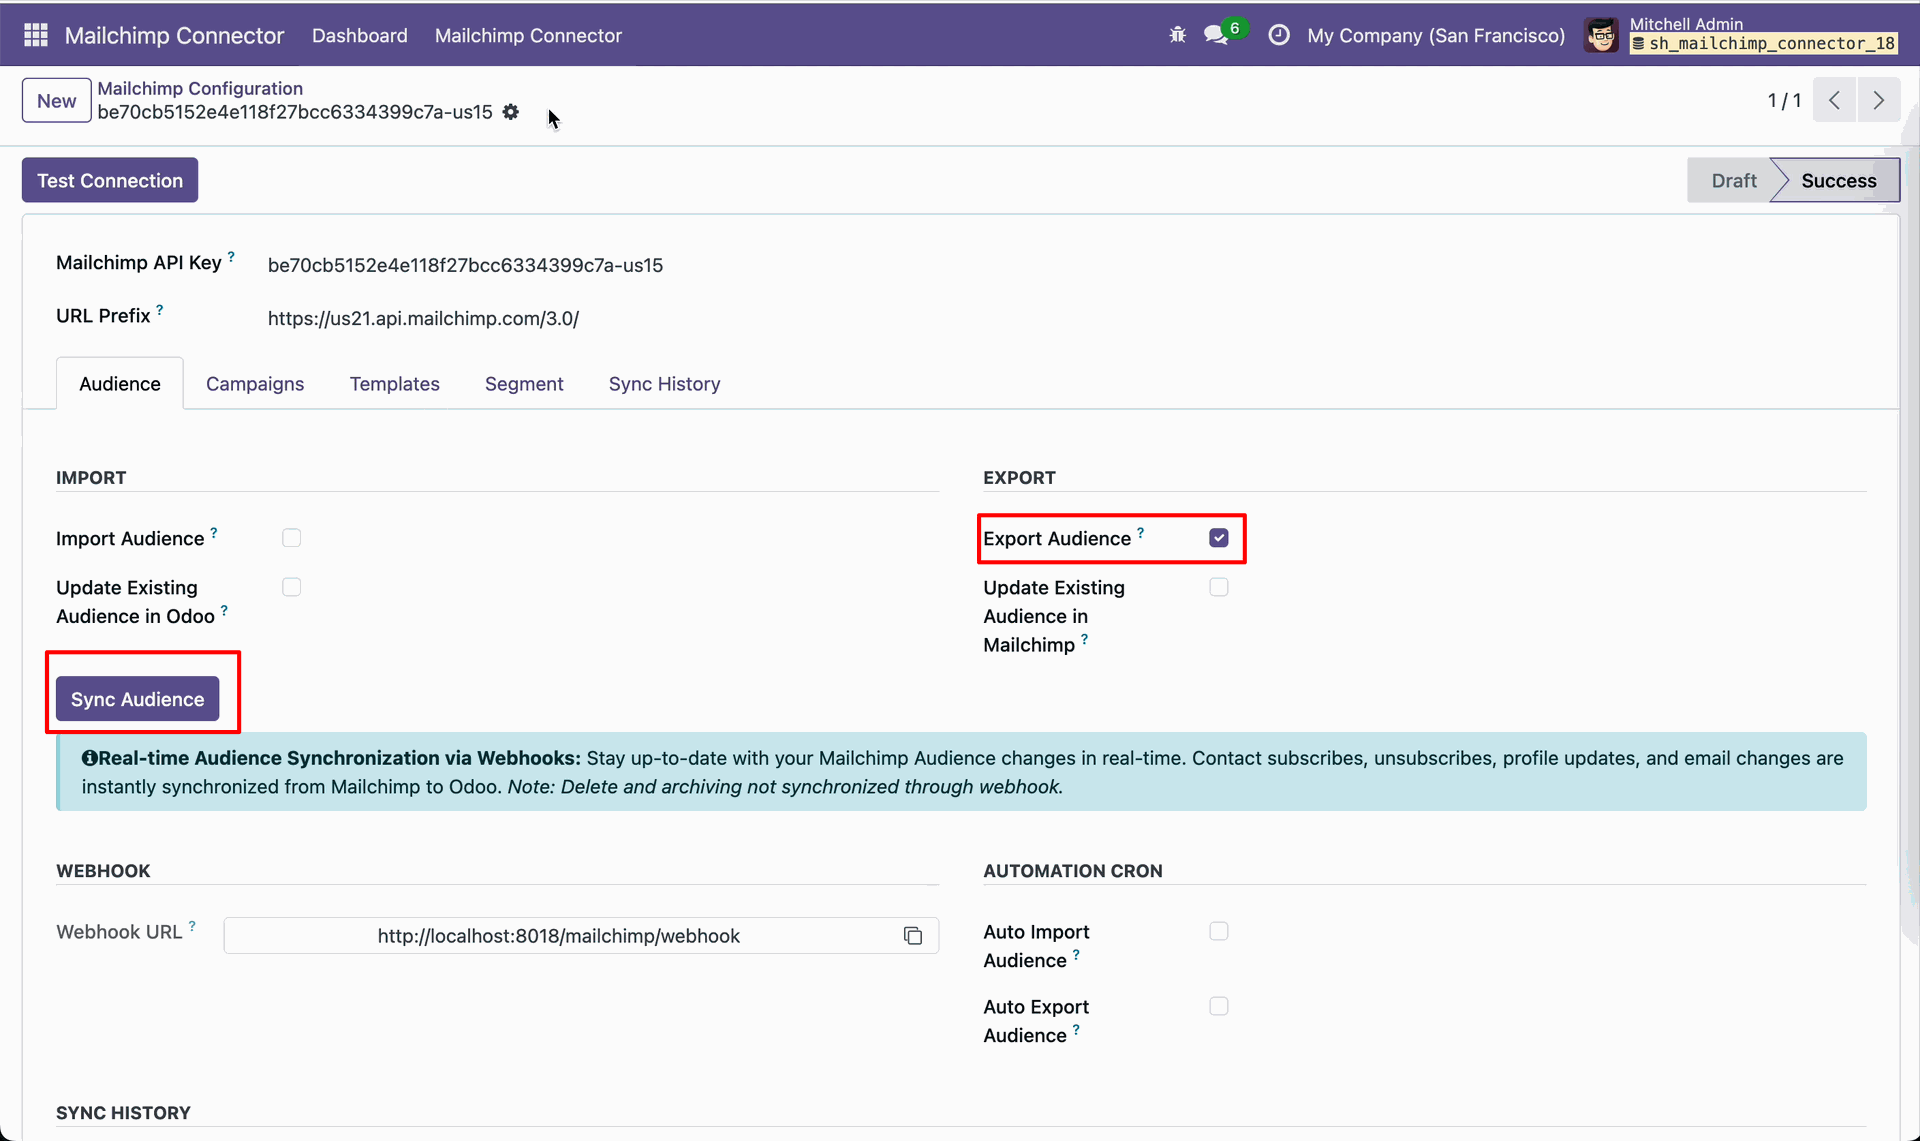
Enable 'Export Audience'.
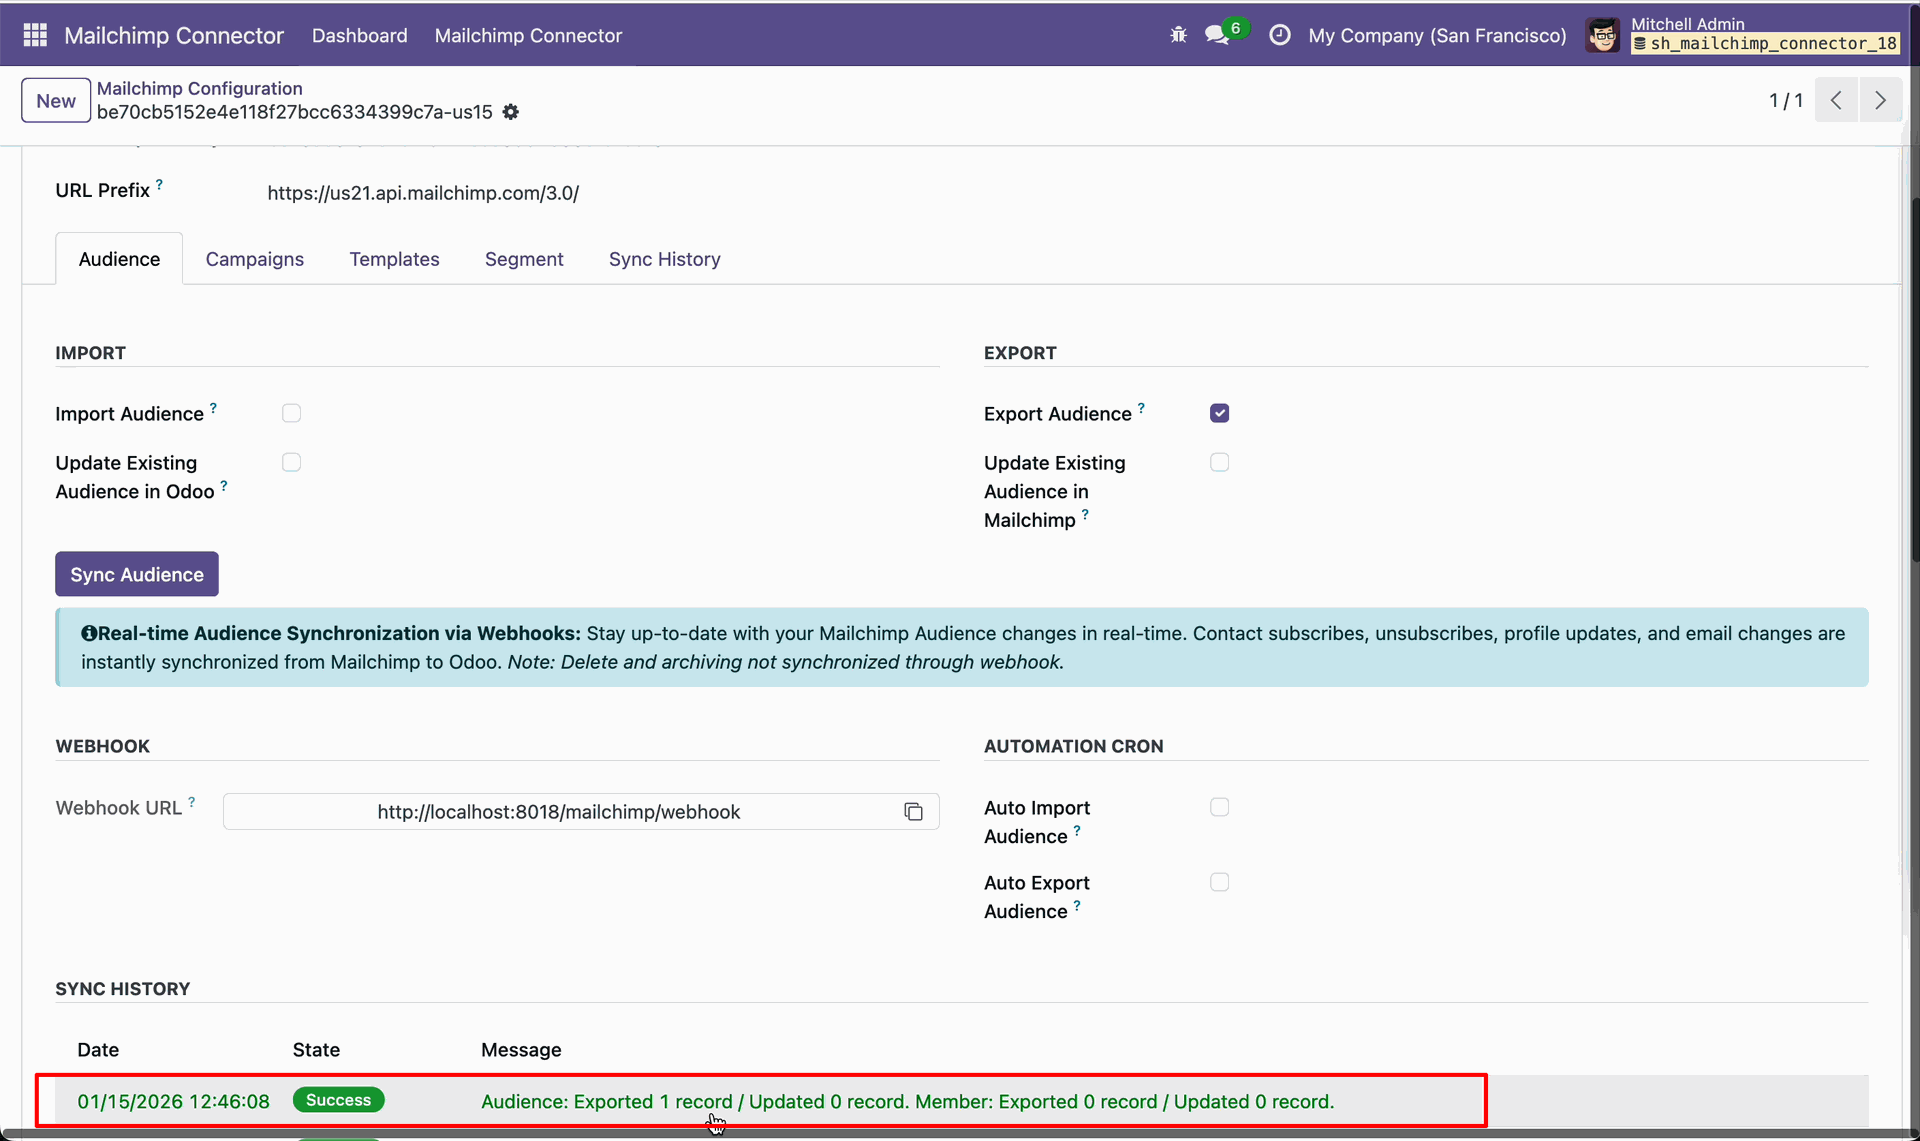
Review Sync History after exporting one audience record to Mailchimp.
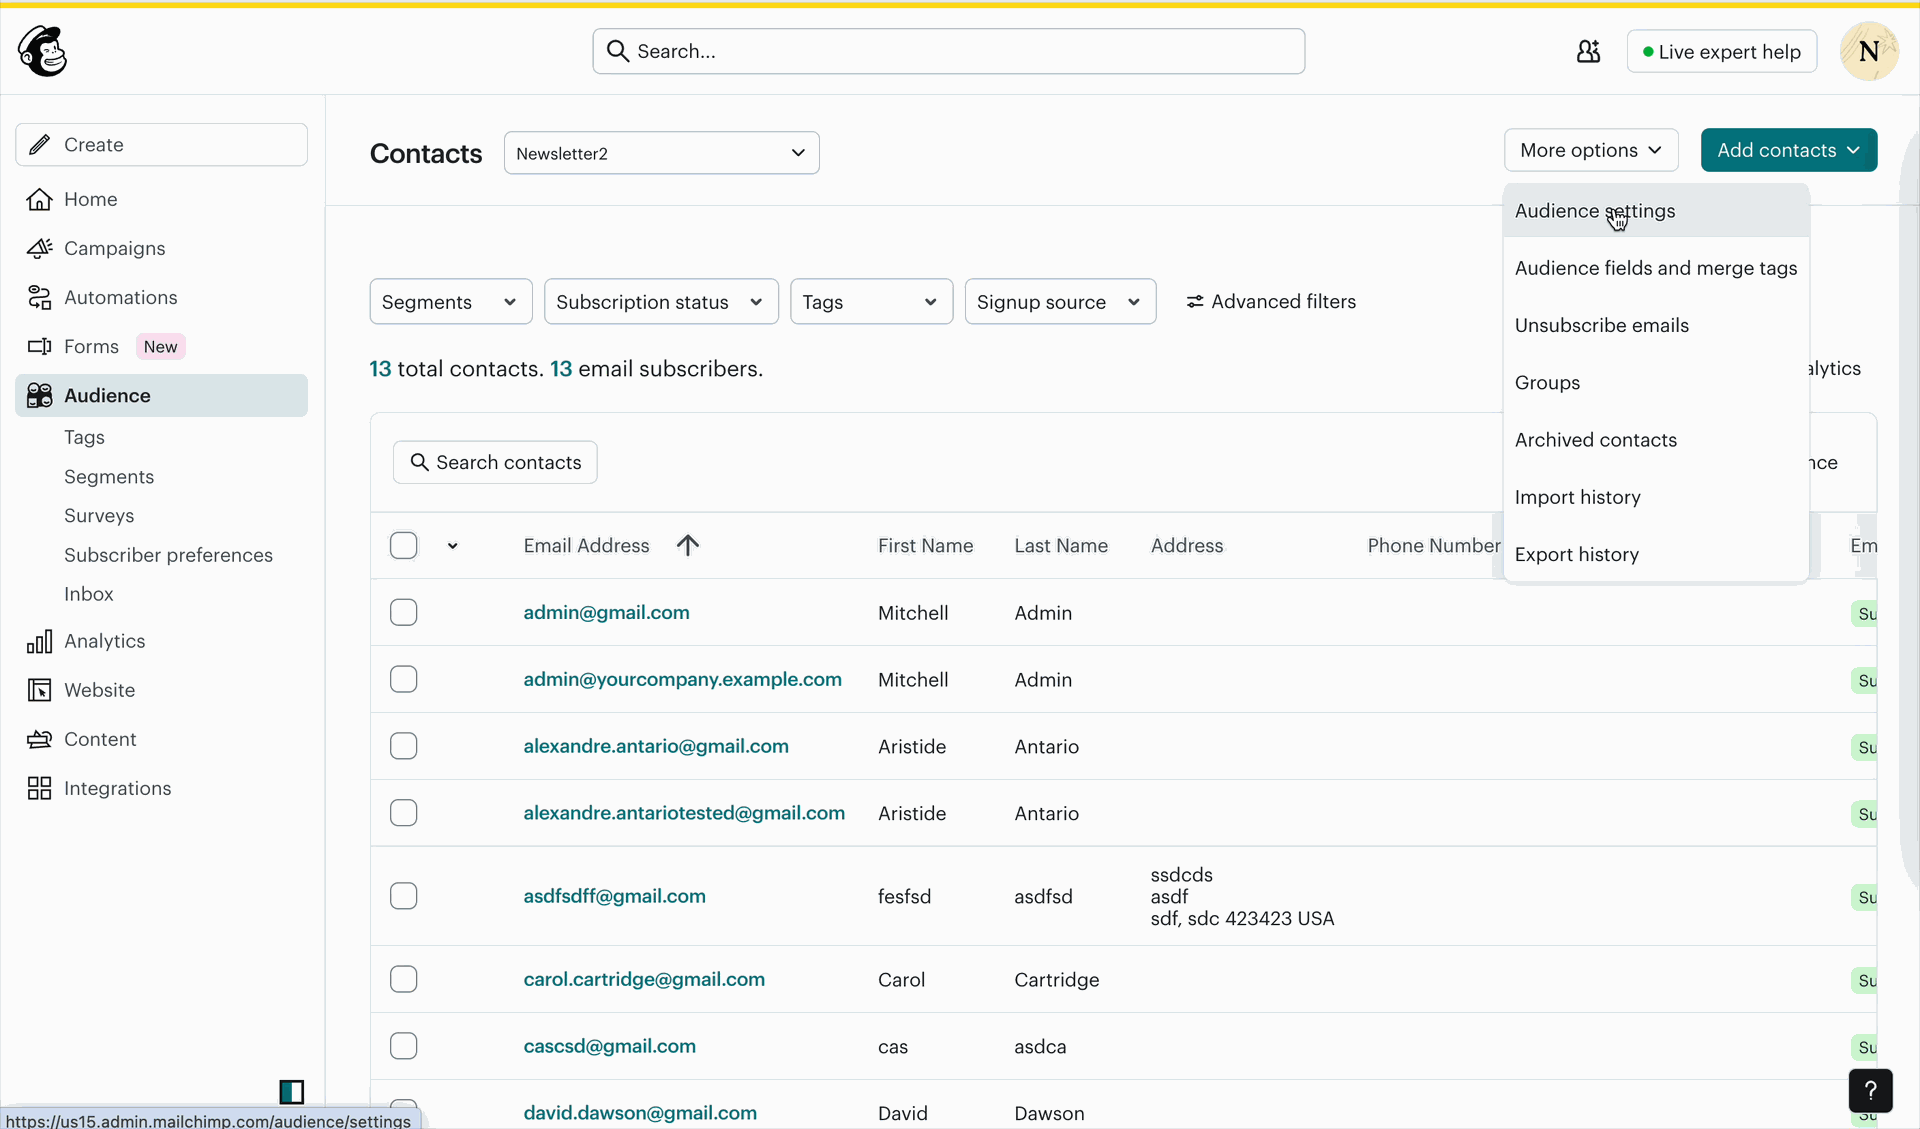
Open Audience settings from More options for the selected Mailchimp audience.
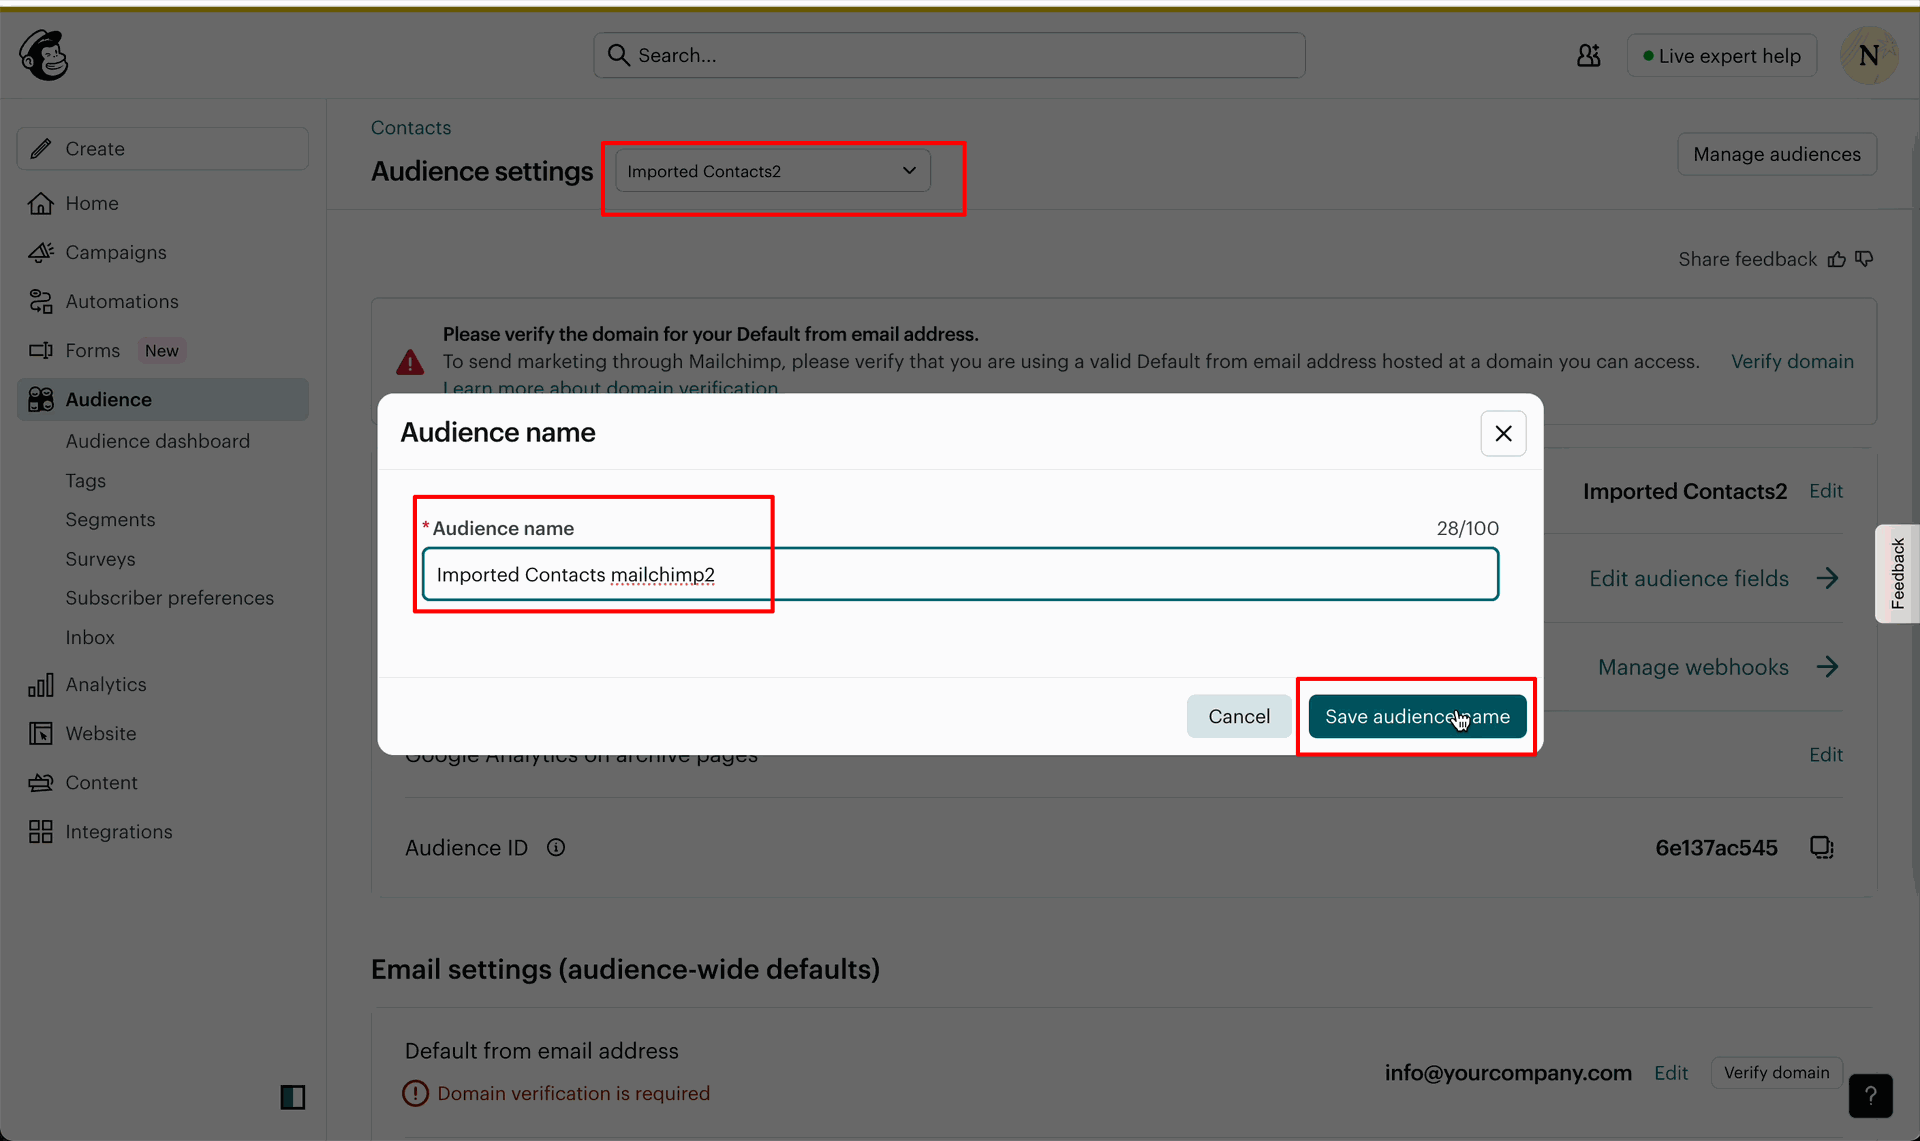
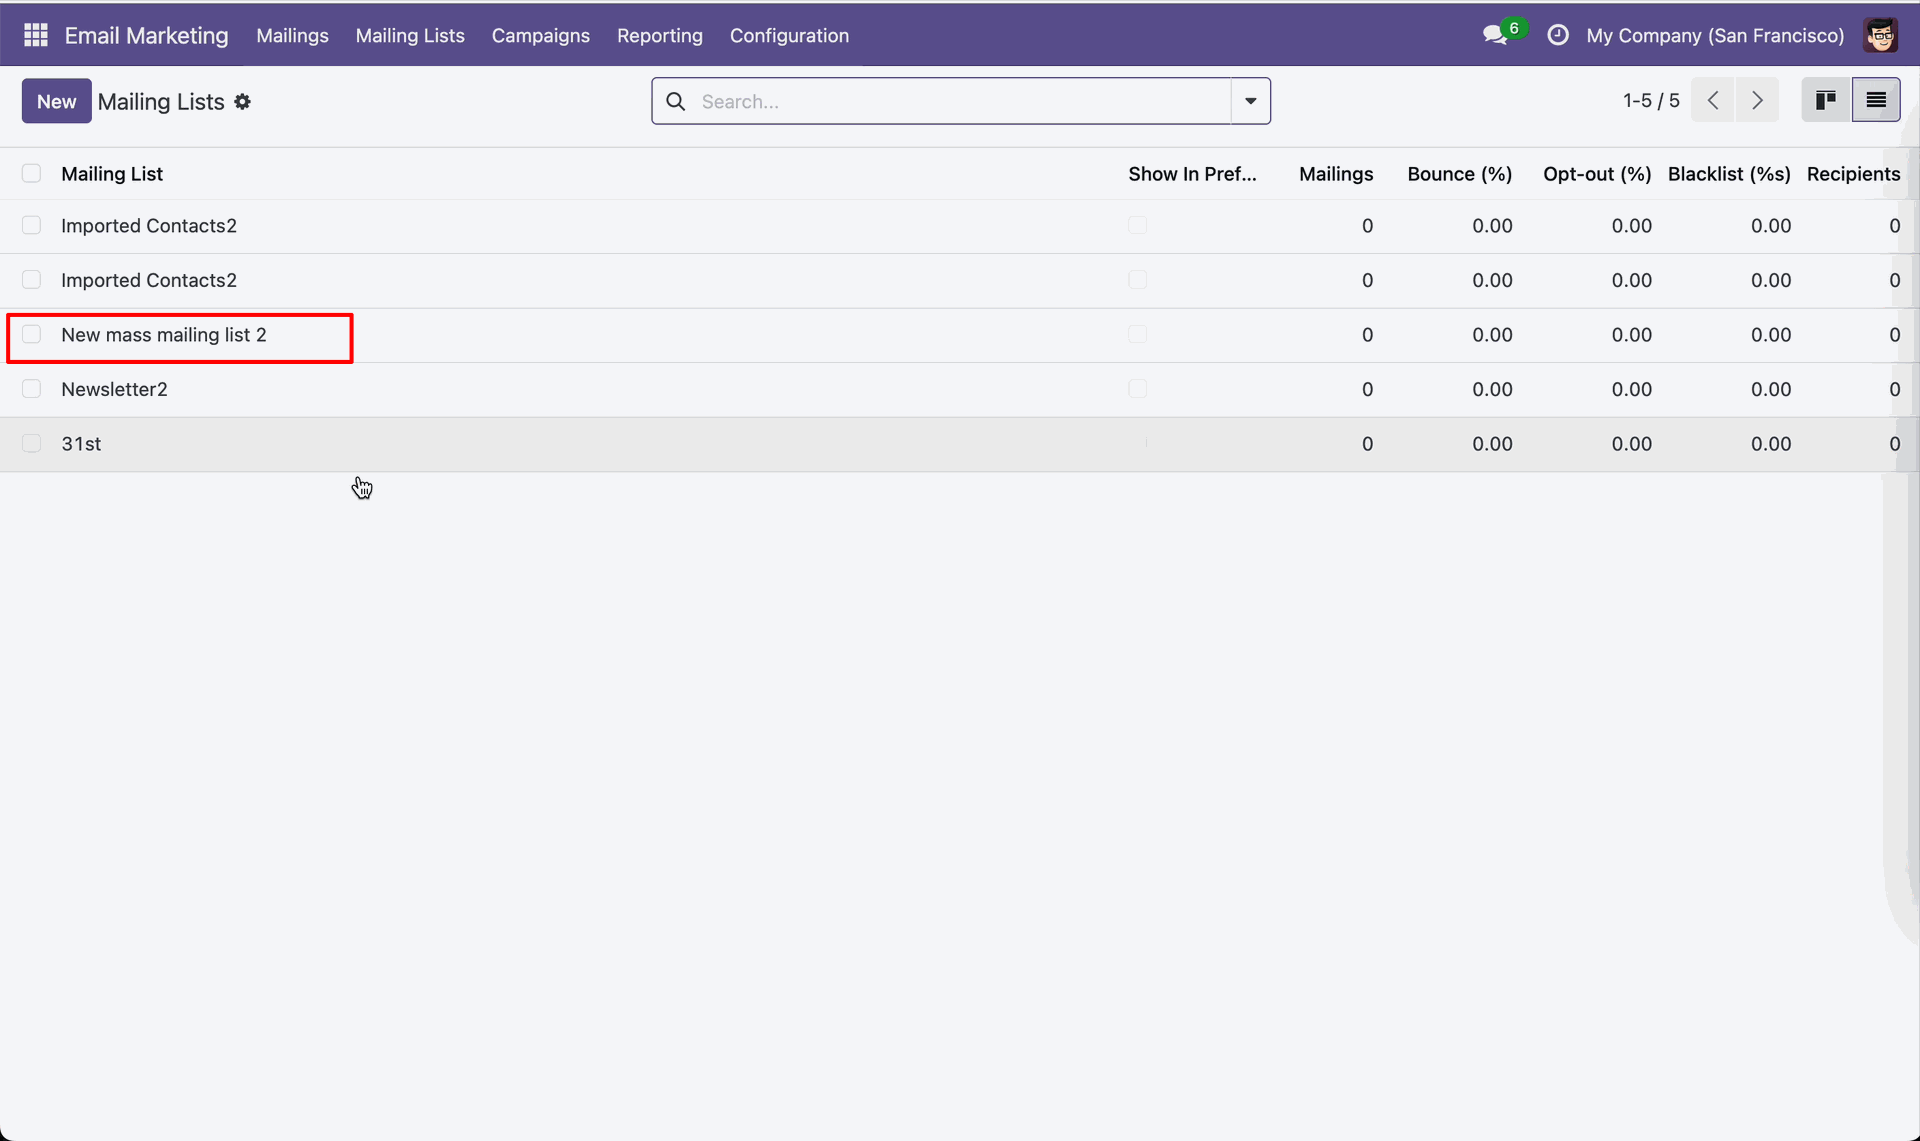
Enable Export Audience and Update Existing Audience in Mailchimp for synchronization.
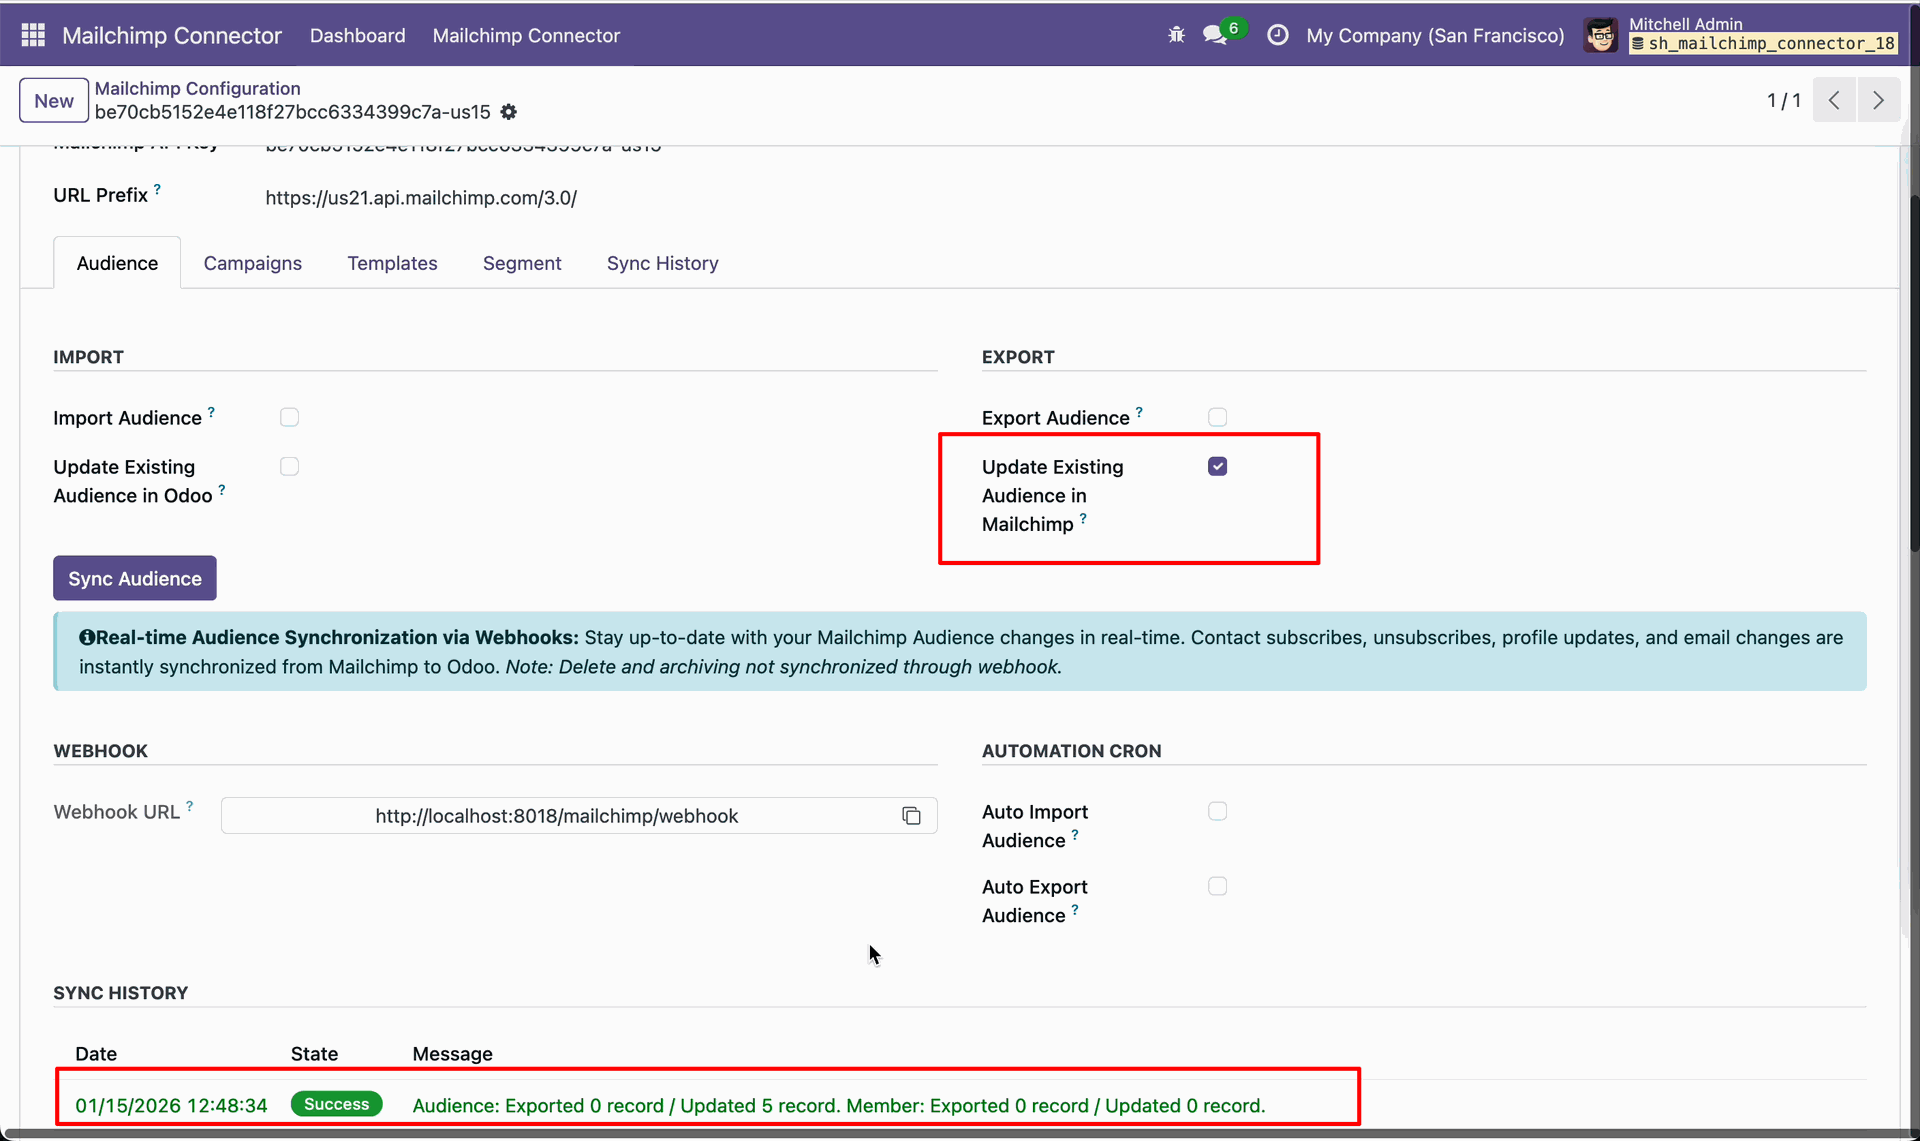
Review the Mailing Lists page and the highlighted New mass mailing list 2 record.
Workflow
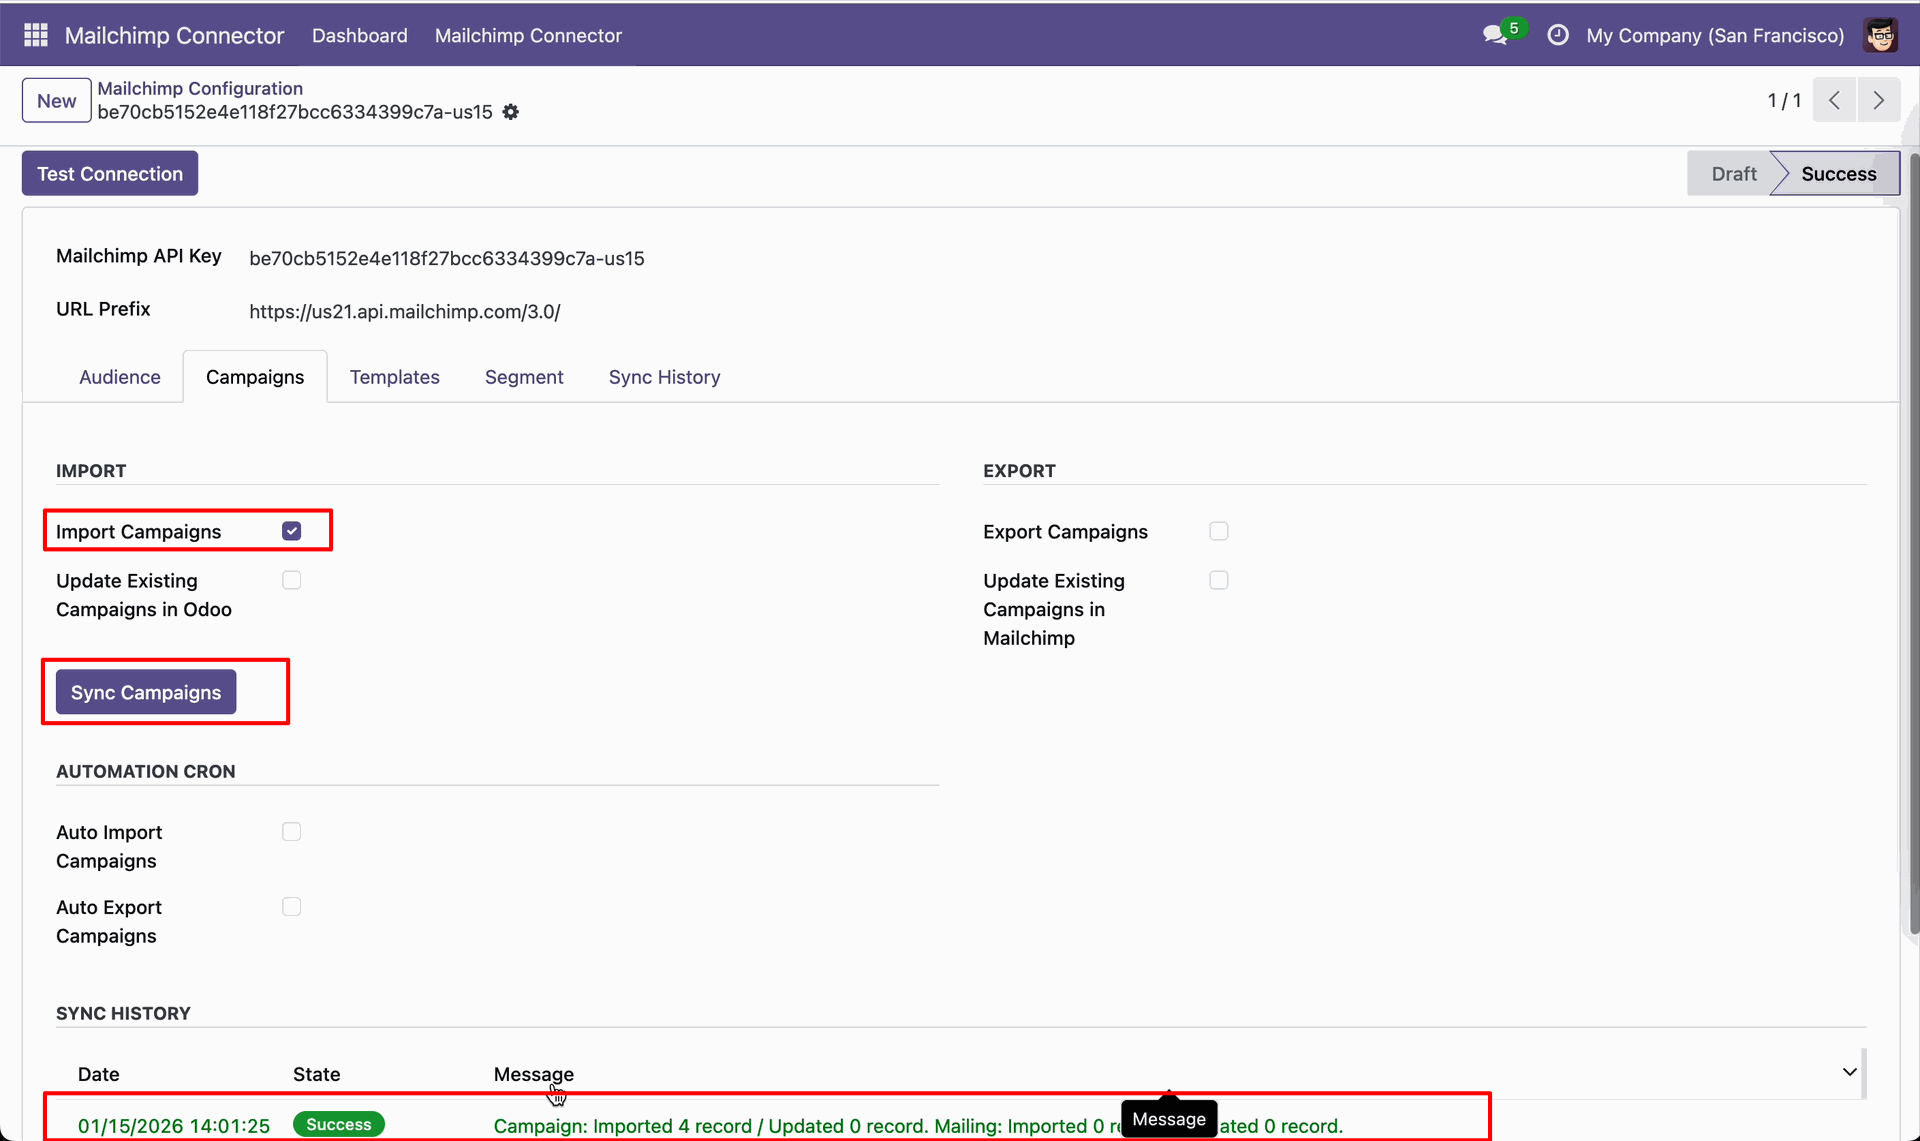
Open the Campaigns tab and enable Import Campaigns before clicking Sync Campaigns.
Review the Campaigns list filtered by Mailchimp Campaign ID values.
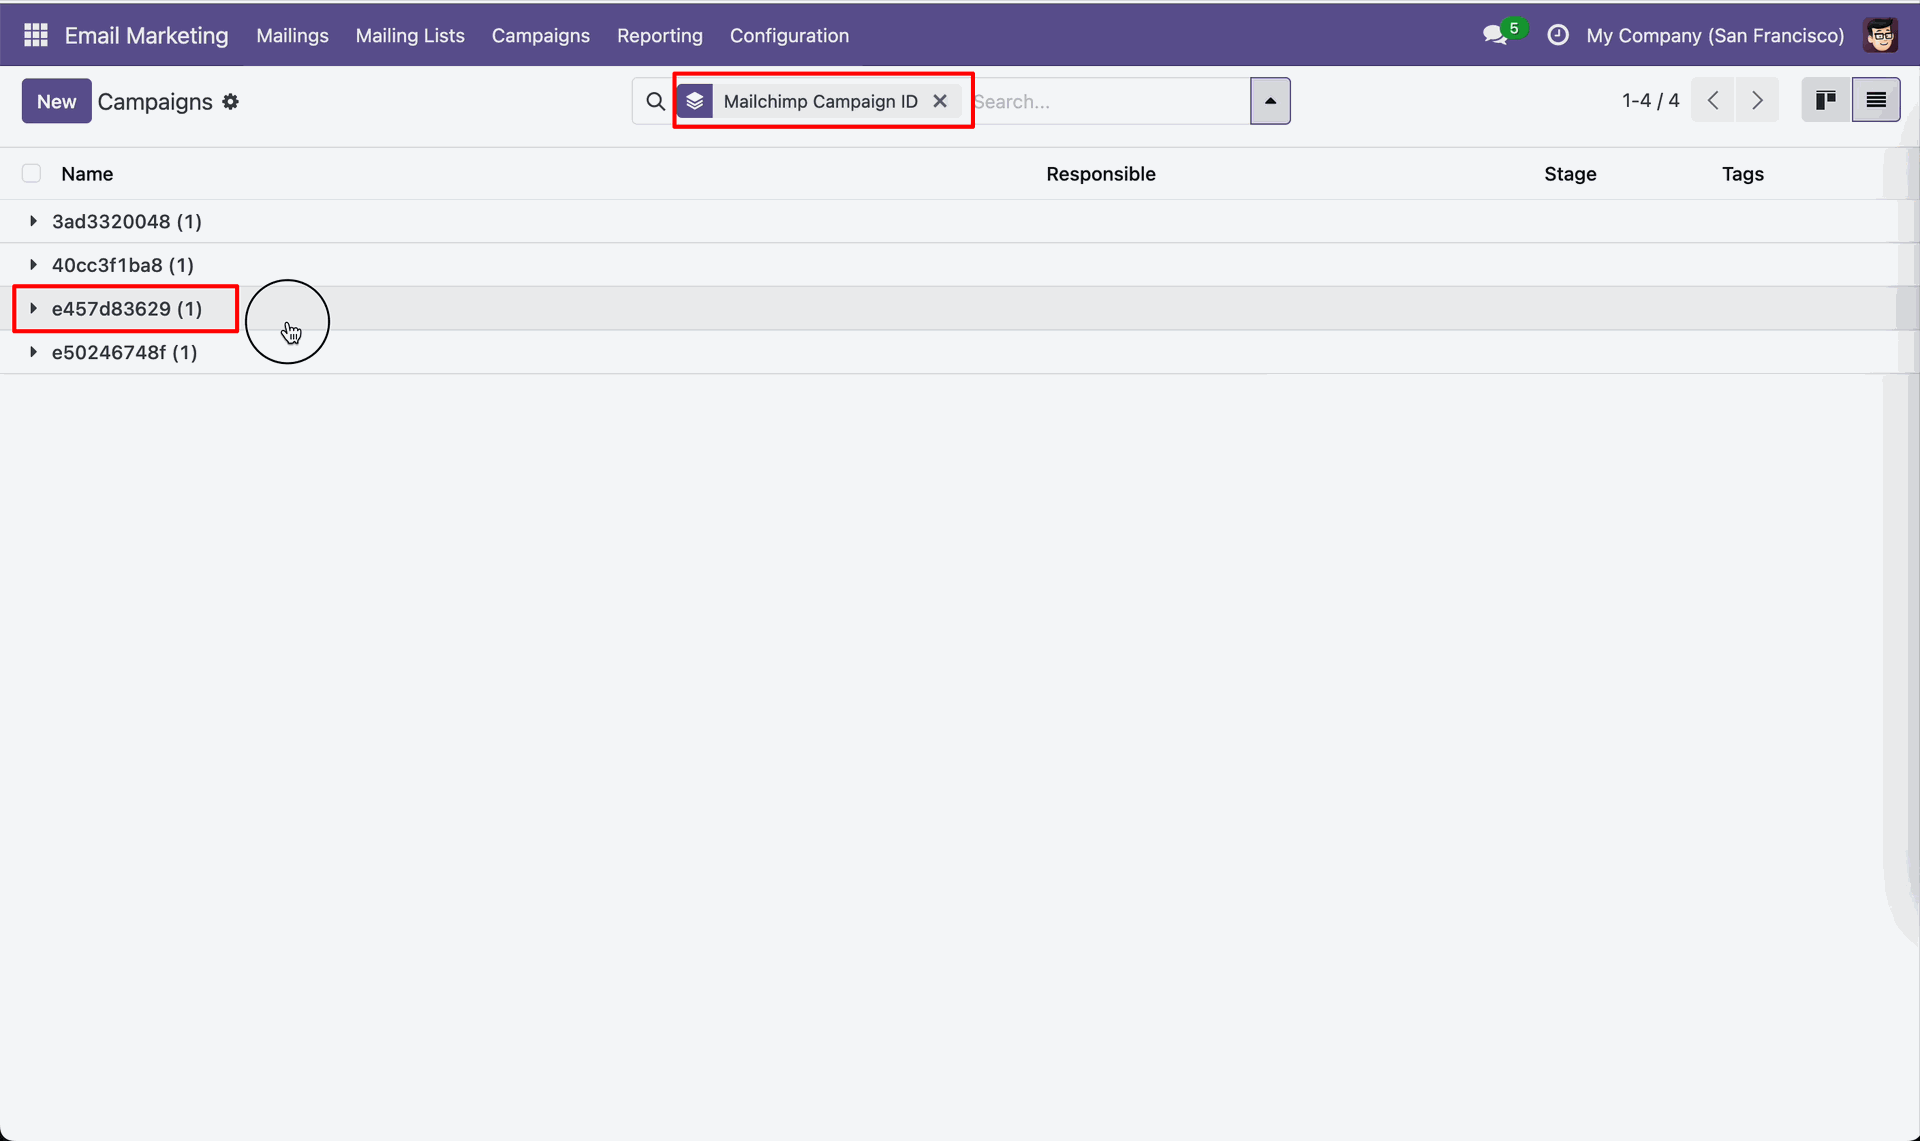
Open the imported Mailchimp campaign record and review its campaign name.
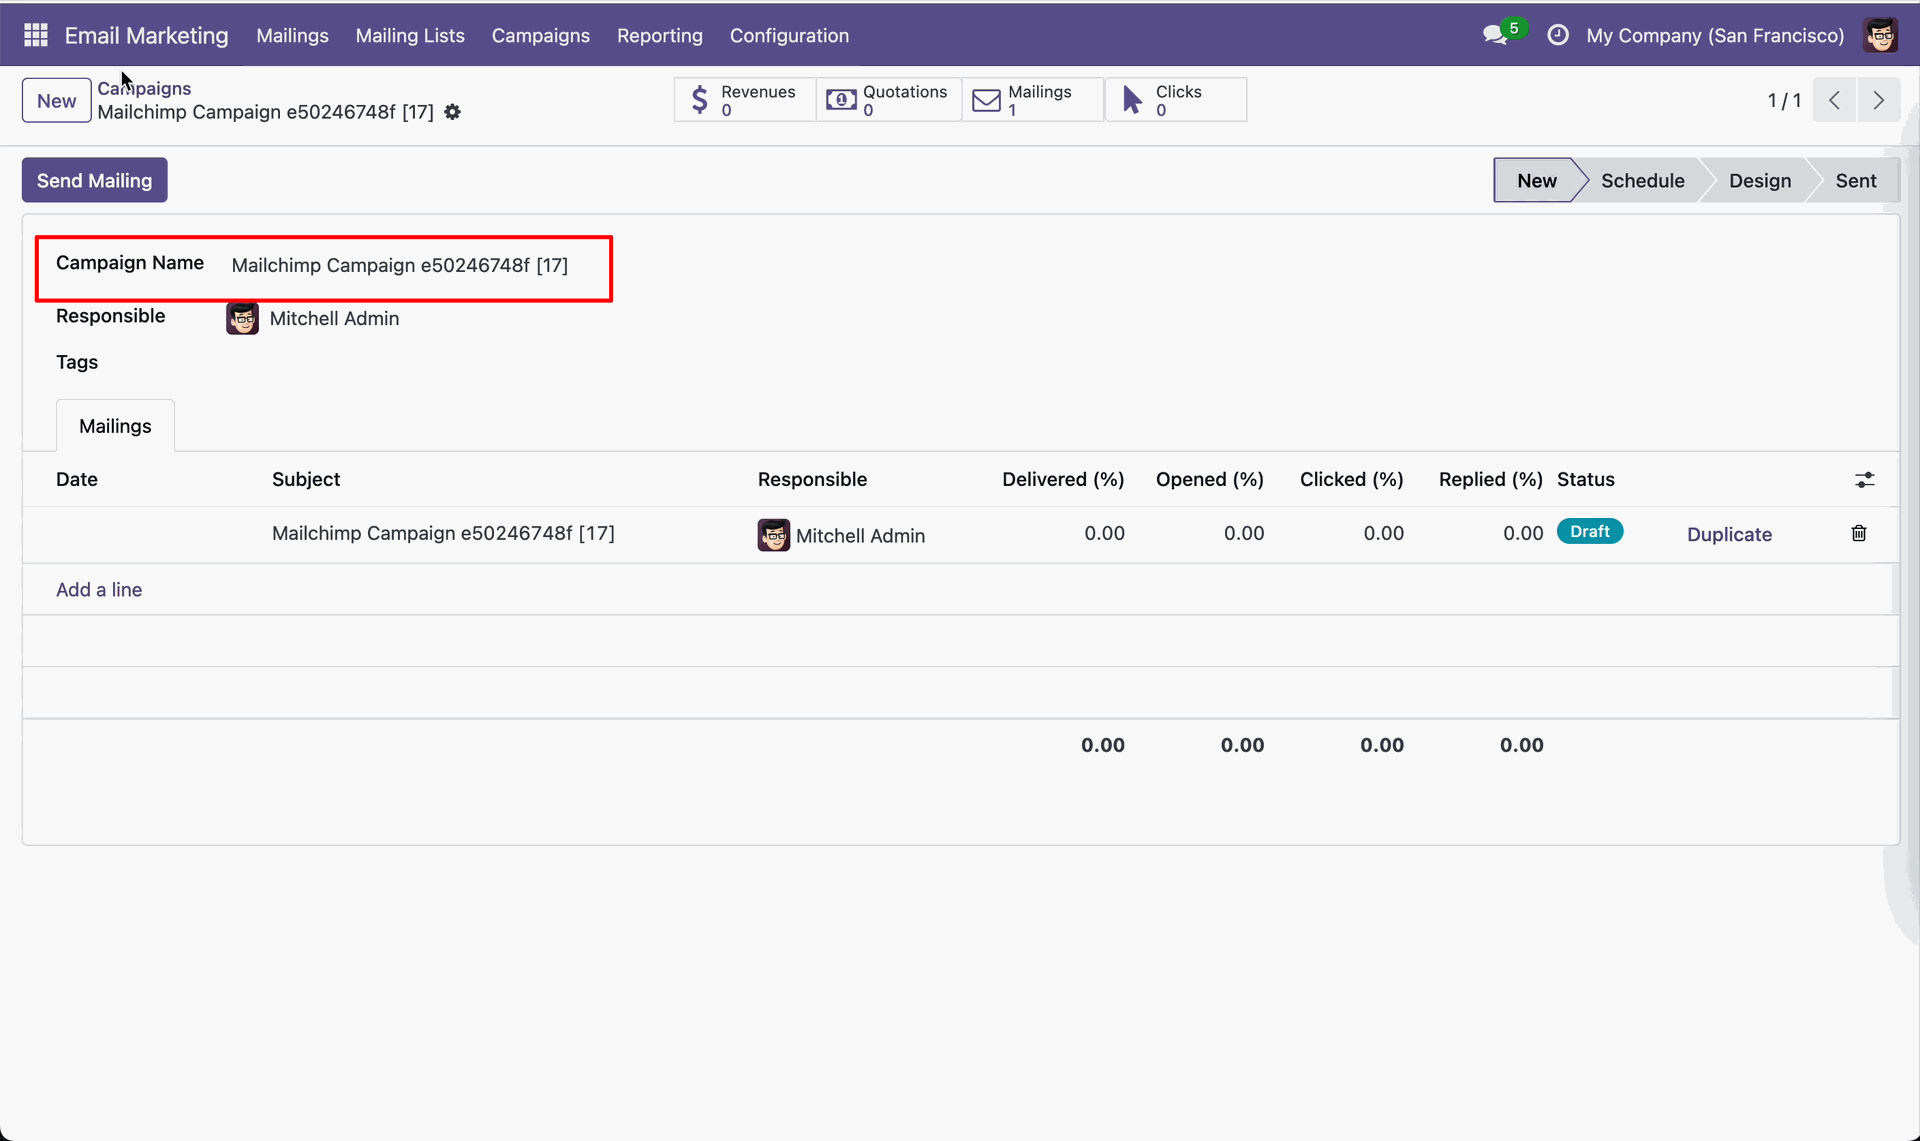
Review the selected Mailchimp campaign on the All campaigns page.
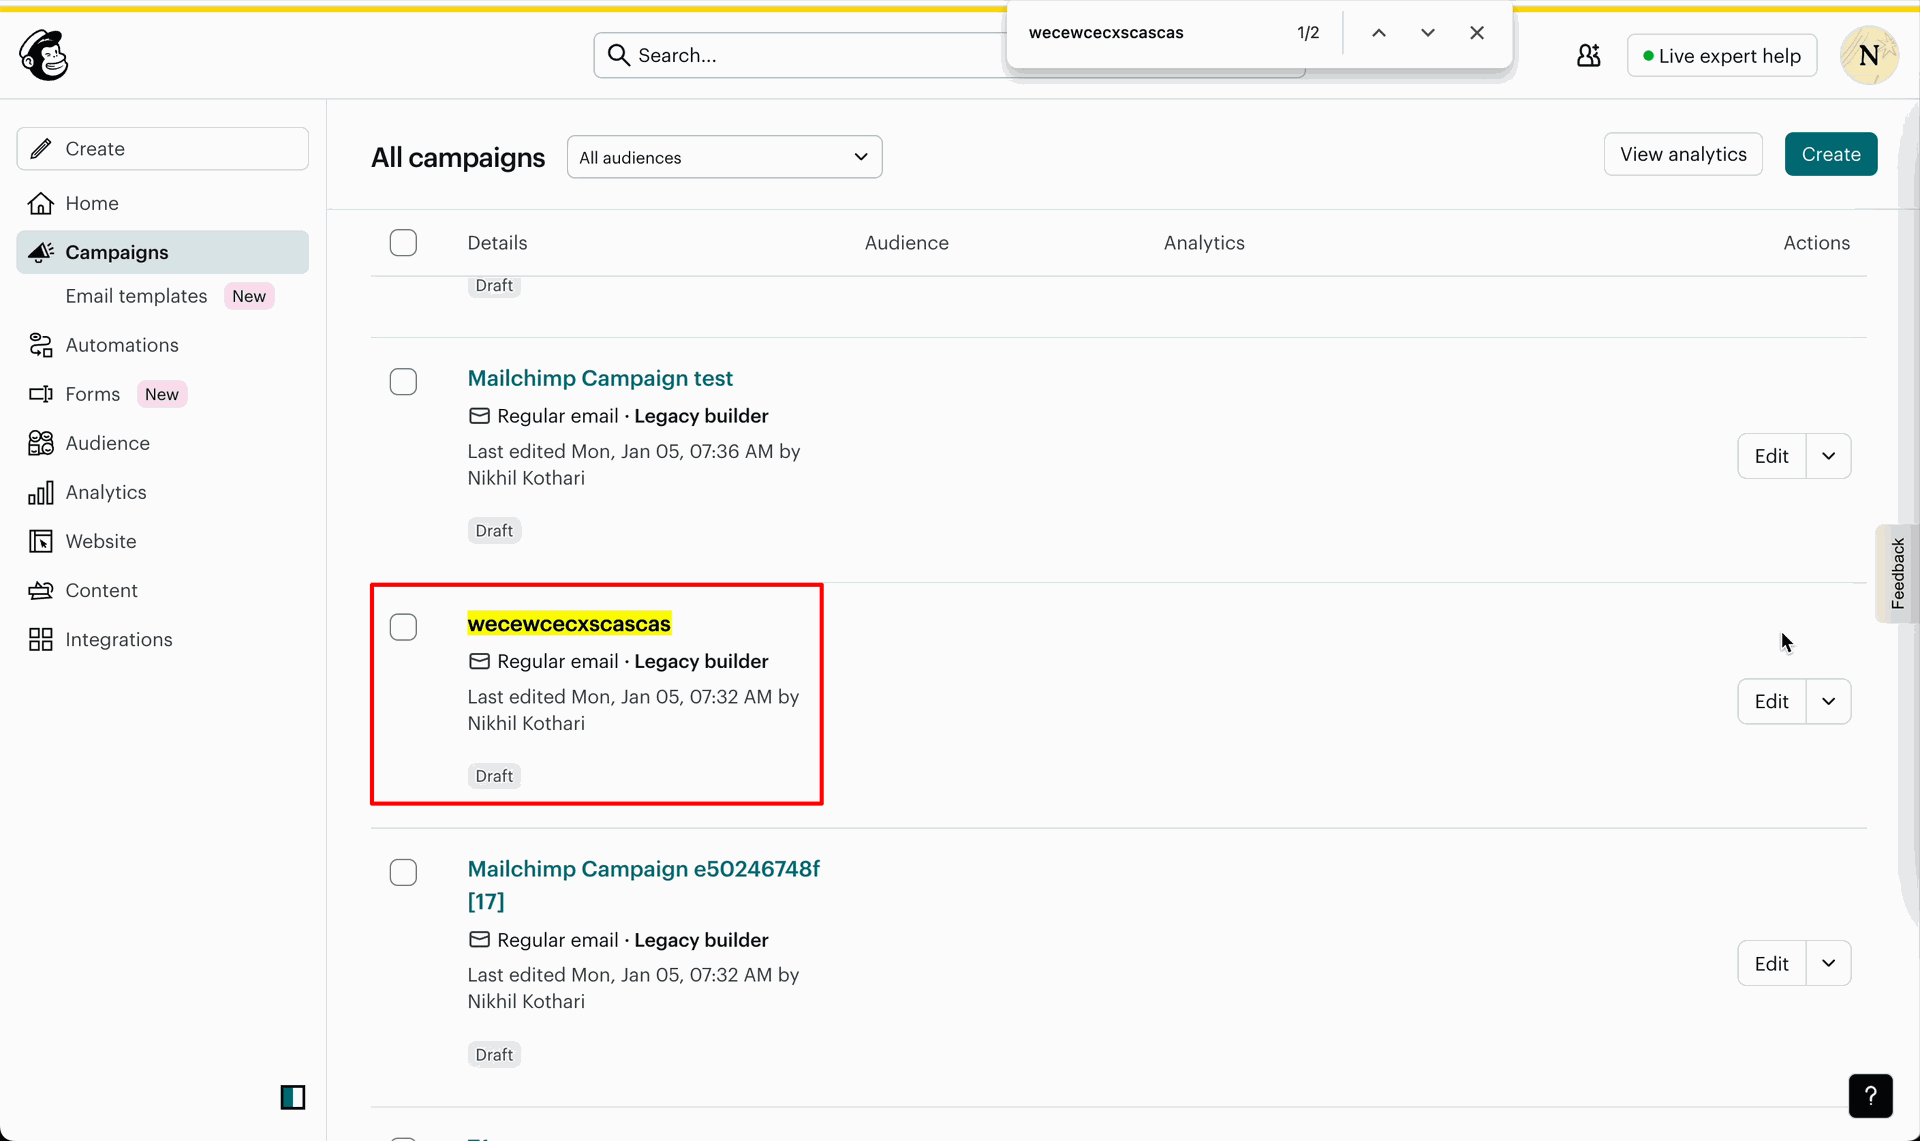
Rename the Mailchimp email to wecewcecxscascas and click Save.
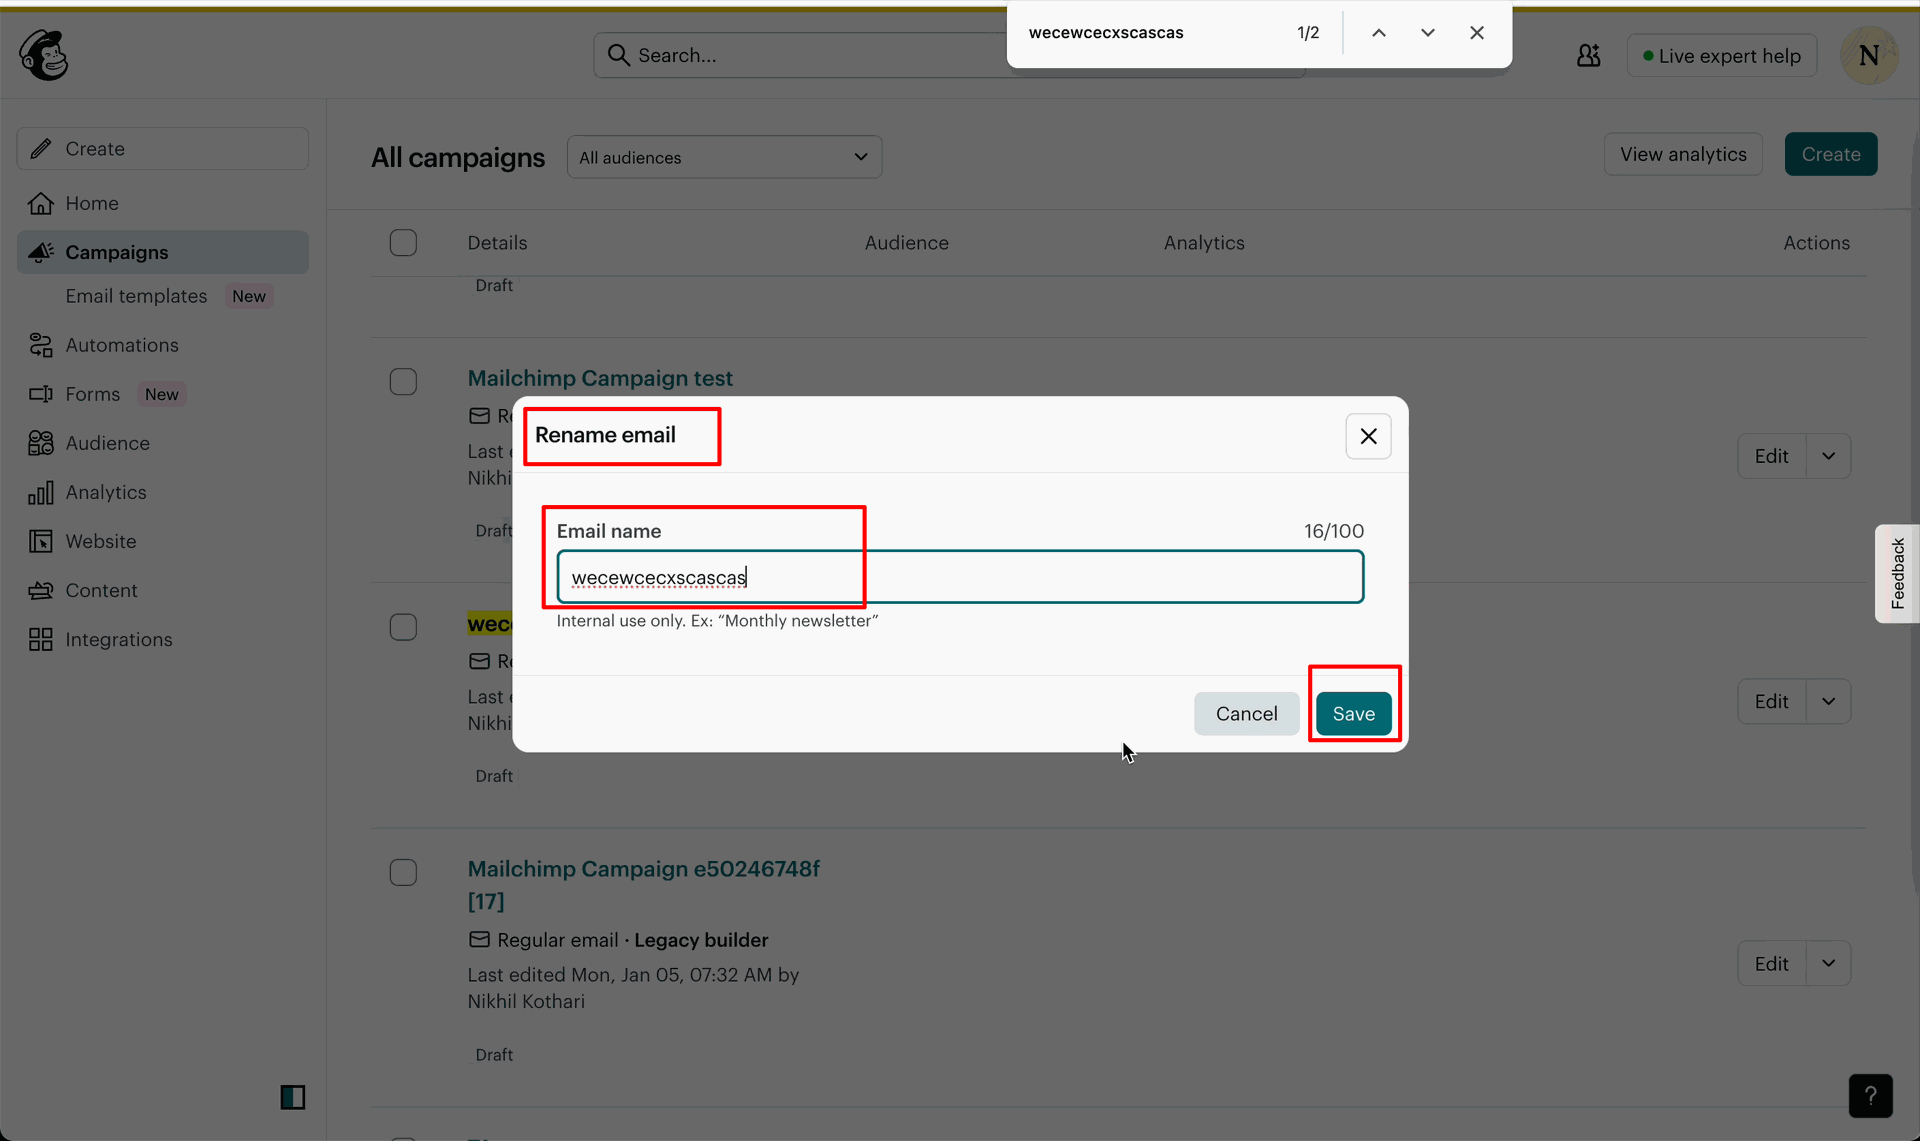
Rename the Mailchimp email to mailchimp camp 1 and click Save.
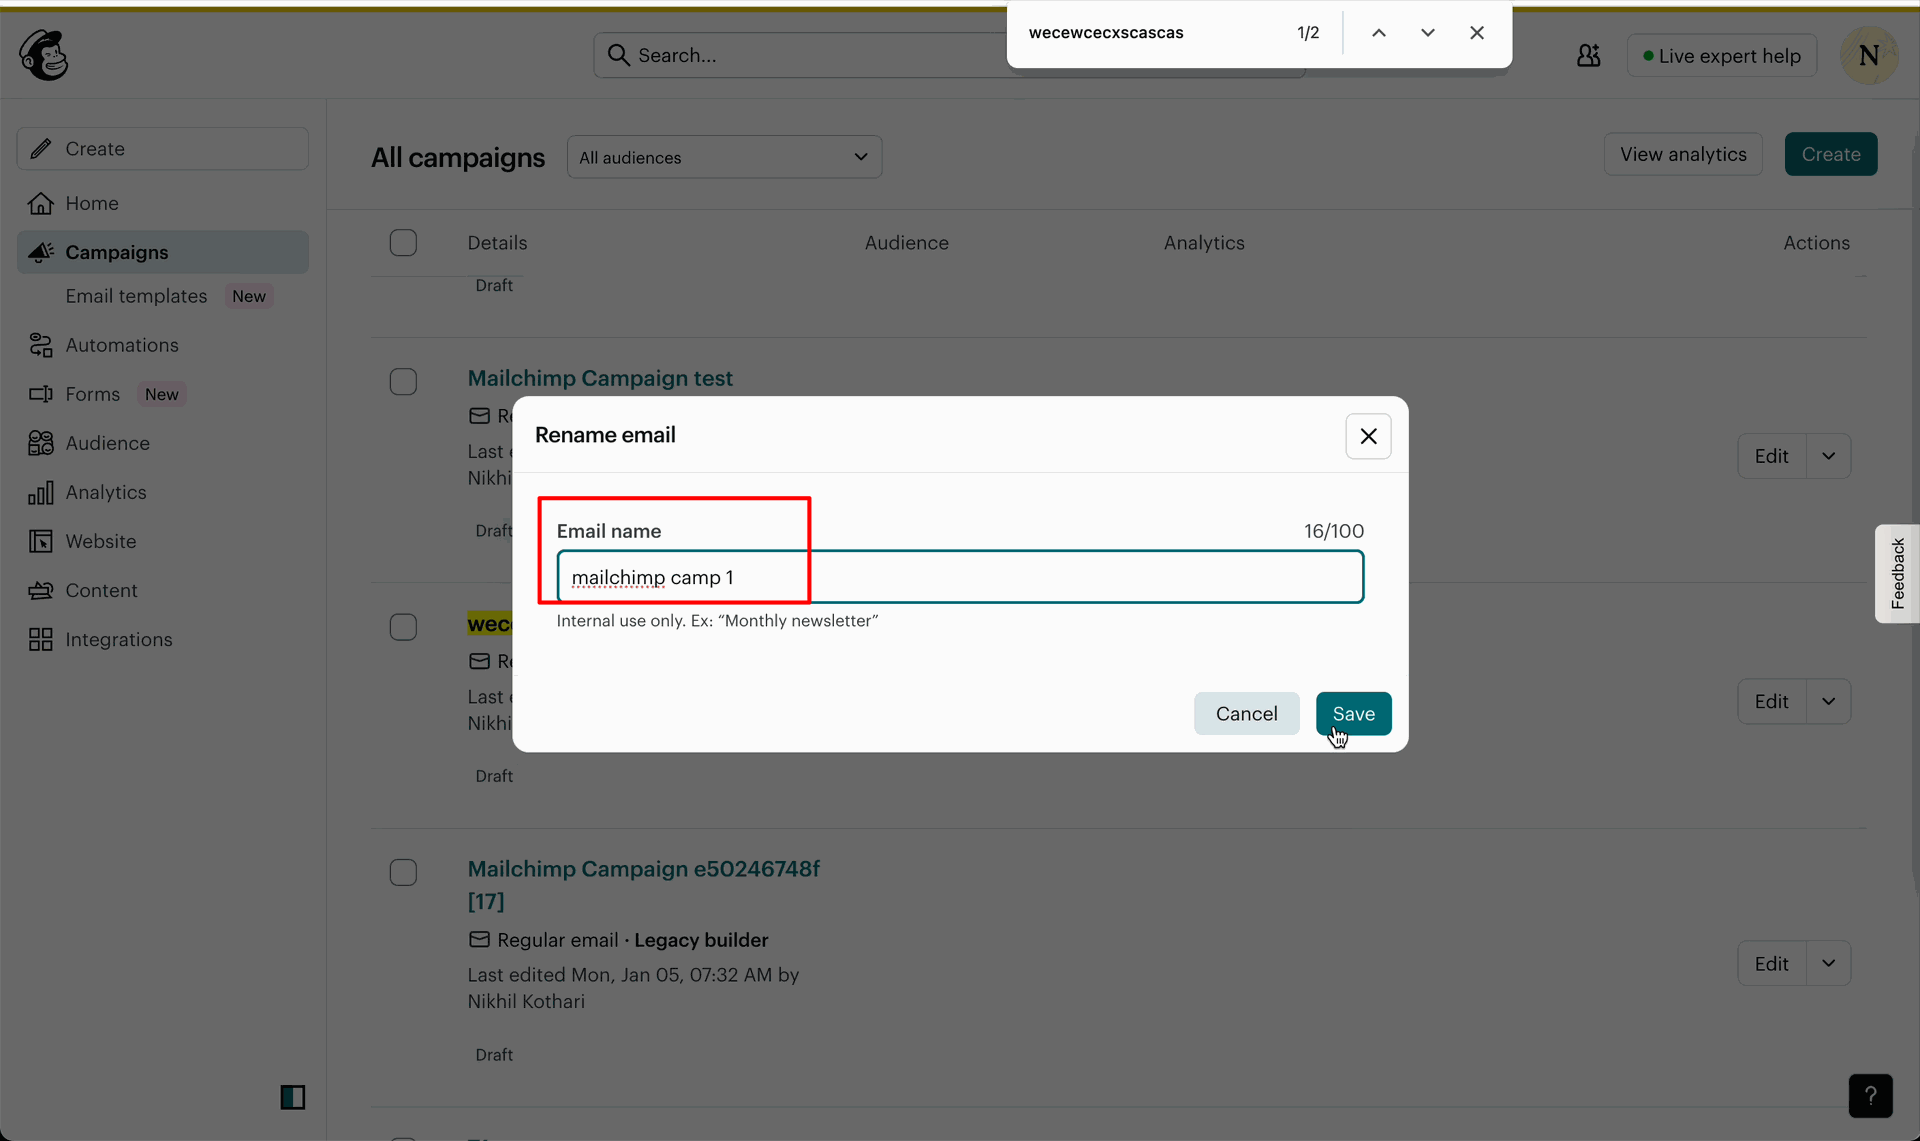
Enable Update Existing Campaigns in Odoo before clicking Sync Campaigns.
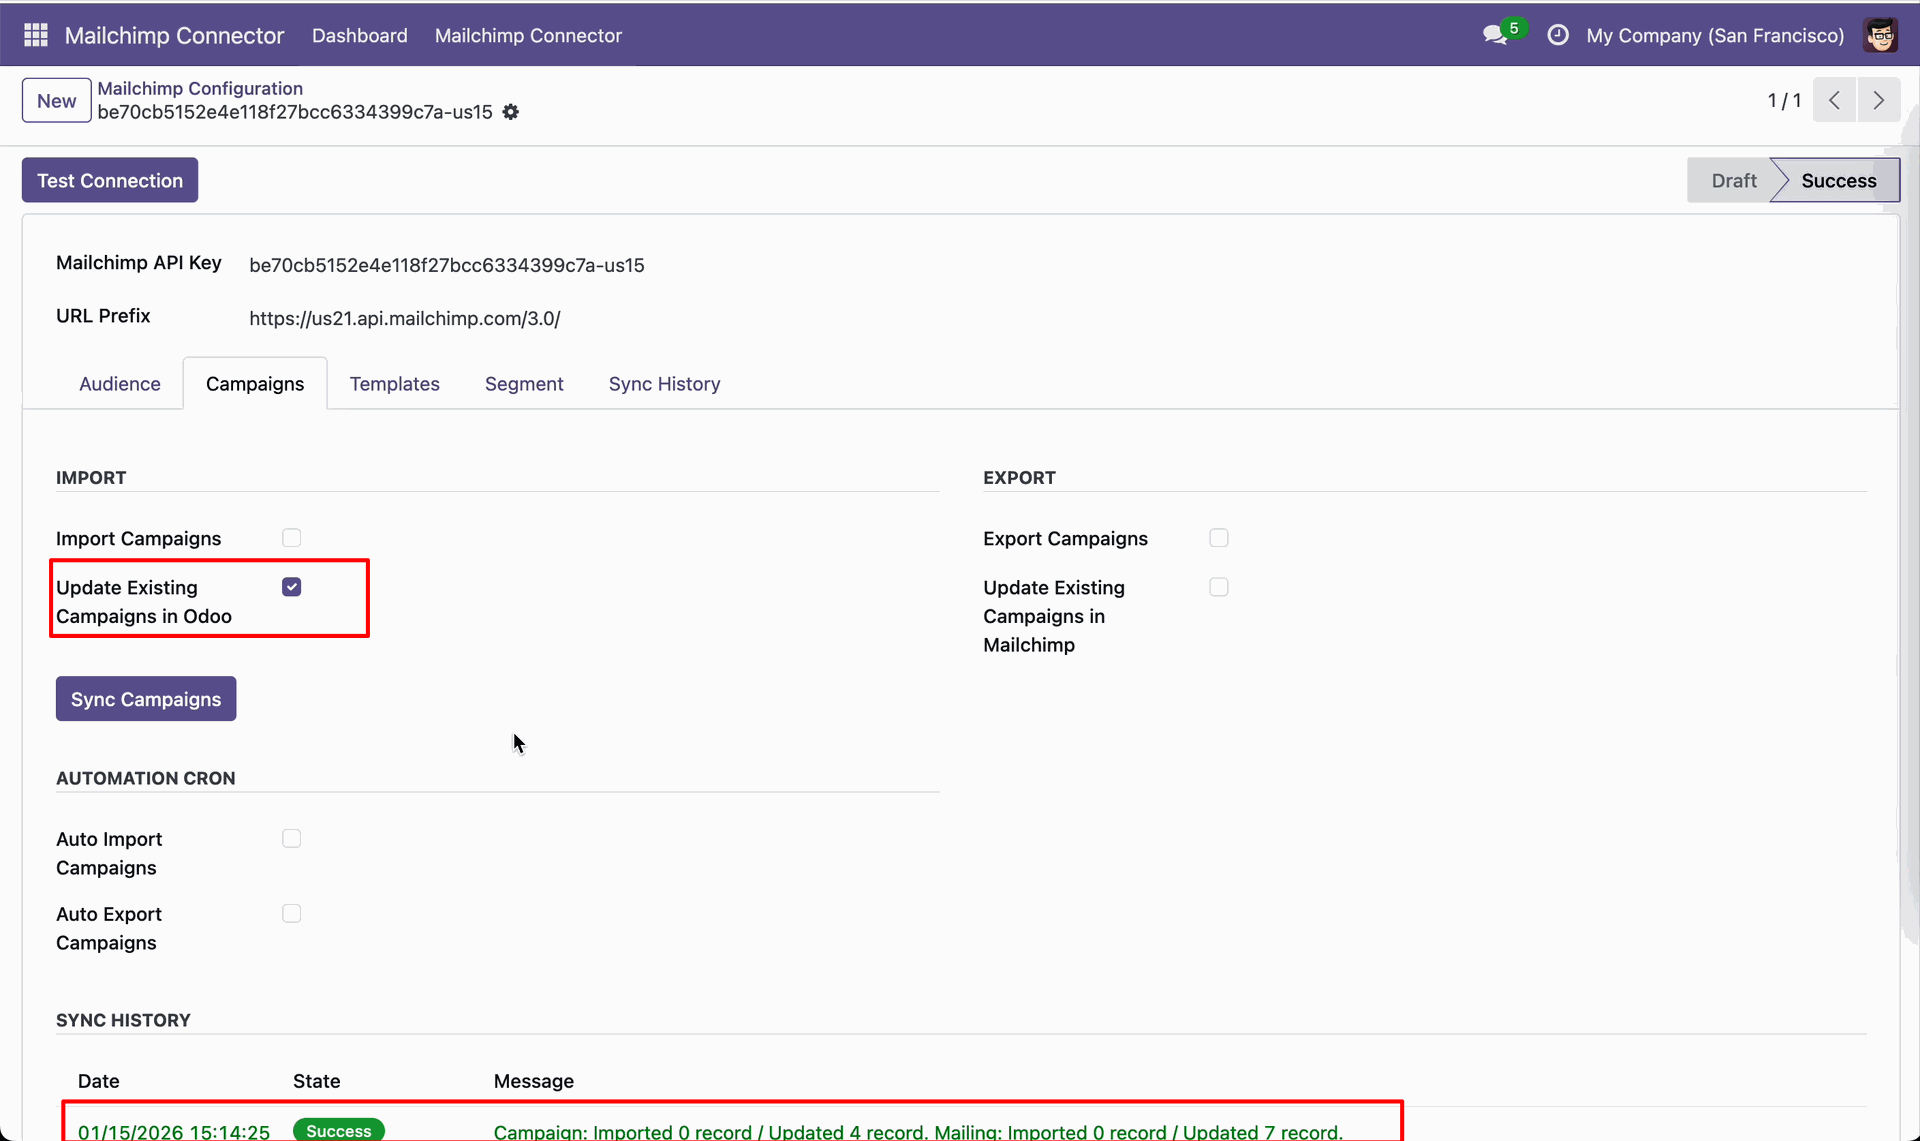
Open campaign record.
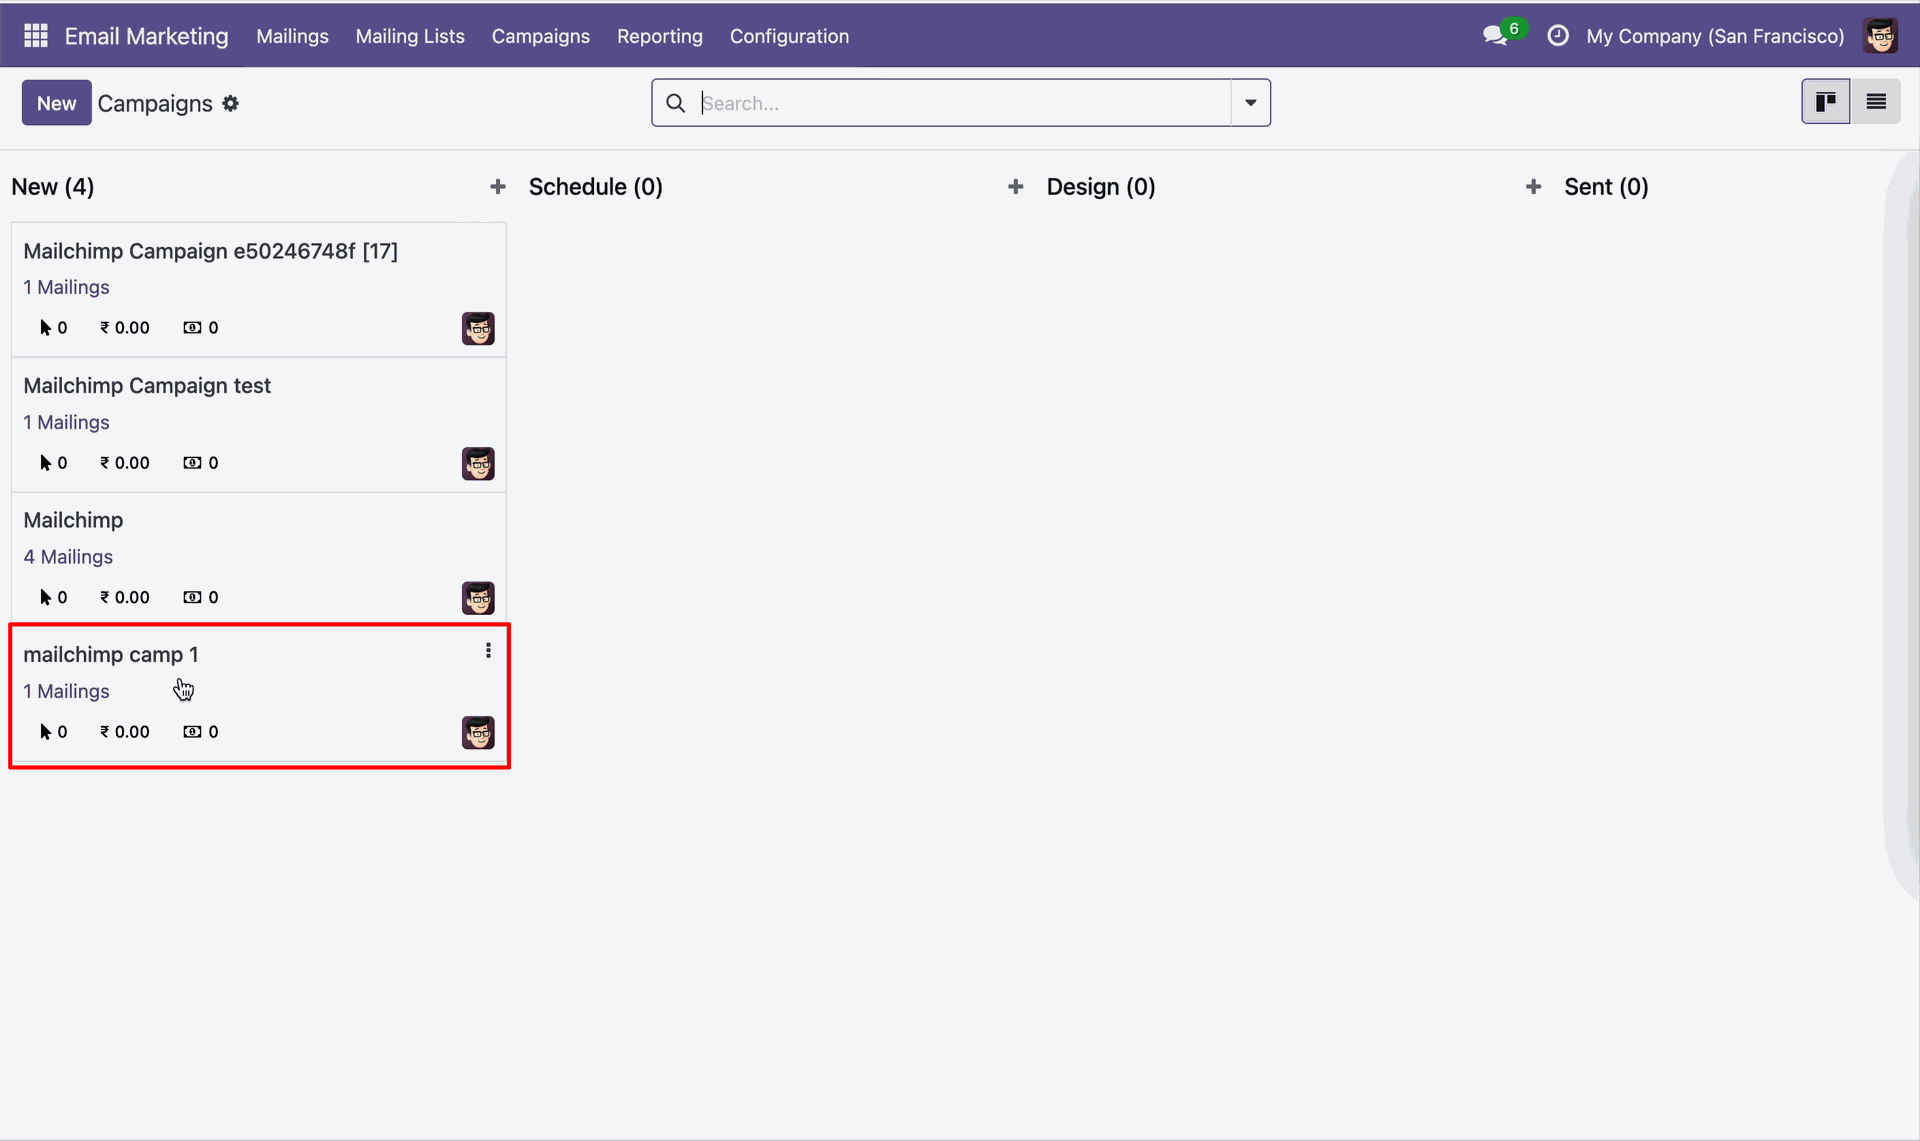
Change name.
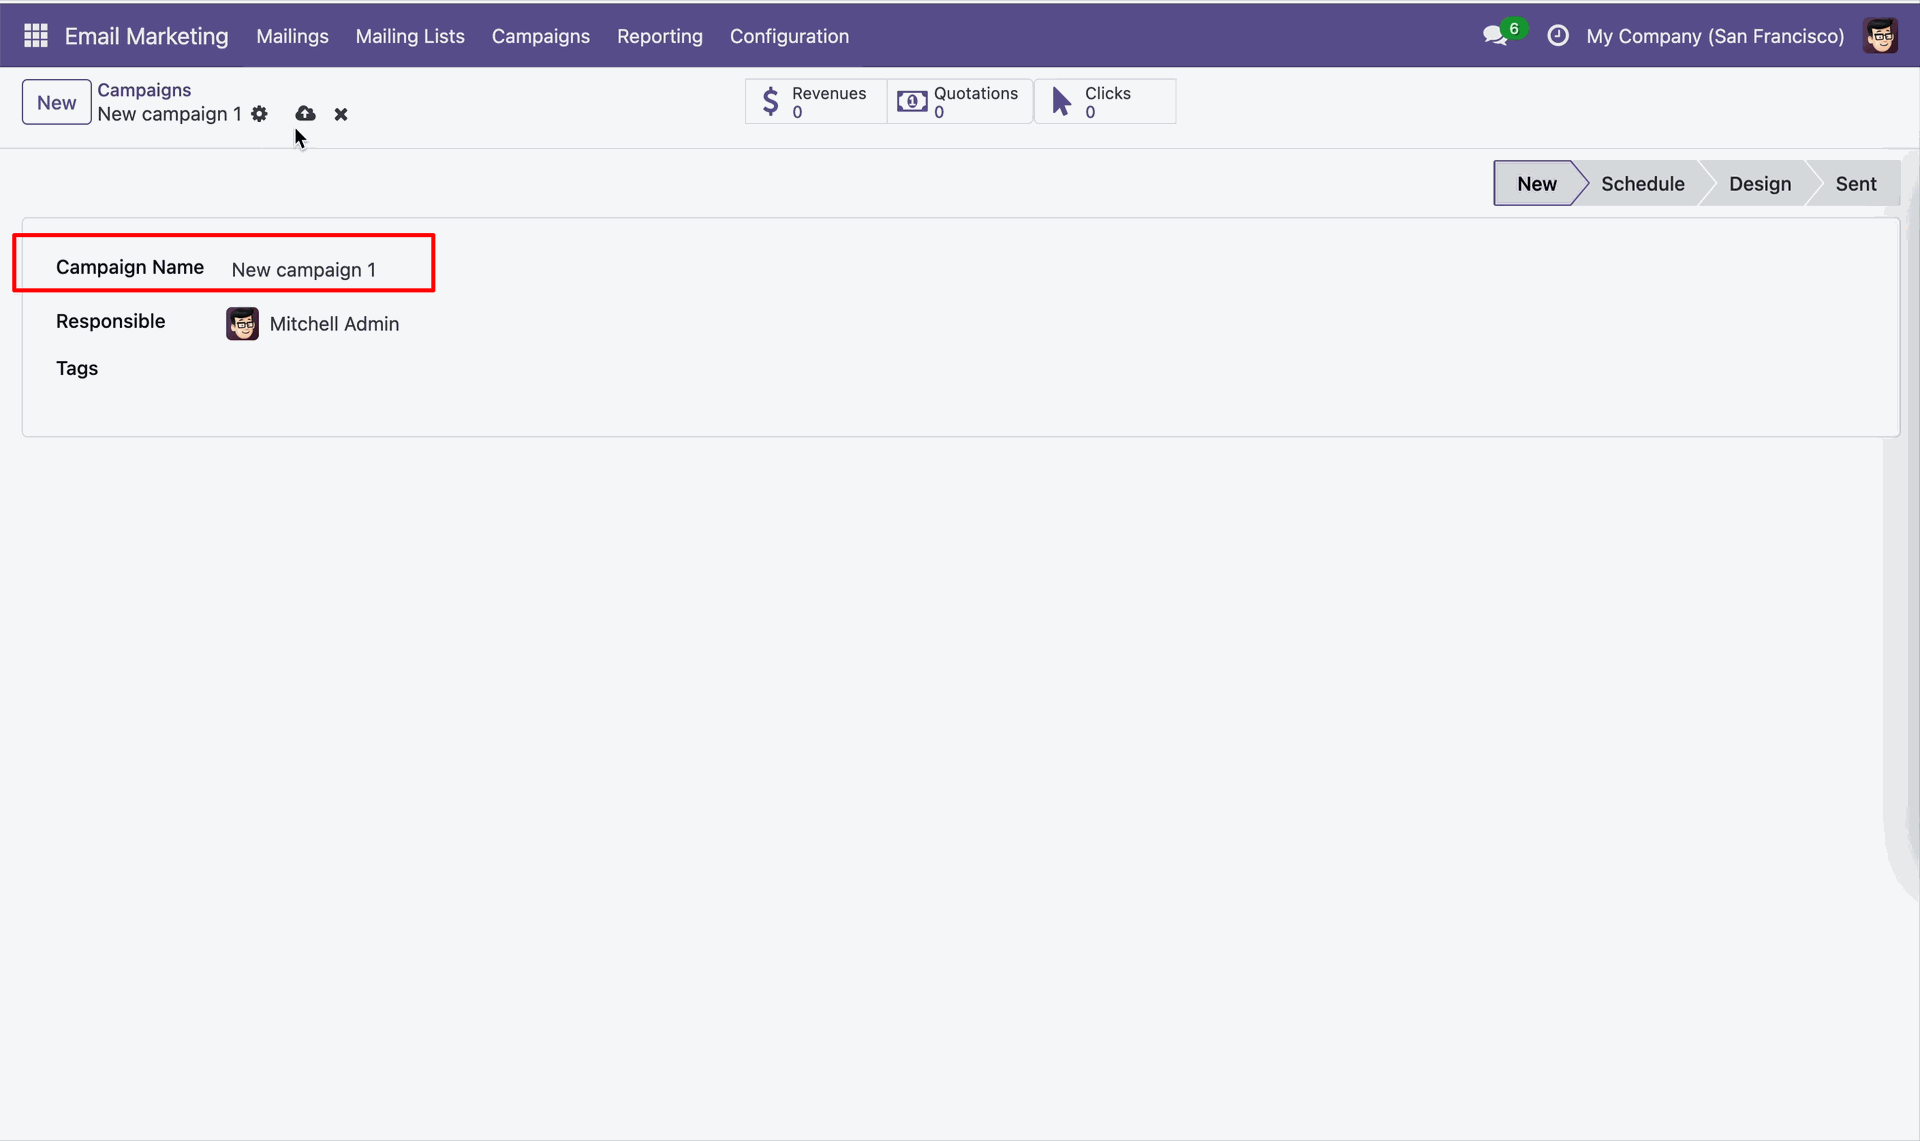
Enable Export Campaigns and click Sync Campaigns to send records to Mailchimp.
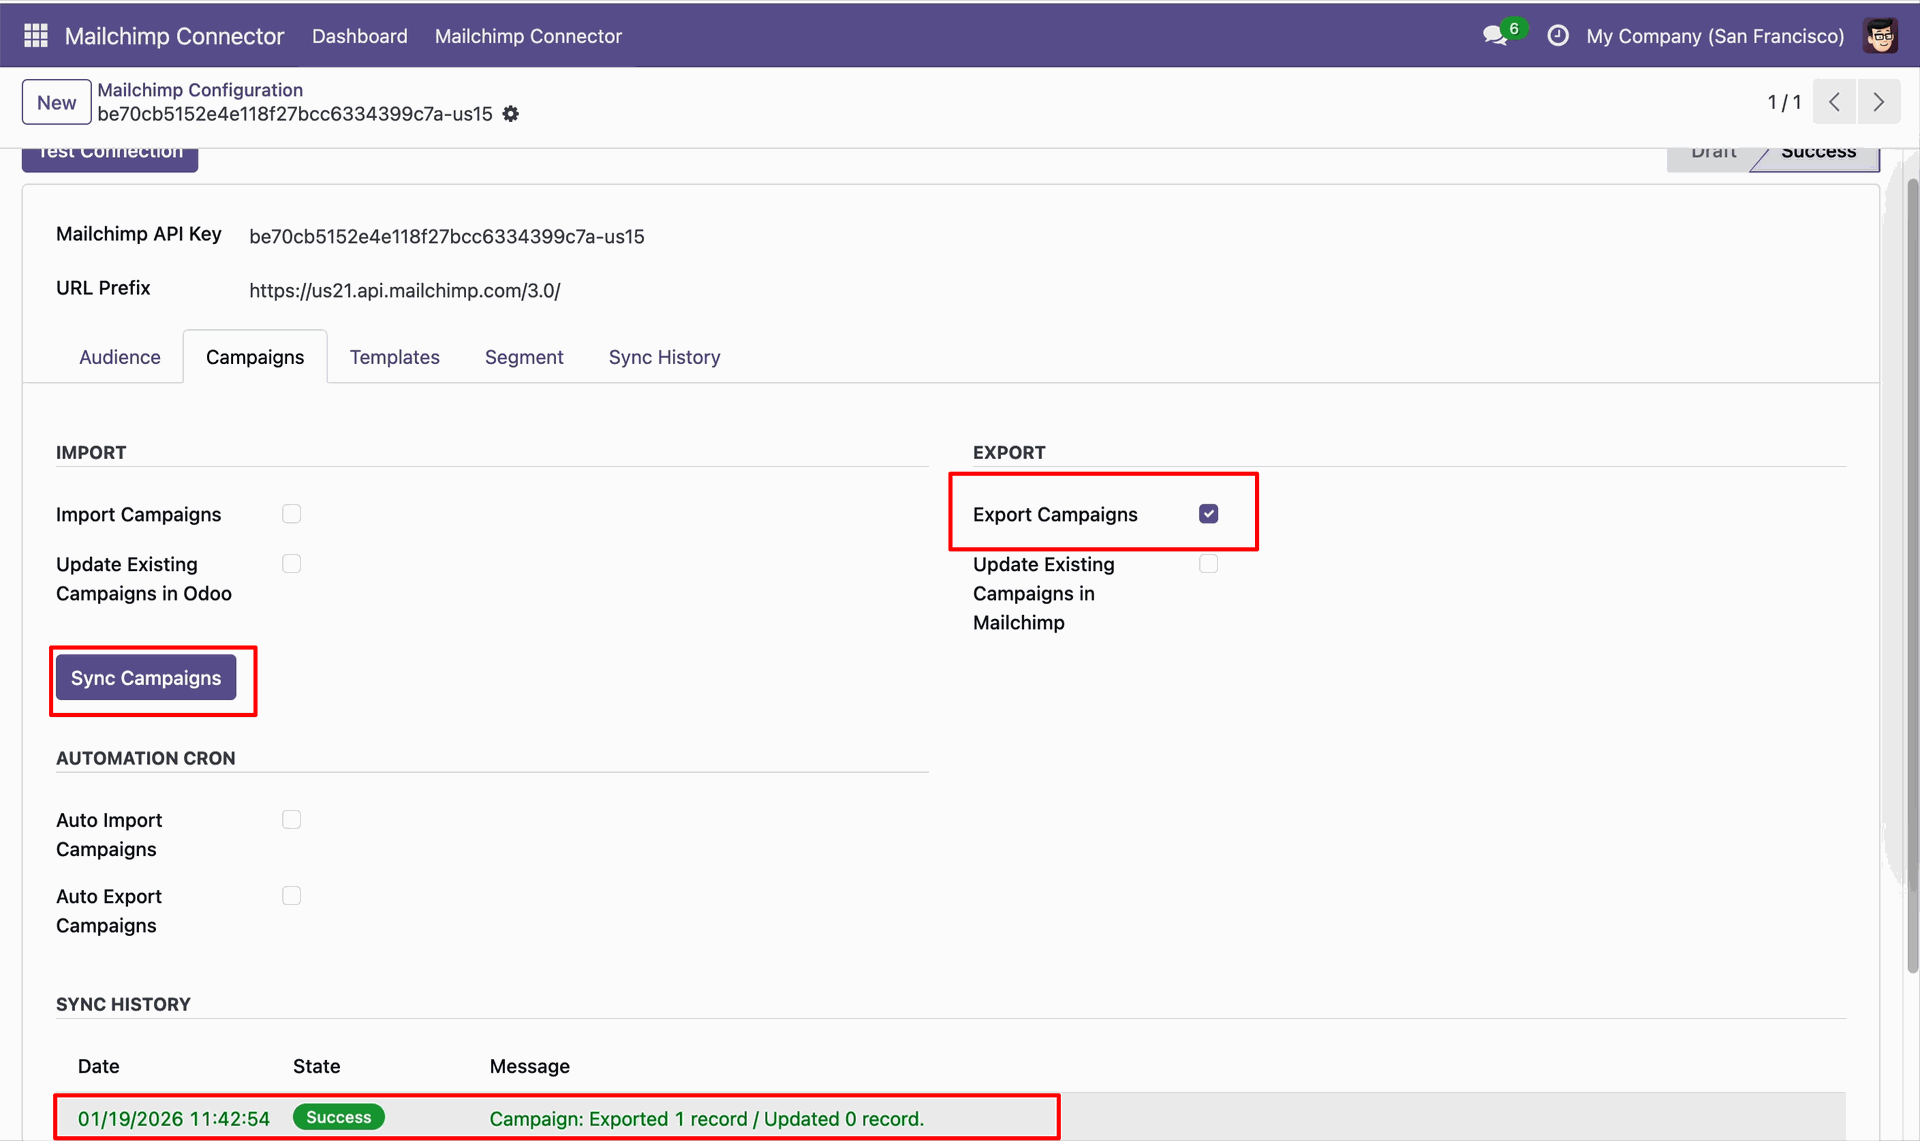
Review Sync History to confirm campaign and mailing records were updated.
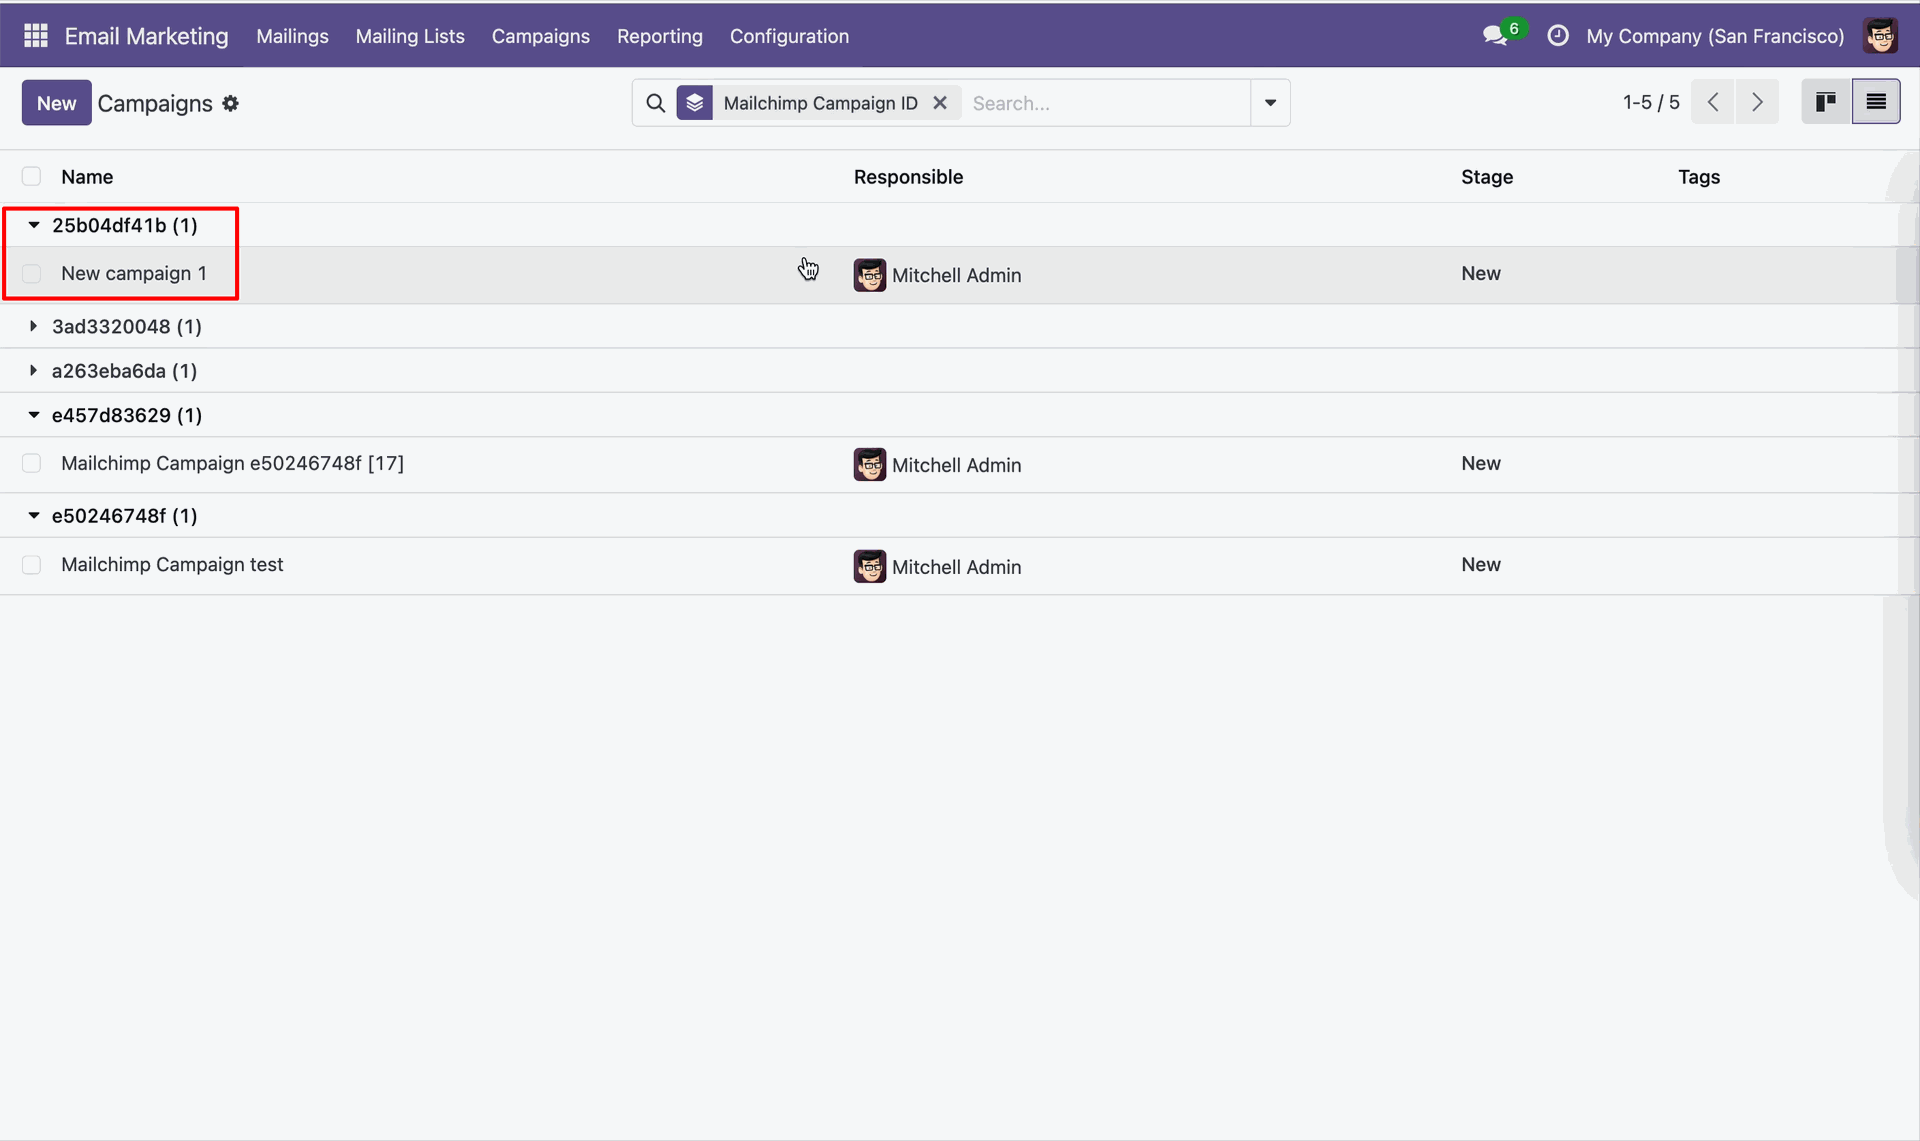
Review the Campaigns list filtered by Mailchimp Campaign ID values.
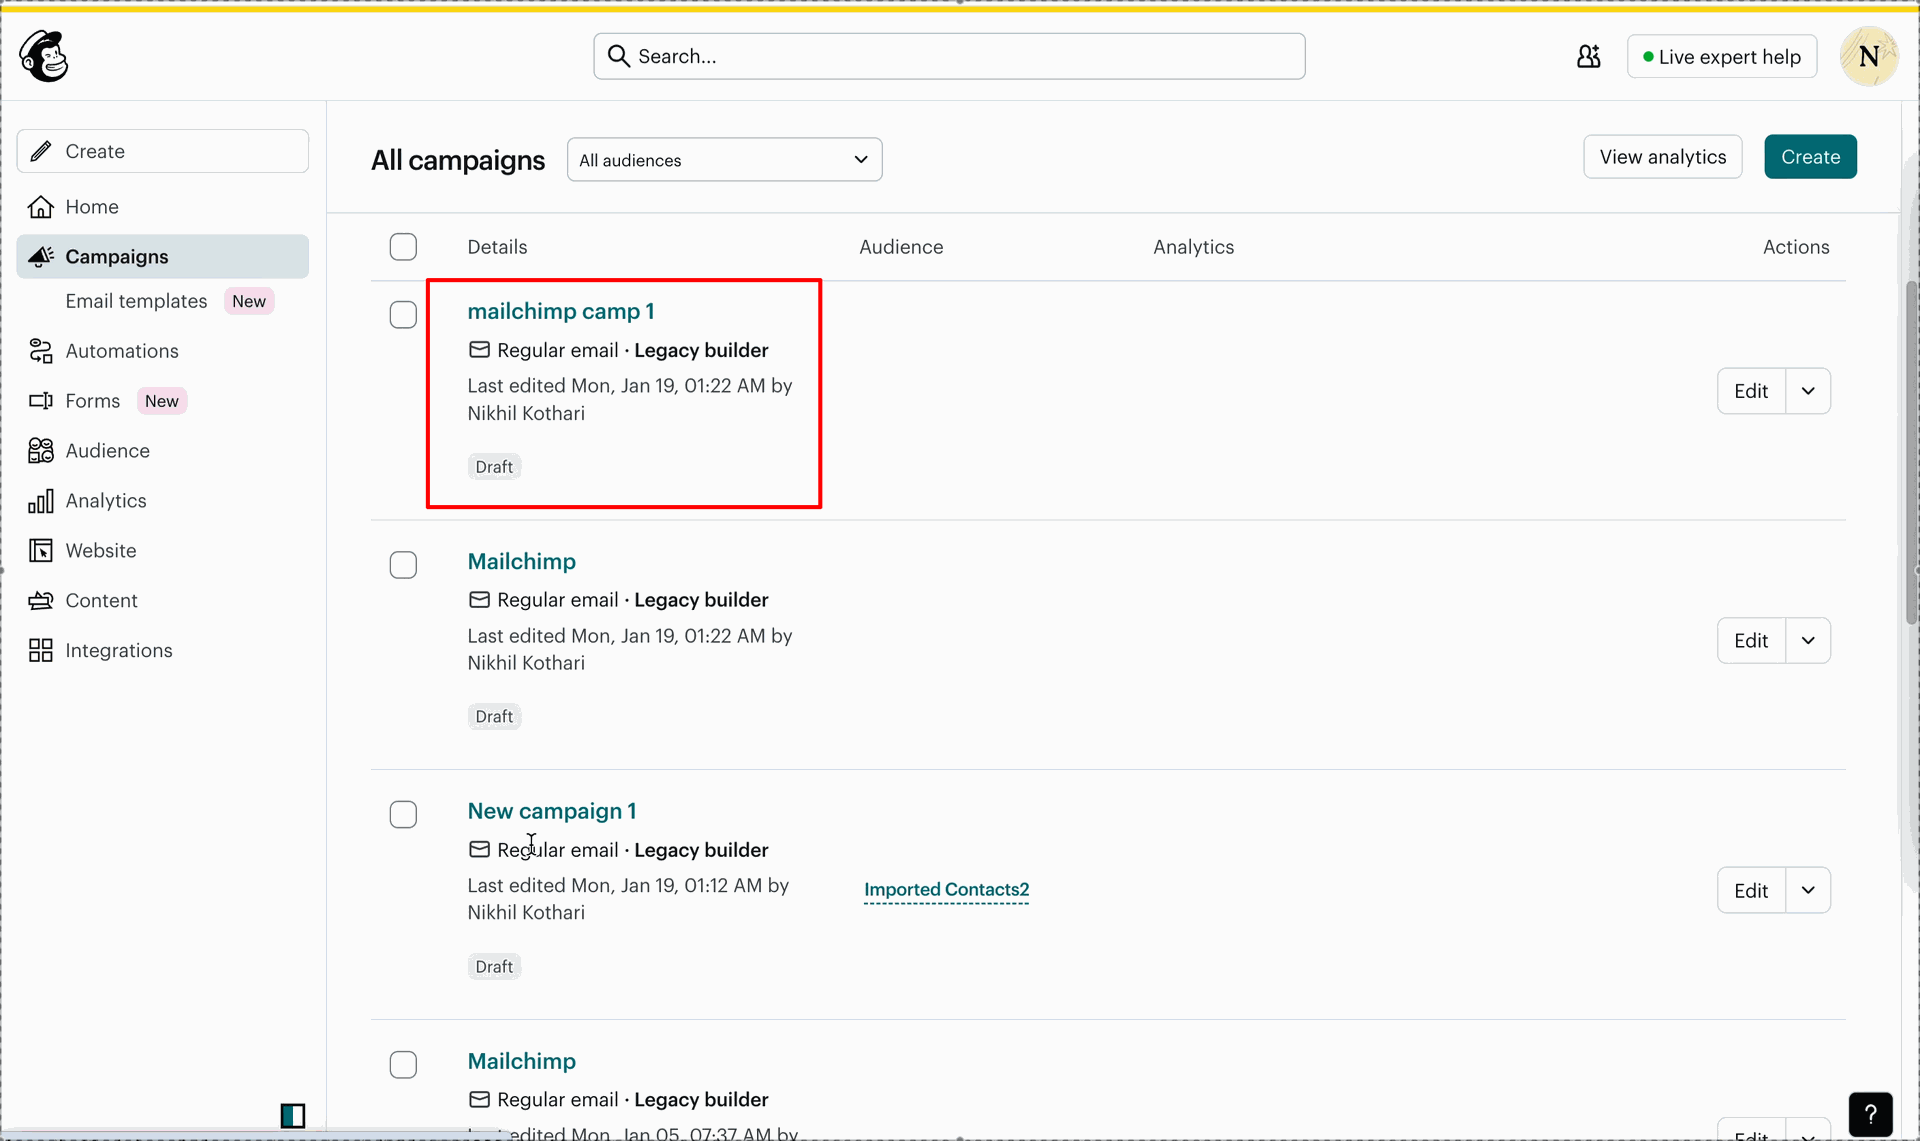
Enable Update Existing Campaigns in Mailchimp before exporting campaign changes.
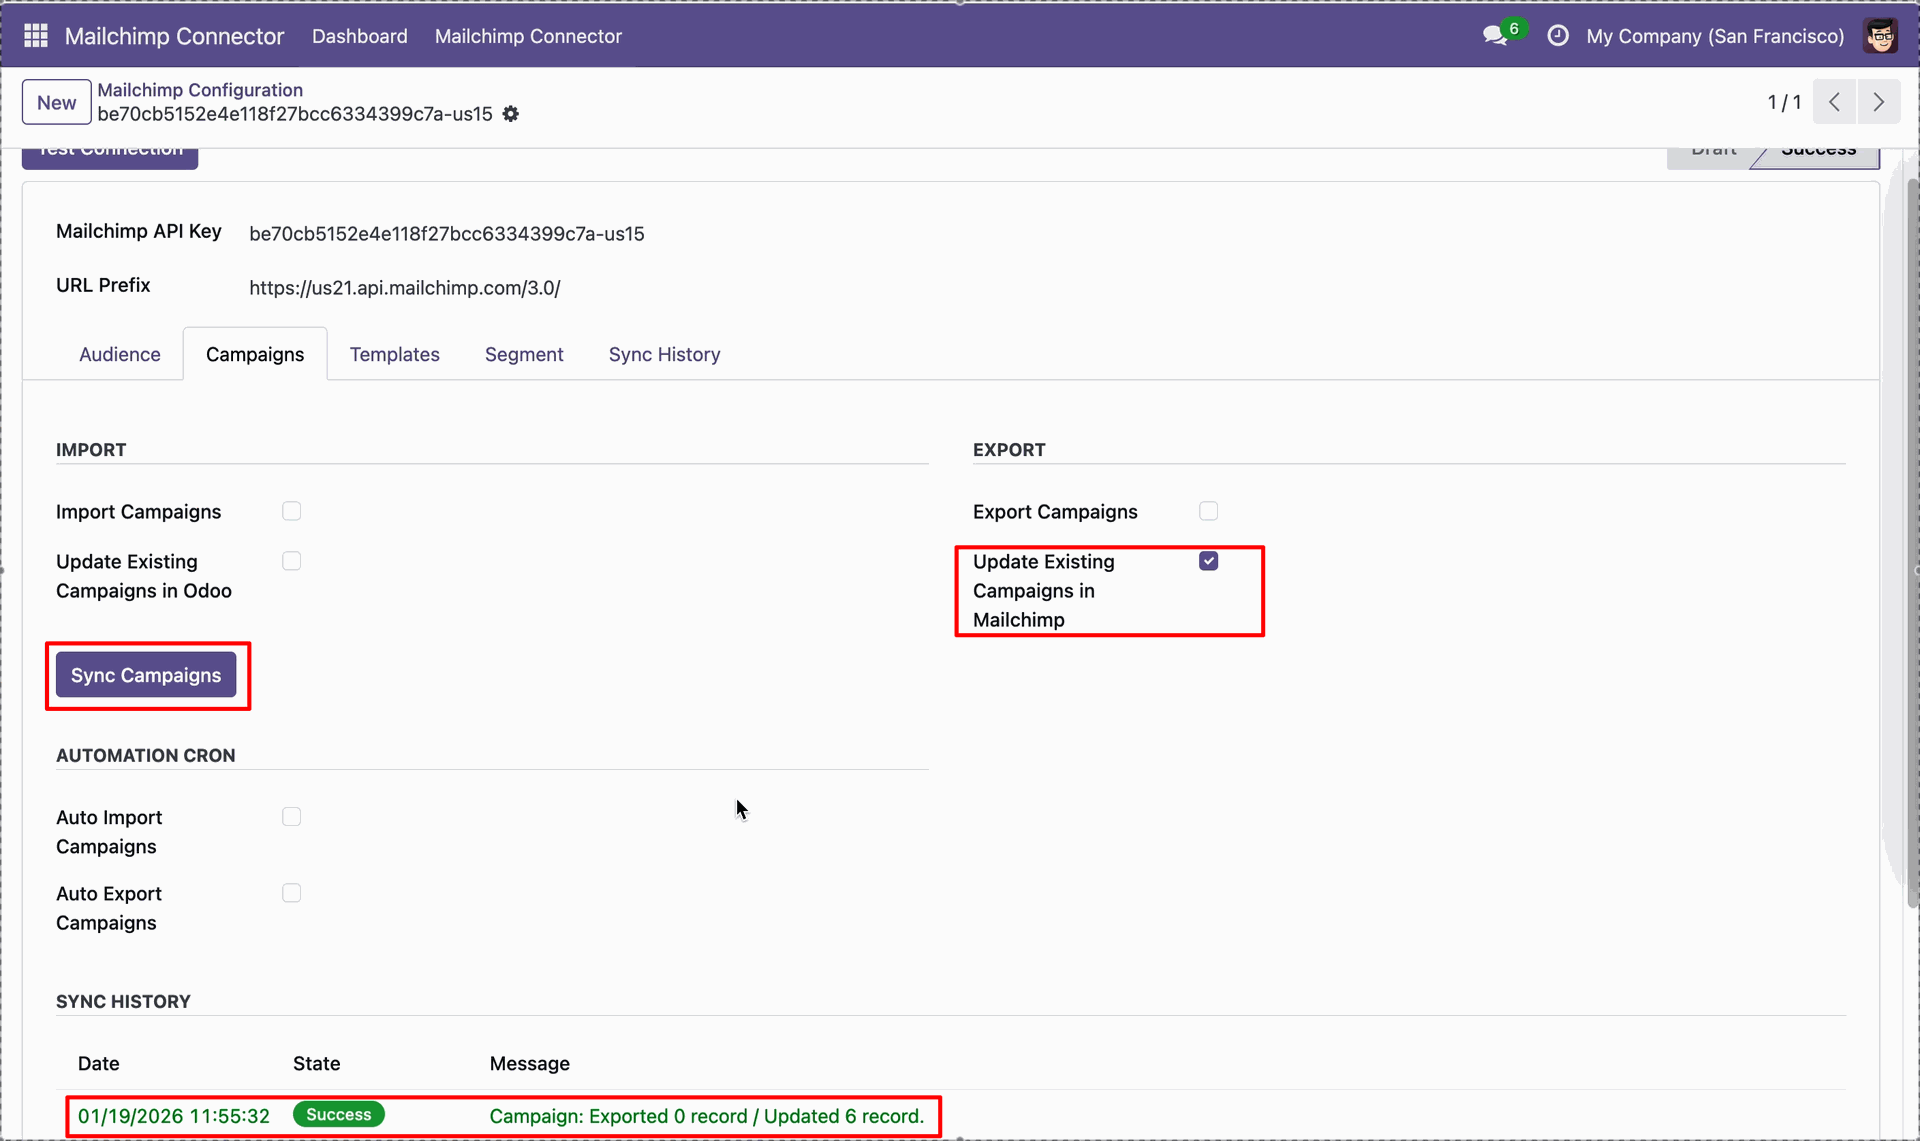
Open the New campaign 1 record and review its campaign name.
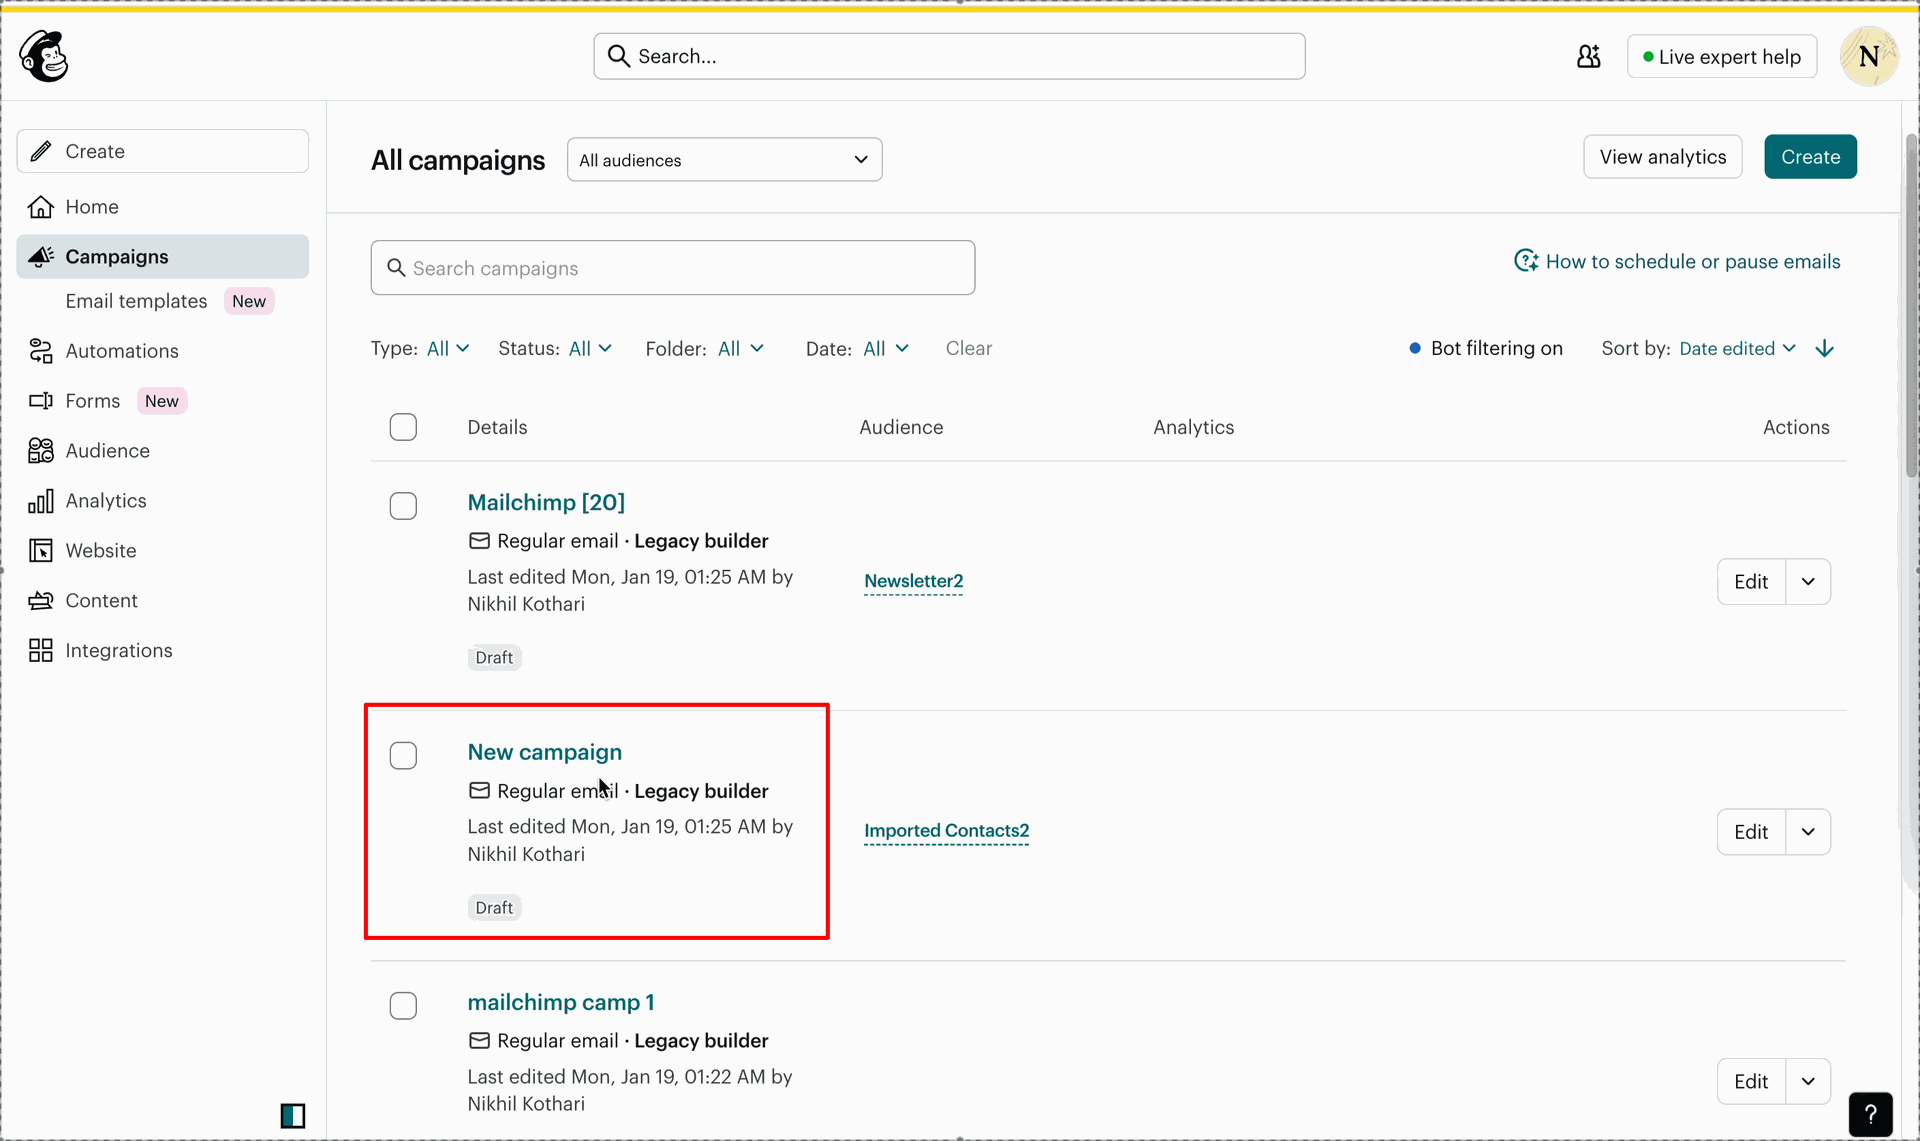
Workflow
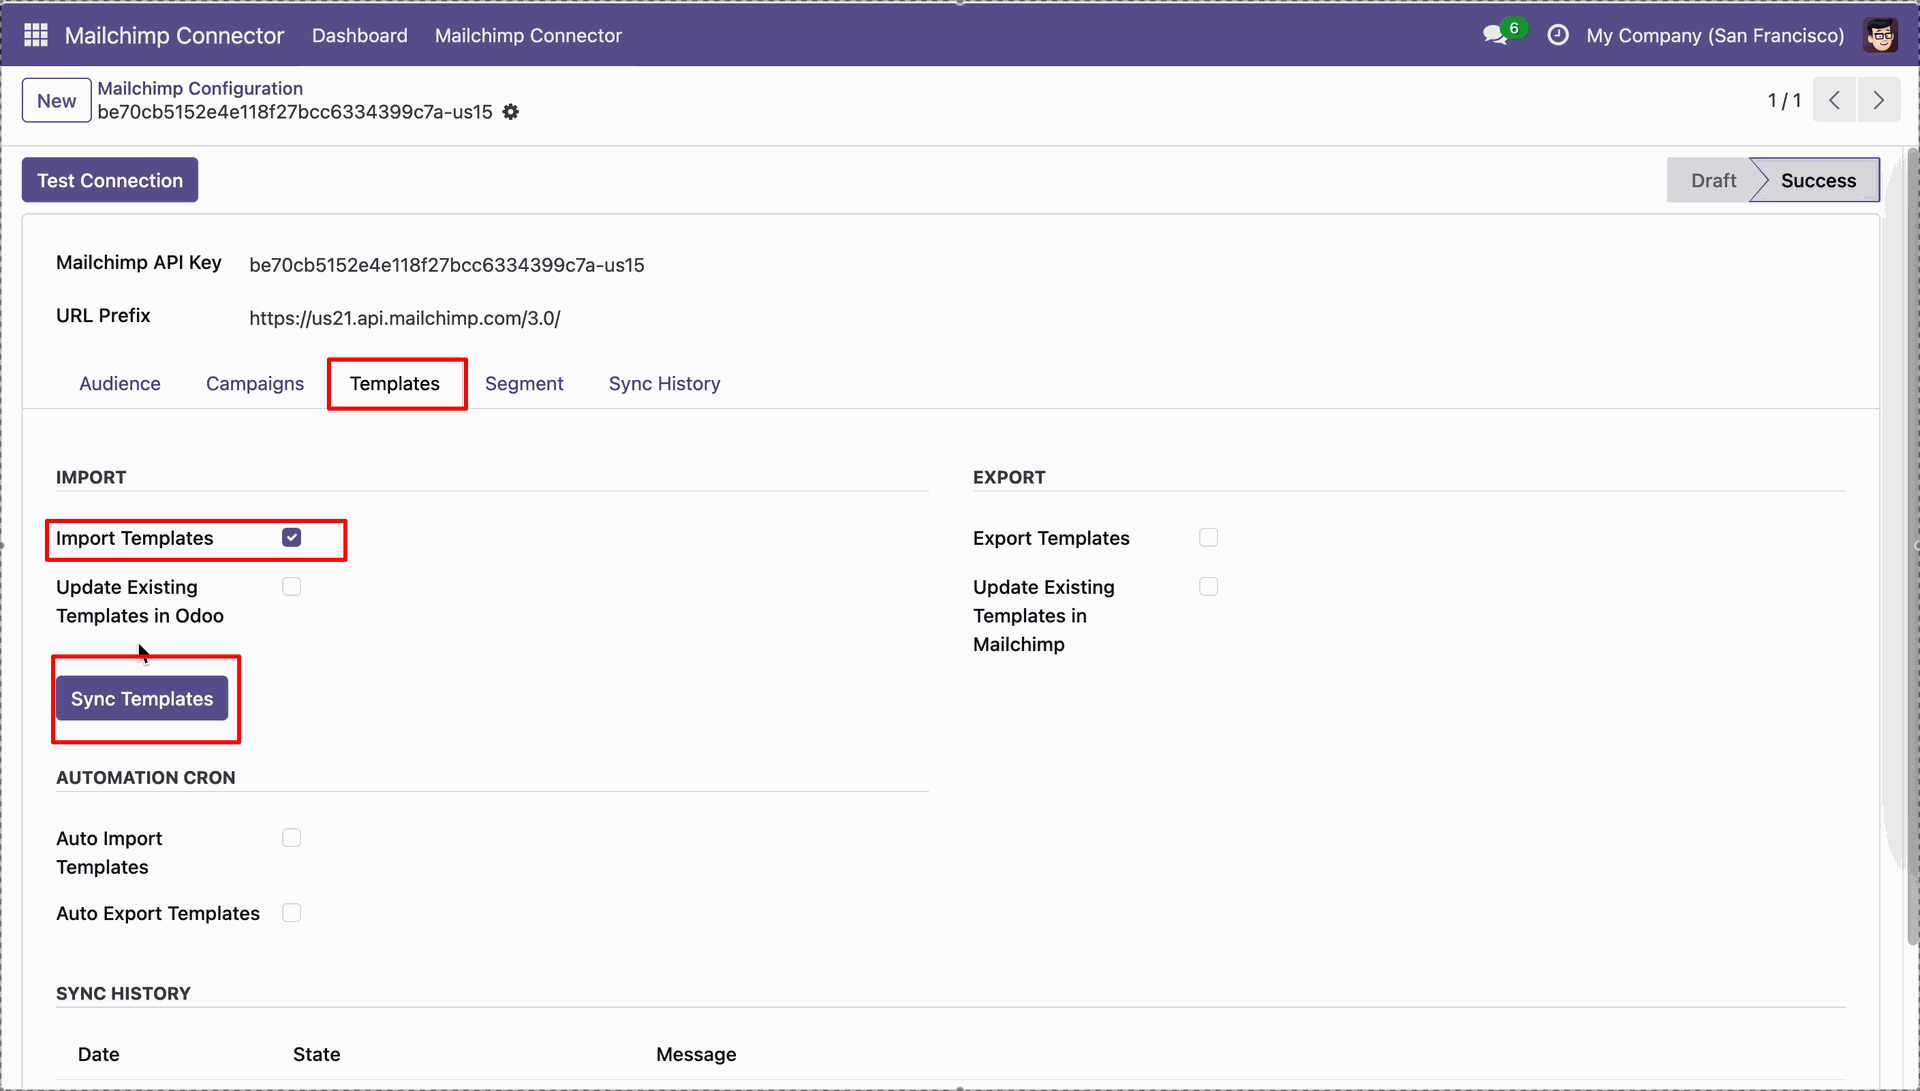
Open the Templates tab and enable Import Templates before clicking Sync Templates.
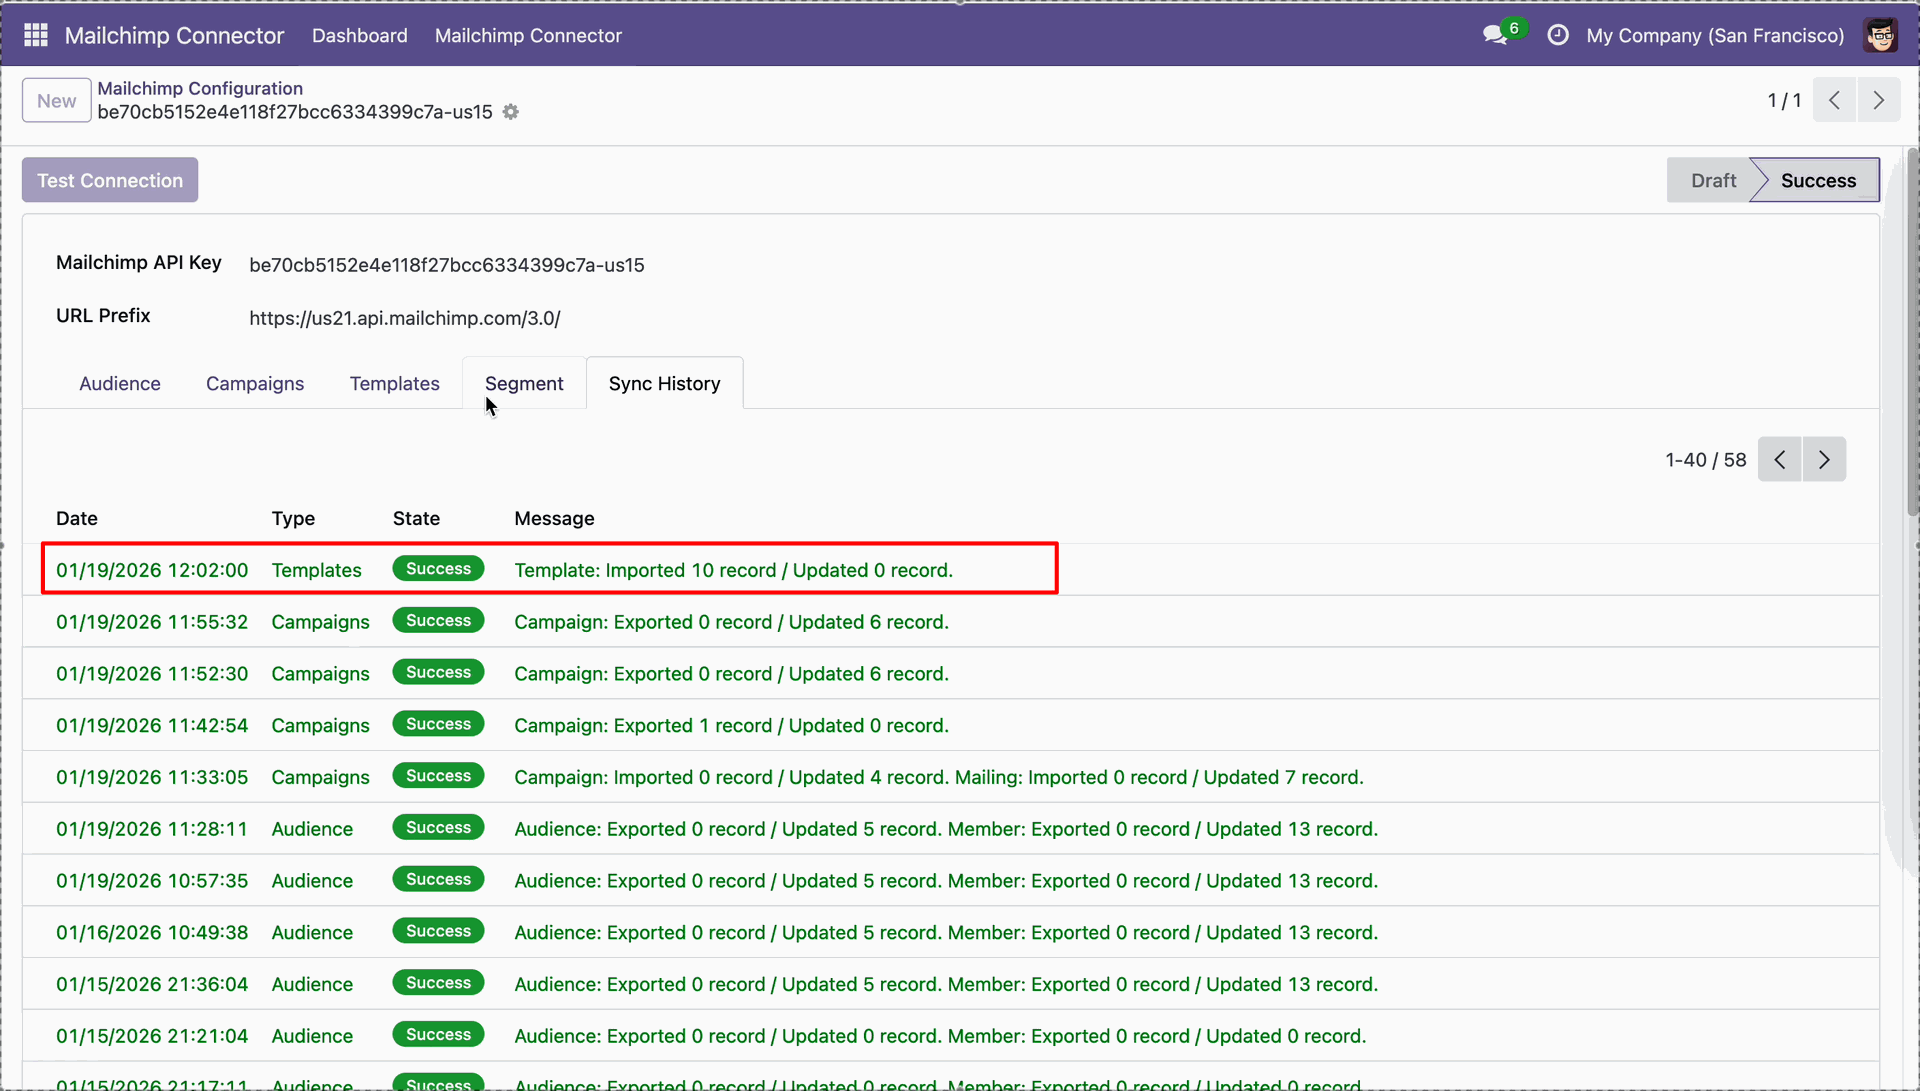
Review Sync History to confirm template records were imported successfully.
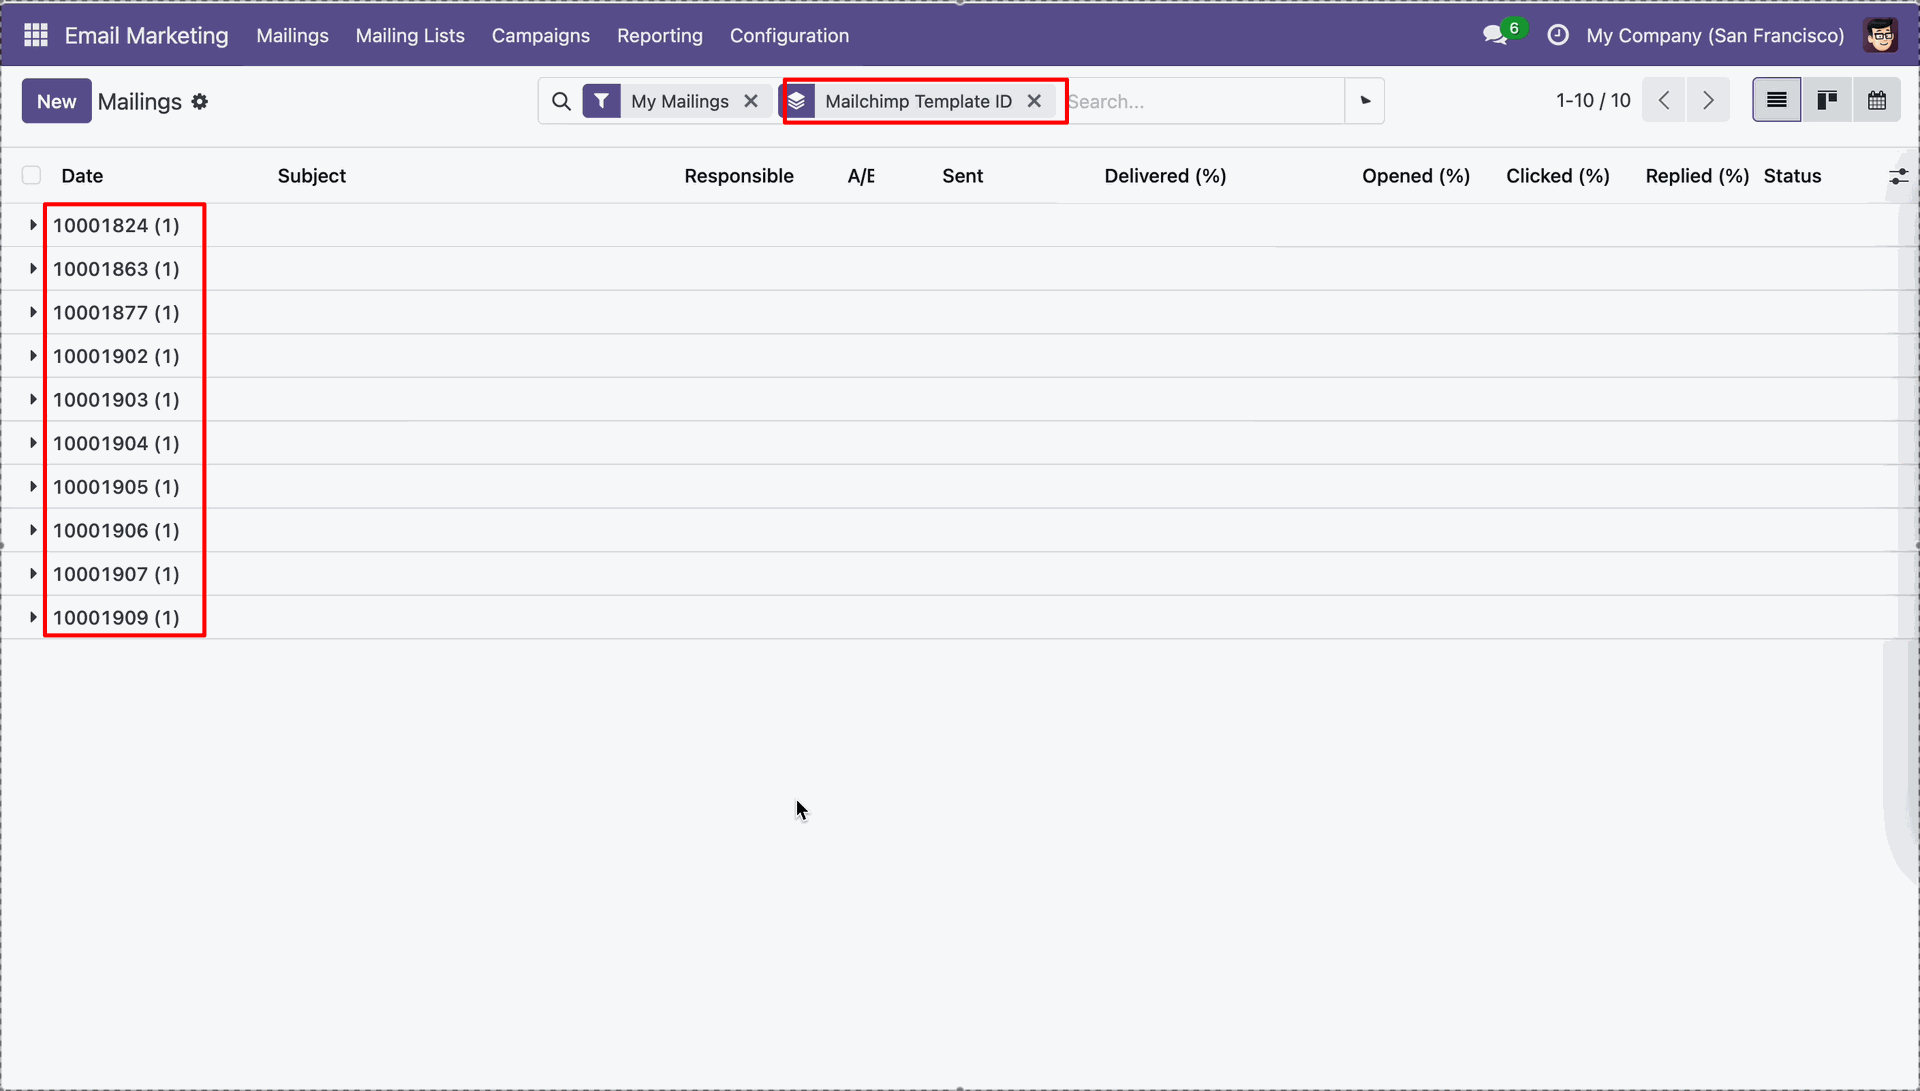
Review mailing records filtered by Mailchimp Template ID values.
Open the mailing form and review the highlighted subject for the imported template.
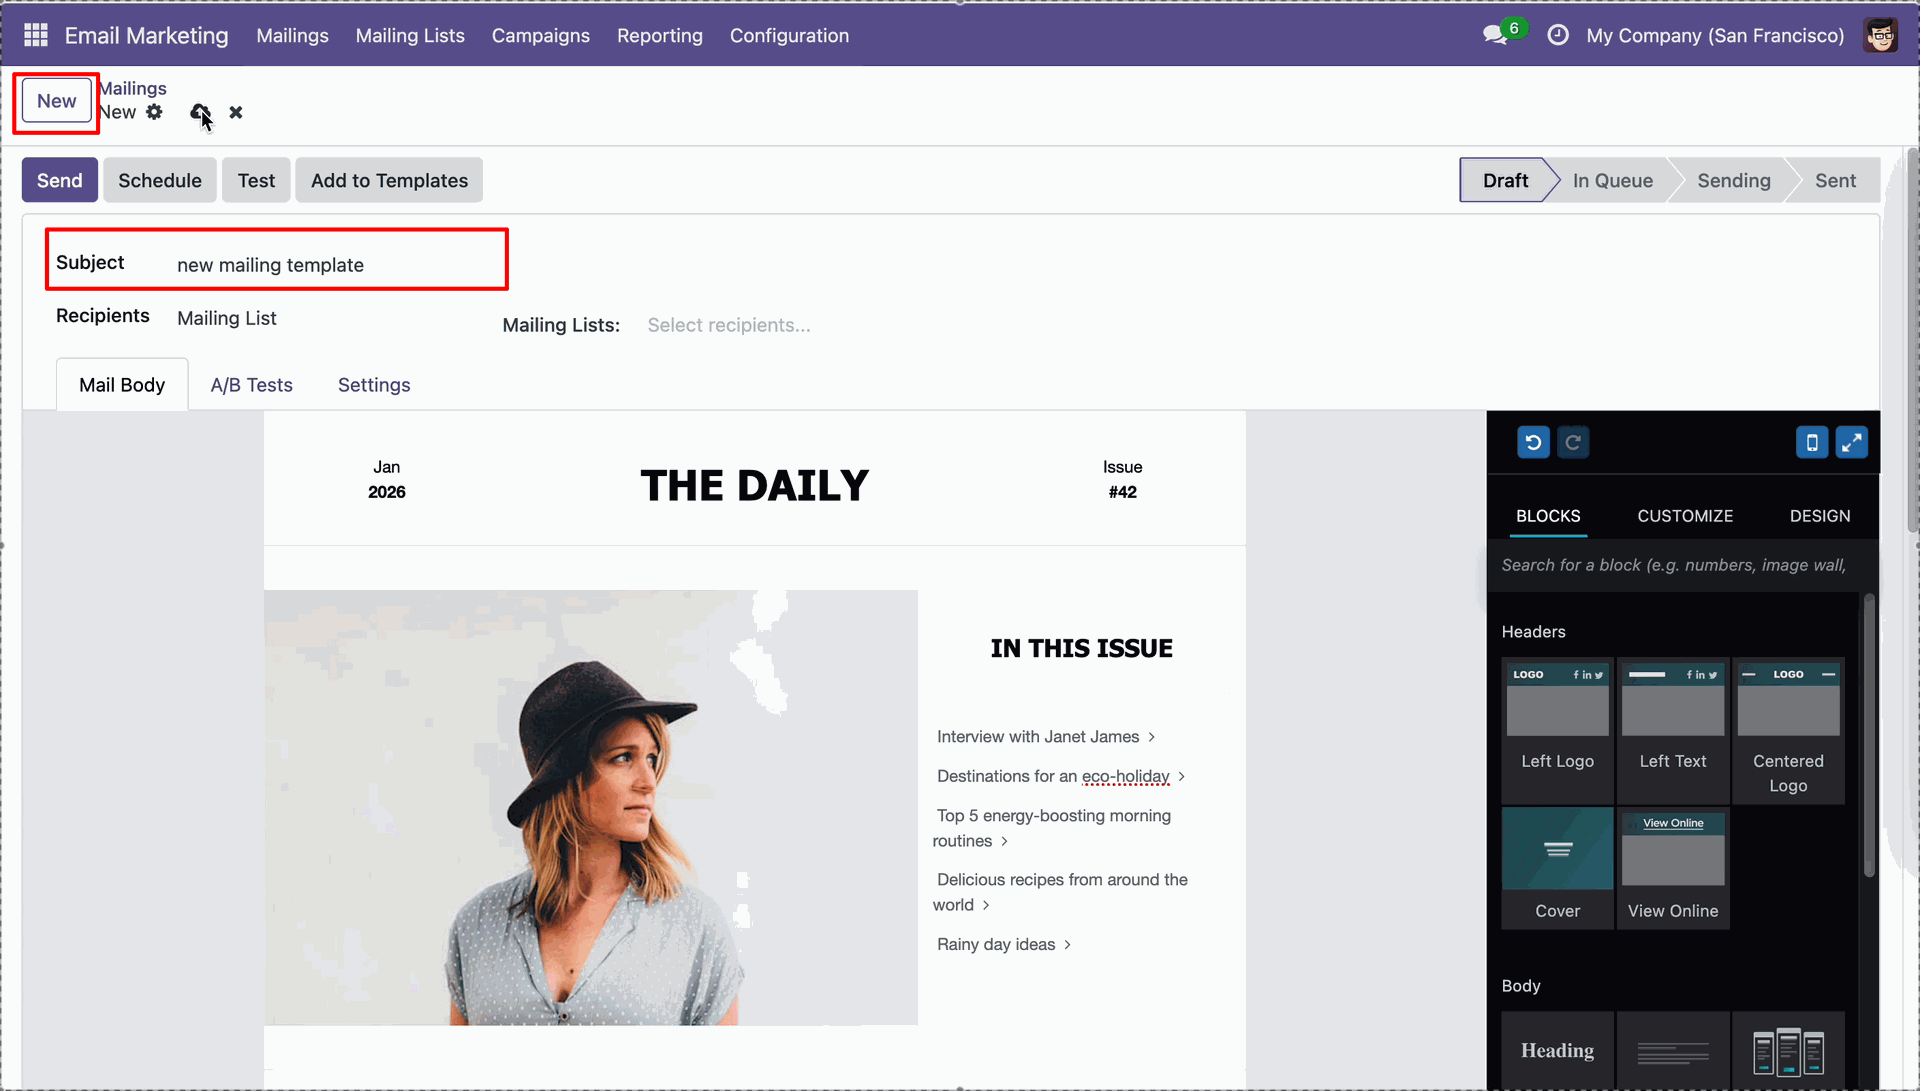
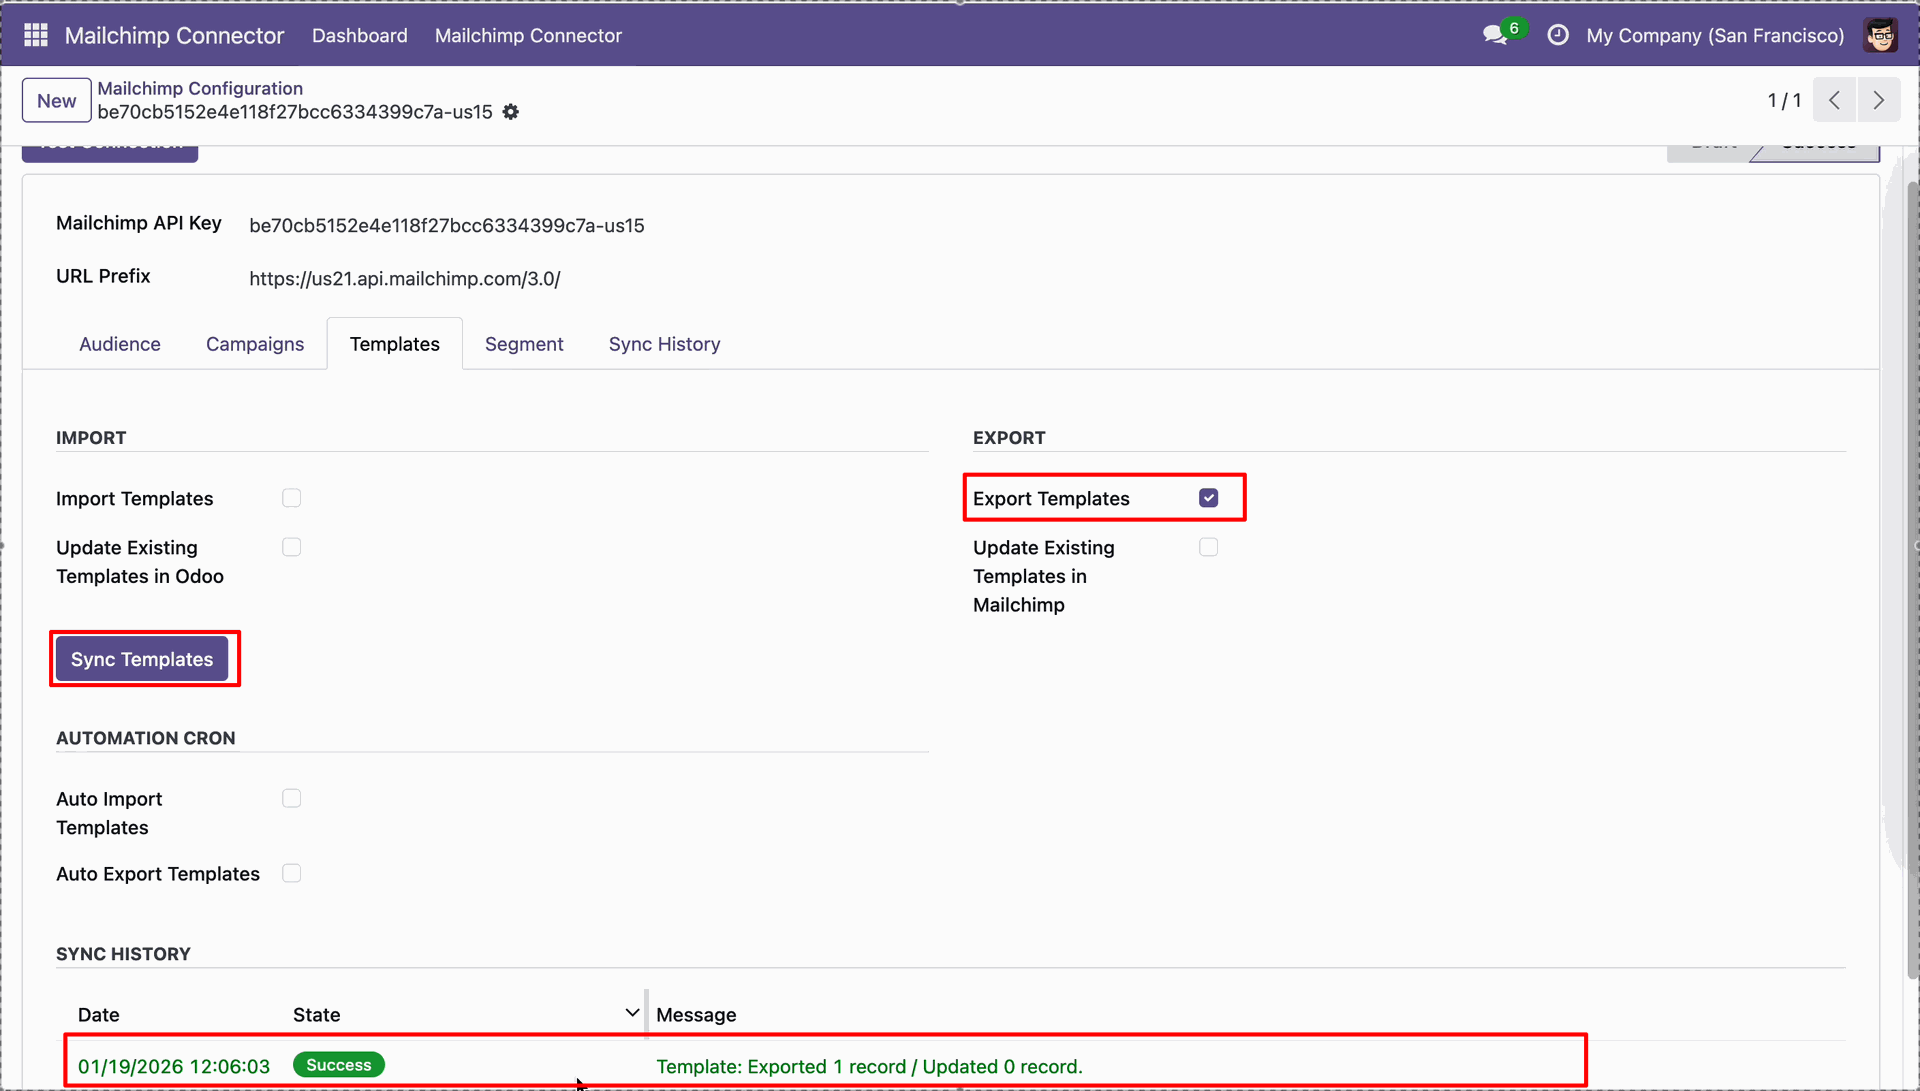
Enable Export Templates and click Sync Templates to send templates to Mailchimp.
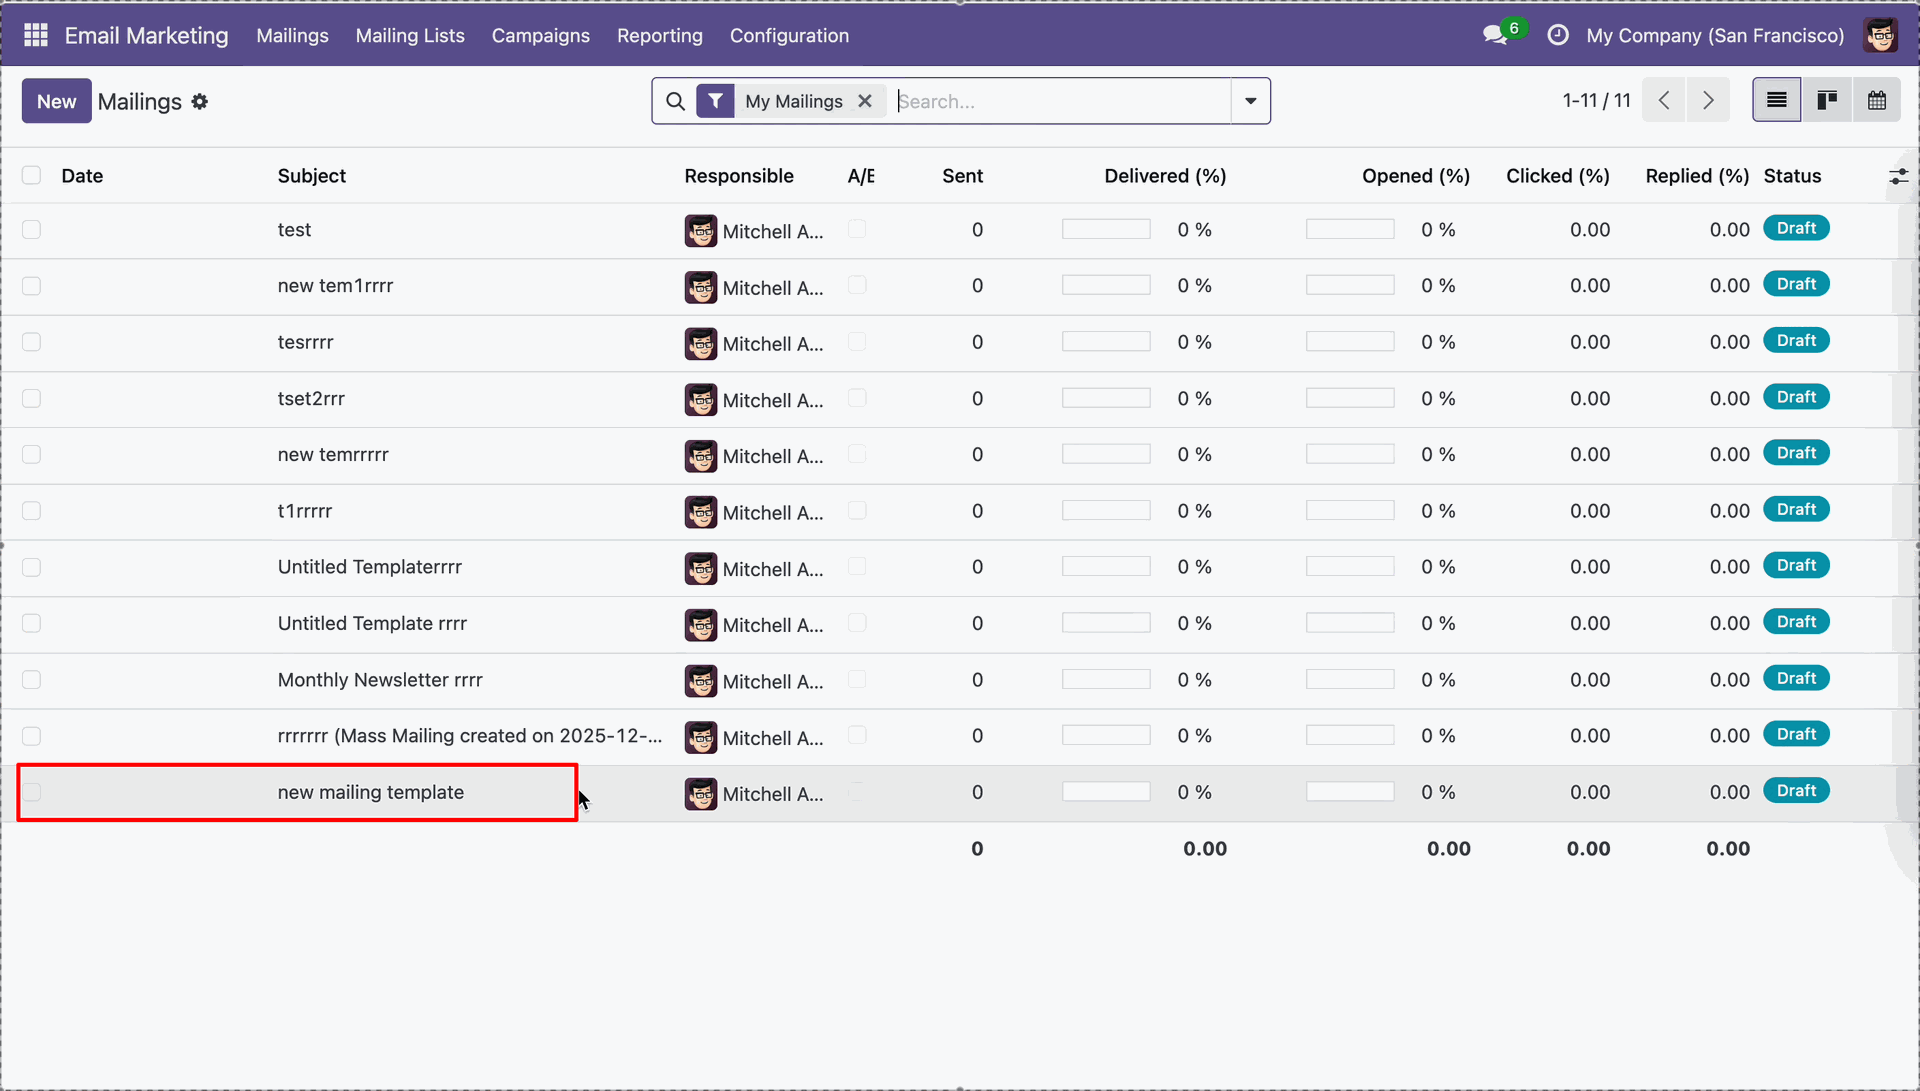
Review the highlighted new mailing template record in the Mailings list.
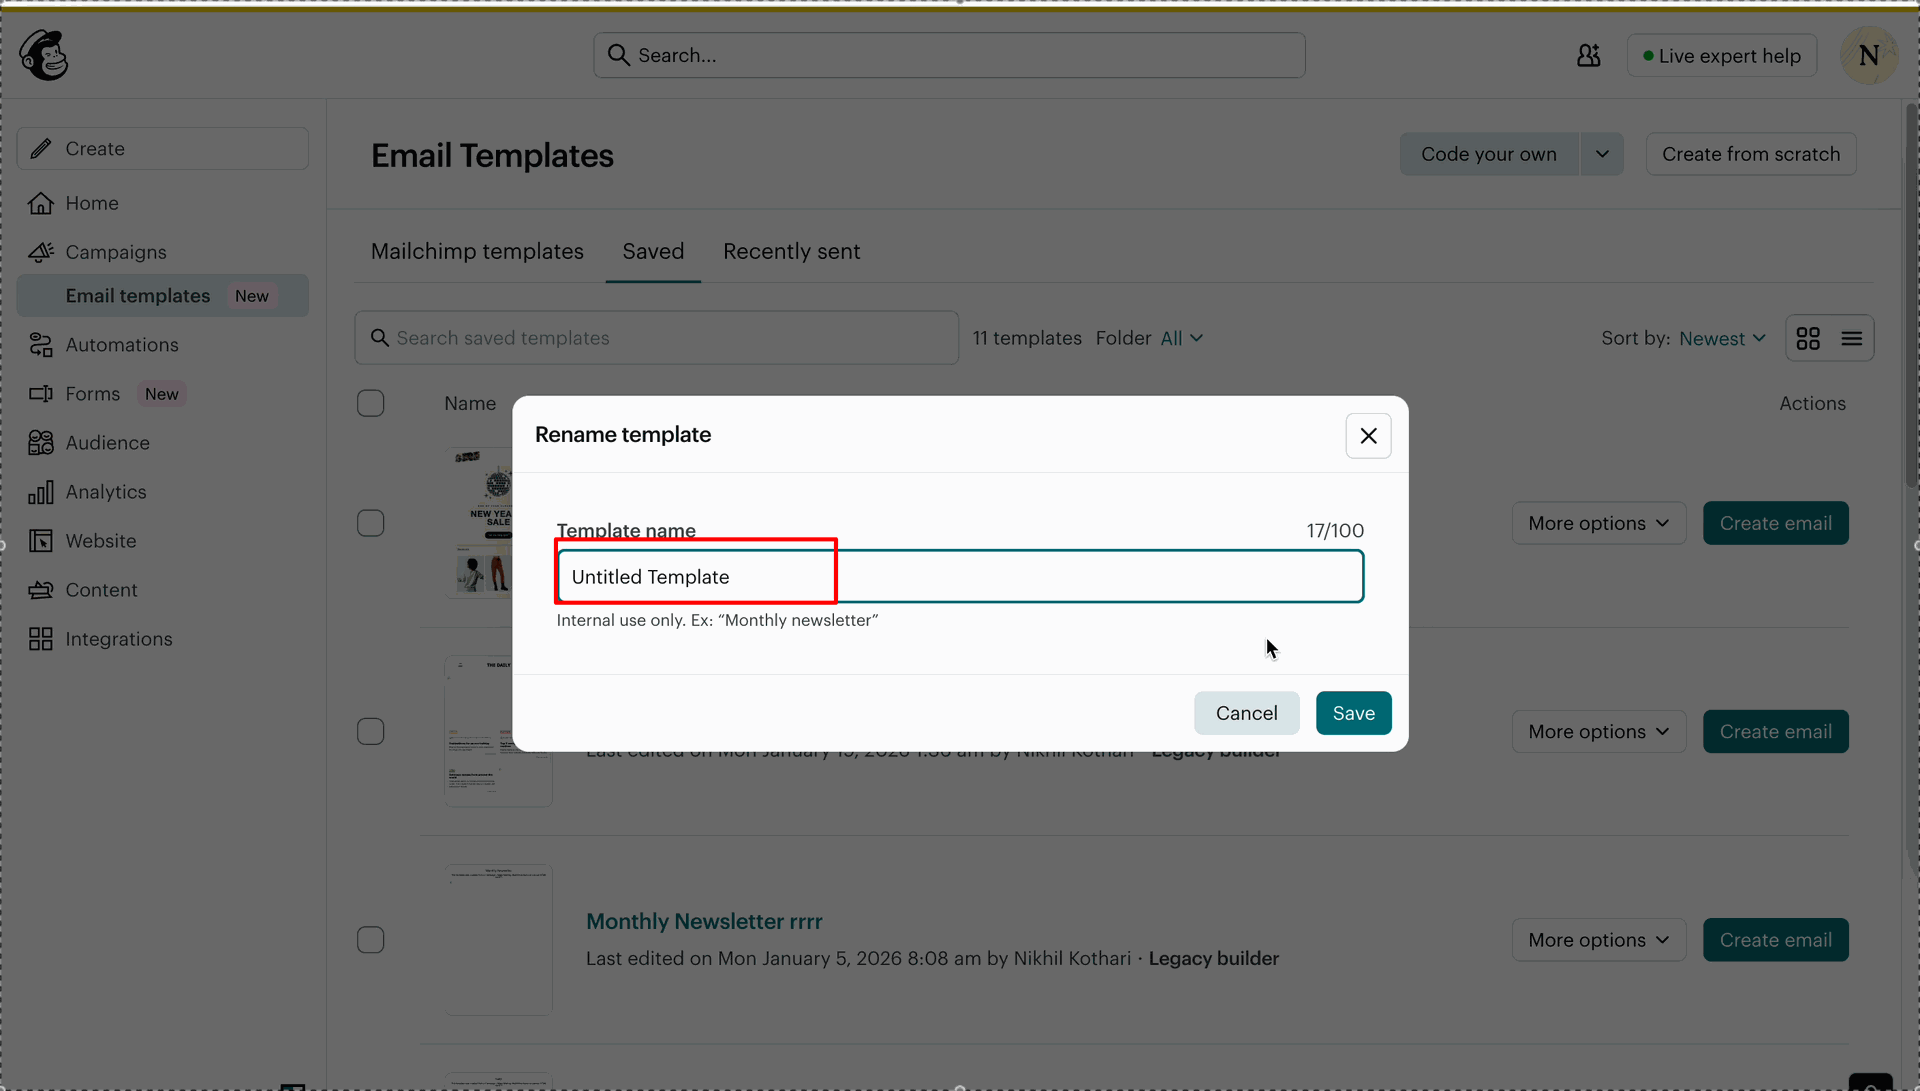
Rename the Mailchimp template to Untitled Template and click Save.
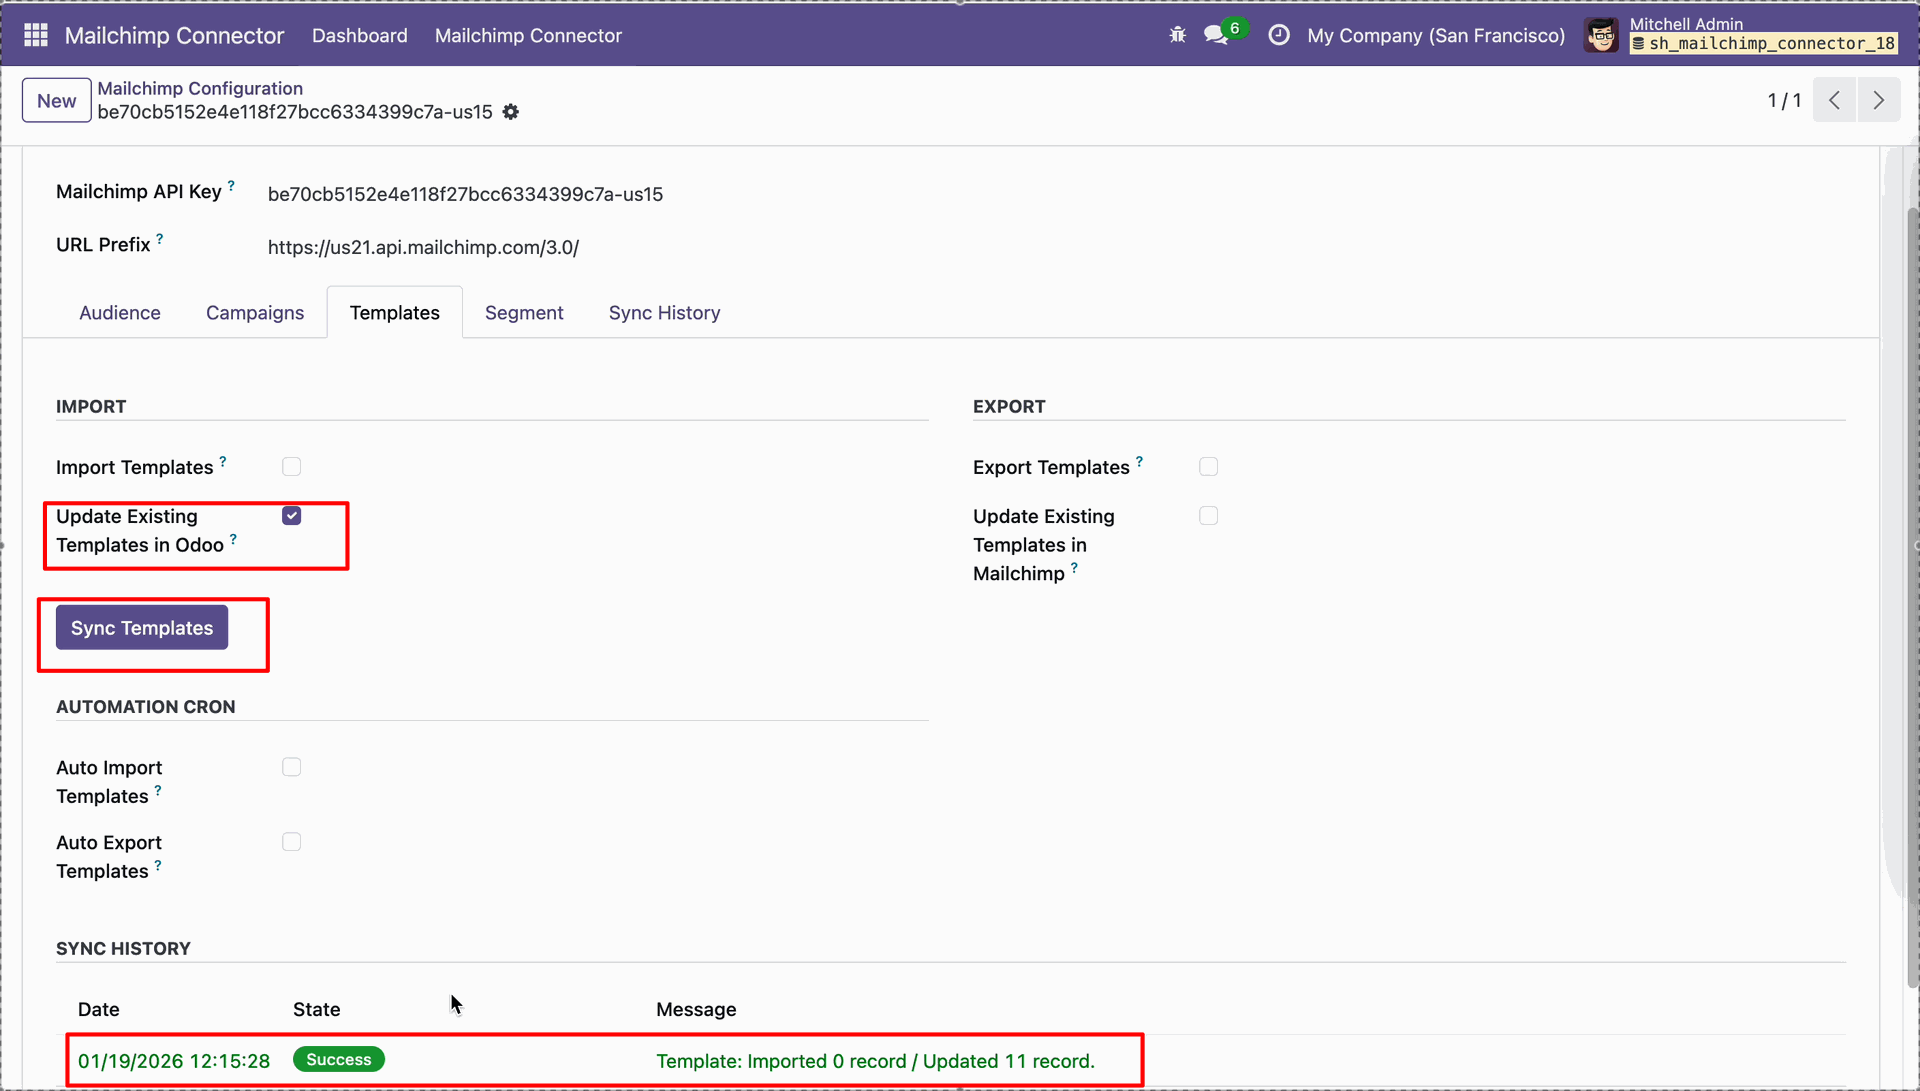
Enable Update Existing Templates in Odoo before clicking Sync Templates.
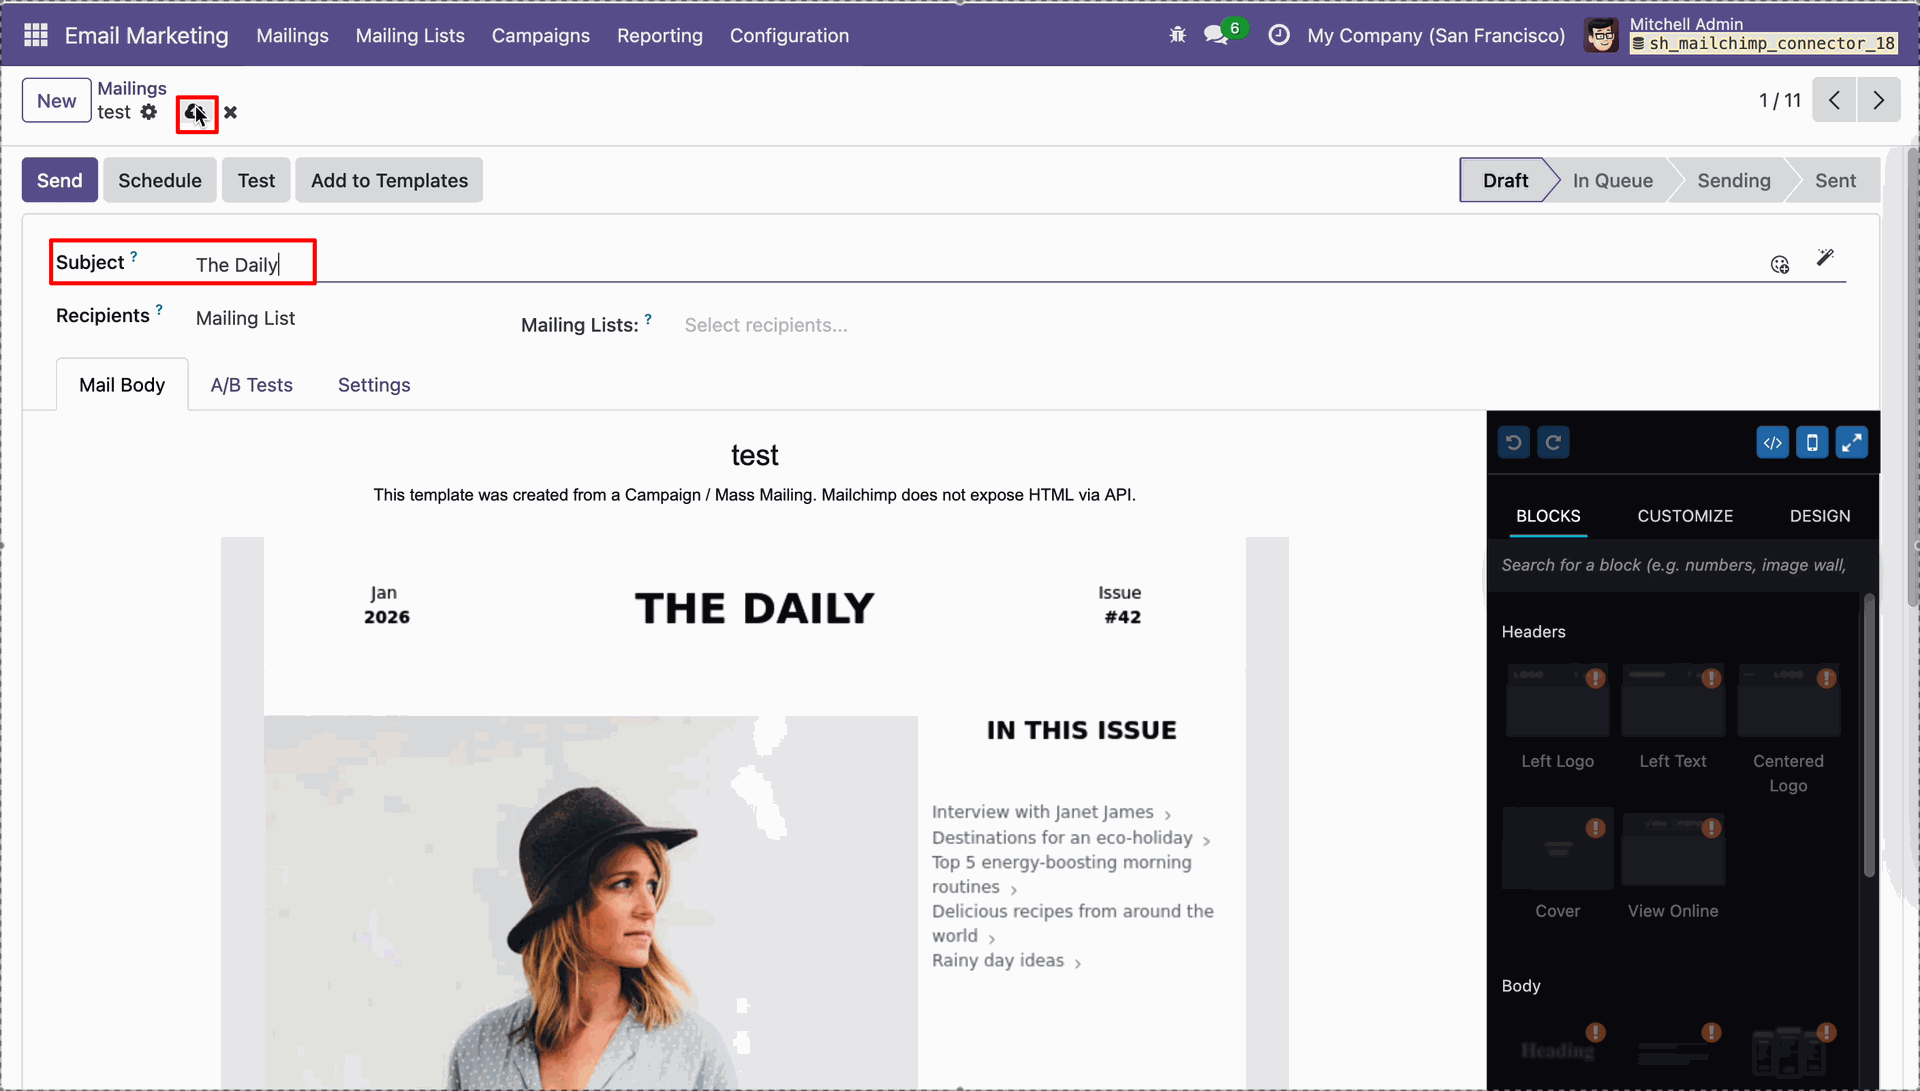
Change name.
Enable Update Existing Templates in mailchimp before clicking Sync Templates.
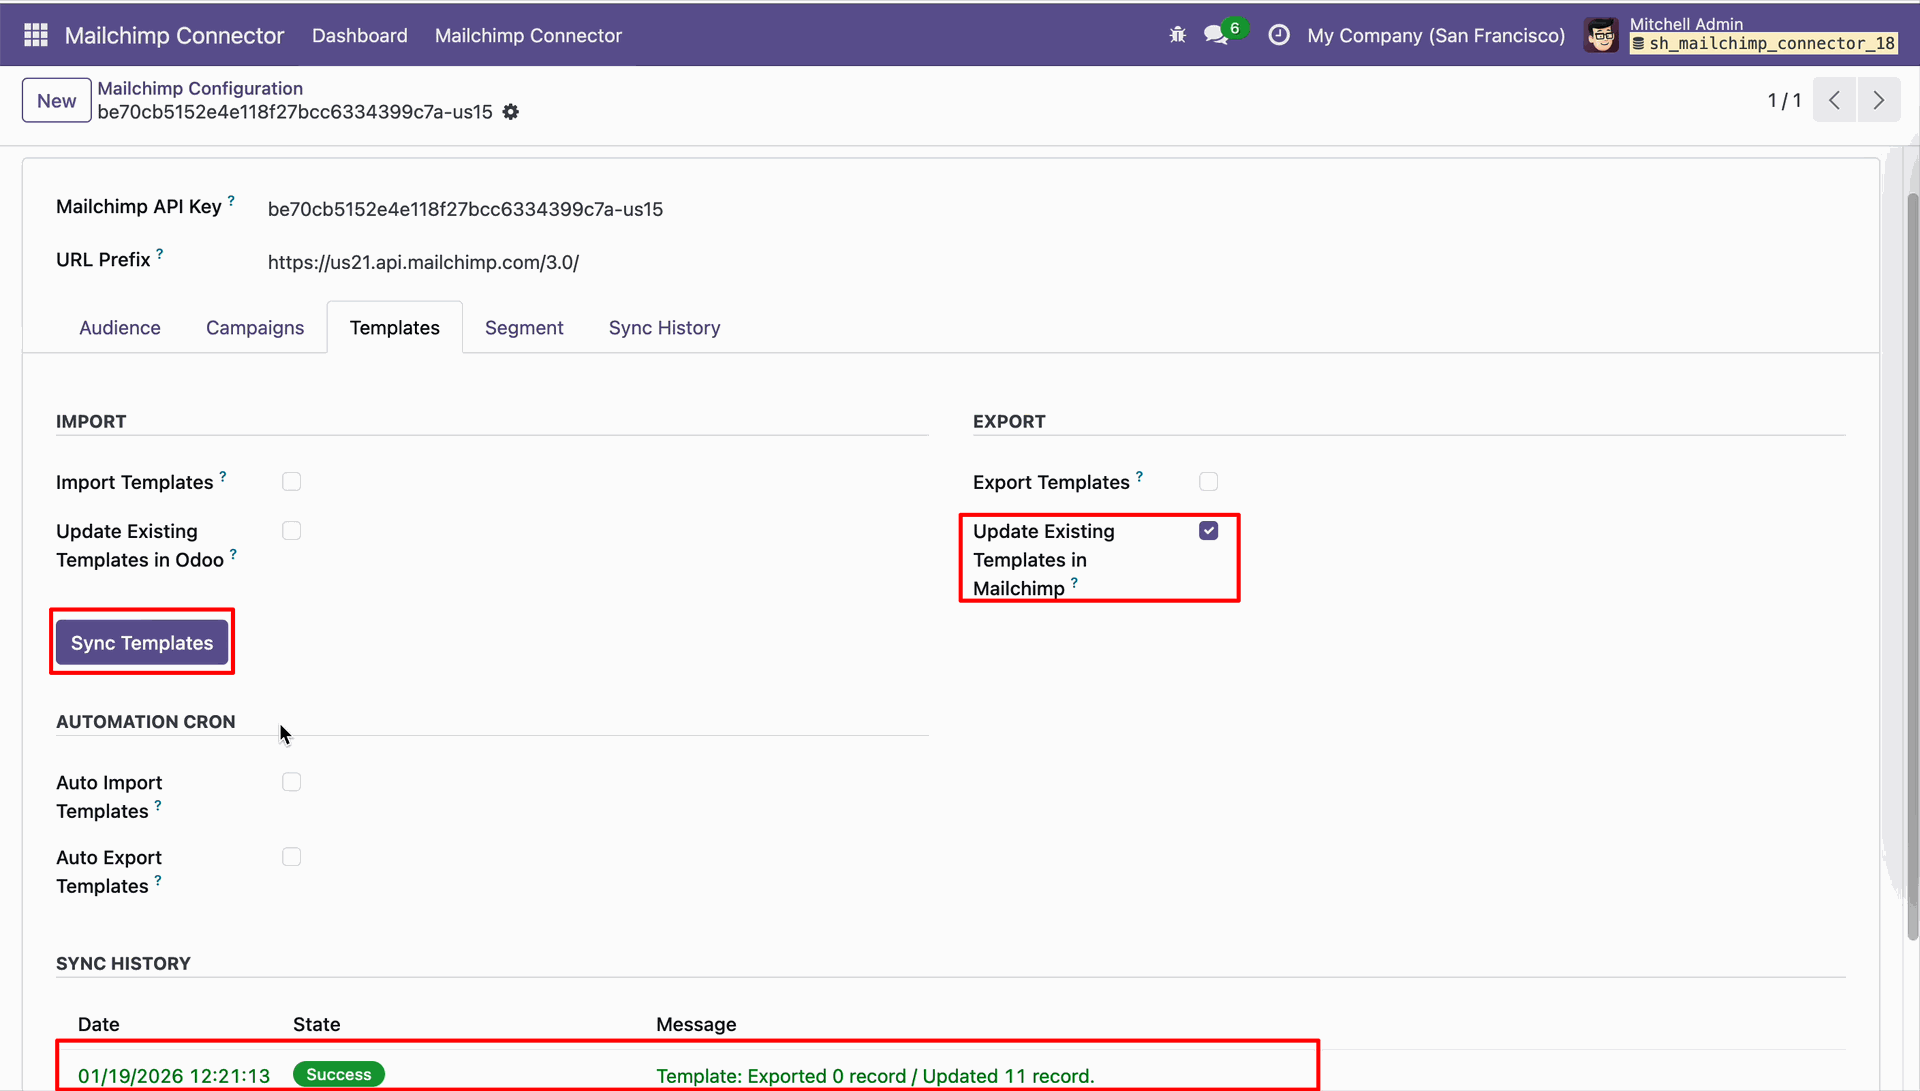
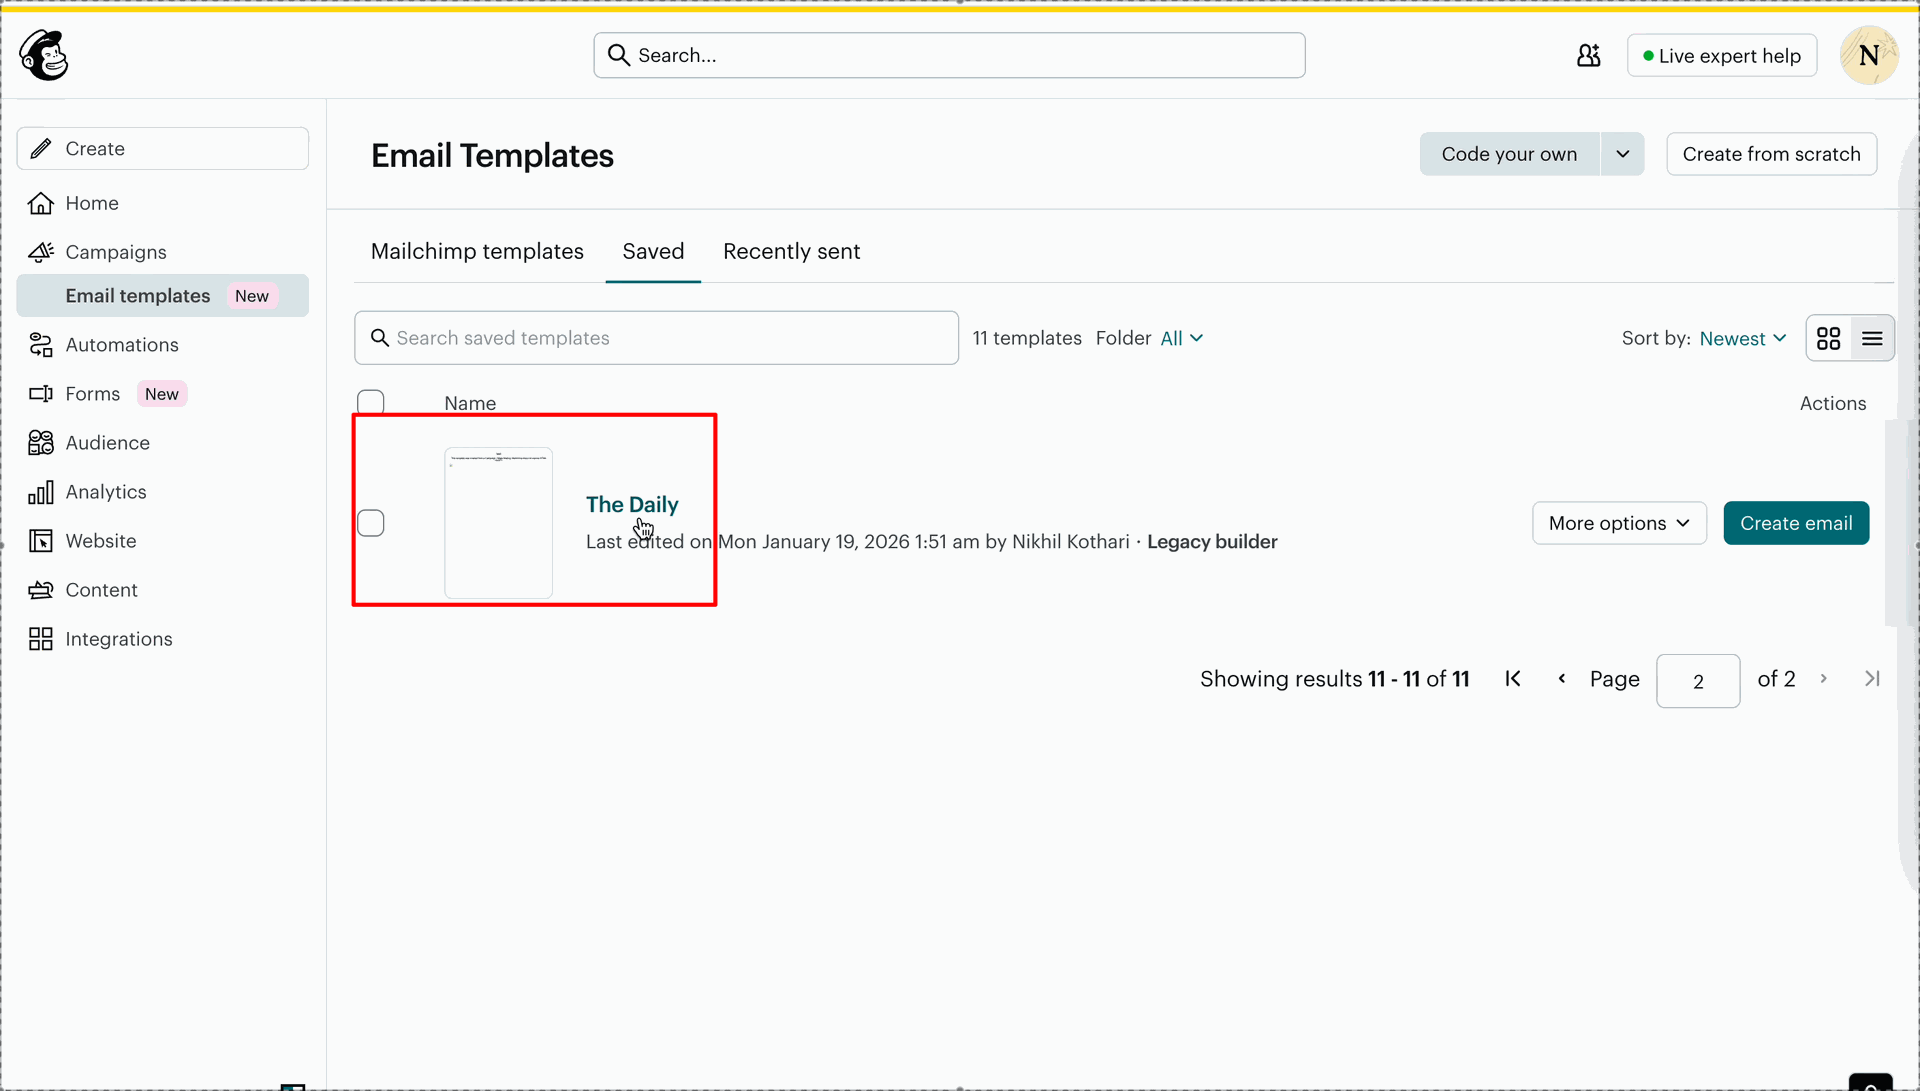
Review Sync History to confirm existing template records were updated.
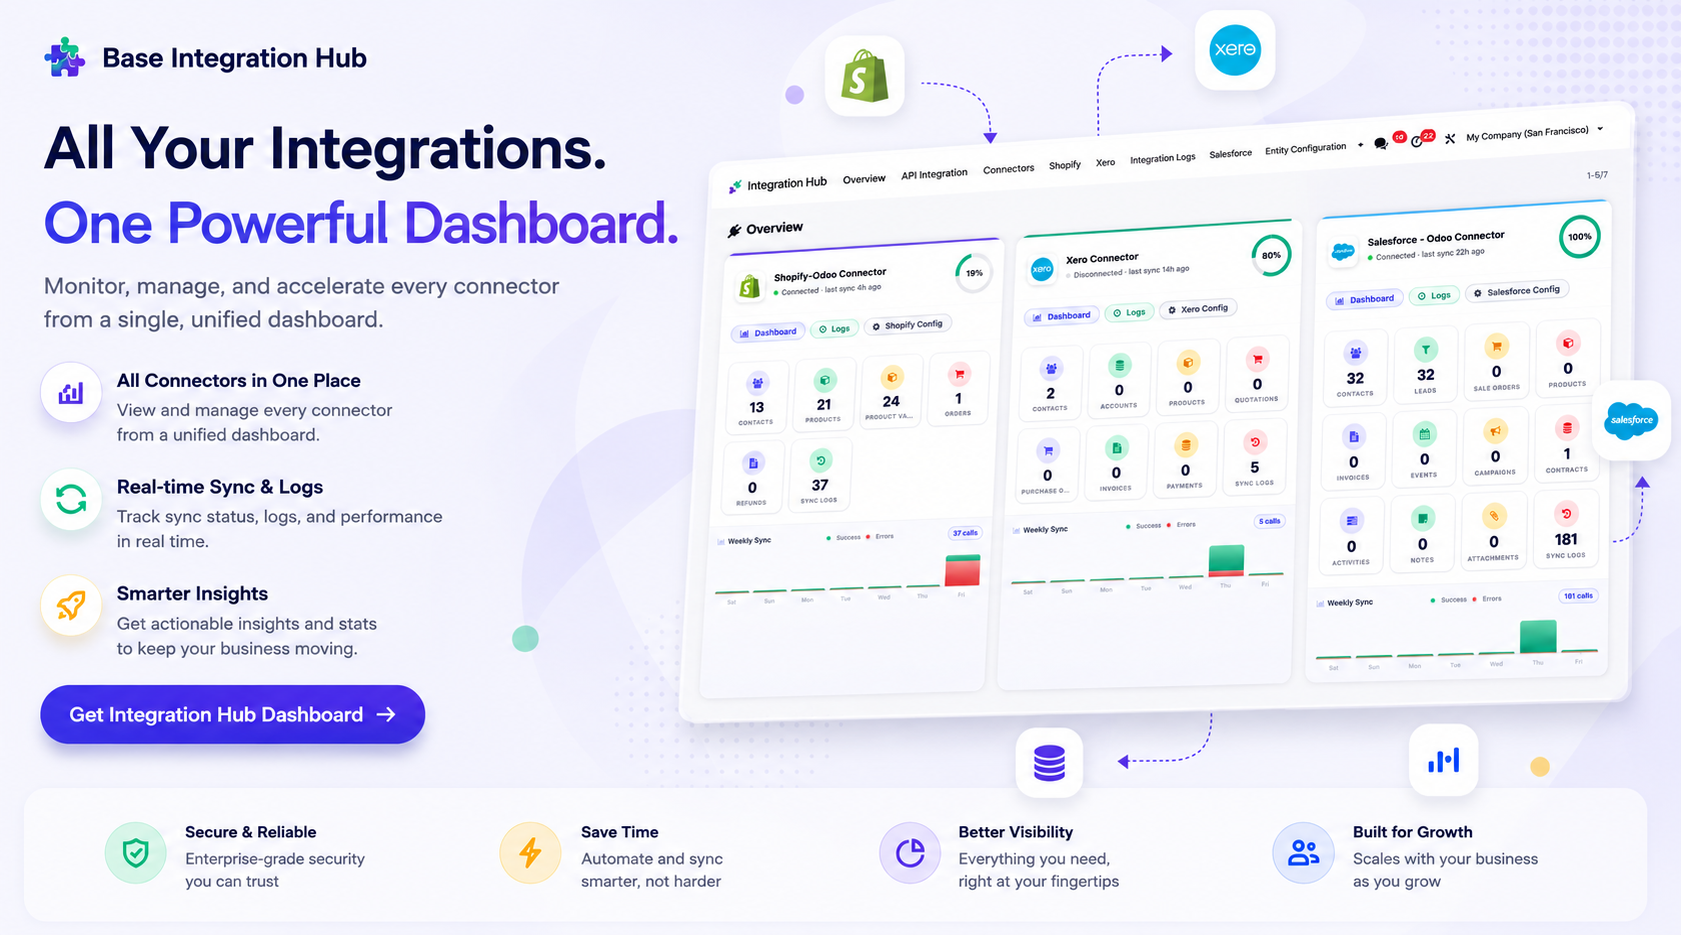
Centralized dashboard to manage and monitor all connectors from one place. Quickly access sync summary, activity logs, and configuration controls with improved visibility.
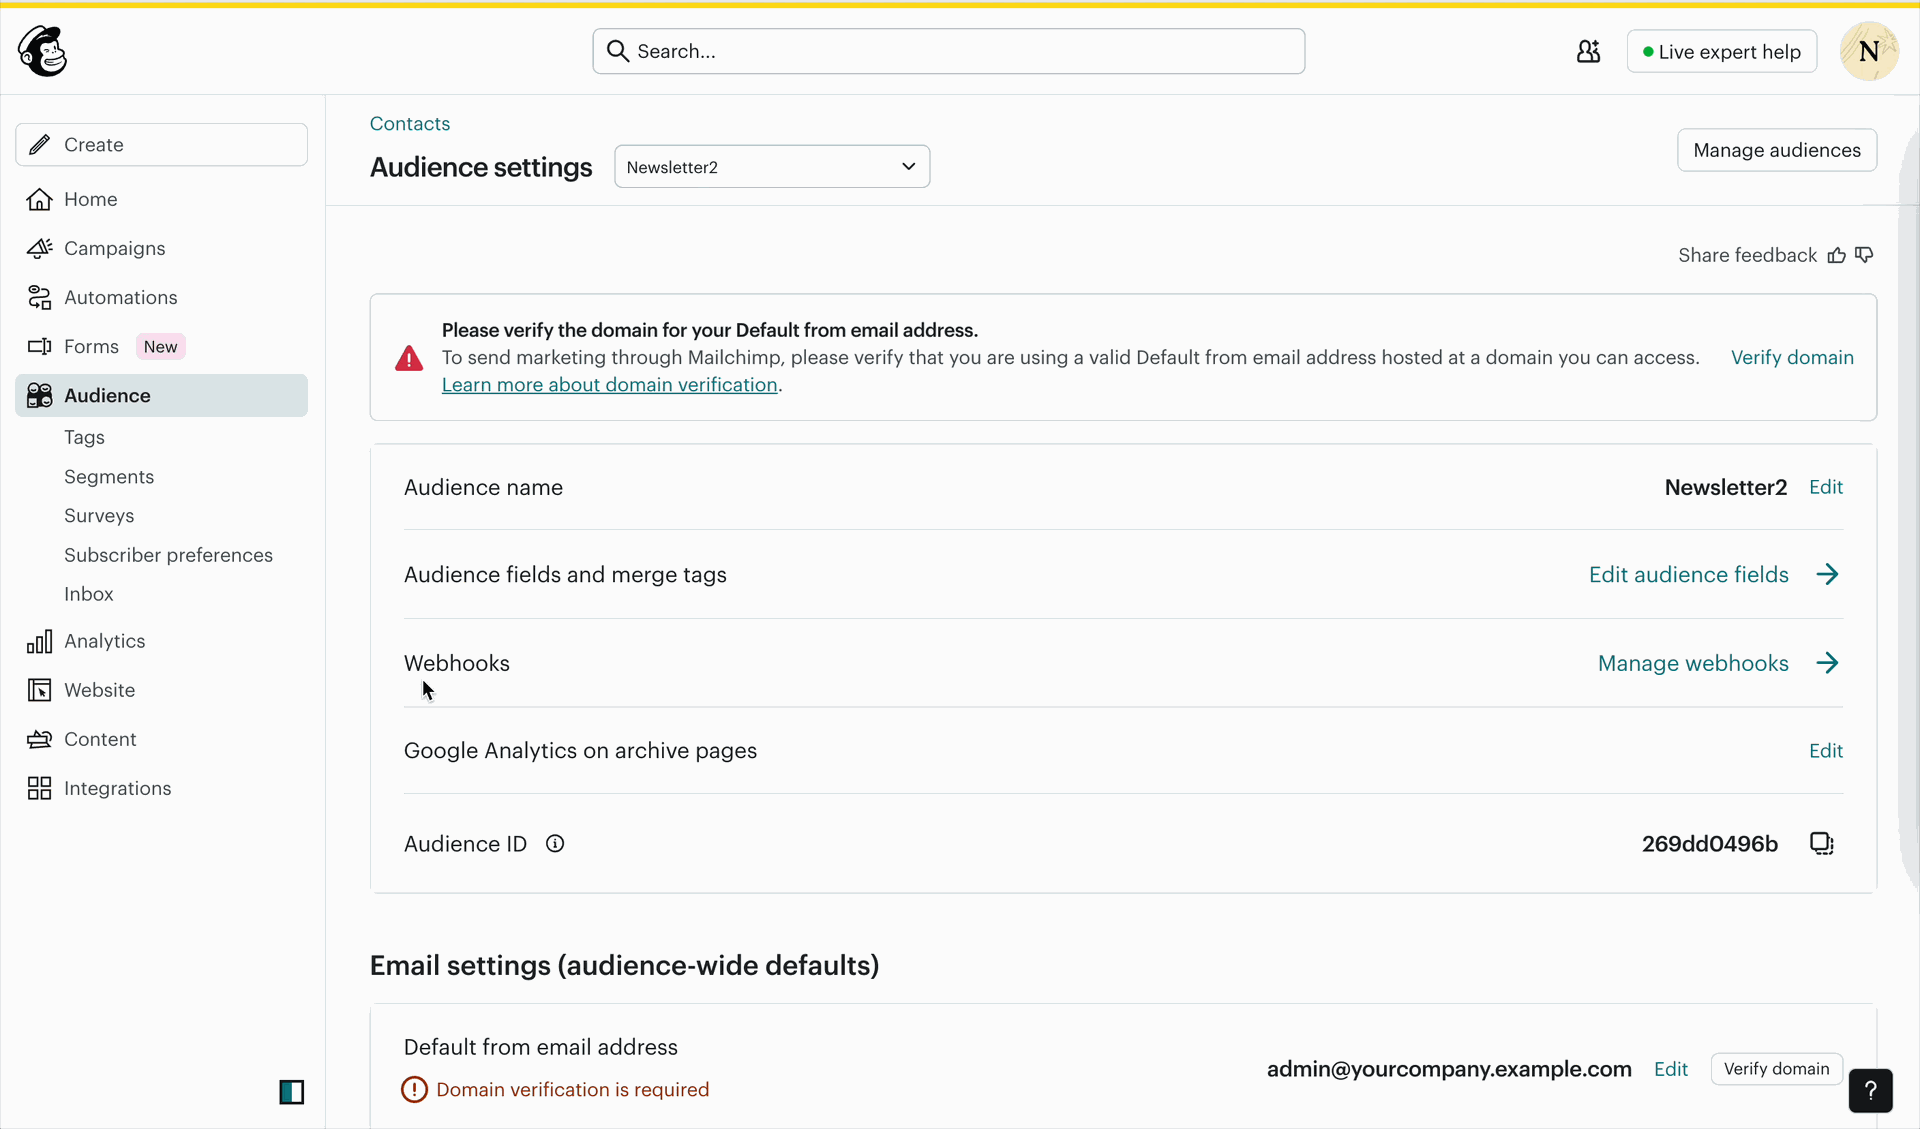
Open Audience settings and review the Manage webhooks for the audience.
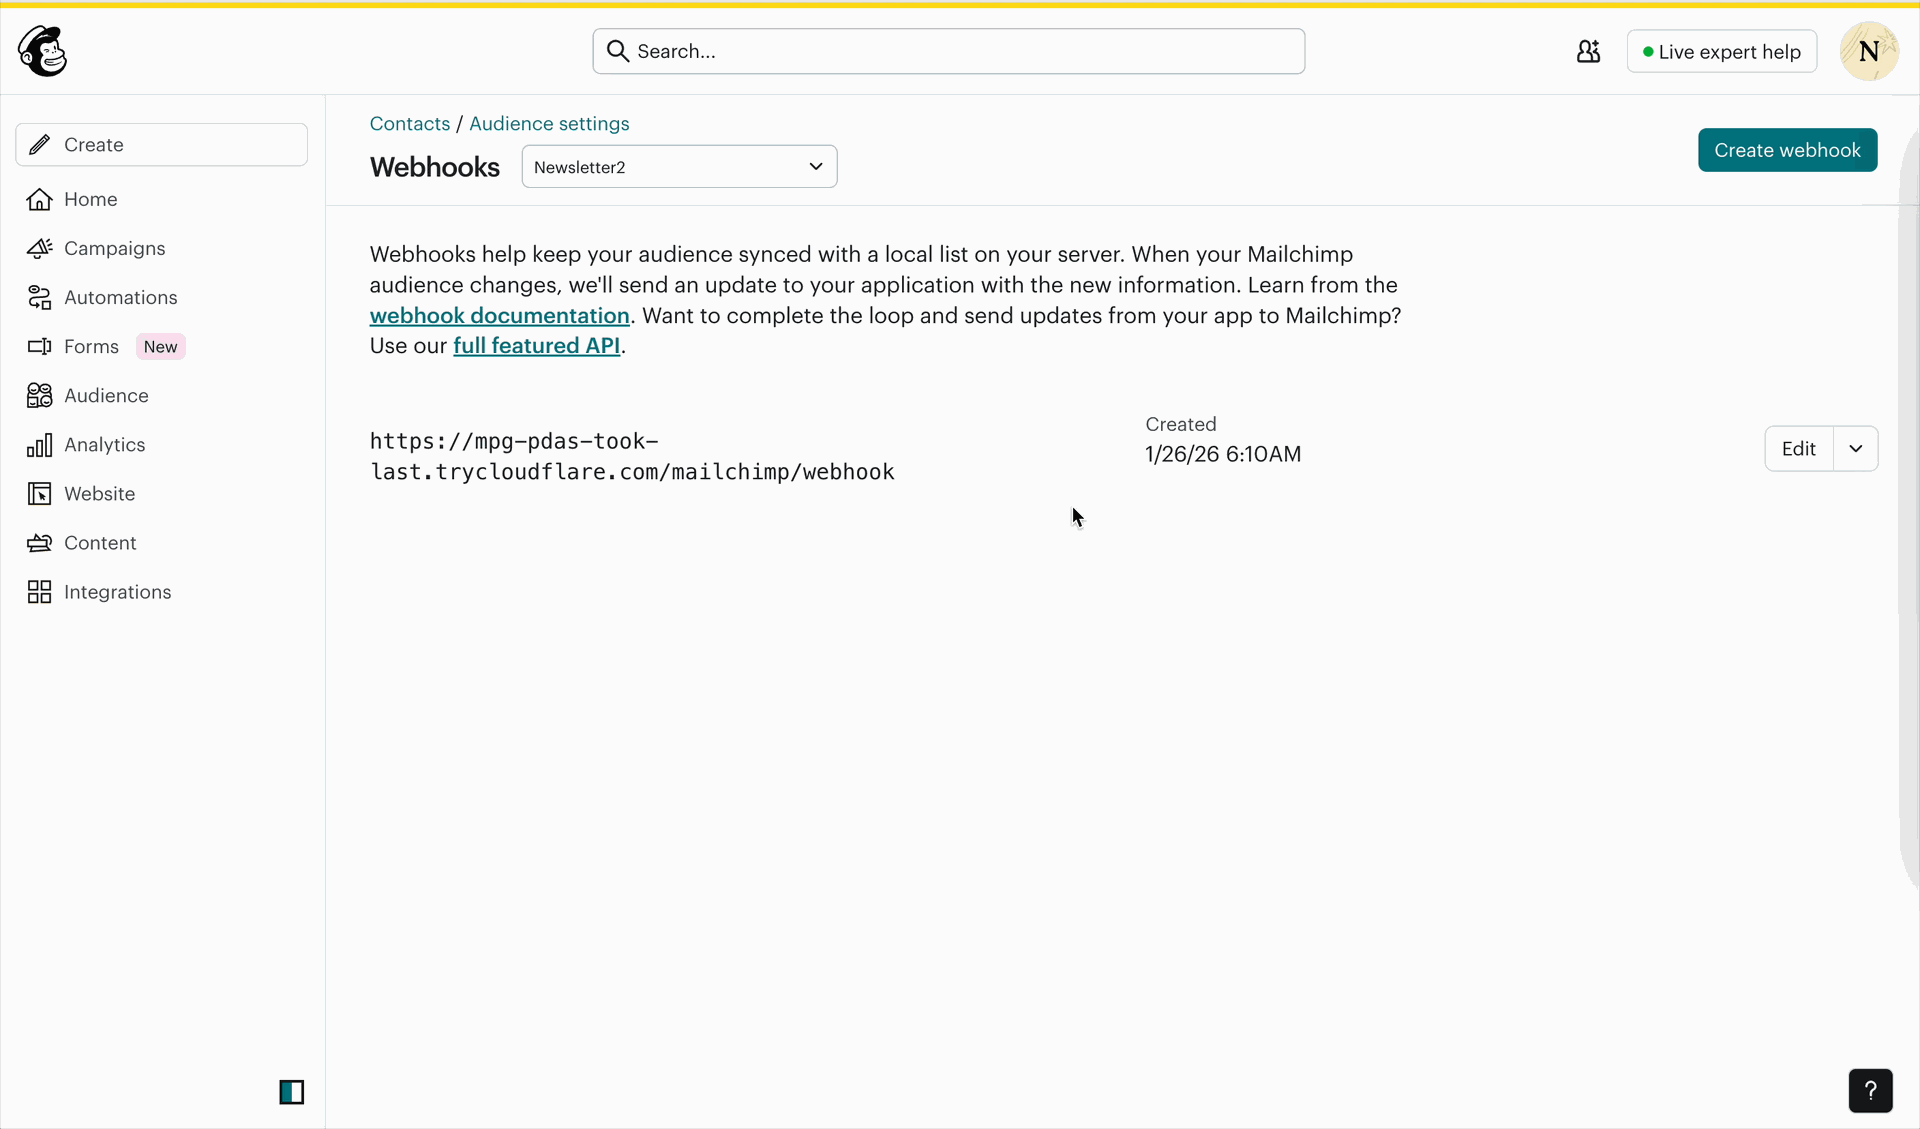
Review the Webhooks page.
Review the success message and open the new contact profile in Mailchimp.
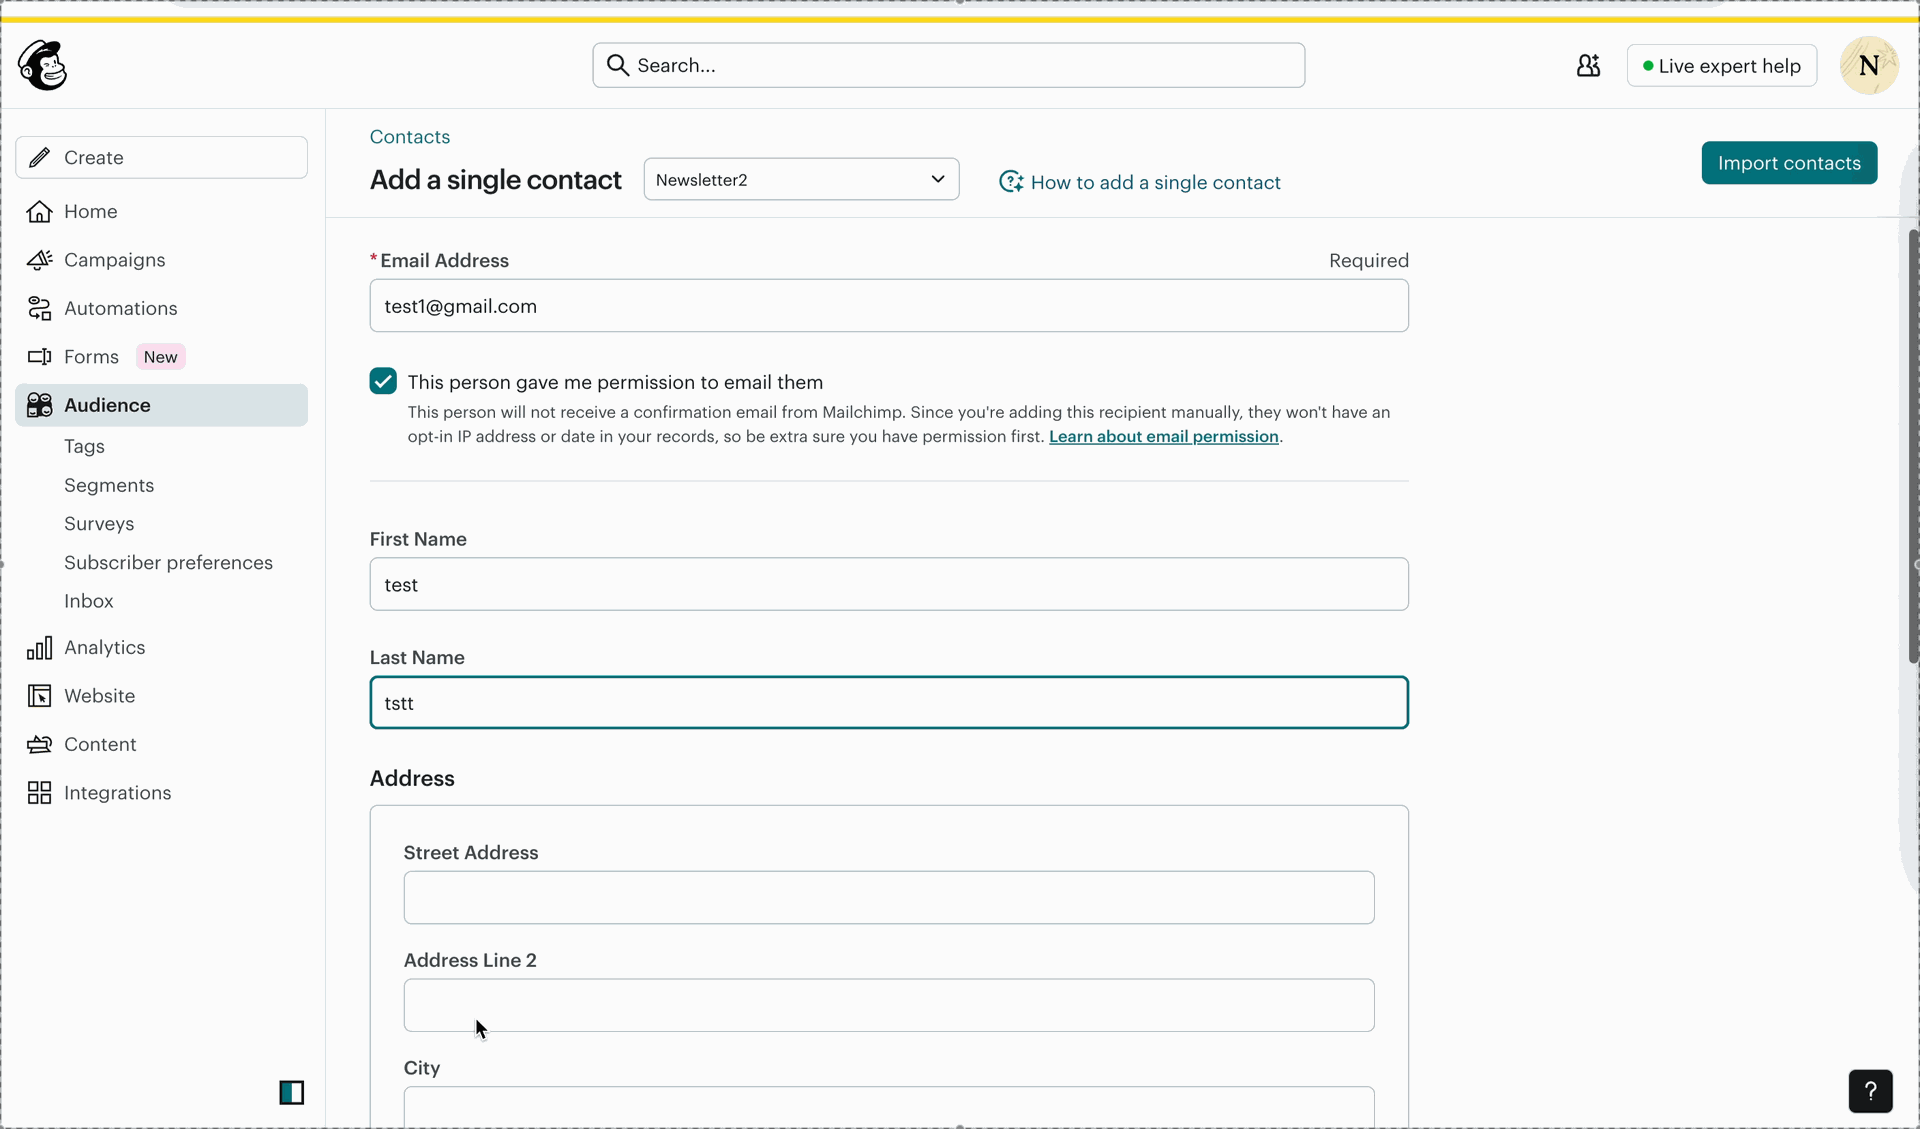
Enter contact details on the Add a single contact page in Mailchimp.
Review the imported contact profile details for the selected Mailchimp record.
Version 19.0.2.0.0 | Released on : 10th September 2026
Version 19.0.1.0.0 | Released on : 29th May 2026
- Yes, this app works perfectly with Odoo Enterprise (Odoo.sh & Premise) as well as Community.
- No, this application is not compatible with odoo.com(odoo saas/Odoo Online)
- Yes, to test this module, please contact us at sales@softhealer.com.
- Please contact us at sales@softhealer.comto request customization.
- Yes, we provide free lifetime support for the version you purchased.
- Yes, you will receive lifetime free updates for the version of the module you purchased.
- No, there is no need to install any additional libraries.
- Yes, for version 12 and above, you need to purchase the module separately for each version you intend to use.
- No, exchanges or refunds are not allowed. Please make sure to select the correct version before purchasing.
- You can contact us at support@softhealer.com for language translation support. We use Google Translator tools to provide translations in multiple languages, so the accuracy may vary. We welcome your suggestions to help improve translations.
Discover Our Latest Apps