












Activities Management-Advance

Manage, track, automate, and monitor all your business activities in one powerful dashboard. Whether you're a sales manager, team leader, or employee, this module gives complete visibility and control over tasks, follow-ups, and performance.
Related Modules
Key Features
Features
Features
-
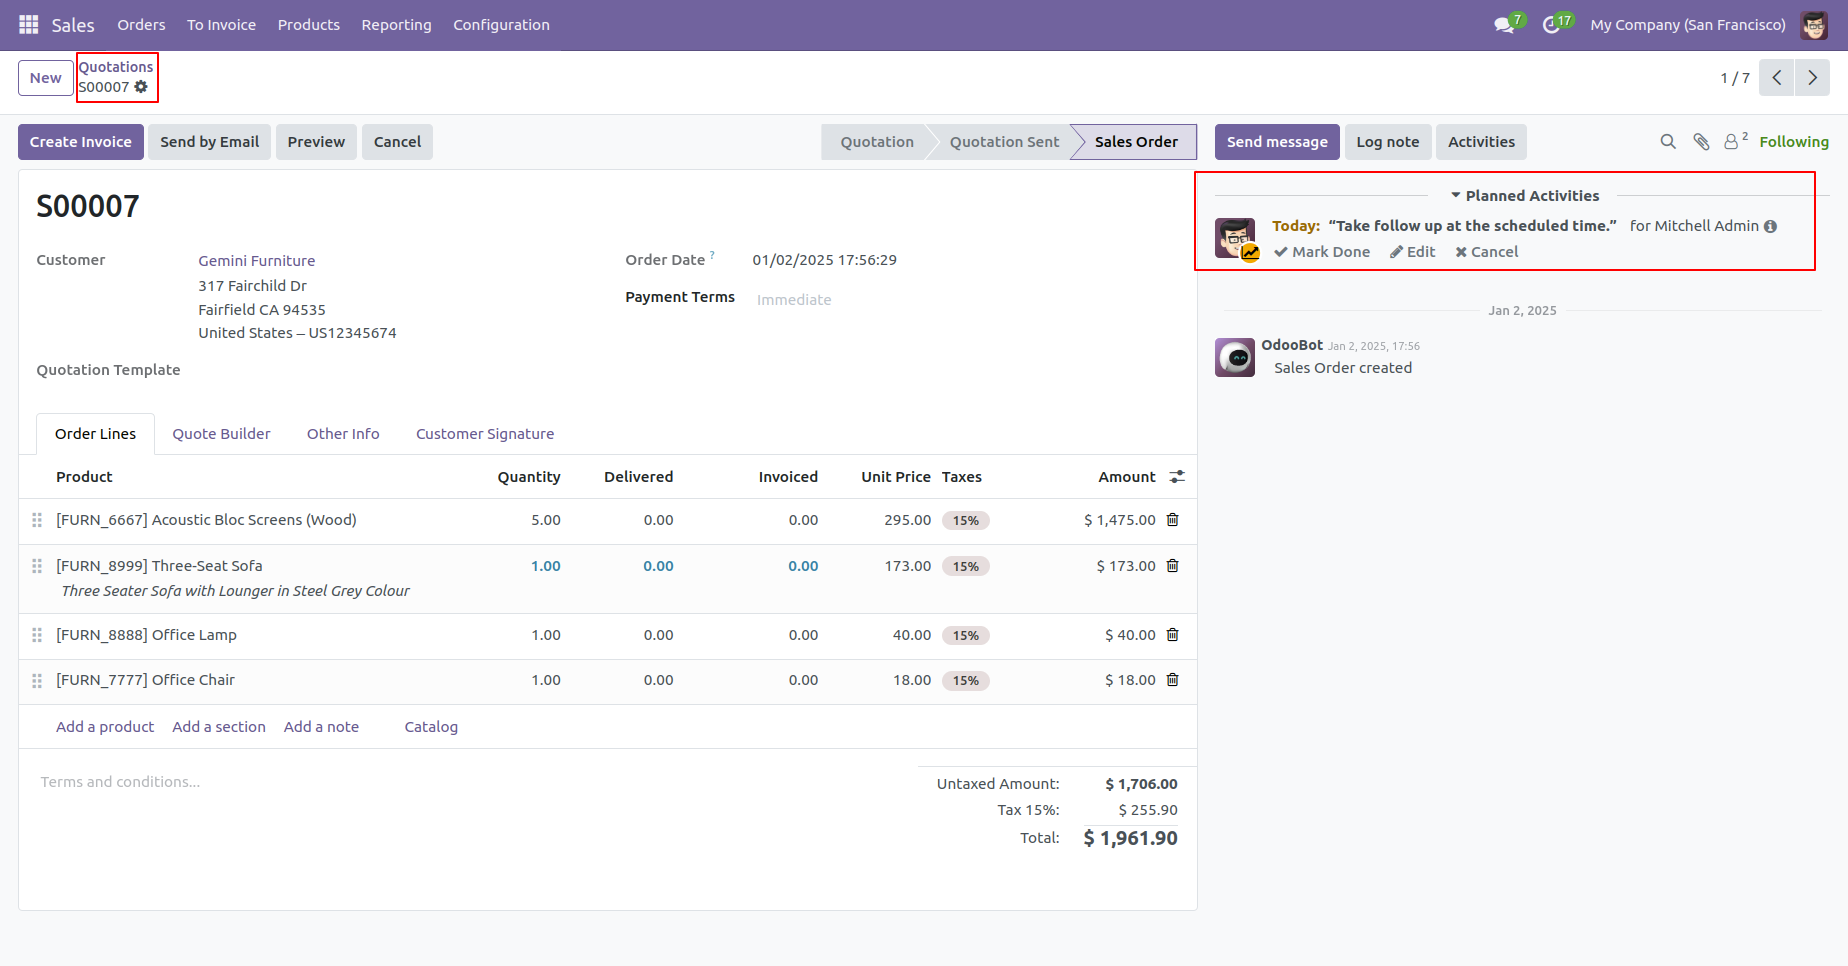
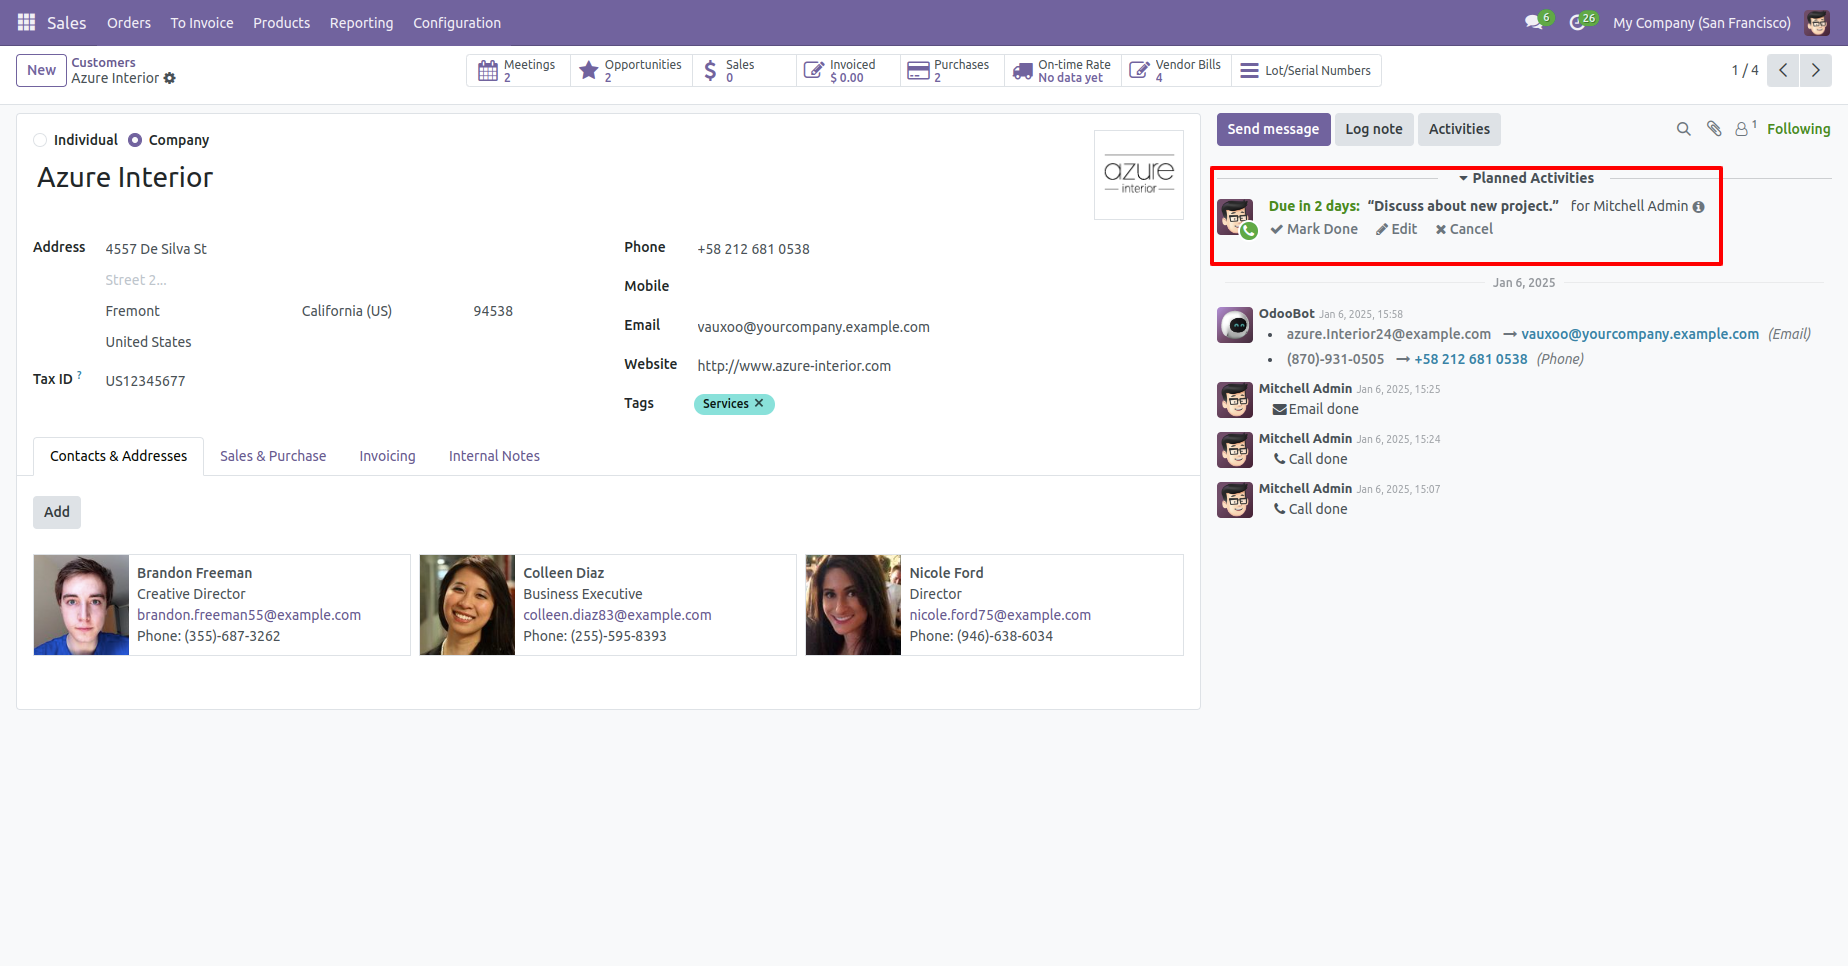
The user's assigned history appears in the chatter.

-
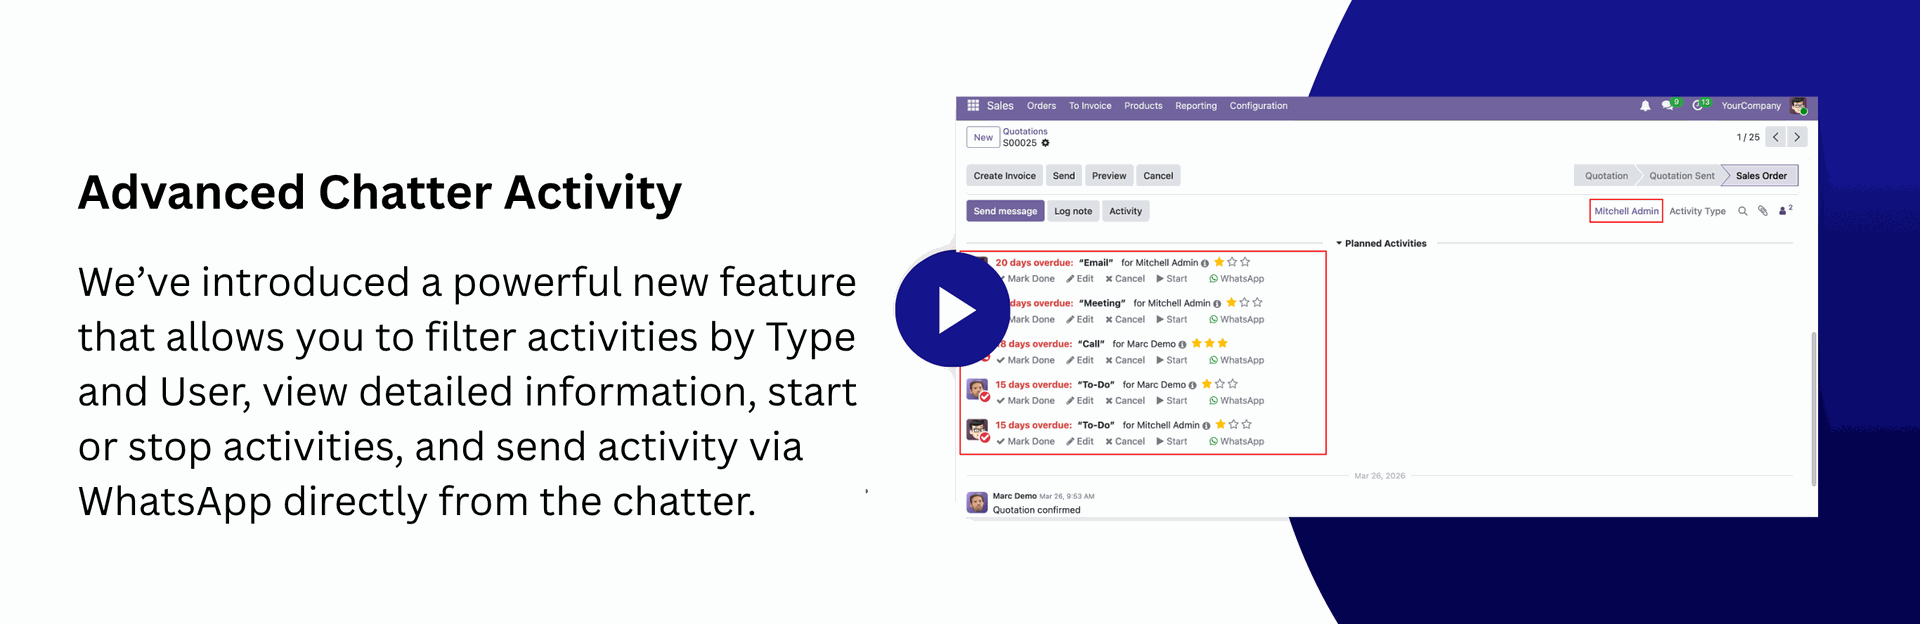
You can share an activity via WhatsApp.
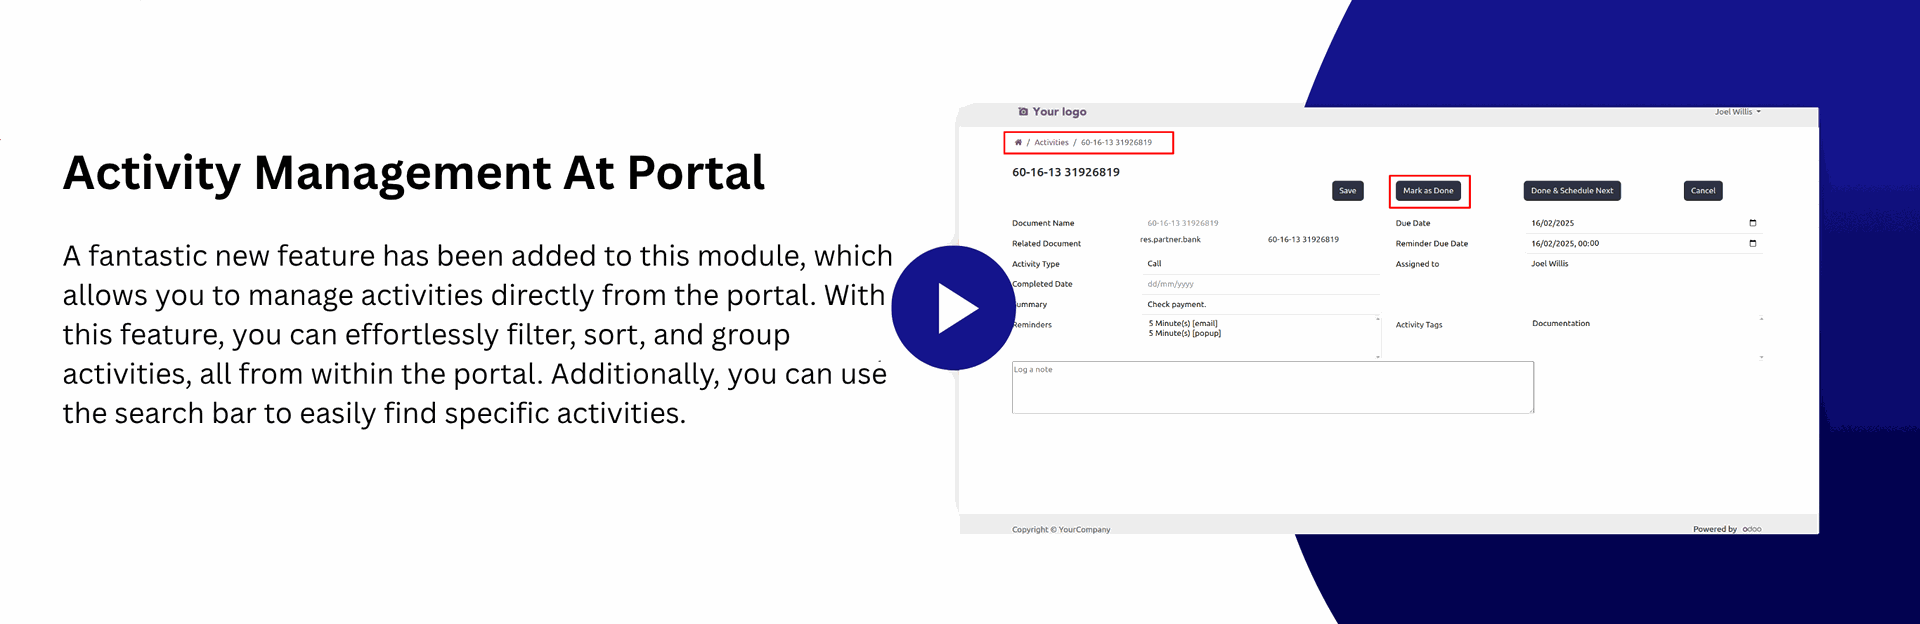
- You can manage activities using portal.
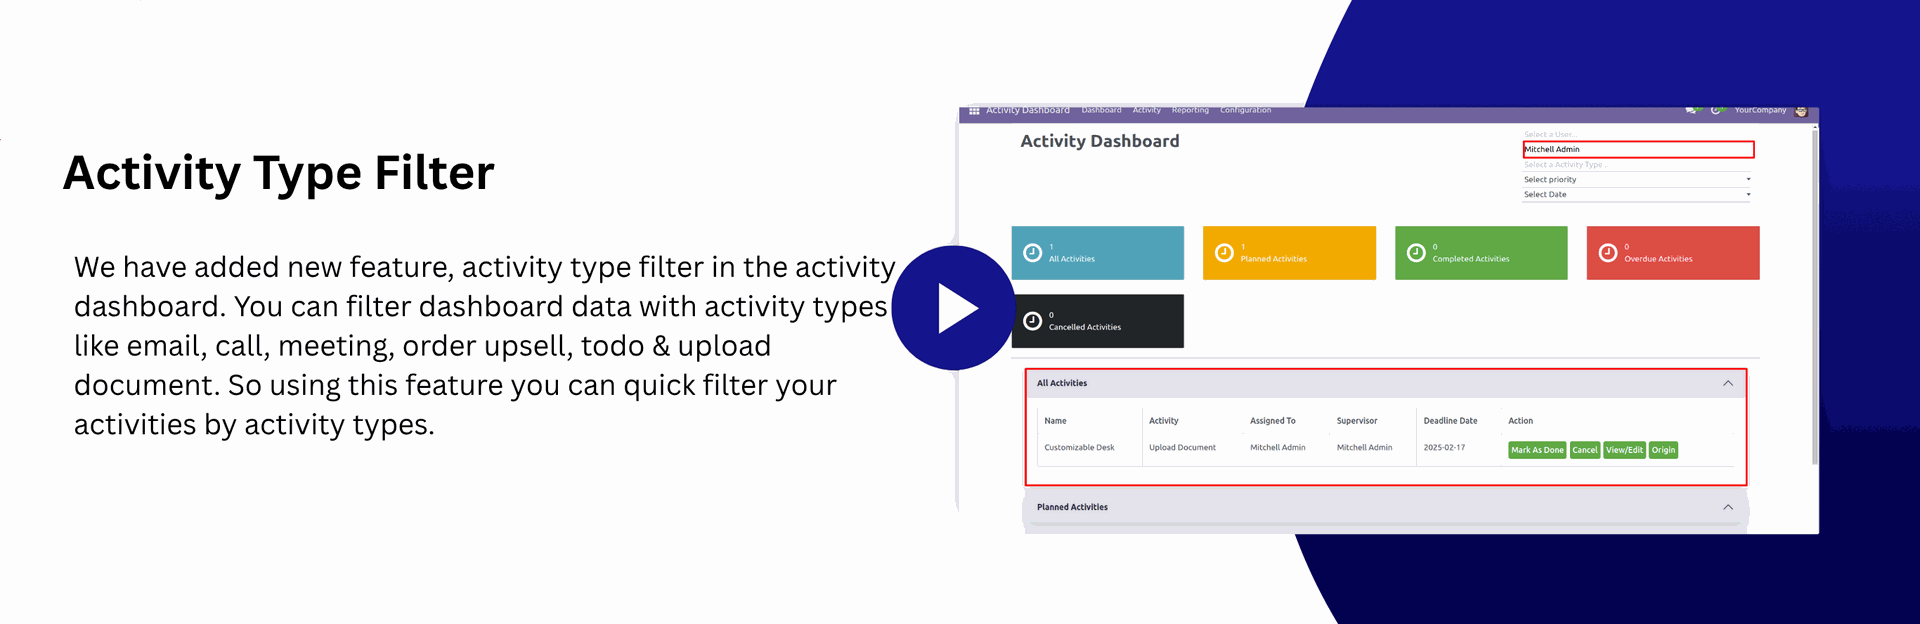
- You can filter activities by activity types in the dashboard.
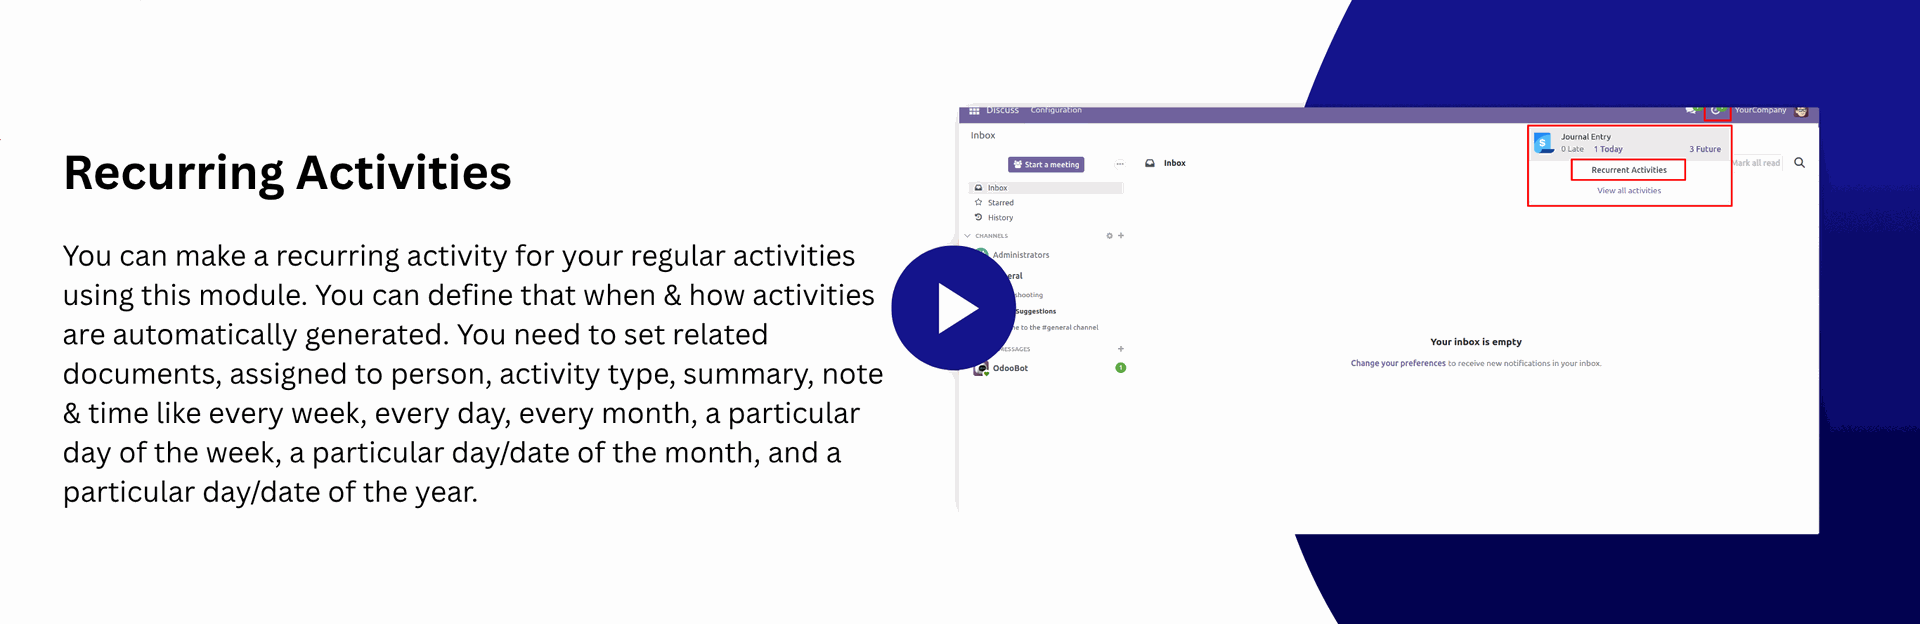
- You can set and generate recurring activities.
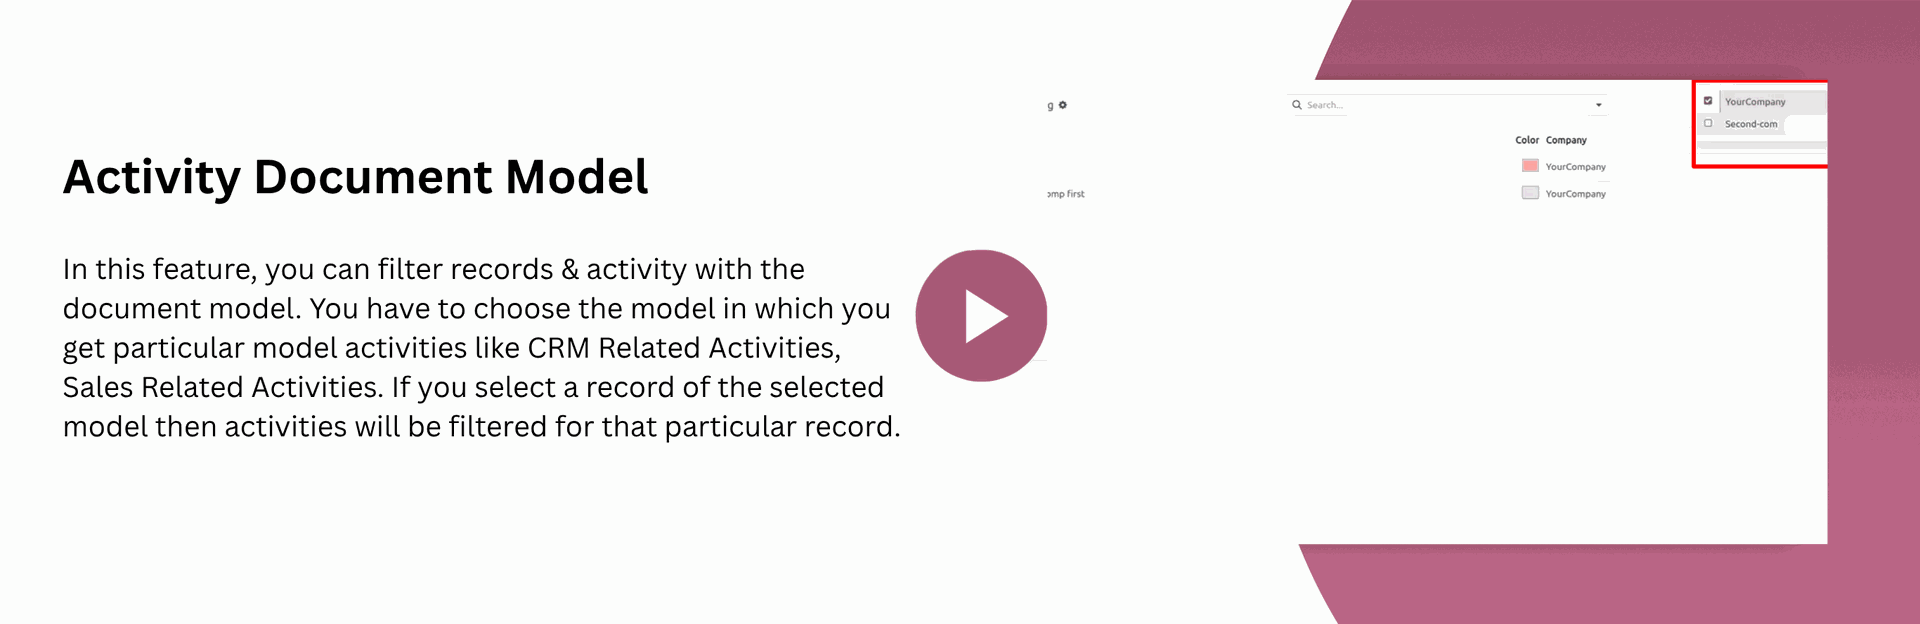
- You can filter activity/record document model wise.
- The "Create" button is added in the "All Activities" view so you can create any model activity from that.
- You can edit multiple records in activity list view.
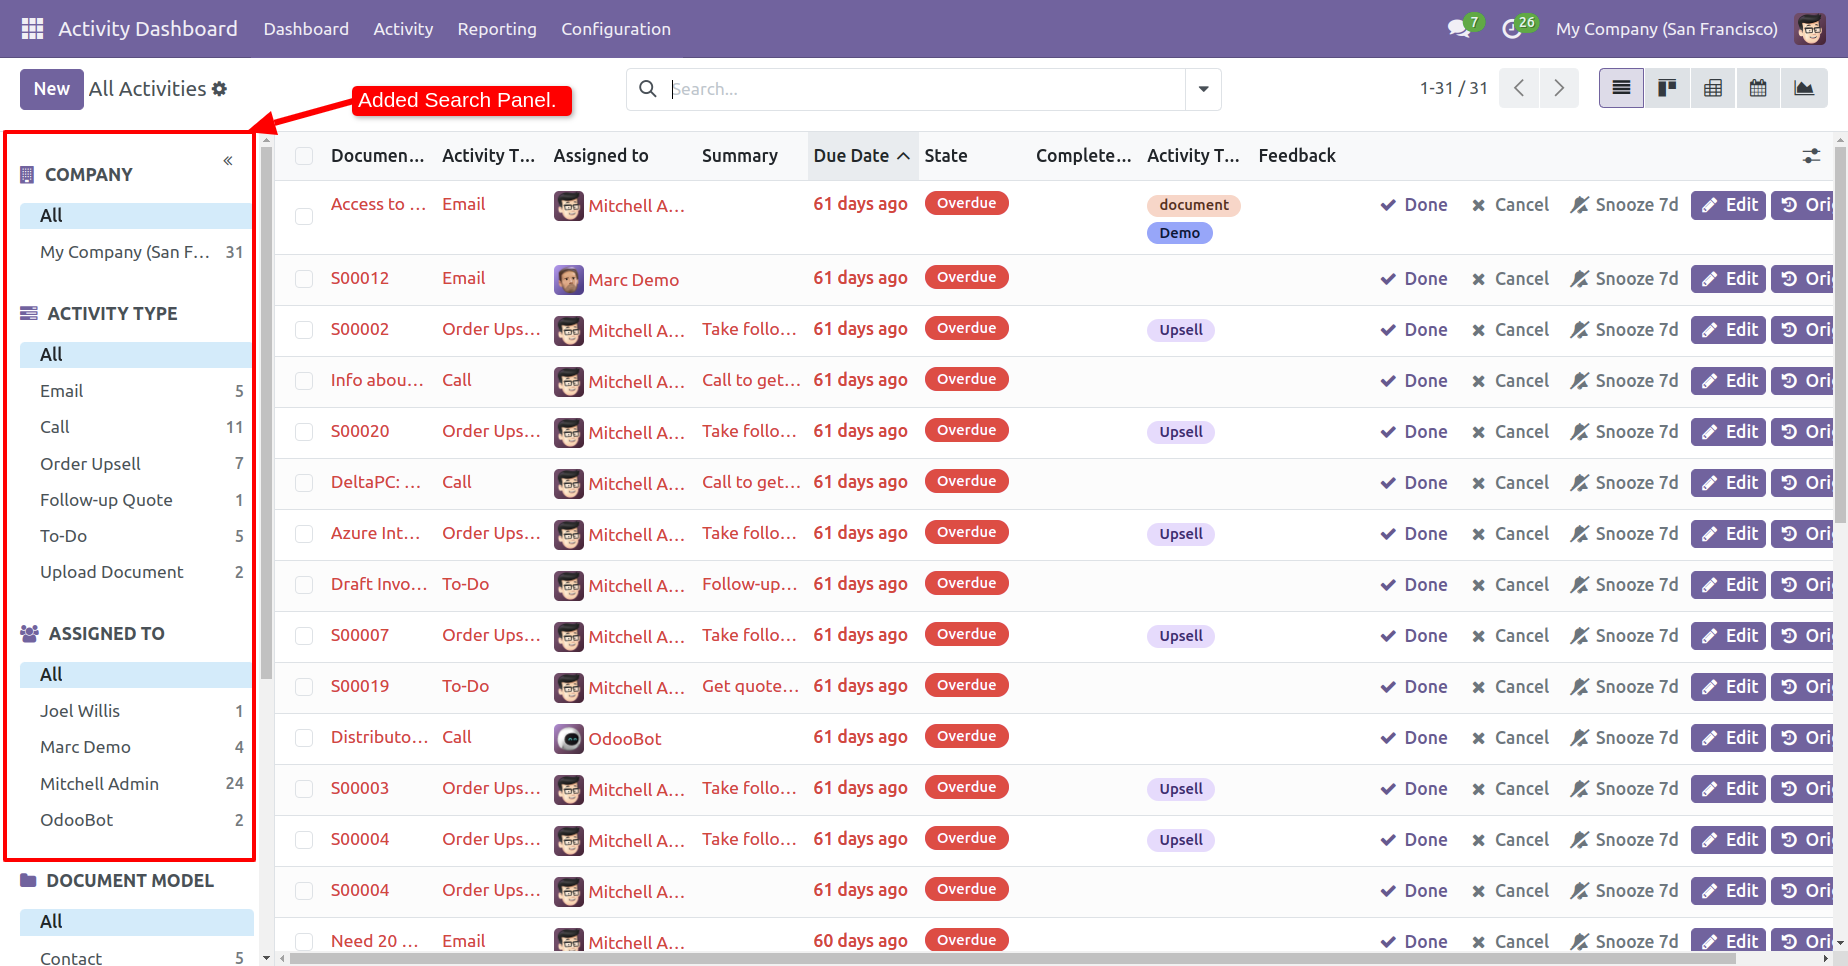
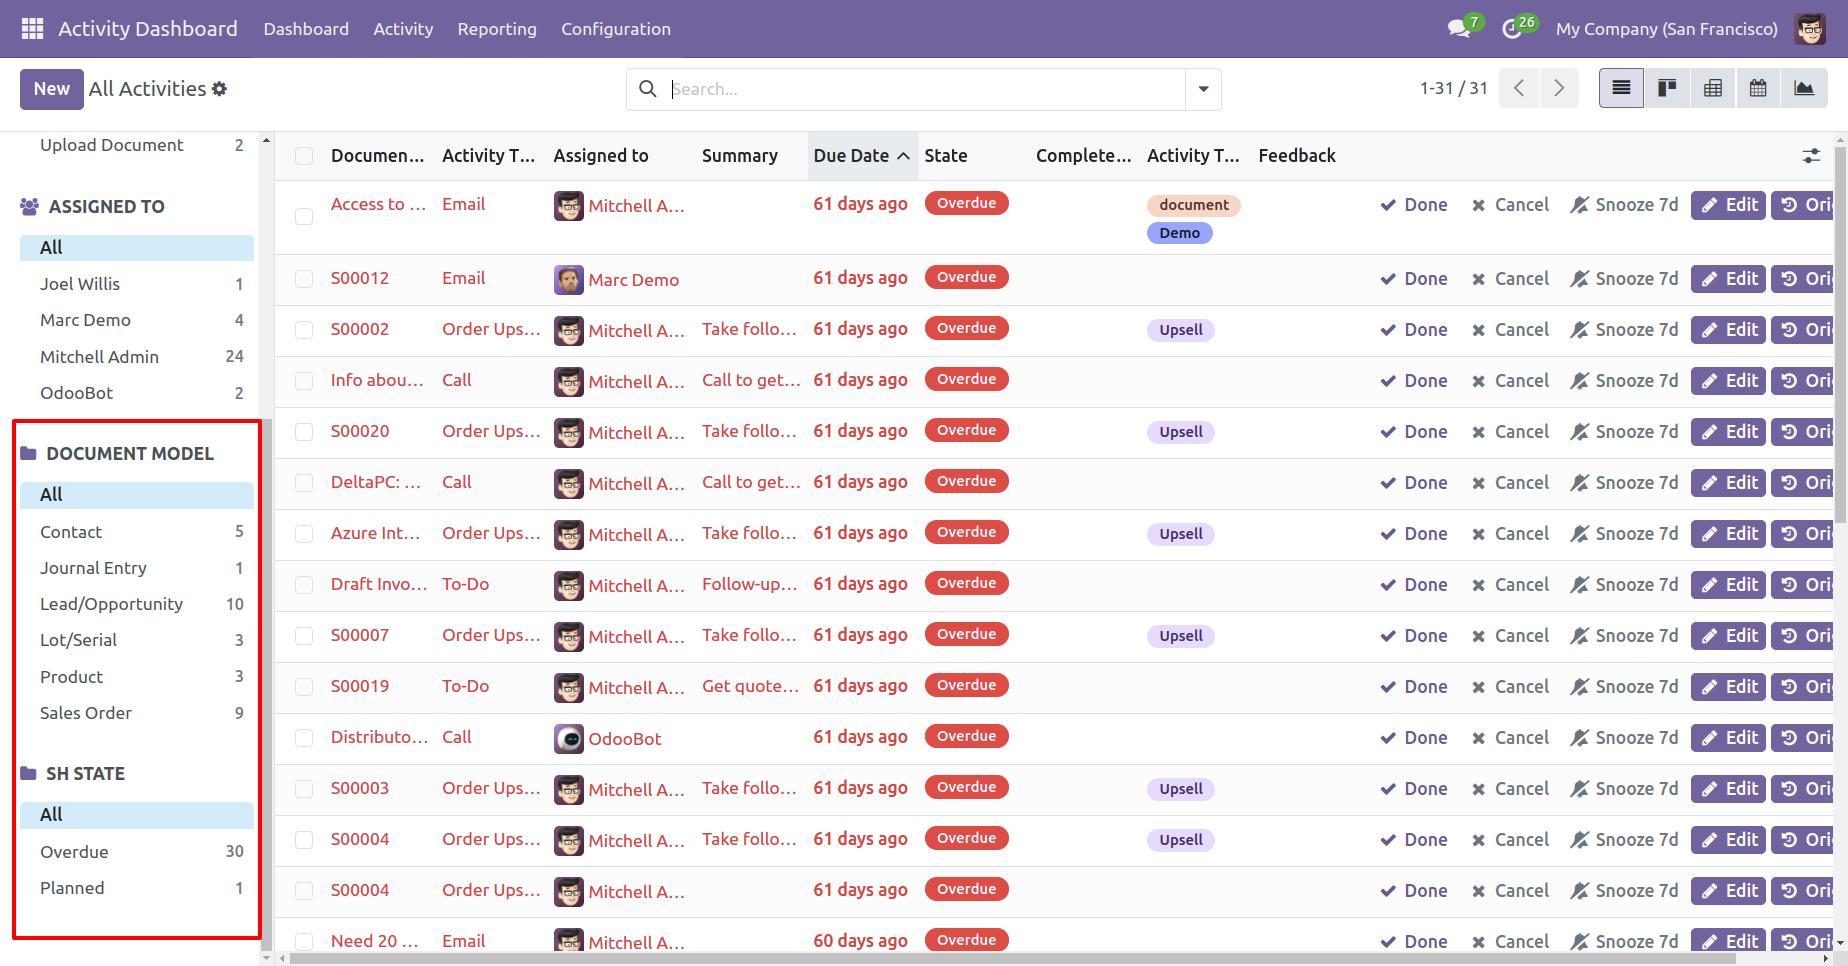
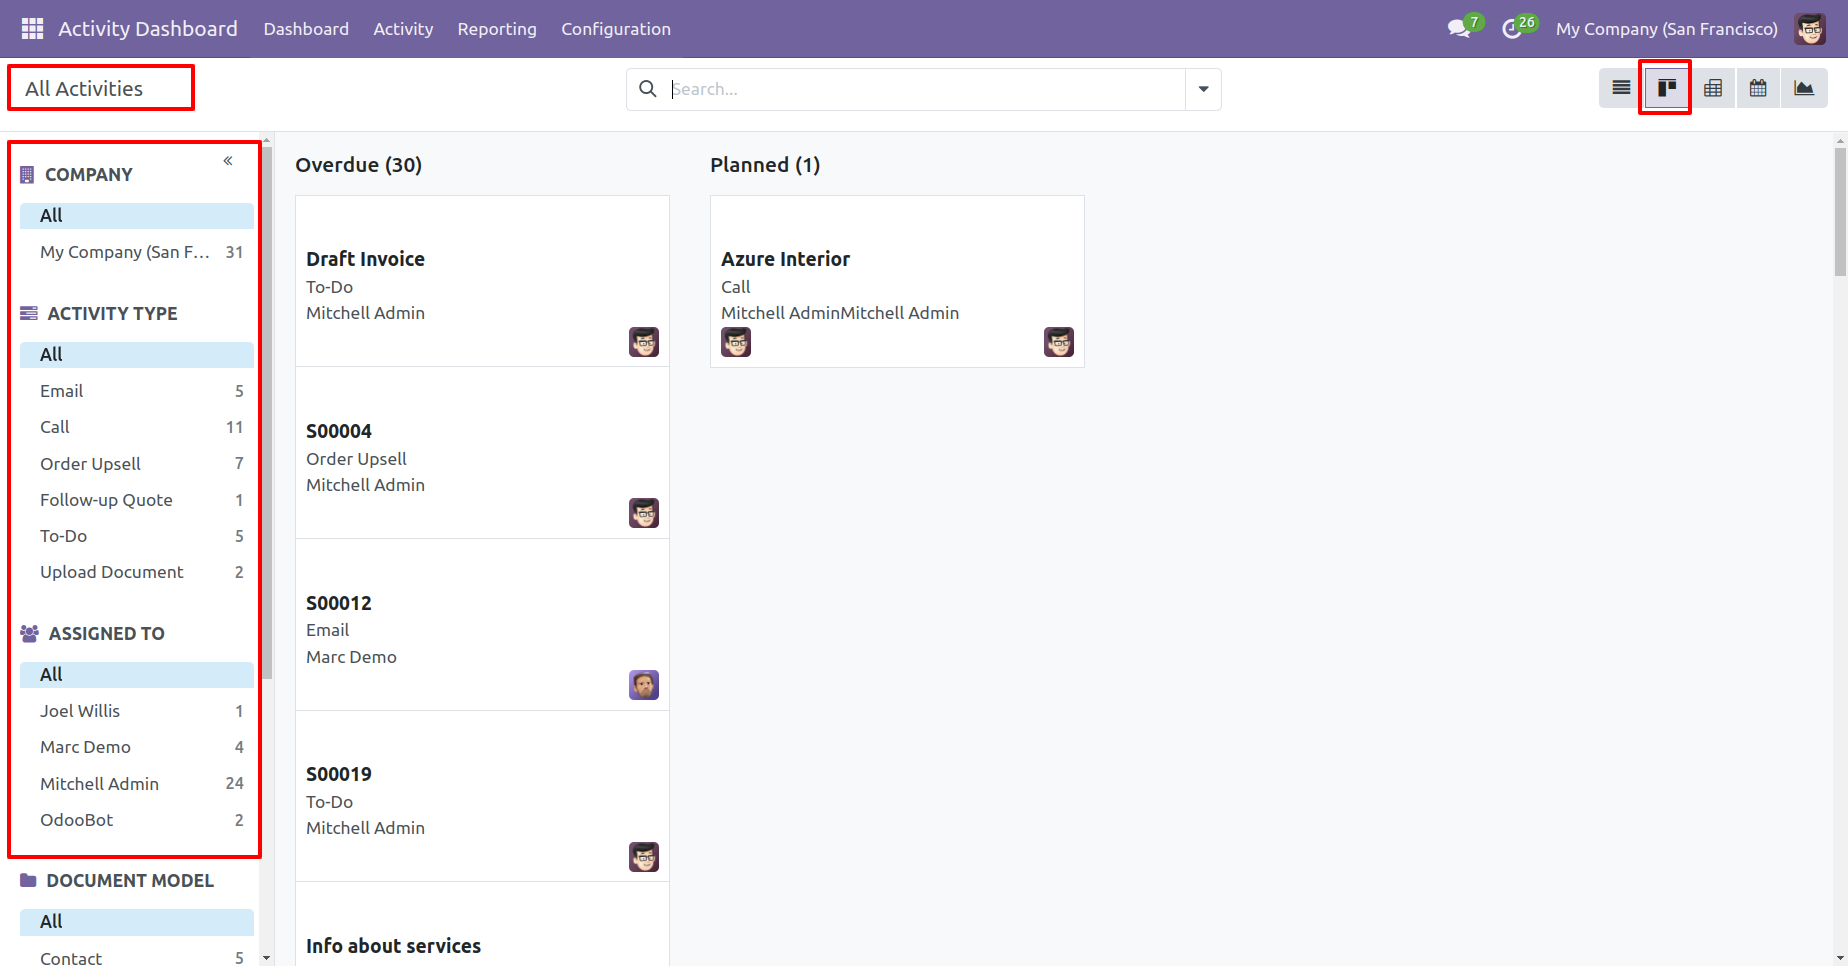
- Easy to use search panel in the list & kanban view.
- You can edit records from the activity dashboard.
- You can set an activity reminder/notification for different activities.
- The "Create" button is added in the "All Activities" view so you can create any model activity from that.
- You can hide/show the data table in the dashboard.
- You can cancel activities from the activity tree view, form view and data tables.
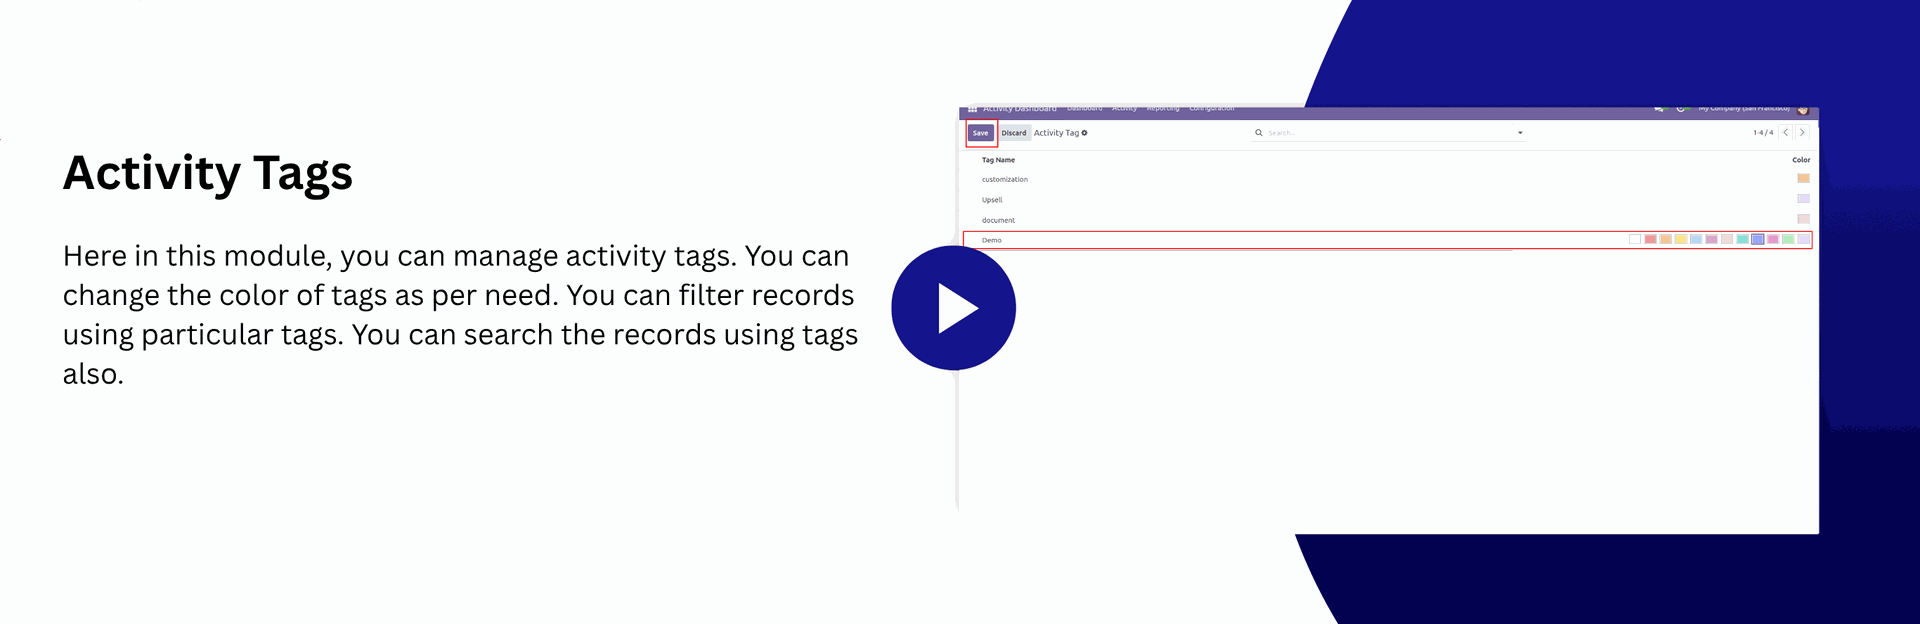
- You can manage activity tags as per activities.
- You can filter cancelled activities by the "Cancel Activities" filter.
- You can "Cancel" & "Mark as done" multiple activities.
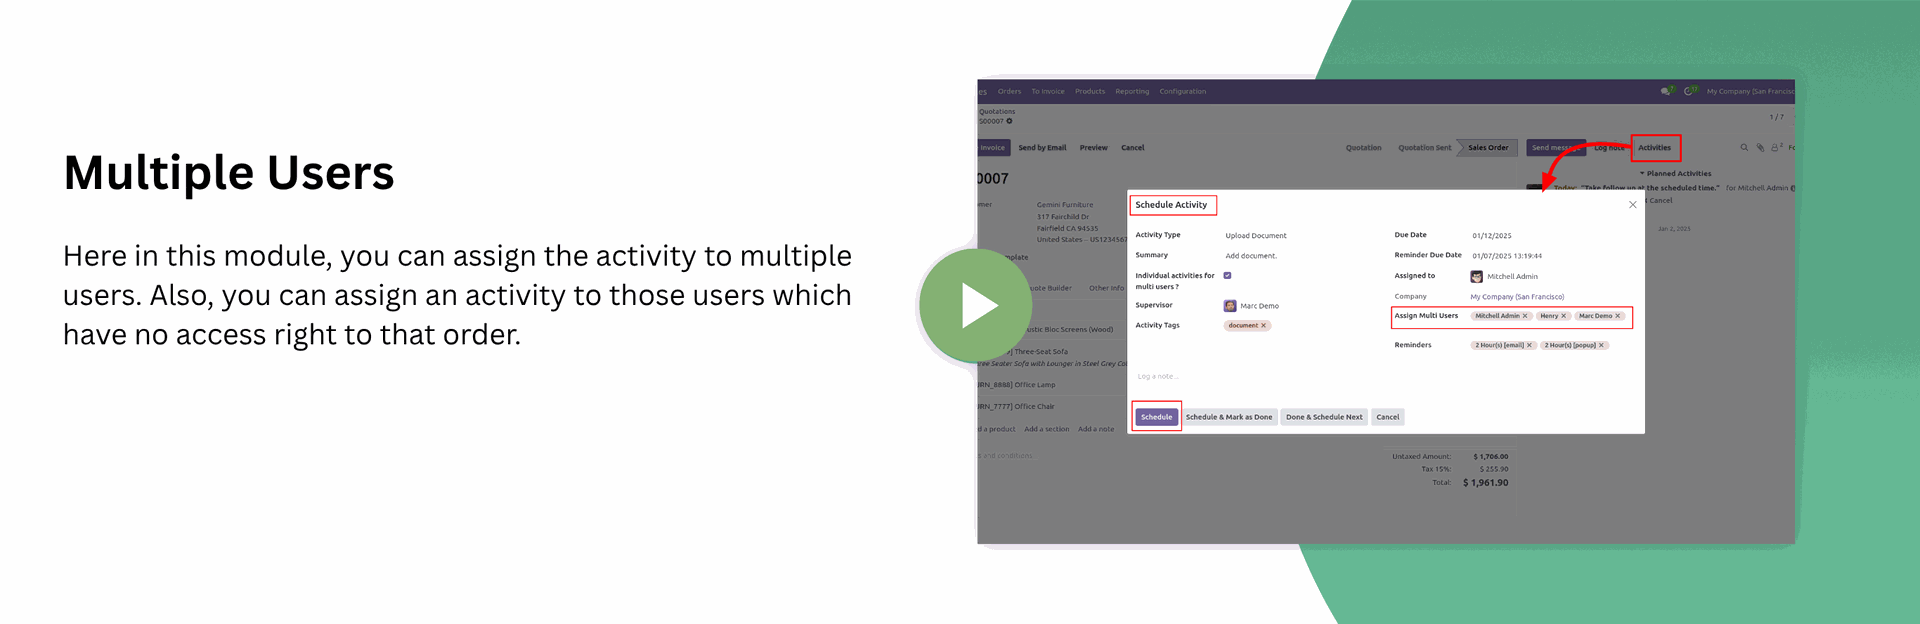
- You can assign activities individually to multiple users.
- You can set pagination in the activity dashboard.
- You can assign activities to multiple users.
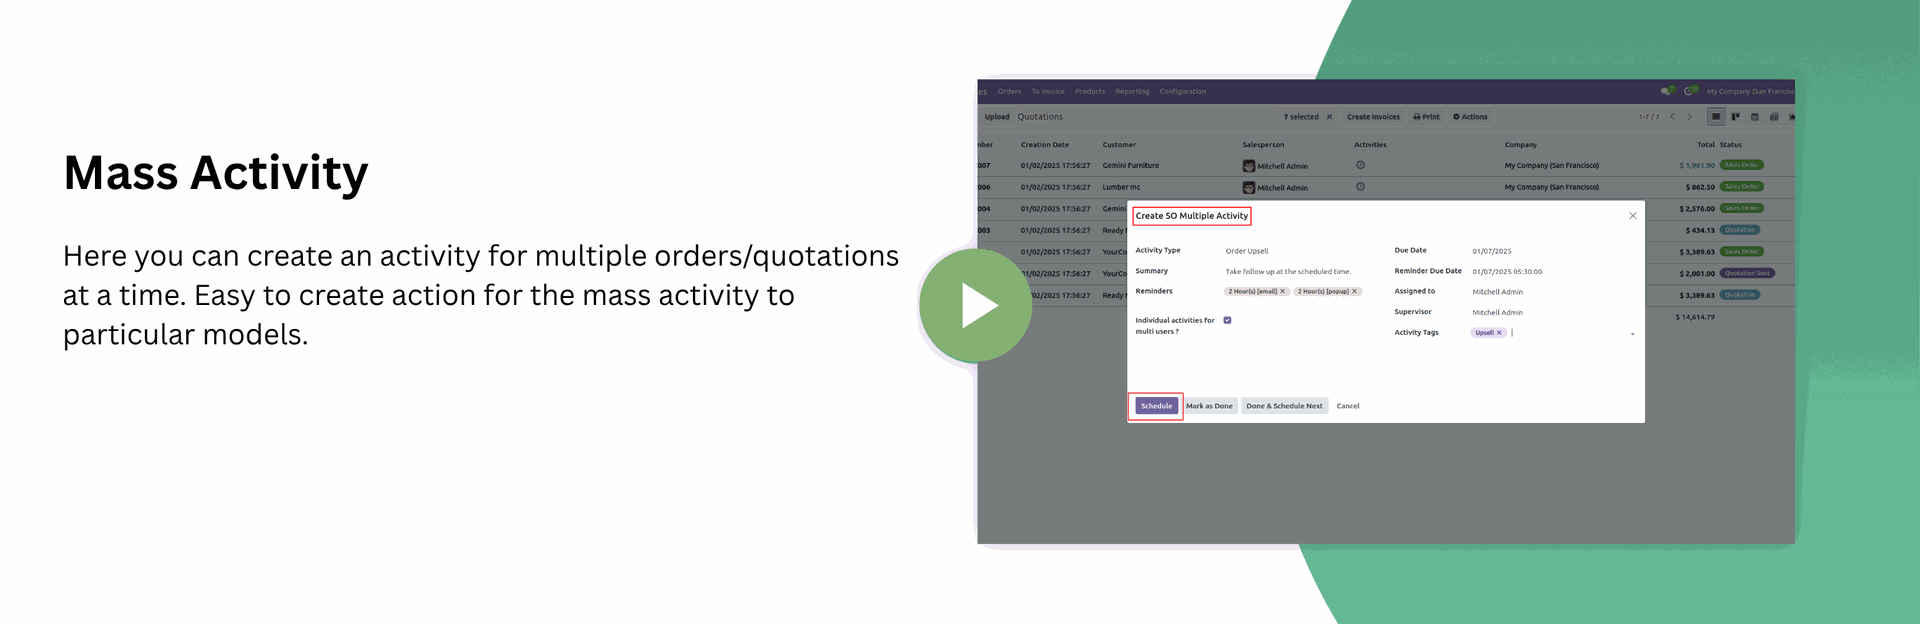
- You can make action for mass activities dynamically for any odoo model.
- You can add feedback/comment on done activity from the dashboard and activity form view.
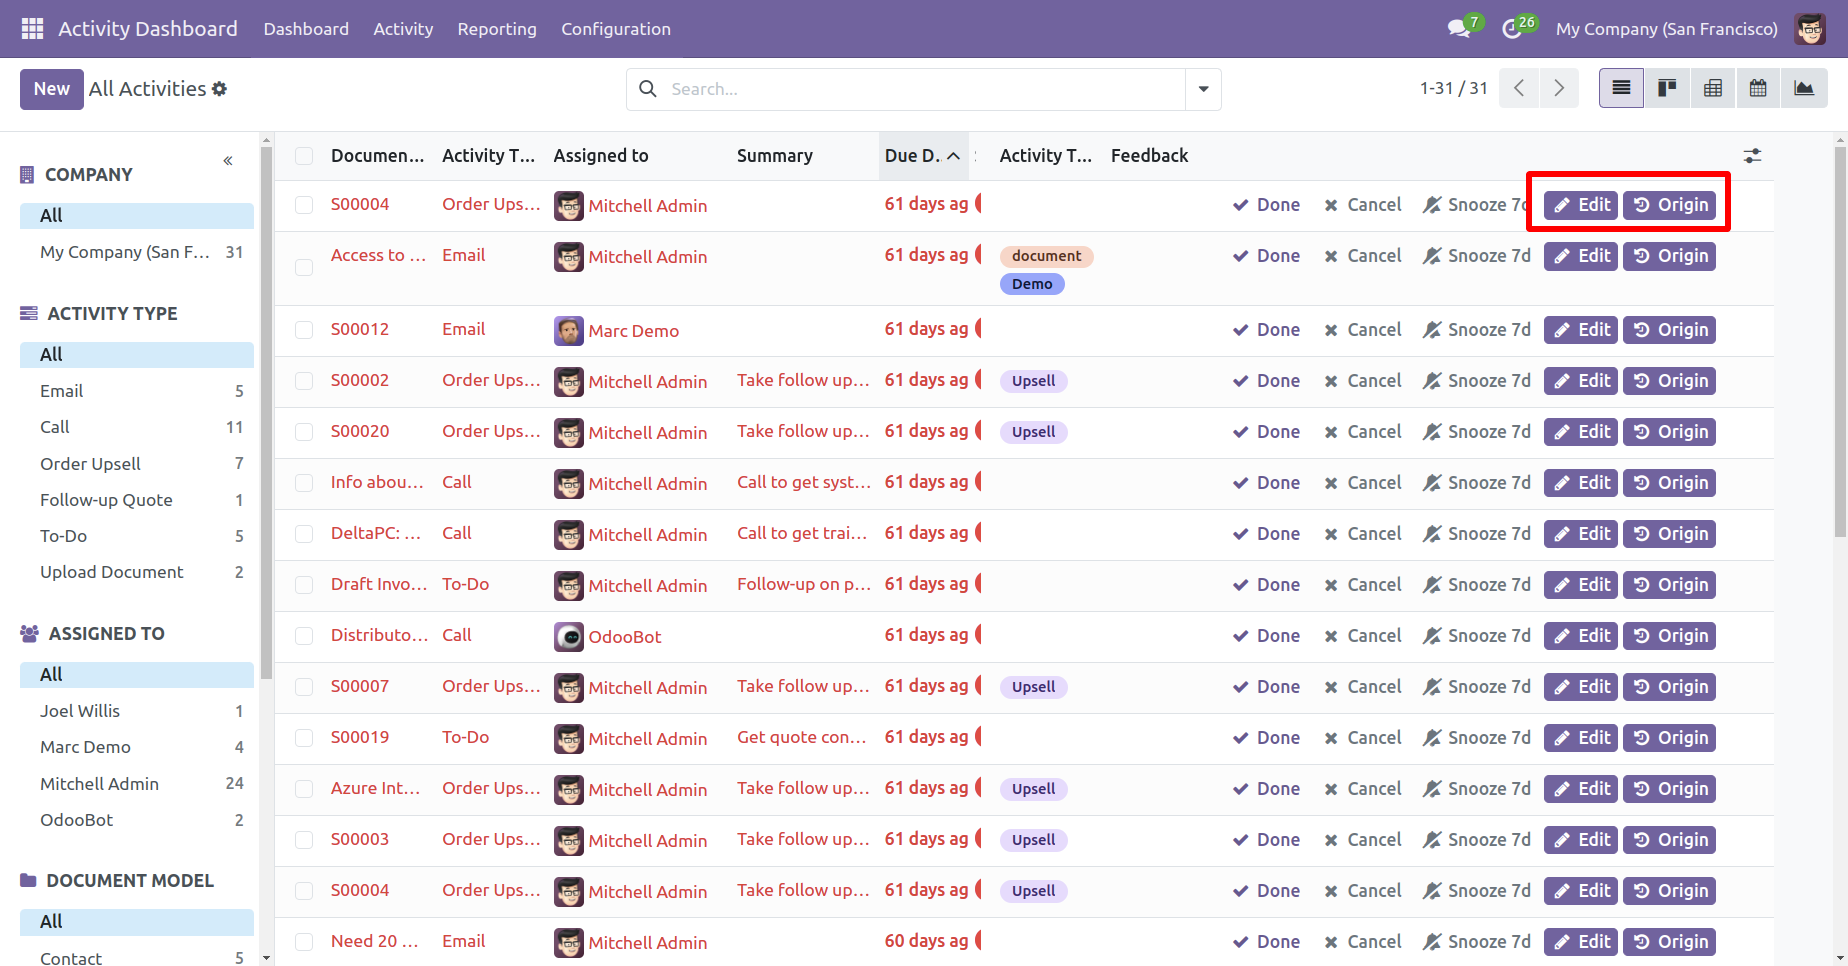
- We have one more button called "Origin" to open the activity origin source document(a record).
- Done & Schedule Next Feature From Activity Form View.
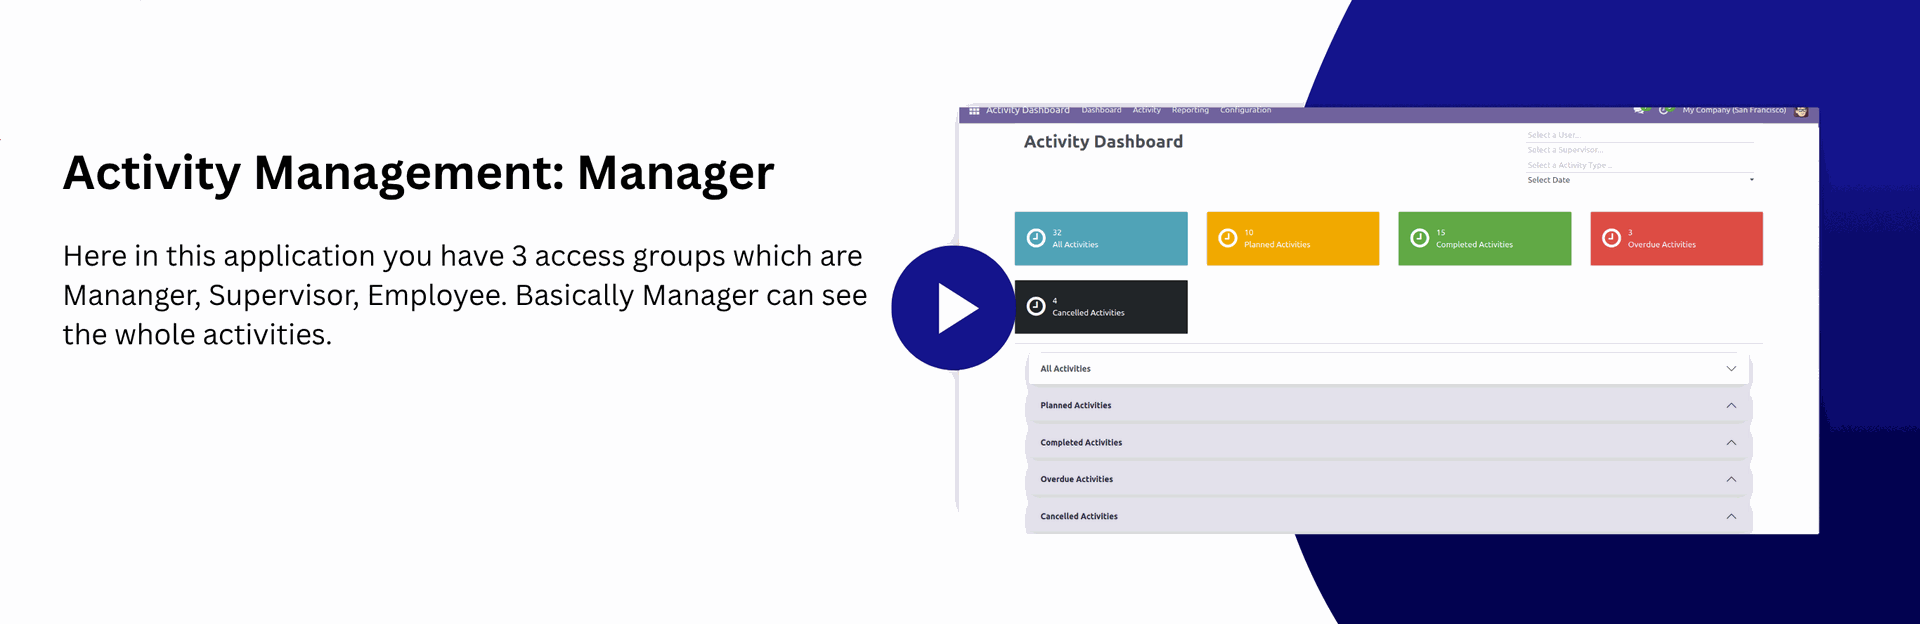
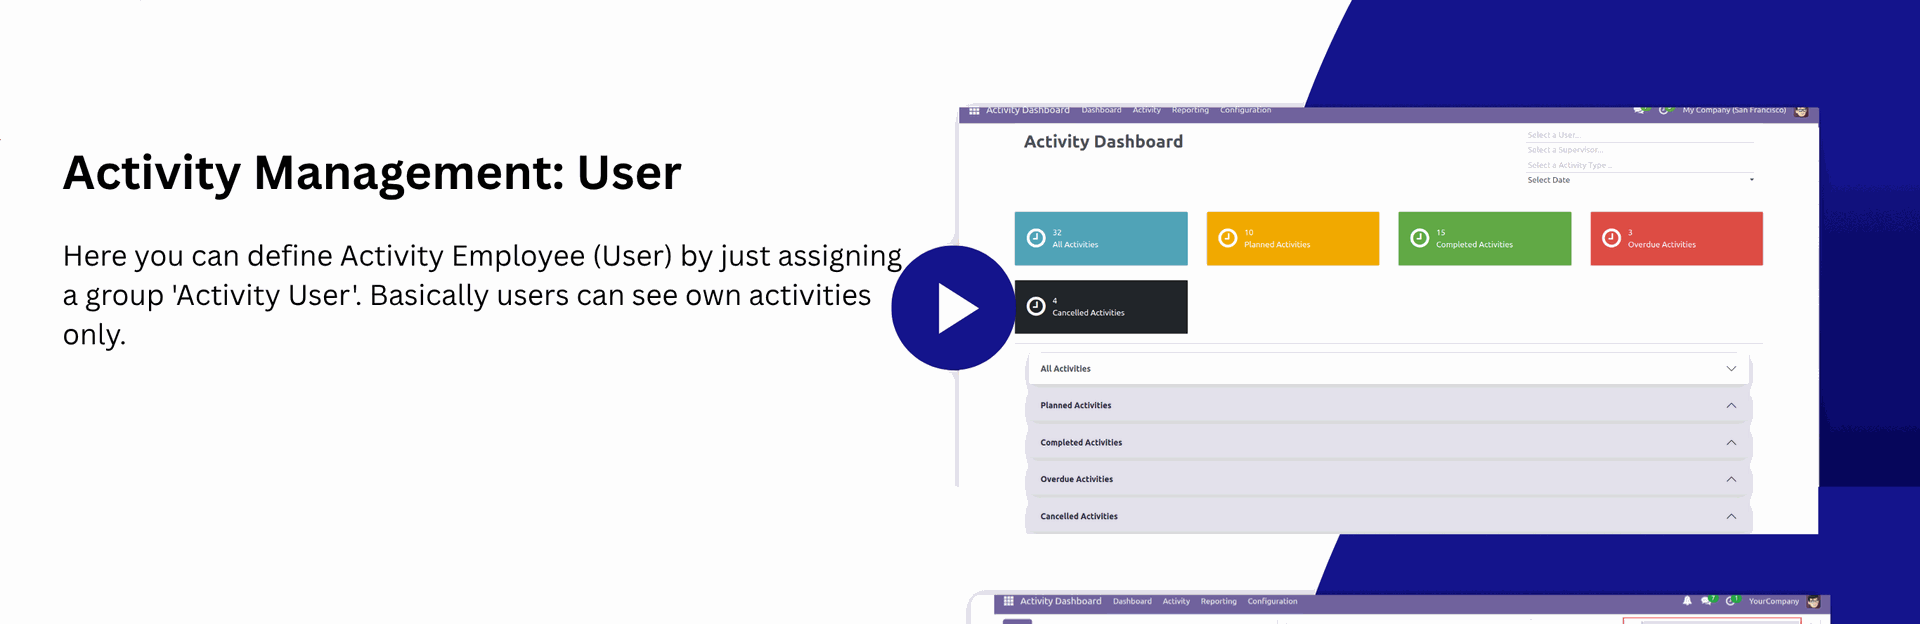
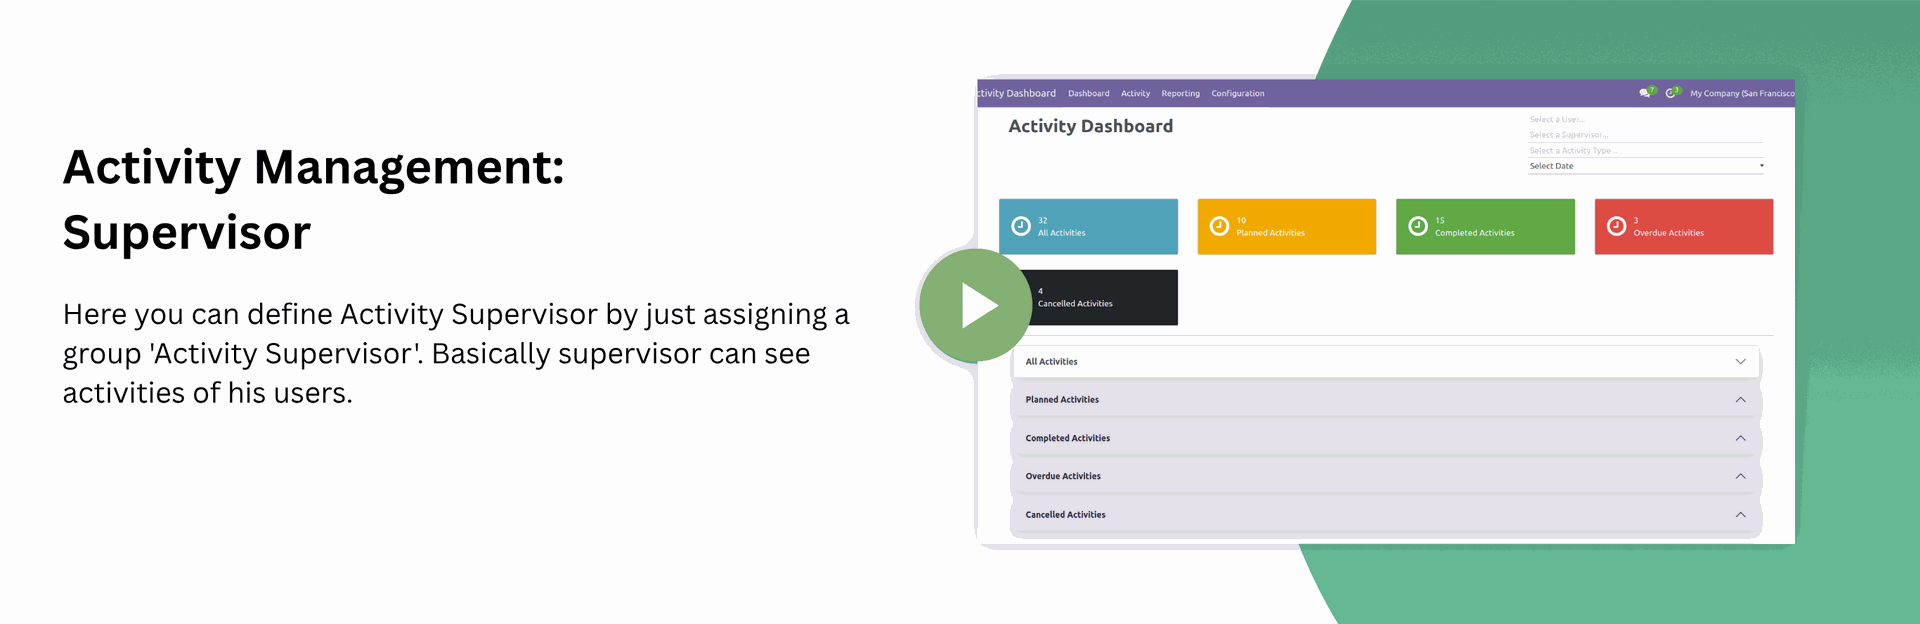
- The manager, supervisor & employee can see all activities, planned activities, completed activities or overdue activities.
- Everyone can filter activity by the previous year, previous month, previous week, today, yesterday, tomorrow, weekly, monthly, yearly & custom dates.
- We have provided a separate activity menu to see list view, form view, tree view & search view.
- Easy to notify persons for activity before the due date so that they can be aware of that activity.
- Easy to set a schedule to notify a salesperson before and after the due date of the activity.
- Easy to set schedule execution time in scheduled Action like Day/Week/Month/Year.
- Automatically create an email after the set schedule for notifying to a salesperson.
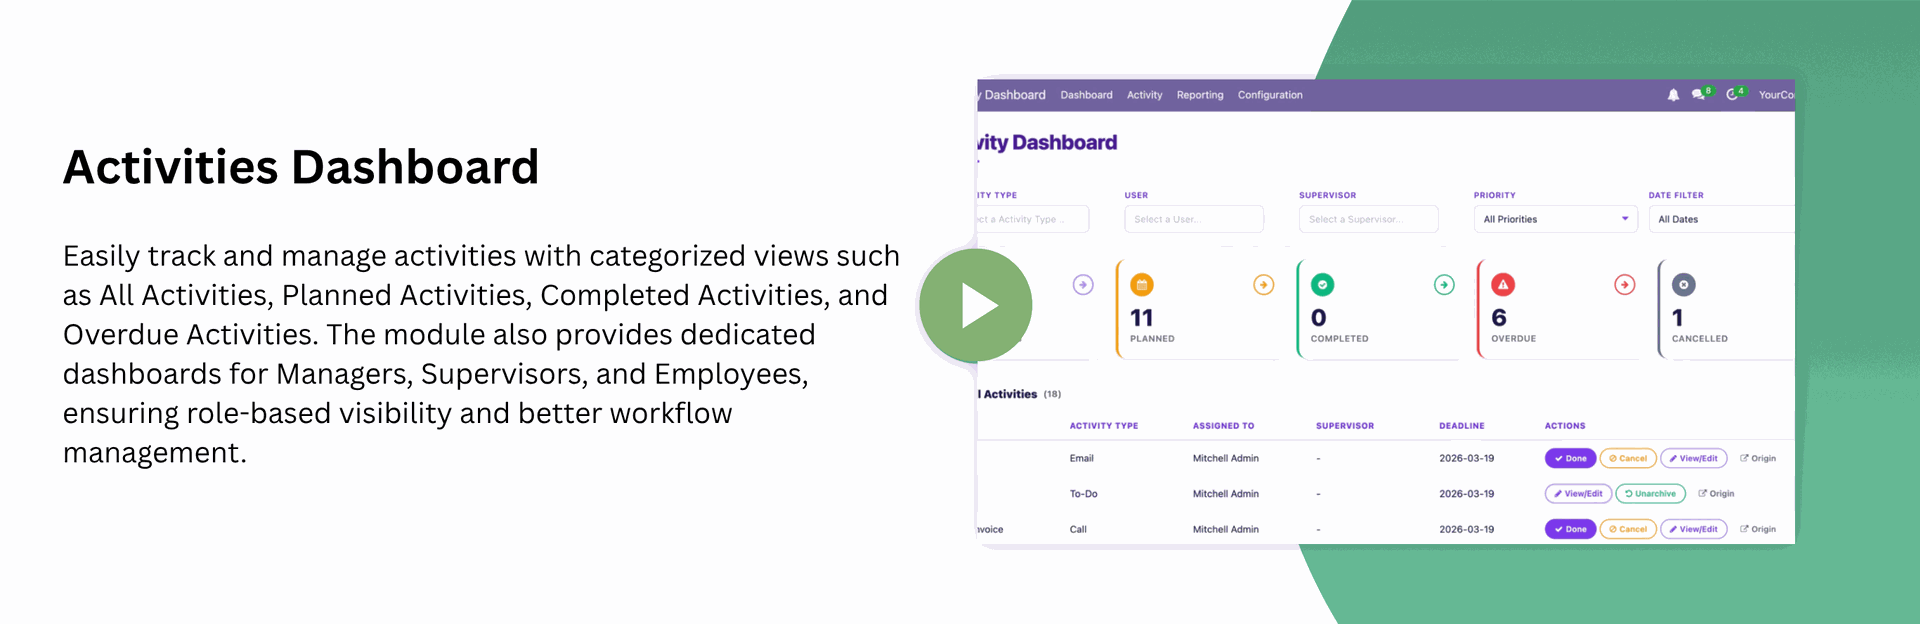
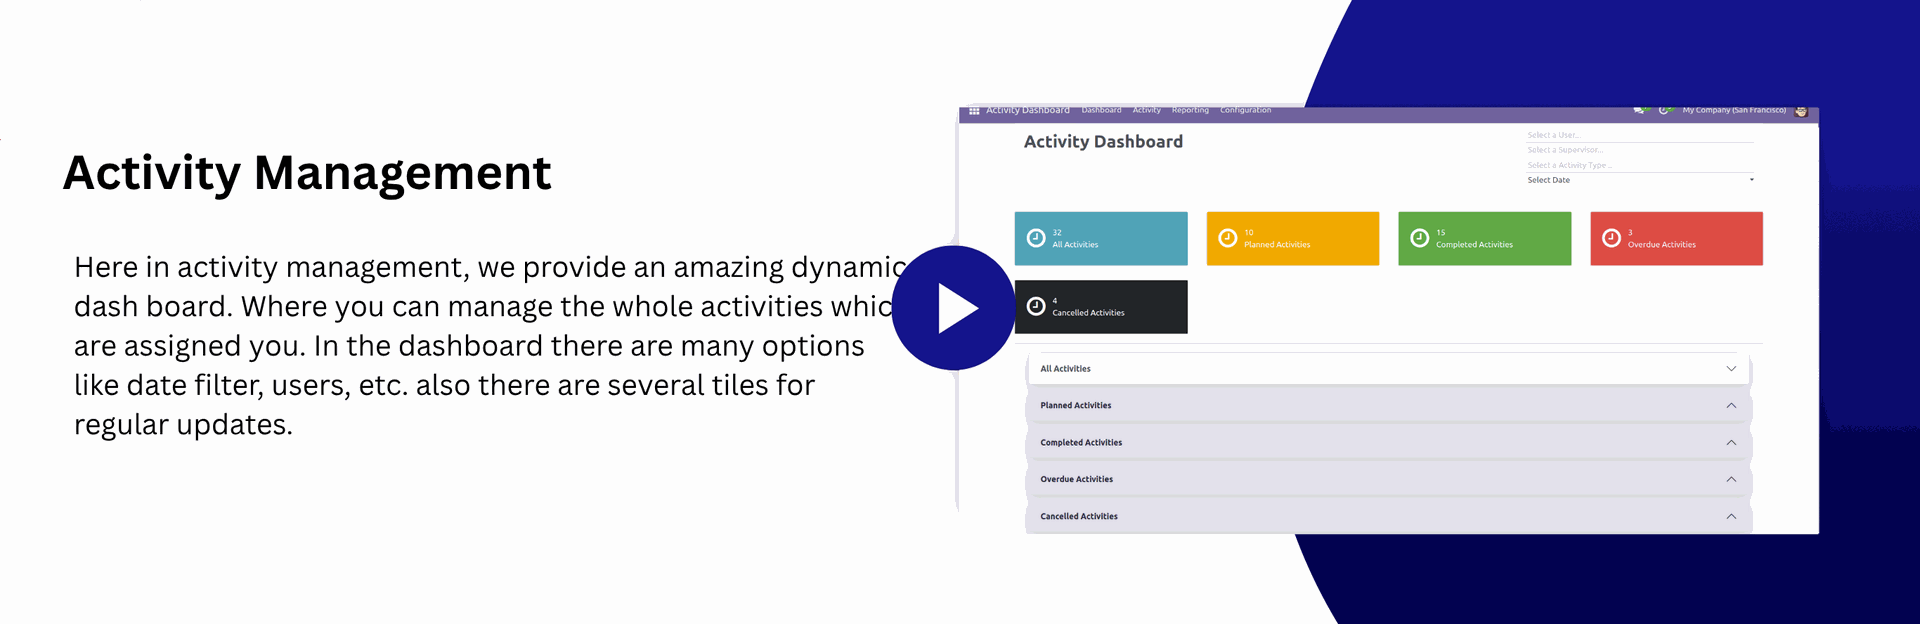
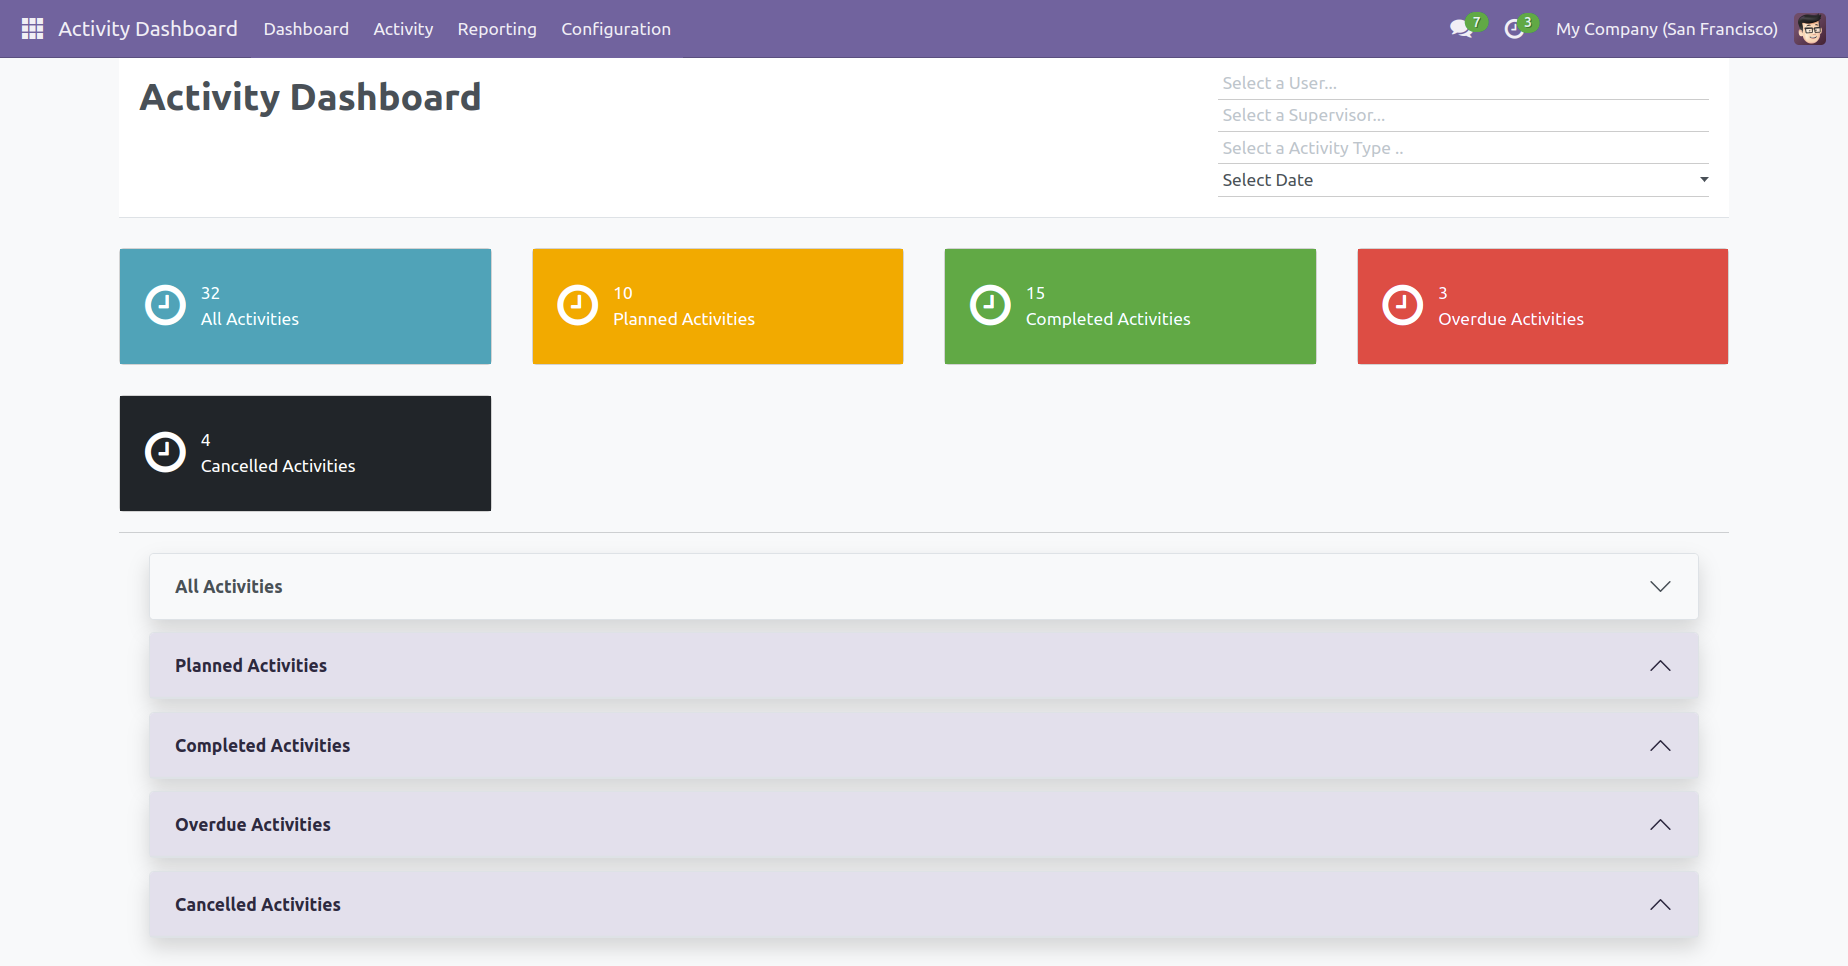
See all your activities in one place.
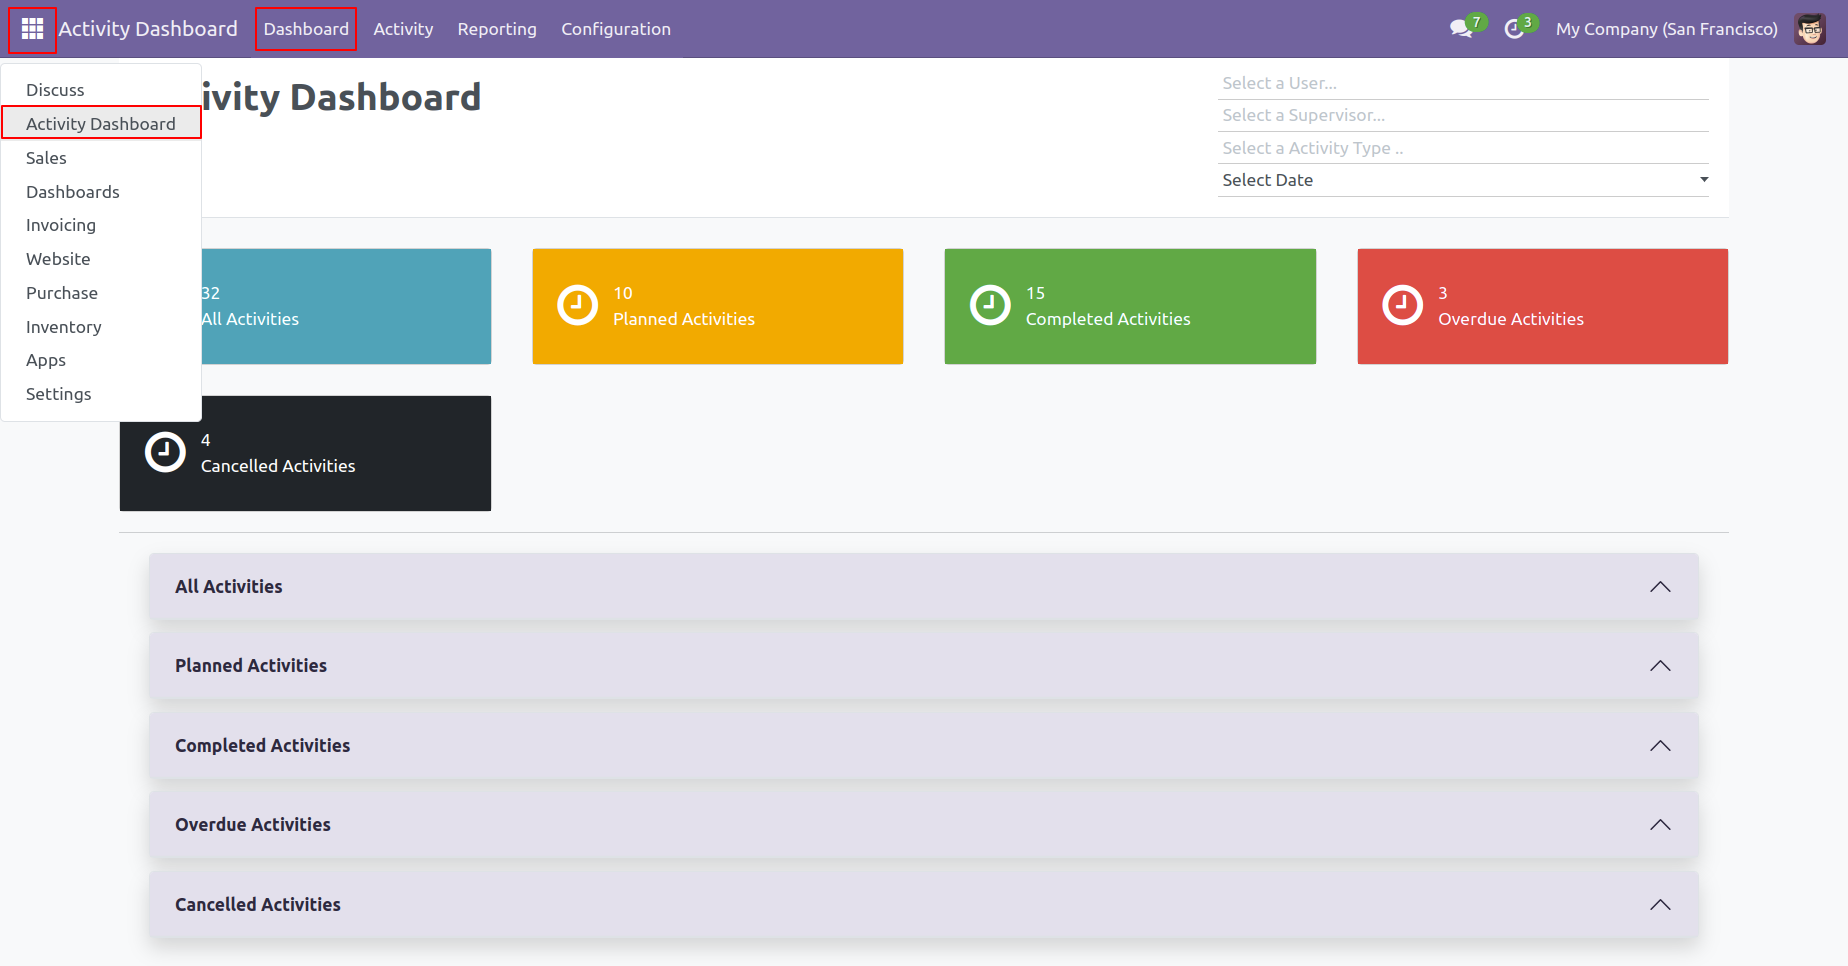
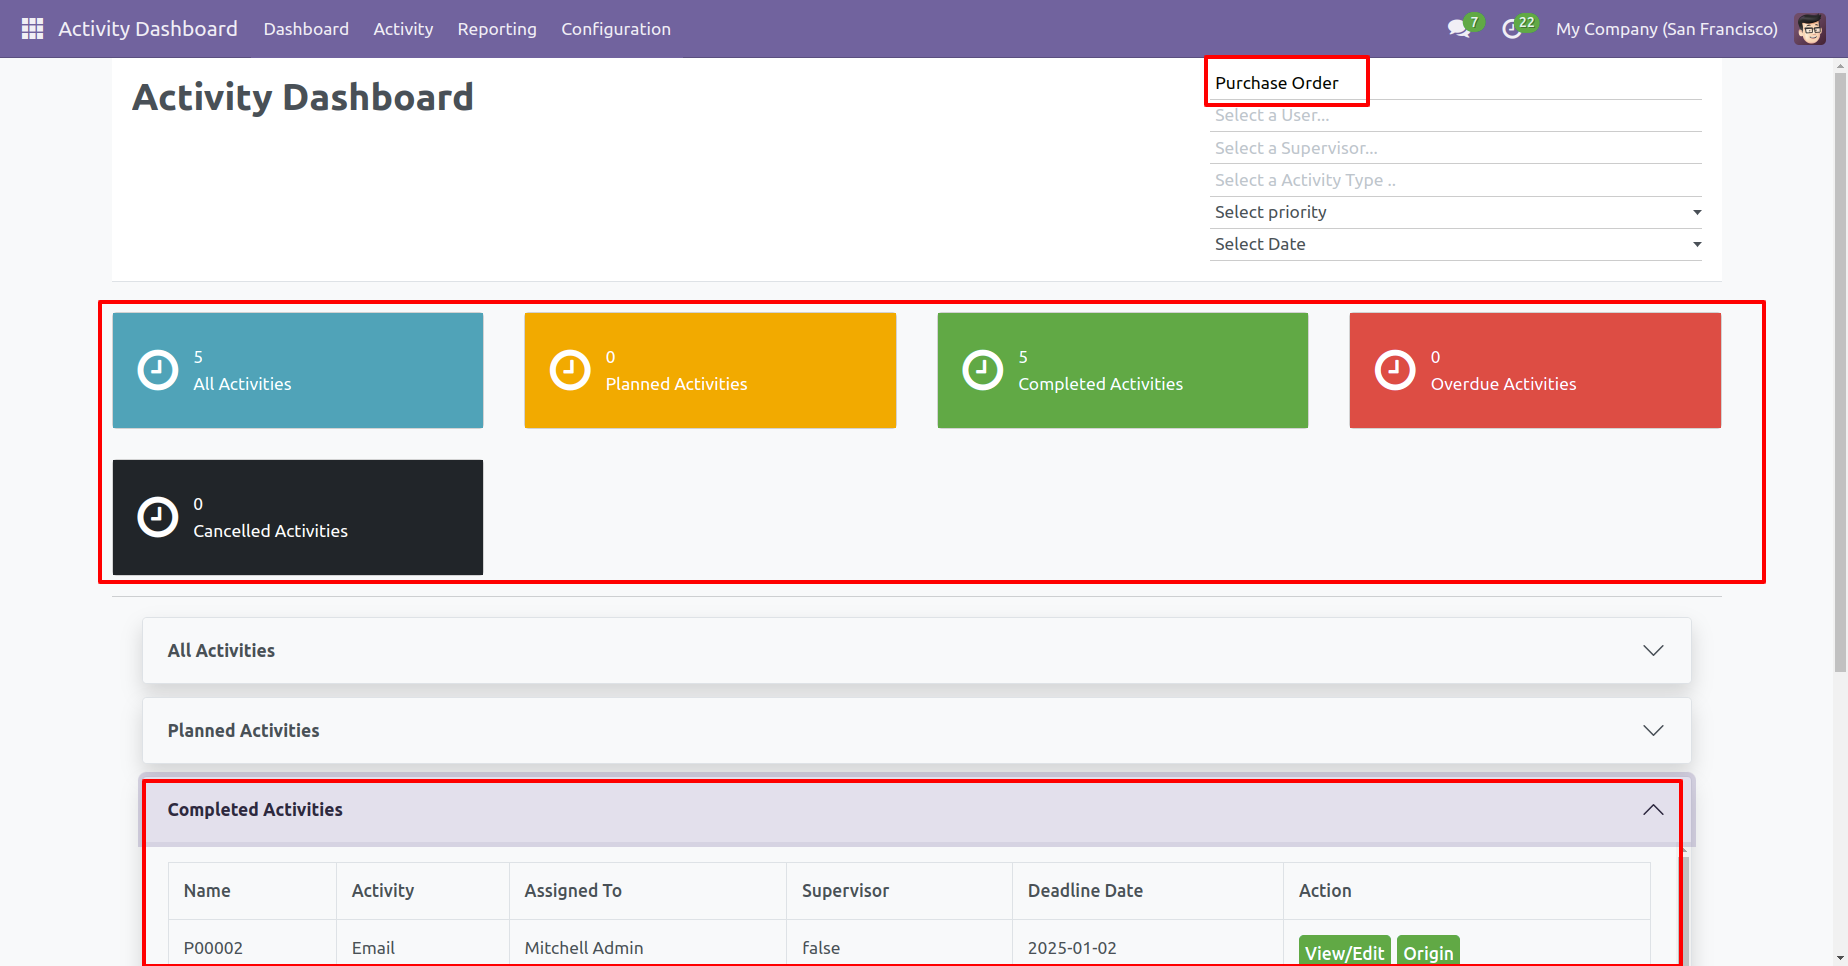
Users get a complete view of all activities in one dashboard. Easily track planned, completed, and overdue tasksFilter by user, supervisor, customer, activity type, or custom date range
Quickly mark activity as done, cancel, or edit without
opening multiple screens.
Instantly navigate to the related document using the
'Origin' button
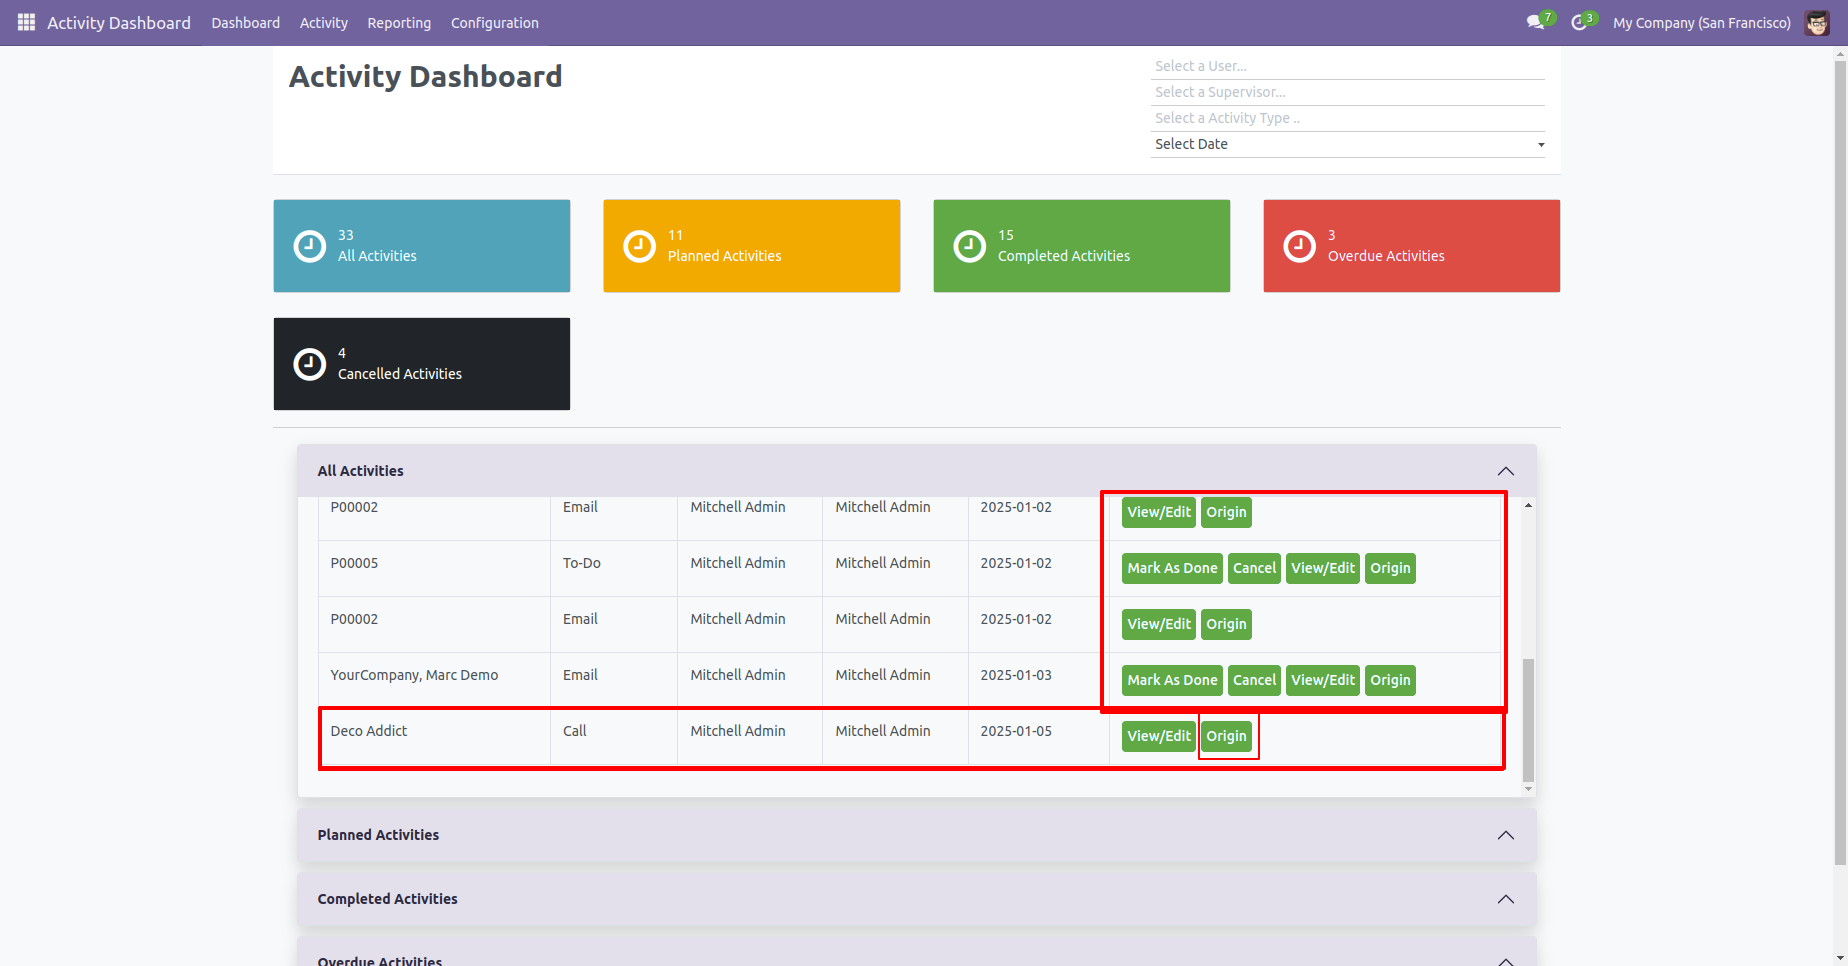
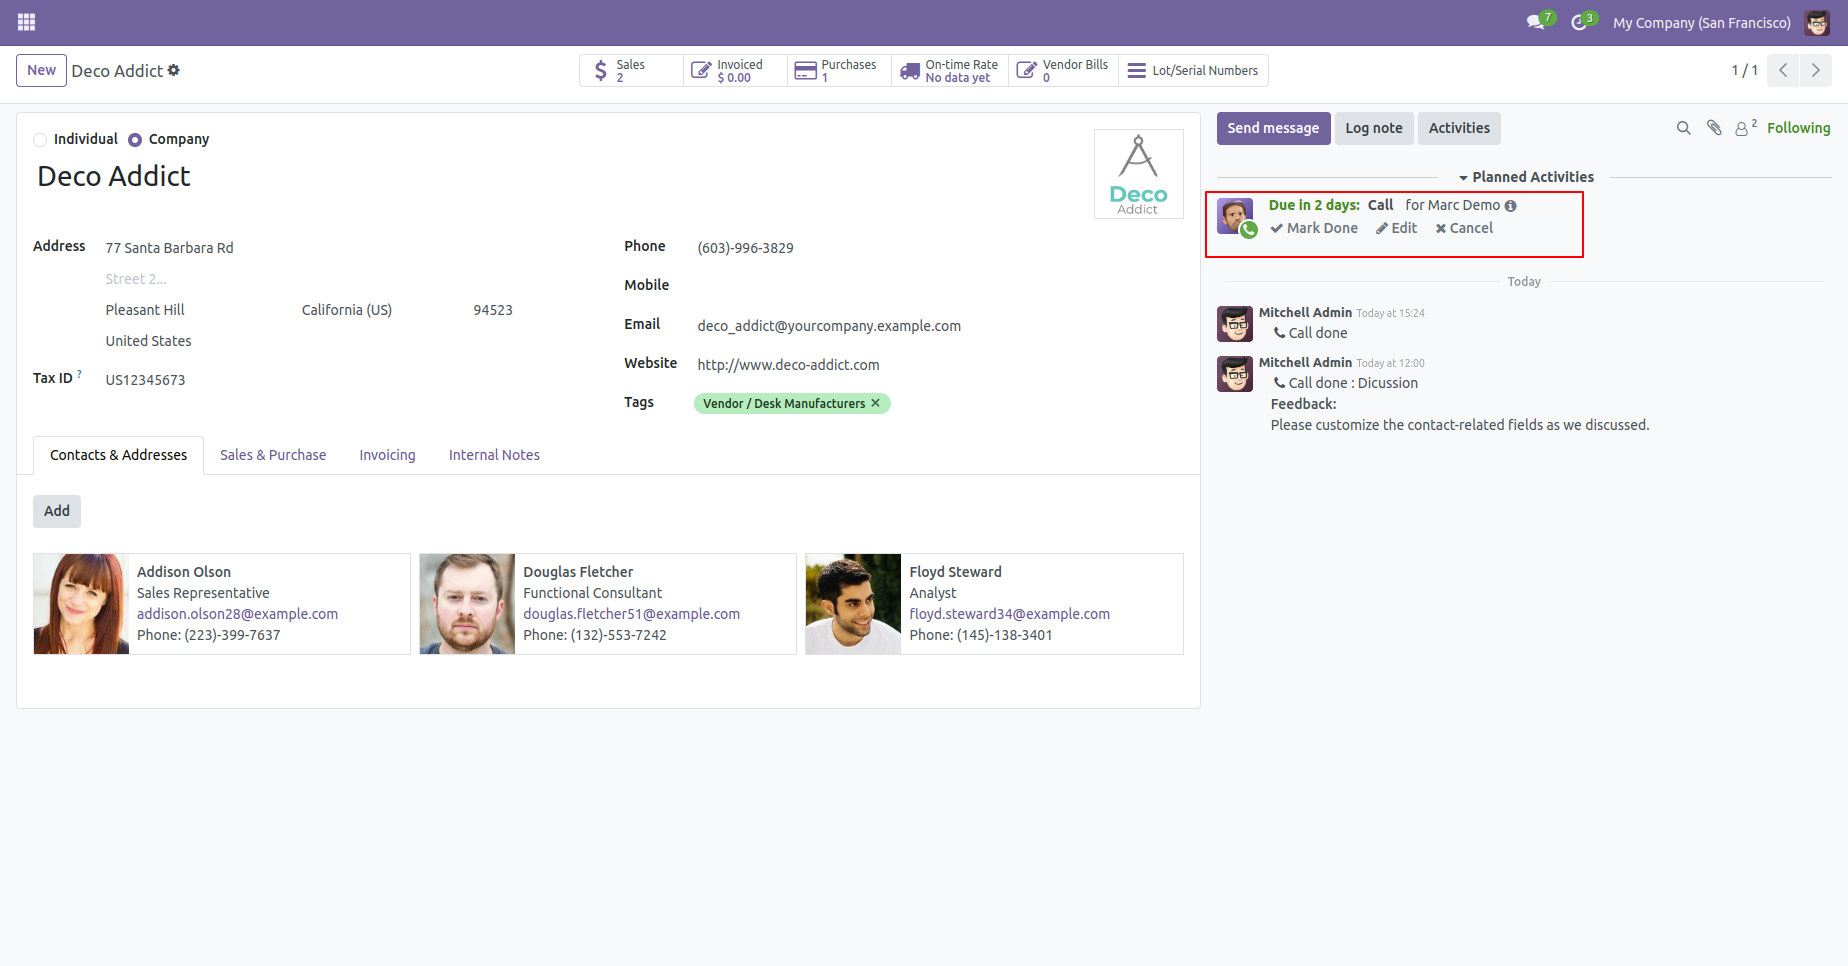
The 'Origin' button opens the activity origin source document.
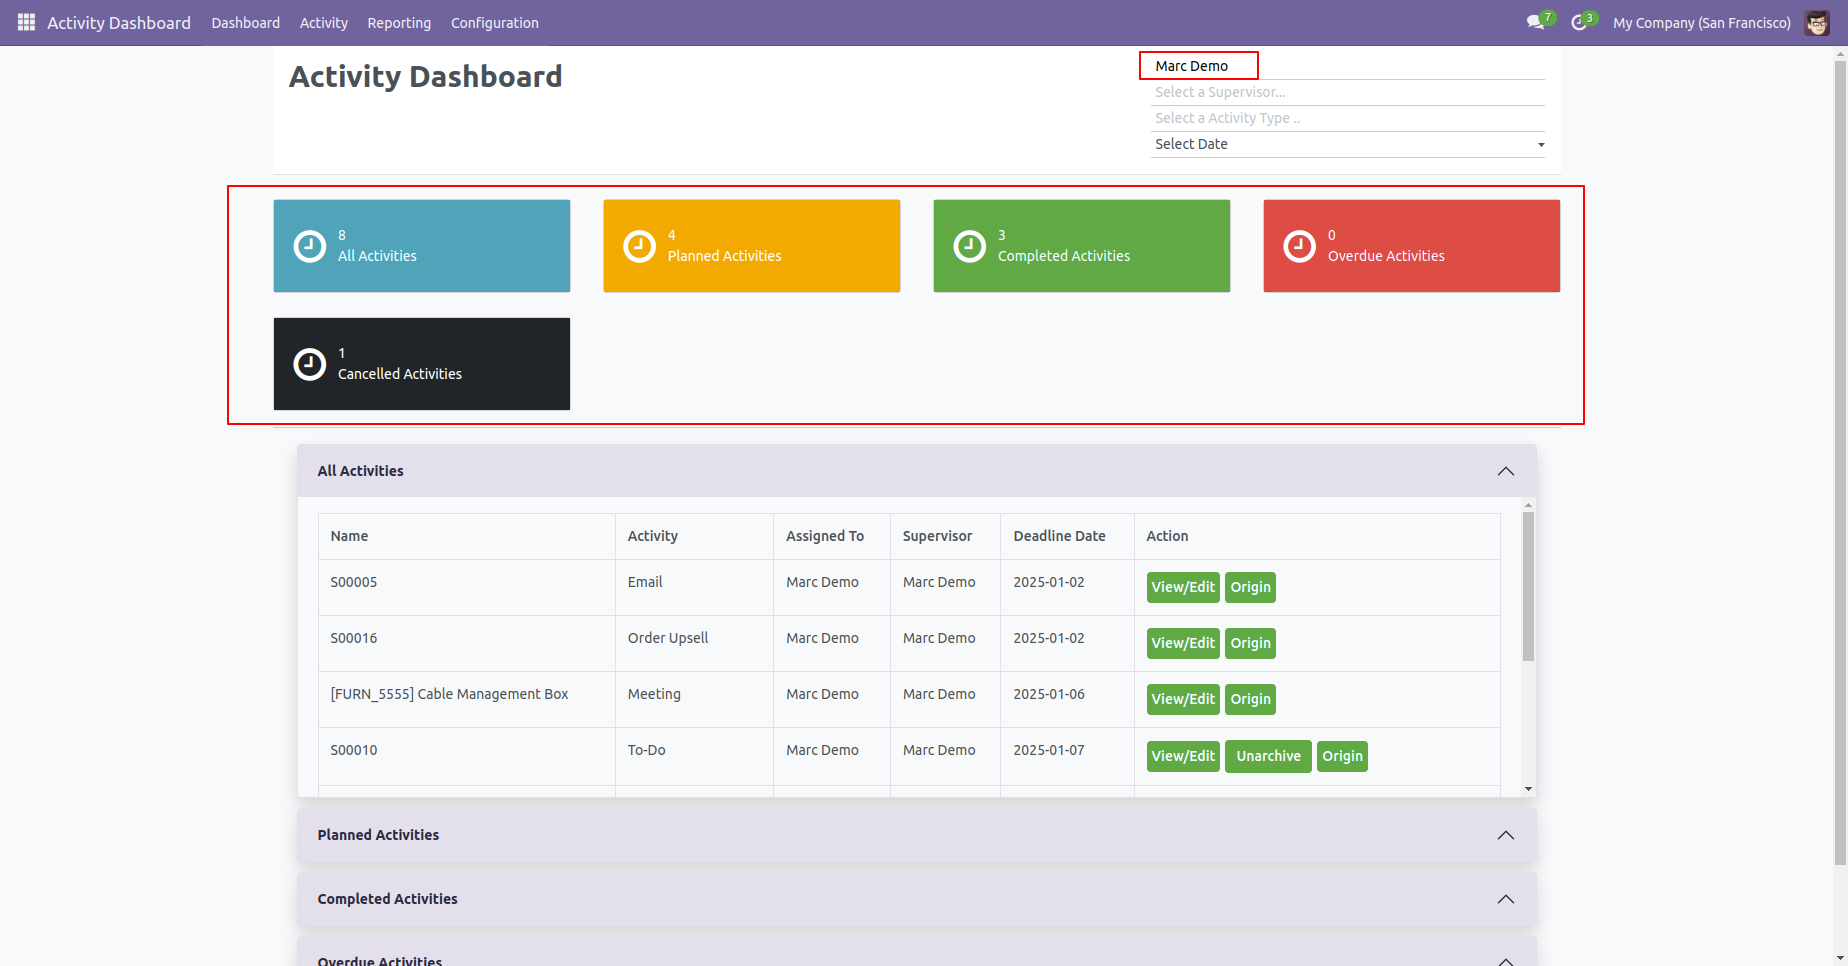
We take 'Marc Demo' as a user. so you can see a dashboard of that.
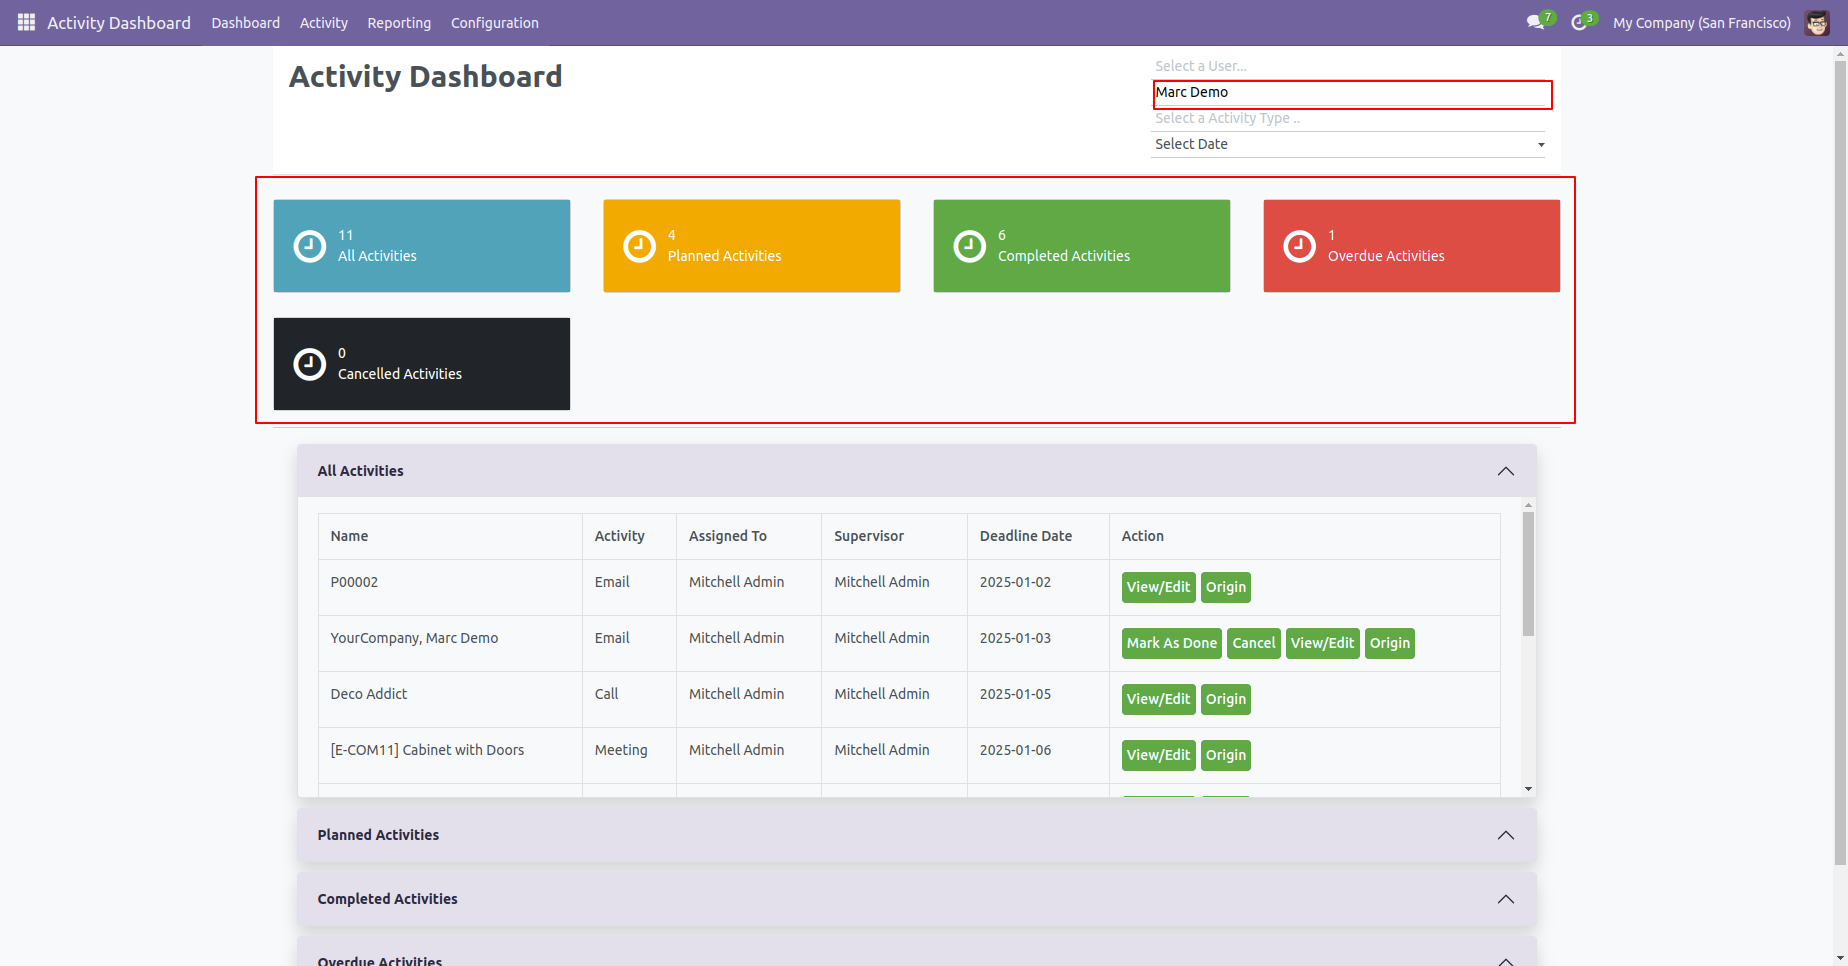
We take 'Marc Demo' as a supervisor. so you can see a dashboard of that.
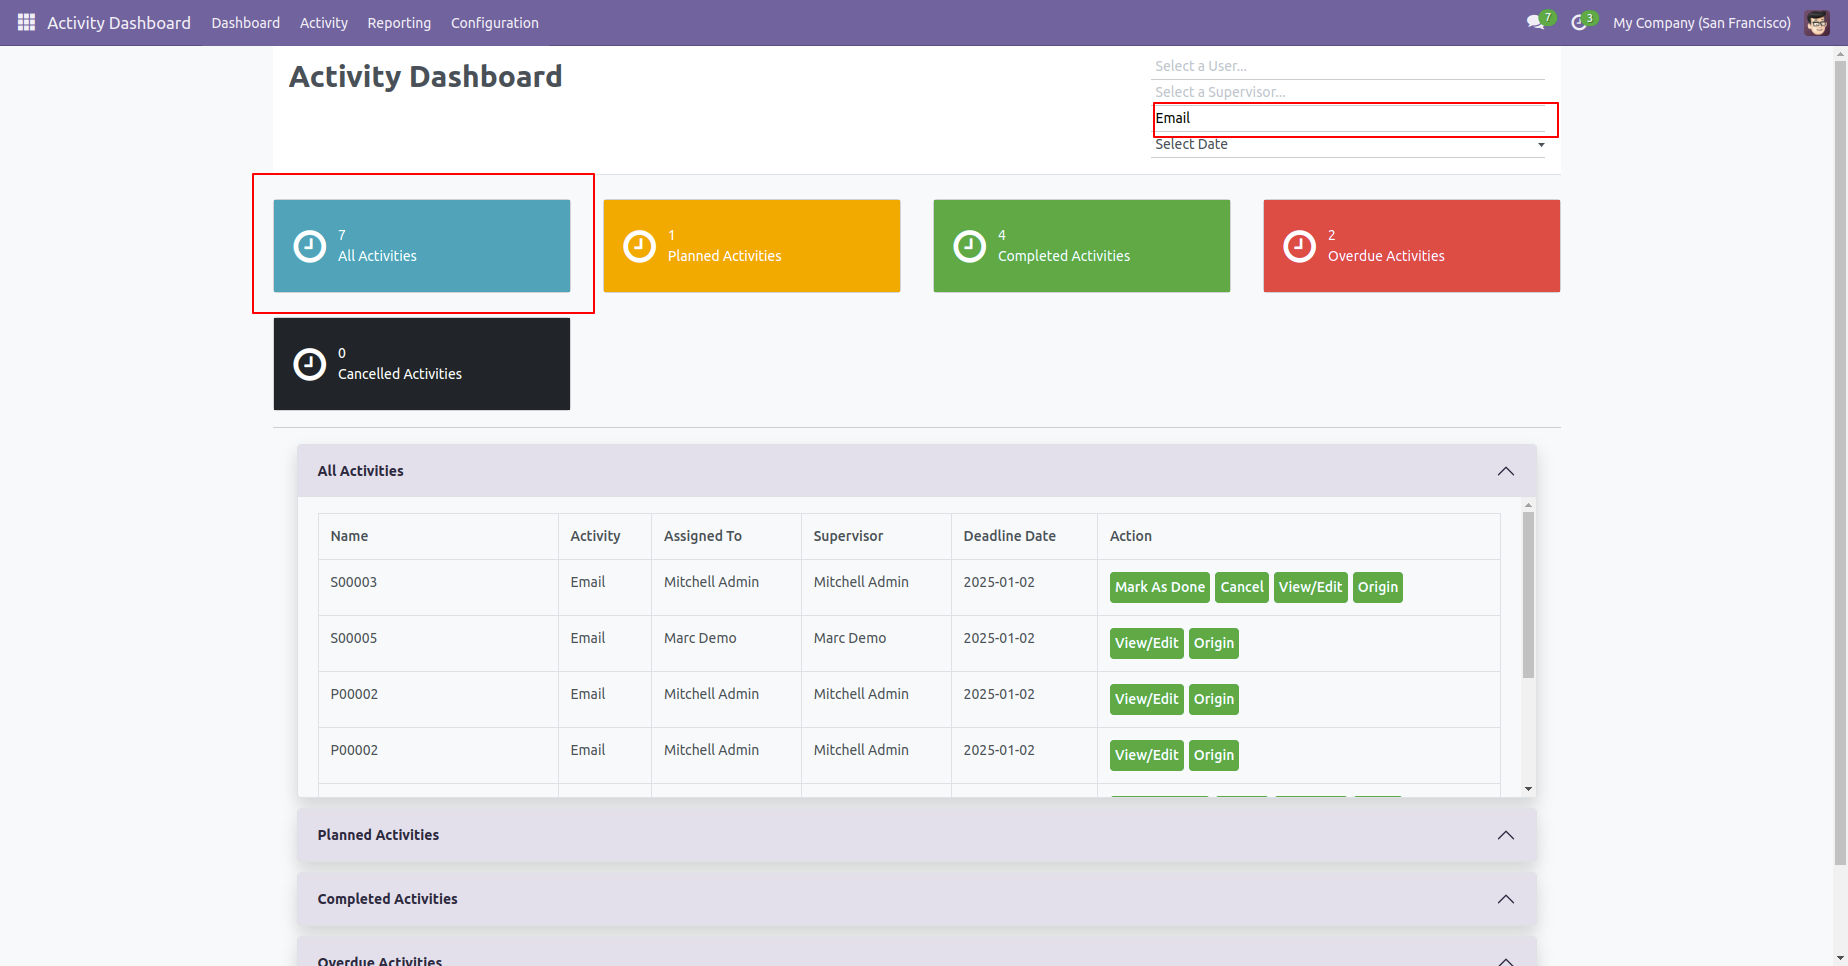
We take 'Email' as a activity type. so you can see a dashboard of that.
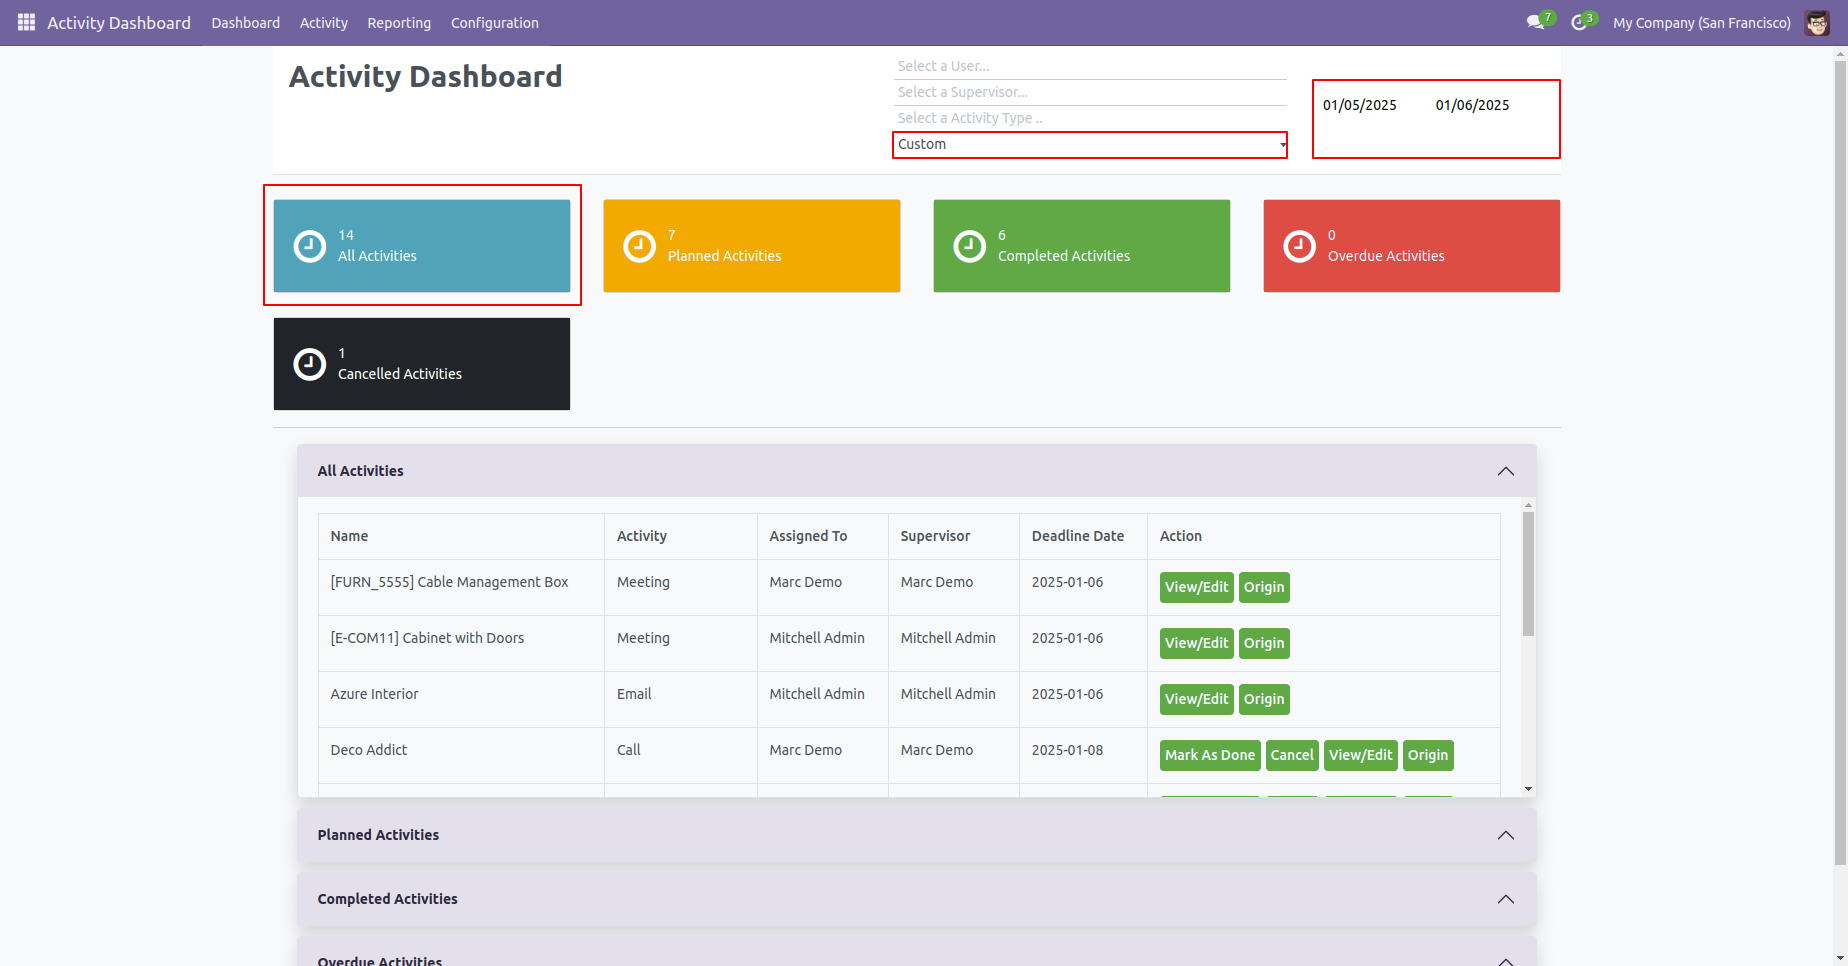
Now we take the date as the custom date.
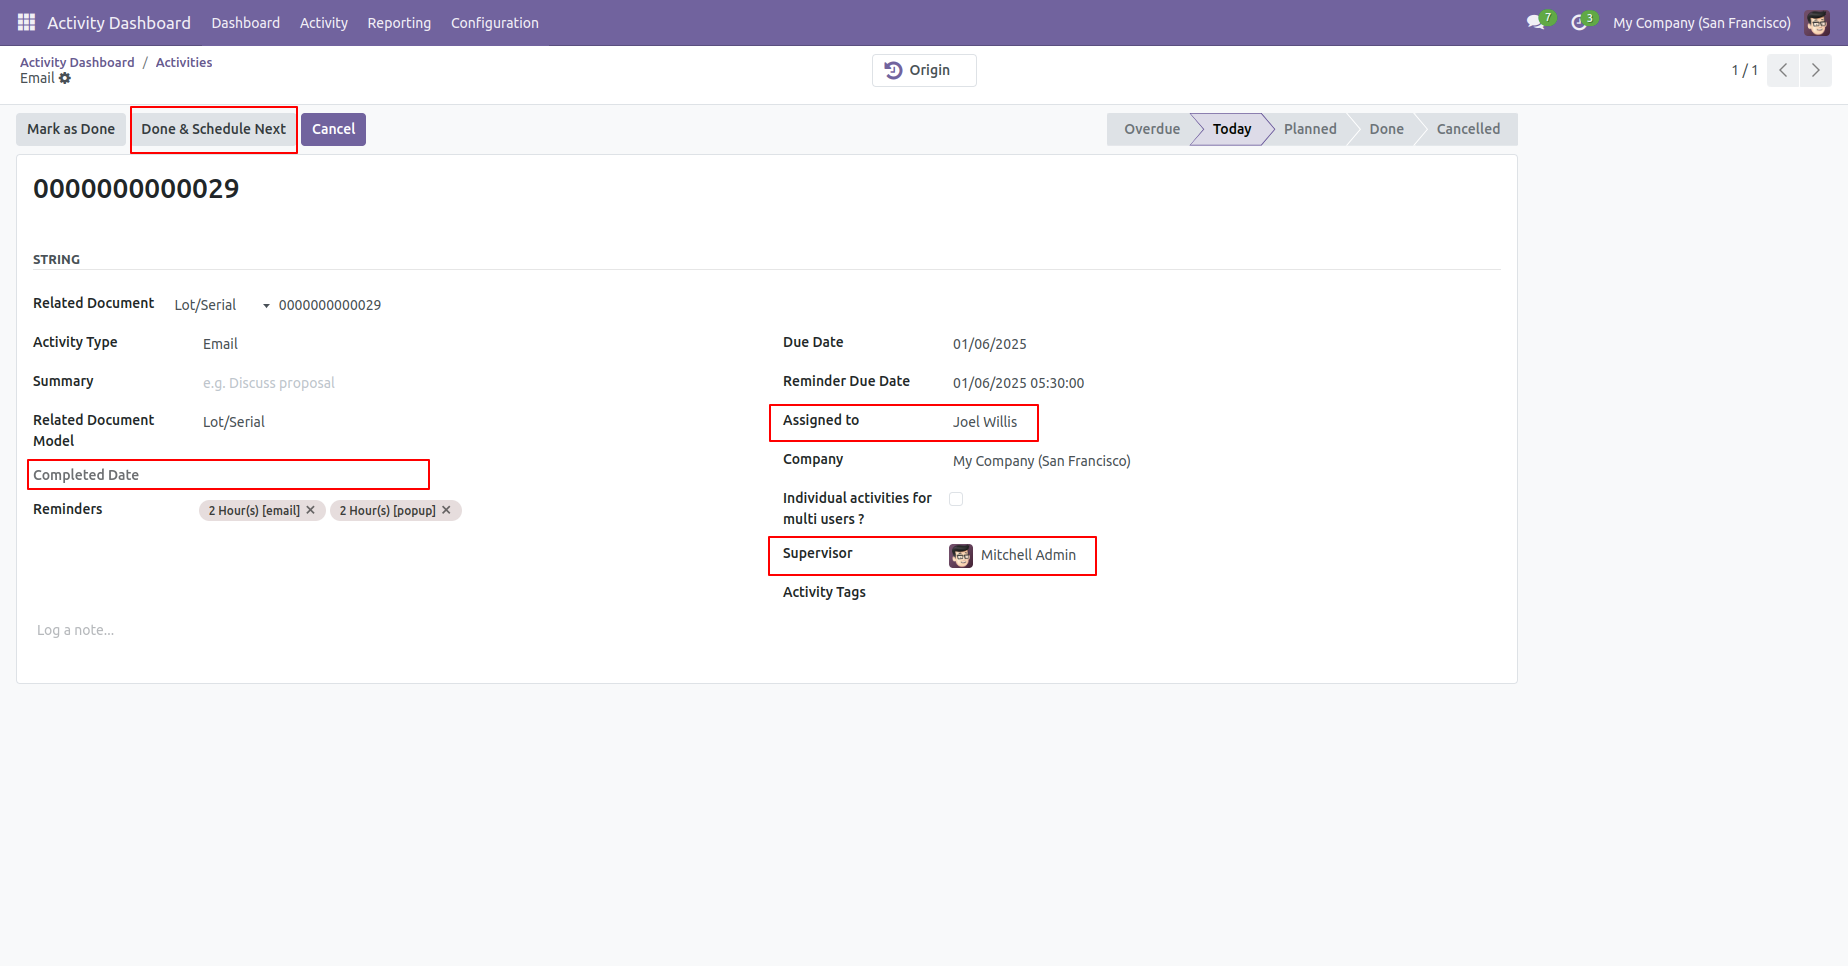
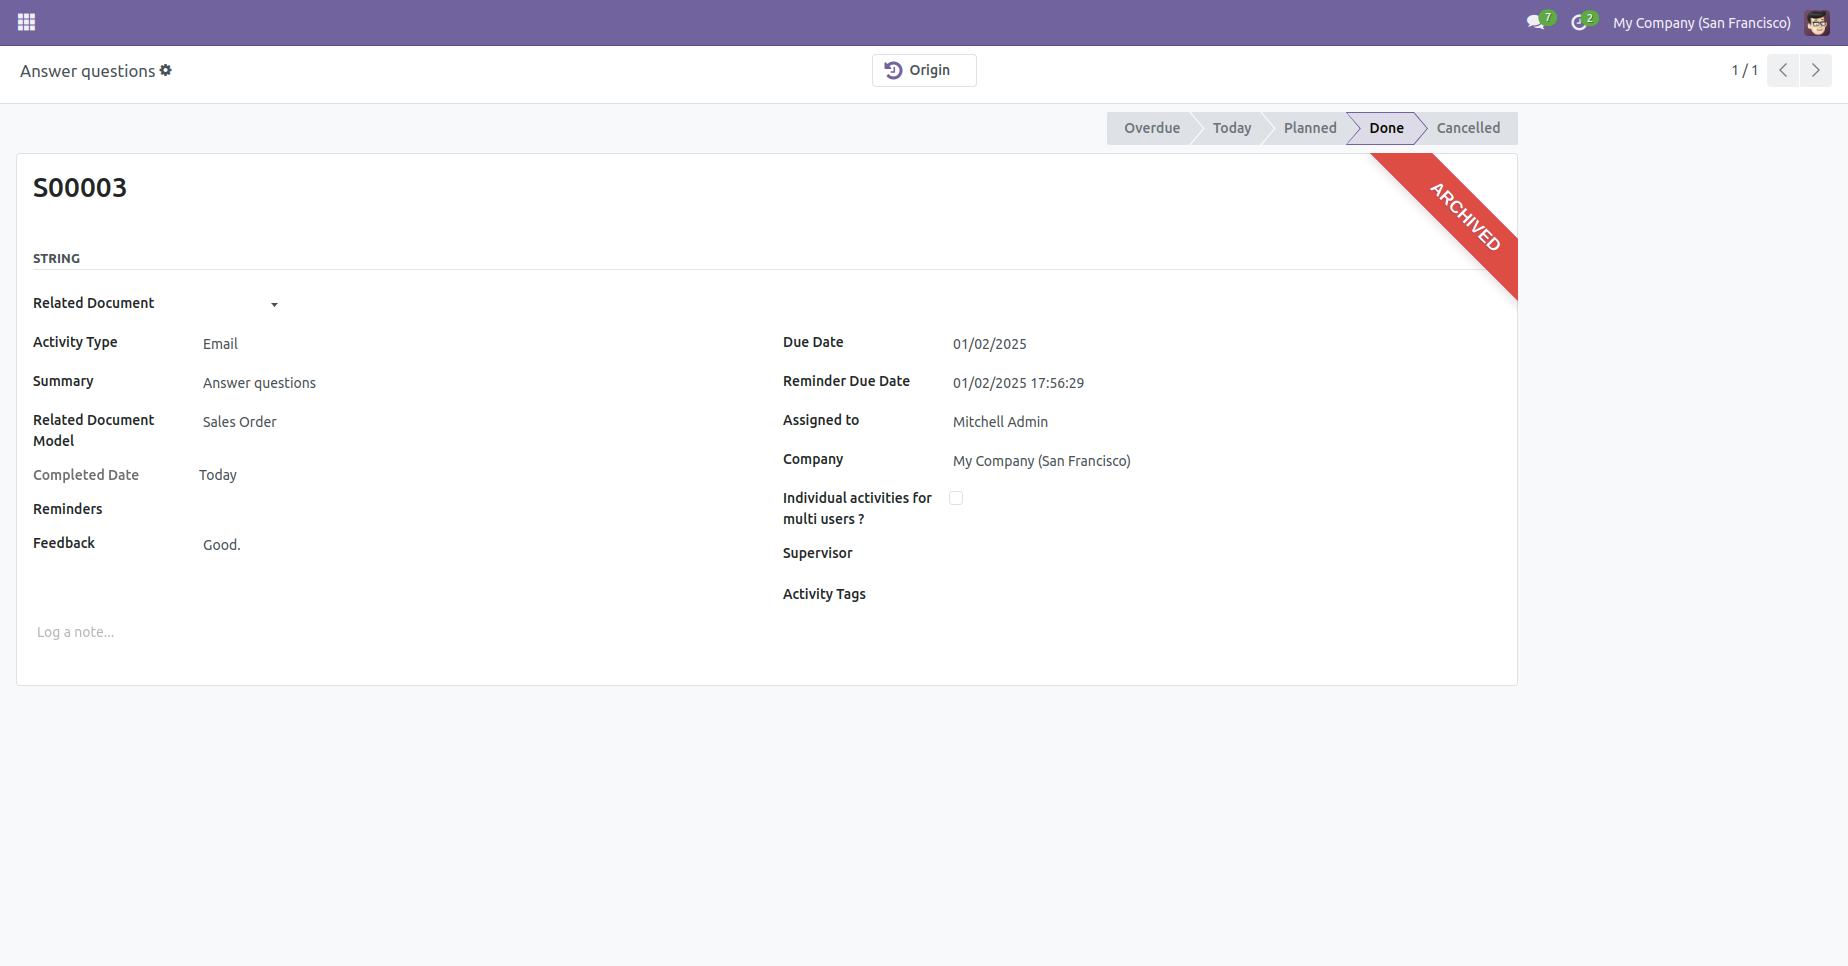
Overdue Activities form view looks like below. here you can see due date, assigned to, supervisor and completed date if done. You can also change the stages of that like 'Schedule', 'Mark as Done', 'Done' & 'Schedule Next'.
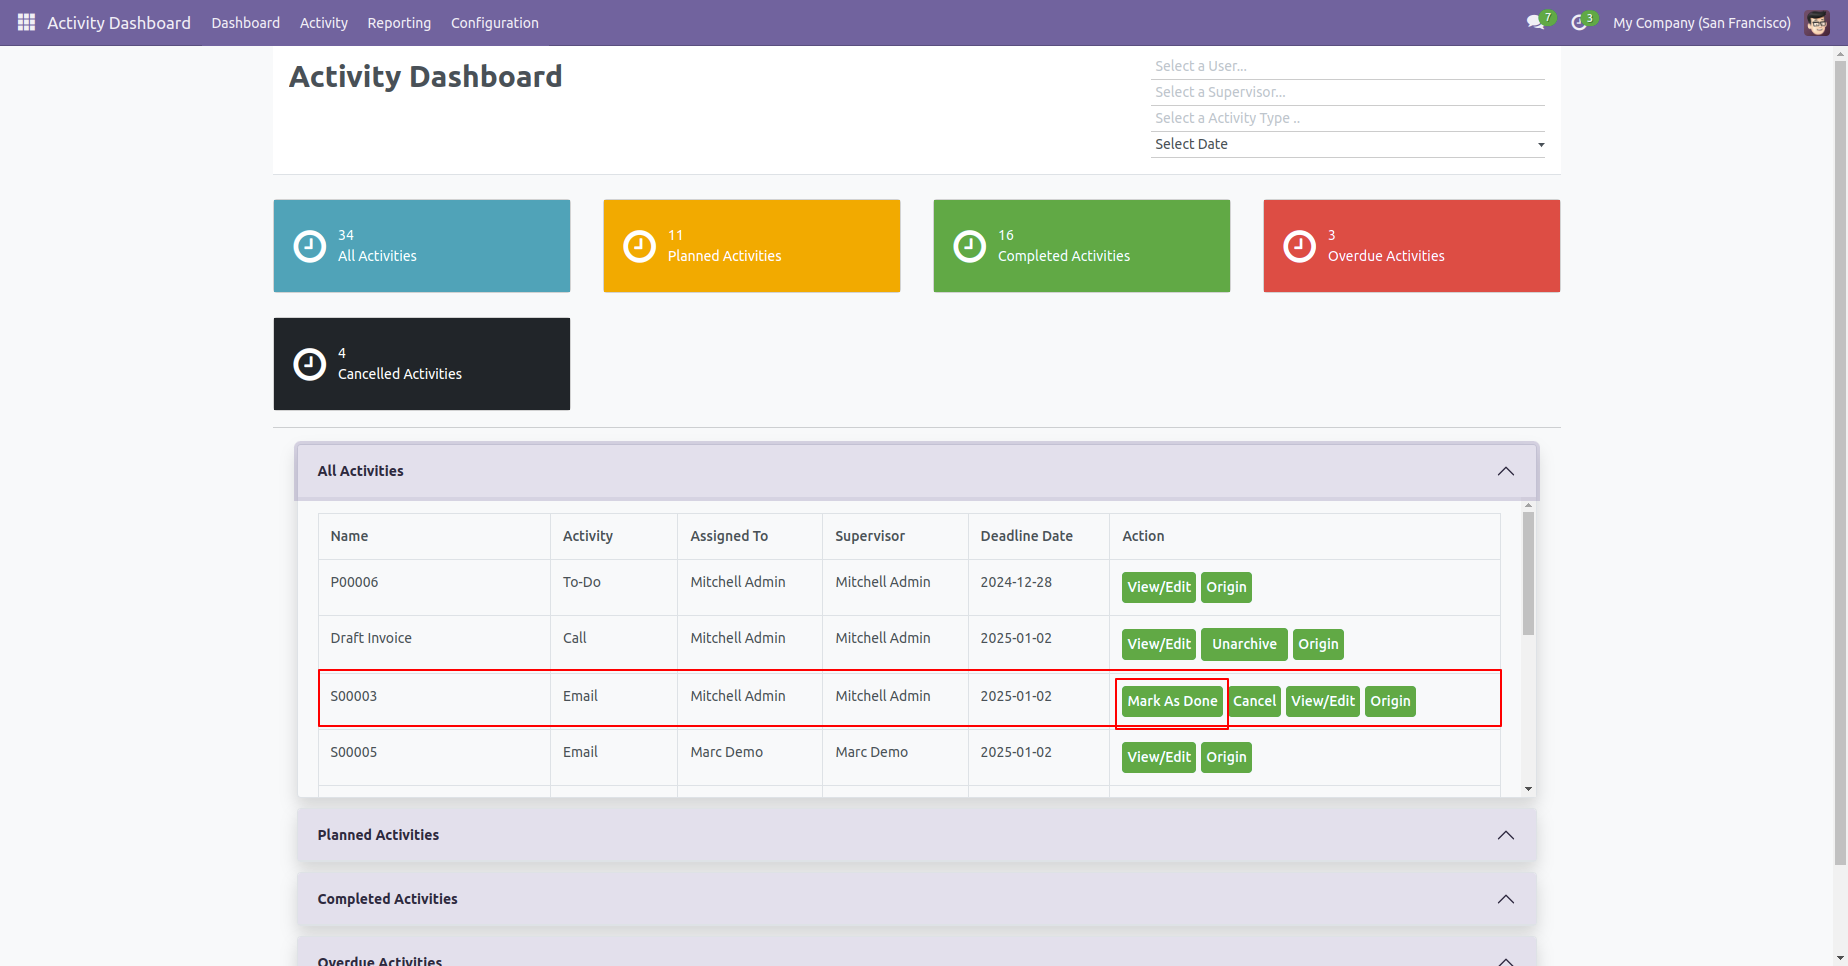
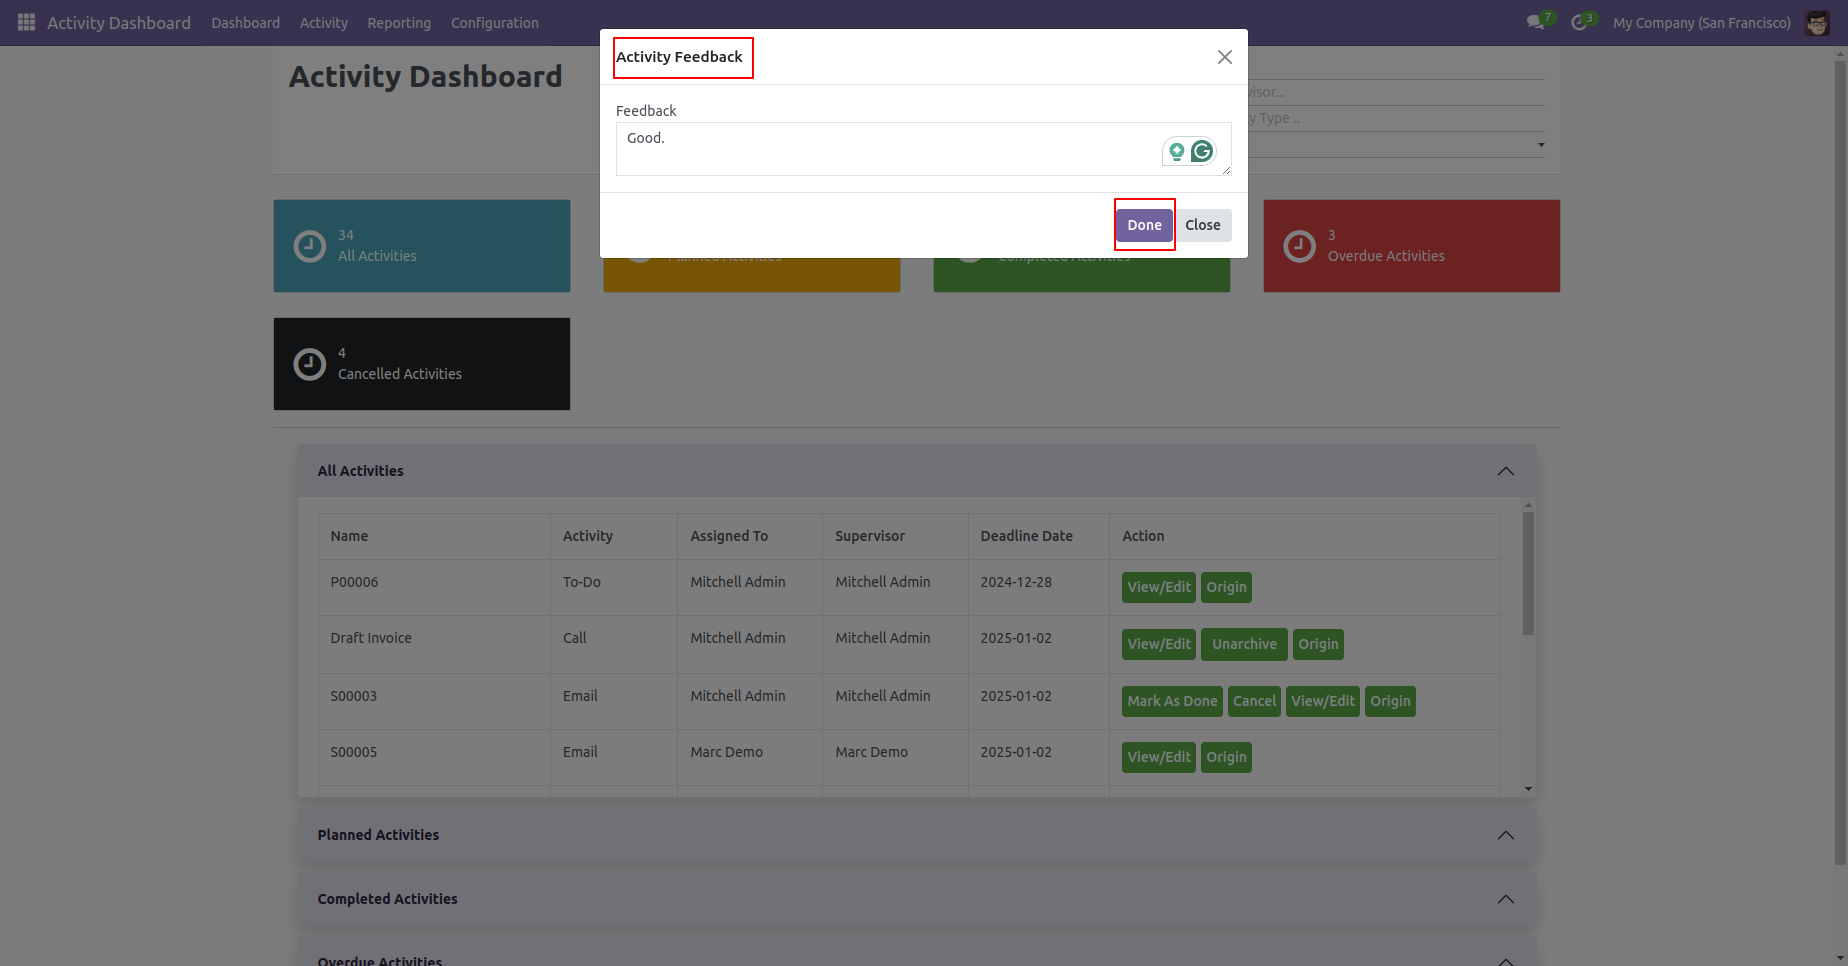
In "Action" if you click 'Mark as Done' that go to completed activities.
After that, 'Activity Feedback' wizard will appears. Add Feed back and click on the "Done" button.
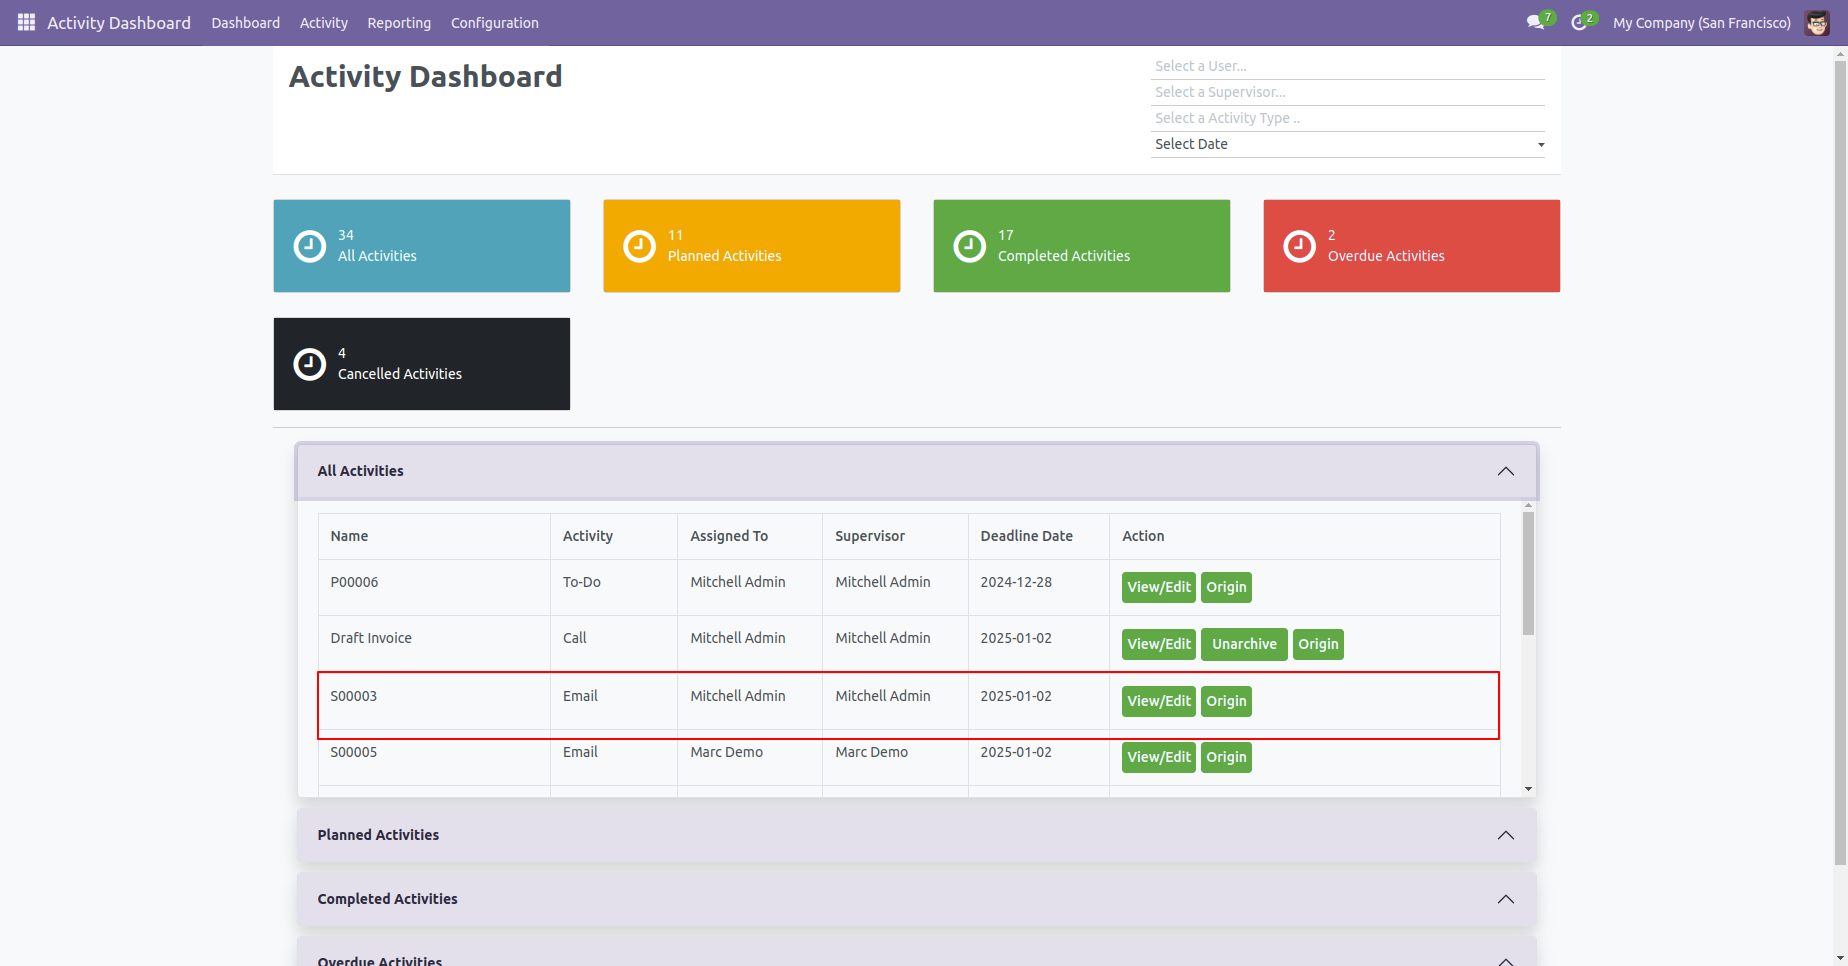
Click 'View/Edit' to see that activity.
The activity form view looks like below.
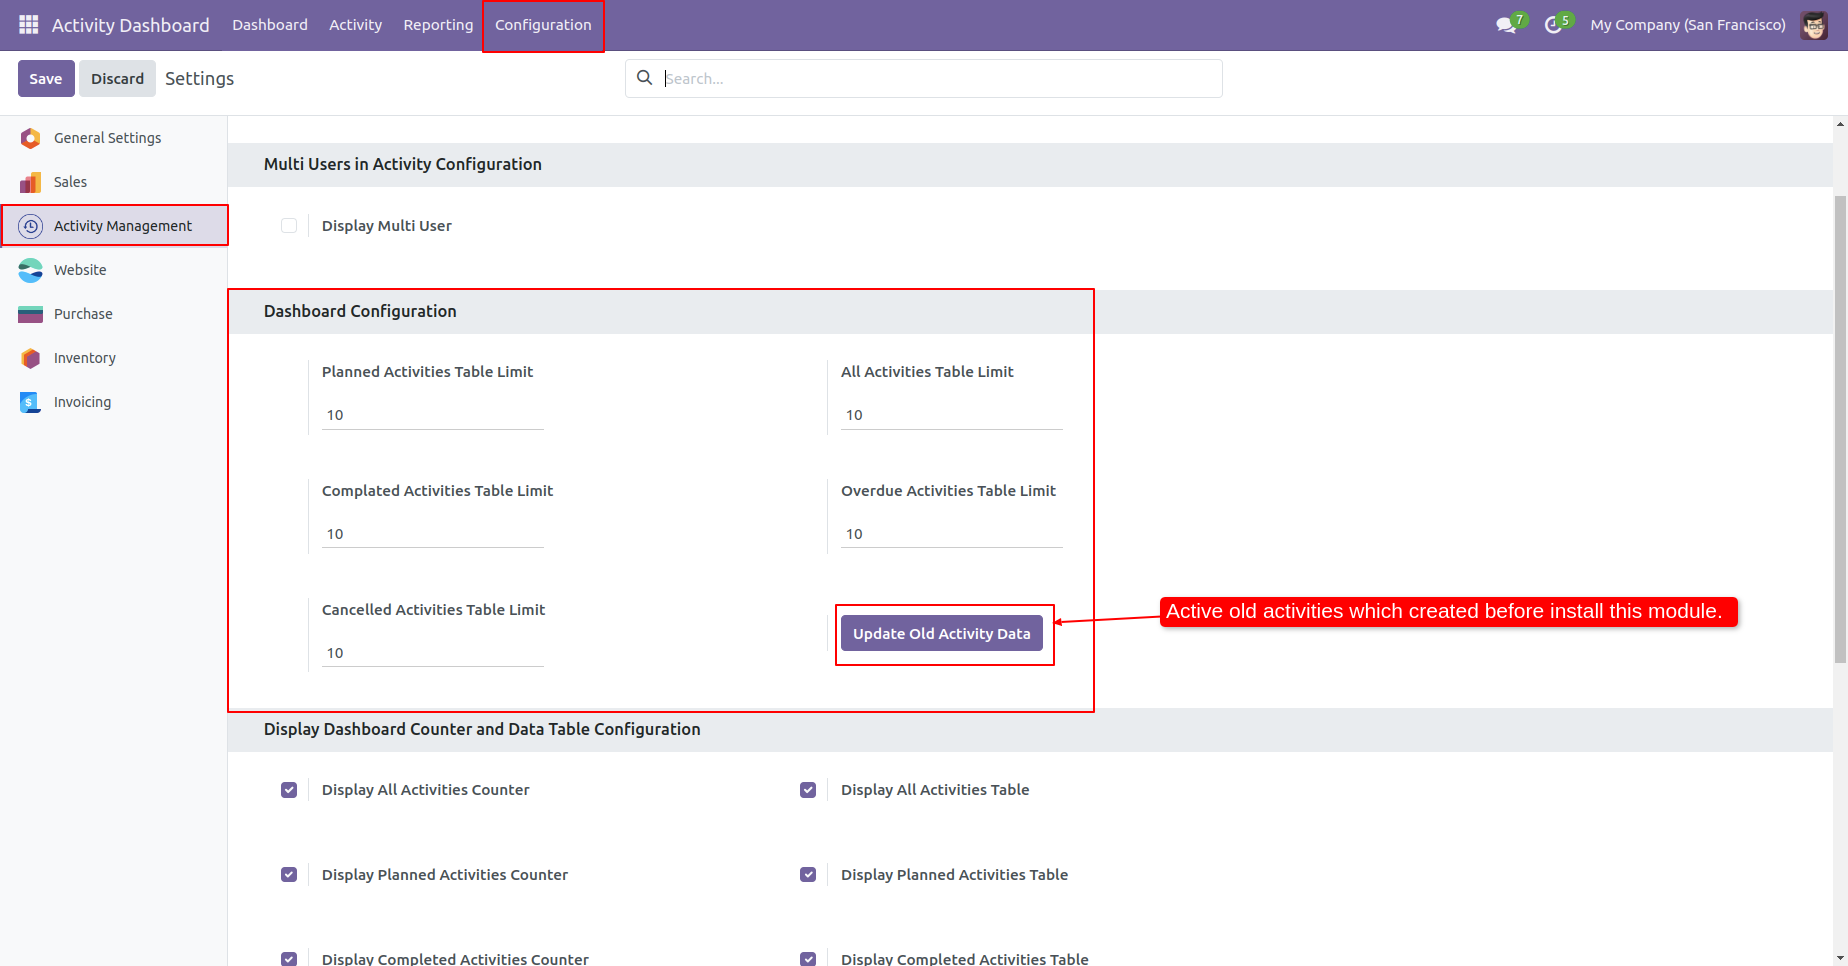
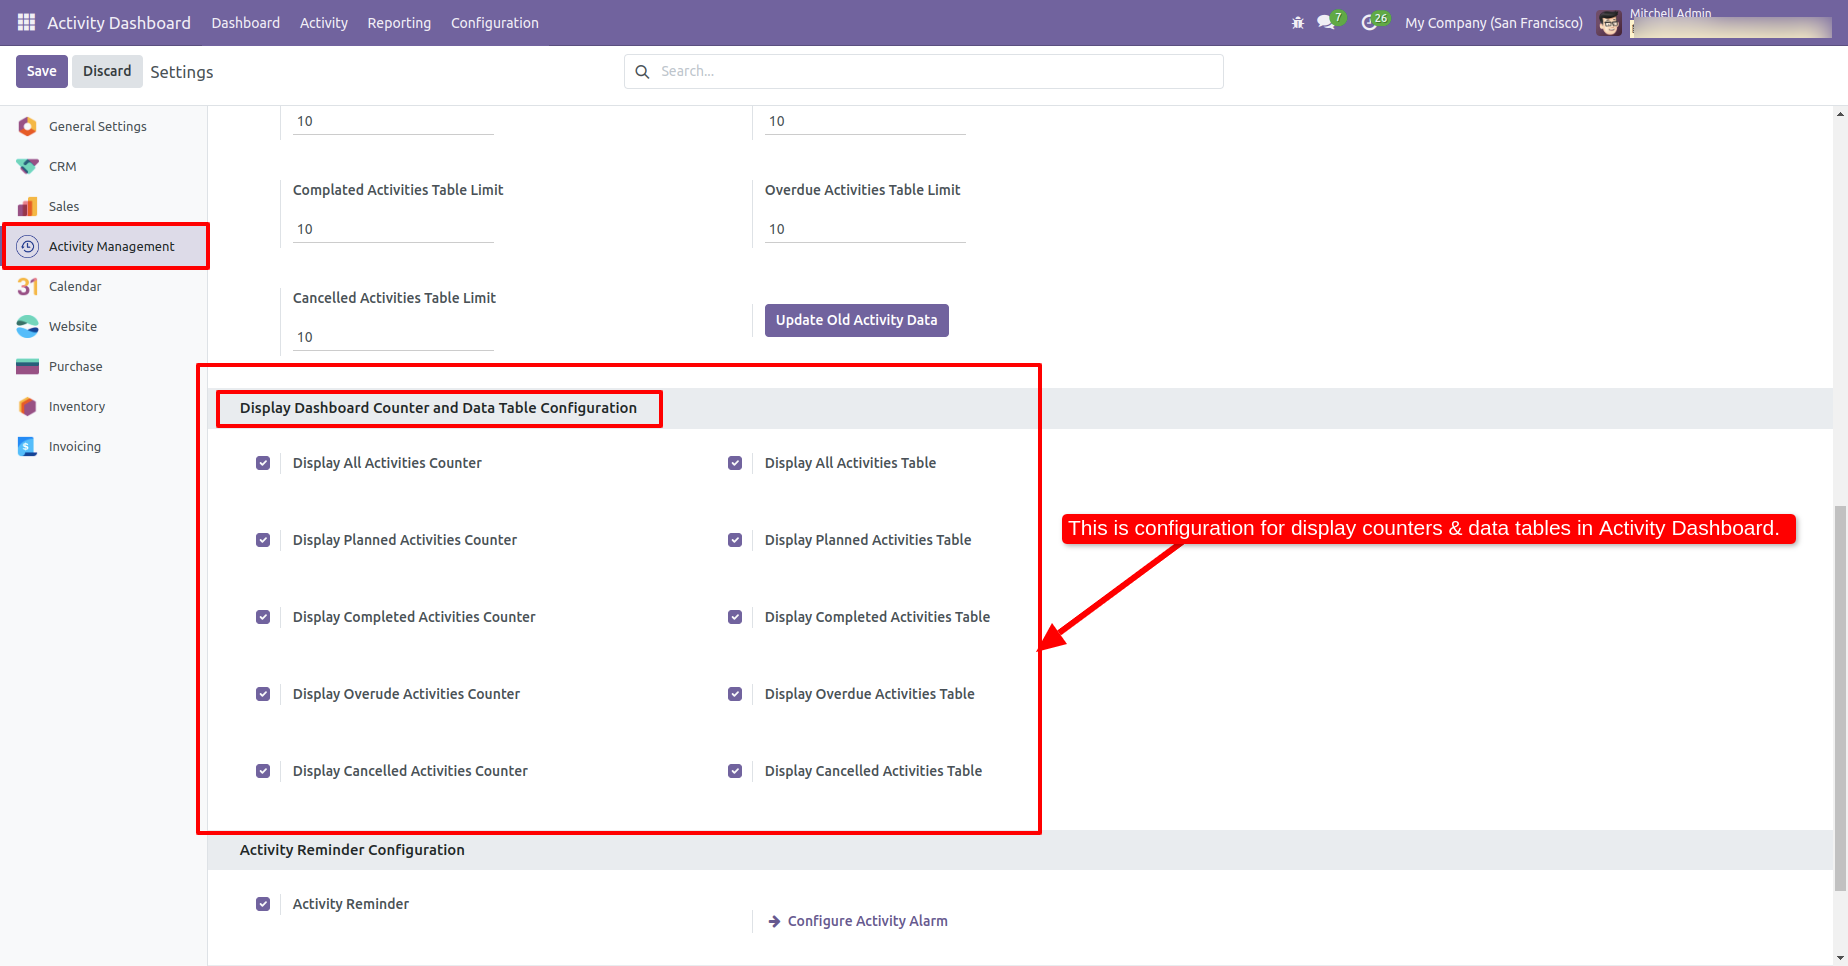
Activity management dashboard configuration.
Configuration for Display Dashboard Counter and Data Table.
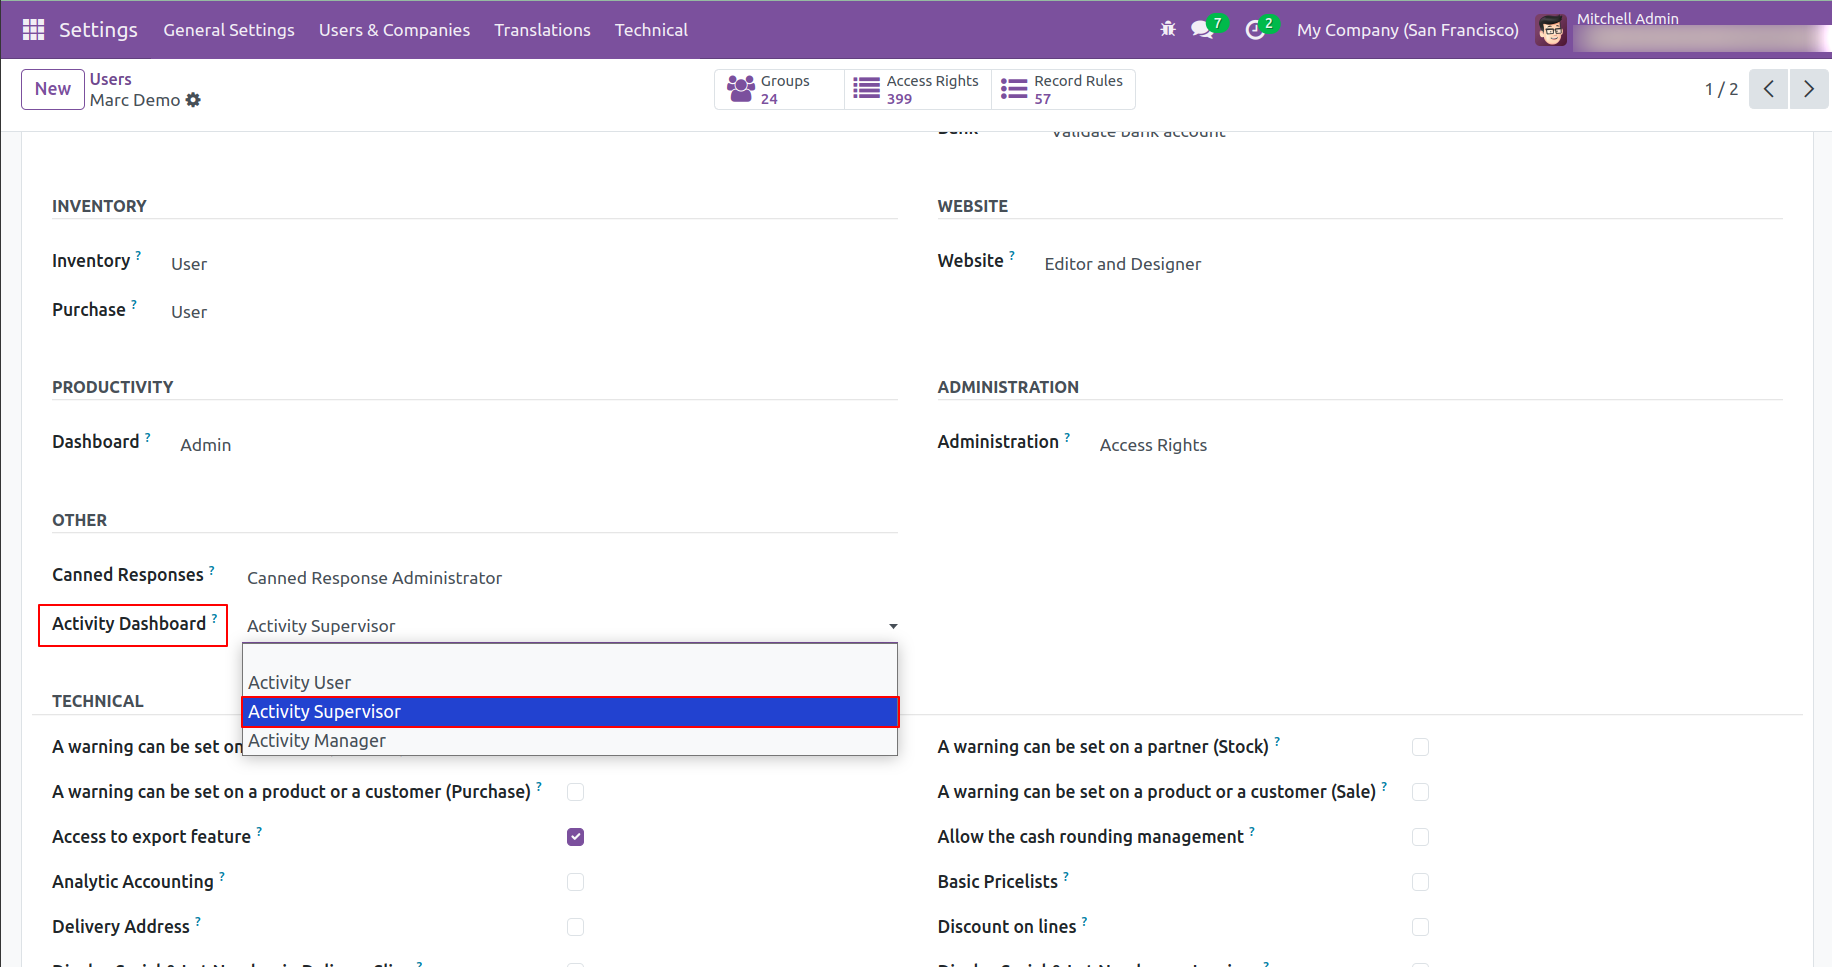
Employee - Can see and manage only their own assigned
activities
Supervisor - Can see their own activities and activities
of users assigned under them
Manager - Can see all activities across the system
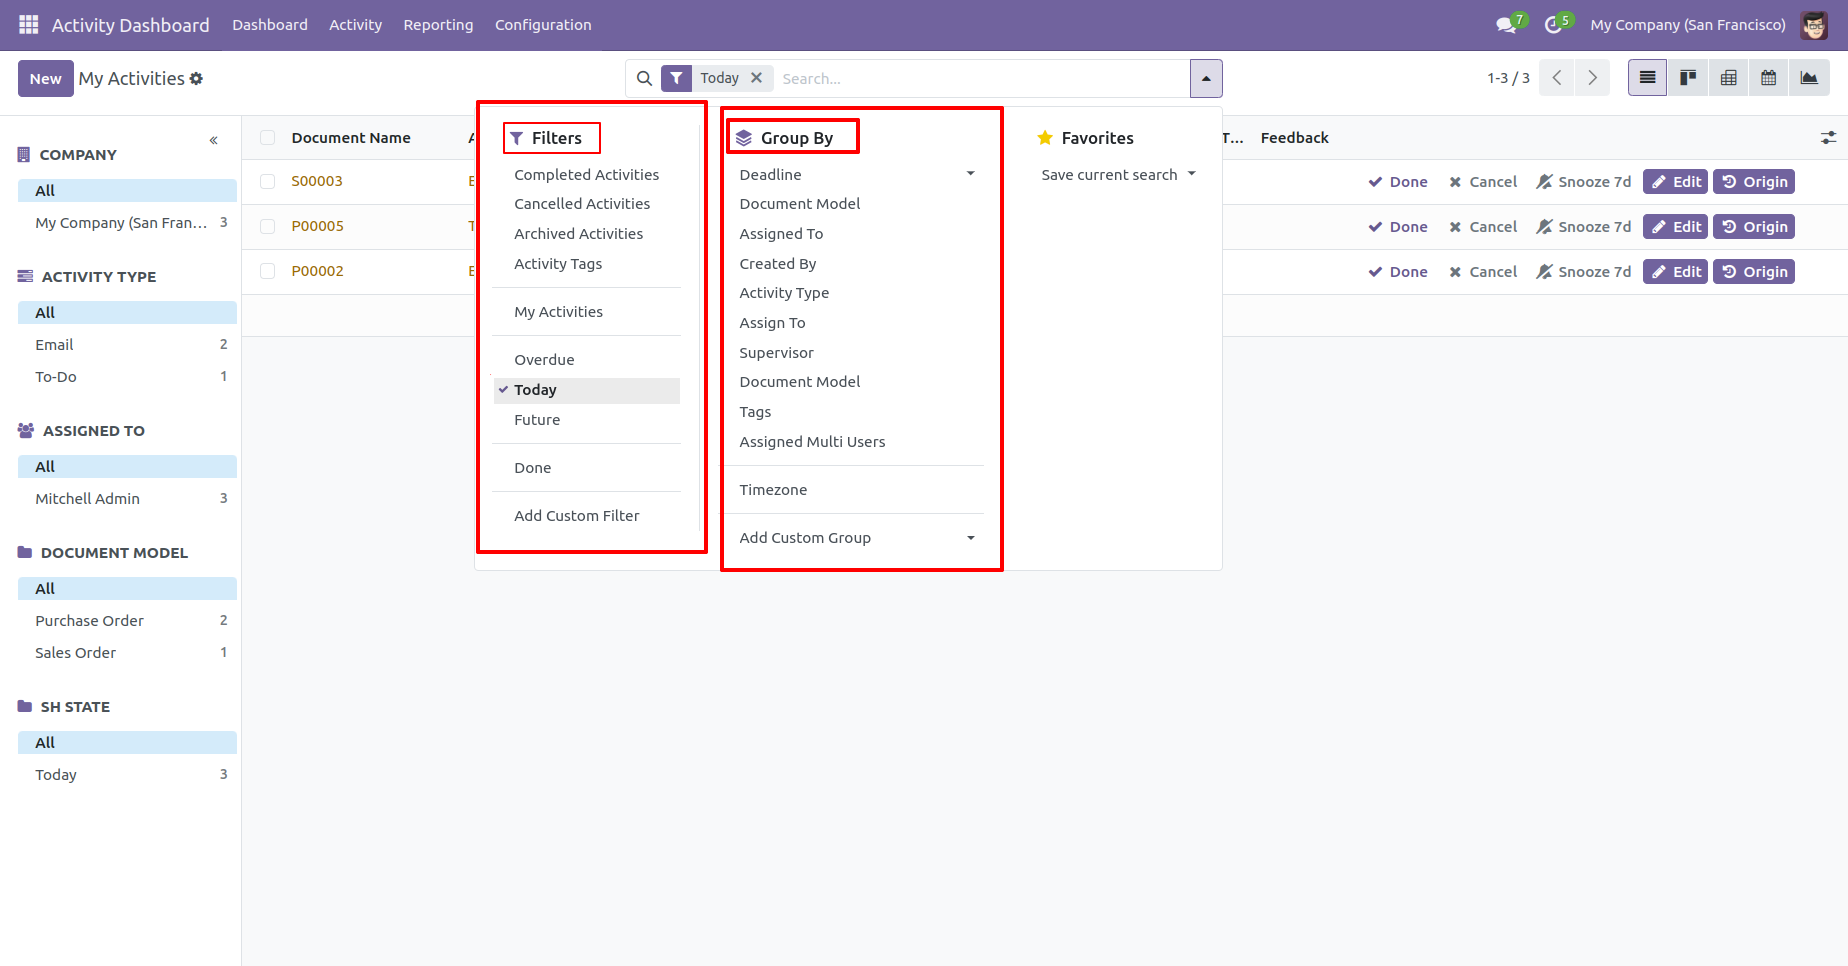
You can filter and group the data by activity as needed.
Quickly filter activities like Today or future ,
Overdue, Completed, Cancelled, archived, tags
Group the results by activity type, assigned user, or
document, deadline, tag, supervisor
Use custom filters and grouping options for better
organization
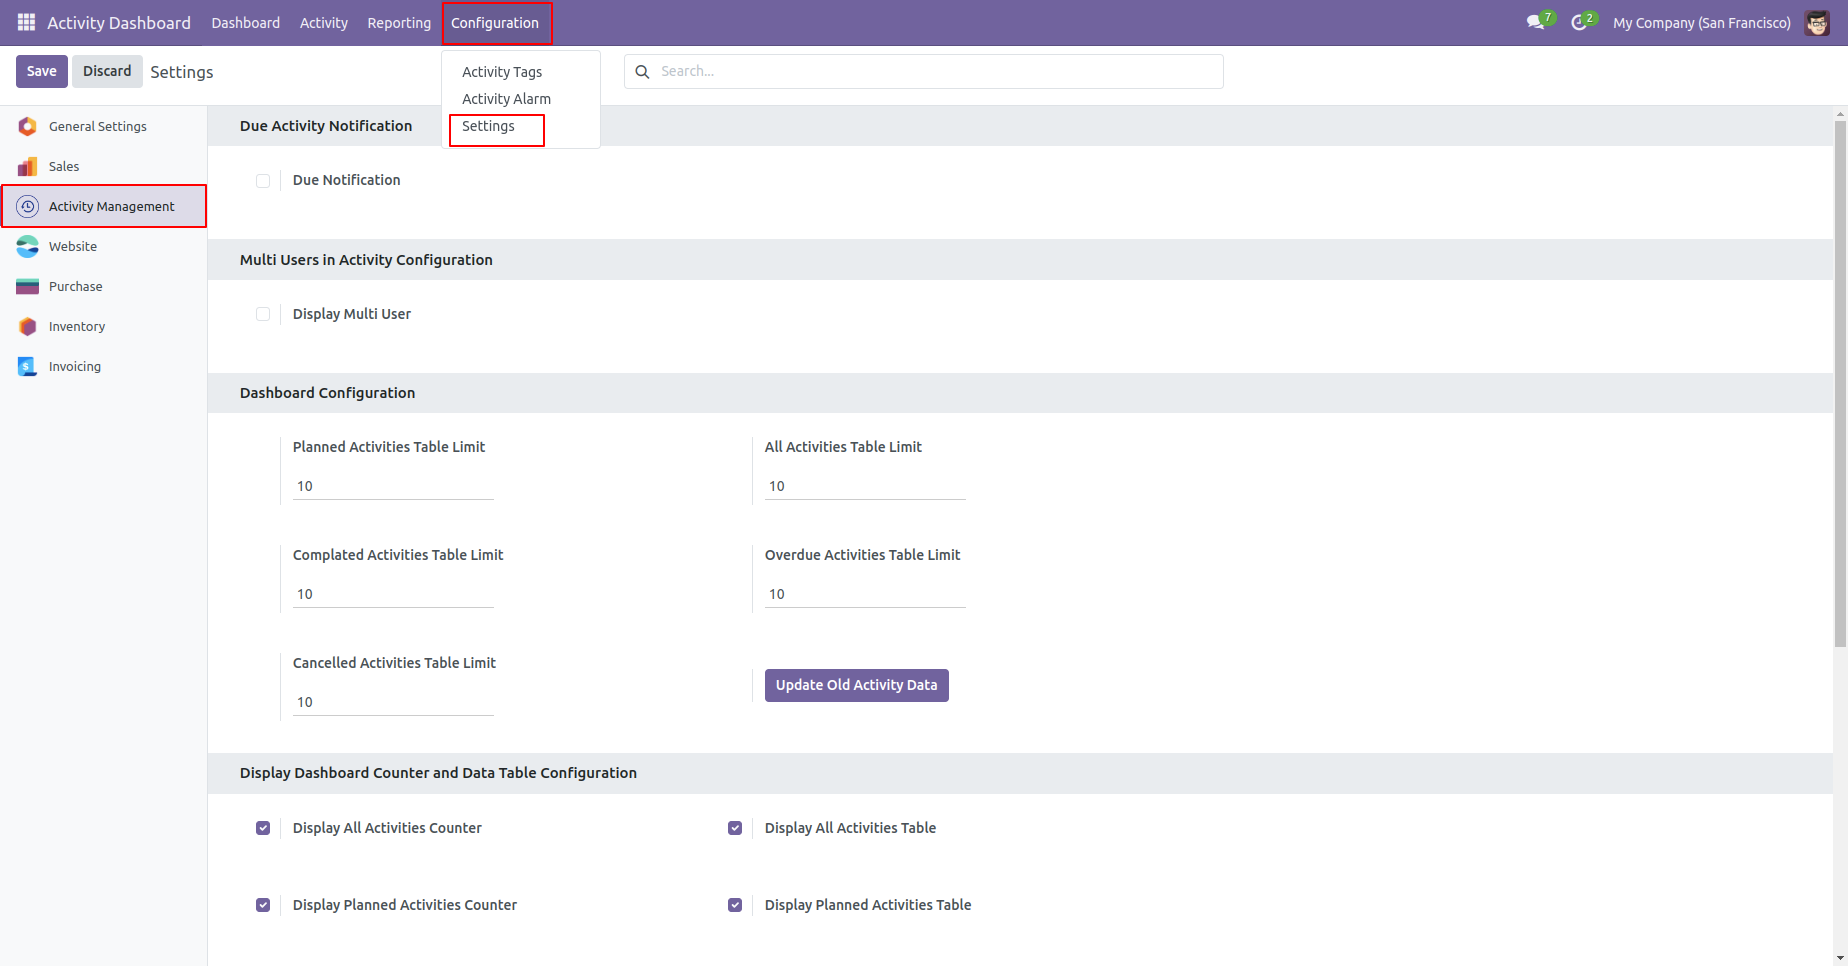
Configuration for Display Dashboard Counter and Data Table.
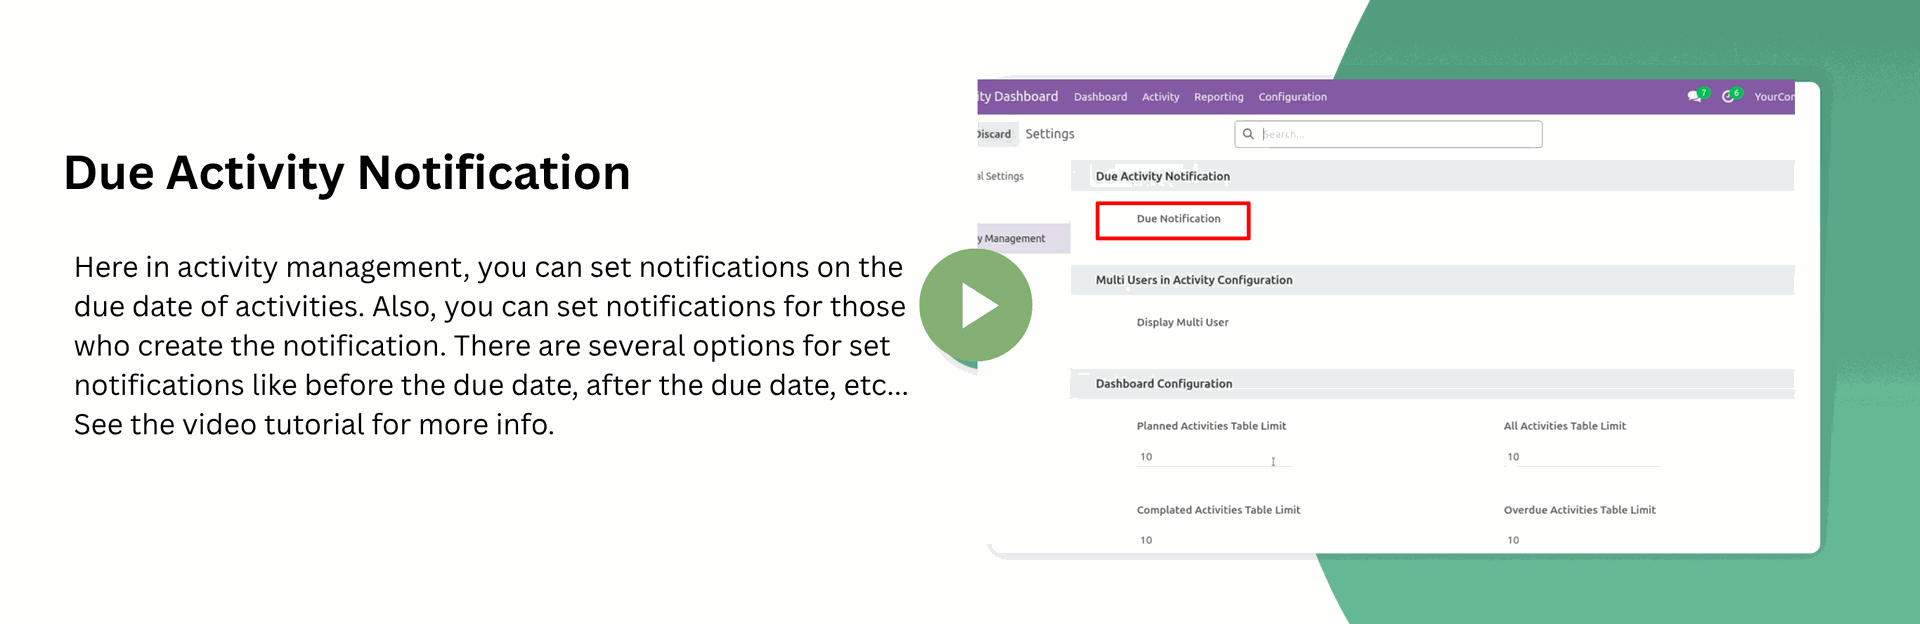
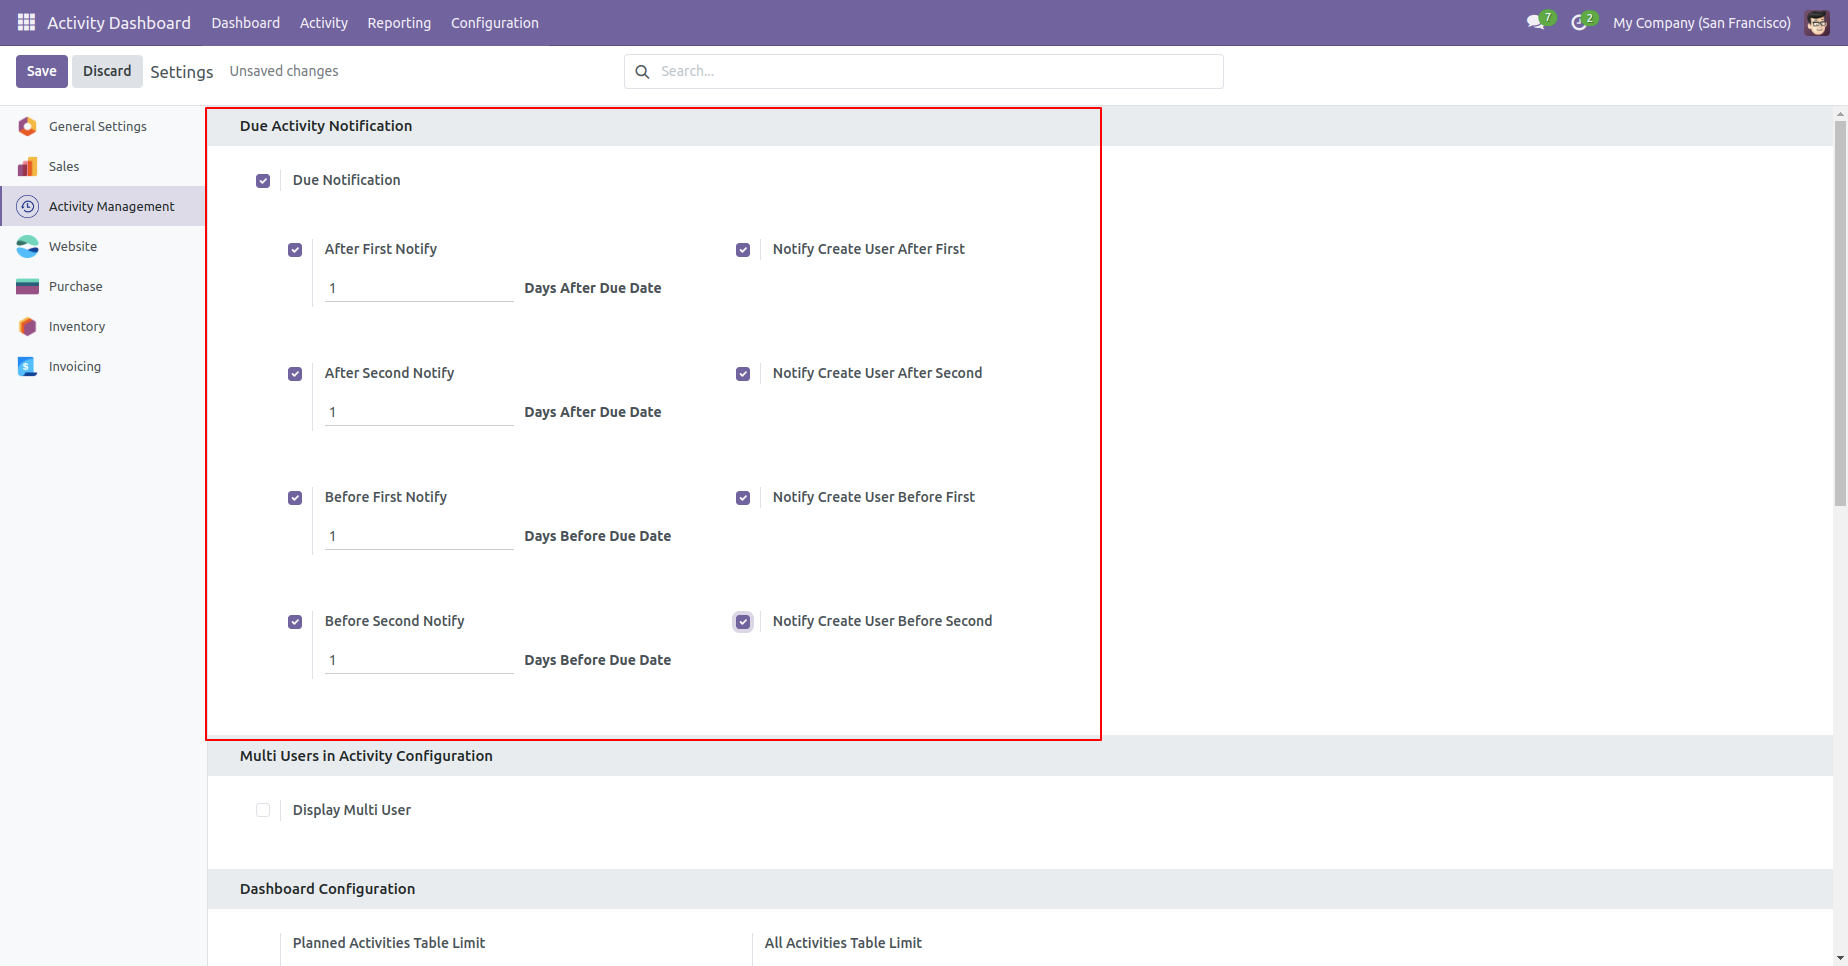
Go to the activity configurations ==> Settings.
Enable 'Due Activity Notification' in the settings. The
system compares the current date with the activitys
deadline date.
If 'On Due Date' is selected, users will be notified on
the exact deadline date.
If days after the due date are specified, users will be
notified when (deadline date + specified days) matches
the current date (for overdue activities).
If days before the due date are specified, users will be
notified when (deadline date - specified days) matches
the current date (for upcoming activities).
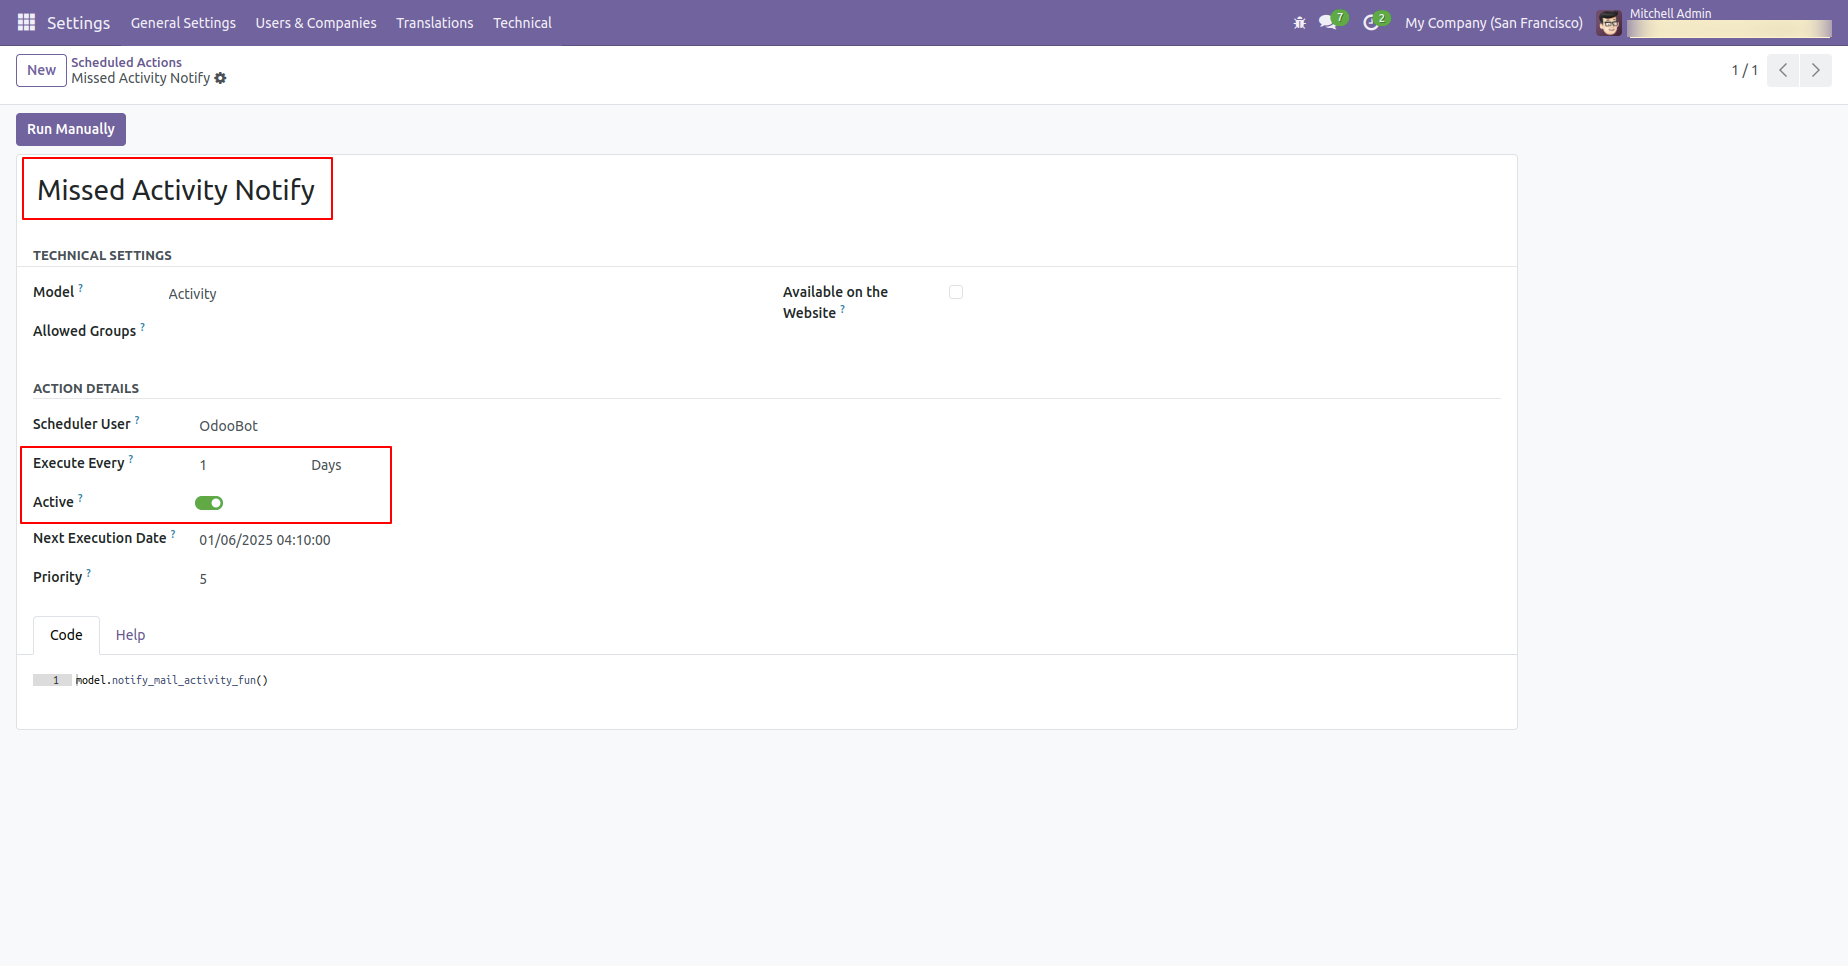
Schedule action 'Missed Activity Notification', set execution days and execution time as per requirement.
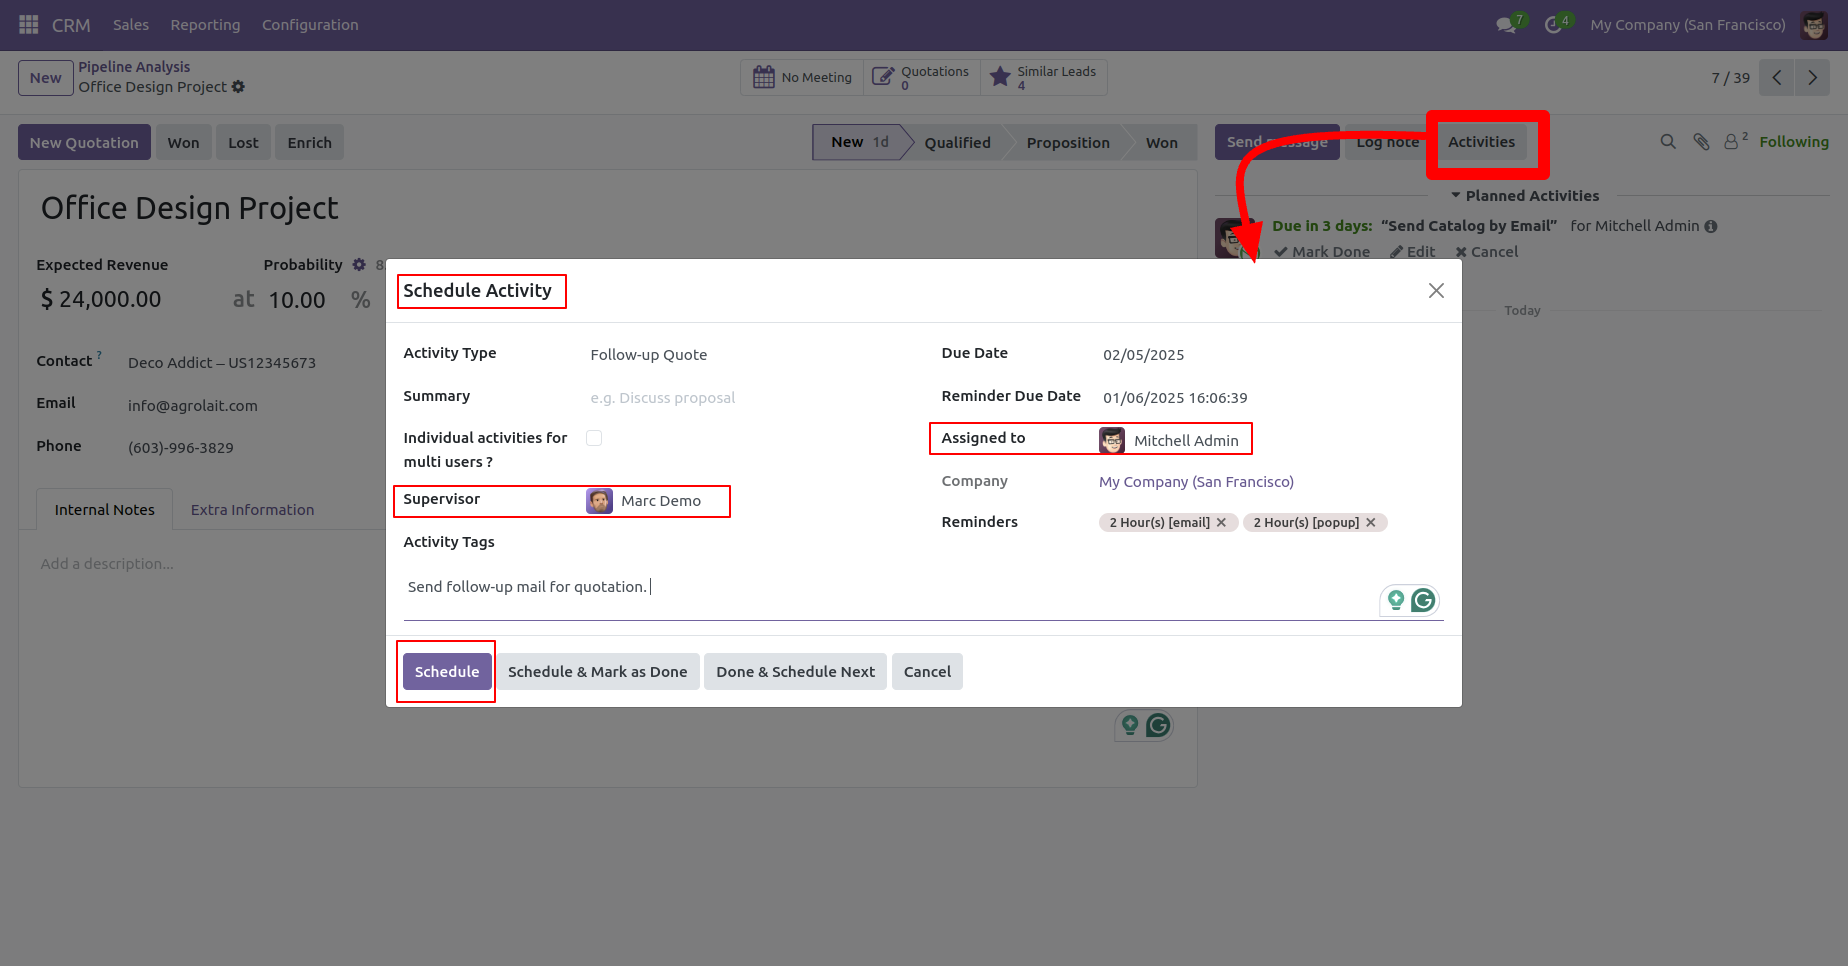
To Schedule Activity, click on the 'Activities' button.
Add details and click on the 'Schedule'
button.
The Assigned user will get activity Due notification
as per settings.
In the chatter, you can see the created Activity.
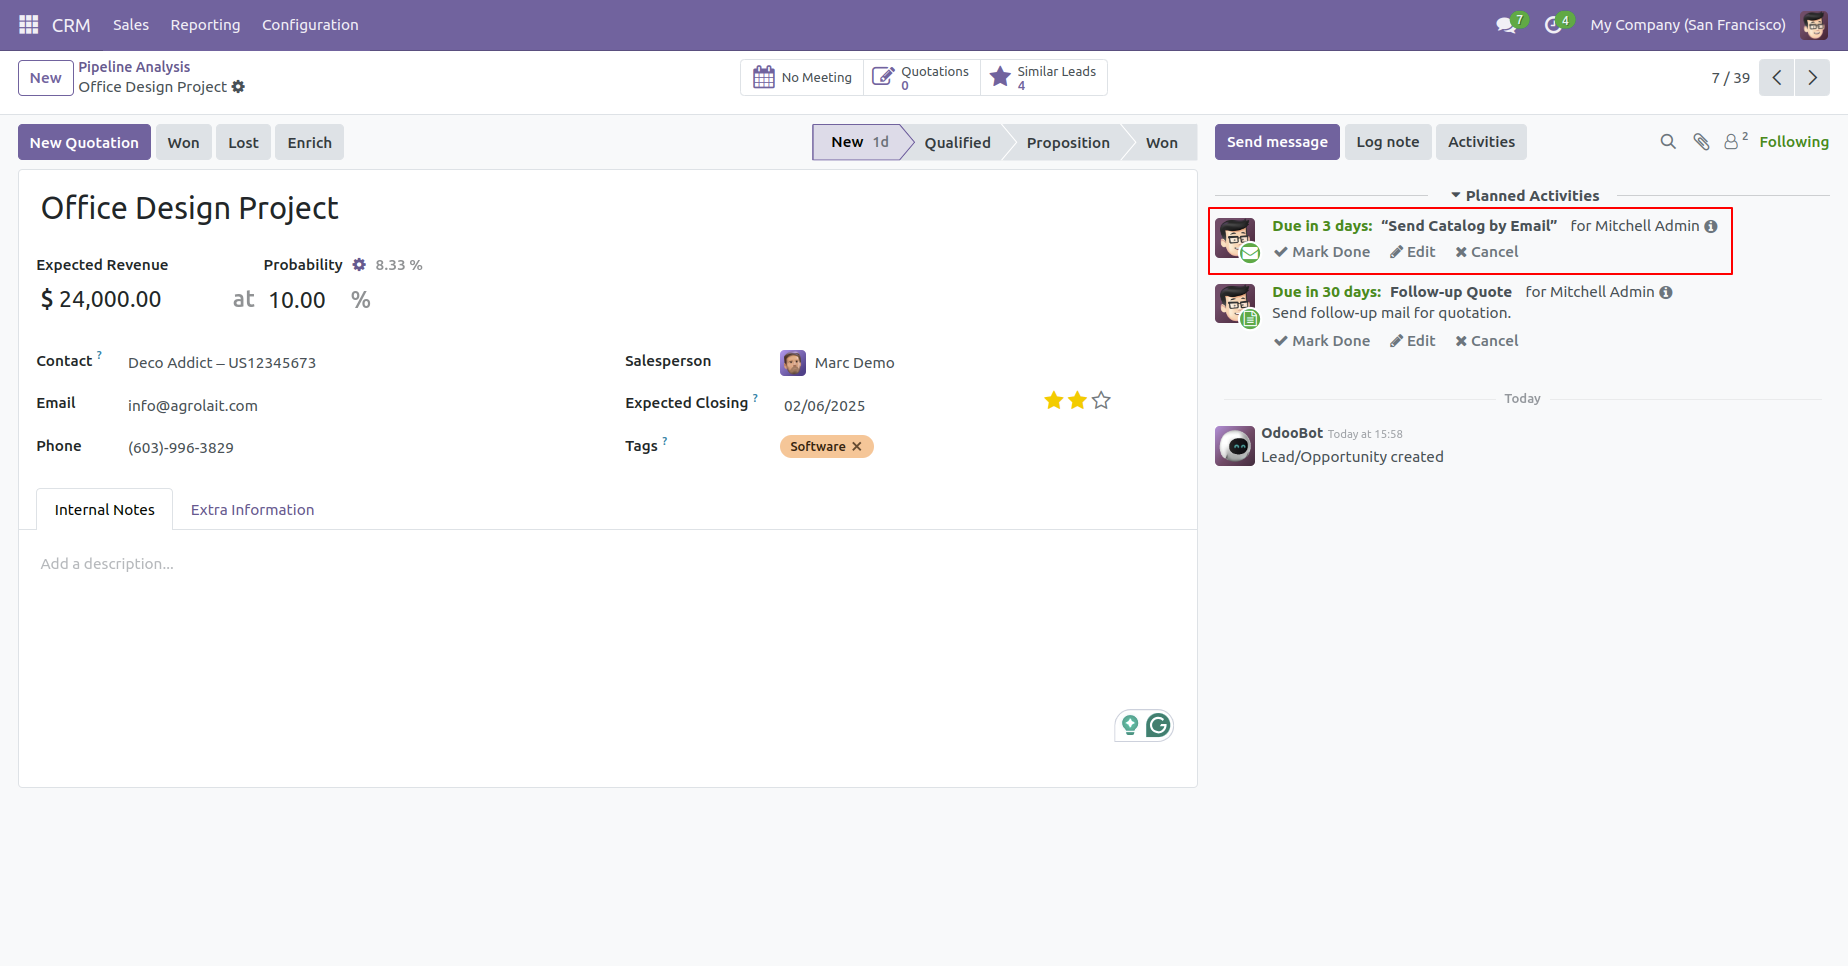
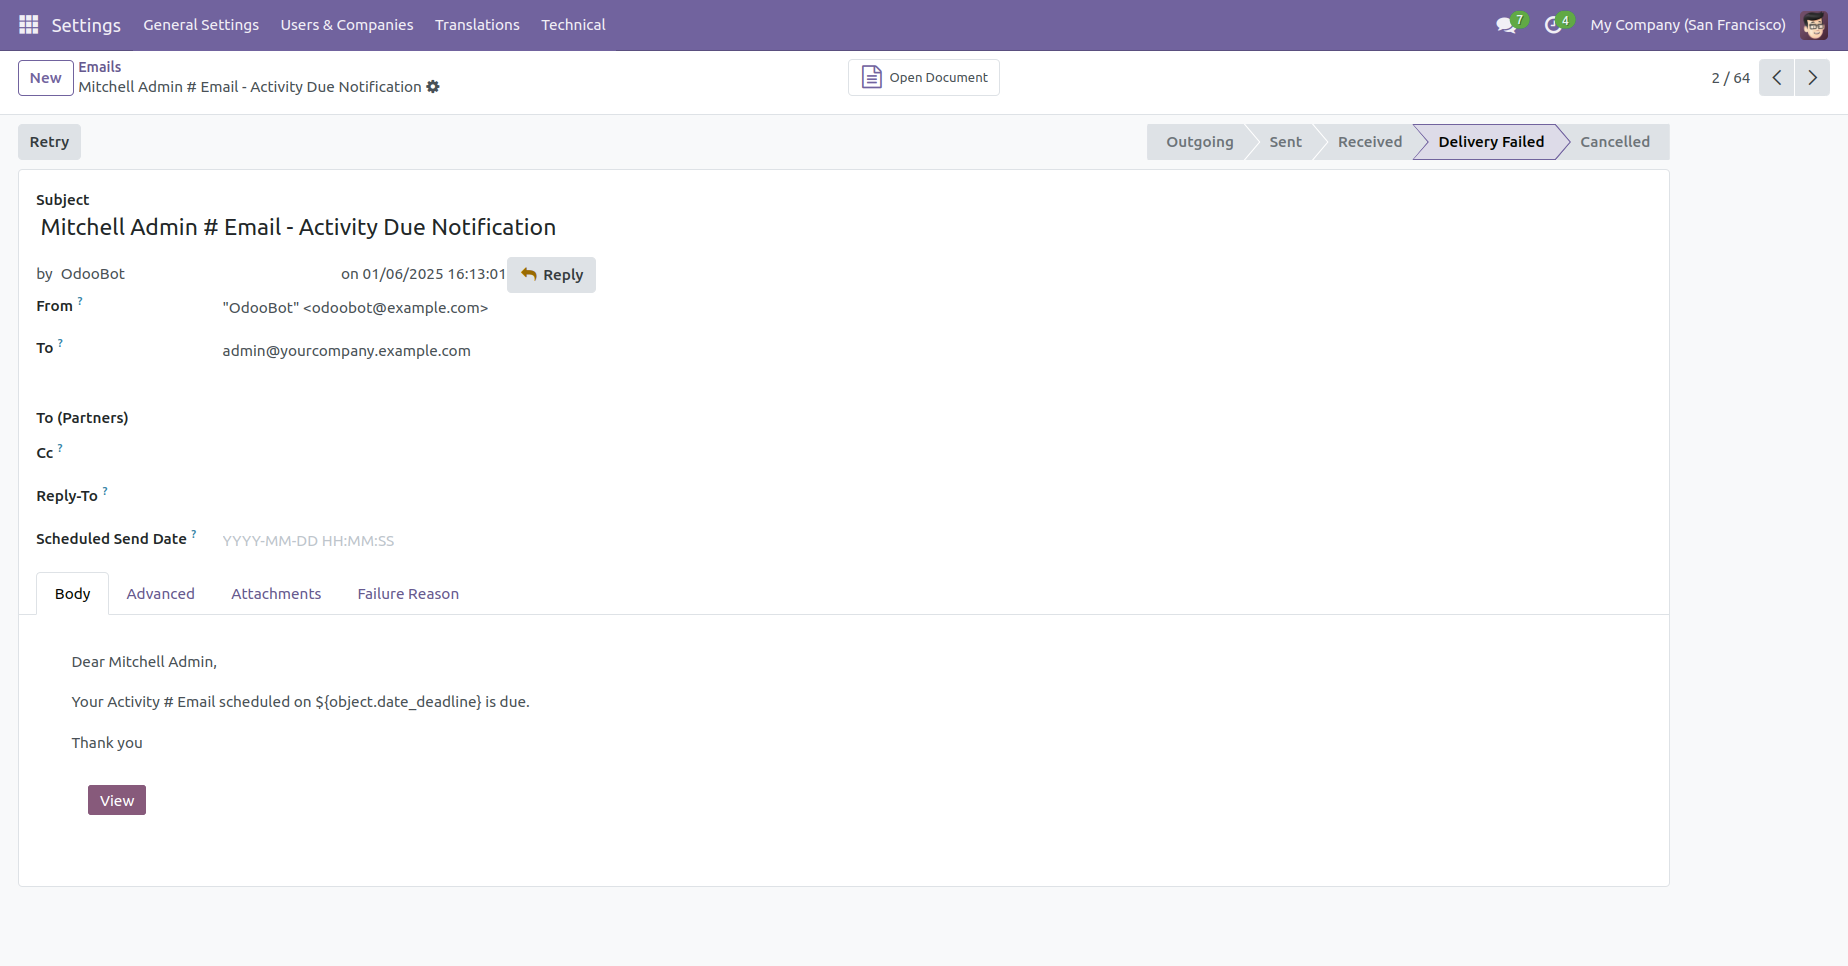
An email will be sent to the assigned salesperson/customer when the activity becomes due, based on the configured settings.
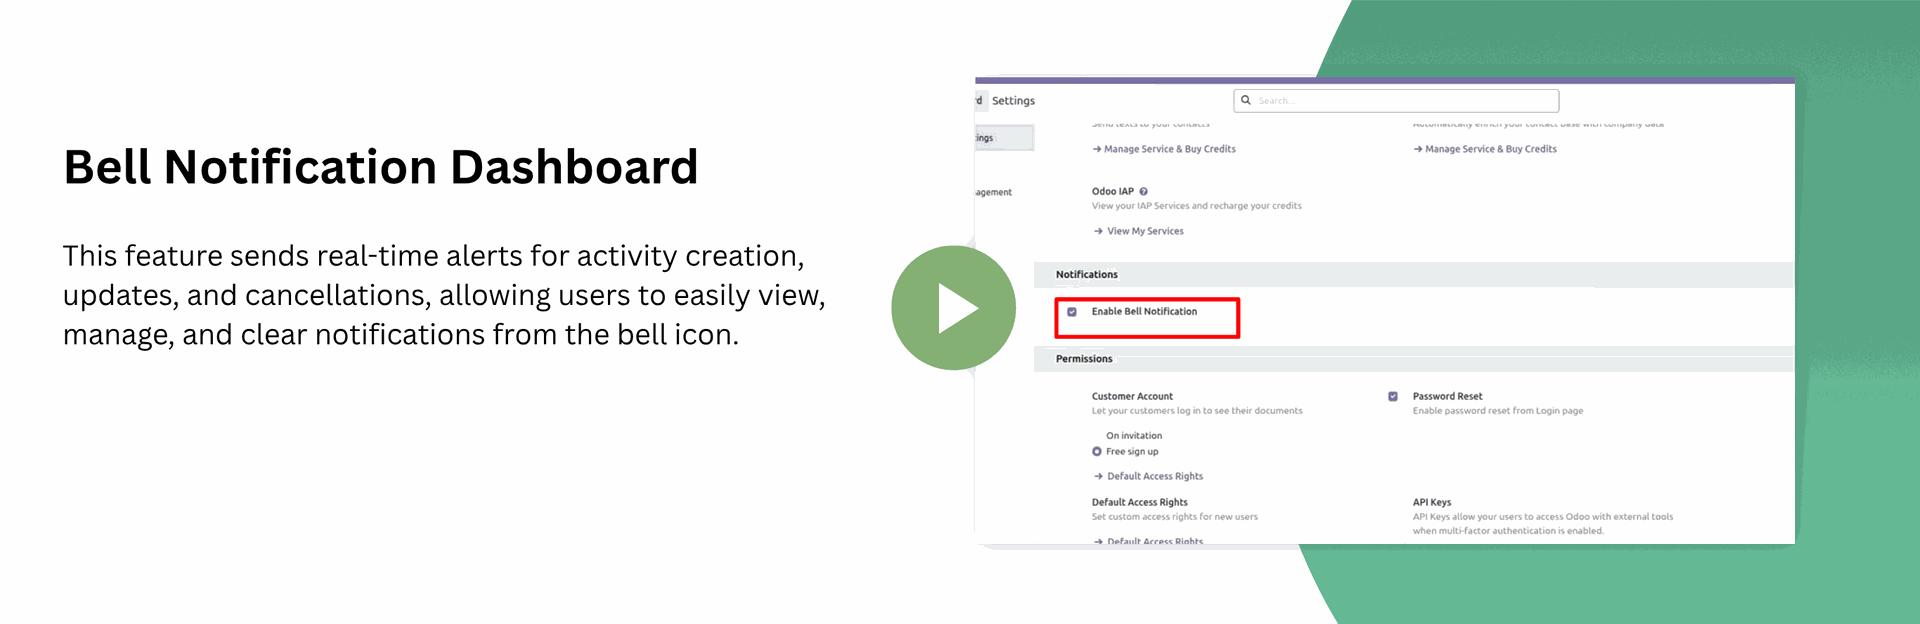
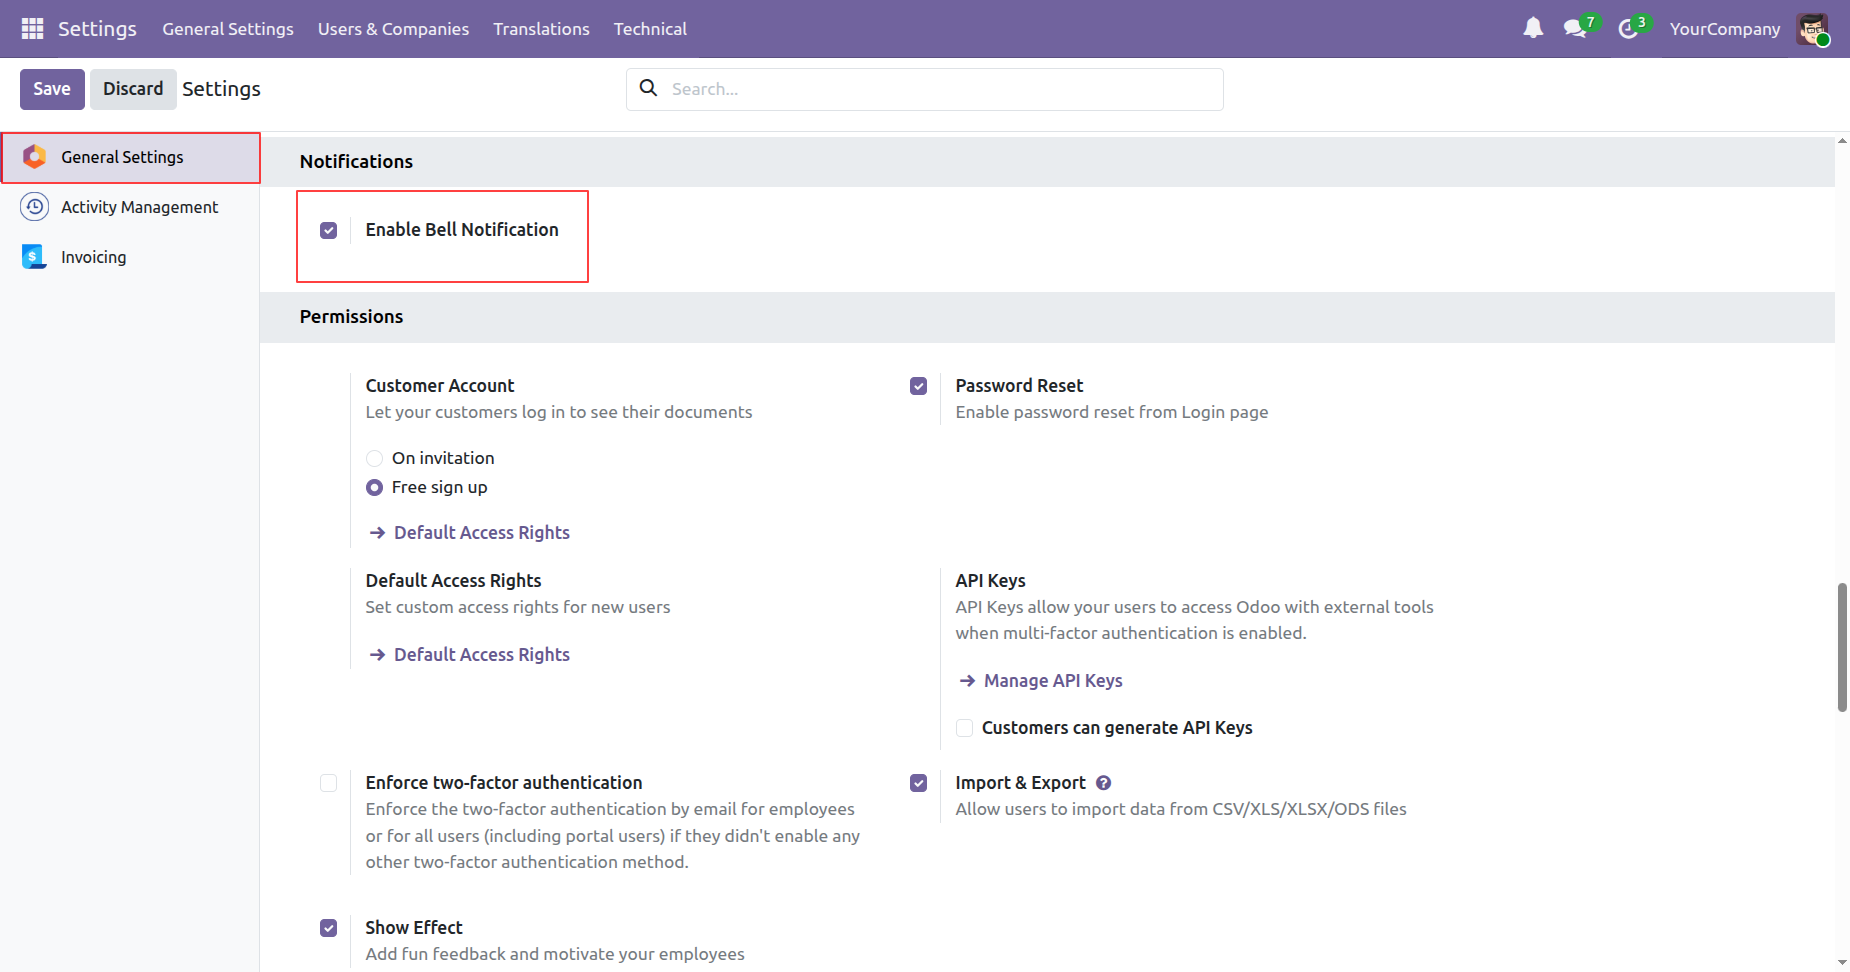
Go to the general settings ==> Enable 'Enable Bell Notification'.
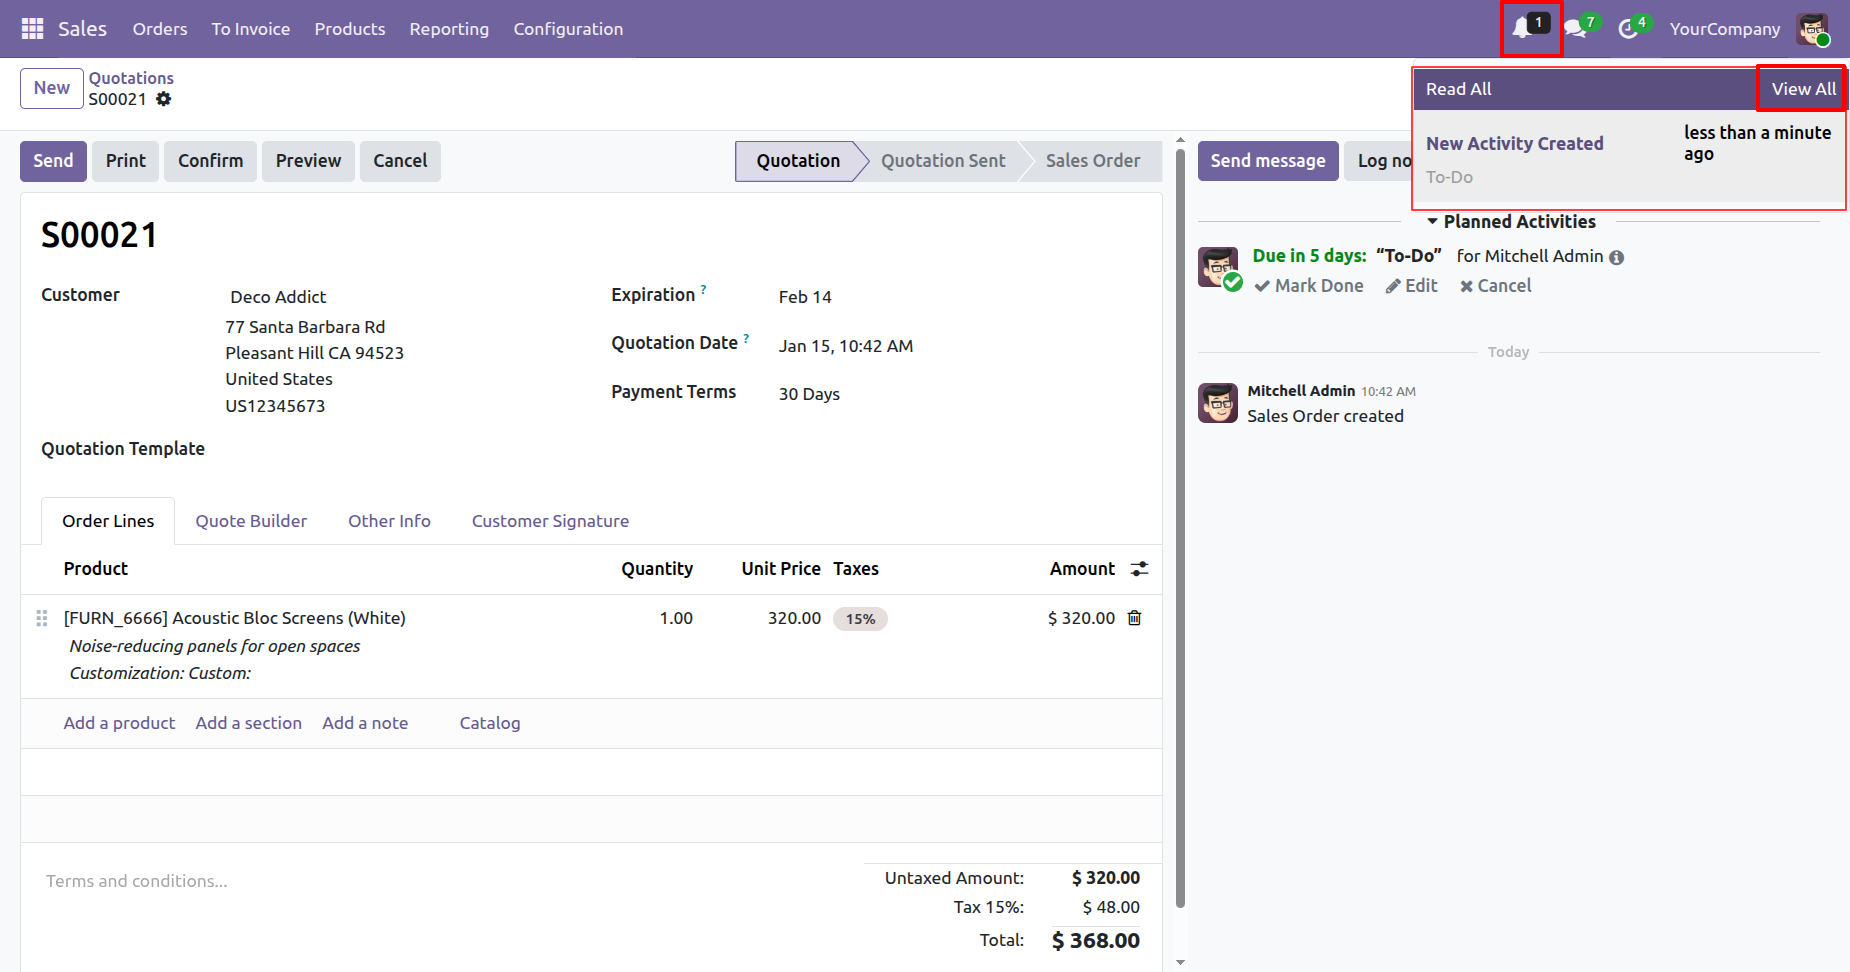
The assigned user and their supervisor will receive a
bell notification when the activity is created.
Click on 'View All' in the activity notification.
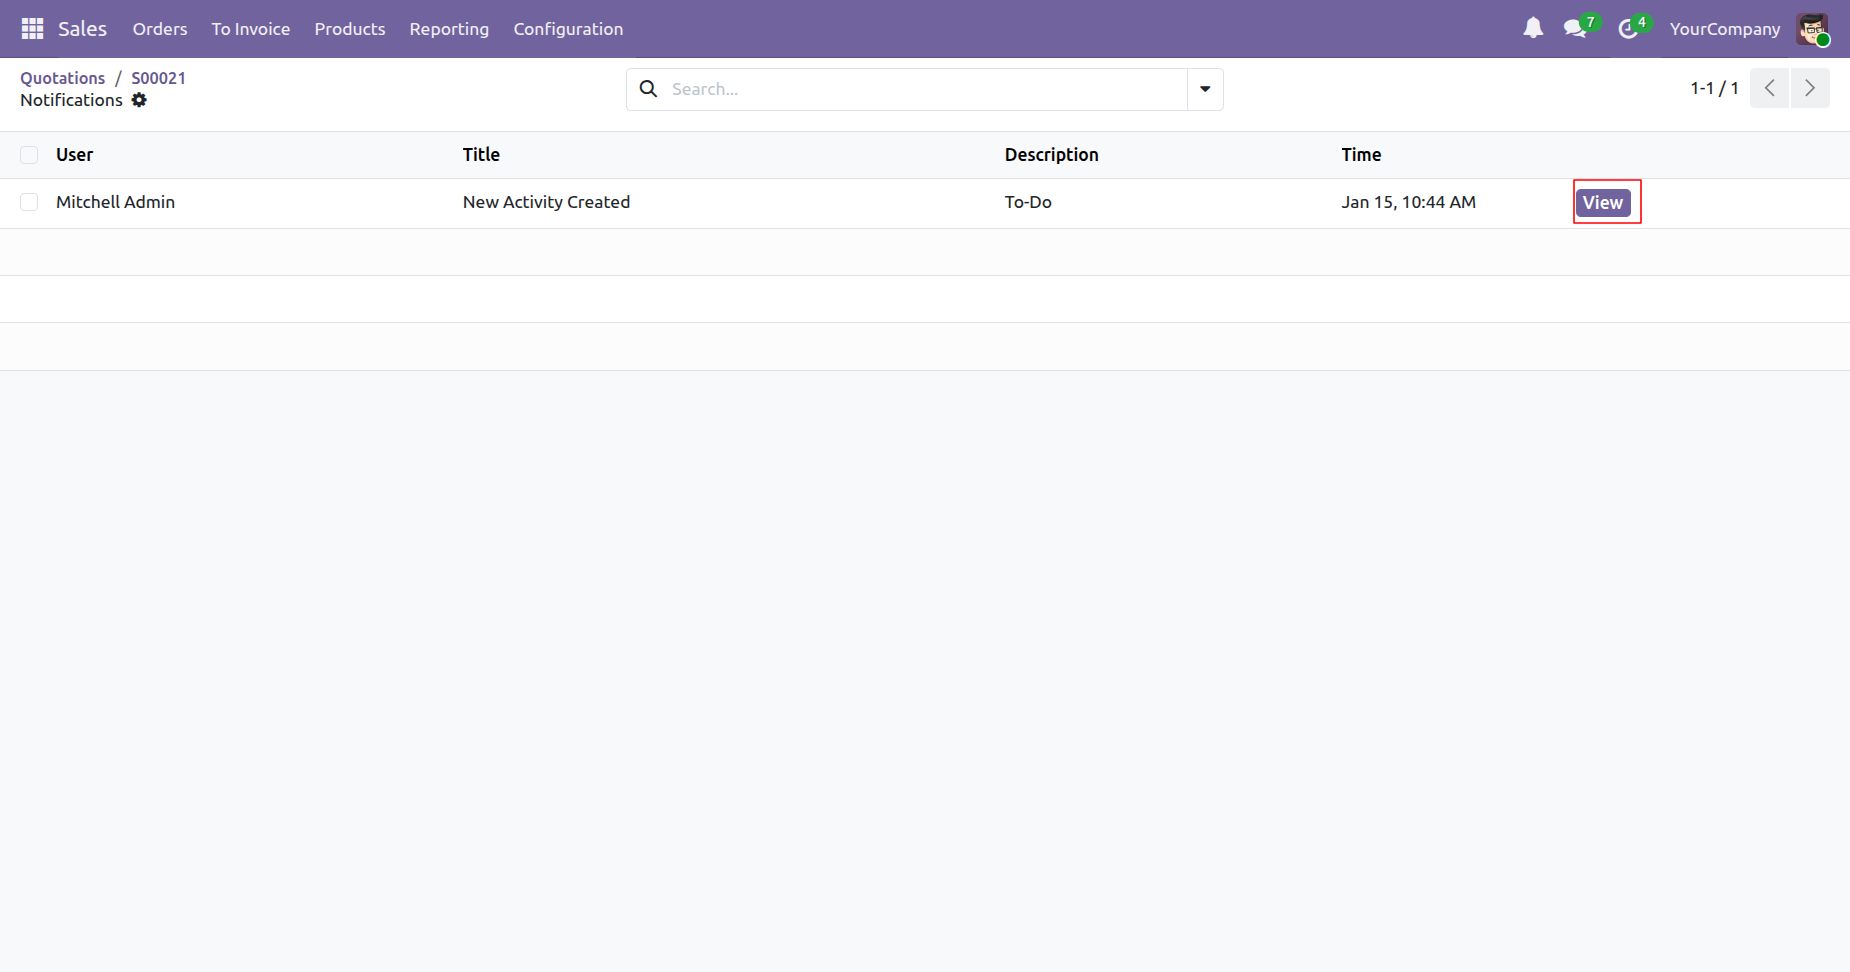
After that, you will be redirected to the bell
notification tree view.
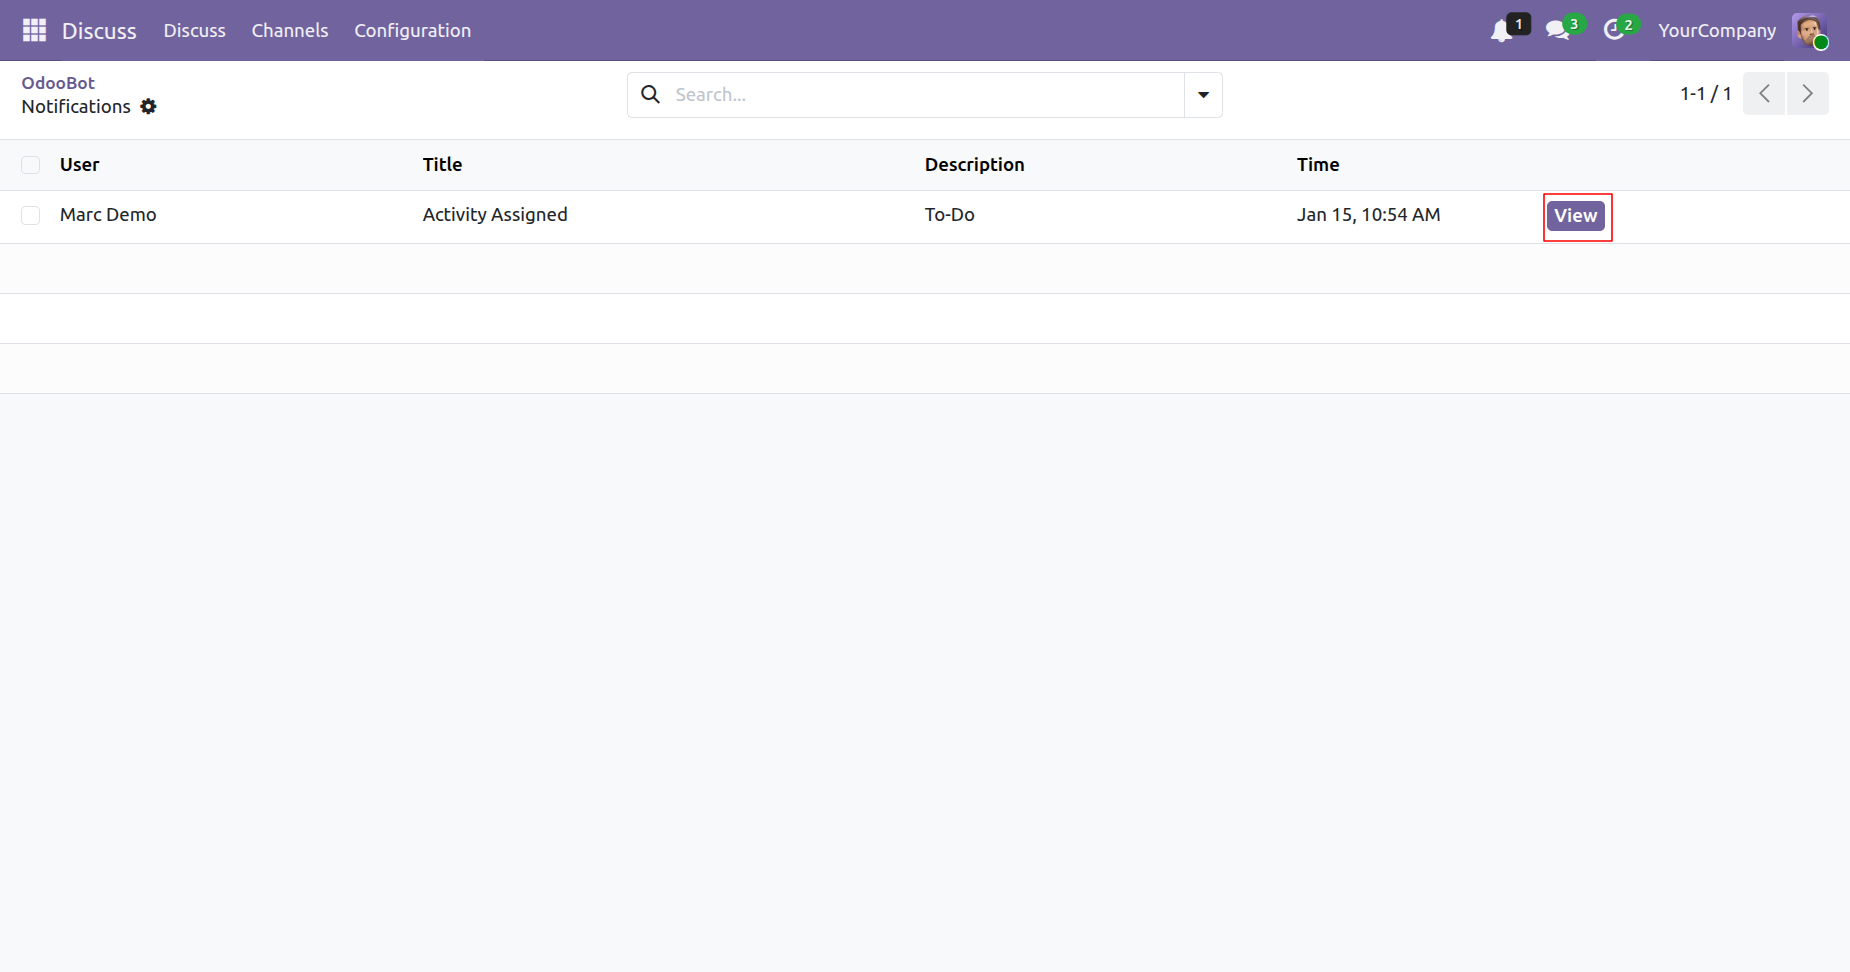
Click on the 'View' button.
Form view of the bell notification.
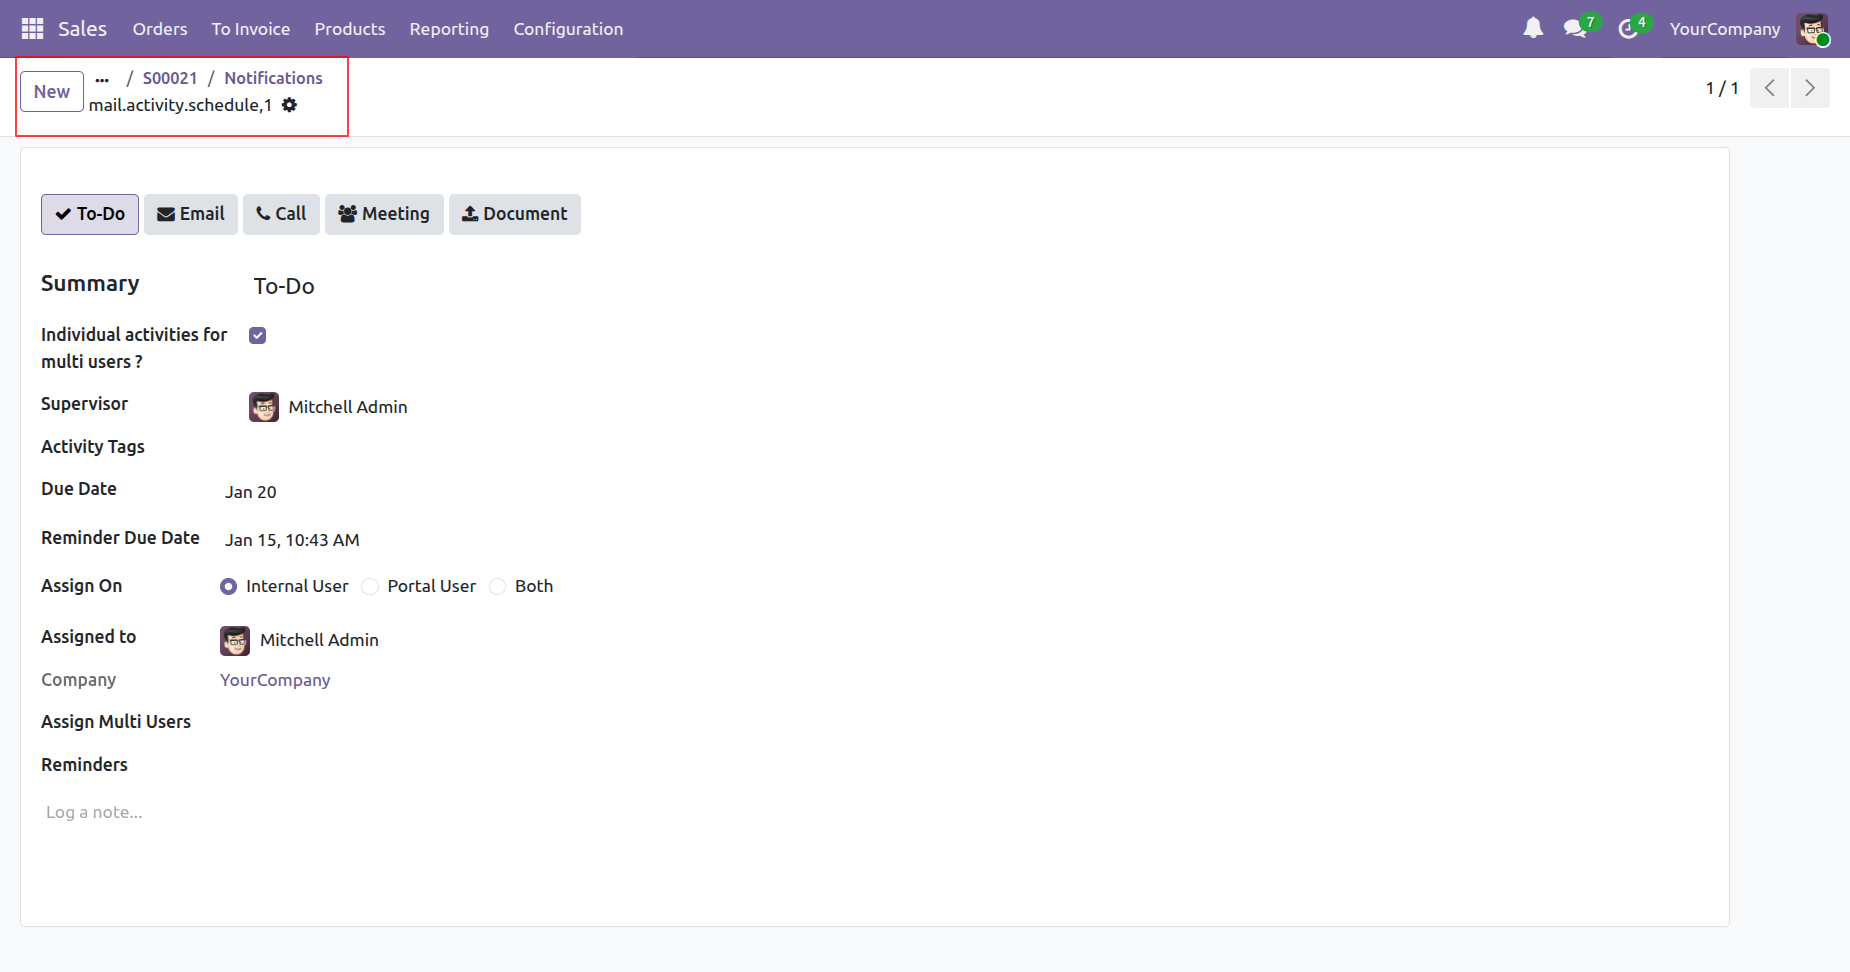
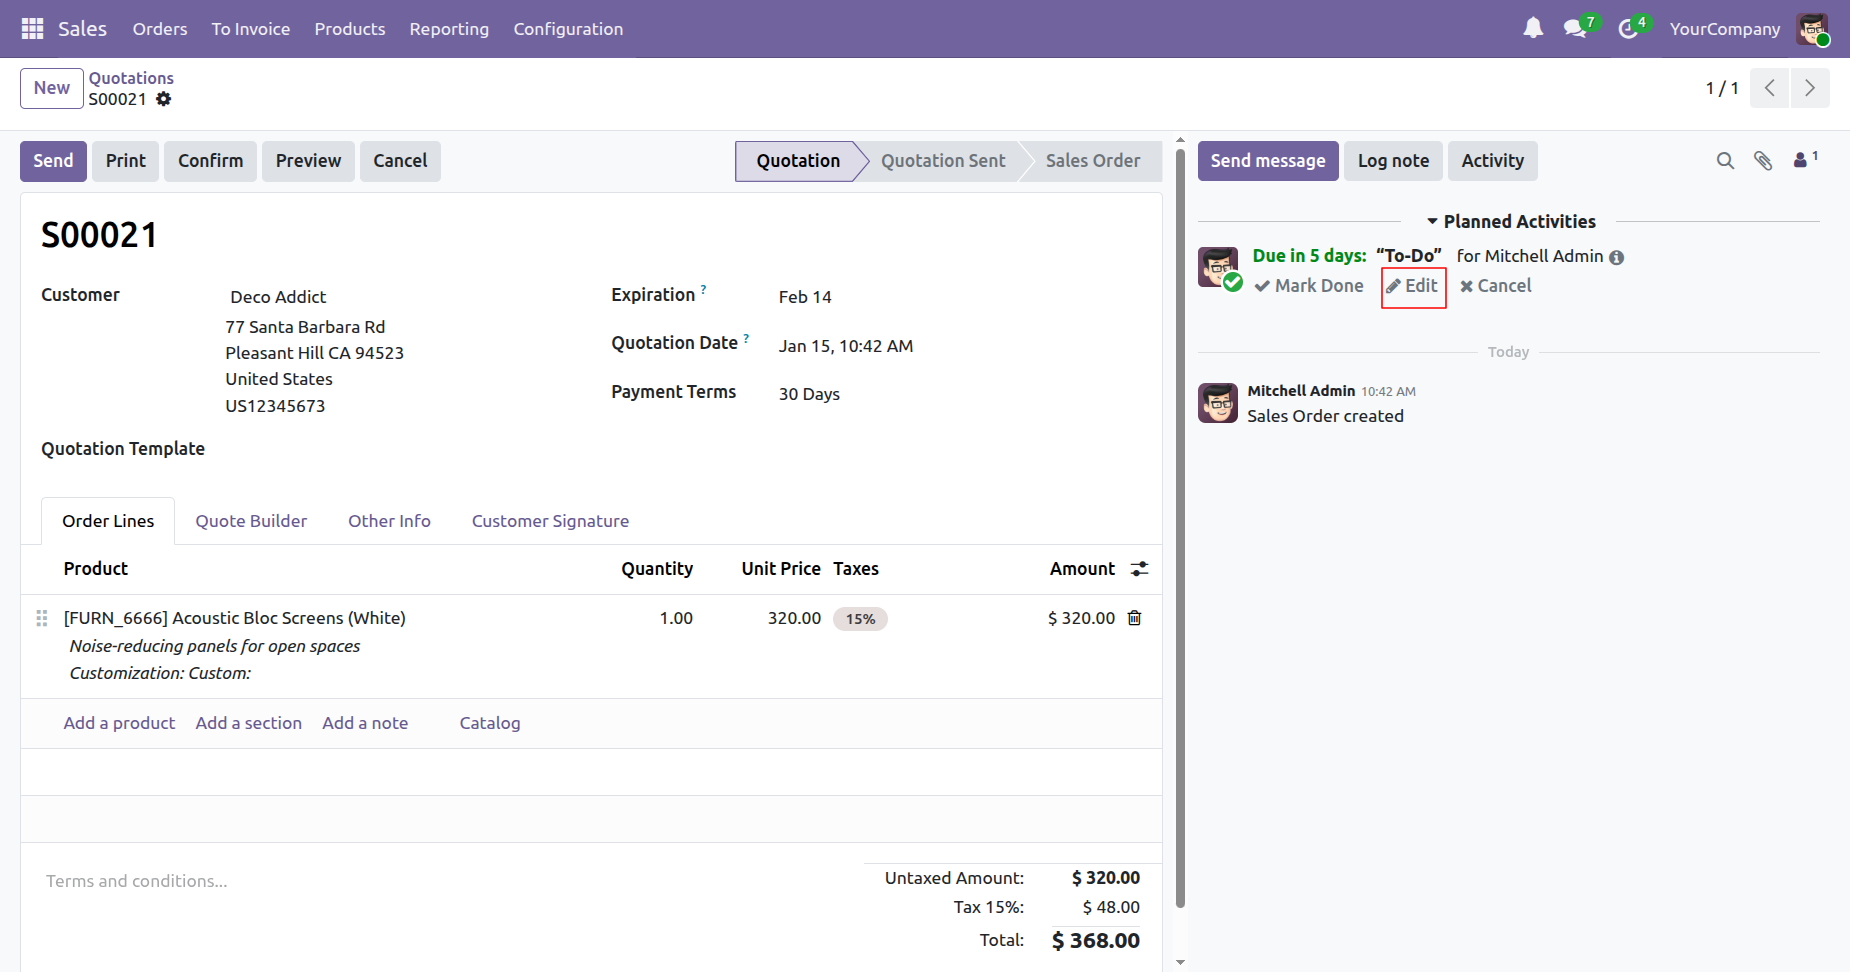
Click on the 'Edit' option to update the created activity.
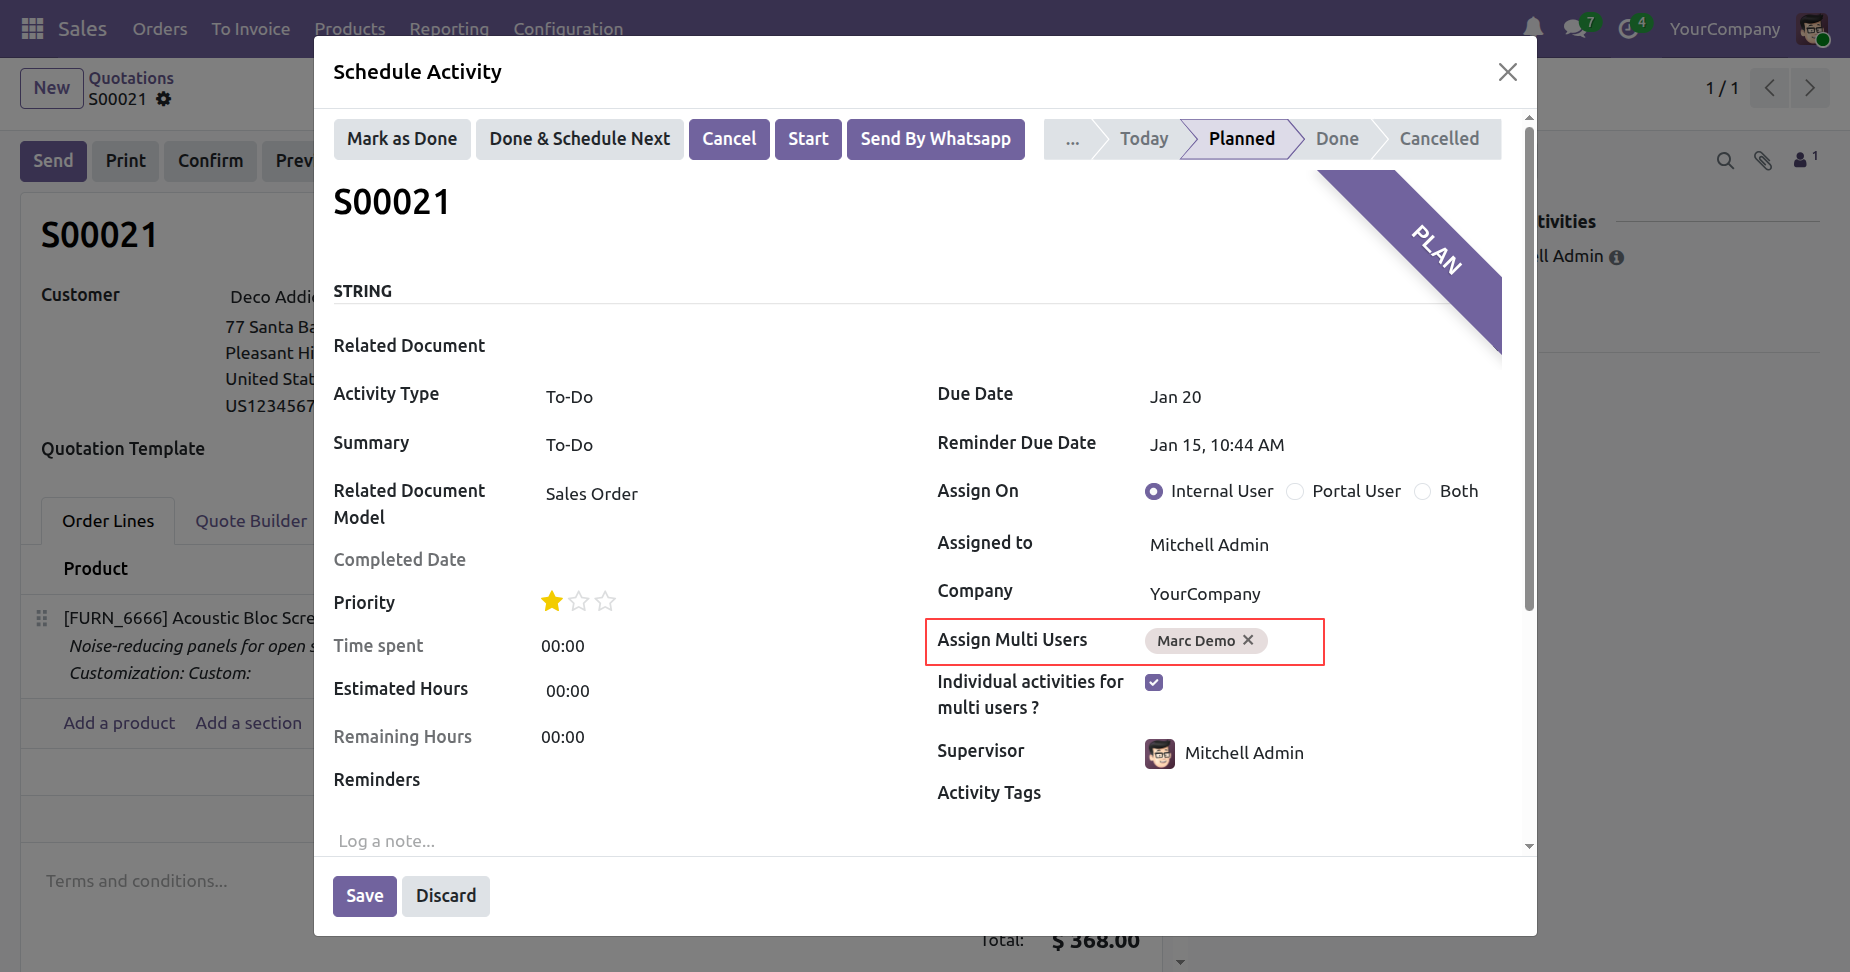
Update assign multi user (Marc Demo) and click on the 'Save' button.
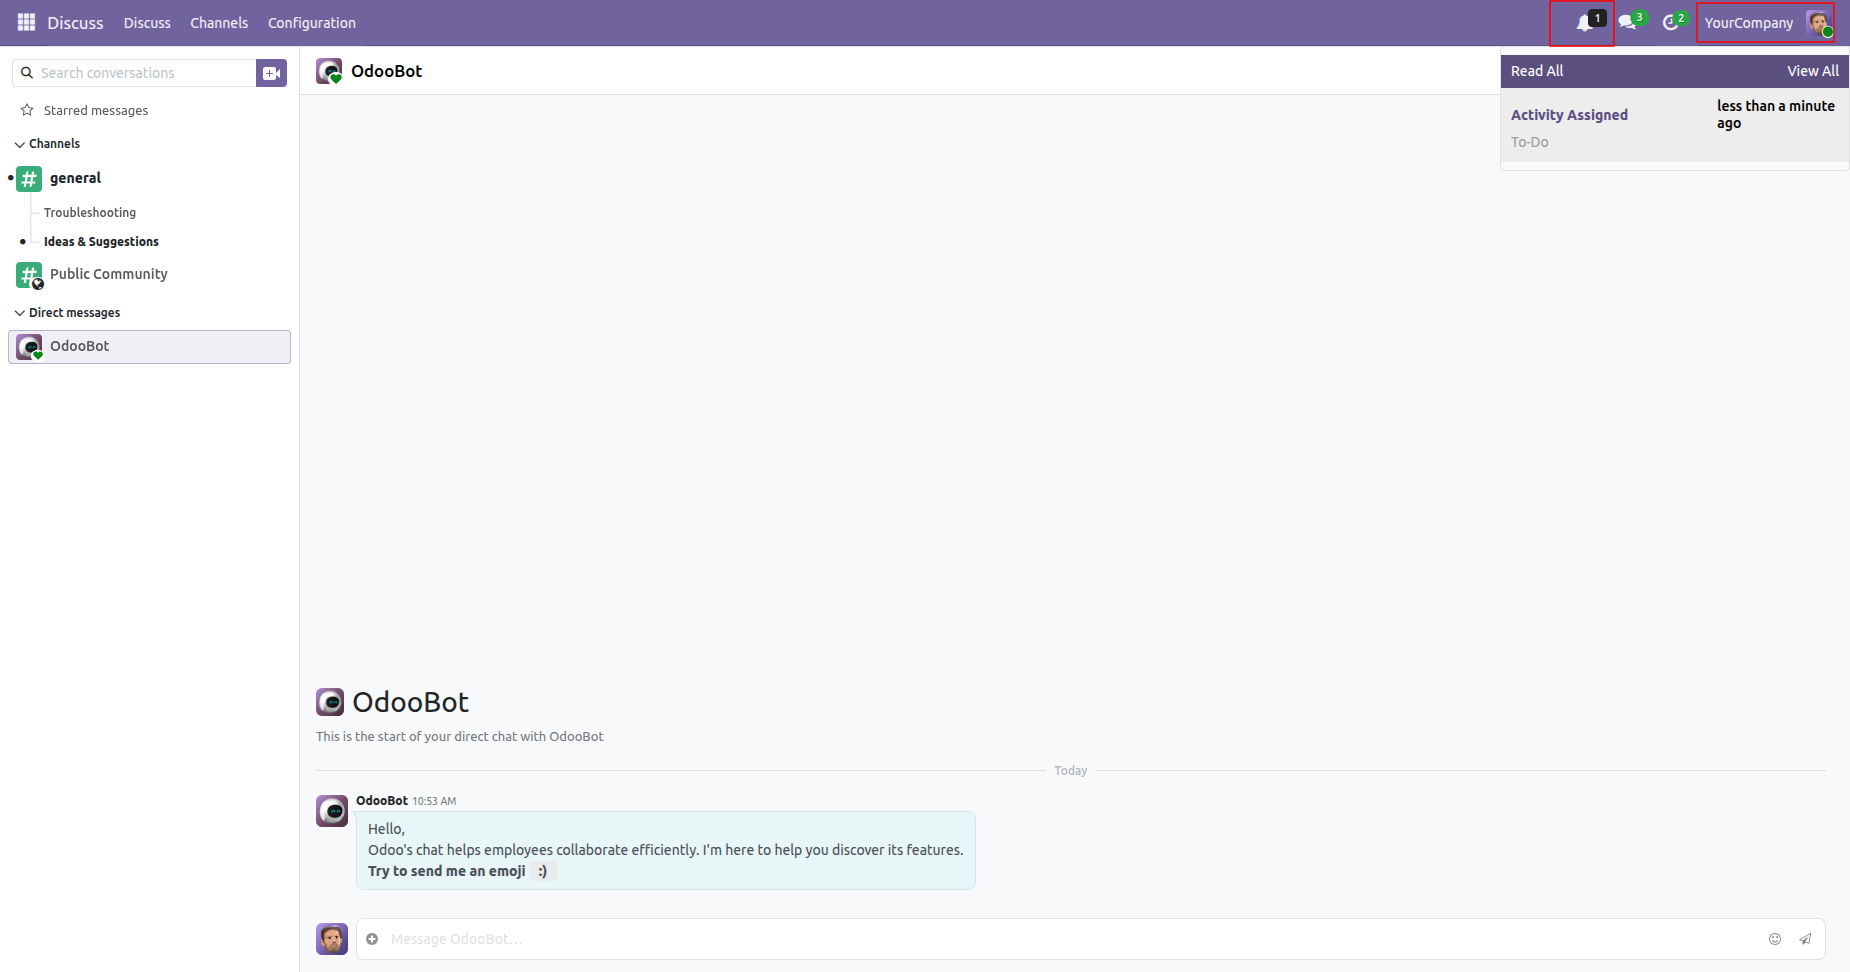
The assigned user (Marc Demo) will receive a bell notification.
Click on the 'View' button.
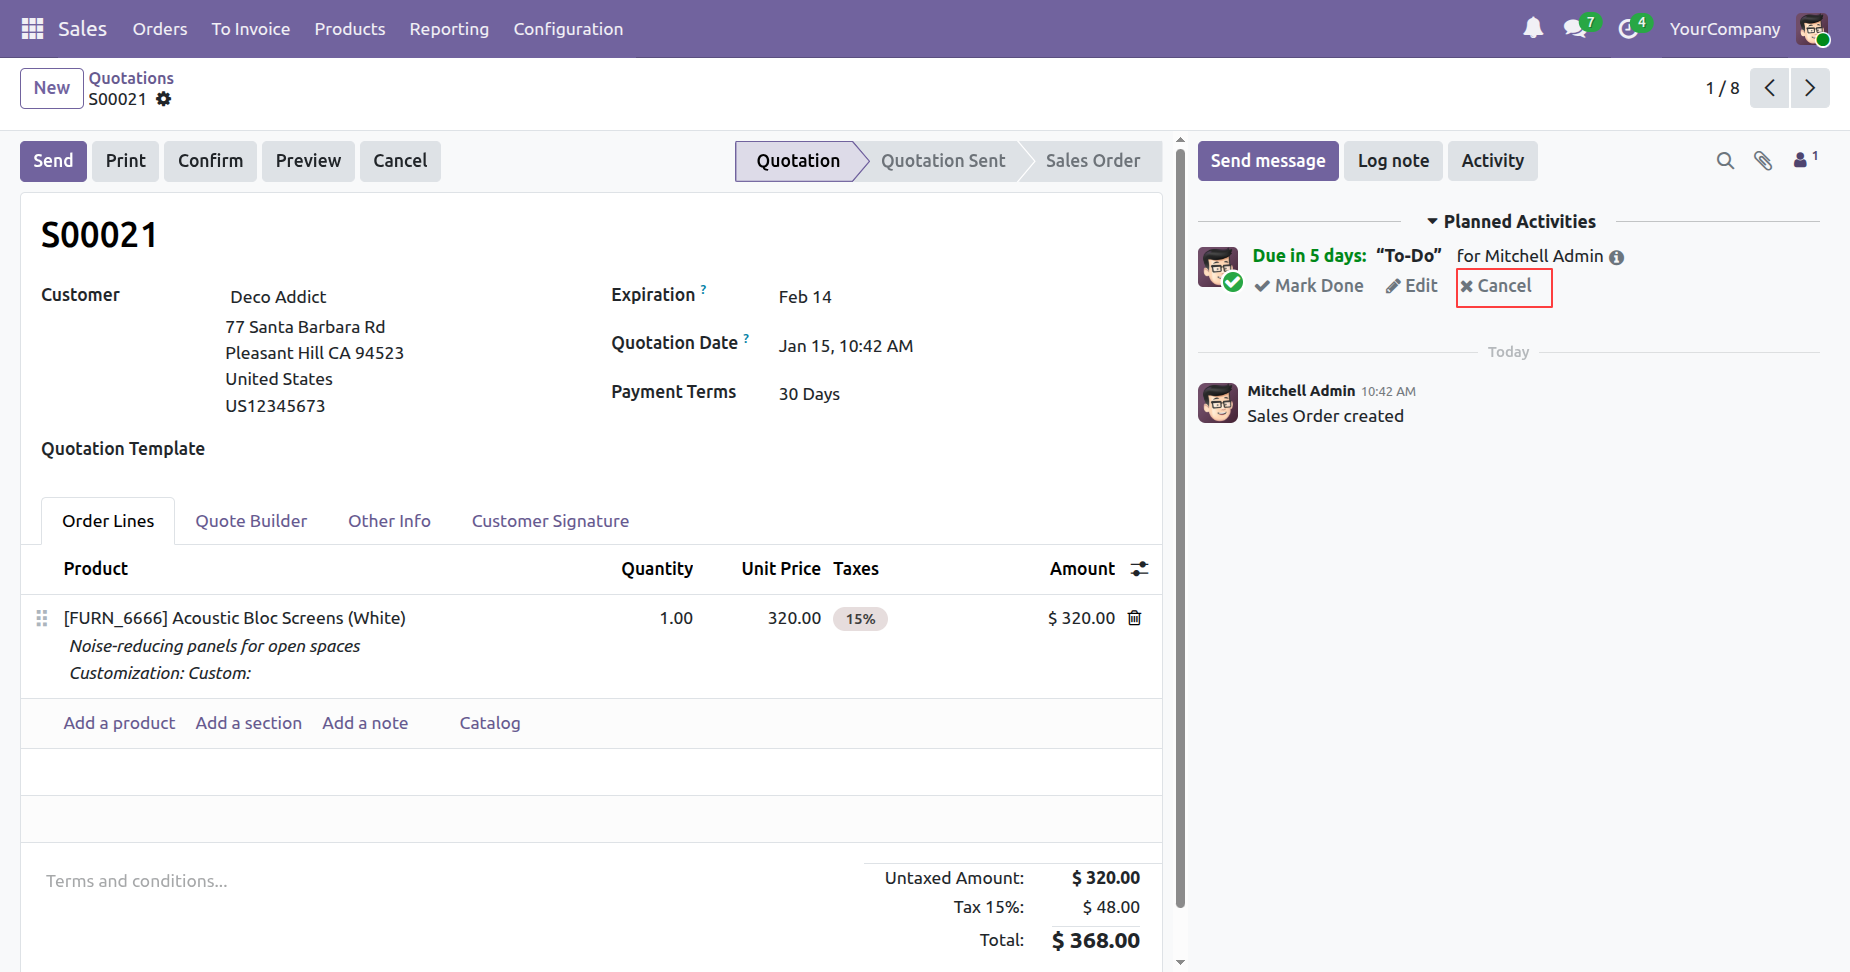
To cancel the activity, click on the 'Cancel option'.
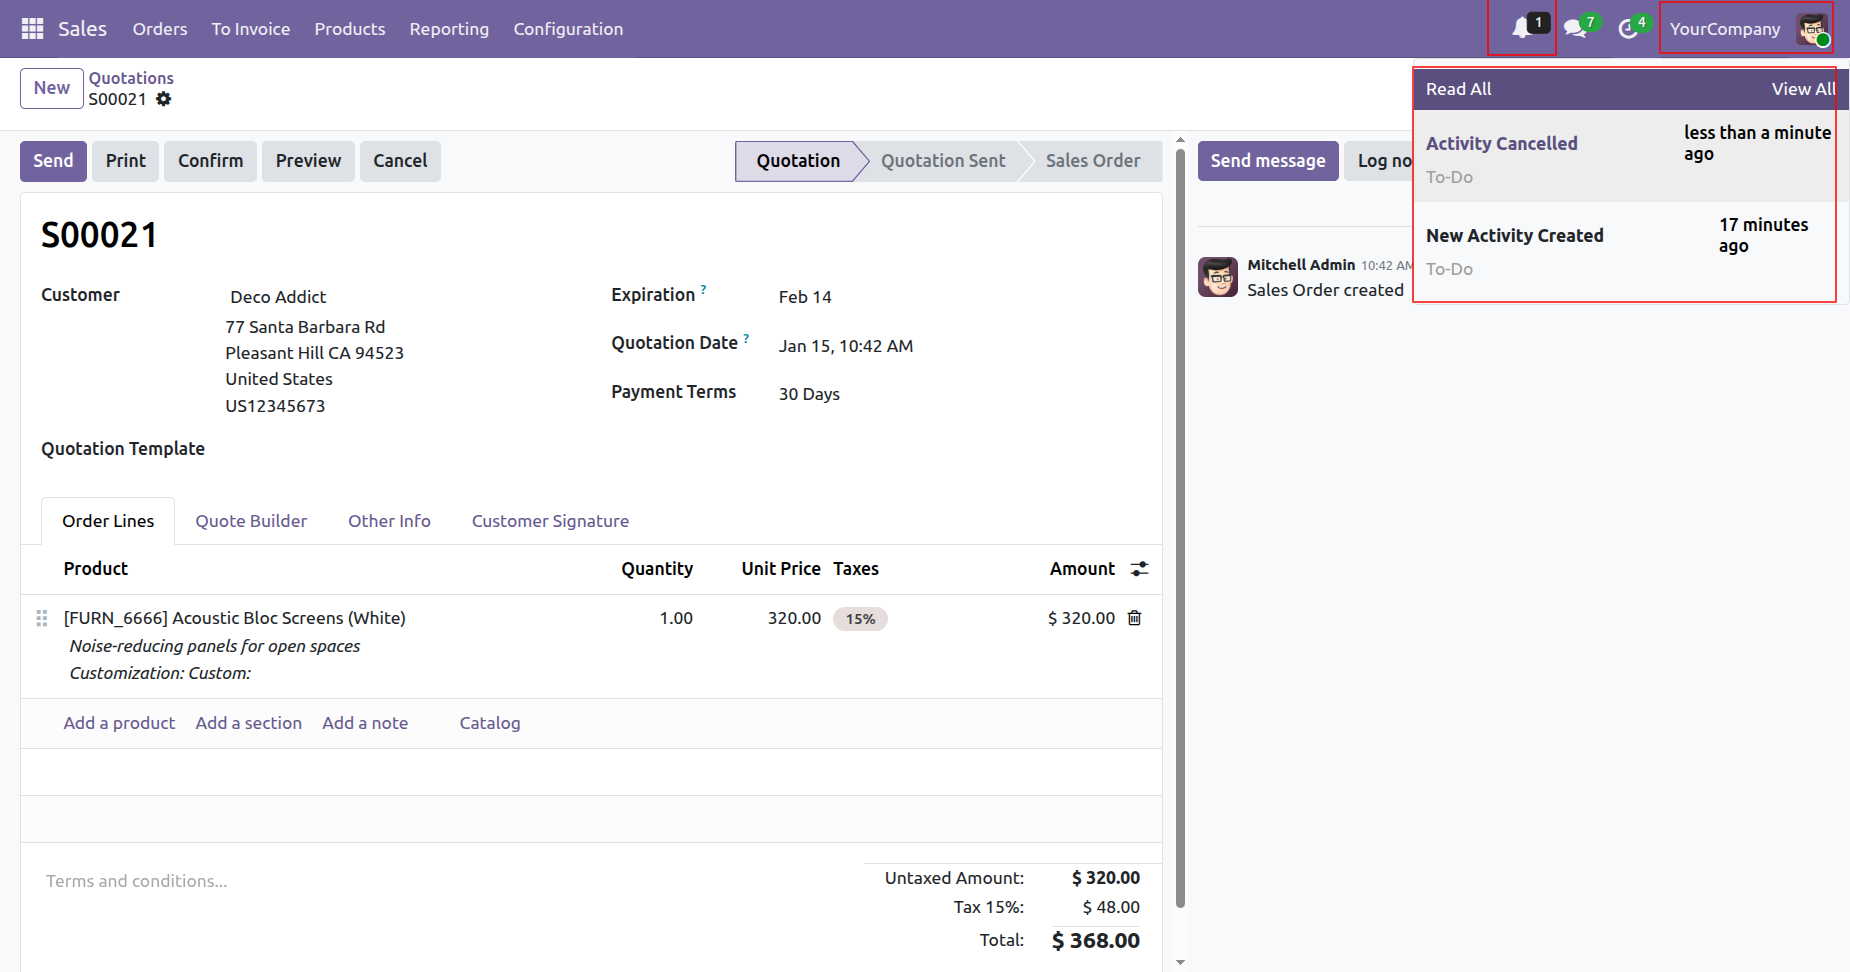
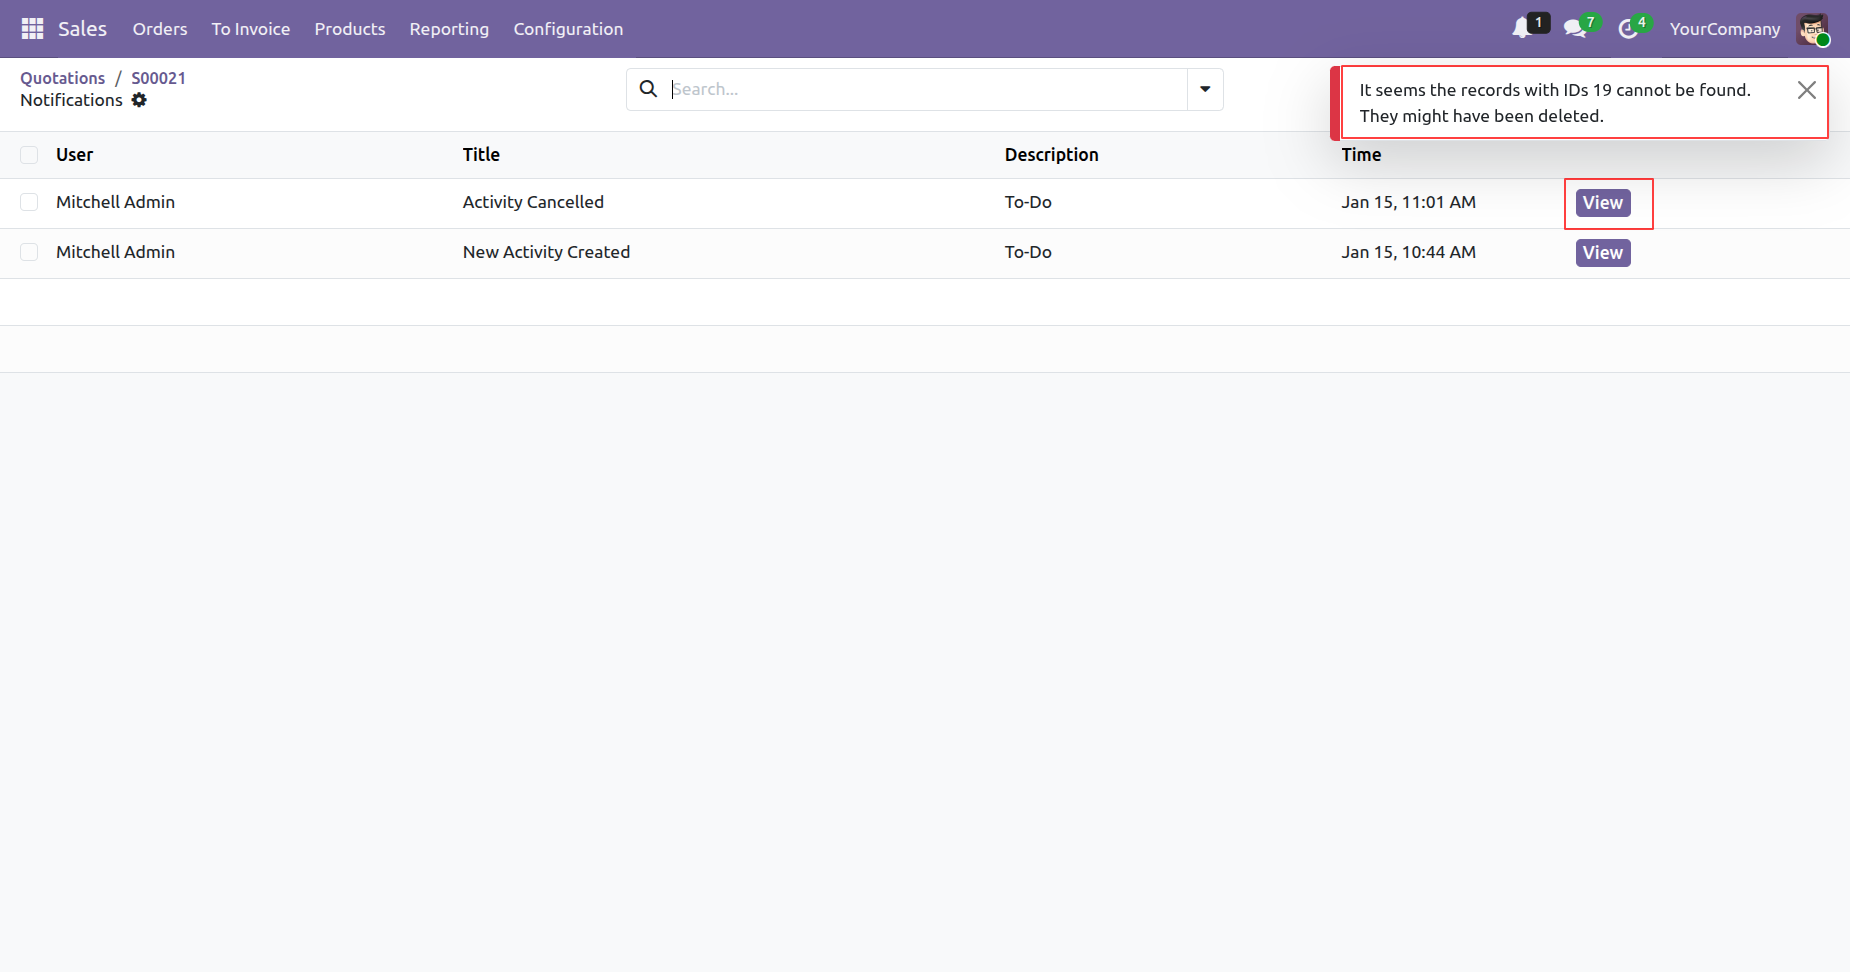
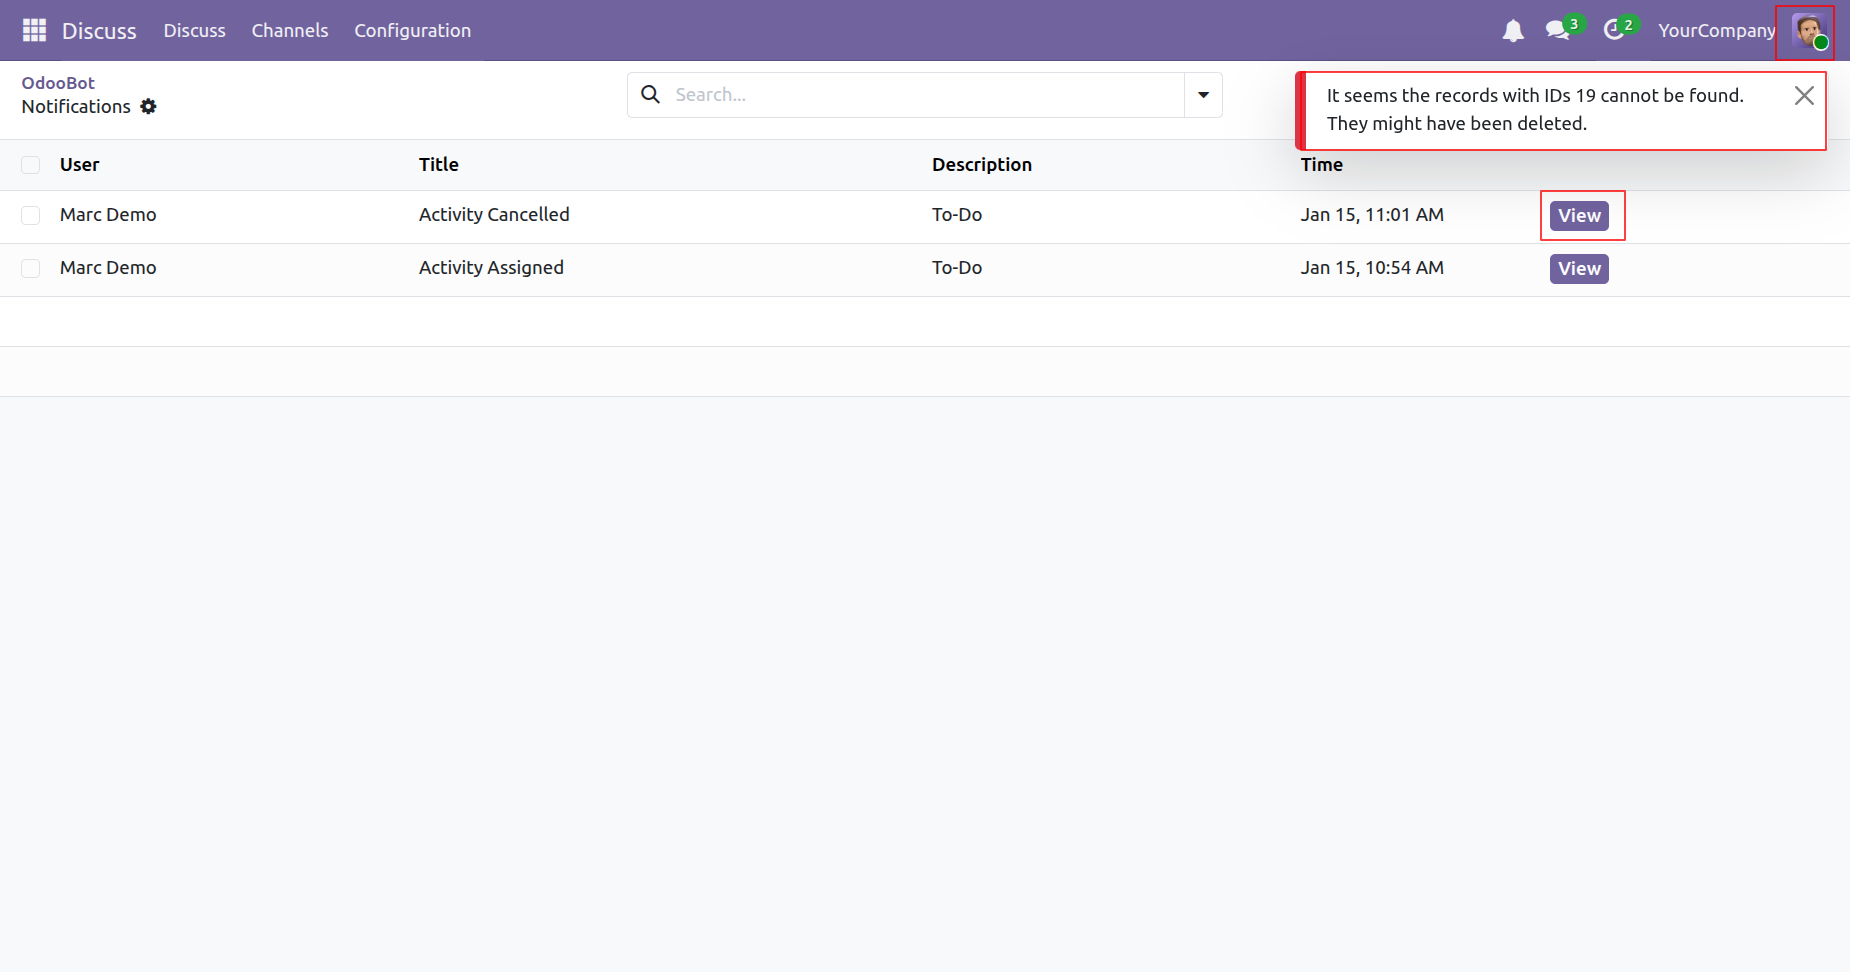
The assigned user and Supervisor will receive a bell notification when the activity is cancelled.
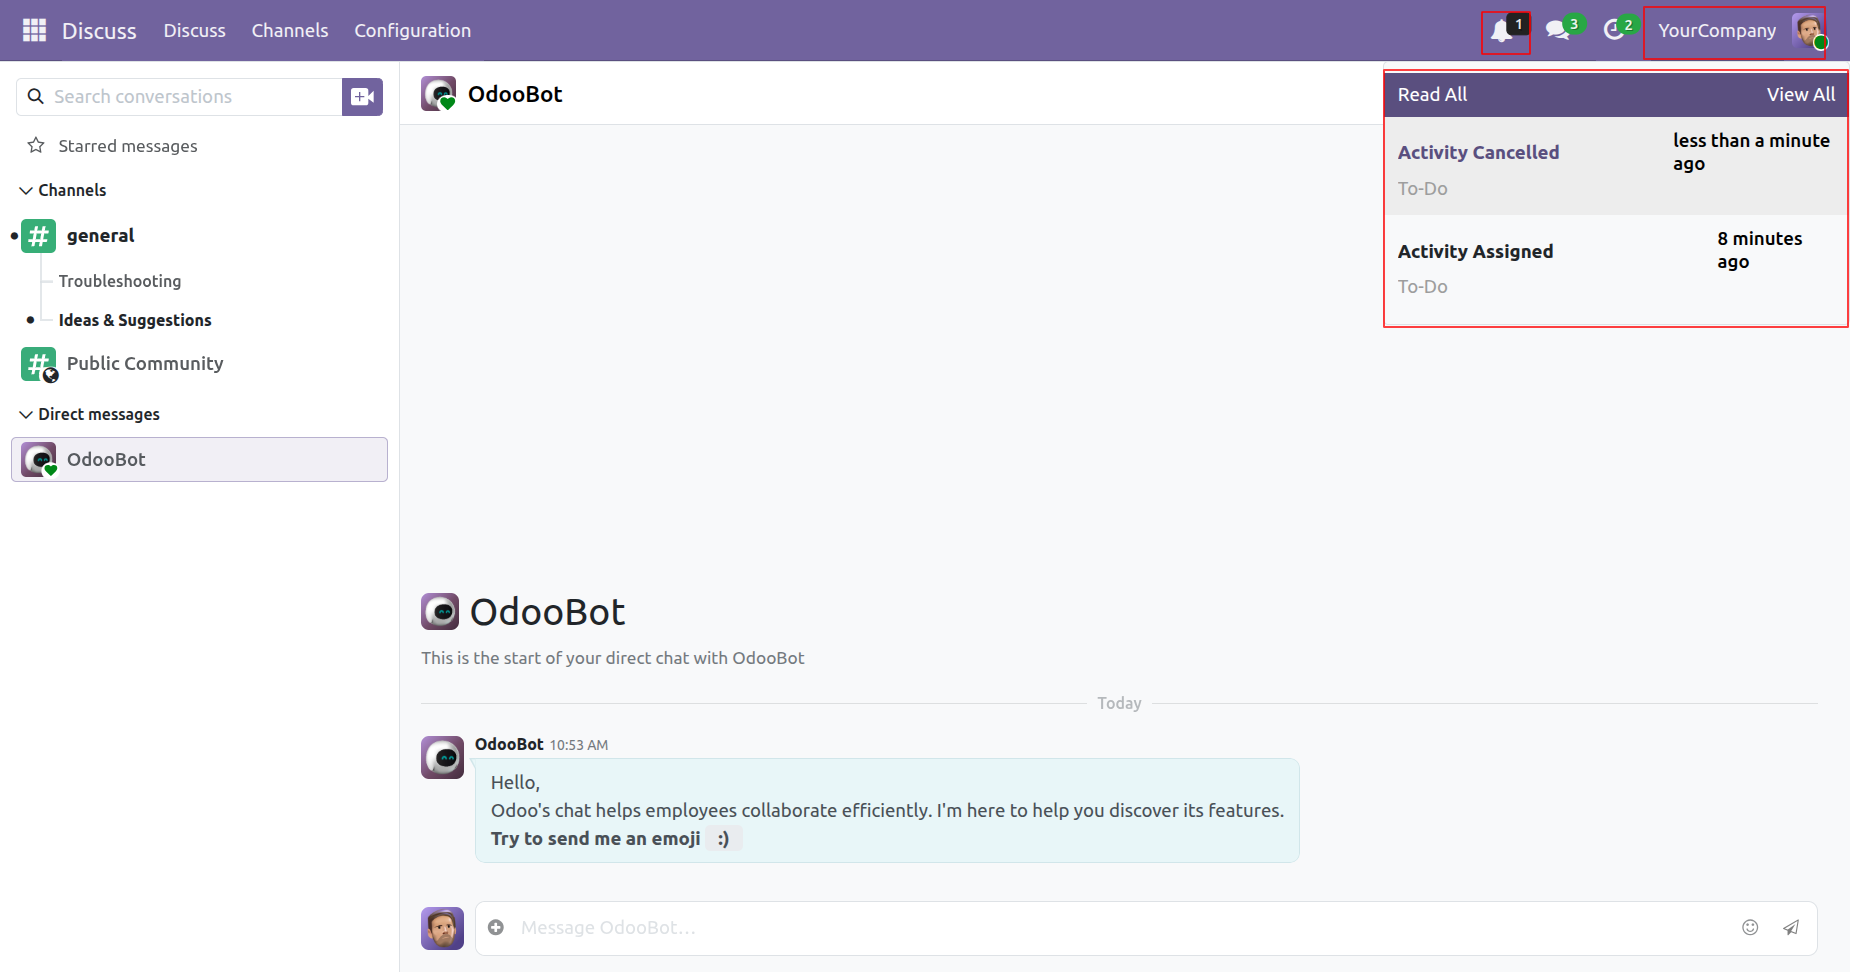
If you try to open the canceled notification, this warning message will be displayed.
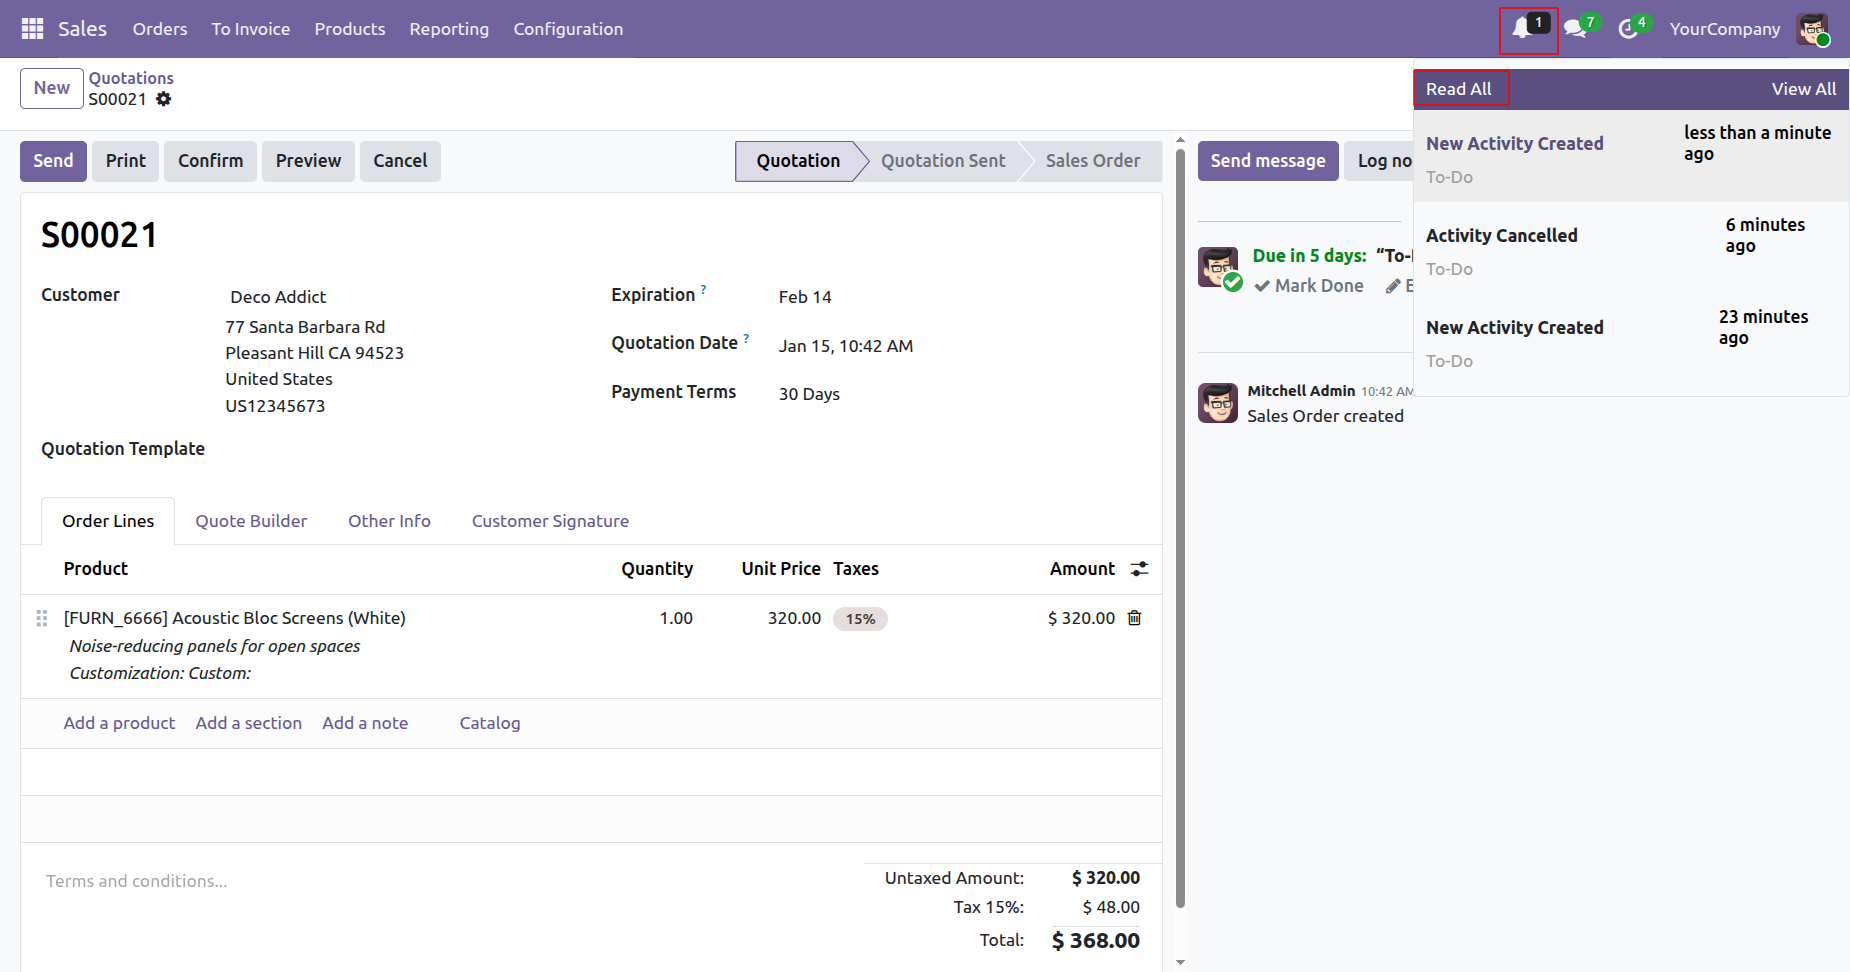
You can view the bell notification using the bell icon.
Click on the 'Read All' option to clear all notification
counts shown on the bell notification icon.
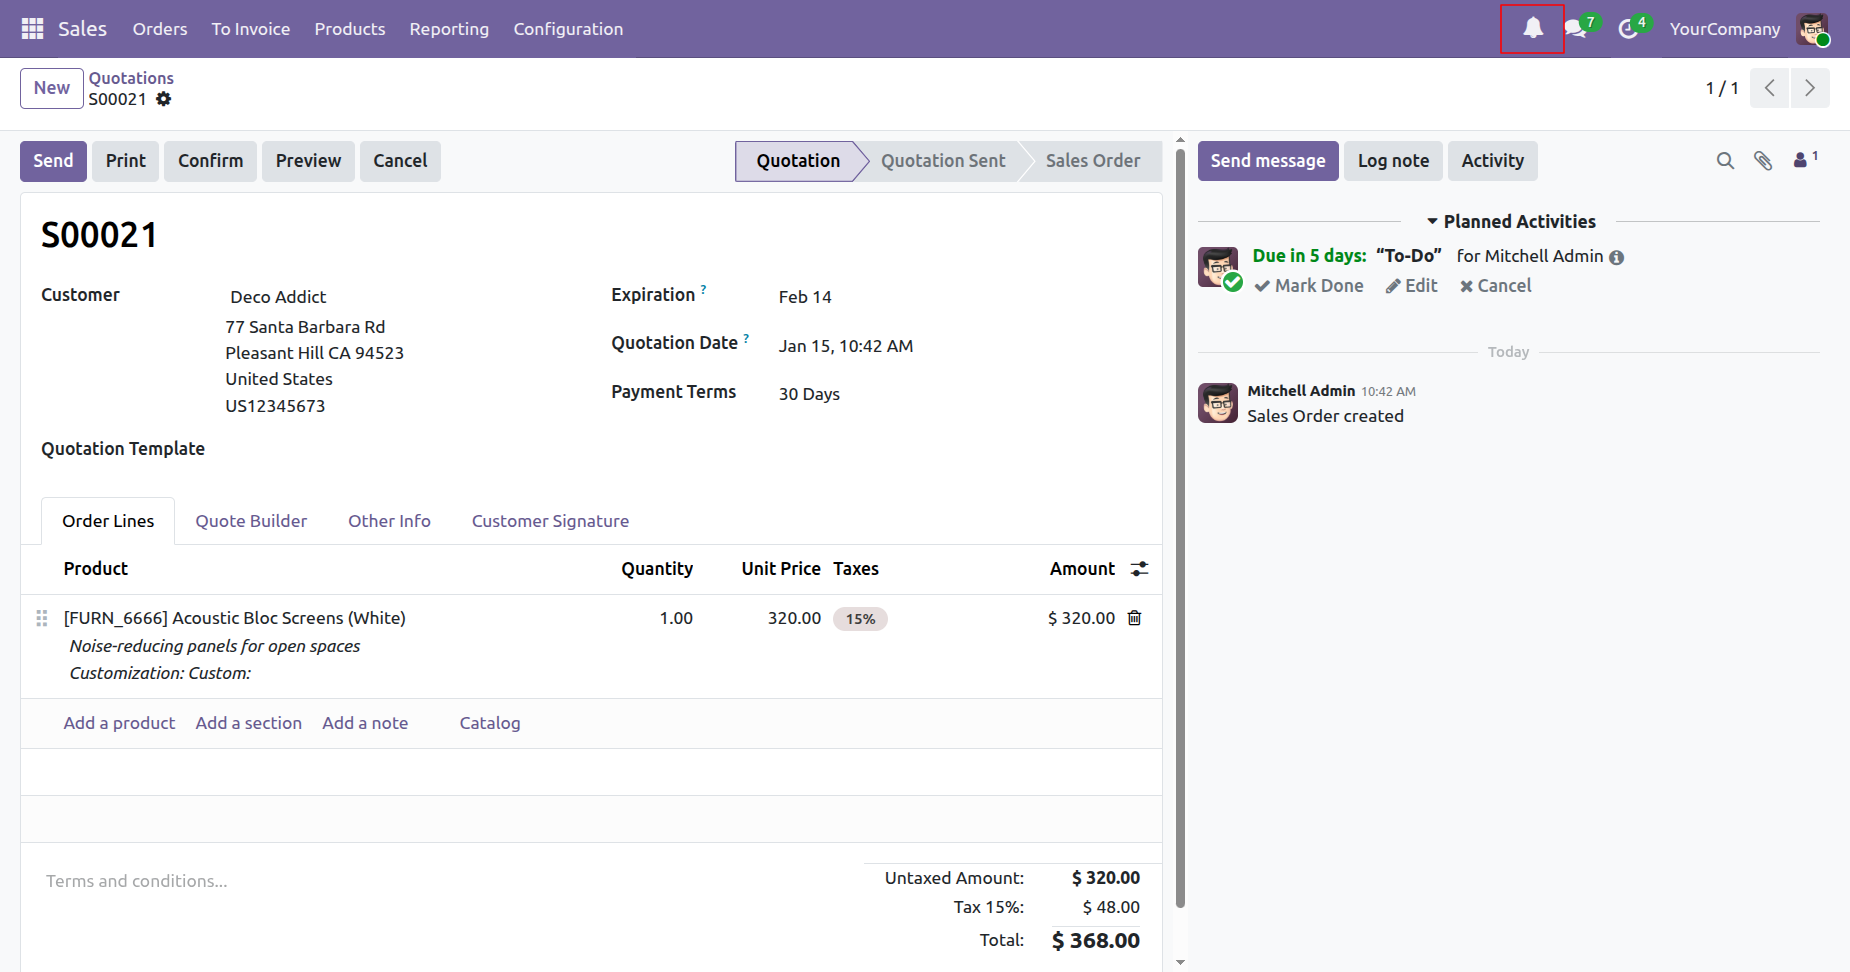
Here, you can see that there is no pending notification count.
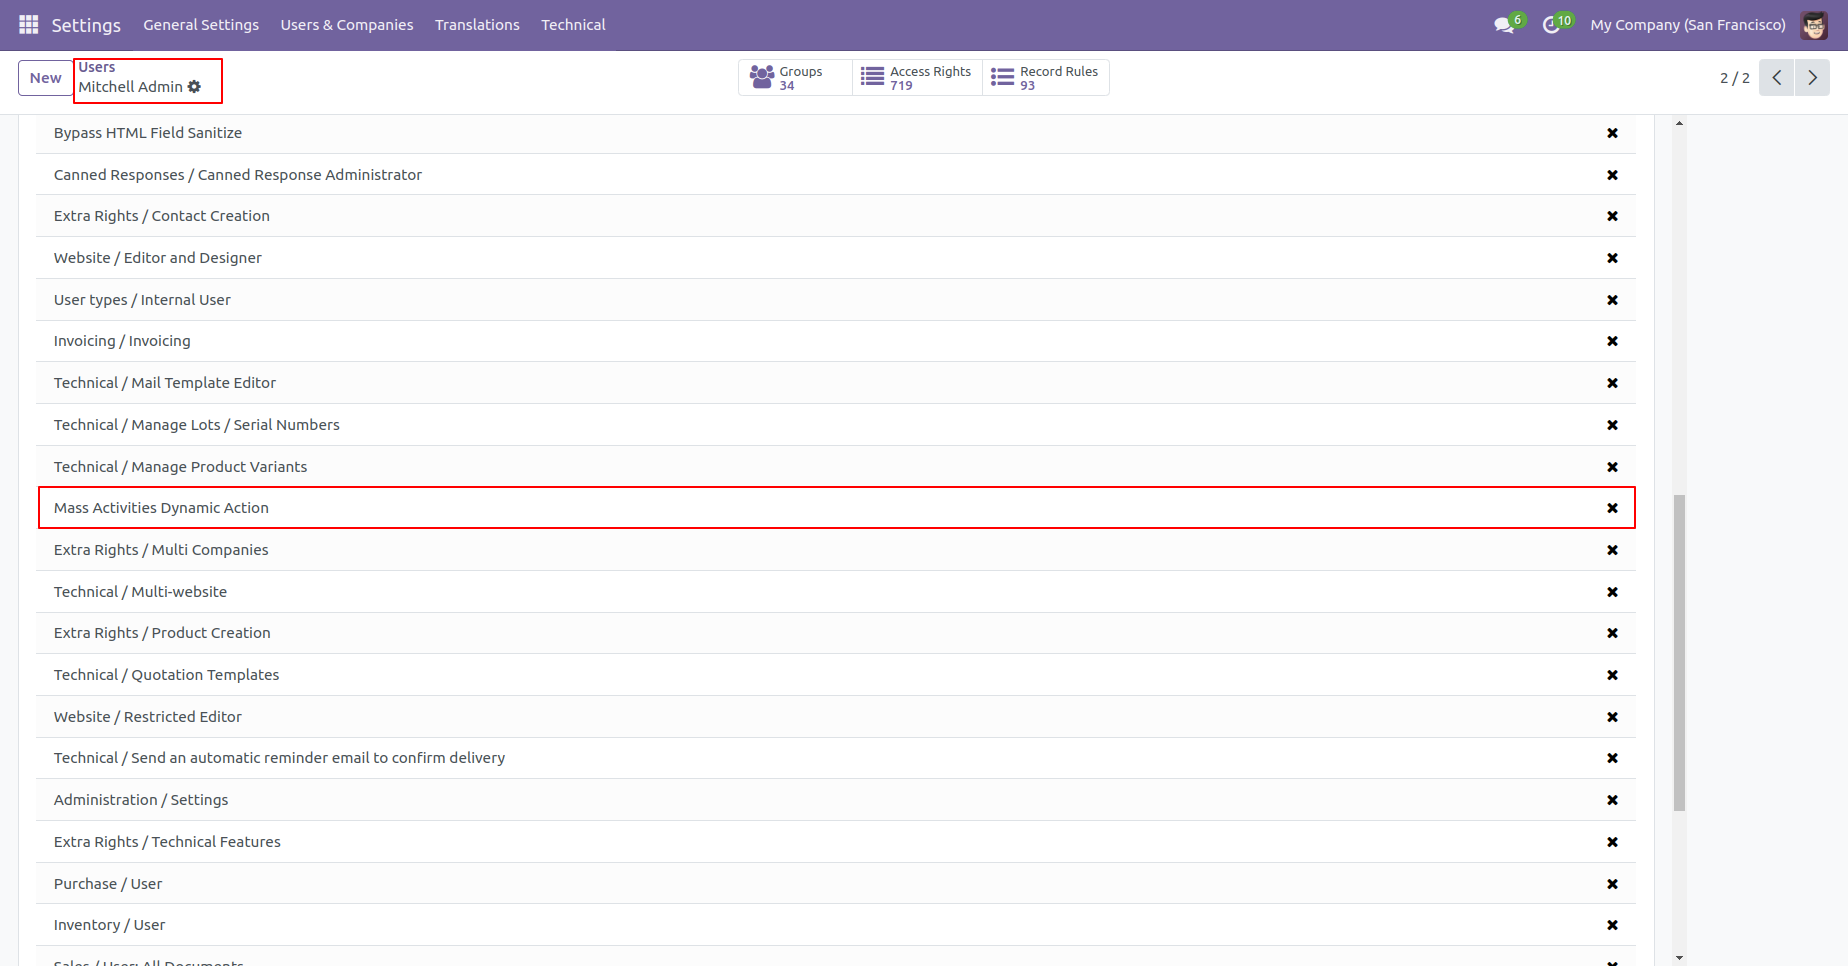
Go to users and tick 'Mass Activities Dynamic Action'.
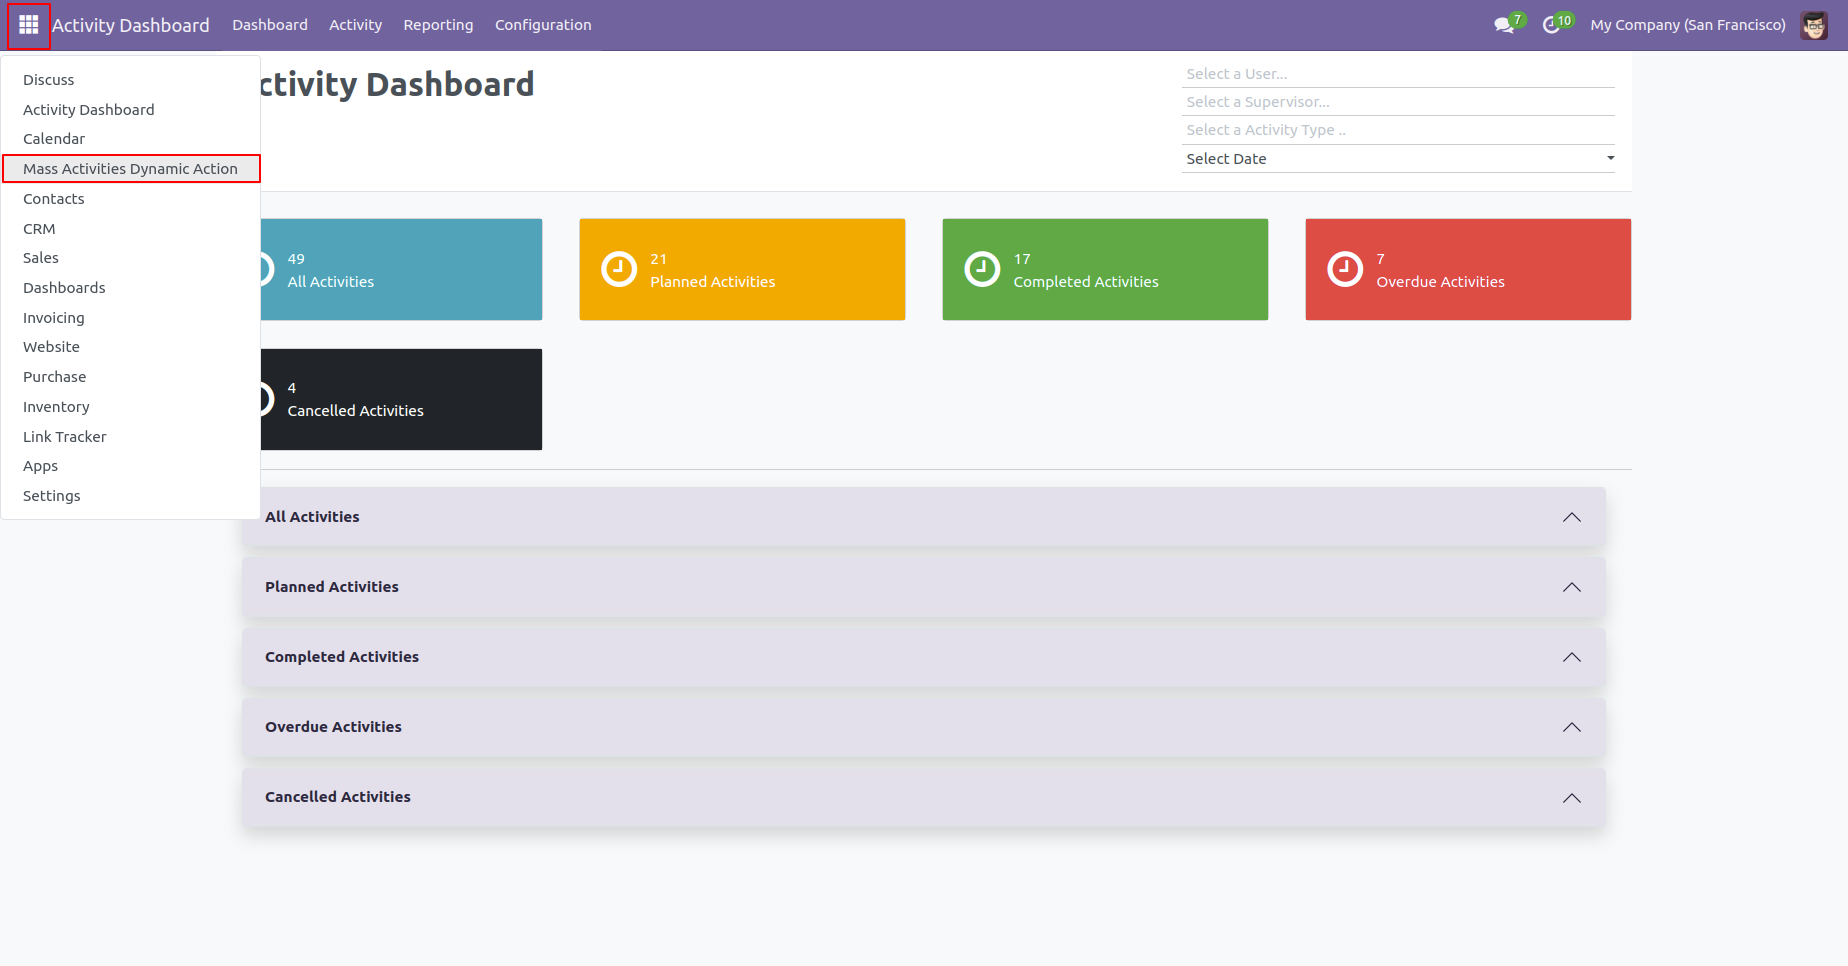
The 'Mass Activities Dynamic Action' menu.
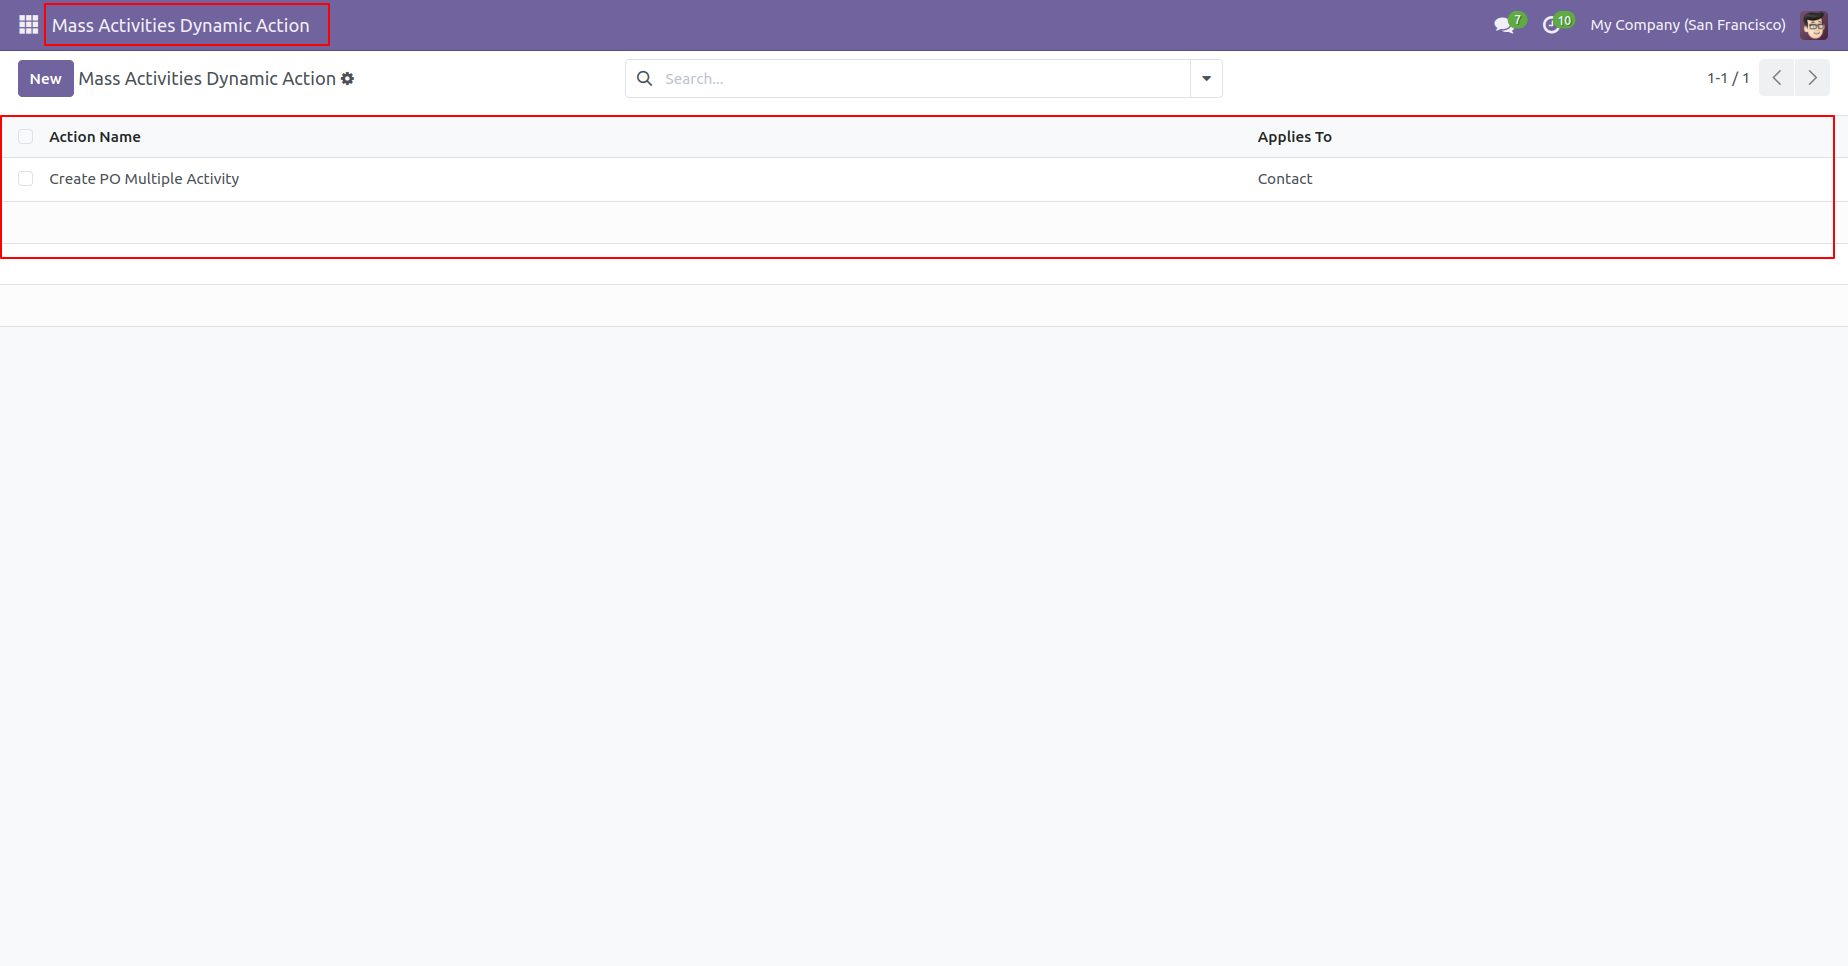
The 'Mass Activities Dynamic Action' list view.
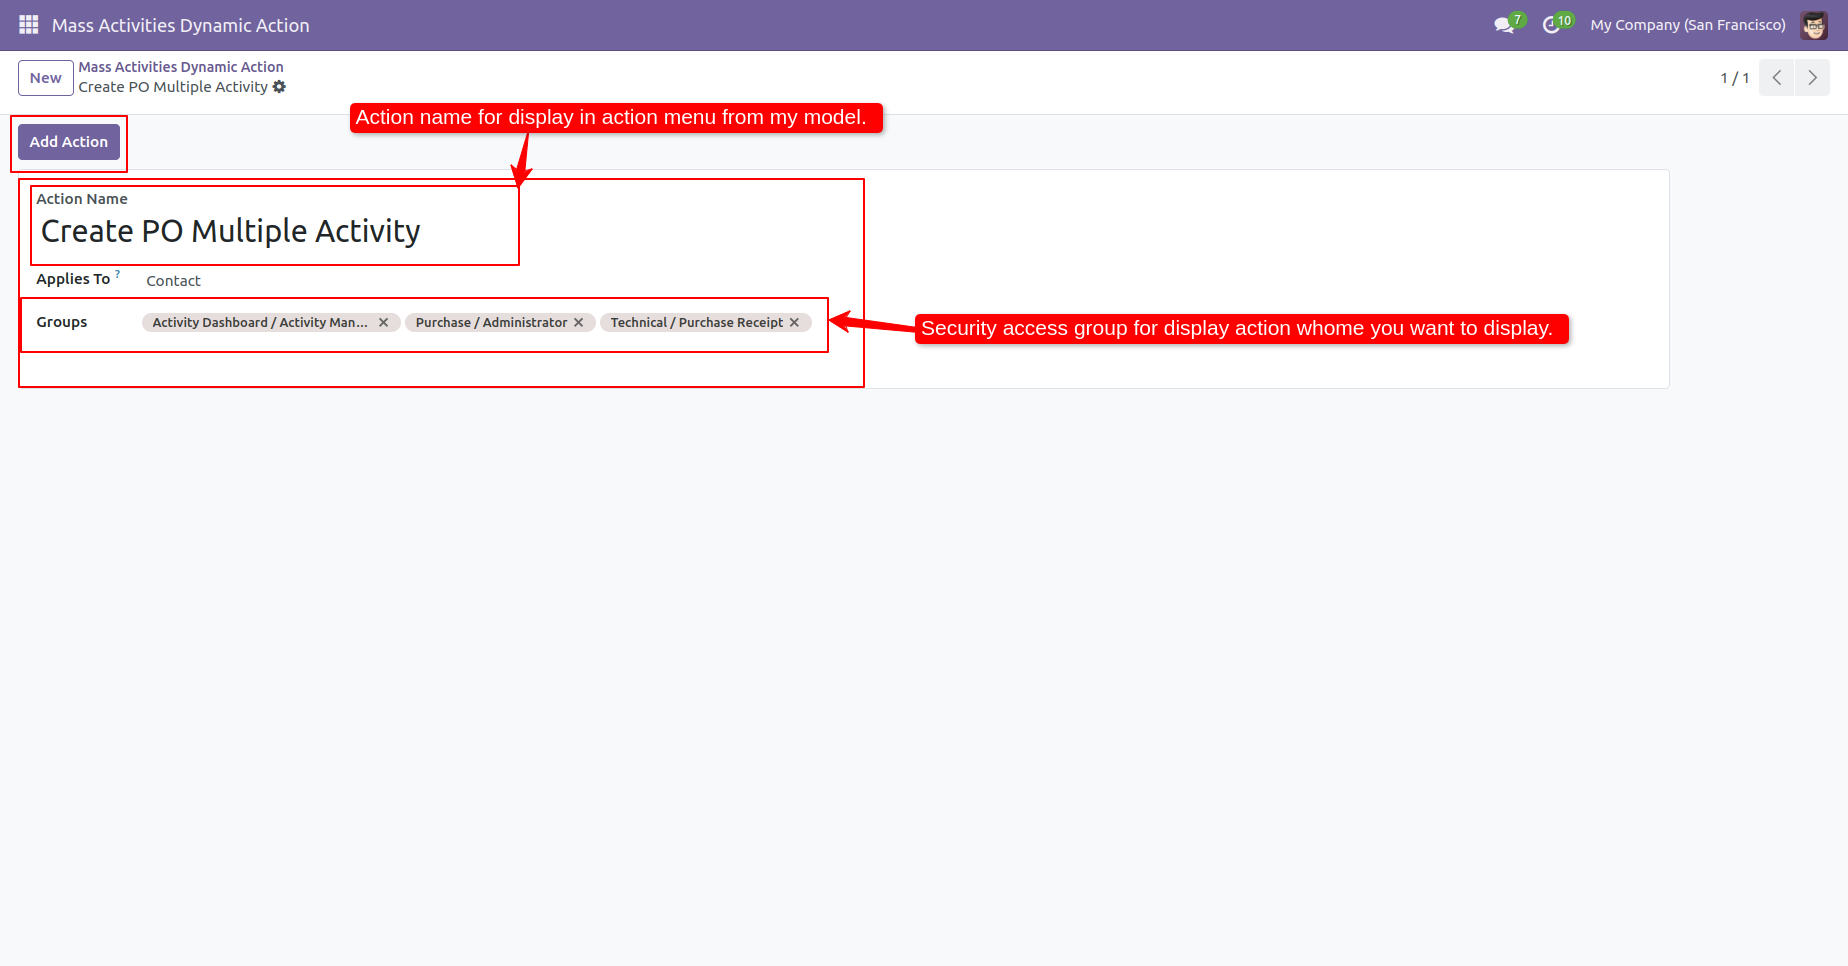
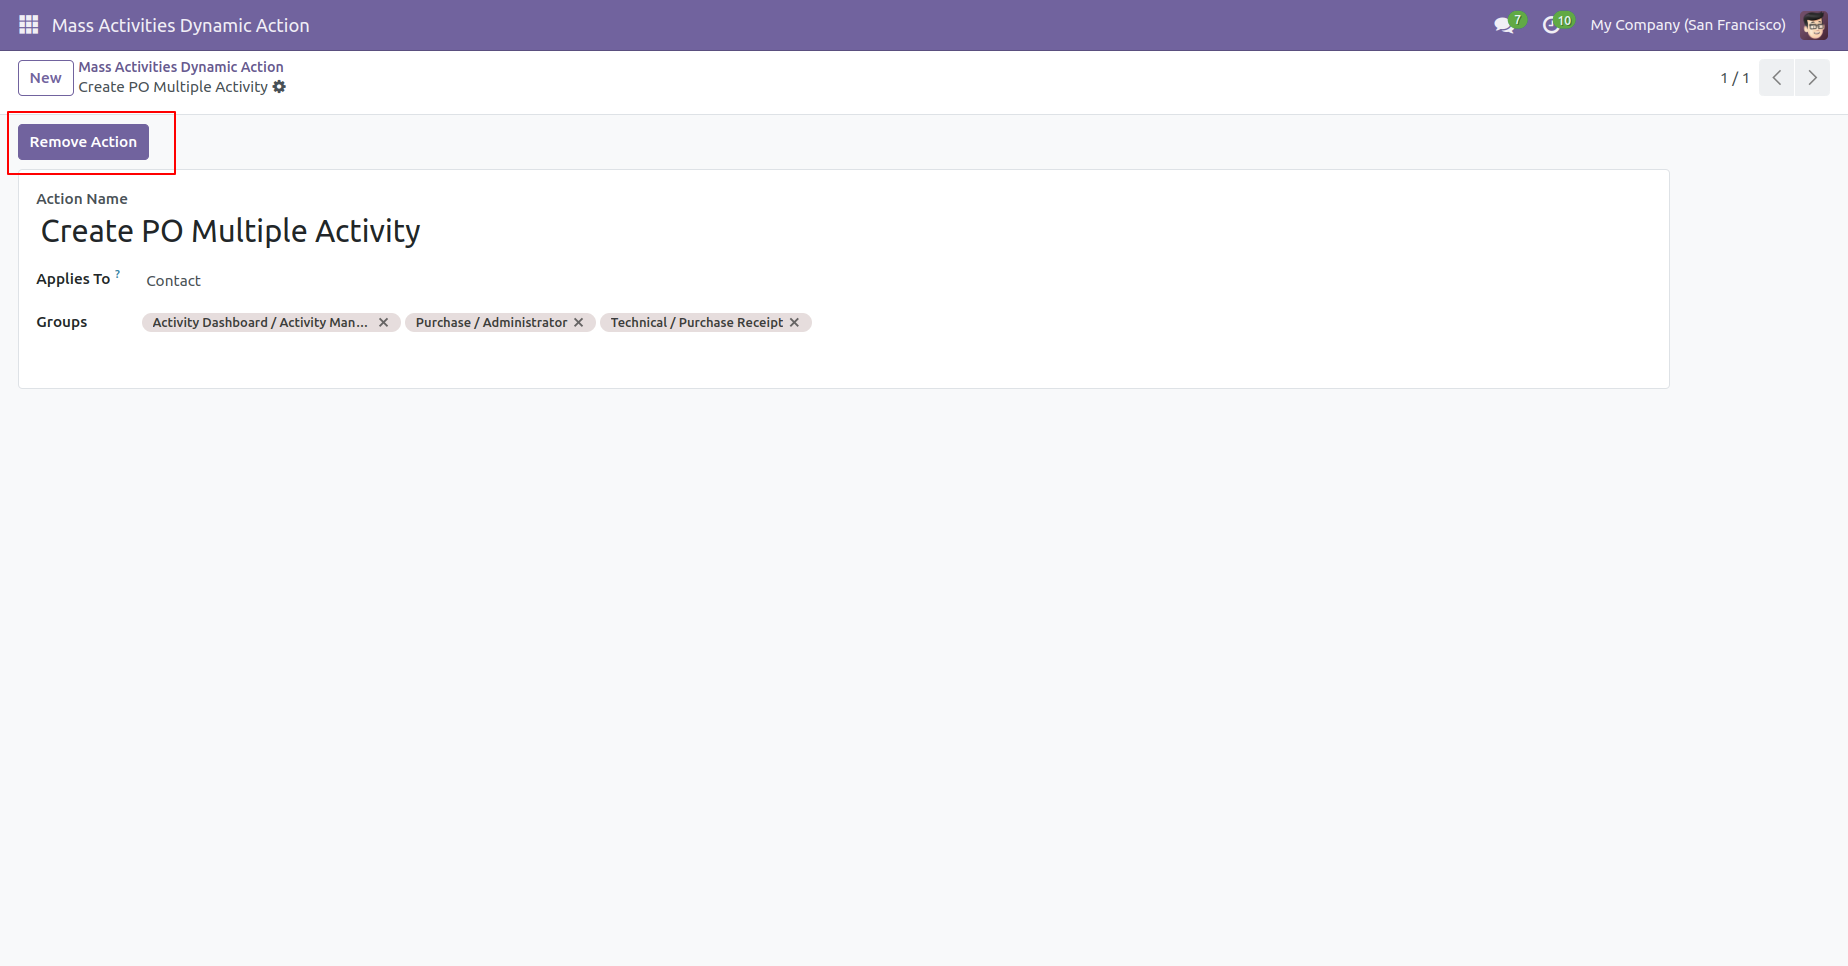
In the 'Mass Activities Dynamic Action' form view,
define the action name and select applies to & group for
that action and click 'Add Action' to add that action in
the selected model.
Note: This is only useful to main models not for
an internal model like(sale order line, purchase order
line), etc. as in odoo standard separate views are not
there for that kind of models, if you have a separate
view for that kind of model than you can use it we don't
have any restrictions for that.
Click 'Remove Action' to remove that action from the selected model.
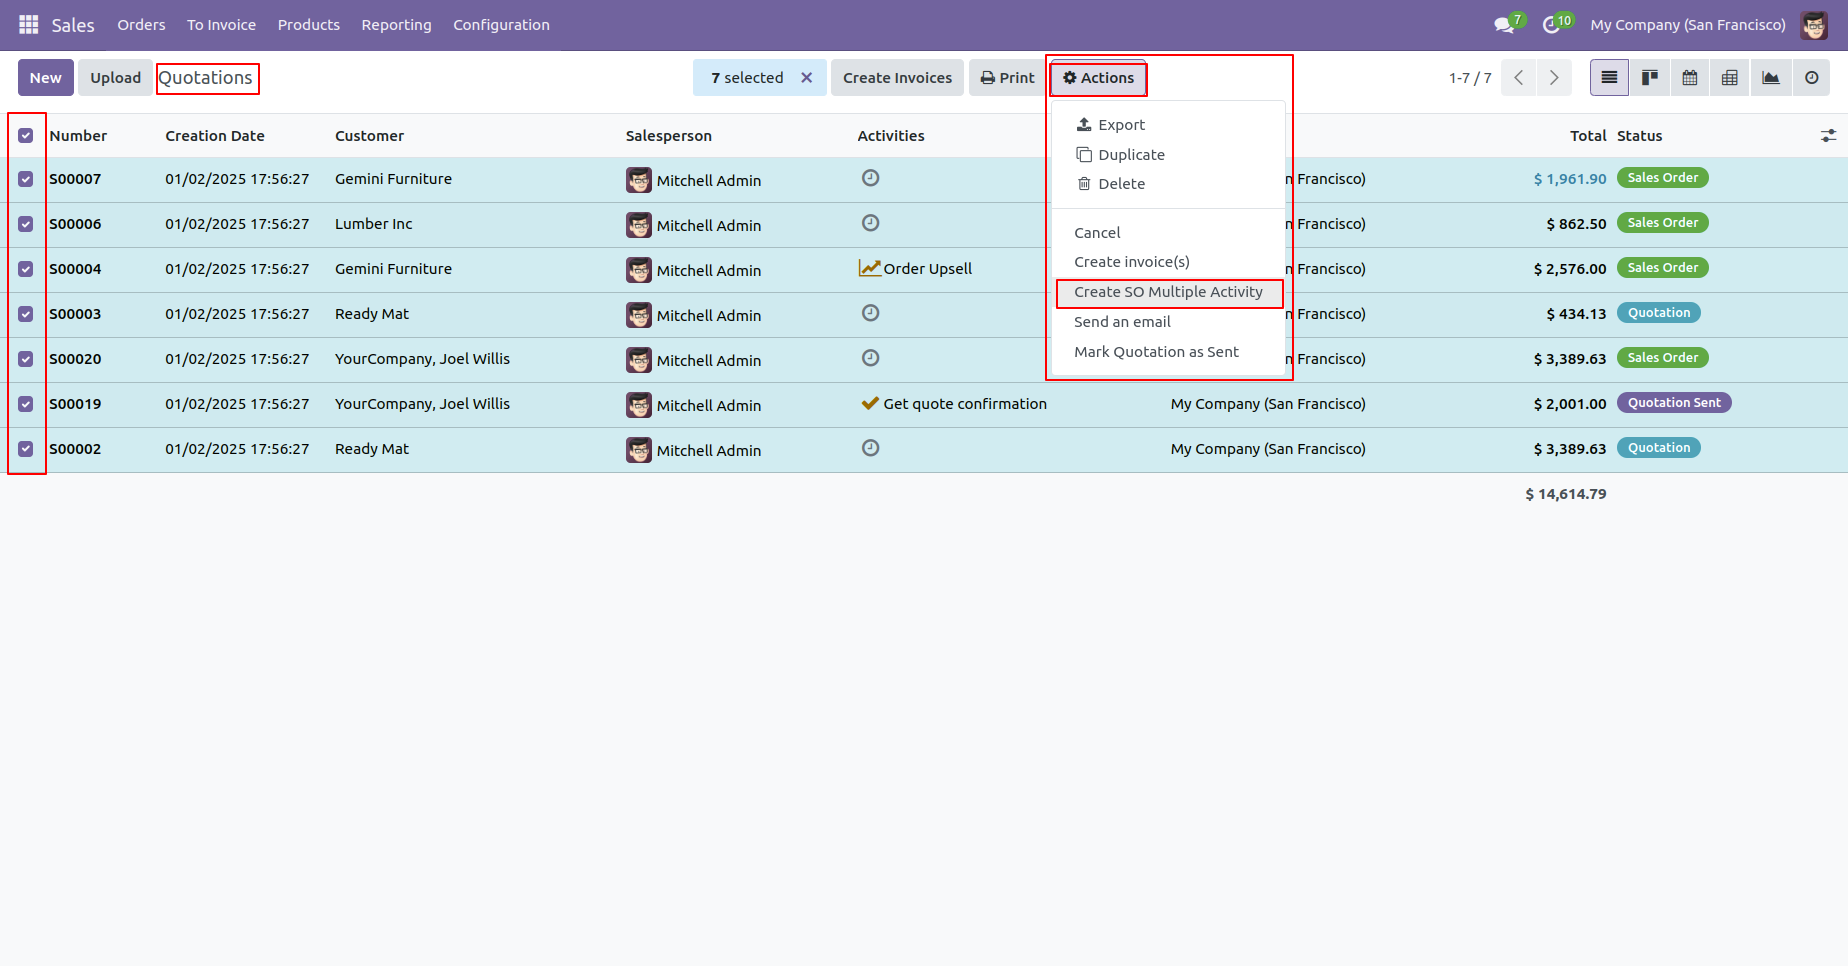
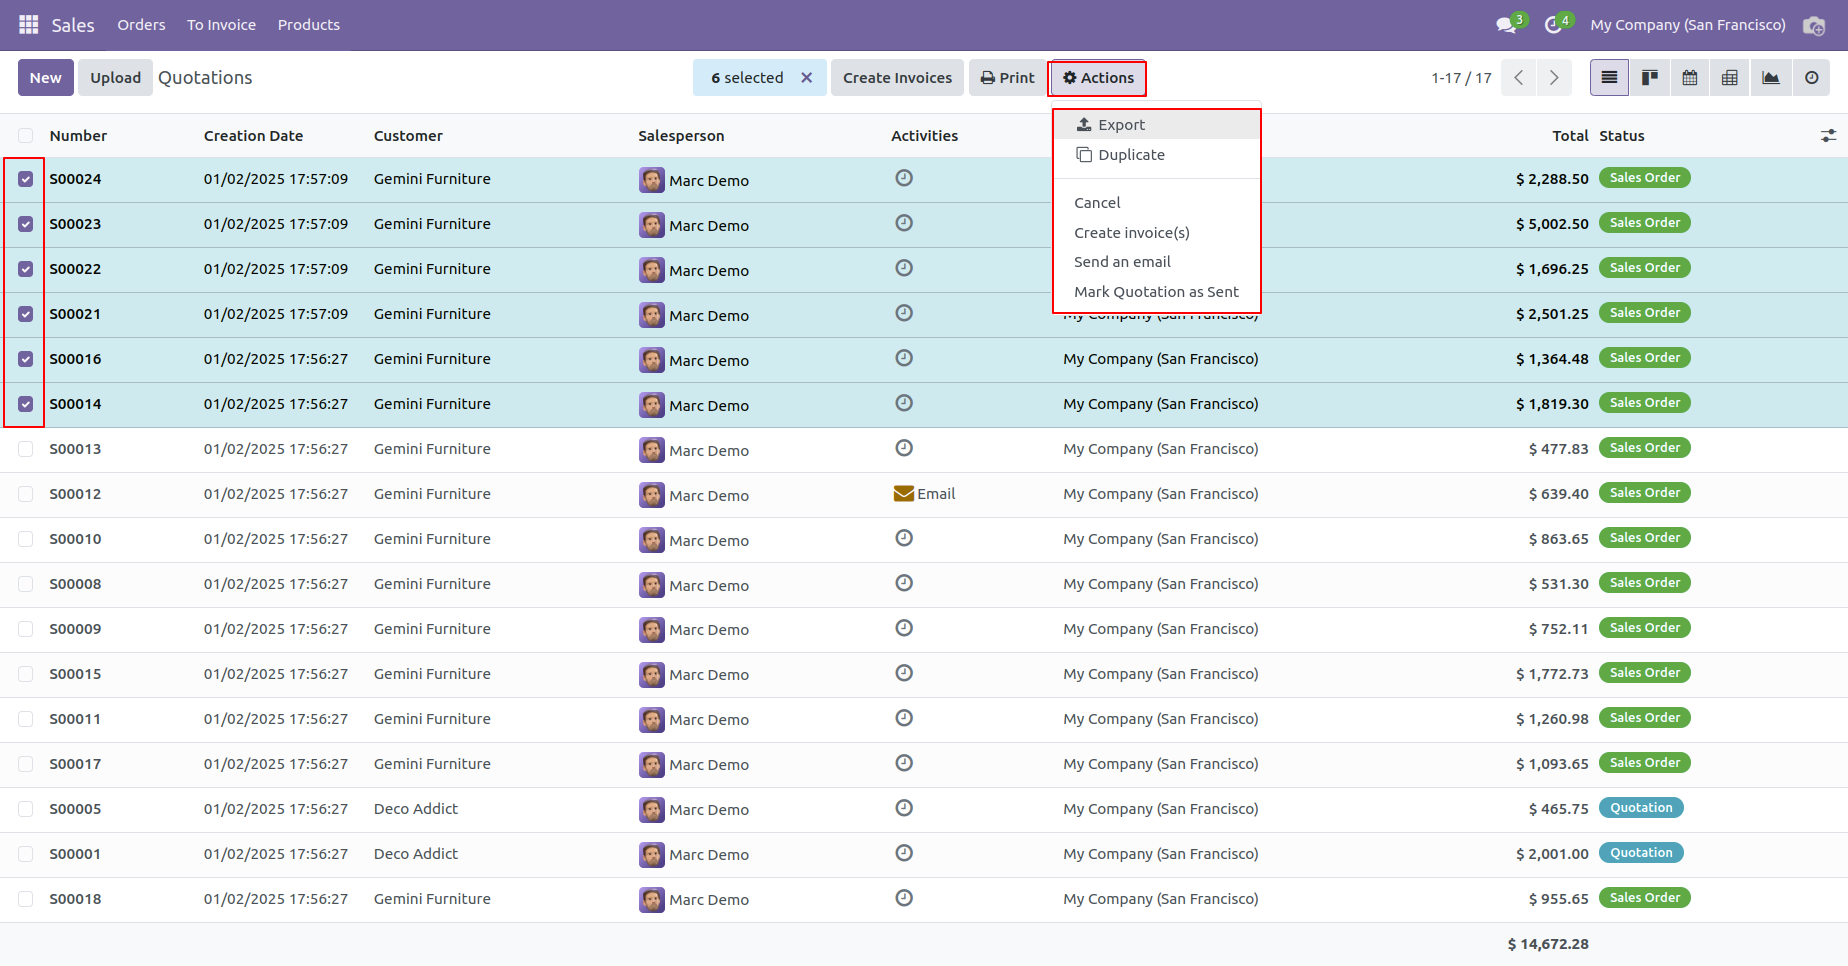
Select records from the list view in which you want to apply that action, and after that go to "Action" and apply that action, It displays action in that group only which was configured.
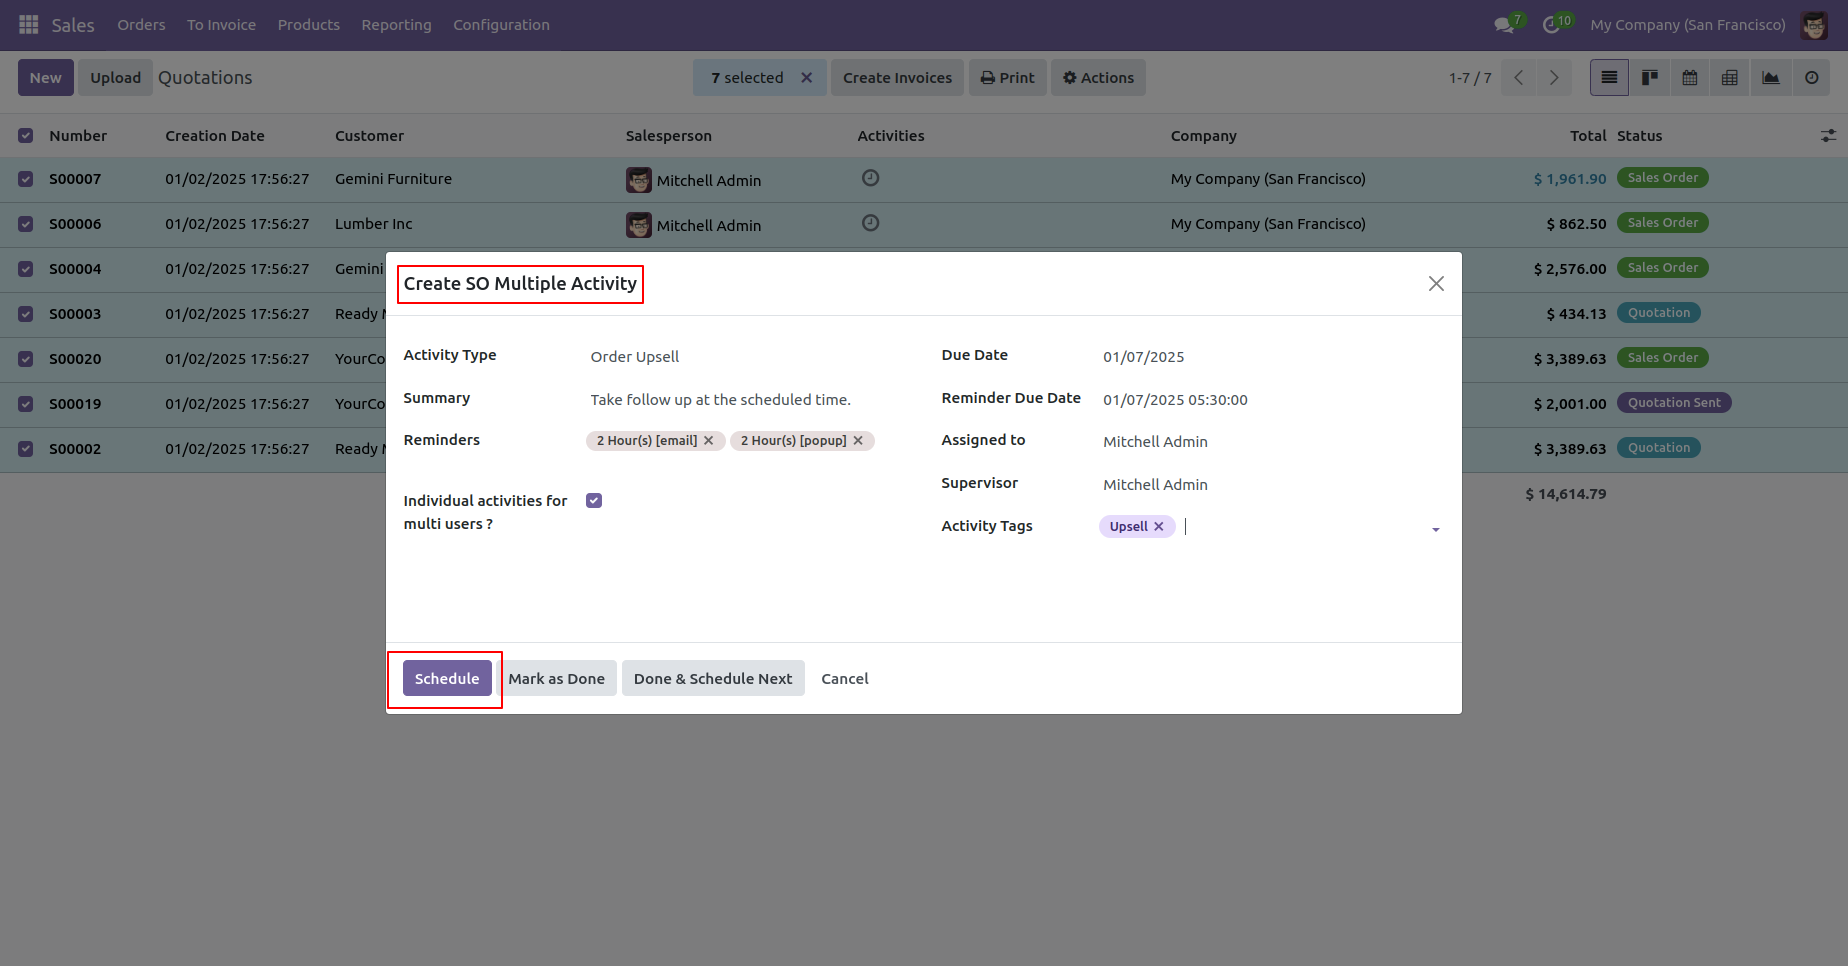
Fill details and click on the 'Schedule' button.
Action applied in all the selected records.
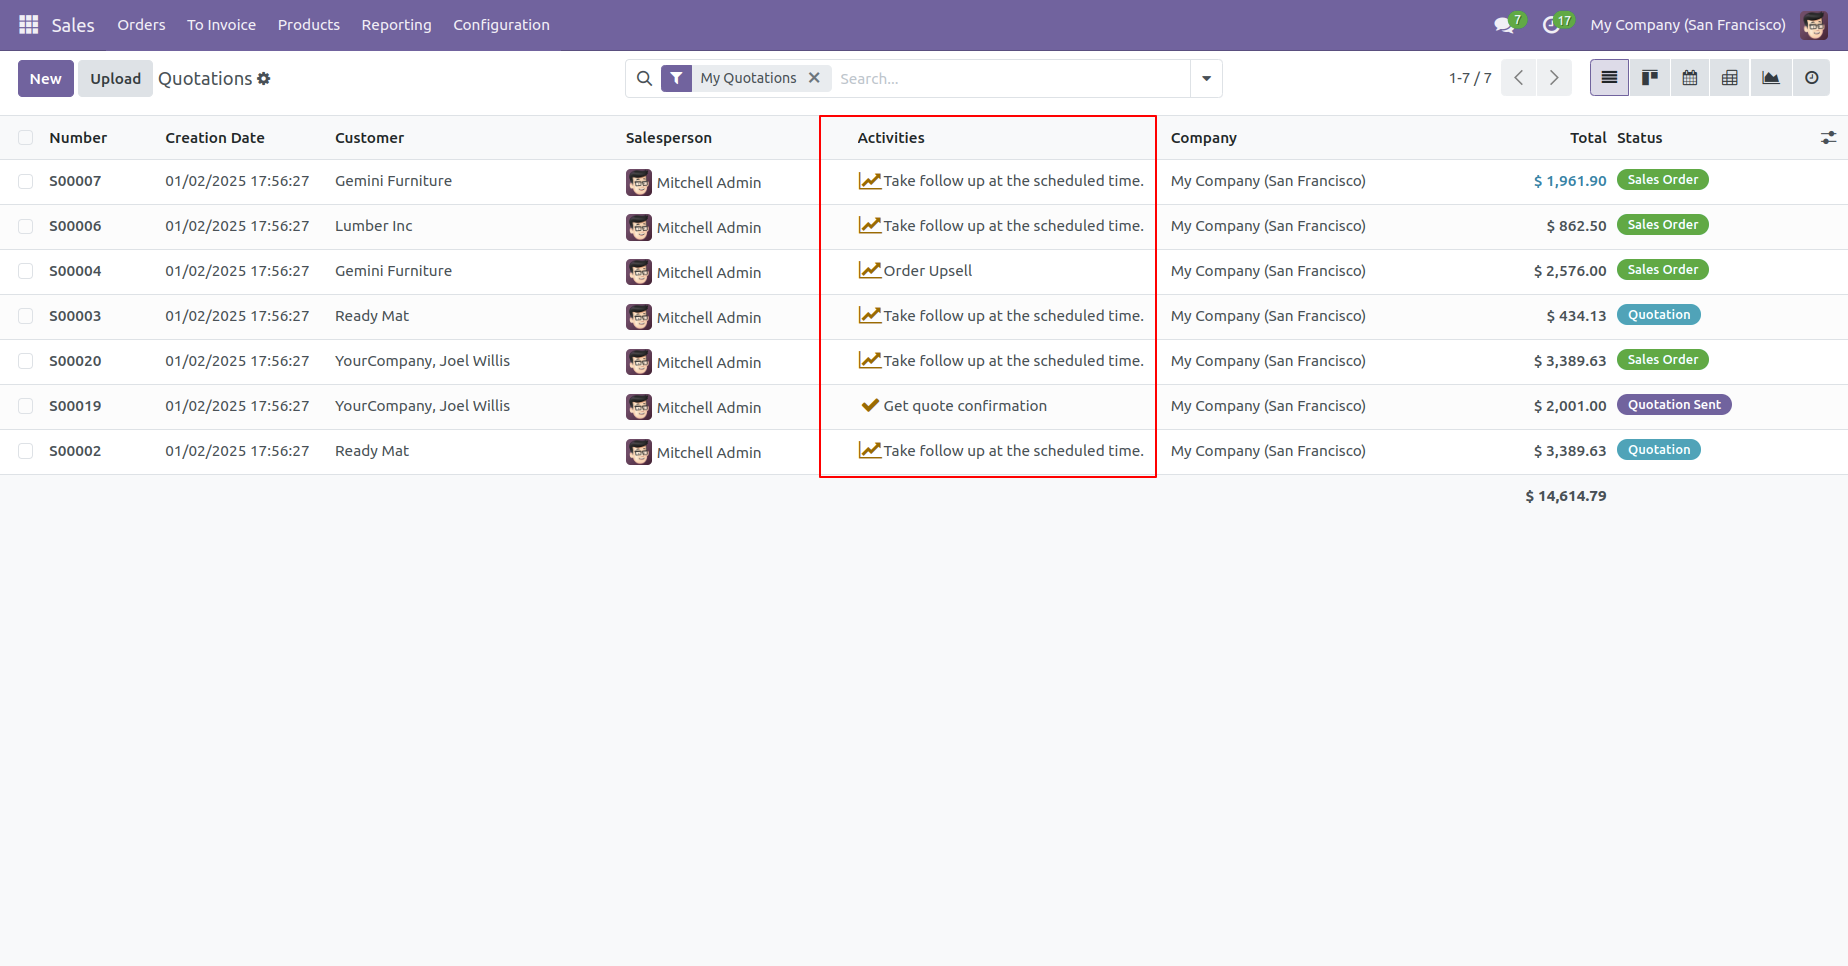
Action applied in all the selected records.
'Create SO Multiple Activity' action is not displayed in that group which was not assigned in the configuration.
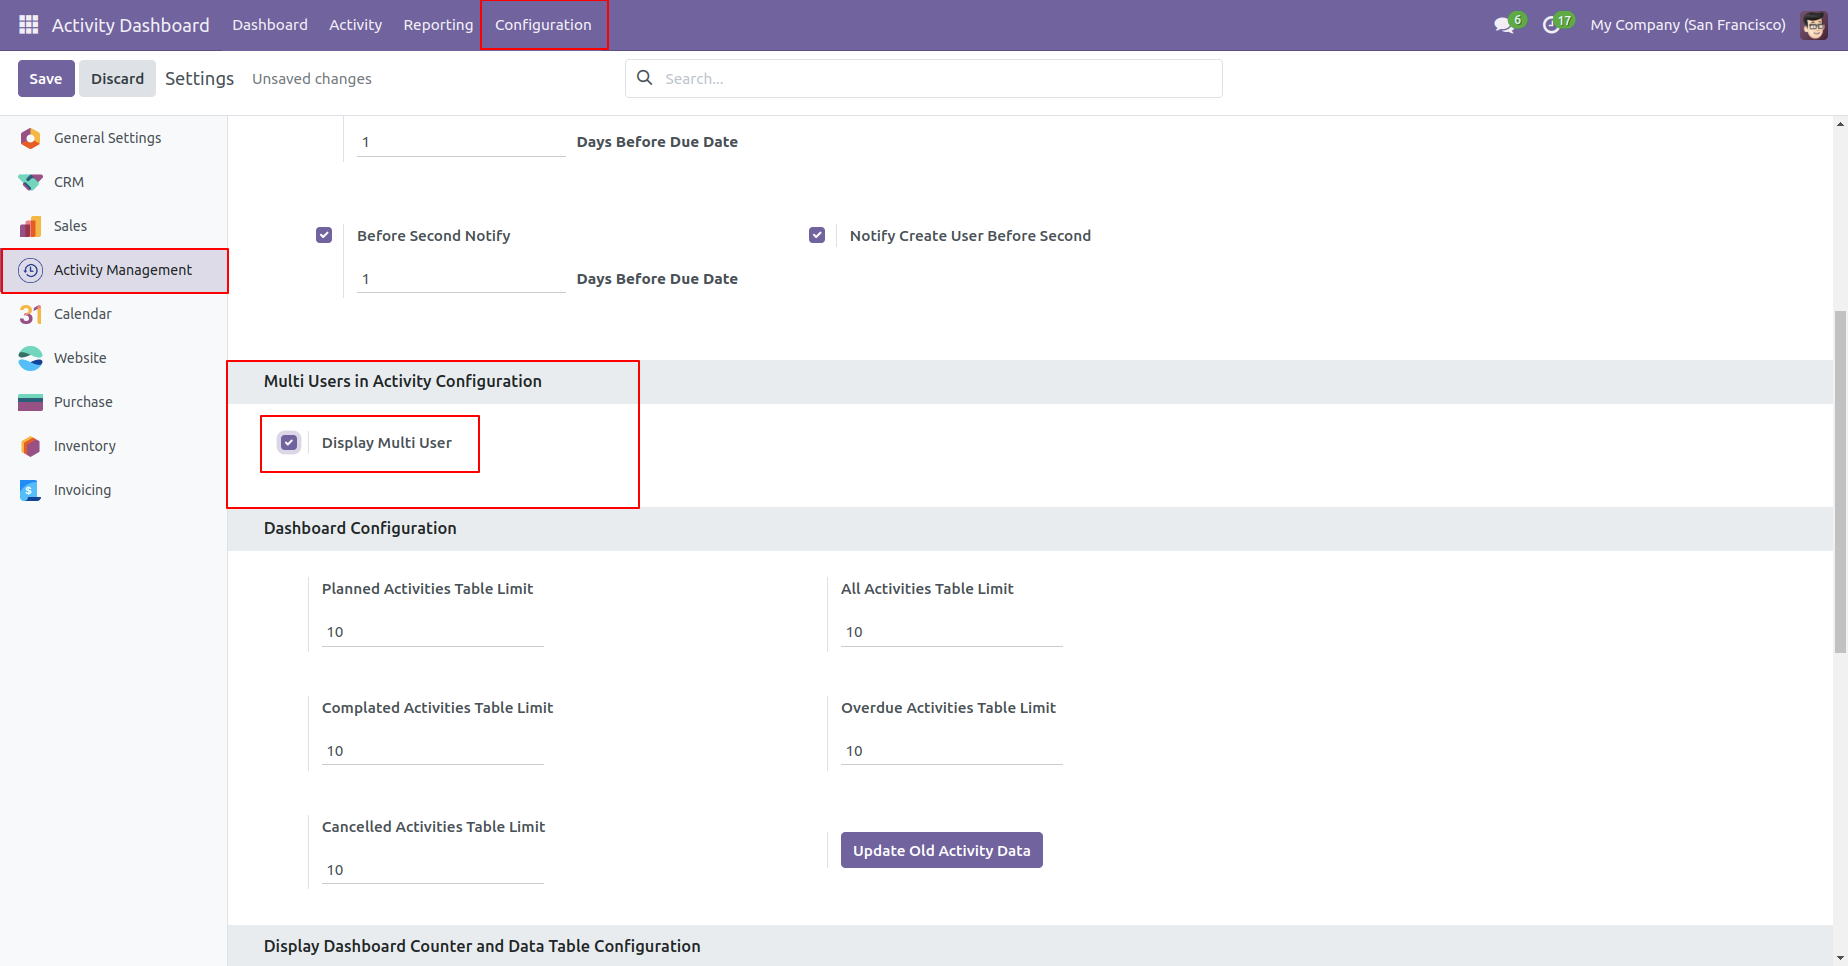
Go to Activity Management setting, Enable 'Display Multi Users'.
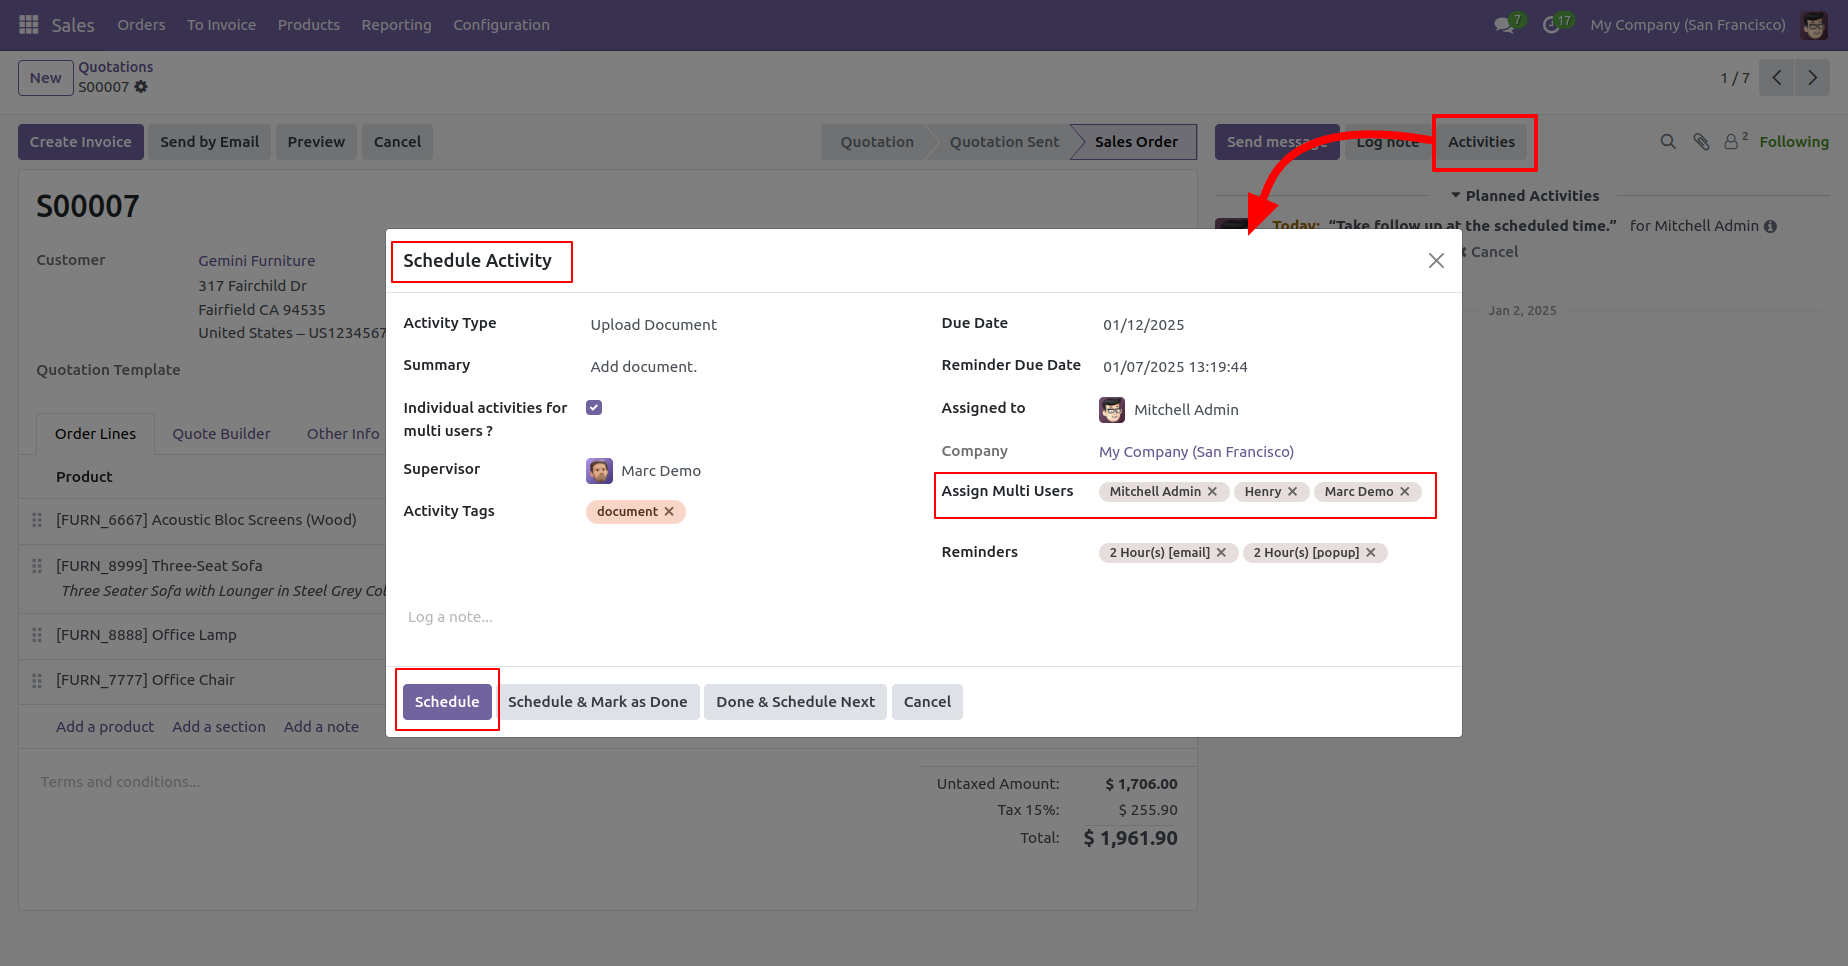
Now goto sale quotation and click on 'Activity'.
In the 'Schedule Activity' popup, there you can see the
field 'Assign Multi-User'. You can assign that activity
to multiple users.
The assigned user can view the activity history in the chatter.
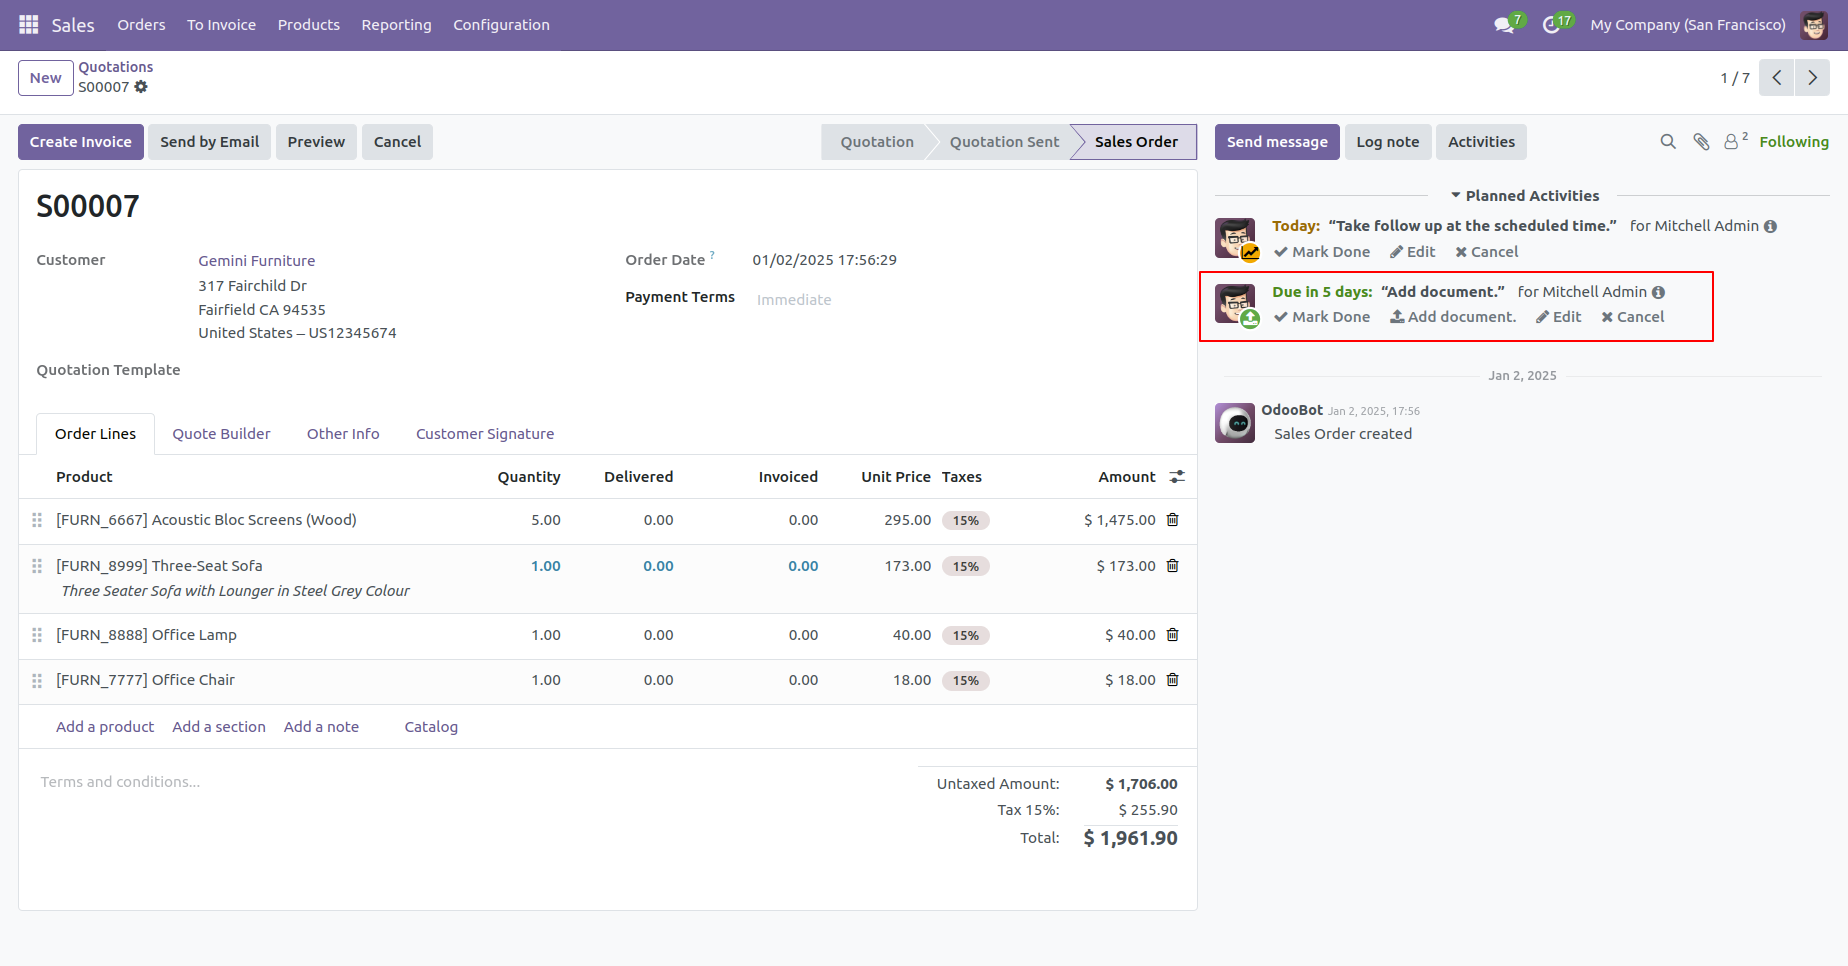
'Henry' can see the assign activity. Tree view of the 'My activities'.
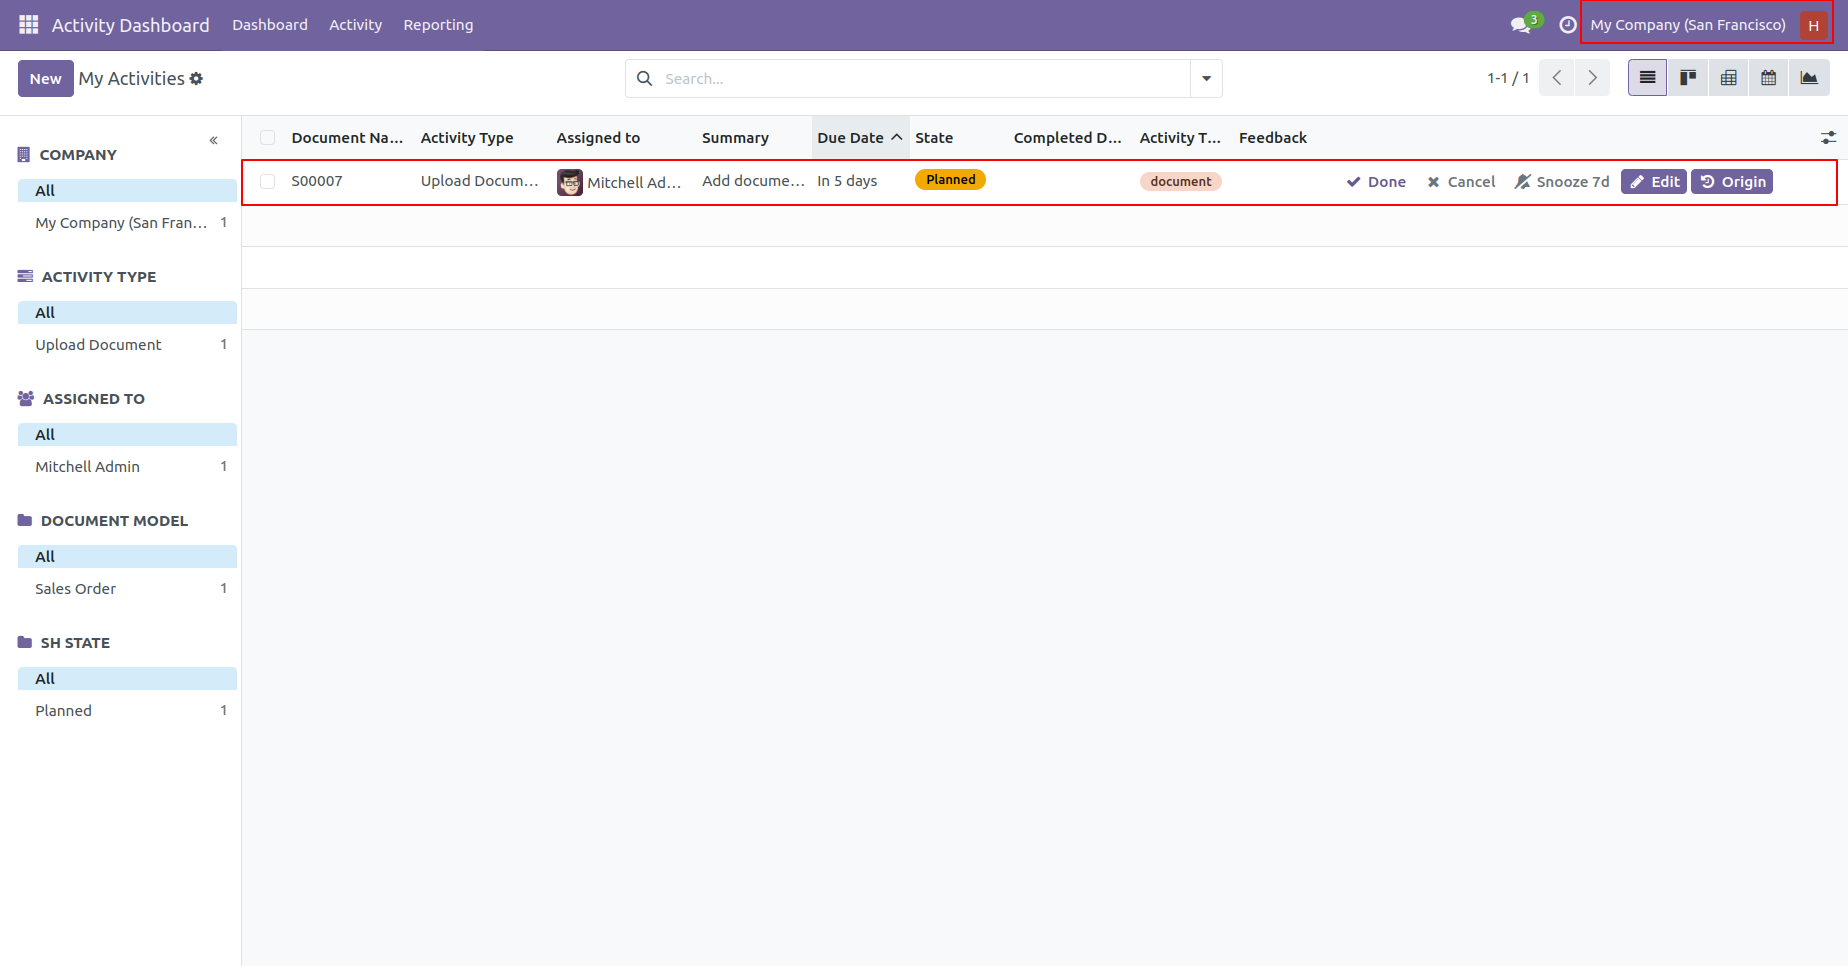
'Marc Demo' can see the assign activity.
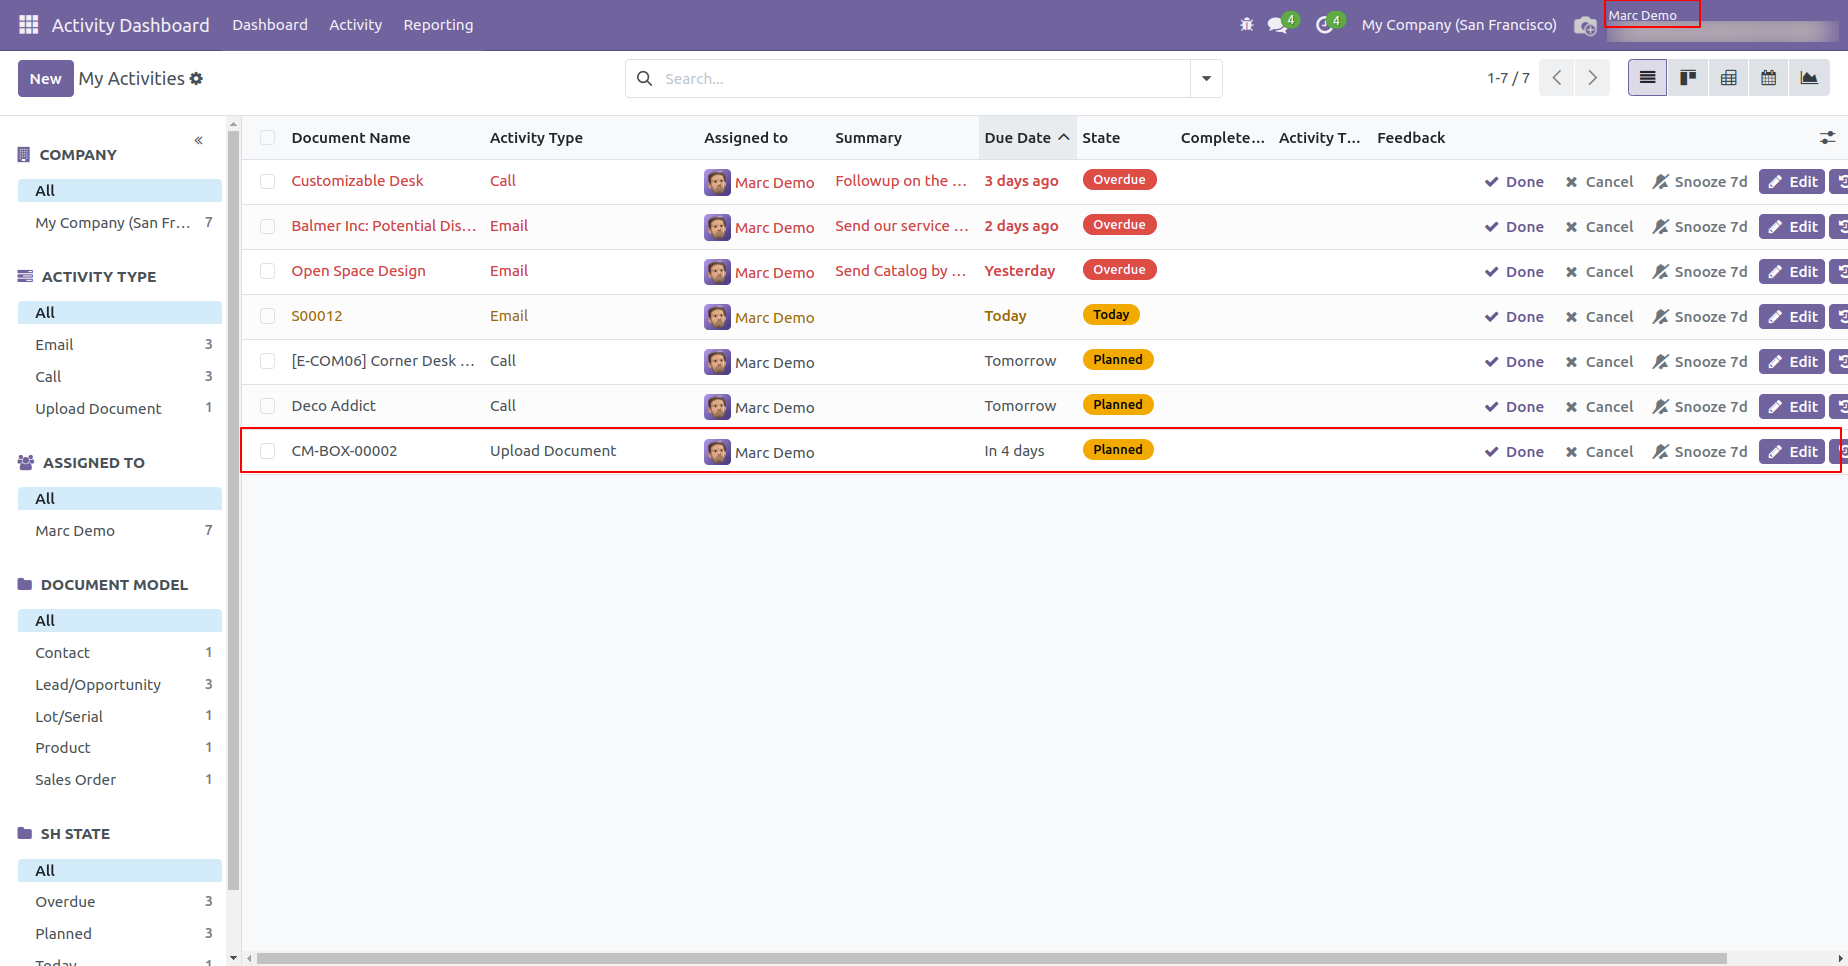
In the 'Schedule Activity' popup, there you can see the
field 'Individual activities for multi users?'' You can
assign that activity individually to multiple users.
So now we tick the 'Individual activities for multi
users?' field to assign that activity individually to
multiple users.
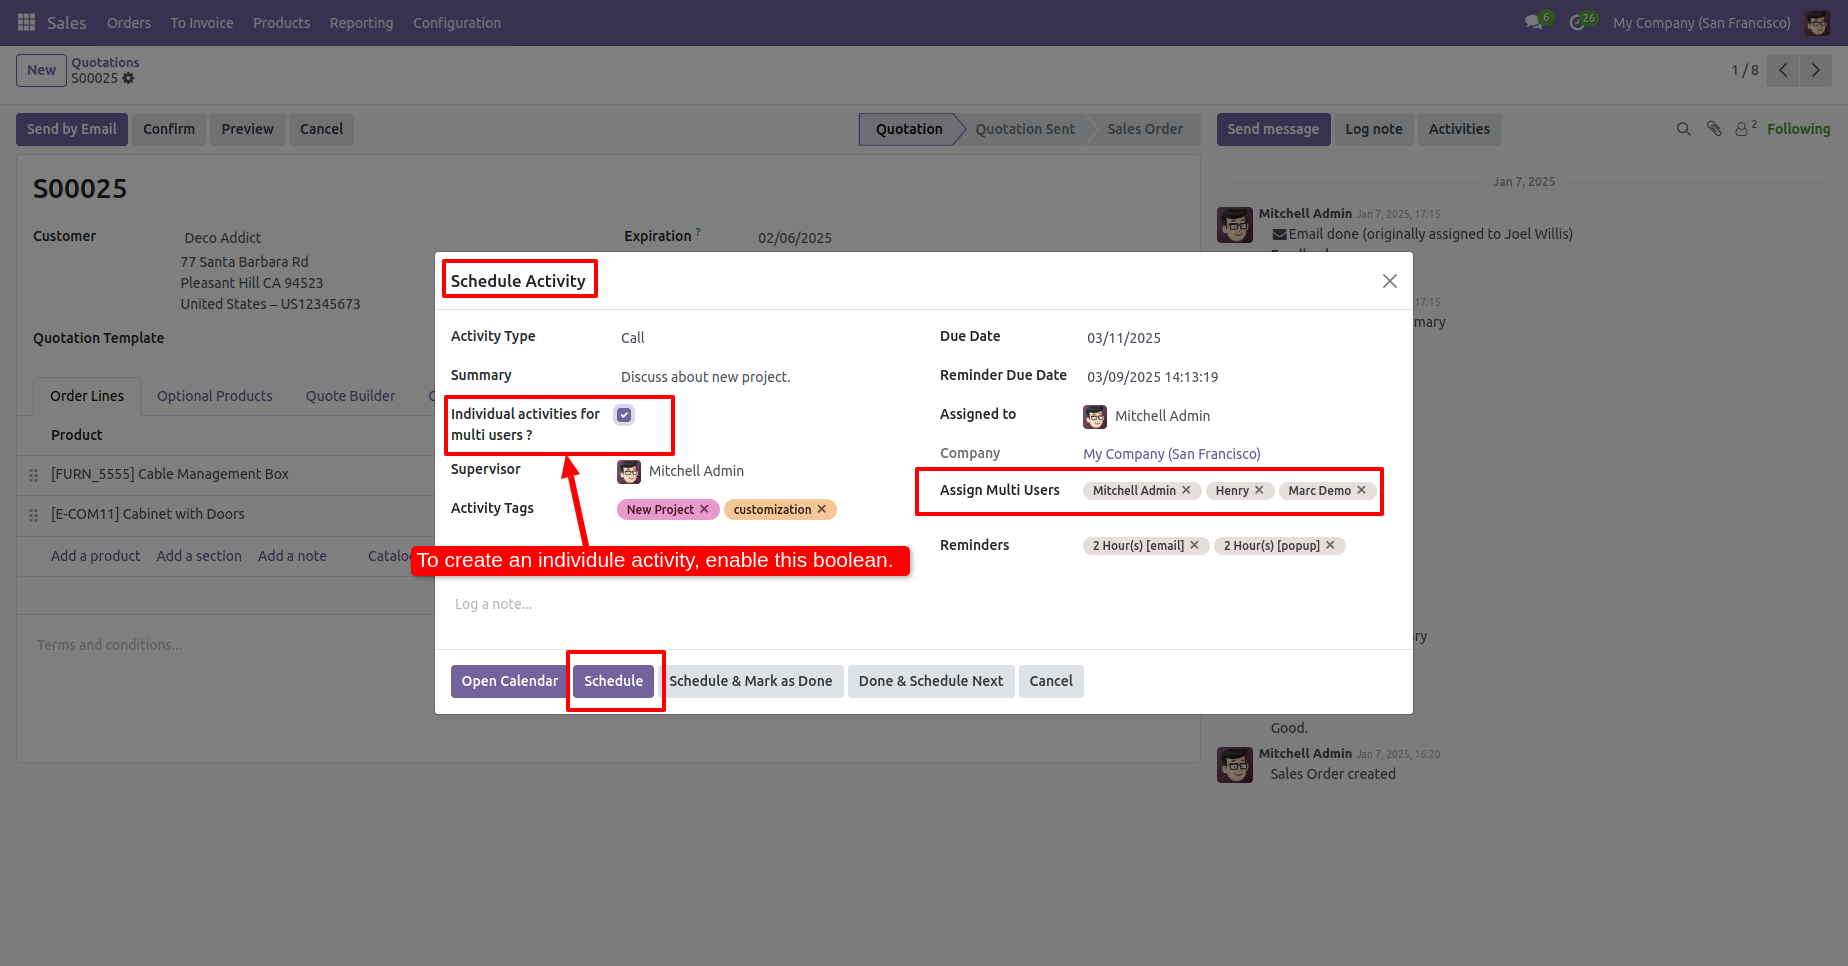
Activity assigned individually to multiple users.
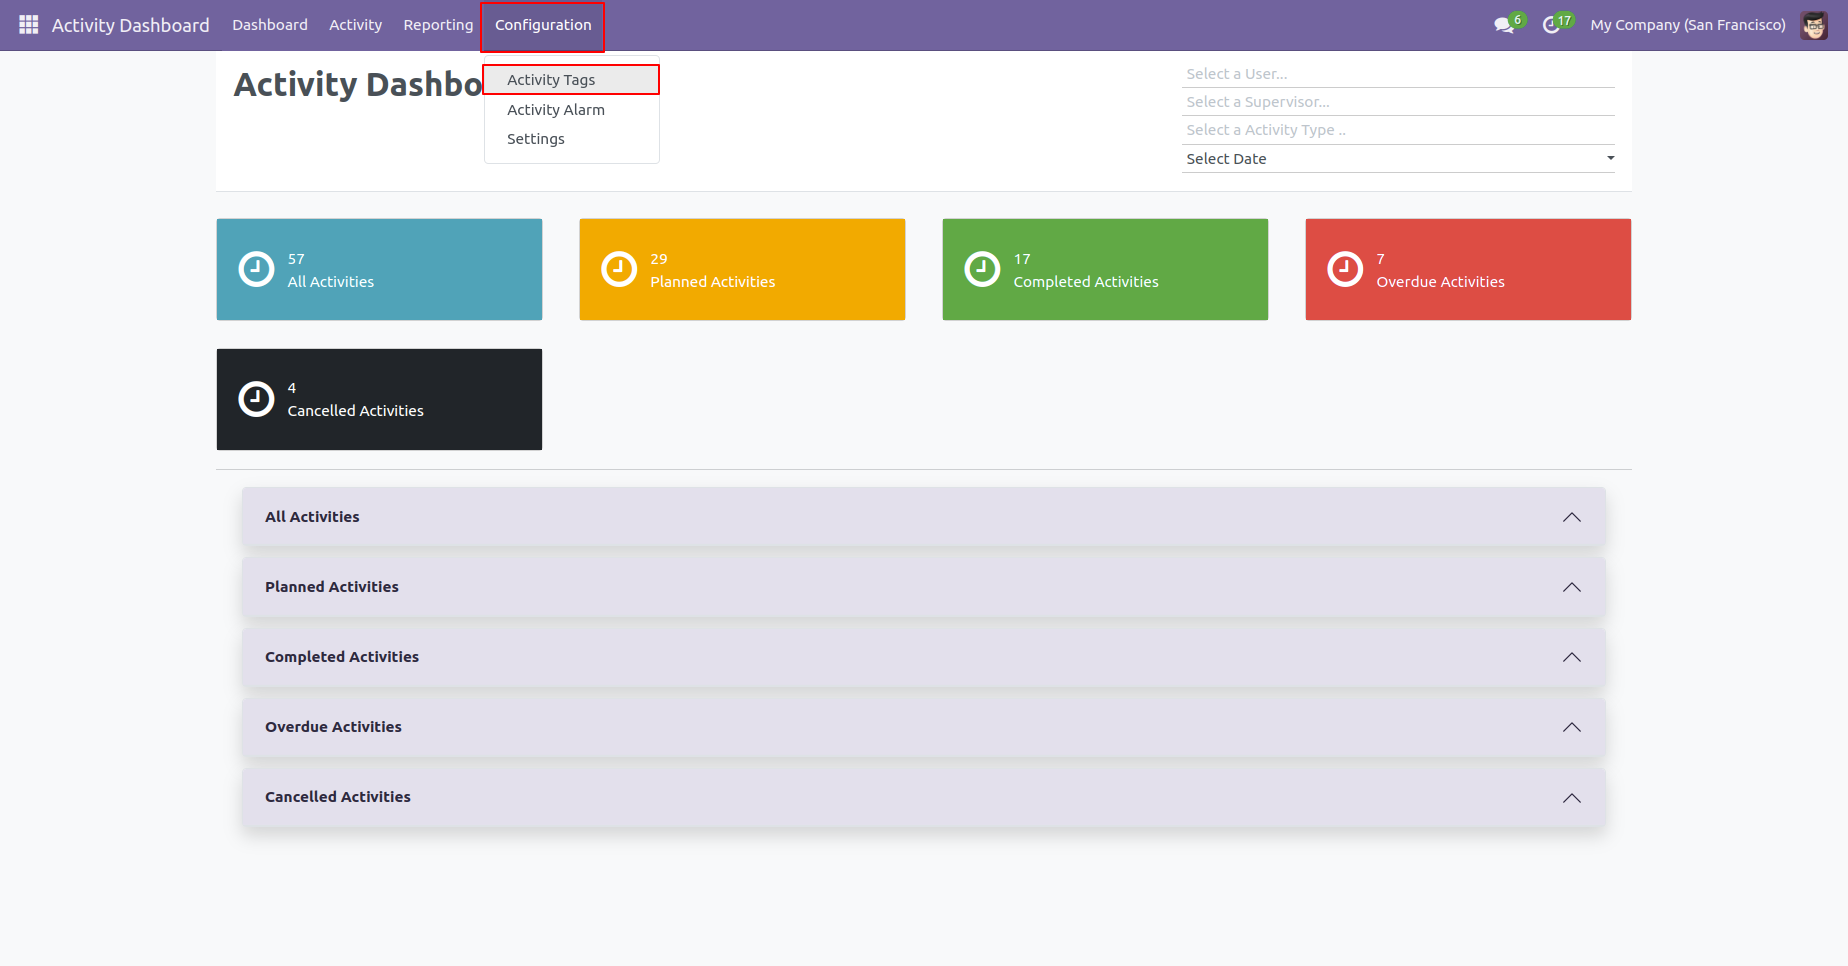
The activity tags menu.
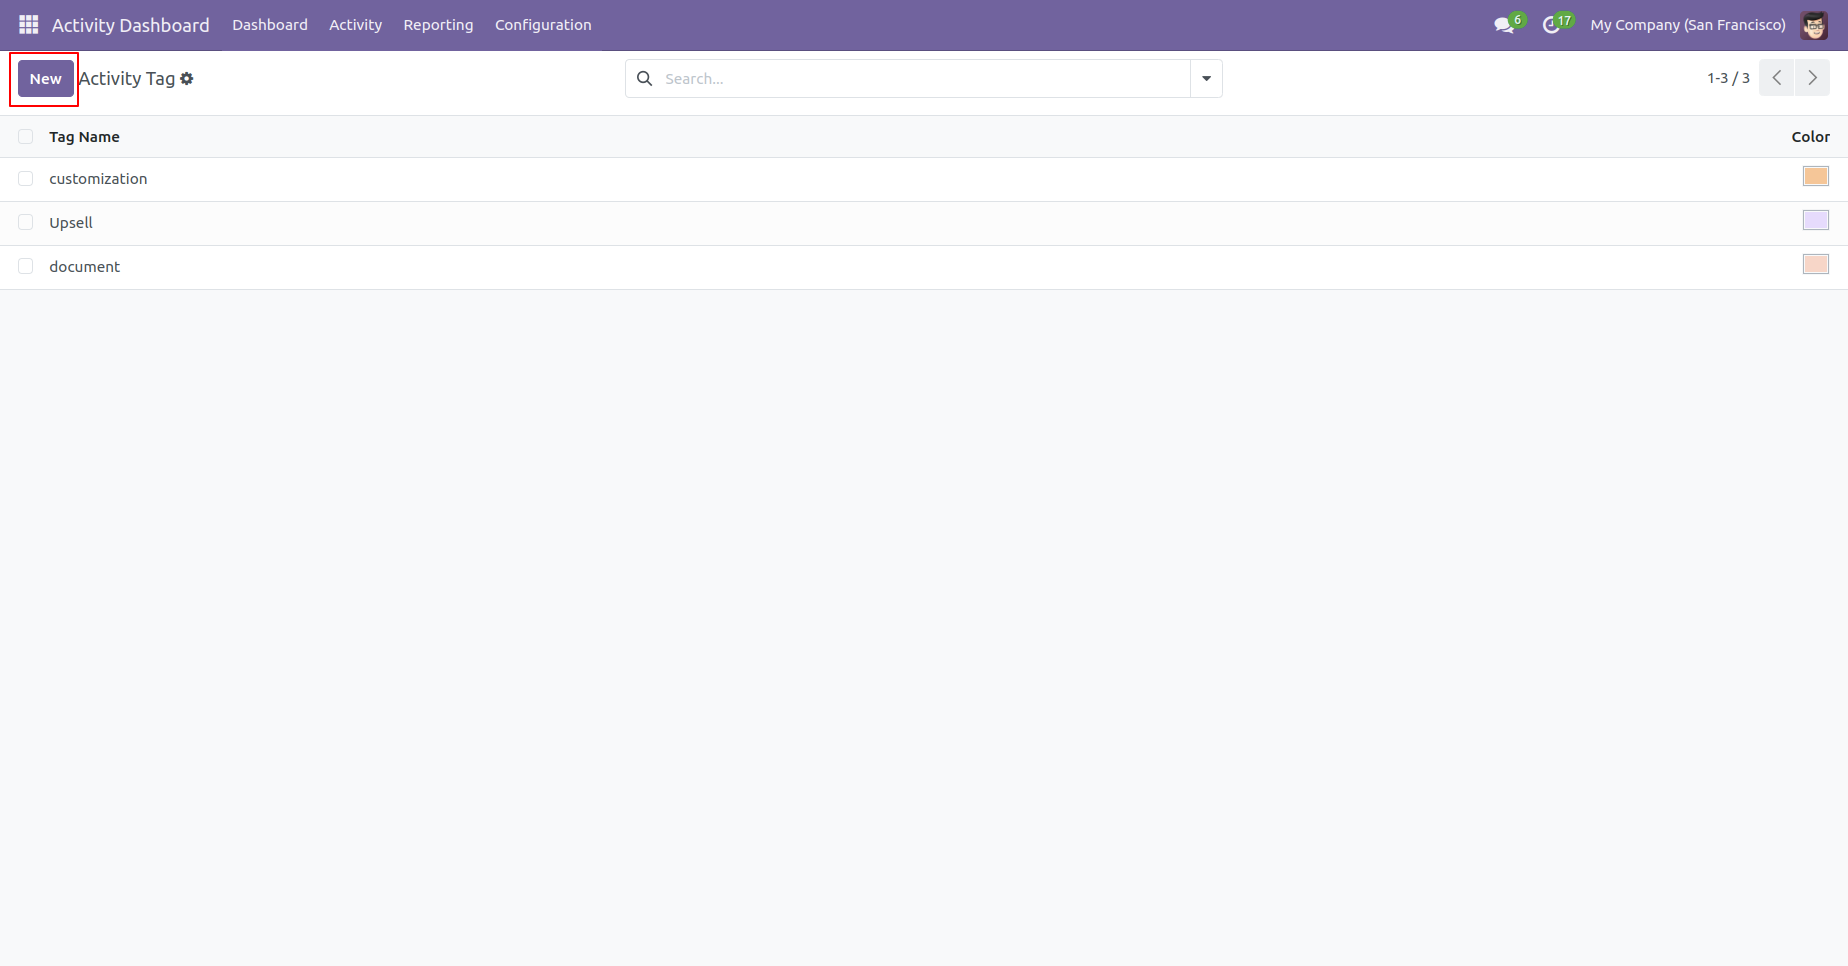
The activity tags tree view.
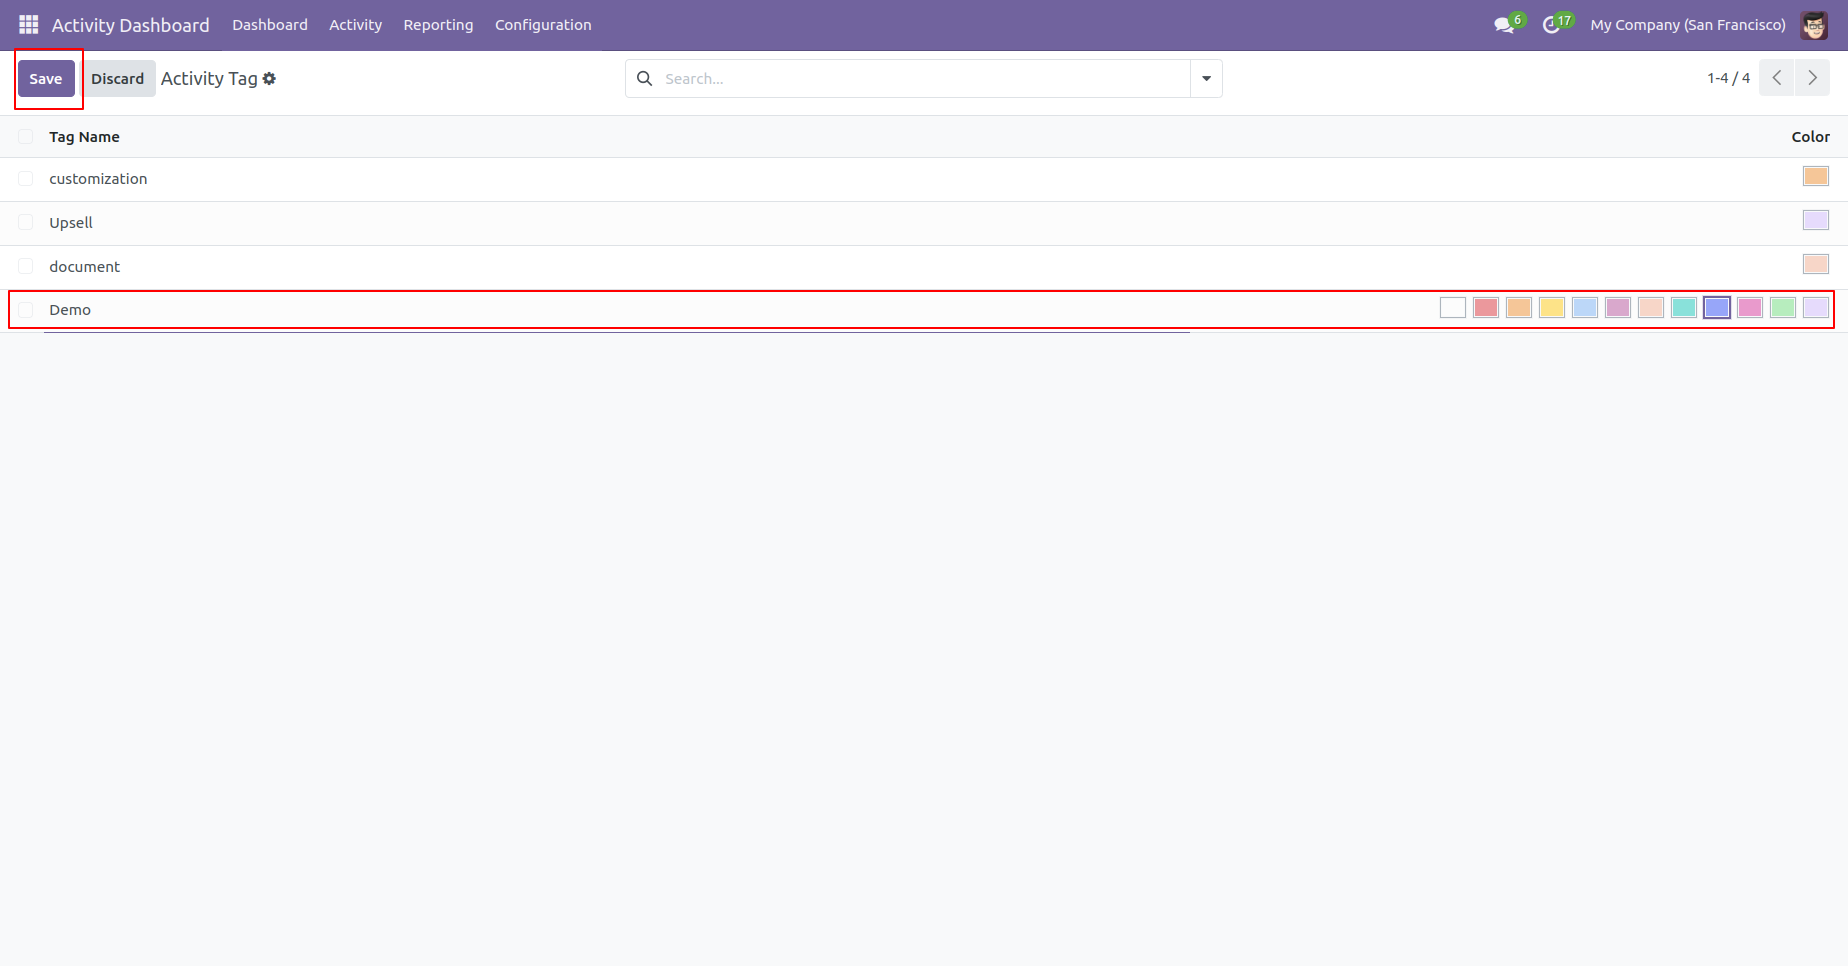
Create Activity tag and set tag color.
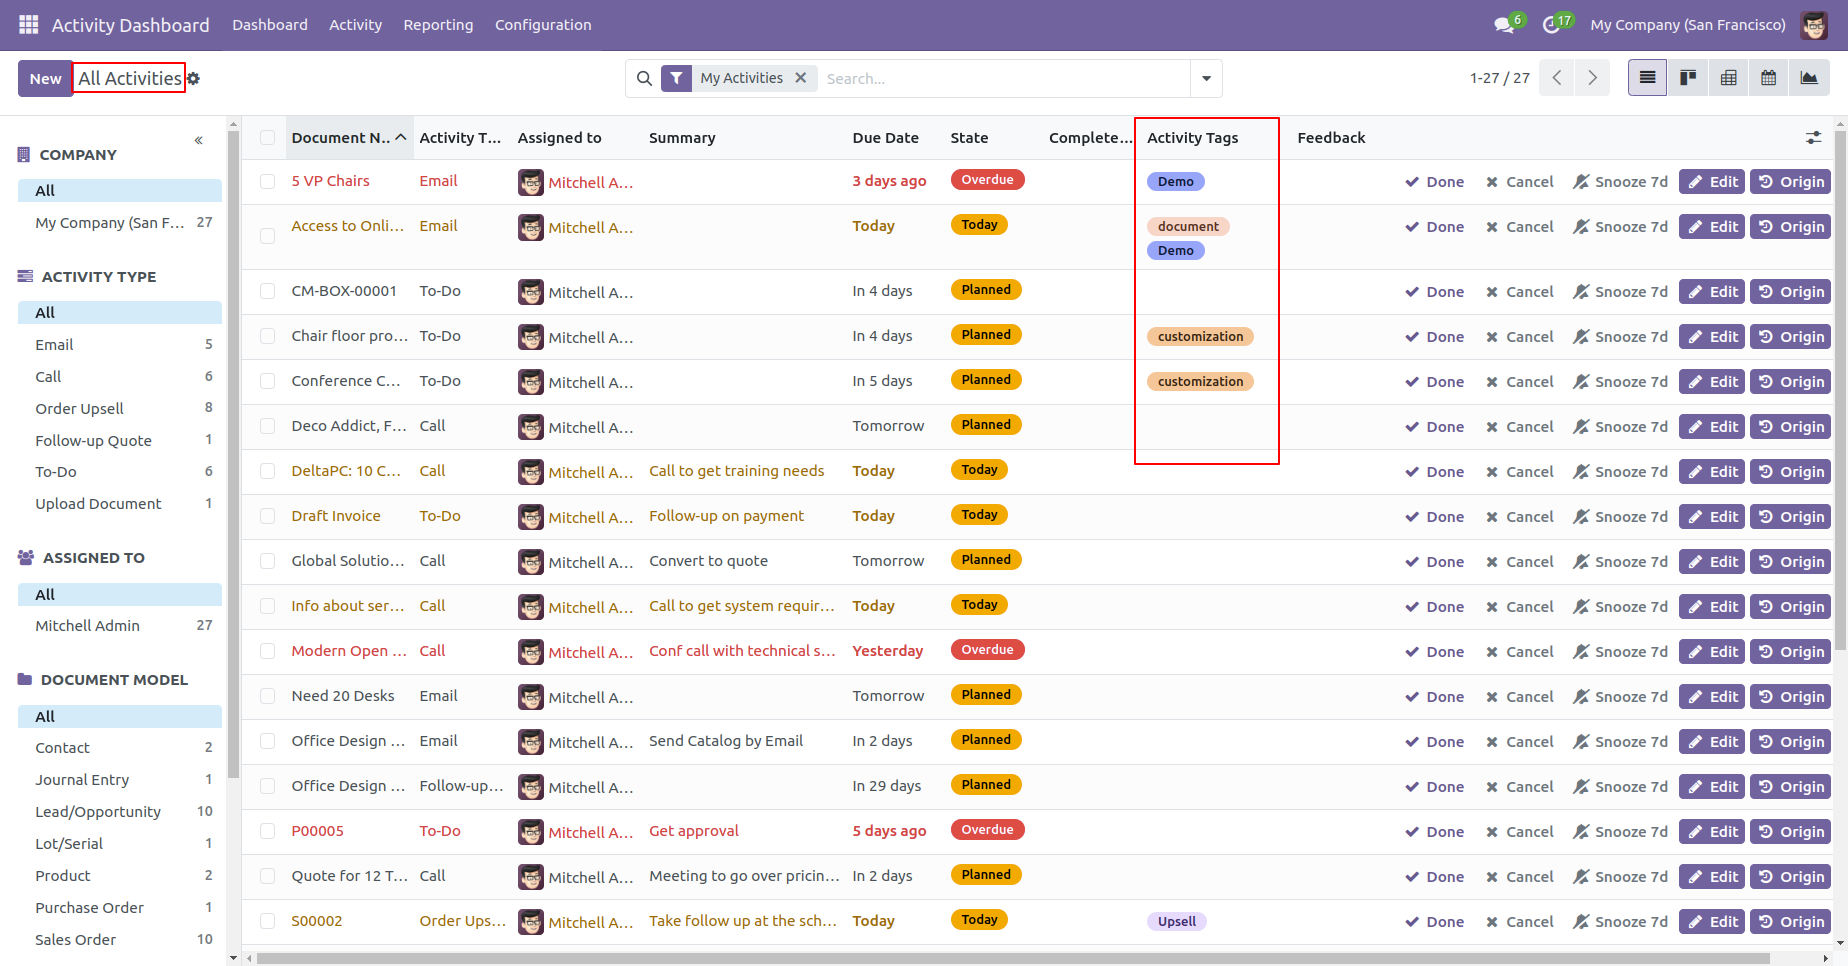
The activity tree view with the activity tags.
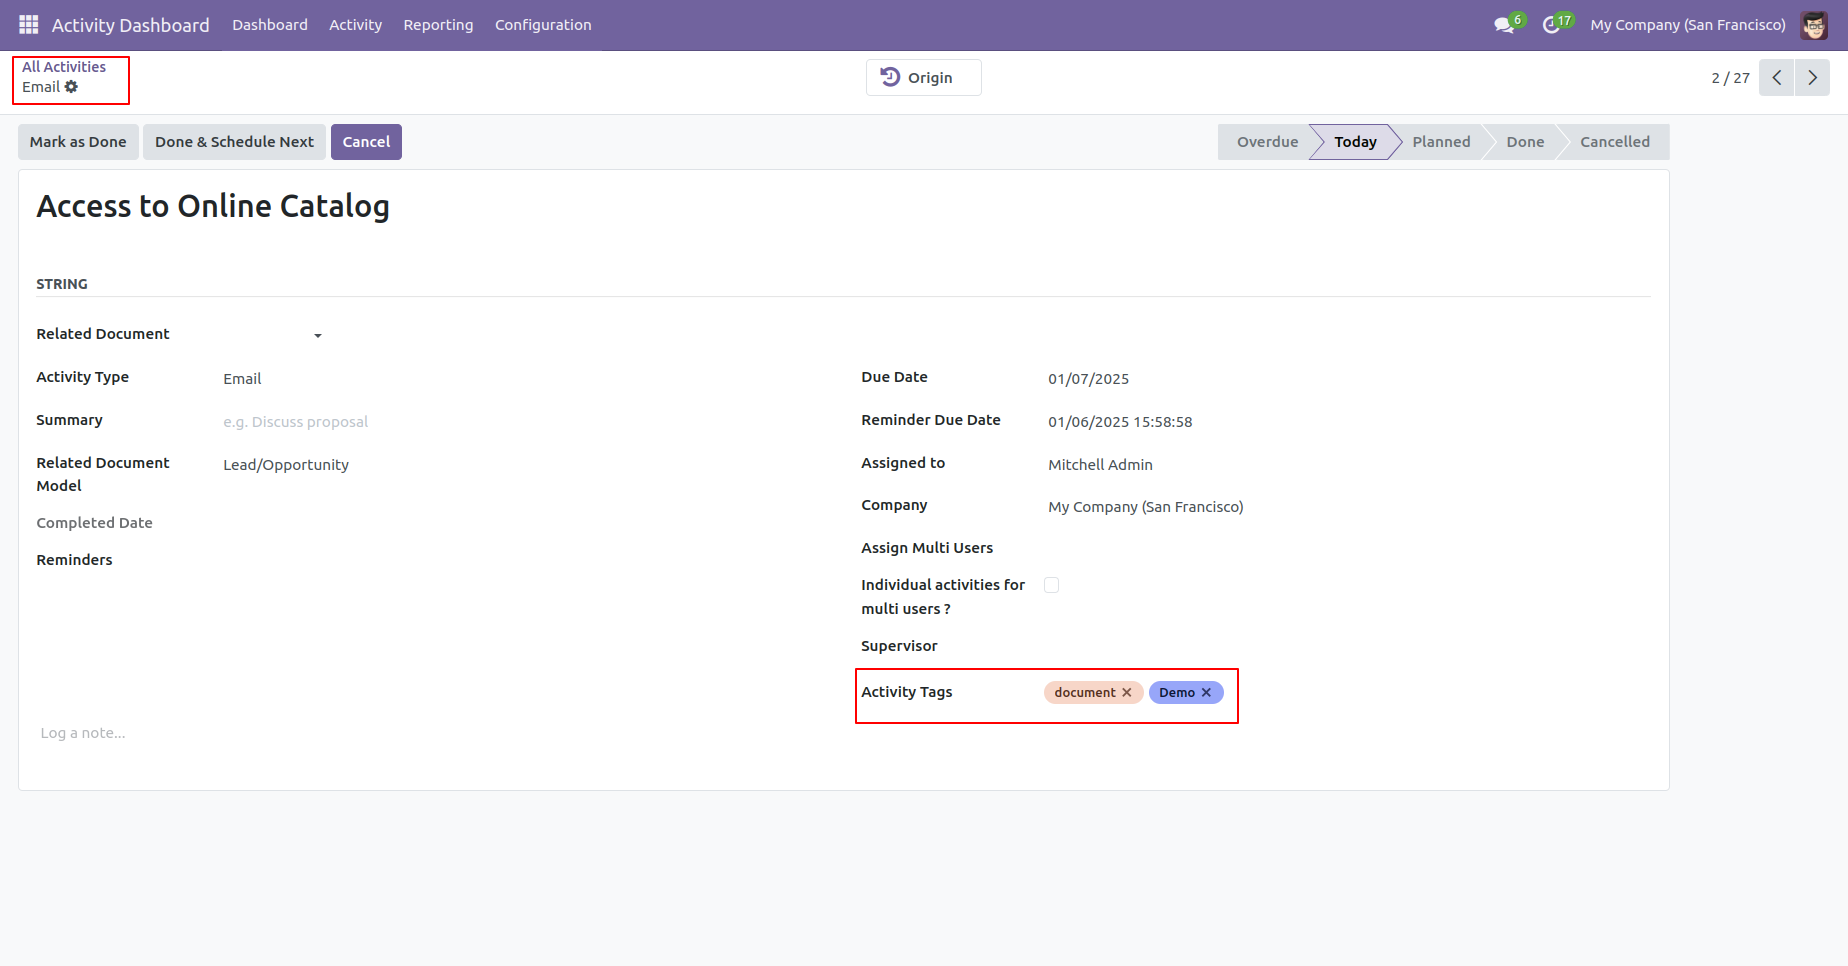
The activity form view with the activity tags.
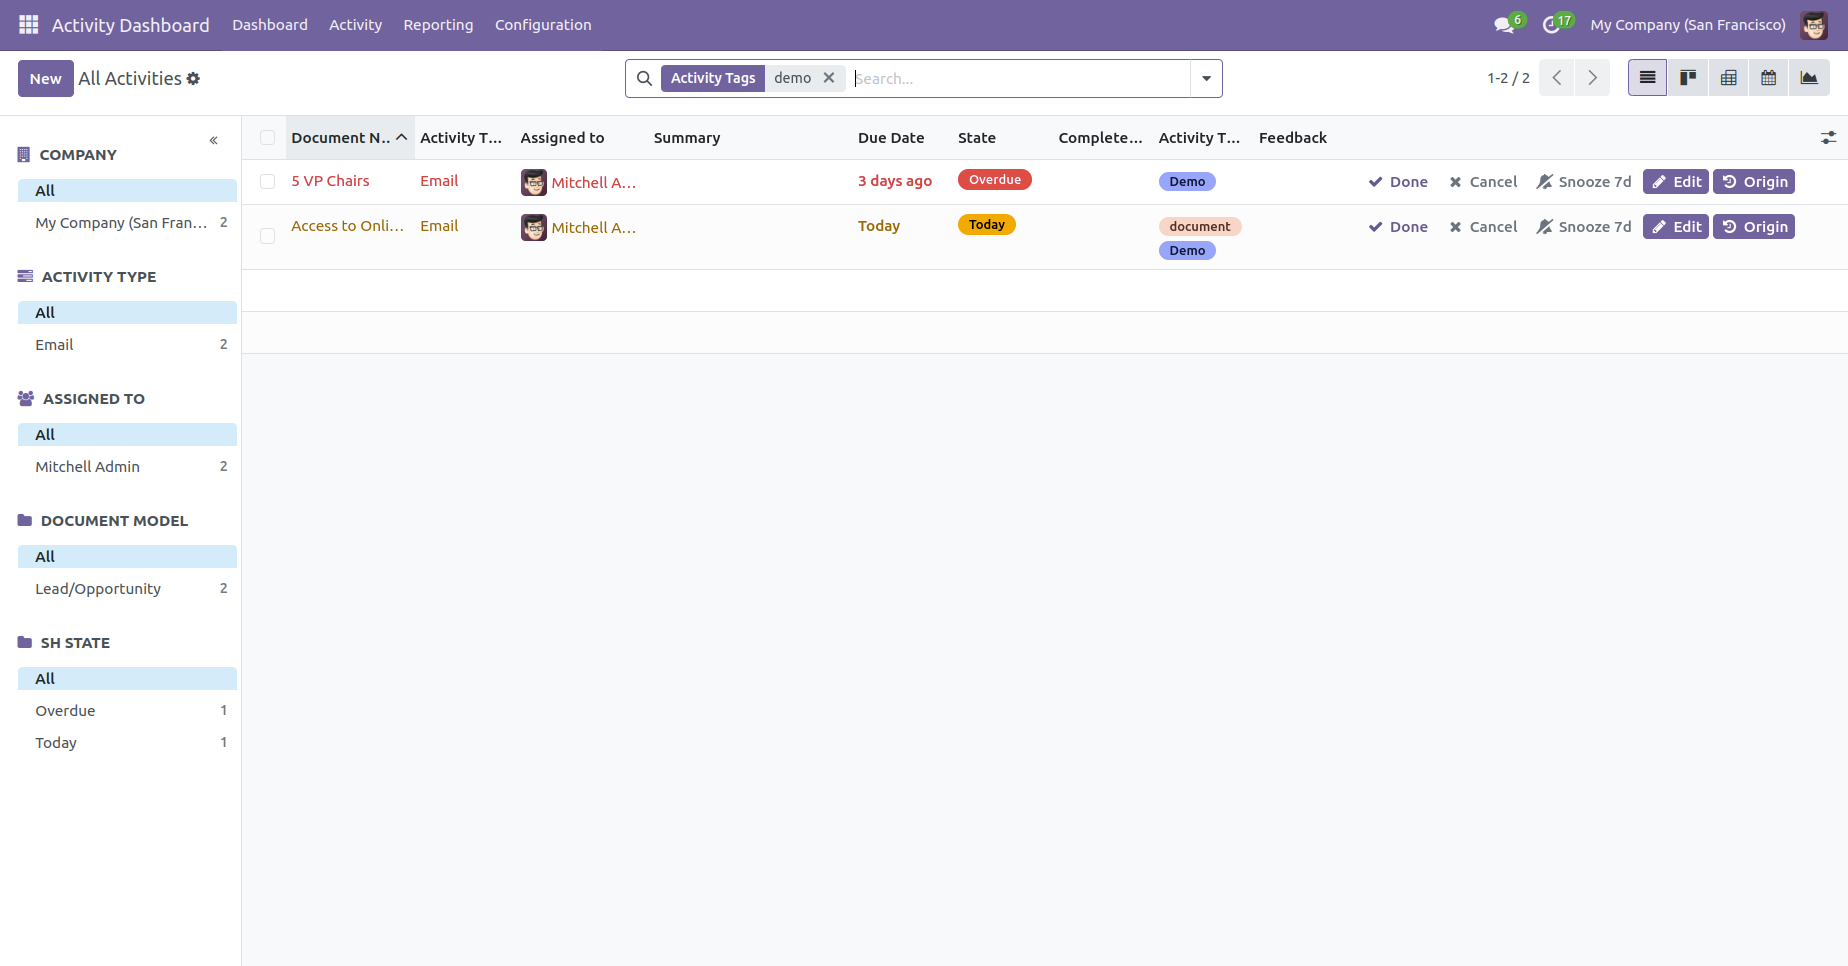
You can search activities by the activity tags.
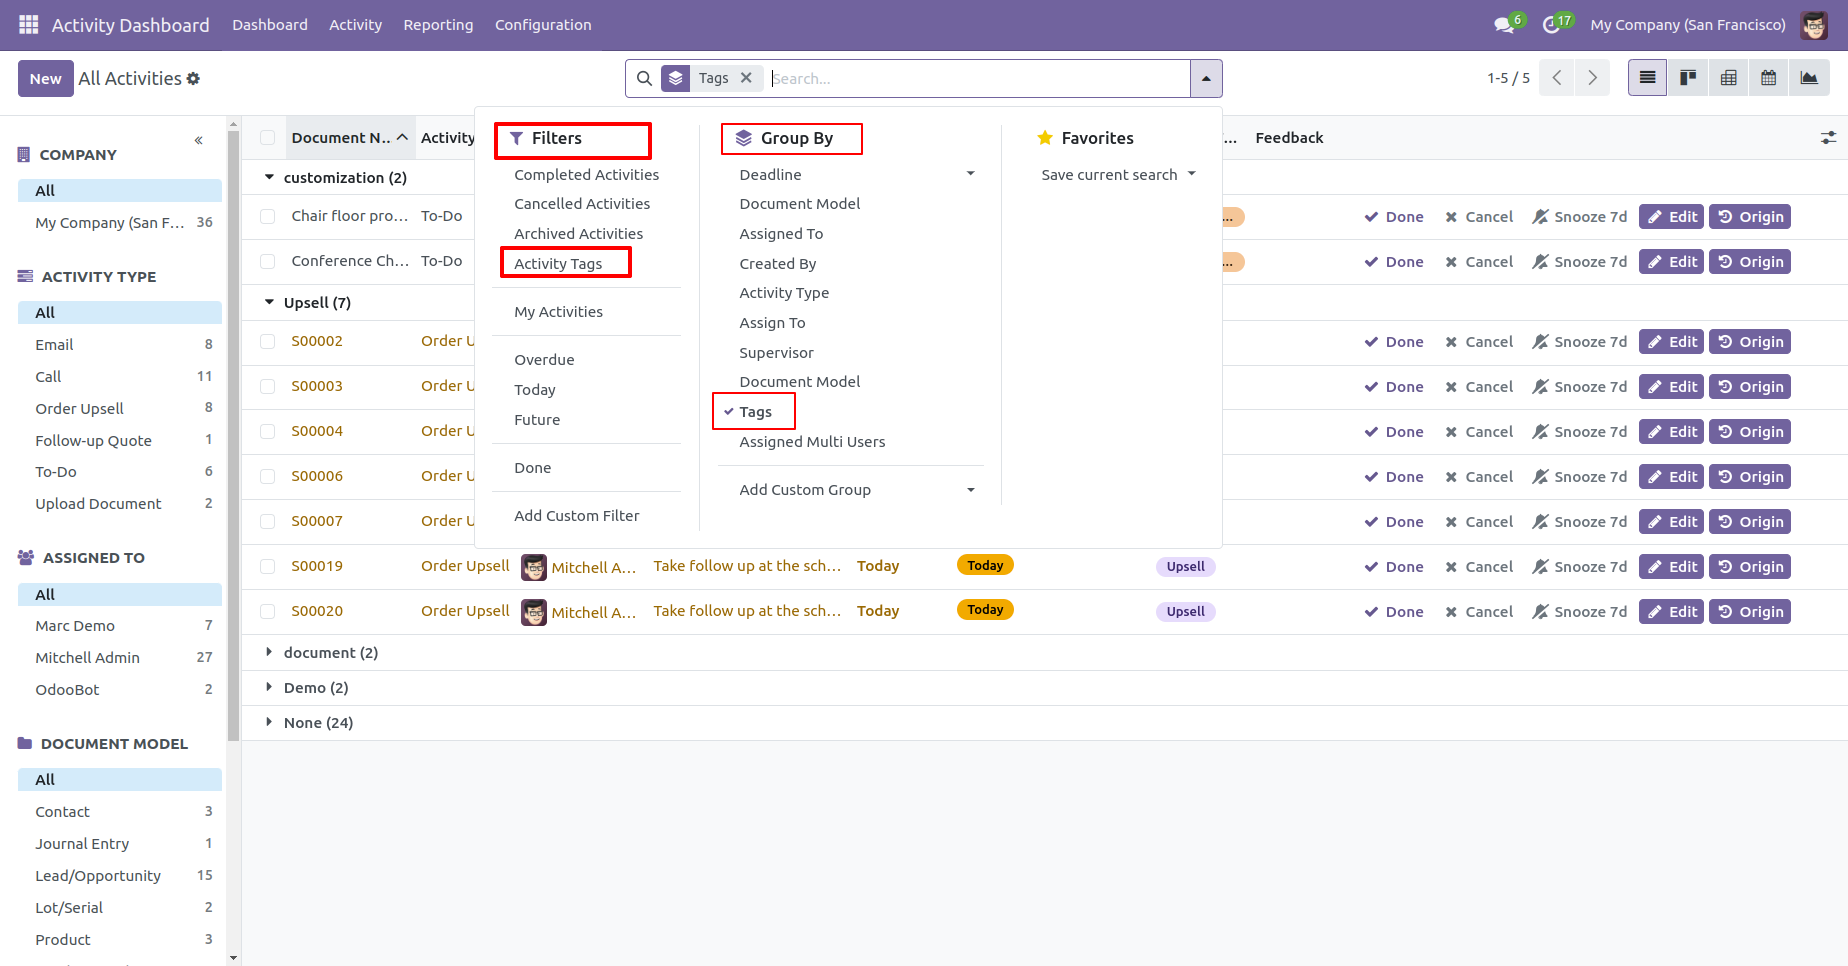
You can group by and filter activities using the tags.
You can schedule activities by activity tags. Click on
the 'Activities' button.
The schedule activity form view with the activity tag
field.
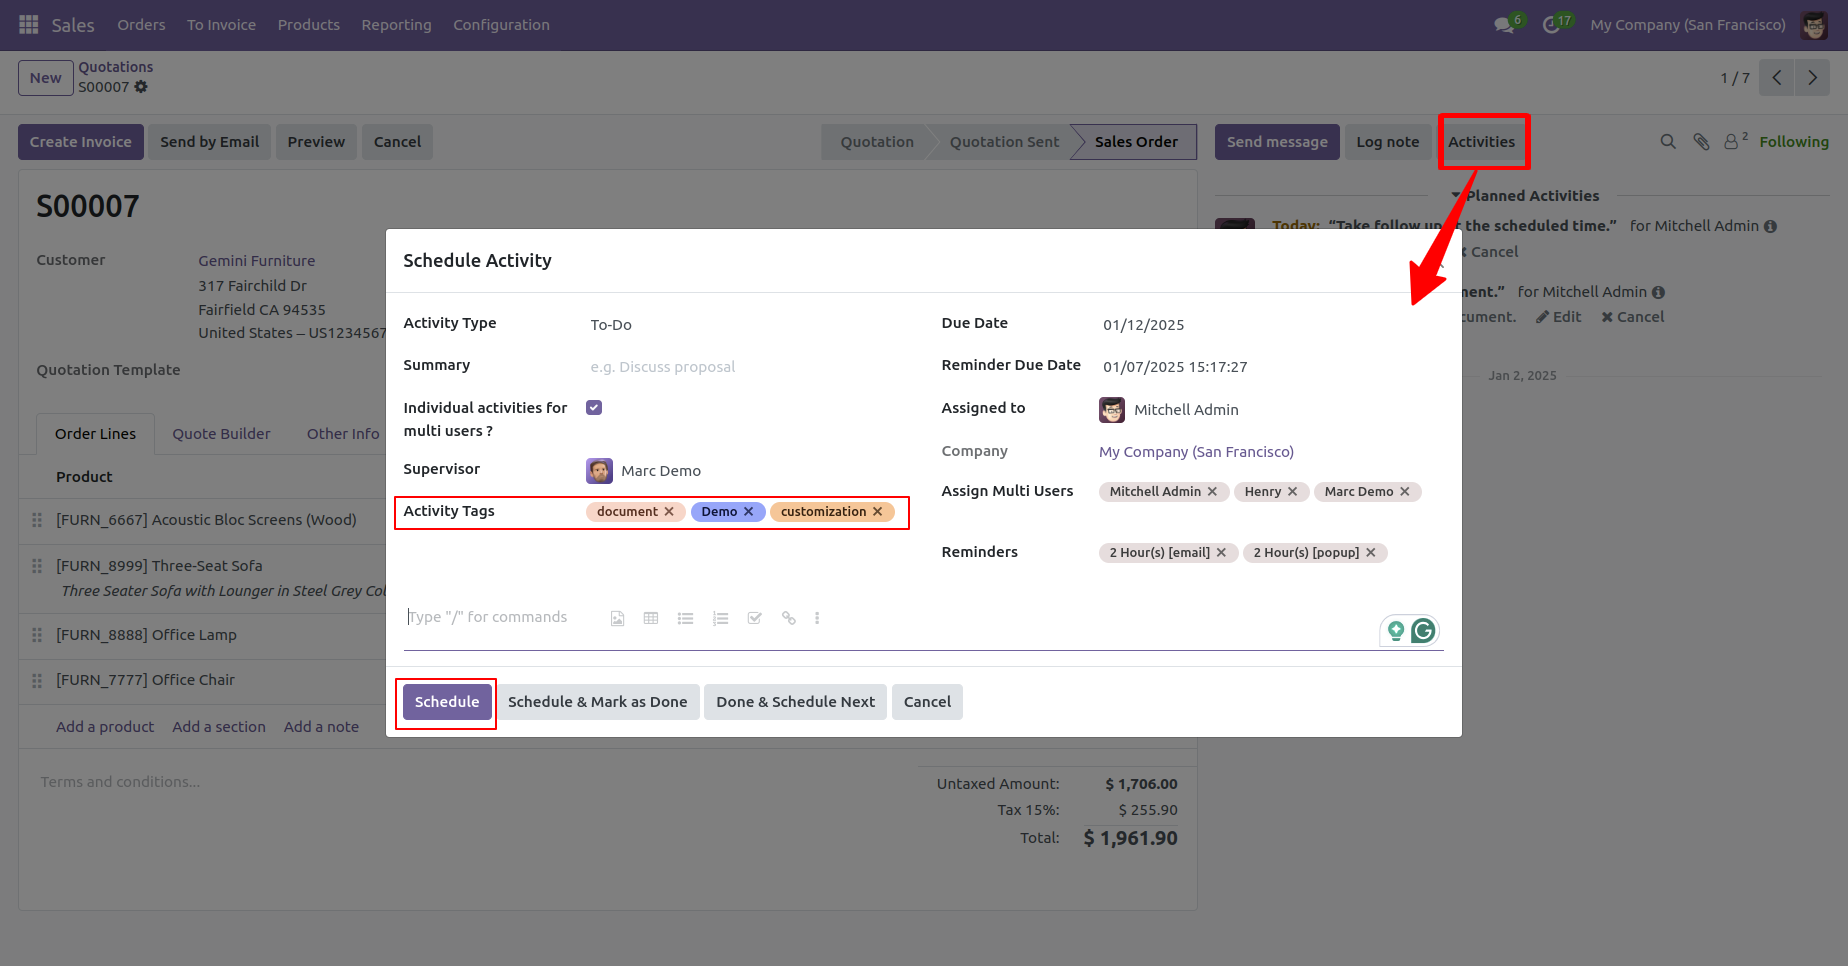
The schedule activity with the activity tags.
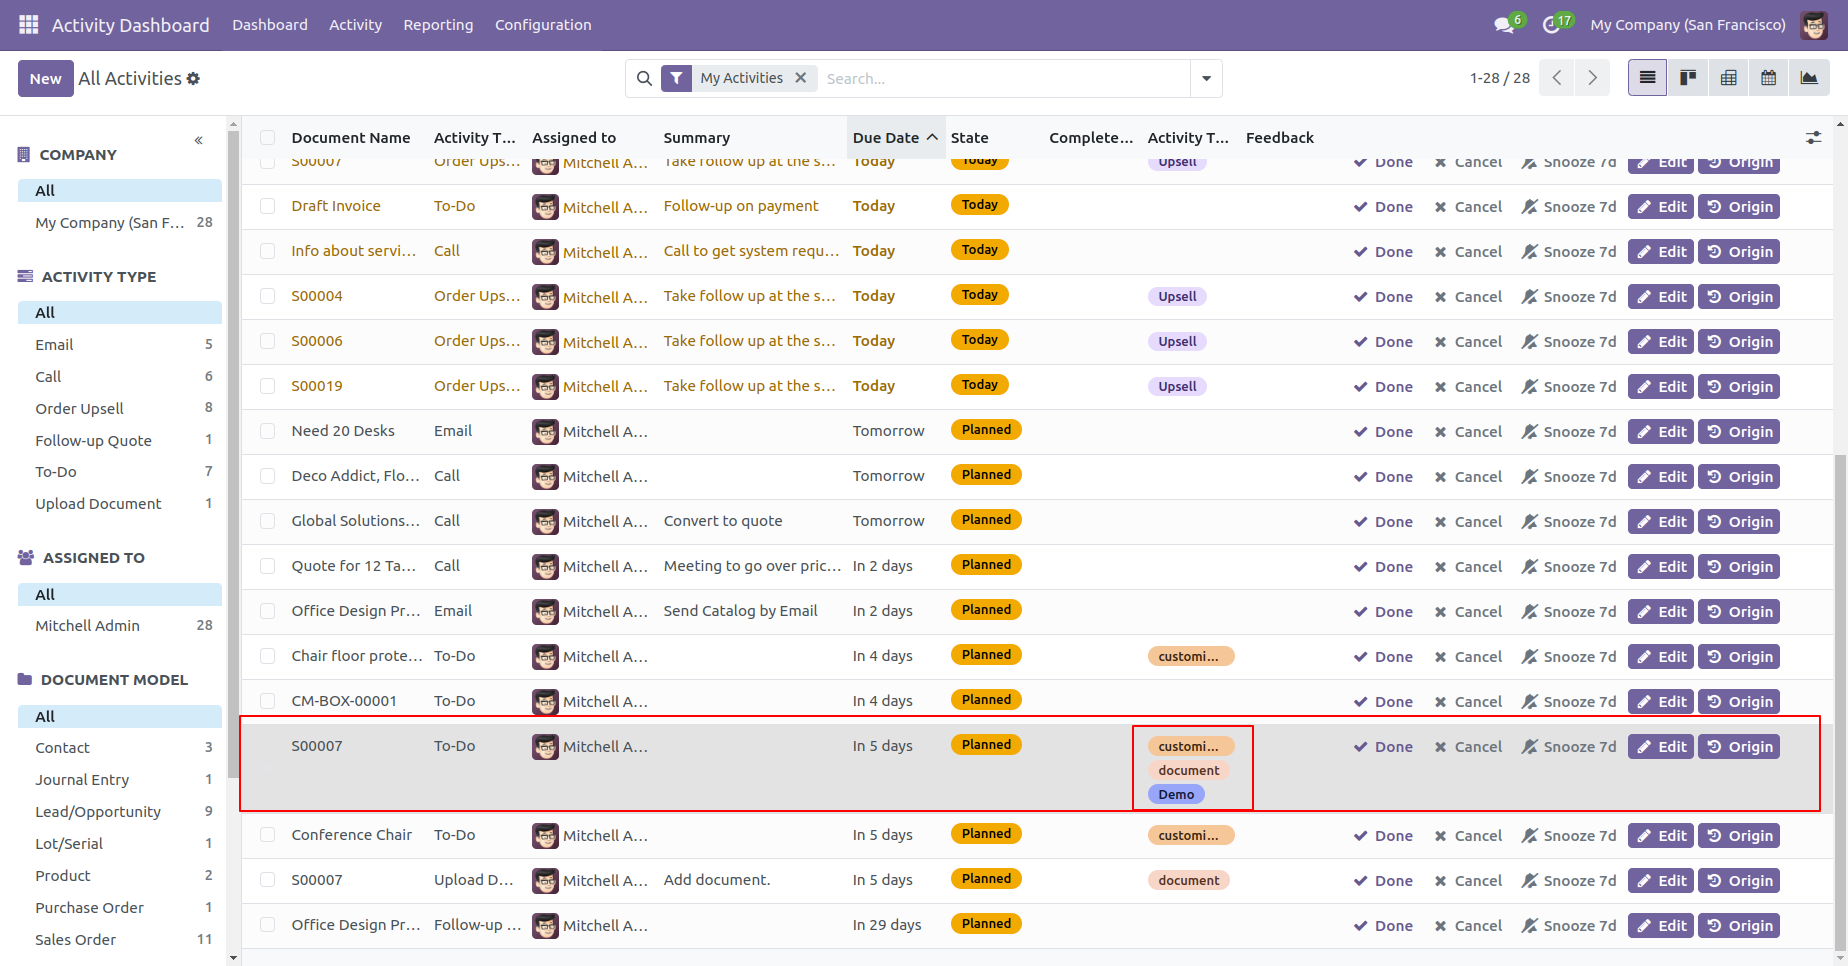
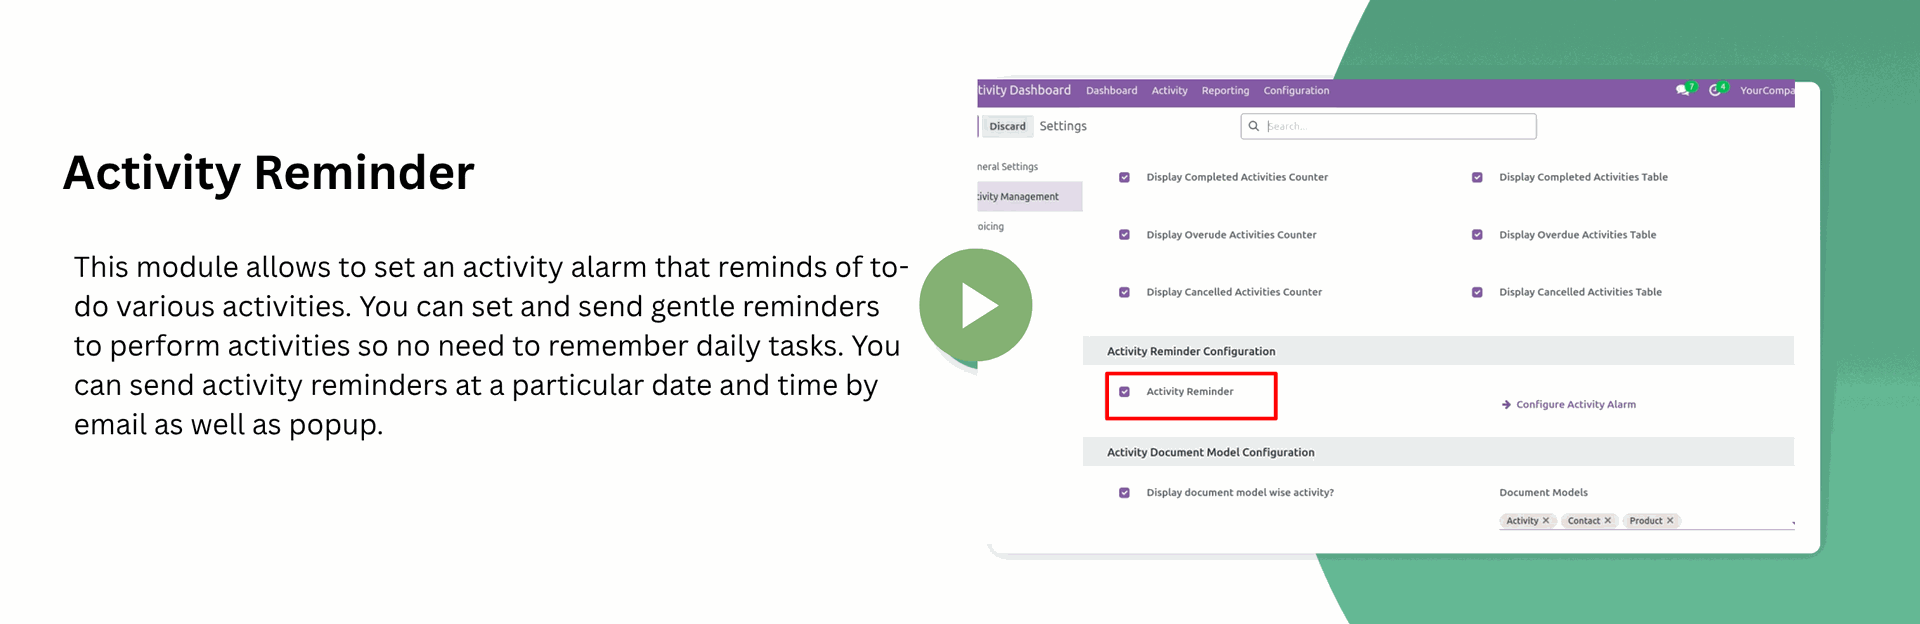
Activity reminder access group.
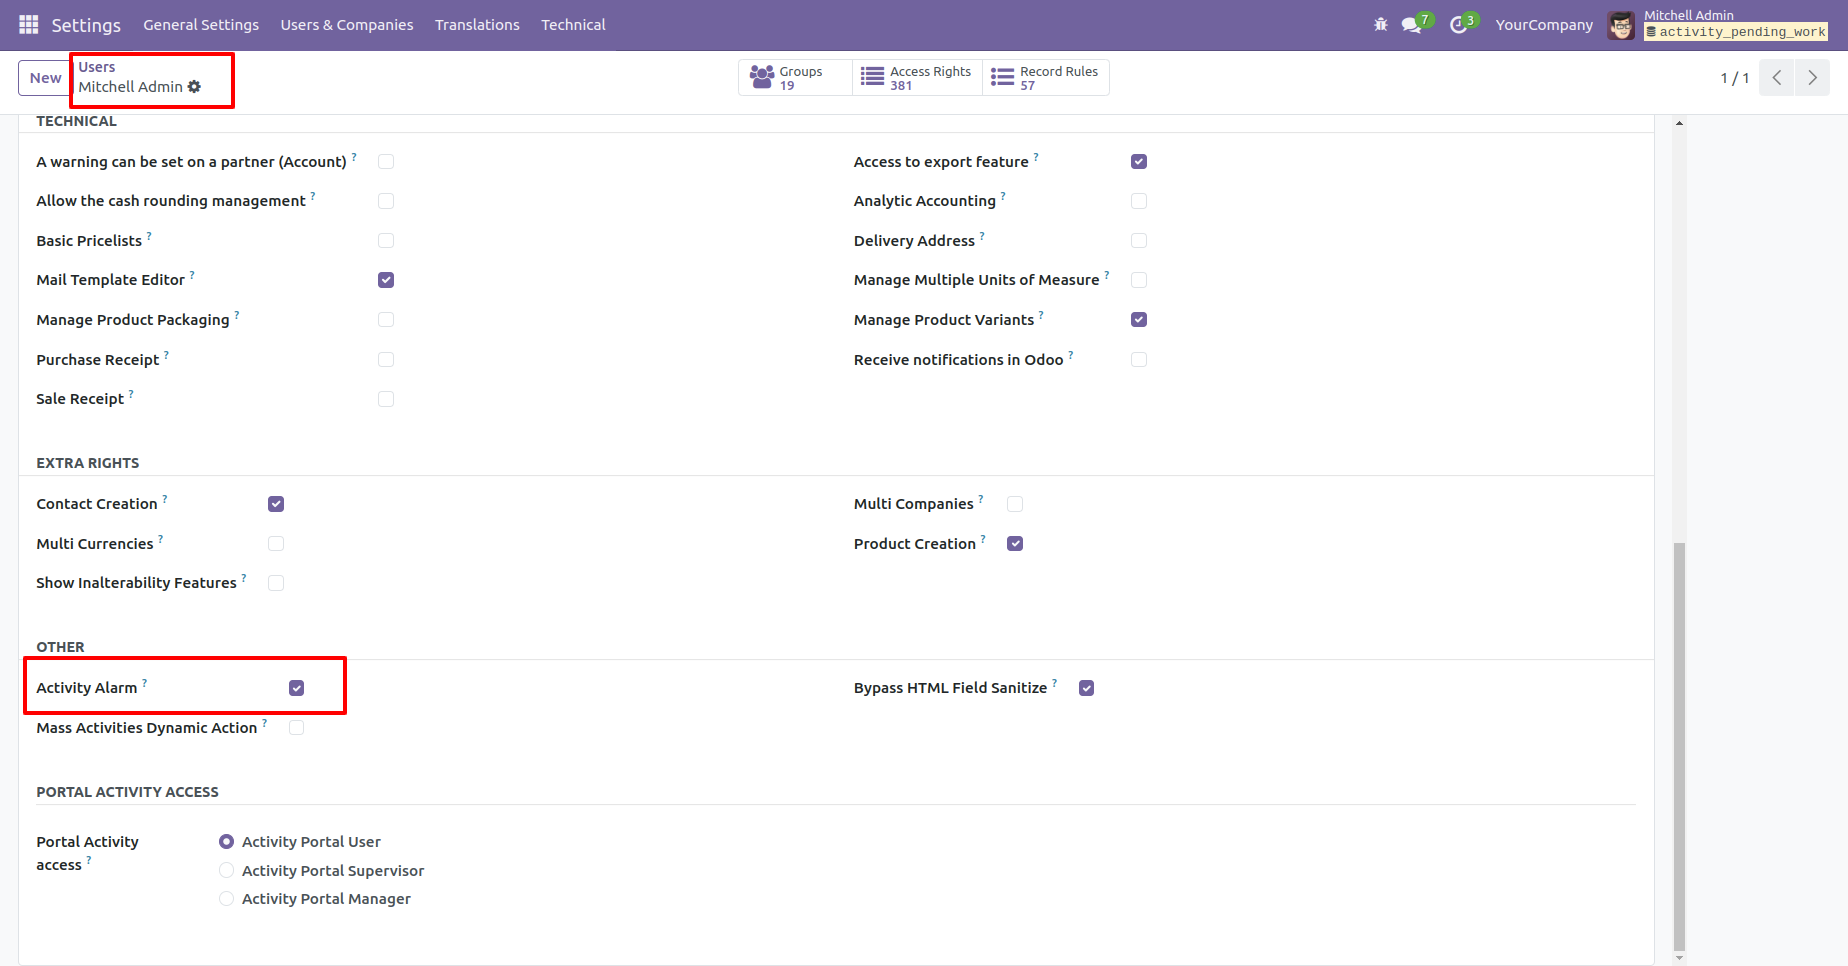
Activity reminder configuration.
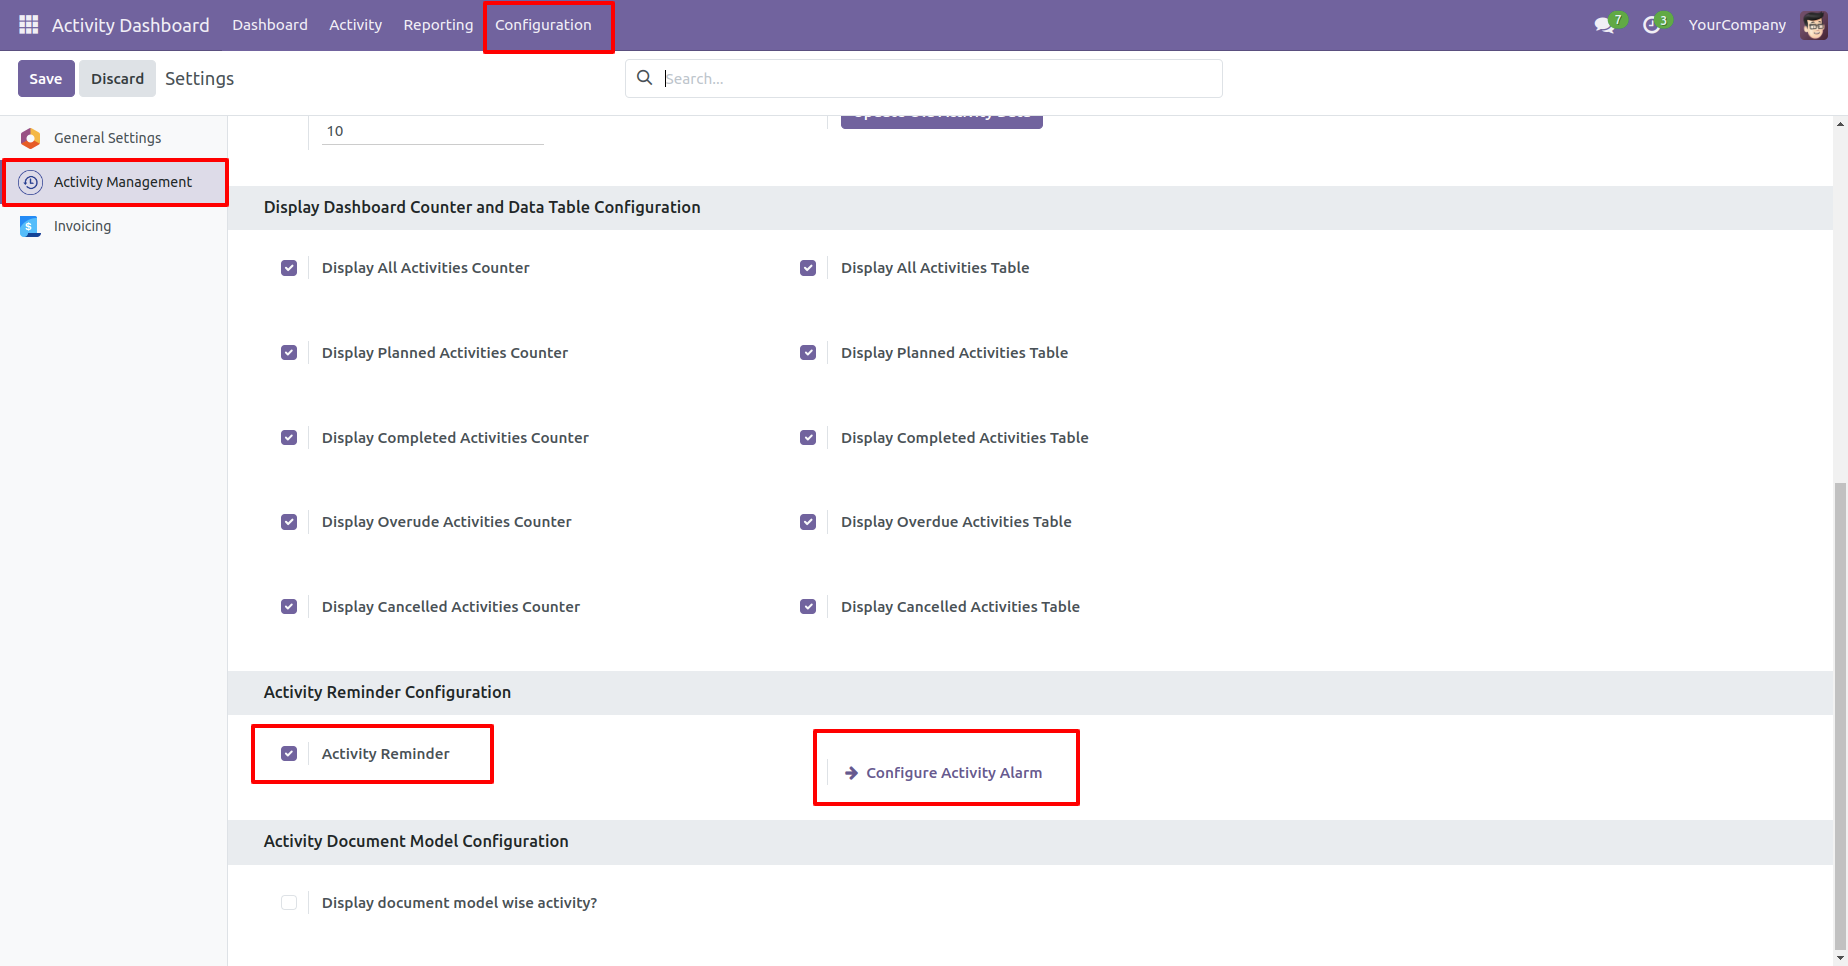
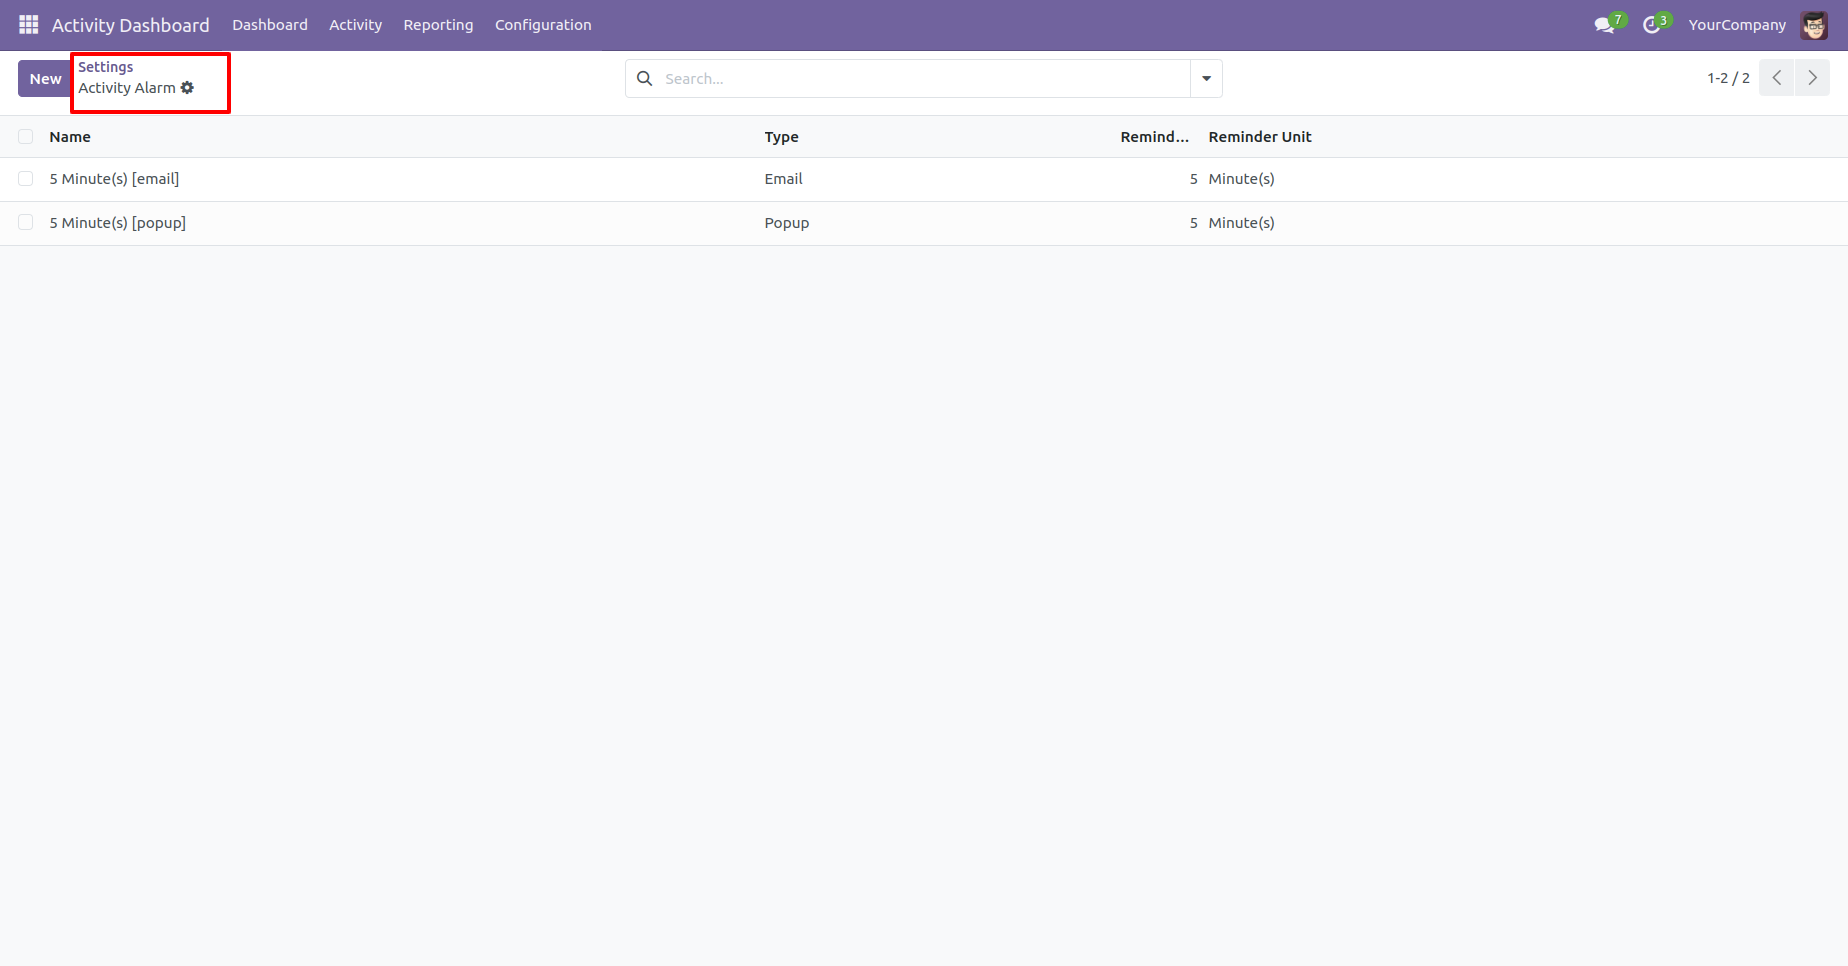
Activity alarm tree view look like this.
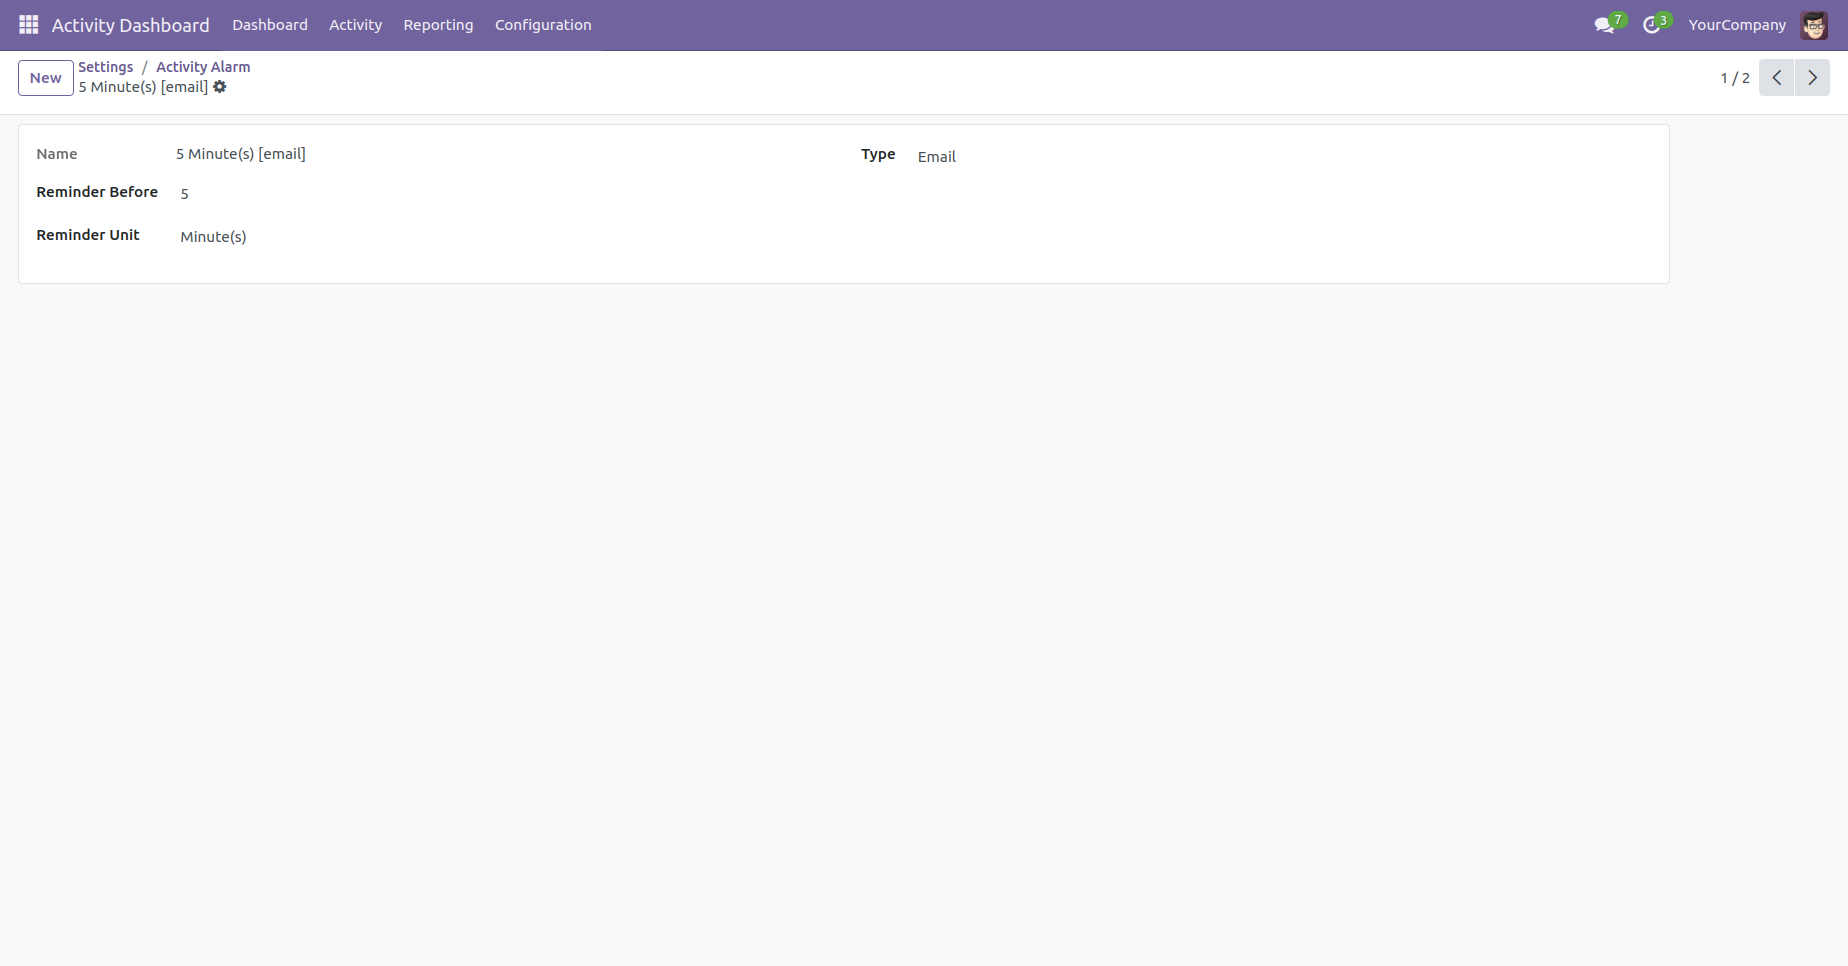
Activity alarm form view look like this.
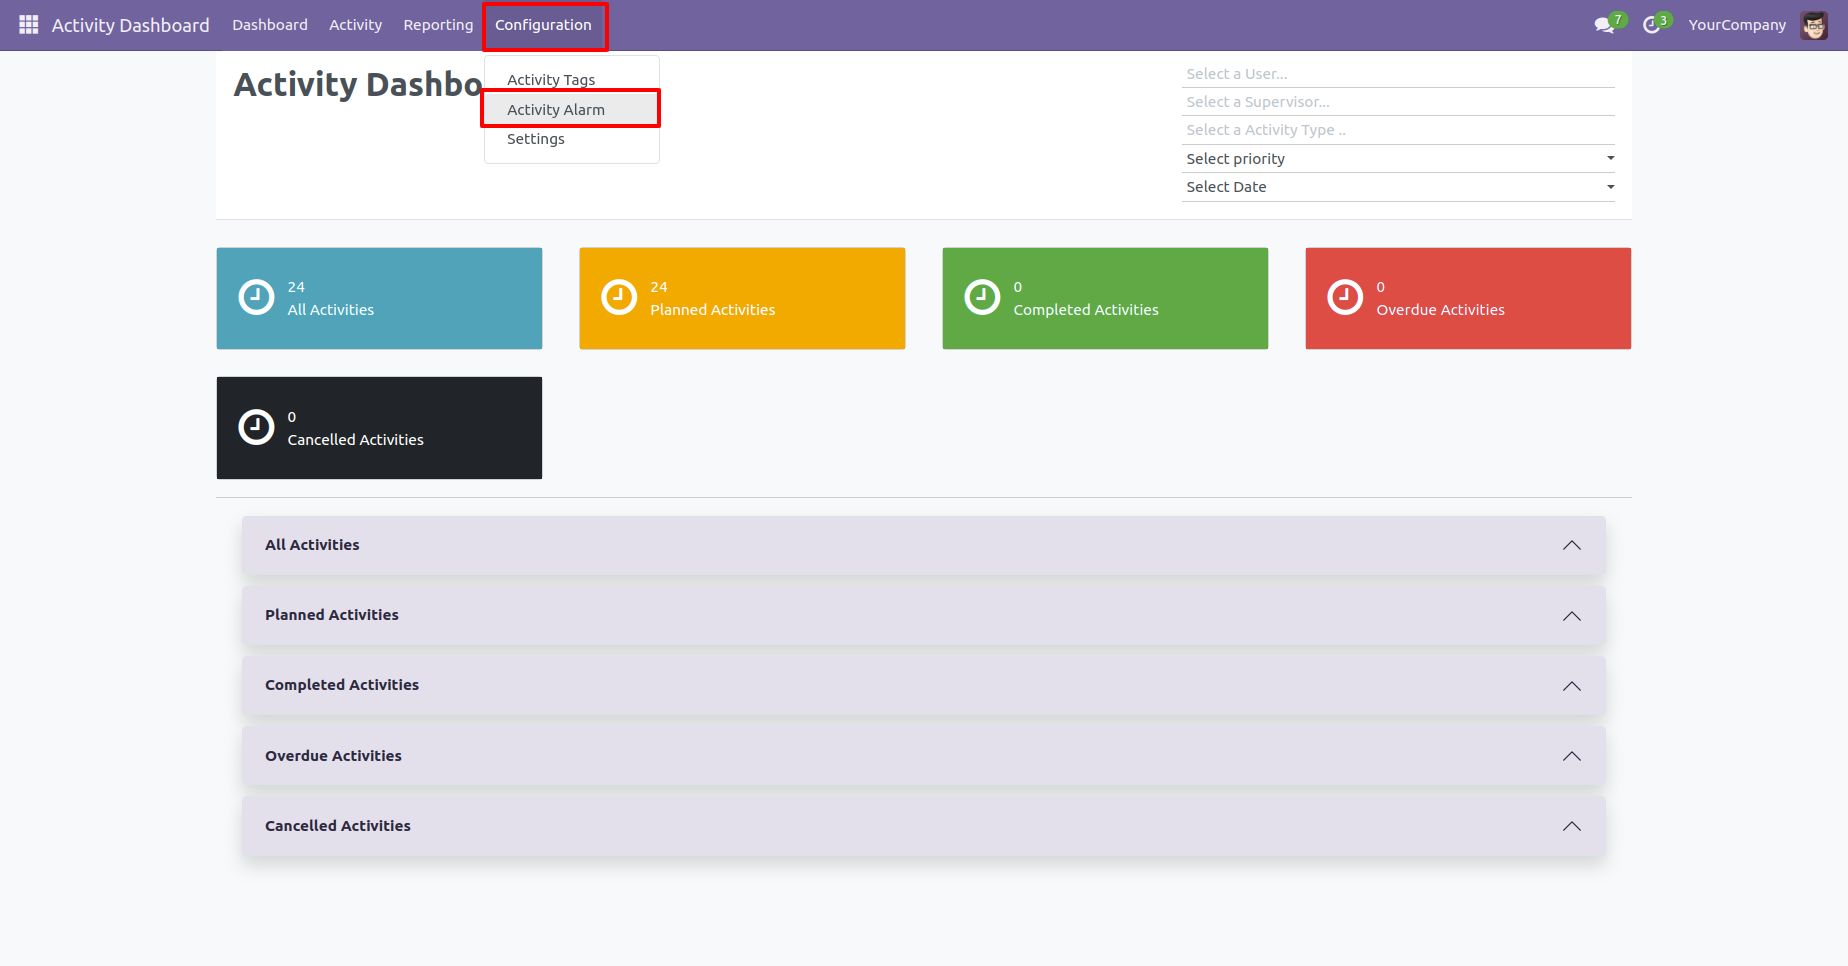
You can open the activity alarm tree view from configuration and from the activity dashboard.
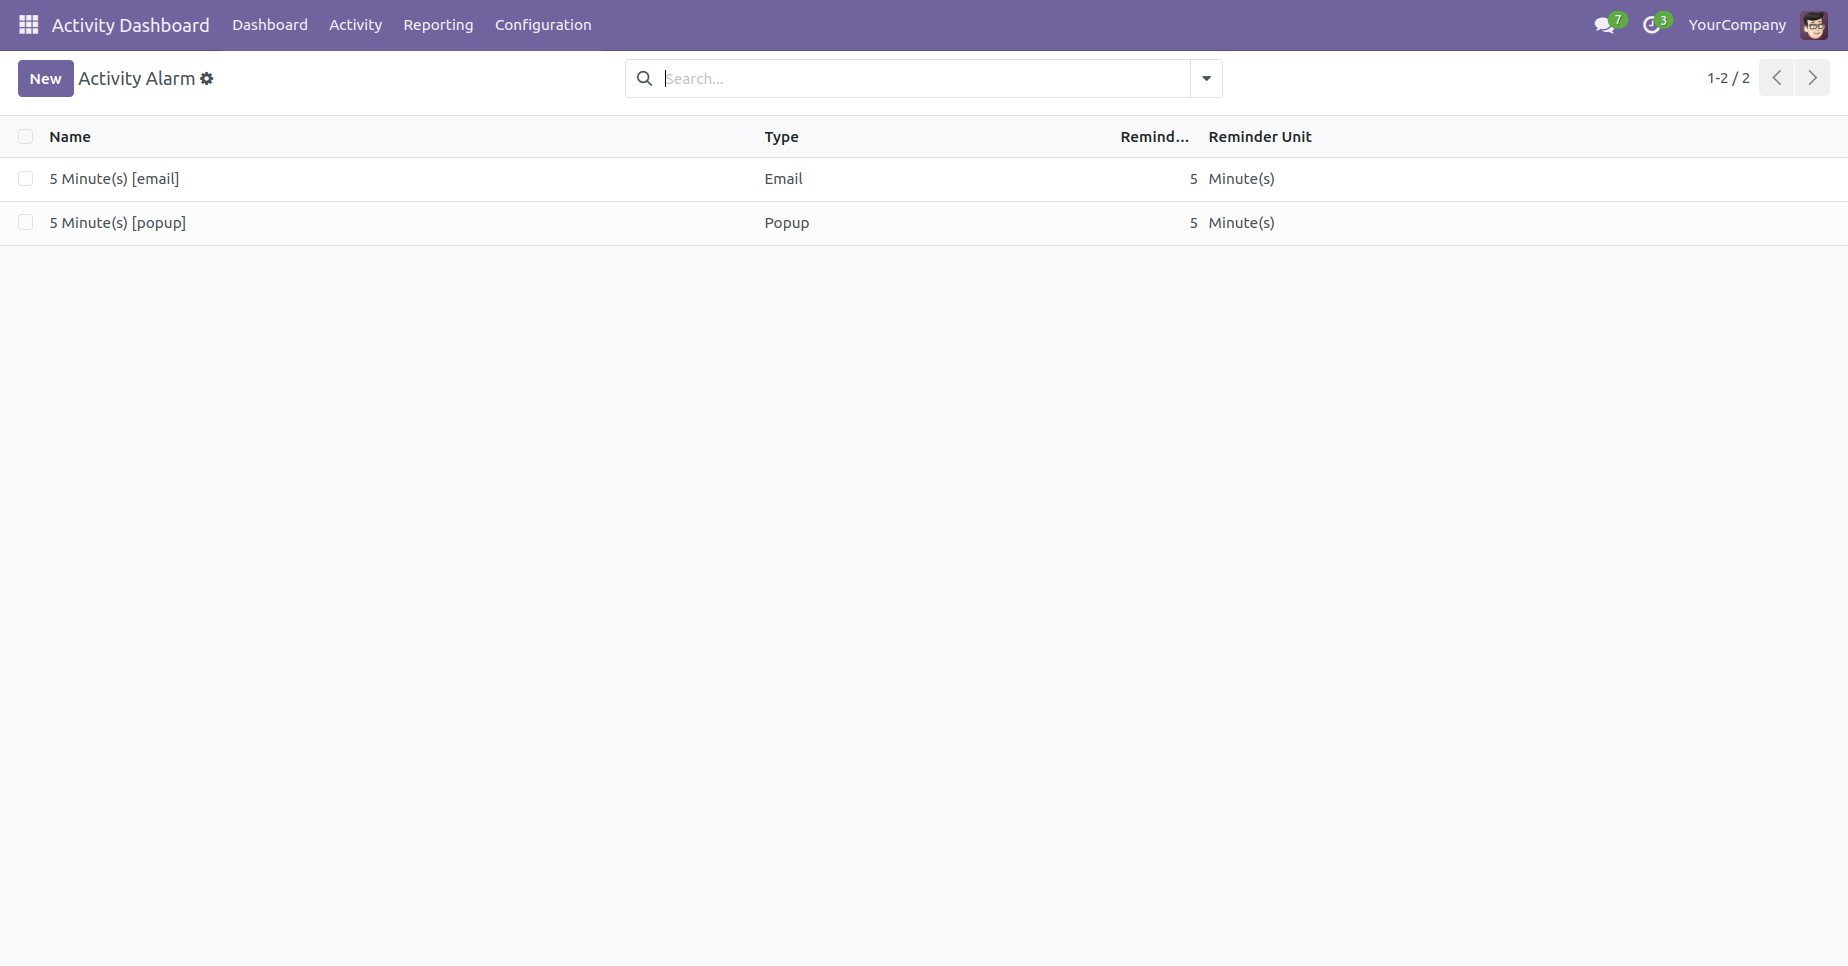
Tree view of the Activity alarm.
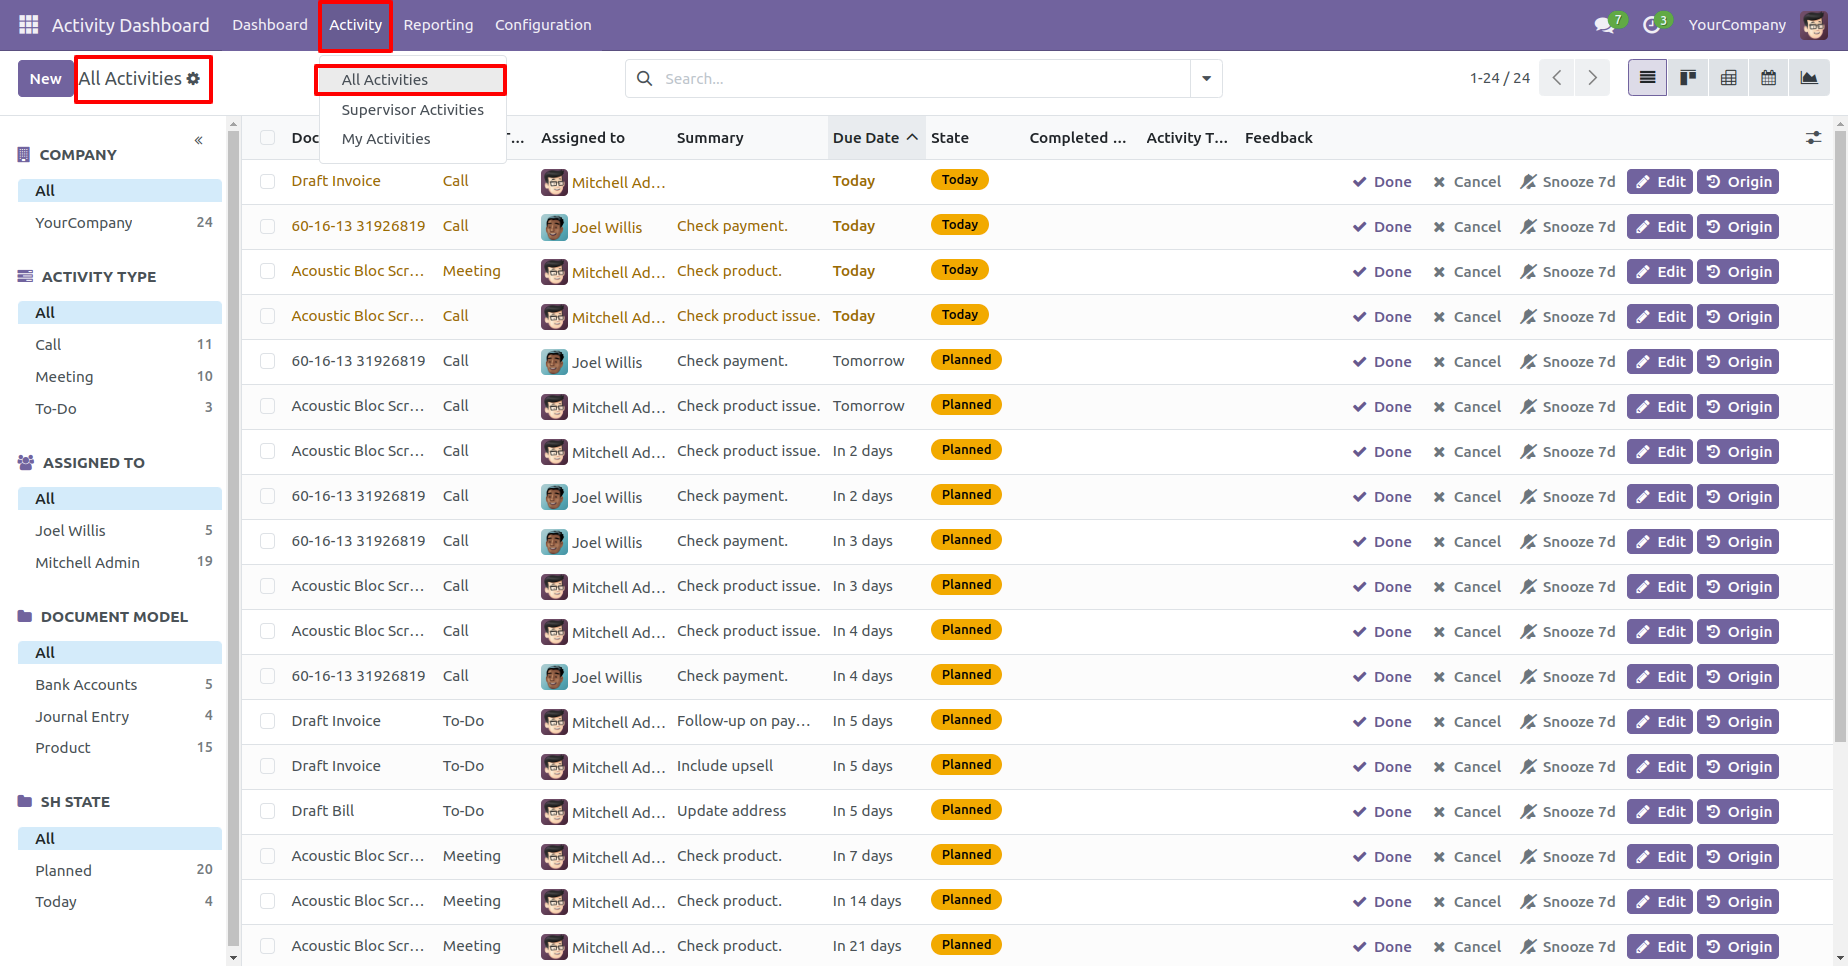
'All Activities' menu and tree view.
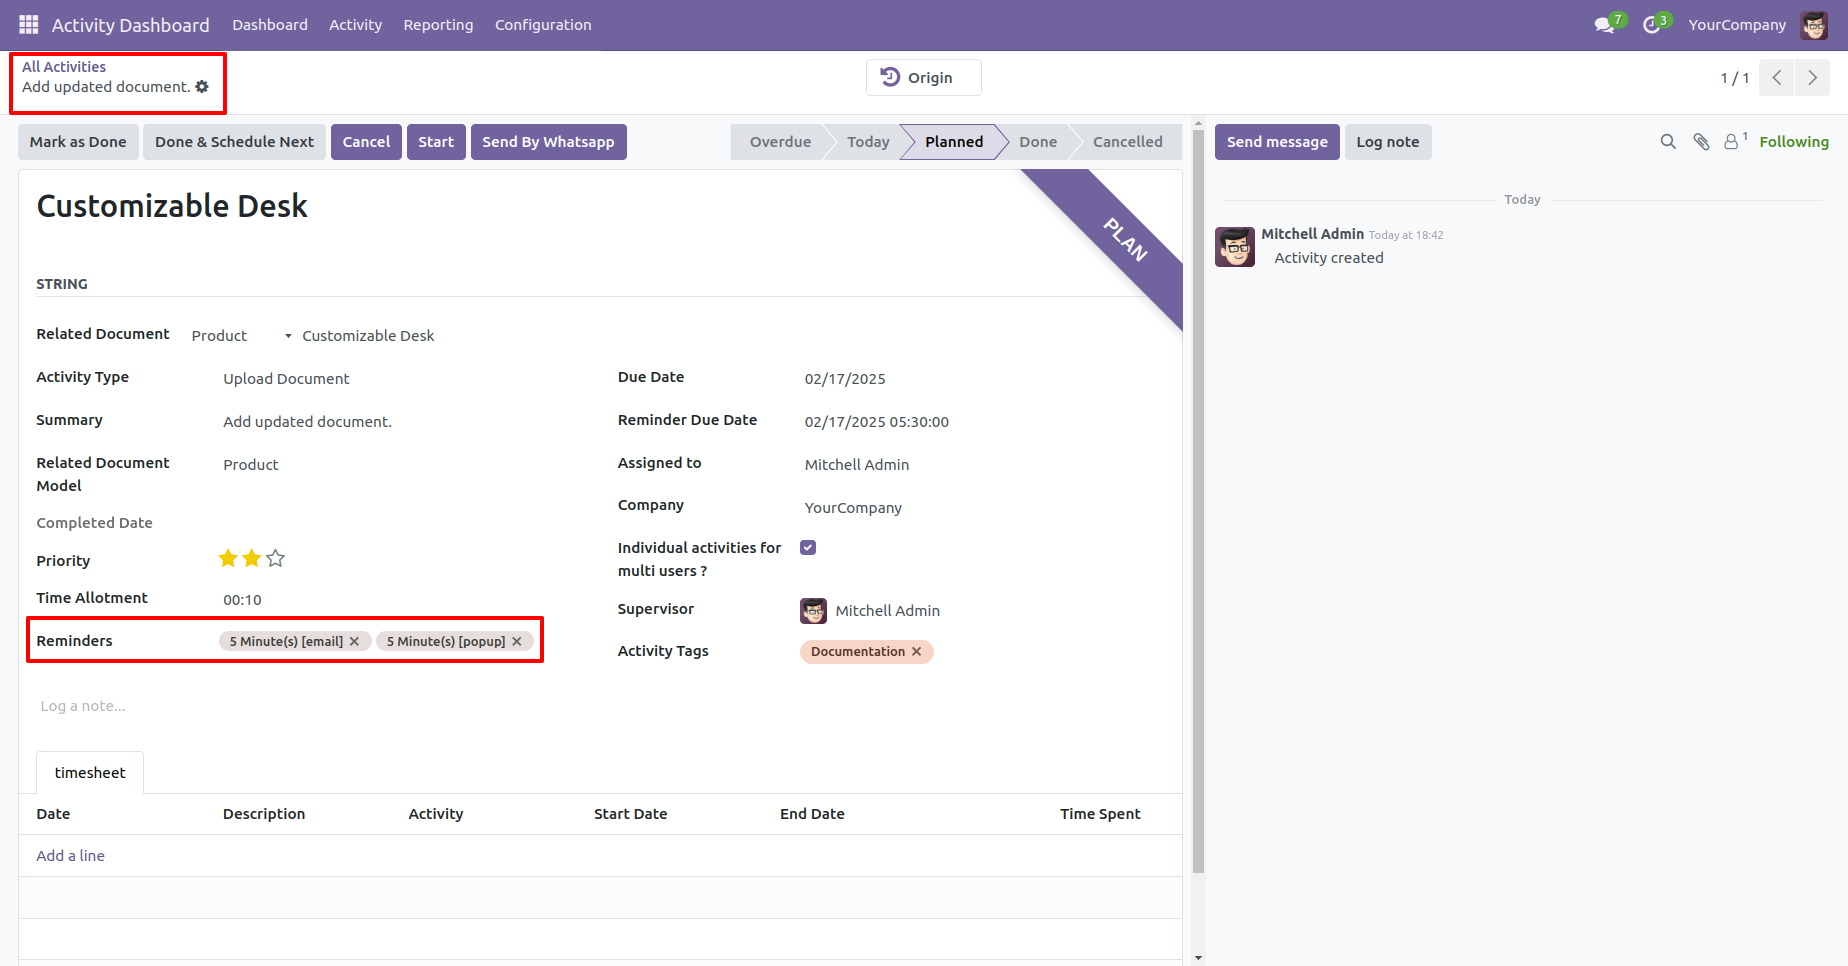
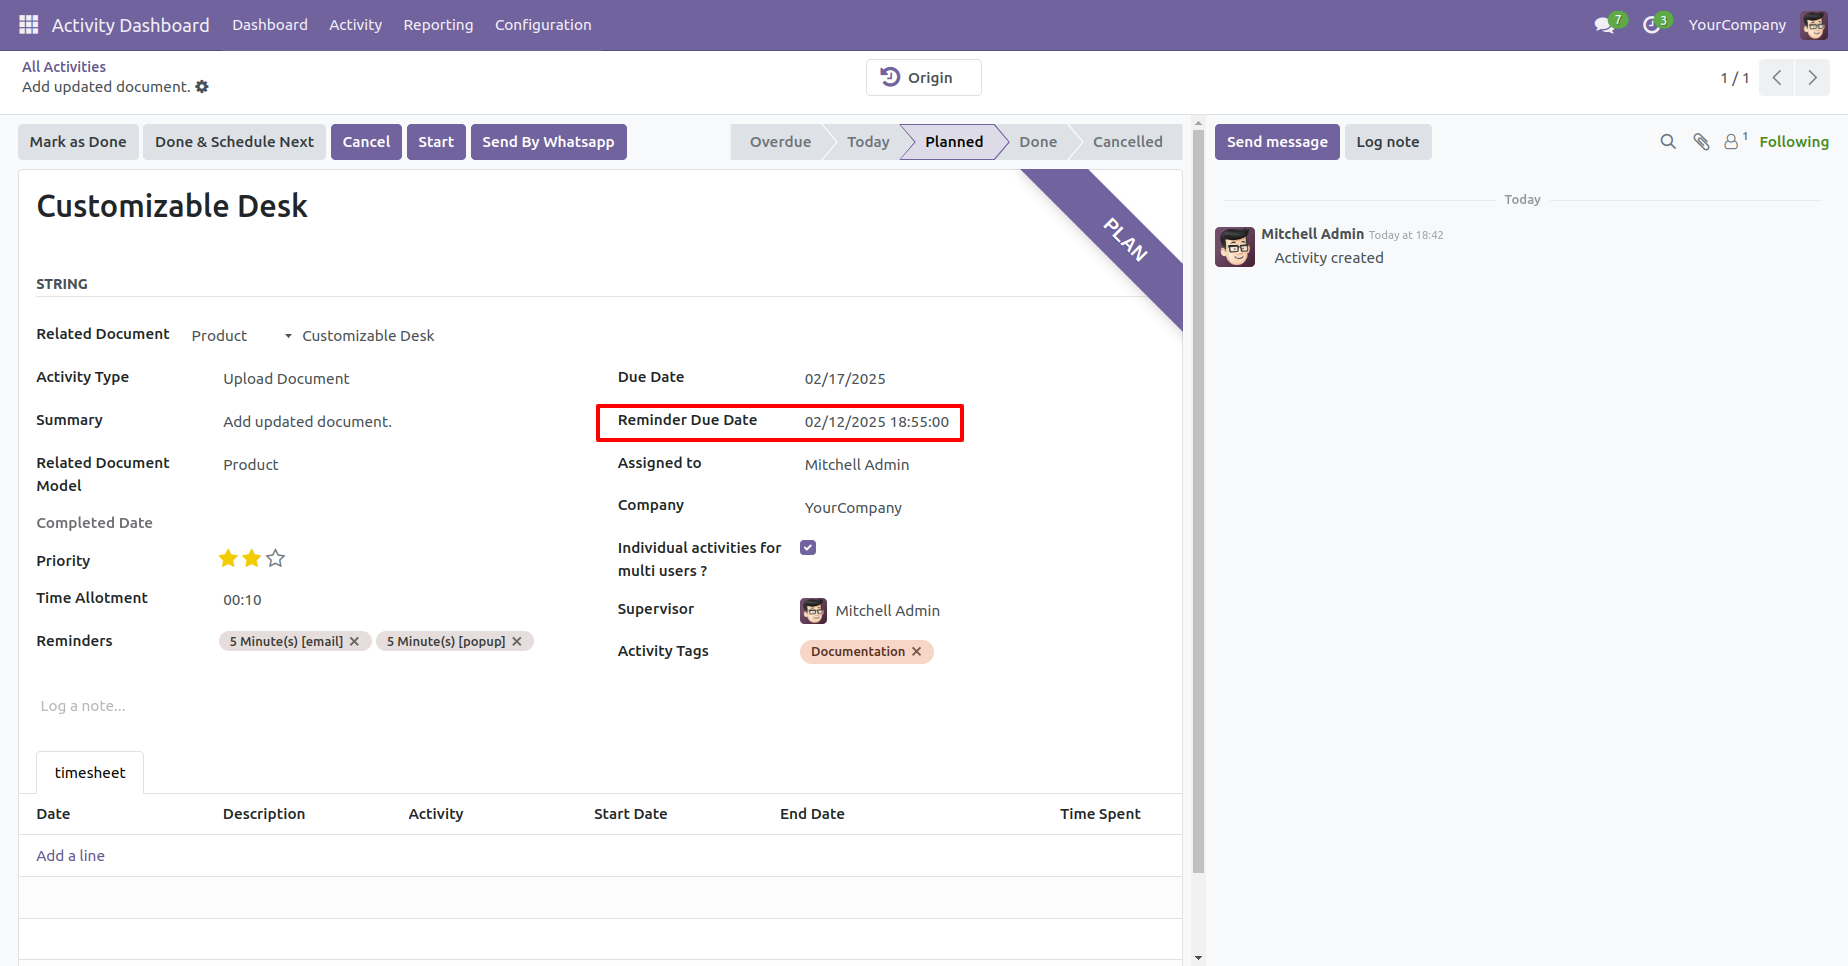
Activity form view with the activity reminder.
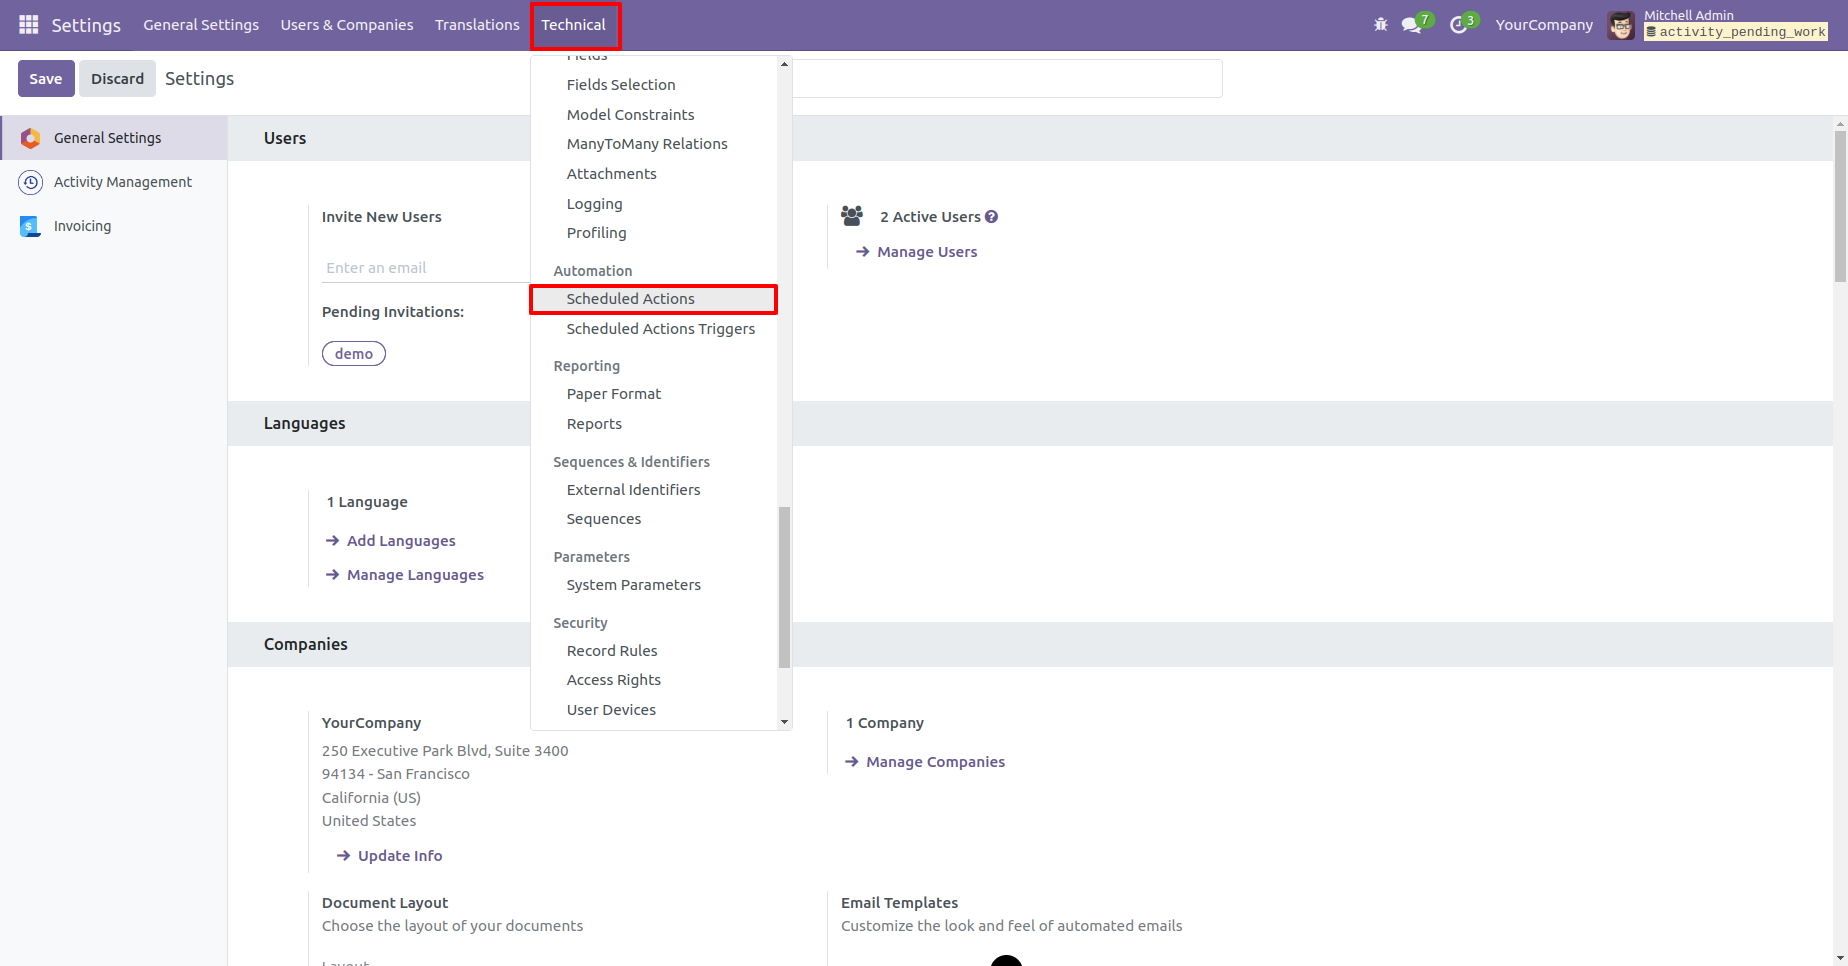
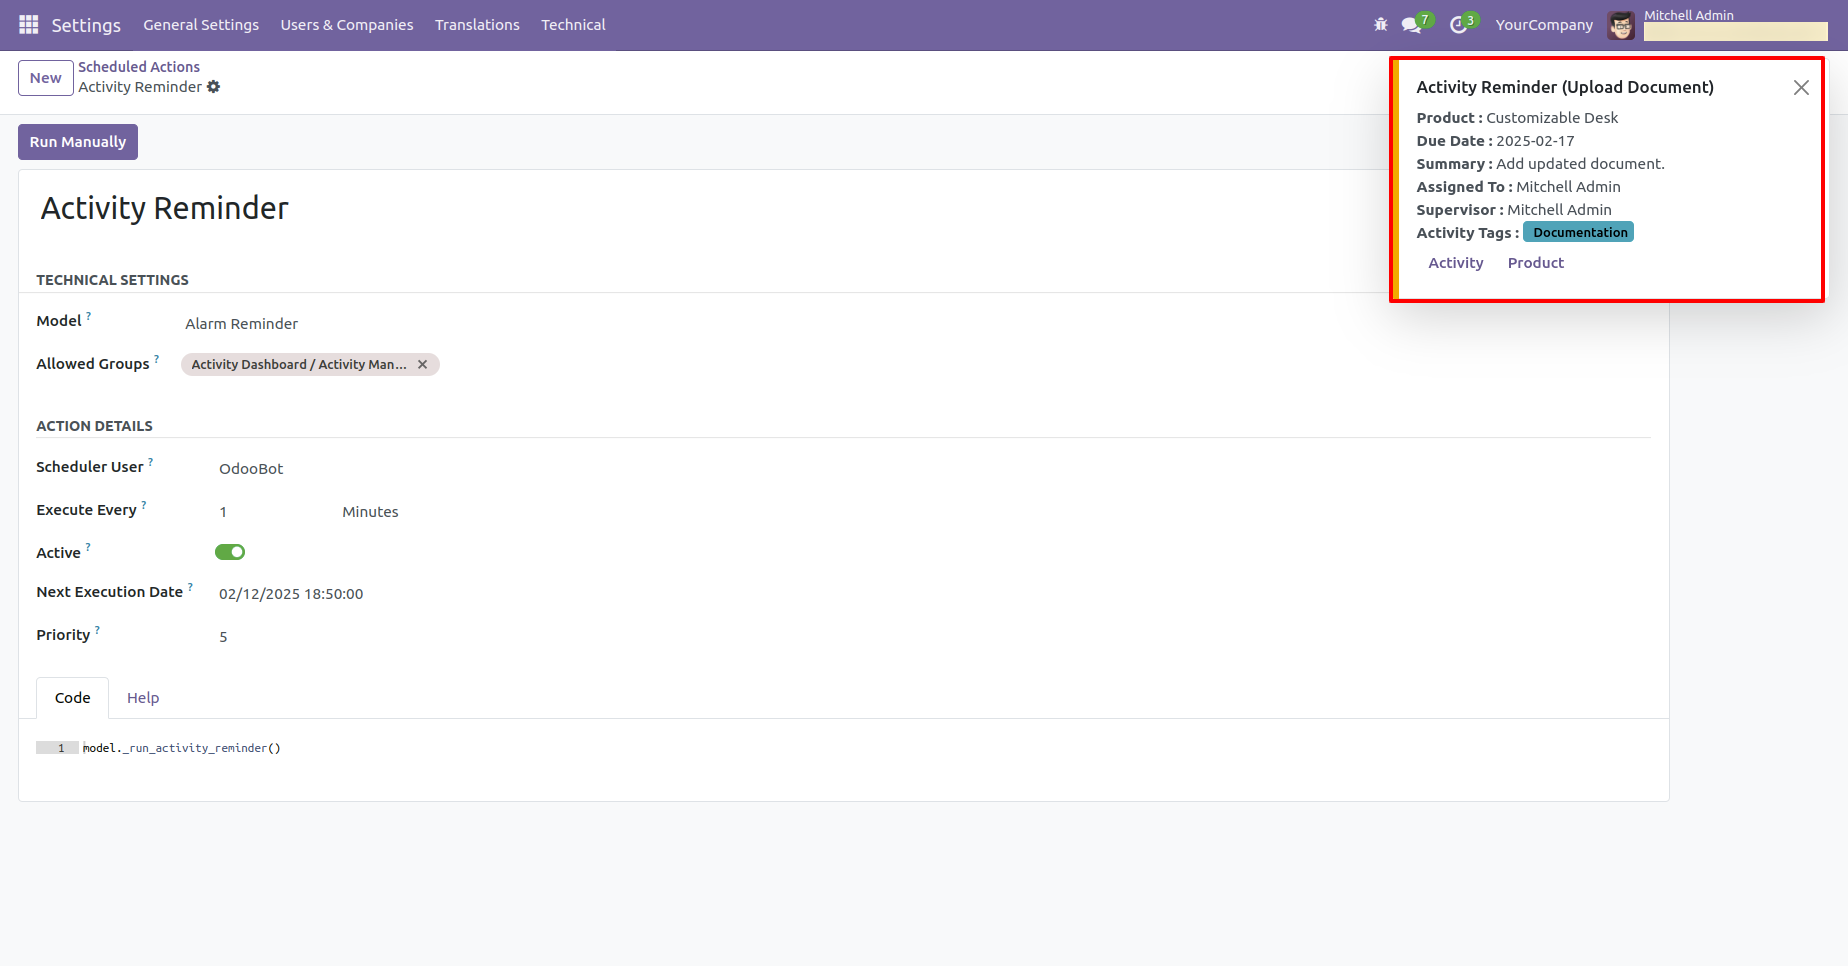
Go to the general settings ==> Technical menu ==> Scheduled Actions.
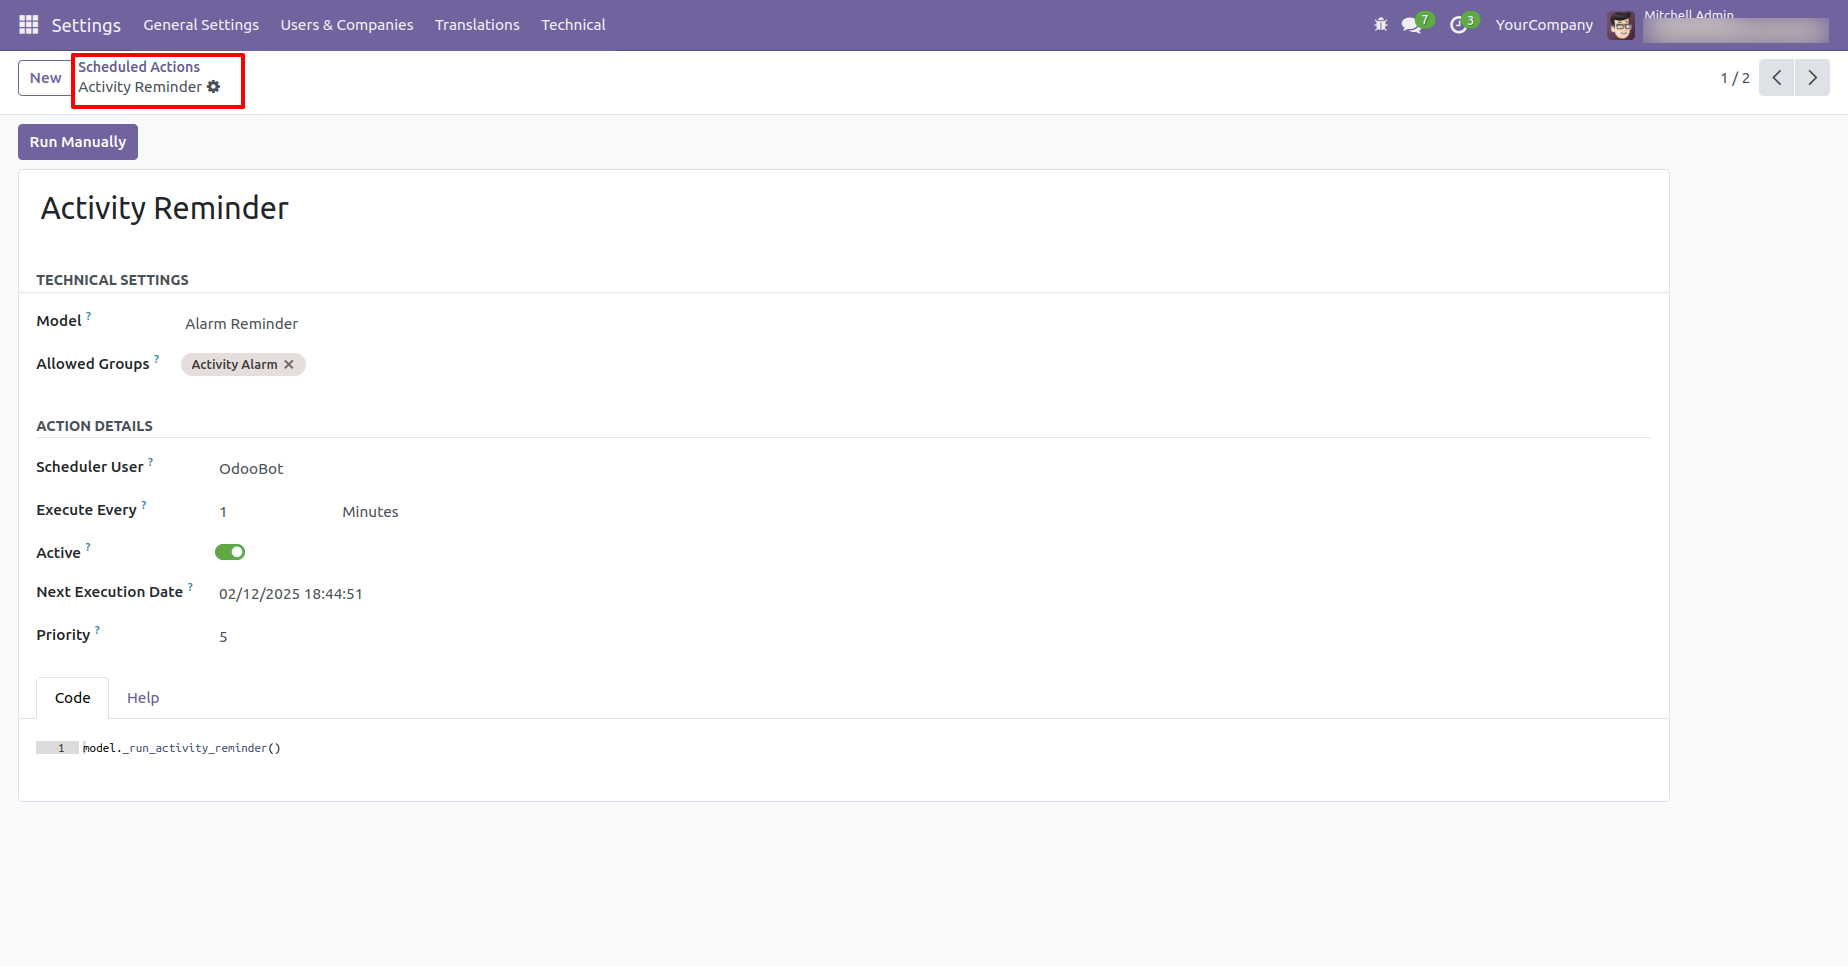
Activities reminders can run using a cron job.
Reminder due date in the activity form view.
The activity reminder popup looks like this.
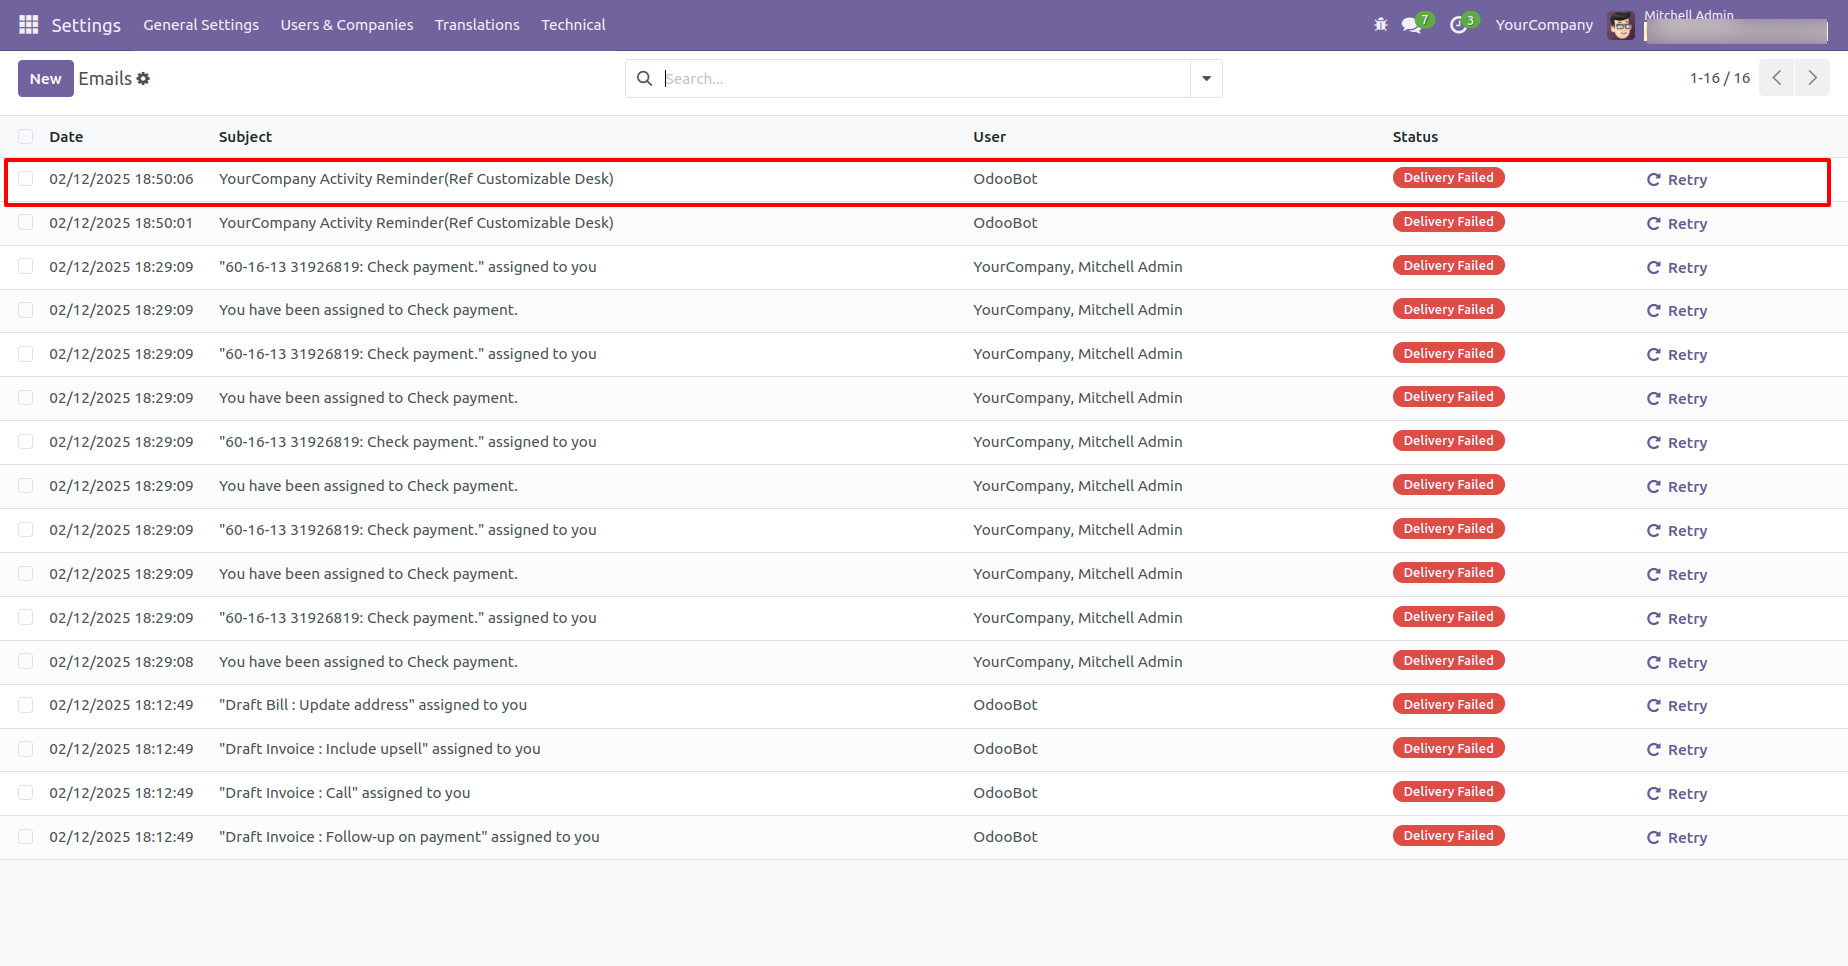
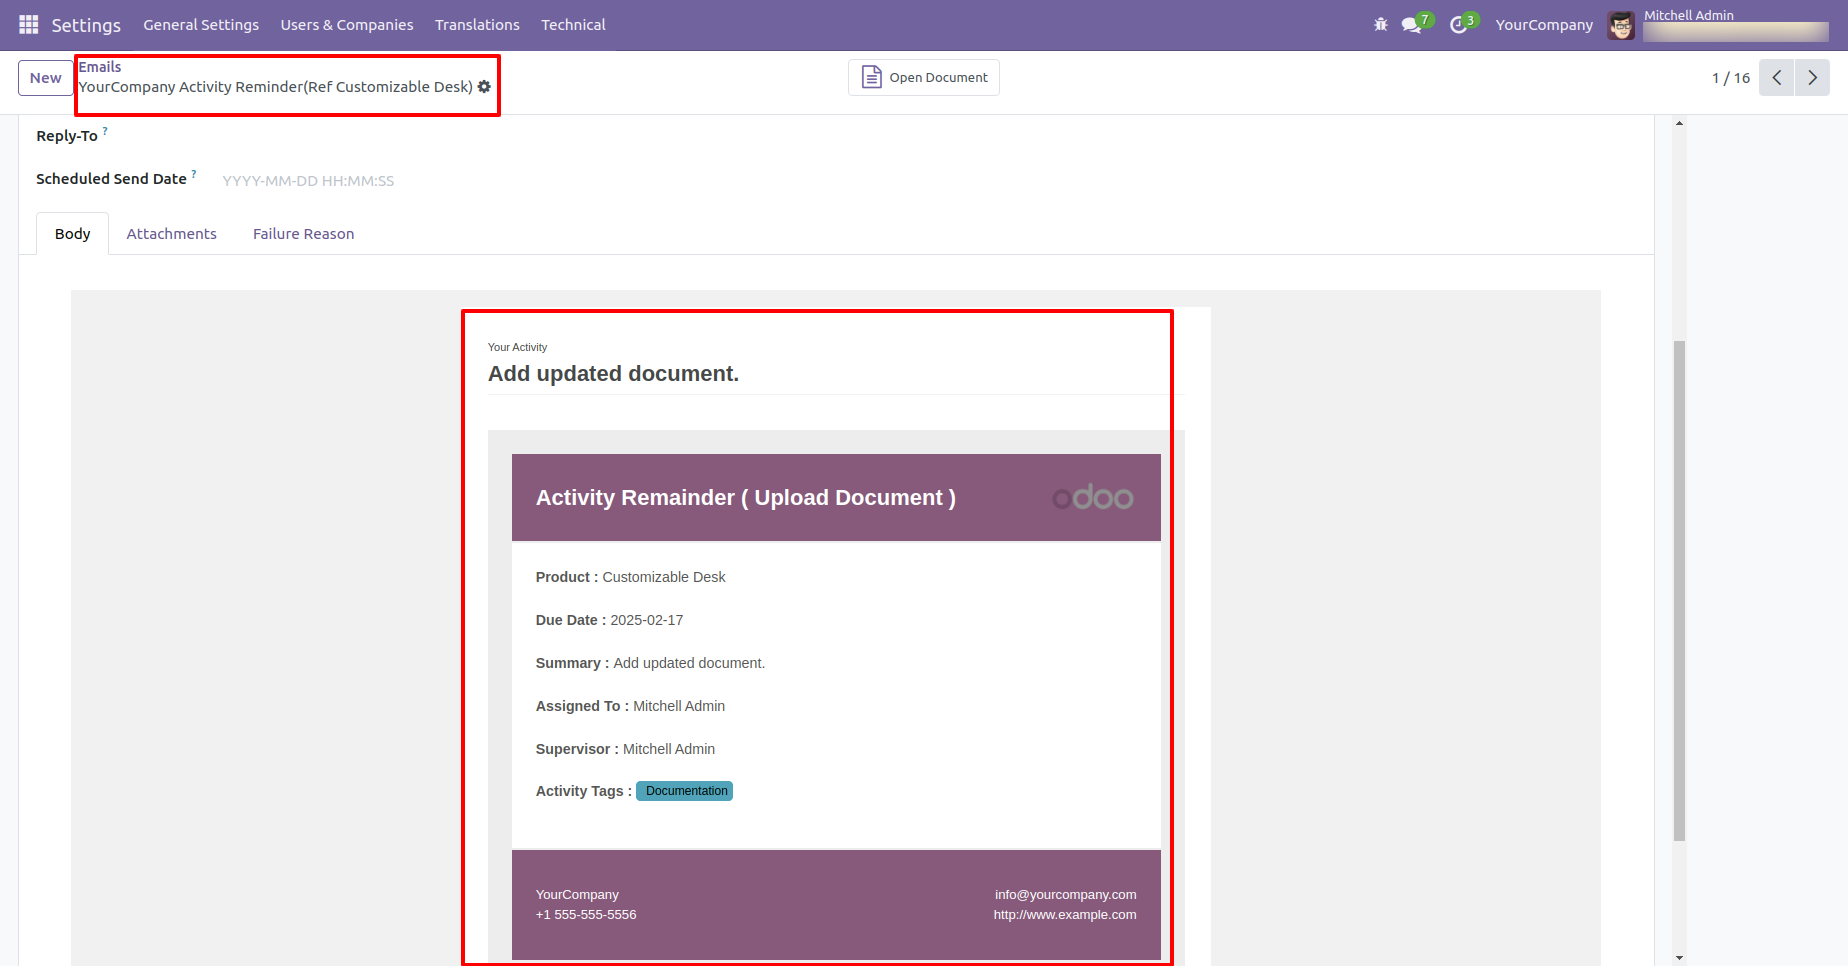
The activity reminder email looks like this.

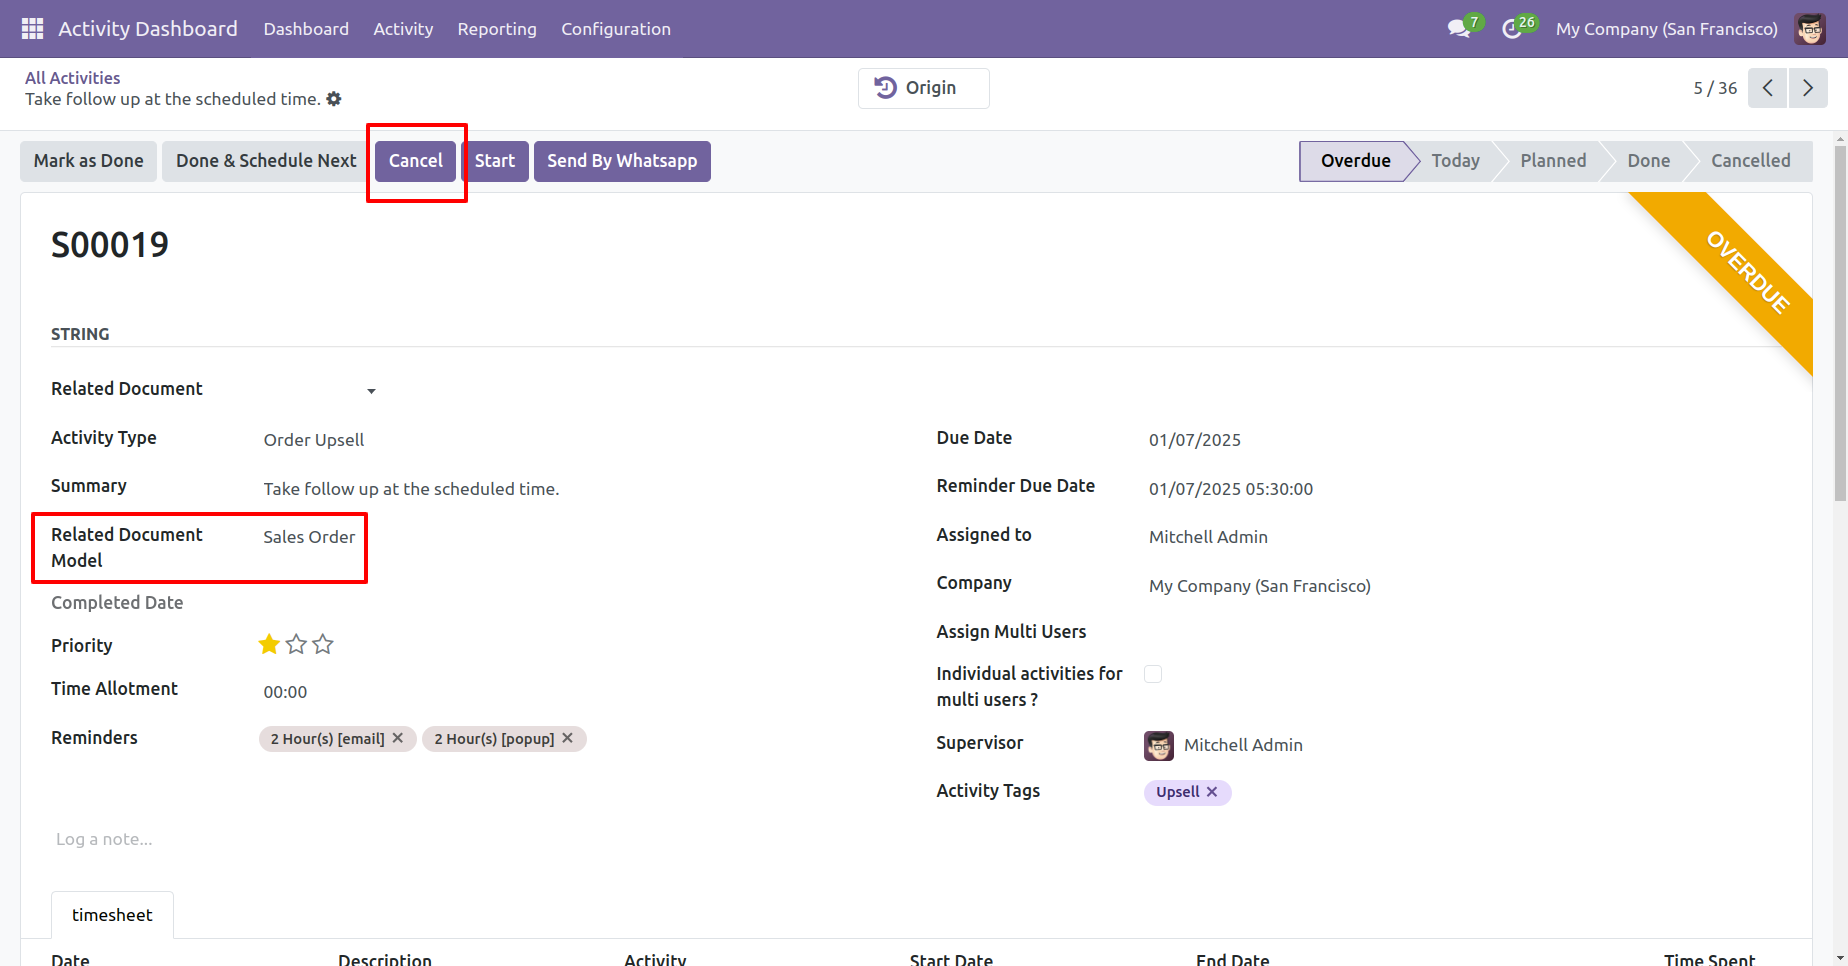
Cancel button & related document added in the activity form view.
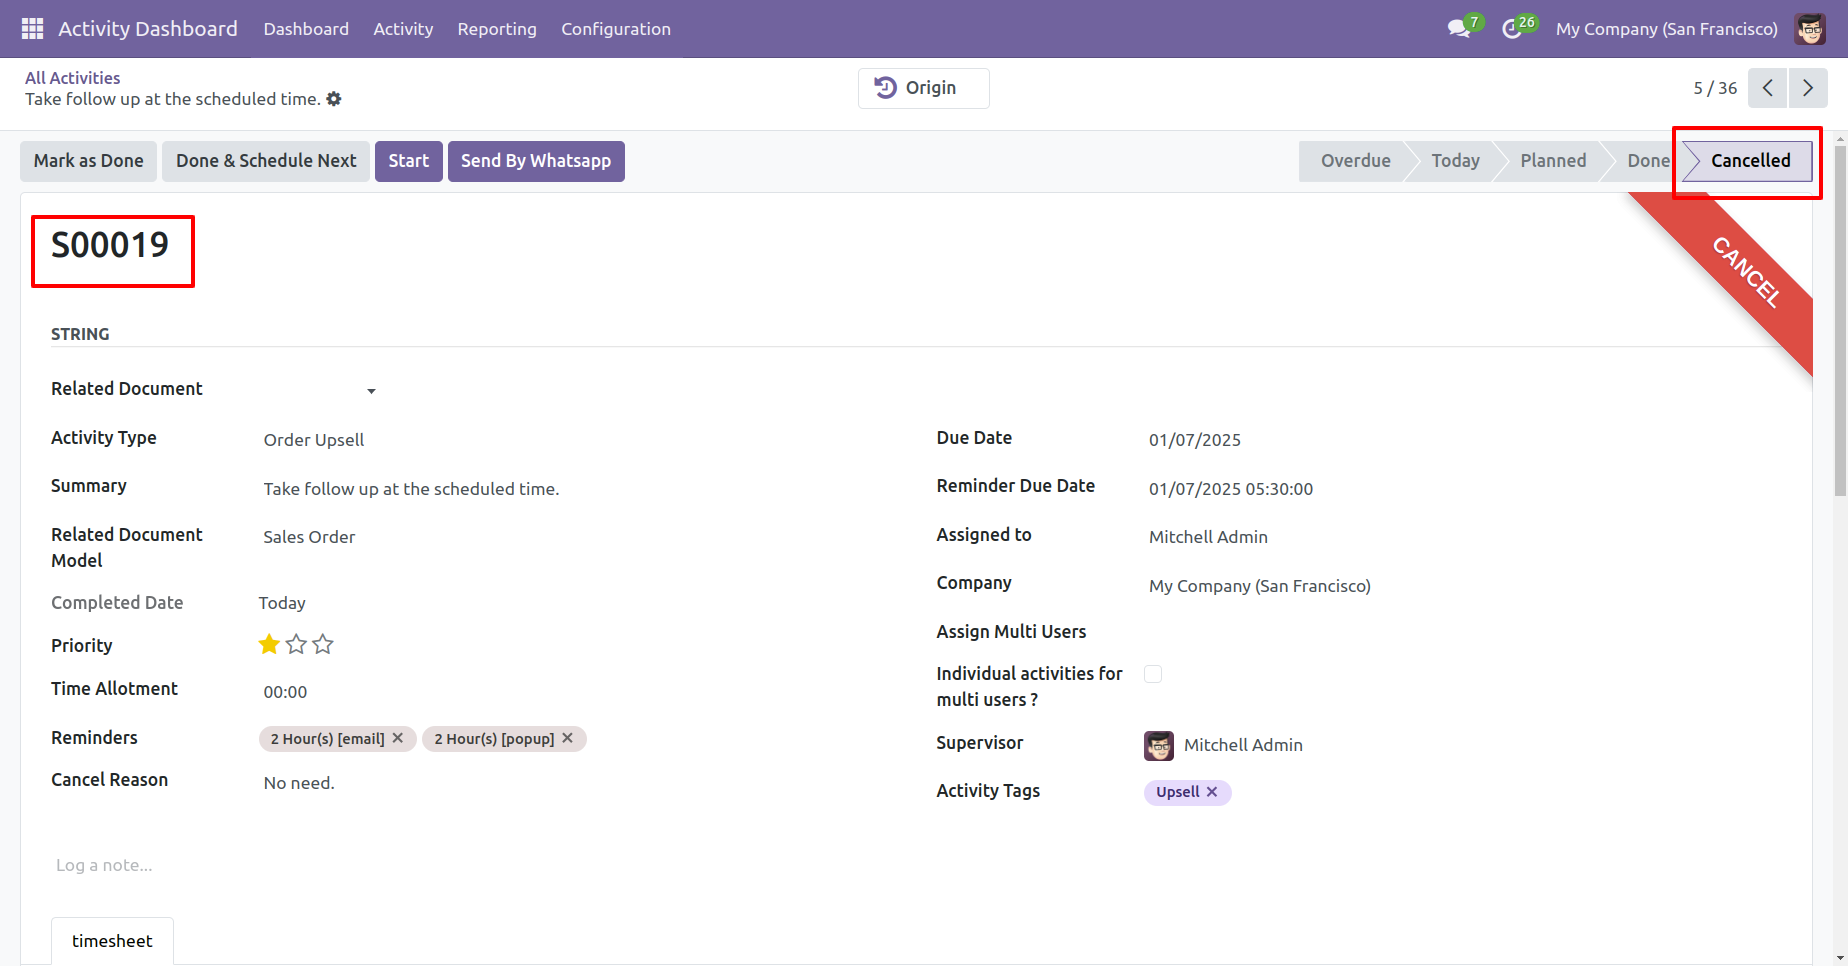
Cancel state & document name in the activity form view.
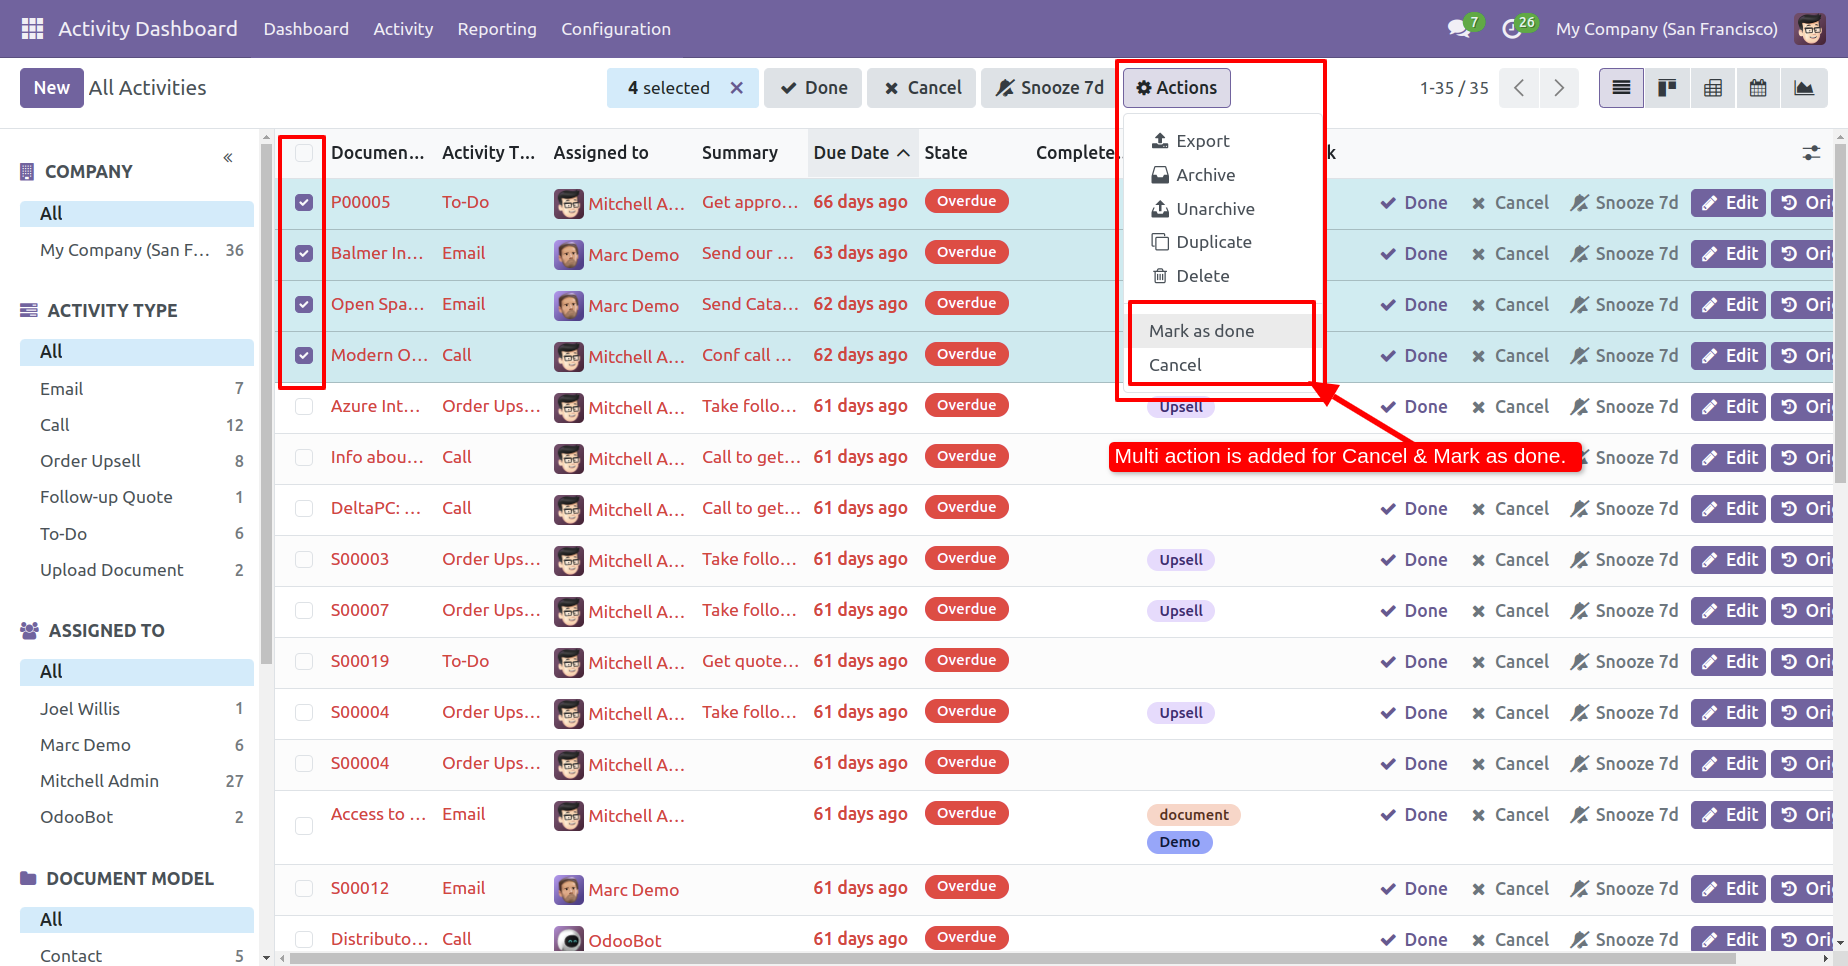
You can do multiple activities 'Mark as done' and 'Cancel' from the activity tree view.
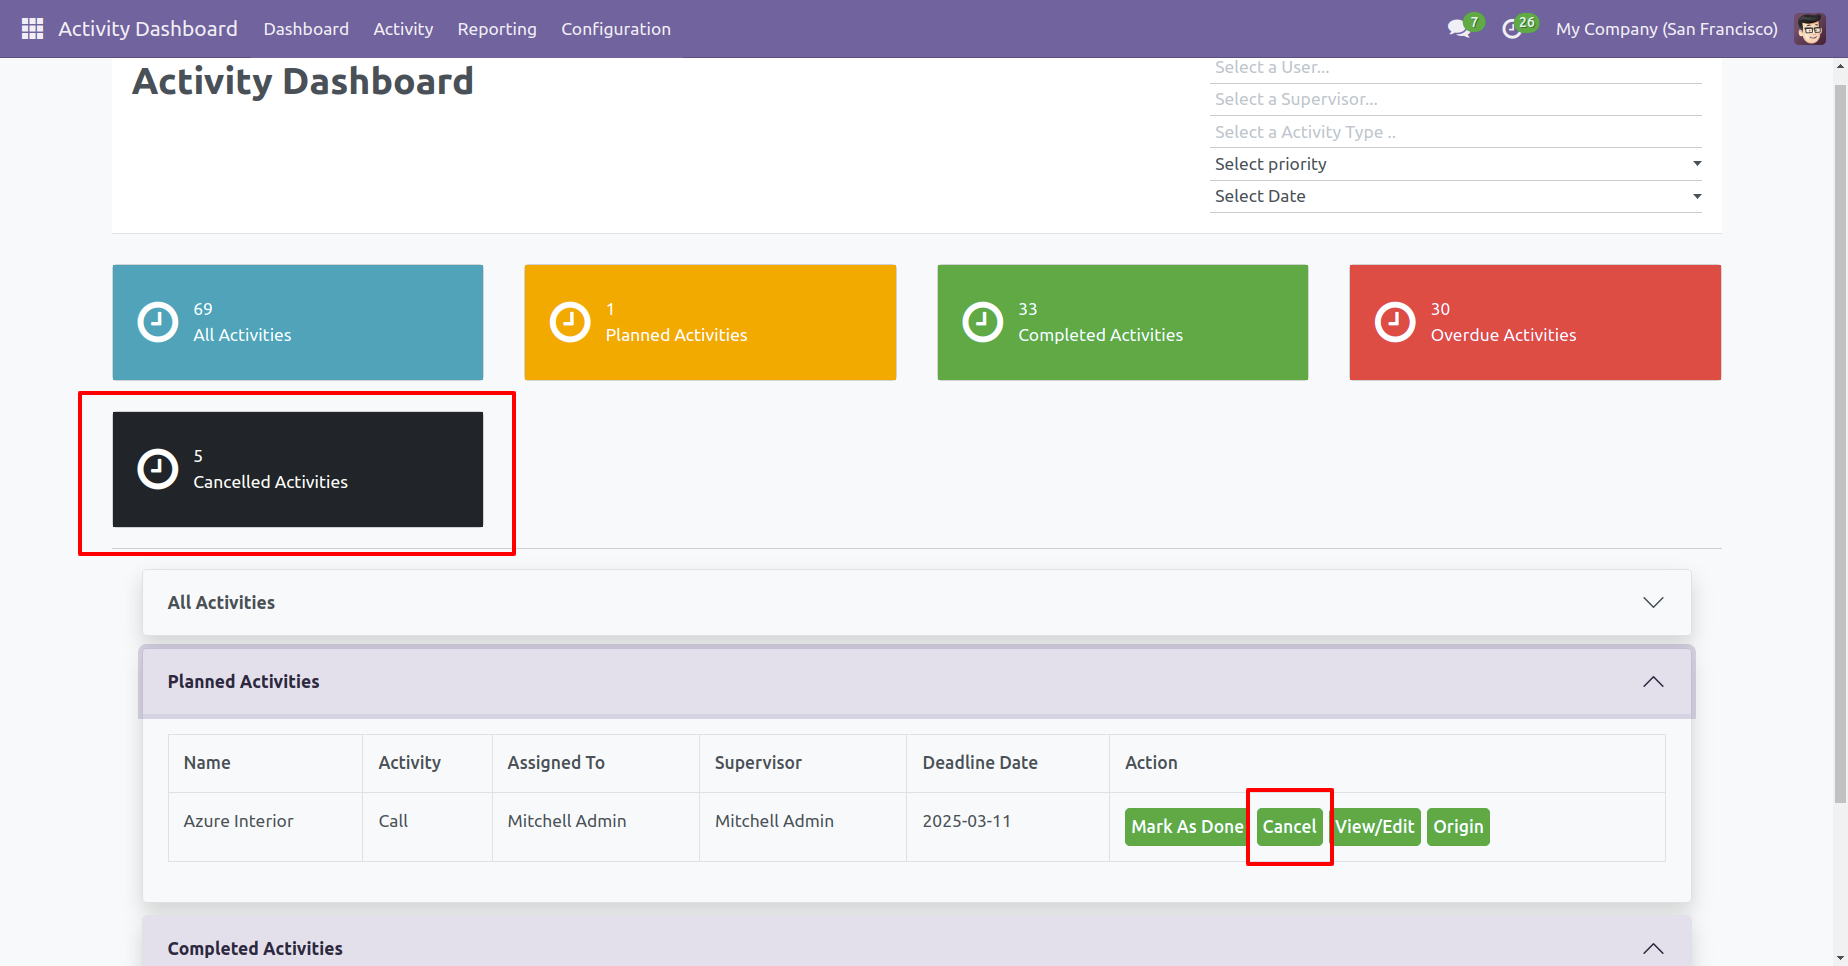
Cancelled activities counter and 'Cancel' button in the related data table.
The search panel in the activity list view looks like this.
The search panel in the activity kanban view looks like this.
The activity list view with the edit & origin buttons.
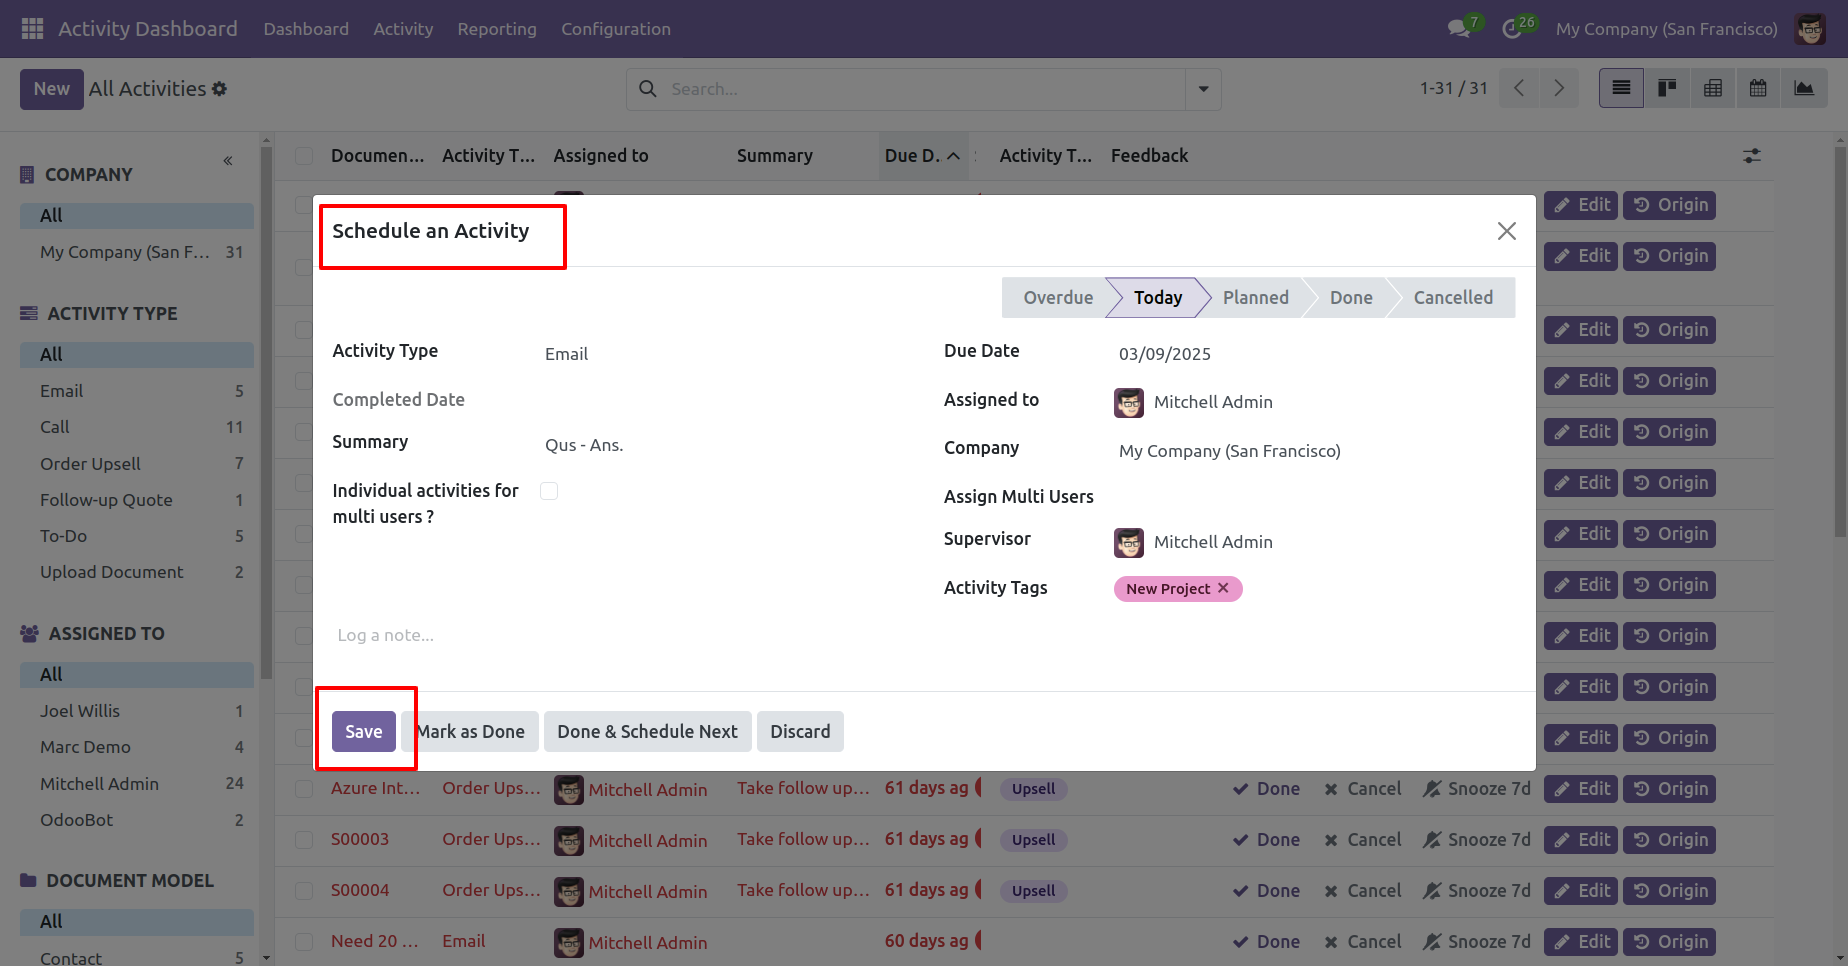
When you press that 'Edit' button this wizard opens for edit activity.
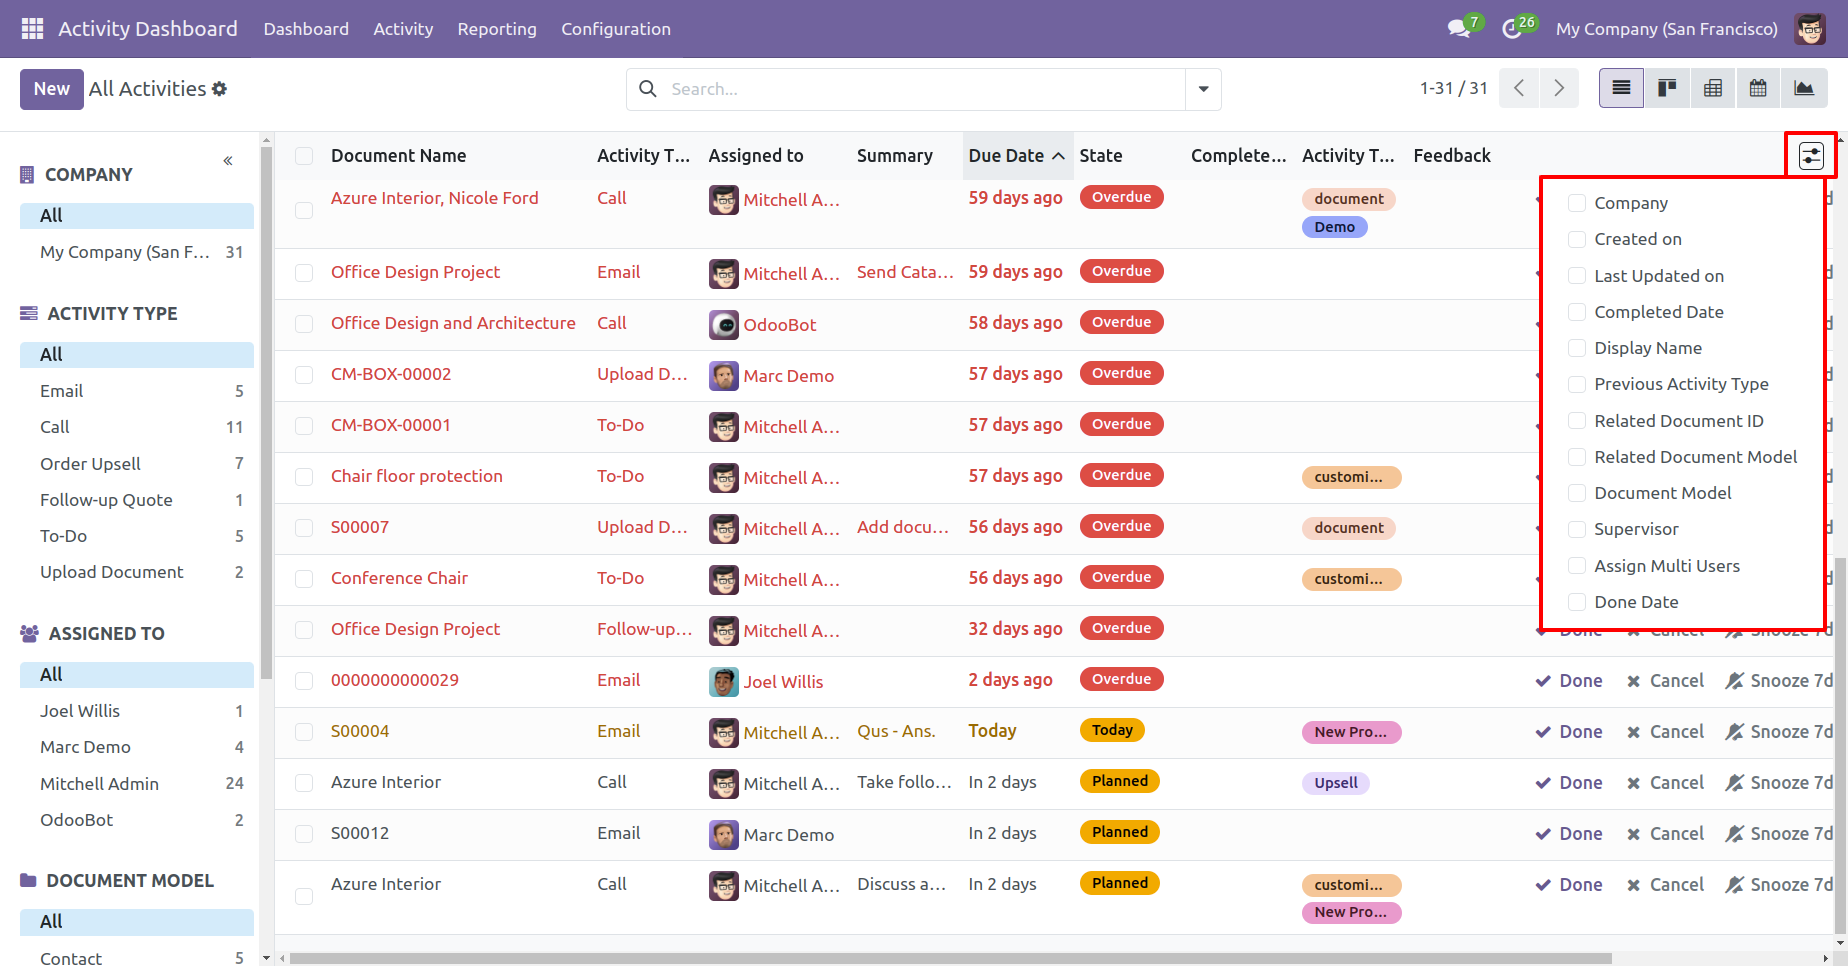
You can display fields from the list view smart button.
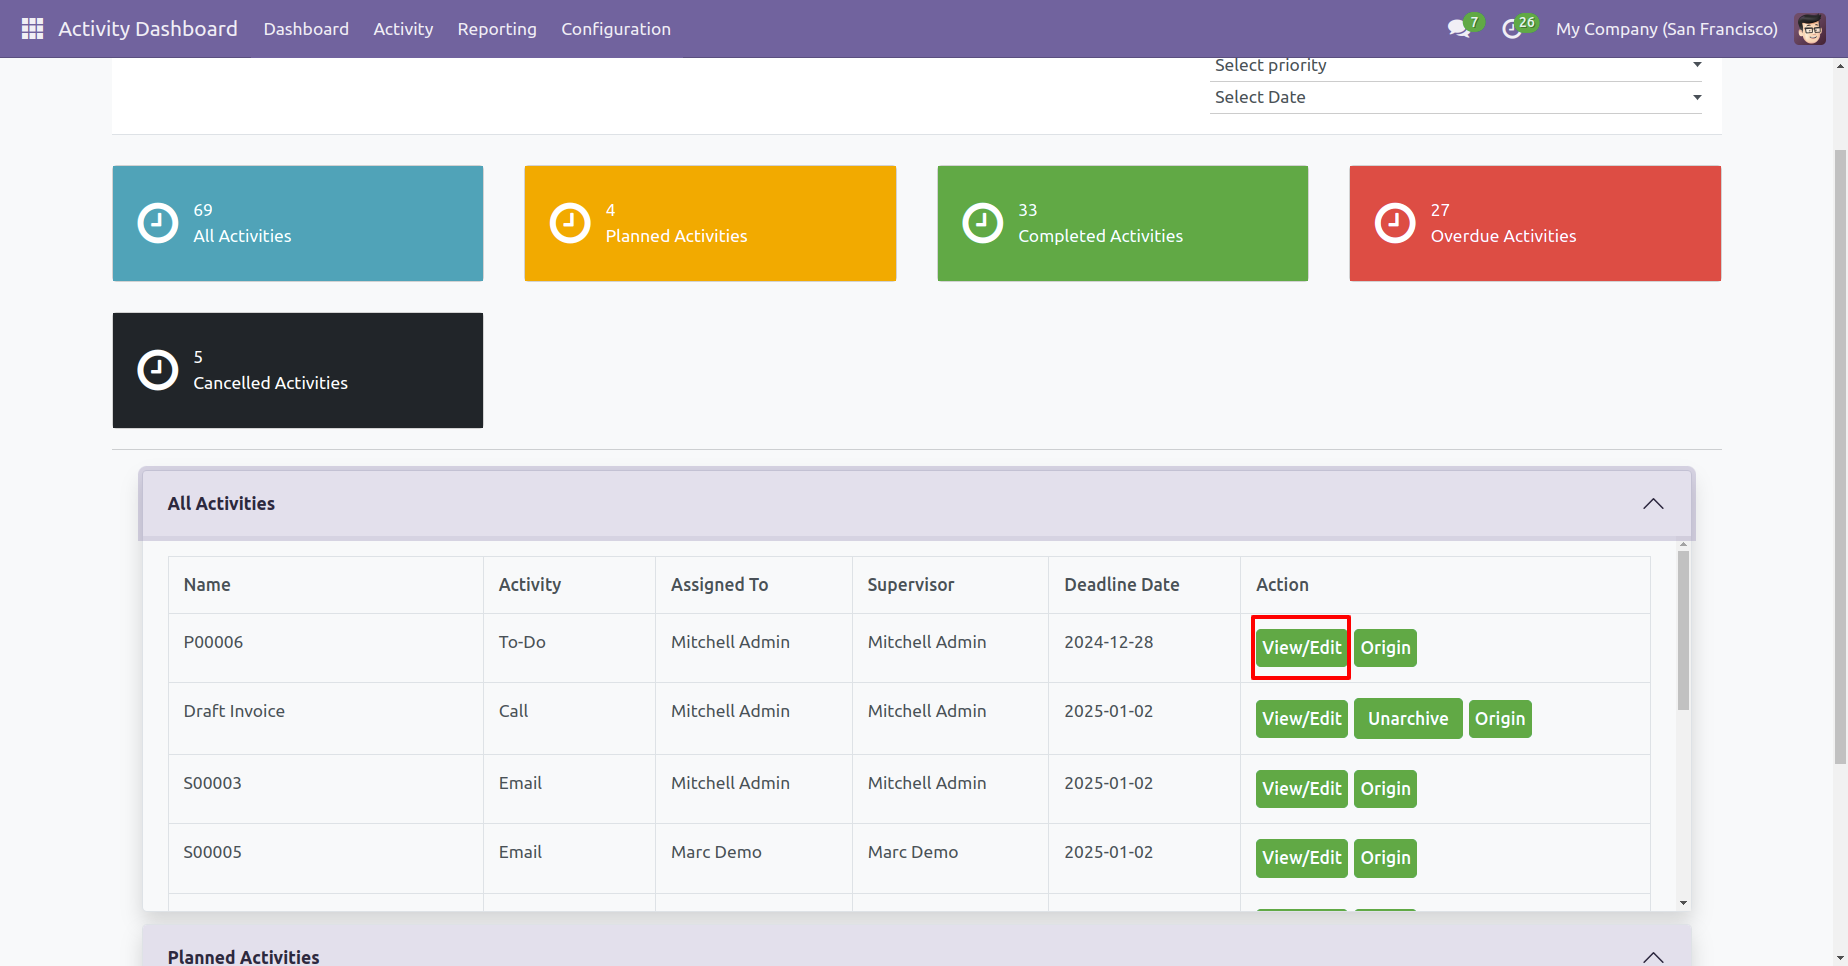
You can edit /view activities using the edit/view button from the activity dashboard.
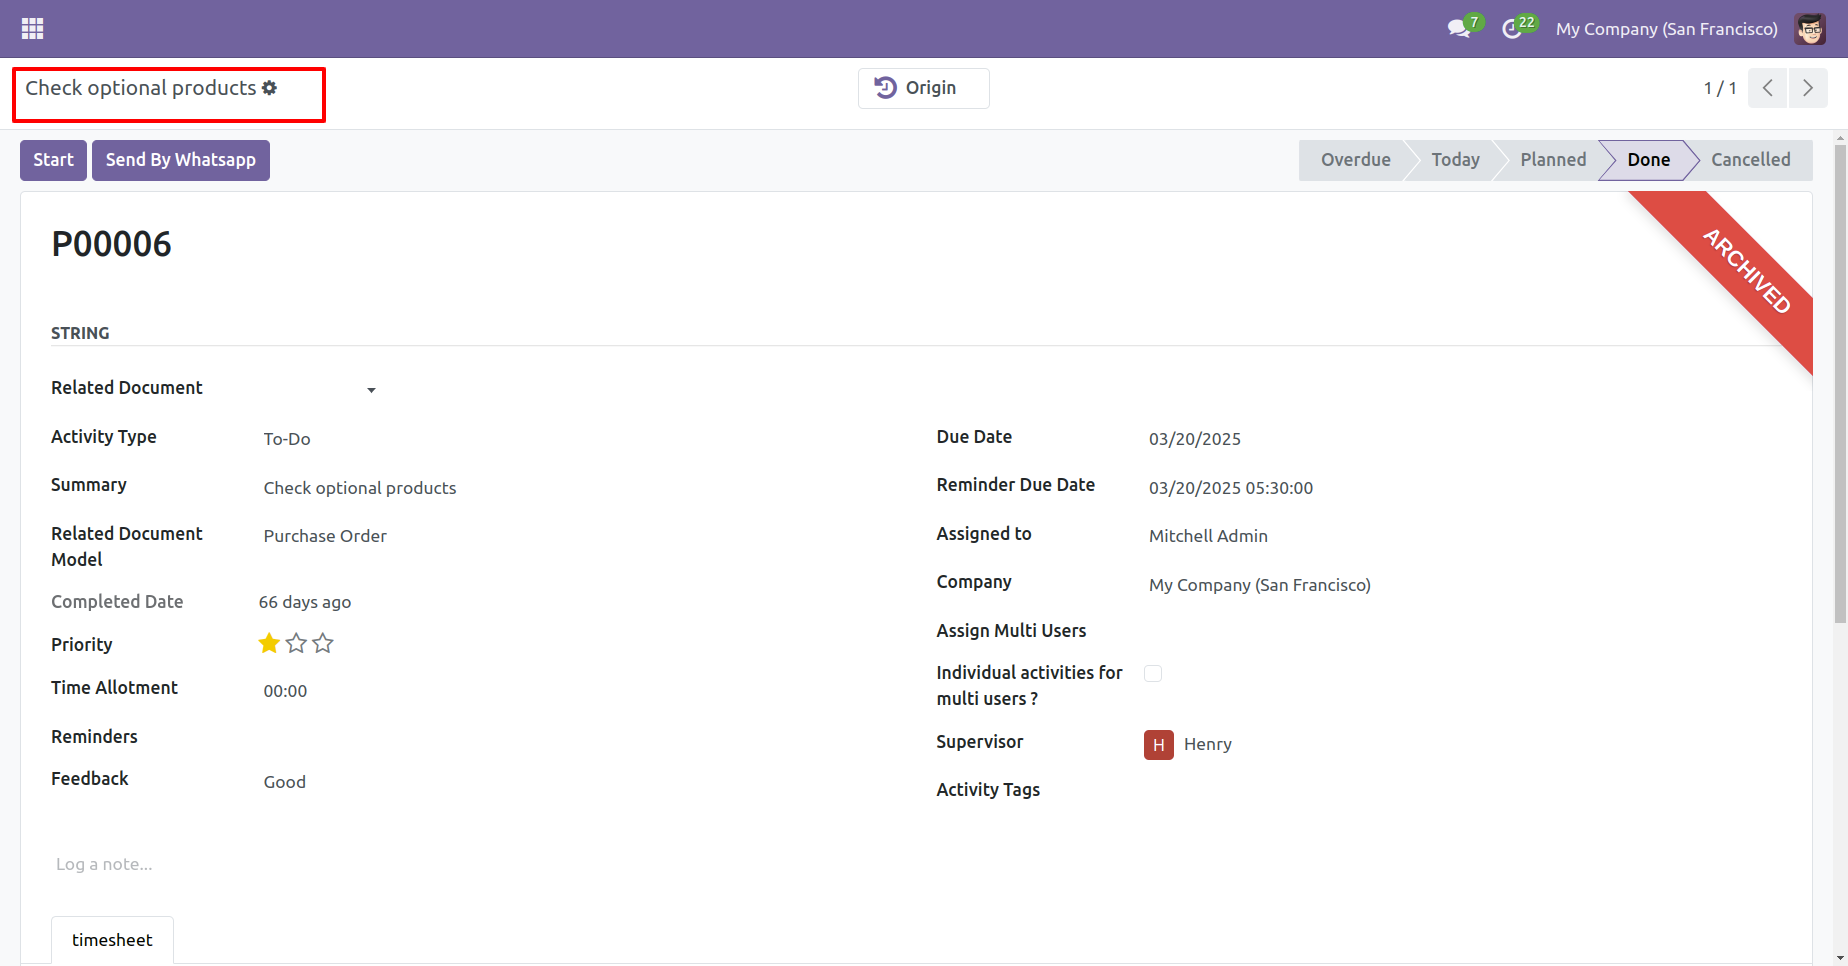
When you press that 'Edit/View' button, that activity opens for edit/view activity.
You can see my activities, supervisor activities & all activities from the 'Activity' menu.
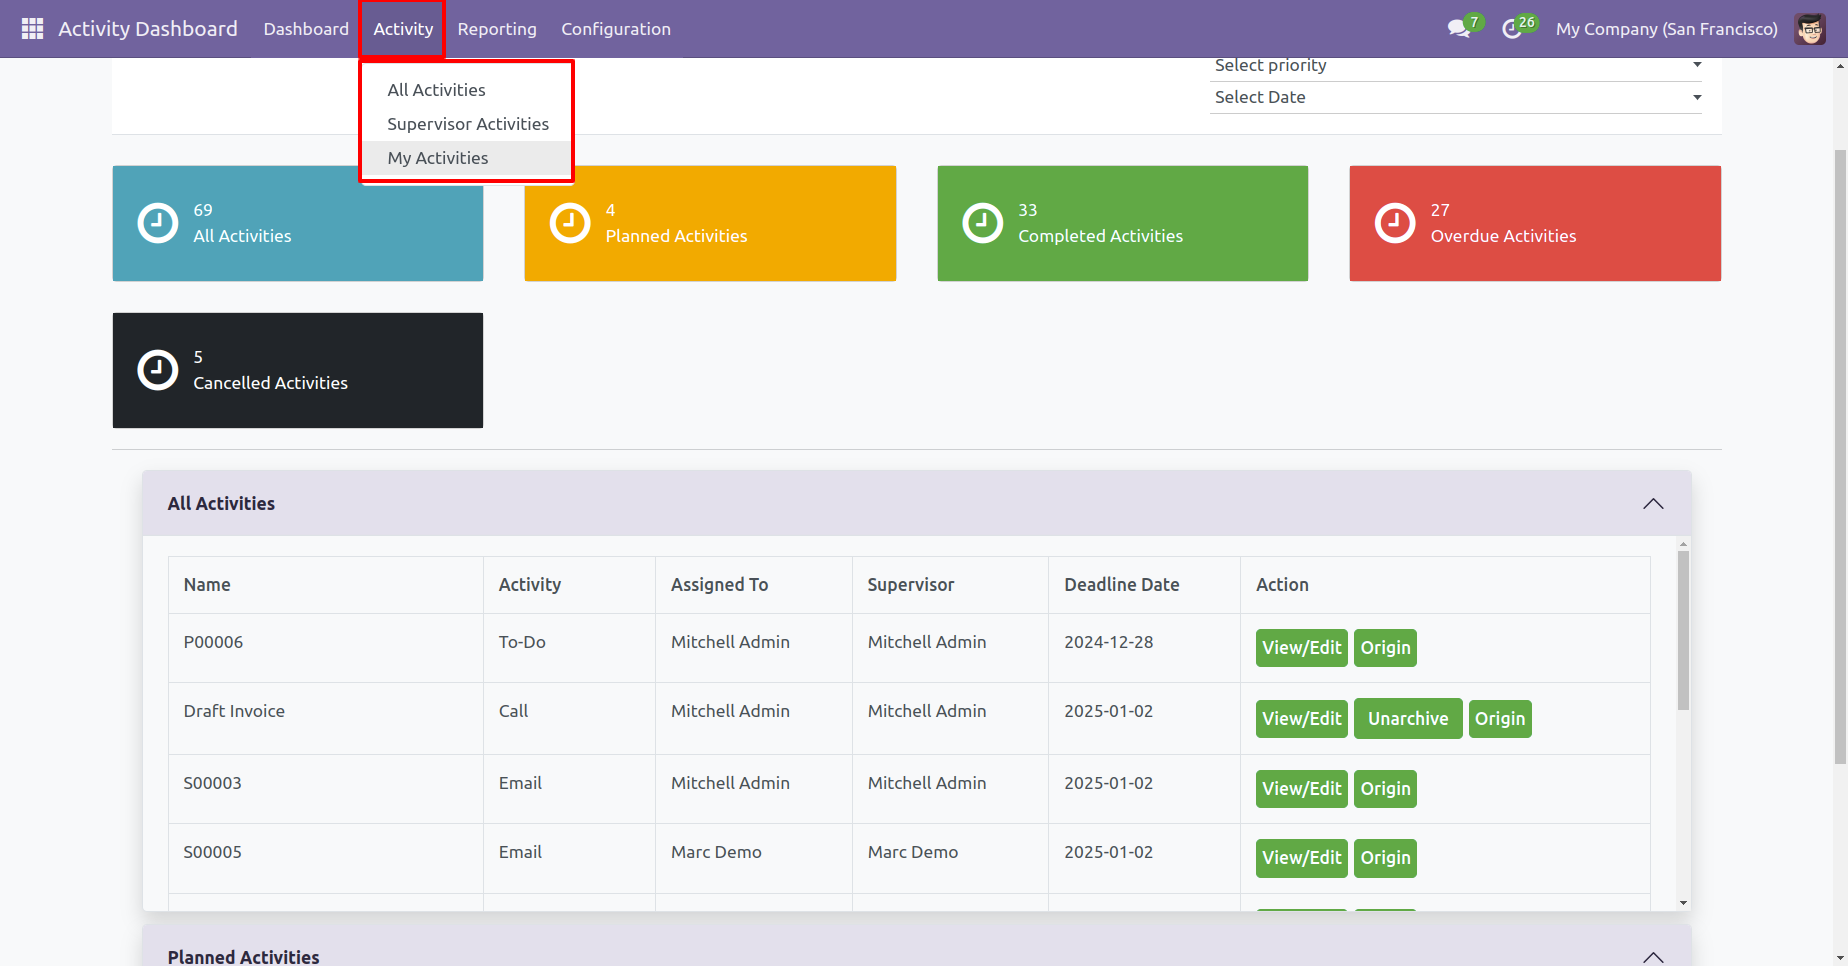
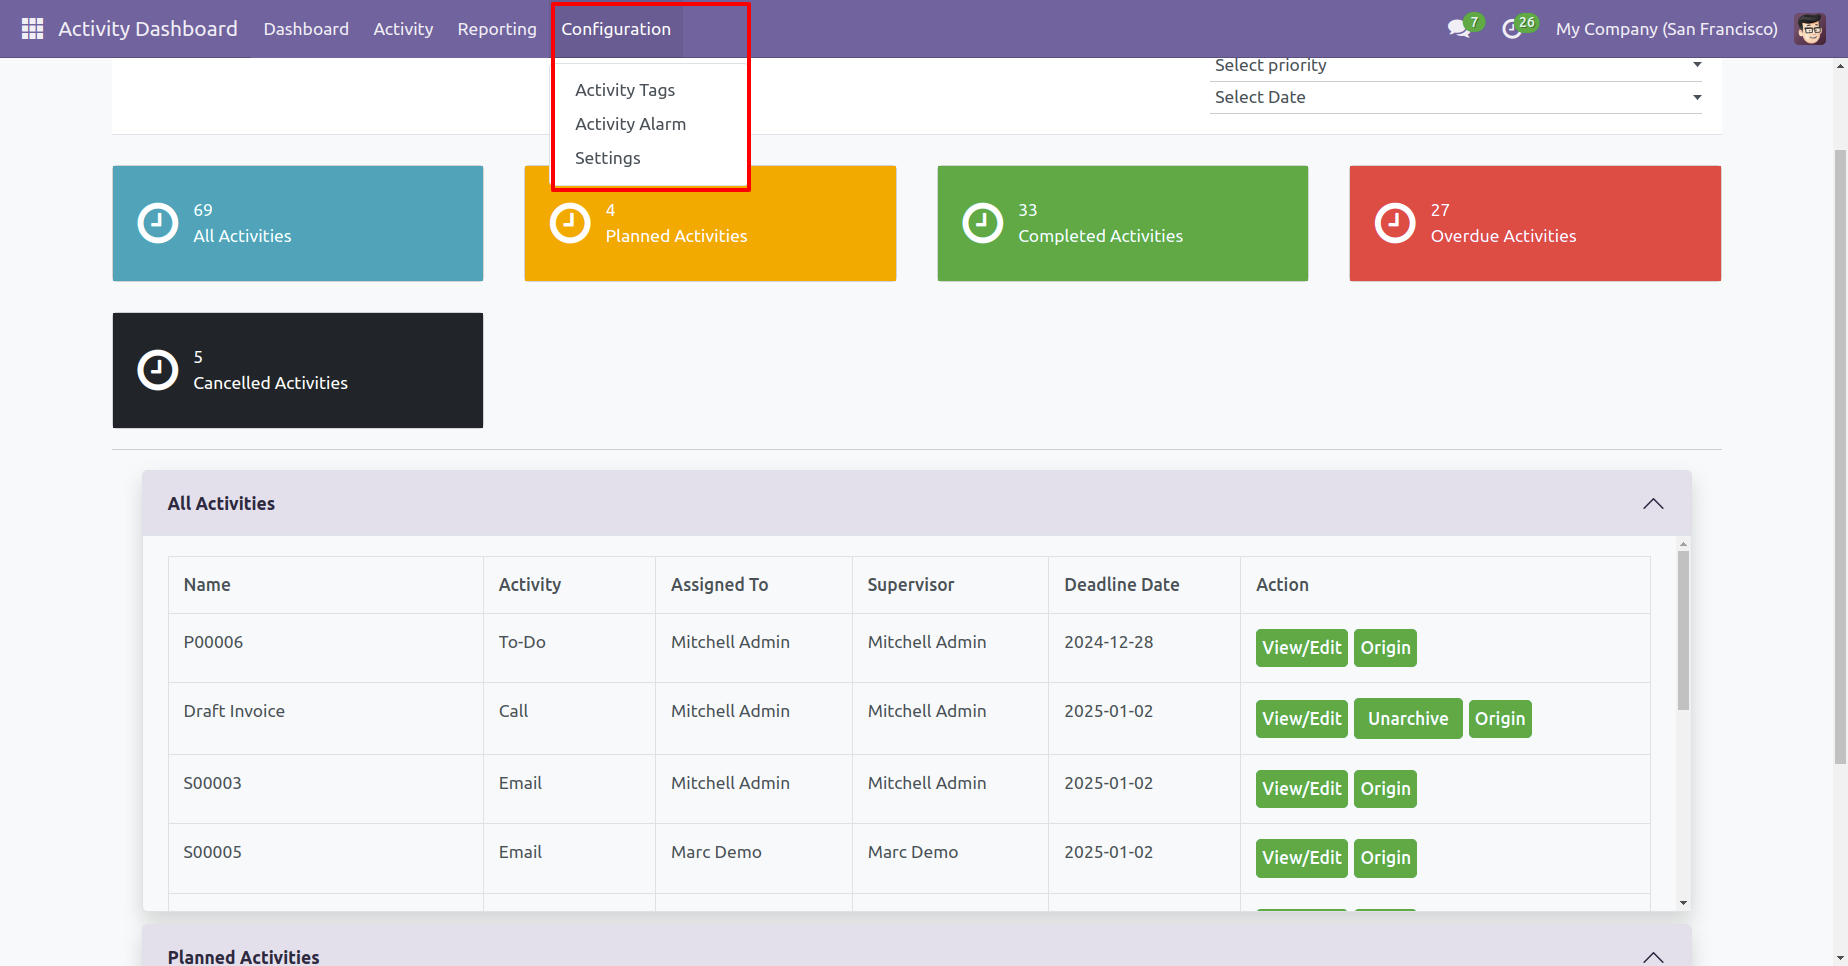
You can go to the activity alarm, activity tags & settings from the 'Configuration' menu.
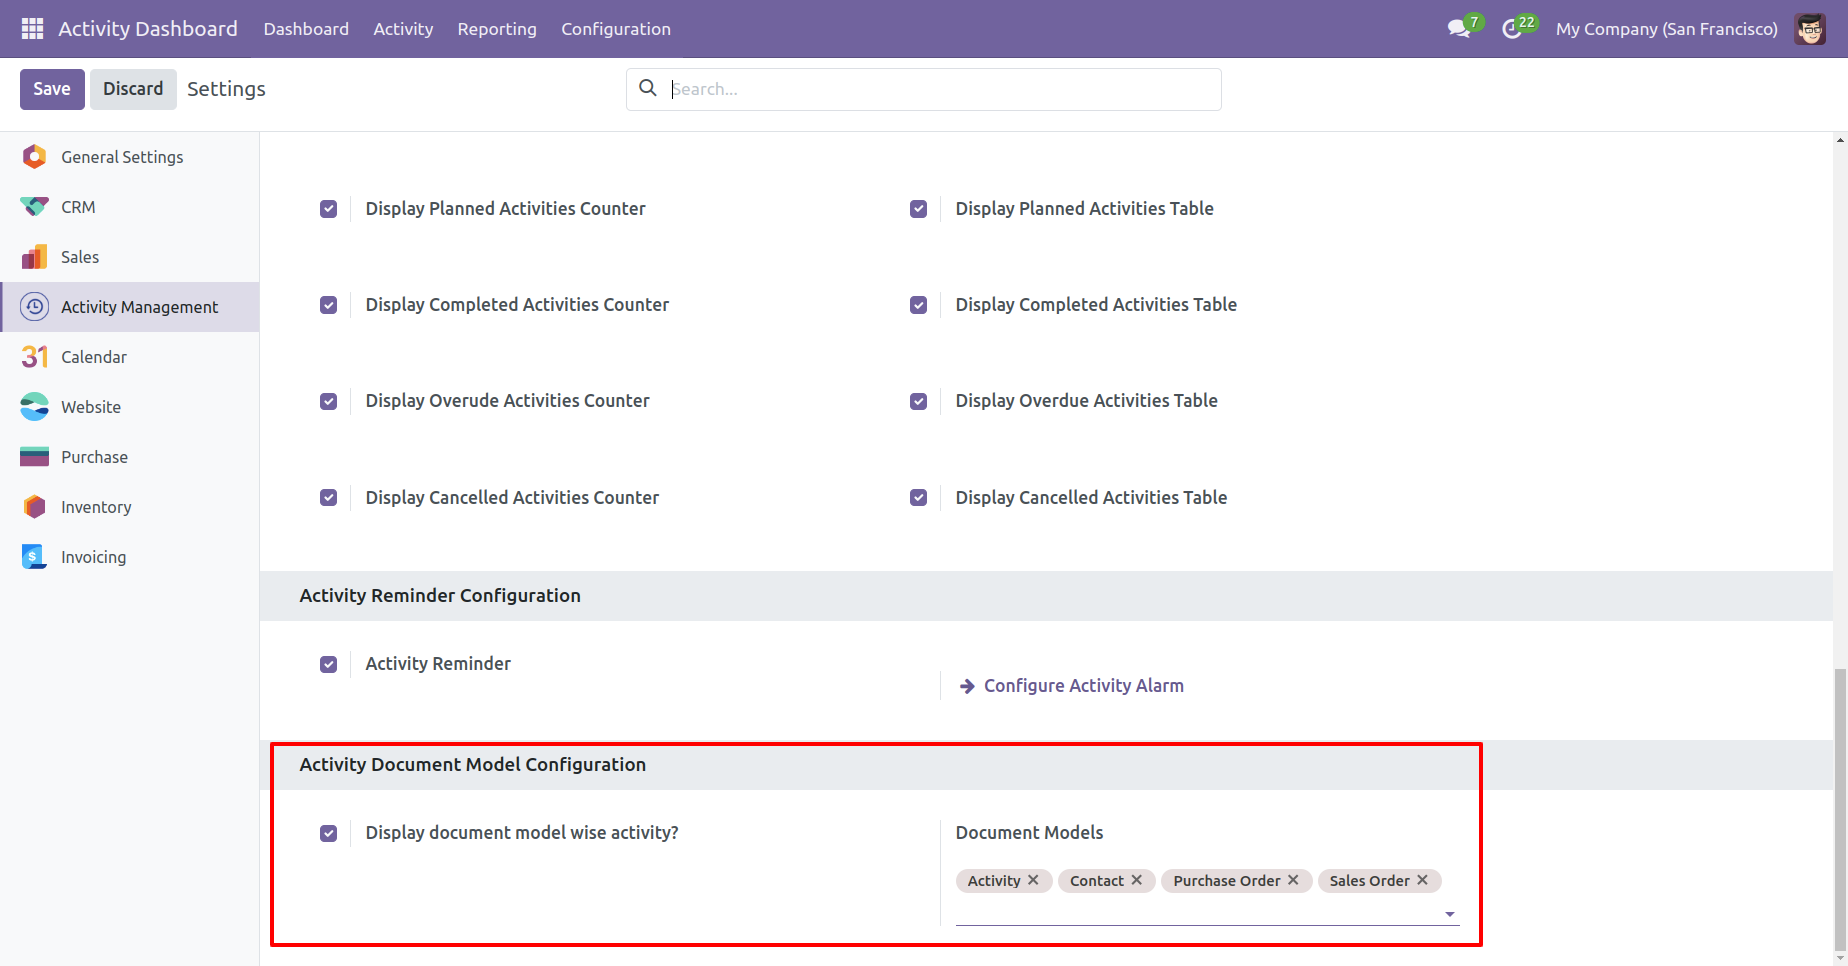
Configuration for filter record & activity with document model.
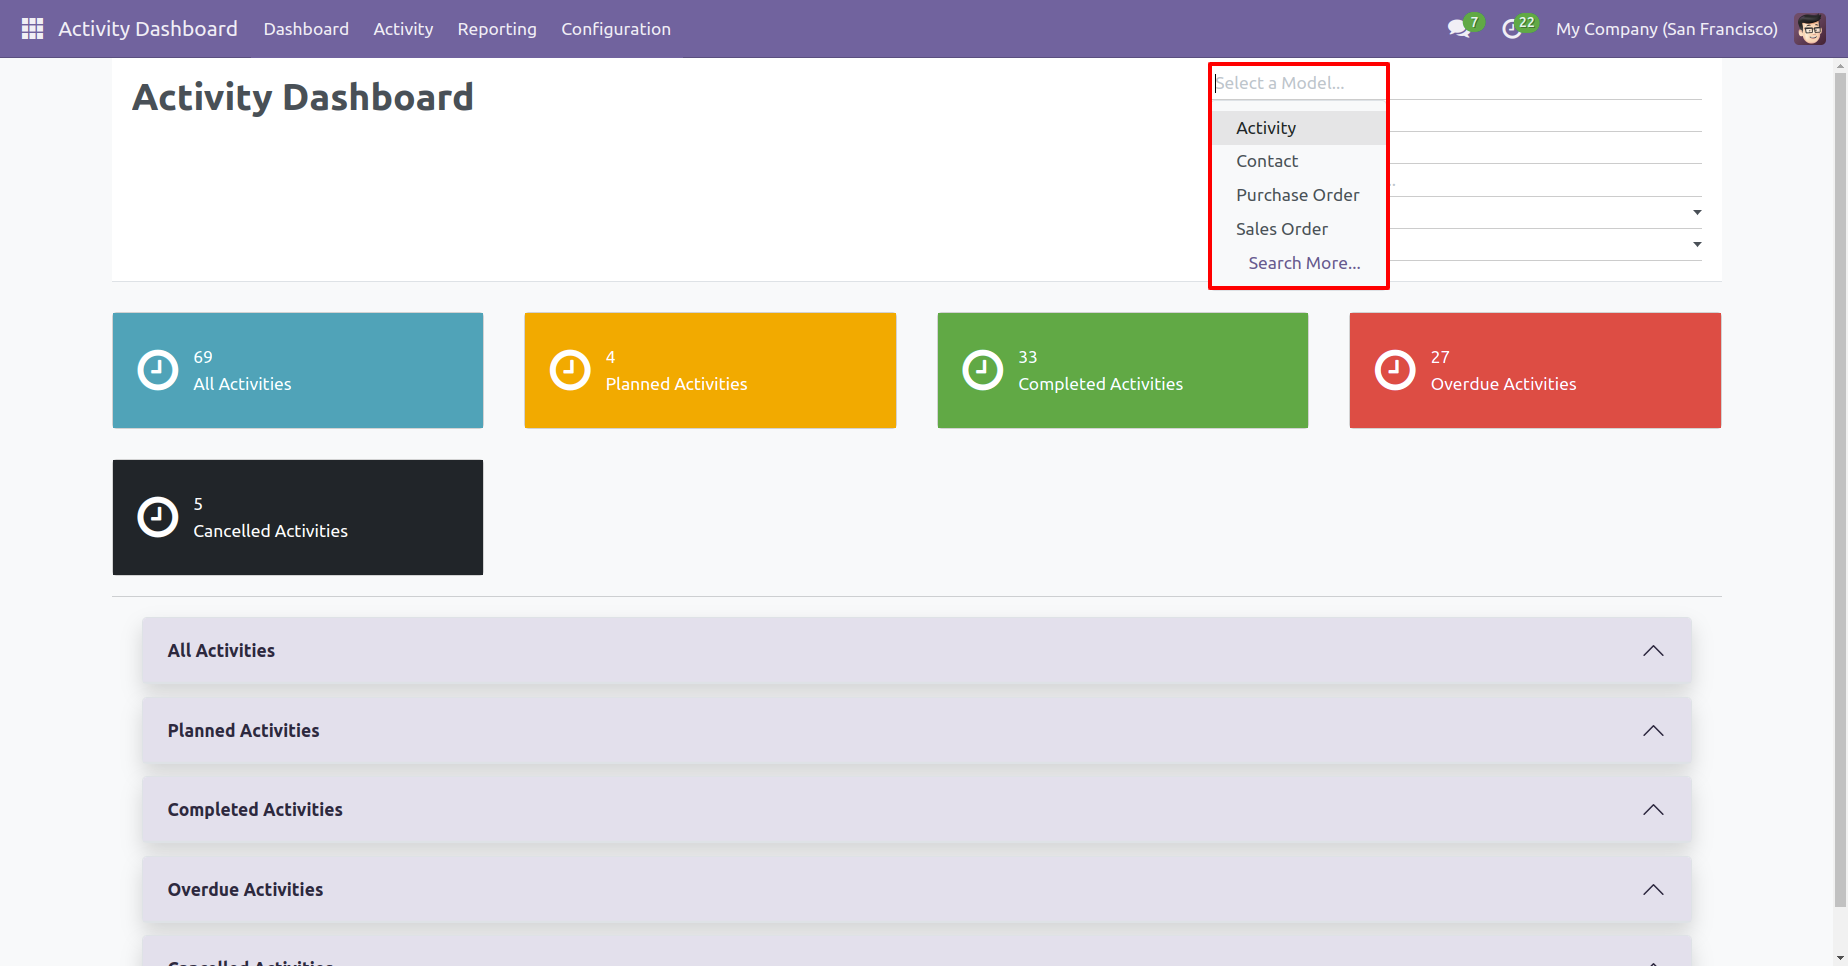
Enter model name which you want to filter, so that model activities will comes.
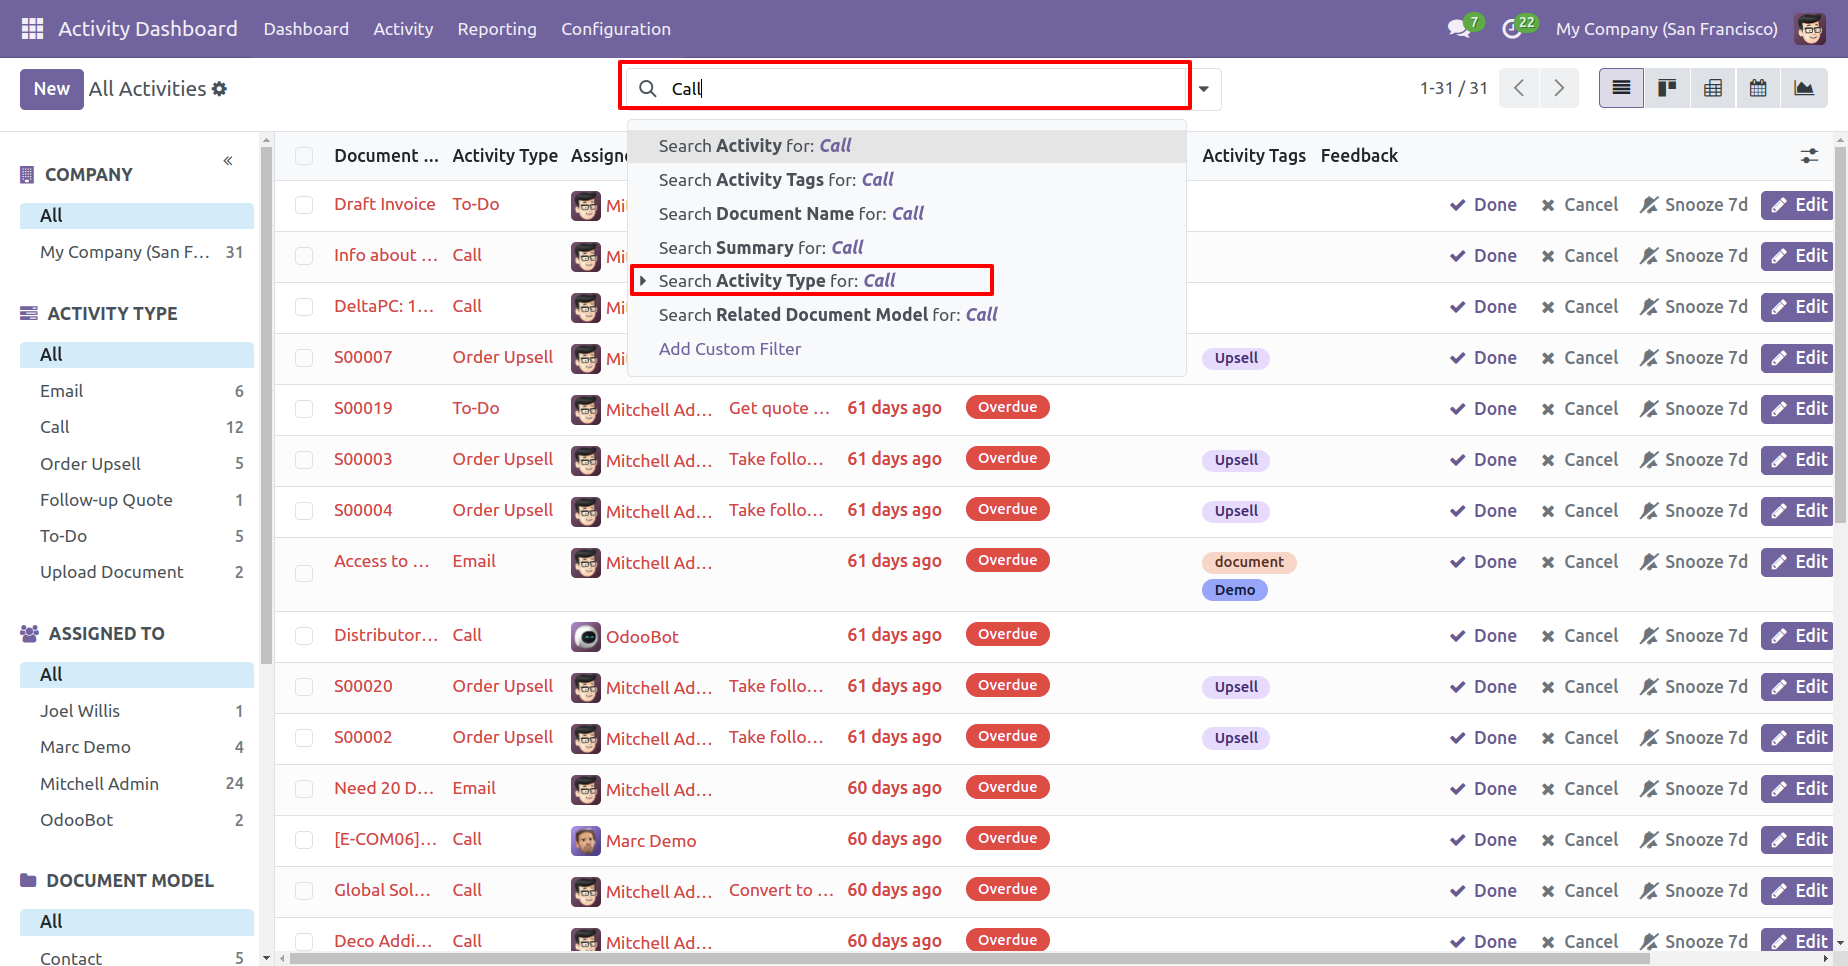
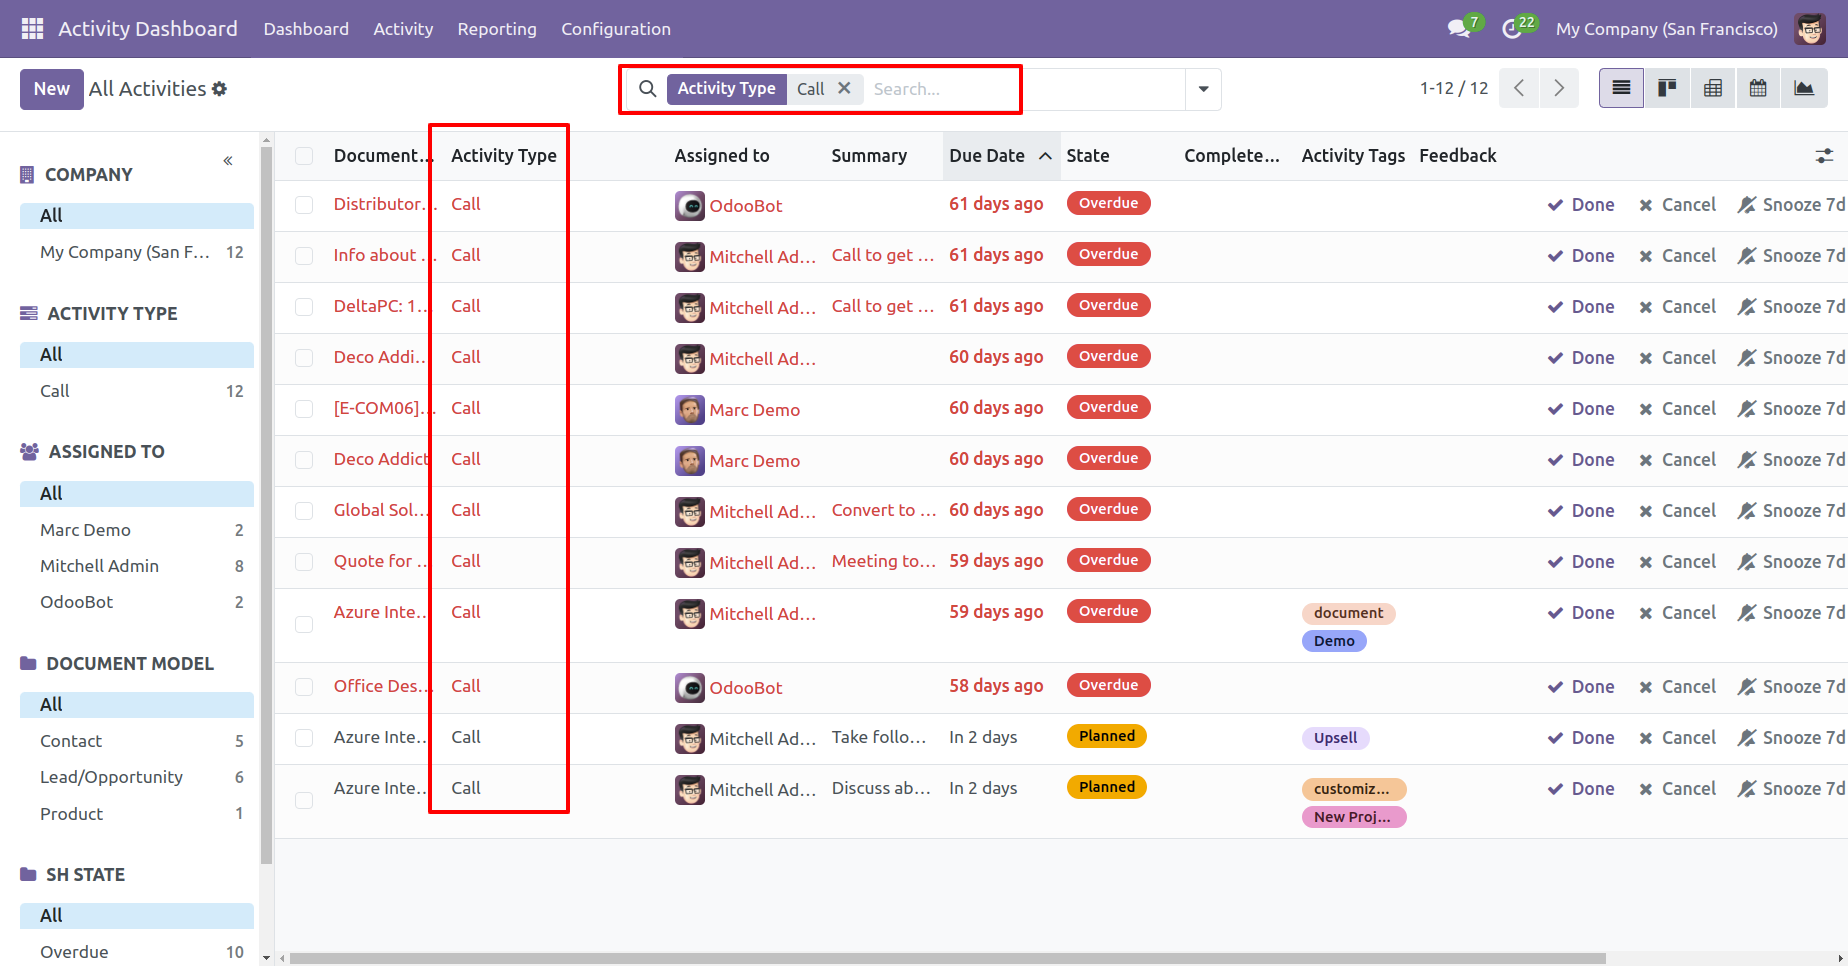
In the search view, Some filters & group by added
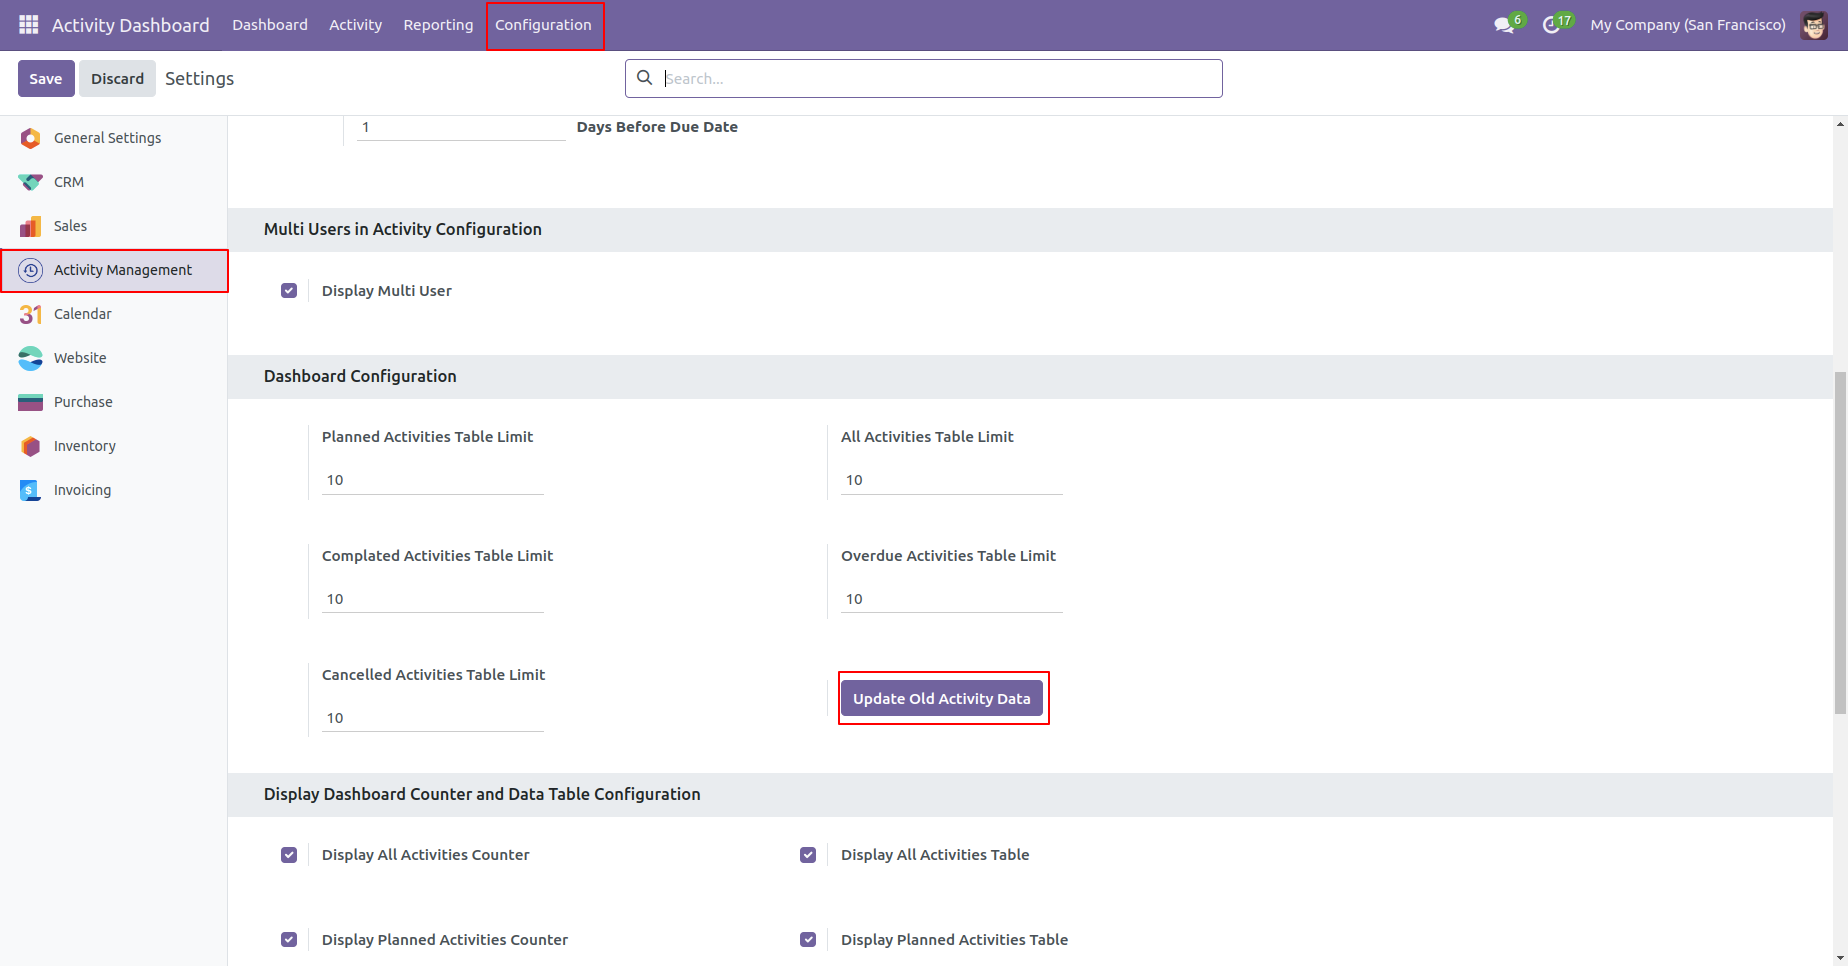
Active old activities which created before install this module.
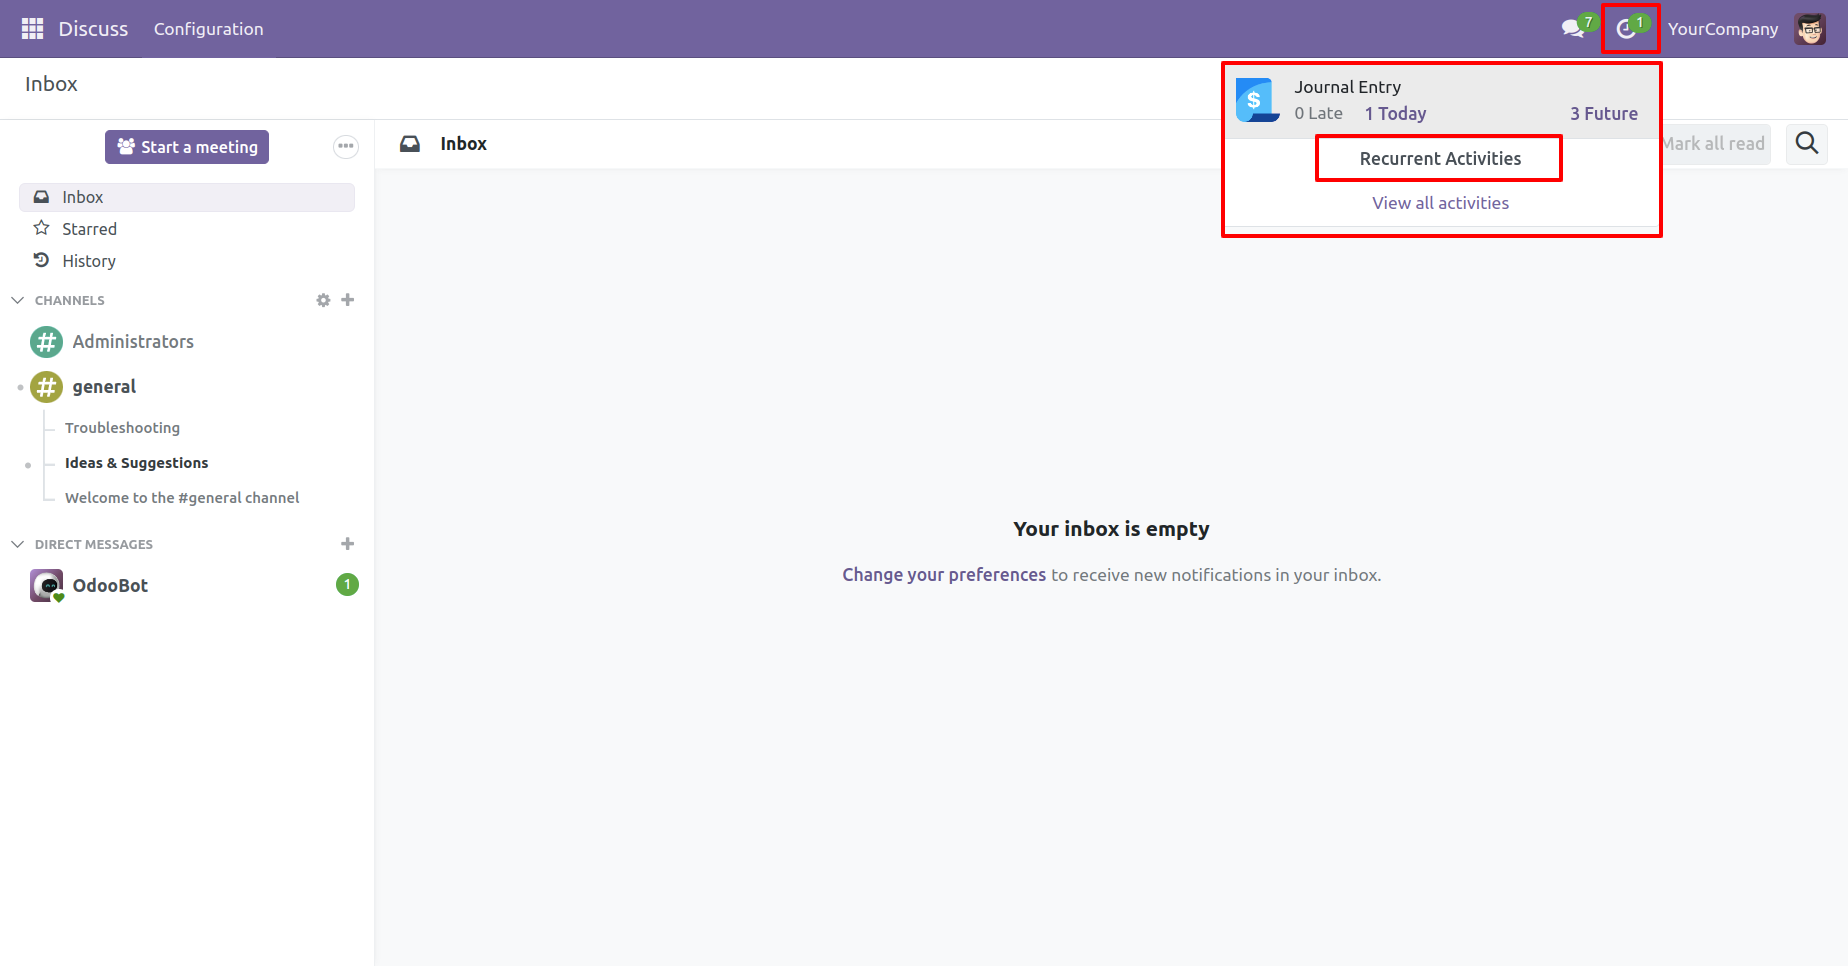
Go to the recurring activities.
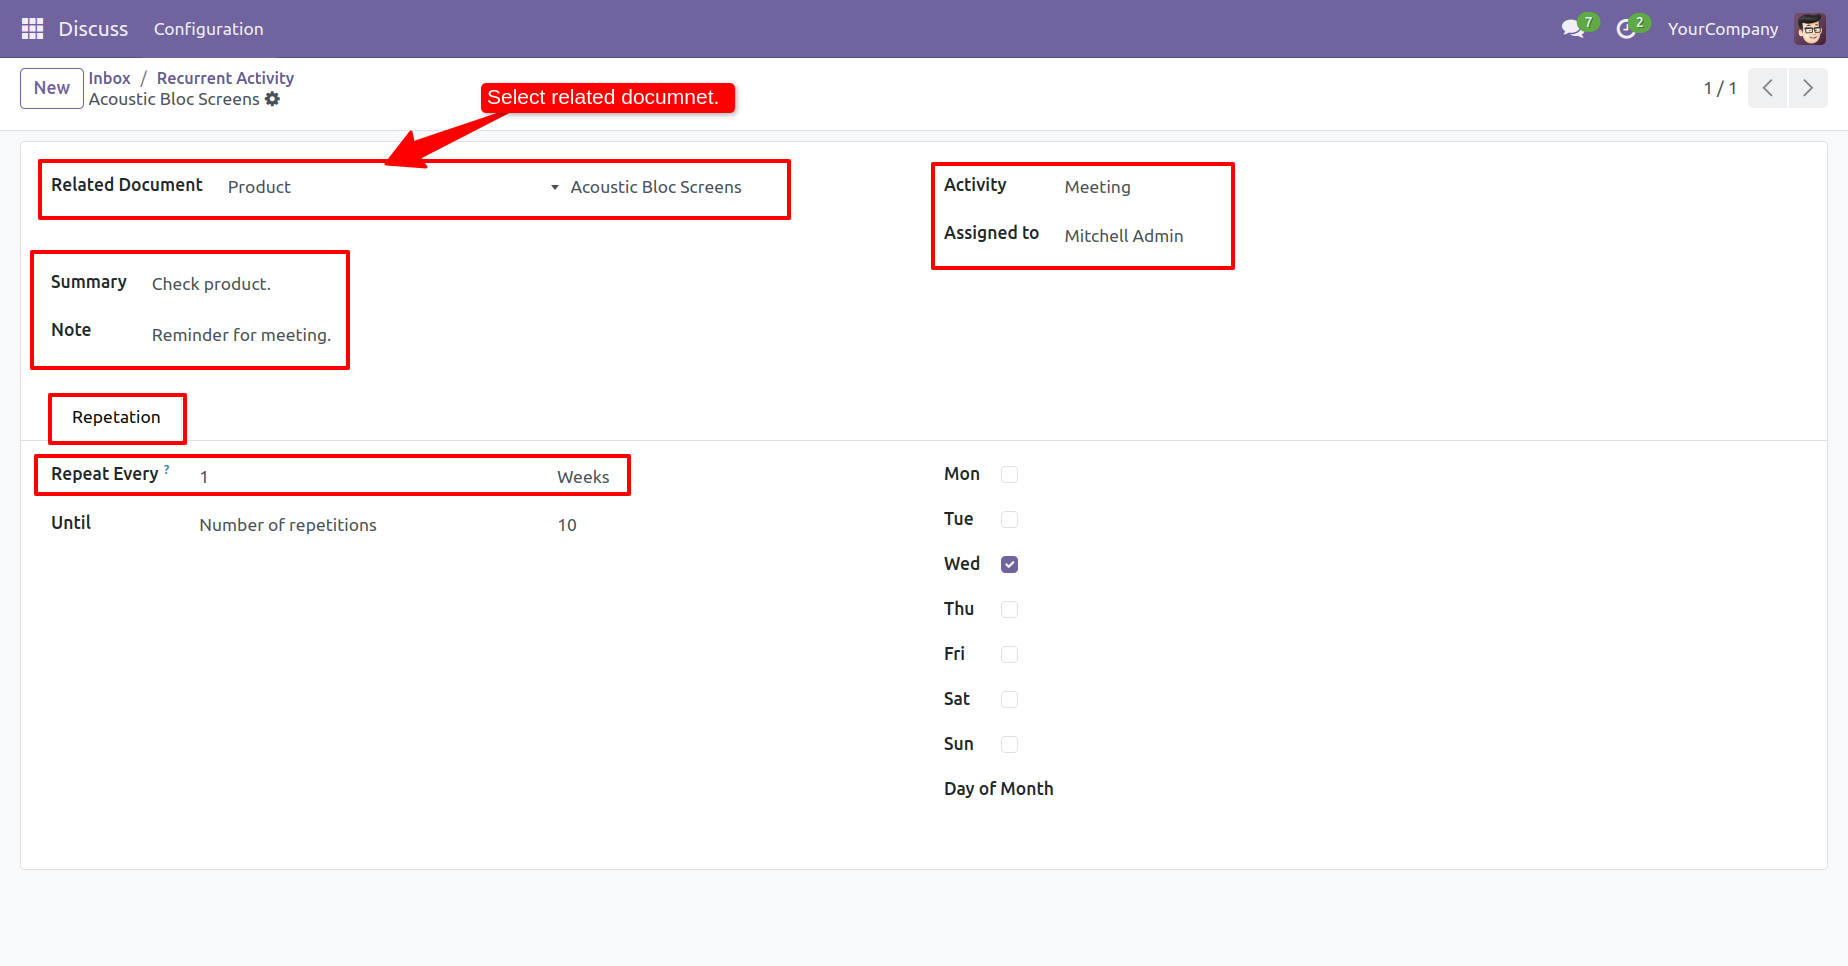
The recurring activity form view, Select the related
document, value of the related document, assign to person,
activity type, summary & note.
You can repeat the recurring activity daily, weekly,
monthly, yearly.
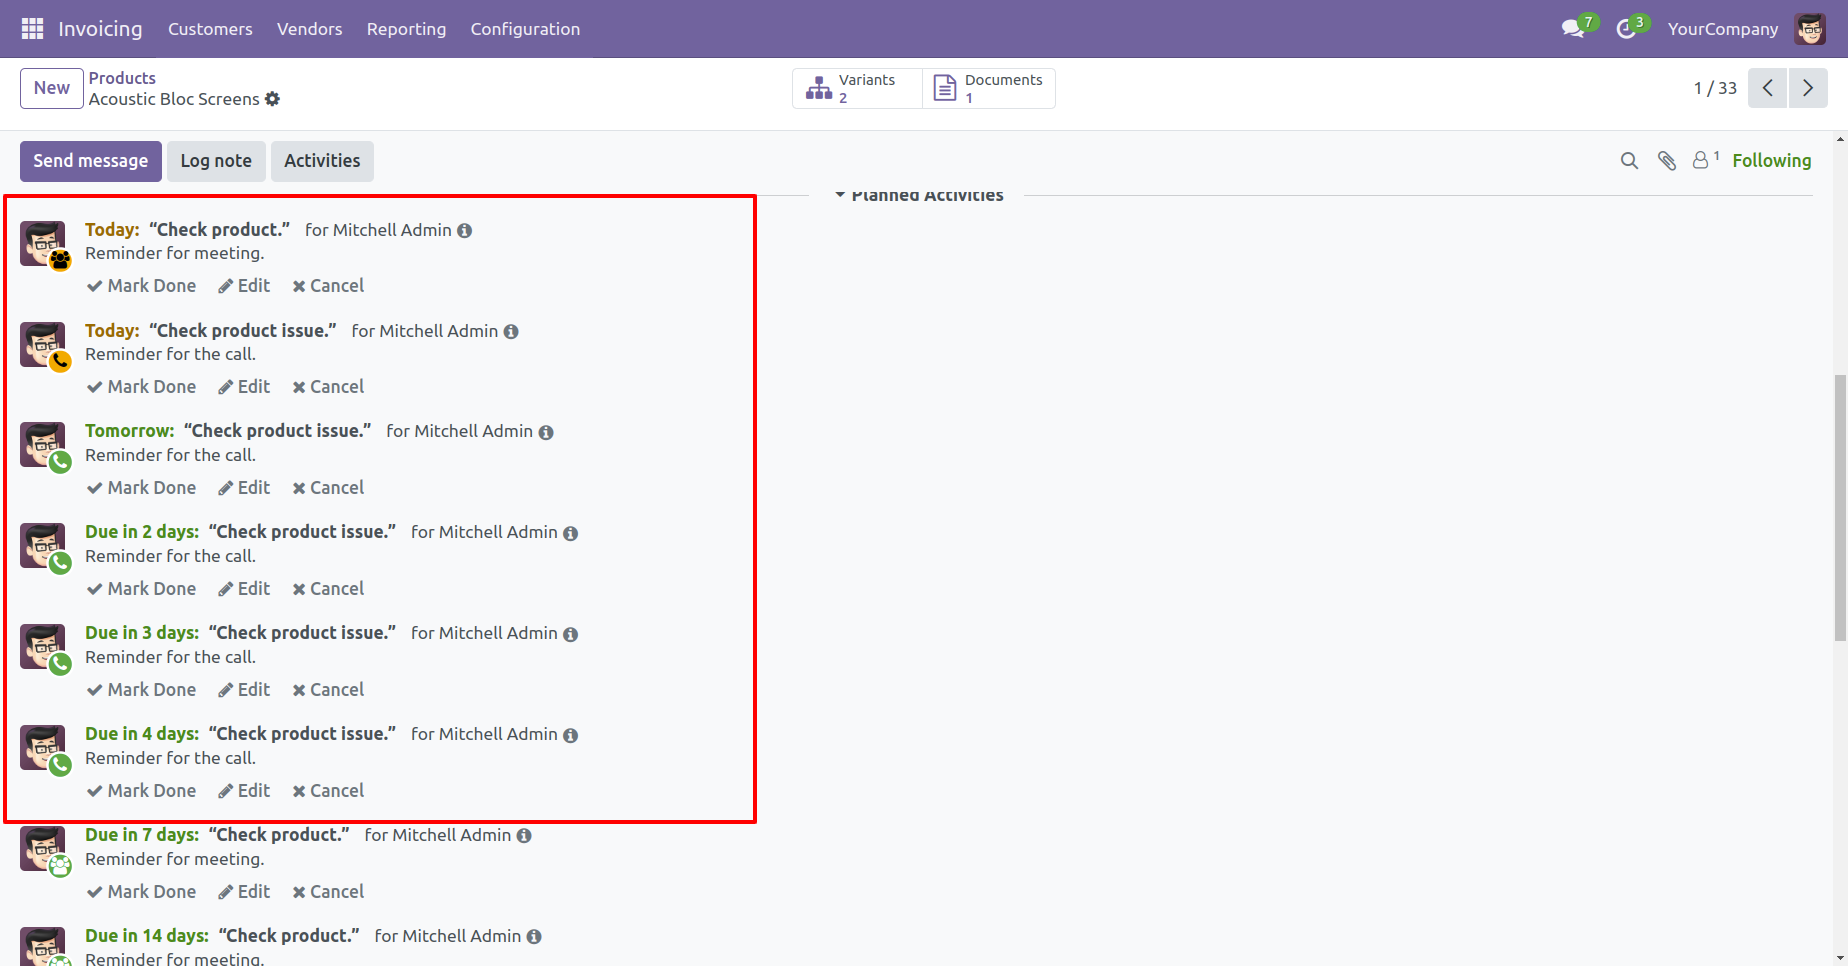
Recurring activity in chatter.
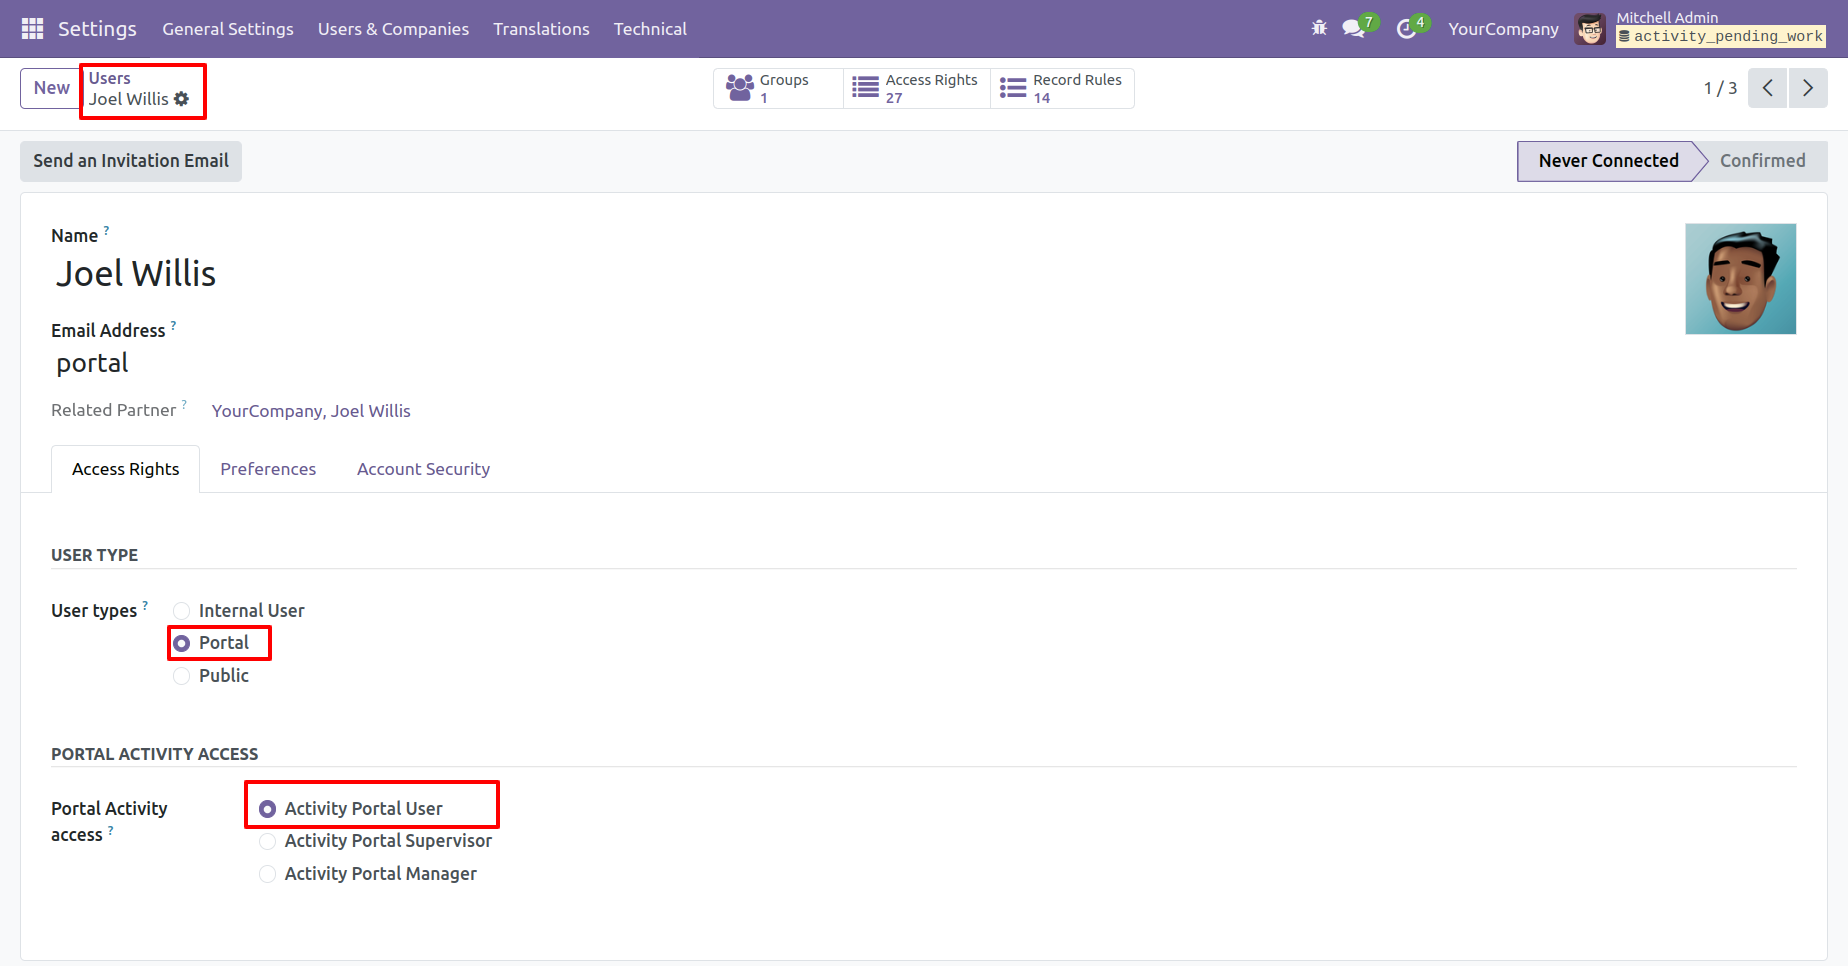
Configuration for "Portal Activity Access".
'Activities' menu at portal.
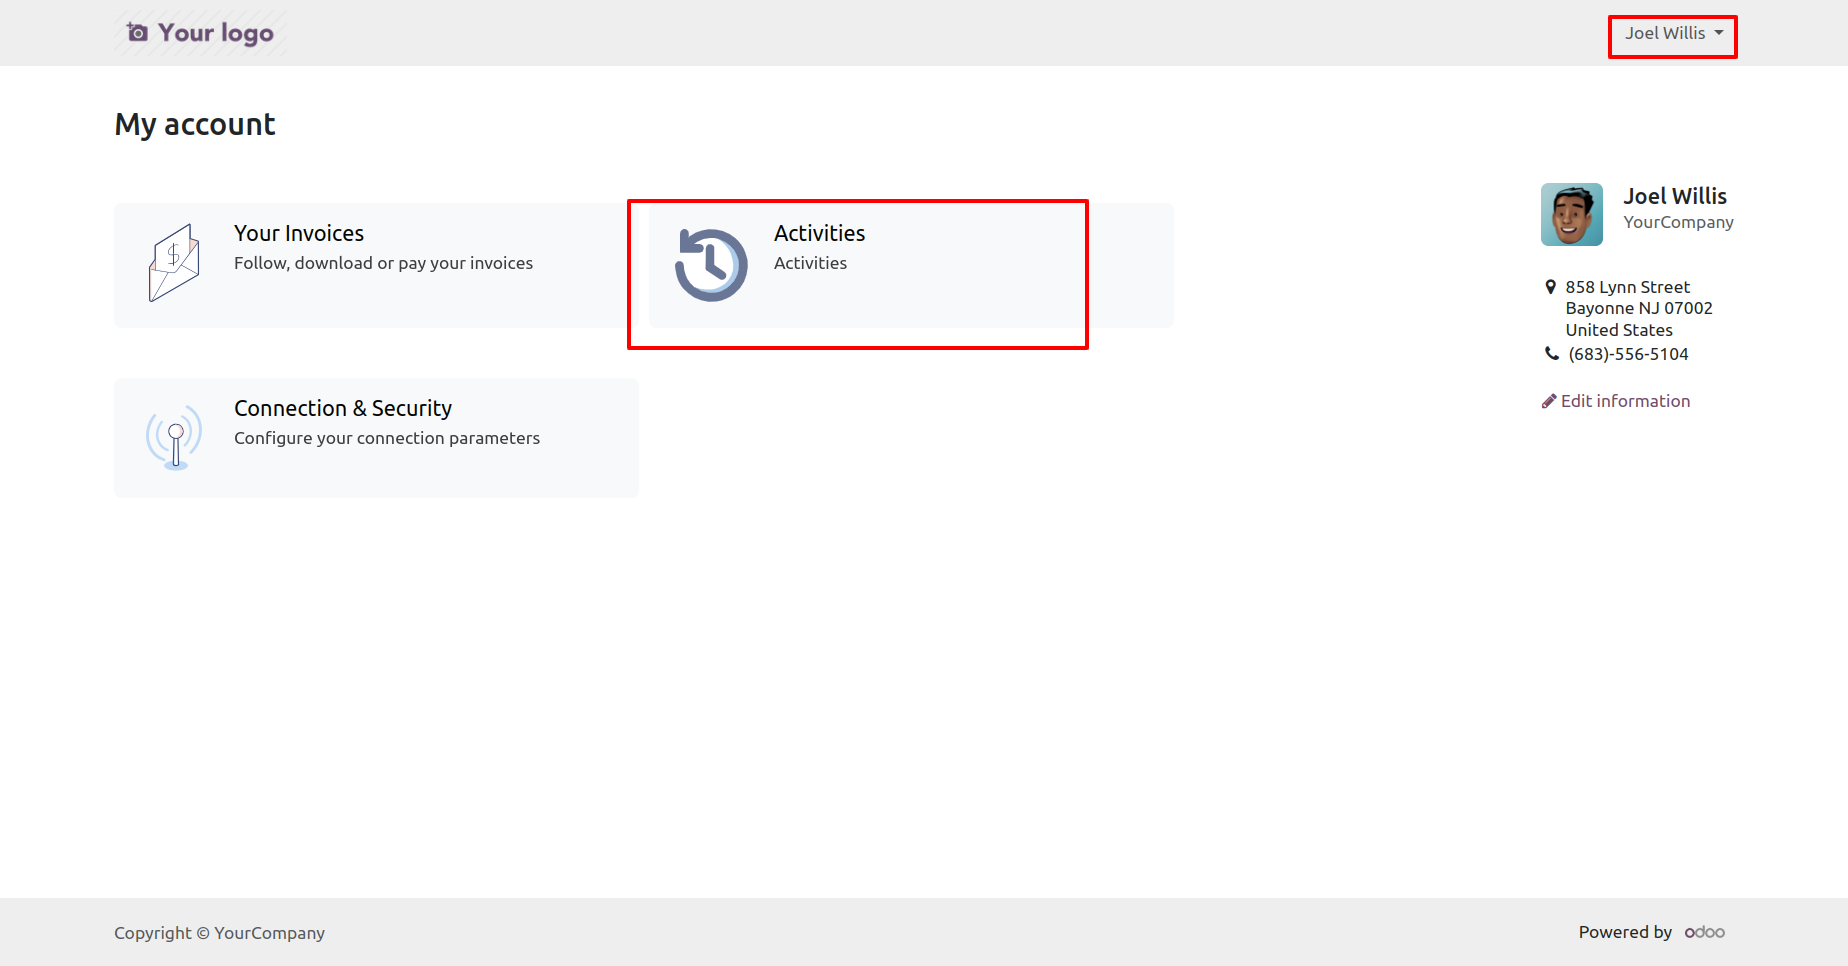
Create an activity.
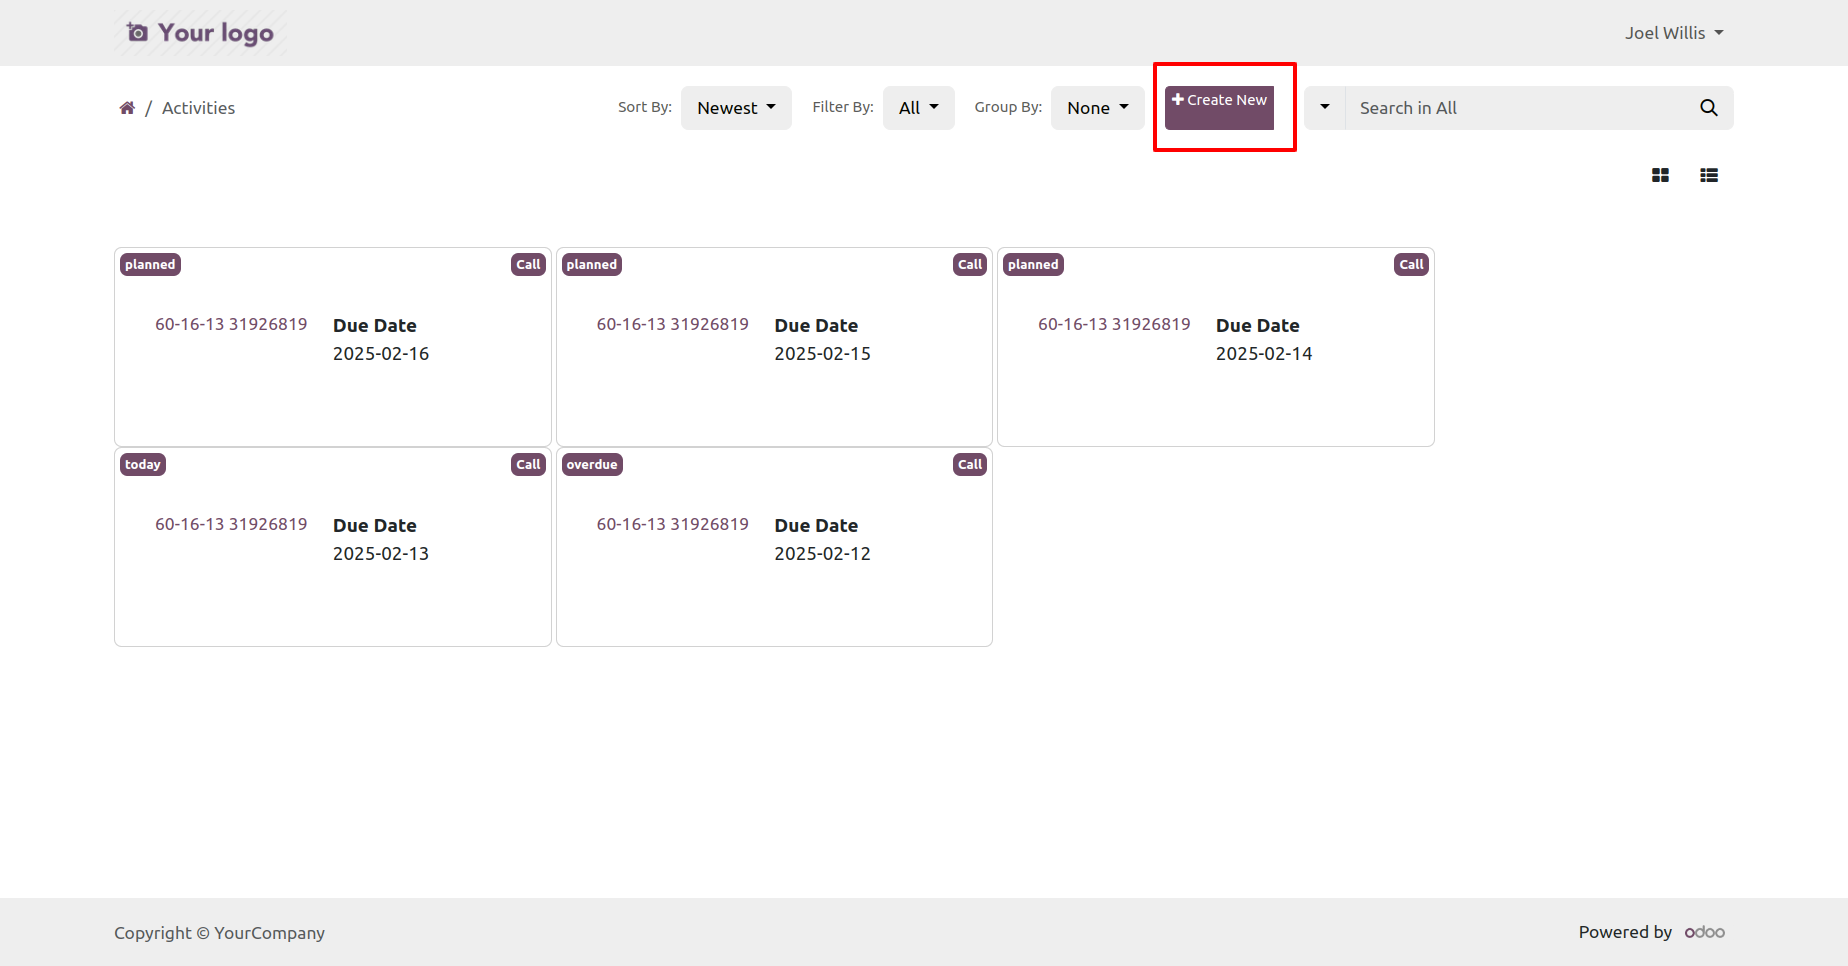
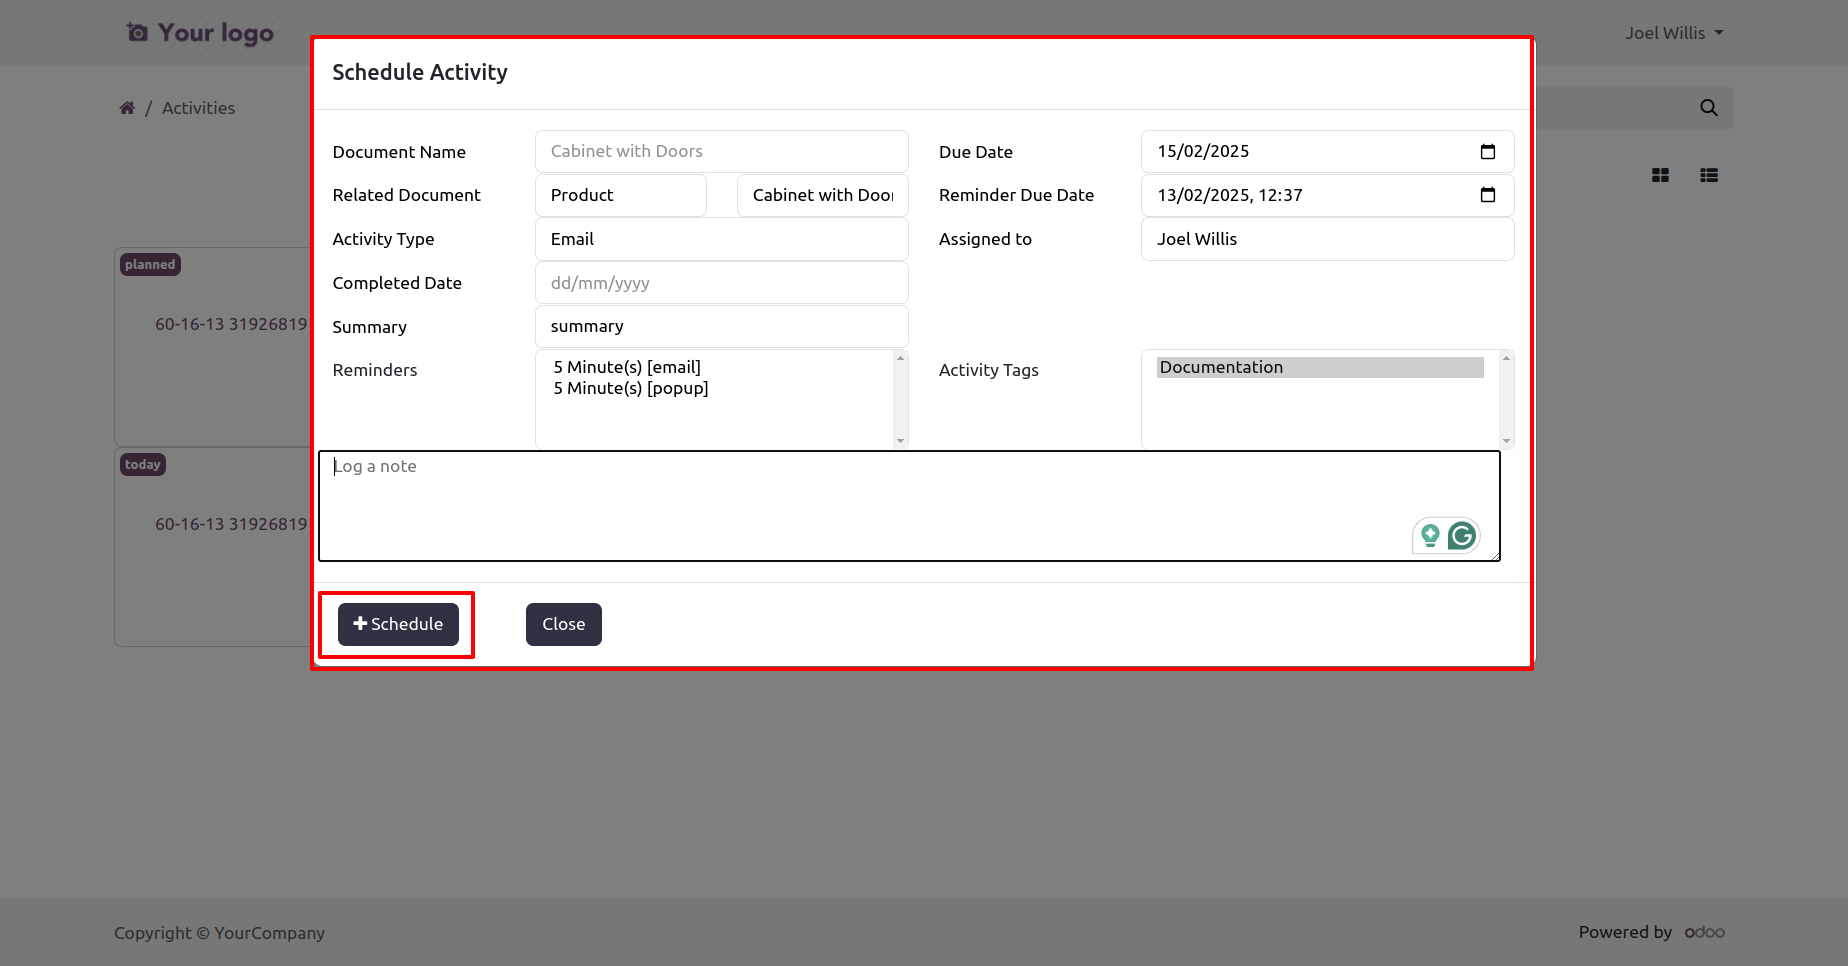
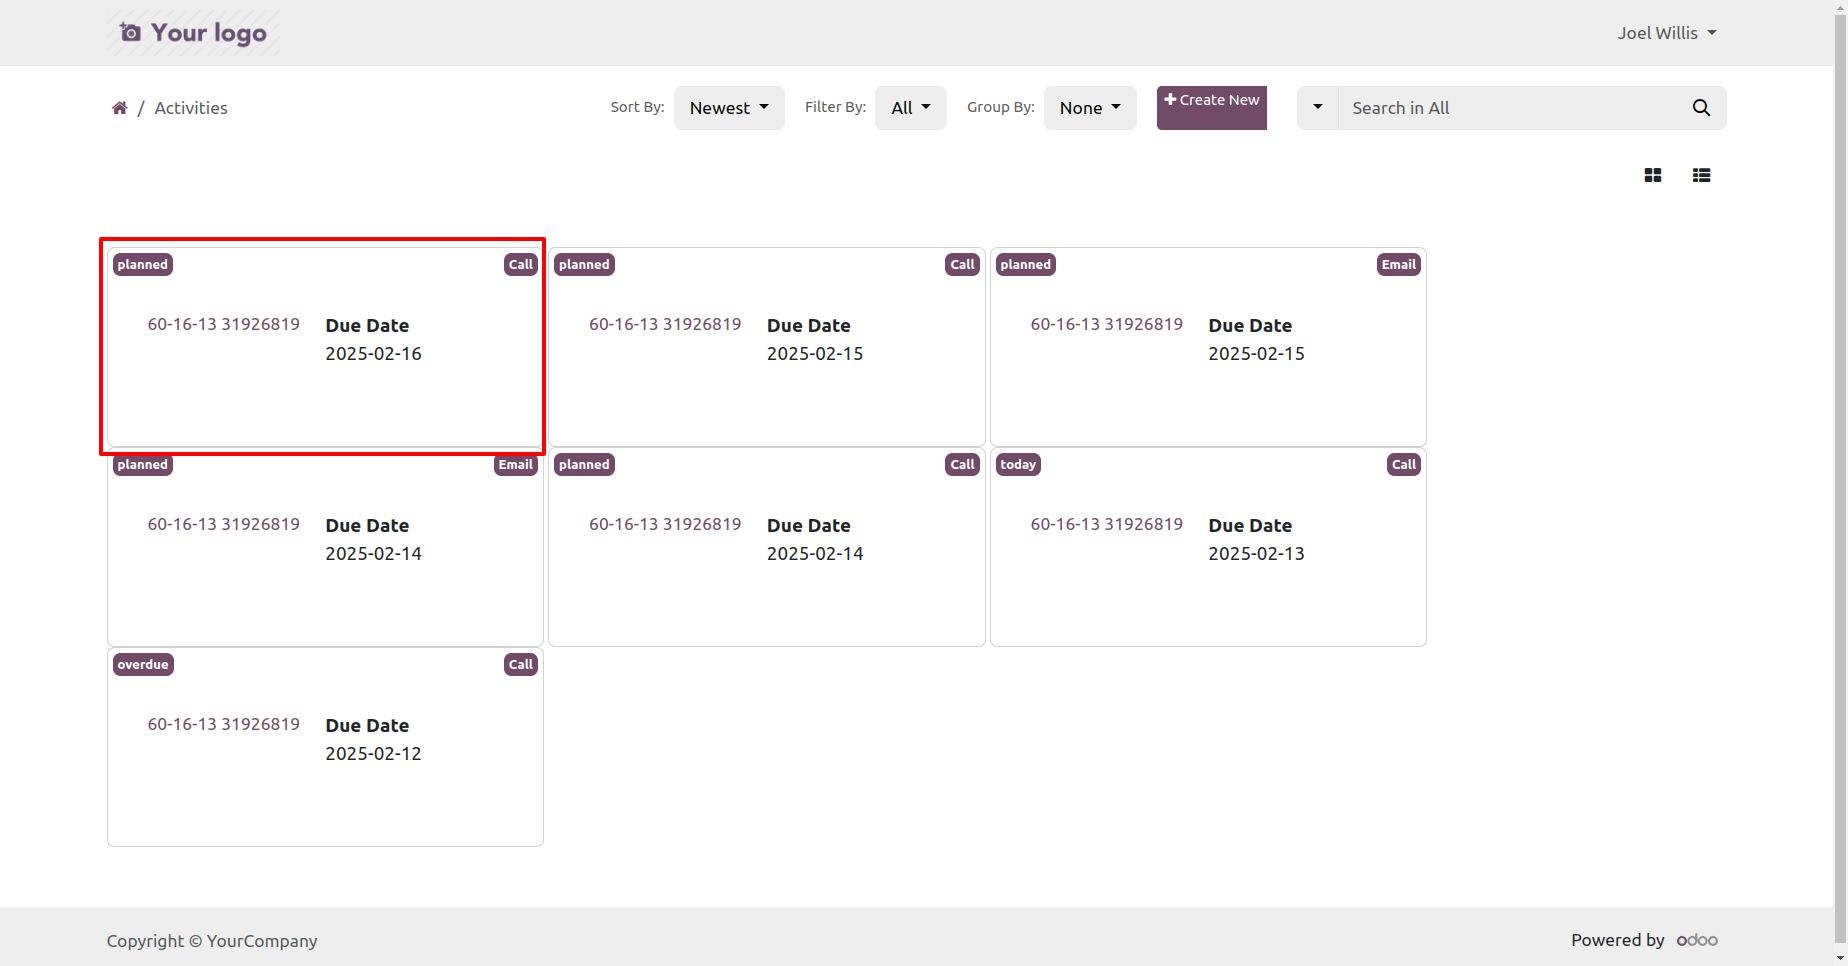
Activity is created, Kanban view of portal.
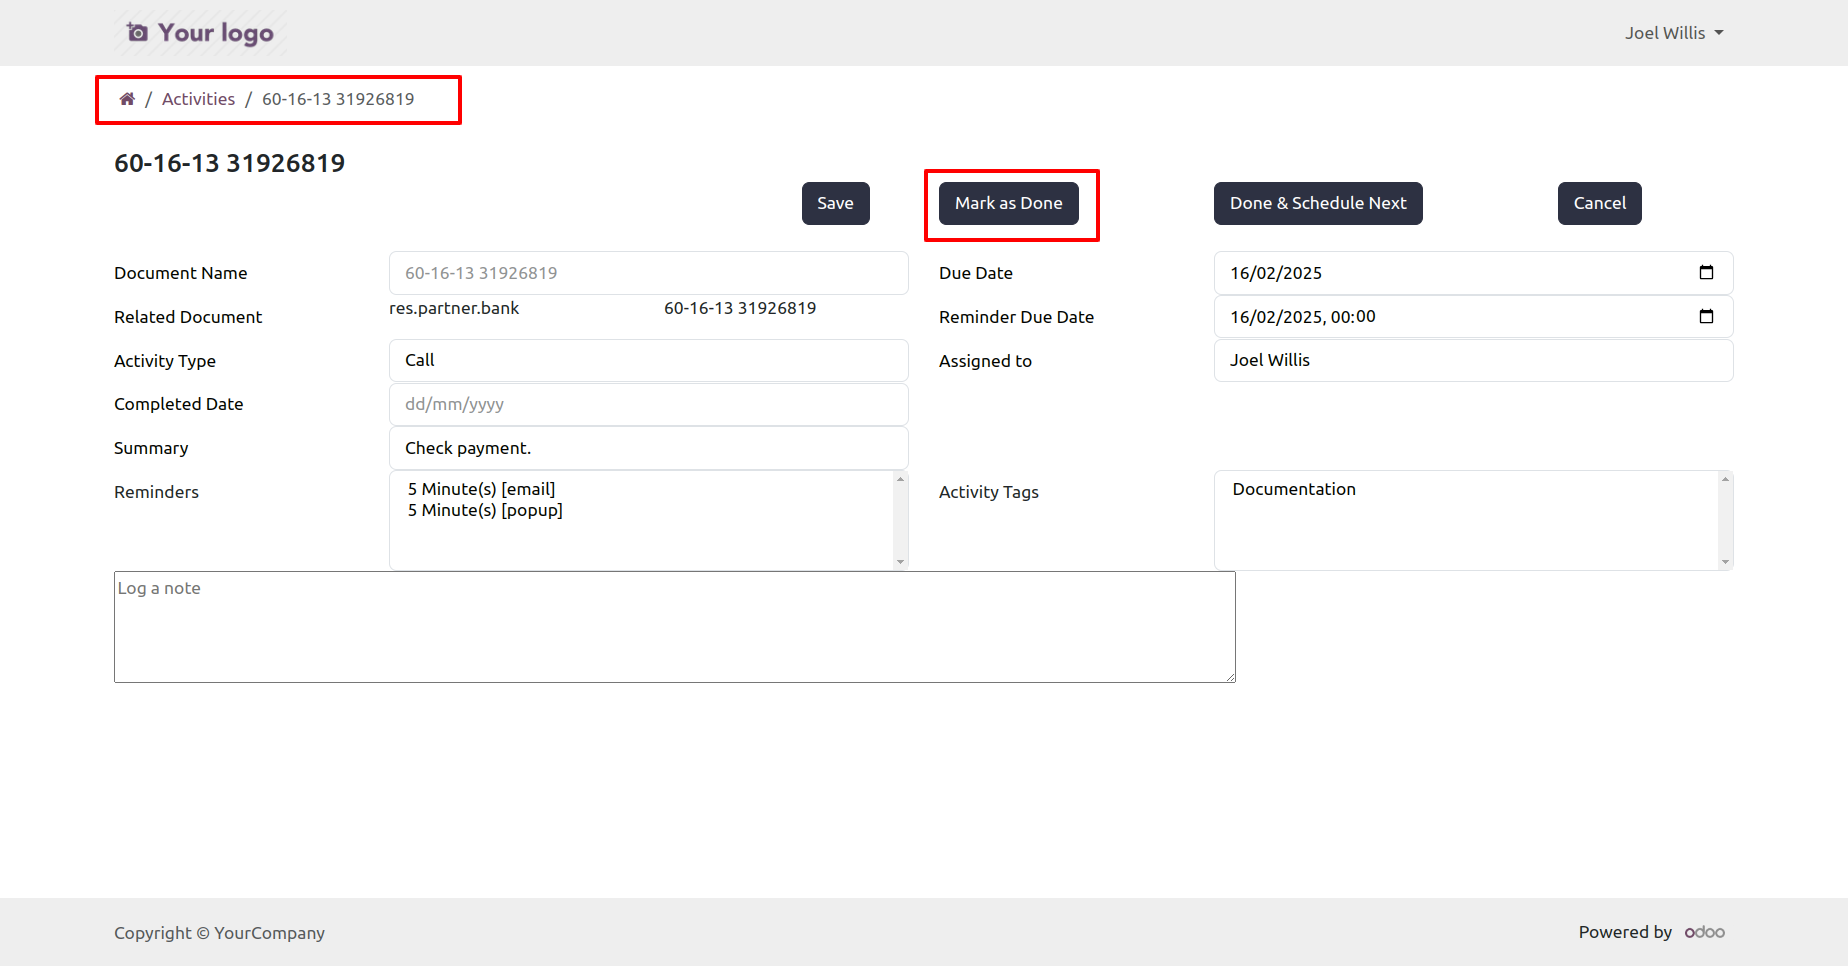
Click on the 'Mark as done' button to done the activity.
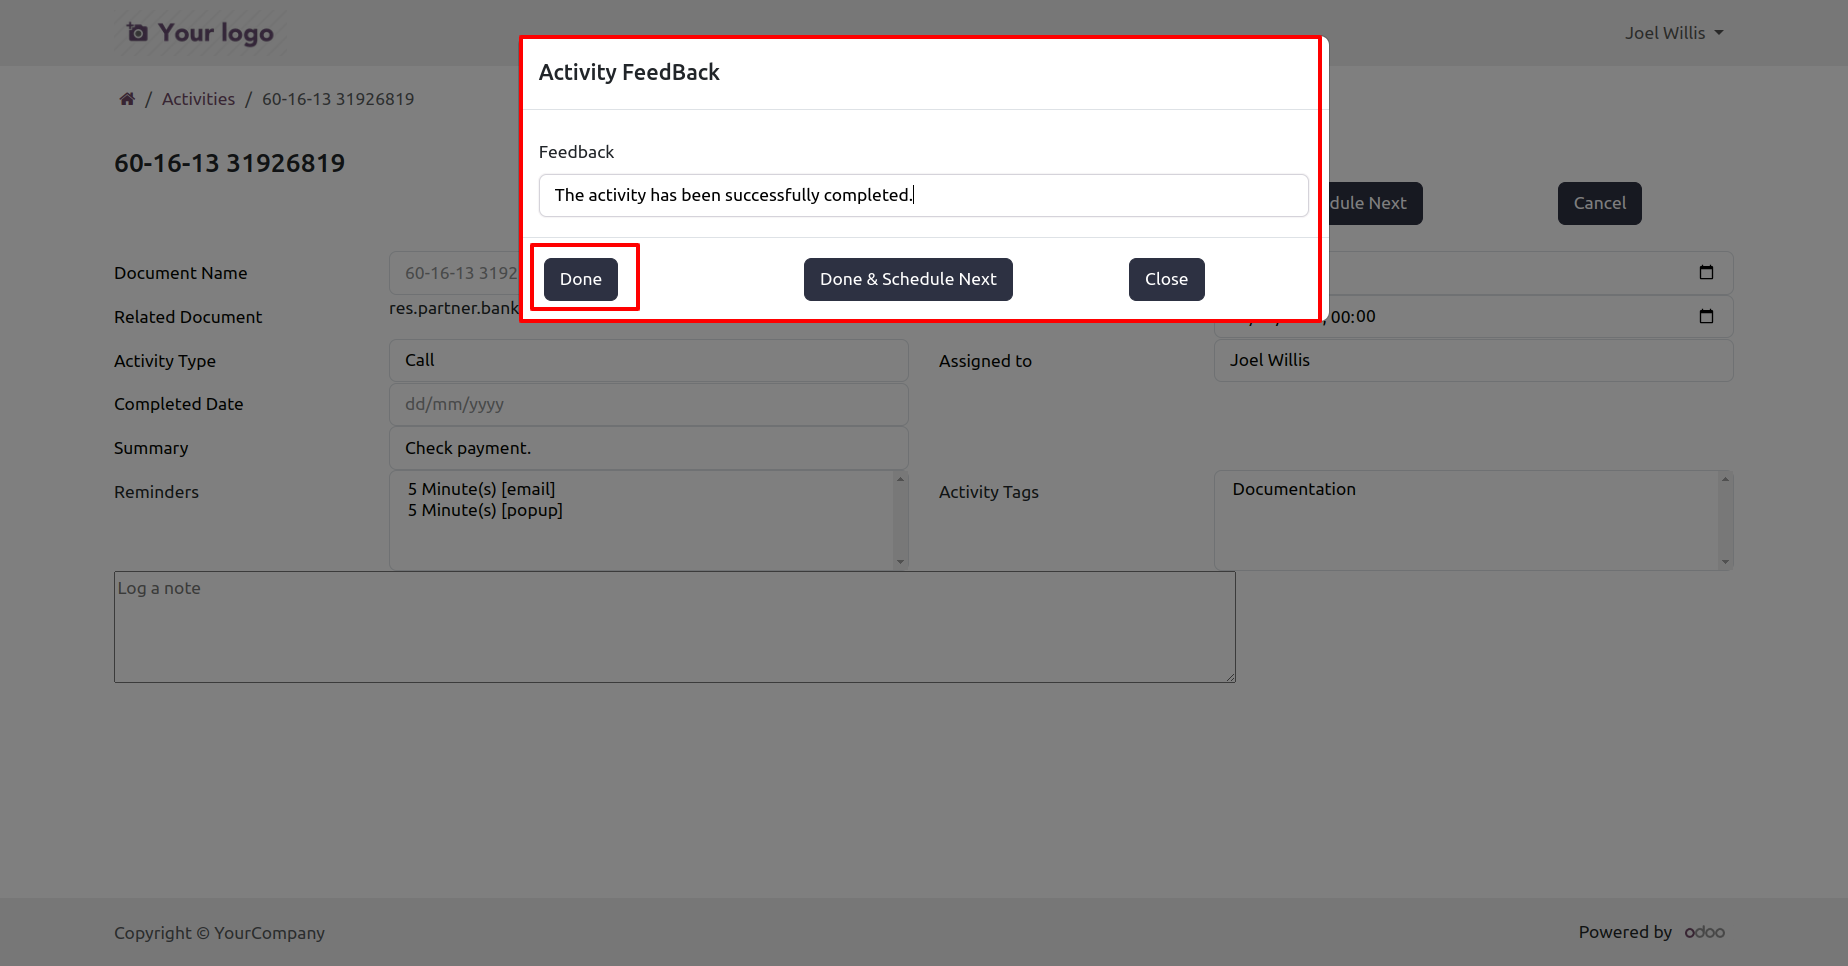
After click on the button, feedback wizard is opens, enter the feedback and press done.
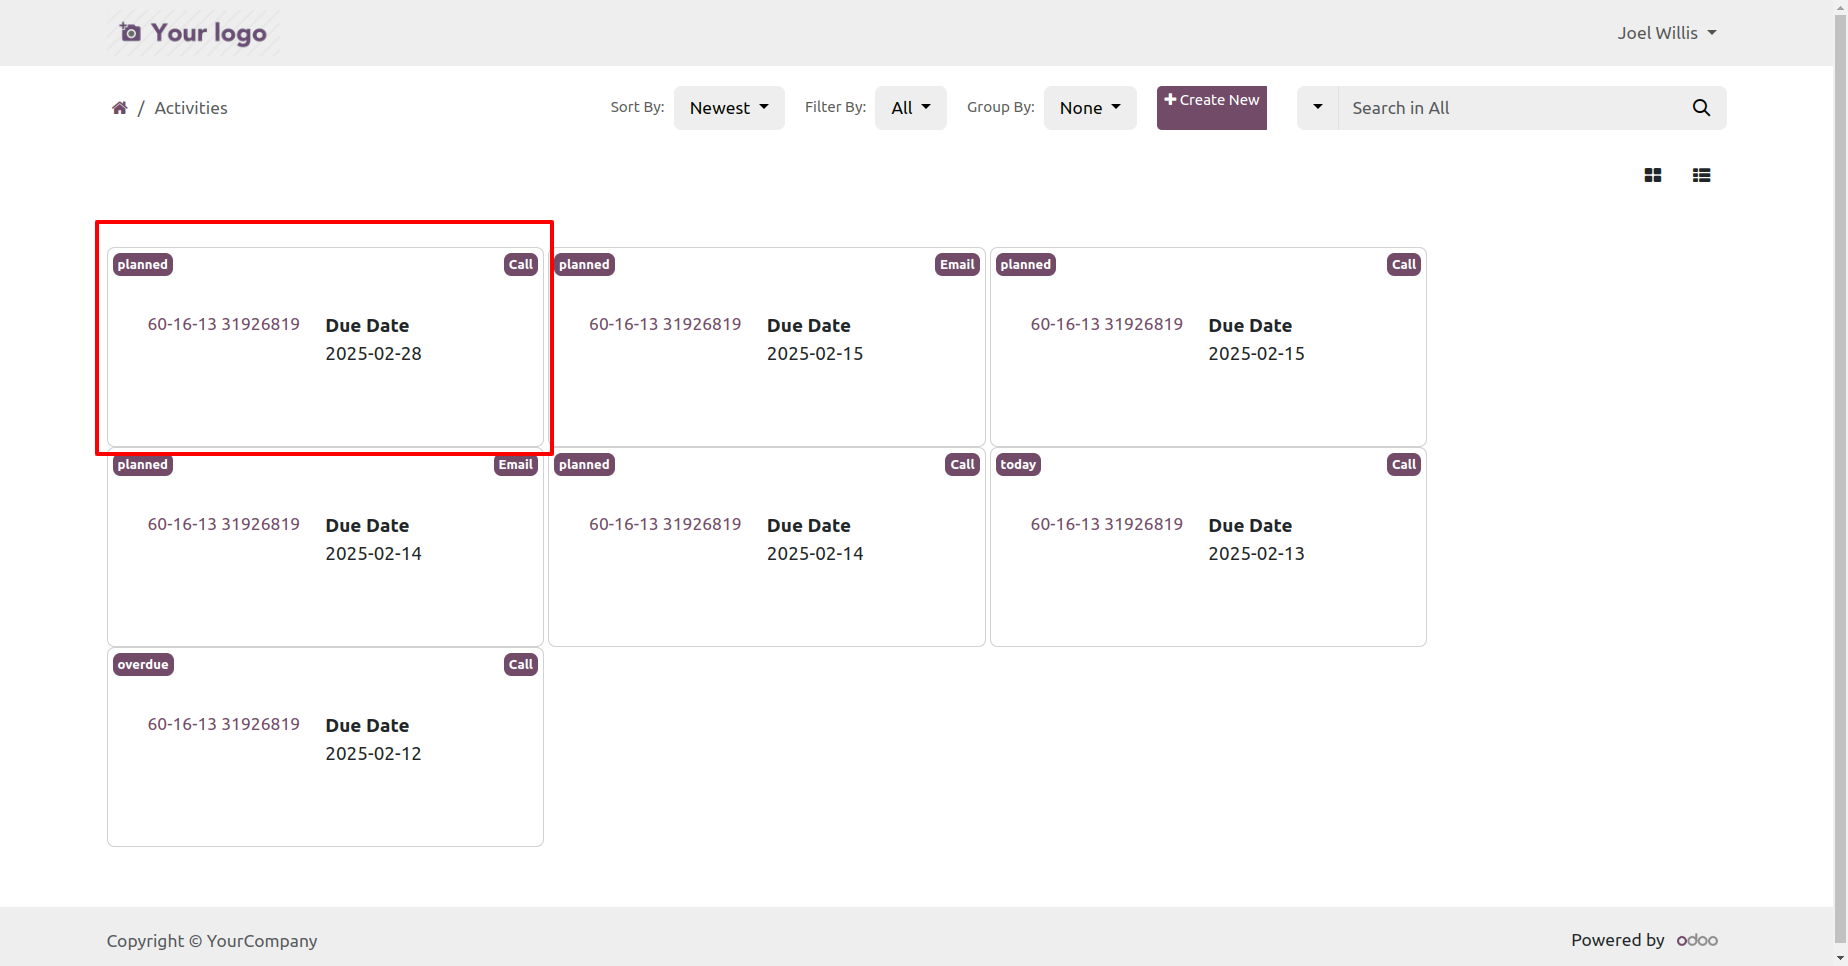
Done activity is not visible.
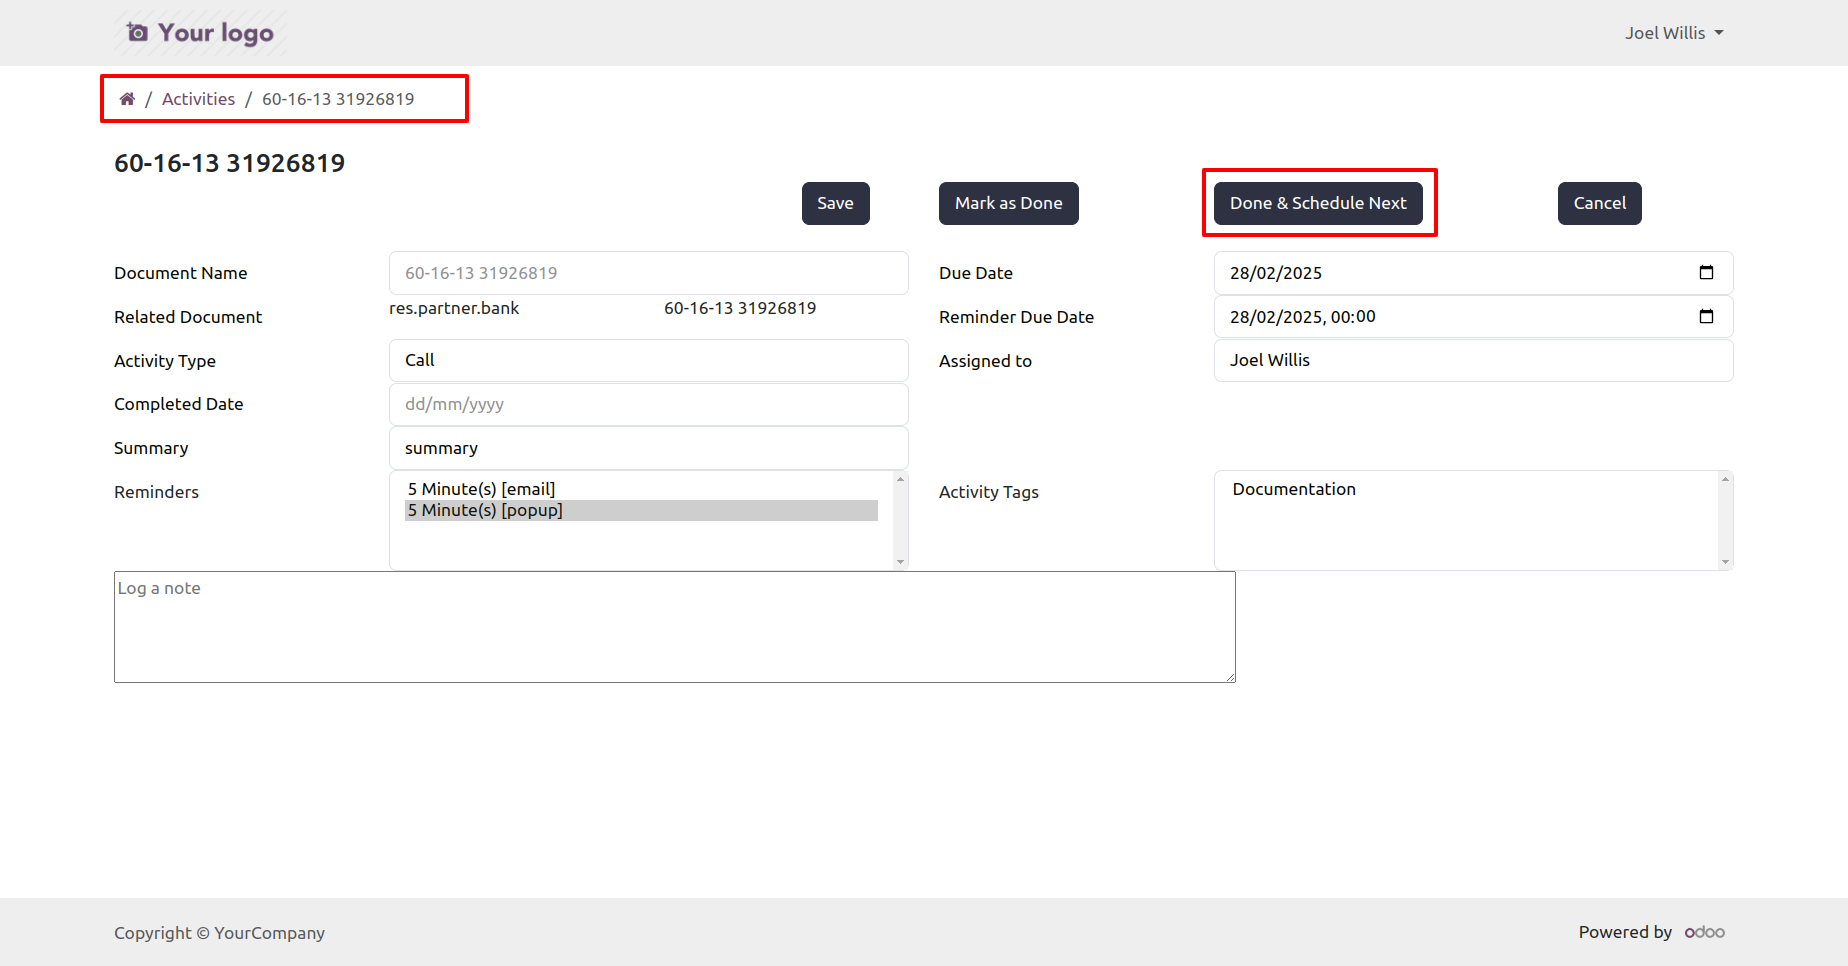
If press done and schedule next, wizard is open as new activity.
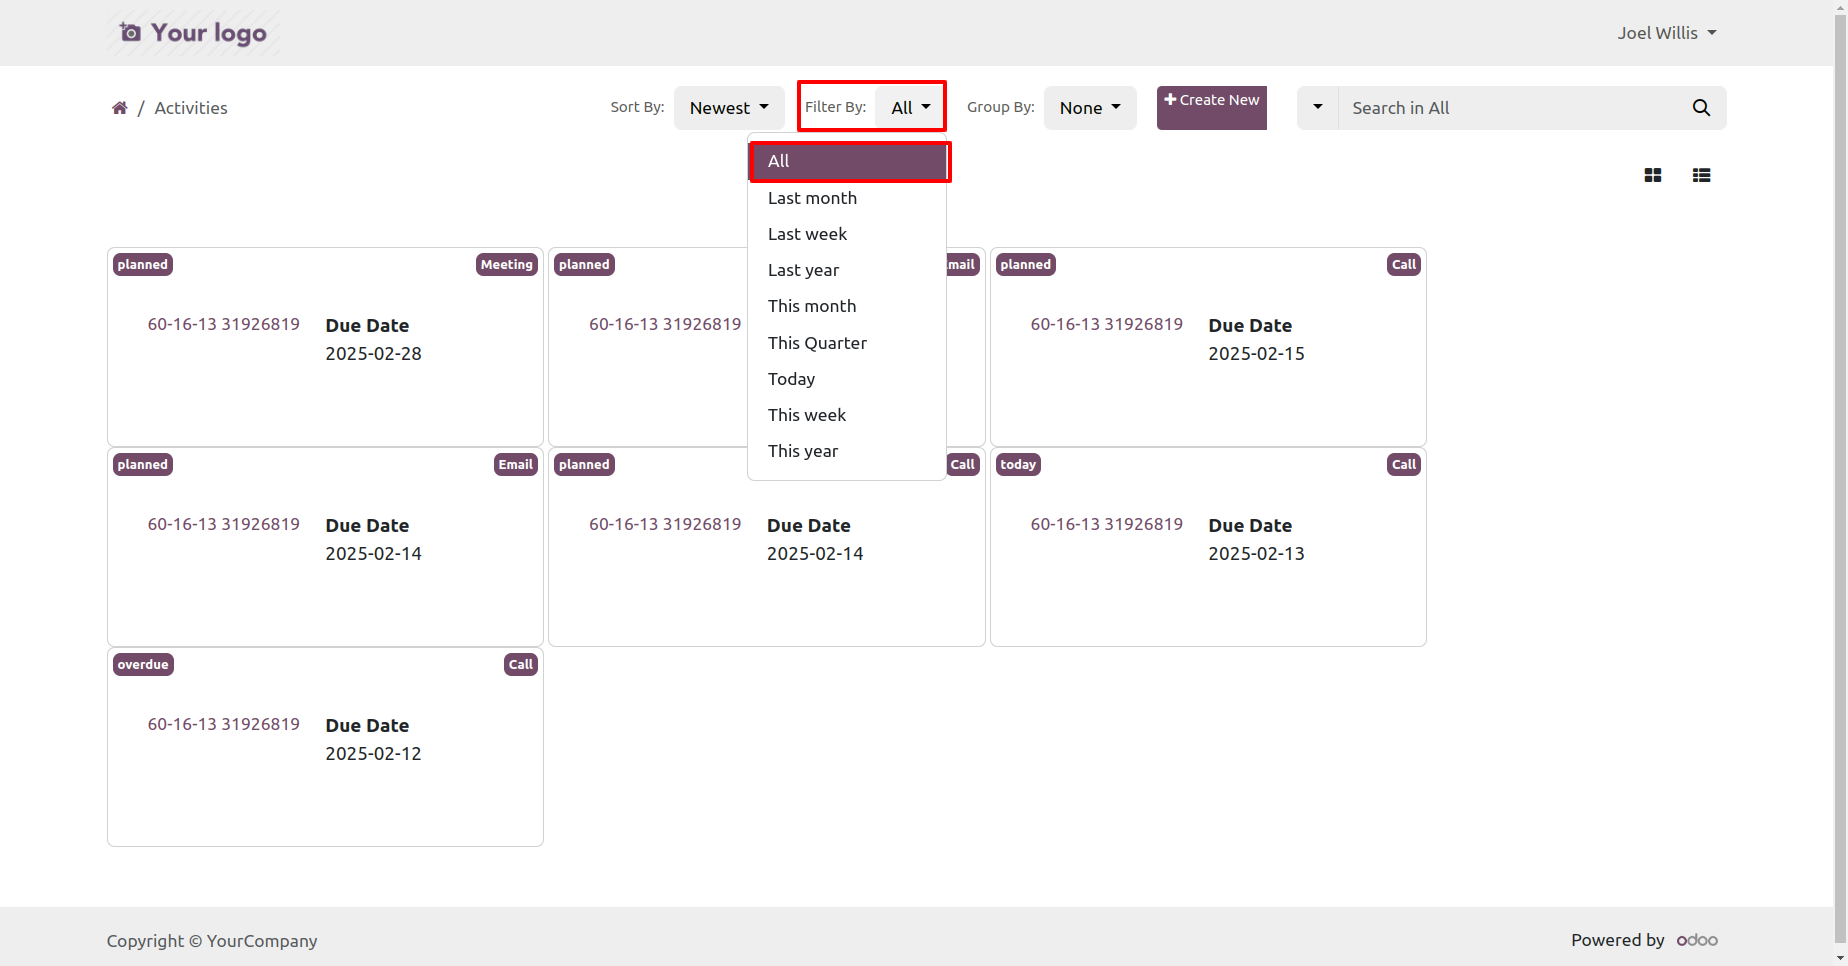
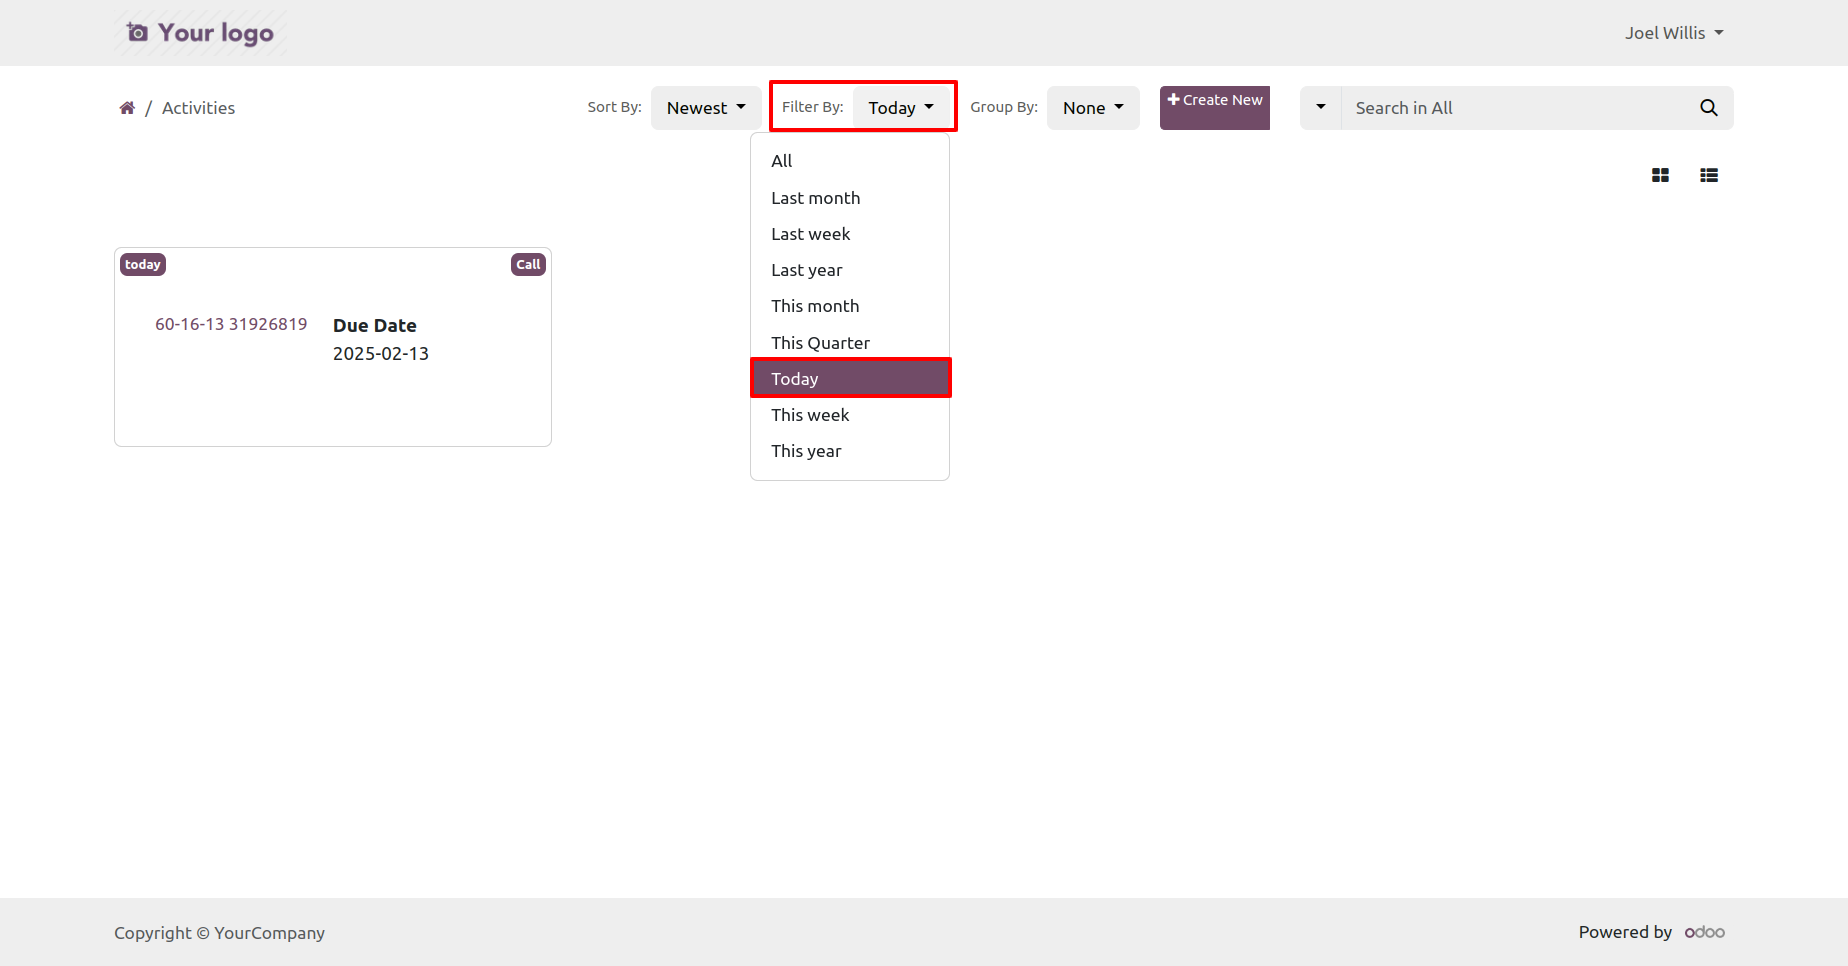
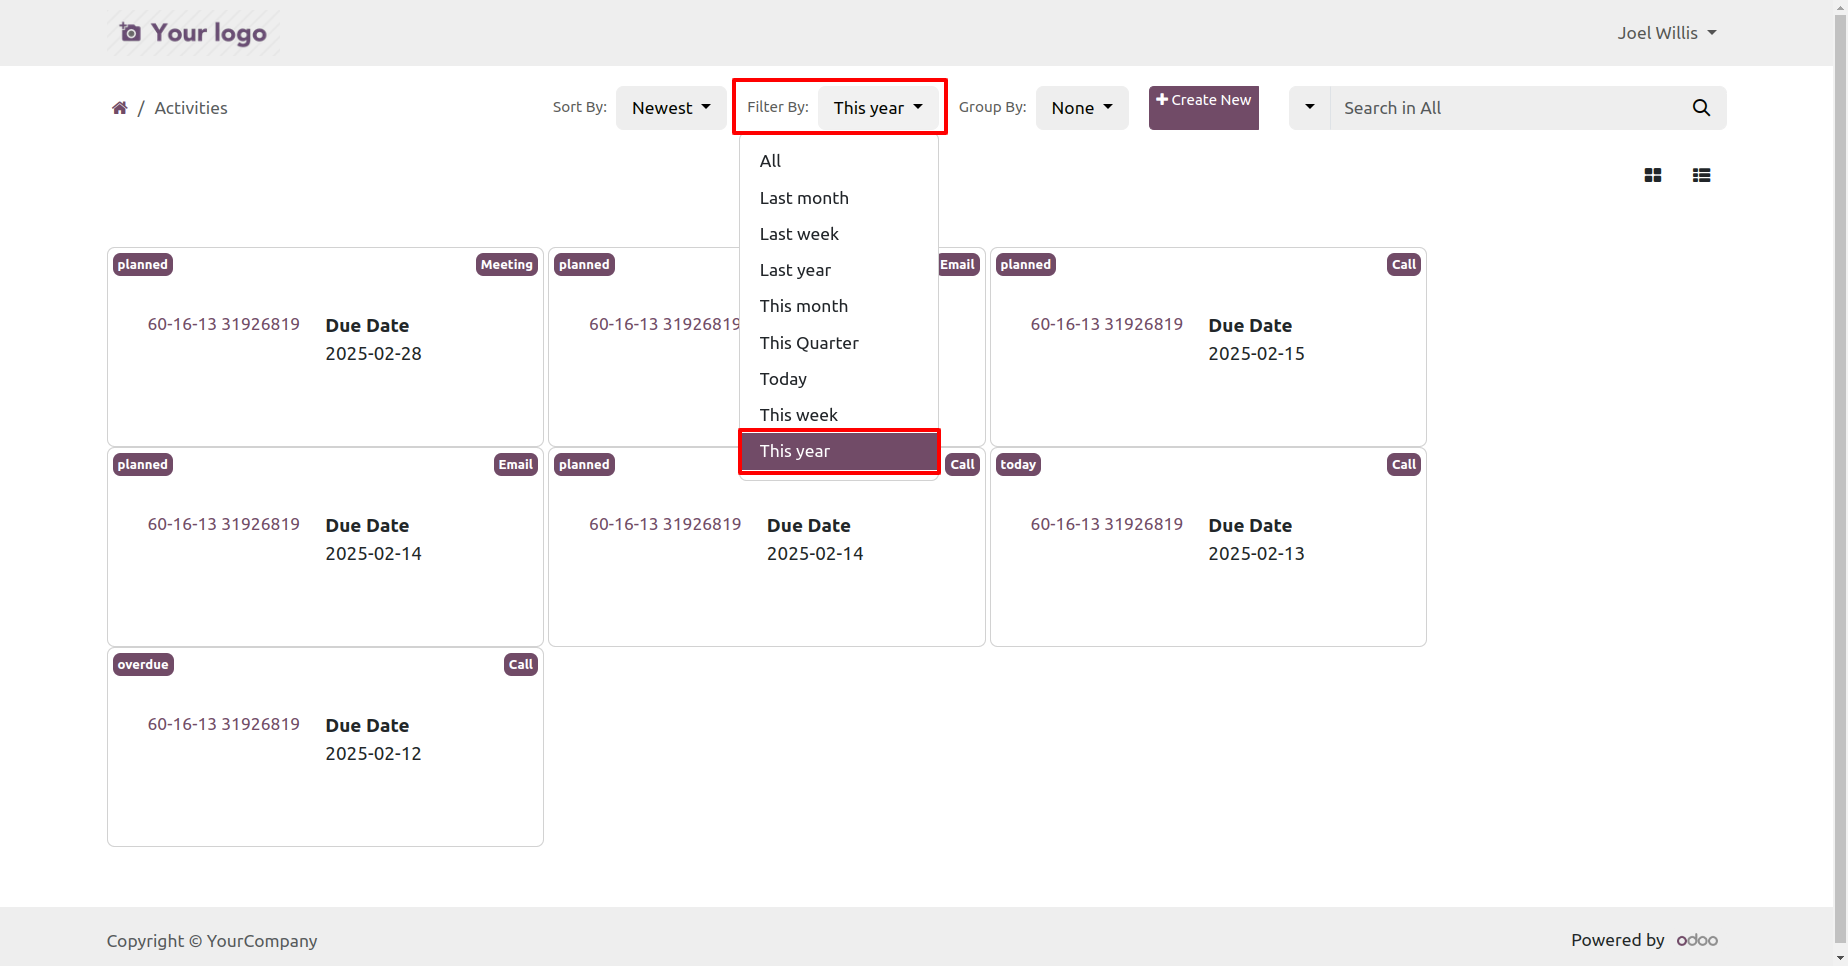
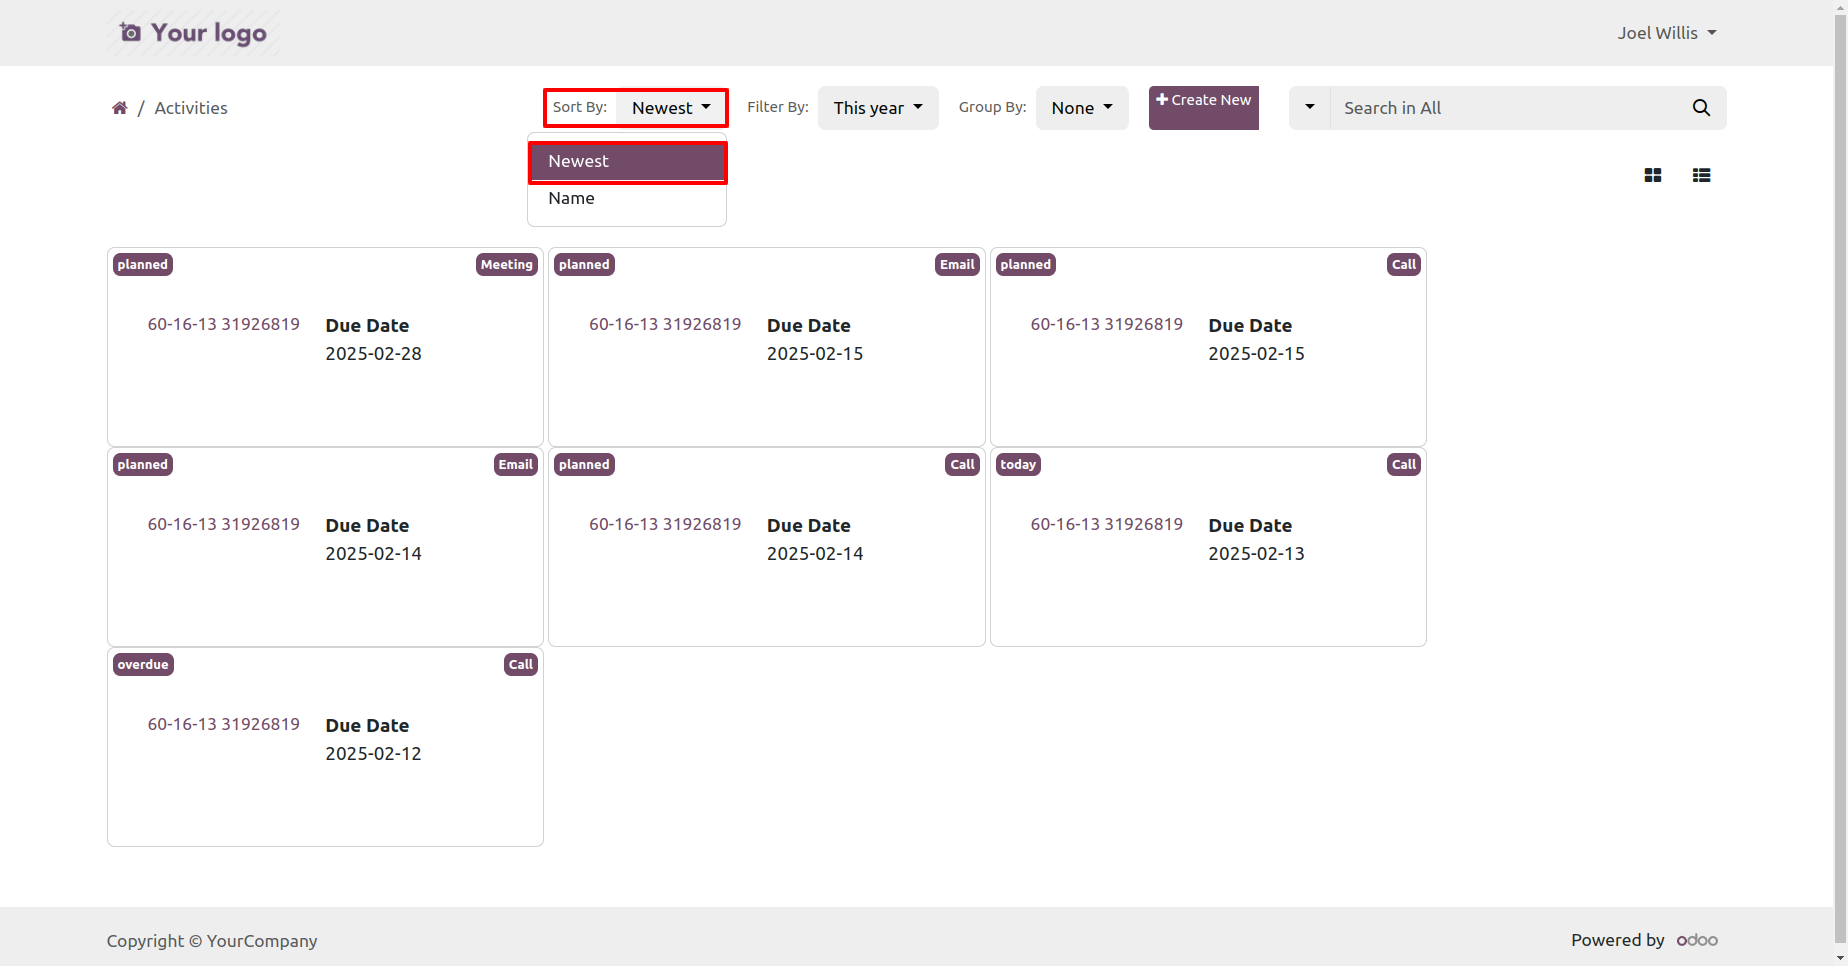
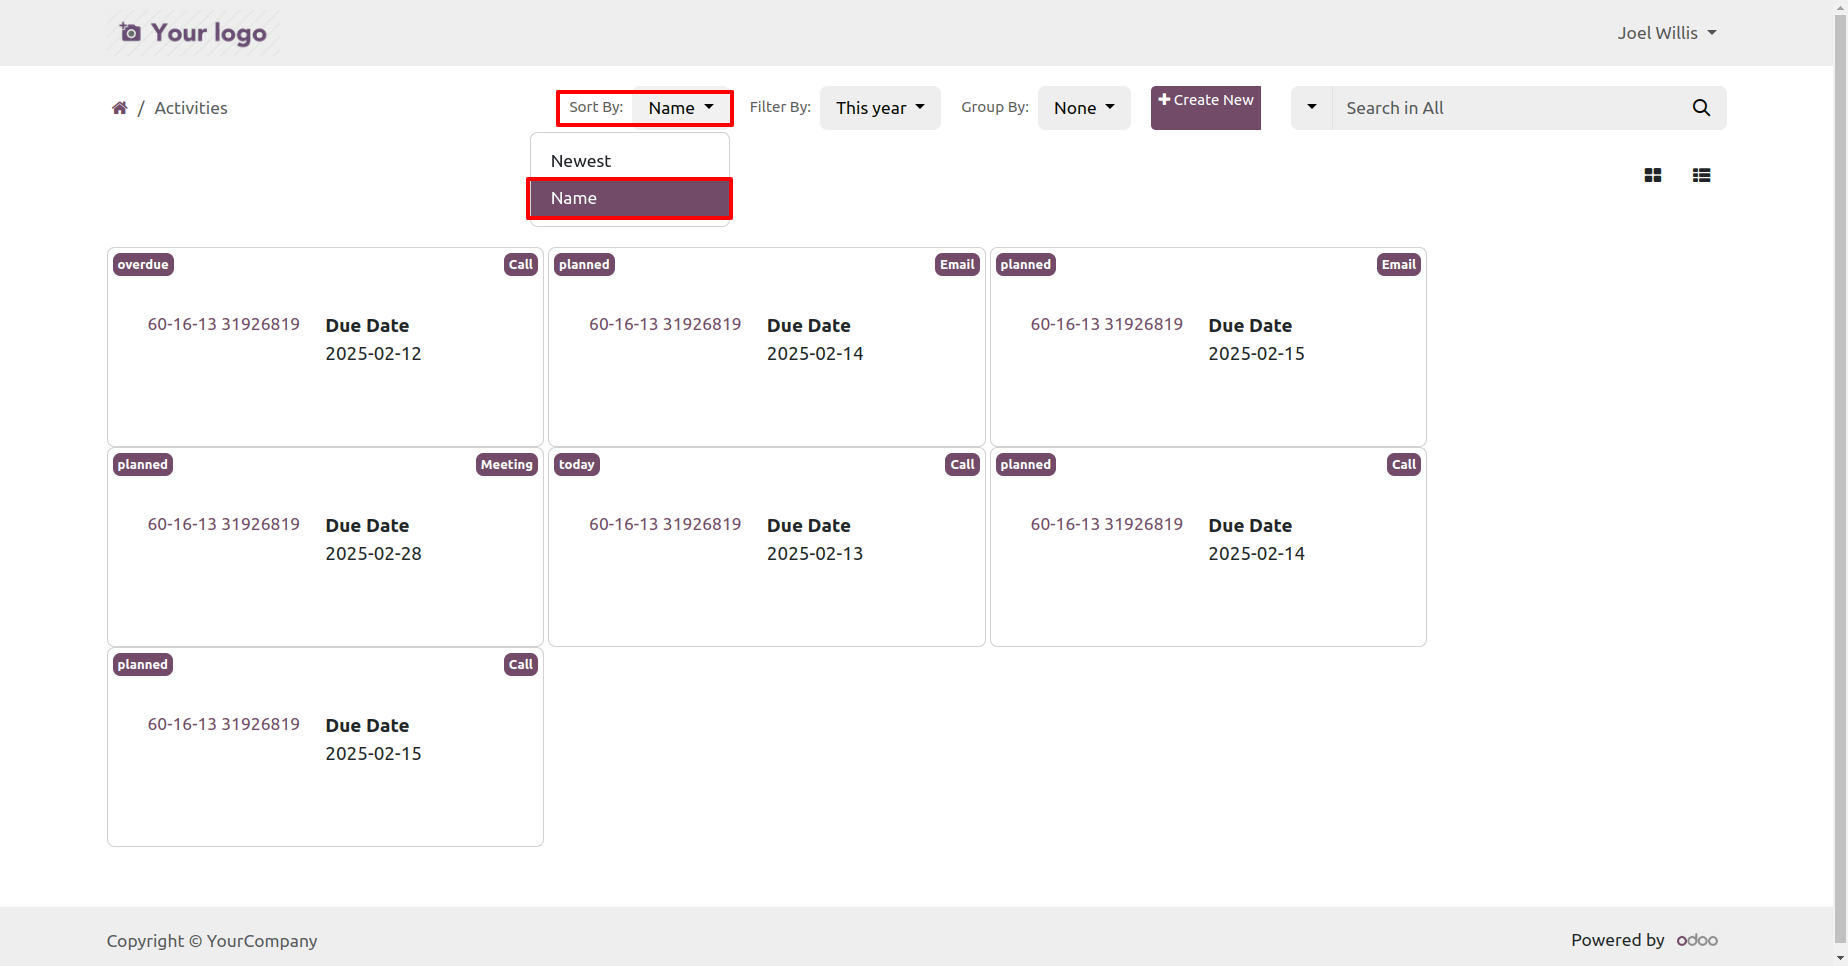
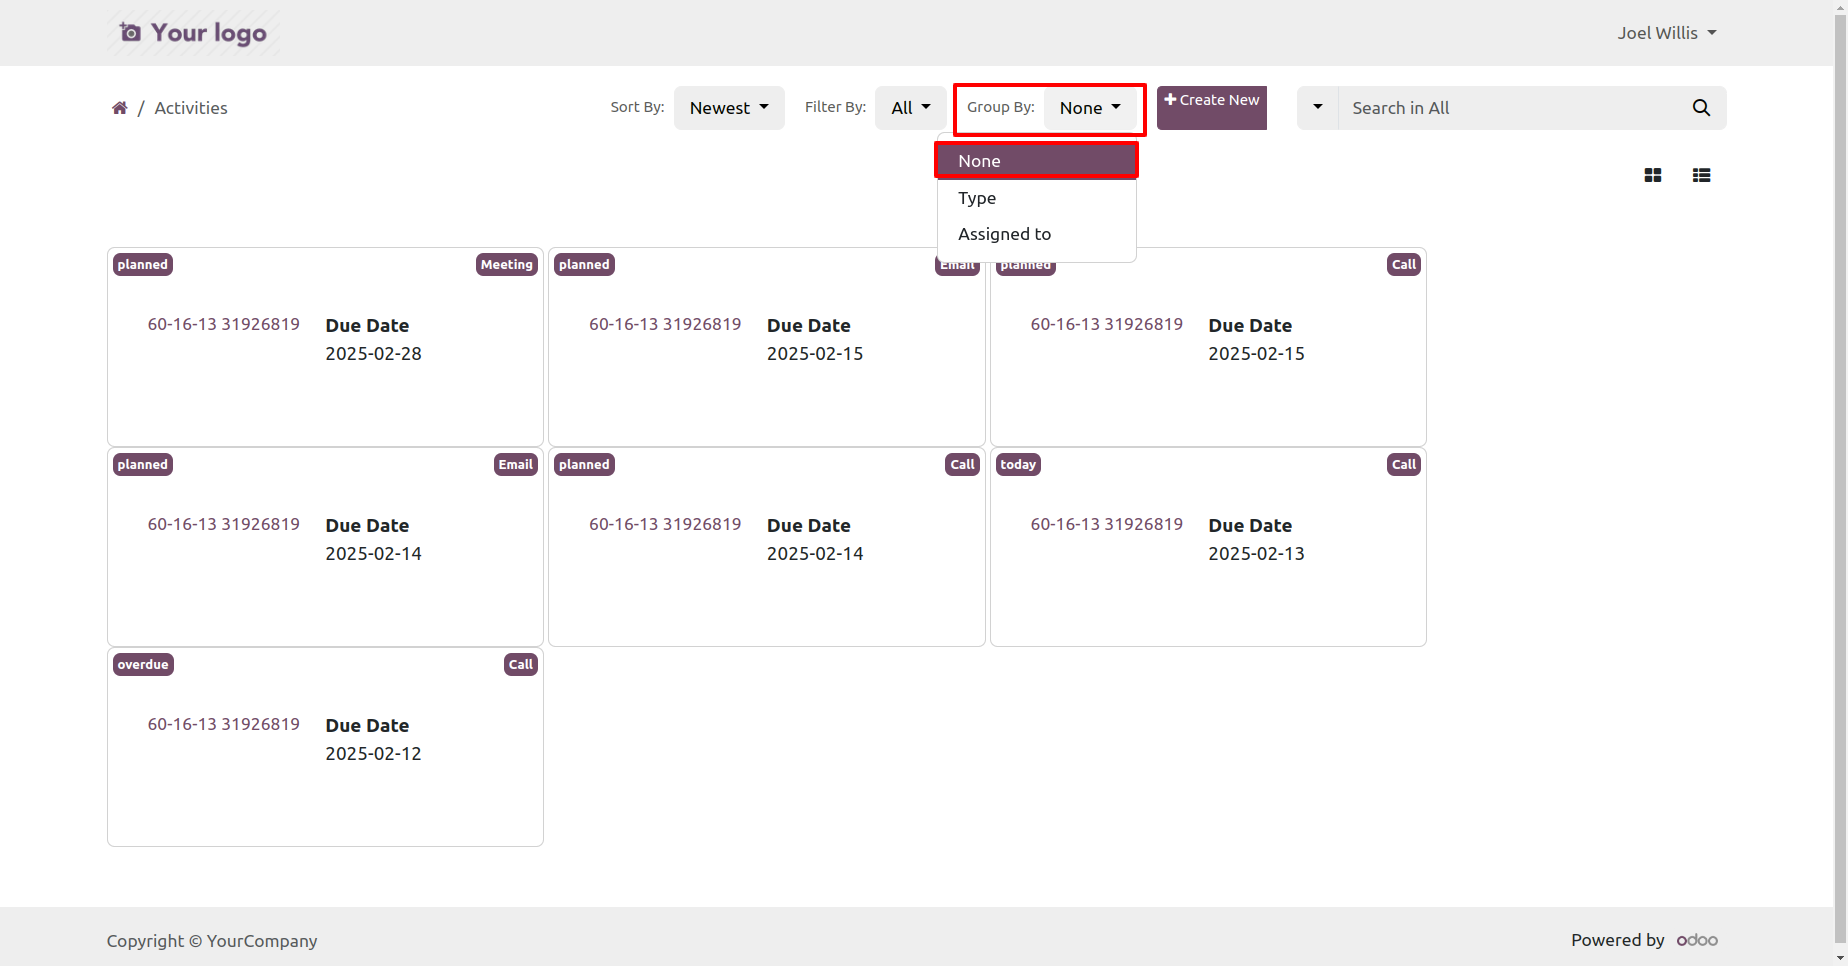
Activities group by, filter and sort by.
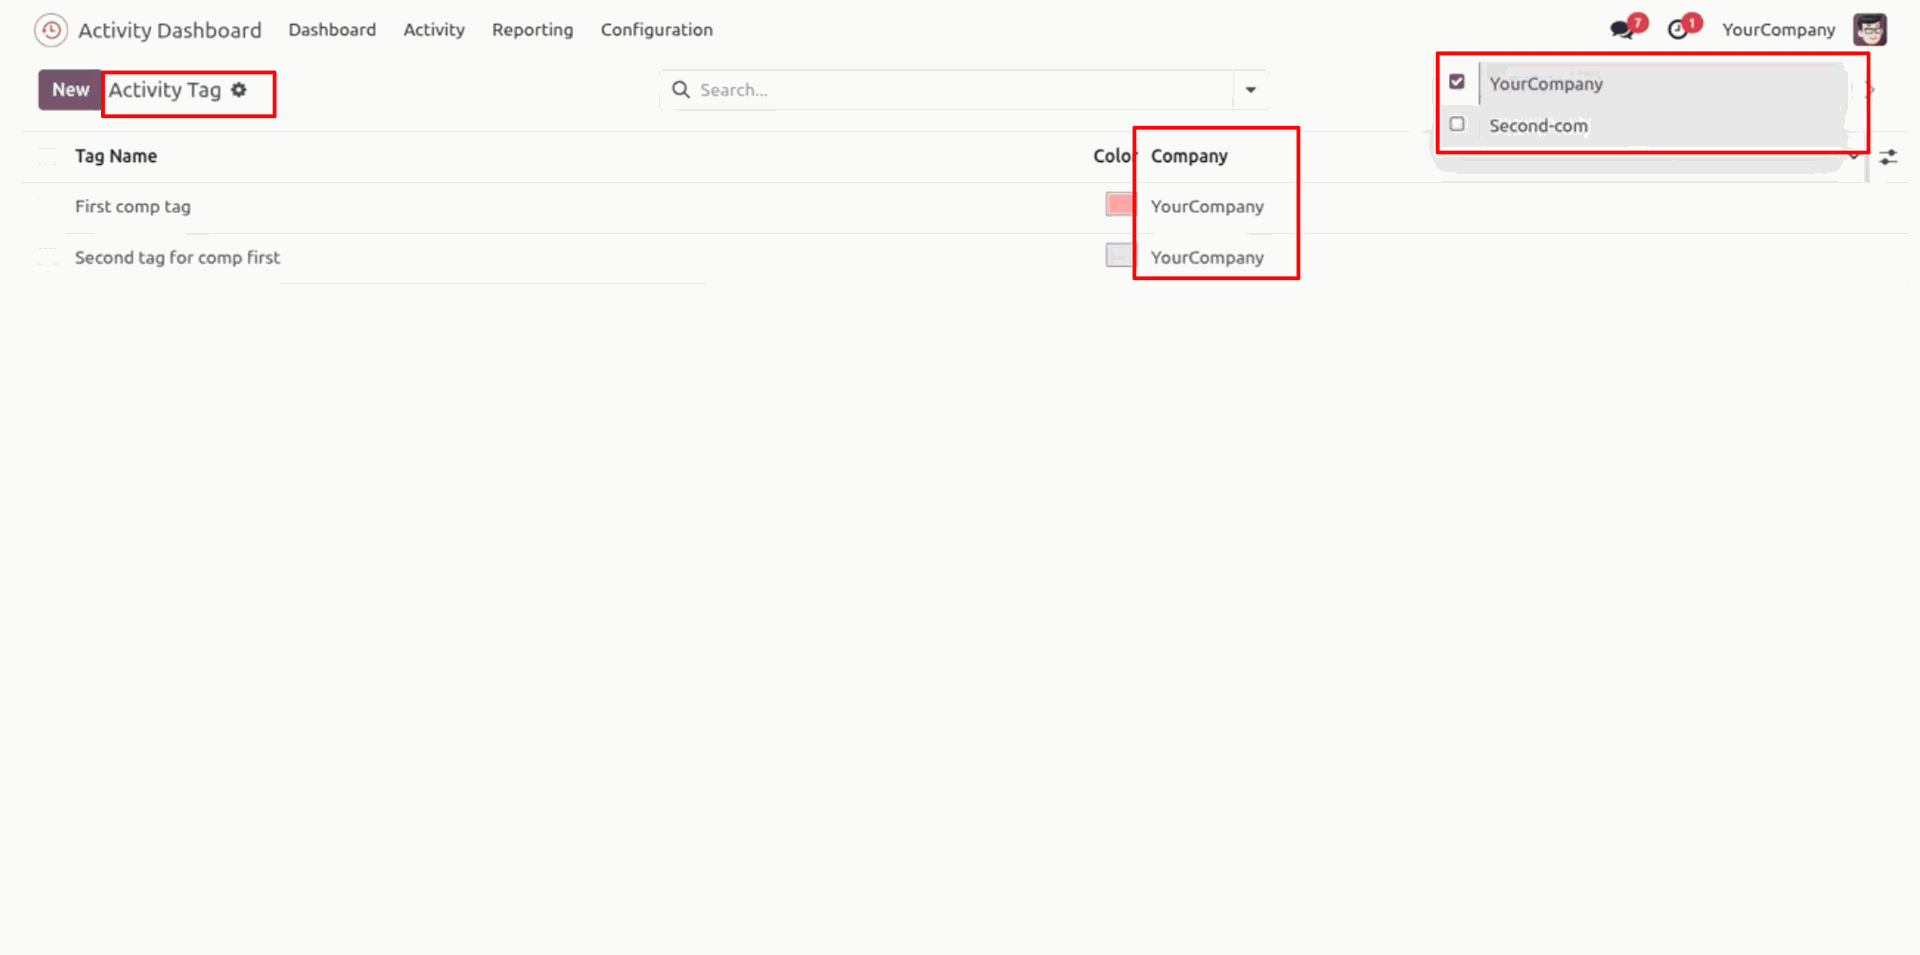
You can assign activity tags to individual companies and manage them efficiently within a multi-company environment. You can easily switch between their assigned companies or select multiple companies to view the corresponding activity tags.
The activity tags menu.
The activity tags tree view.
Create Activity tag and set tag color.
The activity tree view with the activity tags.
The activity form view with the activity tags.
You can search activities by the activity tags.
You can group by and filter activities using the tags.
You can schedule activities by activity tags. Click on
the 'Activities' button.
The schedule activity form view with the activity tag
field.
The schedule activity with the activity tags.
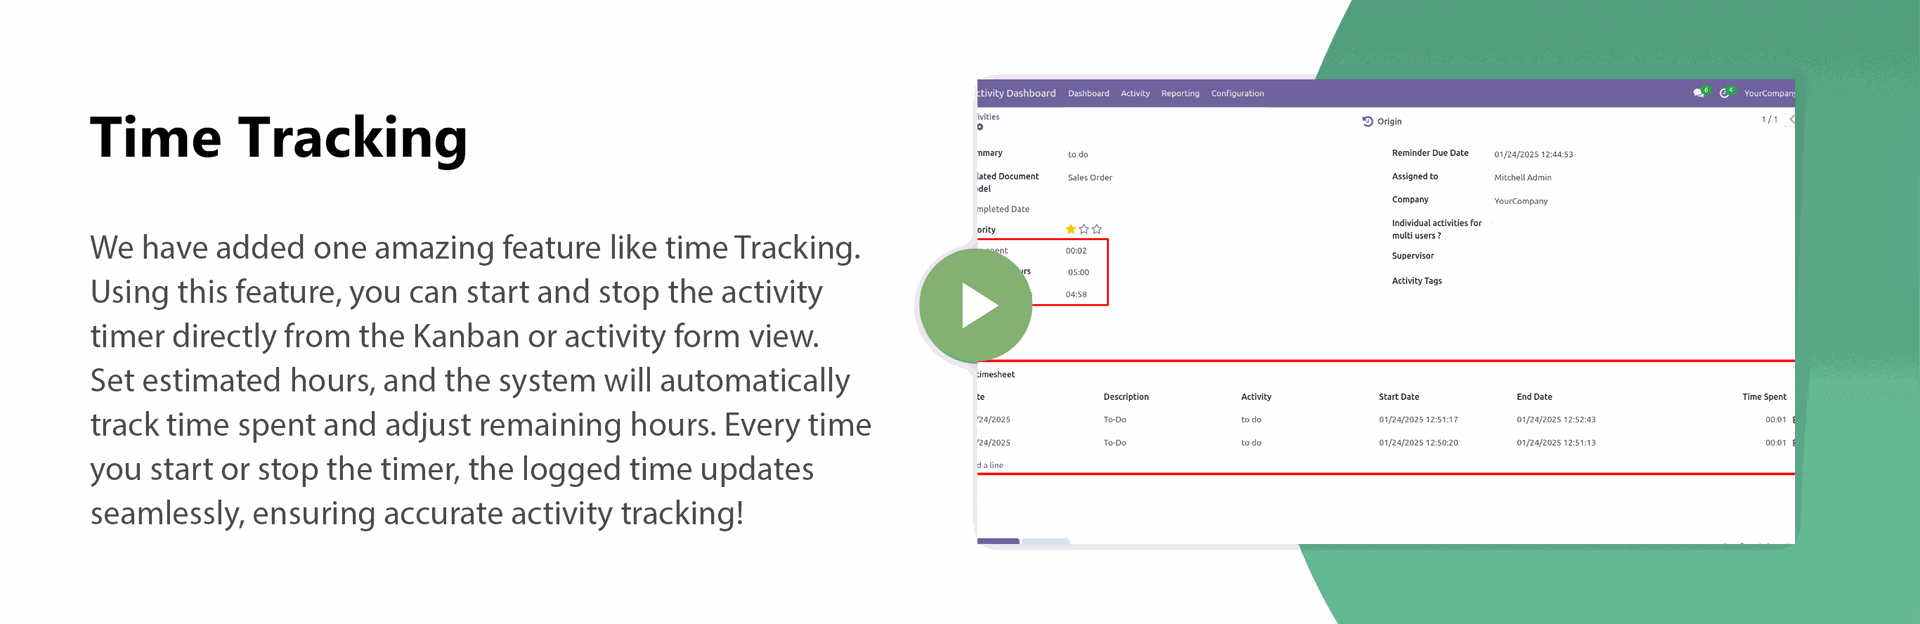
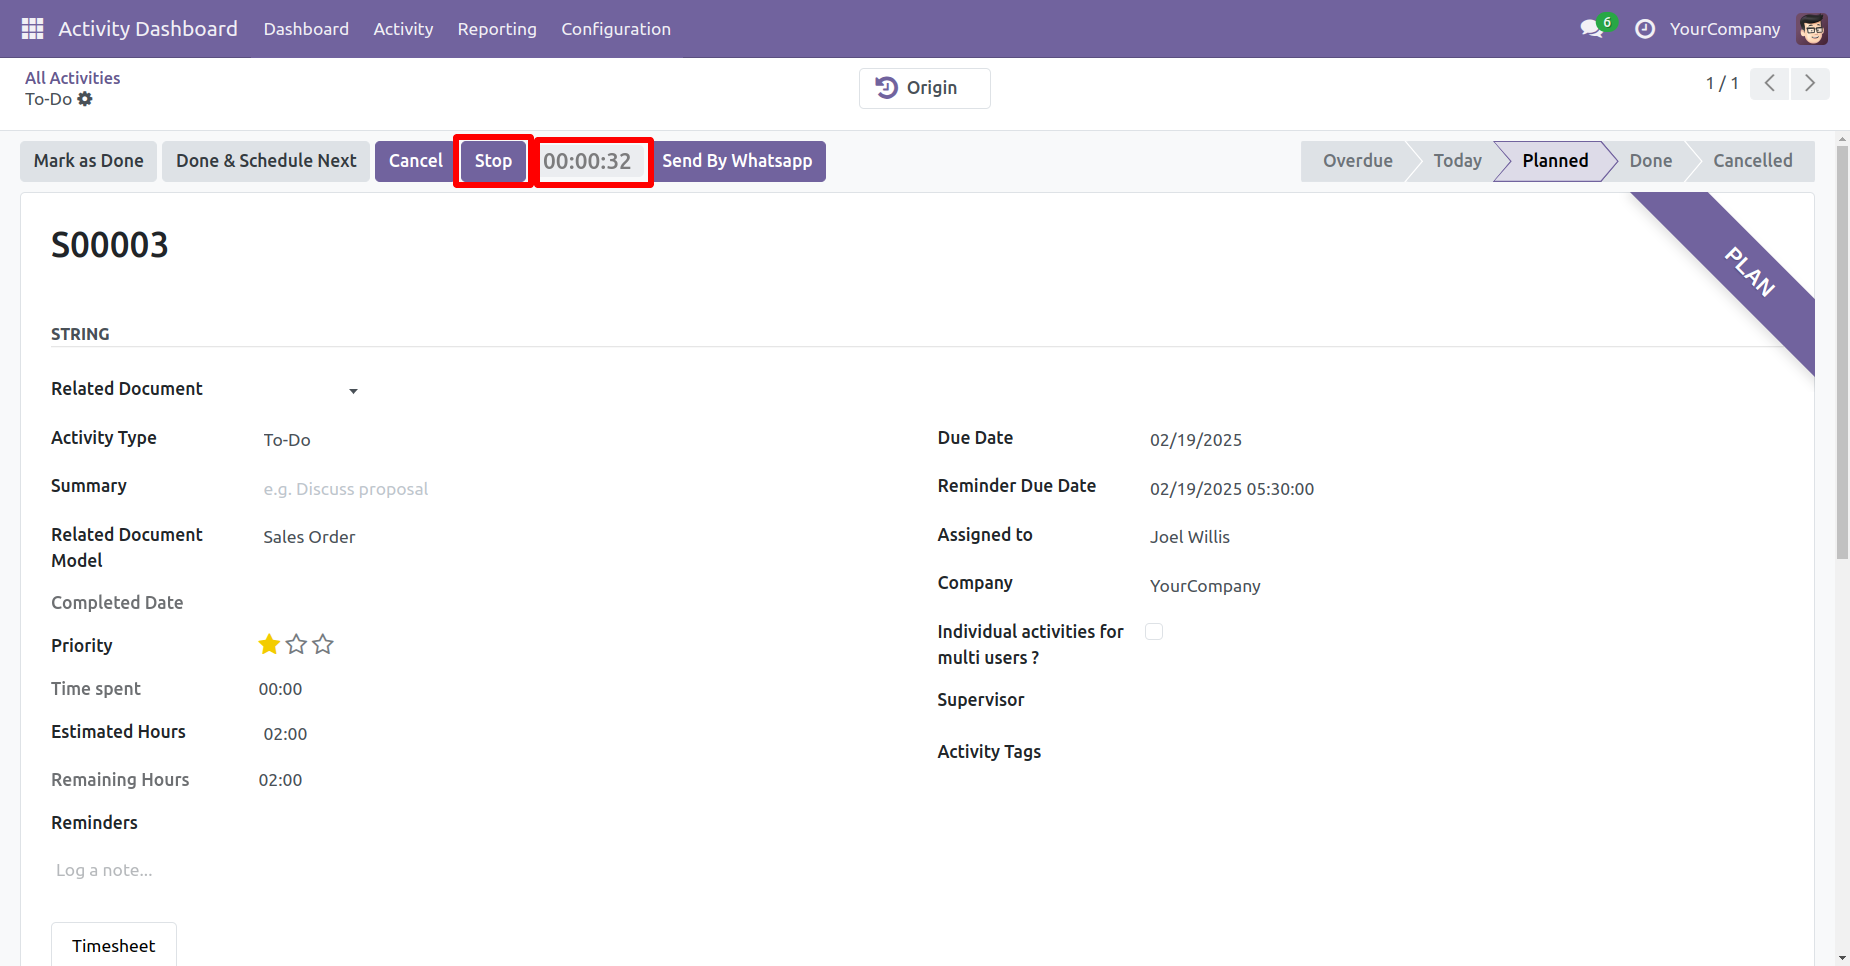
You can start the activity timer by clicking on the 'Start' button.
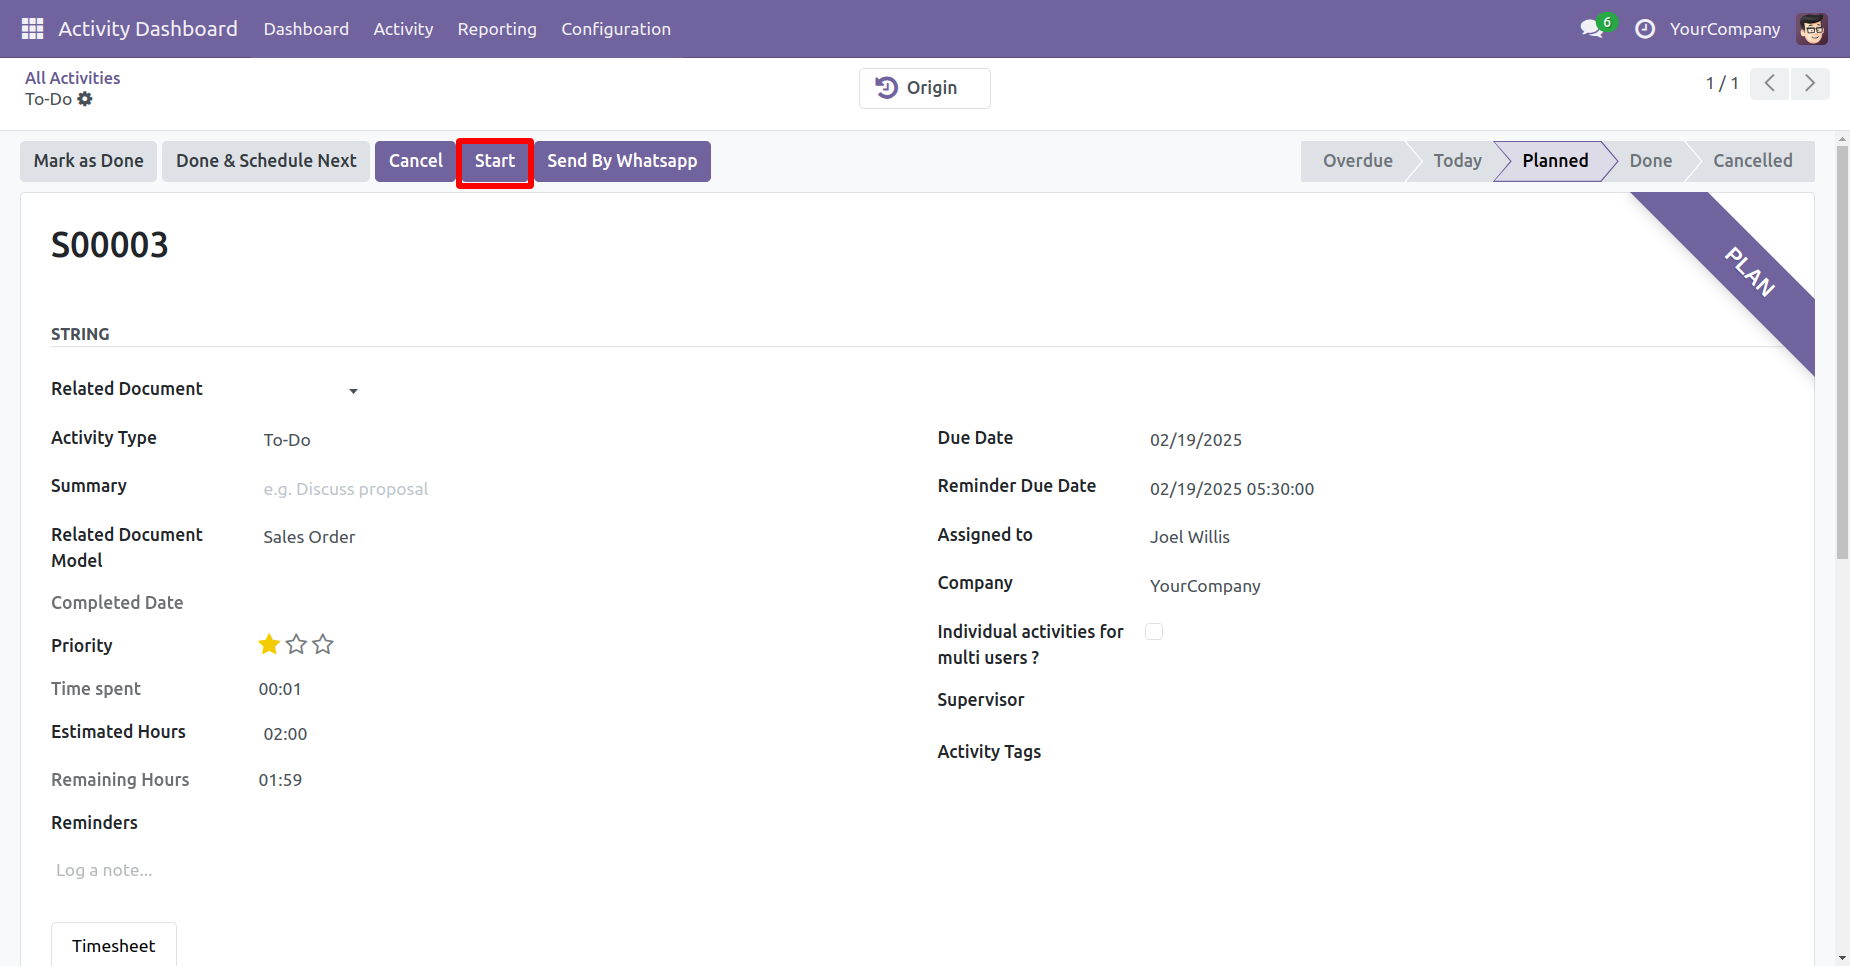
The running timer is displayed here.
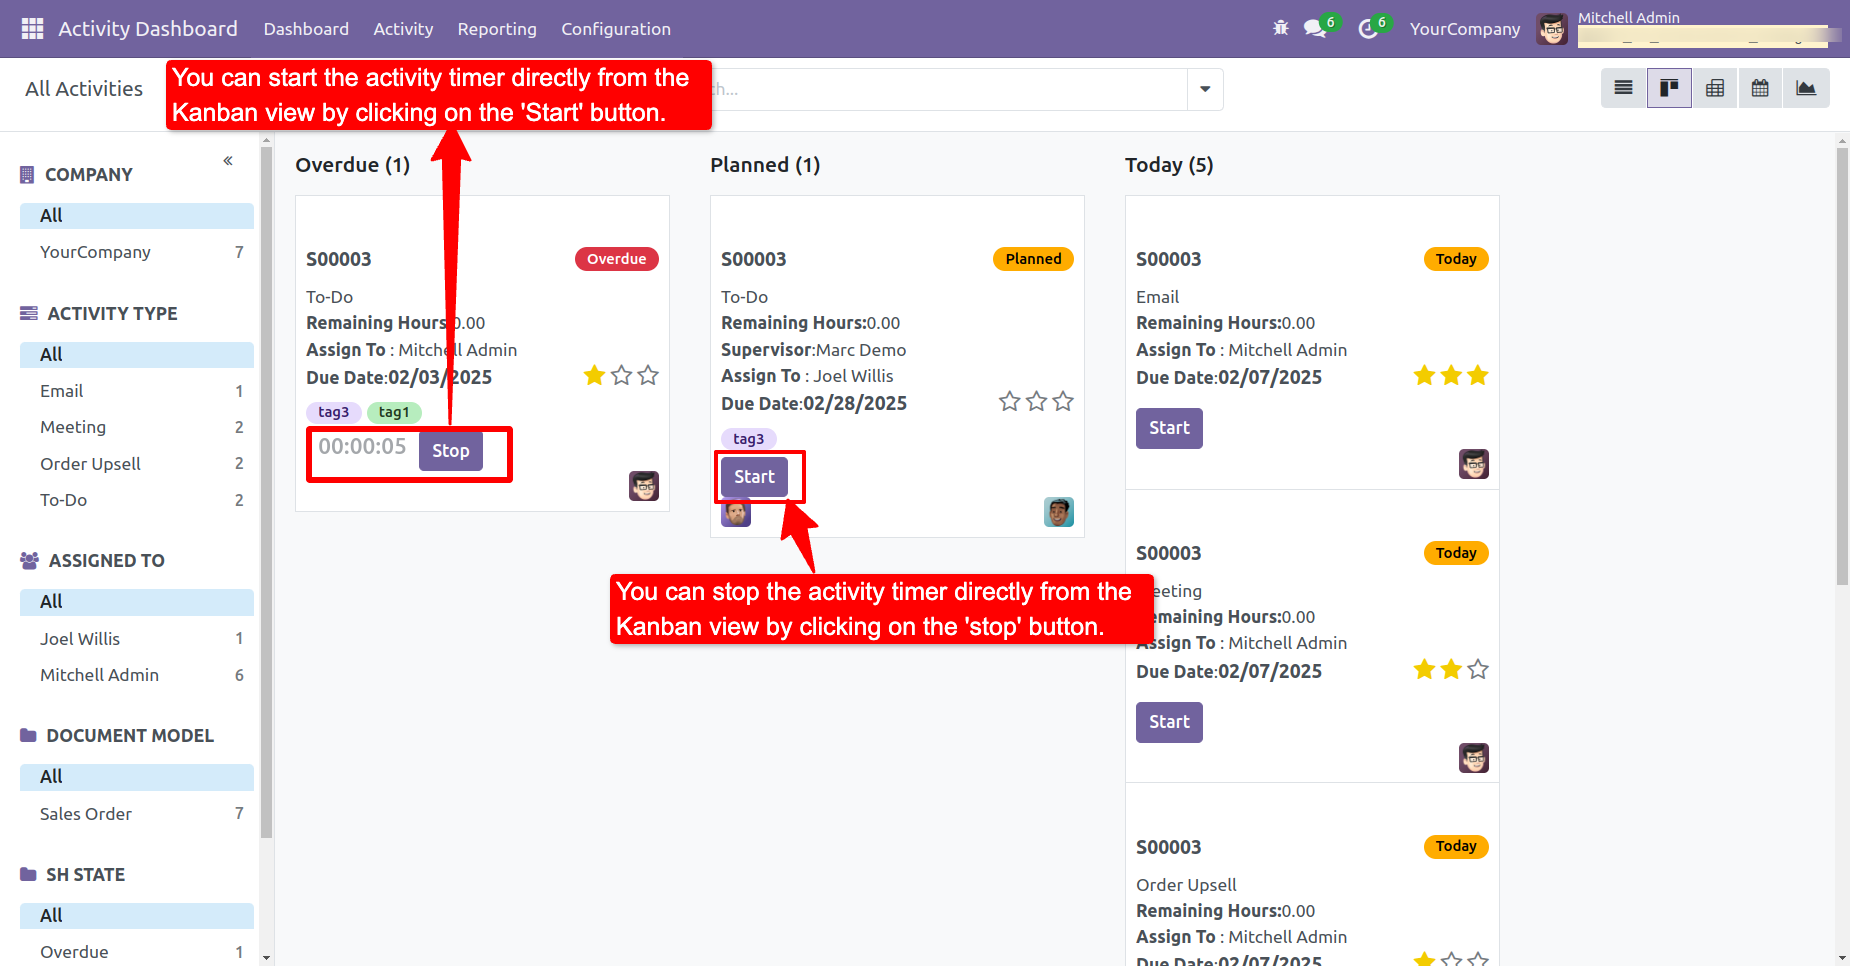
You can start or stop the activity timer directly from the Kanban view.
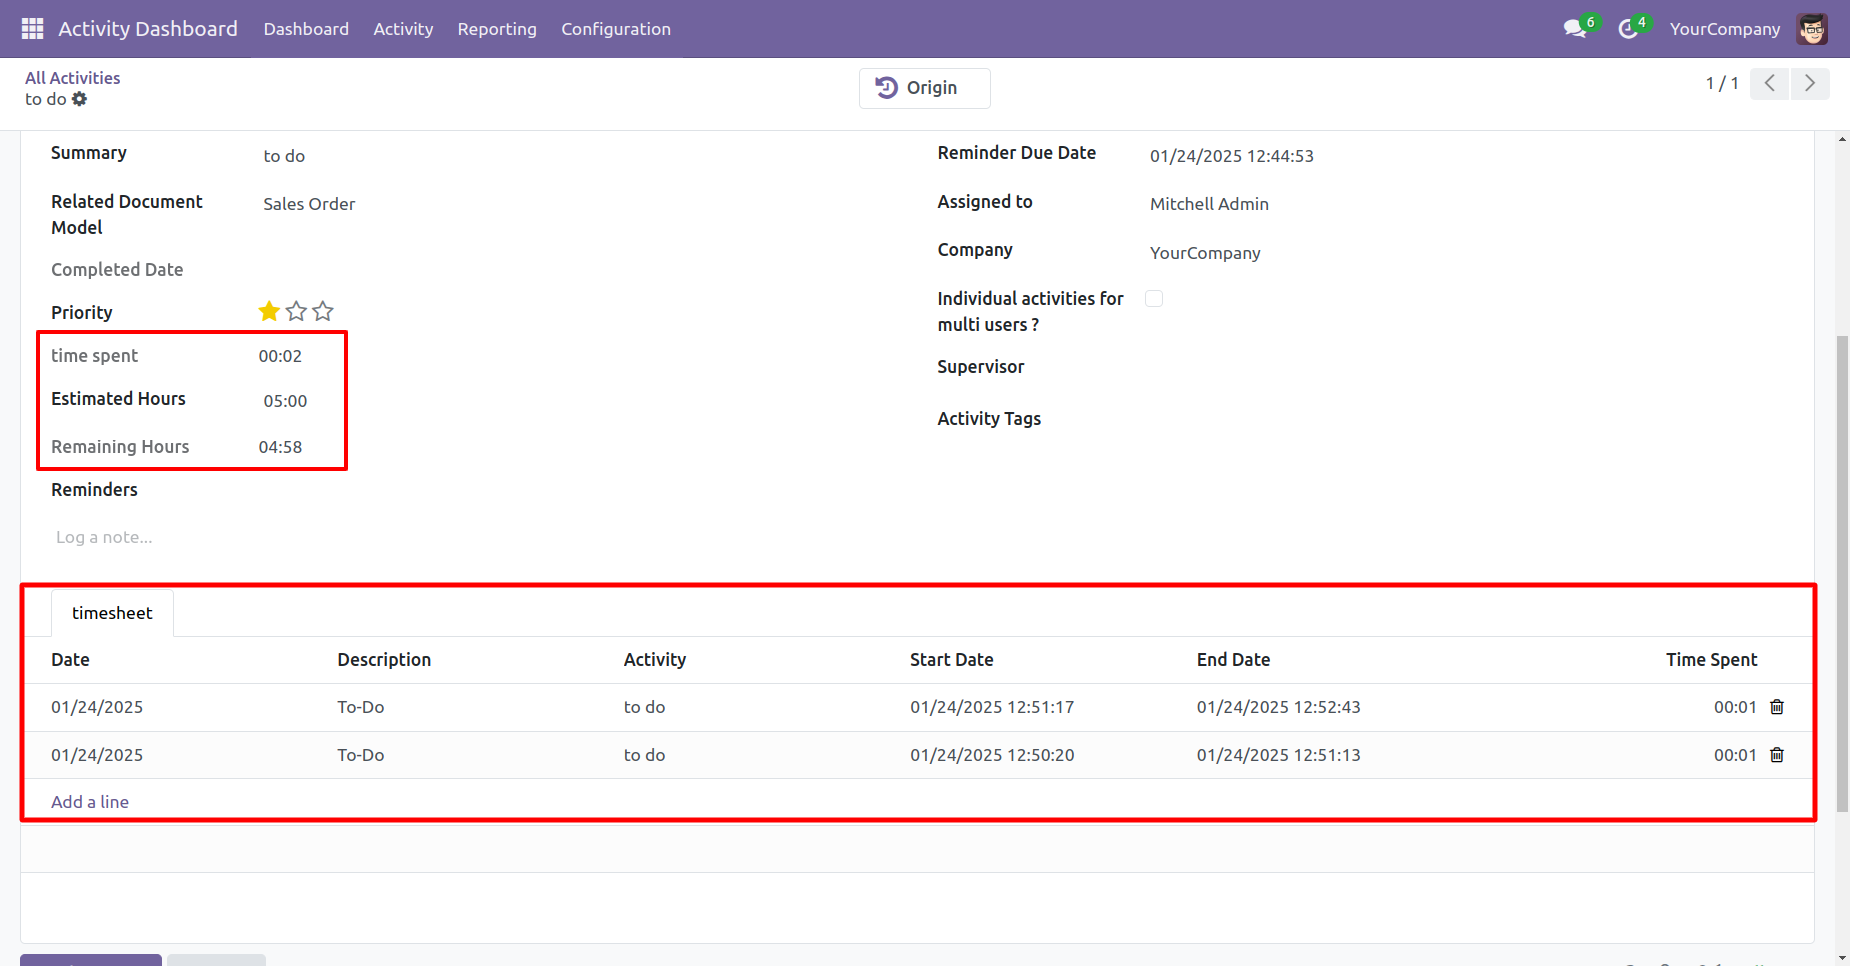
You can set estimated hours for an activity. Each time the user starts or stops the timer, the tracked time is added to the total time spent. The system then automatically calculates the remaining hours based on the estimated hours and the time already spent.
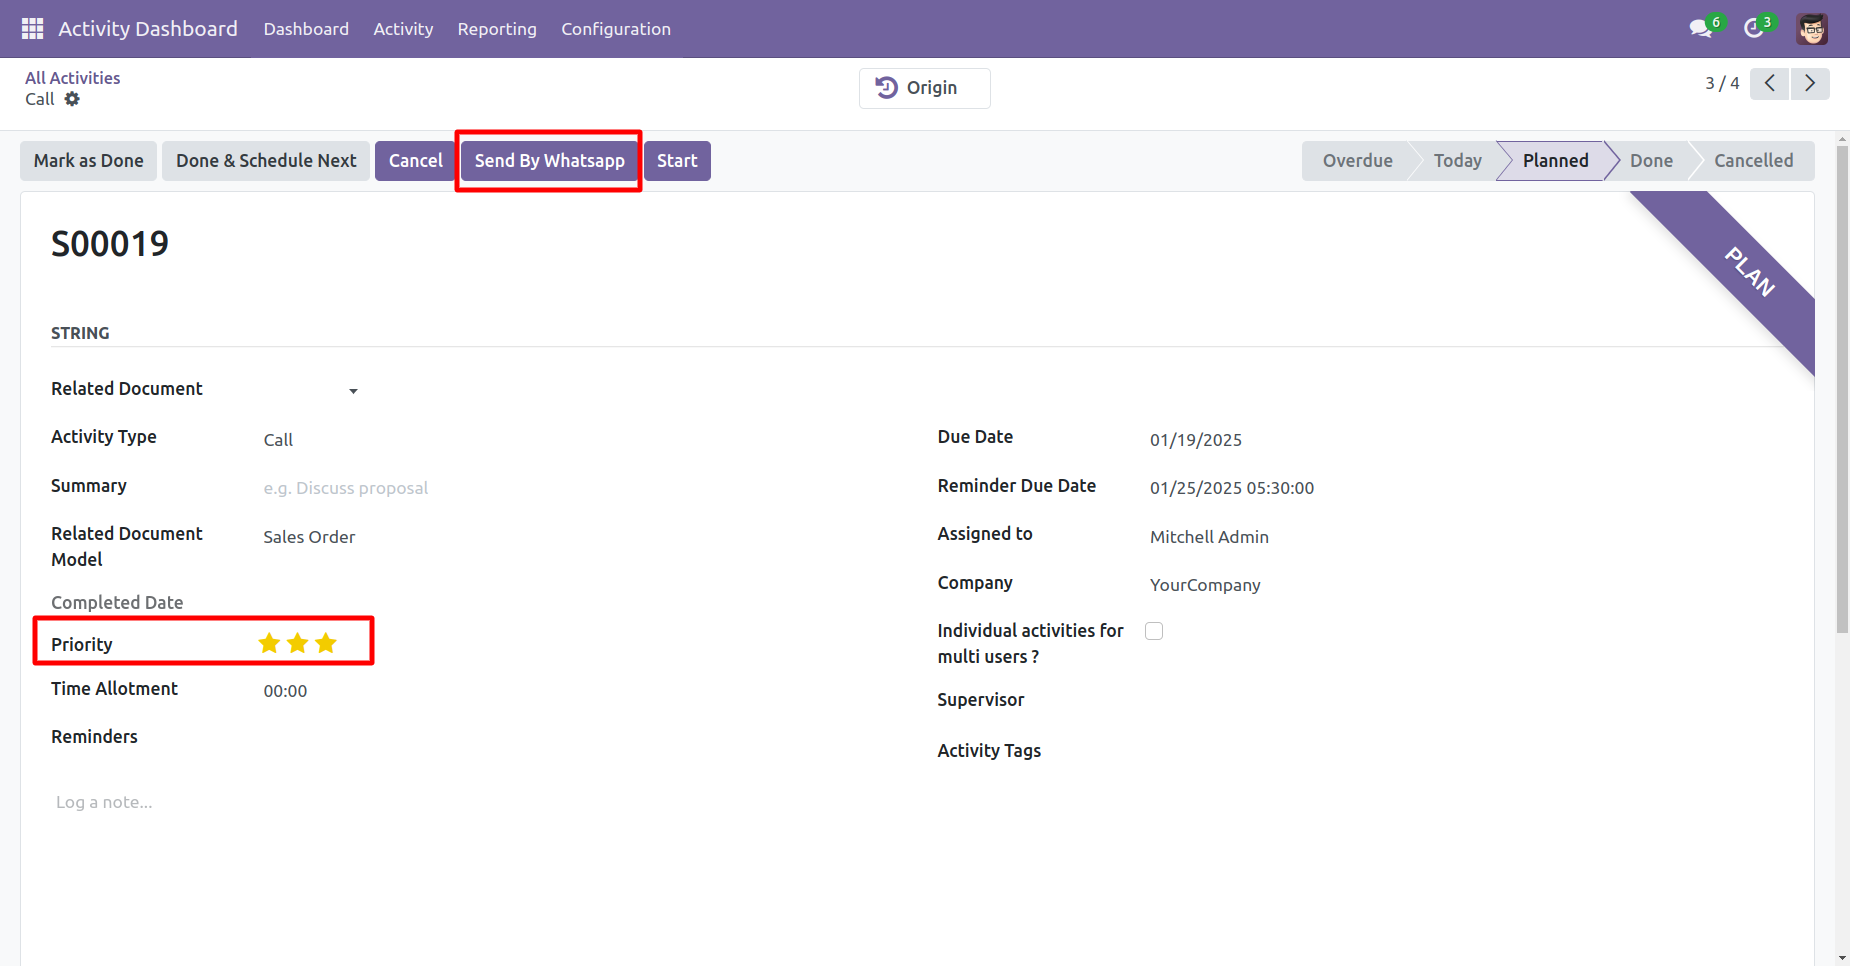
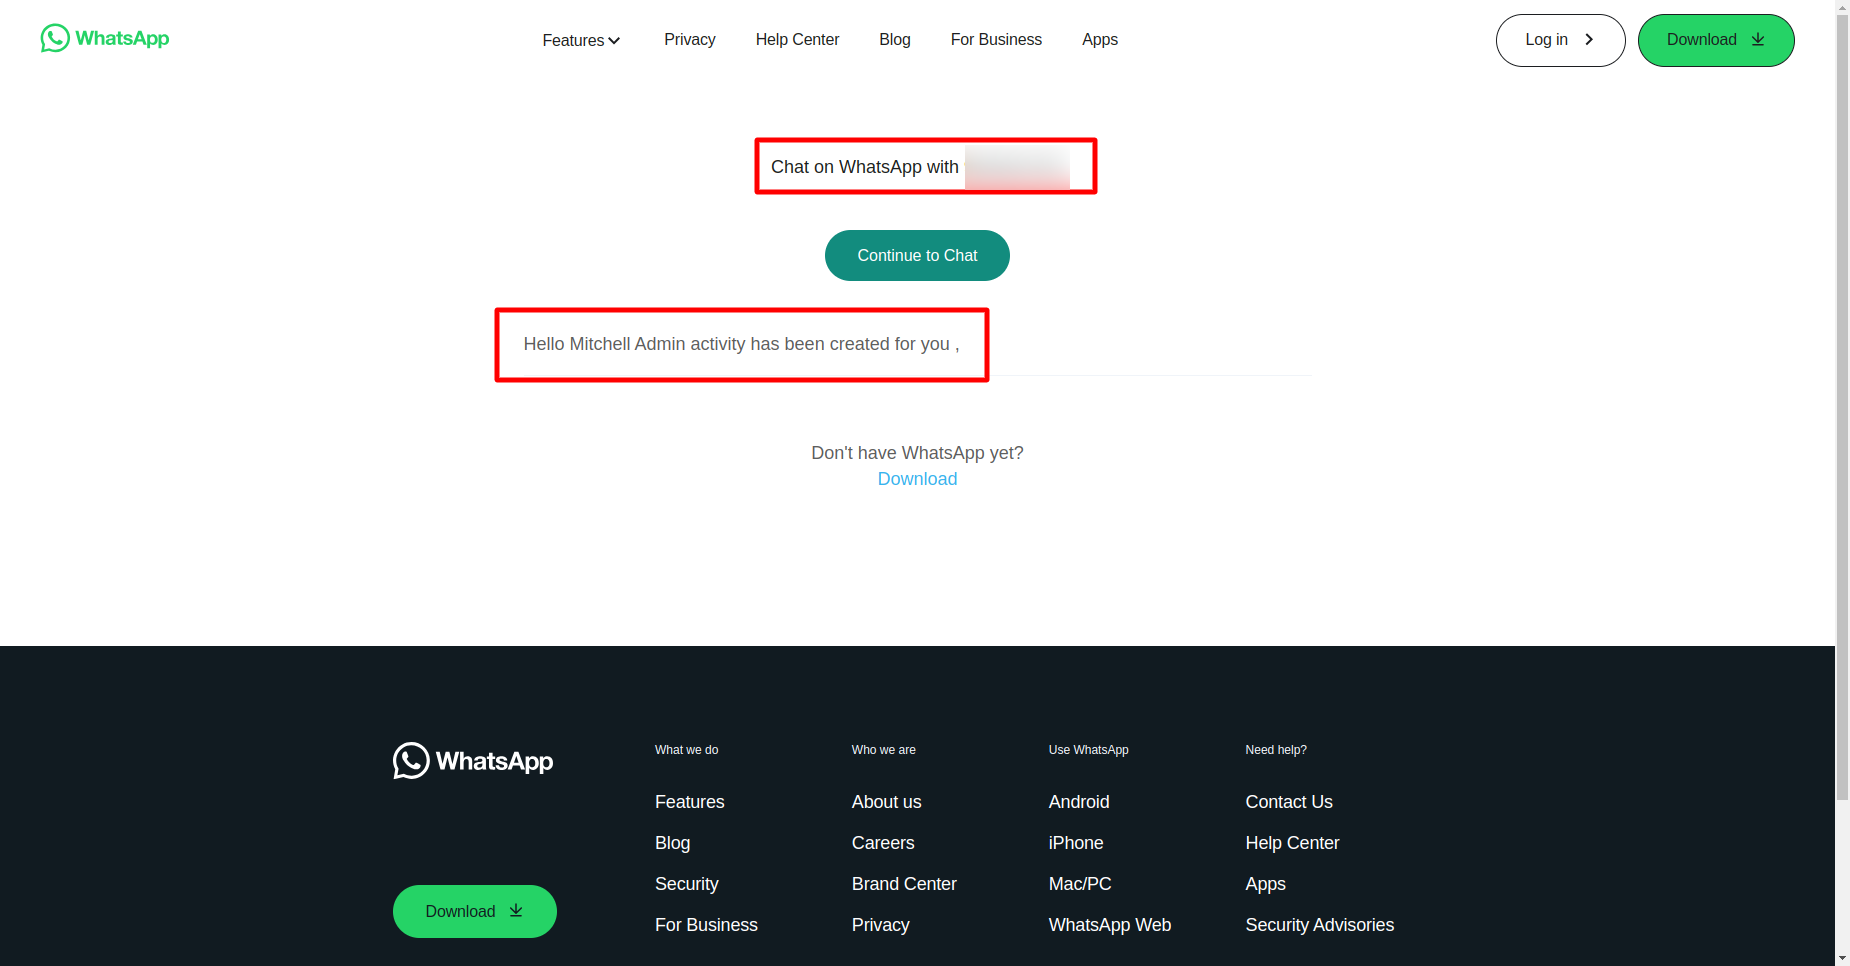
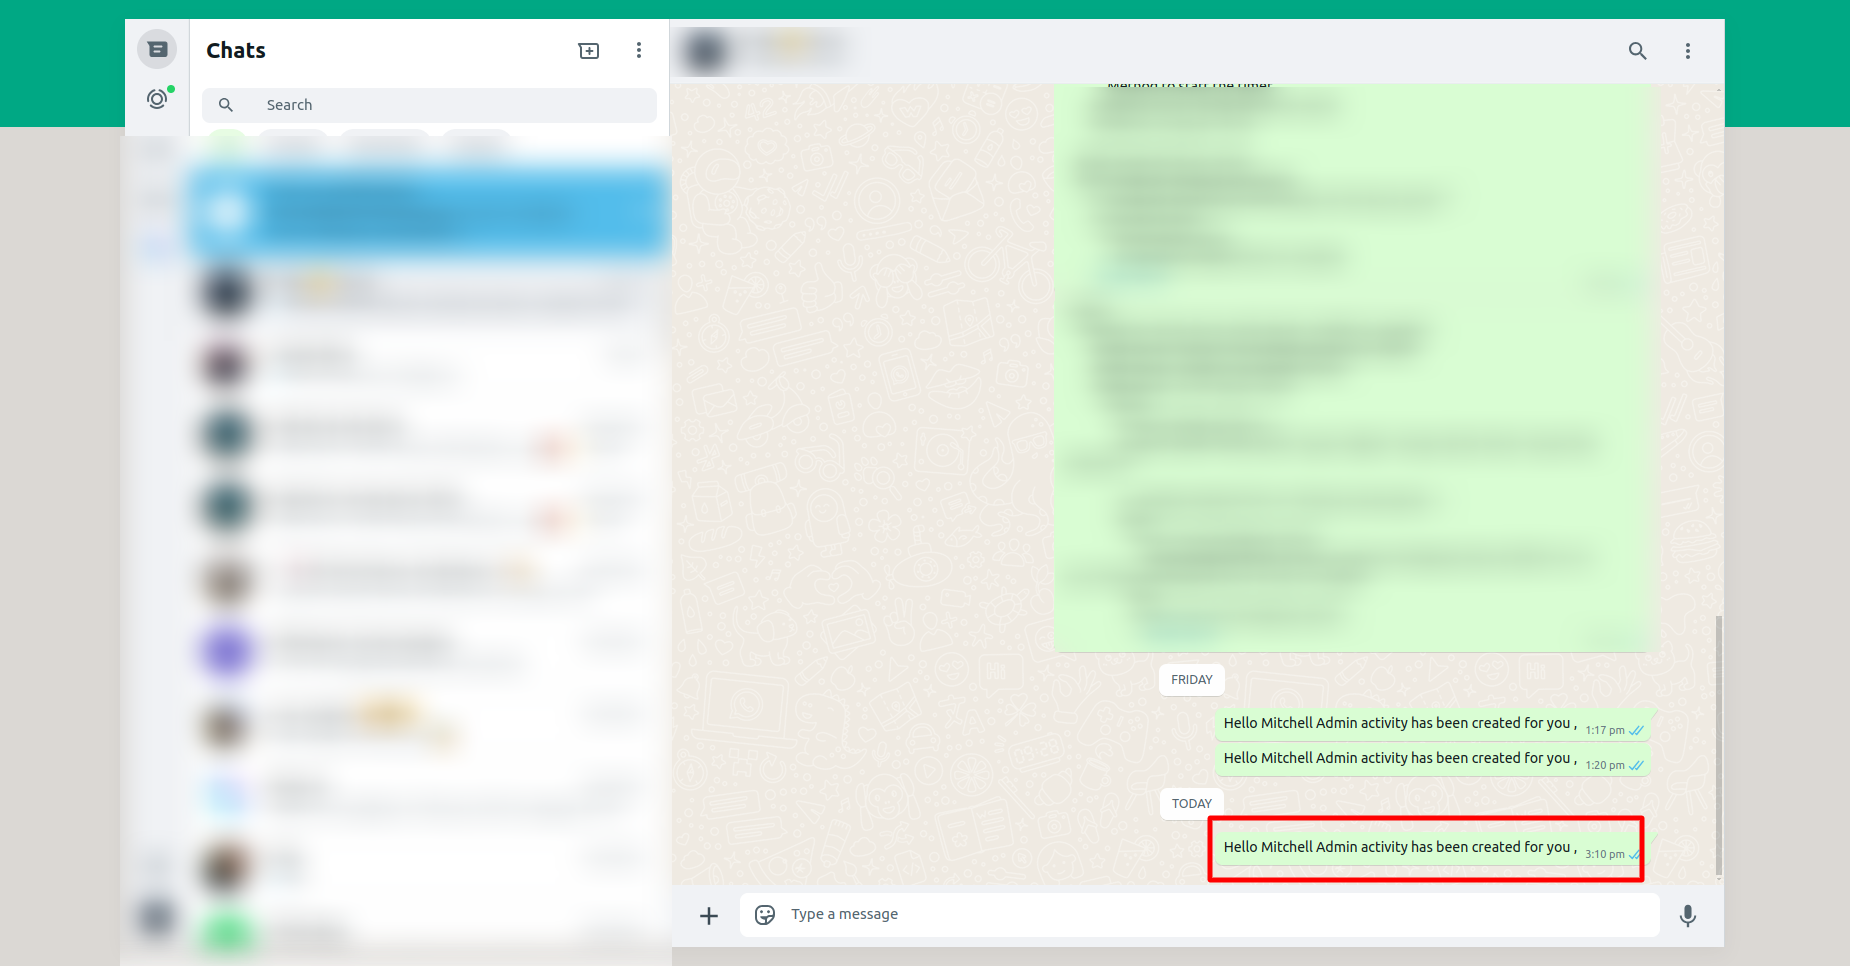
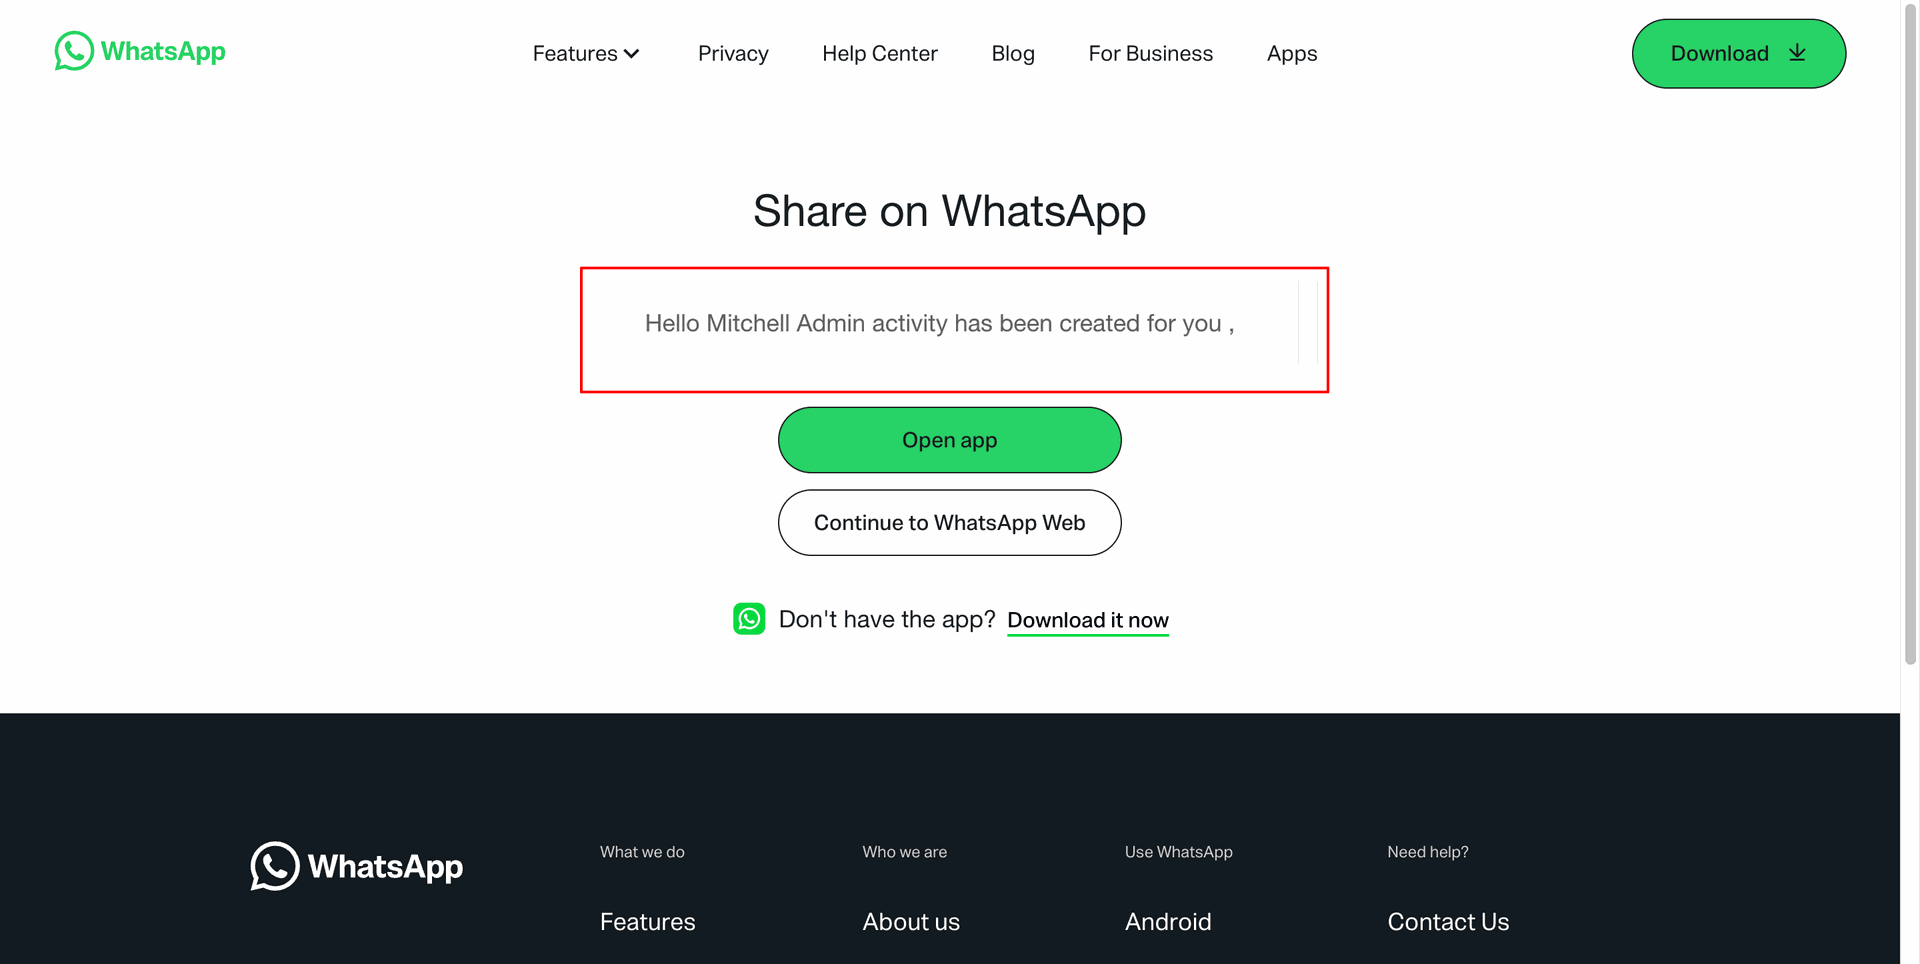
To share an activity via WhatsApp, click the 'Send via WhatsApp' button.
This is the output shown in the WhatsApp web and WhatsApp messenger..
Cancel Activity Popup
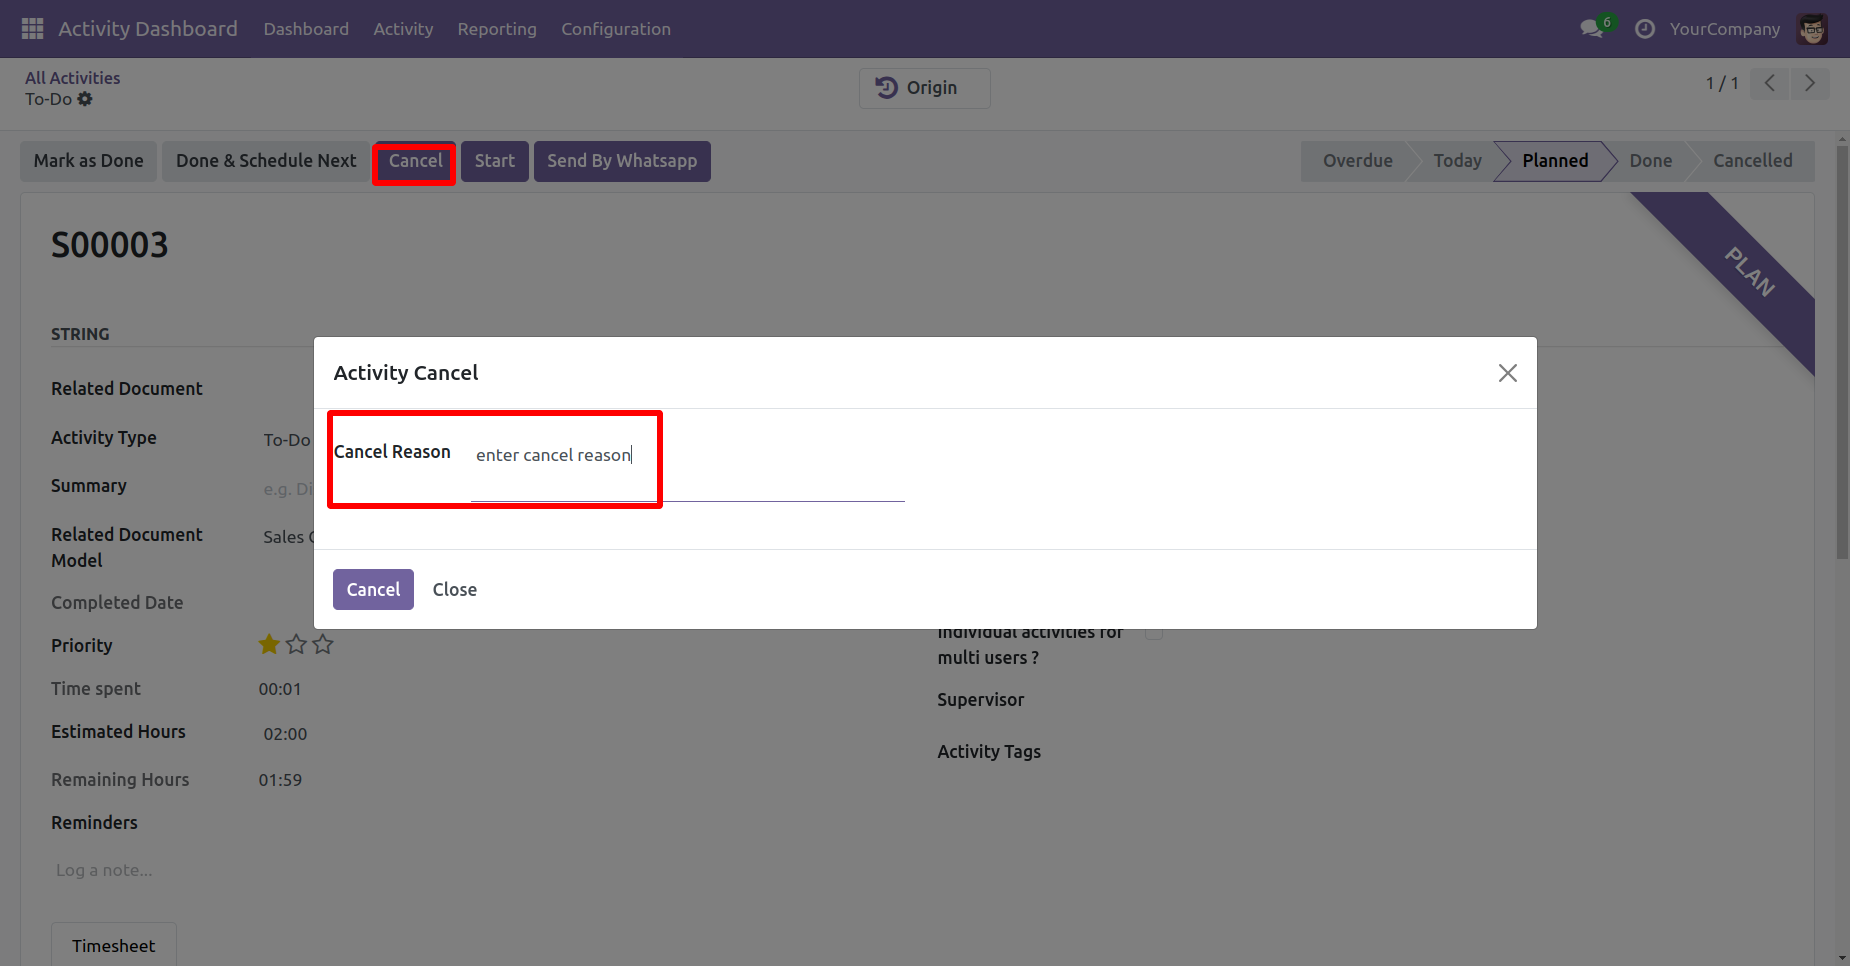
To cancel the activity, click the
'Cancel' button.
Provide a cancellation reason in the
'Activity Cancel' wizard and then click
'Cancel' button.
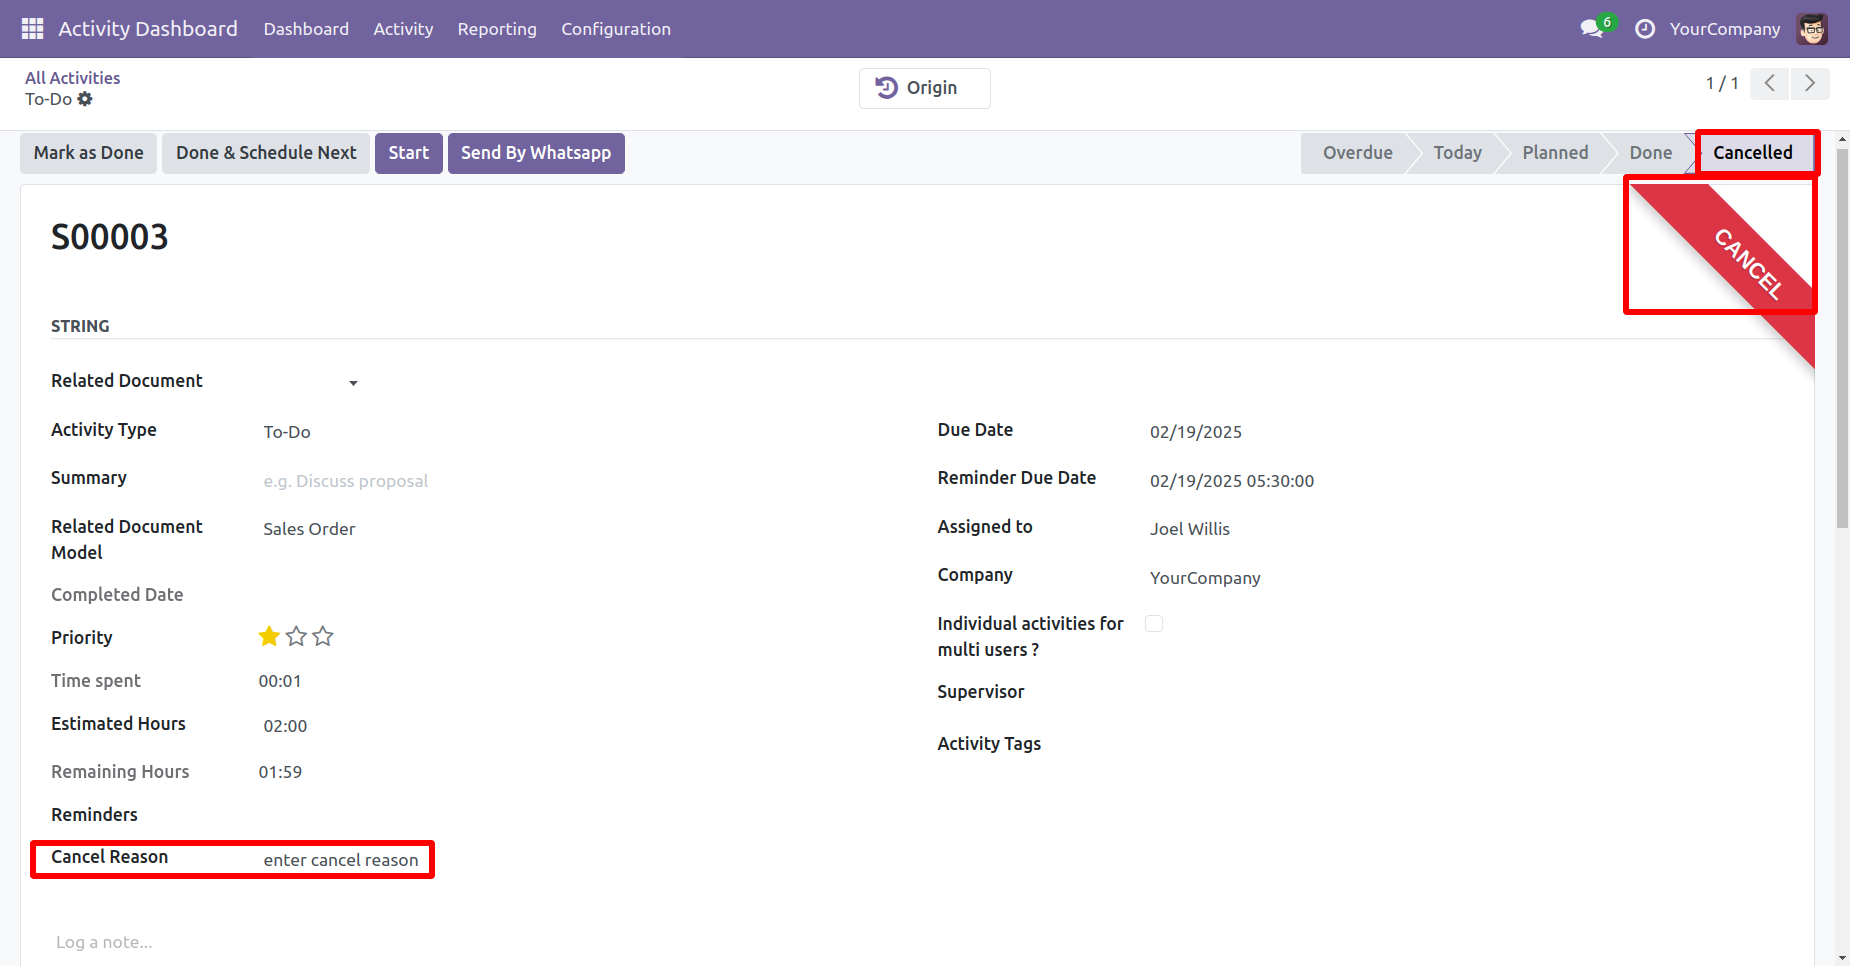
The cancellation reason is displayed in the activity form view.
Priority
The priority is visible in the activity form view.
Display Ribbon
The activity form view displays a ribbon indicating the current status of the activity.
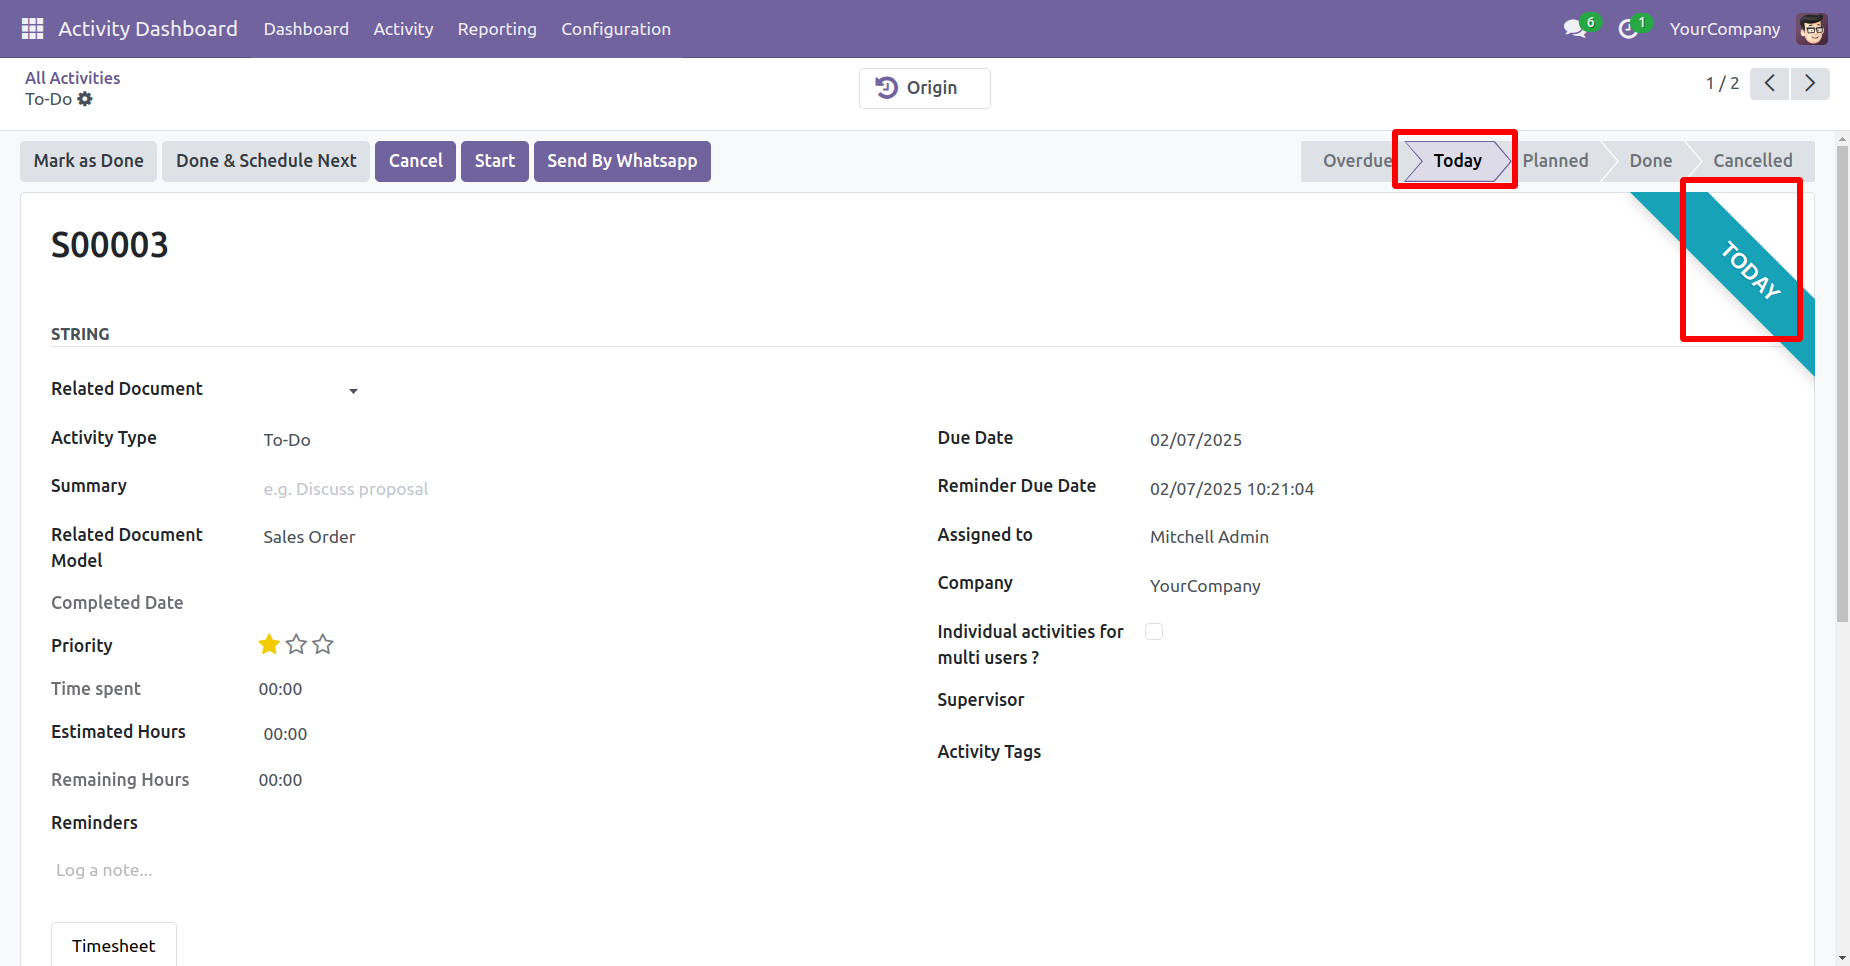
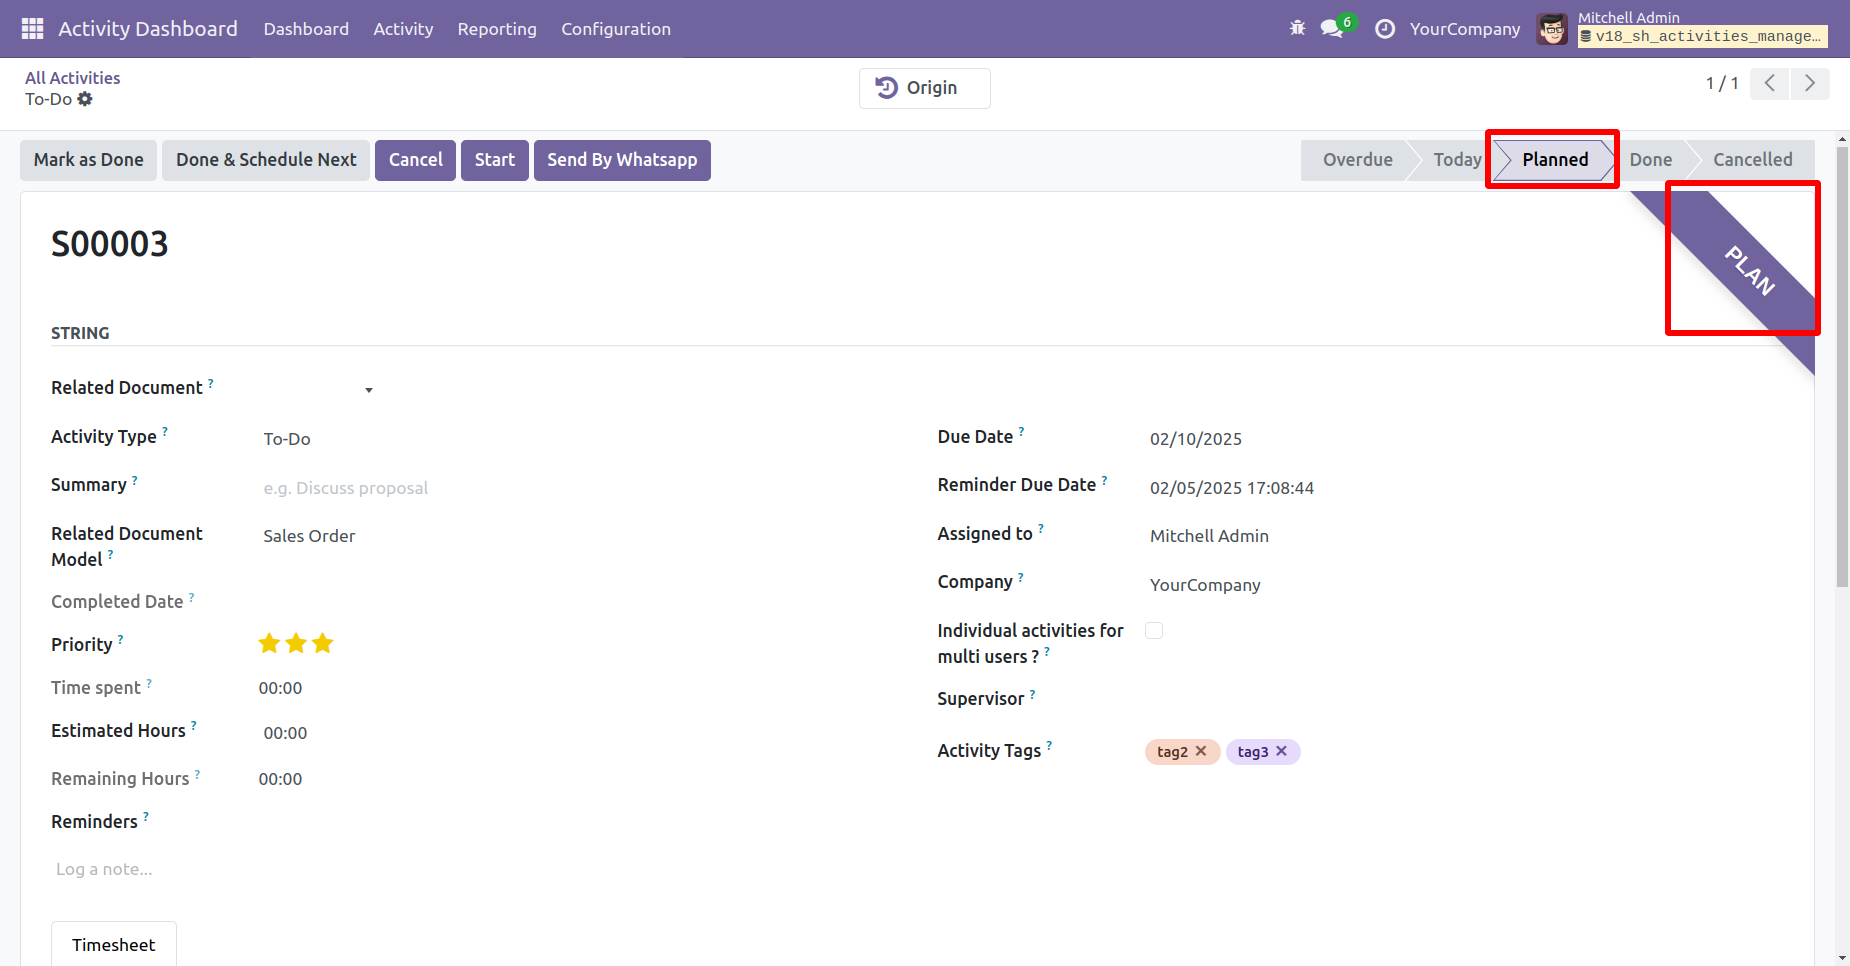
The activity form view displays a ribbon indicating the current status of the activity.
Chatter box
The chatter displays the history of assigned users.
Cancel button & related document added in the activity form view.
Cancel state & document name in the activity form view.
You can do multiple activities "Mark as done" and "Cancel" from the activity tree view.
You can filter 'Cancelled Activities'.
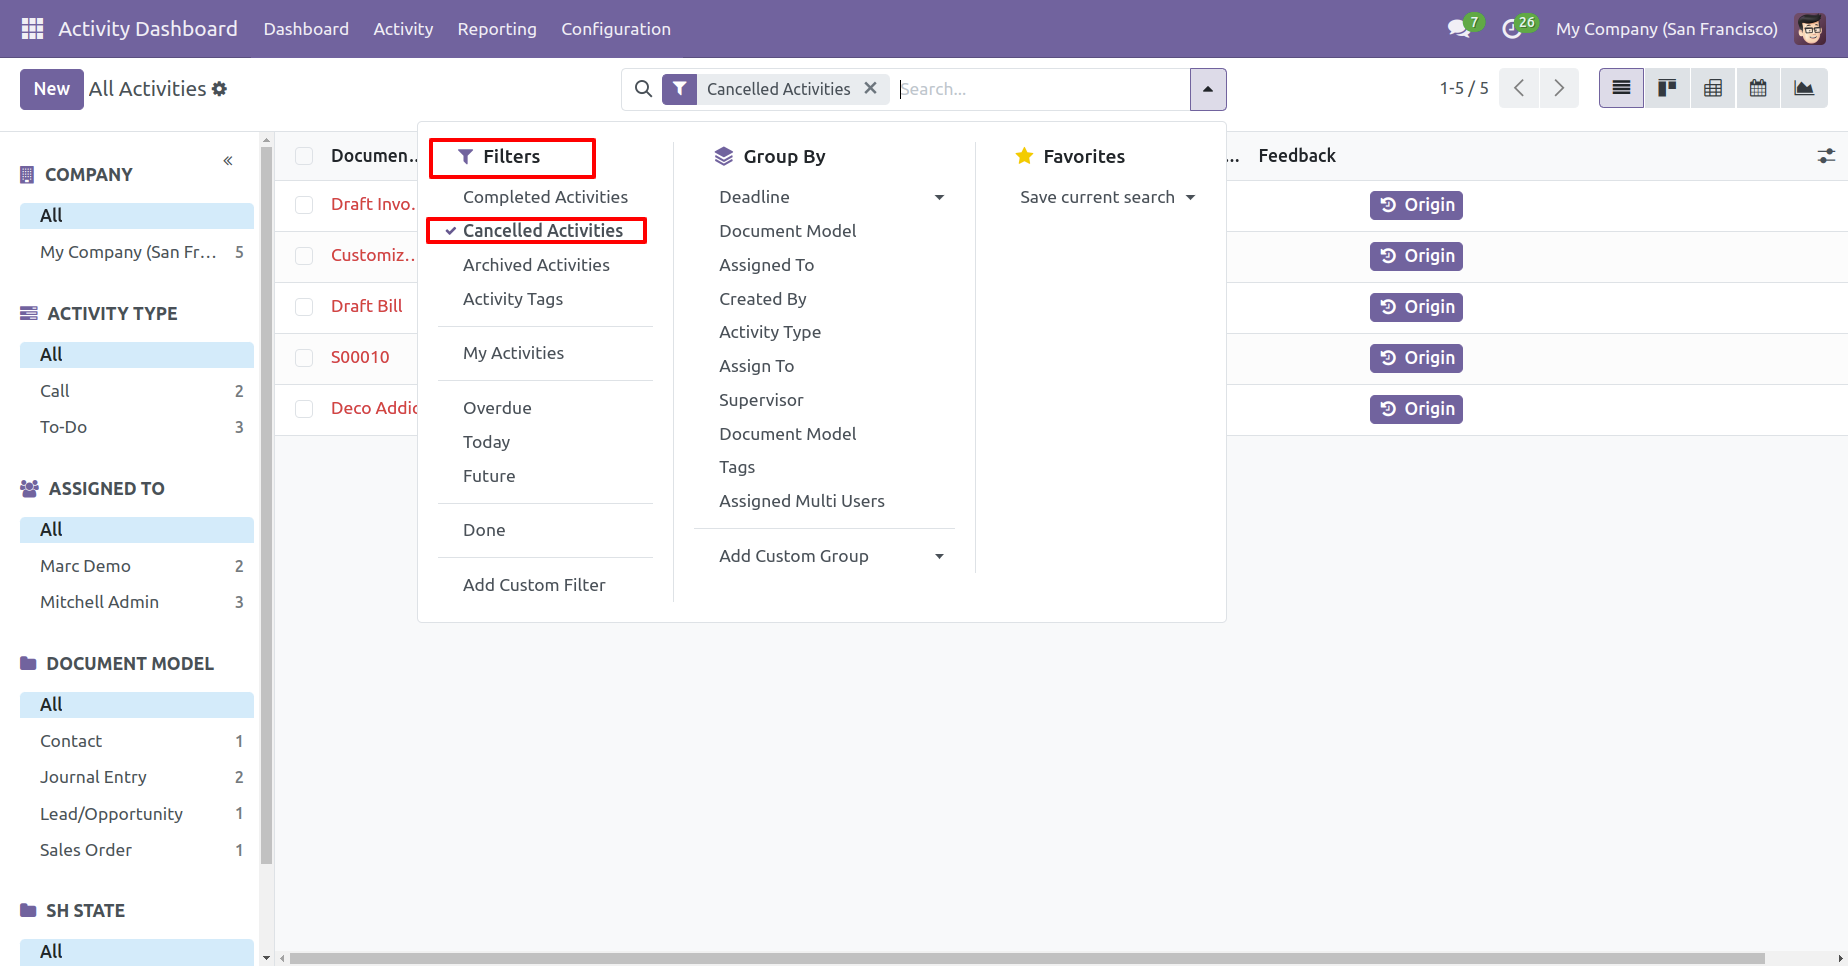
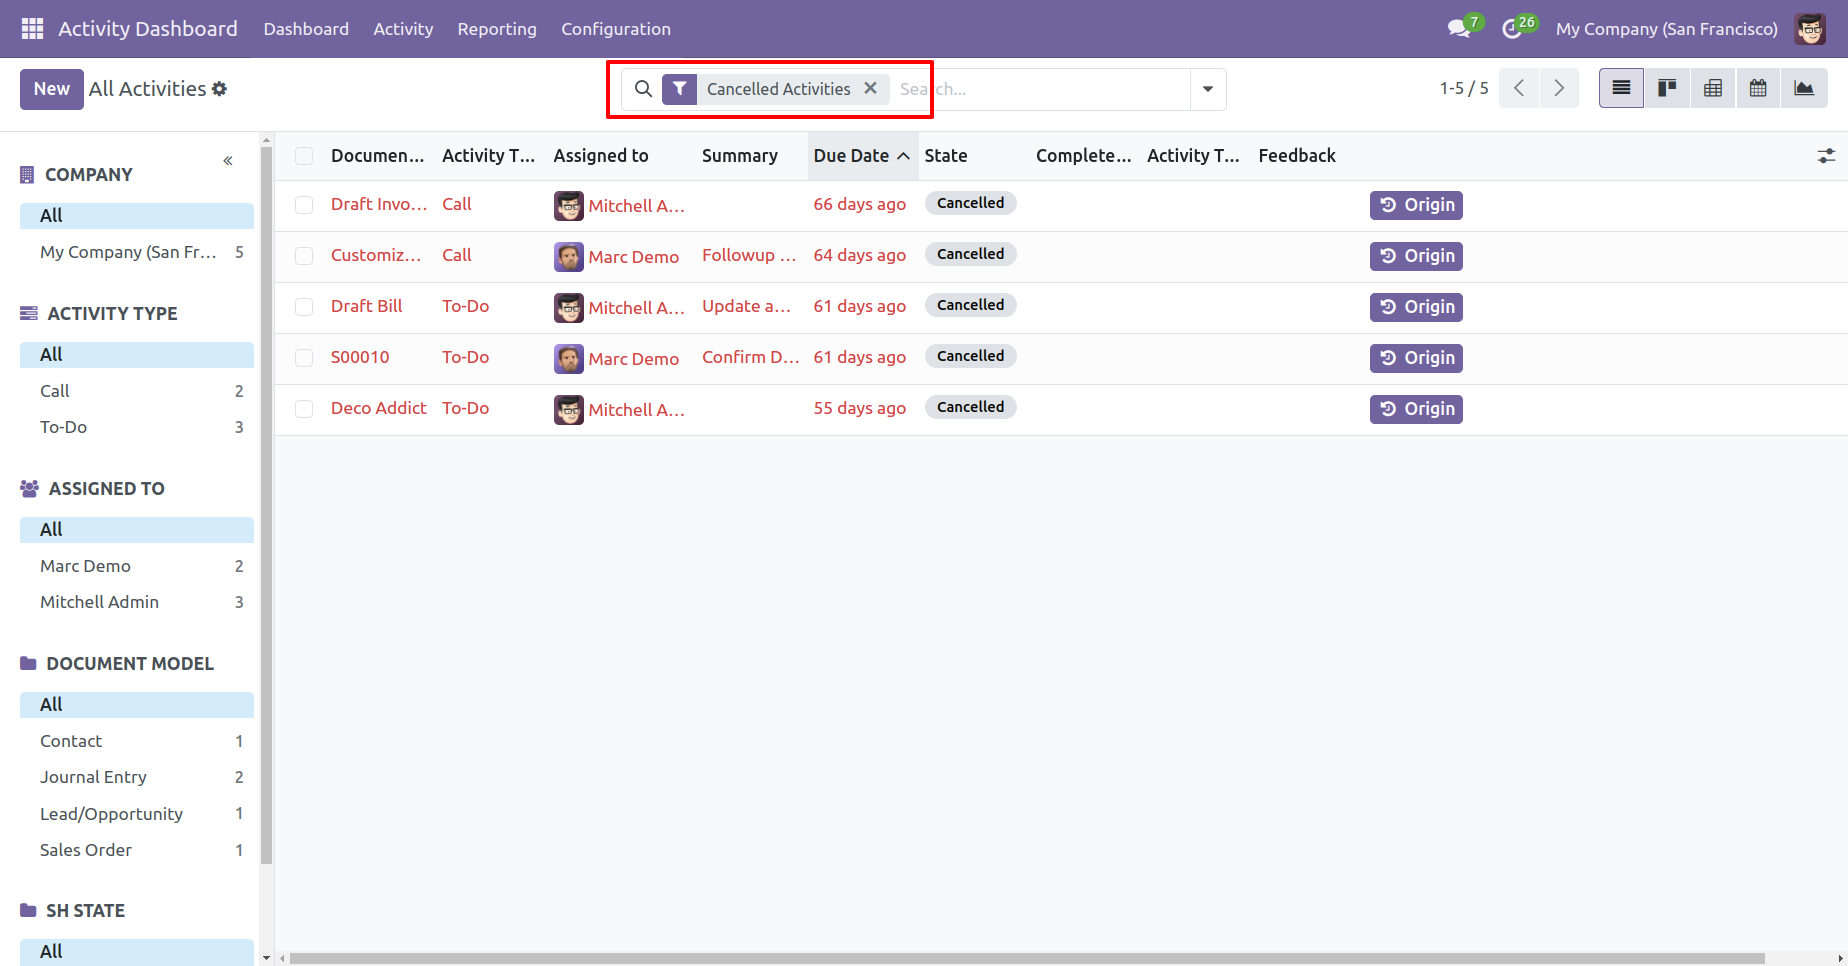
Cancelled activities counter and 'Cancel' button in the related data table.
The priority is visible in the activity form view.
The activity form view displays a ribbon indicating the current status of the activity.
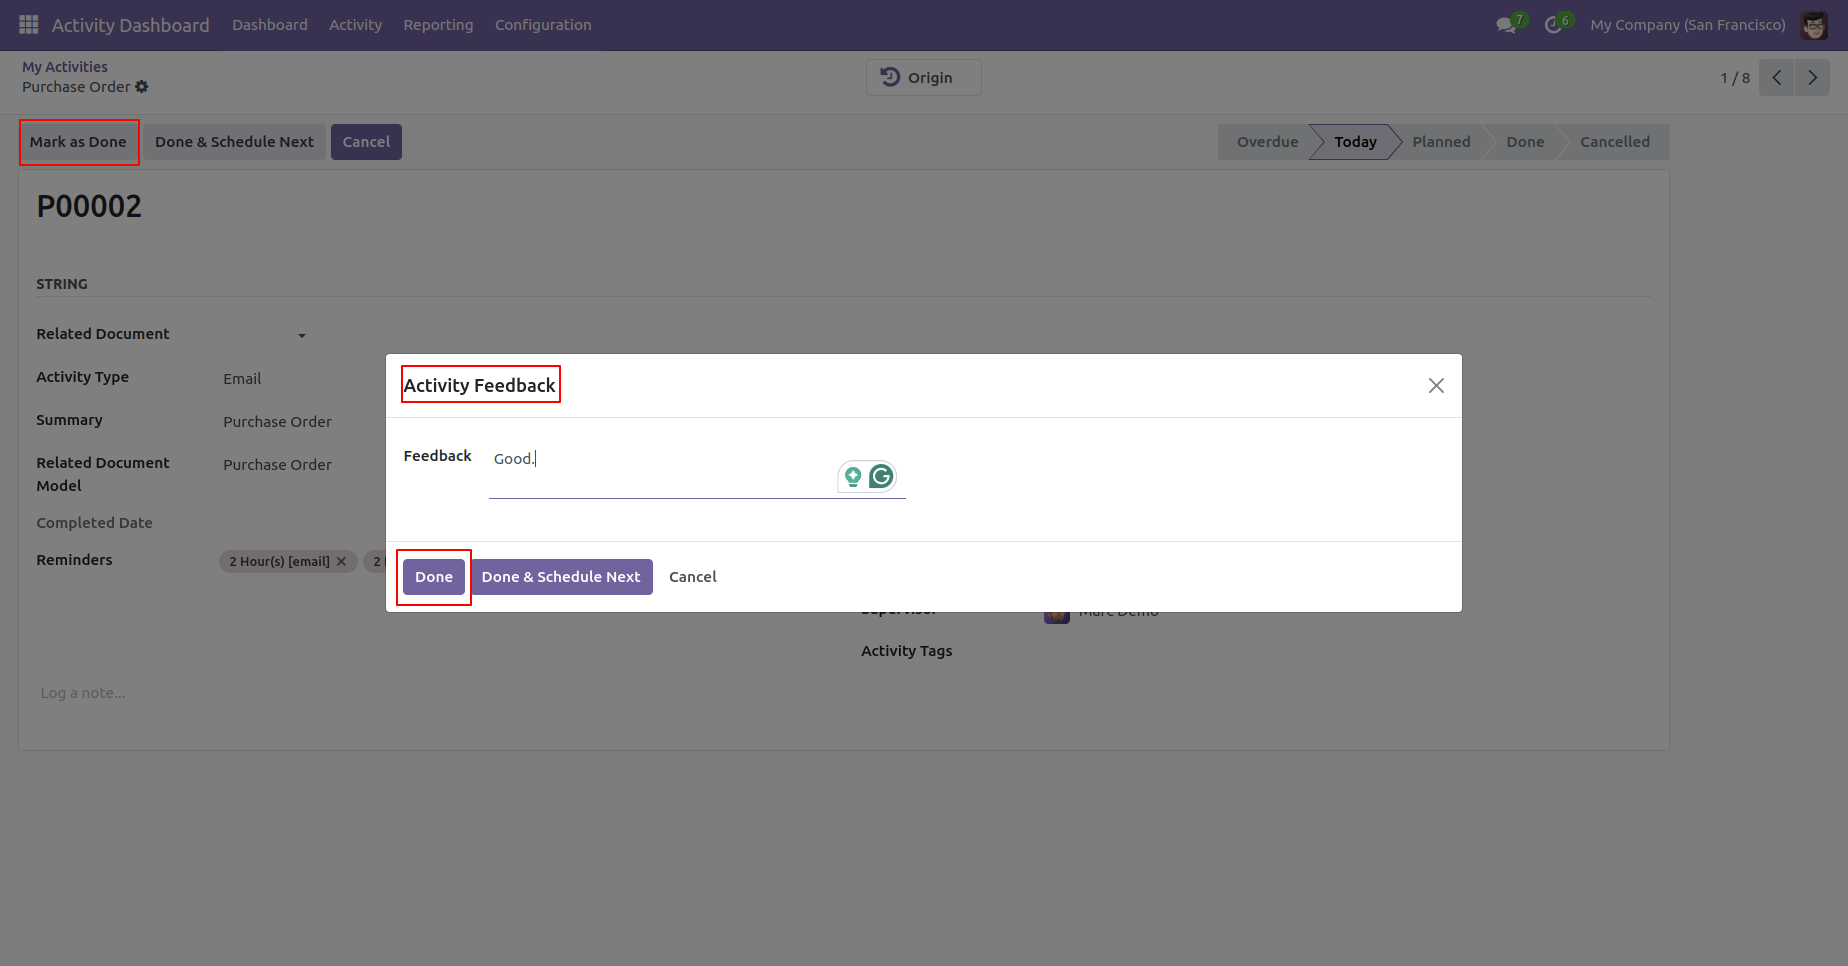
Open the activity and press button 'Mark as Done'.
After that, 'Activity Feedback' wizard will appears.
Add
Feed back and click on the "Done" button.
Keep a complete record of activities, user actions, and discussions with integrated chatter.
Go to the general settings ==> Enable 'Enable Bell Notification'.
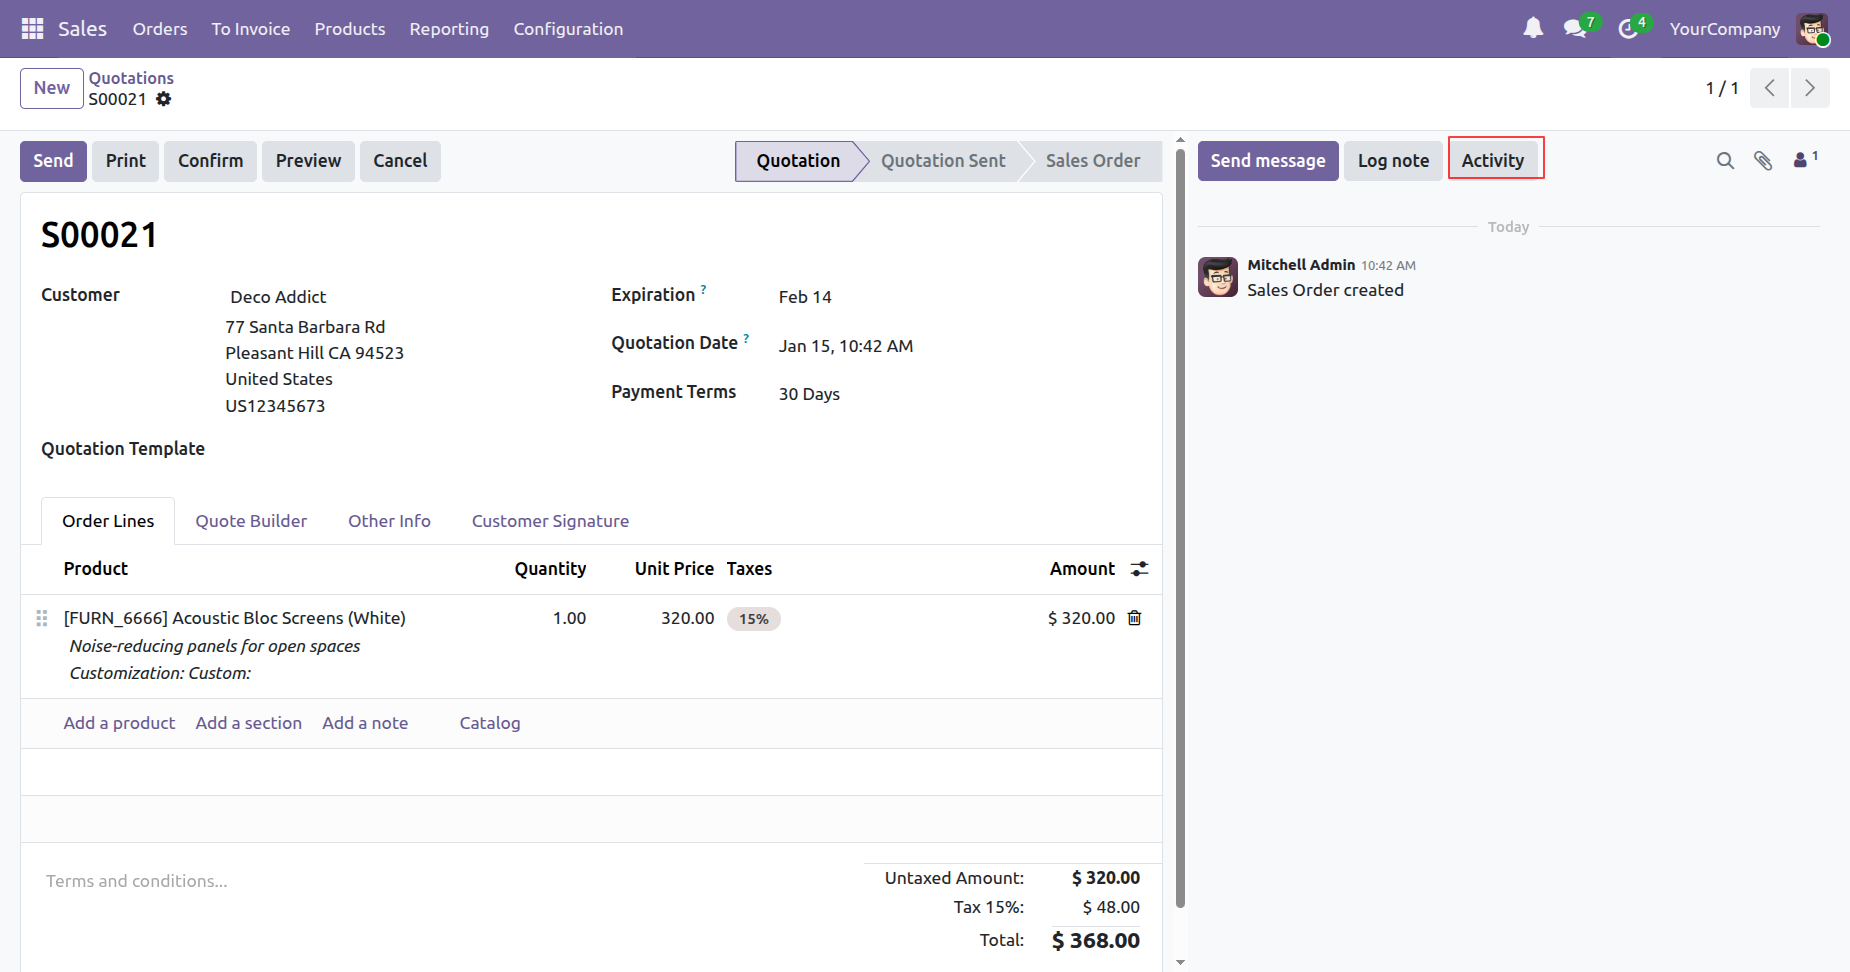
Create a quotation and click on the 'Activity' button.
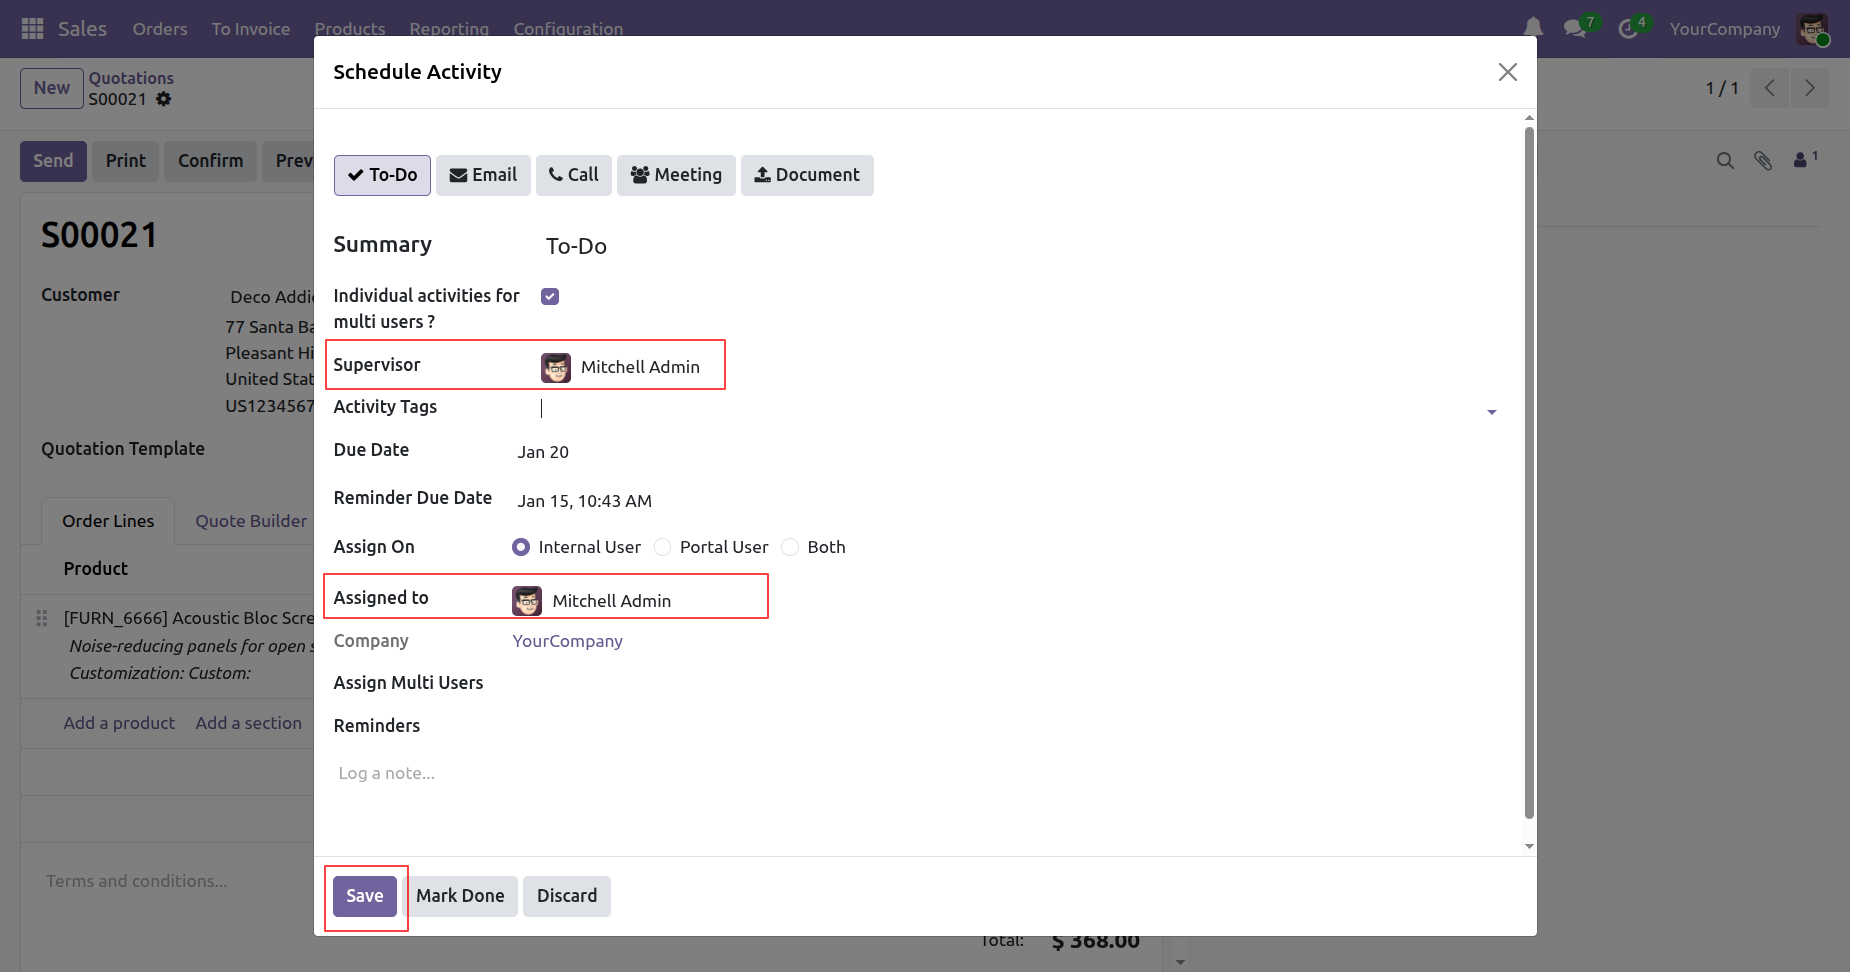
Create Activity and Set Supervisor to whom you want to assign. This is assigned to the user, who will get an activity Due notification as per settings. Click on the 'Save' button.
In the chatter, you can see the created Activity.
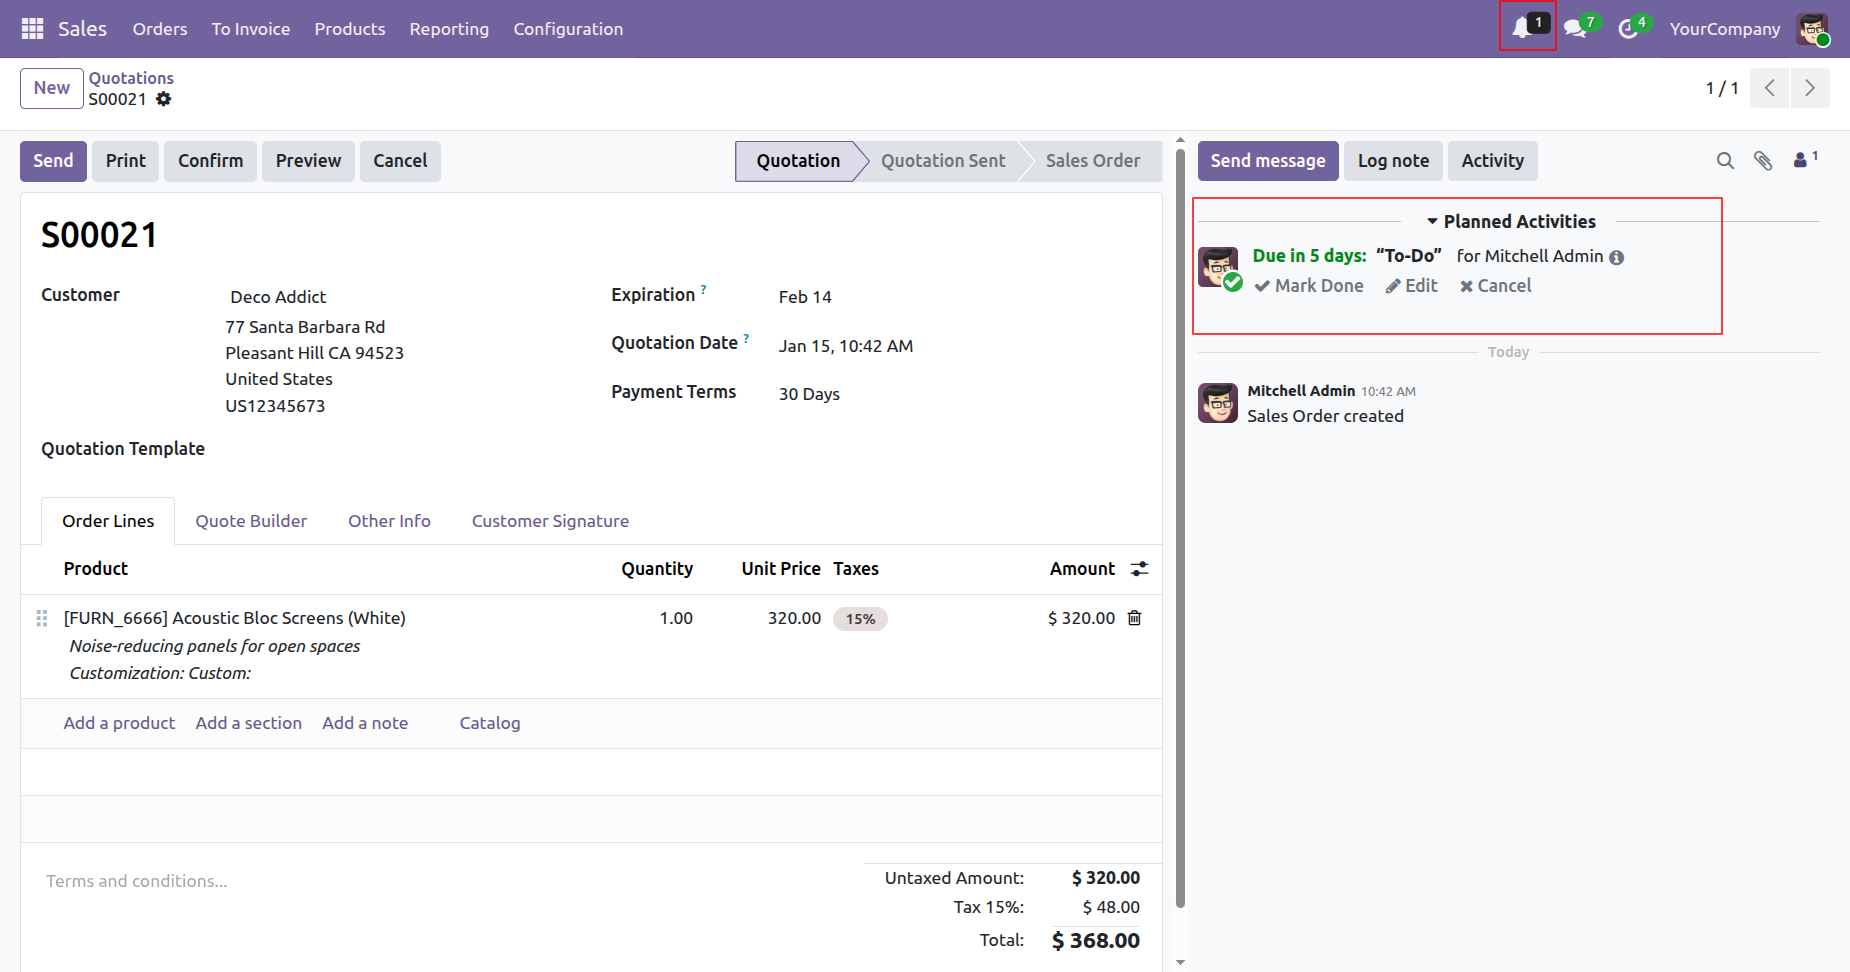
The assigned user and Supervisor will receive a bell
notification when the activity is created.
Click on 'View All' in the activity notification.
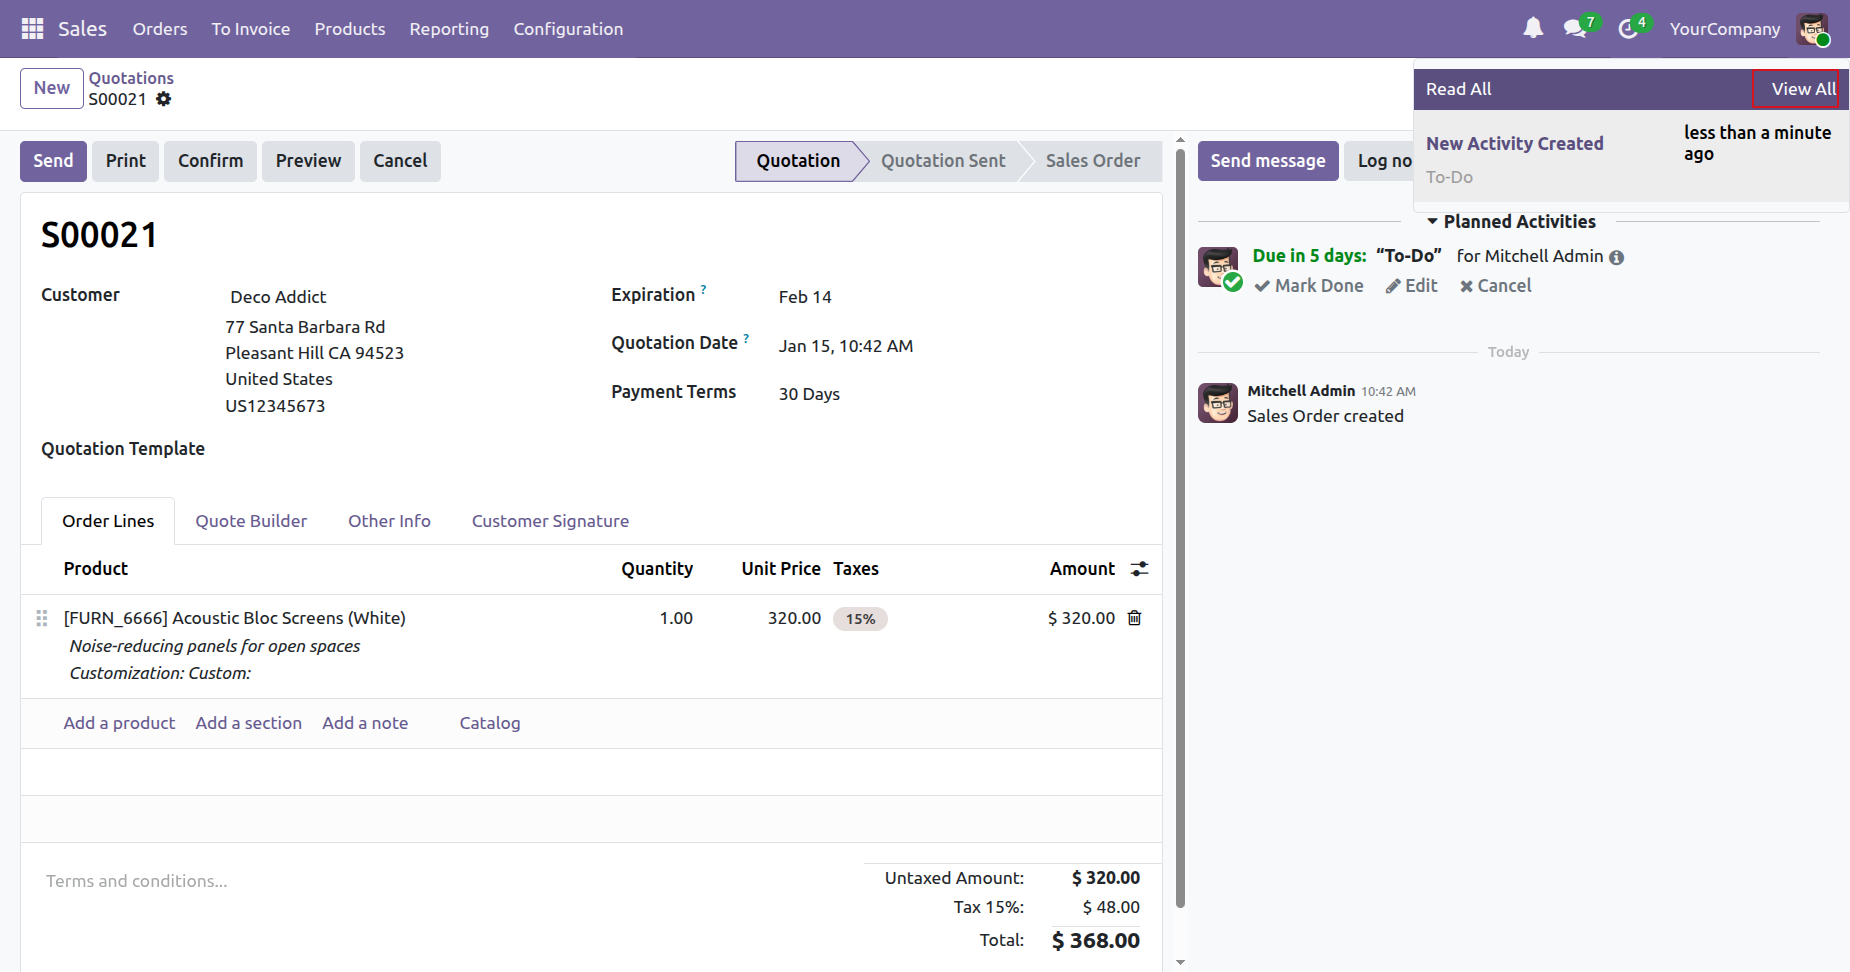
After that, you will be redirected to the bell
notification tree view.
Click on the 'View' button.
Form view of the bell notification.
Click on the 'Edit' option to update the created activity.
Update assign multi user (Marc Demo) and click on the 'Save' button.
The assigned user (Marc Demo) will receive a bell notification.
Click on the 'View' button.
To cancel the activity, click on the 'Cancel option'.
The assigned user and Supervisor will receive a bell notification when the activity is cancelled.
If you try to open the canceled notification, this warning message will be displayed.
You can view the bell notification using the bell icon.
Click on the 'Read All' option to clear all notification
counts shown on the bell notification icon.
Here, you can see that there is no pending notification count.
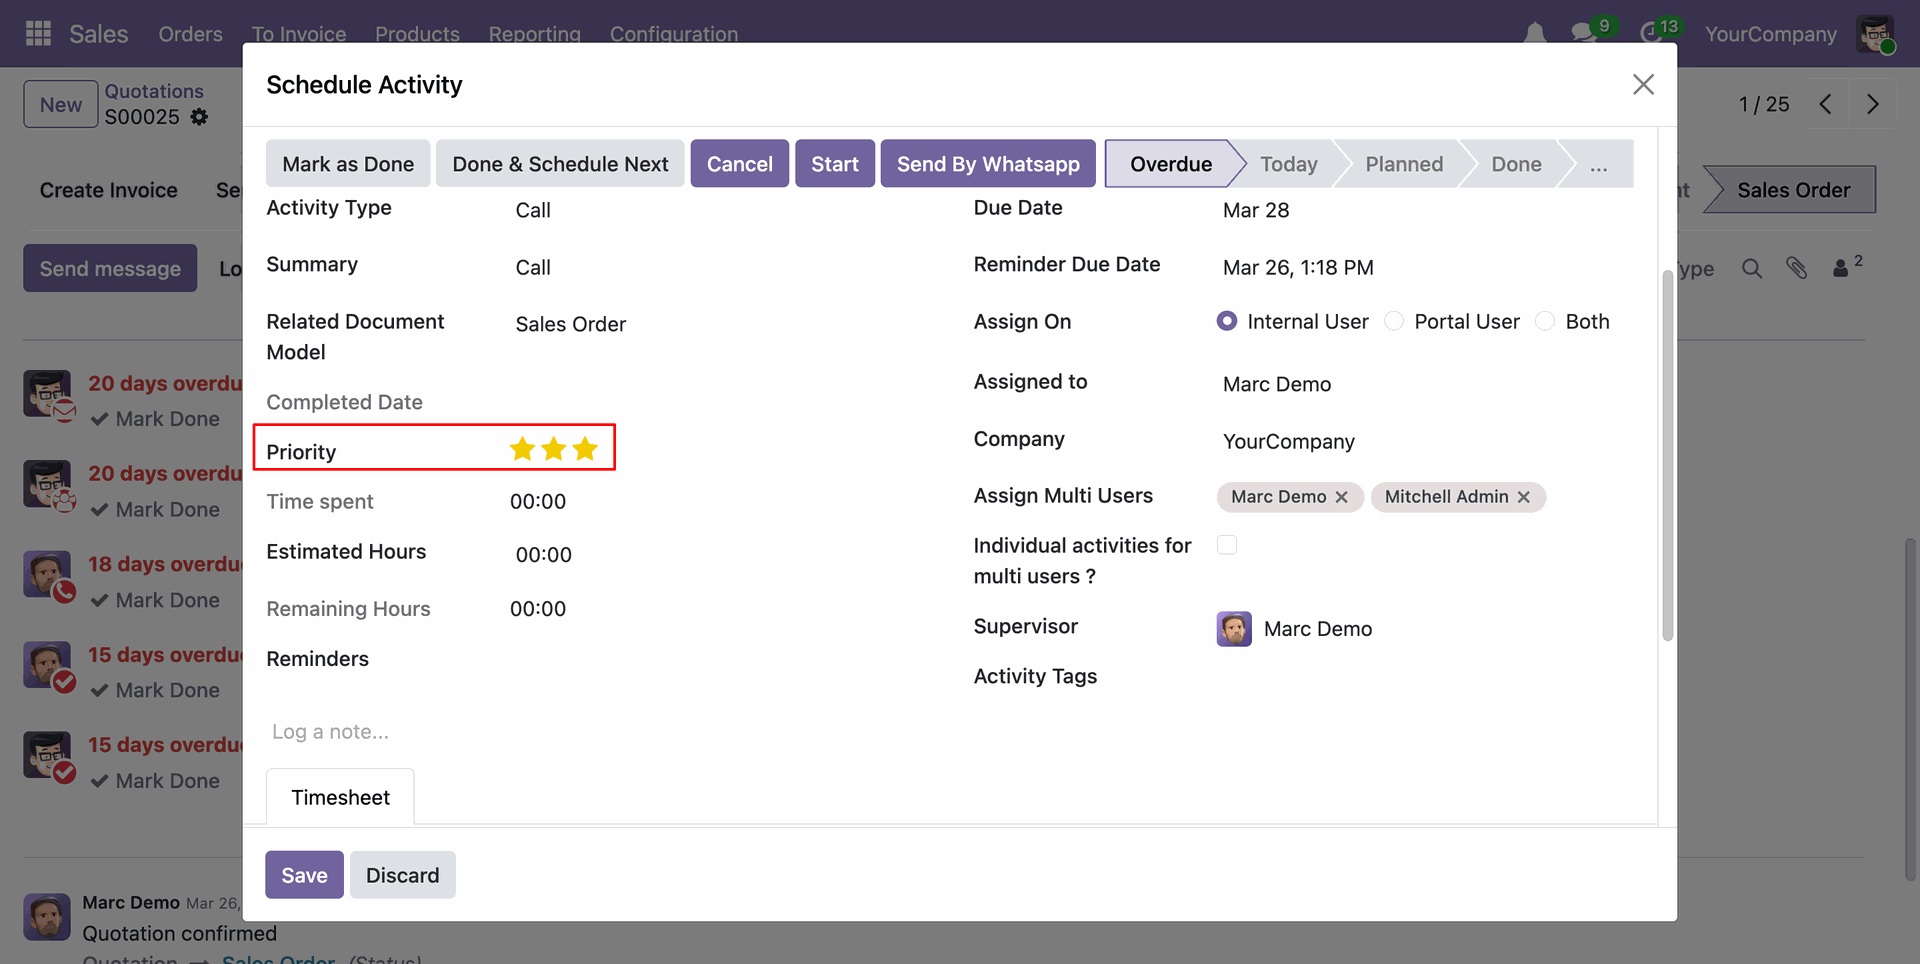
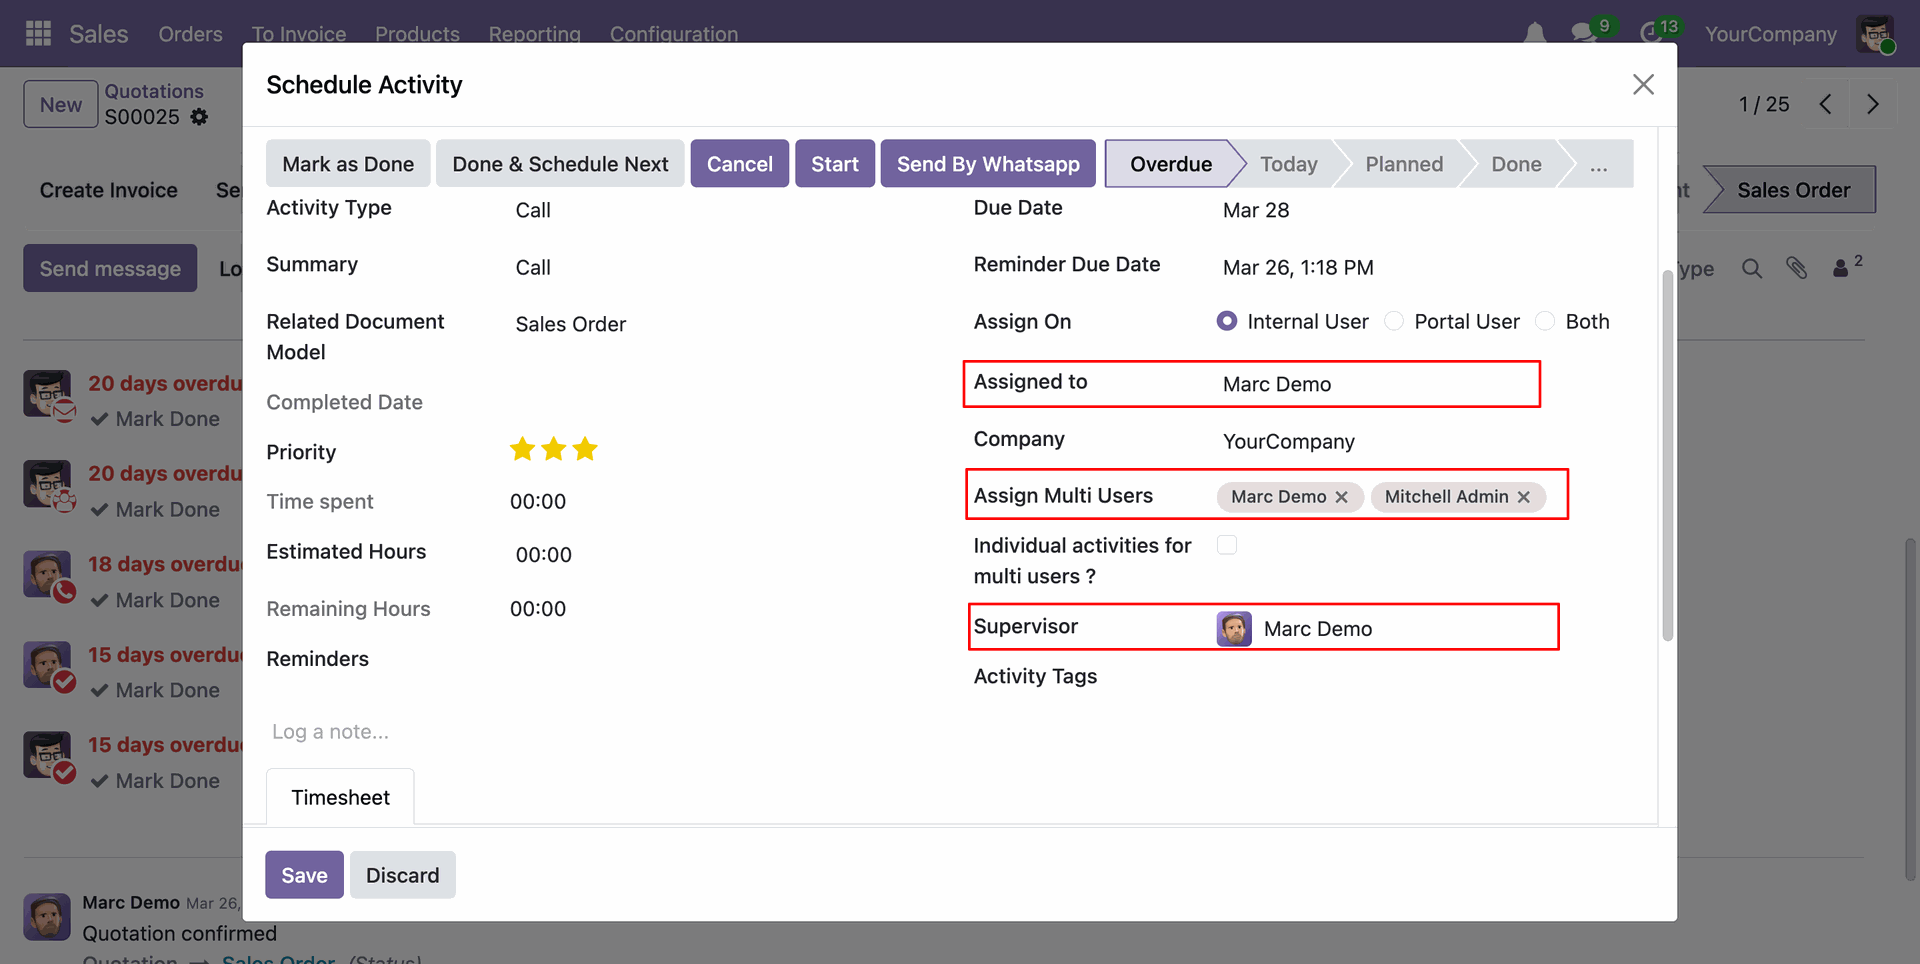
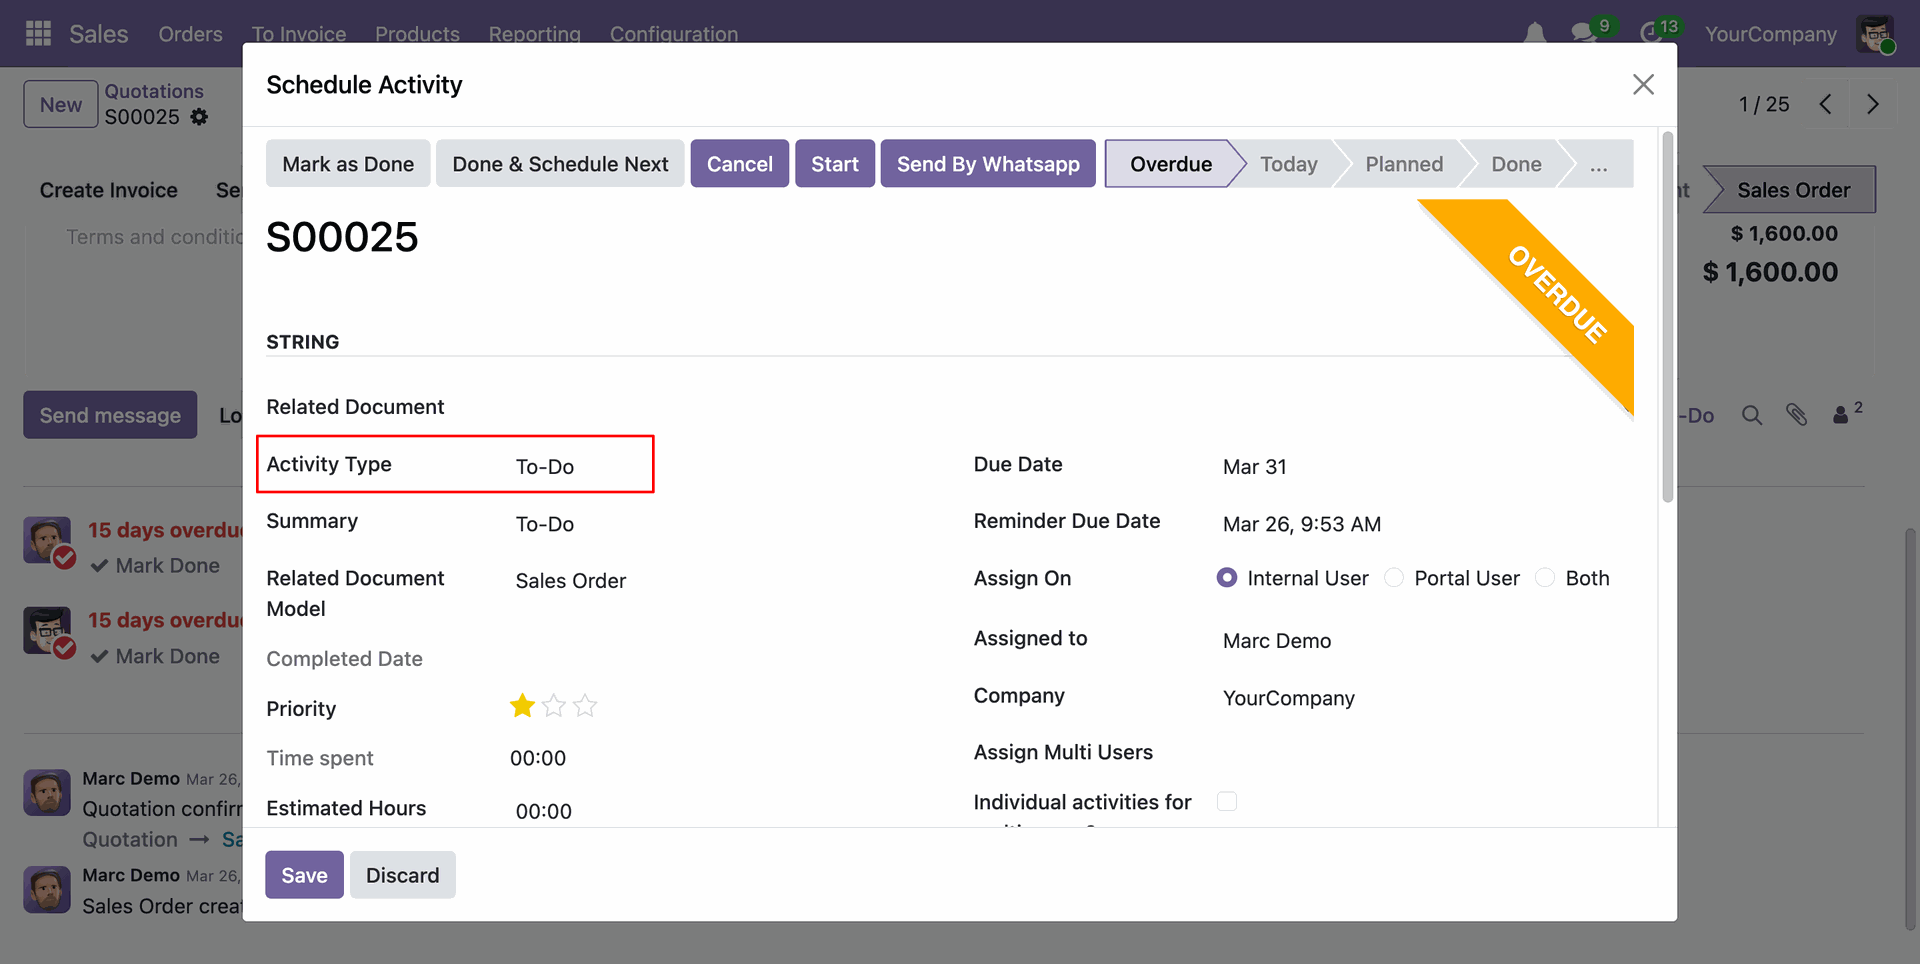
Her you can see the 'Priority' field in the schedule activity.
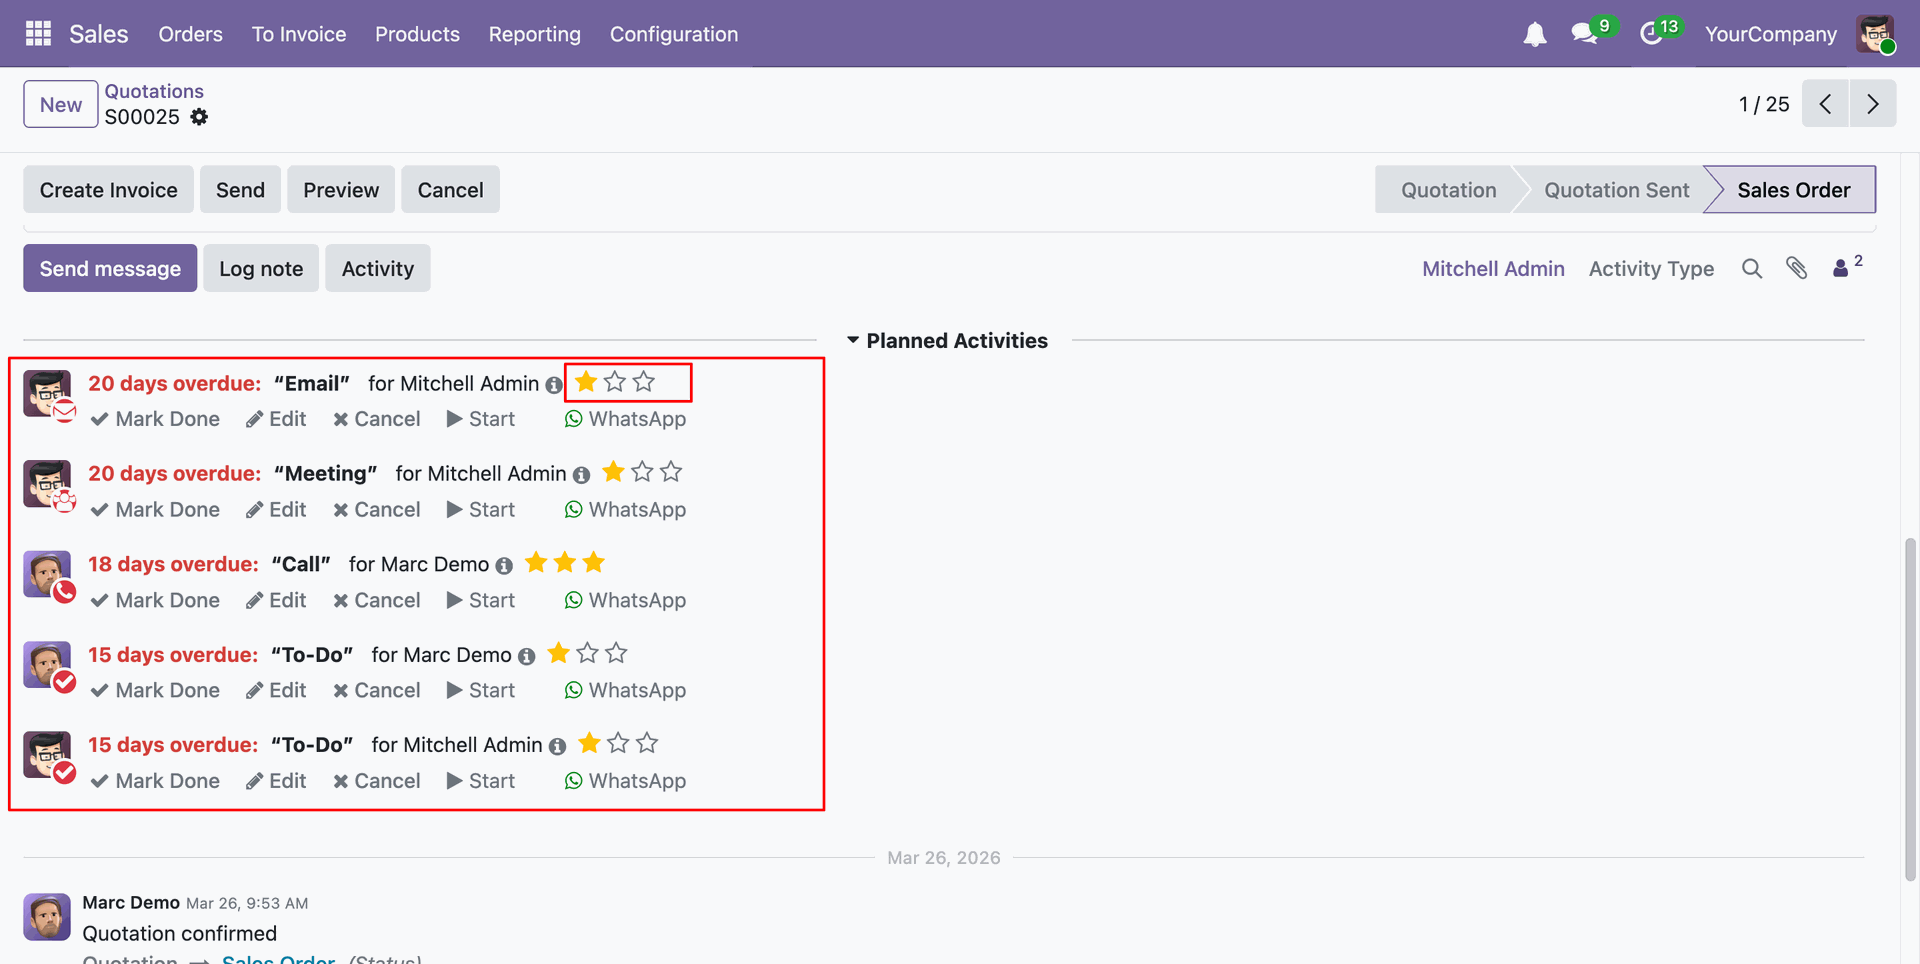
Select a user from the User field.
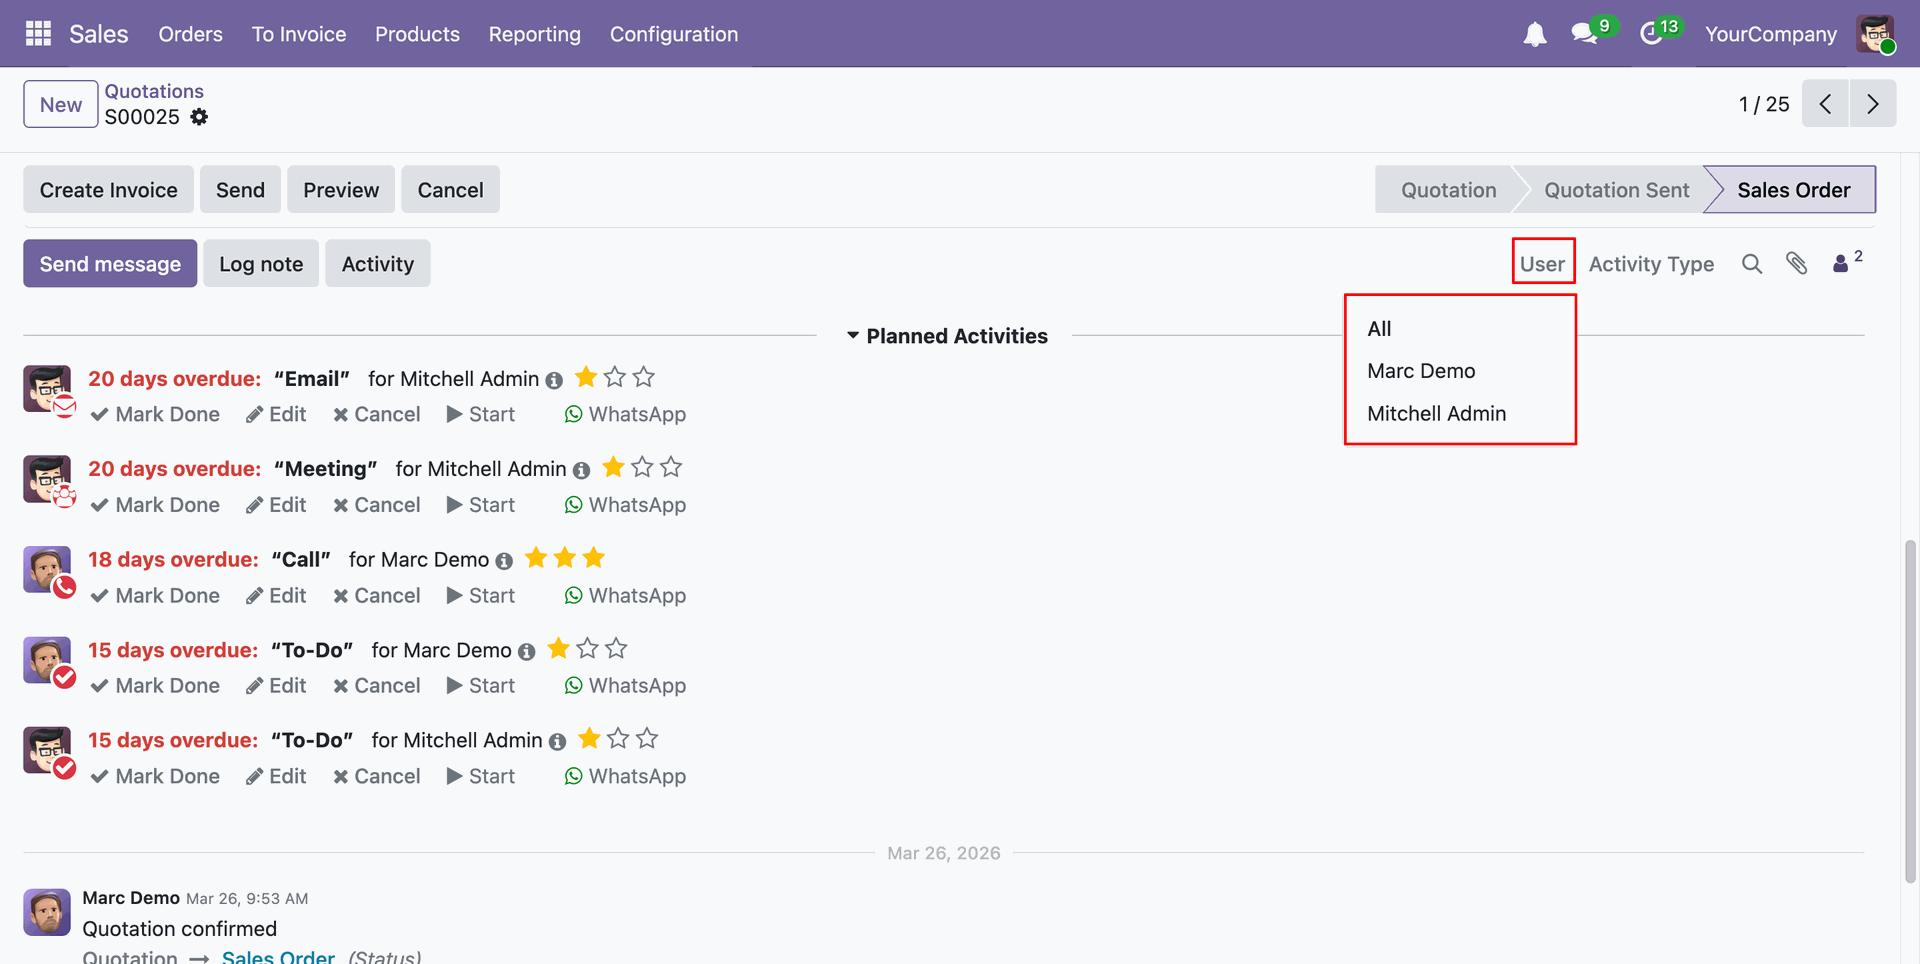
Here we have select the 'Mitchel Admin'.
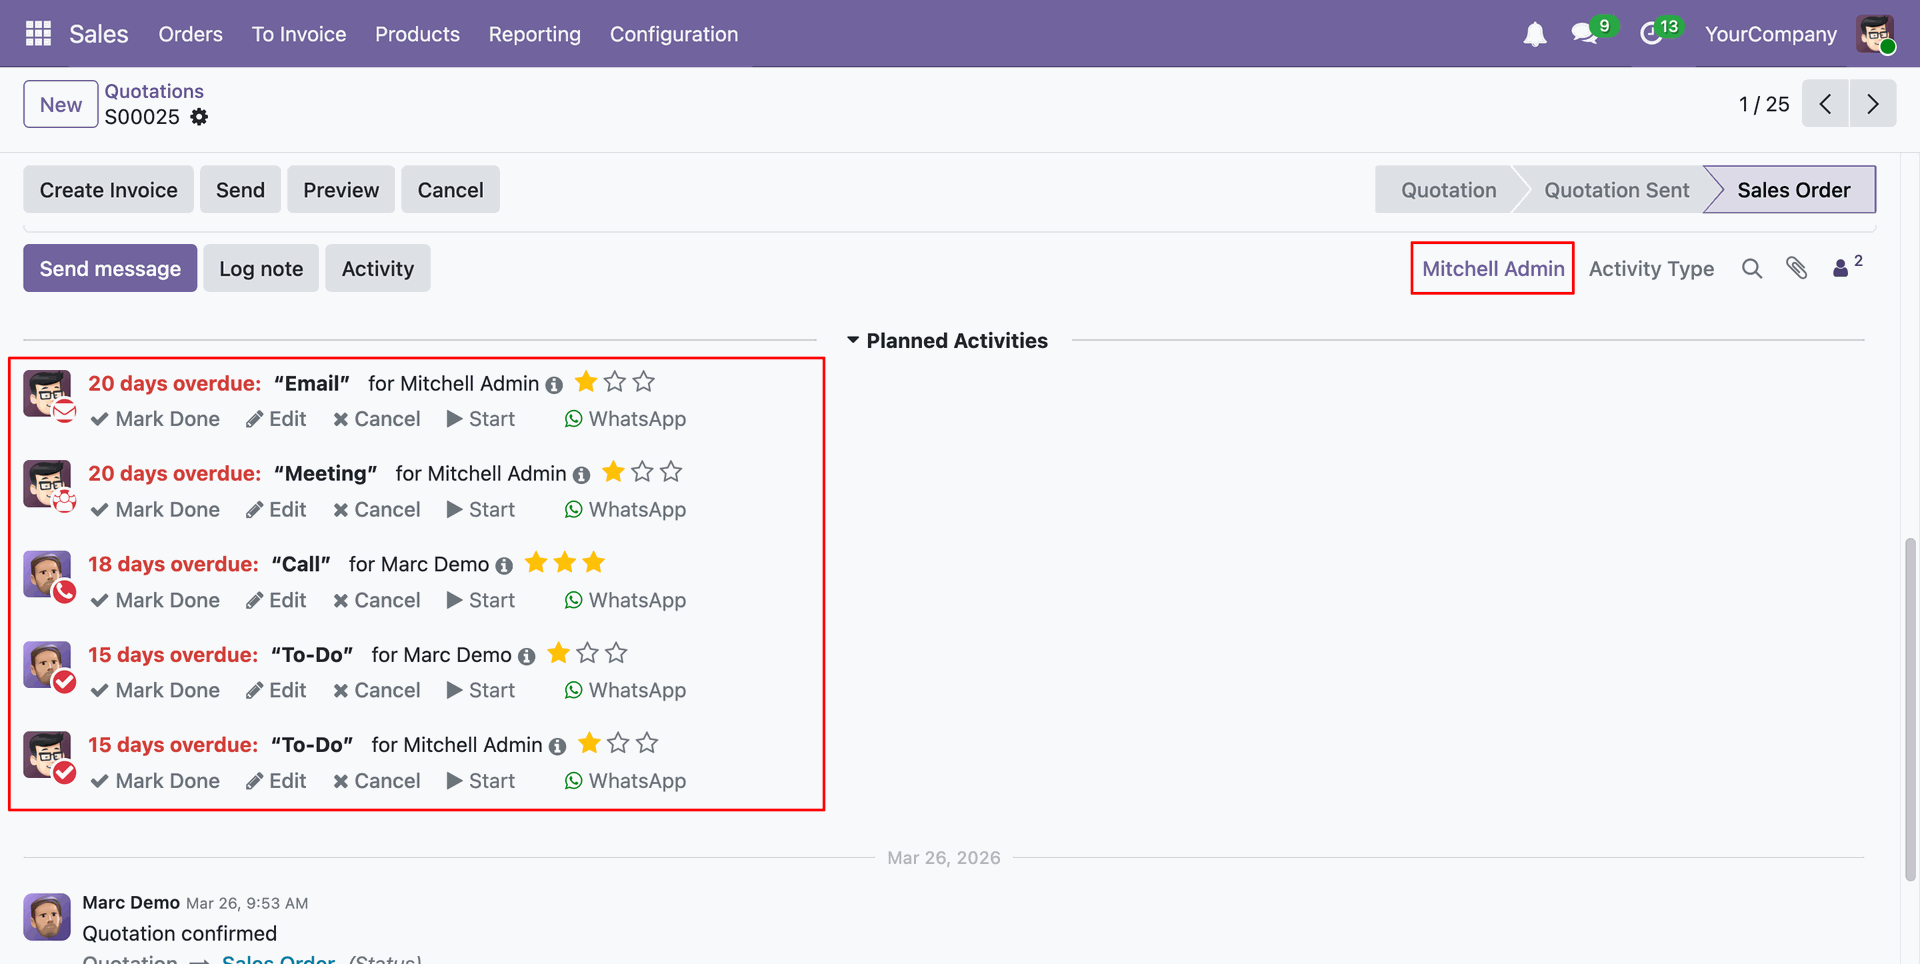
Schedule an activity.
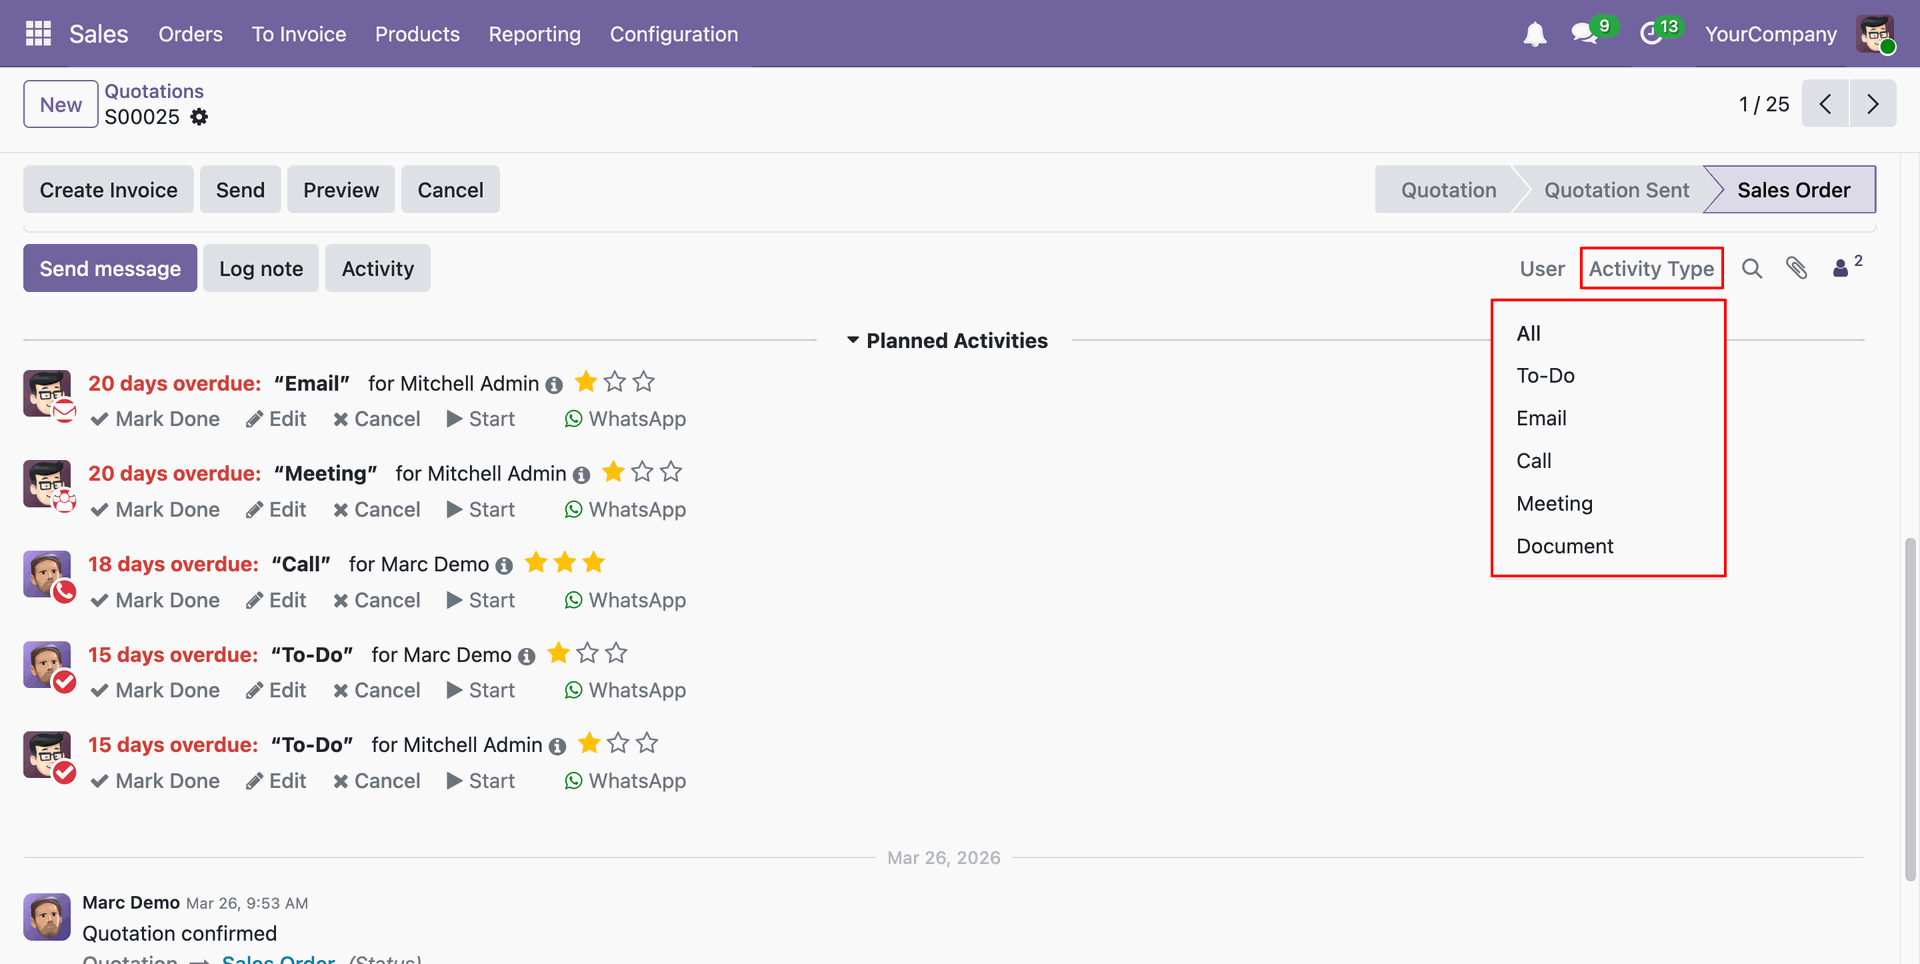
Select the Activity Type.
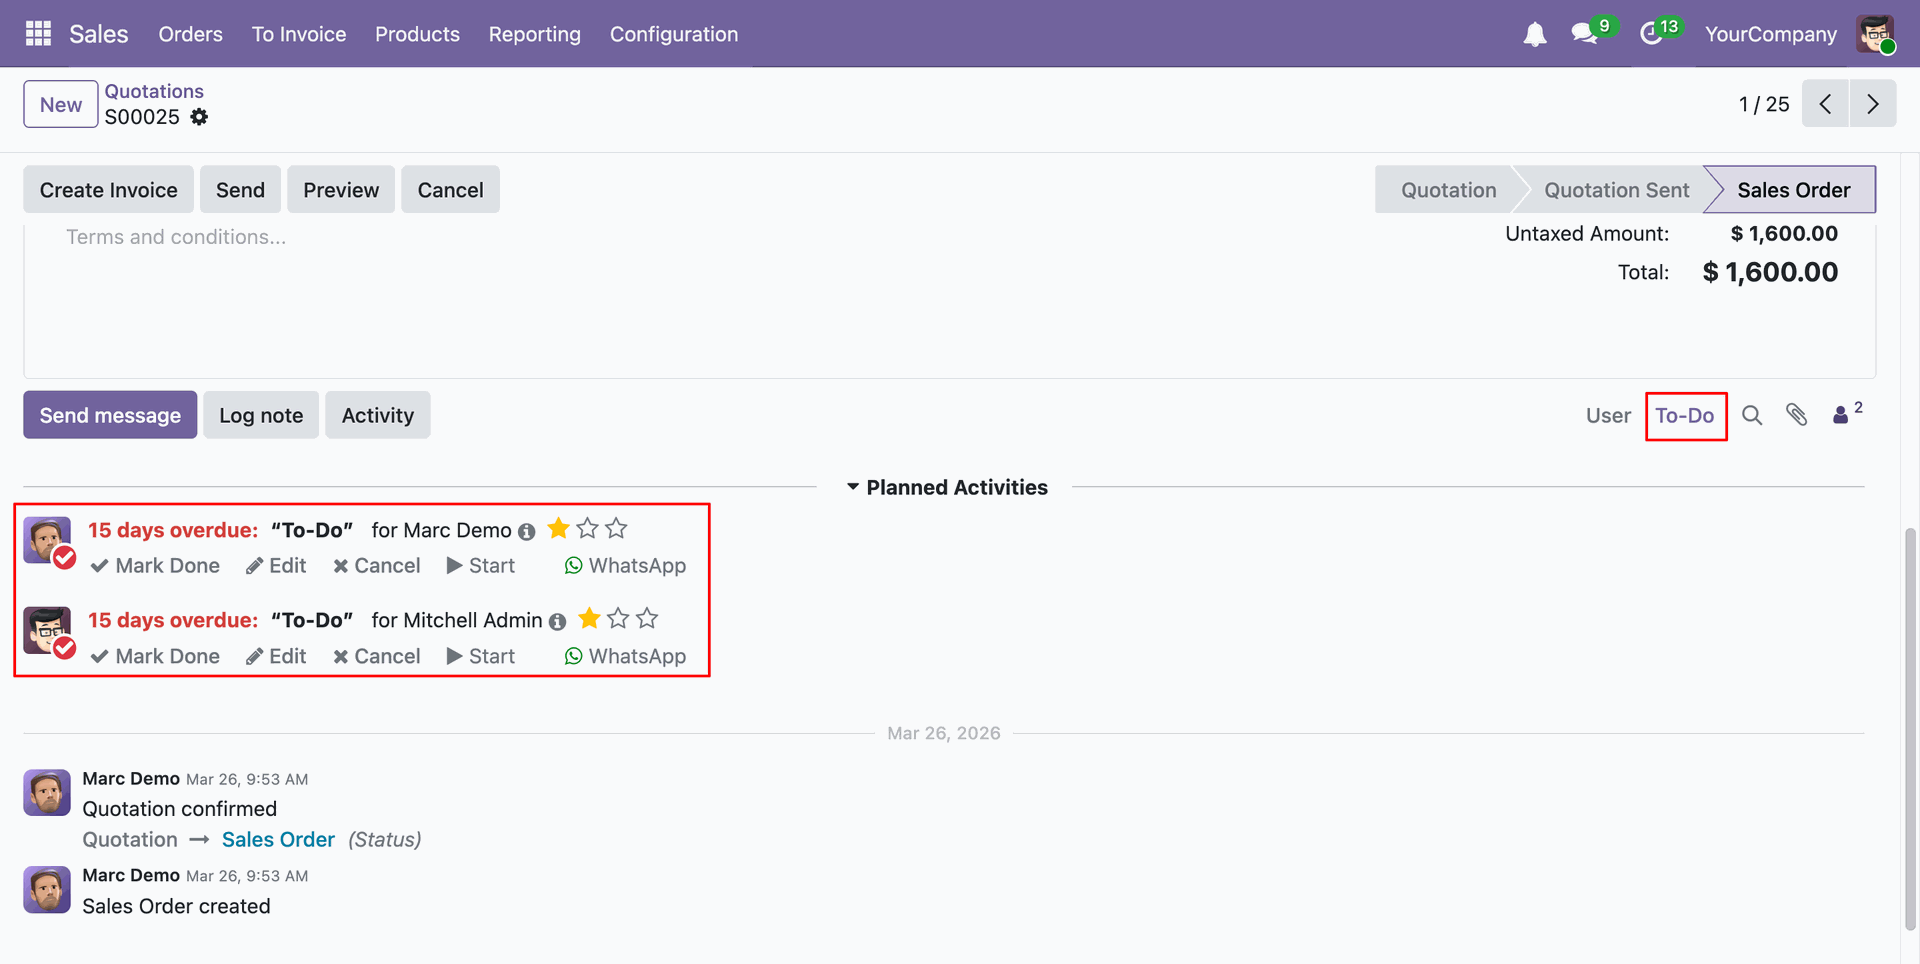
Here we select the 'To-Do' Activity Type.
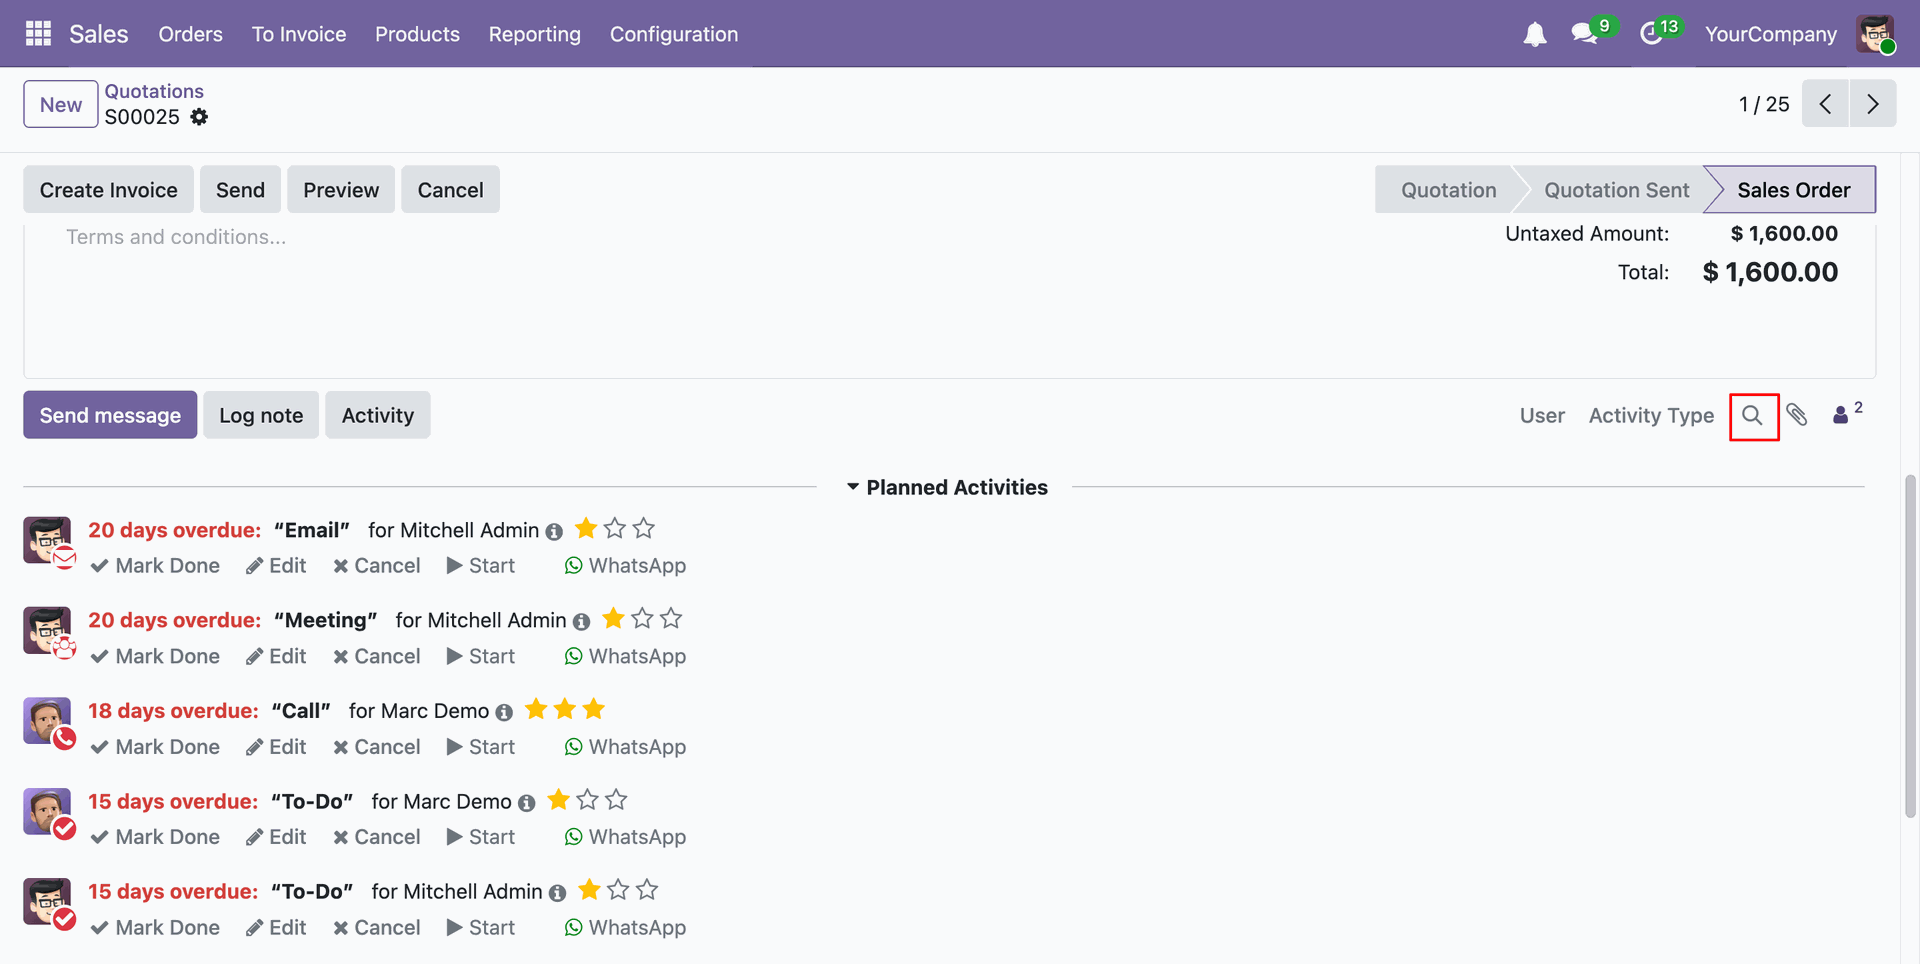
You can search chatter messages using the search icon.
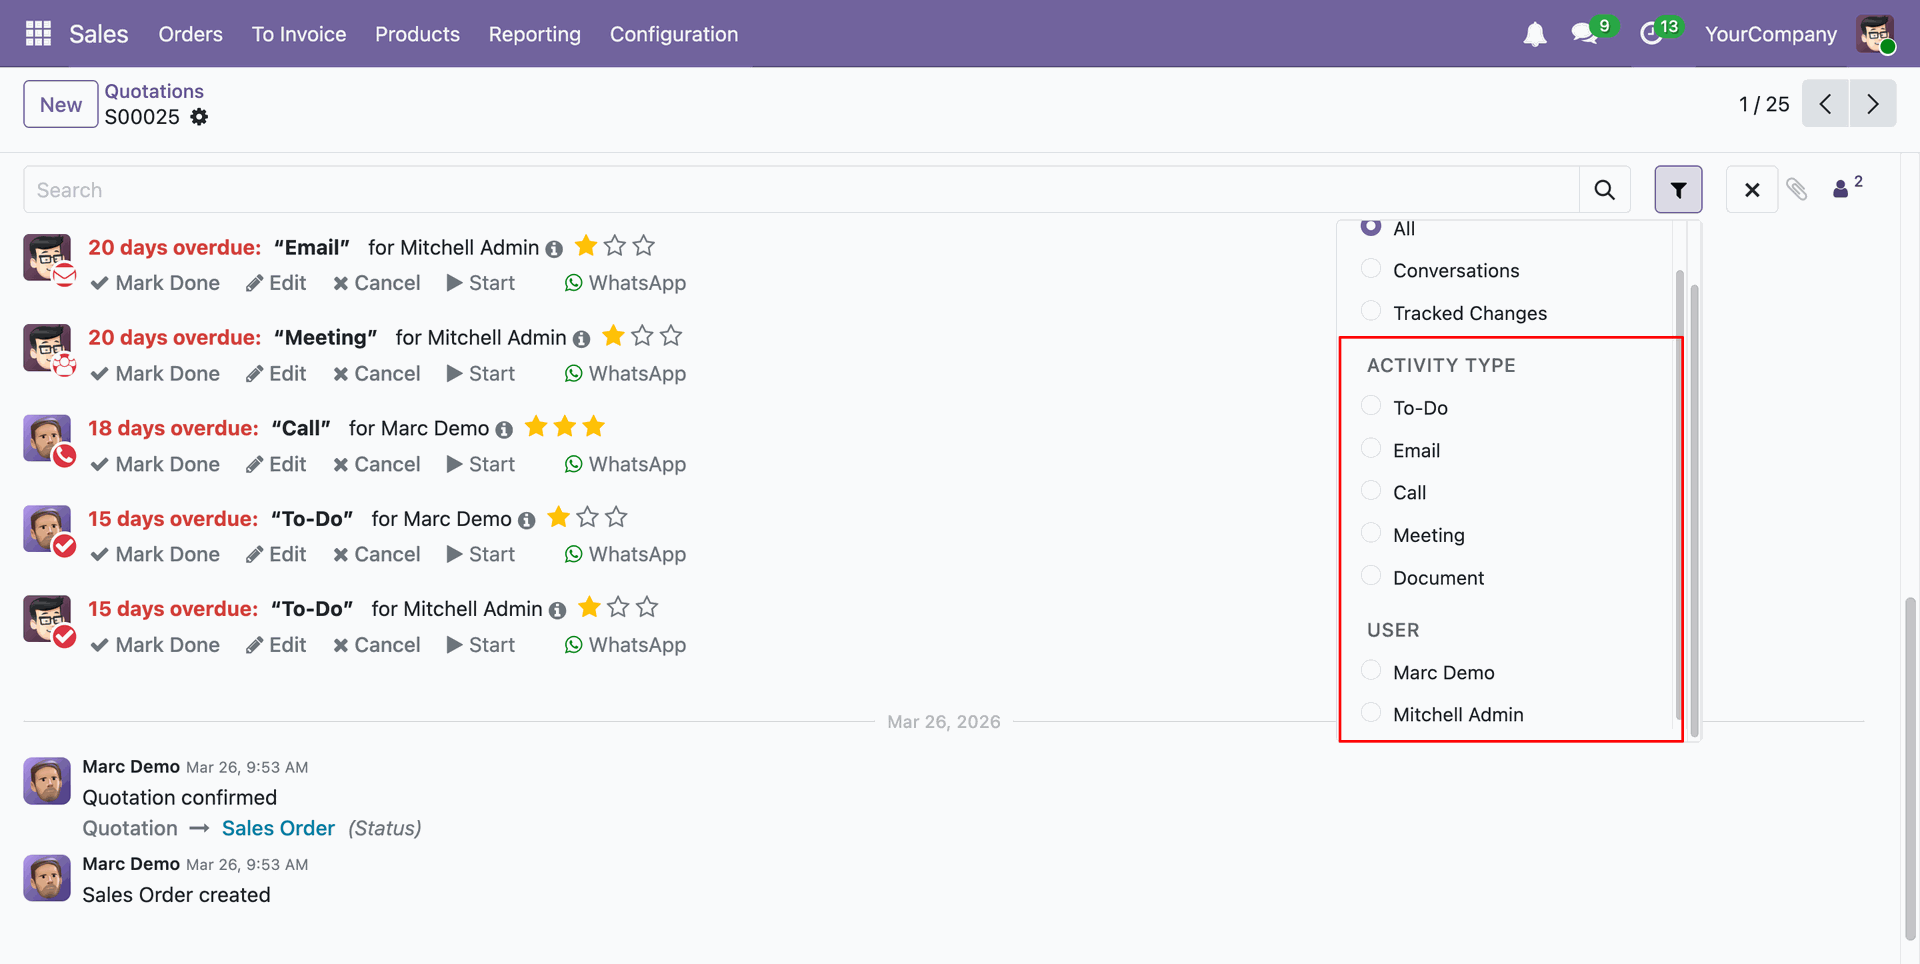
Select the activity type or user.
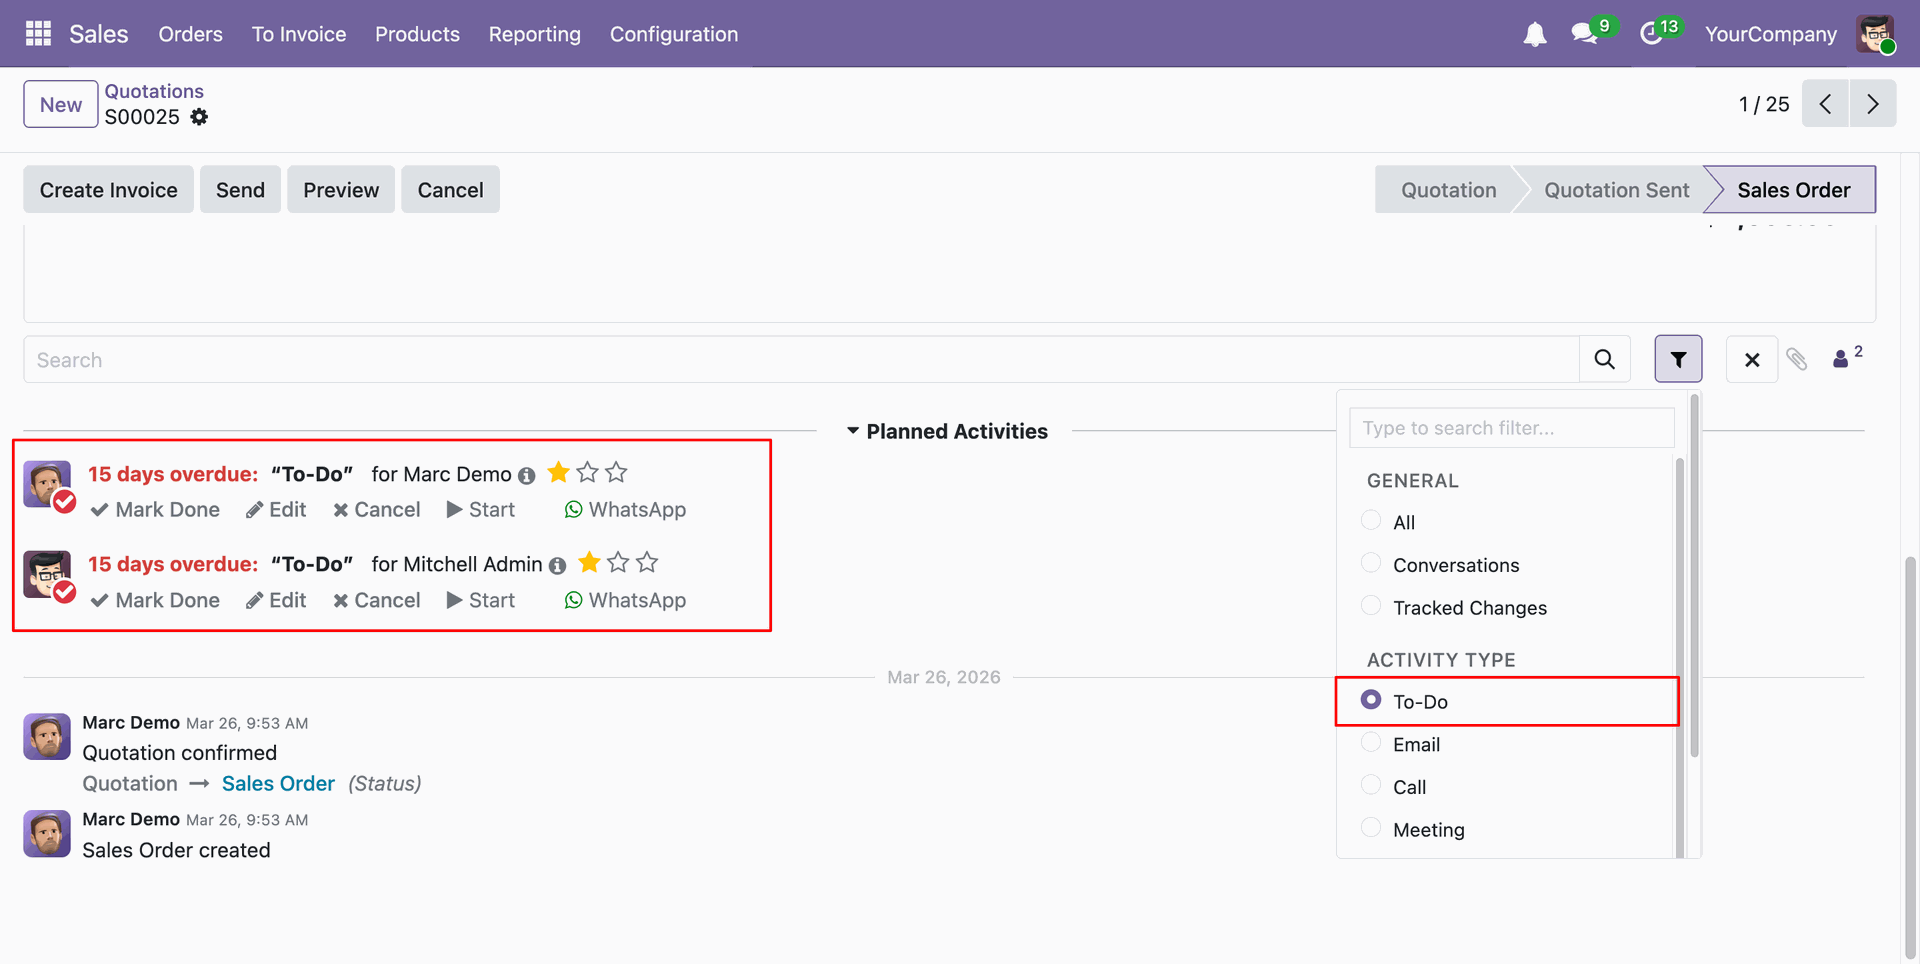
Here we select the 'To-Do' Activity Type.
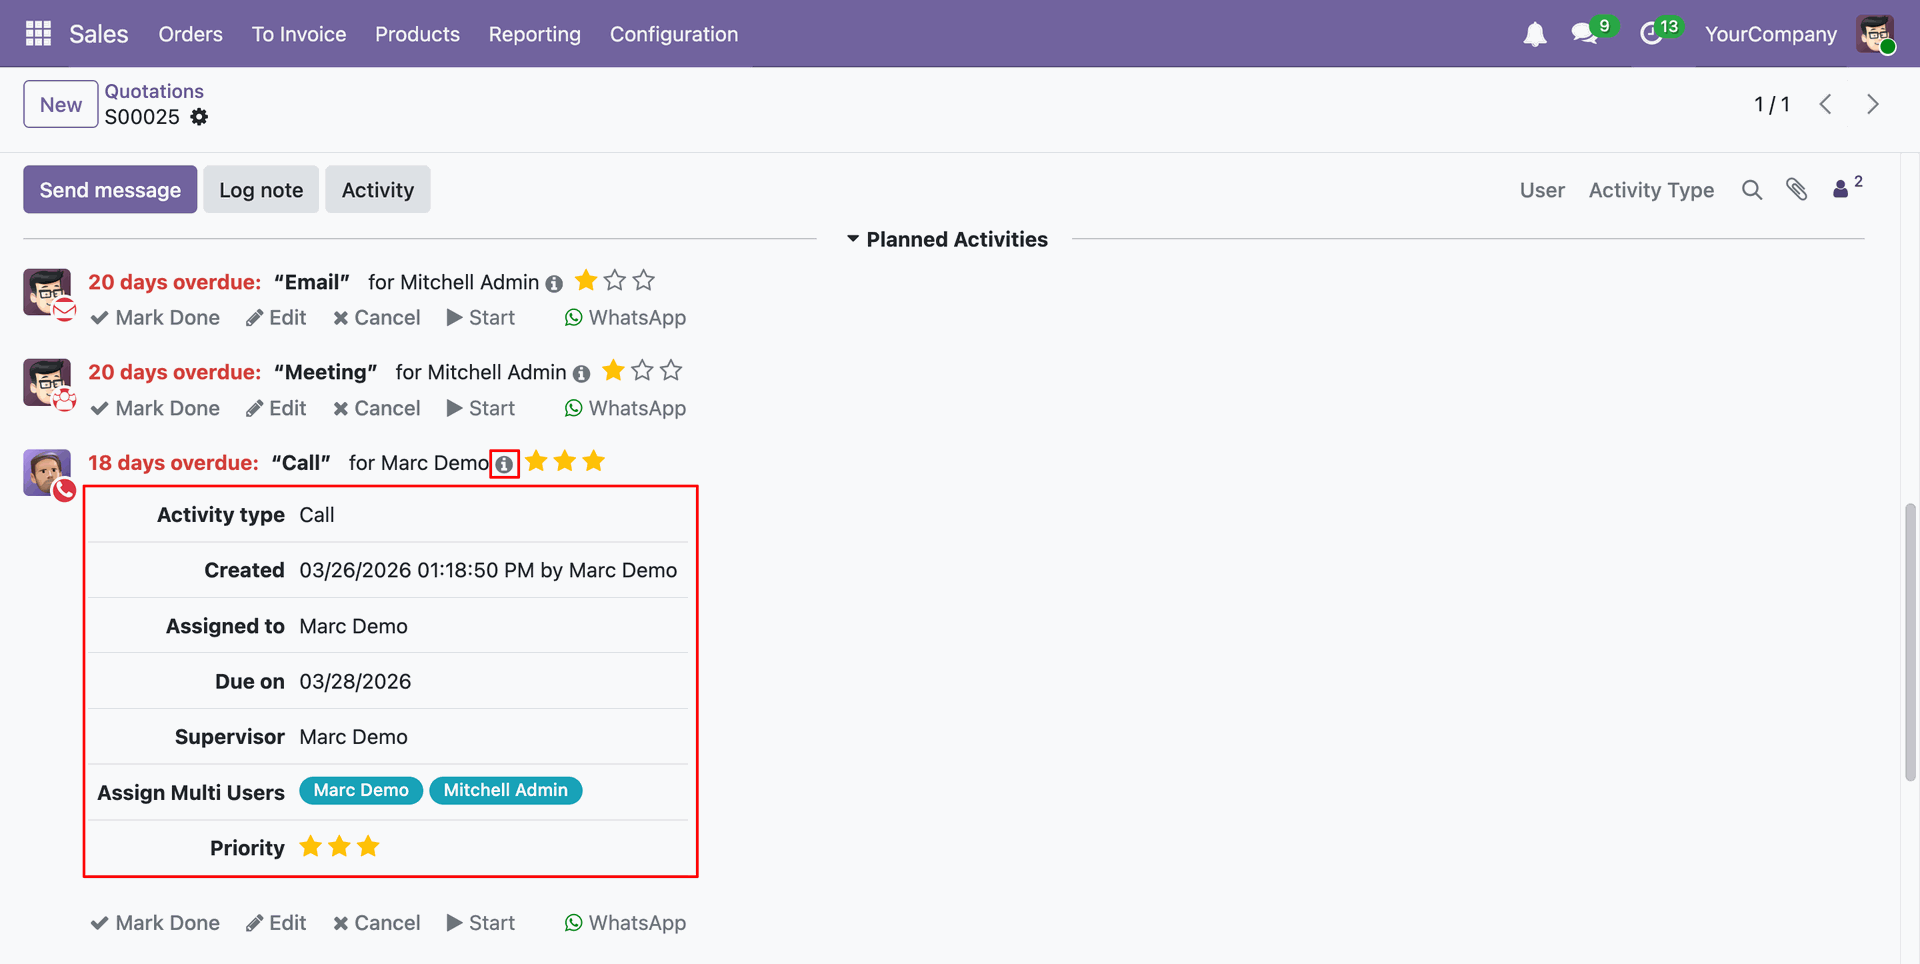
You can see the activity details by clicking on the 'i' Detail icon.
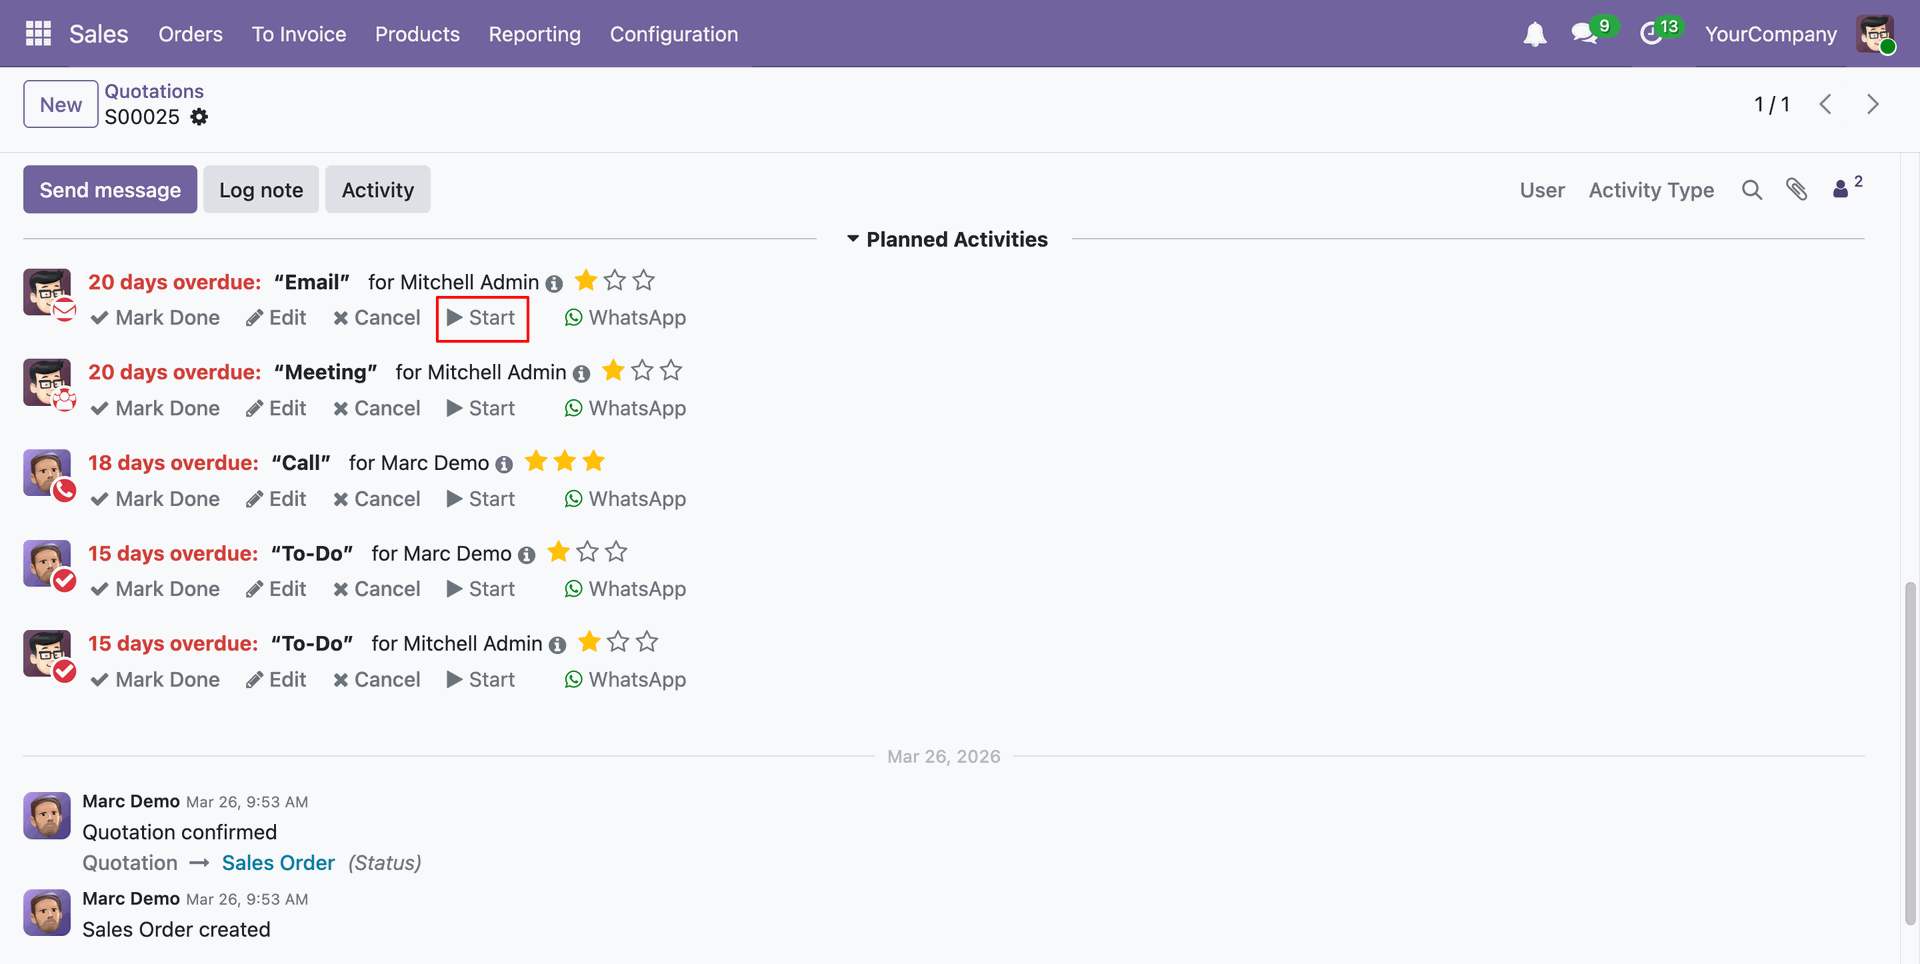
You can start the activity by clicking on the 'Start' icon
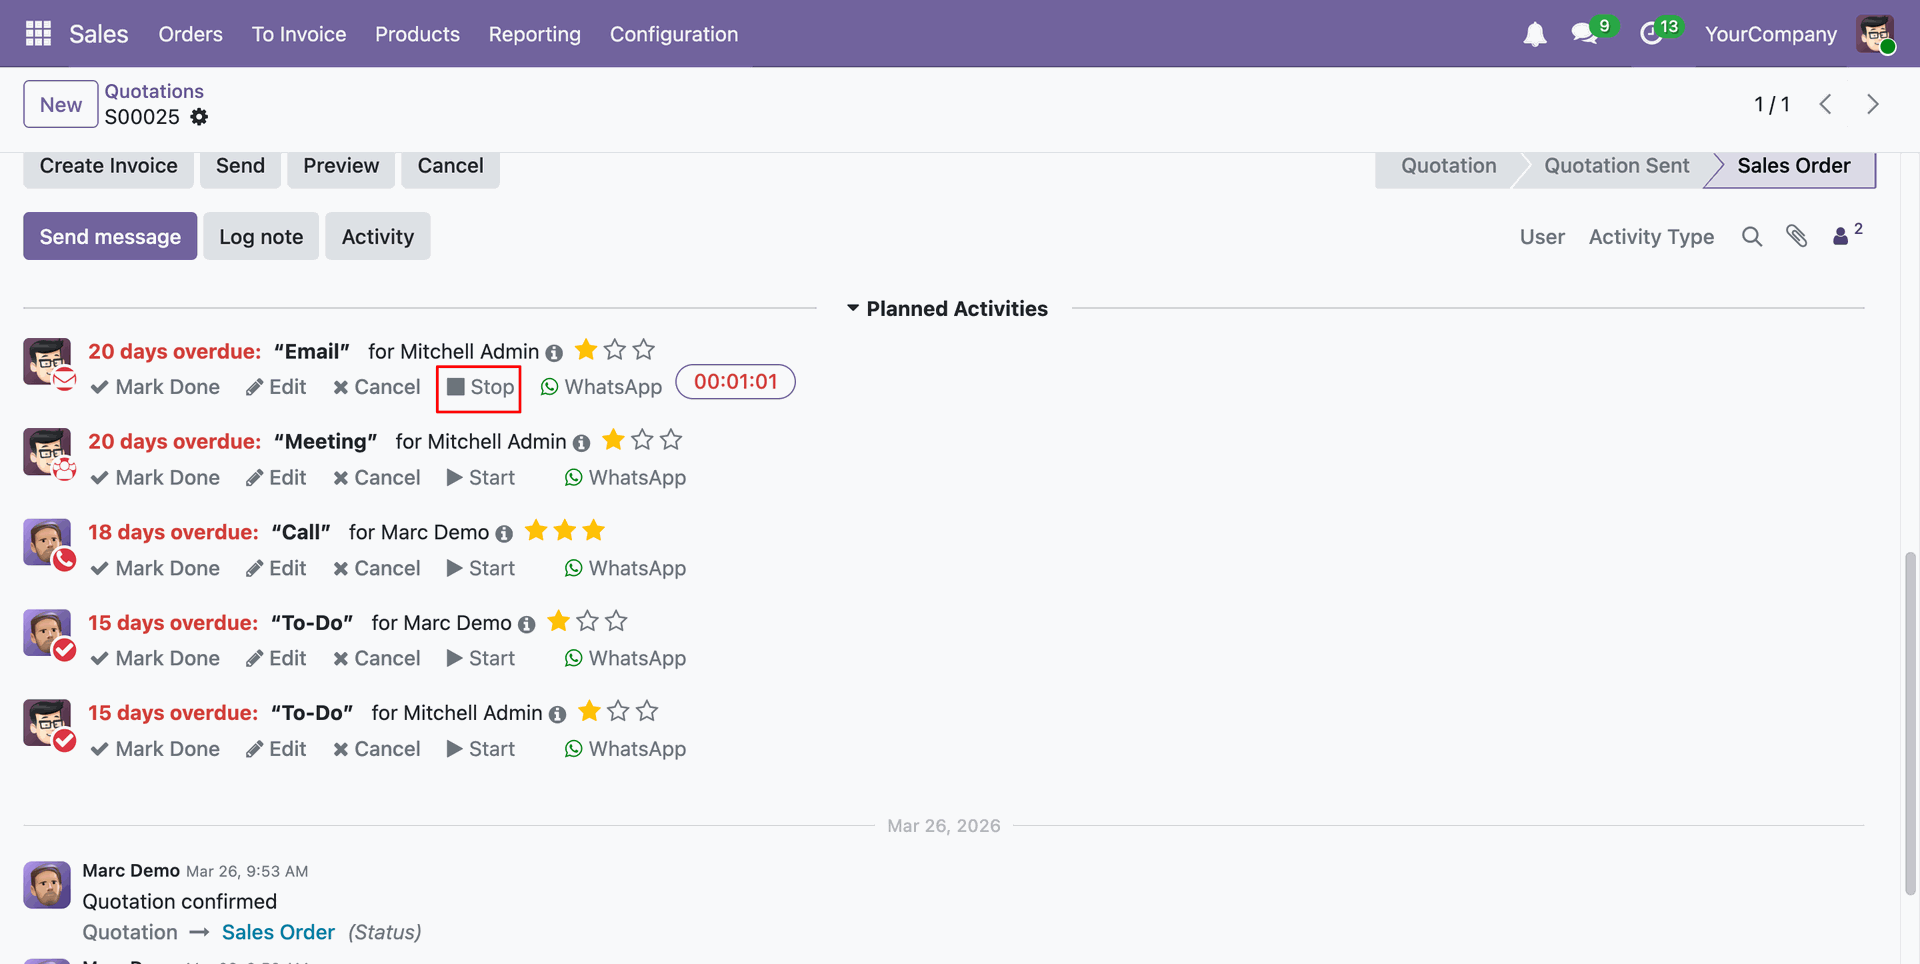
You can End the activity by clicking on the 'End' icon
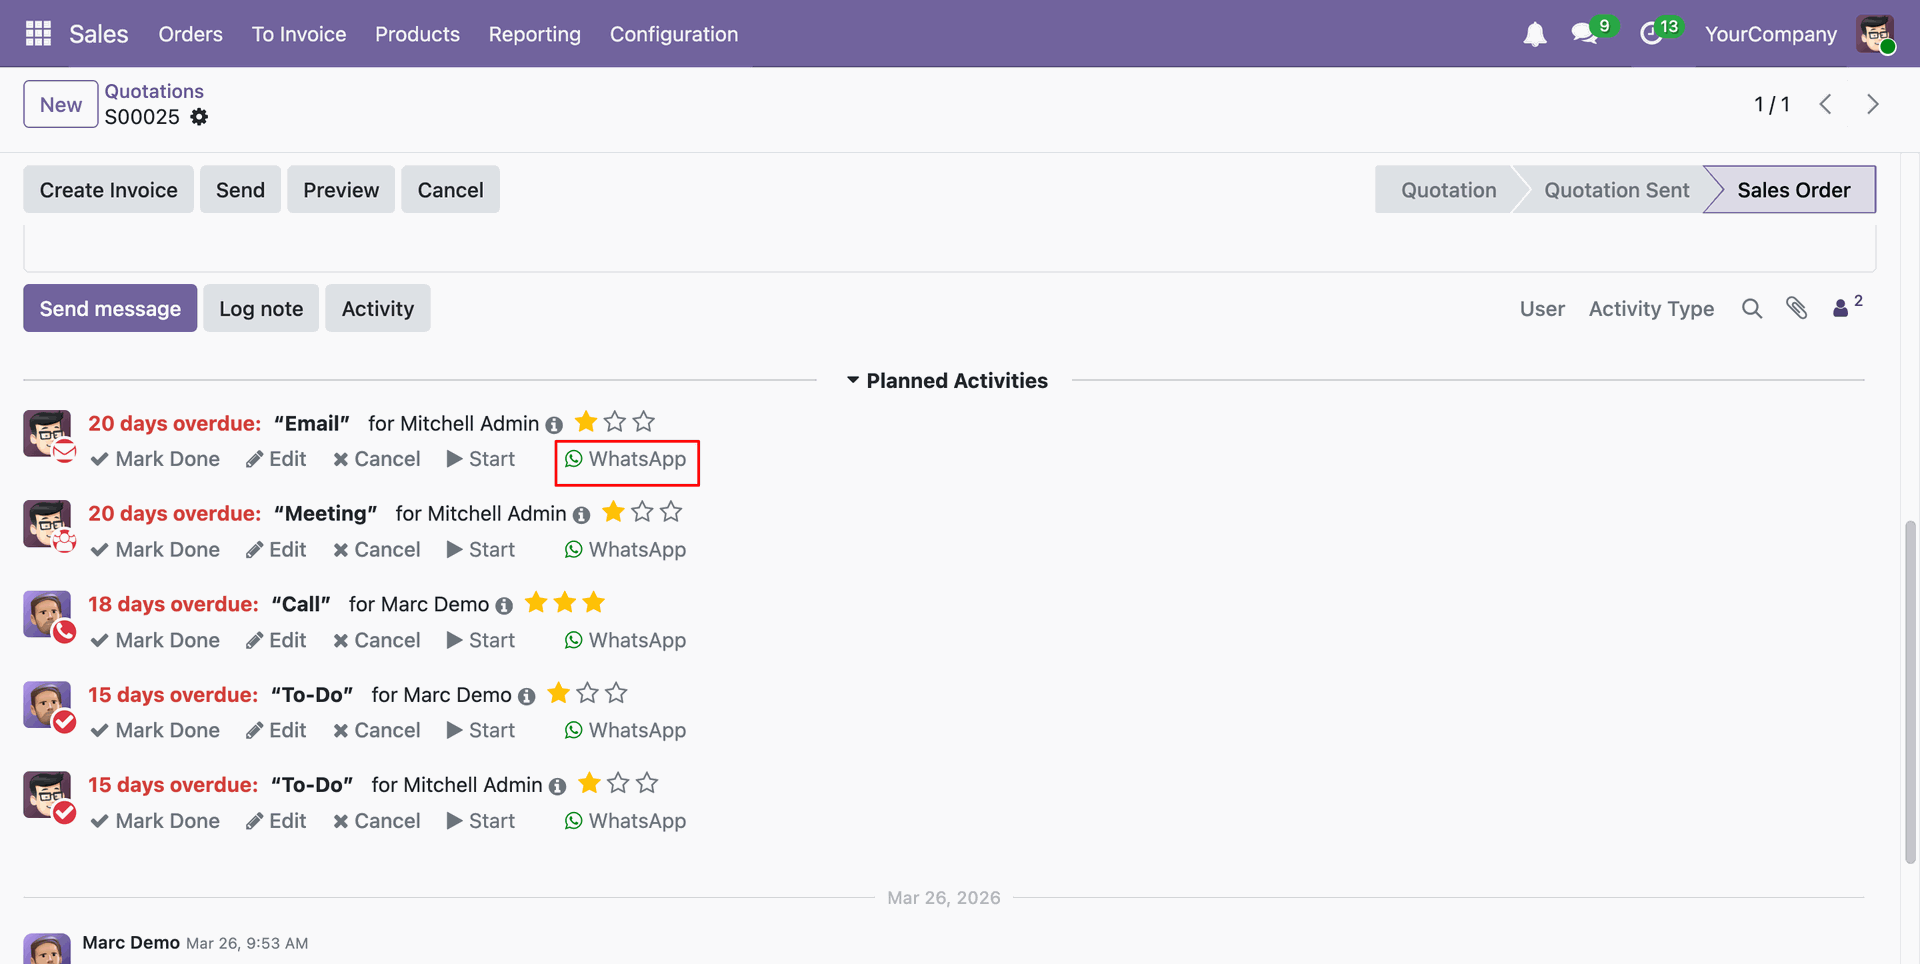
Click on the 'Whatsapp' icon to share the activity via whatsapp.
Version 20.0.1.0.0 | Released on : 15th September 2026
- Yes, this app works perfectly with Odoo Enterprise (Odoo.sh & Premise) as well as Community.
- No, this application is not compatible with odoo.com(odoo saas/Odoo Online)
- Yes, to test this module, please contact us at sales@softhealer.com.
- Please contact us at sales@softhealer.comto request customization.
- Yes, we provide free support for 365 days from the date of purchase.
- Yes, you will receive lifetime free updates for the version of the module you purchased.
- No, there is no need to install any additional libraries.
- Yes, for version 12 and above, you need to purchase the module separately for each version you intend to use.
- No, exchanges or refunds are not allowed. Please make sure to select the correct version before purchasing.
- You can contact us at support@softhealer.com for language translation support. We use Google Translator tools to provide translations in multiple languages, so the accuracy may vary. We welcome your suggestions to help improve translations.
